


The Road To The 2015 Warzone International: Part Three
May 18, 2015 by crew


Continuing on from Part 2 of this article, we will now look at the next two Missions that are part of the Warzone tournament pack. Either of these could crop up for me during the 2015 Prodos Games Warzone: Resurrection International Tournament in May.

Mission 2: Head of the Snake
Deployment Type: Quarters (Each player has an opposite table corner to deploy onto, with a triangular deployment zone that is eighteen inches along both table edges that make up the corner). The objective of this mission is, from the end of turn four onwards, to have killed all enemy squad commanders.

This is one of the of the few missions where both players can potentially achieve a Major Victory although if both players adopt a defensive strategy it is quite possible for one of them to instead score a Partial Victory by being the player who killed the most squad commanders by the end of turn eight; or when the players run out of time to complete the mission.
Eliminating a squad commander is fairly straightforward in principal, although they all have the Guarded skill which means that another non-vehicle model in the same squad without the Guarded skill and within 2" may receive the Wound Effect from a Ranged Attack (note: Models in a squad of size one have, but can't use, this skill).
Thus, eliminating the models near to the squad commander before shooting at the squad commander himself is an option, as is engaging the squad commander in hand to hand combat since the Guarded skill only protects against ranged attacks. There are several squads with Rapid Deployment who are very good in this role such as the Brotherhood Valkyries and Etoiles Mortant but the retaliation is likely to get your Valkyrie or Etoiles squad commander killed.

There are also a few models with the ability to ignore the Guarded (and Shielded) special rule, making them very effective at assassinations. Another approach is to use a special skill or cards which cause a Wound and not Wound Effects, denying the squad commander to chance to offload the Wound Effect to a nearby minion.
The main thing you will have to be prepared for are squads – and thus squad commanders – who can utilise an active ability to ramp up their defensive capabilities. Tiger Dragons and Juggernauts can both turtle up, gaining impressive armour saves, while the Brotherhood Mortificators can use the Void skill to avoid almost all attacks altogether. Try to take them down early while you have the resources to do so.
Protecting your squad commanders is another matter. For infantry squads, I would normally recommend that your models are a little more than three inches apart to mitigate the effects of being targeted by template weapons or guns with a high rate of fire. However, having one or two models within two inches of your squad commander might be more important in this case, particularly if it is a squad where the members have two or more wounds such as the Juggernauts.
Keeping three or more pieces of cover (including other models!) between your squad commanders and a ranged opponent is also viable in the early part of the game but just remember that flamer templates don't care about walls so being totally out of the line of sight of an enemy is not a sure thing!

Holding a Rapid Deployment squad in reserve - especially if you can hold off until turn three or four - is an effective way of protecting the commander of that squad but once they are on the table they are fair game since most - but not all - lack the ability to leave the table again.
The Cybertronic Scorpion is one example of a squad that can effectively un-deploy via their "Burrow" special skill, while the Mishima Shadow Walkers can perform a similar trick via Hidden in the Shadows and Back to Dusk although both can be tied down by a model moving to engage them which prevents them from leaving the board.
Don't forget that the enemy Warlord counts as a squad commander too! He has the Shielded special skill which works in a similar way to Guarded but the model taking the Wound Effect (who can not have the Shielded or Guarded ability) doesn't have to be in the same squad.
Mission 3: Retrieval
Deployment Type: Battle Line (Each player has the full width of a table edge to deploy along, with a deployment zone that is six inches deep). The objective of this mission is to find a set of secret plans hidden beneath one of three objective markers and, from the end of turn four onwards, to have a model holding the secret plans located within your deployment zone.

Where the first mission requires endurance and the second mission demands precision, Retrieval arguably calls for speed. The three objectives are placed along the middle line, with one objective marker in the very centre of the table and the other two twelve inches apart on either side.
Once a model is in base to base contact with the marker (and assuming that model doesn’t have any restrictions on interacting with objectives as discussed in part two of this series where we looked at The Advanced Base mission) you can immediately make a “Target Identified” check to see if that was the marker that concealed the plans. You have a fifty percent chance of finding the plans under the first marker you check, a seventy five percent chance of finding them under the second and if you fail twice, you will be guaranteed to find the plans under the third objective marker.
The catch here is that there is only one set of plans and your opponent is making his own “Target Identified” rolls so he could still find the plans under an objective marker you already checked.

The first part of the mission is relatively straight forward – getting up to those markers as fast as possible. Mishima, Capitol and Bauhaus all have fast moving units that can do it the hard way by moving up from the deployment zone to reach an objective marker in one activation with minimal consideration for the intervening terrain (although the Bauhaus option – the Vorreiters – pose an interesting problem when it comes to turning around and coming back the other way thanks to the limited manoeuvrability of bikes).
Alternatively, infiltrating units can be deployed in the nearest terrain but ultimately it is the squads entering via Rapid Deployment that have the edge here as they can land right next to the objective markers, either searching for the plans immediately or screening the marker while another squad moves up behind them to do the job.
All forces have access to squads who can do this but in the case of my Bauhaus list this responsibility would fall to the Venusian Rangers and Etoiles Mortants . Unfortunately, neither unit is likely to have more than a single action point left after finding and collecting the plans so a better tactic might be to pass the “Target Identified” check and then instead of picking up the plans, dig-in and surround the marker so that an enemy squad can’t get into base to base contact with it.

Now you have a ruck on your hands. With more and more of your squads piling in around the objective marker holding off, and where possible, pushing back the enemy until a faster moving unit can come up behind and grab the plans. With enough squads swarming around the objective, this unit could well be safe from non-template ranged attacks because of the number of intervening models and on the following game turn, it’s time to turn tail with those plans and race for the deployment zone.
That said, with a Close Combat Warlord and the right doctrine any unit in the Bauhaus list can Rapid Deploy – even the Vorreiters. If I won the initiative I could drop my Vorreiters next to one of the markers and close to the next, find the plans, pick them up and still have two action points left to race back home by the end of turn one. But is that such a good thing?
Probably not, and that leads onto the second part of this mission.
Once your squad is carrying the ball, so to speak, it is a very big target. Infiltrated squads are a threat but one you can predict since they will have been deployed at the start of the game, waiting to ambush your model carrying the plans. A smart opponent is going to keep at least one squad with Rapid Deployment in reserve in case you manage to find the plans early. If that happens, you can bet that the Golden Lions, Praetorian Stalkers or Scorpions are going to pop up next to your model carrying the plans just as soon as he – or she – is alone and vulnerable near your deployment zone.

Losing the plans like that during turn two or three could be a real problem. Sure, it’s a long trek back for the enemy squad but if their route will take them along one of the board edges, you might have difficulty moving your units to intercept before they can arrange for other squads to block you off. At the very least, it is likely to result in a Partial Victory for your opponent since those five mission points go to whichever player is in possession of the plans at the end of turn eight, or when the mission timer is up.
I think it's better to have a tough – and preferably large – defensive squad such as some Vulcans waiting near your deployment zone where they can act as both mobile cover and a road block. They can take advantage of their large base sizes to prevent an enemy squad from getting in to close combat with your model carrying the plans.
If that model should die the plans will be dropped in the space surrounded by the Vulcans and it should be relatively simple to keep them alive until their next activation where they can pick up the plans and carry the ball across the line!
The Warzone: Resurrection 2015 International Championship is being held at the UK Games Expo in Birmingham on the 30th and 31st of May. Get your tickets from the UK Games Expo site now!
Helpful Links...
If you would like to write an article for Beasts of War then please get in contact at [email protected] for more information!
"...just remember that flamer templates don't care about walls so being totally out of the line of sight of an enemy is not a sure thing!"
Supported by (Turn Off)
Supported by (Turn Off)
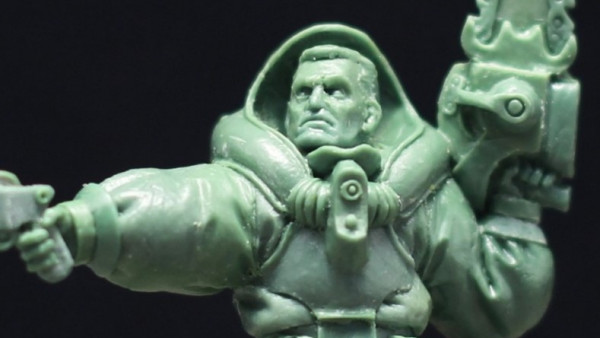
"Mishima, Capitol and Bauhaus all have fast moving units that can do it the hard way by moving up from the deployment zone to reach an objective marker..."
Supported by (Turn Off)


I really hope Mission 3 comes up during the tournament; With so many units scrabbling for the plans I can see them changing hands several times a turn thanks to the alternating activations! I think it will be a hoot!
Okay, so I take it there is a list of possible missions for the tournament (you discuss 2 and 3 above), but you don’t know which ones you will face until you get there? If that’s true, does this effect the army you’re building for this game (i.e., a force that is flexible and versatile enough to handle any/all of the potential scenarios you will encounter)? I guess my question is, are WZR units very “mission specific,” making this tactical flexibility a challenge? And do you have to submit your army lists in advance, or choose from a pre-approved list… Read more »
For the upcoming tournament we know which forces we can include in our lists (essentially everything that has rules, except for “heavy” vehicles). We can bring two lists with us to the tournament, along with two card decks which can be almost as important as the lists. There will be – I think – five games and thus five missions selected from the seven available. Players will pick their lists and decks once they know which mission they are about to undertake, so you with two lists you can put together two different forces that can achieve the Mission objectives..… Read more »
With Bauhaus, for example, the choices are somewhat limited. We have one light infanty squad type that can airdrop onto the table but have no staying power after the initial assault and one infantry squad type that is very reliable but ultimate don’t do anything special. One special forces unit who are quite shooty. One bike squad that are..well.. fast, one light power armour squad that are slow but hard hitting and tough, a walker squad that is sort of average when it comes to ranged combat and formidable in close combat if you take that option.. and finally some… Read more »
Sadly can’t make it to the expo (one of those goodiebags would have been nice ^^ ) but I really enjoyed these articles non the less. Good luck to all attending!