Naval Wargaming: Part Three – WW2 Cruiser Action Battle Report
January 27, 2016 by crew
Time for a battle report! After taking a review of Naval Wargaming in Part One of our series, then focusing on World War Two cruiser actions in Part Two, we now present a battle report from one of the linked scenarios featured in Part Two.
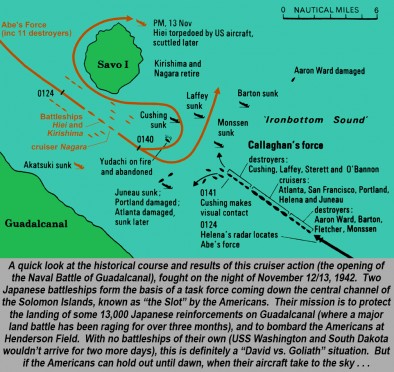
The game chosen was Scenario Three from the last article (night of November 12/13, 1942), where a Japanese task force makes an approach toward Guadalcanal to land 13,000 troops. These reinforcements are desperately needed by the withering Japanese garrison, trying to hold the island against American invasion begun three months before.
The game was played in the Micro Fleet World War II system (Tabletop Games, 1979), using Davco 1/3000 scale models.
Scenario Set-Up
As a refresher from last article, we again present the beginning forces for this scenario.
Japanese Forces
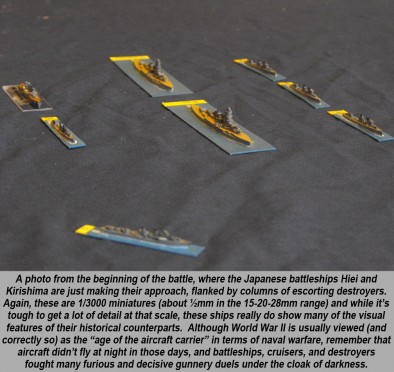
- Force Y - (Vice-Admiral Hiroaki Abe): Battleships Hiei and Kirishima and five destroyers (Yudachi, Harusame, Asagumo, Murasame and Samidare)
- Screening Force (Rear Admiral Susumu Kimura): Light Cruiser Nagara and six destroyers (Yukikaze, Amatsukaze, Terutsuki, Akatsuki, Inadzuma, Ikazuchi)
US Forces
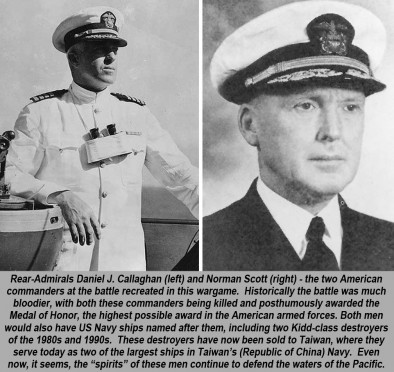
- Rear-Admiral Norman Scott aboard the light AA cruiser USS Atlanta and eight destroyers (Cushing, Laffey, Sterett, O’Bannon, Aaron Ward, Barton, Monssen, Fletcher)
- Rear-Admiral Daniel Callaghan aboard the heavy cruiser USS San Francisco and cruisers USS Portland, USS Helena, USS Juneau
The Battle Begins
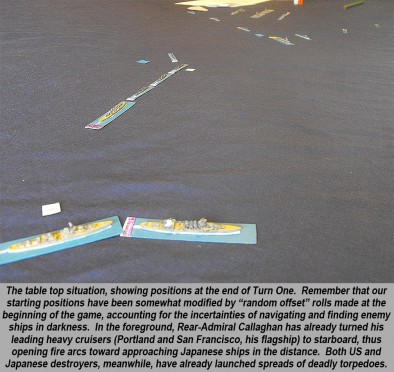
Taking up historical positions (Japanese coming in from the northwest, Americans coming in from the southeast), we then accounted for the uncertainties of navigating and finding enemy ships at night with our “random offset” rolls. Once these were completed, the scene was set and the two task forces closed the distance toward each other.
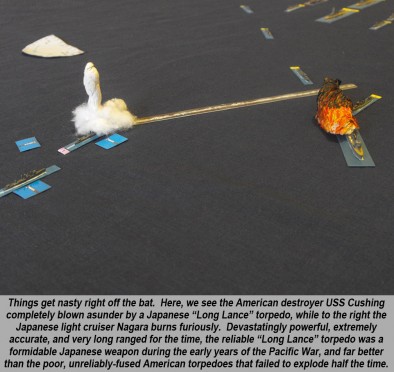
It wasn’t long before the leading Japanese and US destroyers became embroiled in a brief but fierce exchange of gunfire and torpedoes. Quickly the Americans suffered the game’s first casualty when a single Japanese “Long Lance” torpedo struck the destroyer Cushing amidships and the resulting detonation broke her in two.
The Japanese didn’t come away unscathed, however, as the light cruiser Nagara, the main focal point of the US destroyers gunfire, was hit repeatedly and soon set ablaze, lighting her up for all to see.
The loss of the Cushing was especially bitter for the American player, mostly because she was so poorly placed. In fact the joke was made that if her captain didn’t go down with the ship, he might’ve found himself in front of a courts-martial.
To cut a long story short, the Cushing had manoeuvred so violently to escape Japanese torpedoes, that she ended up out of formation and behind some other American destroyers. So when she fired off her last torpedoes before she was blown apart herself, one of these torpedoes actually hit and crippled the friendly destroyer USS Laffey.
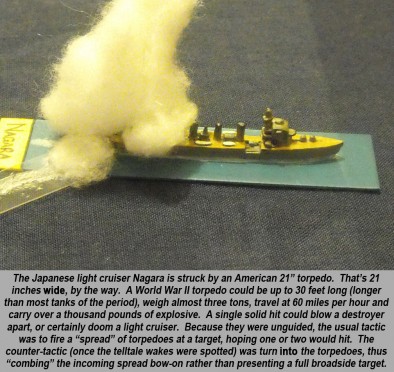
While the Laffey didn’t sink straightaway, she was left in a terribly exposed position. However, the “ghost” of the Cushing took its revenge a few moments later when another of her last torpedoes finally found its intended target as it crashed into the Japanese light cruiser Nagara.
The 21” torpedo left the Nagara dead in the water, down at the bow and listing 12 degrees to starboard having shipped over 4,000 tons of water into her forward hull compartments.
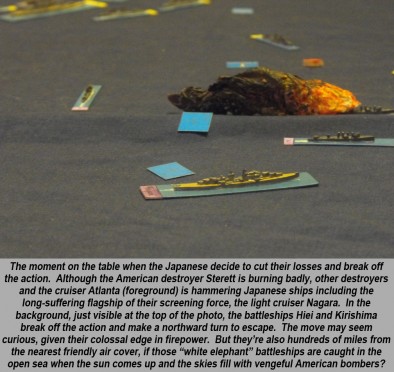
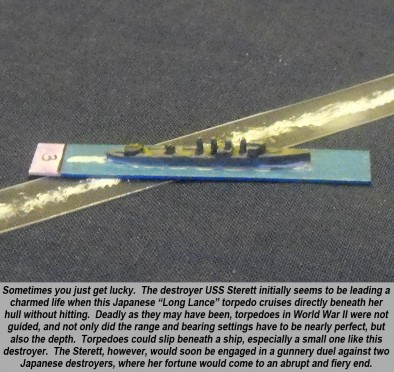
The destroyer fight, meanwhile, continued unabated, with both sides illuminating targets with “star shells” and search lights. The USS Sterett narrowly dodged Japanese torpedoes, though she was hit by several shells from the Terutsuki and Inadzuma and burned badly for before her damage control teams could put out the flames.
Scott’s flagship (USS Atlanta) also bought her considerable firepower to bear against the crippled Nagara, which was soon in flames once more. It was at this point that the Japanese players realised that things were getting a bit too hot for their liking and decided to abort the mission.
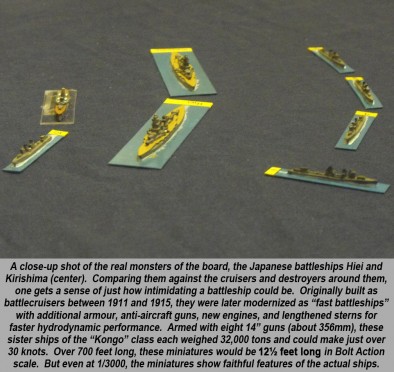
The Japanese players declared that Tanaka’s landing force (11 transports carrying 13,000 troops) were reversing course, and turned the battleships Hiei and Kirishima to starboard and headed them away from the maelstrom. Only the crippled Laffey caught sight of them as they swept past and they exchanged fire.
The idea of a crippled destroyer (3000 tons) exchanging fire with two battleships (30,000 tons...each) may seem crazy, but these are the kinds of moments where medals are won. It was hoped that if the Japanese dreadnaughts could be illuminated, maybe the rest of the American ships could fix them and open fire as well.
Alas, it was not to be. The USS Laffey sank and the Japanese battleships escaped. The Japanese destroyers continued the fight for a few rounds before they too made their escape, leaving the Nagara to her fate.
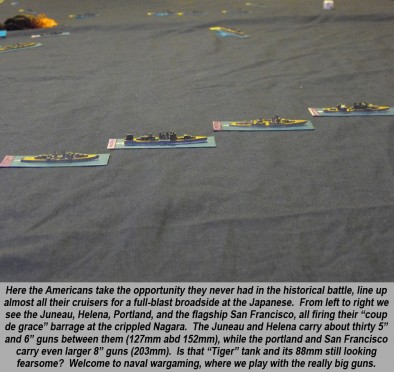
As Callaghan’s cruiser line closed in on her to deliver the coup de grace with heavy gunfire (though their lamentable shooting up to that point was a little worrying for Callaghan!), we “drew stumps” on the game and started the post action analysis.
After Action Report
The game delivered just what we wanted, an uncomplicated and fast-paced torpedo fest. Although our replaying of the historical events was considerably less bloody than the real encounter, our consensus was that the result was still realistic, and probably would have forced Japanese Admiral Abe to make the same decision to withdraw.
Although only one Japanese cruiser had been exchanged for two American destroyers, this game could only be viewed as a strategic US victory. After all, Callaghan’s cruisers had successfully fended off a superior force and caused the Japanese relief convoy to turn back to boot.
Historically, American losses were grievous. Both American admirals gave their lives, and they also lost two cruisers and four destroyers. The Japanese only lost one destroyer initially, but another would be sunk later and the battleship Hiei, badly damaged, would be sunk by American aircraft.
Particularly poignant is the story of the cruiser Juneau. Heavily damaged, she initially survived the battle only to be sunk by a Japanese submarine. Only ten of her 700 crew would survive the sinking and the eight days drifting at sea before rescue. Among the dead were all five brothers of the Sullivan family.
This, of course, was the incident that prompted the American policy of putting brothers in different units across different campaigns, as we famously see in the movie Saving Private Ryan.
Historically, the battle was considered a strategic US victory. A Japanese battleship had been sunk (the first of the war), and the landing of 13,000 reinforcements prevented. The all-important Henderson Field was not shelled, and twenty four precious hours had been purchased toward the arrival of the American aircraft carrier USS Enterprise and battleships Washington and South Dakota.
Hopefully this has sharpened your appetite for some blue-water World War II naval games. However, this is only one aspect of naval wargaming, there’s certainly a lot more to come. Comment below with thoughts, ideas, or questions, and join the discussion on this often-overlooked subject.
If you would like to write an article for Beasts Of War then please get in contact with us at [email protected]!
"It wasn’t long before the leading Japanese and US destroyers became embroiled in a brief but fierce exchange of gunfire and torpedoes..."
Supported by (Turn Off)
Supported by (Turn Off)
"The idea of a crippled destroyer (3000 tons) exchanging fire with two battleships (30,000 tons...each) may seem crazy, but these are the kinds of moments where medals are won..."
Supported by (Turn Off)






Excellent writeup!
Ahh I remember that game, I was playing as the Japanese. Sadly one of the other players In that game passed away just over a year ago. Brings back good memories 🙂
It looks like it was a really intense battle – some great shots of that flaming ship in the background!
Those flames were made out of tissue and pva by Jeff the guy I mentioned in my previous post. They do look impressive 🙂
a great job on the smoke.
Thanks, everyone, and thanks to @broadsword for sending in this great battle report. I’m playing through these scenarios myself, although I maaaay have to skip this one because I don’t have any battleship pieces. 🙁 Quick note on the battleships Hiei and Kirishima … When the draft for this battle report first came in, they were listed as battleCRUISERS, which are of course different (equal guns, but they usually trade some armor for enhanced speed). I thought Broadsword was crazy, because I KNEW these were battleships. Turns out he was right. These two ships were built as battlecruisers between 1911… Read more »
Ok, its a little thing, and has nothing to do with the article itself, but I LOVE the flames to black smoke effect on the board. It really adds a lot of impact.
As for the article itself, the included specifics of the forces involved in the scenario combined with the detailed maps really make me feel like I played the game myself. Another good one guys!
I also like their torpedo tracks. 🙂
This game looks awesome will have to try some cruiser battles.
a busy hectic battle, great report. @commodorerob
Thanks @zorg and @azrea1 . Zorg has seen them but Azrea1 , we’re trying to play through some of these cruiser battles in a parallel thread, located here if you’re interested. 🙂
http://www.beastsofwar.com/groups/historical-games/forum/topic/ww2-cruiser-actions-guadalcanal-scenarios/