


![How To Paint Moonstone’s Nanny | Goblin King Games [7 Days Early Access]](https://images.beastsofwar.com/2024/12/3CU-Gobin-King-Games-Moonstone-Shades-Nanny-coverimage-225-127.jpg)


Kill Team Table - Space Hulk Theme


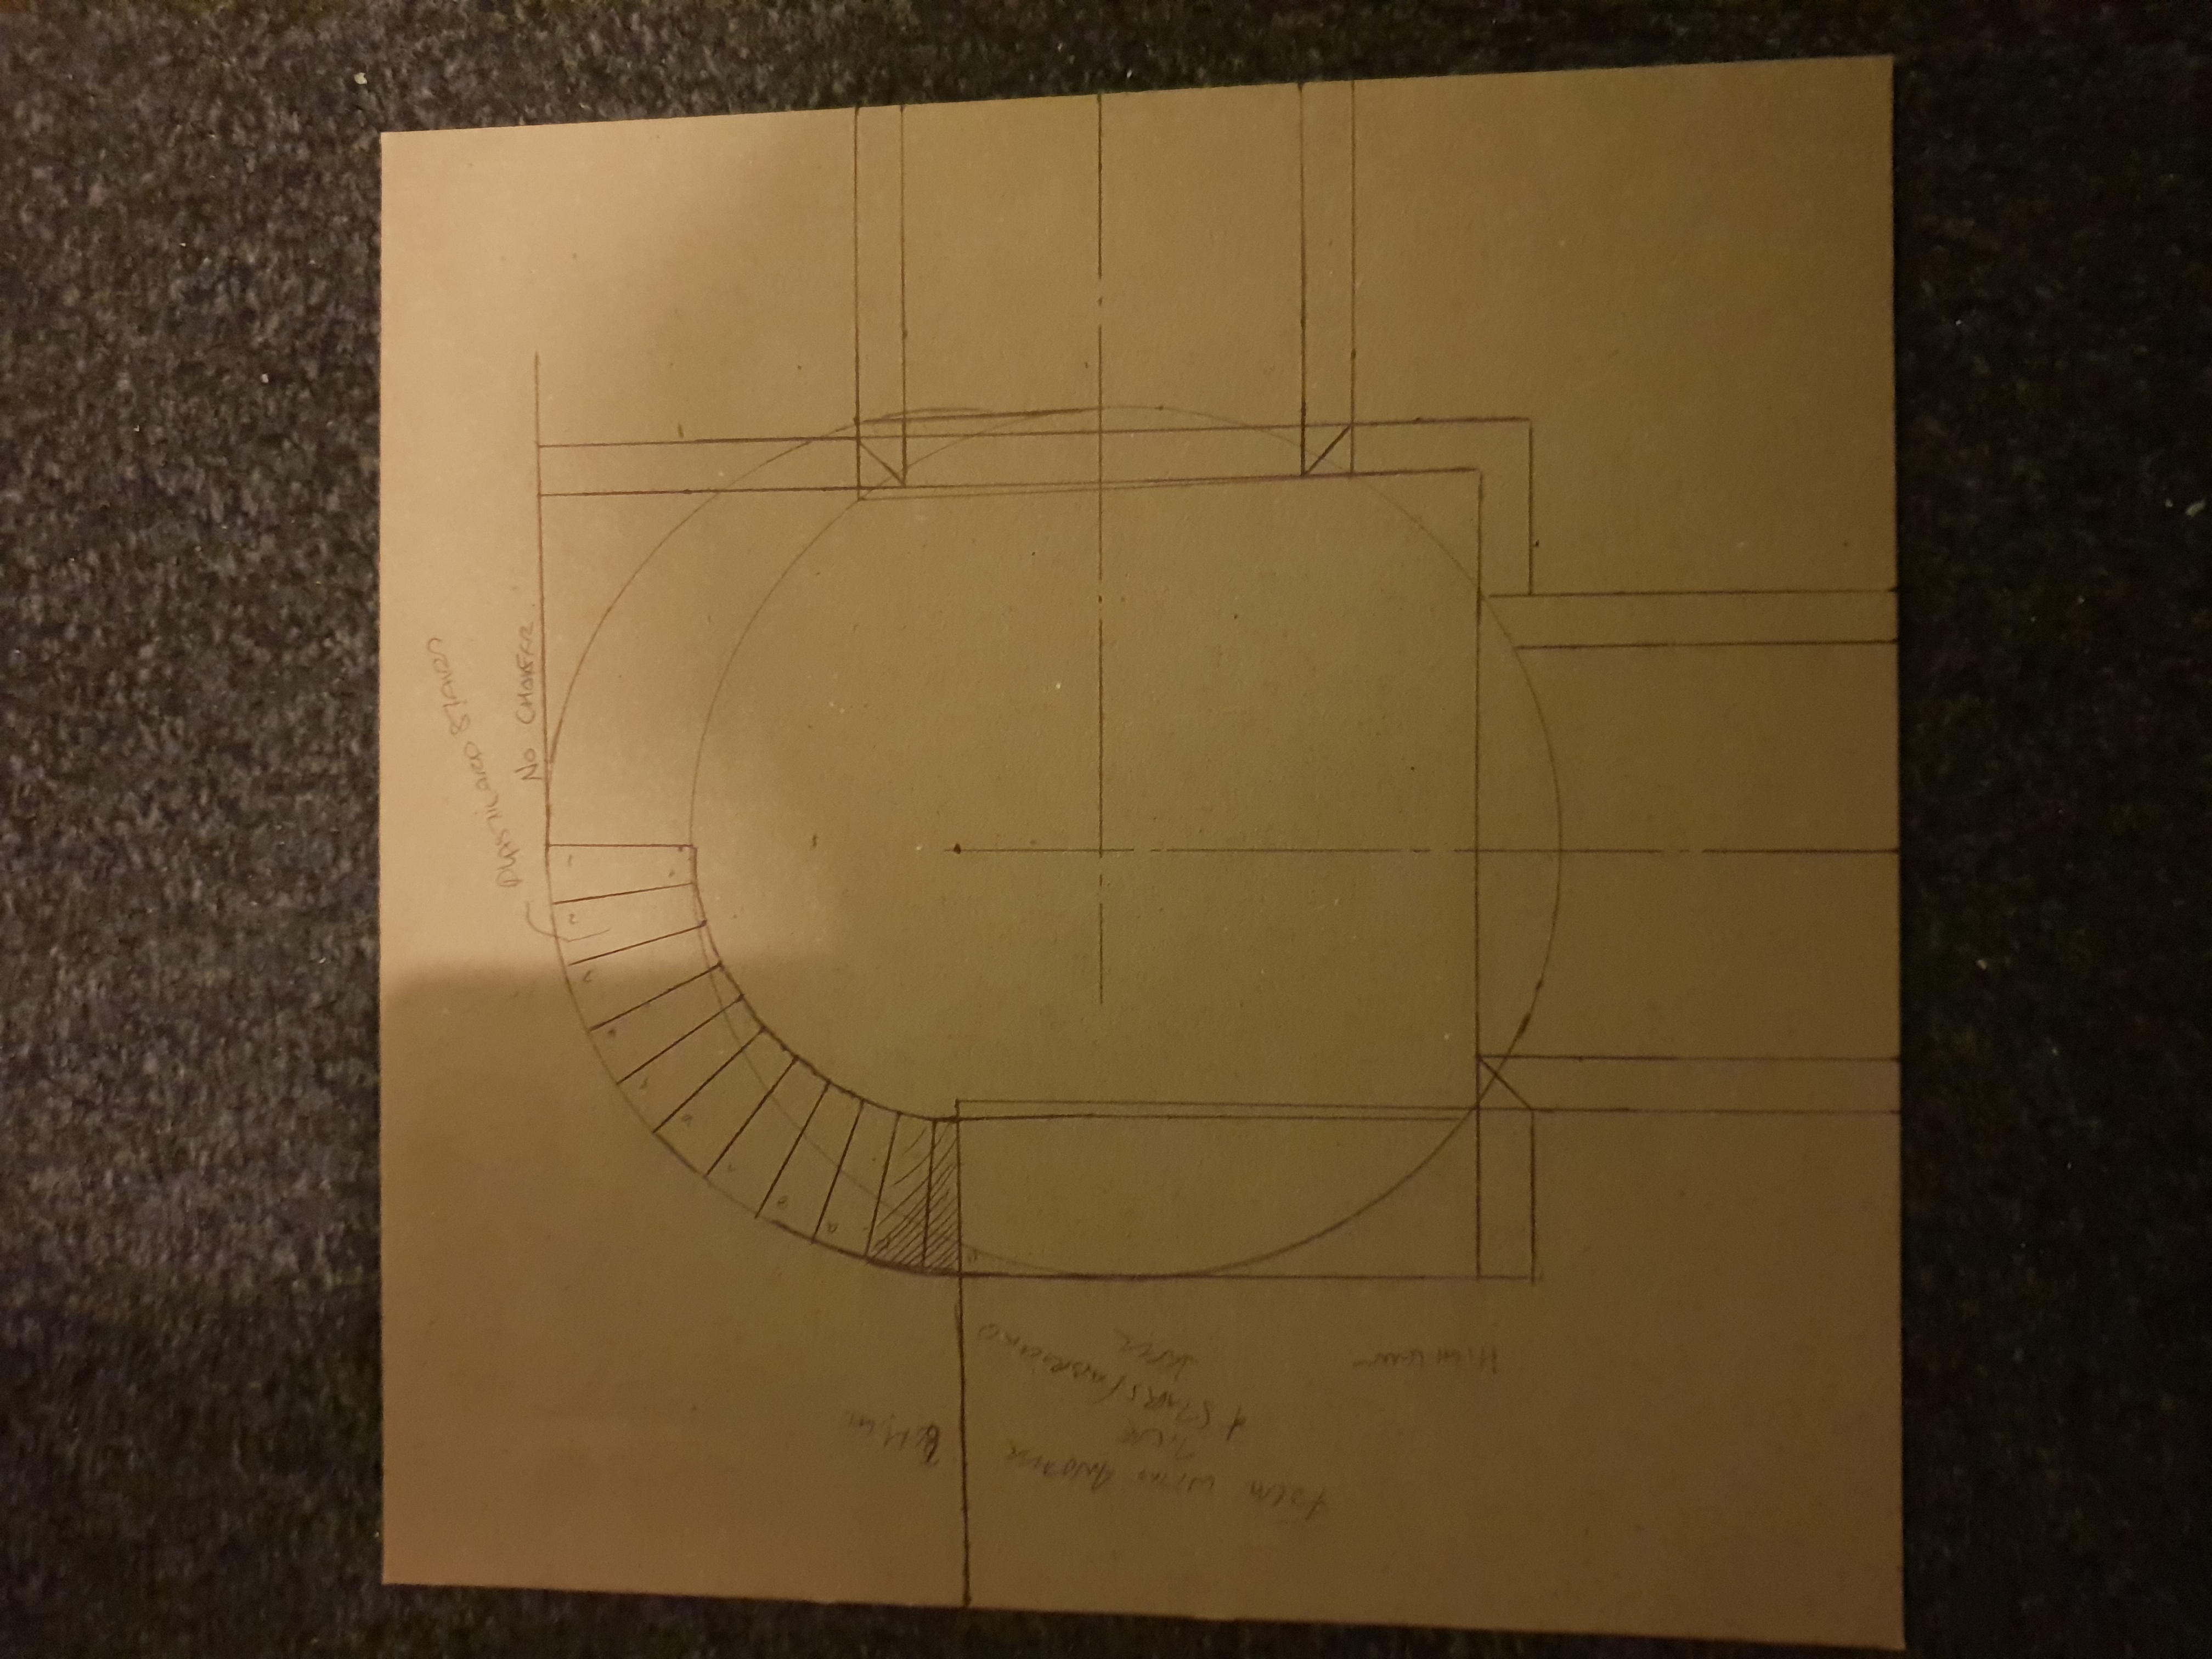
Step by Step Tile Construction (WIP)
Step 1: Layout Tile using Pen. I used 80mm wide for the corridor with a 100mm between walls leaving a 10mm x 10mm chamfer at the base of each wall. These Corridors should be centres on each wall. However, it is not a given rule unless you want something roughly modular!
The keen eyed person will likely notice it differs slightly from the CAD image!
 Step 1: Photo Showing Marking Out
Step 2: Cut Out wall using the same material as your base in mine I used heavy card (chipboard in the US). Then these are glued into position using PVA or Hot Glue. note; the former requires perpendicular supports to keep it vertical.
In long runs I did add some additional support to the walls to ensure these remain somewhat plumb. The Insulation will push the others plumb when this is glued into place.
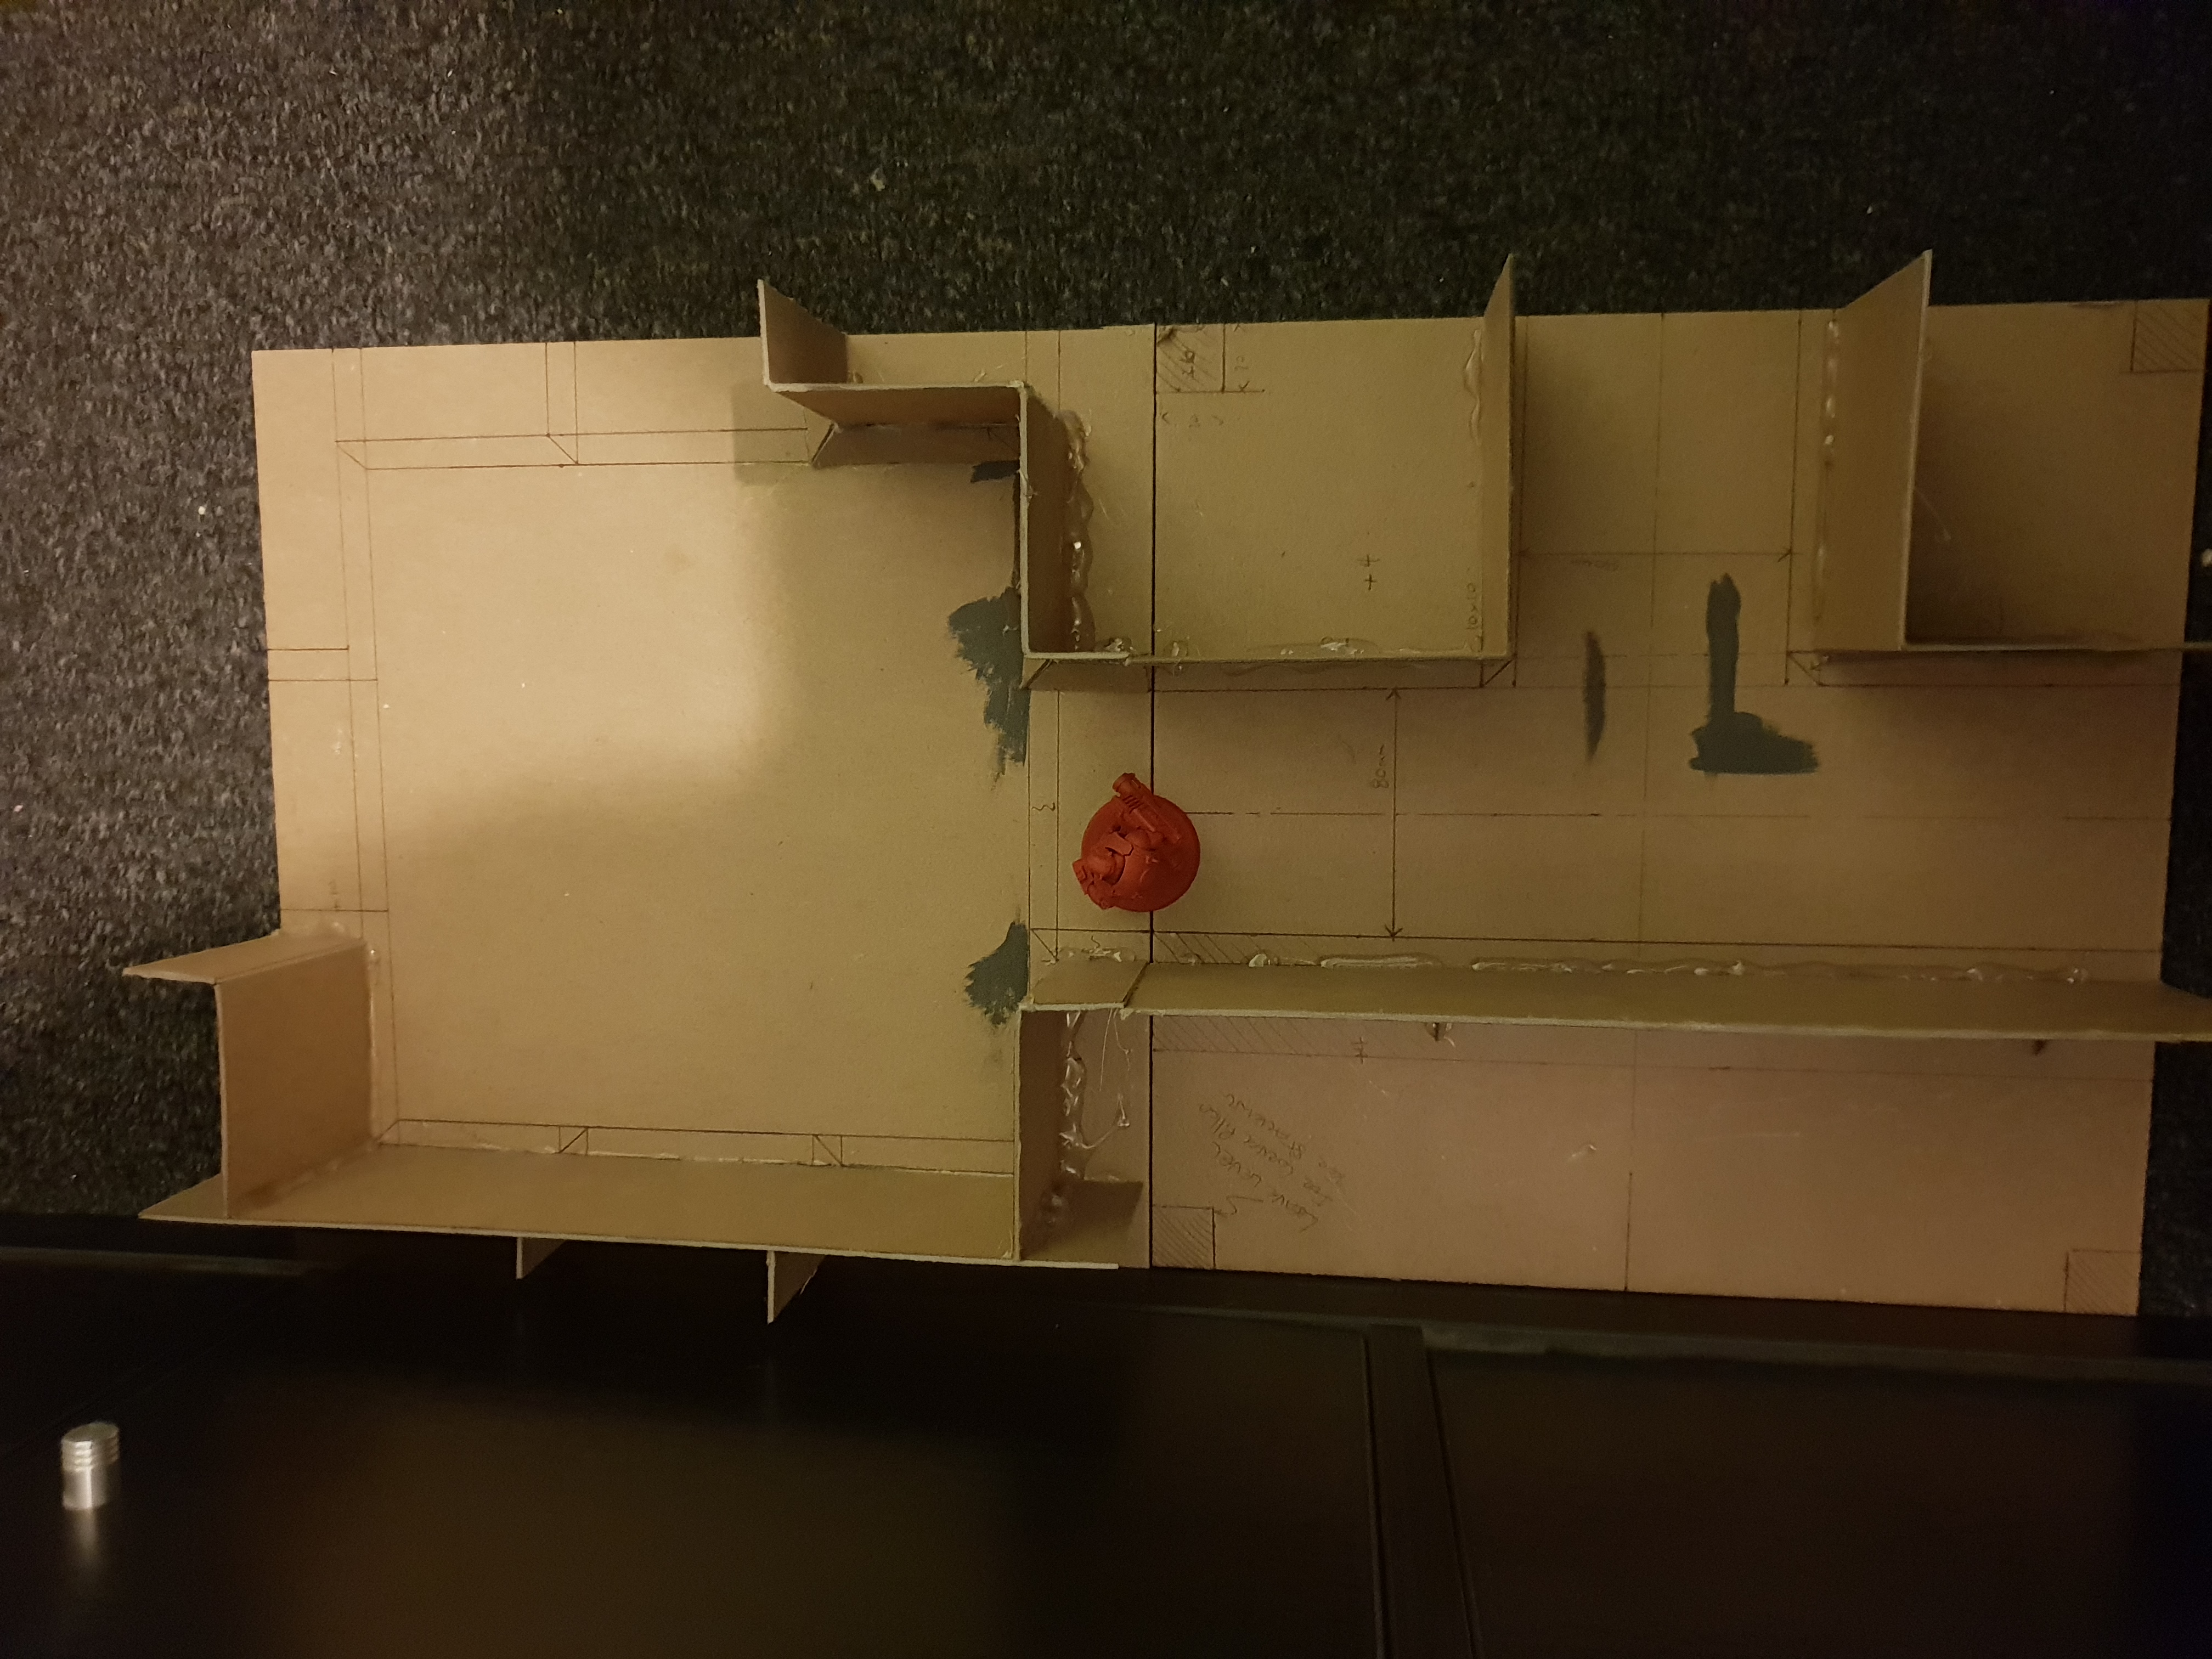 Image showing the Card Walls glued into Position.
Step 3: Is to Add some insulation to pack out the space between the walls and the edge, and in addition support the upper levels.
Then the tile will be filled with some kind of filler.. Considering solely using Sculptamold but given these are card I am more worried I will have 6 tiles which are damaged…
(Note this is not done yet, and thus only forms a bit of a plan)
Step 4: Add Details, then Paint it in a suitable base colour. in My case I will use midnight blue, then wash with Black.
(Note this is not done yet, and thus only forms a bit of a plan)


Leave a Reply