


75th Anniversary of the Battle of Monte Cassino and Northern Italy (Gaming The Battles)


Operation Diadem (Battle 1)
Operation Diadem or the fourth battle for Cassino started at 23:00 on 11th May, 1944 with over 1600 artillery guns opening fire on the defender’s positions along a 30KM front, running from the Western coastline to East of Monte Cassino itself. The guns continued their bombardment for over 2 hours before the infantry, under the cover of darkness, started their assault.
On the left flank, the US 5th Army pushed North, with their II Corps advancing along the coast. The US 5th Army’s right flank was made up of the French Expeditionary Corps of mainly Morrocan soldiers who were tasked with advancing up the Aurunci Mountains and then to swing East to link up with the left flank of the British 8th Army who would be pushing up the Liri Valley.
The British 8th Army were tasked with taking the town of Cassino and the now ruined monastery atop Monte Cassino. The plan was to send most of the forces across the Garigliano river and up the Liri Valley whilst the Polish II Corps would advance on Monte Cassino from the East, following the same path that the previous three ill fated assaults had taken.
British XIII Corps were tasked with the Garigliano river crossing and the advance up the Liri Valley using Route 6 – the main road North toward Rome. In the early hours of the 12th May, Infantry from 4th Infantry Division and 8th British Indian Division crossed the river against significant opposition from the German defenders. During the night they managed to make small advances and established a bridgehead across the river.
More importantly, the engineers of the 8th British Indian Division had worked through night to establish bridges to allow the armour to cross and support the infantry. As sun rose on the 12th May, 1st Canadian Armoured Brigade was crossing the Garigliano in support of the infantry.
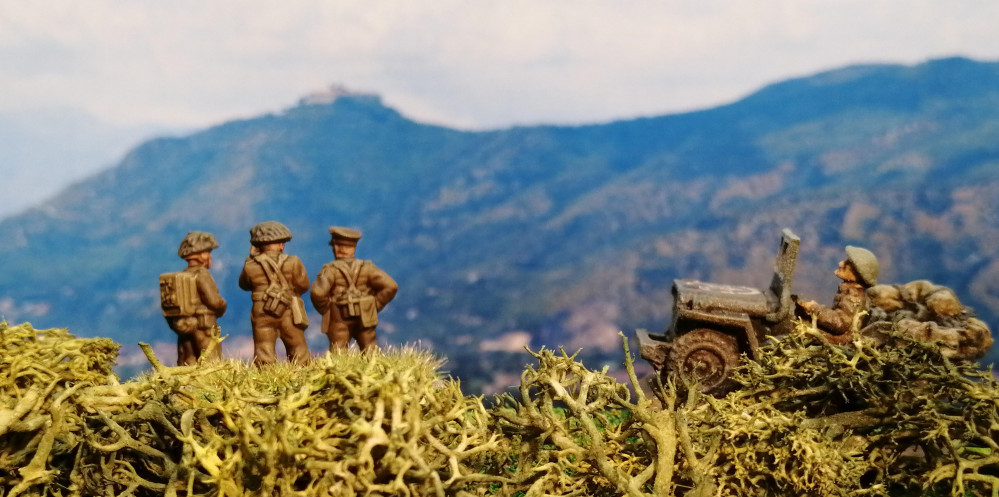
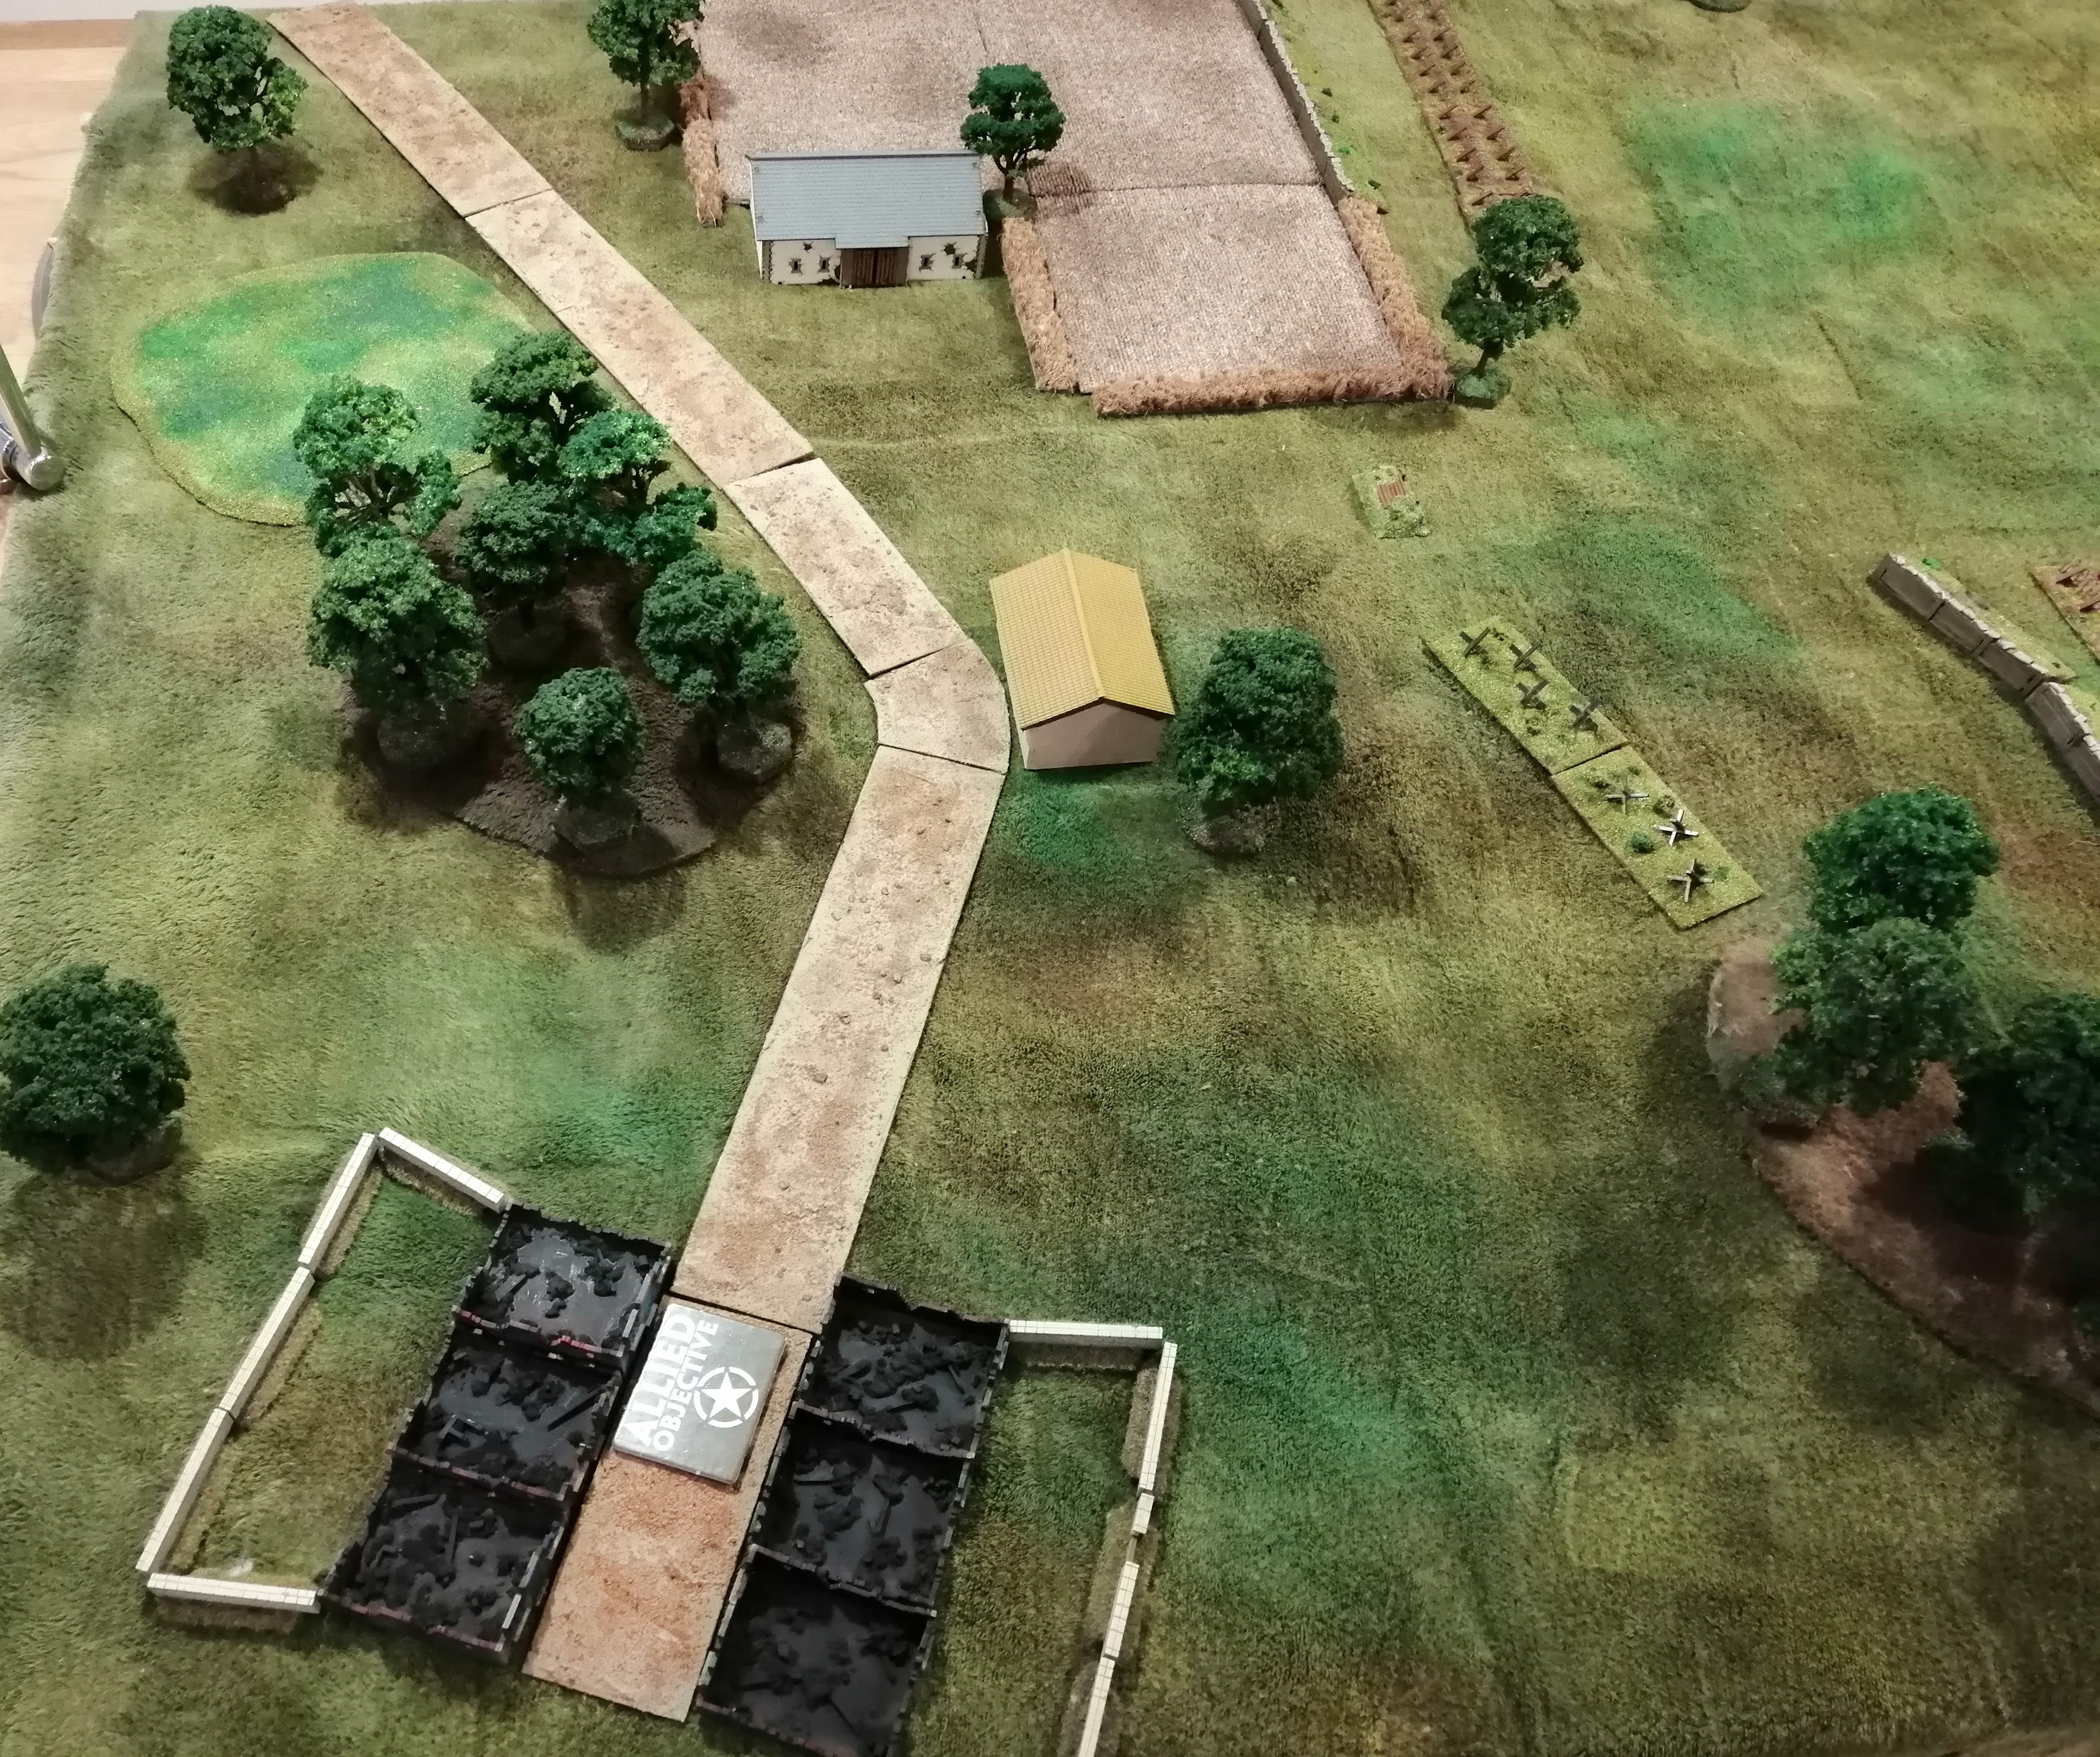
We join the battle at day break as the 1st Canadian Armoured Brigade prepare to cross the Garigliano. Several platoons of infantry are dug in on the other side of the river ready to carry on the advance with the support of the armour.
 View of the Battlefield from the Allied perspective
The Rules for the game:
Allies:
The first round starts with a full smoke bombardment across the table to provide some cover for the advancing troops
Three infantry platoons start deployed in advanced positions across the river to represent the previous day’s bridgehead. An engineer platoon starts next to the pontoon bridge on the German side of the river
Germans:
The Germans can deploy 5 minefield markers, only 2 of which are actual minefields to represent the limited time the Allies have had to reconnoitre across the river
The Allies have made contact with the first line of German defenders and these are deployed on the board at the start of the game. This will be the platoon of grenadiers, platoon of Fallschirmjager, a PaK40 and the two MG Nests. A German Mortar team has been spotted operating further back
The remaining German units are deployed as counters into various defensive terrain areas. The counters are exposed at the start of the German turn when an Allied unit moves within 20”
German units starting as a single team are not subject to last stand rules
Victory Conditions:
The Allies have been tasked to expand the bridgehead and their objective is to capture the collection of ruined buildings on the road. They have 8 turns to accomplish this and must take the objective uncontested. The Germans will win if they stop the Allies achieving this objective
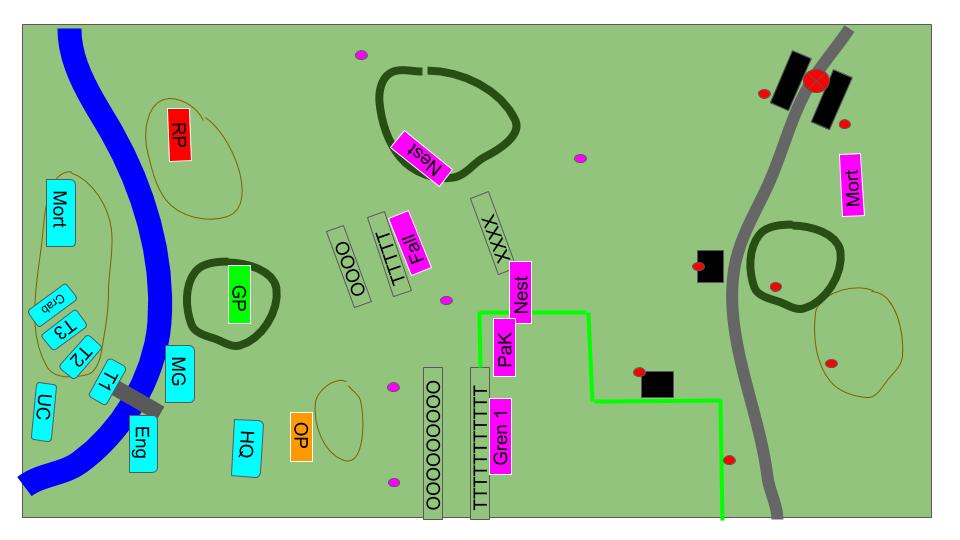 Initial Deployment
Map key.
German forces are marked in magenta with a brief text description. Gren1 being Grenadier Platoon1, Mort are the mortar team and Fall the Fallschirmjager Platoon. The defences are marked a TTTT for trenches, XXXX for tank traps and OOOO for barbed wire. Little magenta circles are possible minefields and little red circles are German Troop deployment spots for the hidden units.
The Allied troops are mostly in light blue except the infantry platoons who are coloured as per their platoon (Red Platoon, Green and Organge). T1 to T3 are the Sherman Tank Platoons.
The blue strip is the Garigliano river, grey strips are roads (or pontoon bridges), thin brown ‘circles’ are hills, dark green circles are copses of trees, light green lines are hedges and black blocks are buildings and/or walled areas. The Allied objective is marked with a red circle with a cross in it.
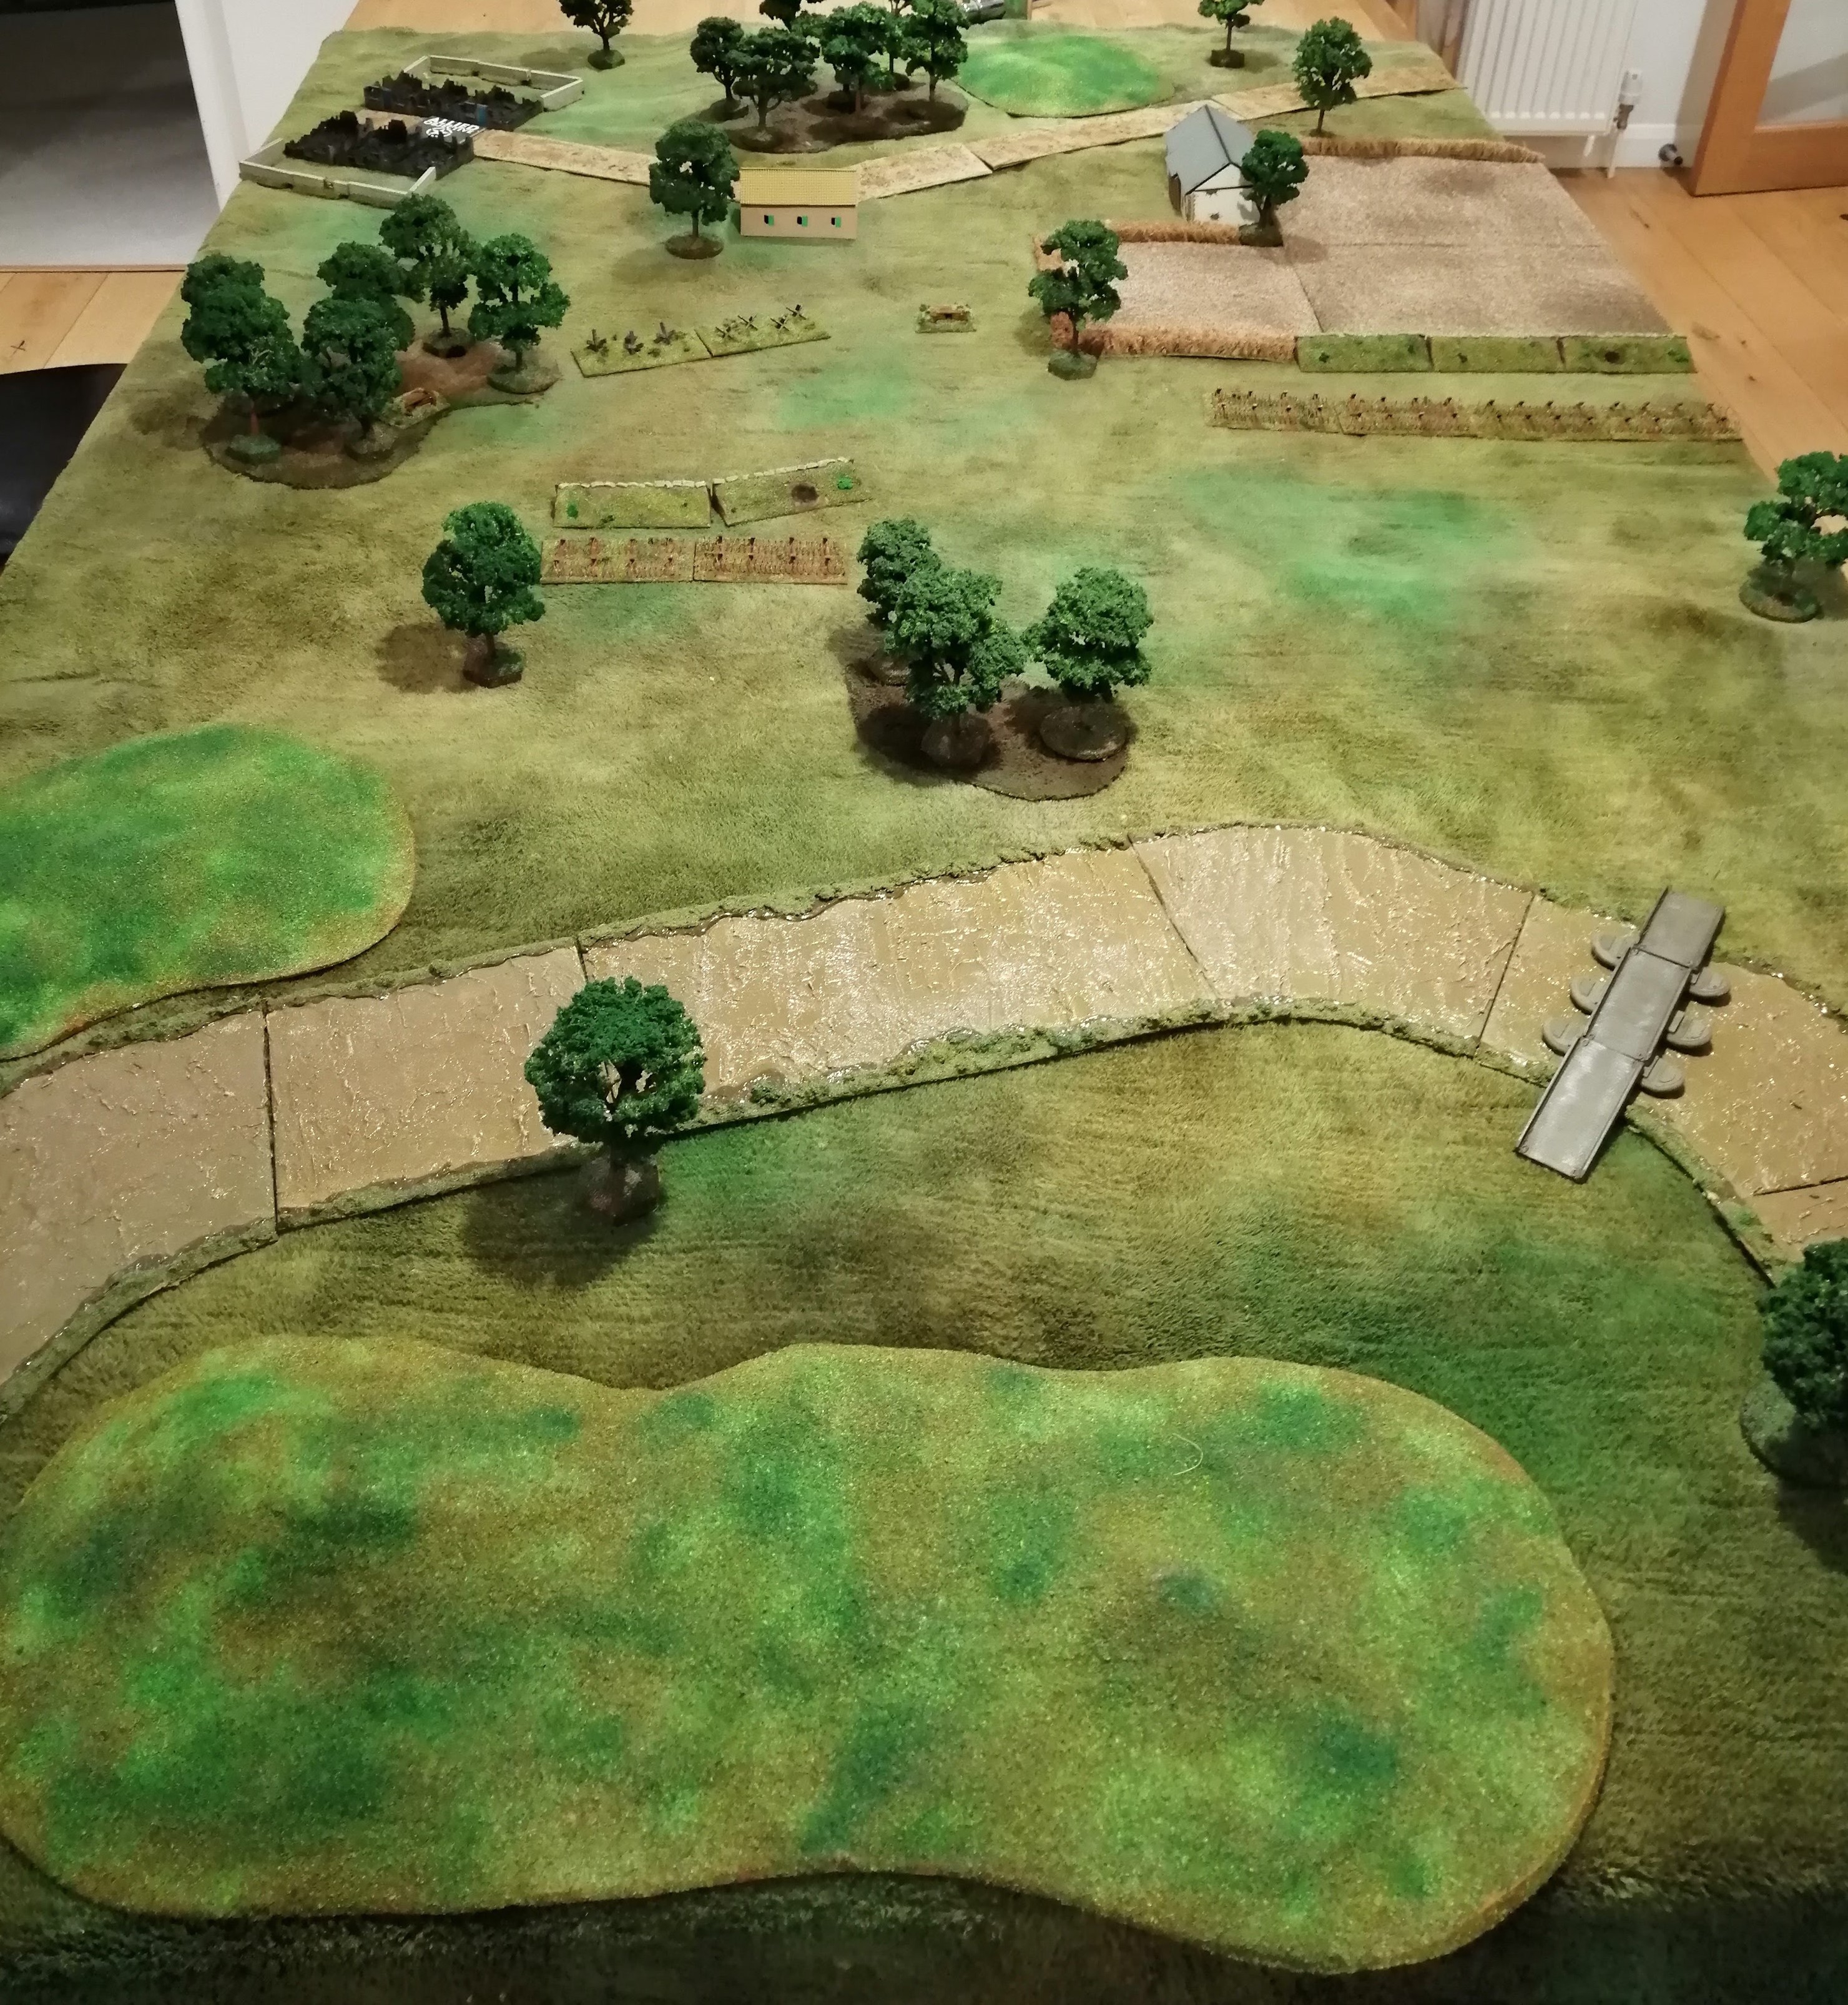
 Location of the Allied objective, down at the end of the German end of the battlefield
Allied Forces:
Infantry HQ 1st and 2nd in command
3 Infantry Platoons of Cmd team, 6 rifle/MG teams, PIAT team and 2” Mortar team
1 Engineer Platoon of Cmd sqd, 3 Rifle teams and a PIAT team
1 MG Platoon with 2 Vickers MG teams
1 Heavy Mortar Team of four teams with 4.5” mortars
3 Sherman Tank platoons of 3 tanks per platoon
1 Mine clearing tank platoon of 1 Sherman and 2 Sherman Crab tanks
German Forces on the board:
Infantry HQ 1st and 2nd in command teams with SMG
1 Grenadier platoon of Cmd team with SMG and Panzerfaust and 6 Rifle MG teams
1 Fallschirmjager Platoon of Cmd team with SMG and Panzerfauct and 6 MG Teams
1 Pak40 Anti Tank gun
2 MG Nests
German Forces off the board:
1 PaK40 Anti Tank gun
1 Marder II
2 STuGs deployed as separate units
1 Grenadier platoon as above
1 Heavy MG platoon of 2 separate MG Teams
1 7.5cm recoilless guns


Leave a Reply