The Final Push - Lawnor approaches 100% painted
37 MTG: Abomination, Klukva Demon of Lust, & Raging Heroes Shiveryah, & Nocturna Malefic Flesh set review
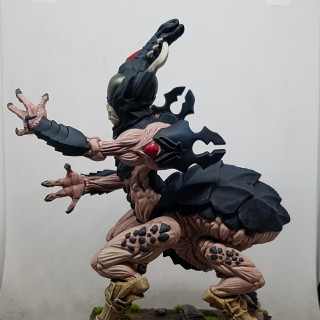
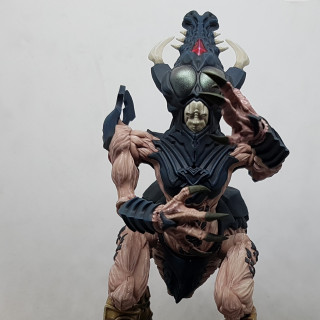
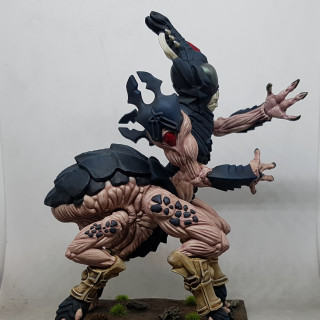
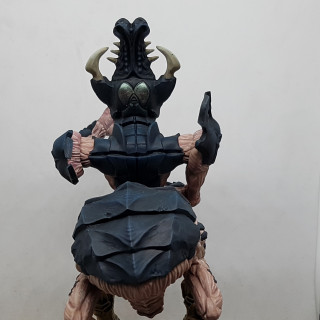
There it is. The final model from the Conquest starter set: The Abomination. That means all I have keft is 40 models to paint just for the fun of it, at least until the next big box arrives in a few months.
Spires Paint lists as a reminder to future me:
Bone
Base: P3 Jack Bone
Wash 1: Gw Seraphom Sepia
Wash 2: Handcraft Tabletop Terrain Wash Dunkelschatten / Dark brown Grey 267.01
Drybrush 1: P3 Menoth White Base
Drybrush 2: P3 Menoth White Highlight
Horns
Base: Mr Paint Brown-Grey
Drybrush 1: Mr Paint Dust Grey
Drybrush 2: Mr Paint Bine White
Wash/filter (Around base of each horn only): Brown-Grey with just a hint of Black
Dark Cloth
Base: P3 Coal Black
Wash: Gw Nuln Oil
Drybrush: I started with Coal Black mixed with Menoth White Base, but it was similat to p3 Trollblood Base so I switched to that for convenience. it ended up a little more blue and less green as a result, but speed is the key to large armies
Burgundy Cloth (Menoth robes guide)
Base: P3 Sanguine Base
Wash: P3 Exile Blue, P3 Sanguine Base, P3 Coal Black
High 1: P3 Sangune Highlight
High 2: Sanguine Highlight & P3 Menoth White Base
Drone Flesh (Cryx Pallid Flesh)
Base: P3 Ryn Flesh, P3 Carnal Pink, & P3 Trollblood Highlight mix
Wash 1: Base + P3 Traitor Green
Wash 2: Wash 1 + P3 Beaten Purple
Wash 3: Beaten Purple, Traitor Green and P3 Midlund Flesh
High 1: Ryn Flesh, Carnal Pink & Pr Menoth White Highlight
Spire Flesh (Retribution of Scyrah Iosan Flesh)
Base: P3 Ryn Flesh and P3 Menoth White Base
Wash 1: Base + P3 Sanguine Highlight
Wash 2: Base + P3 Battledress Green
Wash 3: Sanguine Highlight and Battledress Green
High: Base + Menoth White highlight
Chitin
Base: 3-4 large brushes of Revell Aqua Colour Tar Black 361.06 to 1 drop VMC Turquoise 70.966 (On my first day of mixing and basing with this it came out more green than blue, but definitly dark. When I mixed it up again later for a highlight it seemed more blue than green. I don’t know what I did different.
Wash: GW Nuln Oil
Drybrush 1: Base
Drybrush 2: P3 Coal Black
Drybrush 3 on highest and sharpest edges only. Keep this subtle: P3 Trollblood Base
Bug Eyes
Undercoat: Gloss Black
Airbrush Base: Turbo Dork Dark Net. Only do one or two even coats and then spray from above so the colour is less strong on the undersides of the eyes. I thought of this a little too late.
Post Varnish Treatment: I gave mine two coats of Satin varnish when all was done.
Red Gems
Undercoat: VGC 72.053 Chainmal
Base: Many layers ofAmmo Mig Acrylic Crystal A.MIG-093 Crystal Red.
Post Varnish Treatment:I gave them aonther coat or two to restore its glassy appearance. This worked out better than just gloss varnish
Claws
Base: P3 Cryx Bane Base
Drybrush: P3 Hammerfall Khaki
Wash: I think I used GW Athonian Camoshade, but I ususally use GW Nuln Oil
Ceramic Mask
Base: P3 Trollblood Highlight
High 1: Added a little P3 Menoth White Base and kept adding a little more as I built up the layers
High 2: Final High 1 mix, with a little P3 Menoth White Highlight, adding more and more again
High 3: Last mix adding pure White again and again
Next up I chose the Demon of Lust by Klukva, bases on Slan from the manga Beserk. I’ve not read it, but I won some Klukva vouchers a while back and I liked this model. I’ve a large sith lady to paint soon and I’m looking for a good skin paint scheme for her so I picked up the Vallejo Nocturna Malefic Flesh set and thought I’d test out one of the three schemes on her. I did not have the best experience. If you have experience with this guide/set please let me know of your experiences.
Vallejo paint kits have been a mixed bag for me. This is my fourth. This one more so than the others had dissapointing instructions. They aren’t instructions. They’re a list if paints. This might be fine for a high end painter, but for someone looking for help it’s almost worse than nothing. Let’s take a look:
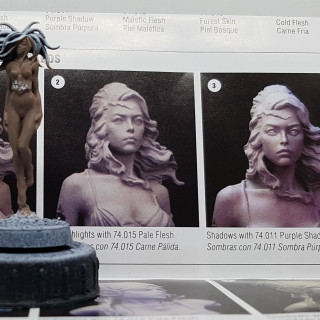
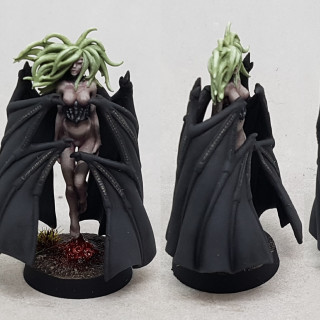
Pic 1: I have applied the recommended base colour. Please note that it looks nothing like the image in the guide. I am following the Purple Tones guide here. In the pic she is light pinkish edging towards white. On my model she is brown. Only one paint has been asked for so far. The colours should not be so different. Either someone is not telling the whole truth or those pictures are really bad.
Pic 2: I started applying some of the first highlights and just no. This is wrong. I’m starting again. They are clearly assuming skills and knowledge they are not discussing, if not outright lying to us. Time for me to redo a base coat, get out my largely unused wet pallette and try doing this while reading between the lines.
So here’s what I did, more or less
Base and highlight 1: I added a little of their first highlight to their base colour and got an even coat over the model. I then put a blob of their base and their first highlight on a wet pallette and smudged them together, creating a smooth transition acorss the blend from which I could apply multiple stages of thin highlights over my model.
Shade: I took their base colour and smudged it in to their shade colour as above and did the same again.
Final highlight: Same but smudging my first highlight in to a little of their final highlight
At no point did my colours match their photos, but I like the results. I need to work on my thinning and wet pallette use, but I do like the tones. It reminds me of the PP Cryx Pallid Flesh recipe, which I’ve always liked. Maybe others can match the photos with these paints, but I feel their guide pics are misleading and I’m happy enough with my results.
Time to test of the Nocturna Flesh Blue Tones recipe on Raging Heroes Shiveryah:
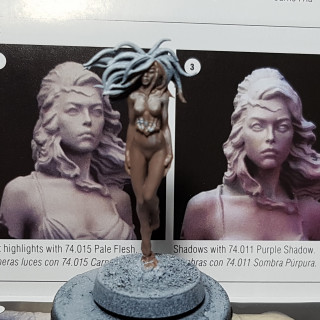
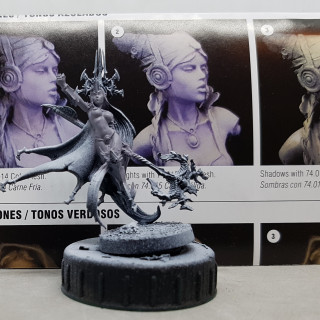
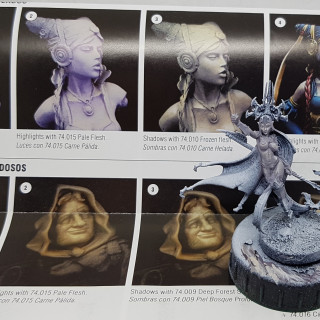
Pic 3: Now my photos are starting to be misleading. While her purple tones weren’t as vibrant as in the guide, she was more purple to the naked eye. A pale grey-purple. Step 2 was to highlight with Pale Flesh and yet in their photos the model just gets more purple. There’s no purple in Pale flesh. Its a pale flesh colour. Its like their pics aren’t meant to show you what they’ve done, but are clean repaints of the same piece using just the colour they’ve mentioned.
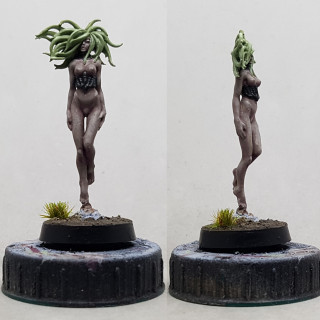
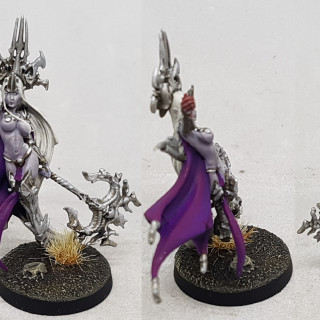
Pic 4: I’ve followed their guide as best as I can using the techniques discussed for the Demon of Lust. What I have now is someone with pale purple Dark Elf skin and I really like it, but it is drastically different to what I can see in their photos and not what I was working towards. Now I’m writing this I’m lookin at Pic 4 below and it does not match the model on my desk, so I’m guessing cameras don’t show this paint shceme very well? I would not call this Blue Tones. It’s more purple than the Purple Tones recipe above.
This just leaves the Green Tones recipe to test. I don’t have a model to hand that is asking for that. I’ll have to have a hunt around and see what I want to test that on.
So far, I rate these paints, but the guide is misleading/lying. The colours are all muted and desaturated and I have achieved good results with them. It’s just a shame they didn’t take a little more time over the guide.
If you have experience working with this guide please let me know of your experience below. Am I the problem here, or have others had similar experiences?
If anyone at OTT is reading this I’d love an Edit button at the top as well as the bottom of the project entries. My entries keep getting long and longer and always require many edits.


![How To Paint Moonstone’s Nanny | Goblin King Games [7 Days Early Access]](https://images.beastsofwar.com/2024/12/3CU-Gobin-King-Games-Moonstone-Shades-Nanny-coverimage-225-127.jpg)




Regardless of the quality of the instructions you were following, those skin tones came out great.
Thanks. I do like them and will use them again, even if they don’t look like what I was lead the believe they would