


![How To Paint Moonstone’s Nanny | Goblin King Games [7 Days Early Access]](https://images.beastsofwar.com/2024/12/3CU-Gobin-King-Games-Moonstone-Shades-Nanny-coverimage-225-127.jpg)


Tuscany Hill Village Terrain Build


Town Hall
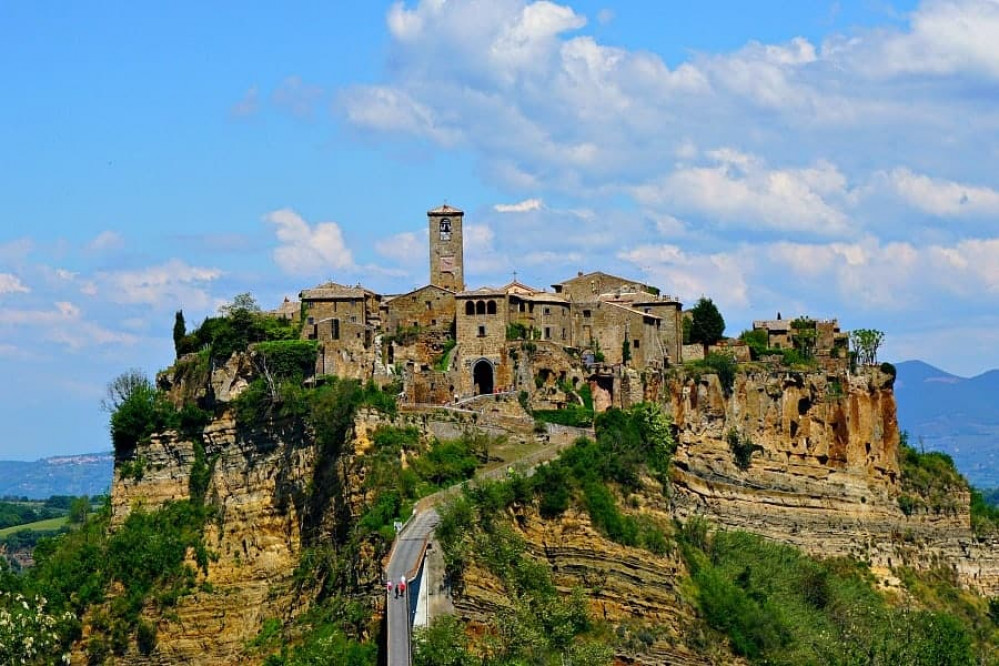
I want a couple of centre piece buildings for the town. One will be the church, the centre of just about every Italian village, but I also plan a town hall. I’ve been looking at reference pictures and particularly like the building below from Cortona.
I’ll take some of the features but try to adapt it to limit its footprint on the table.
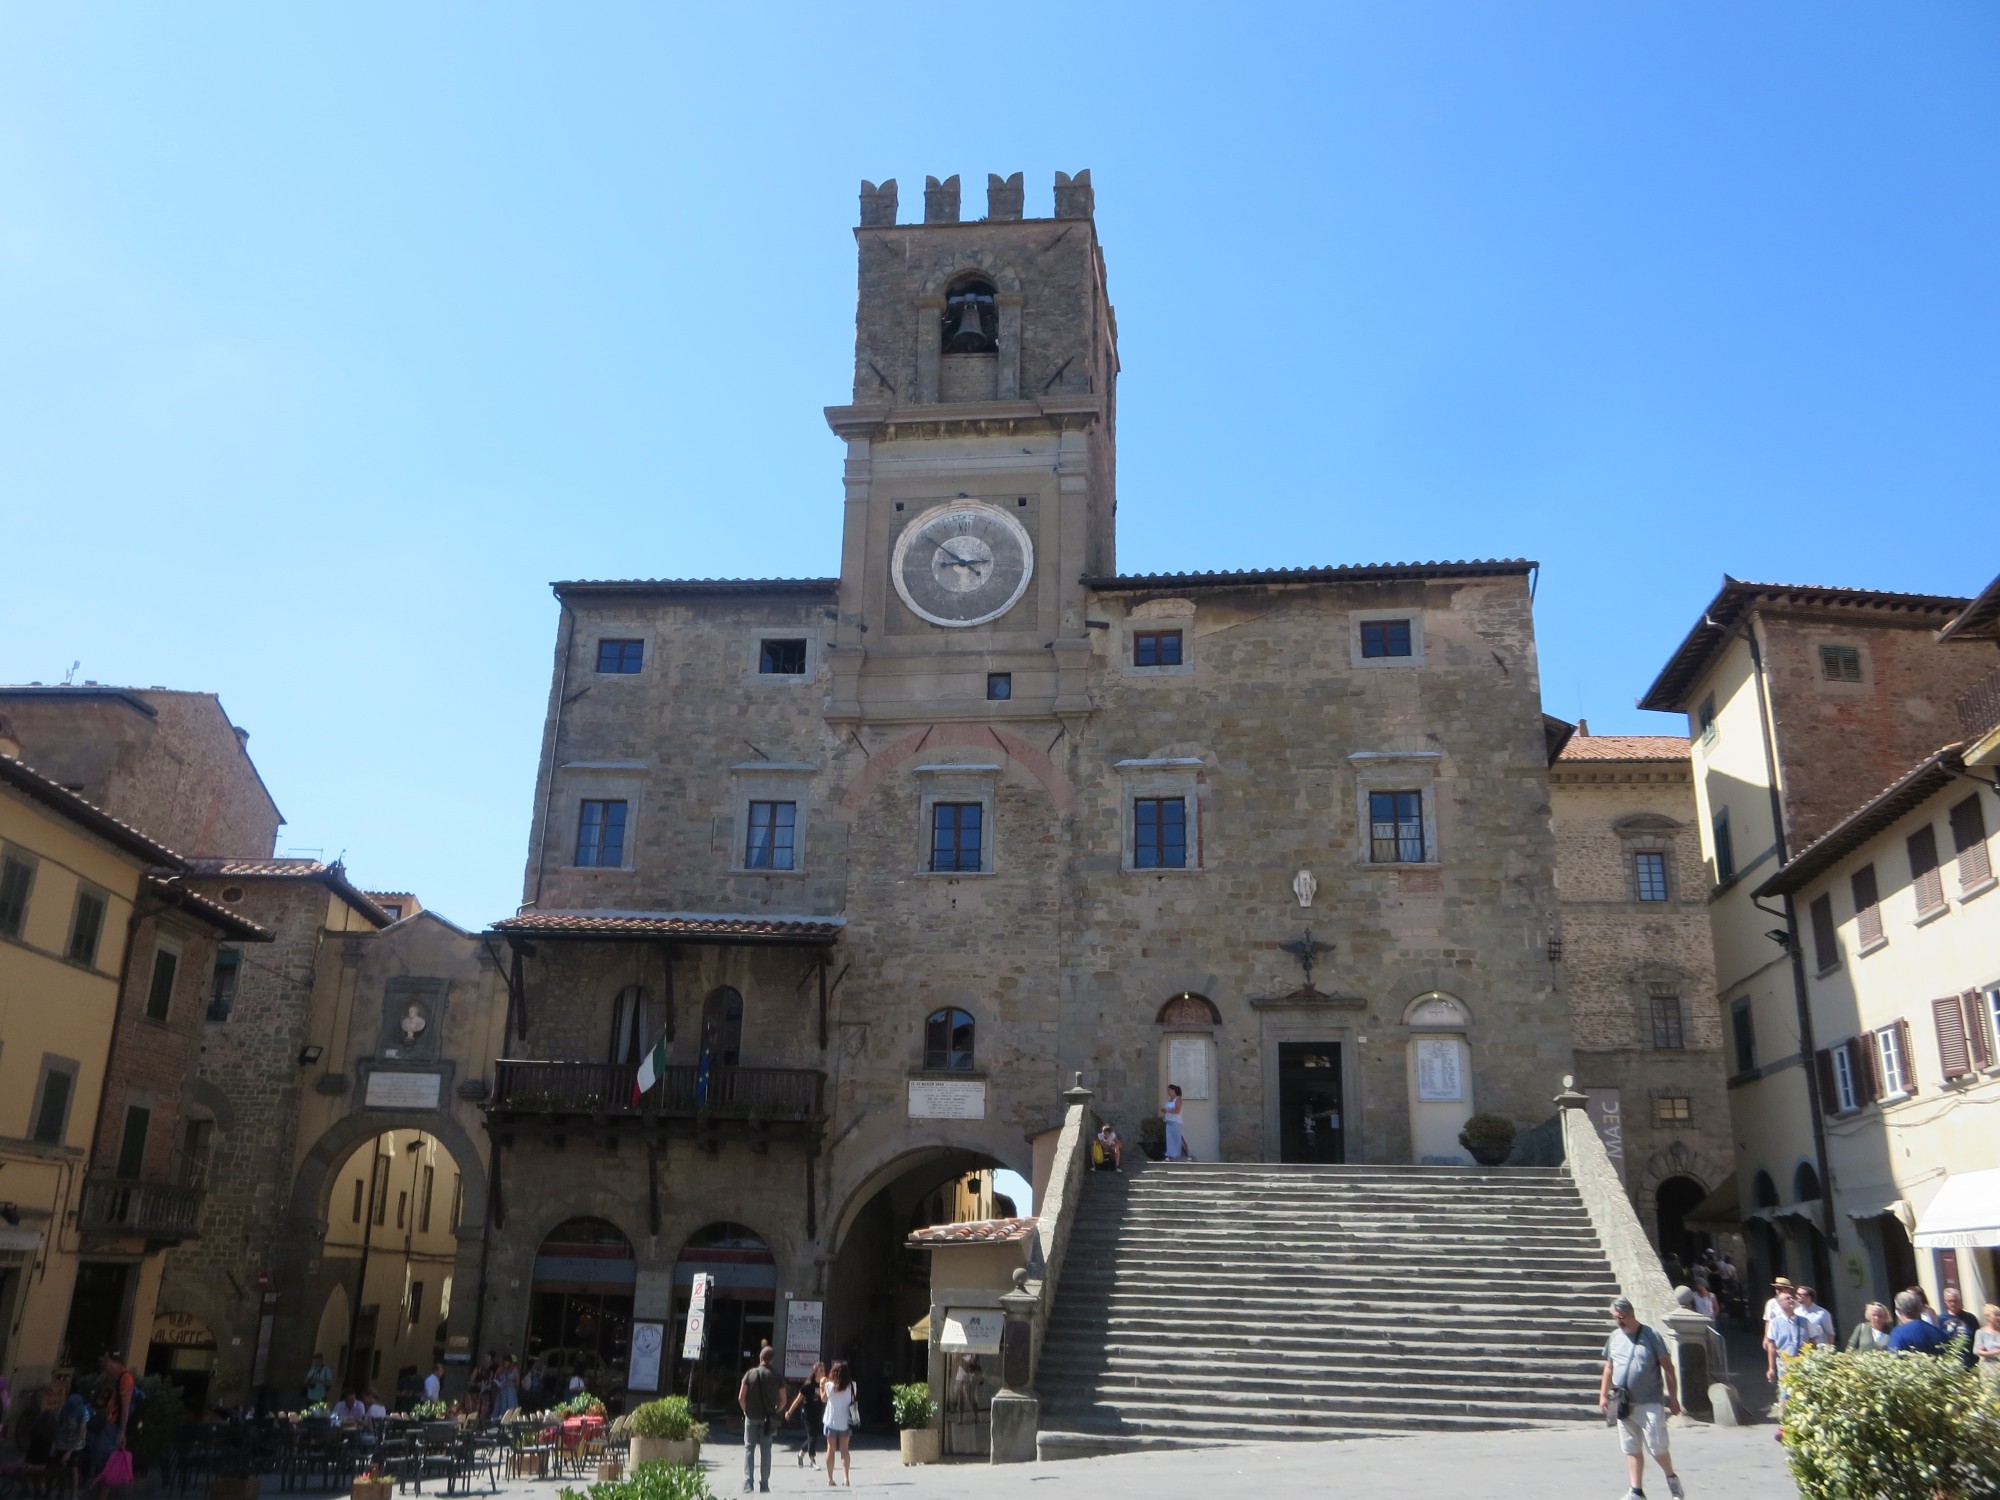 Cortona Town Hall
How I build the Cad designs
I thought I’d add a couple lines on how I design the buildings. Firstly, my cad skills are limited and I’ve had to ‘teach myself’ from YouTube. I’ve found the easiest approach is to break the building down into smaller sections that can be built separately and then combined to make the final 3d print file.
Logically, taking each floor at a time makes the most sense. This requires a basic template and some planning on paper first with the footprint and basic design. To keep the building together once made, I’ve added 1cm long ridges on the top of the two side walls. These fit into the corresponding slots on the floor above’s base and will hopefully be not too noticeable once actually printed out.
For doors and windows, I’ve found ‘punching’ rectangular holes through the walls that are larger than required to be the easiest approach. The door and window can then be designed separately and then slotted in to the hole. You can see below the basic shell of the ground floor for the town hall with holes punched for the windows.
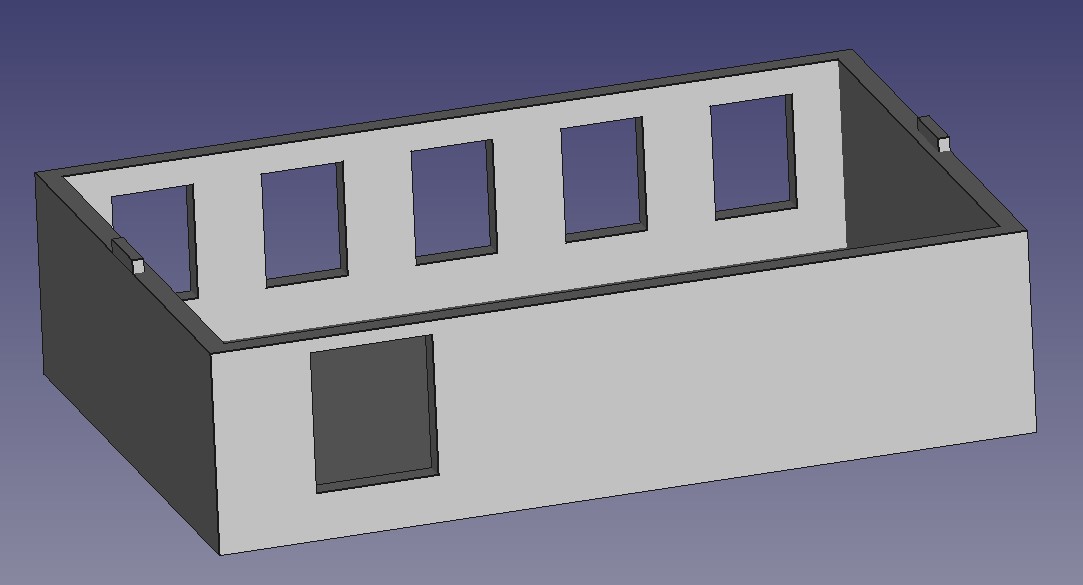 Basic shell for the ground floor of the town hall
By taking the approach to build the more complex parts separately, you can reduce the repetition and break down complex issues into simpler, geometric shapes.
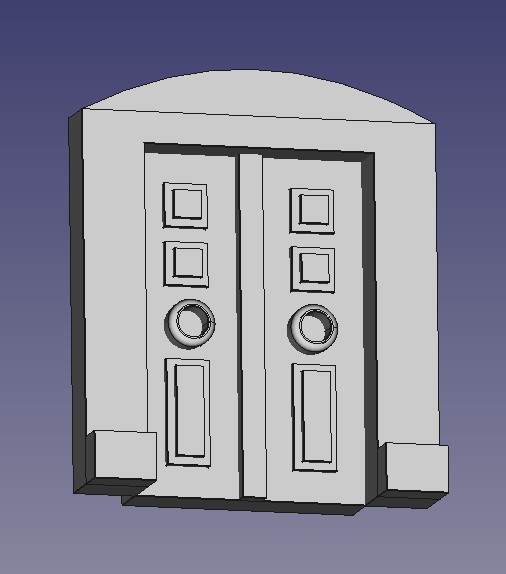
Below are examples of the windows and a door that will get slotted in to one of the holes in the basic shell. The door was in turn built up from smaller parts that were put together. The arch was a rectangle with elements removed. The actual doors had the paneling added before then being slotted in to the arch. This is then combined in FreeCad before being slotted in to the door hole in the main model.

For the ground floor, I wanted to recreate the staircase in the reference picture. However, to reduce the building footprint, I have the stairs running up the side of the building.
The stairs (below) were broken down into separate builds. In fact, the stairs themselves are a series of rectangles placed together. The banisters where the hardest challenge and again had to be created separately and then combined with the stairs to reduce the complexity. The complete stair case was then added to the ground floor shell and the windows added.
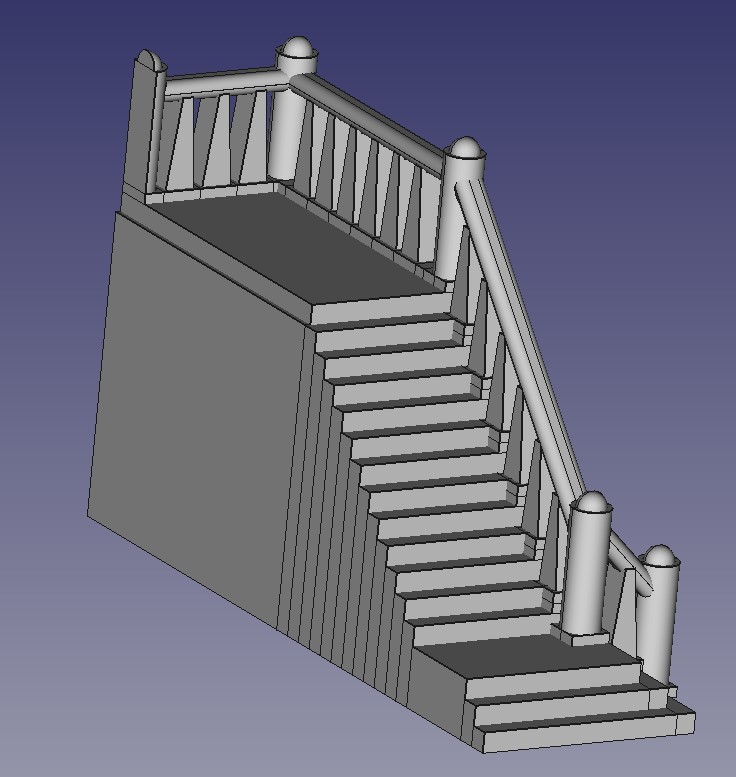 The Town Hall Stairs (from the side that will be attached to the building)
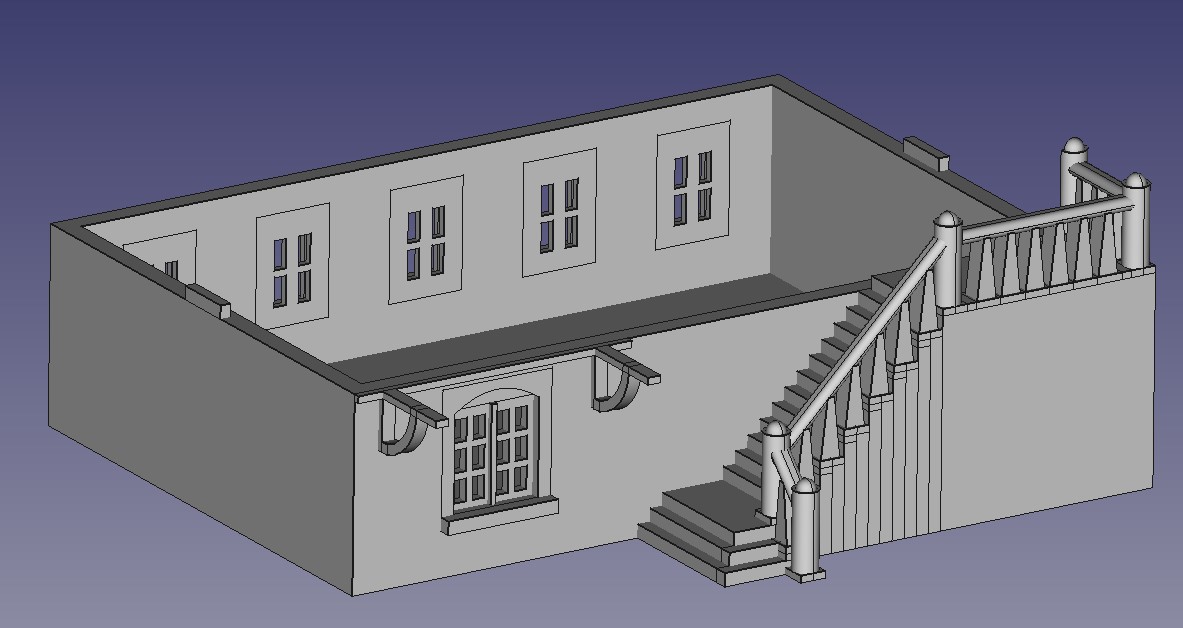 Completed ground floor, with all of the windows and stairs slotted in to place
For the first floor, I wanted the main doorway as well as the balcony. This latter feature took some planning and calculating (I had to go back to my trigonometry lessons from school) to get the angles correct.
The second floor needed a clock face. I’ve opted to actually model the hands into the model rather than paint on once printed. I think this will look a lot better.
The roof took some time to put together. I have ‘sheets’ of roof tiles designed that I import and place on to a triangular sub structure. But that still required a lot of planning to make sure that the sheets didn’t overhang the model to stop issues with the printing when the time comes.
The completed model design is below
 First Floor
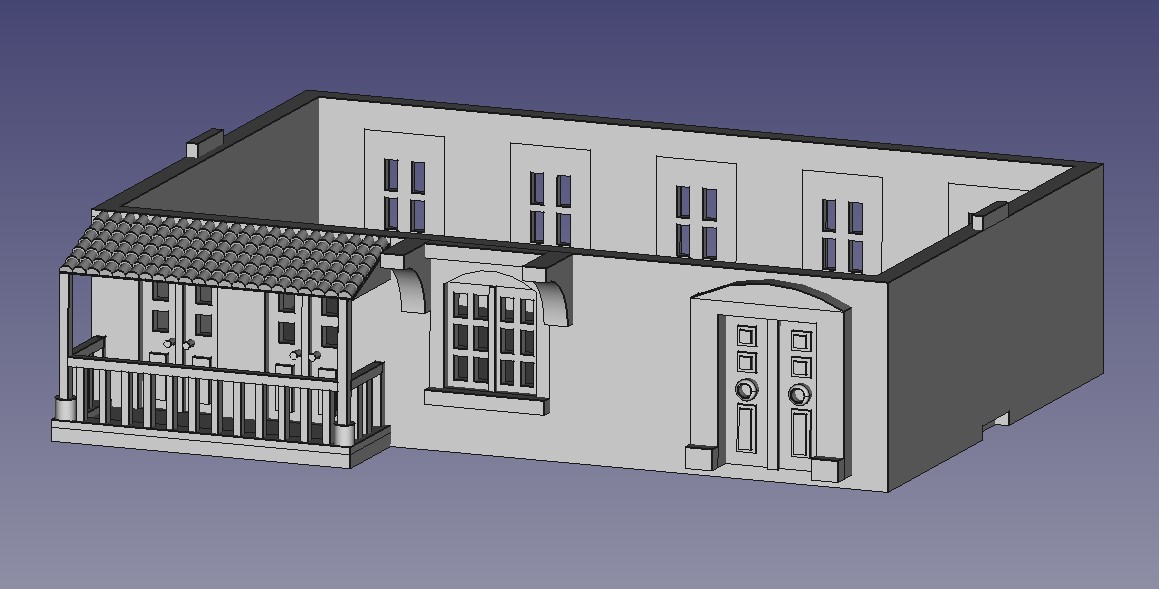
 Completed Town Hall


Leave a Reply