


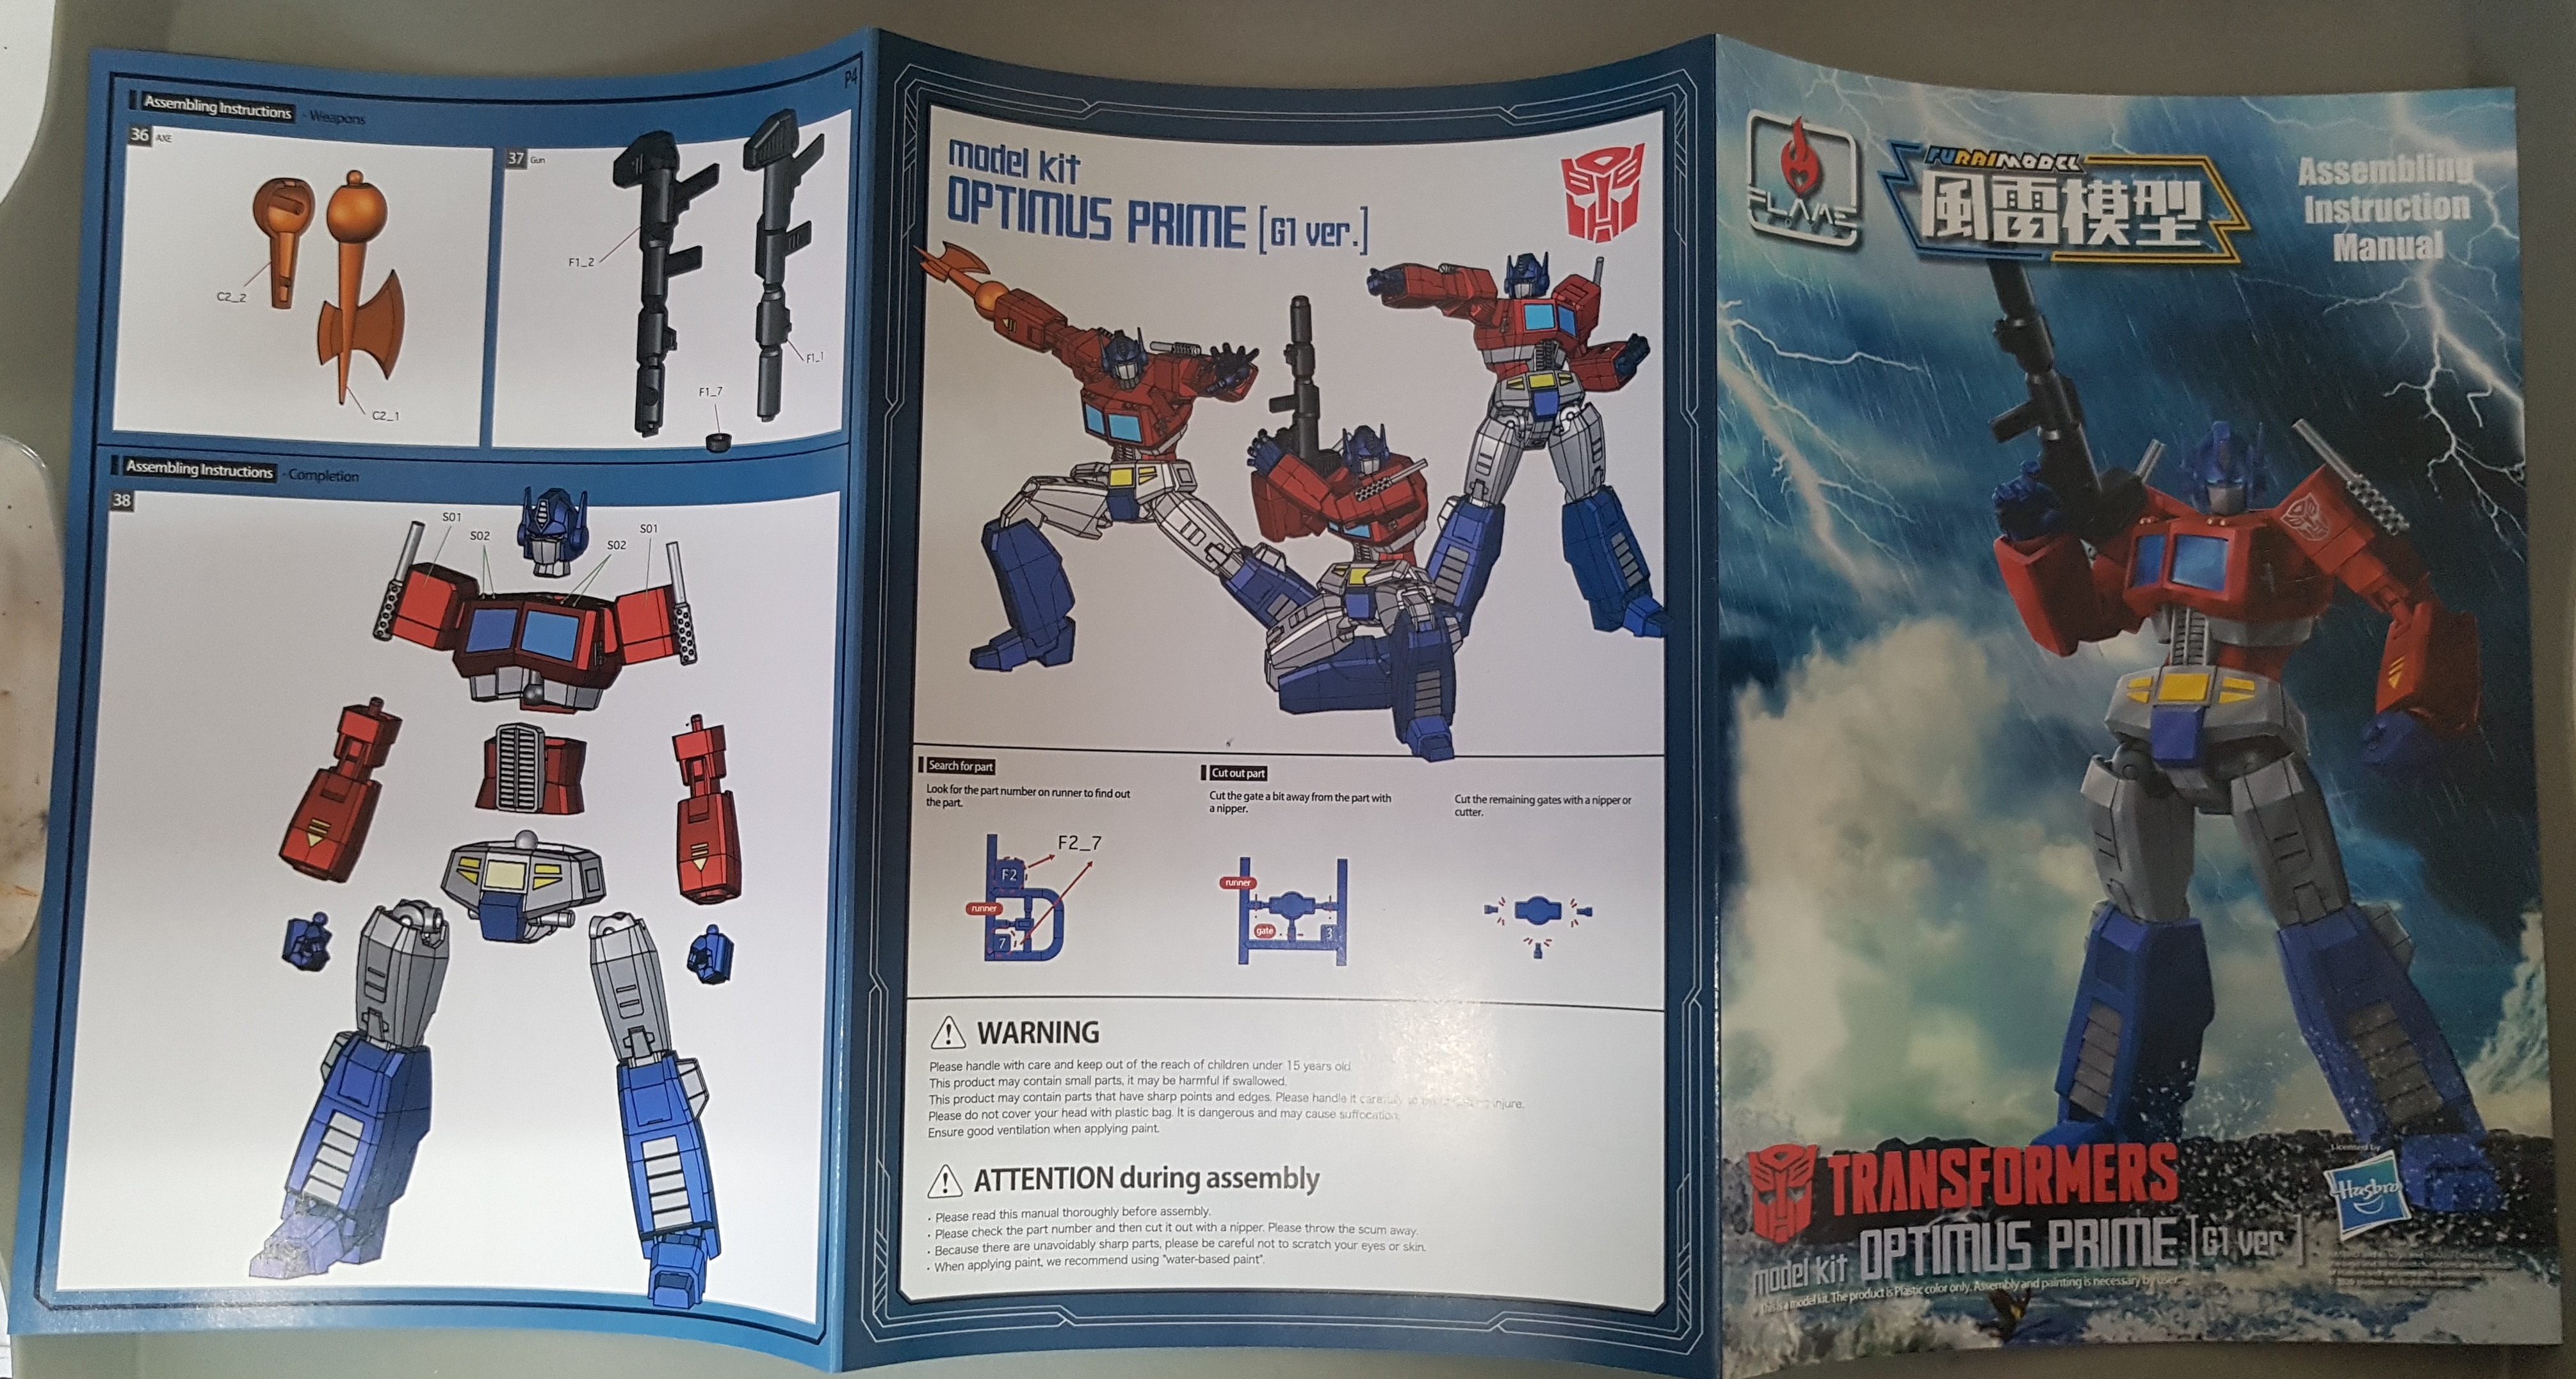
Optimus Prime & Co.: A Newbies attempt at Gunpla


By George kimosabes your smashed up, blotto friend, soon like brand new with ninety day warranty all iciban parts and labor is!
I built Prime this weekend. He took around 5 hours. I was able to watch the Weekender and Critical Role in the background, so it wasn’t too intense. Glue wasn’t needed, but it was recommended for the windshield. I’ve worked with GW push fit parts before and I’ve usually had to file down the pegs to make them fit. I never had that problem here. I did have to thin out one or two axle type parts to make them fit, and the Matrix cover flap thing had to have some plastic shaved off to make it work. Otherwise, everything worked first try.
The instructions were much shorter than I expected. The steps were mostly quite clear. At first I thought they were putting too much within each box, but then I noticed they have a sub-build order within each step. This makes it real easy to follow usually. Problems can arise if you get carried away and ignore this build order, as some stuff needs to go together in the right order or it won’t go together. I had to remove a part at one point and broke an internal peg and nearly damaged some visible parts. Usually, things only actually fit together one way due to shaped pegs and good design. The parts on the sprue are usually put on in number order. Part 1 is next to 2, which is next to 3 etc. None of this GW stuff where parts 1, 2, and 3 might even be on different sprues.
There were times when the steps could have used more pics to clearly show how things went together. There were axle/peg parts in the arms that went in half way and stopped. It was only by looking up videos on youtube that I found out I had to force them another 5mm deeper.
I had issue with the stickers. The logos went on fine, but the cab lights were too small to apply by hand. I used the tip of my hobby knife to lift them up and transfer them to the model. Two went fine, but the other two came off with paper still attached so lacked a sticky surface. I had to glue them in place, which could have resulted in frosting where I really didn’t want it.
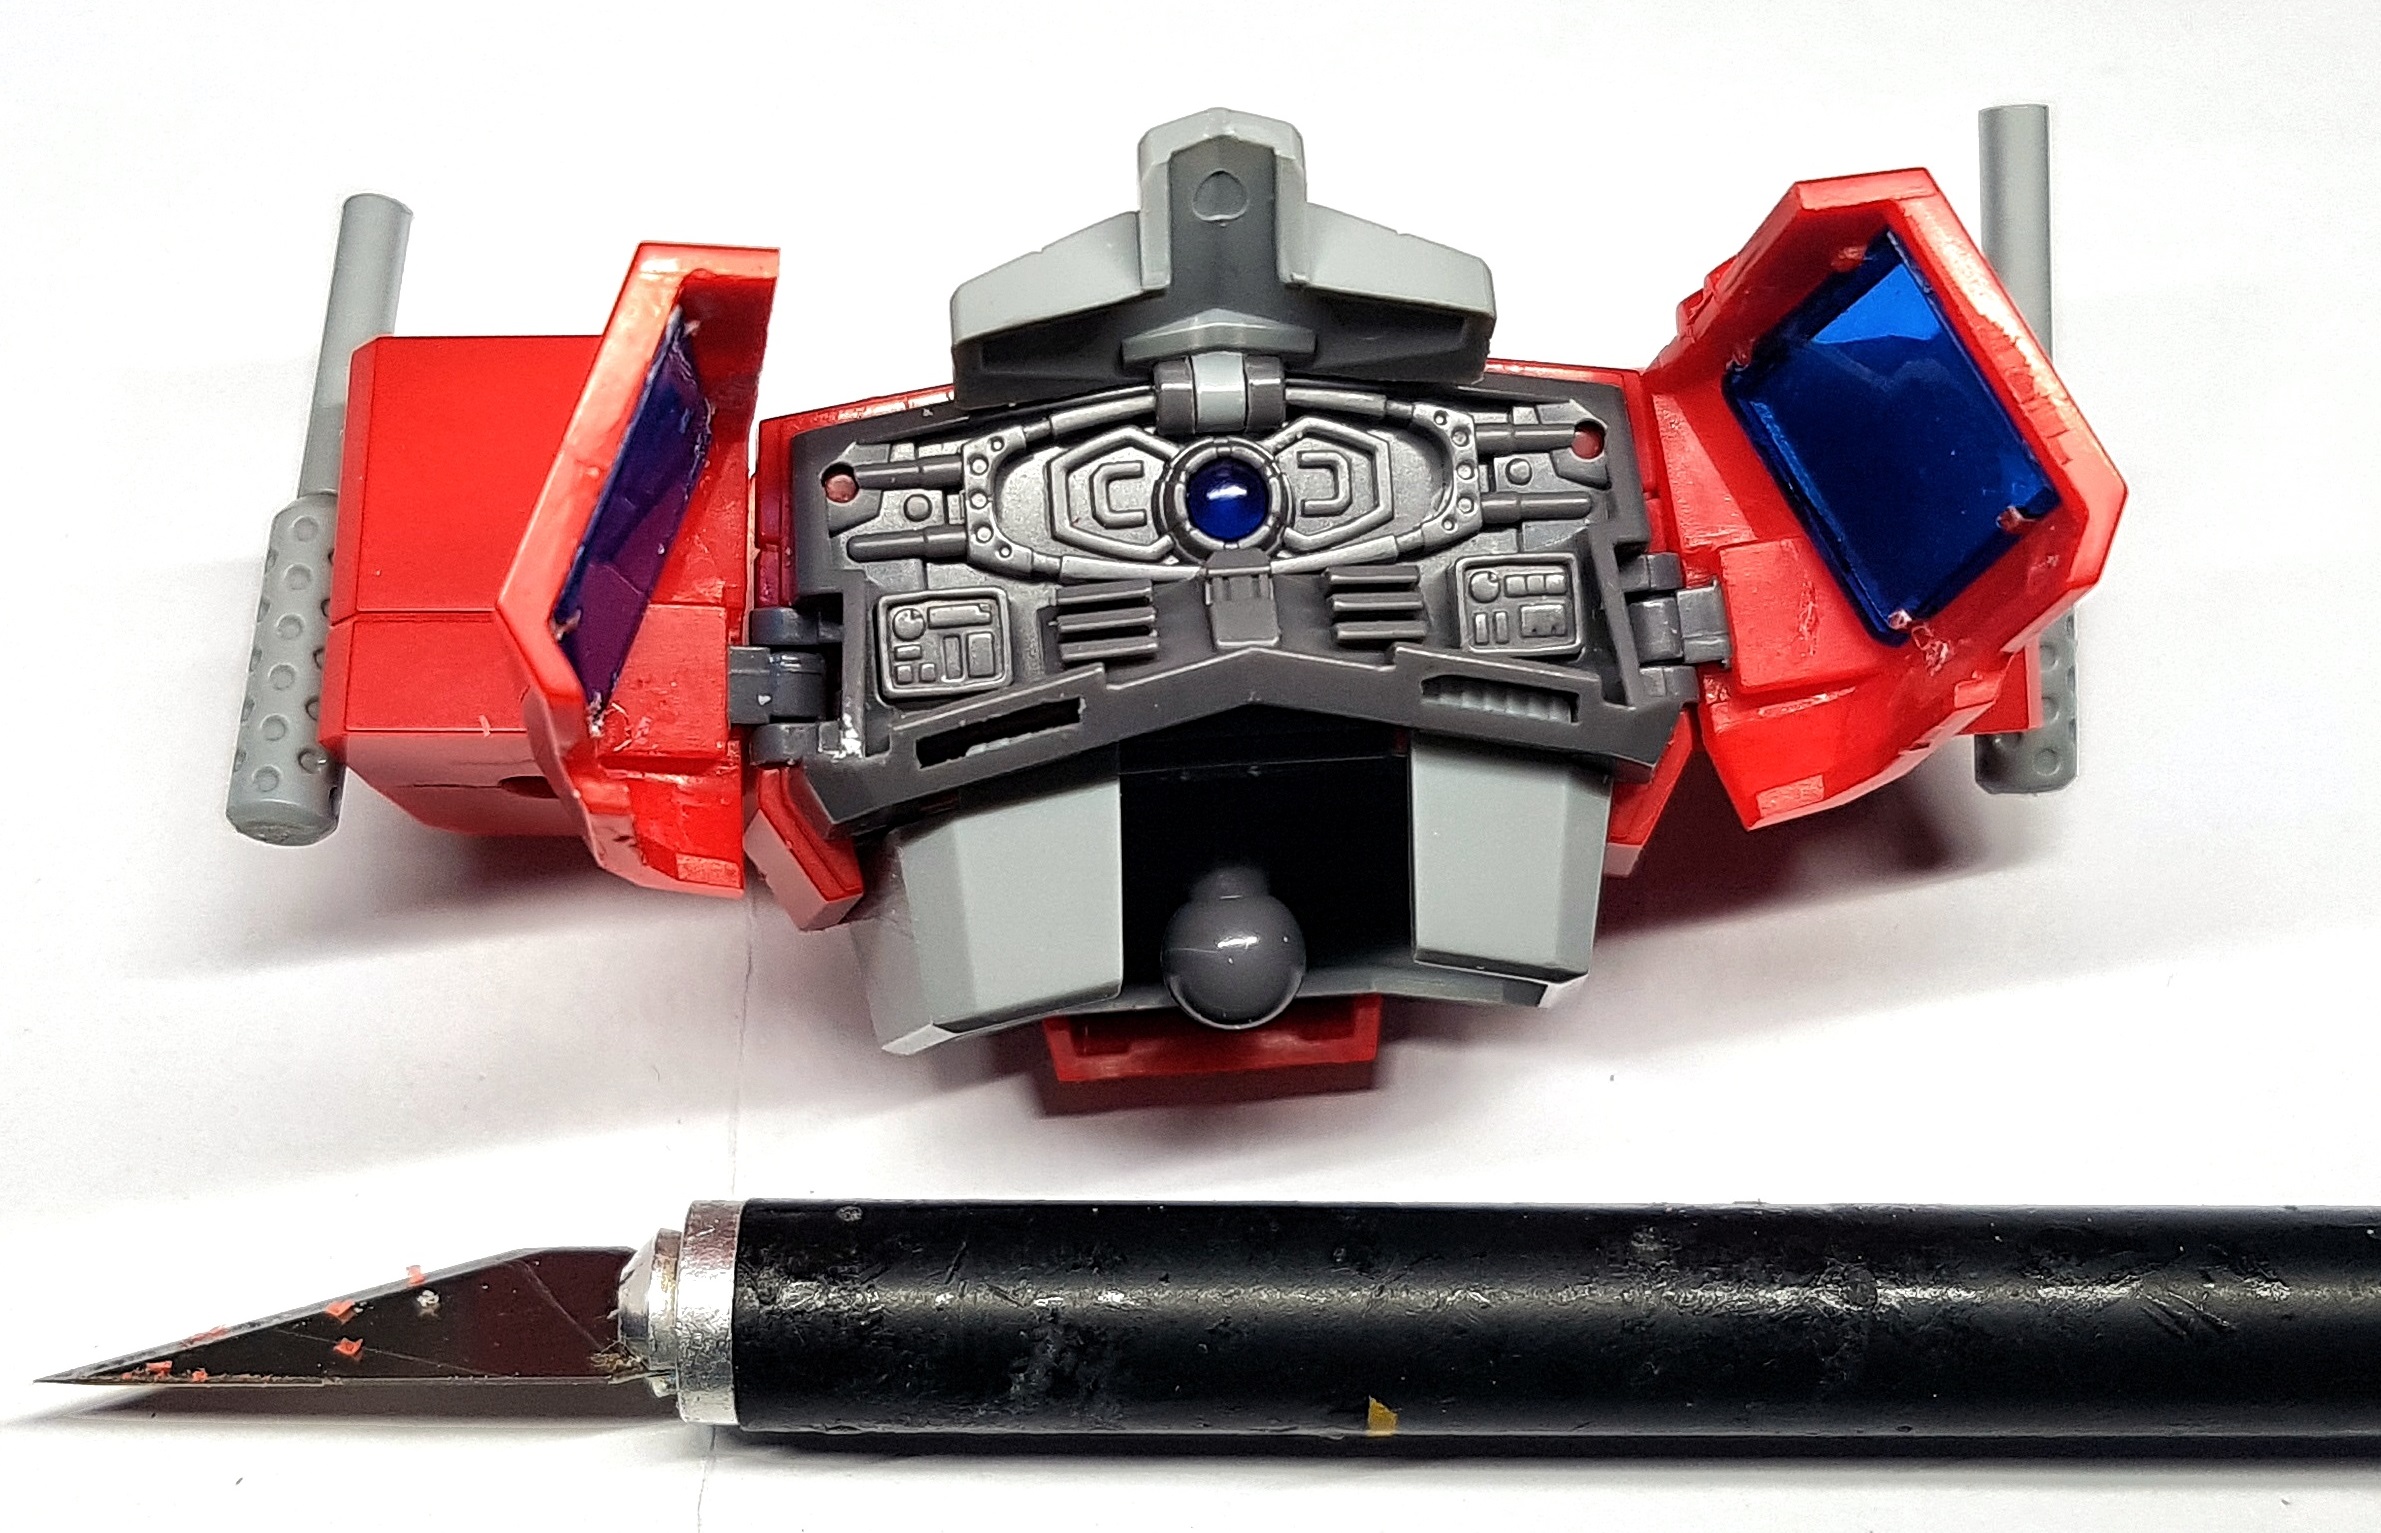
On that subject, the windshields needed gluing in to stop them falling out later (the cab opens up and his chest folds forwards to reveal the Matrix). There’s just no way of hiding this once the cab is open, and my glue did turn white.
The Energon Axe, his eyes, and the Matrix are all made of transparent plastic, which is cool. However, there’s no way to get light behind the eyes or Matrix. It would be nice if there was an option extra lighting kit to have light pass through everything that should glow. I wouldn’t know where to begin doing that myself, and I’m not even sure there’s room to hide the parts inside him.

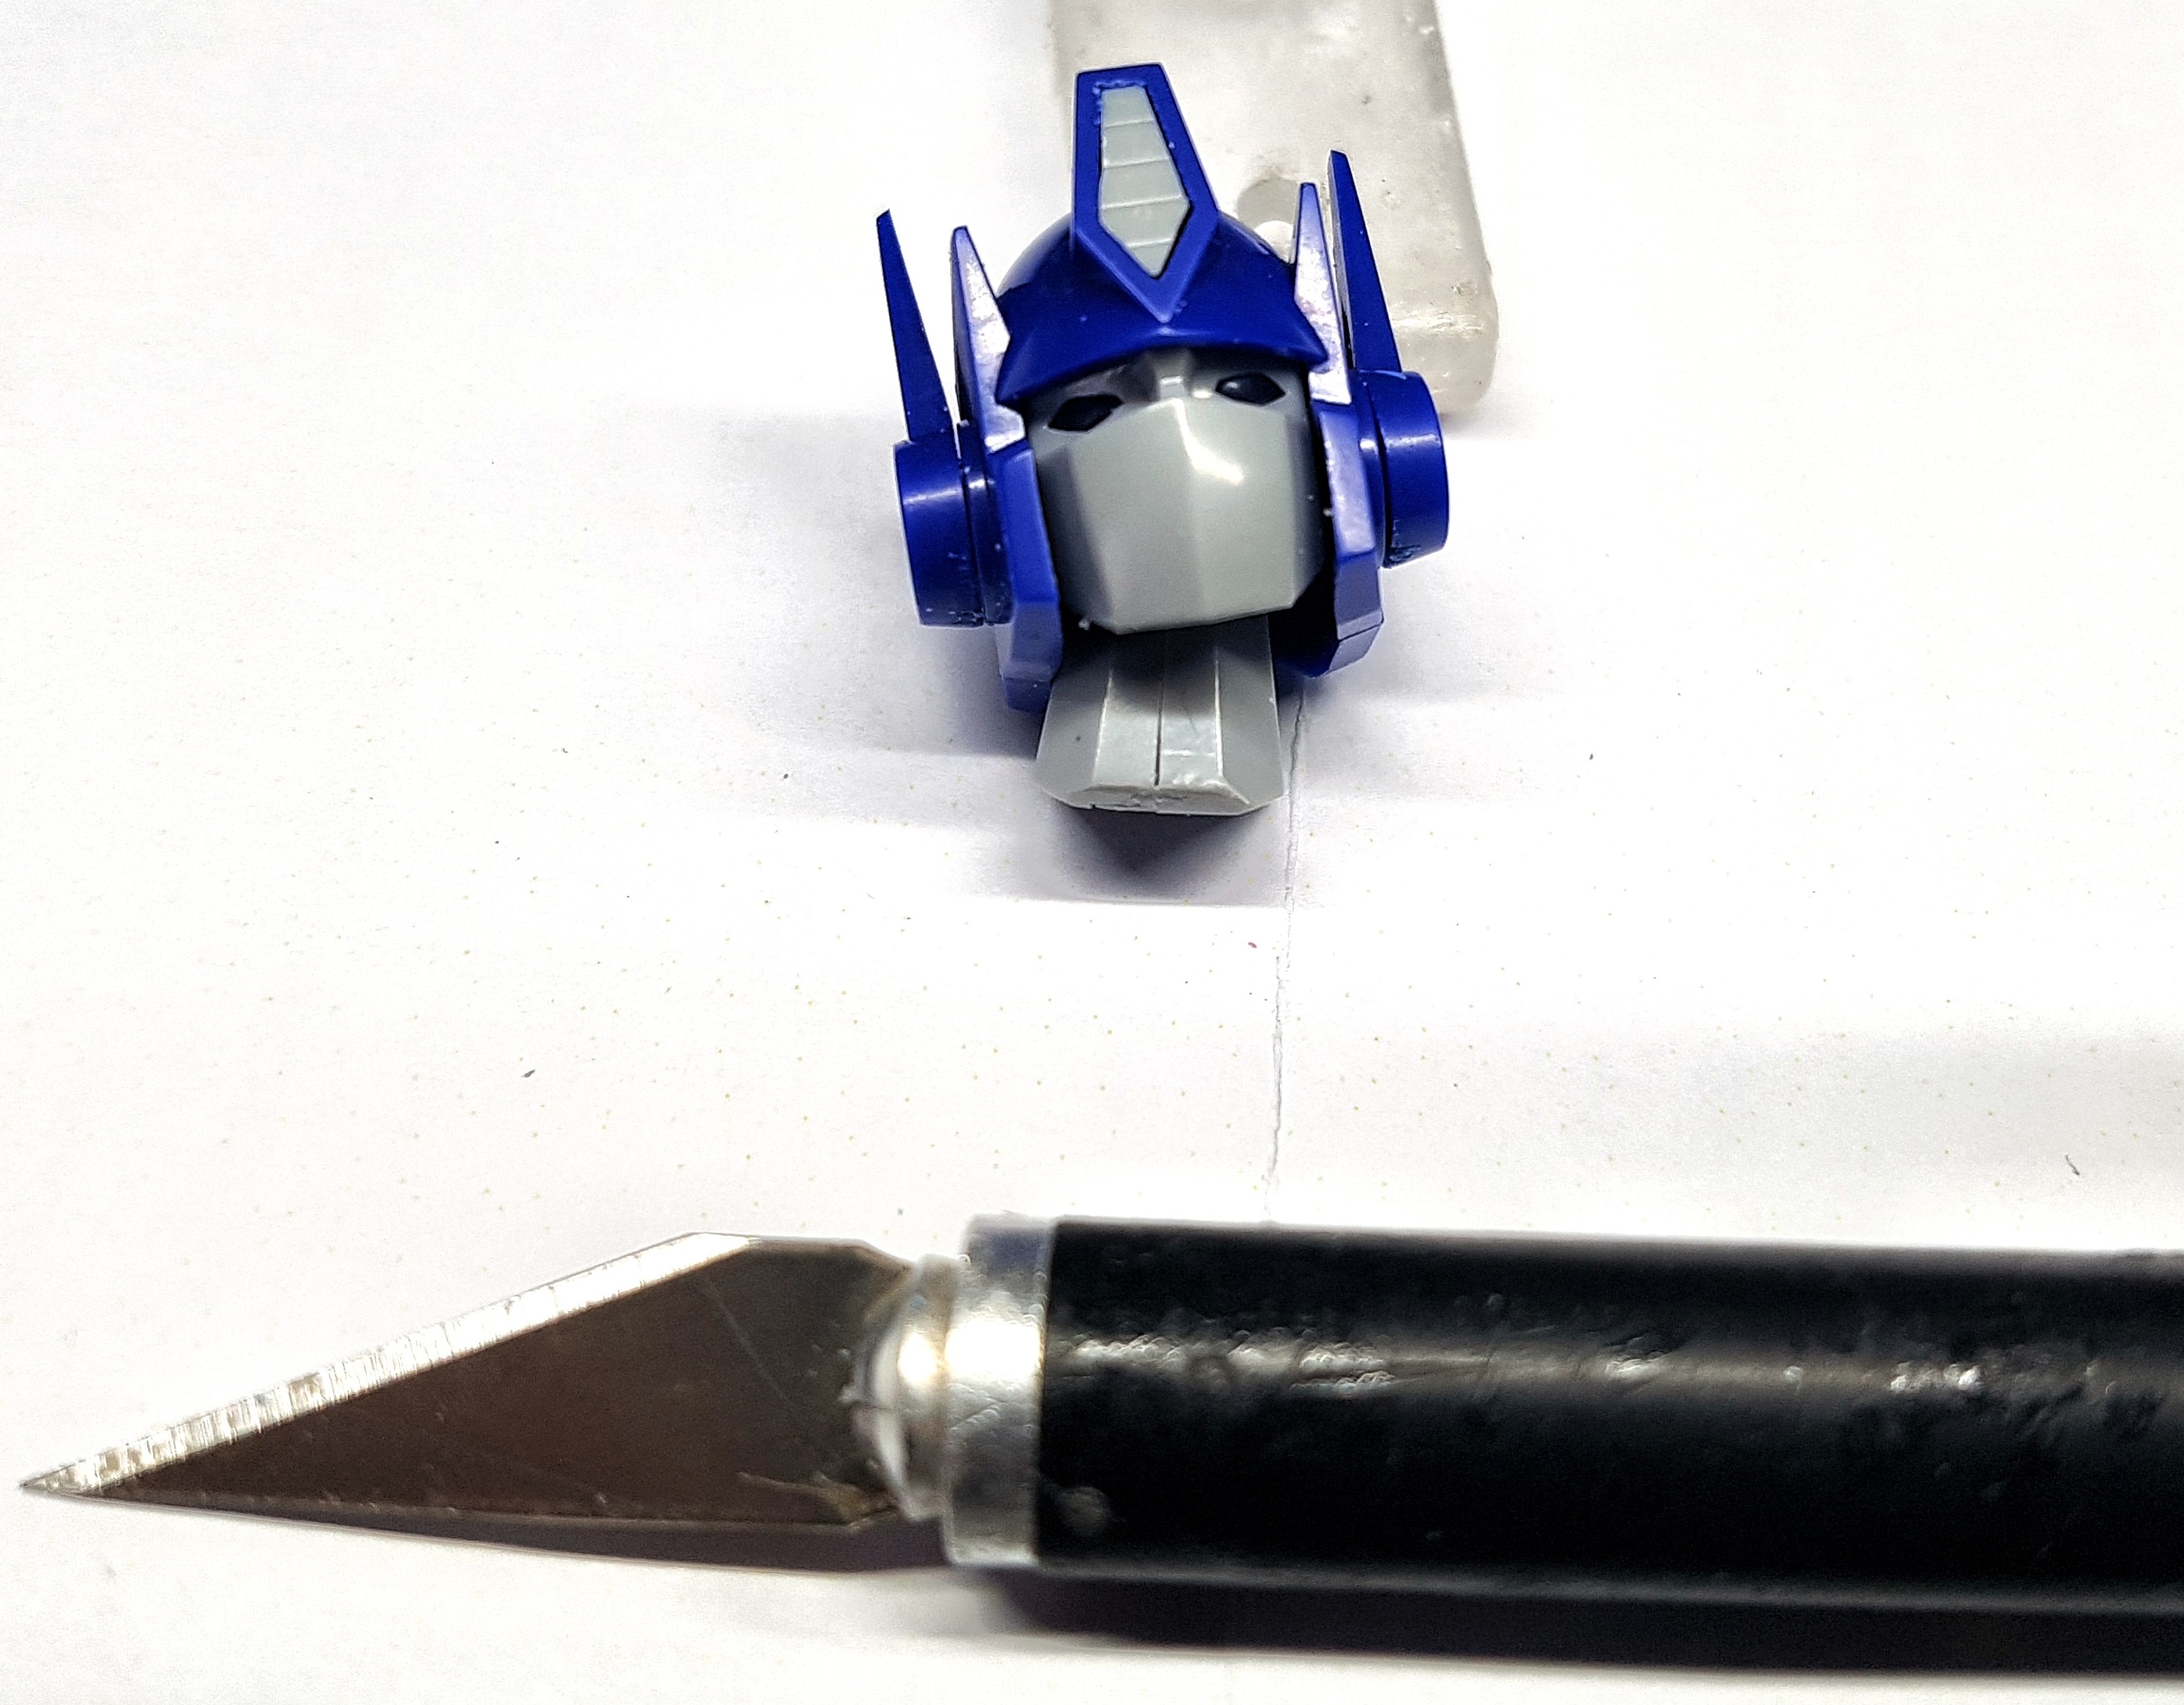
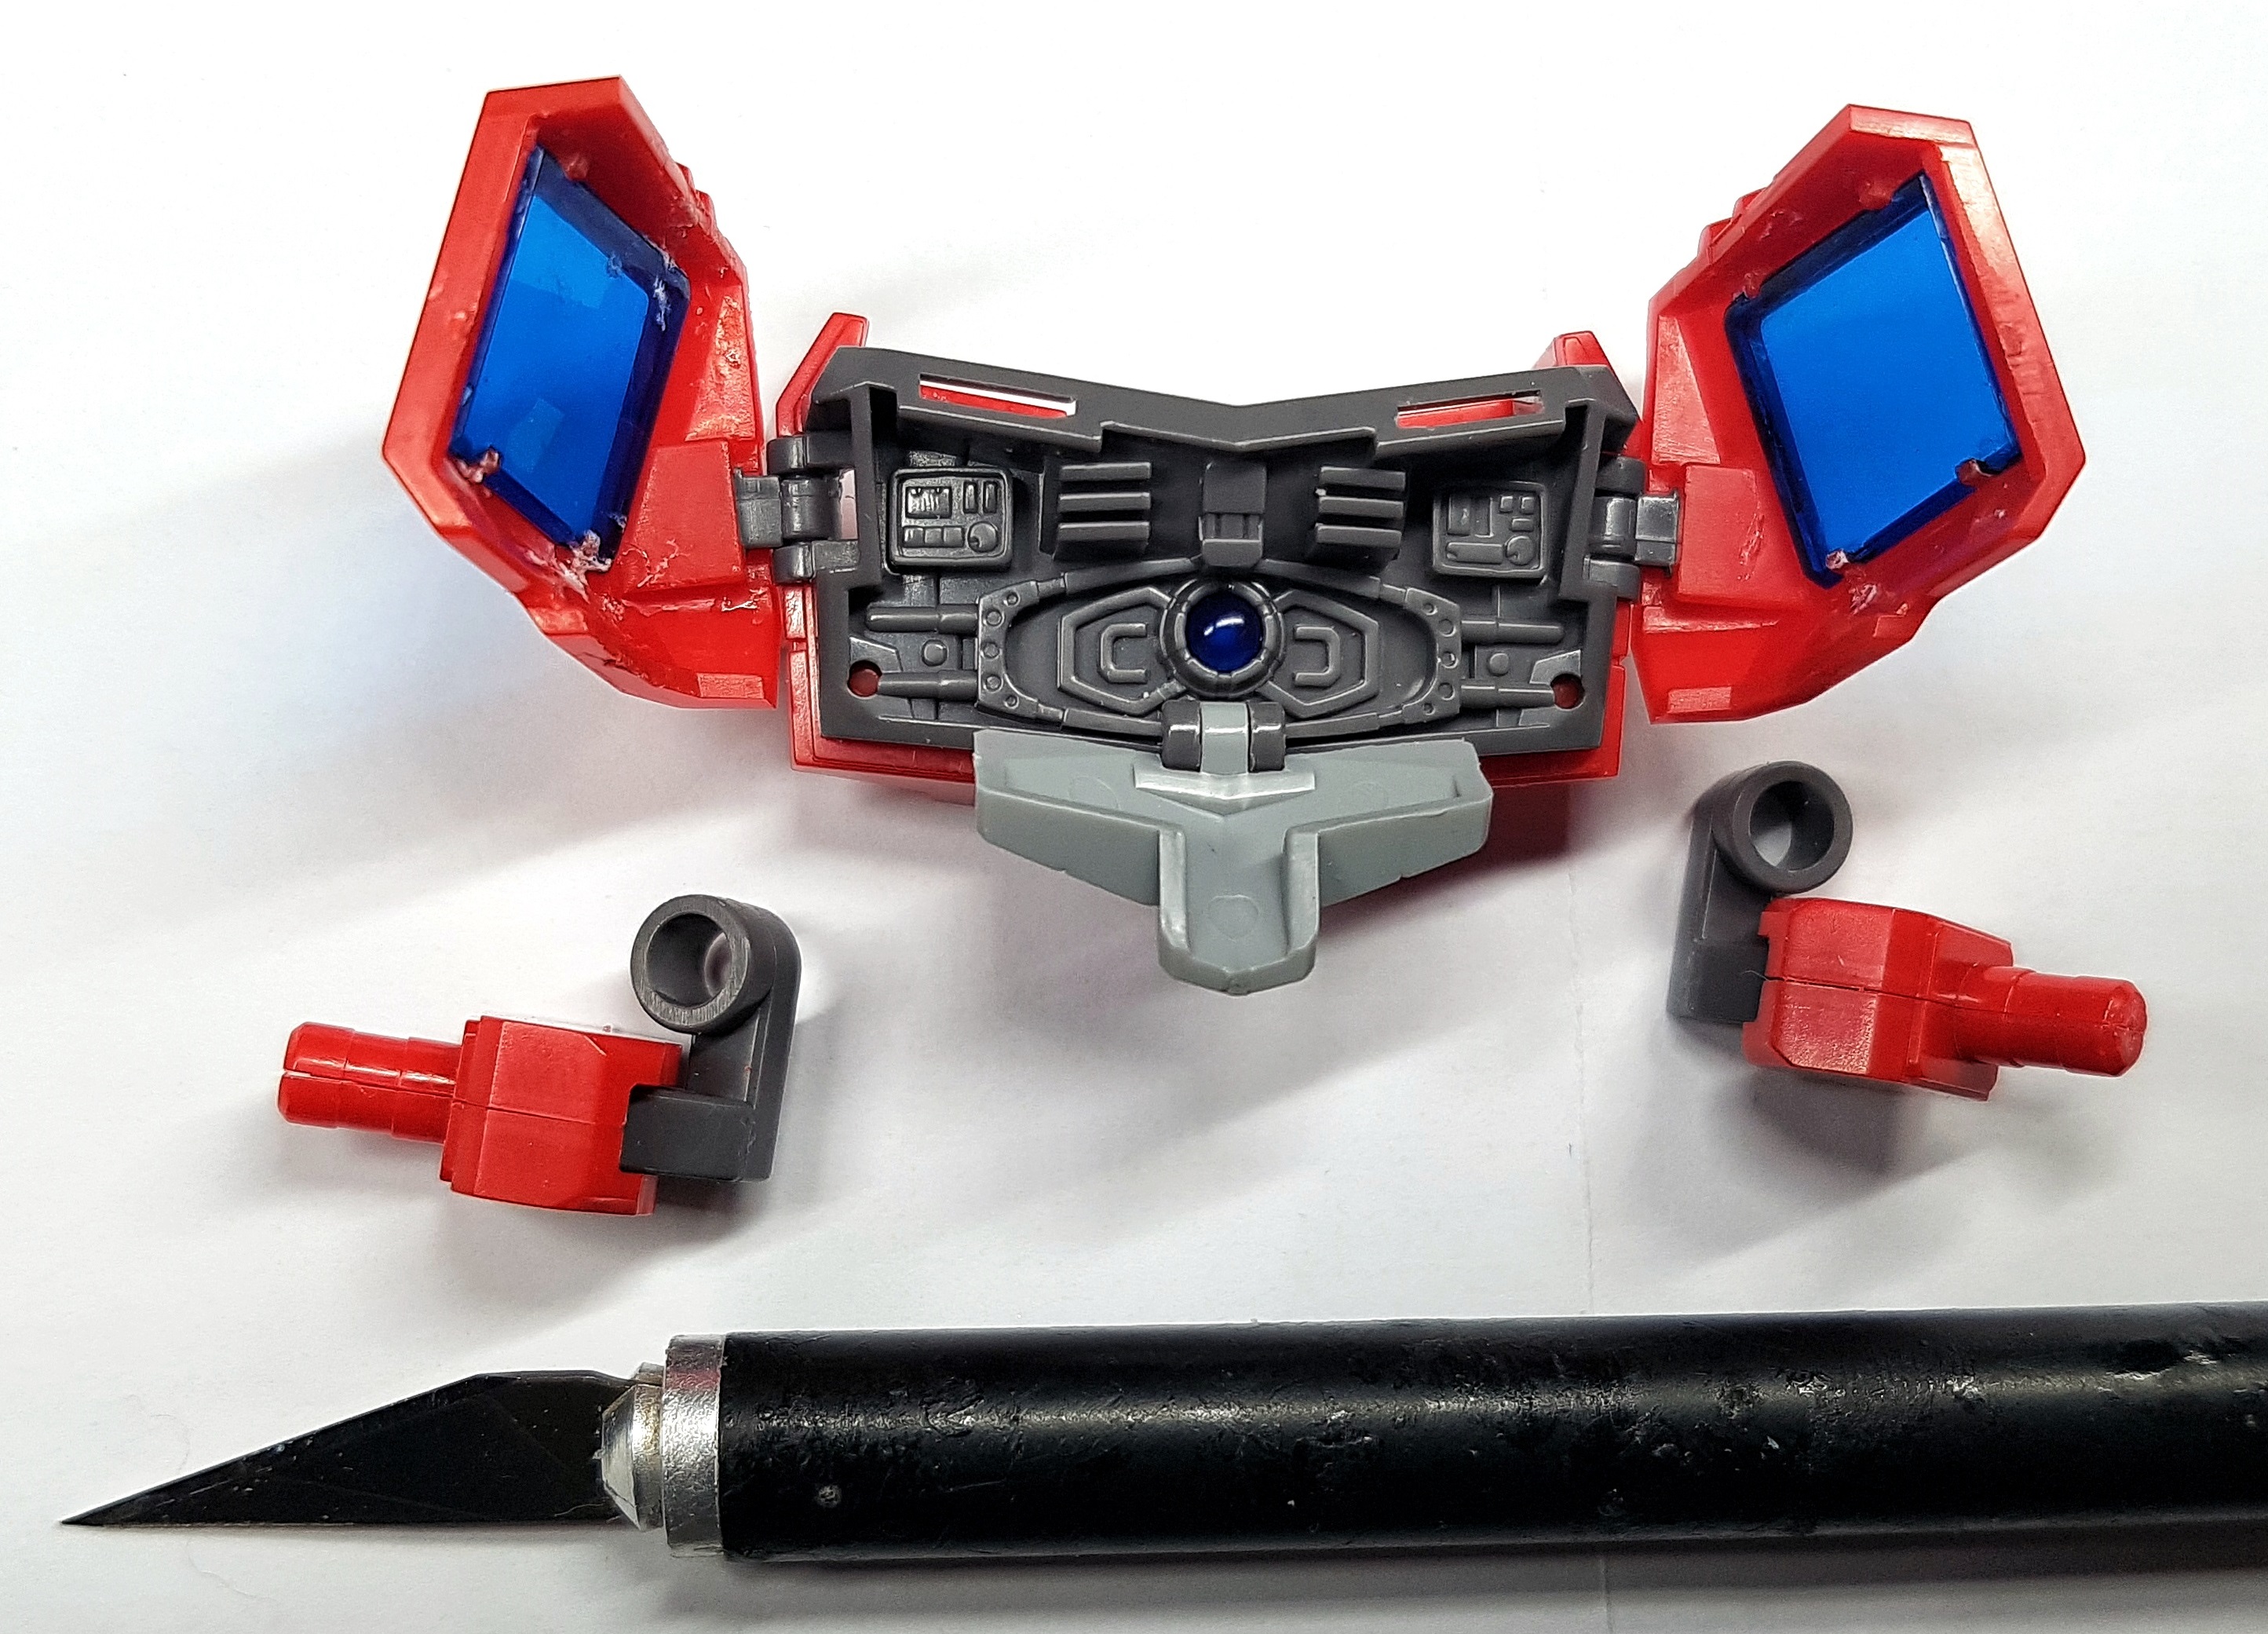
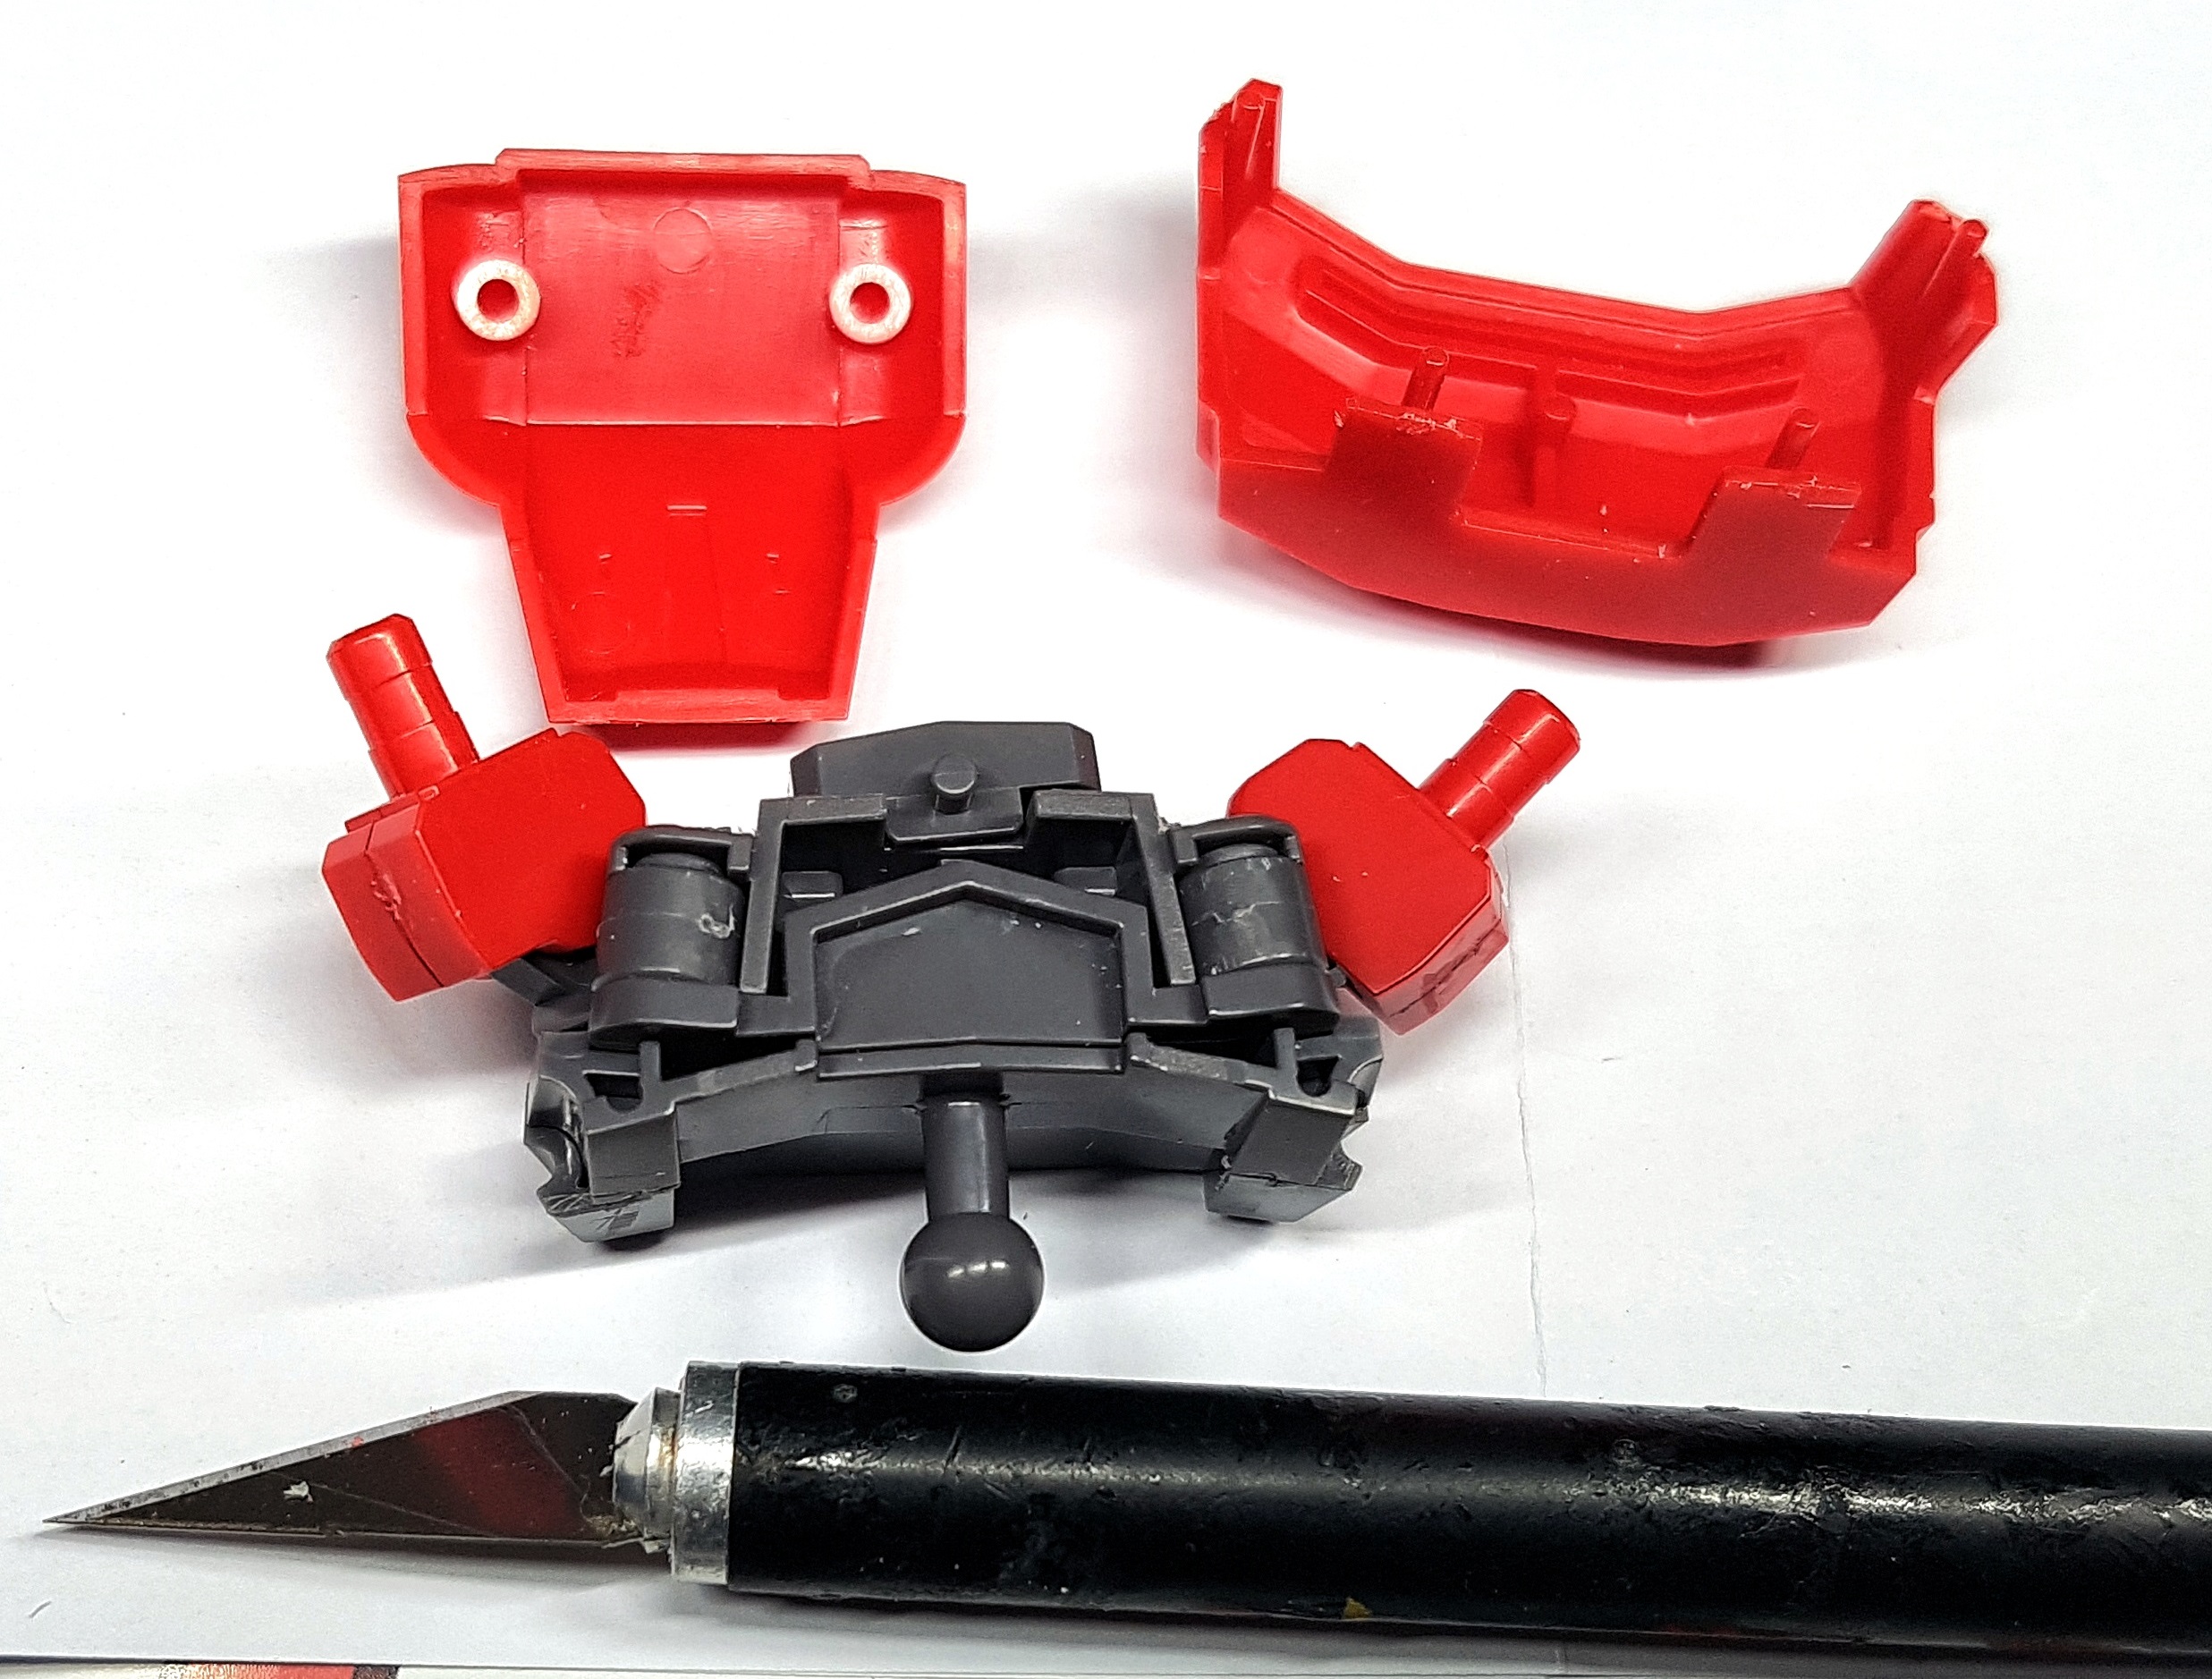
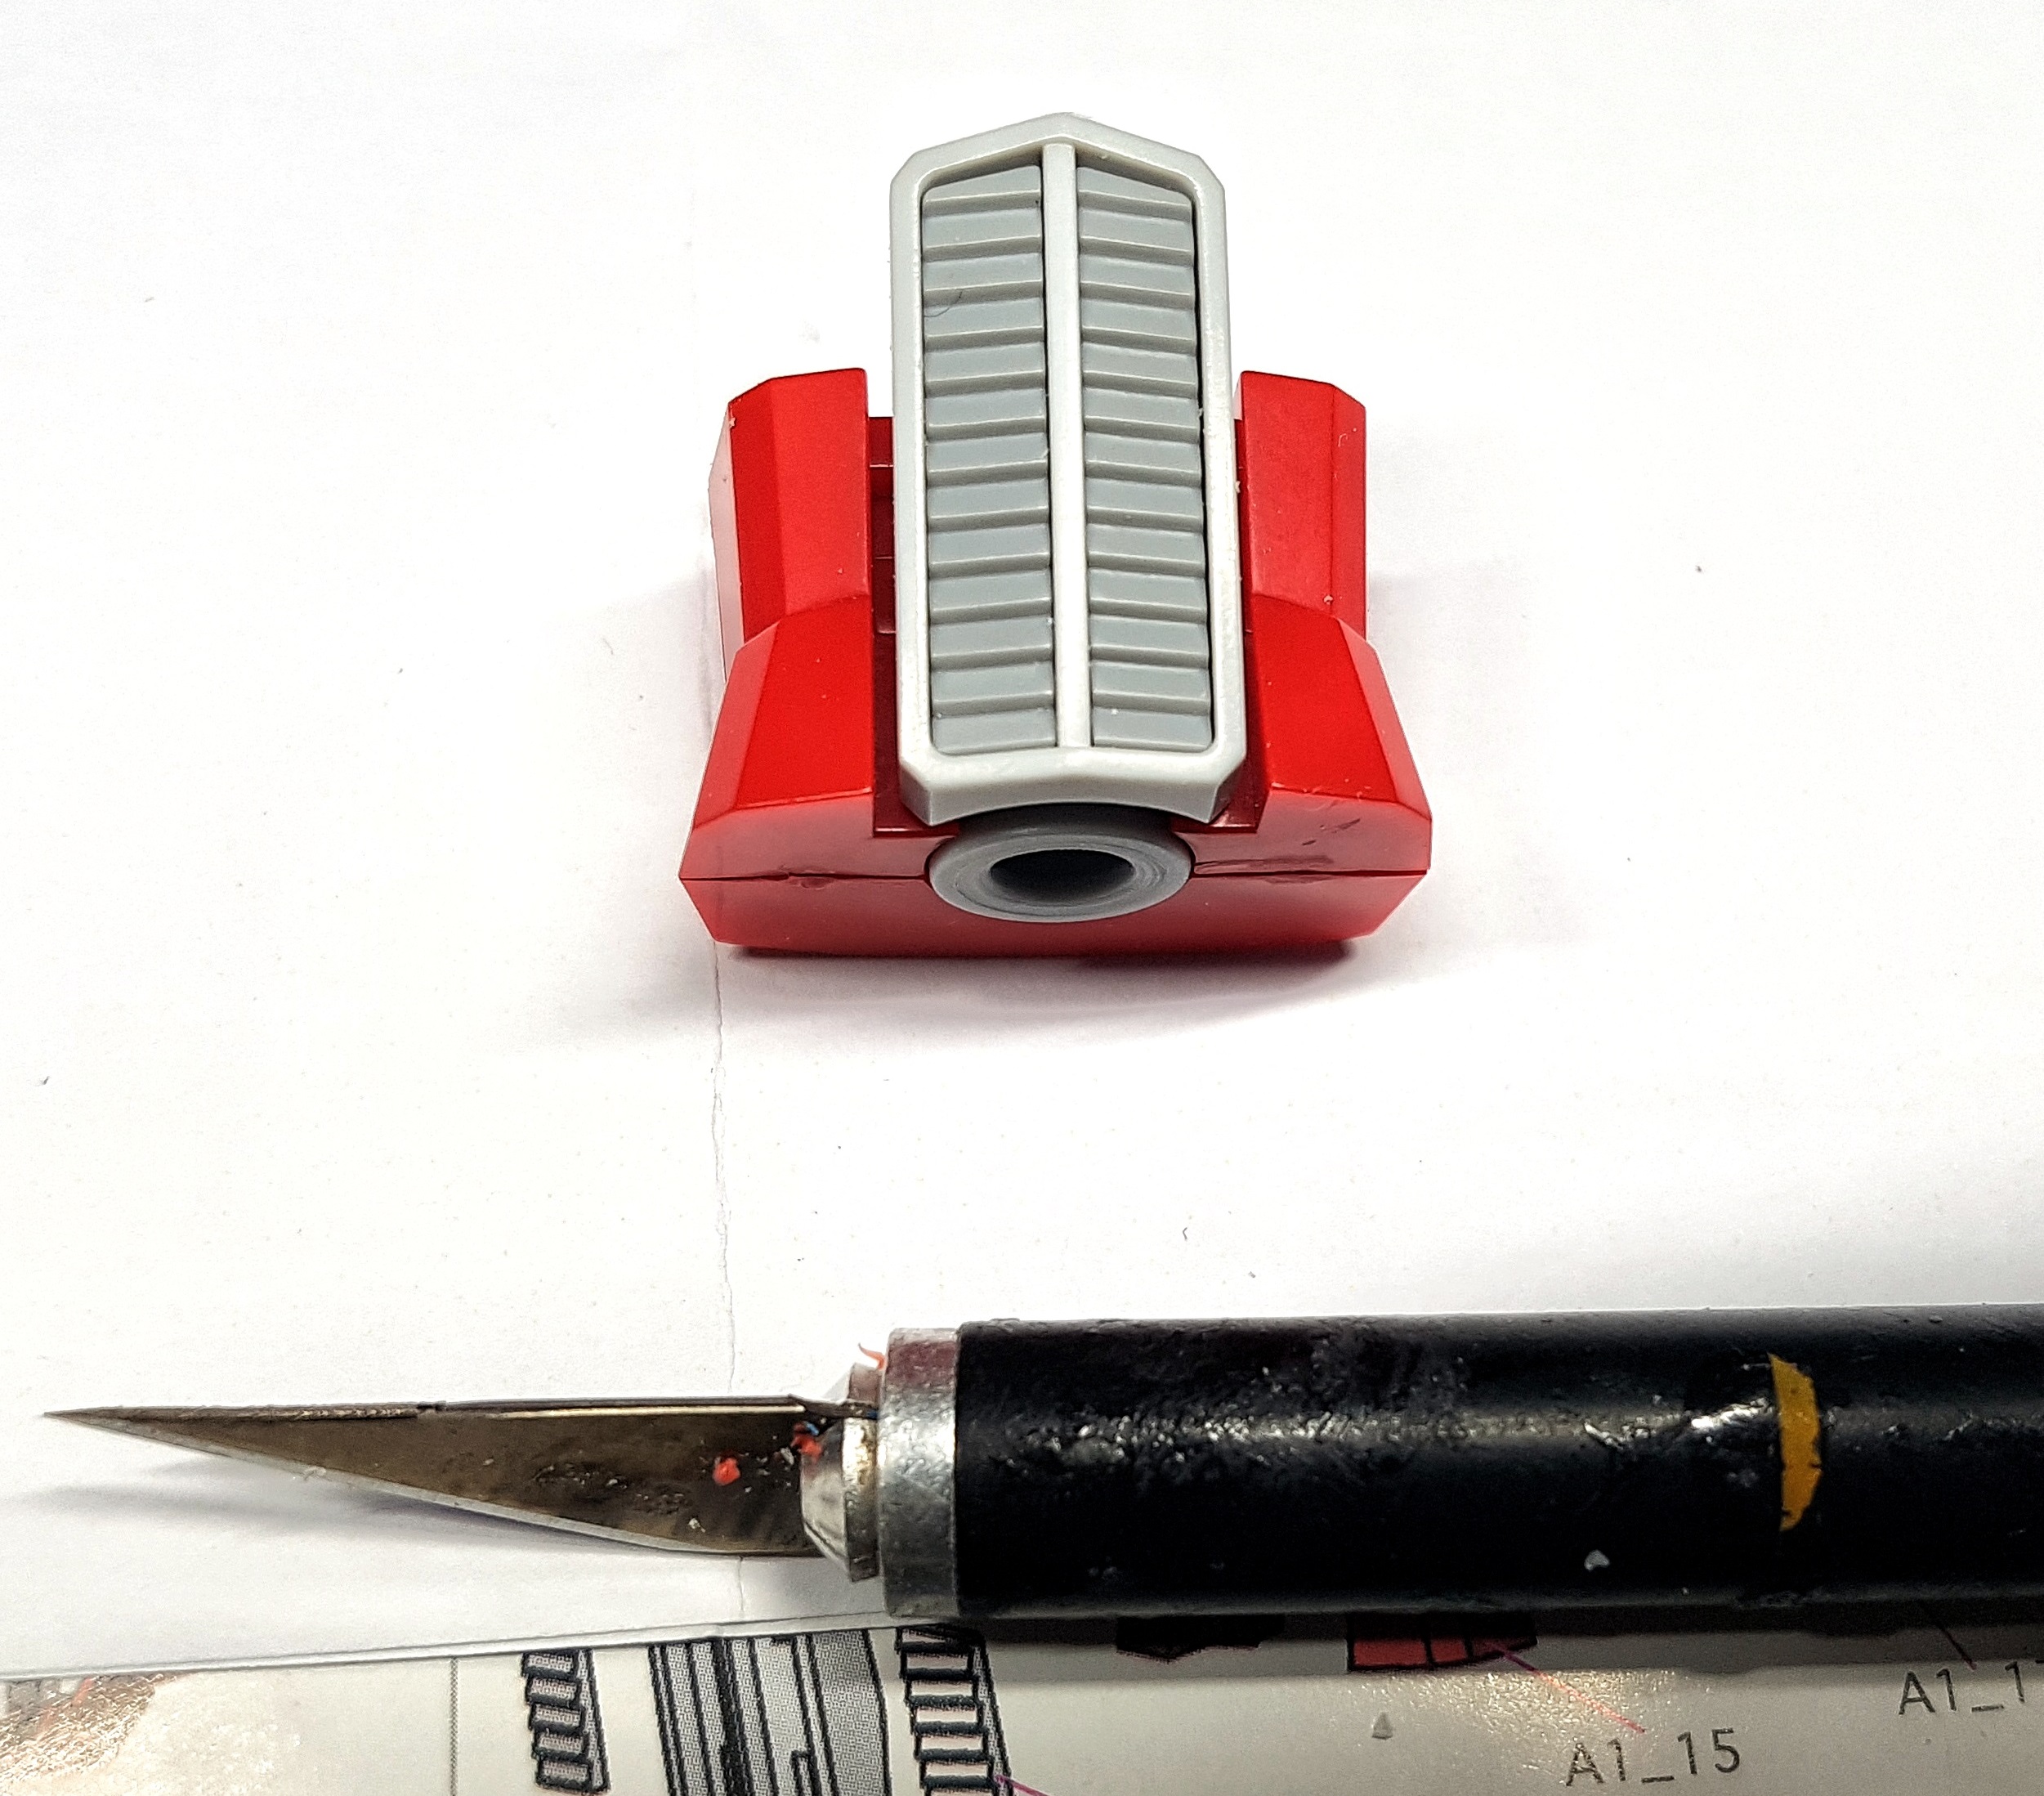
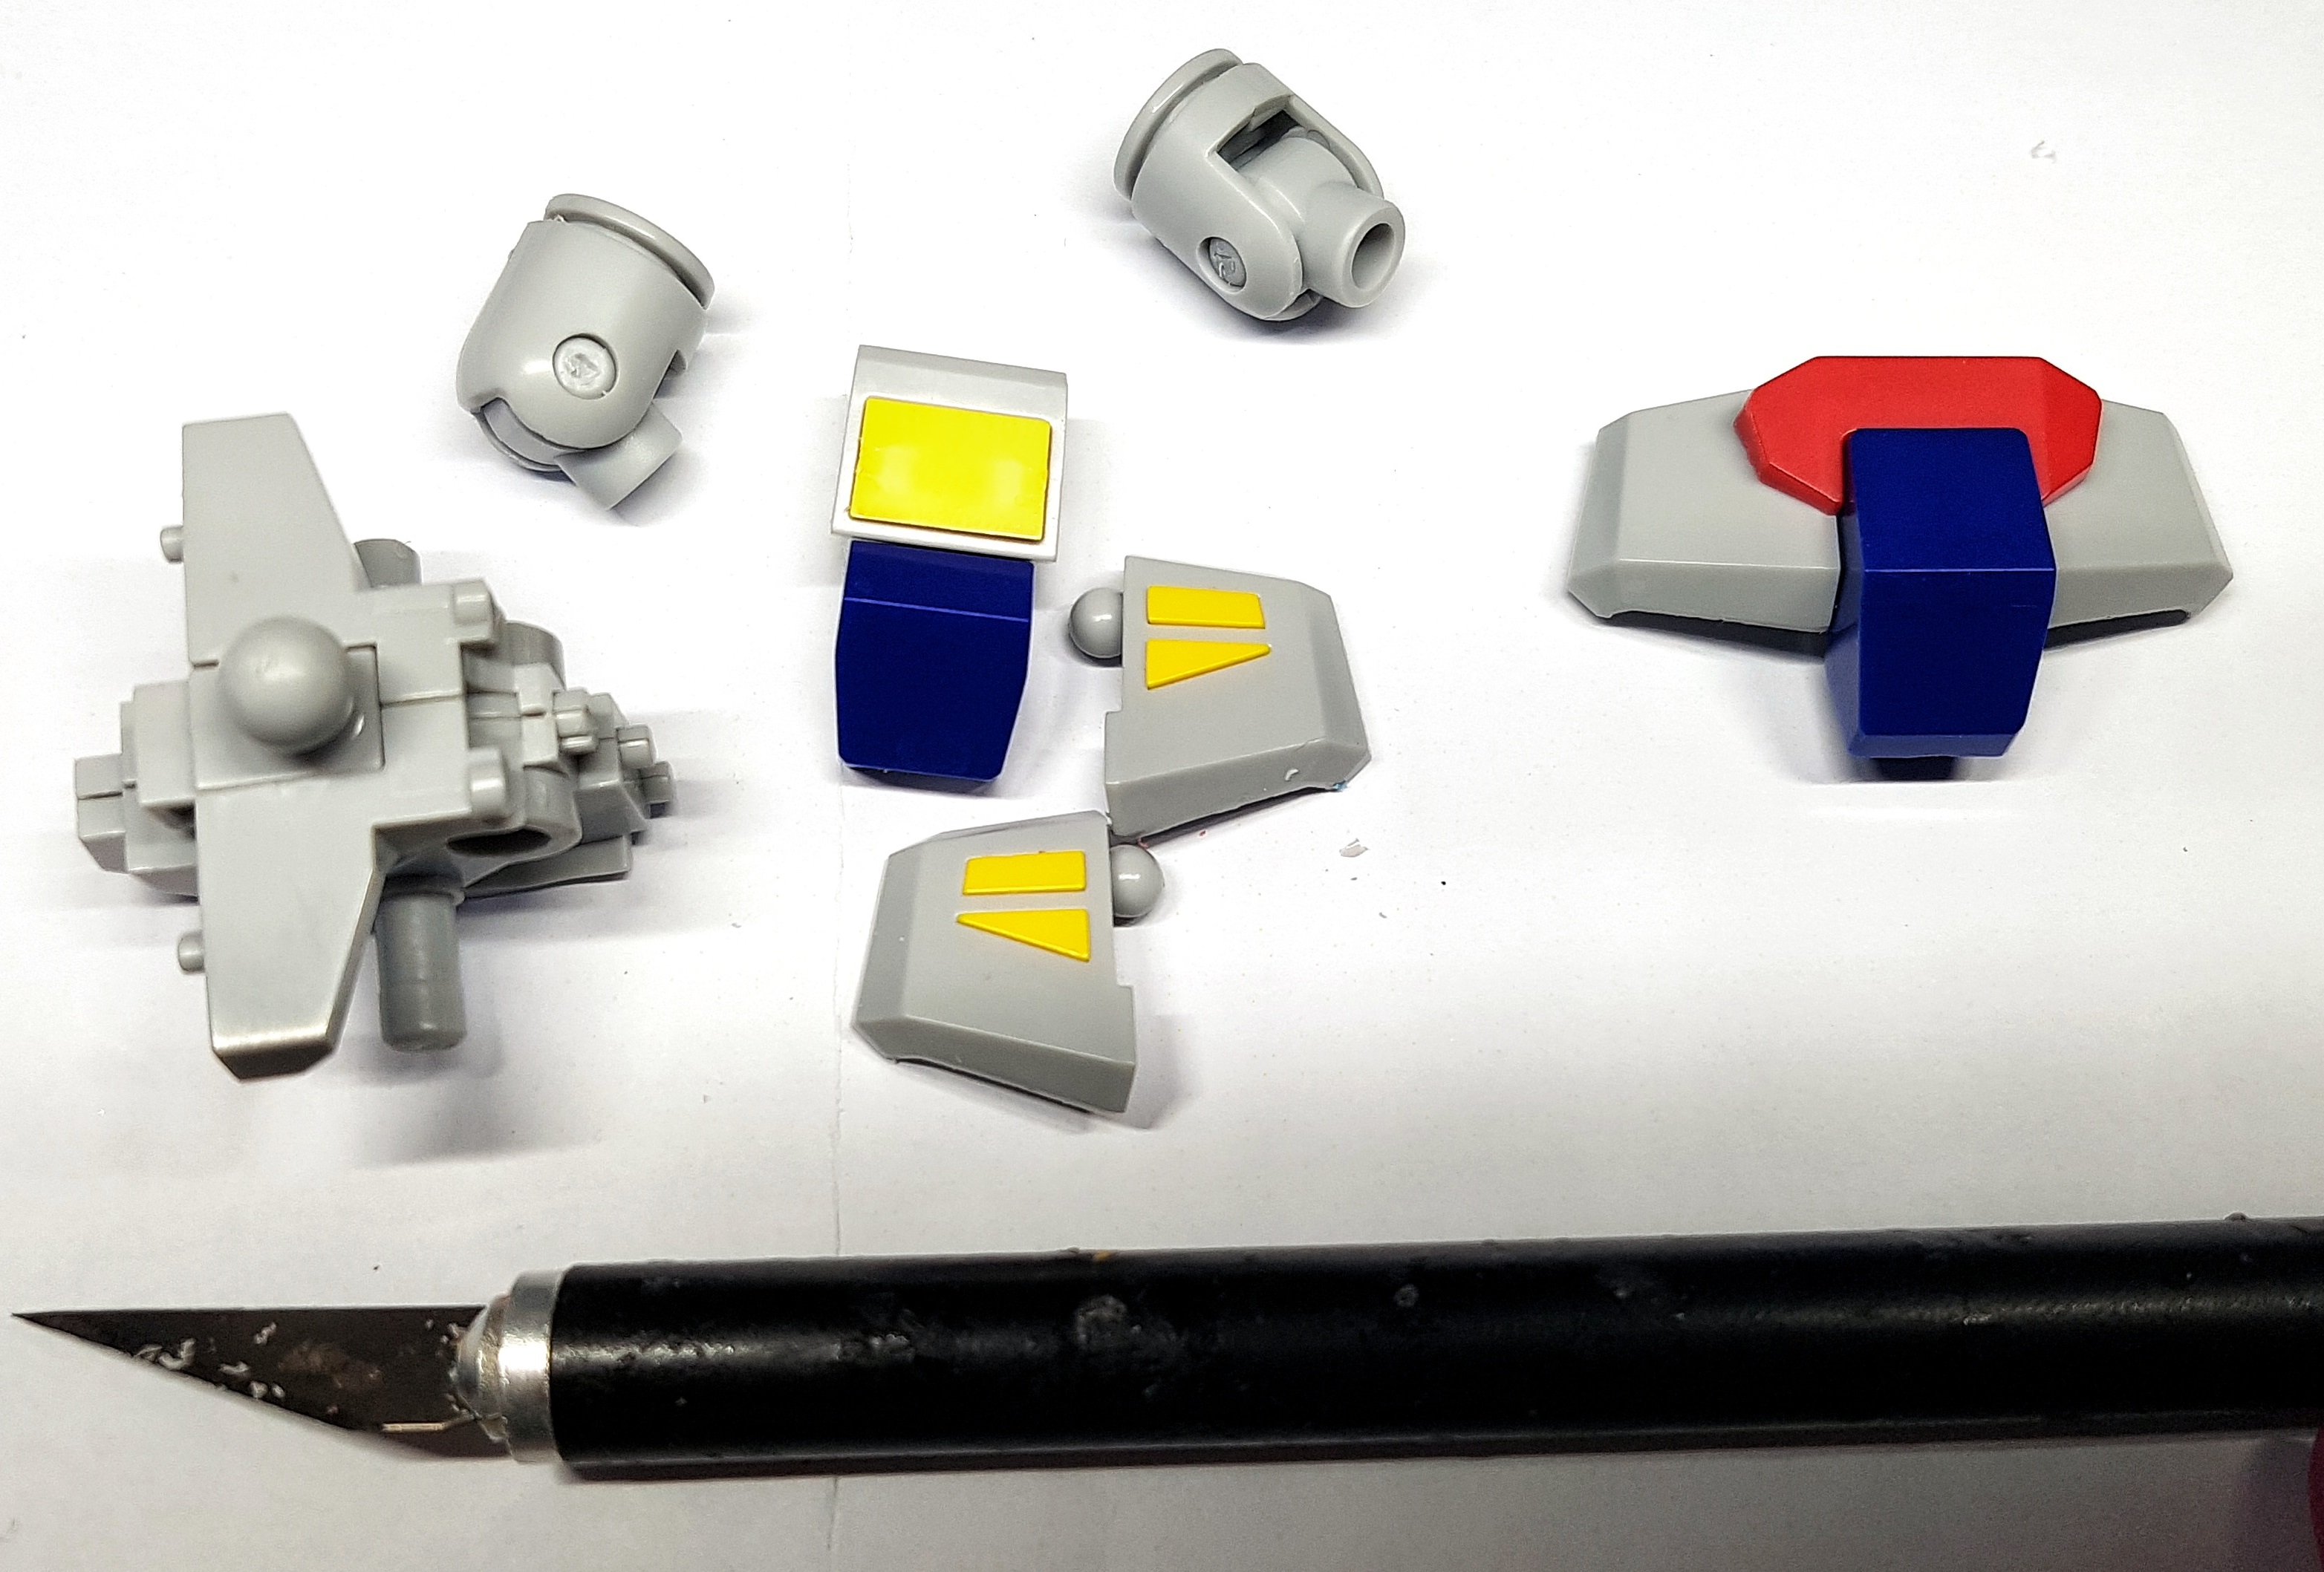
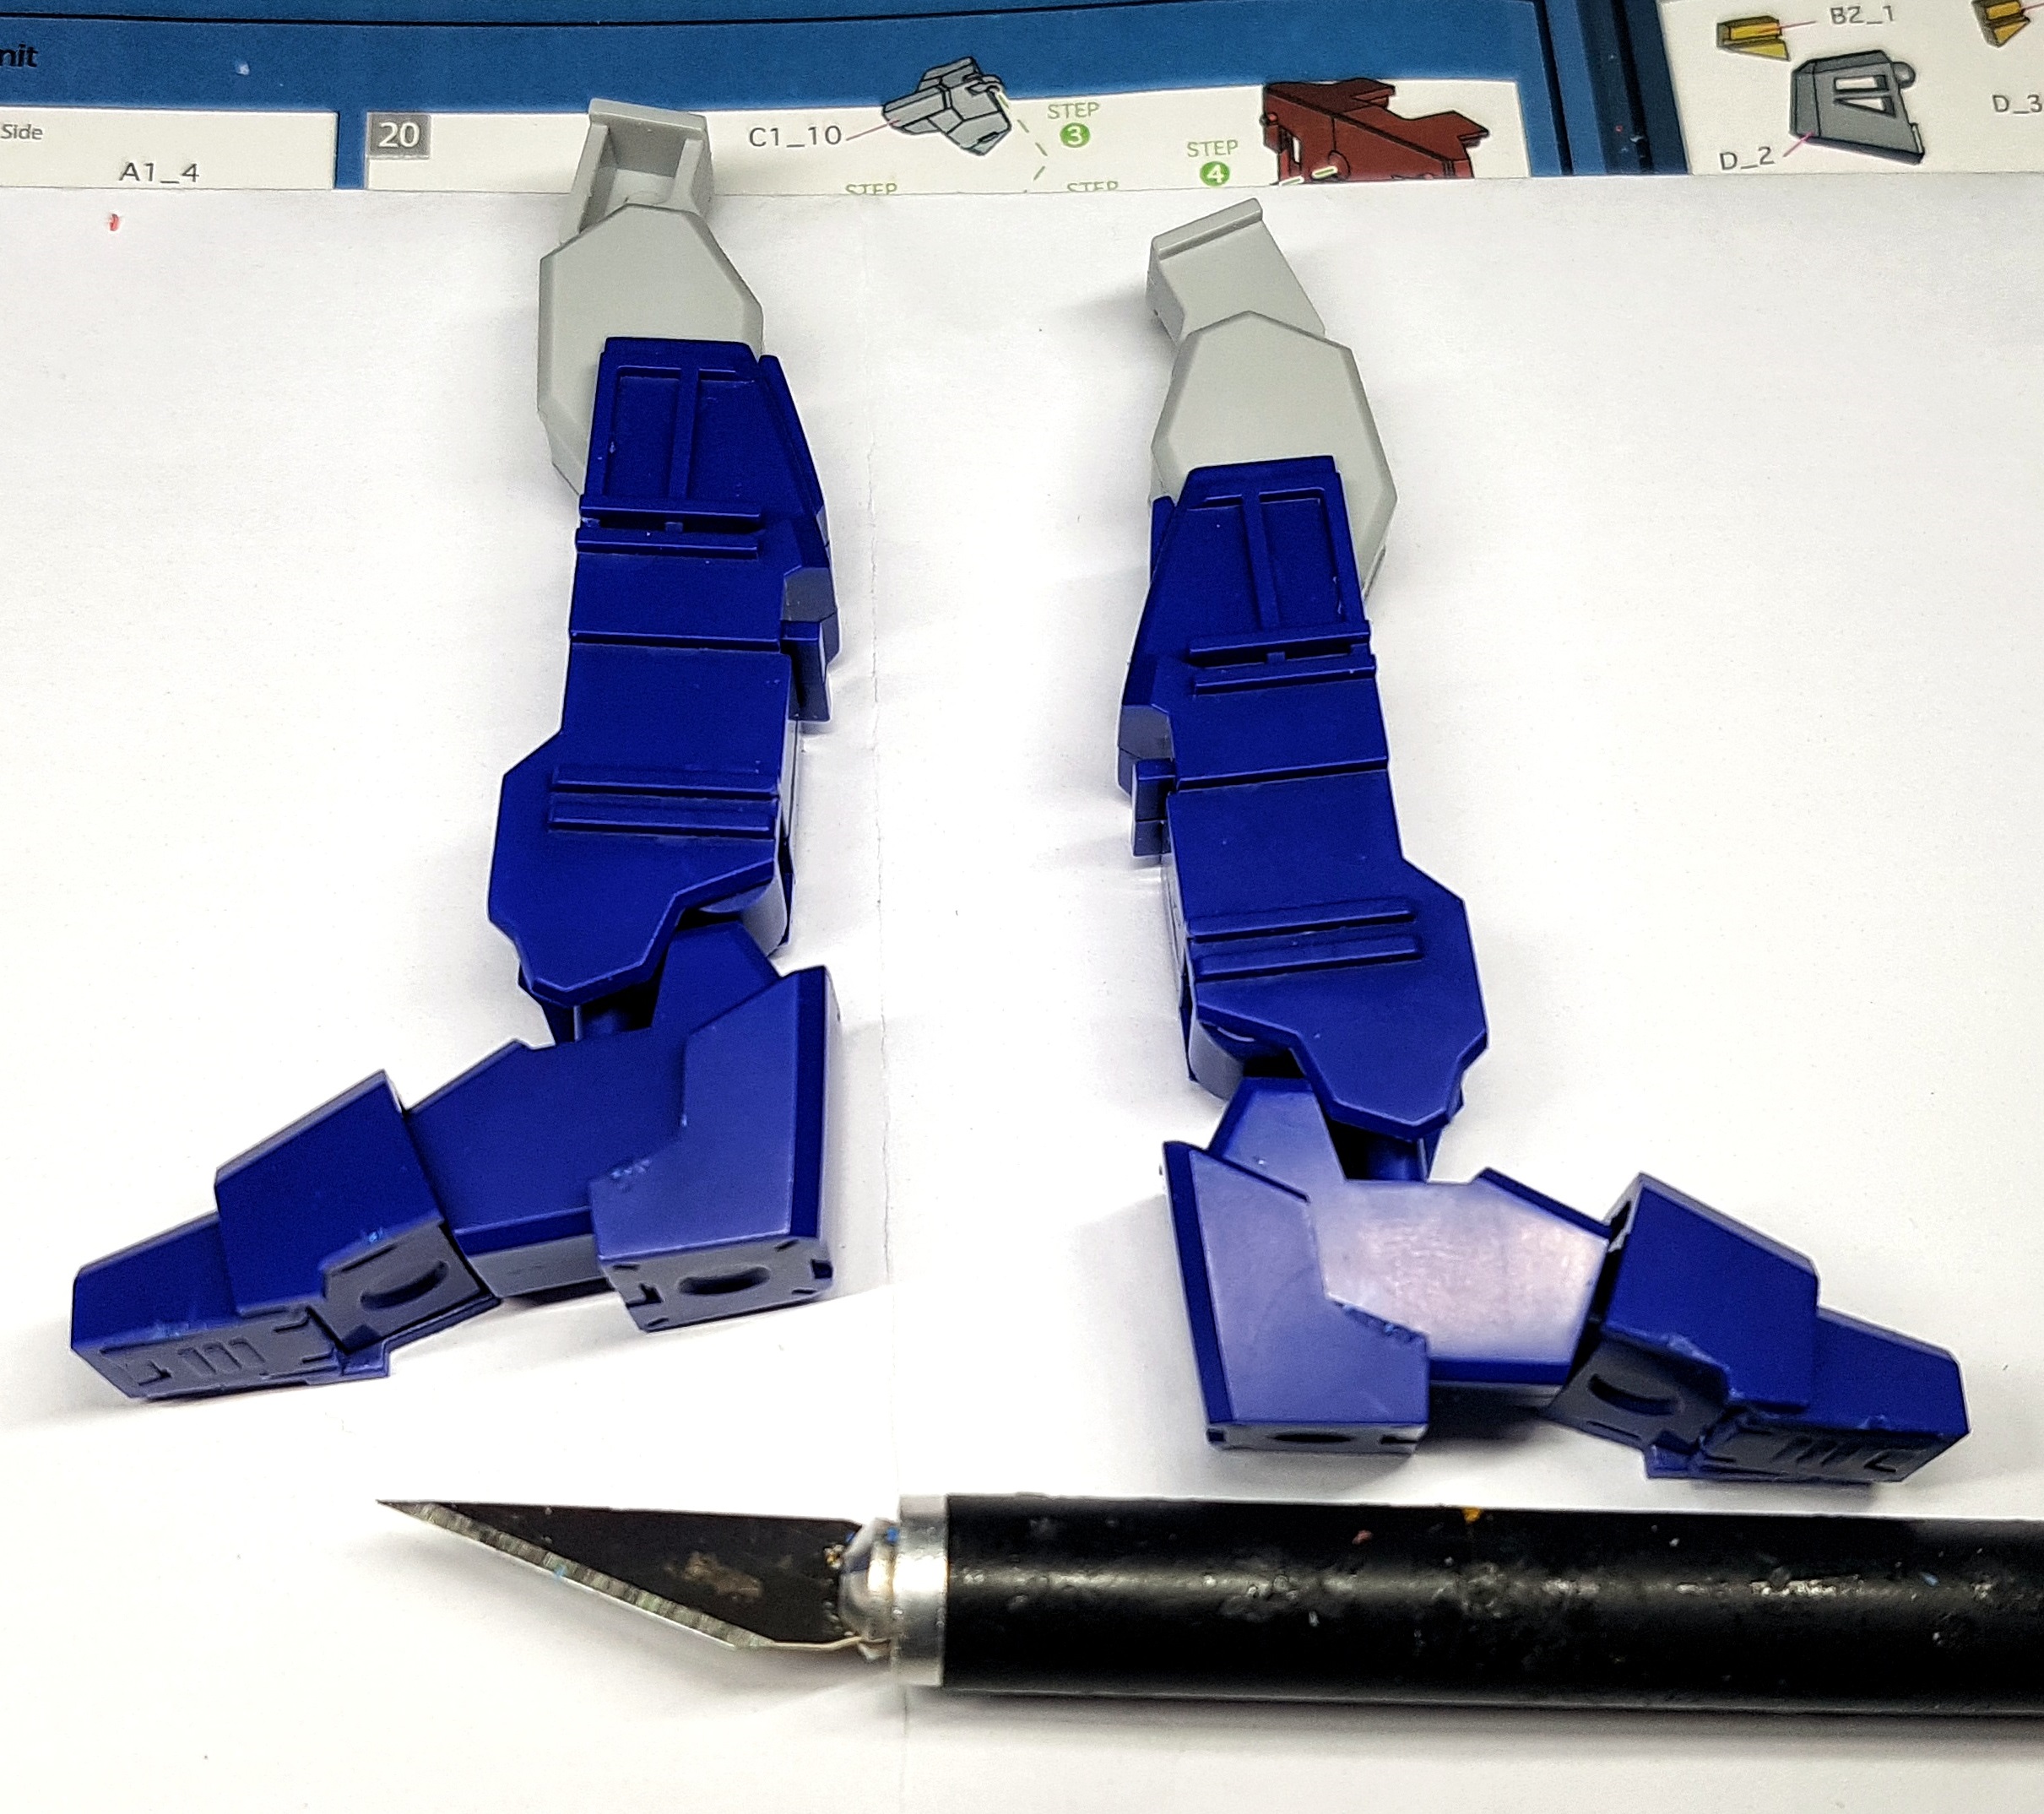
I kept notes as I was going on how long each stage of the build took me, but I don’t have them to hand. I’ll likely come back later and add that information, perhaps with any relevant notes on that stage. Here’s a gallery of the sub assemblies, in order. The hobby knife is included for a sense of scale.
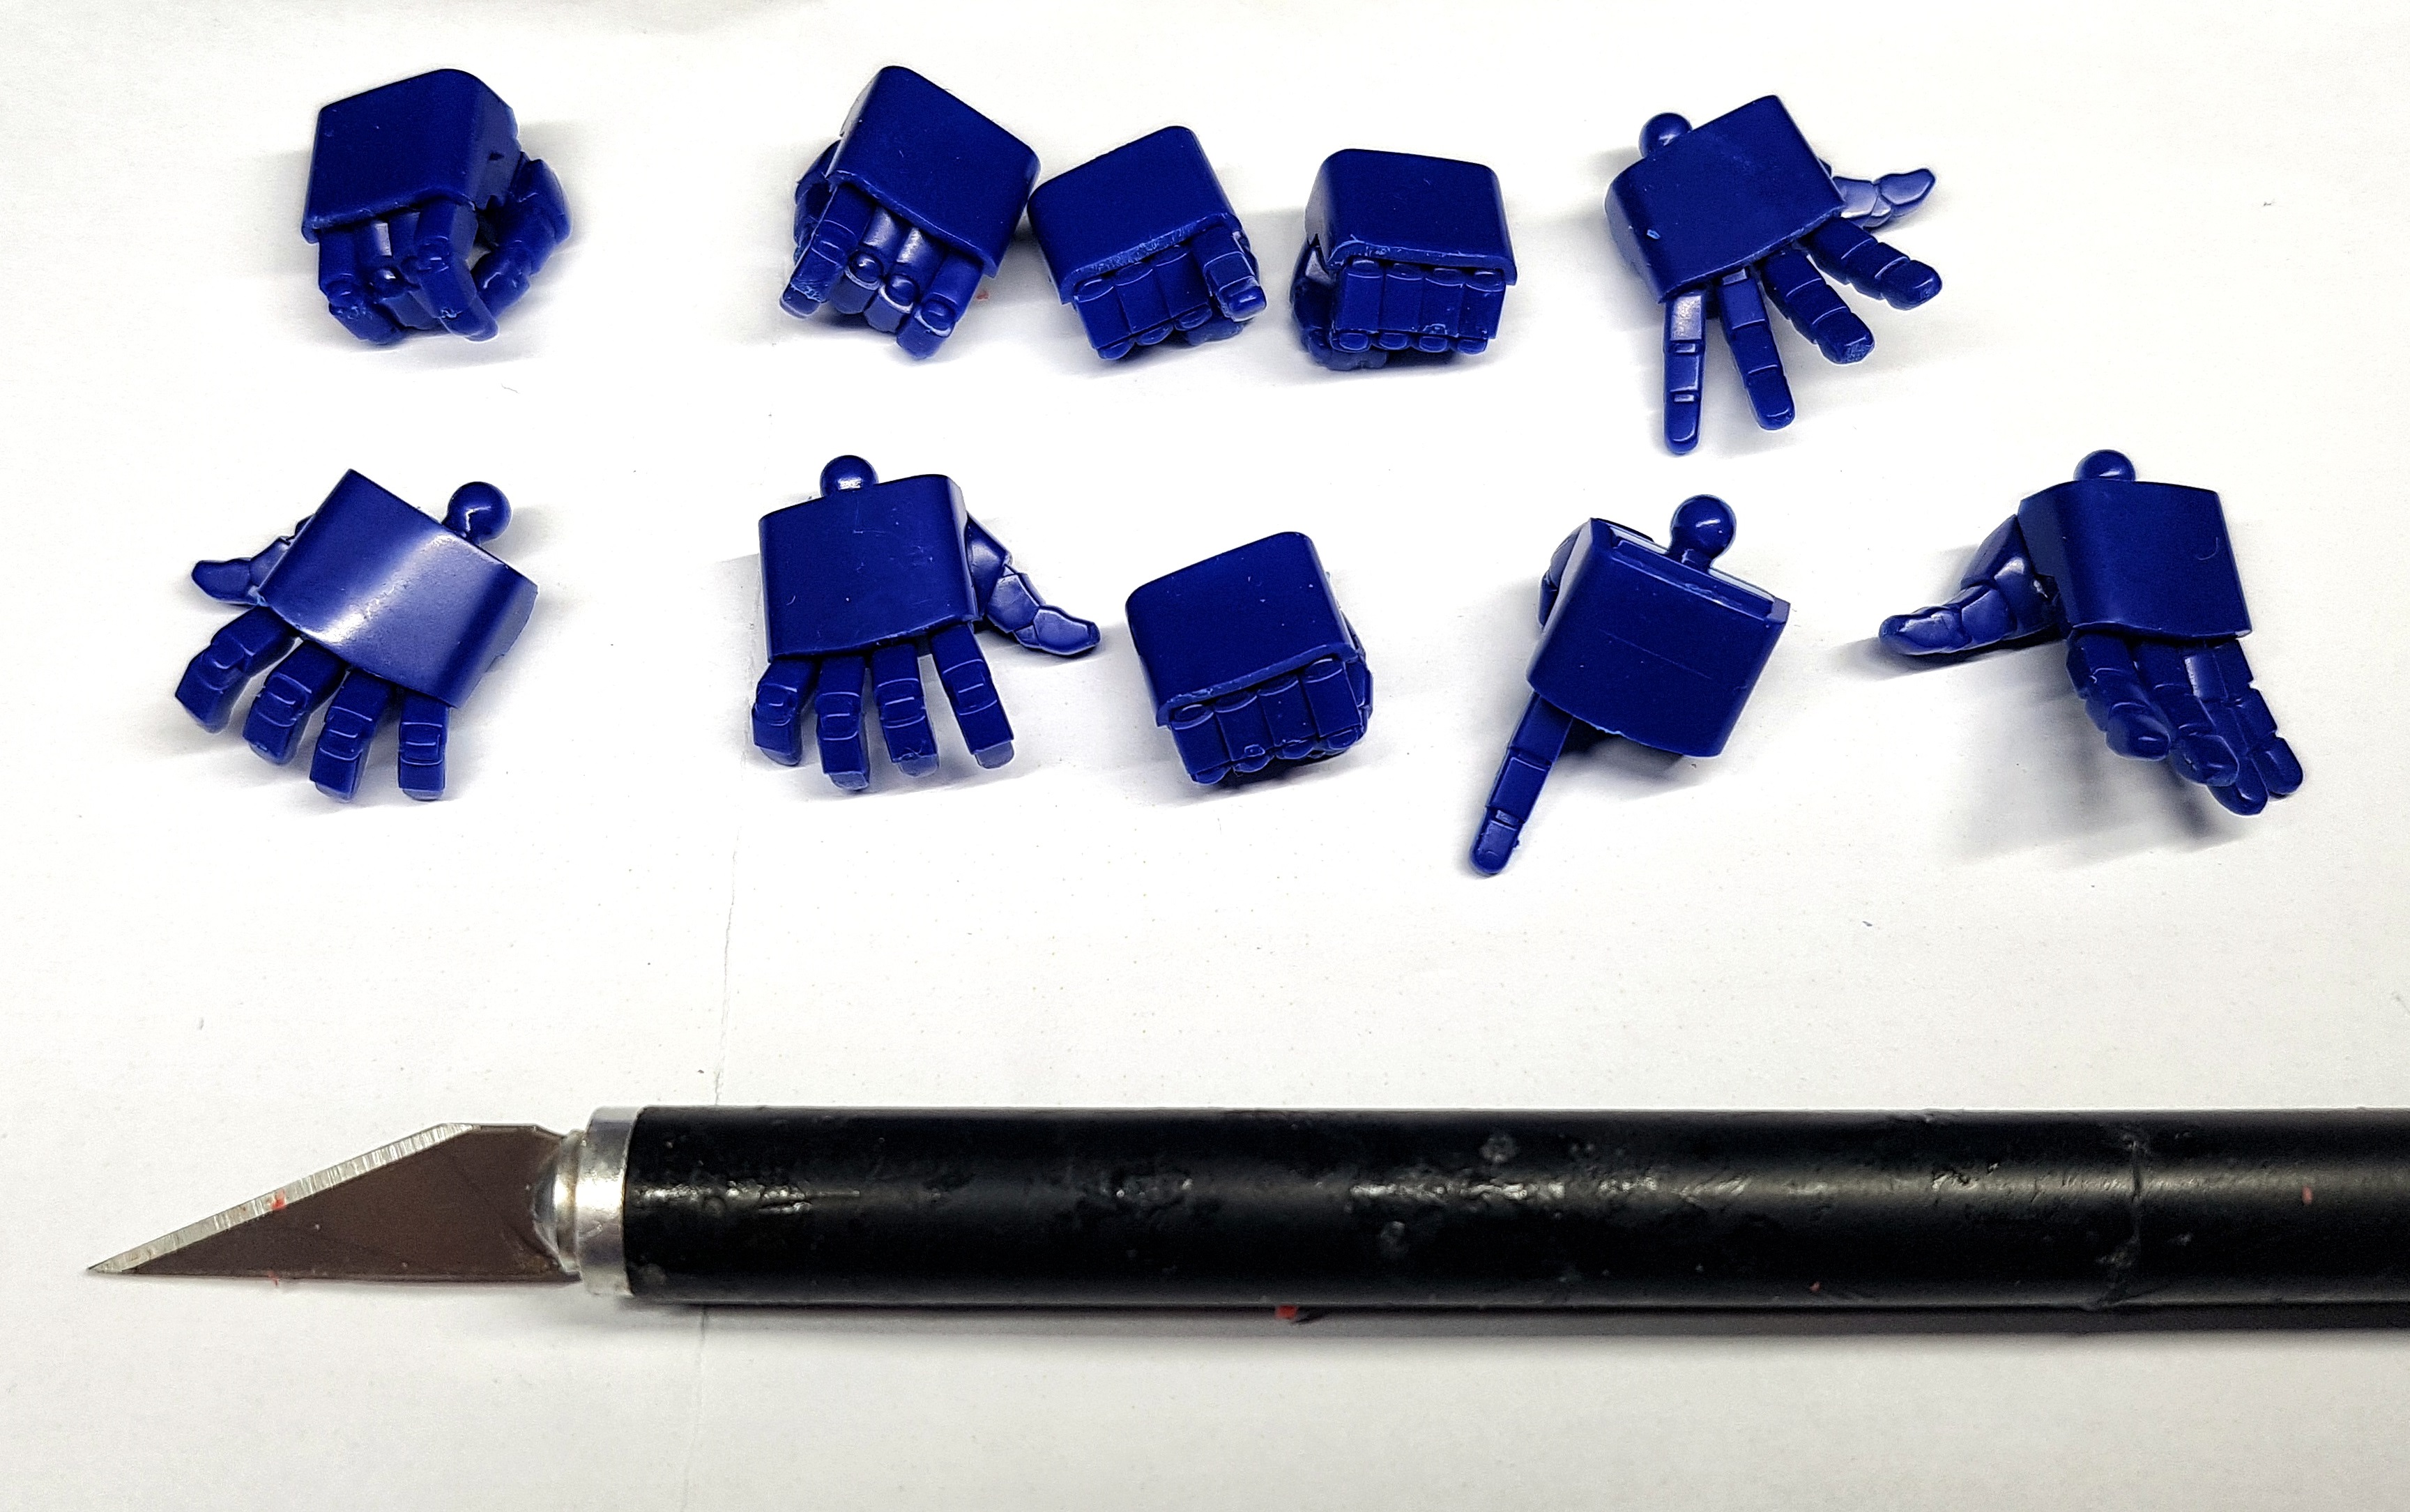
Pic 1 – Hands: It apparently took me 40 minutes to build all 10 hands. I guess most of this was finding the right numbers on the sprues and working out which sprue I wanted. It should have been simpler though, as most of them were on the same sprue, which was entirely used up by the end. Had they not mentioned Sprue E until after I’d finished with G it might have been simpler.
Pic 2 – Arms: 40 minutes for 2 arms. The diagram was intimidating at first, until I noticed it had an order to be done in. One of the parts is shown joining the wrong way around, but it all only fits one way so it’s an easy fix. I always liked finding and fixing mistakes in old lego instructions anyway. It’s part of the fun.
Pic 3 – Head: 15 minutes. A simple build, even if the eyes were tiny and fiddly.
Pic 4 – Chest Front: 40 minutes. This would have been a lot less, but the Flippy matrix cover was too big to slot in and flip. I had to shave off some plastic to make it work, and I wanted to be real sure I needed to before i did anything I couldn’t undo.
Pic 5 – Back: 12 minutes. A simple stage
Pic 6 – Torso & shoulders: 25 minutes. The joint between the shoulders and the torso was tricky. The peg/axle popped in but left a 3-5mm gap, which was plausible. it wasn’t until a few steps later that I figured out the shoulders would fall off still. I watched Youtube build videos and saw the gap wasn’t supposed to be there and I had to heavy handedly force the peg/axle to go further, even though it didn’t feel like it wanted to.
Pic 7 – Midriff: 10 minutes. No challenge here
Pic 8 – Pelvis Parts: The peg/axle running through the middle did not want to go. I think I had to file inside the hole to make it a little wider.
Pic 9 – Pelvis Assembled: 28 minutes all in for this robo-crotch.
Pic 10 – Inner Legs: 45 minutes for the pair. Again, one of the axle/pegs above an ankle was stiff and got stuck. I couldn’t get it all the way on, and I couldn’t remove it to widen it. I had to wiggle it about and file at what I could access and finally got it in place, and it seems to move fine now. Part of the issue was a lack of grip and leverage with small parts and fat fingers. Once the rest of the plastic is attached there is sufficient leverage for the joint to move as it’s supposed to.
Pic 11 – Legs assembled: another 16 minutes to clean up and clip the outer shells and joints on.
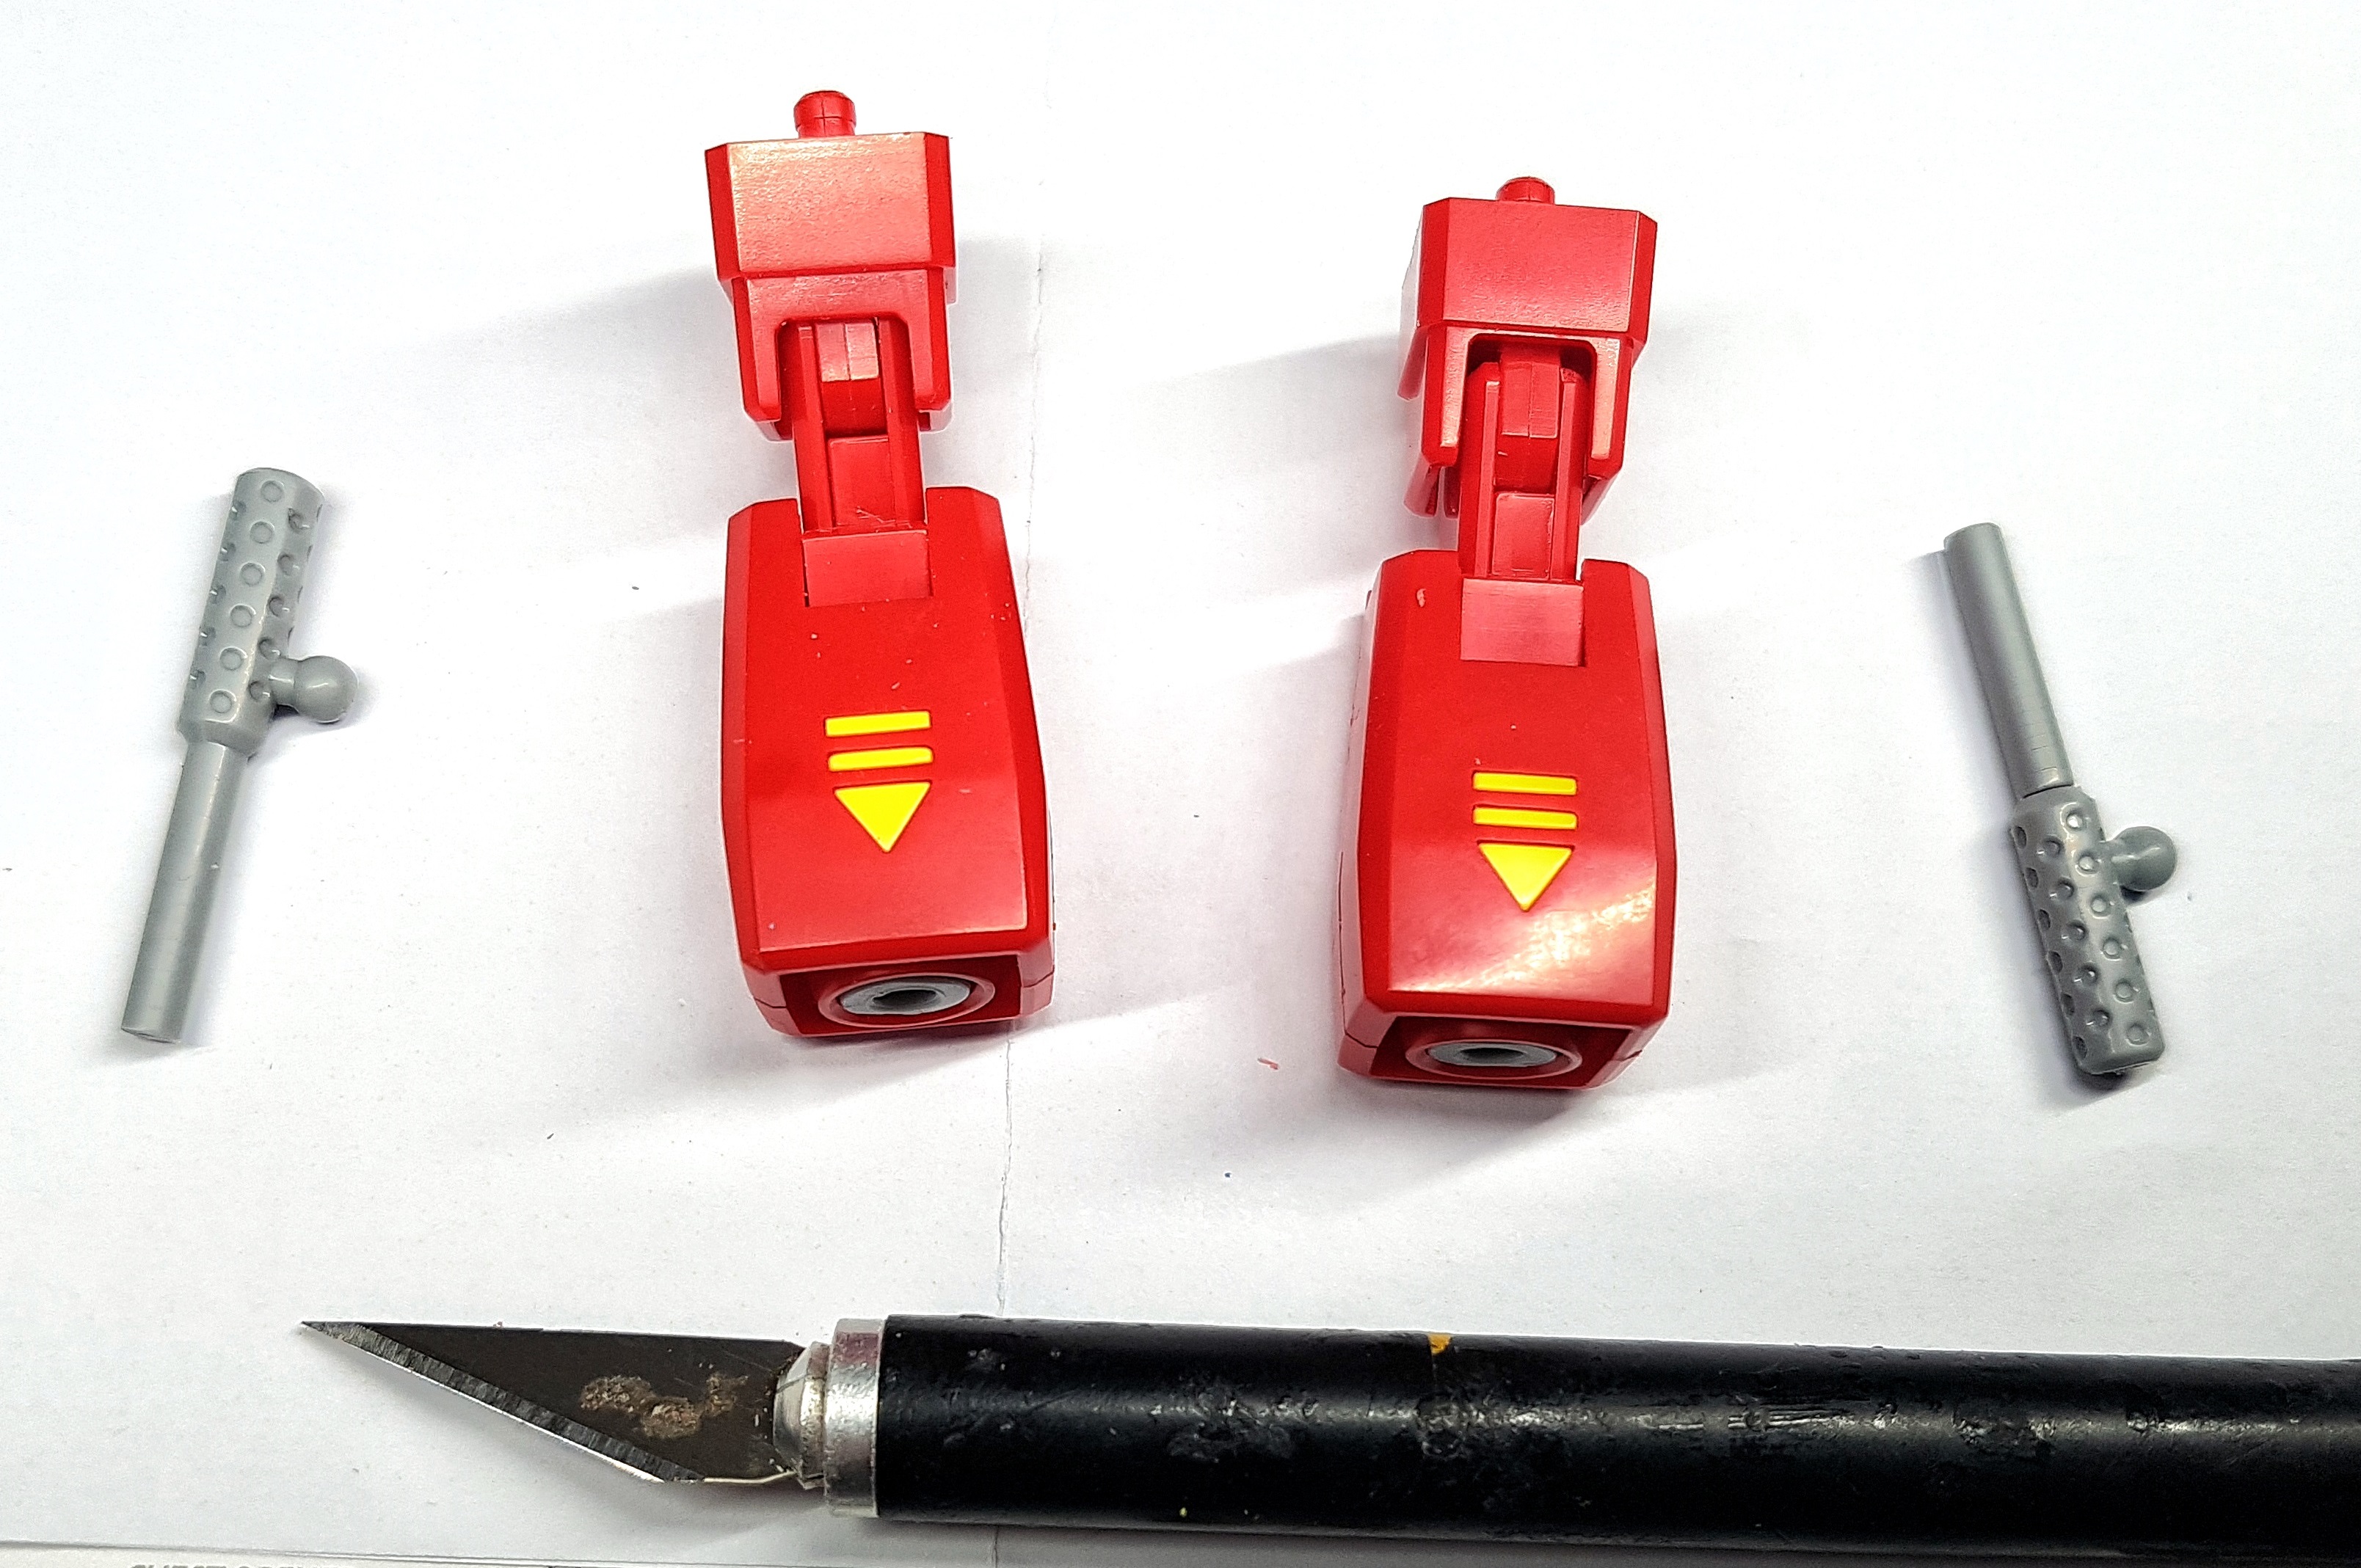
Weapons: It took 7 minutes to build the weapons. The end cap for the gun didn’t want to go on, and took some filing and enlarging.
Stickers and final build: 10 minutes. As I said above, I had issues with the stickers. The logos went on fine, but the cab lights were too small to apply by hand. I used the tip of my hobby knife to lift them up and transfer them to the model. Two went fine, but the other two came off with paper still attached so lacked a sticky surface. I had to glue them in place, which could have resulted in frosting where I really didn’t want it. The build was simple enough otherwise. The ball joints should pop on and off with ease when I want to swap out hands. I found a dramatic pose from the box and went with that for now. He’s now looking cool, standing on my DVD shelves in my living room.


So he’s now fully built. Am I happy with the experience and would I build more? Yes. I enjoyed it, and he looks cool guarding my DVDs.
Was it worth the money? That’s a tougher question. Everyone has a different sense of the value of a pound/dollar/whatever. I’m not a very well off man so I like to get value out of what I spend. Here’s a little something I’ve been using for years now to work out if games or toy solders are value spends. It’s out of date but it’s a helpful metric. A two hour cinema trip costs about £10 (See? Out of date), so 1 hour of special entertainment costs about £5.00. If I get more than 8 hours play from a £40 game then it’s earned it’s keep (8 x £5 = £40) and was good value, for example. Prime cost me £60, after postage. I paid through the nose as we couldn’t find him for sale anywhere else. I’ve seen the other models in the line going for £40ish, but stock is an issue.
I didn’t hit my value threshold from the build, so whether or not these kits are of value to you comes down to how much you want the final piece. I’ve always kinda wanted an Optimus Prime to sit on my shelf, and this guy is cooler than the original boxy toy while remaining faithful to the spirit of the piece. I also know how I feel about Gunpla now, so that adds value. Would I pay £60 again for a similar piece? Probably not. £40? Perhaps, depending on the model. I’ll certainly be looking for bargains in the hope of picking up Starscream or NGE EVA01, and keeping an eye out for new releases. Windblade is tempting, although I don’t know that character. She’s a little after my time. It’s a nice model but I fear it’s the male gaze-iness of it that’s tickling my fancy. I fear I’m a smidge aroused by a robot plane and that’s why I’m tempted. If I were to find more G1 Transformers model kits under my Christmas tree I’d certainly be very happy.
I would also be interested in trying a more complicated kit that takes a whole lot longer, but has more going on. Do kits with electric components tend to need access to soldering irons or any other electricians tools or skills? Anything I wouldn’t already have or know from building wargaming models?
Does anyone know of any price comparison sites that might help me keep an eye out for a good deal, or any sites that are known for good sales?
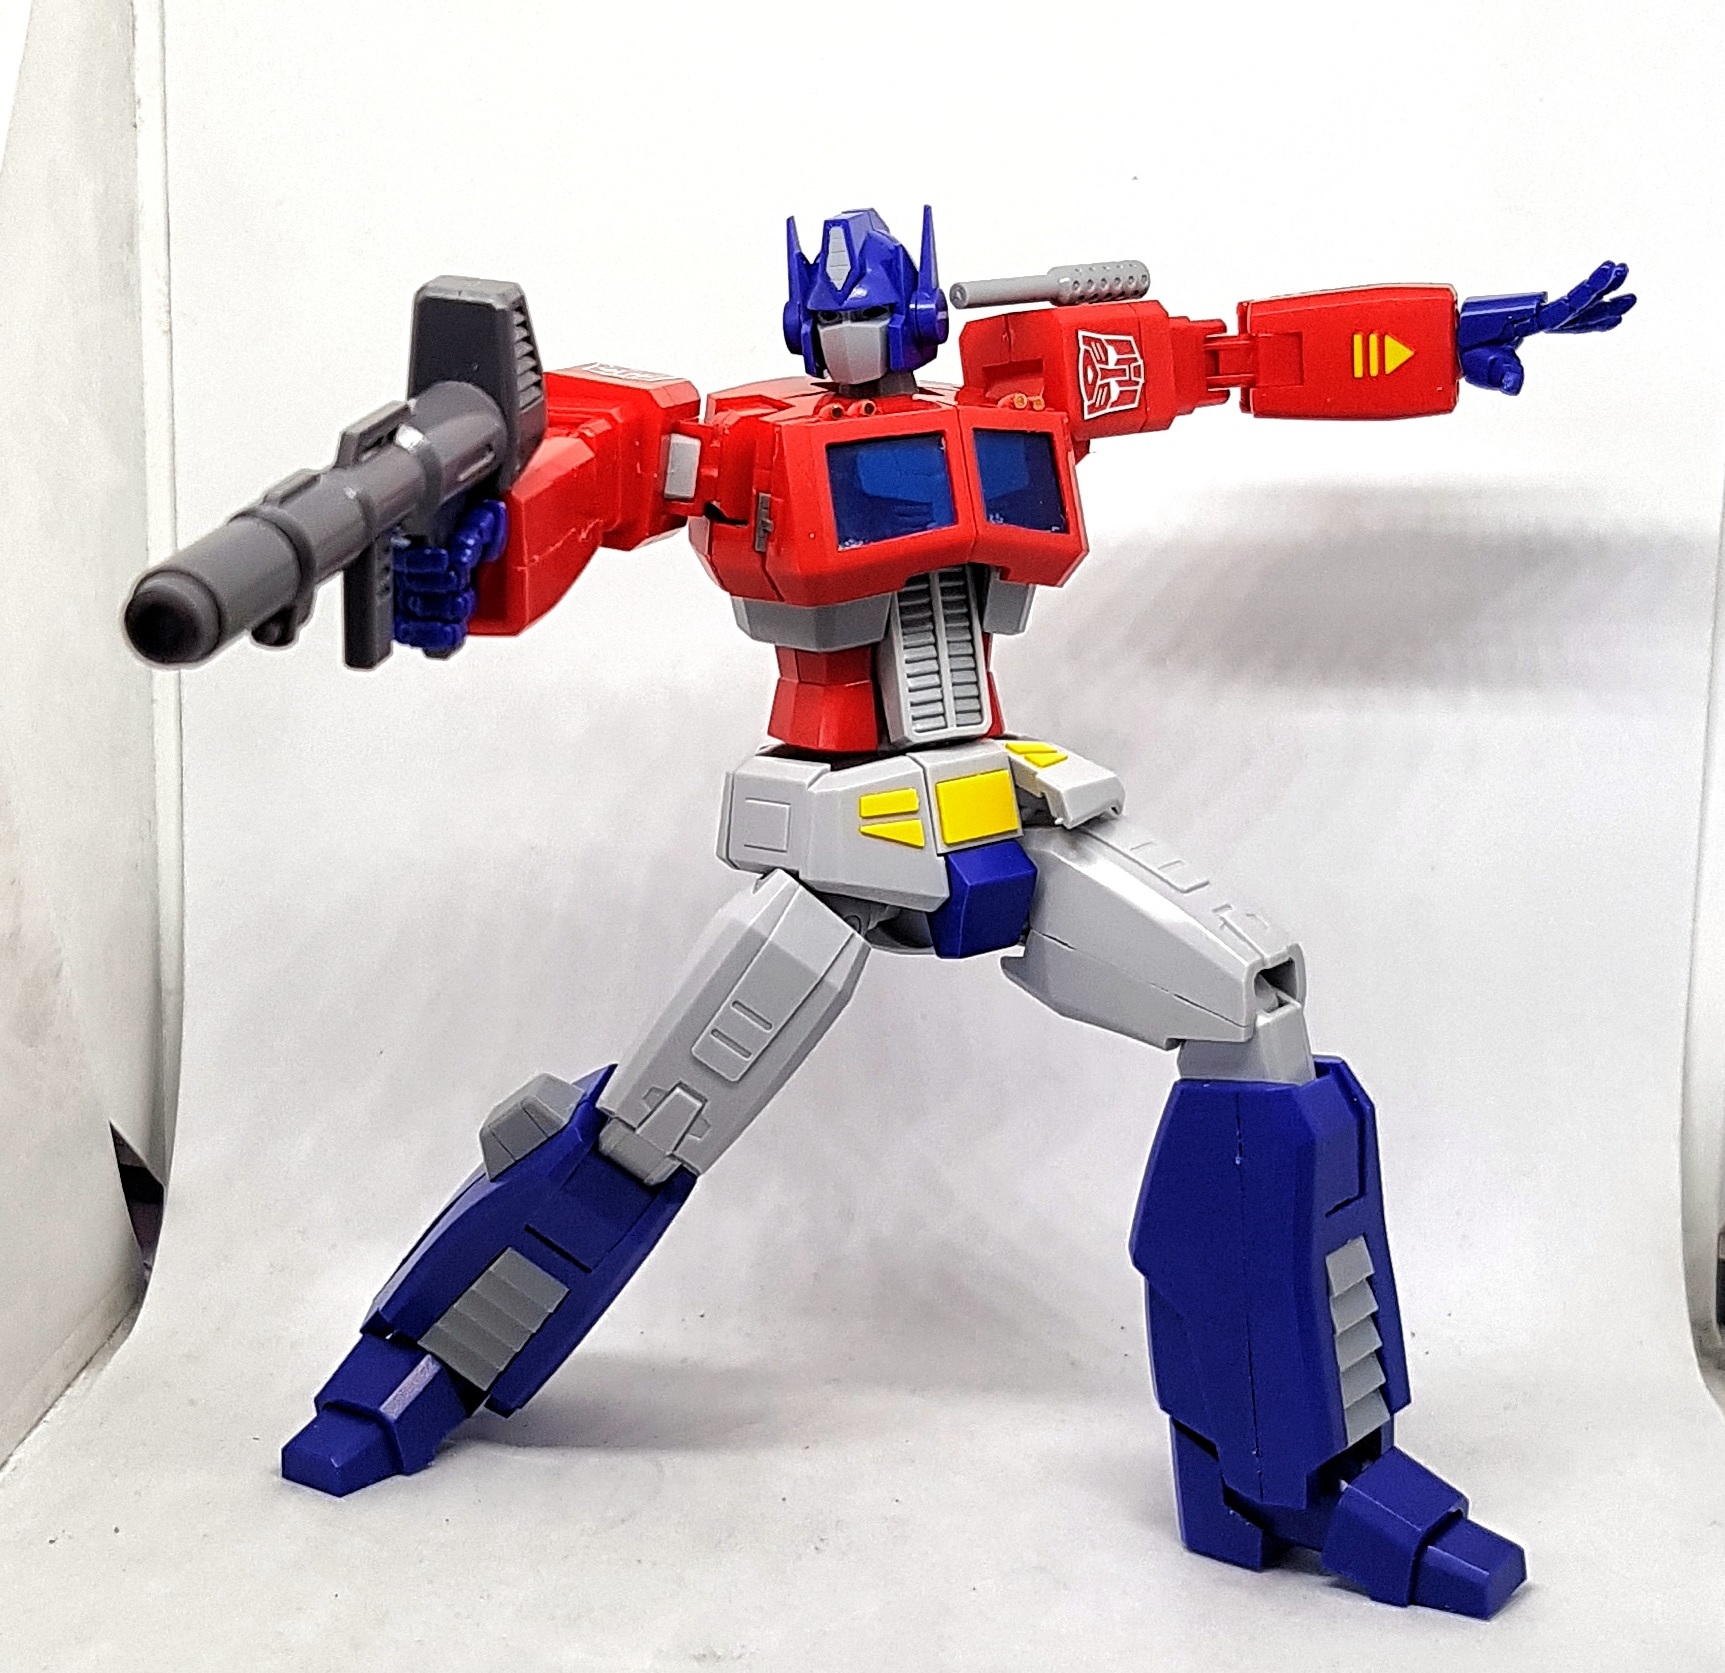 I went with one of the dynamic poses from the back of the box. He's looking pretty cool.
 Robo-booty!
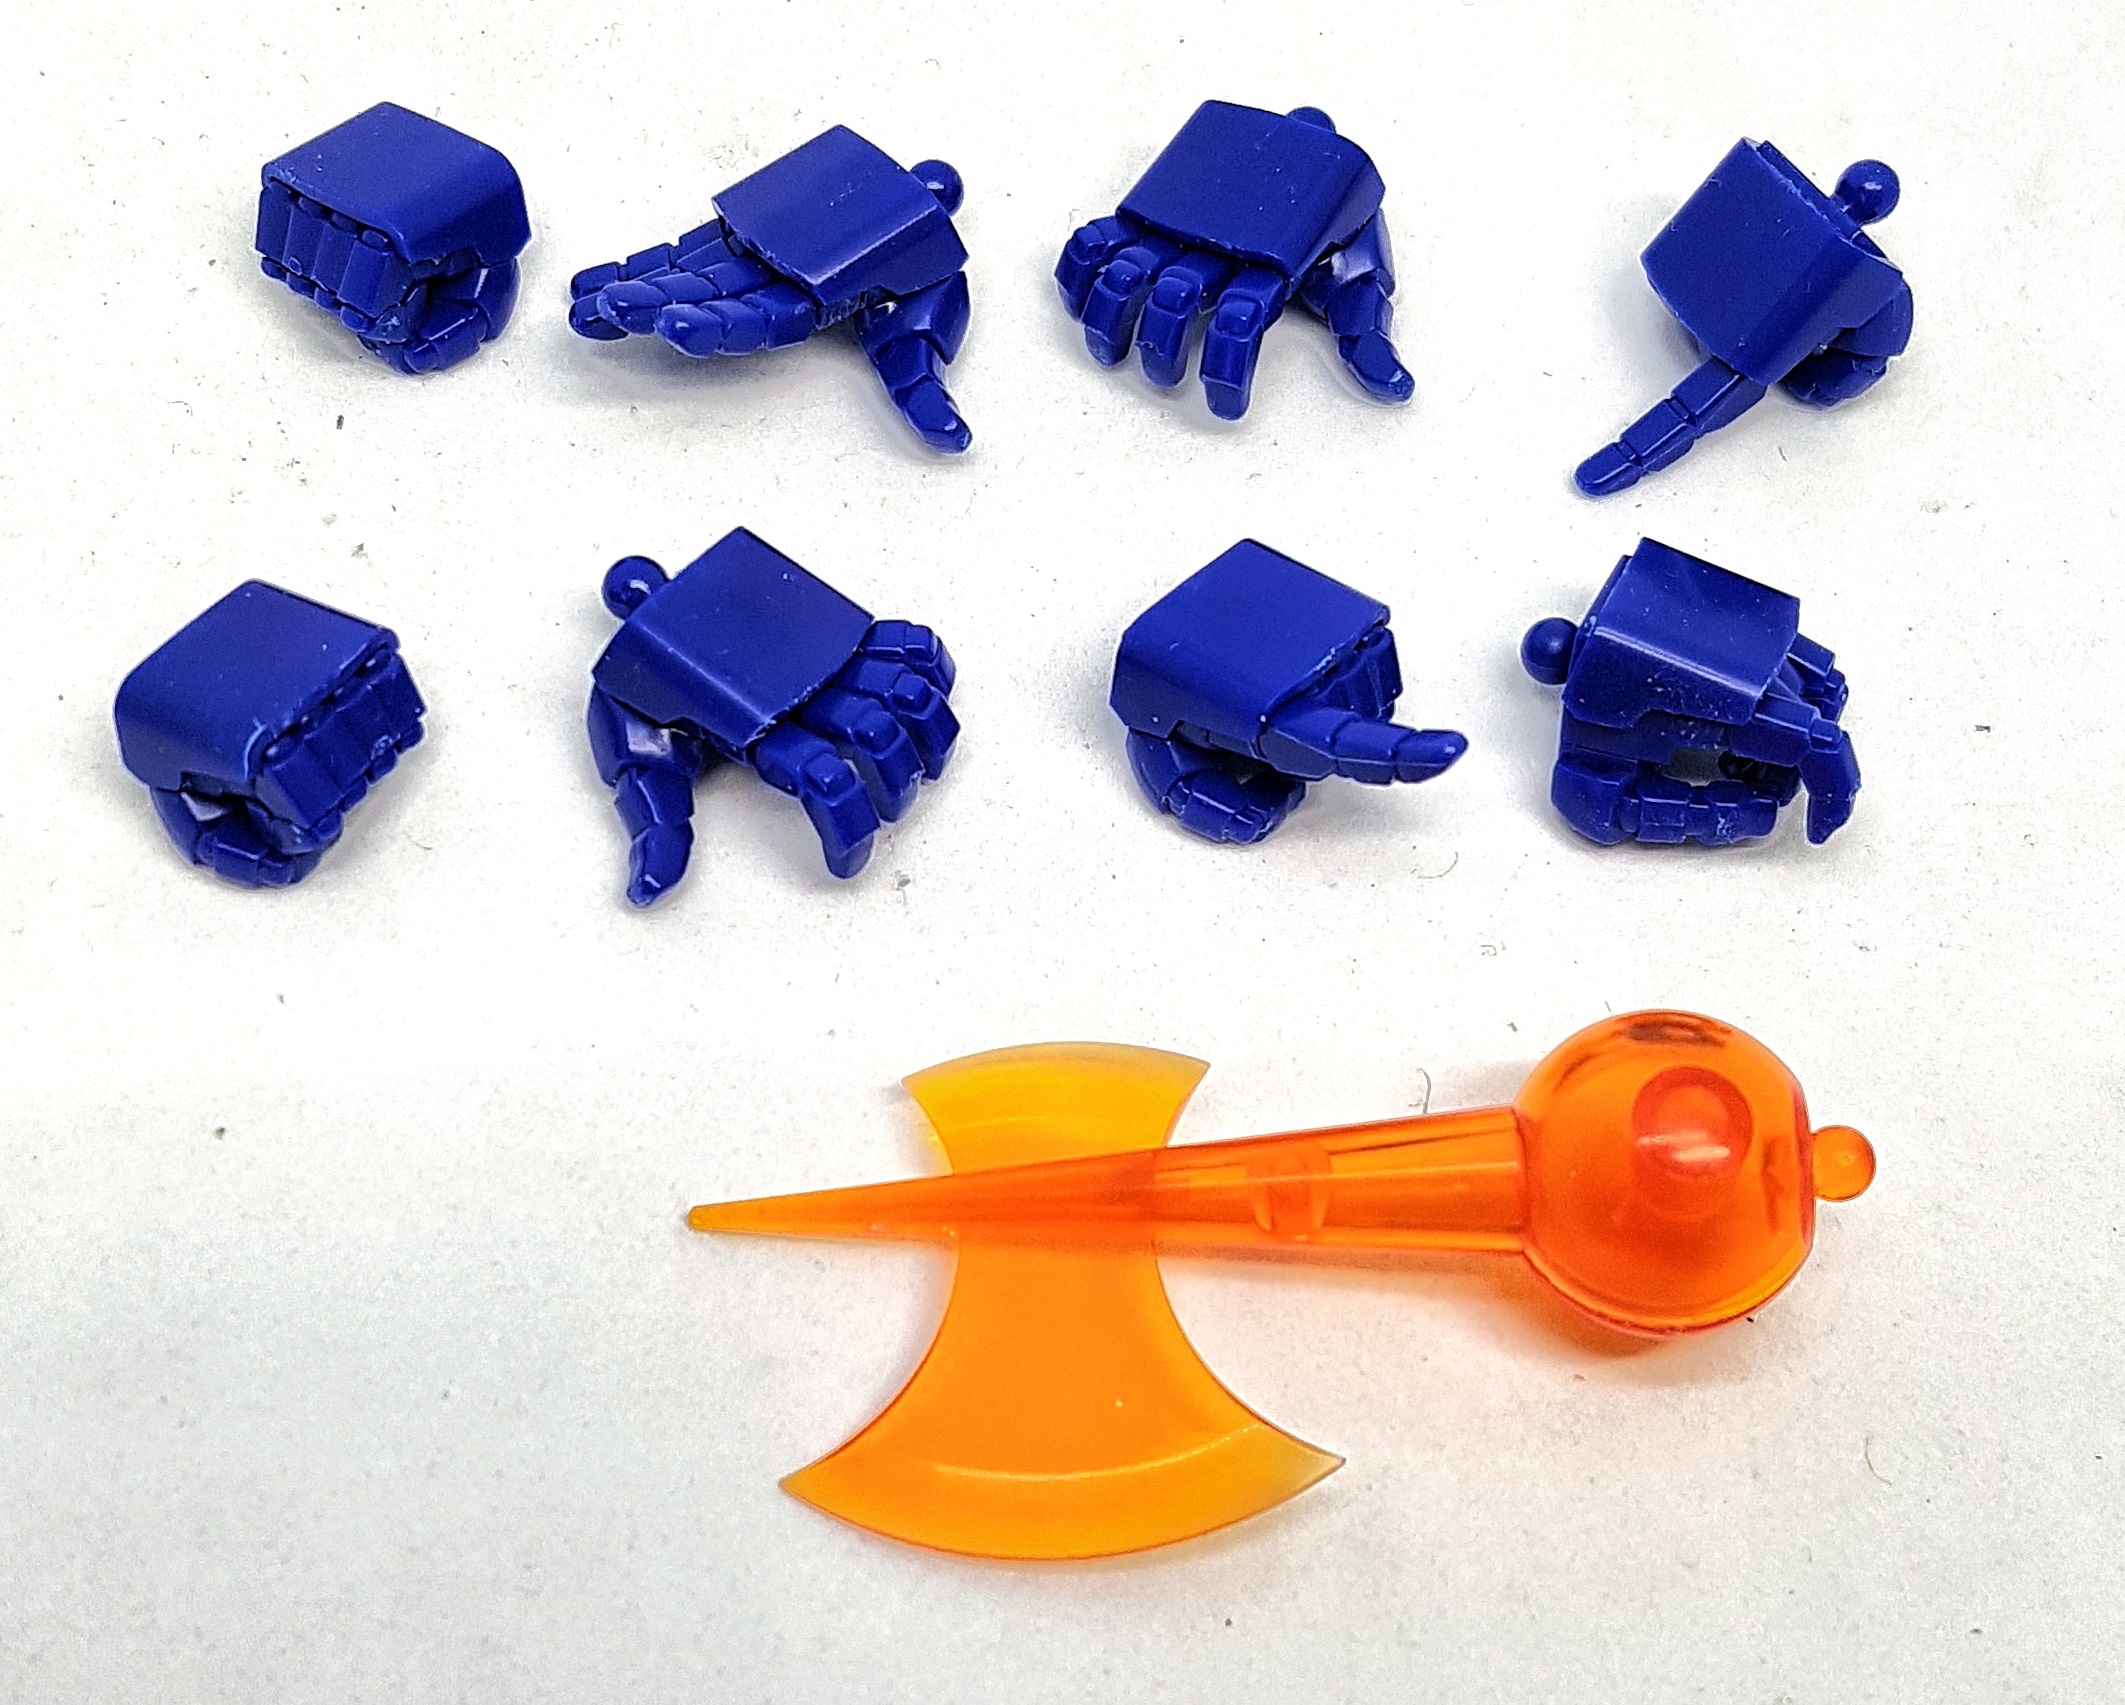 Here's the spare hands. For some reason, they chose not to fully articulate every finger.
I meant to use the sprues to test how well the plastic takes primer and paint, but I forgot to do this when I got my airbrush out later in the weekend. I’ll have to revisit this project once I’ve done some tests. I can say that Gorilla glue worked without issue, although it did turn white. That happens sometimes and I think I introduced moisture thinking those areas would be hidden inside out of site. I wanted them to dry fast so no vapours trapped inside could cause fogging on the glass.


Awesome work man, and fair shout on the cost vs fun ratio. Couple of things that might help in future: I’ve not done it myself, but several of the Gunpla sites I follow reccommend applying a topcoat of varnish over the sub assemblies, even if you are not painting the kit, to better tie any variances in the finish fo the different plastics together. Ref the fogging up of the windshield when you glues some of the cab stickers, you can get superglues that are odorless and so don’t fog up plastics. I’ve got a bottle in my toolkit of… Read more »
I’d definitely be interested to know about superglues that don’t for and 100% dry clear, even if they’re old. That’s always a concern of mine. I’ll take a look at colour variance on him, but I didn’t really notice any. Varnishing seems like it might mess with the finish, possibly ruining the “glass”, but I can always mask or re-gloss after. It’s also got moving parts which makes me worry about the varnish wearing, or not getting everywhere and the difference looking odd. Something to think about though. I know I use varnish to help blend my paint jobs together… Read more »
Ok, so the glue I brought was Hobbyking Super-Gold. My only niggle is it’s a very thin glue so the first time I used it I got overspill over my fingers >_<
Thats good to know before I spill some everywhere. Thanks.
Tanks mate