


Dust City Board


Recommendations: 40
About the Project
I had this idea for a city table after buying several sets of tenement buildings from the Dust range. The intention was to build a series of ruined and intact buildings that would each be mounted on a section of pavement. The pavement sections could then be assembled into streets allowing the spaces in between to become the roads.
Related Game: DUST 1947
Related Genre: Historical
This Project is Cancelled
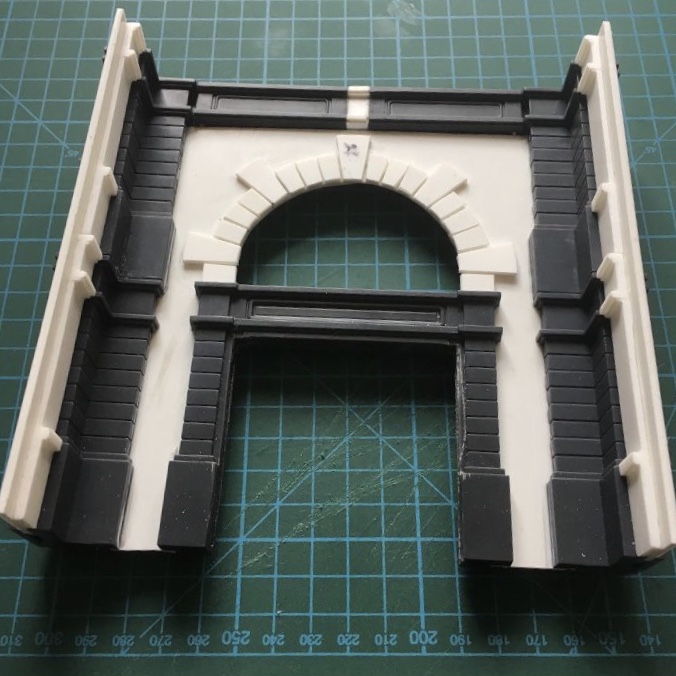
Graystoak Hall
In the early stages of this project I started throwing ideas around with my good friend and long serving gaming buddy ‘Fil’. I explained that the layout I had in mind needed some kind of main feature that the rows of buildings could be centred around. Fil had the idea of creating a public building such as a town hall, museum or library. This would be larger than the standard structures and could be used as a focal point for missions or simply to provide an interesting piece to battle across.
Fil was keen to scratch build this structure but I wanted him to used whatever architectural components could be spared from the tenements. This would ensure the central building tied in with the style of the city and also provide valuable raw materials for the build.
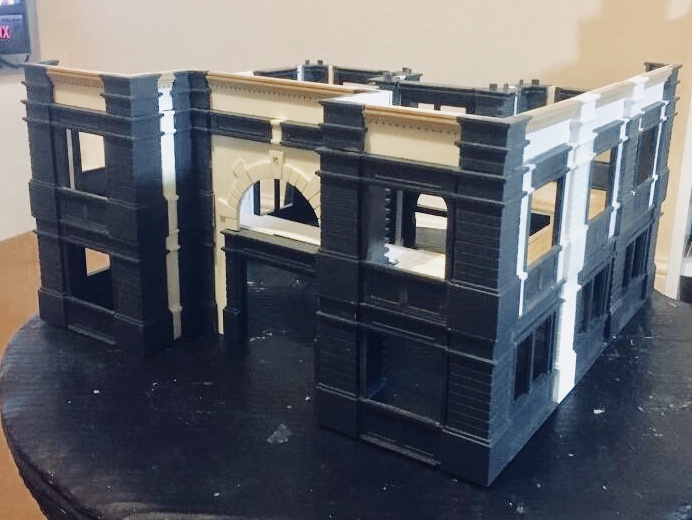
Though still a work in progress the public building, (dubbed Graystoak Hall by Fil), is impressive to say the east. It probably deserves a project log in its own right! Many pieces have been scratch built including casts from modified pieces of the original kit. In the attached images the white sections you see are either plasticard or fast cast components that Fil made in order to increase the proportions of the standard kit.
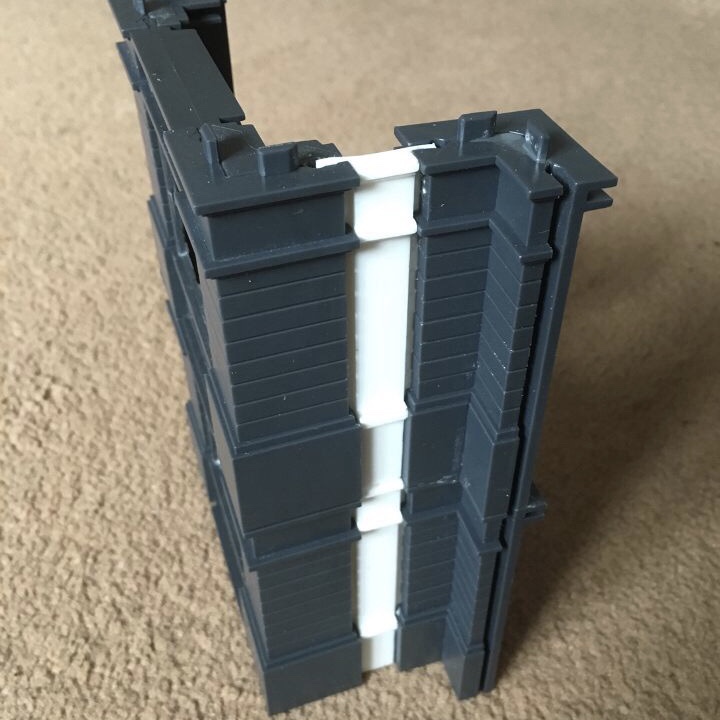

Plinths
The below images show the plinth structure a bit more clearly. As you can see the corner pieces are made from cutting up a standard corner section (eg, the section directly below the corner piece). I used the top detail for some of the buildings and the bottom detail (turned upside down), for others. This was primarily for economy but it also added some variety to the buildings.
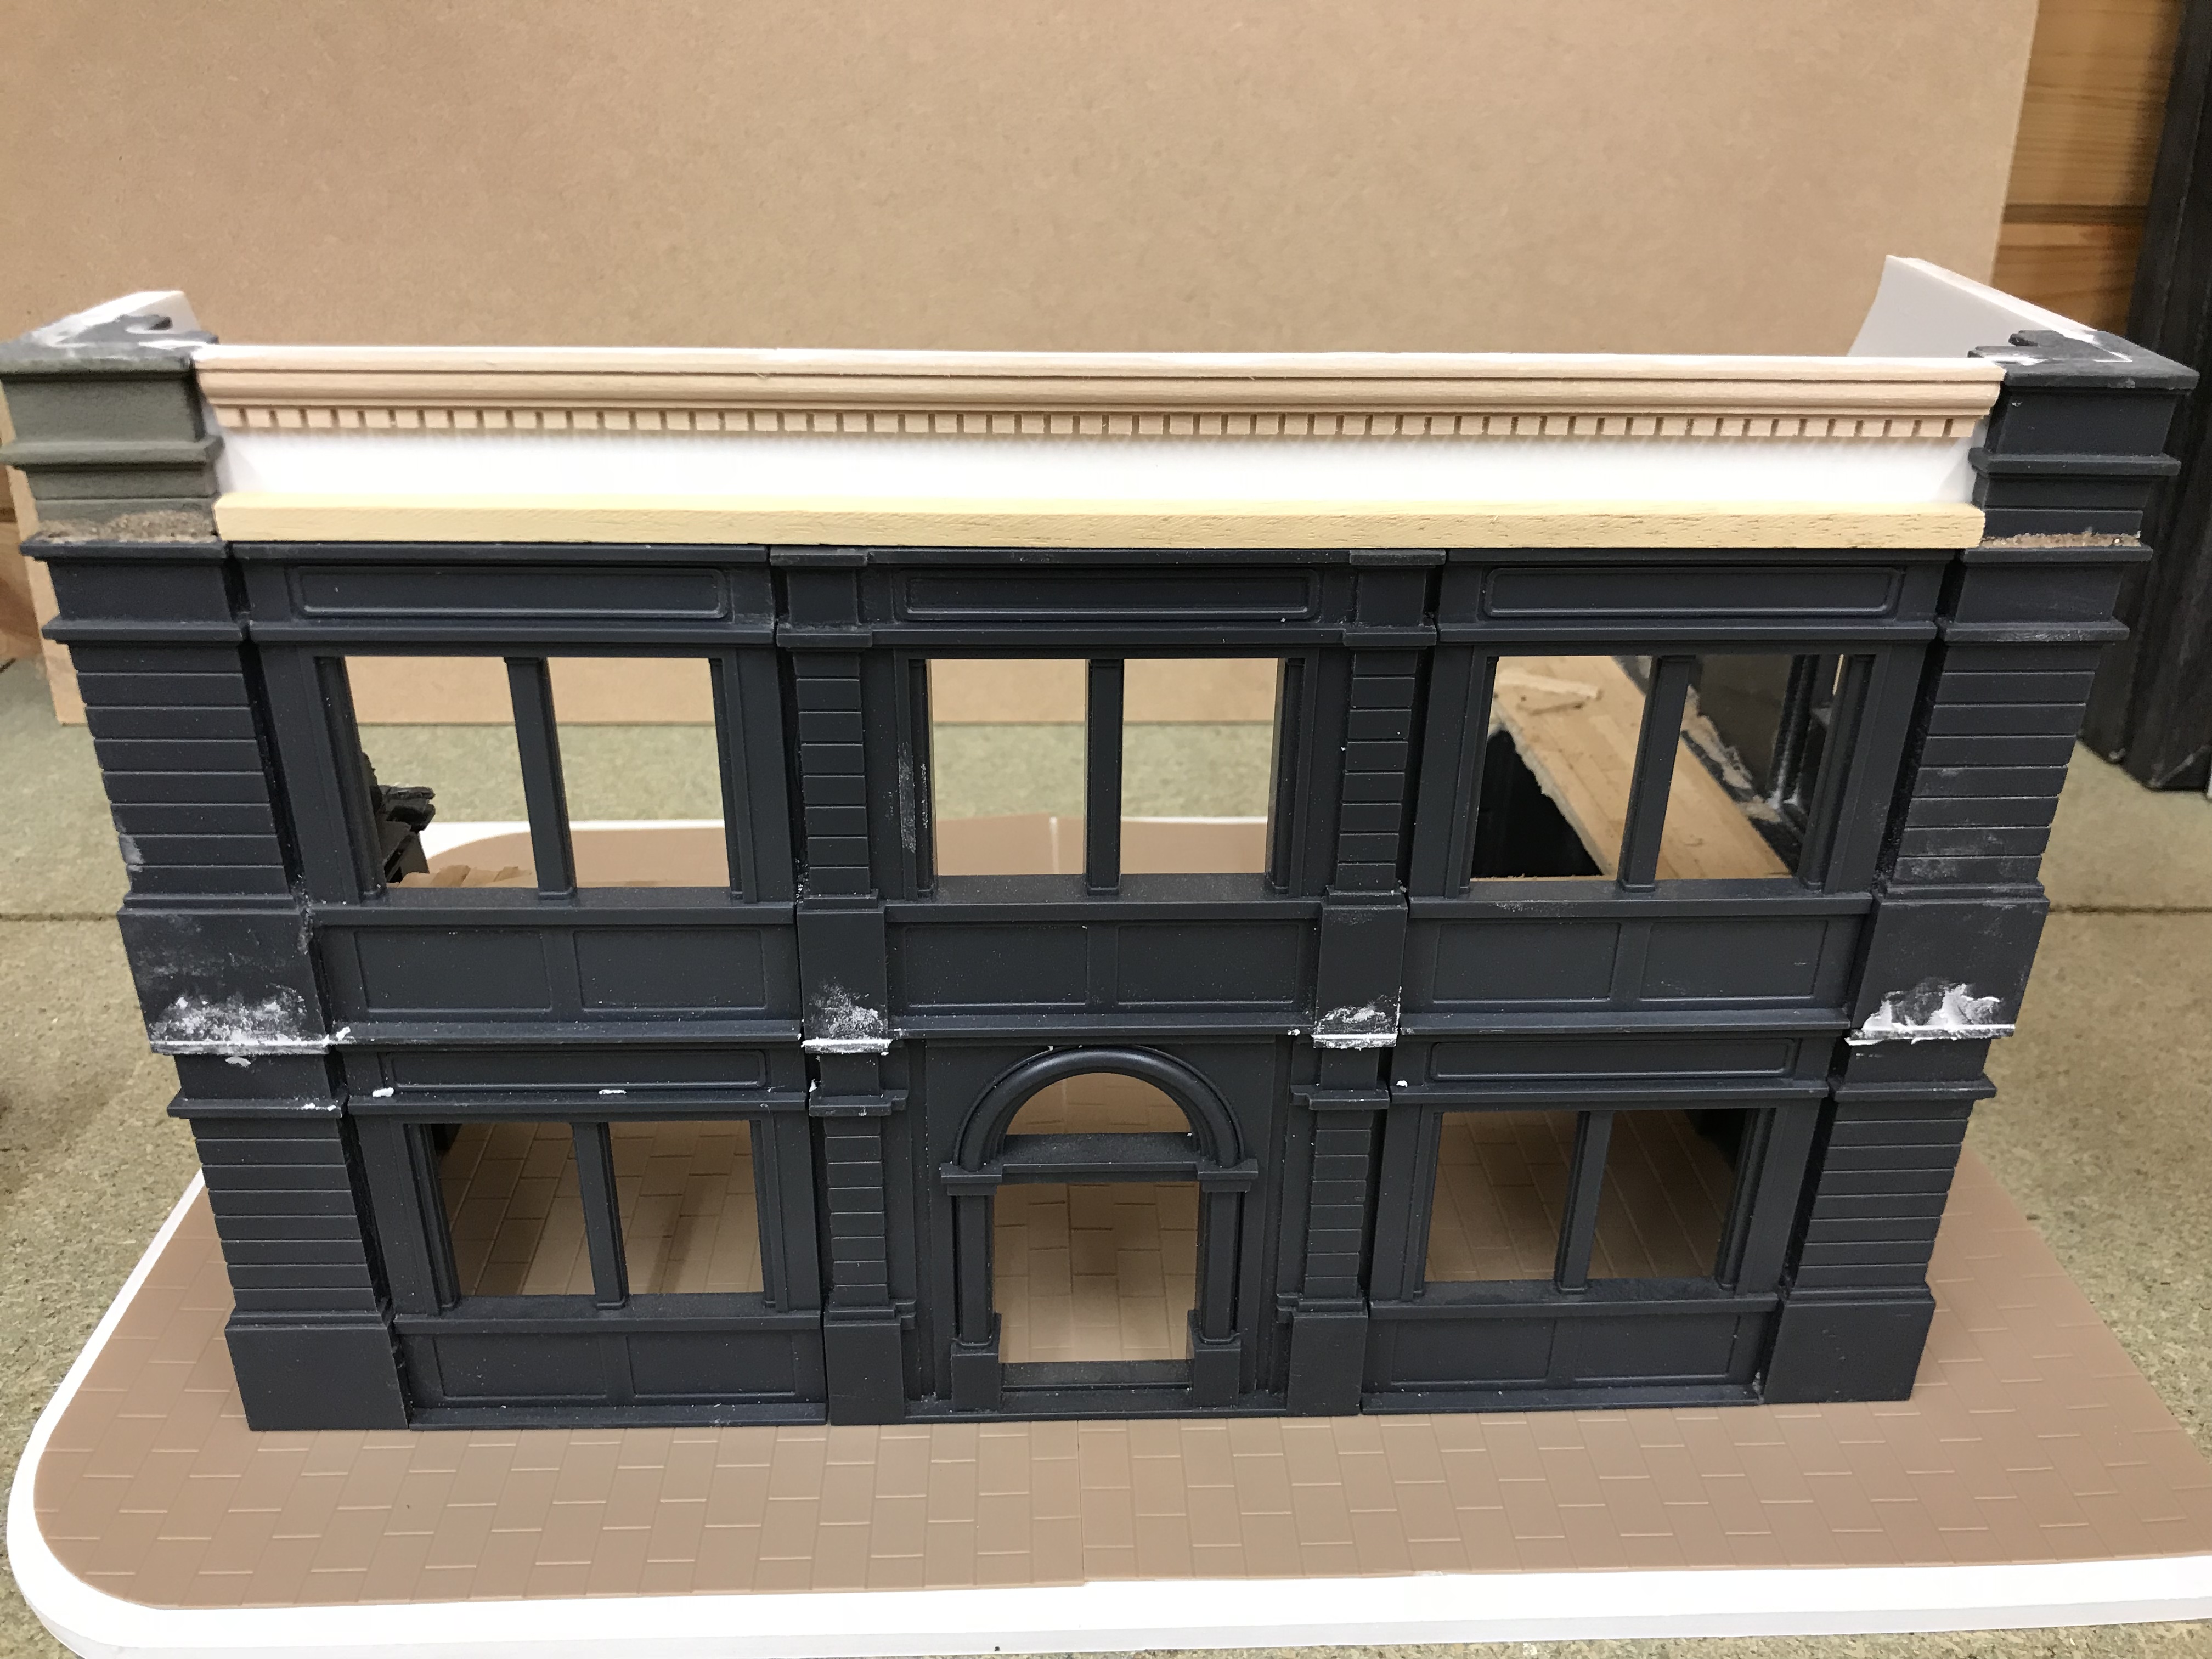
3mm Plasticard was used for the main plinth section and some ply wood cornice/moulding was added for detail. This also served to strengthen the plasticard which can be a bit bendy when left to its own devices!
After the basic structure was completed I used some light weight, pre mixed poly filler to fill any unsightly gaps.
These buildings are standing on the version two pavement prototypes. This is 5mm poly board, pictured here with an embossed brick pattern plastic that I’m considering using for the pavement texture. However I don’t think poly board is the solution as it isn’t strong enough and is prone to warping.
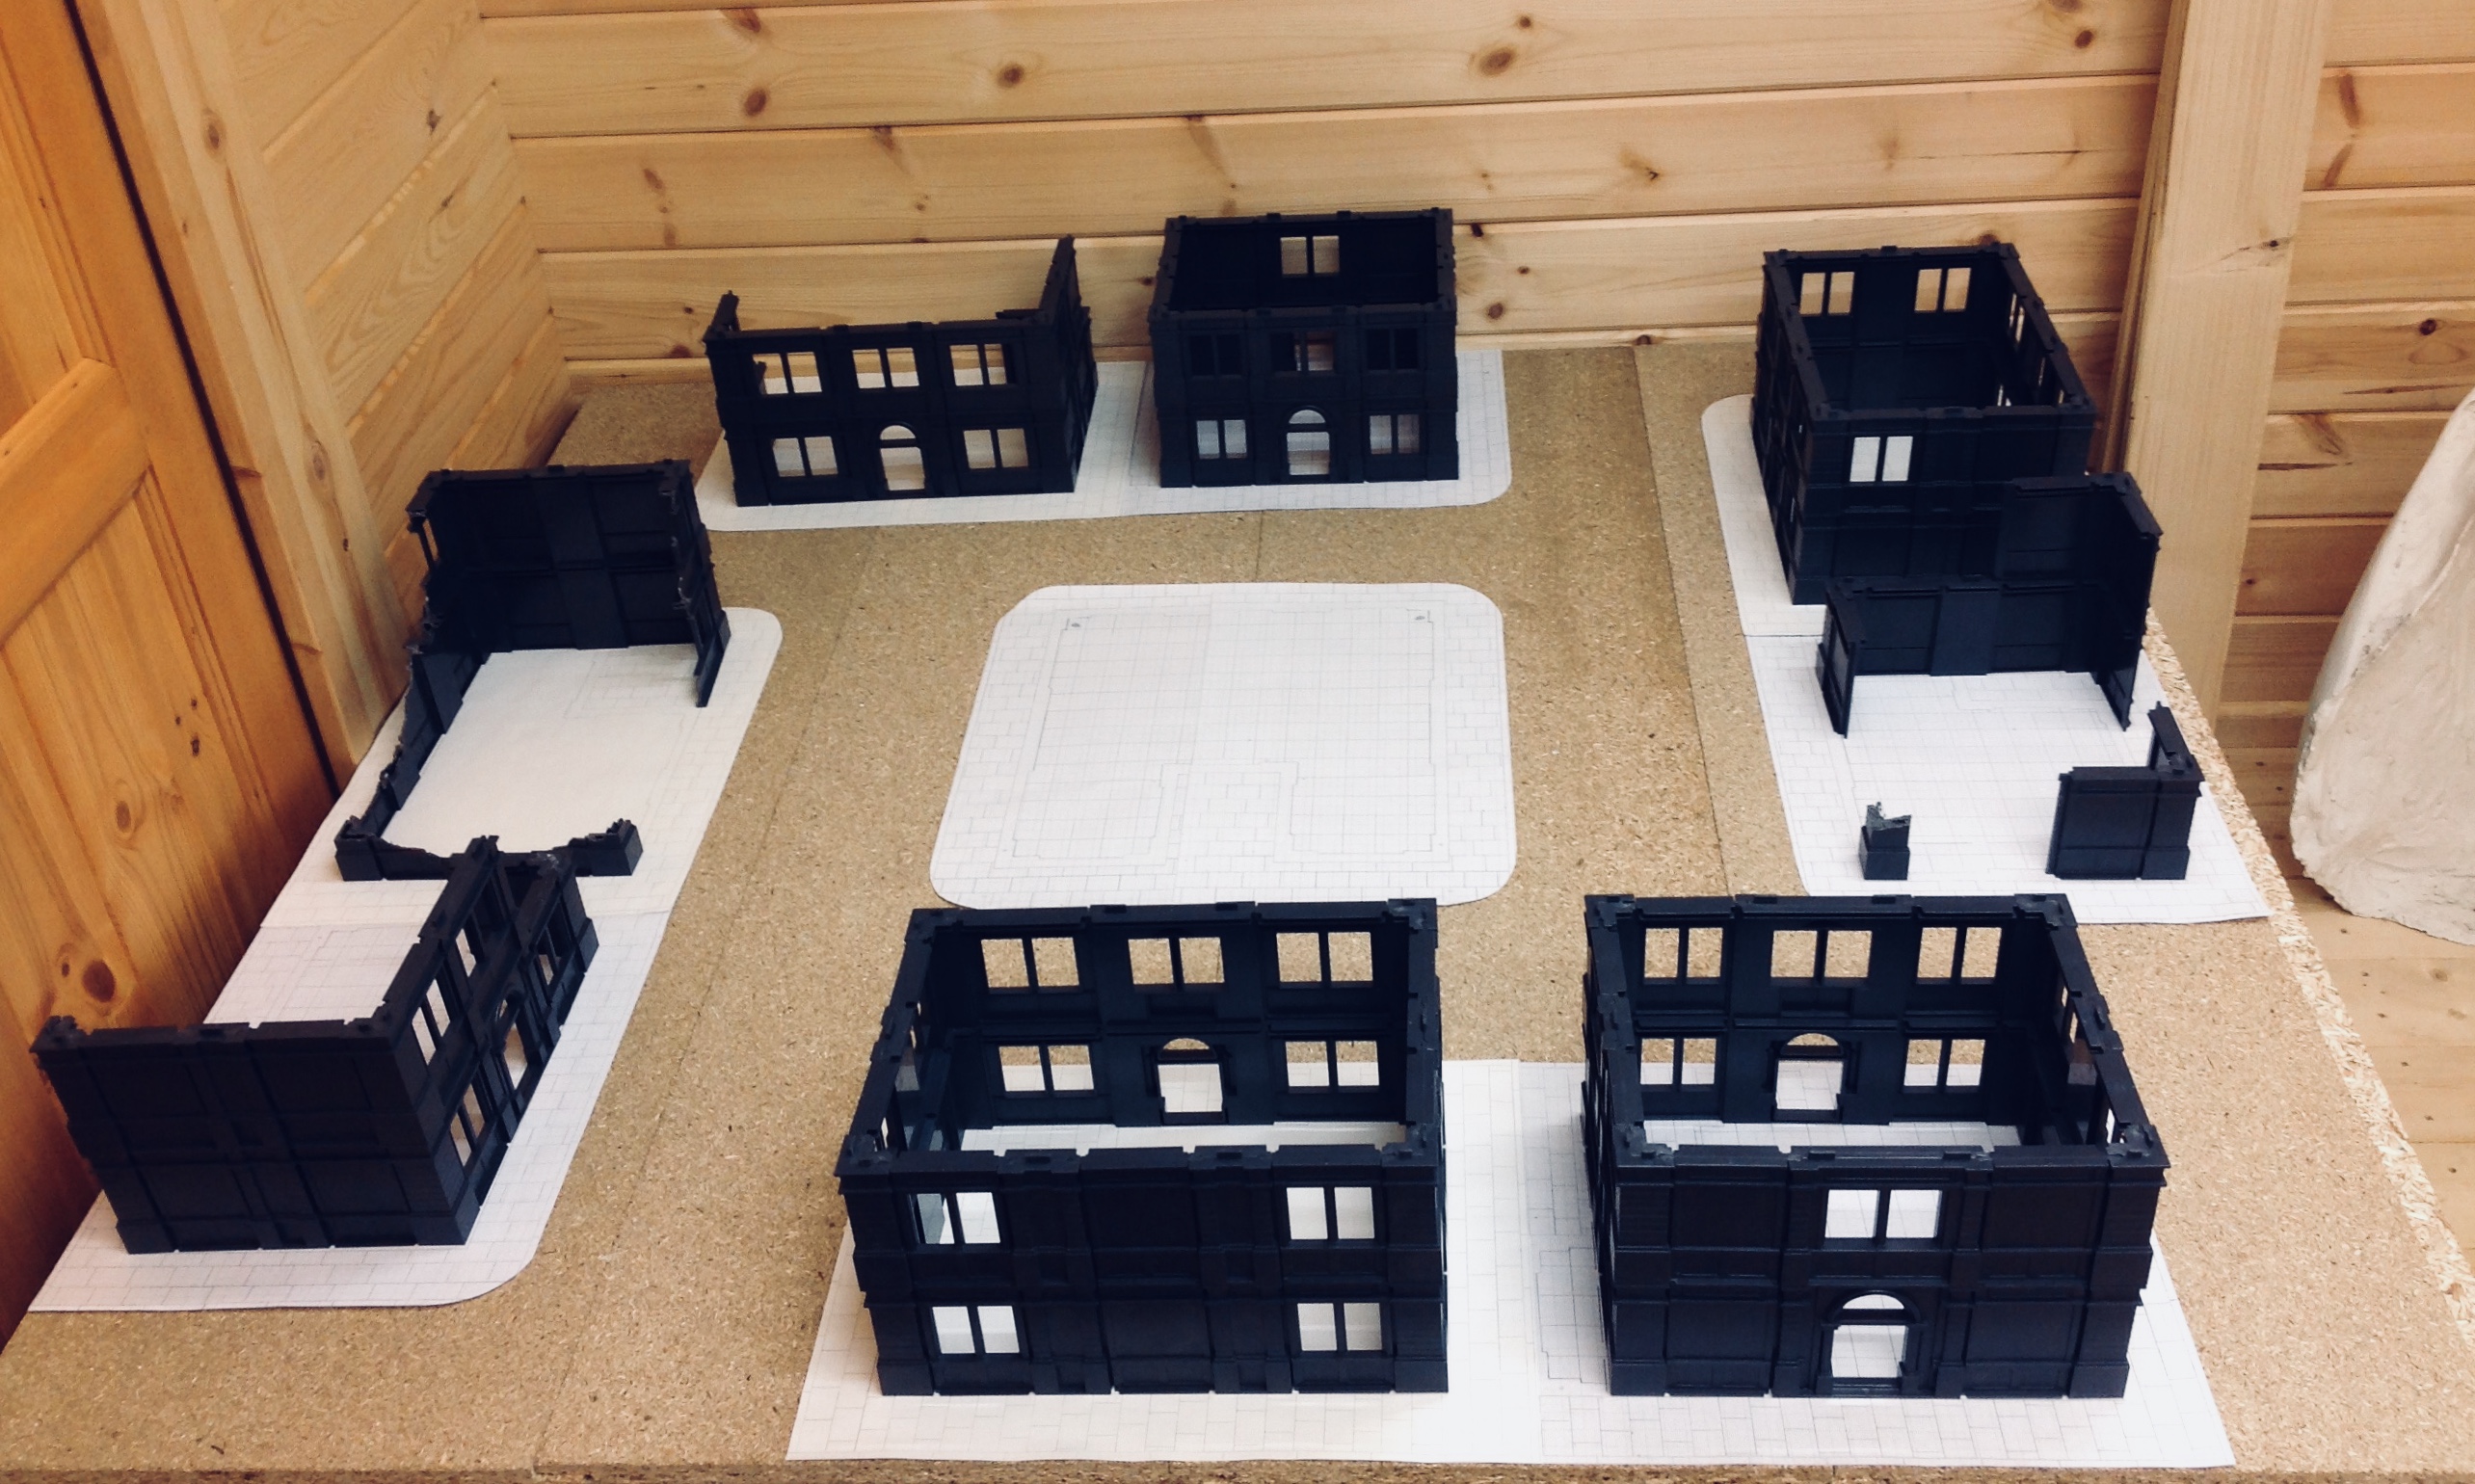
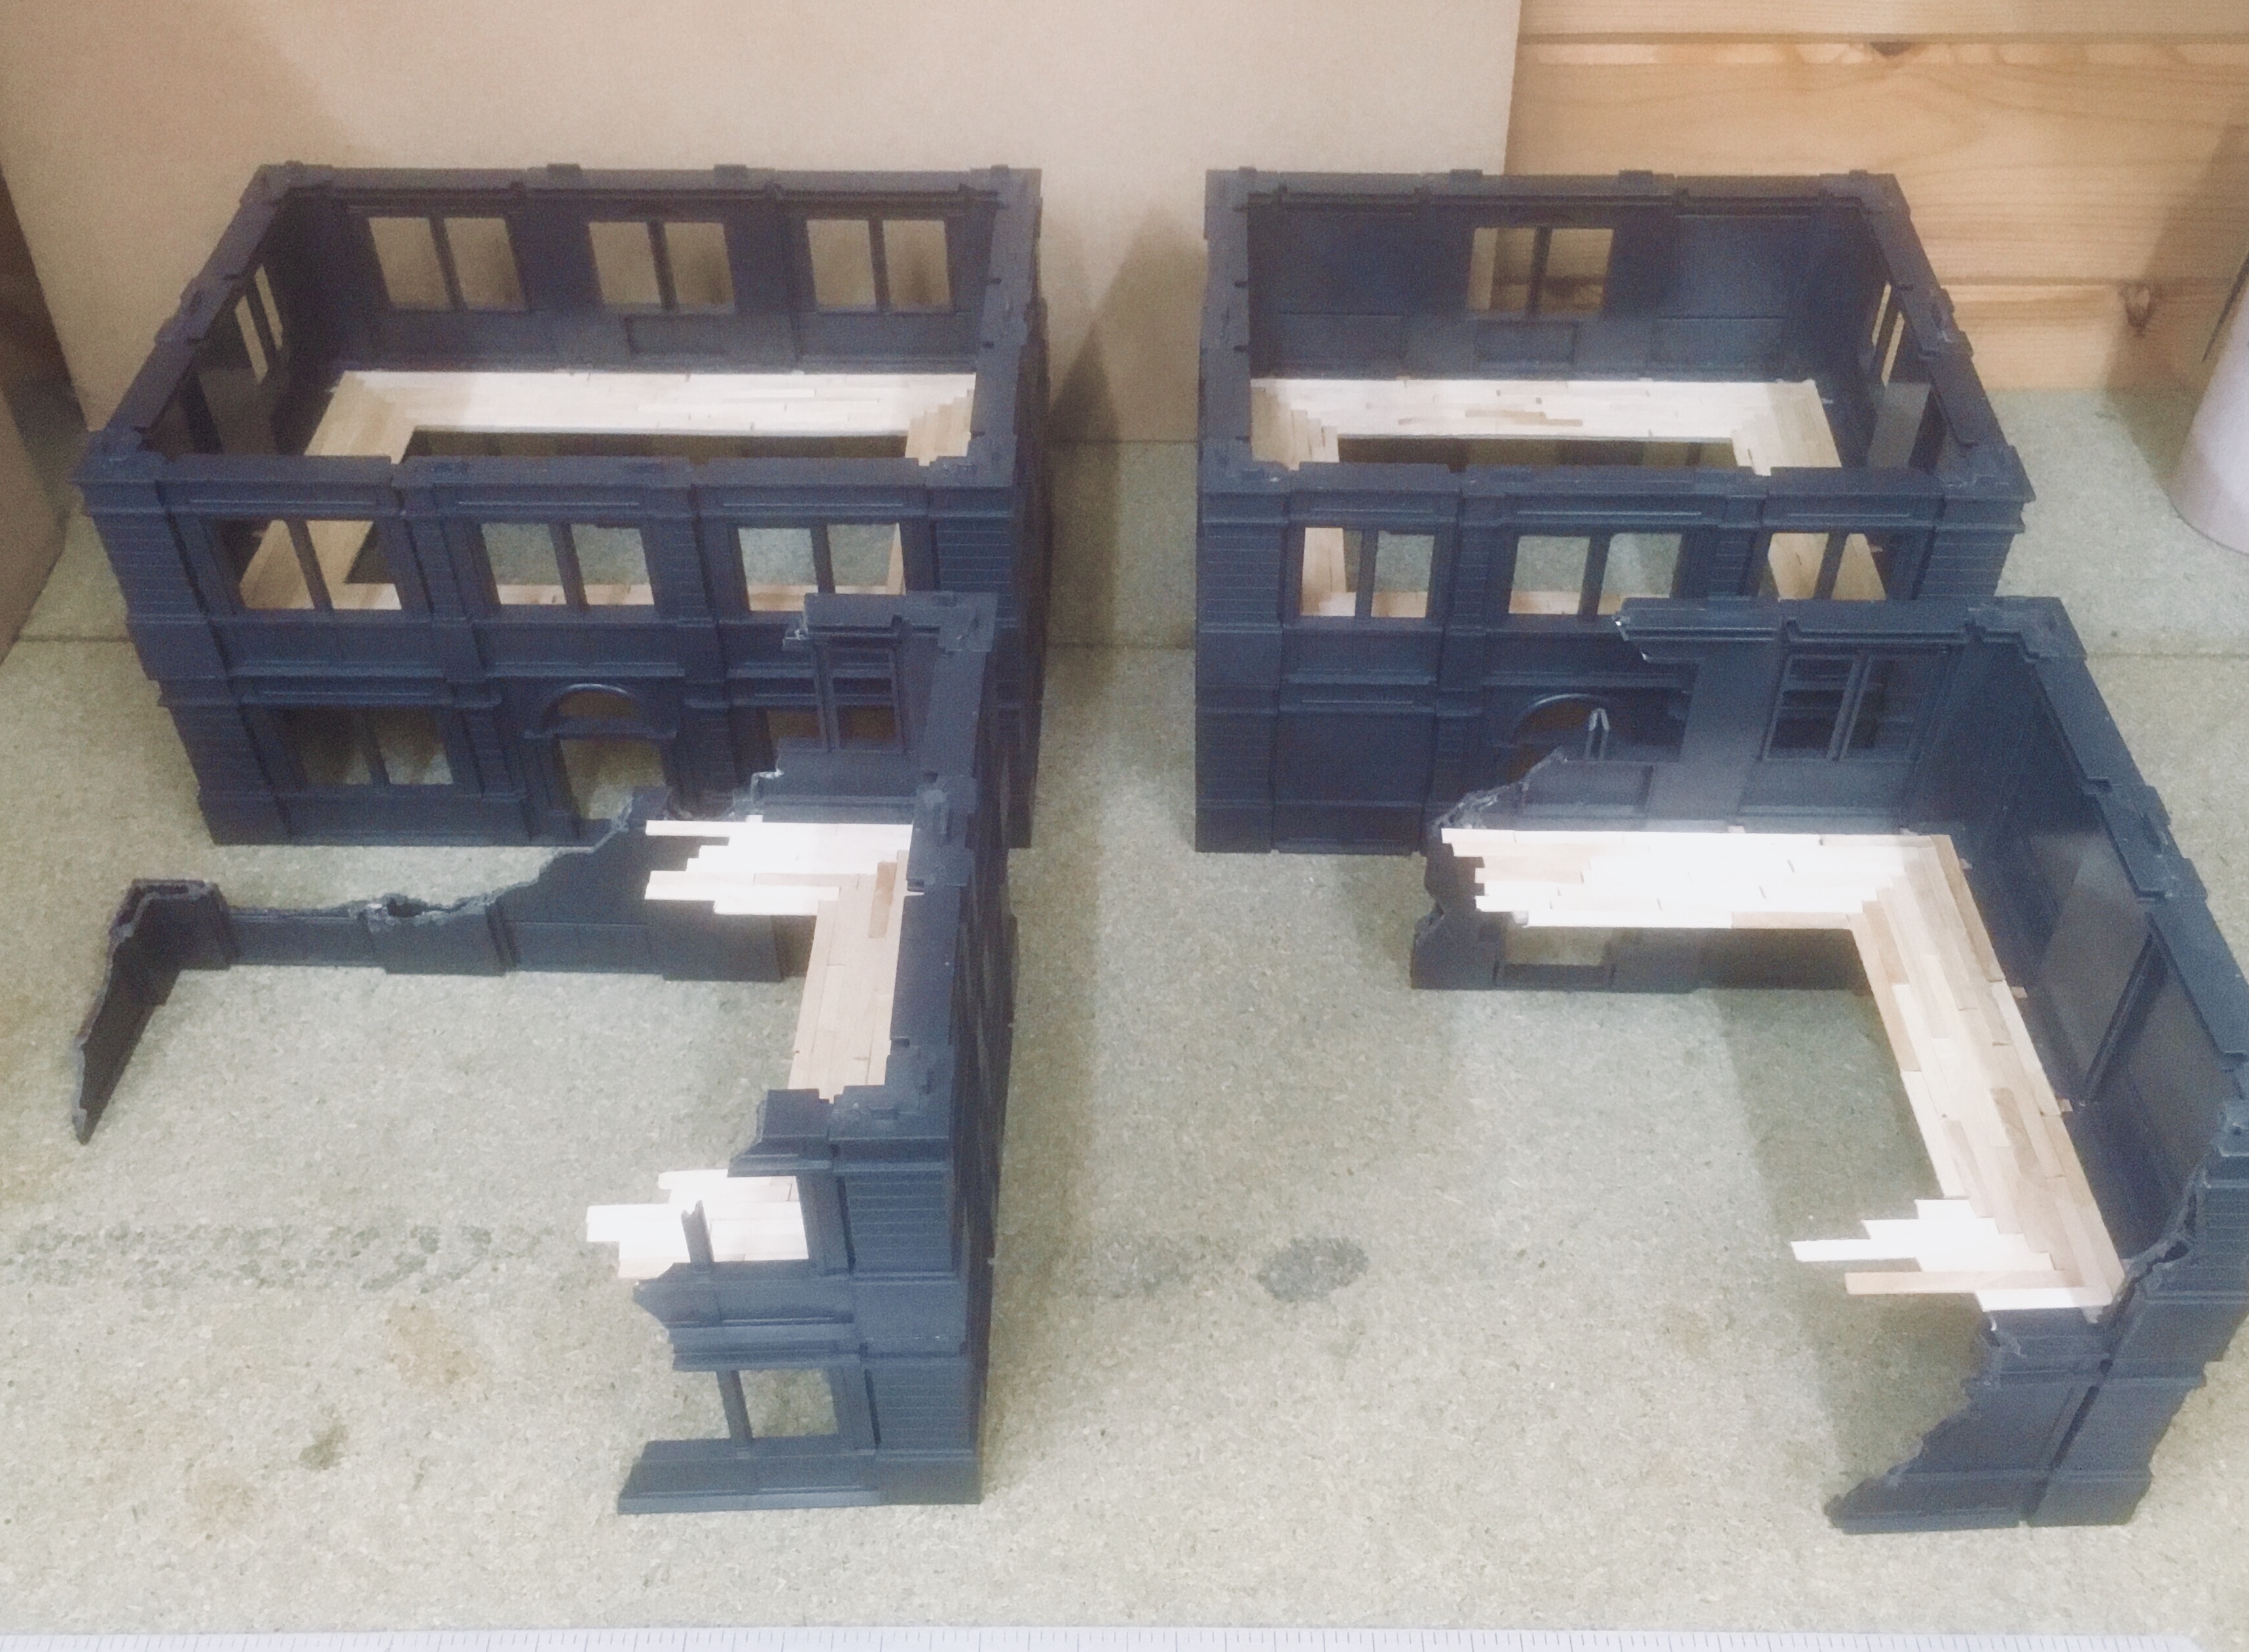
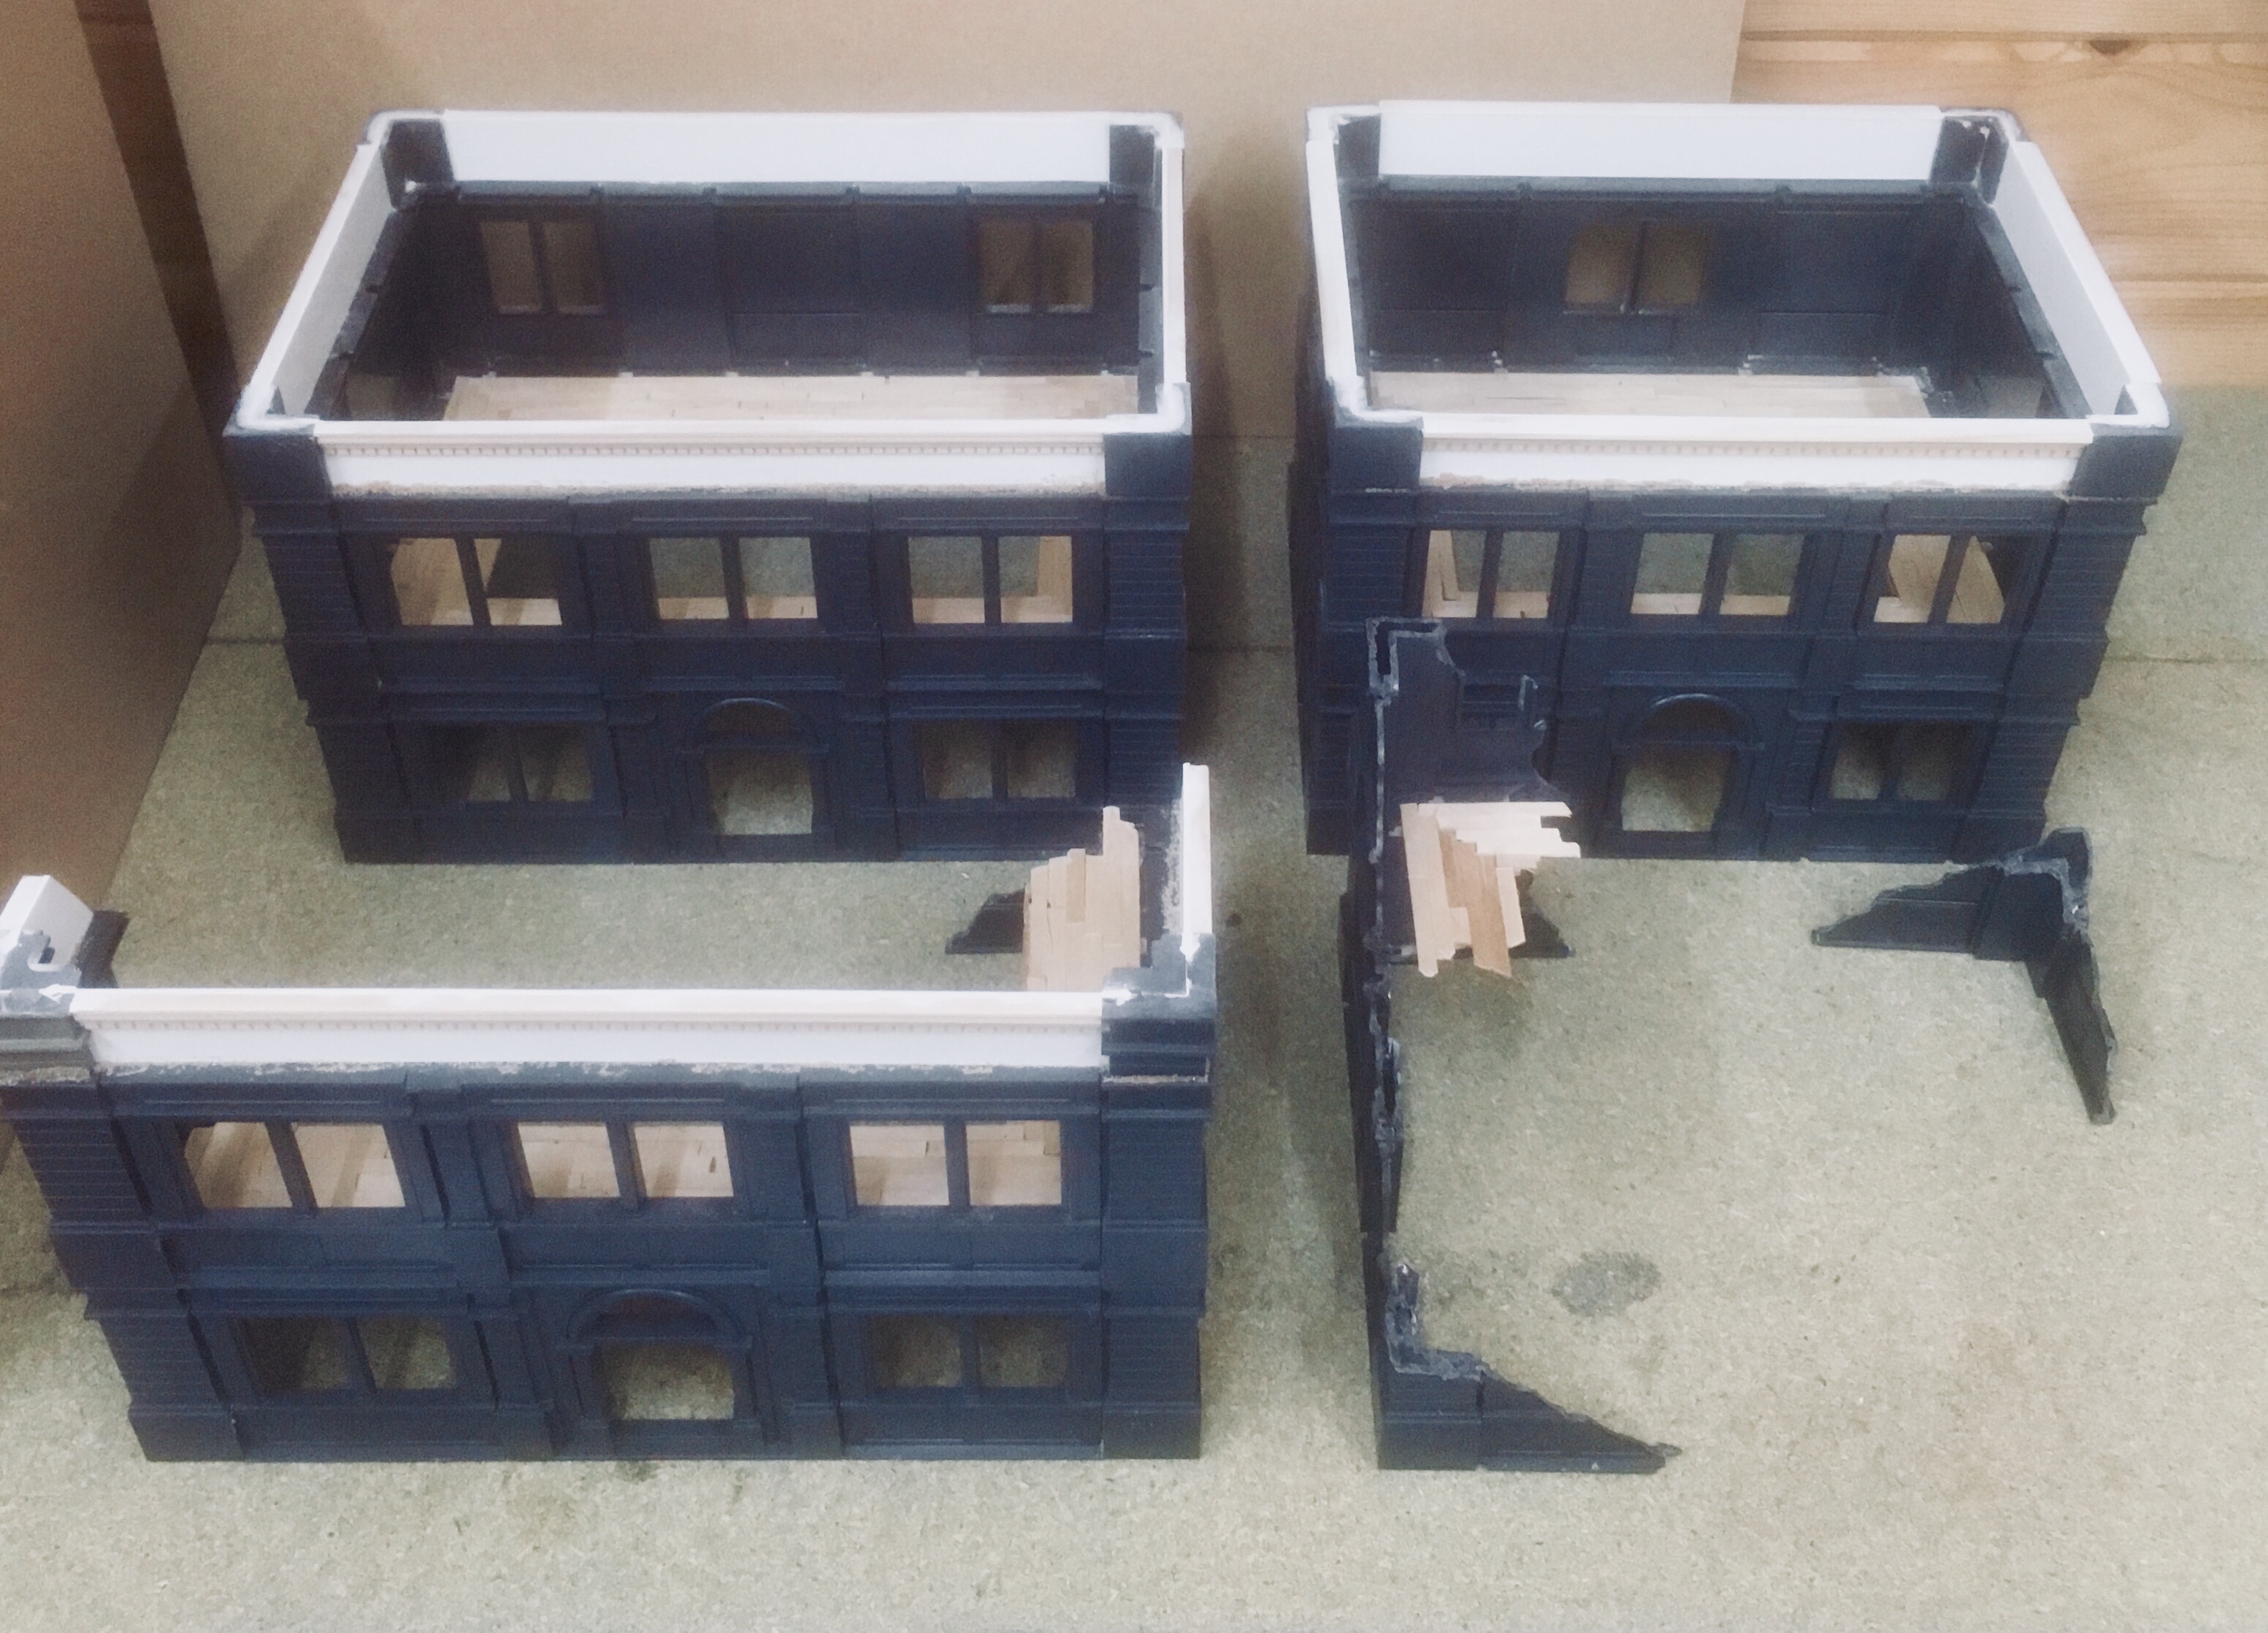
The images from left to right show a large ruin, a large building and a small building. There is only about 2cm difference in width between the large and small but you’ll notice that the windows are narrower on the smaller building than the large one.
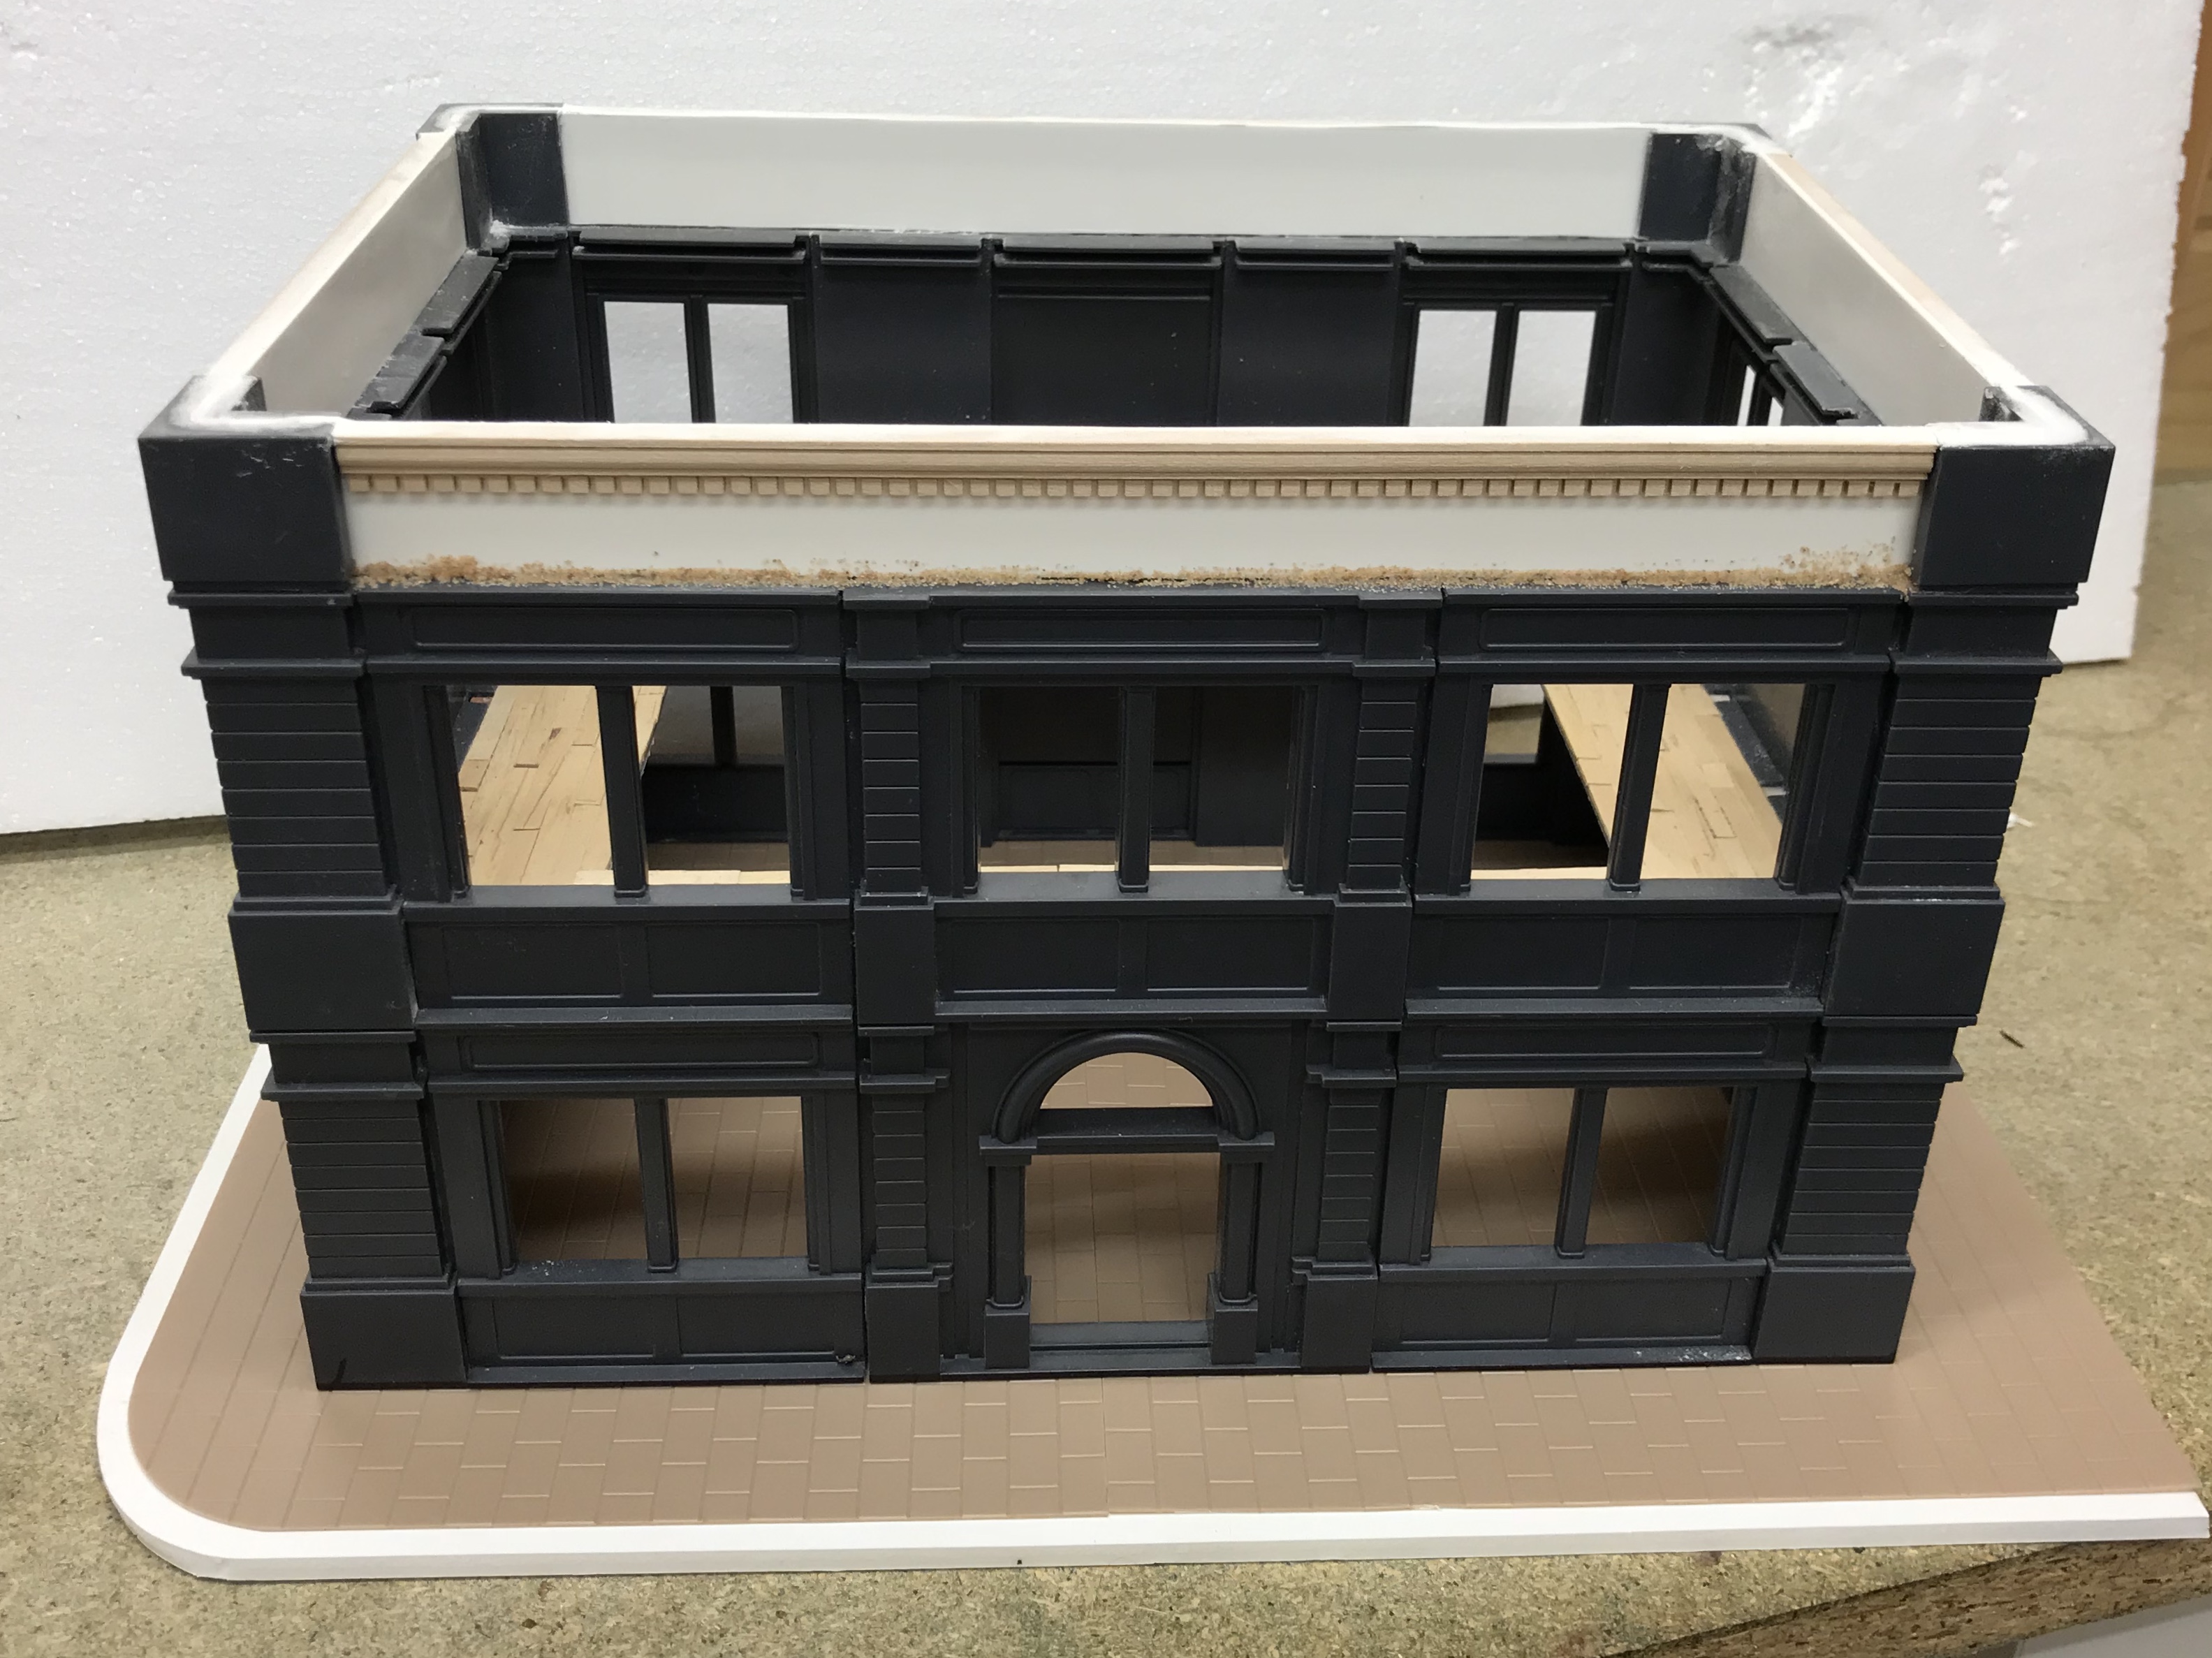
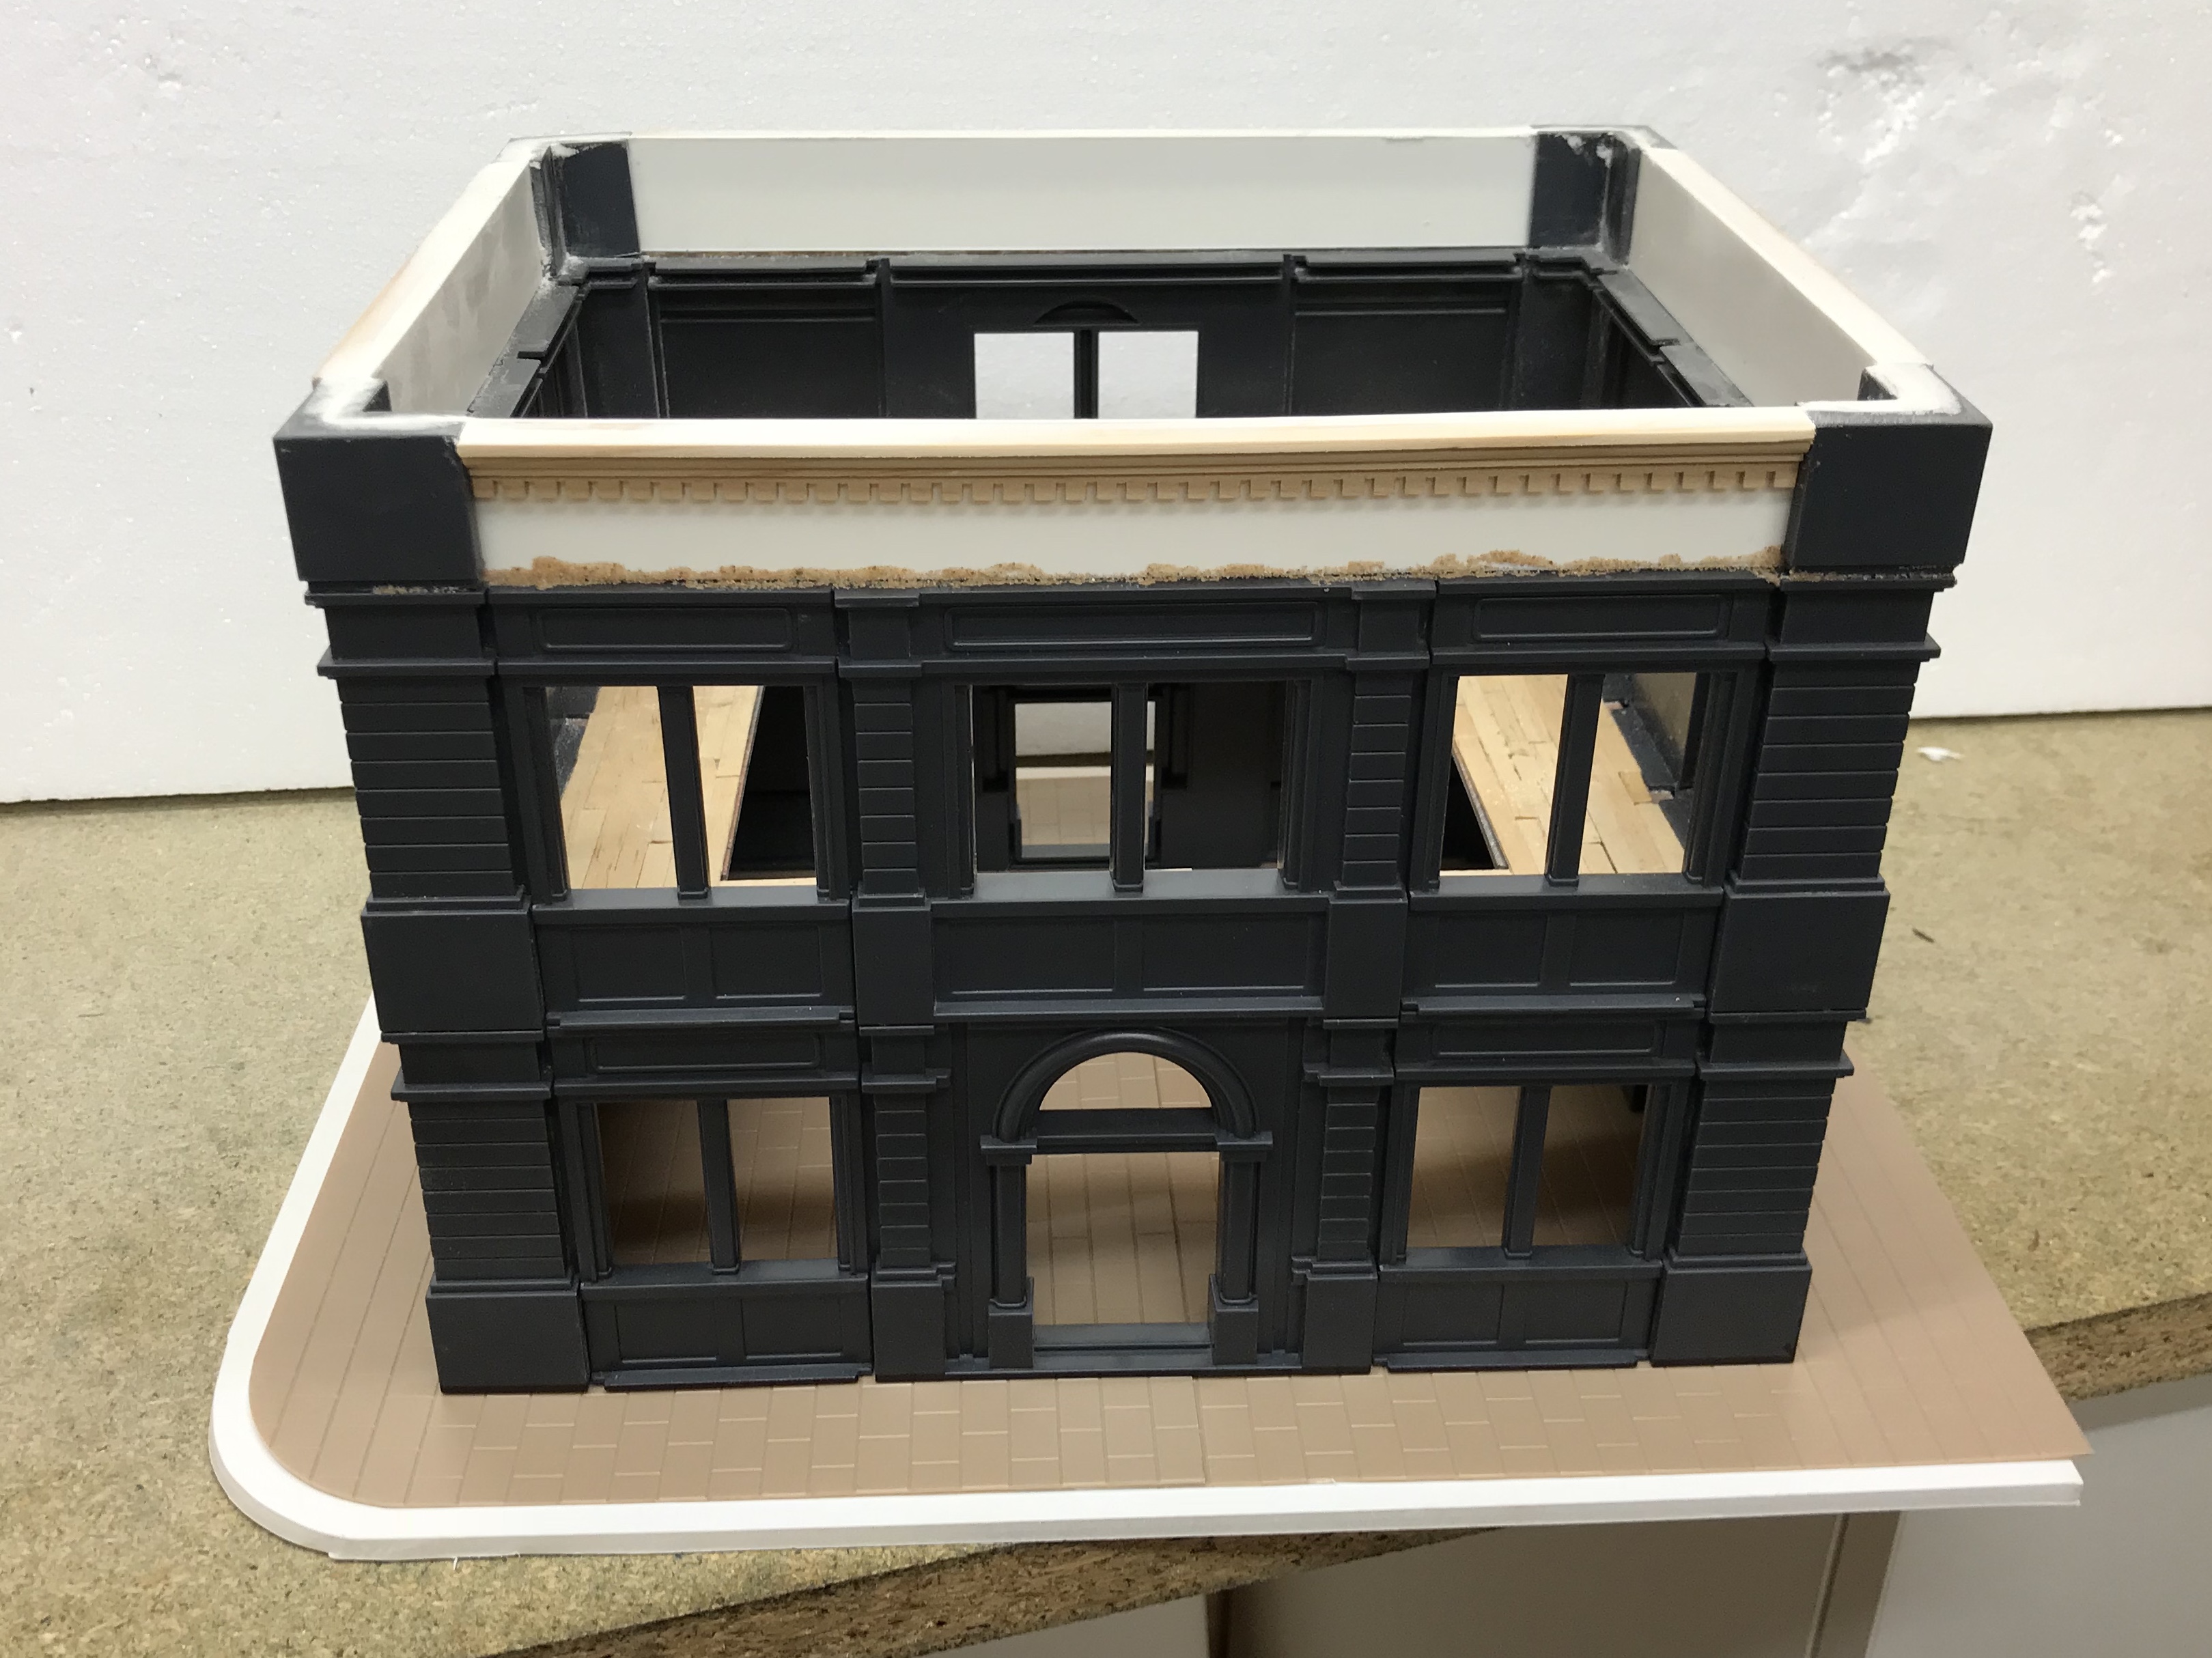
Buildings
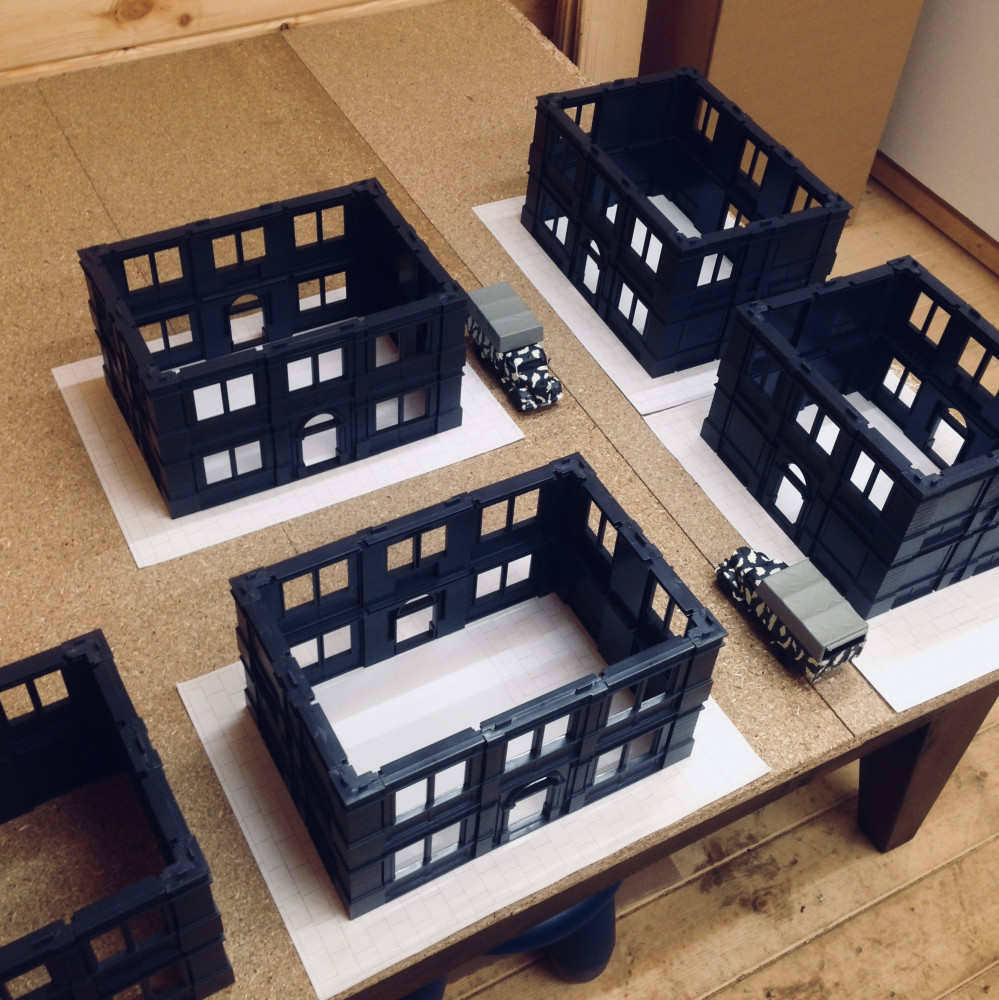
The Dust Tenement buildings are modular kits that fit together without the need for glue. They are designed to work with the gridded mats of Dust 1947 but as I wasn’t planning on using the grid system, I wasn’t restricted to the standard construction of the buildings. I played around with the pieces I had available and settled on two different builds, one slightly wider than the other. This would allow me to construct a total of eight buildings, four of which would be ruined to varying degrees.
Although the buildings can be constructed in multistories, I don’t find this particularly practical for game play. In any event, I would soon run out of pieces if I added multiple floors to each building. Instead I settled for just one raised floor per building. The interior level was constructed using the card board internal floor sections that come with the kit. With this decided I glued the buildings together for added strength. I then clad the thick card floors in coffee stirrer floor boards which adding some detail and increased their strength.
Although I was sticking with single stories, I did have a plan to add a little extra height to the buildings. By using plasticard and some wooden mouldings, I could add a plinth to the building tops. This was largely for cosmetic reasons as the buildings themselves have no roof features. However it would also allow a flat roof to be dropped in, giving a second level for game play.
Layout
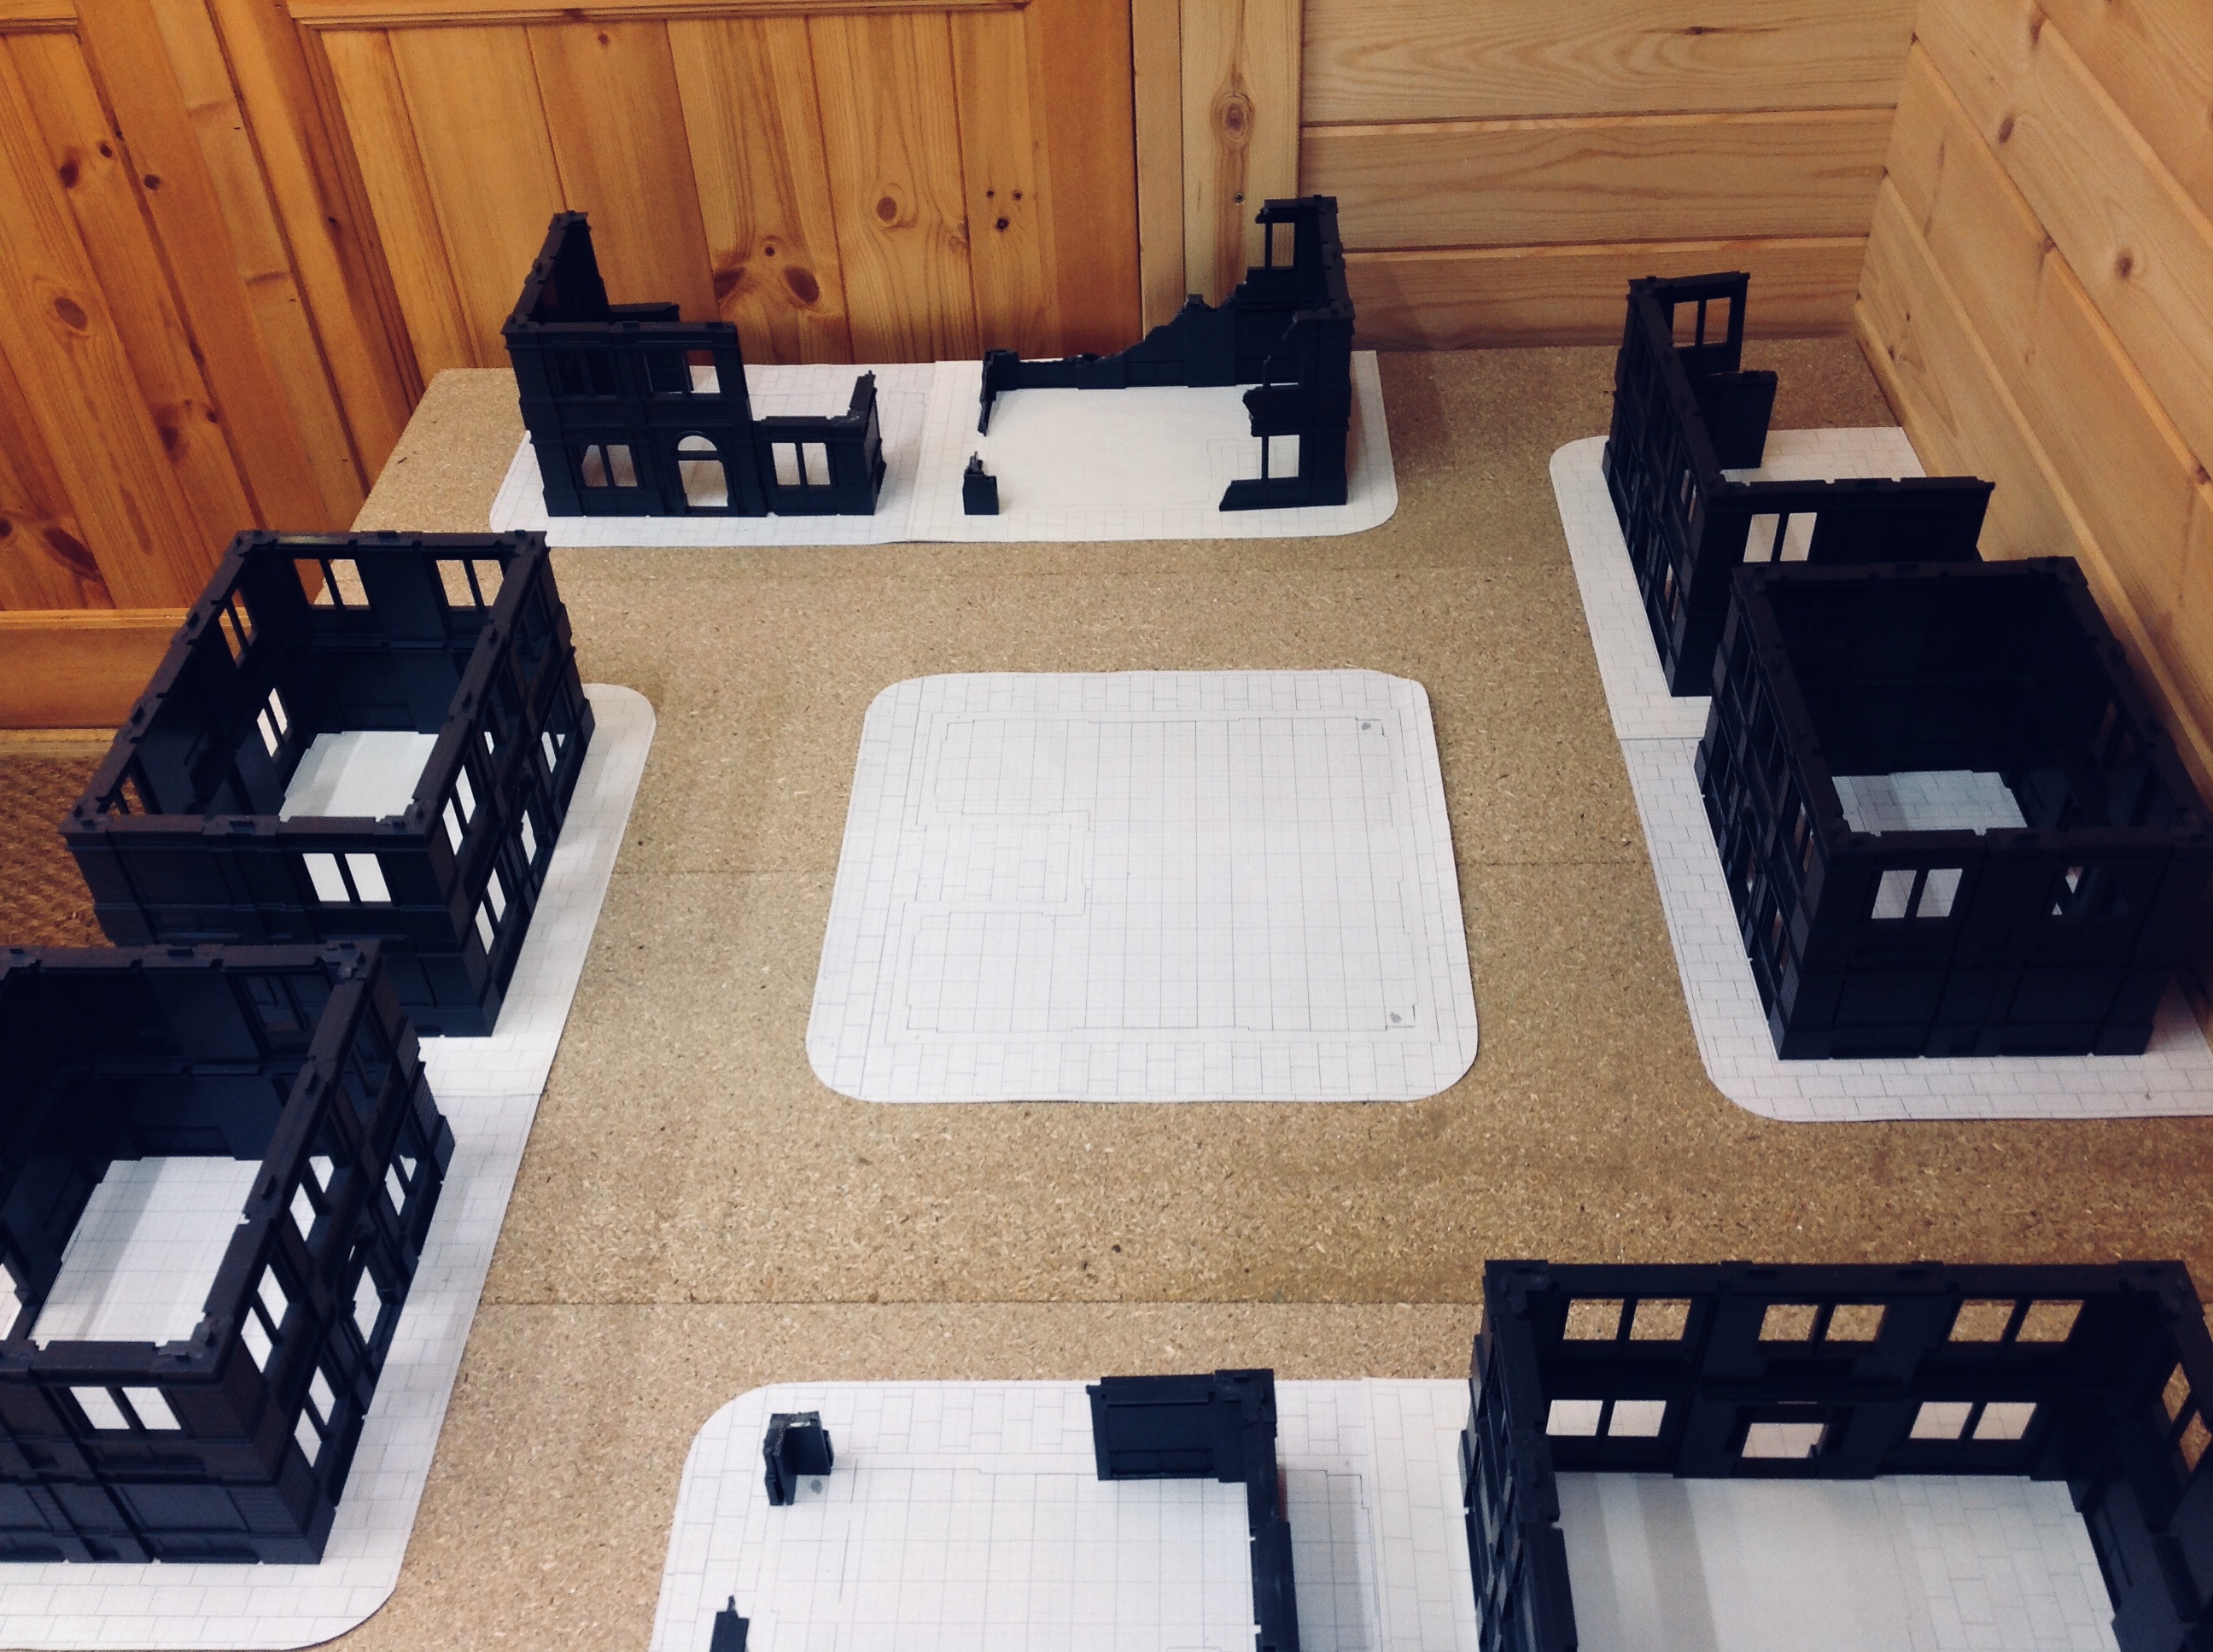
After some initial measurements and sketches I assembled my buildings (without glue), and cut out some pavement sections from graph paper. Placing them on a 4×4 table I tried some different layouts. This allowed me to see what kind of space would be left for the roads. I wanted to make sure the proportions of the roads, pavements and buildings worked visually but they also needed to work for gaming.
Although in cities buildings are generally seen in rows, I quickly realised that leaving gaps between buildings allowed for more movement options in game. This resulted in alleyways and the idea of having spaces narrow enough that they would only be accessible to smaller vehicles and infantry. Heavier vehicles would be restricted to the roadways.