


Spring Cleaning with Janus1004 – Ogres for Age of Magic


Recommendations: 217
About the Project
This is my project for the Spring Cleaning event. I recently bought an Ogre army with the intention of using straight away in Saga: Age of Magic. However, the Ogres were not as good as I first thought so I intend to do a complete overhaul of the force.
Related Game: SAGA
Related Genre: Fantasy
Related Contest: Spring Clean Hobby Challenge (Old)
This Project is Active
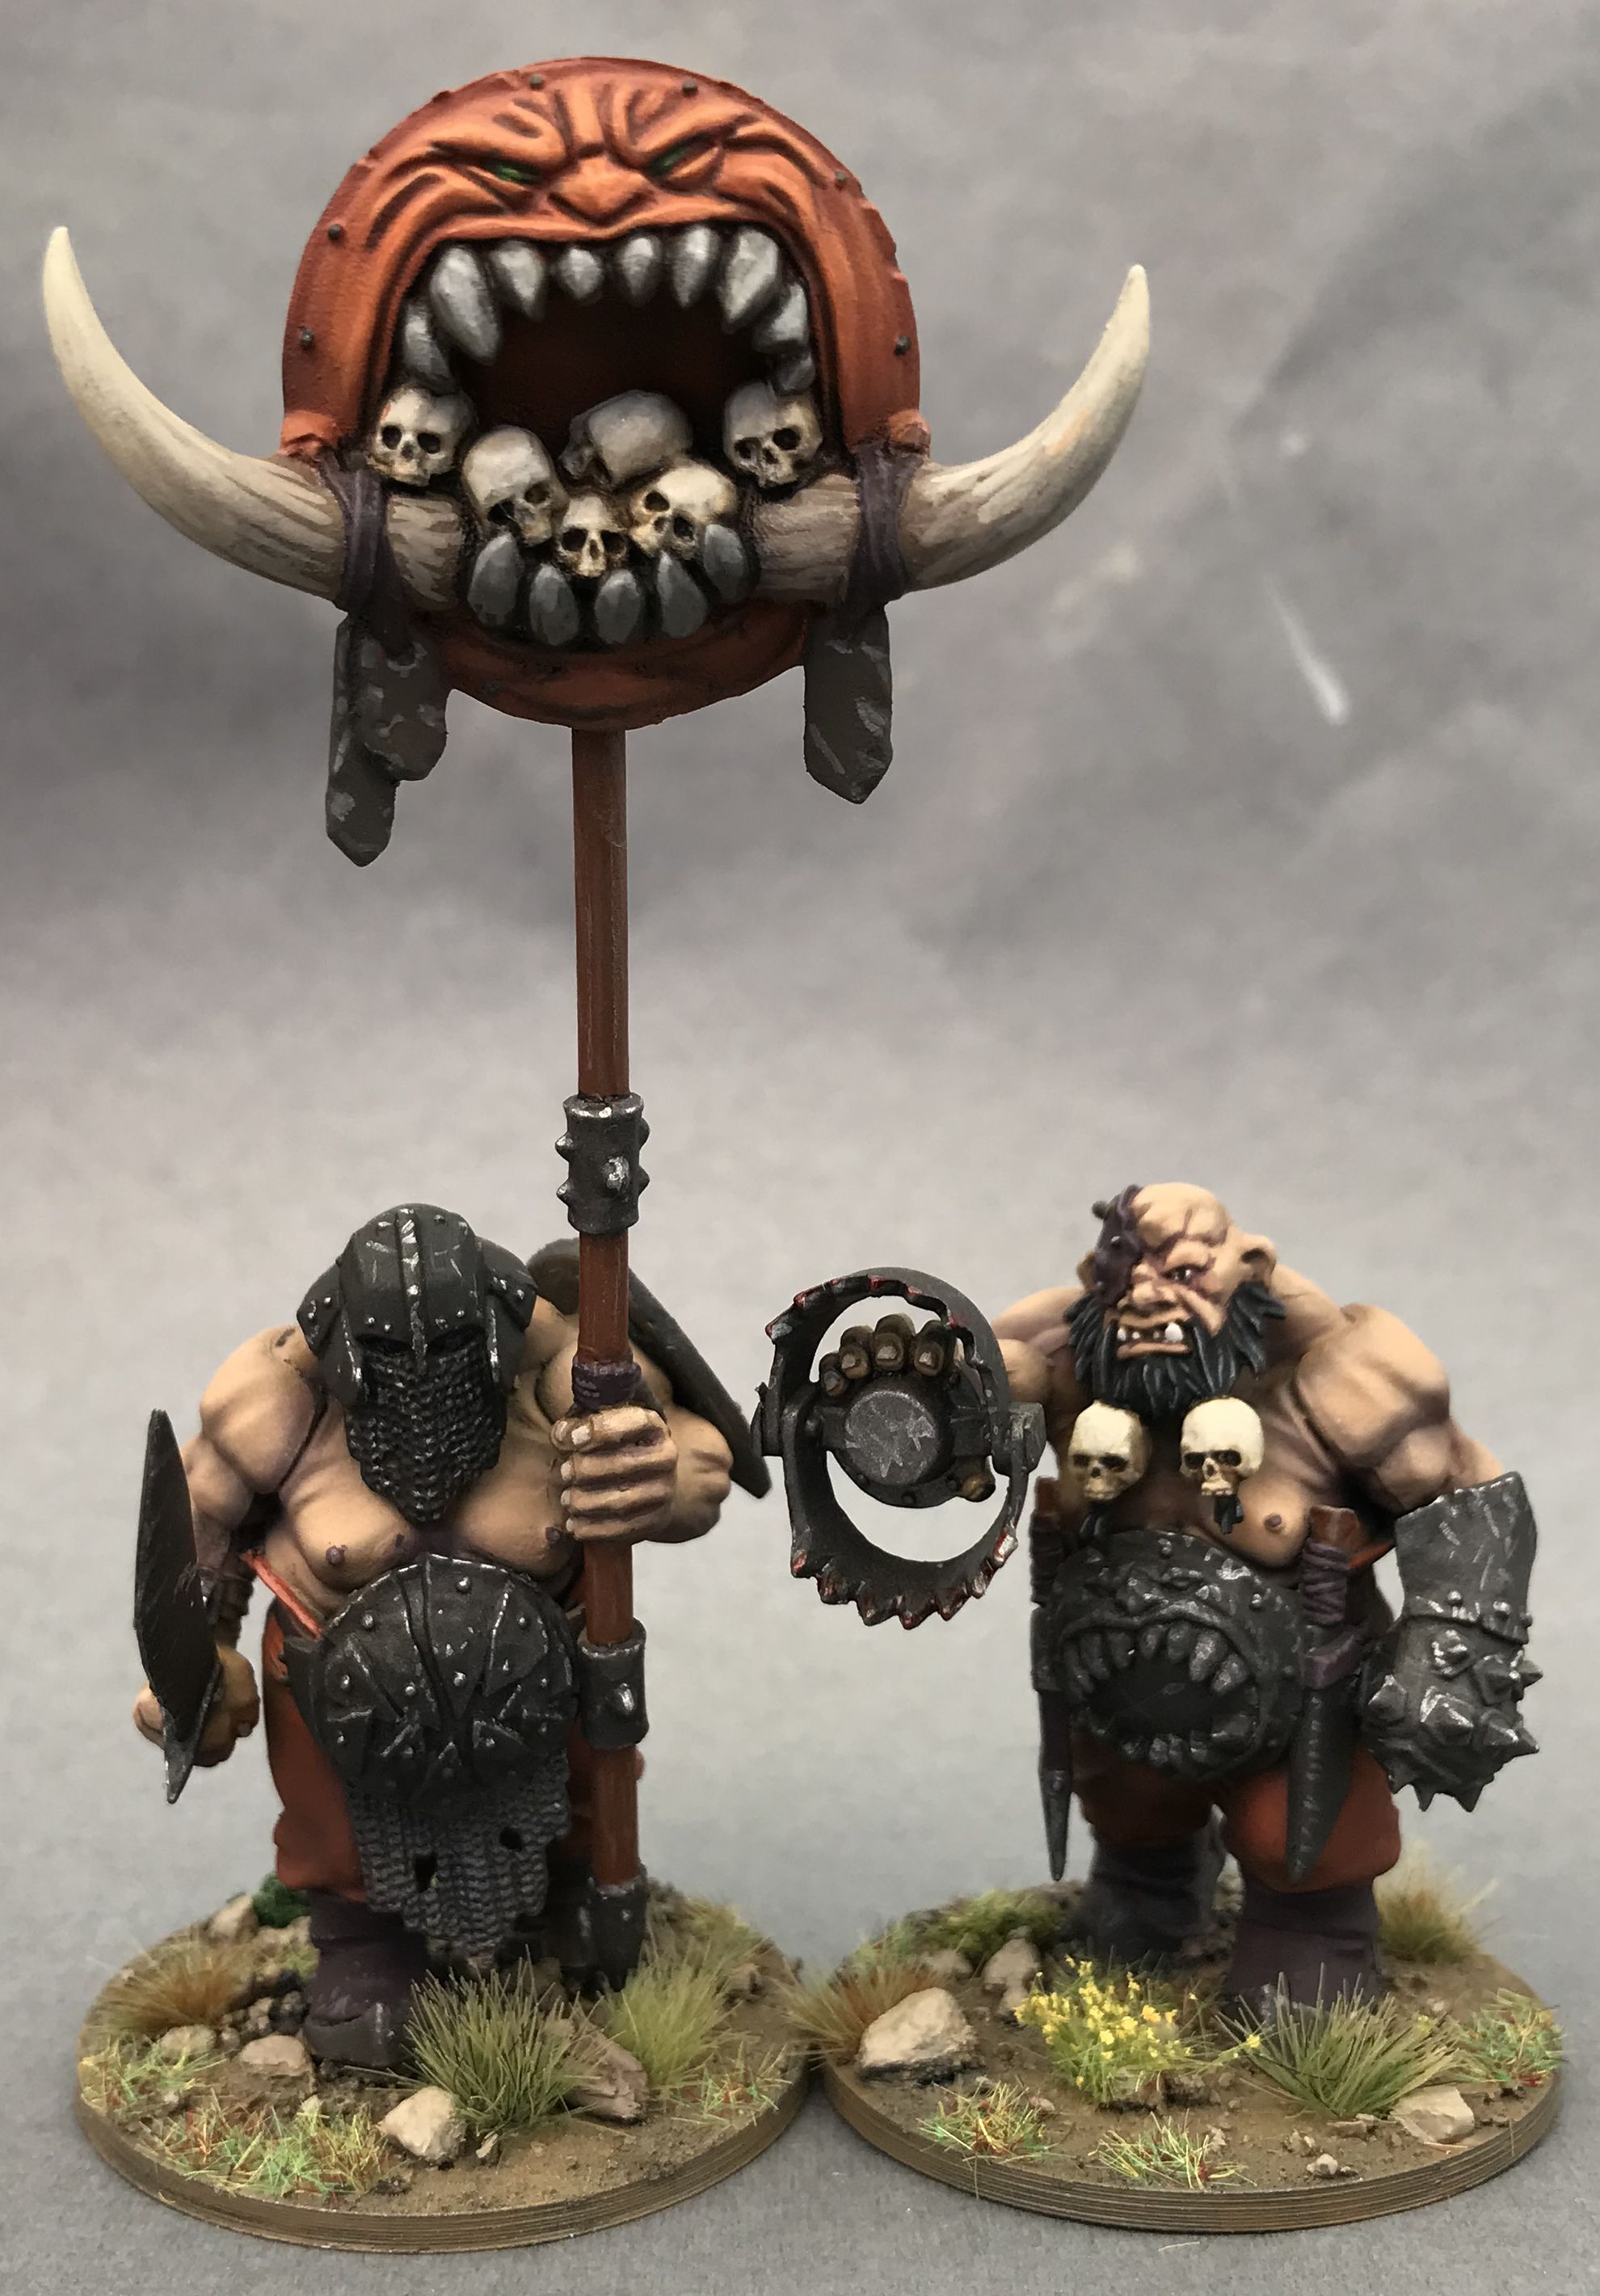
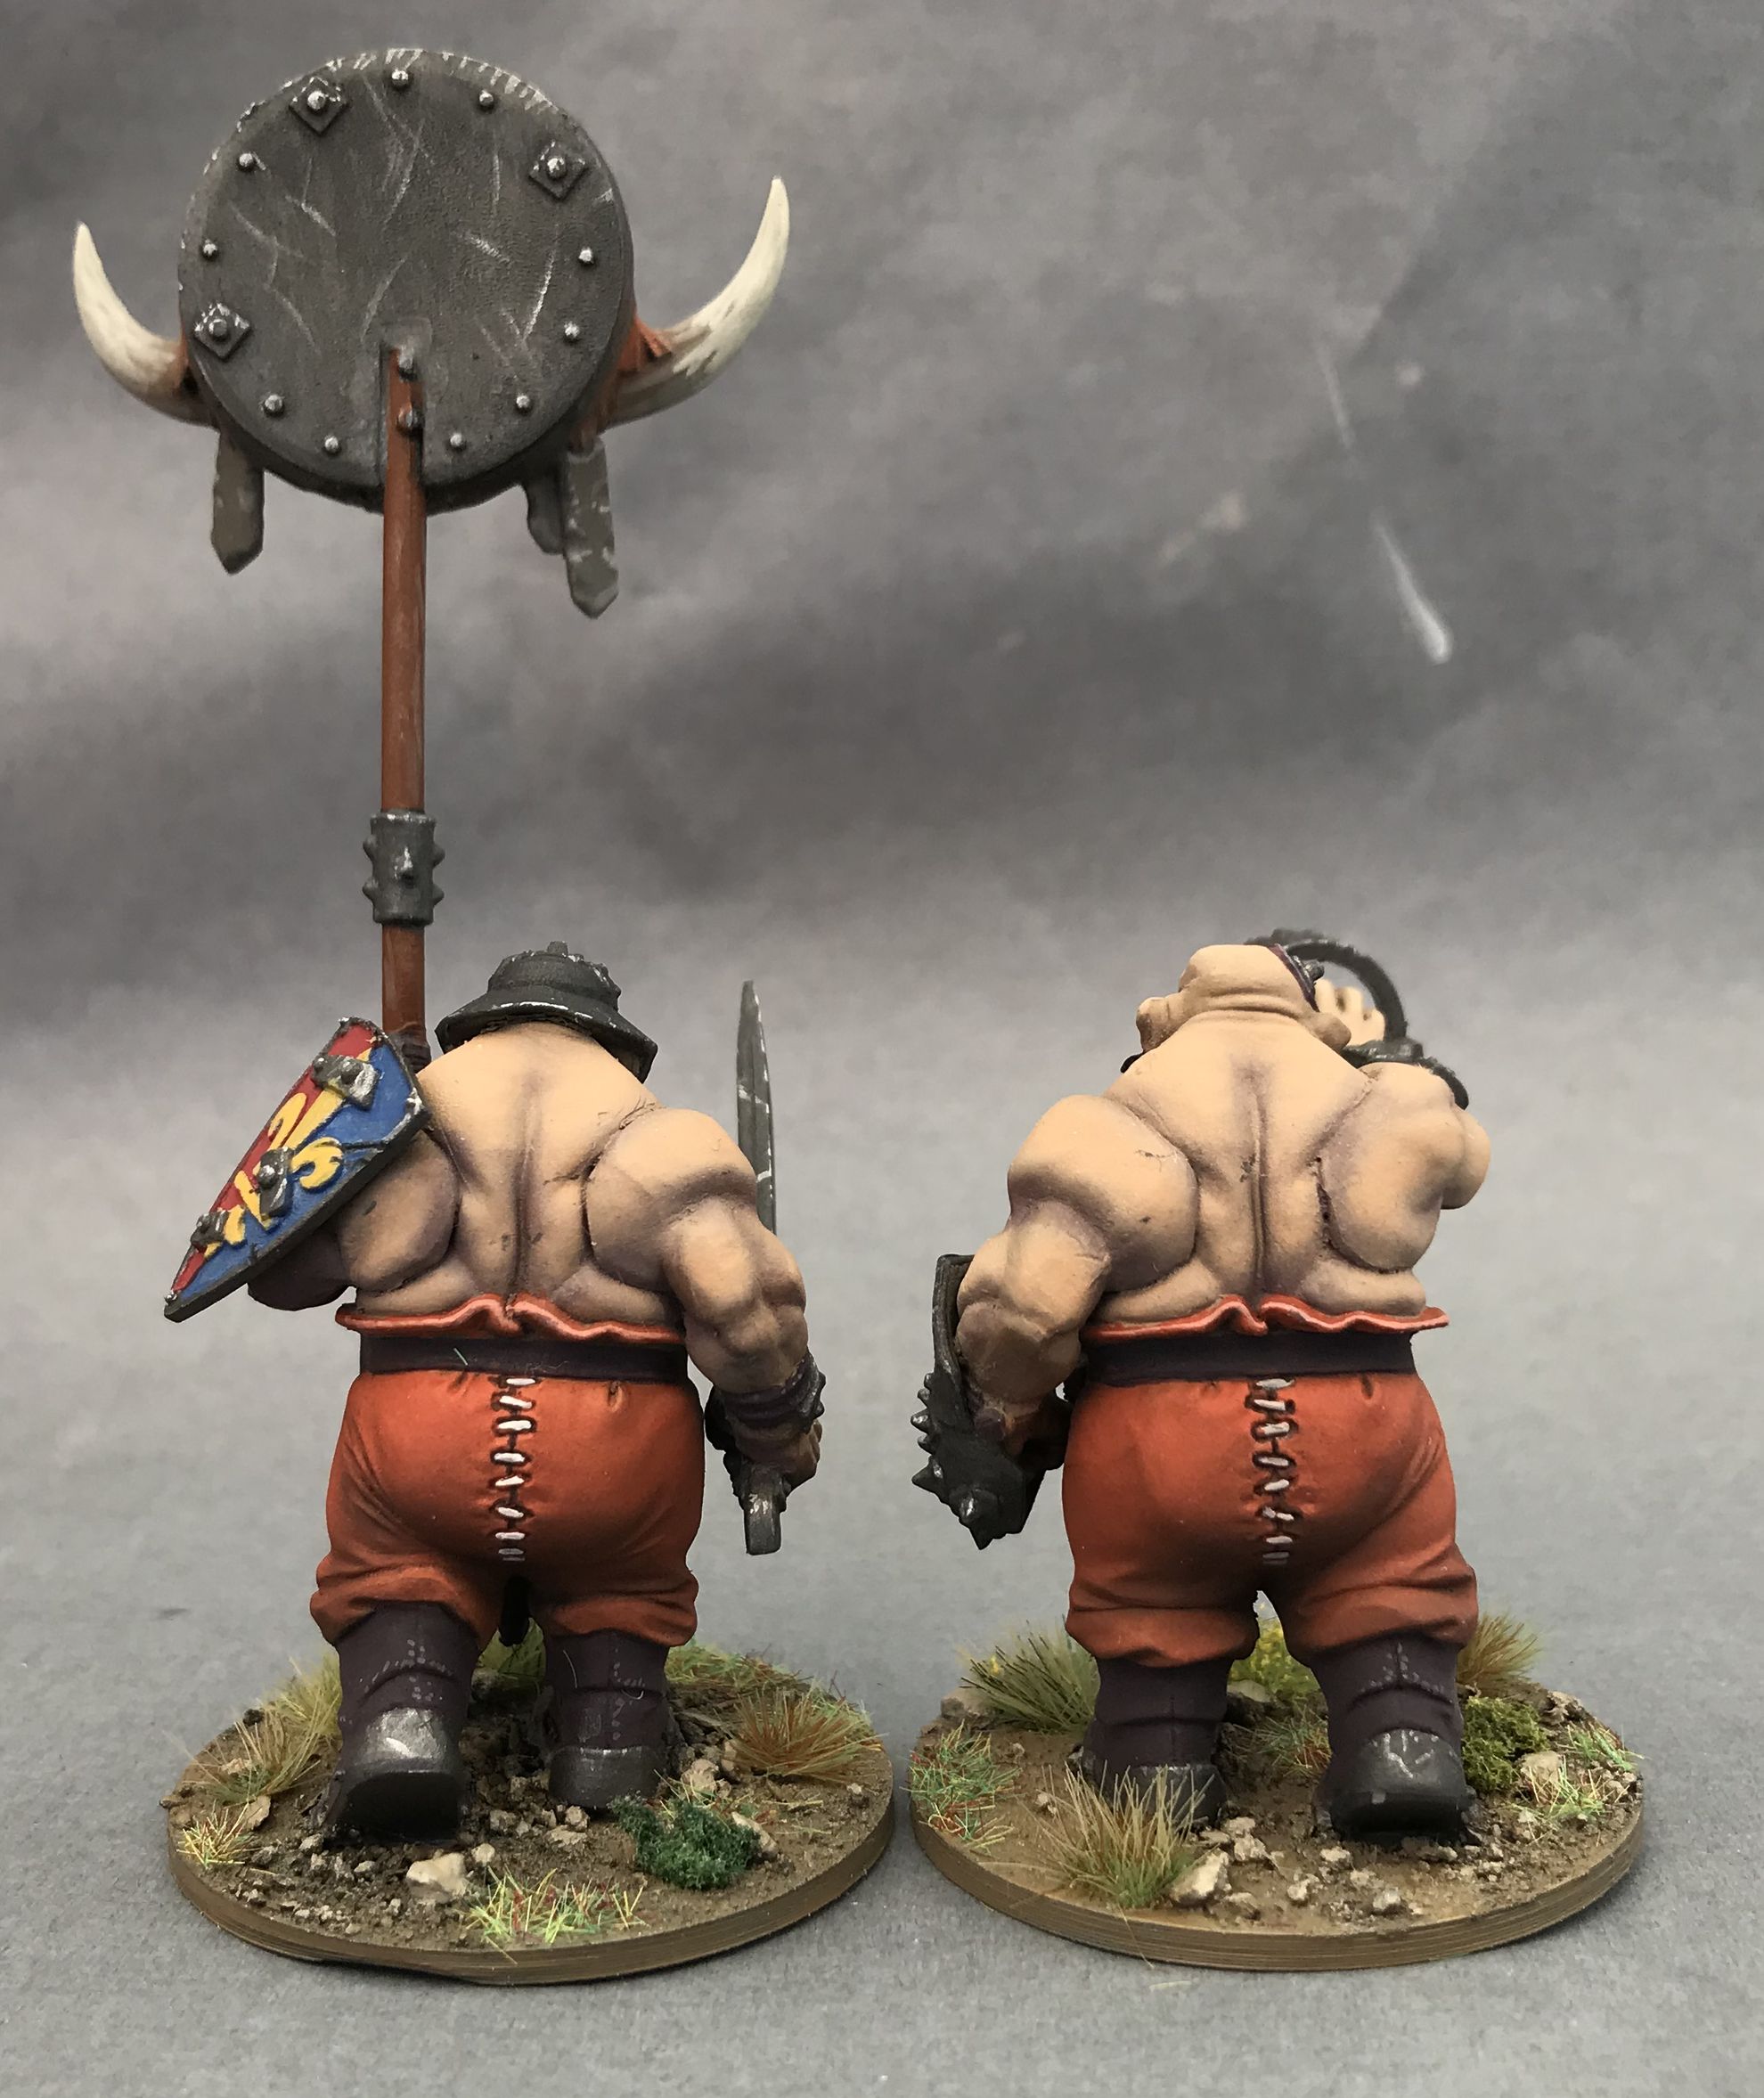
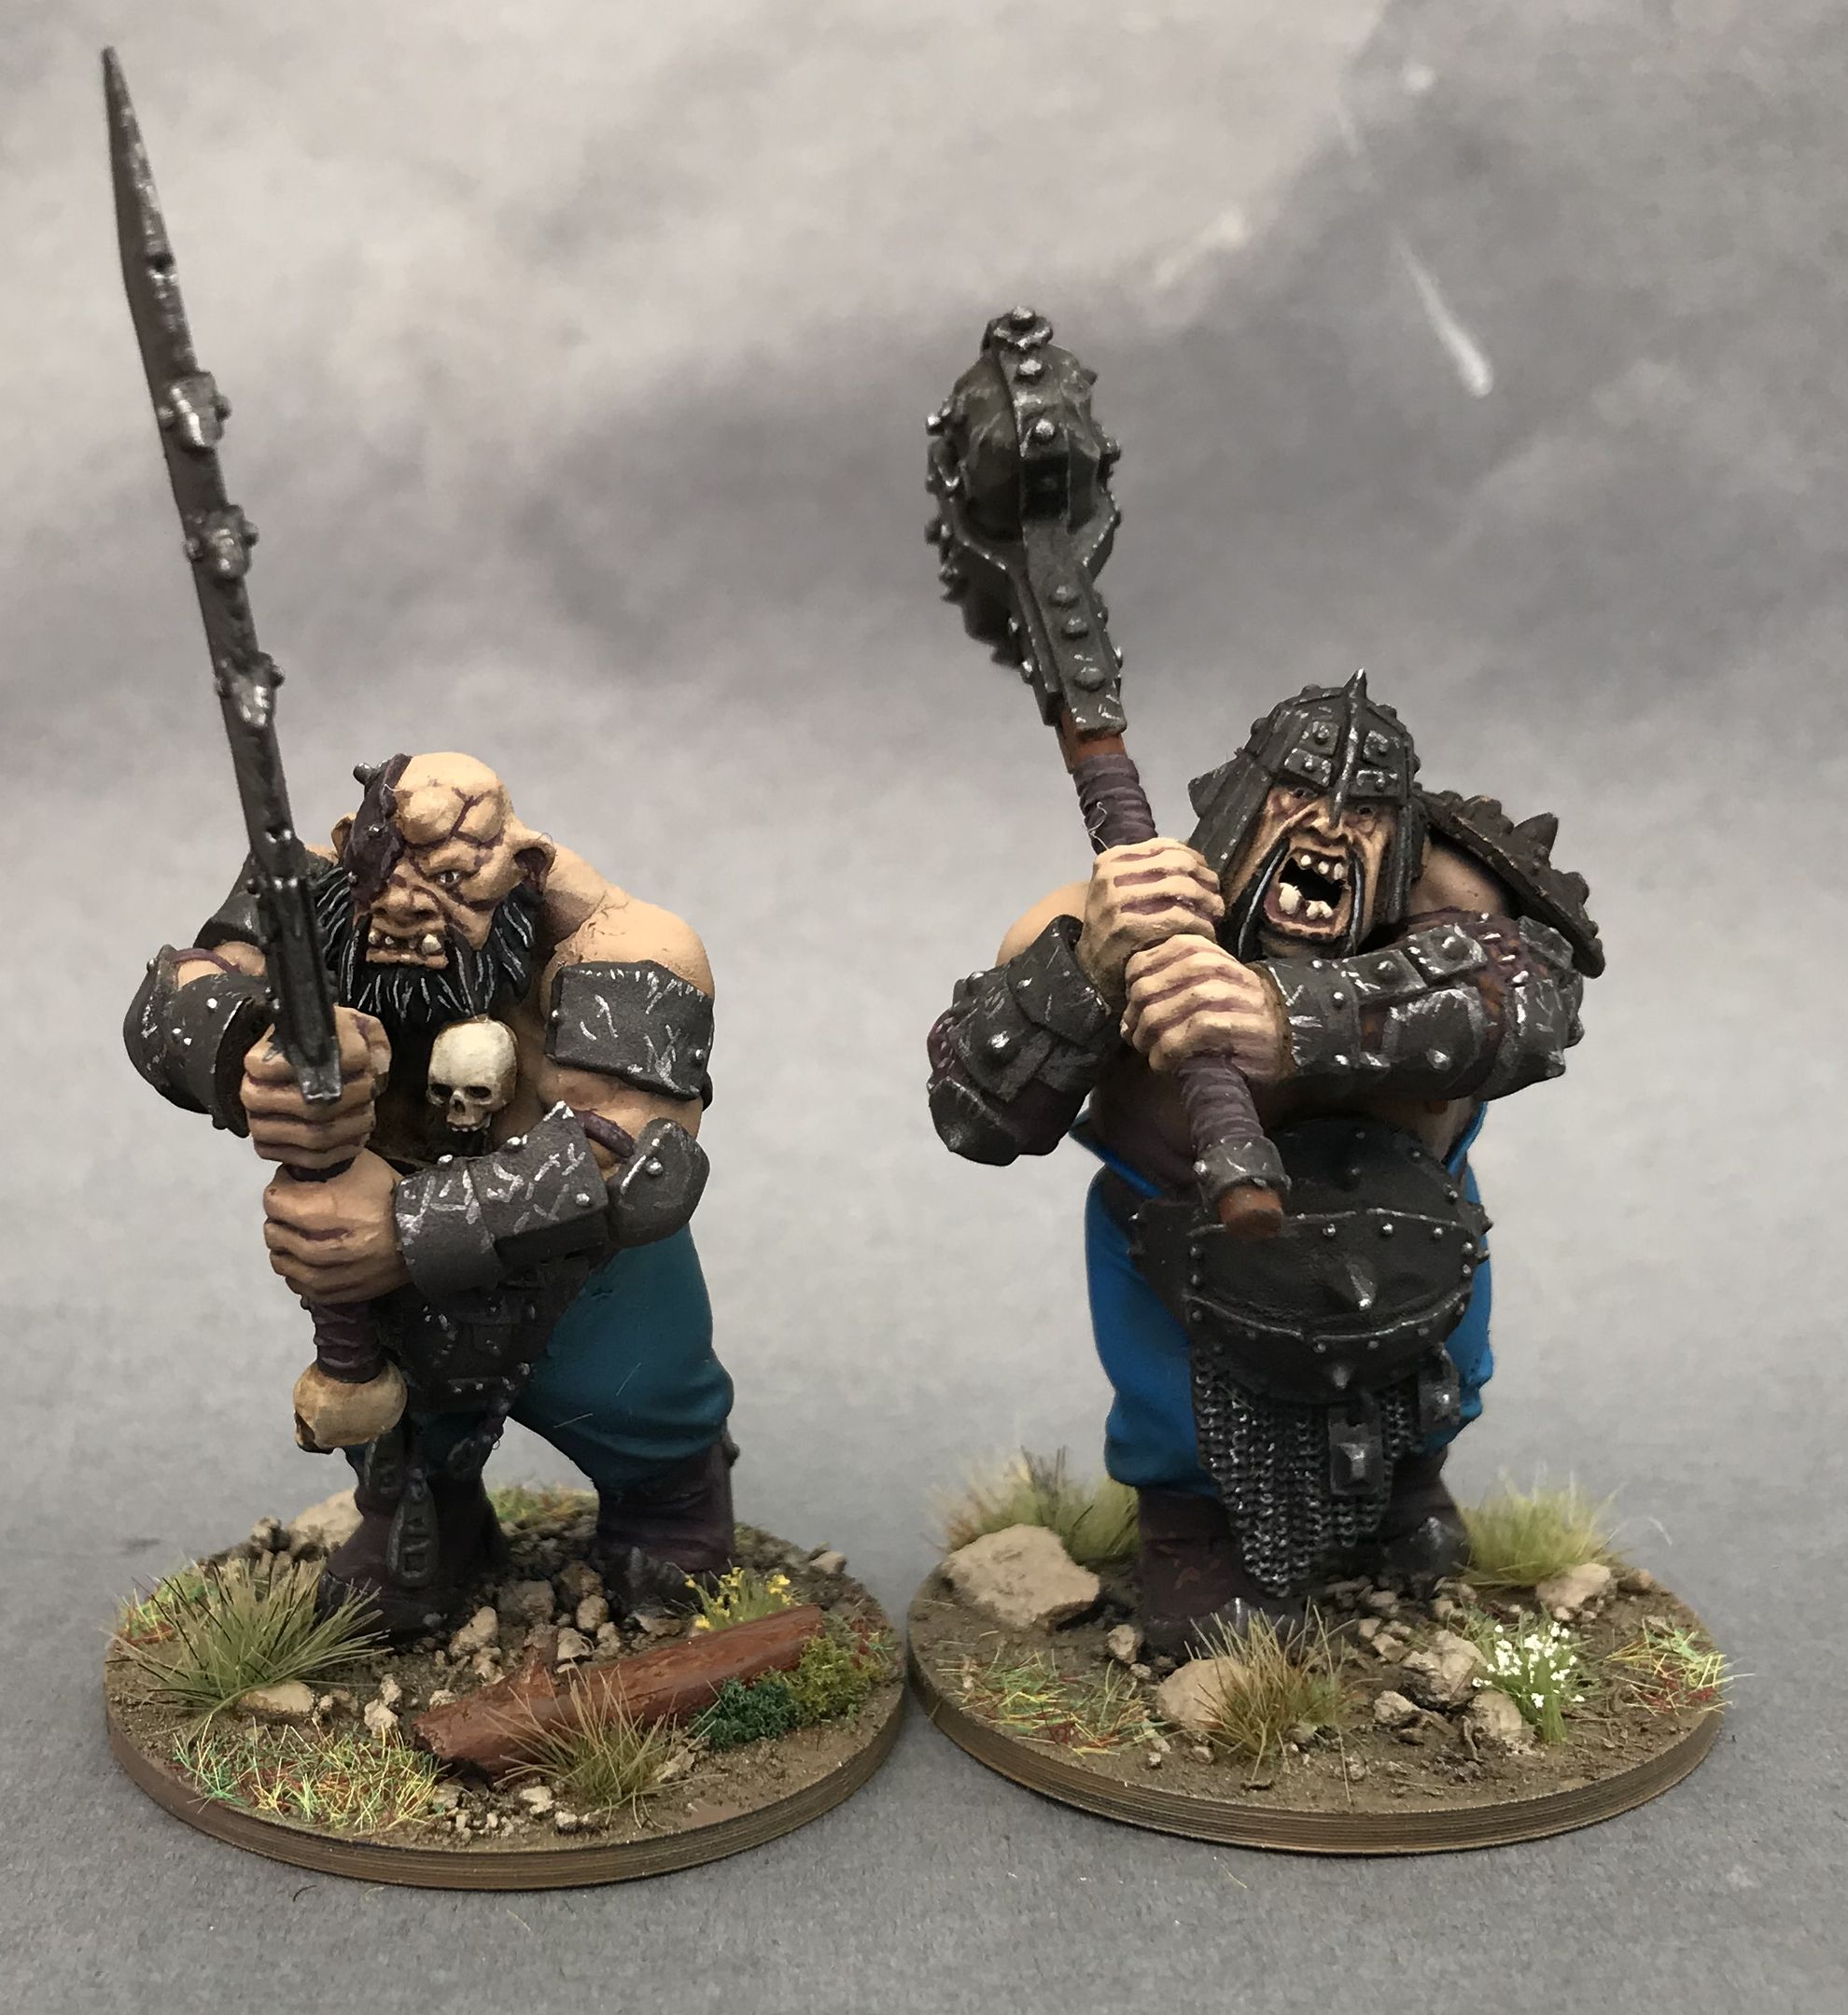
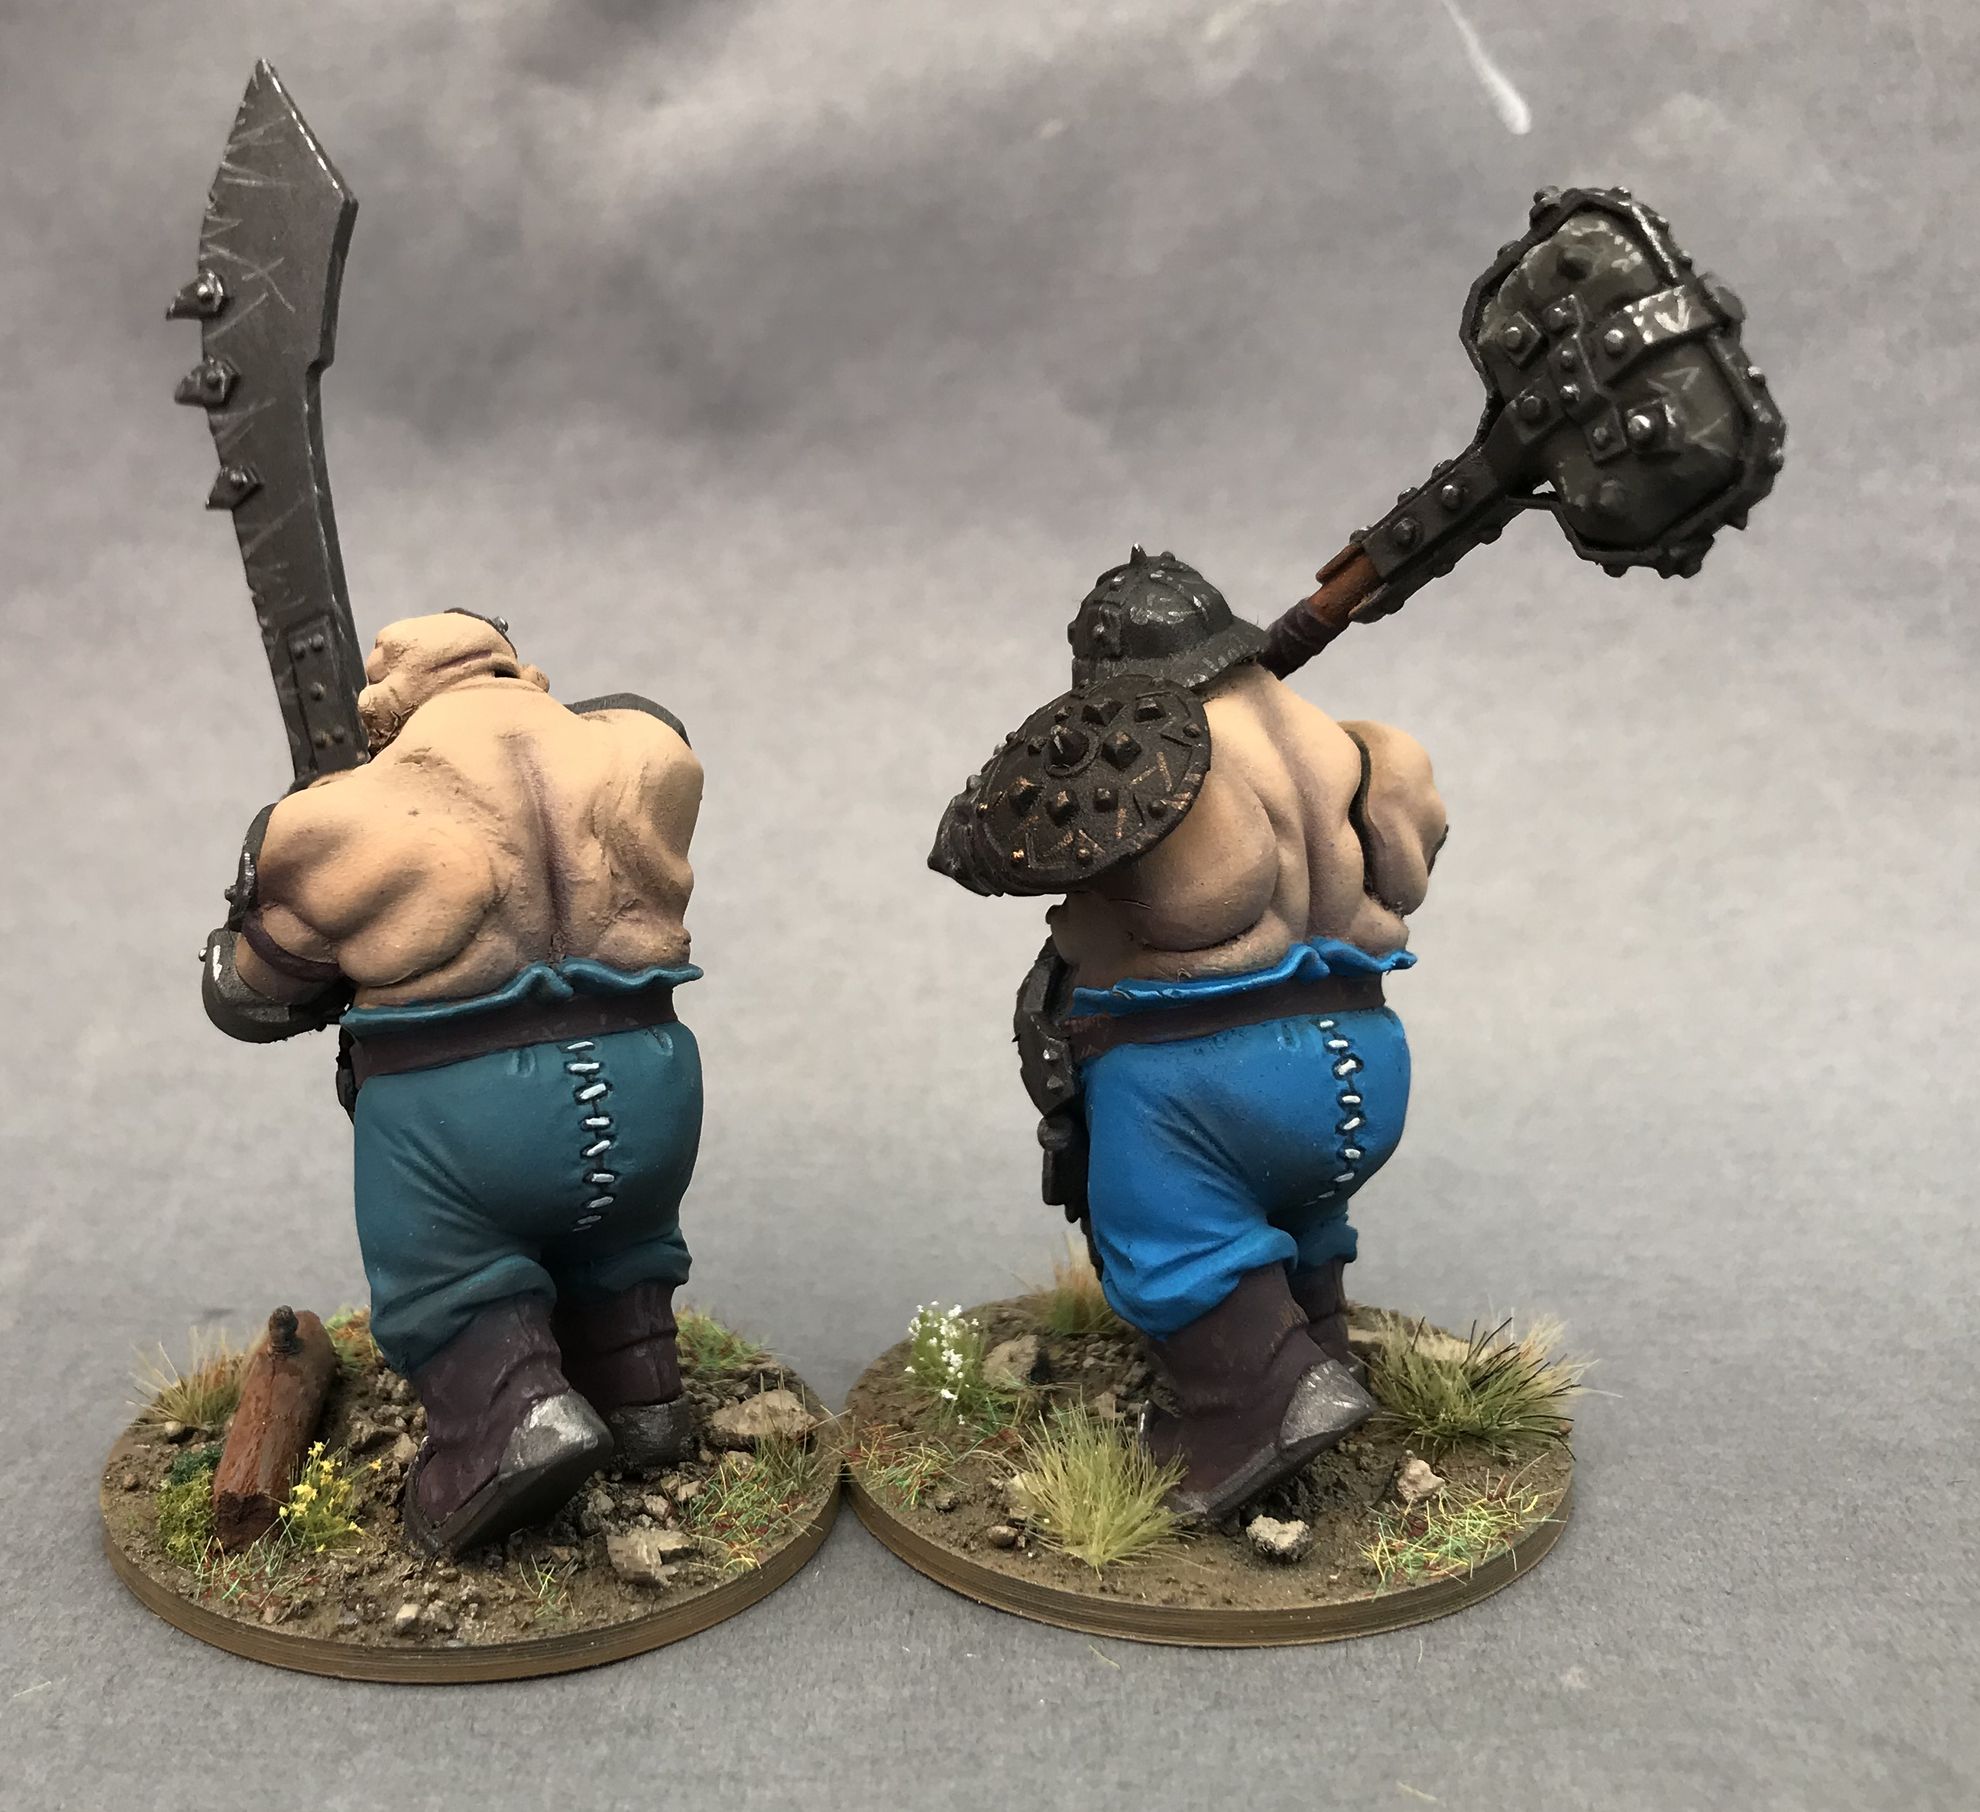
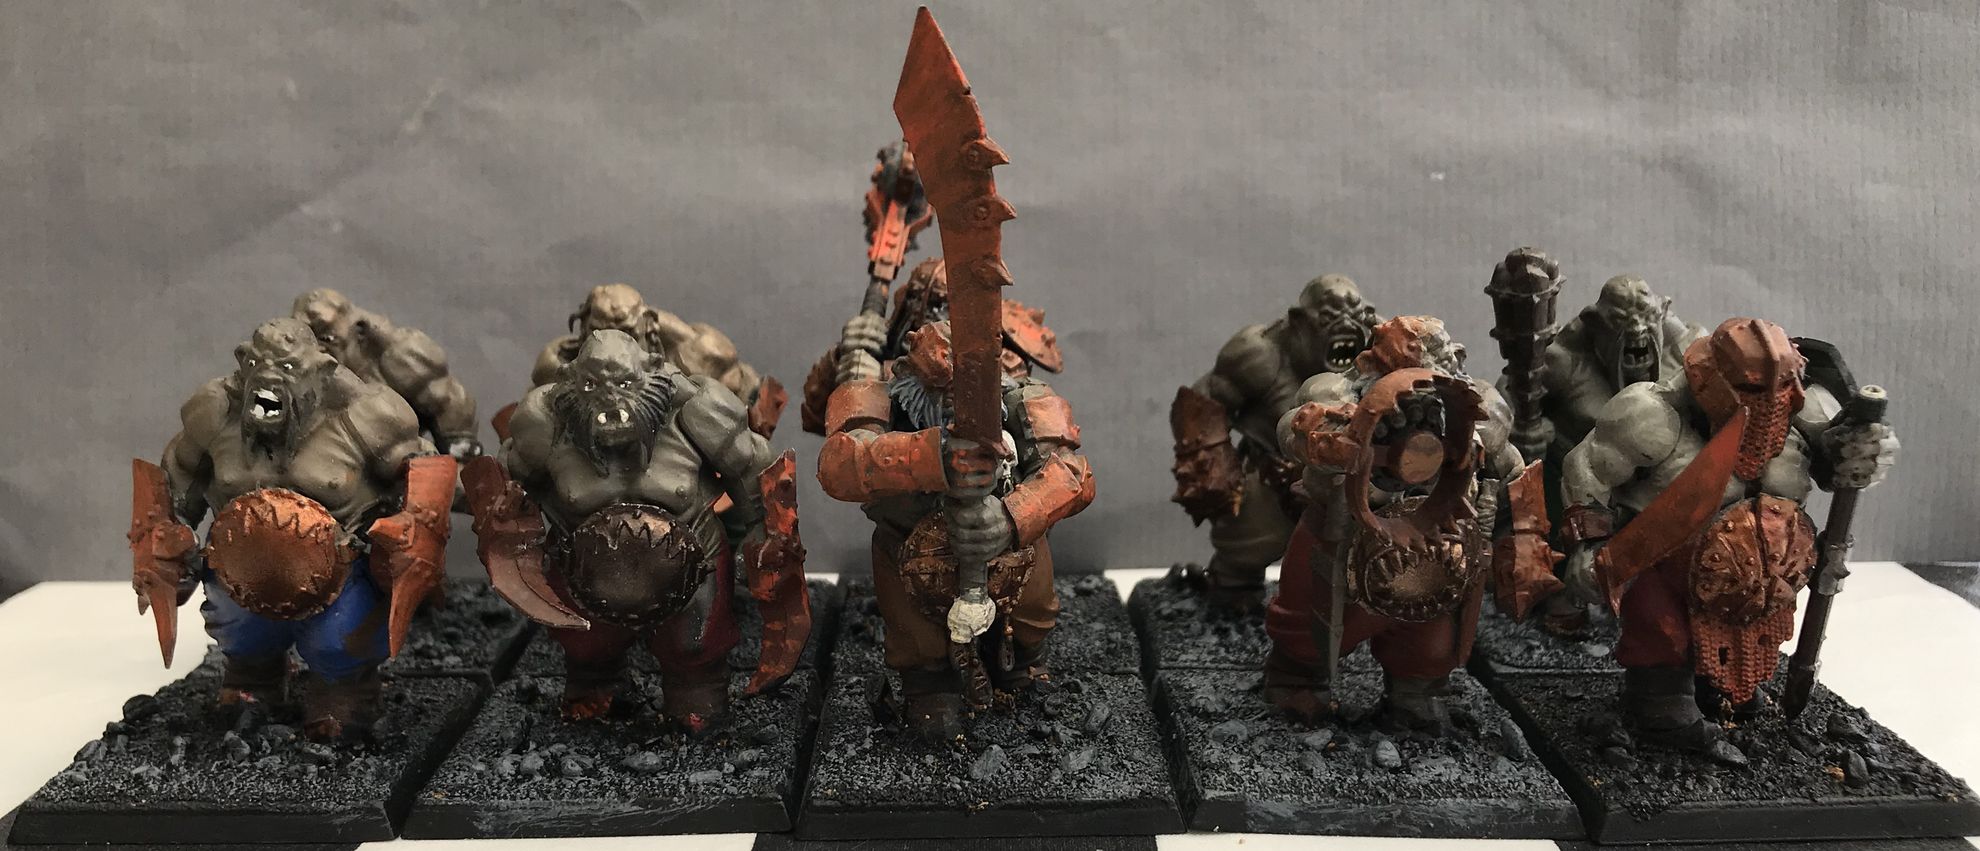
Four more completed Ogres
Recently completed four more of the Ogres. The banner was a lot of fun to paint!
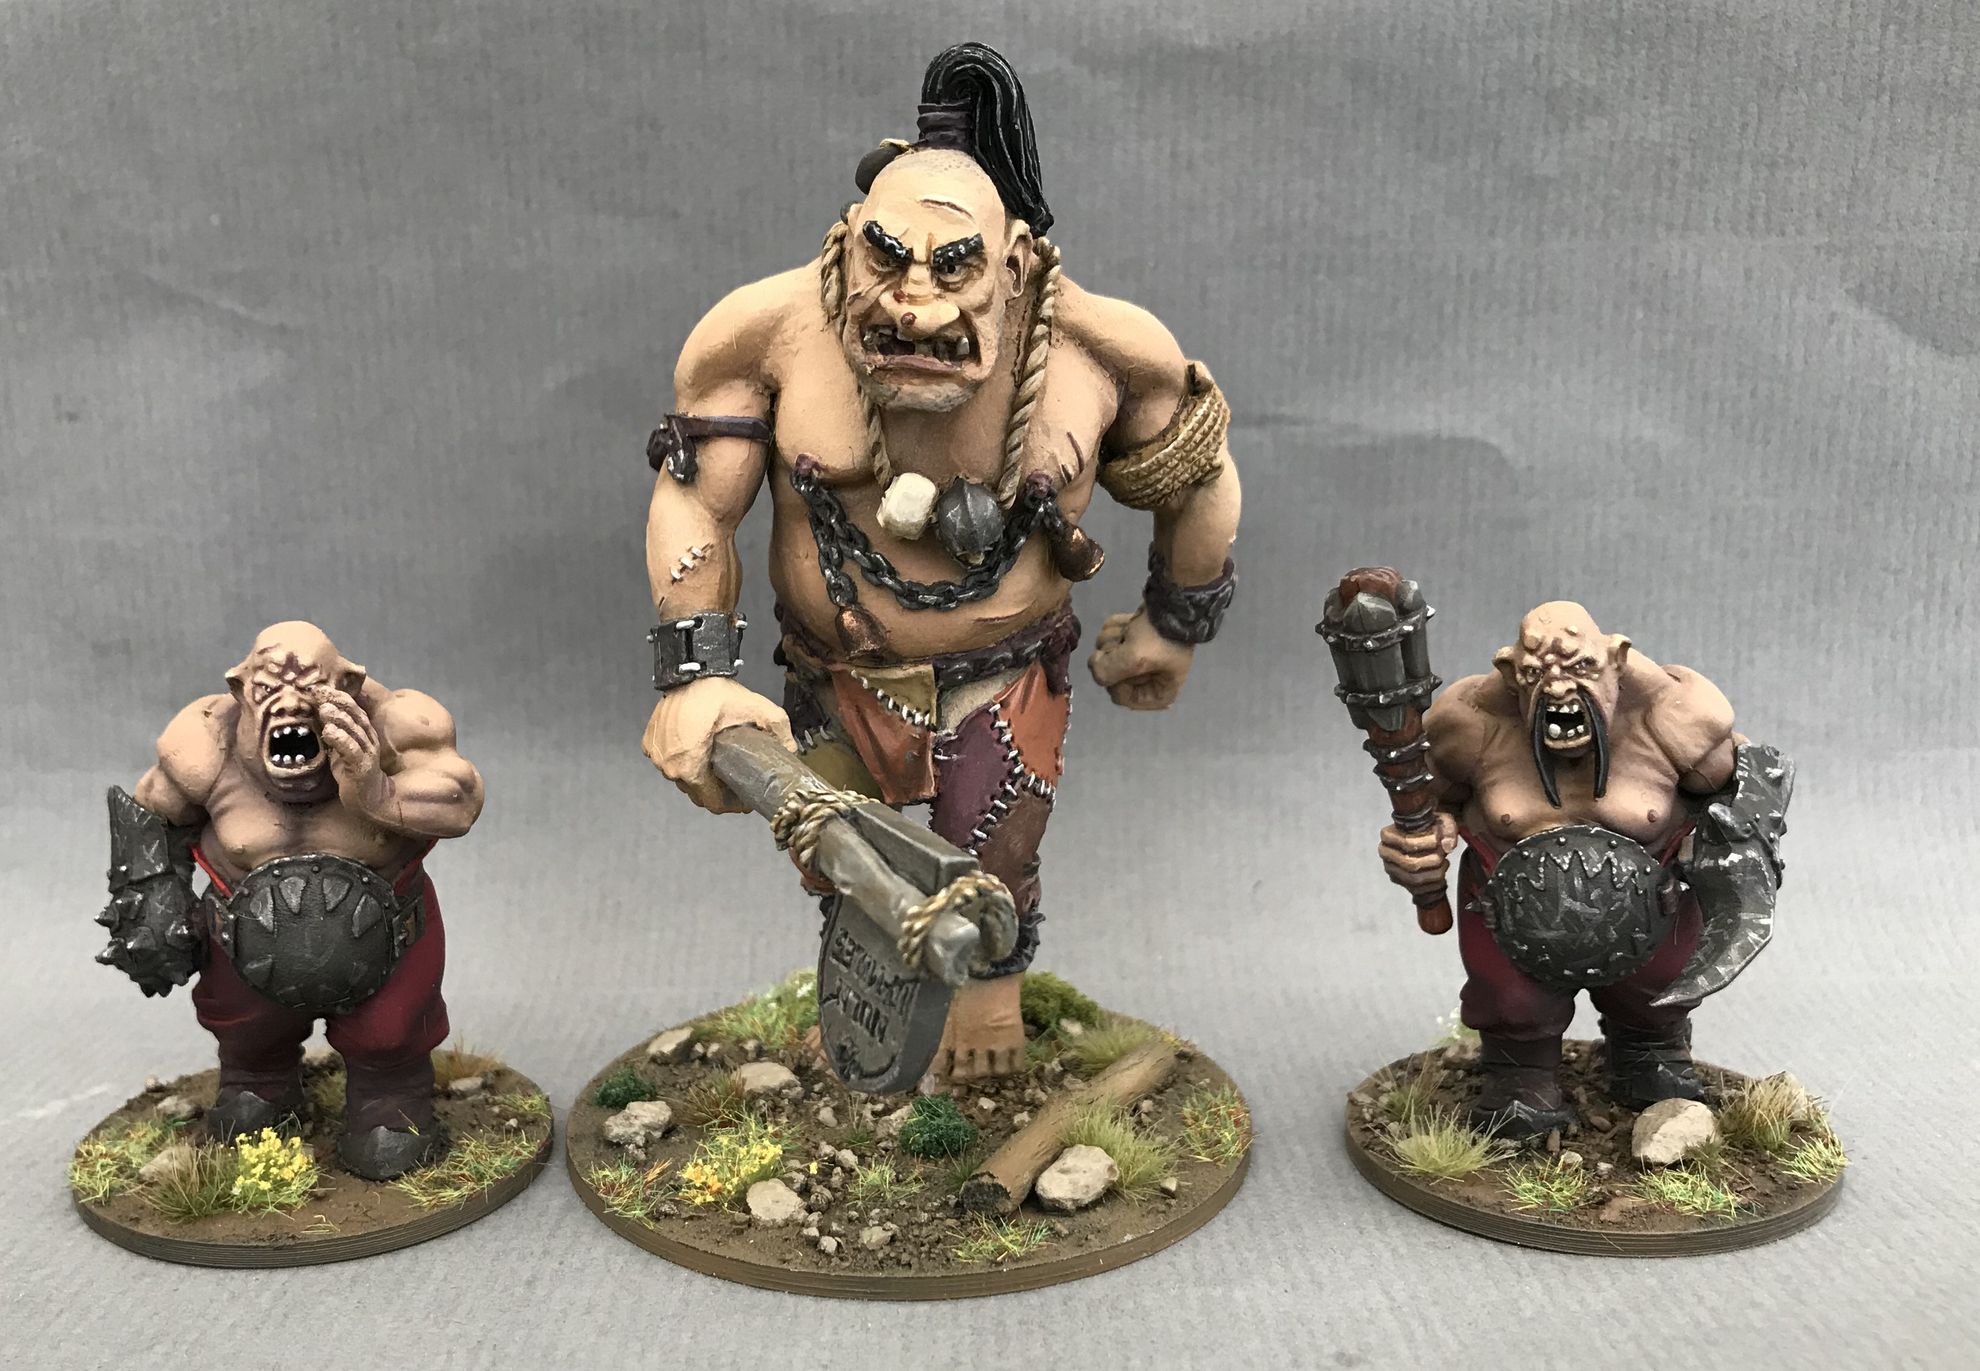
The giant and two Ogres completed
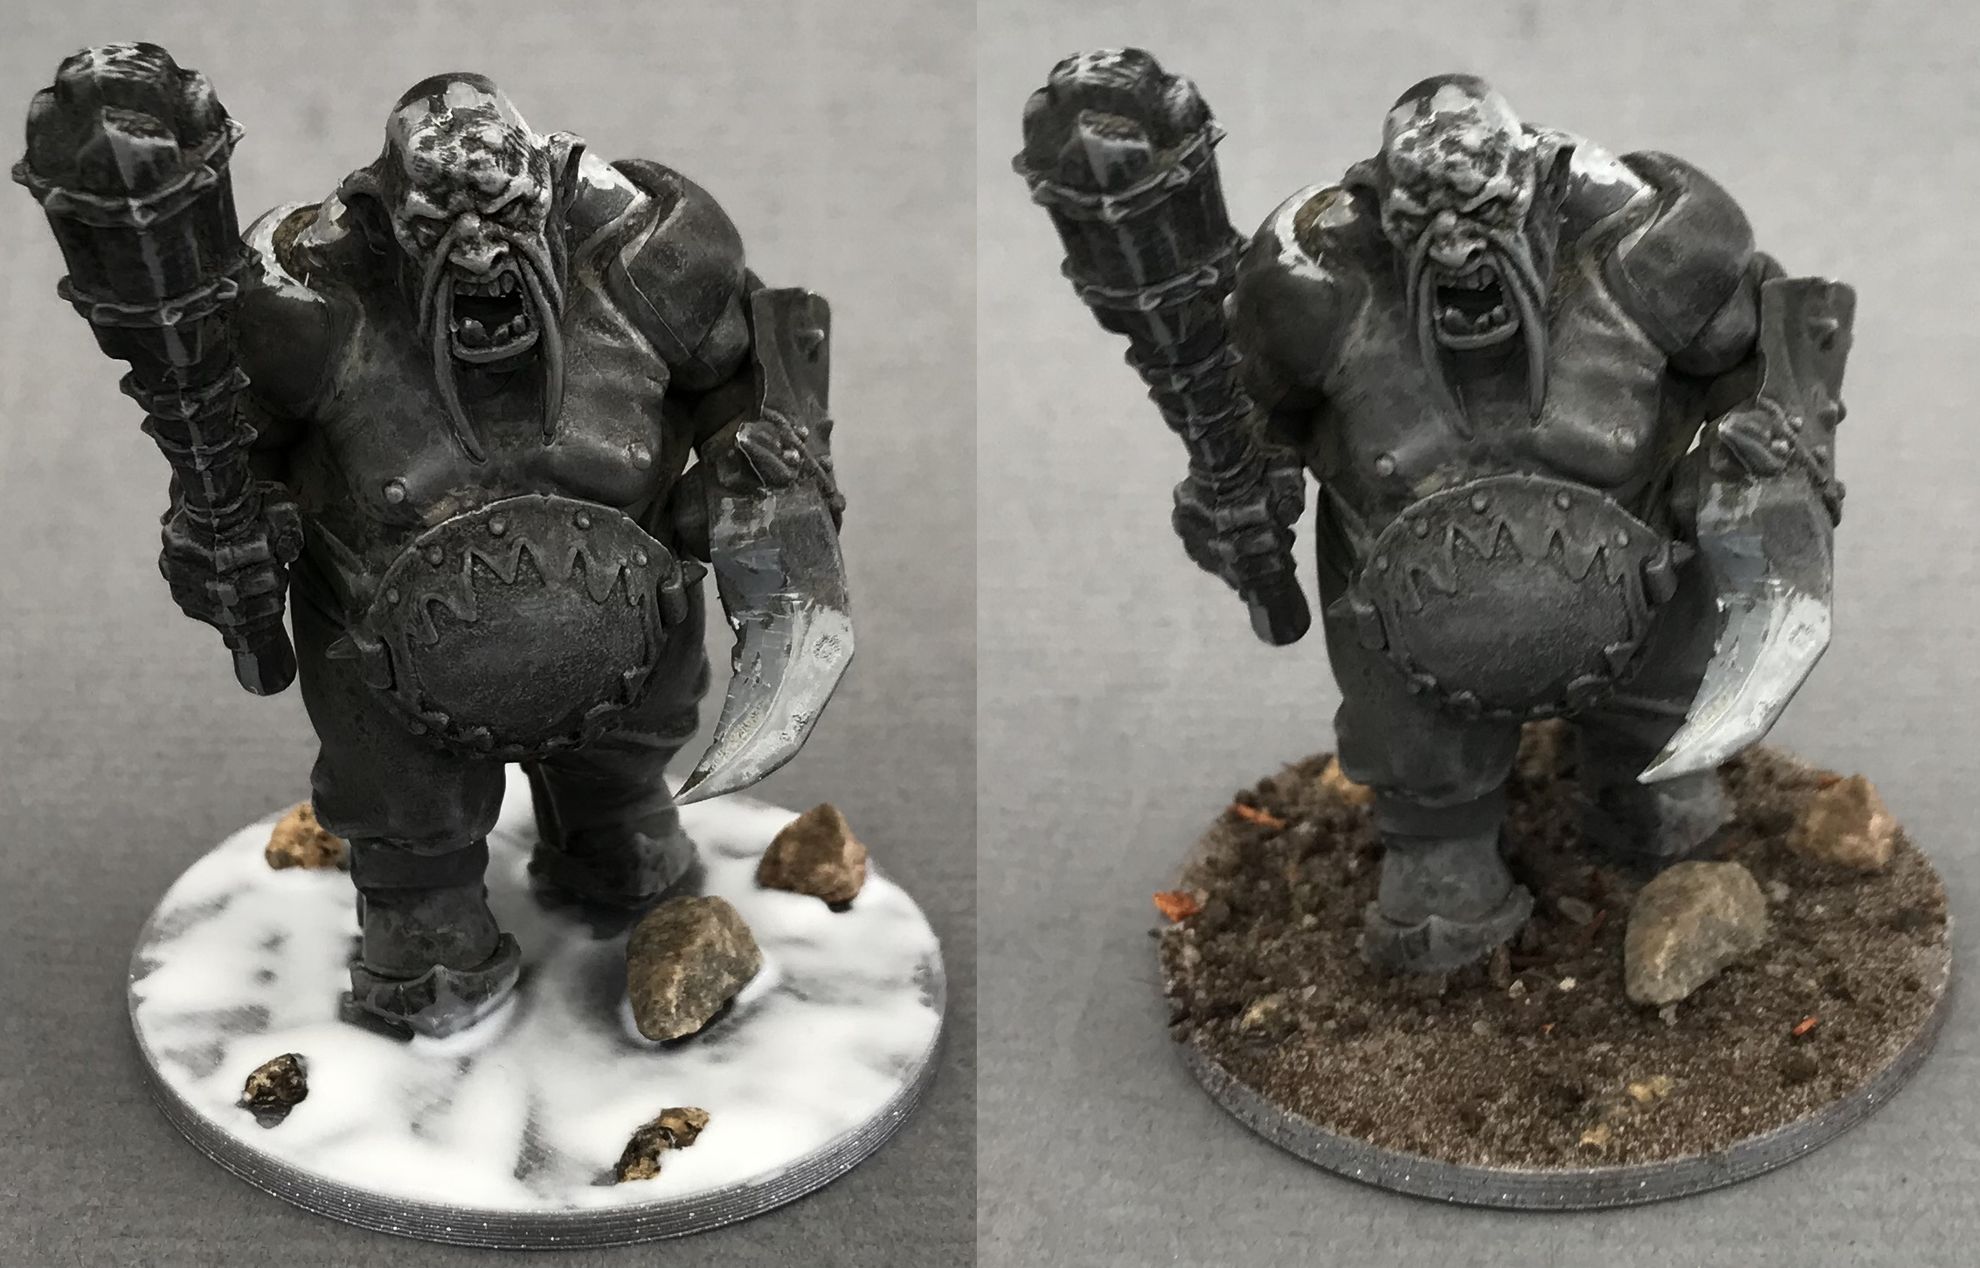
Completed the giant and two first Ogres, quite happy with the result. I have fielded them in Saga -Age of Magic and they did ok, so that is also nice. 🙂
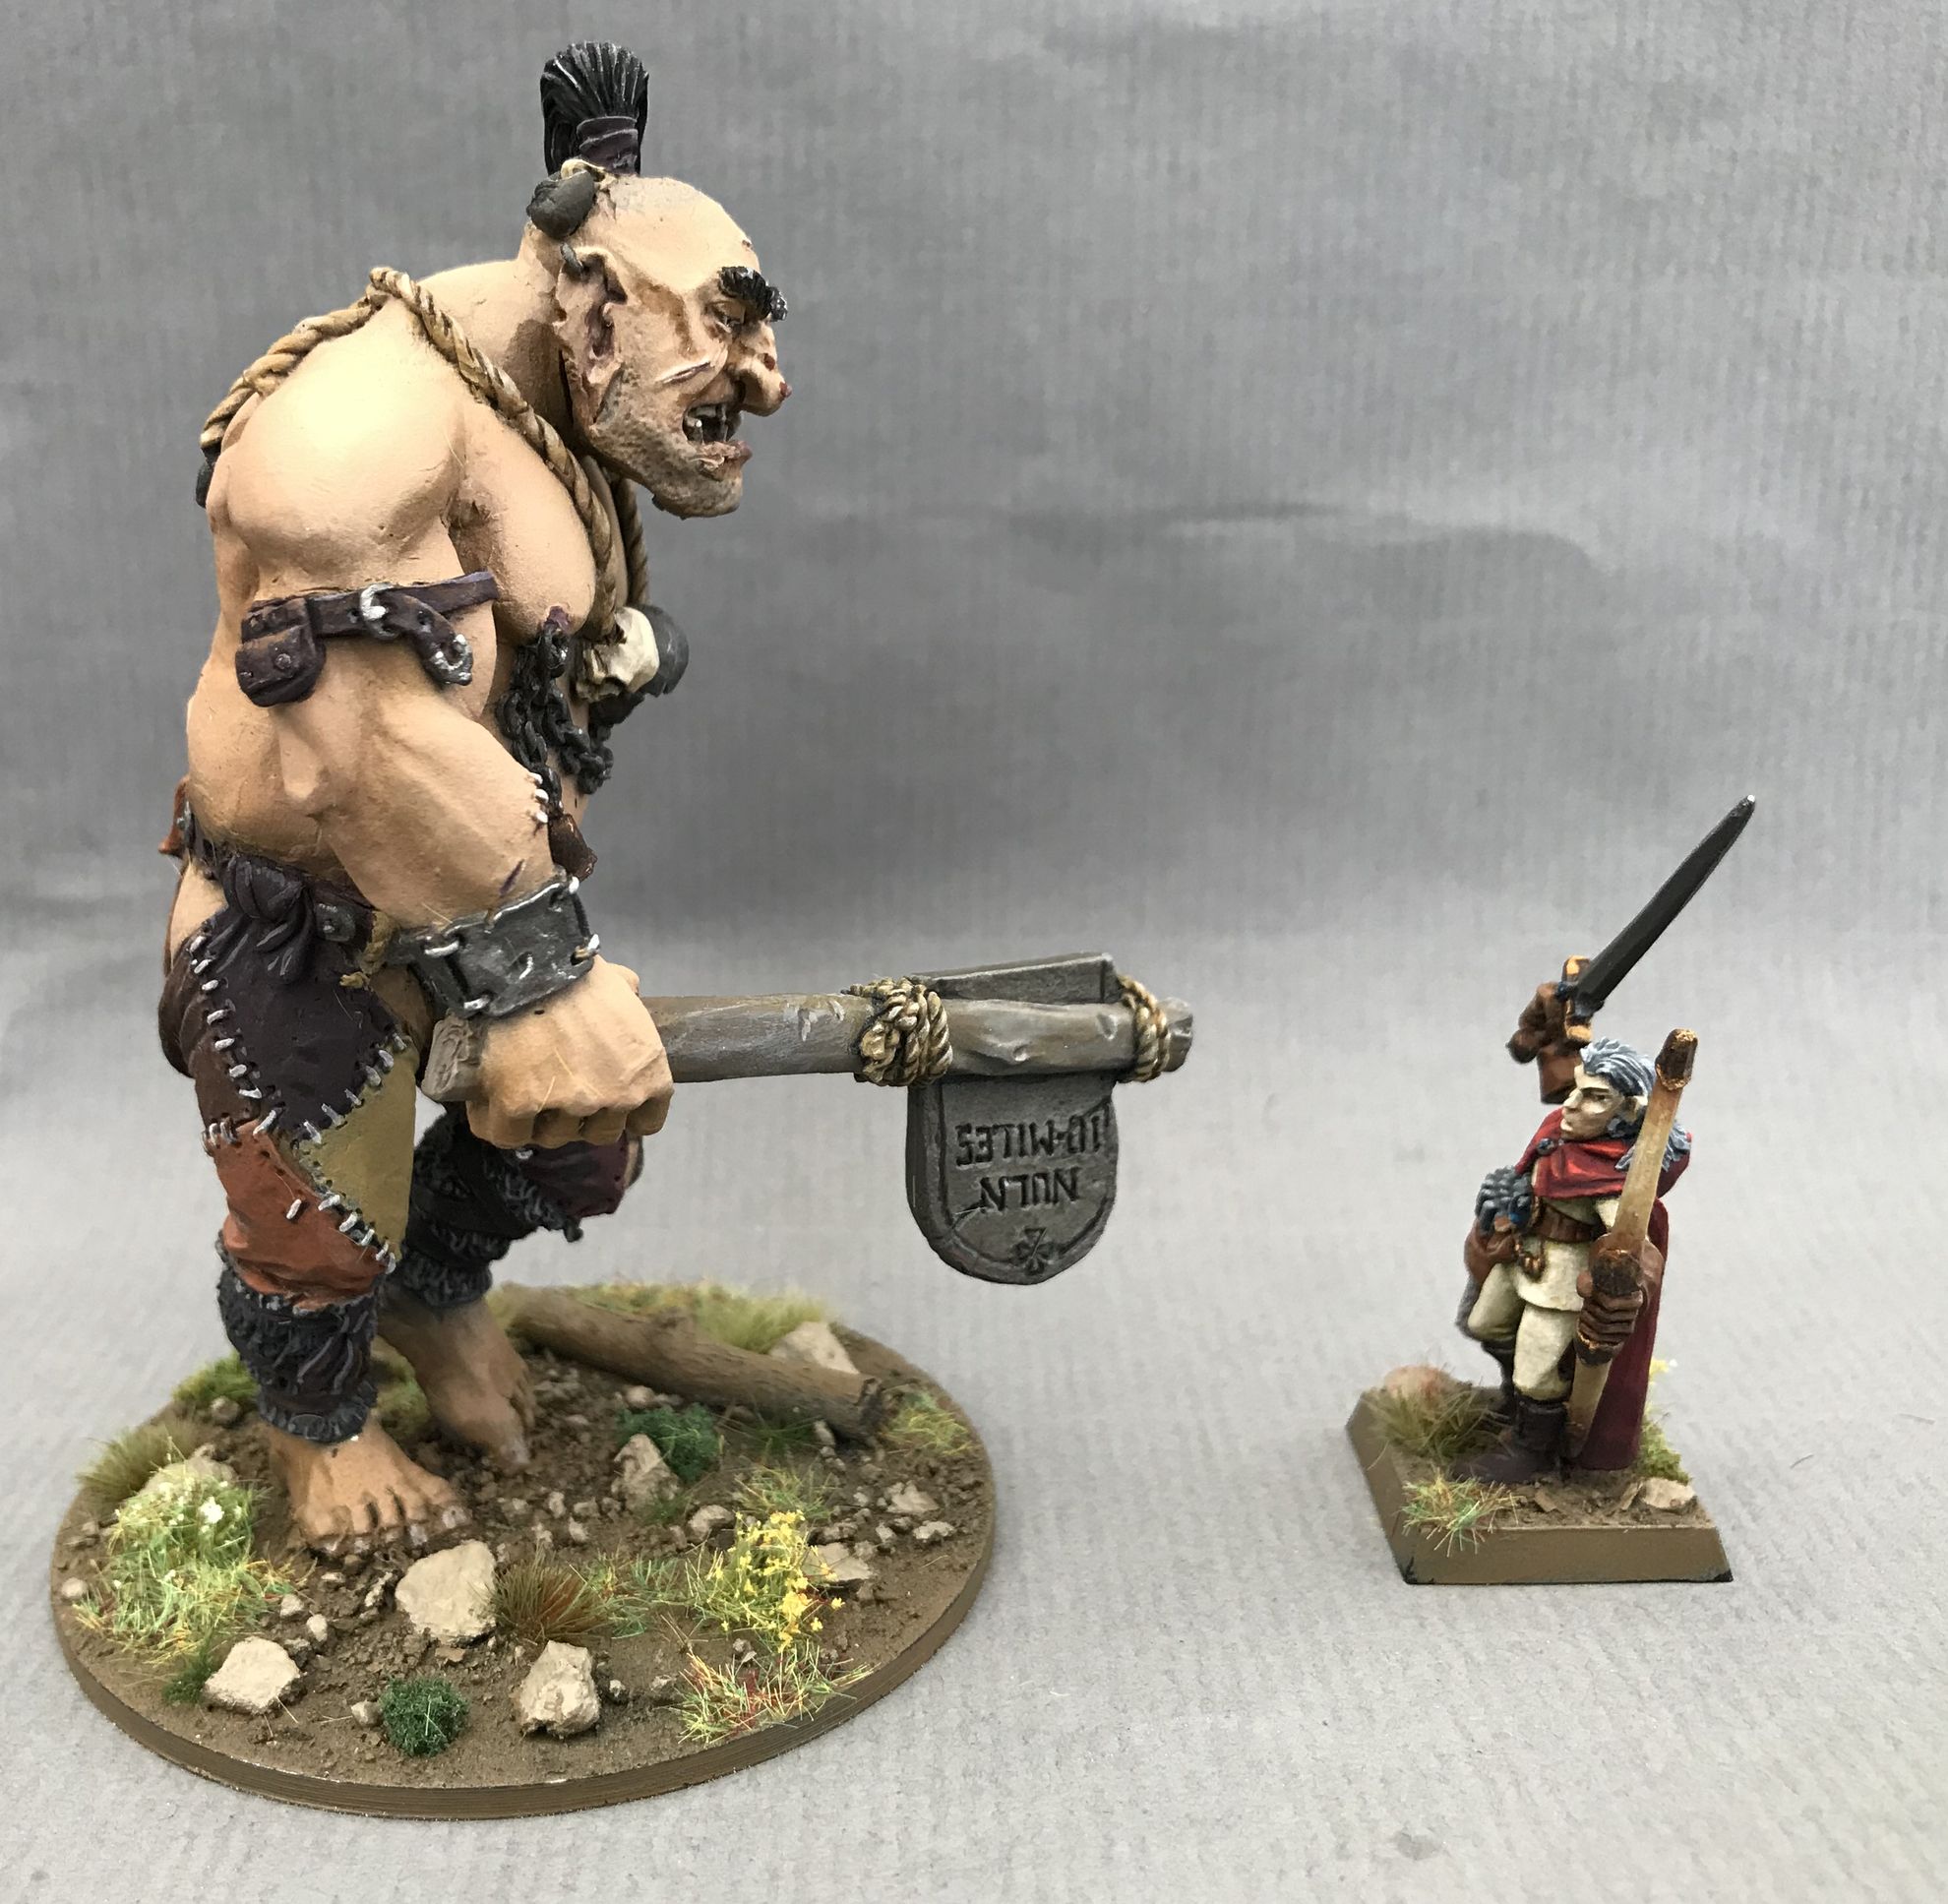
Giants regularly beat humanoids smaller than themselves….. :-O
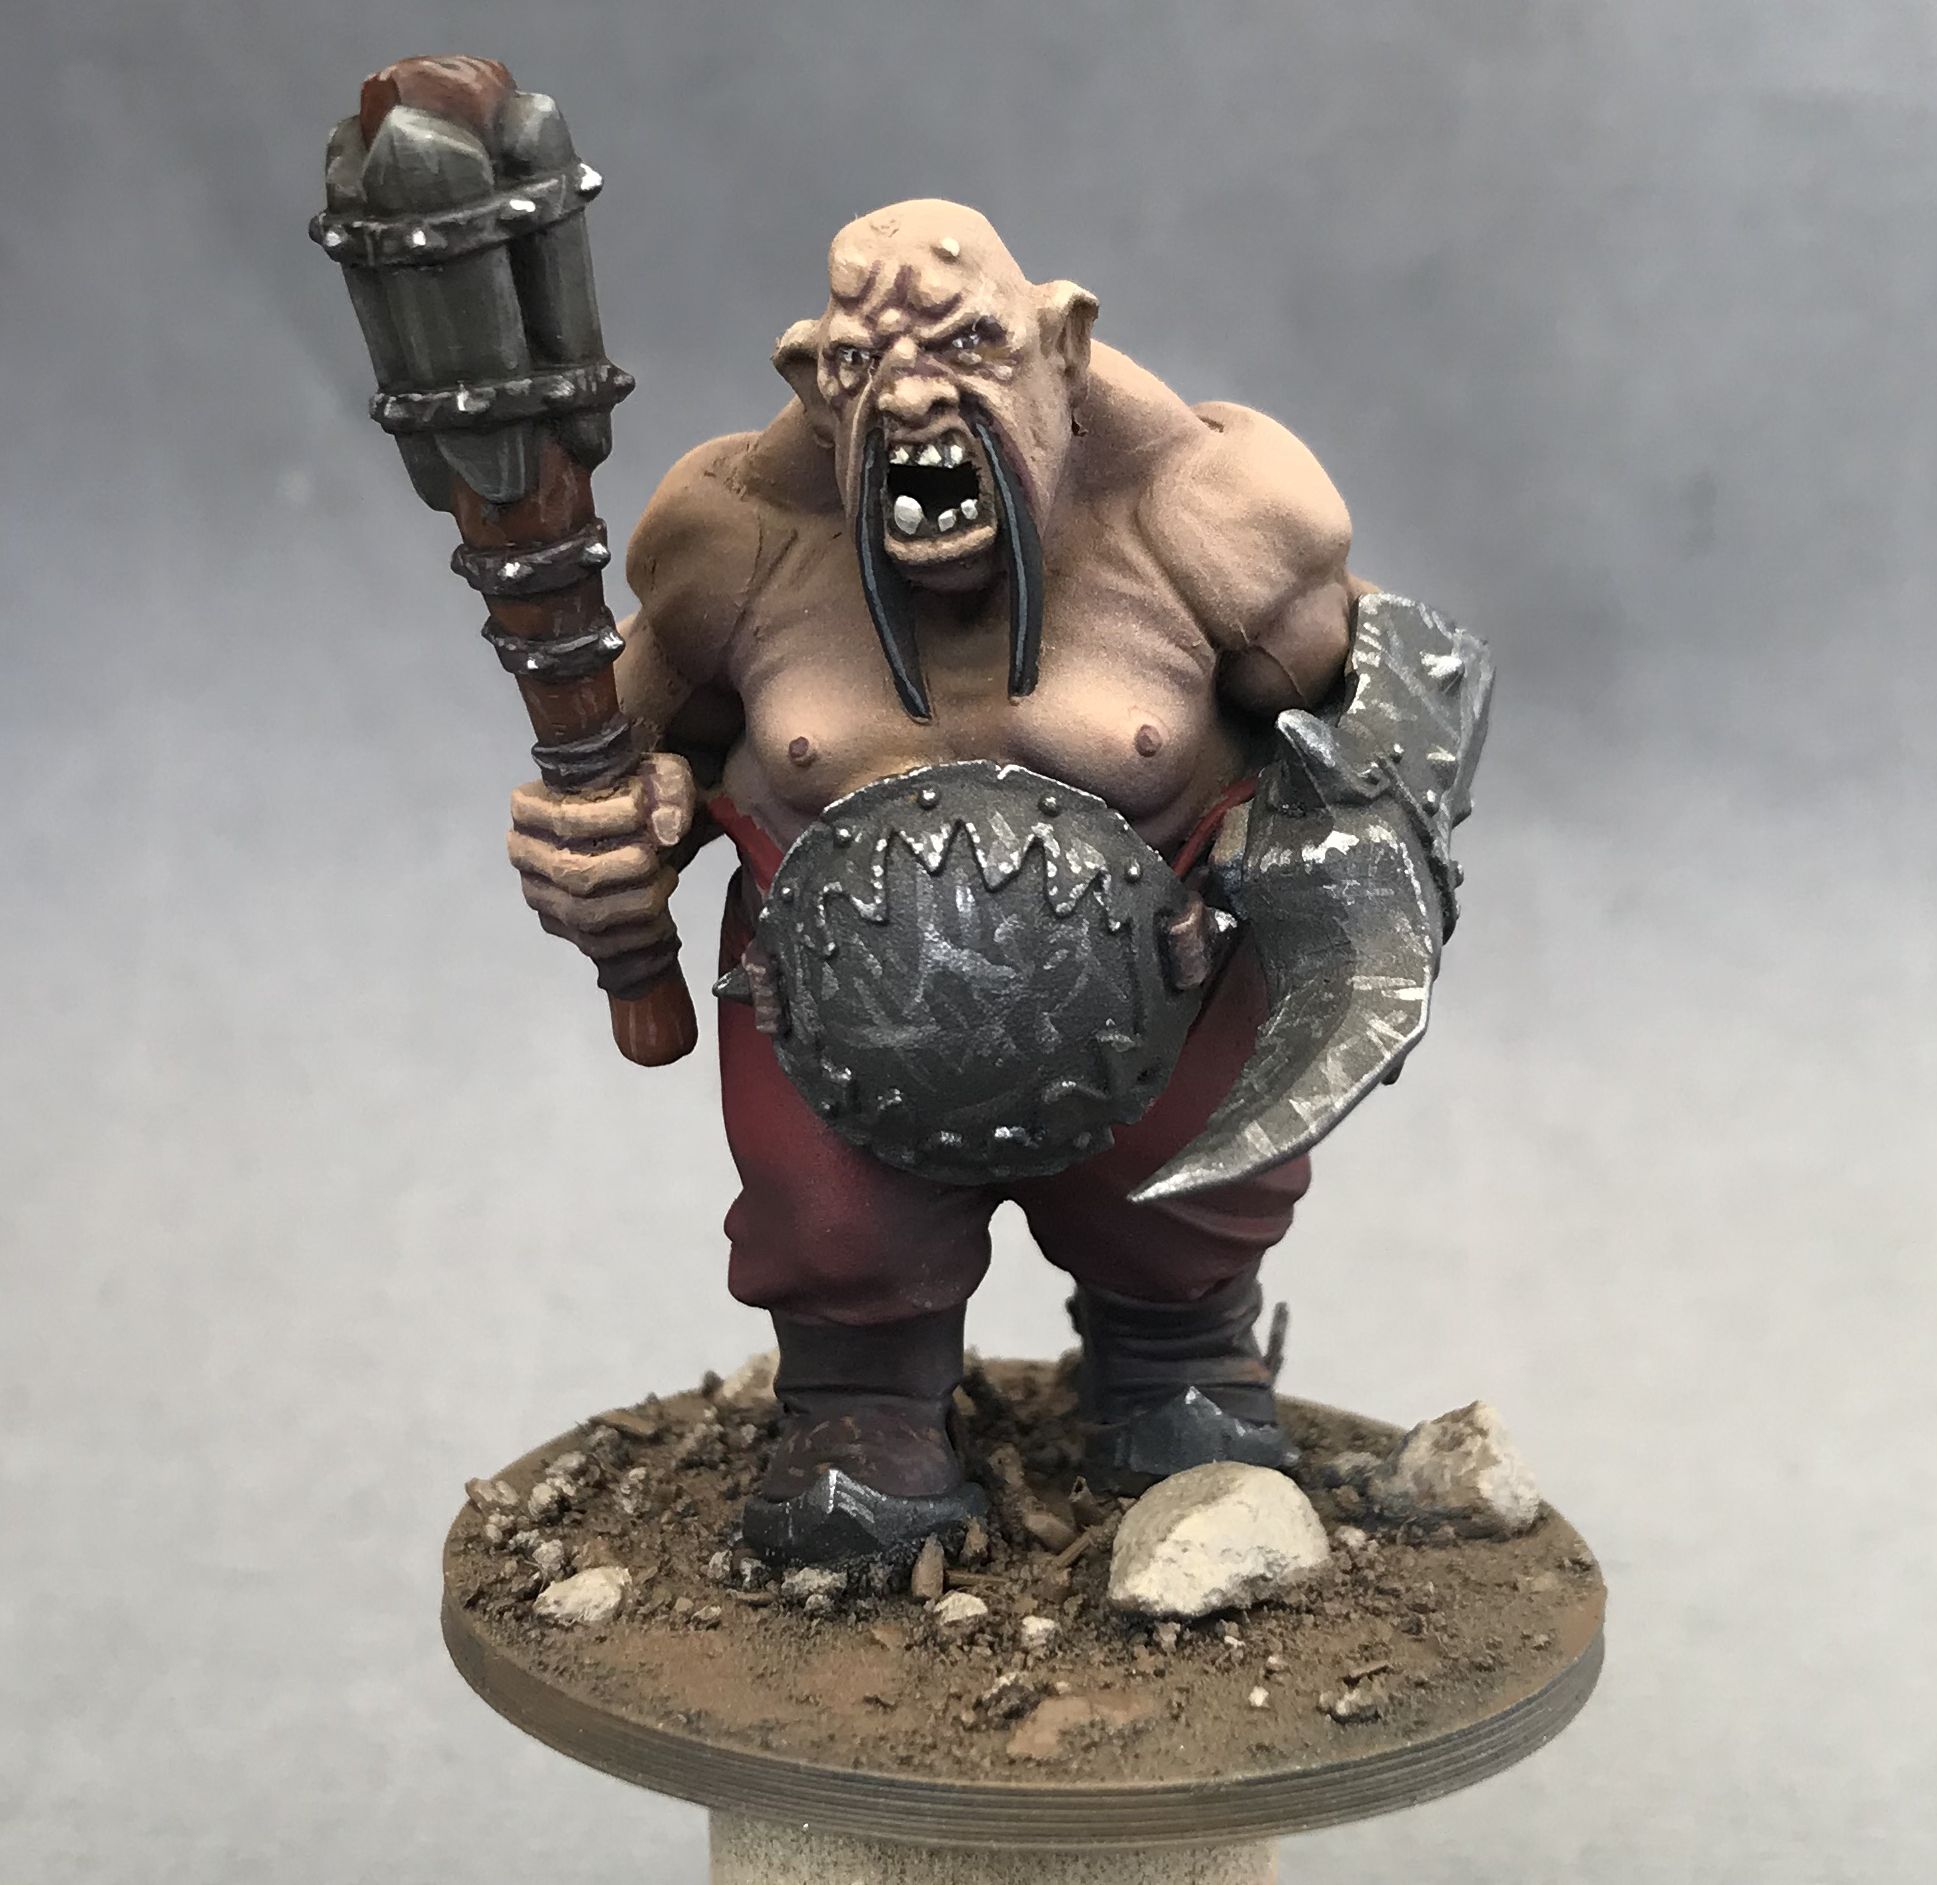
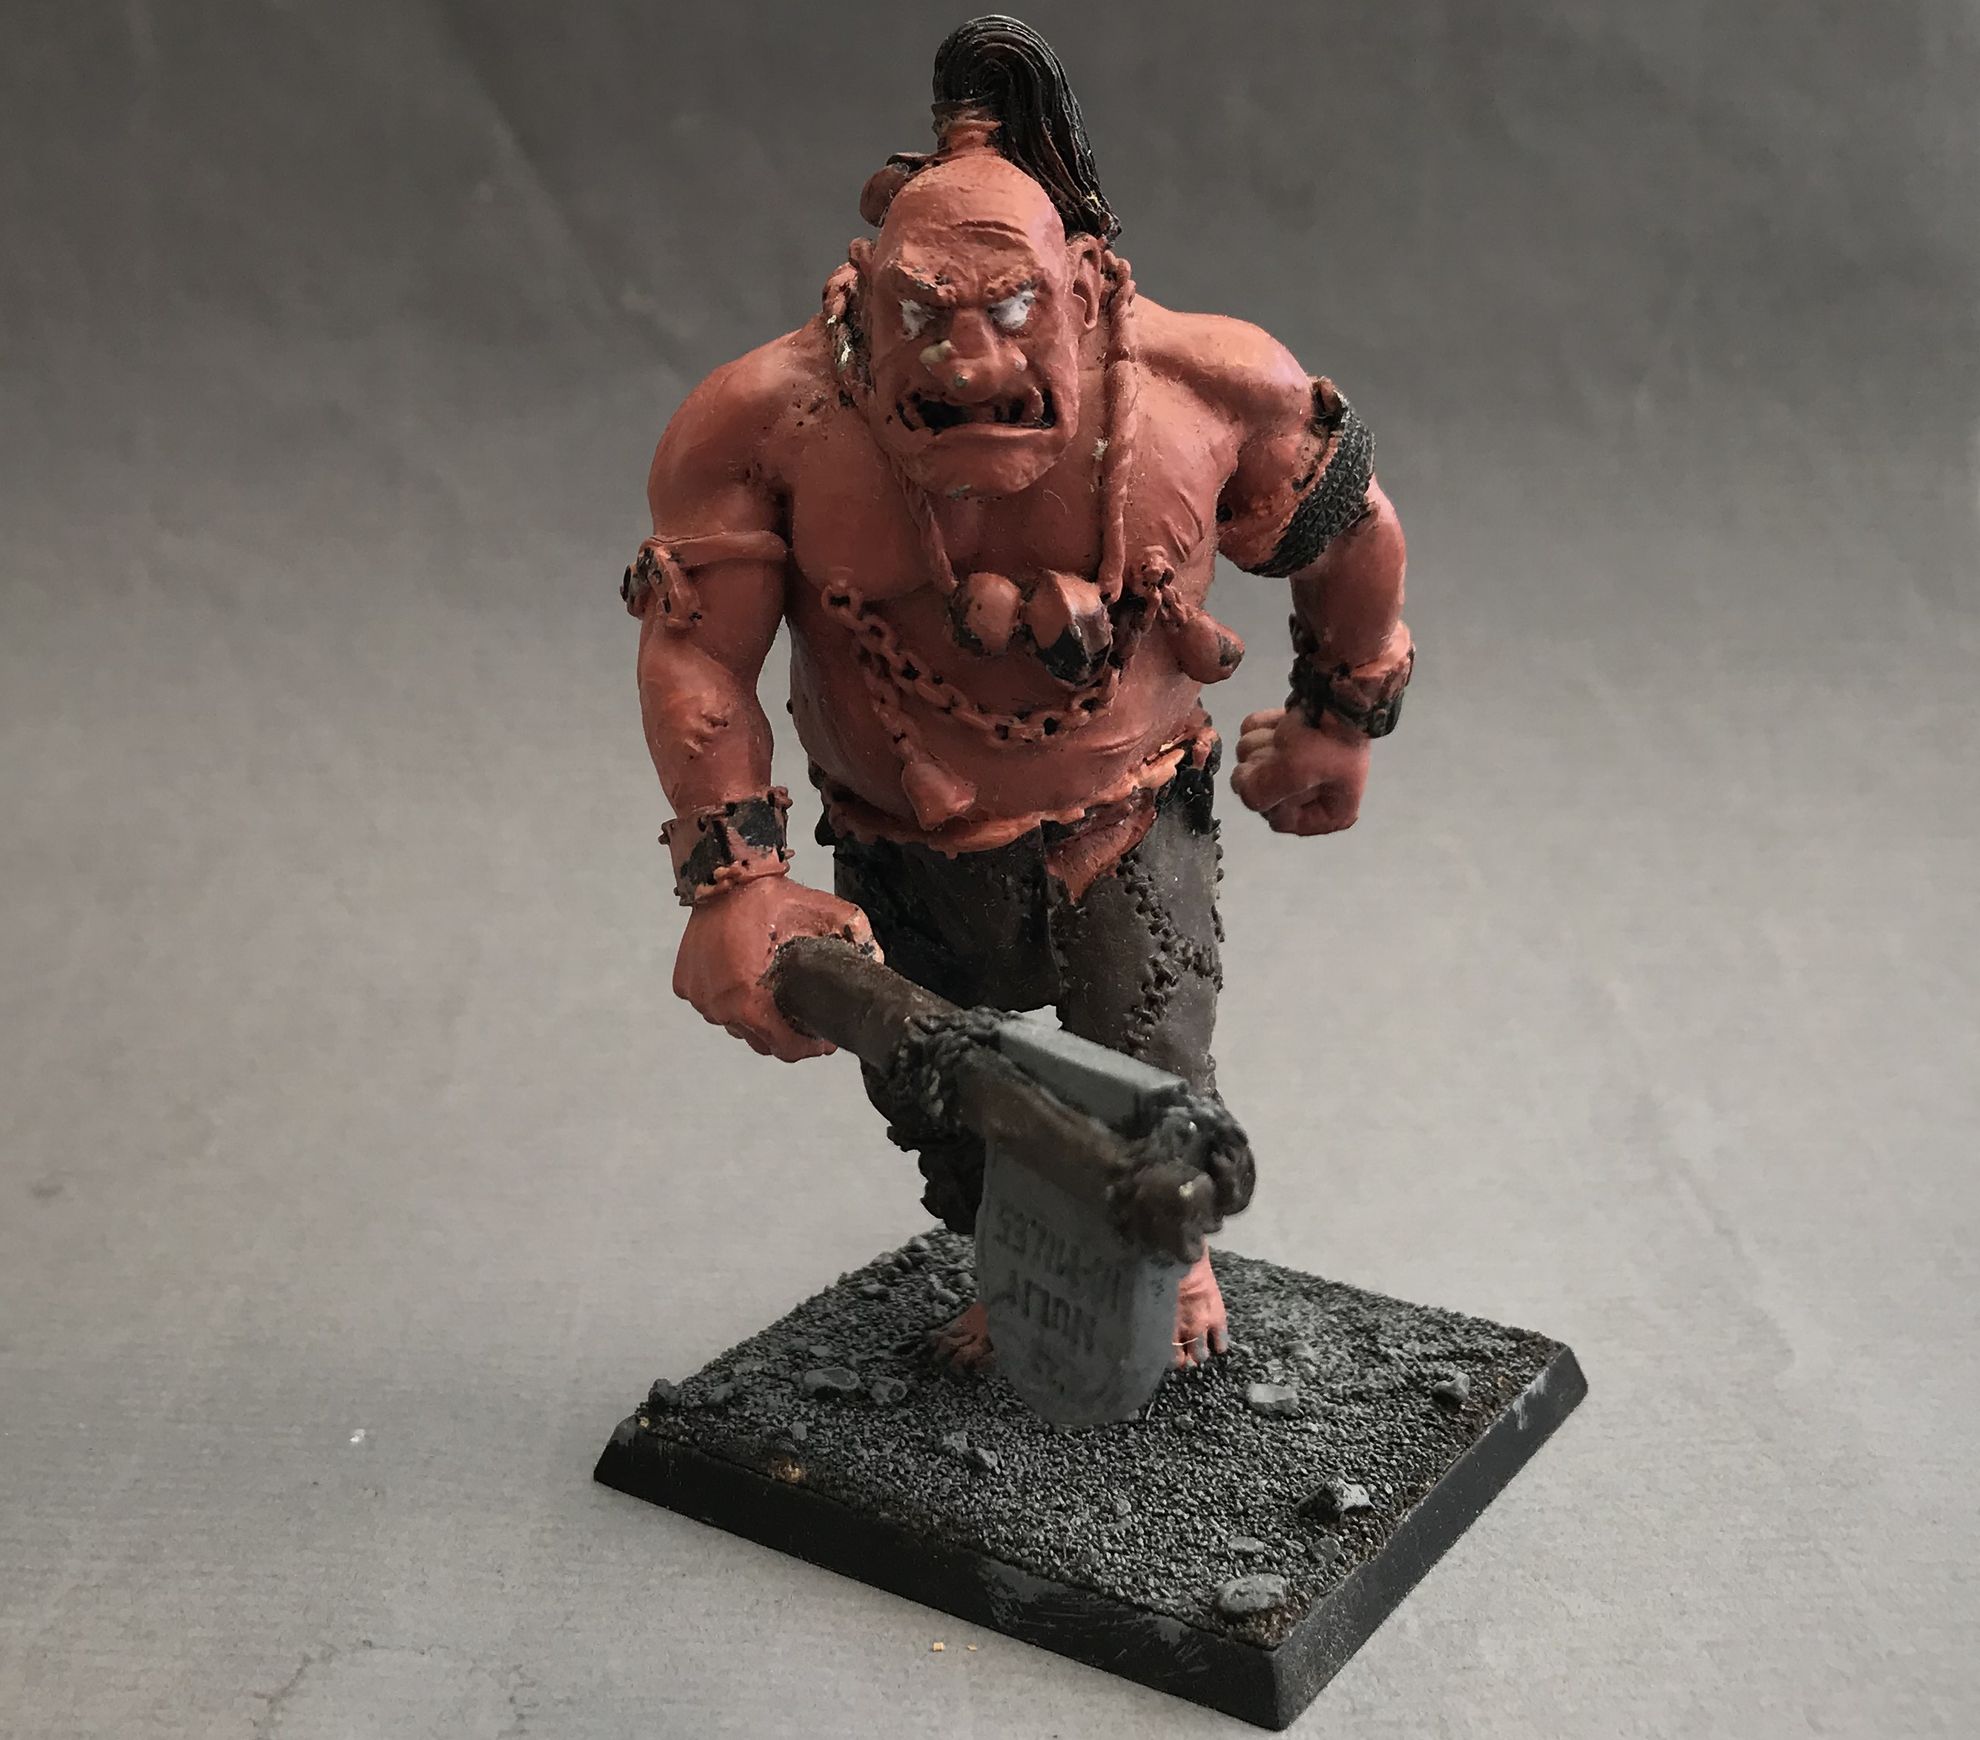
First Ogre painted
Completed the painting part on the test-Ogre and I must say it was great fun to paint it. As it is oversized the details are clear and easy to pick up, I think this should be a great beginners model. The basing remains, but as I will seal it with varnish before that I probably will wait a bit and paint up a few more before moving on to that step.
Airbrushing
I used this project to push my airbrushing experience a bit. I start of with a classical grey/black zenithal priming. The primers used are the usual suspects from Vallejo. Then I airbrushed on Scale75 Arabic Shadow, and this is actually harder than it looks…. I have had enormous problems with Scale75 and the airbrush, so this time I diluted it very much, around a 50/50 mix with Vallejo airbrush thinner. Finally I got rid of the sputtering and clogging that I always have had with Scale75, so that was obviously not the colours fault.
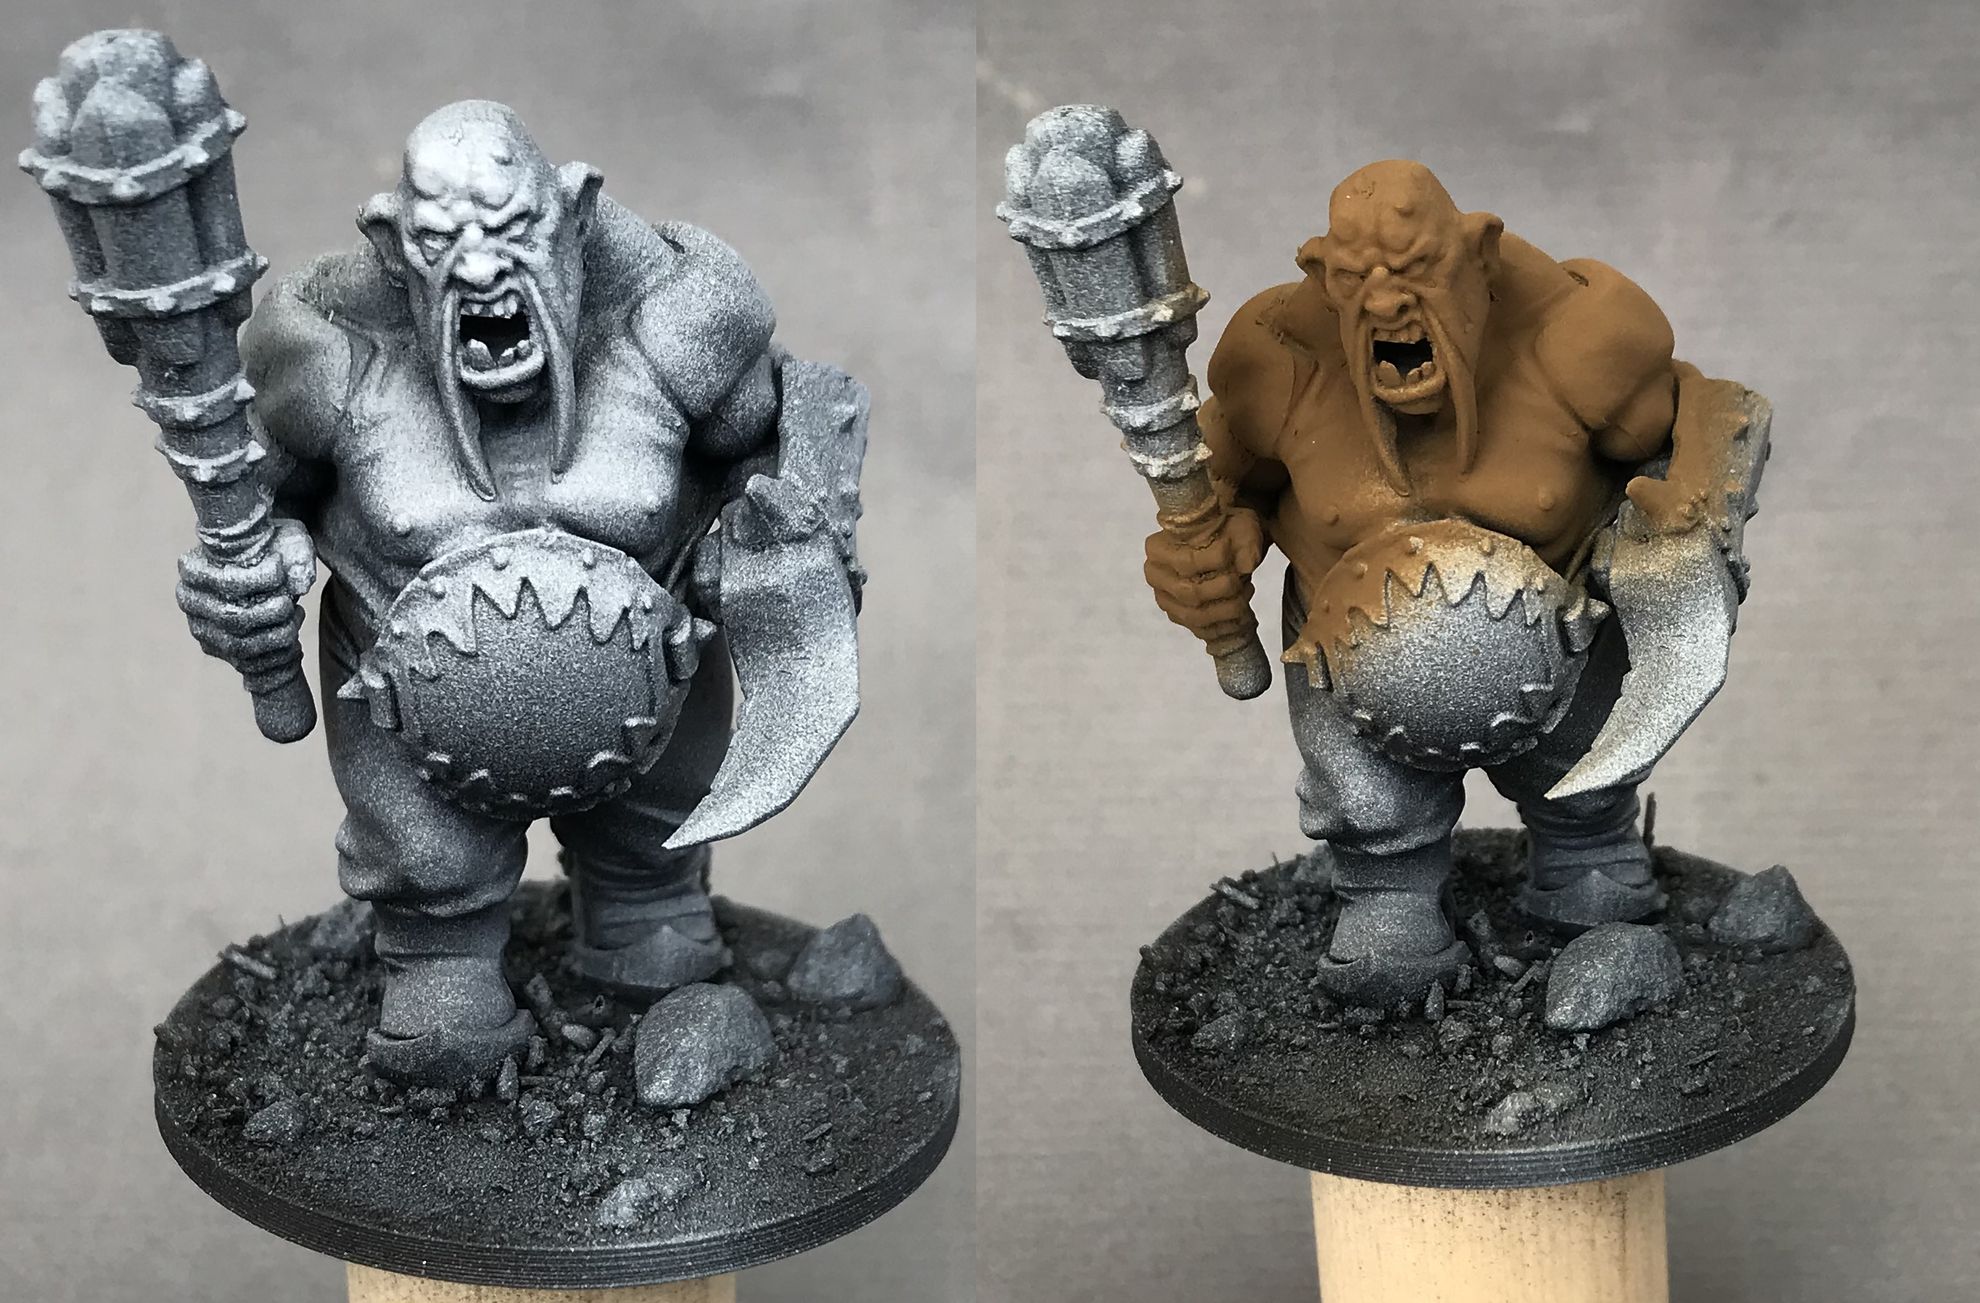
Then I tried airbrushing in shades (Scale75 African shadow) and highlights (Scale75 Basic flesh). The large skin surfaces these model offer up are prefect to practise on. The trousers were painted with Scale75 Deep red and shaded with the same colour with some black in. Overall I am pleased with the result.

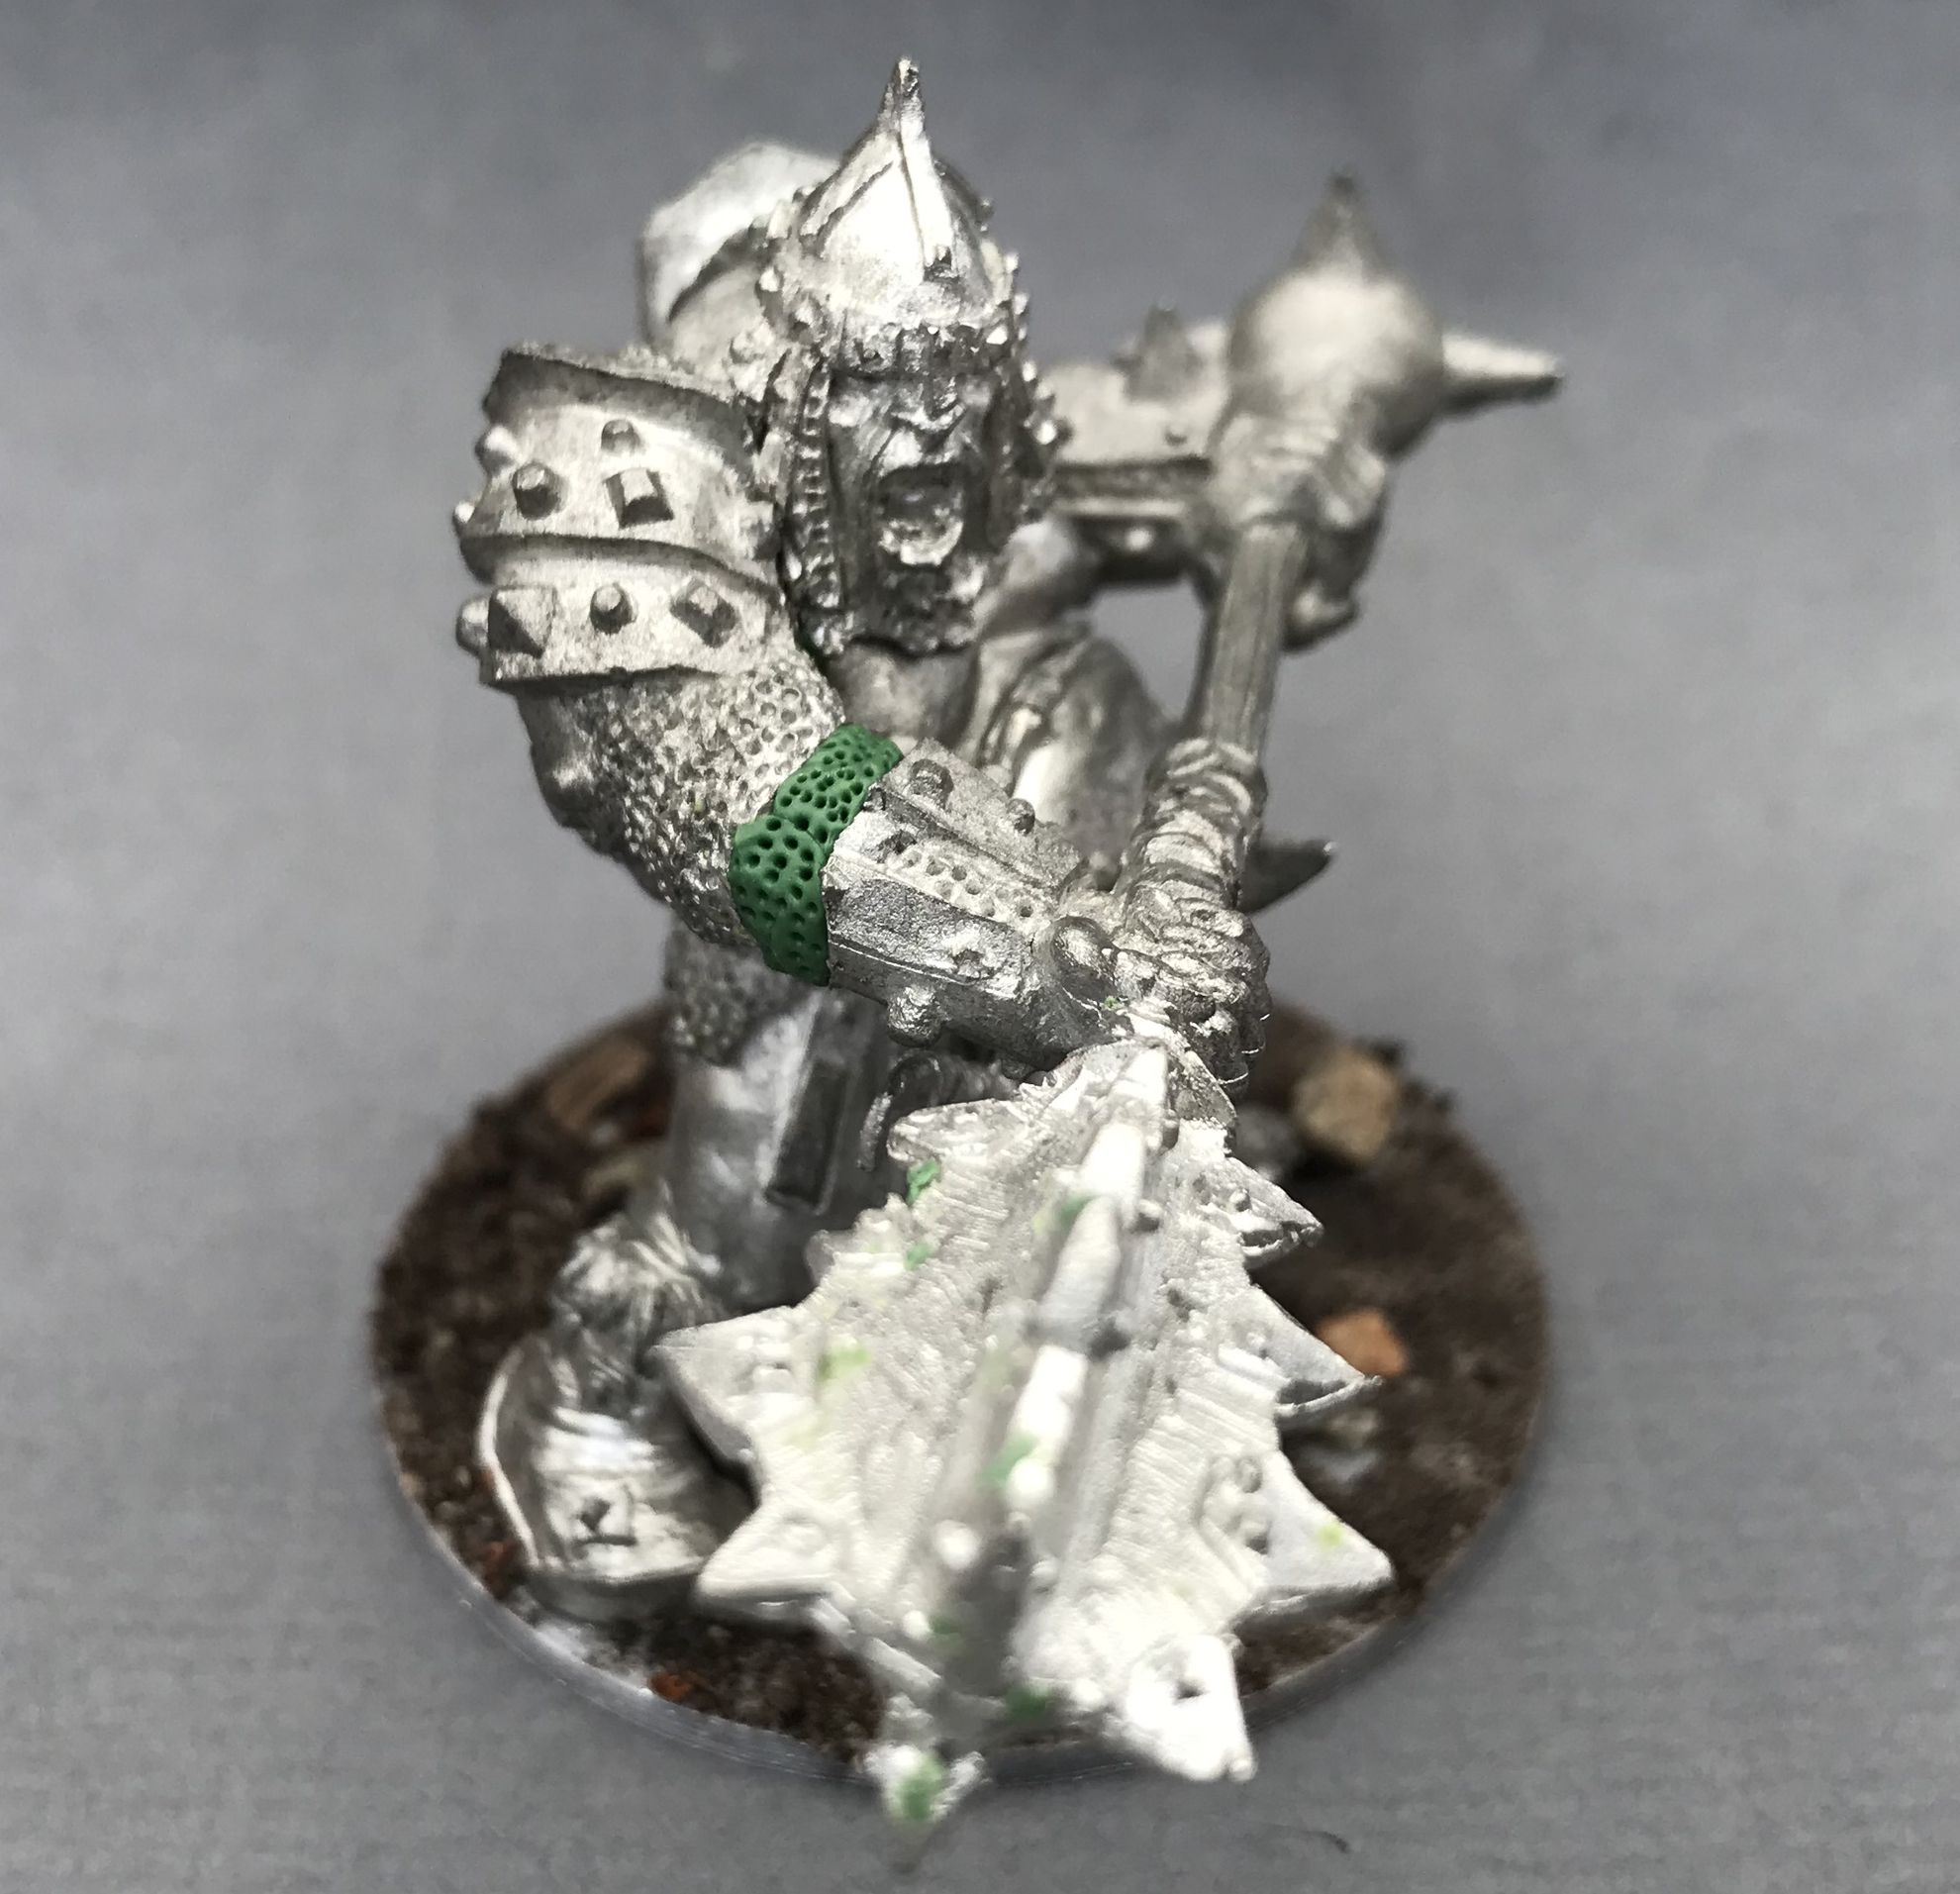
Adding greenstuff, finally ready for priming
So the last task remaining was to fill some gaps with greenstuff. The most interesting part was on the Warlord where I did some chainmail. This is easily done, just make the area smooth and then add indents with a needle, simple and efficient.
All set for priming! Will feel good to get going with the painting.
Basing basics....
I am getting to the end of the cleaning/rebuilding phase with my Ogres now, and that feels good. Will be nice to start getting some paint on to these figures and get a feeling for how it will look in the end. Below you can see how I build up my bases before priming; I start with adding some larger stones with superglue to the bases. These will be great to have later on when adding tufts and other grasses, as they like to cuddle up to rocks and other things tat give protection from the sun/wind etc.
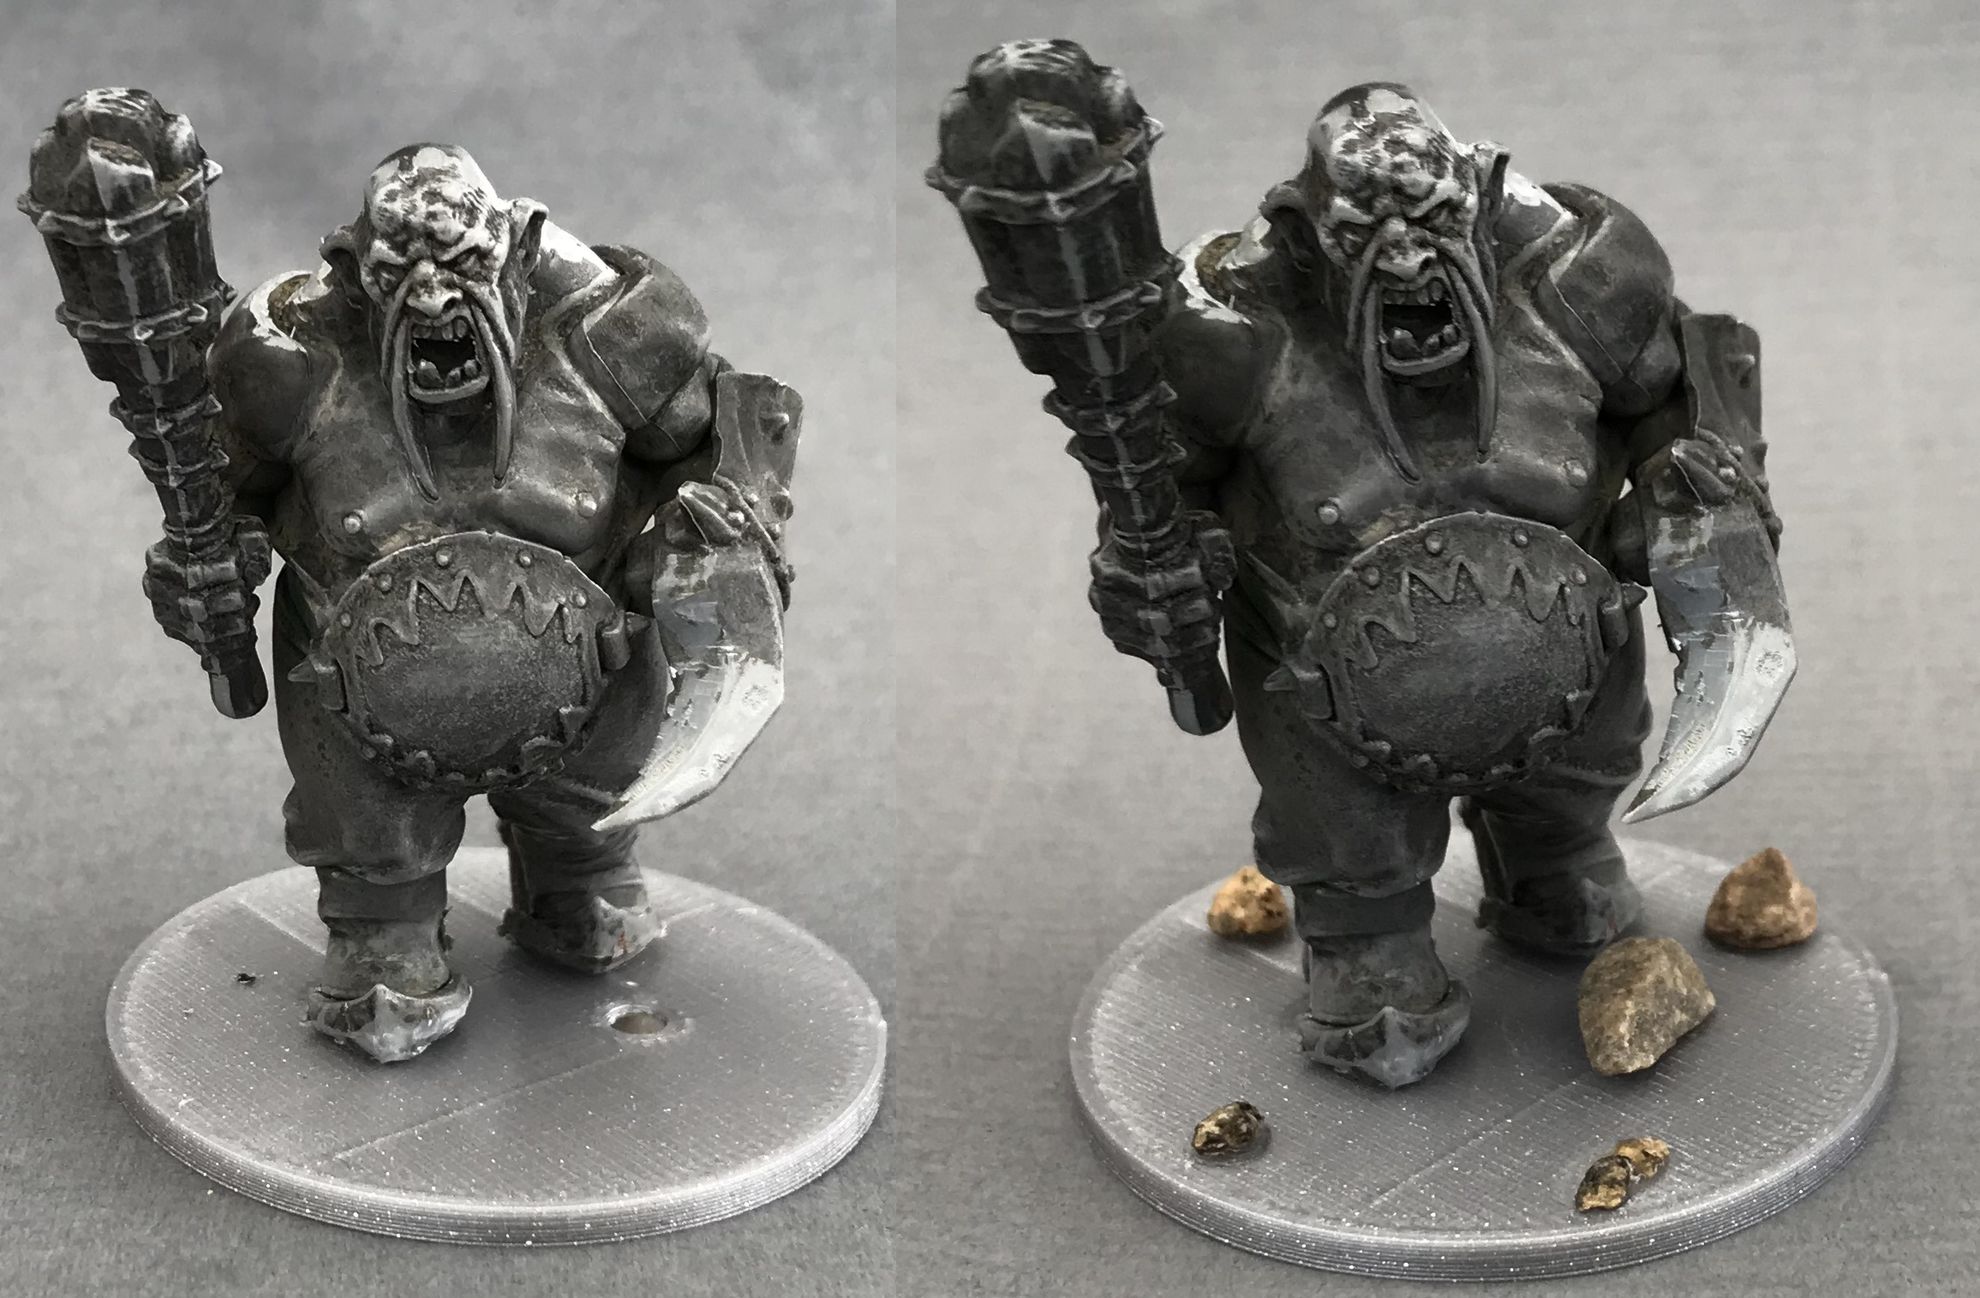
After that I cover the base with PVA and sprinkle on my “clean dirt”, essentially cleaned earth from my garden with added green tea… When dried it is set up for priming!
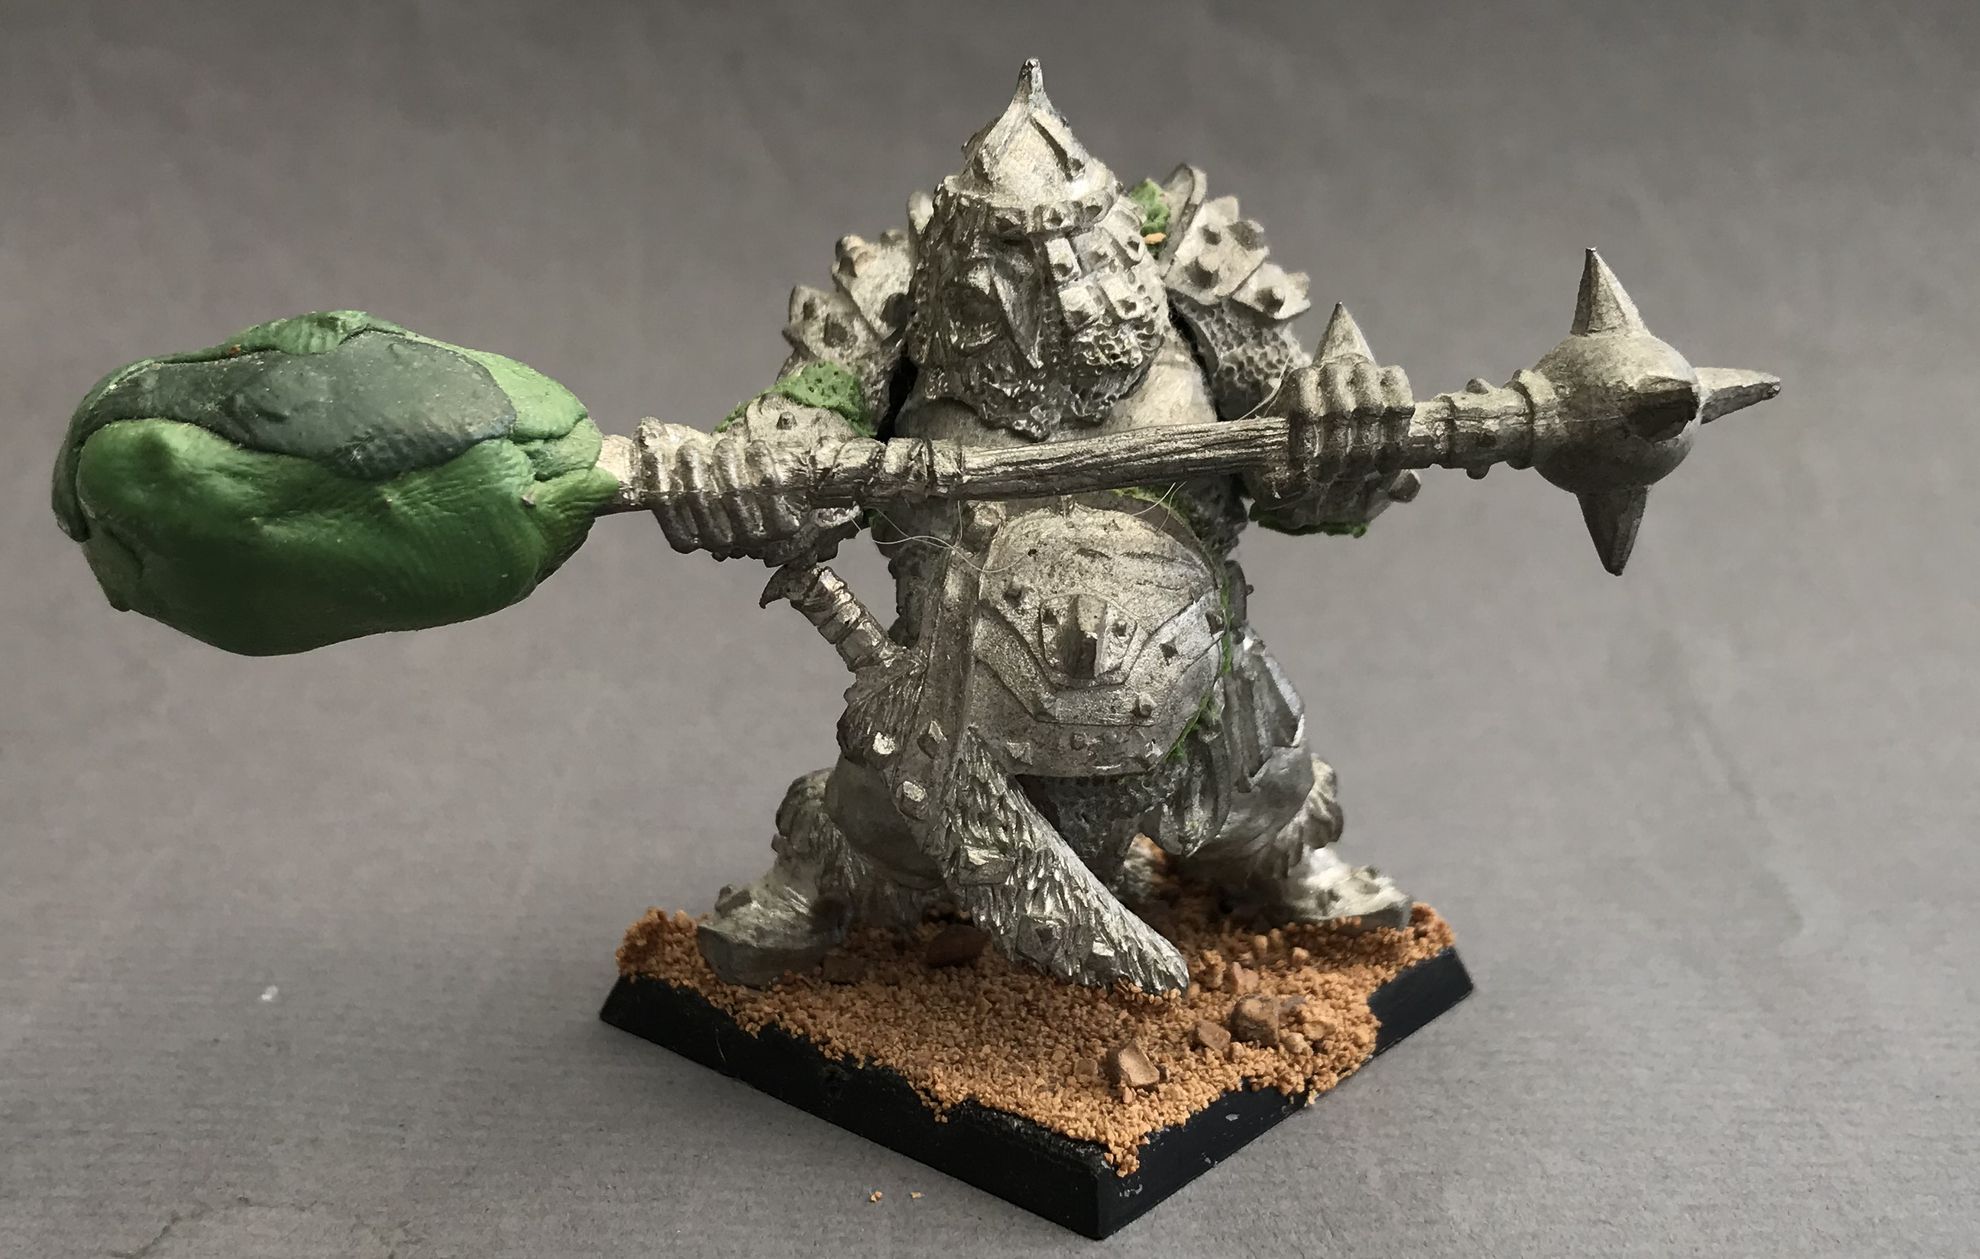
Cleaning metal figures - Getting rid of greenstuff!!
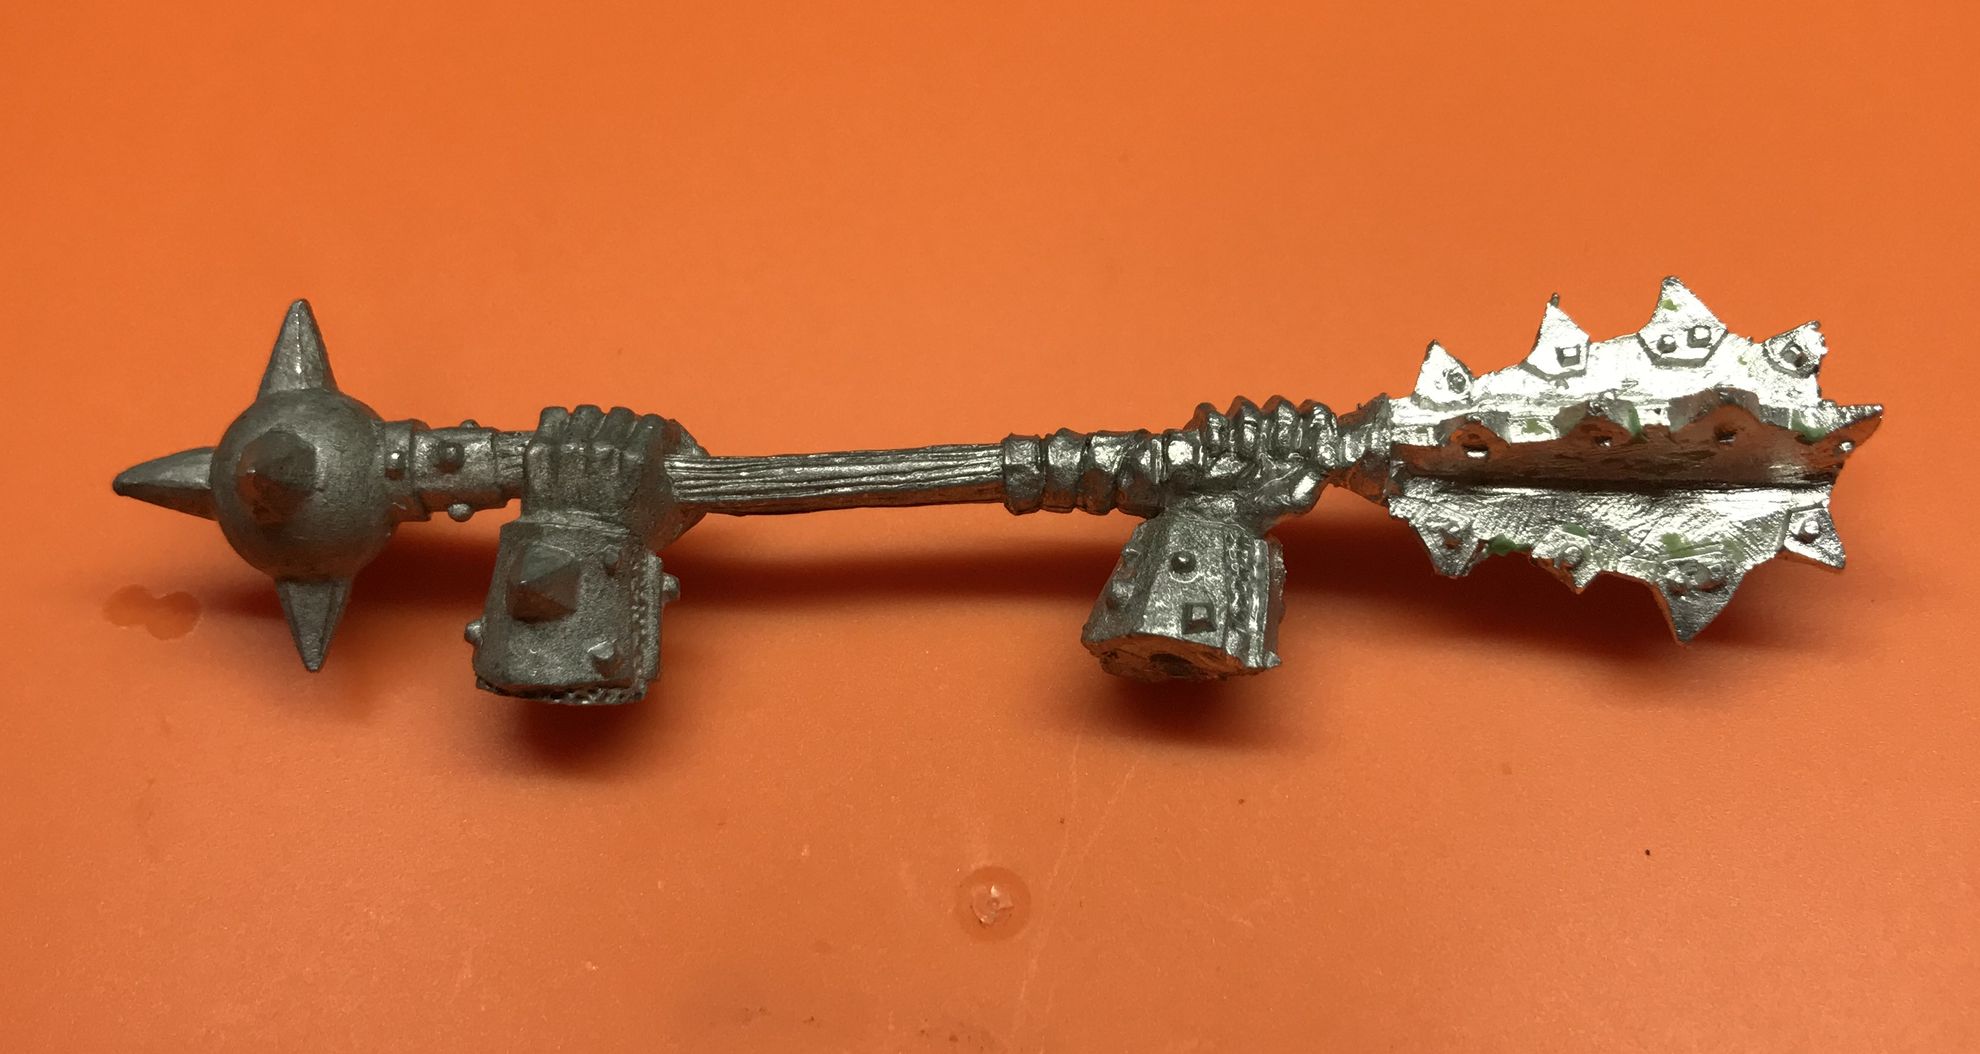
As you can see a bit earlier in this group of posts the mace of my warlort was covered in a gigantic blob of greenstuff! This had to go, but how to do it. I tried dissolving it in acetone, and that did not work with this amount of greenstuff. Instead I found out that boiling and then scraping greenstuff off was the way to go. The trick is to work it quite fast after it has left the boiling water (but naturally don´t burn yourself!) and when it get back to room temperature just boil it again. I did it for about ten times and now it is completely gone! Hurra! 🙂
Small amounts of greenstuff can be better removed with the acetone bath.
Cleaning metal figures - The easy task
I managed to clean the metal Ogres which was quite straightforward, just dip them in acetone and brush. As can be seen it completely removes all paint residues. The picture is a bit poor, but that is more due to the problem of photoing reflective metal figures.
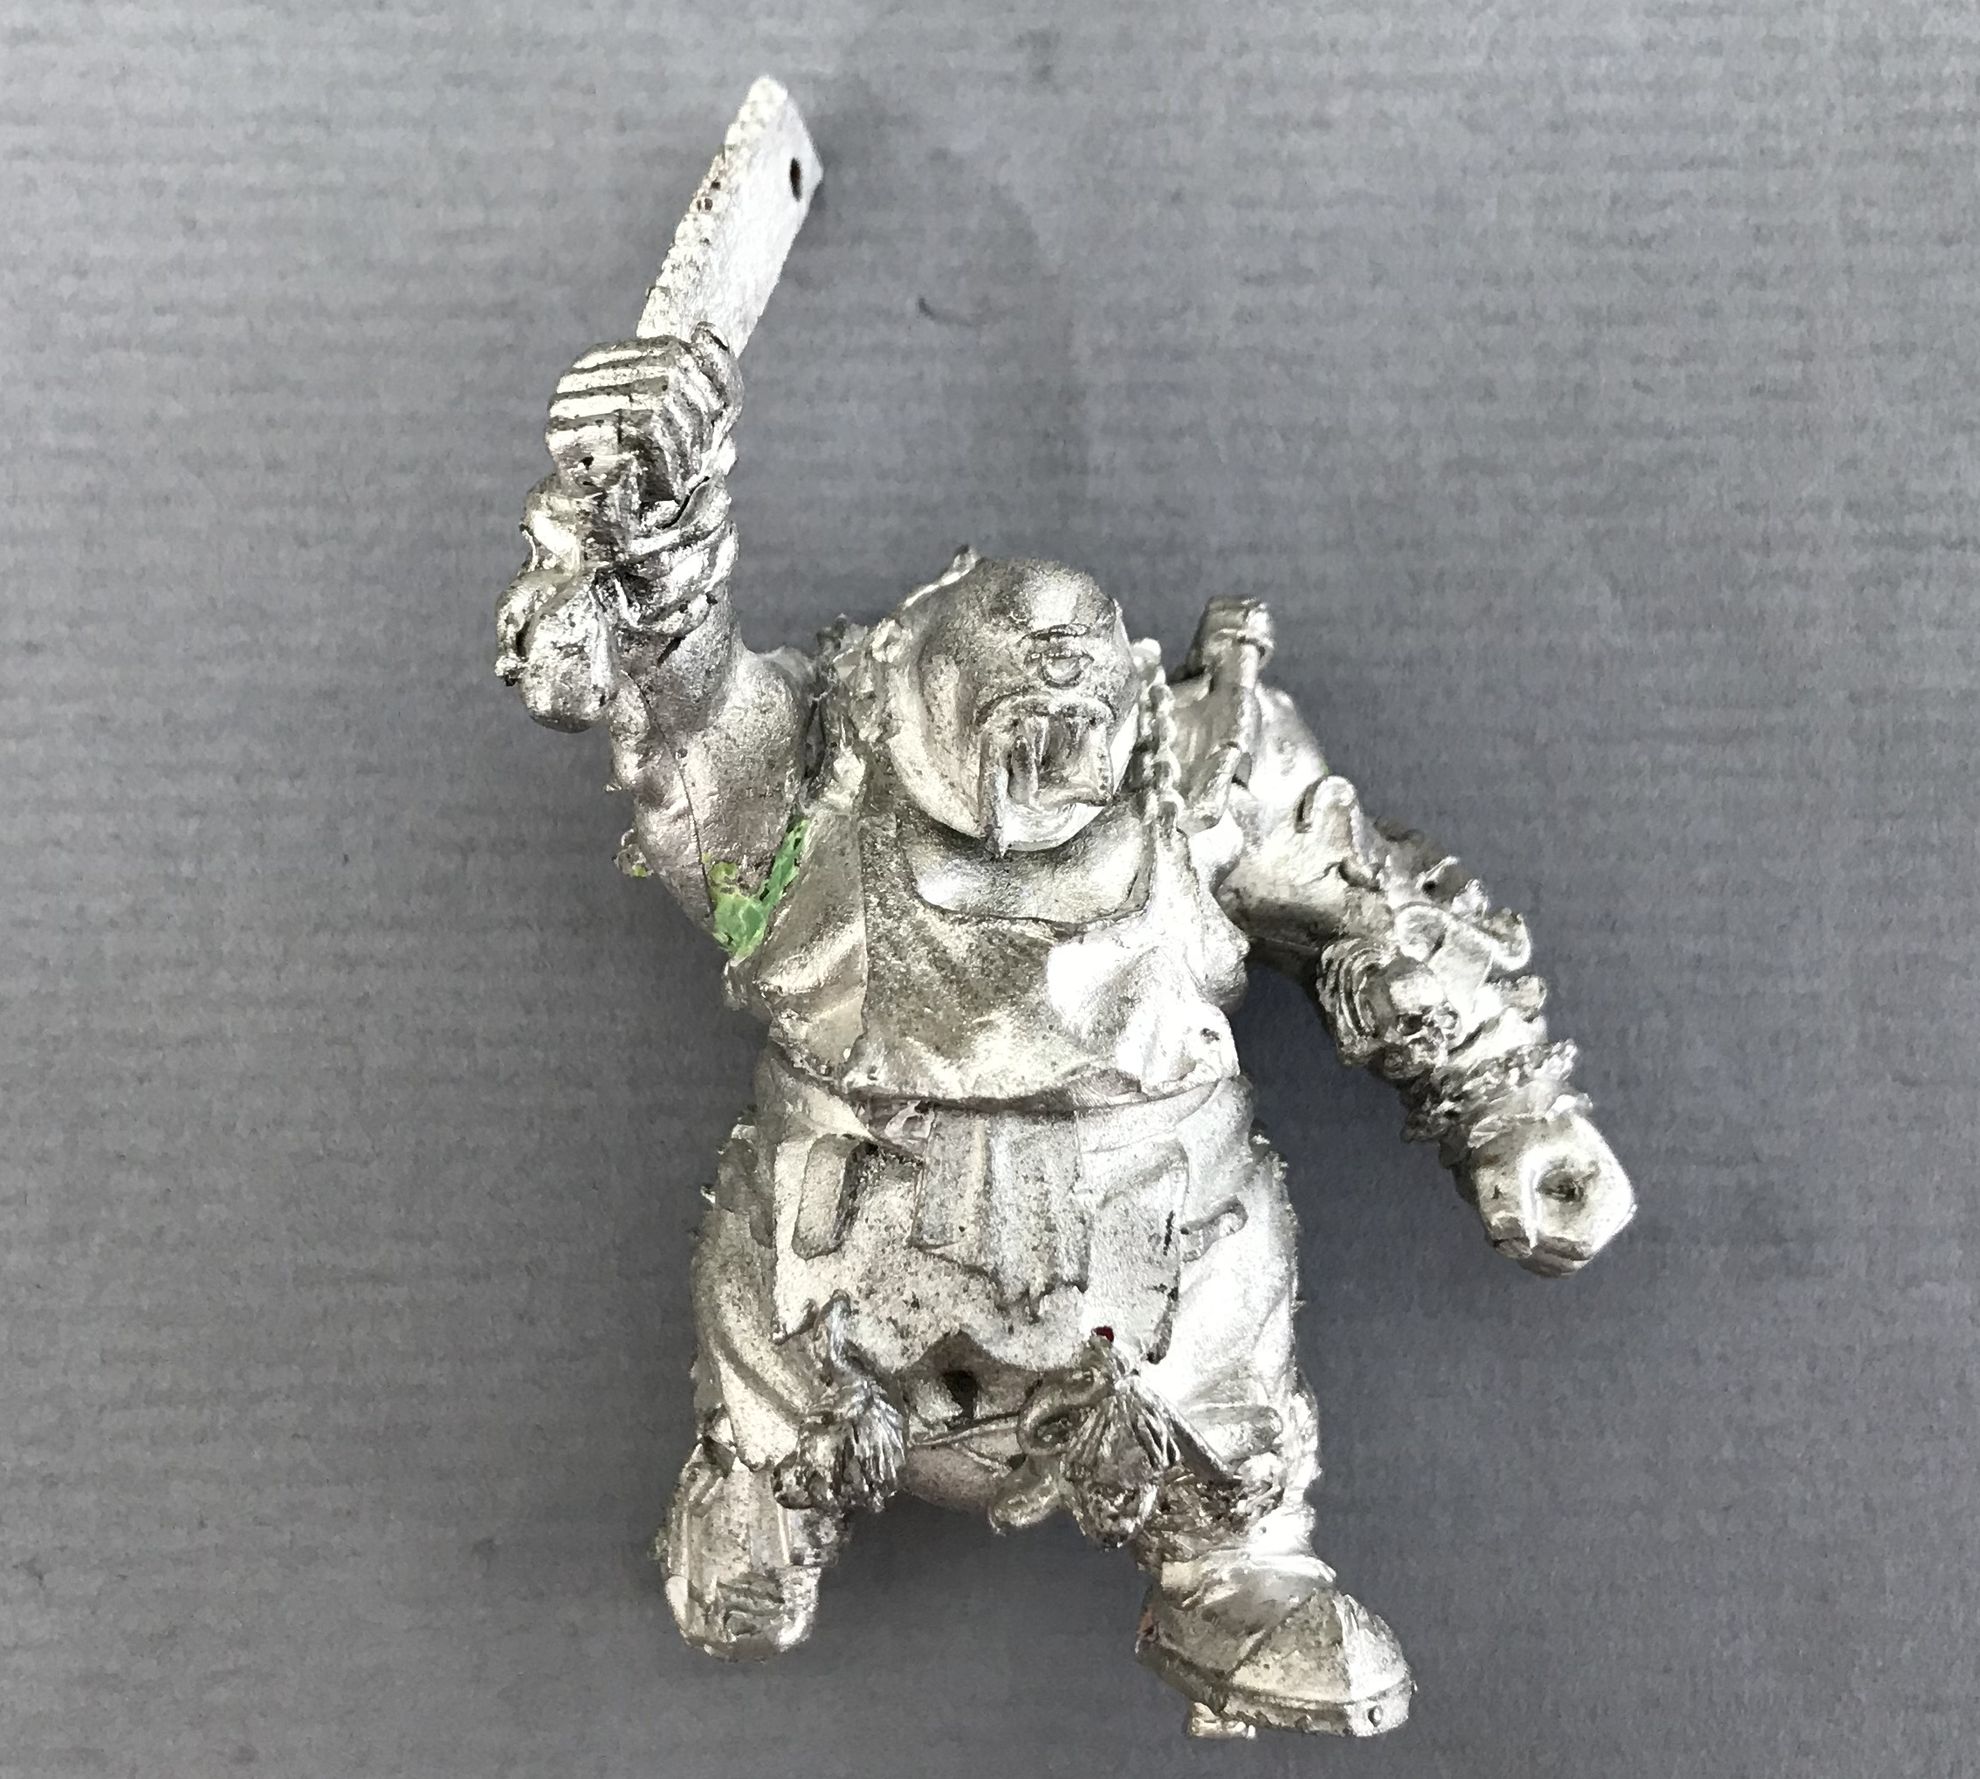
Another trick to get rid of superglue and greenstuff I tested was to boil the figure in water, and the result was quite interesting. It completely killed of the superglue, so the different part just fell apart when I took it out of the water and let it cool. I assume the expansion/retraction of the metal breaks the bond to the glues. Anyway, it was what I wanted so not I could properly clean the main Warlord of the force. Only the mace with the big gob of greenstuff remains a problem of sorts.
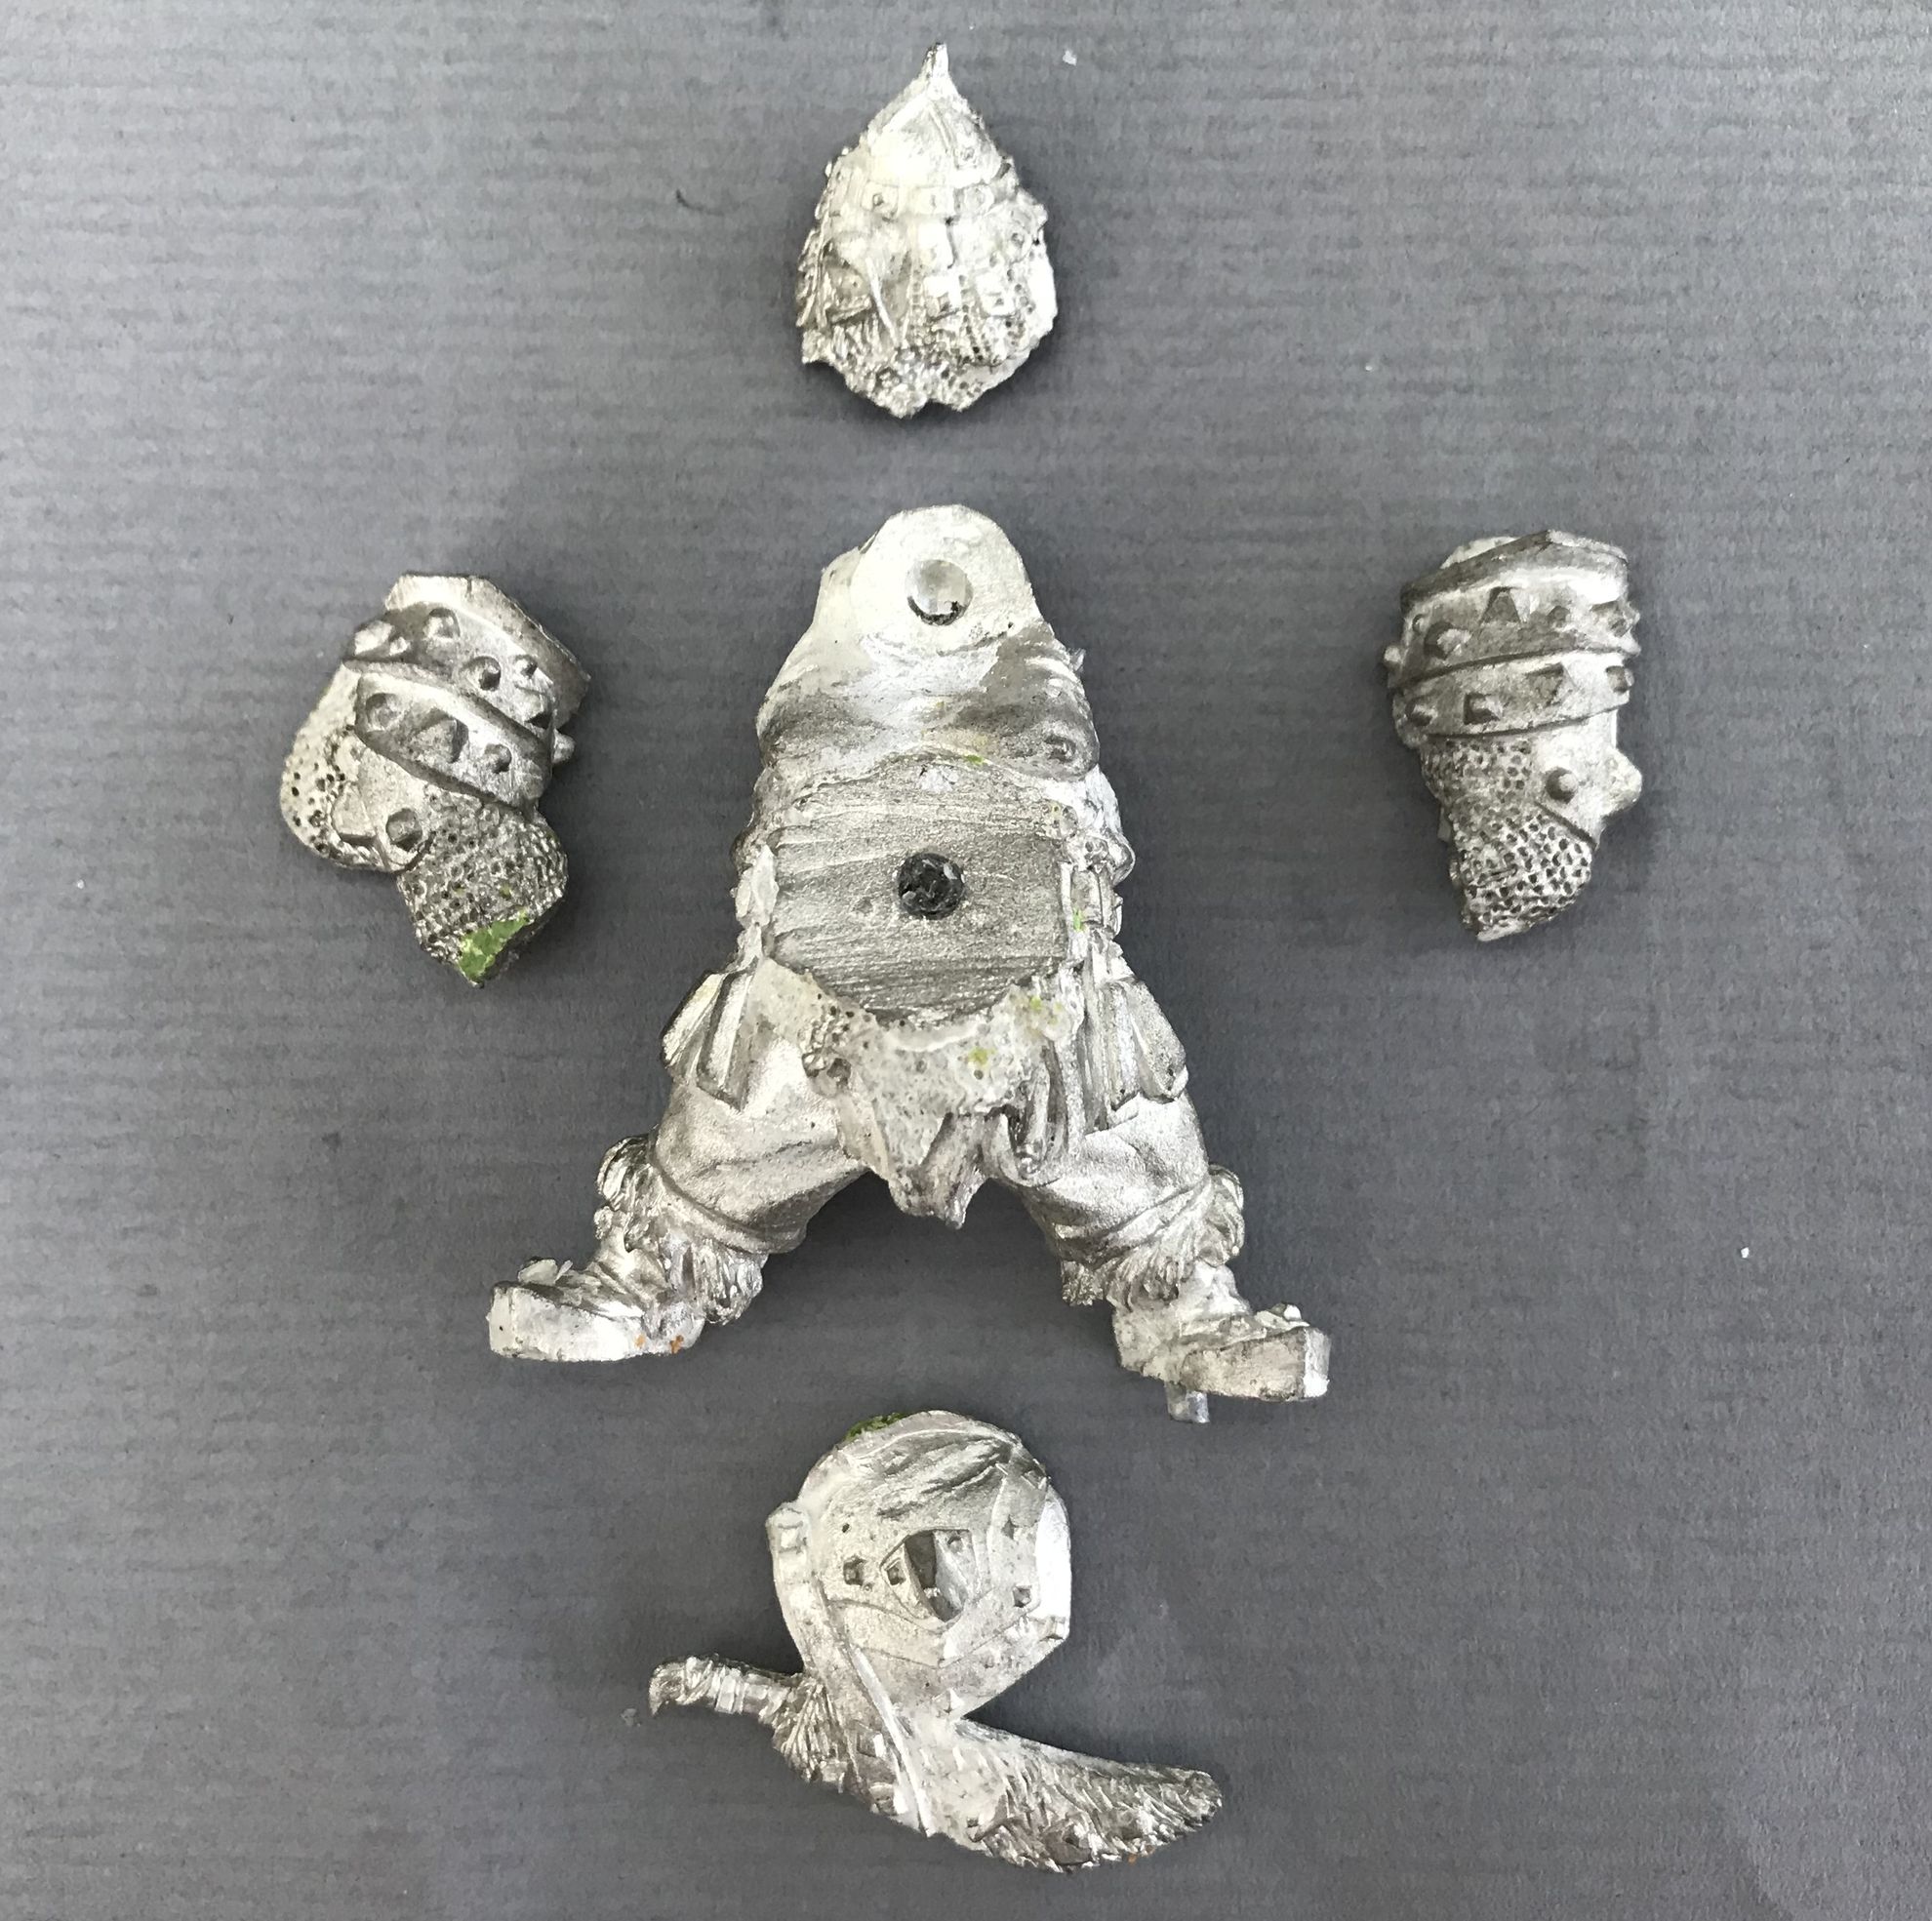
Designing and 3D-printing the bases
As mentioned I would like to use round bases for the army. I am currently using 2mm thick bases with holes for magnets on more or less all my new figures. That way they are compatible with my movement trays and transportation systems. The magnets I use are 3mm diameter, 2mm thick rare earth magnets, which works very well in my opinion. The first thing I do is to design the base in TinkerCAD, which is easy to use and has a high accuracy, which is important for this work. In this case I do not plan to use movement trays, but when you do you want to be certain that the magnets in the tray matches the magnets in the bases exactly, and that you get ion TinkerCAD (which is also free to use, another great thing!! :-))
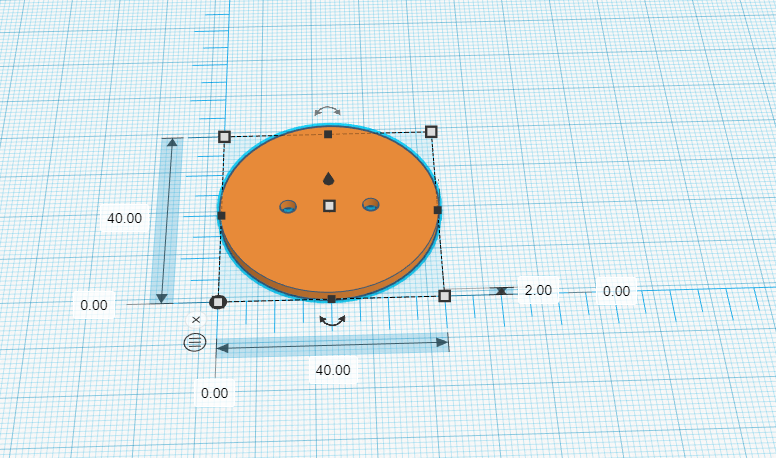 The 40mm base in TinkerCAD.
Then I export the base as an .stl and import it into my printer software. I mostly use PrusaControl, as I normally do not need more advanced tools. If I do I swap to Slic3r, which also works well. Both these programs can be used with someone having a basic understanding of computer software and are quite intuitive.
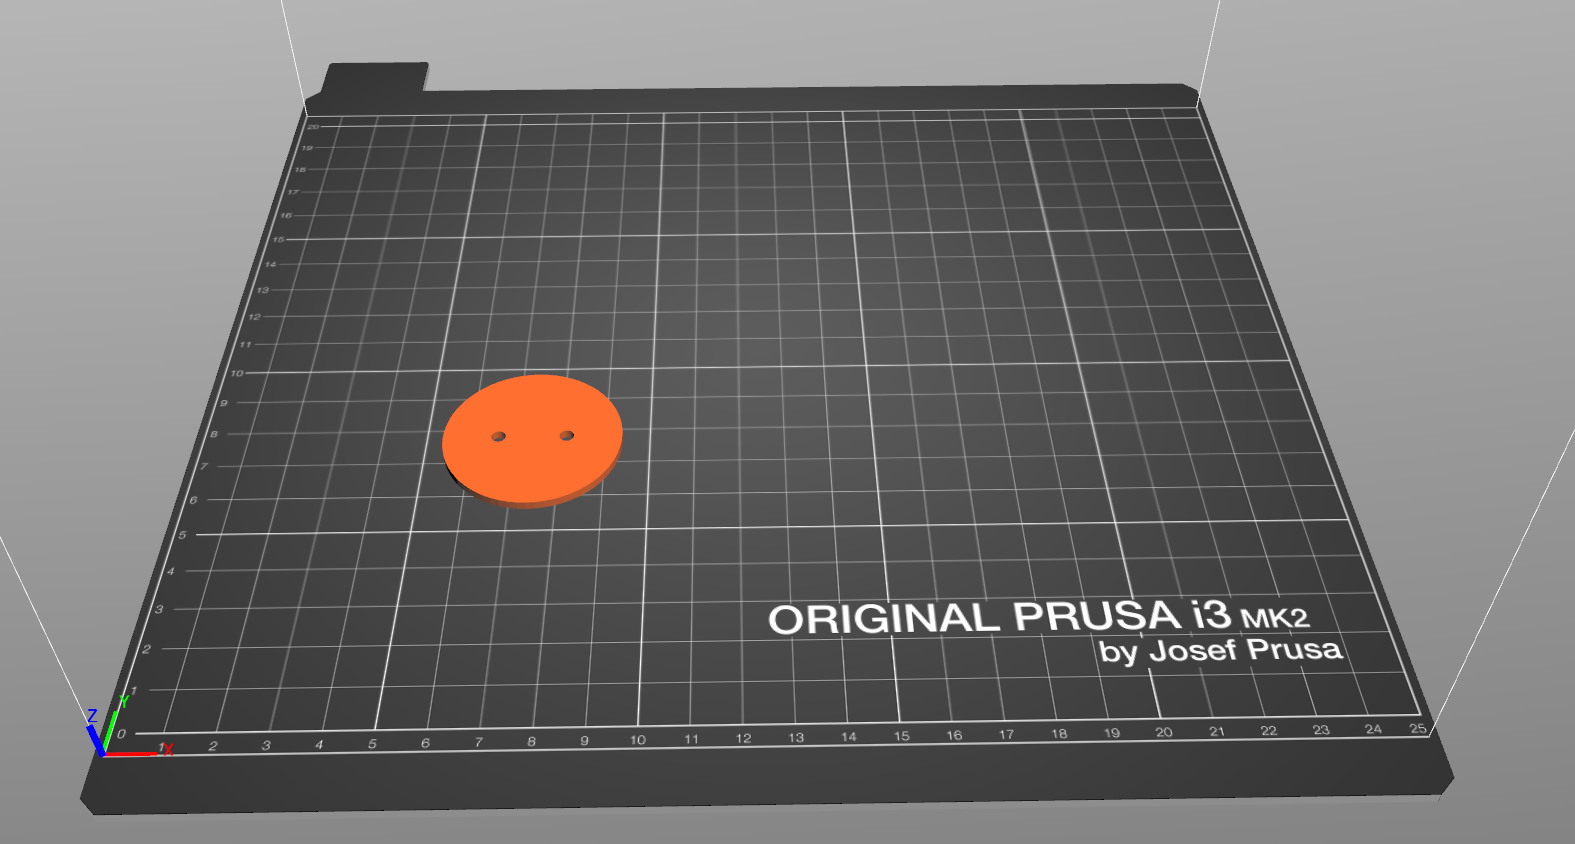 How it looks in PrusaControl.
Finally I printed the bases on my Prusa i3 MK3 using 0.2mm thickness. I use Prusament PLA-filament and I have few problems, and for a very easy print as this is naturally worked without issues.
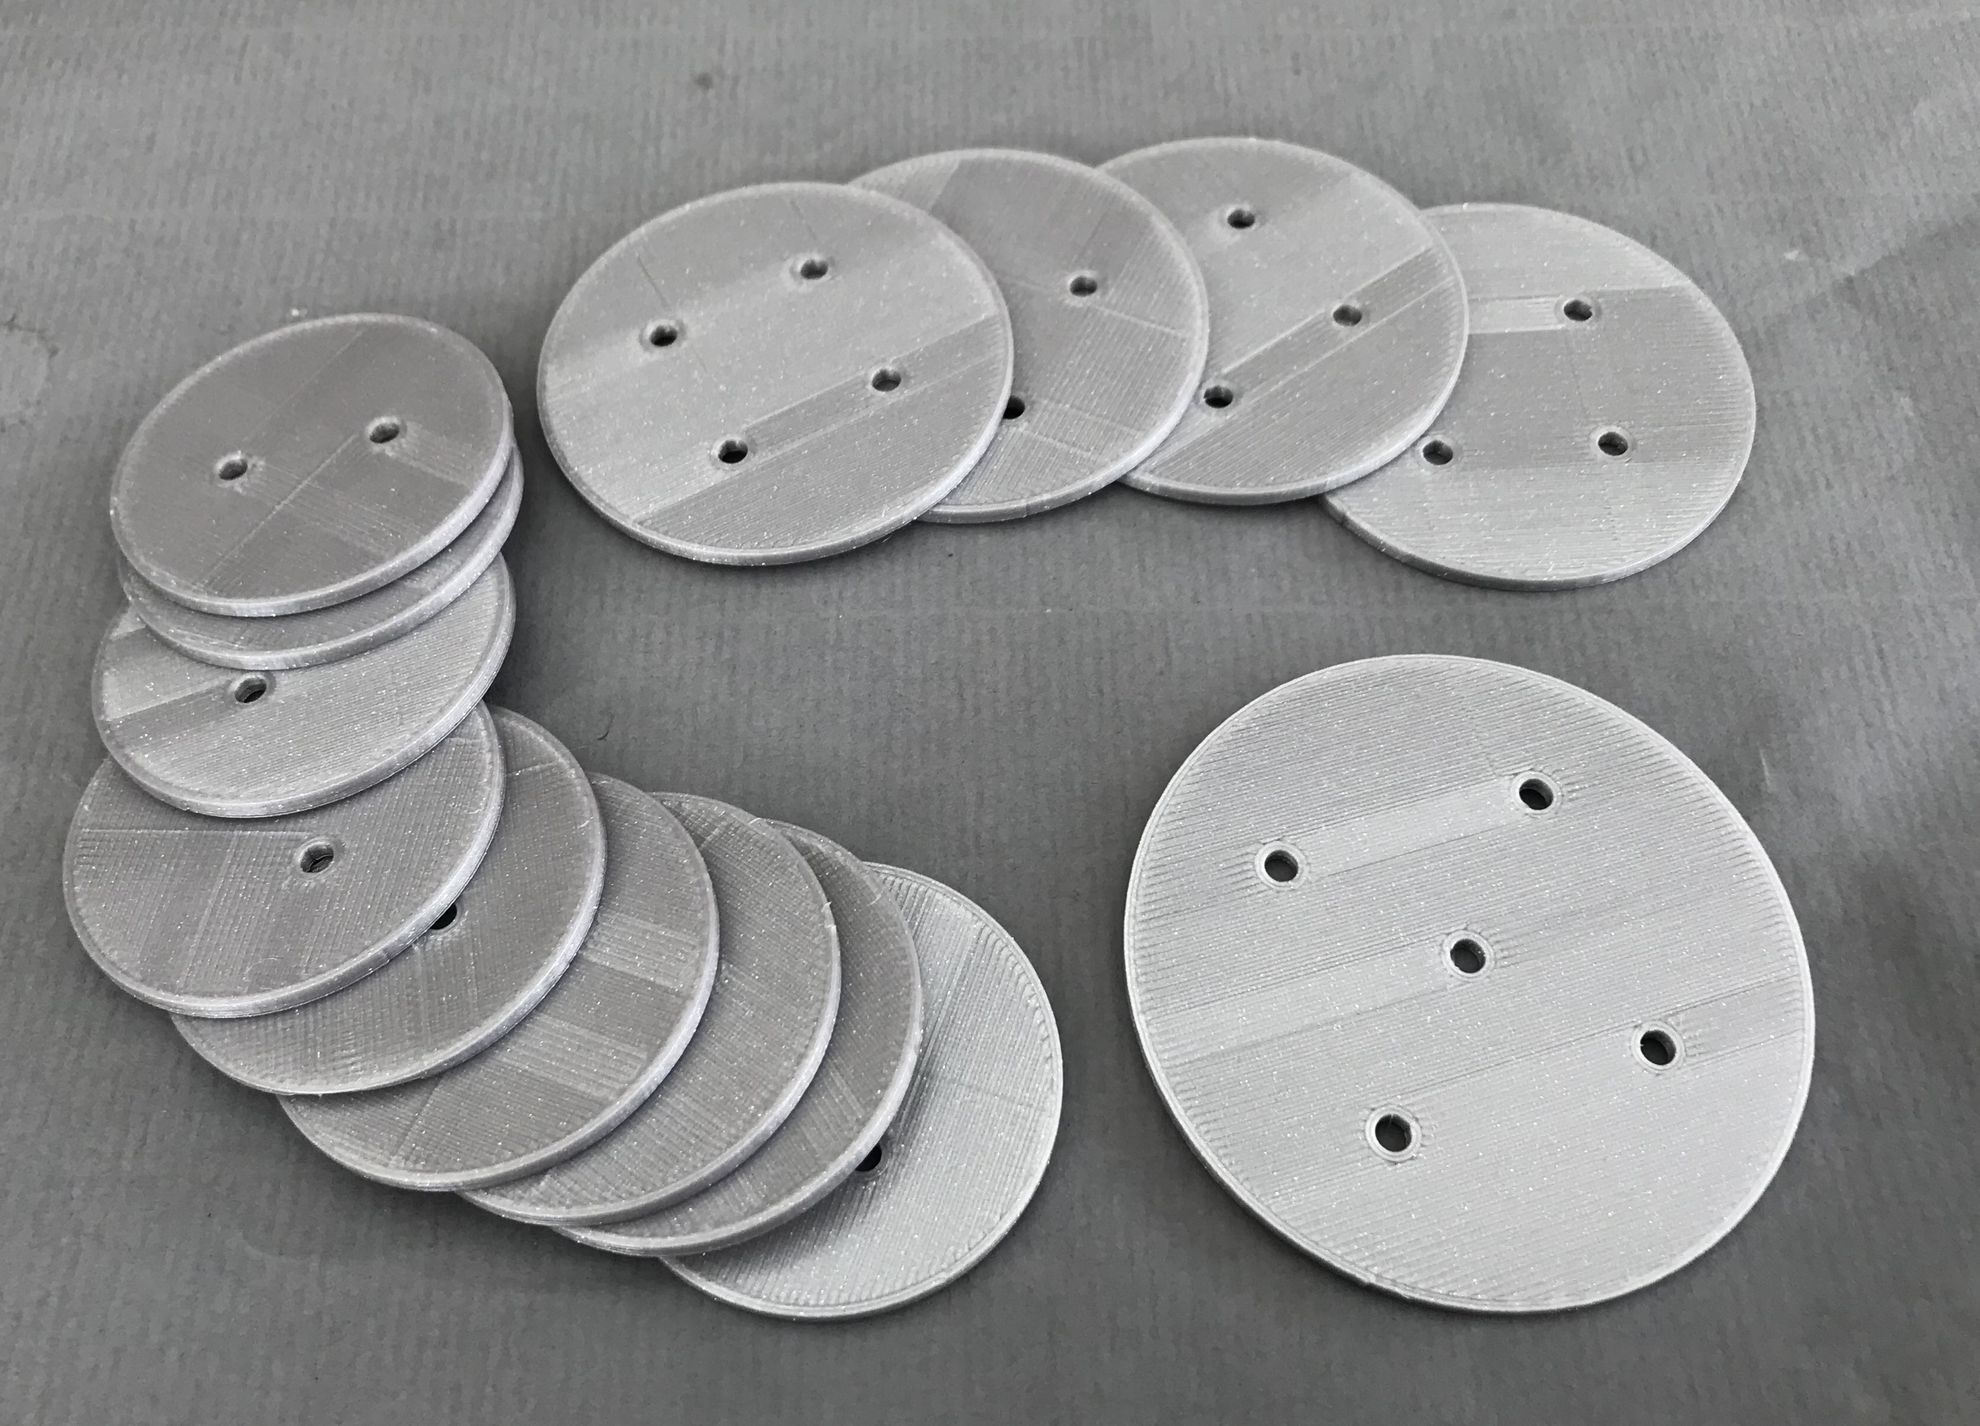 RL bases... :-)
Cleaning plastic figures - Ogre testing
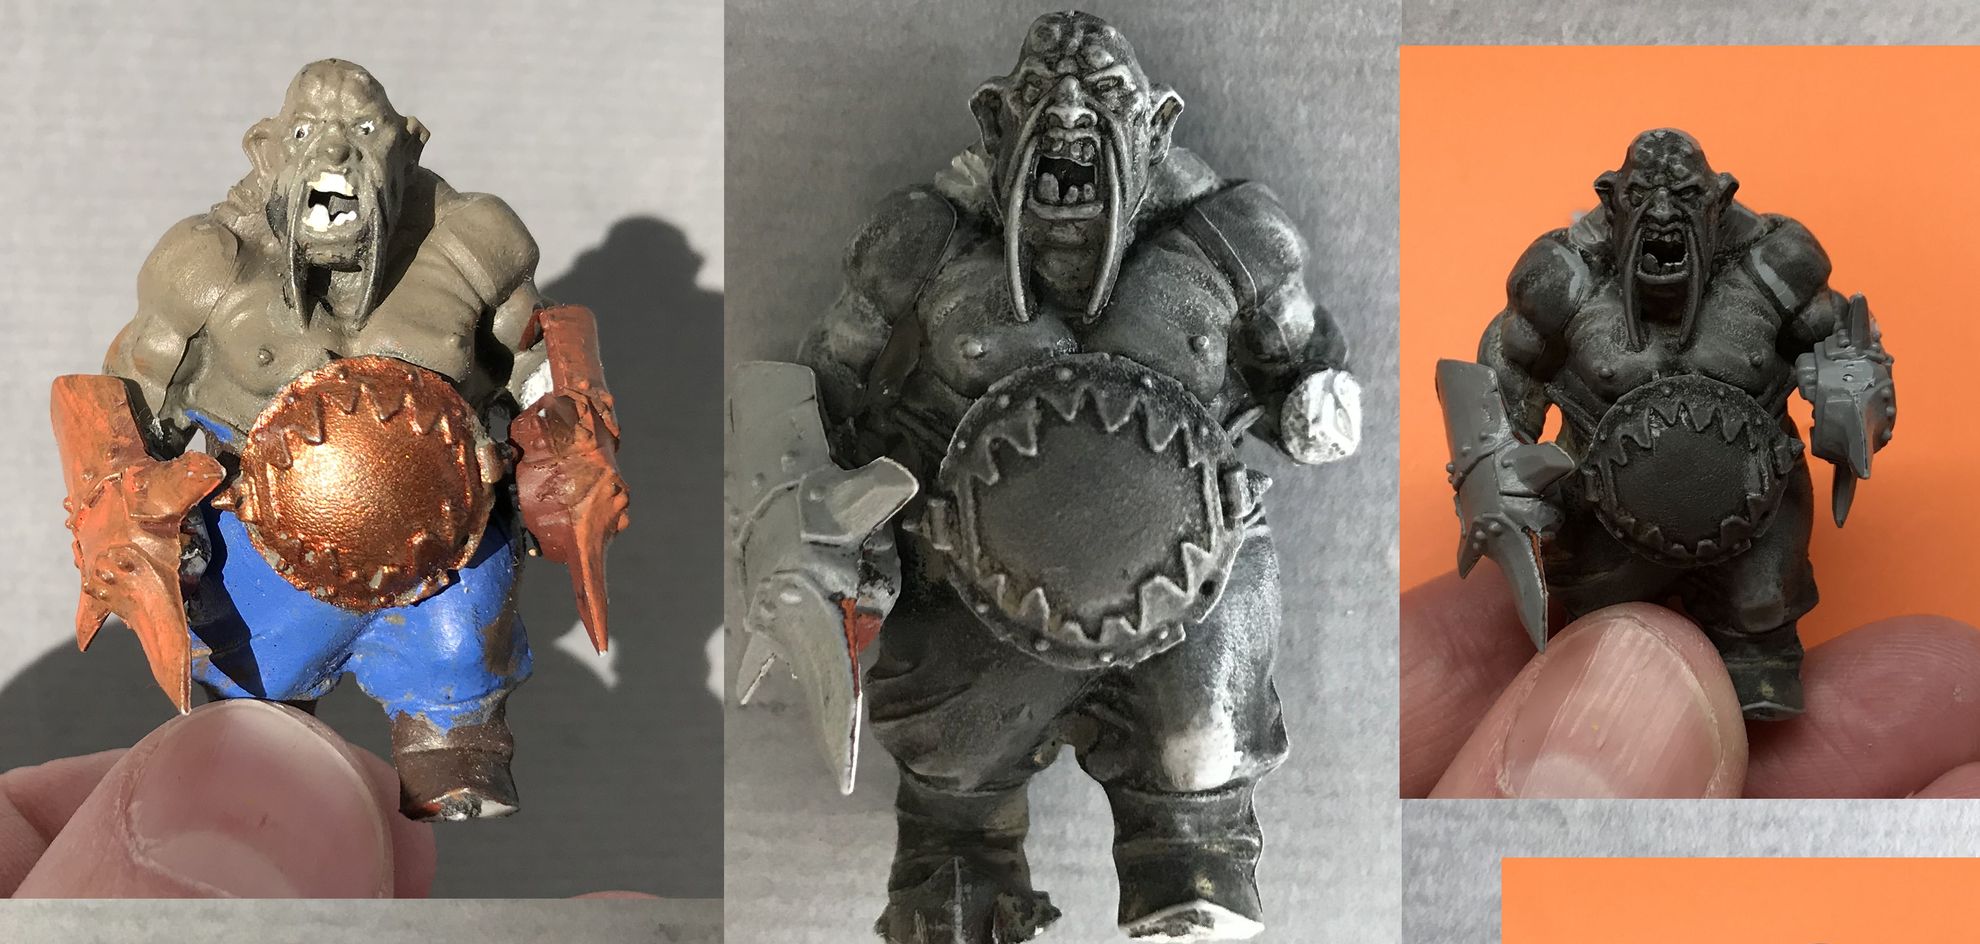
So after the adequate result with the Gnoblar it was time to dip a test Ogre in, about one hour and a thorough later brush later it looked like the middle picture. I then removed some mold lines (hate mold lines, they got to go!!!) and spots where the parts had not been clipped particularly well from the sprues, overall rather good (pic furthest to the right). I am a bit worried that I still have to much old primer on, but I guess I will have to reprime and see how it looks.
Also, I always use PVA for my bases… so I thought that likely the earlier owner used that as well? Indeed, I put the bases into water (remember that PVA drying in 100% reversible) and the basing started to come loose. This will make it easier to remove the Ogres from the bases before putting them into the bath!
Cleaning plastic figures - Grab a Gnoblar volunteer!
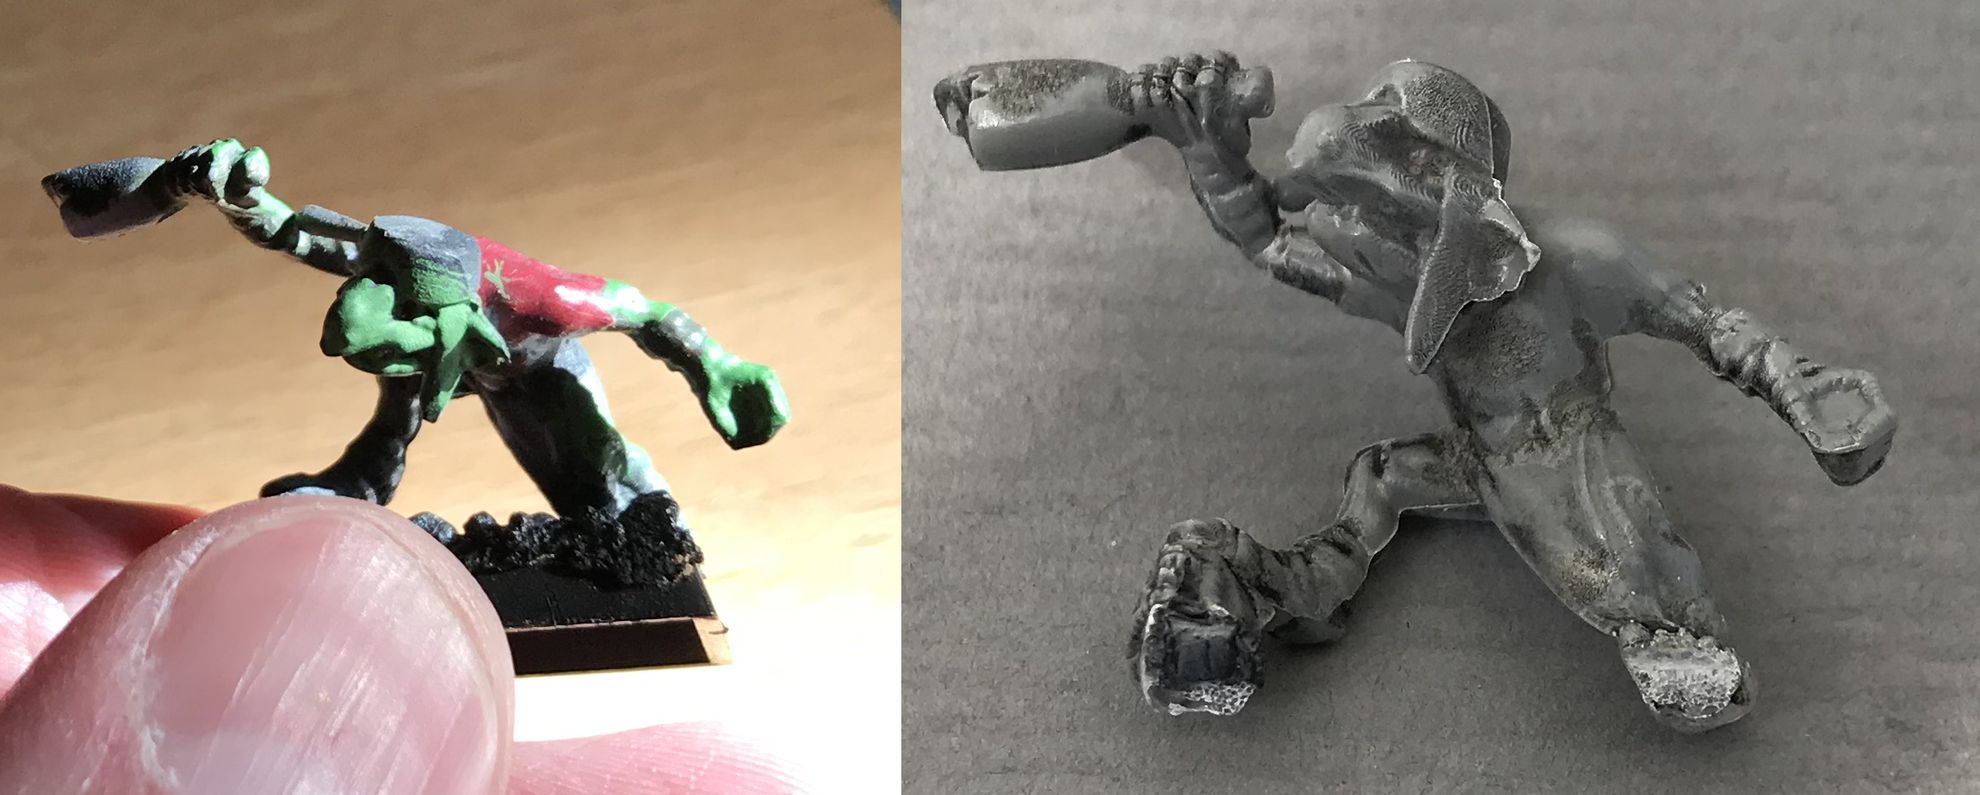
The Ogres came with a small horde of Gnoblars, which I do not care much for. Therefore one of them had to be the volunteer for testing out my cleaning recepie which was a simple as hopefully efficient. After some searching on the internet I gathered that dropping the plastic mini into essentially denaturated ethanol followed by scrubbing. As can be seen it was a vast improvement in just about one hour, so I will try this approach on an Ogre next!
The beginning - Looking at the starting point - Part 2
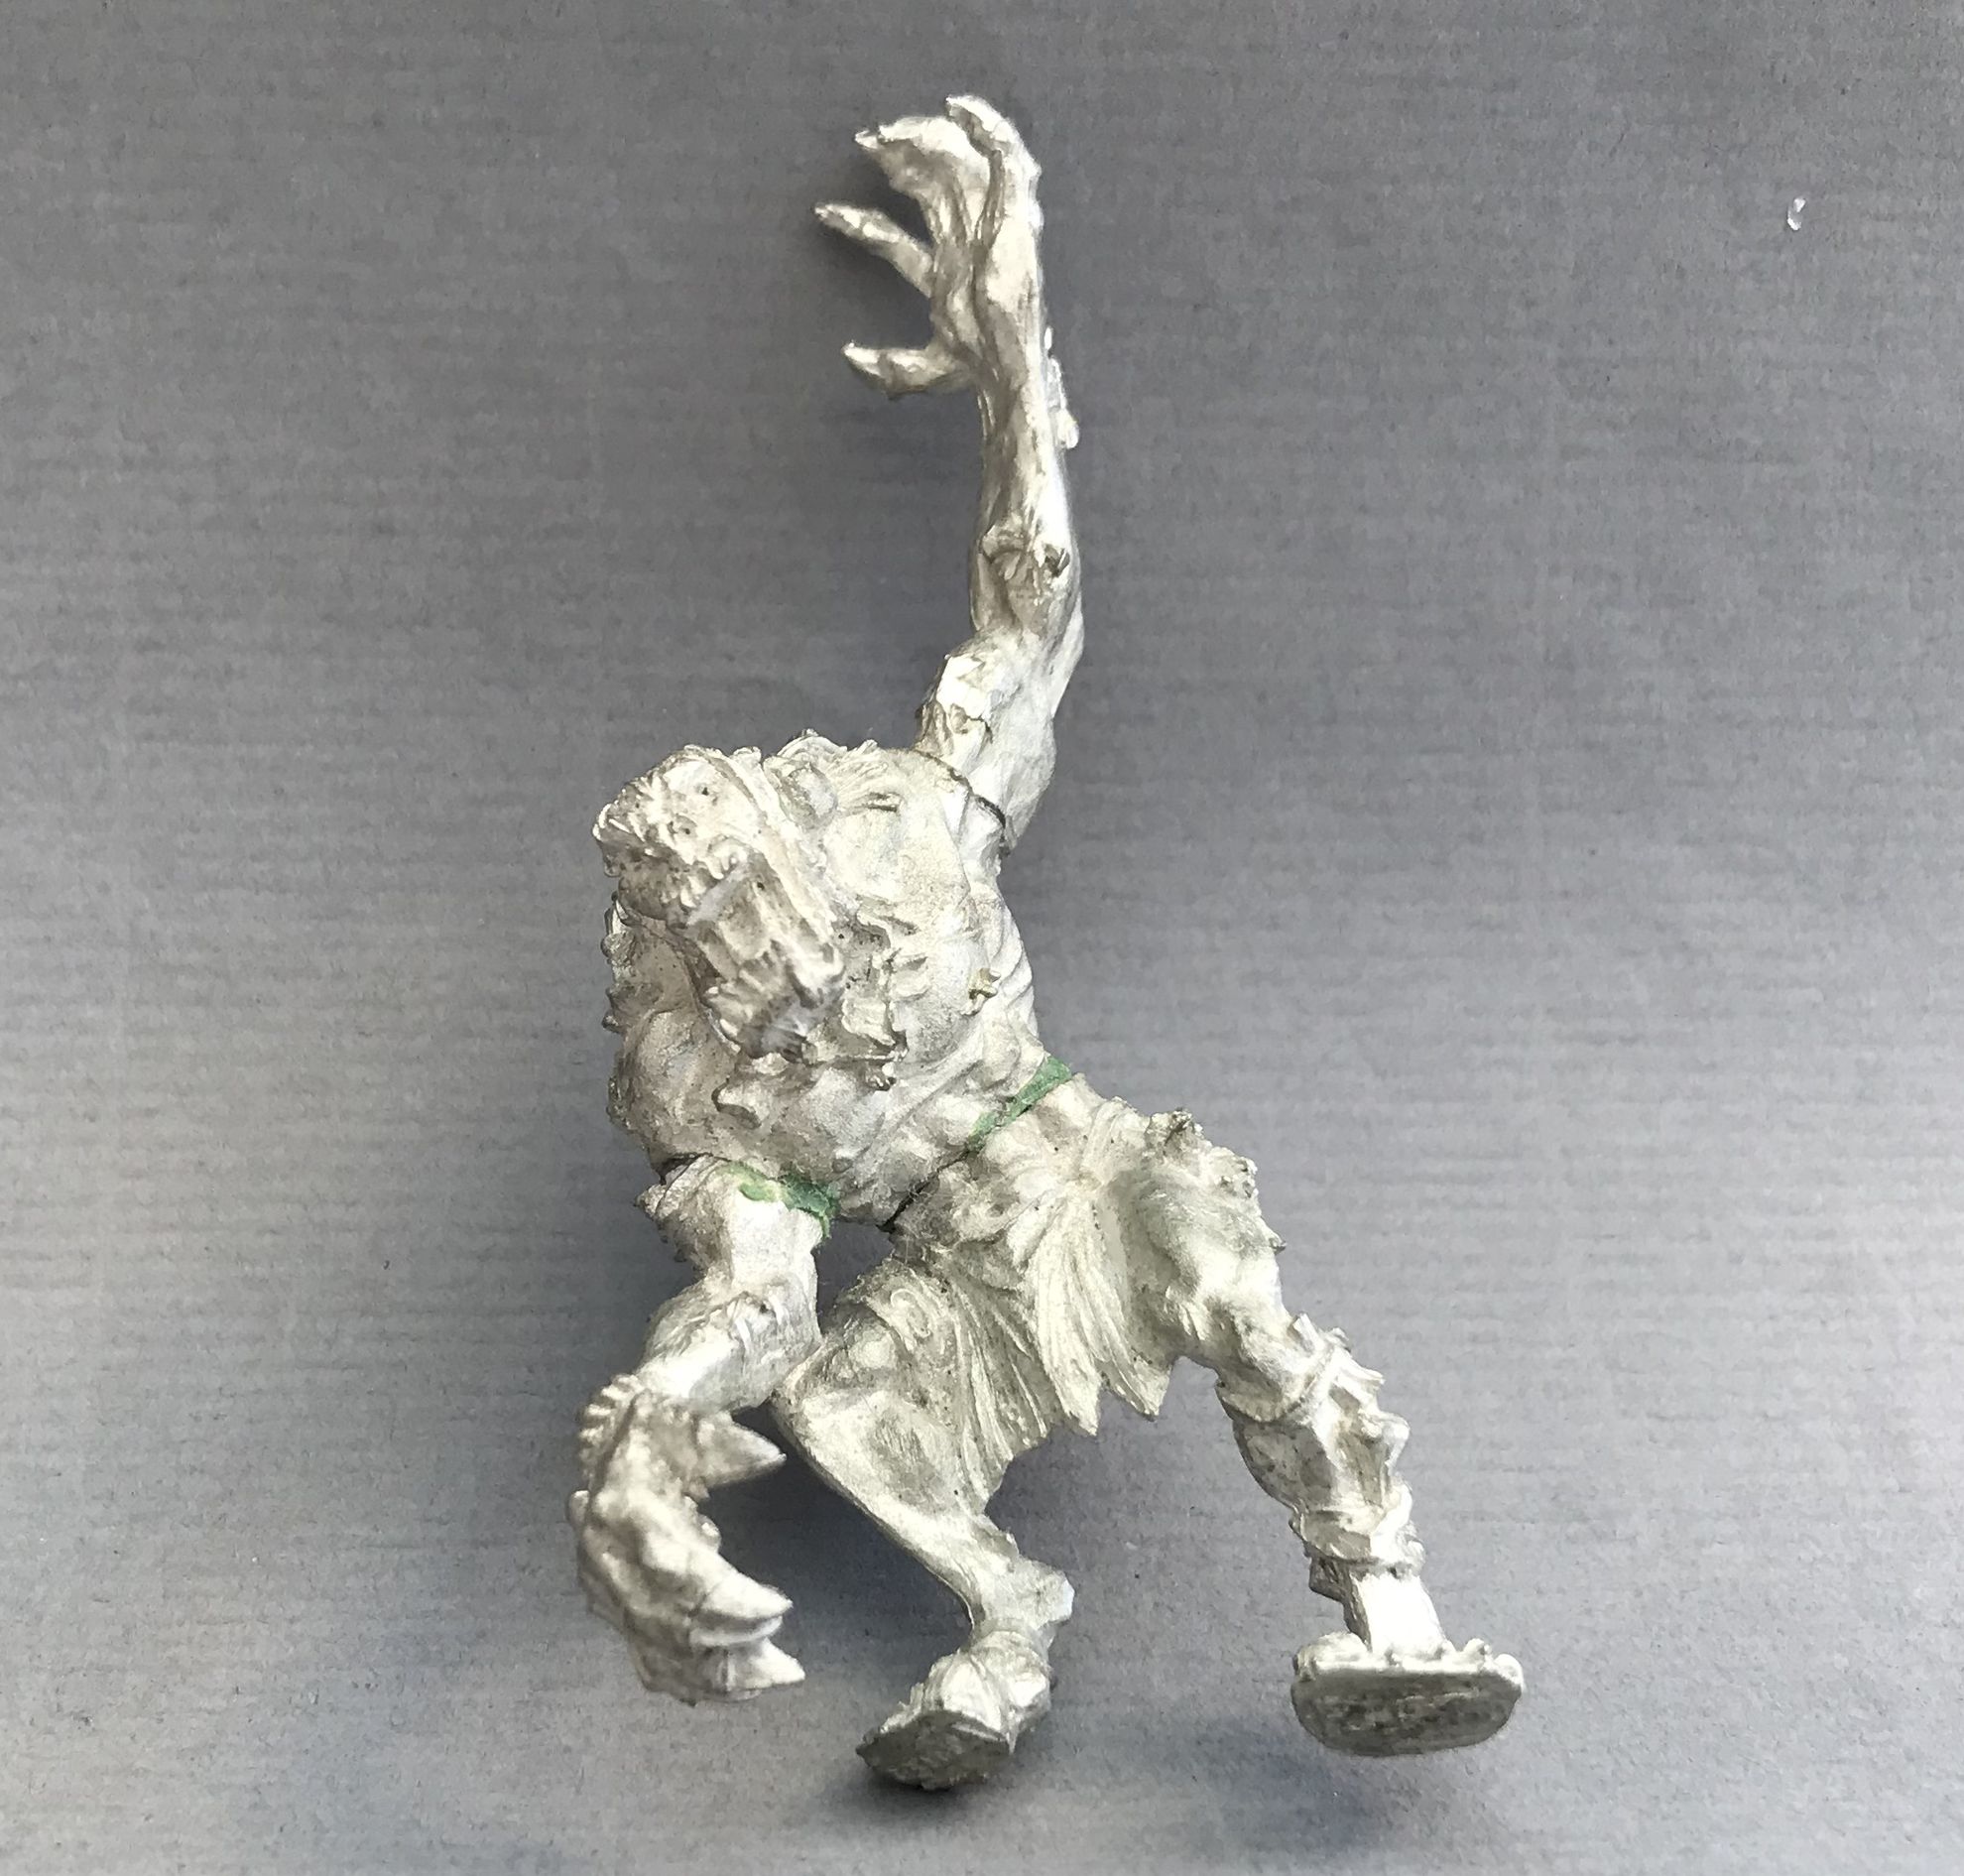
The Behemoth, again a classic model which looks great, problem is that currently all is hidden behind the thick paint… or so I hope.

These two I quite like, I will use them together on one base to serve as the army’s war machine. Again cleaning and rebasing will be needed to get started.
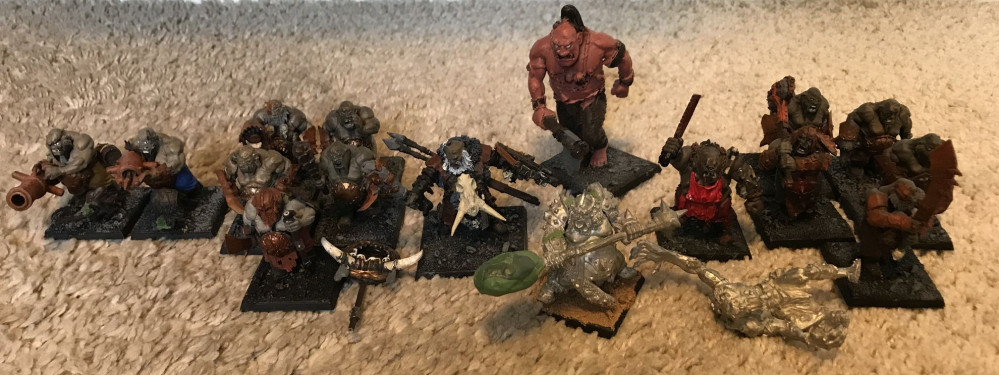
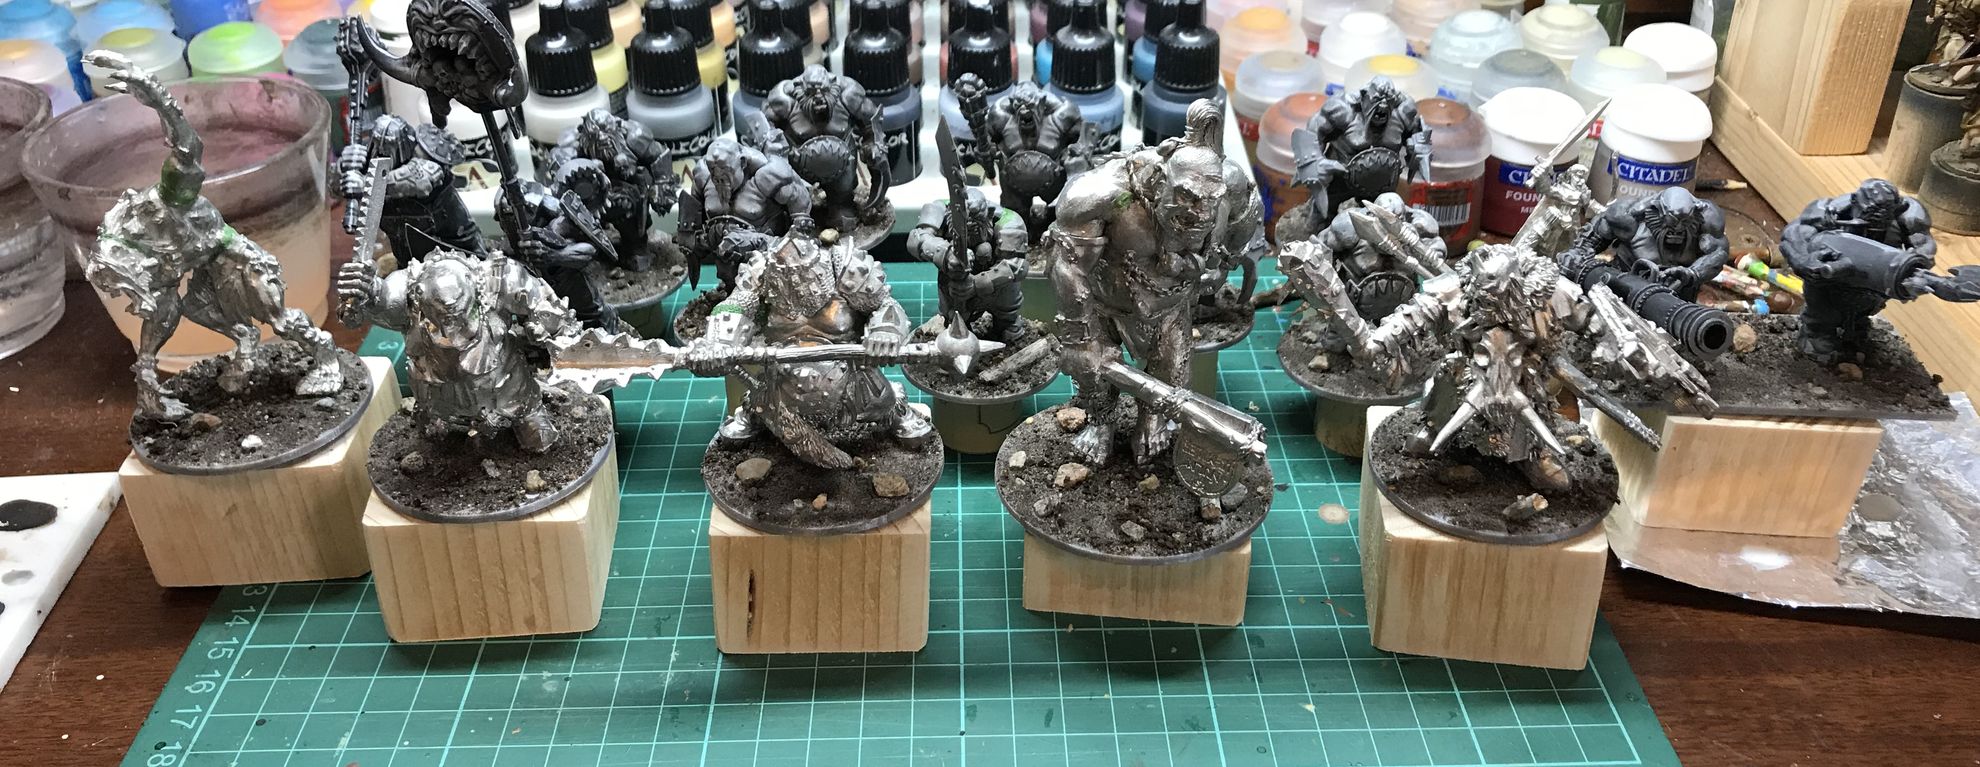
 The bulk of the force are these ten Ogres. I would like to stripp paint from them as well, so I have to think how to do that on plastic.
The bulk of the force are these ten Ogres. I would like to stripp paint from them as well, so I have to think how to do that on plastic. They will also go on round bases instead.
The bonus figure…. the earlier showed ones make the eight points in Saga I need. This one however I will add, I have a plan for him…. 🙂
The beginning - Looking at the starting point - Part 1
Hi all!
When I saw the Spring Cleaning content this morning I found it quite ironic. This is as I yesterday bought a second hand force of Ogres that I intended to use in Saga – Age of Magic. However, I realised I would like to have them painted hopefully quite a bit better than their current state. First I thought I could just touch them up a bit, but I think they are just to bad a starting point. Lets meet the suspects…
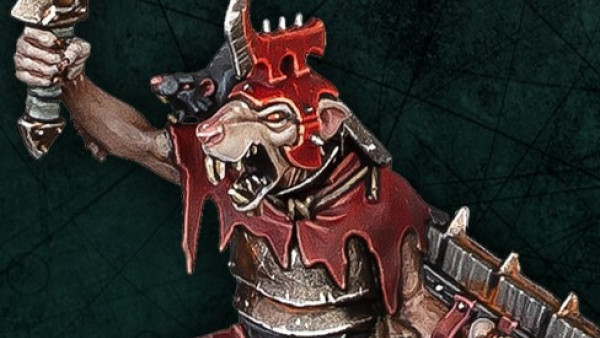
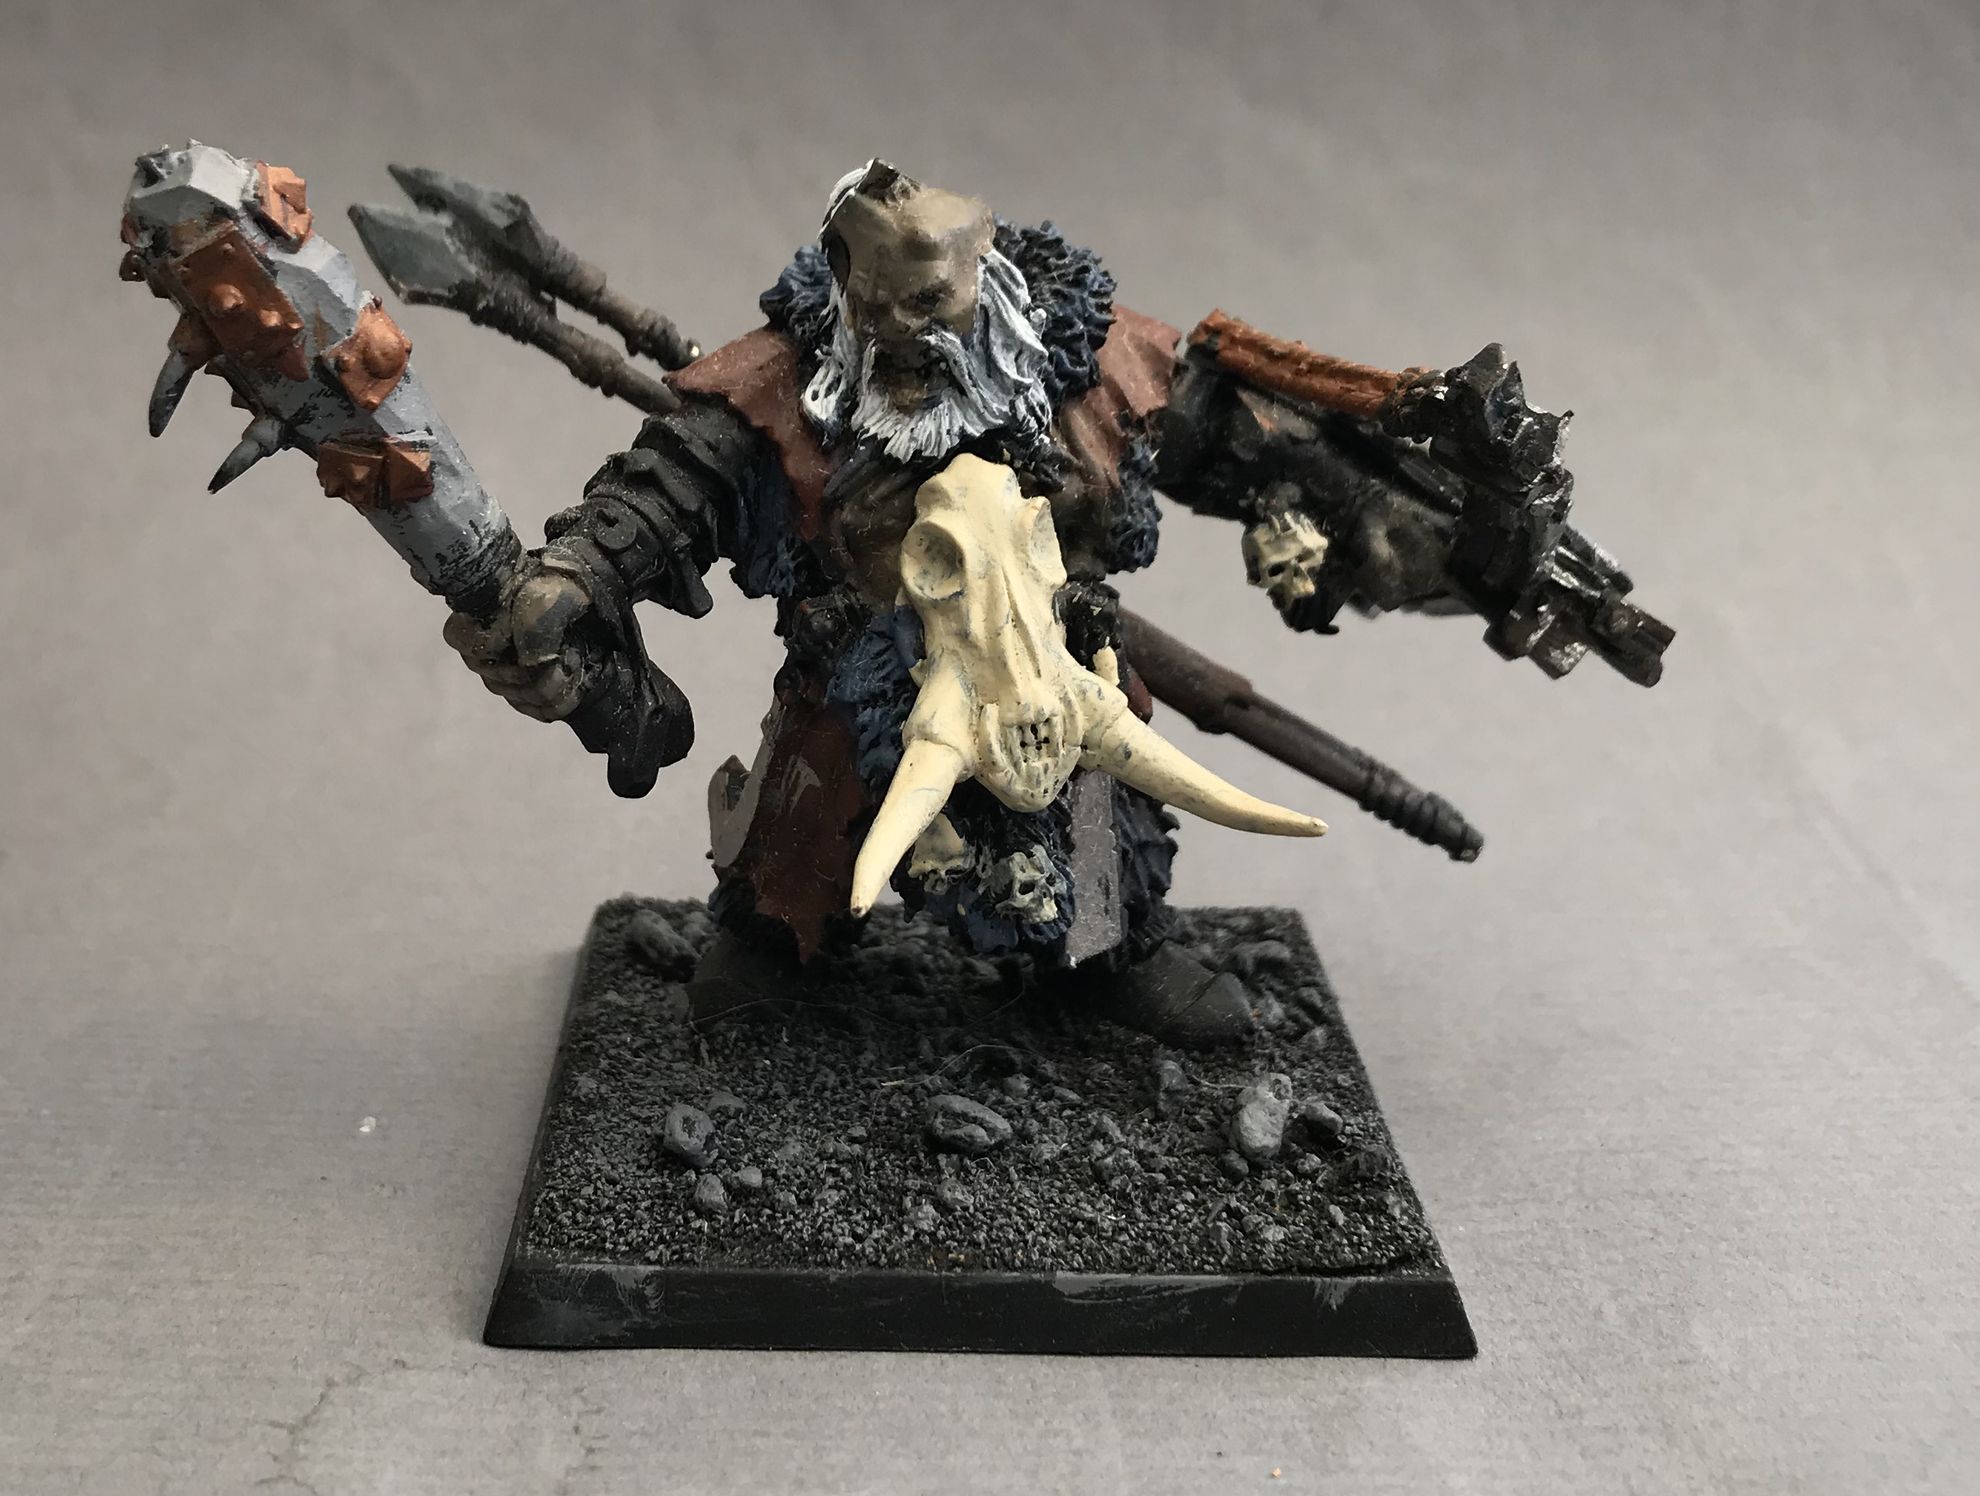
The Warlord of the force… why why have someone put a big lump of greenstuff on his weapon? What is hiding beneath?? This needs removal of the greenstuff and rebasing to a round base.
 The Champion, again a really nasty paintjob, lots and lots of paint on. Intention is to stripp it and rebase.
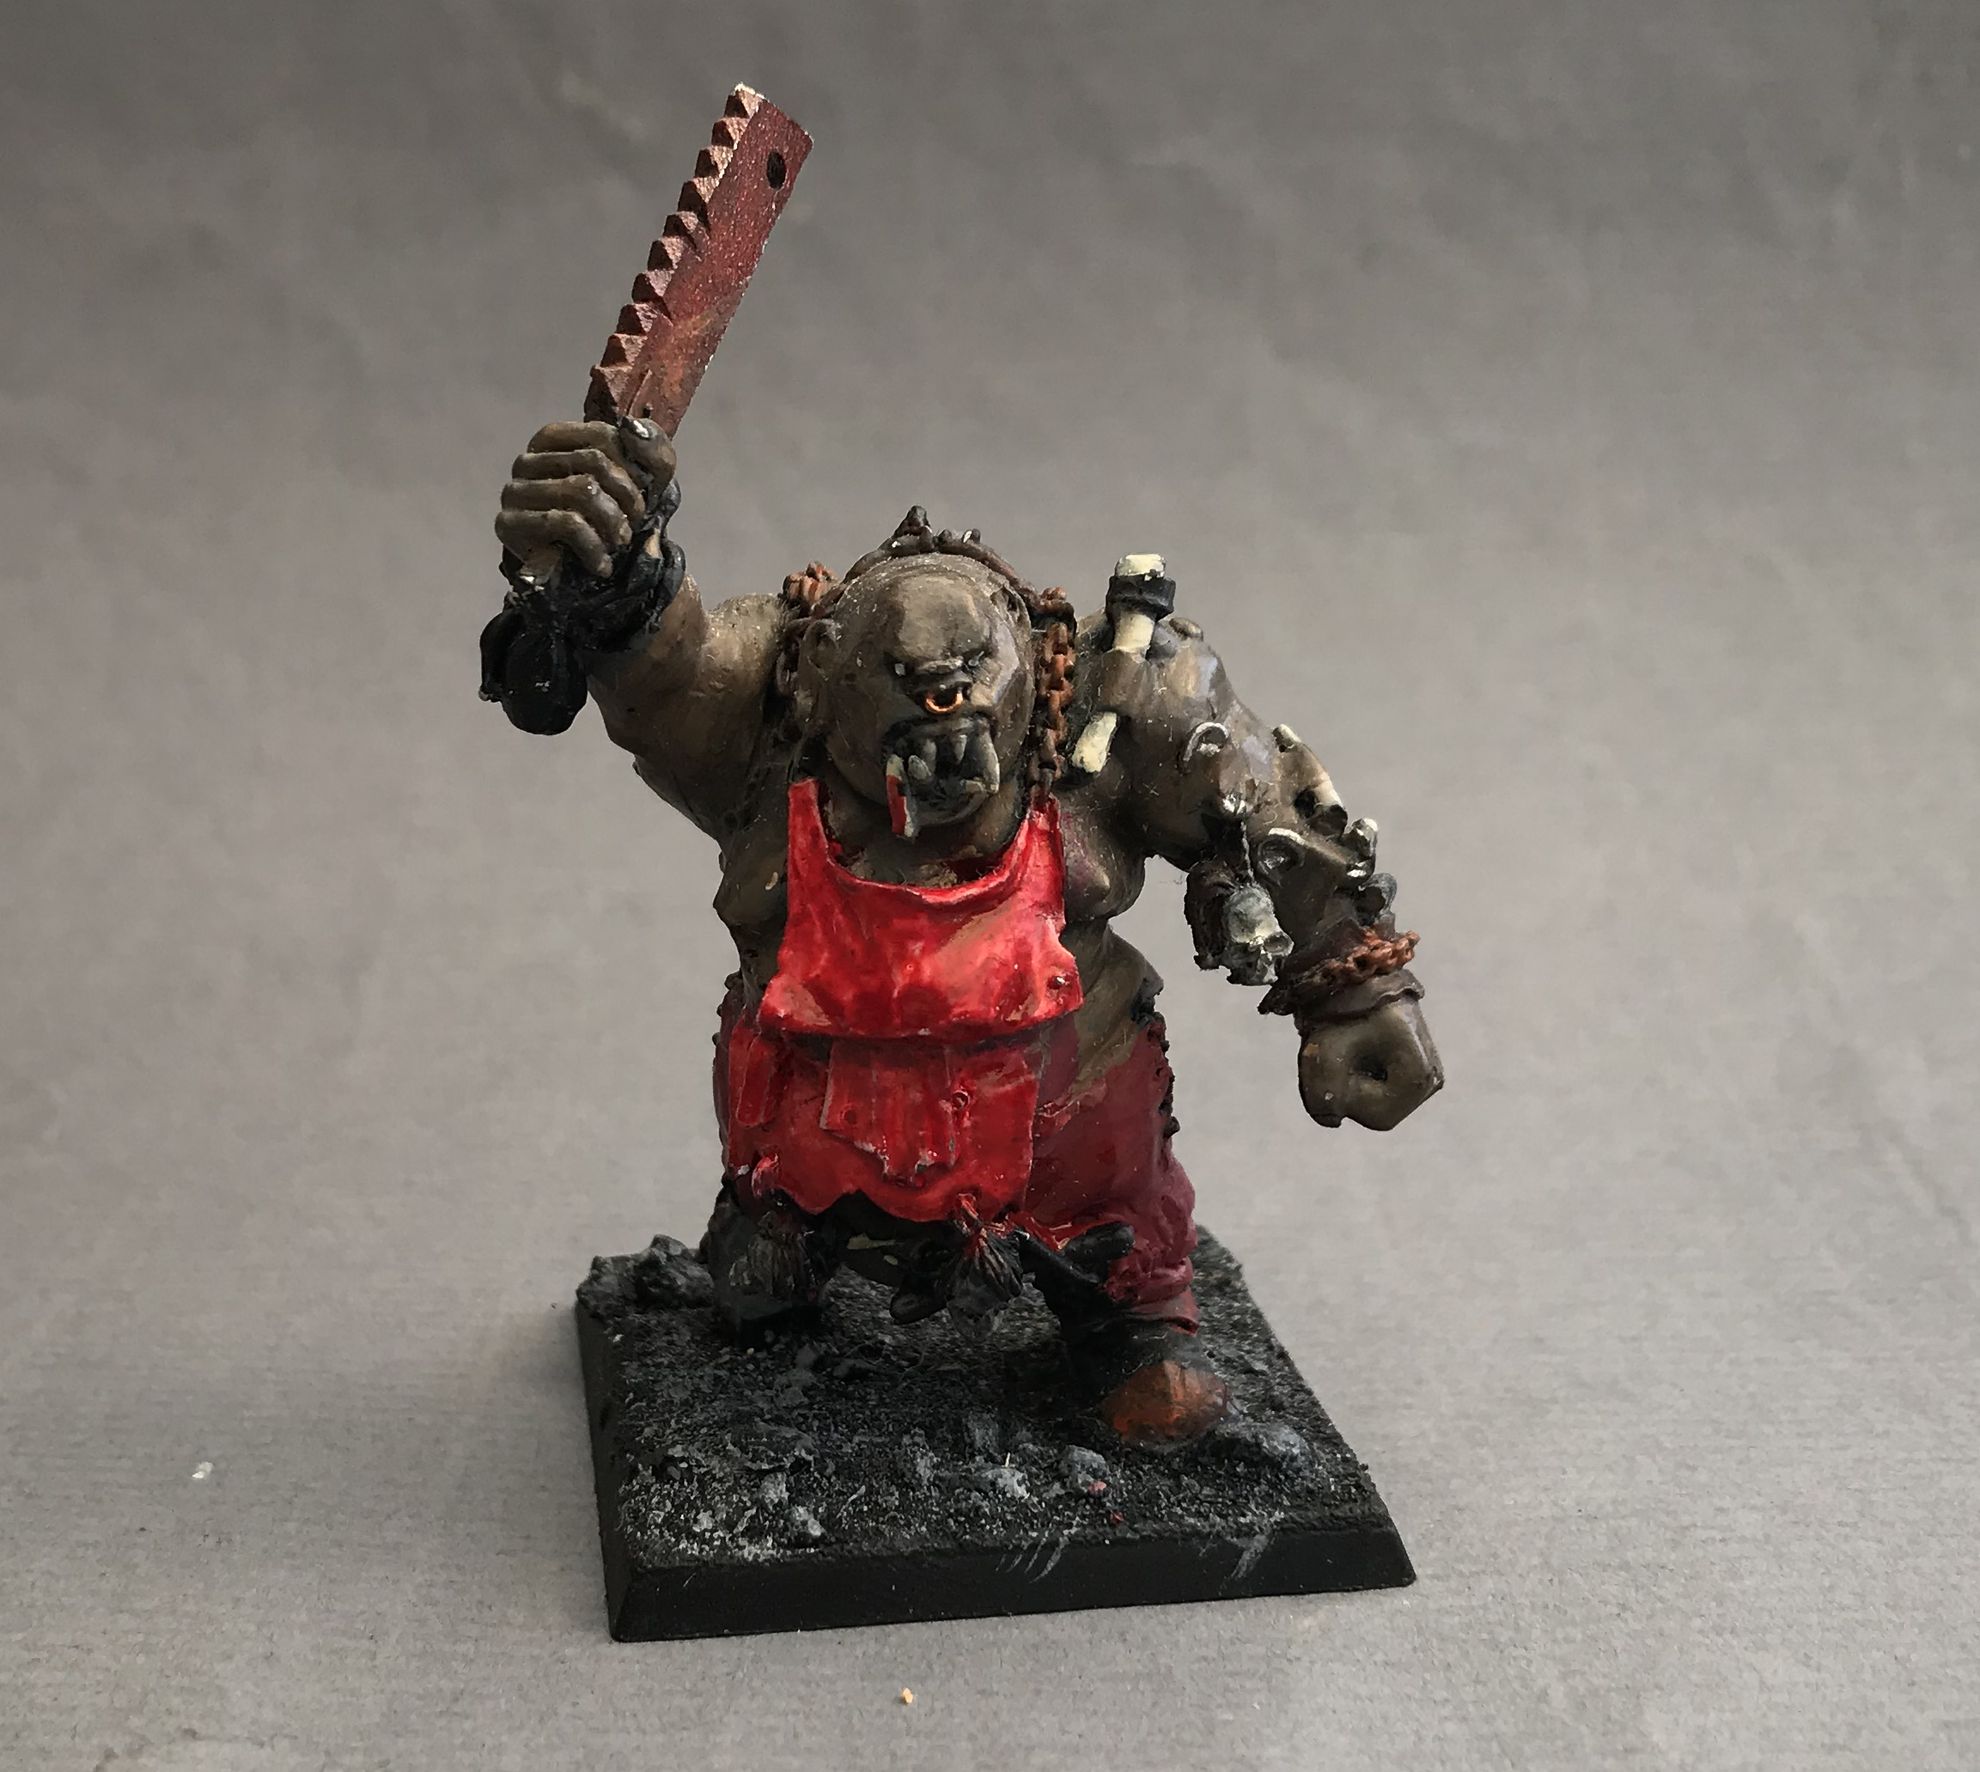 The Sorcerer, again a great model but currently not that nice. Note that more blood is not scarier!!