


Liberty Prime is back online!


Recommendations: 130
About the Project
Build project for the massive Liberty Prime model from Modiphius for Fallout Wasteland Warfare.
Related Game: Fallout: Wasteland Warfare
Related Company: Modiphius Entertainment
Related Genre: Post-Apocalyptic
This Project is Completed
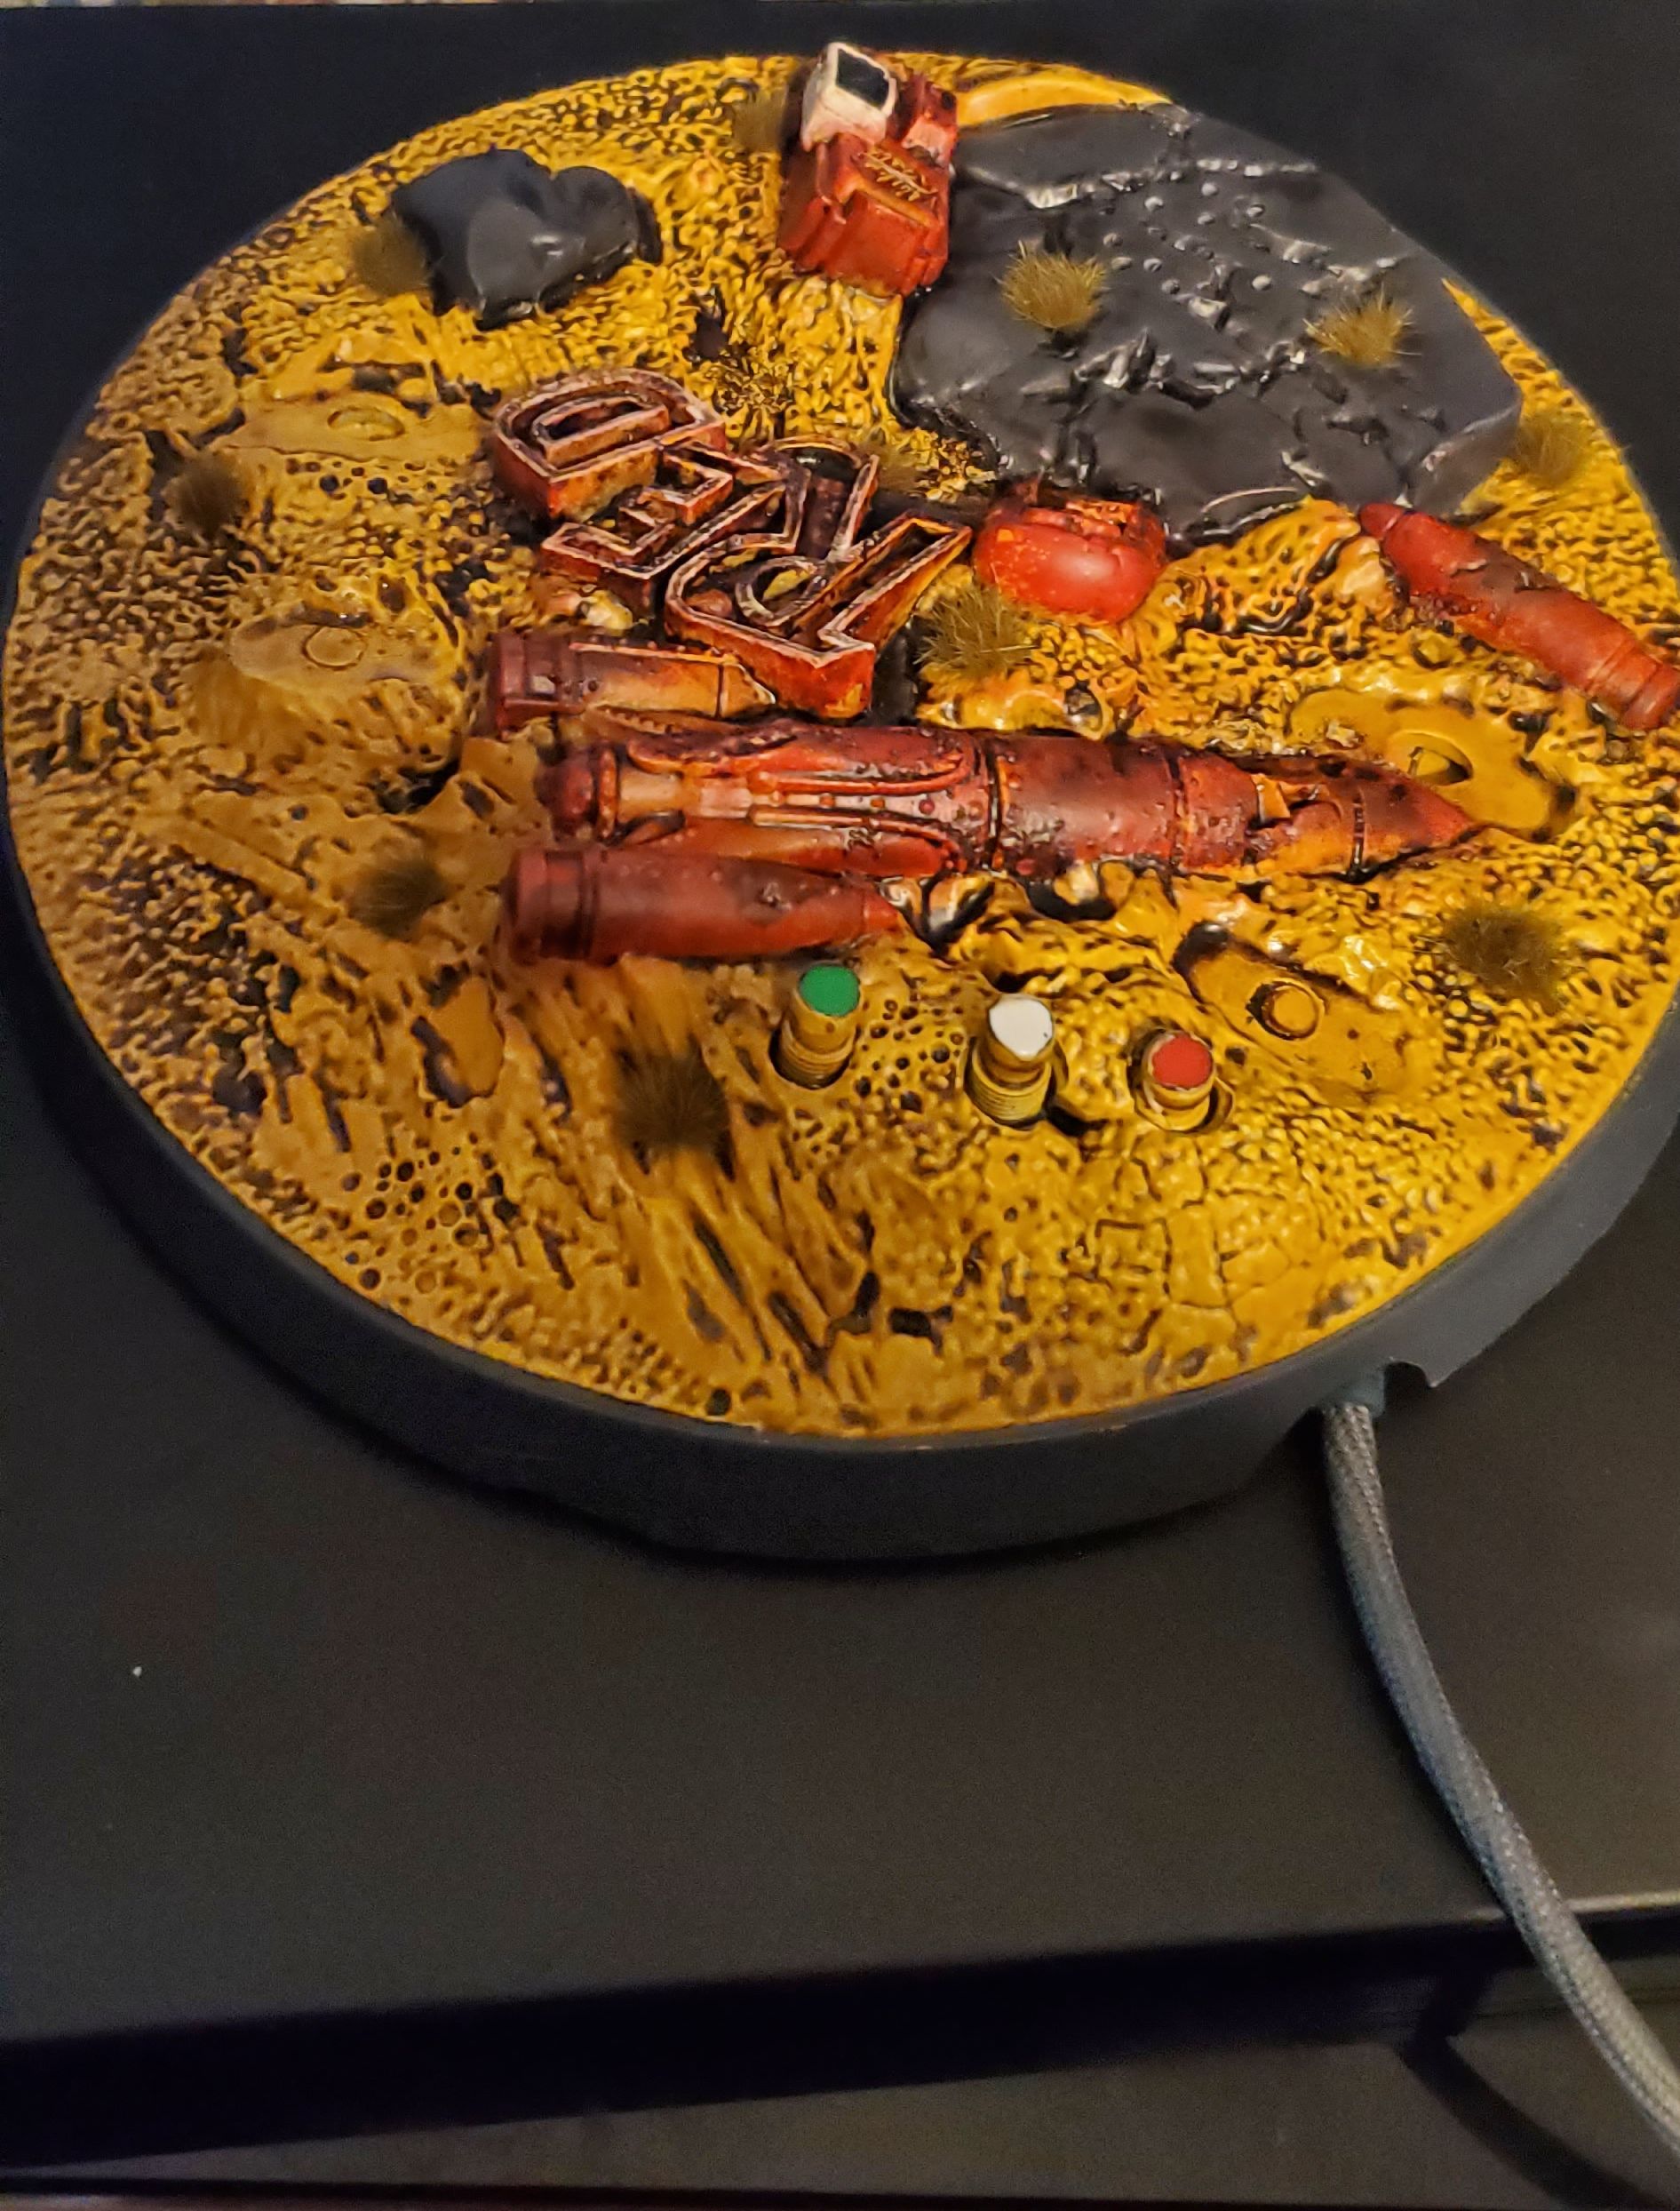
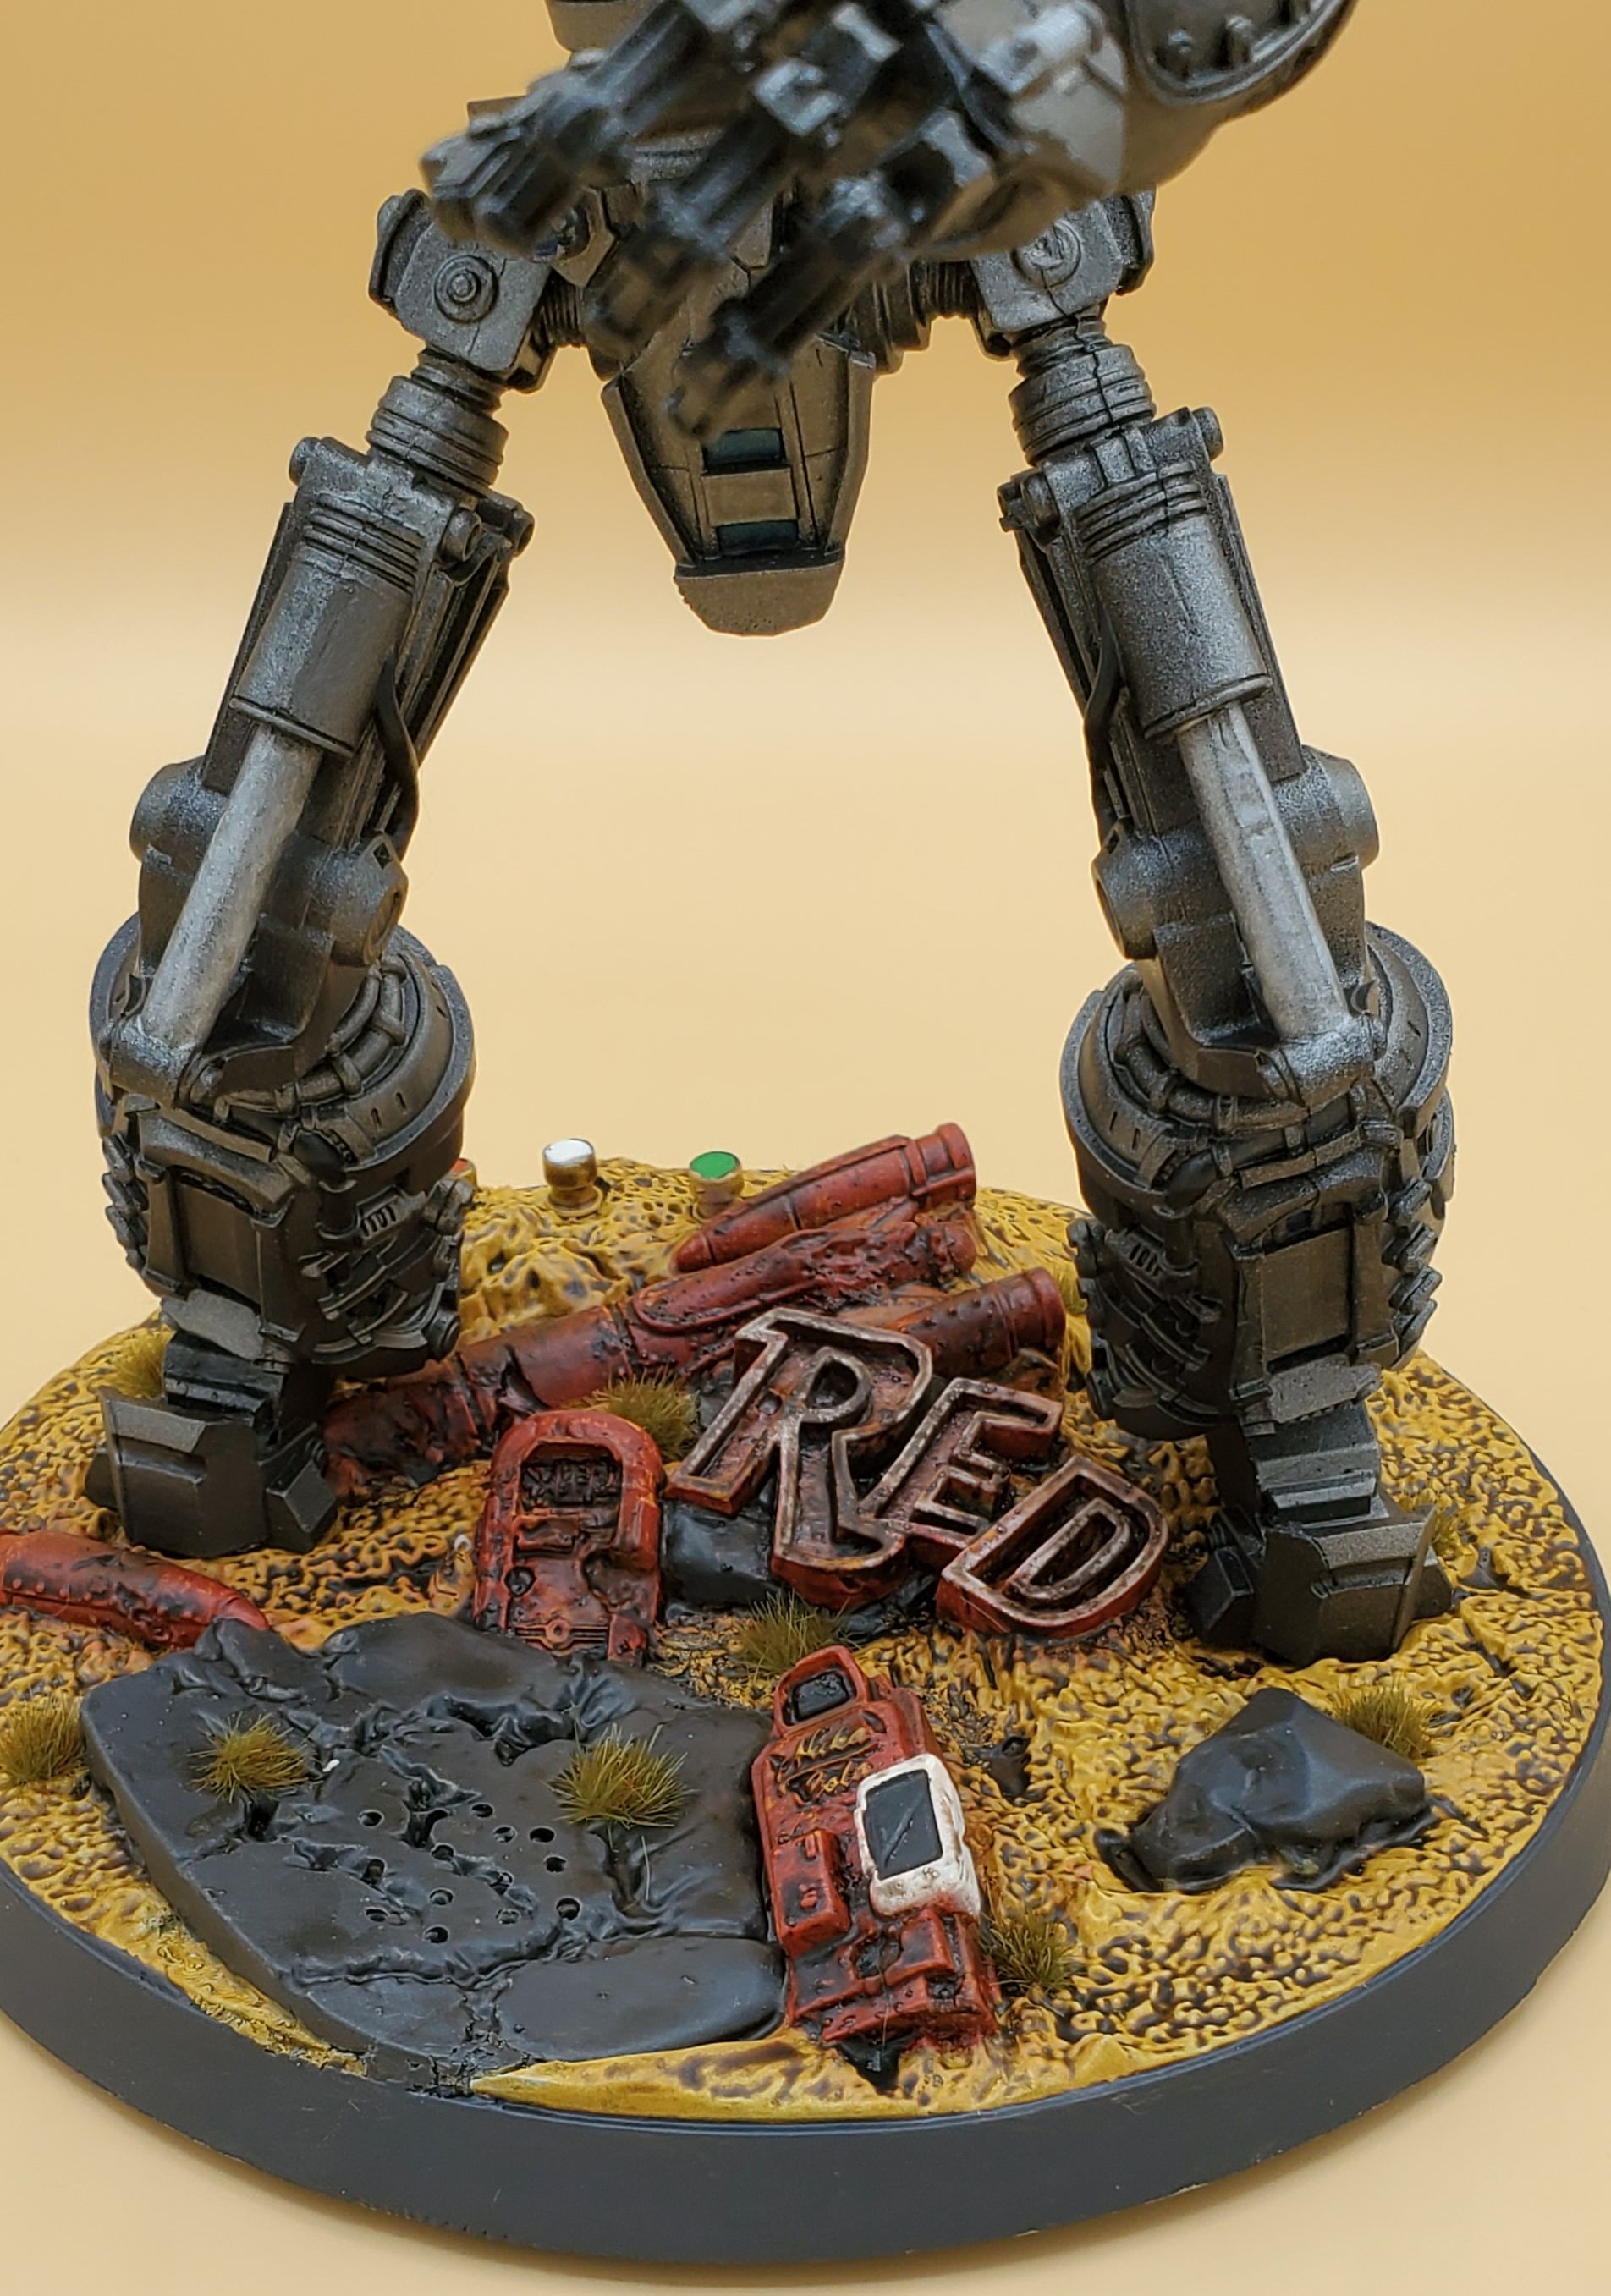
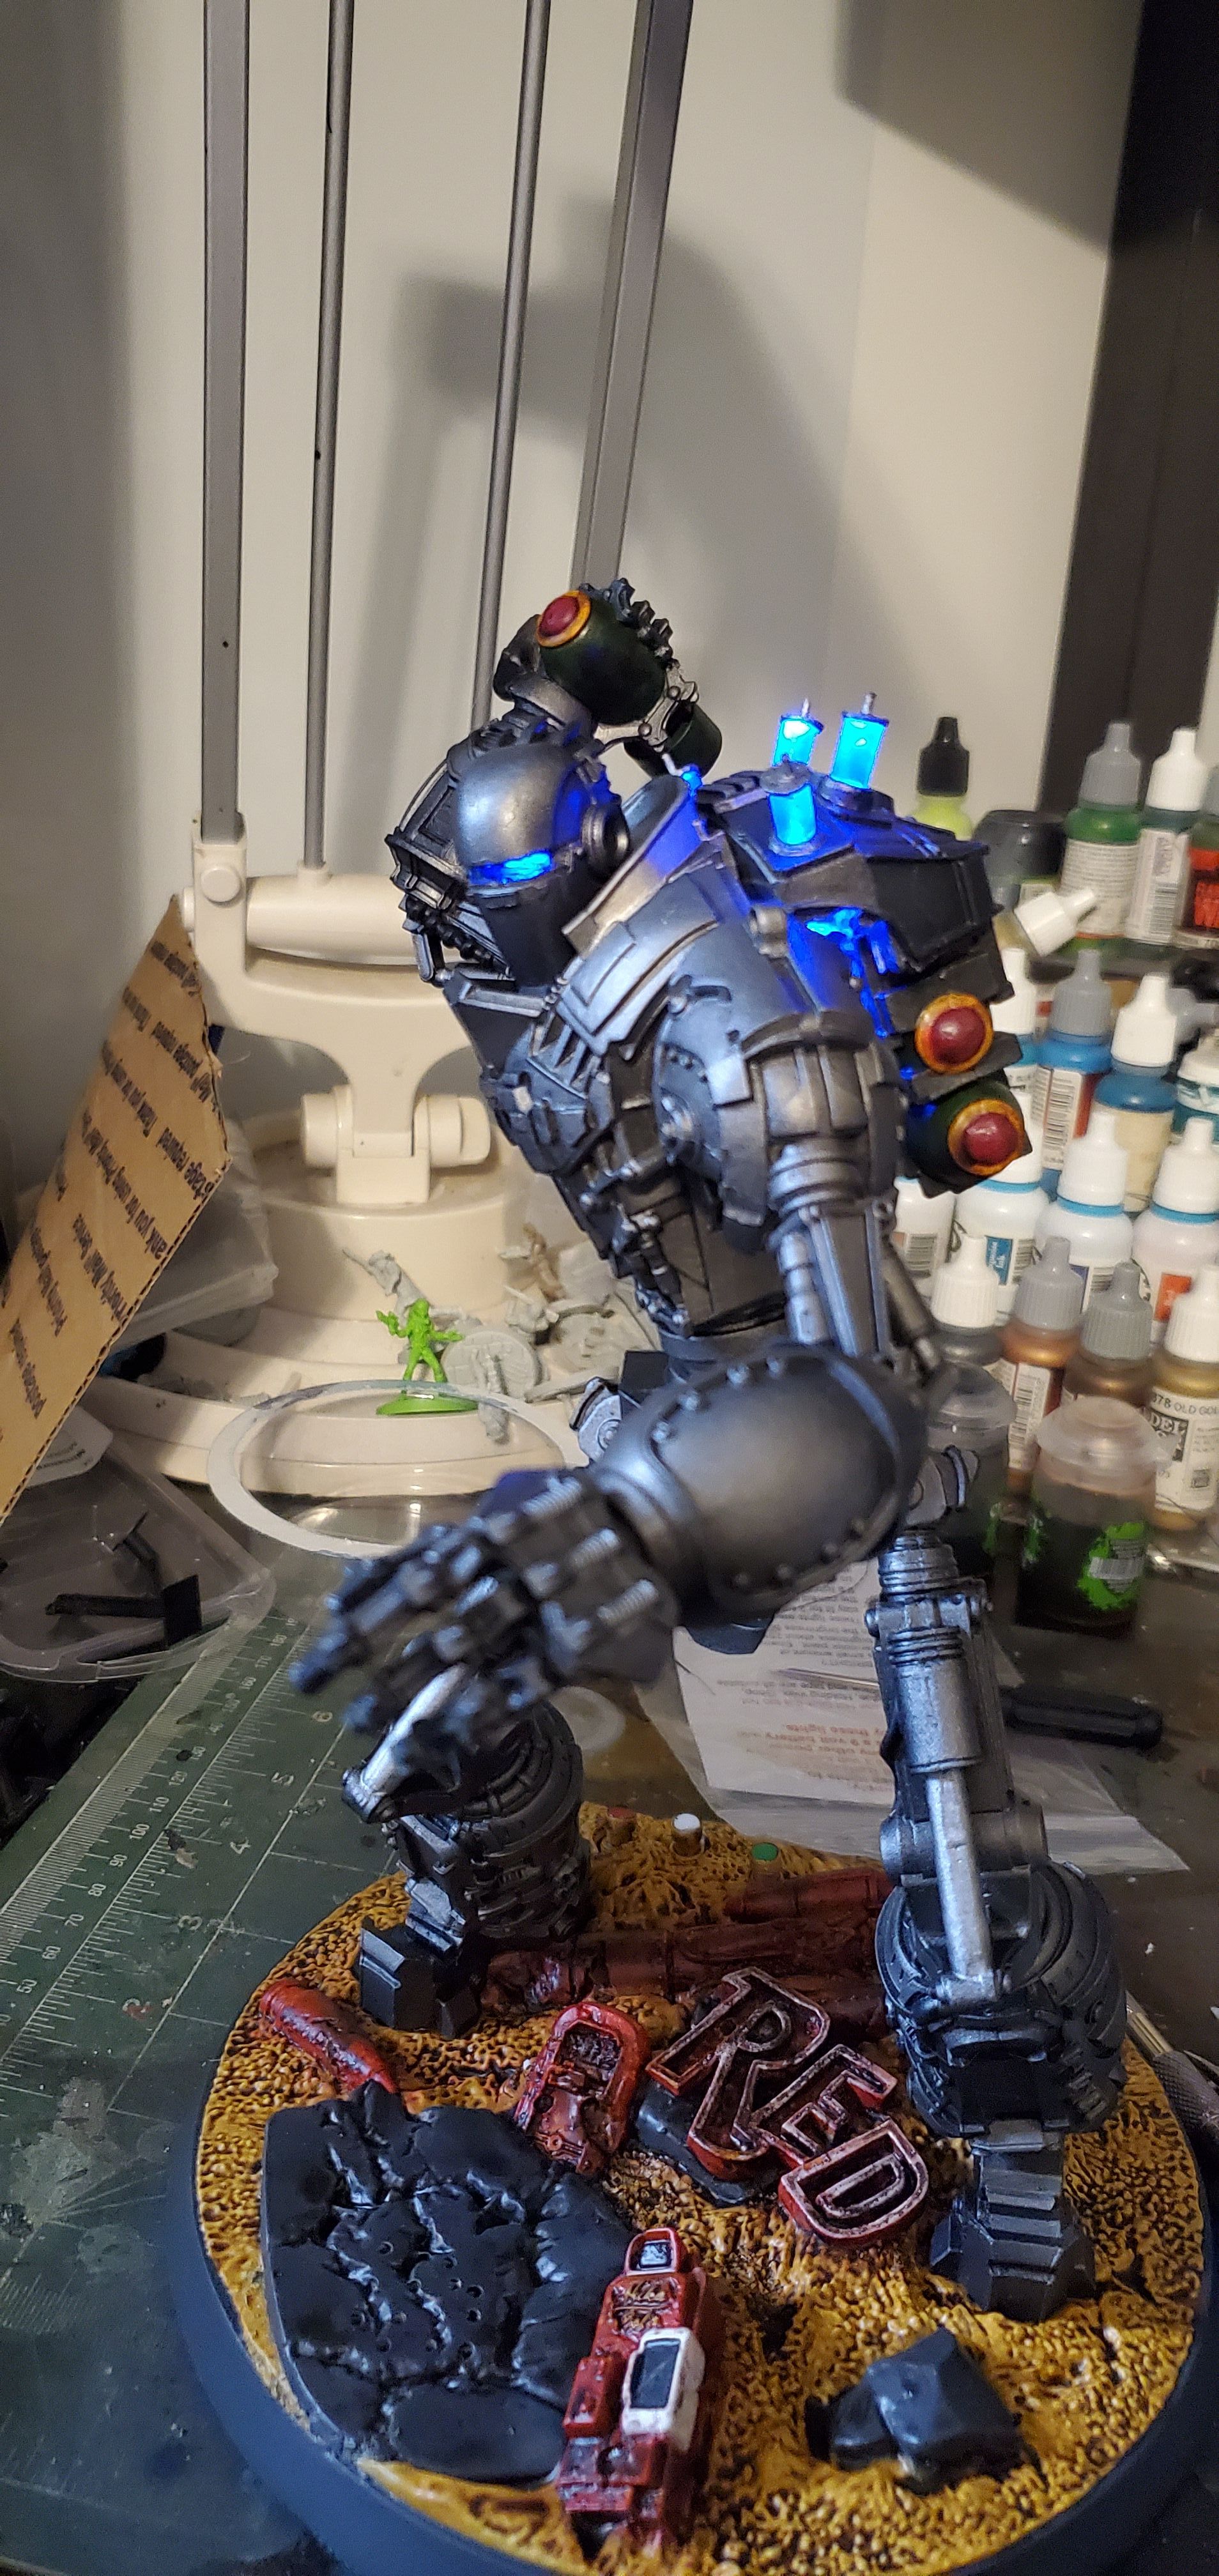
Final Shots
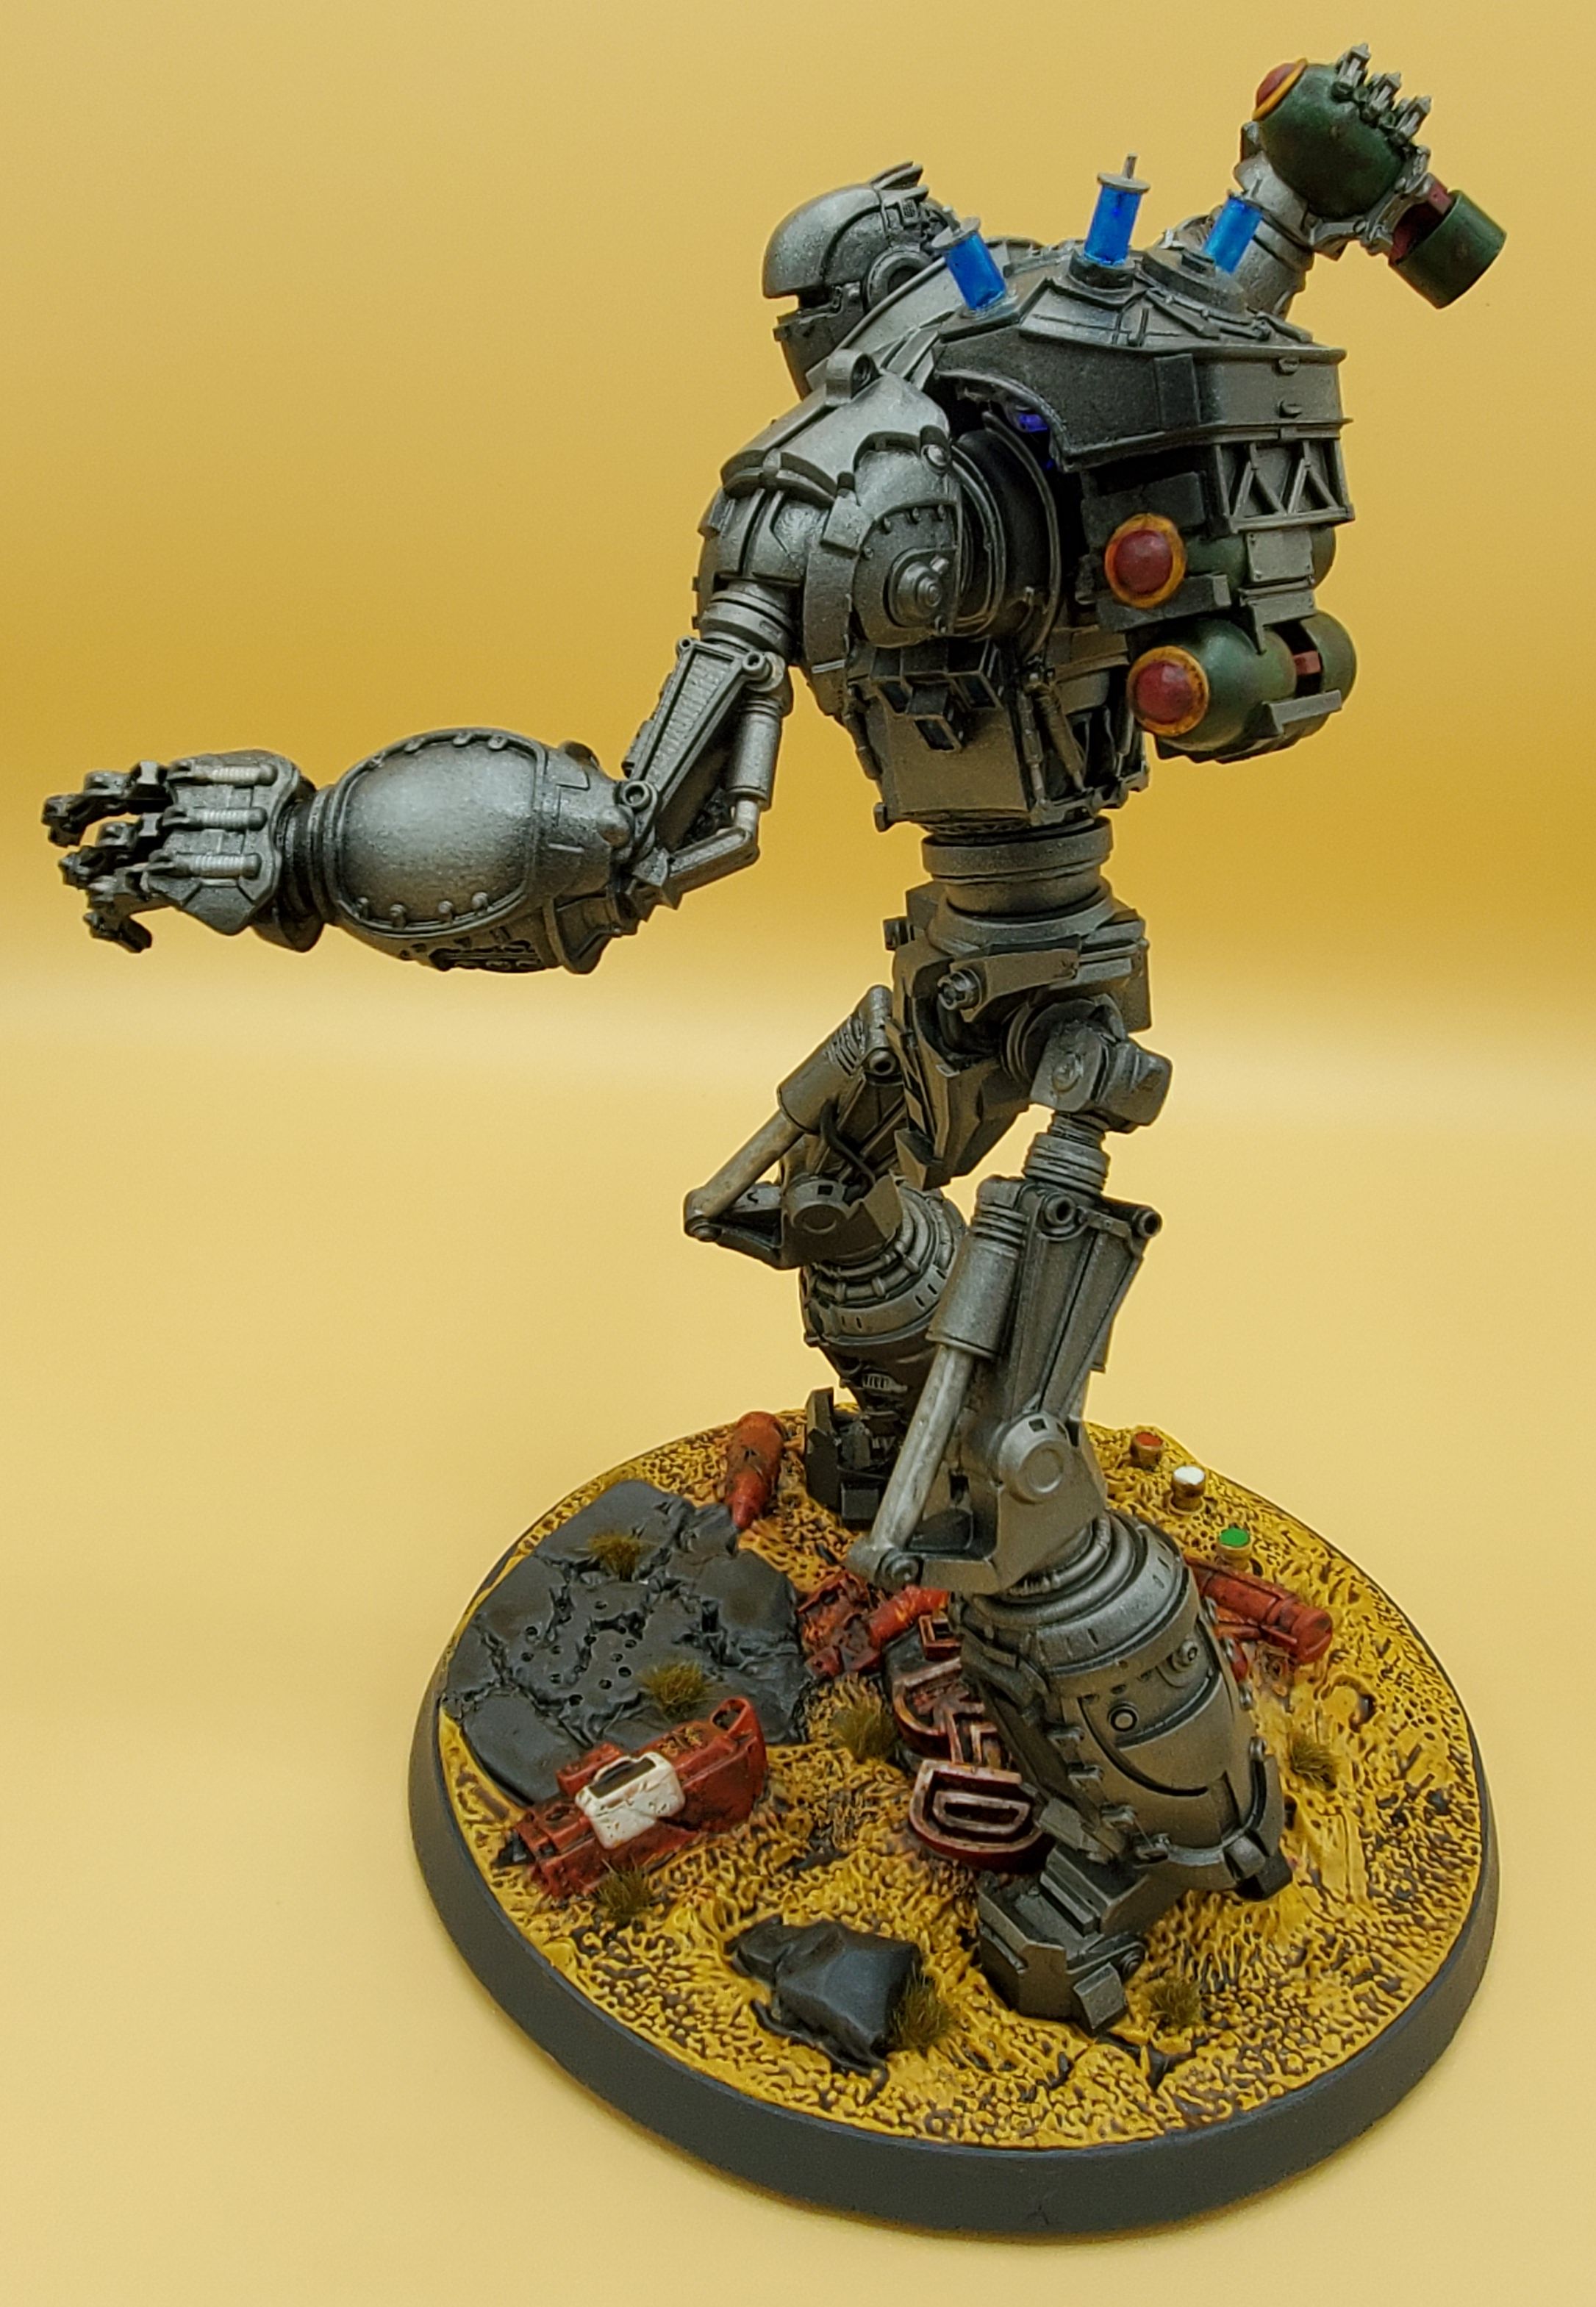
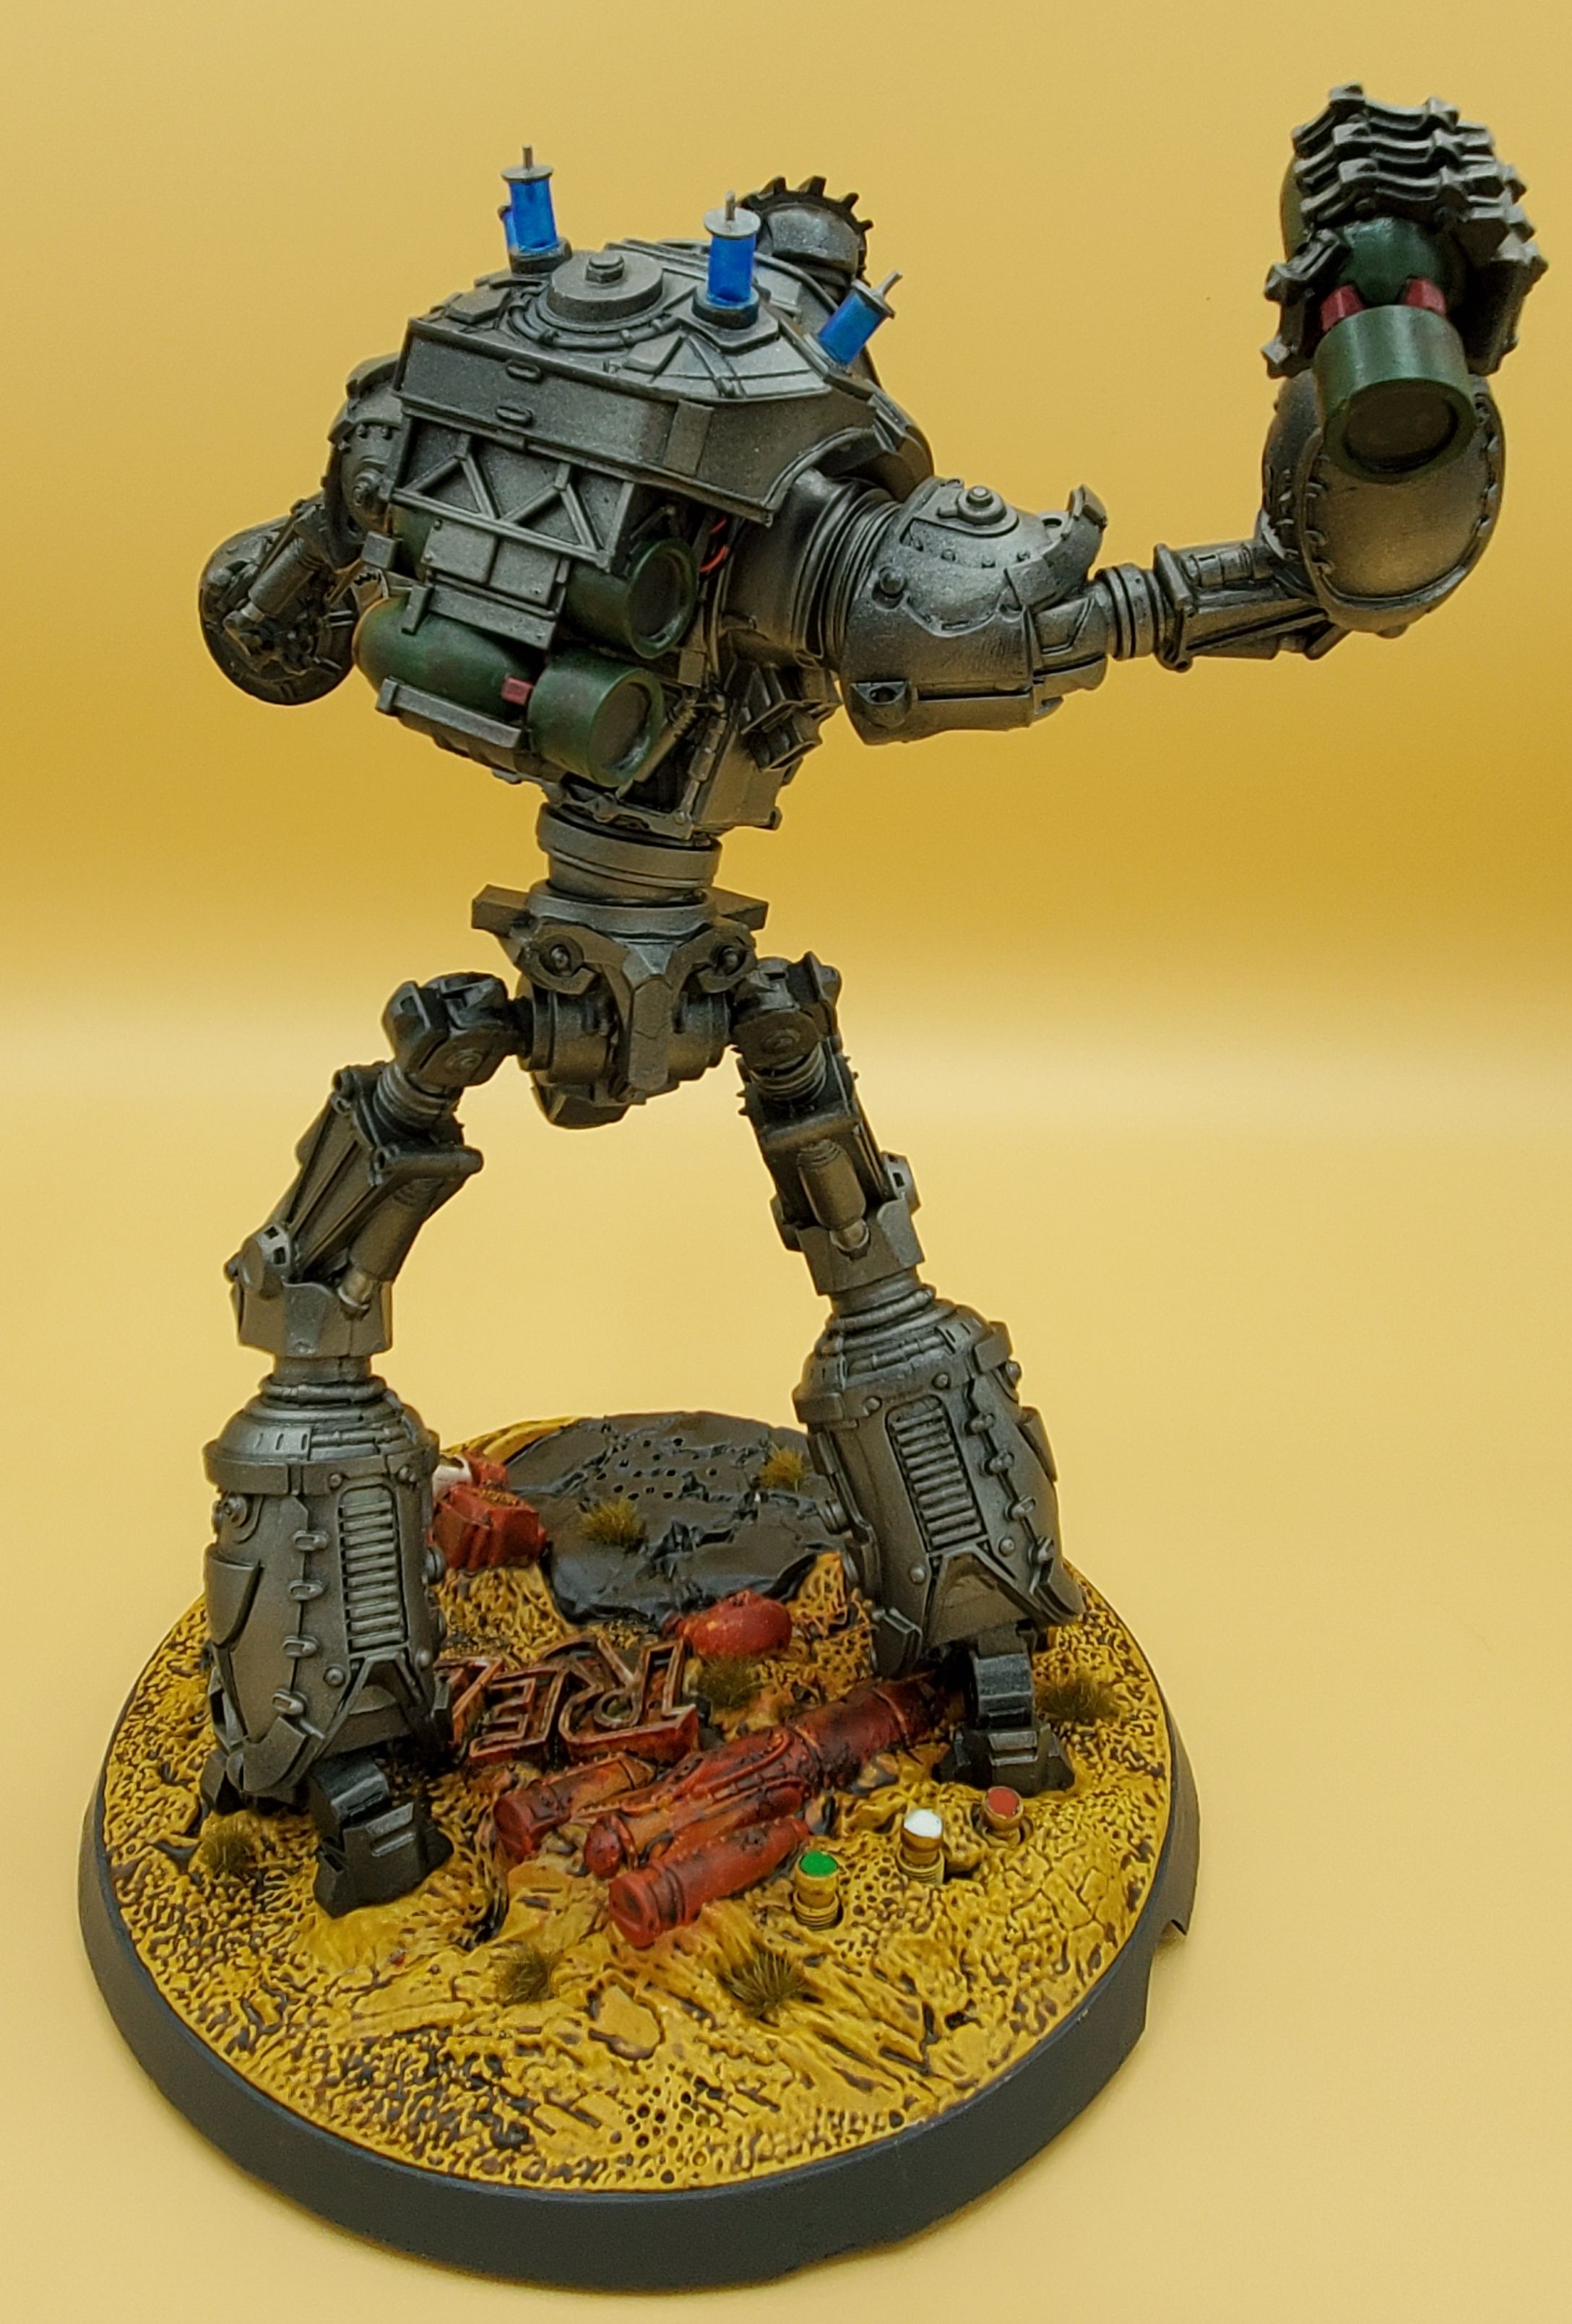
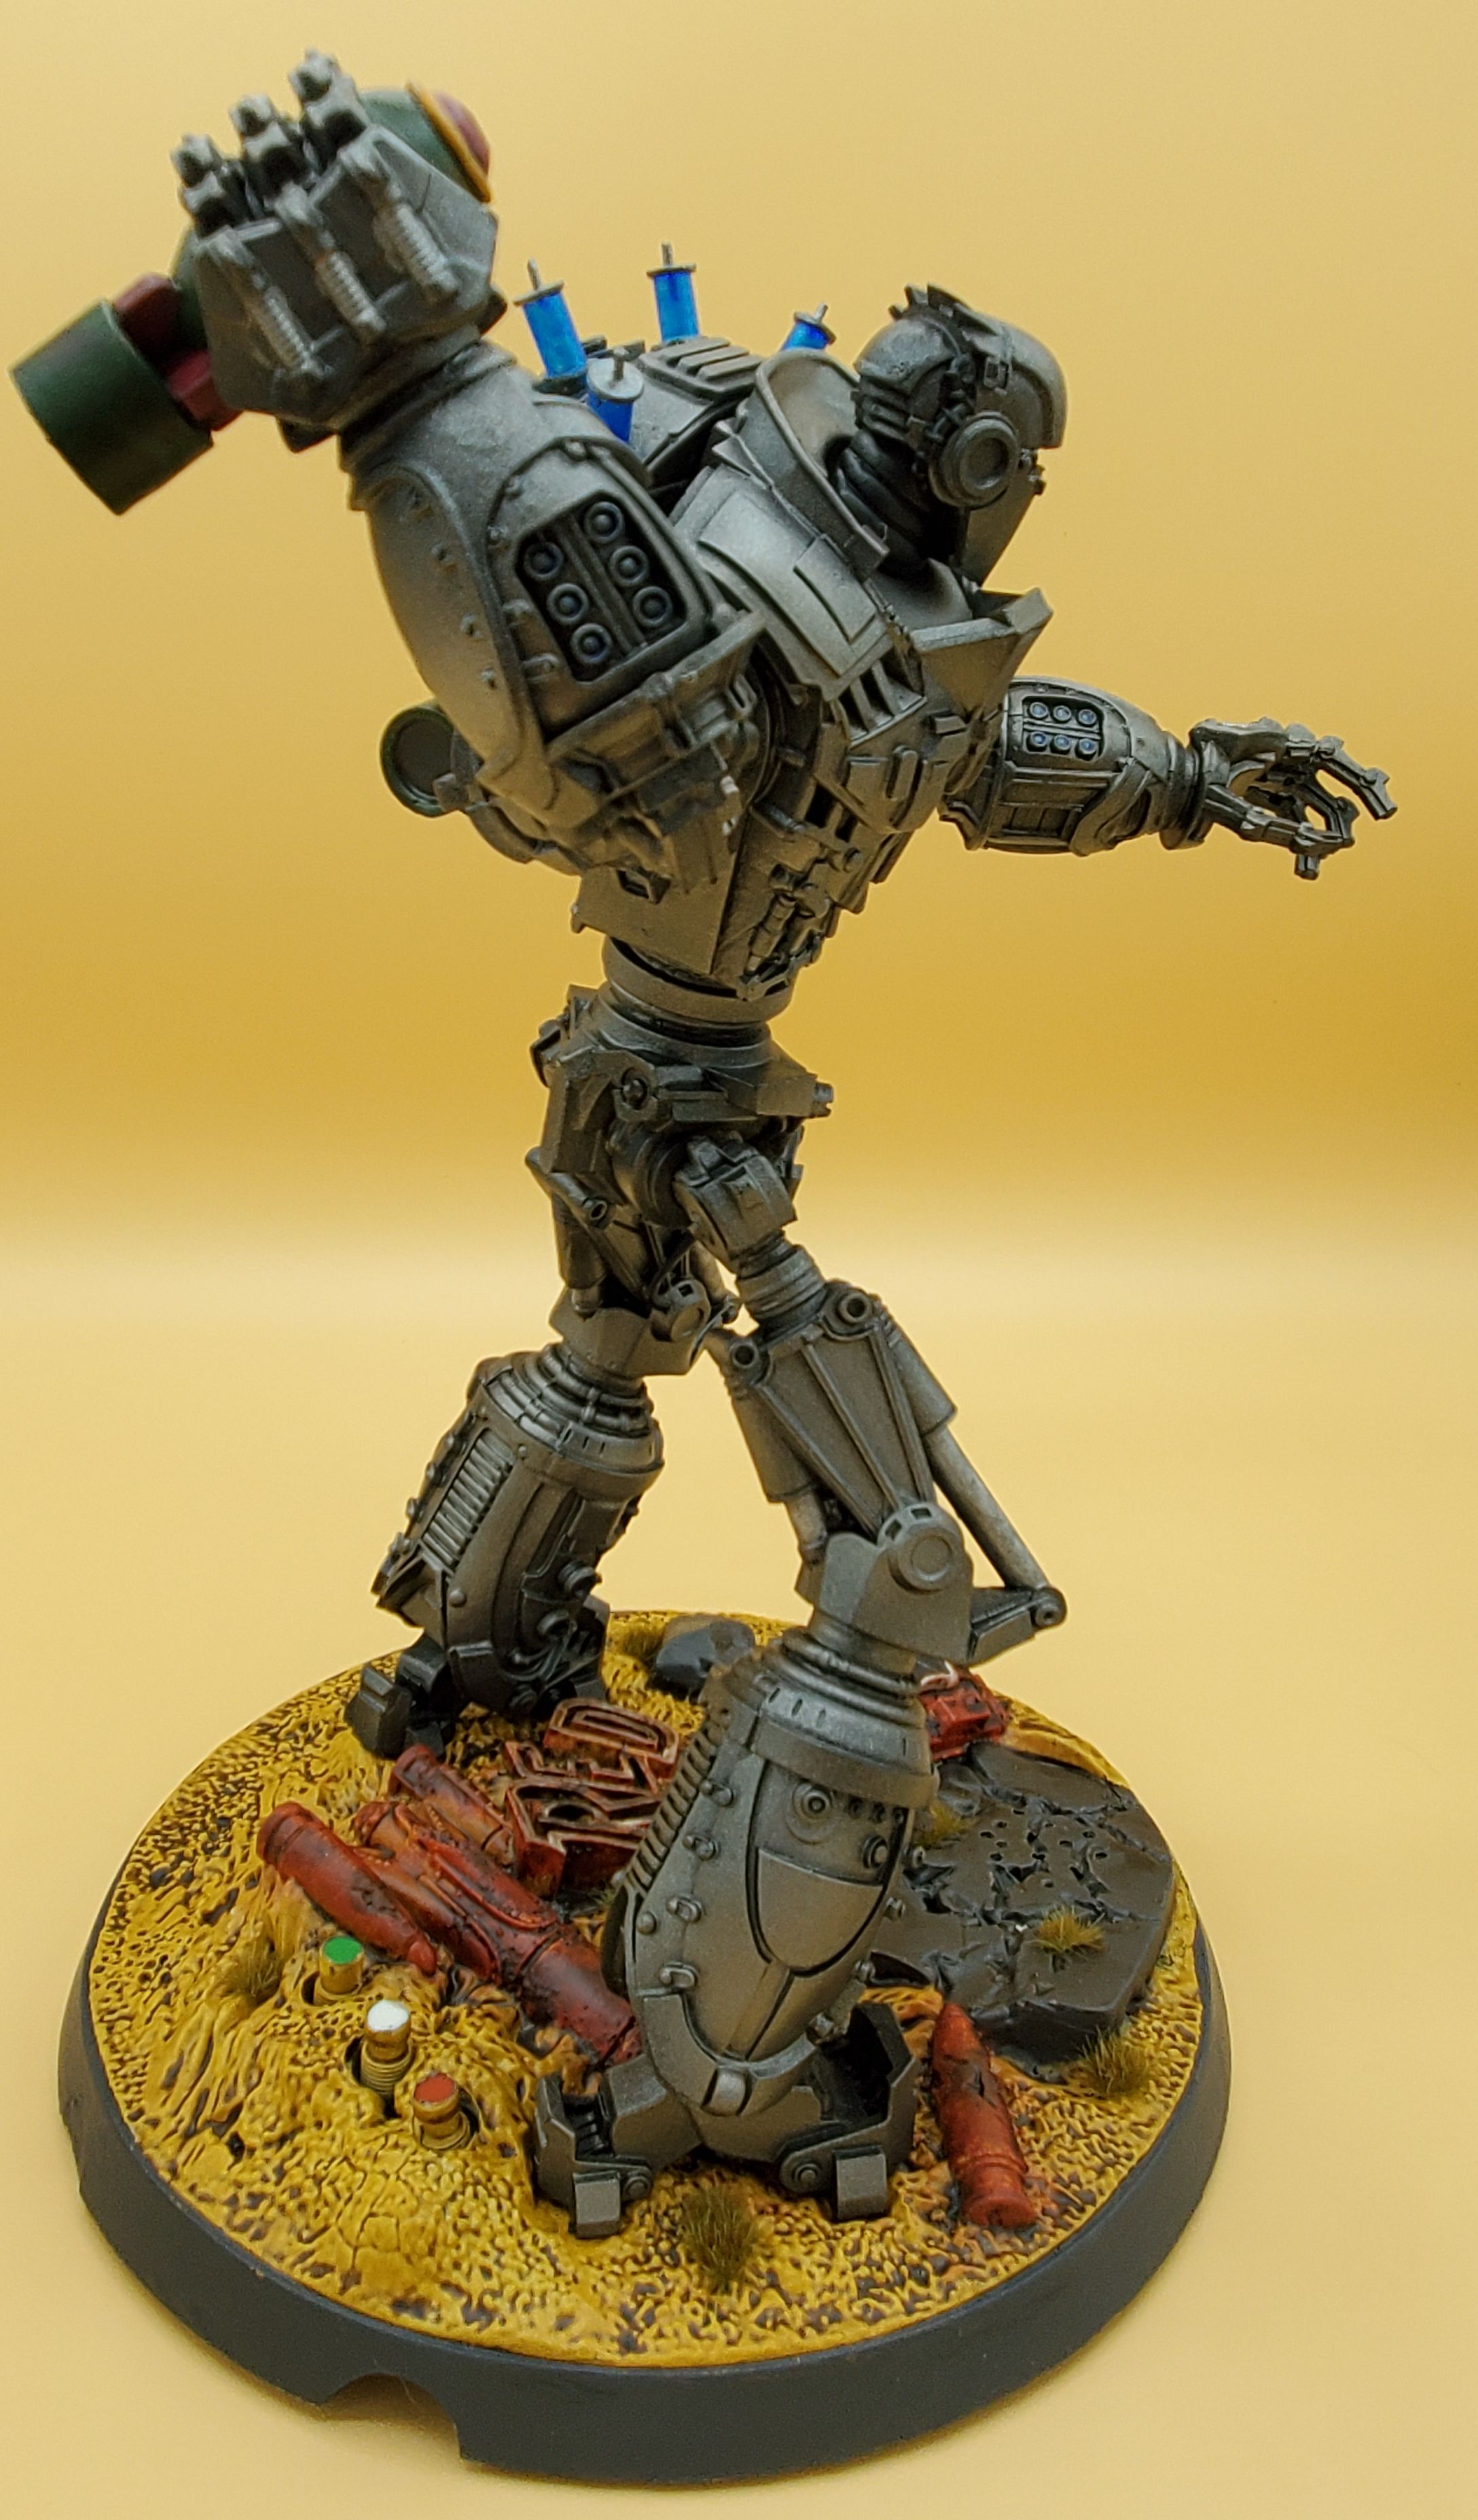
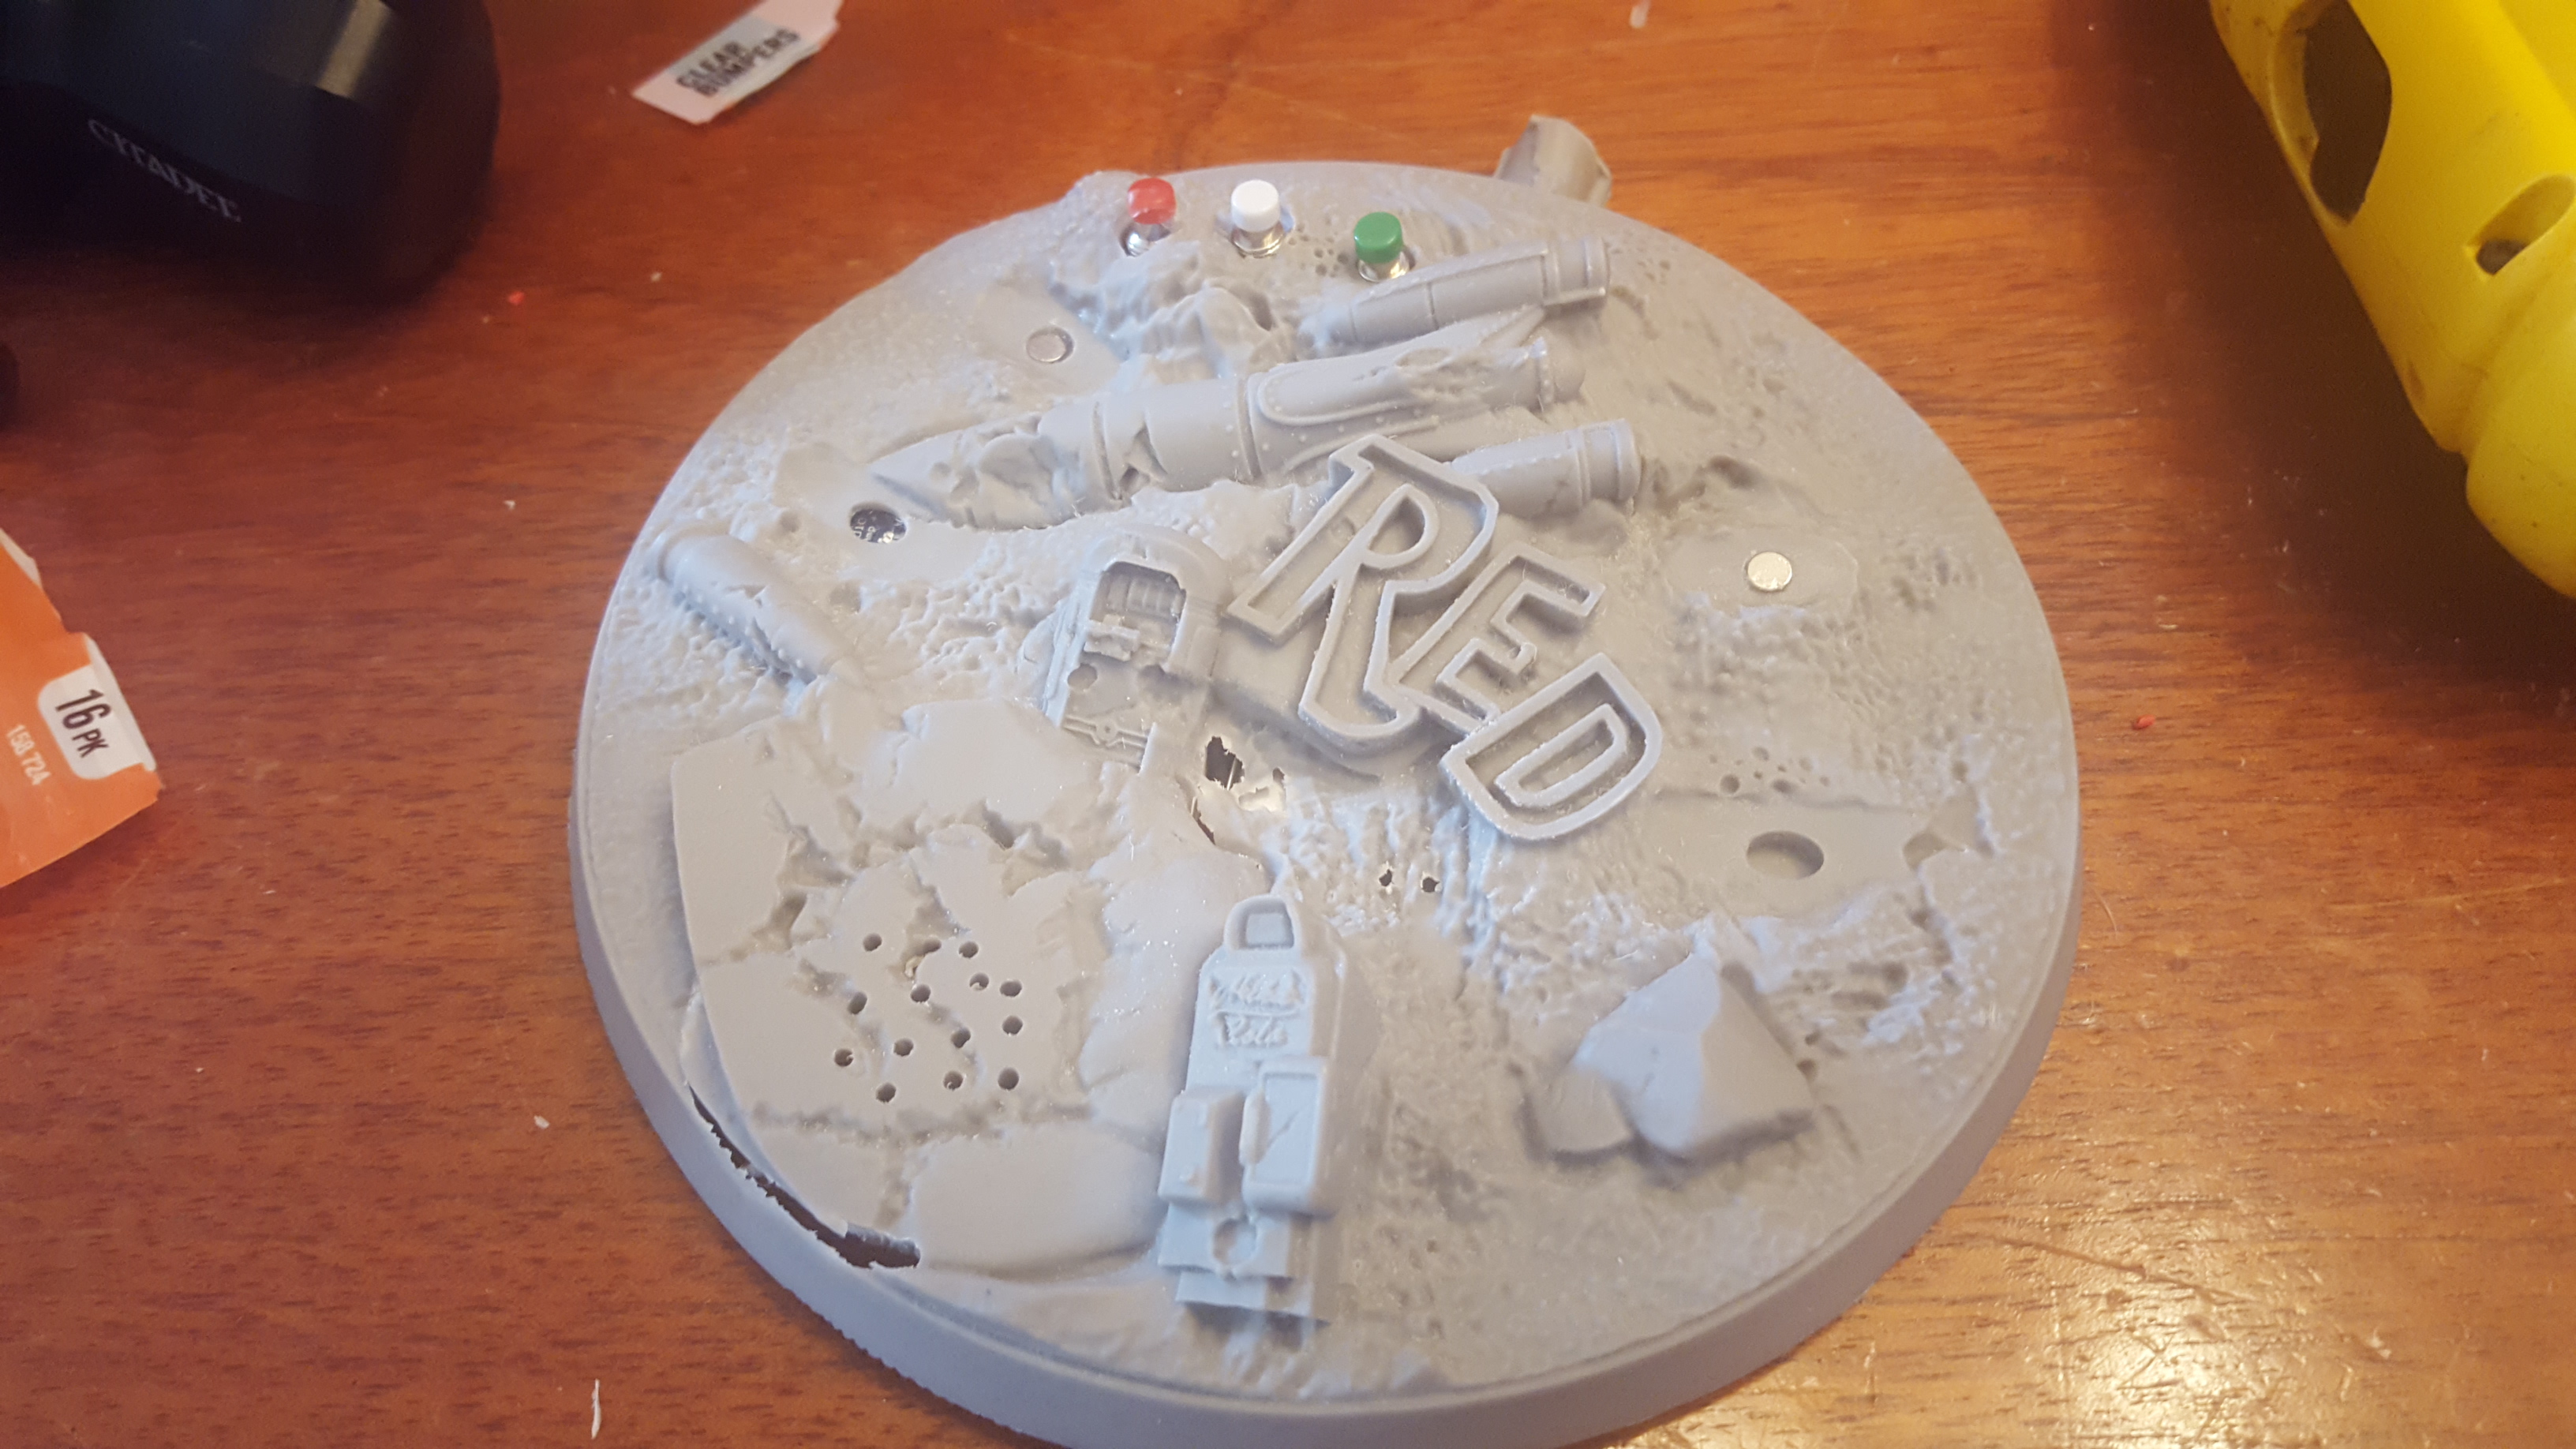
With everything complete I applied some finishing touches, sealed with Testors gloss coat, then a couple dull coats on top of that. Army Painter wasteland tufts really bring out the look of Fallout minis I think so I liberally applied those as well. After charging the base up fully I am calling this project done. I may revisit Prime at some point and apply a bit more weathering to him but I’m happy were he is now.


Paint!
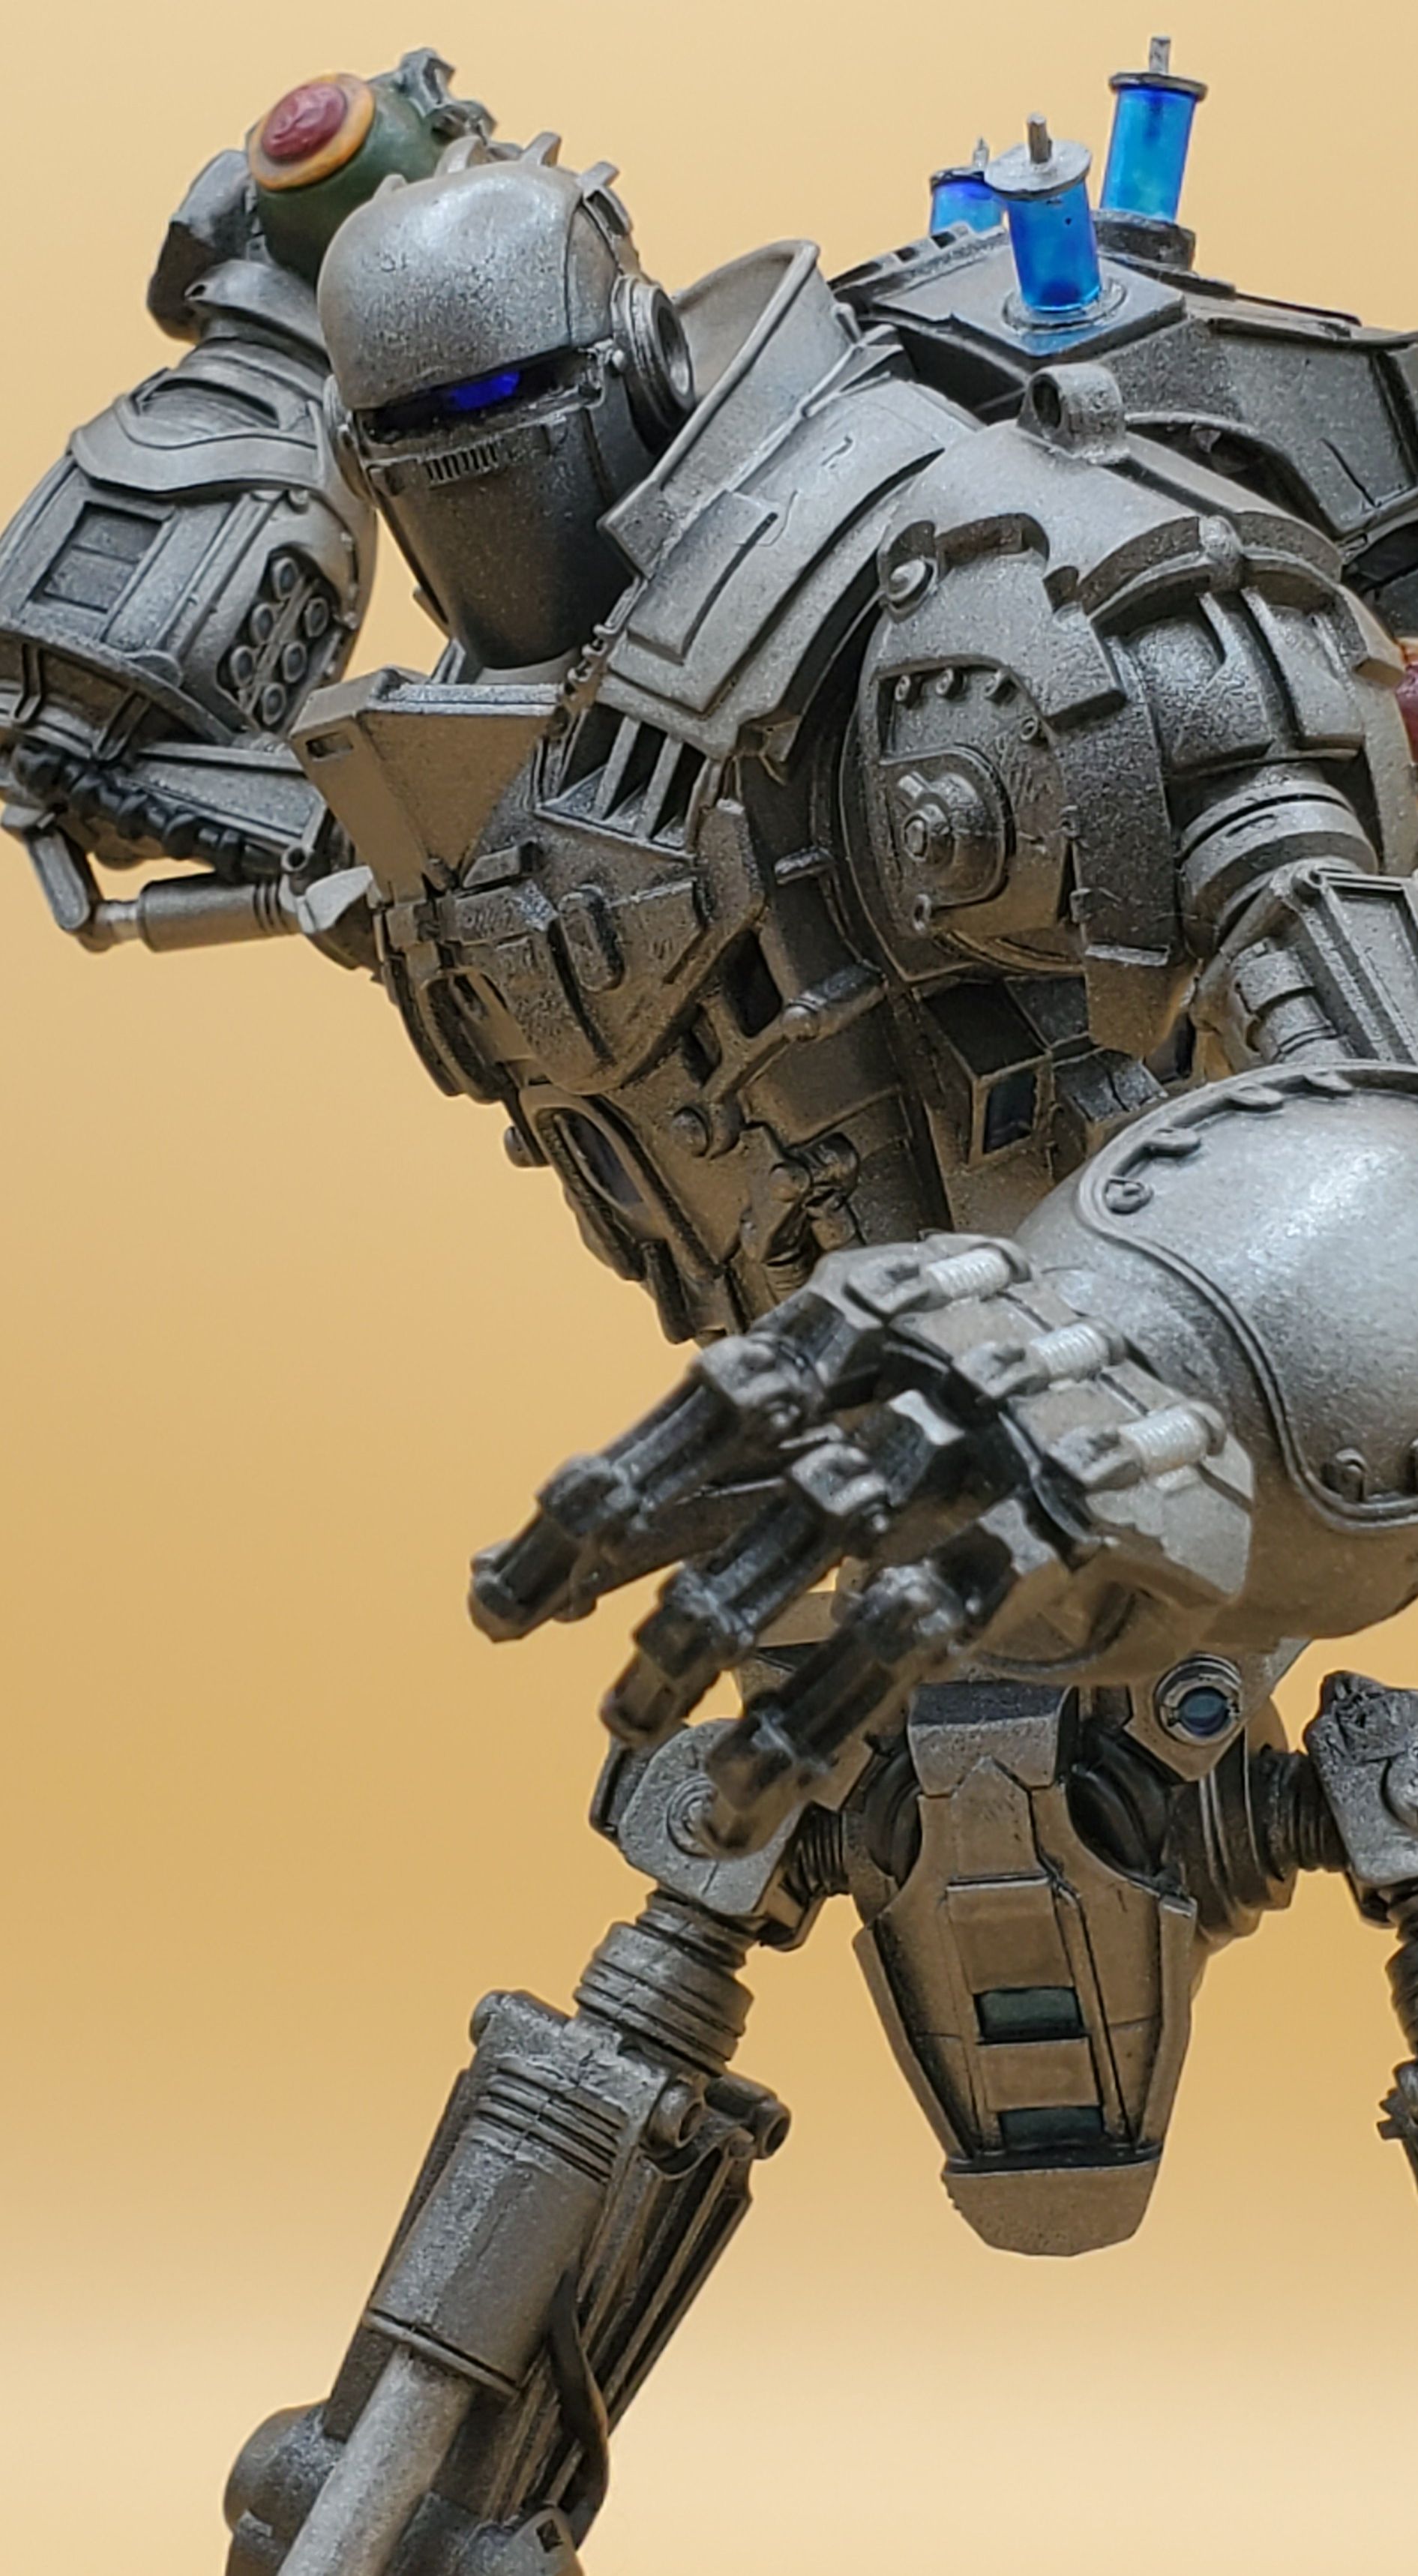
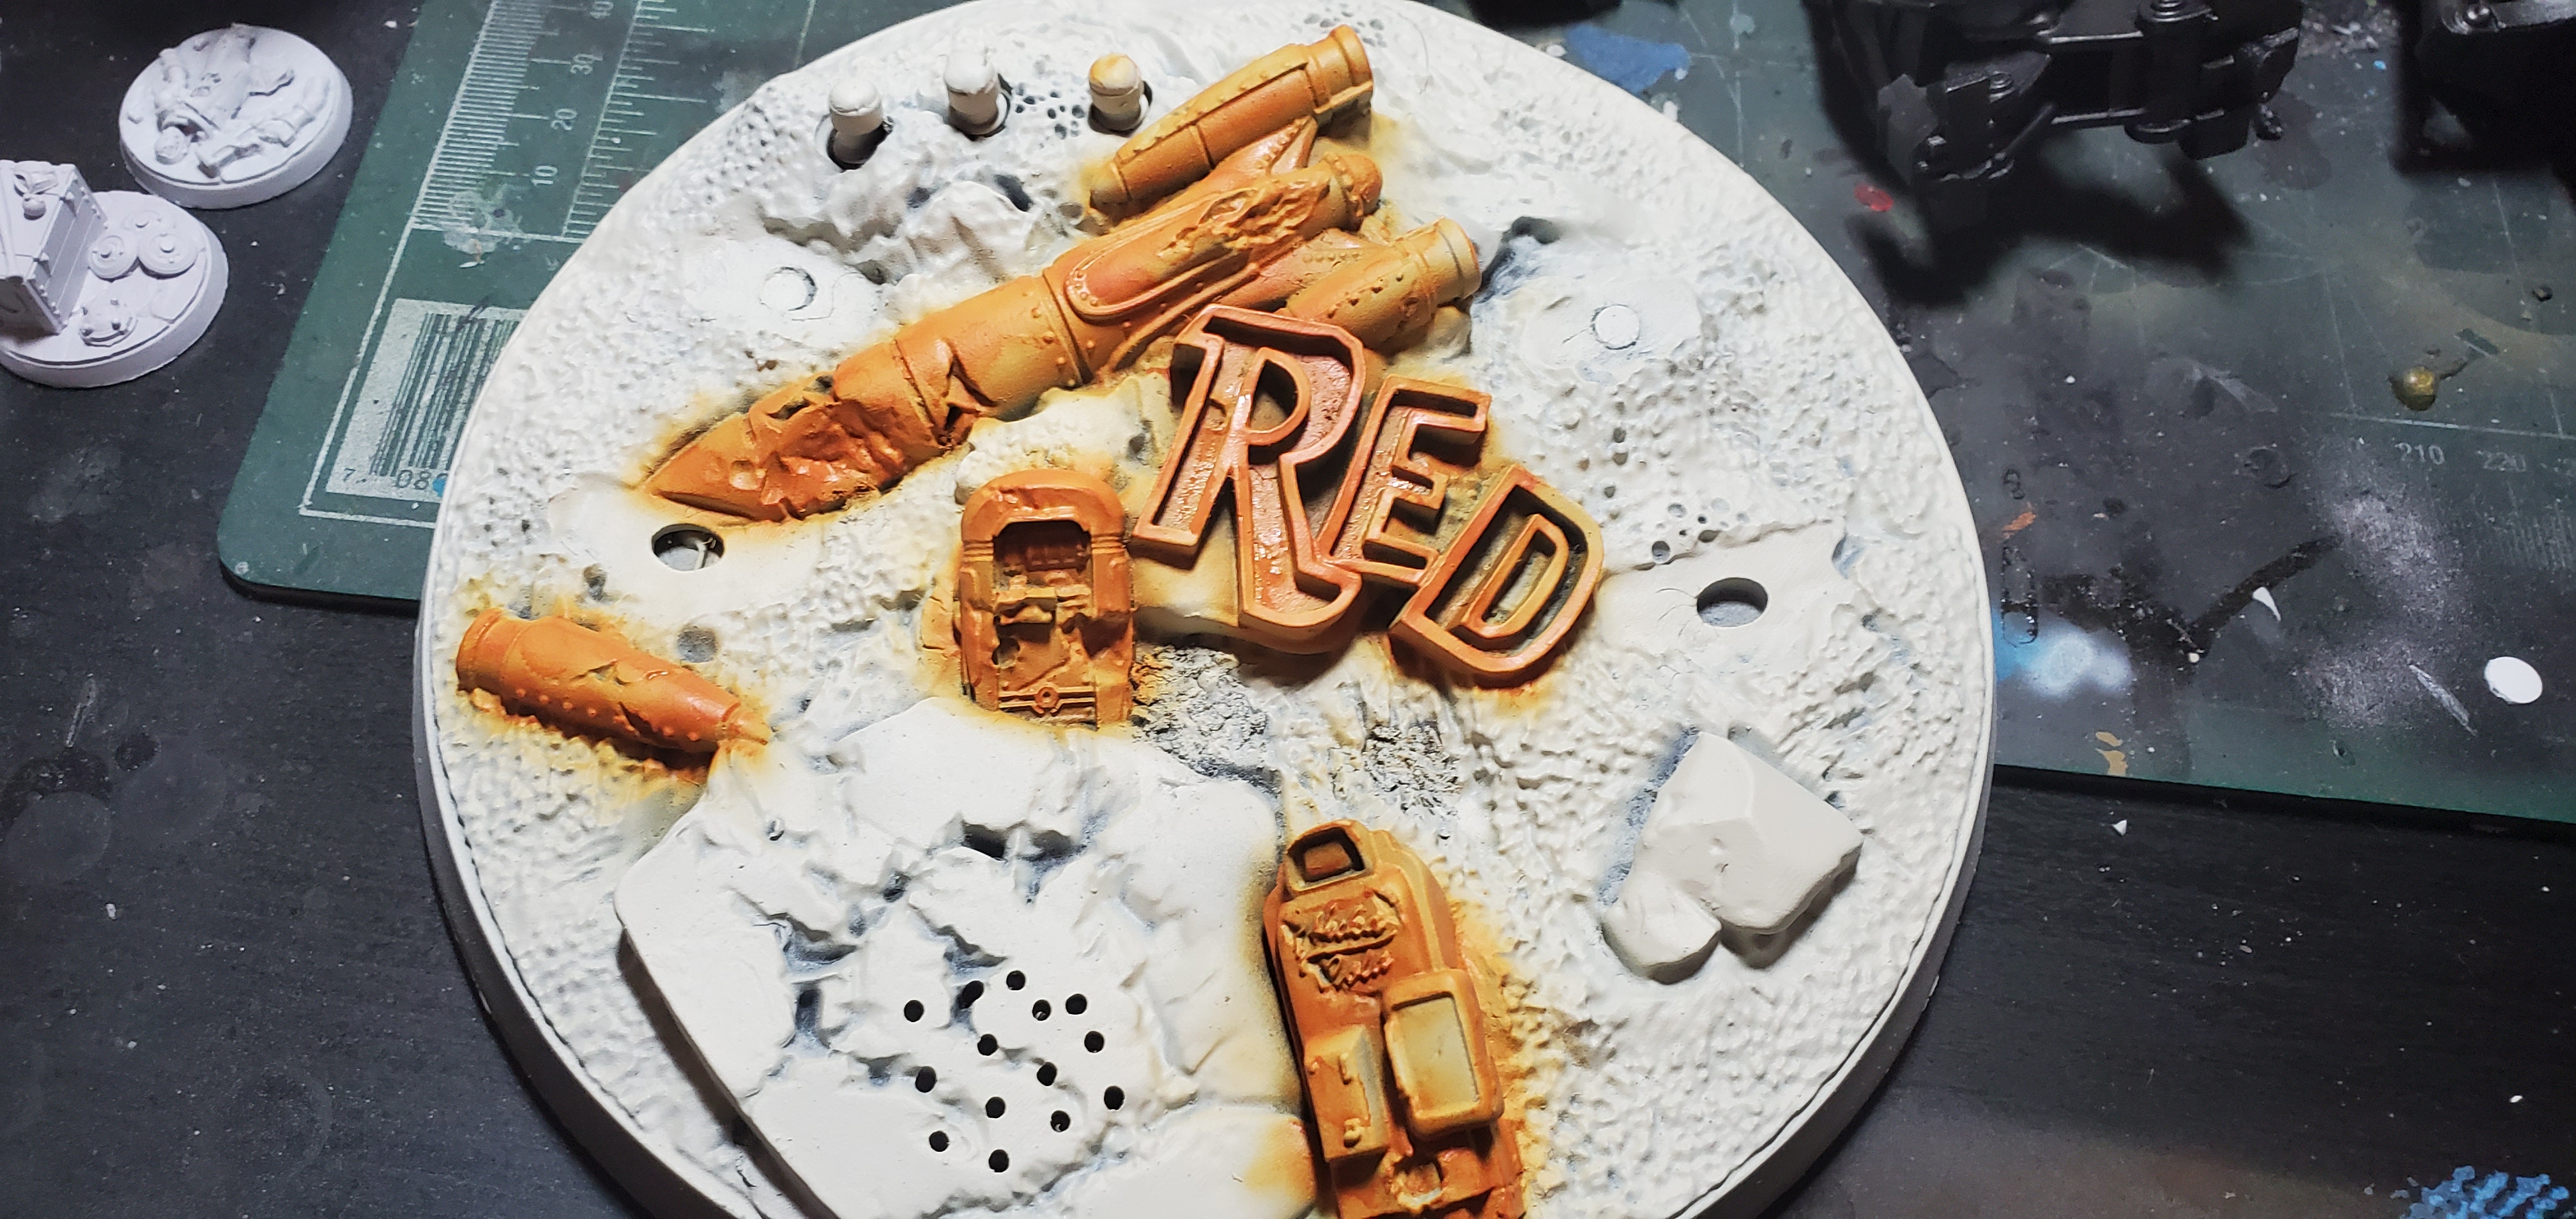
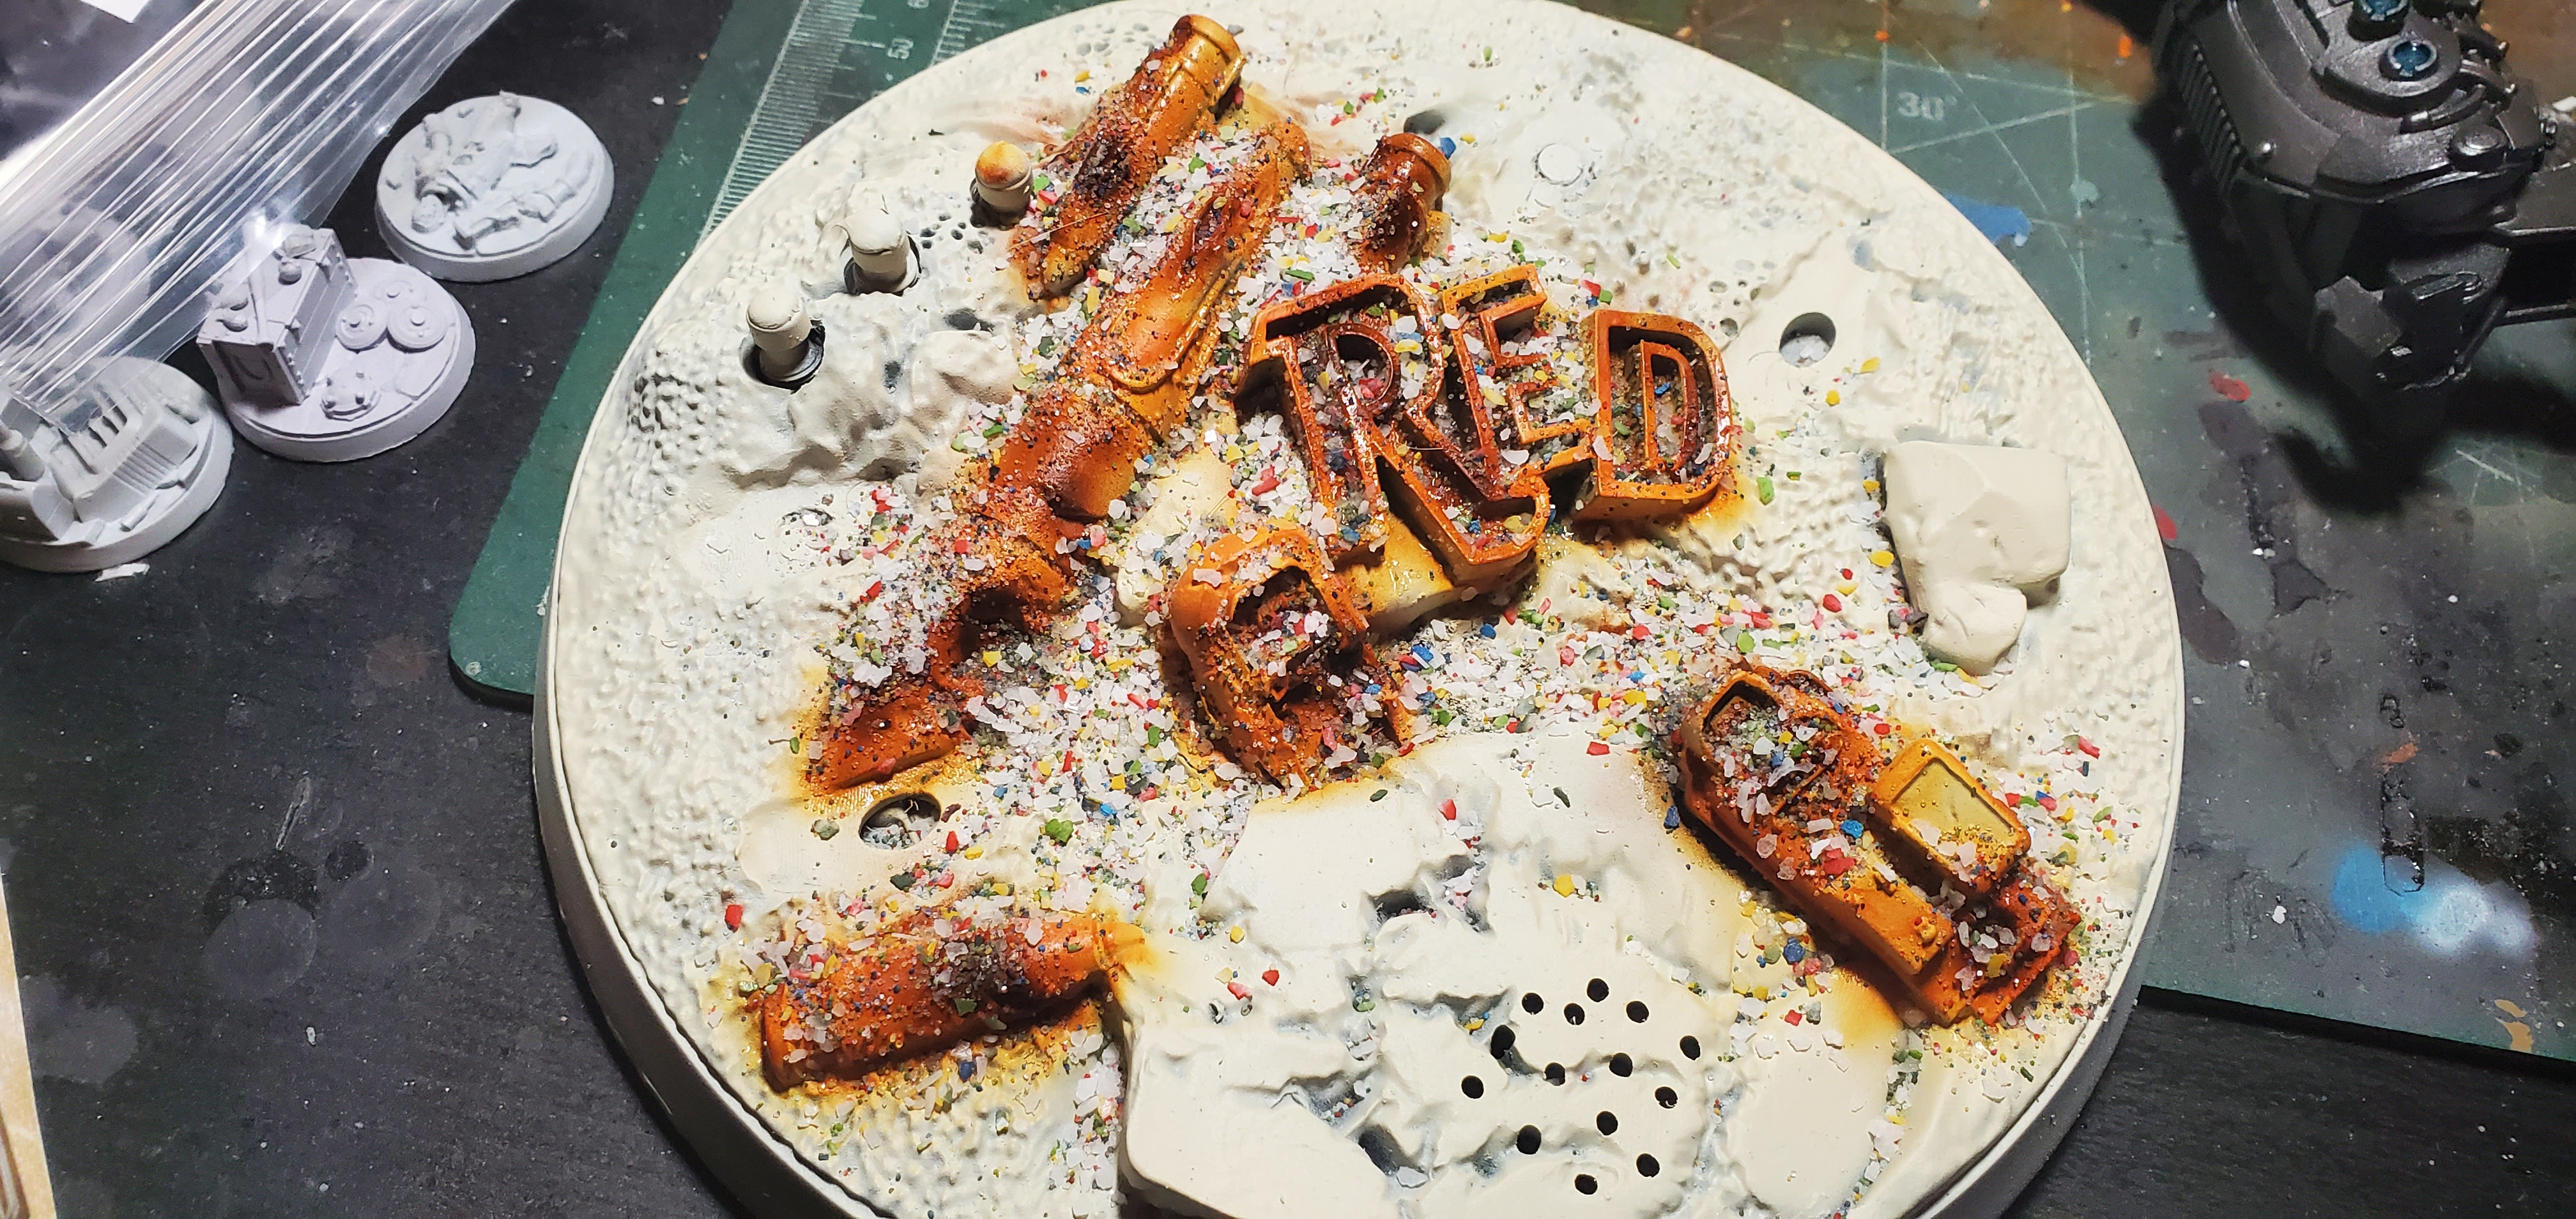
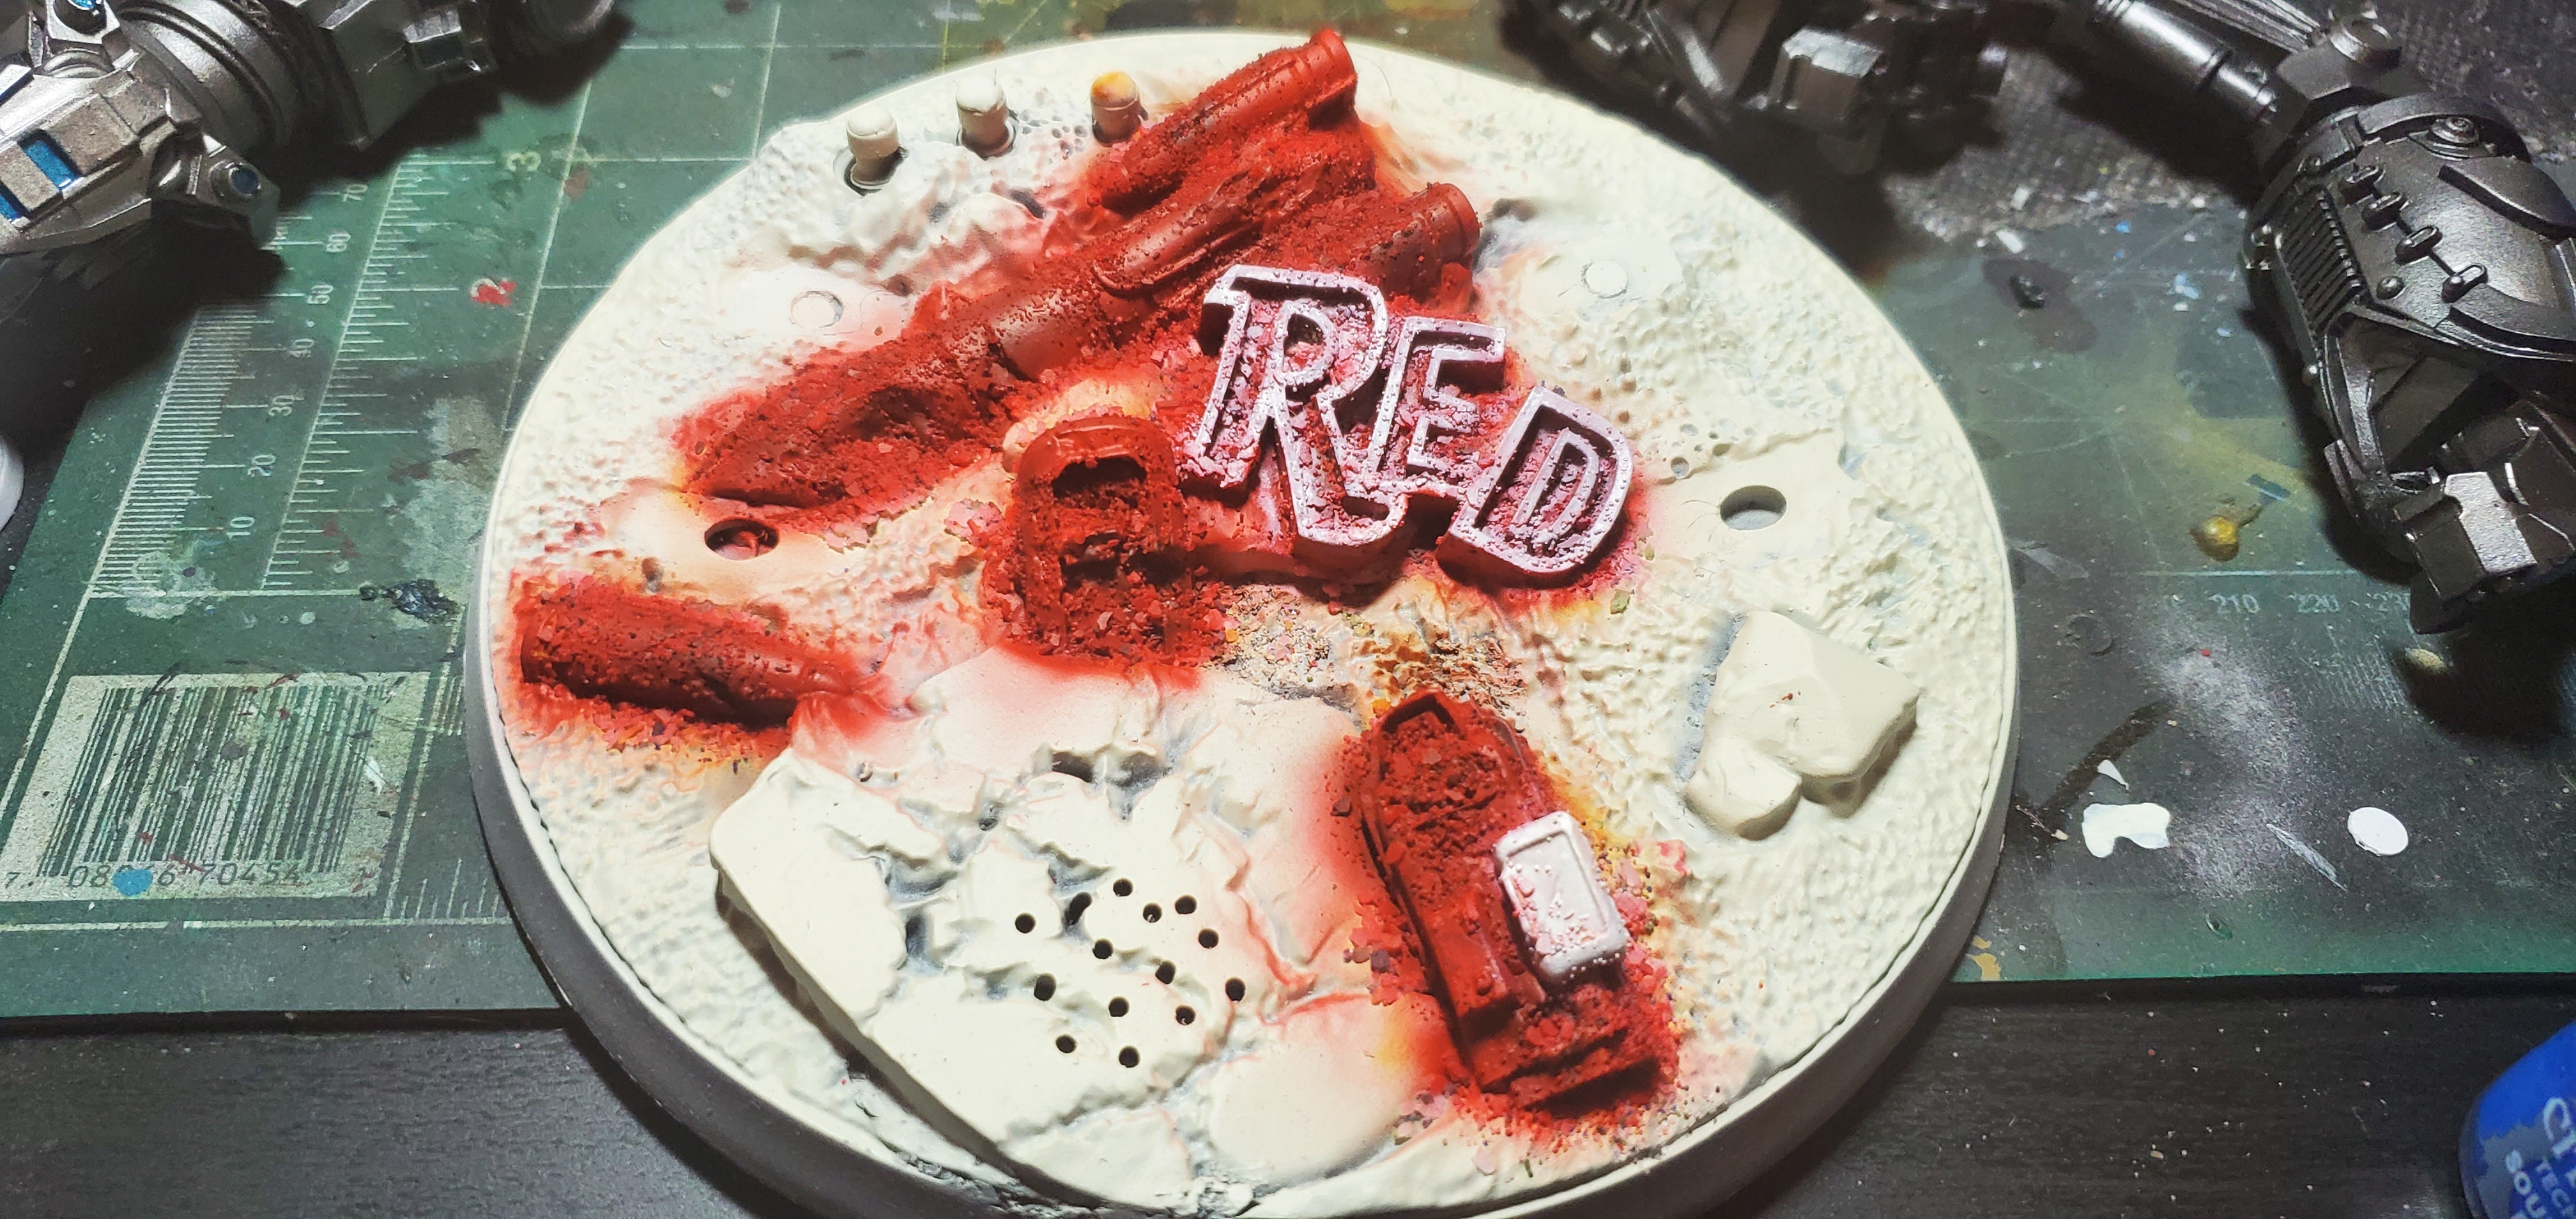
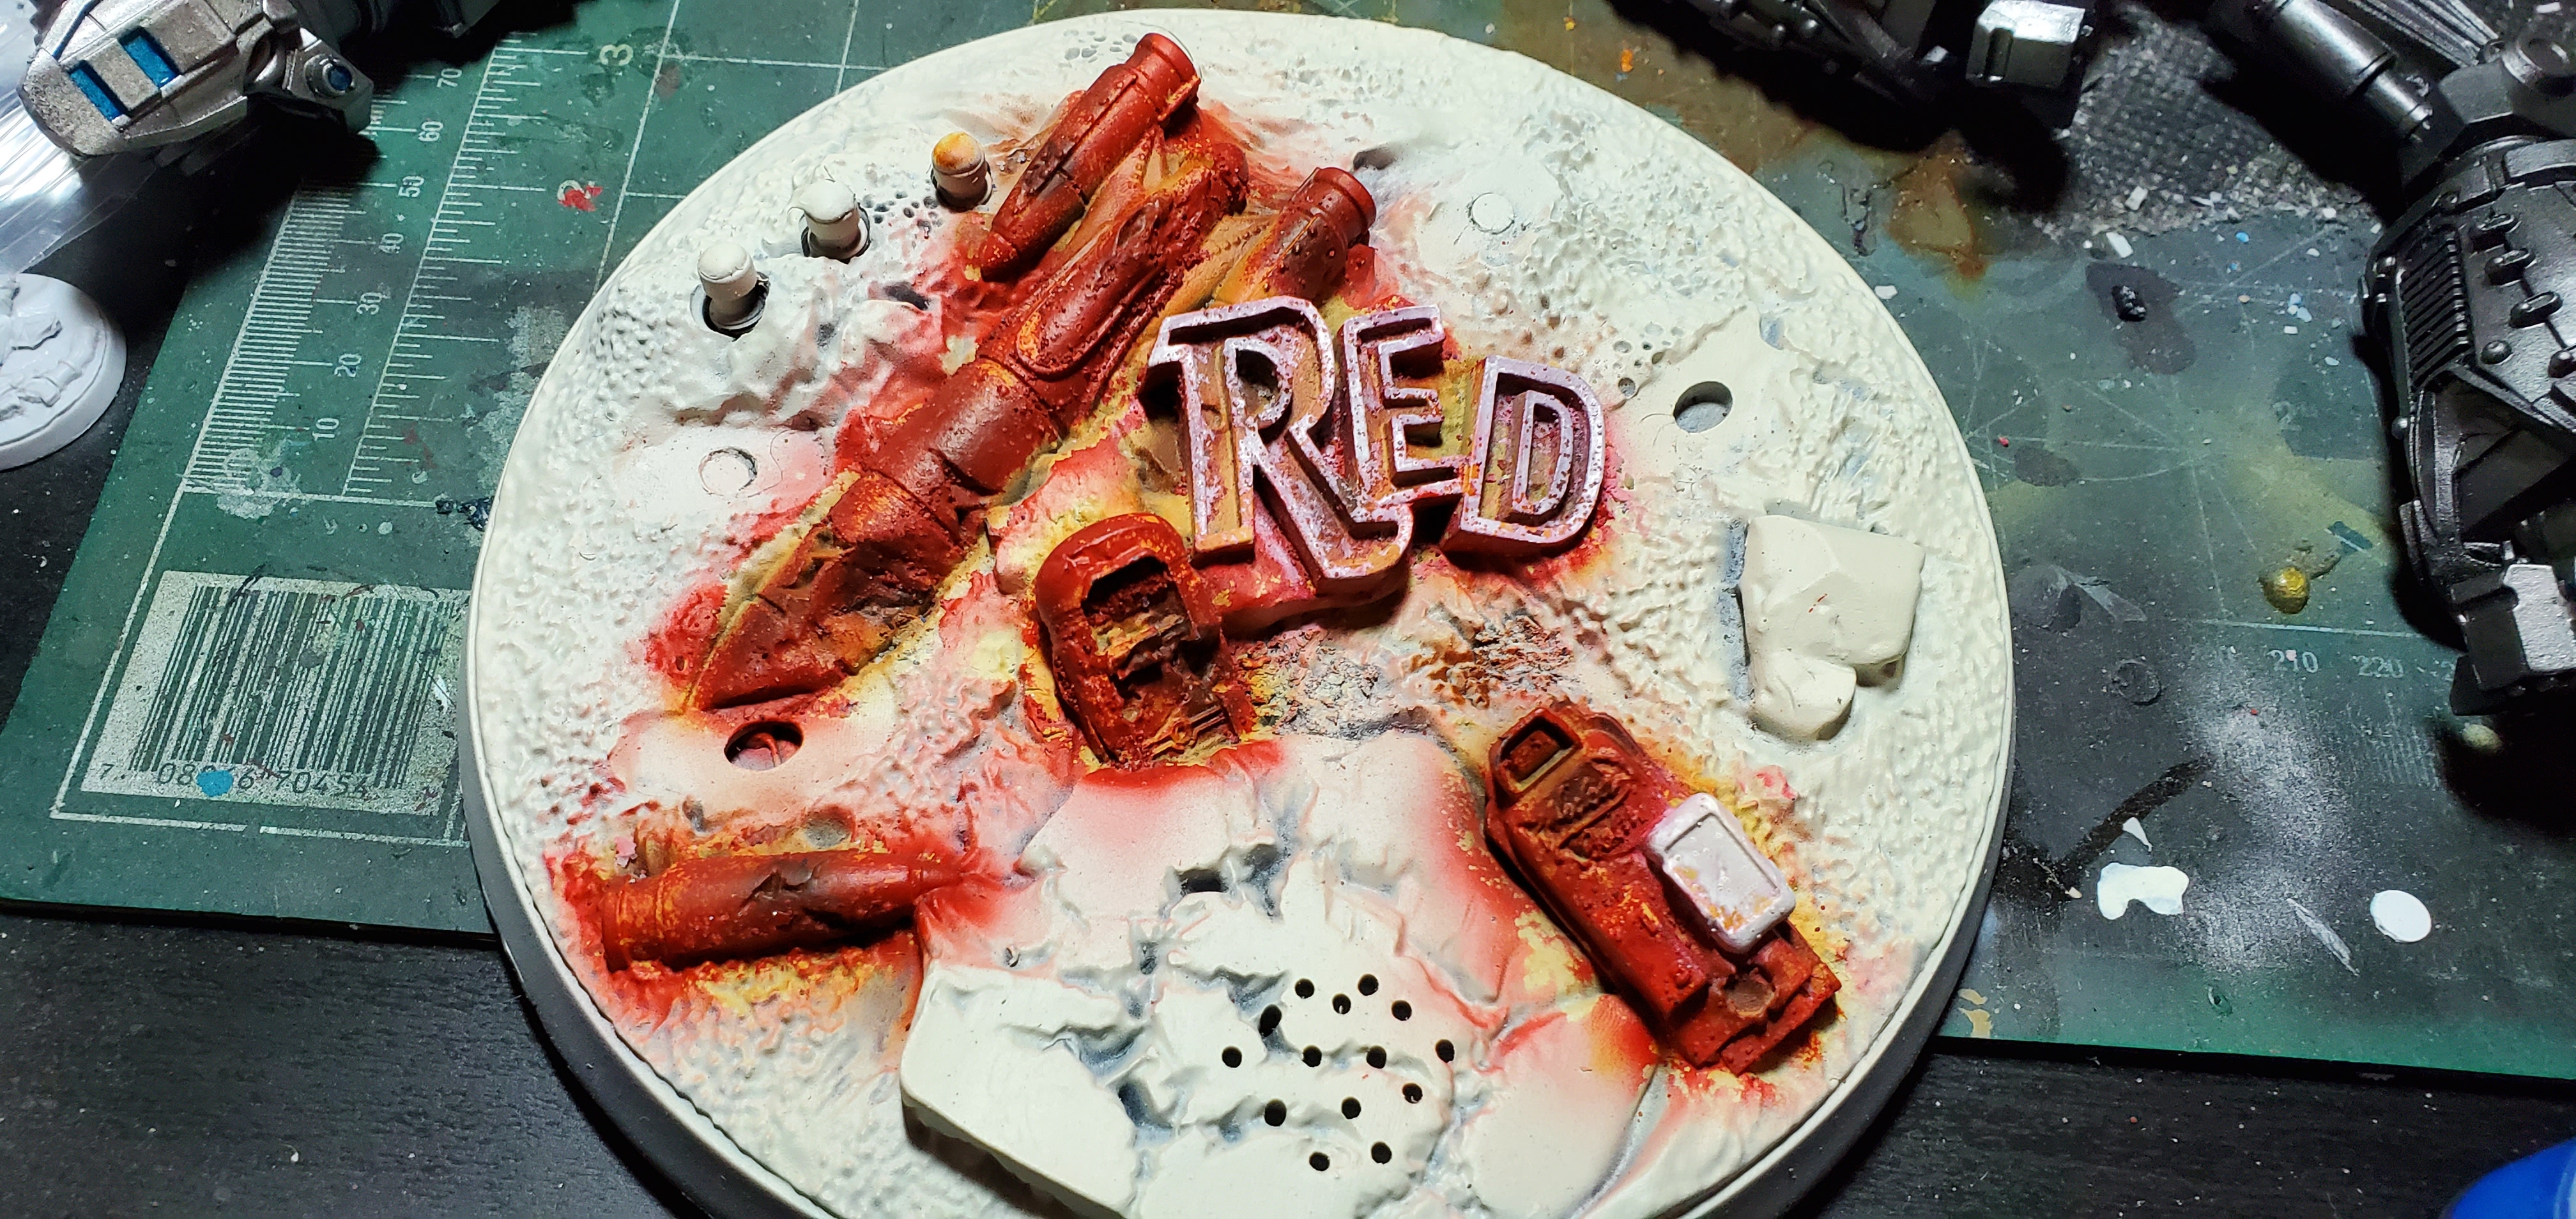
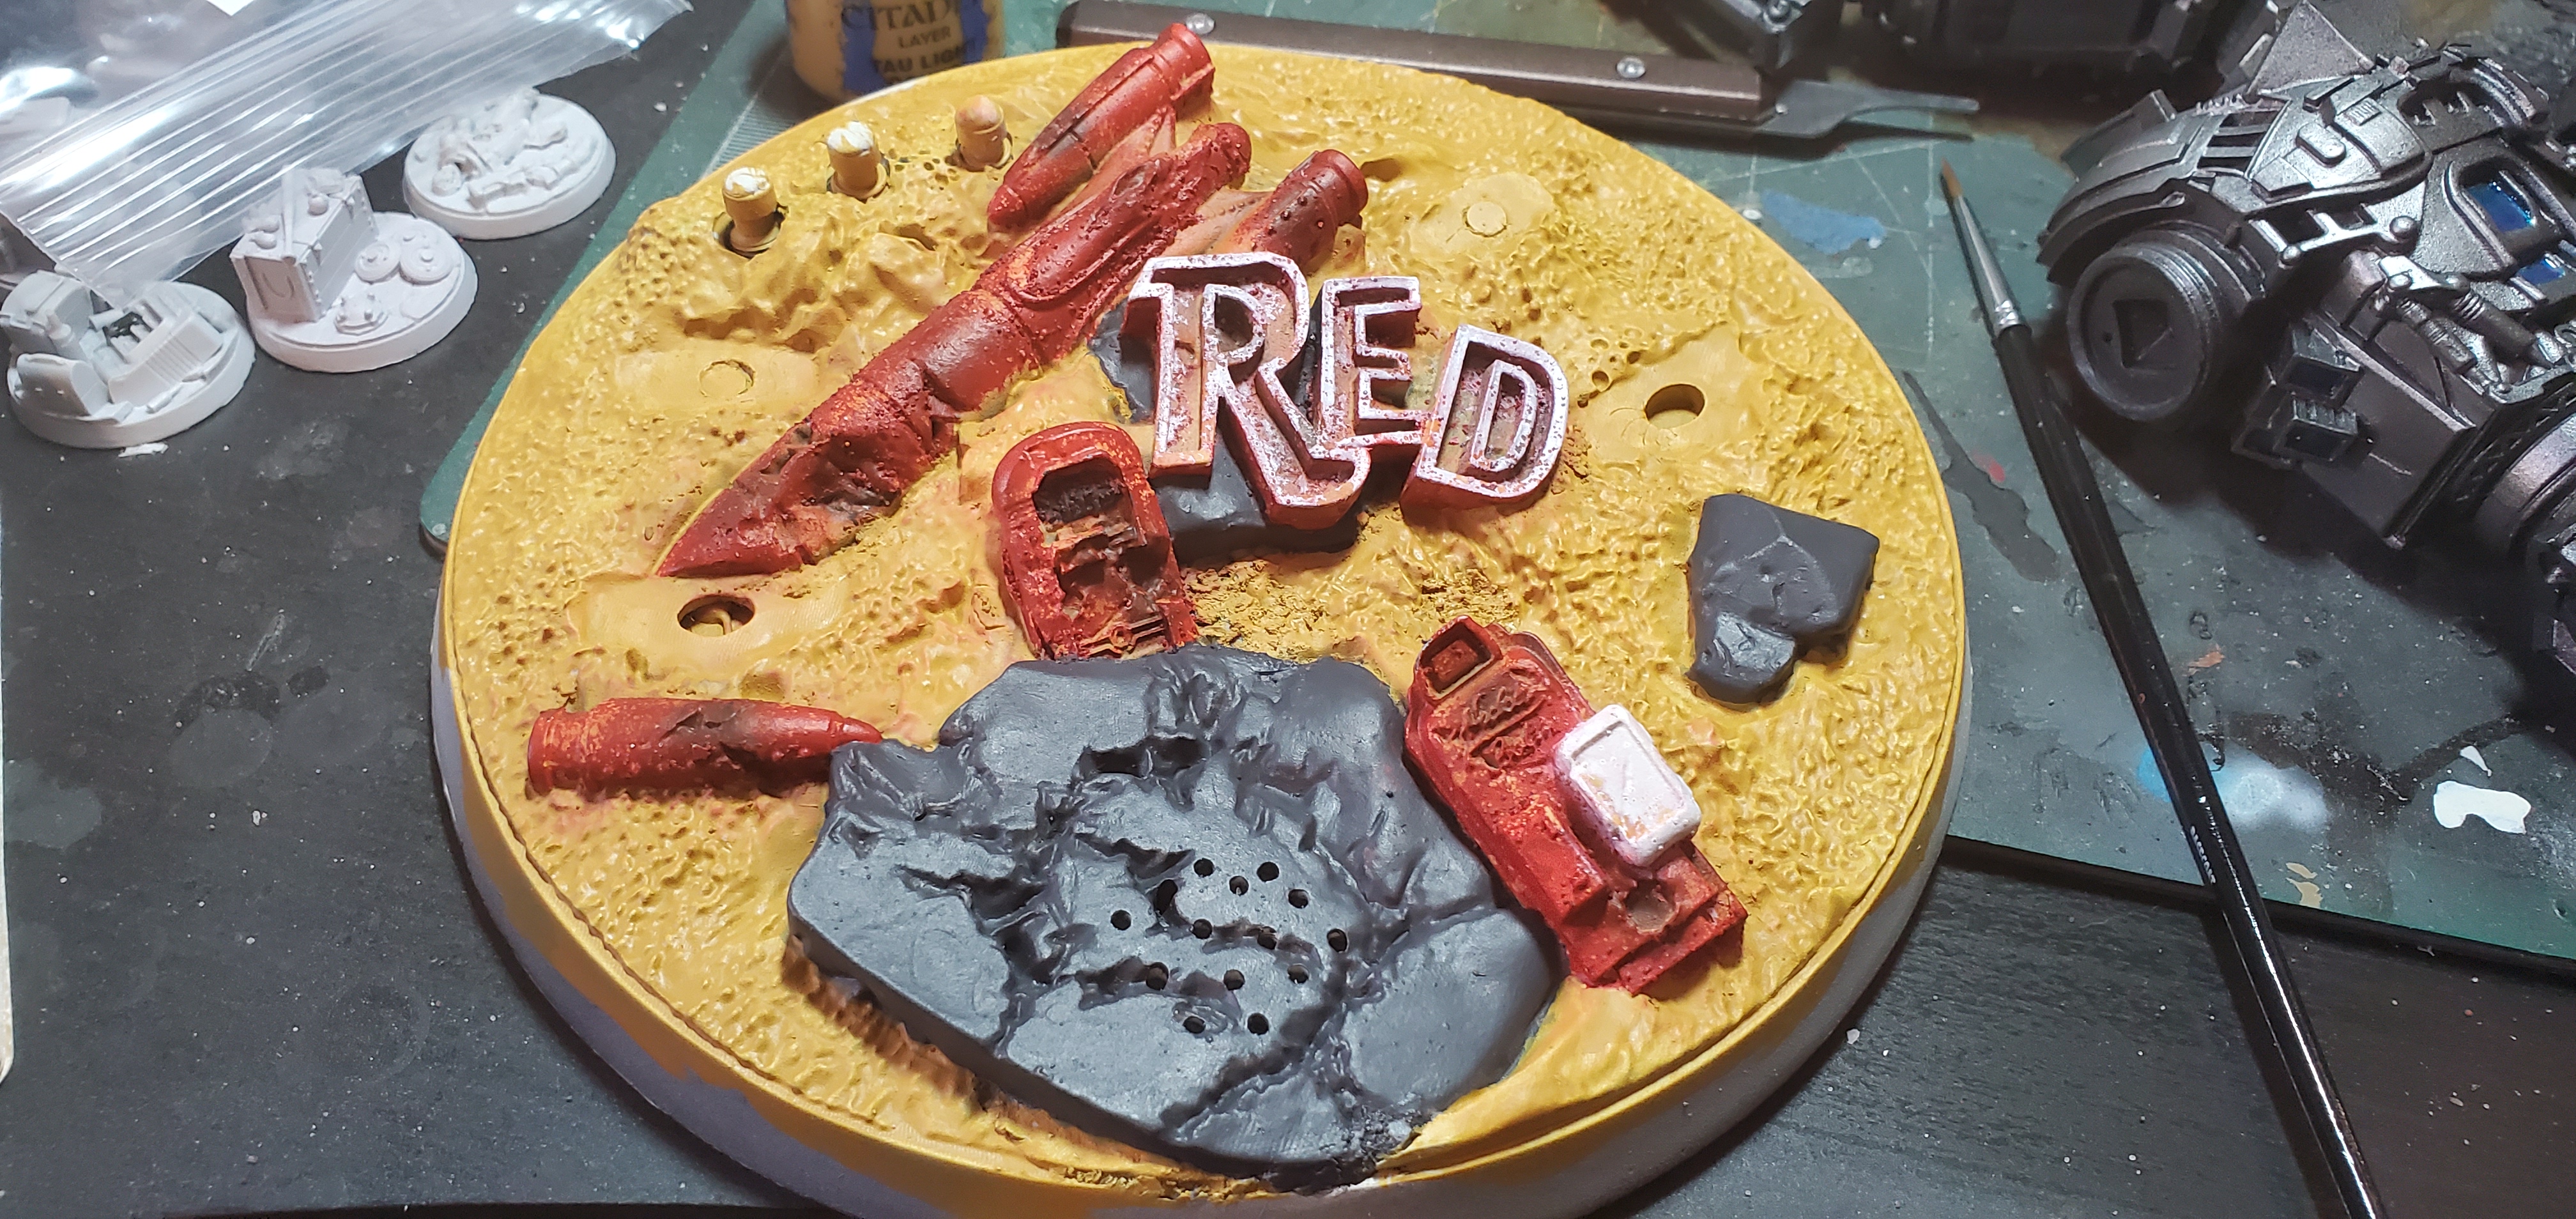
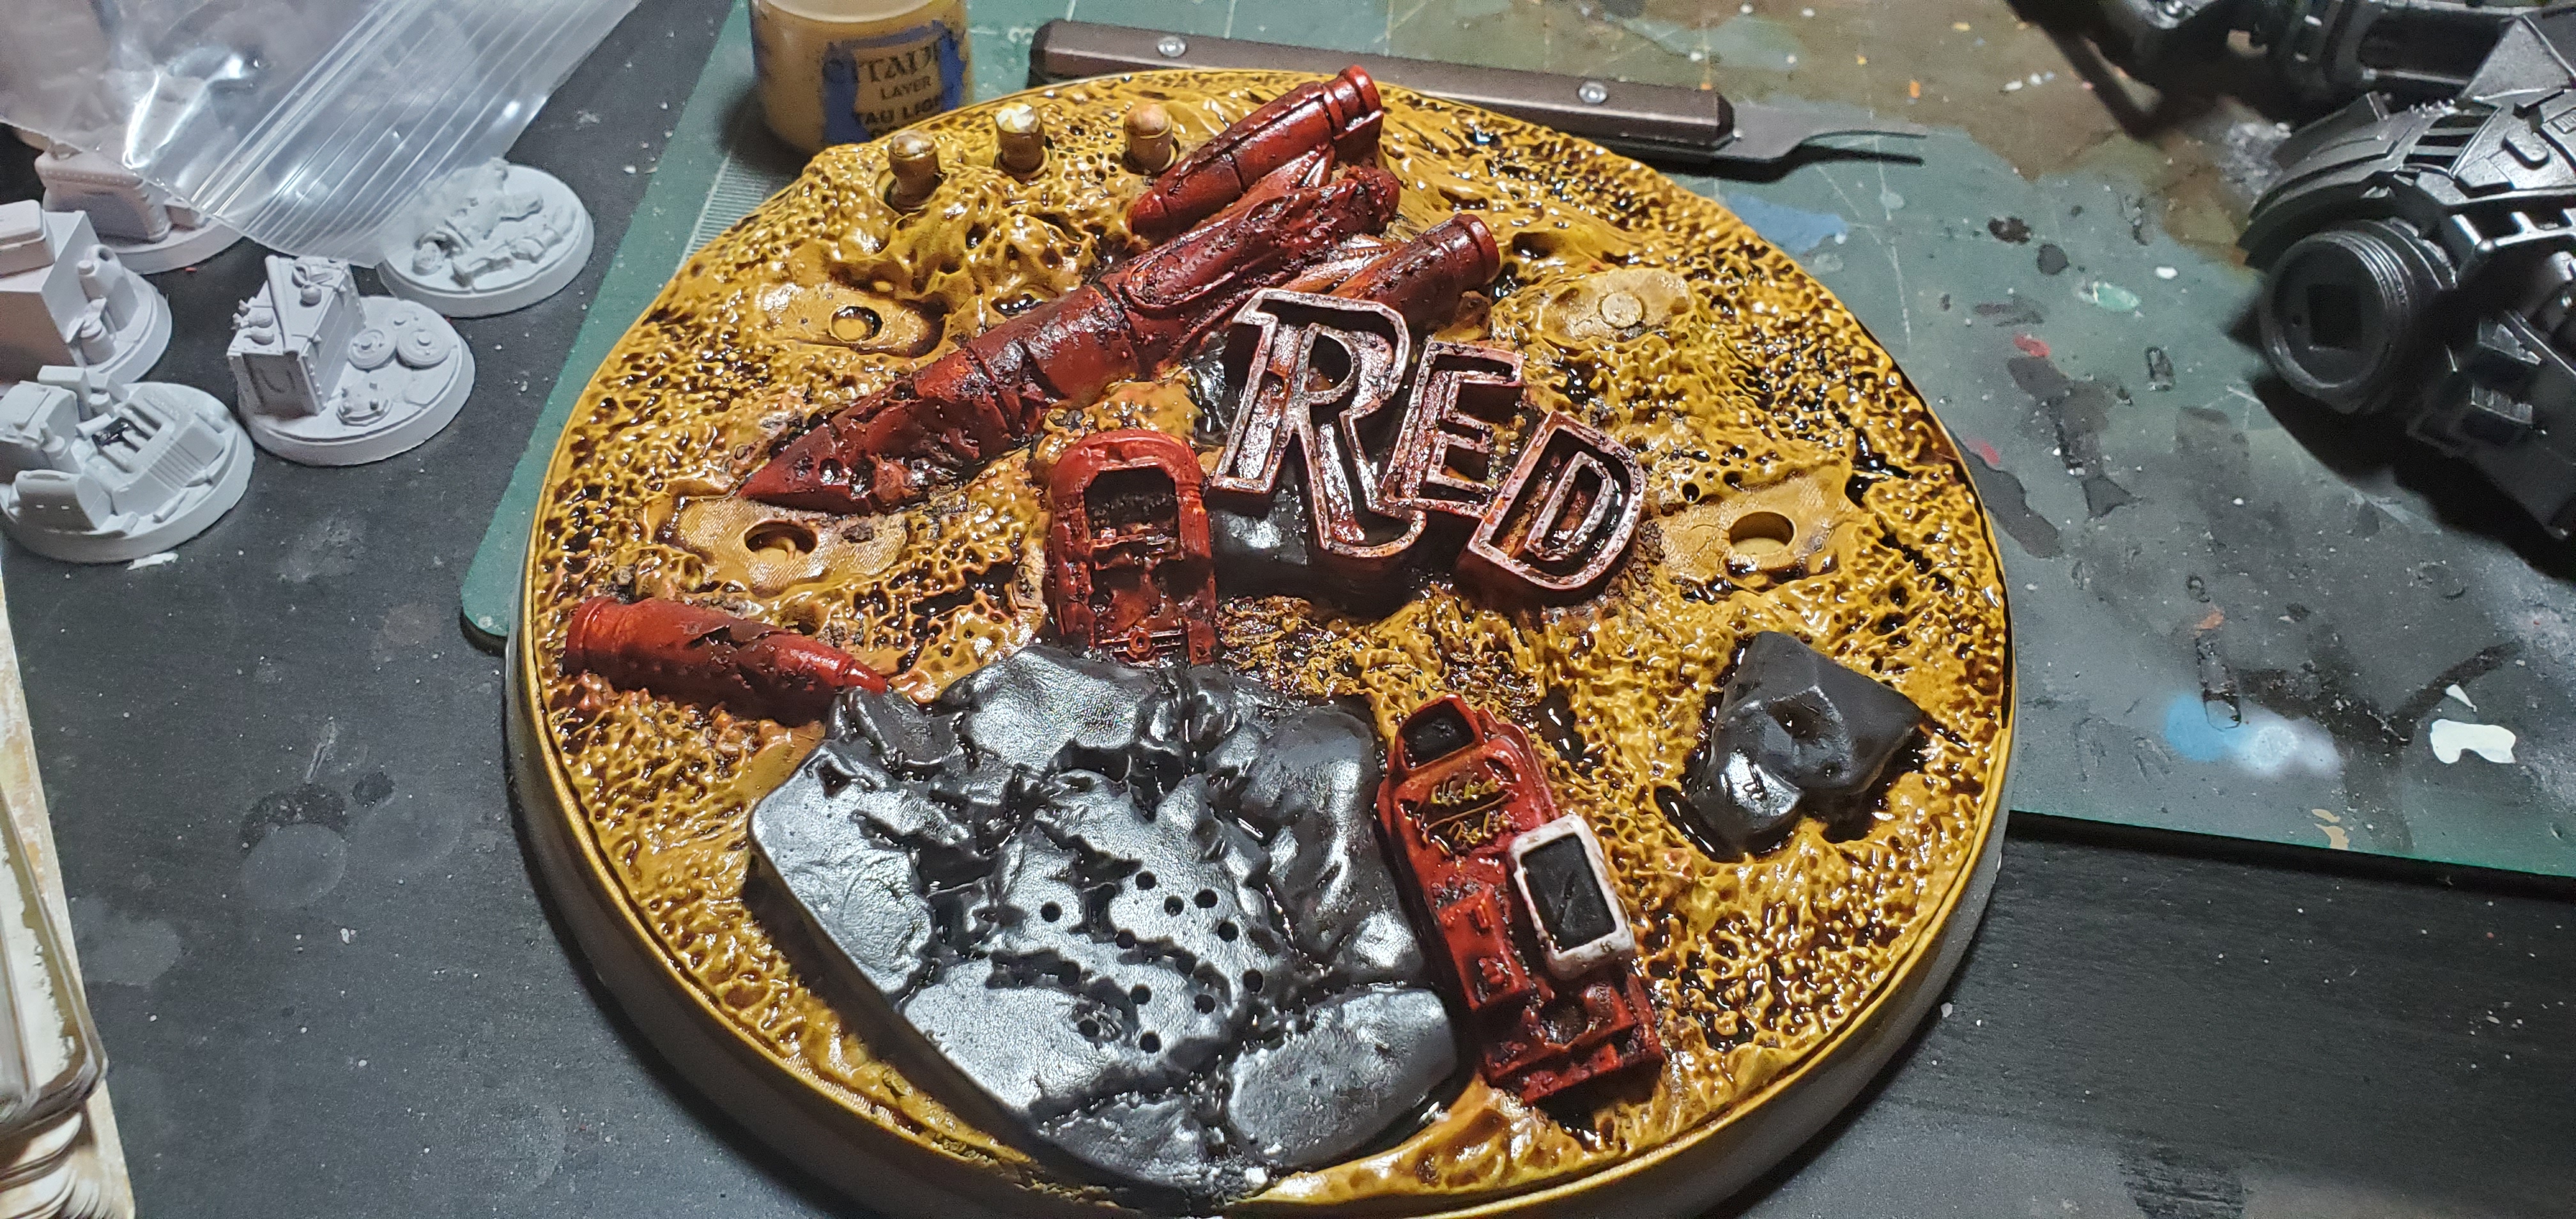
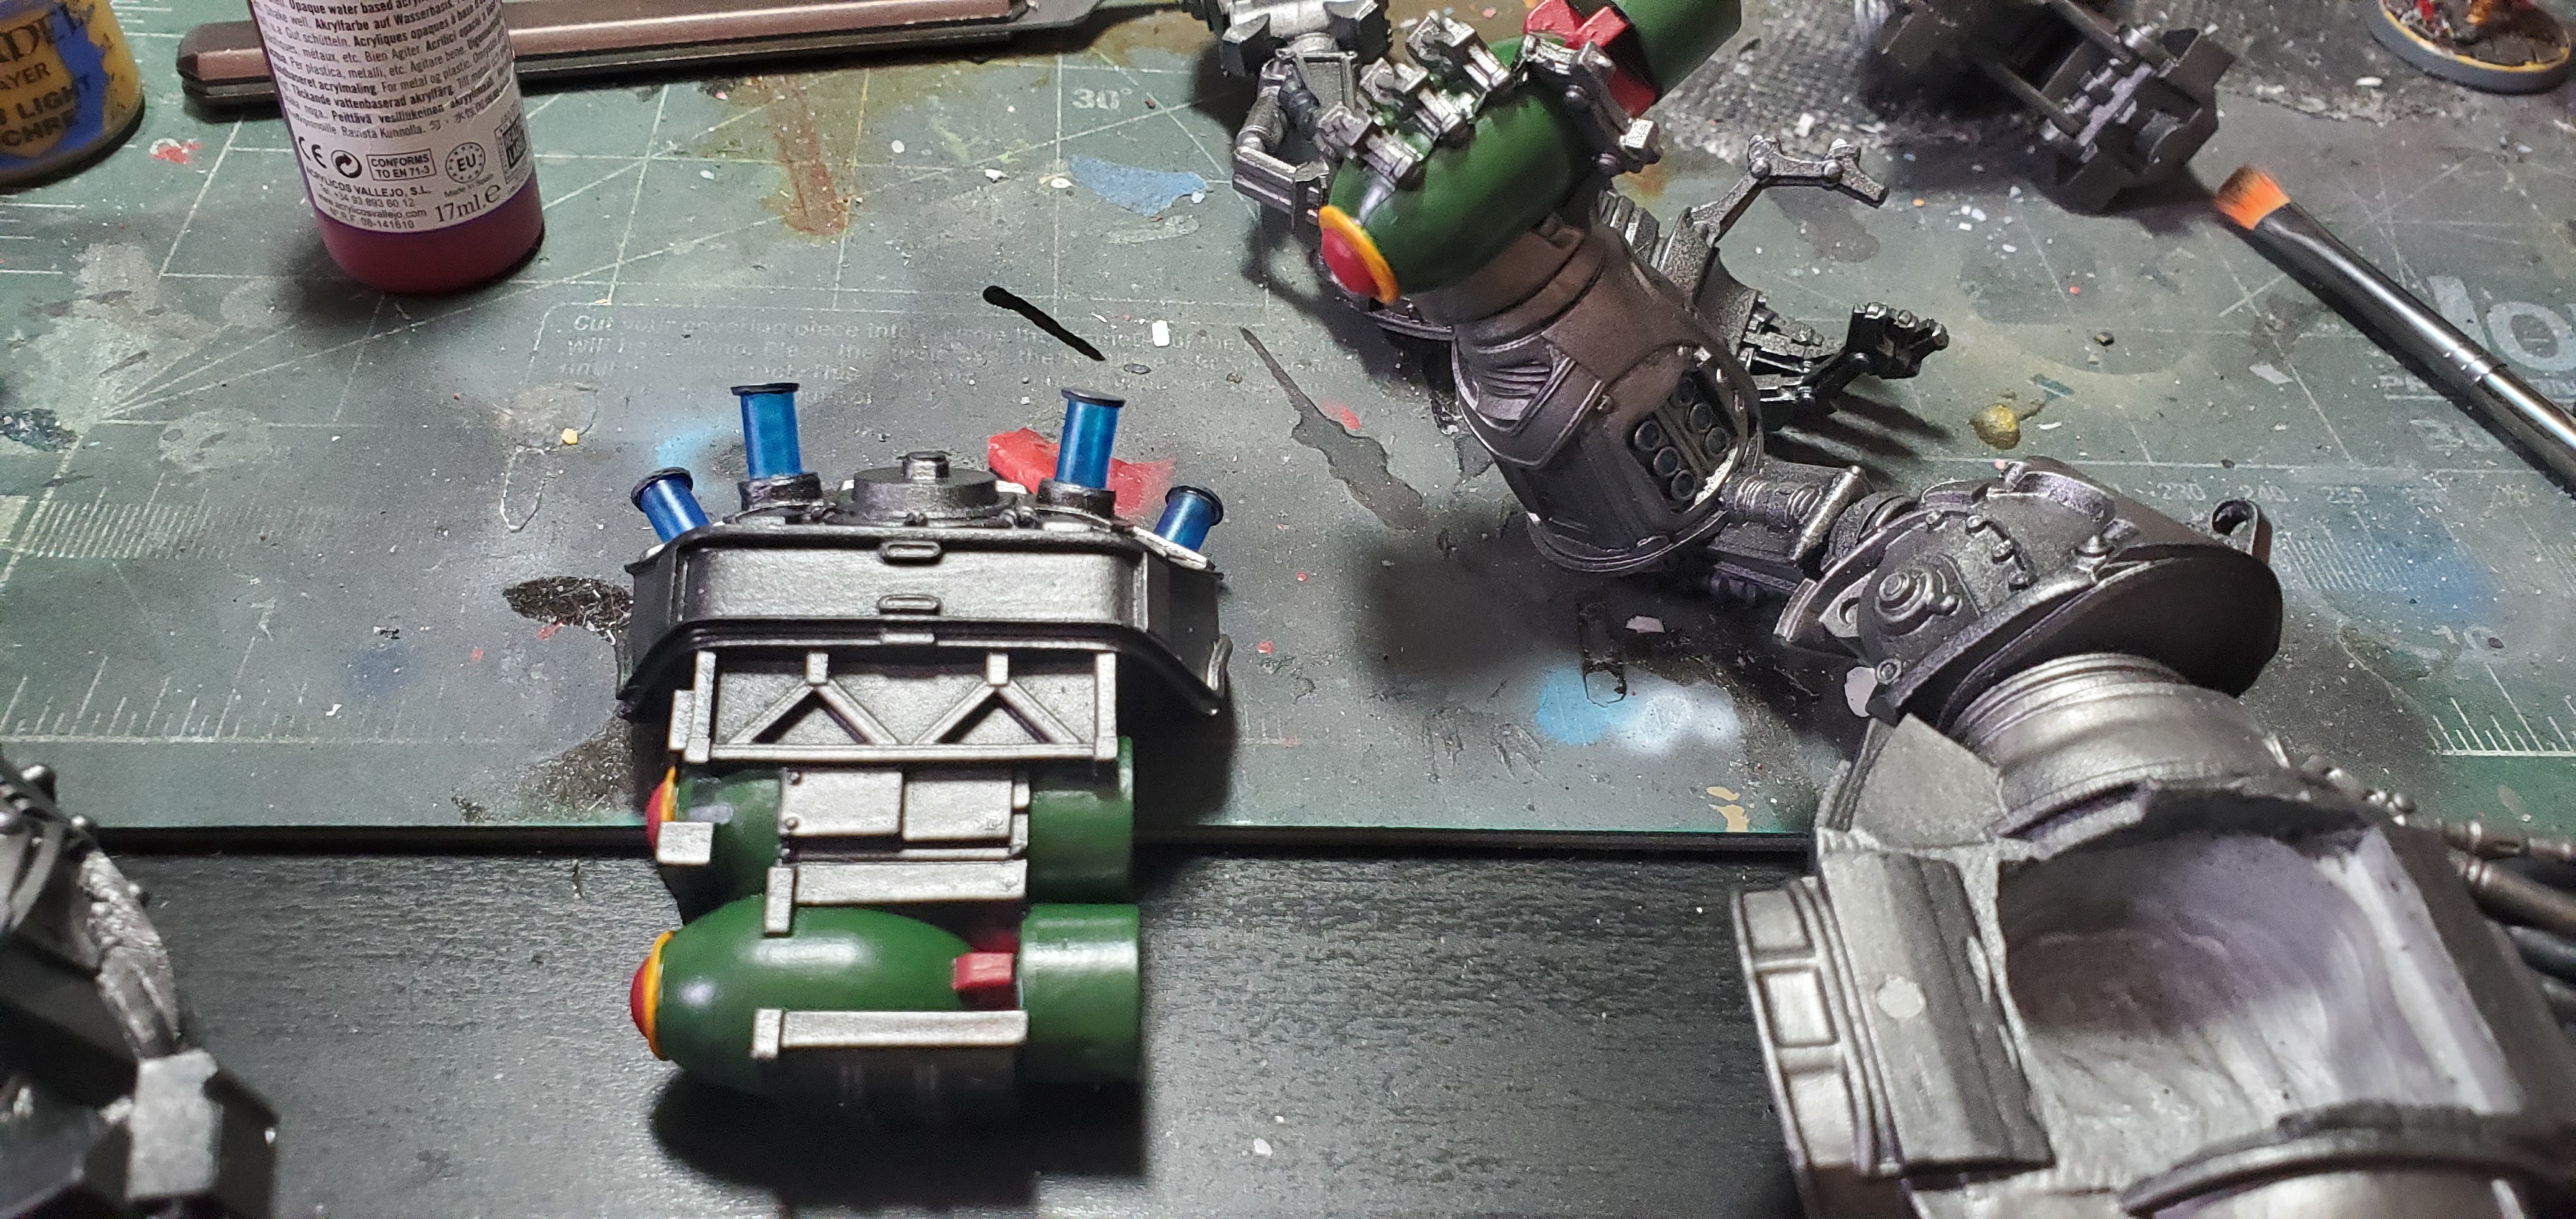
After washing all the parts and priming in a gloss black to help showcase the metallic I then did a lighter prime on the base for highlights. When it boils down to it Prime is just a giant metal man so there is not a huge amount of detail to do, the base is really the show stopper. I decided to use salt weathering on the Red Rocket parts and the Nuka machine so I airbrushed a couple shades on (Vallejo Model Air orange rust and Burnt Umber for contrast). Next I wetted the parts and sprinkled them with salt (I use standard table and Kosher Sea for diff size/textures) and let them dry. I then used Vallejo Model Air Fire Red as the base with highlights of Scarlet Red. Once dry I then flaked off the salt to reveal the “rust” underneath. At this point everything is a bit bright but will tone down once I apply some GW Agrax Earthshade. For the rocky outcropping I used Army Painter Necromancer Cloak and the dirt is GWs Tau Light Ochre, then I applied the mentioned Agrax Earthshade.

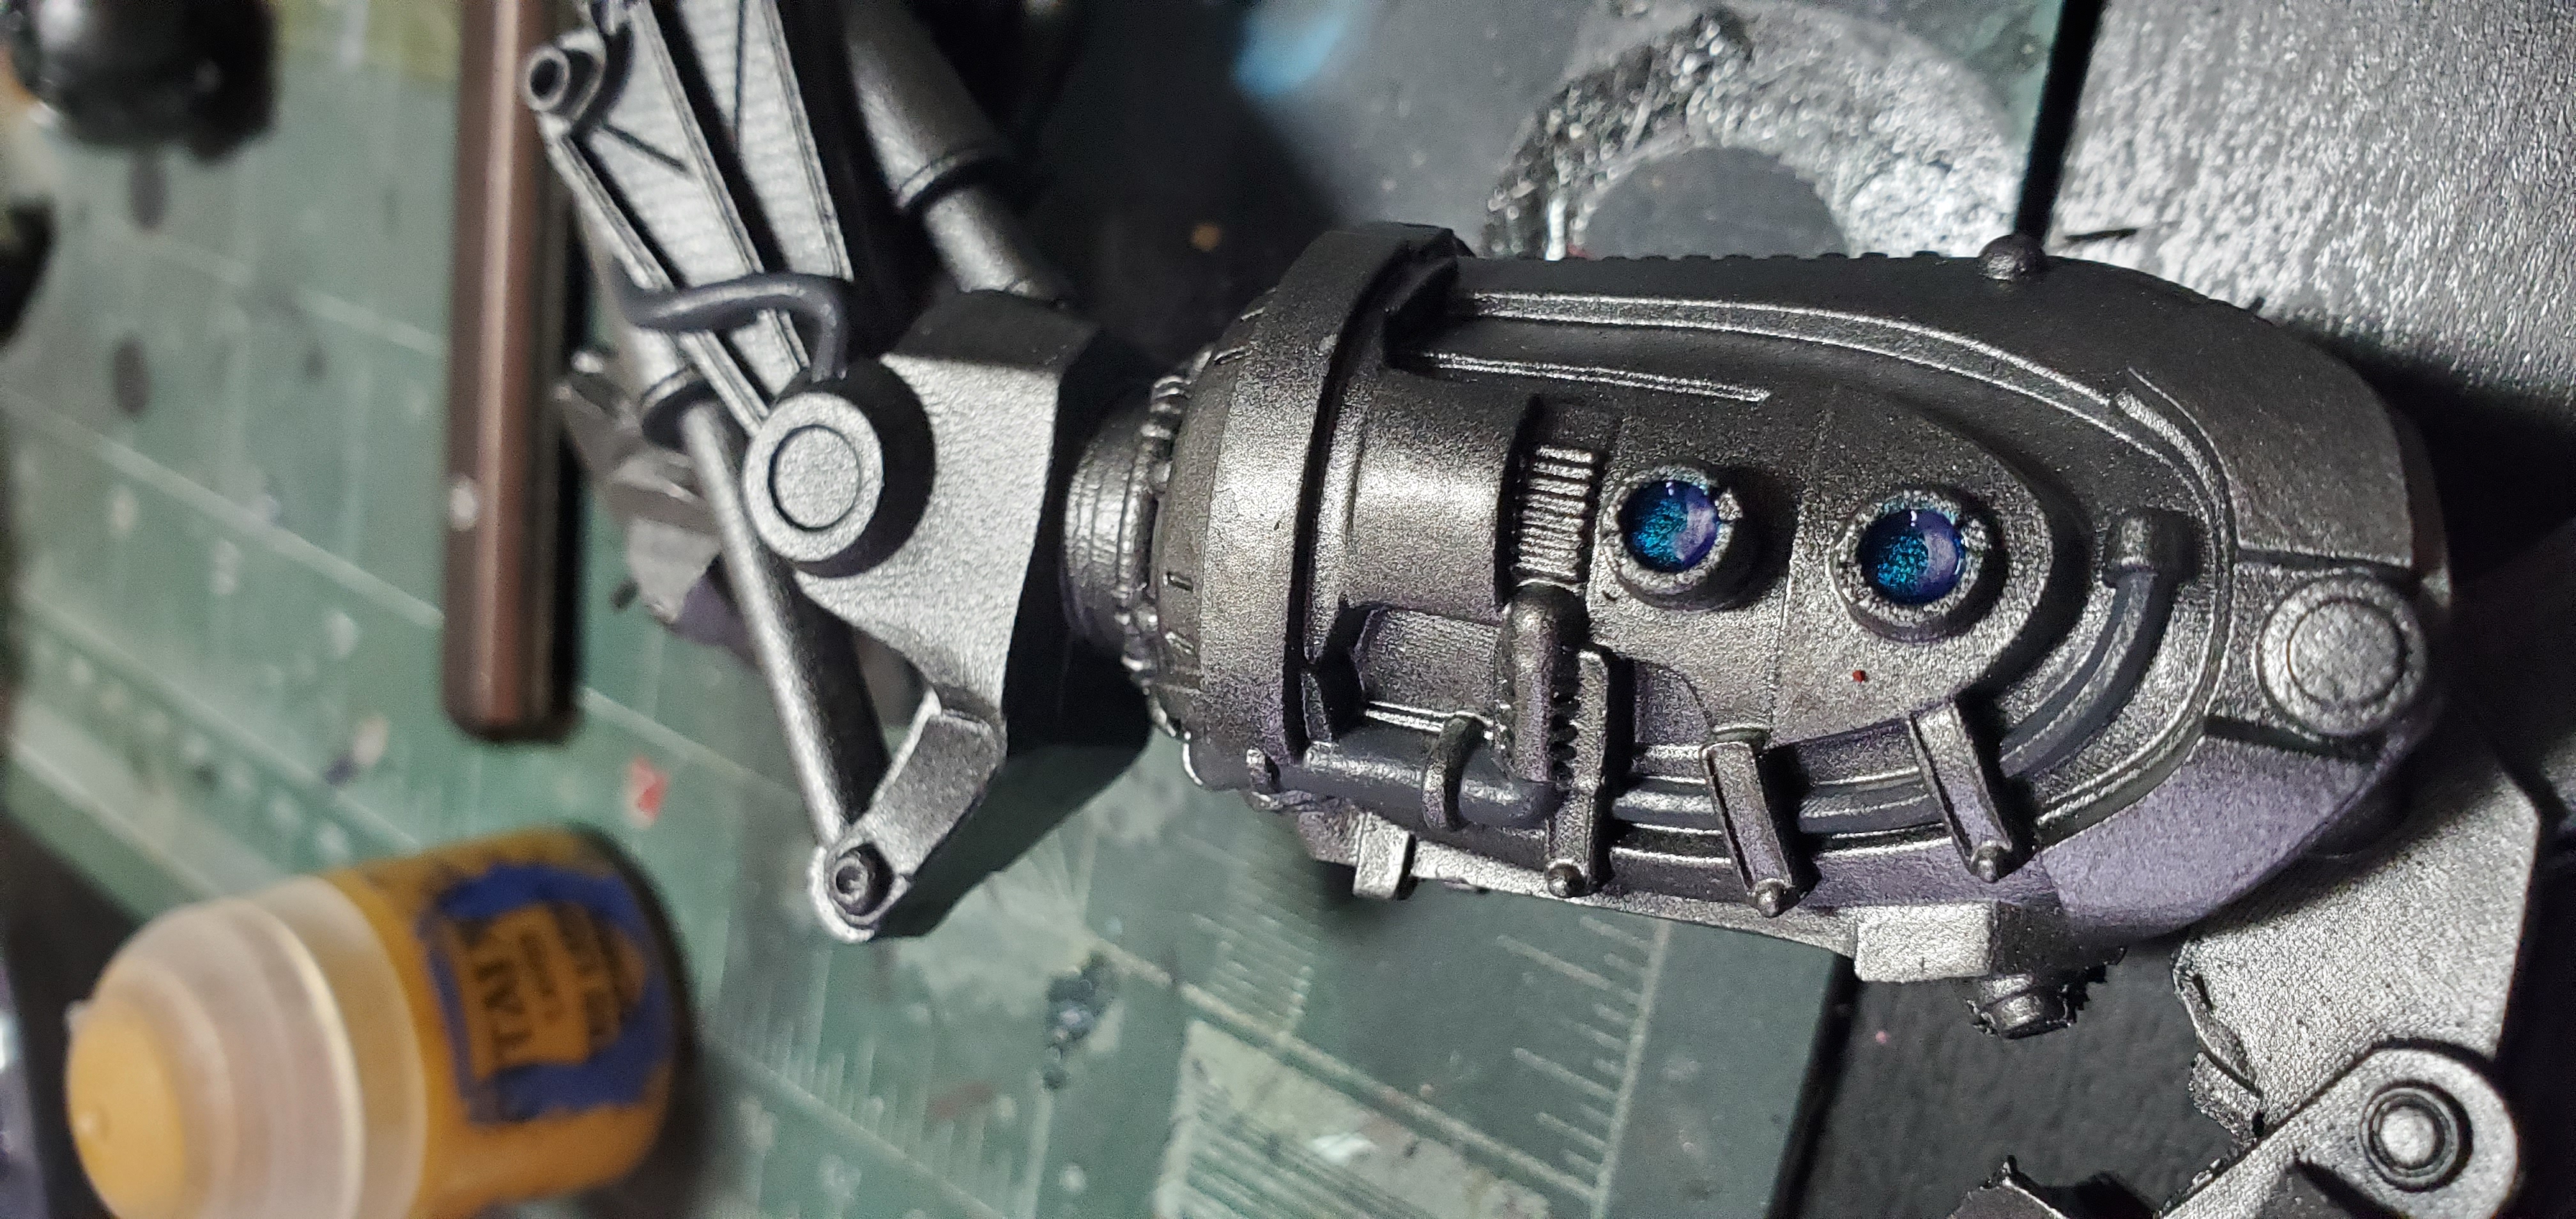
For Prime himself I used a basecoat of Citadel Air Leadbelcher with highlights of Runefang Steel. Instead of doing object source lighting for glow effects (mostly because I’m crap at them) I used GWs technical paint Soulstone Blue, I added this to areas I thought made sense to have power glow showing, I then highlighted it with Contrast Talassar Blue. For piping and tubes I used Necromancer cloak again and applied Contrast Chaos Black over it for shading. Some of the recessed panels that I wanted dimmer I did a coat of GW Nuln Oil to shade. Finally for the pistons I applied Runefang steel to brighten them from the constant “wear” of the back and forth. For the Nukes I went with a classic OD look using Vallejo Model Colors Reflective green, I added some color with a ring of Vallejo Game Color Gold Yellow smoothed out with a couple coats of Contrast Iyanden Yellow. The fins I applied some Vallejo Heavy Red. I also wore off some of the green to reveal the original metallic base coat as weathering and applied some Agrax as well.

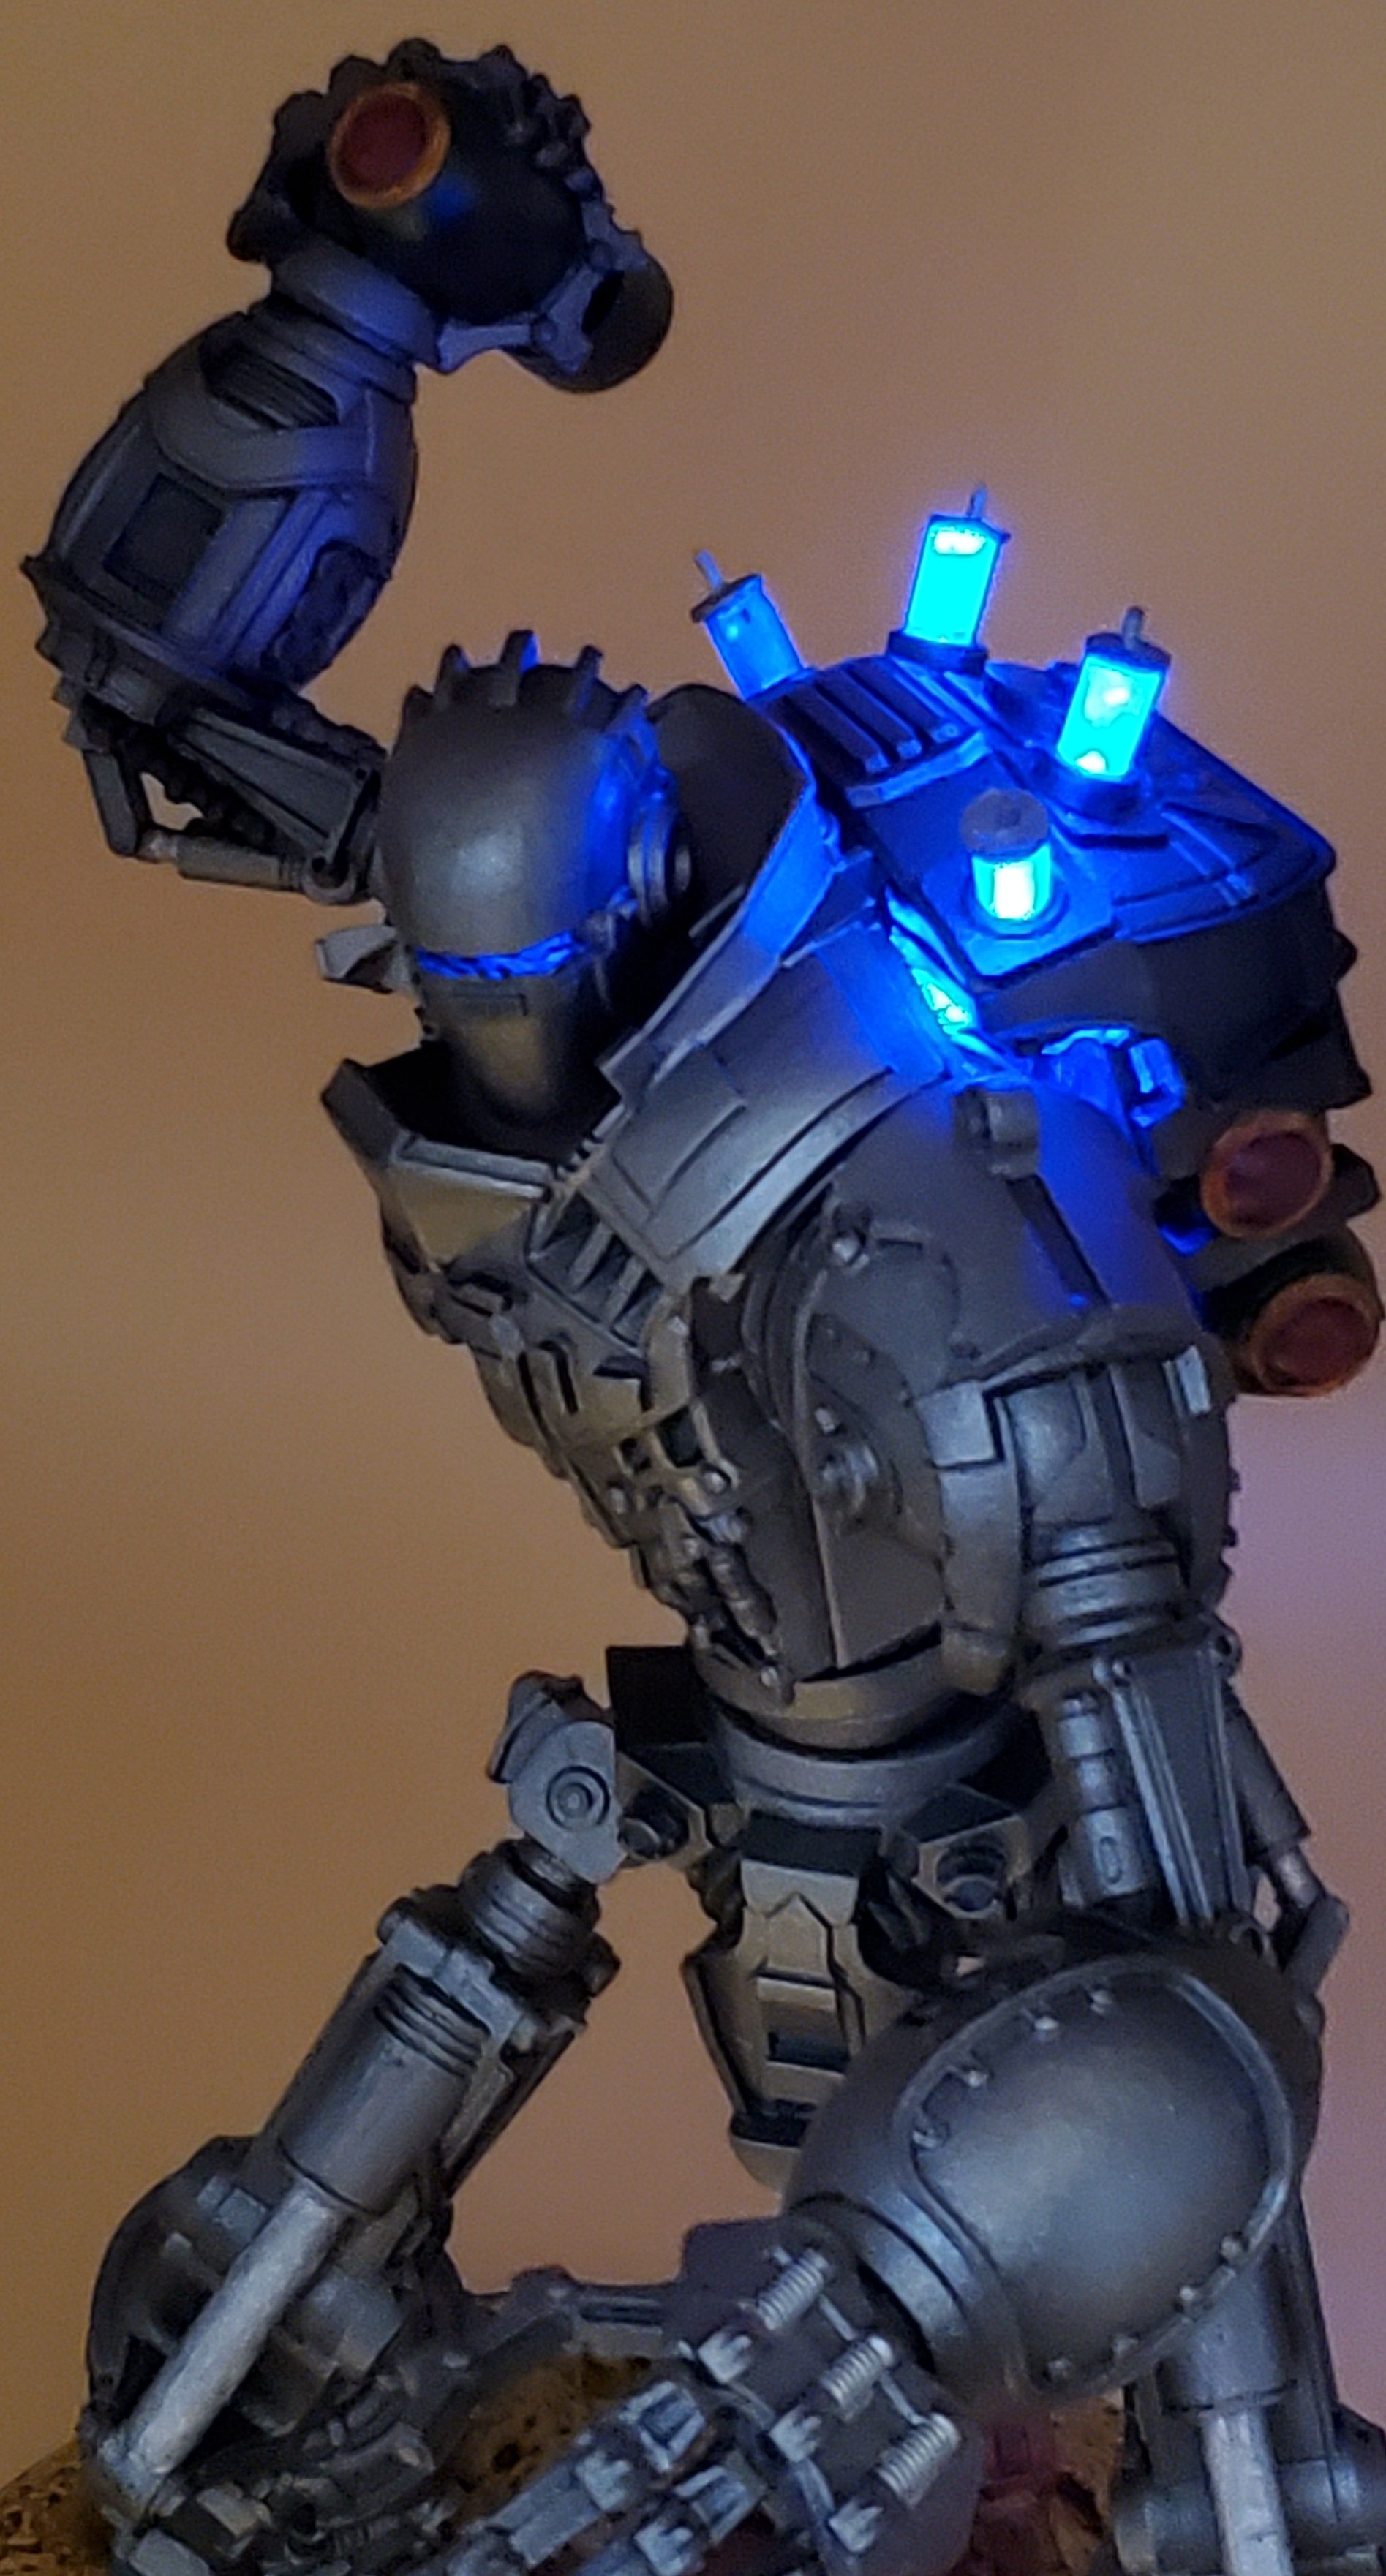
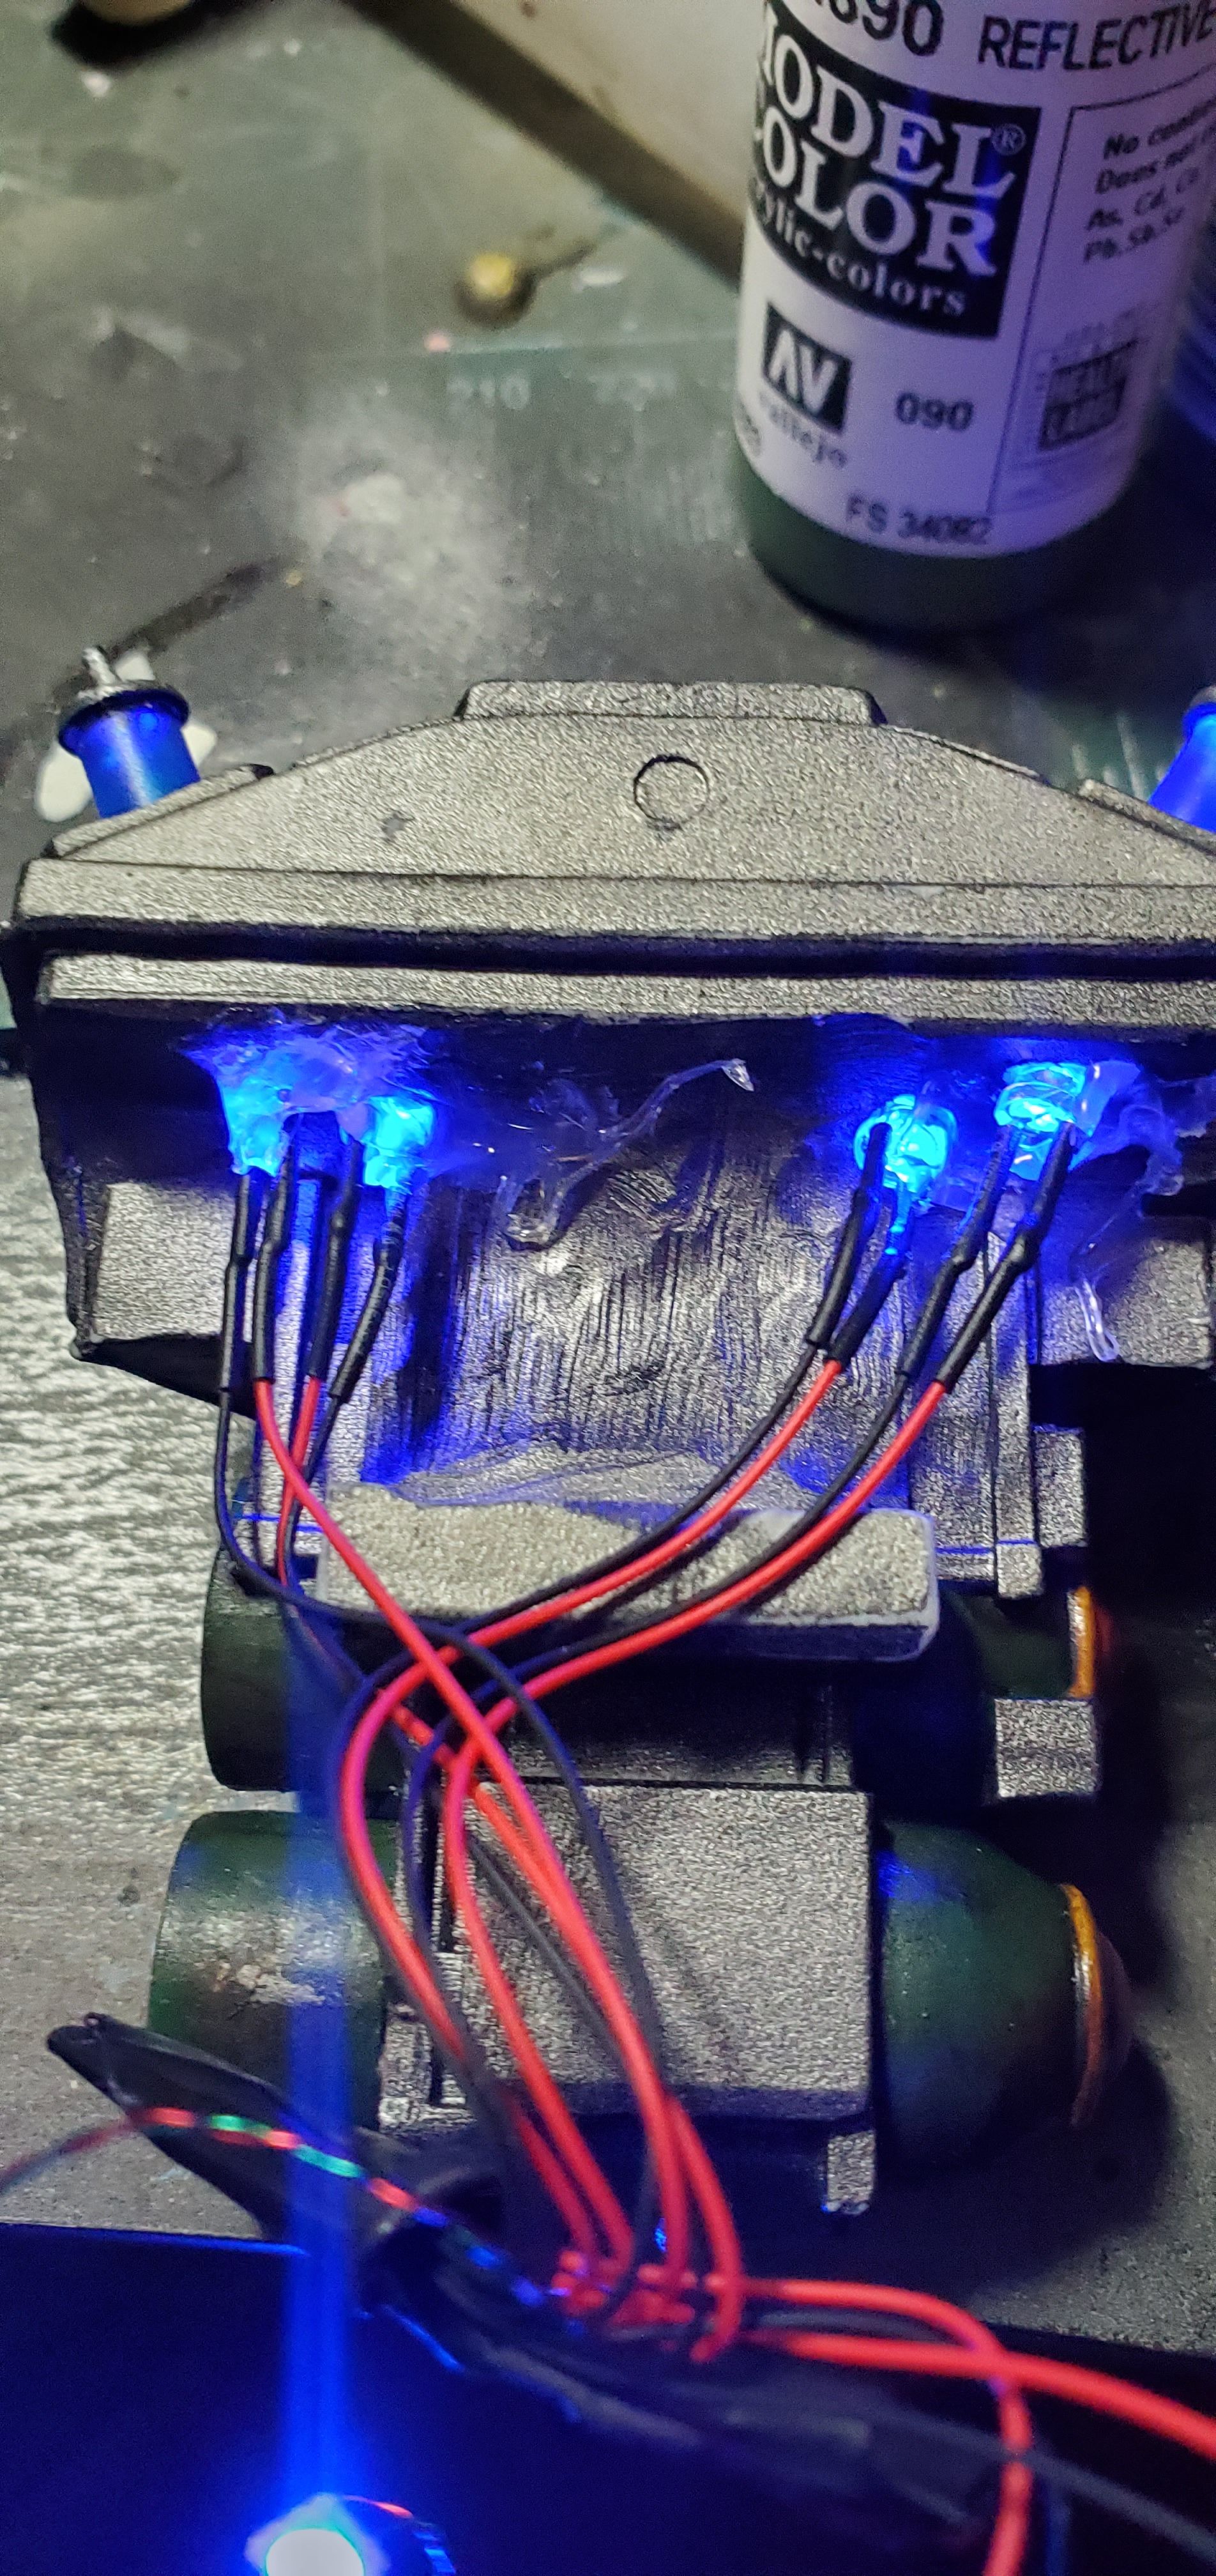
Finally I applied the lighting pack I built, it’s all run off a single coin cell battery. I secured the backpack lights using some hot glue but left the Head’s LED loose so the wiring can still be removed from the central body. I finished off the back cells with some plasticard caps I punched out with a hole punch and then added a pin in the middle to match the spikes on the original look.
Getting ready for lighting
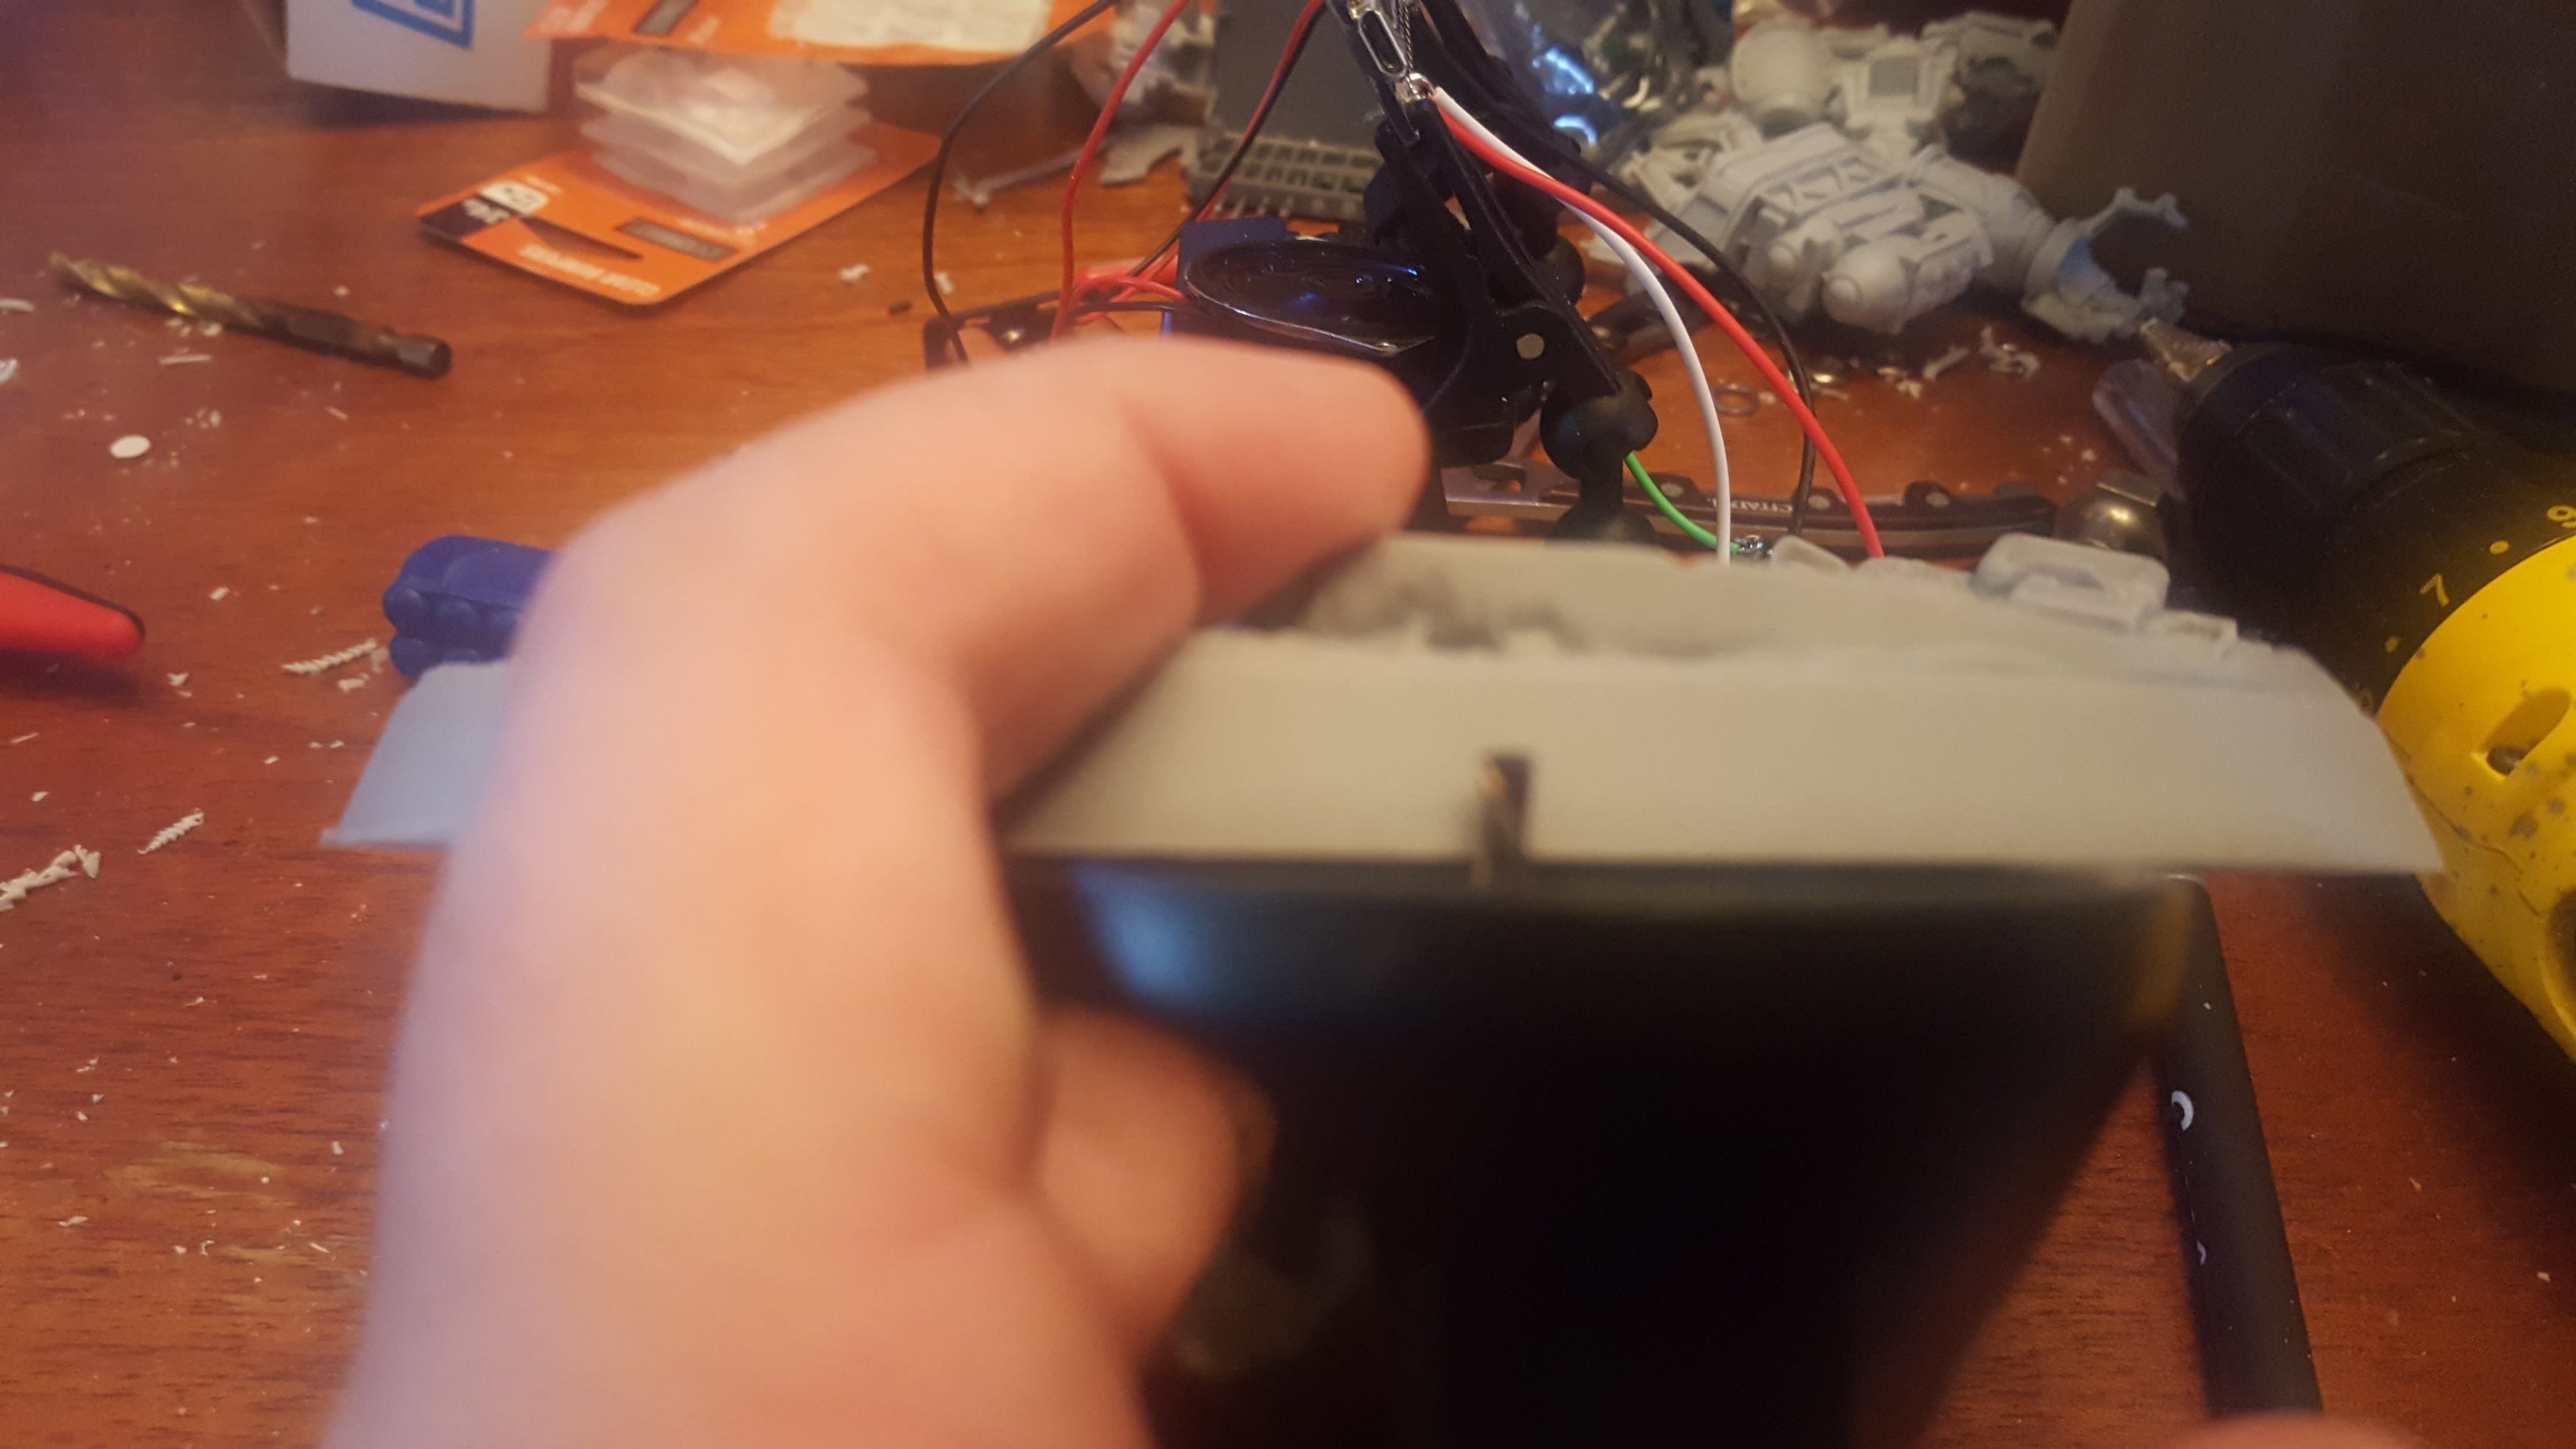
After sitting idle on this project trying to decide if I was going to wire the body any more I decided to go ahead and move forward with lighting the head and backpack. to do this I hollowed out the body and parts of the backpack so they just snap together with magnets to hold them. Then I drilled up into the head socket and then the neck/visor of the head so it will snap on with magnets as well. then I removed the back coils and drilled thru to those as well.
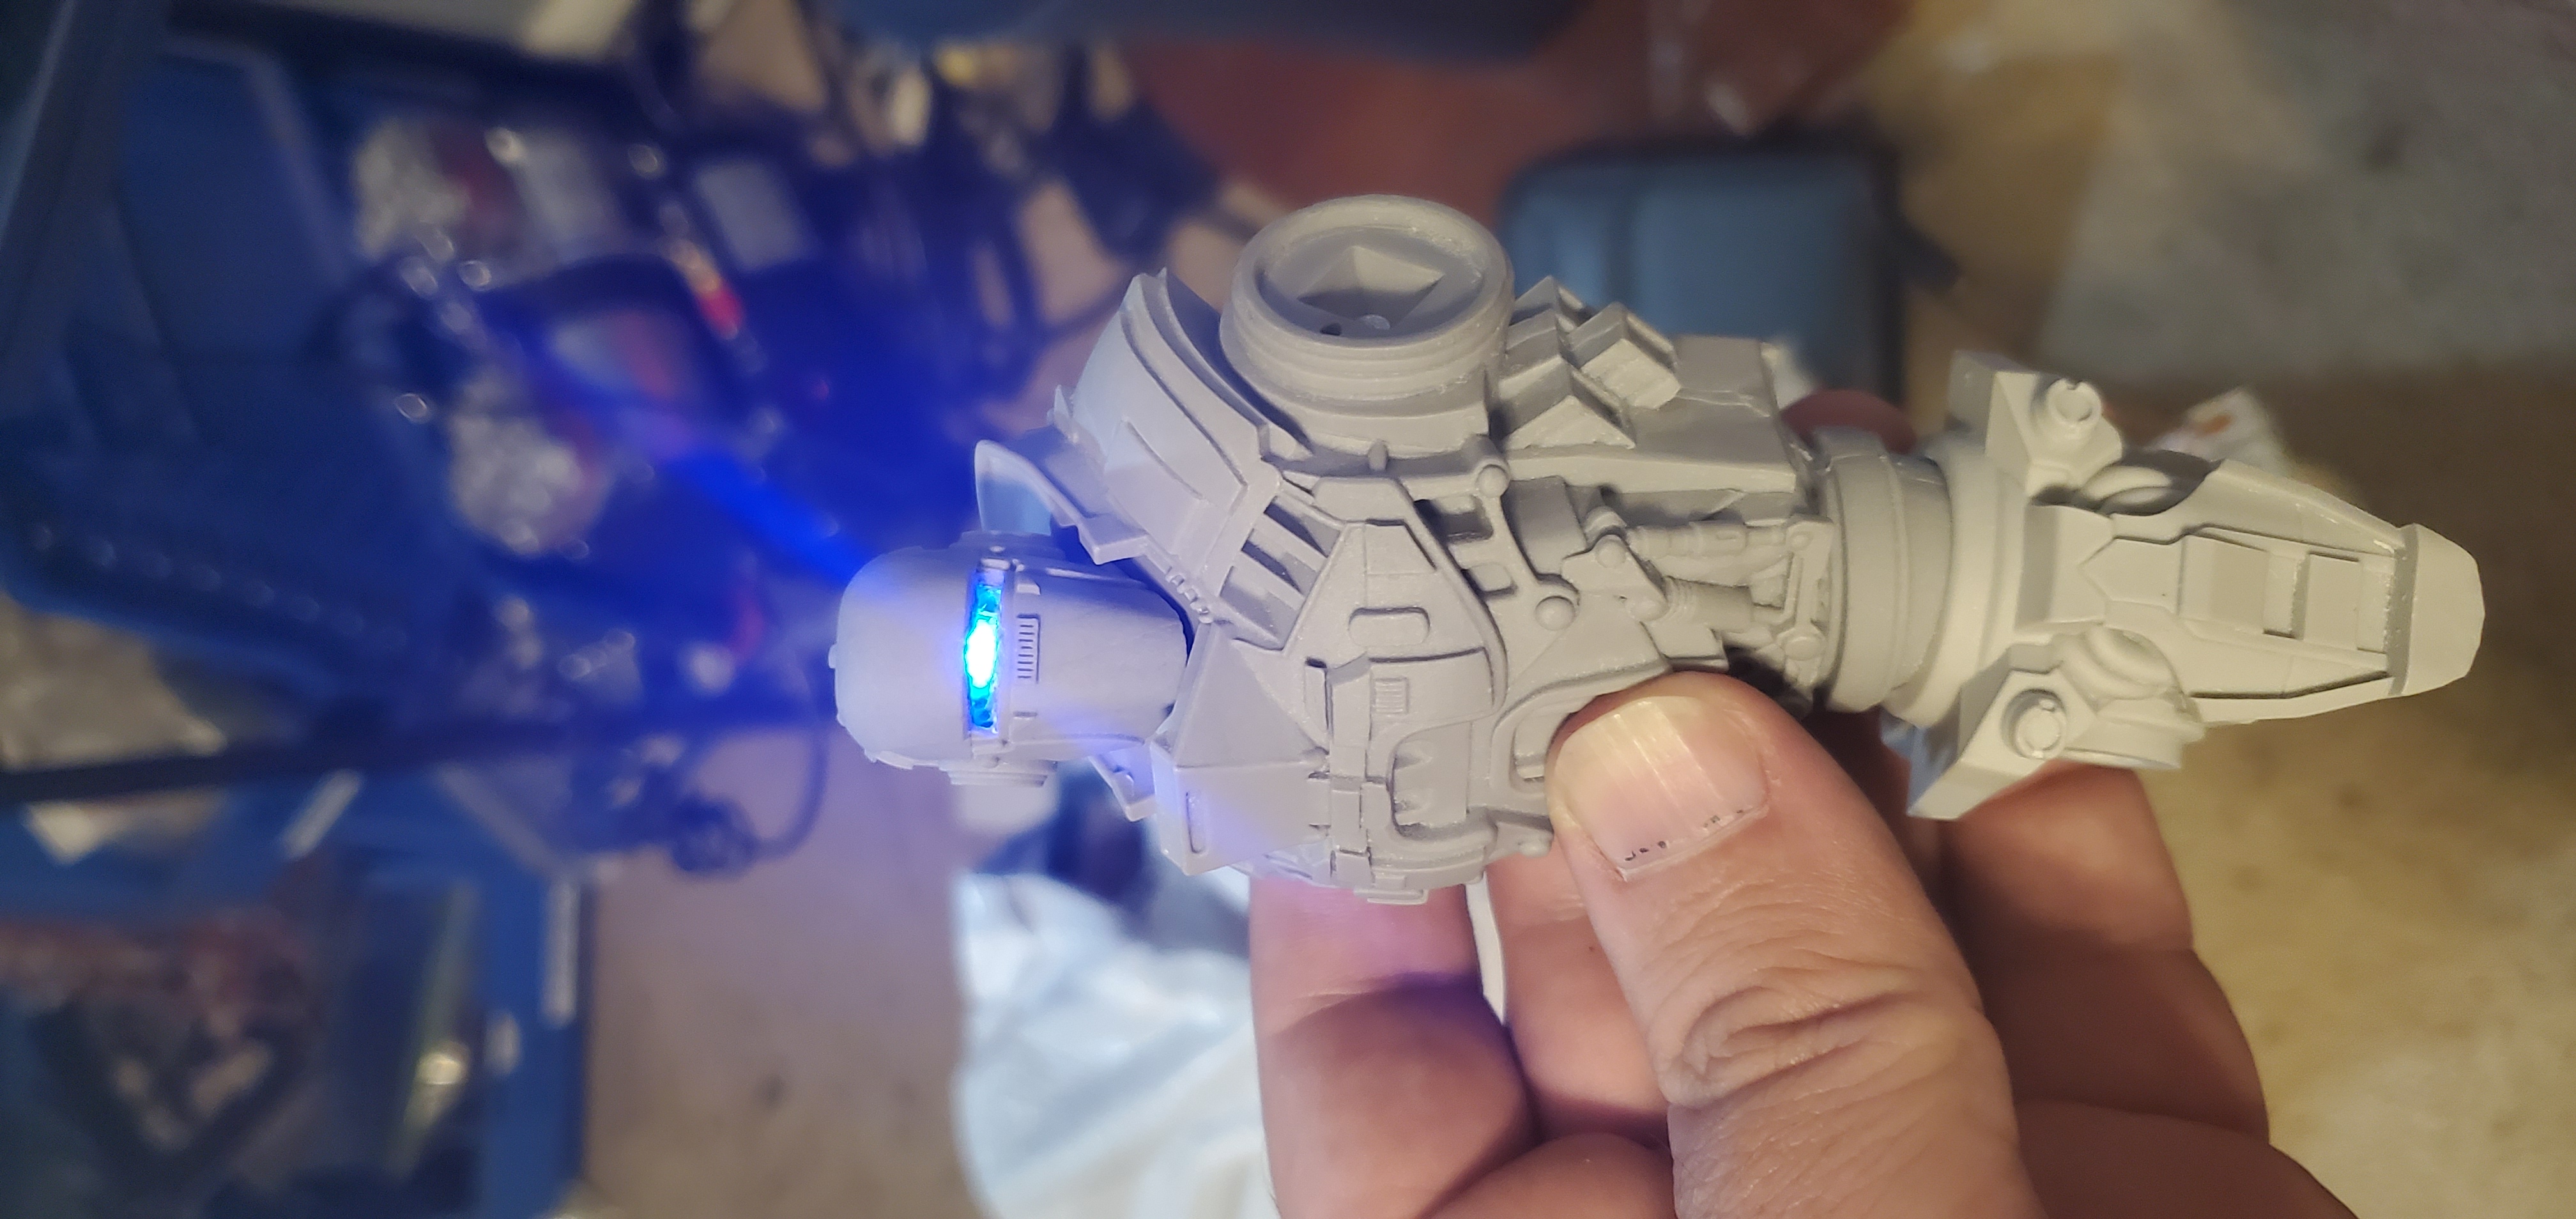
Next I tested replacing those coils with clear aquarium tubing. For lights I first went with flickering LEDs but they did not shine up enough so I wound up using solid ones with a flicker inline to have them pulse a bit.
With everything prepped it’s on to painting.

The Voice of Liberty!!
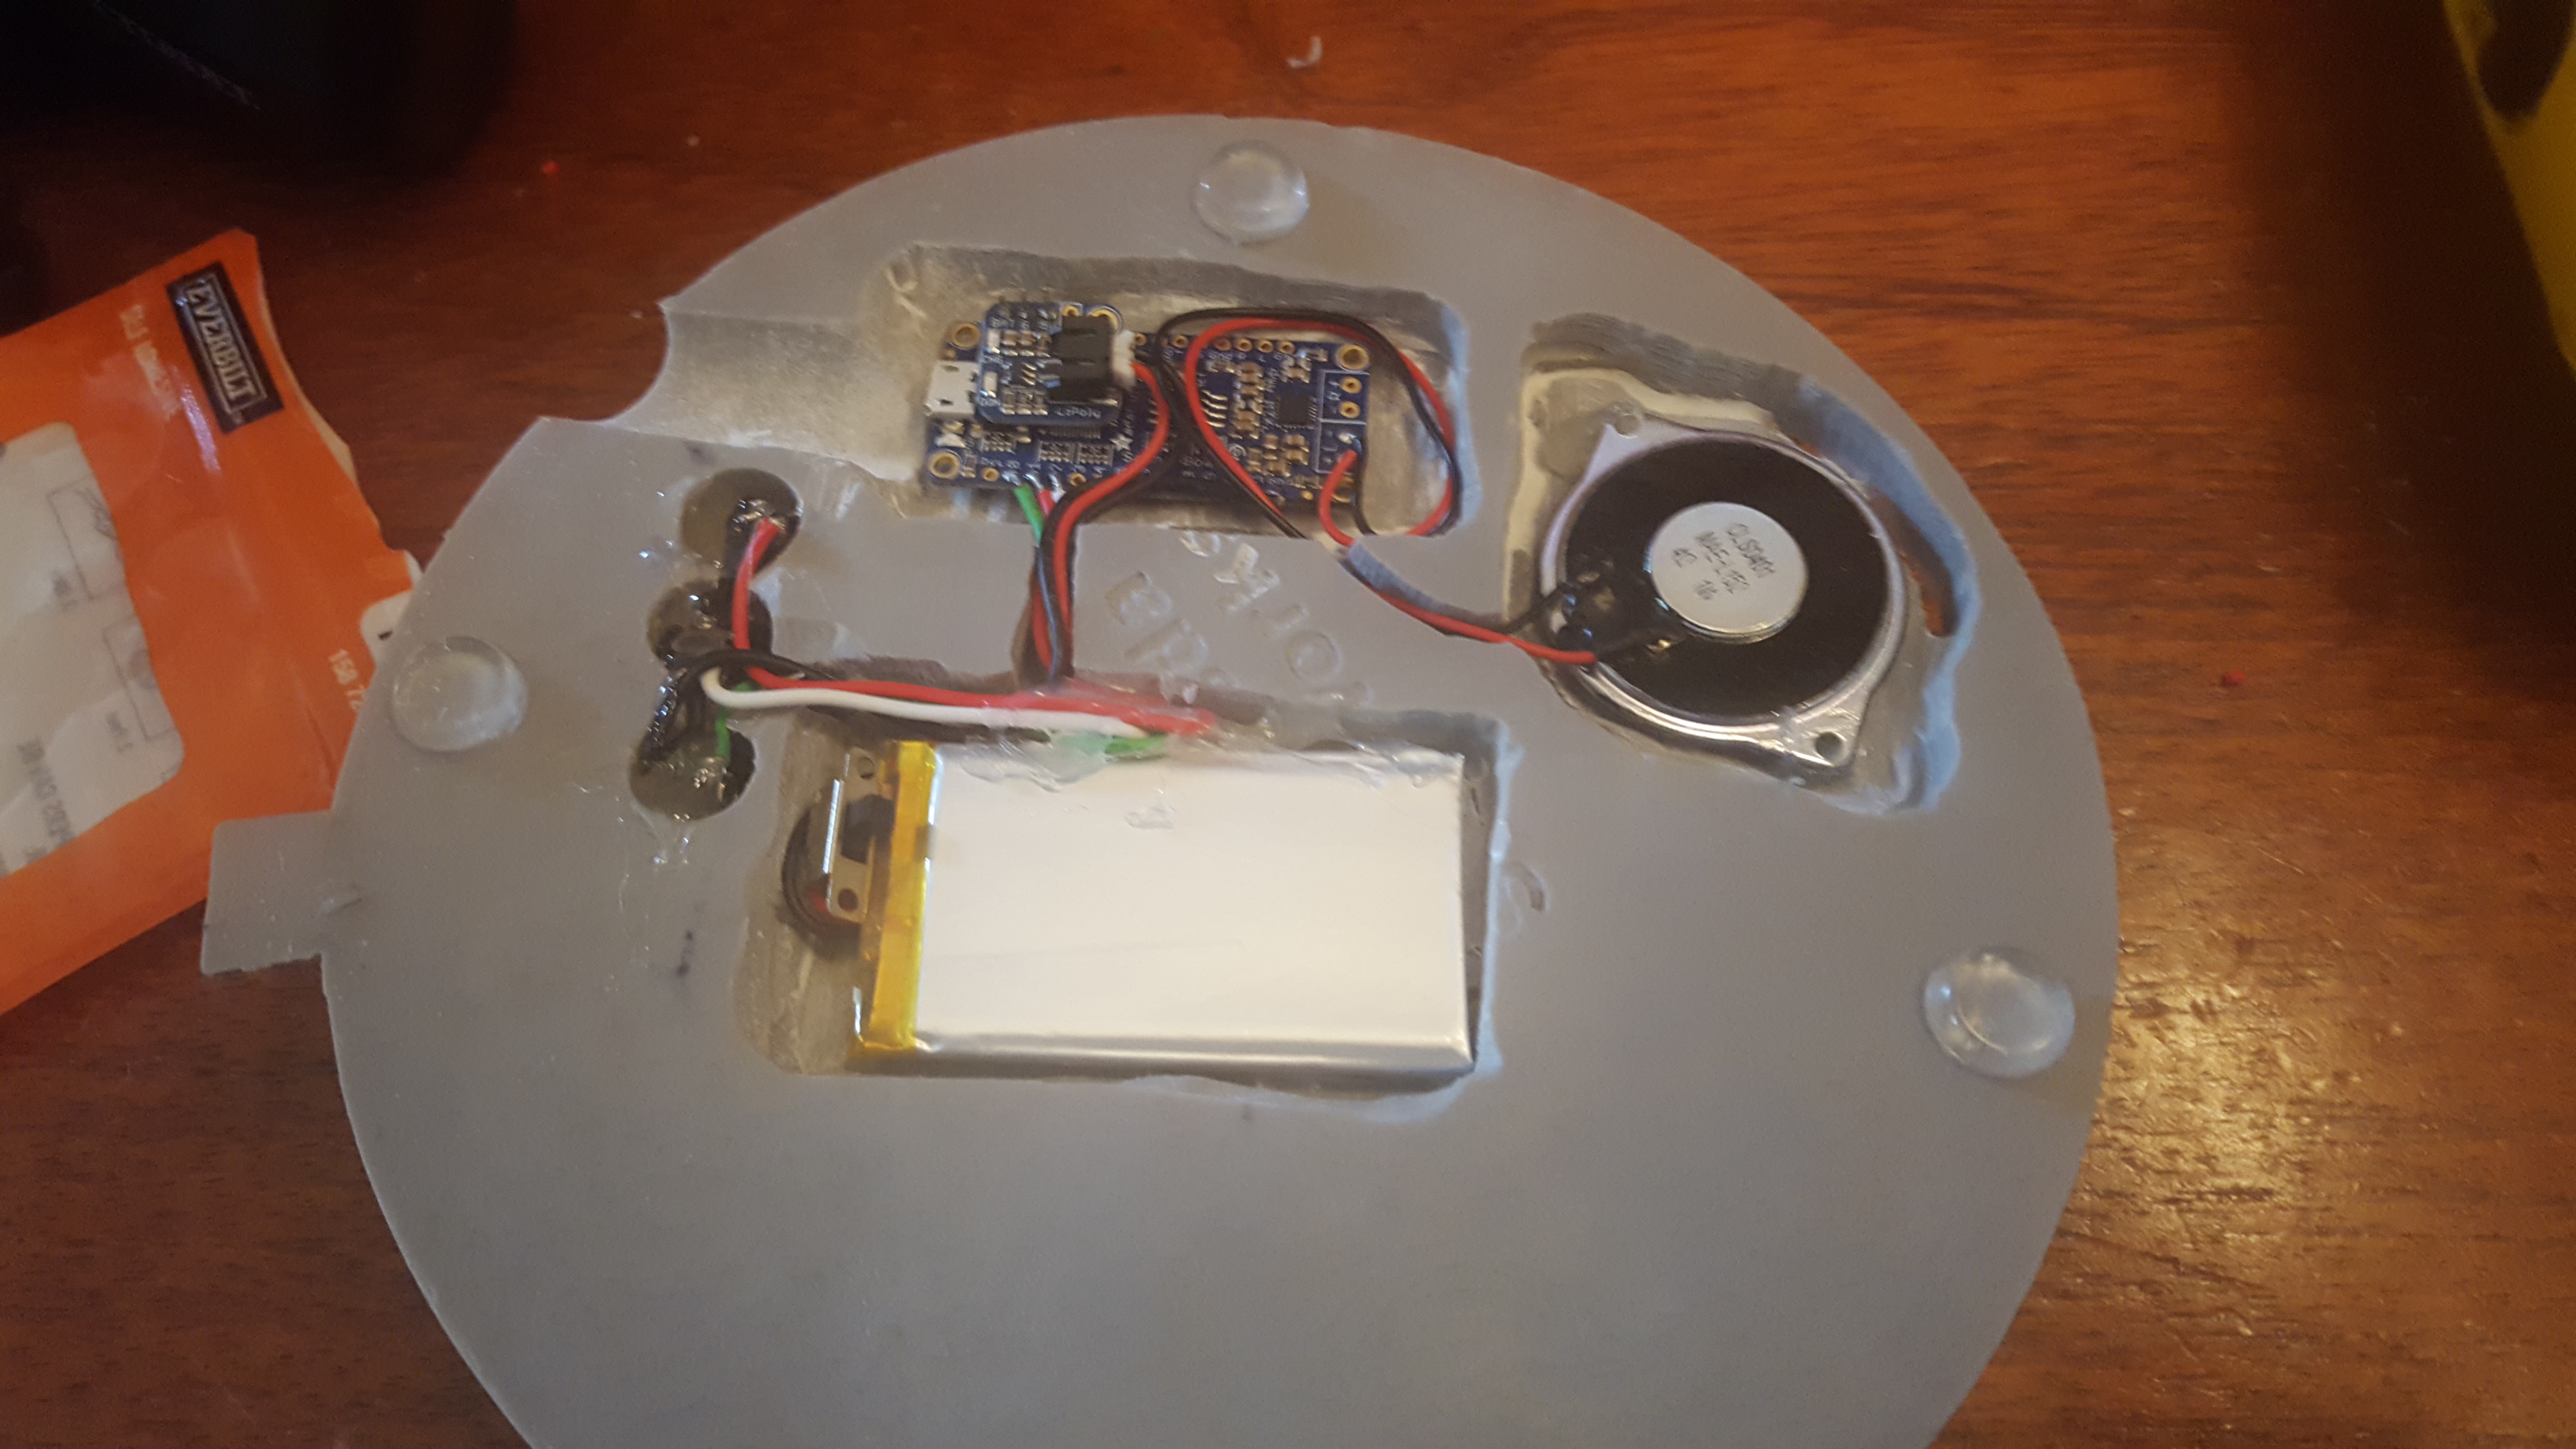
Having taken a break from voice work as I decided to change power sources (the AAA battery pack was just to big so I got a rechargeable lithium with an adapter for the board) I was happy to finally finish installing parts into the base.
I desoldered the battery pack from the board using my handy suction tool (I had a video for this, or at least I would have if I had hit the record button instead of the camera button), heating the connections back up the suction tool (a plunger with a nozzle basically) pulls the melted solder off, with small connections like these were you may need to pull on the wire slightly as the solder is melted to remove it then clean the pad with the suction tool I ten attached the batter adapter directly to the board, this raised the profile of the board but was still less then the battery pack. The adapter allows the board to recharge the battery via the same USB used to transfer the audio files to it so I also made sure to grind a cable channel on the base so it could connect up easily. I also installed the switch from the battery pack I discarded inline with the positive cable of the battery so I could toggle it off and on.
With the parts assembled and tested again it was finally time to install them into the base. For this I just used hot glue, it’s non conductive so I don’t have to worry about shorting anything out and provides a good solid connection. I seated the switches into the cone shaped holes I drilled for them, the glue seating them solidly with the switch tops poking out enough (I used a step drill bit for these, it’s a brilliant tool, starting at a small hold and every 1/2″ or so getting larger, this allowed me to fit the switches perfectly). I then applied extra glue to reinforce connection points and secure the cables into the channels I had dug for them.
With everything secure in the base the board was still slightly sticking out, so I added some small plastic “feet” to the bottom of the base to elevate it slightly.
Everything complete I assembled prime in his magnetized glory and proceeded to test the audio, SUCCESS!!
With this first part complete I am now free to move onto fixing the damaged parts of the base with a bit of green stuff, then paint the model.
Or I would if the idea of lighting up the visor and coils on his back had not been put into my head, so at least one more update to come!
Magnets!
As part of this build I wanted to make it so that I could break Prime down into parts that could then be placed as terrain for objectives etc.
I attached the waste to the upper body as I did not care to have that part separate. The head and arms took magnets well however the connection points for the legs are rather small, so I opted to use magnets as the central connection point and add pins off center to log them into place more securely. I did the same for the arms to be sure and used larger magnets on the feet and base in insure a solid connection point there. All in all it holds together well and can take some shaking without falling apart.
Bringing Voice to Prime
As soon as Modiphius put Liberty Prime up for sale I knew what I wanted, to bring Prime’s iconic voice from the games onto the table top. The key was how to do this? Looking at the previews it was obvious the base would be massive and easily able to hide components. So I began doing searches for audio components to make my dream reality. The easiest solution was to take a bluetooth speaker and cut it up then install the parts, I had already done this to the Fallout 76 Pip Boy based on a video by Punished Props. However this did not really meet my desires for this project. My thought was I wanted to imbed push buttons in the base so that you could press for power up, destruction, and a 3rd for during game sounds. Enter a company called Adafruit and their Audio FX Sound Board. Not only did it allow you to map sound files to switches by just connecting the board via a USB to your computer, it came in a variant with drivers for speaker connections, and allowed you to set a group of files to a single switch to be randomly played each time you press that button, all without needing to do any programming and a minimal of soldering!
With that I placed my order and eagerly awaited the arrival of my parts and Prime himself!
When the parts arrived I began assembling everything, my idea was for the 3 switches, a power supply (in this case 3 triple A), and the speaker. I drew around them on the base to insure fit and tried to judge the best location based on thickness.
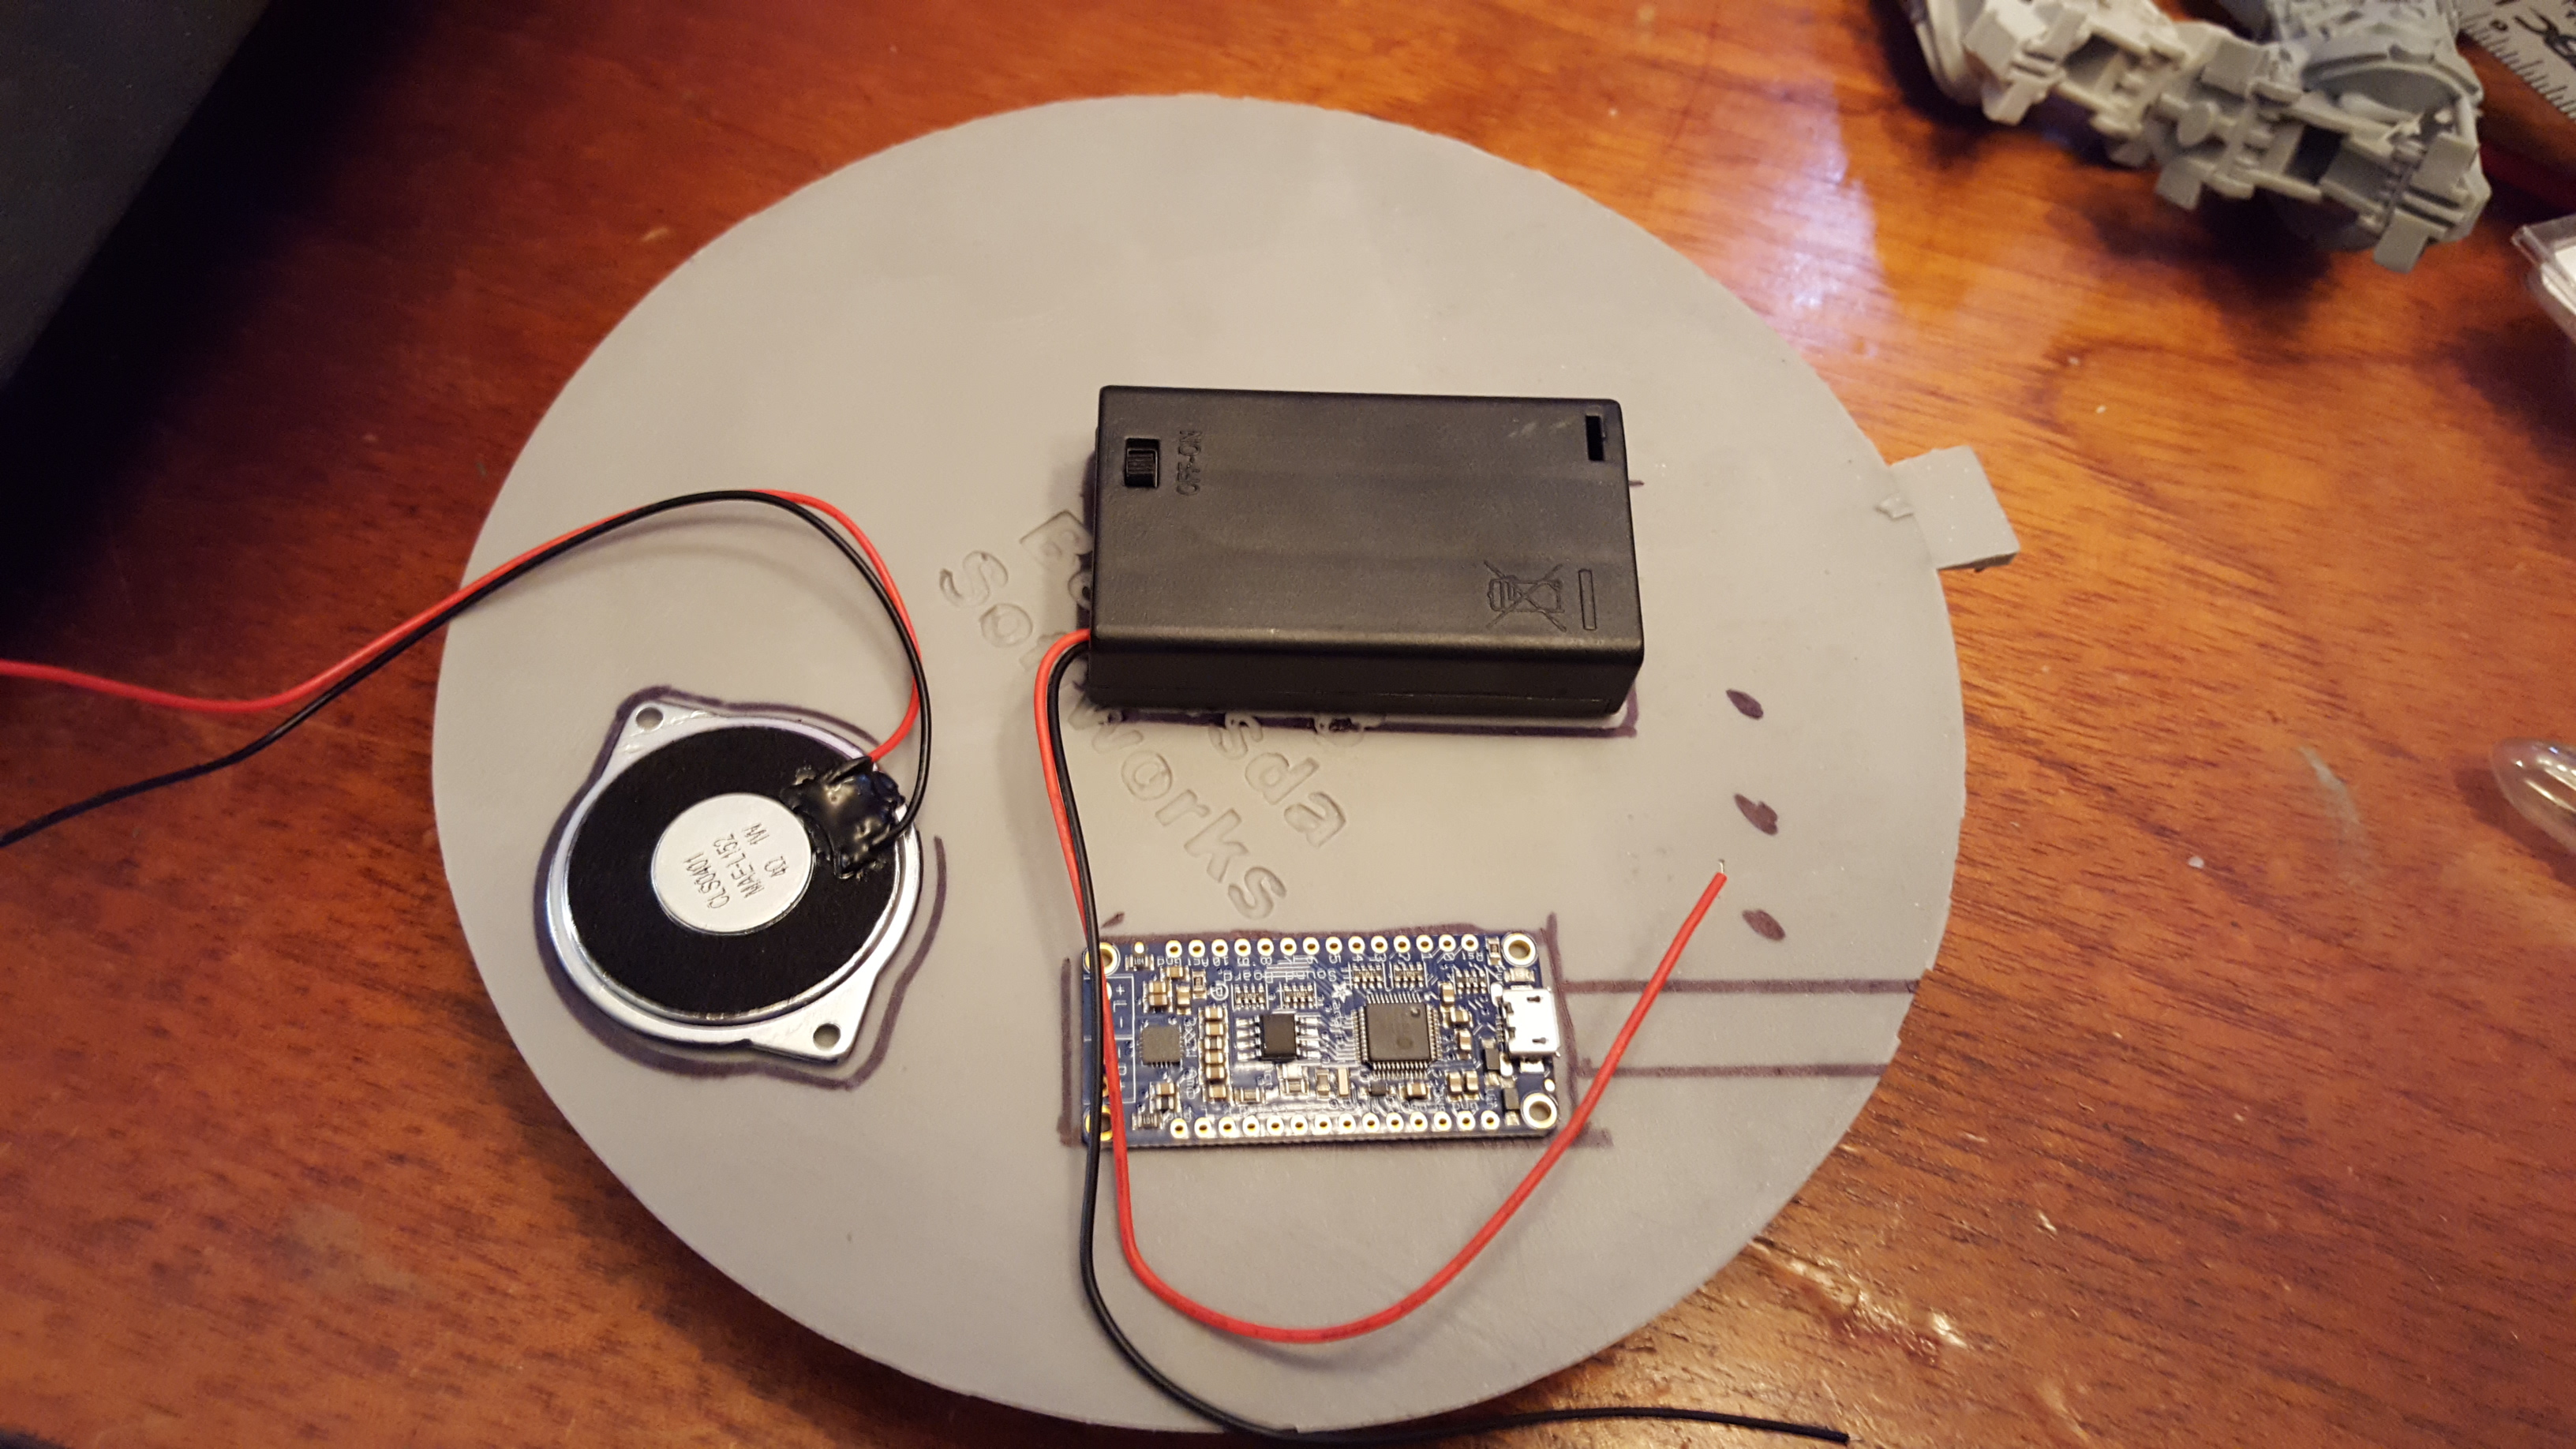
Next I proceeded to use my GW figure holder with the arms to hold the board steady (I actually bought it for this reason) and then soldered all the components to the board. The switches I did with a common ground back to the board to link them all in an array. Everything went together pretty easily.
With the files named correctly, the power and speaker connected, and the first switch connected I decided to do a test, SUCCESS!!
With the test complete I finished up the other 2 switch connections and tested them as well.
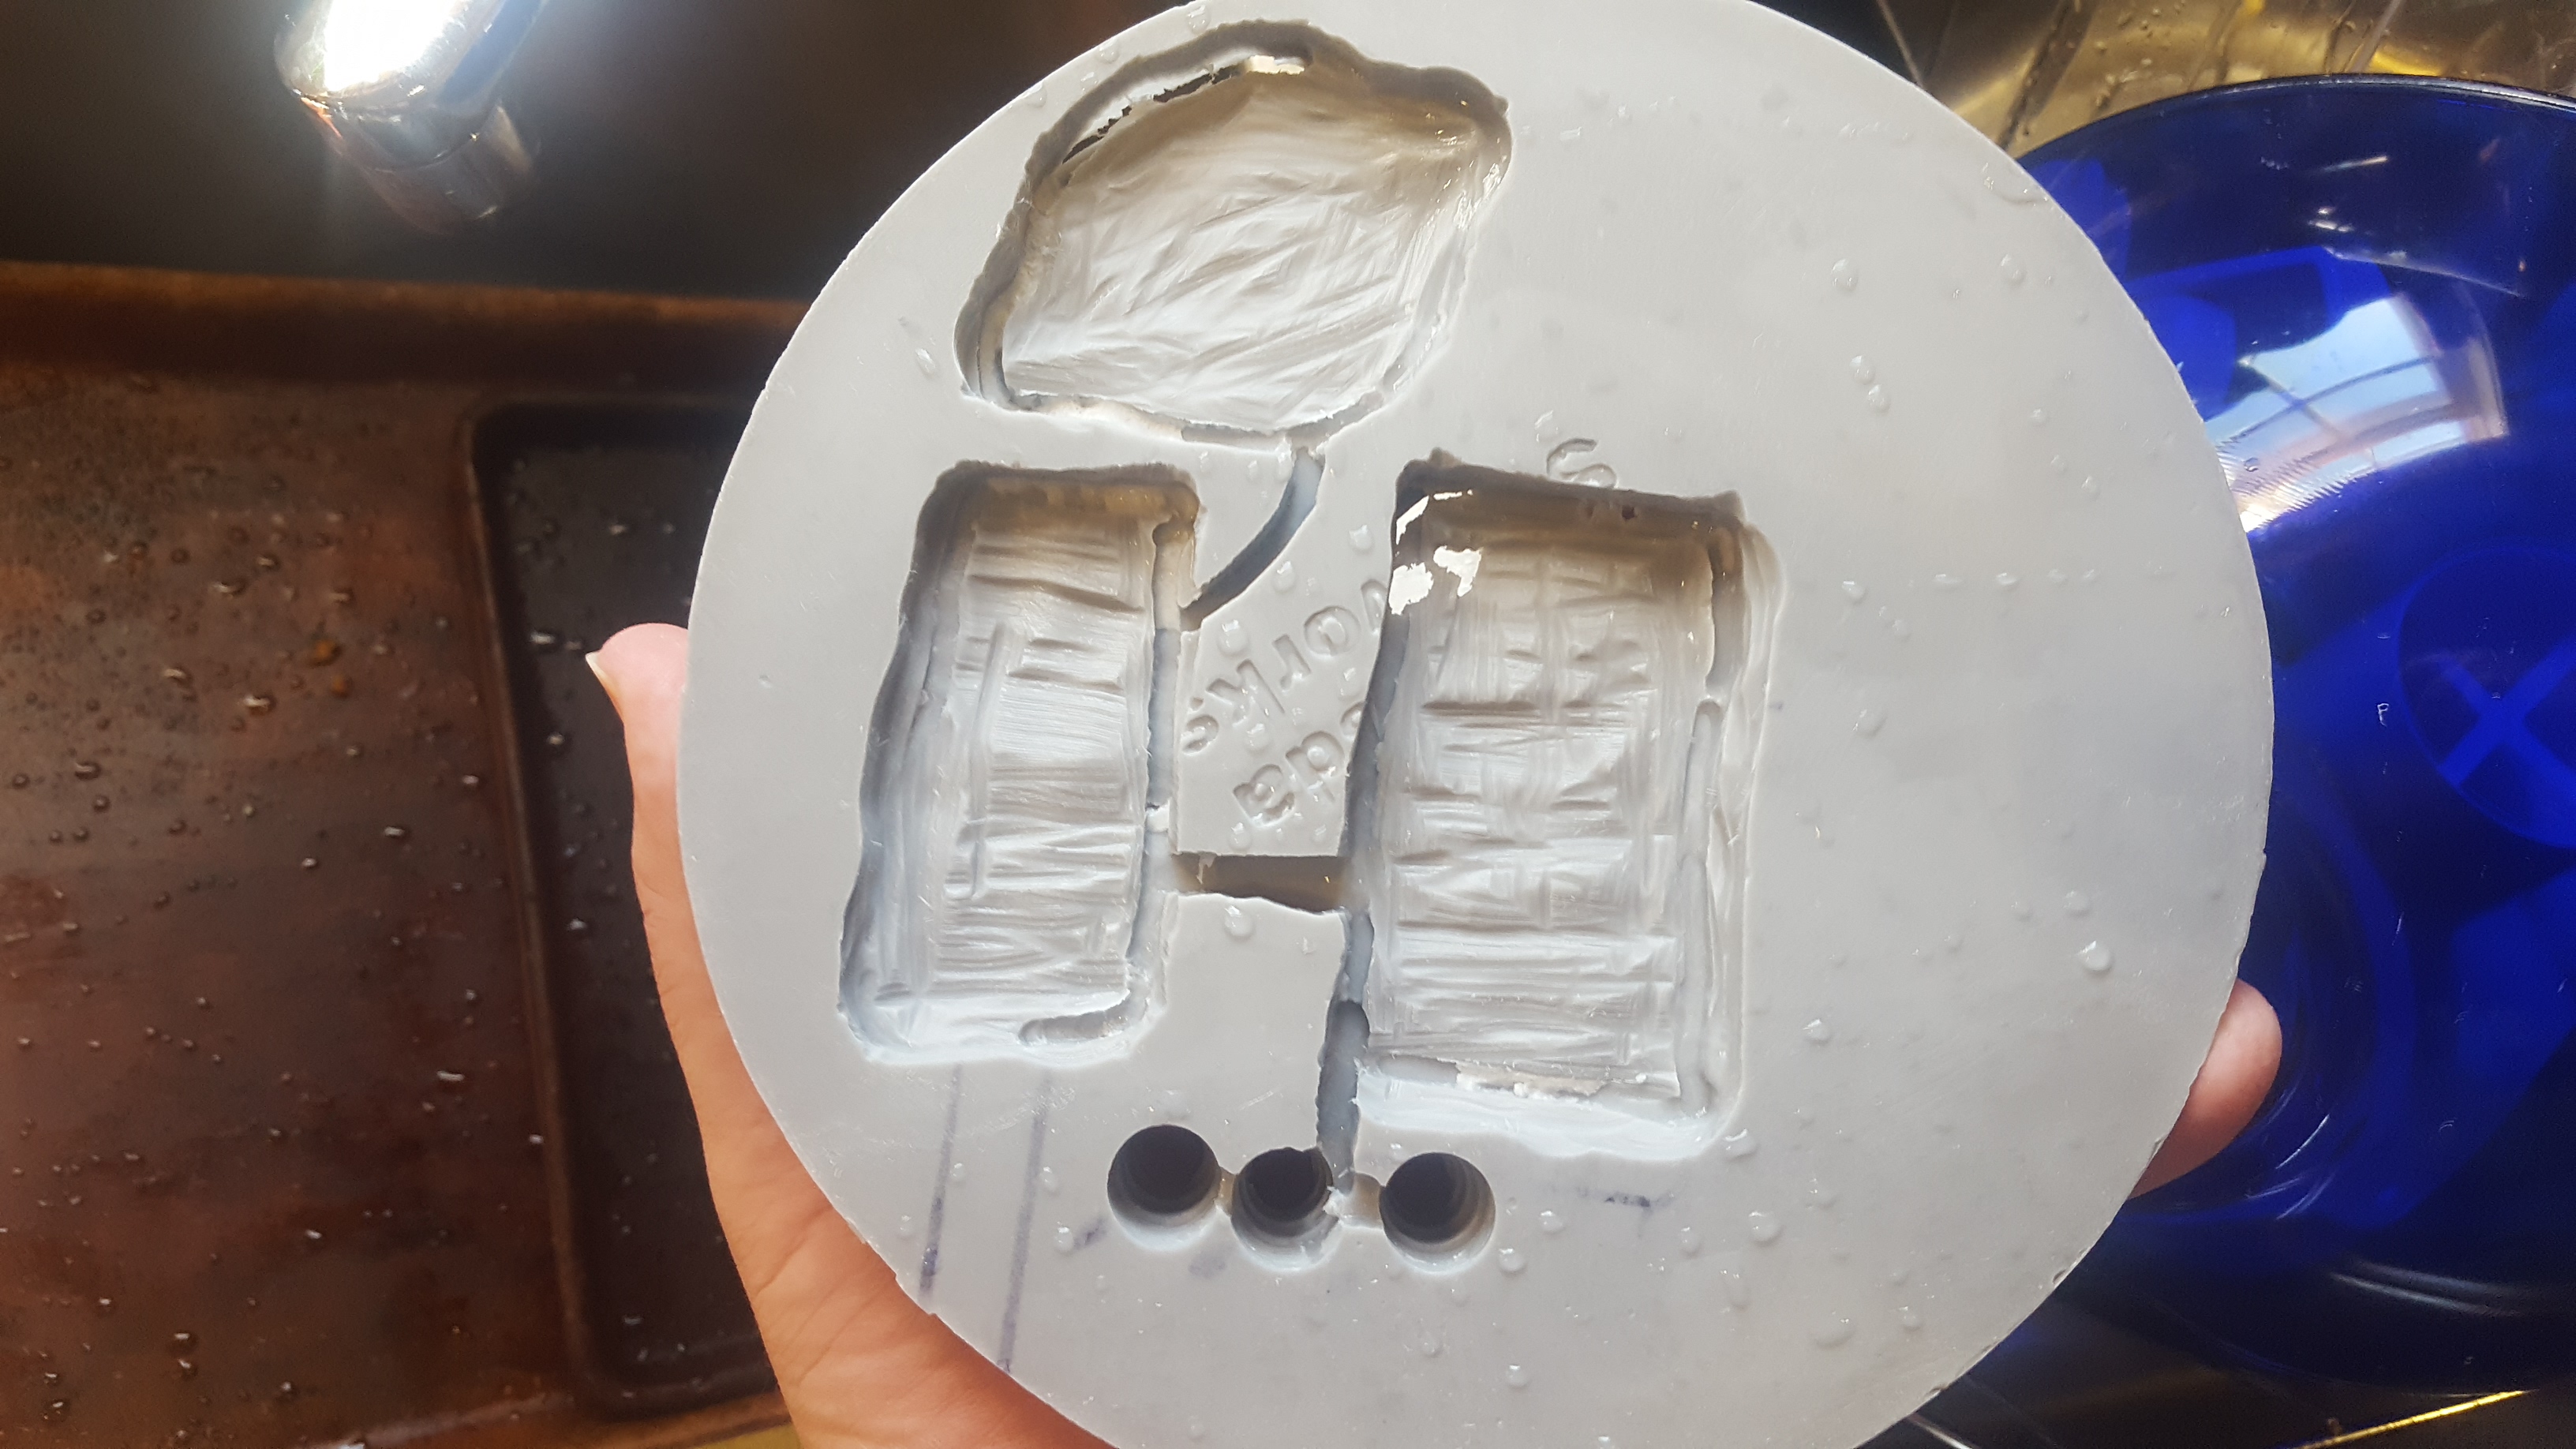
Next I proceeded to use my Dremel’s router attachment to line out the areas fo removal on the base. I set it at what I thought was 1/2 way thru the base but still had a couple oopsies that I will have to fix with some green stuff. I also came to the conclusion that the AAA battery pack is to big without raising the base. So I have decided to replace it with a lithium Ion rechargable pack Adafruit has as an add on to the sound board, however this was decided after grinding away the material so there will be some extra spaces (not that anyone will see it on the table.
I will note when working with resin like this be sure to wear suitable eye protection as well as a filter mask, it produces very fine particles you do not want to inhale or get in your eyes.
Having completed 75% of the work and needing to wait on the post again I decided to move onto the model itself.
Unboxing
So coming home today I found a couple packages, both to do with my next Fallout project, Liberty Prime! I have several ideas of what to do with this massive beast of a model but for now here is the unboxing of the first package containing the man himself. The other will have to wait and will truly bring “voice” to this icon of the wasteland.