![How To Paint Moonstone’s Nanny | Goblin King Games [7 Days Early Access]](https://images.beastsofwar.com/2024/12/3CU-Gobin-King-Games-Moonstone-Shades-Nanny-coverimage-225-127.jpg)


Bolt Action Japanese 1000pts army


Recommendations: 796
About the Project
Watching The Pacific TV box set with my son and seeing all the gorgeous US Marines Andy Zeck has painted made me reach for some old project ideas to get into some Pacific WW2 action. I have friends who have plans for desert British and British Burmese theatre bolt action armies, so fighting Japanese troops would fit fairly well as opponents. I will eventually paint up my own US marines but feel i can get the Japanese project underway faster. Including an FT17 is my deviation from historical accuracy and the list building in the game. The FT17 is a WW1 tank, the Japanese had some, but by WW2 they were just used for training and yet my army have gotten one and are desperate enough to field it.
Related Game: Bolt Action
Related Company: Warlord Games
Related Genre: Historical
This Project is Completed
Starting out.

I started a basic Japan list years ago, but never got beyond buying a couple of resin kits and a Warlord Games infantry plastic minis box.
I already have a spreadsheet for a US Bolt Action list where i have entered the cost of irregular, regular and veteran troops and additional weapon choices etc so i can total the points cost.
I adapted this sheet to accept the same type of list building for the Japanese. Several tweaks were required as unit maximum headcounts and other changes weren’t applicable between the two factions.
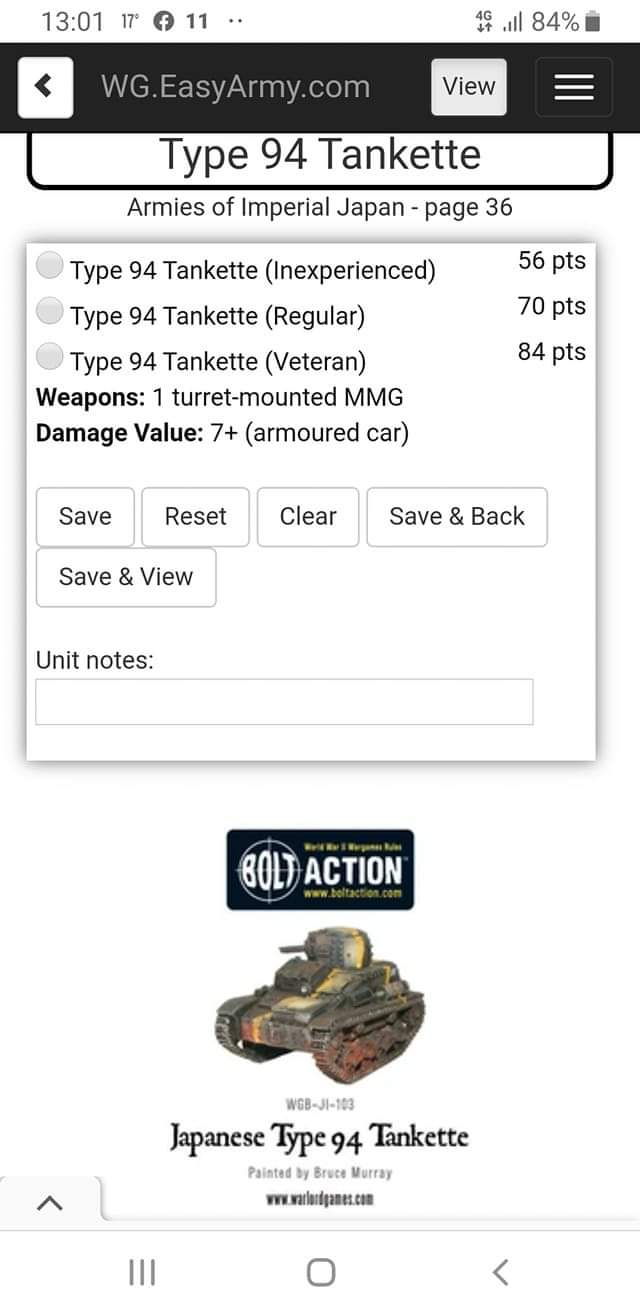
I went to the Bolt Action Facebook web page and asked how i could field the FT17 in a Japan list fairly, even though they didn’t technically fight for Japan.
There was tons of interesting history thrown my way and they said i could use the cost of another Tankette on the actual Japan list, or the China list that actually has options to field a FT17 / 18.
I have chosen the China list option because it has built in special rules that reflect using WW1 kit in WW2 (One-man turret and Slow).
Land of the resin sun.
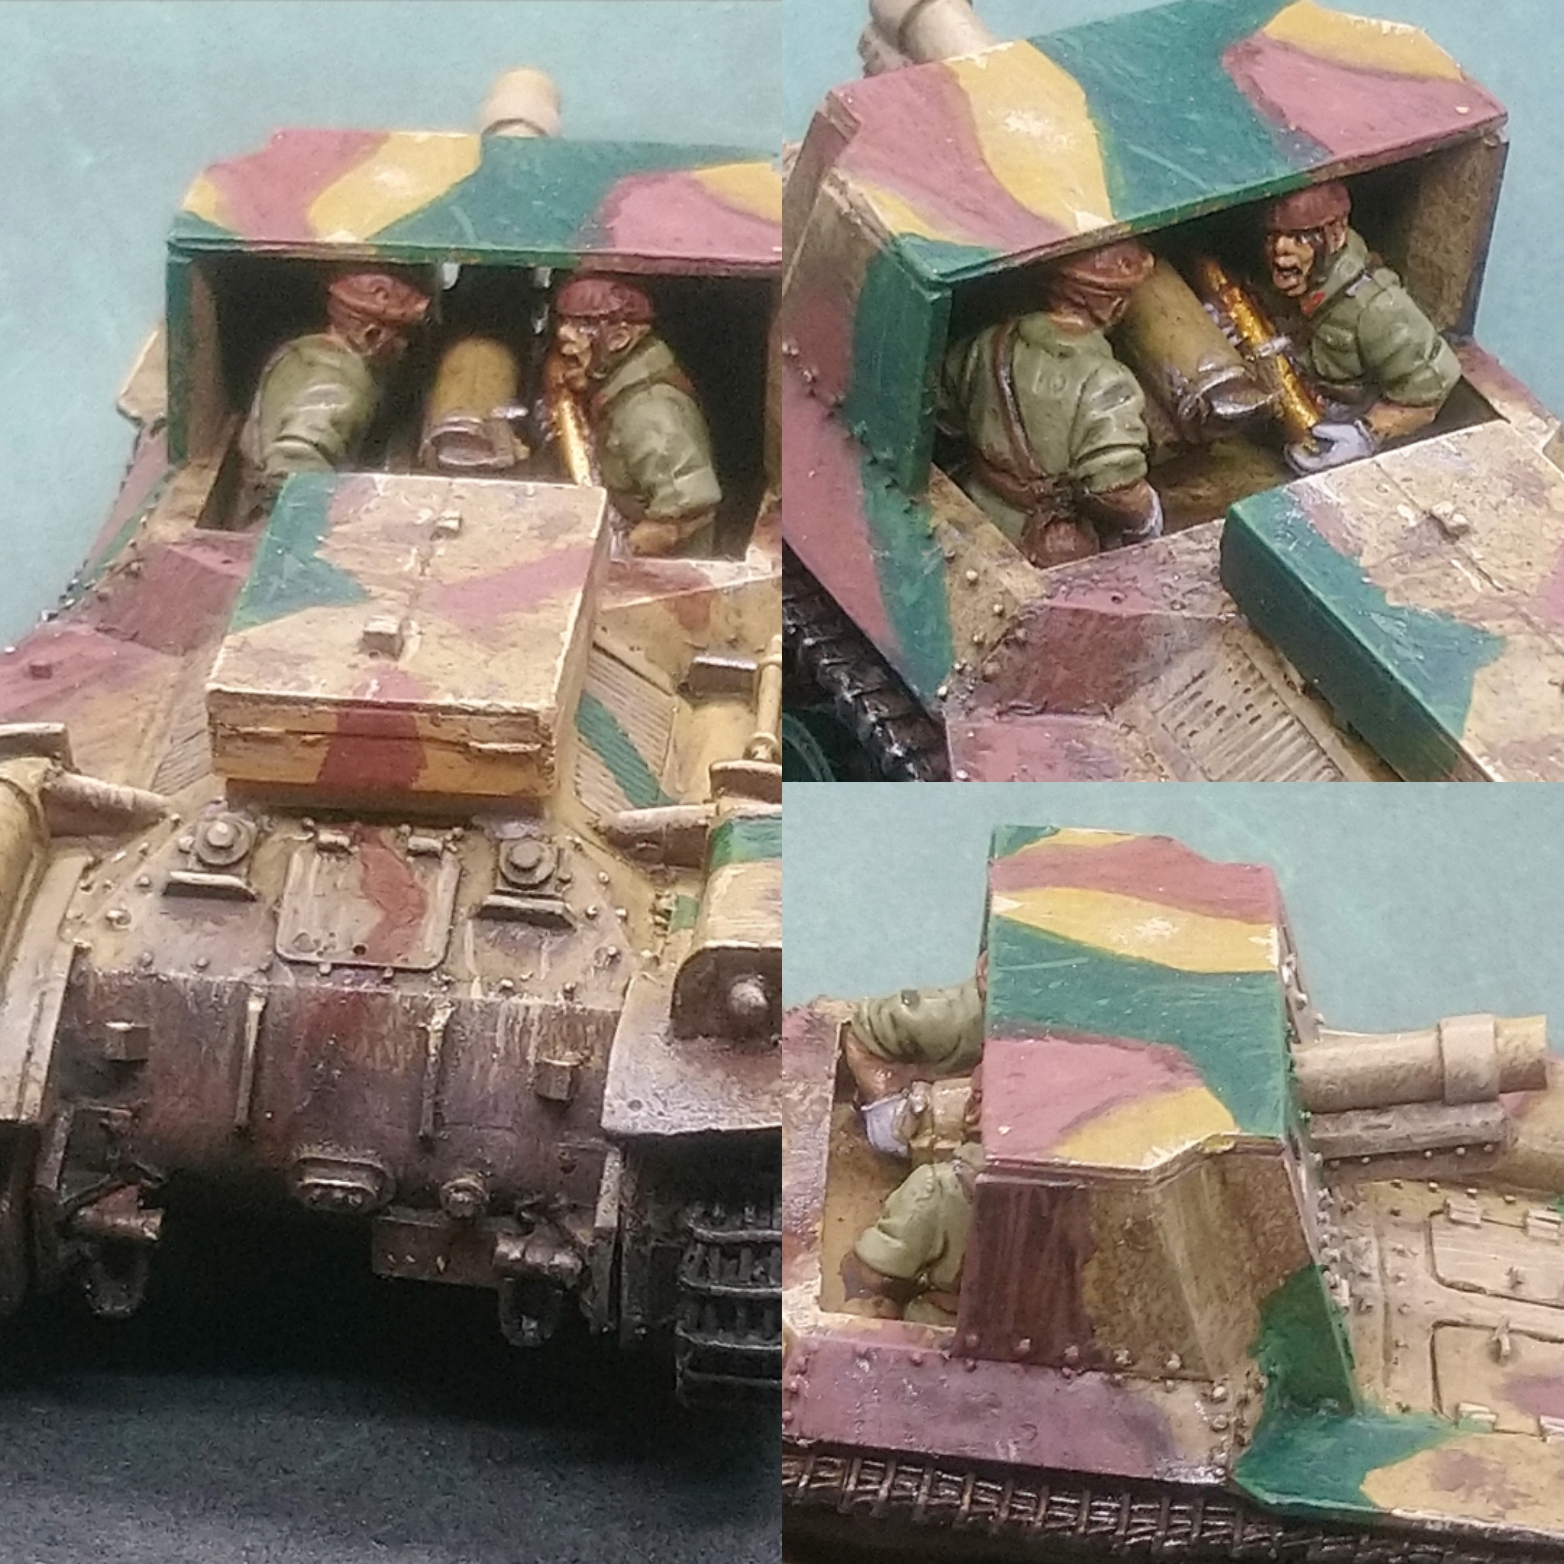
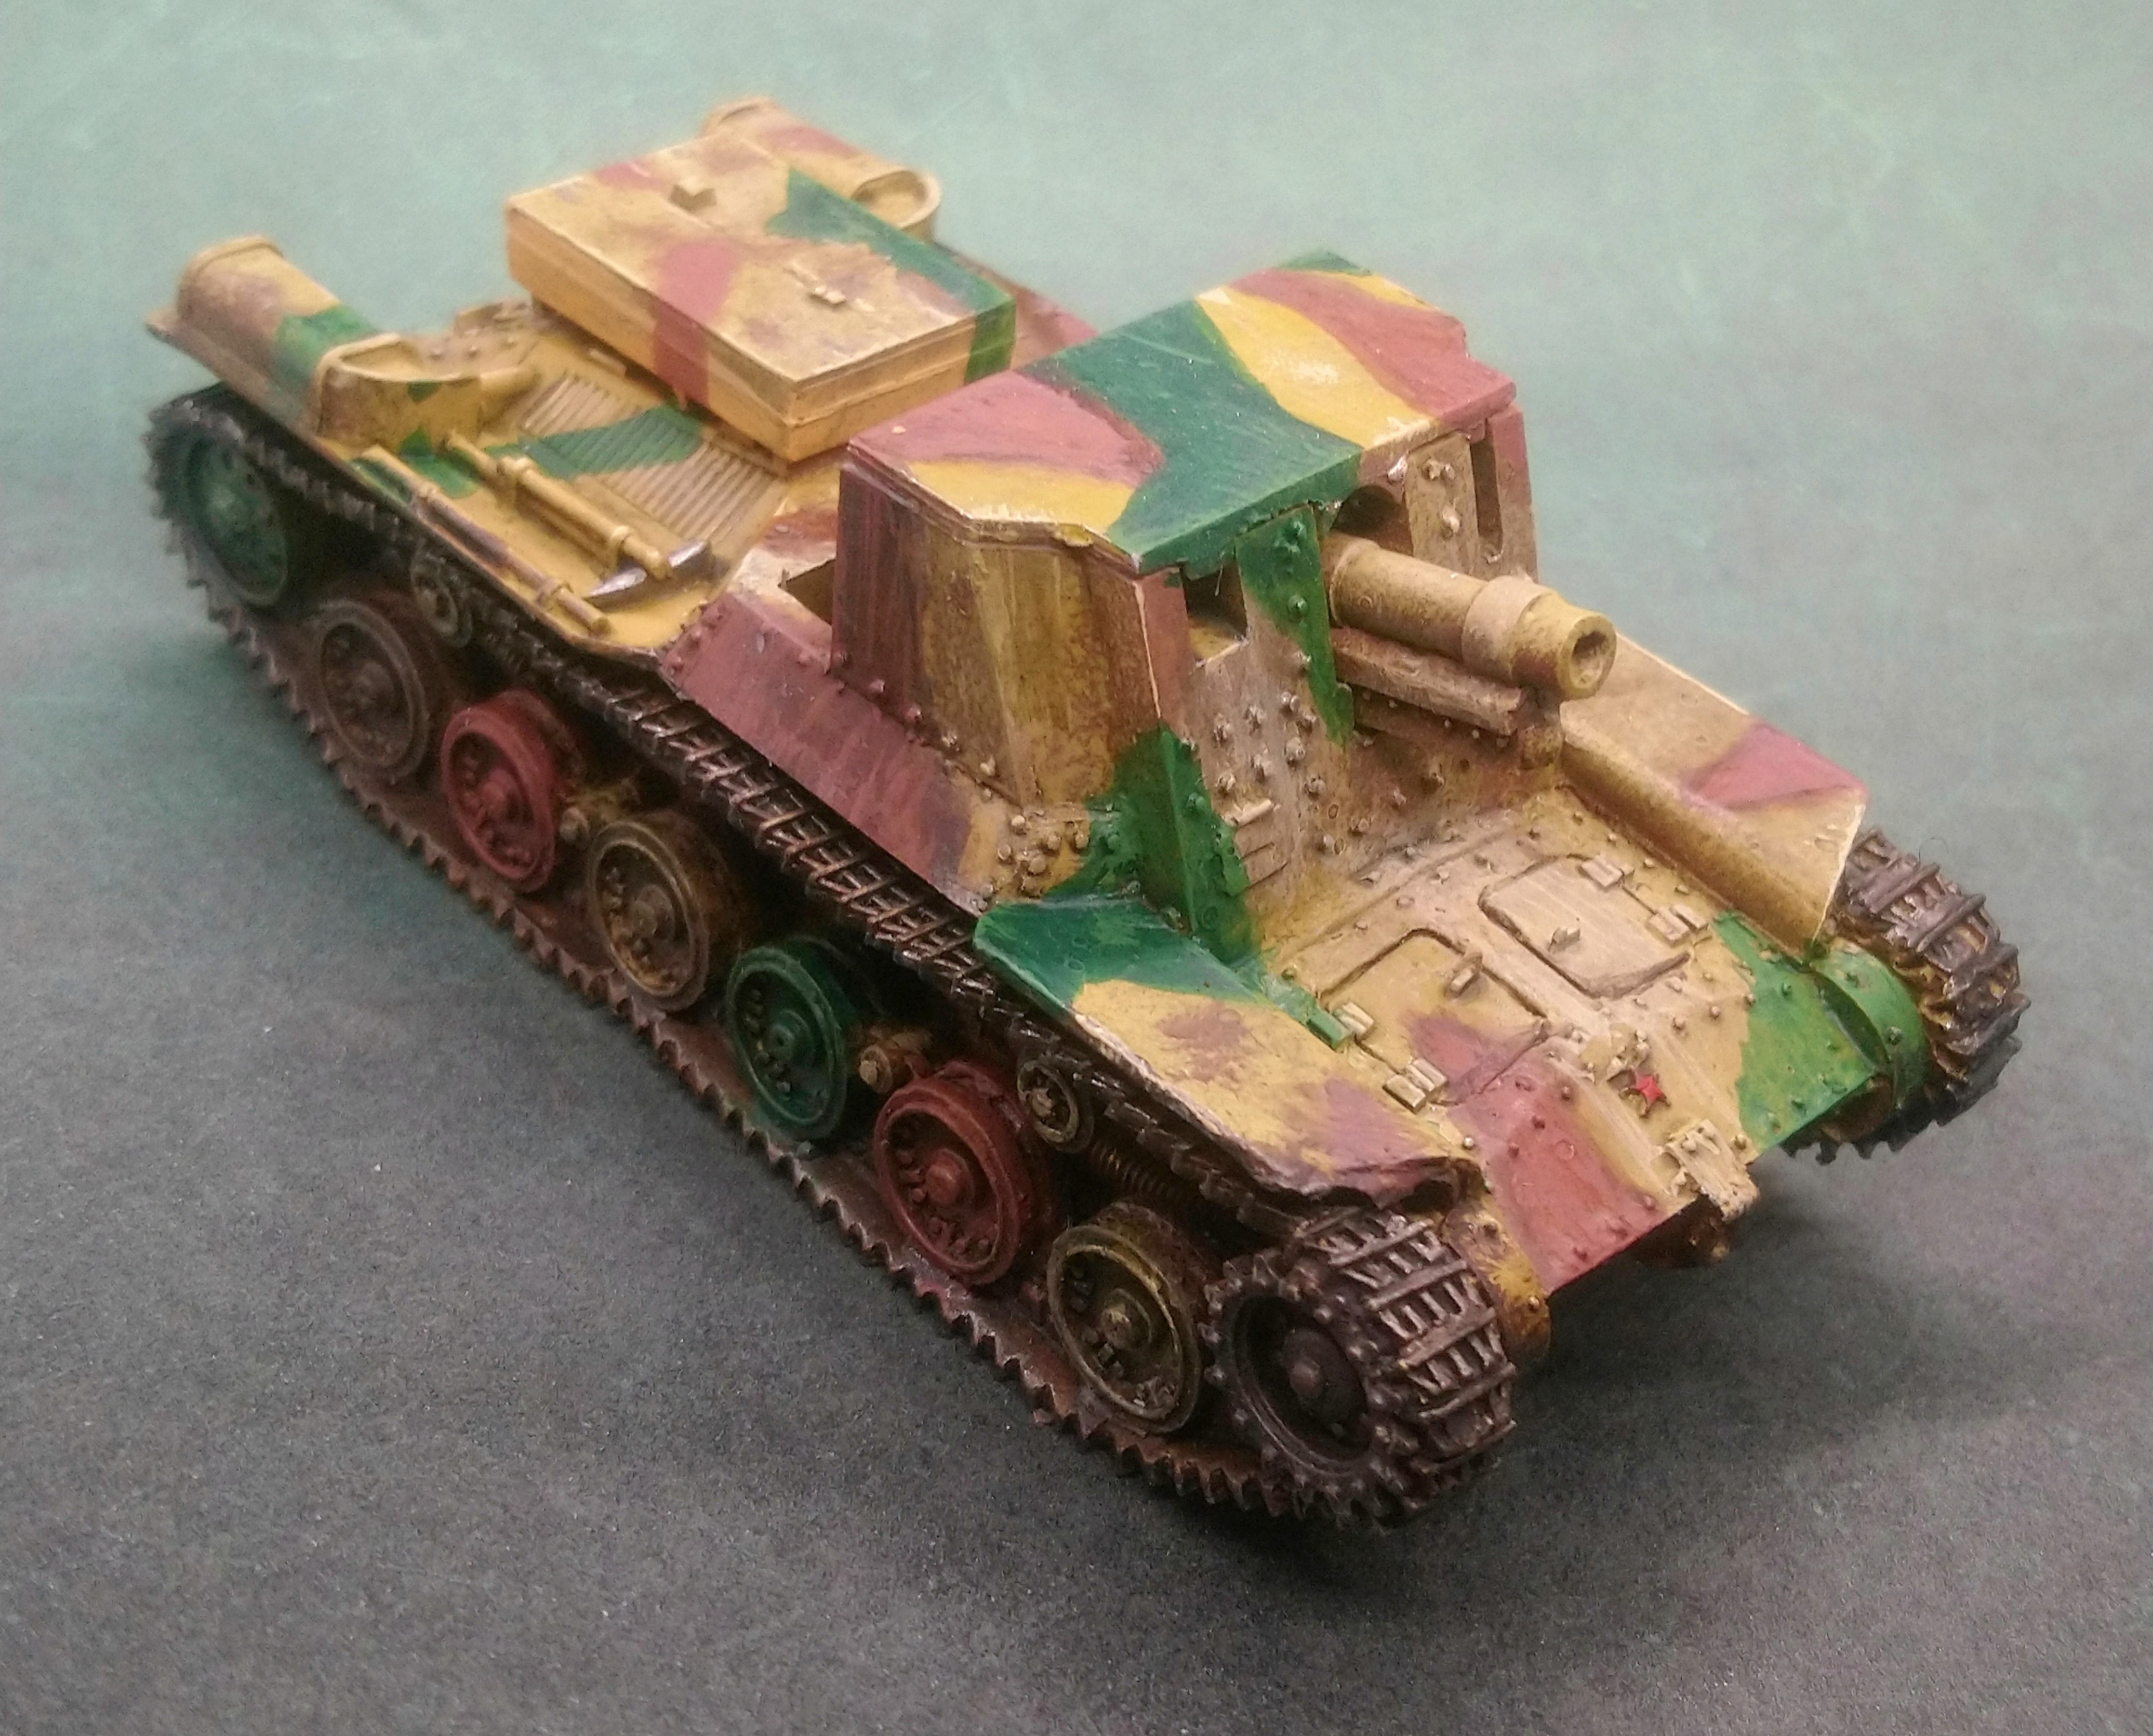
I decided to plow on making my Type 4 Ho-Ro Self-propelled gun.
I hadn’t hit the book for the points price etc, or list building at this point… I just trusted my younger self that i wouldn’t have bought the model if it wasn’t worth being in my list. This Tank option has a Heavy Howitzer which should upset most allied tanks that pose a problem.
If my opponent decides to leave his tanks at home, to make my anti-tank redundant without any targets, the High Explosive rounds from this fella can ruin a squads day instead. Equal opportunities fire giver. ?
Resin is not my favourite medium for hobbying because there always seems to be dramatic lumps where the mold entry meets the sculpt and plenty of swarf to be removed compared to plastic. This kit had a couple of metal pieces that worked neatly, but the the more perceptive of you will notice i sat the barrel too far back in the carriage and i am not sure how i managed to have one track longer at the back than the other, but on this occasion for some reason i am not phased by this enough to fix it and am happy to continue with my project.
Arms and Liszt
This is my list to 995 pts
So, my old grey haired officer, Lieutenant Kendo Nagasaki, remembered his training days and when told he had to hold this island he wanted something familiar and, in his eyes, wanted to lead his men in the tried and tested way Japan was fighting and winning wars in his youth. At his own expense, and against all advice, he managed to get his FT17 tankette and embraced it as an old friend. (OK he is a throw back, but that wasn’t that uncommon or beyond the realms.)
List wise – I started with my Type 4 Ho-Ro gun carriage and my FT17 with the points and rules from the China list. I decided to go max on the additional miniatures allowed per unit with my two reinforced platoon required infantry units. Then i remembered I had brought 10 jungle fighter metal minis, so they became a 10 man Veteran Squad.
The 3 light mortars in a squad interests me mechanics wise. I am still unsure how to hobby these or how to use them tactically for the best, but I always like to lean into faction specific rules to get the flavor the designers intended.
I already have everything purchased that I need so it is just a case of making my way through the hobby task a bit at a time.
2nd Lieutenant (Vet.) w/ 2 men – 91 pts
IJA (Reg.) Infantry Squad – NCO & 6 men +8 men (LMG, SMG and 1 Tank grenade) – 175 pts
IJA (Reg.) Grenadier Infantry Squad – NCO & 4 men +13 men (SMG, 3 Light Mortars) – 243 pts
IJA (Vet.) Infantry Squad – NCO & 4 men +5 men (LMG, SMG and 2 Tank grenade) – 131 pts
MMG (Vet.) – 65 pts
Suicide lunge mine (Ireg.) – x2, 1 man units – 28 pts
Sniper (Vet.) w/ spotter – 65 pts
FT17 Tankette (Vet.) – MMG only – One-Man Turret/ Slow / 7+ armour – 42 pts
Type 4 Ho-Ro – Heavy Howitzer – Open-topped/ 7+ armour – 155 pts
Tanks for the memories...
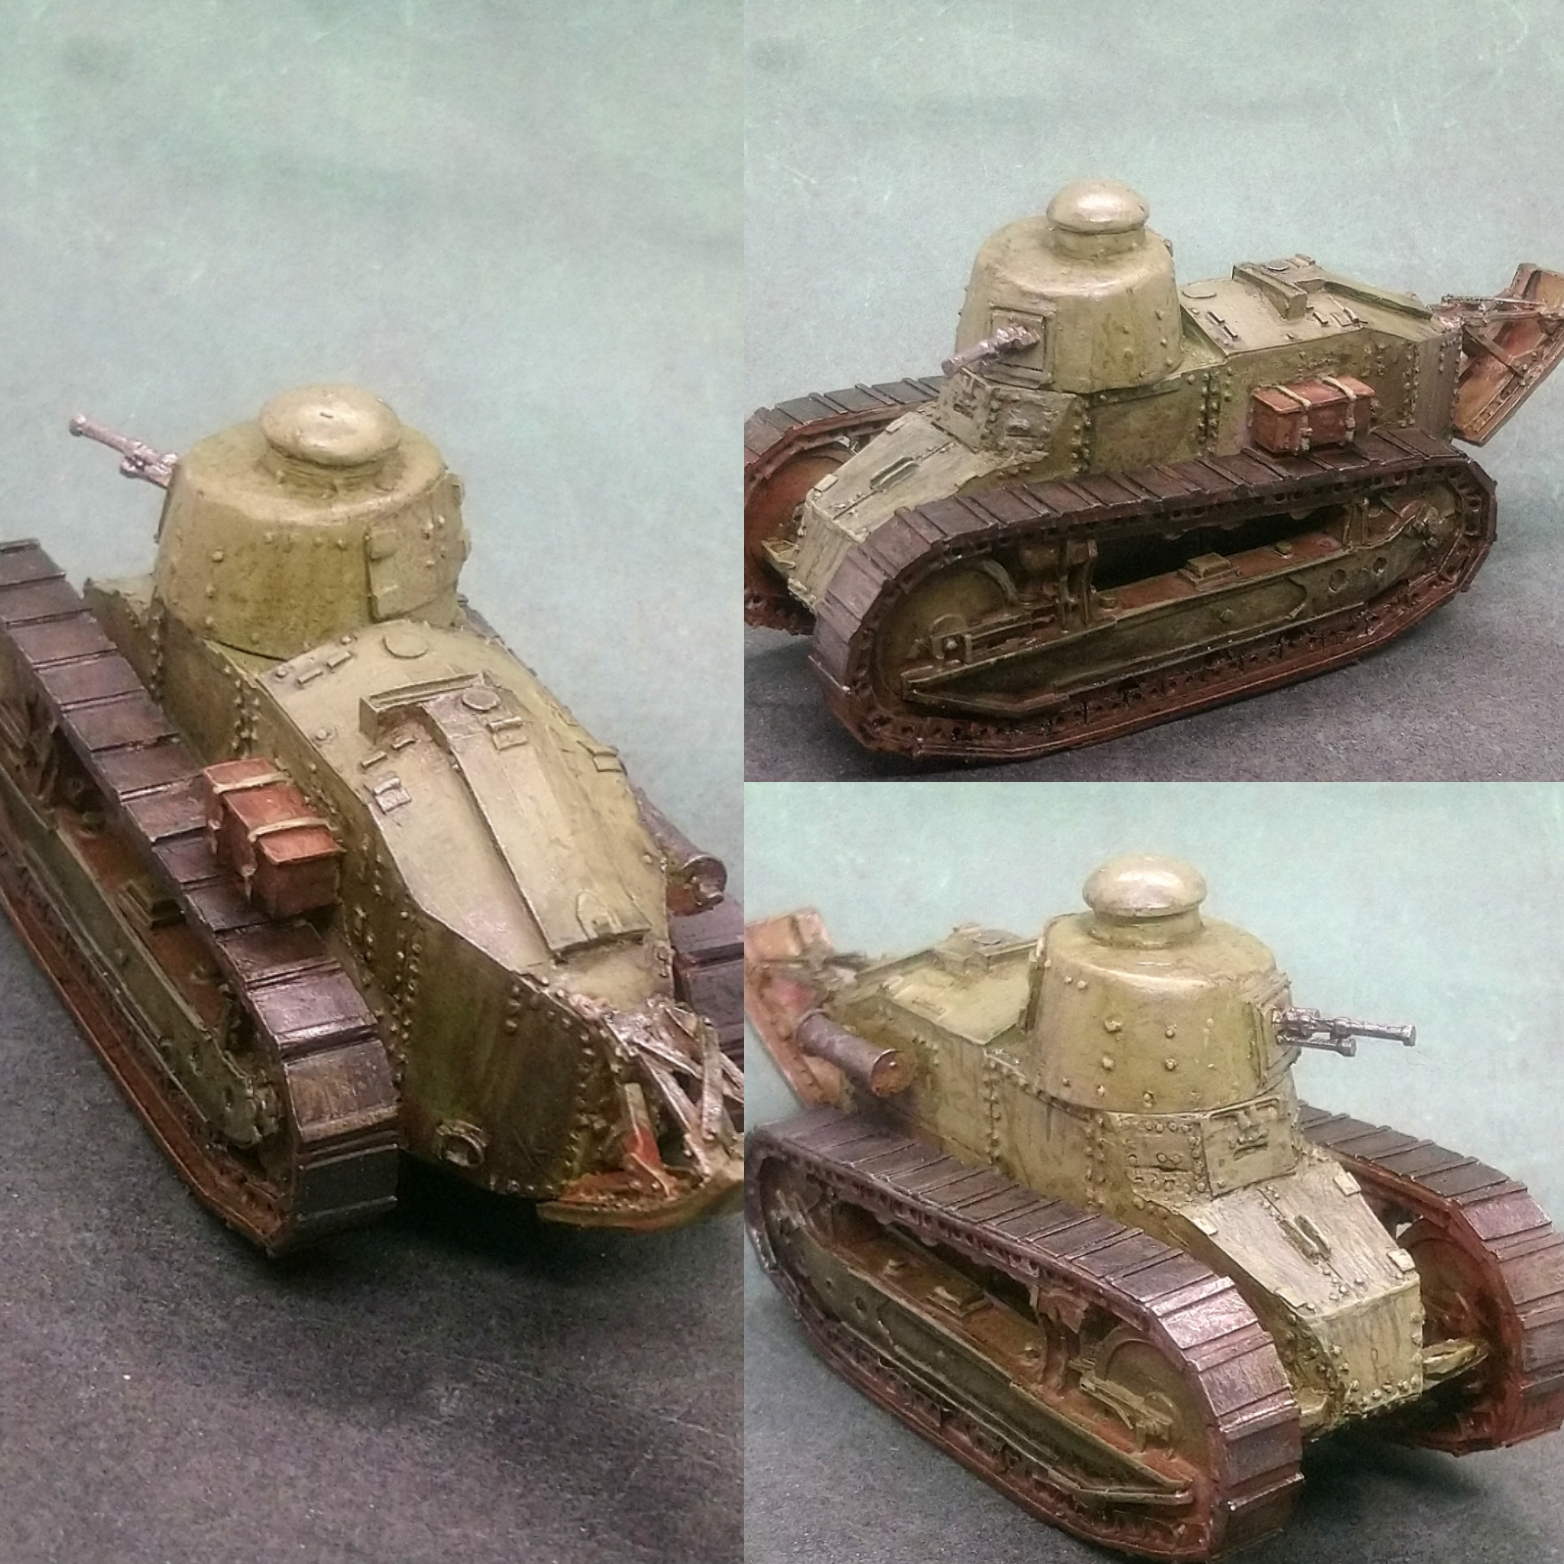
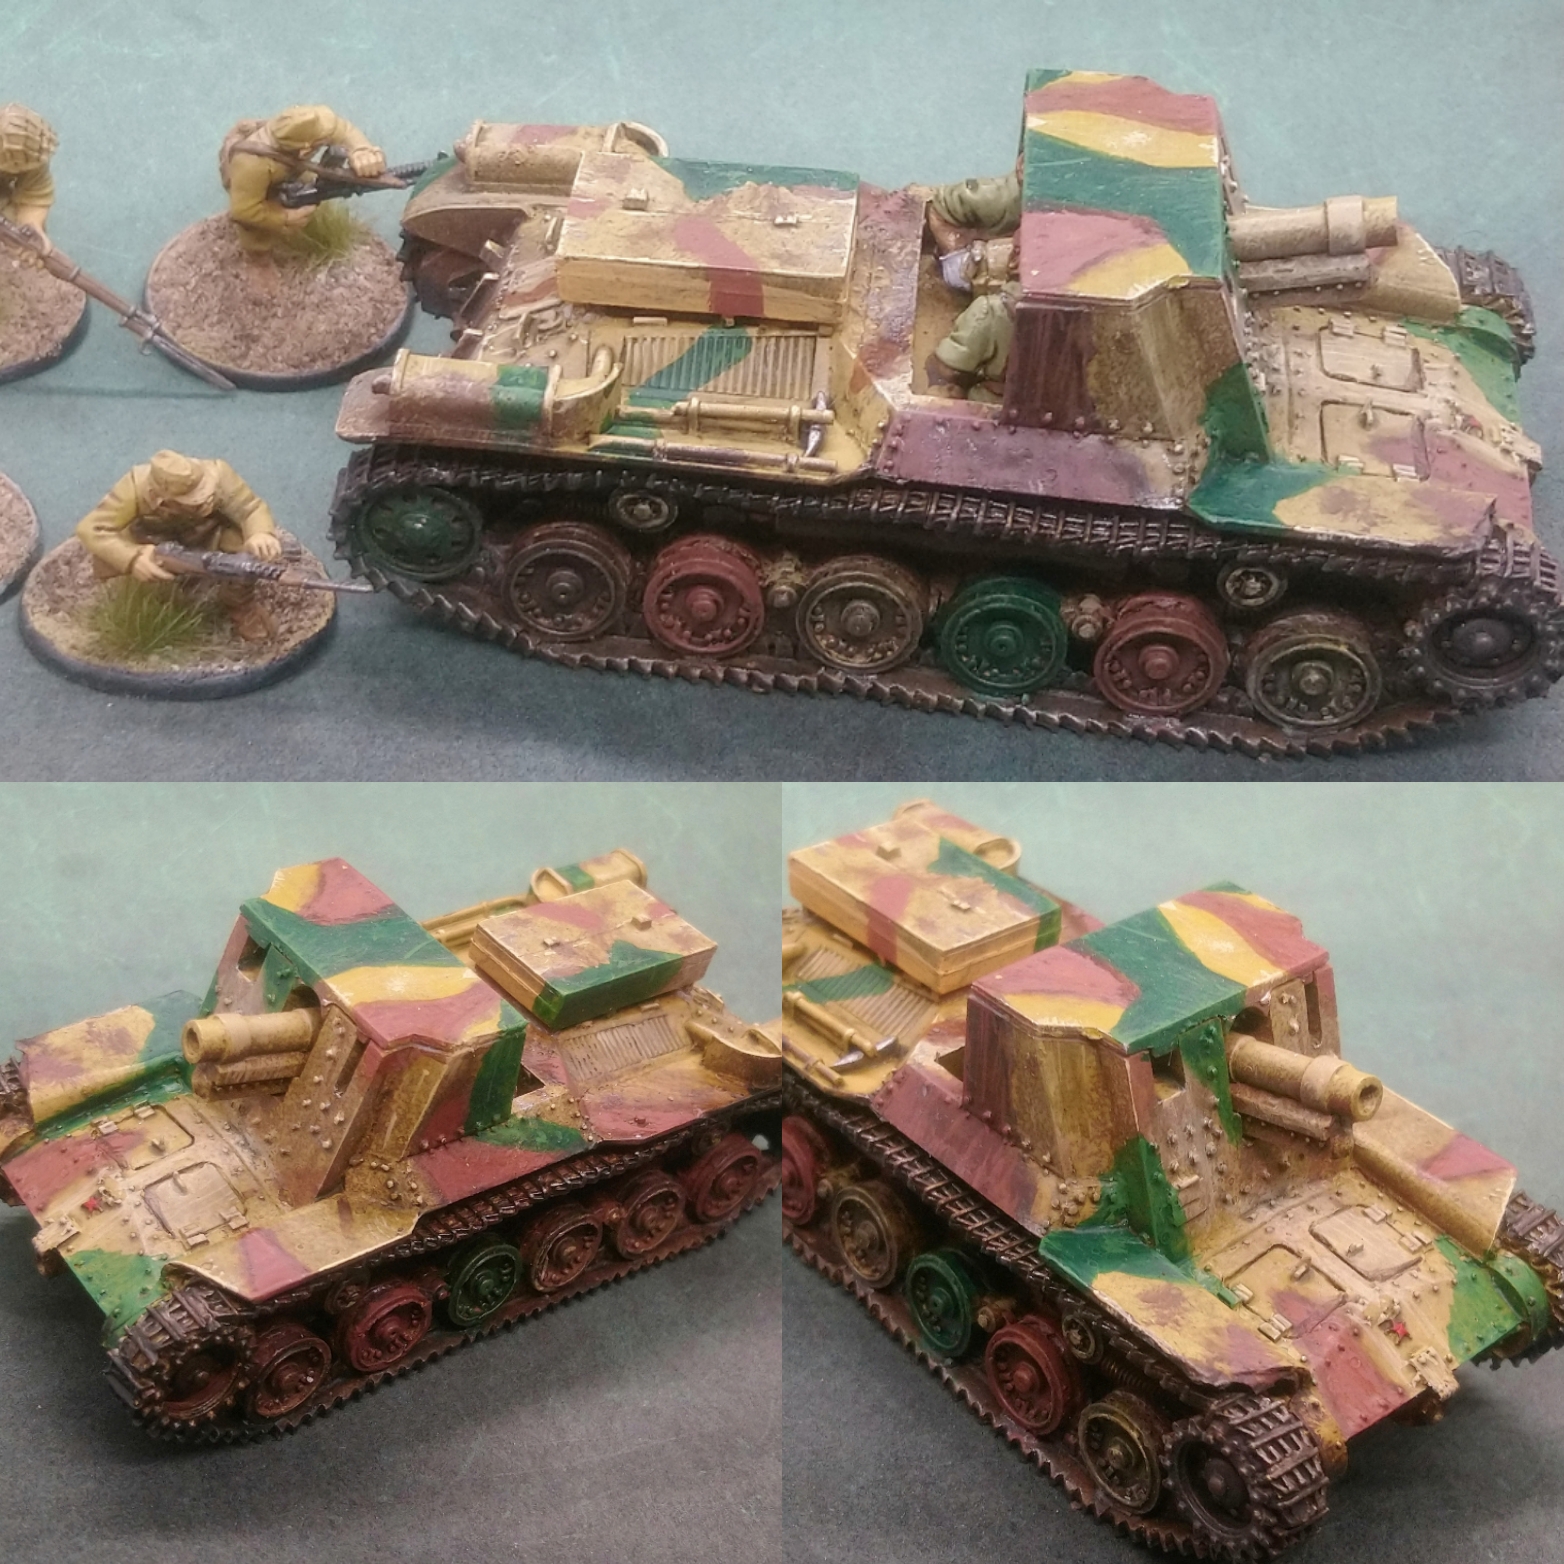
Next I assembled the FT17. I checked online for paint jobs, but I have in mind that i want the tank to be an objective if and when i get into Blood and Valor. As long as i don’t splash Japanese flags over it, the heavily washed Death Guard Green will be a acceptable in both games.
I used Mournfang Brown spray to prime, Death Guard Green over the tank hull and Model Mates oil and mud brown sprays to weather the tracks and darken the green colour.

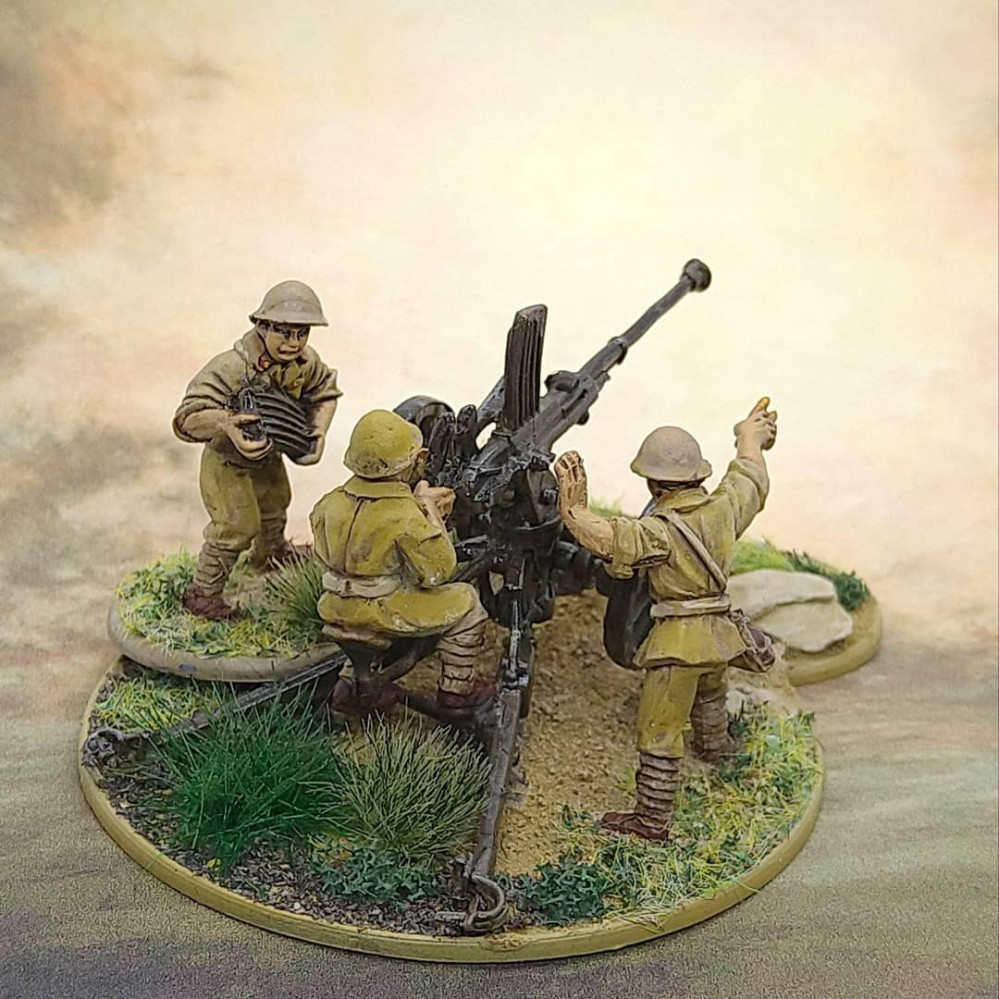
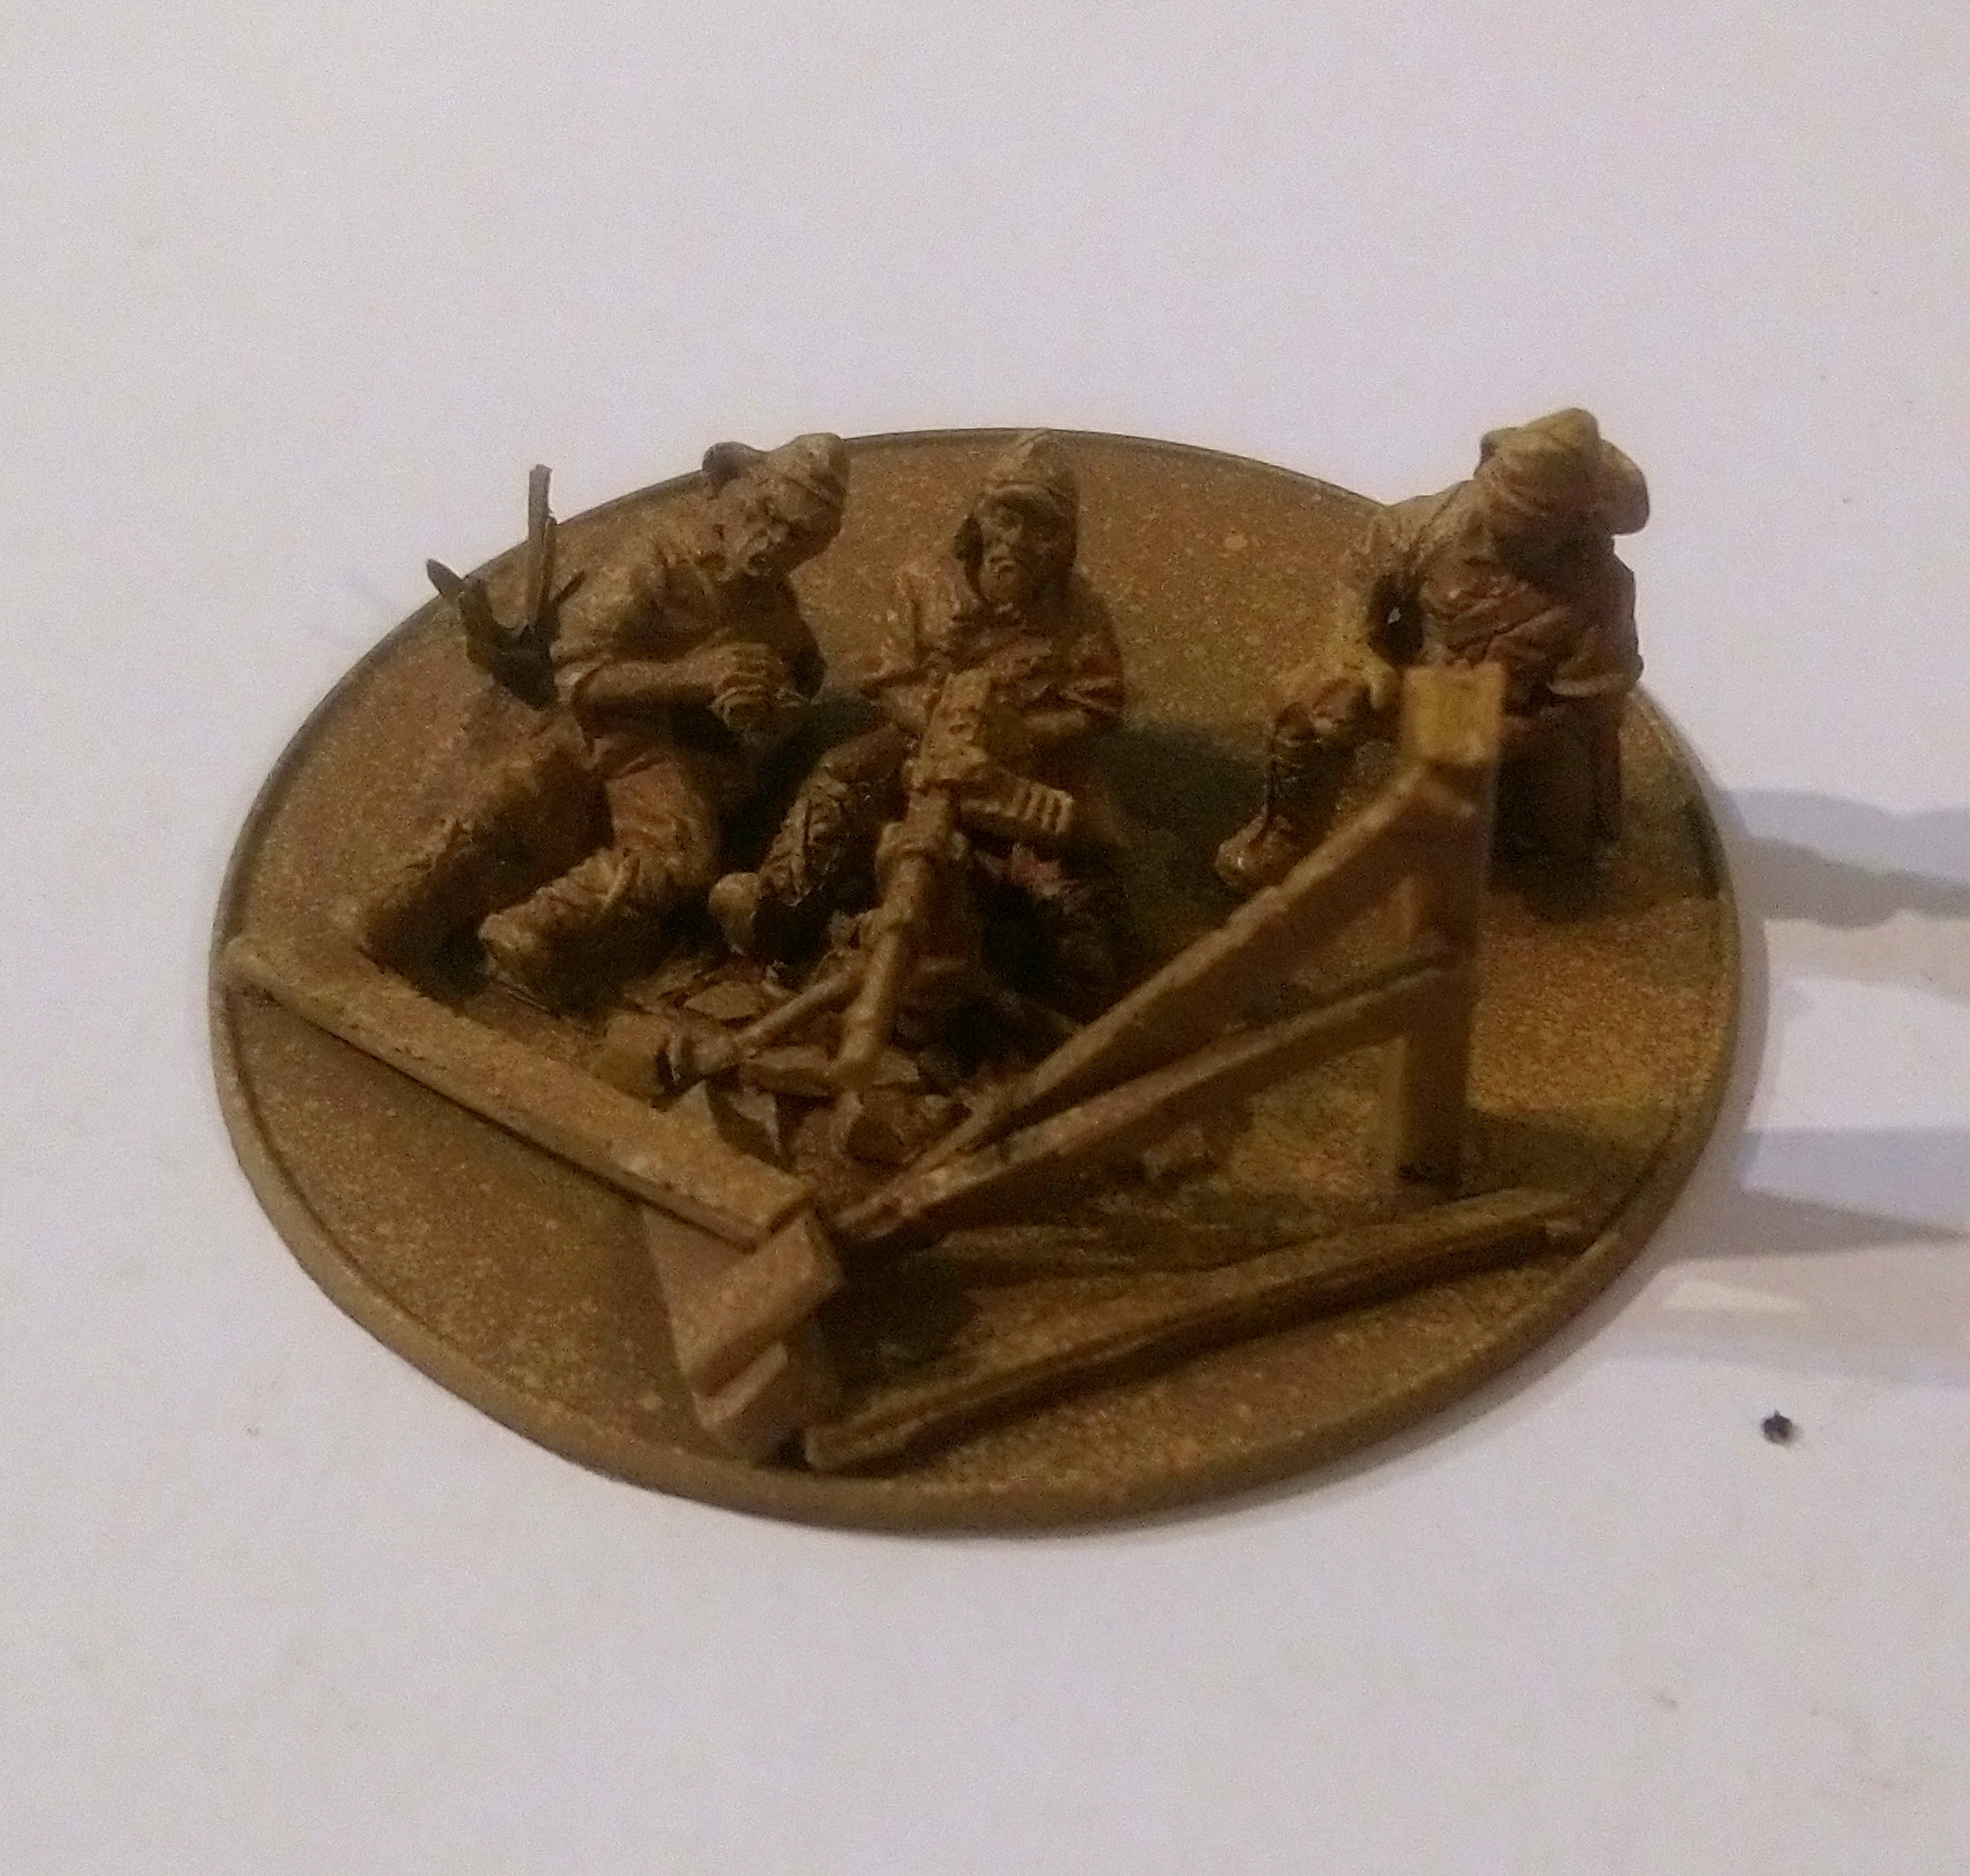
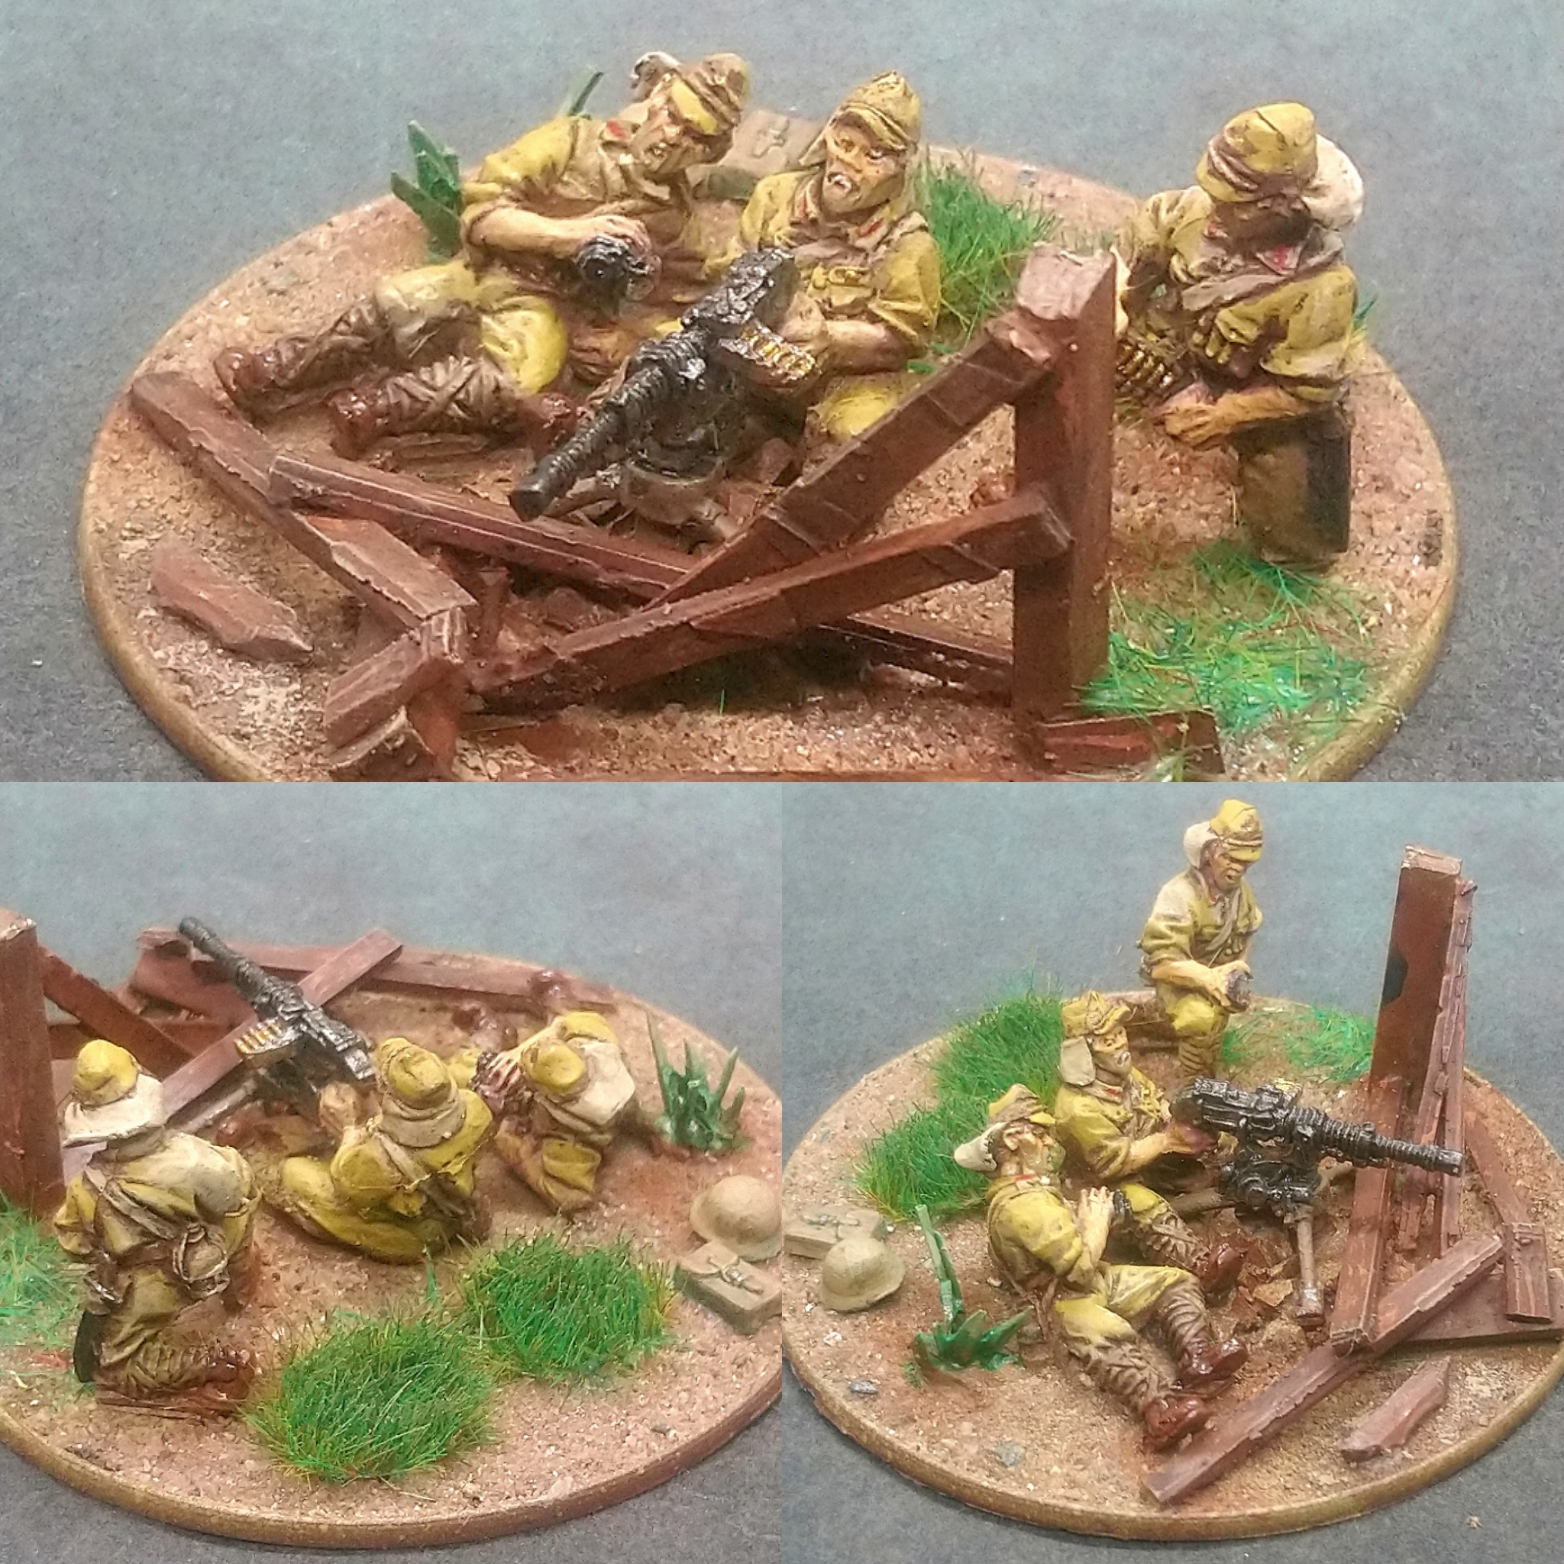
Warlord Games Customer Service.... Mwah. Xxx
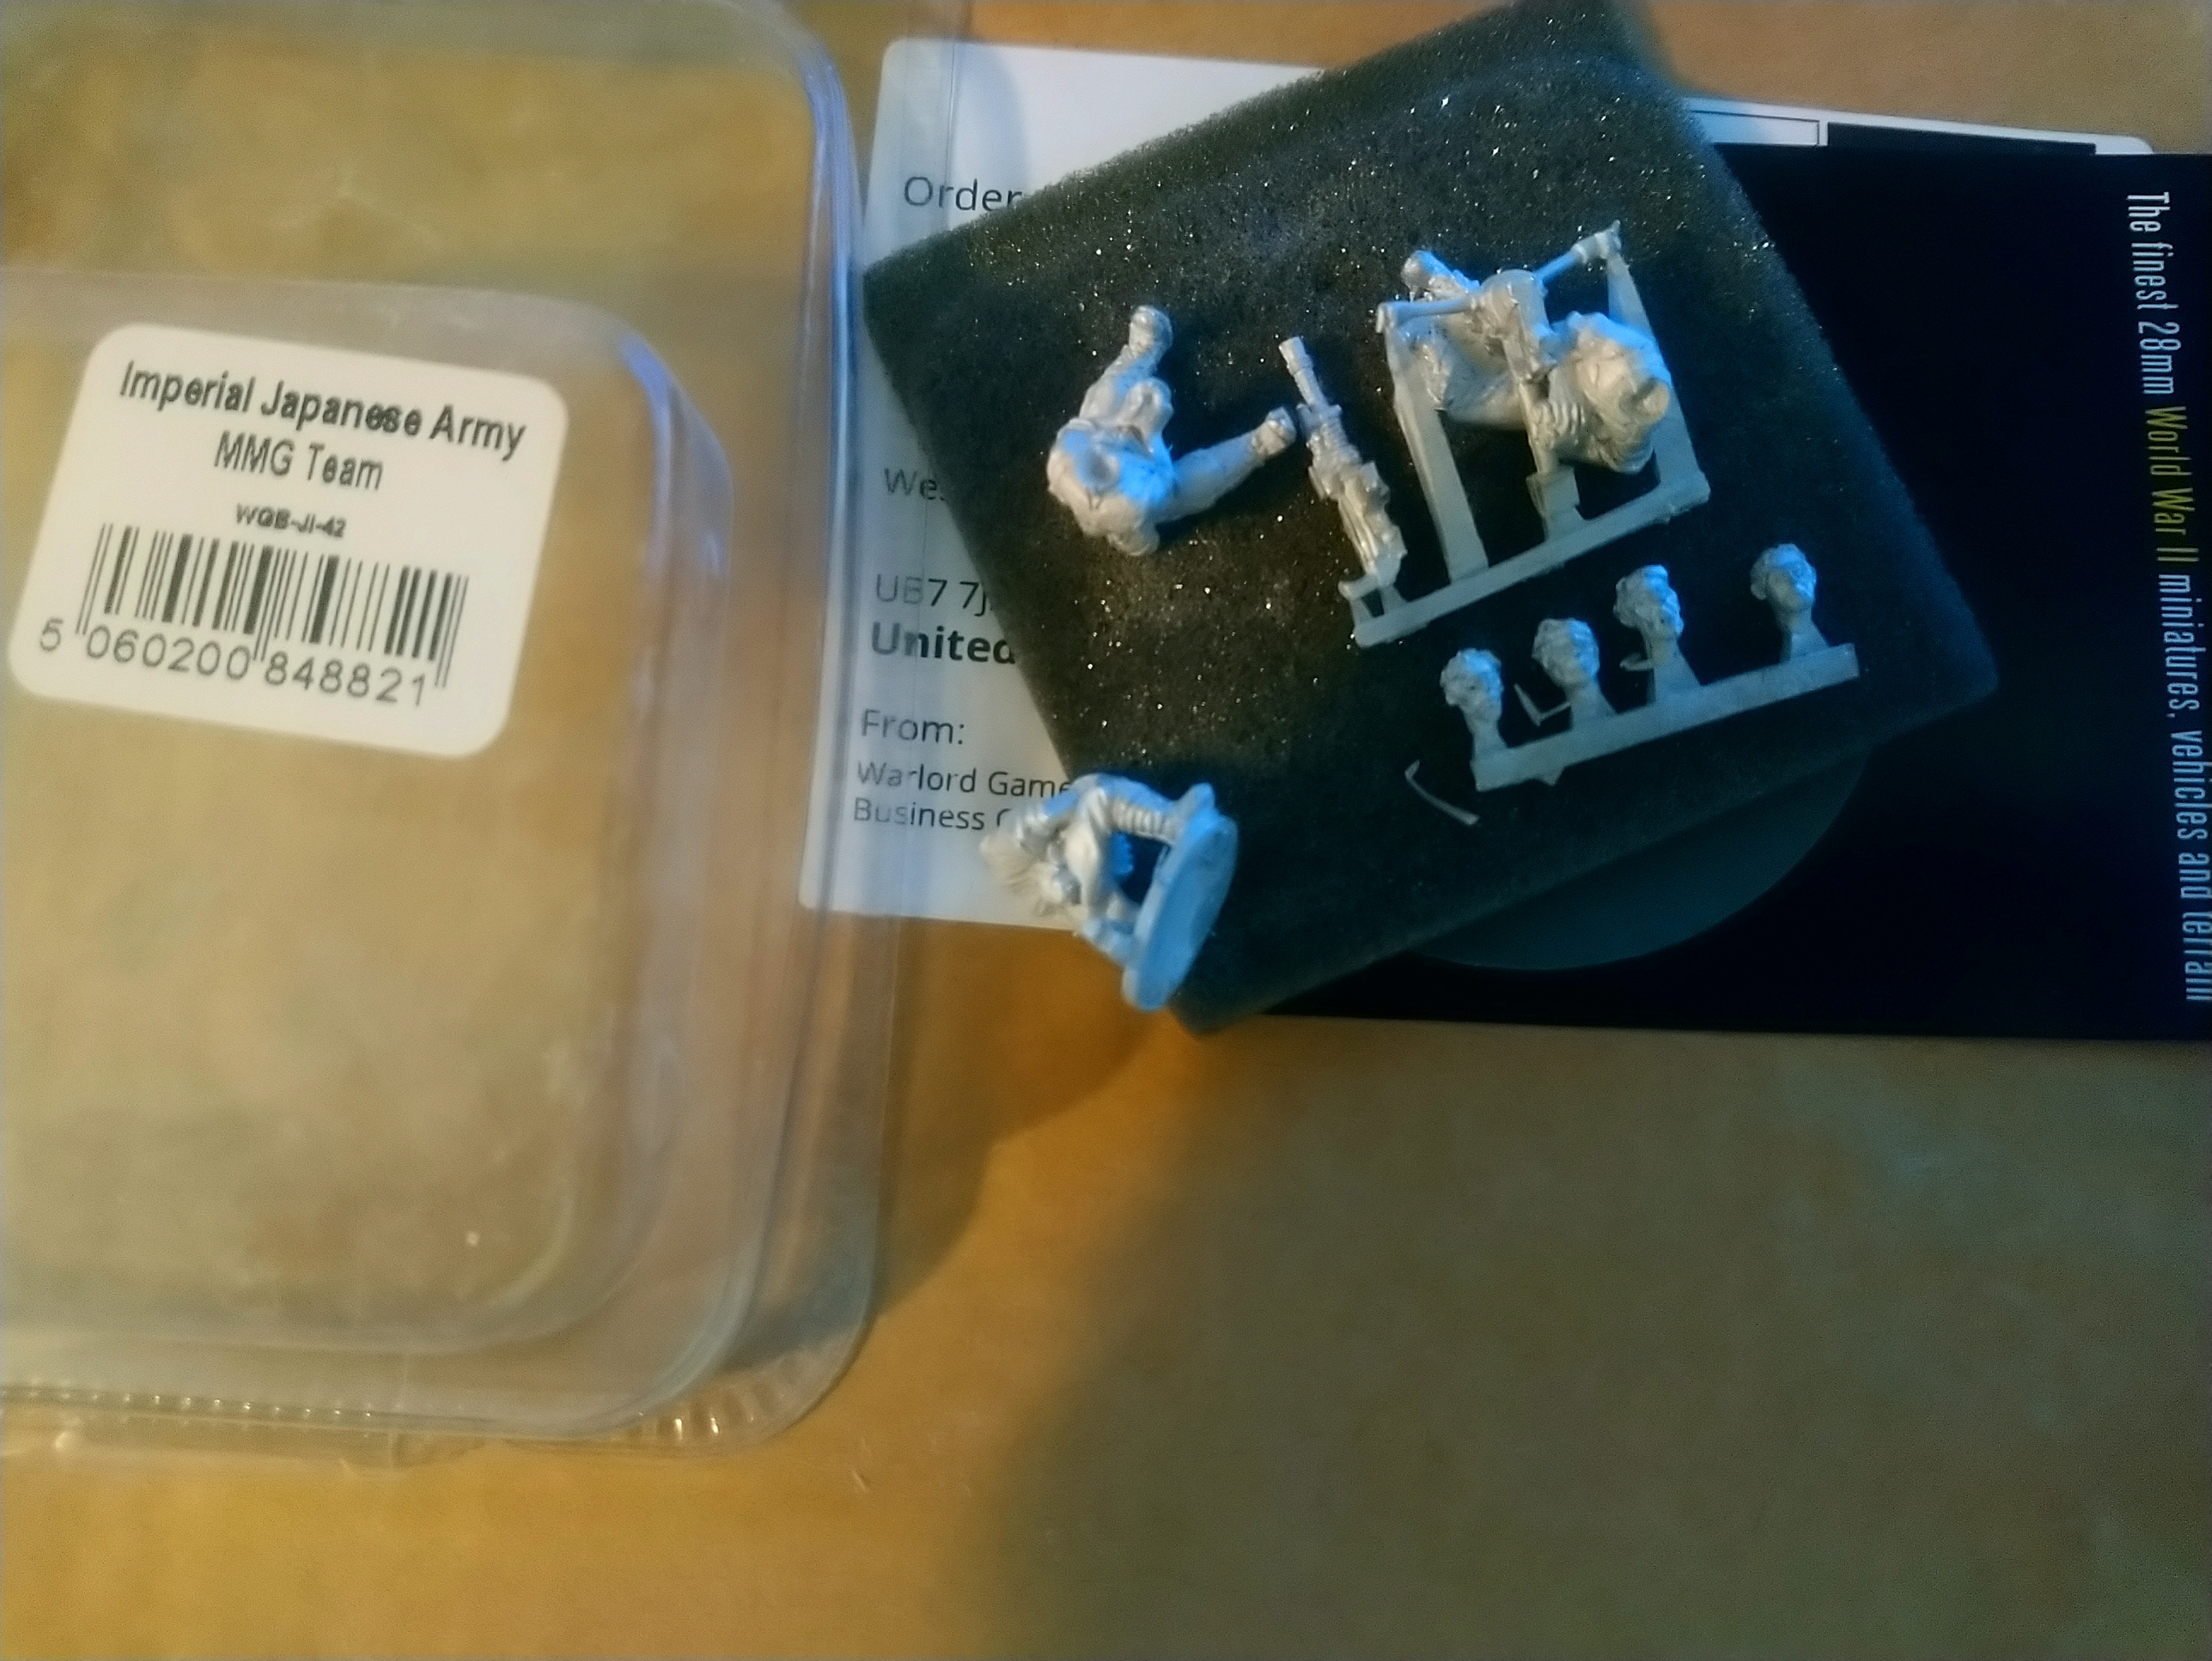
Warlord Games Customer Service are great. I emailed them about my Japanese MMG blister, that i bought and didn’t check in 2016, and they sent me the Japanese heads that were missing. It felt like next day delivery, but at most it was two days and i was able to keep my enthusiasm for the project and keep moving forward.
I used plastic sprue and the metal sprue from the heads to make a fence and a pile of stones.

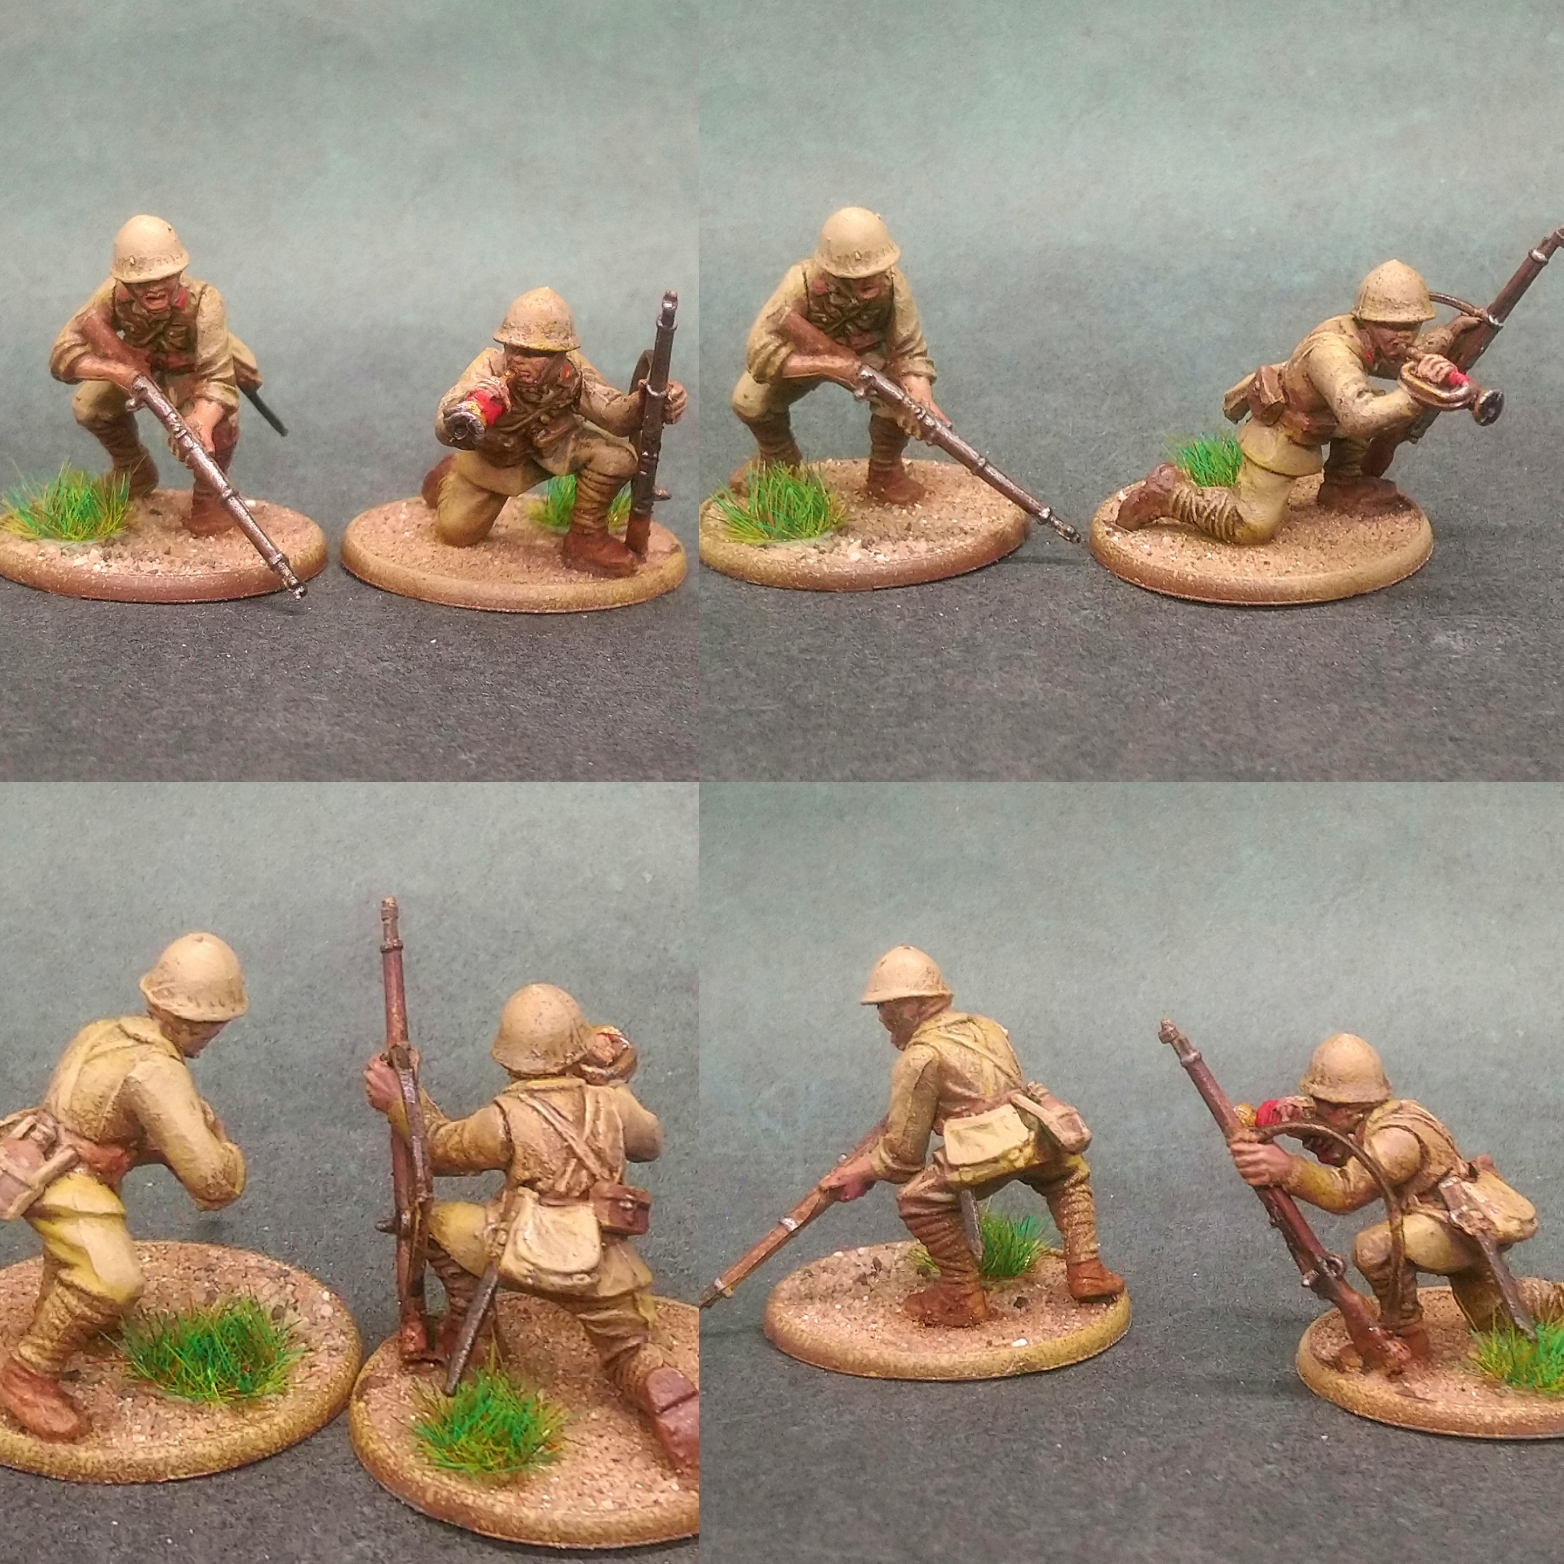
The Paints
You can follow the Warlord Games paint set advice:
Stone Grey (Vallejo 884): Officer’s shirt
Japanese Uniform (Vallejo 923): Tunic, trousers, caps, uncovered helmet and water bottle
Flat Earth (Vallejo 983): Boots, belt, ammo pouches
Flat Brown (Vallejo 984): Weapon stocks
Green Grey (Vallejo 886): Shirts and puttees
Gunmetal (Vallejo 863): Metal parts
But I ended up mostly using citadel colours instead:
Medium Fleshtone (Vallejo 860): Skin Highlight
Bugman’s Glow (Citadel): Skin base
Japanese Uniform (Vallejo 923): Tunic, trousers, caps
Morghast Bone (Citadel): Shirt collars and webbing
Mornfang Brown (Citadel): Boots, belt, ammo pouches and weapon stocks.
Zandri Dust (Citadel): Helmets, bread bags and puttee highlights
Lead belcher (Citadel): Metal parts
Retributor Armour (Citadel): Brass buttons, cap badges
Skin – I used a base of Bugman’s glow, a small amount of Riekland Fleshshade and then highlight of the Medium fleshtone.
Main uniform – I used a base of the Japanese uniform paint followed by Agrax Earthshade and then a highlight of the Japanese uniform paint again.
The webbing – Once the majority of the model had been hit with Agrax Earthshade I simply picked out the straps with Morghast Bone (Occasionally using the bone to highlight high areas on the uniform.)
Boots, belt, ammo pouches and weapon stocks – I used the Mornfang Brown as a base and used a heavy wash of Riekland Fleshshade and then highlight of the Mornfang Brown again.
Helmets, bread bags and puttee highlights – The Zandri Dust is very close to the Japanese Uniform Vallejo colour, but different enough to make the contrast worth changing colour for. I used two washes of Agrax Earthshade on the puttees and then did a rough dry brush / highlight with the Zandri Dust.
Sniper, Sniper, Sniper
I couldn’t find a sniper rifle on the sprue so went for placing spare binoculars next to him and tagging him up with a spotter lying down too. The Japan book specifically says that your spotter only has a pistol so i modelled him that way.
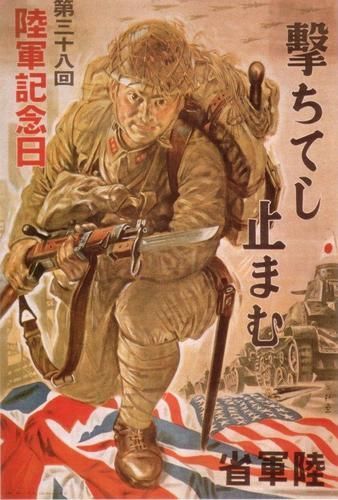
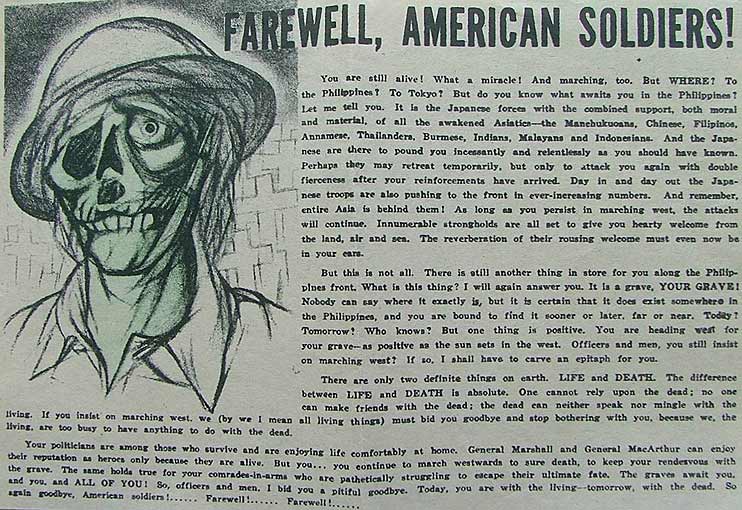
Proper Propaganda.

As the scheme is very tan and off-white I wanted to add some colour to the bases some how. It was difficult to find propaganda posters that would be more likely to be at the front rather than just in the country’s cities.
In the end i just chose colourful pieces or flyer type propaganda dropped on the enemy to sap morale.
I just saved them from Google, manipulated the size on an excel spreadsheet and printed them out.
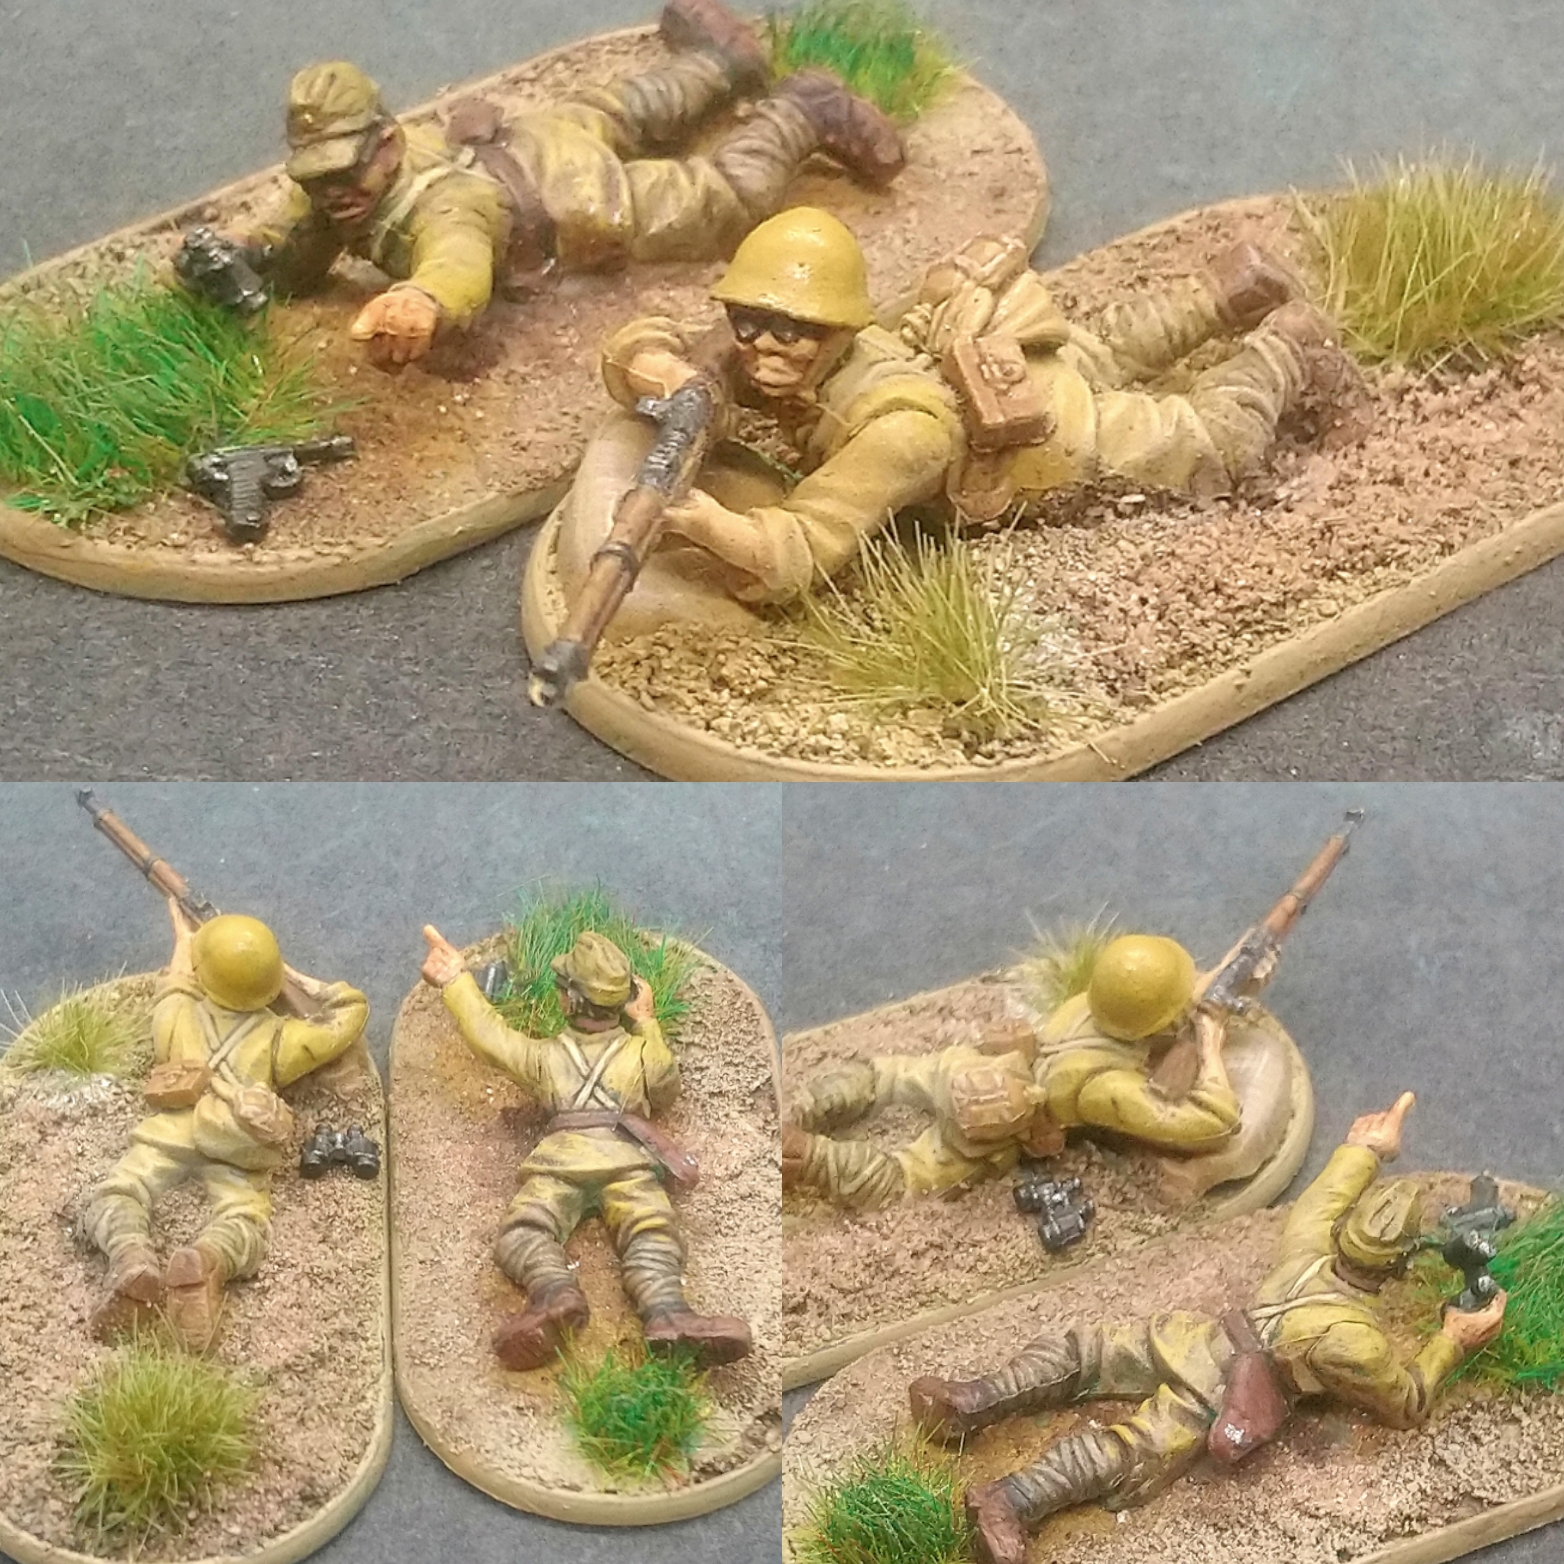
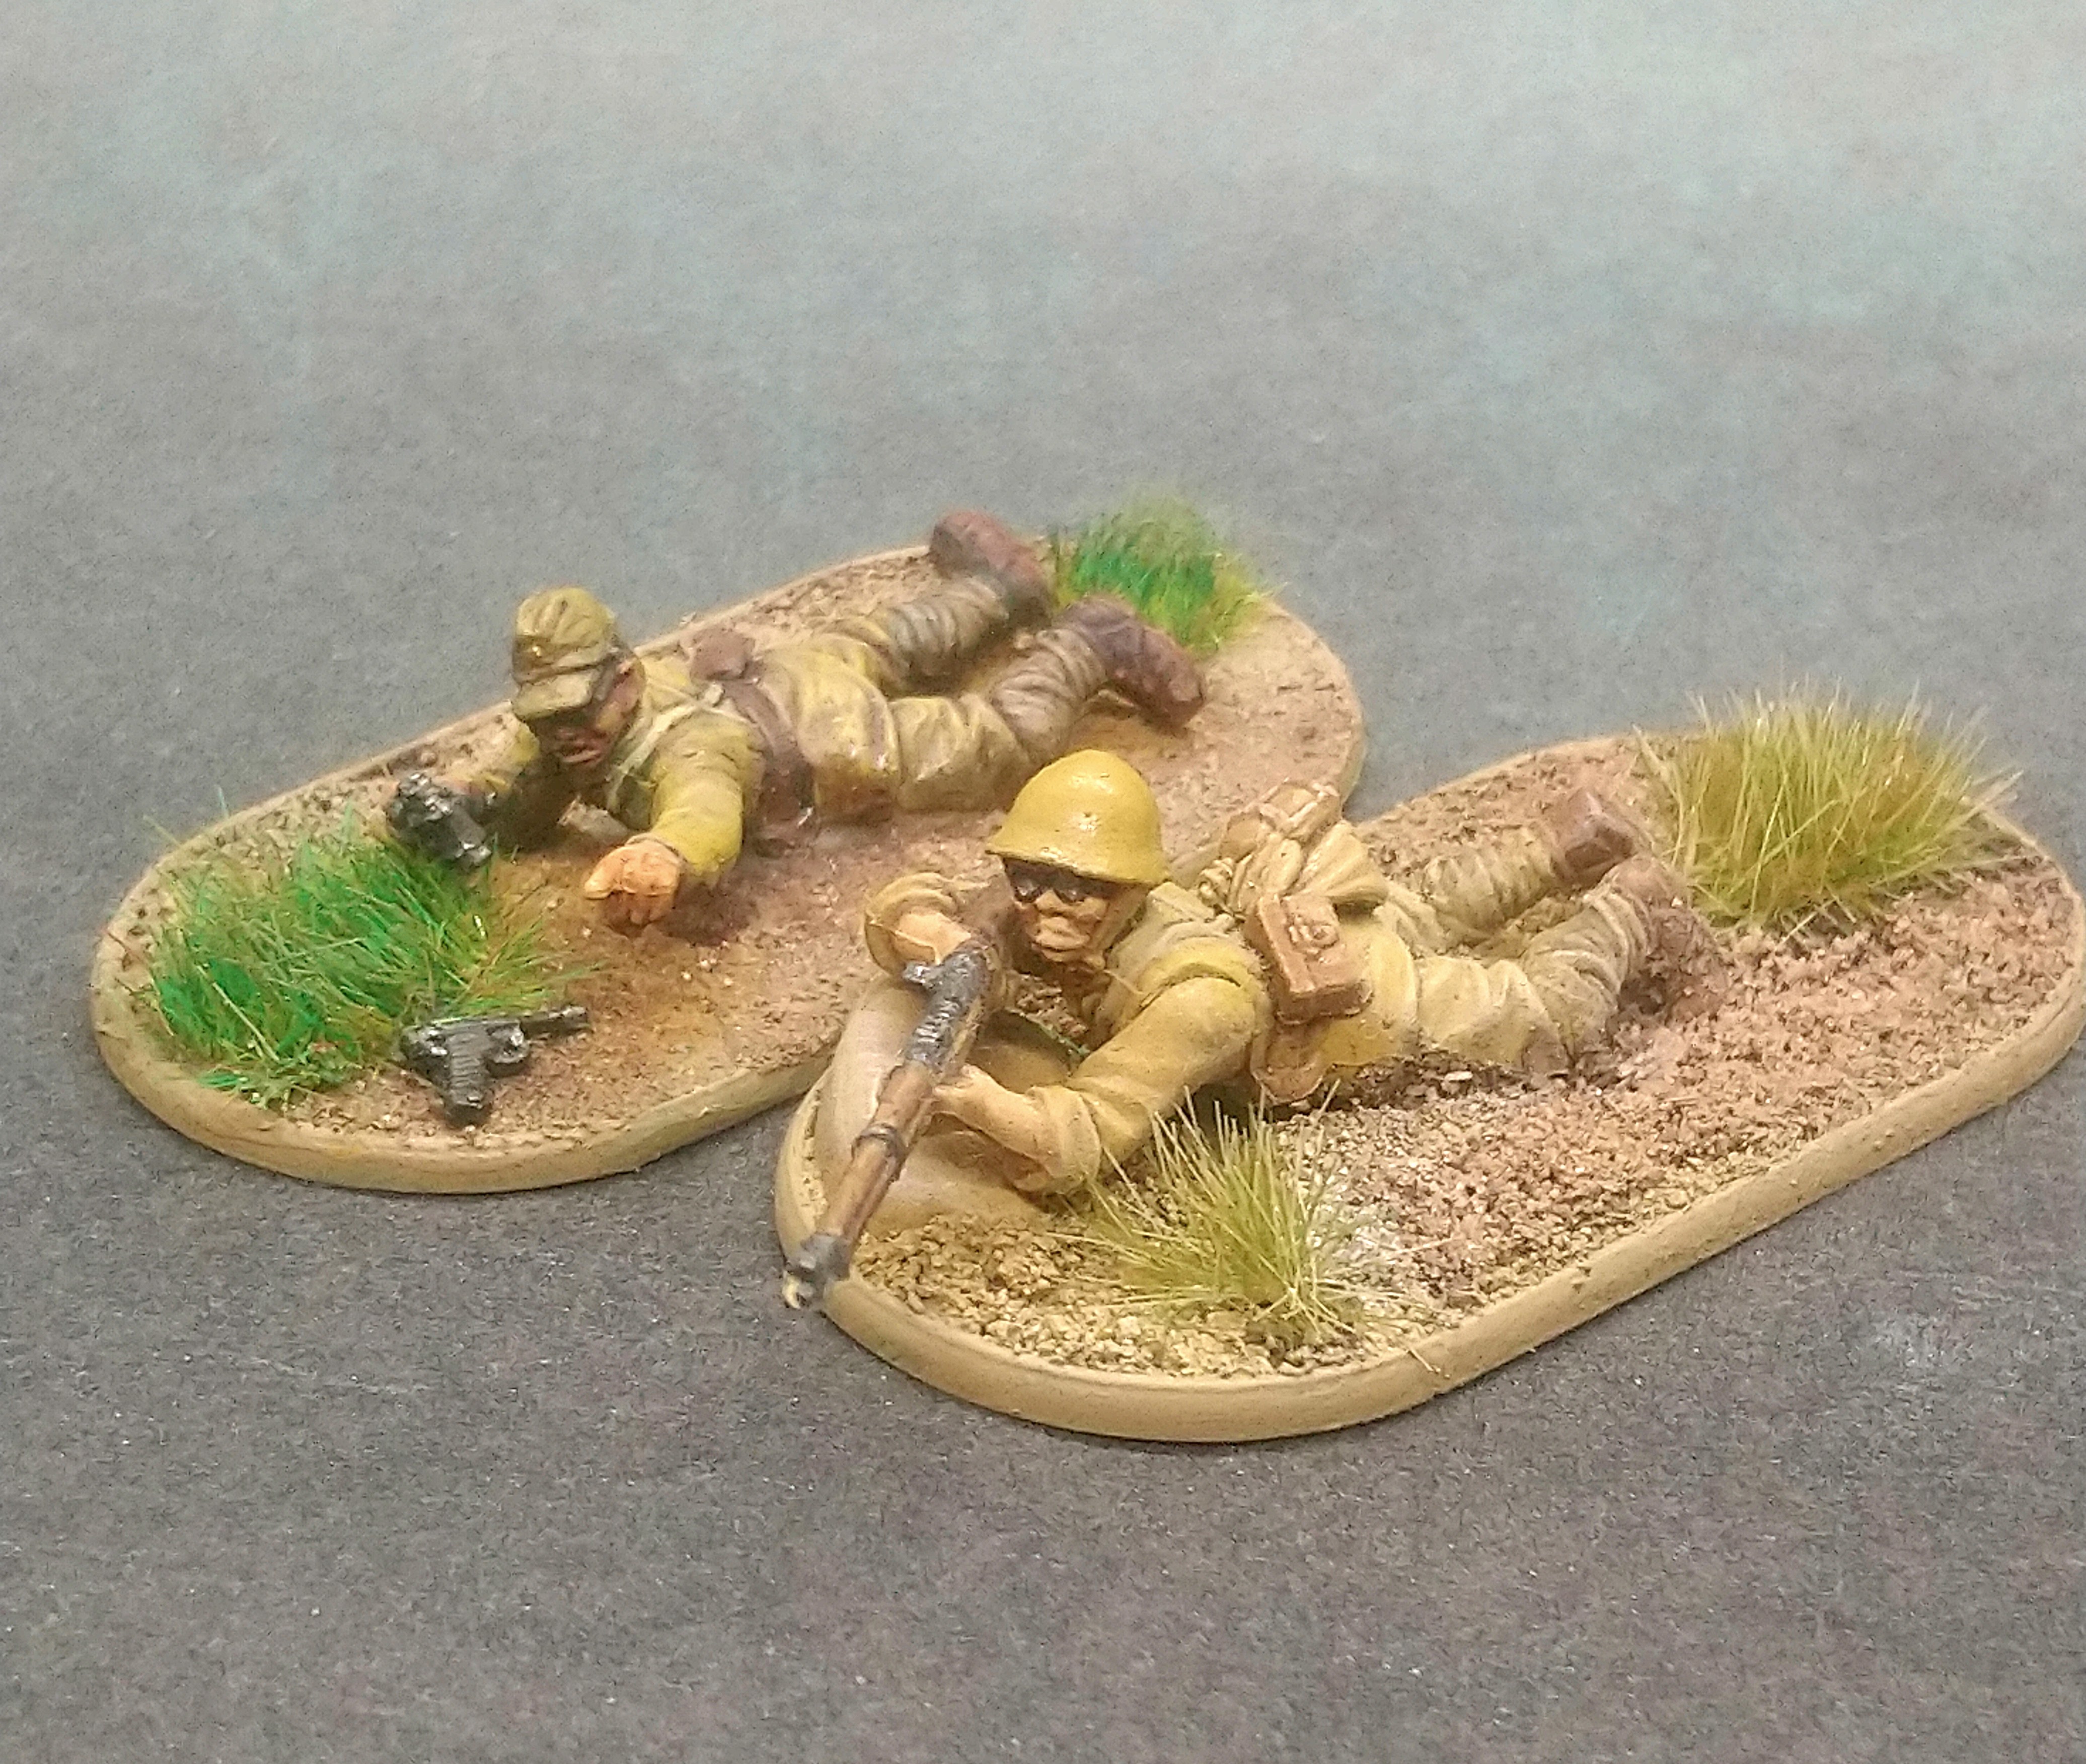
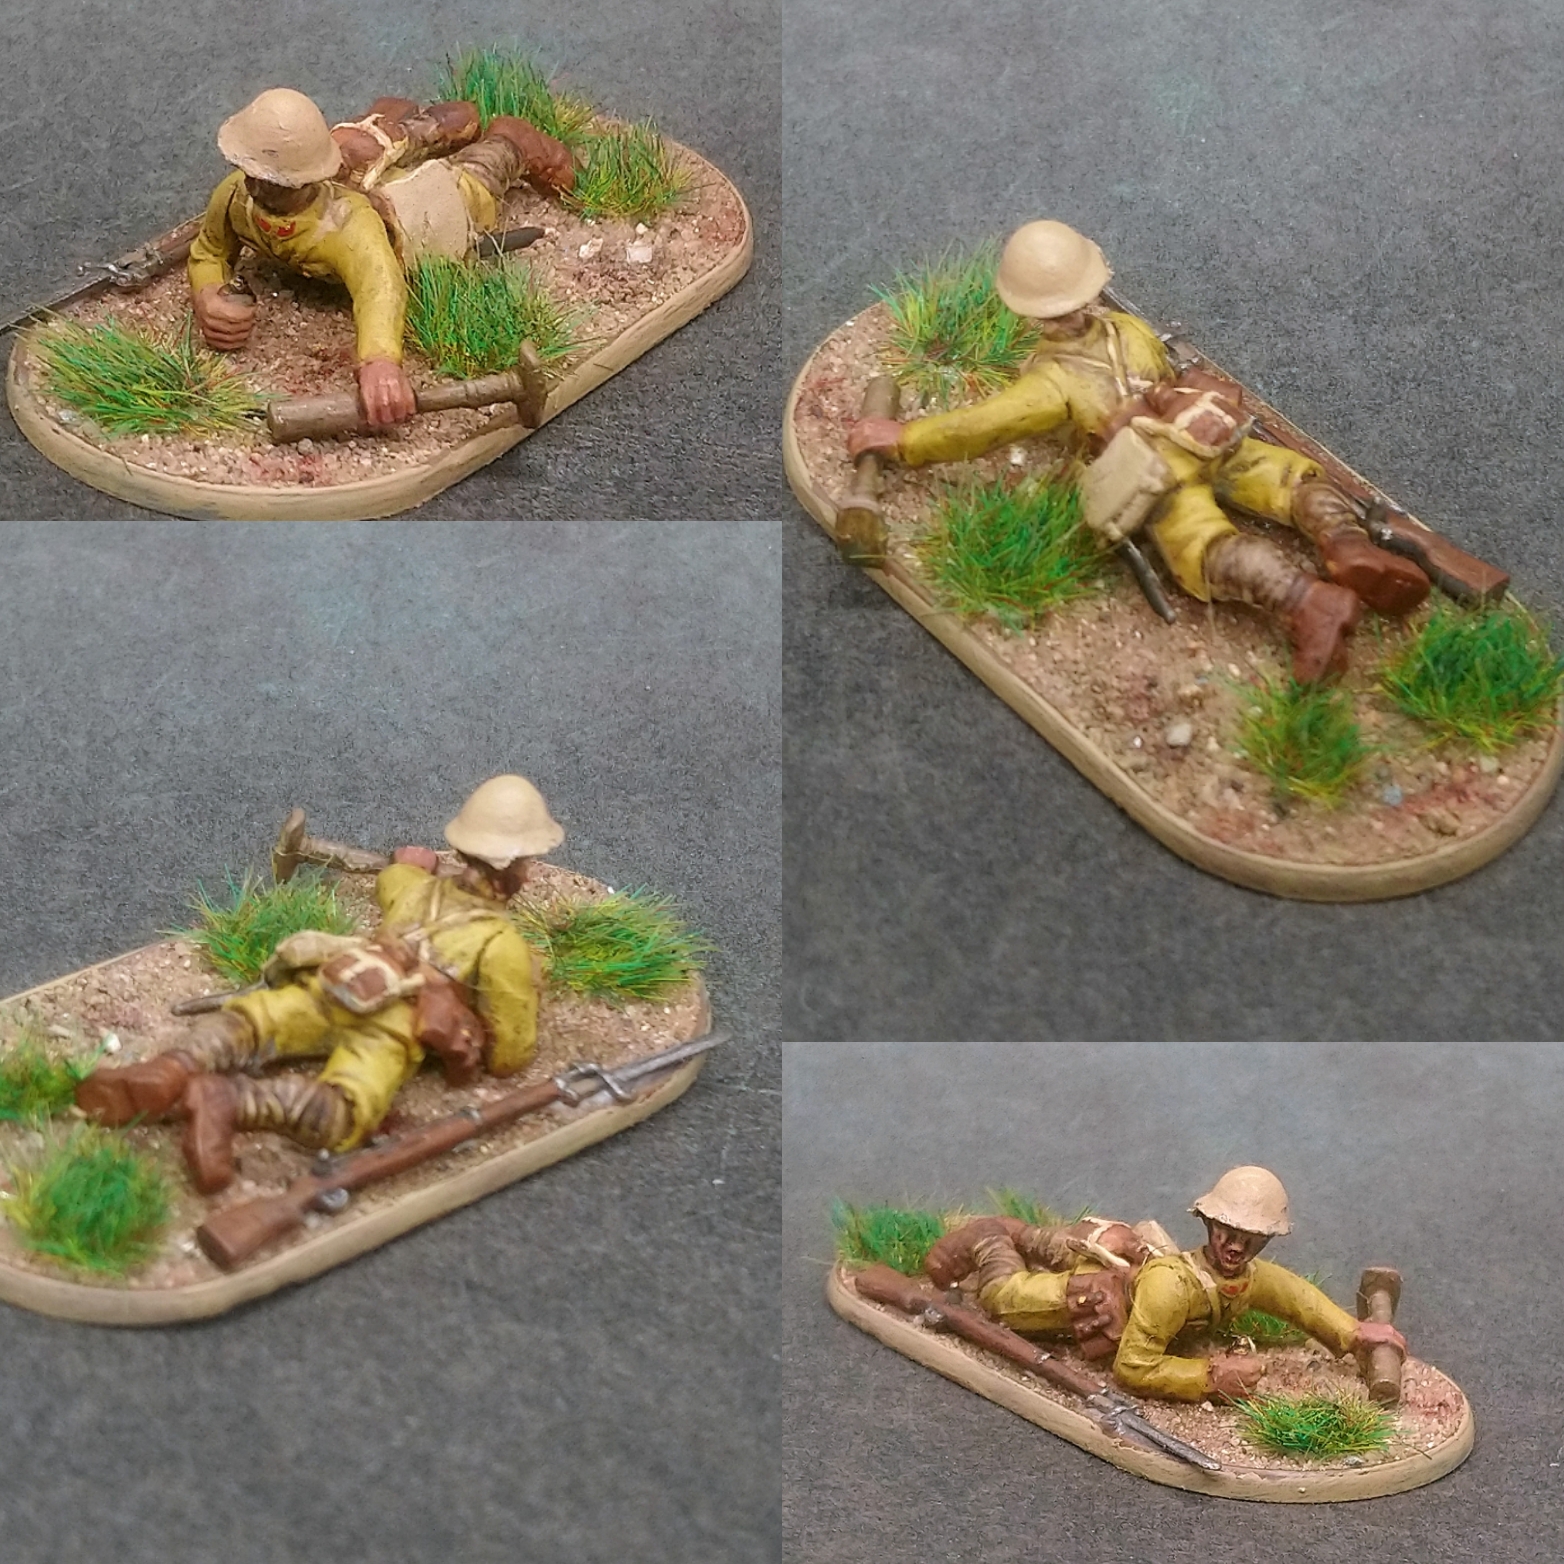
Muta the Knee mortarman
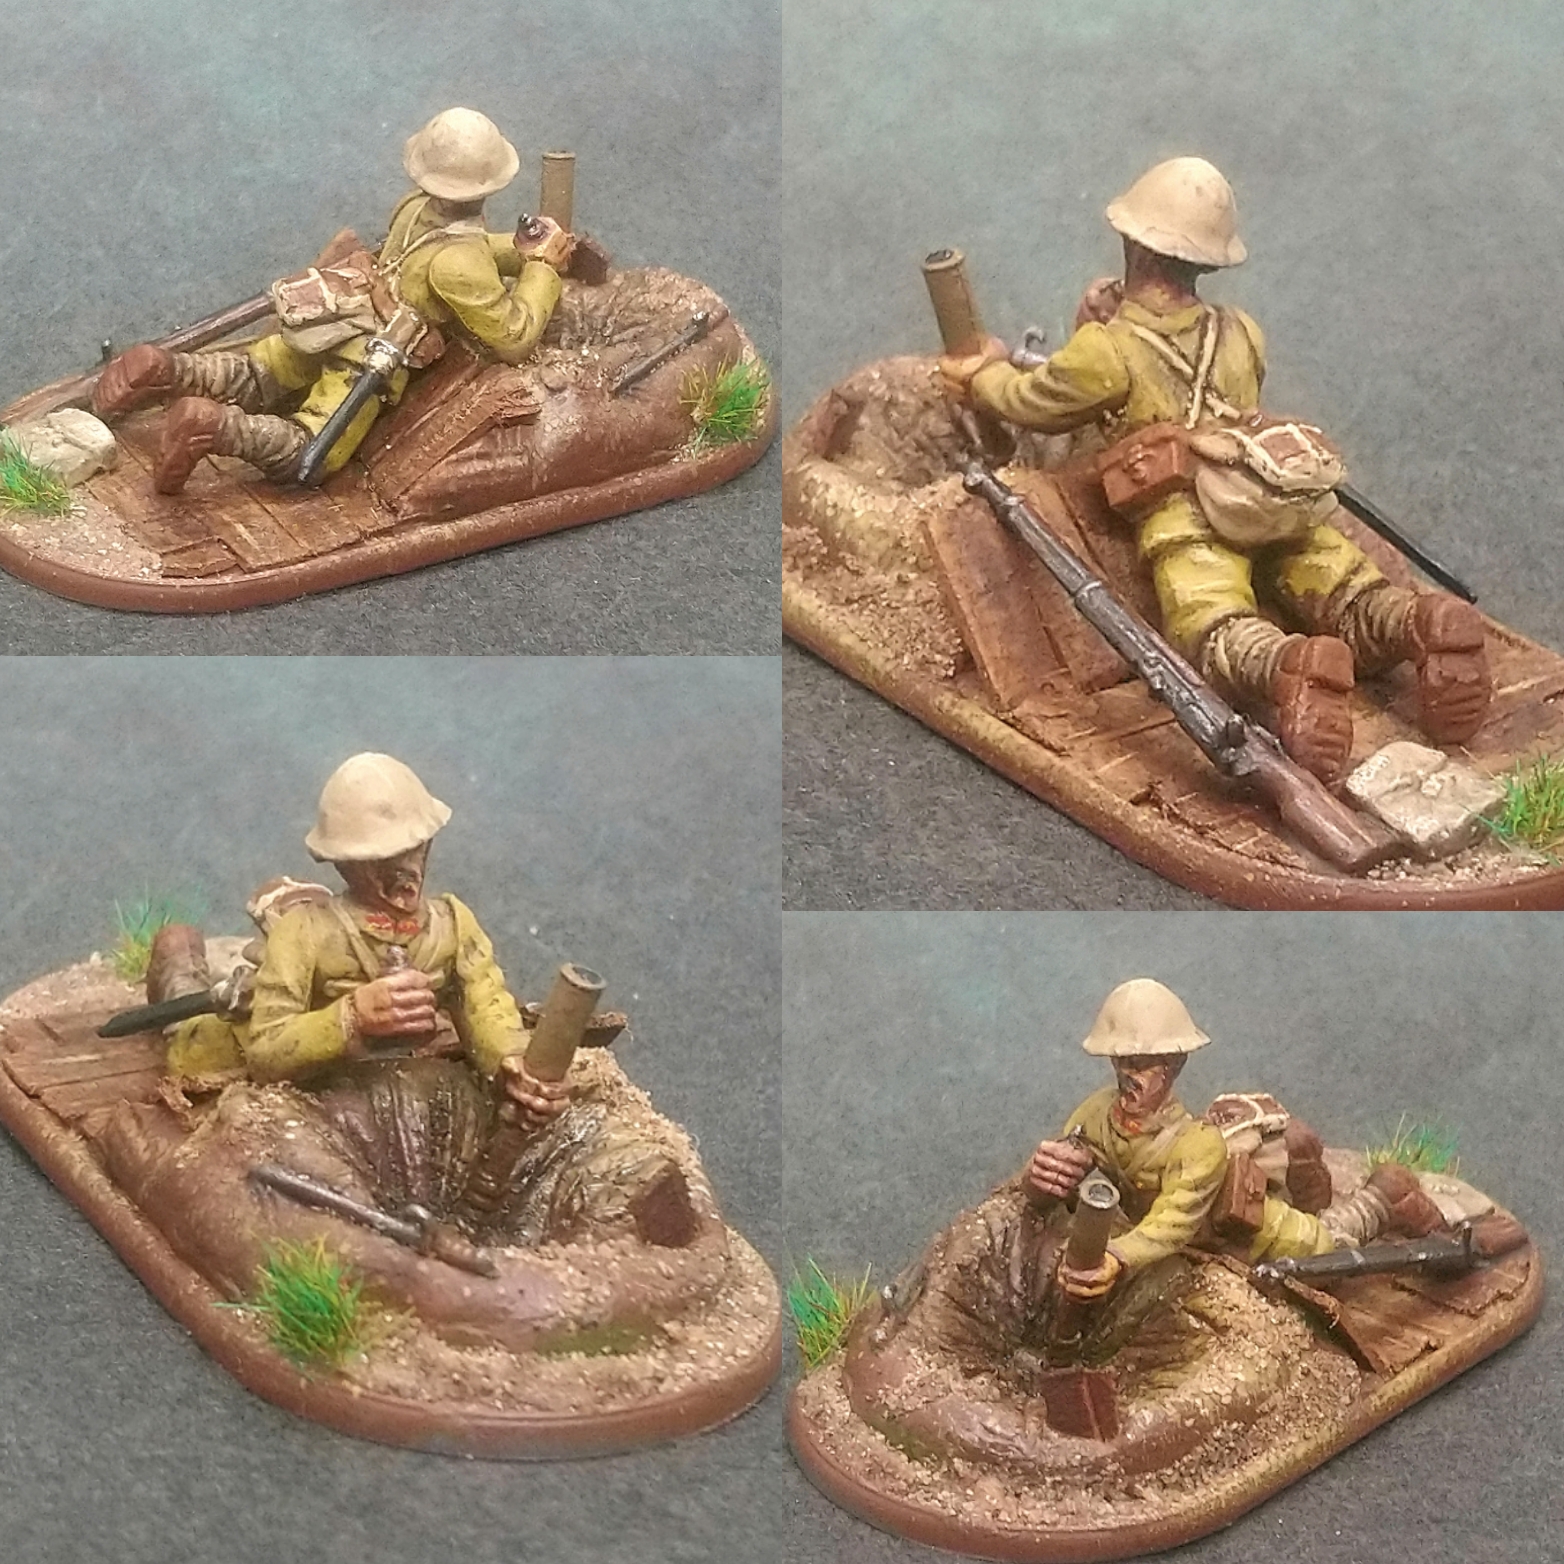
I don’t like having prone models in squads of men with lots of standing men without explanation or reason.
I turned to the Bolt Action Facebook page for their advice on how they use their prone models.
They agreed that there is an aesthetics issue with mixed squads and some solutions were offered.
Use them just for set tasks. Sniper. Forward Observers. Spotters. LMG teams.
Or just use them for set tasks followed by any remainder in the box used in just one infantry squad. If it only comprises of crouched guys and prone guy it gives a pleasing aesthetic in play, because you have one unit of almost all standing minis charging the enemy as the other unit is crouched and prone set to give covering fire.
Another alternative was to use the prone men as pin markers instead of the first pin marker? Less tokens is important to the emersion sometimes, but this option does deplete my box of 30 minis to 25 quite quickly.
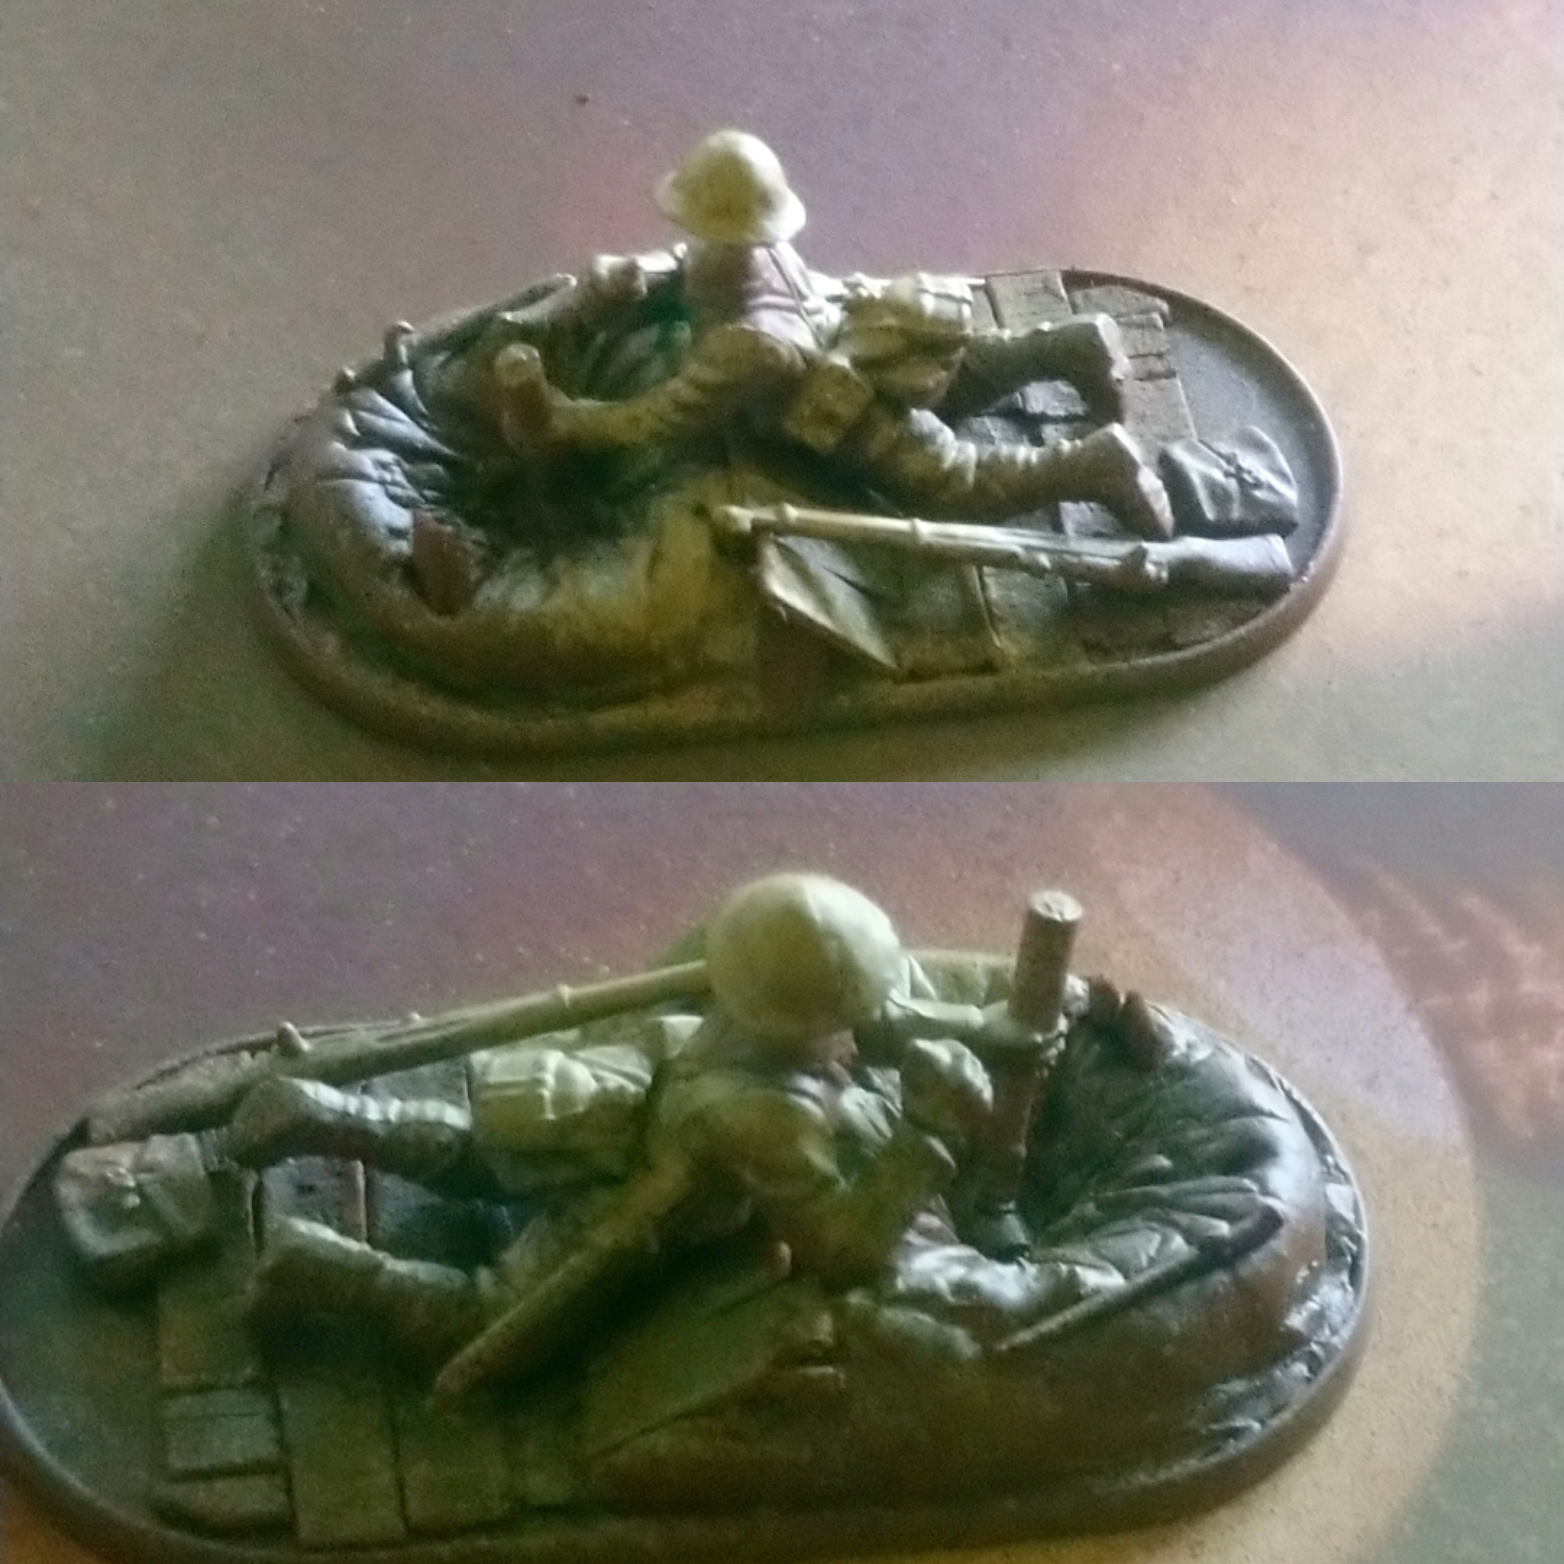
I have made a sniper and spotter already and know that i have 3 light mortars to make so this should give me full use of the prone models from the initial box. I tried to use the mortar arm with a prone model and the arm was too straight to pose him lying down. I fashioned a defensive area of some kind and a crater to get the arm to make sense with the prone body… It was then that i realised how blind i had been. I removed the mortar round hand from a sprue and selected a right arm to sever the hand from to glue it to and realised… Why didn’t i find an alternative left arm to improve the way the mortar was being held in relation to the prone body? Not my smartest moment after several minutes of messing with Greenstuff and awkward assembly. ?

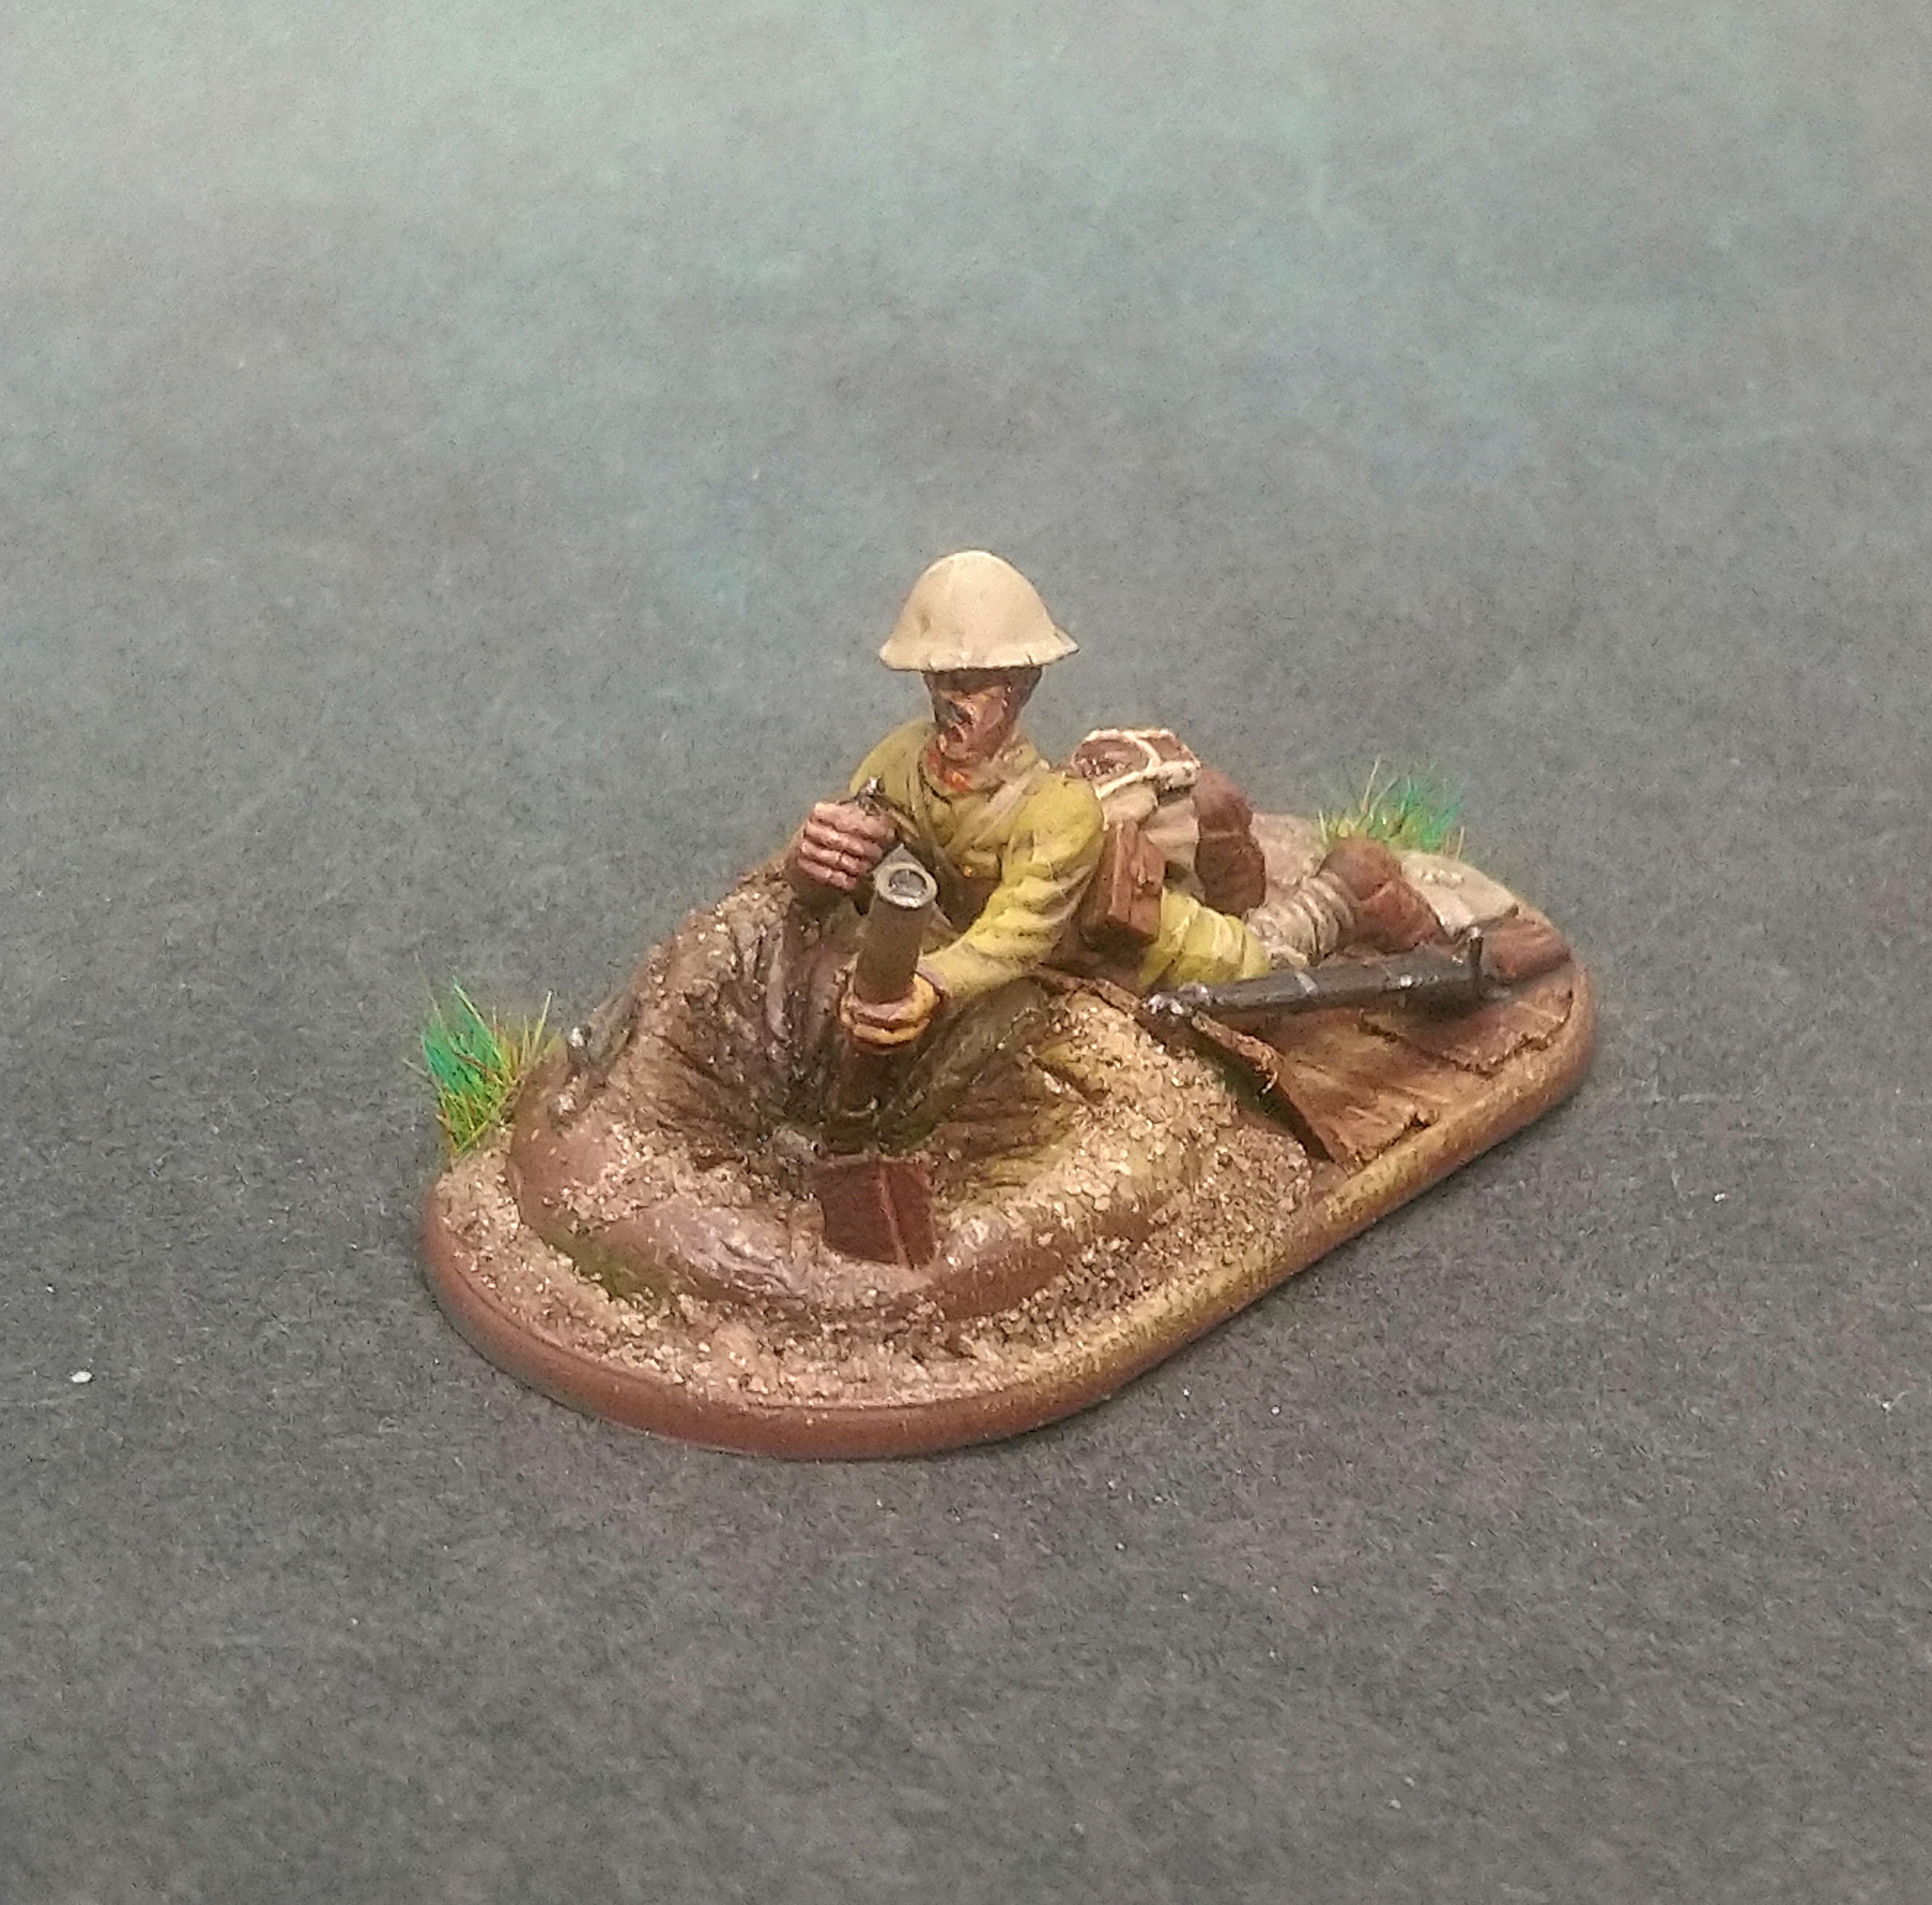
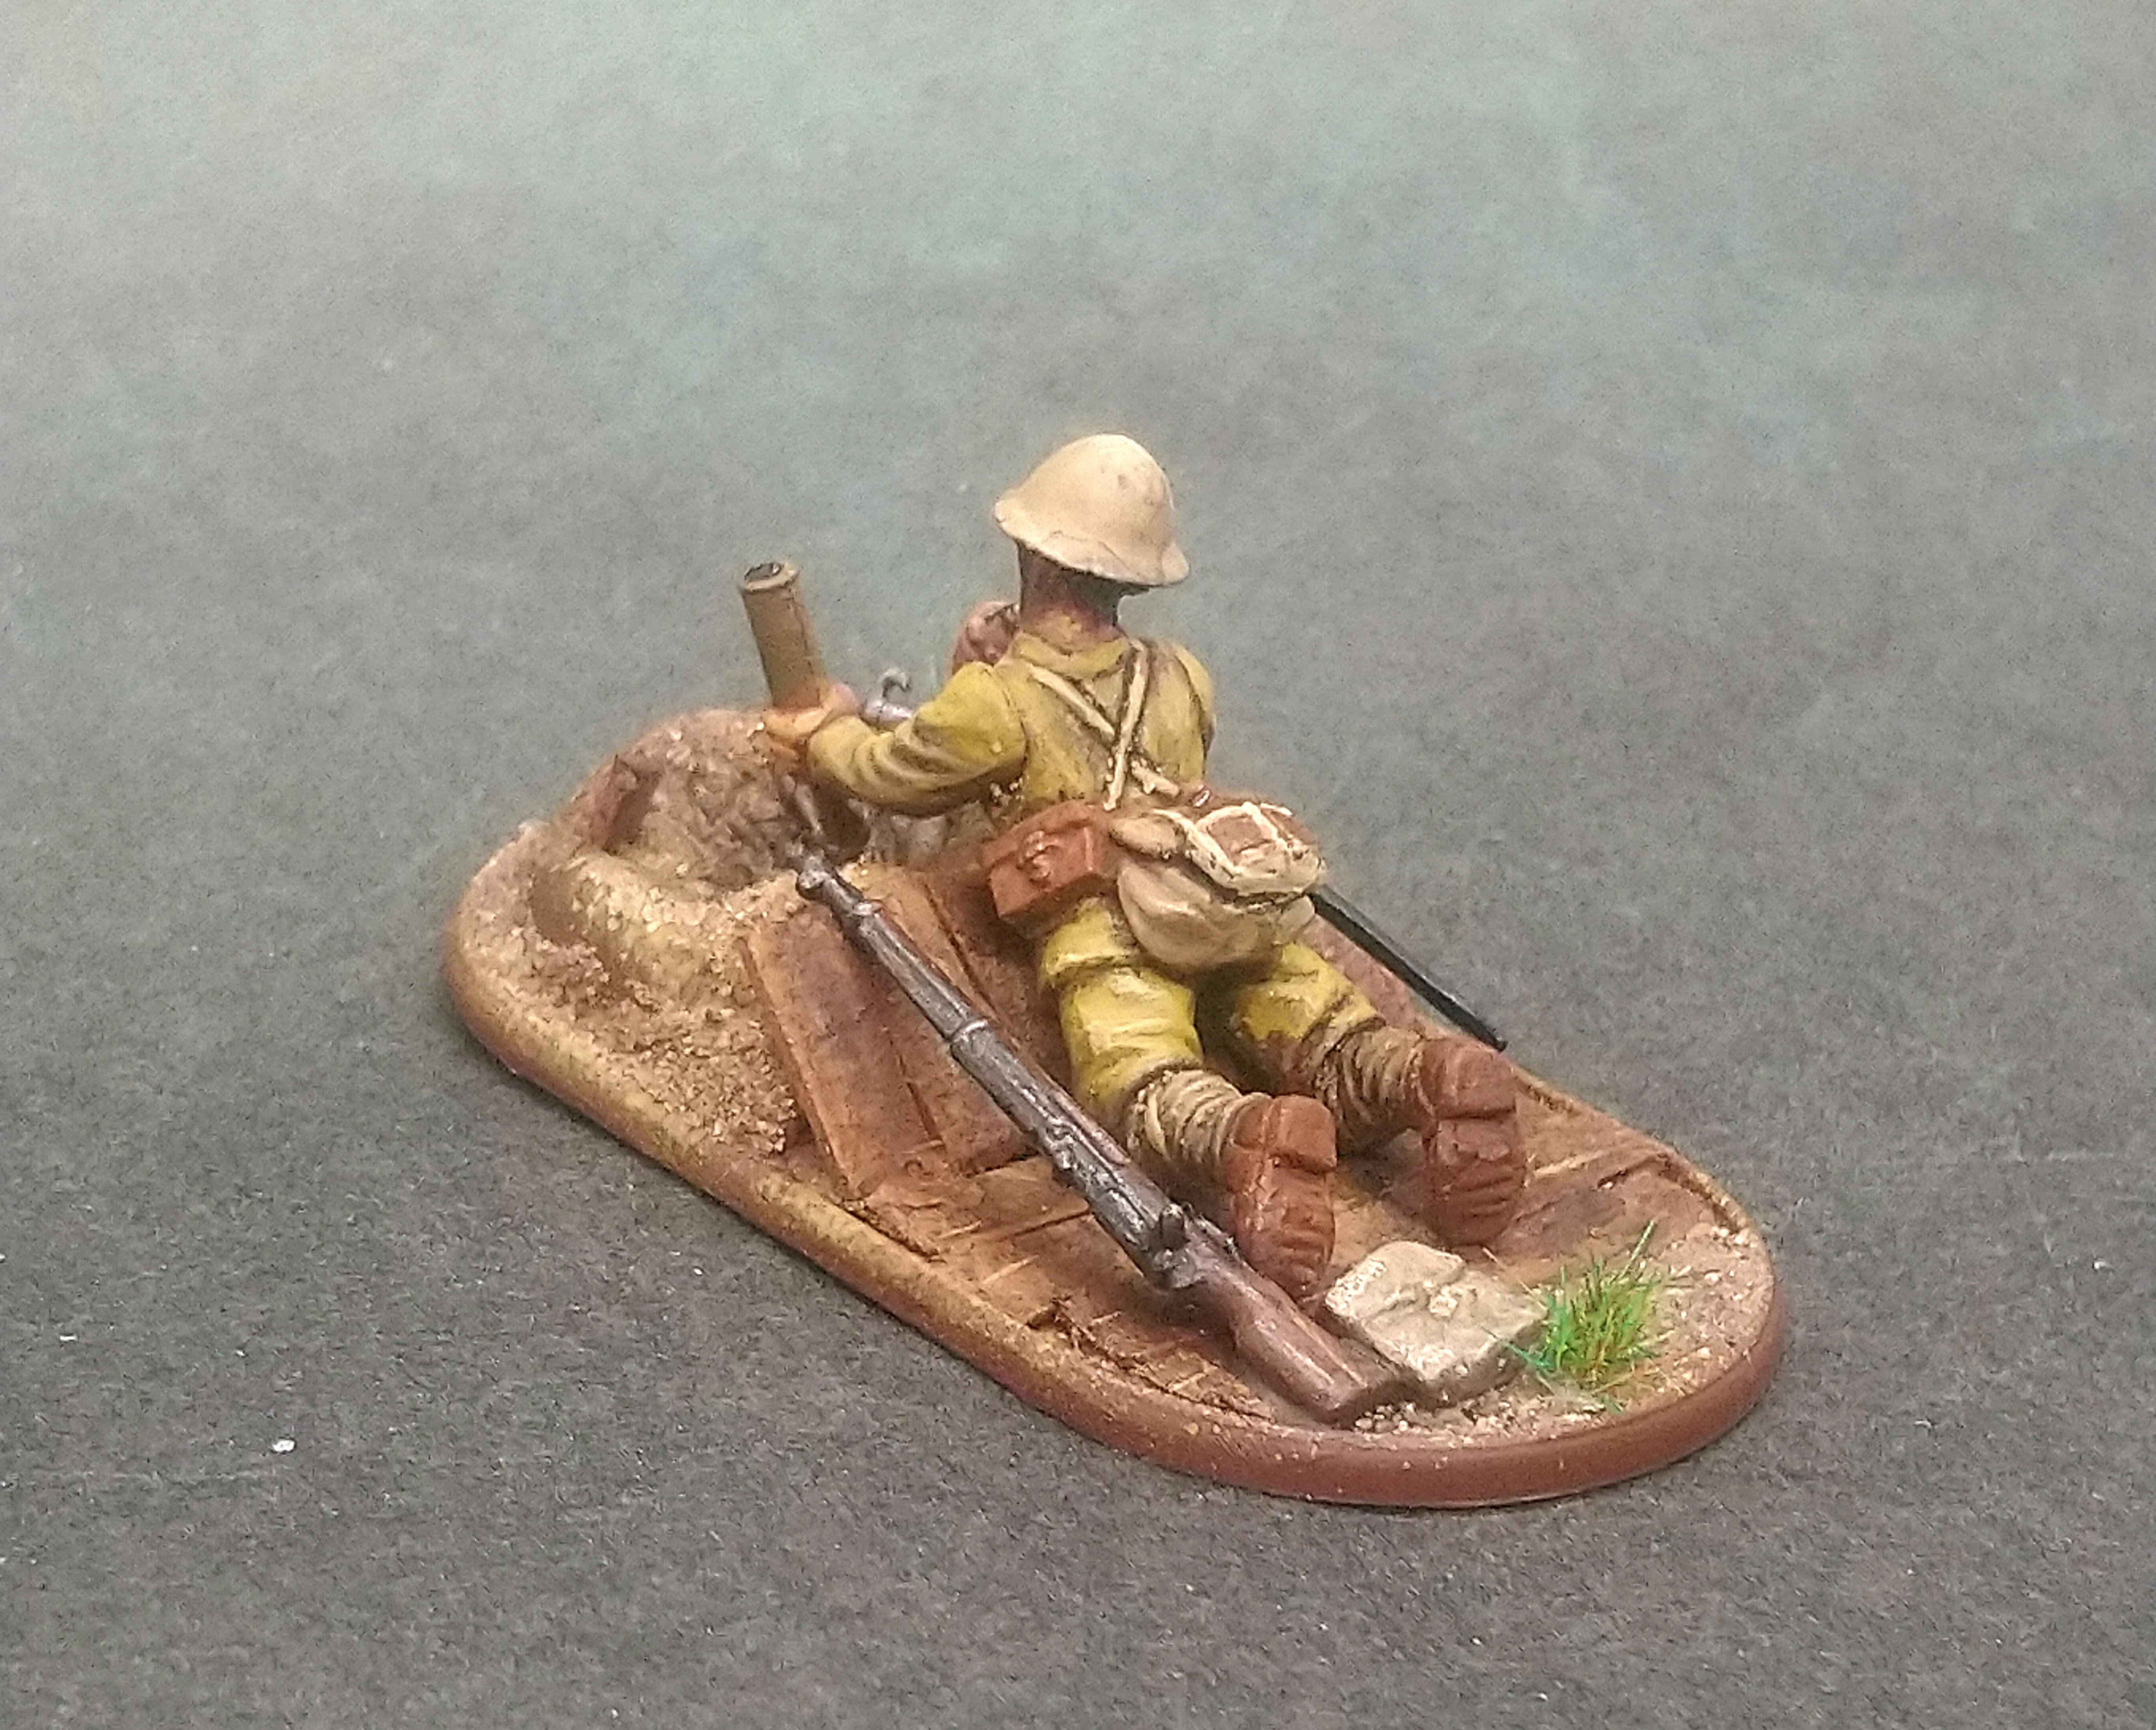
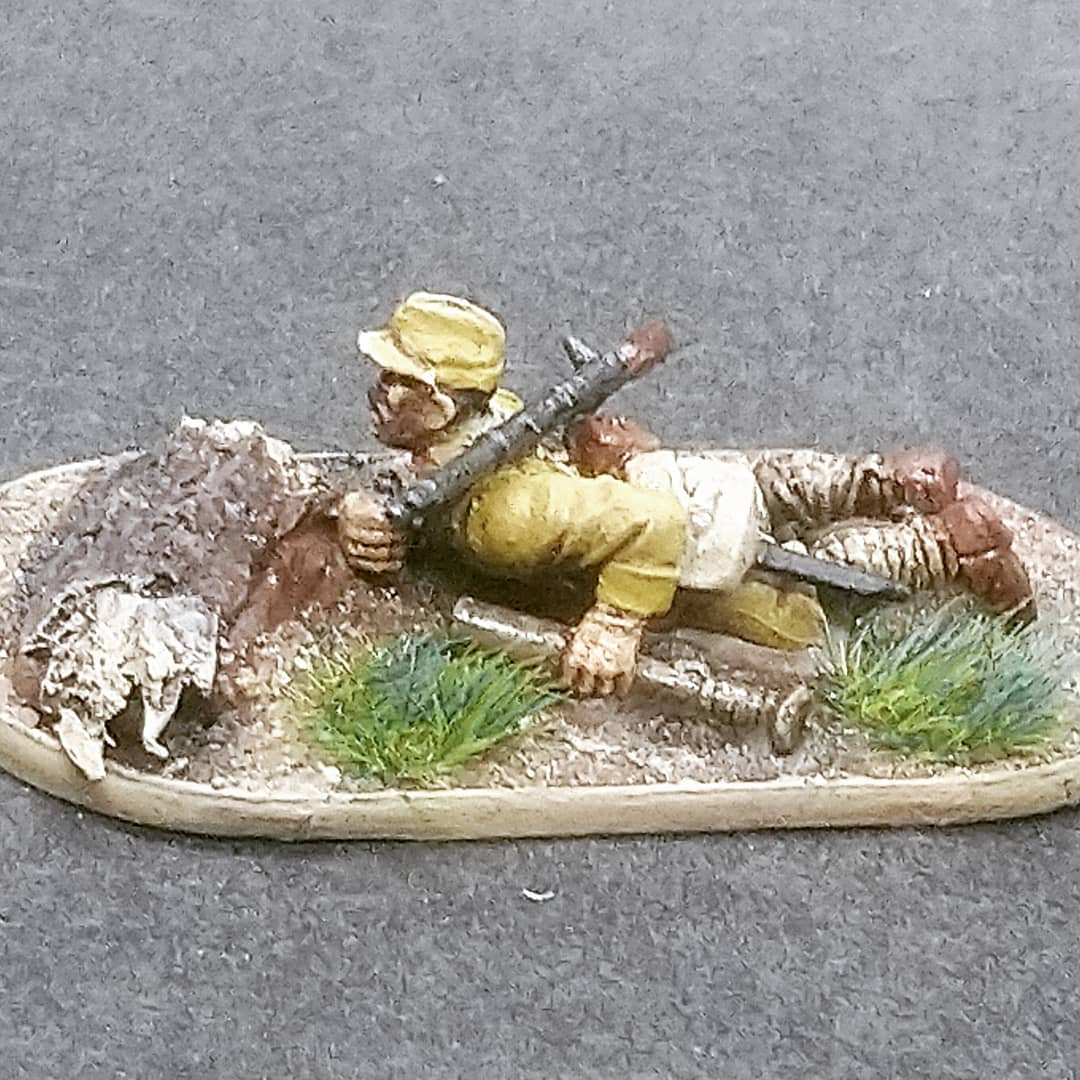
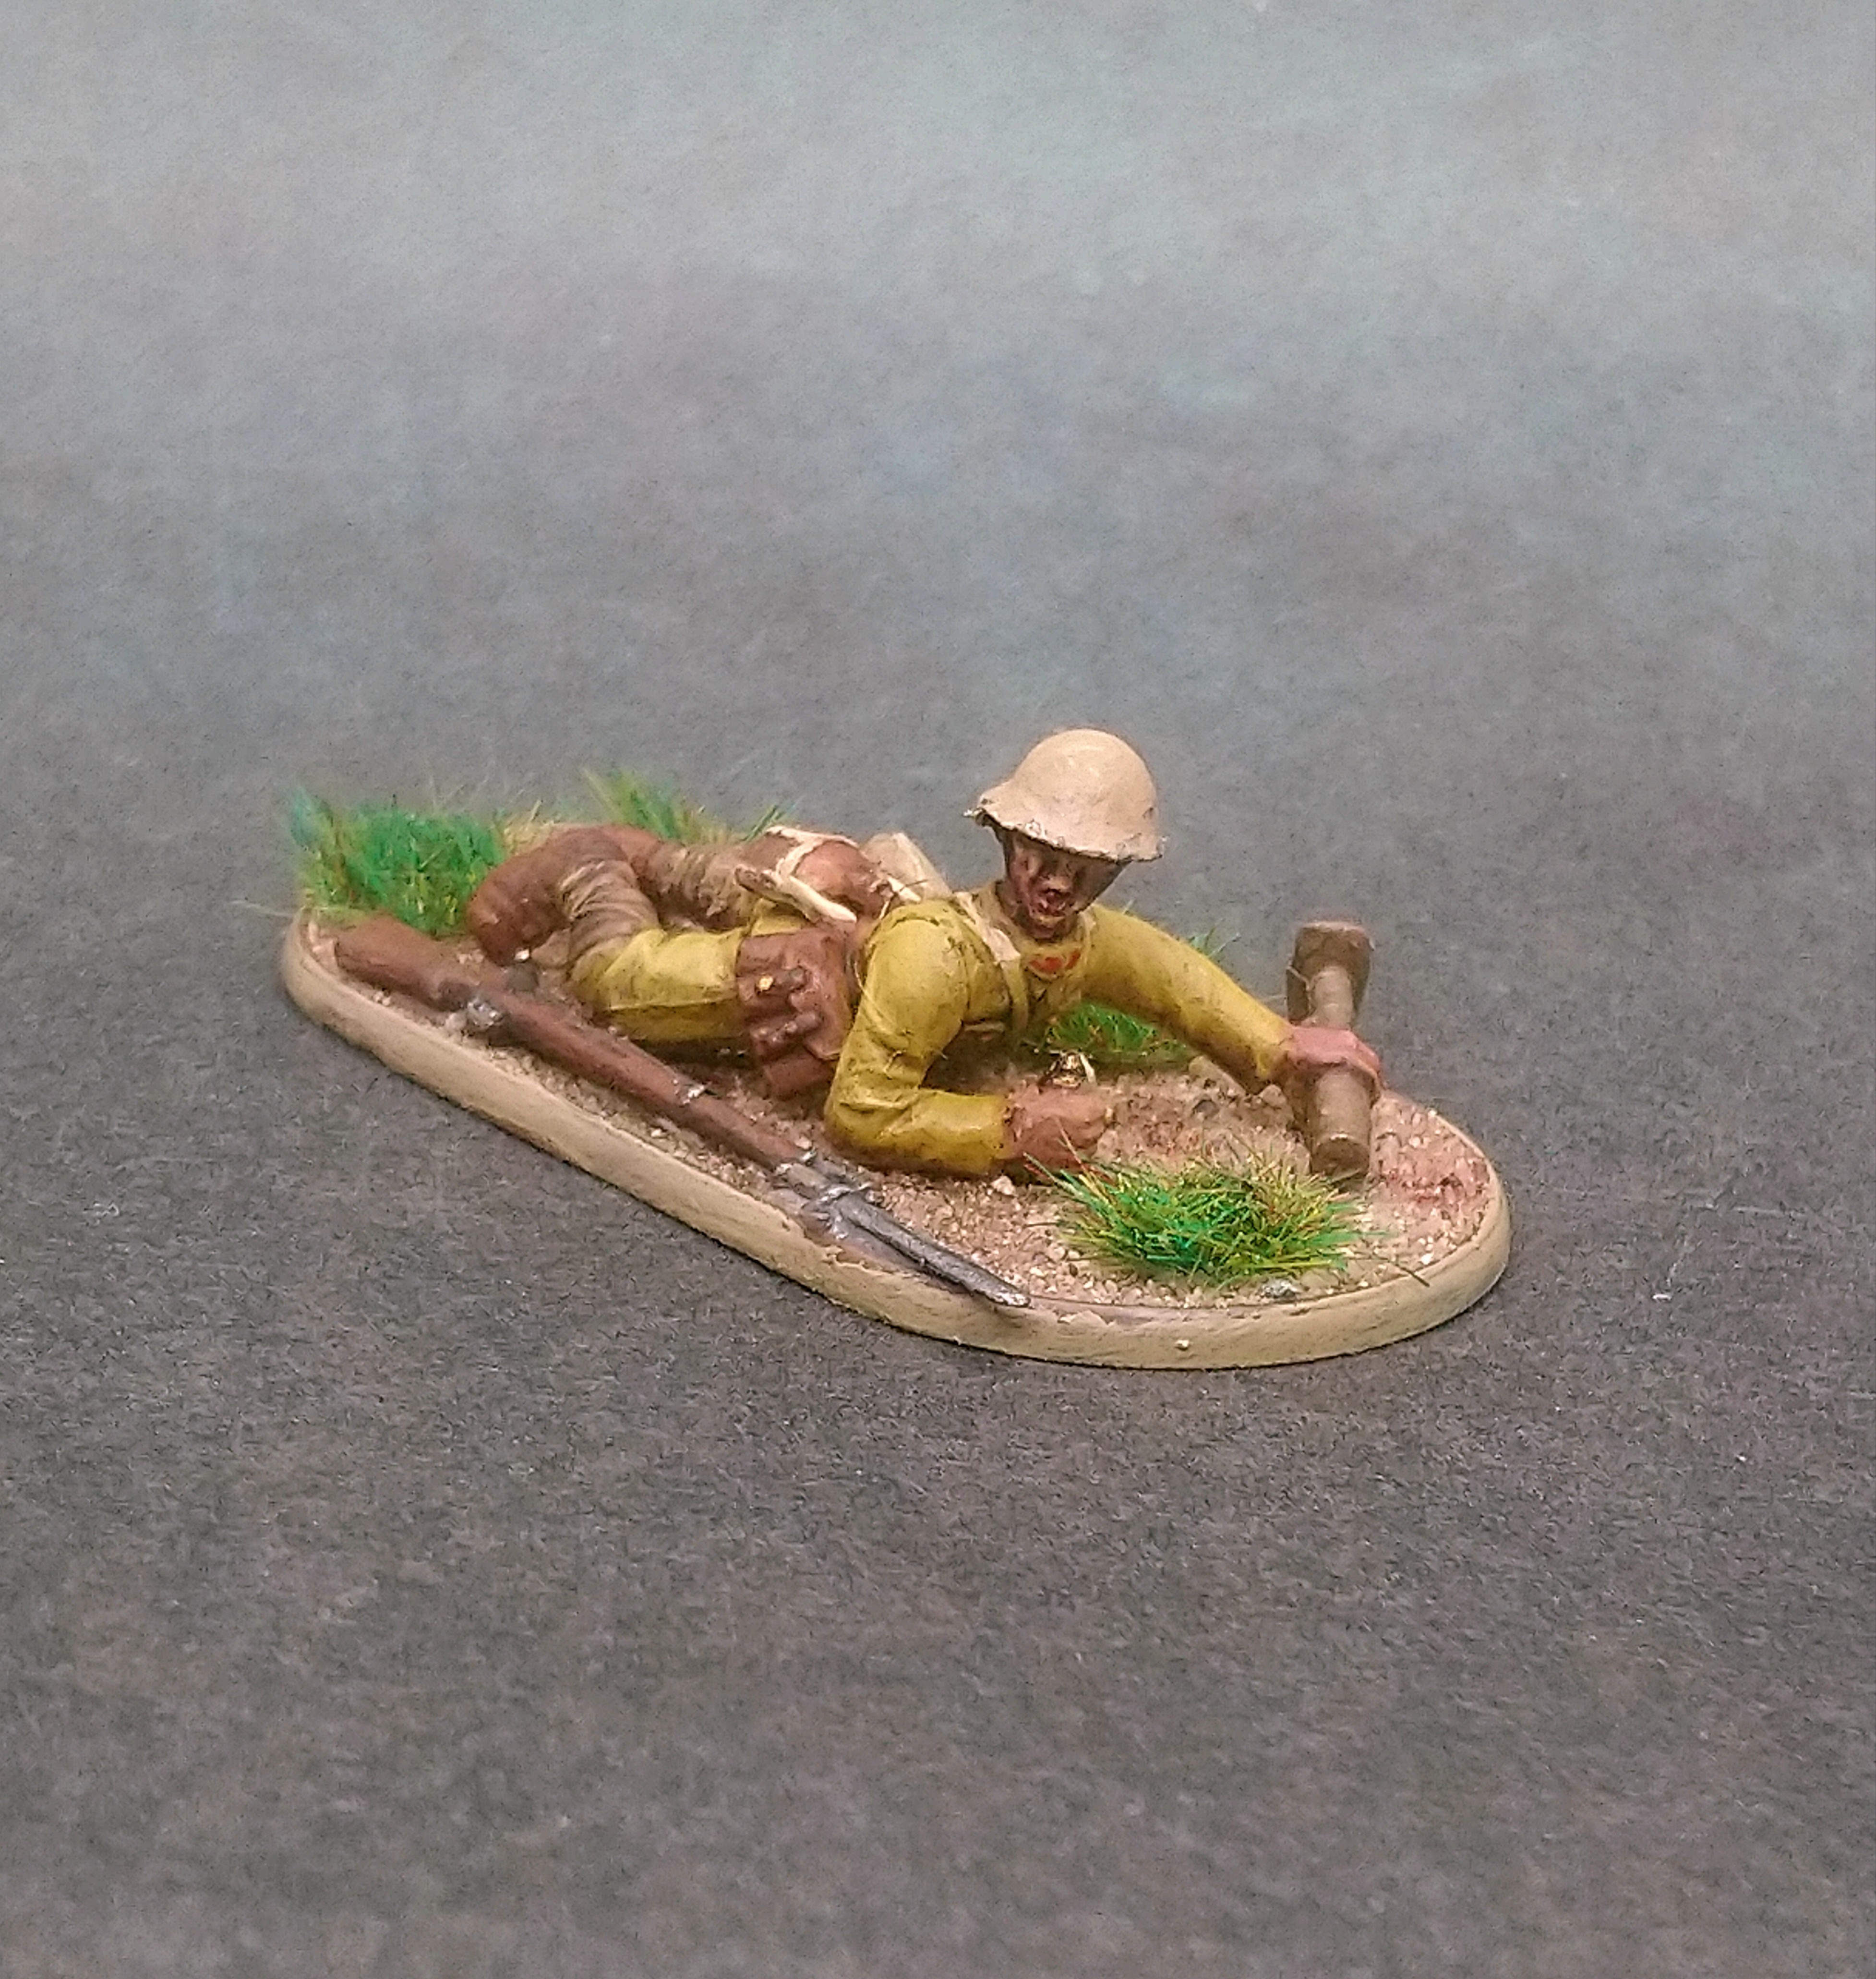
Light mortar Masahiro
Poised ready to set his knee mortar against the tree trunk.
The tree trunk is two pieces of resin. I tried to cut off a piece of resin sprue to bulk out the basing and lay Greenstuff over it. Then realised that a sandy or grassy dune would not look as good as a tree trunk and the resin had contorted in a bark like texture.

We'll call him Max...
Calling him Max Chono because that’s as many Light Mortars as the book allows for this type of squad. ?

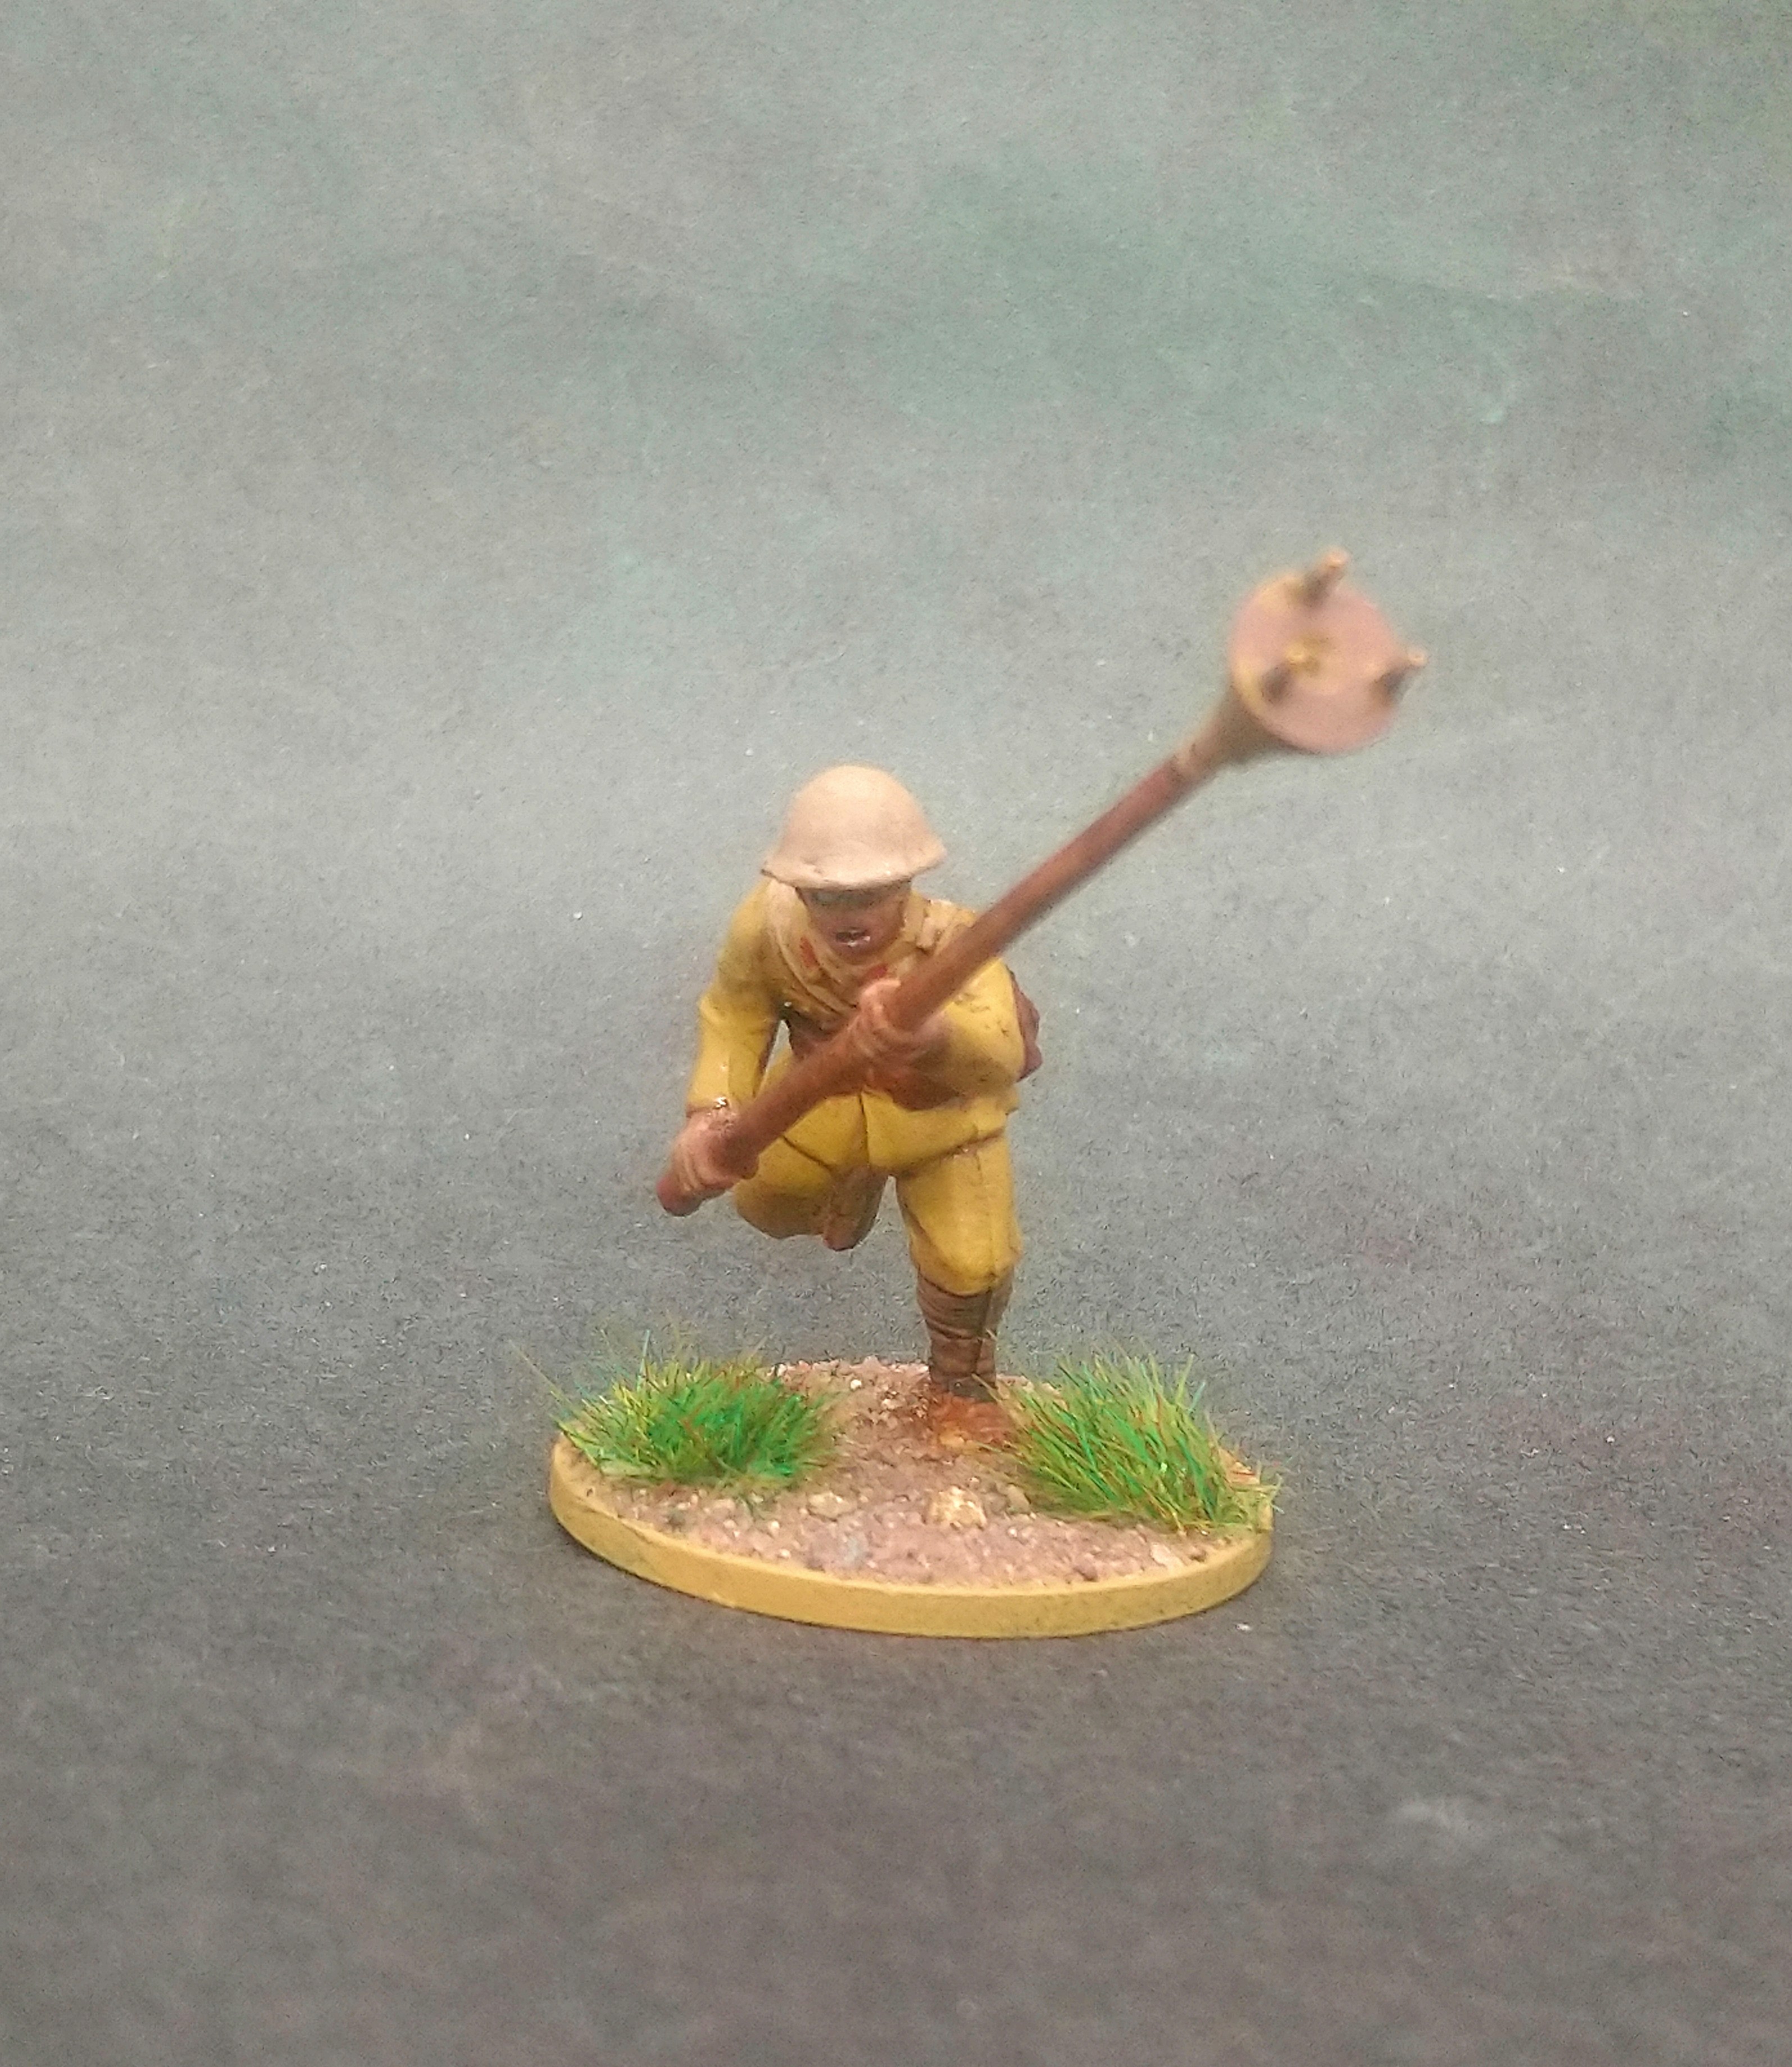
Suicide is painless. Well quick hopefully...
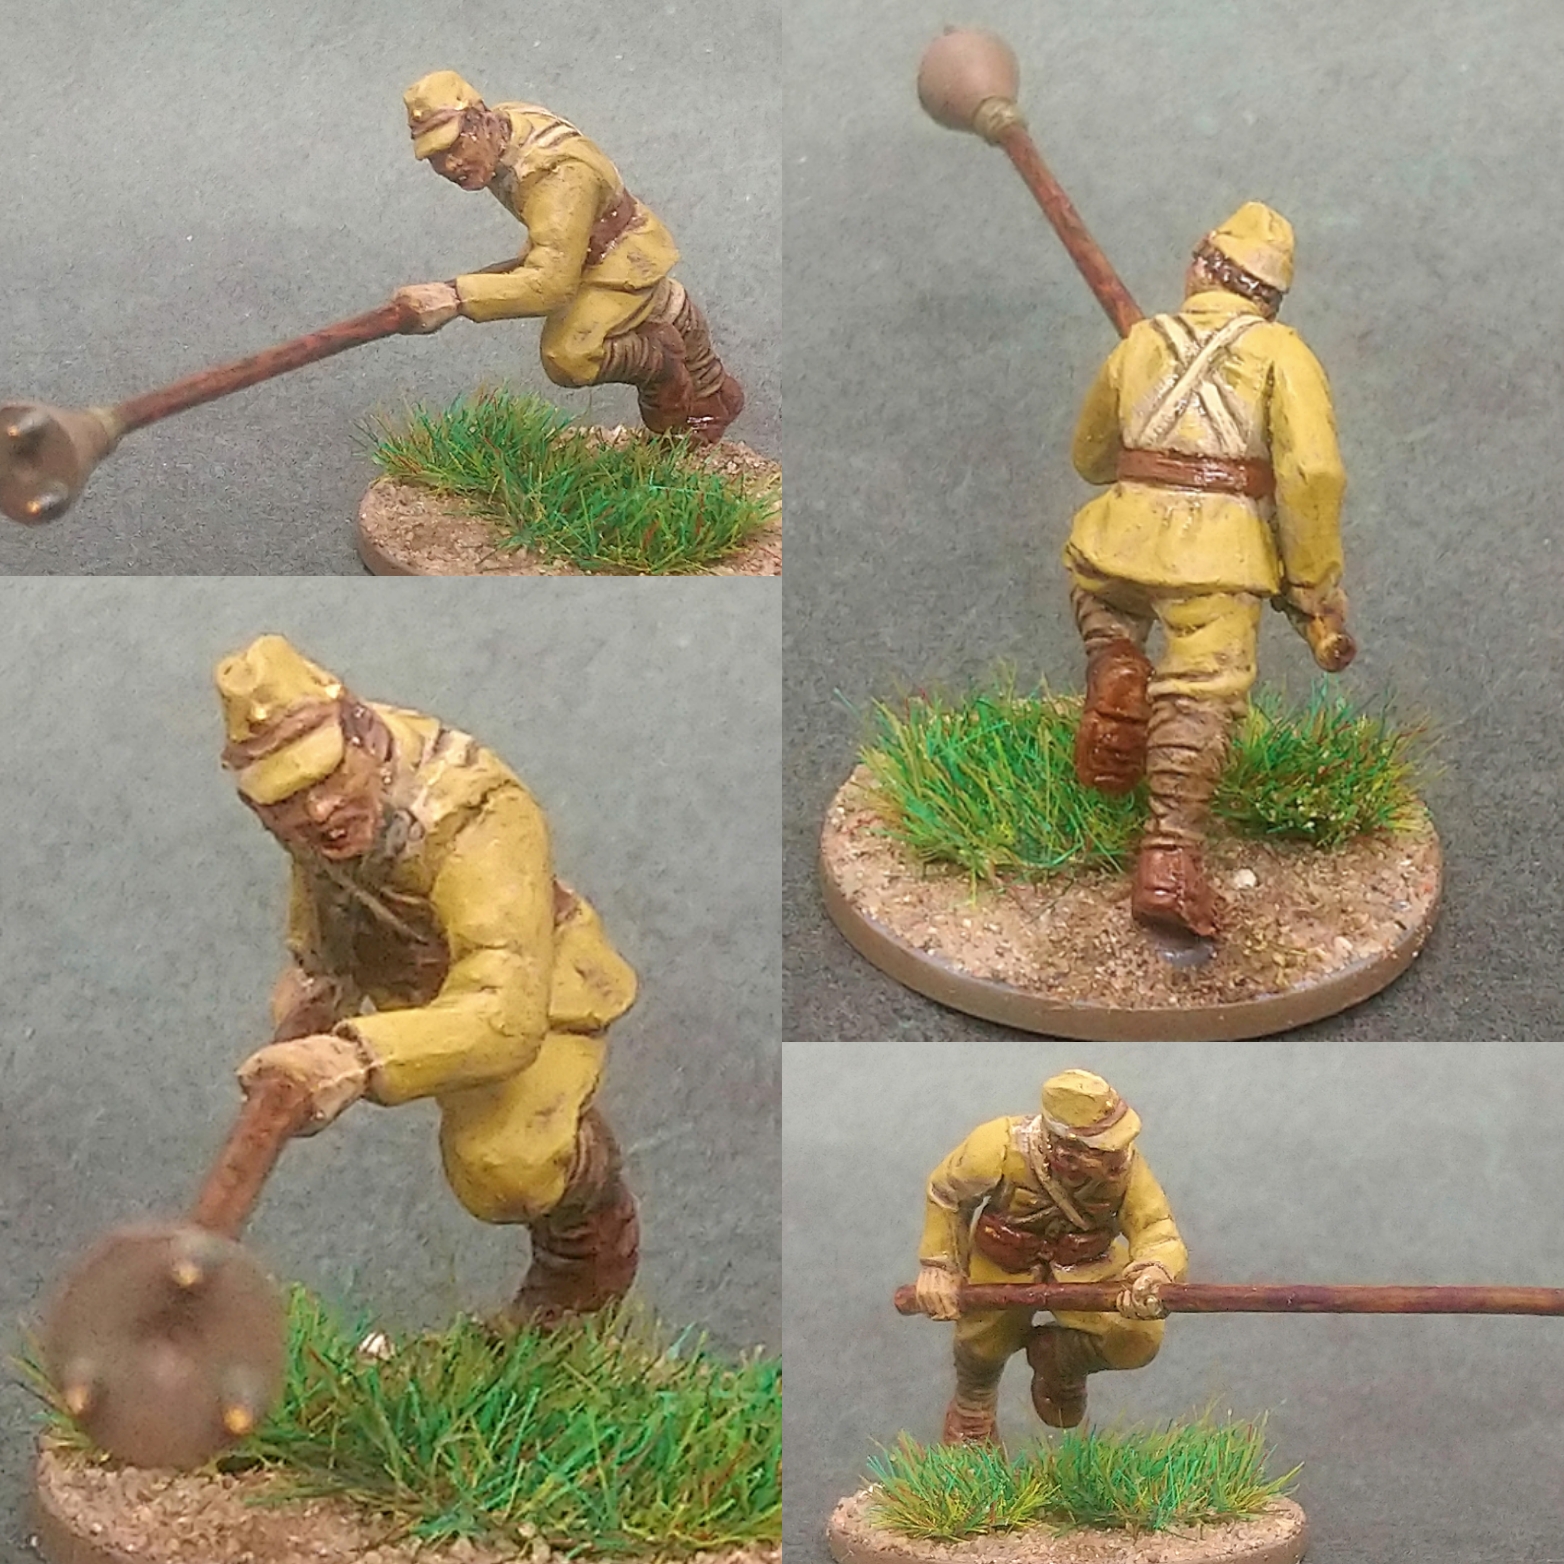
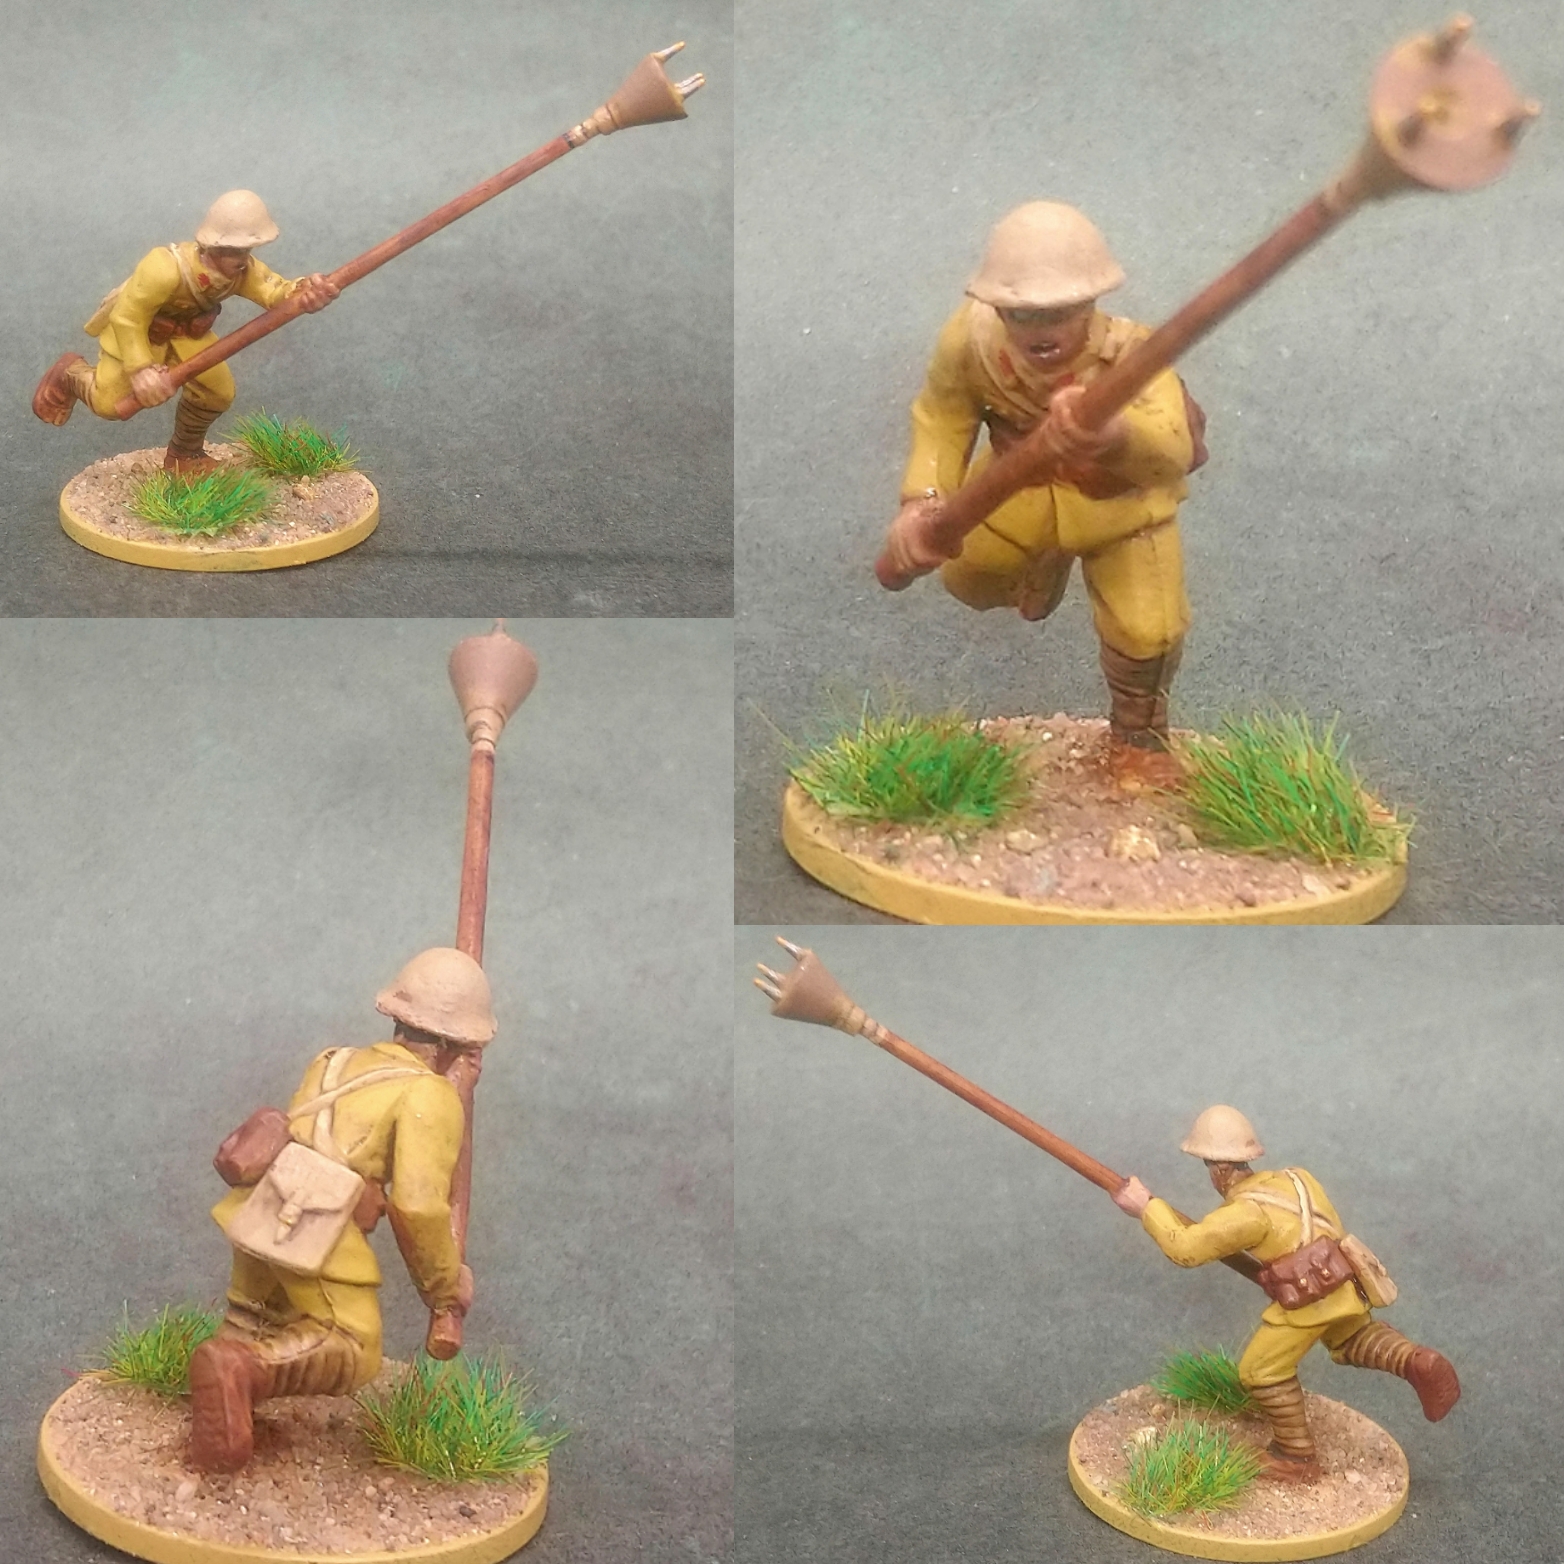
Japan realised that their anti-tank equipment was too light to knock out the Shermans, Lees and even Stuart tanks being put in front of them, they had no time or resources to up-gun their defenses. It was only the fact that Japan had such a devoted and indoctrinated infantry that allowed them to use Suicide attacks, lunging anti-tank mines on wooden shafts directly against the sides of tanks, as a last ditch defensive field tactic for taking out enemy armor.
I had some spare points so wanted to spend them on something only the Japanese can take and they give me a Dice in the bag quite cheaply even if there are no tanks for them to attack for some reason.

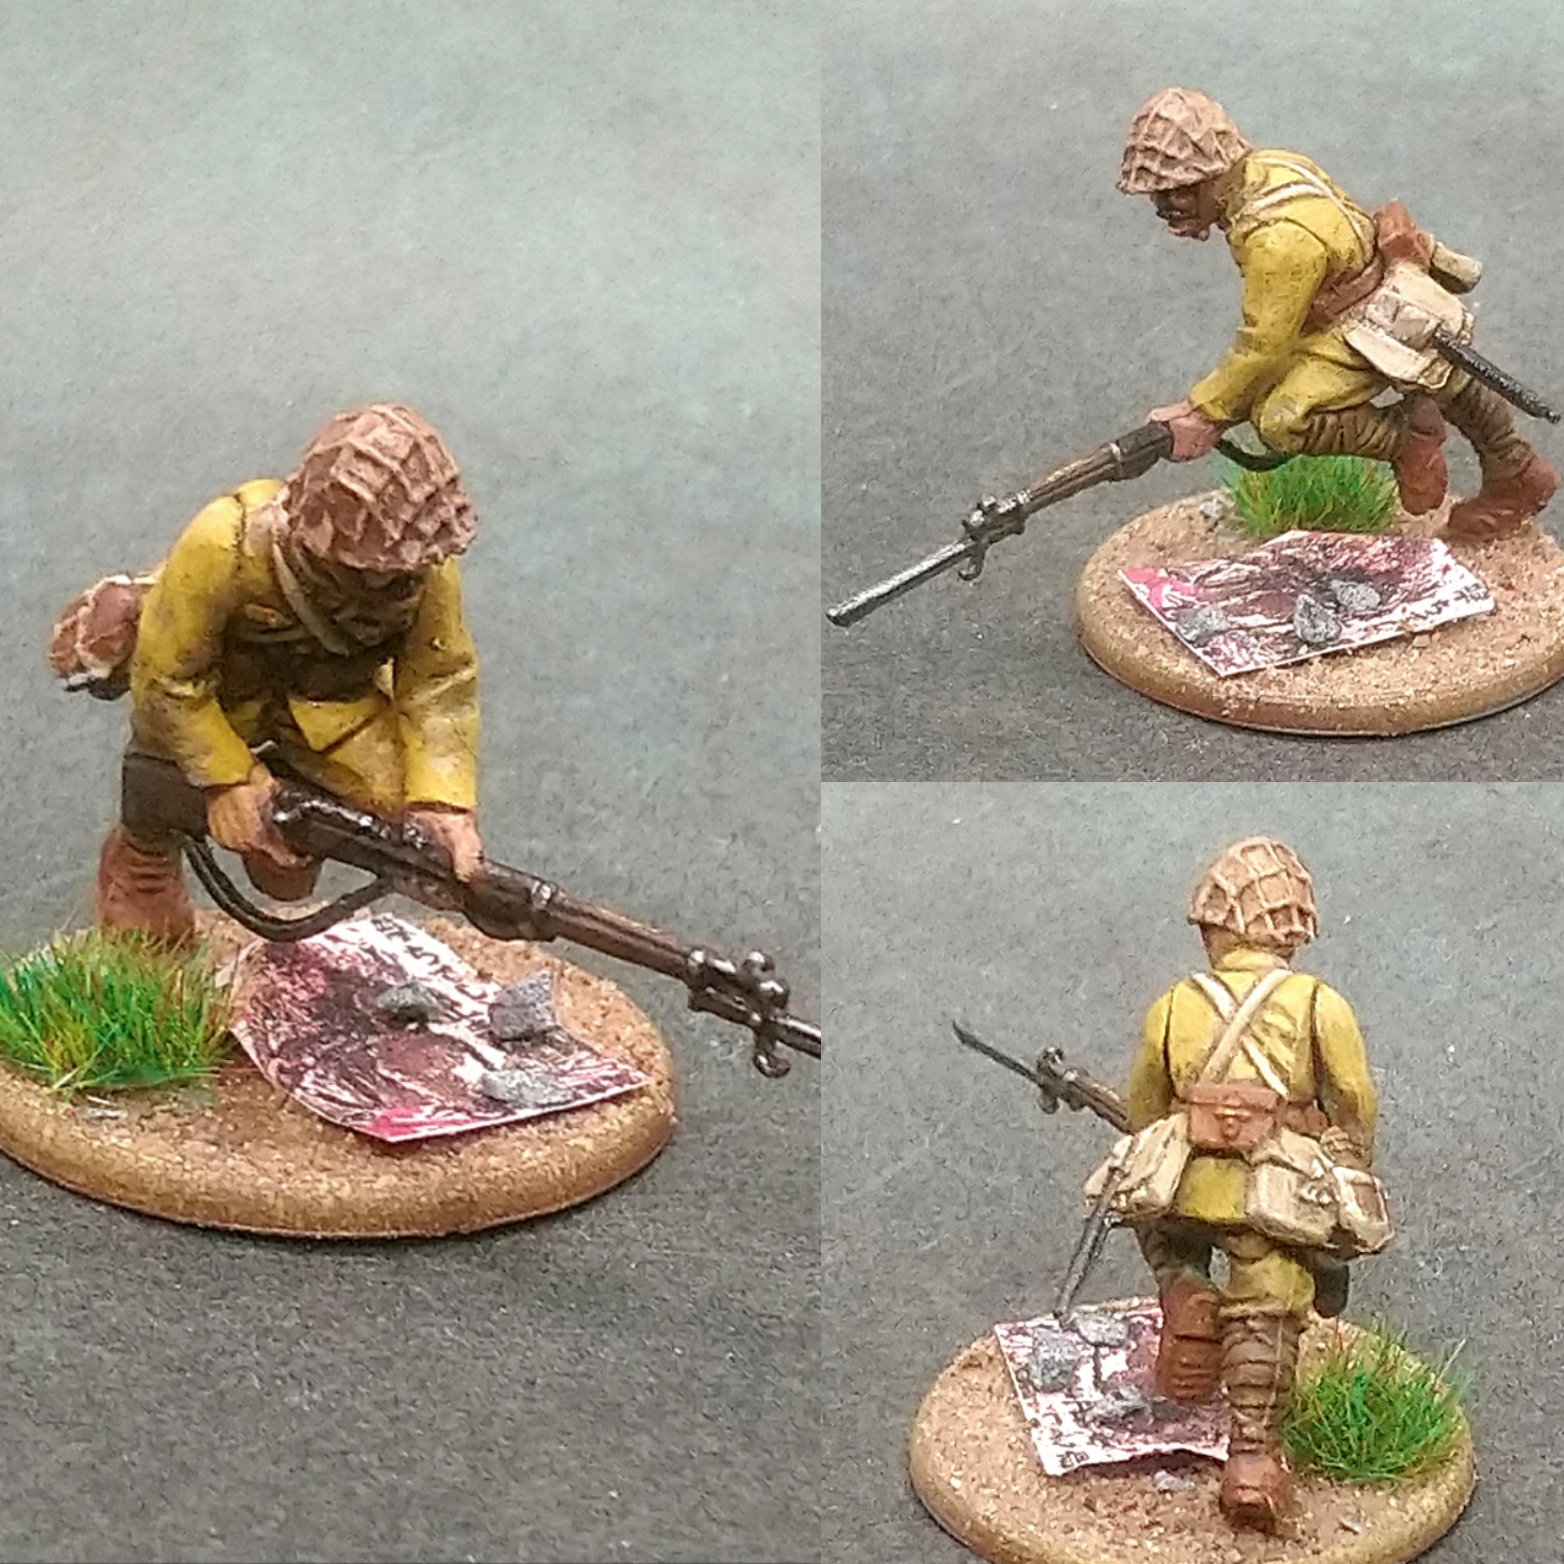
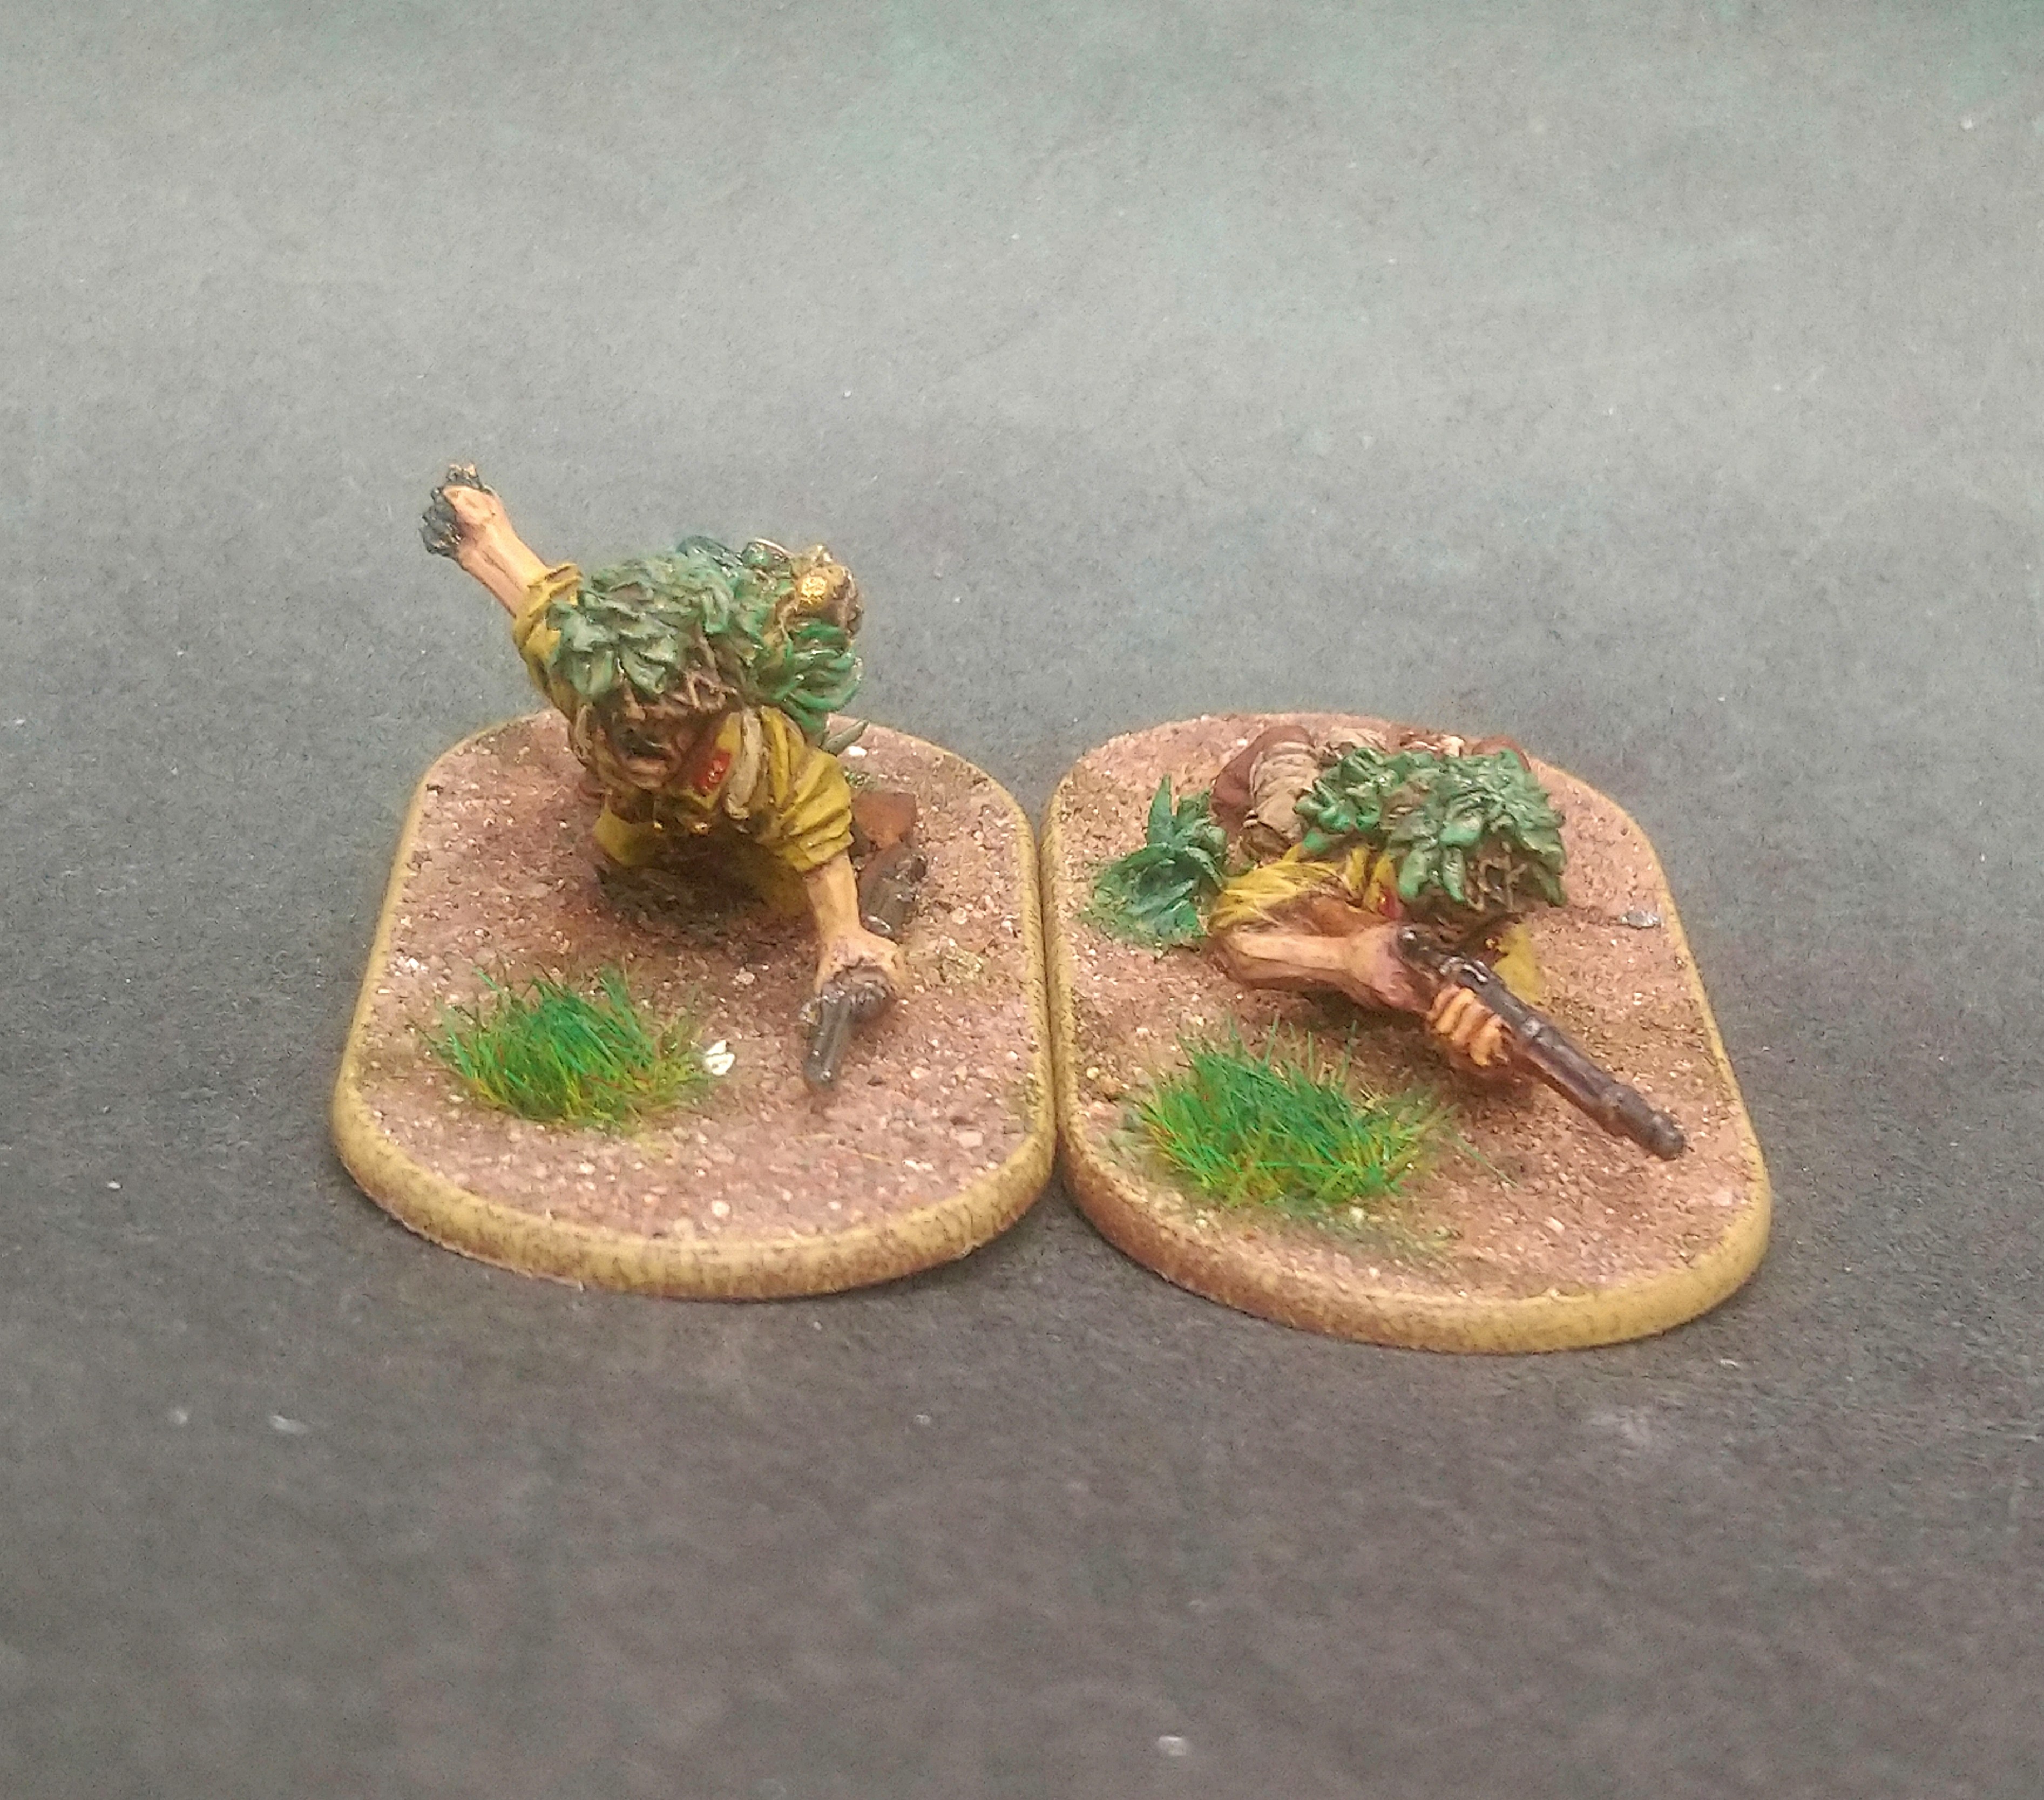
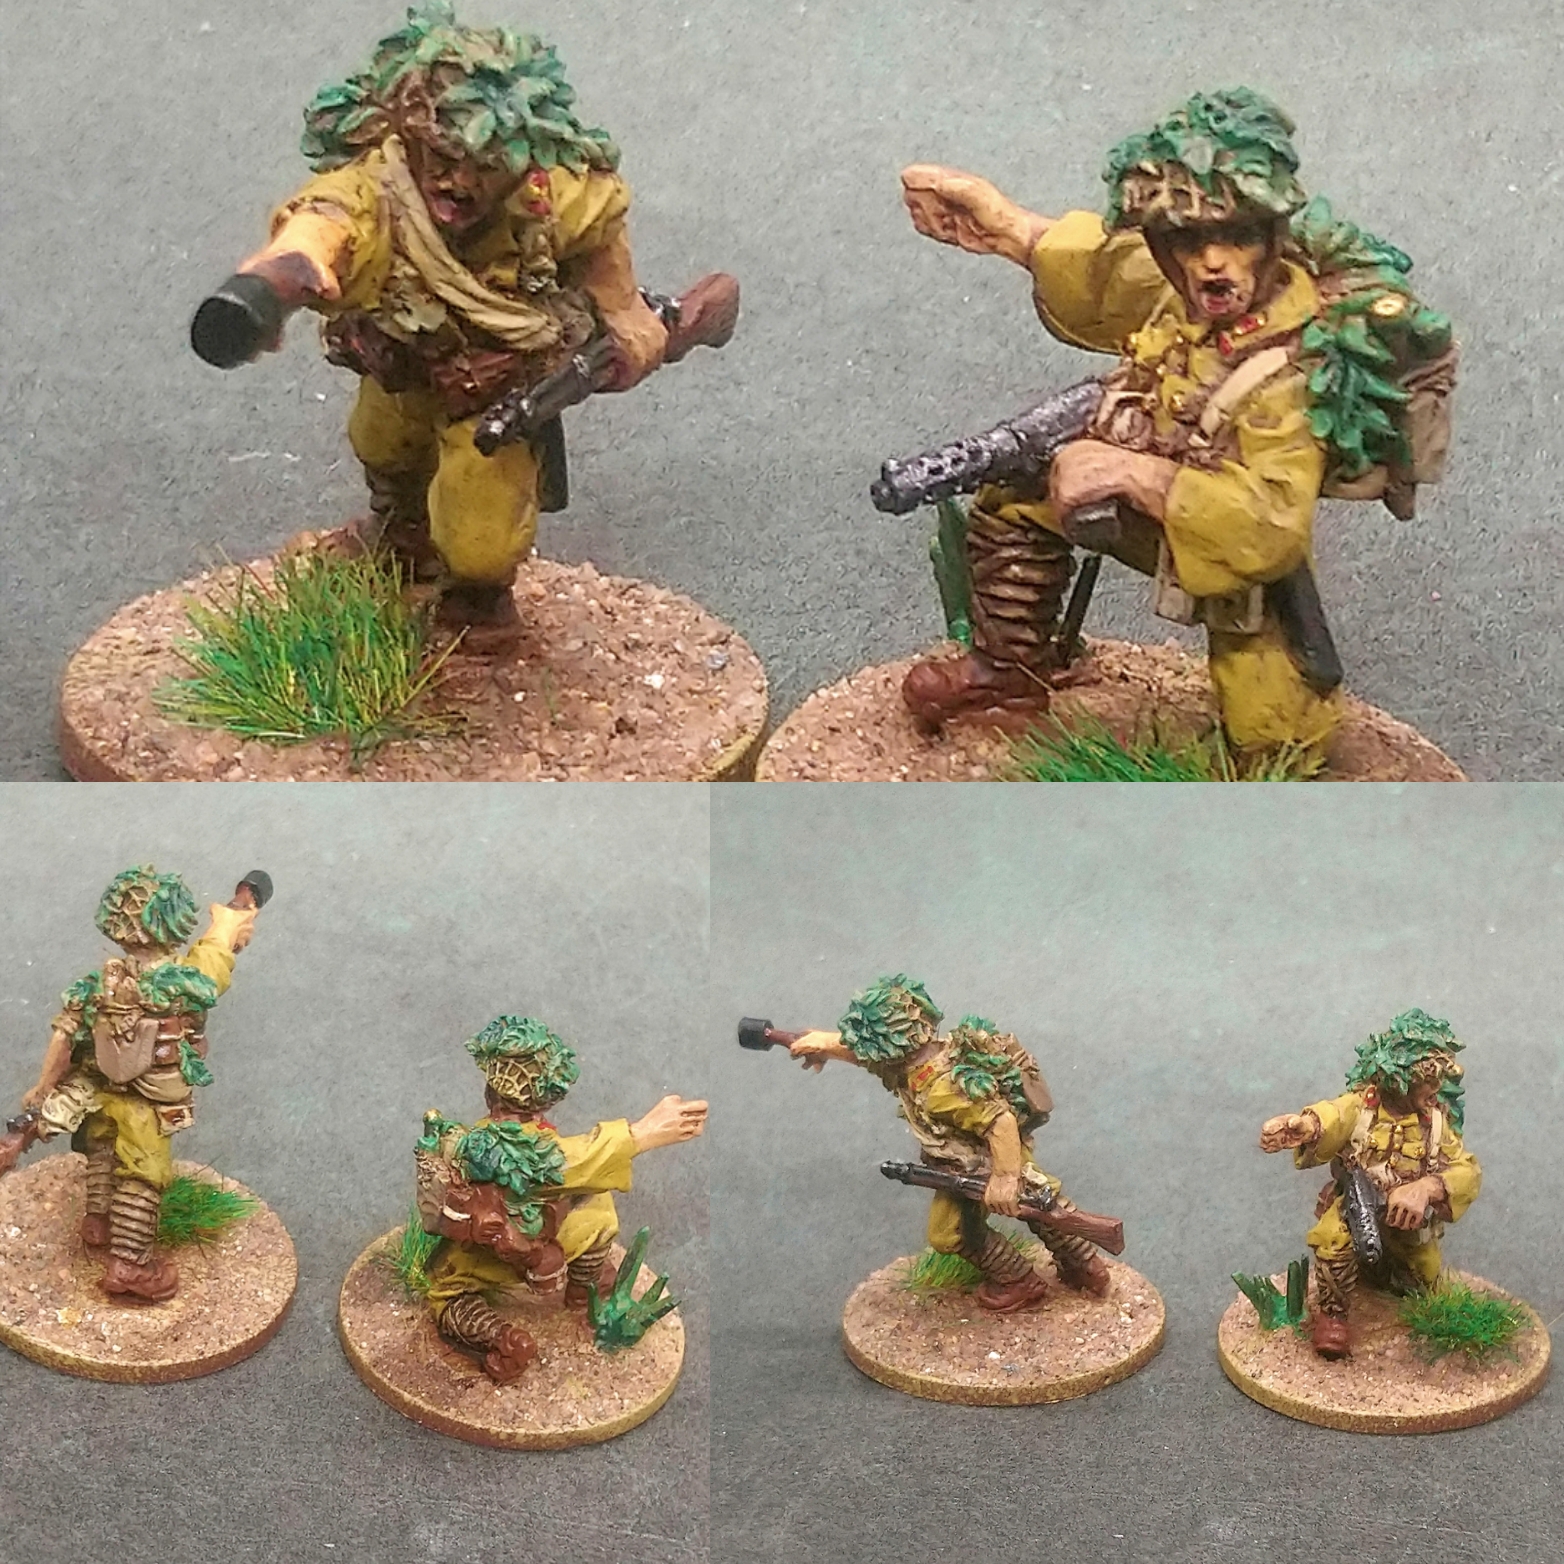
Jungle fighters.
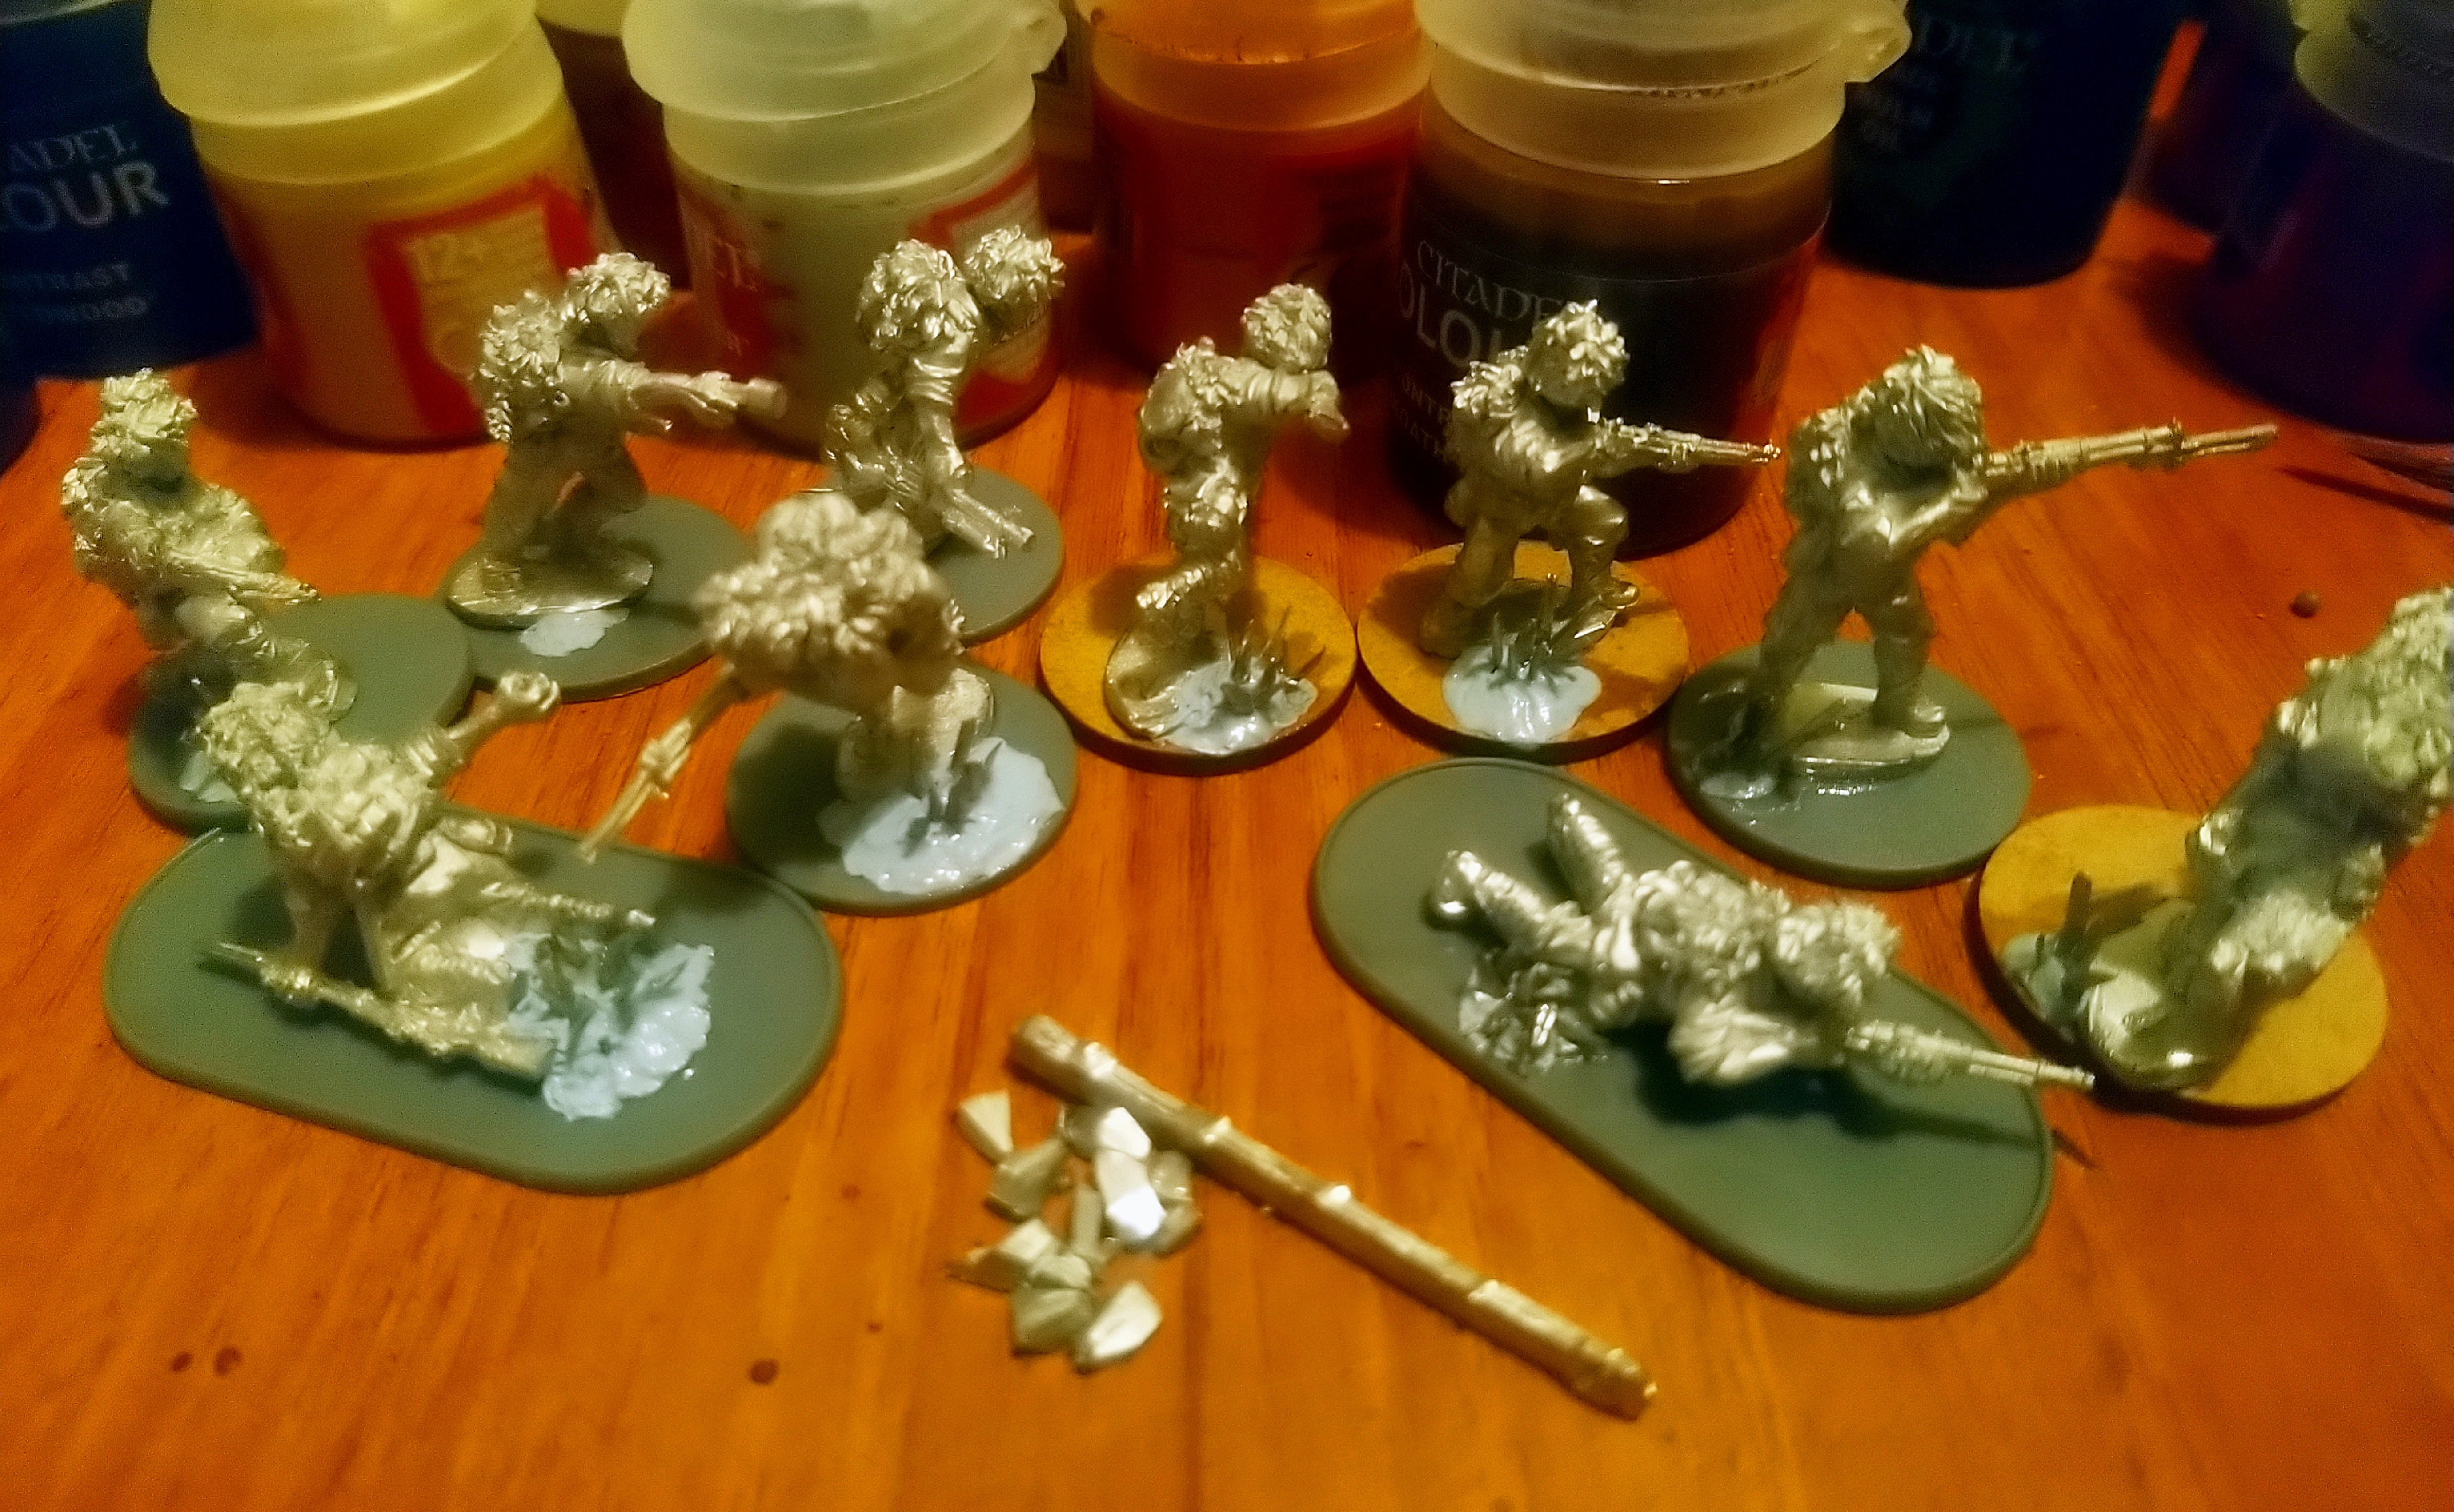
Started out by washing the metal to remove mold release agents. These can spoil the quality of the primer adhesion and gluing the minis together. These were mostly only two part minis. Being able to choose the heads is always nice with Warlord Games blisters like this.
As with an experiment on the MMG team’s base, I chose to use metal sprue shards, blue tac and superglue to make plants.
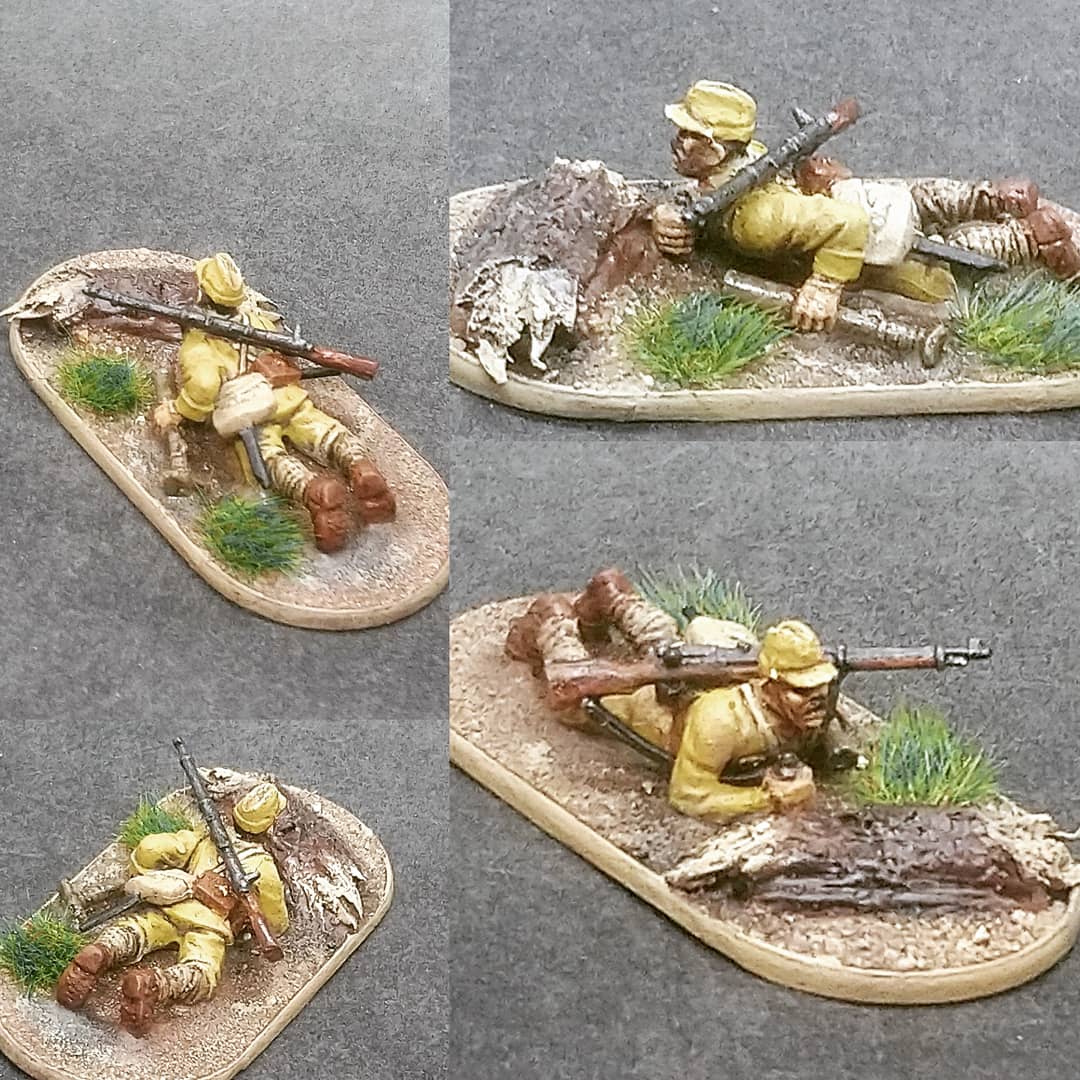
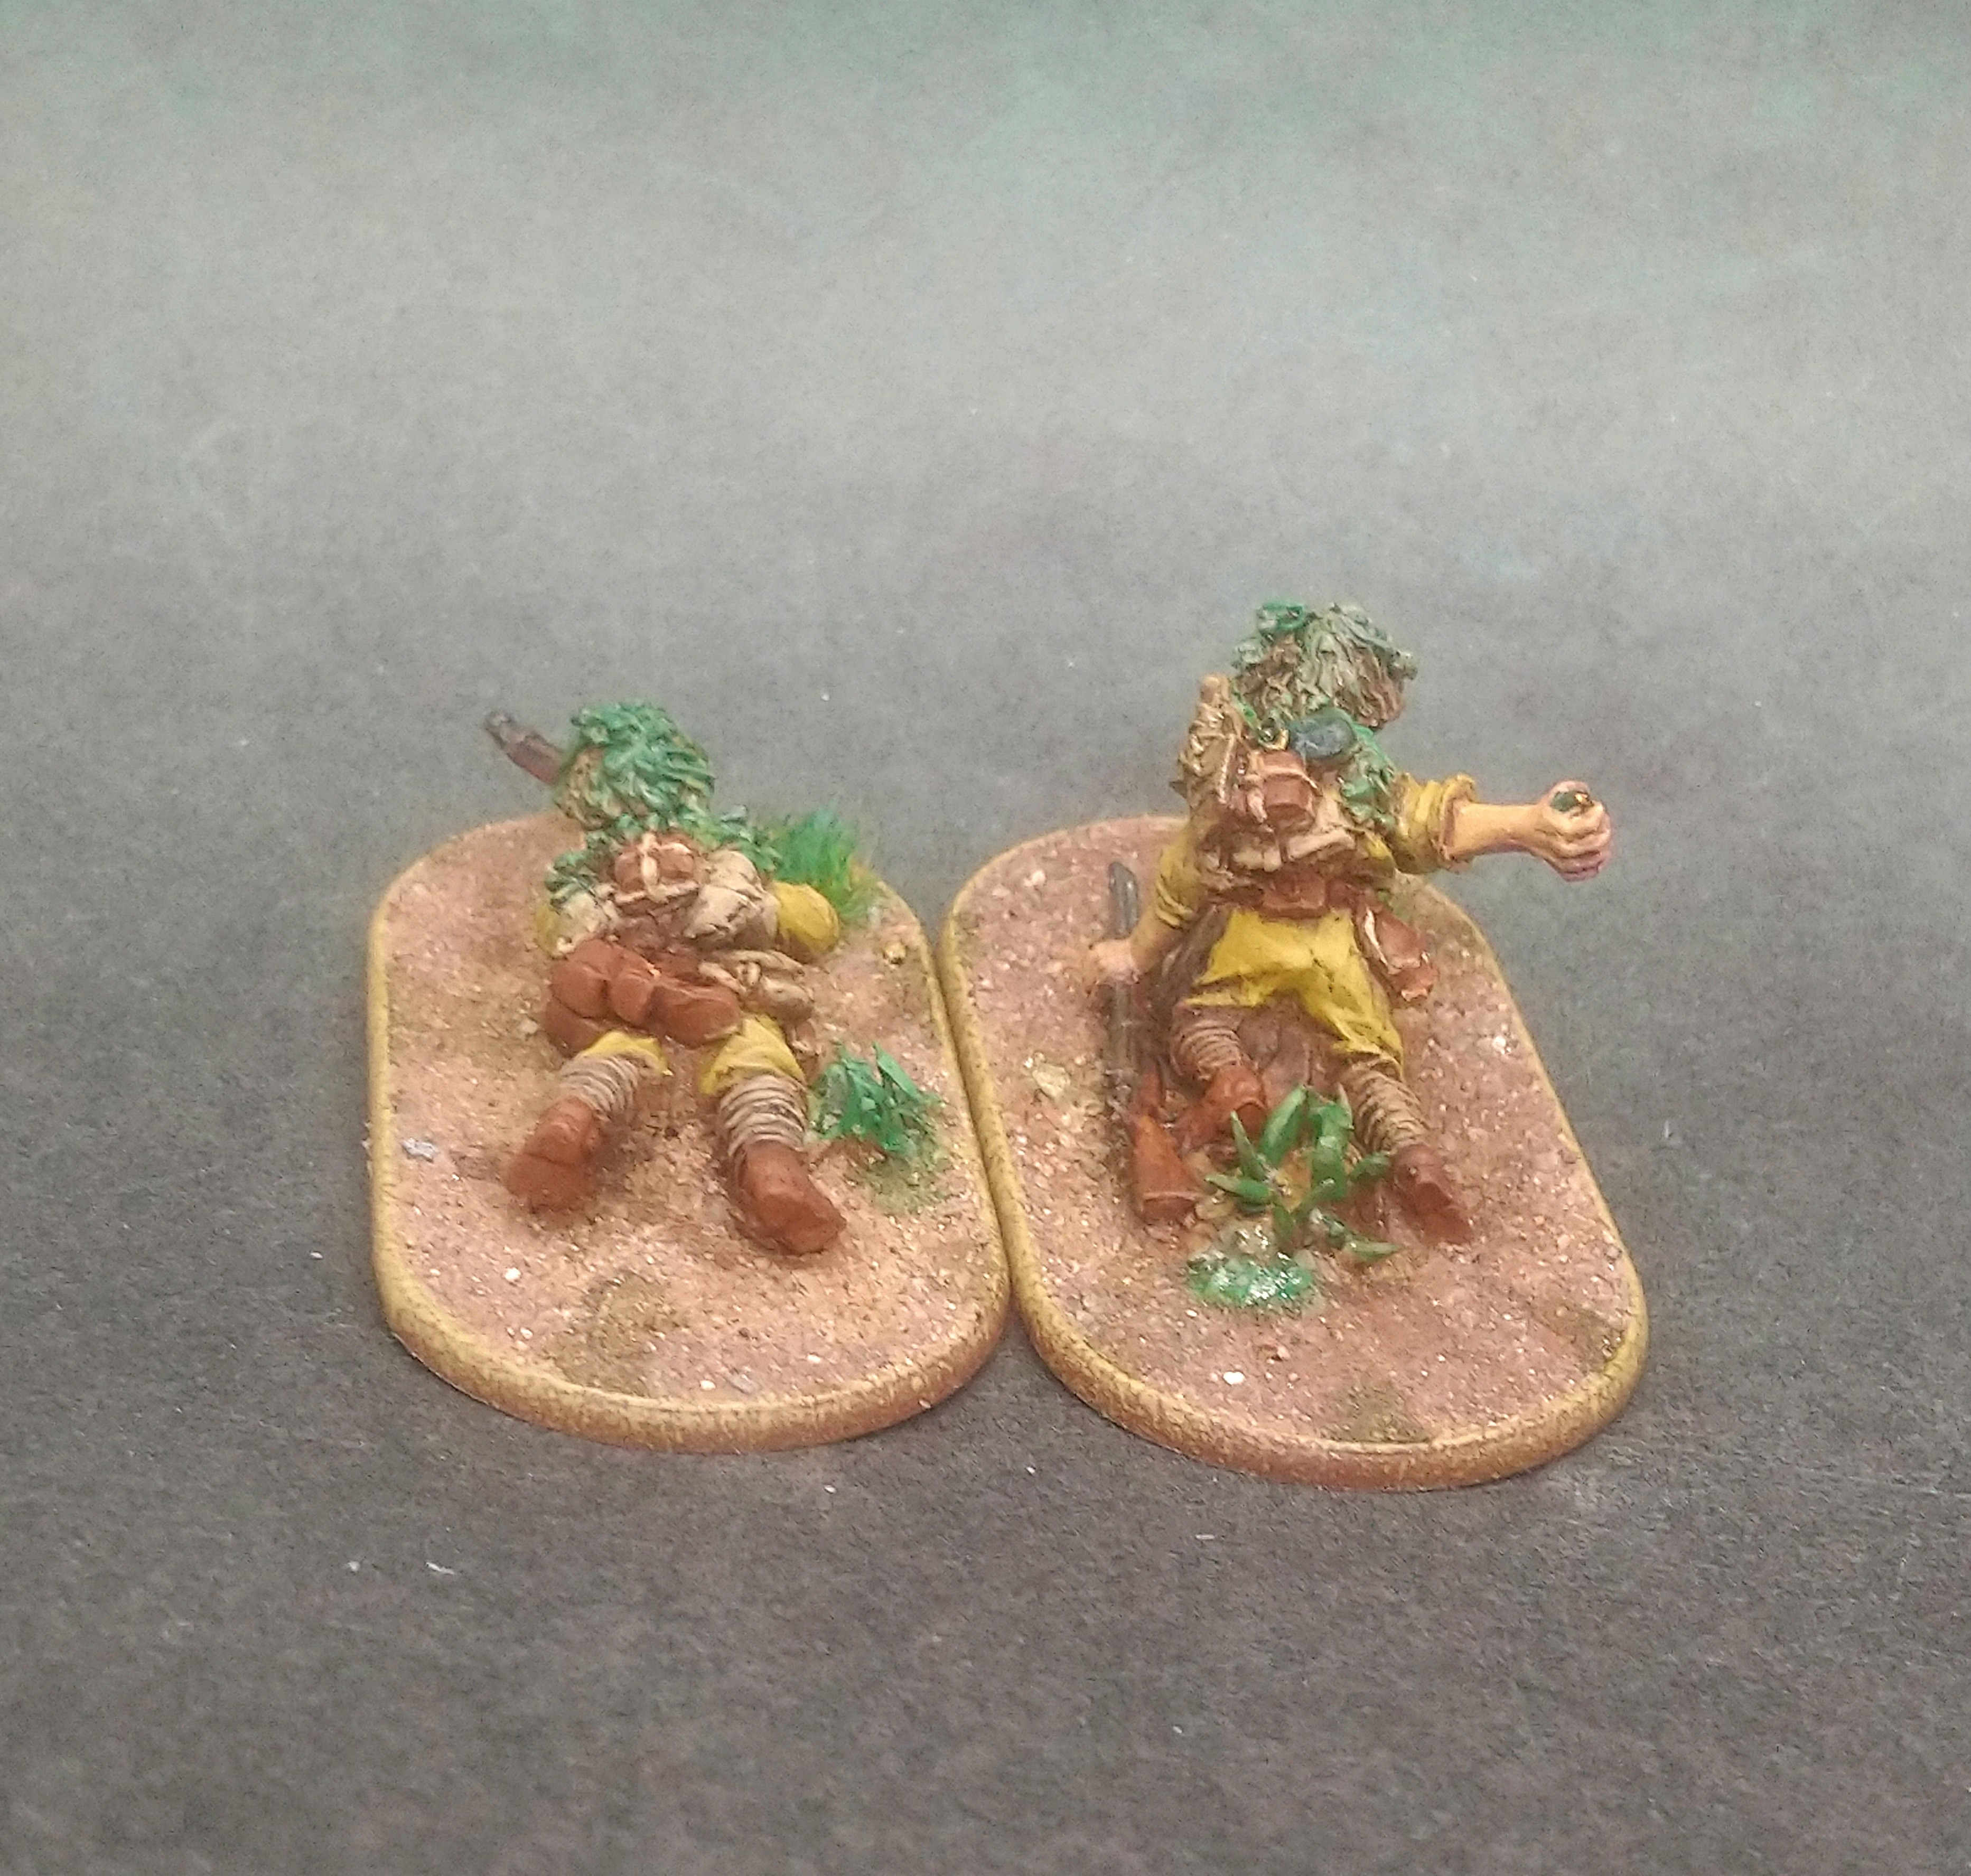
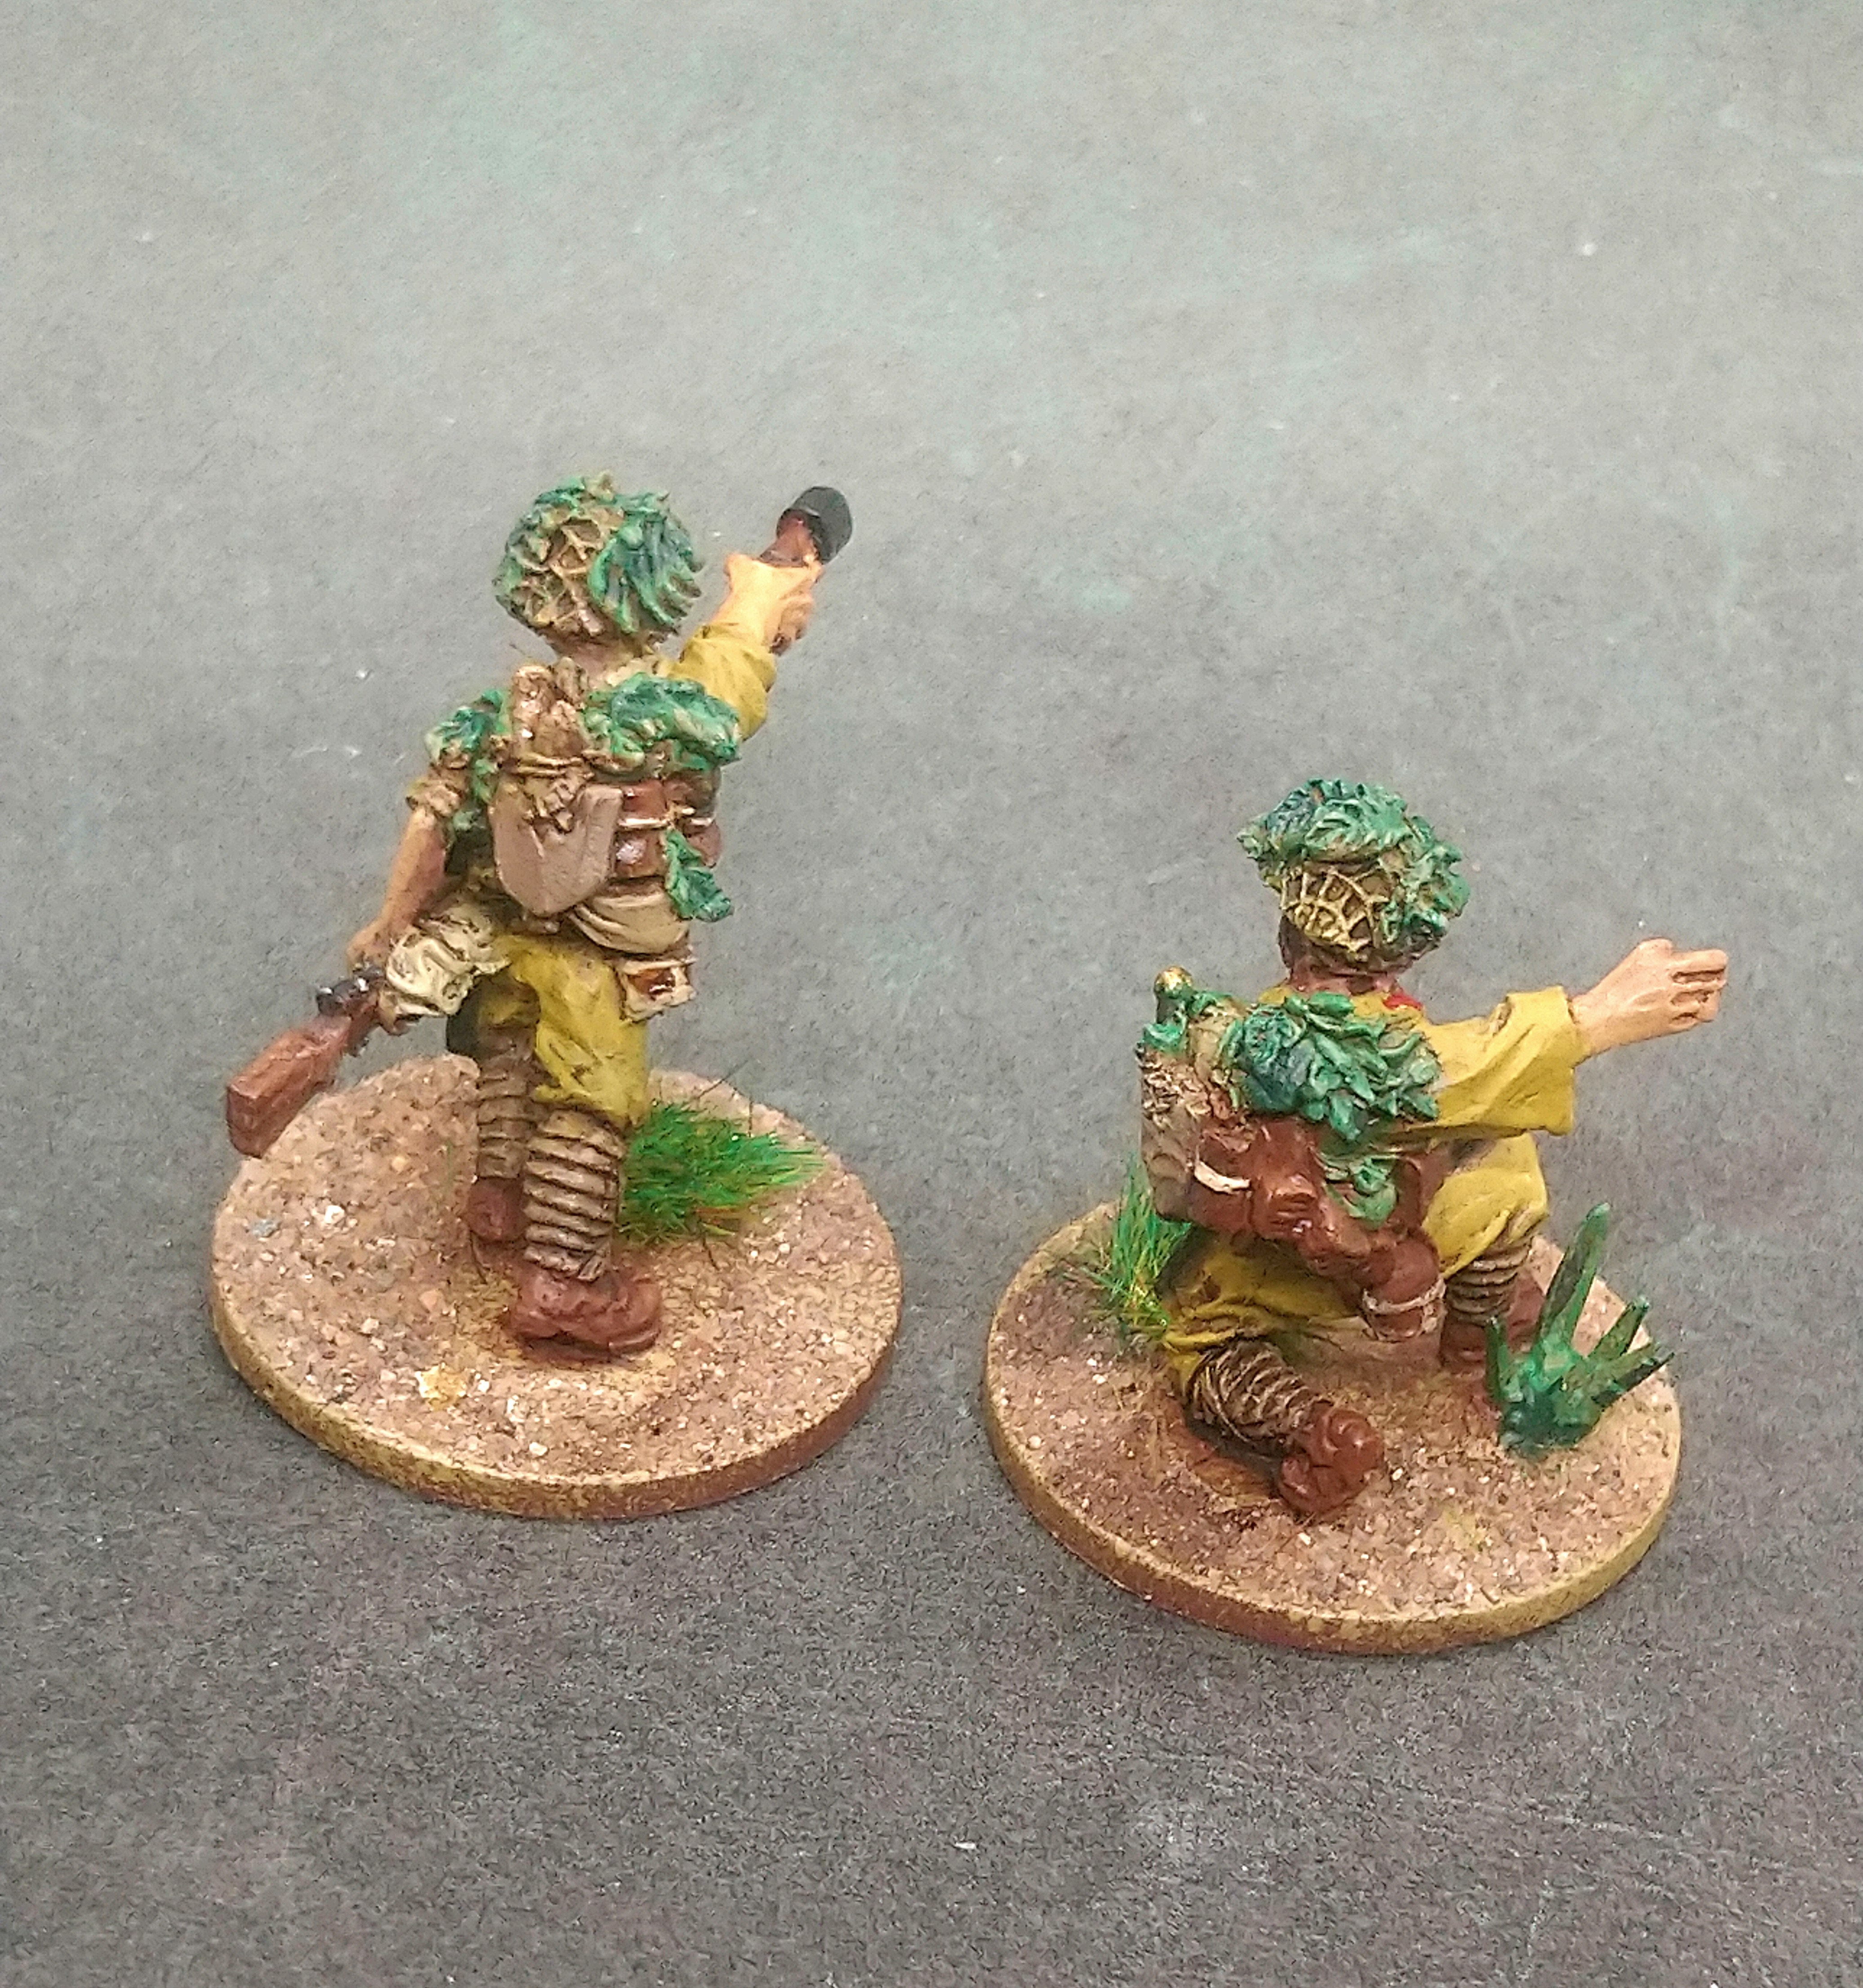
Jungle Fighters 2: Prone to attack
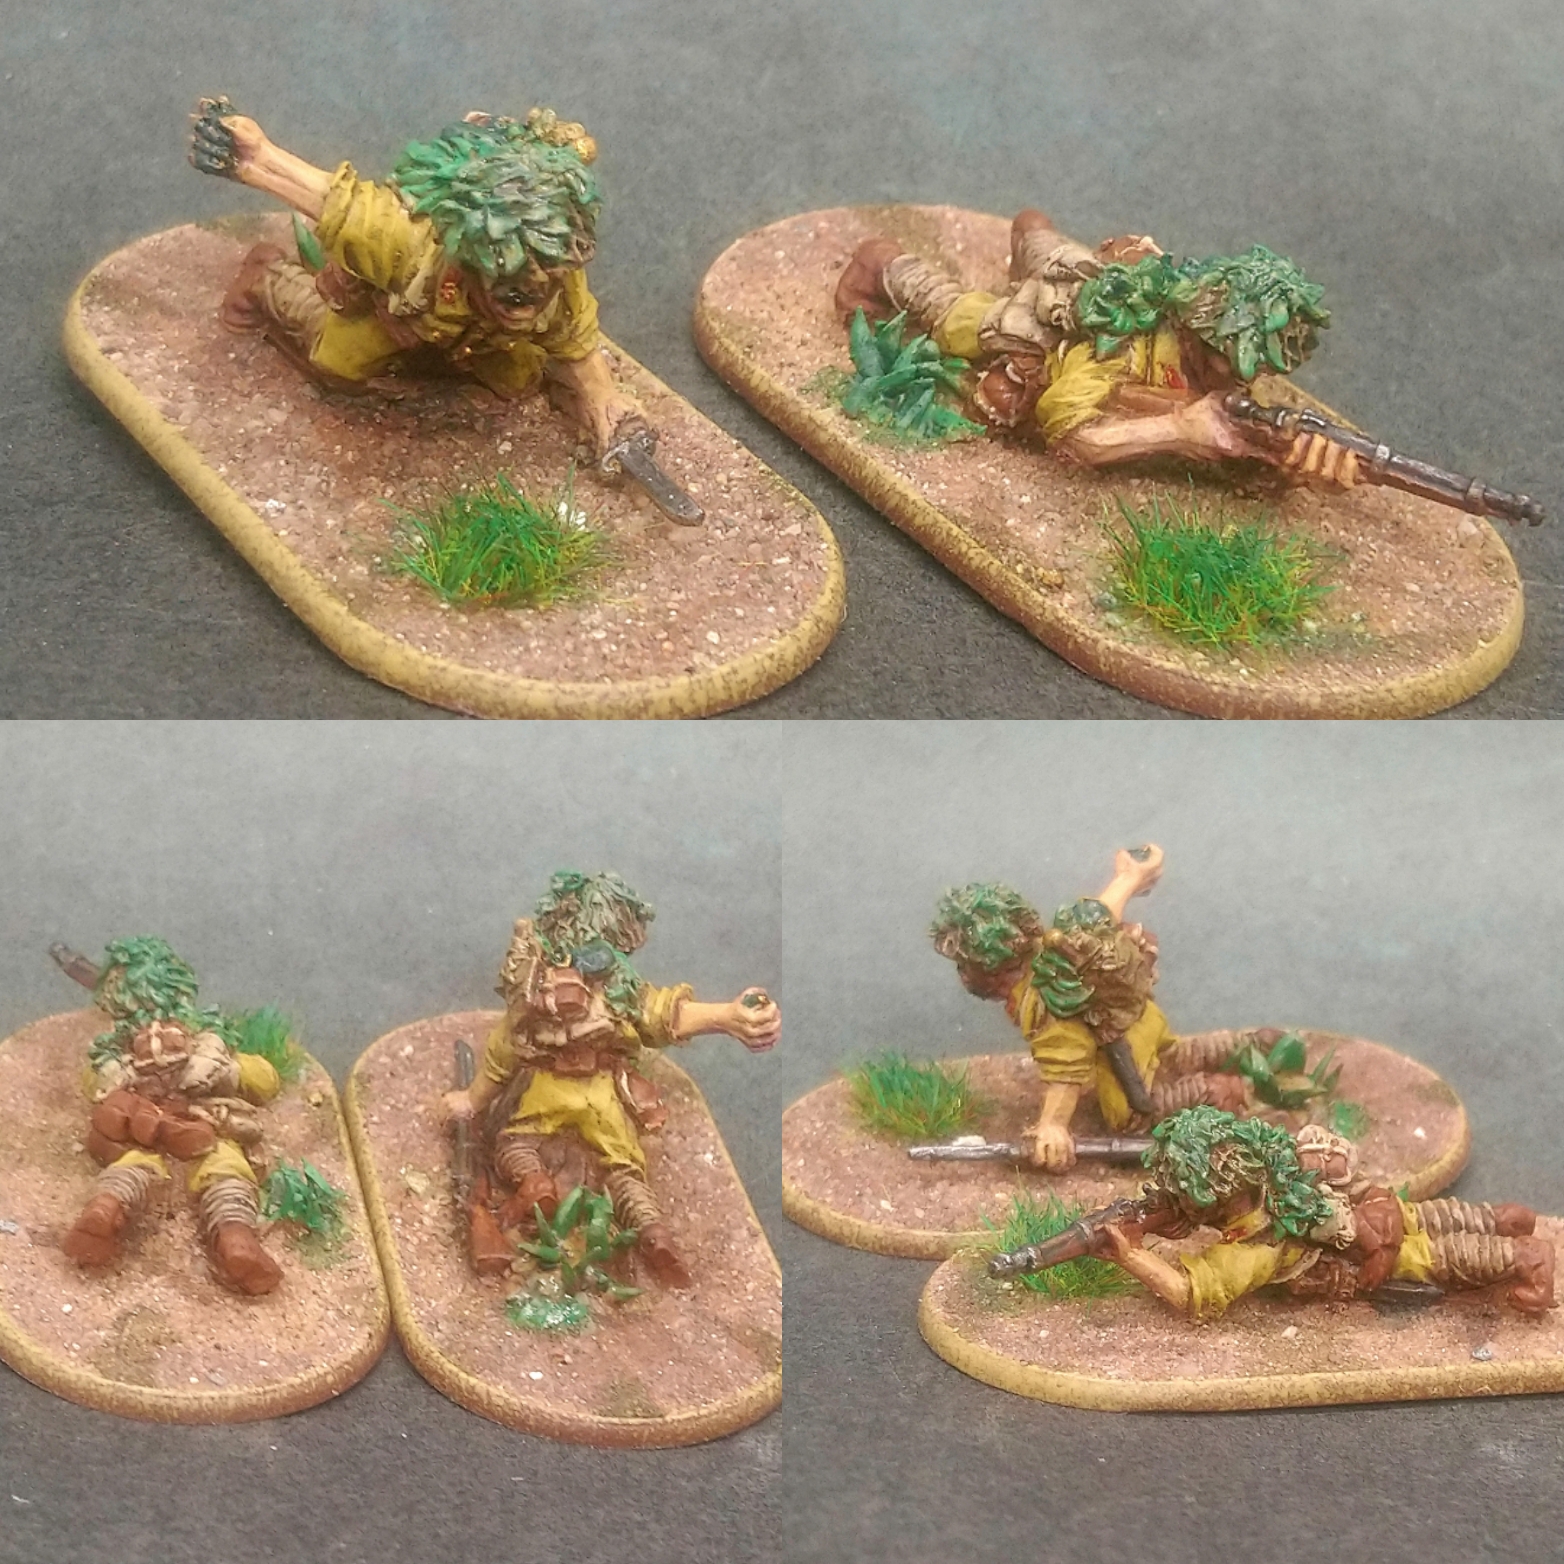
I think the metal shard plants have worked out OK.
Will be able judge easier once the whole squad is finished.
Thank you On Table Top

Took advantage of the Greenstuff World hobby sale on OnTableTop webstore.
Had my eye on this punch for a while. Will see if i can at least get some of this on all the bases as a theme for the whole force.
Also got some pigment powders to try for the first time.

Jungle Fighters 4: Welcome to the Jungle
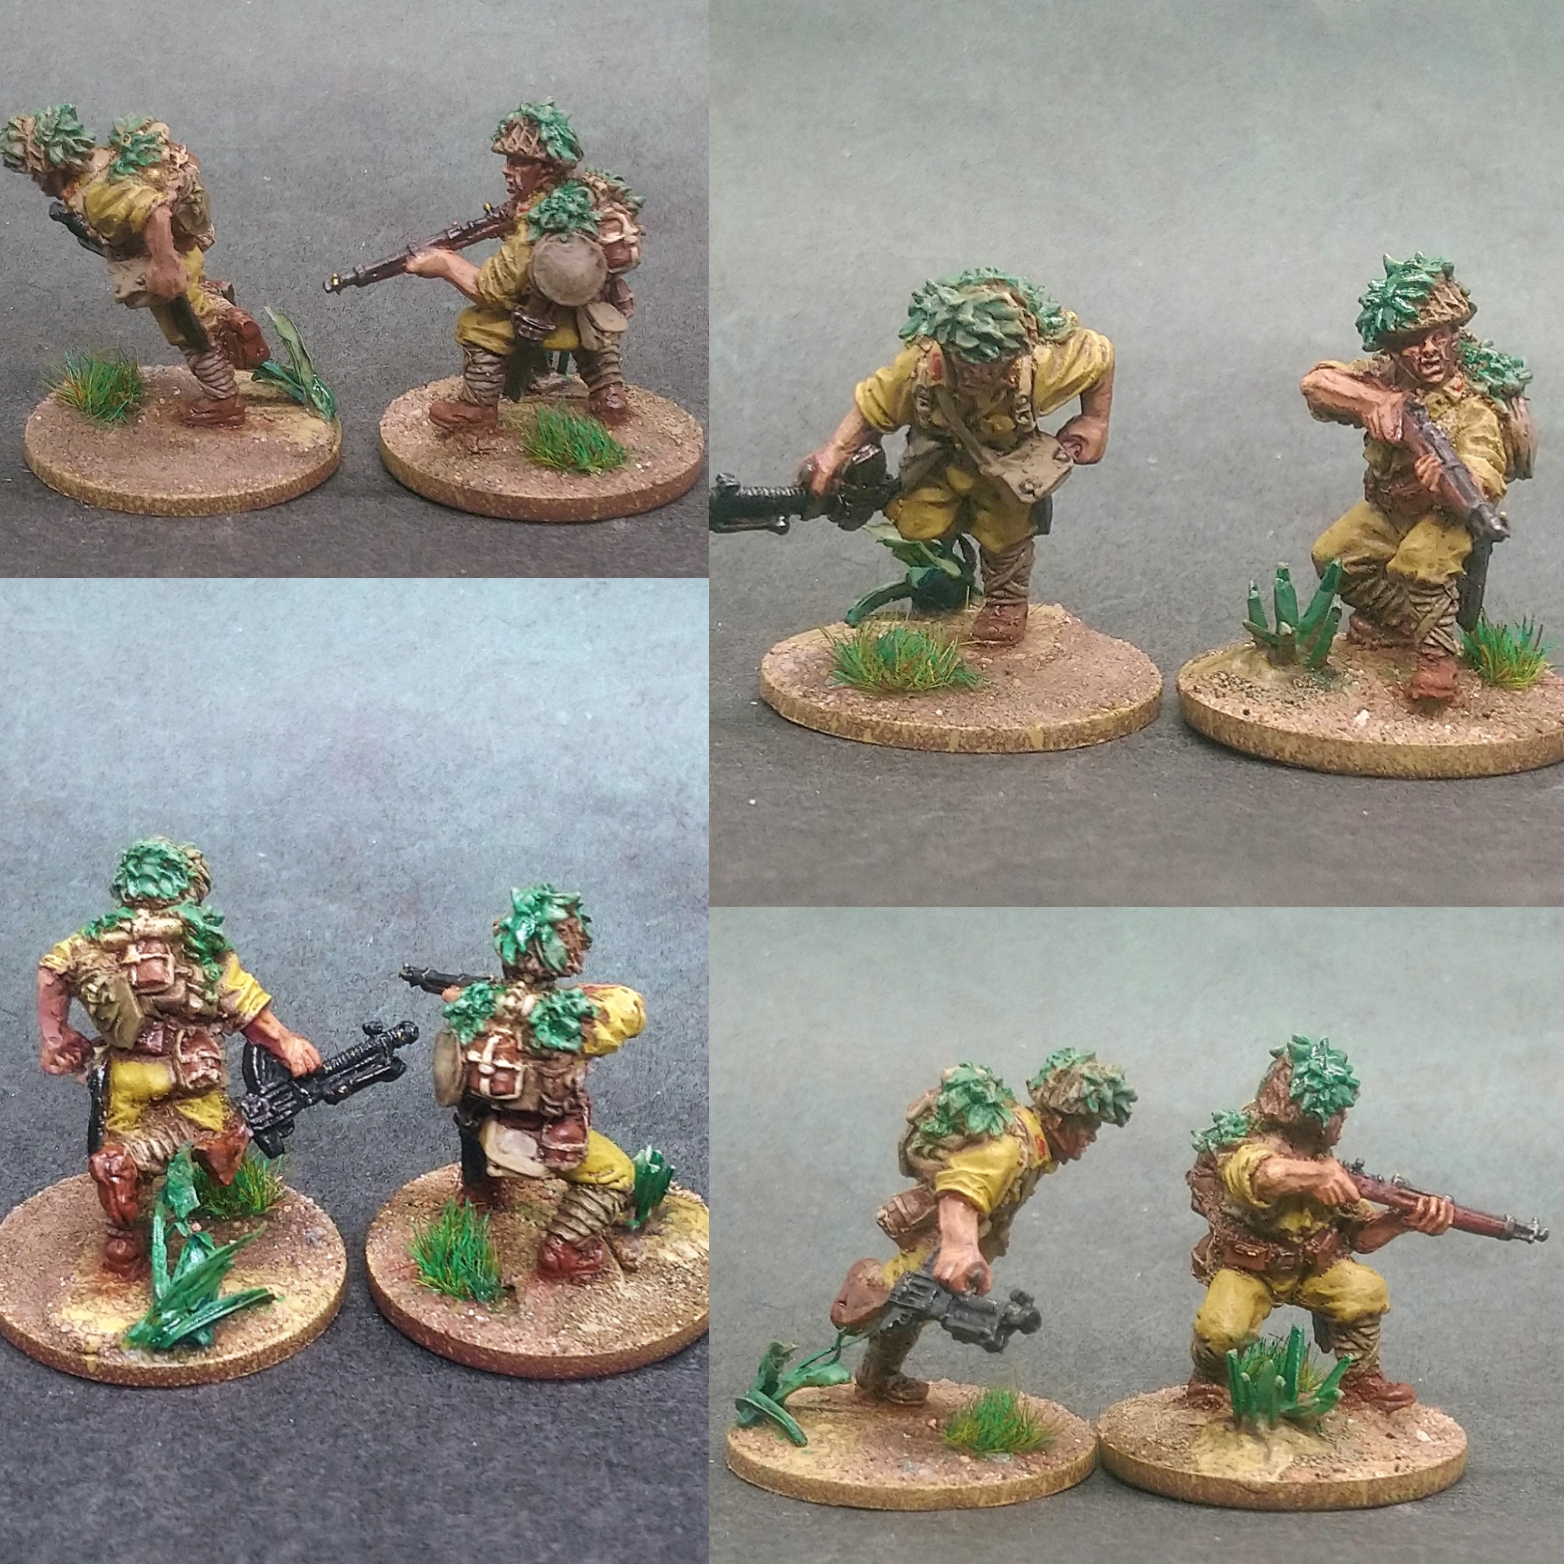
Almost finished my 10 man team and finished this LMG displacing and rifleman mini today. On the base of the LMG i have used dried up paint from the lids of Citadel paint pots as leaves for a tropical plant.
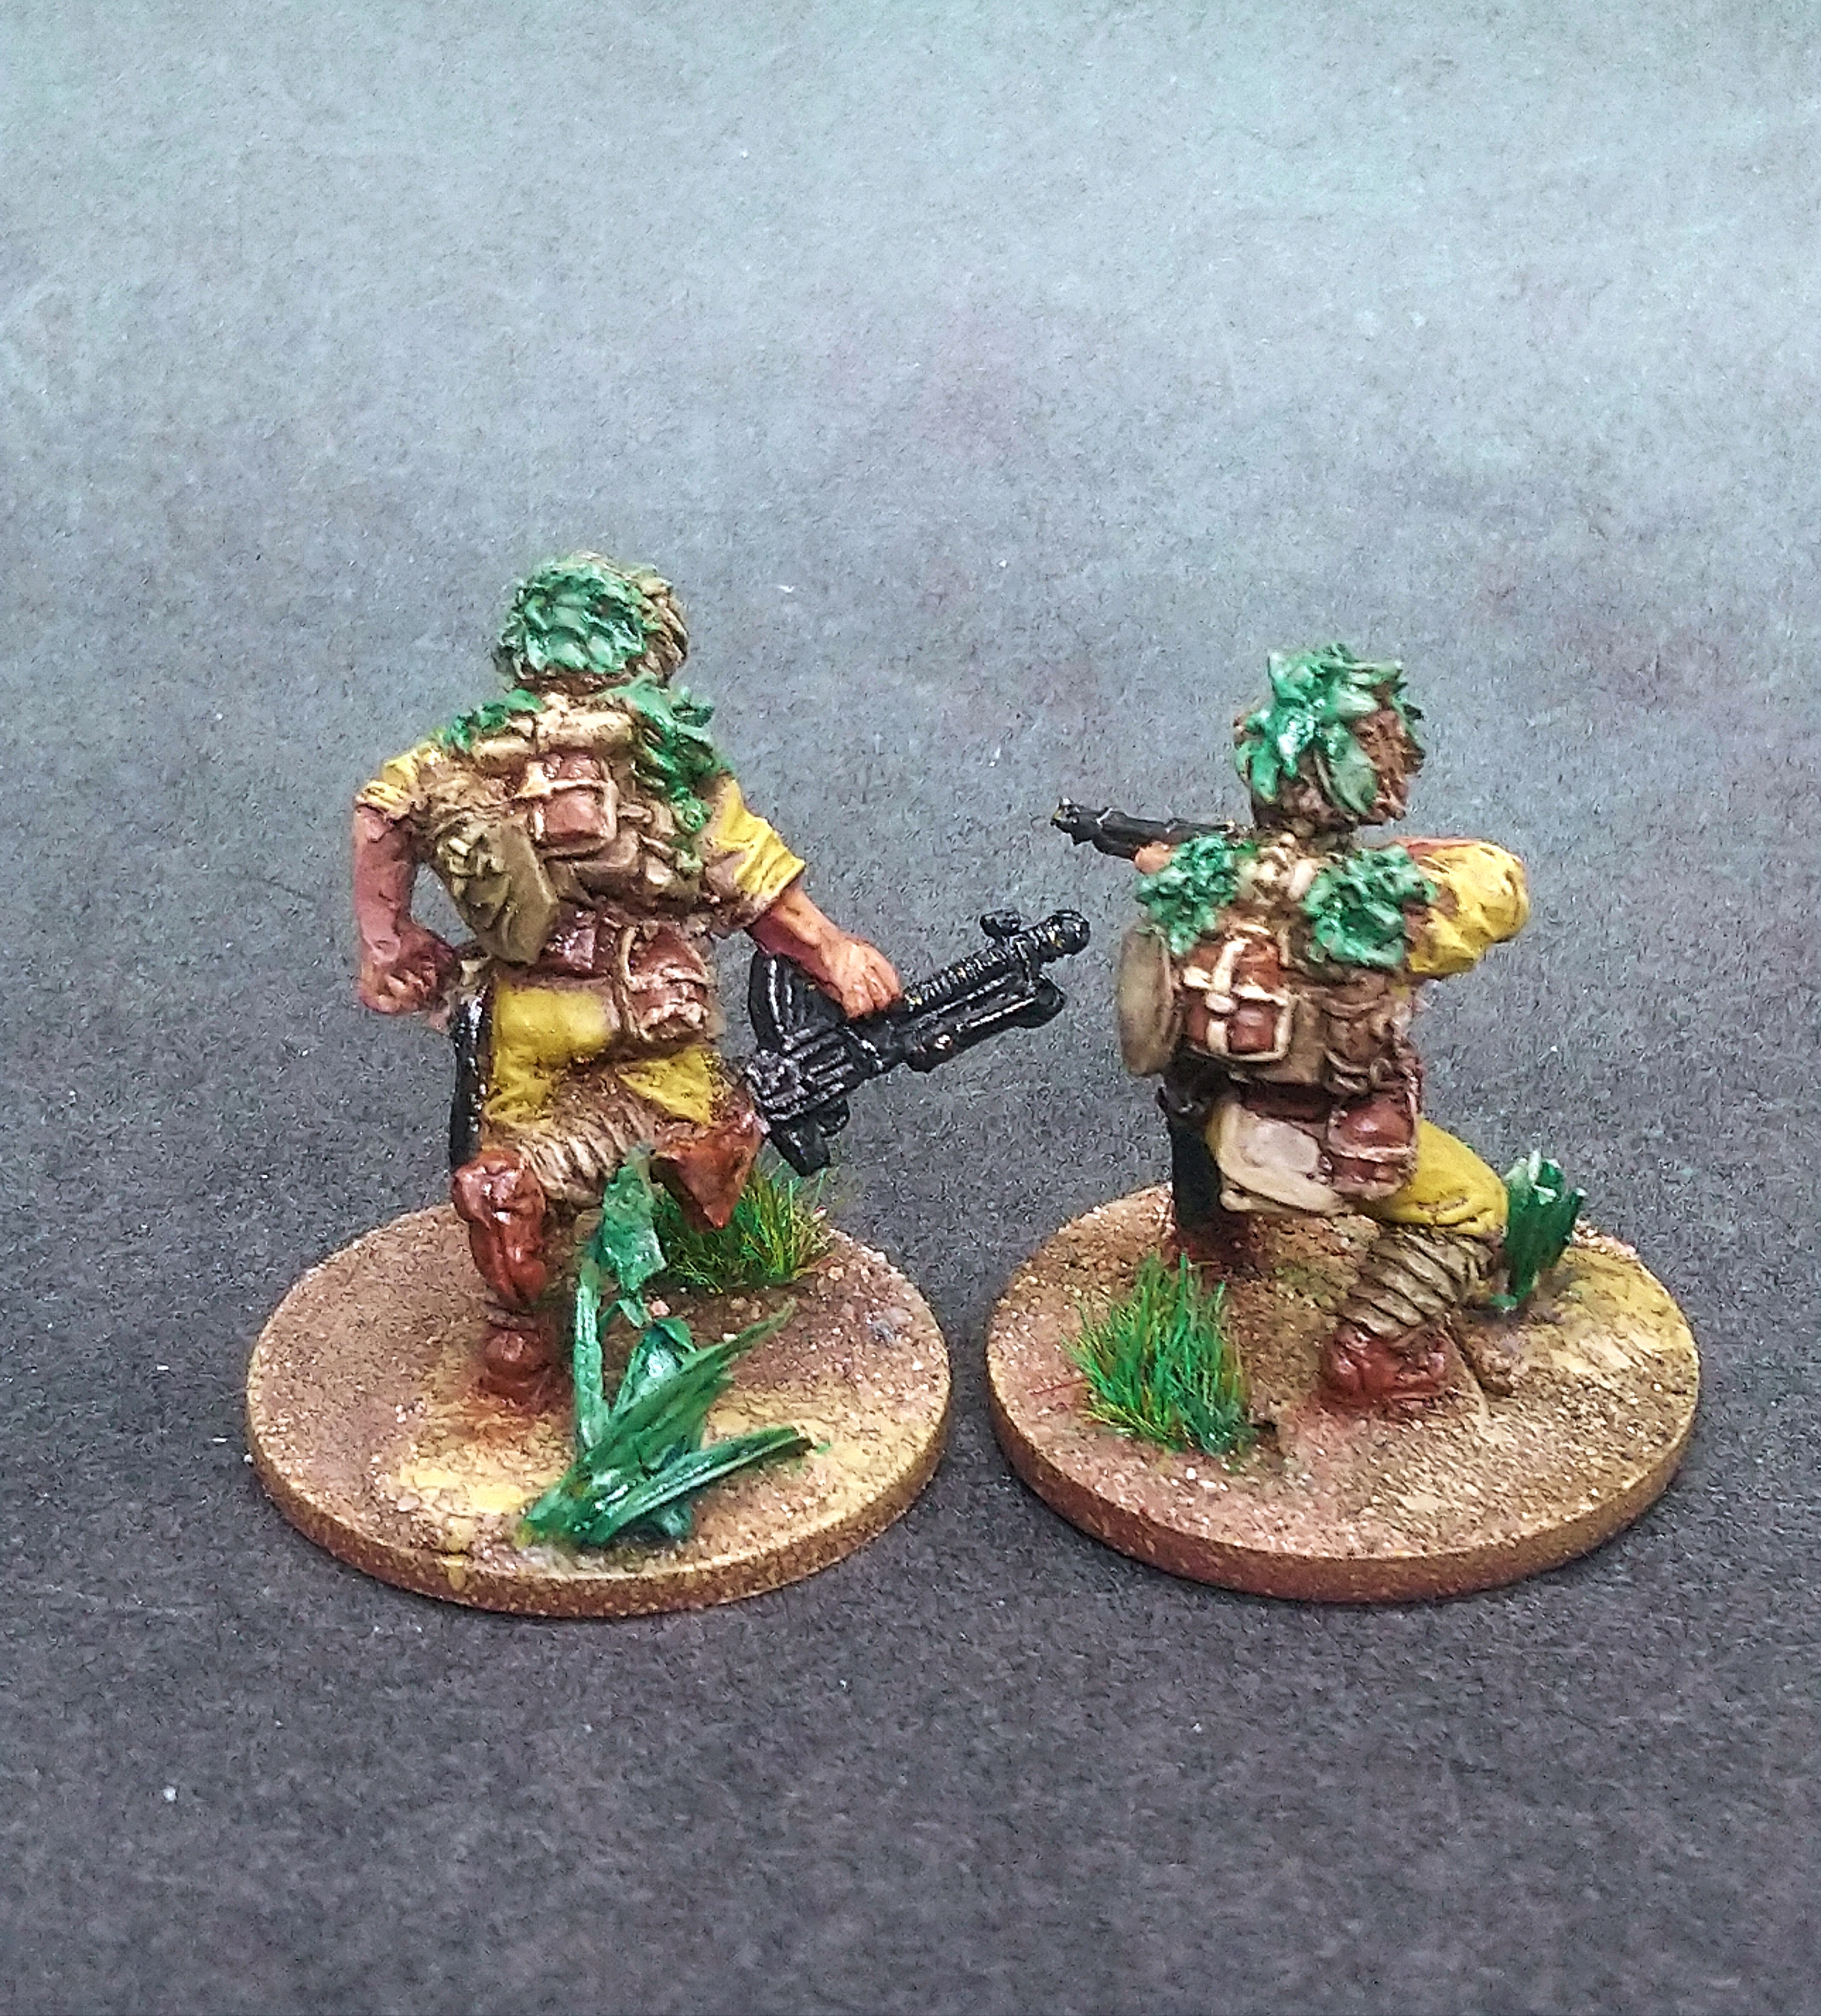
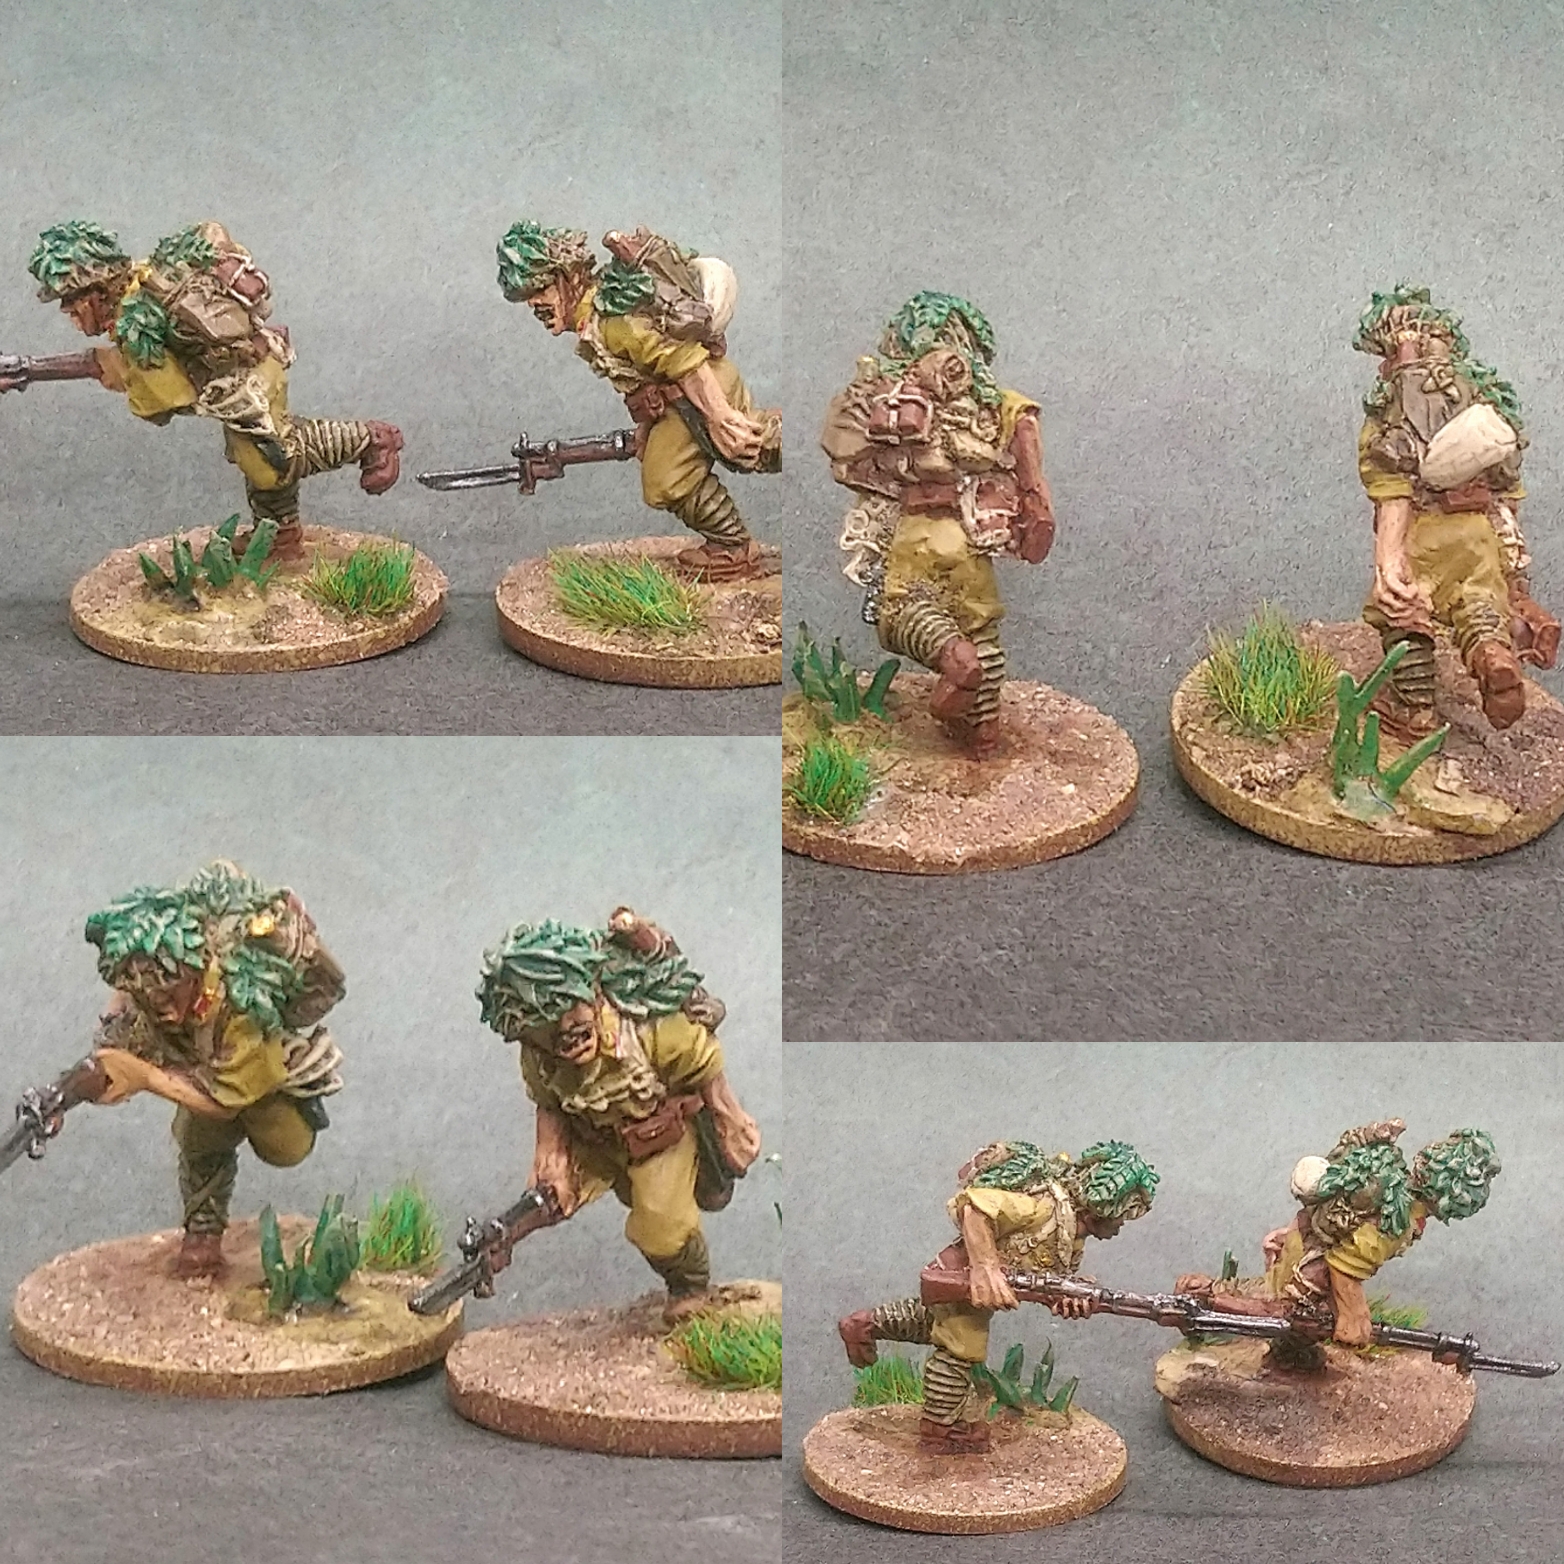
Jungle Fighters 5: Assignment Miami Beach...

Finished my last 4 guys to complete the Jungle Fighters veteran squad of ten.
Need to start building a TON of minis for my huge regular squads. This may end up being a mistake tactically but will plough on anyway. If i have spare minis i will make another LMG and NCO above what I currently have planned, because i feel at some point i will divide the two huge squads into three smaller ones.

Punching out a Monster
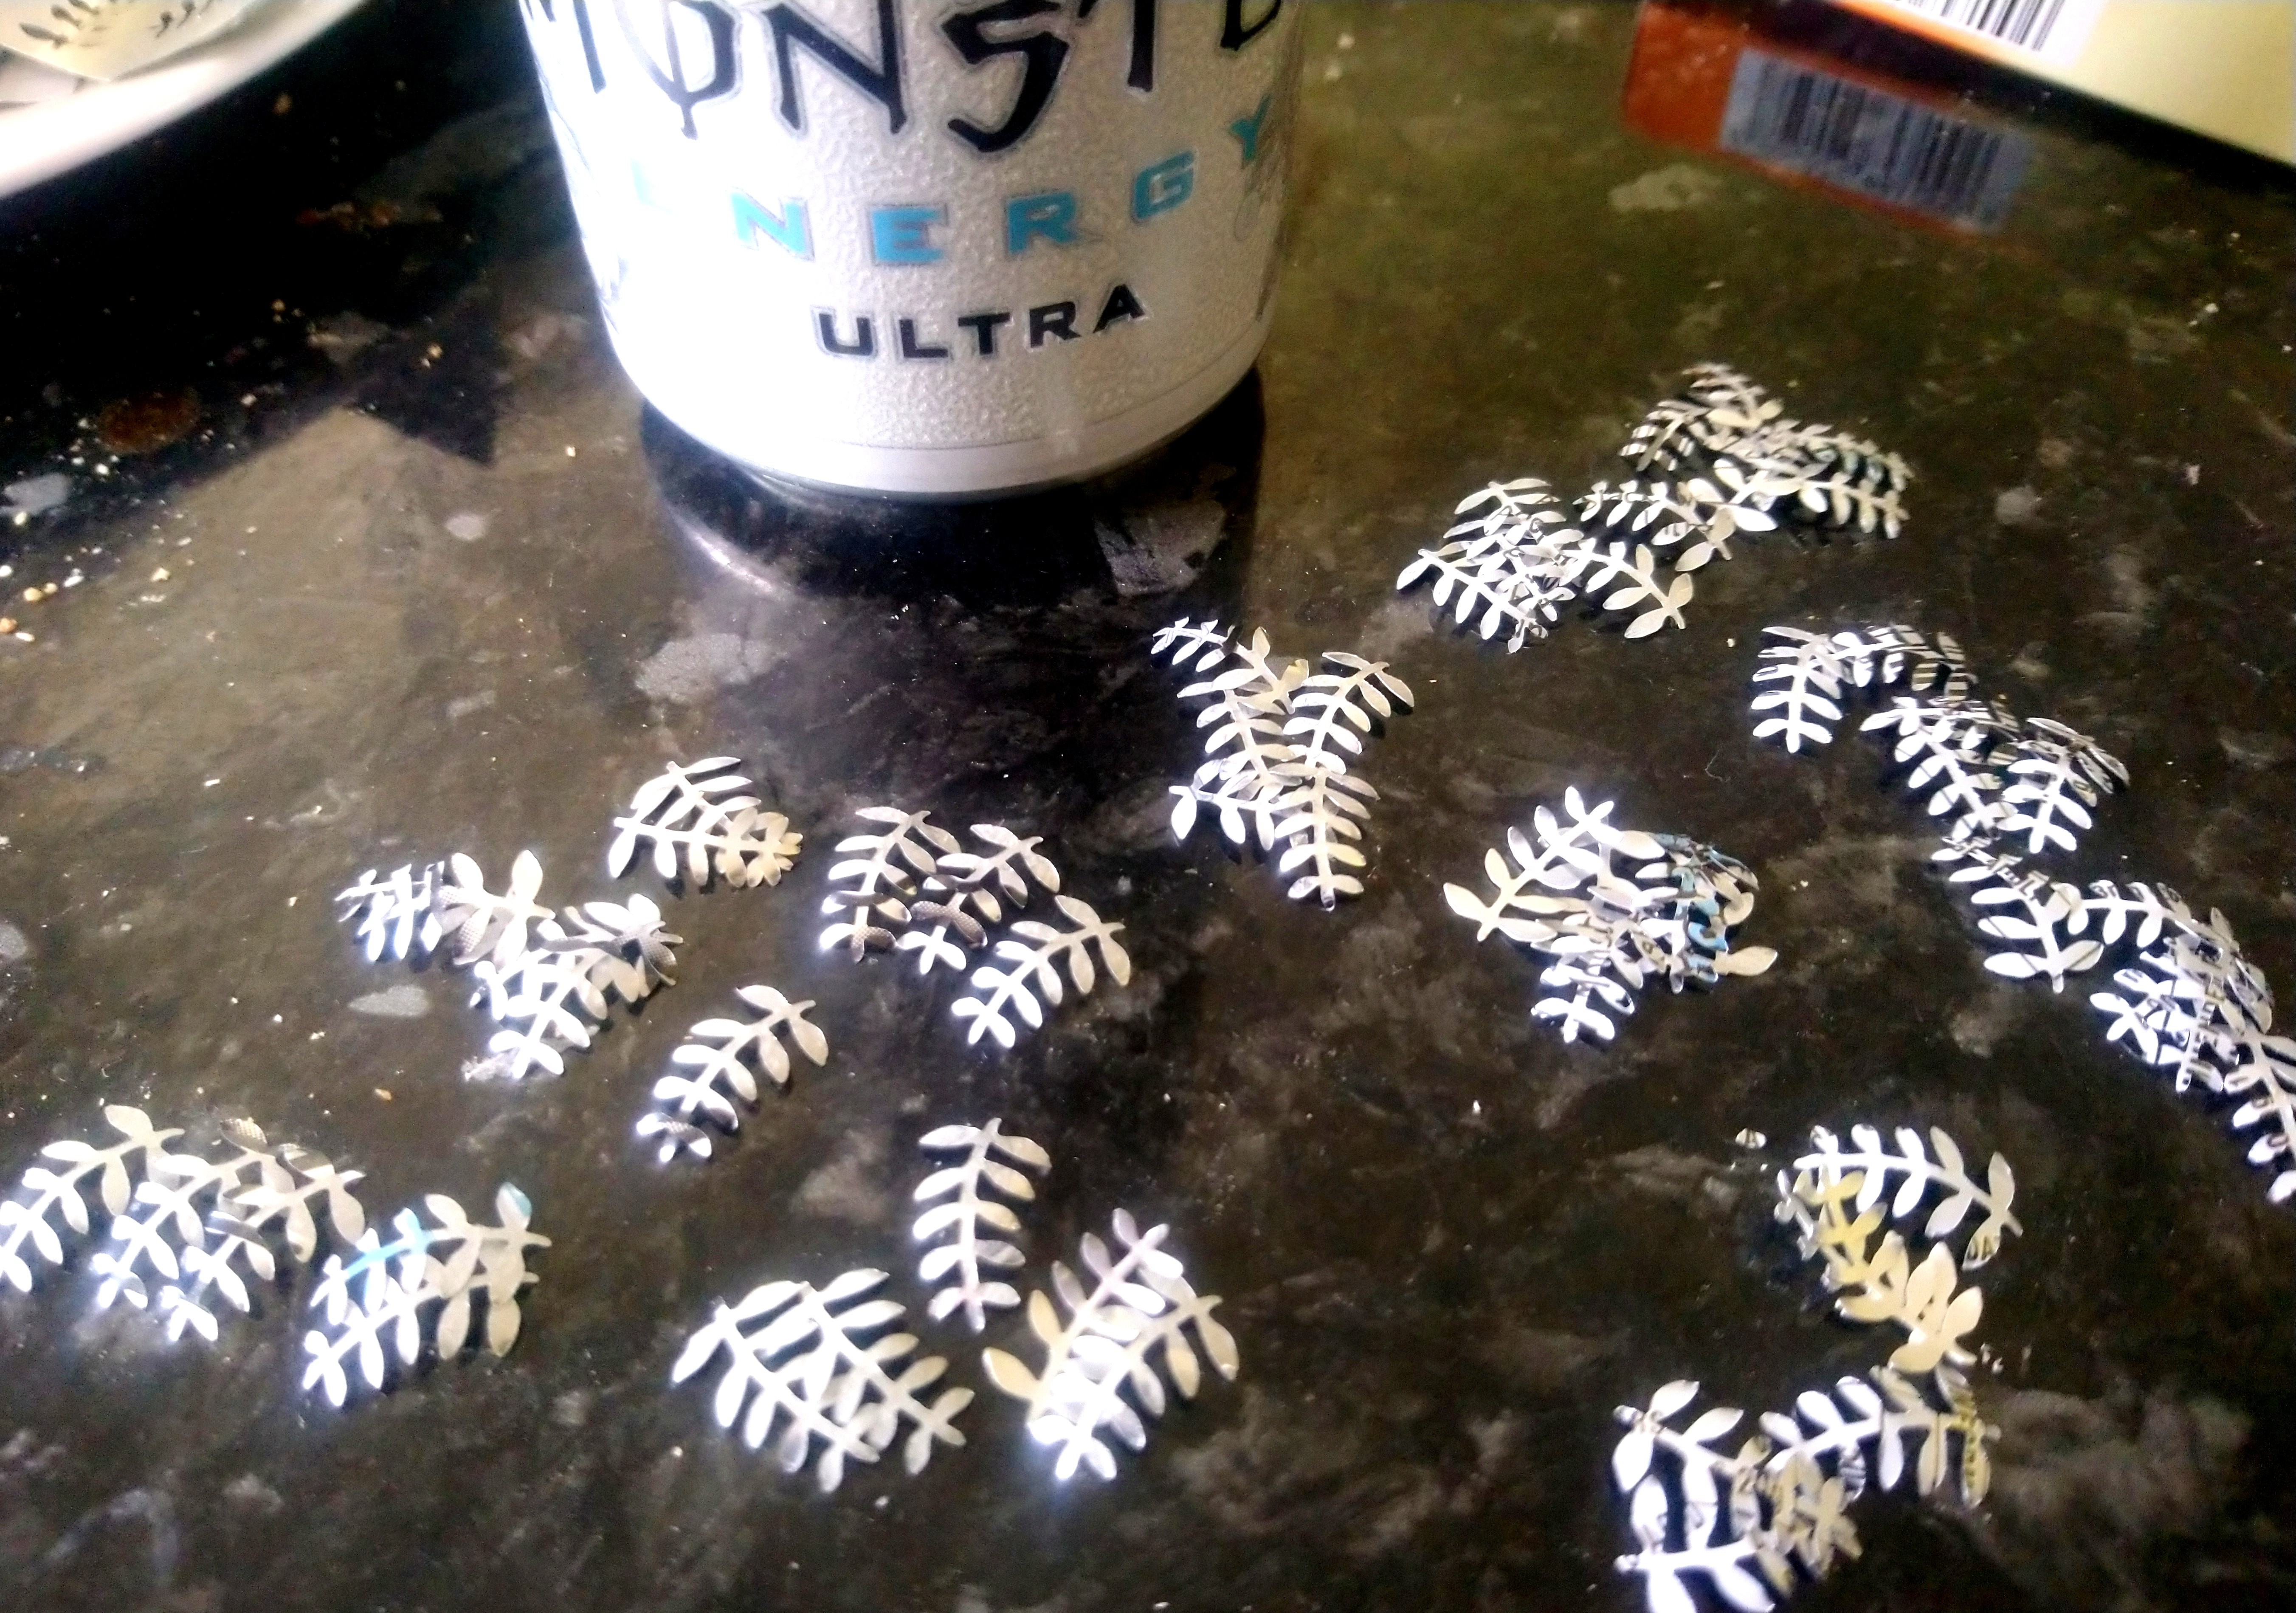
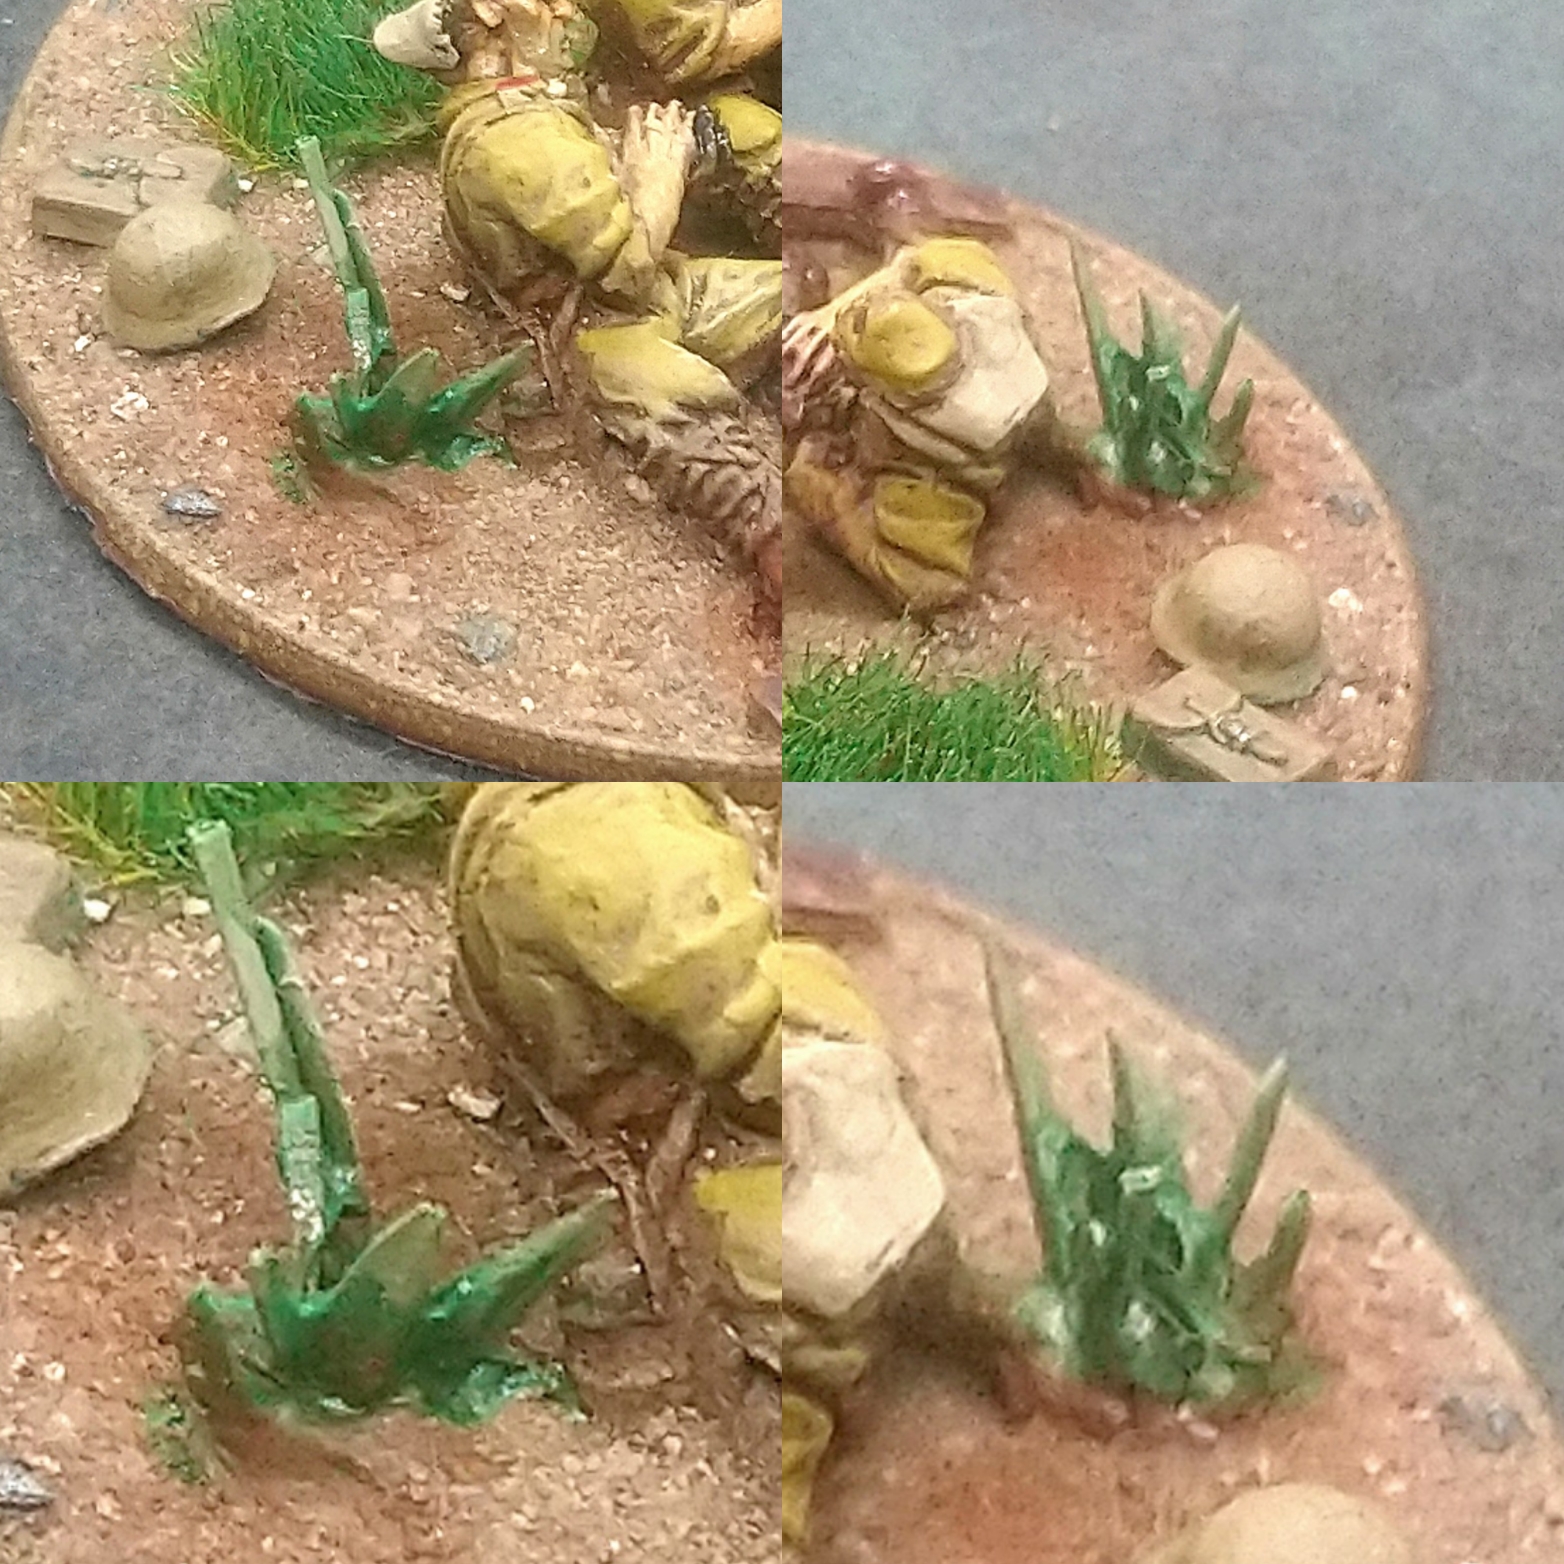
Armed with my new Greenstuff World branch punch i dissected a can of Monster and punched out about 55 metal branches for basing. Time again i would probably be able to get 80 or more out of it, but i was very wary / cautious of opening an aluminium can and it was my first time using the punch.
I found it easier to punch through from the outside of the can inward for some reason. I also found it uncomfortable to push the punch down with the heel of my thumb and palm. I found pressing down hard with one thumb and then adding extra pressure with the other thumb on top was the best technique for me. I also took the precaution of using a work glove for extra grip and avoiding getting cut on some jagged edges made when initially breaking into the can.
I laid down globs of blu tac to stand the branches in for ease of priming. I used Death Guard Green primer spray.
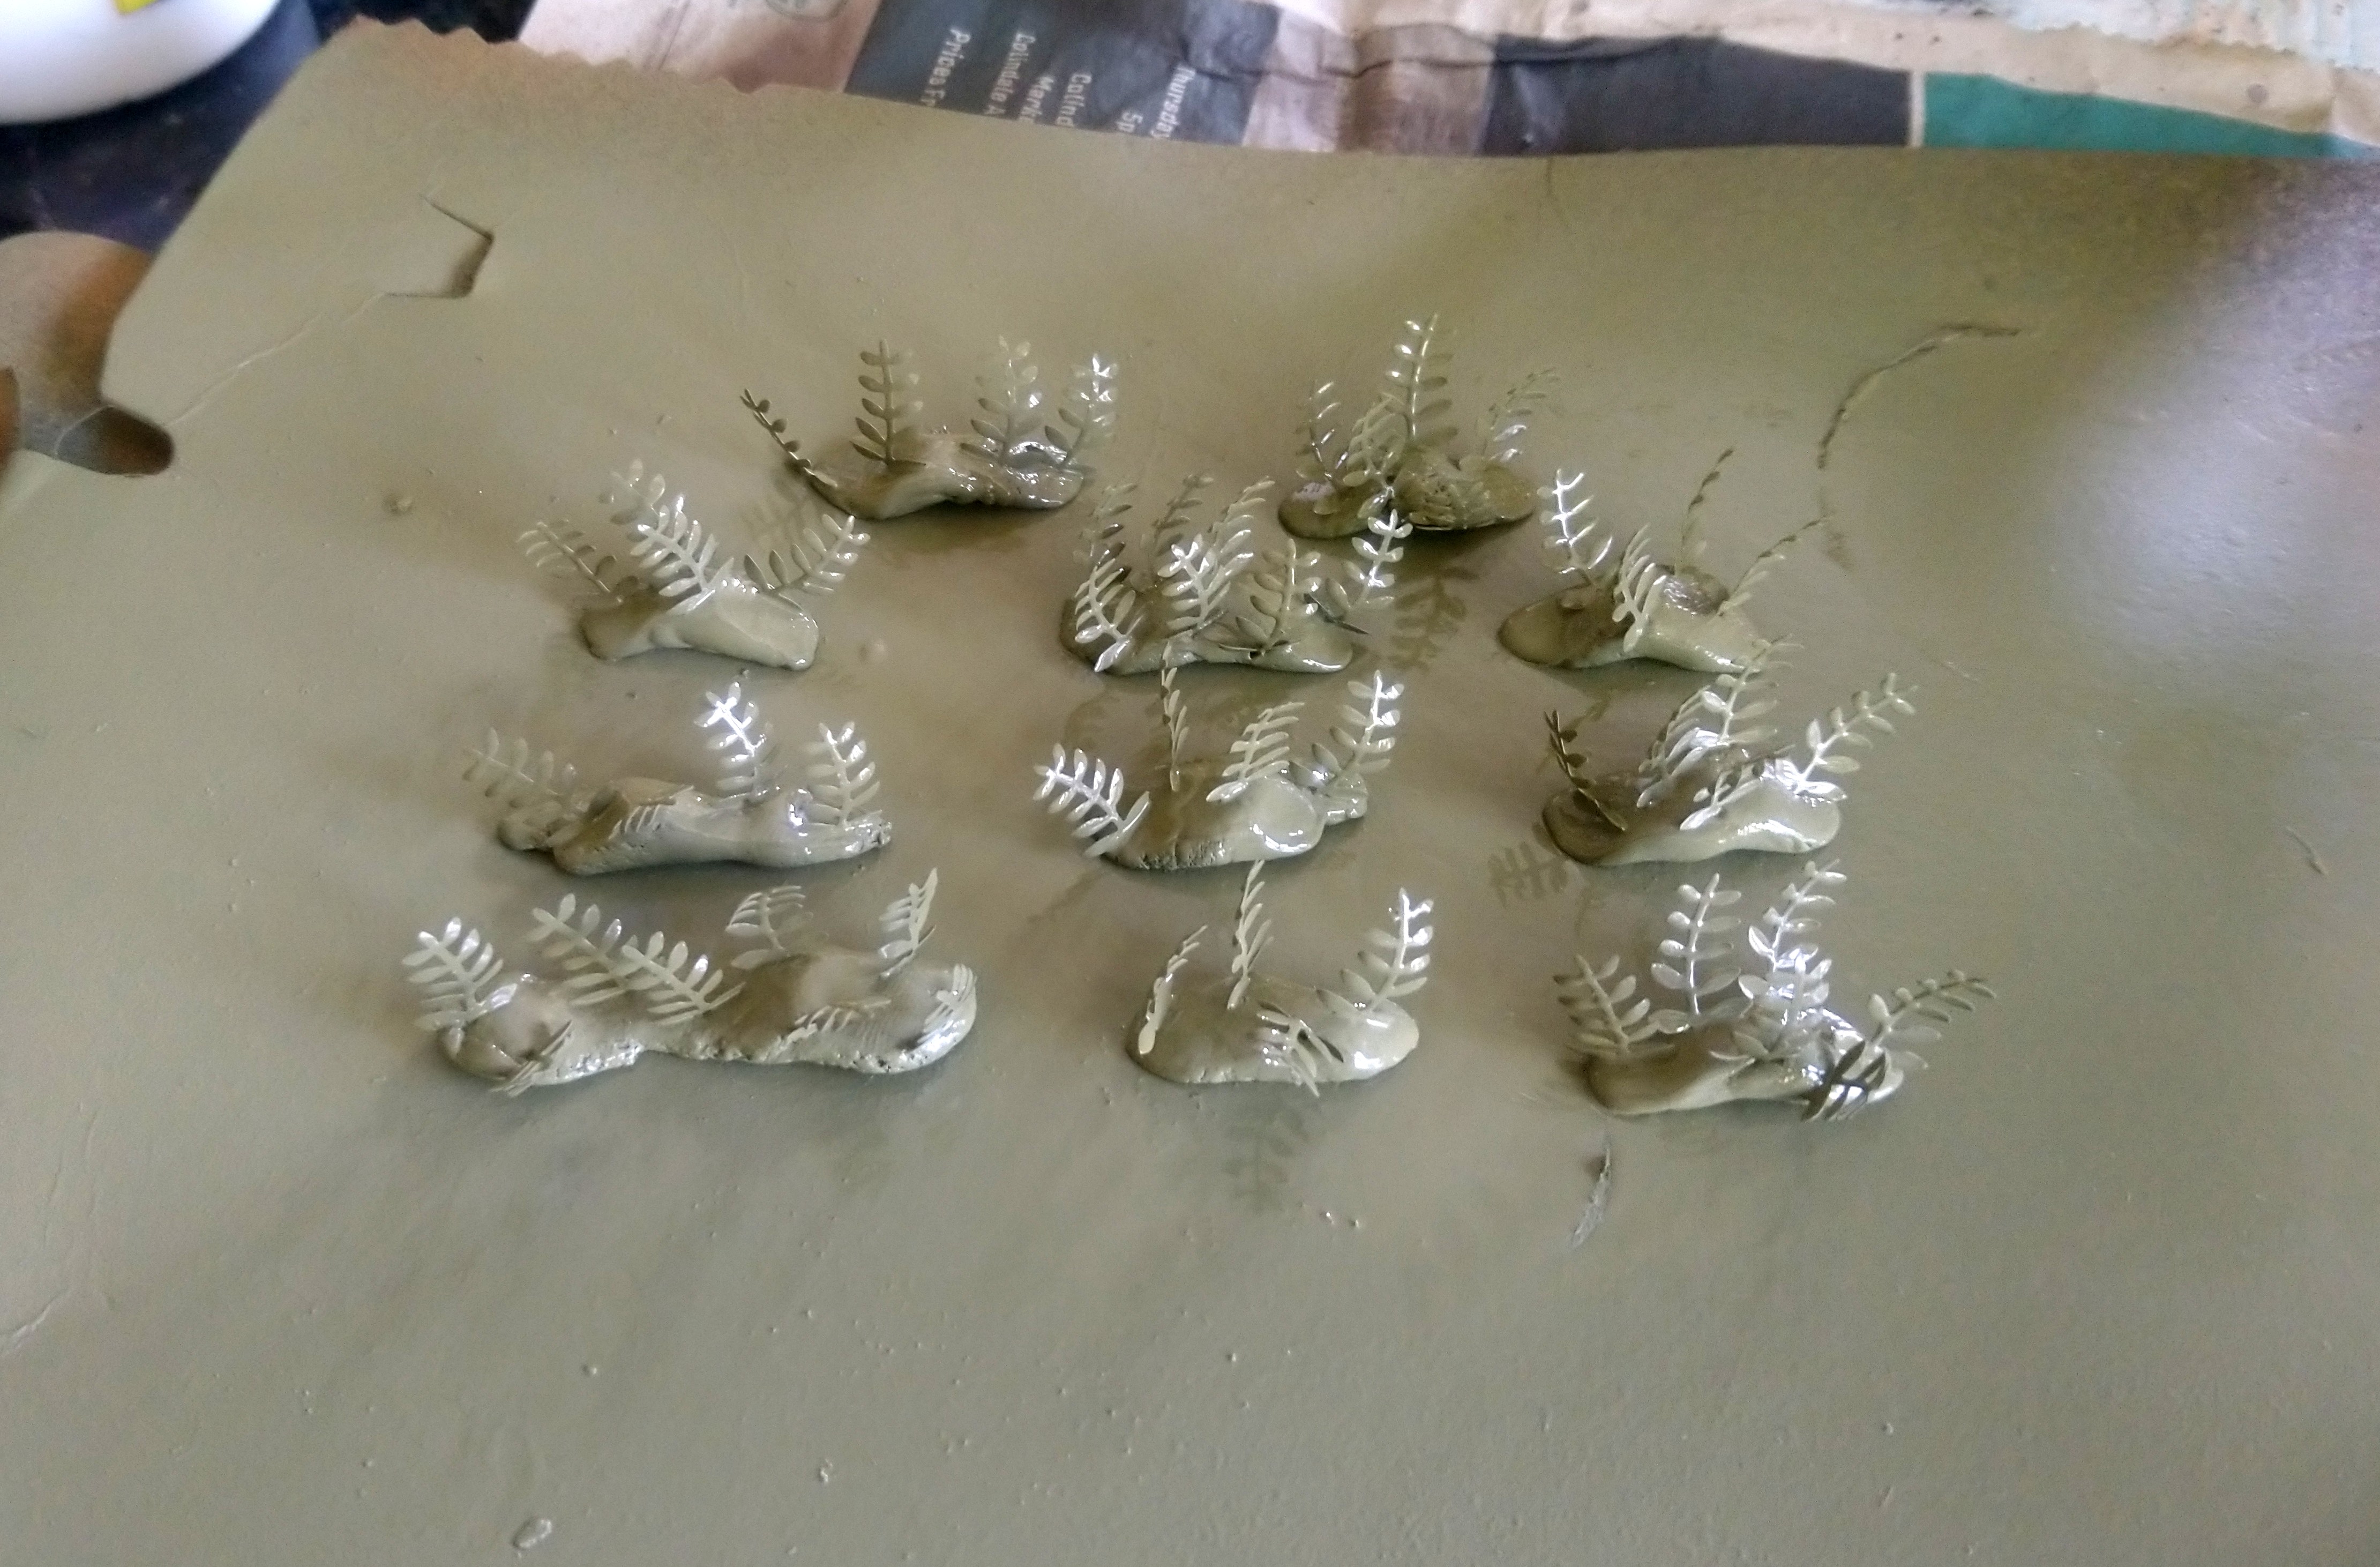
I used Citadel Warpstone Glow green and Ork Flesh contrast paint to detail the plants and stuck them in the turfs of grass i had placed on the bases earlier. I think across the whole force it will be a great unifying theme that will set the army off nicely.

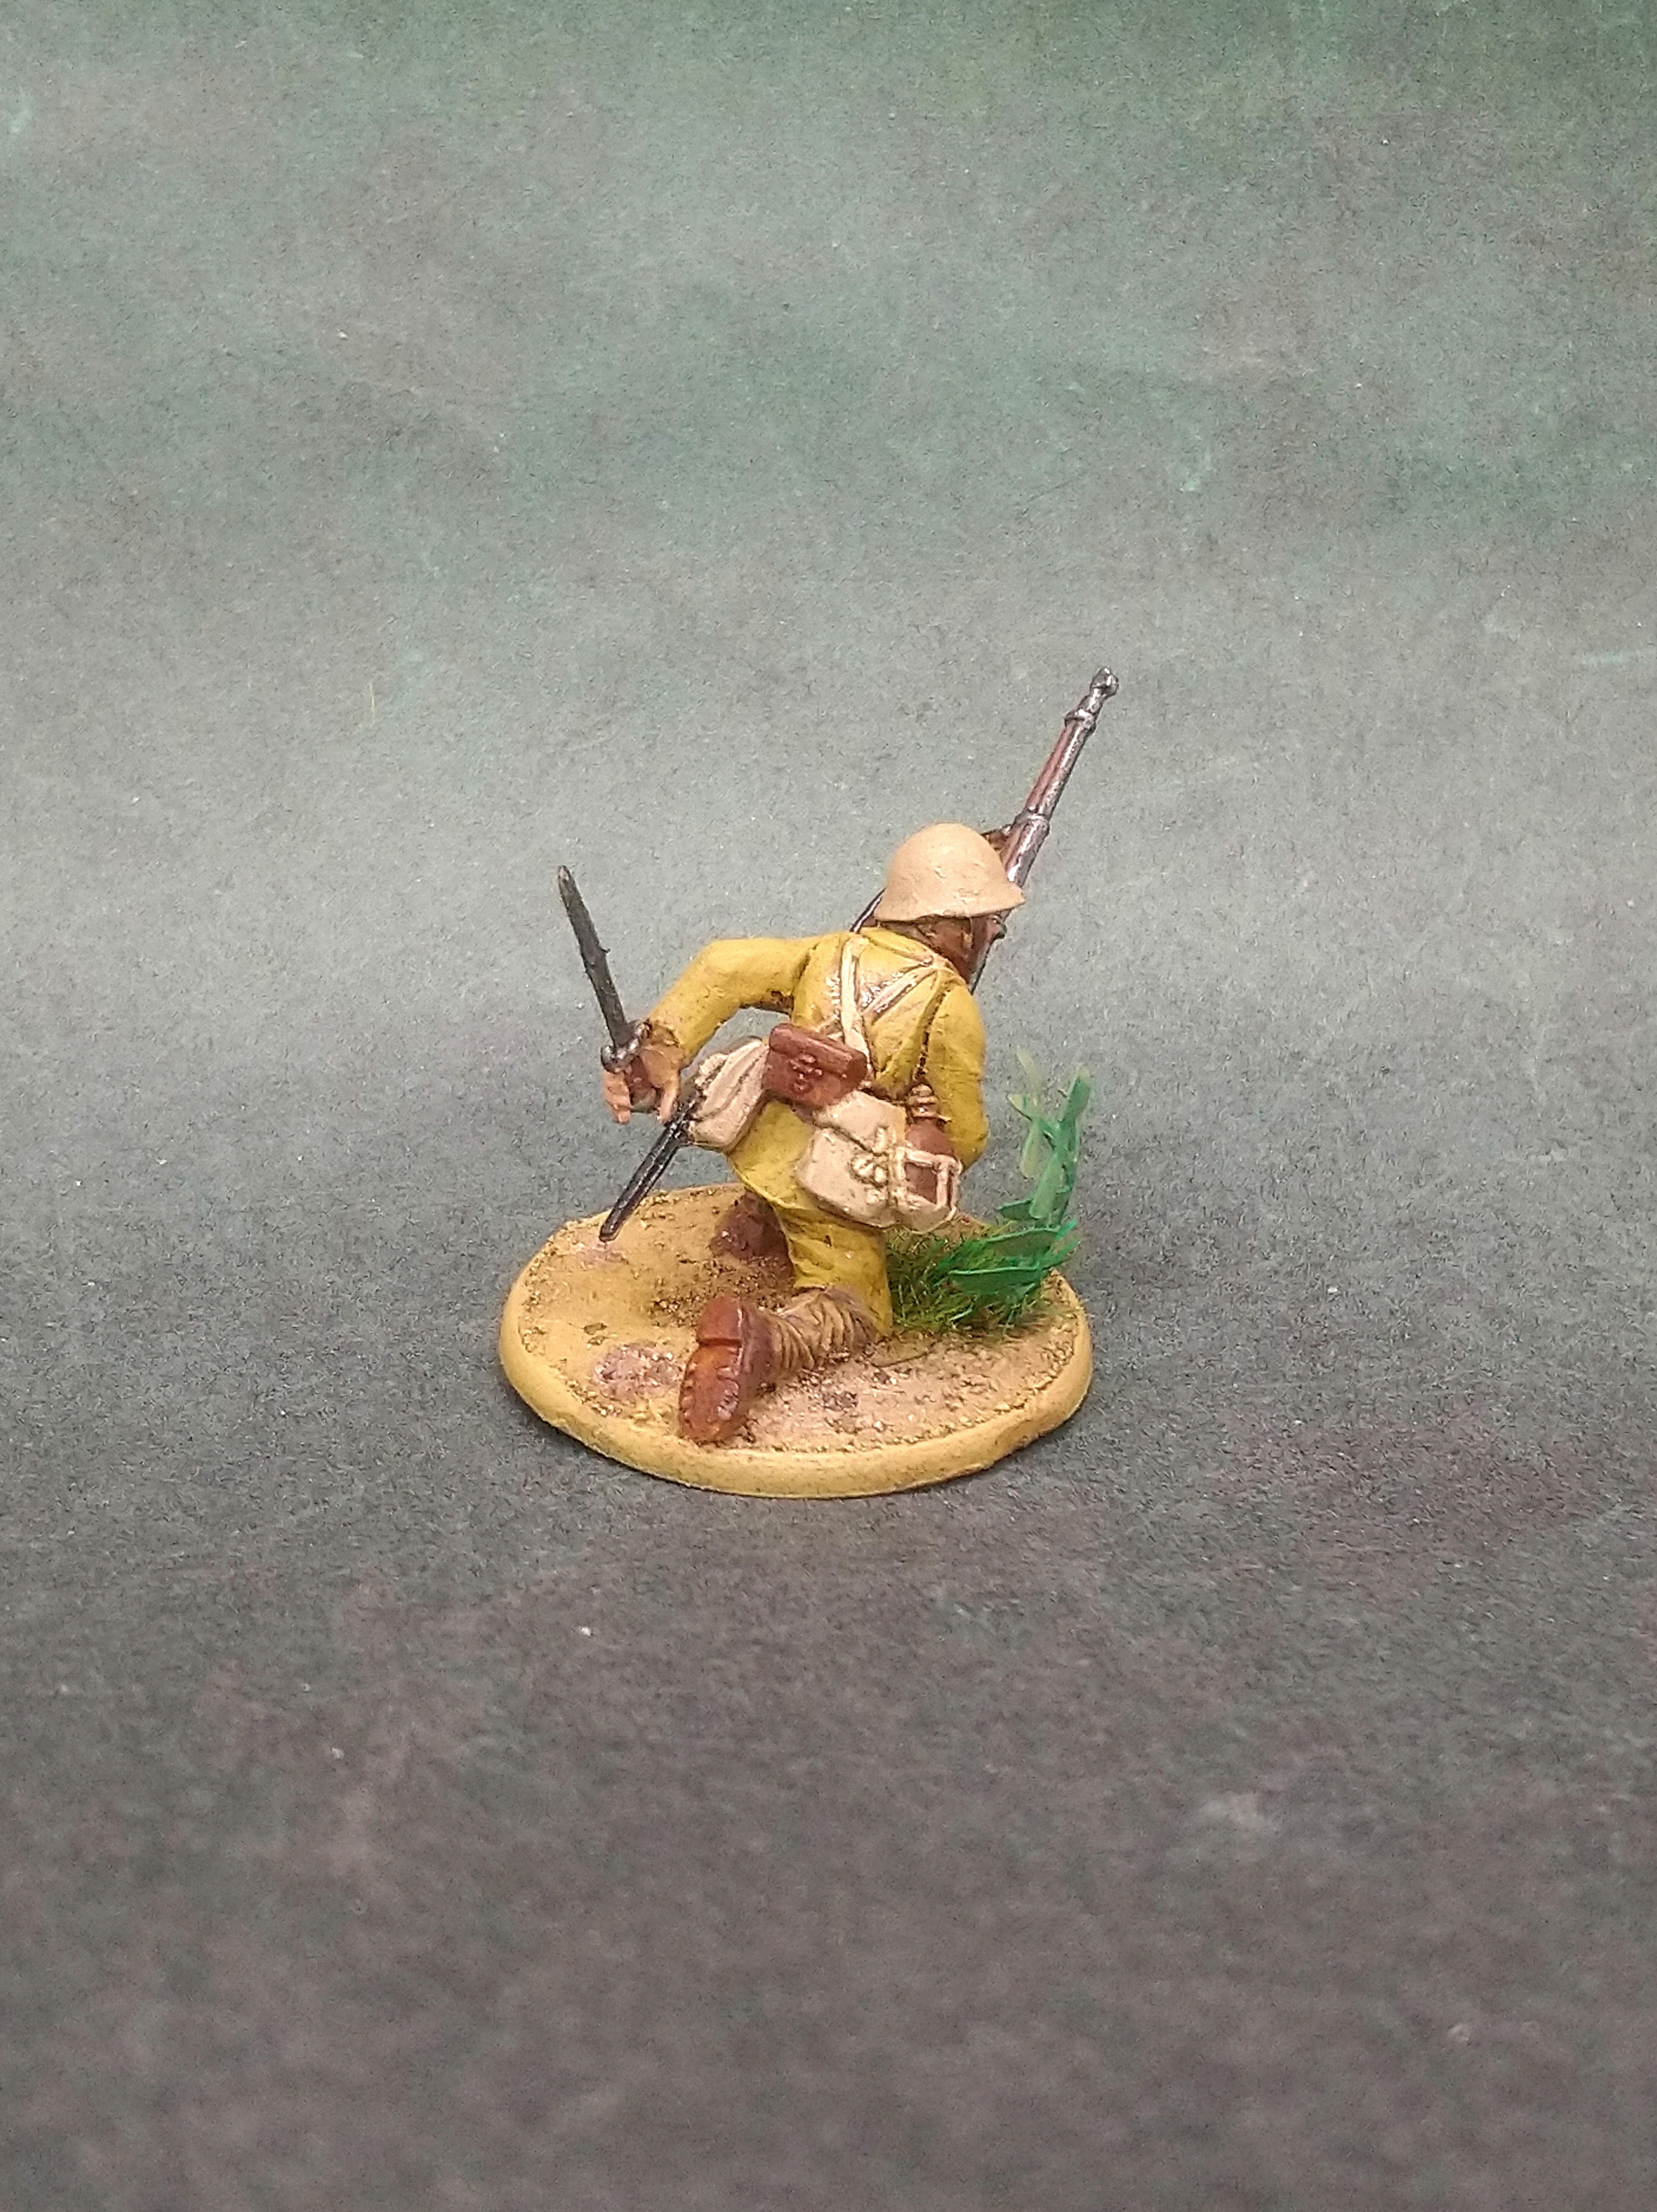
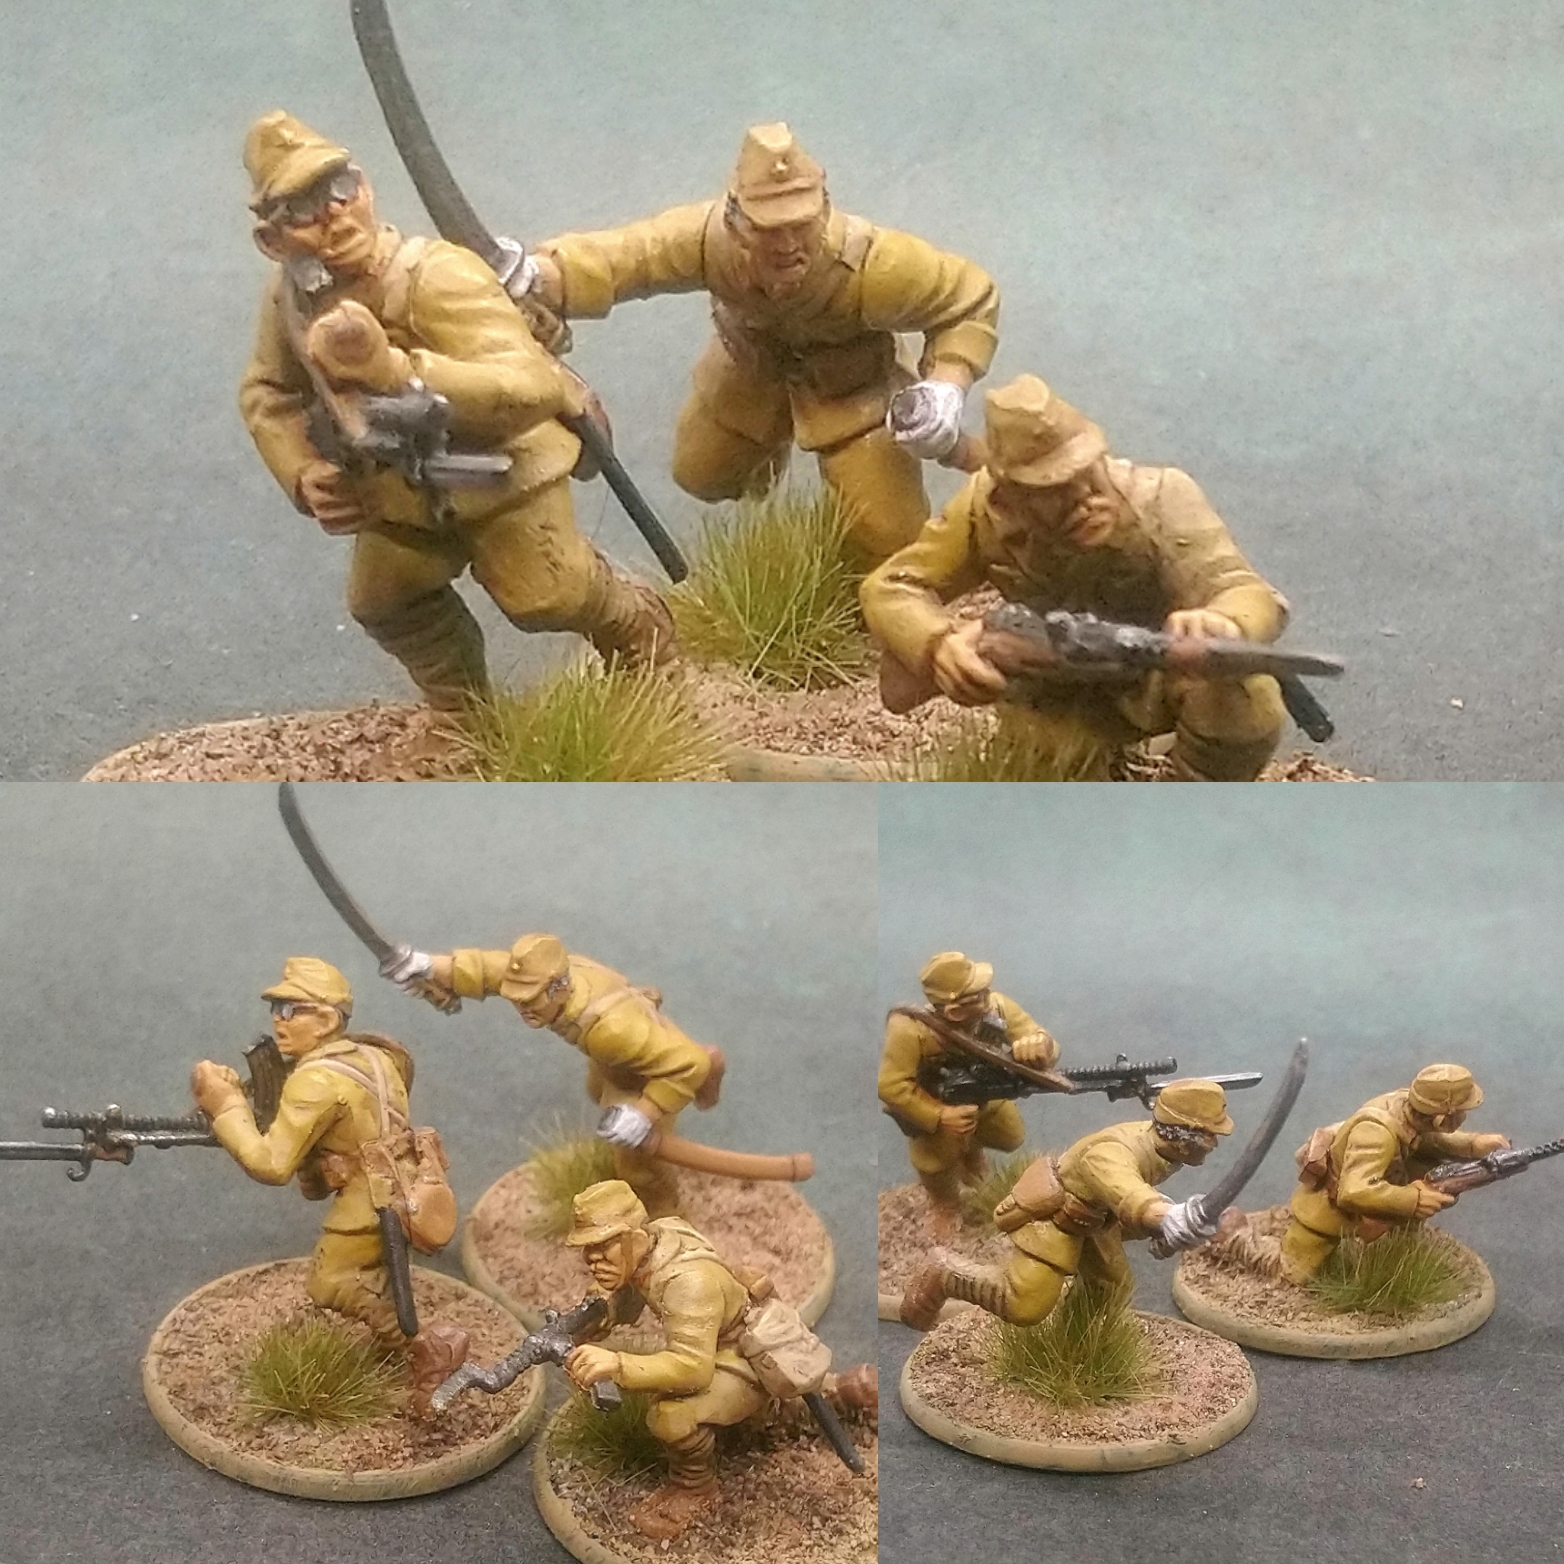
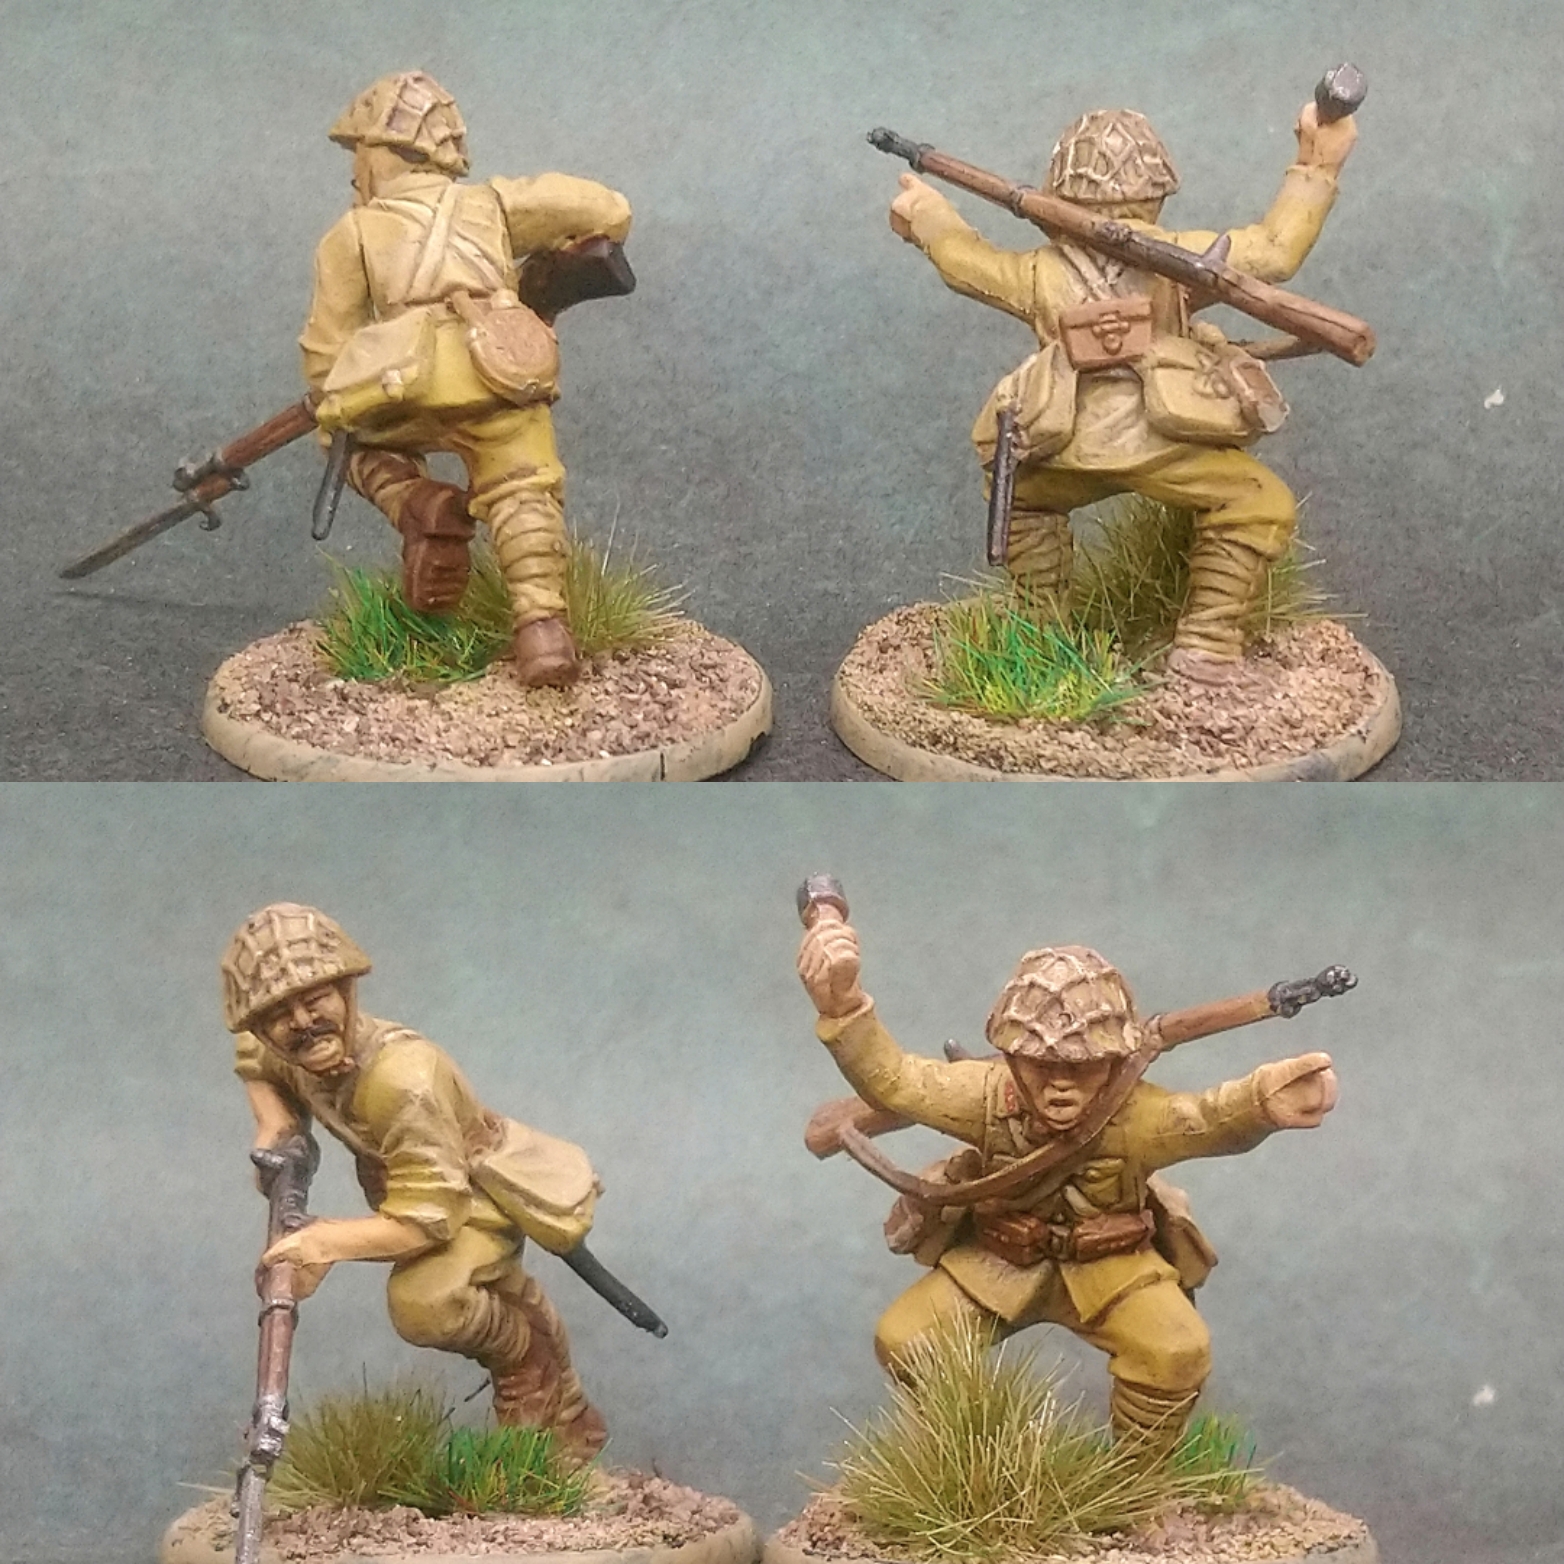
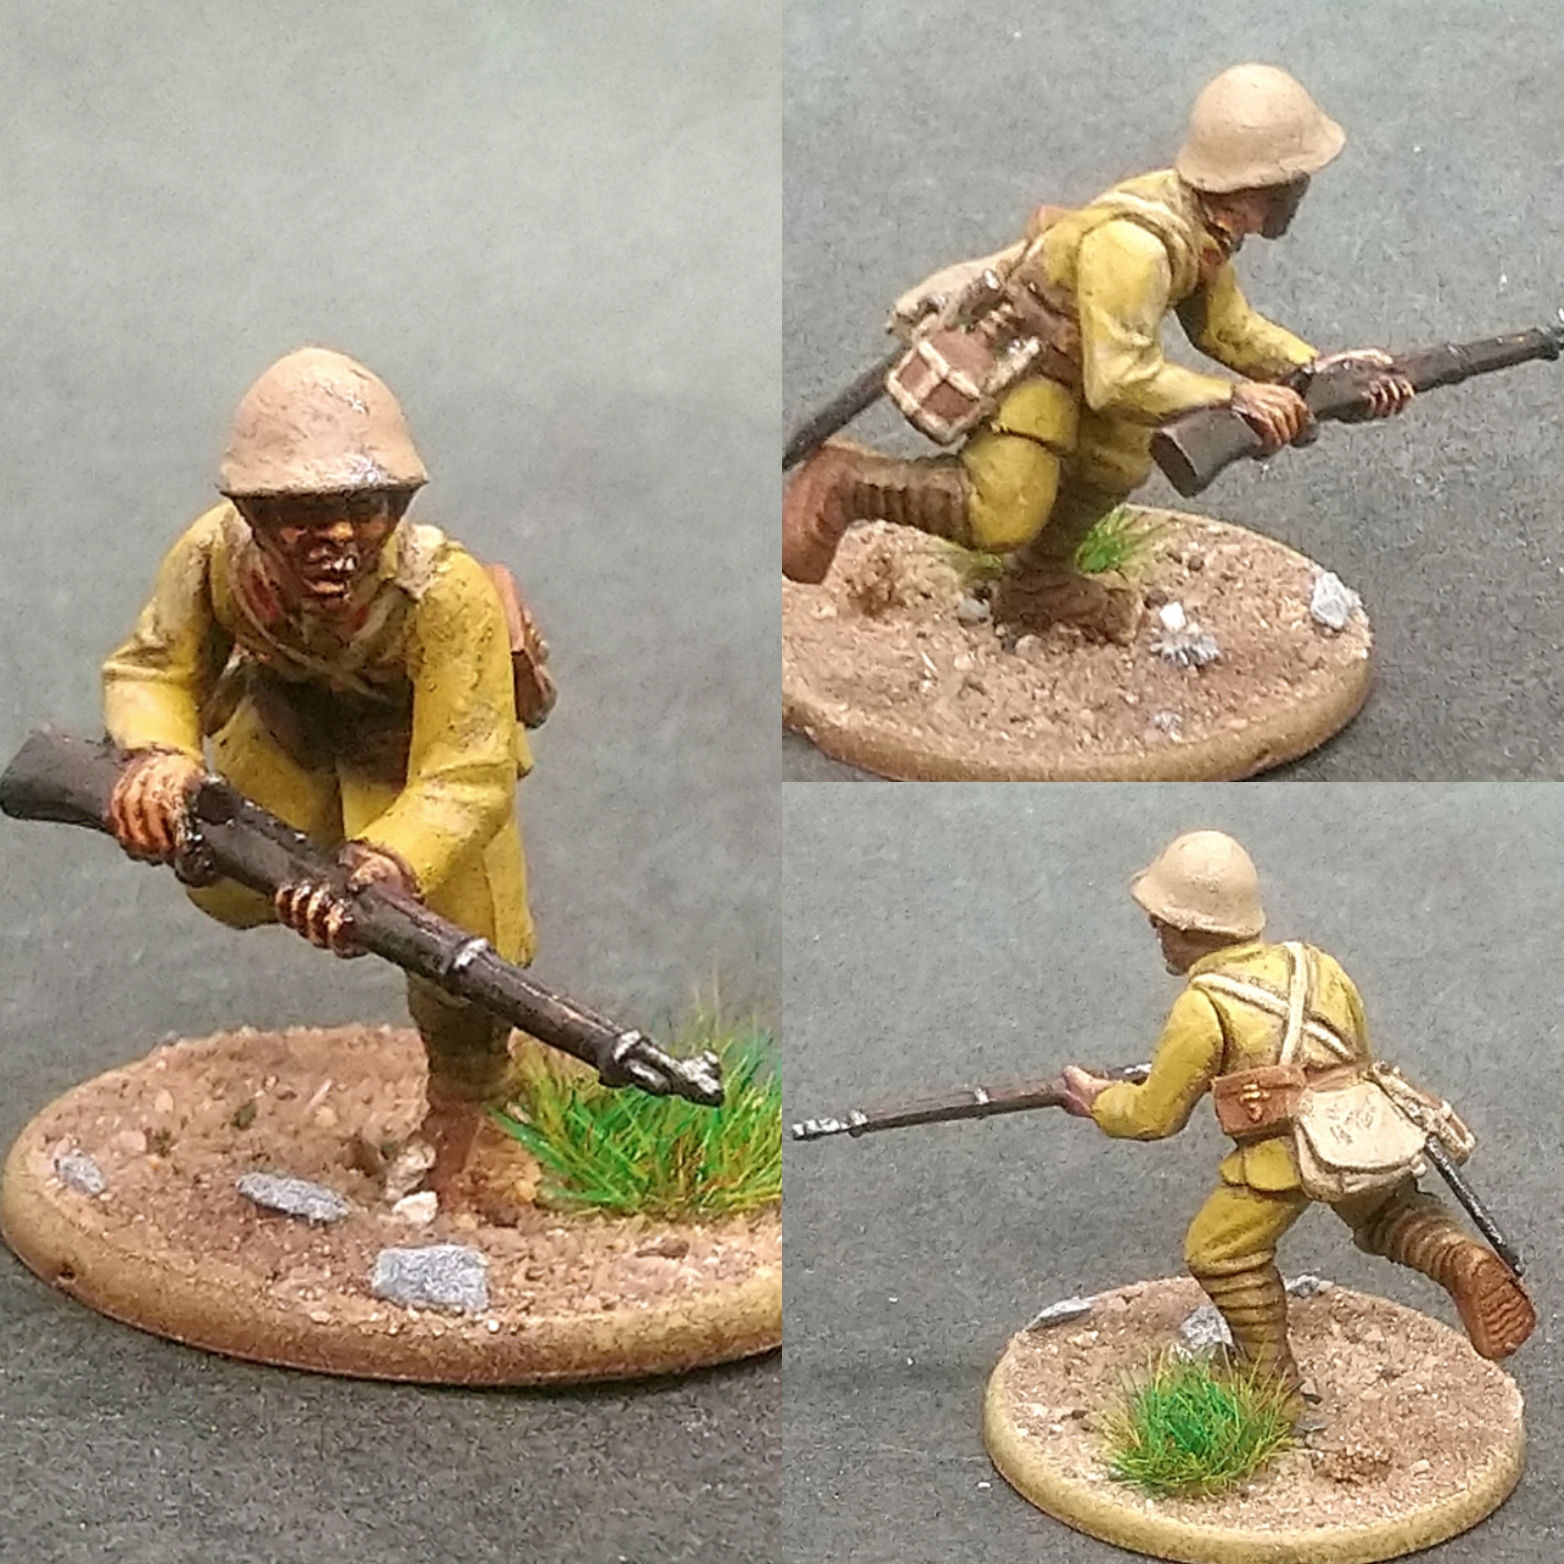
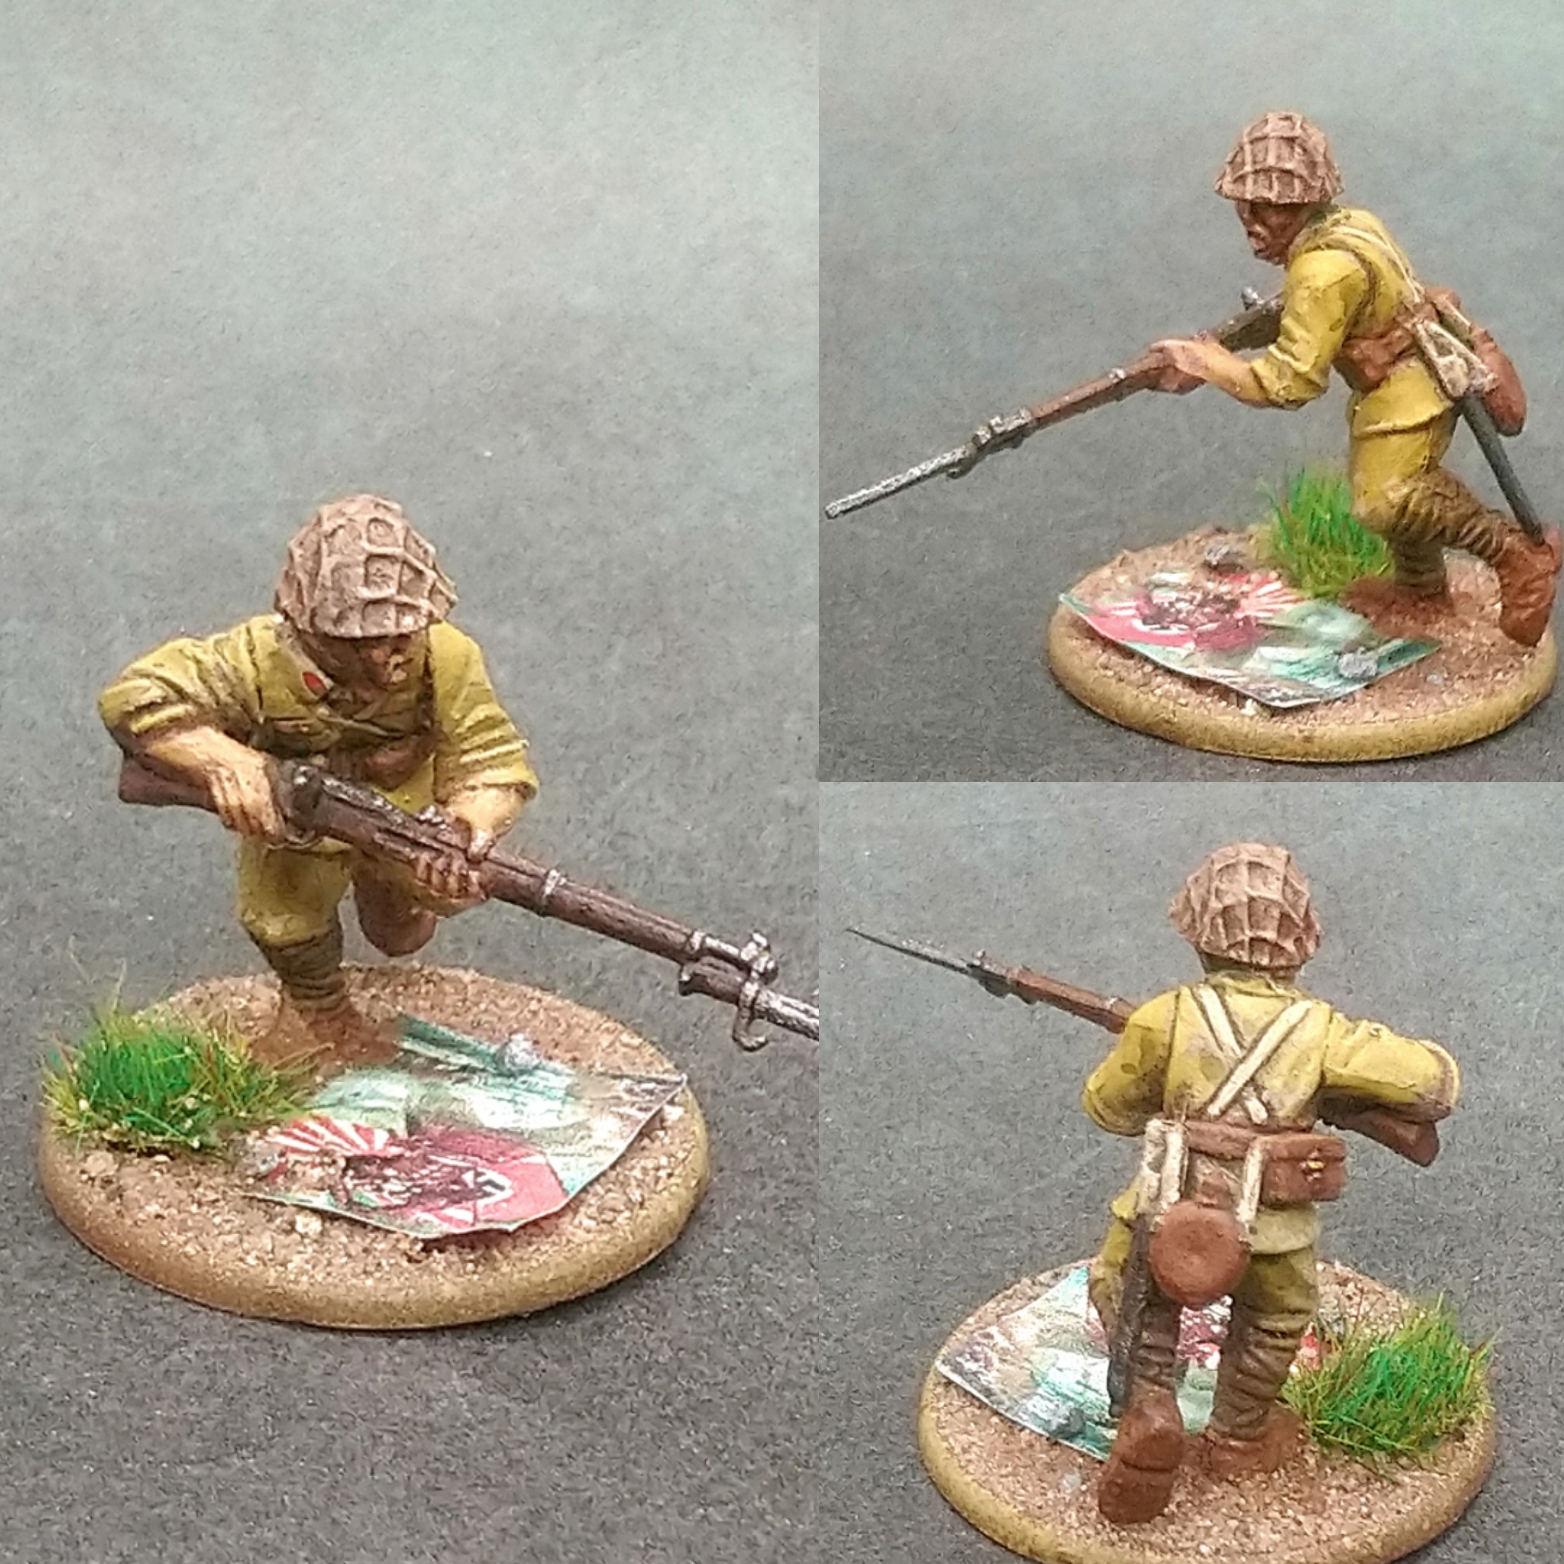
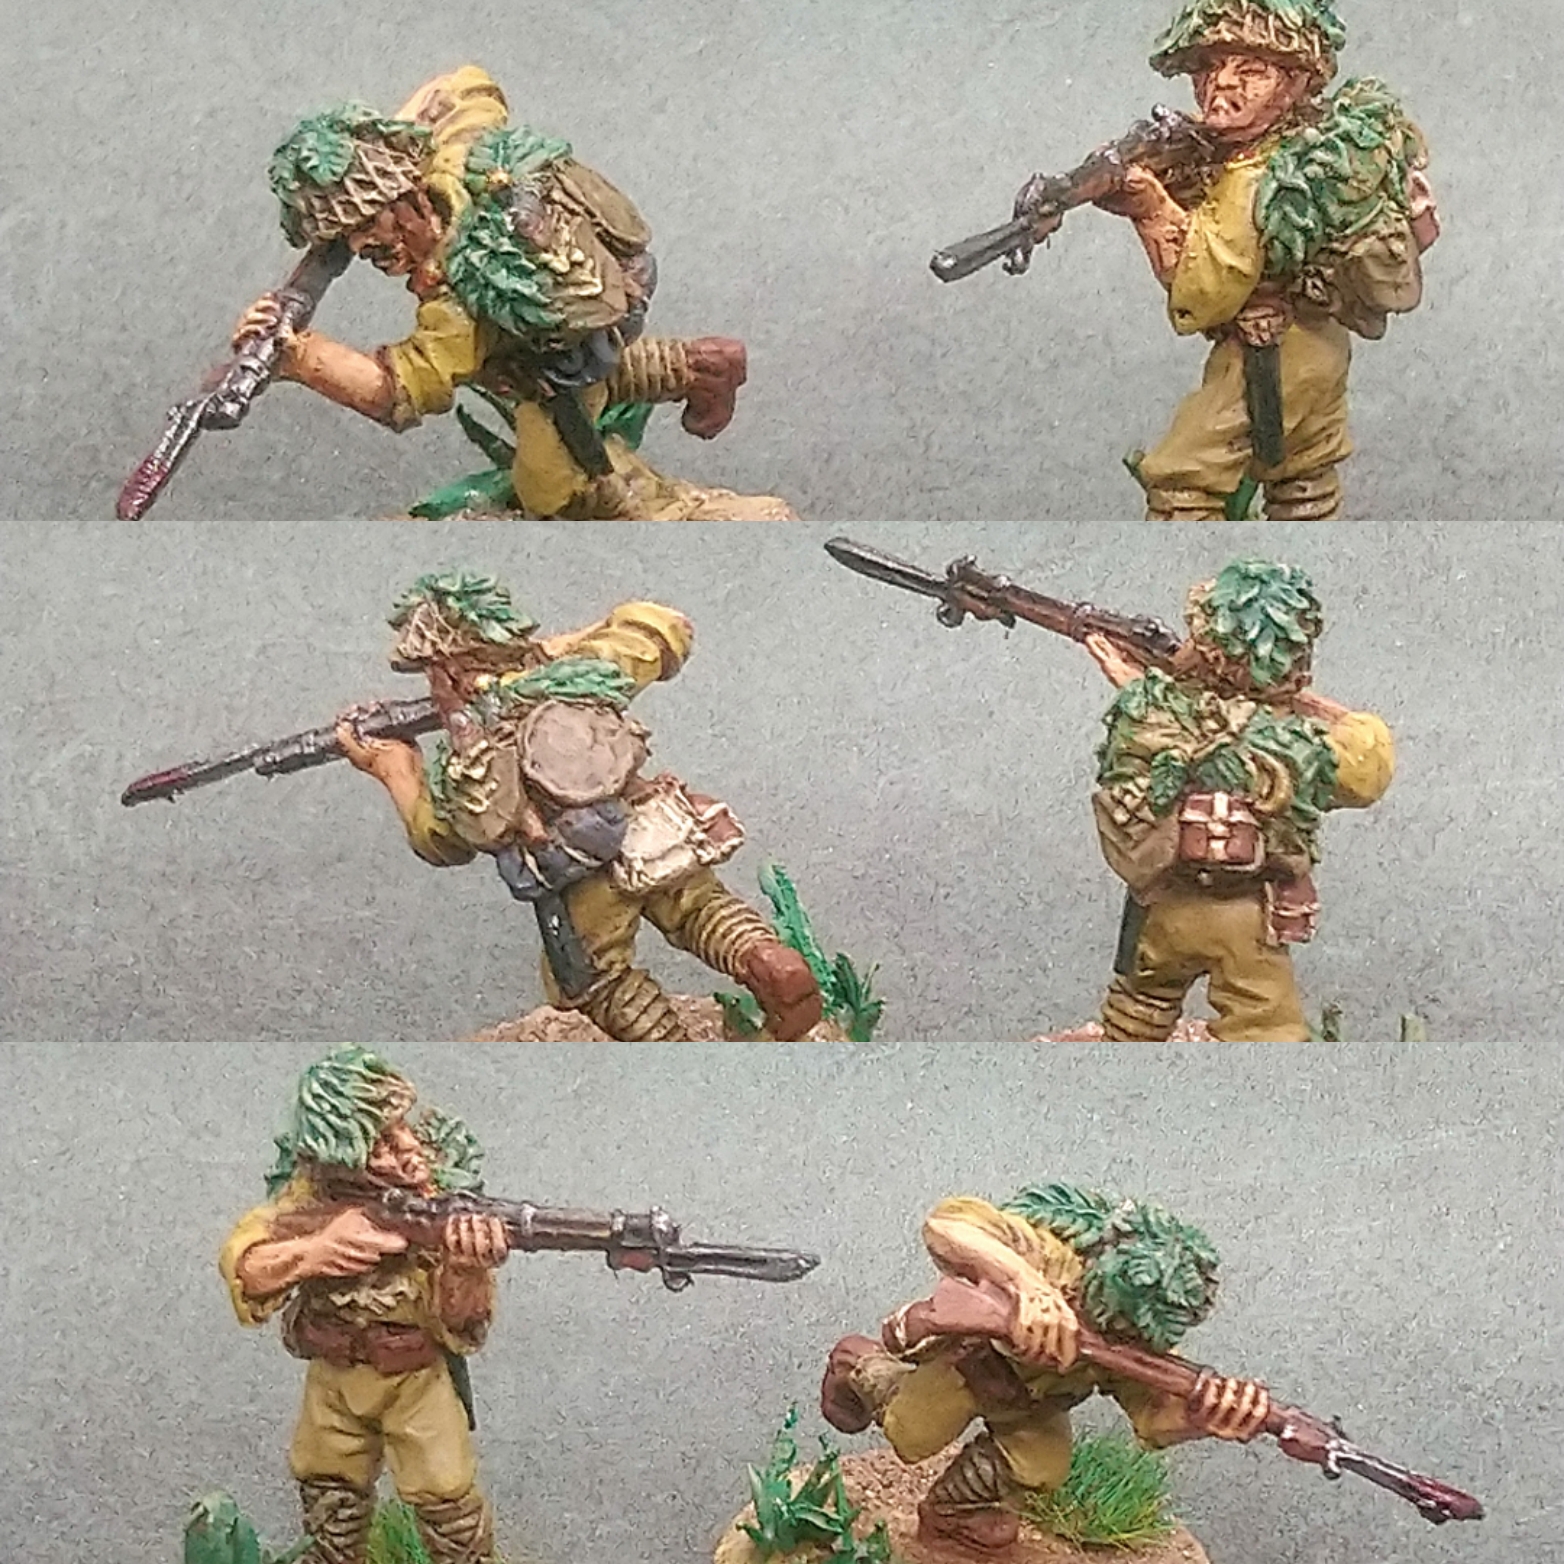
Jūken o shūsei (Fix Bayonets)
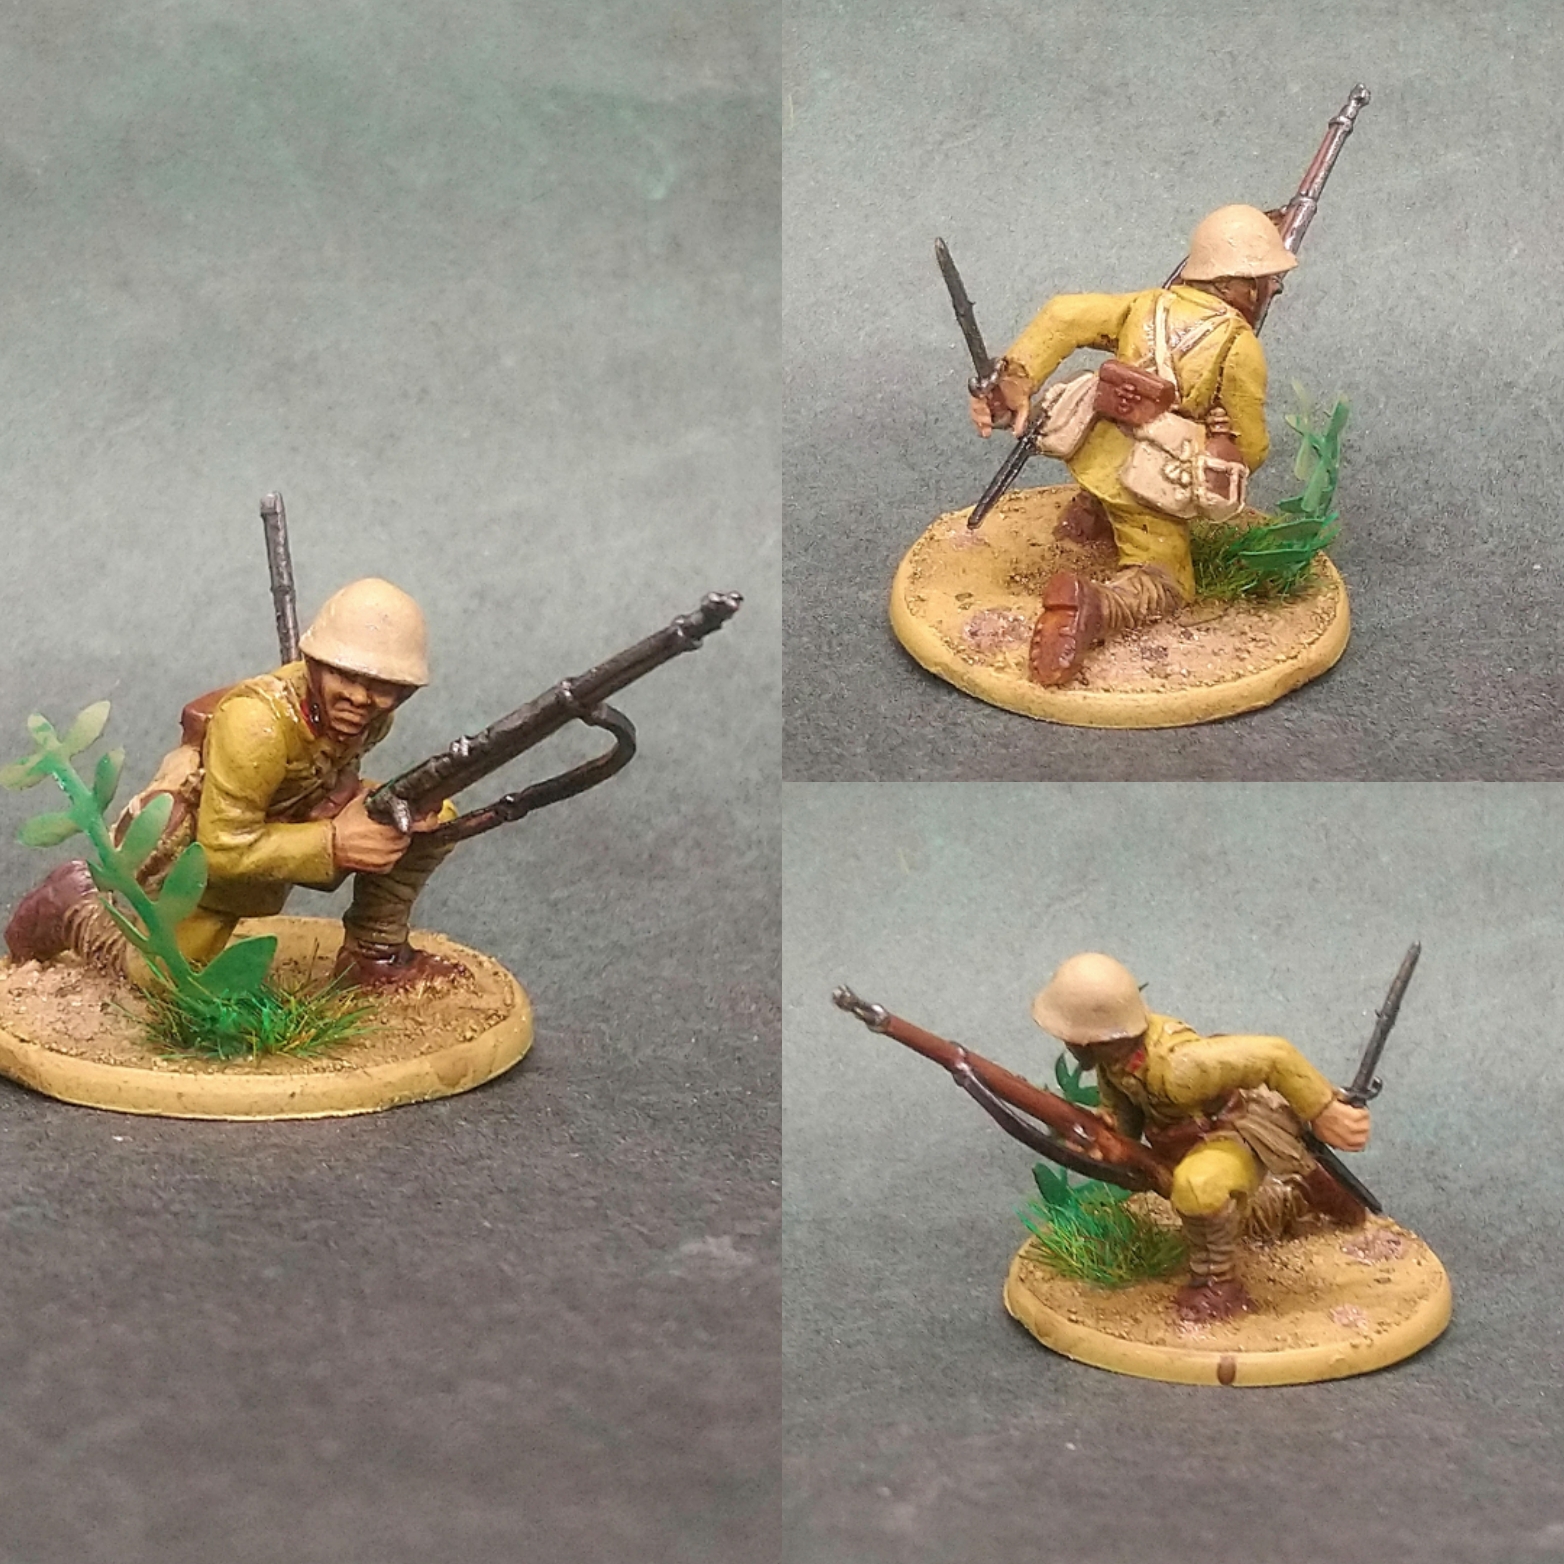
I liked this pose.
Looks like he has freed the bayonet from the scabbard and drawing his rifle close to him ready to fix the bayonet.