


Kitbashing and recycling packaging for sci-fi terrain


Recommendations: 1043
About the Project
I’ve been keeping a hold of various bits of packaging, different plastic parts and gathering up some old model kits to try and get a collection of things that can be used to create some sci-fi terrain pieces. I really like the look of the post apocalyptic ash wastes aesthetic that I’ve seen in old Necromunda magazines and pictures and I want to build some kitbashed items that could be used in table top gaming, wether it be Warhammer 40k or Necromunda itself. The plan is to make a number of individual pieces that all fit into the look and feel I’m going for, and to take pictures along the way to help show where the models are coming from. Also aiming to get lots of nice weathering techniques tried out and to see what works.
Related Game: Warhammer 40,000
Related Company: Games Workshop
Related Genre: Post-Apocalyptic
This Project is Active
LED Bulb Packaging
 LED bulb packaging and other bits view 1
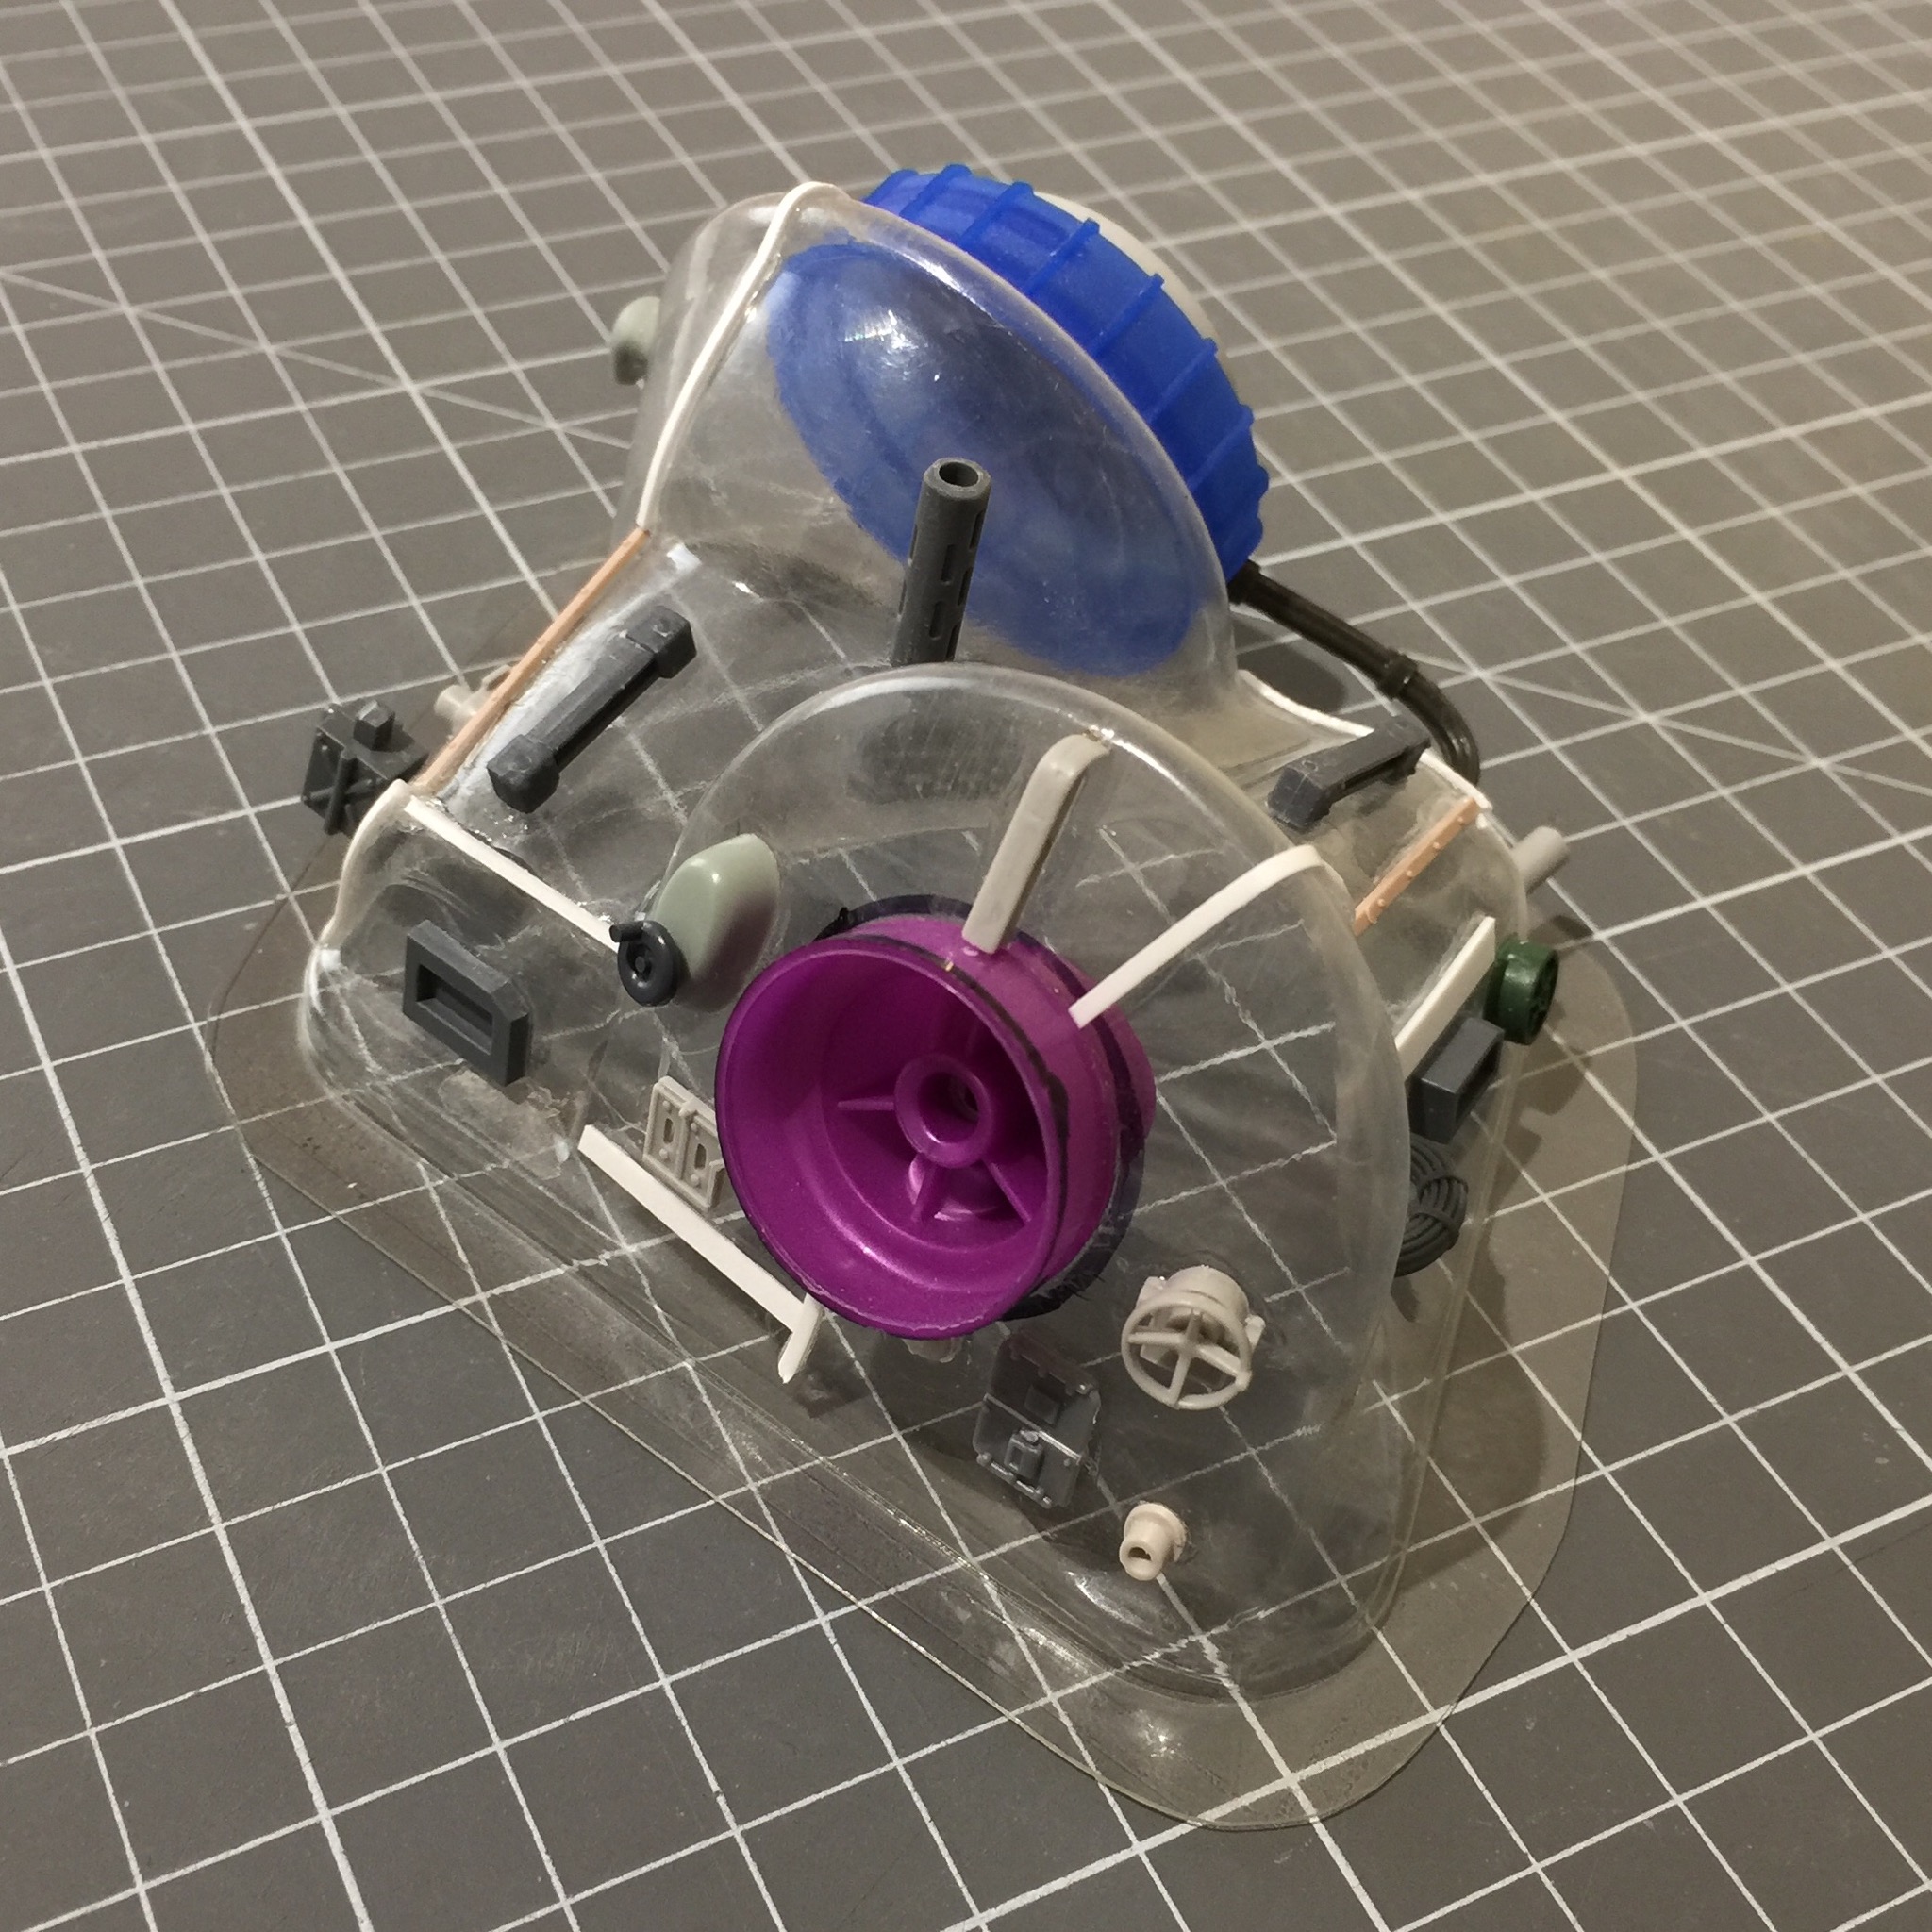 The other side
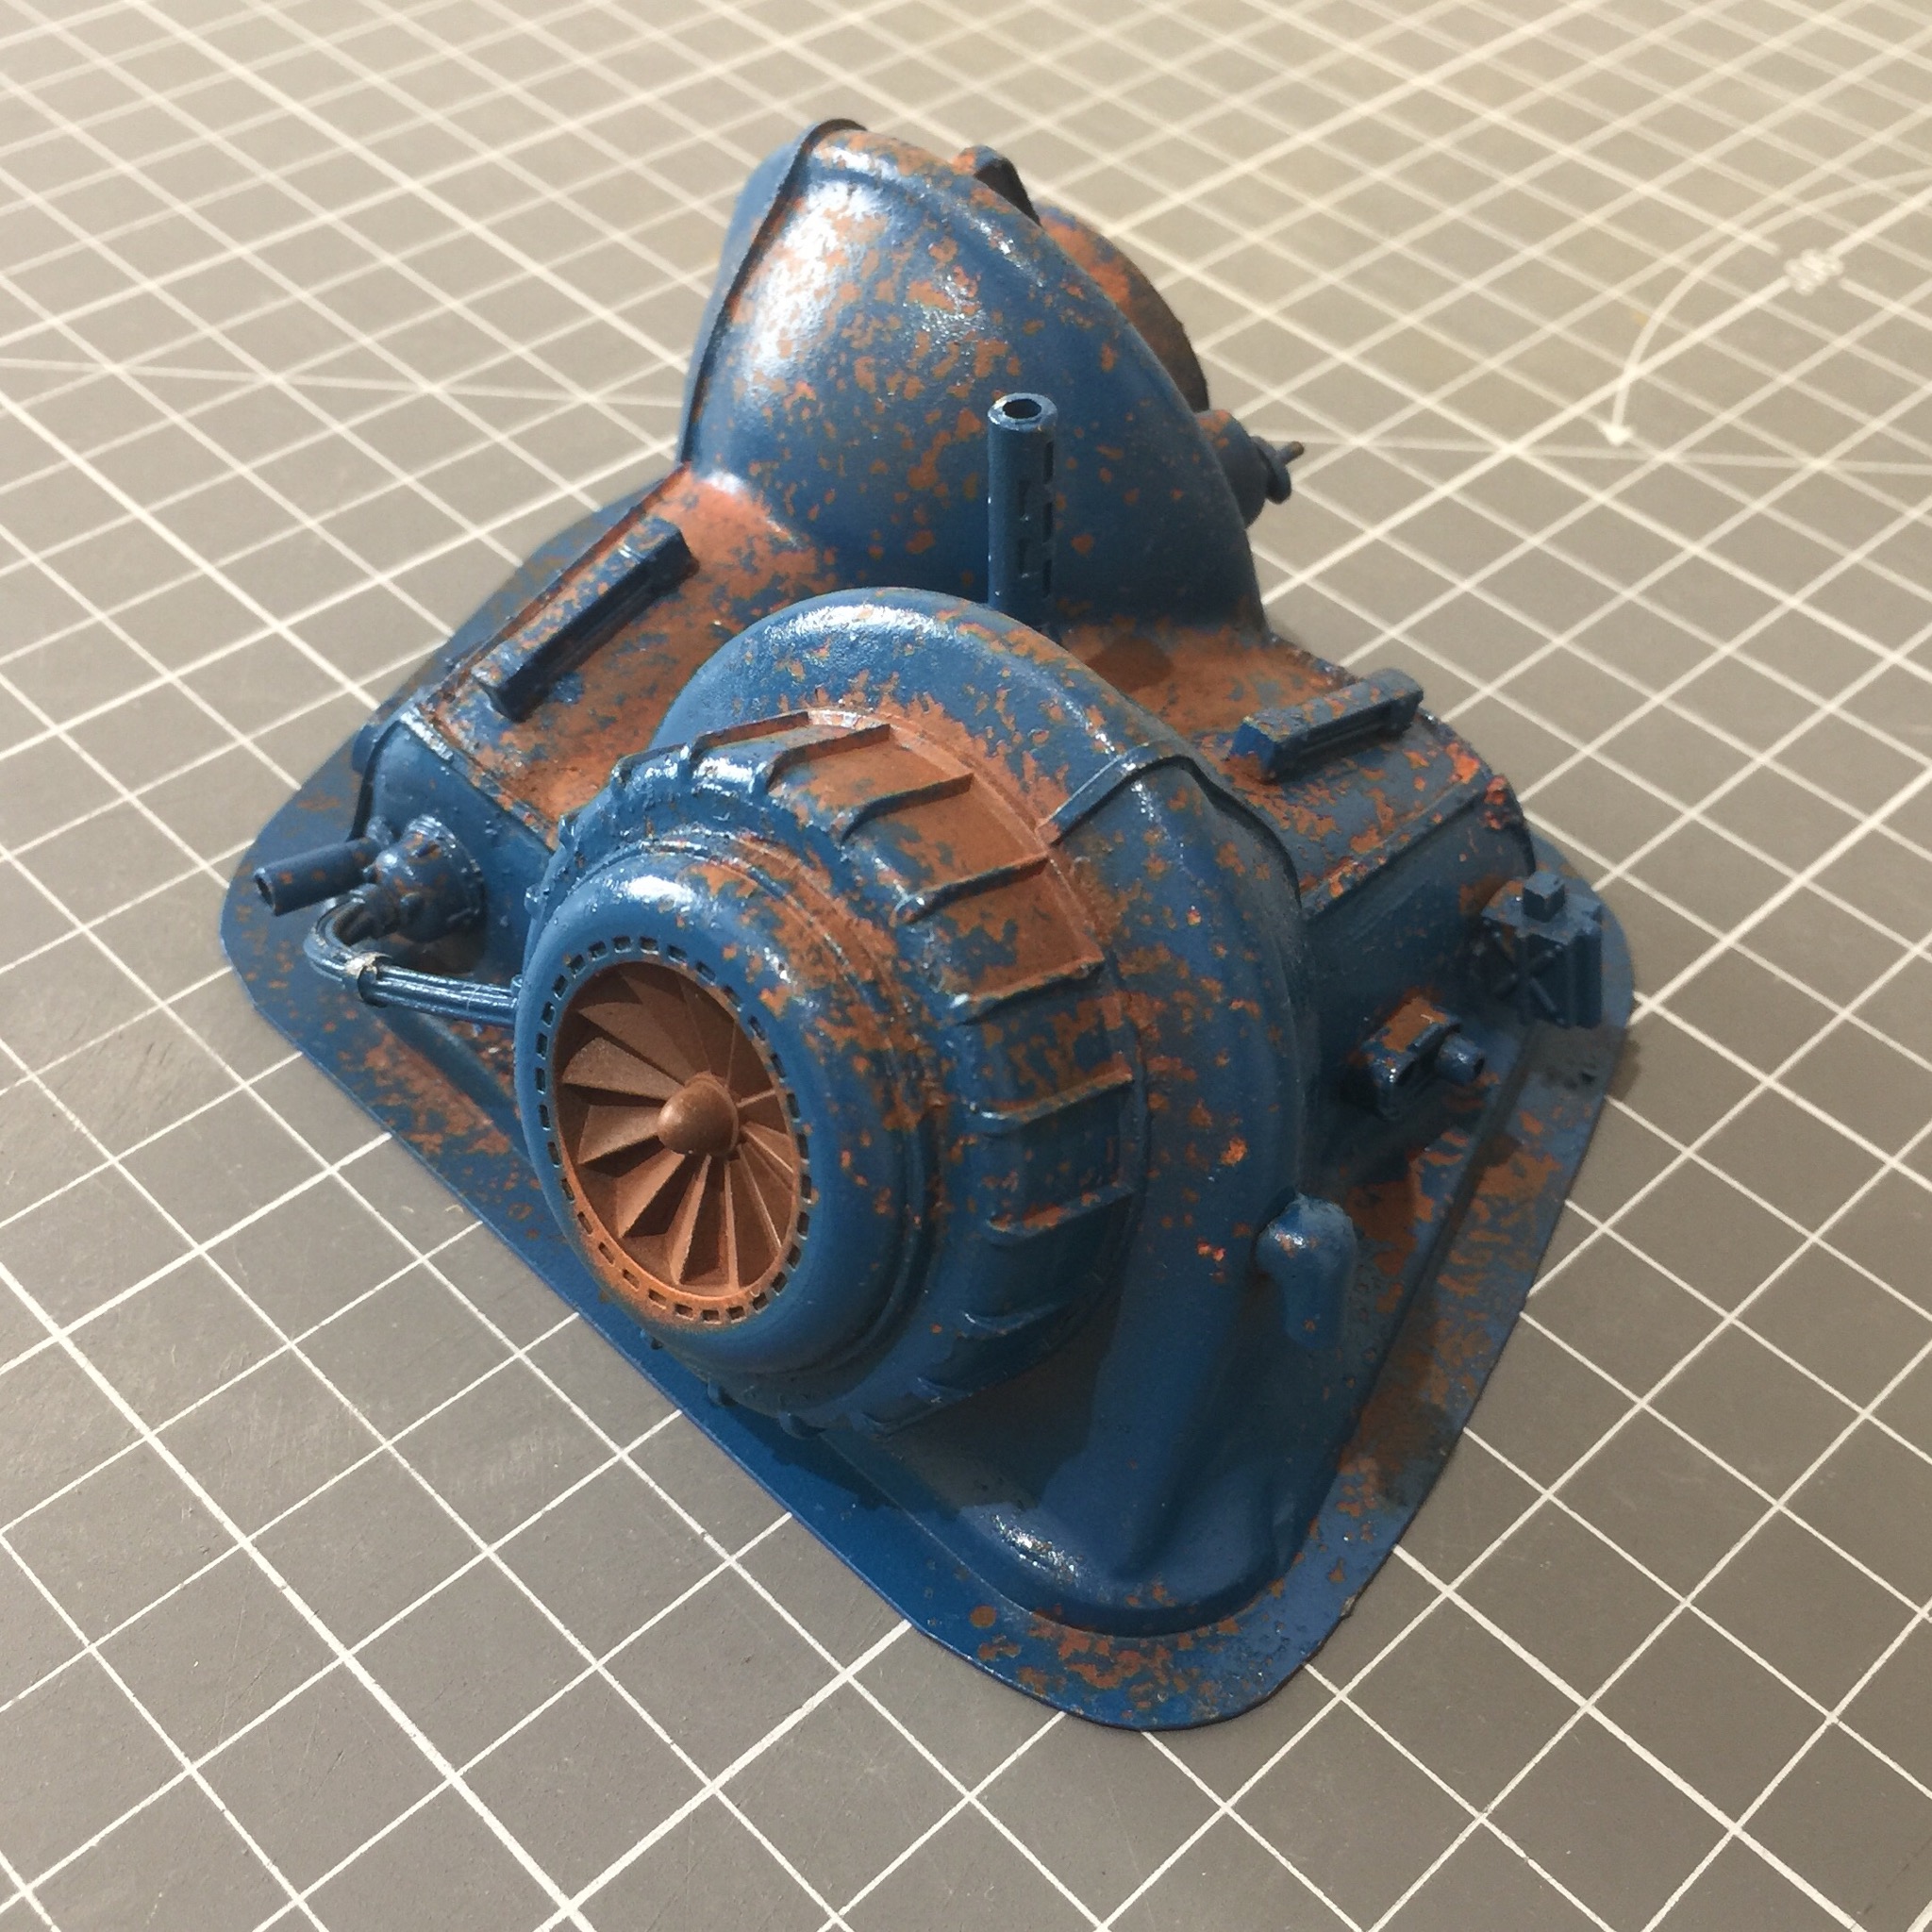
So here’s the starting point for terrain item one… it starts with the packaging for a pair of LED bulbs. I immediately recognised this packaging as being the basis for some sort of sub surface moisture pump. A vital piece of Ash Wastes equipment.
Onto that goes a few pieces from various places, including a nice industrial fan from Zinge Industries. This helps give the impression of a sort of turbine driving a pump, I think. A few ports for connecting hoses to are dotted around for collecting the condensed moisture and spitting out the waste.
Completed model primed
 Primed
With the various parts all super glued together, and some rough filling around gaps with liquid green stuff, the model is primed. Suddenly it starts to look like something.
 Rusty
RustySome colour now with an all over spray with some brown rattle can paint. Onto that goes a few different tones of brown paint, just randomly dotted around for variation. A mix of stippling and dry brushing.
Finally a few colours of weathering powders are added and that’s when it really starts to look like rust. Love this stage. Need to find a good way of locking weathering powders in place other than with Matt spray. I use the GW spray for this, but always feel that it sort of blows away the powder to a degree. But then you also lose that dry, dusty, rusty look that the raw powders have.
Weathering with salt
 Maybe over did it
Having watched a lot of people on YouTube using the salt weathering technique, I wanted to have a go too. So a spray of water over the top of the model and then sea salt sprinkled over. The salt sticks to the wet and that’s about it. I then sprayed it with my top colour, another rattle can enamel paint.
It went on pretty well, and after letting it dry off and brushing away the salt with an old toothbrush I think I lost too much of the rust layer to being covered with blue. So either not enough salt or too much blue paint sprayed on.
I think next time I’ll do a lighter spray so as not to cover up the overall rustiness completely. Overall though, I like the technique and it works for what I’m after in terms of look.
And, I can pull back the rusty look with weathering in the last steps.
Weathered up and ready to pump moisture
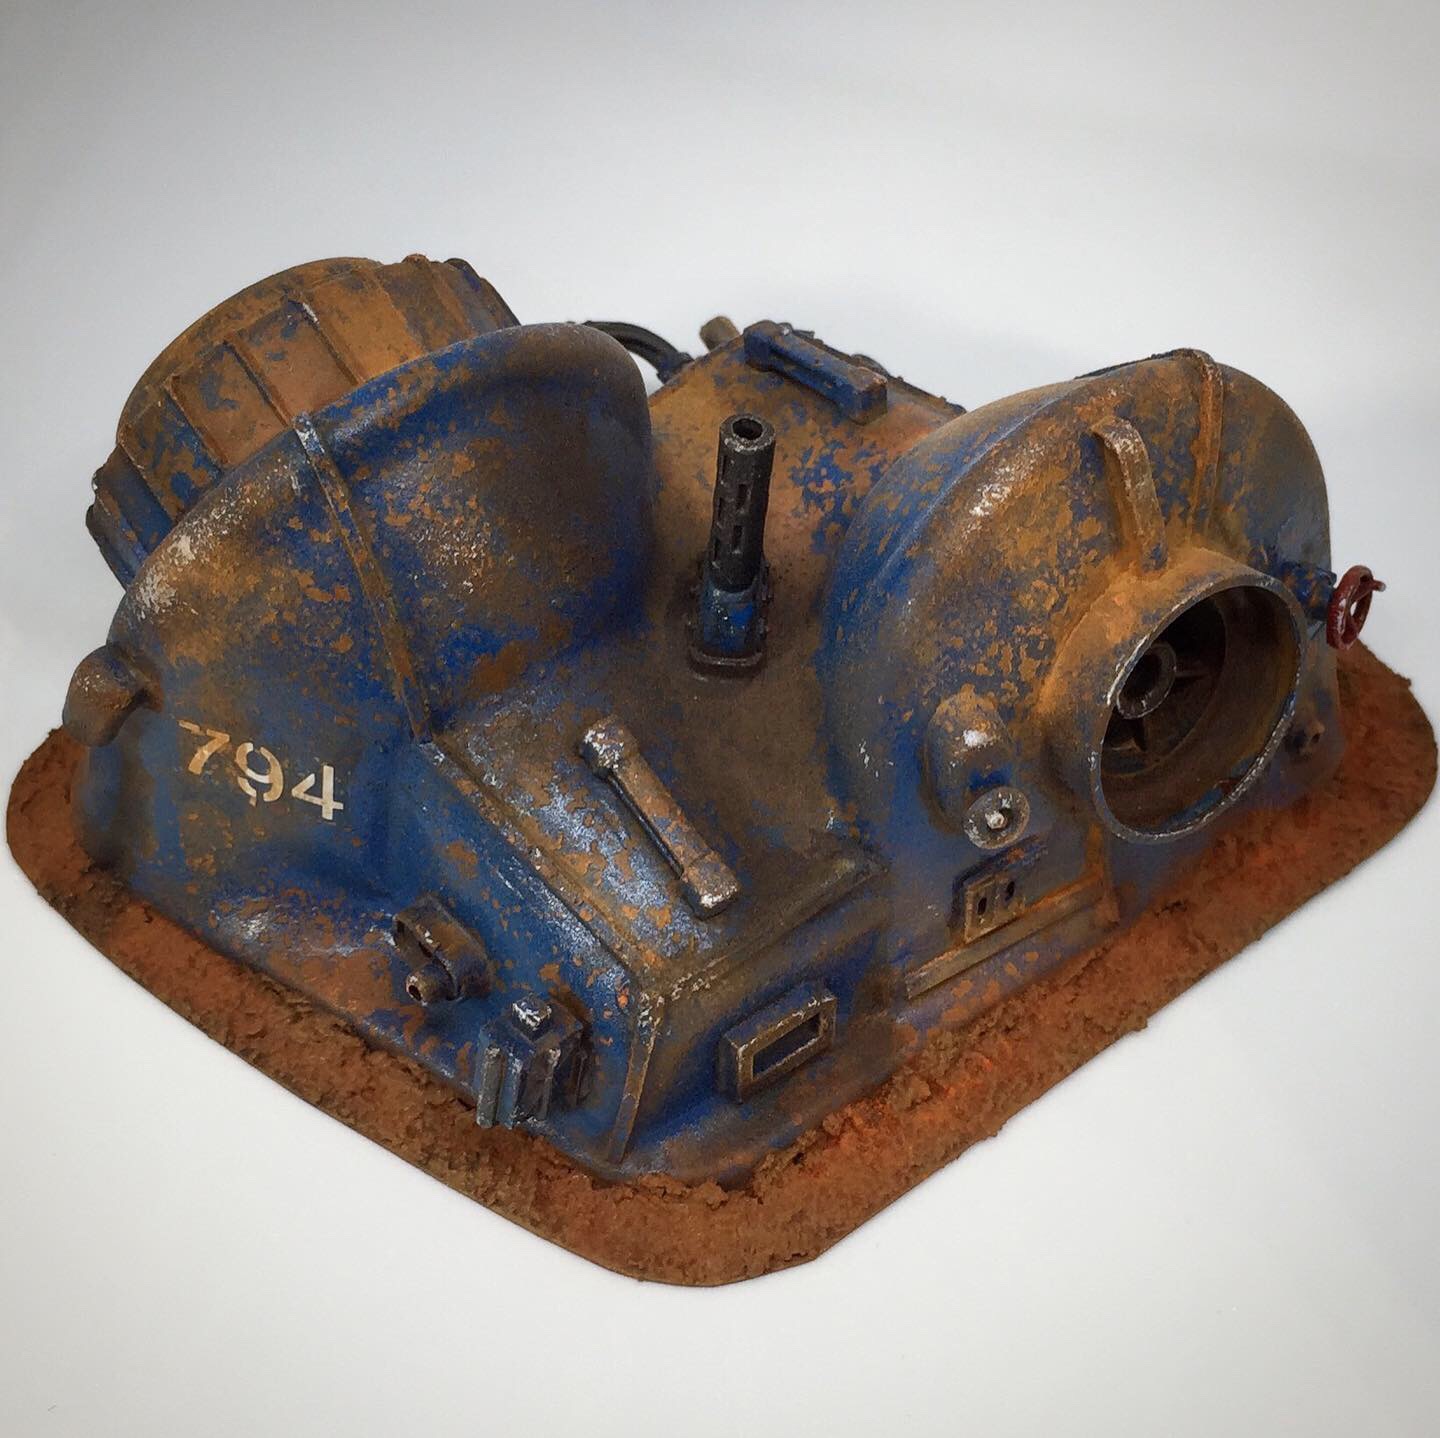 Subsurface Moisture Pump 794 ready for operation
Here’s the completed model with weathering and some basing. Decals always add a nice finishing touch and help set the scale.
Basic process was to go in with some weathering powders and get some rusty, dusty effects back in. I also sponged on some brown paints in places to scuff it up to counter act the previous blue spray.
Also used some metallic paint with the sponge to get that metal feel into the exposed edges. Used a few of the AK Interactive enamel washes for various additions of colour and grime here and there. Quite like using those.
 Motor or rotor or turbine
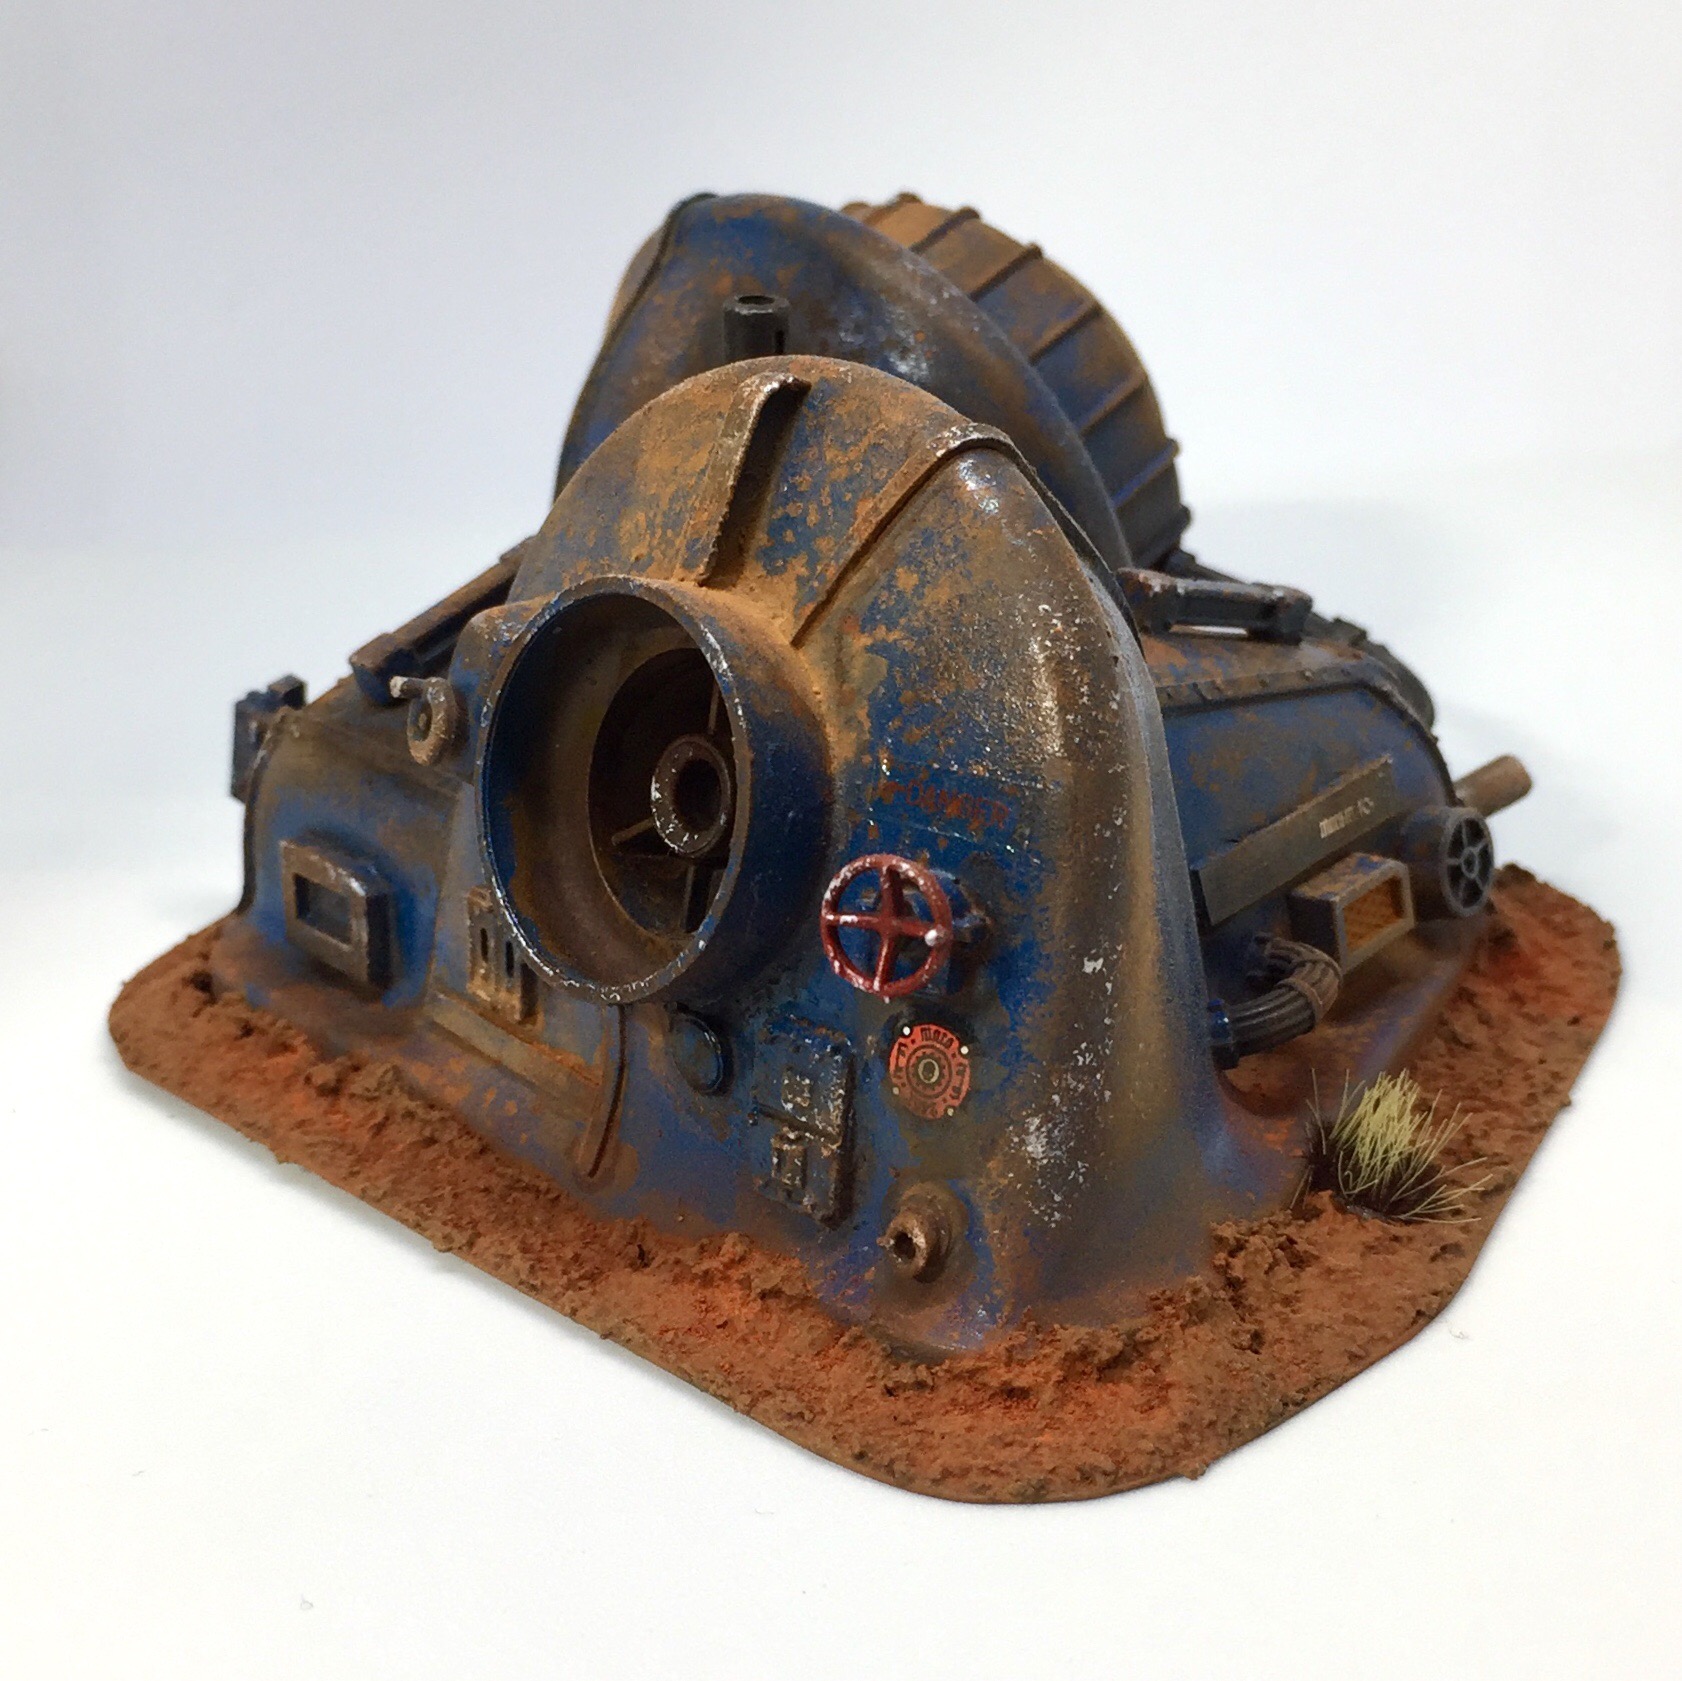 Connection points
  Always add a decal
So that’s the first piece done, kitbashed and based on some old plastic packaging.
I’m happy with the end result, and with the red rust basing it’ll fit into my overall theme of a post apocalyptic red planet. All that’s left to do is get her up and running and start condensing some moisture to sell for credits.
Ok, on to the next piece… that Ariel Washing Pods box looks good for something.
Sludge Processing Unit - Kitbashing done
So the Ash Wasters have happened across an old Sludge Processing Unit situated over a sludge outpouring. These are used for extracting sellable chems from sludge and if it’s in working condition, it’ll be a valuable resource.
I’ve started with one of those washing machine pods boxes, as I like the way it appears as if it’s a prefab unit that could be brought in and dumped into position quickly. The door is from the Kill Team Rogue Trader set, and I didn’t make a neat job (not going for neat) of cutting a suitable shape out from the box to glue the door into. So I’ve added some bits and pieces to help hide that. The piping piece coming out the side is also from that same boxed set.
Priming brings it all together

Once you get the primer on it just suddenly pulls the whole thing together as a semi-convincing model. All the various bits from different places start to seem connected, almost make sense together. A few GW parts help tie it into the over riding 40k and Ash Wastes setting I’m going for so it’s certainly worth making sure to have some of their model kits at hand to super glue into the mix. Love this stage! I can now get onto the “turnin’ rust” stage…
Rusted Up
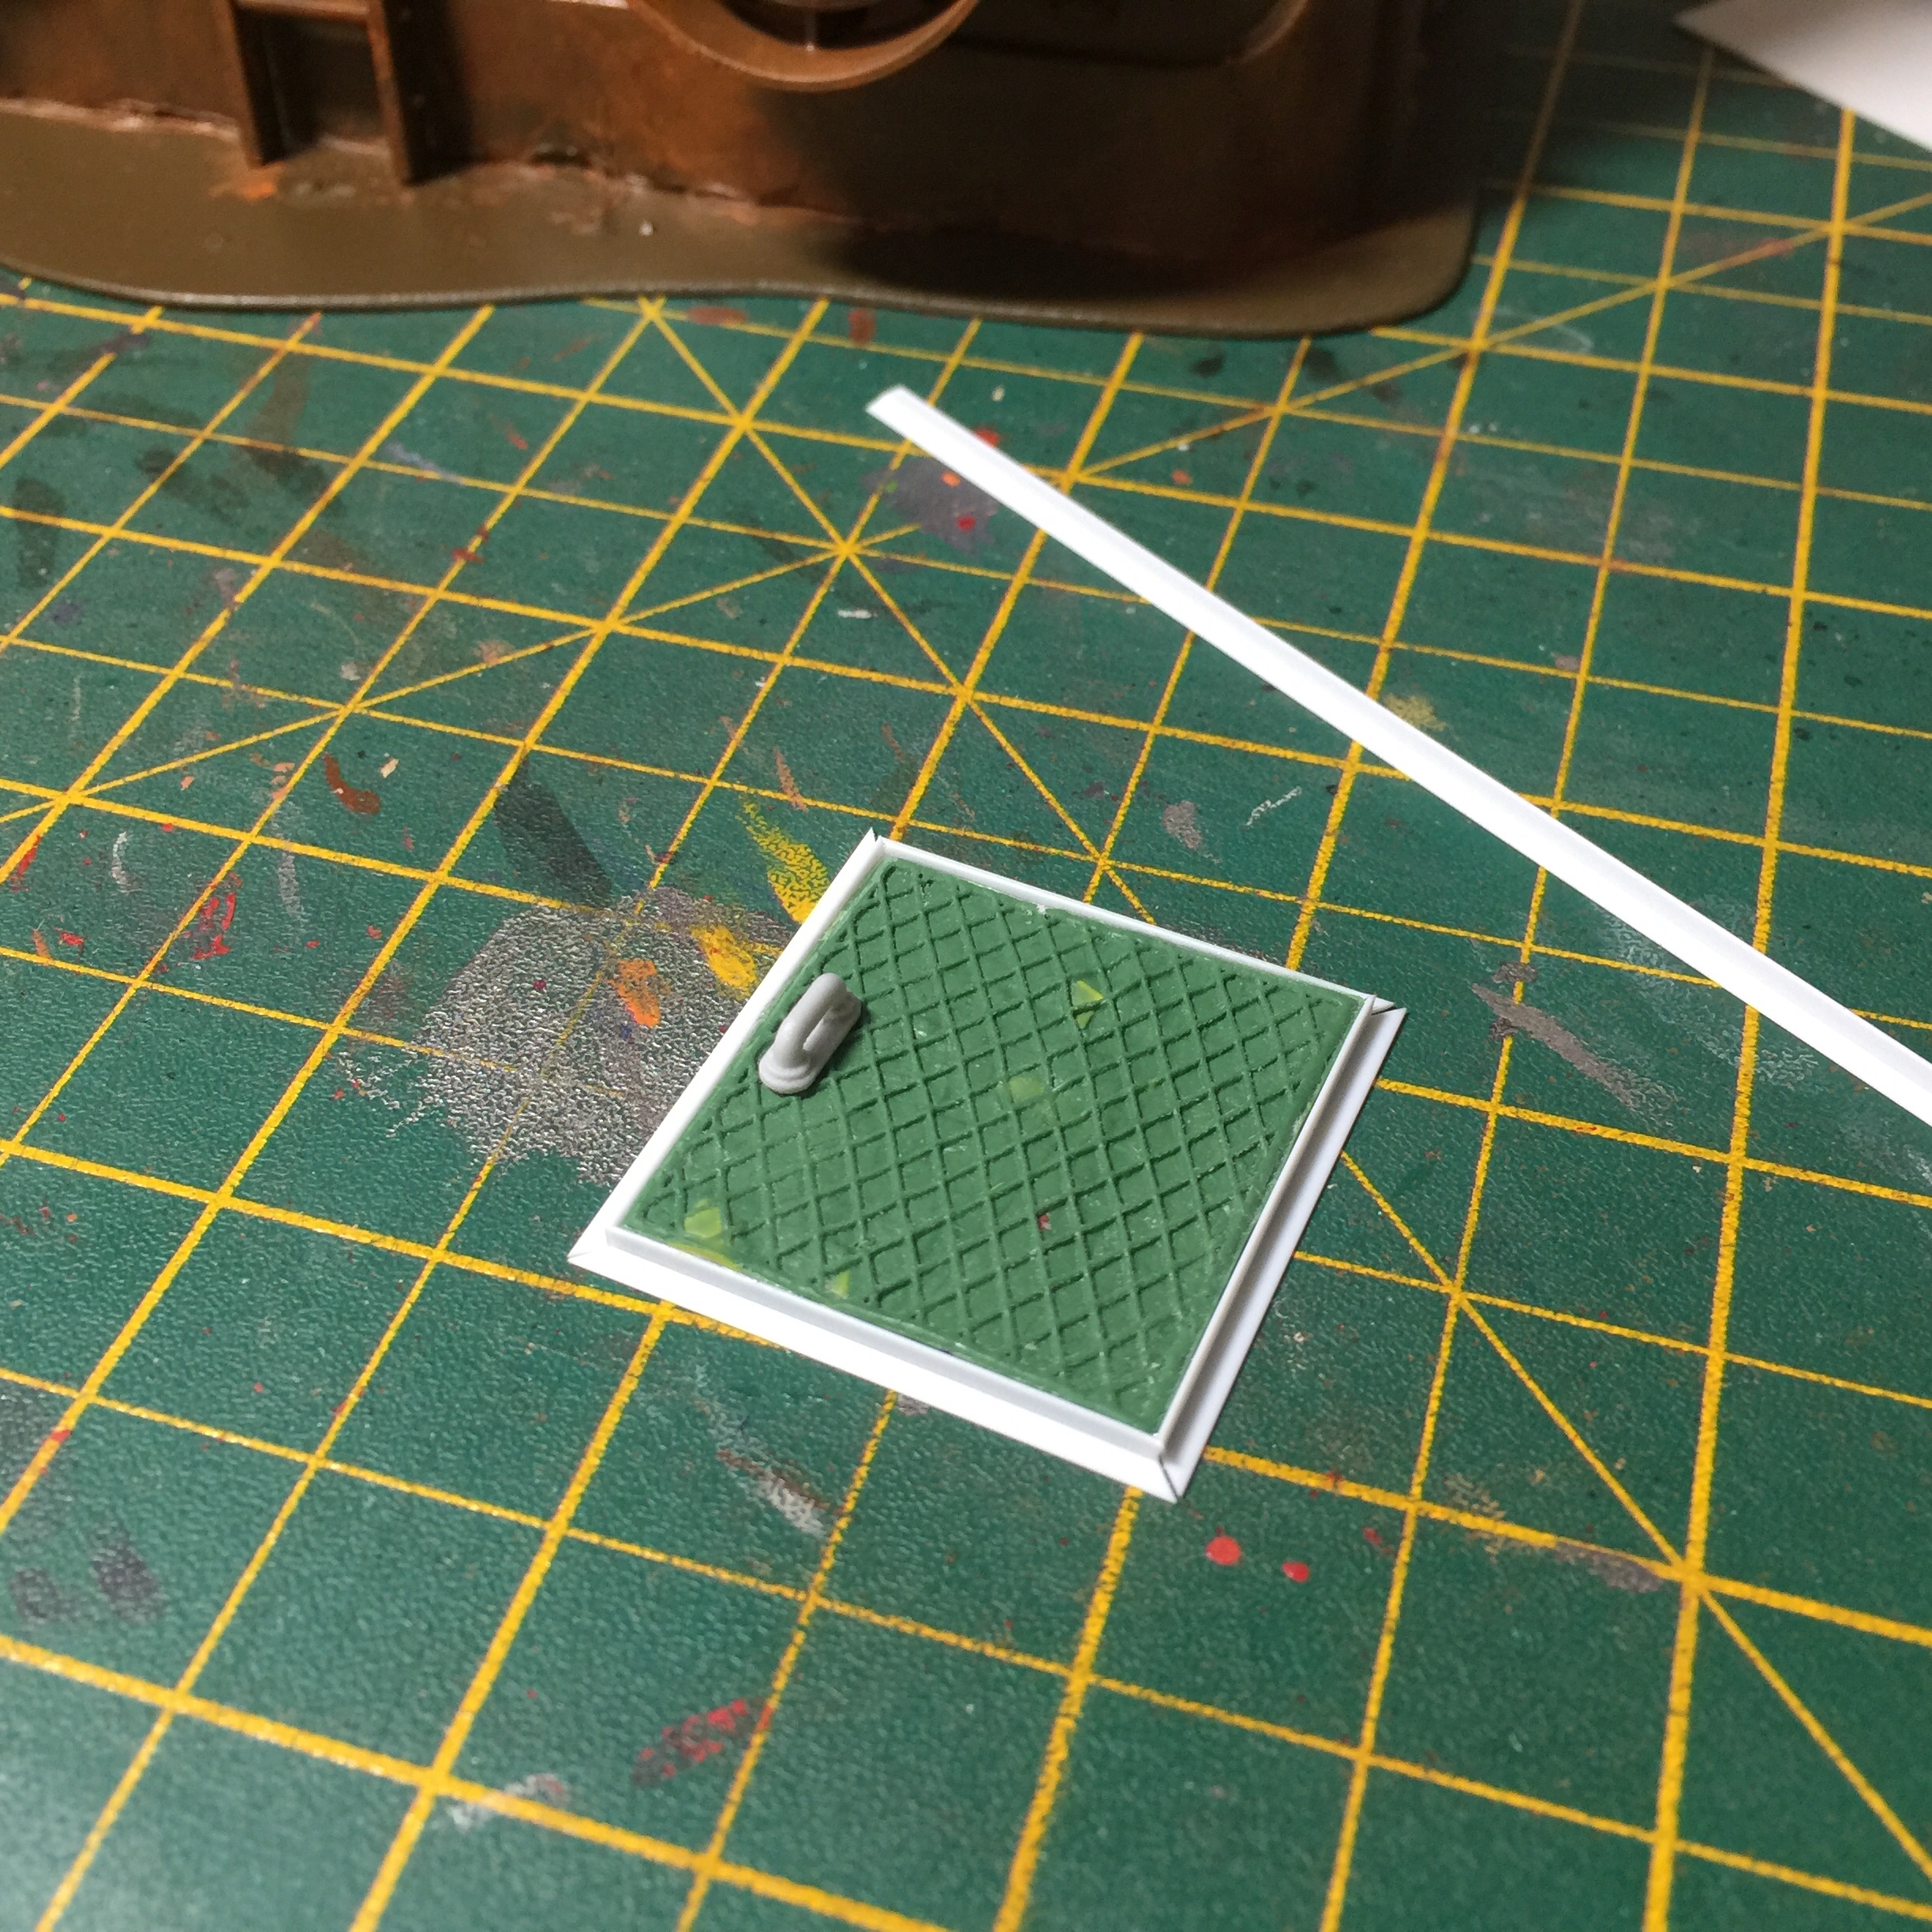
That’s the rust layer pretty much done, could add some weathering powders here and there but overall that will do. I did want a bit more detail on that top surface though. There is a layer of card from a chocolate box that had a nice checker plate pattern but it’s starting to disappear with the paint so I went and added in a hatch of sorts. Just some green stuff flattened out then a quick roll with one of those GSW textured rolling pins. I then used some Evergreen styrene angle to form a frame. That should do it and can move on to getting some colour onto the overall model now.
Base painting done

So that’s the initial paint layer done, again sprayed from a rattle can over the previous rust layer and with some salt sprinkled over the model to scrub away later, leaving the rust showing. Picked out a few items in other colours to add interest and now we’re ready to get the final weathering done then the basing… first thing to do next is some chipping with grey and metal paints.
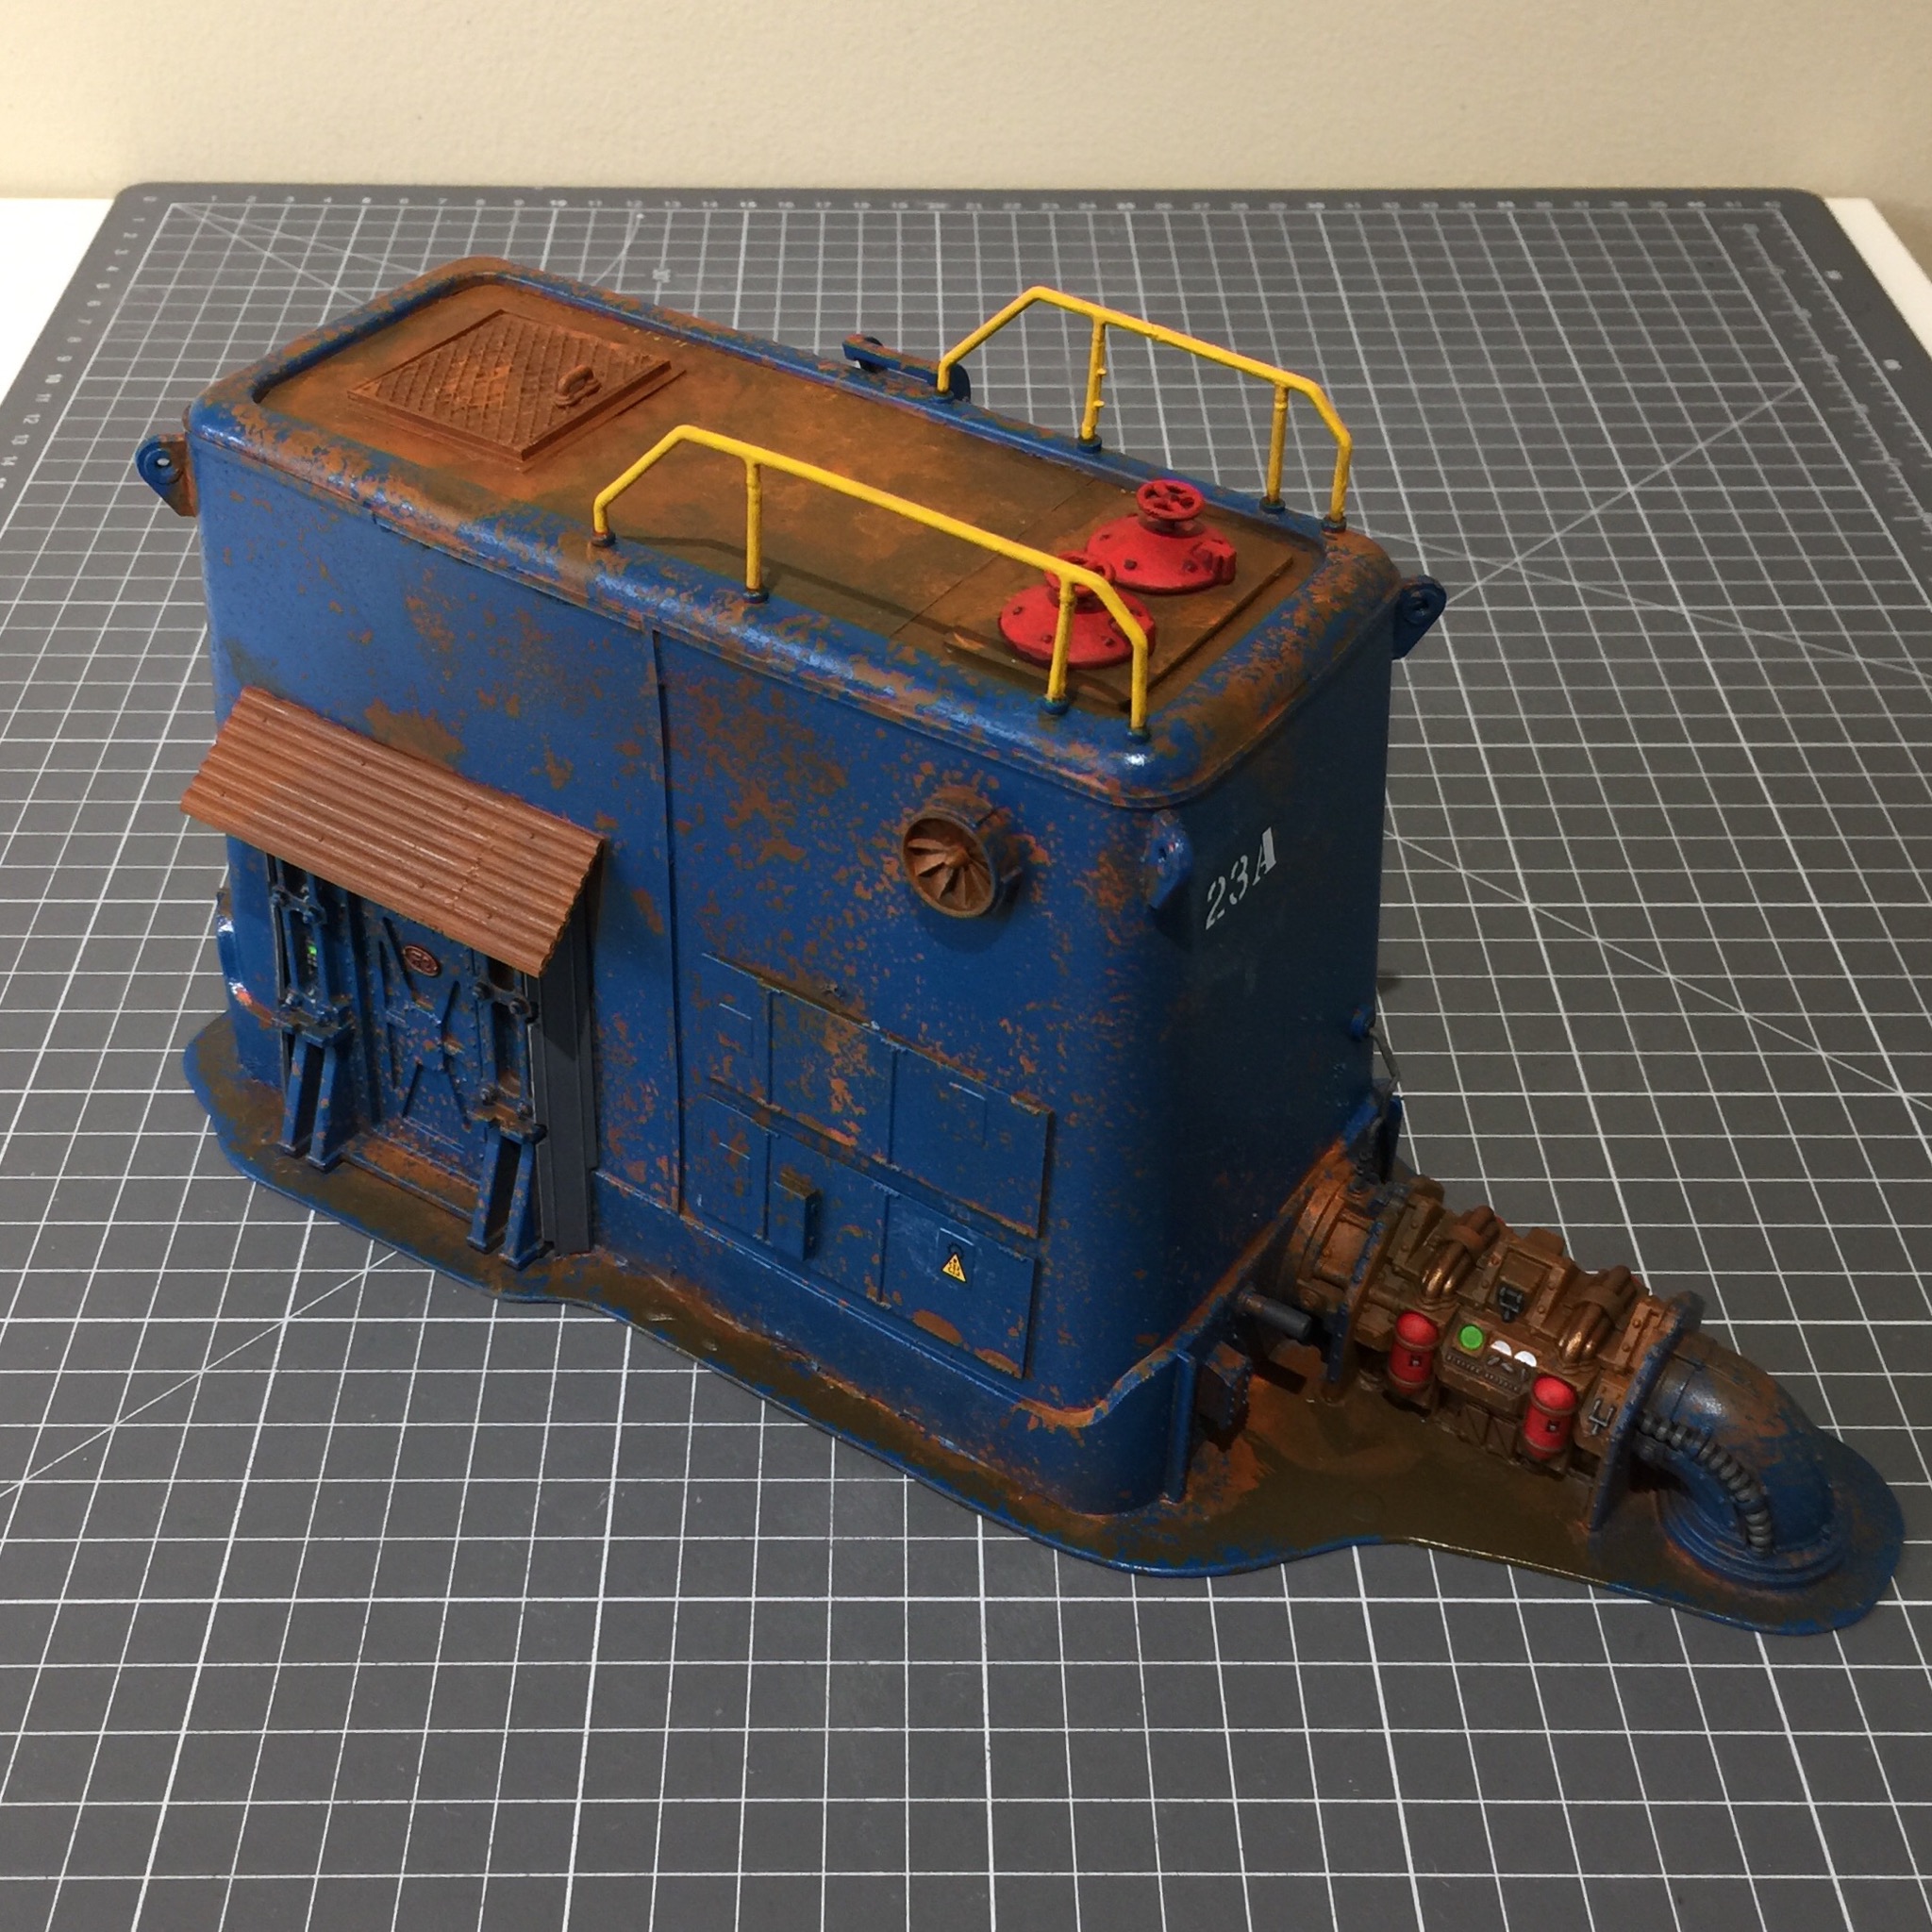
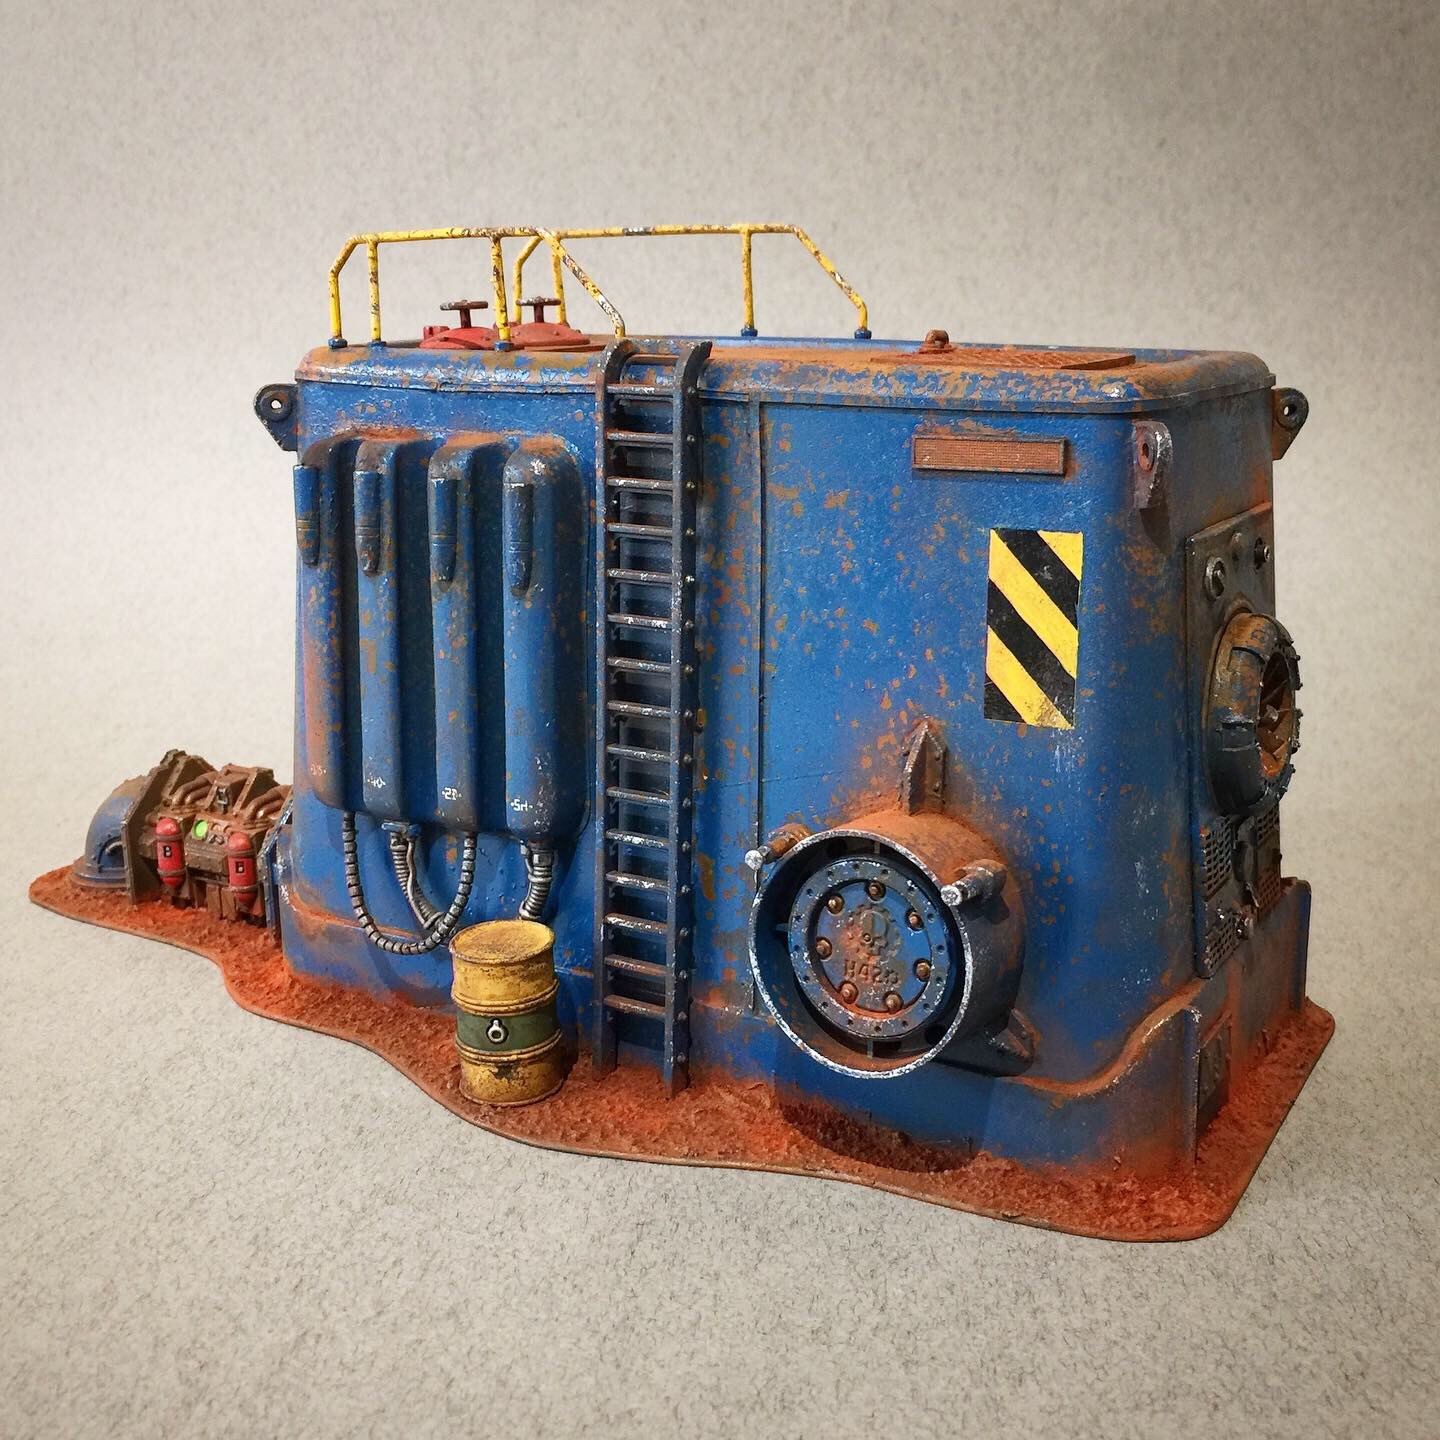
Sludge Processing Unit complete
 Mandatory barrel
 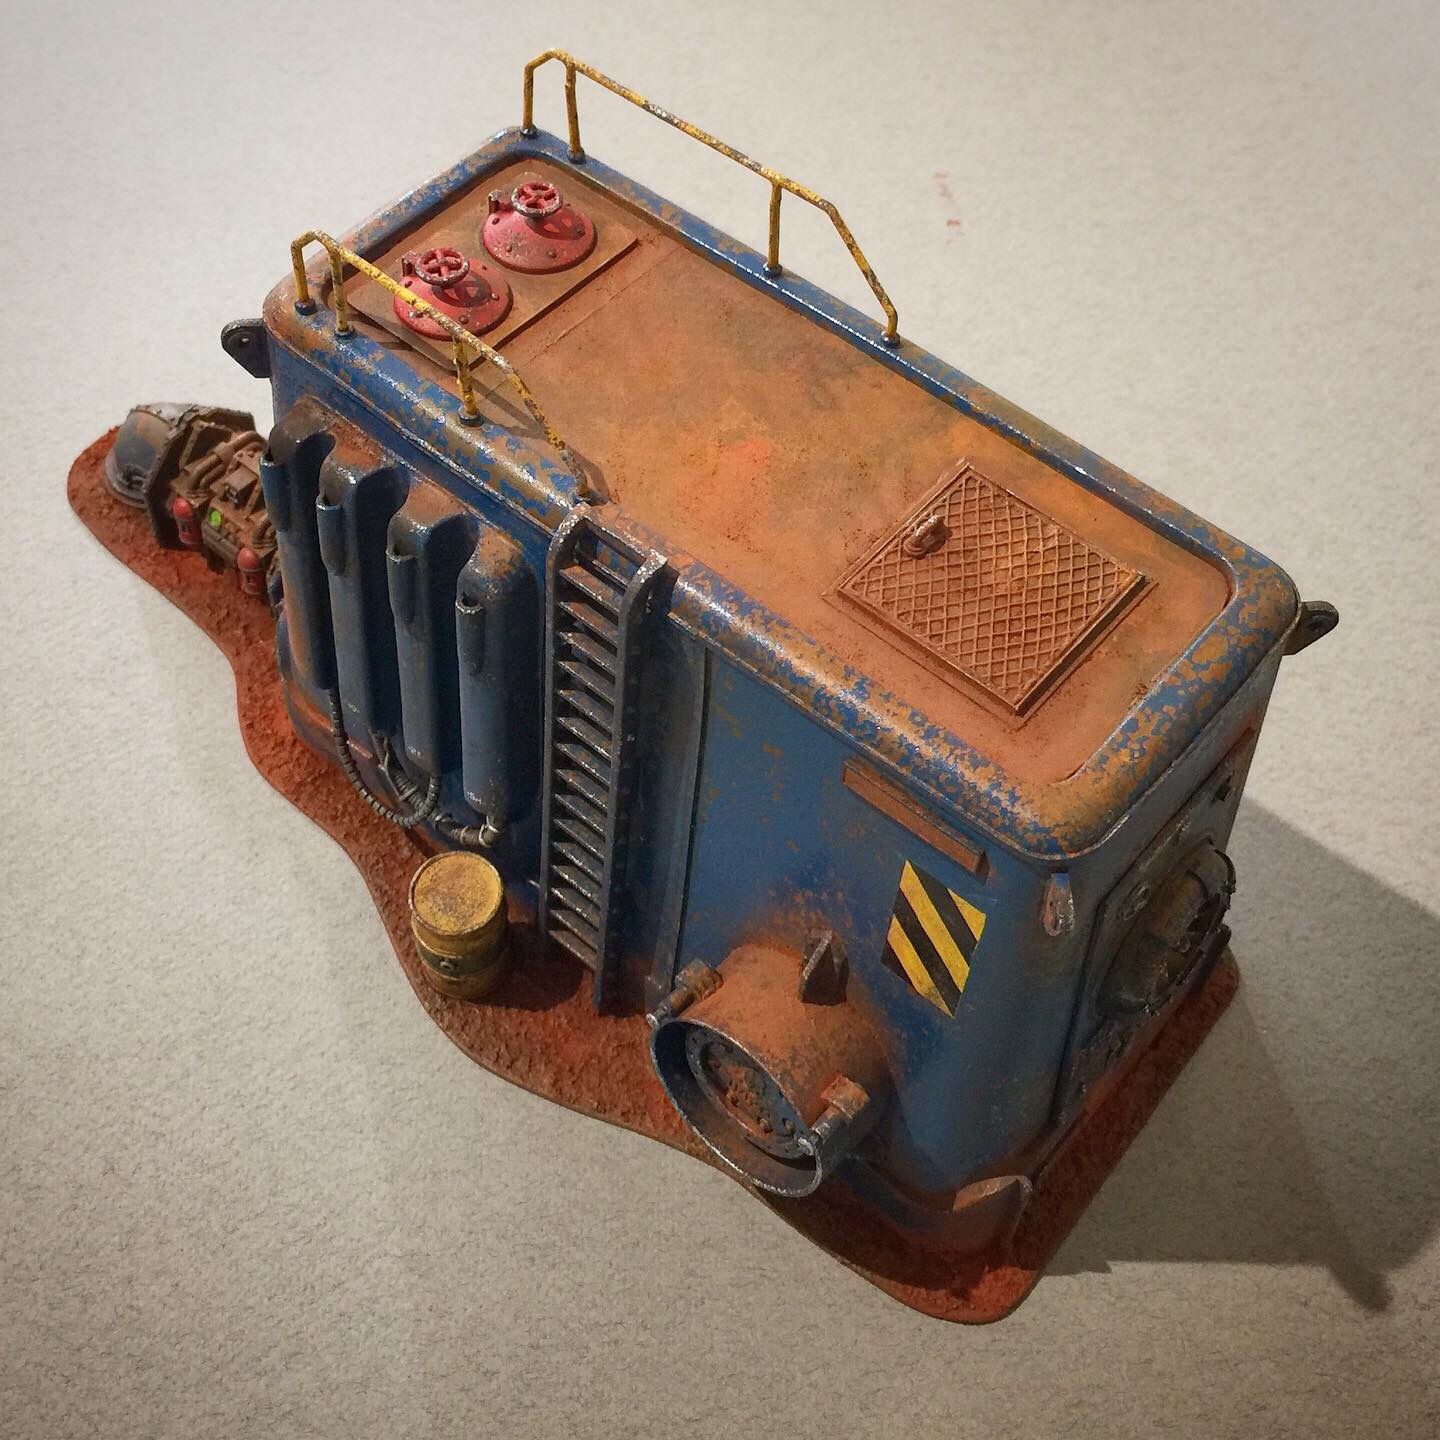 Top hatch and tank access
 Where the chems are collected
Well that’s the Sludge Processing Unit completed and ready to start separating sellable chems from the sludge found underground. It’s seen better days but remarkably it’s still operational, and will be a target for rival Ash Wasters and Nomads scavenging this area for vital resources.
Overall it was a similar process to the first terrain piece, spot a useful looking packaging design and super glue on some other bits and pieces. Give it a rusty base then use the “salt weathering” technique to get the worn and damaged paint look on top. Vital step at the end is getting the additional areas of chipping and wear then a final going over with the weathering powders.
Source bits are from GW, Zinge and various old tank model kits. The bigger the bits box the better! Hopefully I’ve disguised the washing machine pods box, at least until you are told what the base item is.
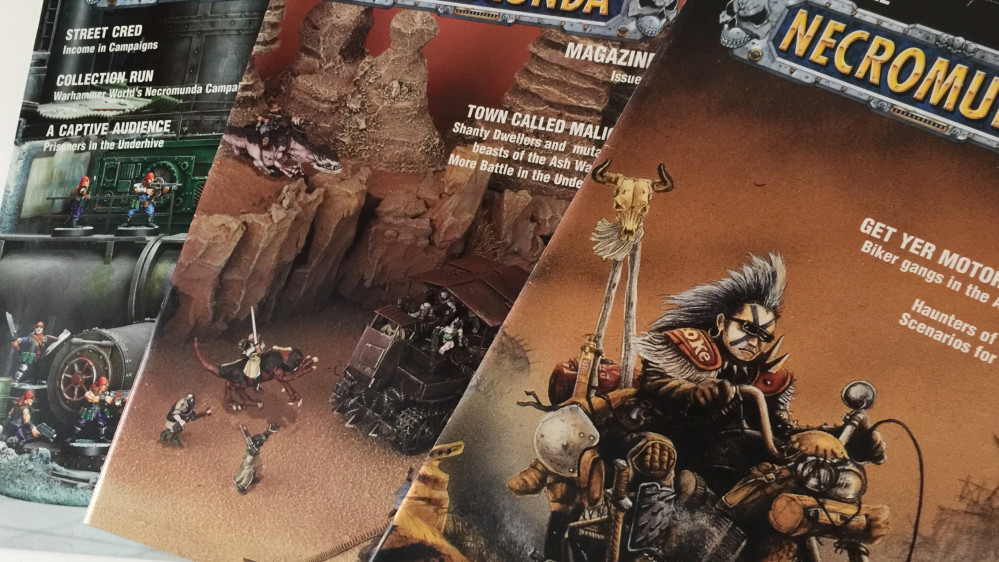
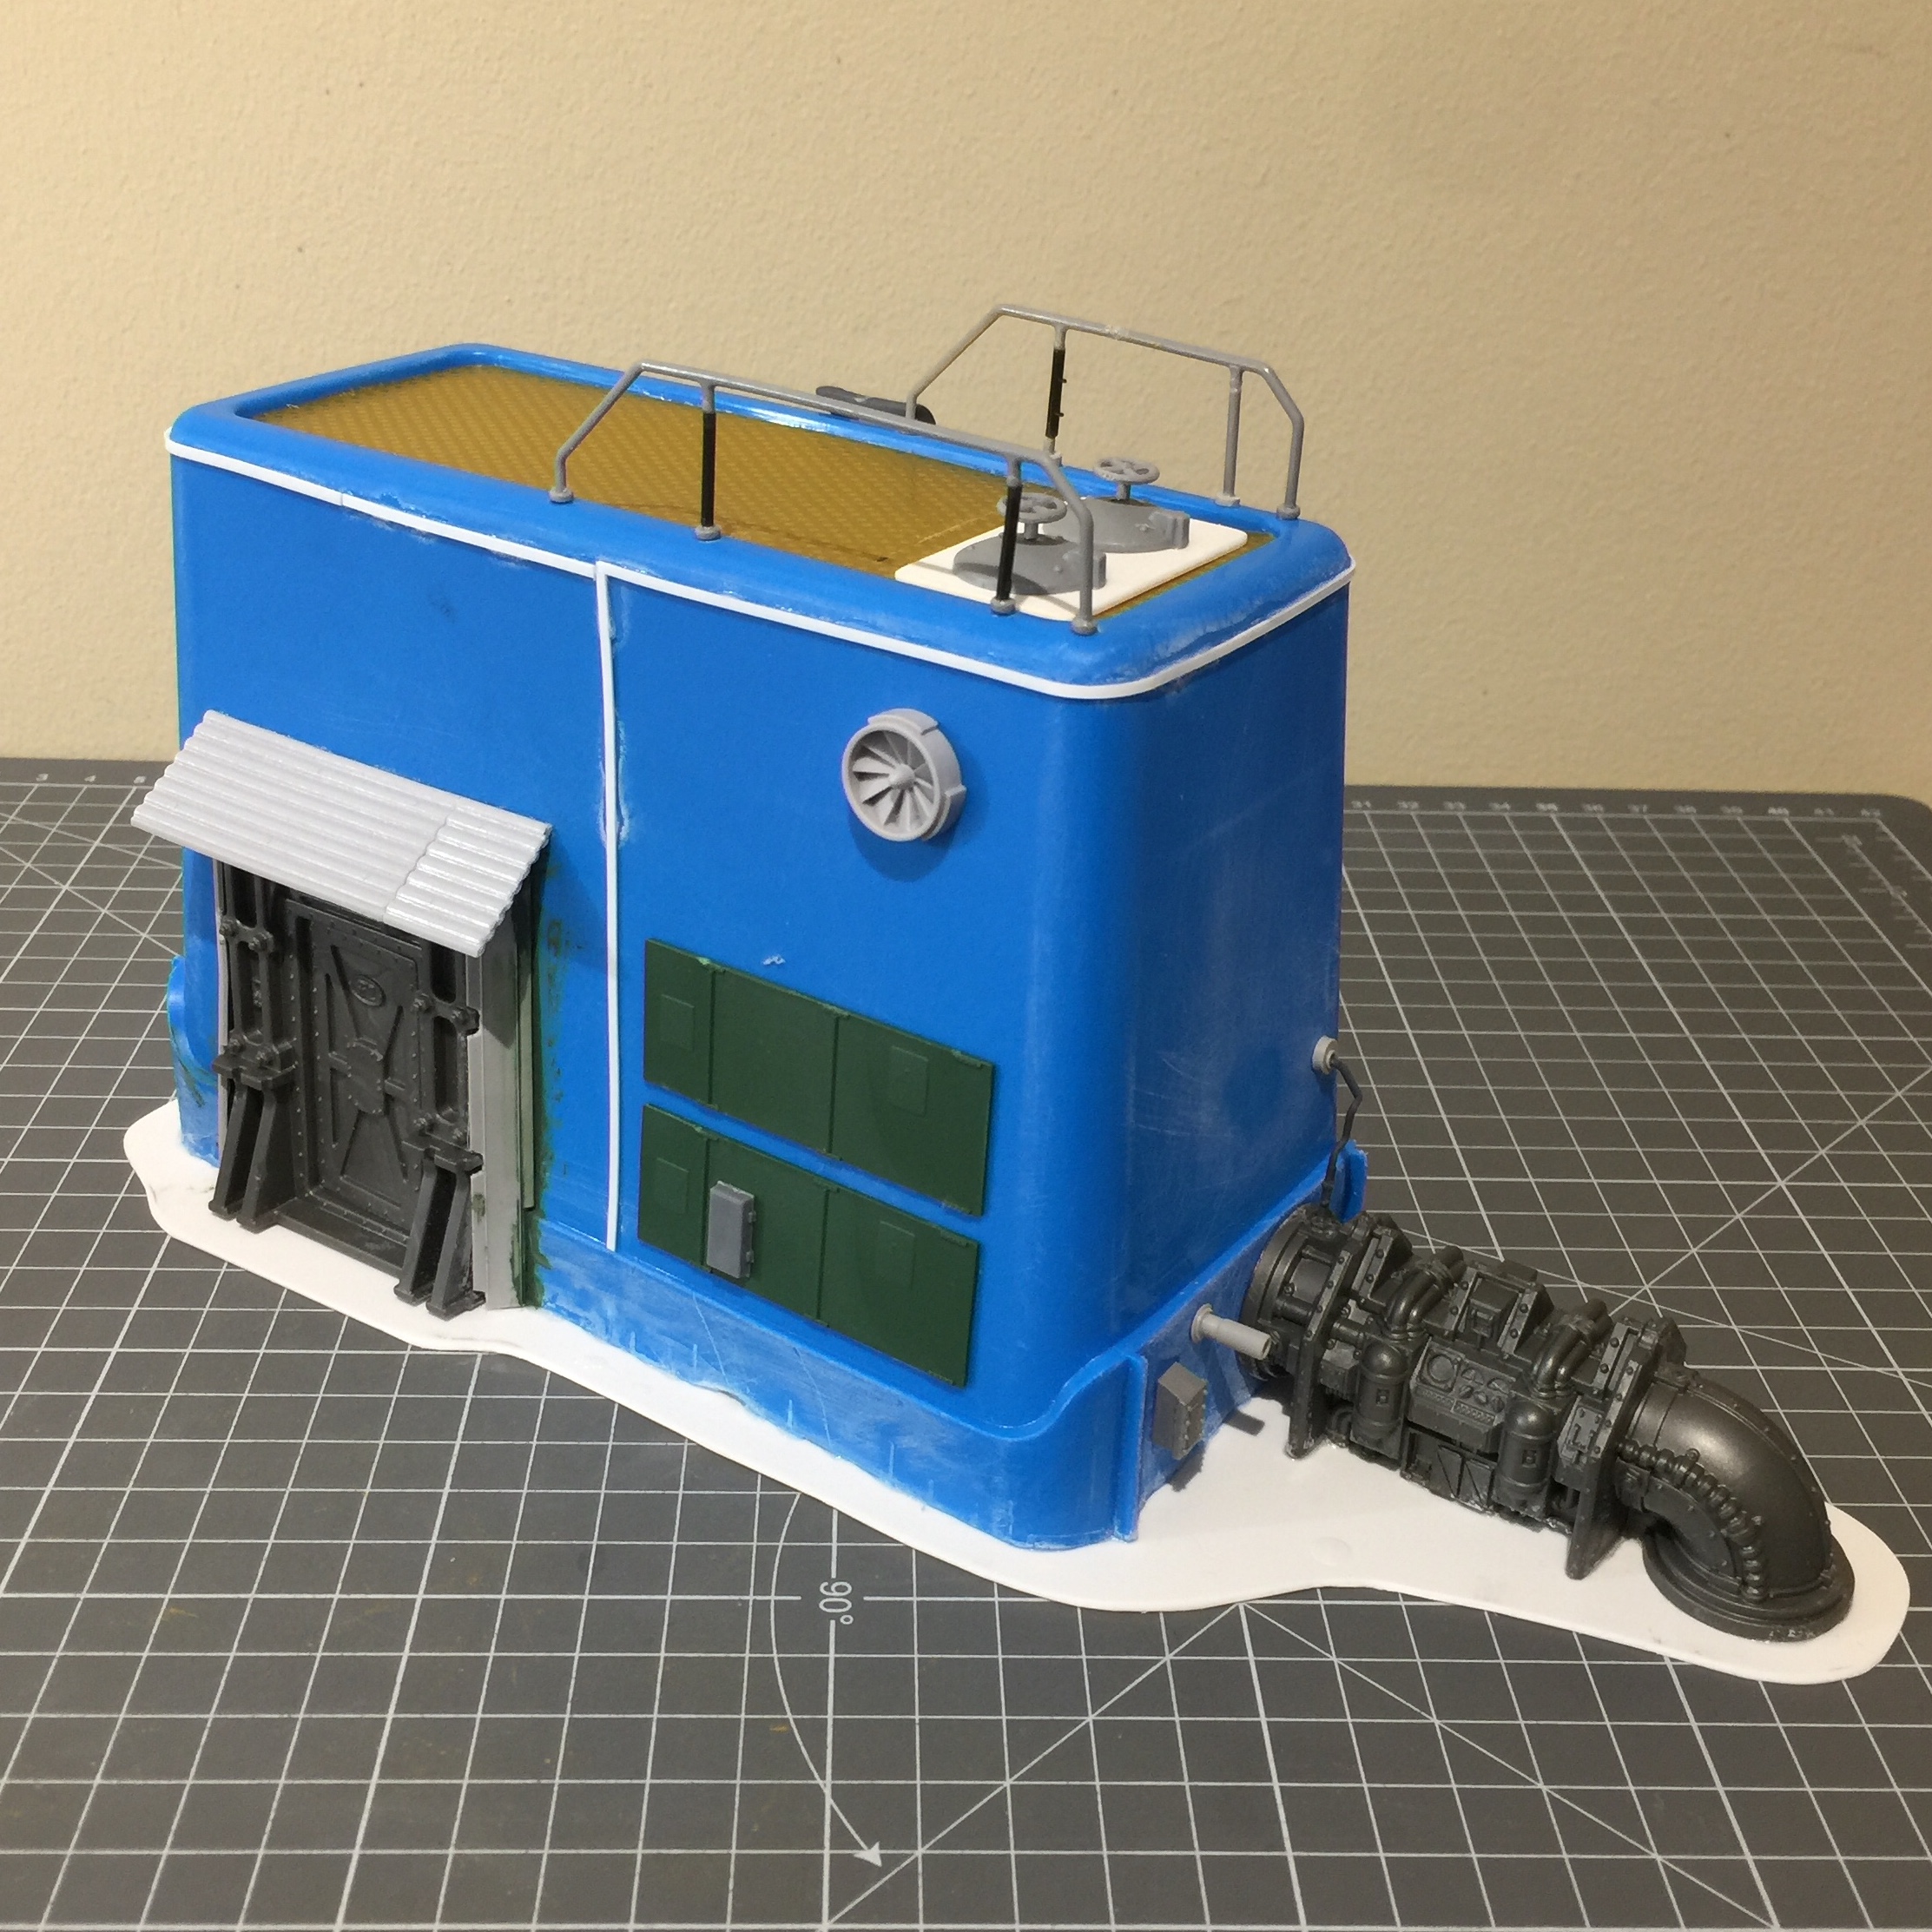
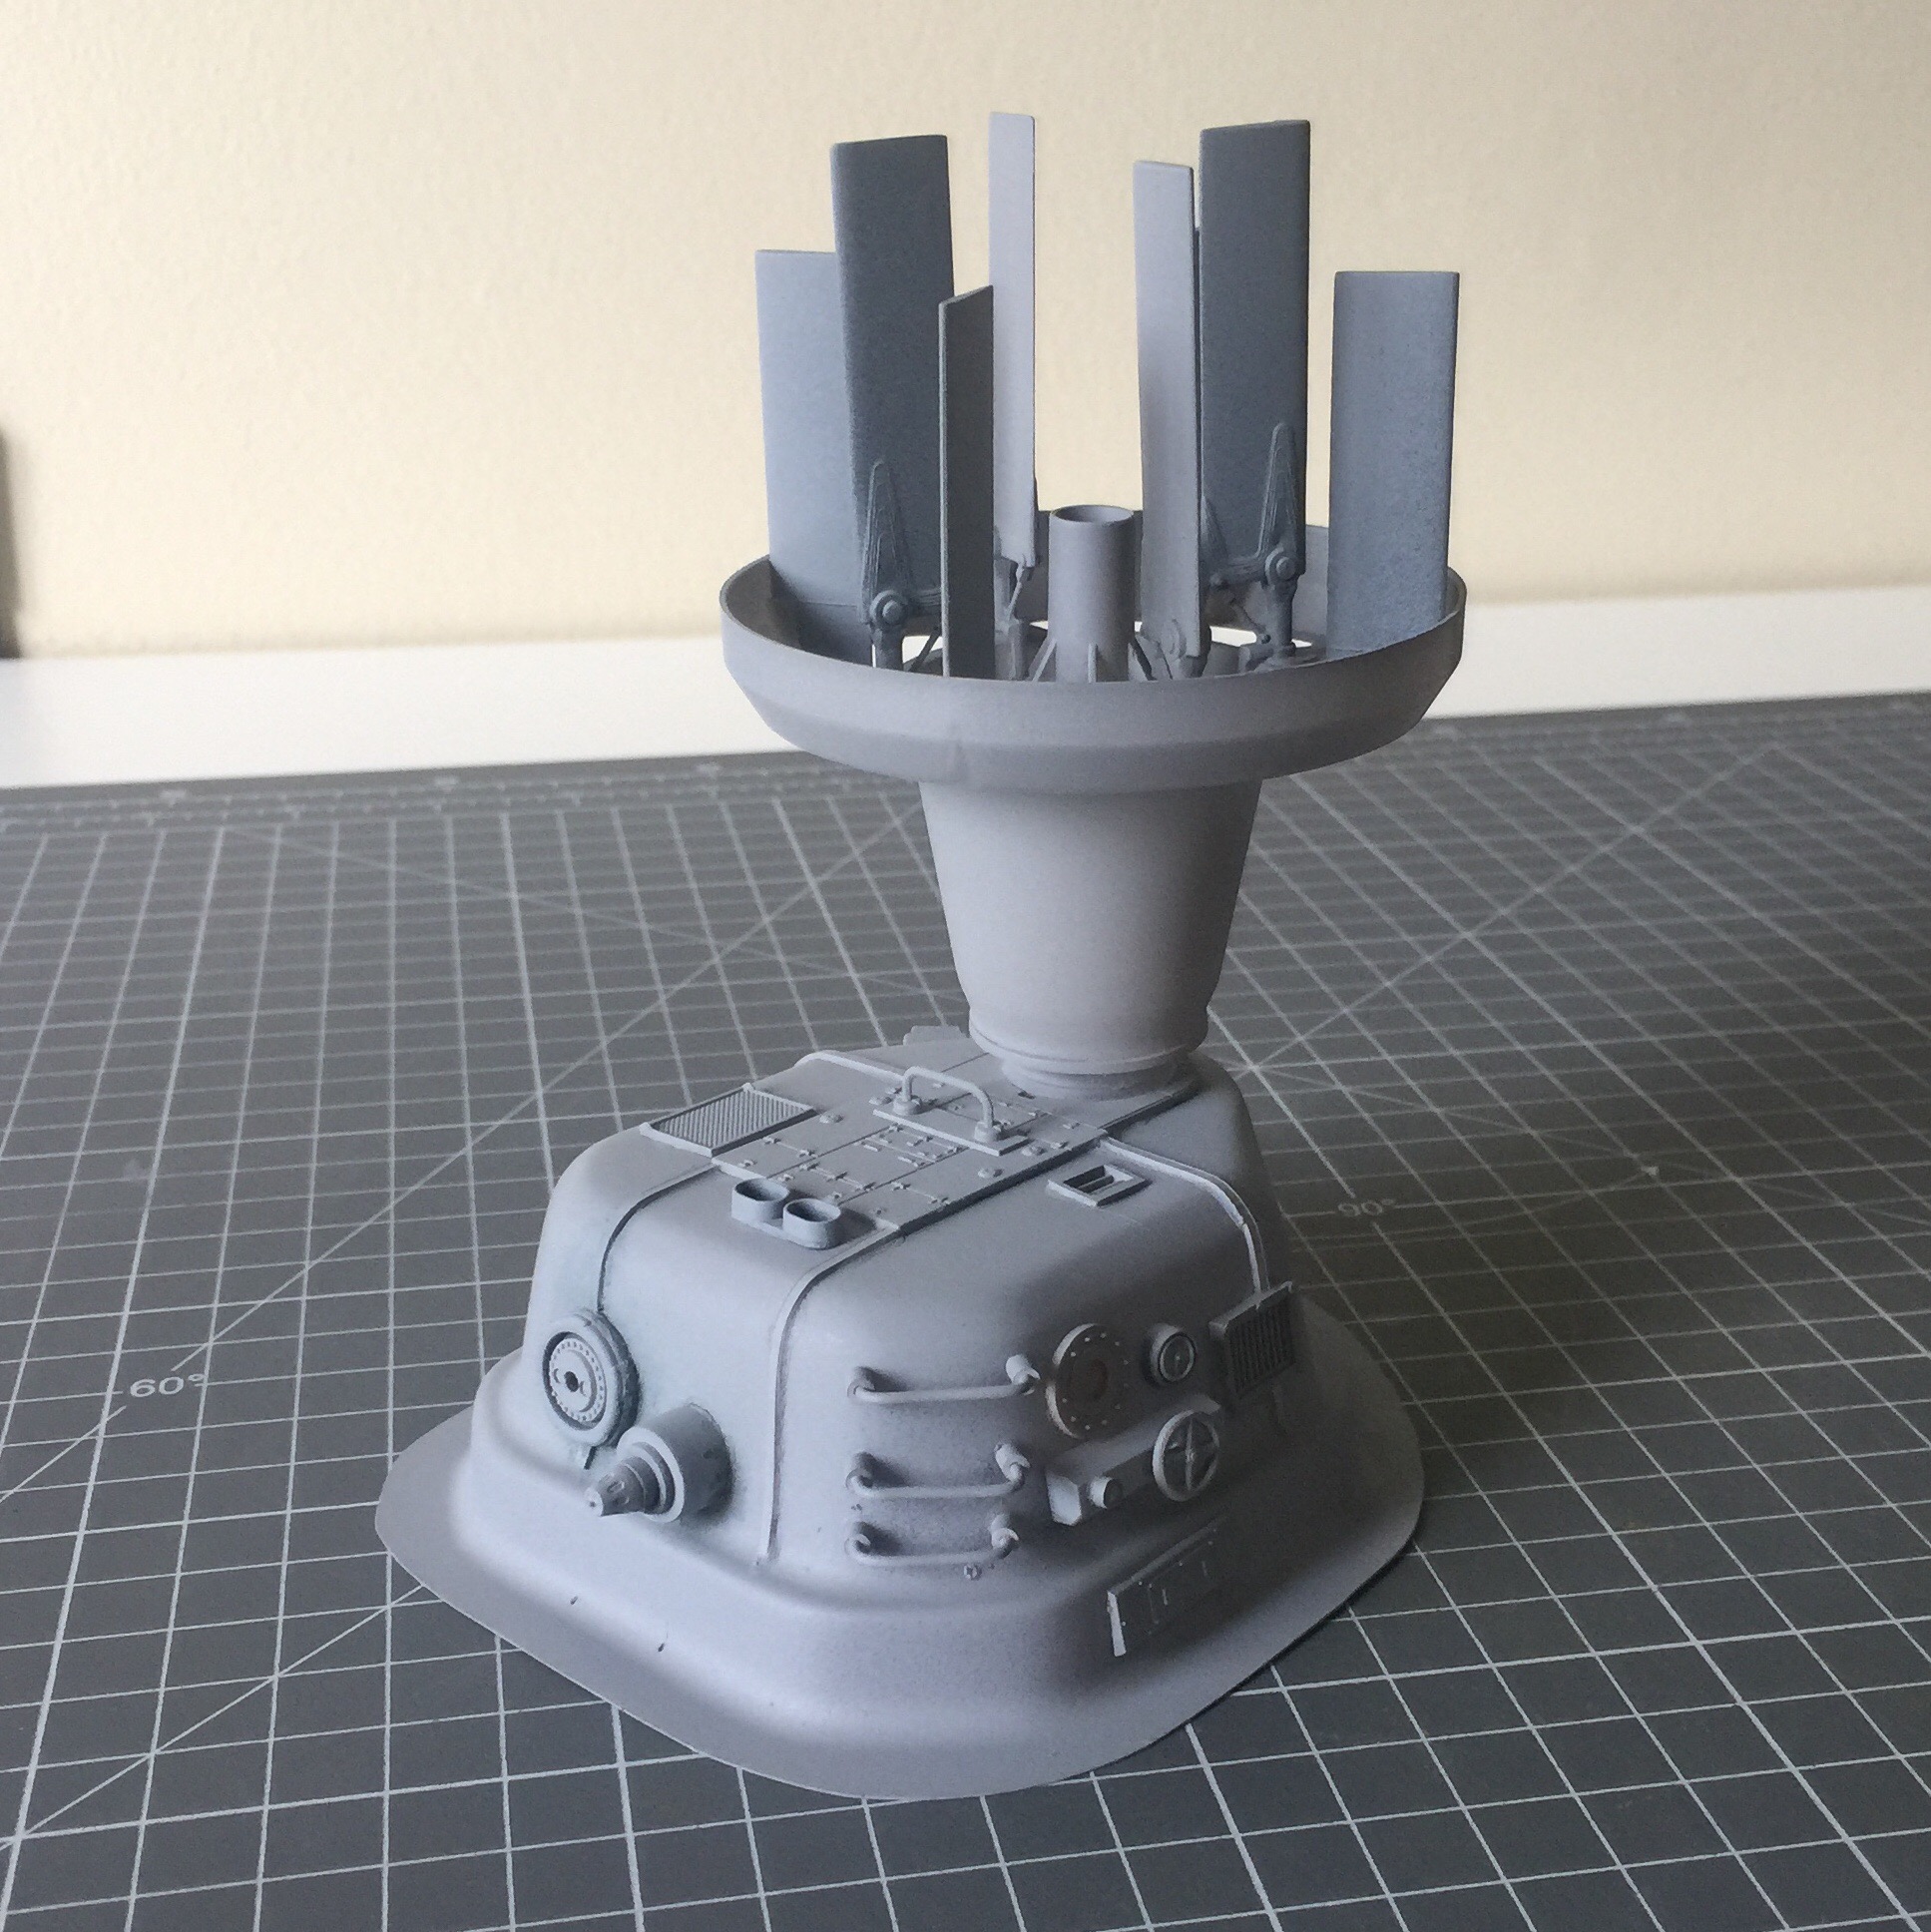
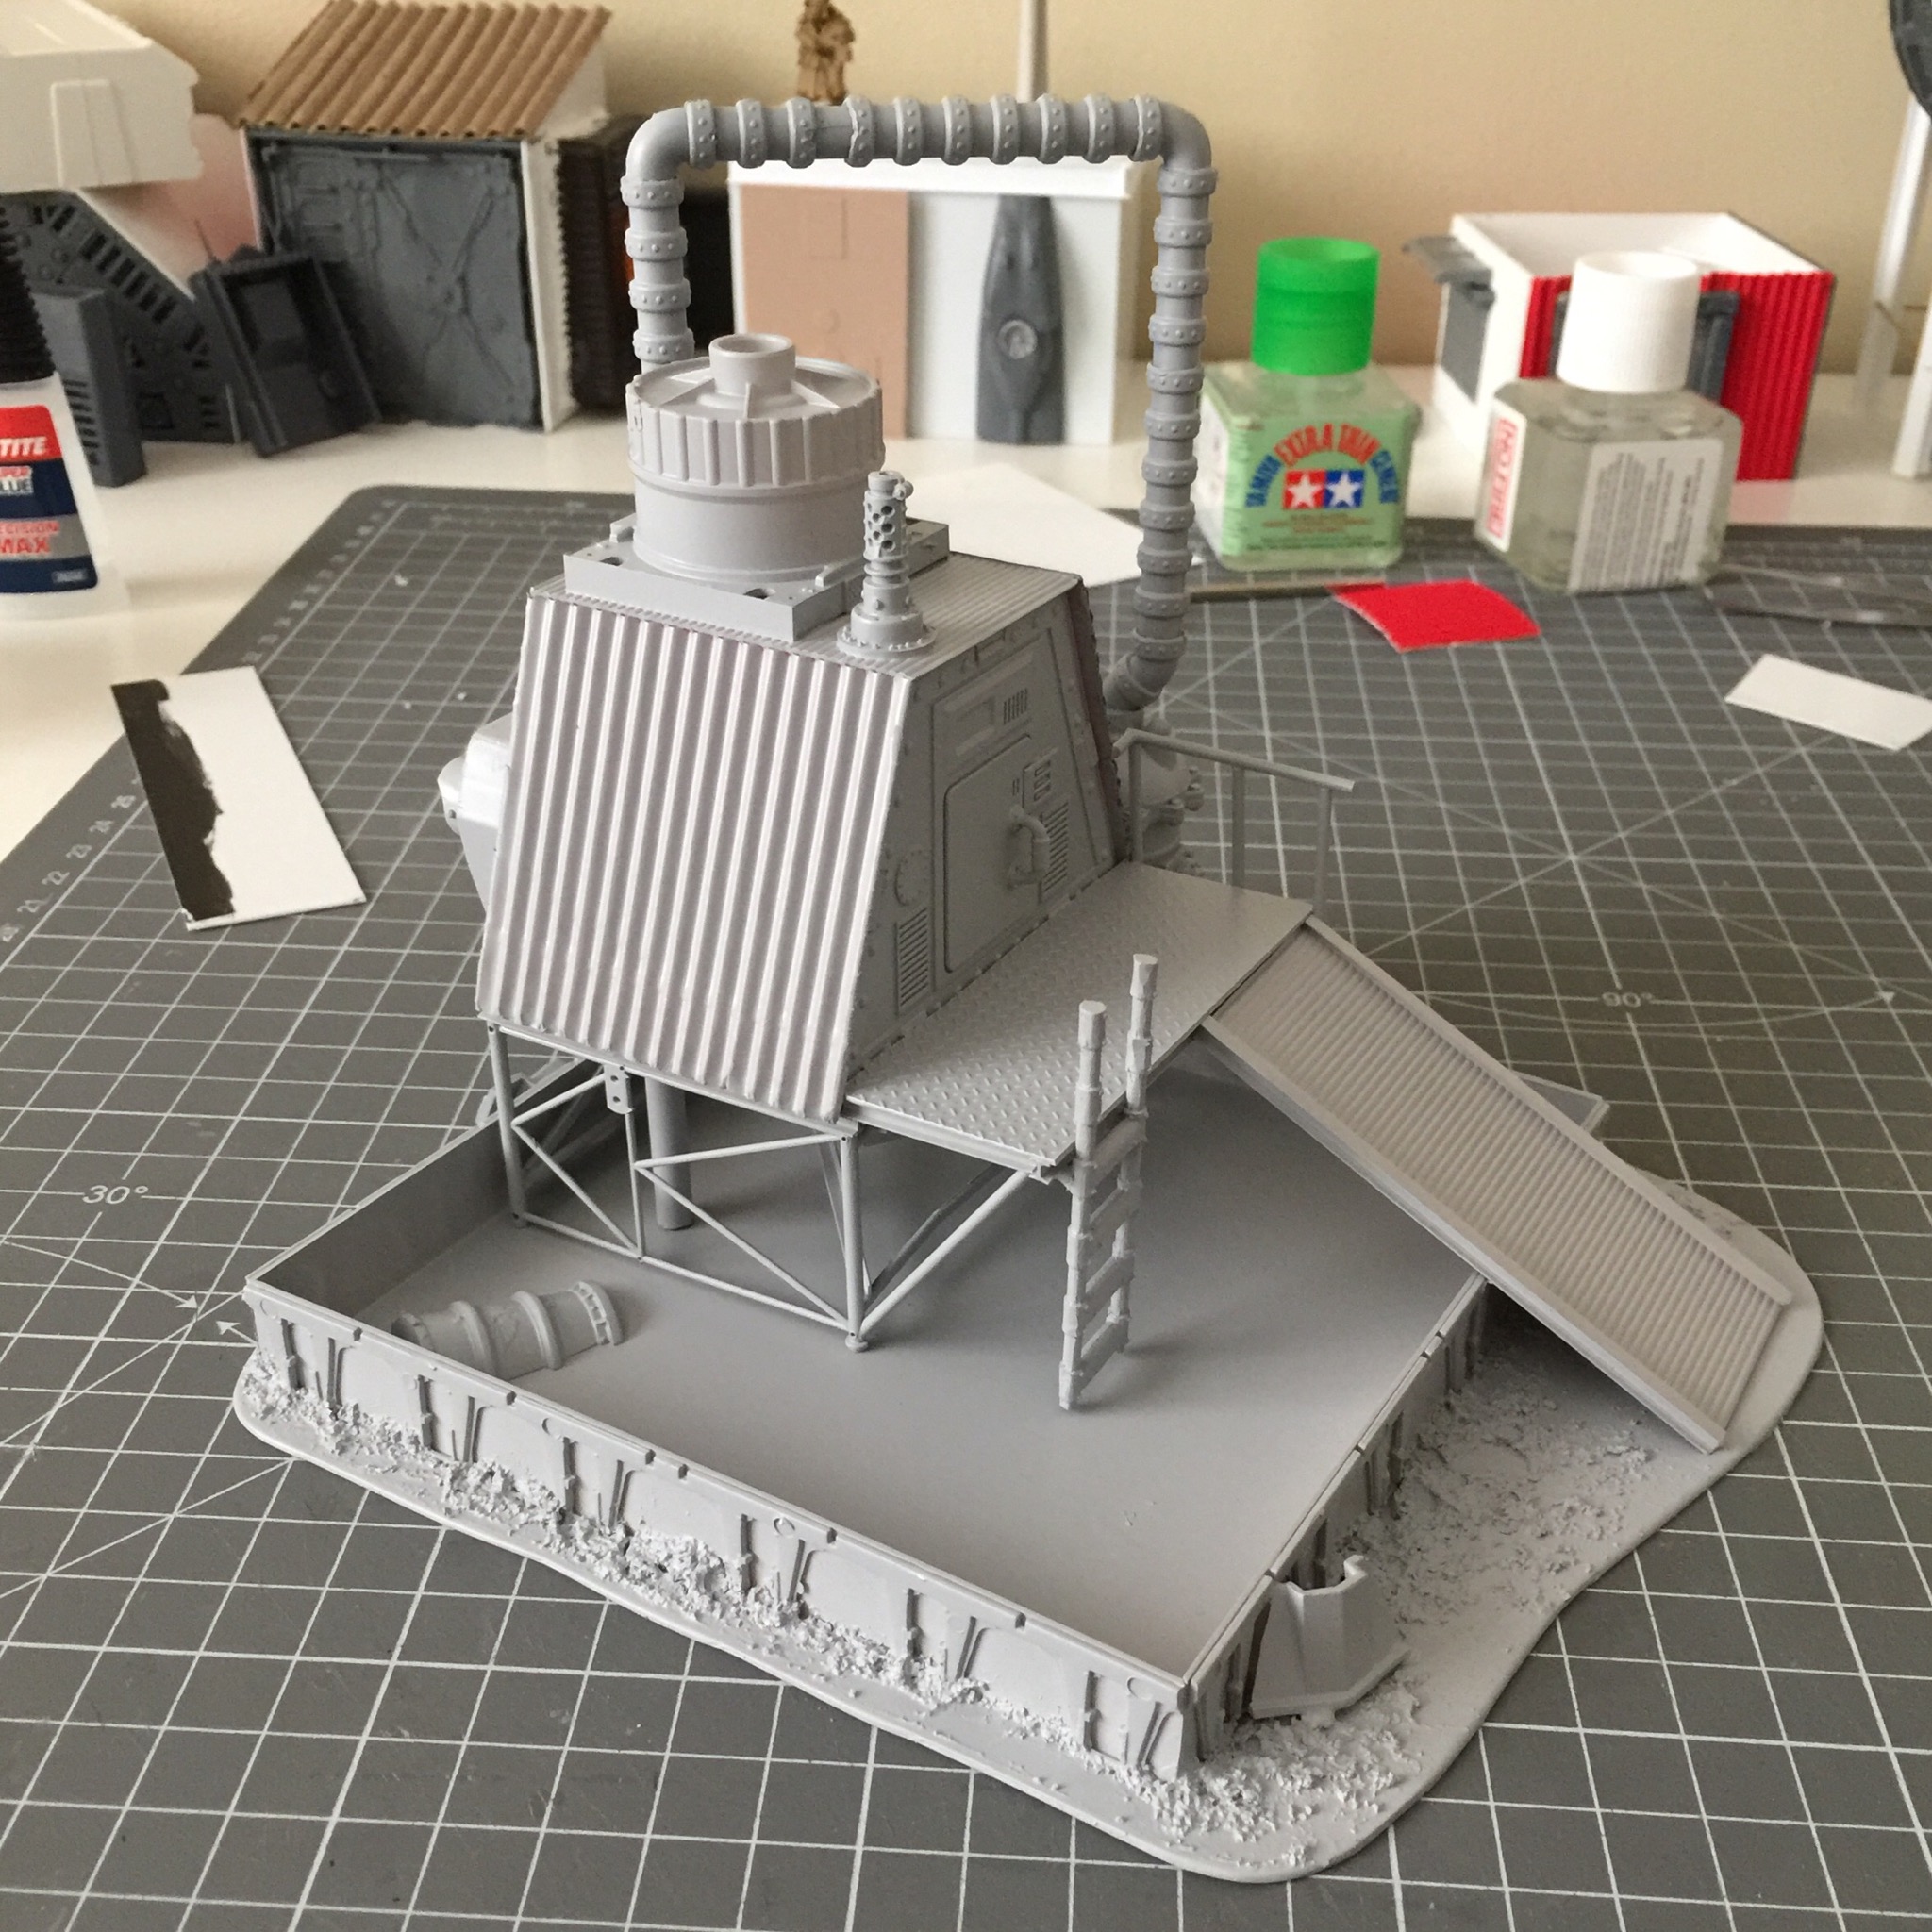
Windtrap started
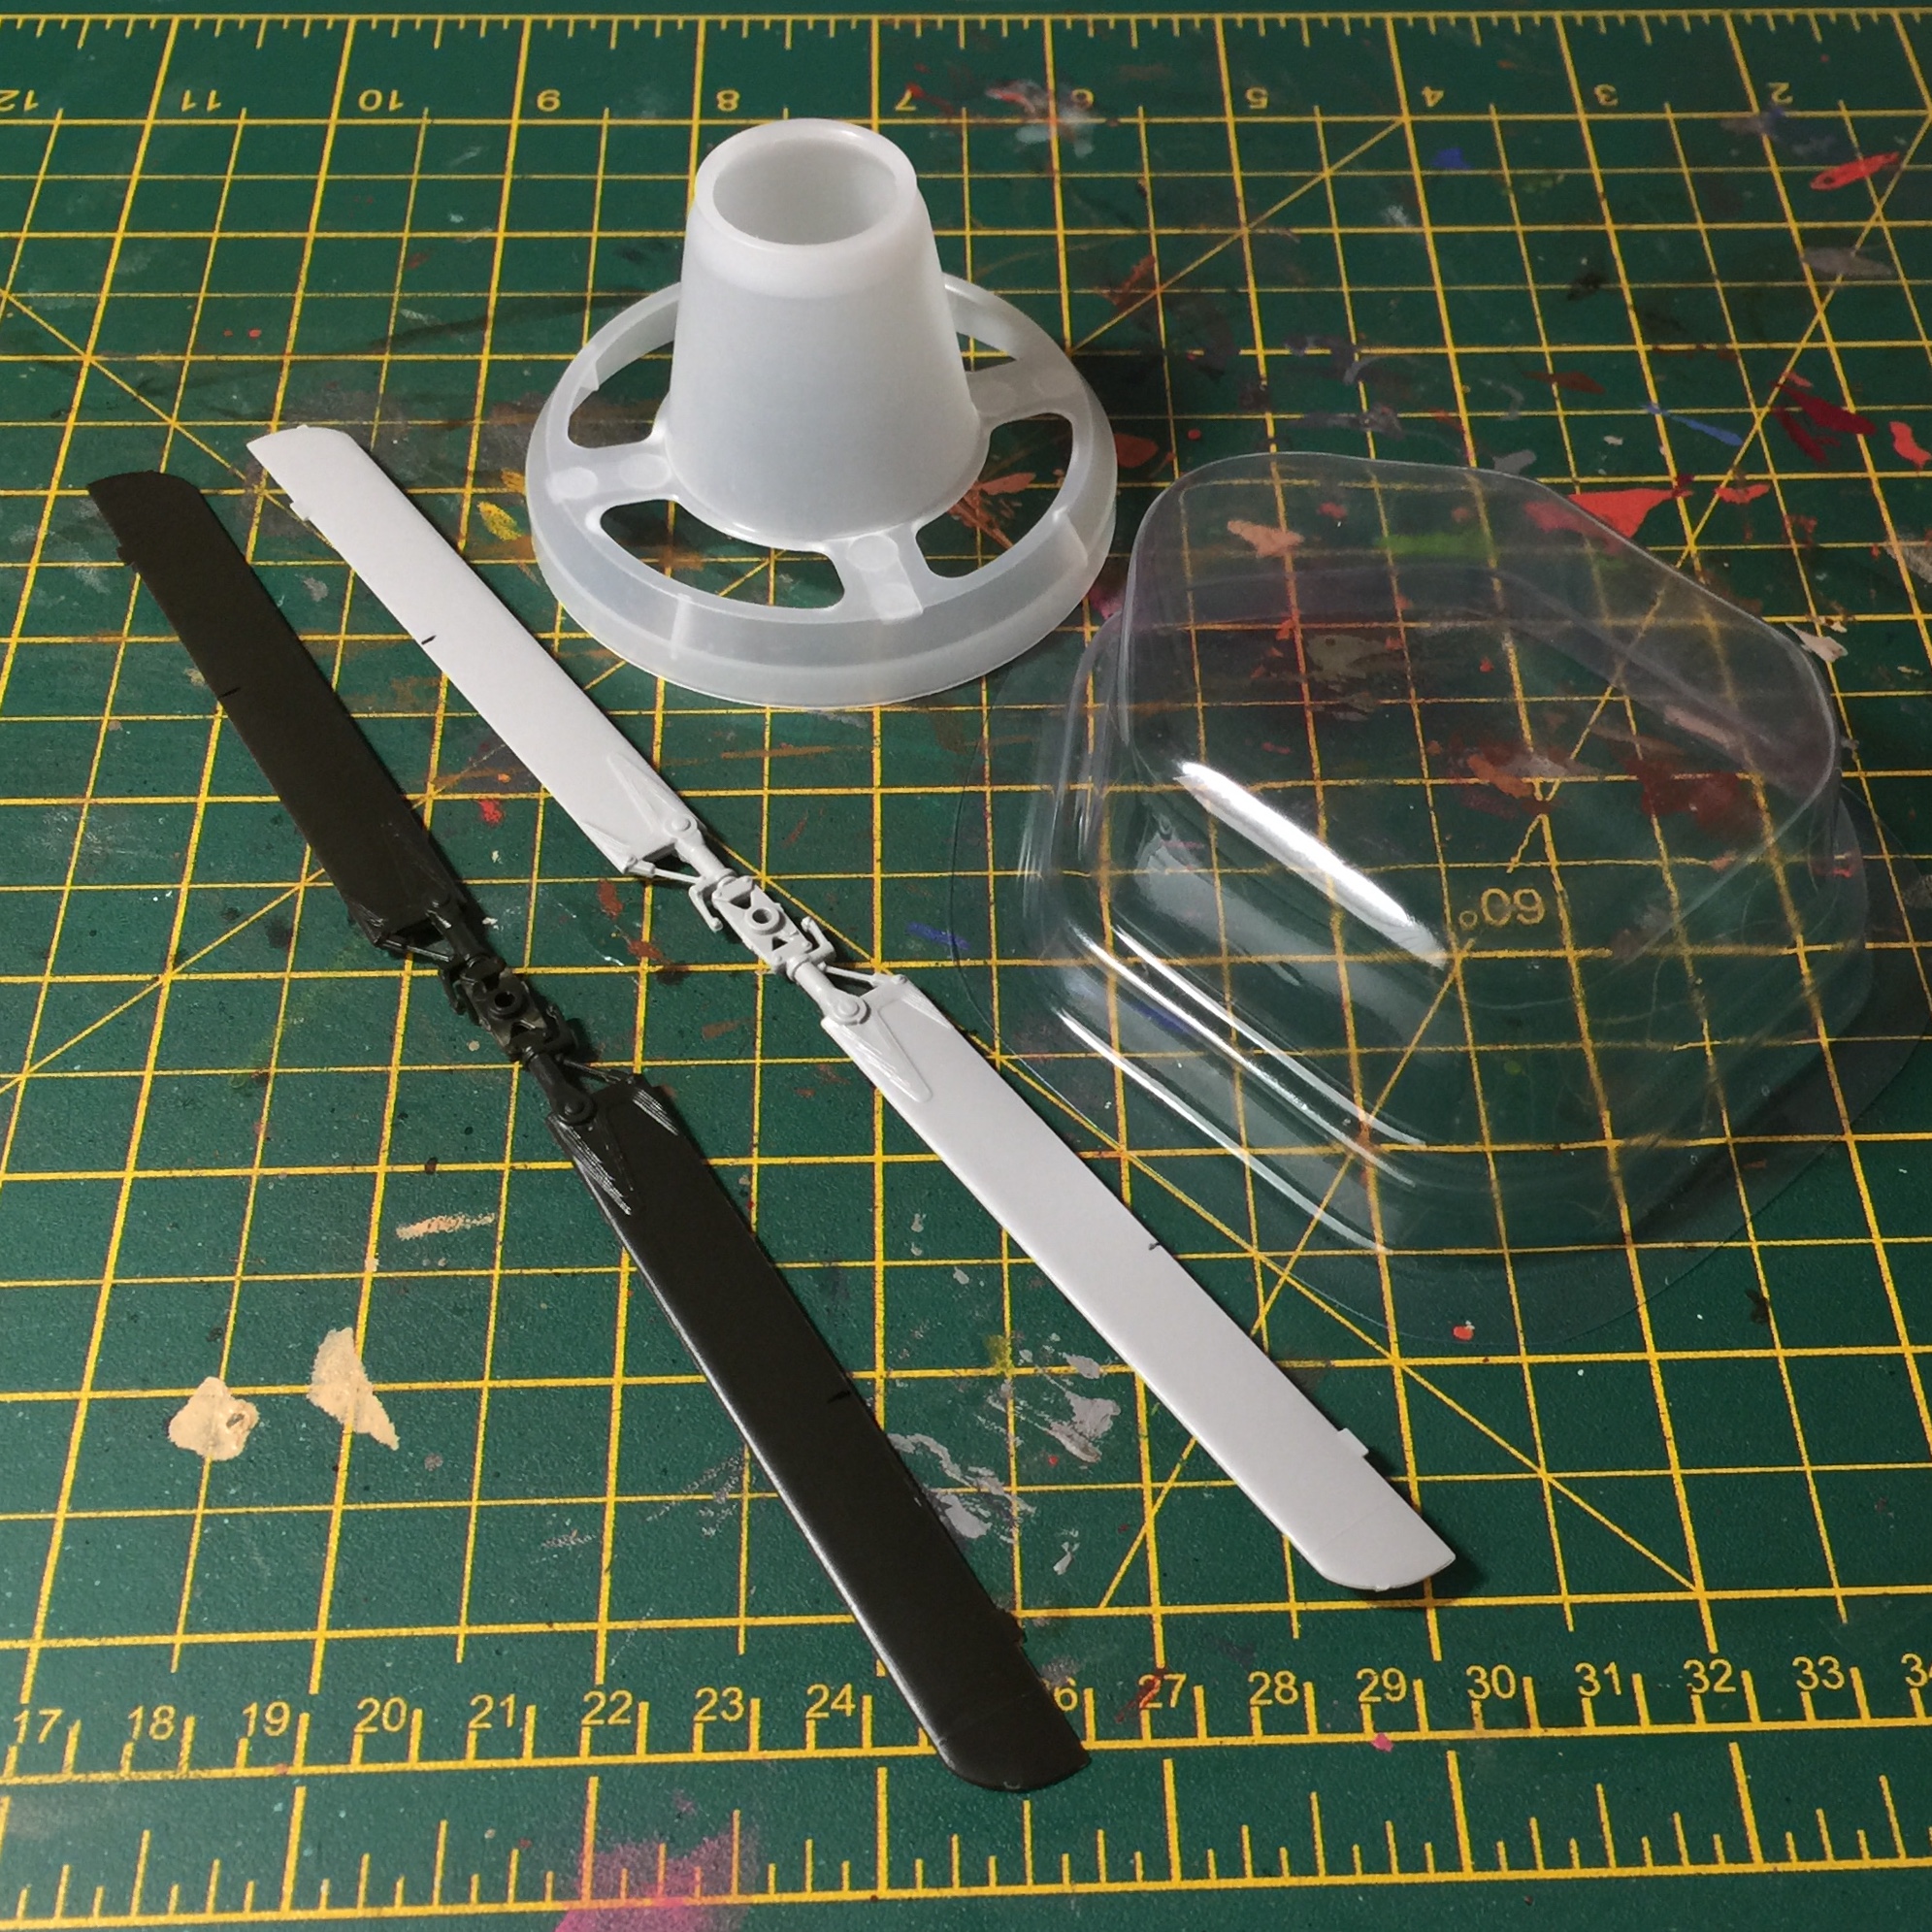 The basic bits to start with
The next piece is going to be a “Windtrap” as listed in the Necromunda Shanty Town territory table… essentially the blades on top spin in the breeze and cause the turbine within to draw air into the machine below. The moisture in the air then condenses and is stored in the catch basin below, underground. That’s the idea, I think a machine originally described as part of the Dune universe. Then the wider Necromunda fiction.
So I’ve got these pieces to start with, some packaging from something and a couple of helicopter kit blades. The rest will just be whatever looks right when glued onto it.
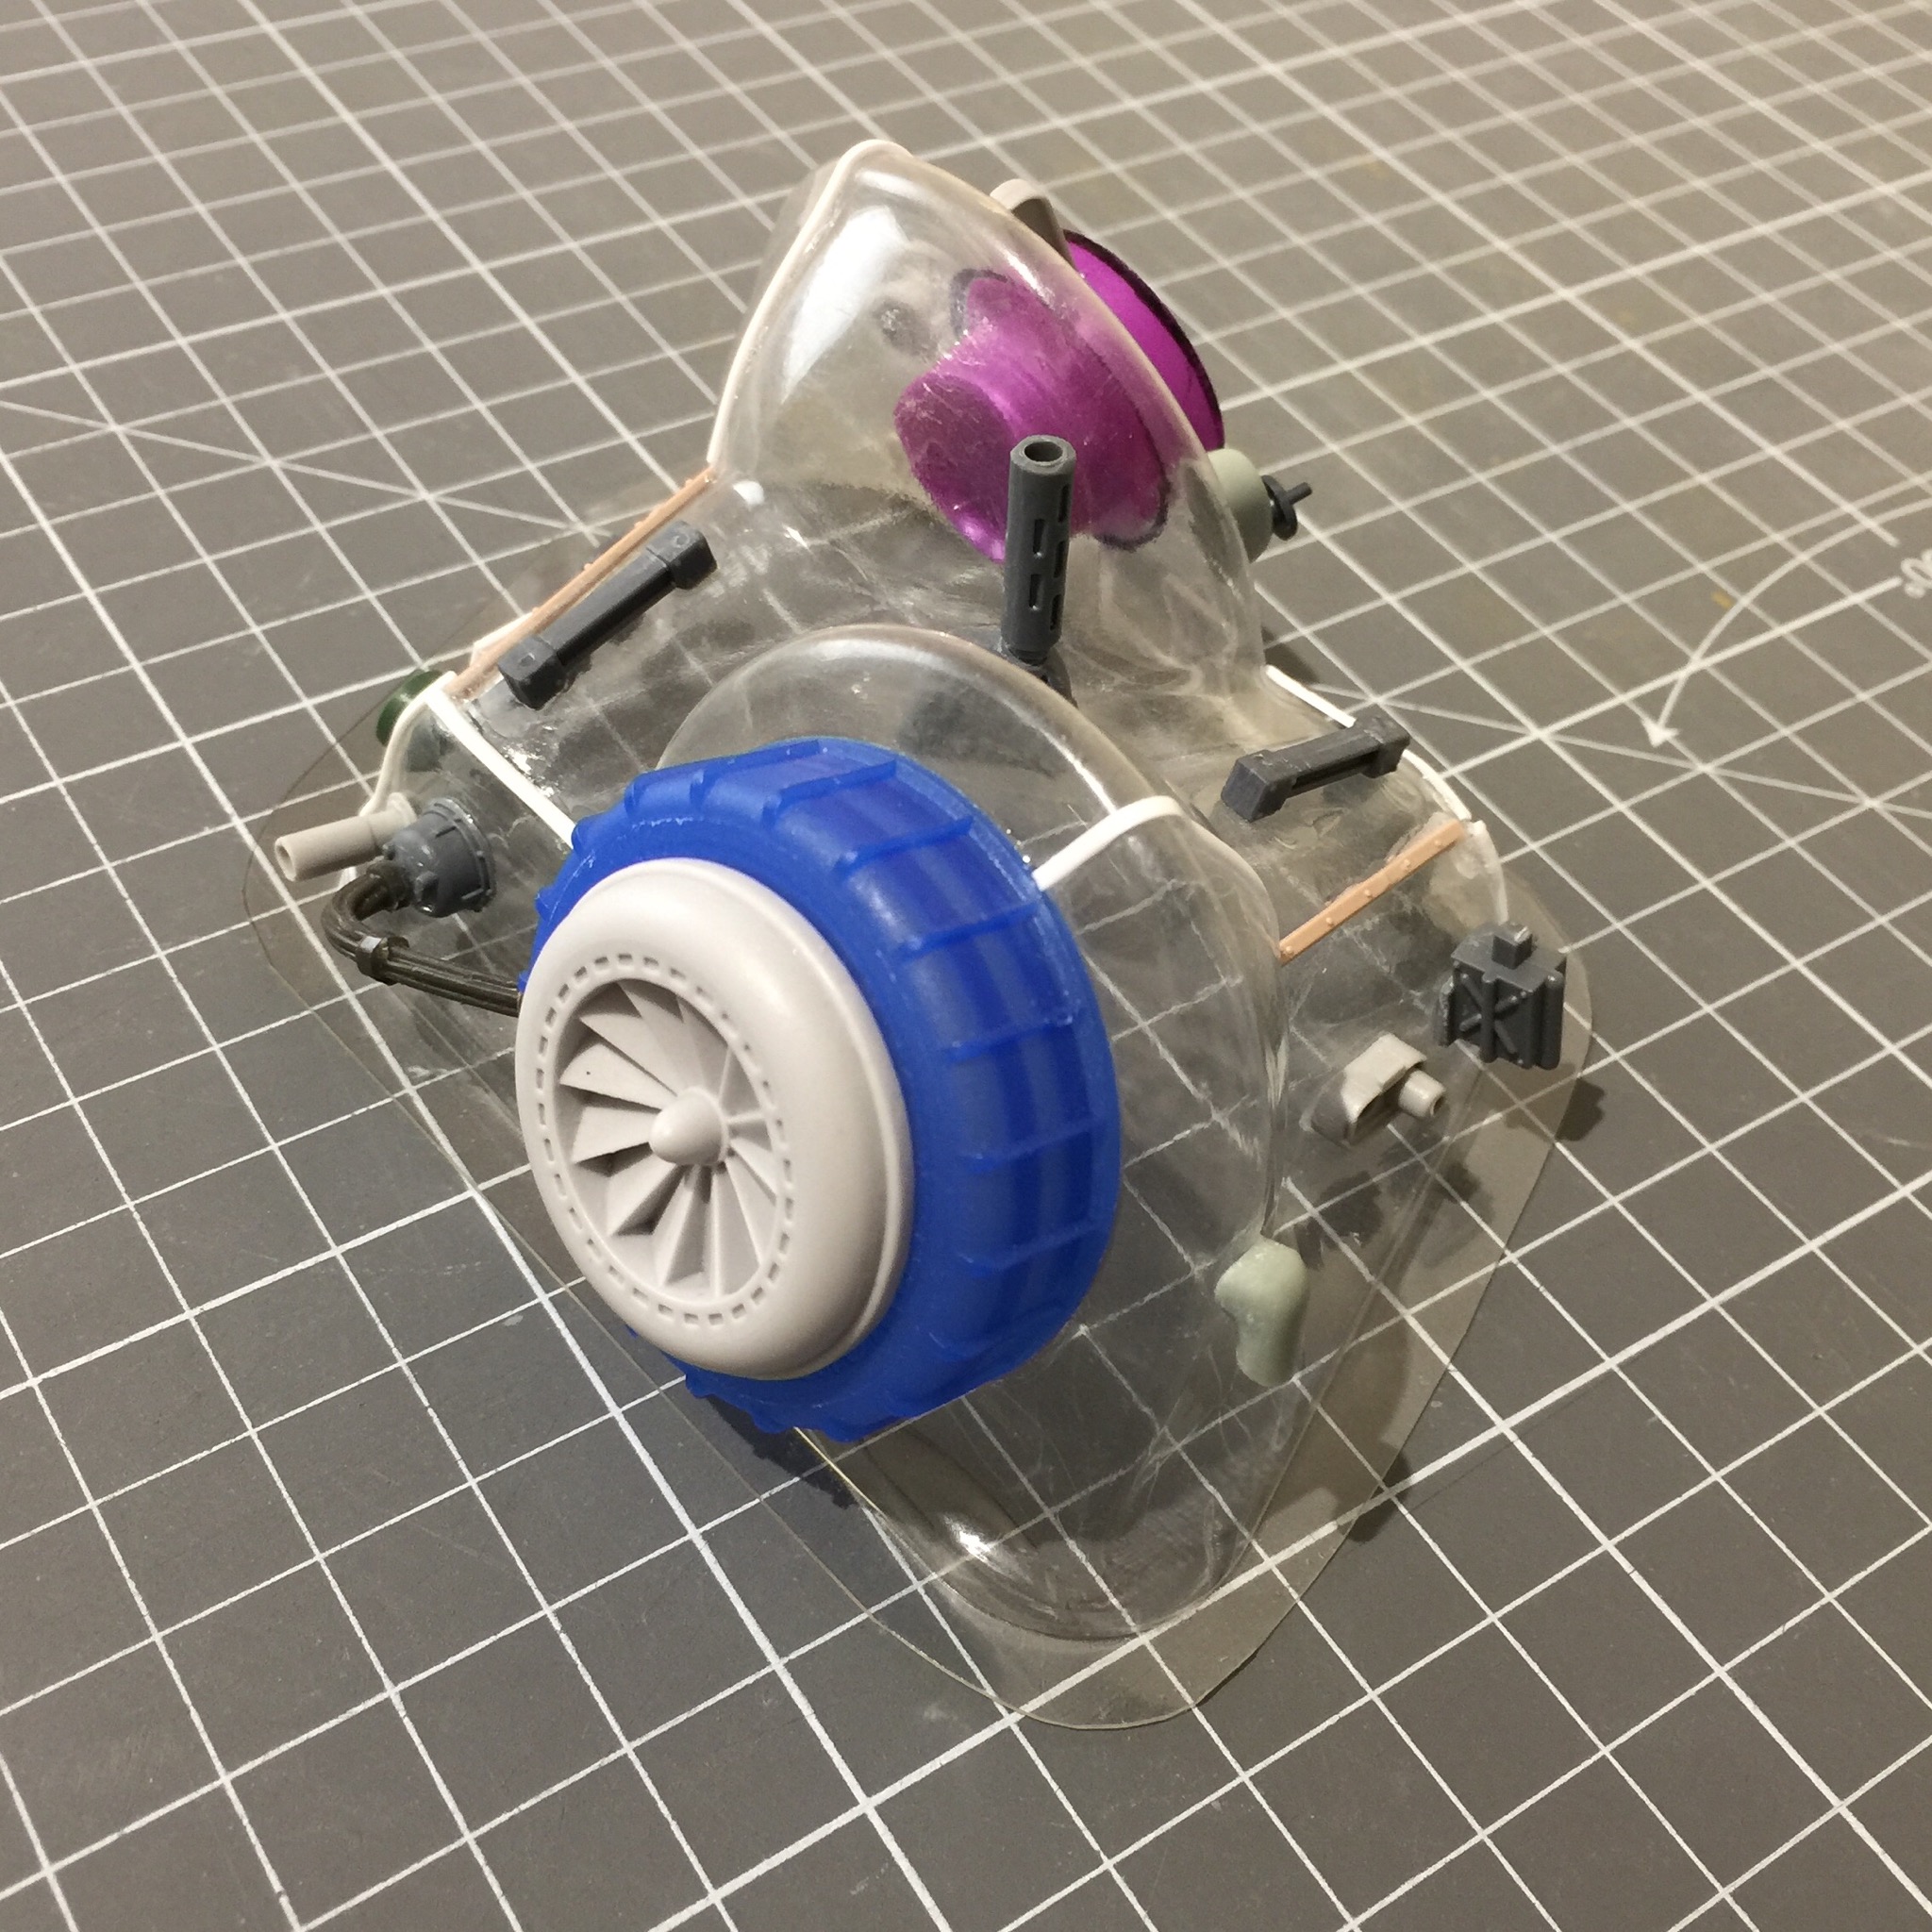
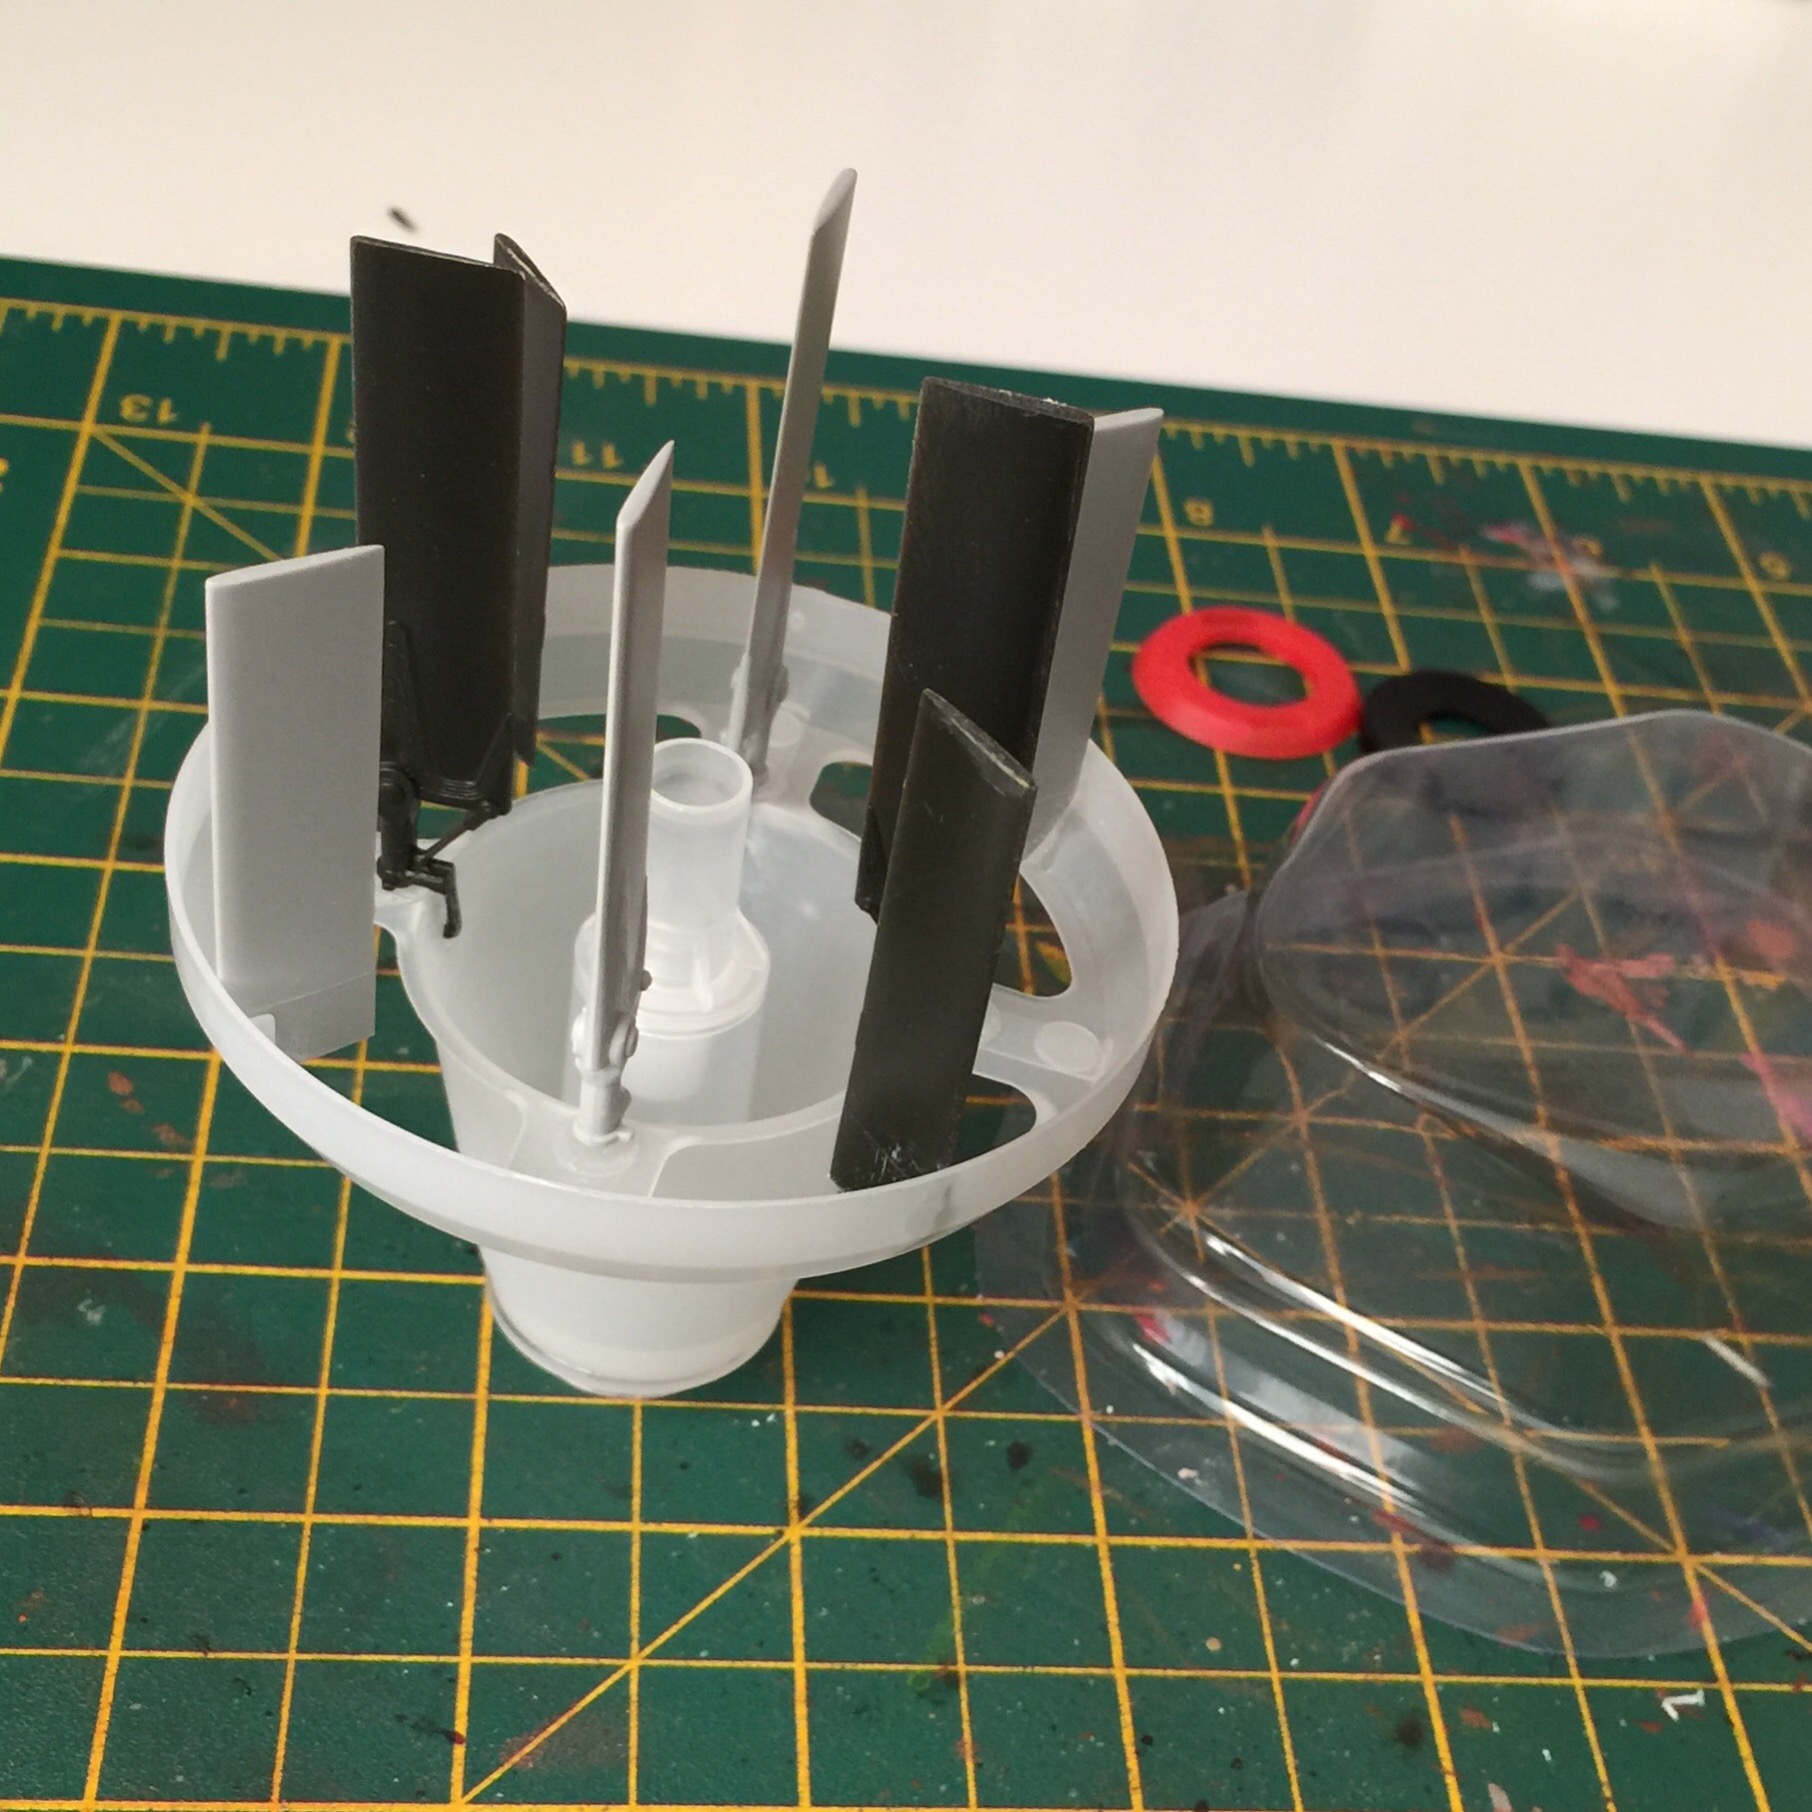 Blades in place
There’s a nice piece from the inside of a press pump bottle top, like hand sanitiser, and it fits perfectly into the middle of the larger part with the blades.
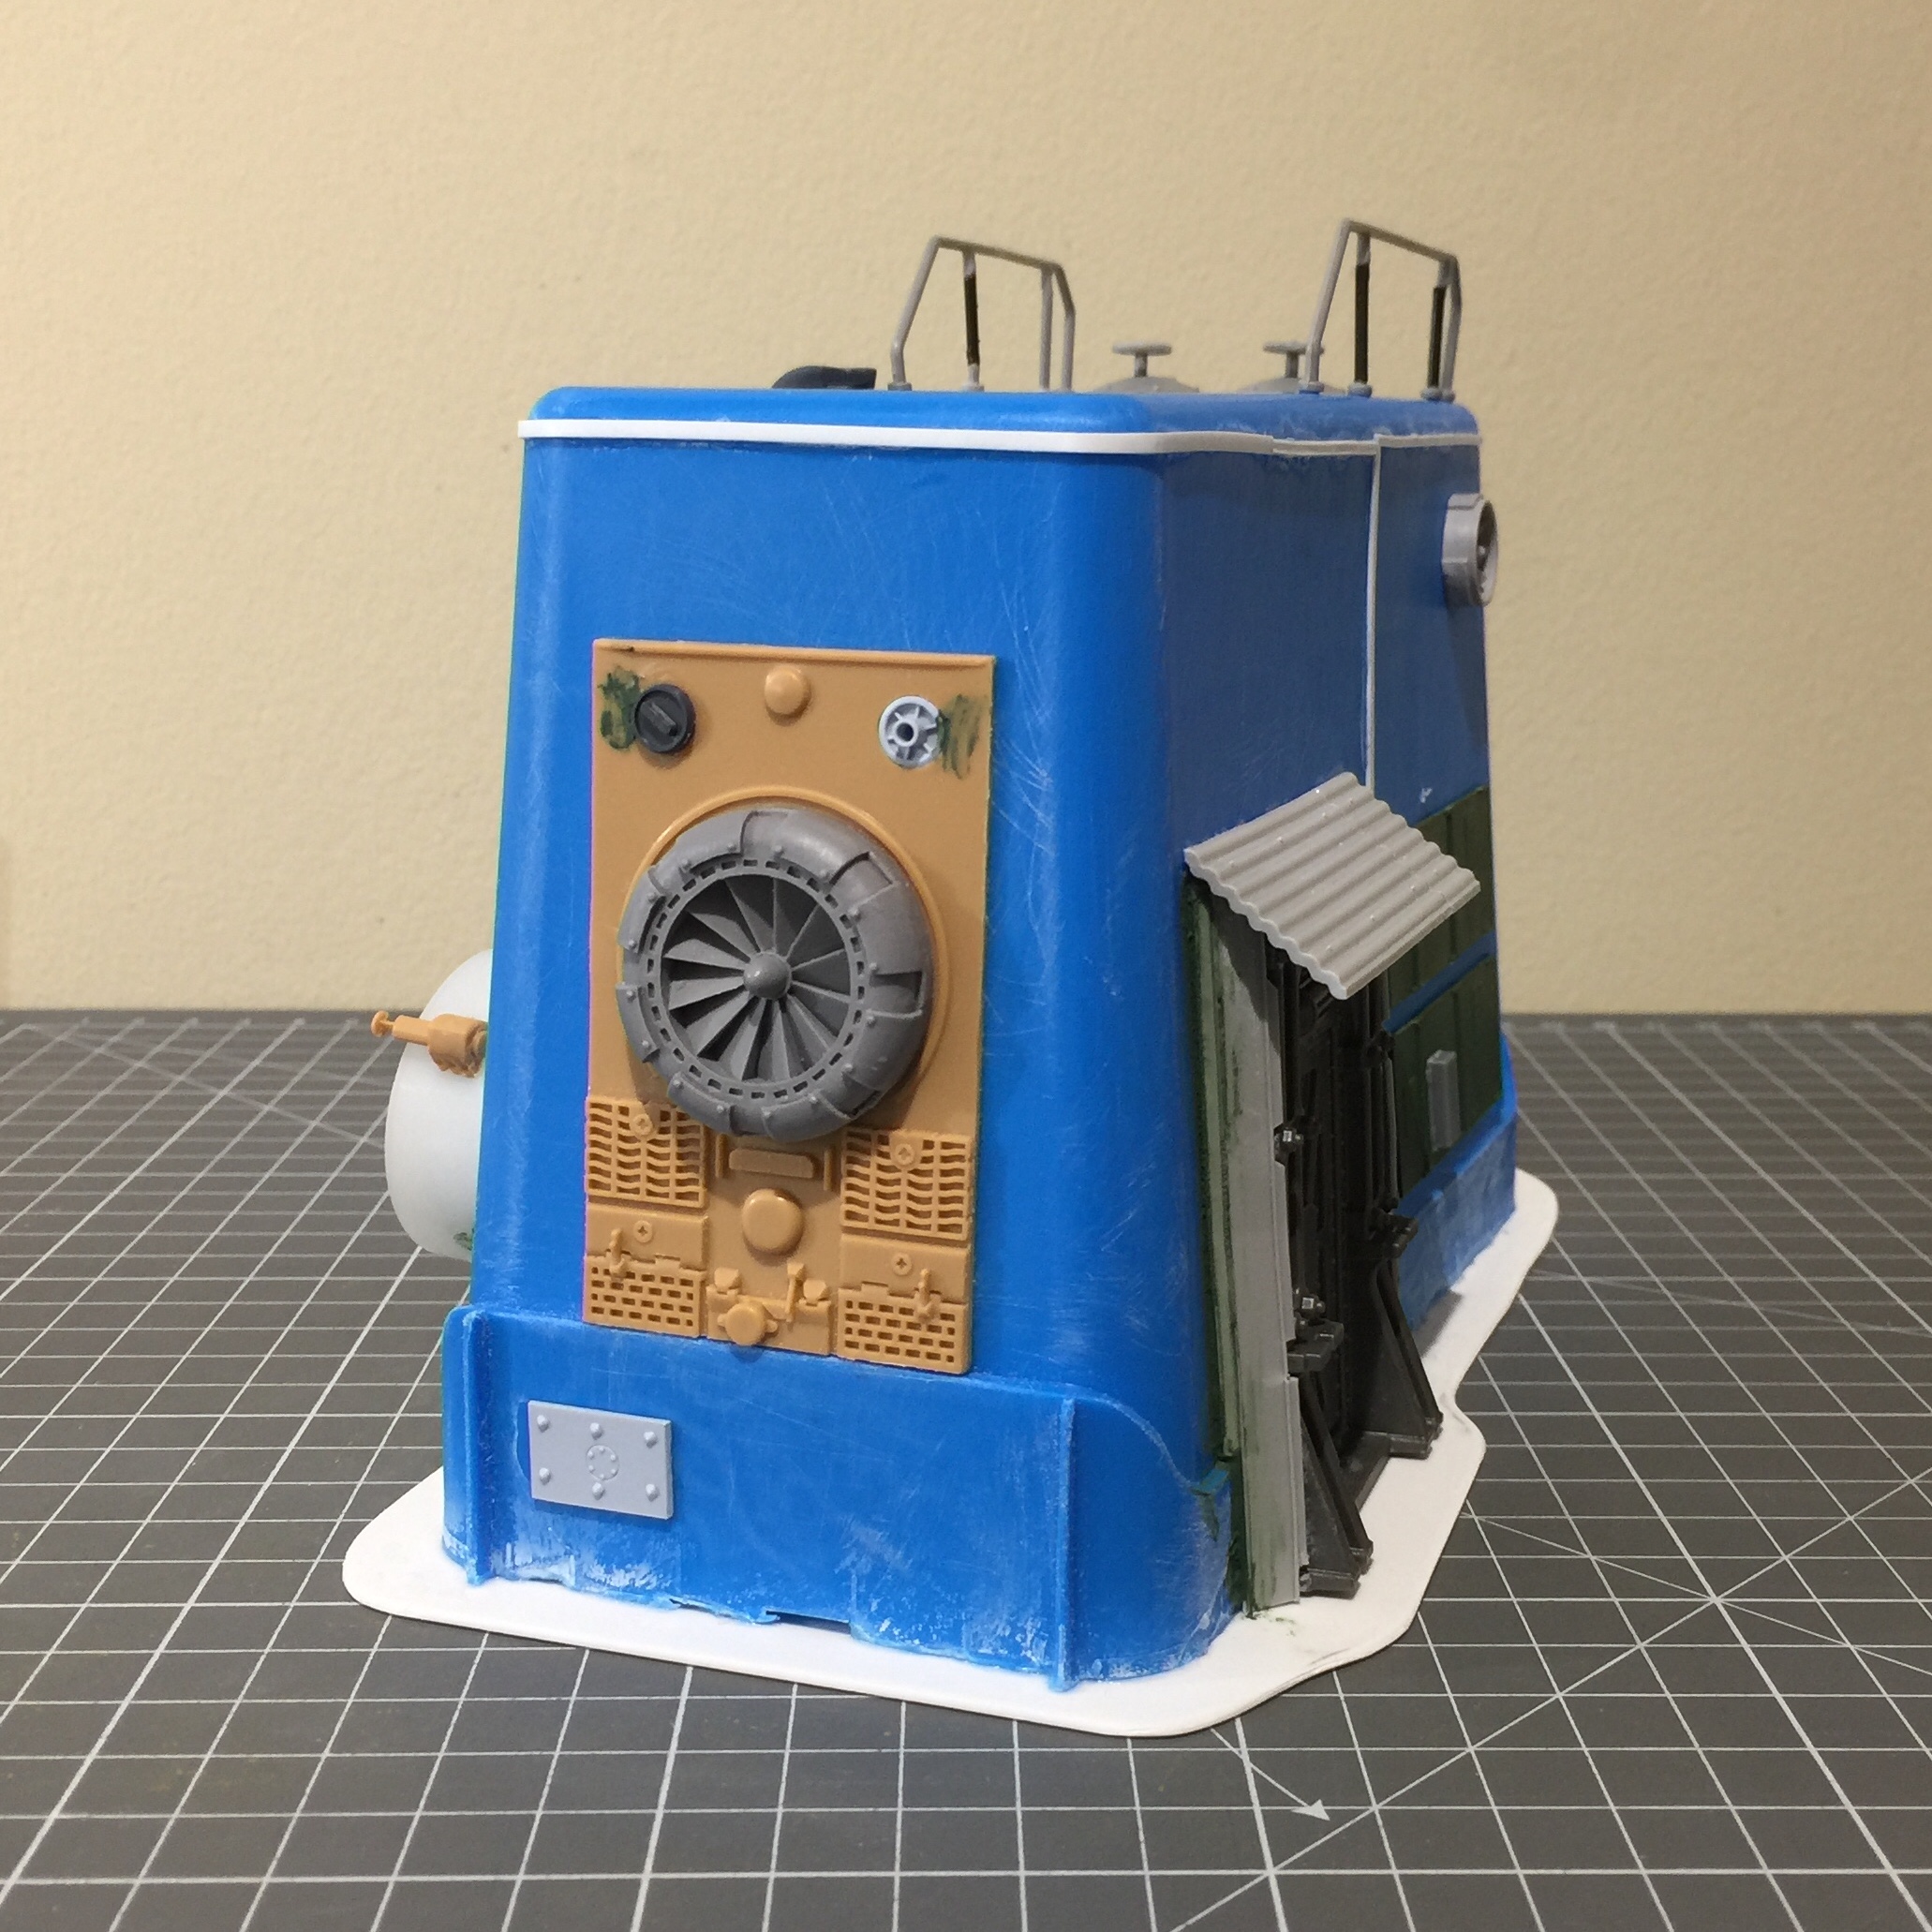
Detailing the main unit

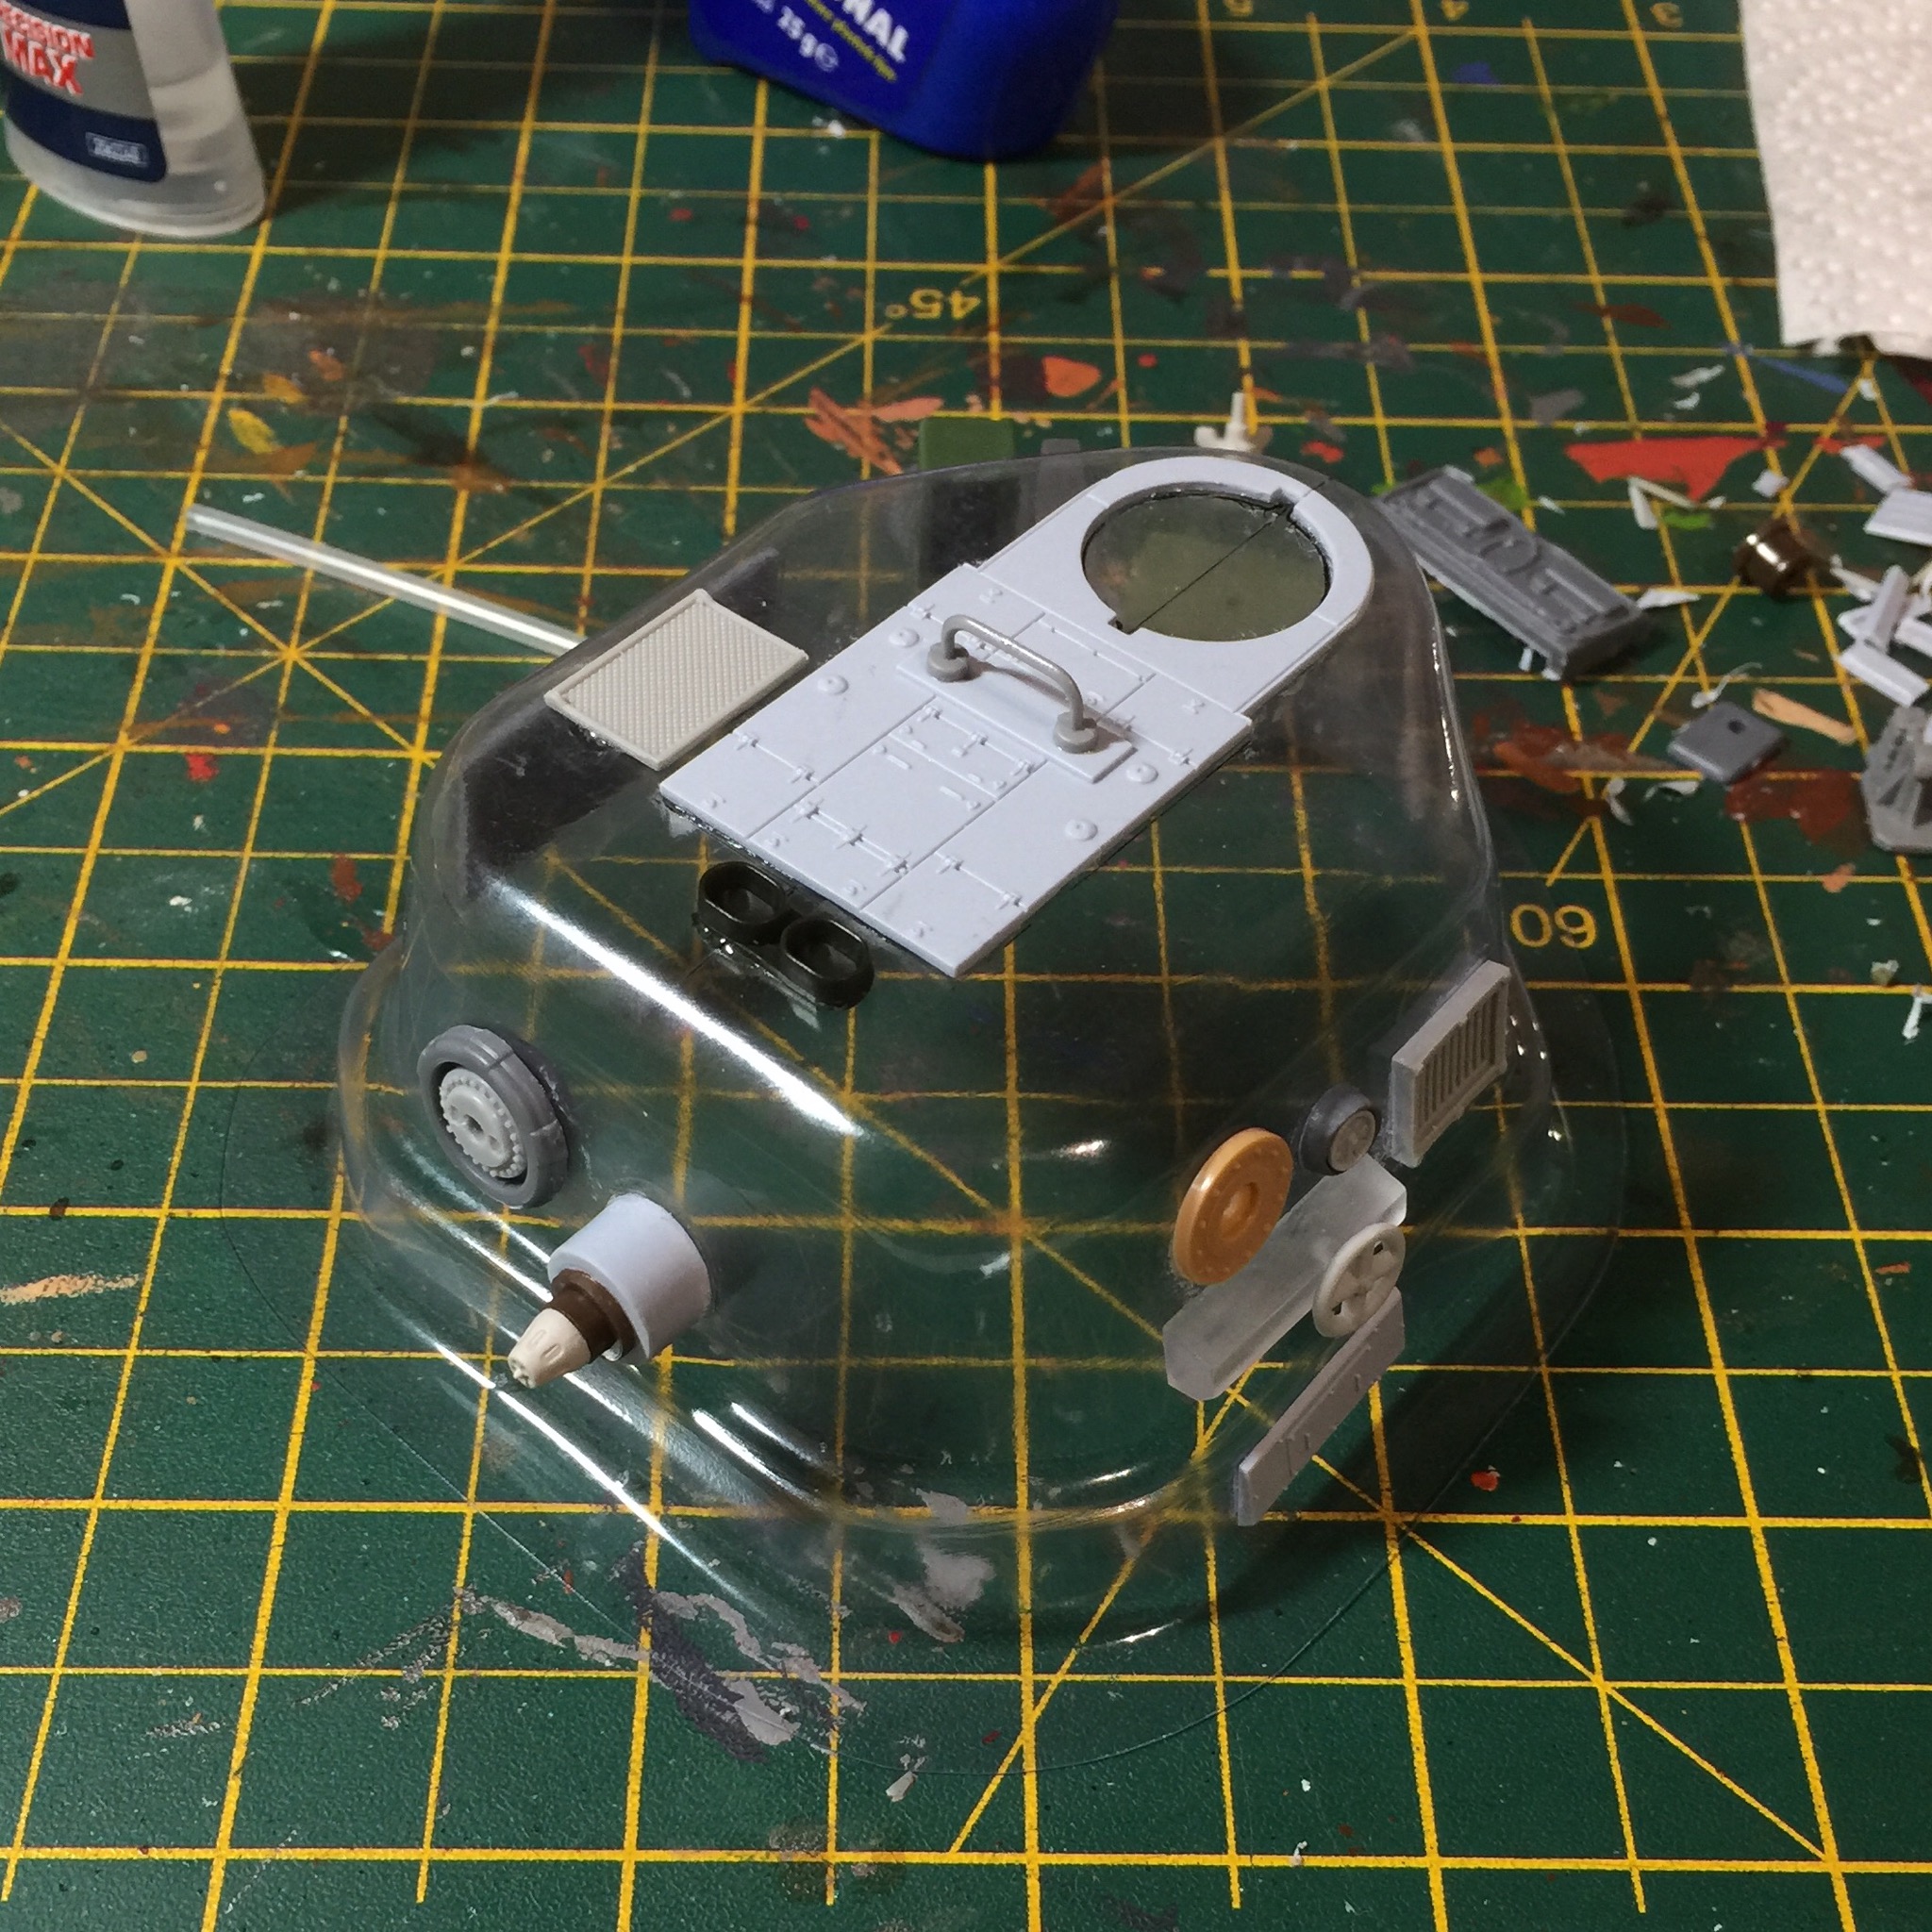
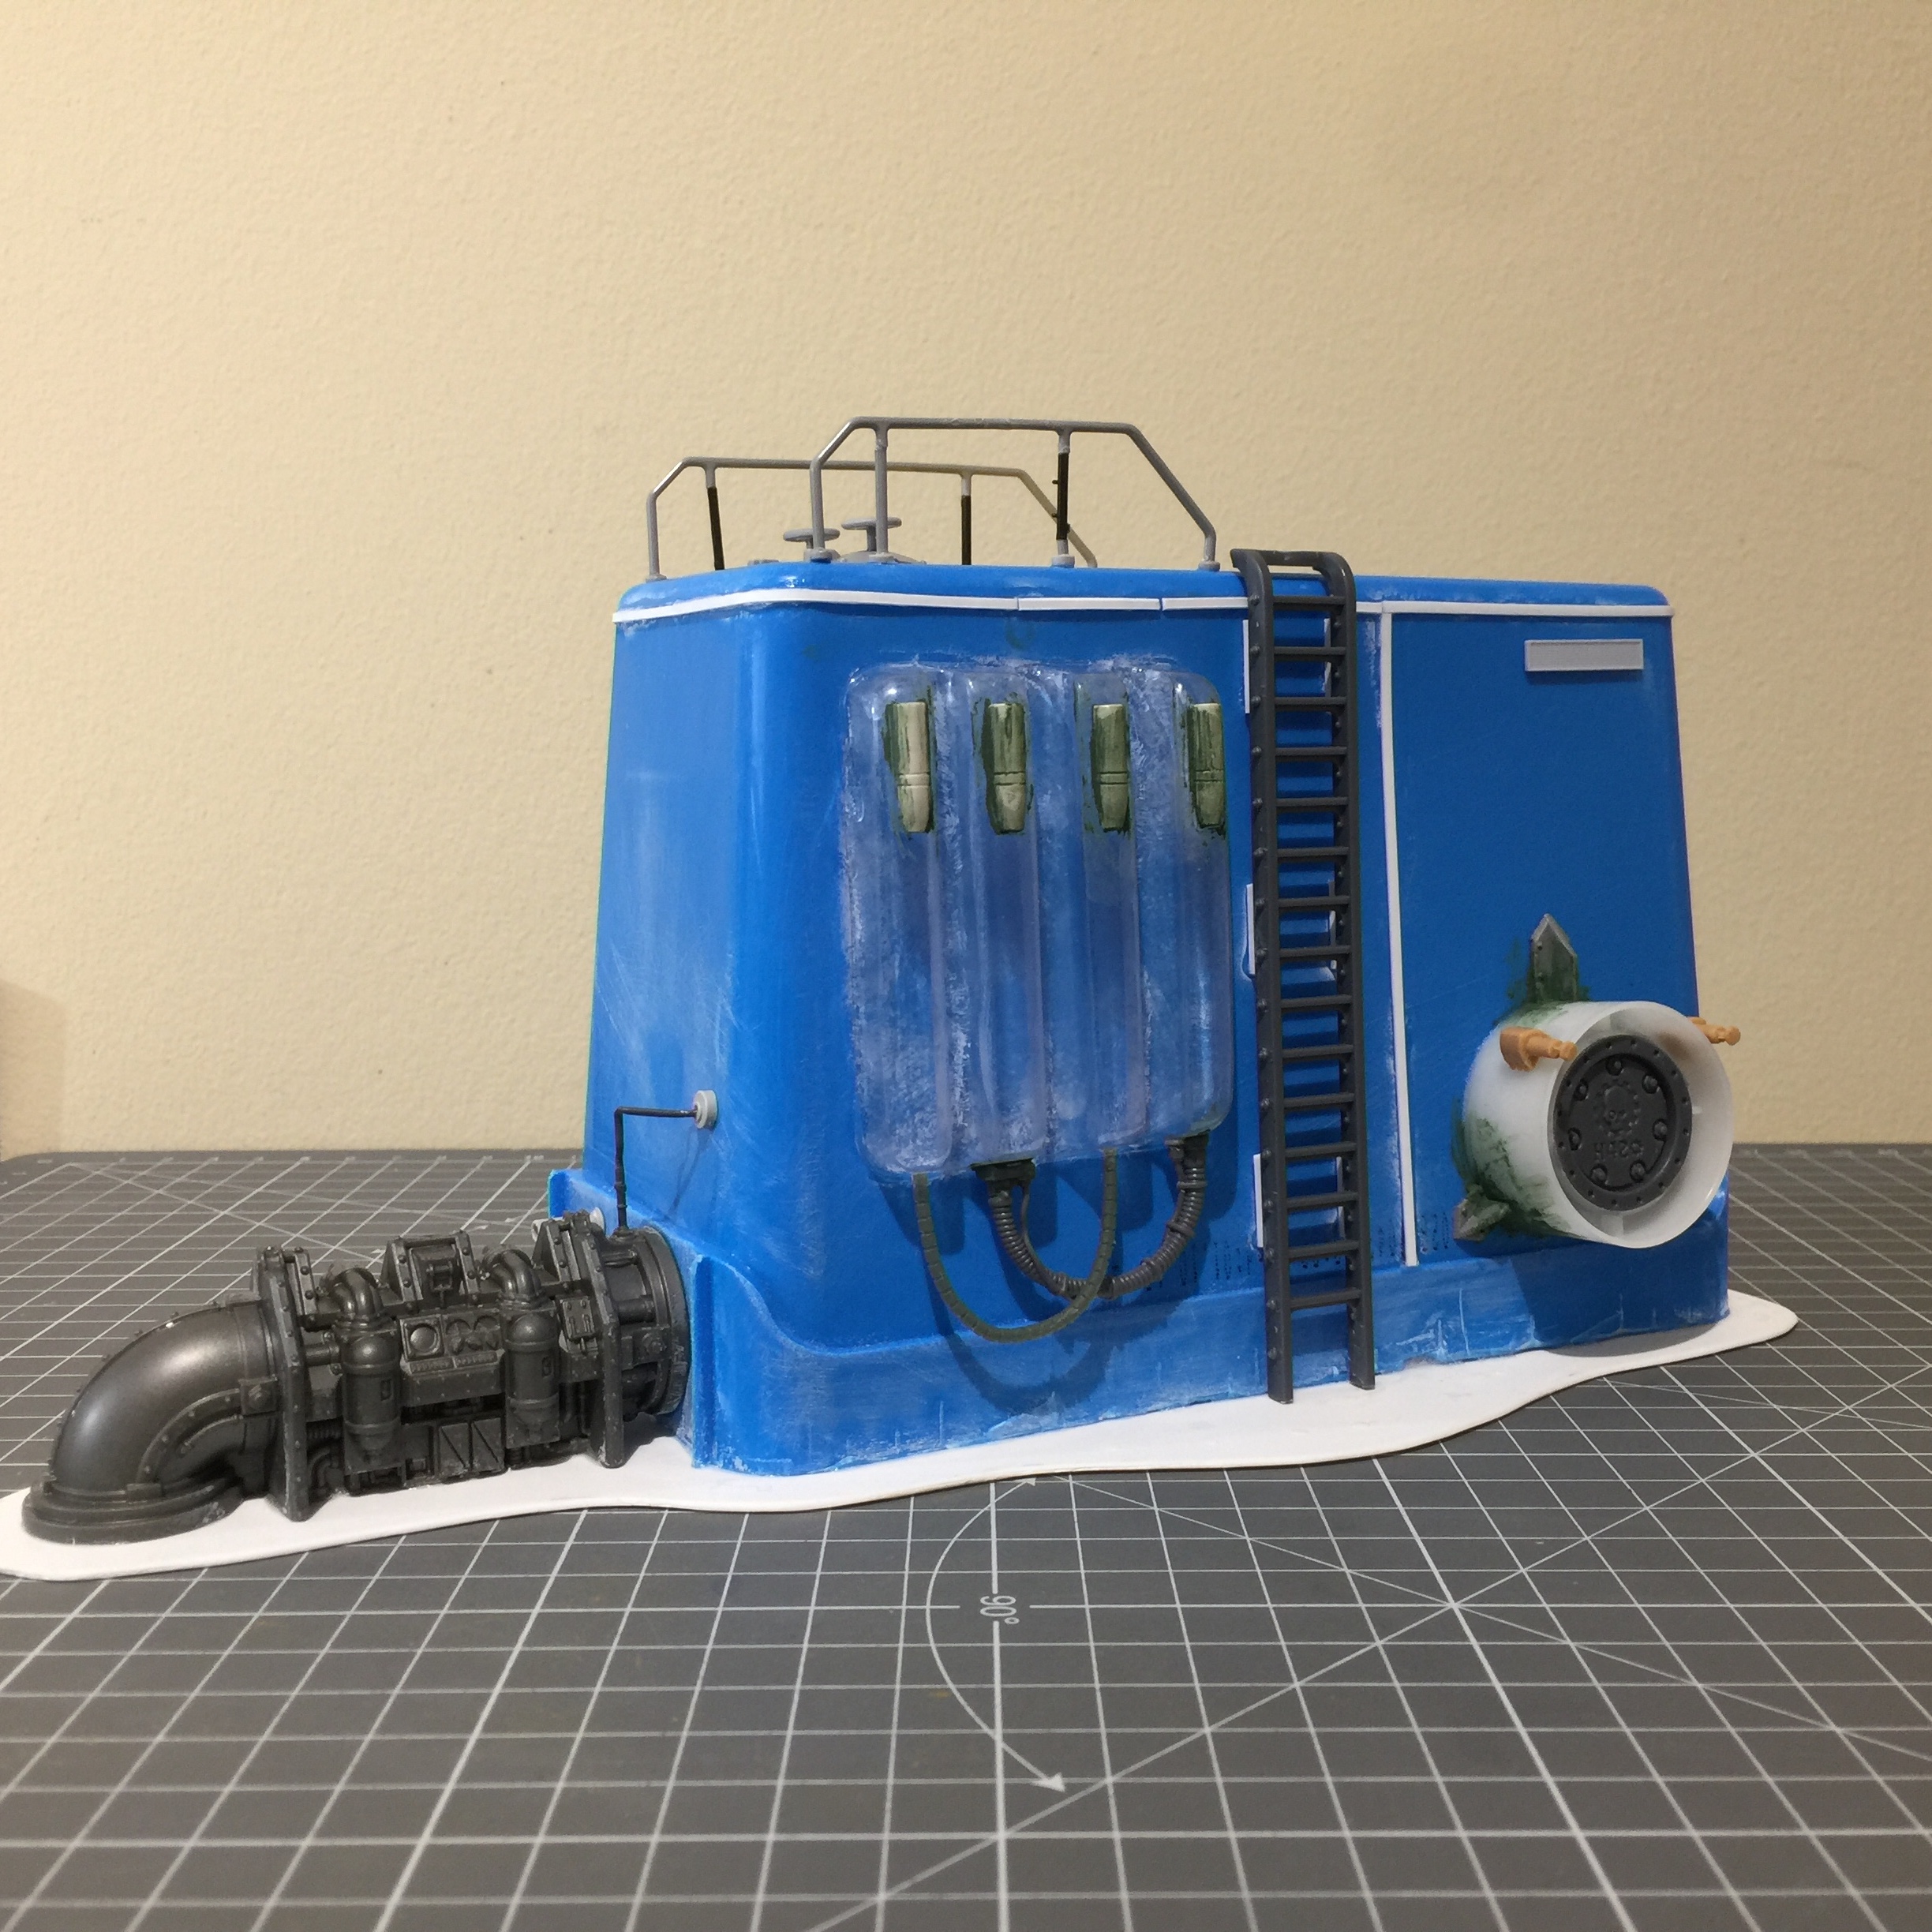
Moving to the main unit of the Wind Trap now and getting some bits stuck on to build up the detail from being just a plain box.
I’ve found a nice part from a tank kit and cut away the sides and rounded off the front end to match in with the packaging it’s getting stuck onto. That makes for a suitable detail where the blades assembly will fit. Then it’s just a case of finding items that look good when offered up to the sides of the main unit and getting them super glued in place.
Detailing finished on the Windtrap
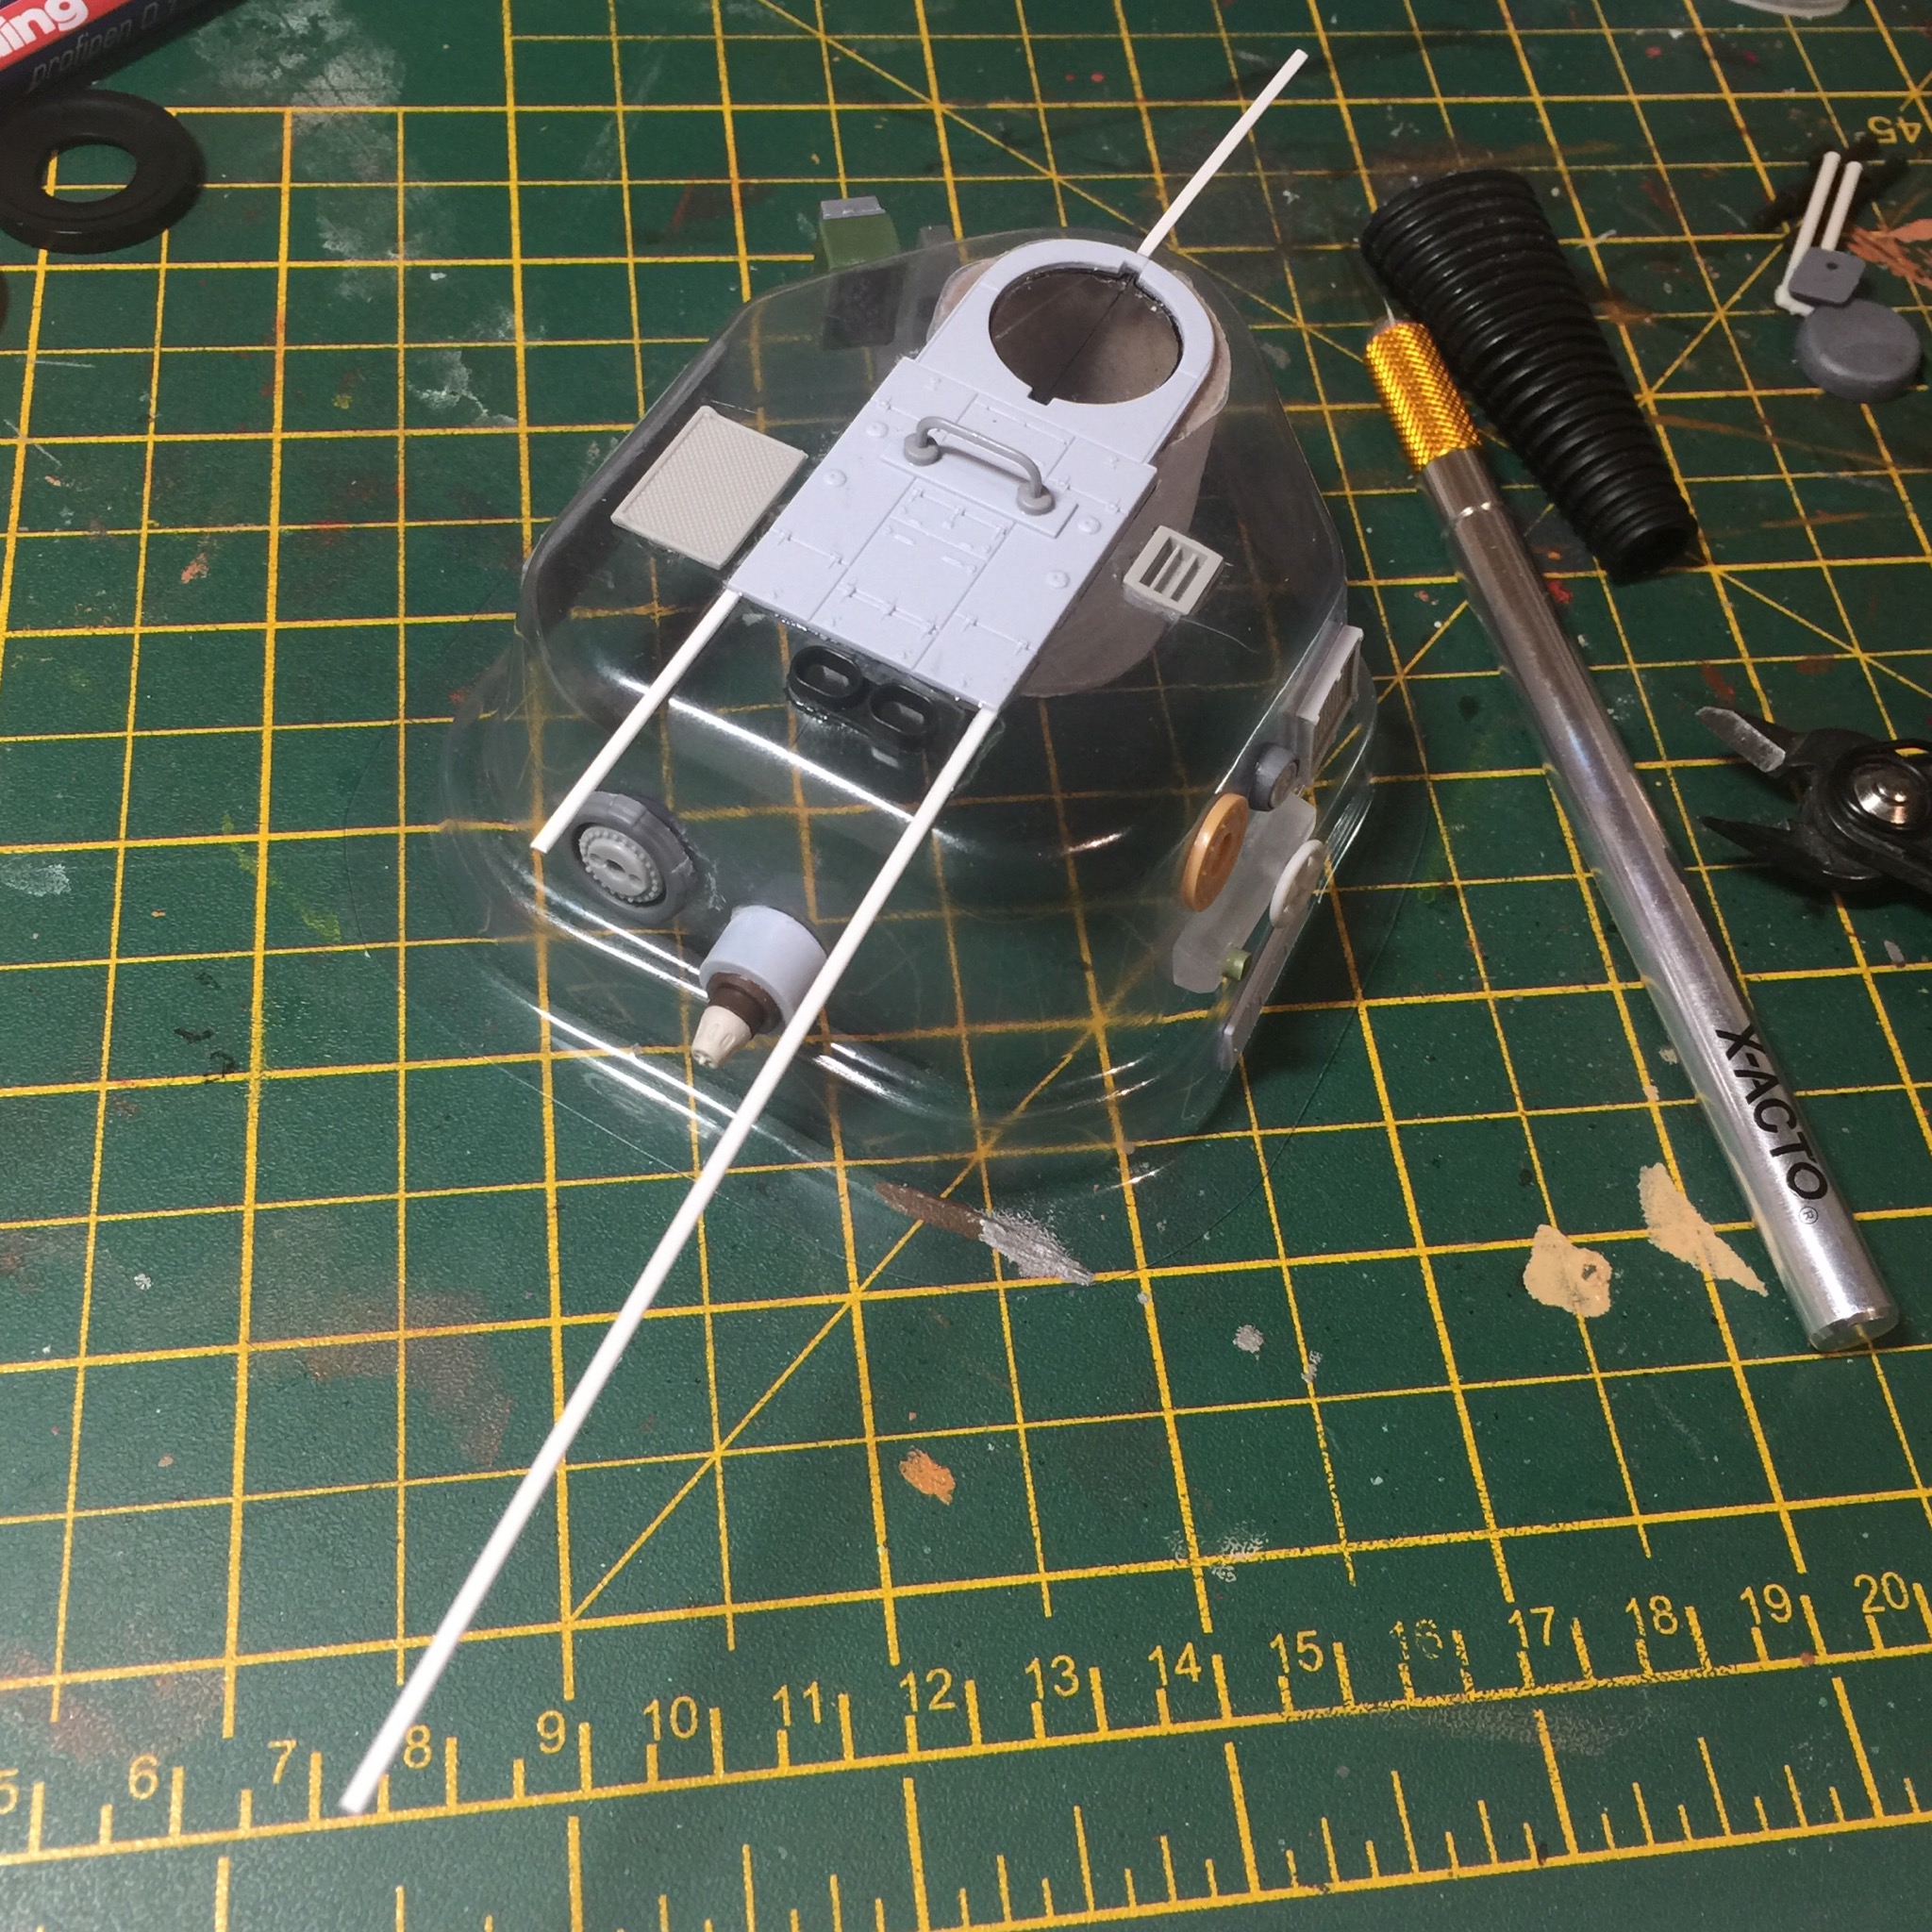

With the various bits now glued on its time to finish of the detailing with some thin strips of styrene. I have a few pieces pre cut, 1 or 2 mm thick and I start by glueing one end to the model then moving to the next strip of styrene and glueing it’s first end elsewhere. That gives time for the first piece to stick and then I can go back and add glue and form the styrene around the edges etc. It’s the most efficient way to do, until I can think of a better way. You can’t do the whole strip in one go as the glue tends to let go once you go round a bend or over an edge.
Really important step this, in terms of getting across that your model is constructed from large pieces of metal that are welded or bolted together.
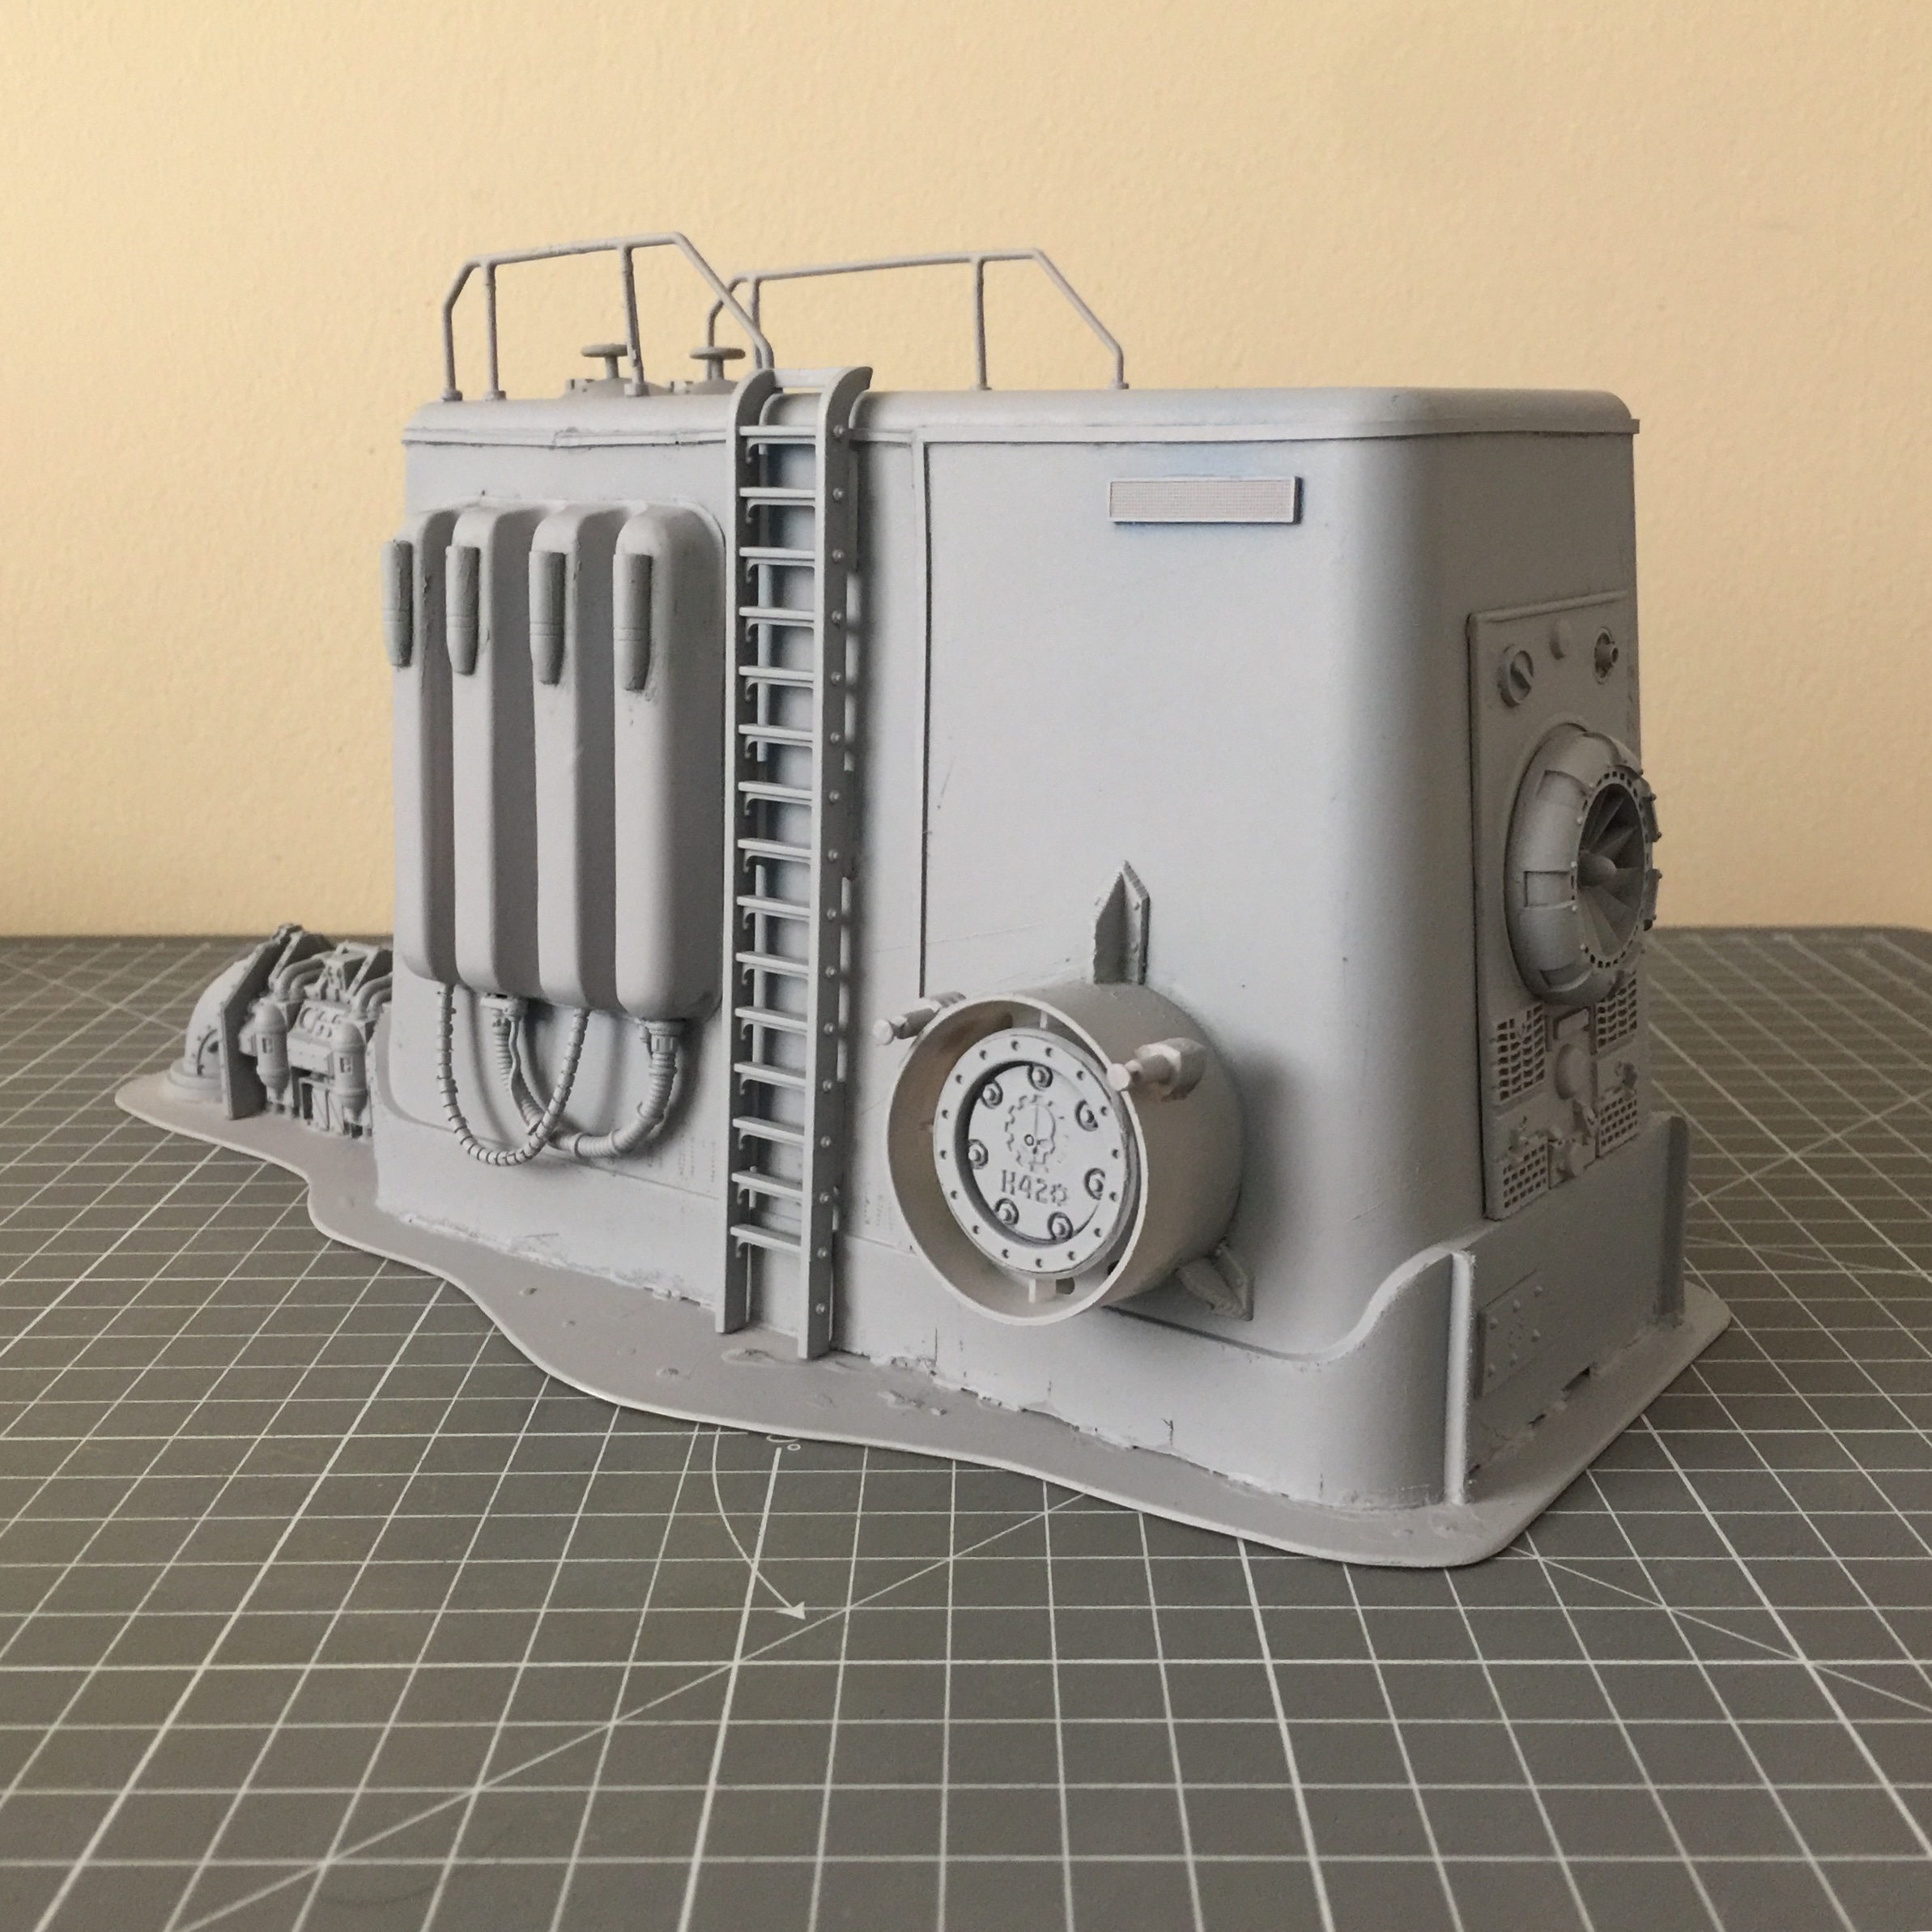
 The completed build stage
Barring some filling in with Liquid Green Stuff, which I’ll have a go at another day, this model is now ready for priming. Then onto the painting stage!
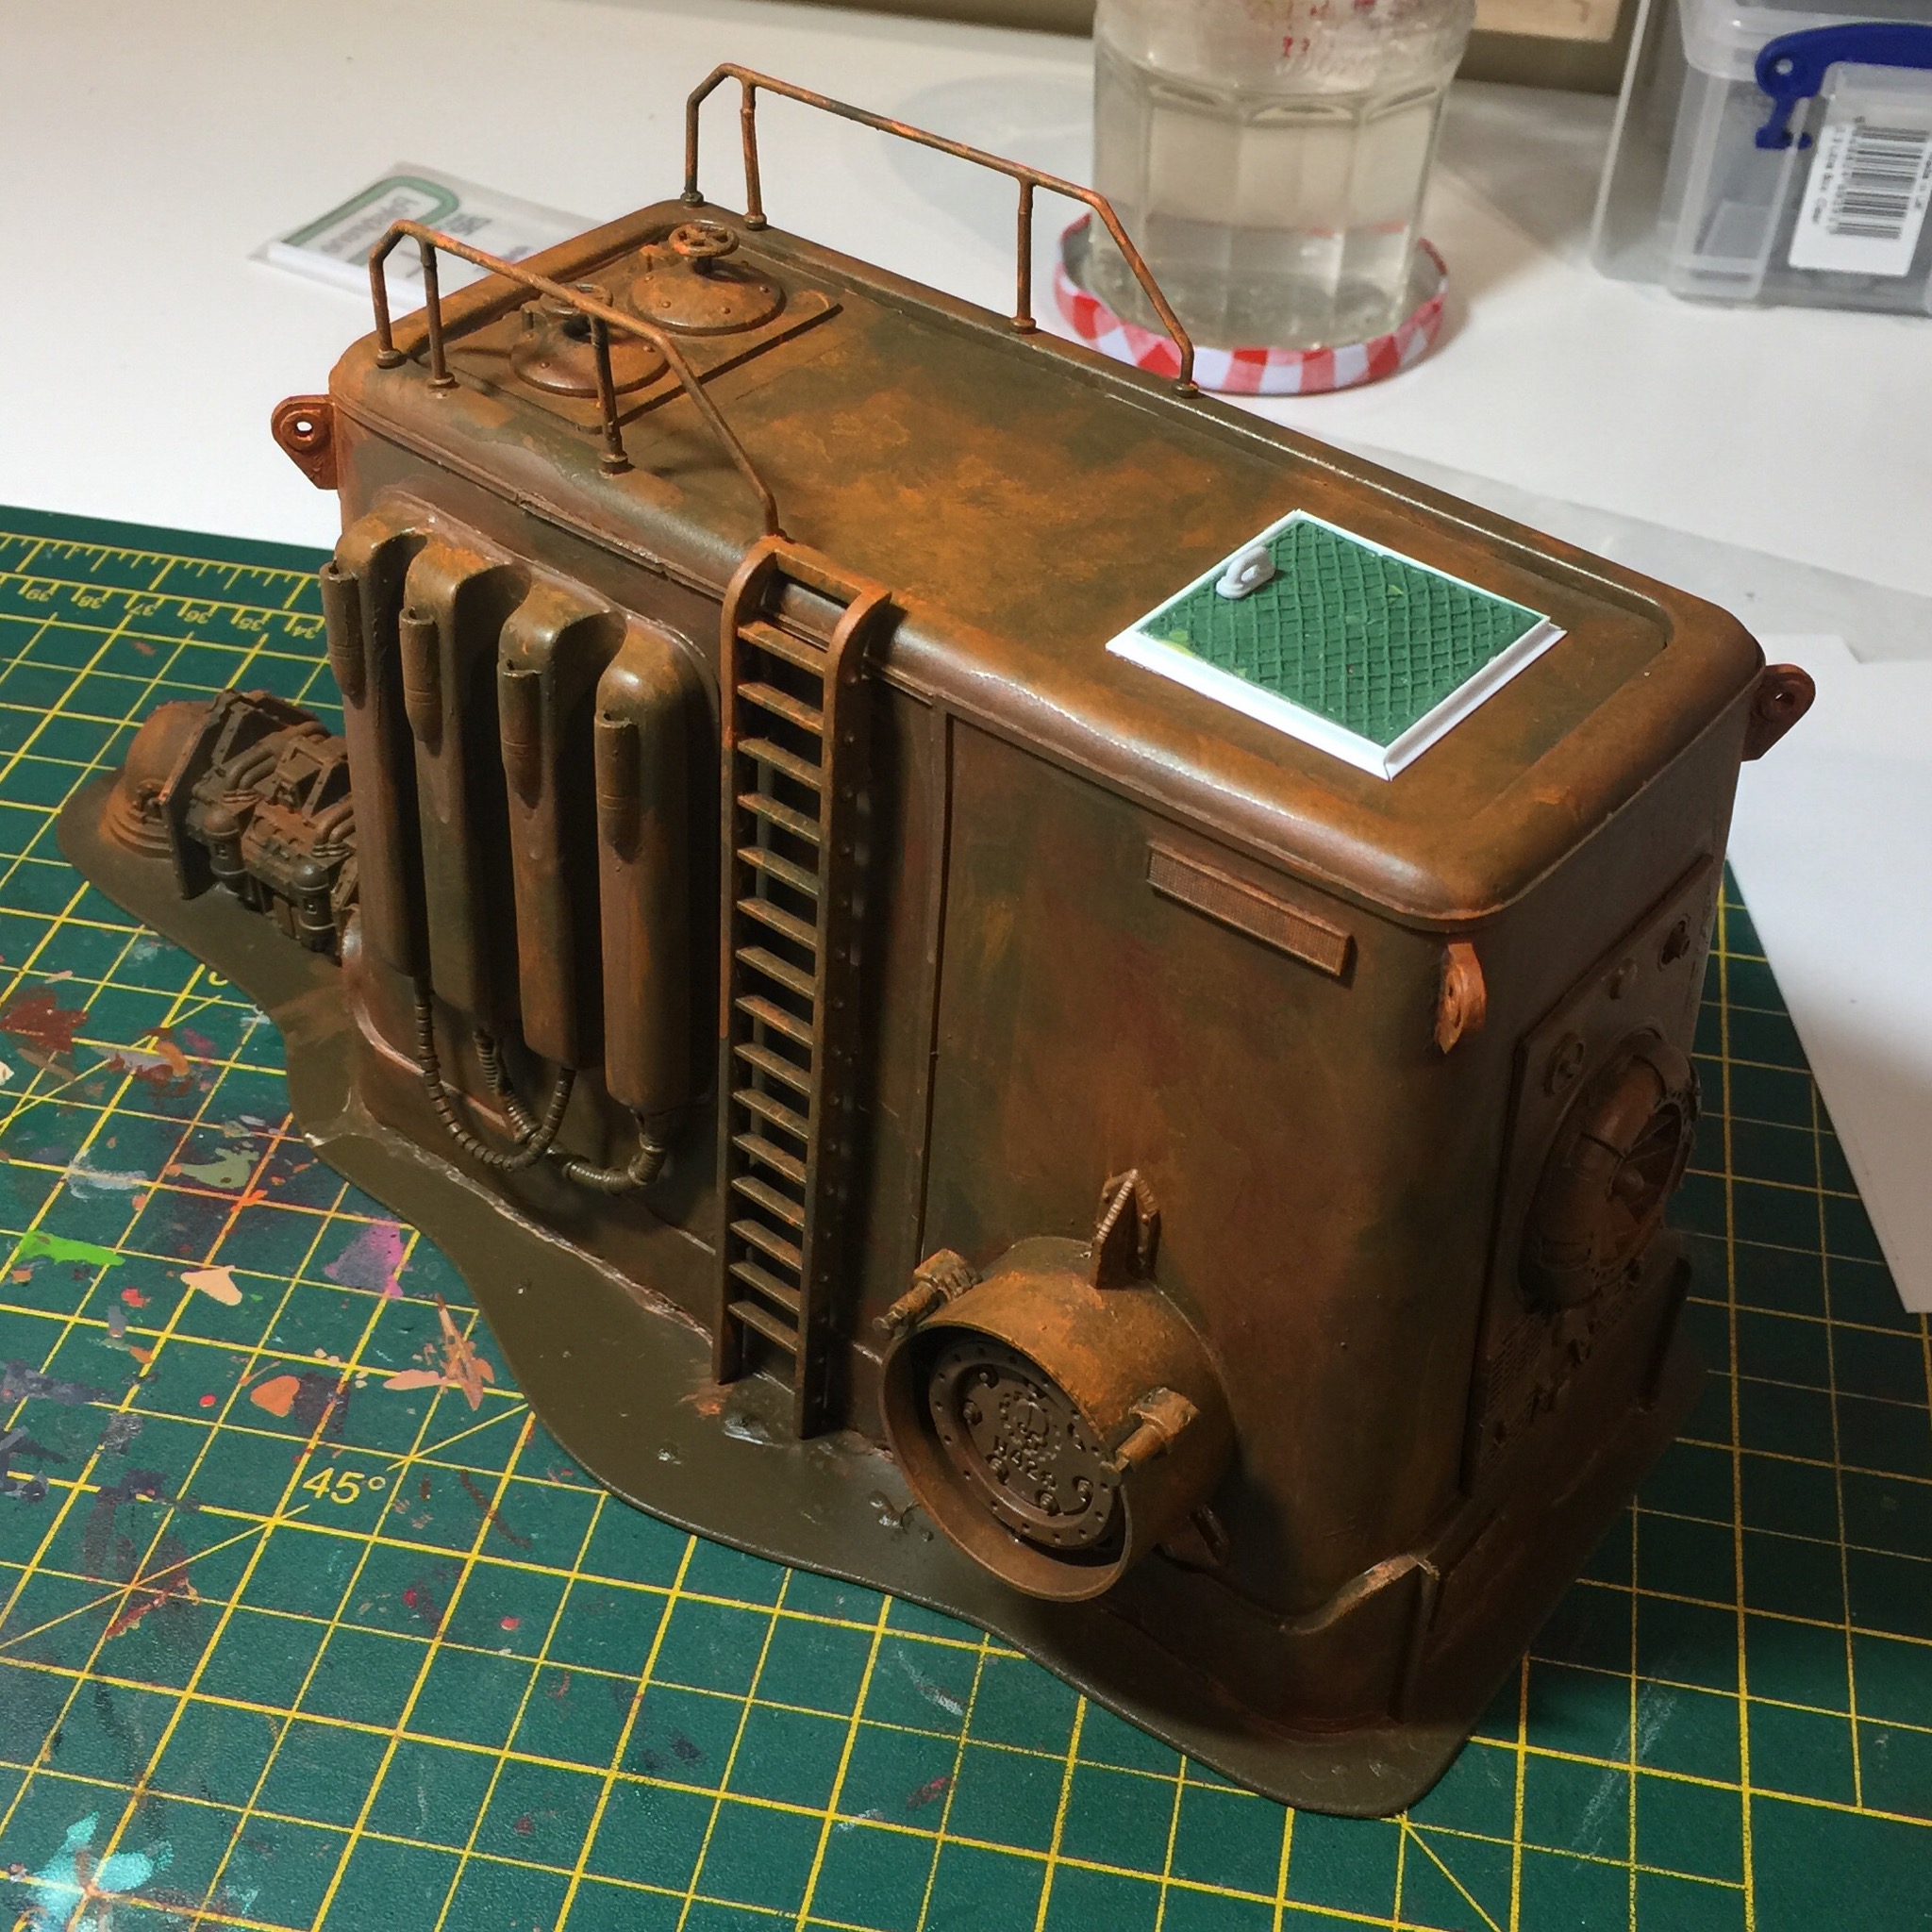
Rusted up the Windtrap


Pretty quick stage again, prime with some Tamiya spray paint then a cover with brown also from a rattle can.
After that I’ve used a few browns, roughly stippled on without much care. The last colour being Ryza Rust to get those lighter, orange bits. And that’s us, ready for salting up and spraying with top coat colours.
Now for a tall, cool glass of fresh water
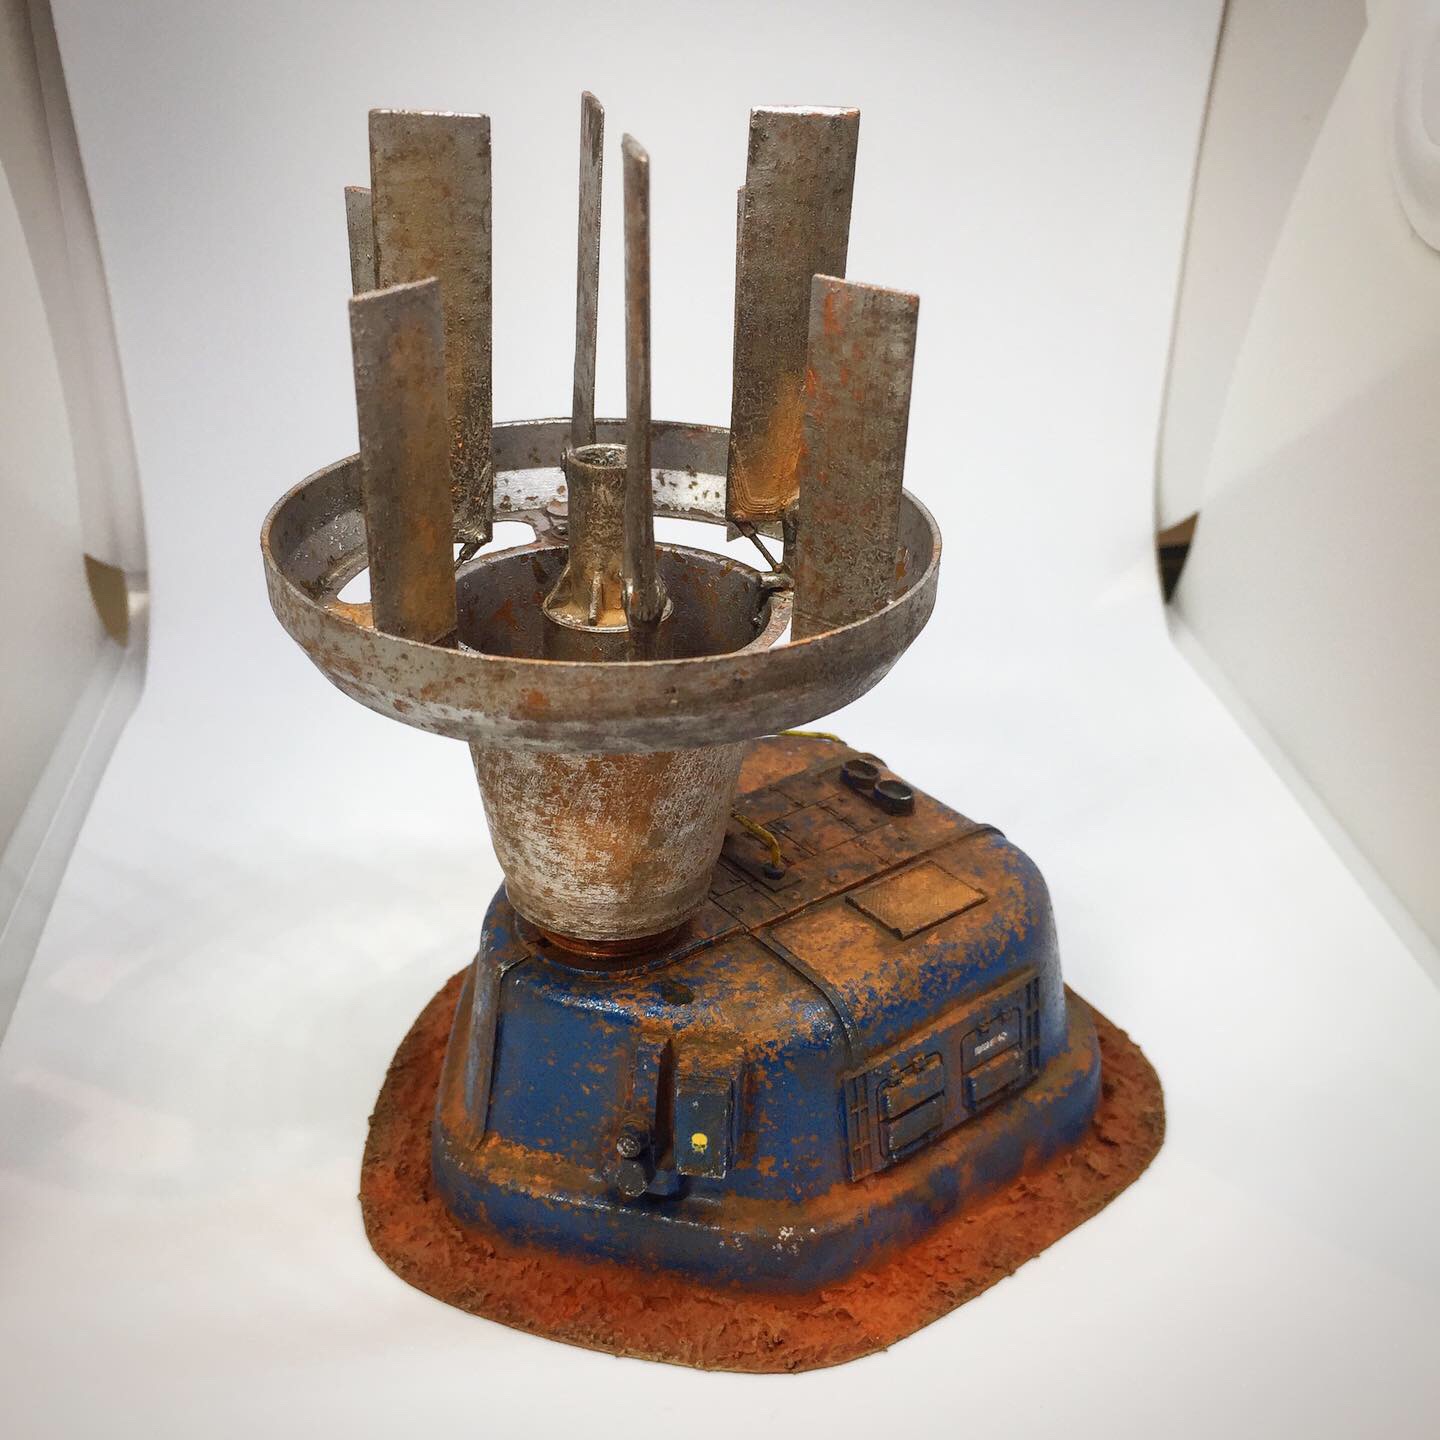

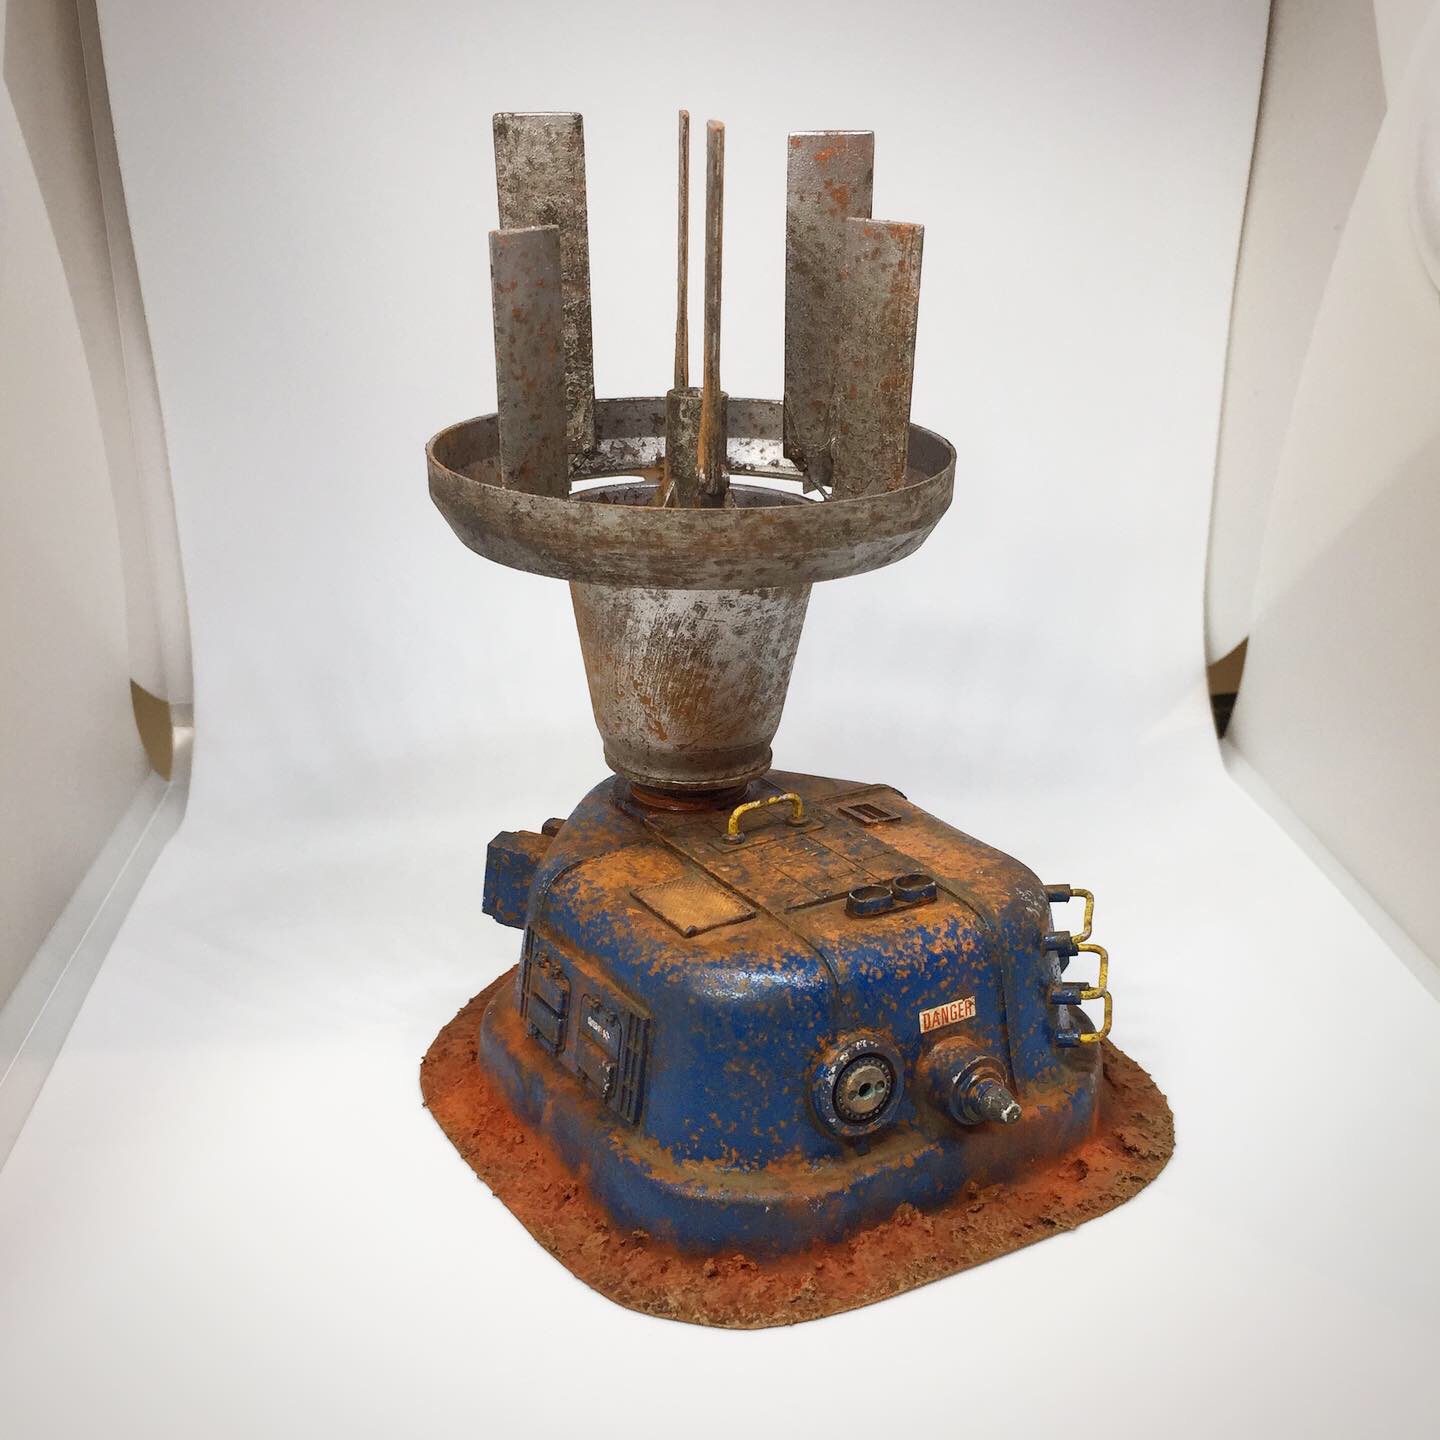
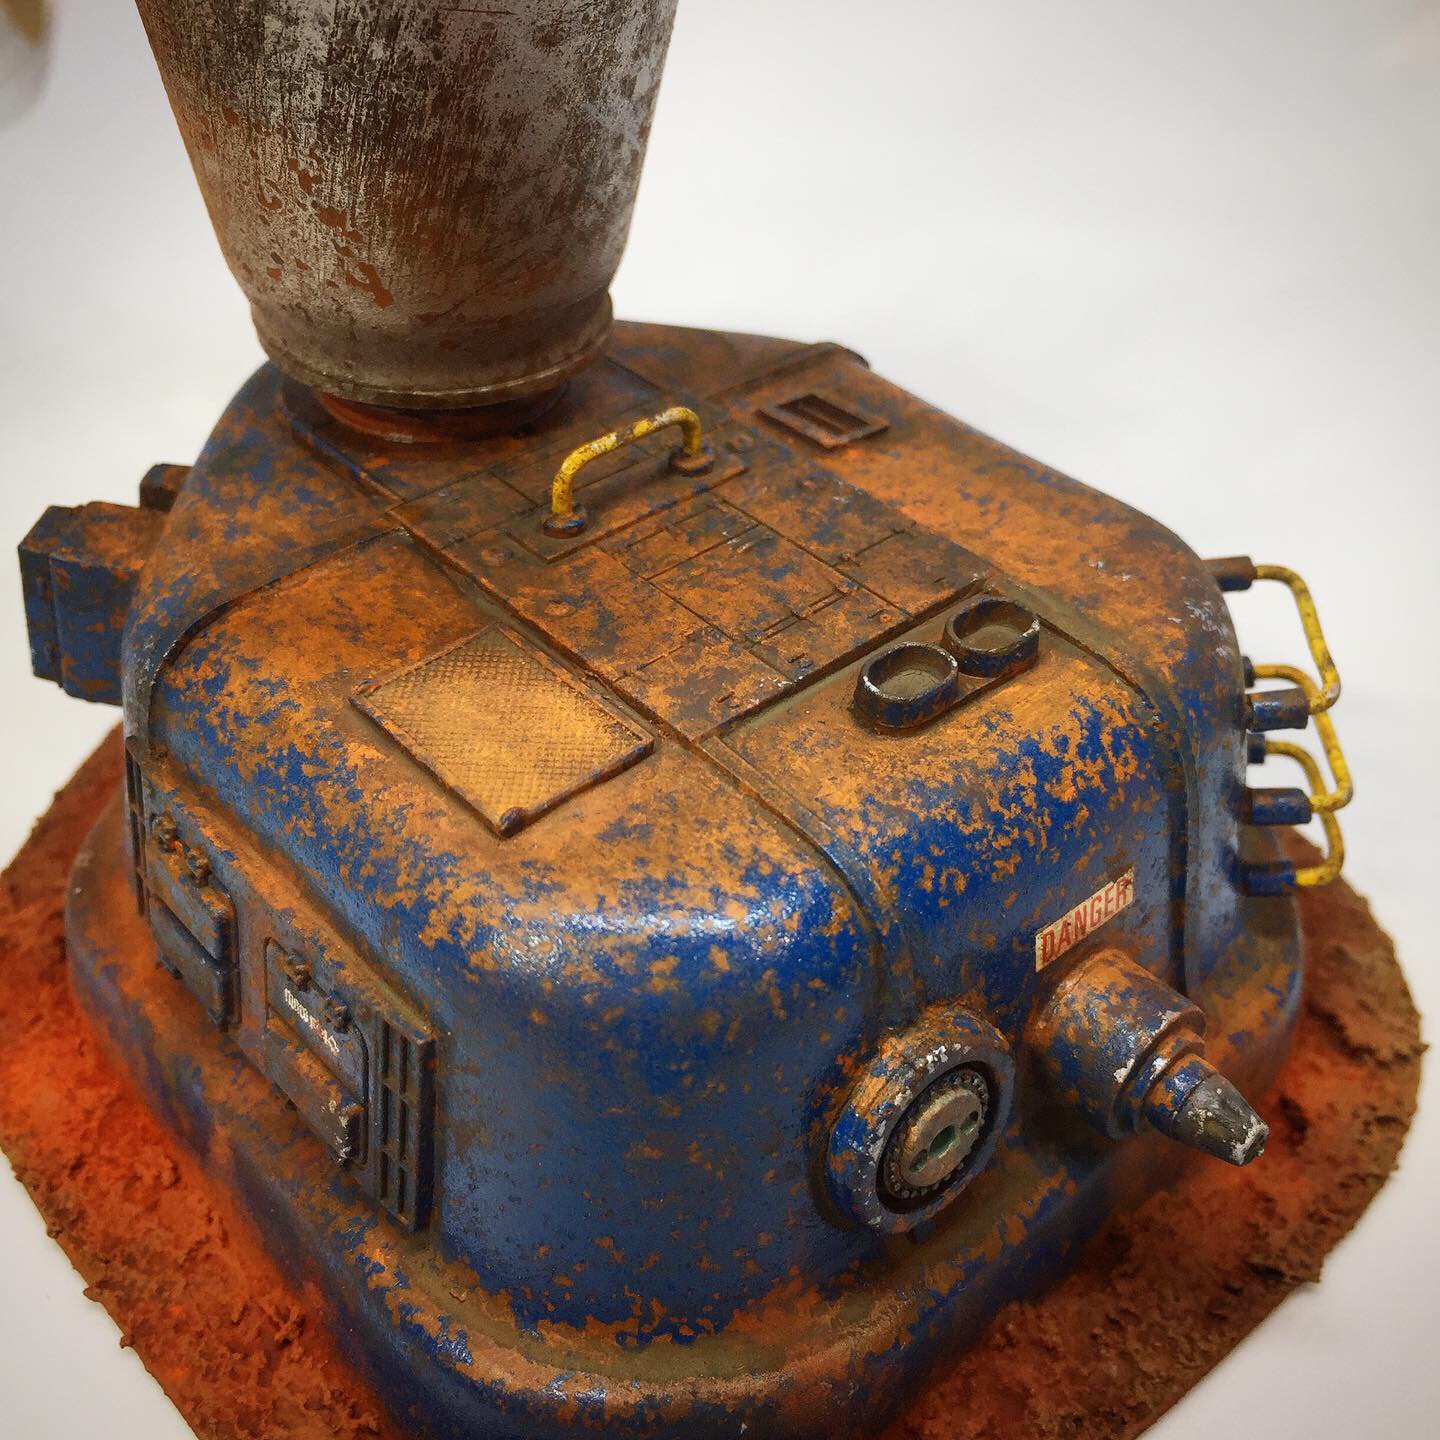
Well the third piece of the set is complete. So it turns out that the first piece I made should be called a Water Purifier, which according to the rules, can be used in conjunction with the now ready Windtrap.
The Windtrap collects the water from the air and then the water can later be run through the purifier for greater profit. If your gang owns both pieces of territory!
Income for the Windtrap is 30 creds, plus another 2D6x10 if combined with the Purifier. Quite a little money making venture for those ash wastes gangs. Worth fighting over no doubt.
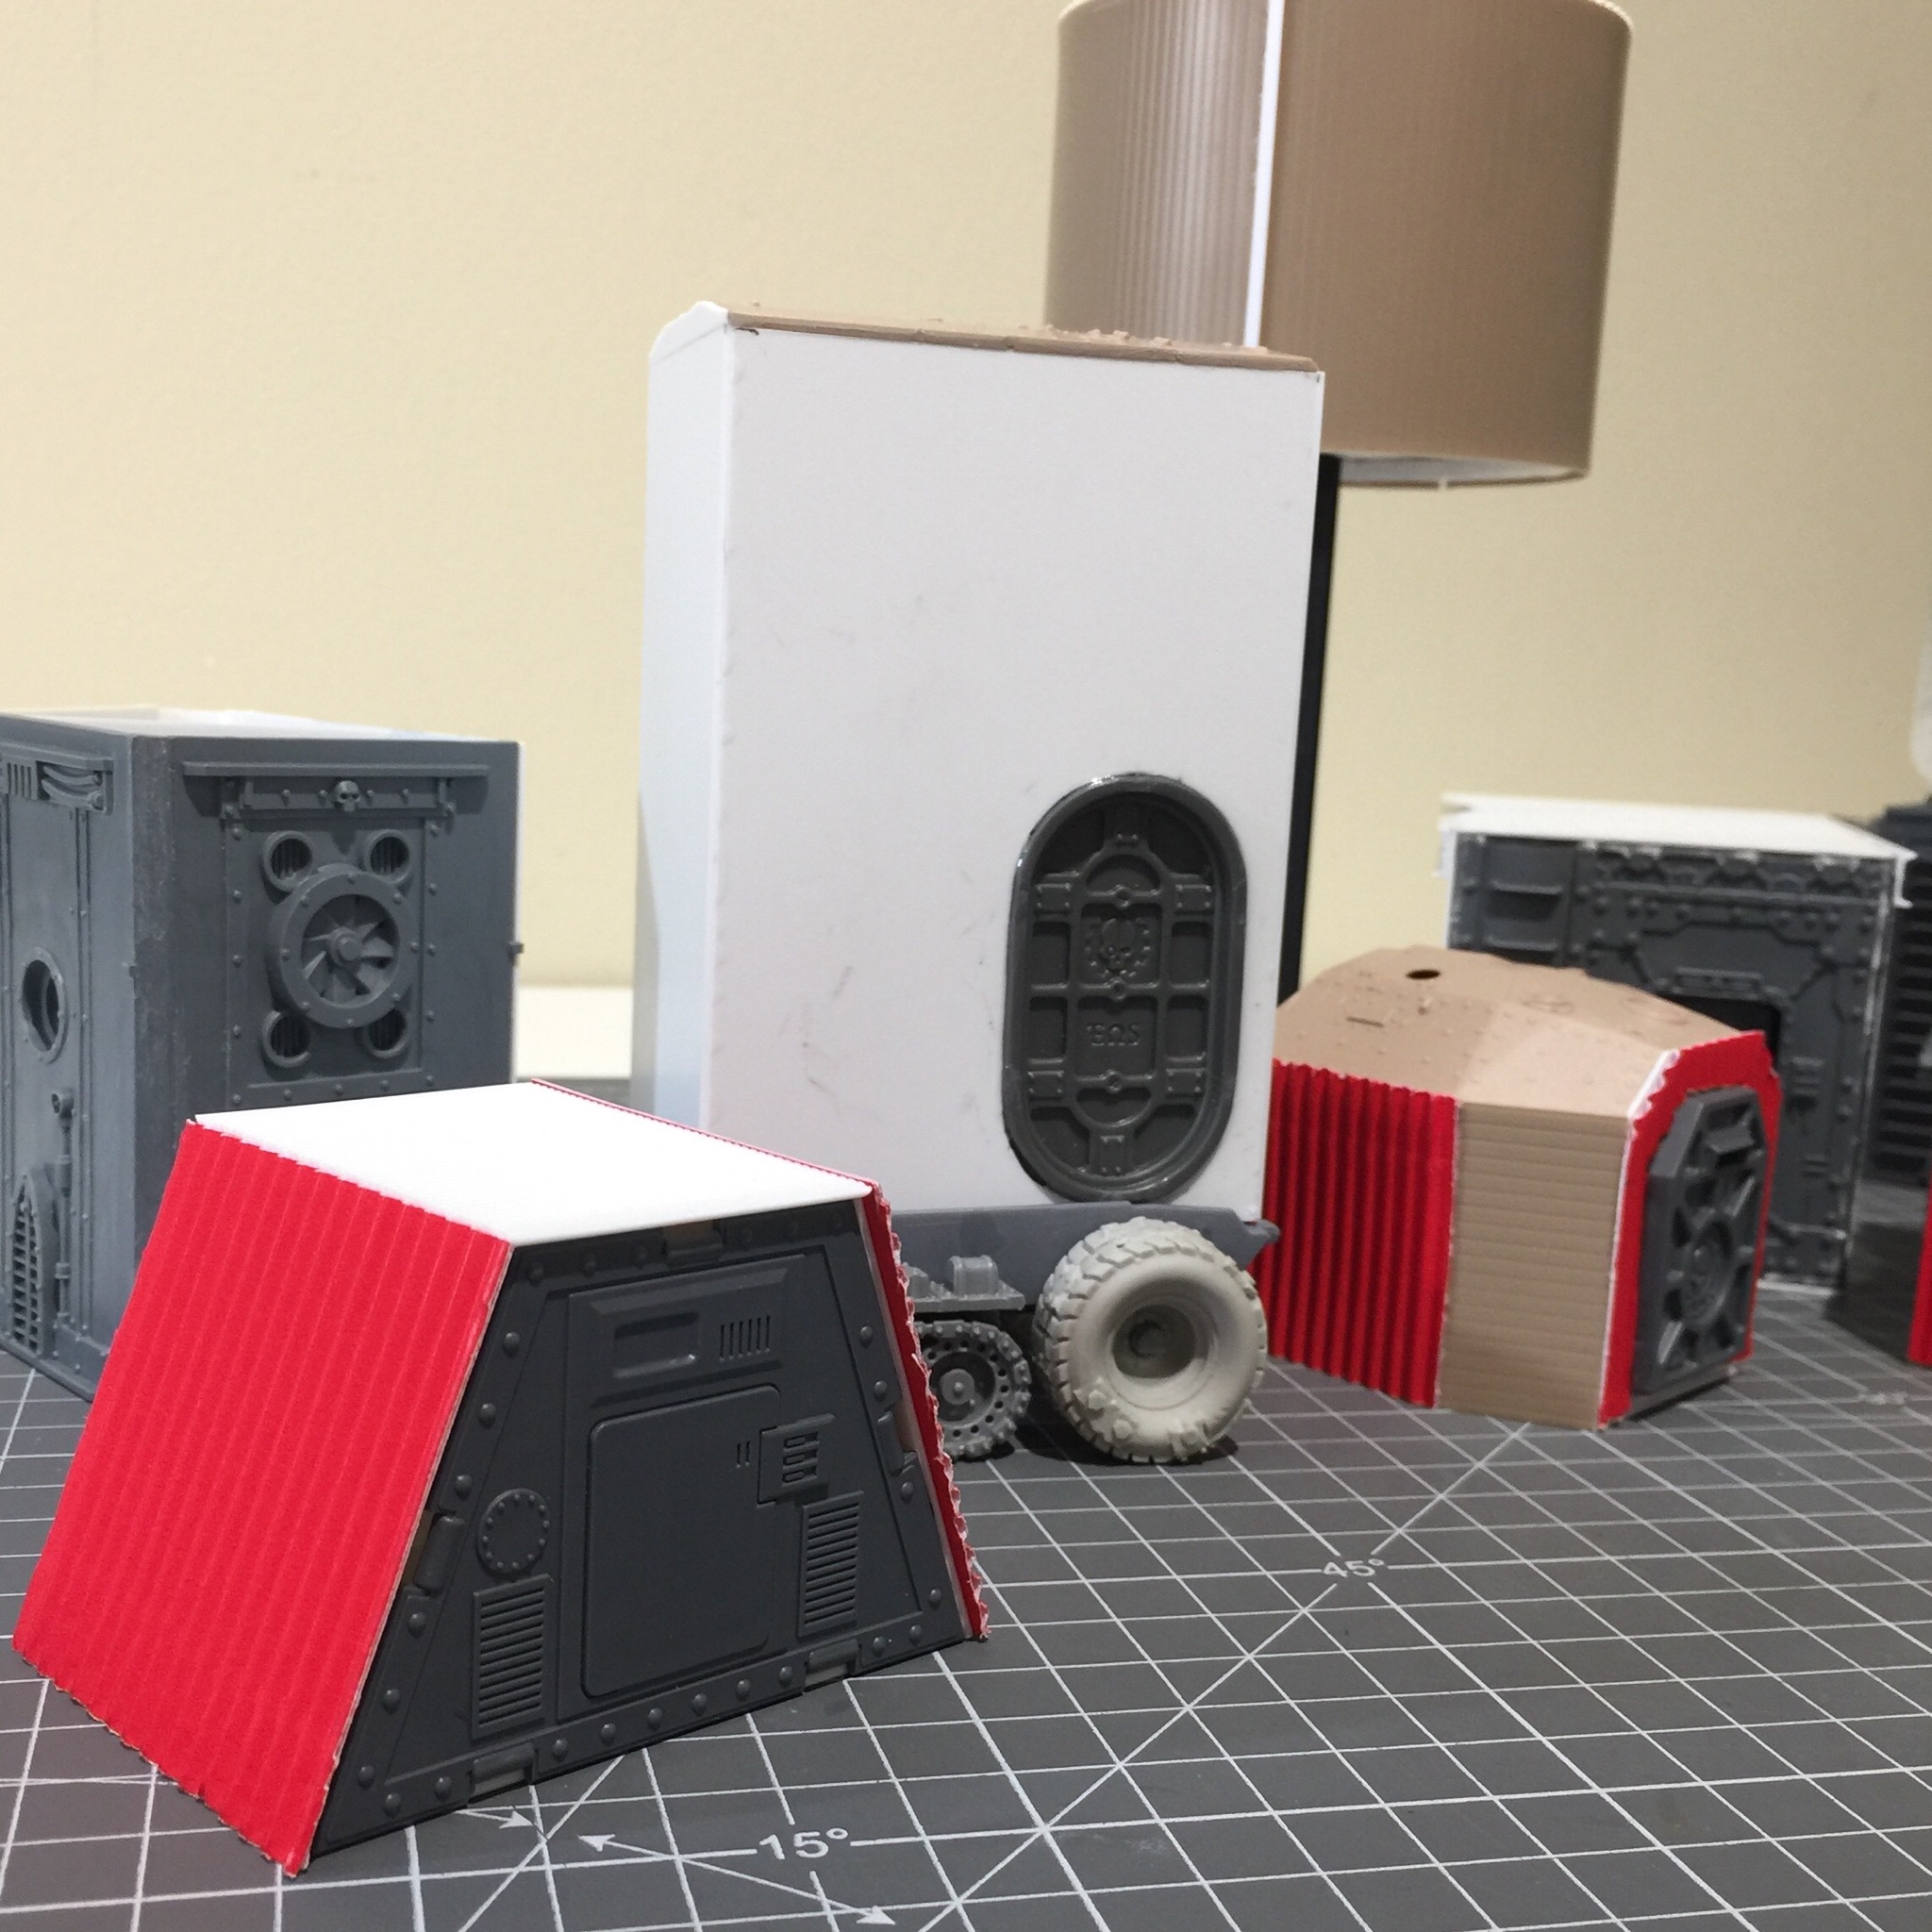
Shantytown

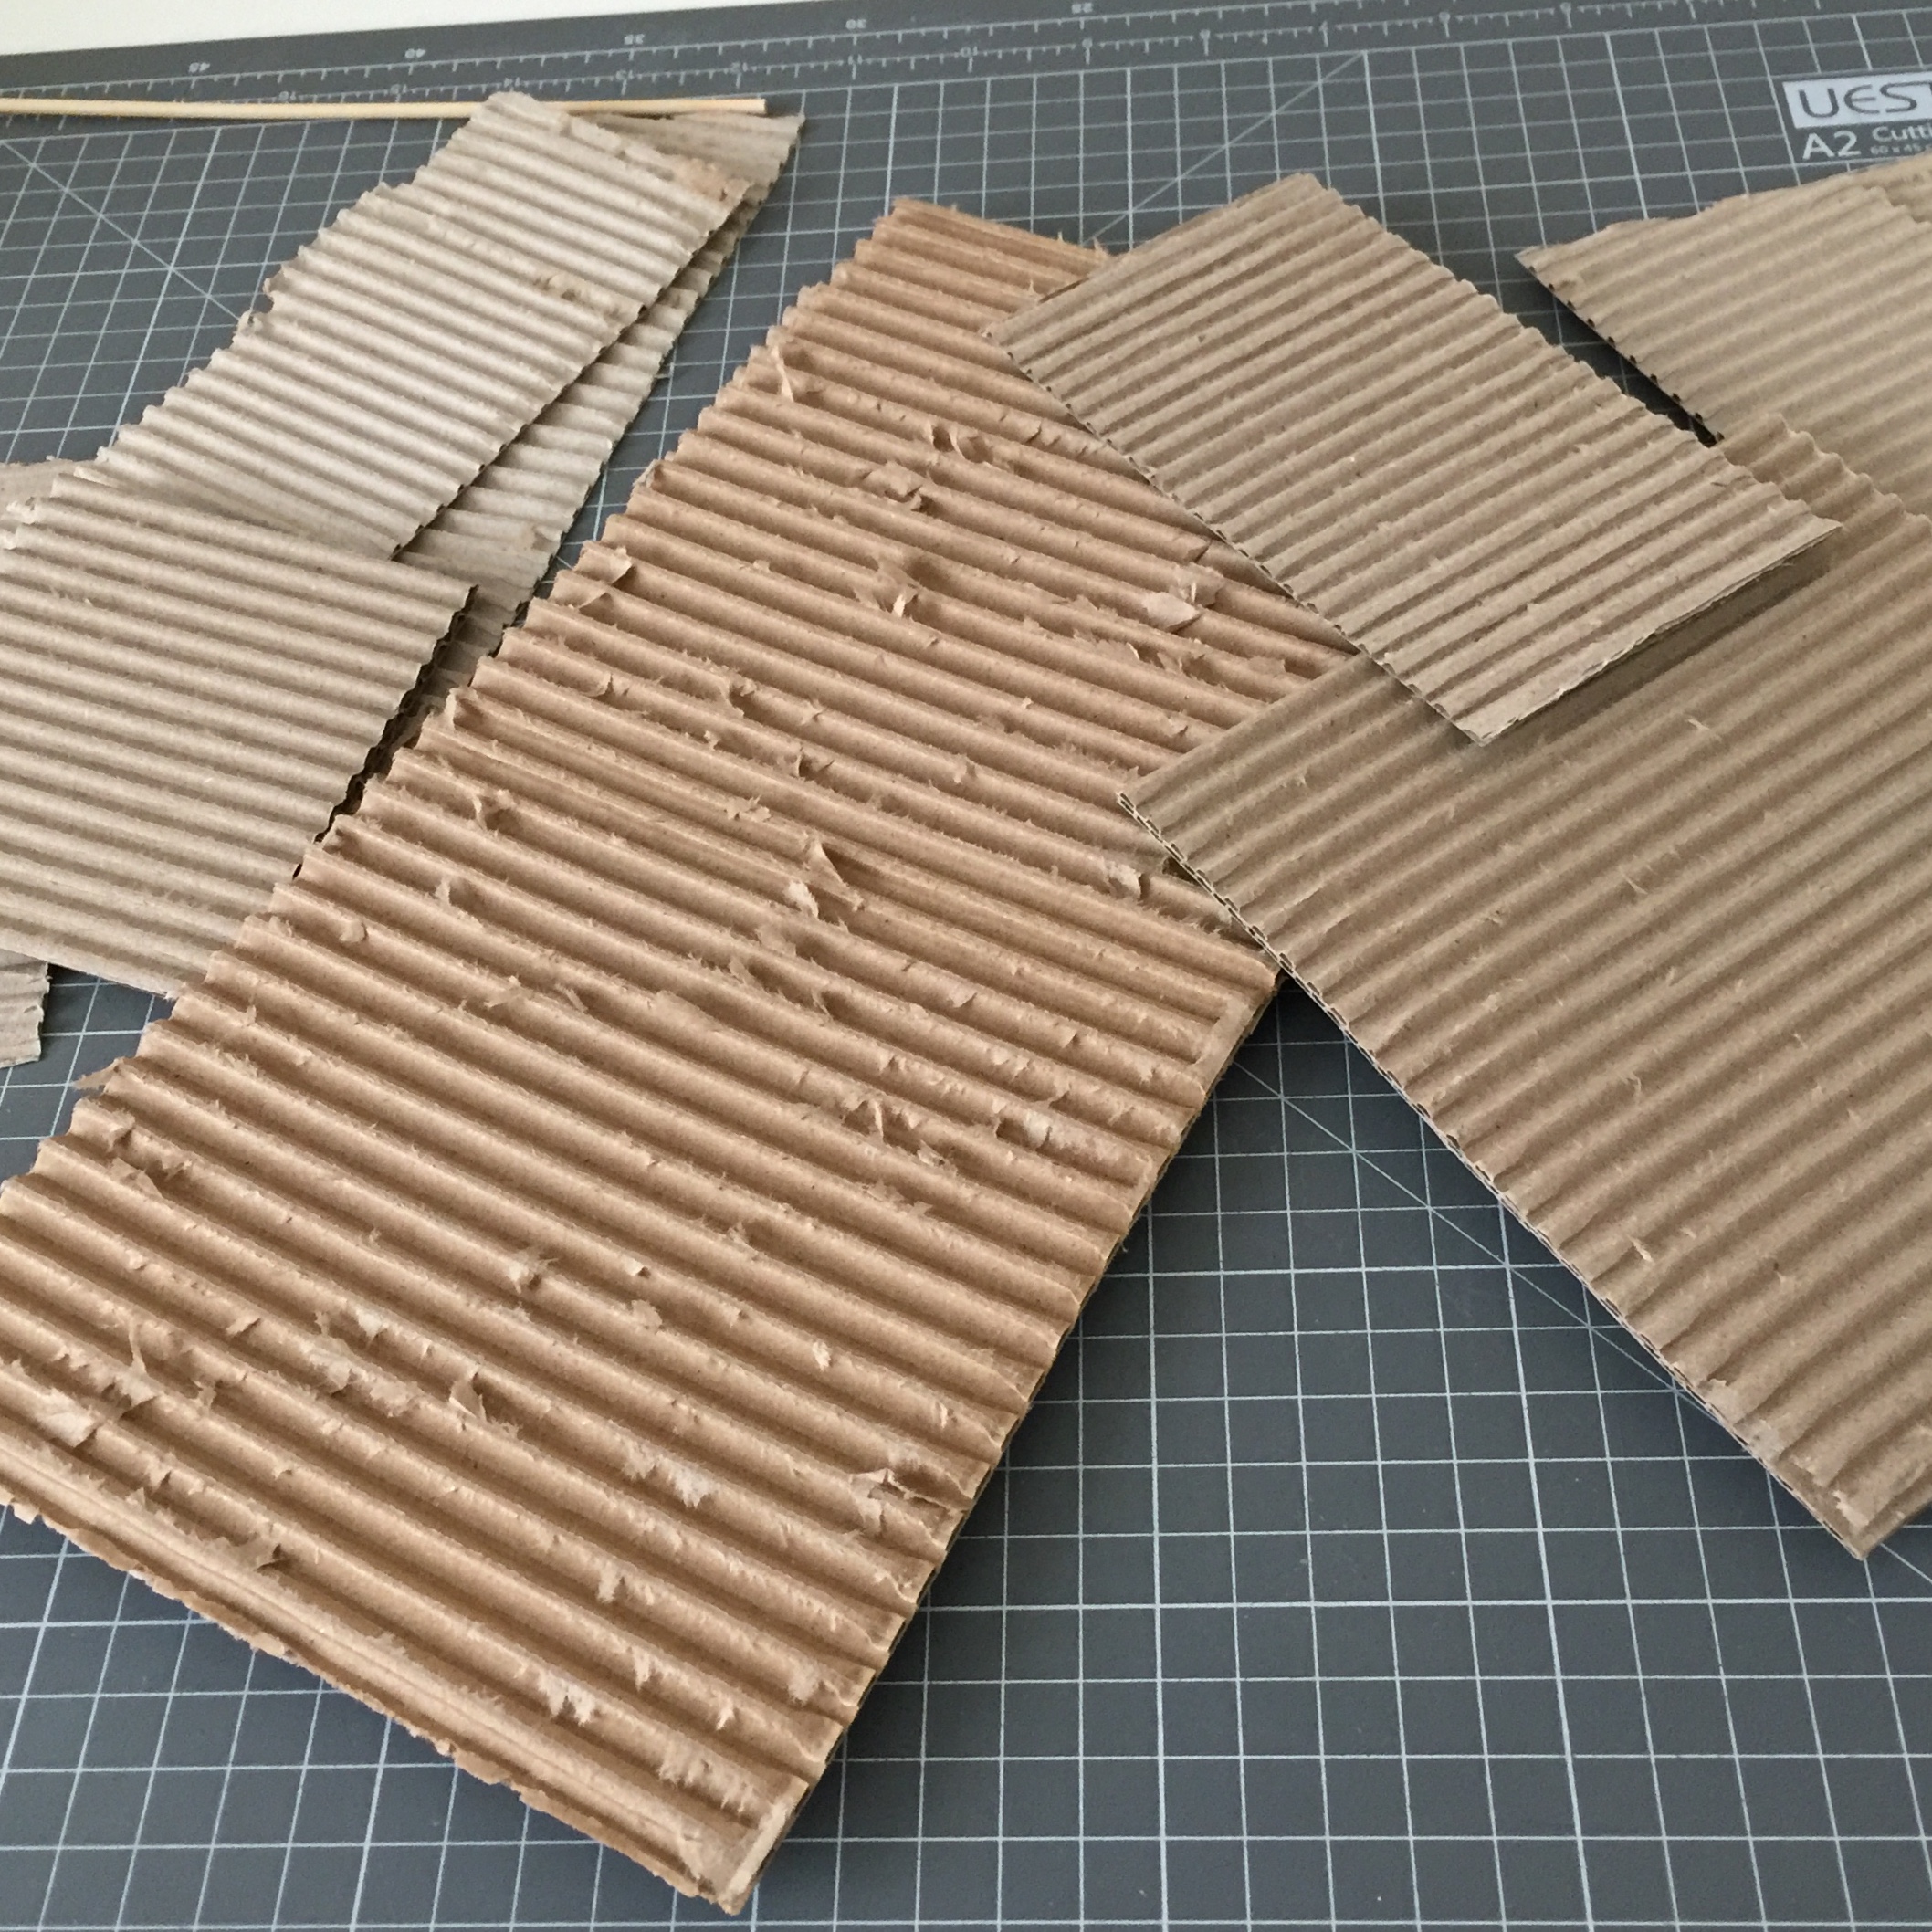

Next on the Shanty Town Territory Table that I fancy having a go at is the “Shanty” itself… Just starting with some rough shapes and forms for small buildings. They are all going to be quite small, stacked up in a precarious fashion and clad in corrugated metal sheets. Have tried delaminating some cardboard to get at the corrugated surface within, the scale might be a bit off for 28mm though. One thing I found that worked well was to strip away the top layer and then to use a thinned down white glue to smooth away all the little bits left behind. That leaves you with some better pieces to work with, but I’ll need to see how it looks scale wise. Alternatively I could source some proper model corrugated sheets in plastic or card. Will mix it all in though. I think that variety is key here!
Shanty Dwellings Appearing
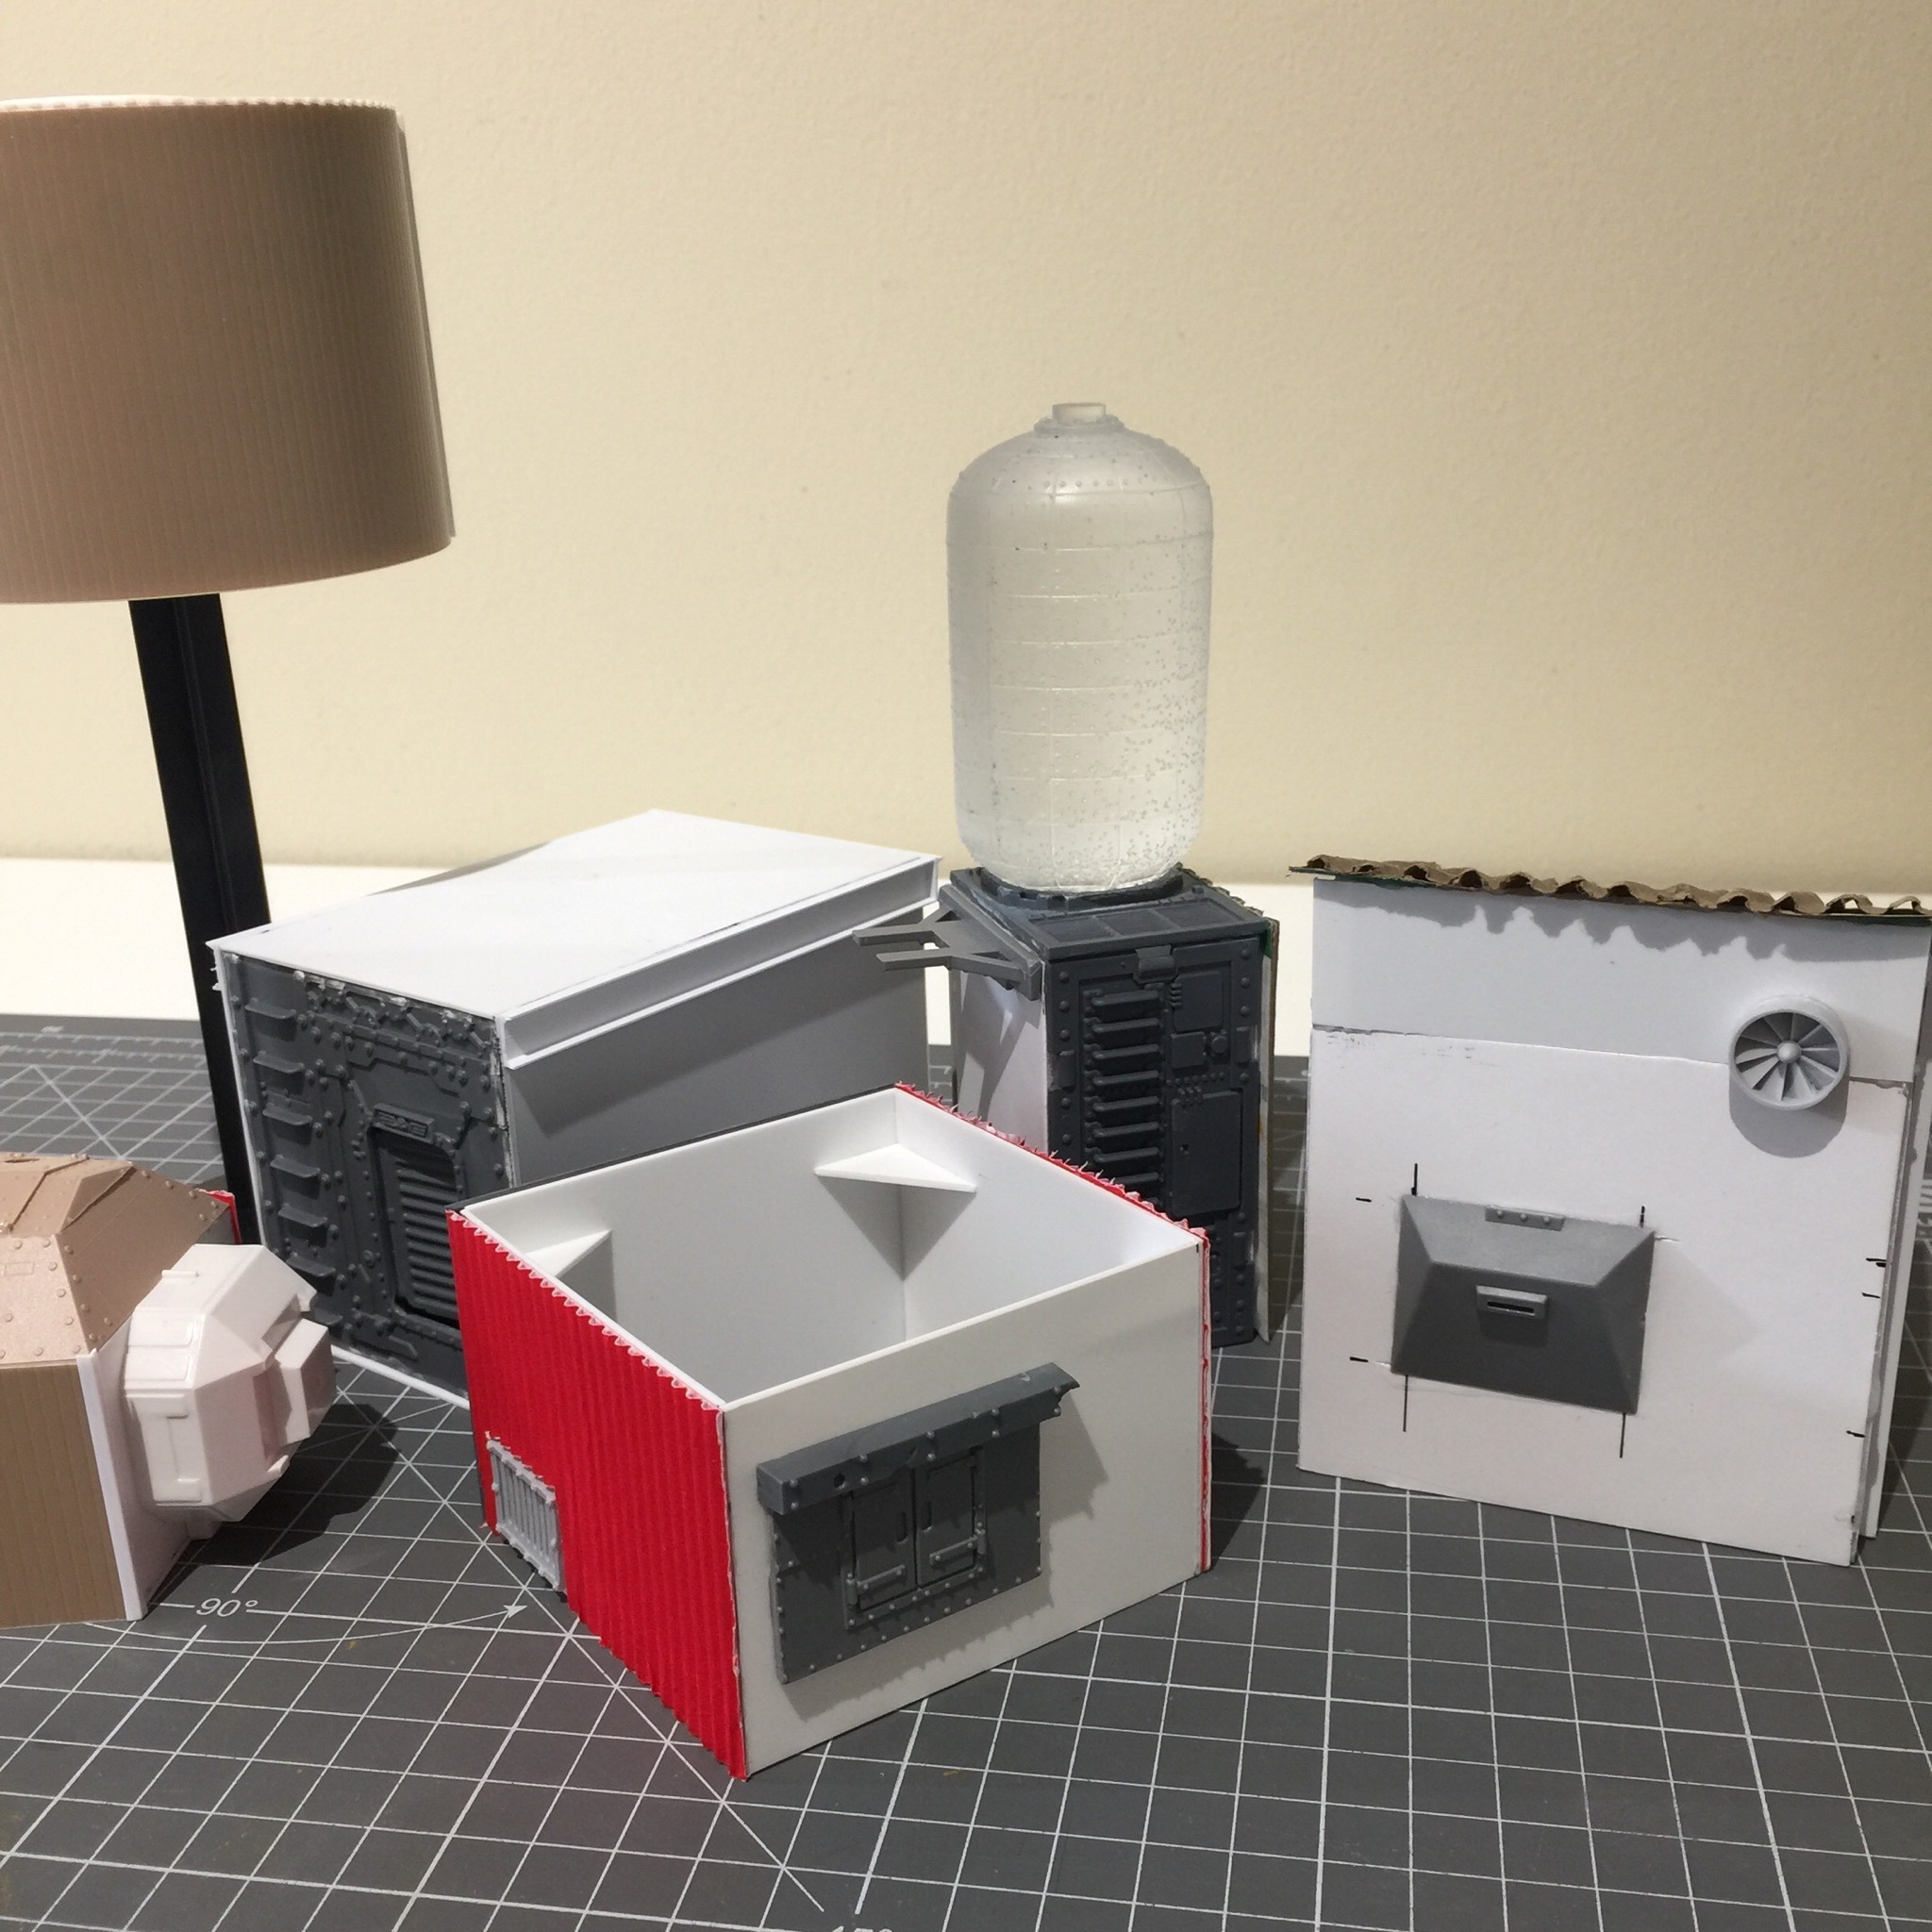
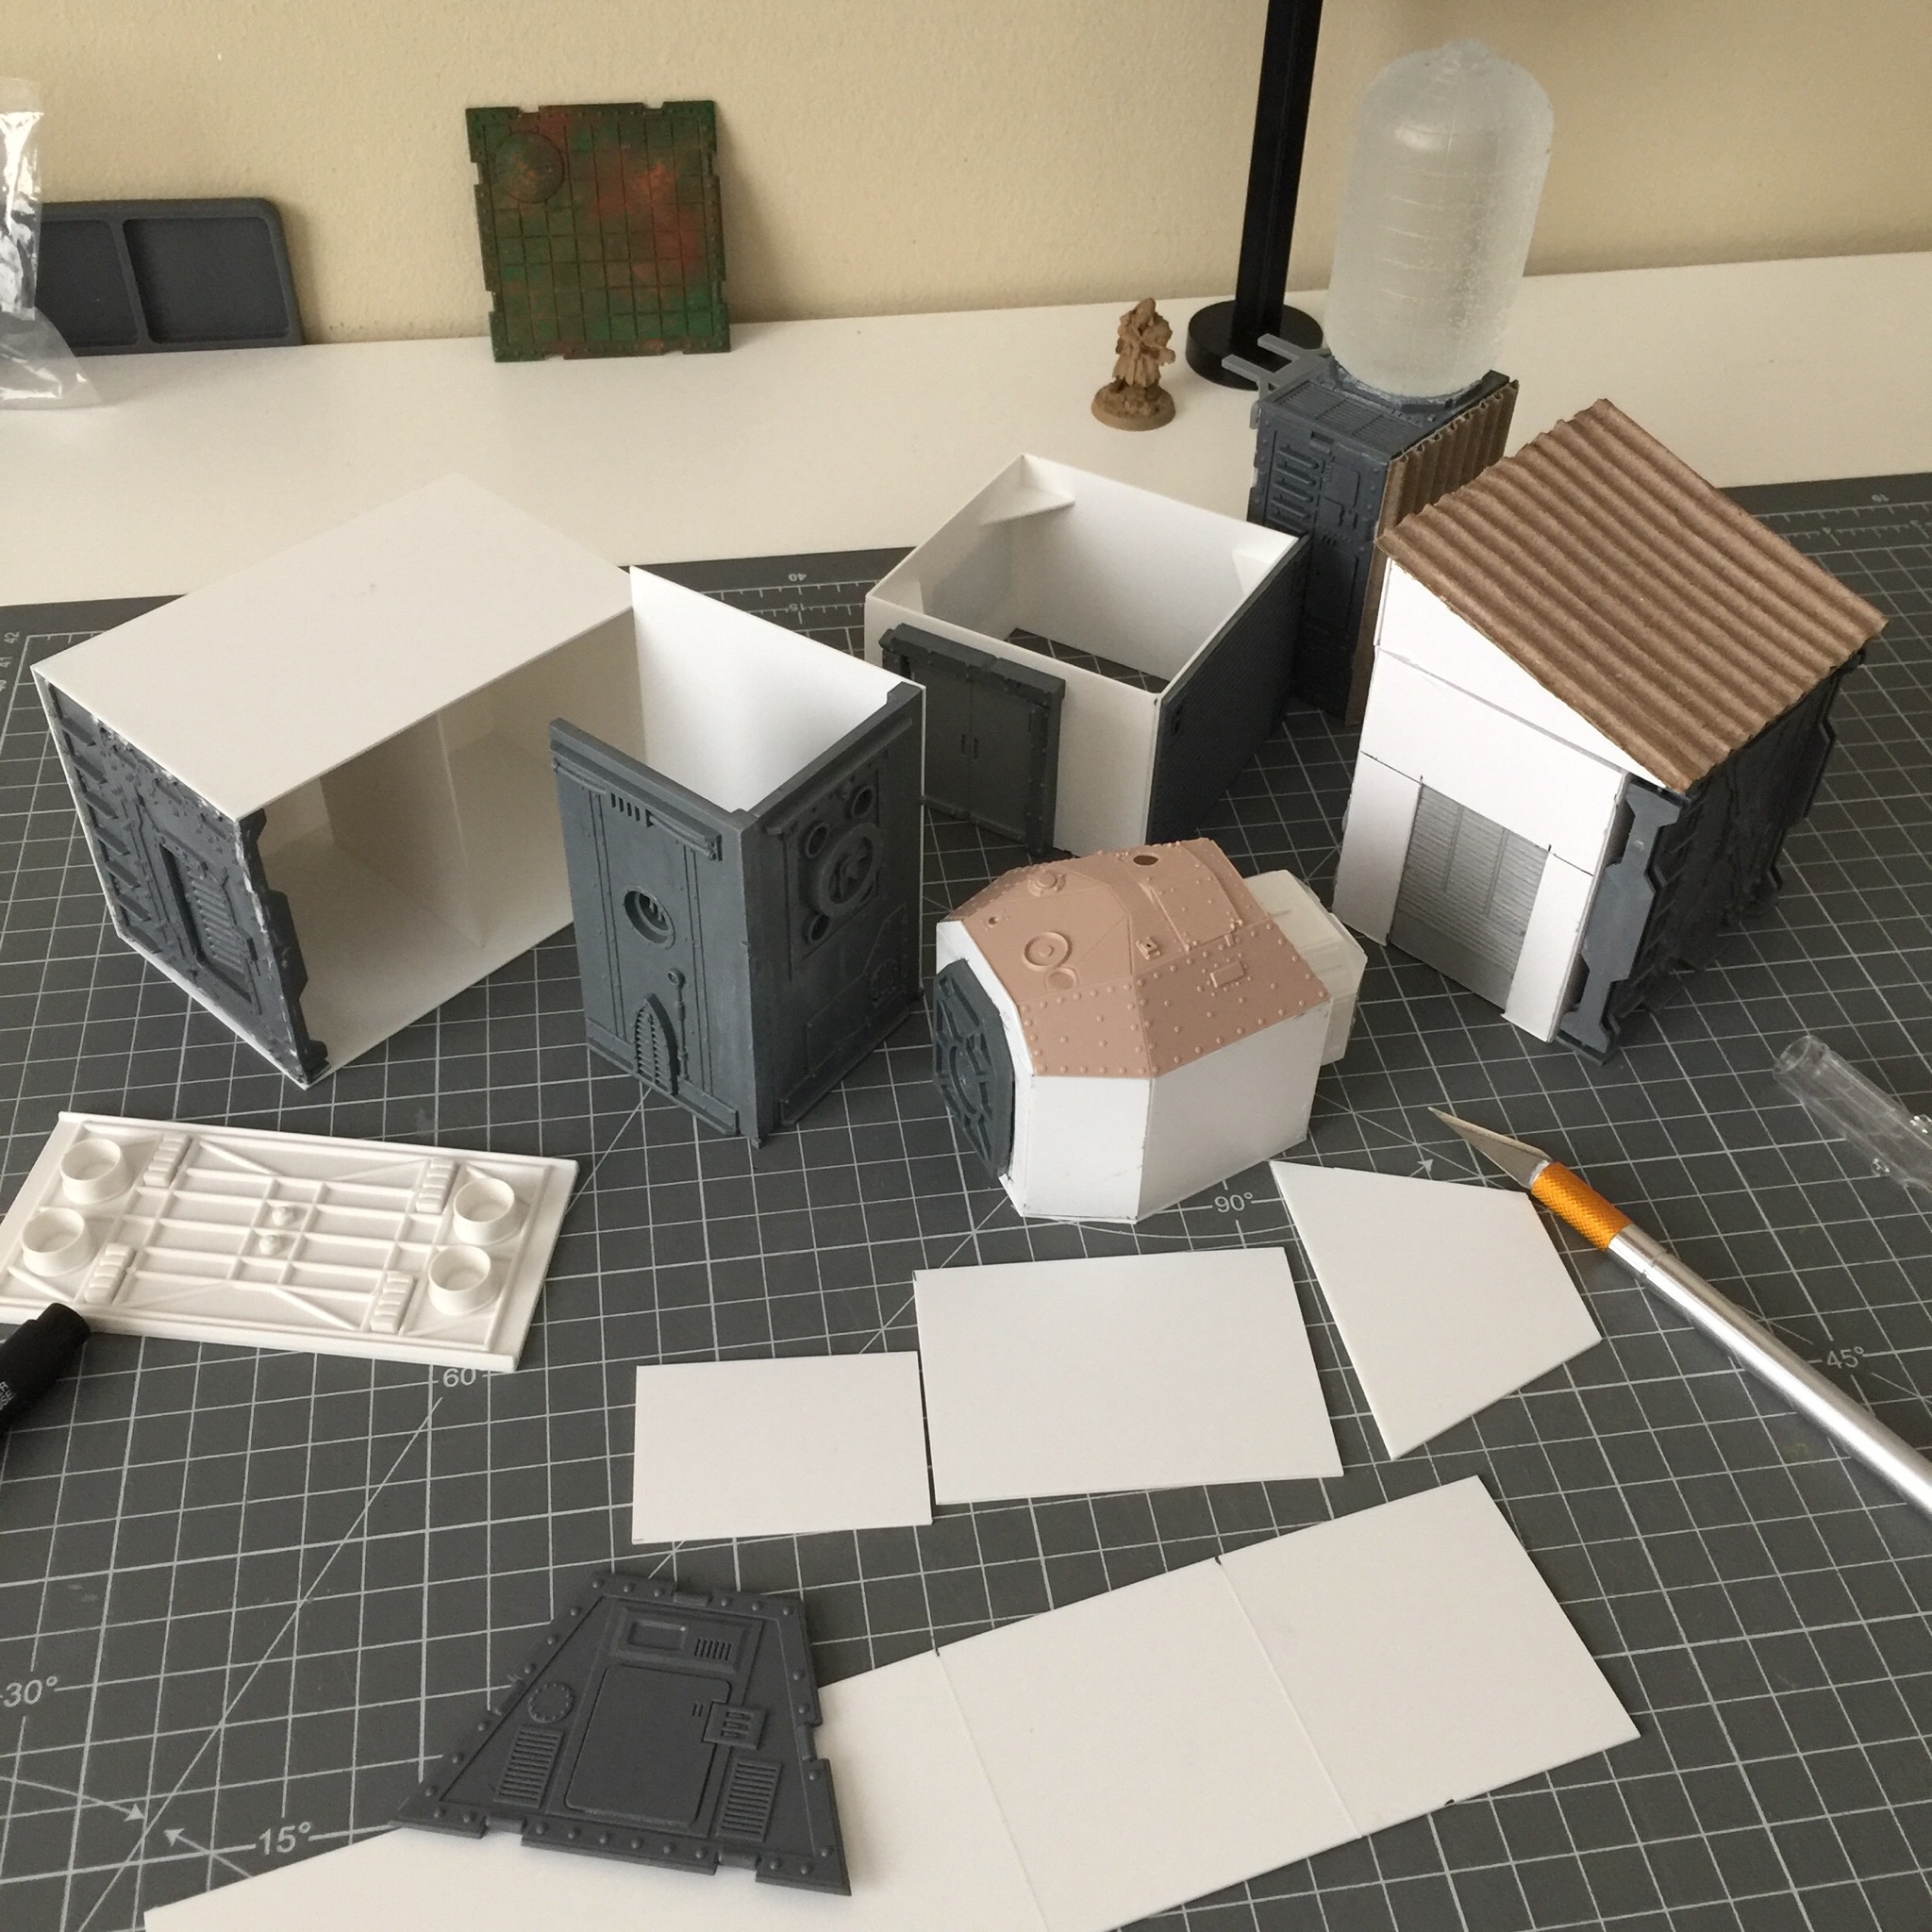 Styrene Street
Here are the Shanty dwellings so far, mid construction. As you can see they are generally a mixture of styrene sheets, bits box bits and what will be increasing amounts of corrugated cardboard. I’ve ordered some specific card stock for that which will hopefully look better in terms of scale opposed to ripping up old boxes.
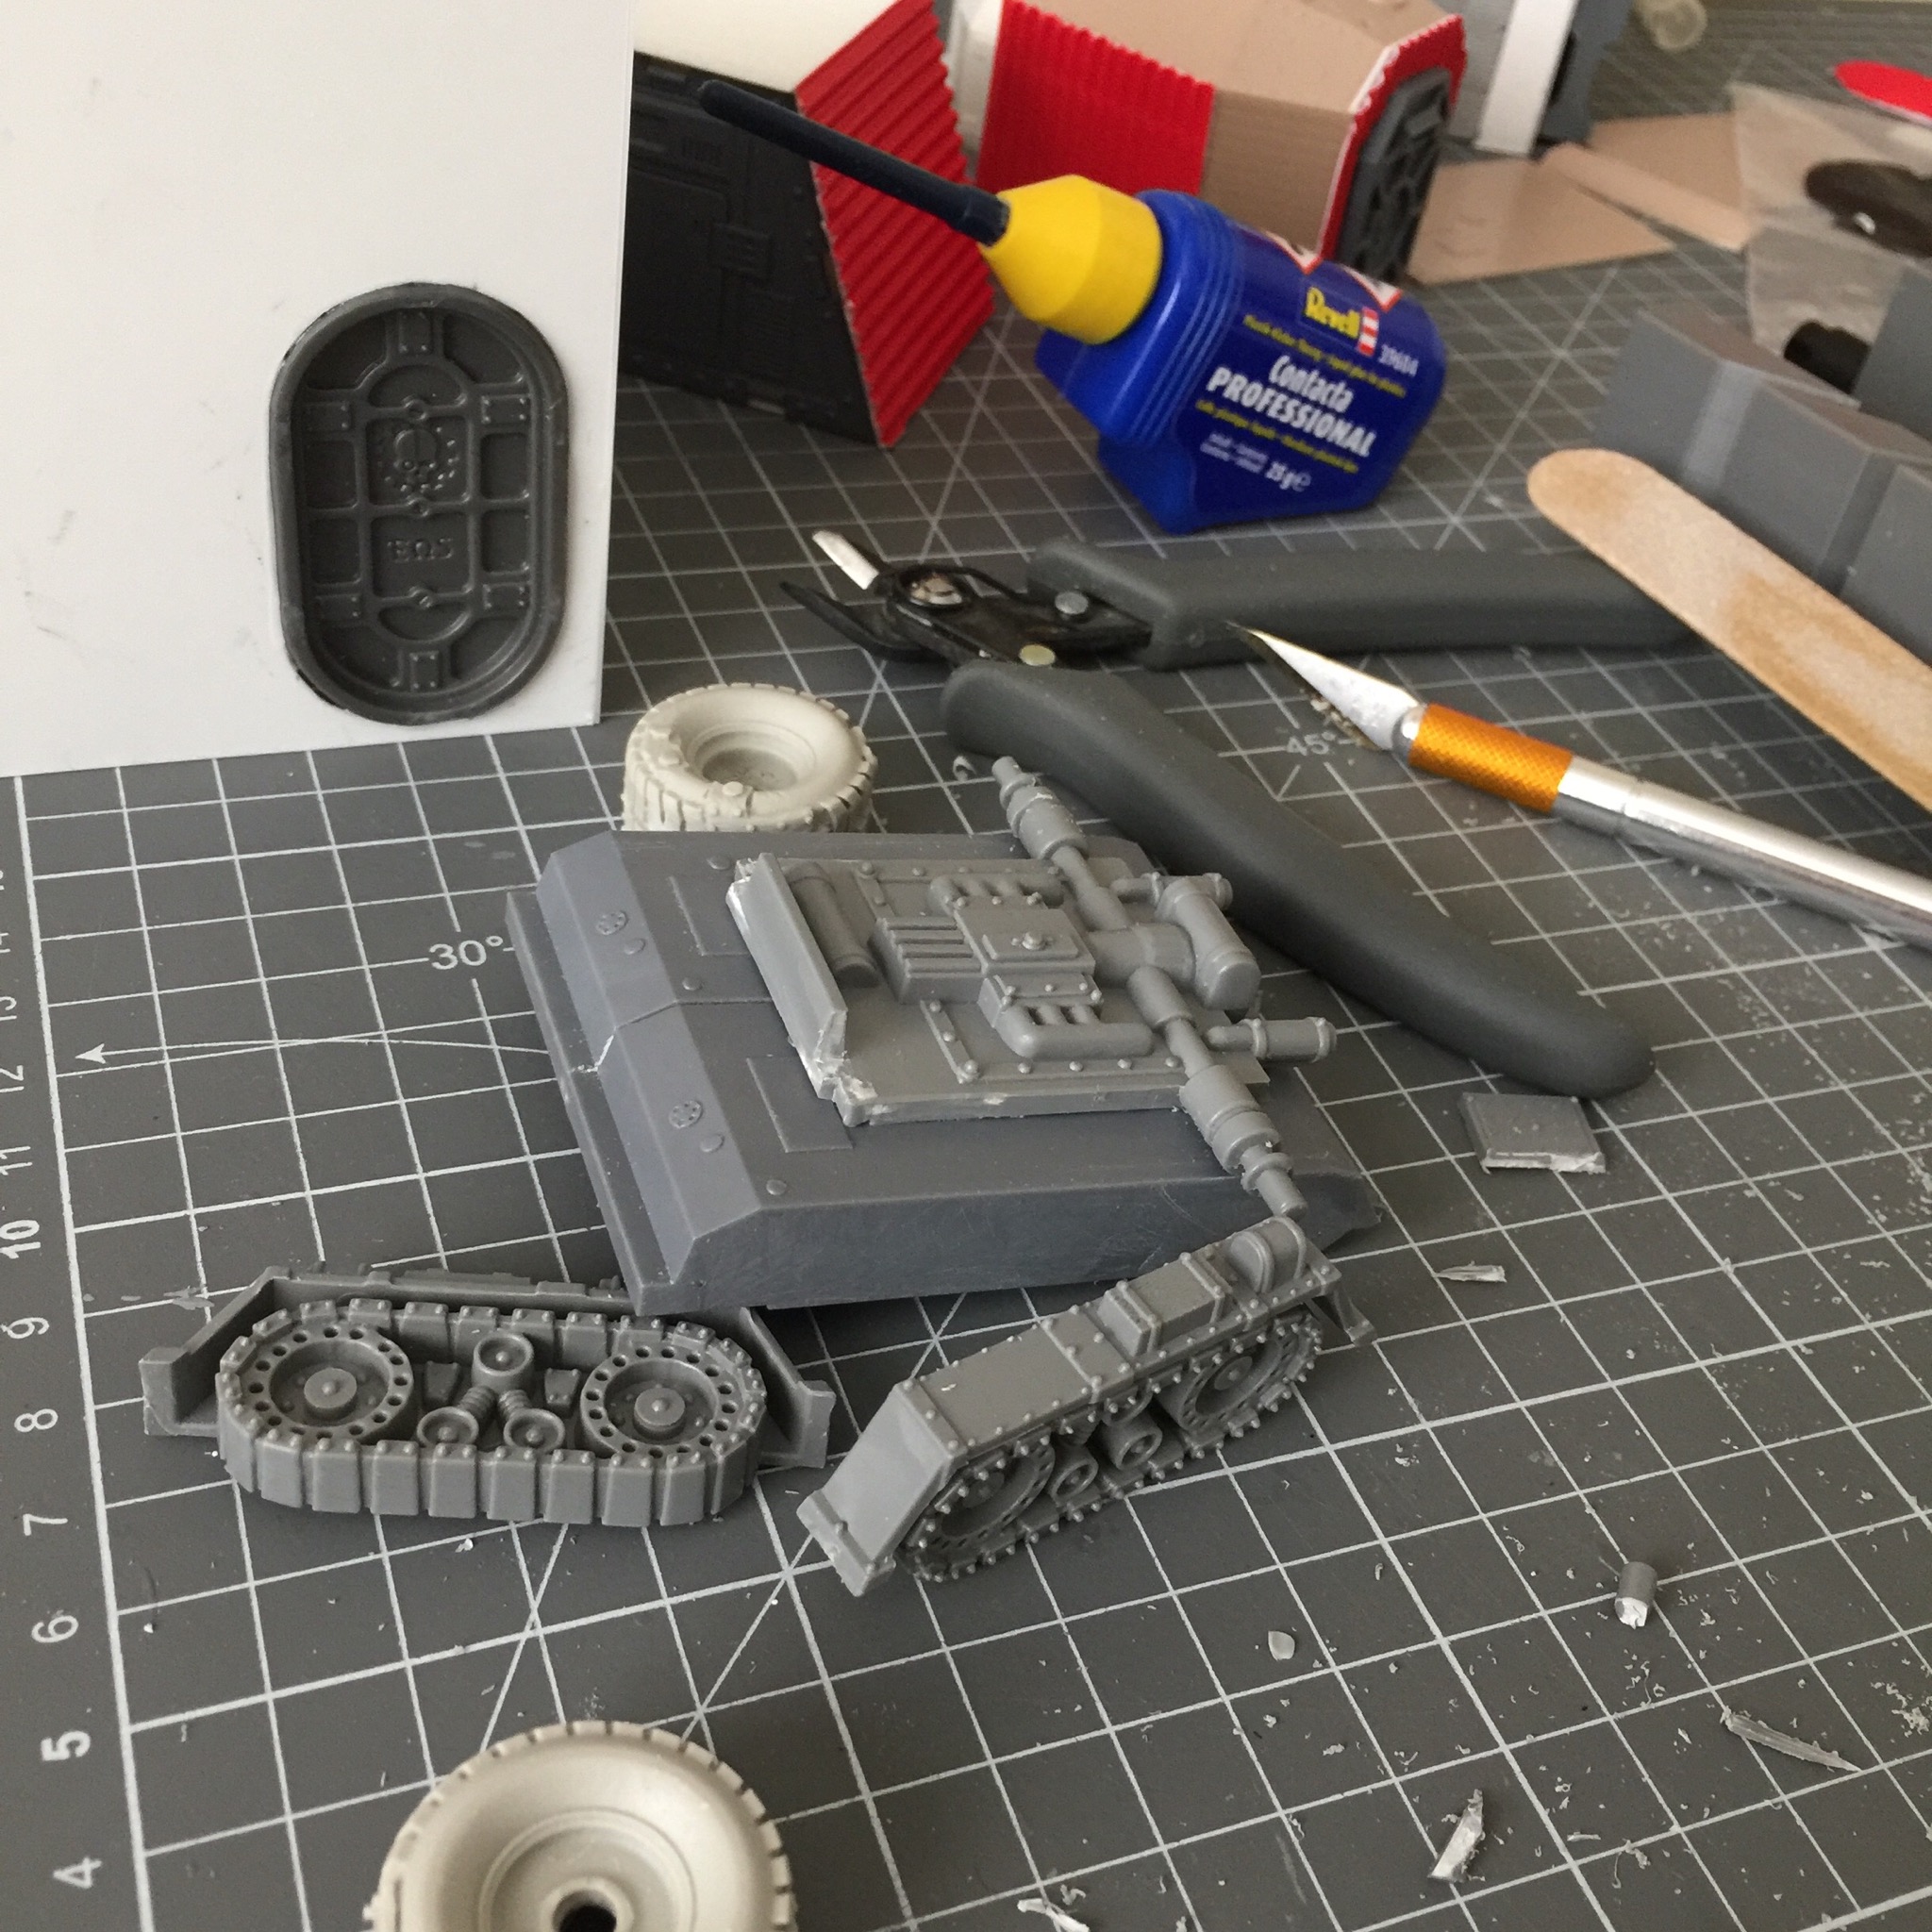
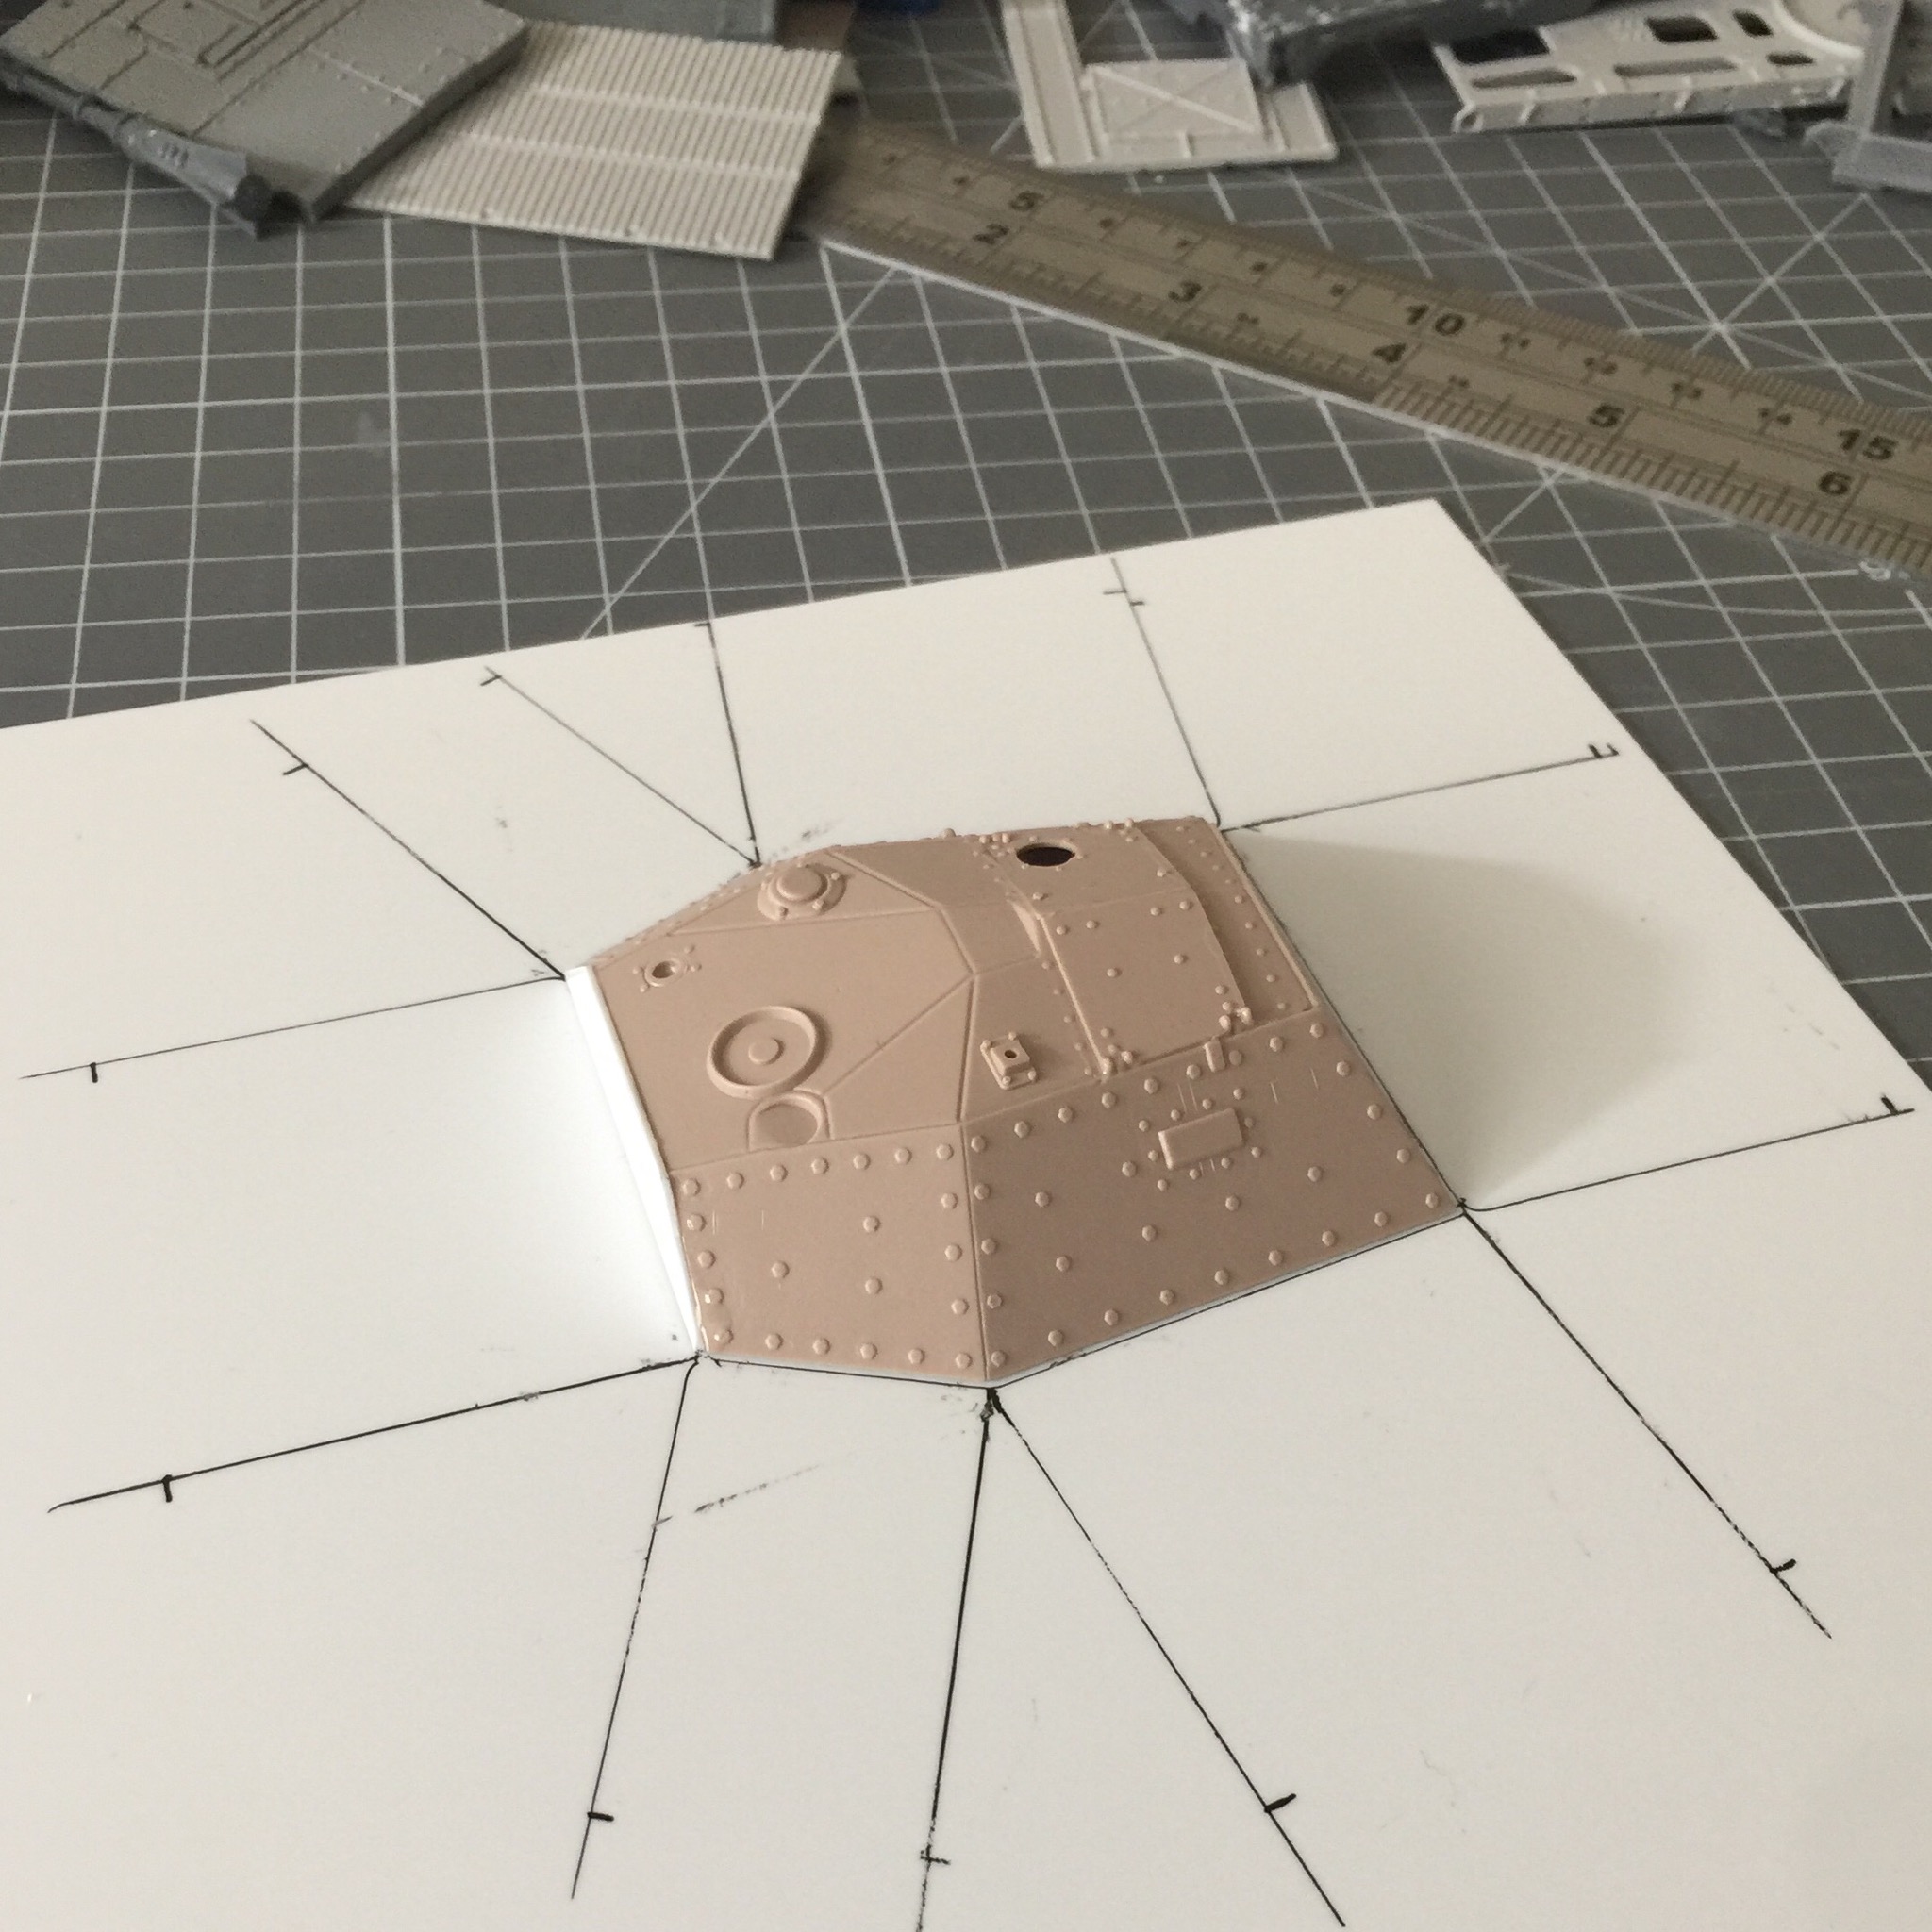 Tank Top
This model tank part is looking like a useful roof for a dwelling. My aim is to not have a Shanty town that looks like modern day… it needs to have some sci-fi to it. And I think some odd shaped structures will help a lot. Certainly no wooden parts for my Ash Wastes where natural wood would be a long lost commodity.
I do recommend getting some styrene sheets though, as a building material it is great to work with. Easy to cut and snap apart, then easy to glue and stick together.
More base shapes constructed
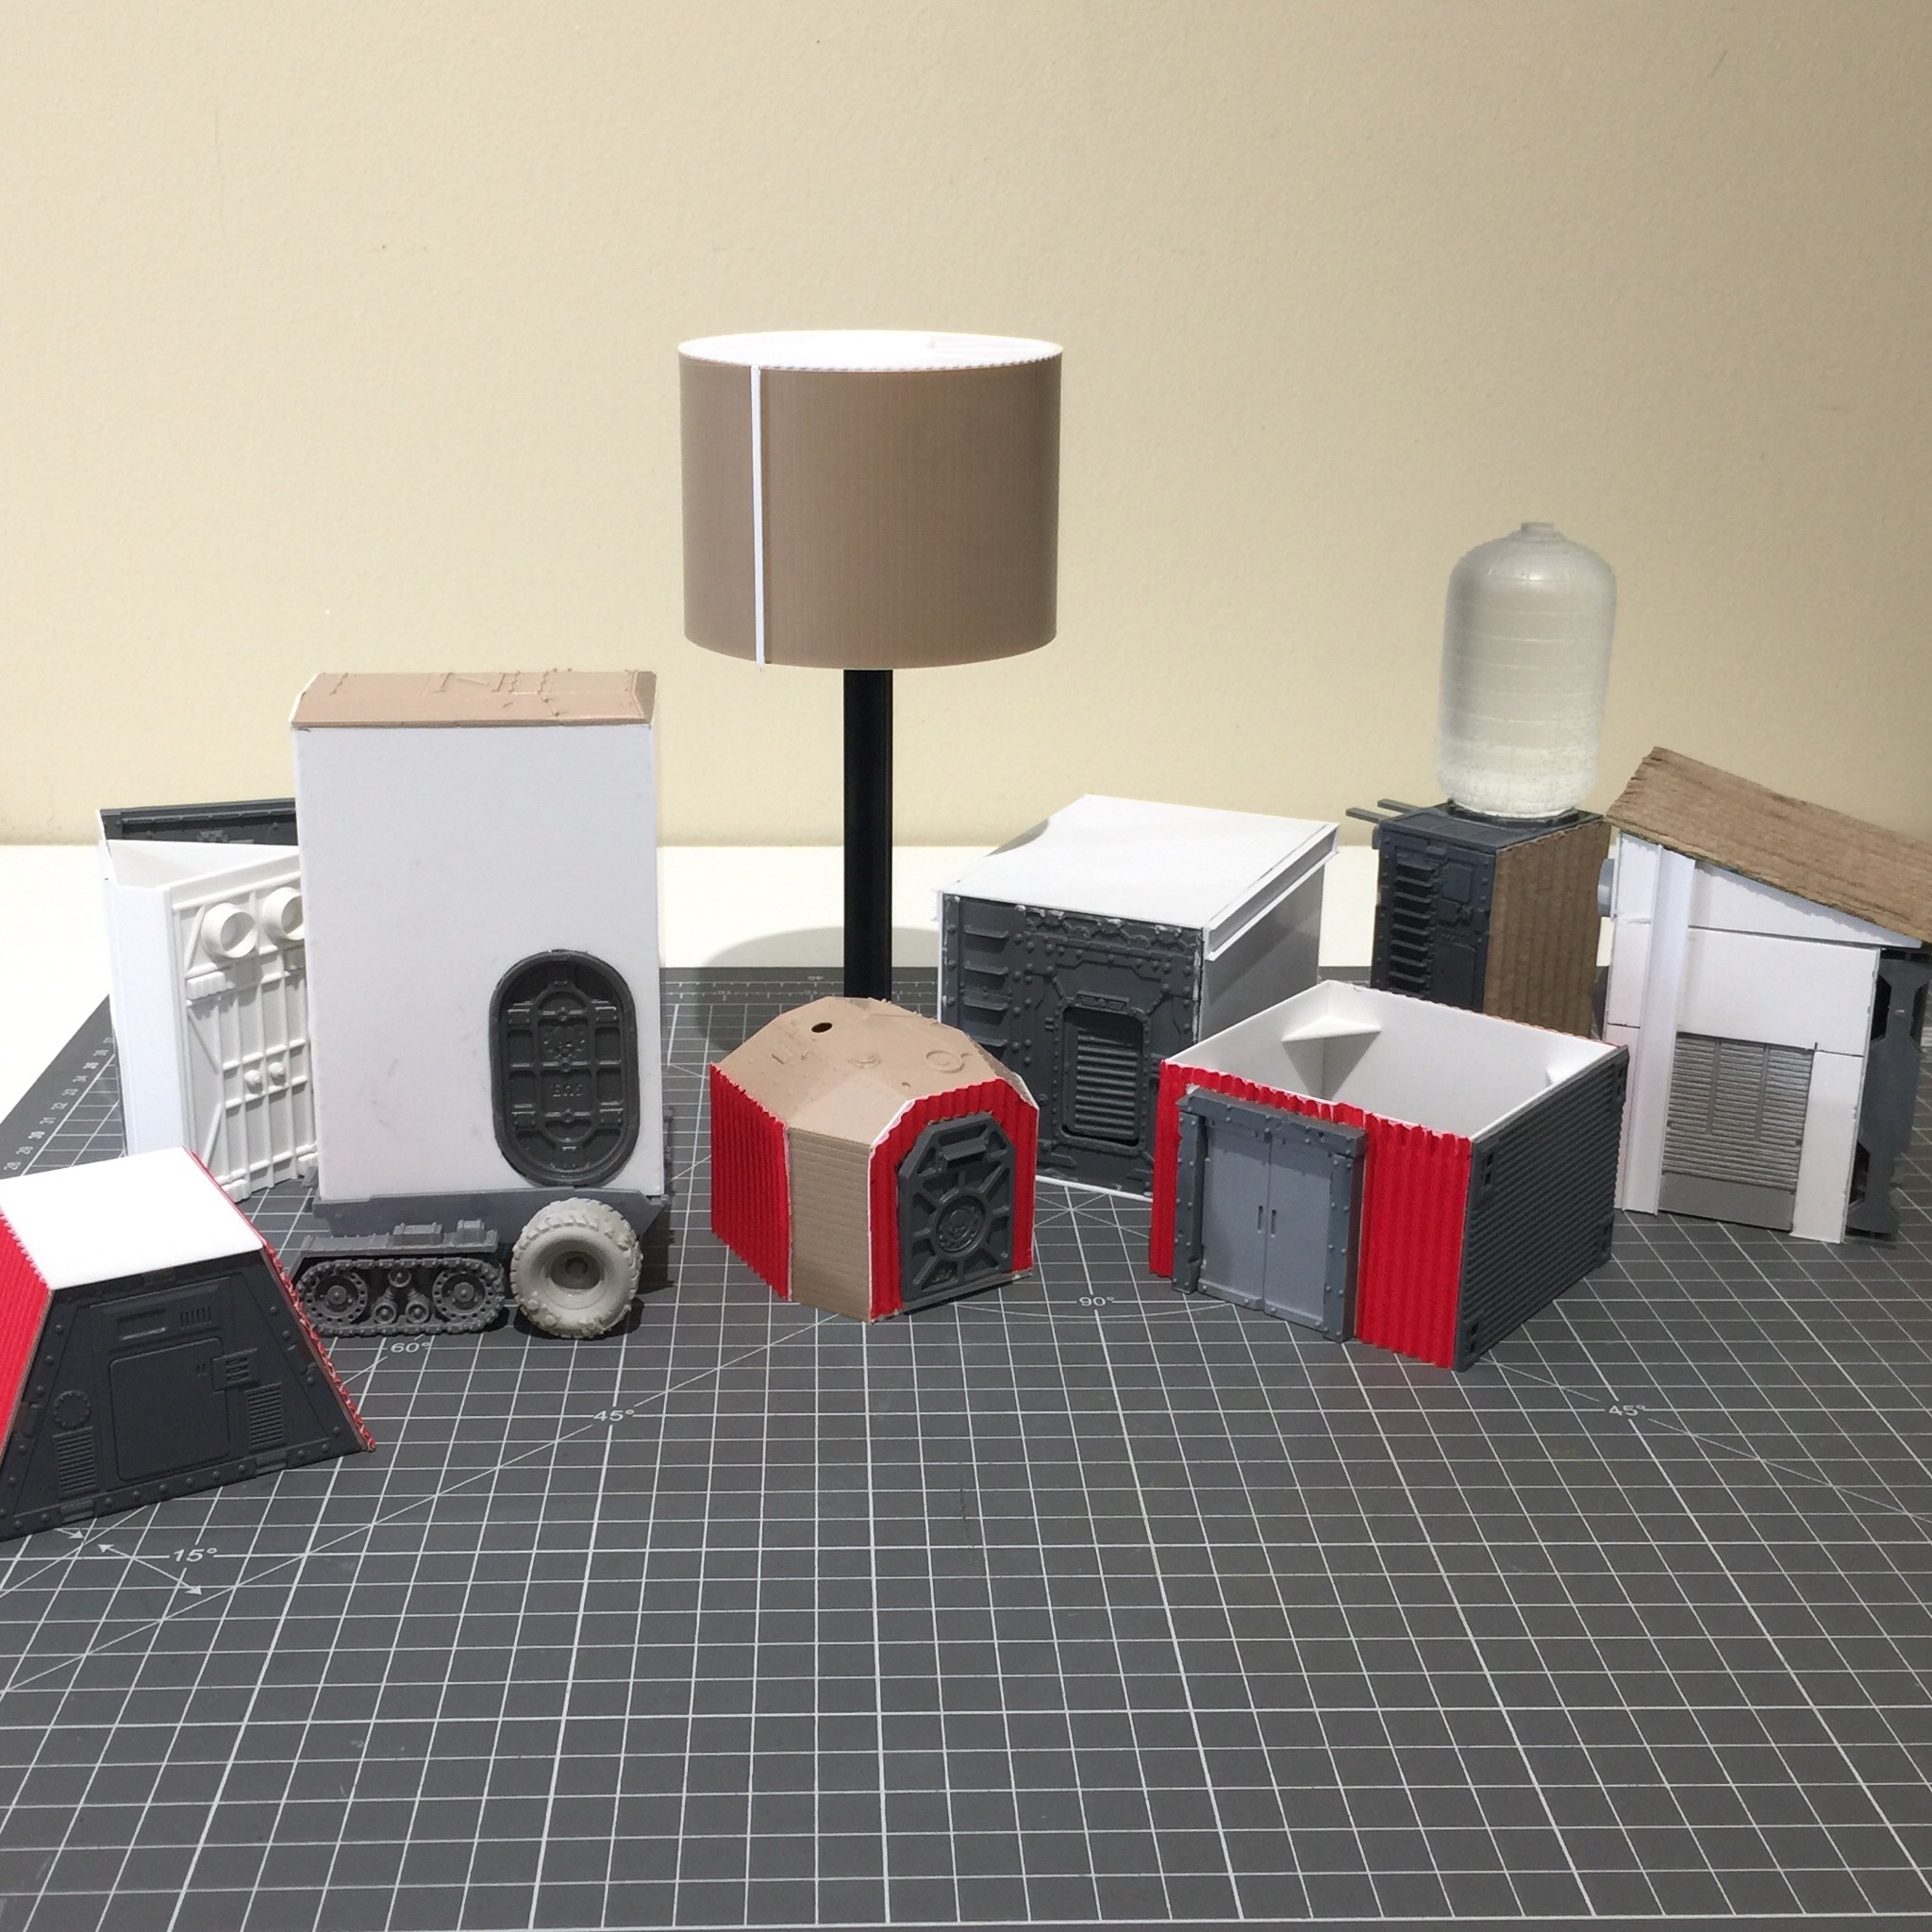
More base shapes constructed this weekend. Here’s where I’ve gotten to, looks like nine dwellings so far. Plenty still to do to these, need to finish their structures, add roofs where needed and then start detailing with bits.
I’m trying to capture a few of the Territories listed in the Shanty Town Table such as; Gambling Den, Nutrient Vats, Shanty Guilder, Friendly Doc, Drinking Hole and maybe a Water Still. I’ll see how I go.
I can already sense the dilemma of whether to base them collectively or to keep them independent so they can be arranged freely.
Currently one of them looks like a cheap bedside lamp, that will hopefully transform from being a Cotton Buds container clad in plasticard into a Water Still of some sort but needs a lot of work.

I do recommend the styrene sheets (various thicknesses) as a building material. Very useful and easy to work with. Also recommend the corrugated card sheets for crafting that are ideal as a wall cladding. Foam board also very handy as a wall when coupled with a Glue Gun.
I heard Warren and the guys sounding very unimpressed with battery powered glue guns this weekend. I just want to say that my Bosch GluePen is great. It uses the 7mm glue sticks and is rechargeable, and has hardly any “warm up” time at all. Turn it on and a few moments later it’s ready to use. Maybe this is different to the ones they were using, I think they had actual replaceable batteries in theirs which could explain the poor performance.
Getting back to the styrene though, you can see in those images that I was able to cut a round door shape into the sheet and “flex & snap” (TM) the piece out leaving a nice clean space for the door to glue into.
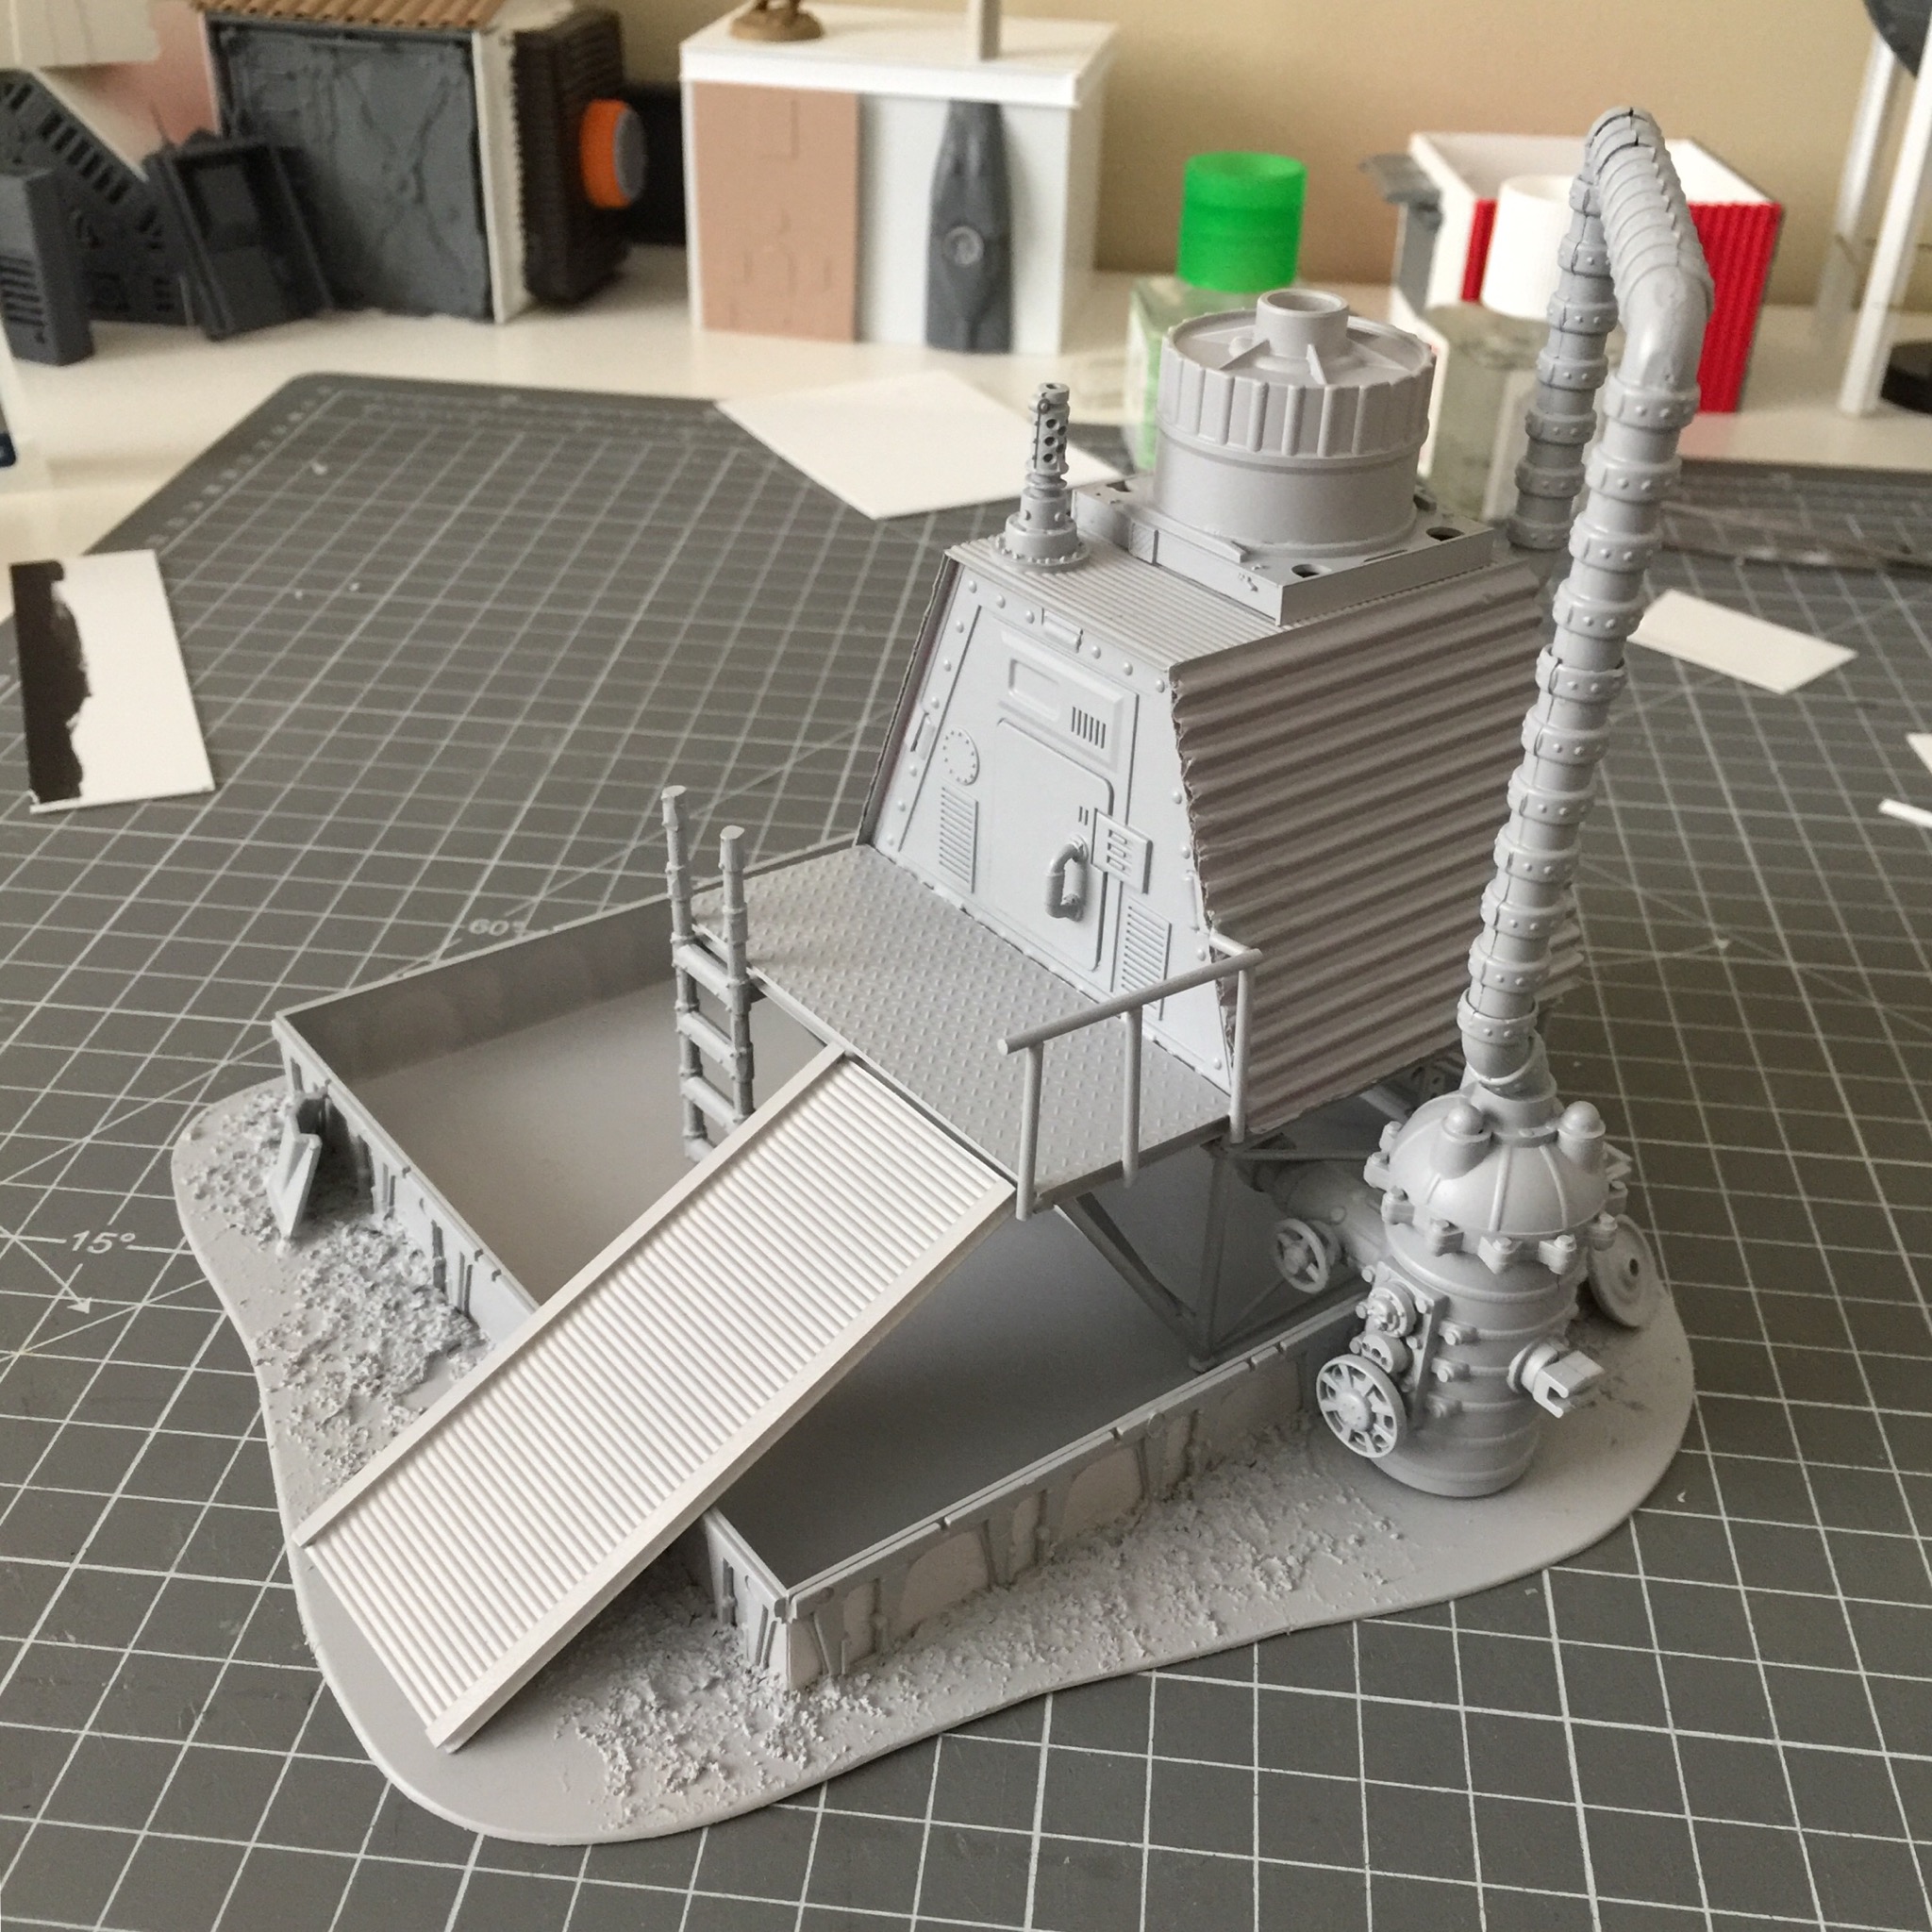
Shanty Town comms relay
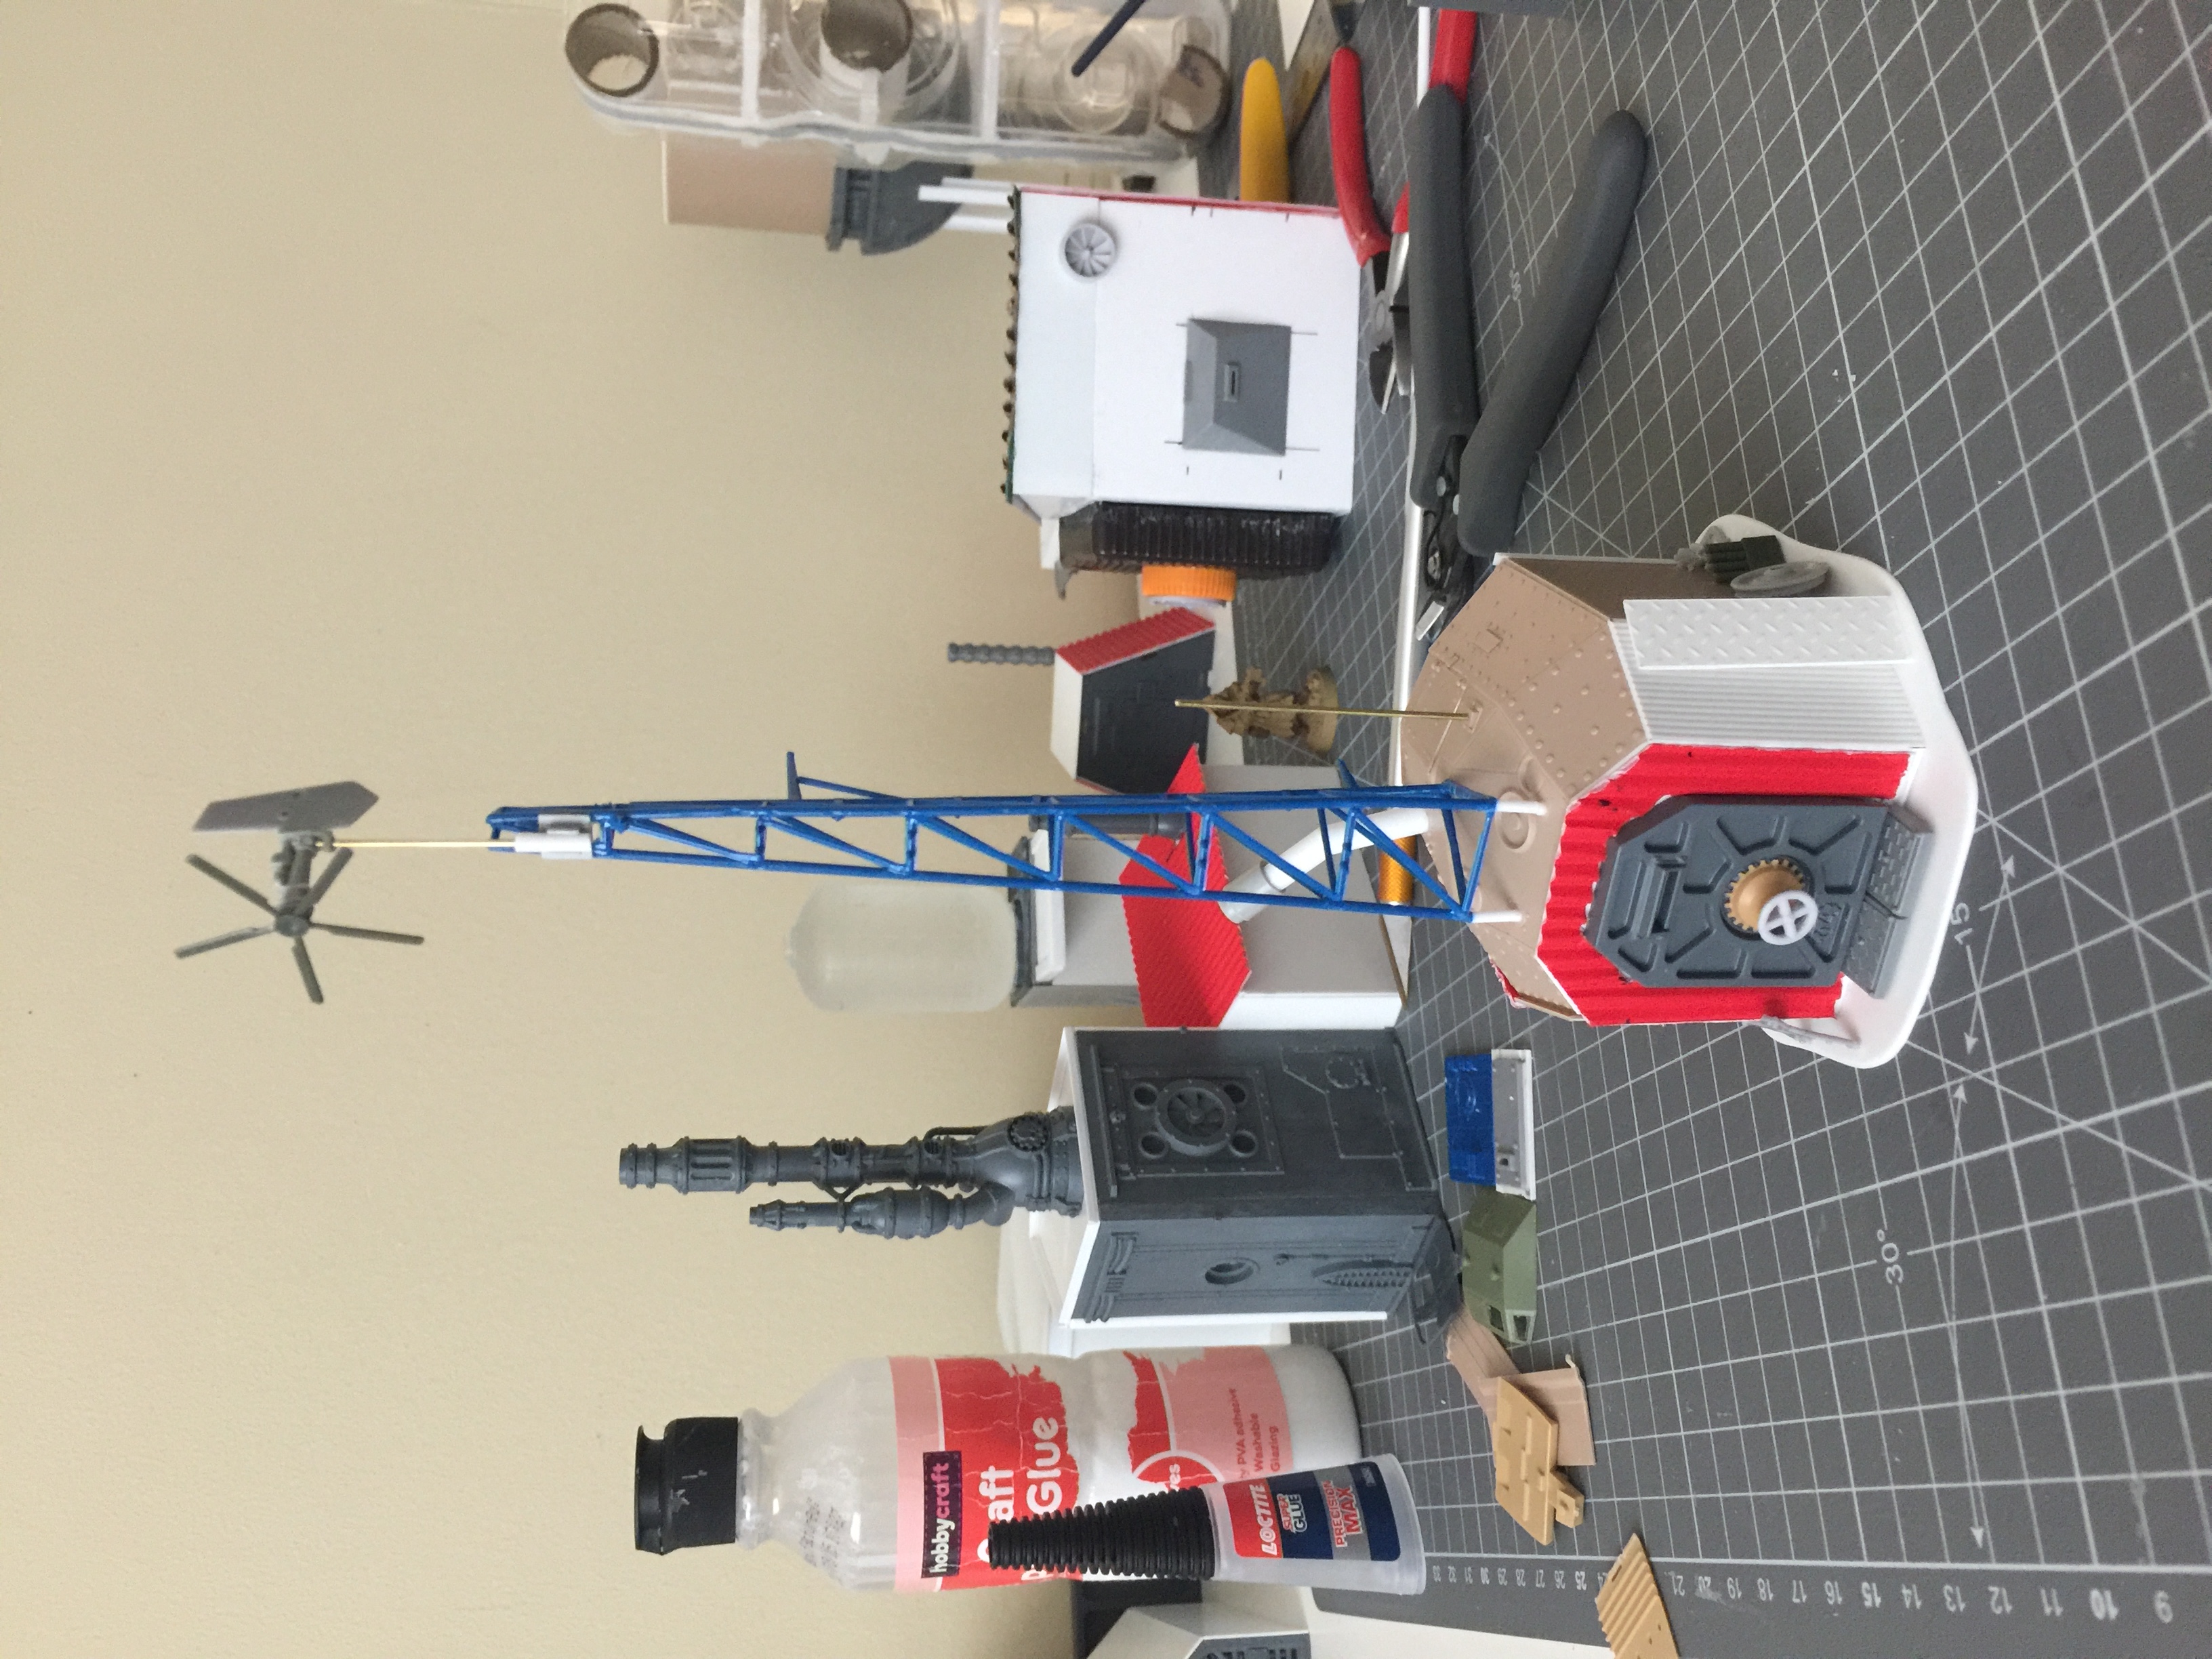


So this one has turned into what looks to be some sort of communication station or a comms relay for the Shanty Town.
Just wanted to post a WIP showing the finished kitbash and the various bits visible and then the model primed.
Workshop model built and primed
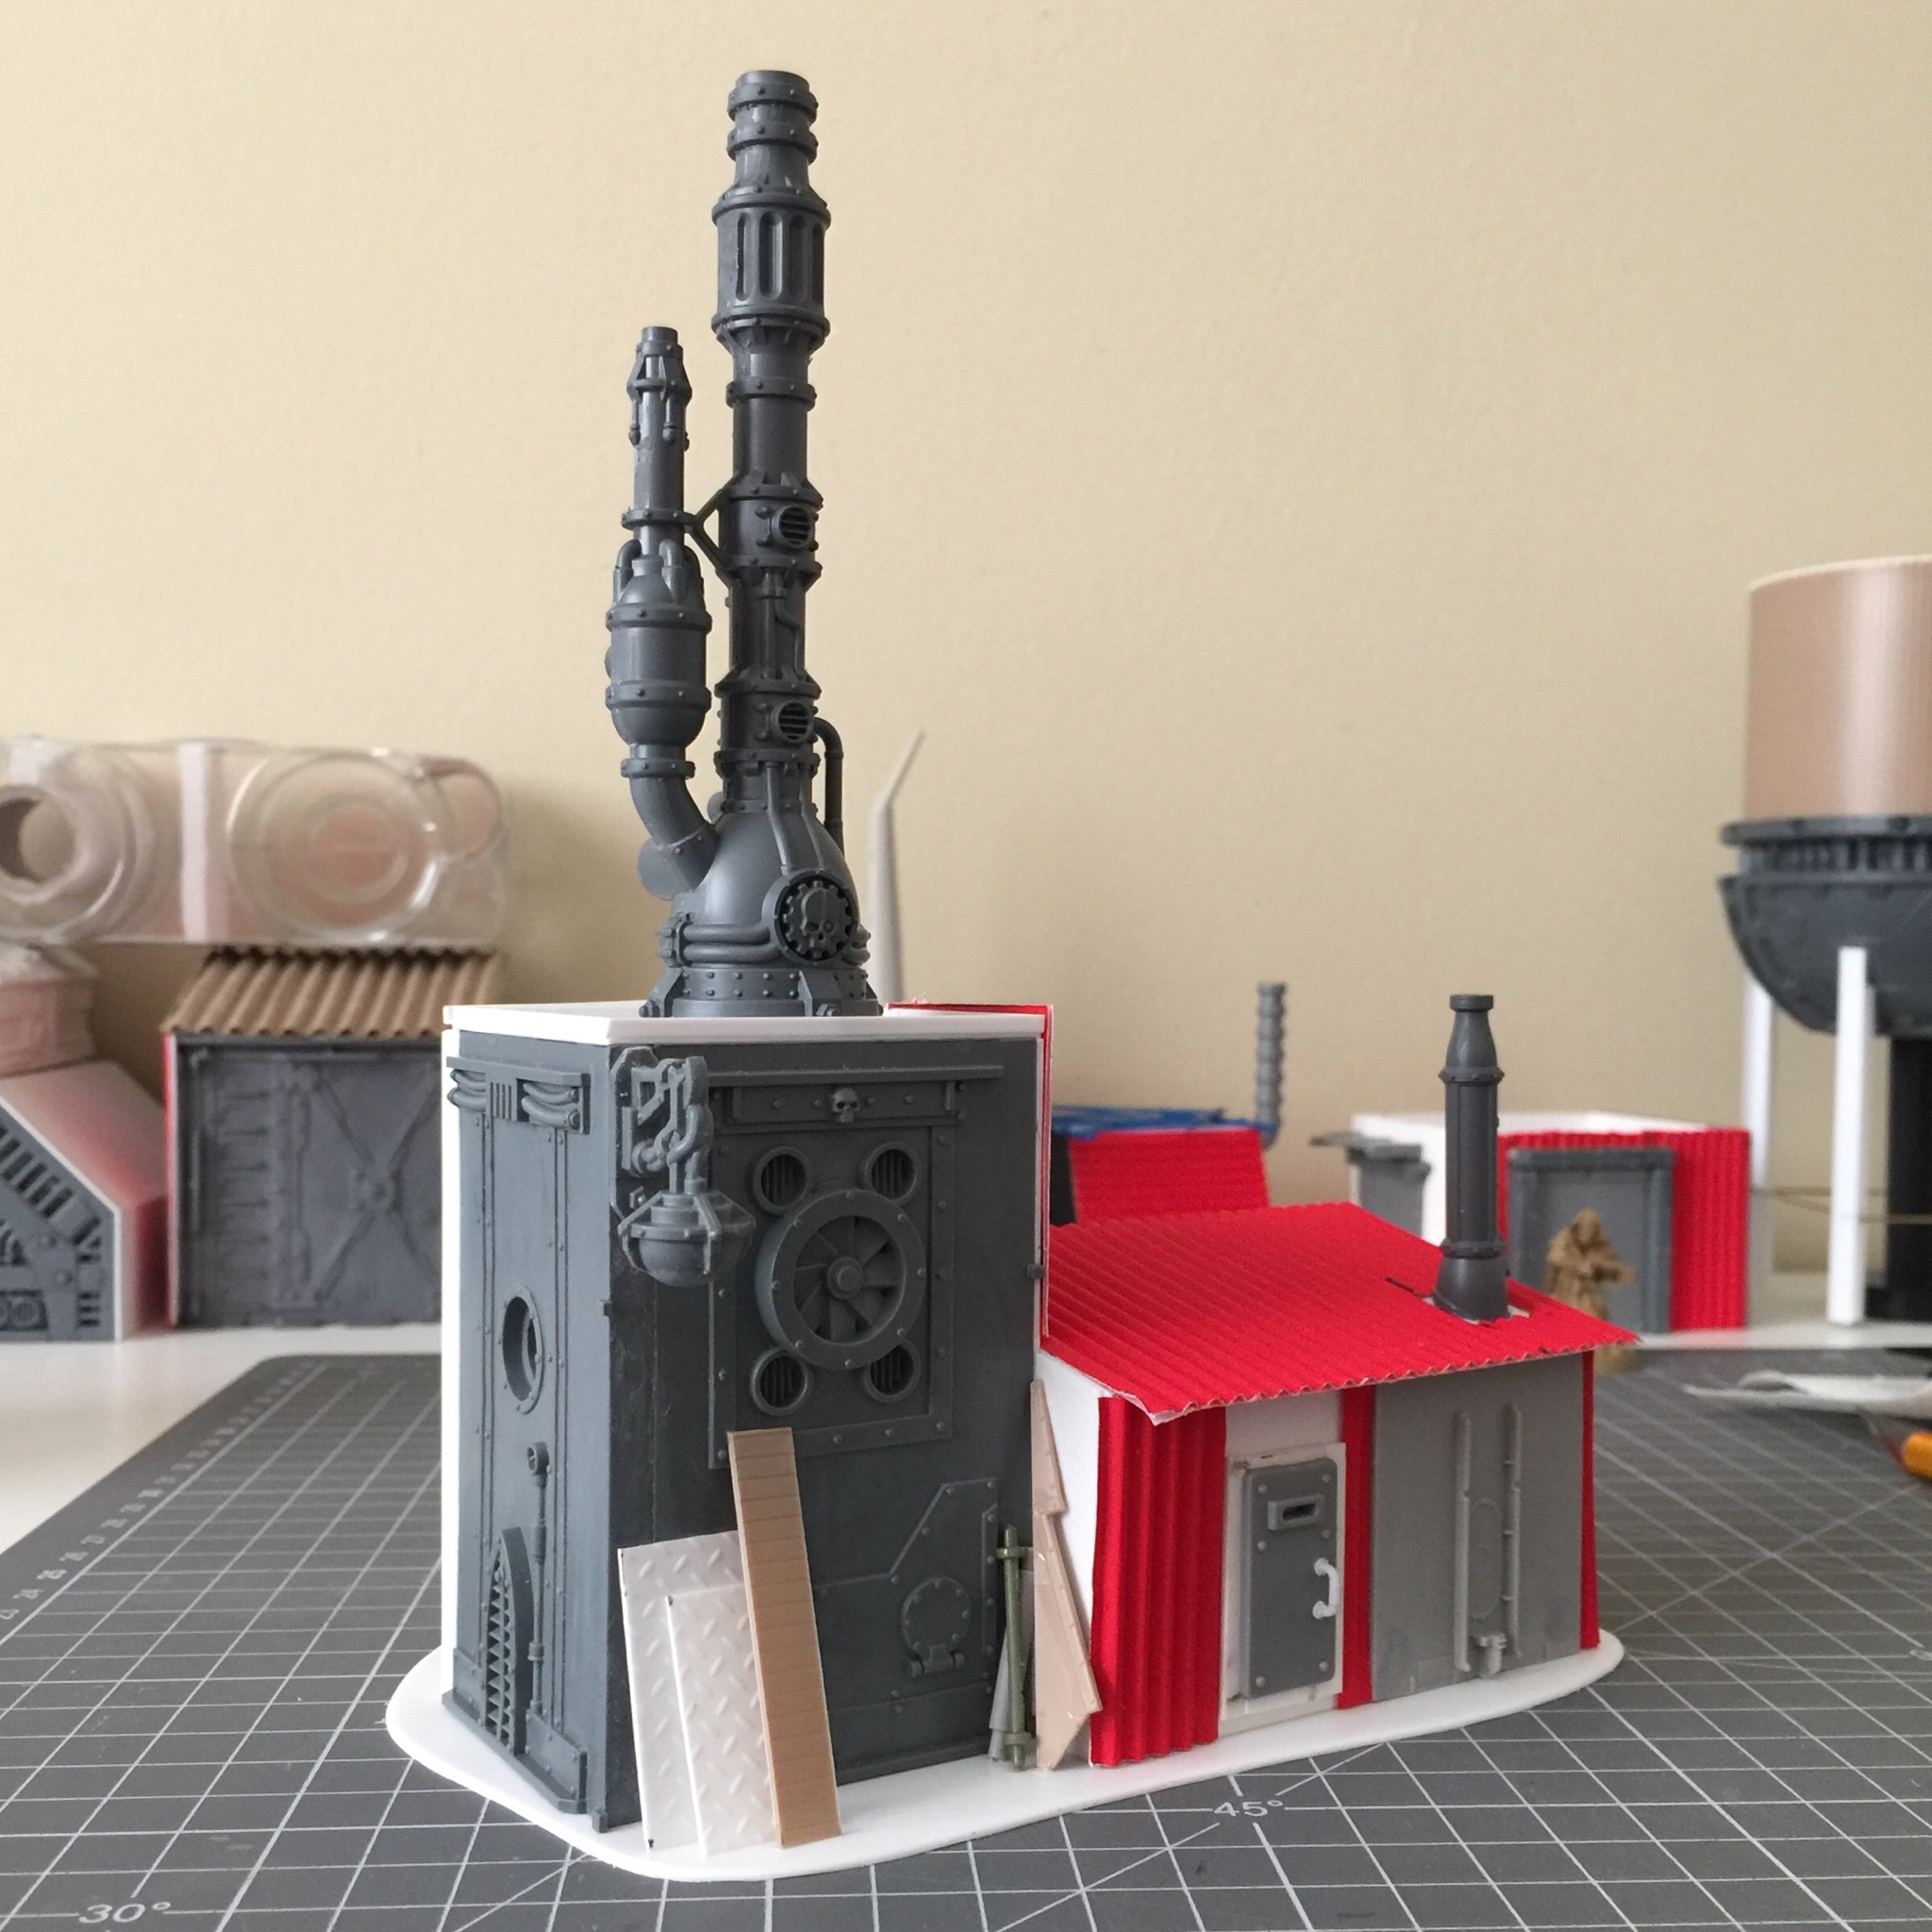
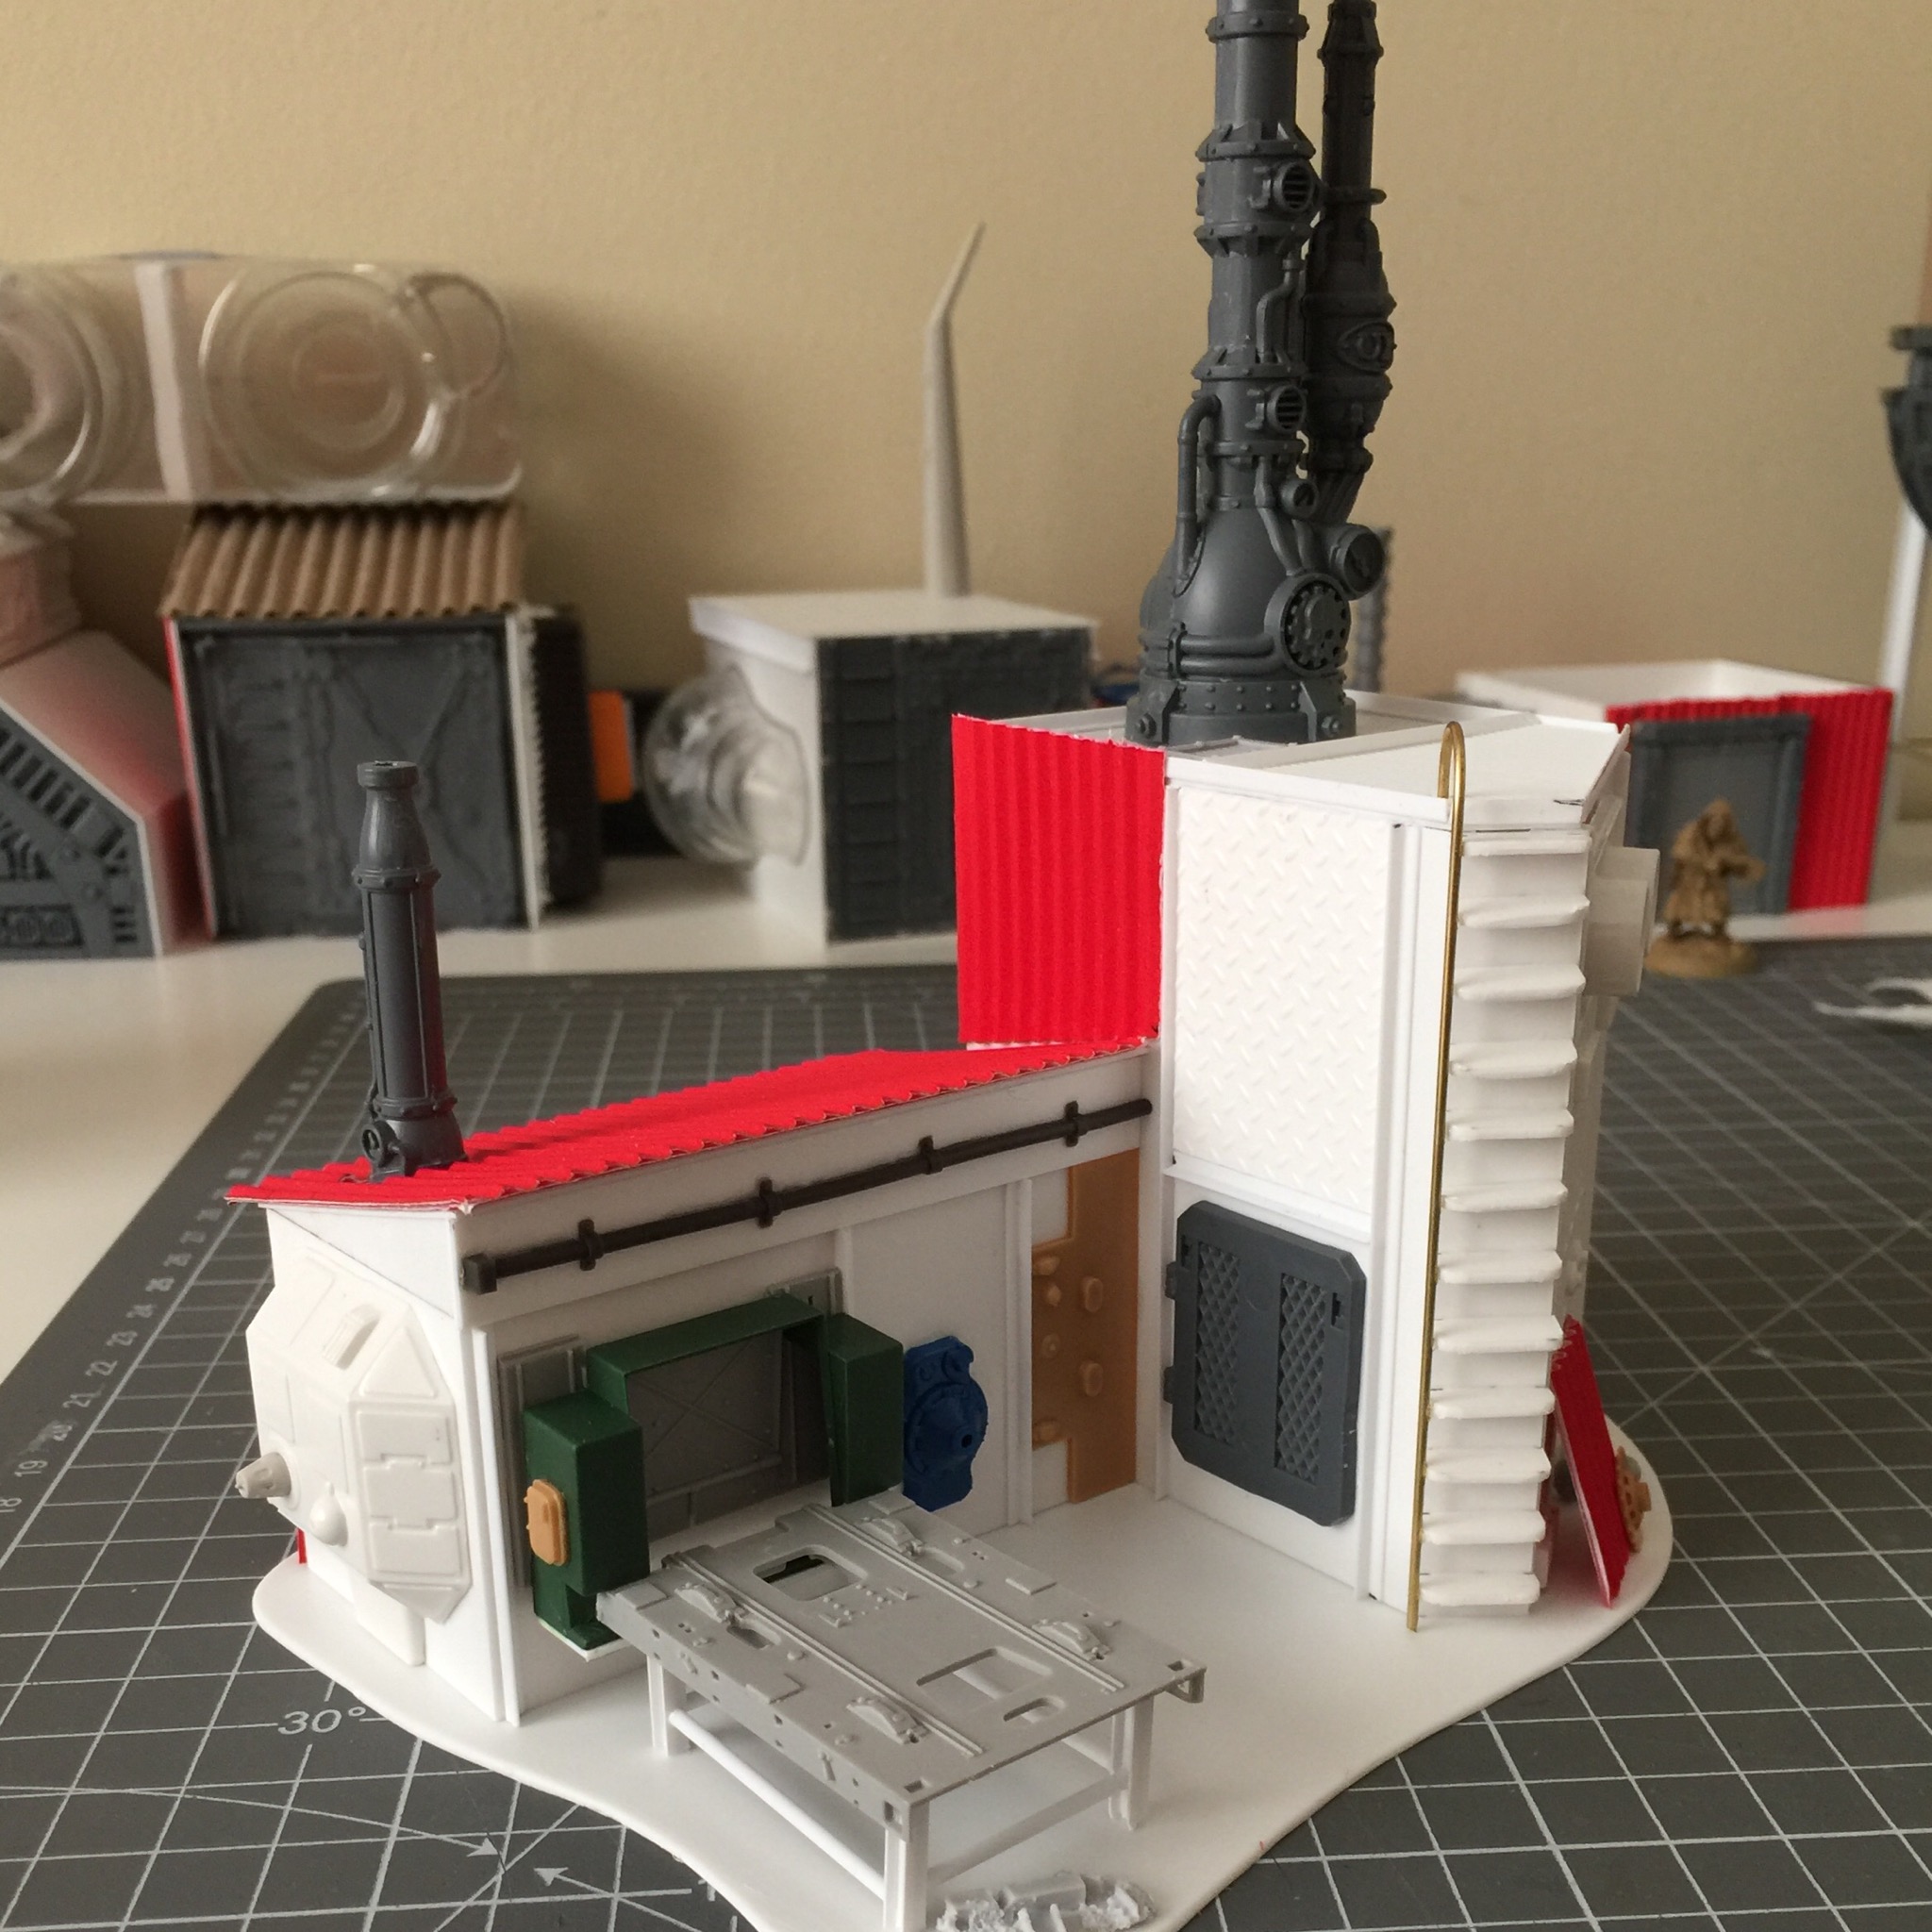
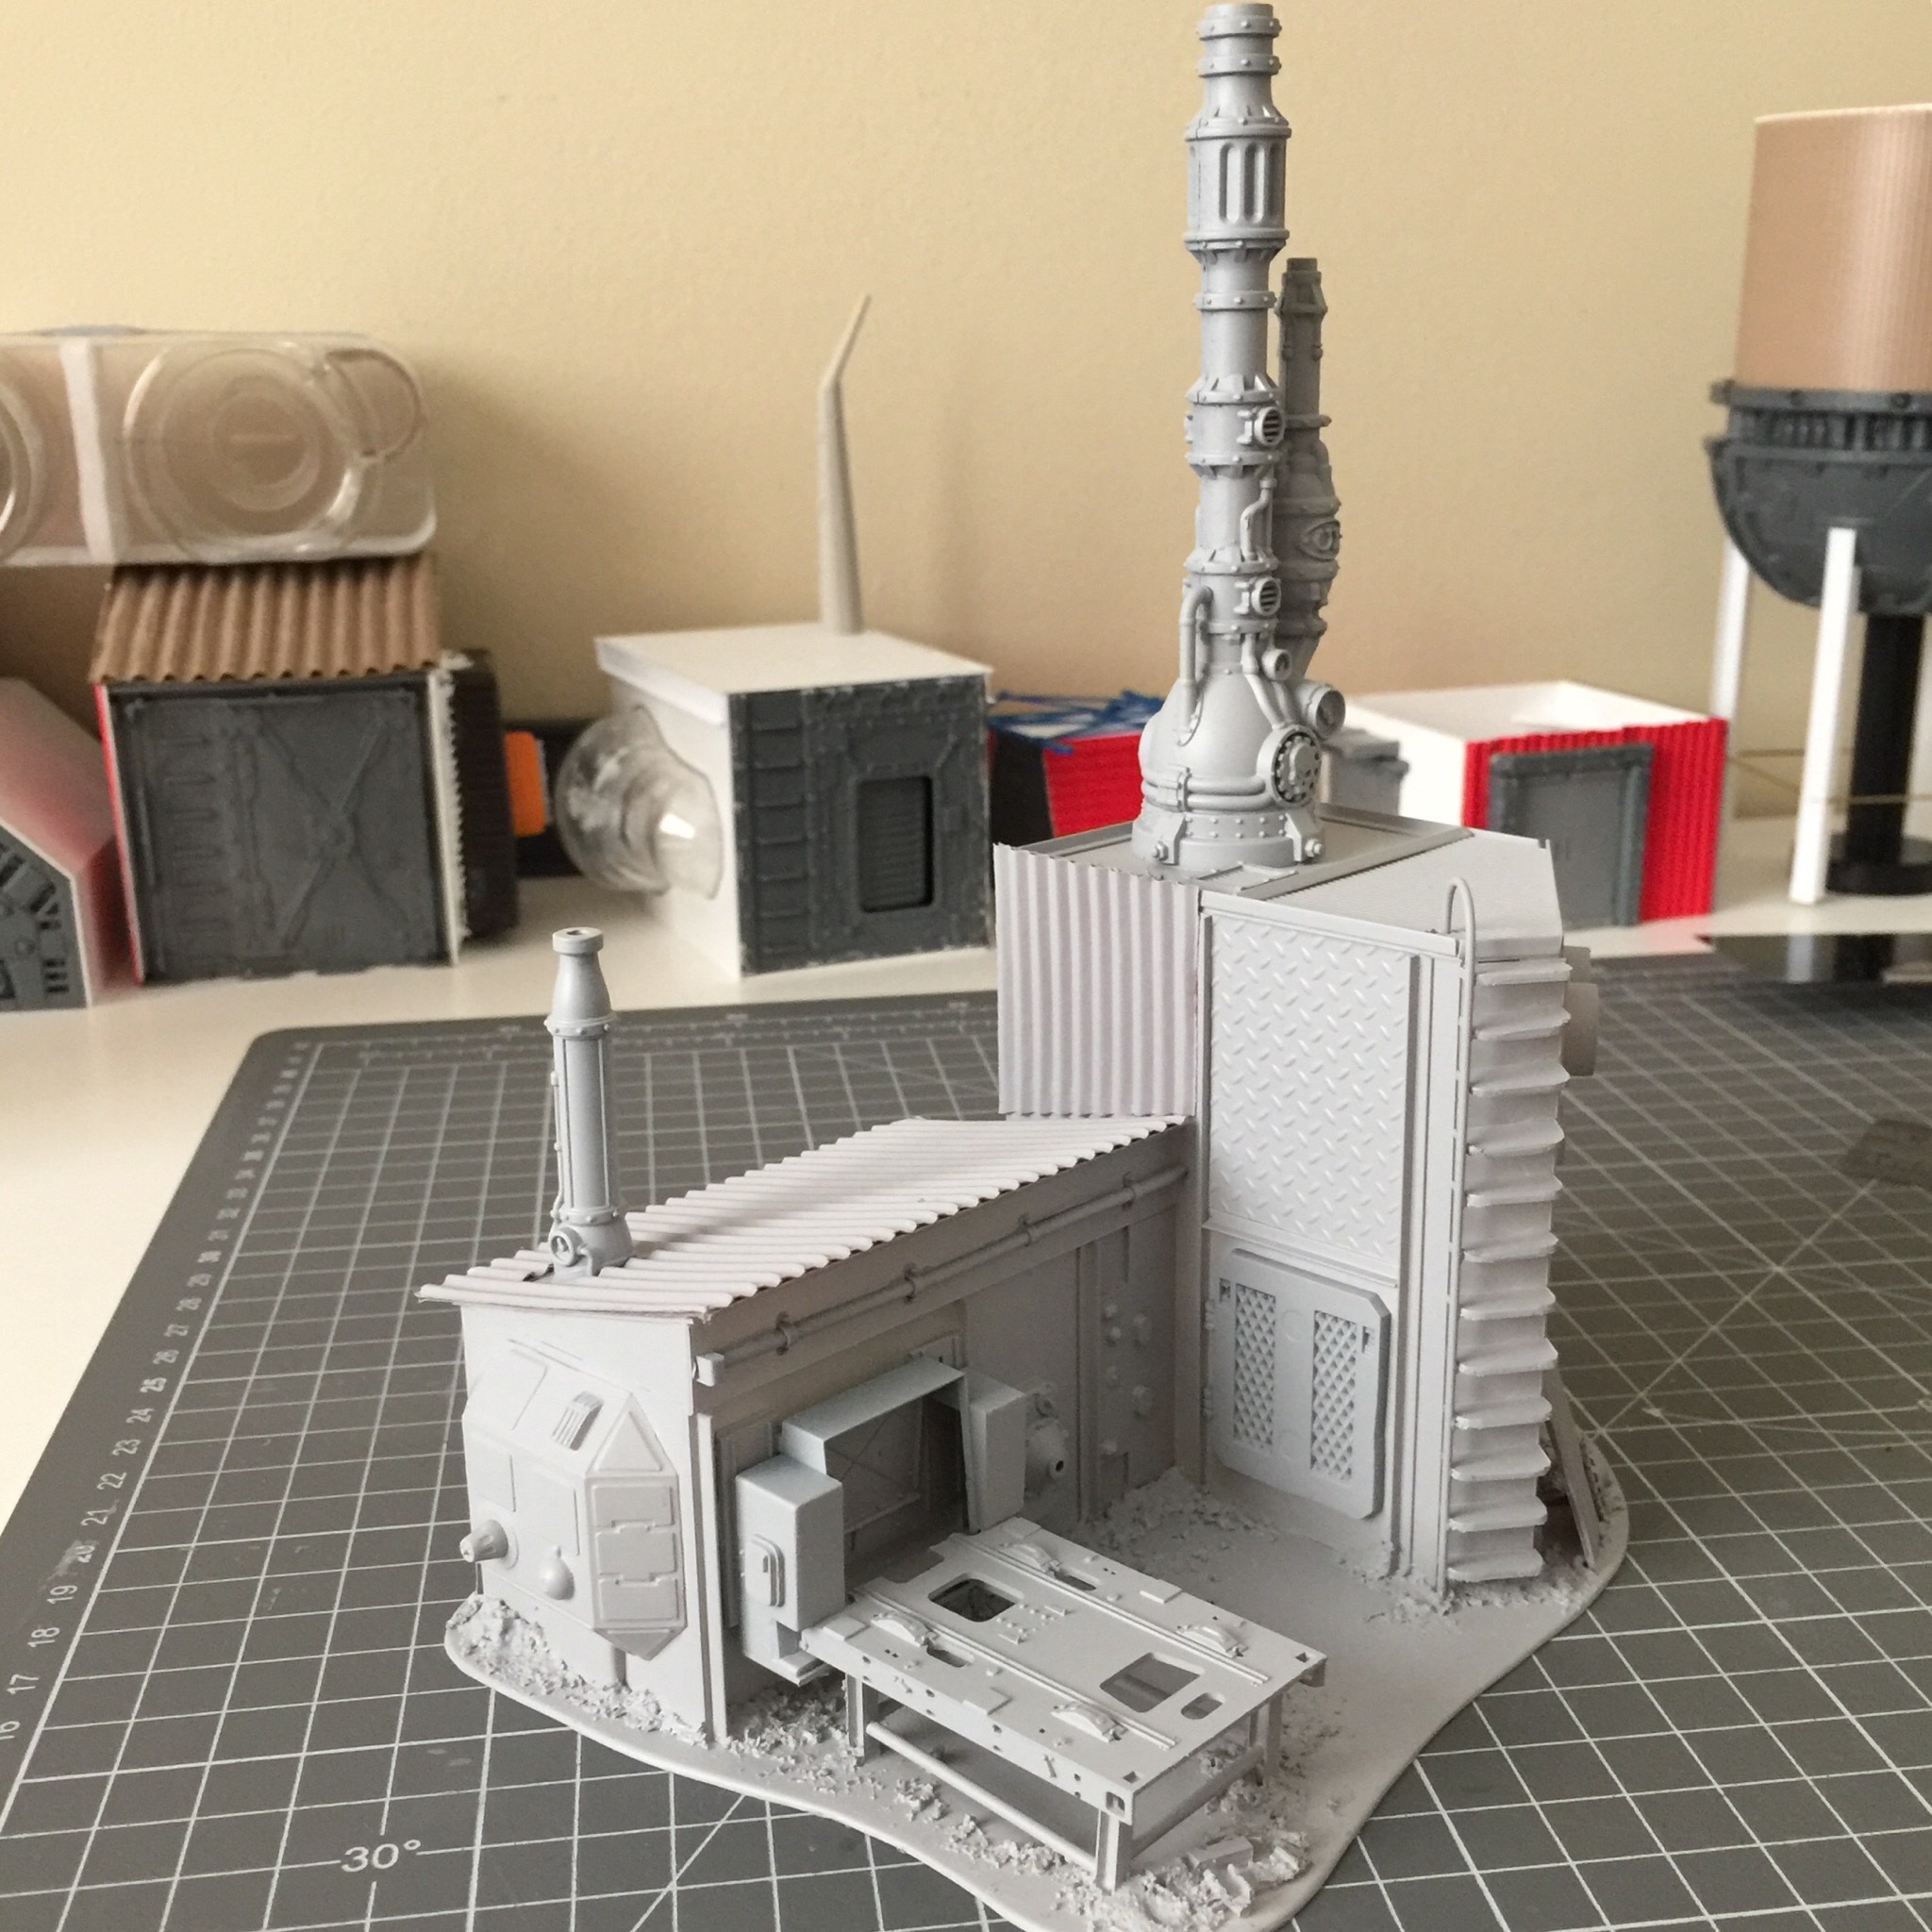
This one has turned into a Workshop for the Shanty Town. A piece from one of the Sector Mechanicus sets makes for a nice chimney / exhaust… using those parts sparingly across a number of models helps spread their cost and gives a hint of GW’s universe to the overall look.
I’m happy with the workbench that emerges from the building, those bits all just fell together nicely and suggest things being produced inside and sliding outside onto the bench for further processing…
Holestead

This one is going to be a place where the owner produces “nutritious slime” as a crop. It’s listed as a Holestead in the Necromunda tables, so I’ve gone for a bunded surrounding wall built up at the site of the slime coming out from the ground. That will give me something to pour resin into at a future date after painting. The owner has then built his shelter / Processing setup right on top of the slime where he can protect it and sit out on the front porch and maybe give the slime a stir from time to time.
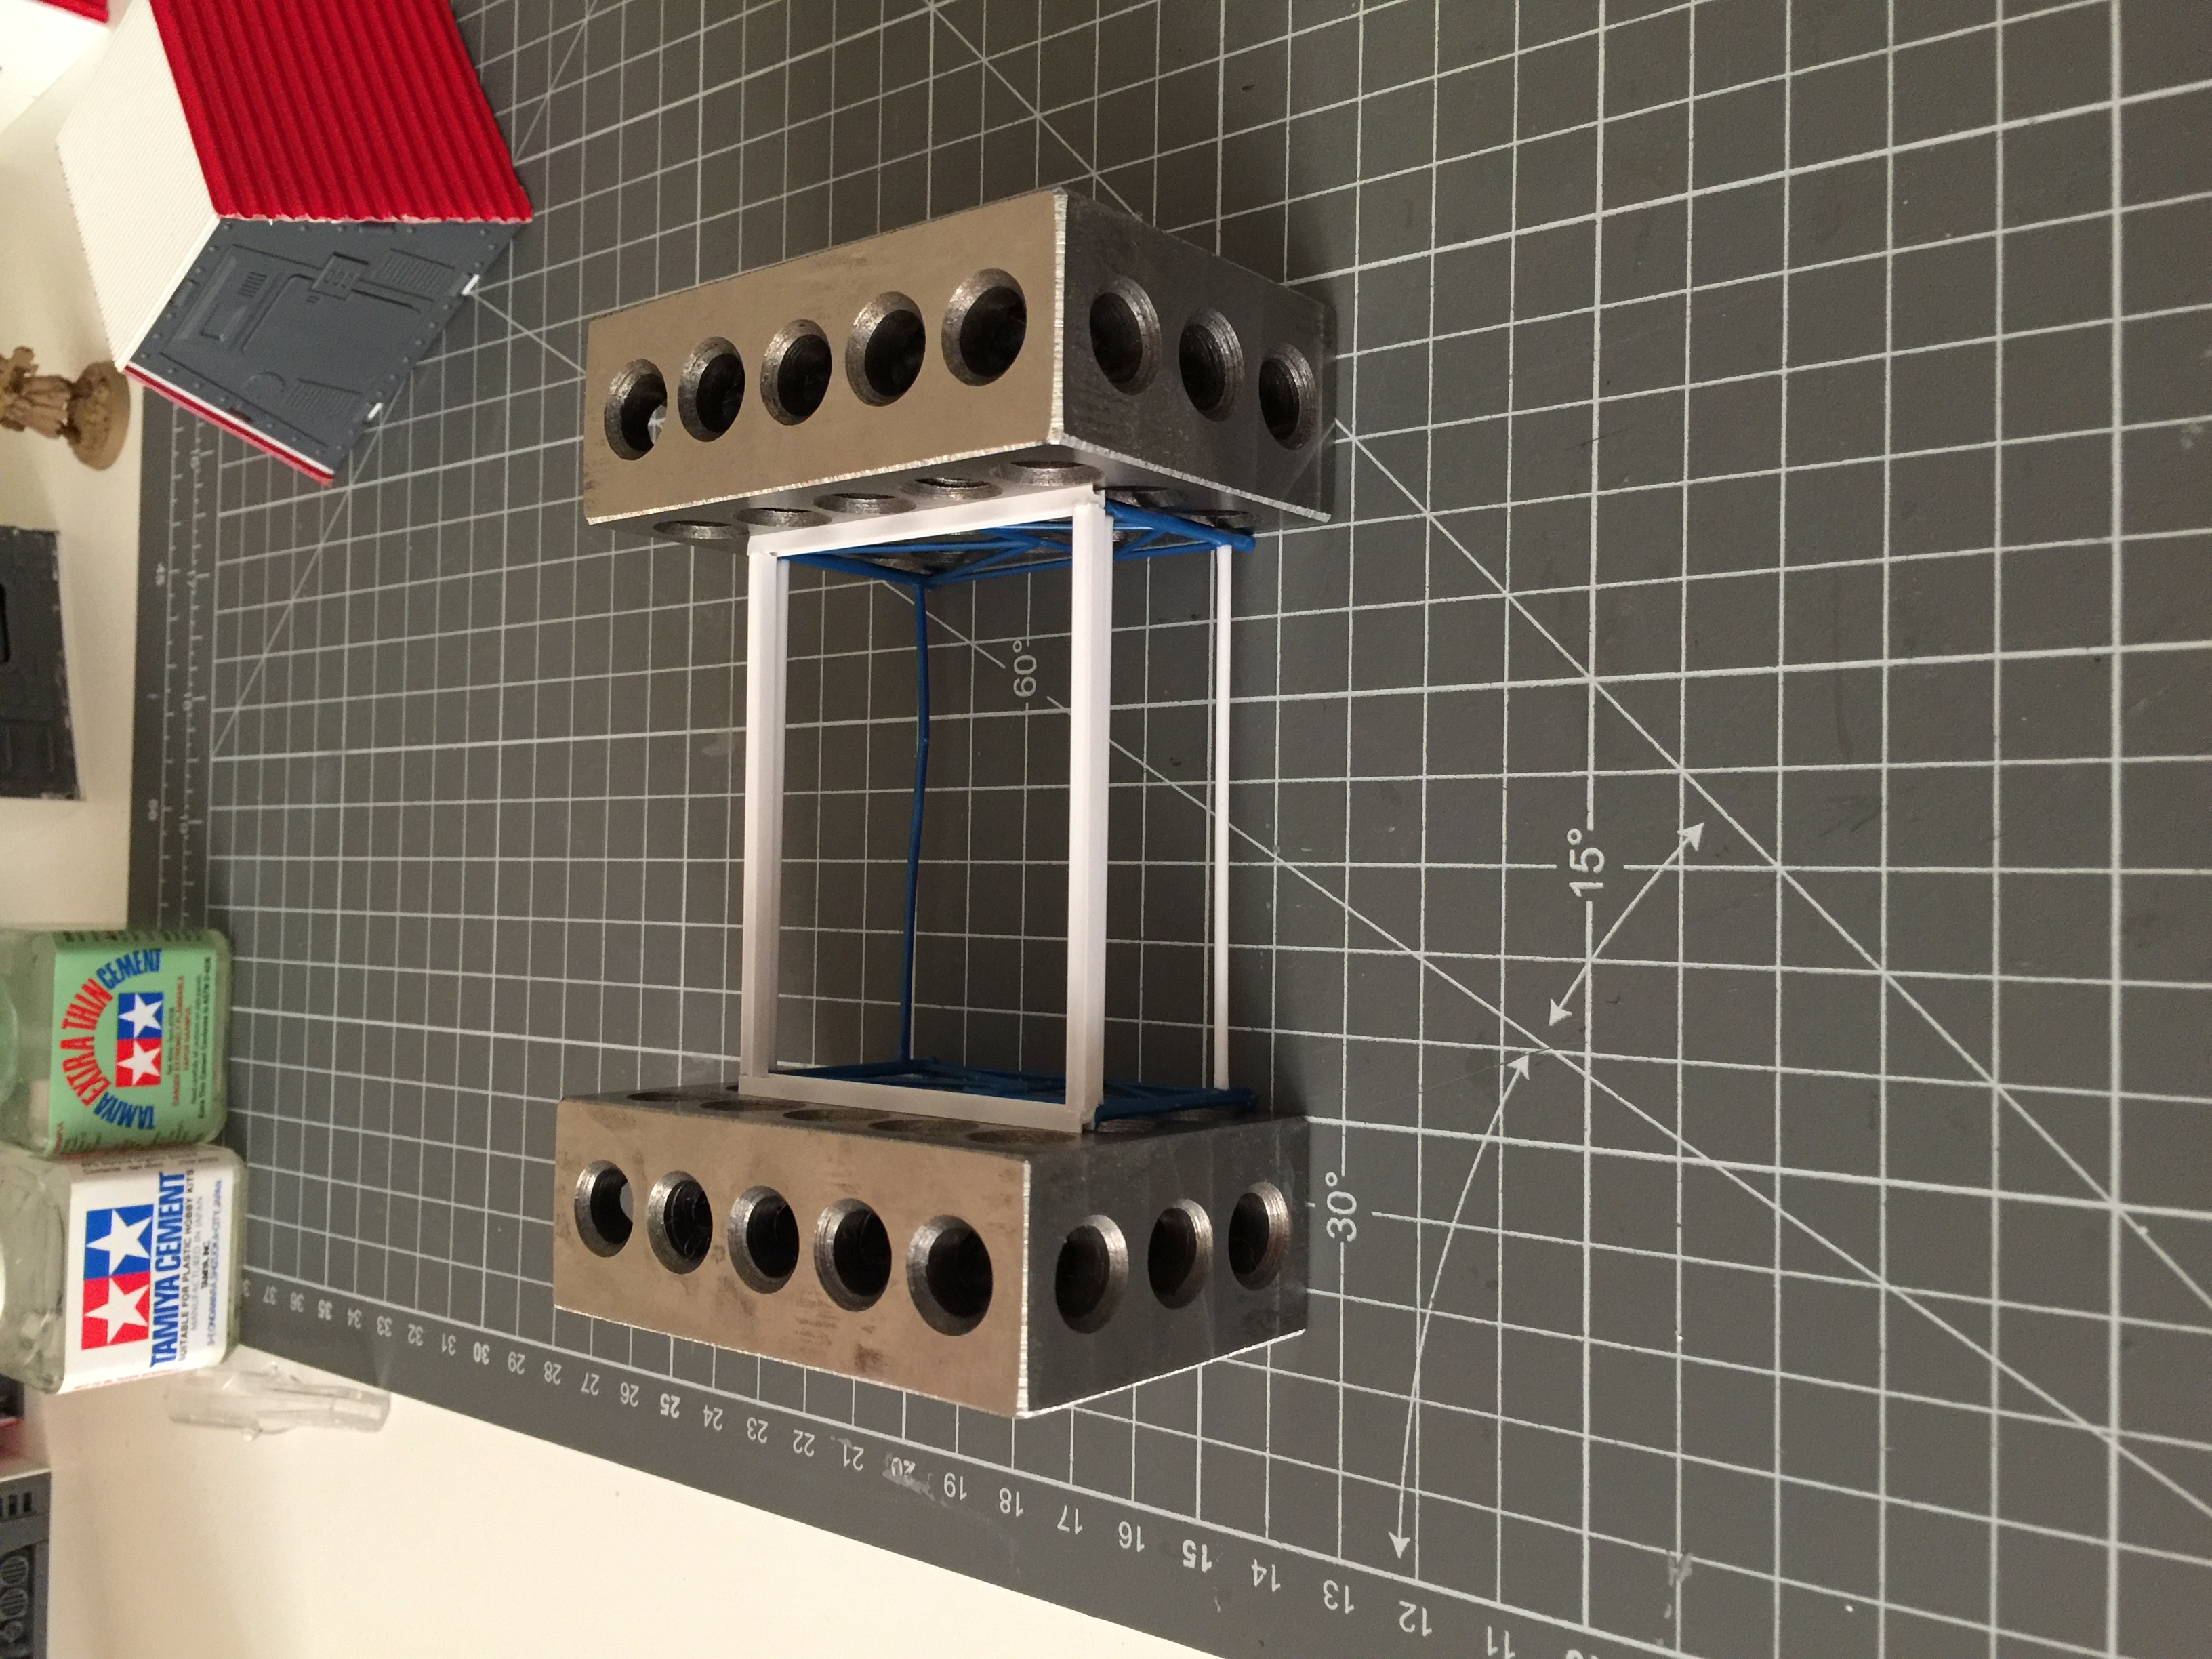 Machinists Blocks
Something I’ve found useful for getting items glued together are a pair of machinist’s blocks. They are nice and weighty, and of course come with good square sides. They help keep items together at right angles and you can get your hands free to do some glueing etc.


