


Blitzkrieg Project


Recommendations: 450
About the Project
Little Lockdown project to help support my FLGS and to keep me sane
Related Game: Bolt Action
Related Company: Warlord Games
Related Genre: Historical
This Project is Active
Step 1: Assembly and basing
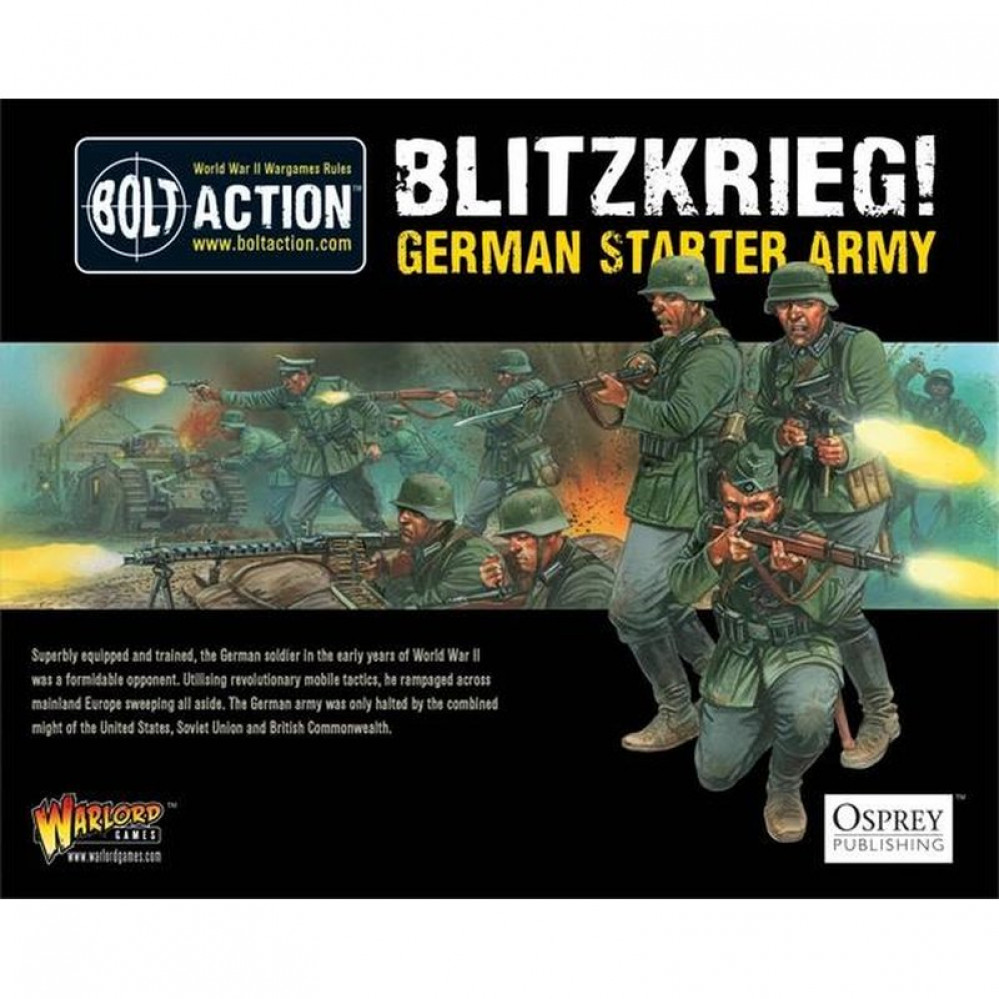
Due to Lockdown regulations in my homecountry my FLGS amongst others had to close. To make good use of my left over hobby budget of all the conventions I couldn’t attend I tried to make this time for the owner as well as for me a little easier and therefore gifted myself with a Bolt Action starter army which I want to assemble and paint during those crazy times to keep me sane. I was keeping and eye on that box for quite a while and I thought the time had come.
I will post updates of my progress not only to keep me motivated but to be part of lockdown leisure league and motivate others to go through those rough times by cleaning the “piple of possibilities” as I like to call it. Cheers!
 Contents: 6 Sprues of Infantry, one halftrack, one tank, one artillery, one medium mortar
DAY 2: Assembly of halftrack and tank
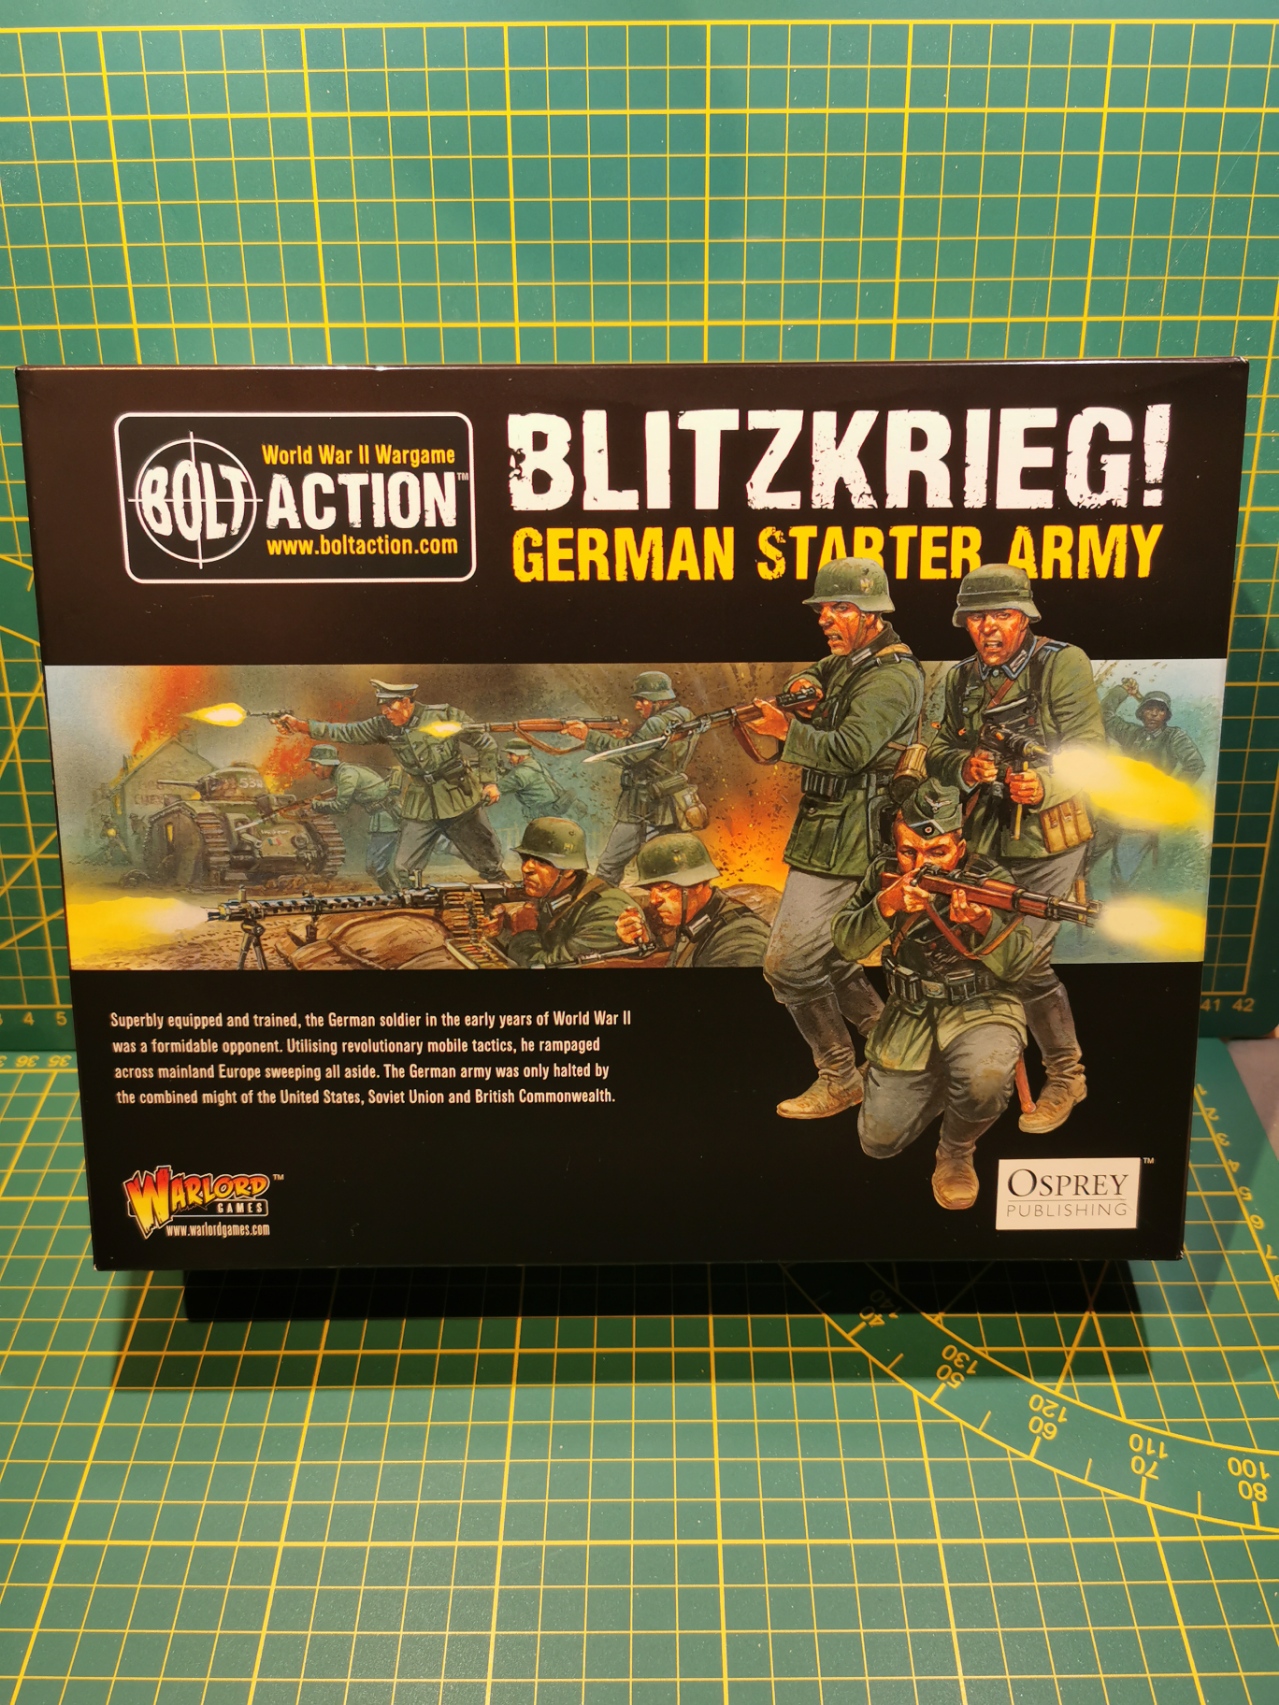
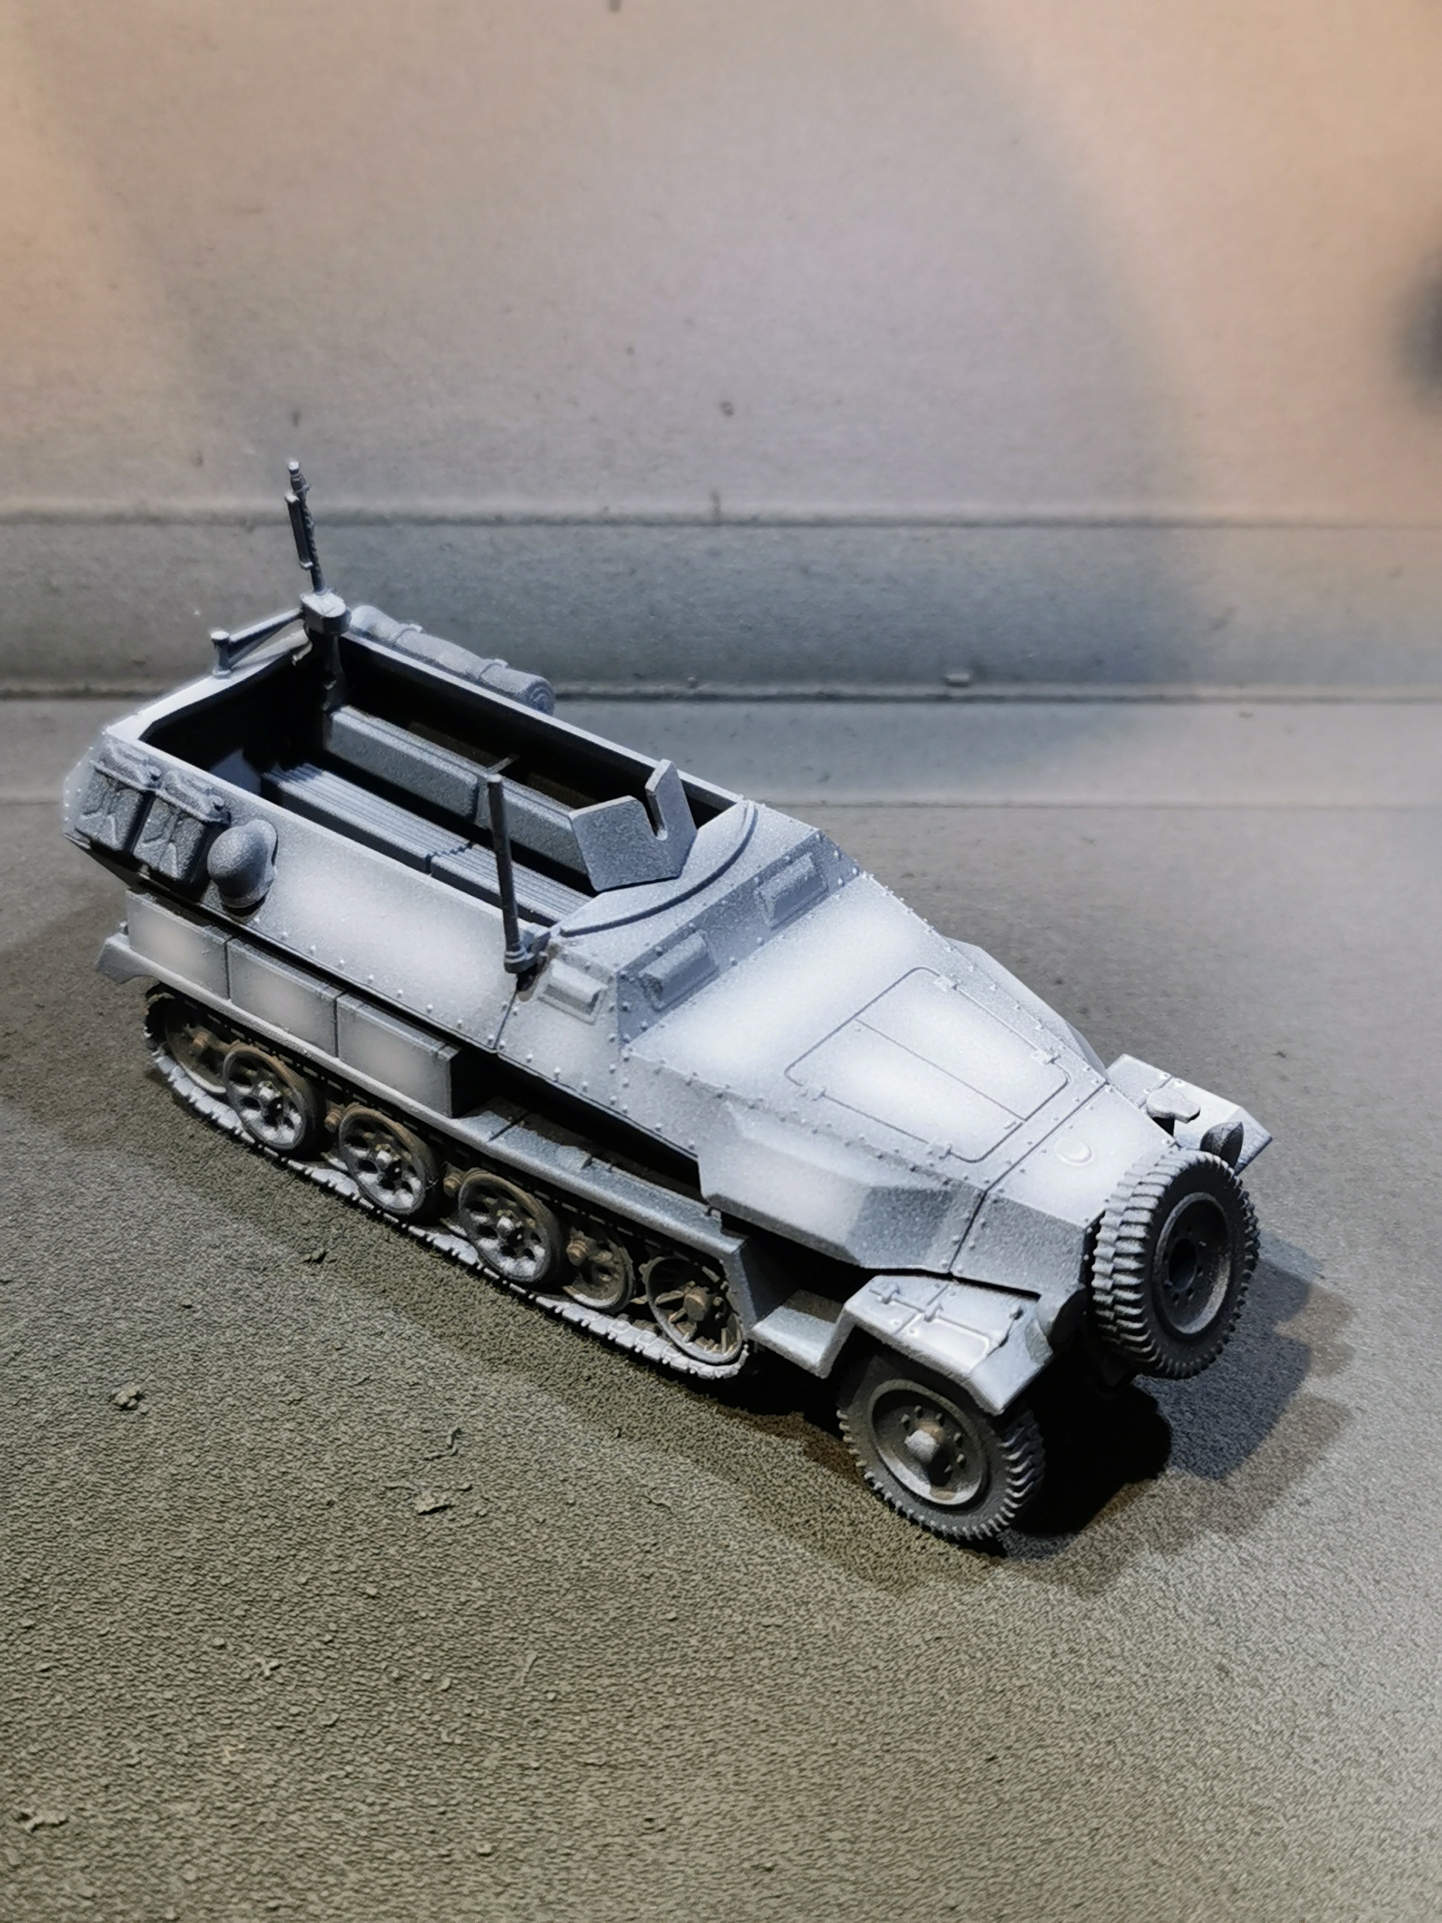
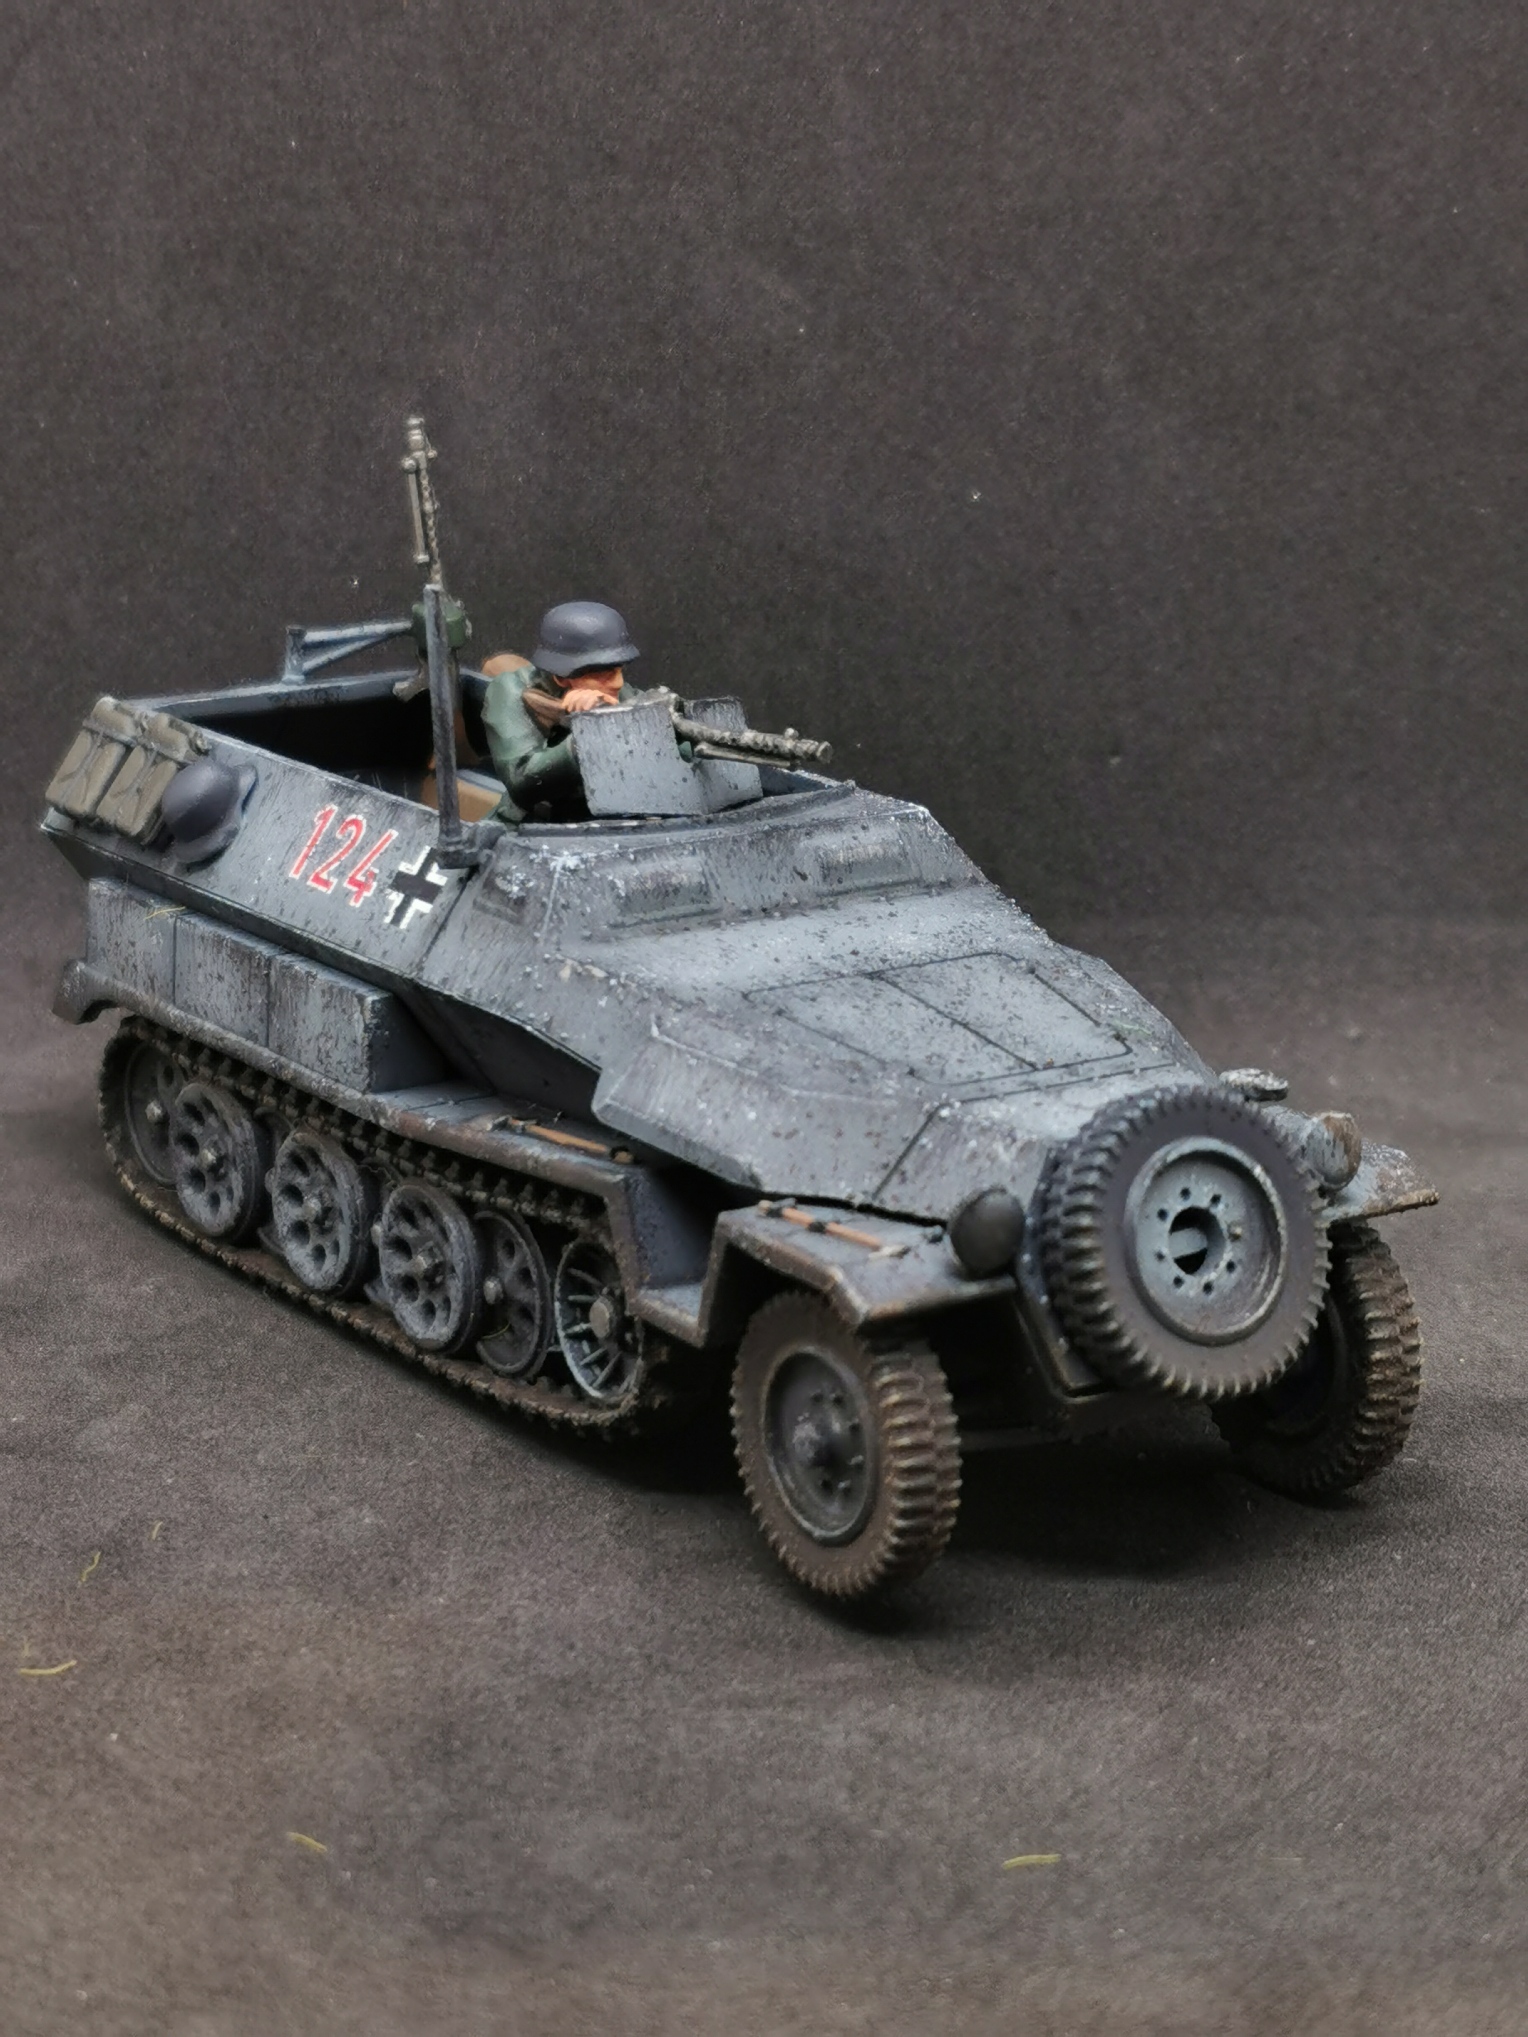
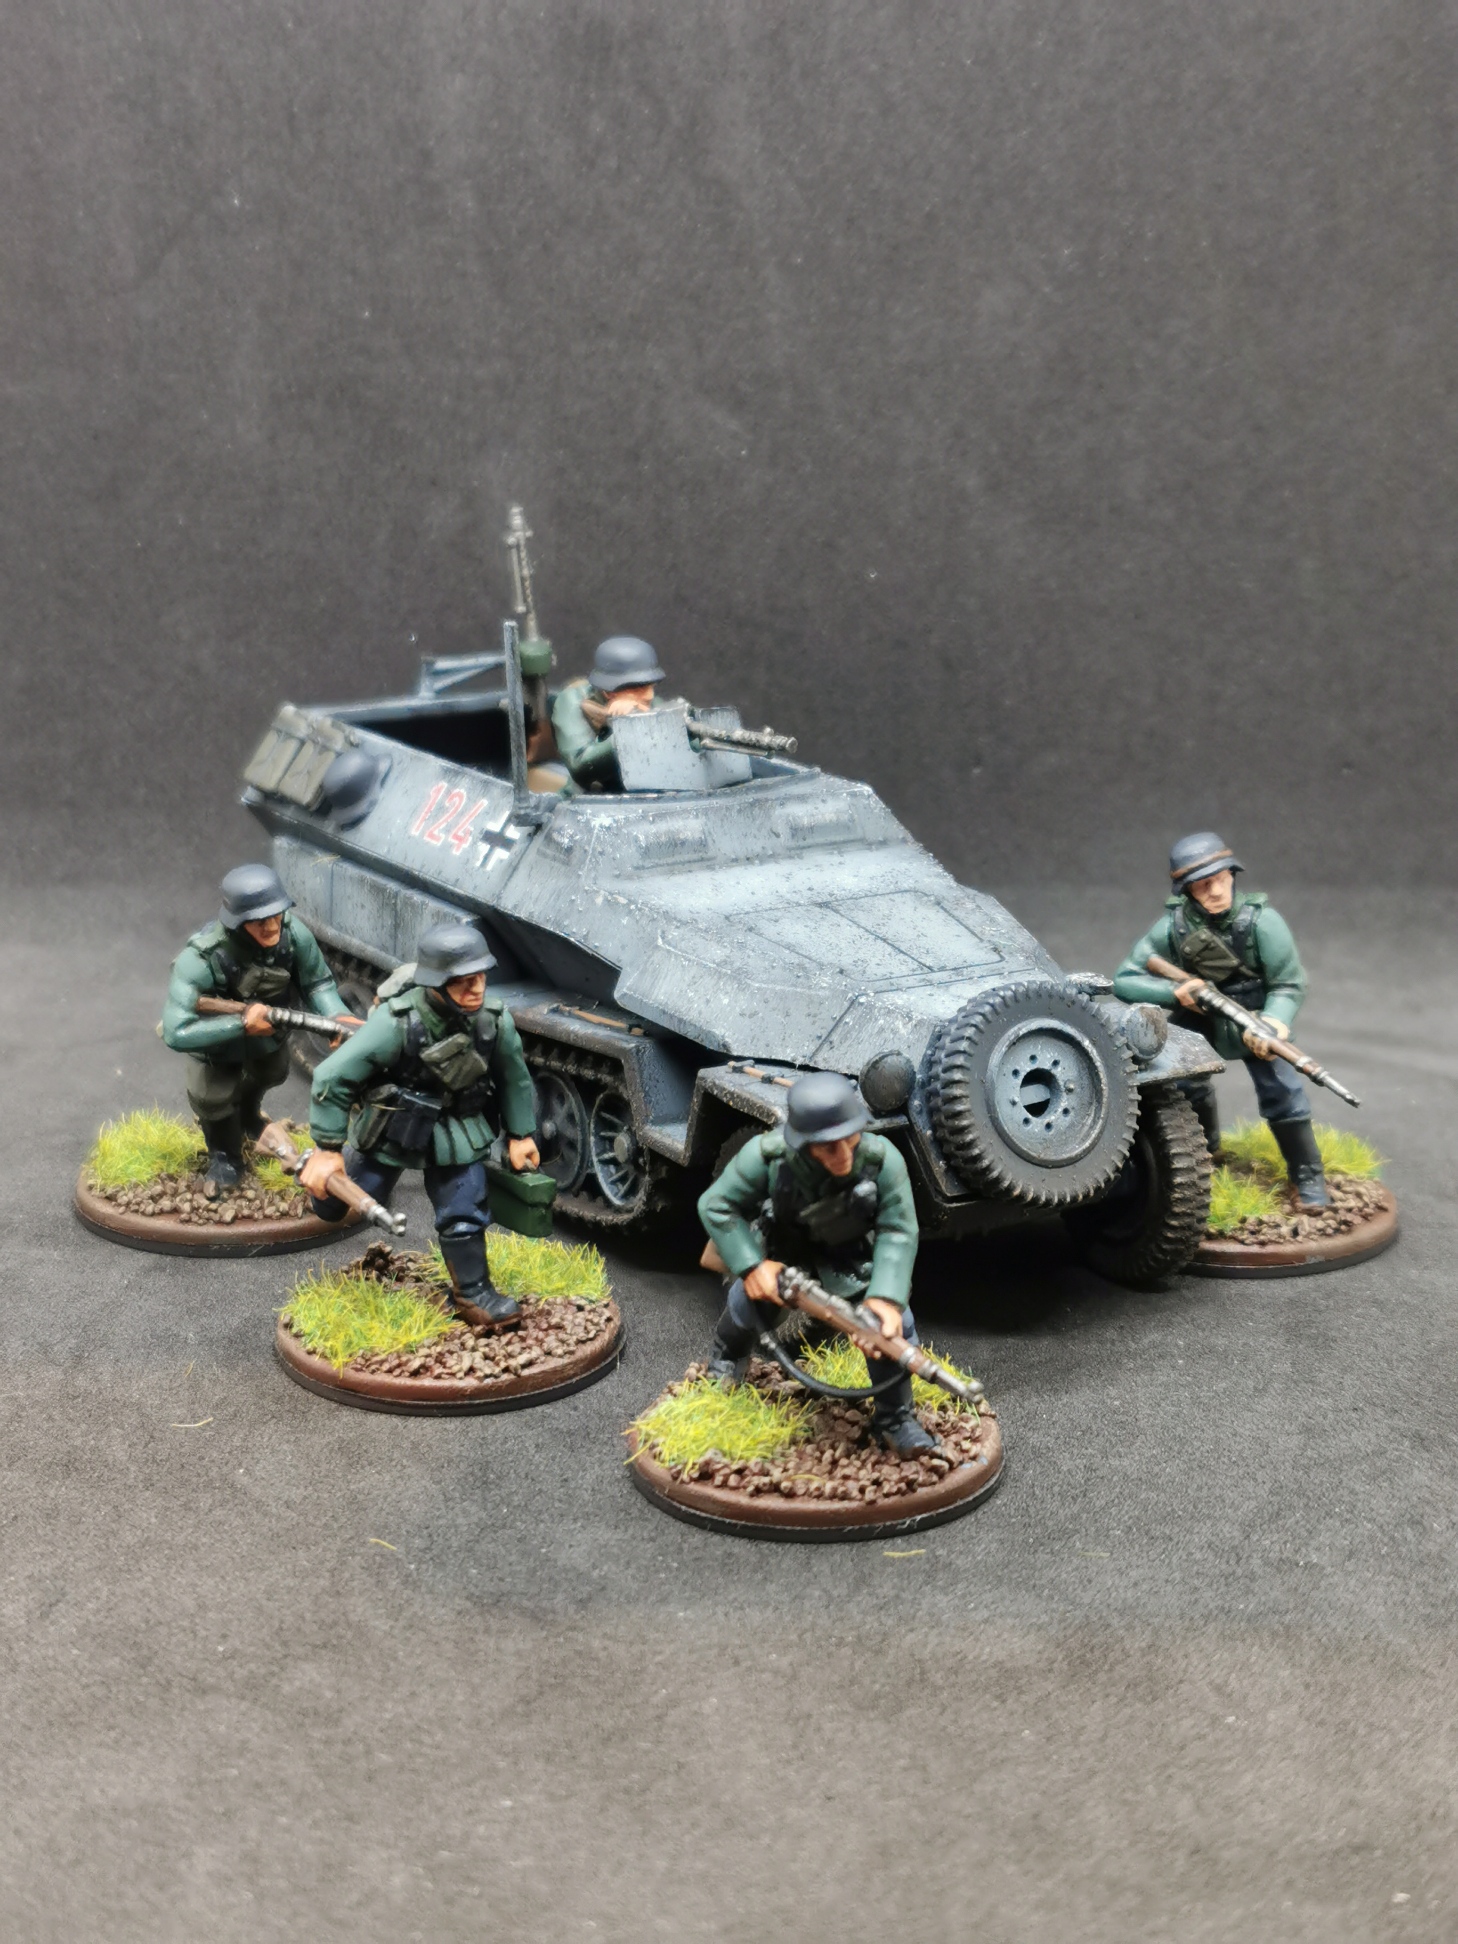
 SdKfz 251/1 Hanomag
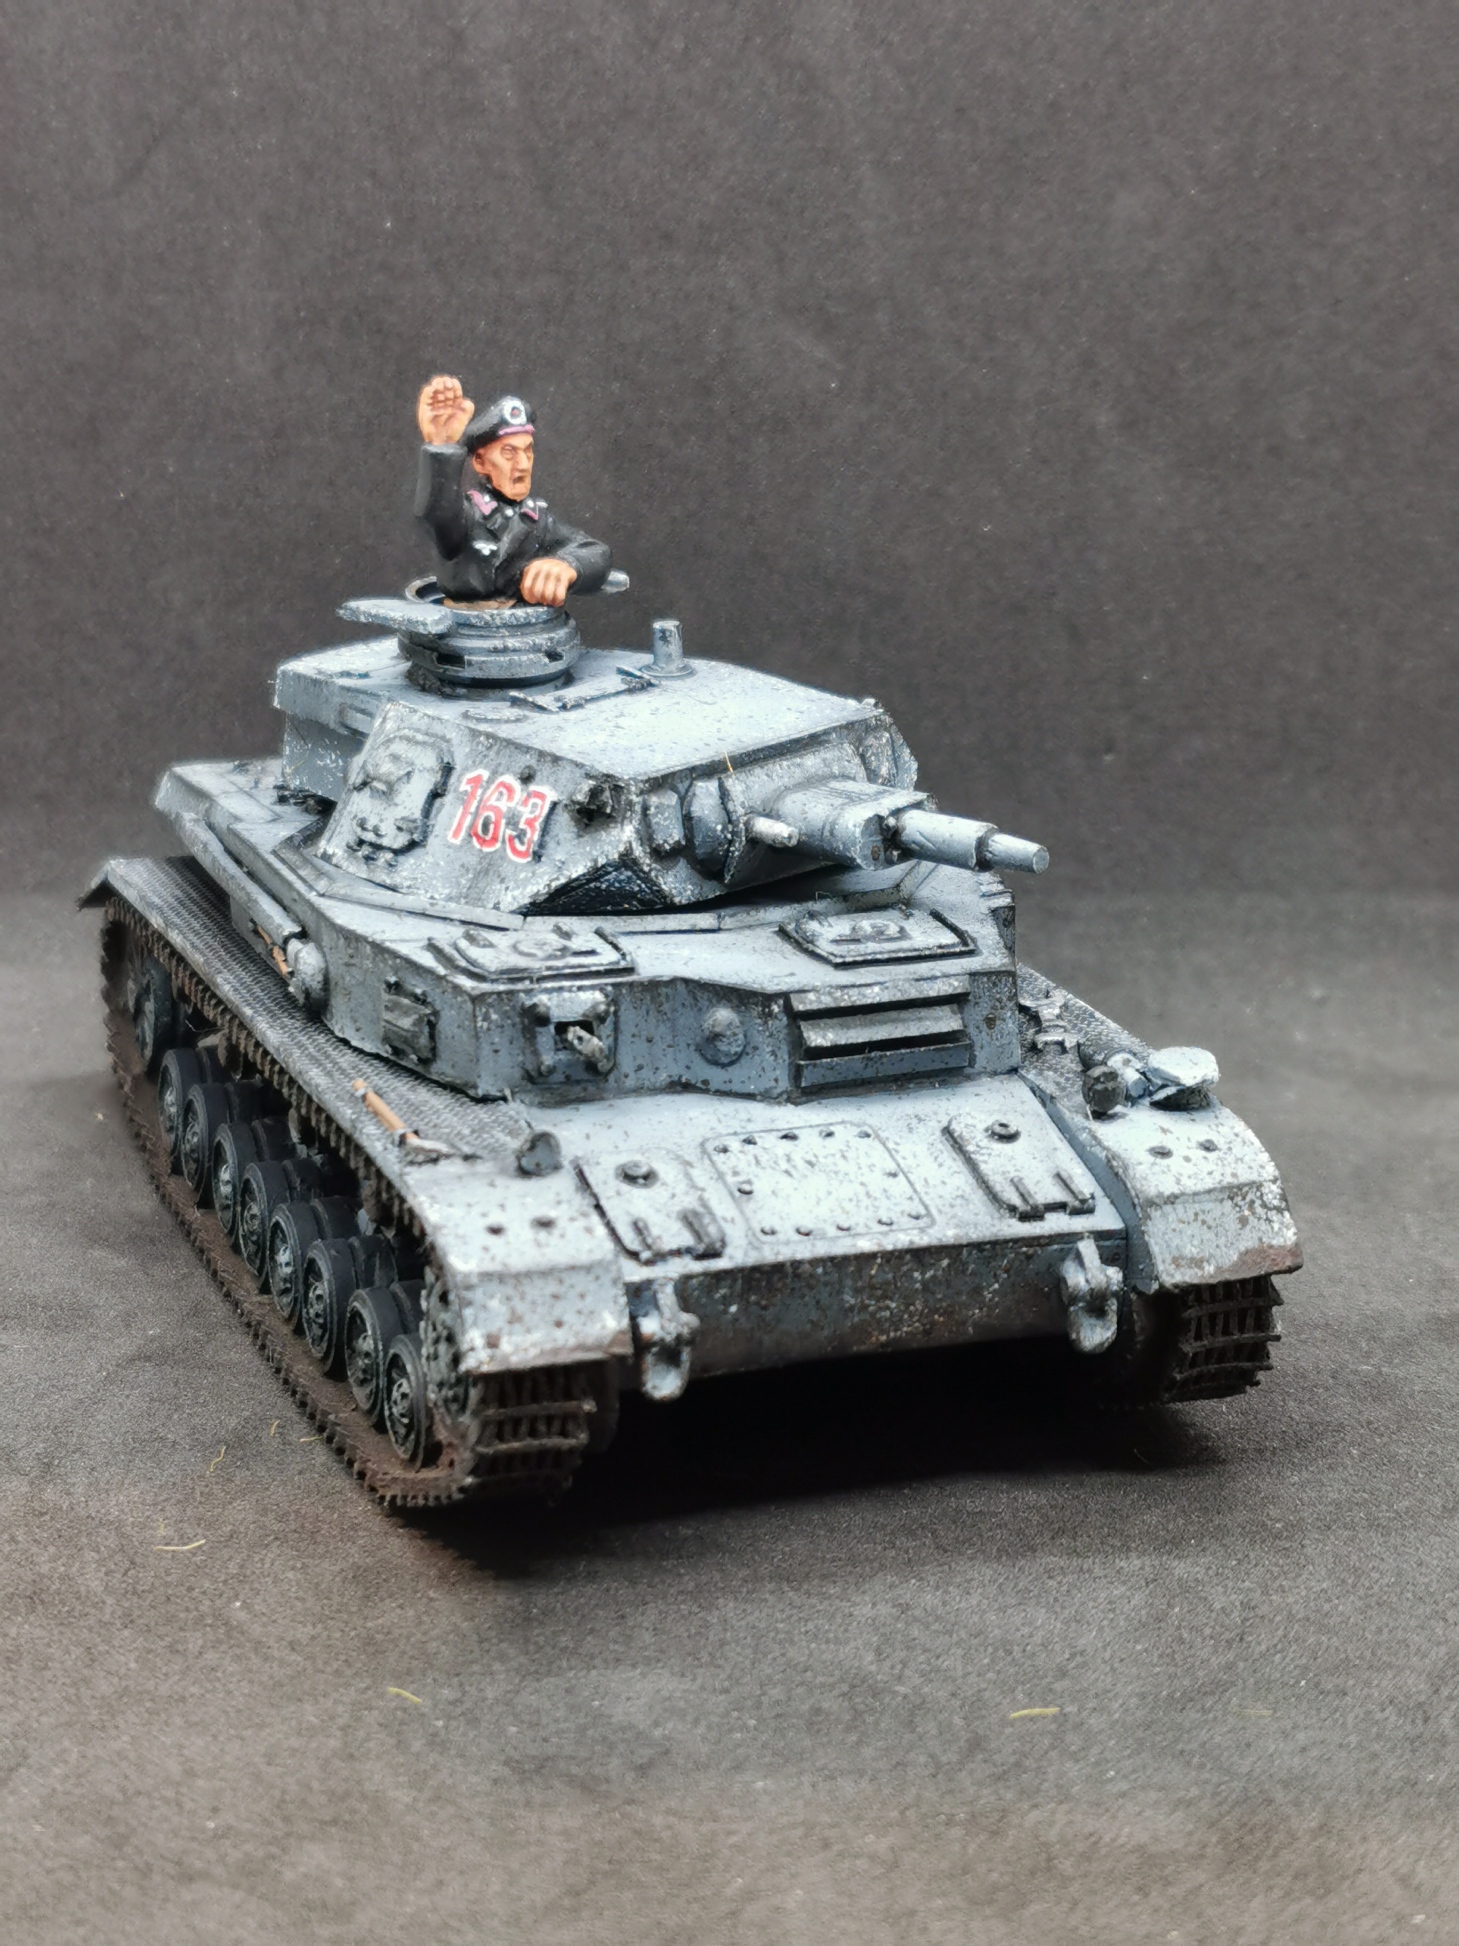
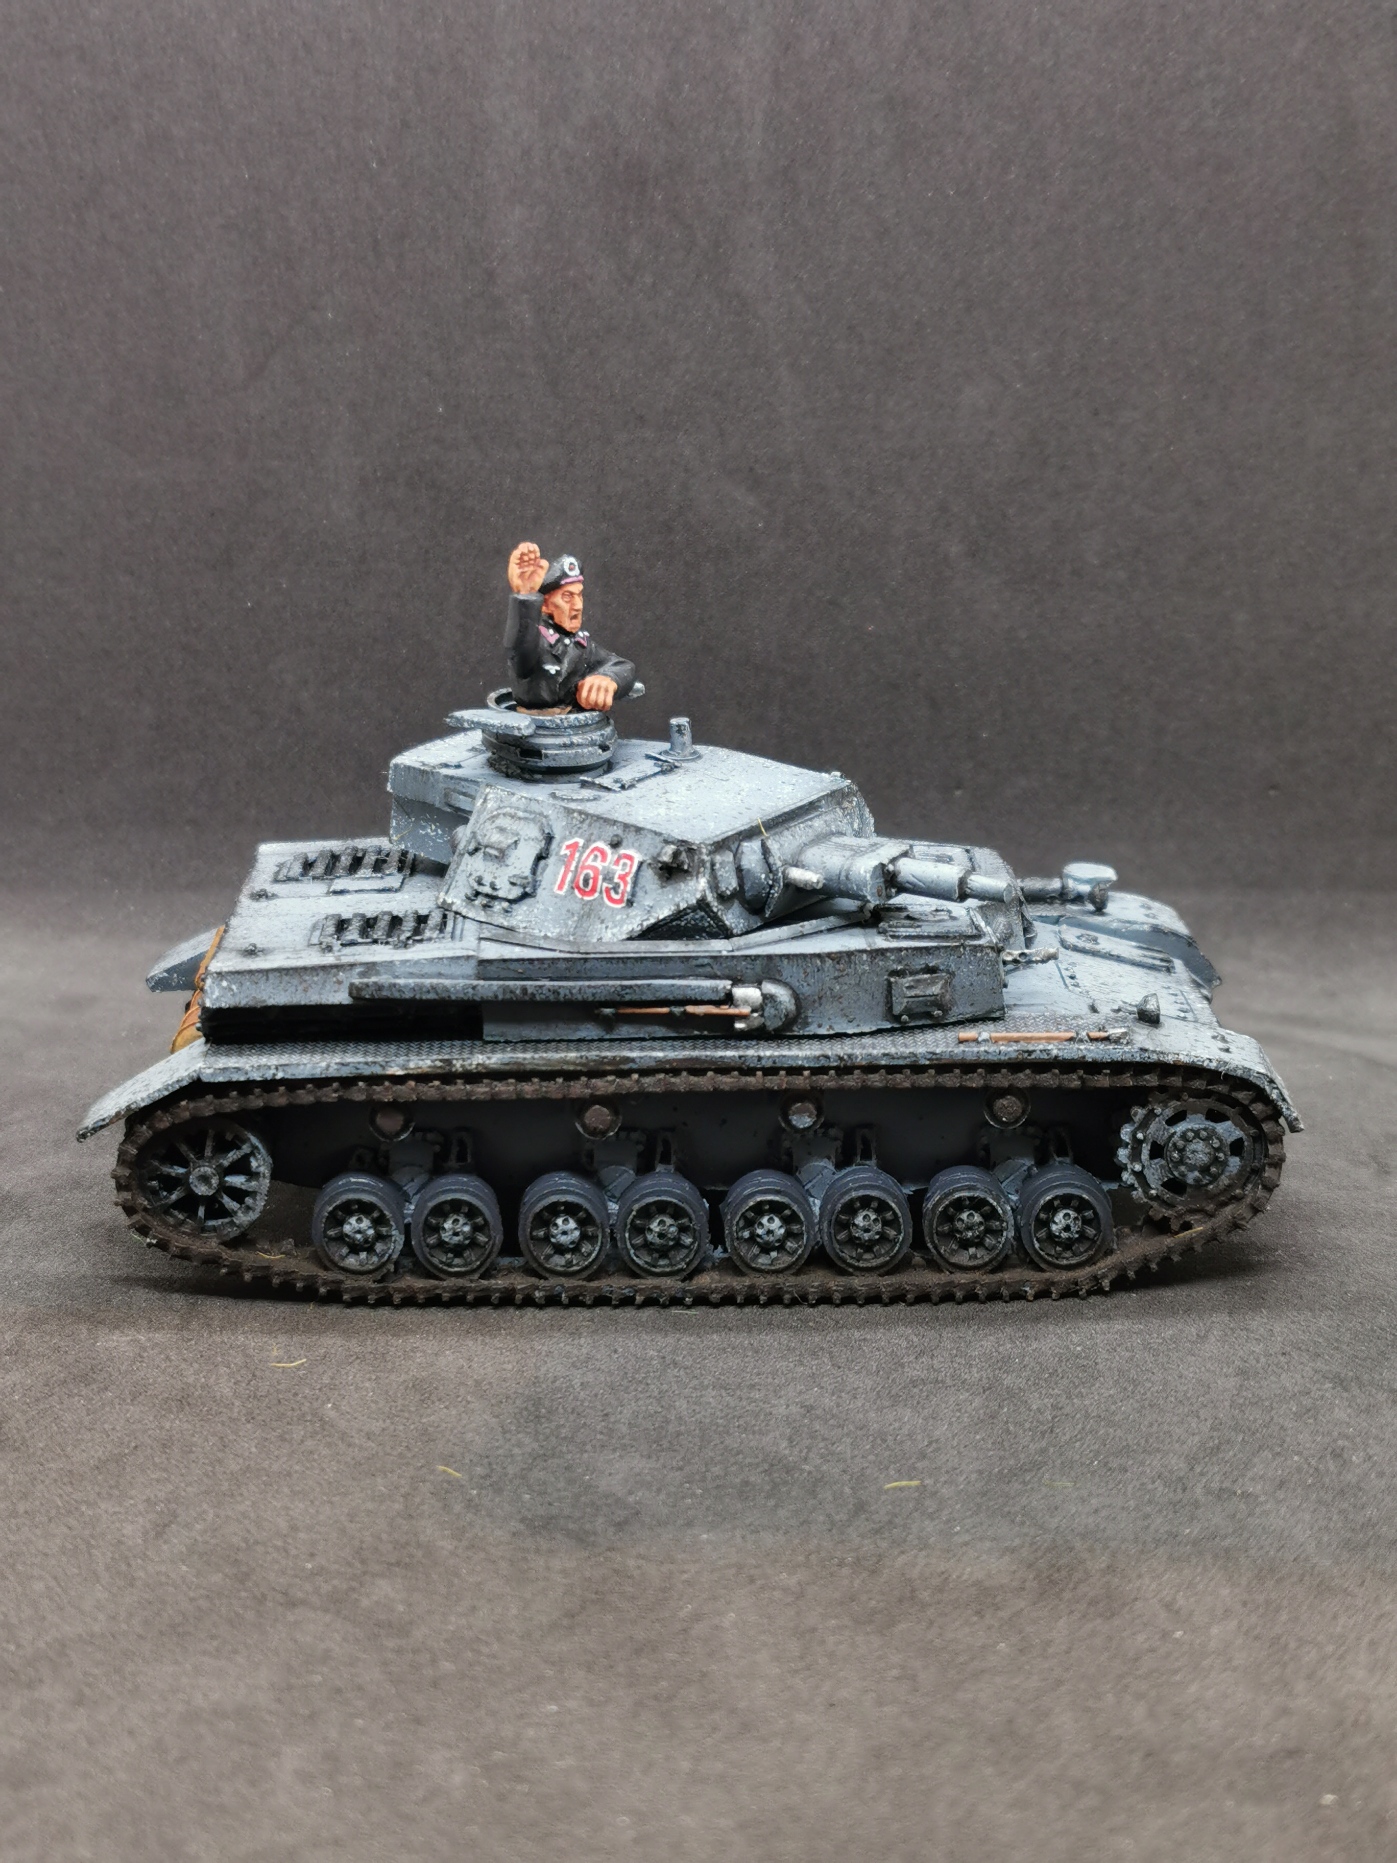
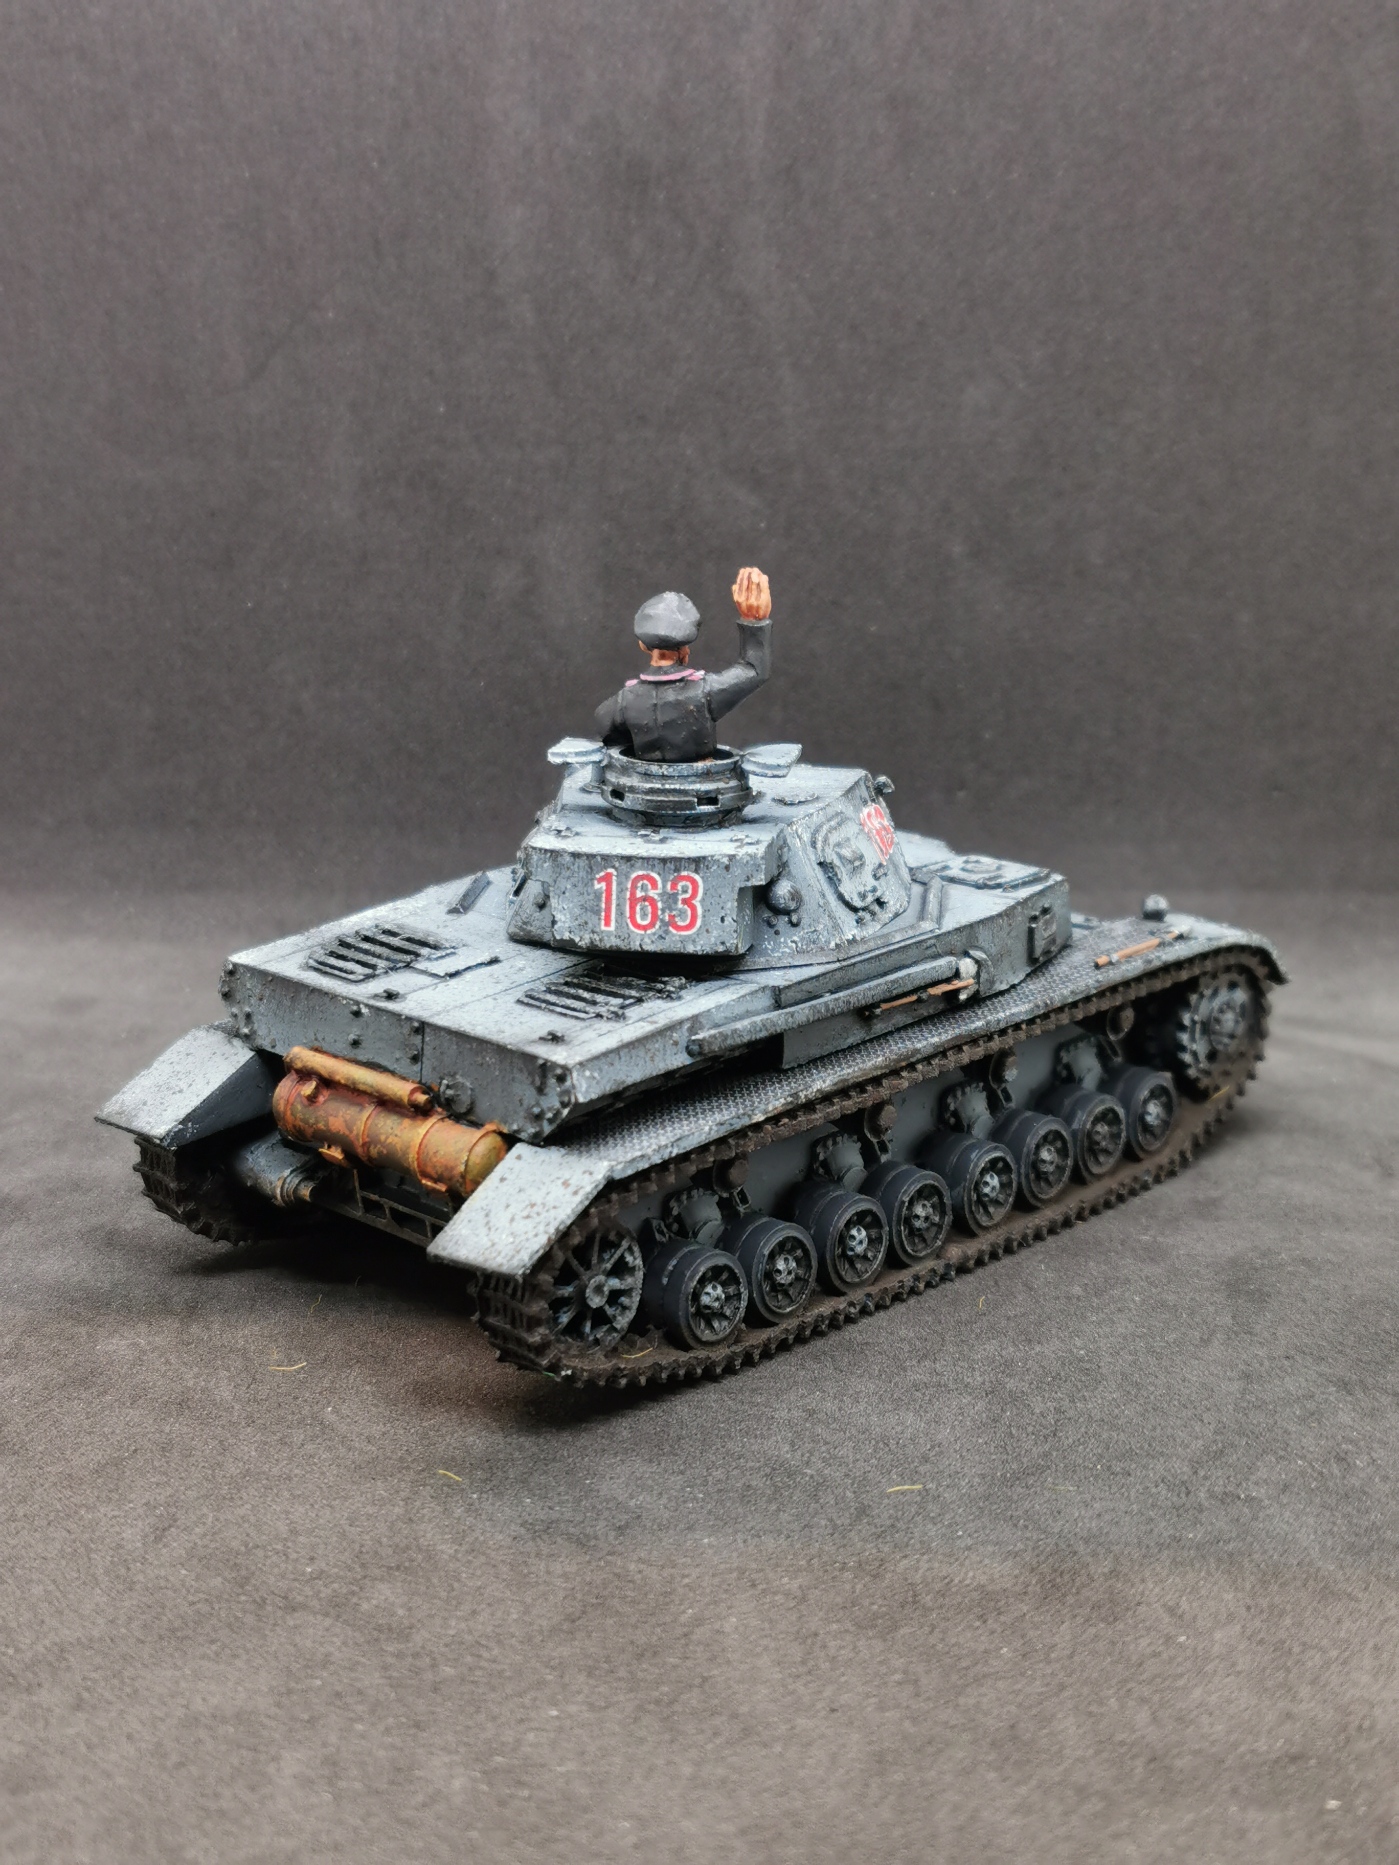
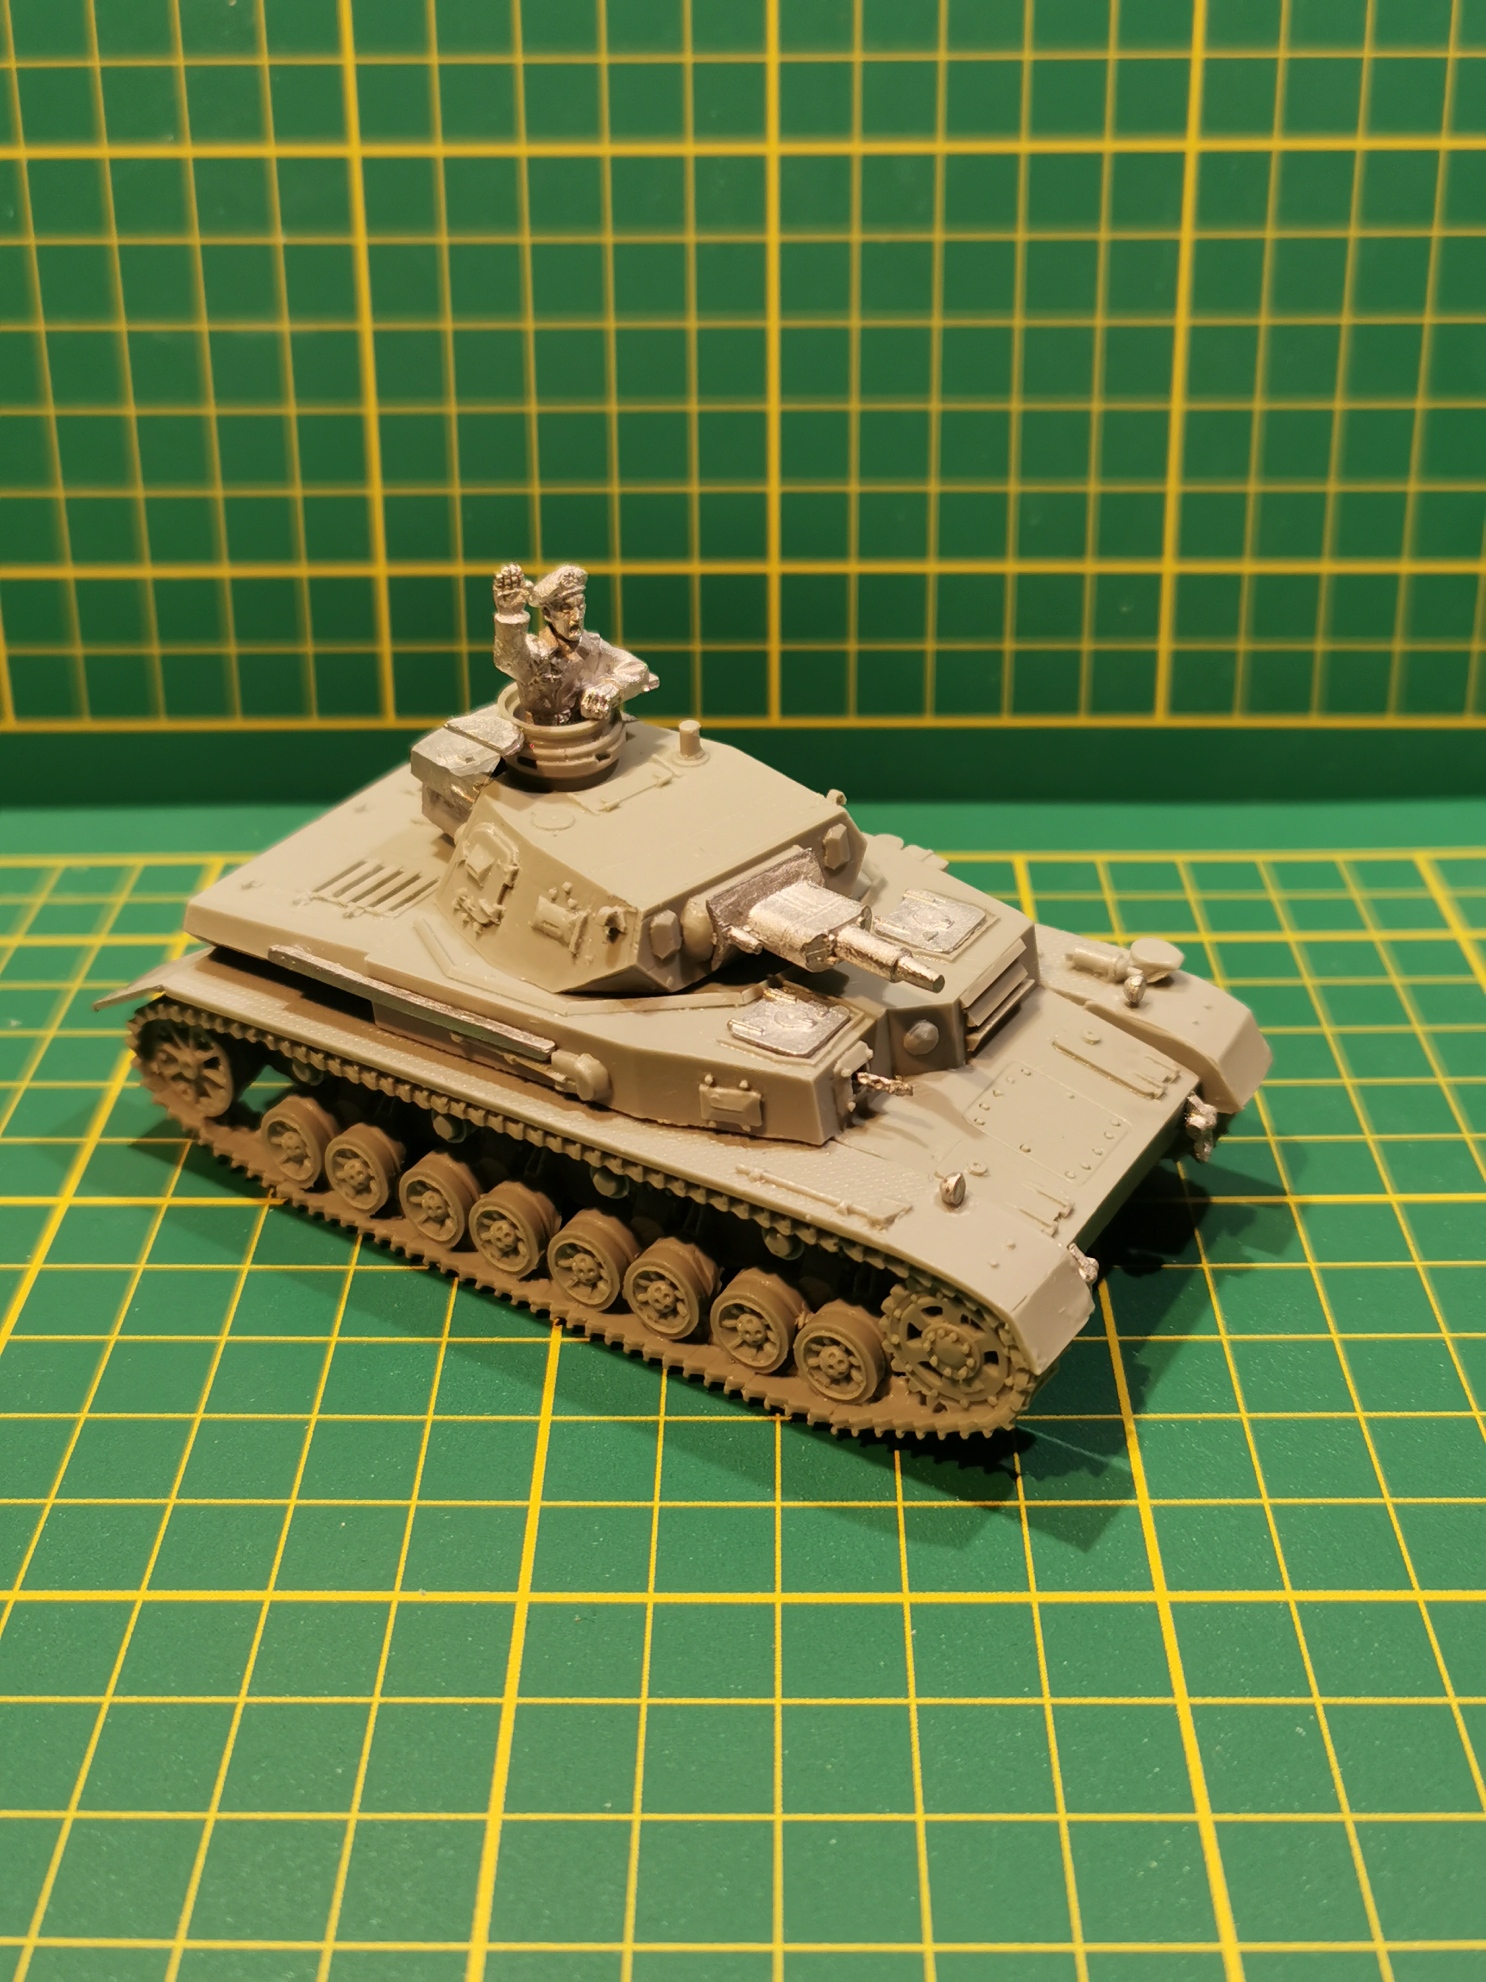 Pz.Kpfw IV Ausf. D tank
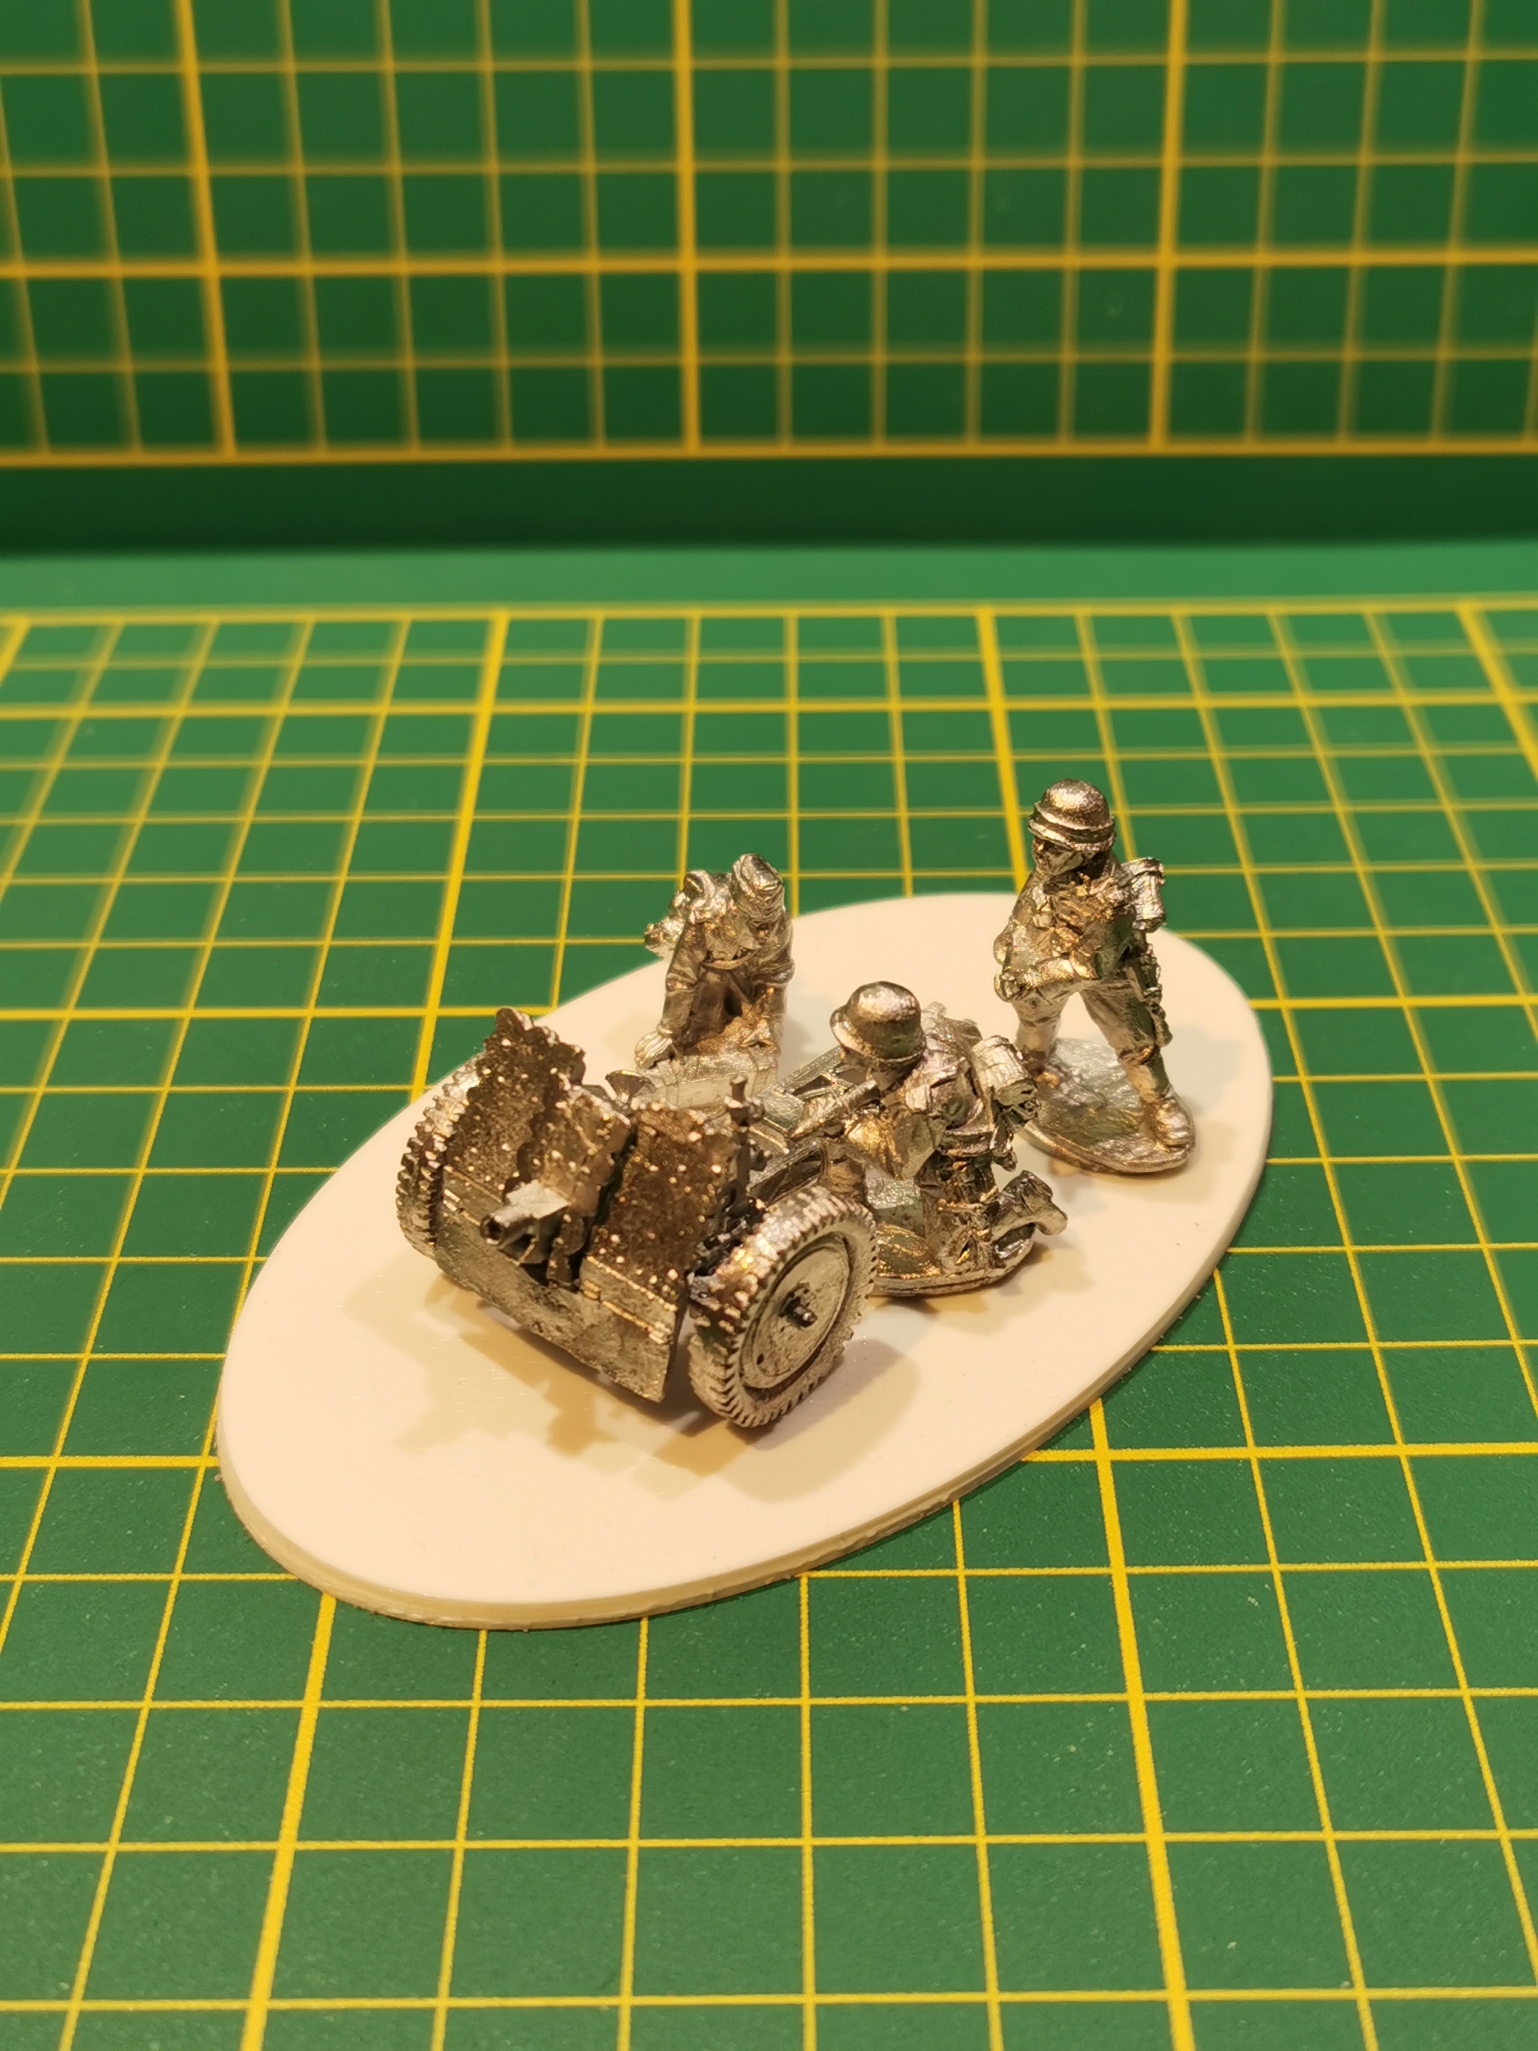 75mm LeIG 18
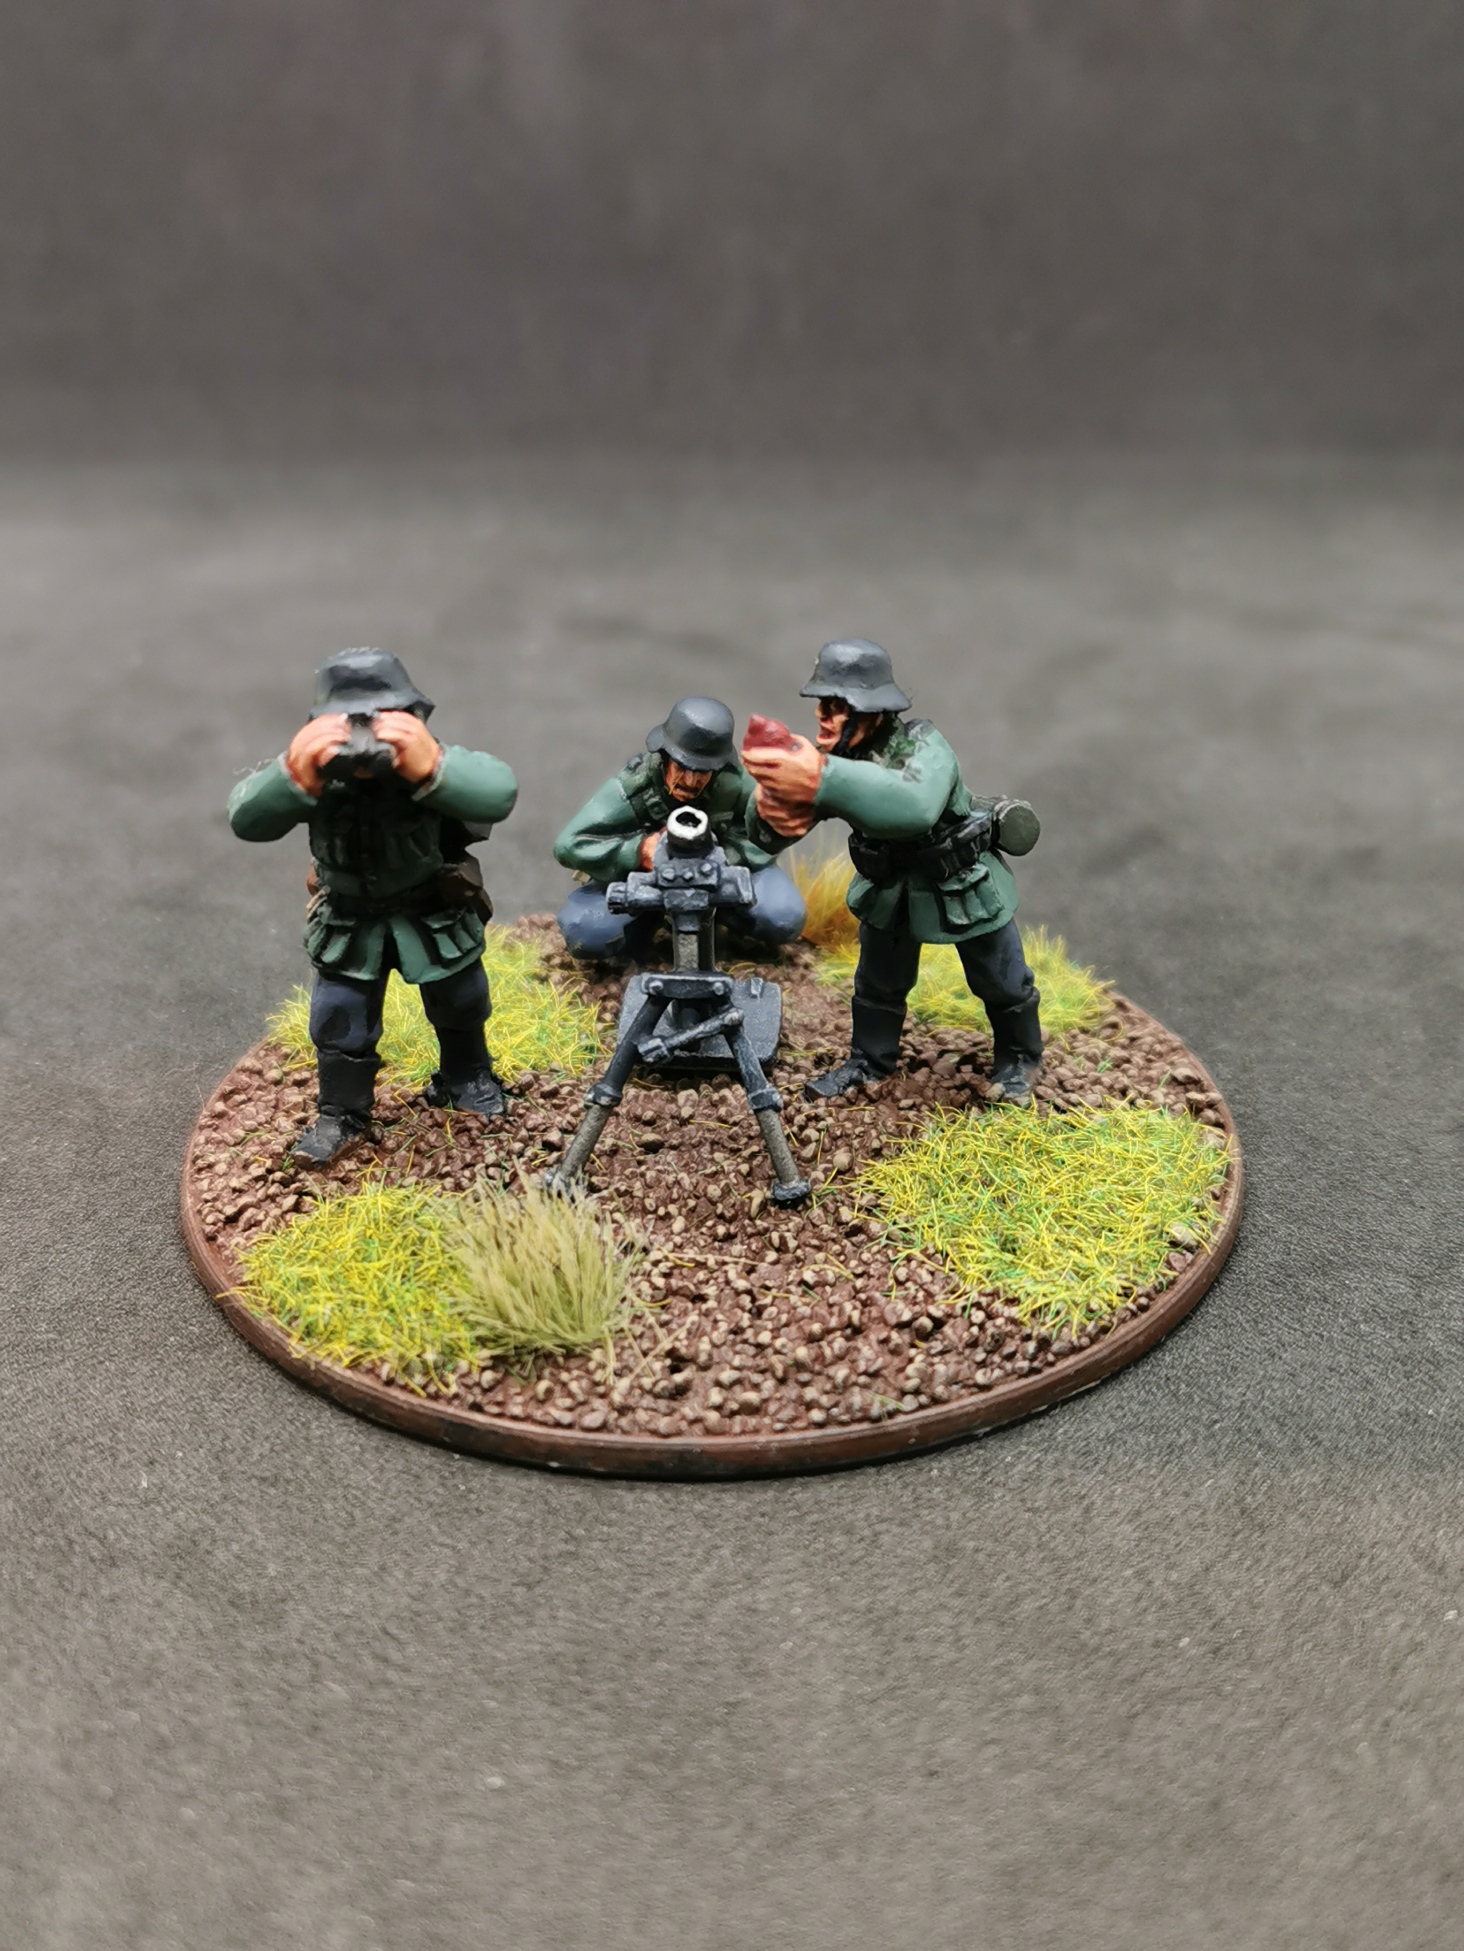
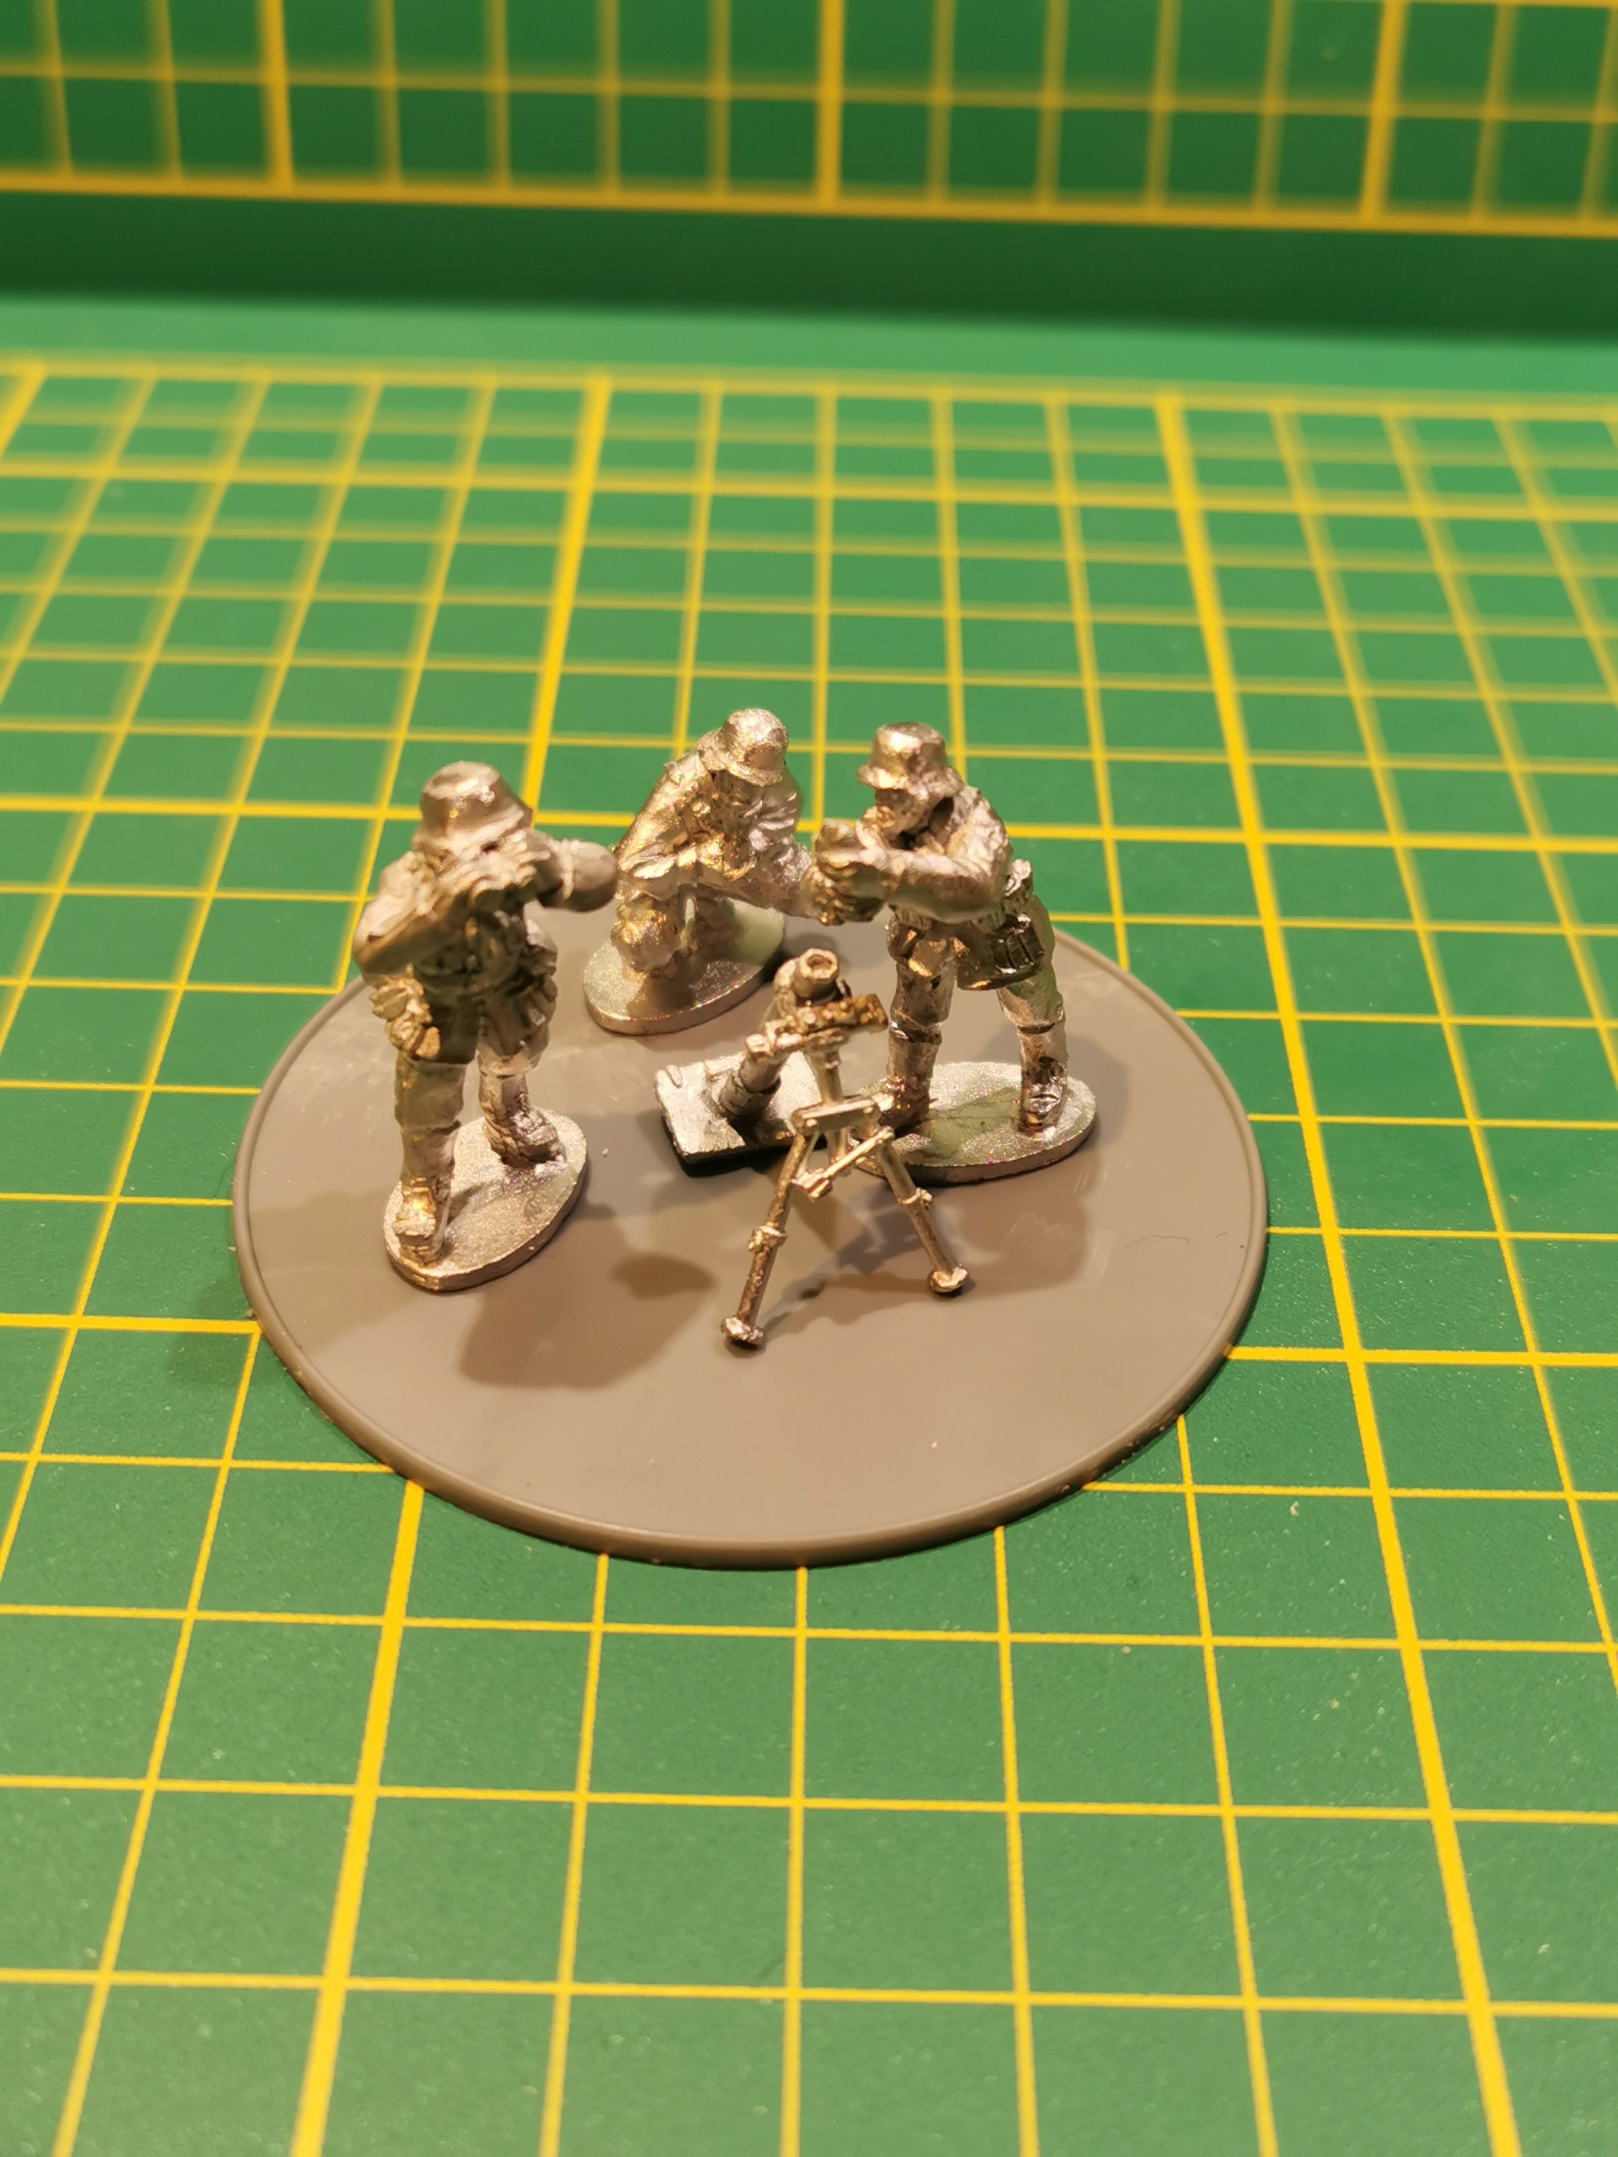 81mm medium mortar
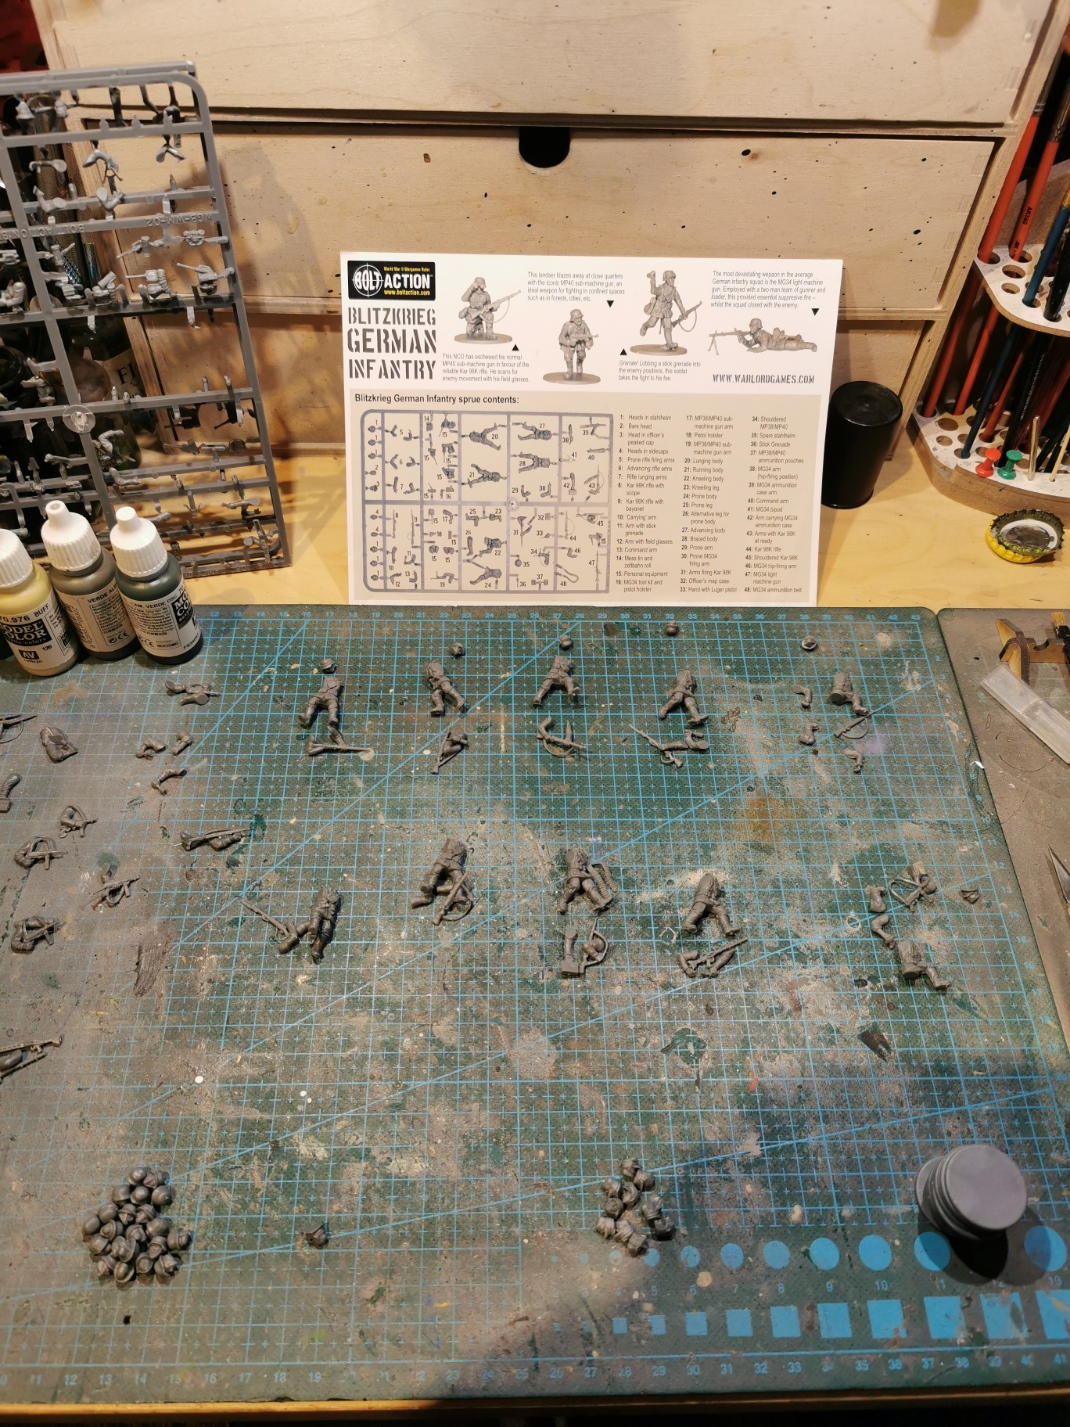 assembling first run of soldiers
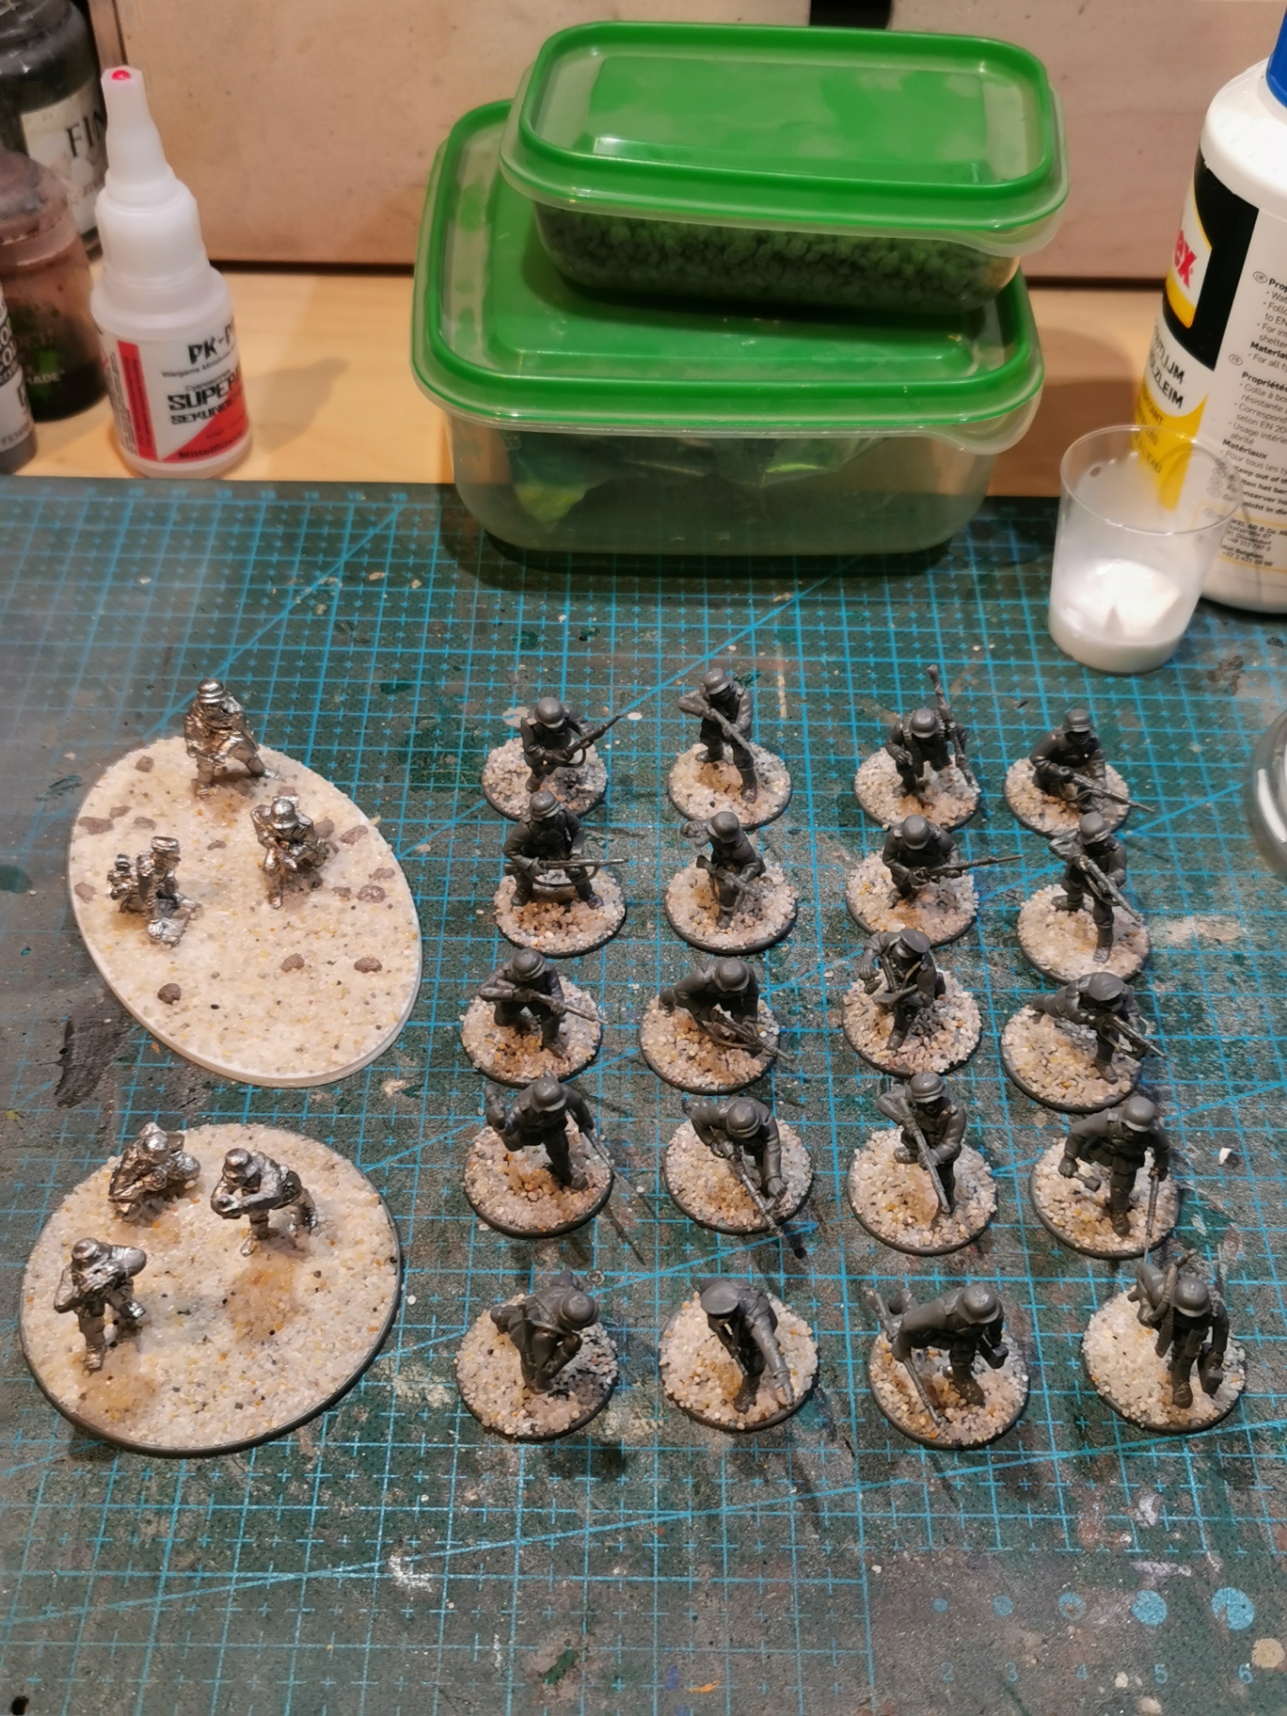 based and ready for priming
Step 2: Priming
The Assembly of the supports and approx. half of the infantry is done. I like to batch paint but this hobby is supposed to be fun, so to give it some variety I only assembled 20 minis to get to paint them a little earlier and finishing the other ones later on.

Step 3: Colour Scheme
The most Important part besides chosing between weapon options befor building the minis is to choose a colour scheme and decide on which paints to use.
In historical wargaming in can be a bit of pain in the back to get the right colours for a specific uniform. However there are paint brands like Vallejo that provide certain tints and hues in their colour range.
The easiest way is to pick up a paint set for specific uniforms or camo schemes but you often get paints in it you already have and this method is also a bit pricey regarding the wealth of diferent uniforms use in WW2.
Another way would be to mix your own tints, but if you are not accurate while mixin every time the colour will turn out differently every time. You could use an empty dropper bottle and mix a large quantitiy of the needed colour to extend your existing range.
The best method for me is to look at paintings of the specific period (in early WW2 photos were only in black-and white). I research in Books and the internet. Sources I can recommend are Osprey books covering a lot of different periods and Pinteres providing a lot of material which can be saved in collections with no ned to save every image on your harddrive.
What can also be found on the internet are painting schemes already provided by hobbyists or even paint brands or miniature brands themselves. Check out Youtube for painting tutorials or Websites of manufacturers to find some tips on how to paint your minis.
Video by Pete the Wargamer on painting Blitzkrieg Germans:
The research on correct uniform colours is a science on its own but we should not forget that the colours on the mini are only a represantation of the uniform and that camo patterns cannot be applied in the right scale because hardly anything would be visible at the gaming distance of half a meter away. I therefore always try to find a compromise between historical accurancy and what I think looks good on the mini and the tabletop.
Below are some resource examples of colour schemes I was coming across during my research. They were randomly picked and are no kind of advertising whatsoever!
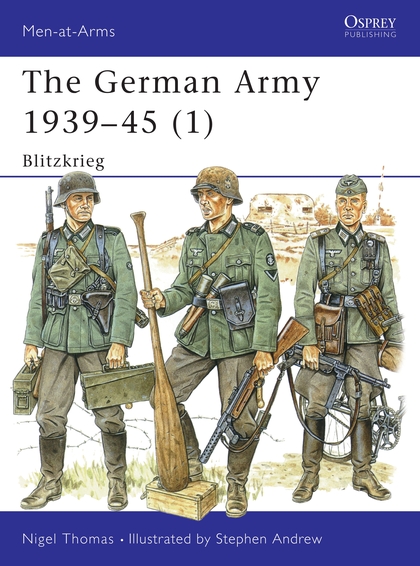 The German Army 1939-45 (1): Blitzkrieg (Men-at-Arms, Issue 311)
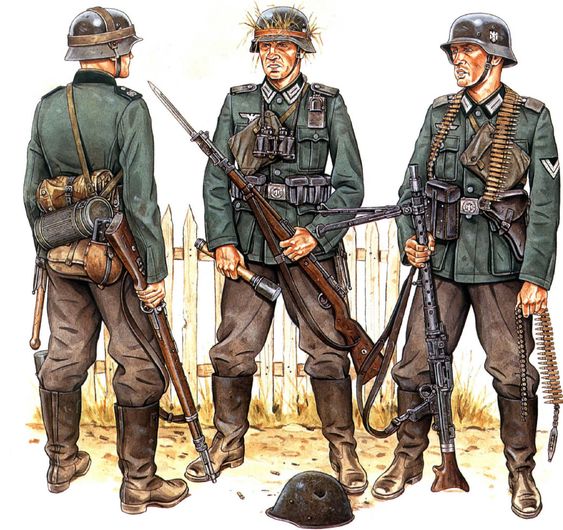 Source: https://www.pinterest.at/pin/720153796658914498/
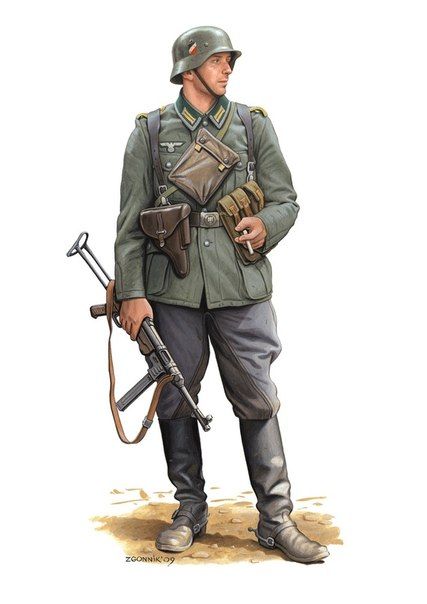 https://www.pinterest.at/pin/383439355767353627/
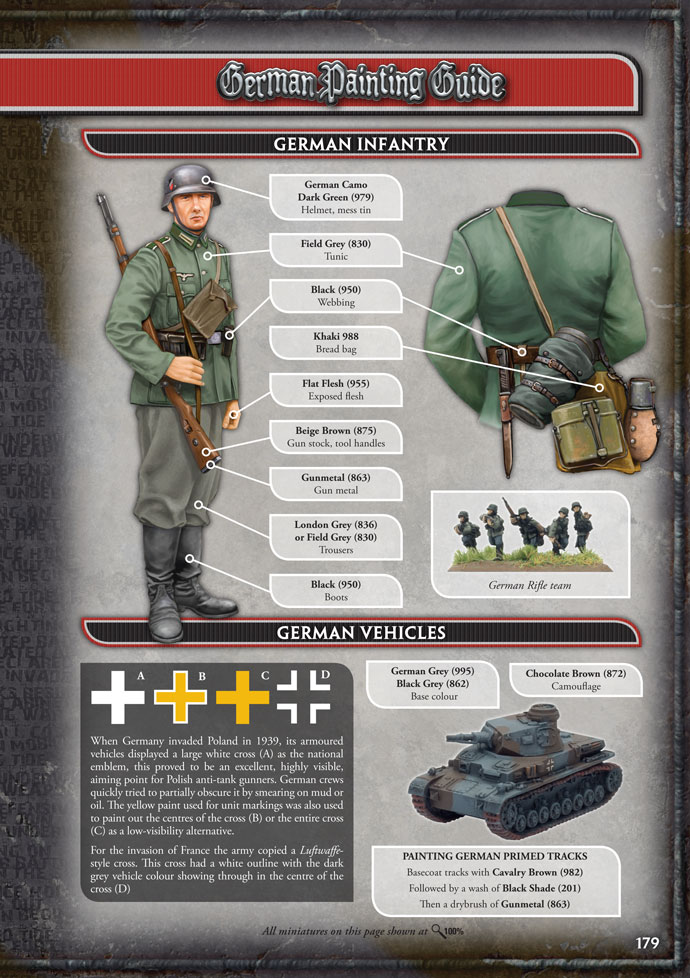 https://www.flamesofwar.com/Default.aspx?tabid=53&art_id=2138
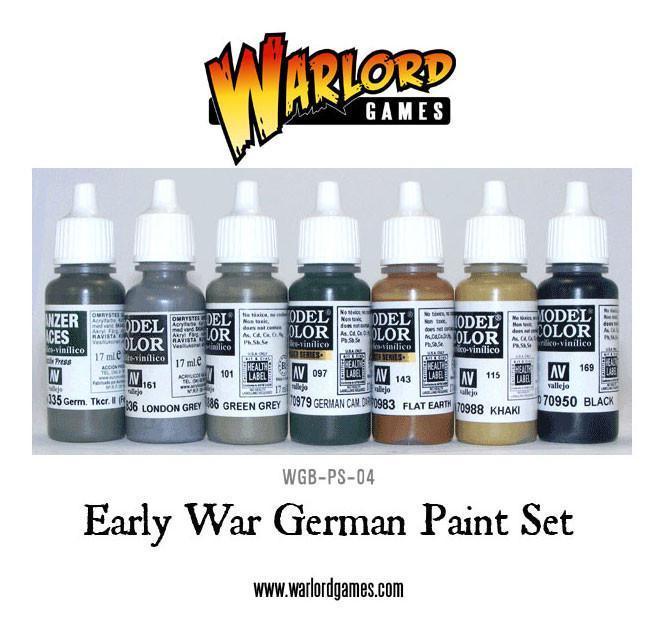 https://store.warlordgames.com/products/early-war-german-paint-set?_pos=1&_sid=124b425ea&_ss=r&variant=31468987220048
Step 4: Choosing Colours
After reading some articles, chapters and gathering picture reference this is what I found out about early war german uniforms:
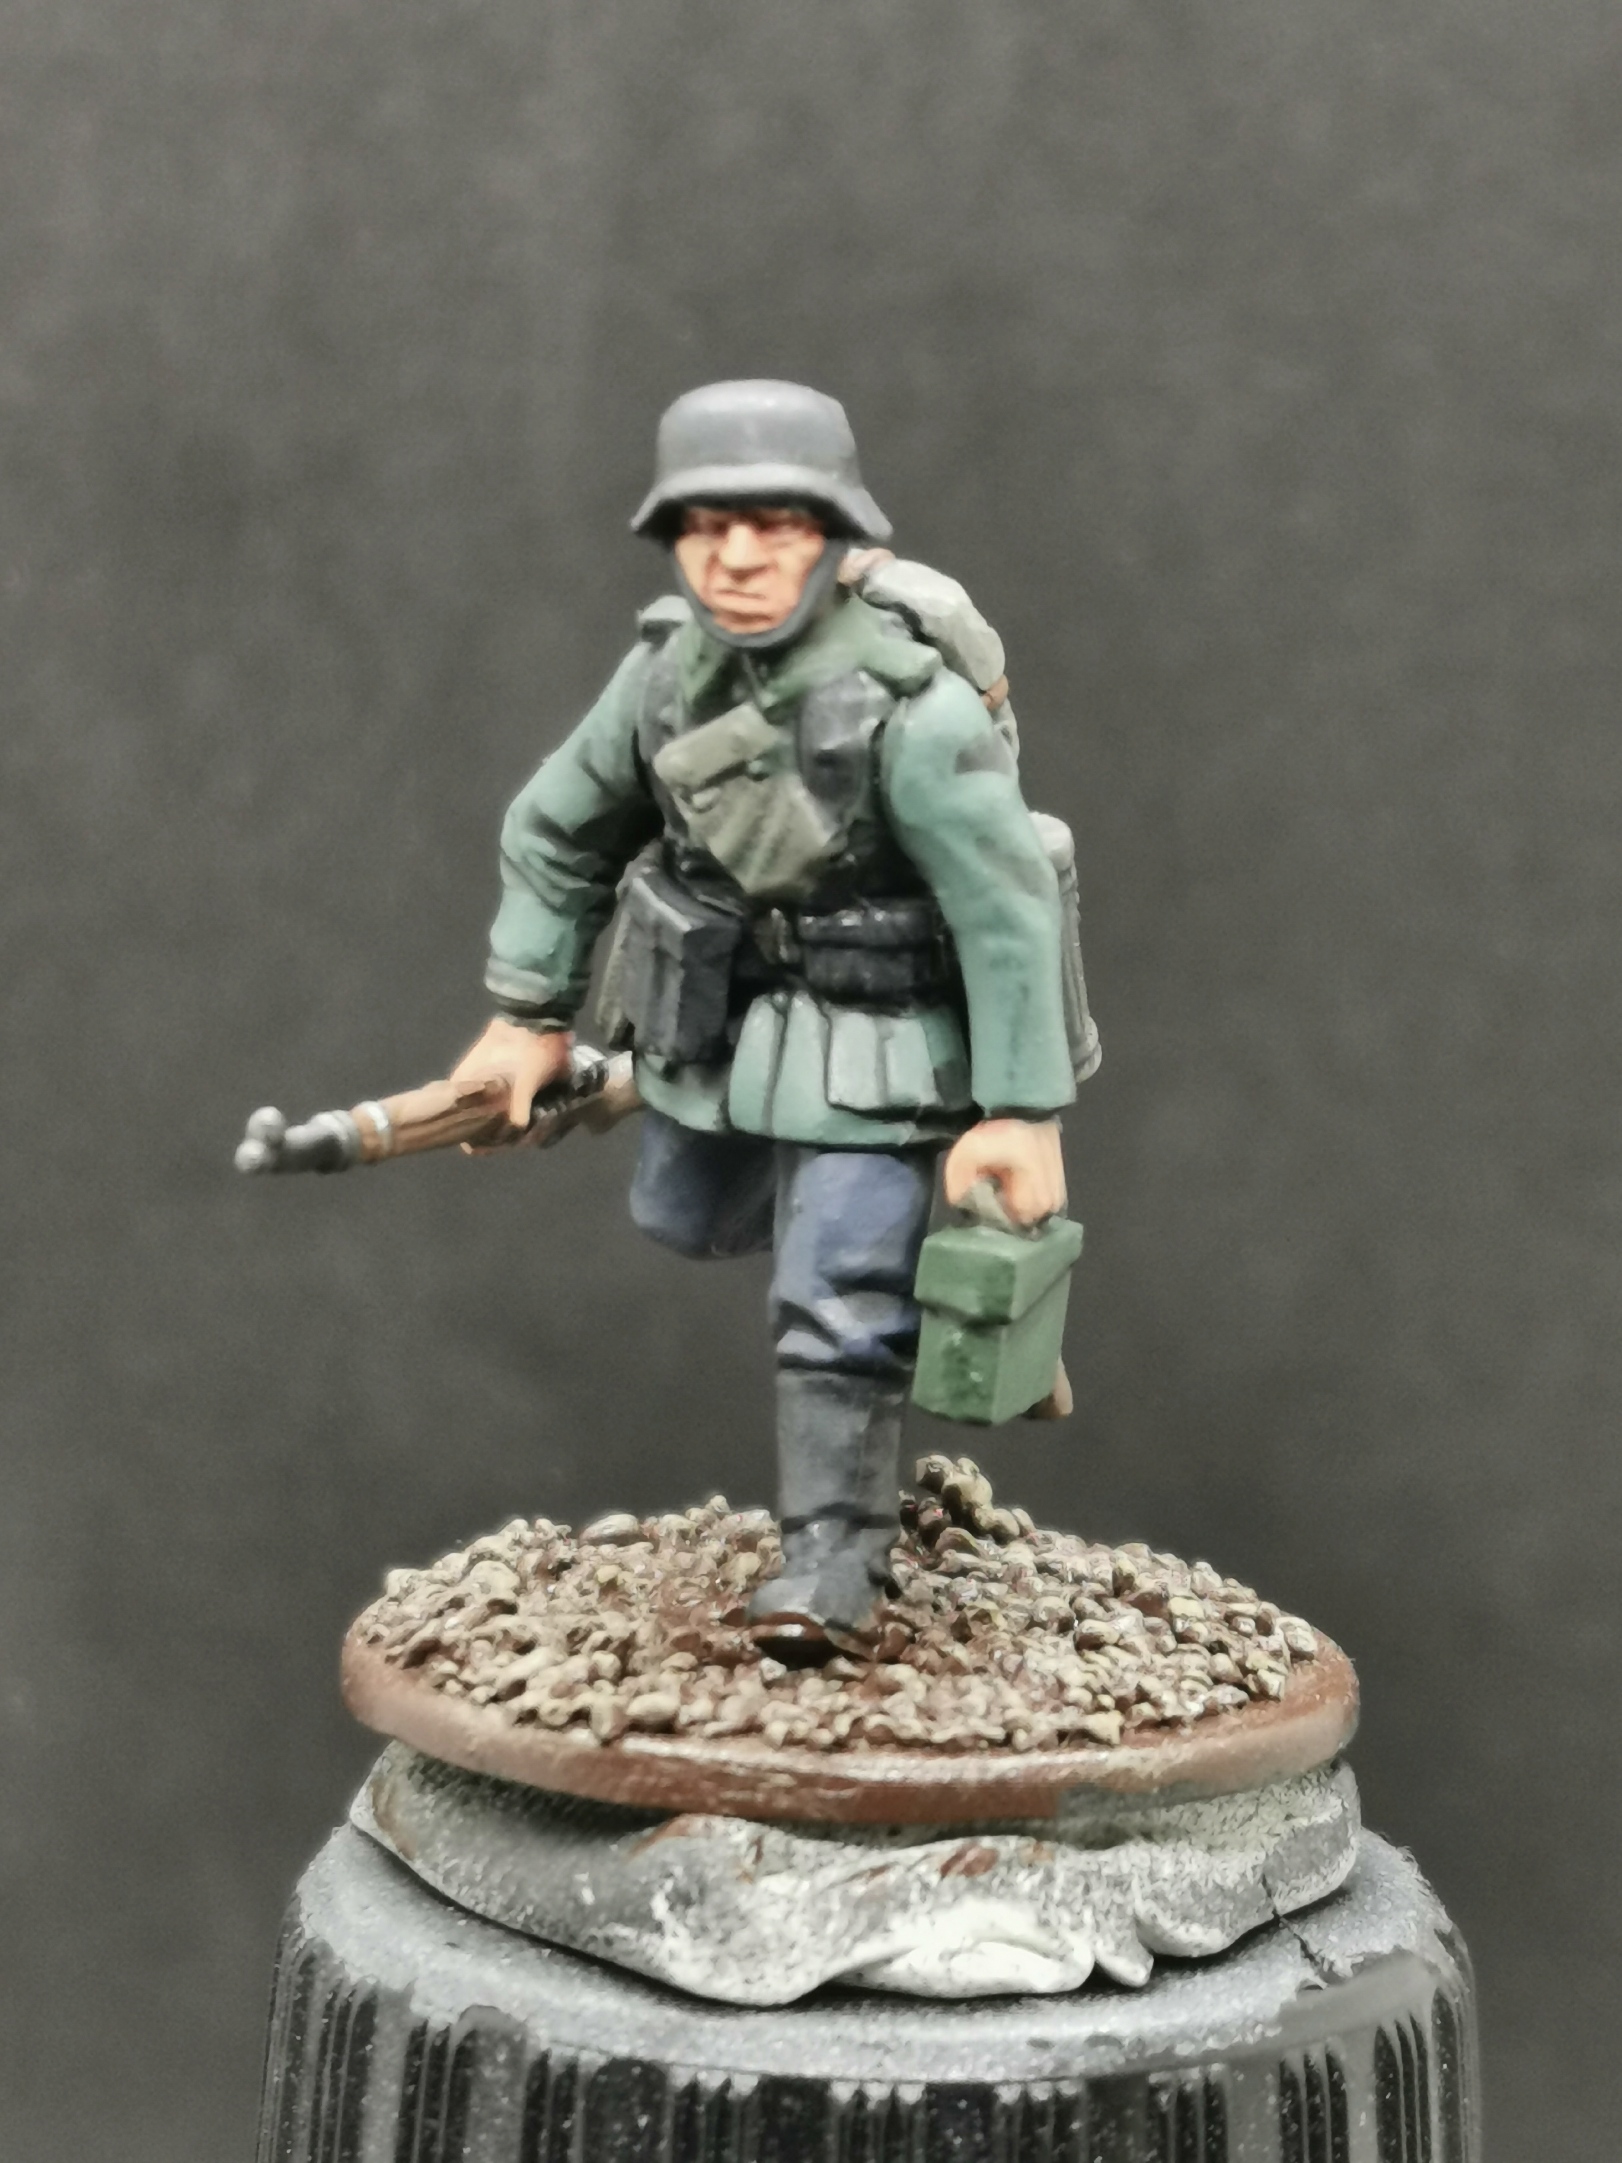
I decided to go for the uniform of about 1940 which is called “Feldbluse M40” but also the “Feldbluse M36” was still in use. The slight difference was, beside the number of buttons, the collar changing from green to the matching uniform colour but in fact the green collar was so popular that soldiers kept it or changed it back to green. I decided to keep the green on the collar as it adds a little eyecatcher to the model making it more interesting to look at.
The pre war german uniform was mostly grey but changing in the 1930s to green. There were two versions worn by the soldiers: One was the fieldtunic (Feldbluse) in fieldgrey and the other was the mor comfortable fatigue uniform (Drillichanzug or Arbeitsanzug) which had a more dark olive or reed green colour and was used in the warmer time of the year. The trousers had a slate grey colour at the beginning but changed to fieldgrey or during the Blitzkrieg. During the invasion of the soviet union the uniform changed to an overall fieldgrey and introduced the famous camo patterns. I decided on using a bluish grey trouser colour for one half of my force and a fieldgrey for the other representing the colour changes happening during the early war.
A great article I came across:
http://www.historyofwar.org/articles/weapons_german_army_equipment.html#7
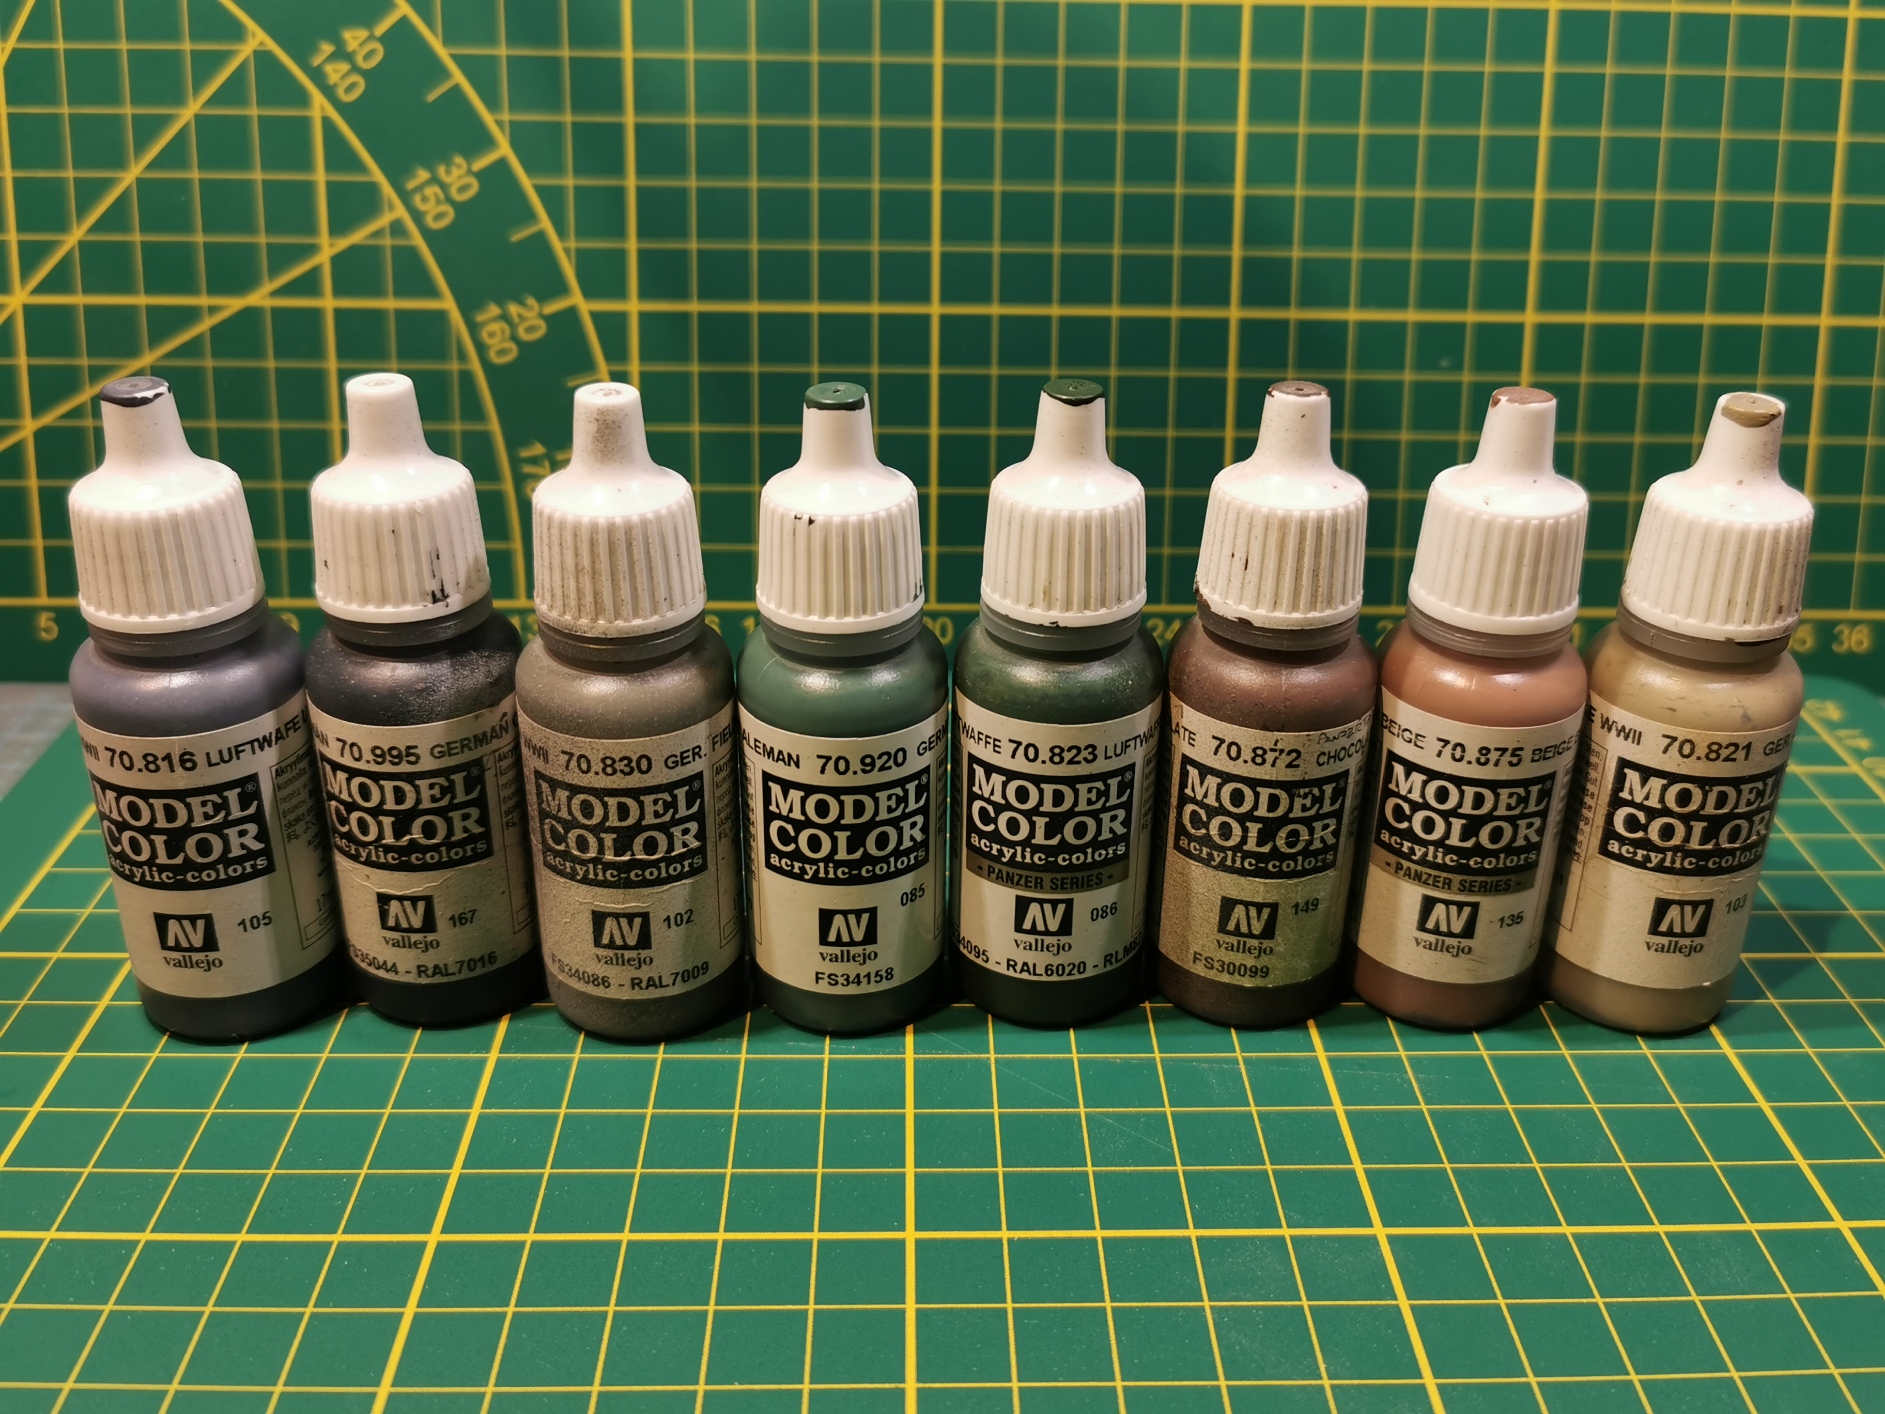
So as I did all my research and decided on a colour scheme its time to choose some matching colours:
VMC = Vallejo Model Colour
CP = Citadel Paint
VMC 70.920 German Uniform: uniform
VMC 70.816 Luftwaffe Uniform: early trousers
VMC 70.823 Luftwaffe Camo green: mess tin, collar, shoulder straps, MG 38 ammo box
VMC 70.995 German Grey: boots, Kar 98 ammo pouches, Y-straps, cup on top of canteen, helmet, weapon belt
VMC 70.830 German Fieldgrey: late trousers, gas mask canister, gas cape pouch, blankets, bed rolls
VMC 70.821 German Camo Beige: breadbag, MP 40 ammo pouches
VMC 70.875 Beige Brown: wood on rifle, shovel and stick grenade
VMC 70.872 Chocolate Brown: canteen, officers map bag, holster, eather straps
CP Cadian Fleshtone: skin base
CP Kislev Flesh: skin highlight
CP Leadbelcher: metal parts
CP Stormhost Silver: metal highlights
CP Agrax Earthshade: shading for beige and brown parts
CP Nuln Oil: shading dar parts of uniform and metal
CP Reikland Fleshshade: skin shading
Step 5: Actually Painting
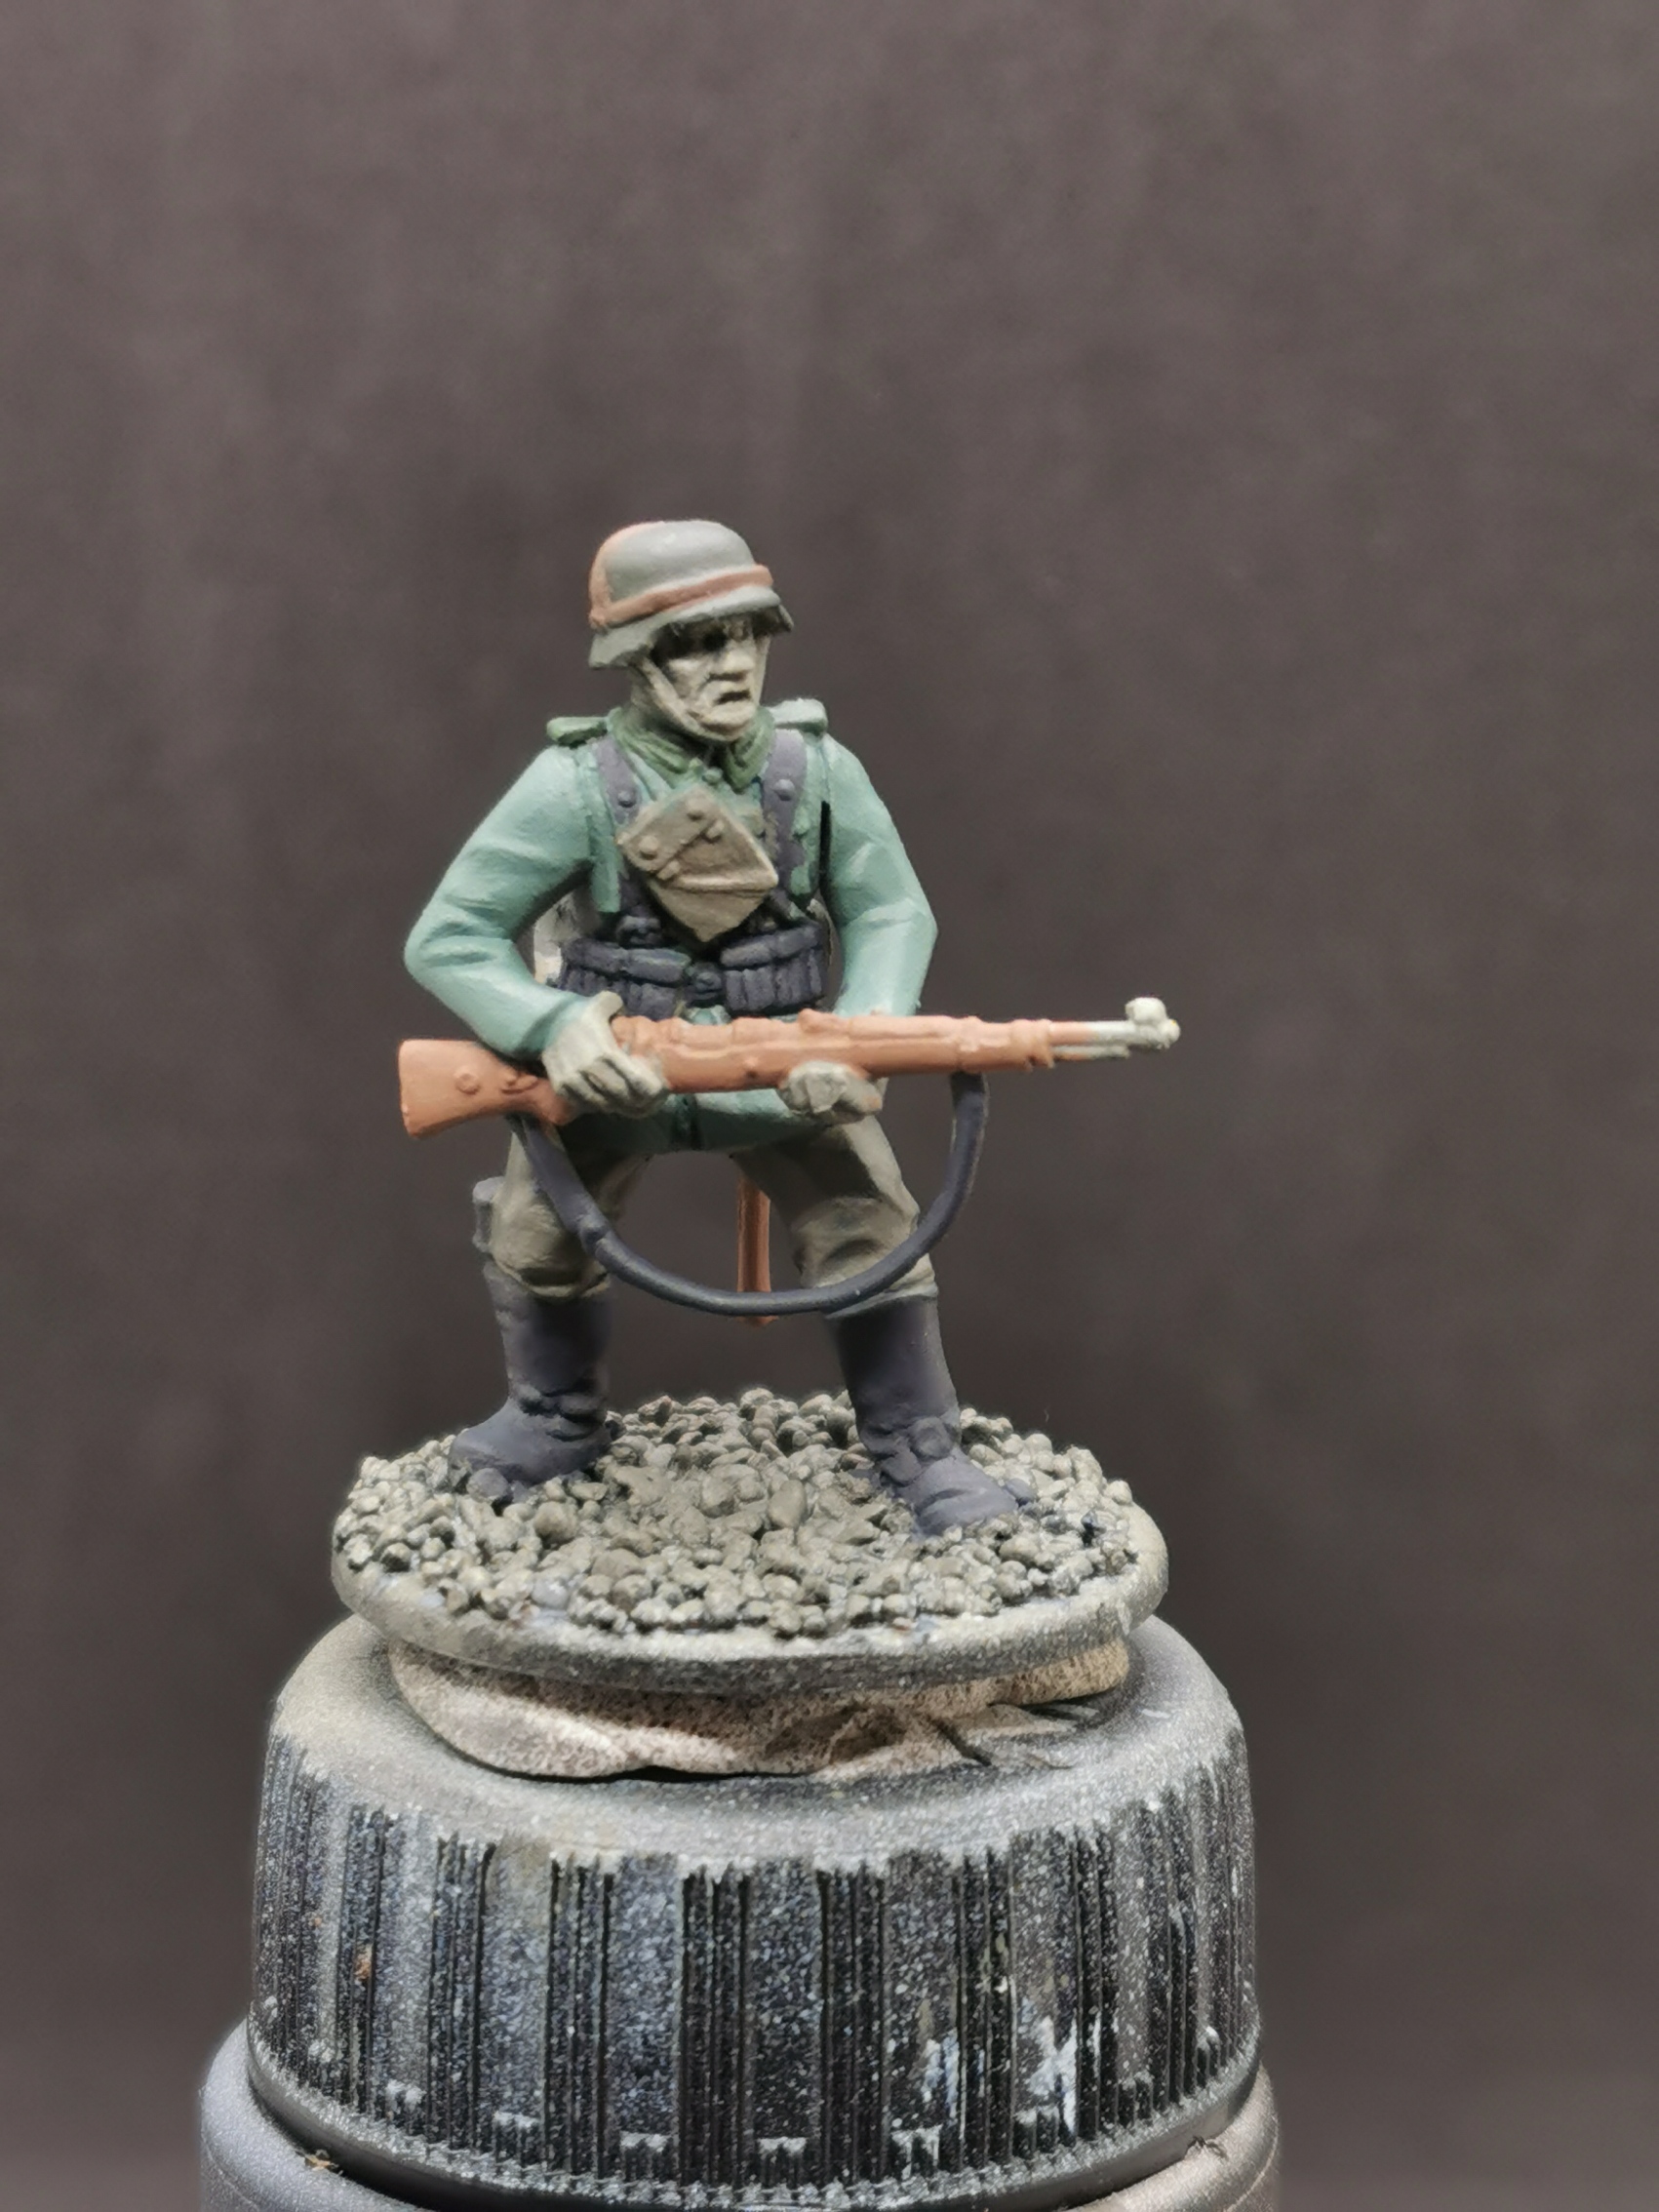
After all this research its time for painting and I’m eager to pick up some brushes and get started.
I painted on all the base colours, then gave all the areas a good wash and then put on the base colour on the raise areas -nothing fancy as they are supposed to be gaming minis.


Step 6: Painting Armor
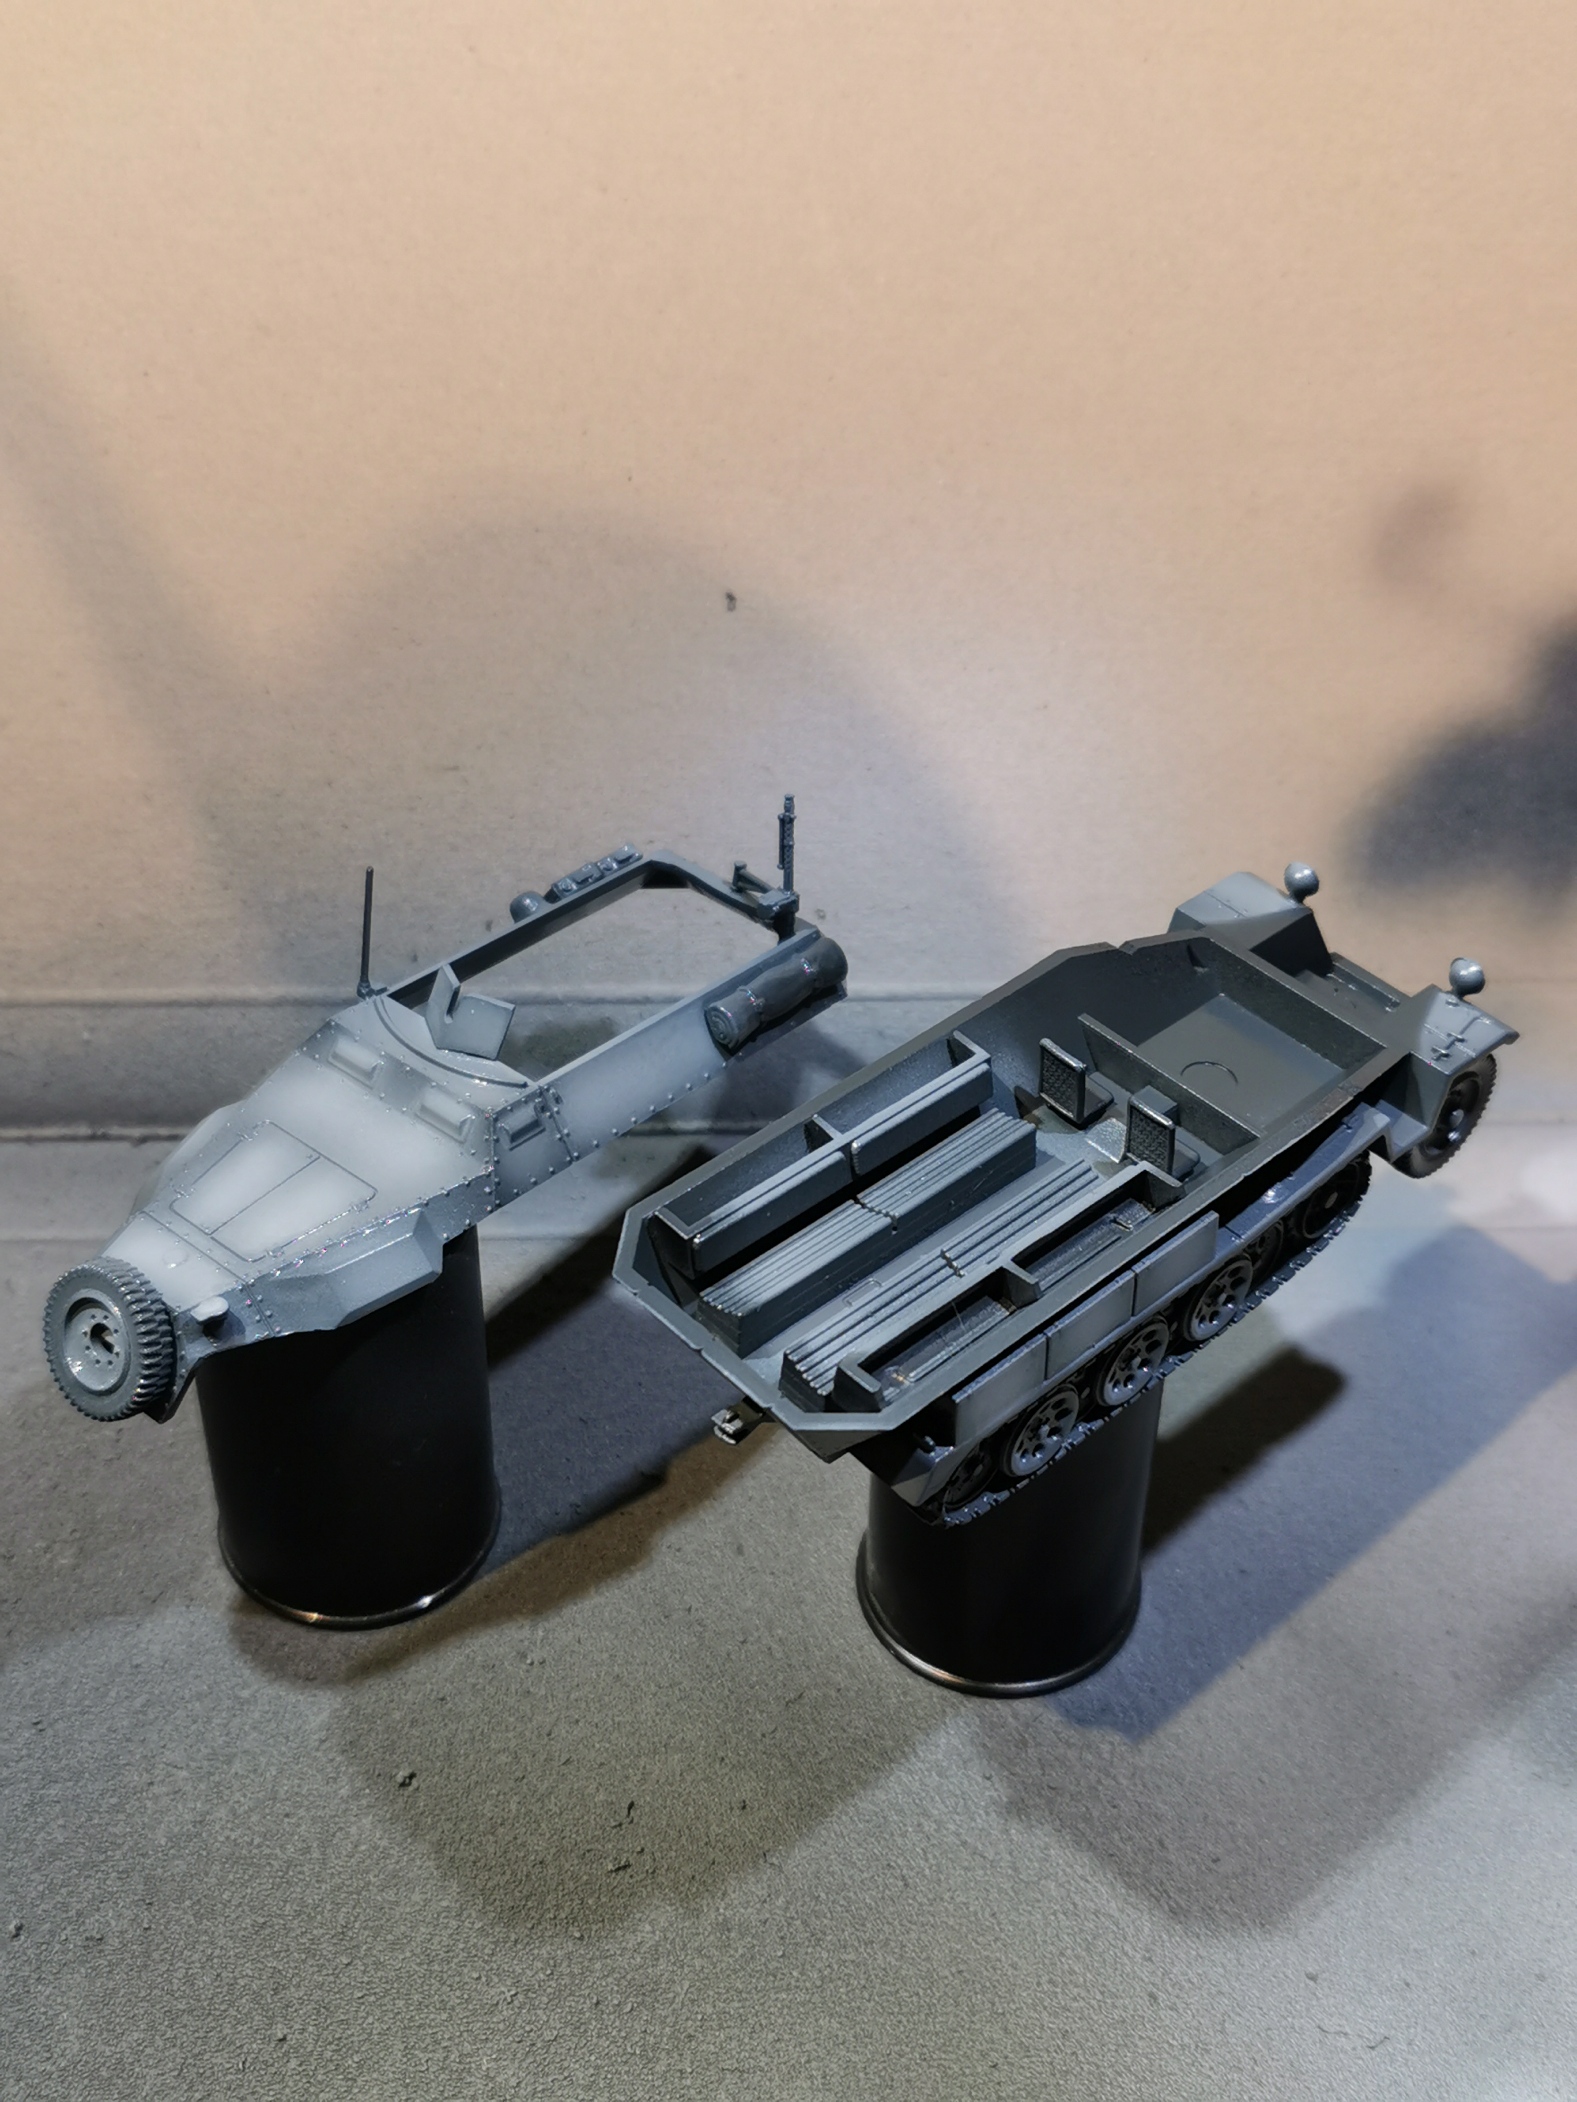
As I progress with the infantry I must not forget about the support vehicles which will be the backbone of my fast advancing Blitzkrieg force. I decided to start with the halftrack first and deal with the tank later on.
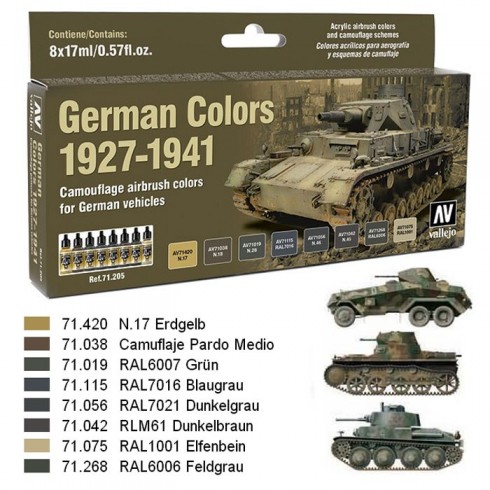
The research for the appropriate colour scheme was quite easy due to the fact that in early war almost all german vehicles were in various shades of grey (no movie or book reference intended). I therefore picked up a vallejo air colour painting set called ” German colors 1927-1941″.
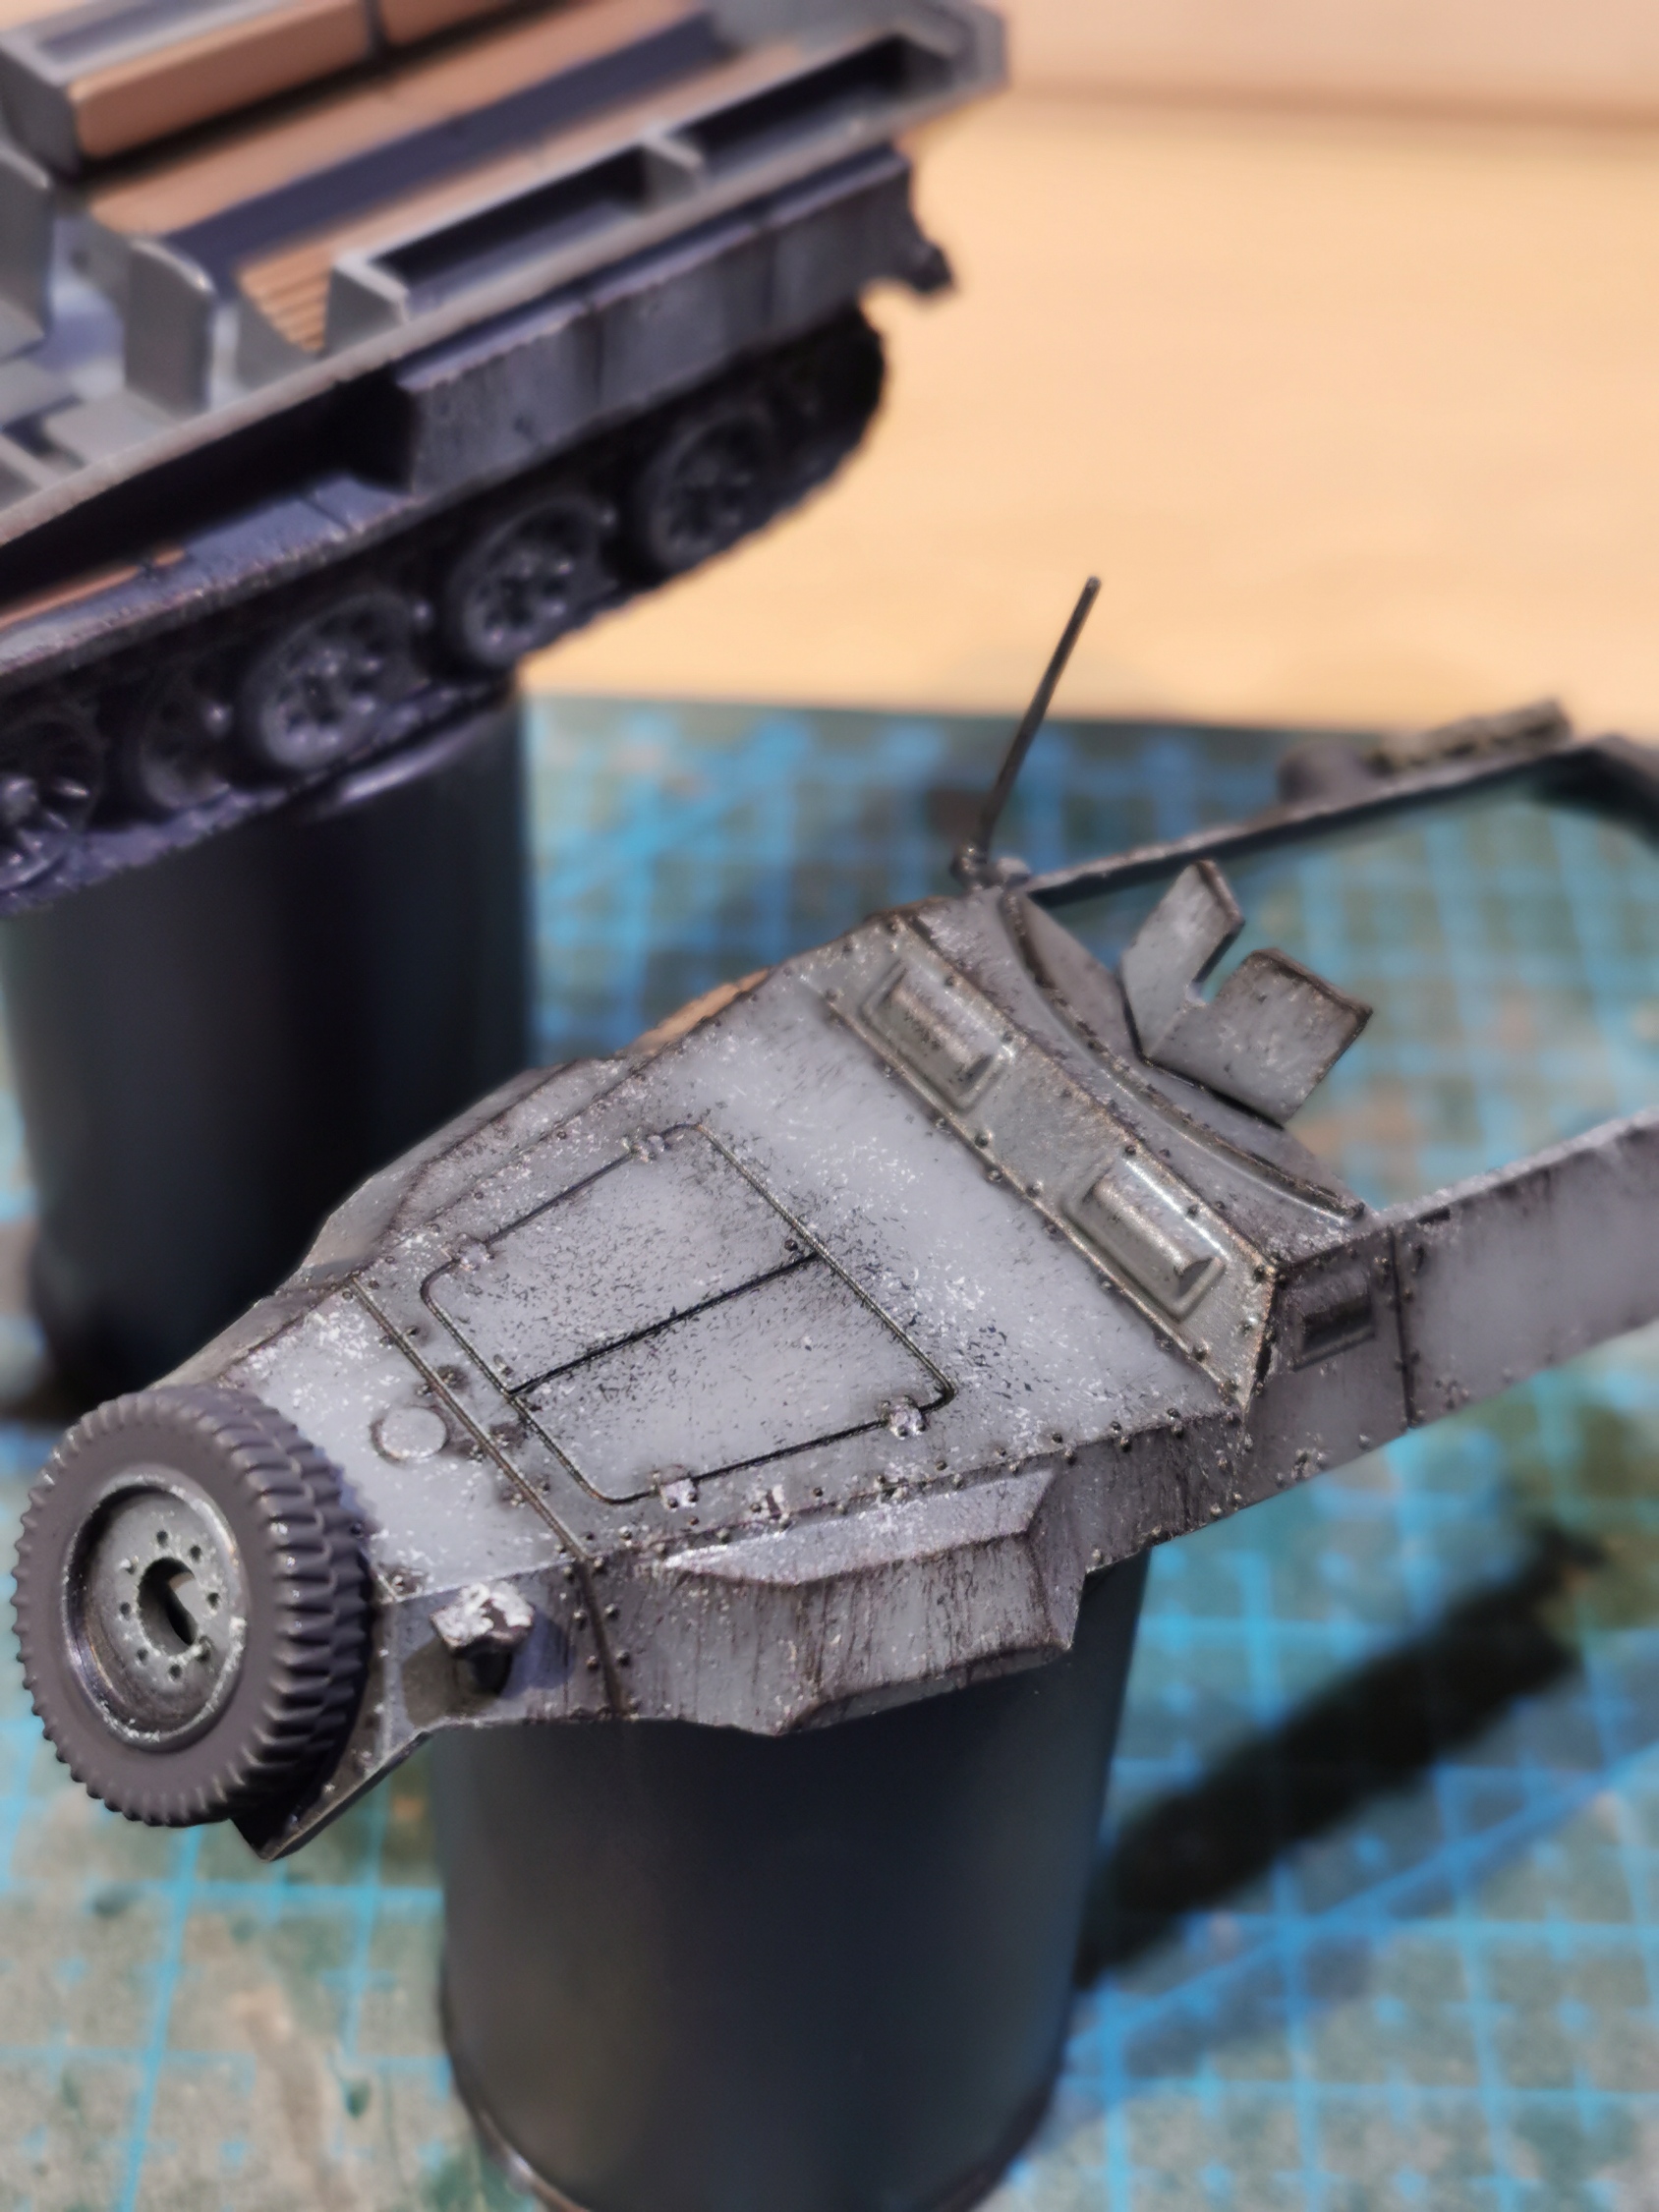
I started with a black prime followed by very subtle zenithal highlight. I then did a panel highlight over the whole miniature.
I used the colour Vallejo model air AV7115 Blaugrau (bluegrey) as basecoat and repeated the panel highligting with the base colour mixed with an increasing amount of white ink.
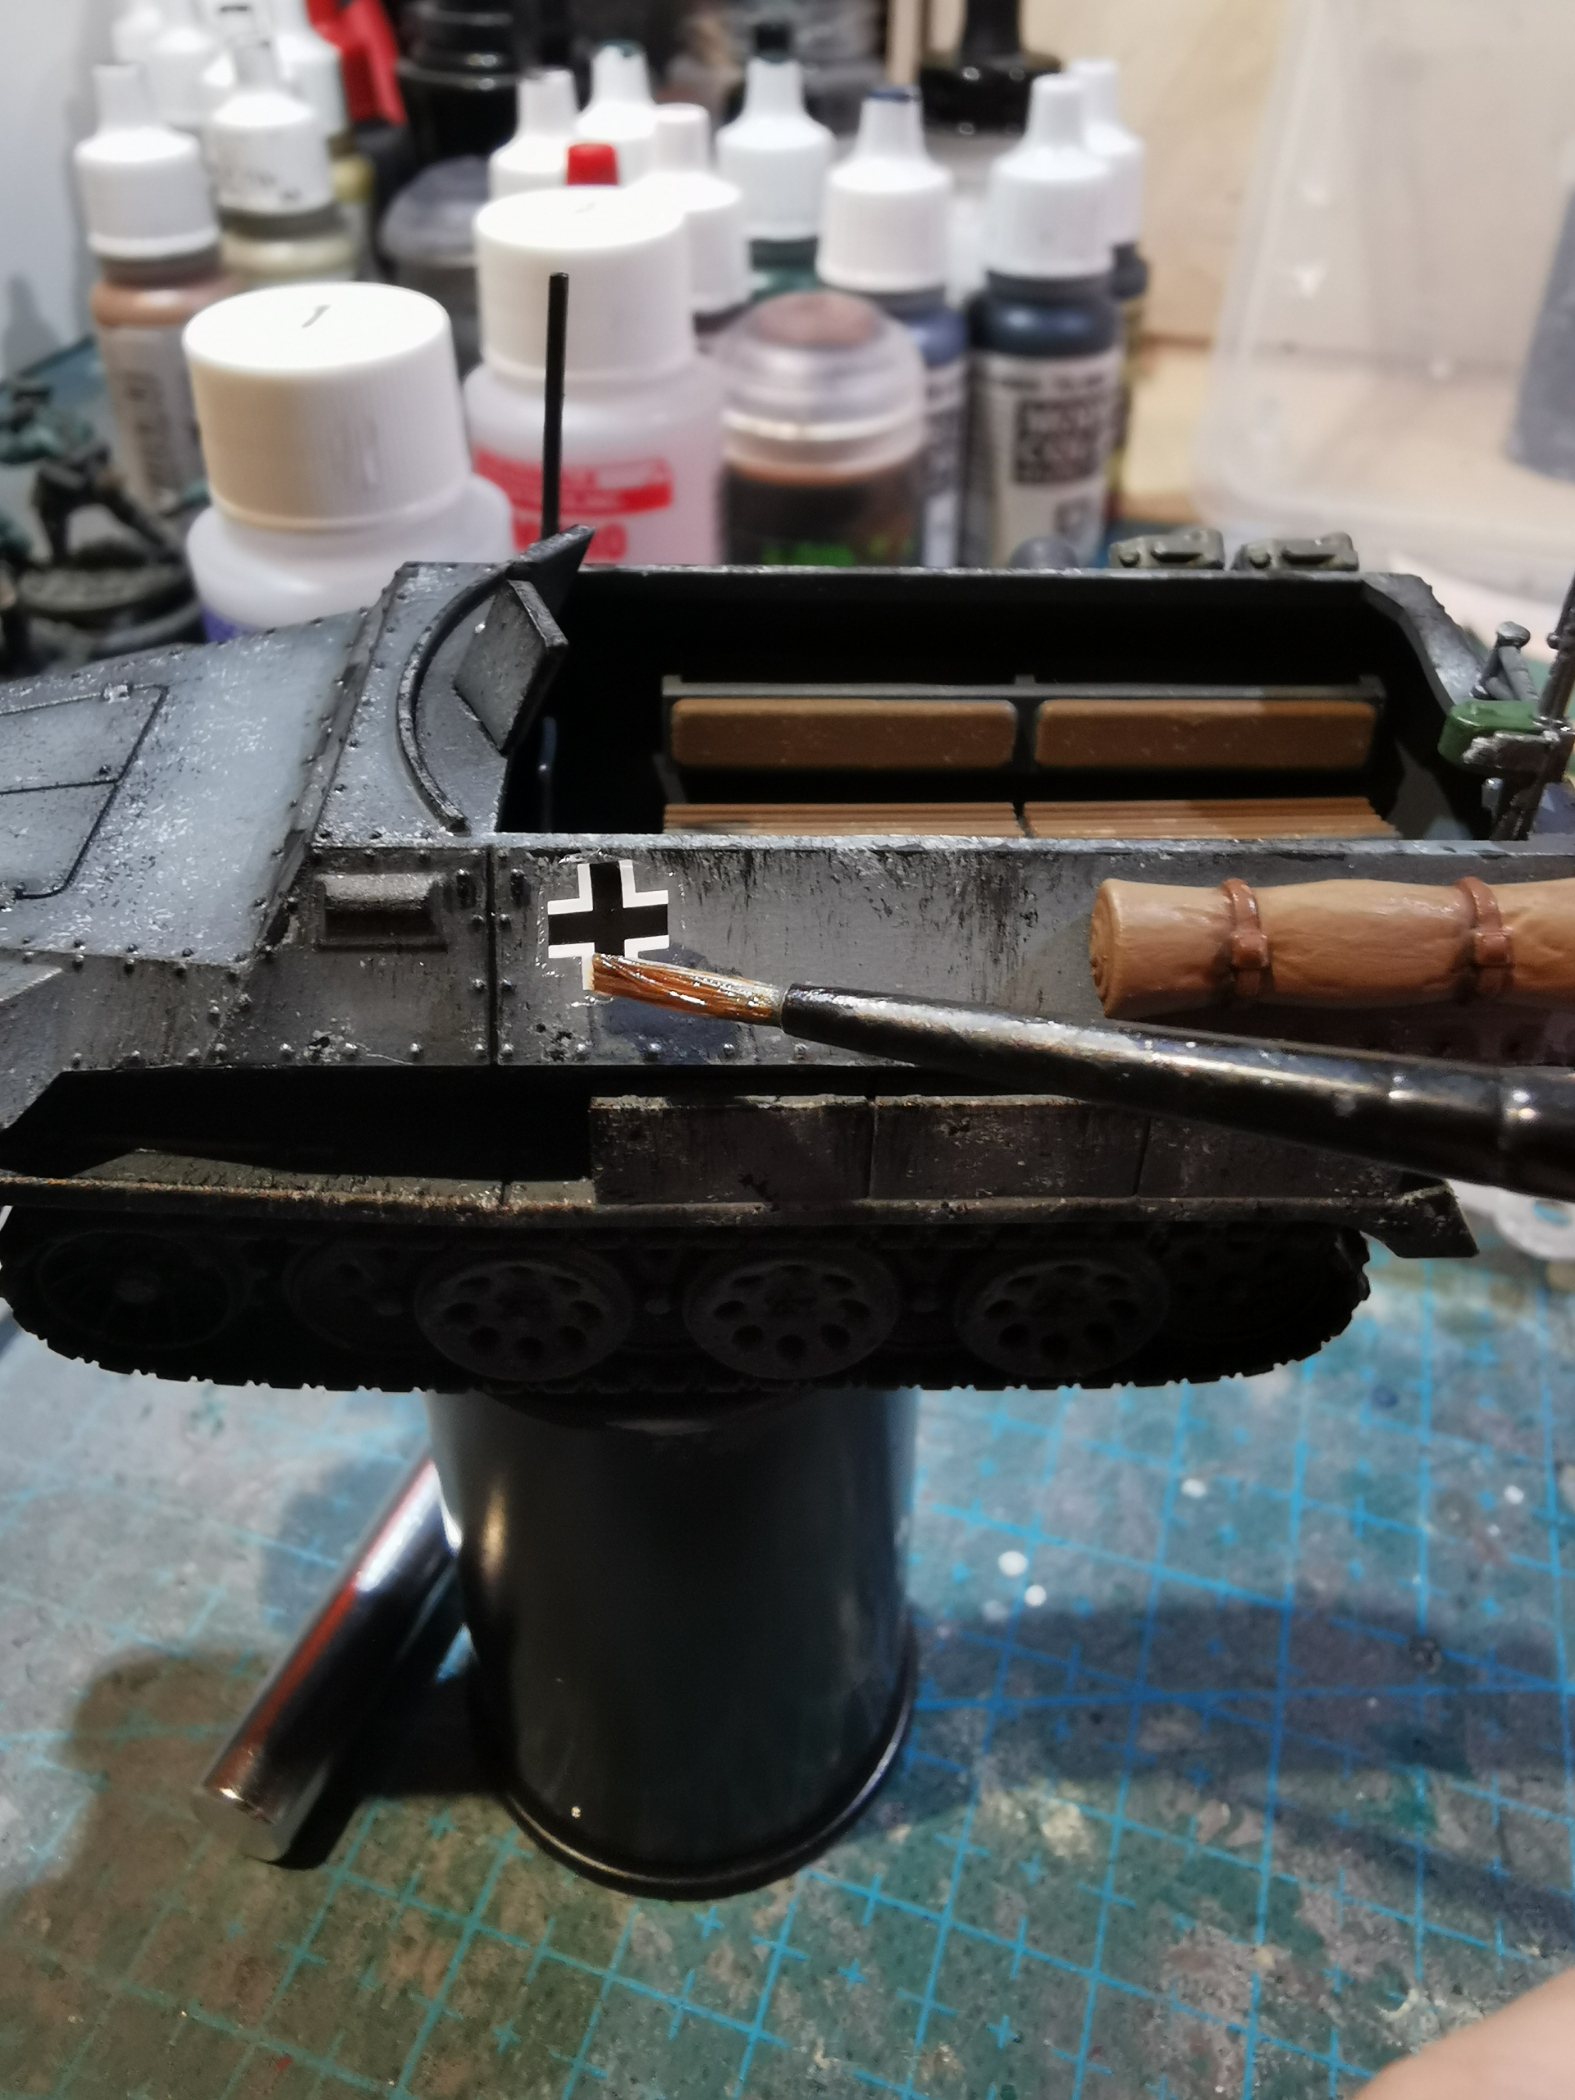
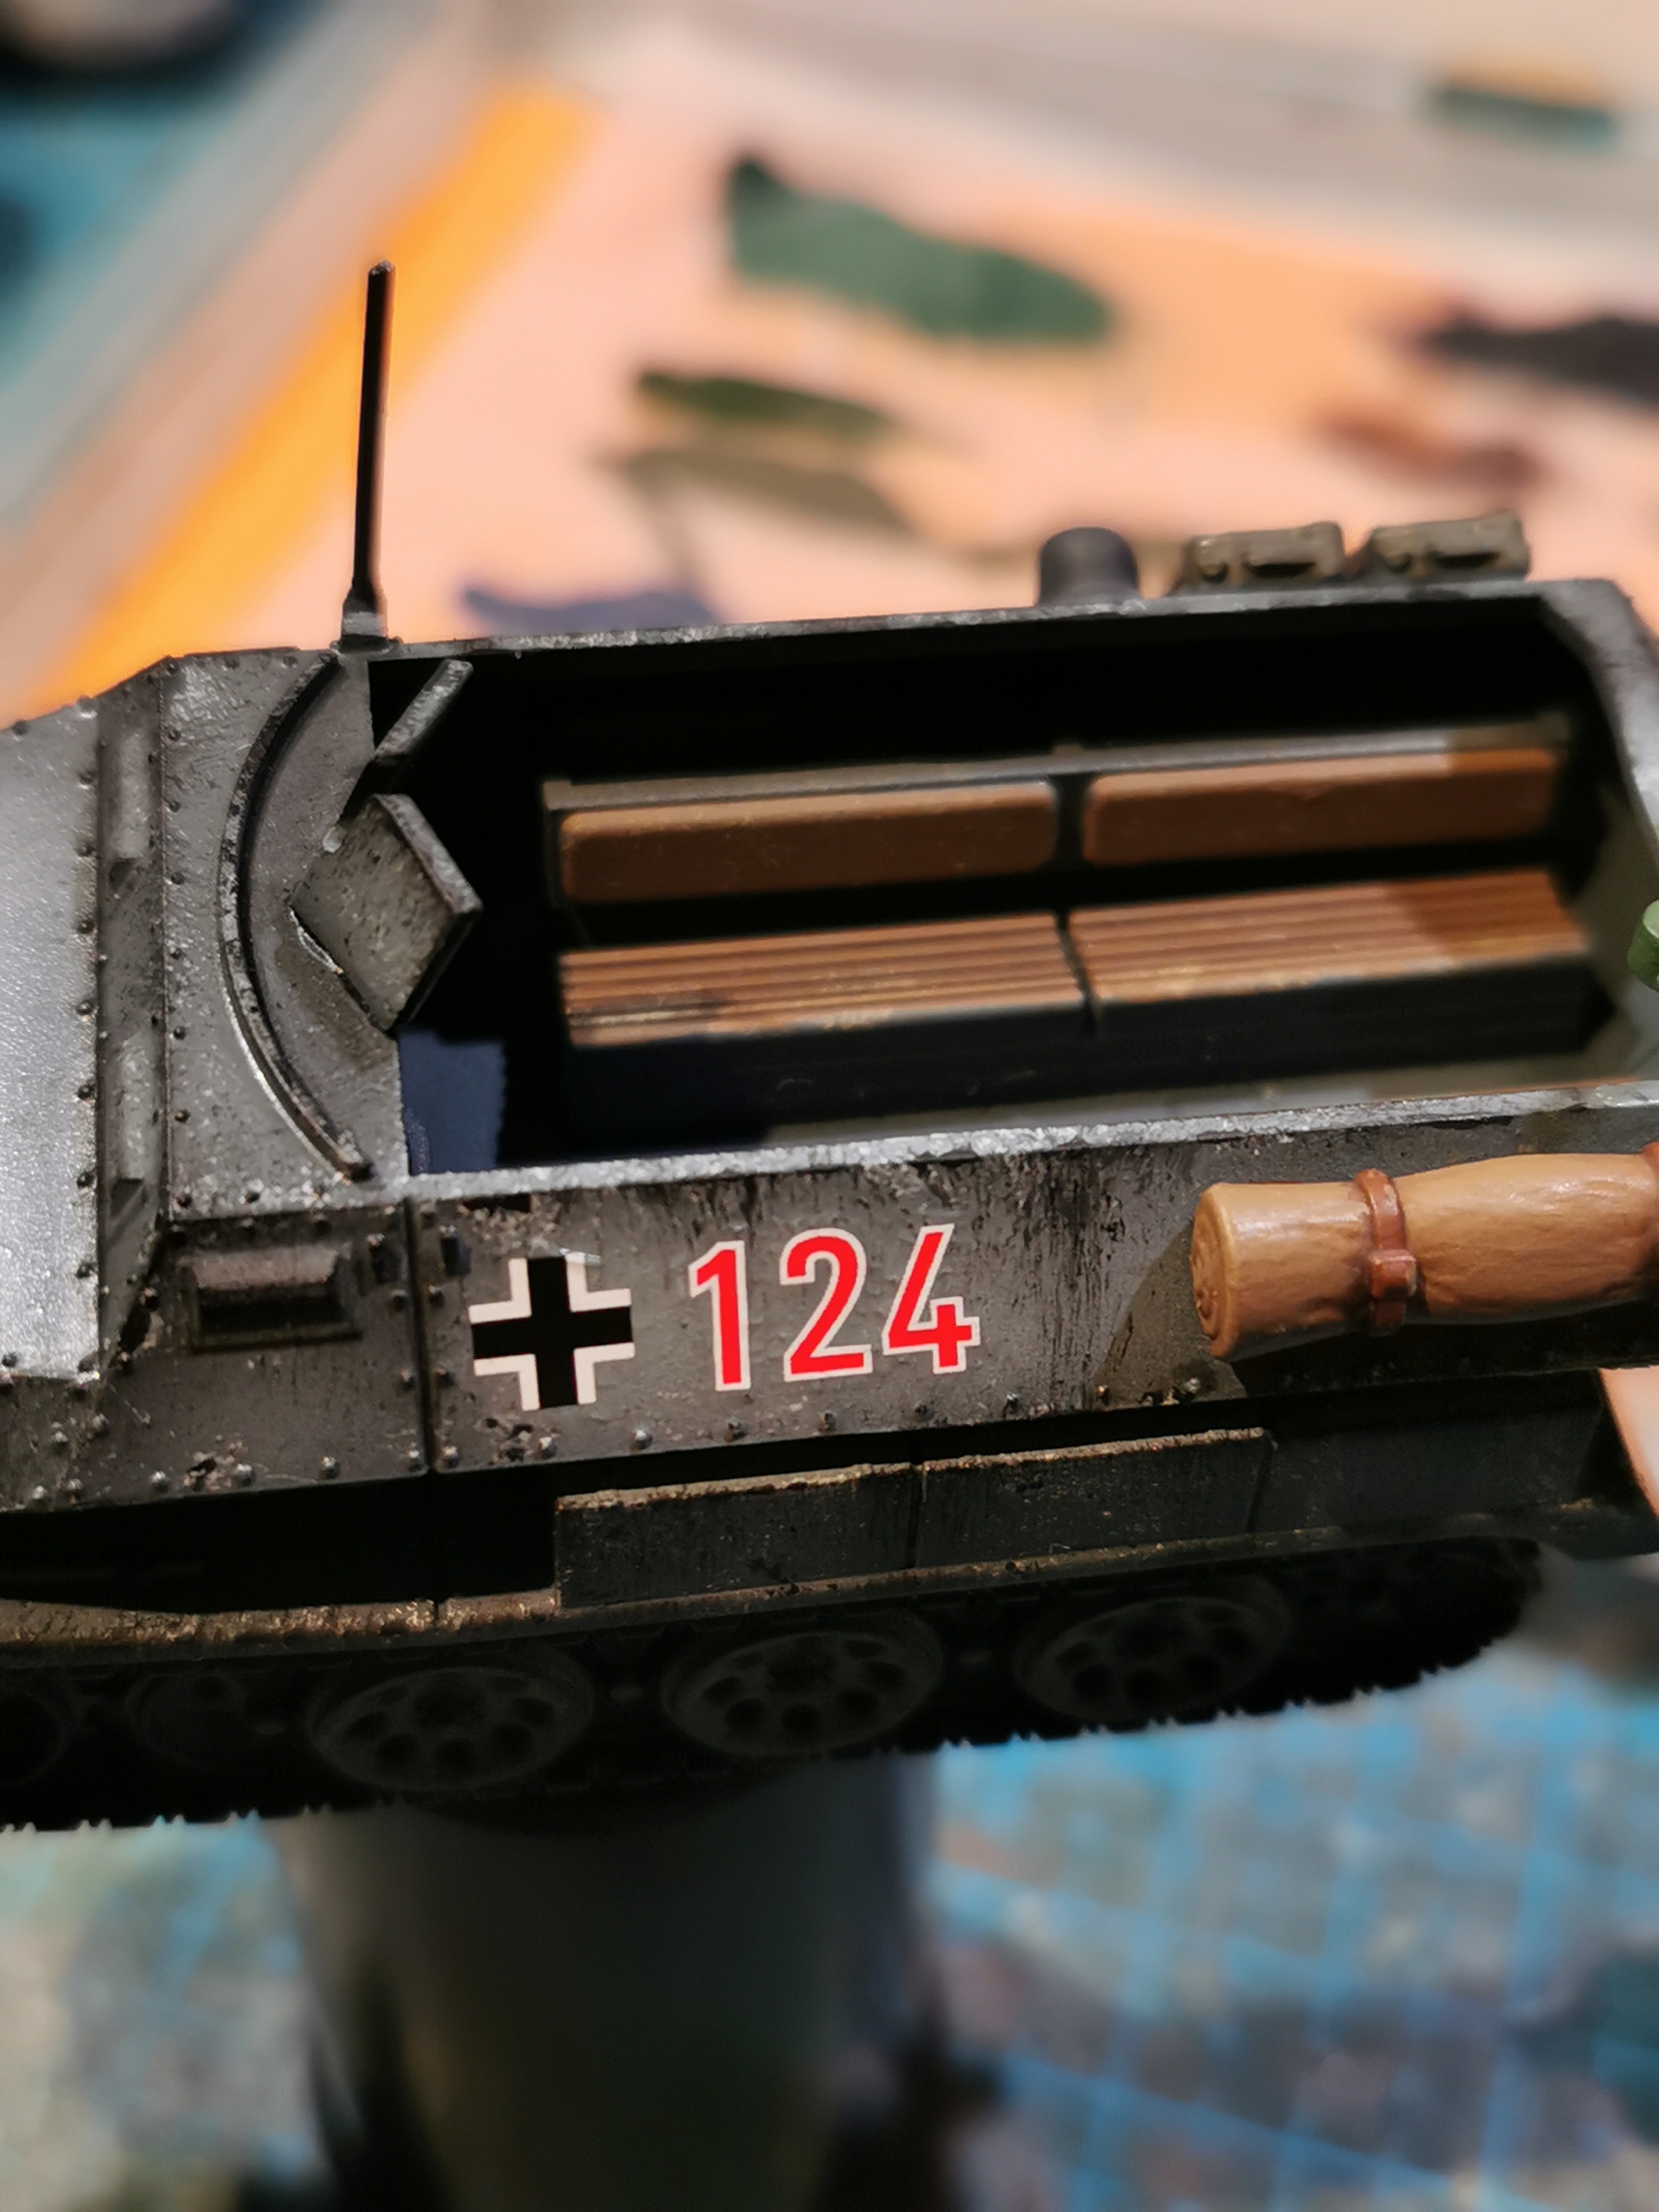
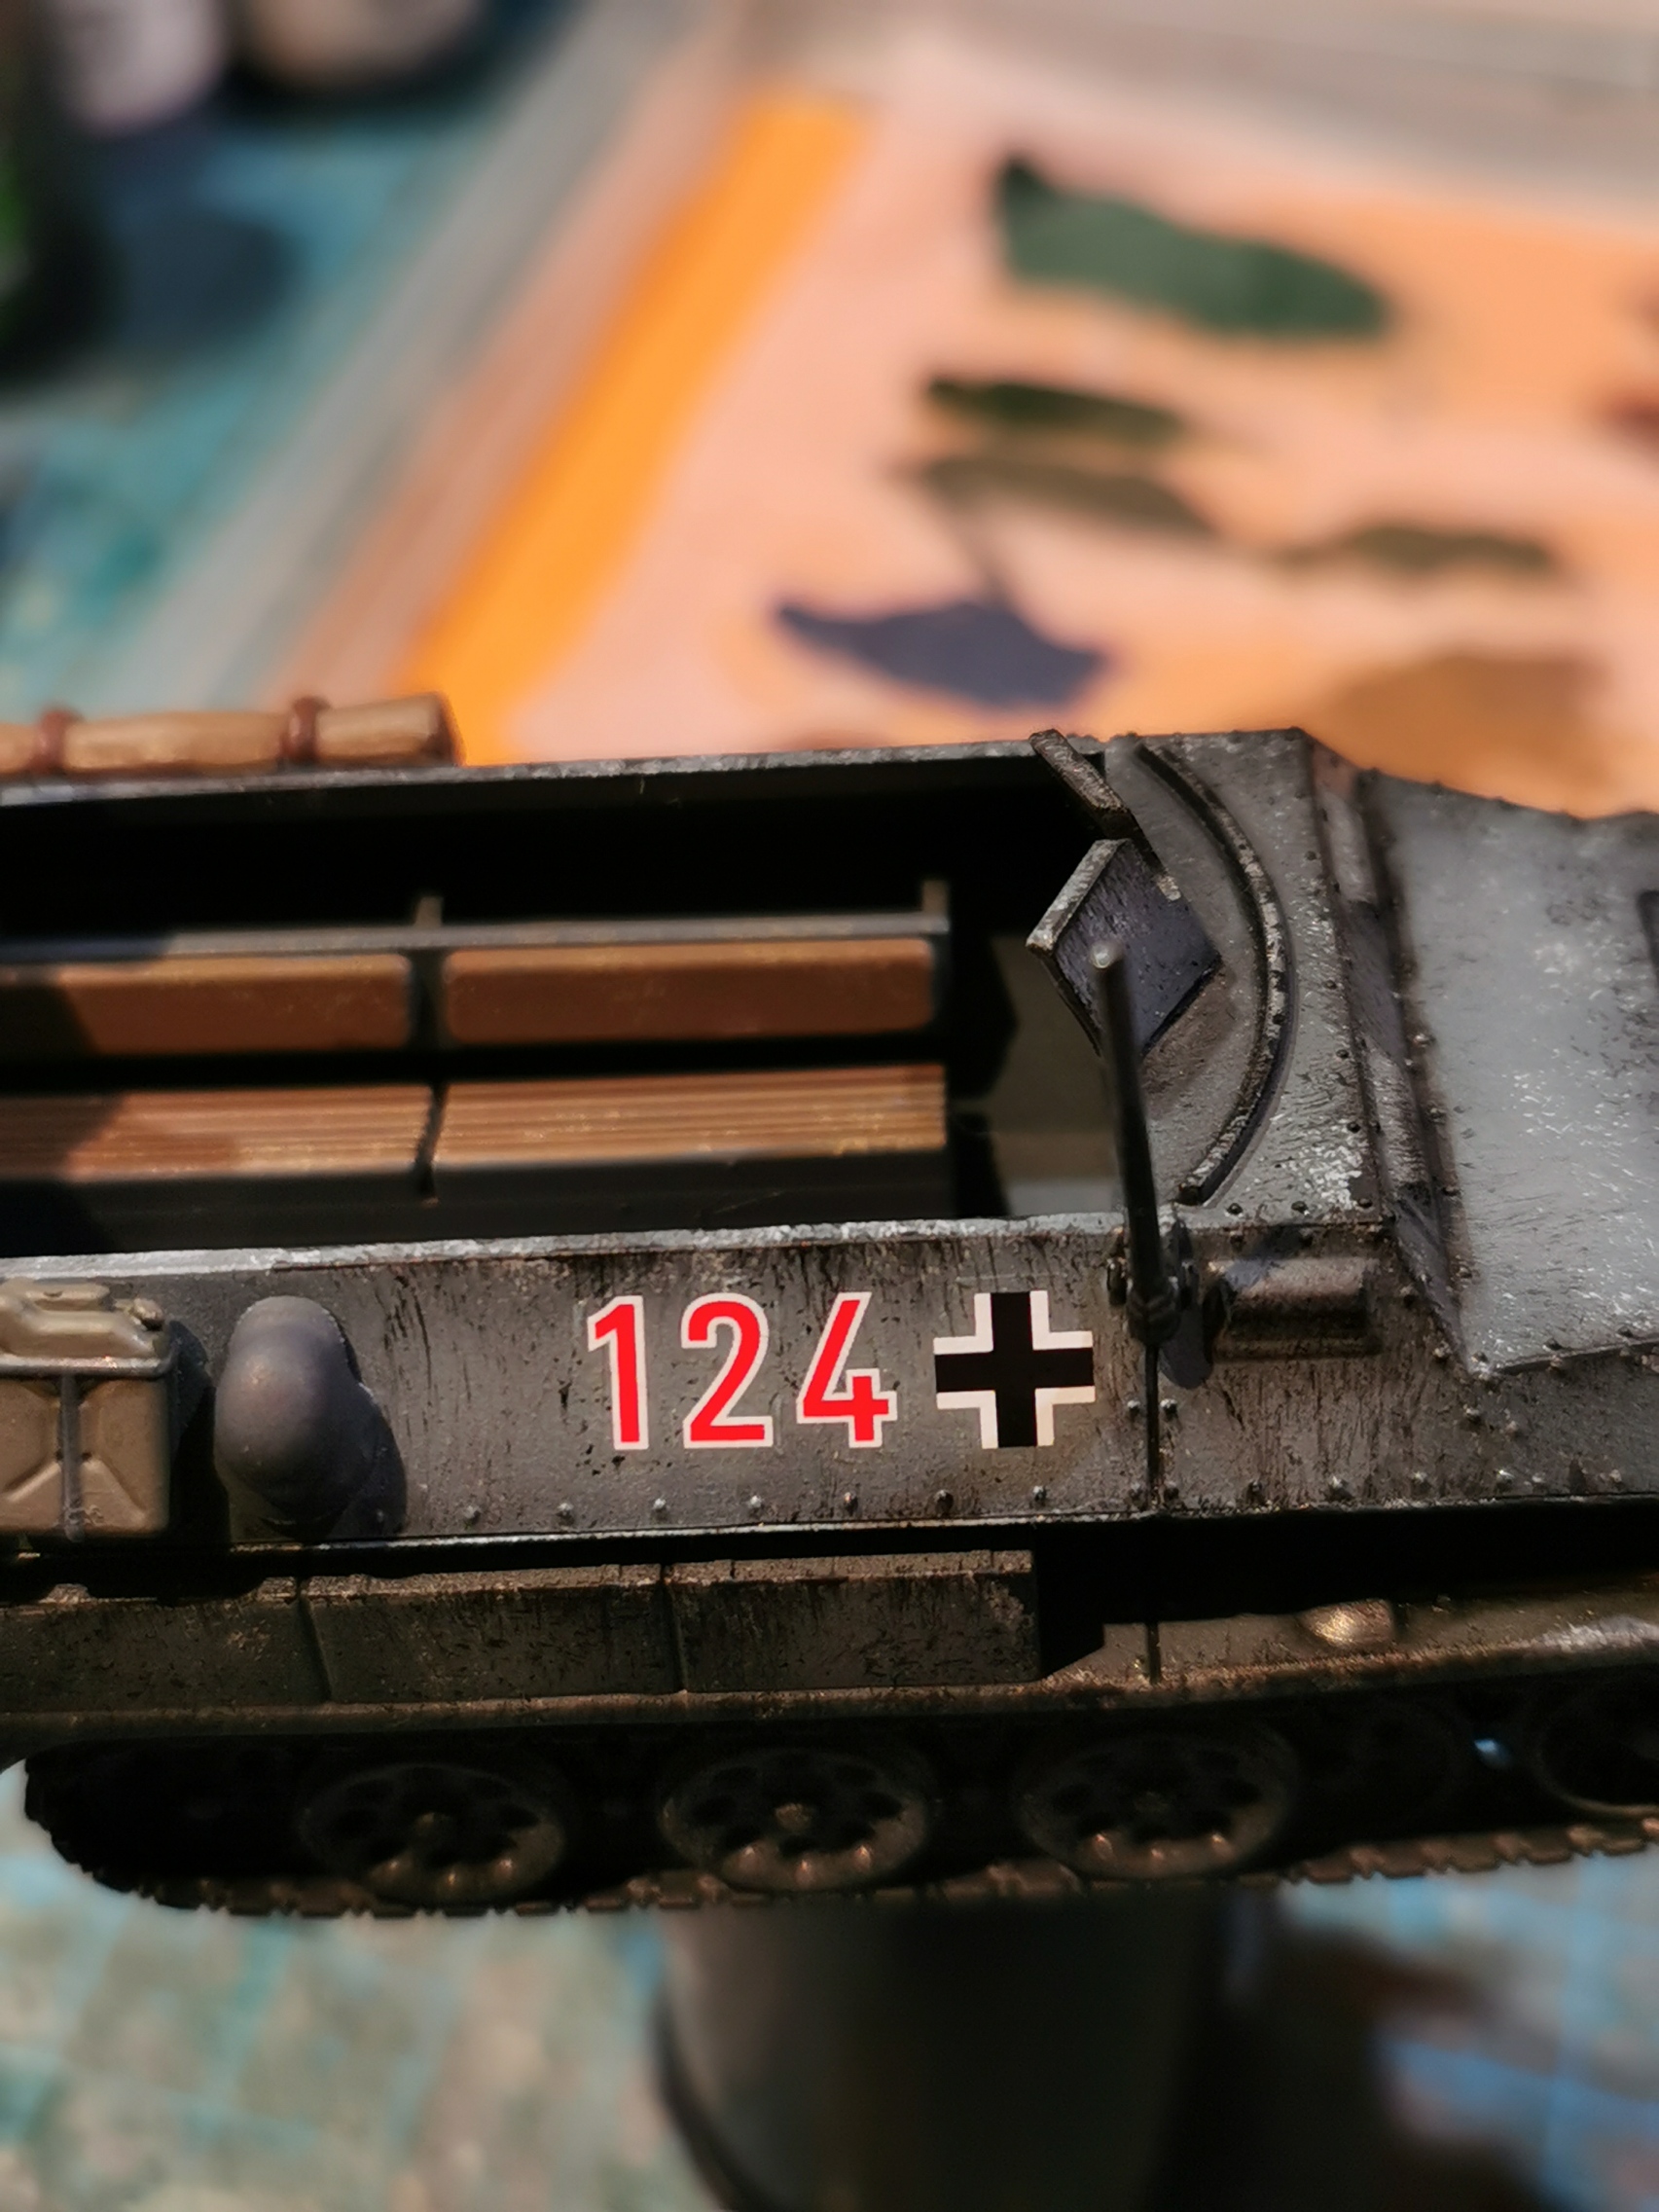
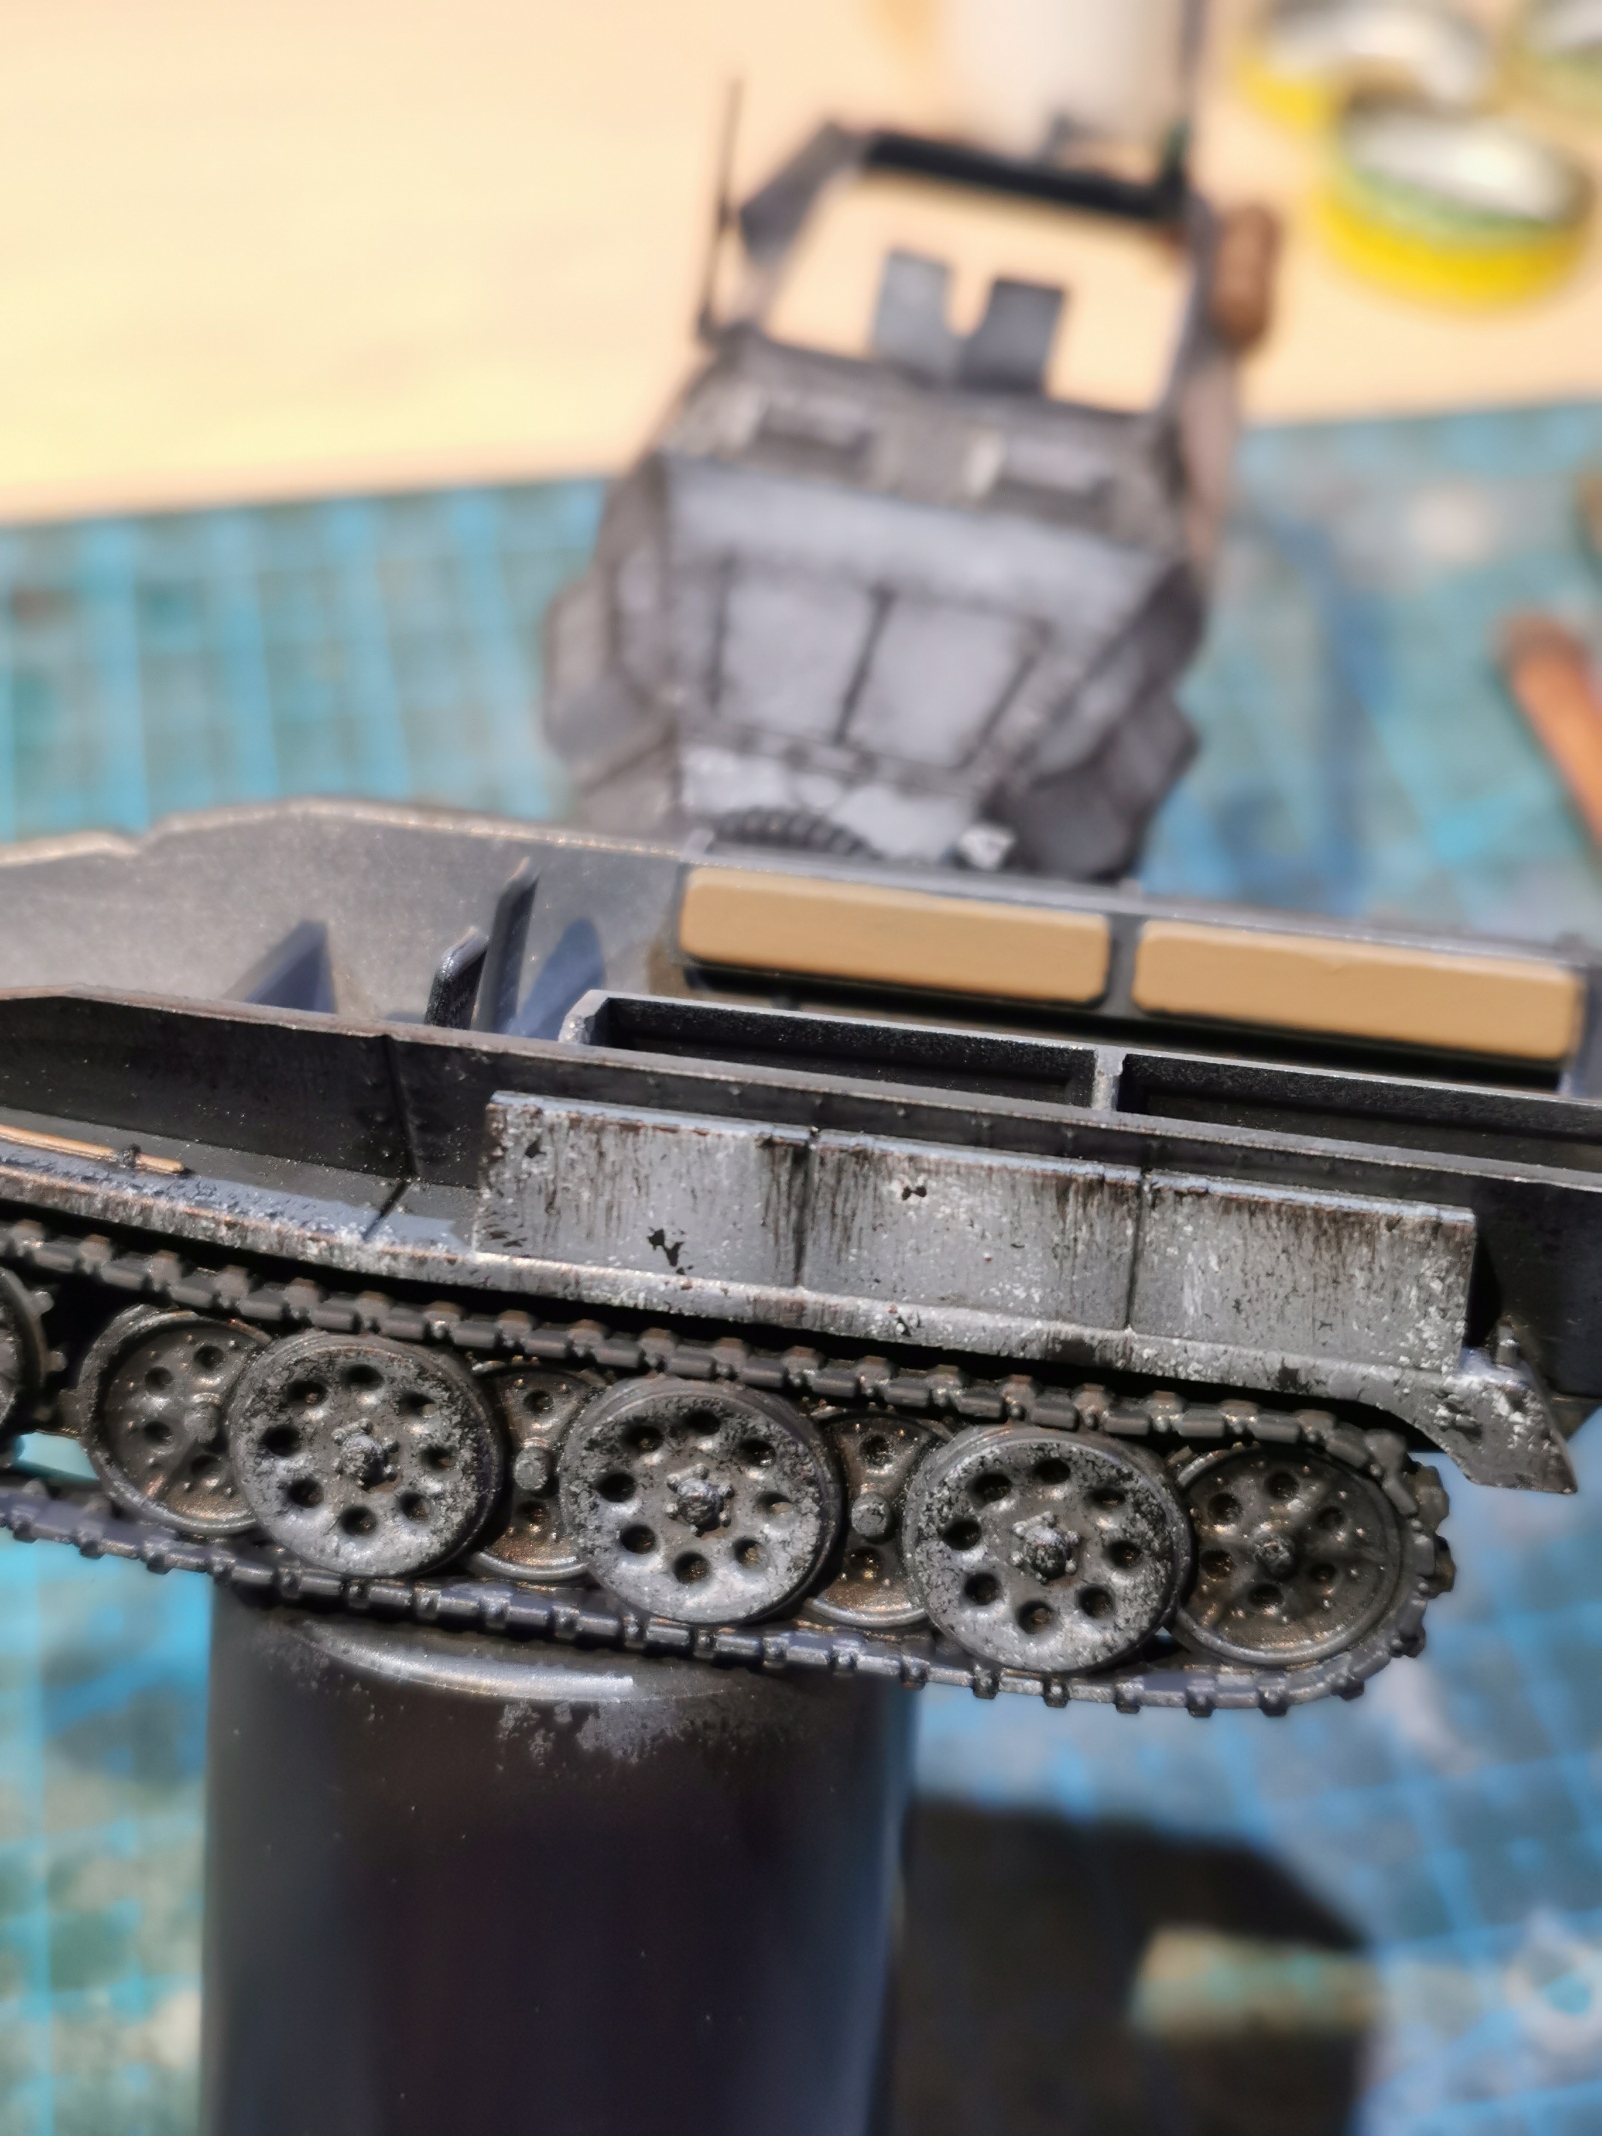
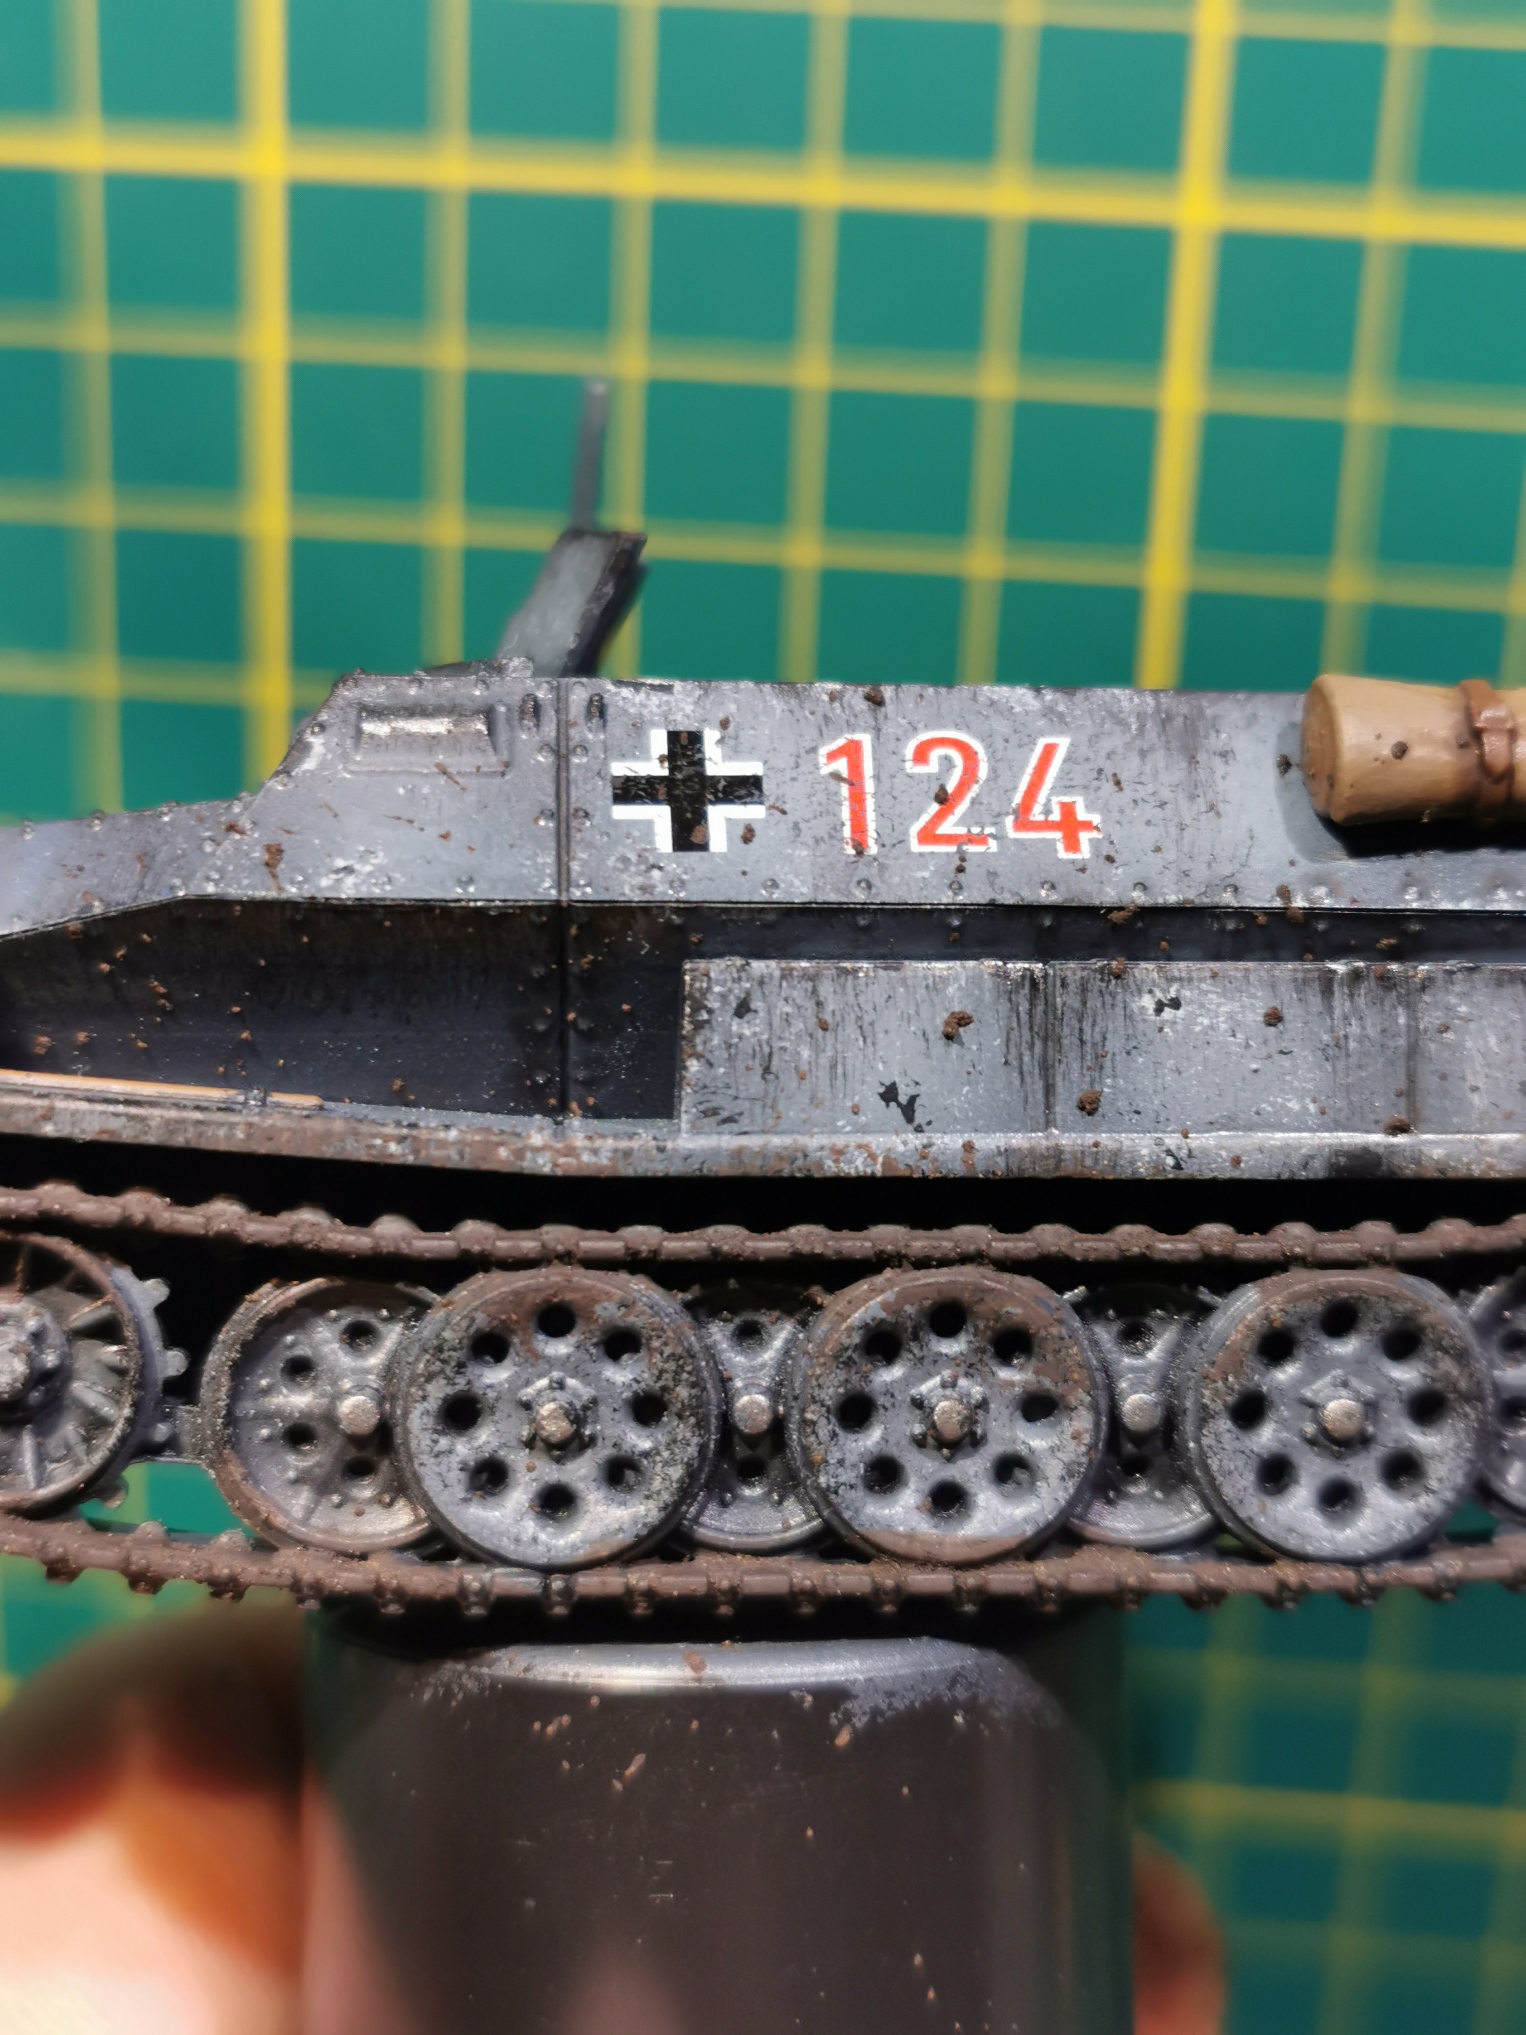
After basecoating was done I gave the model a drybrush with Citadel Administratum Grey. I sponged on some chipping effects using Citadel Ulthuan grey and filled some of the spots with Vallejo Model Colour German Grey. I then painted the details on the vehicle such as the MGs, the tools, the jerrycans and the tires and tracks.
I continued by covering the whole mini in gloss varnish and then did a panel wash with black oil wash.
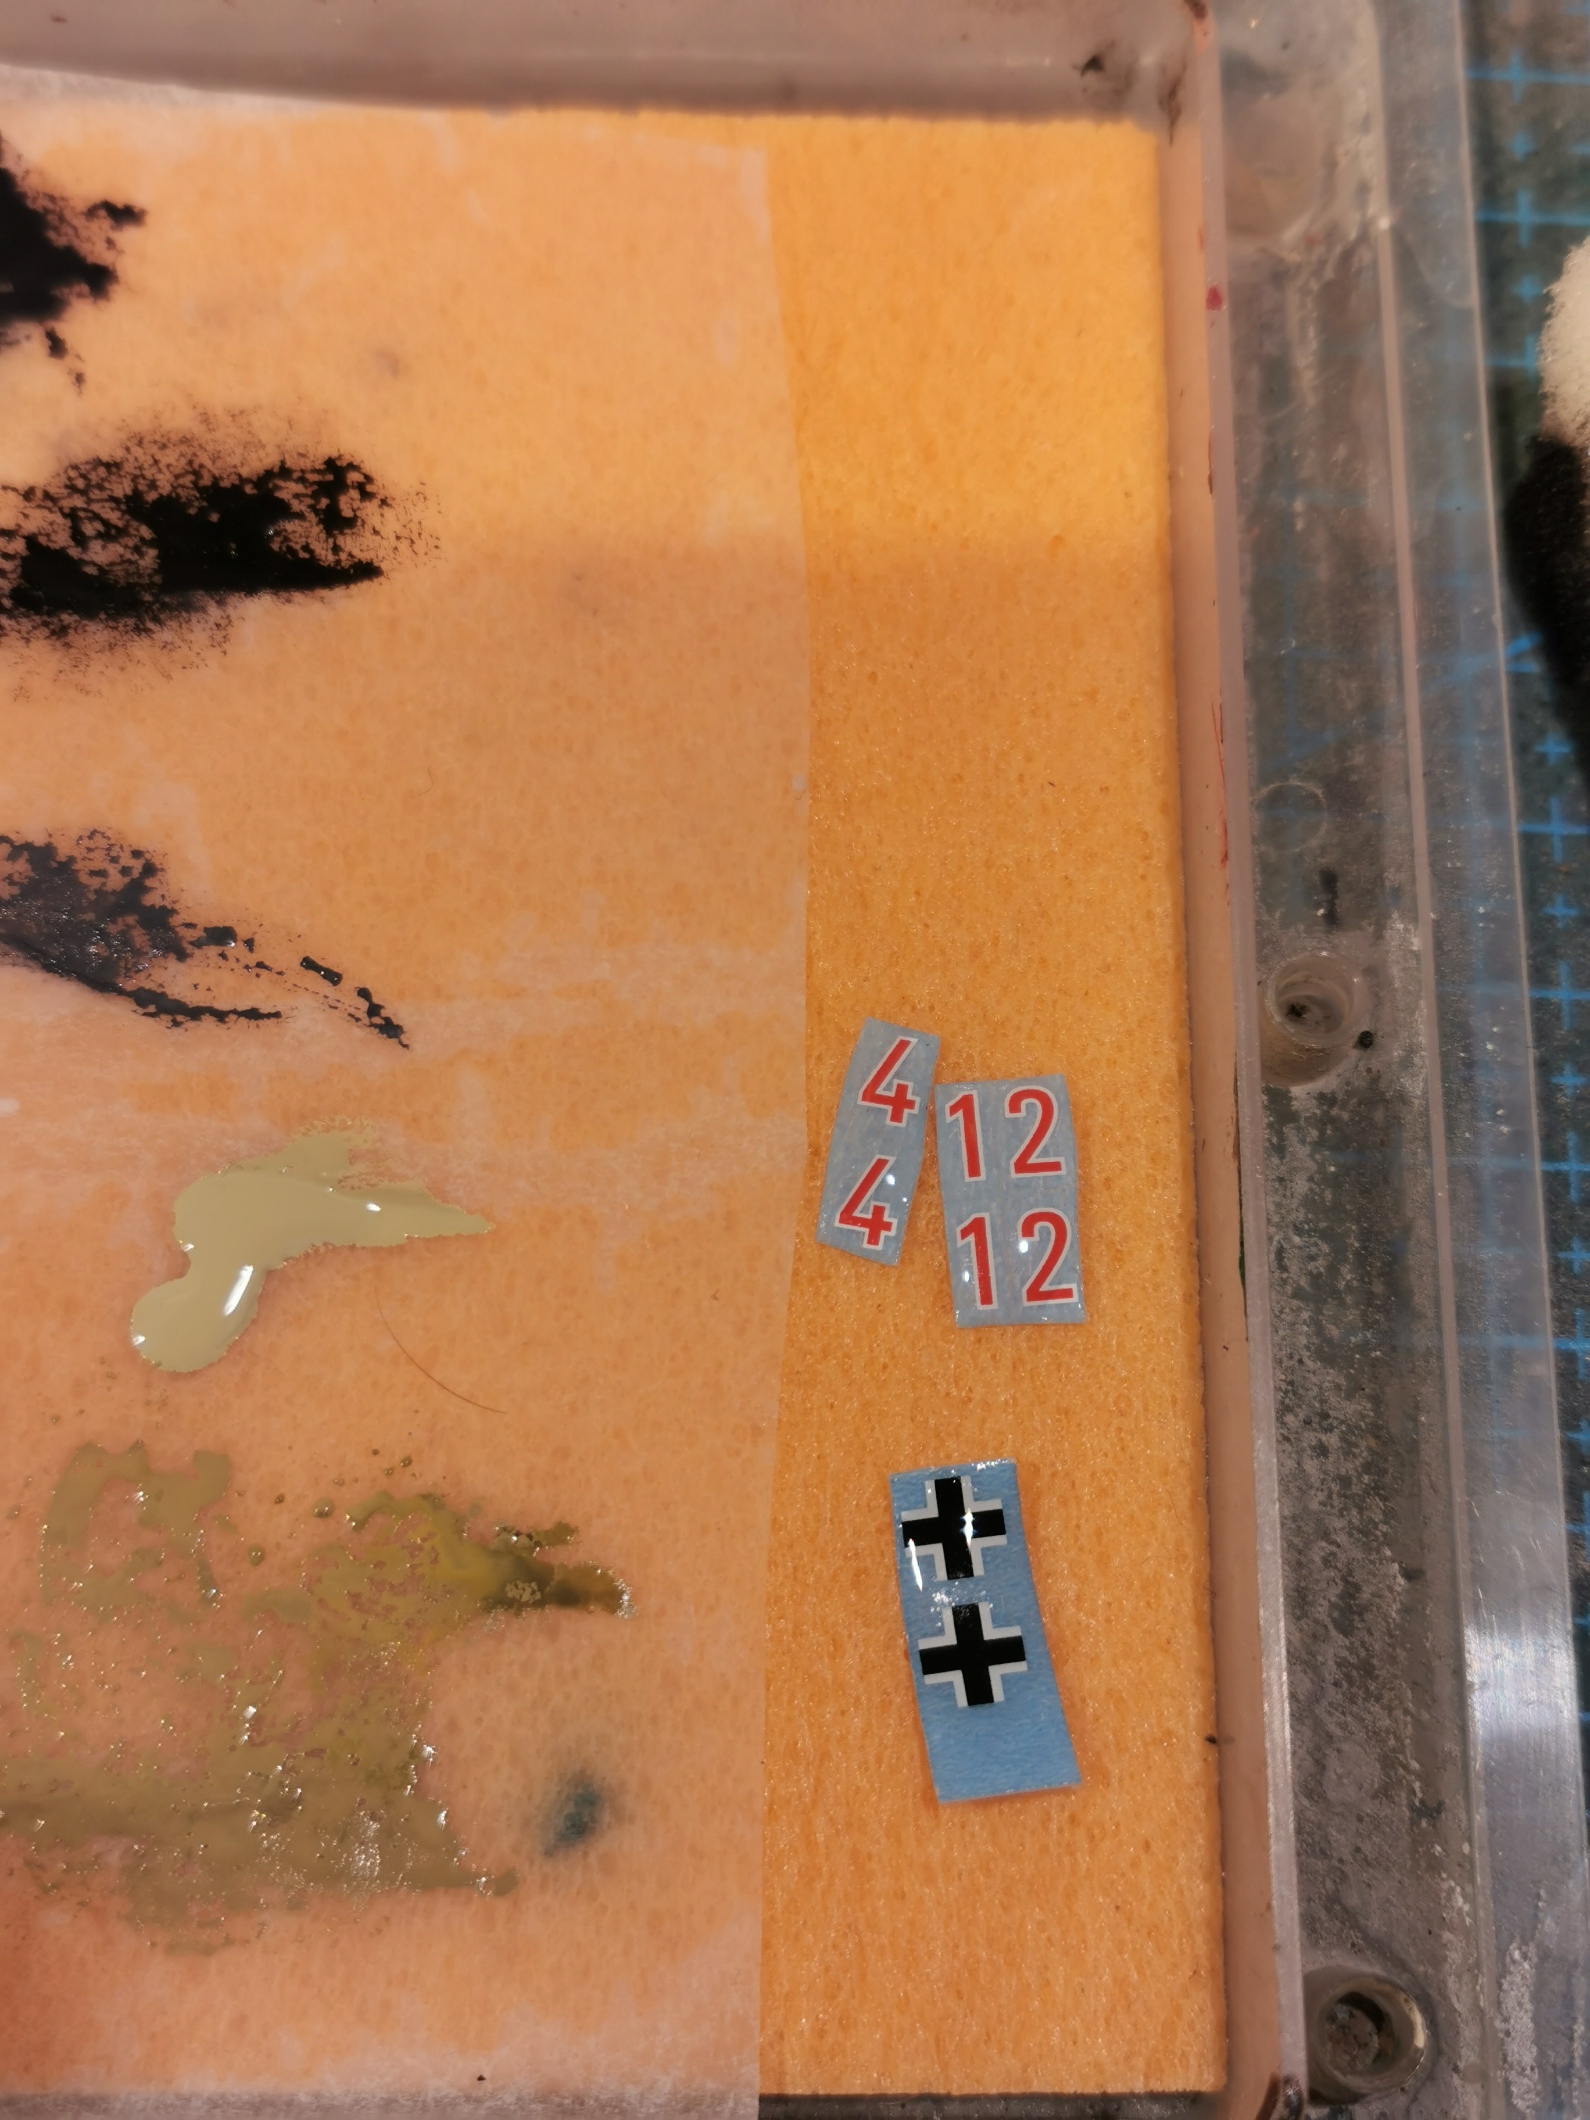
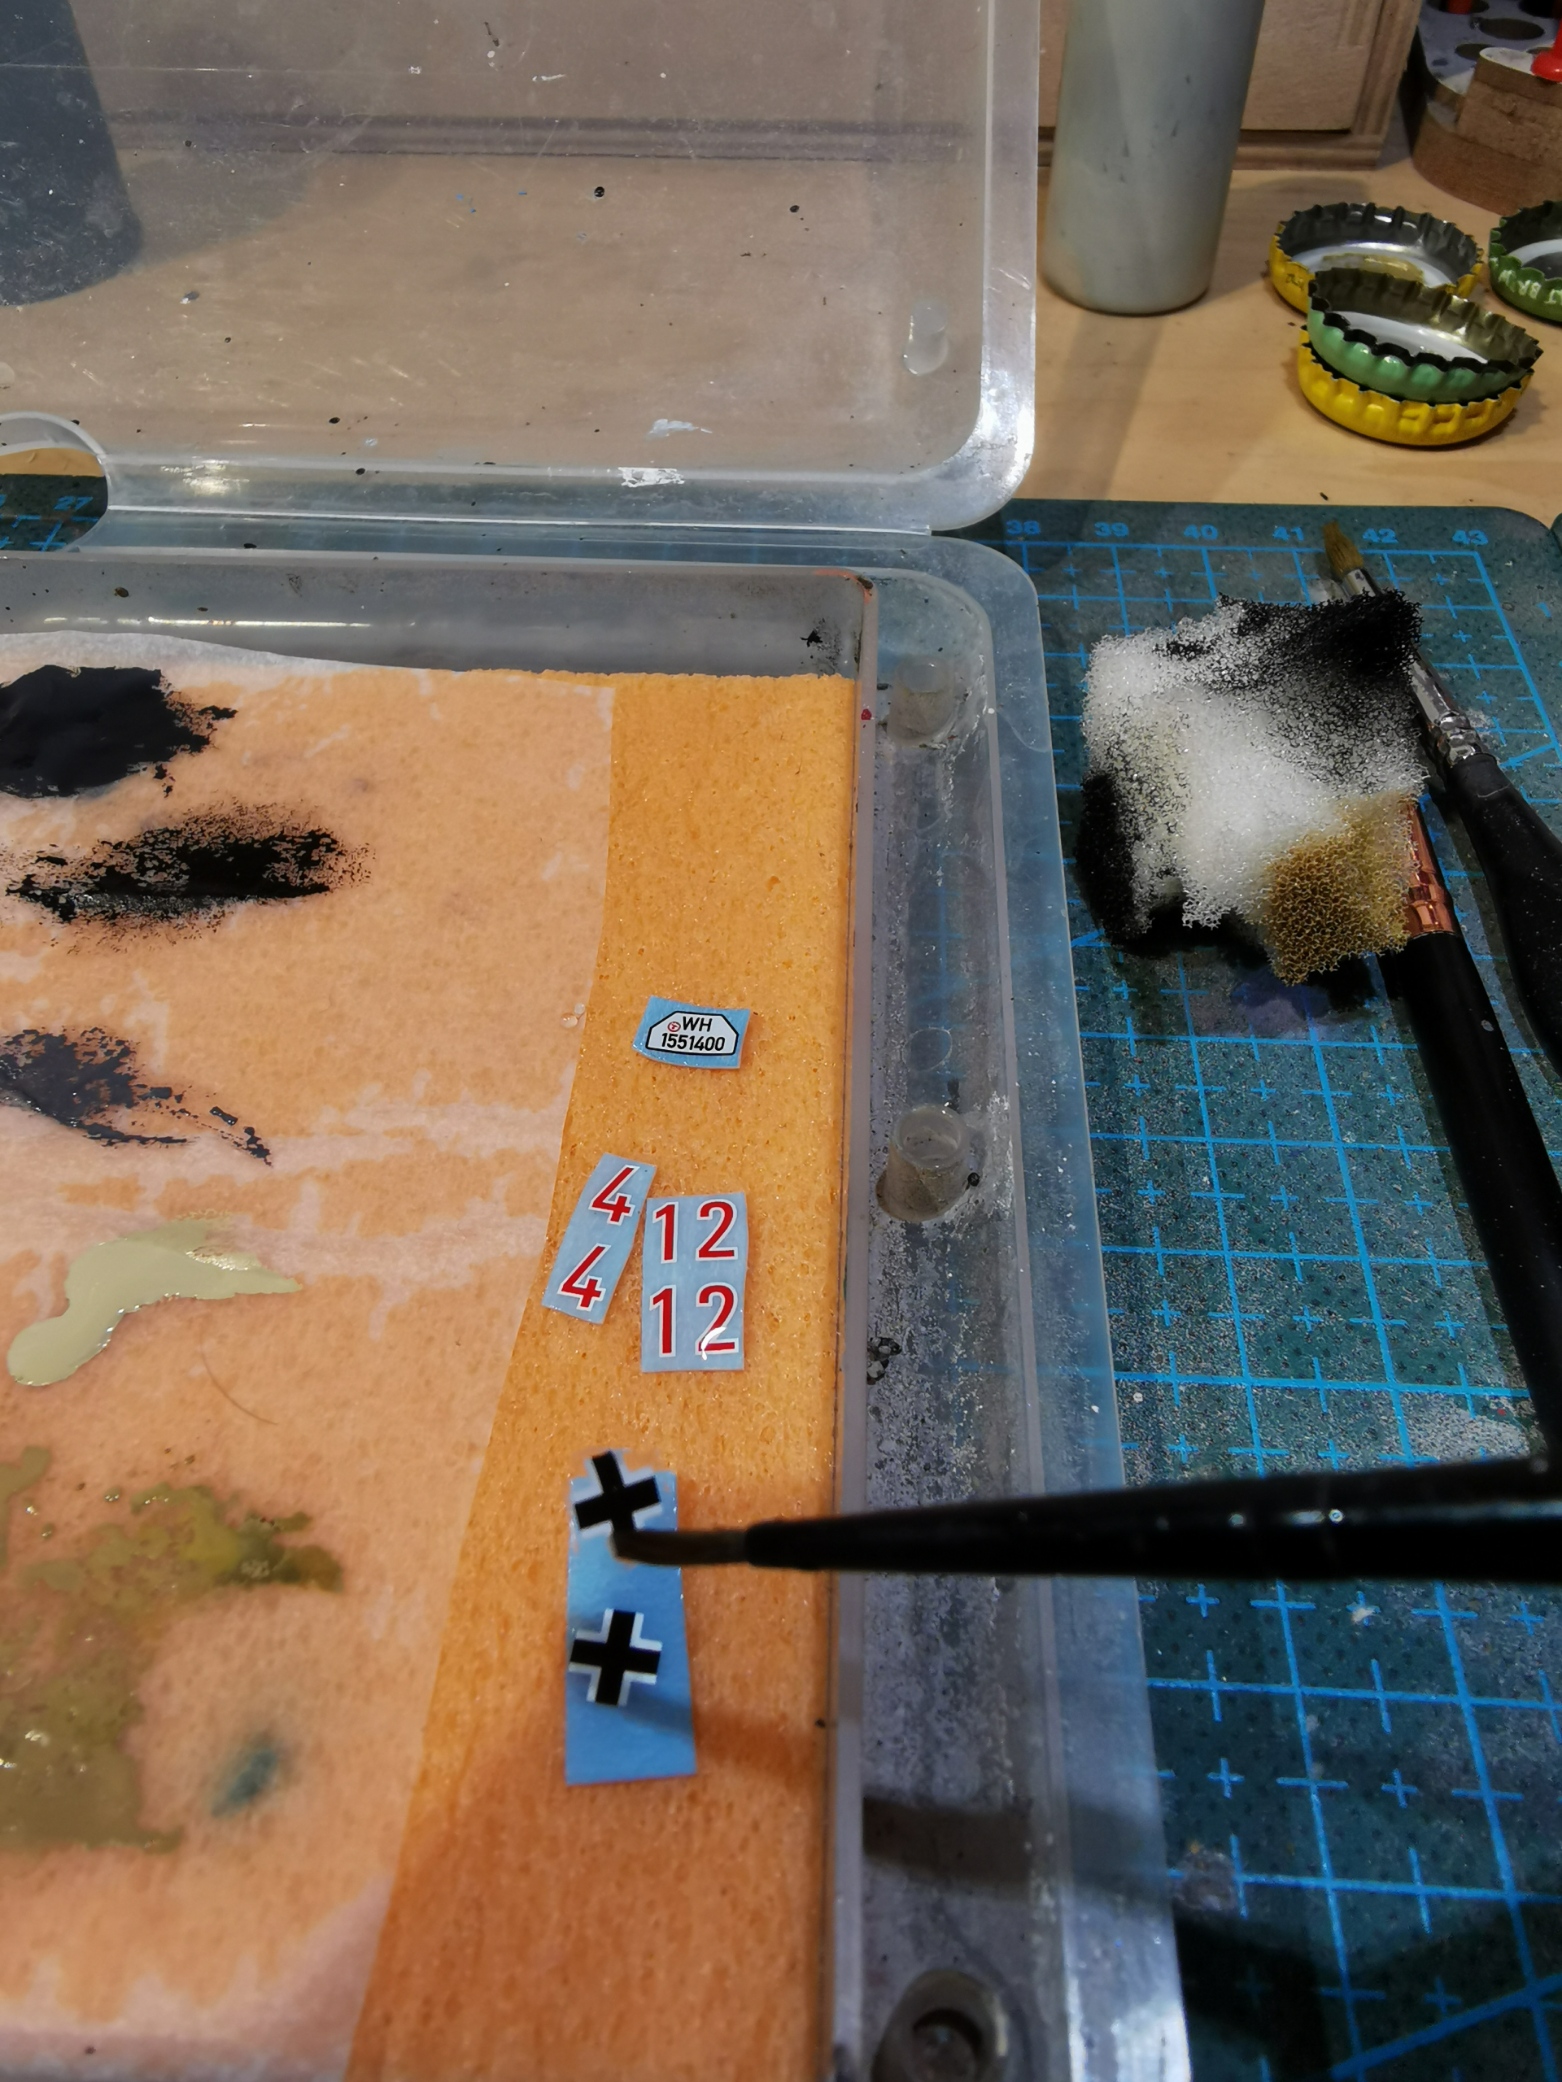
The decals were first put on the moist sponge of my wet palette as using this method it won’t float away or drown in a glass of water. I use Micro Set to prepare the surface for the decal on the mini, then put on the decal with a most brush and let it sit for a while. After that I put on Micro Sol to achieve a “painted on” look.
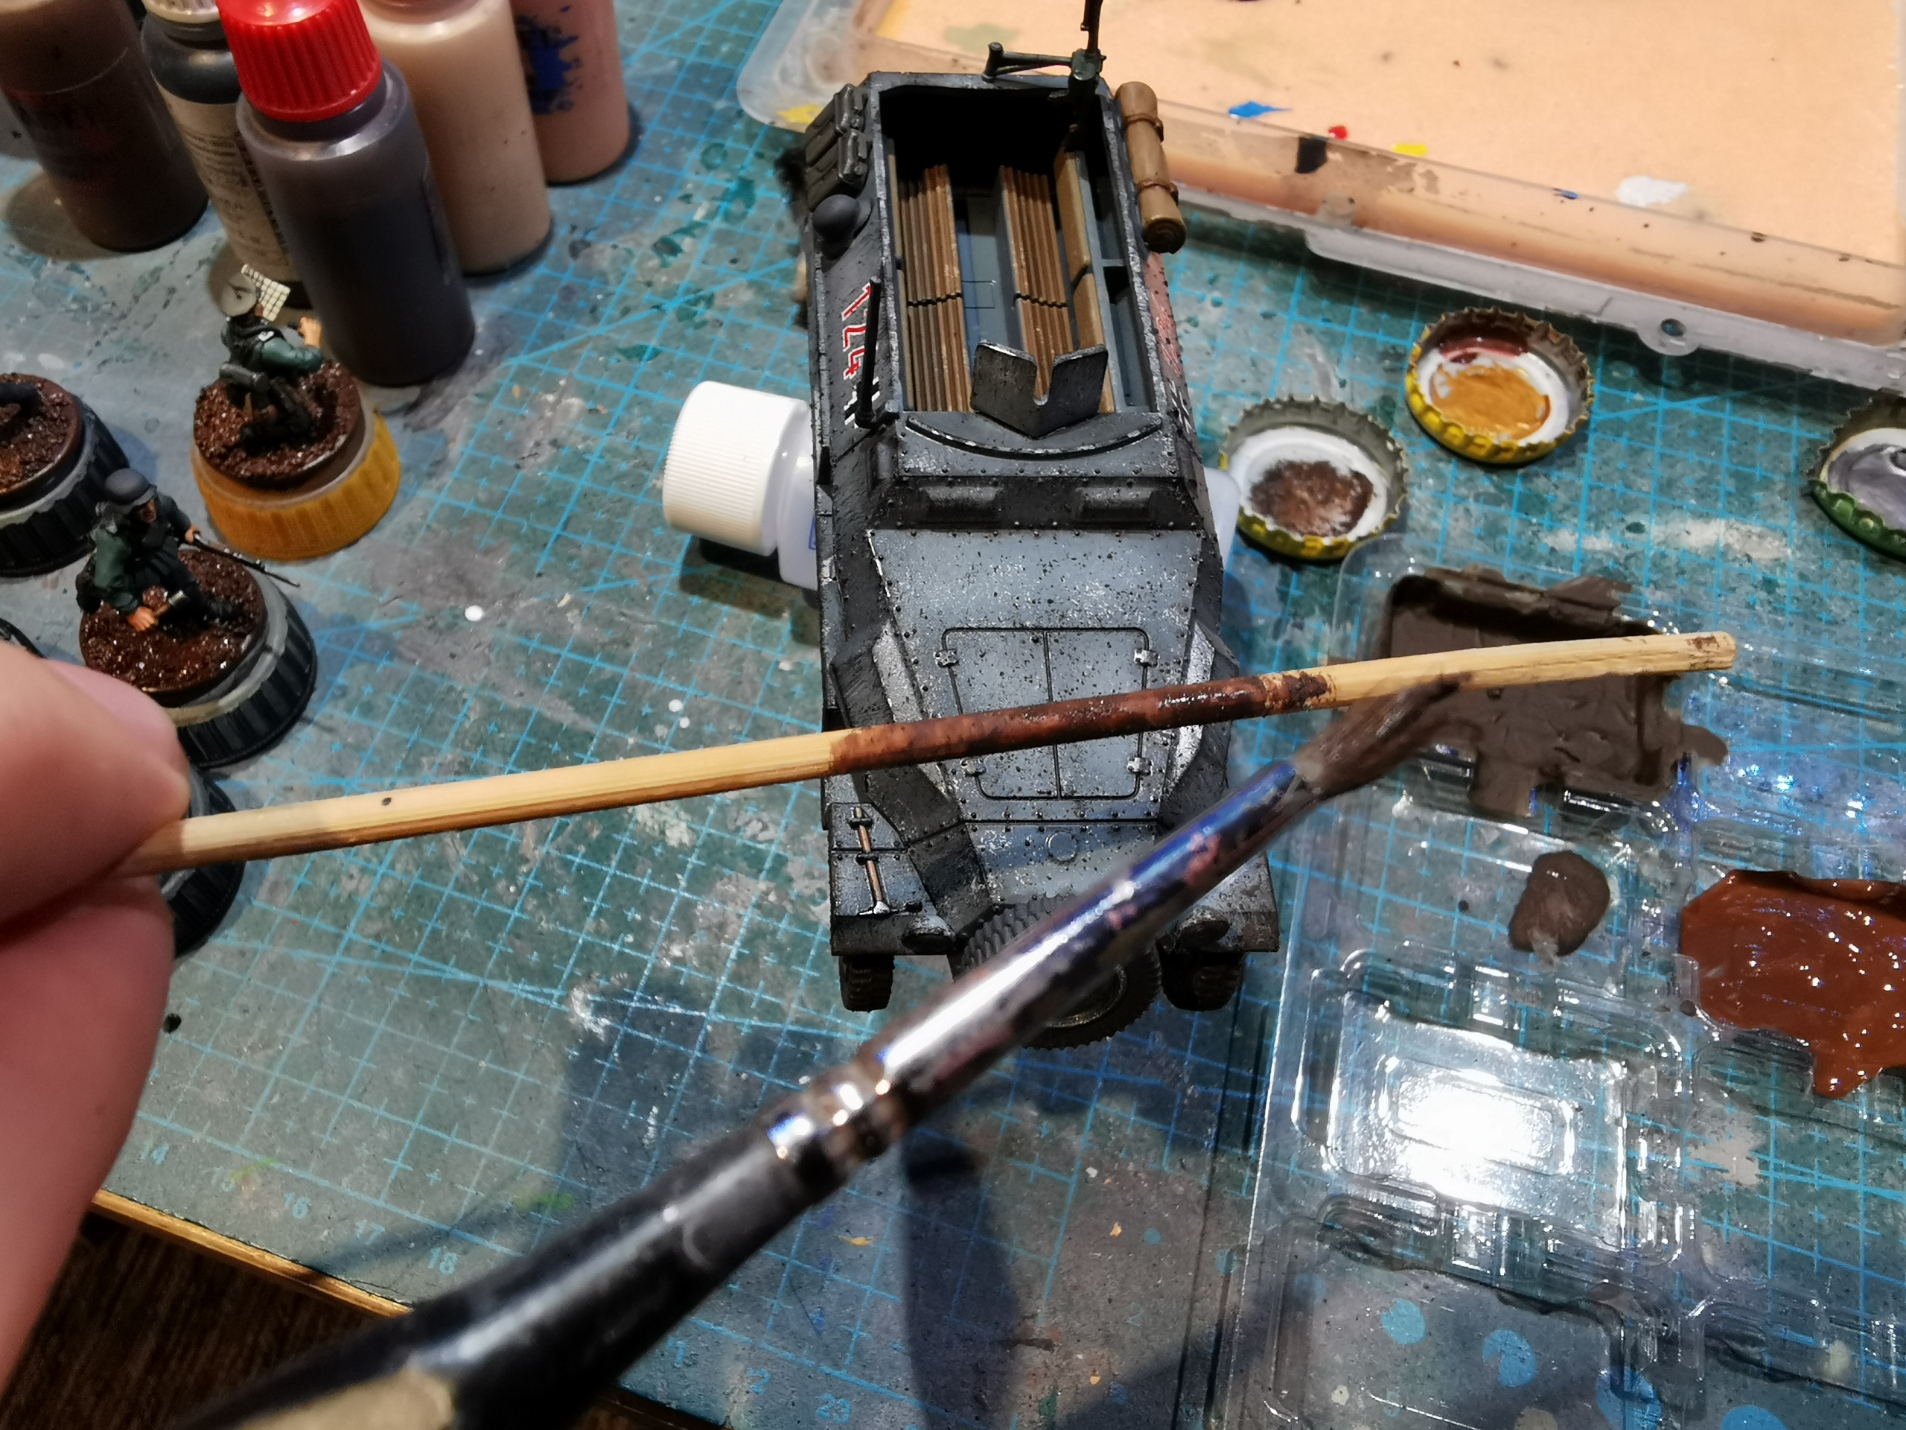
The last step was the streaking grime done by a sponge using black paint and wiping it from edges vertically downwards. I then covered the tires and the tracks with Citadel Typhus Corrosion and sprinkled it on the vehicle from an upward angle by pushing a brush loaded with typhus corrosion against a small cocktailstick at a 90 degree angle as shown below.
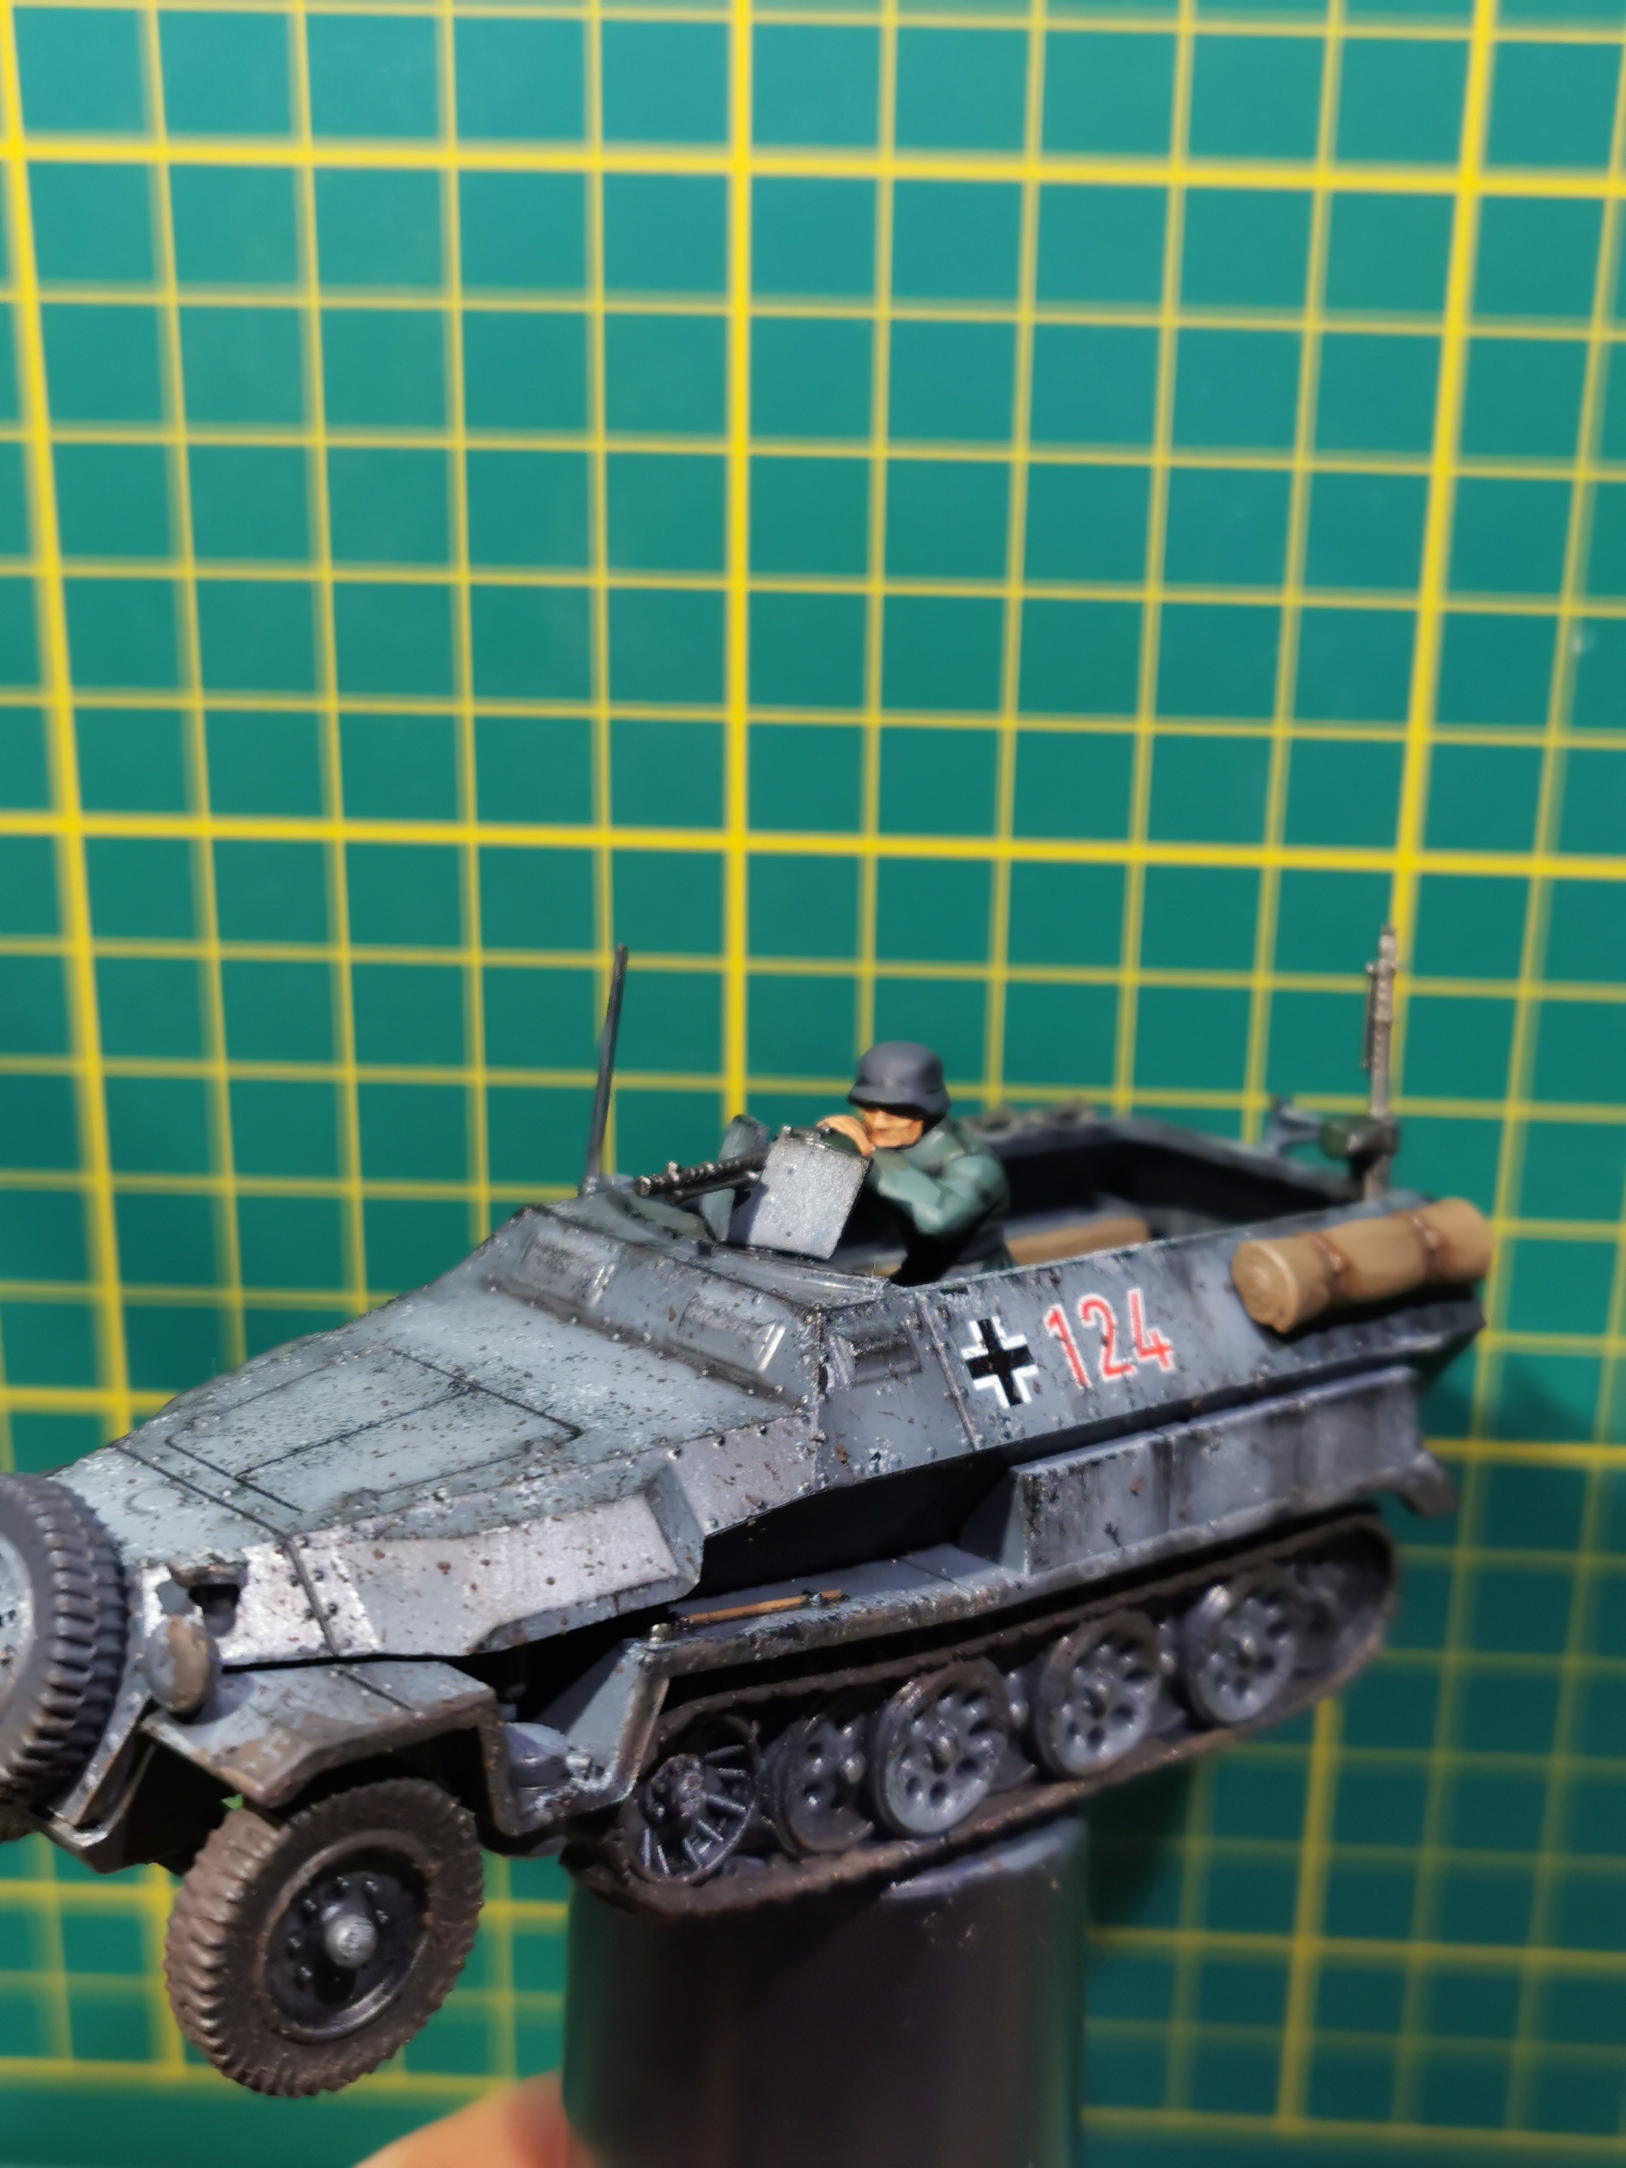
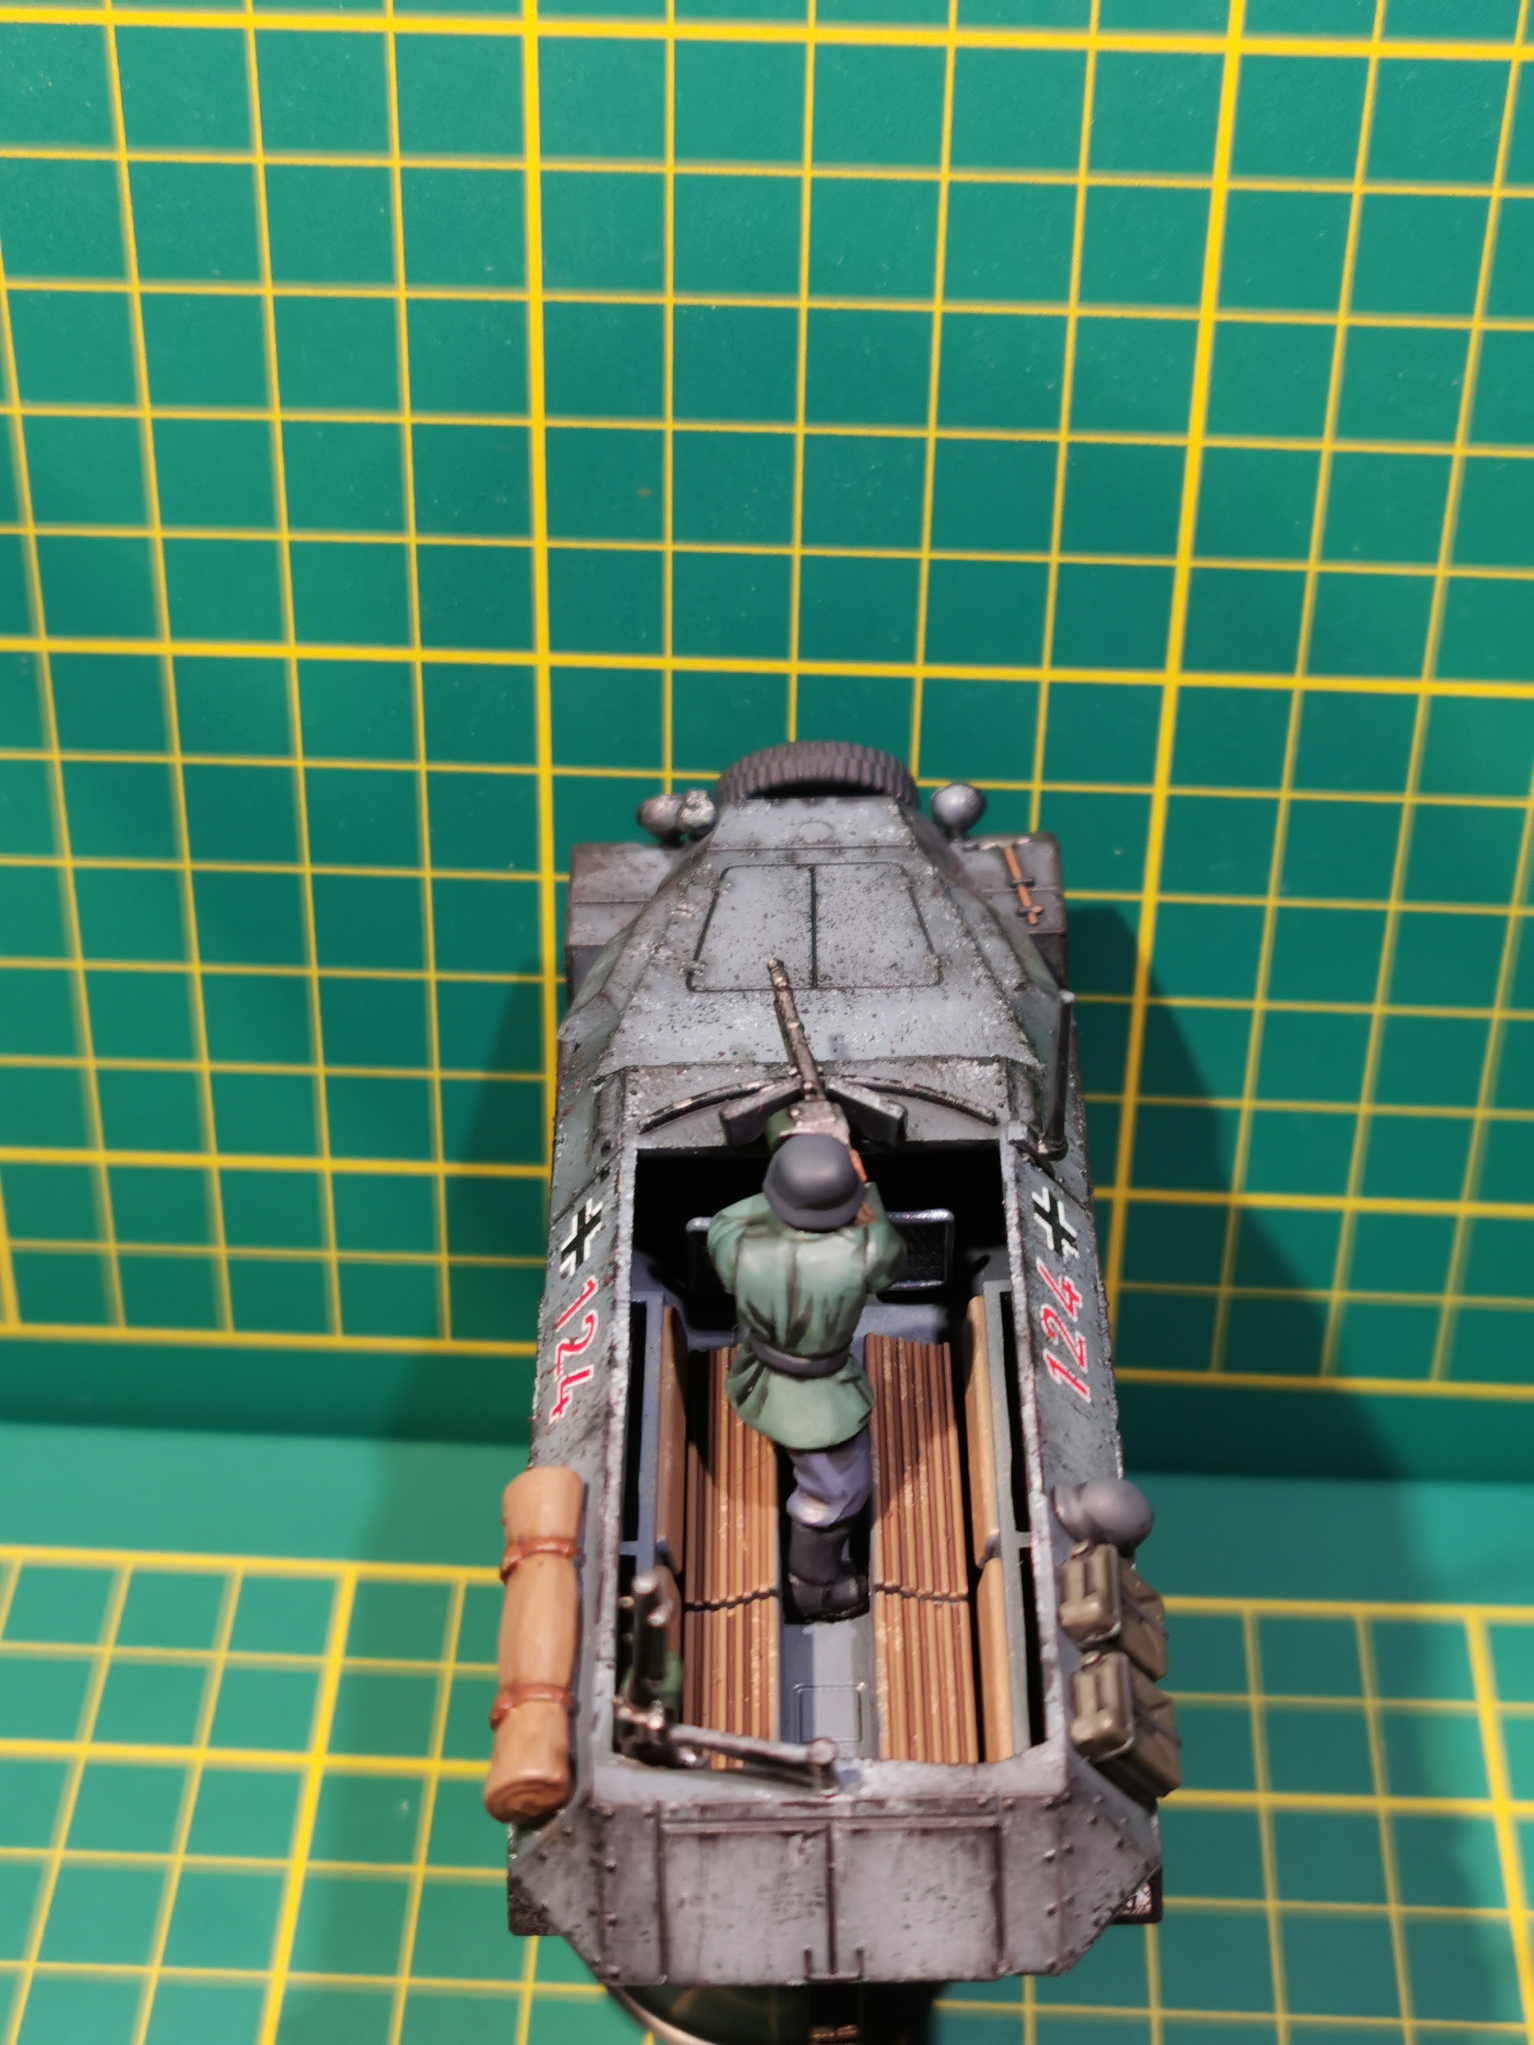
The last step was a coat of mat varnish and inserting the MG gunner.


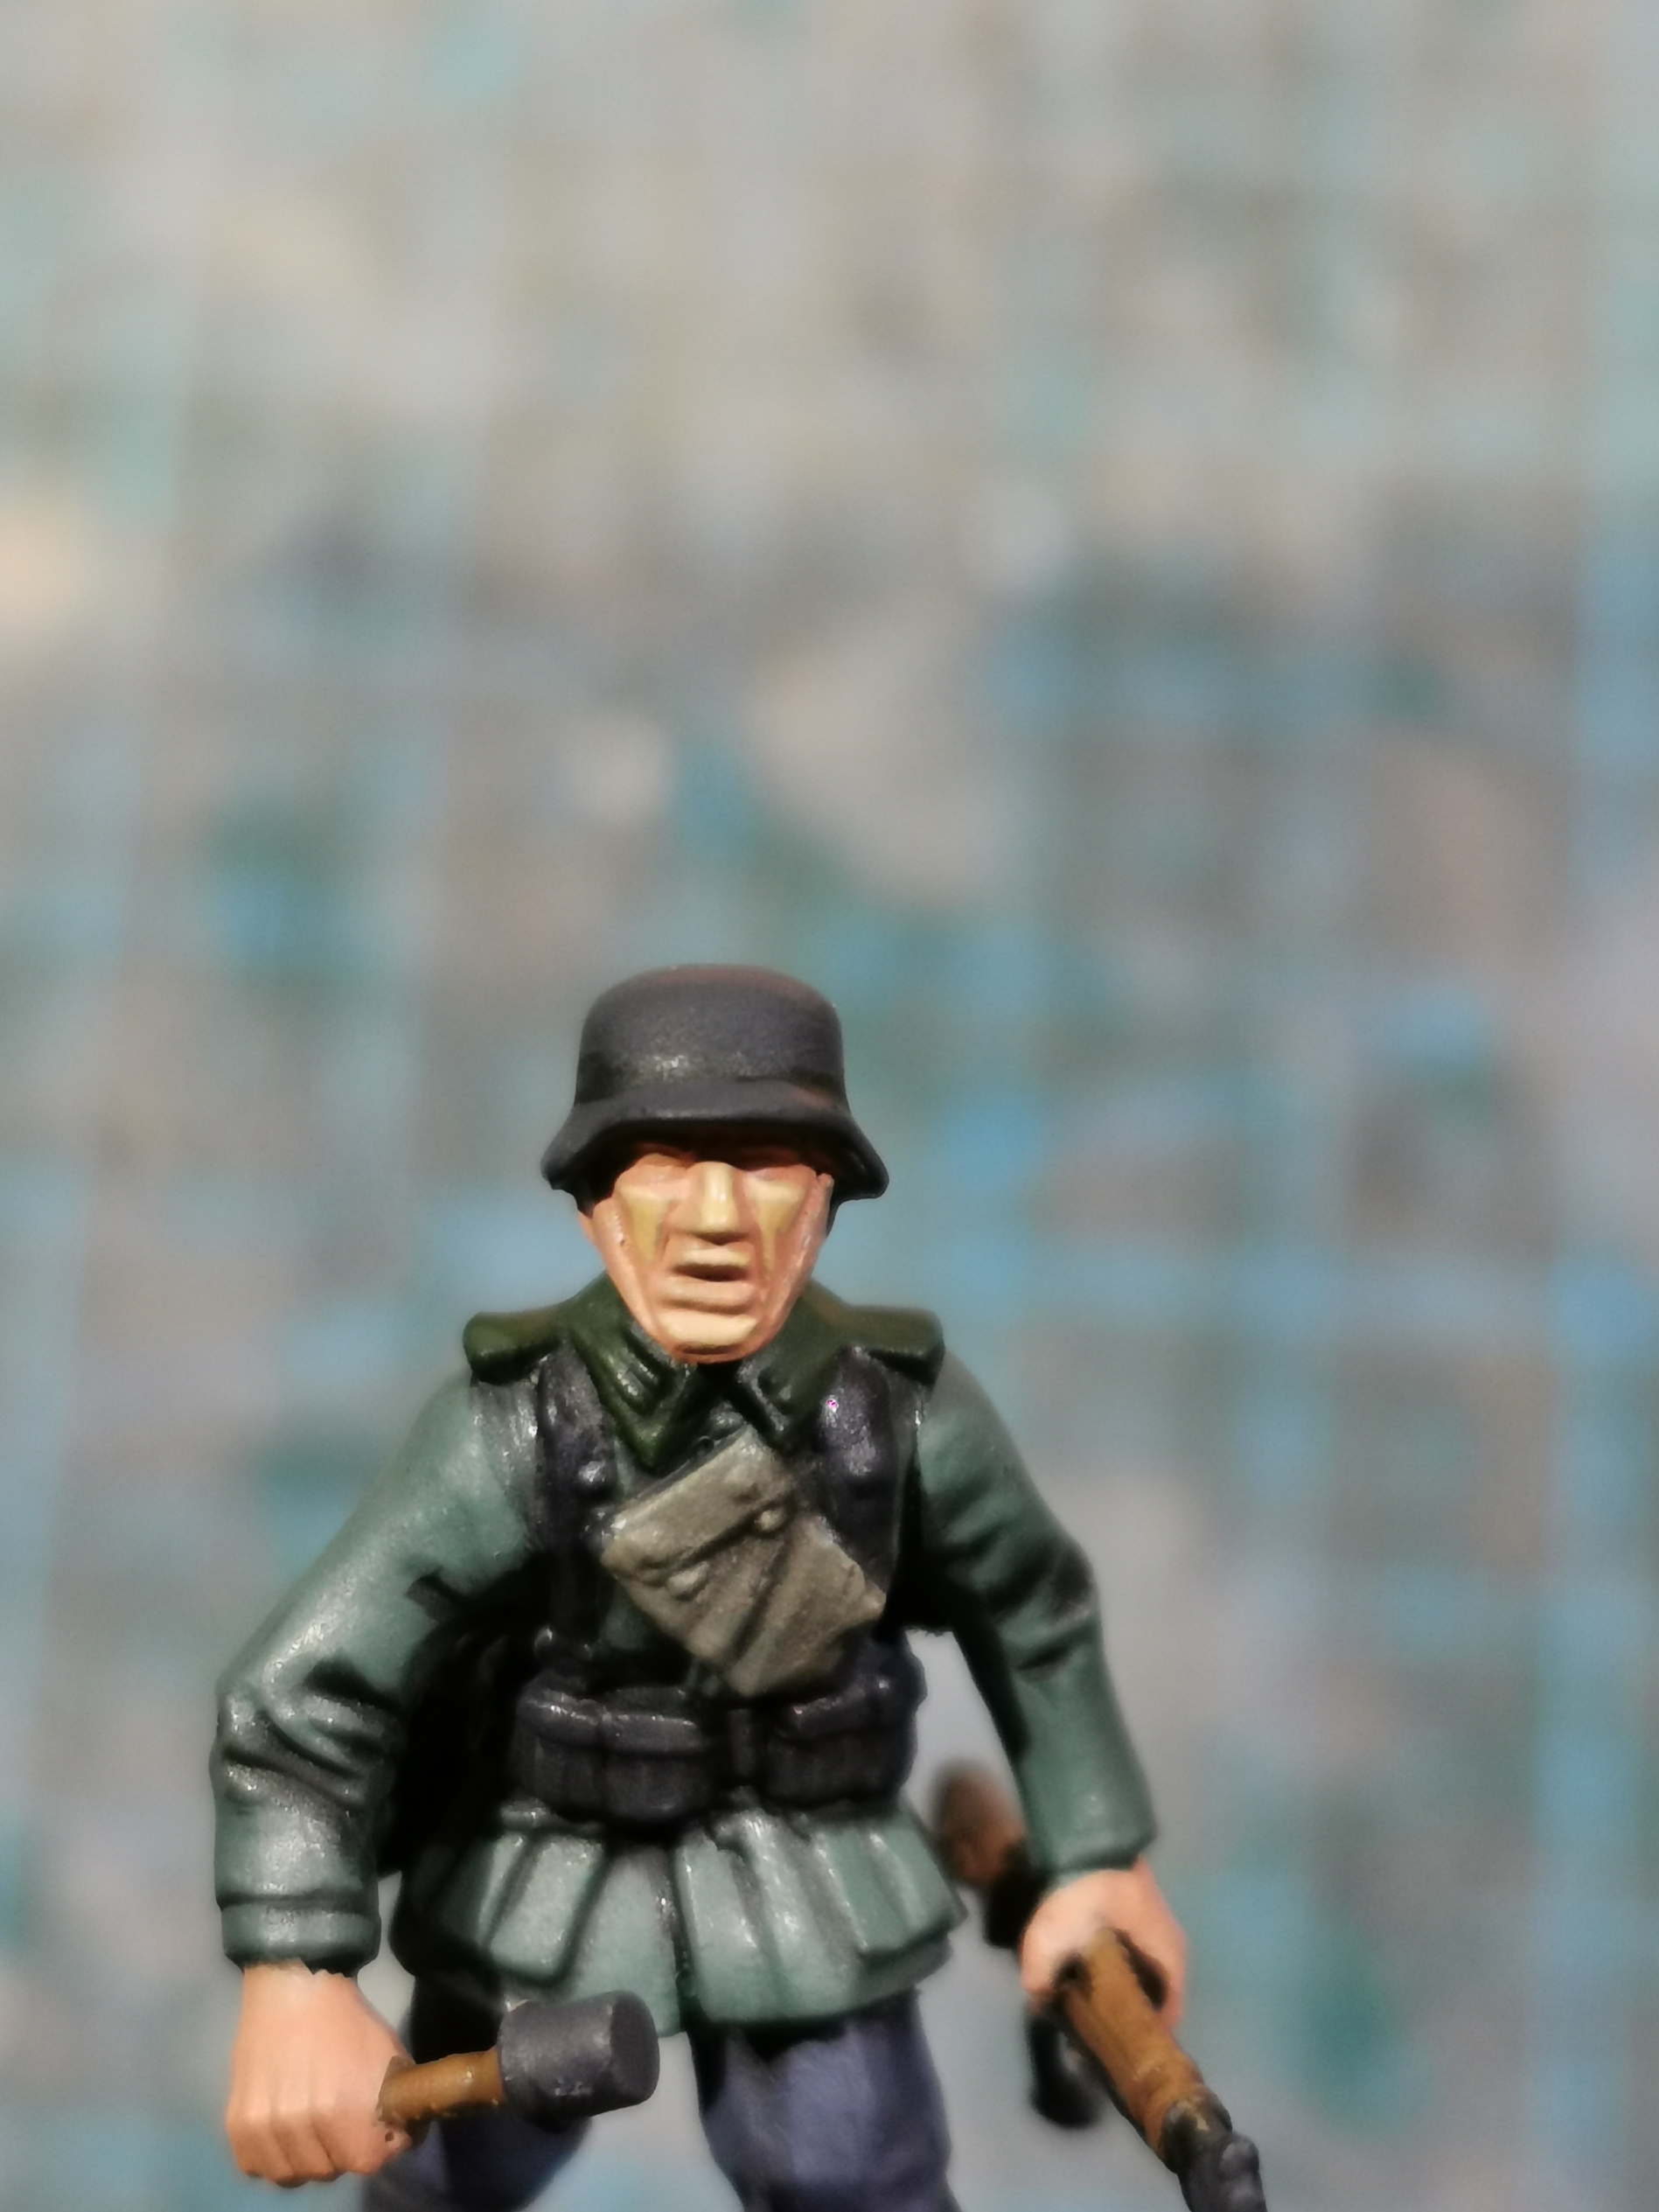
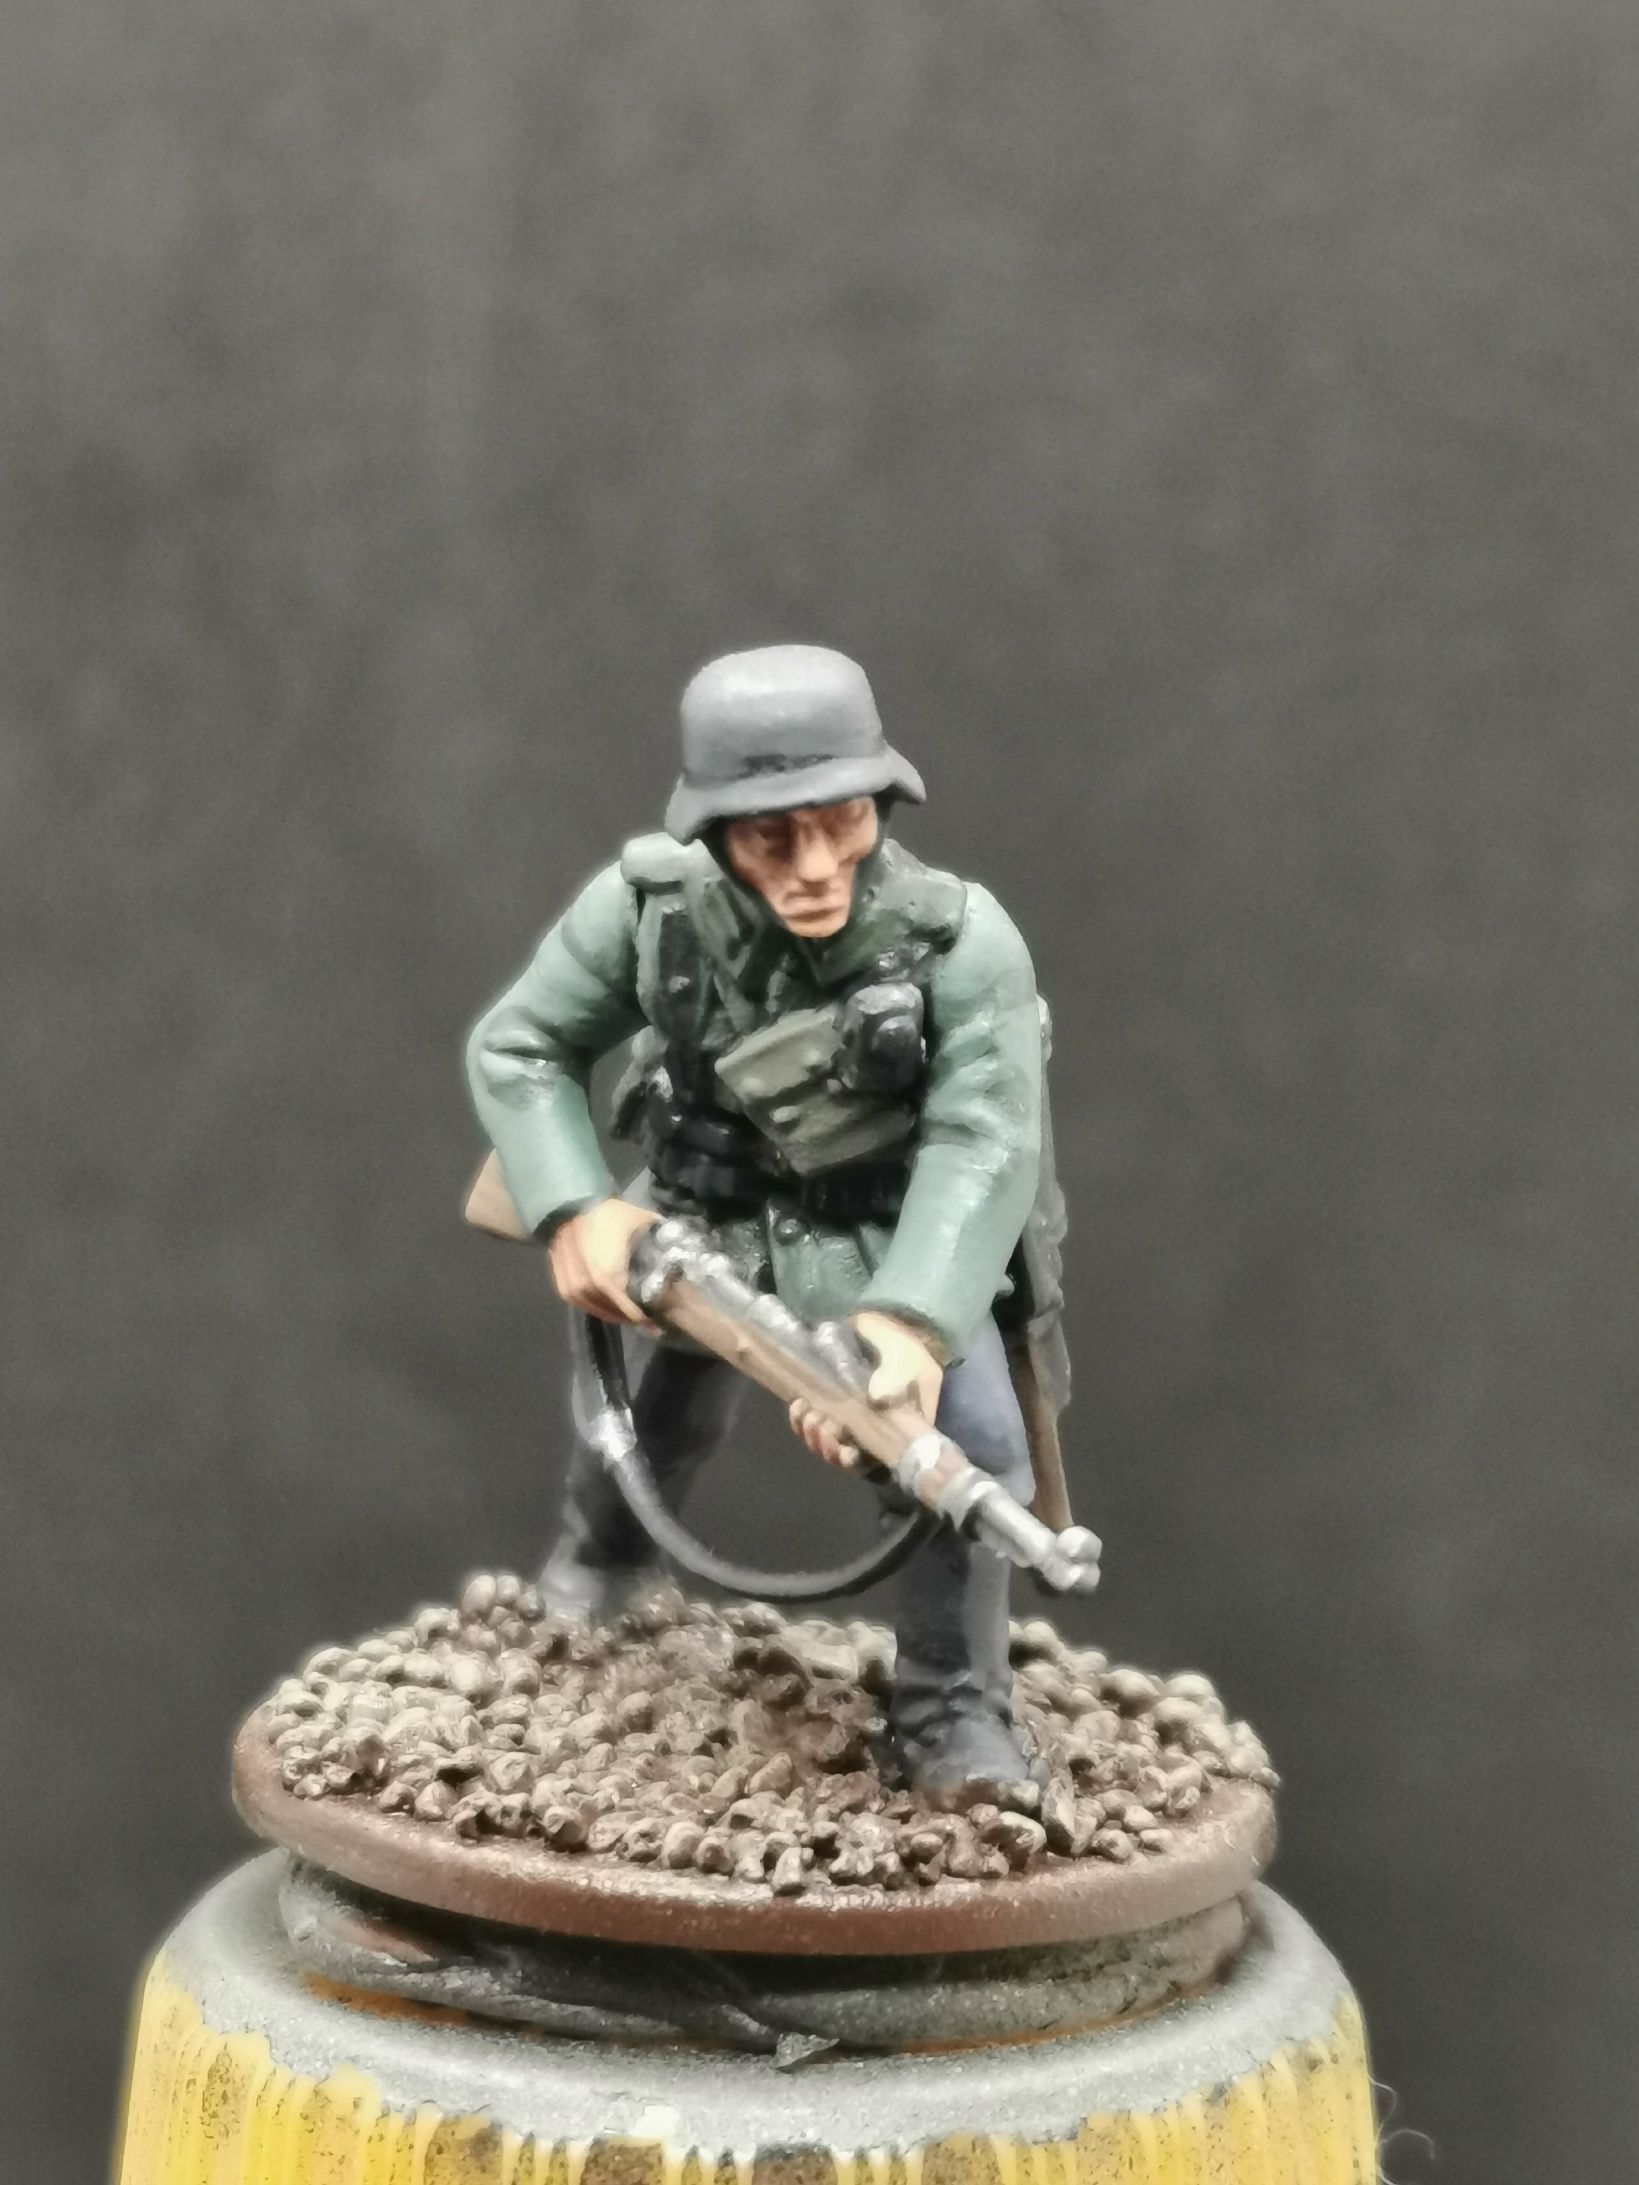
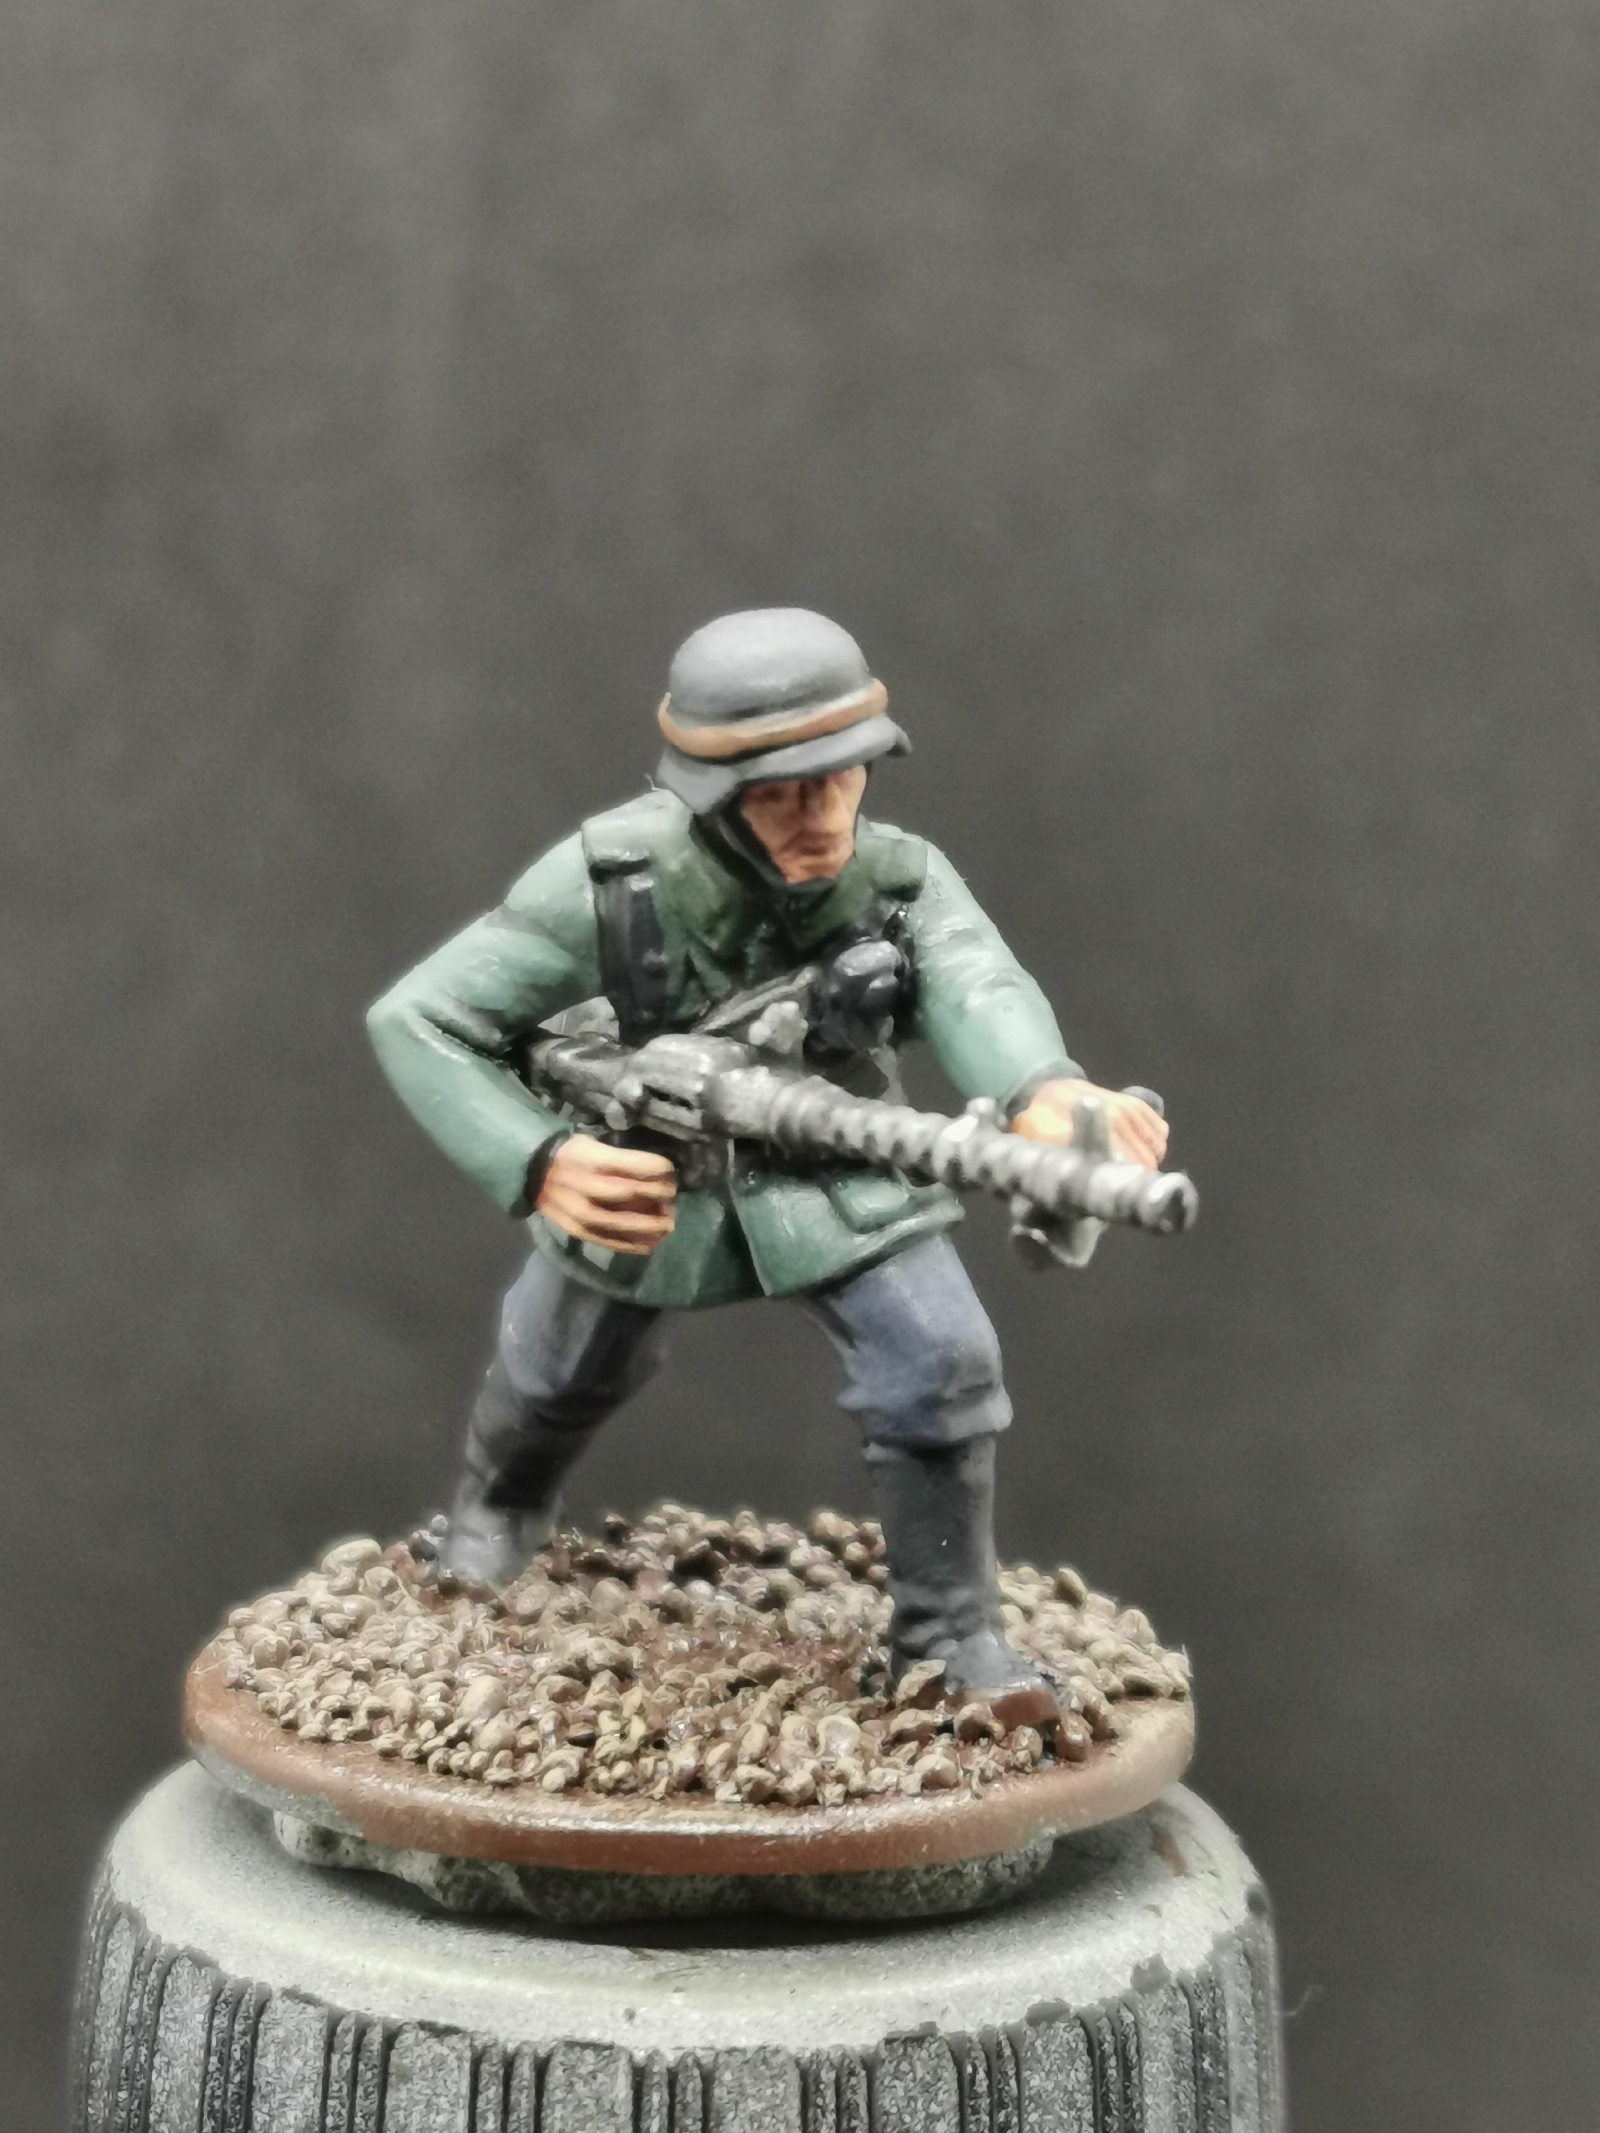
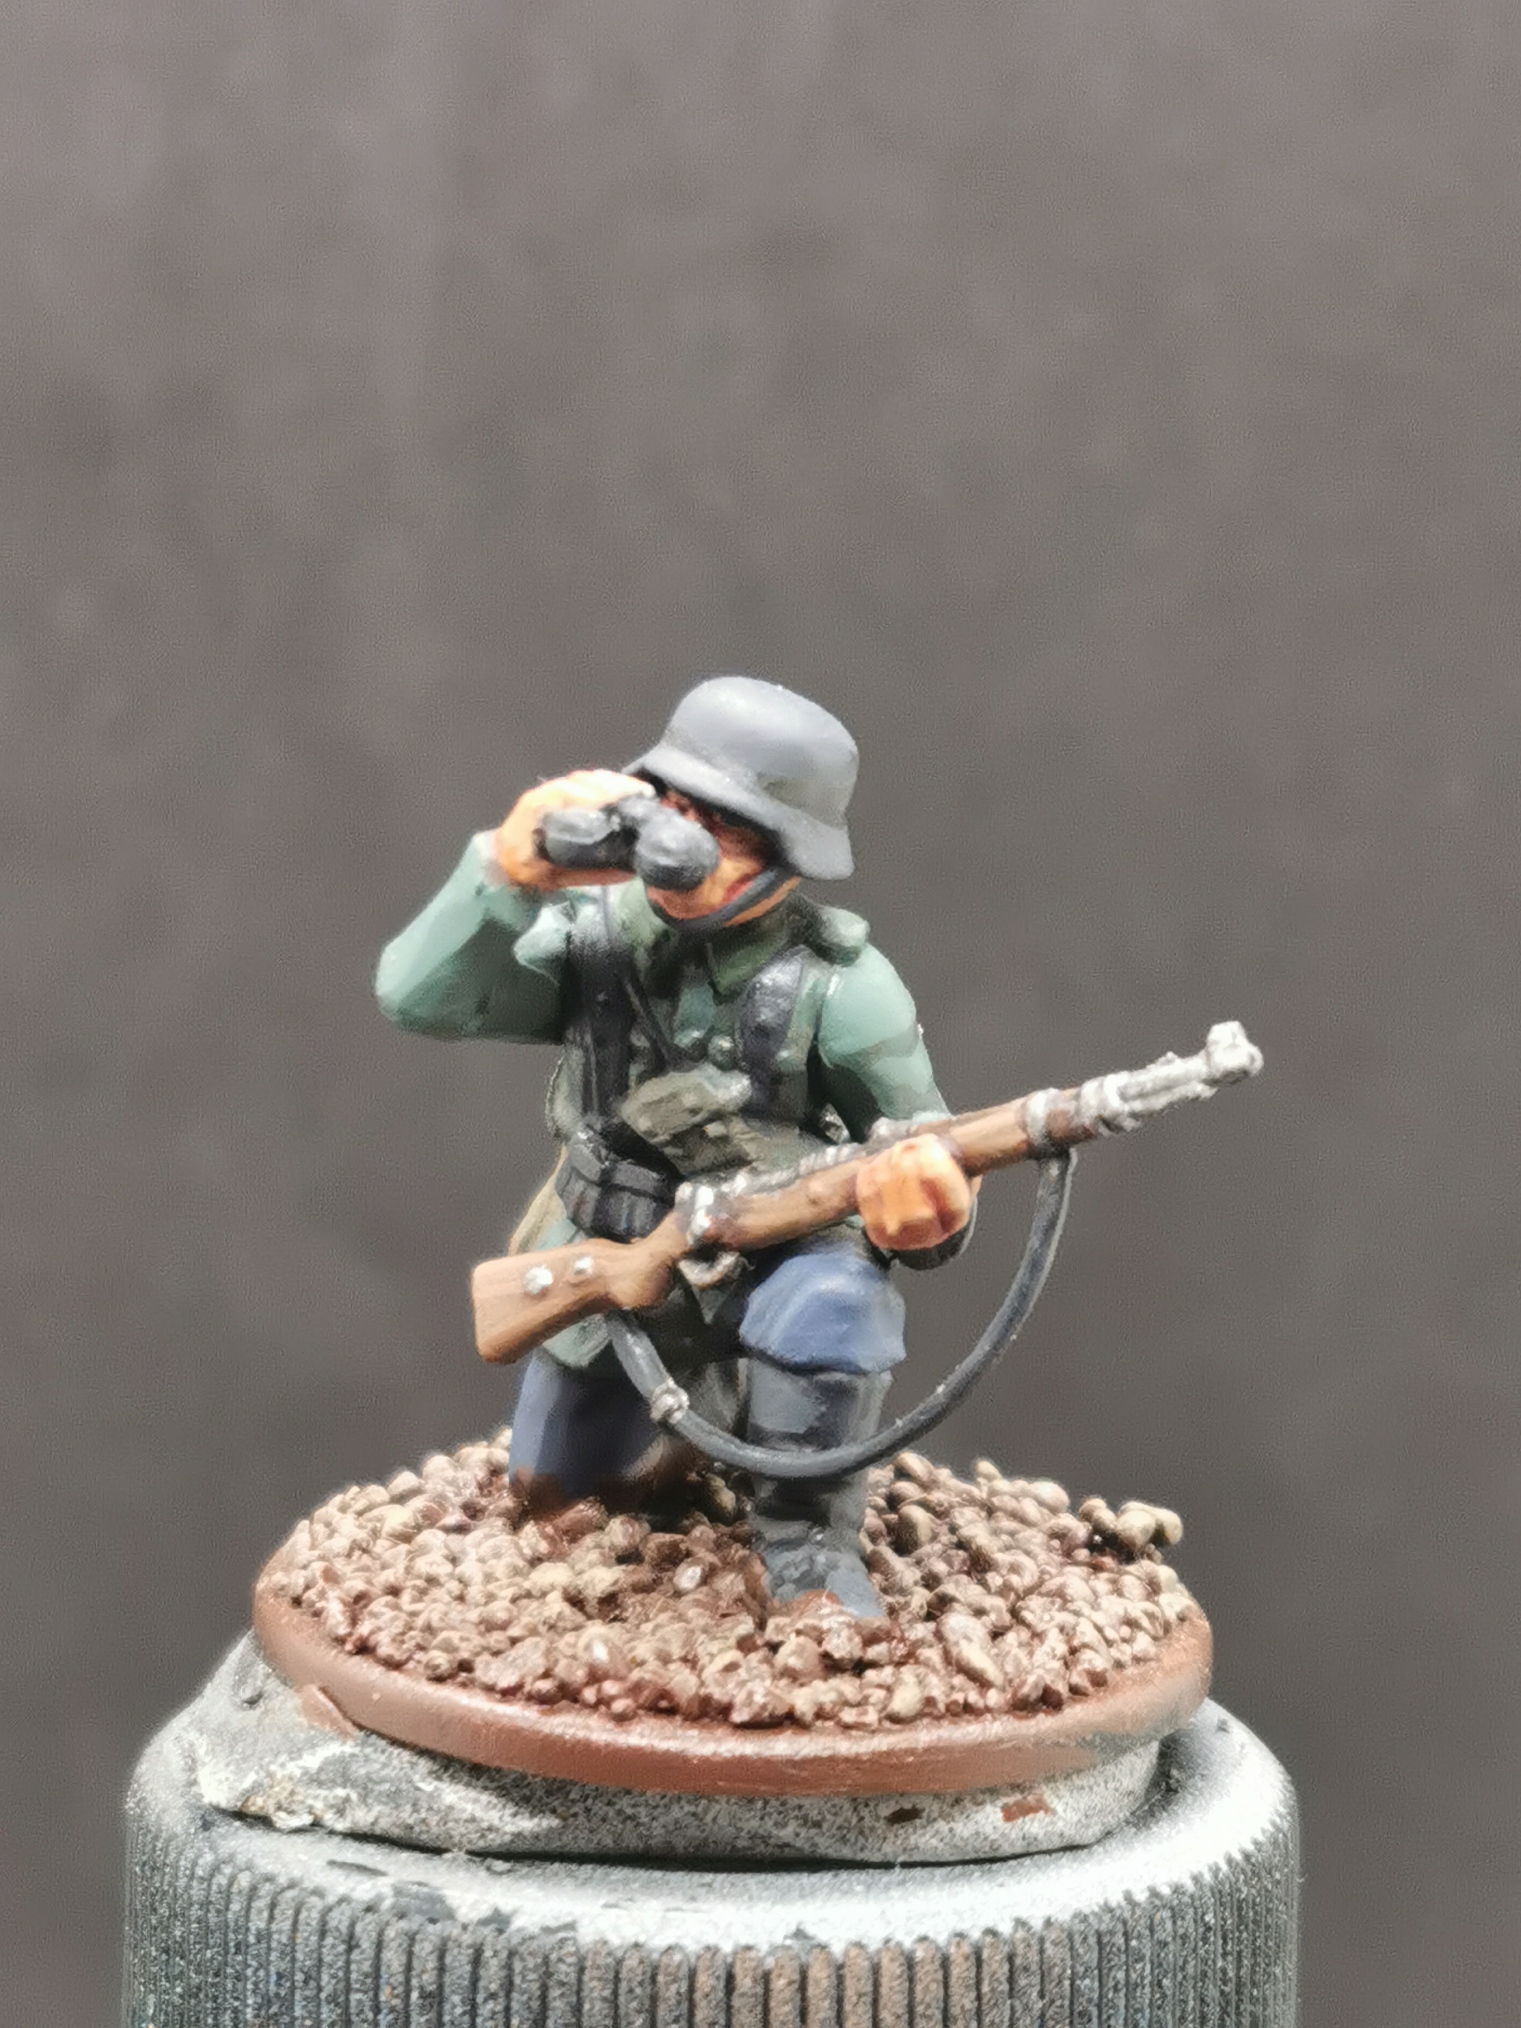
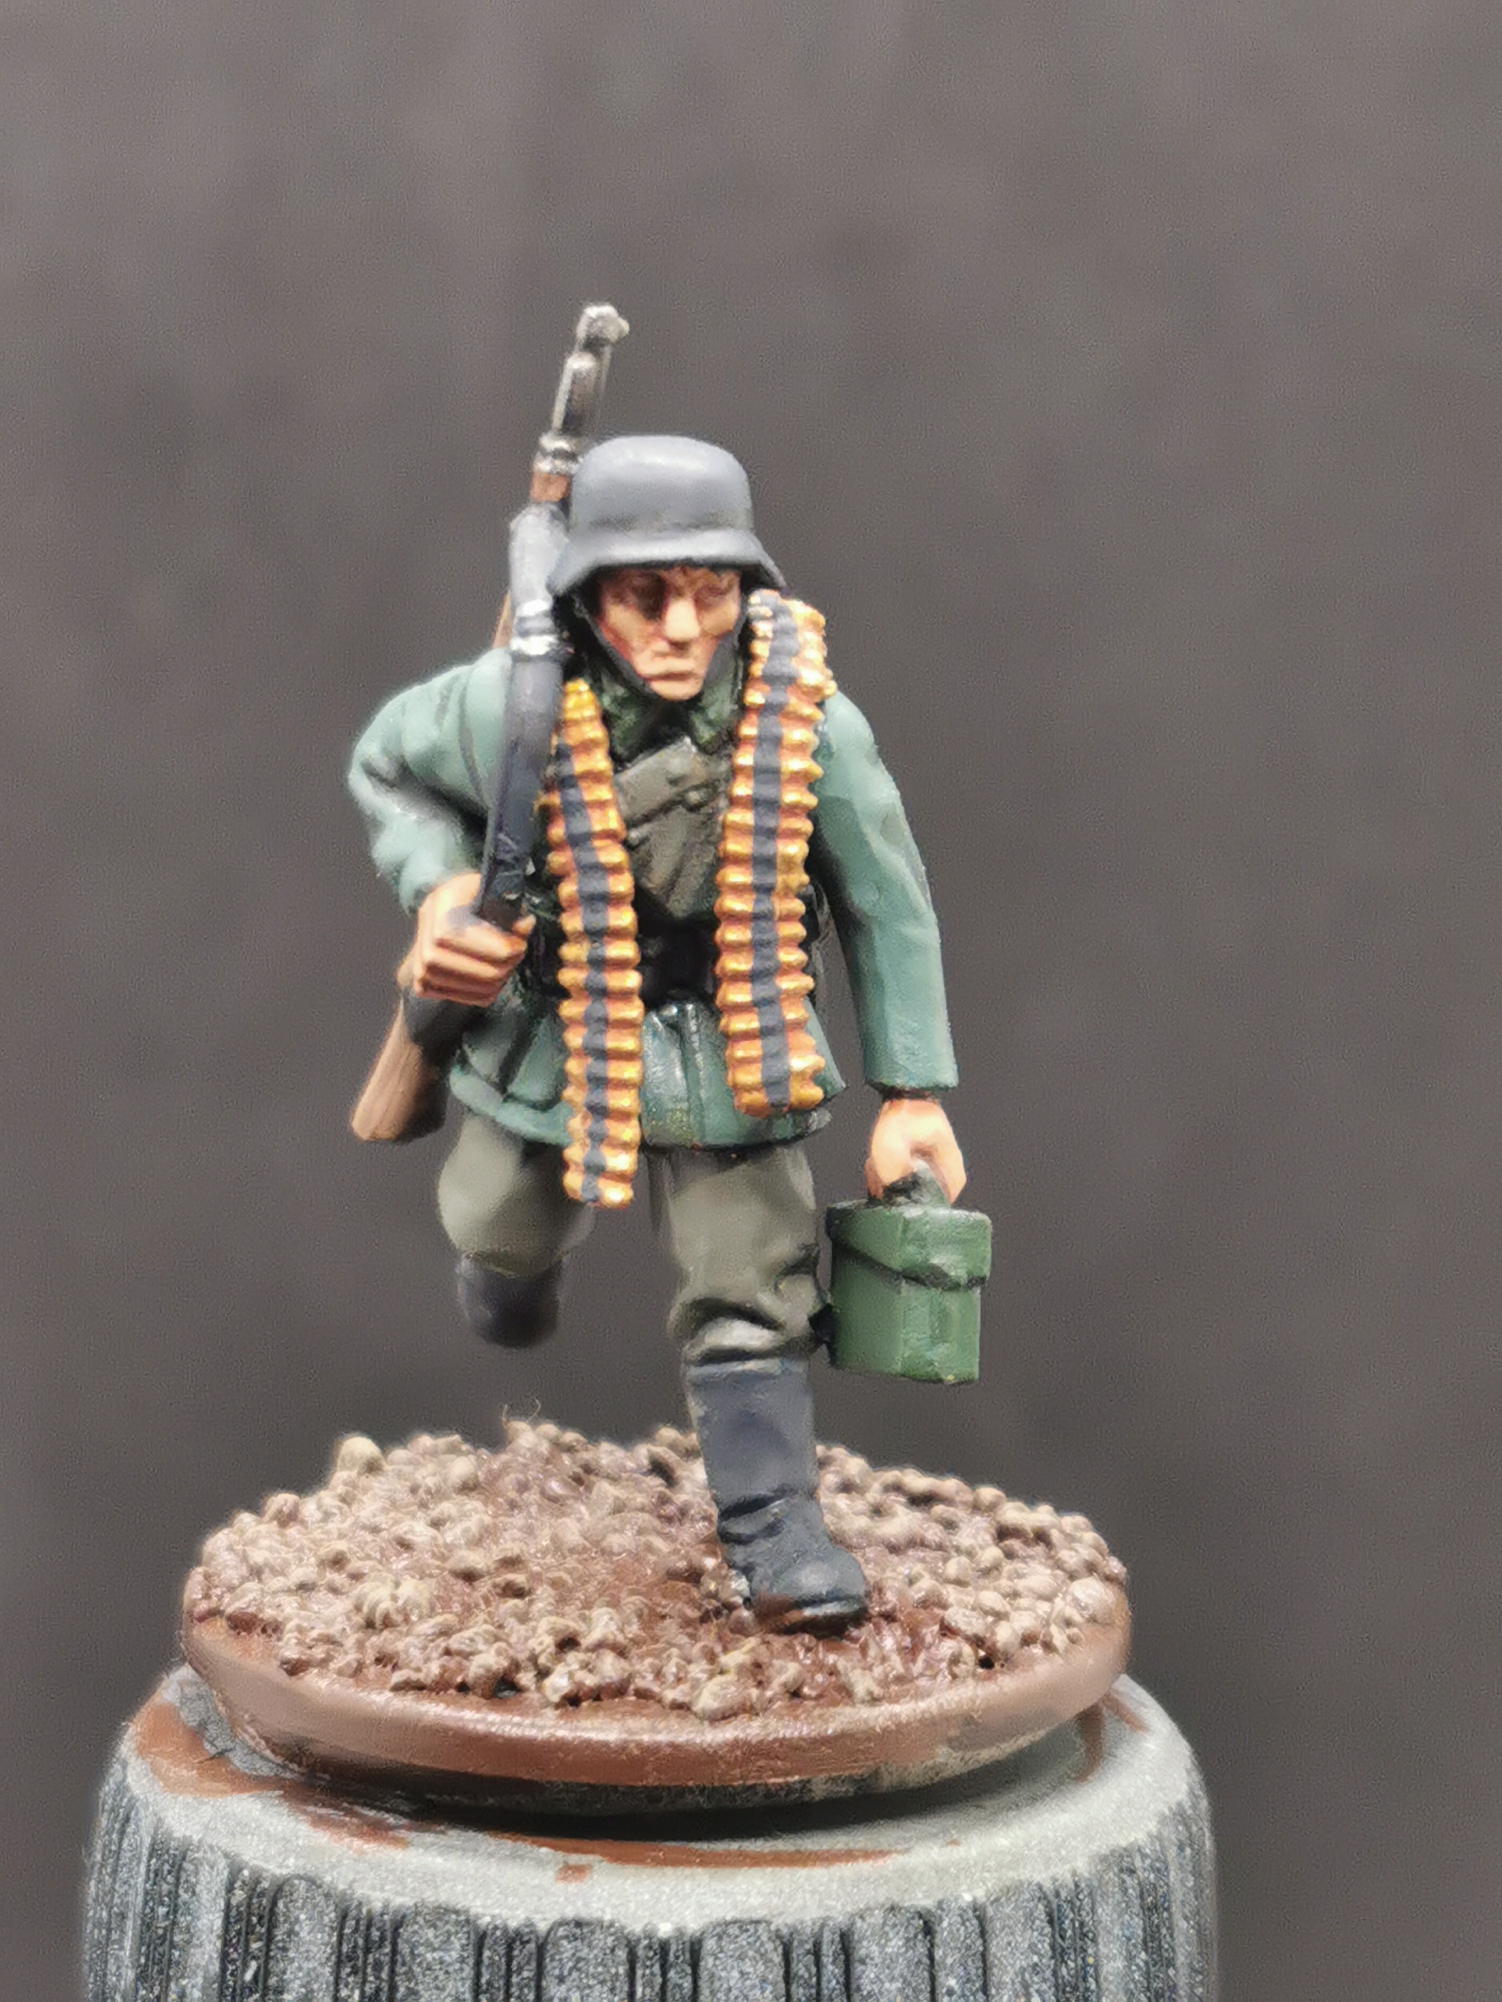
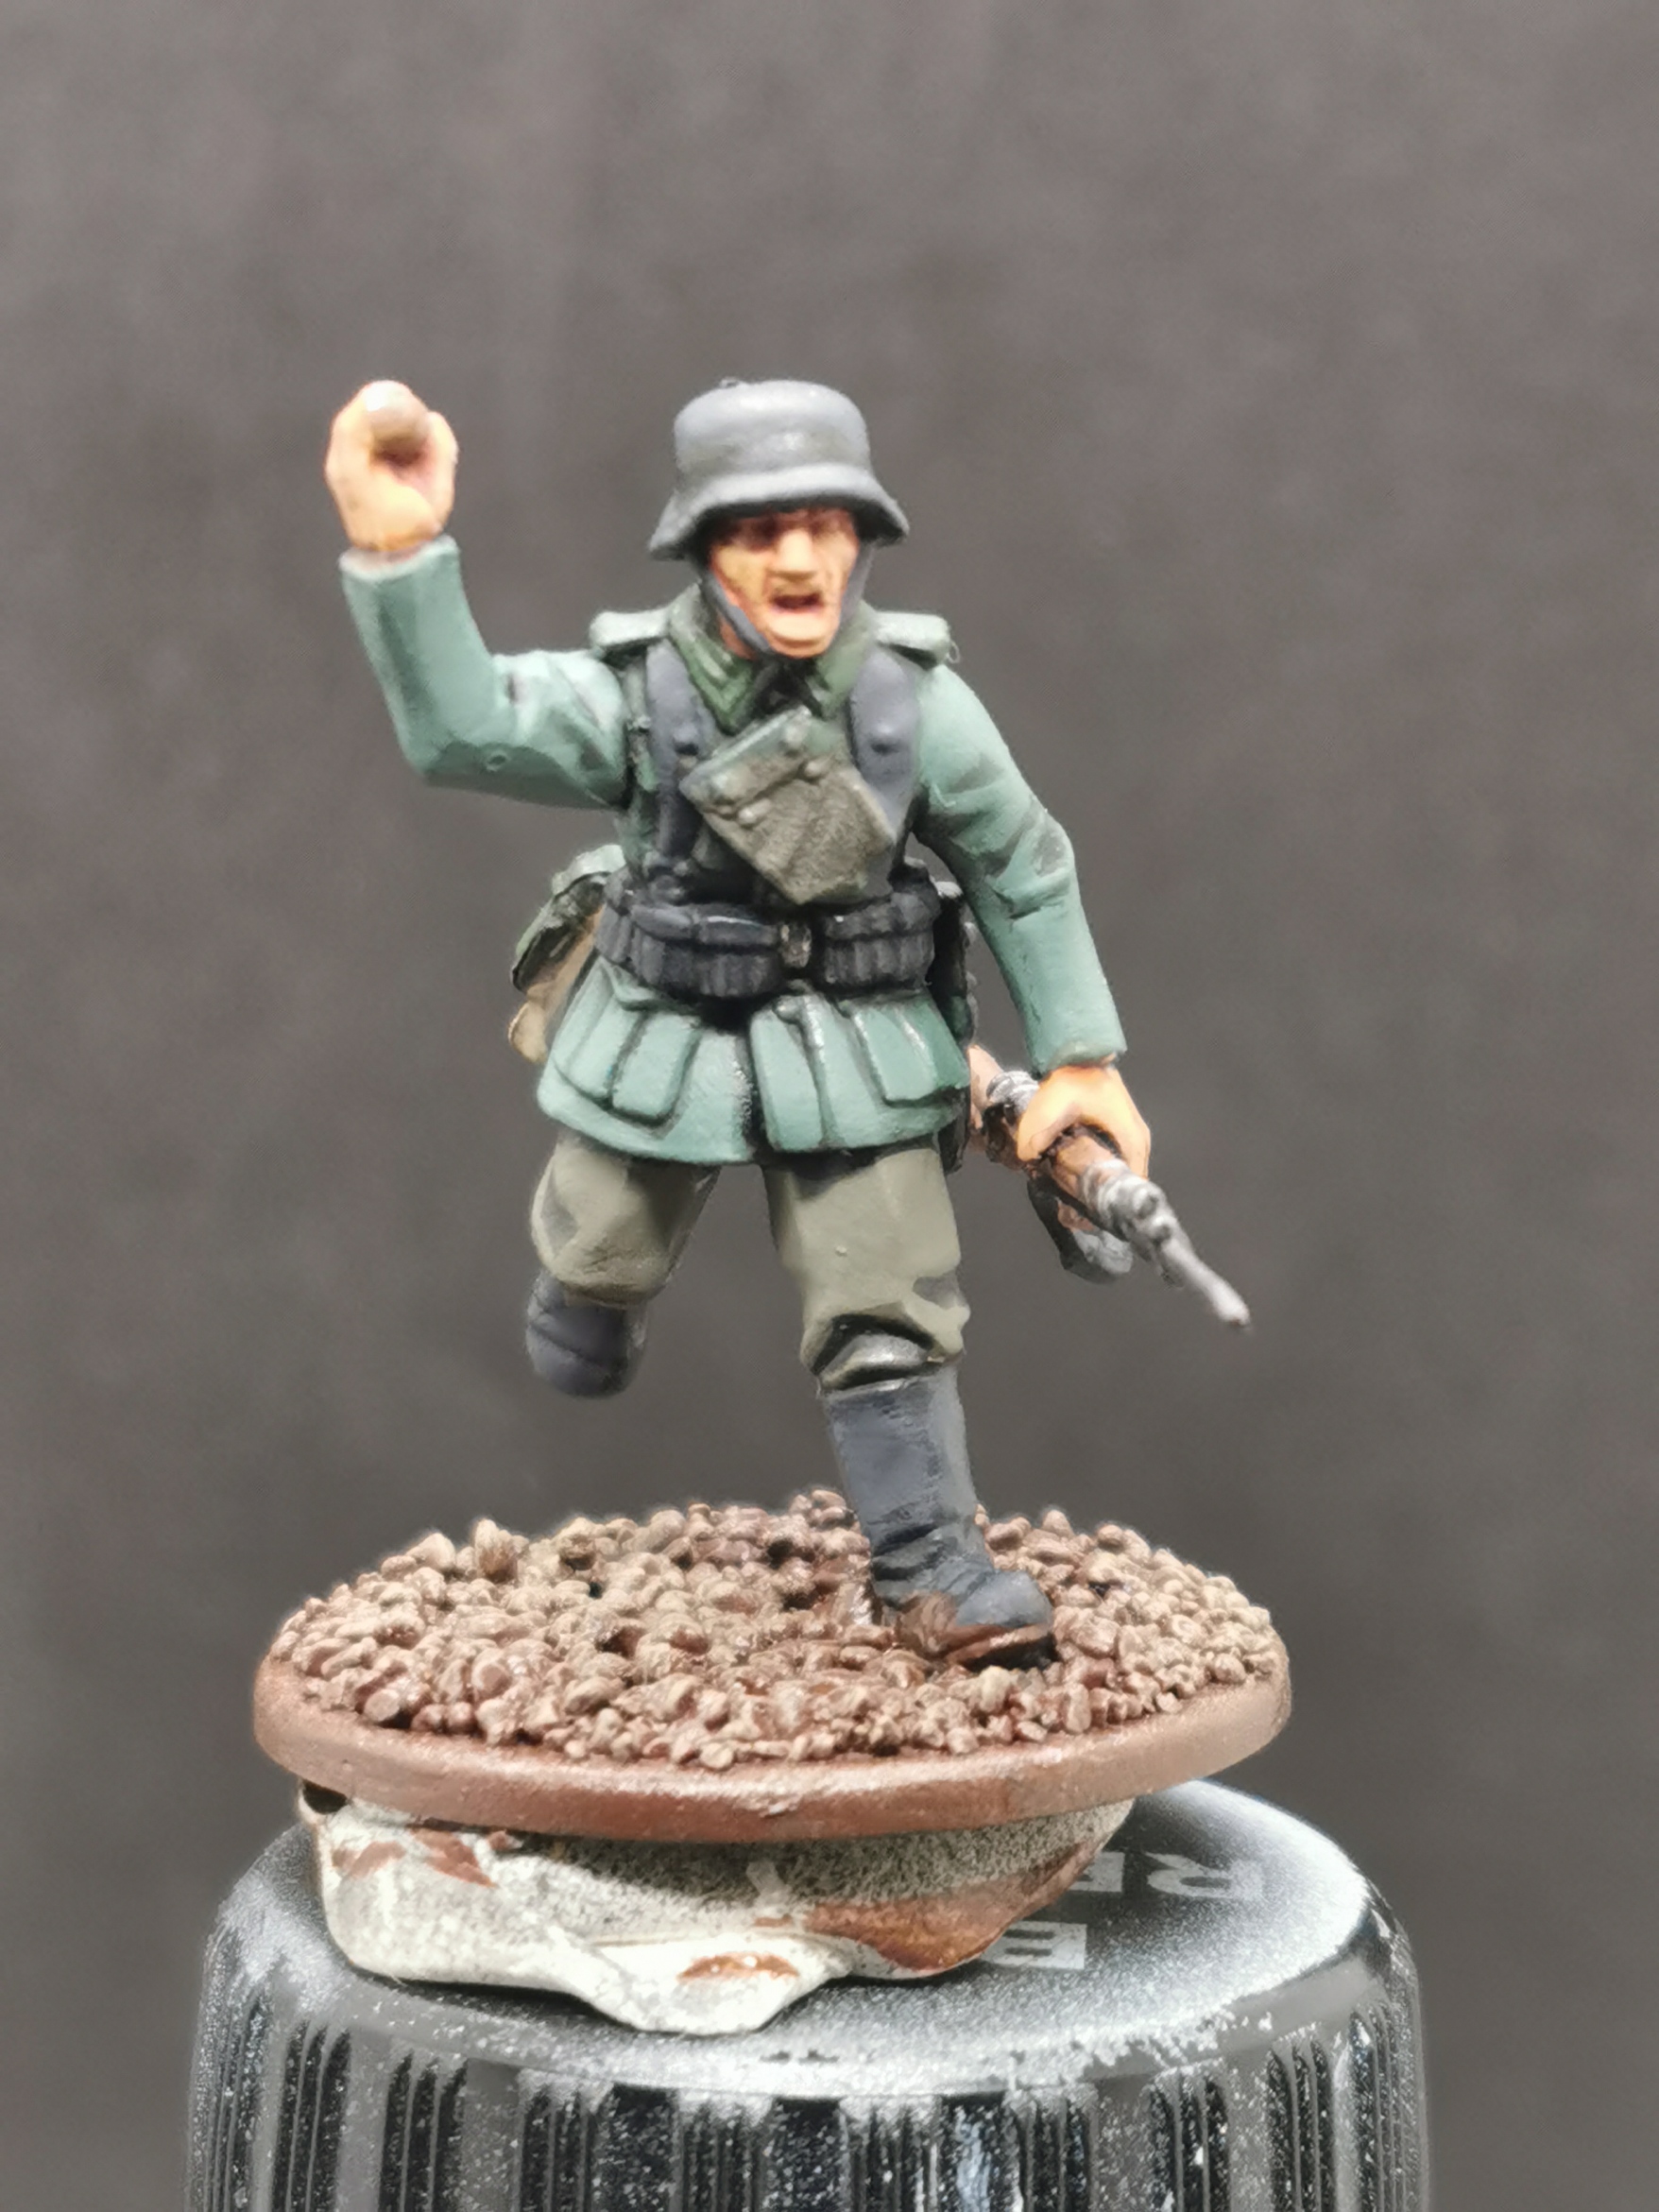
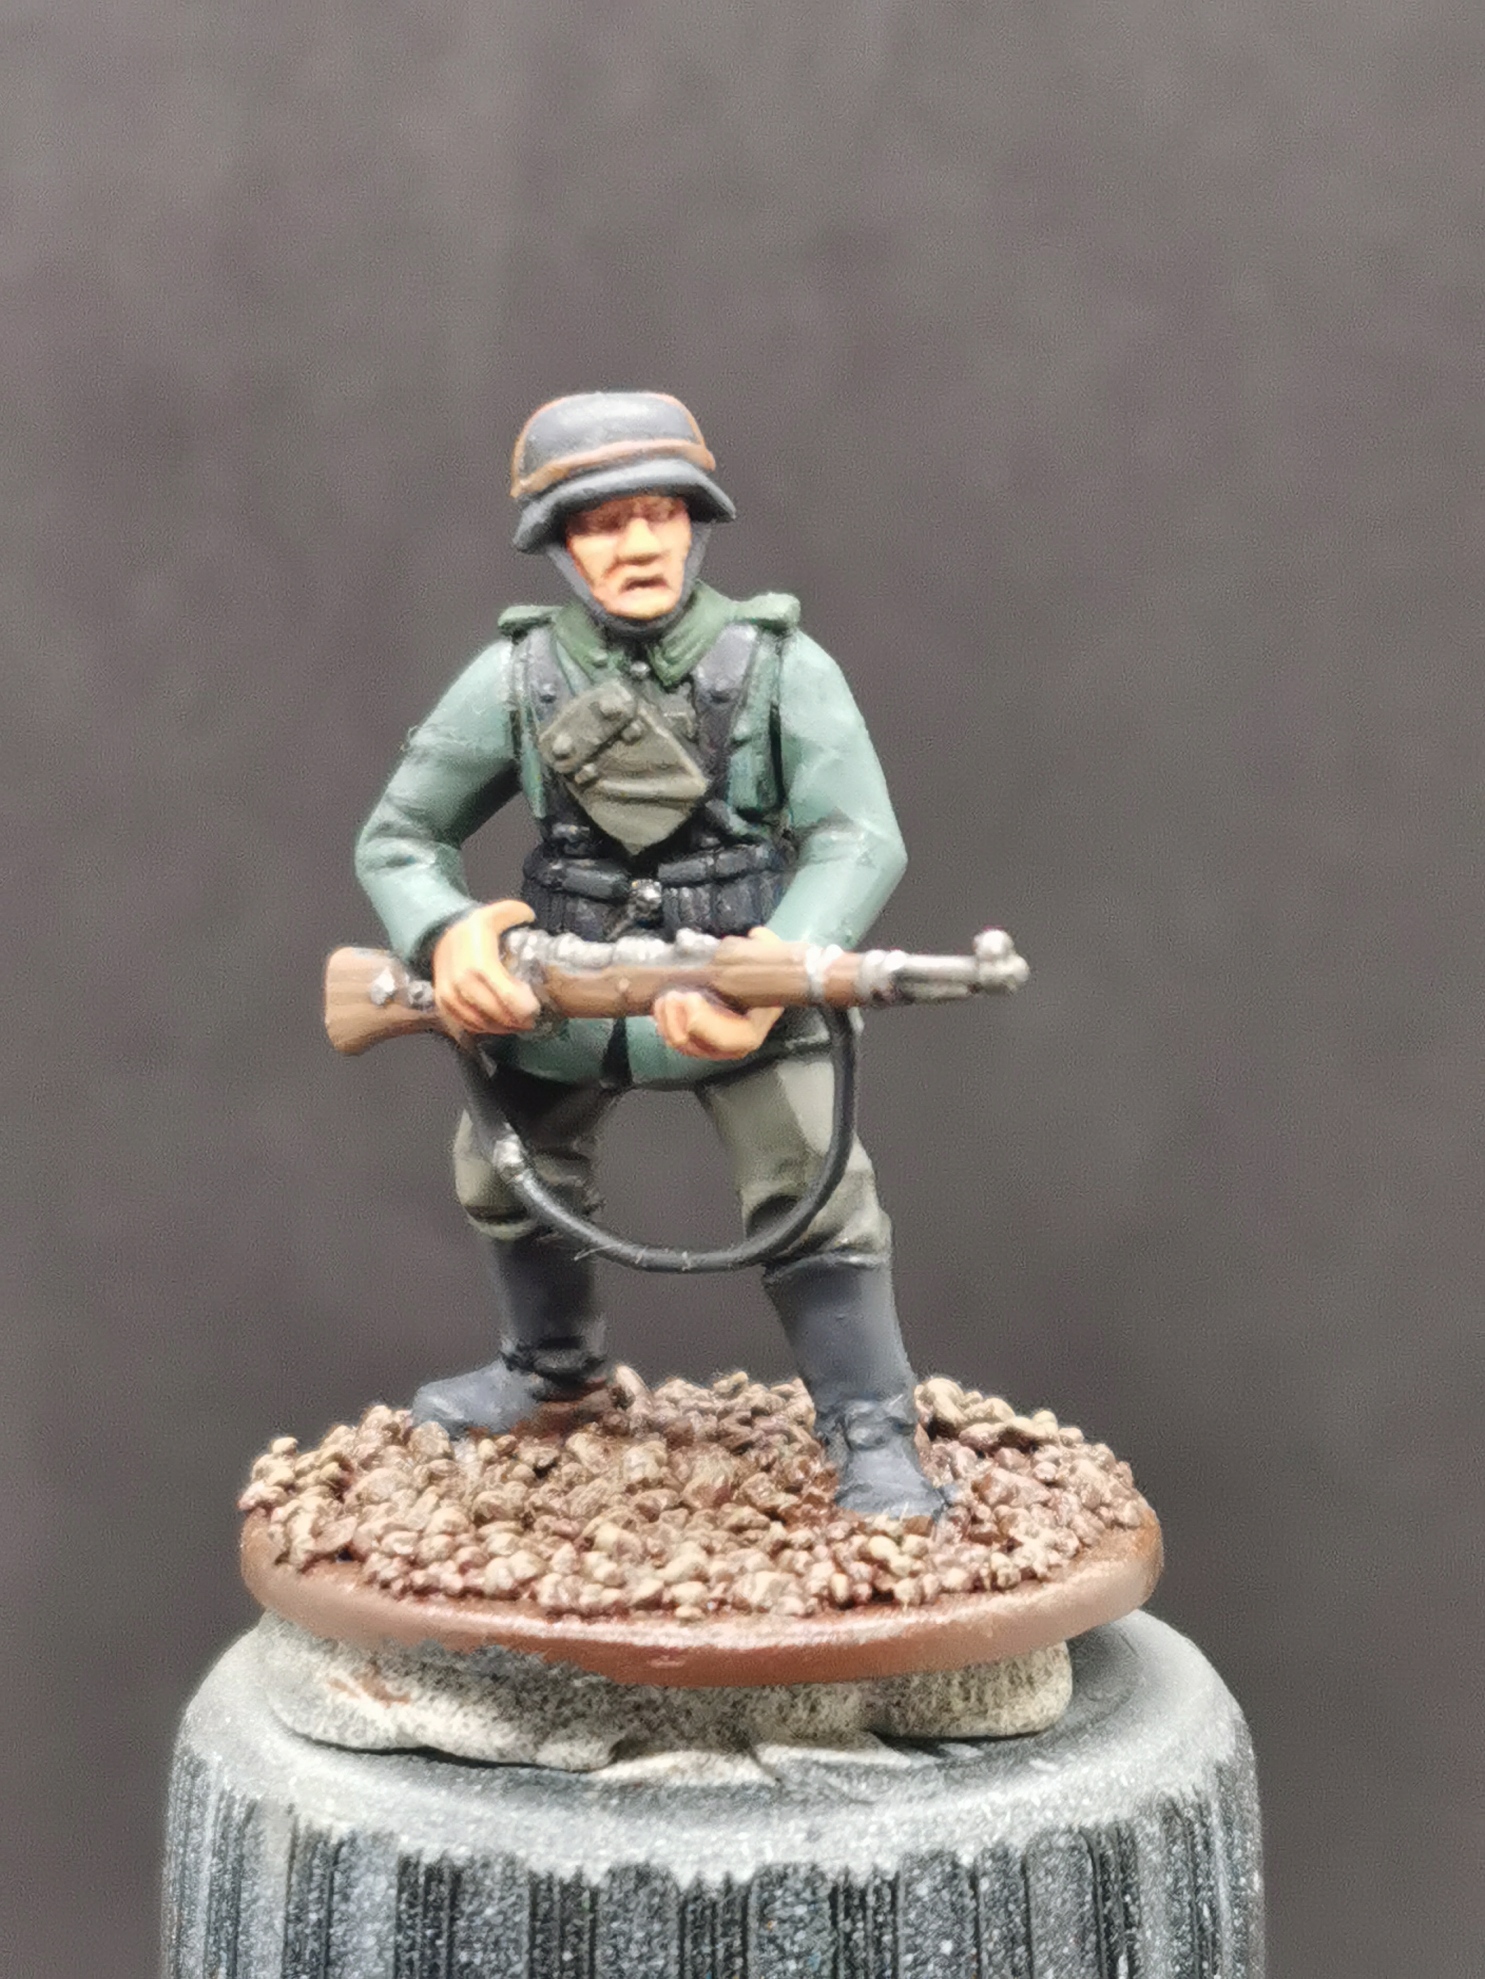
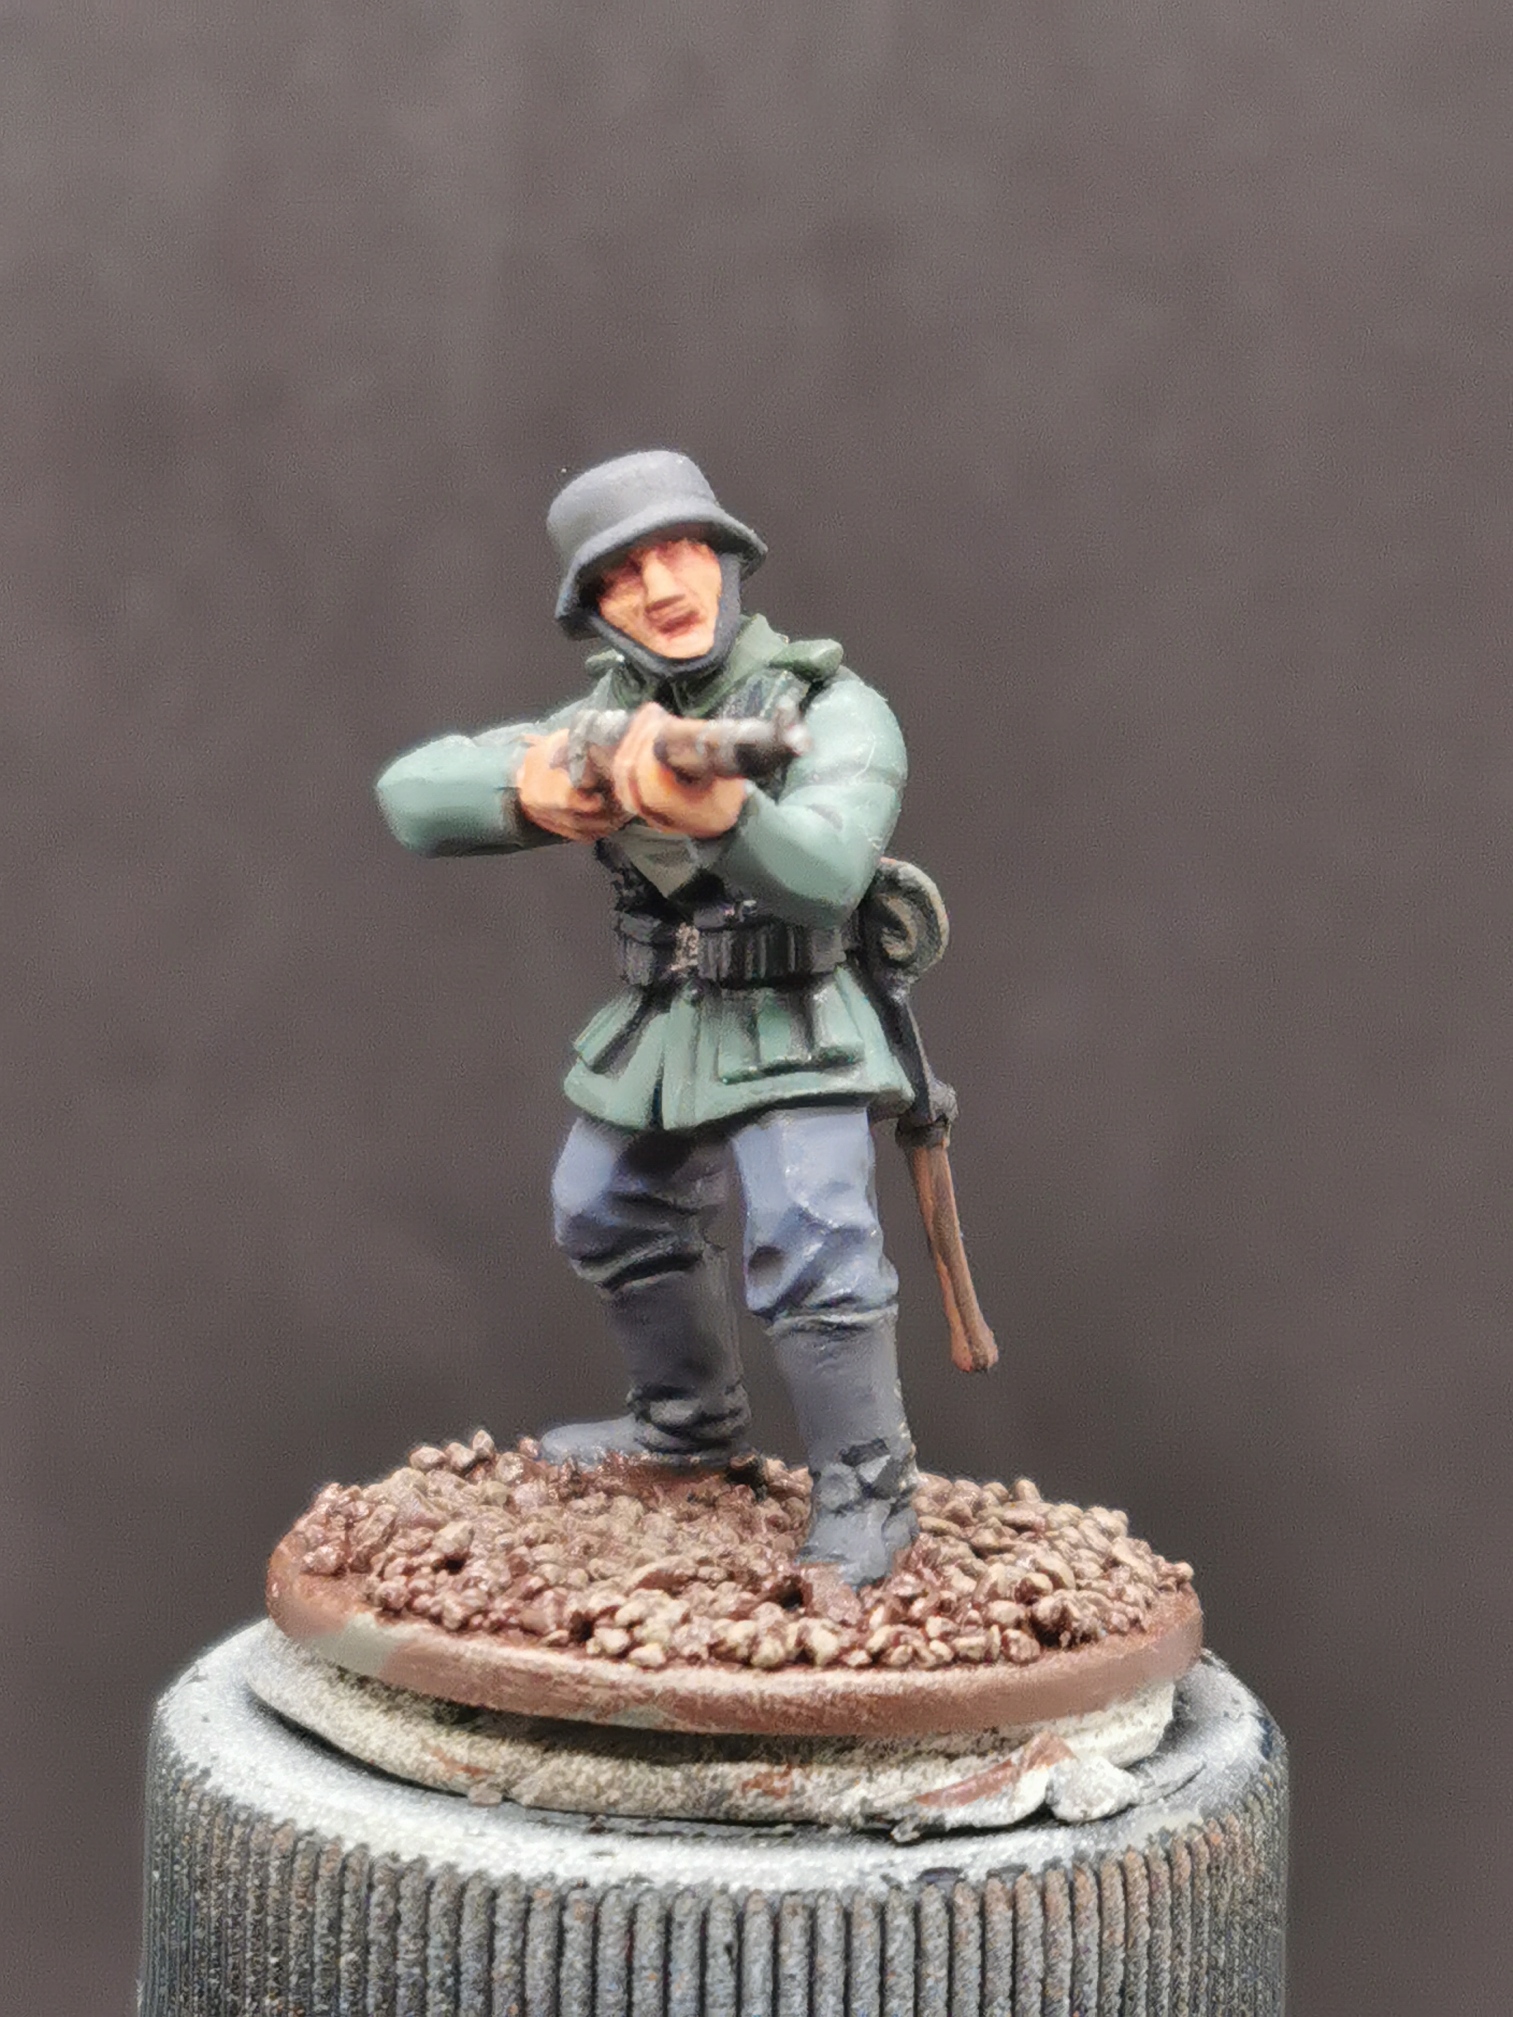
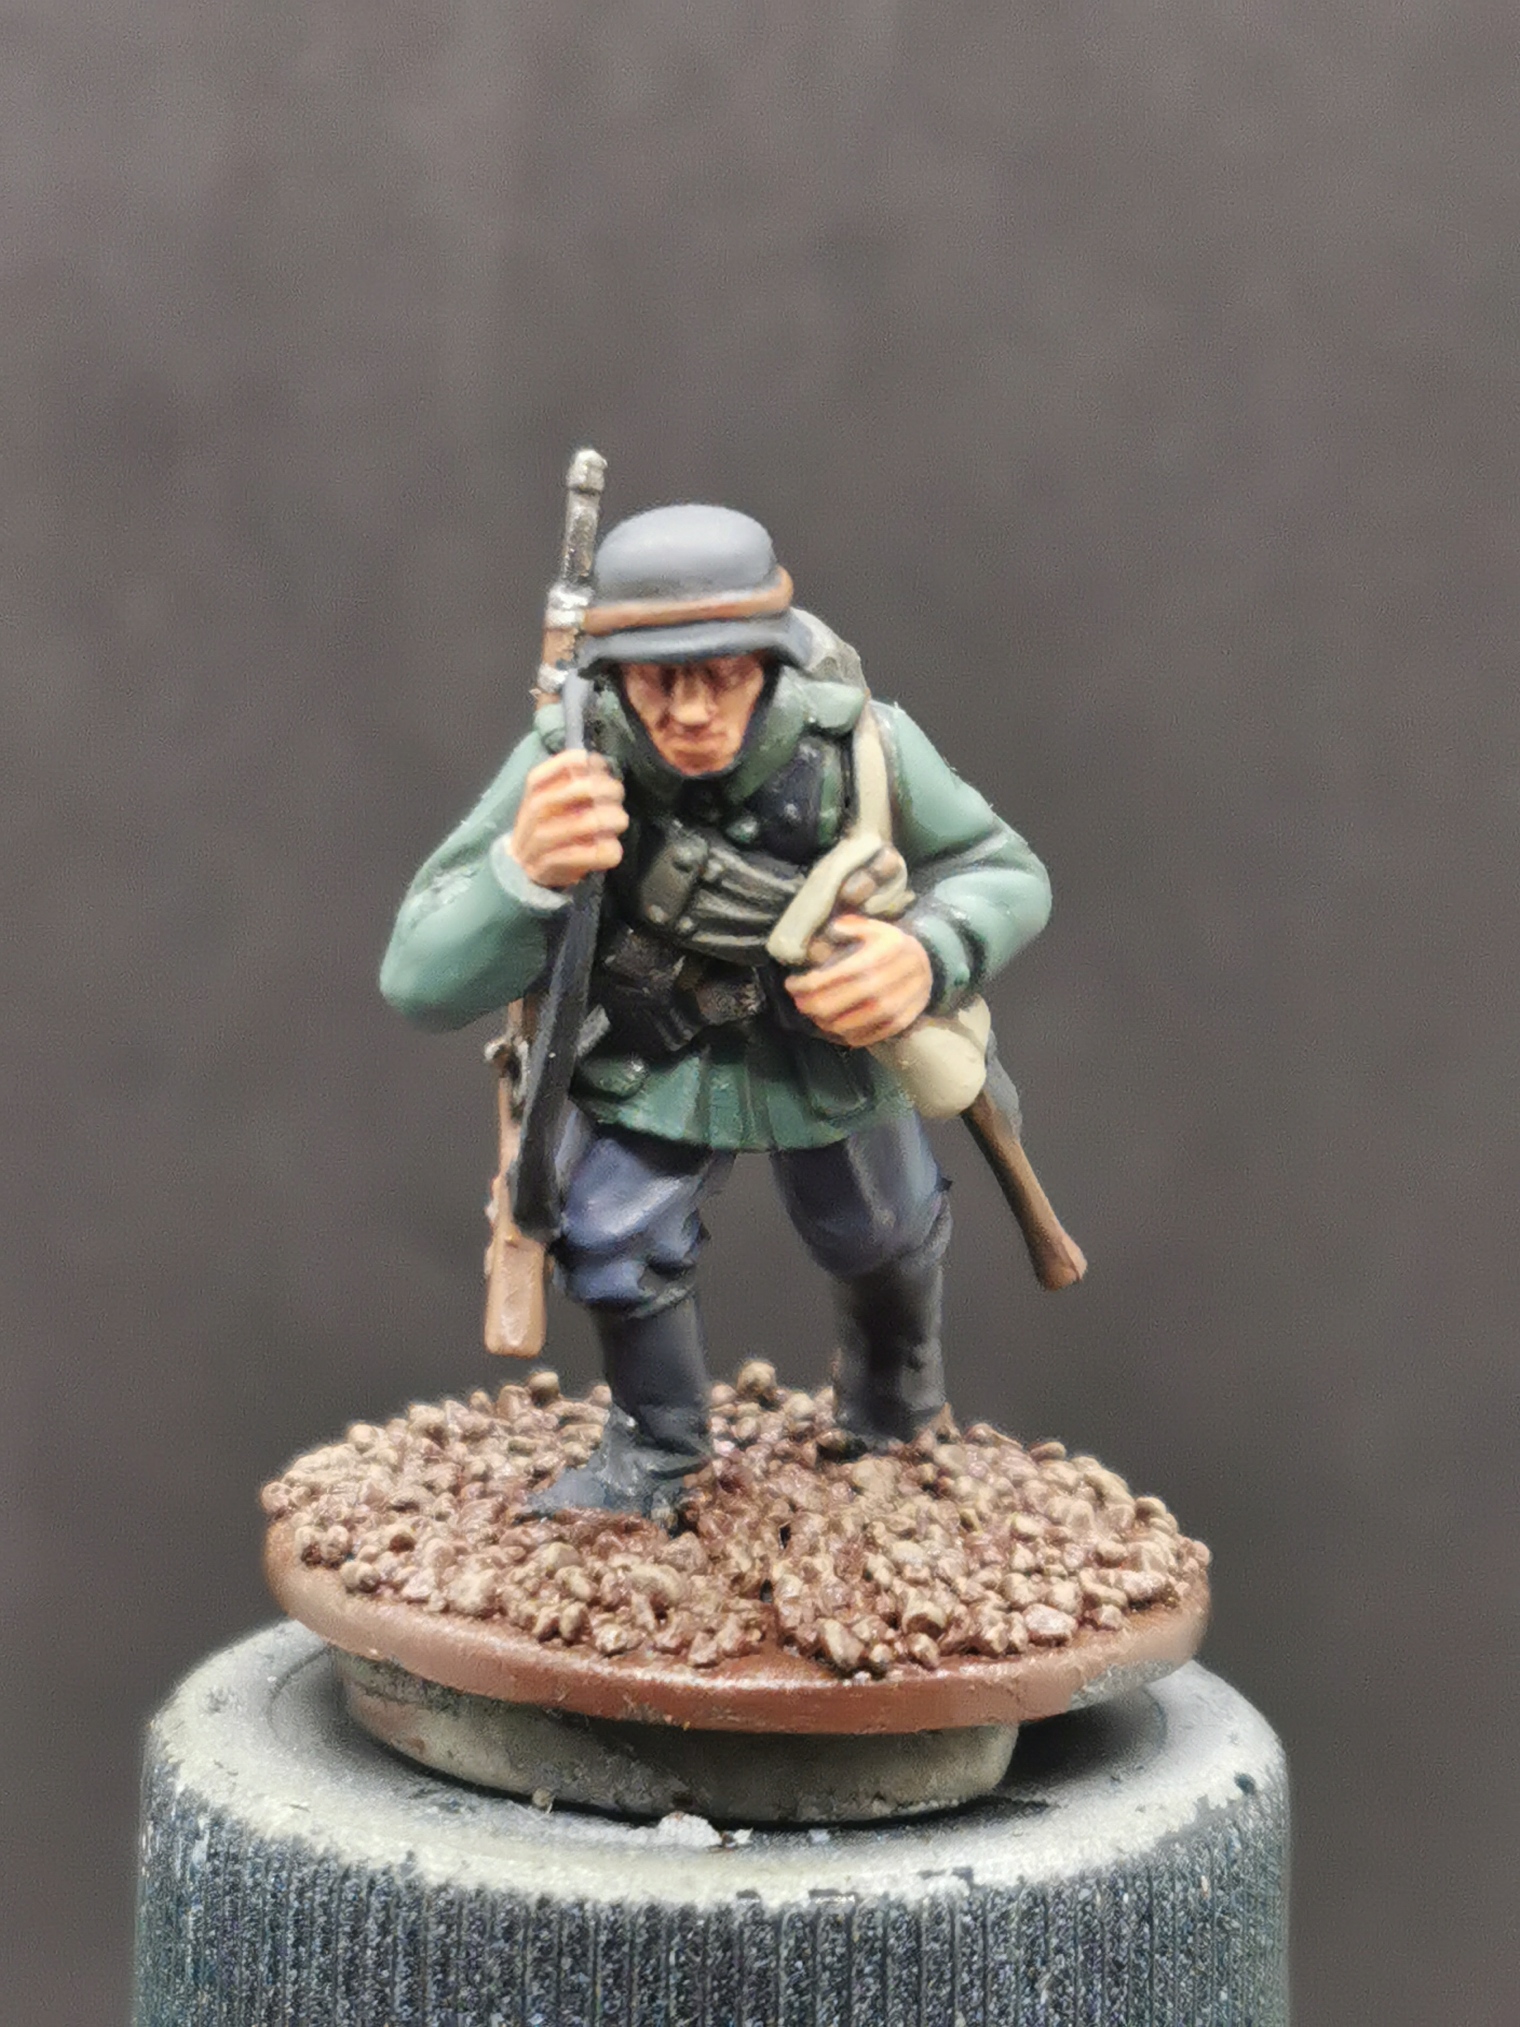
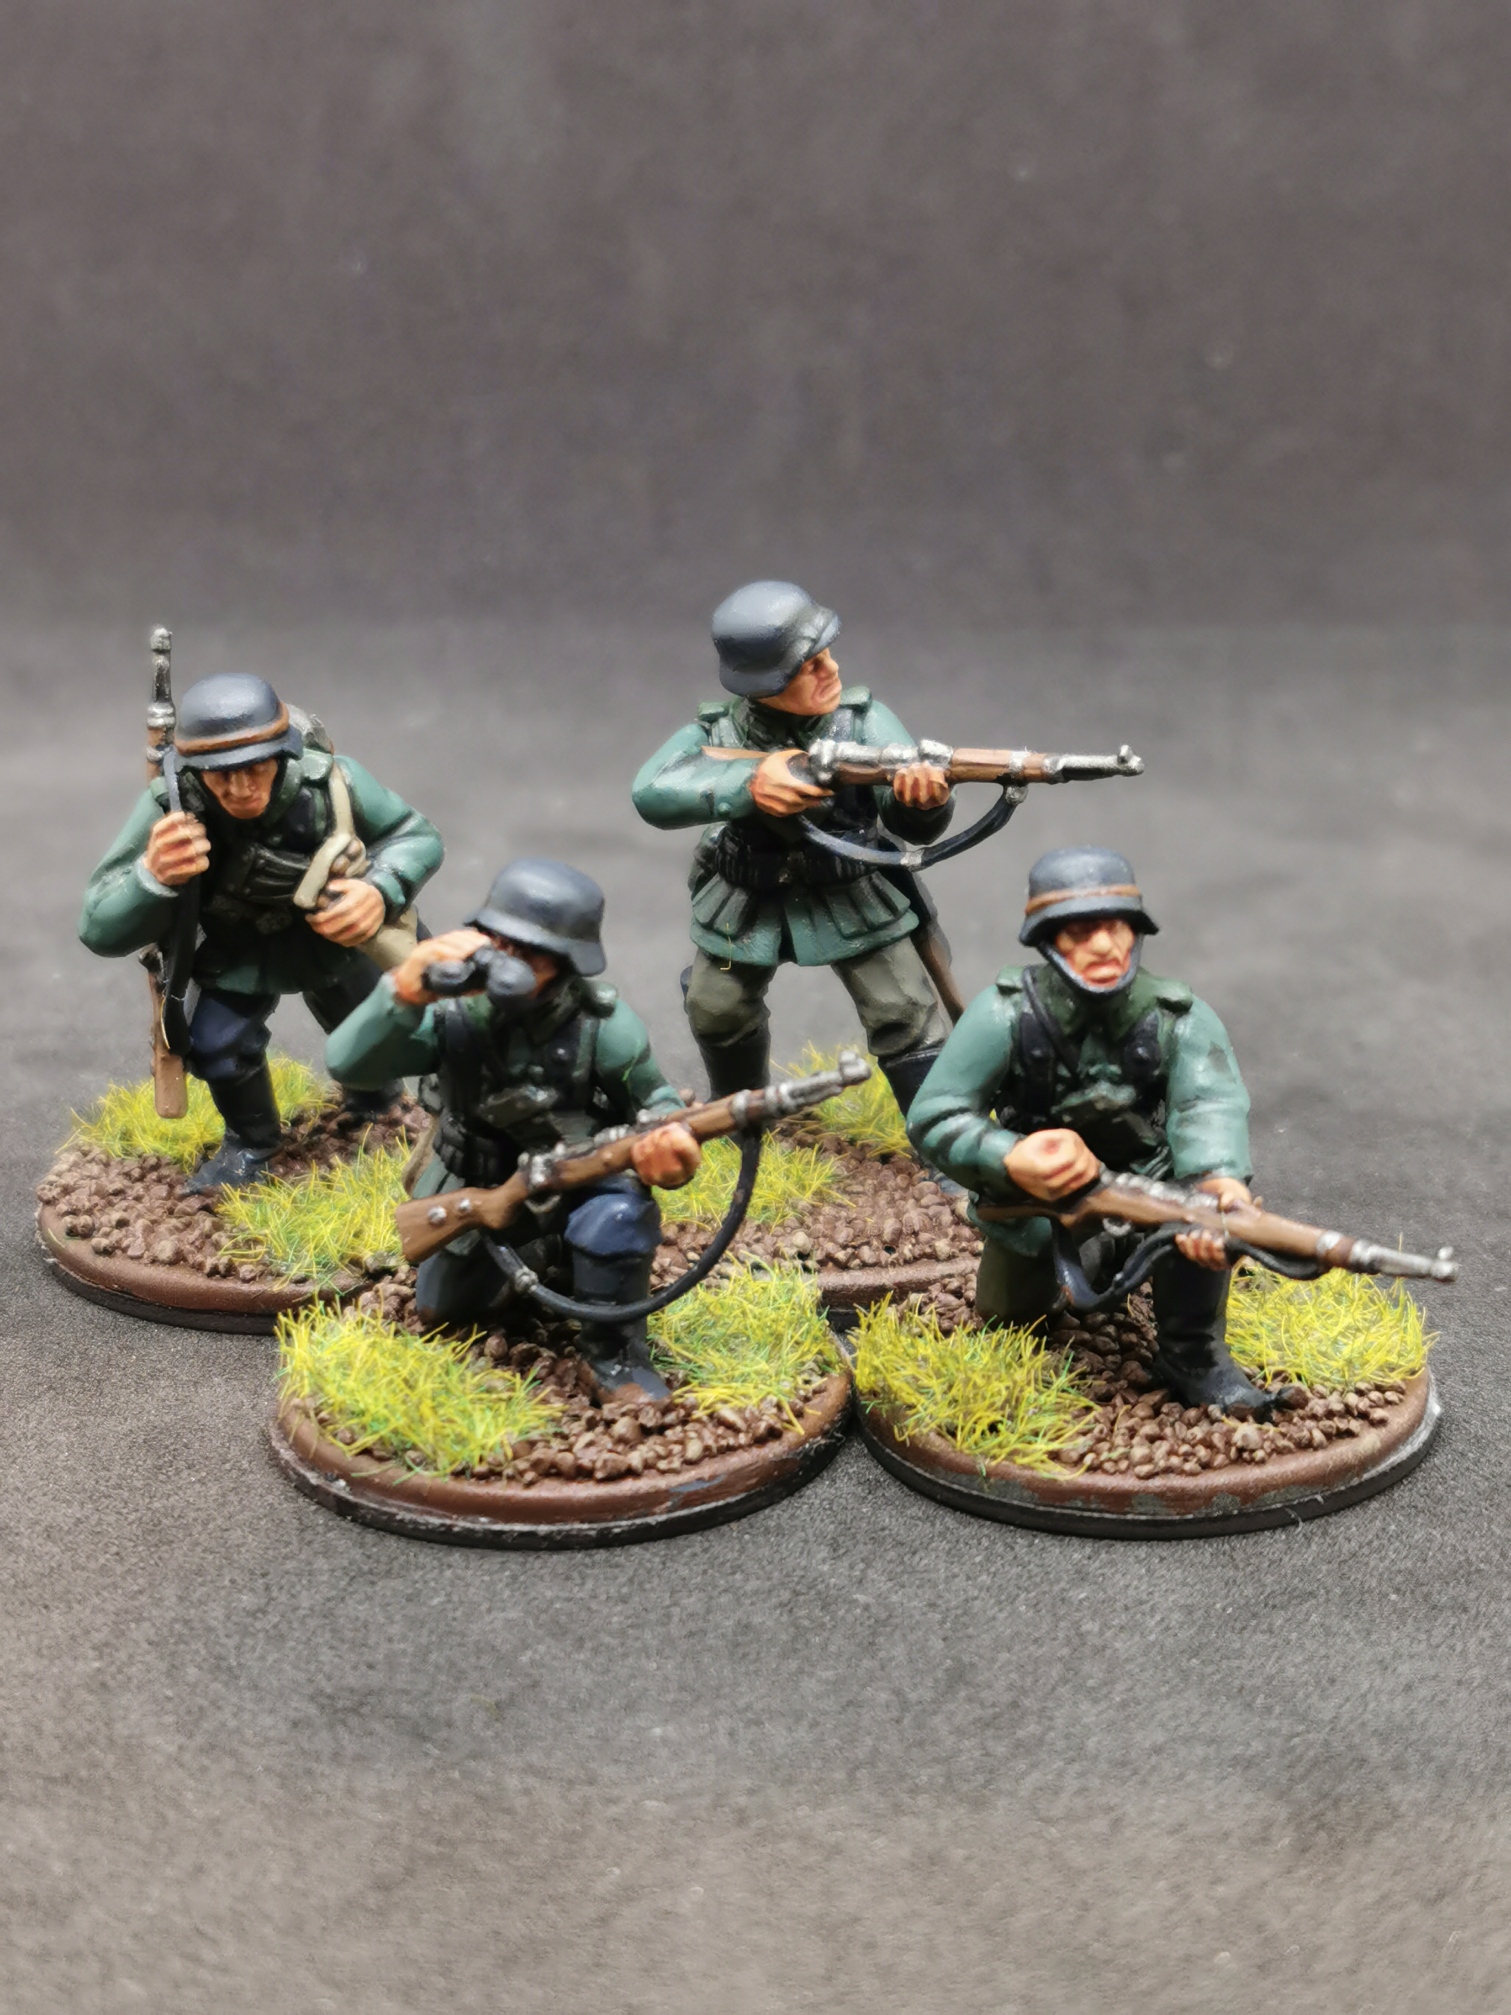
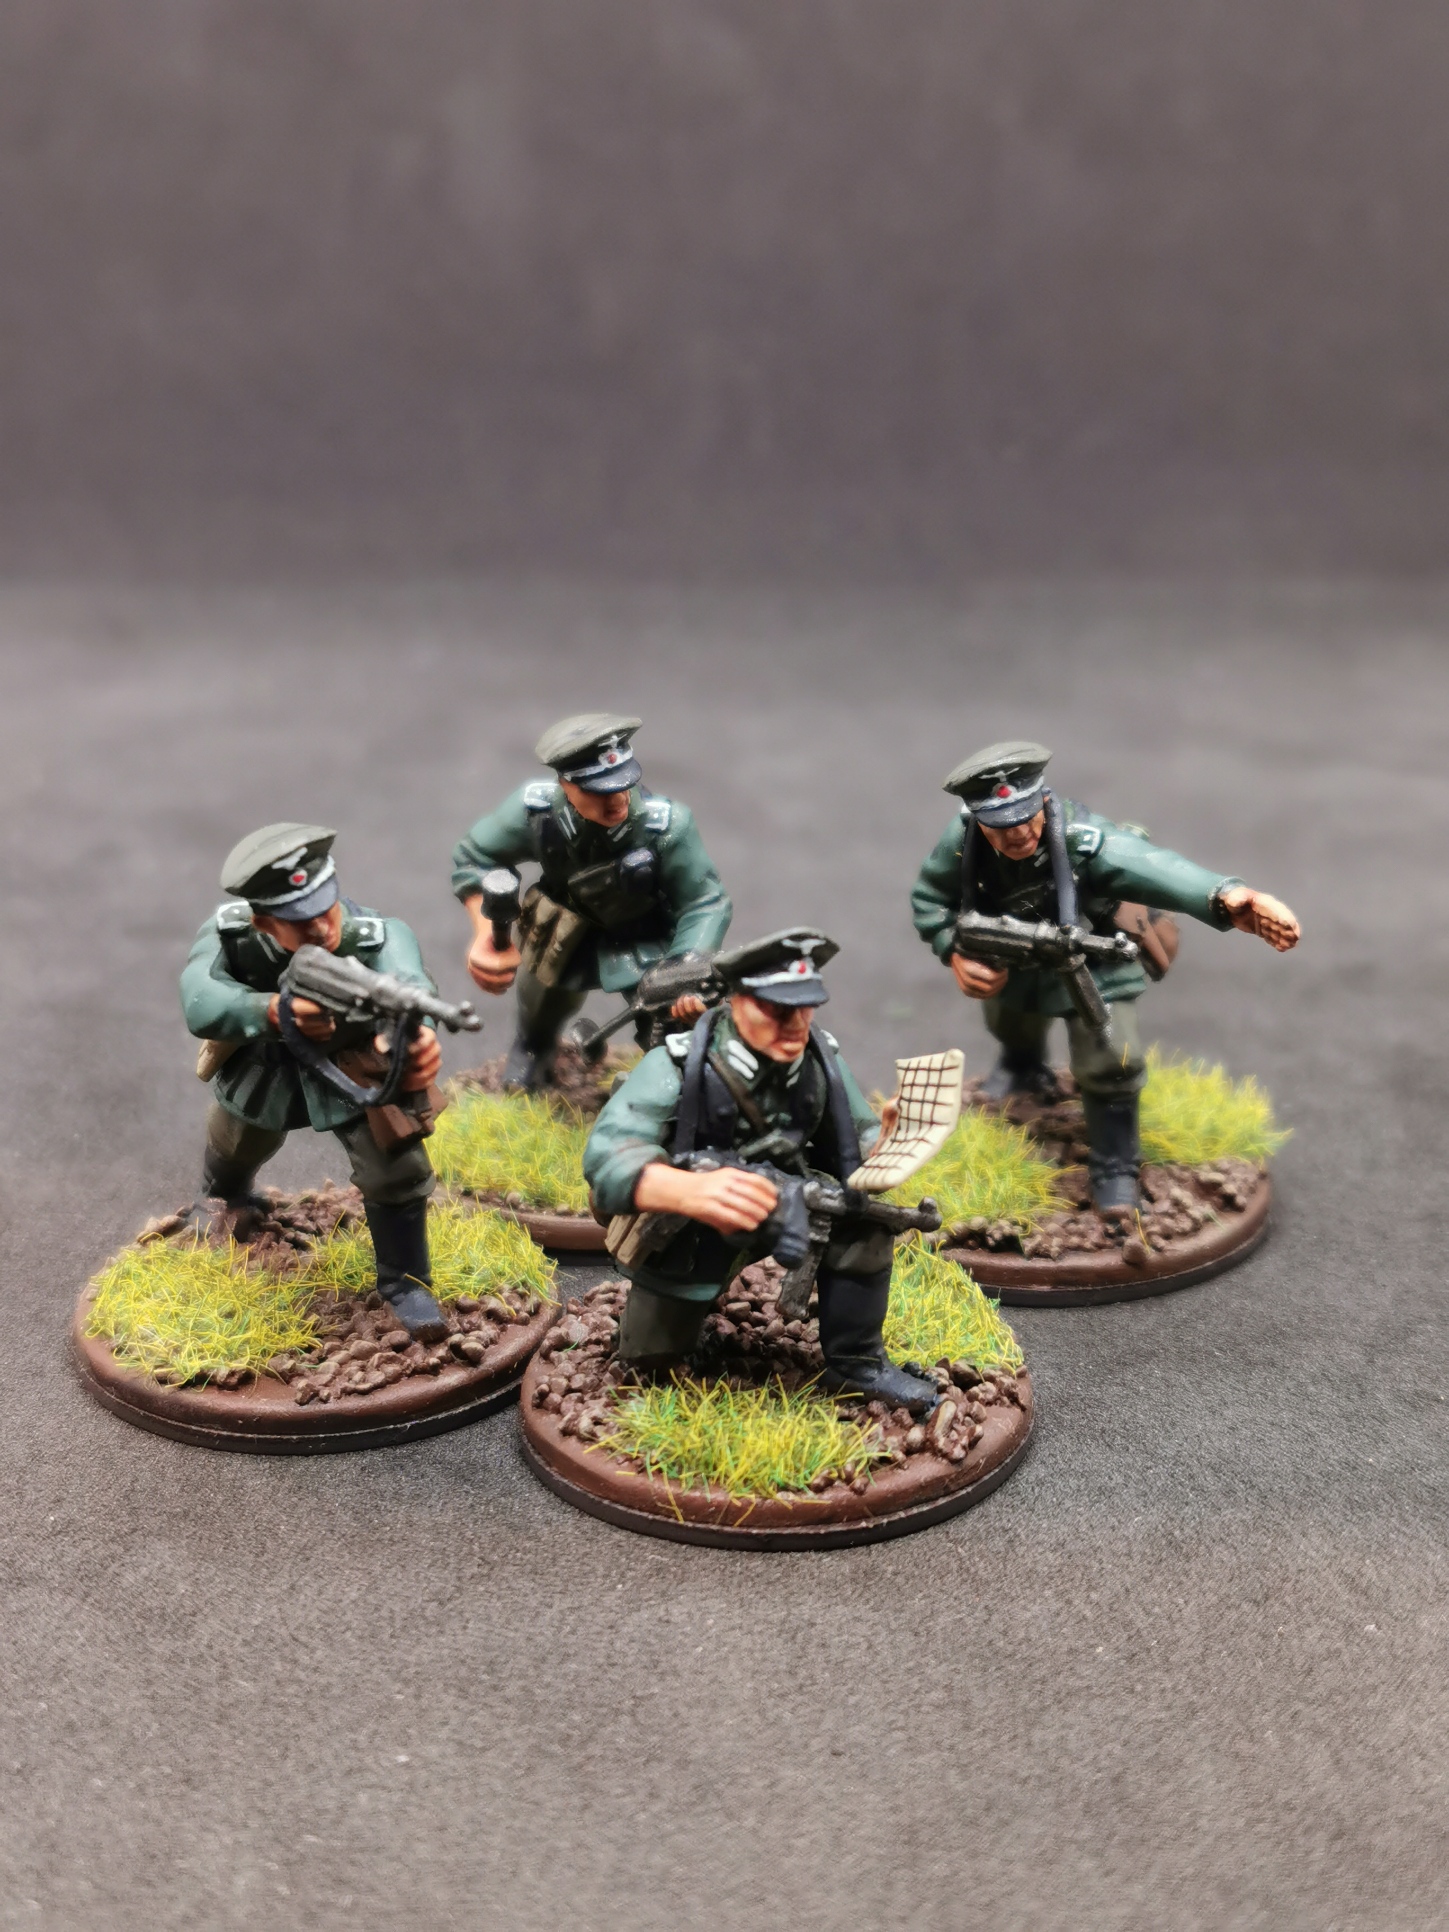
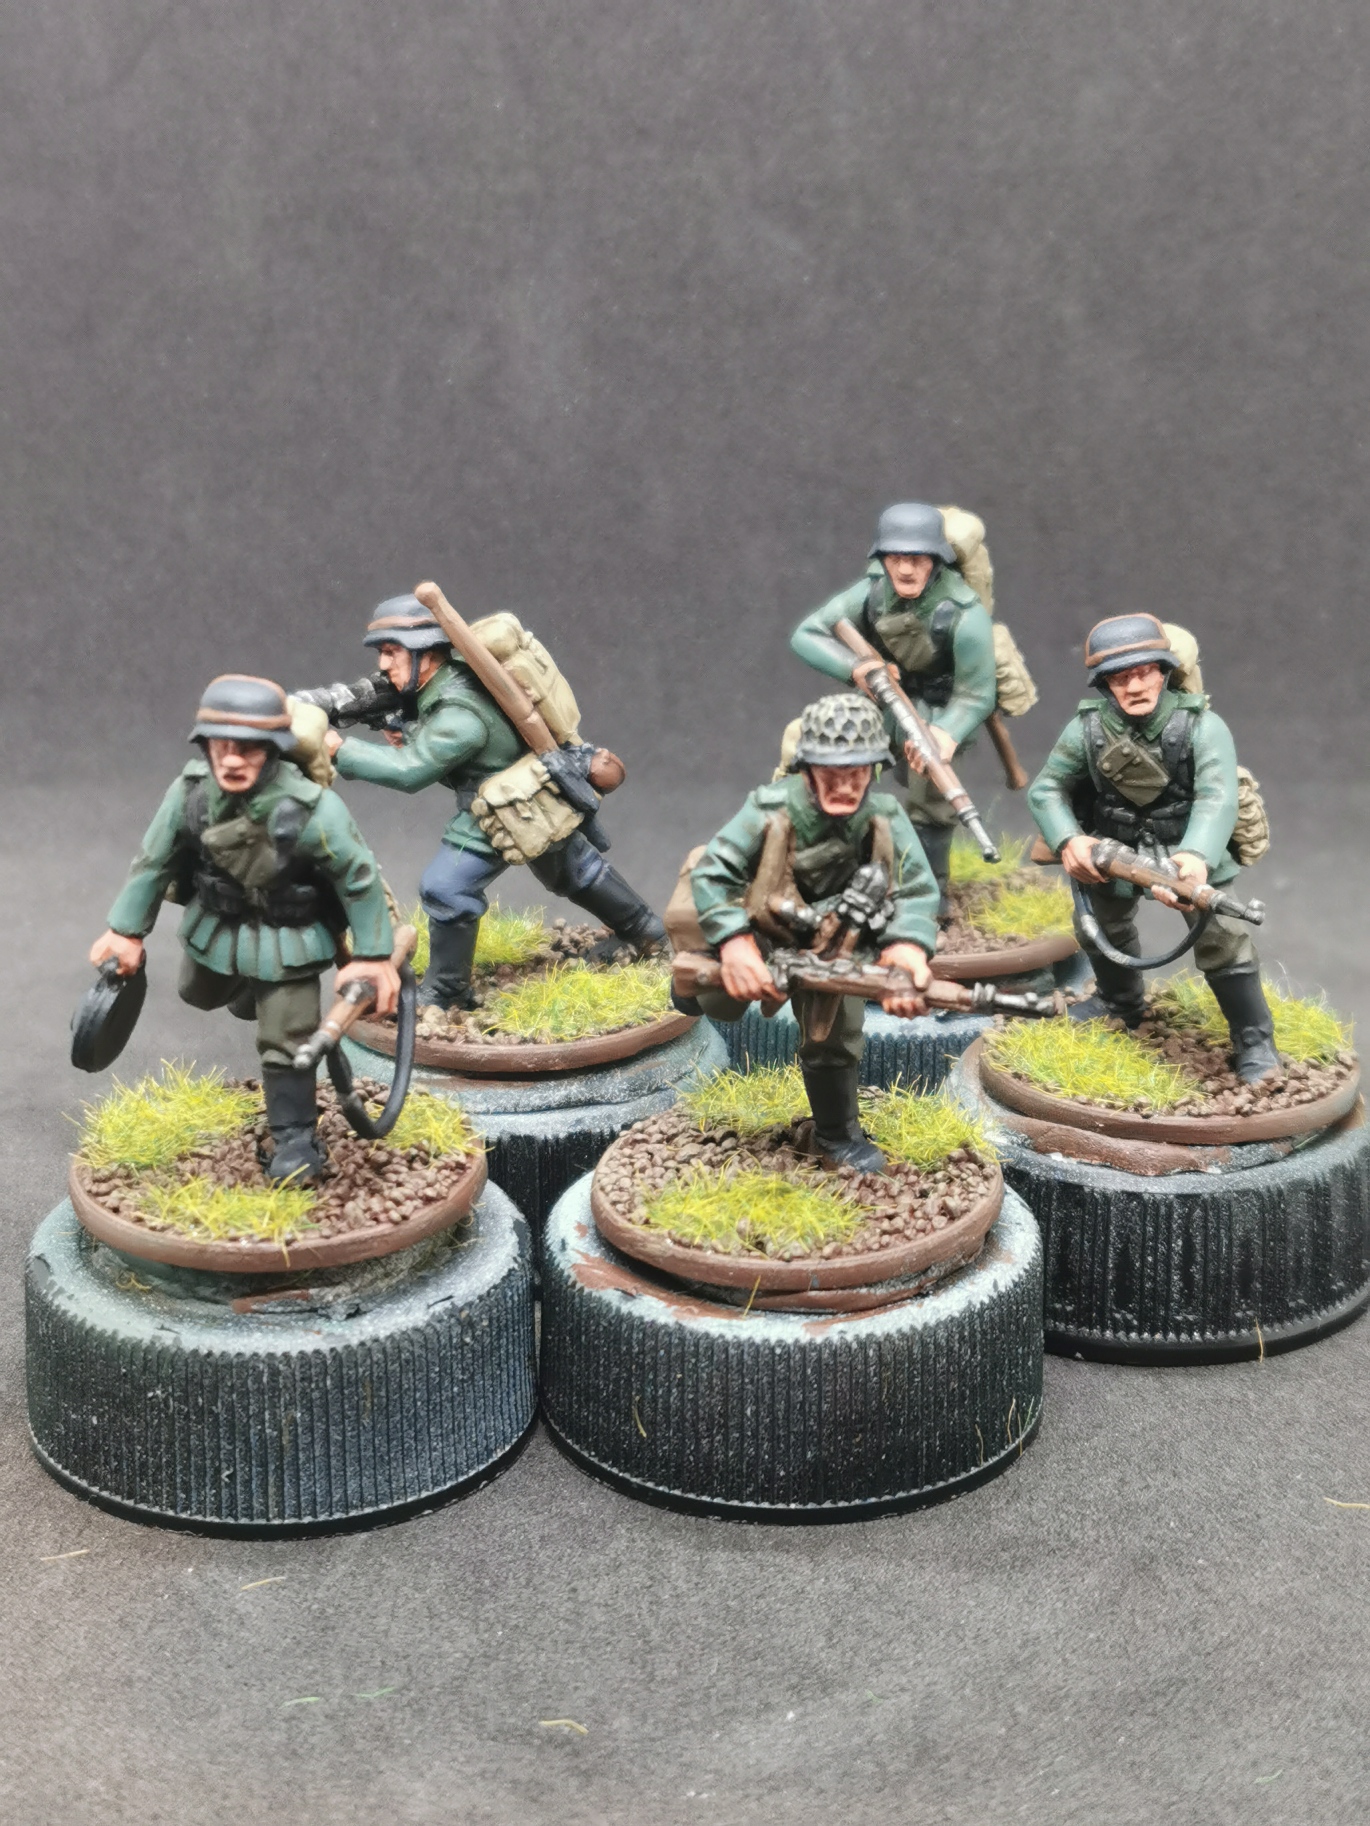
Step 7: Finishing first infantry squads
Here are some closeups of my first squads of Germans. I’ll do the flocking of the base at a later stage because it is always a huge mess on my desk and I want to make them all in one go.
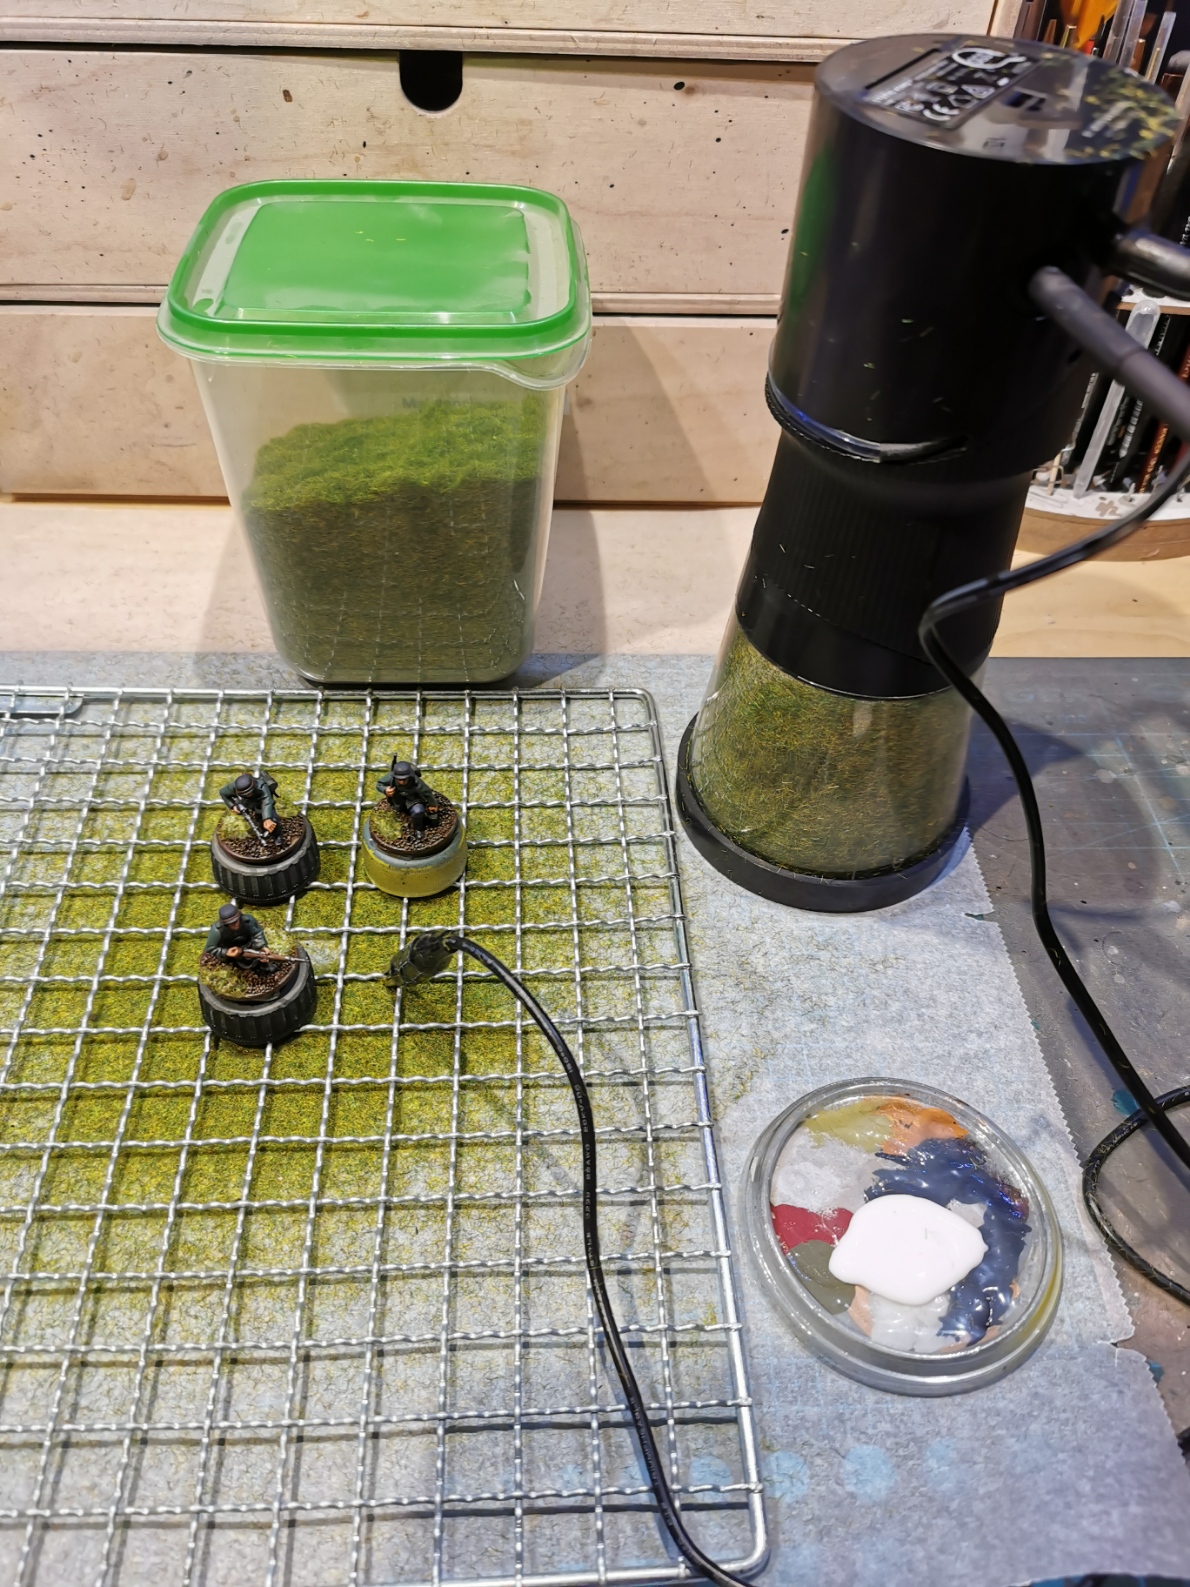
Step 8: Getting ready to flock!
Since the minis were all fully painted I started flocking the base and putting on some tufts on the larger bases to make them more interesting to look at. I always do this step in bulk so that the mess this makes is a one time clean up afterwards.
I use baking paper on the table surface to collect all the static grass the gets left over. On top of the paper I put a metal grid on top which is a wiping grid I got from the colour department in the hardware store. I put the electrical clamp from my Woodland Scenics Static King on the grid creating a static field which helps the grass flock to stand up straight. As glue I used undiluted PVA spread with a wet brush on the base.
Thes last step was a coat of gloss varnish on the whole mini followed by a coat of matt varnish to remove the shine from the previous coat.
Step 9: Roll out!
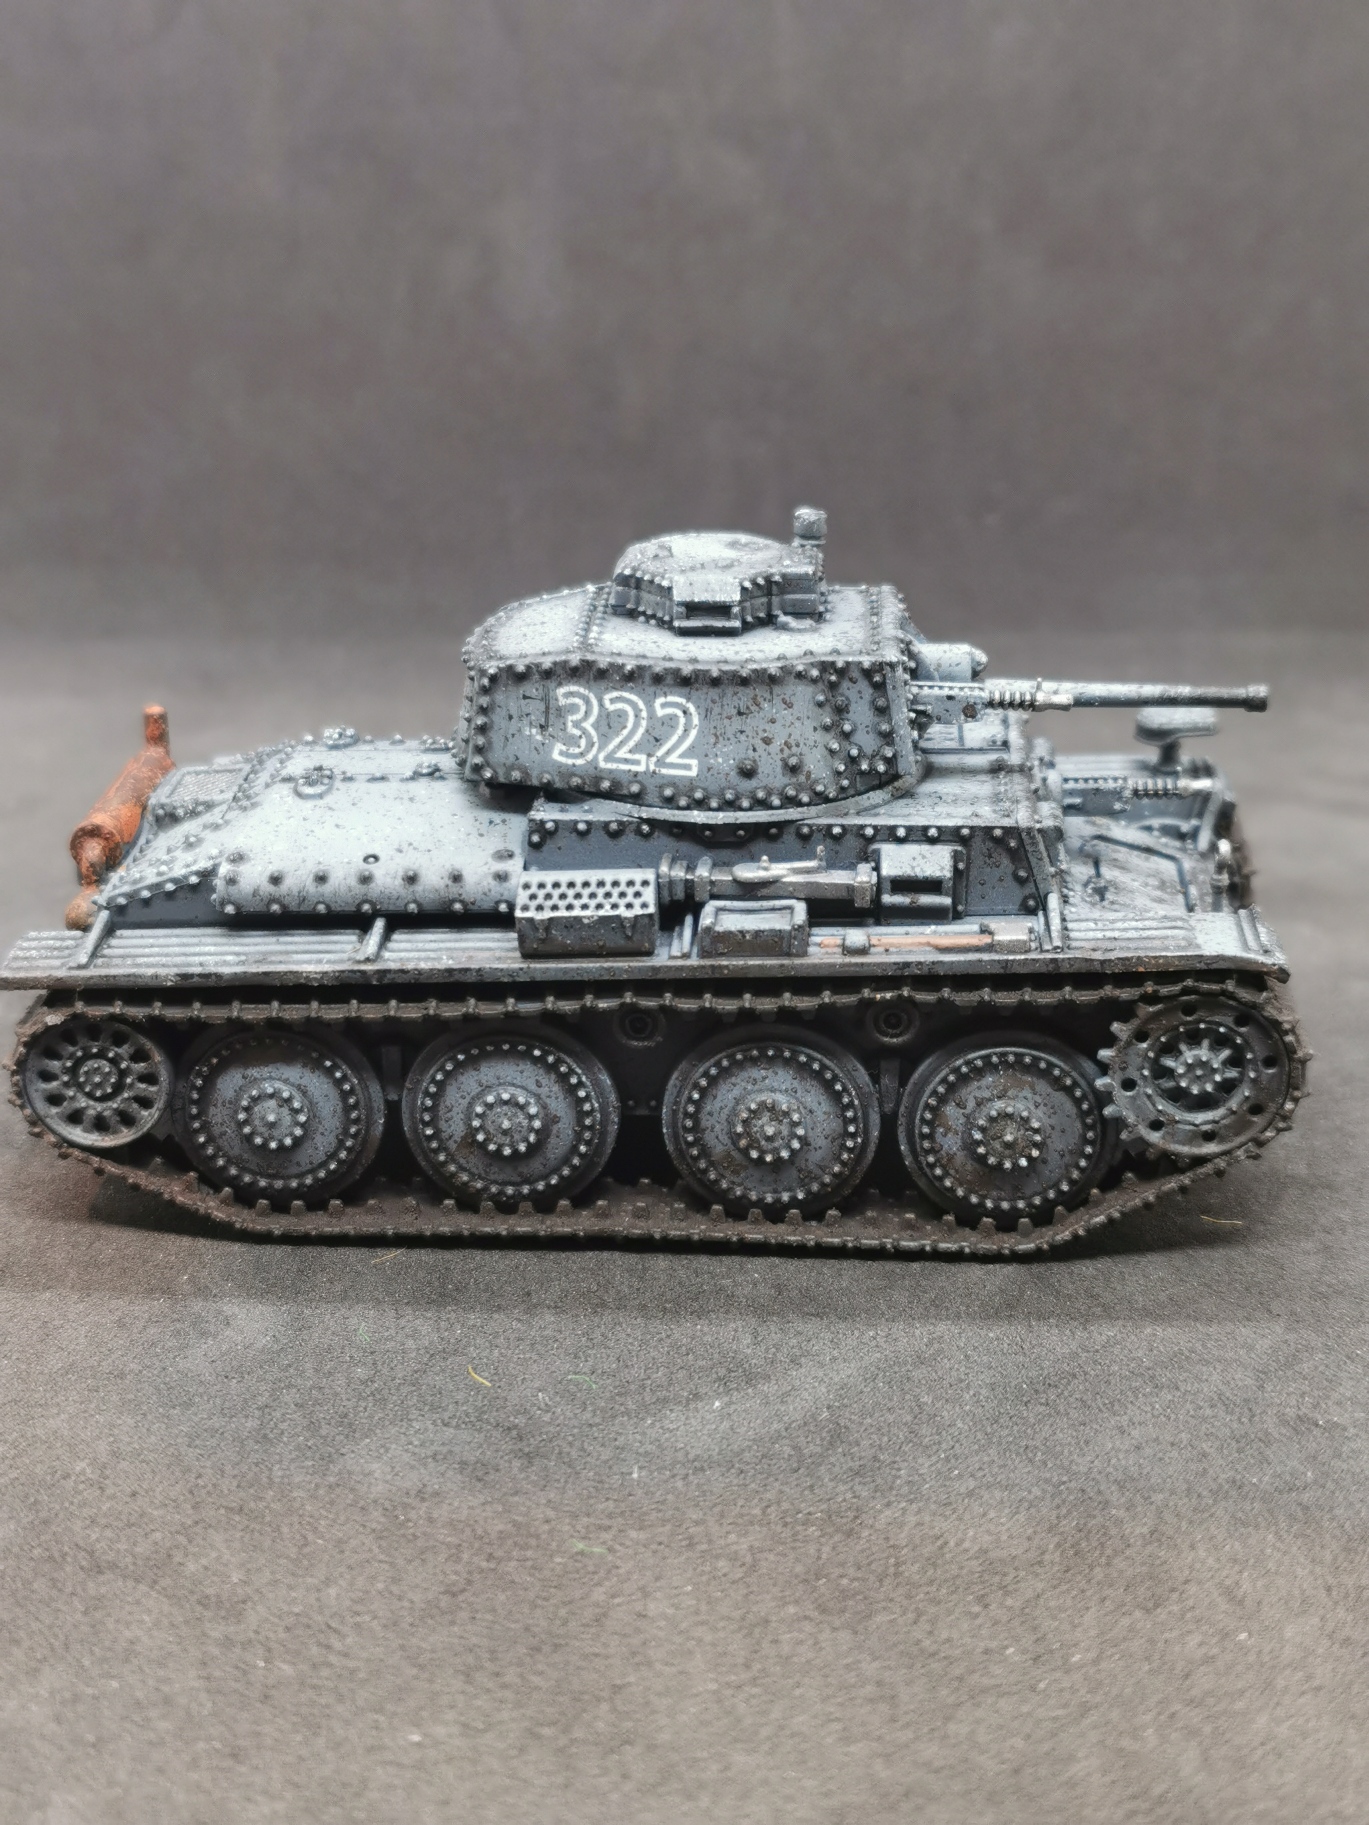
I painted the rest of the armor in the same way as the hanomag and also did red markings on the rest of the vehicles to keep some kind of unity.
I found a great website to help how german vehicles were marked during WW2:
https://www.flamesofwar.com/Default.aspx?tabid=110&art_id=287
The Tank comander was basecoated with VMC German Grey followed by two coats of Citadel Nuln Oil. The typical pink markings on the tank crew uniform was painted with a mix of Citadel Mephiston red and Citadel White scar.
The other markings were painted using Citadel White Scar.
The rust on the exhaust pipes was achieved using dirty down rust.
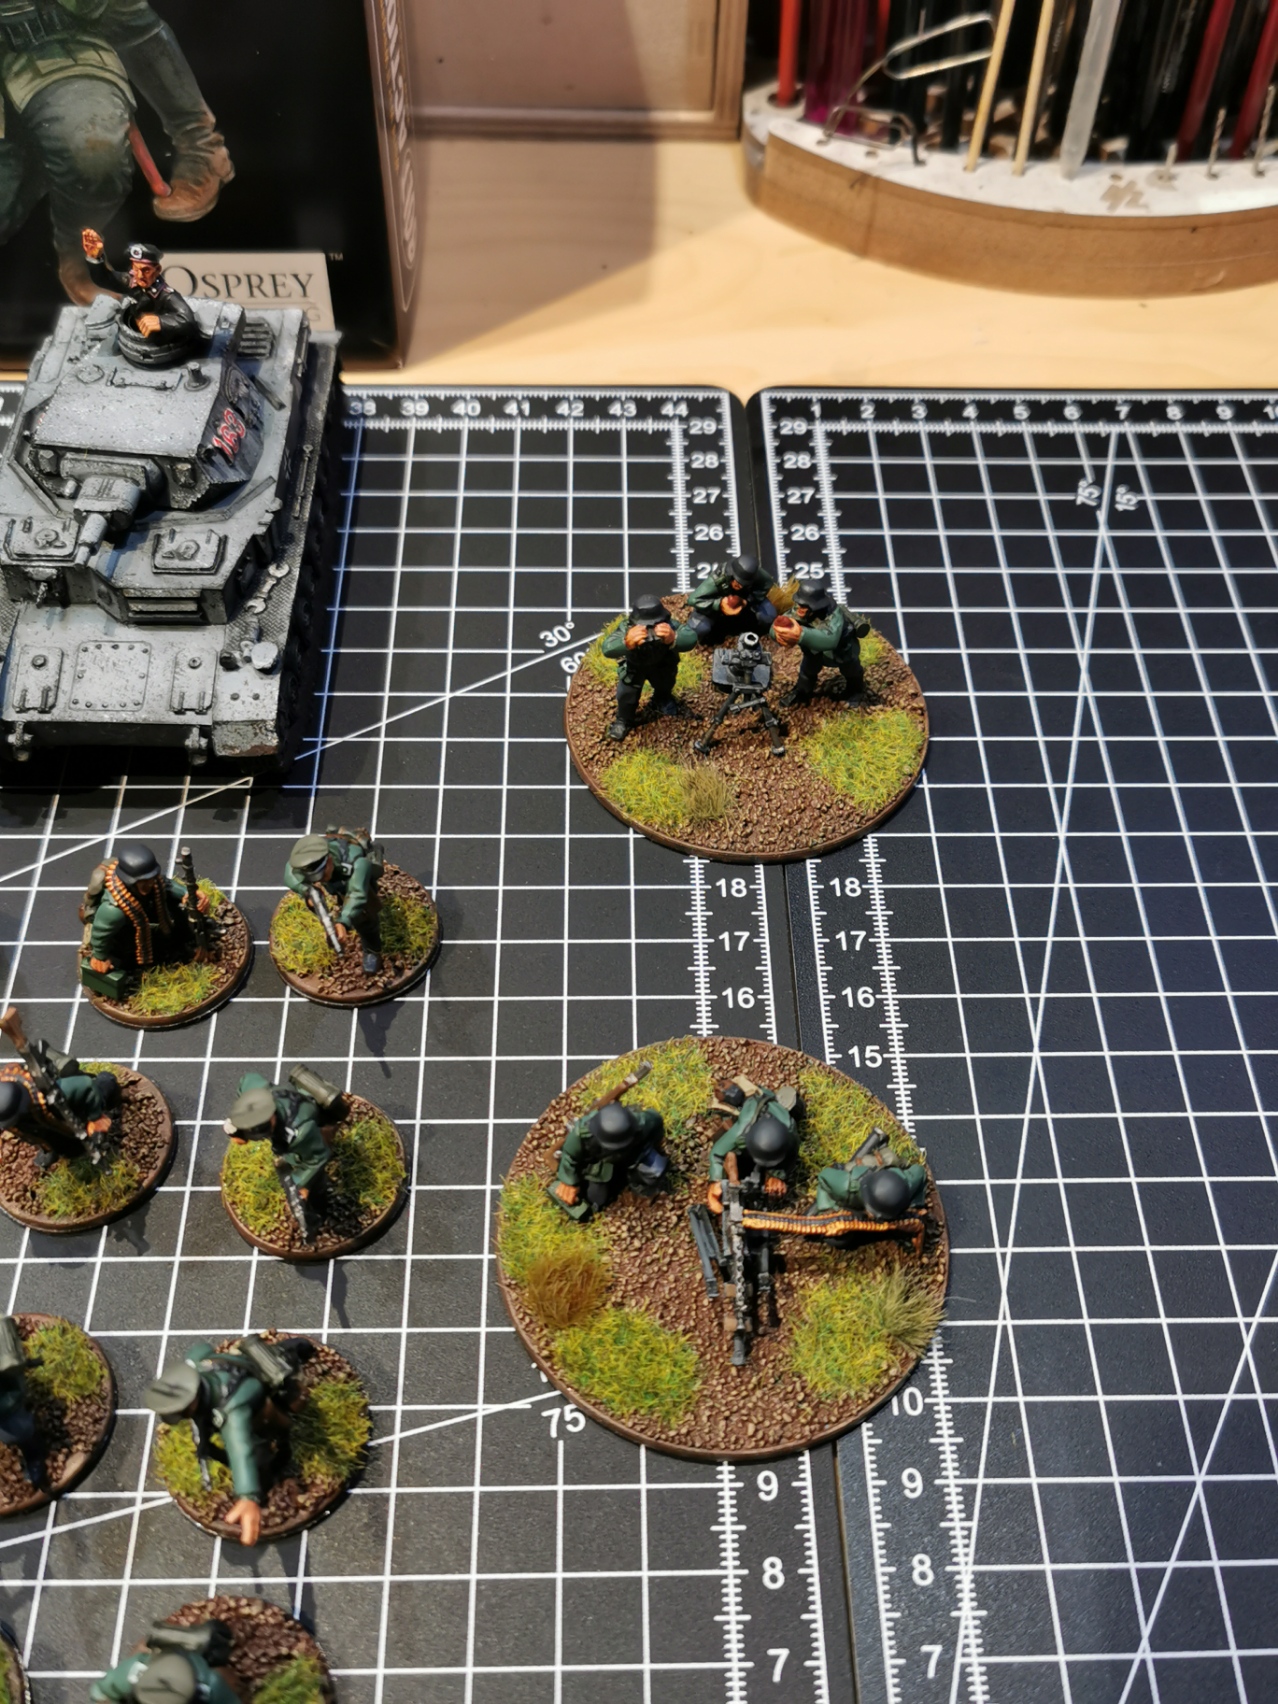
Step 10: Action shots!
There is nothing more satisfying than some action shots of the newly painted minis! Aaaaaaaaaaaaaaaaaaaaand ACTION!!!
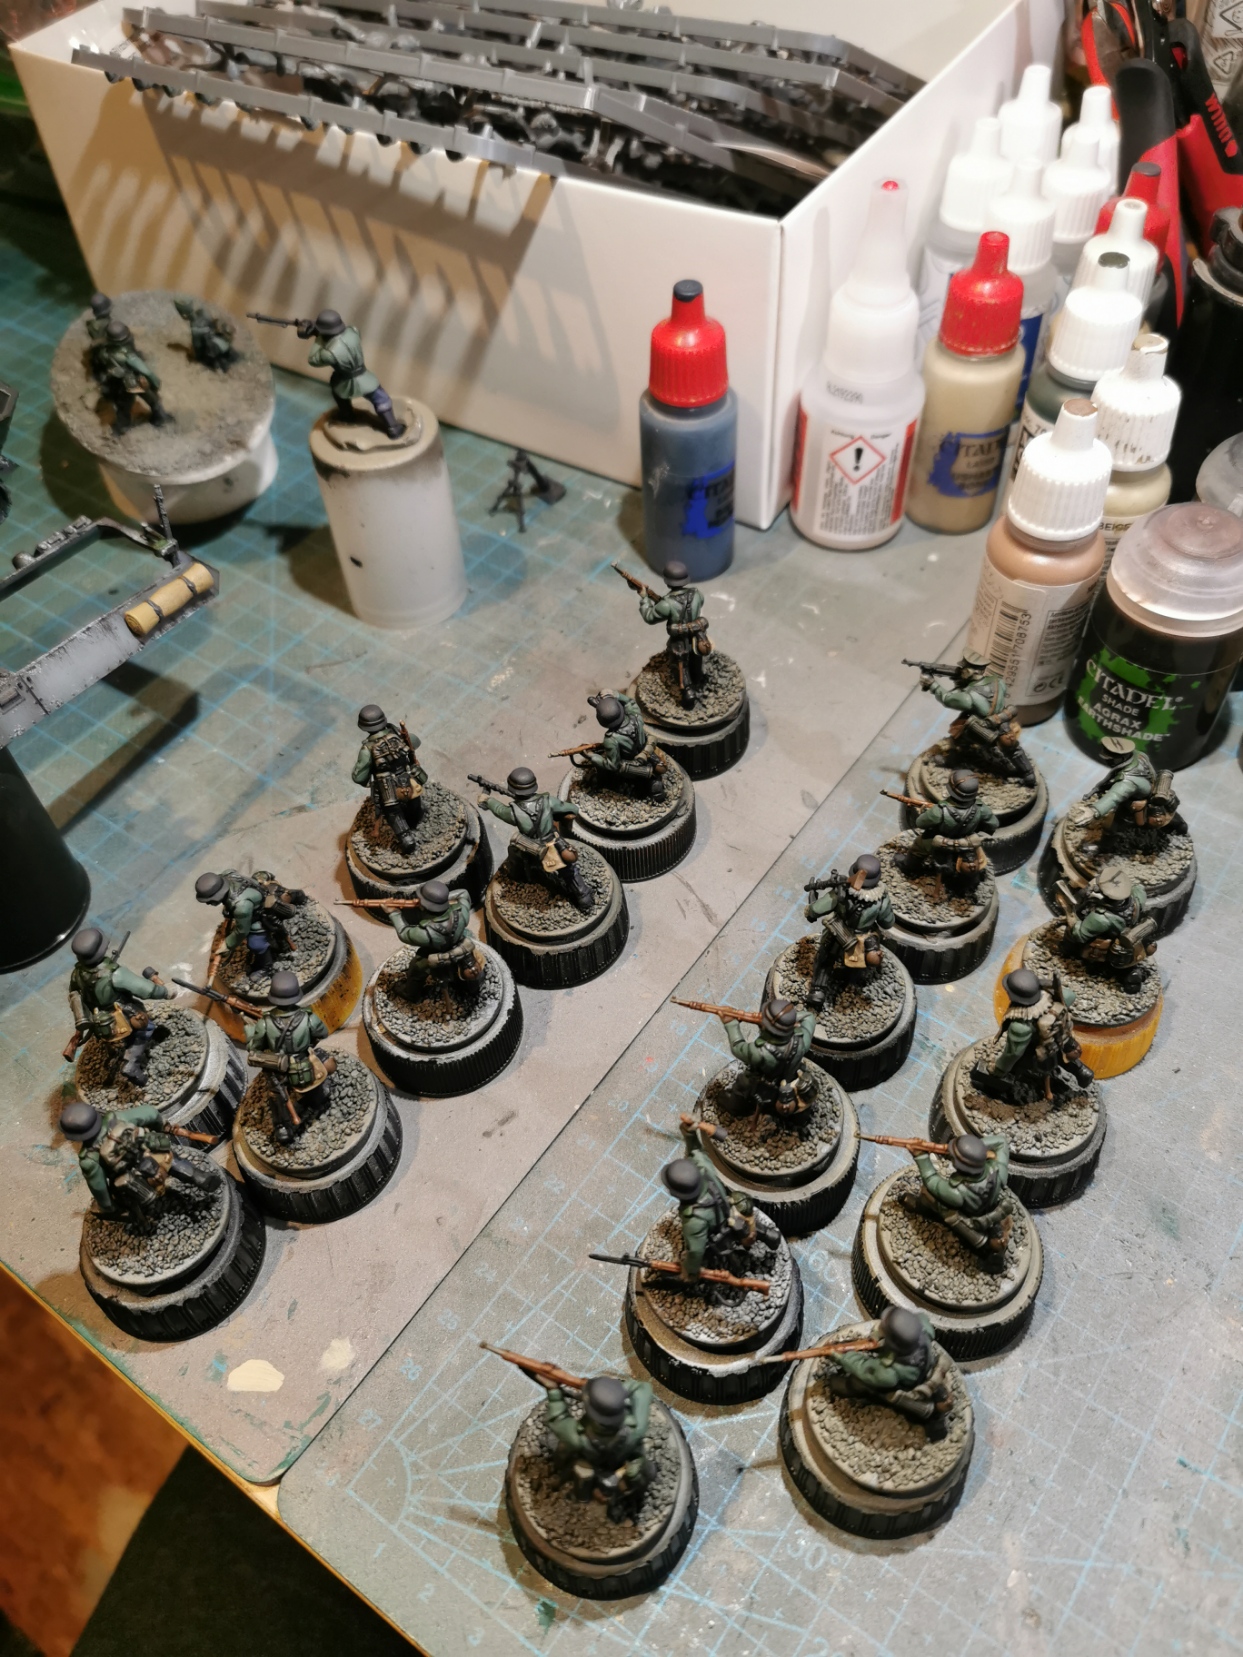
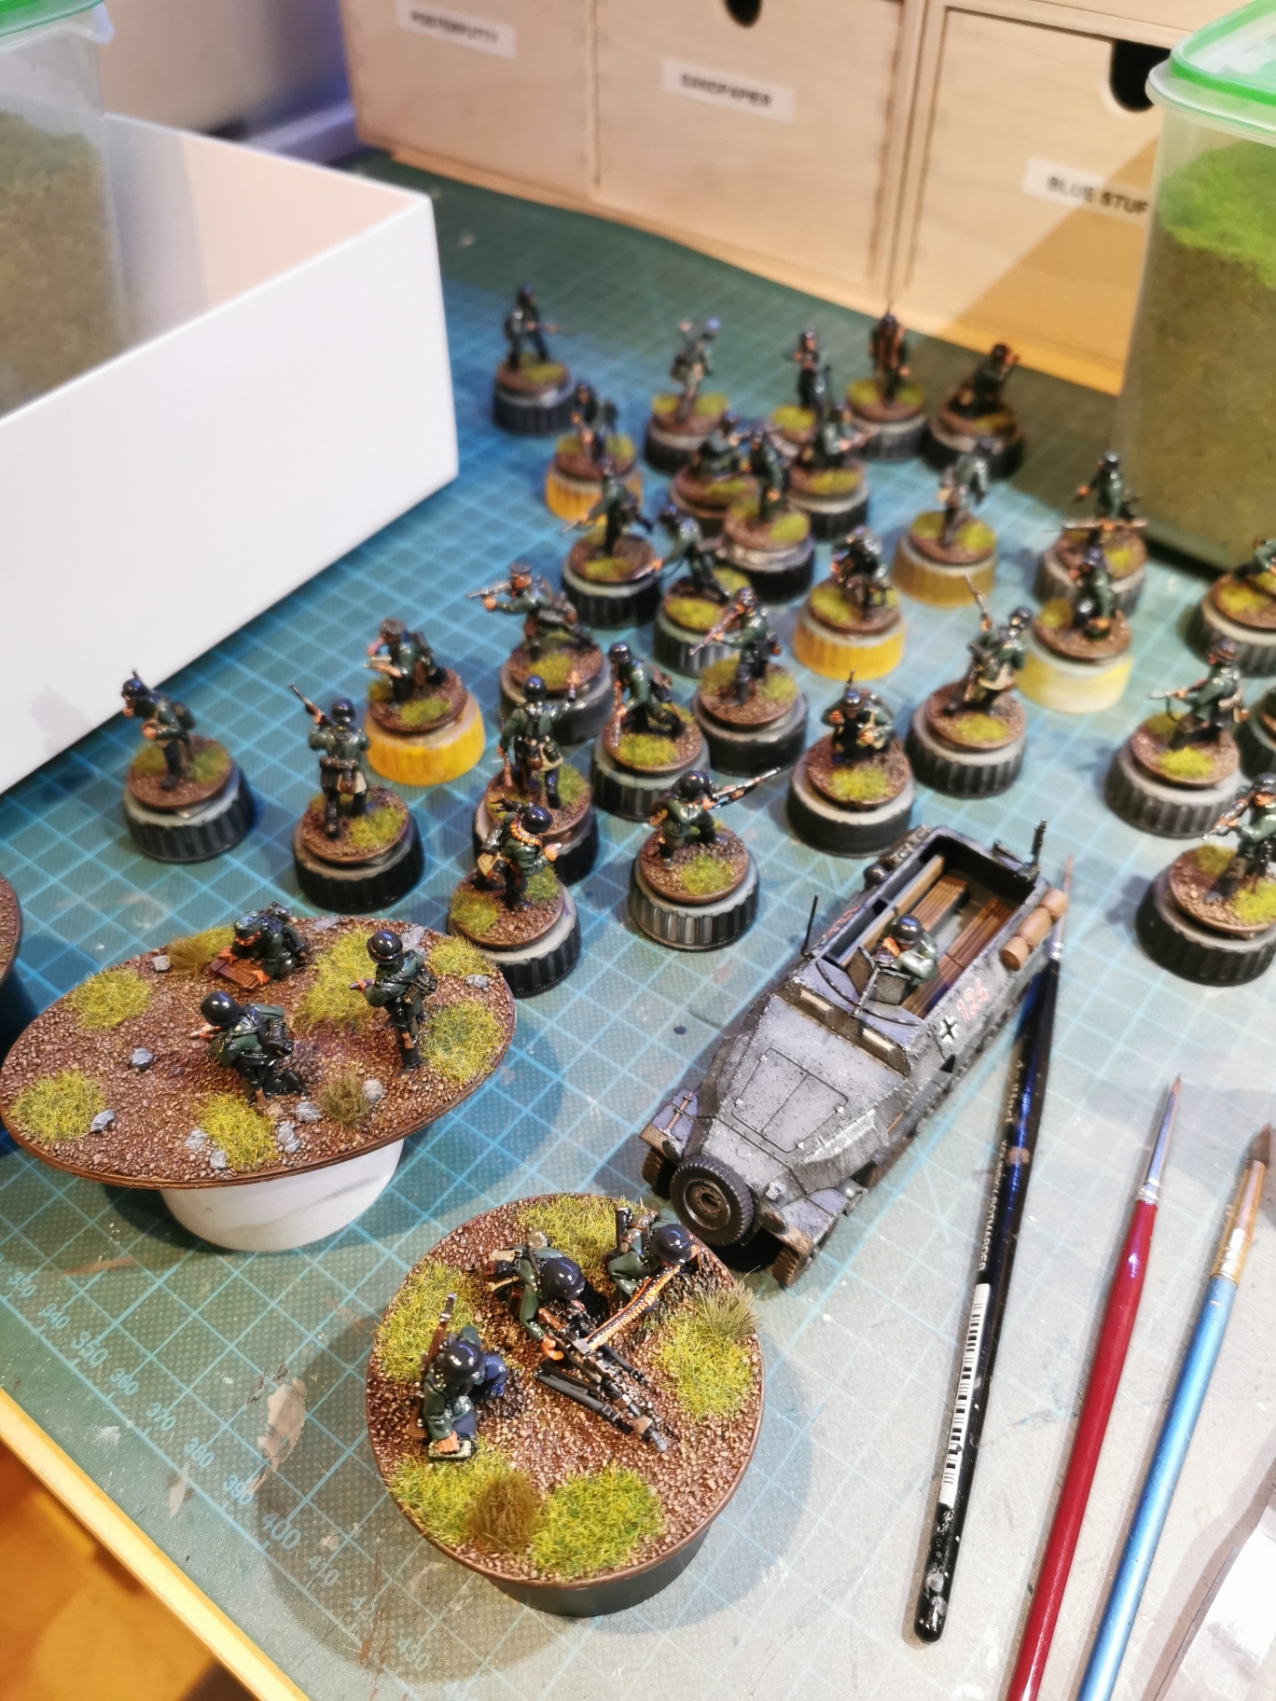
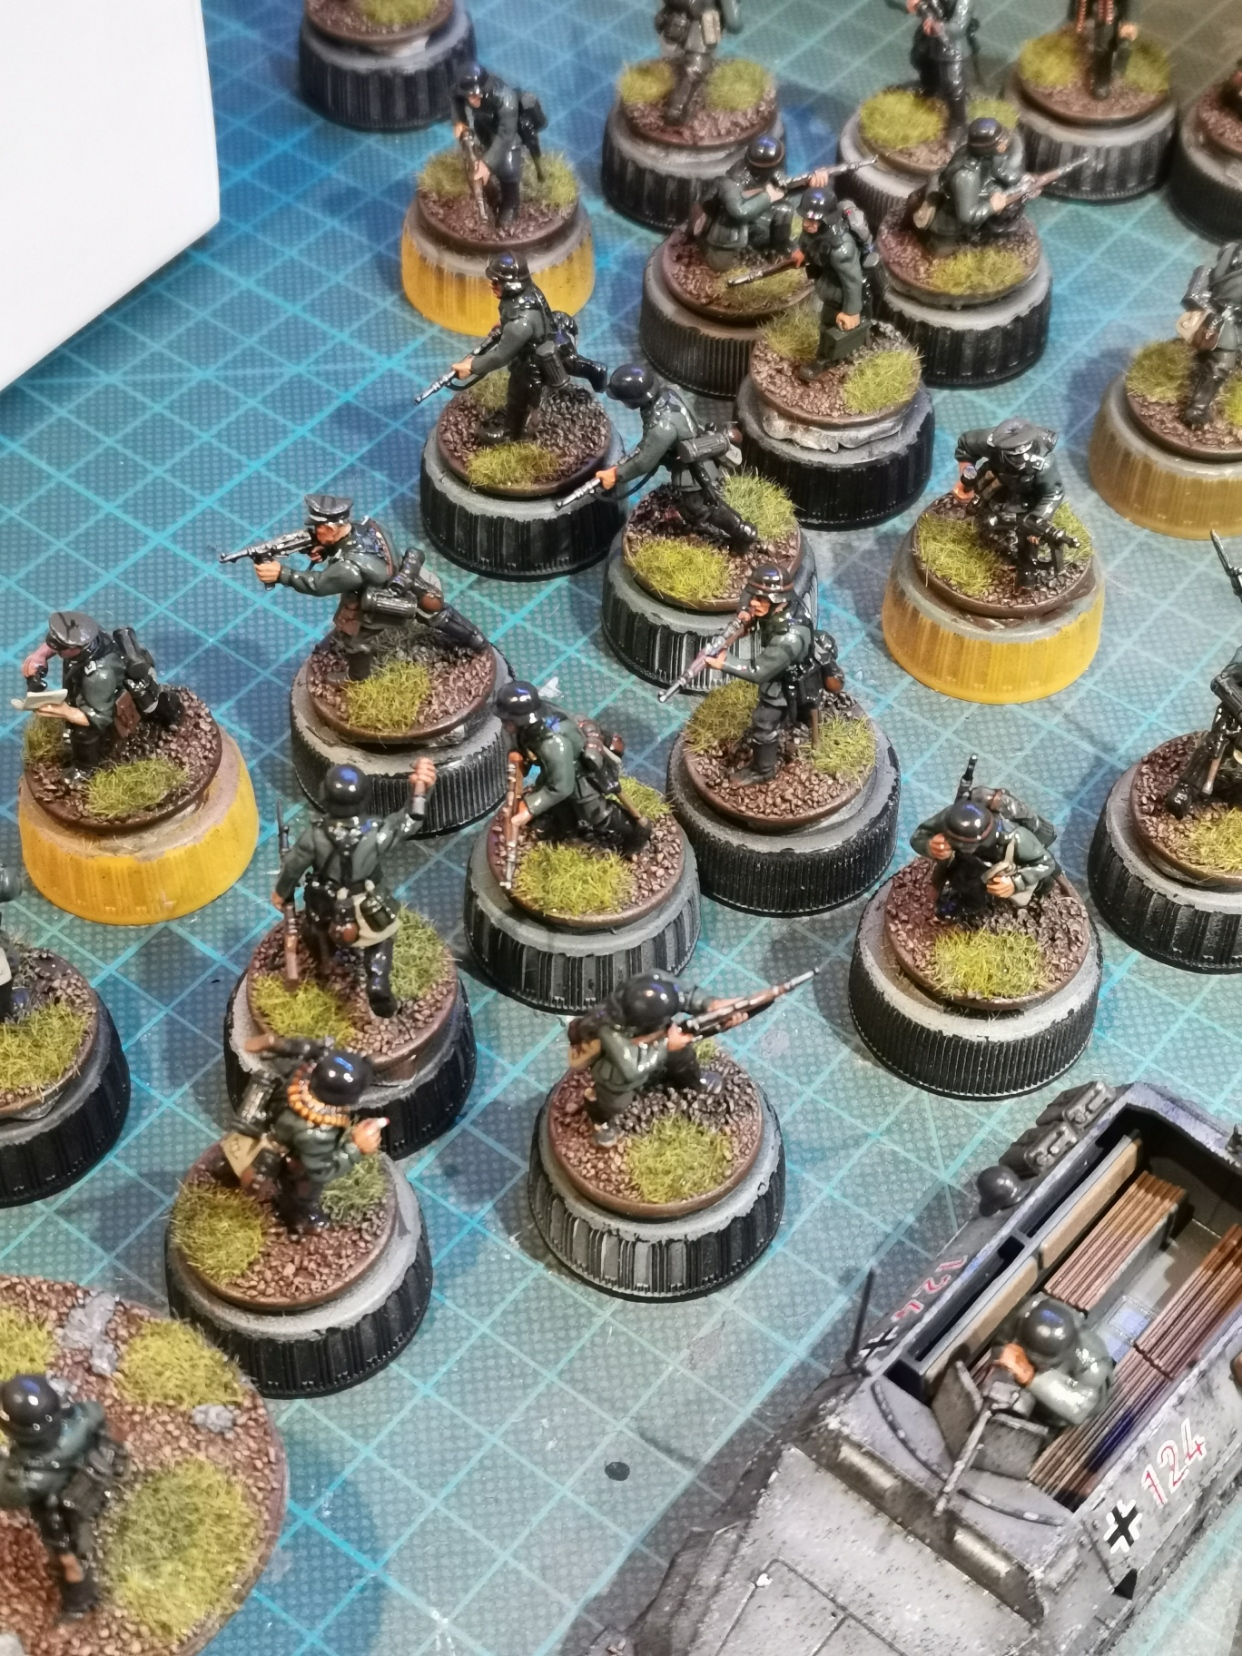
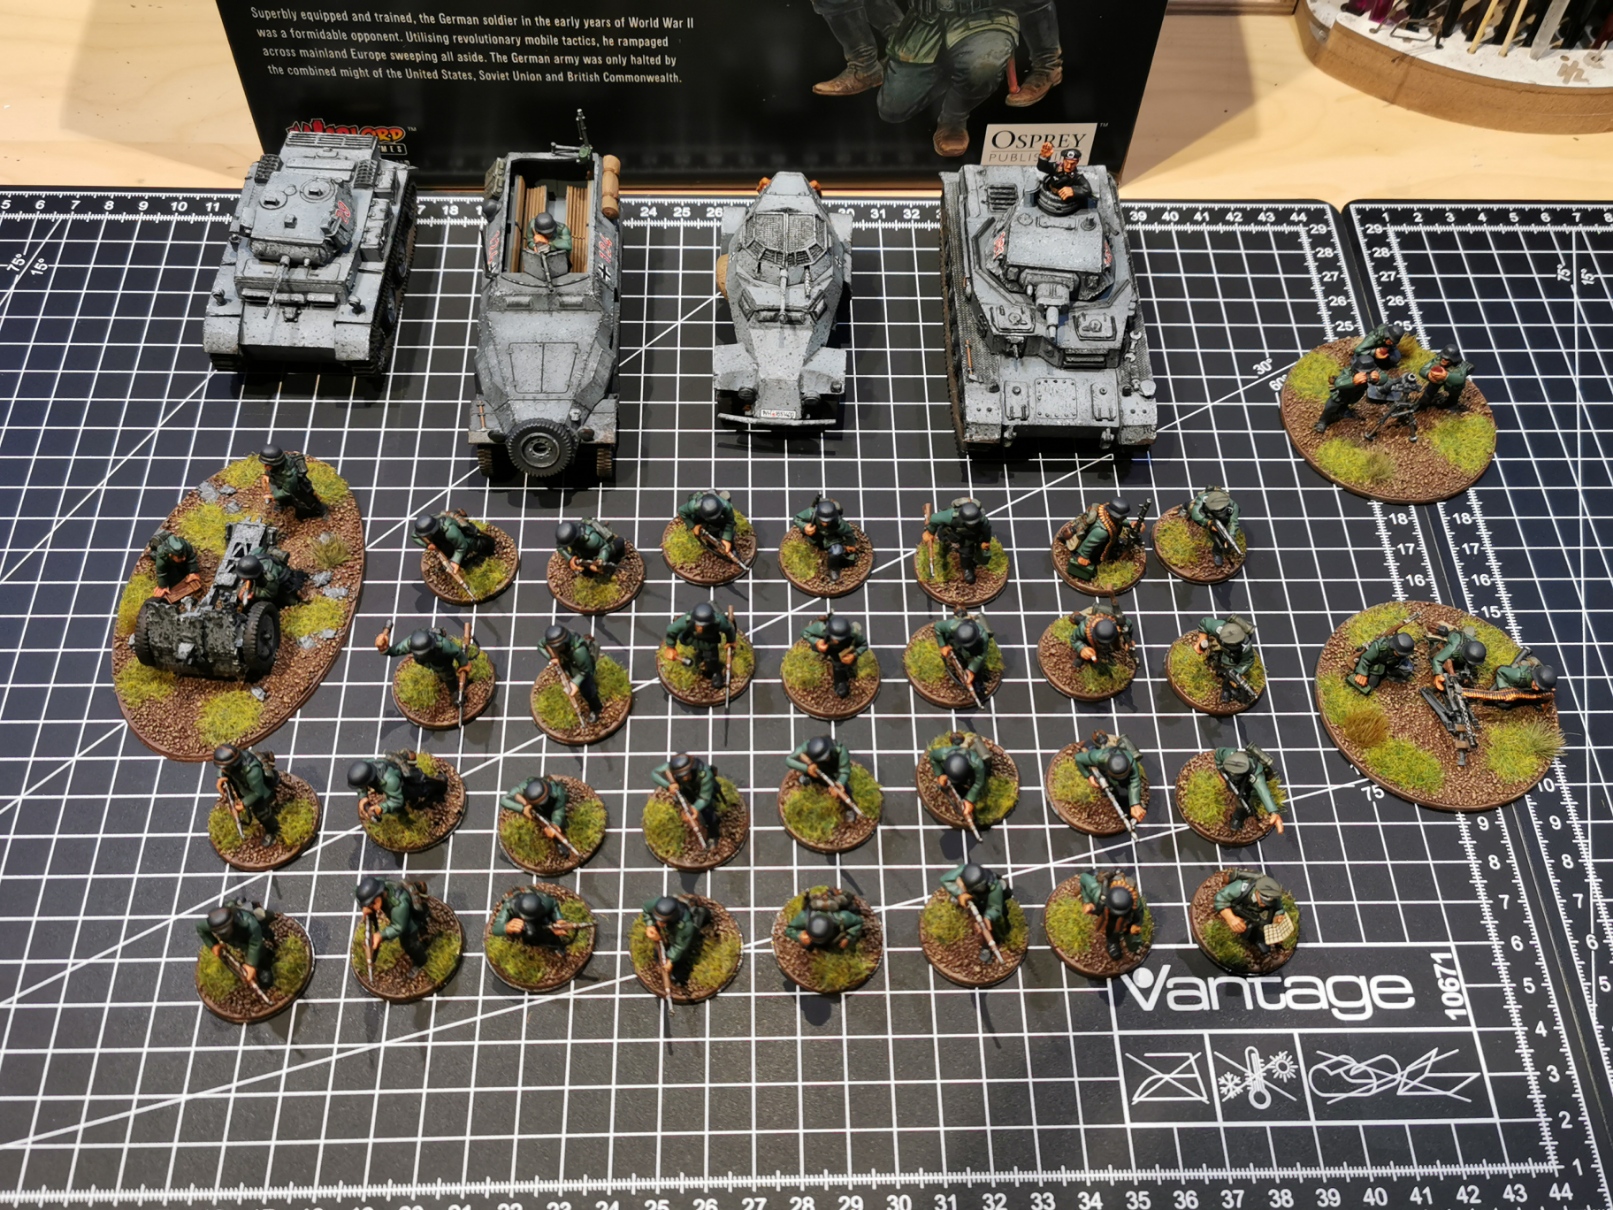
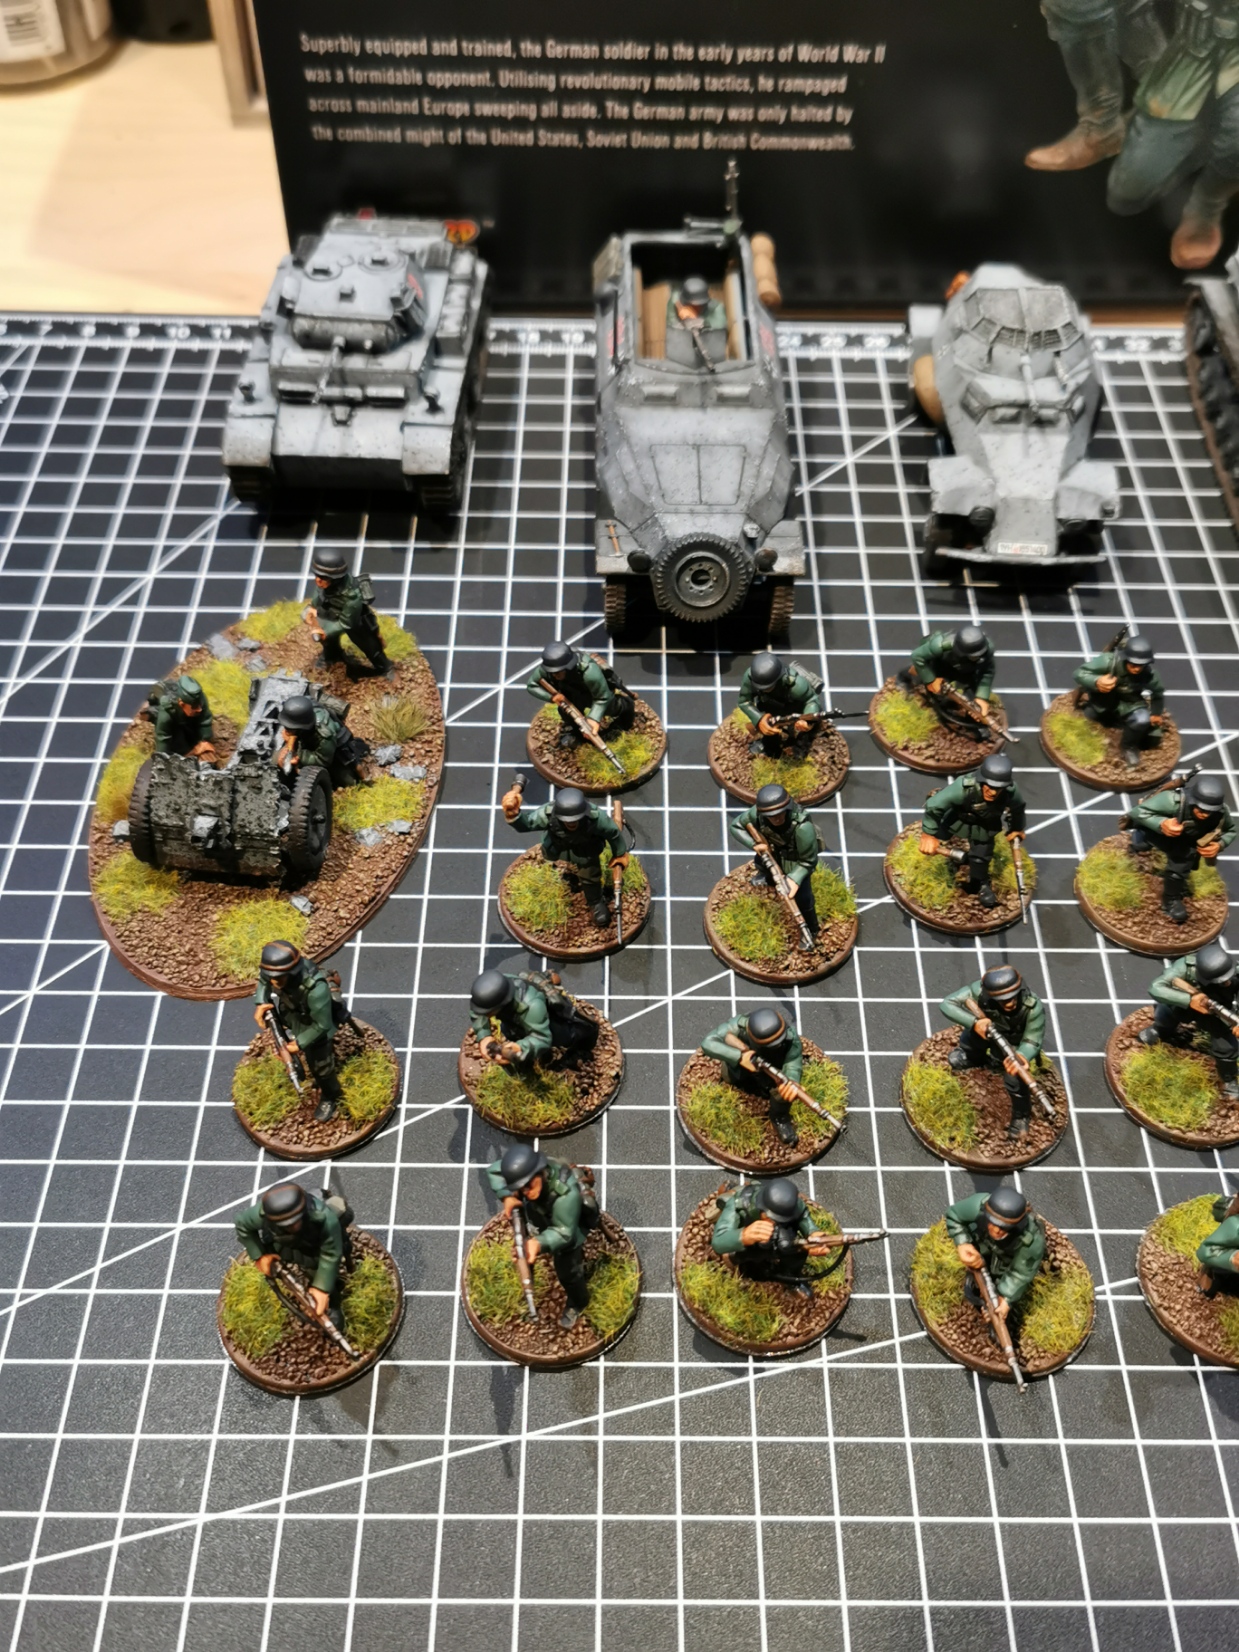
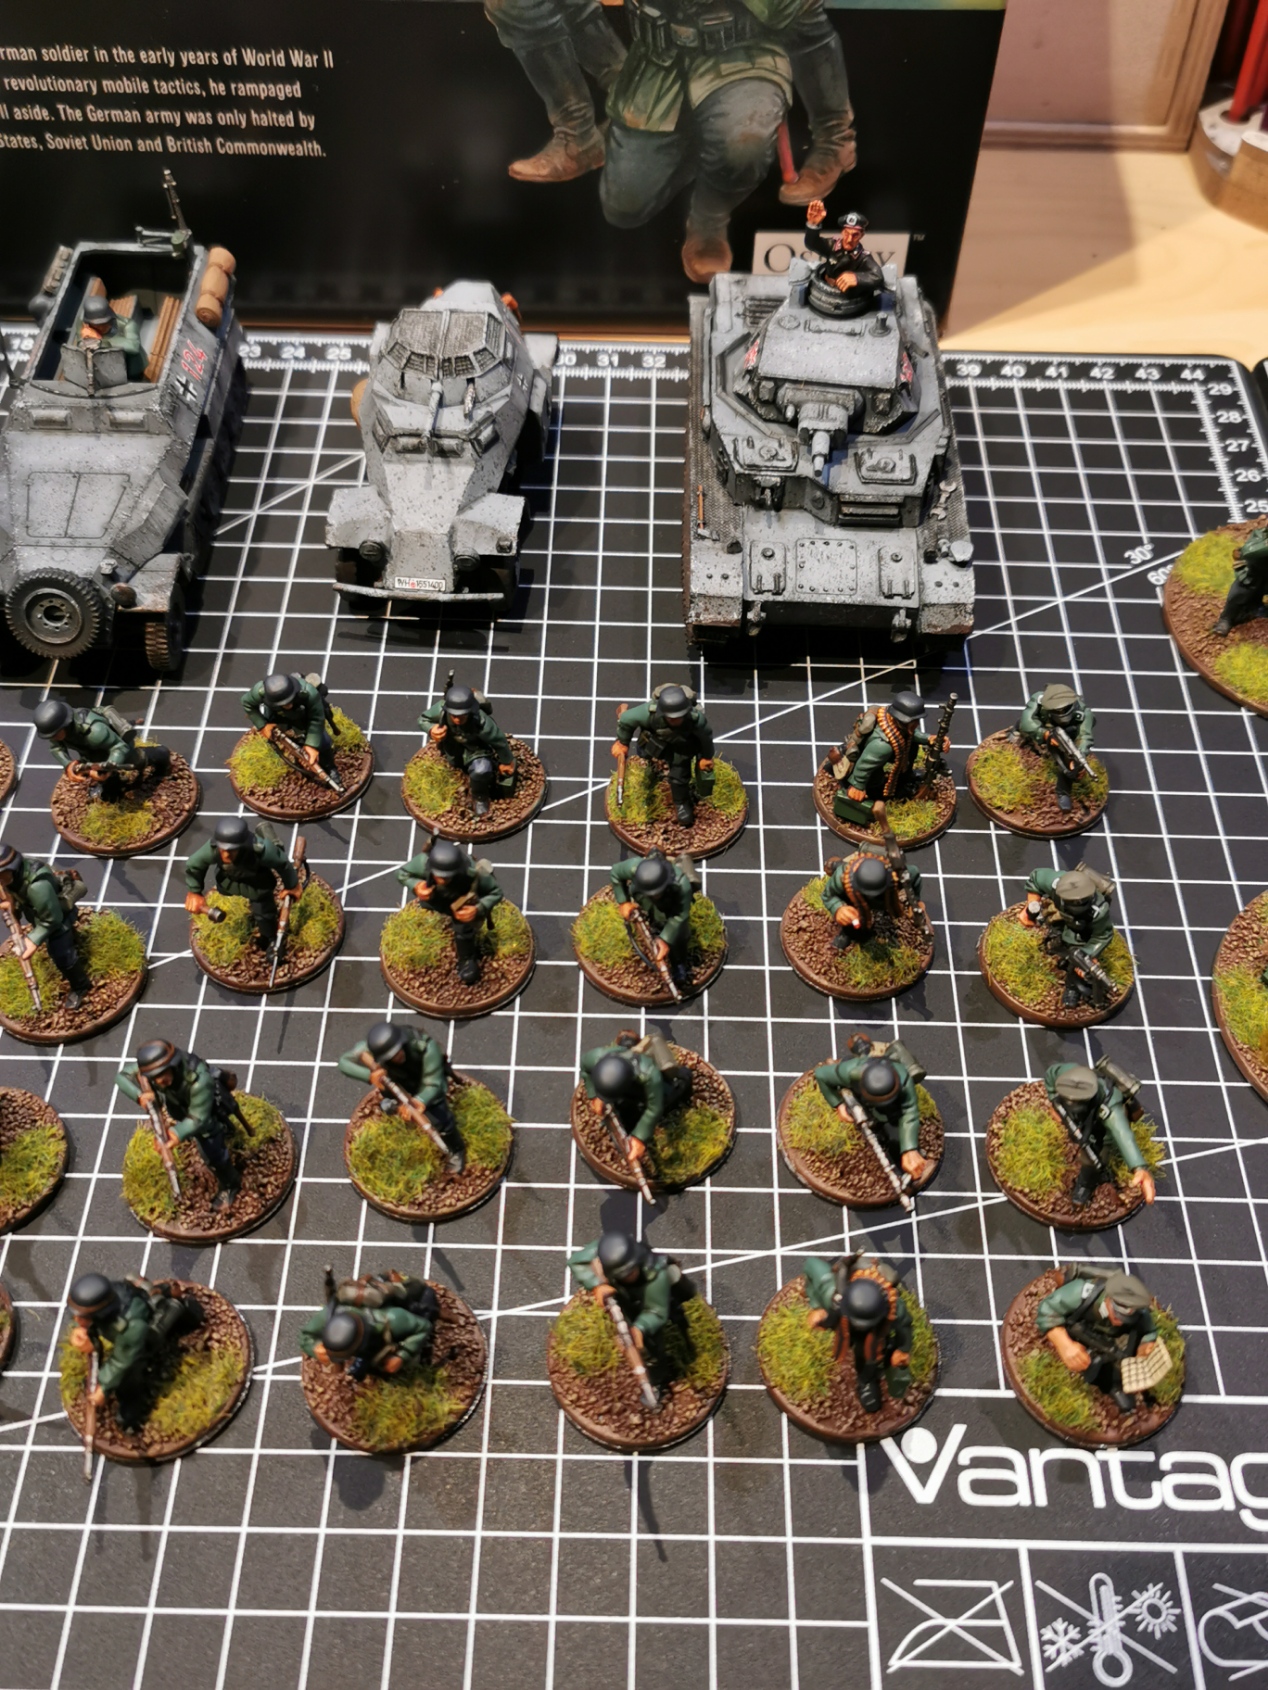
Step 11: Overview
Here are the obligatory full army shots on cutting mat…. Enjoy!
I’ll be adding more troops to my army so as the starter army project is finished I will continue on the Blitzkrieg project as a new Lockdown is on its way after Christmas and I already have some expansion ideas – SO STAY TUNED!!!!
Step 12: Adding Support Units
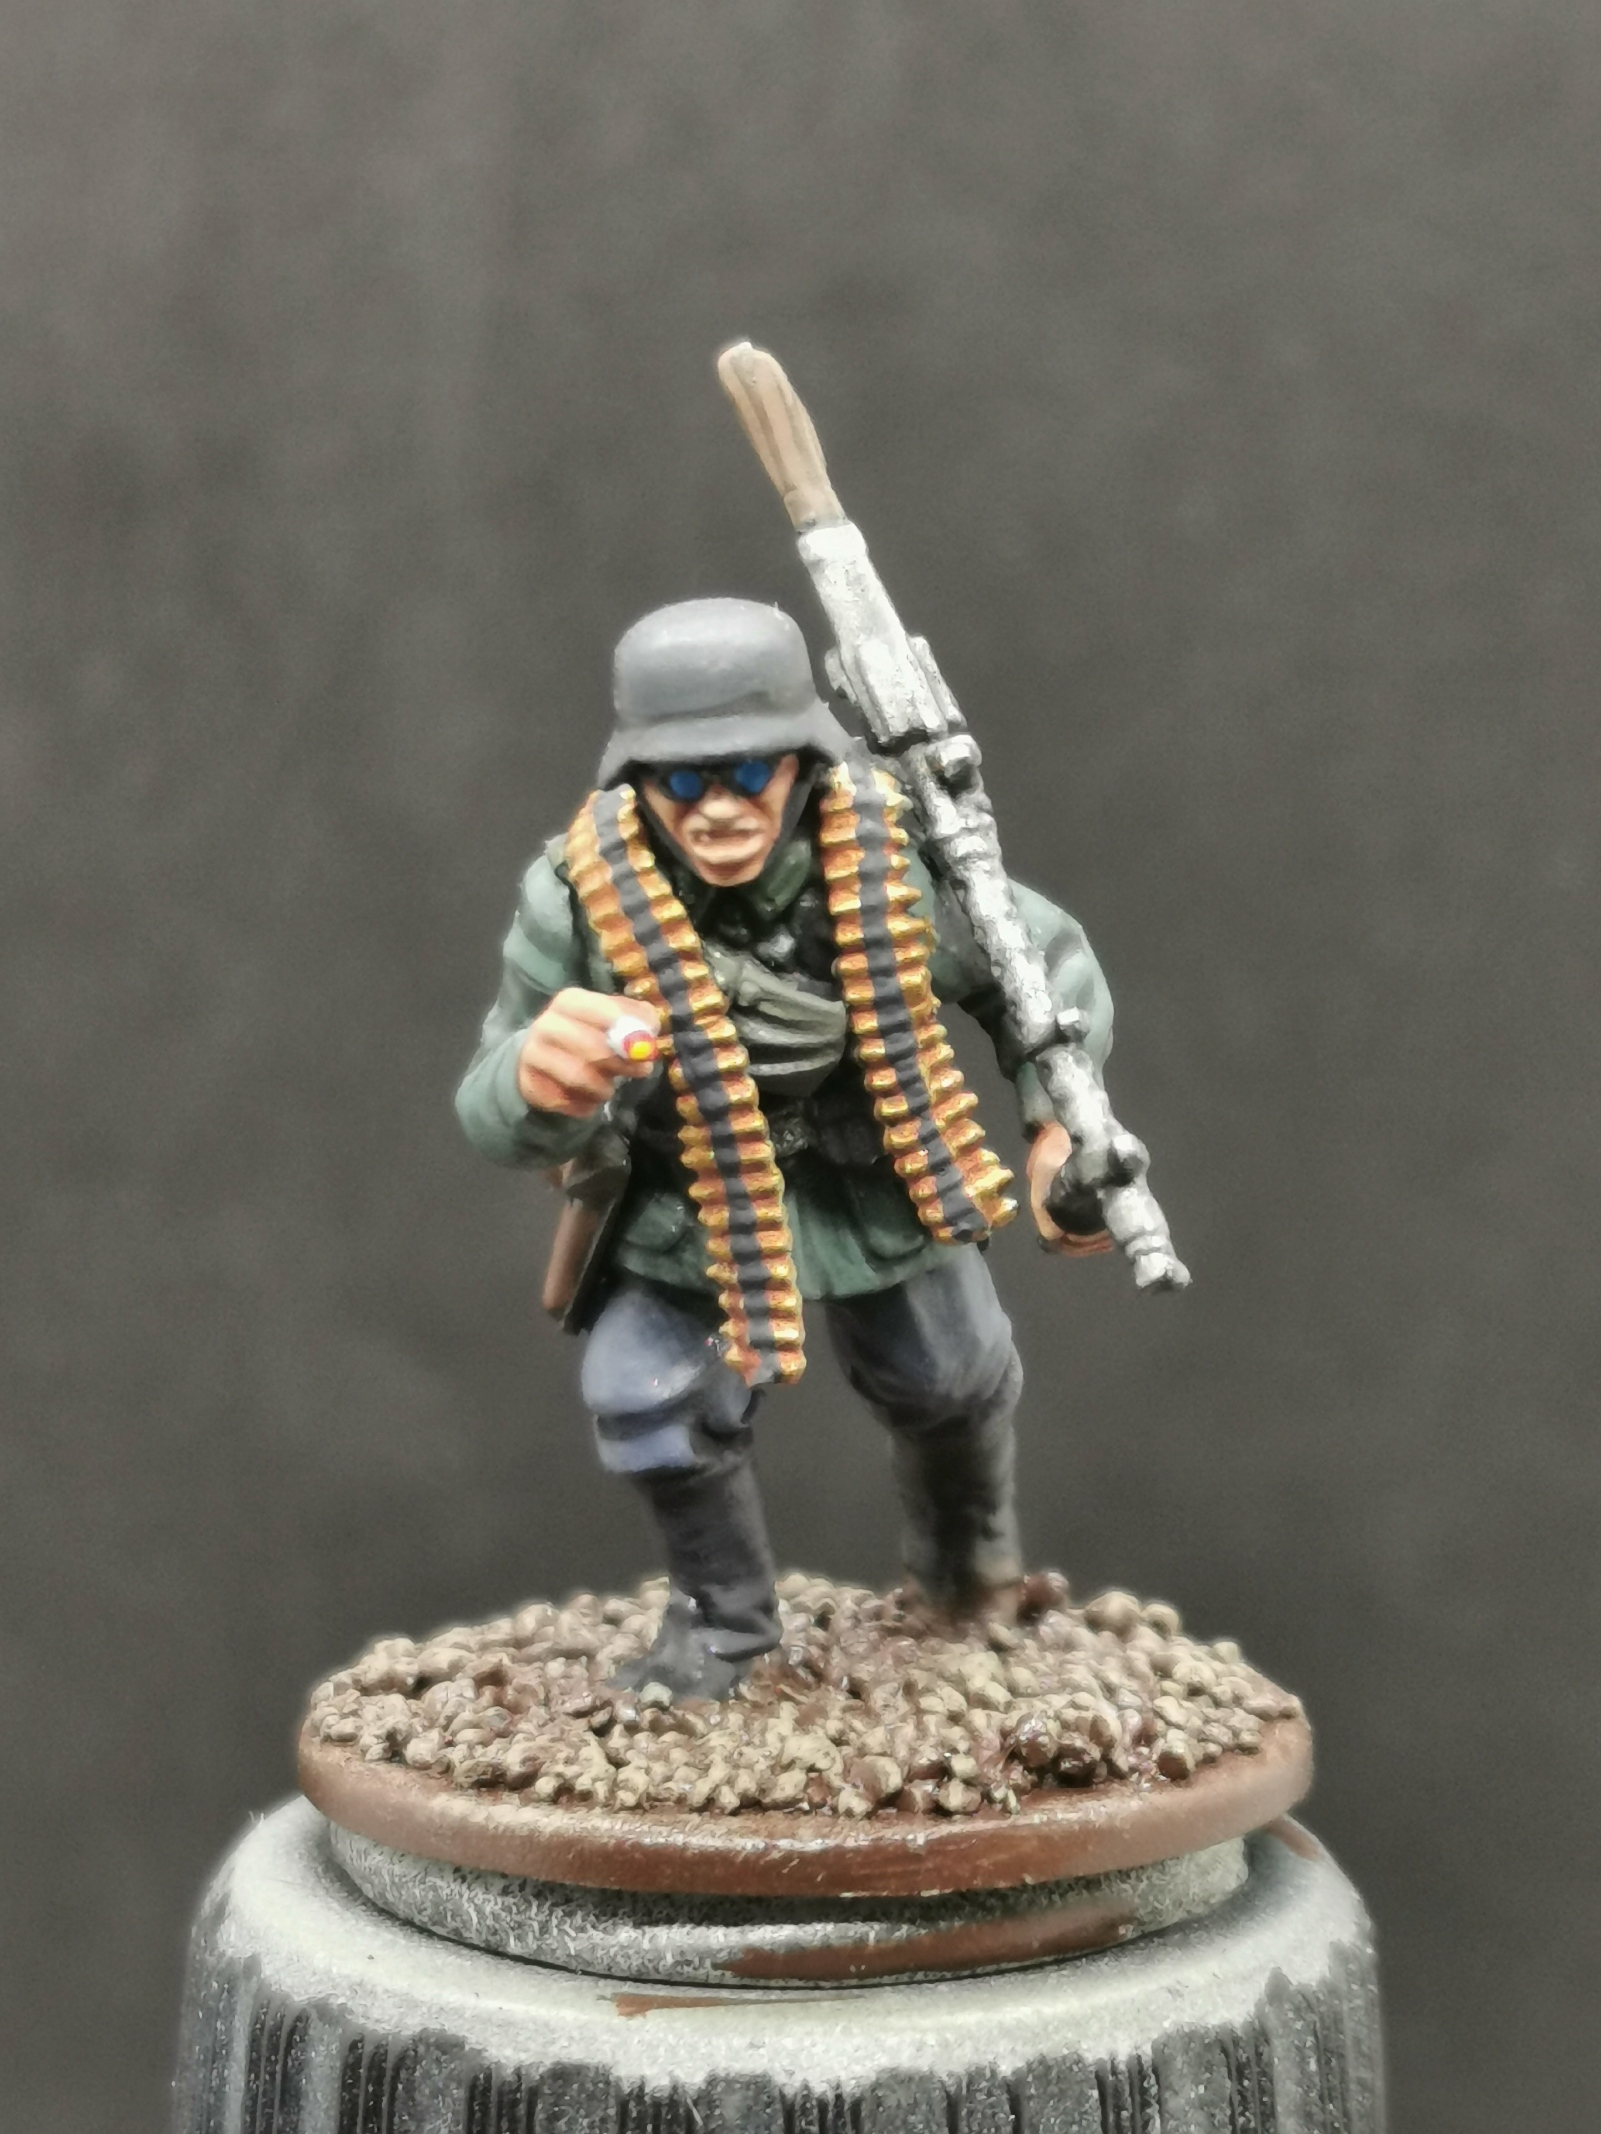
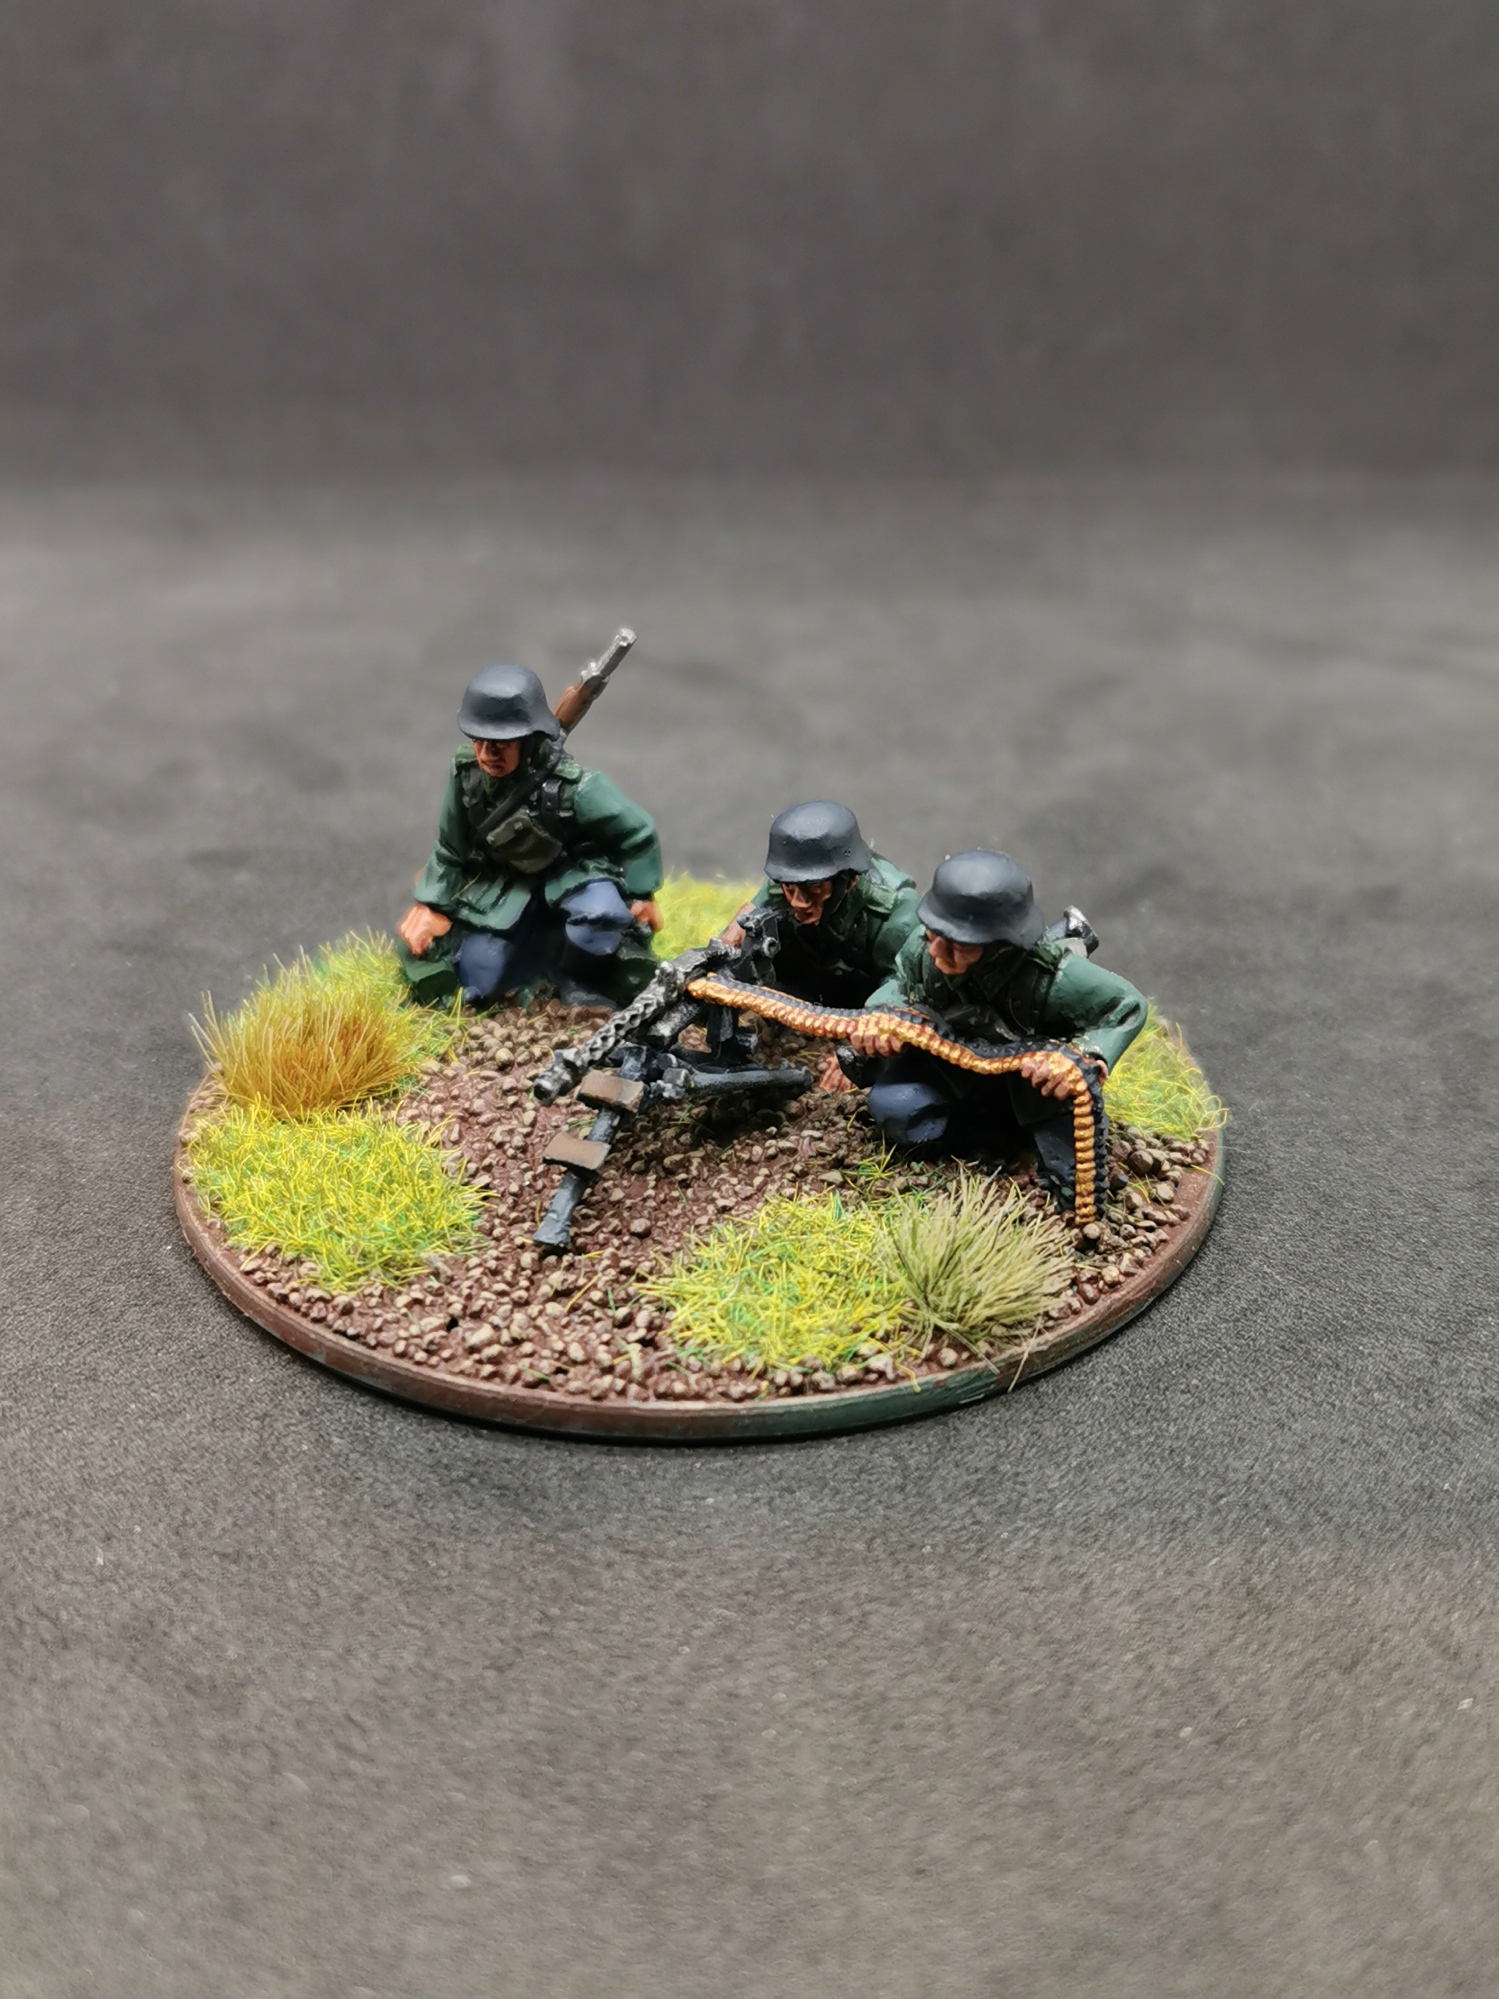
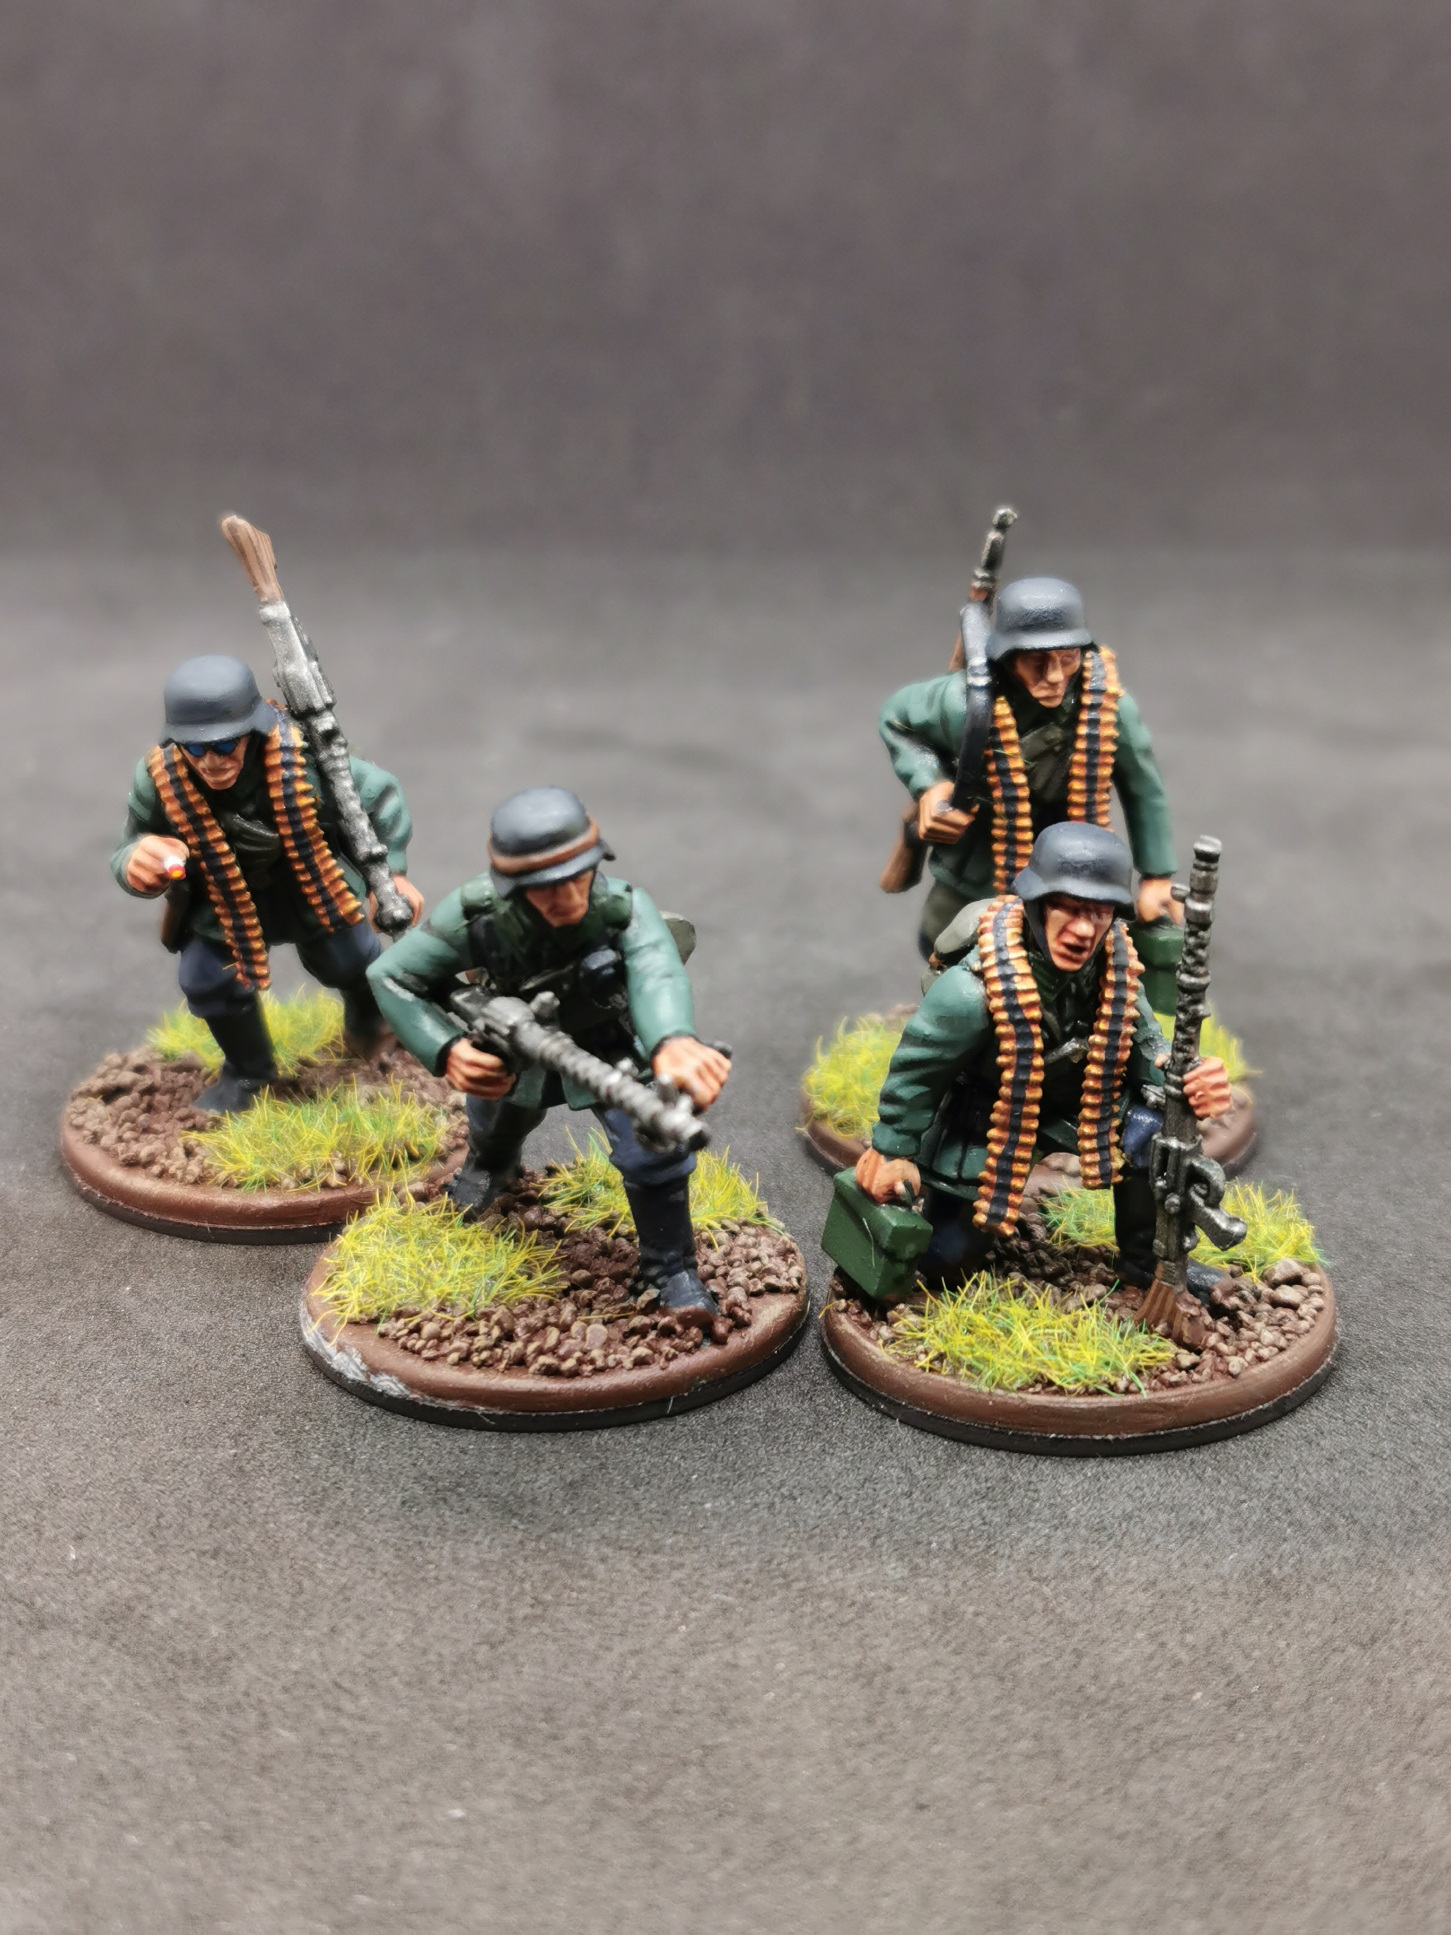
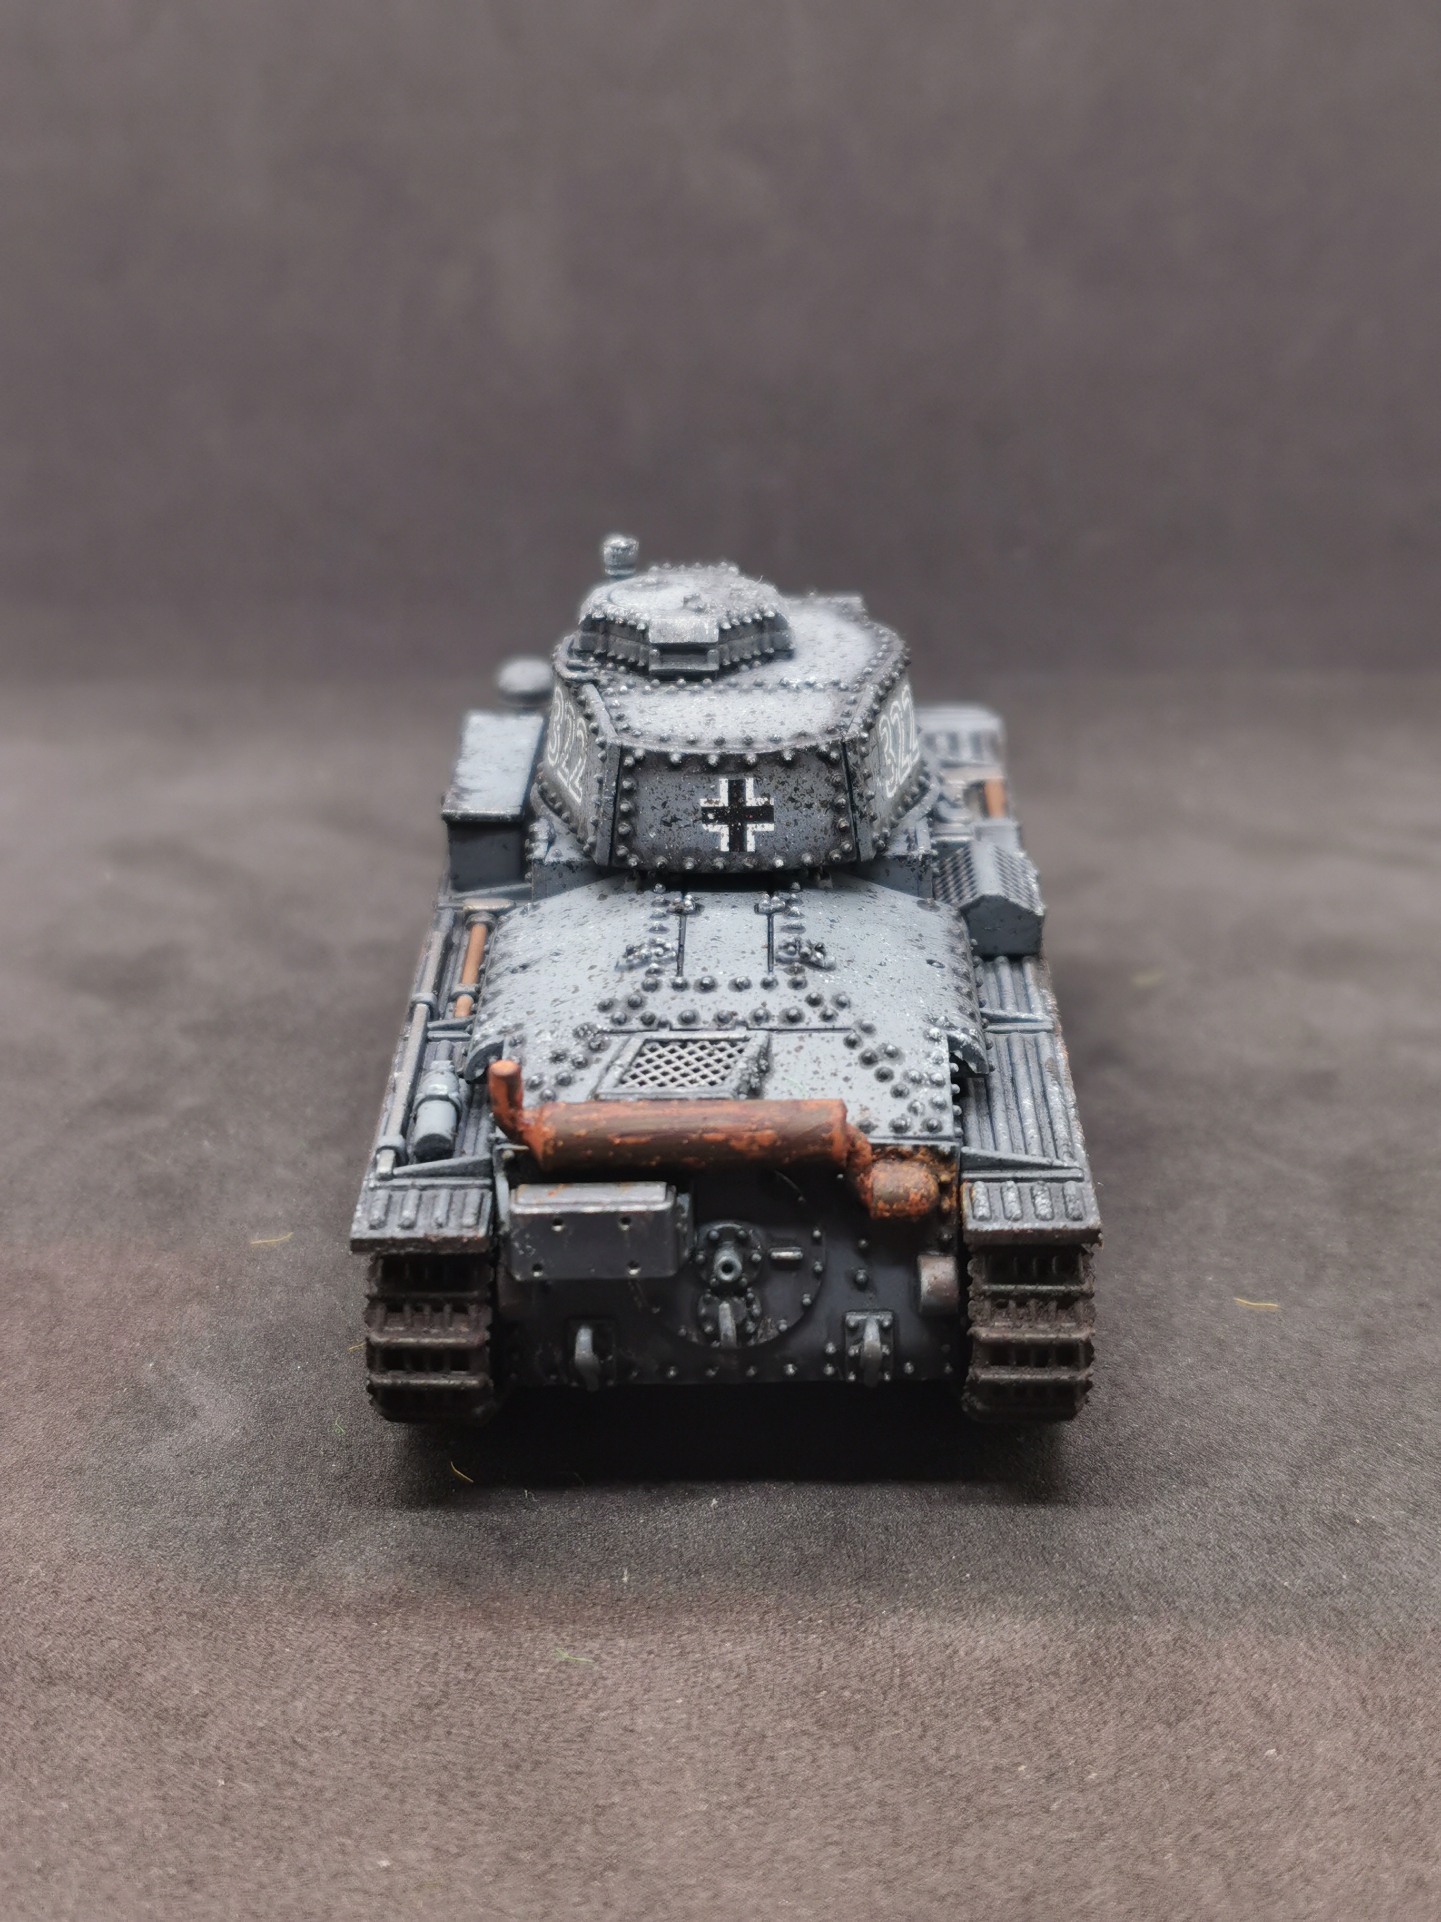
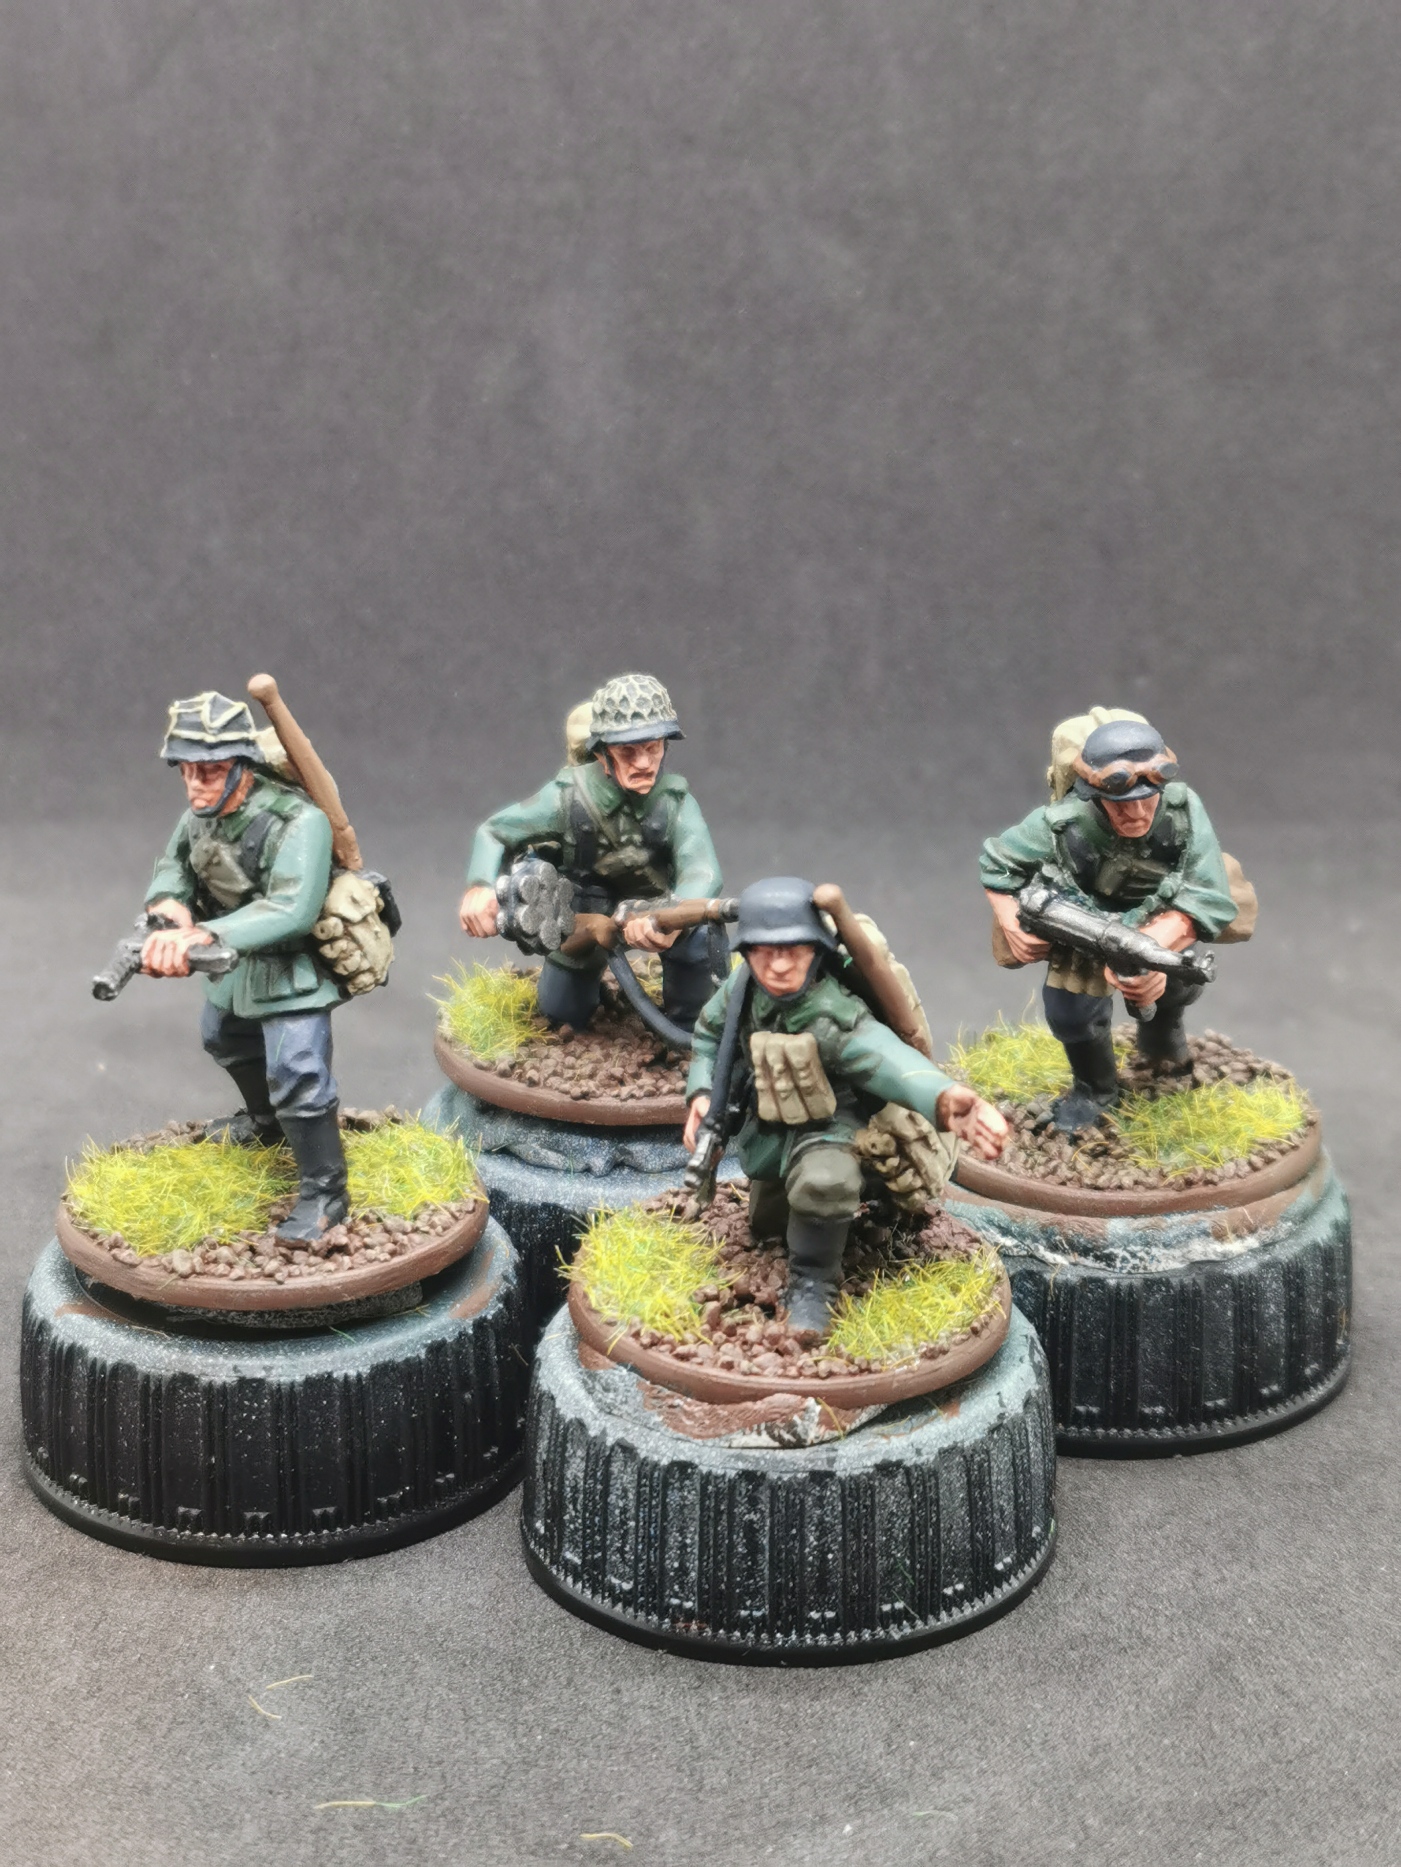
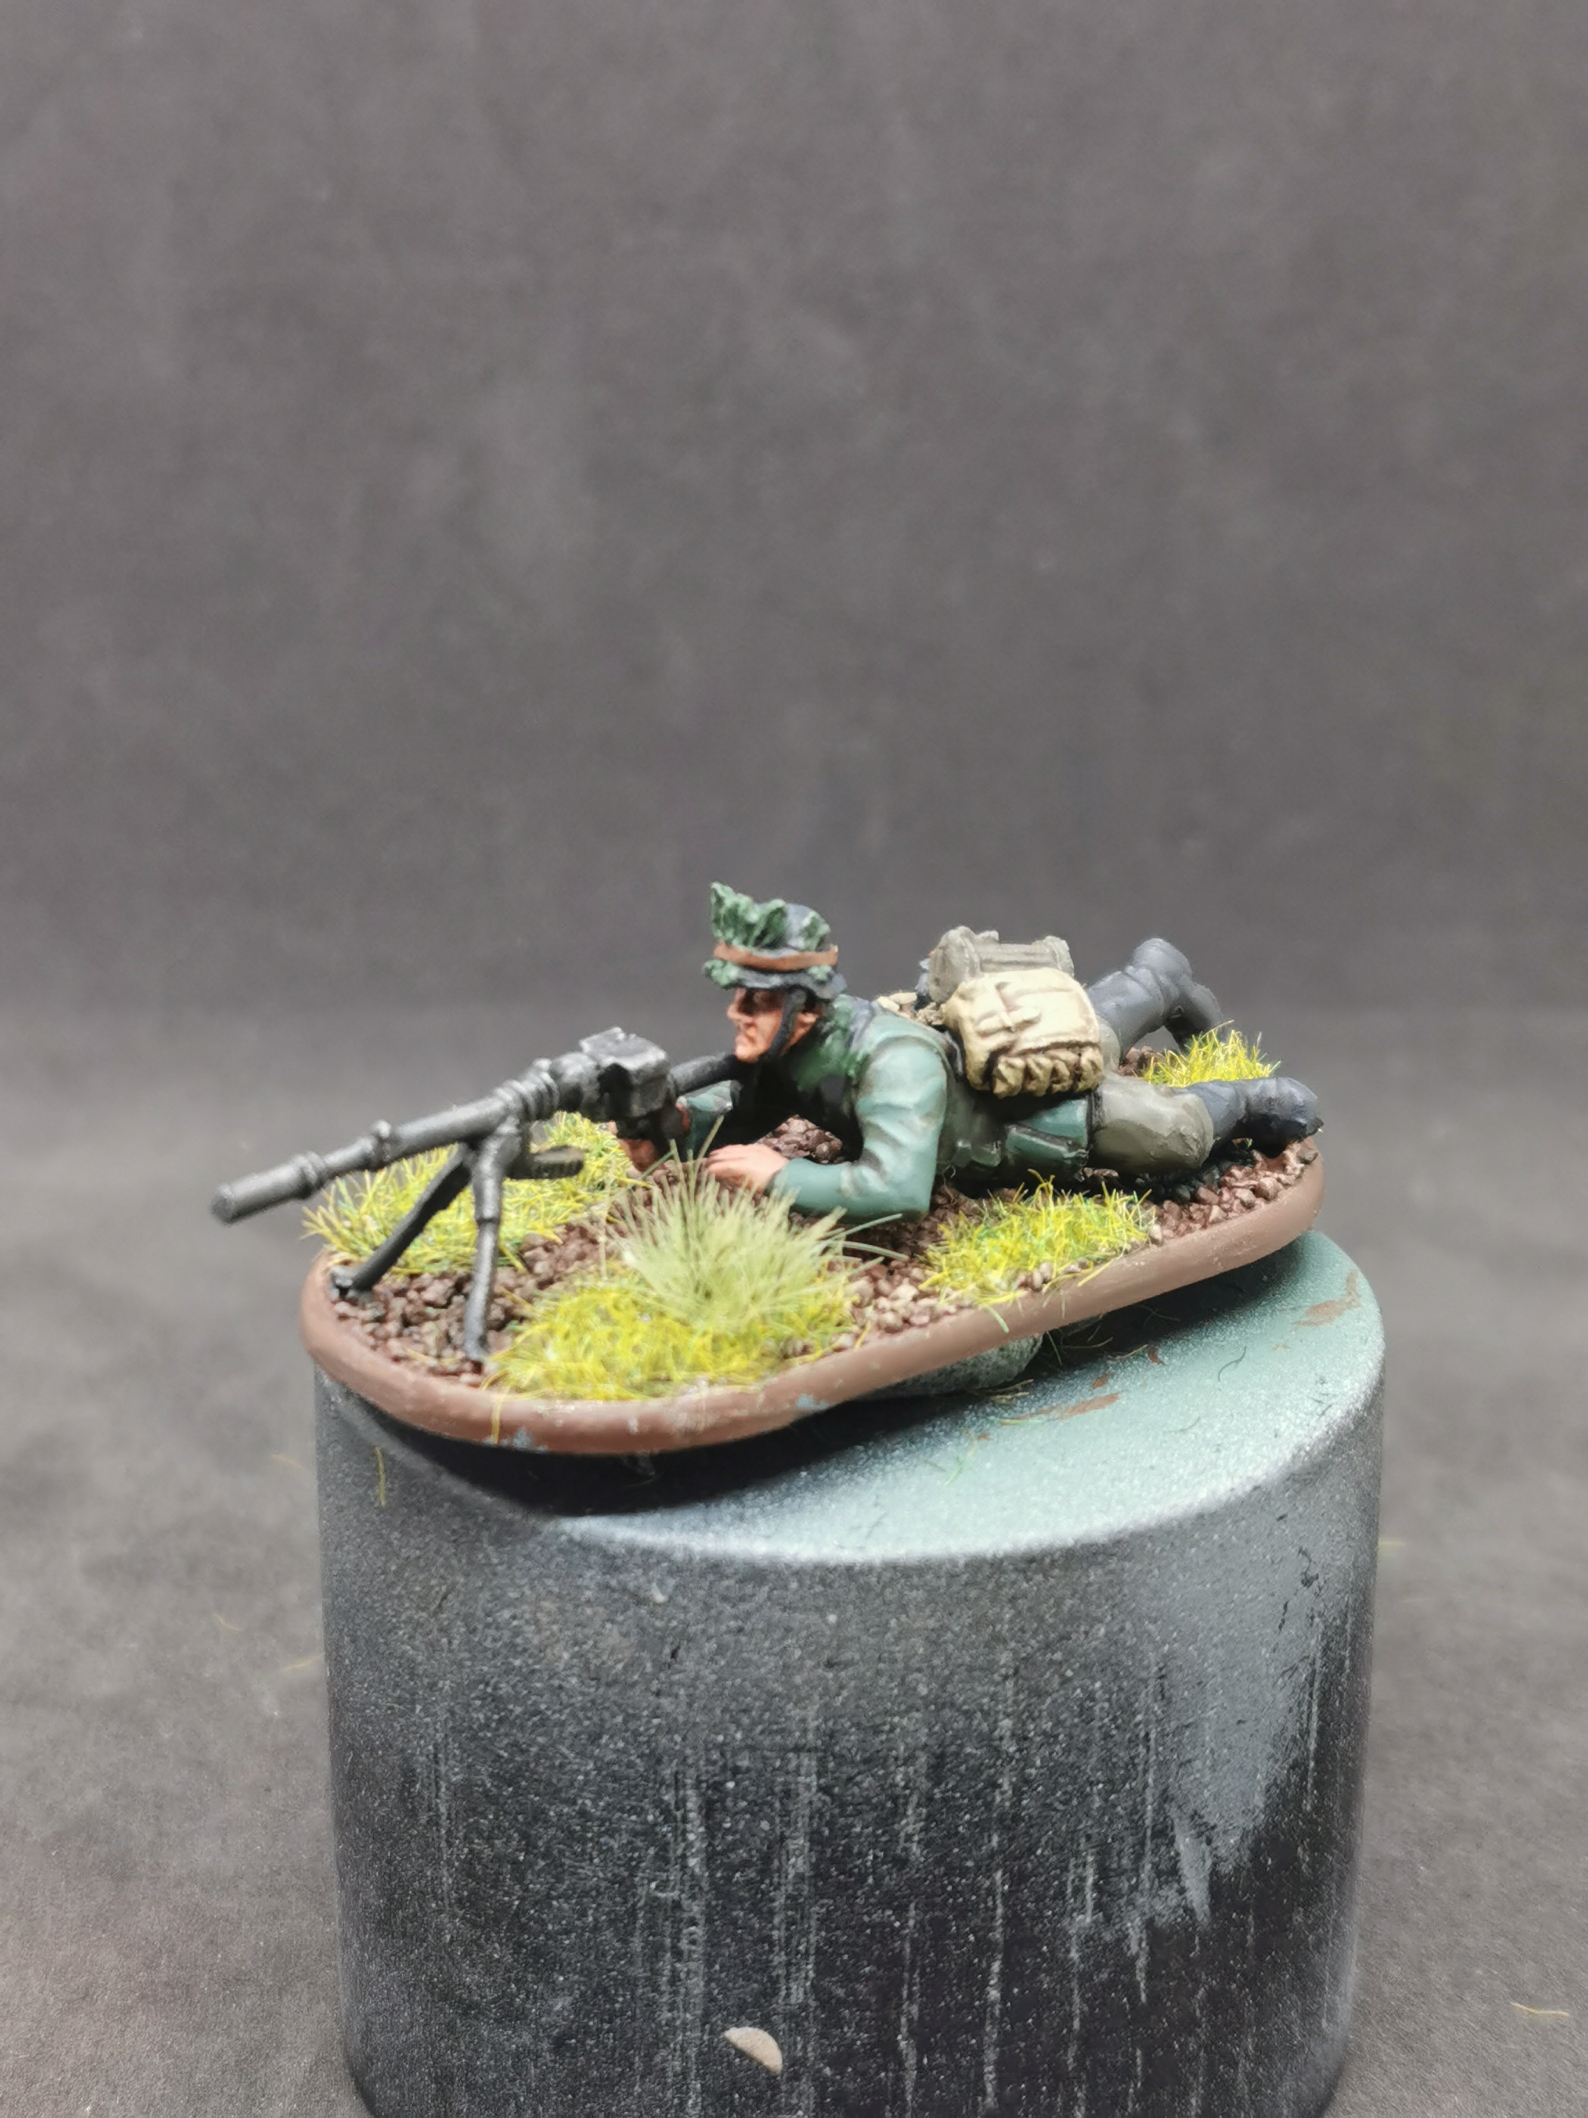
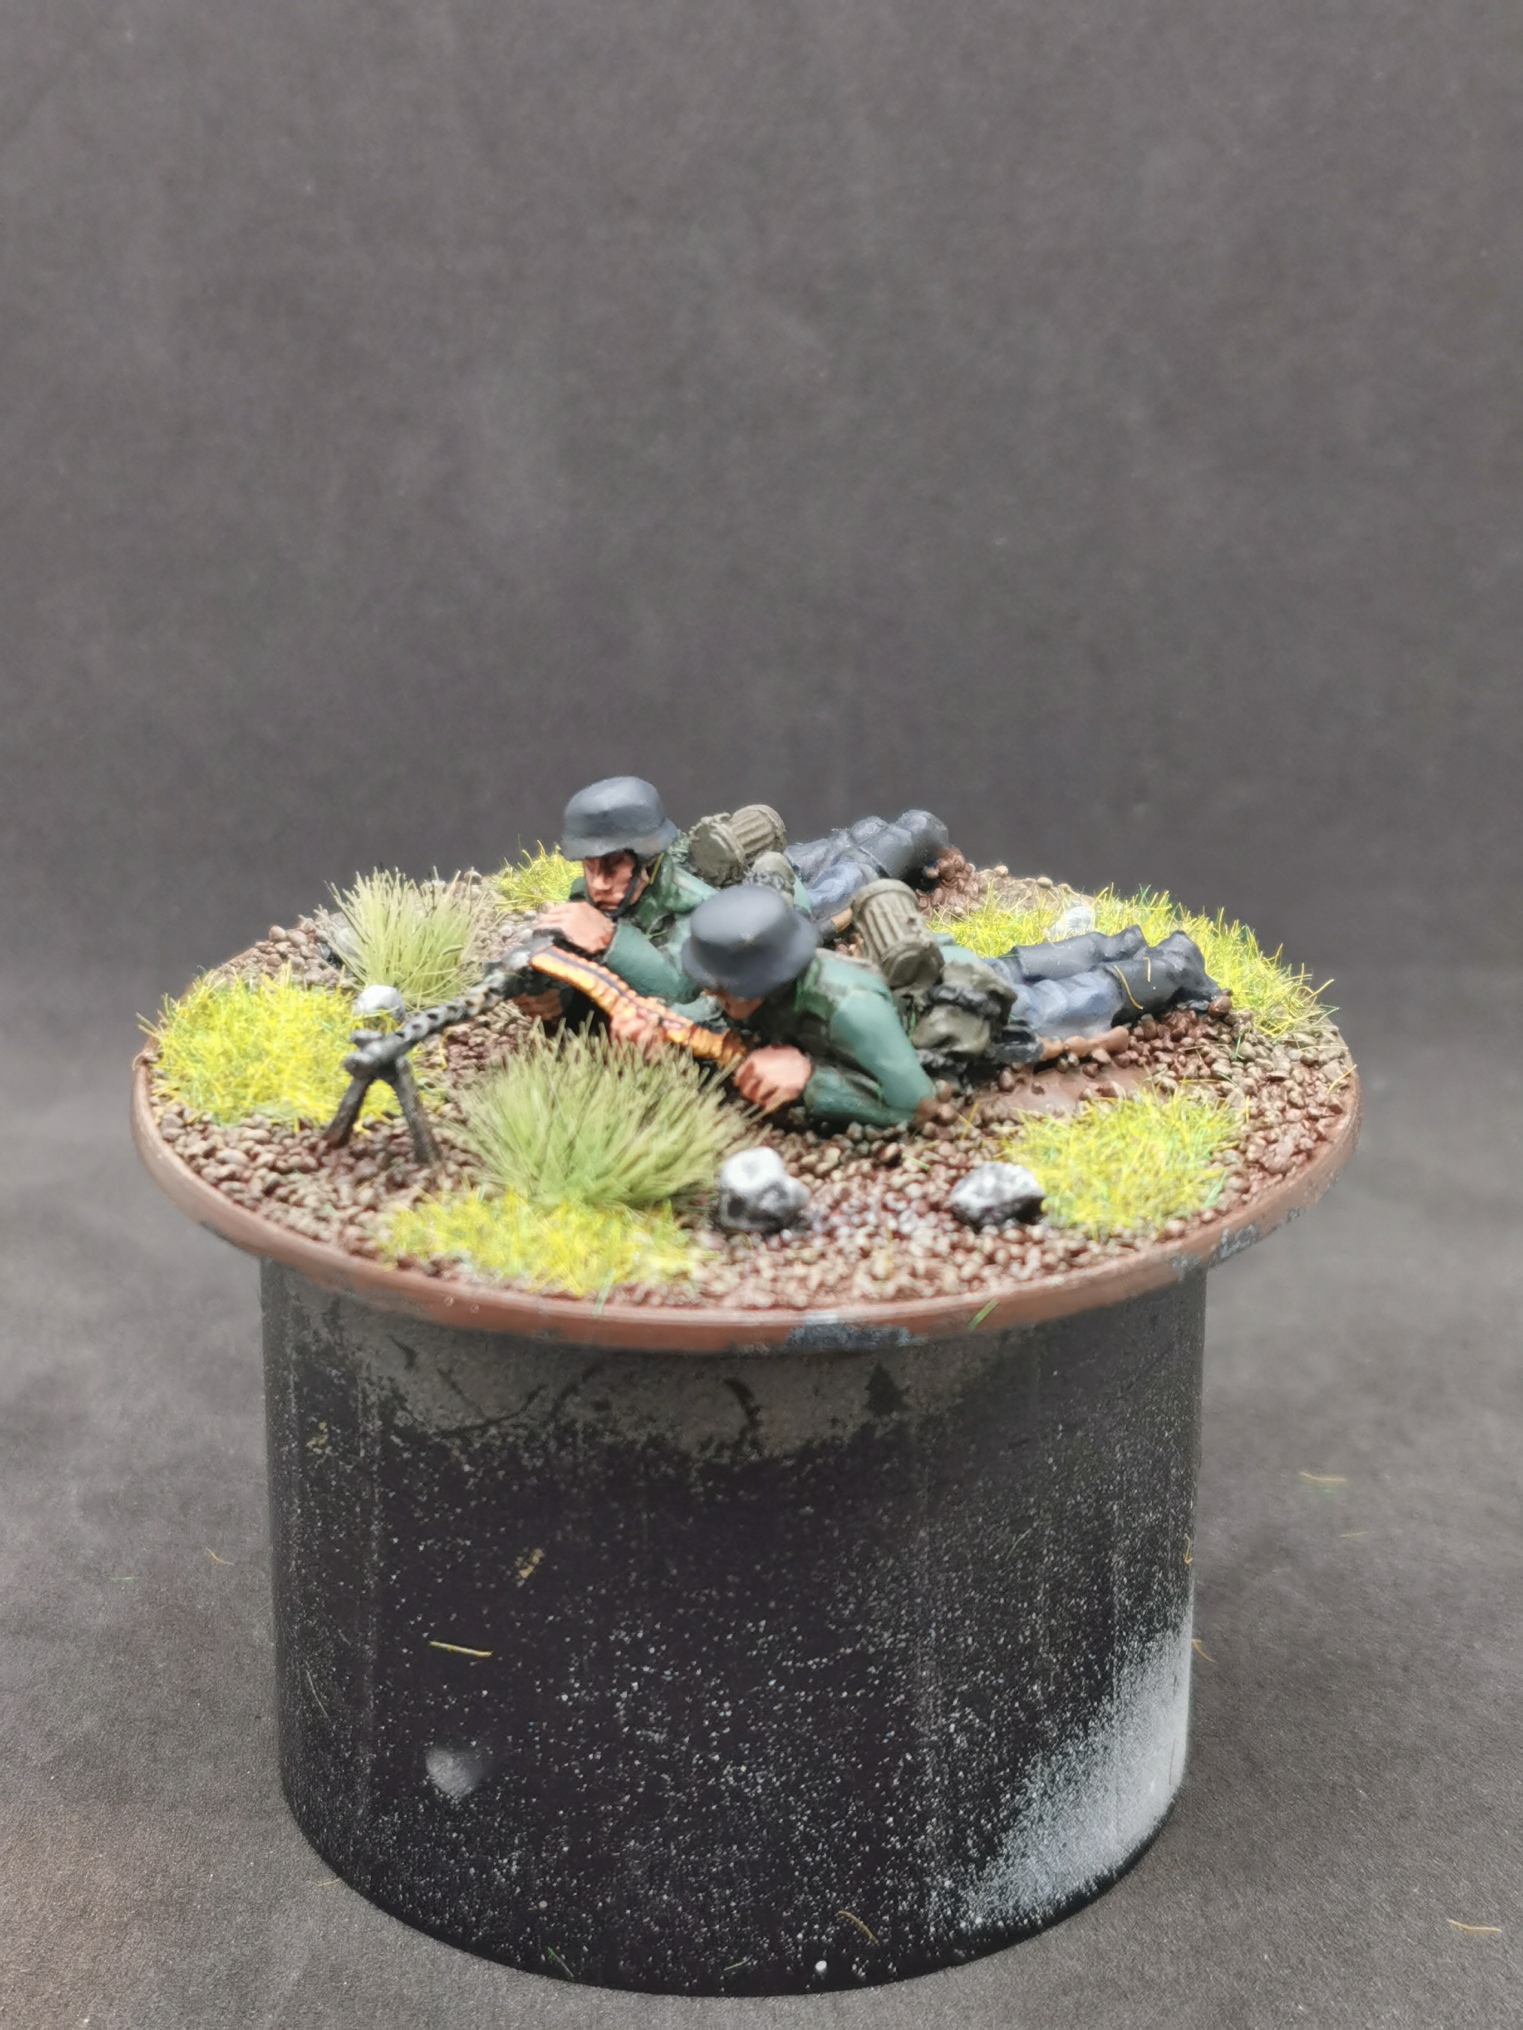
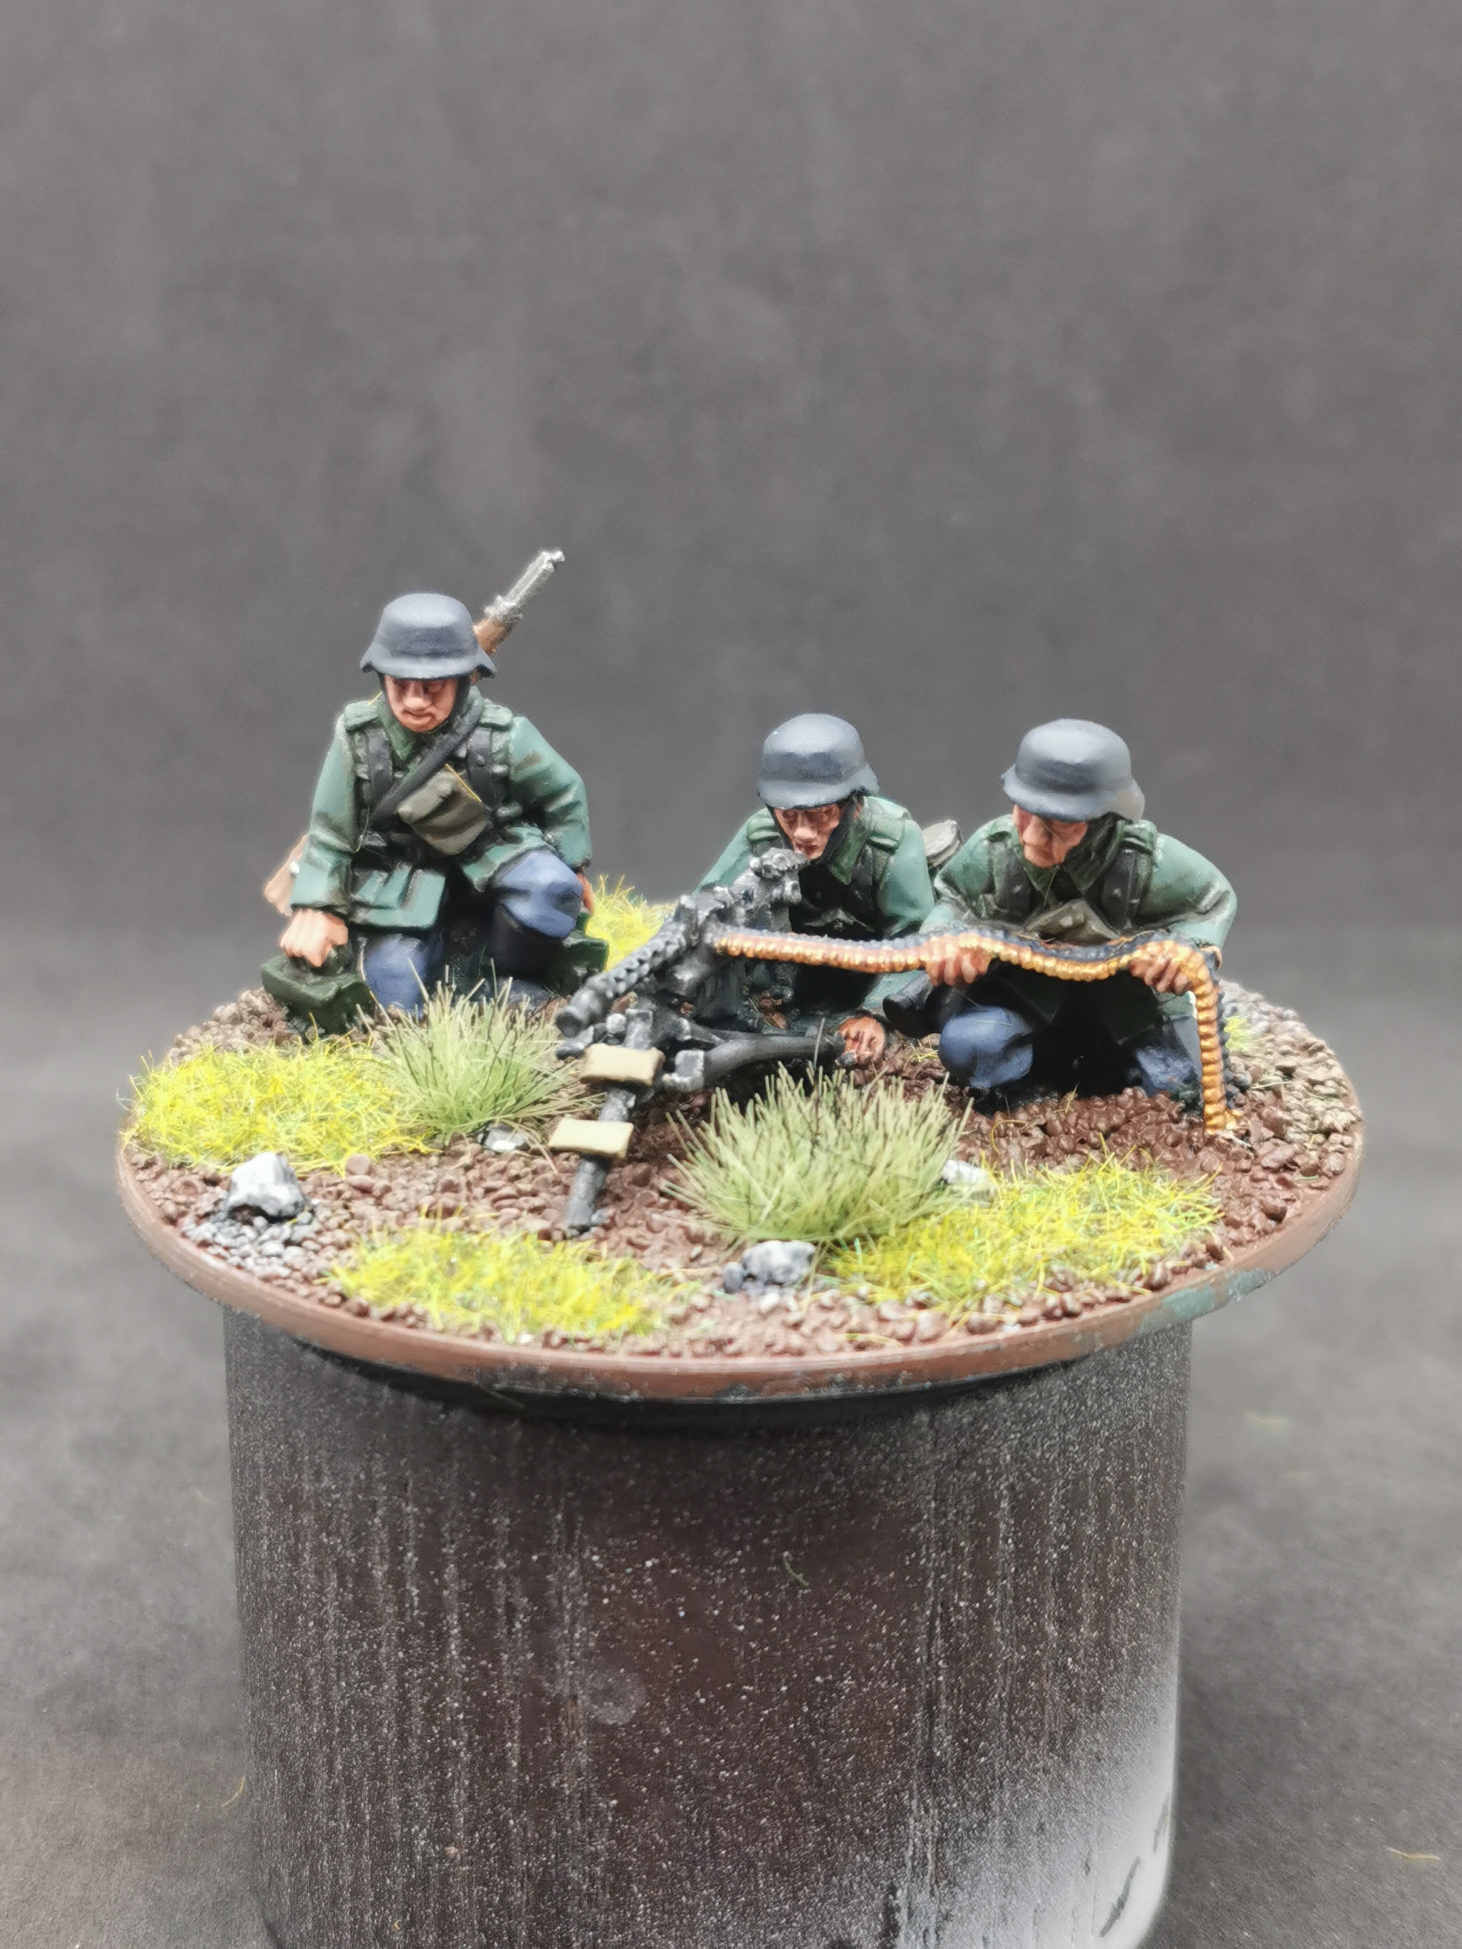
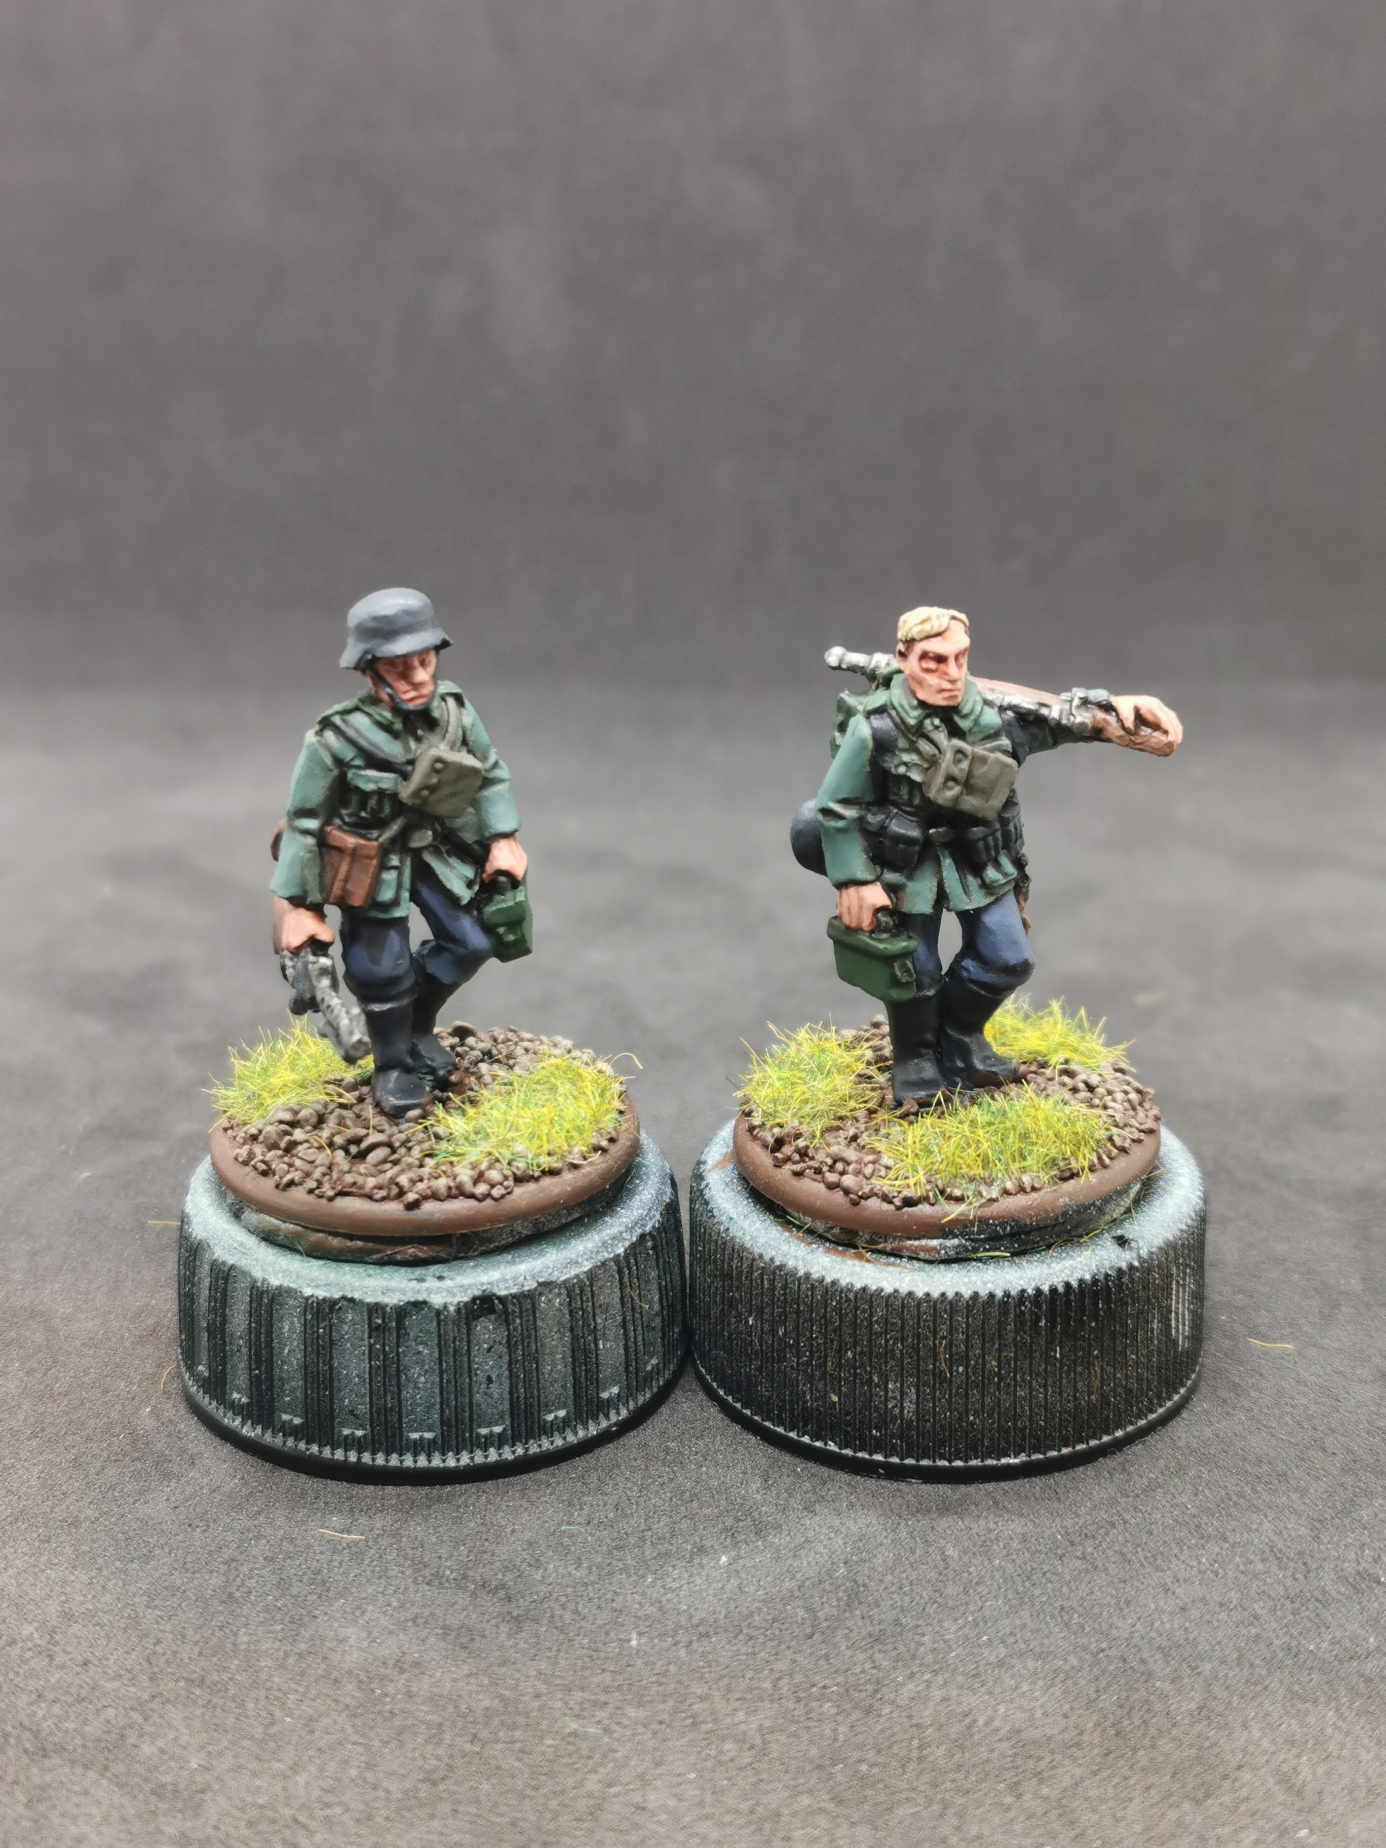
The next step for me was to add support units to my existing force and I wanted to start with some iconic troops of the early war campaigns. The iconic Panzer 38 (T) was a no brainer. For some covering fire I added three MG 34 teams, one as LMG, one as MMG and a two men team redeploying.
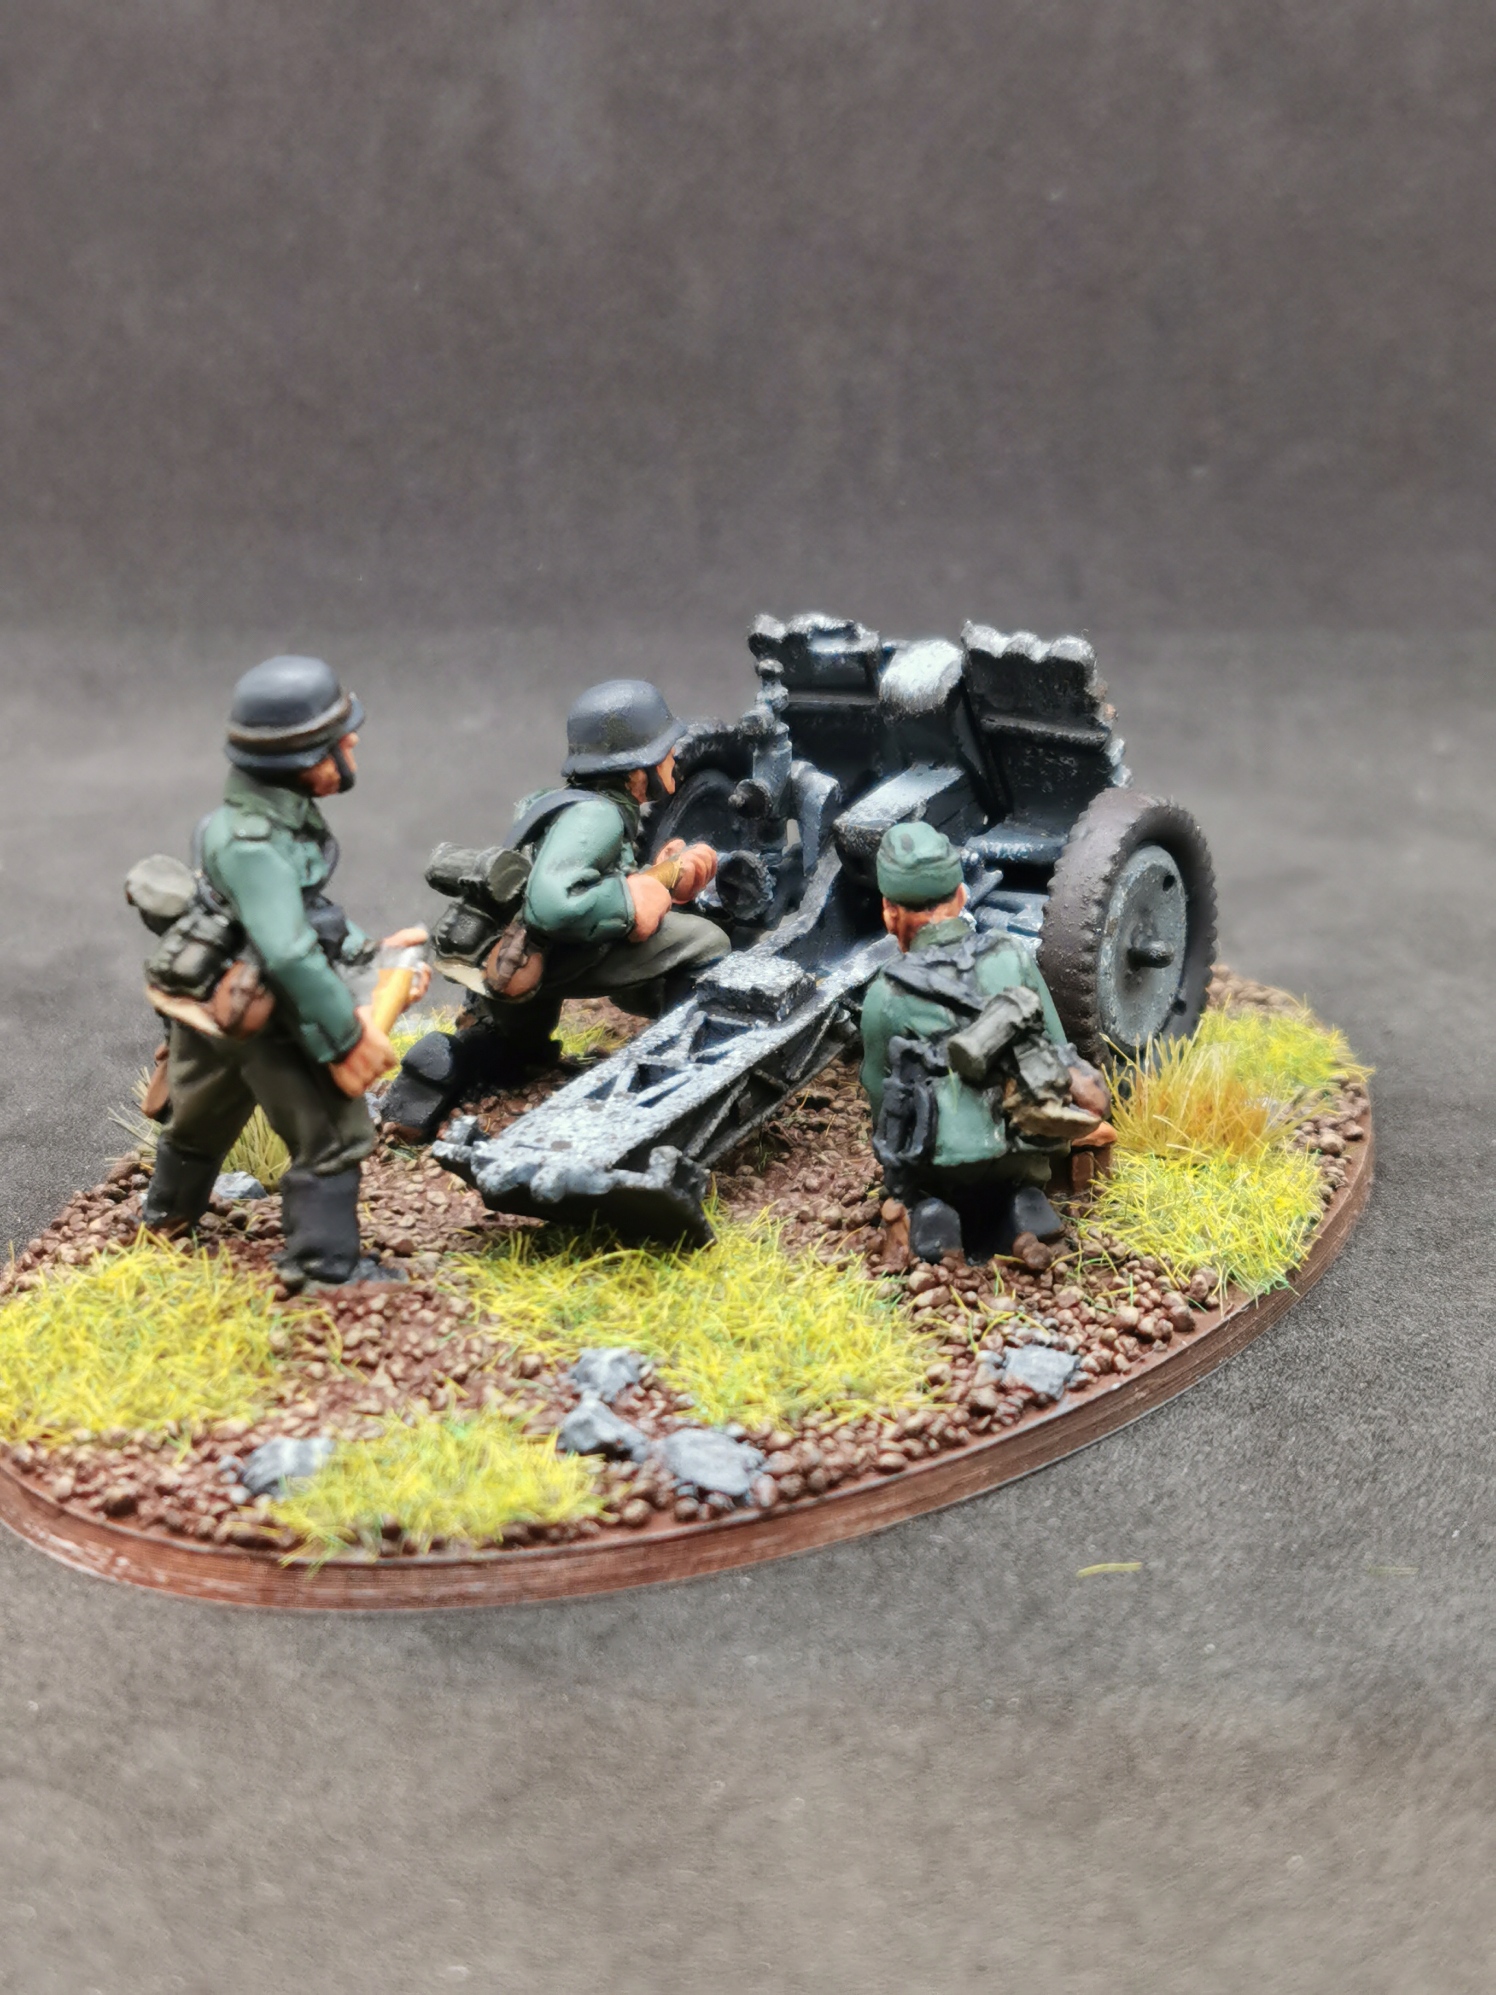
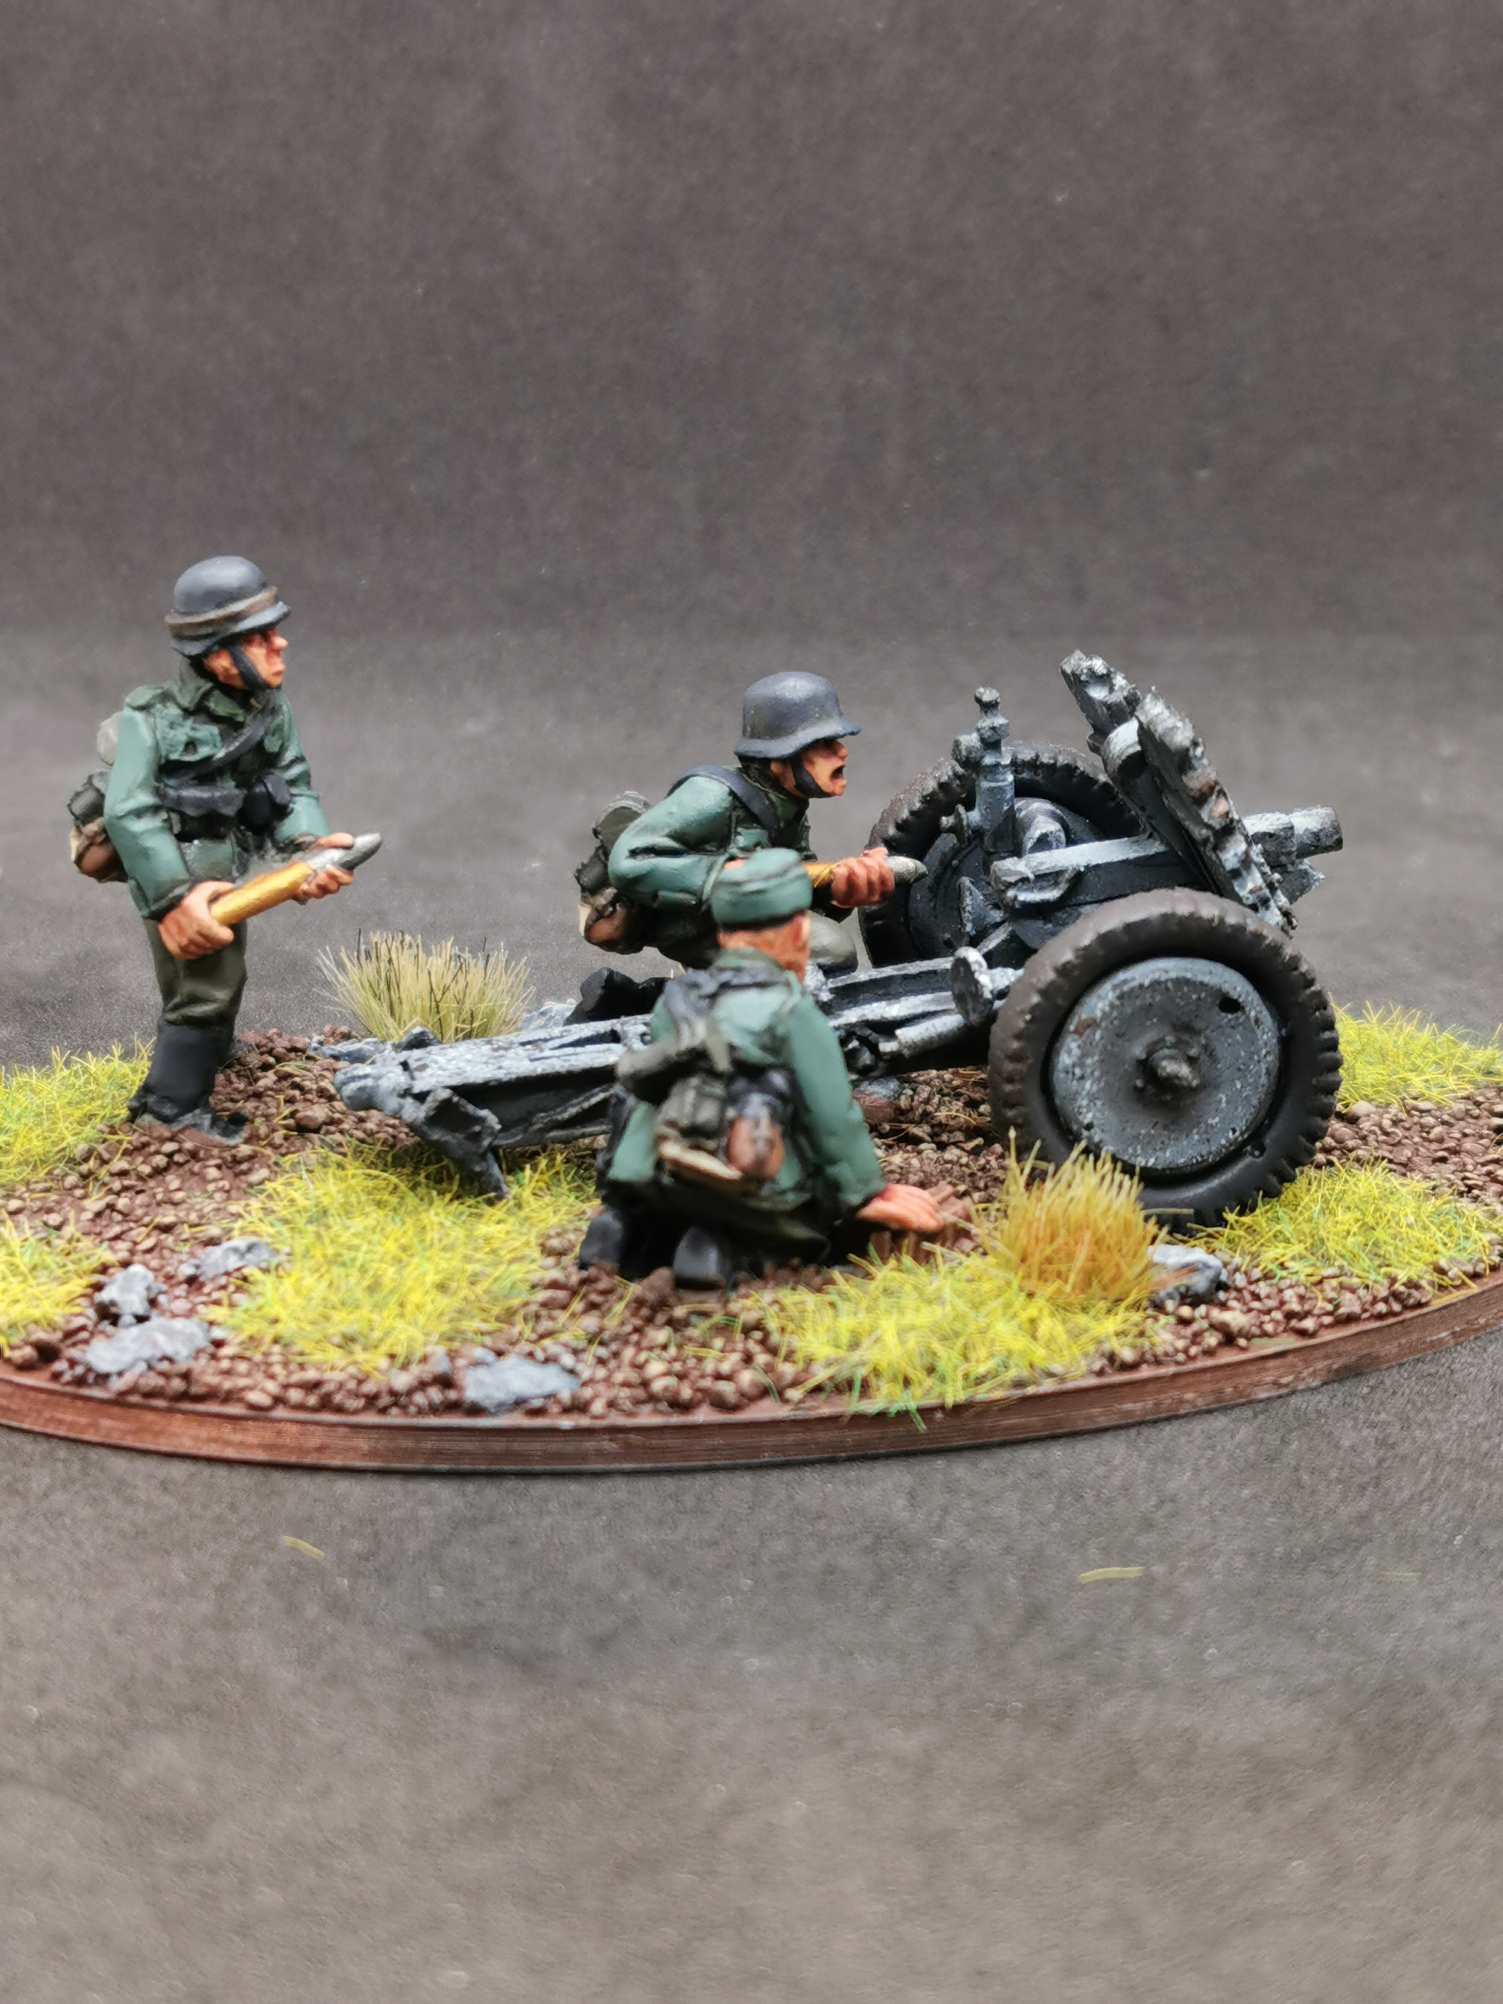
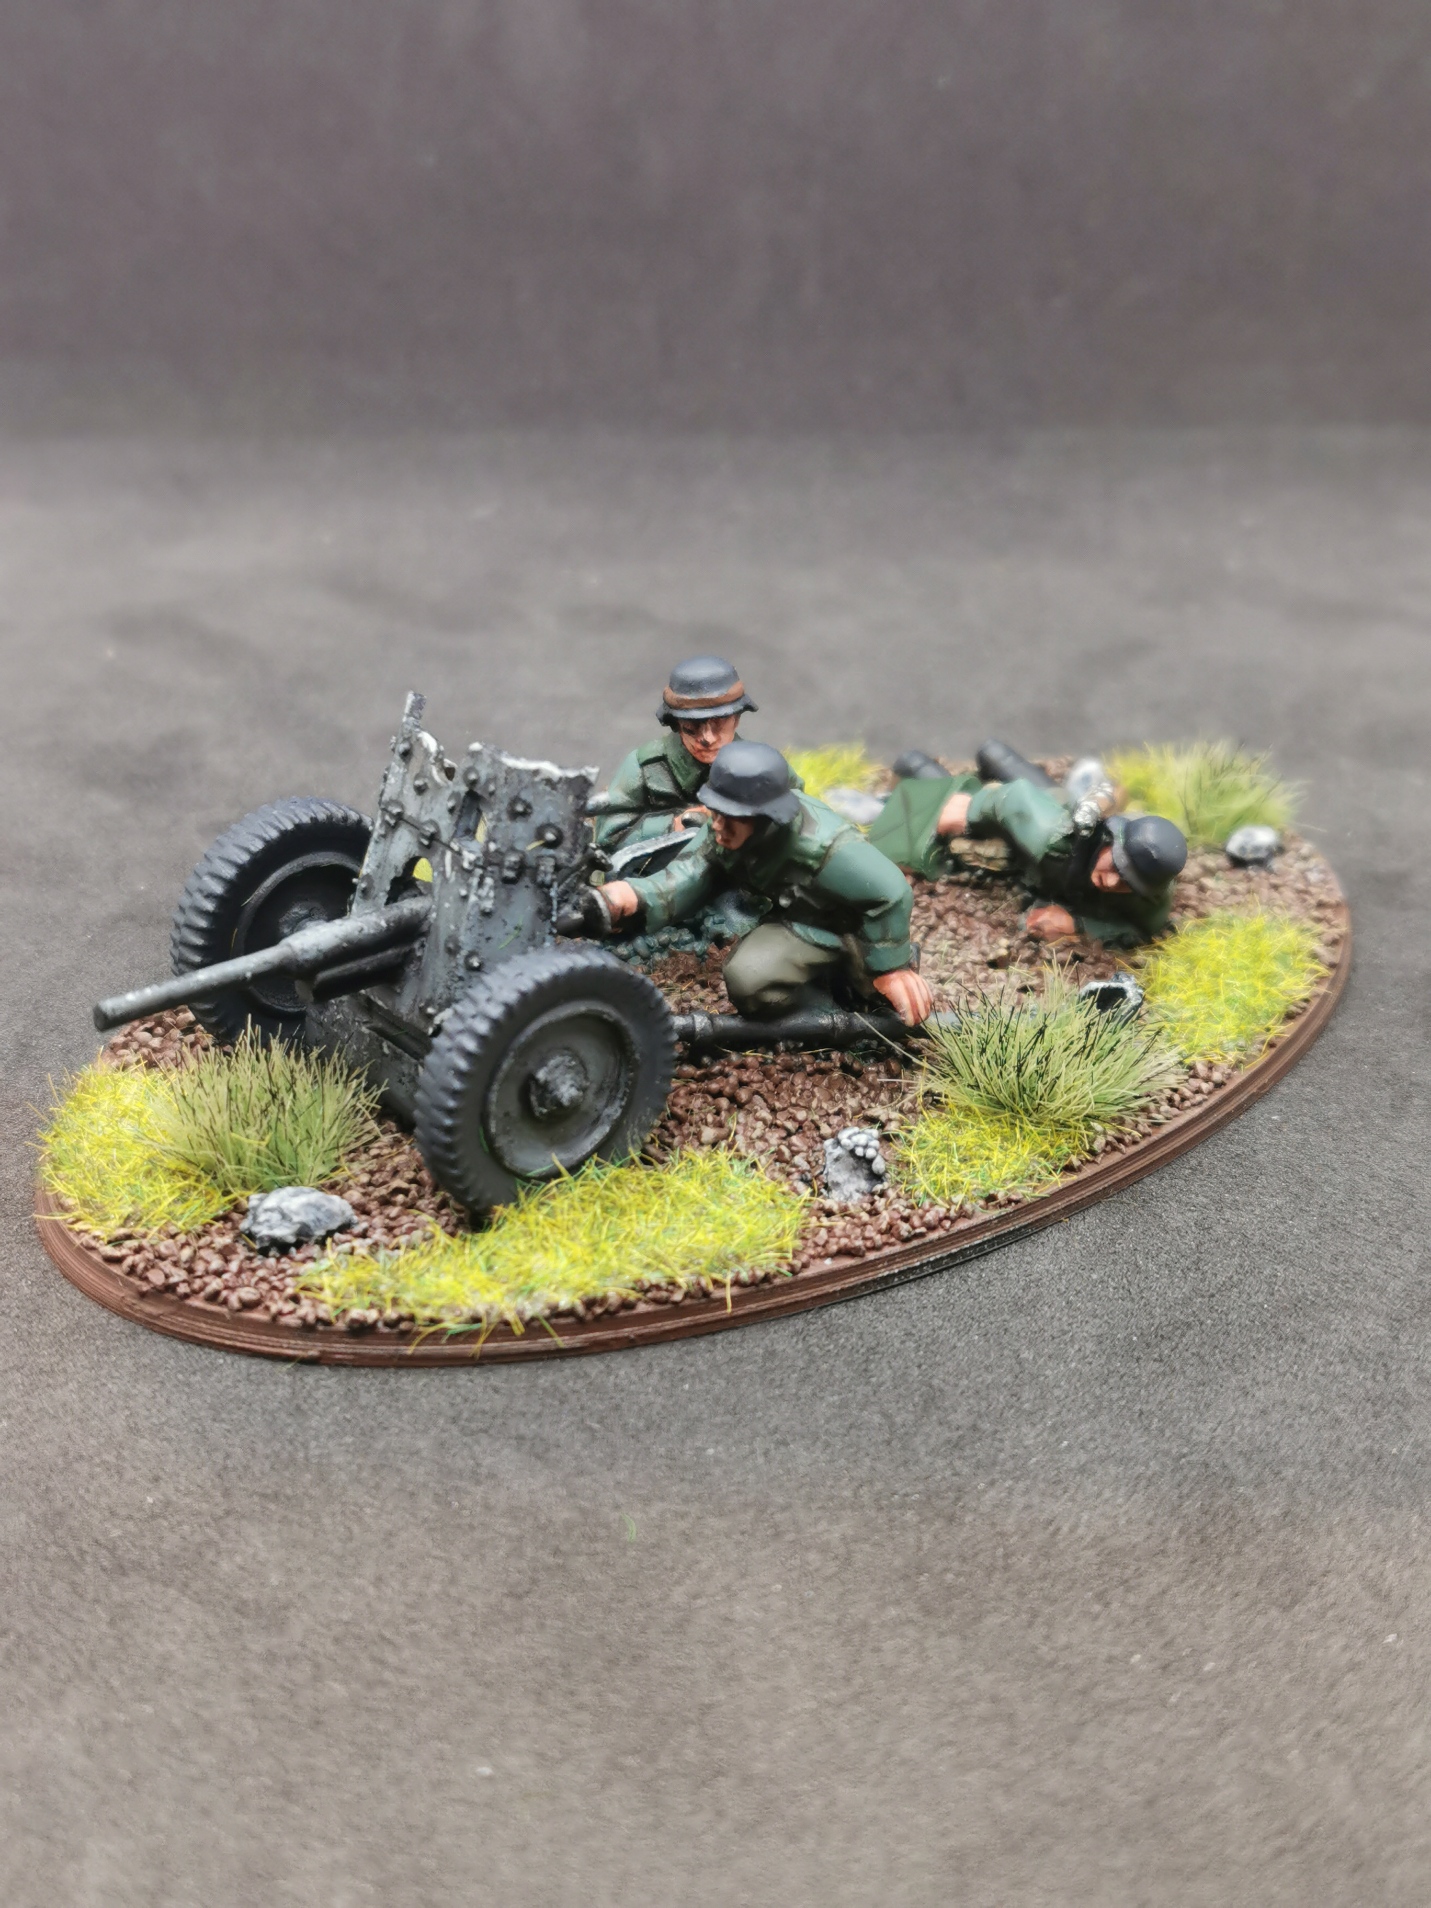
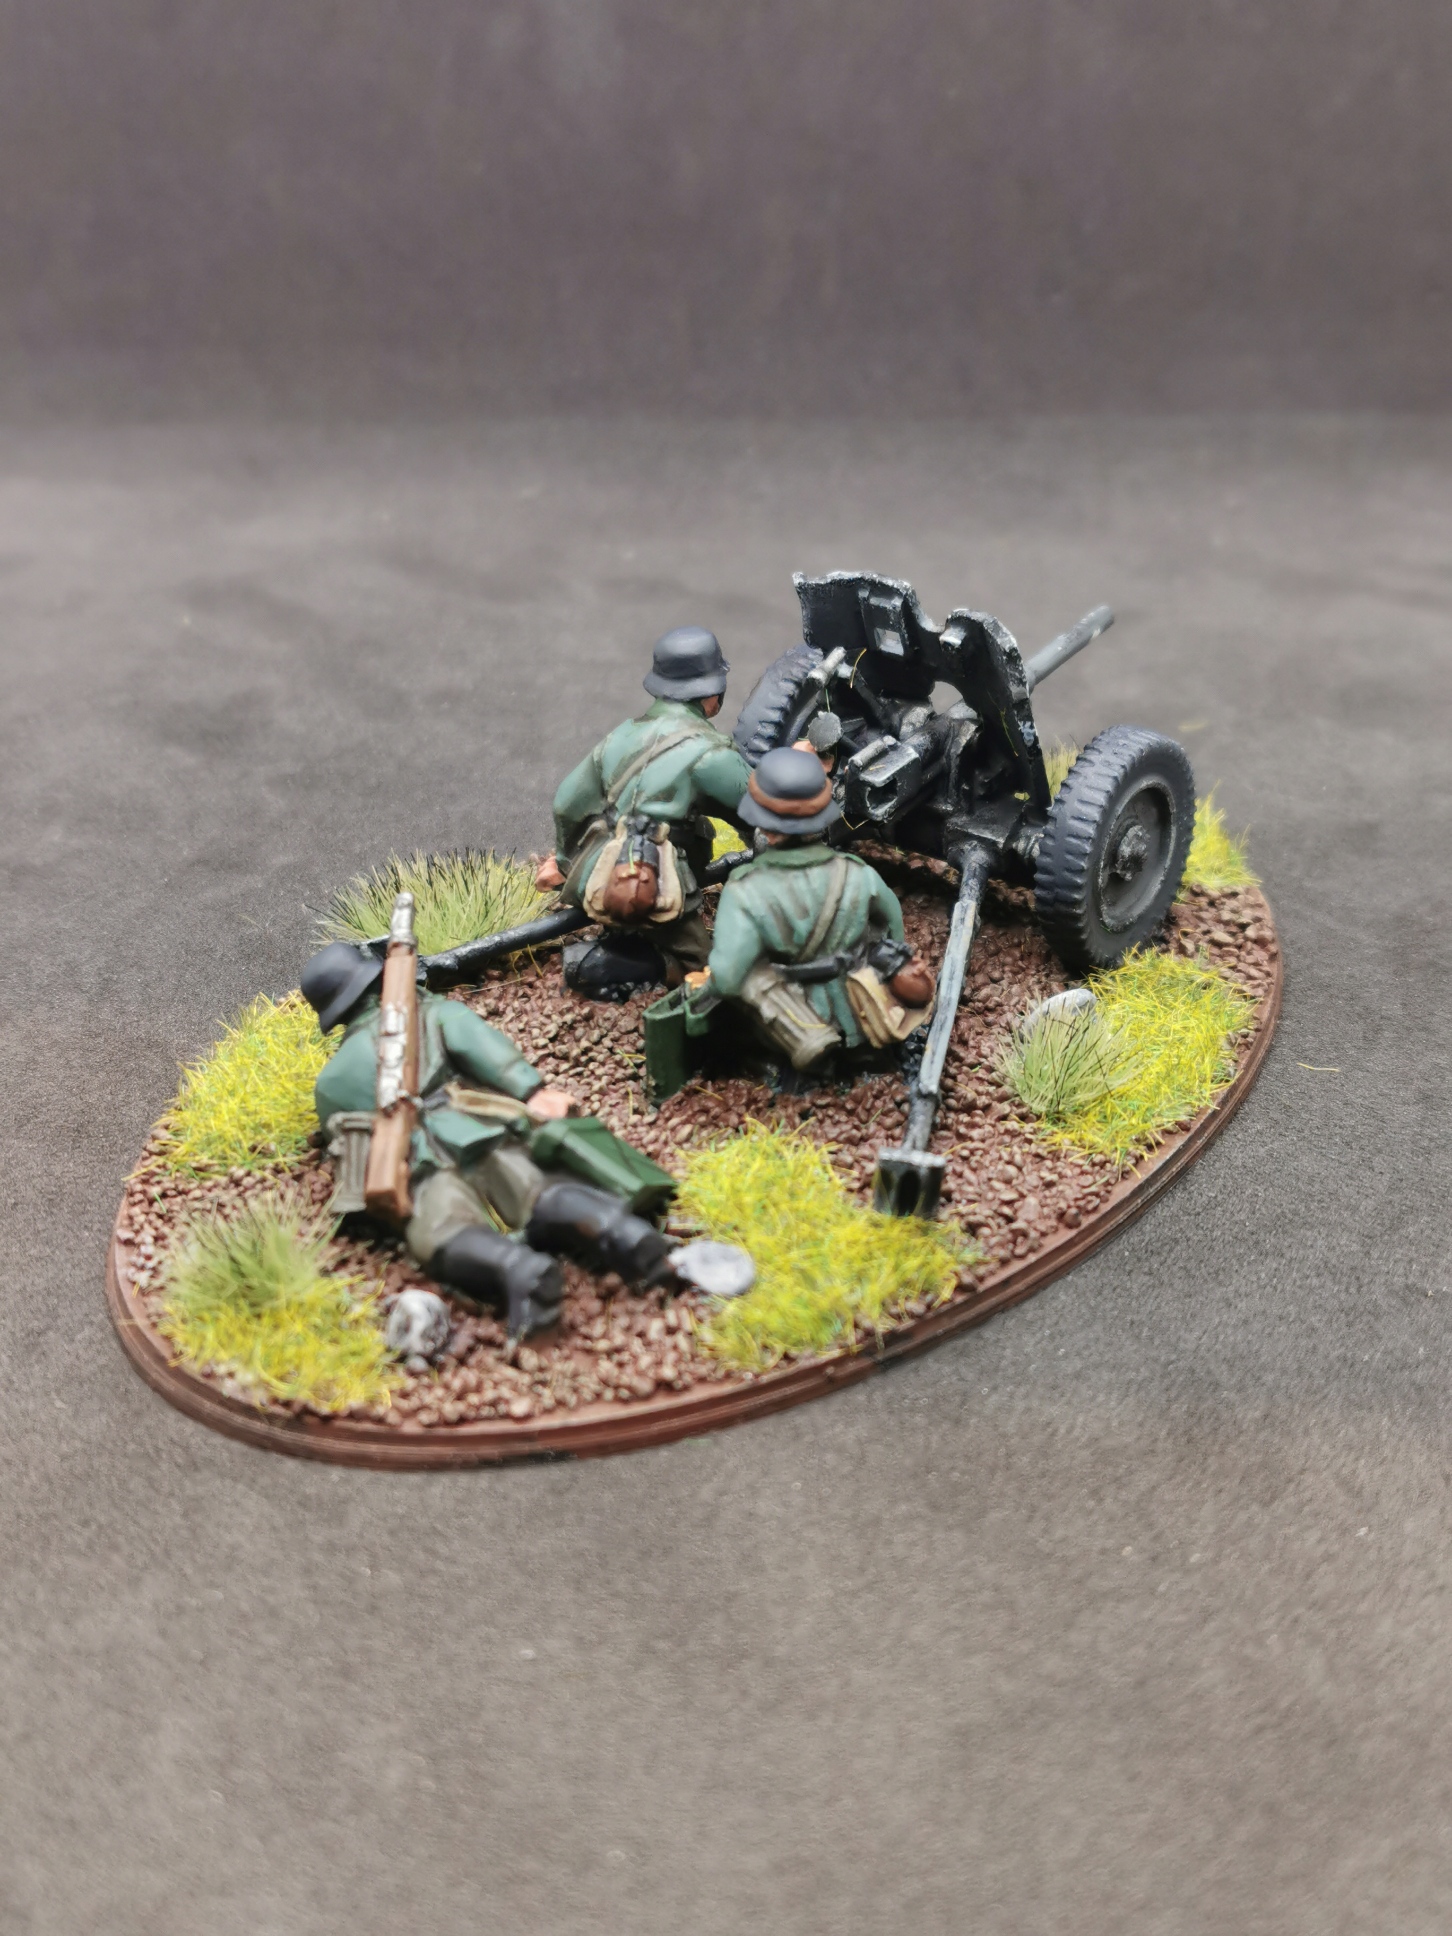
For even more firepower I added an AT Gun and chose the PAK 36 with its 3,7cm calibre.
To support the existing strikeforce I aslo added a unit of pioneers to ensure a quick advance by clearing all objects in the way.
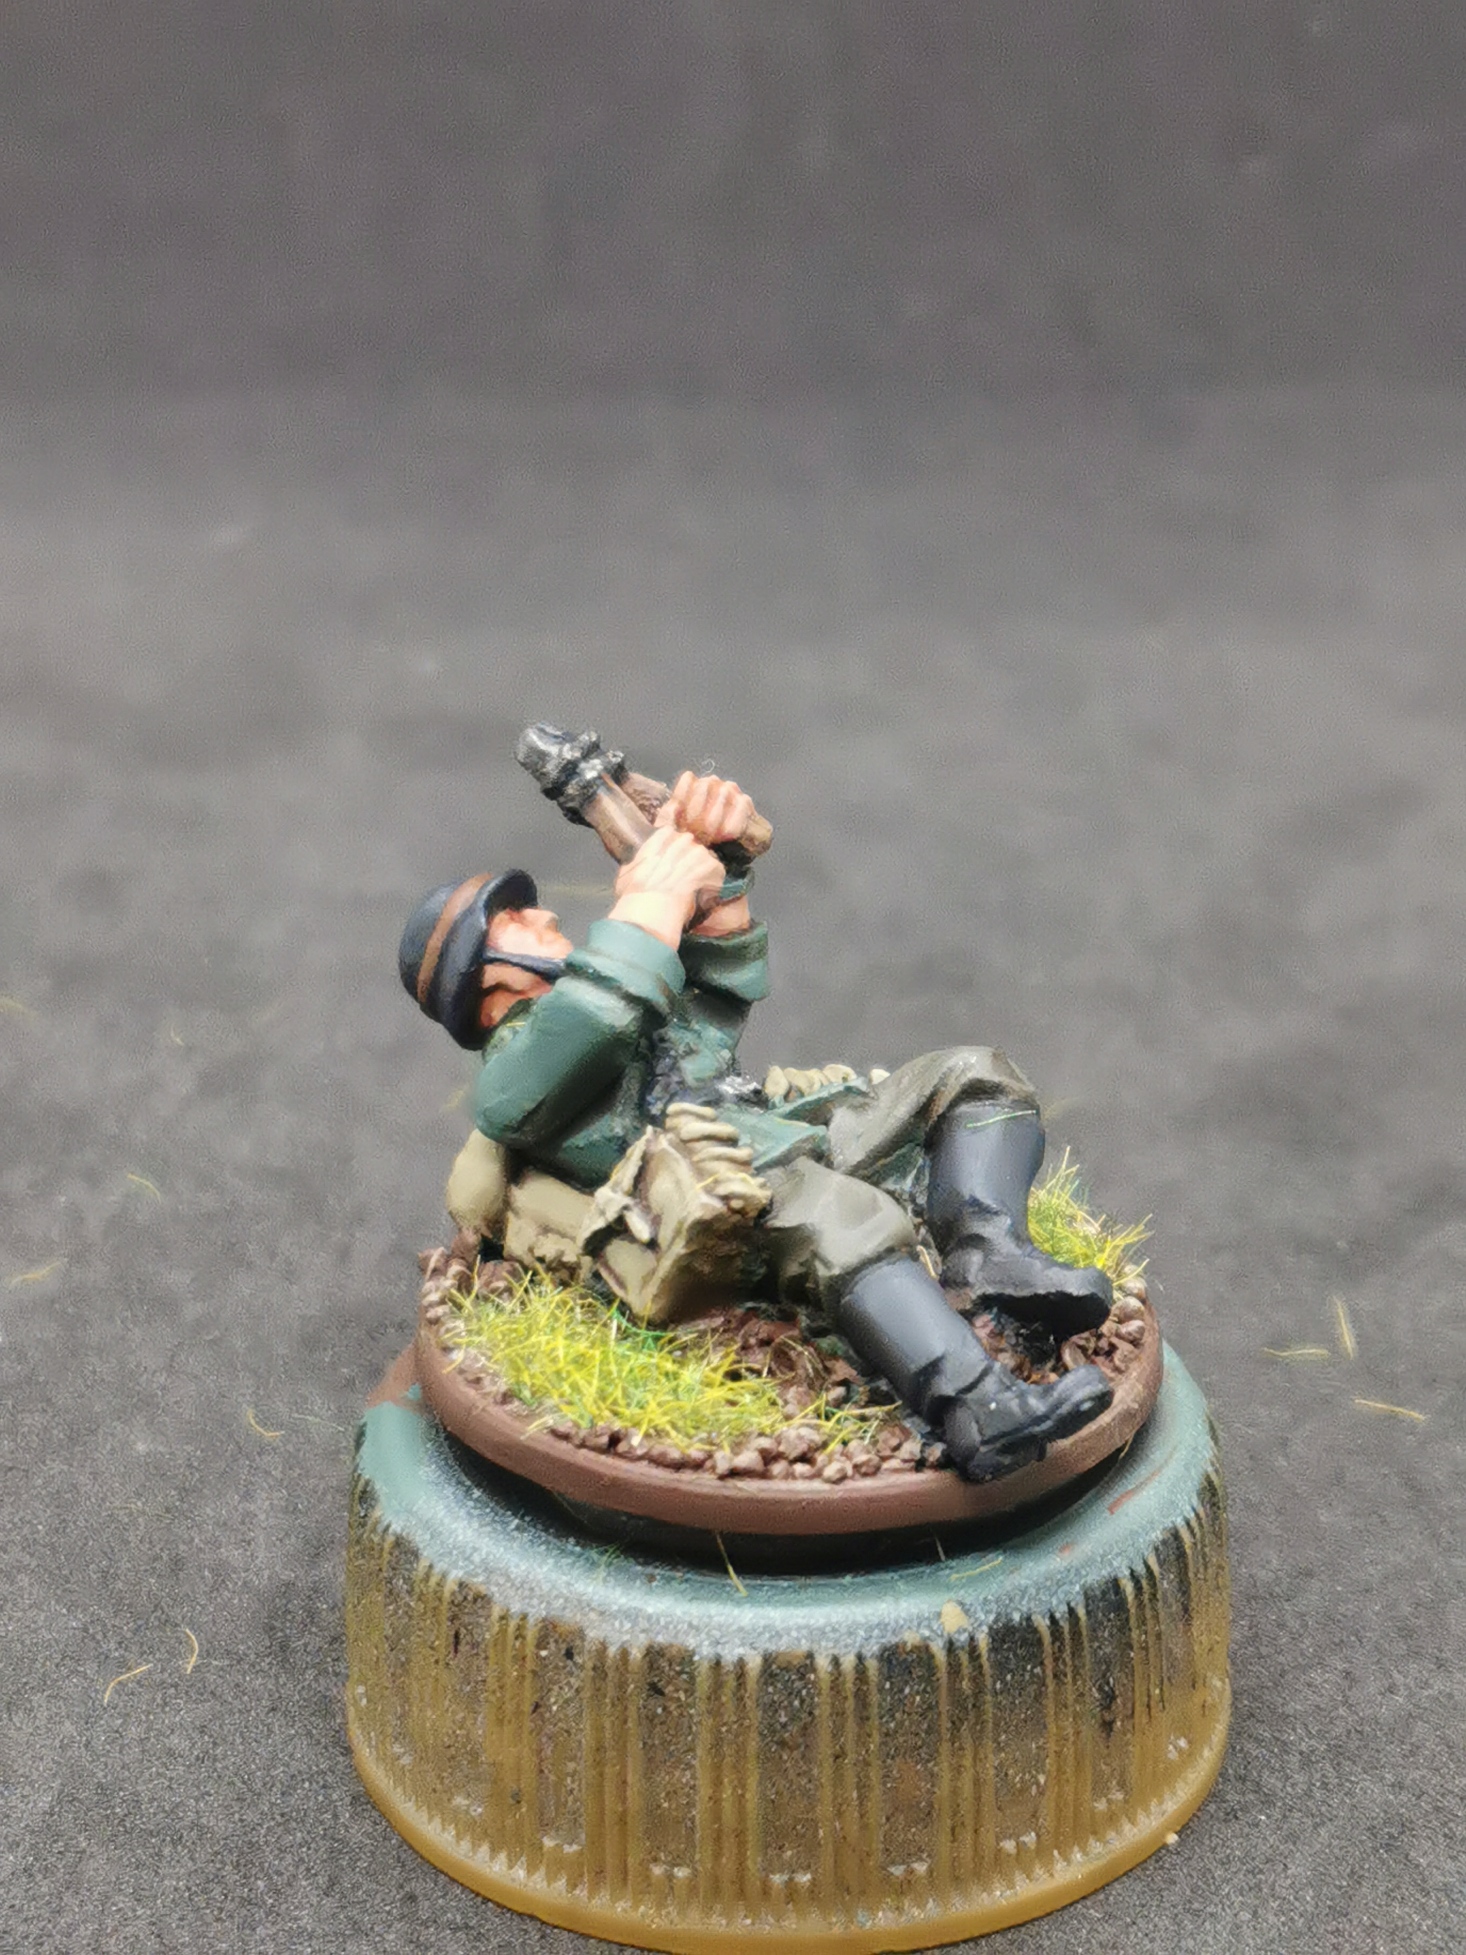
The minis were painted using the same colour scheme posted earlier with the exception of the additional bags and backpacks wich were painted using VMC 70.988 Khaki, washed with Citadel Agrax Earthshade and highlighting back up with base colour and 50:50 mix of Khaki and Citadel Ushabti Bone.
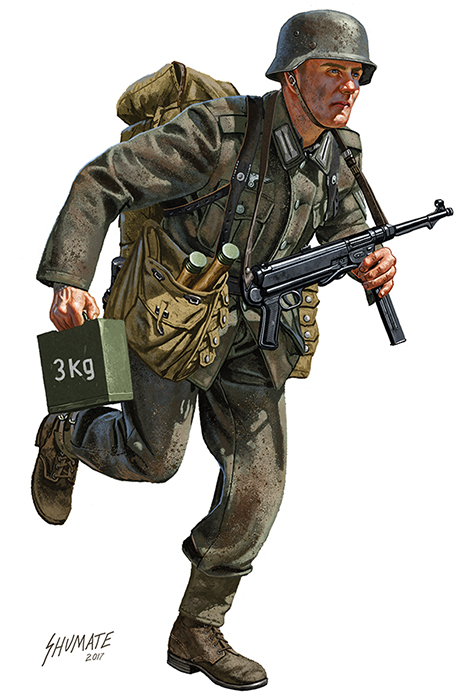 Source: DeviantArt.com
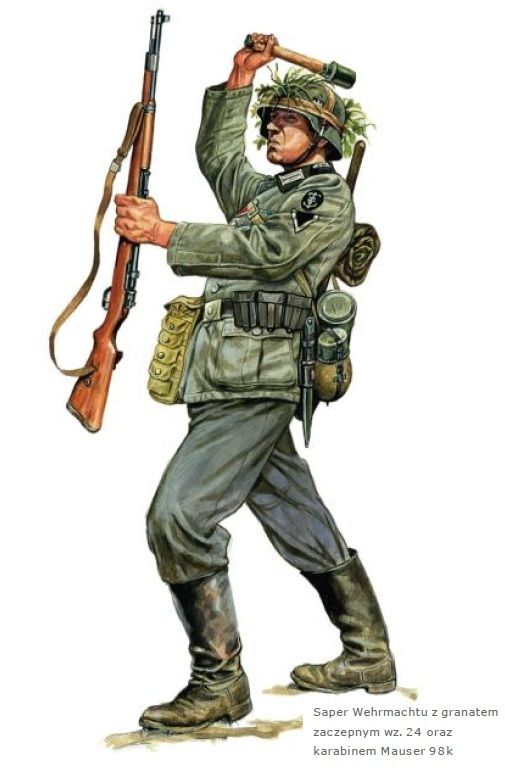 Source: Pinterest.com
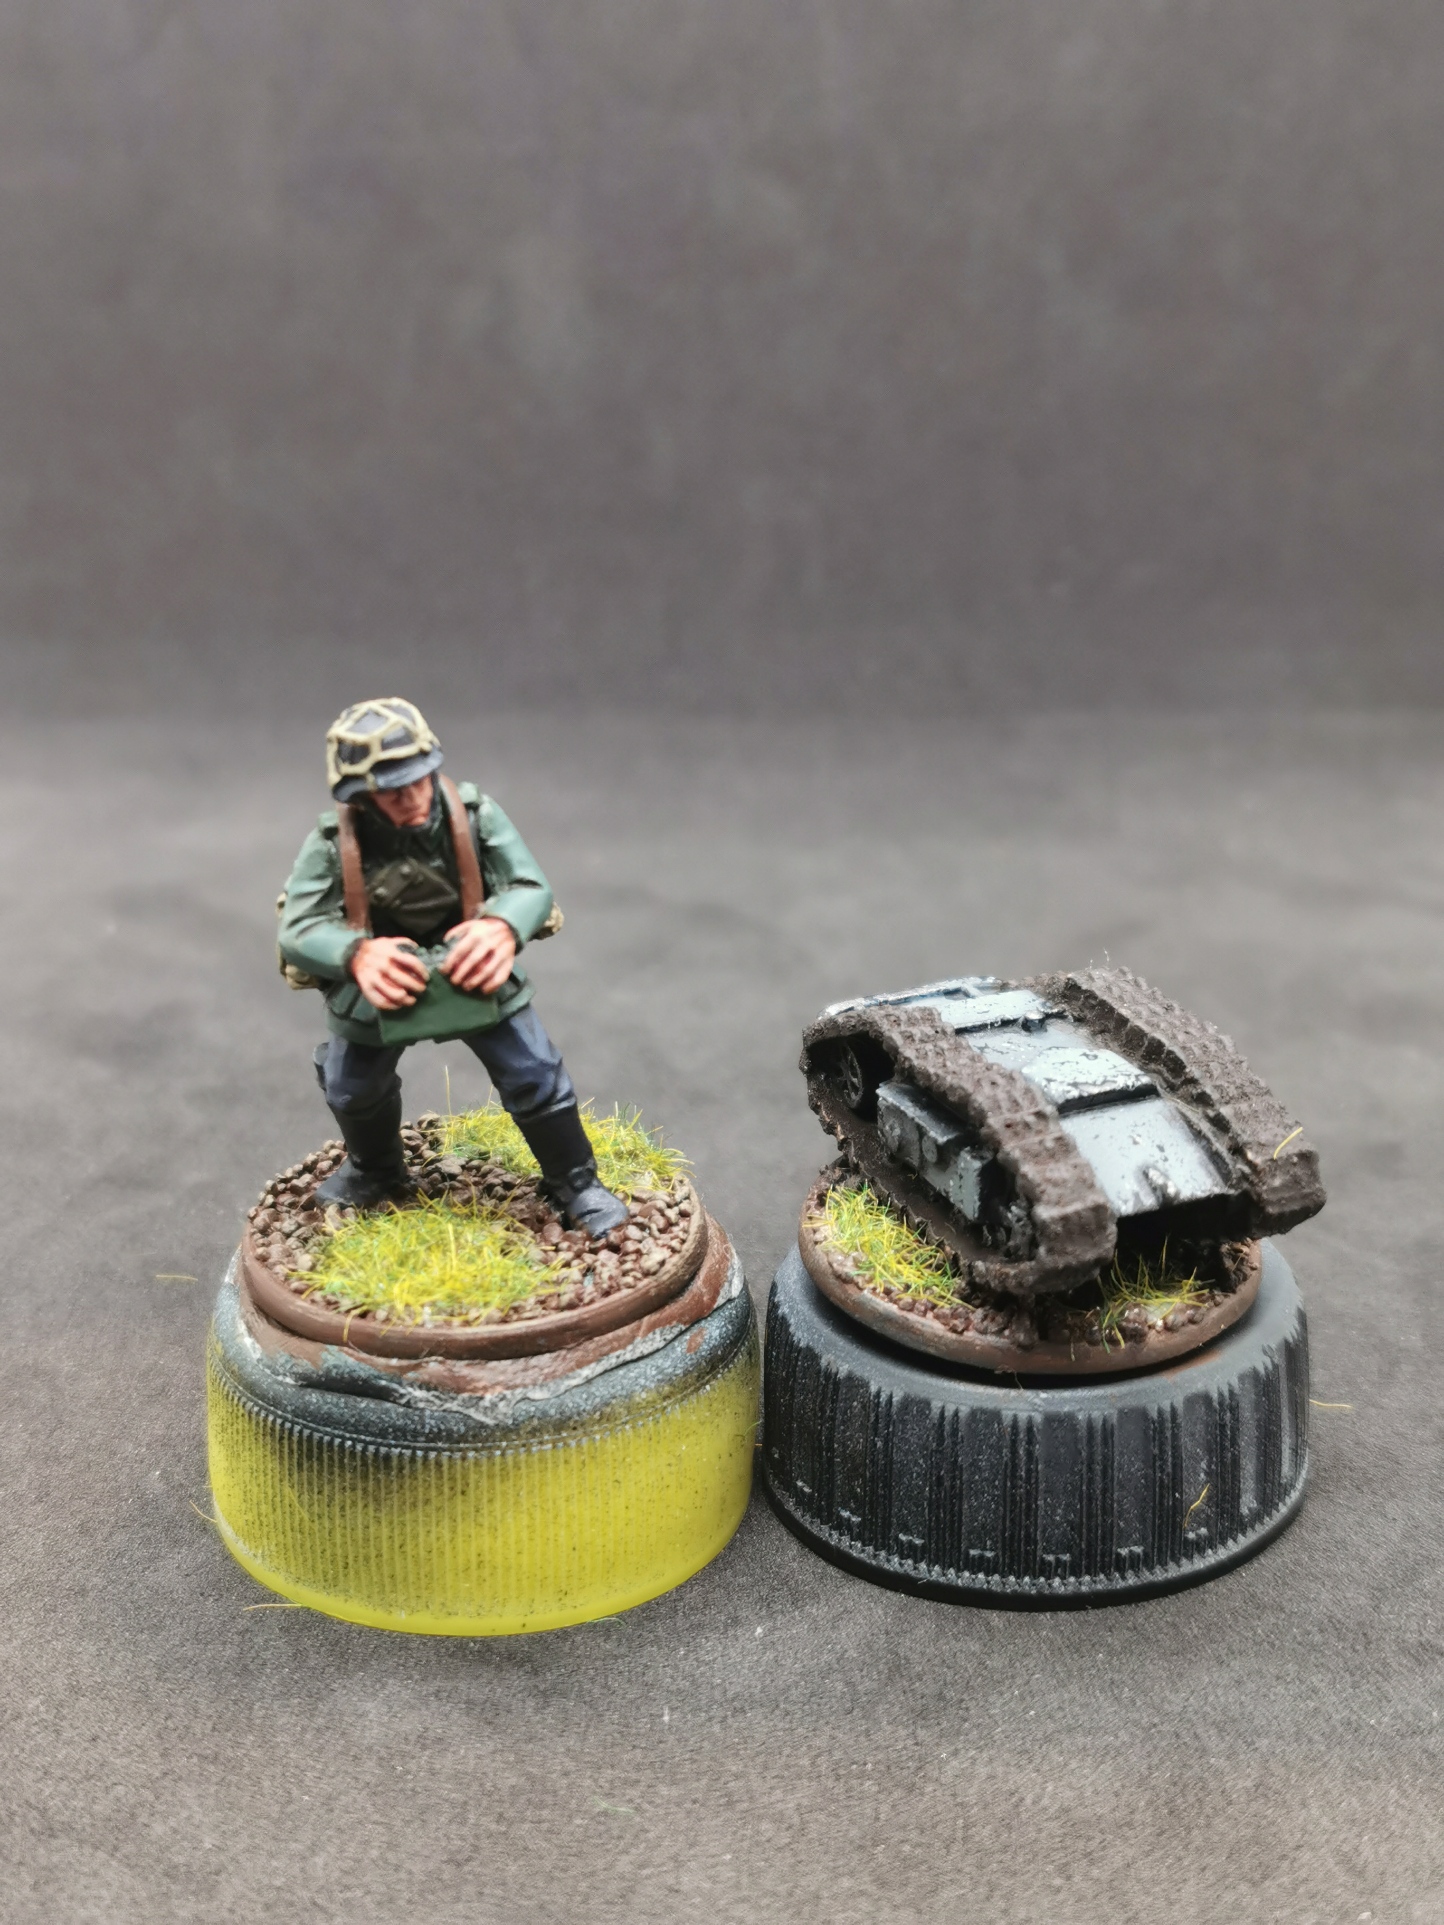

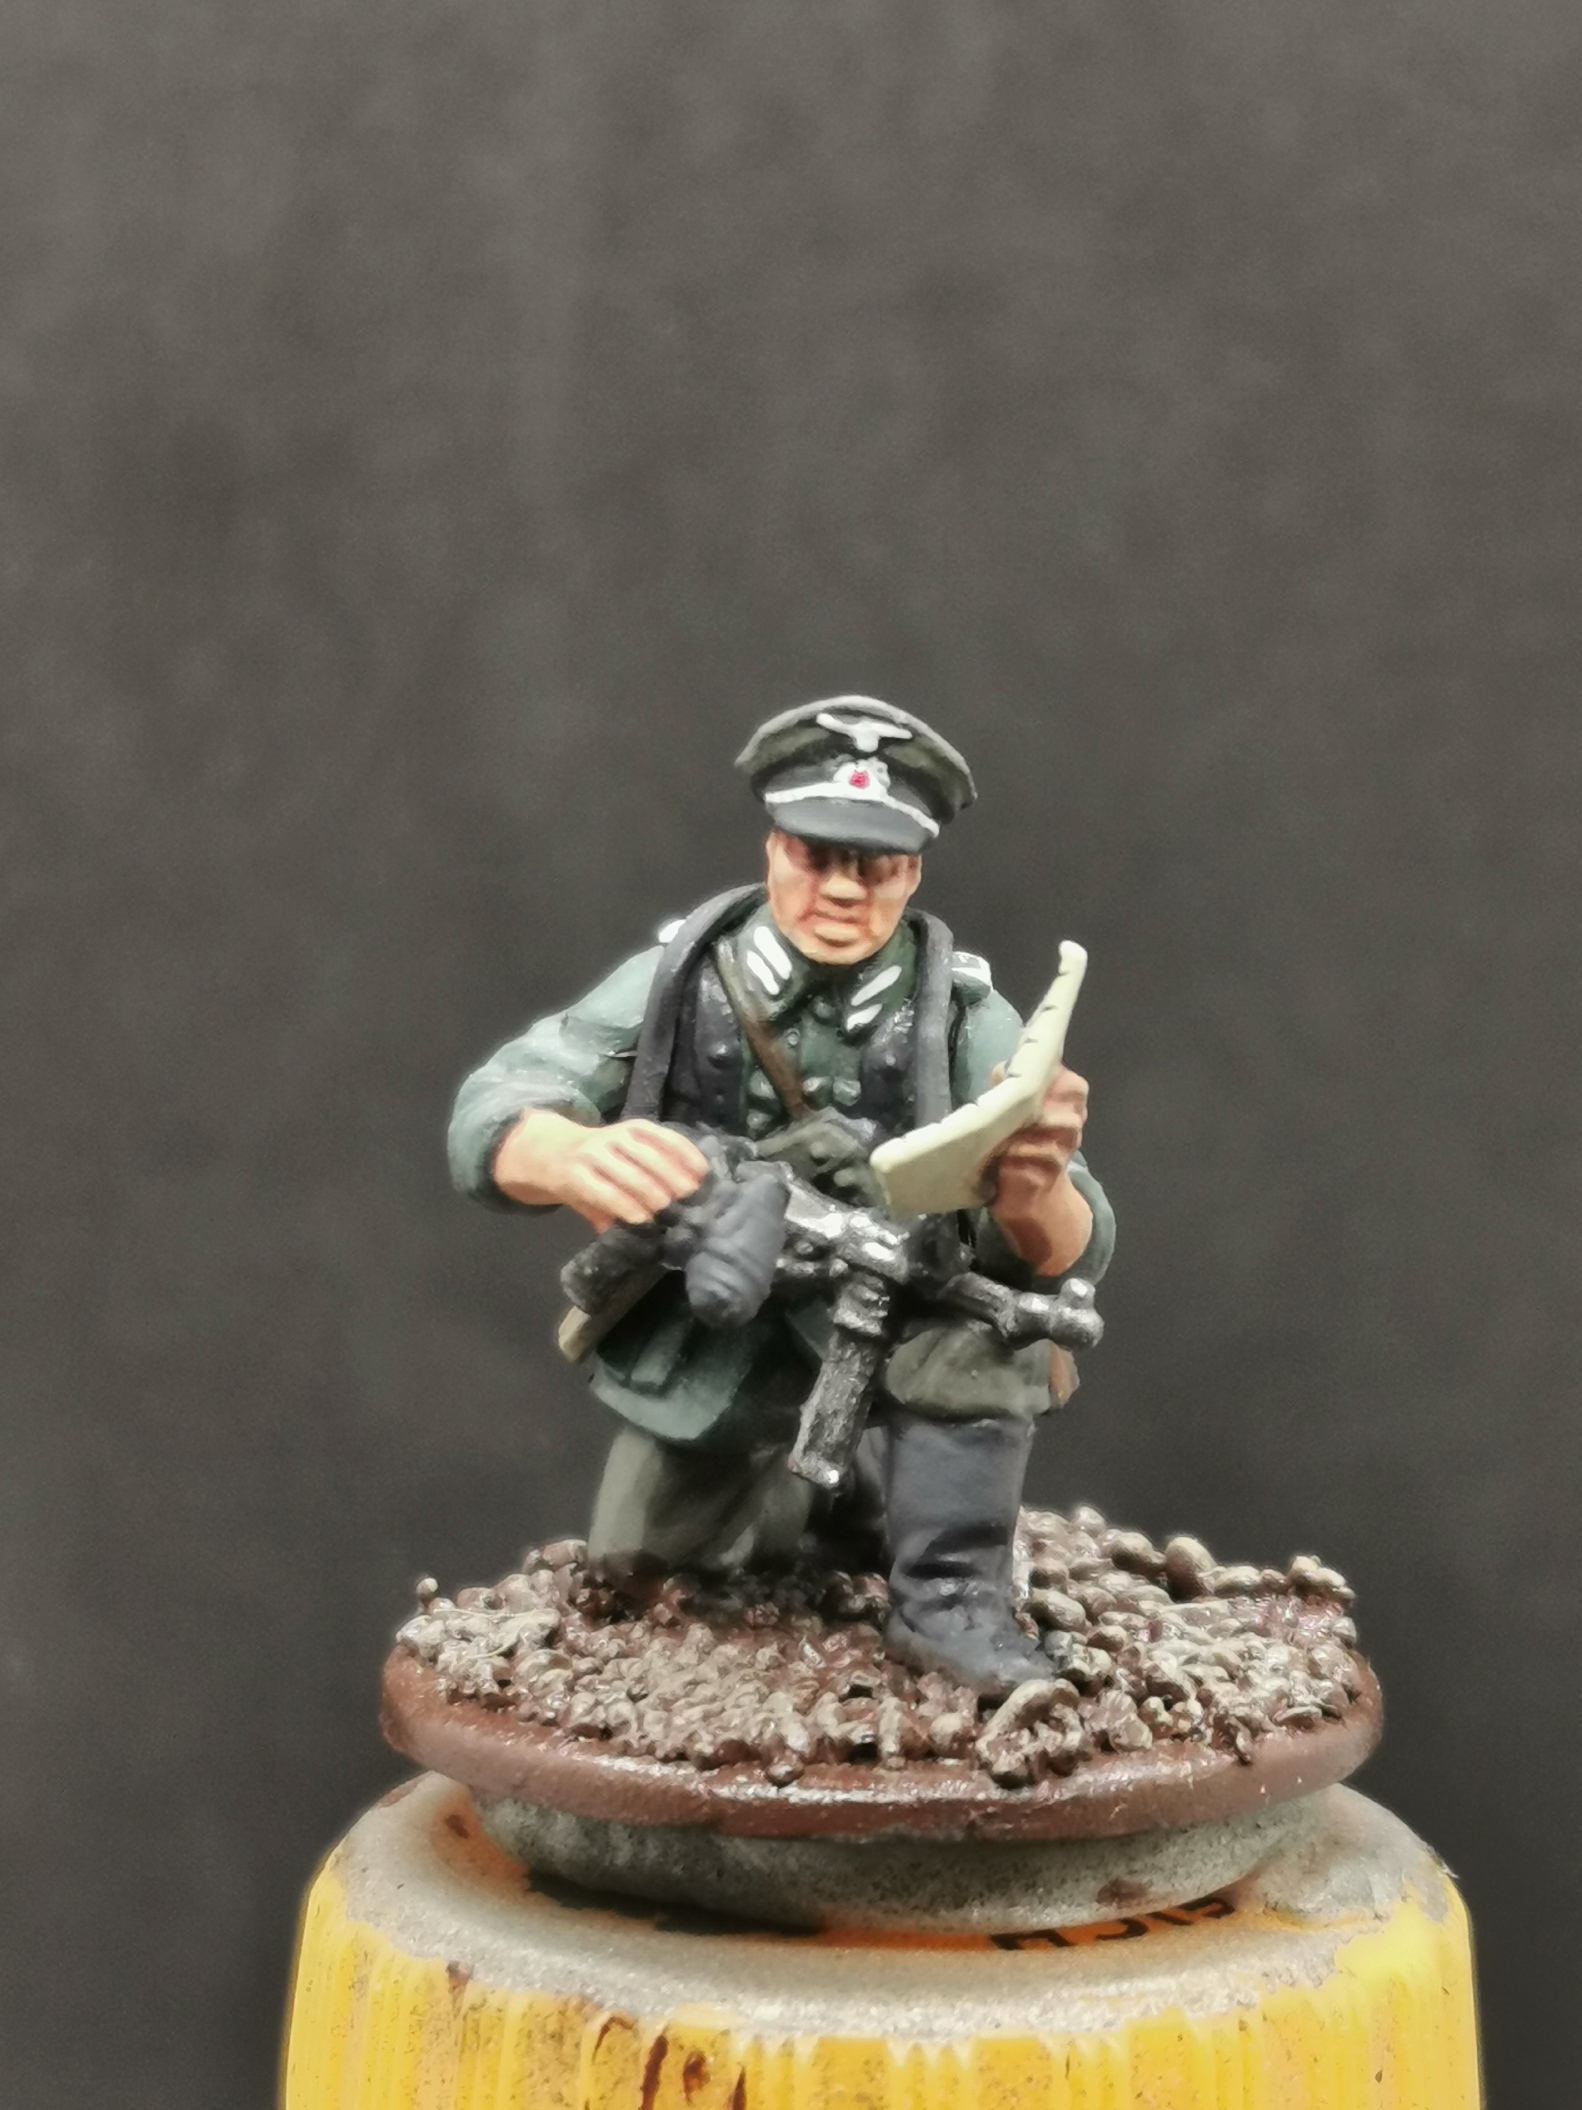
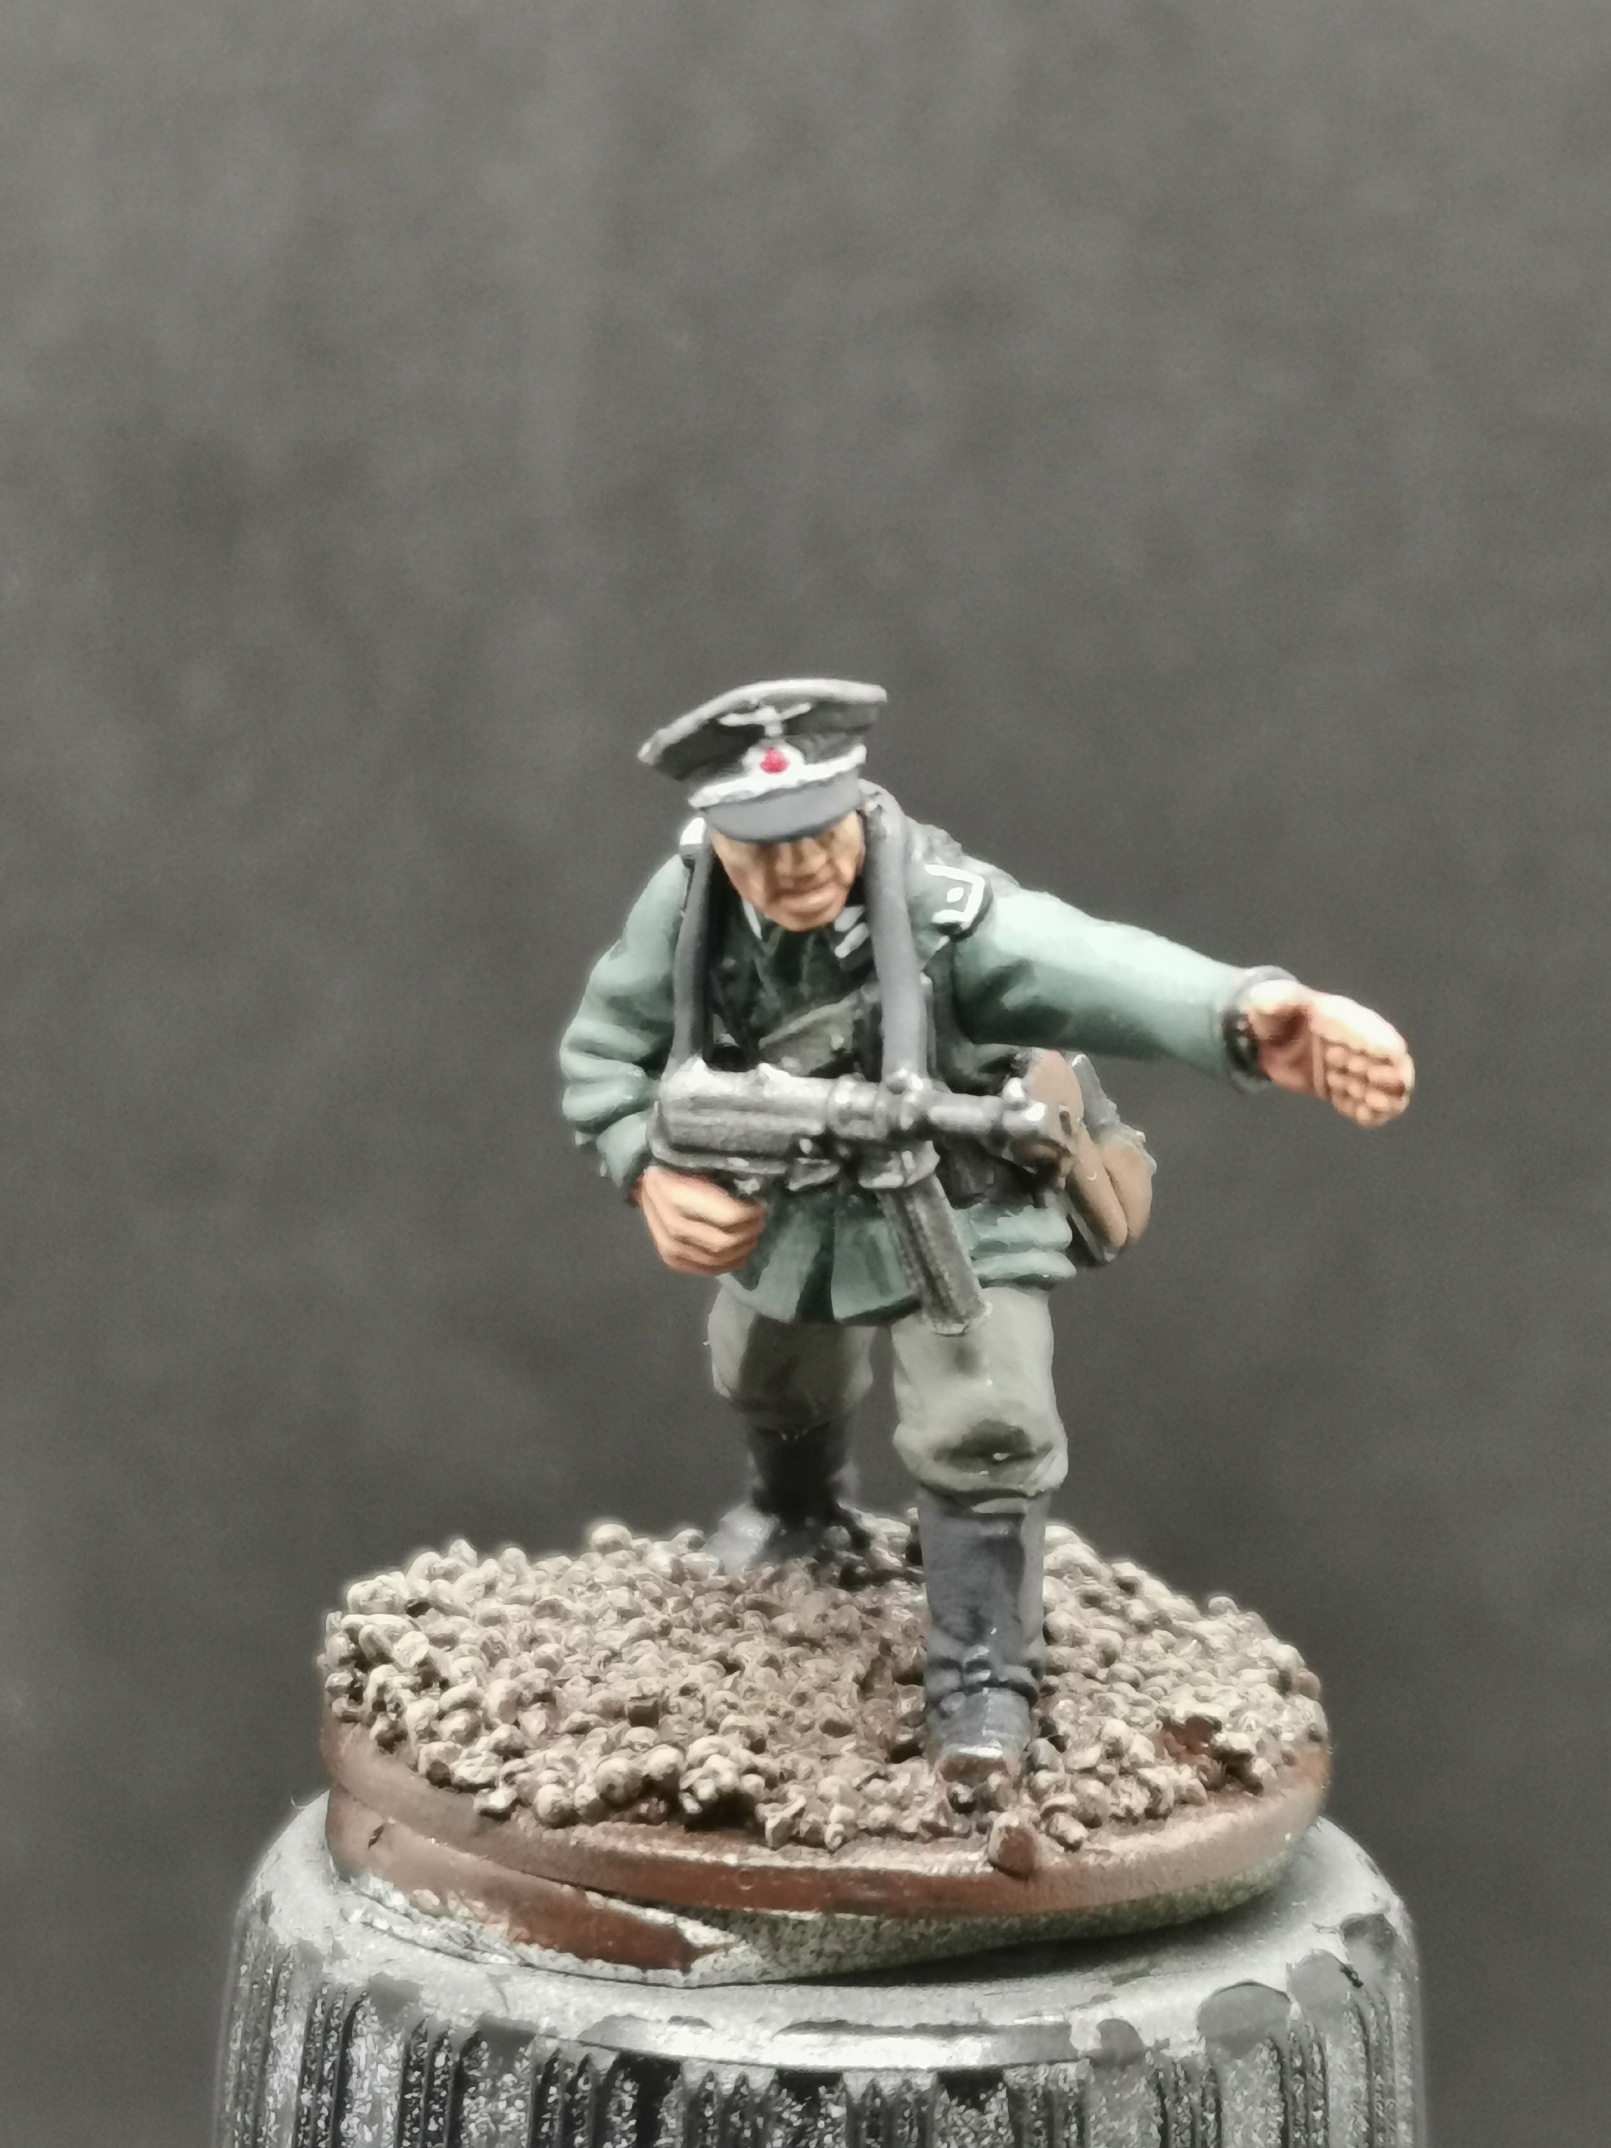
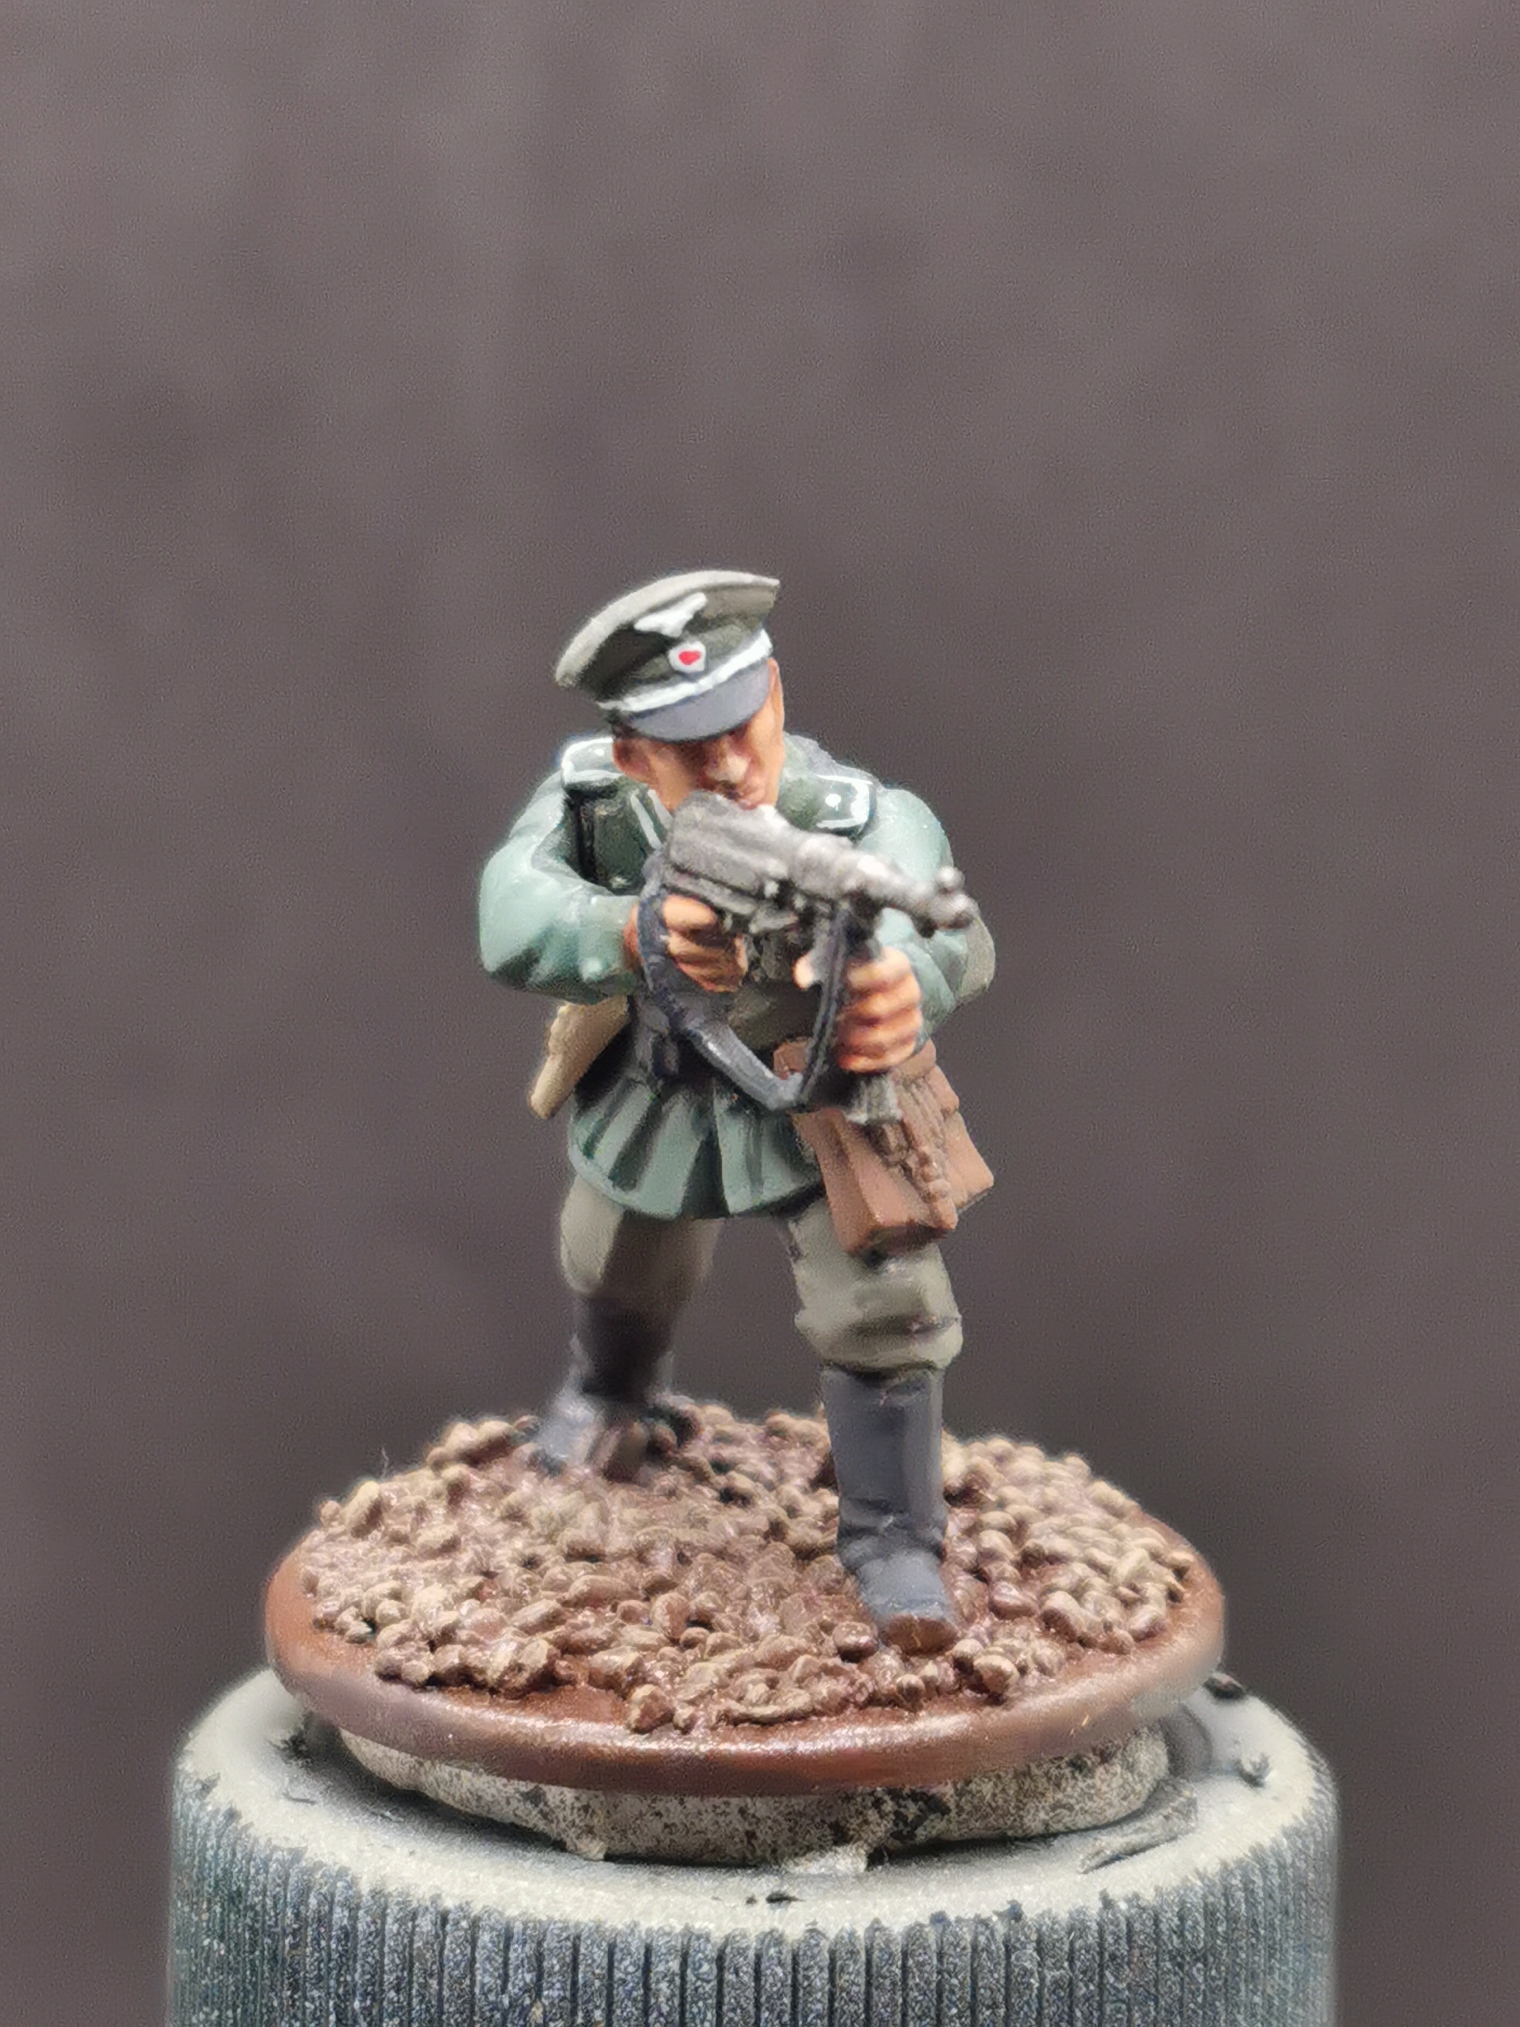
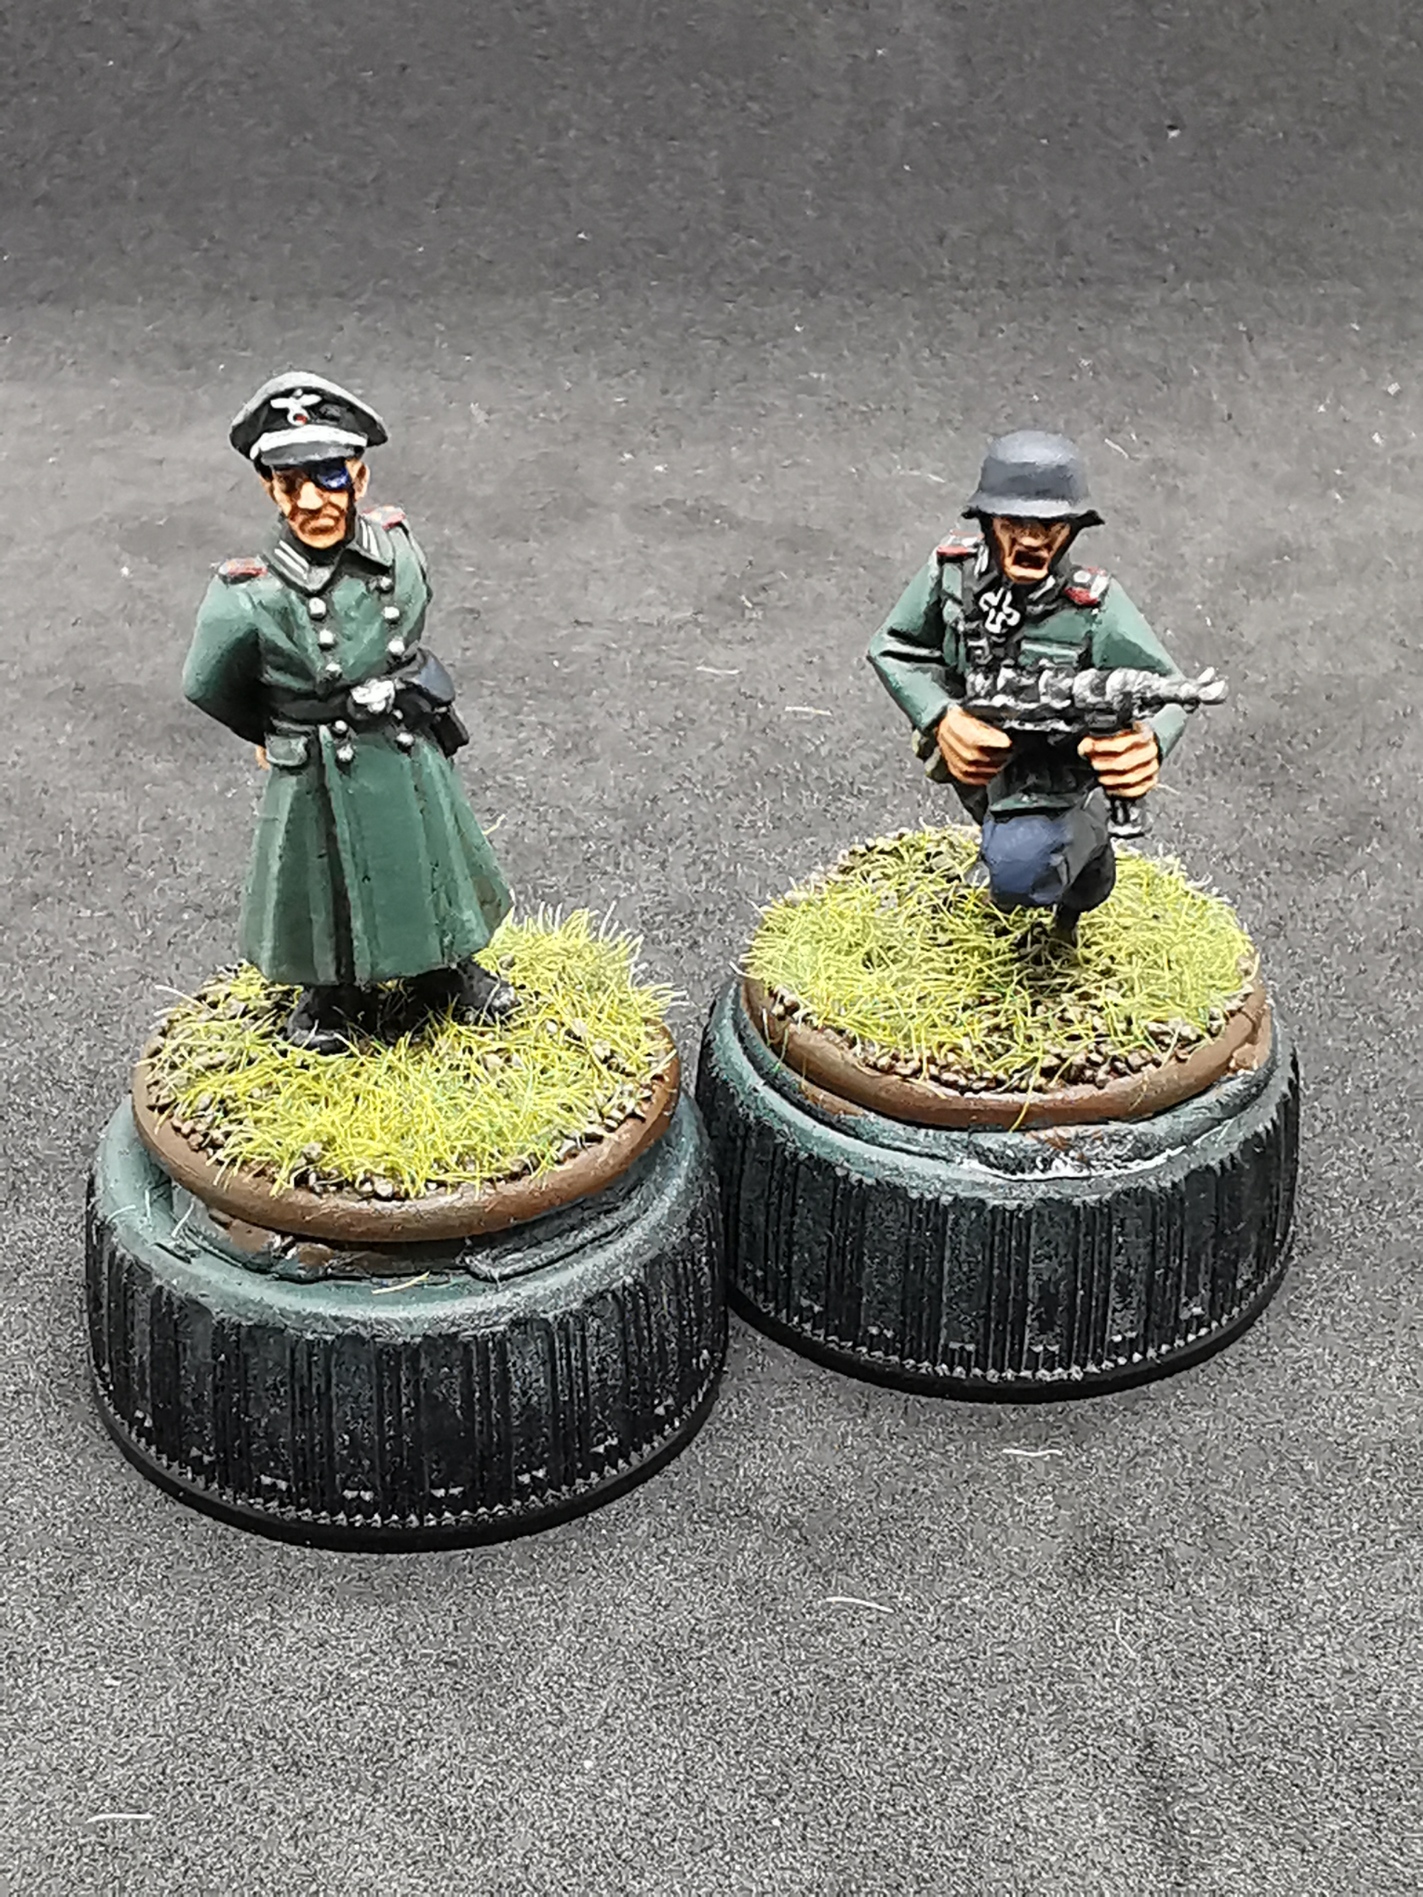
Step 13: Getting someone with a plan... (adding HQ)
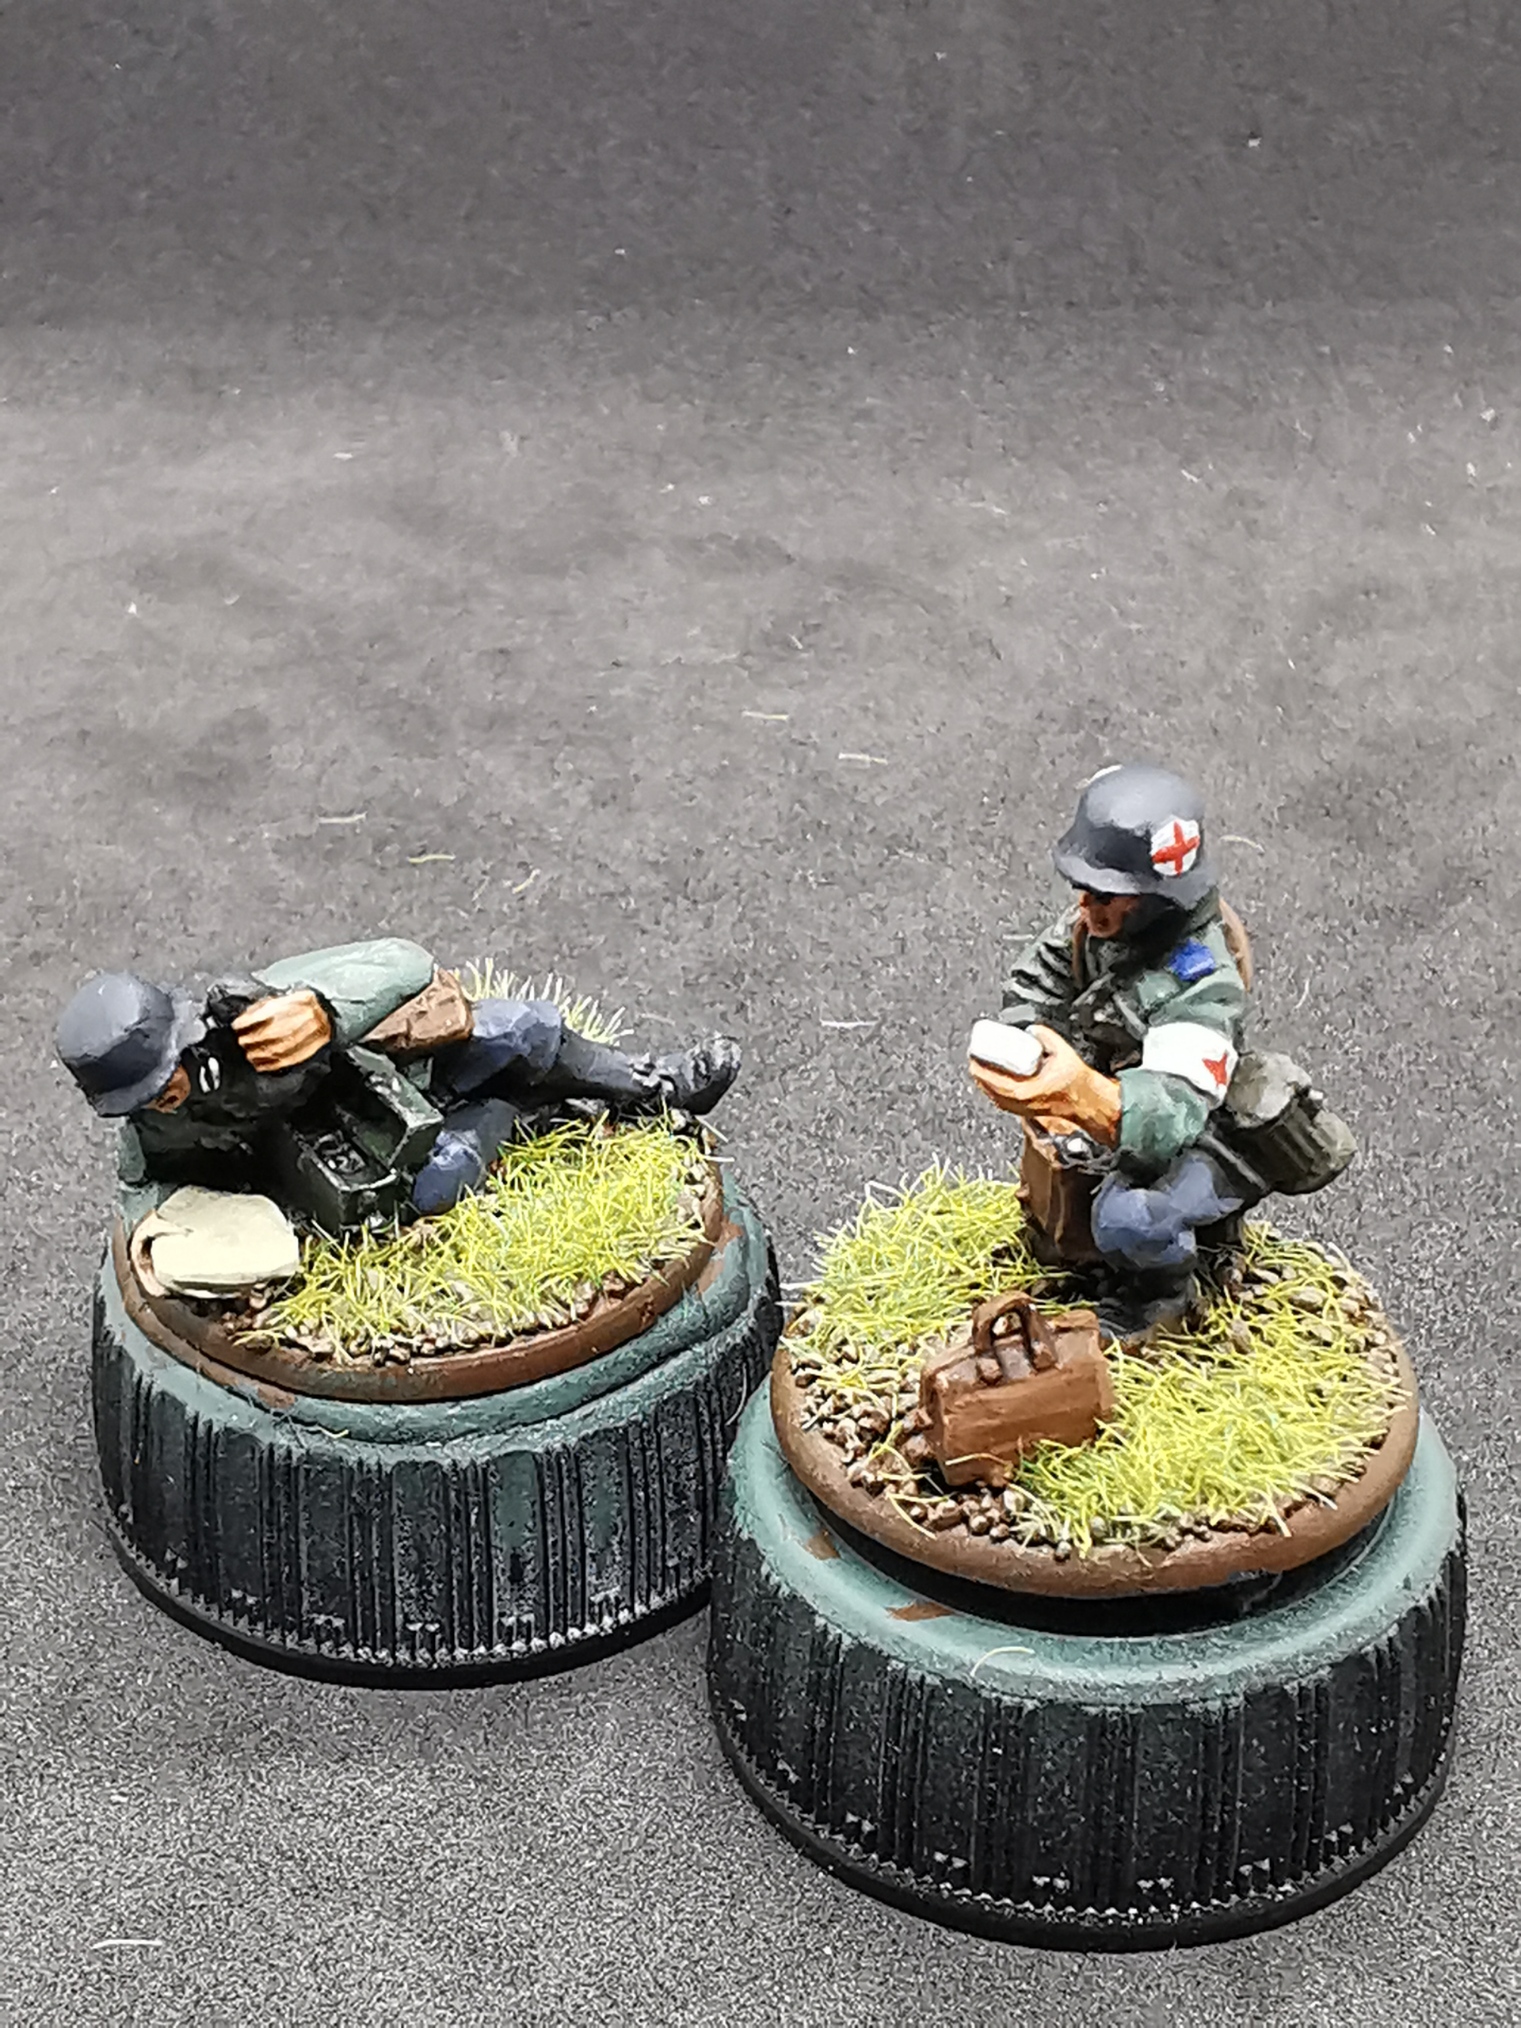
Stillgestanden! ———- Here comes the officer, an NCO, a Medic and an Observer/Radio operator. I really like the officer model with the monocle giving it a lot of character! ———- Rührt euch!
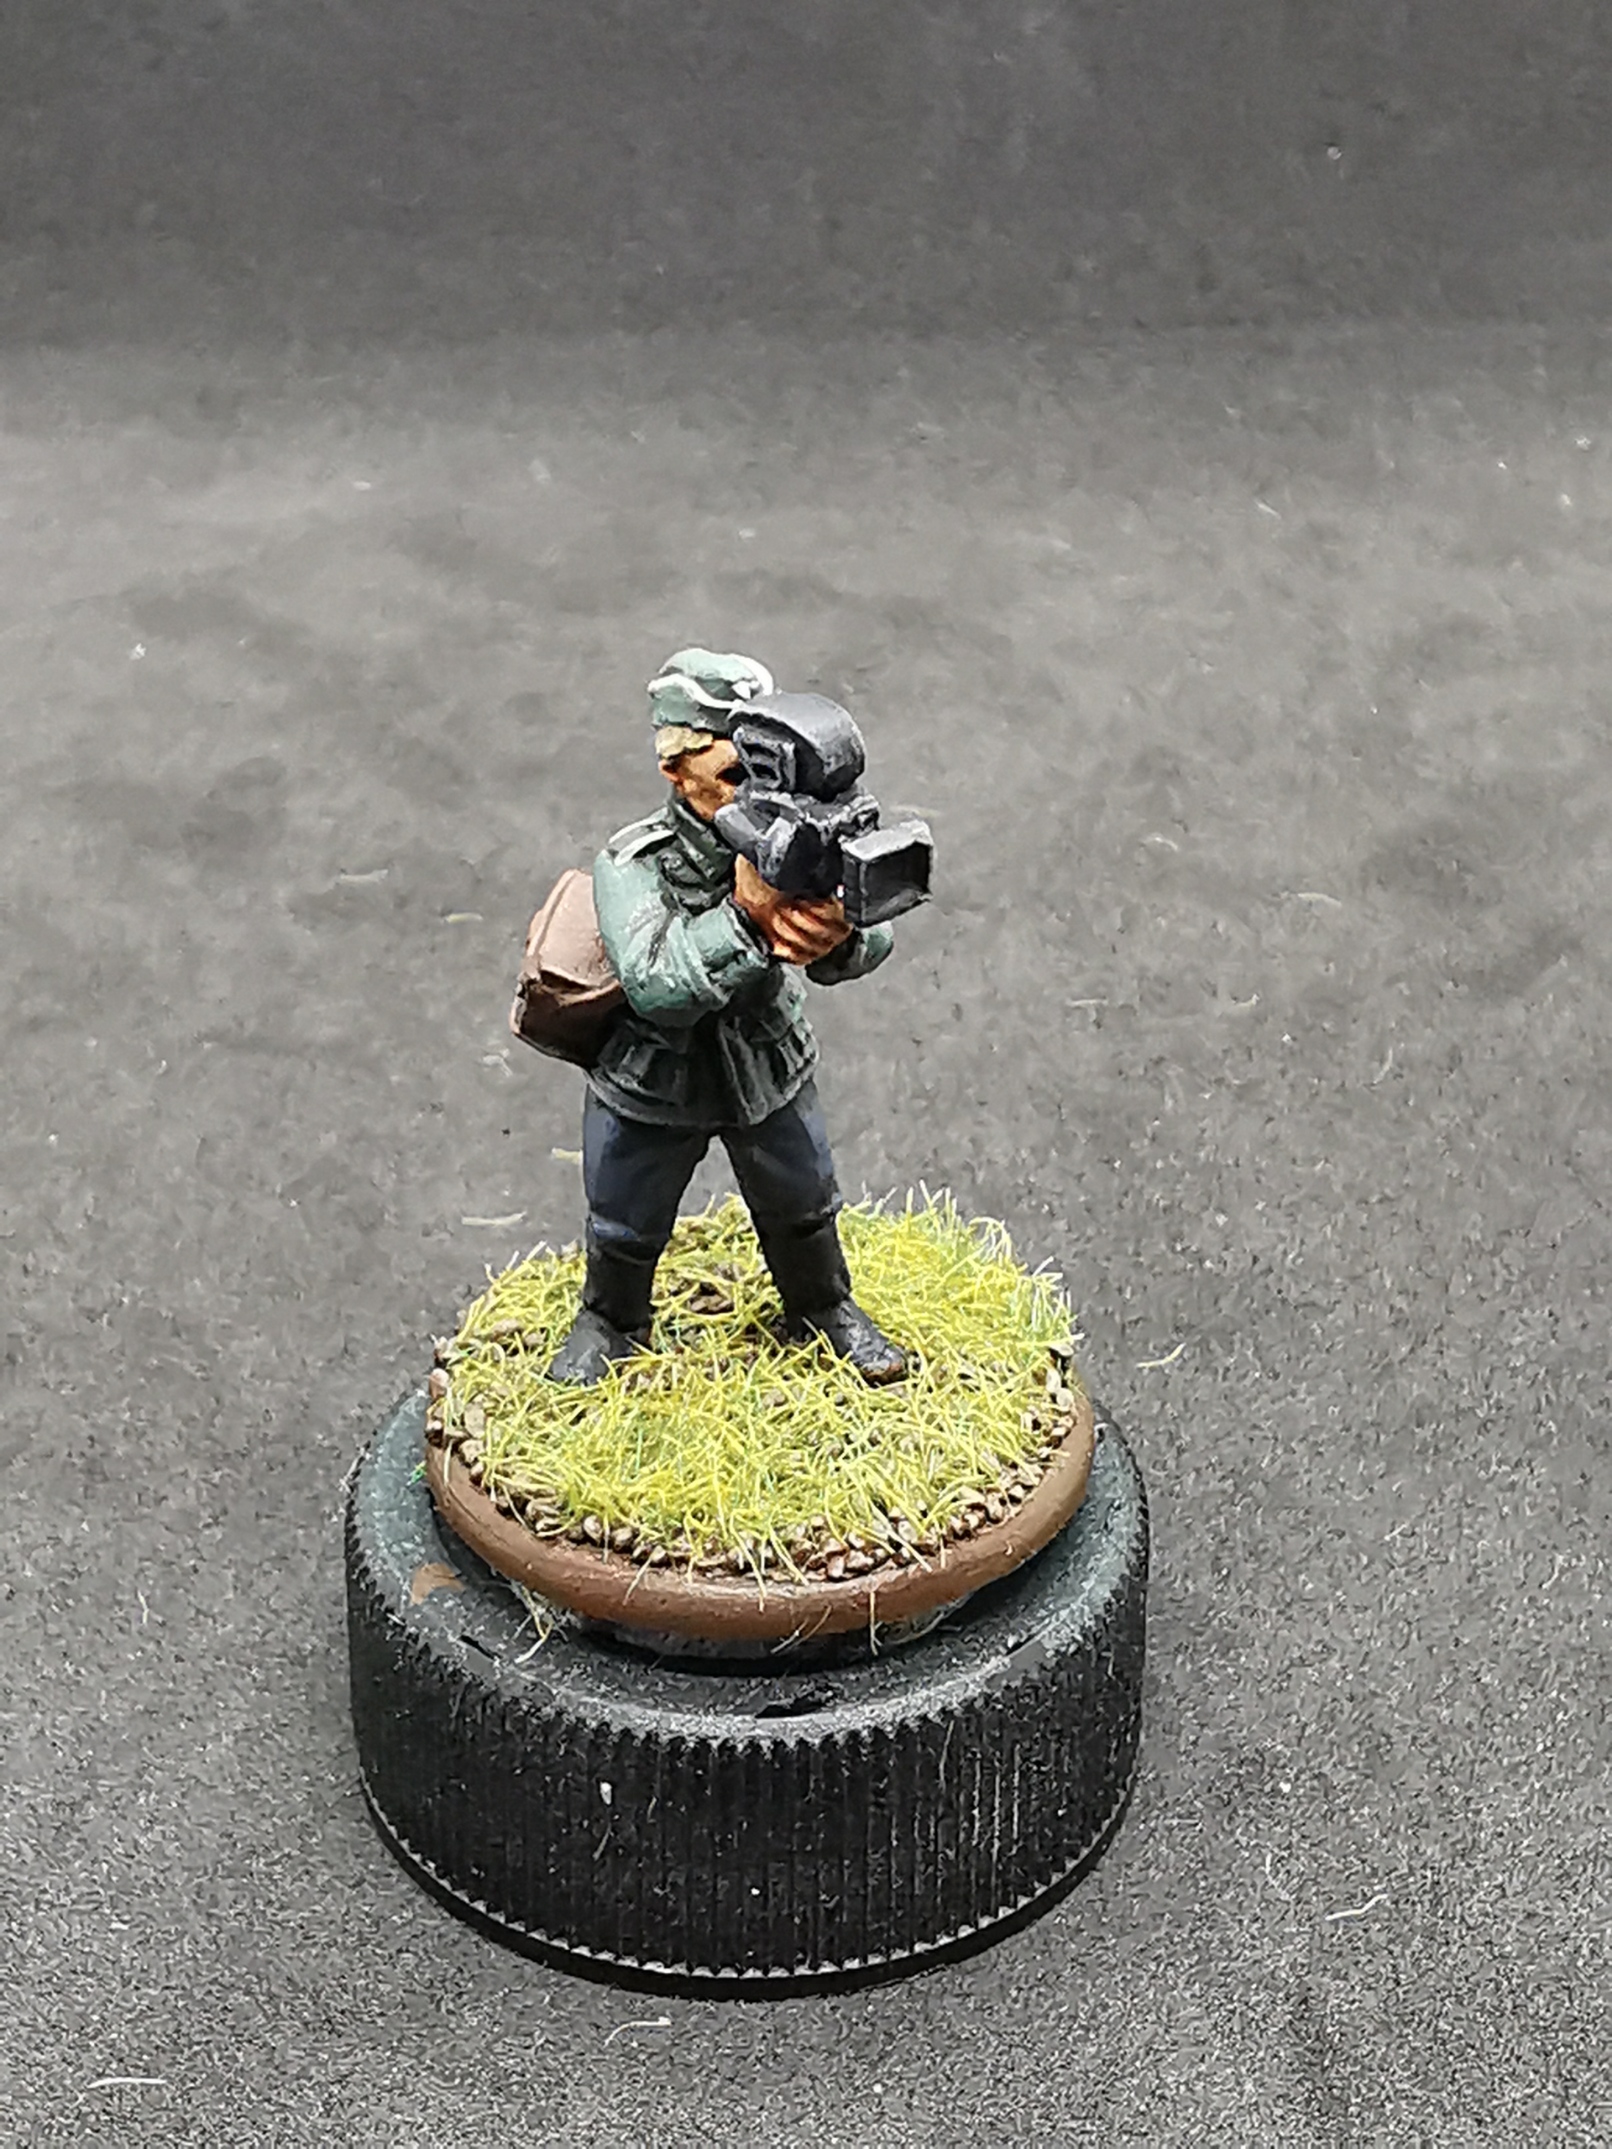
I also added a cameraman of the Wochenschau keeping track of all the successes happening on the front to boost moral on the homefront.
——— Uuuuuuuuuuuund Kamera läuft!
Step 14: Adding Mobility
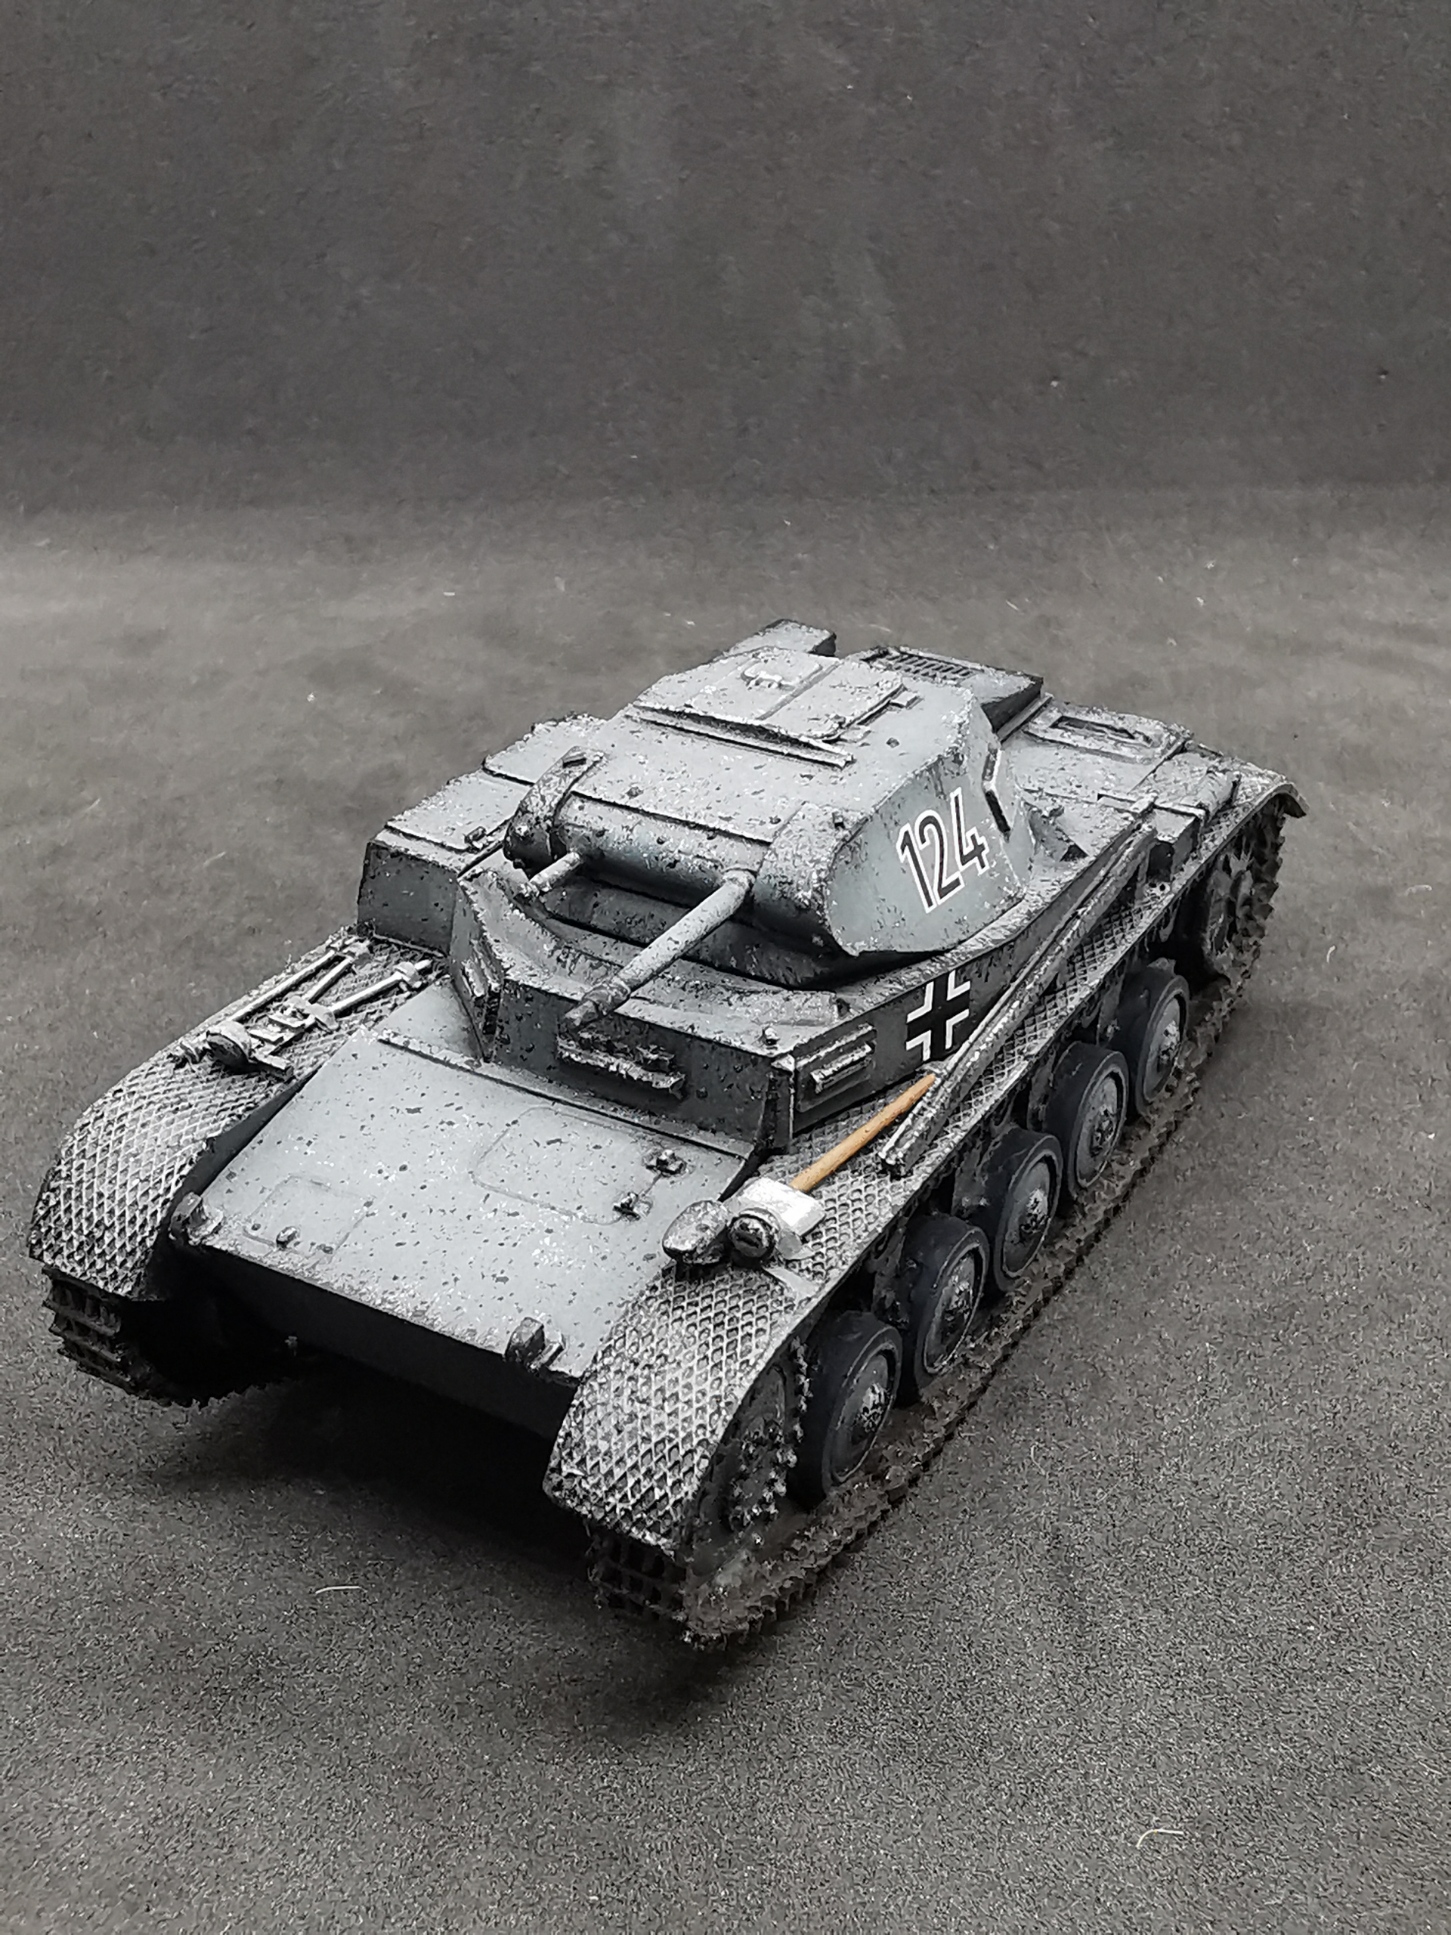
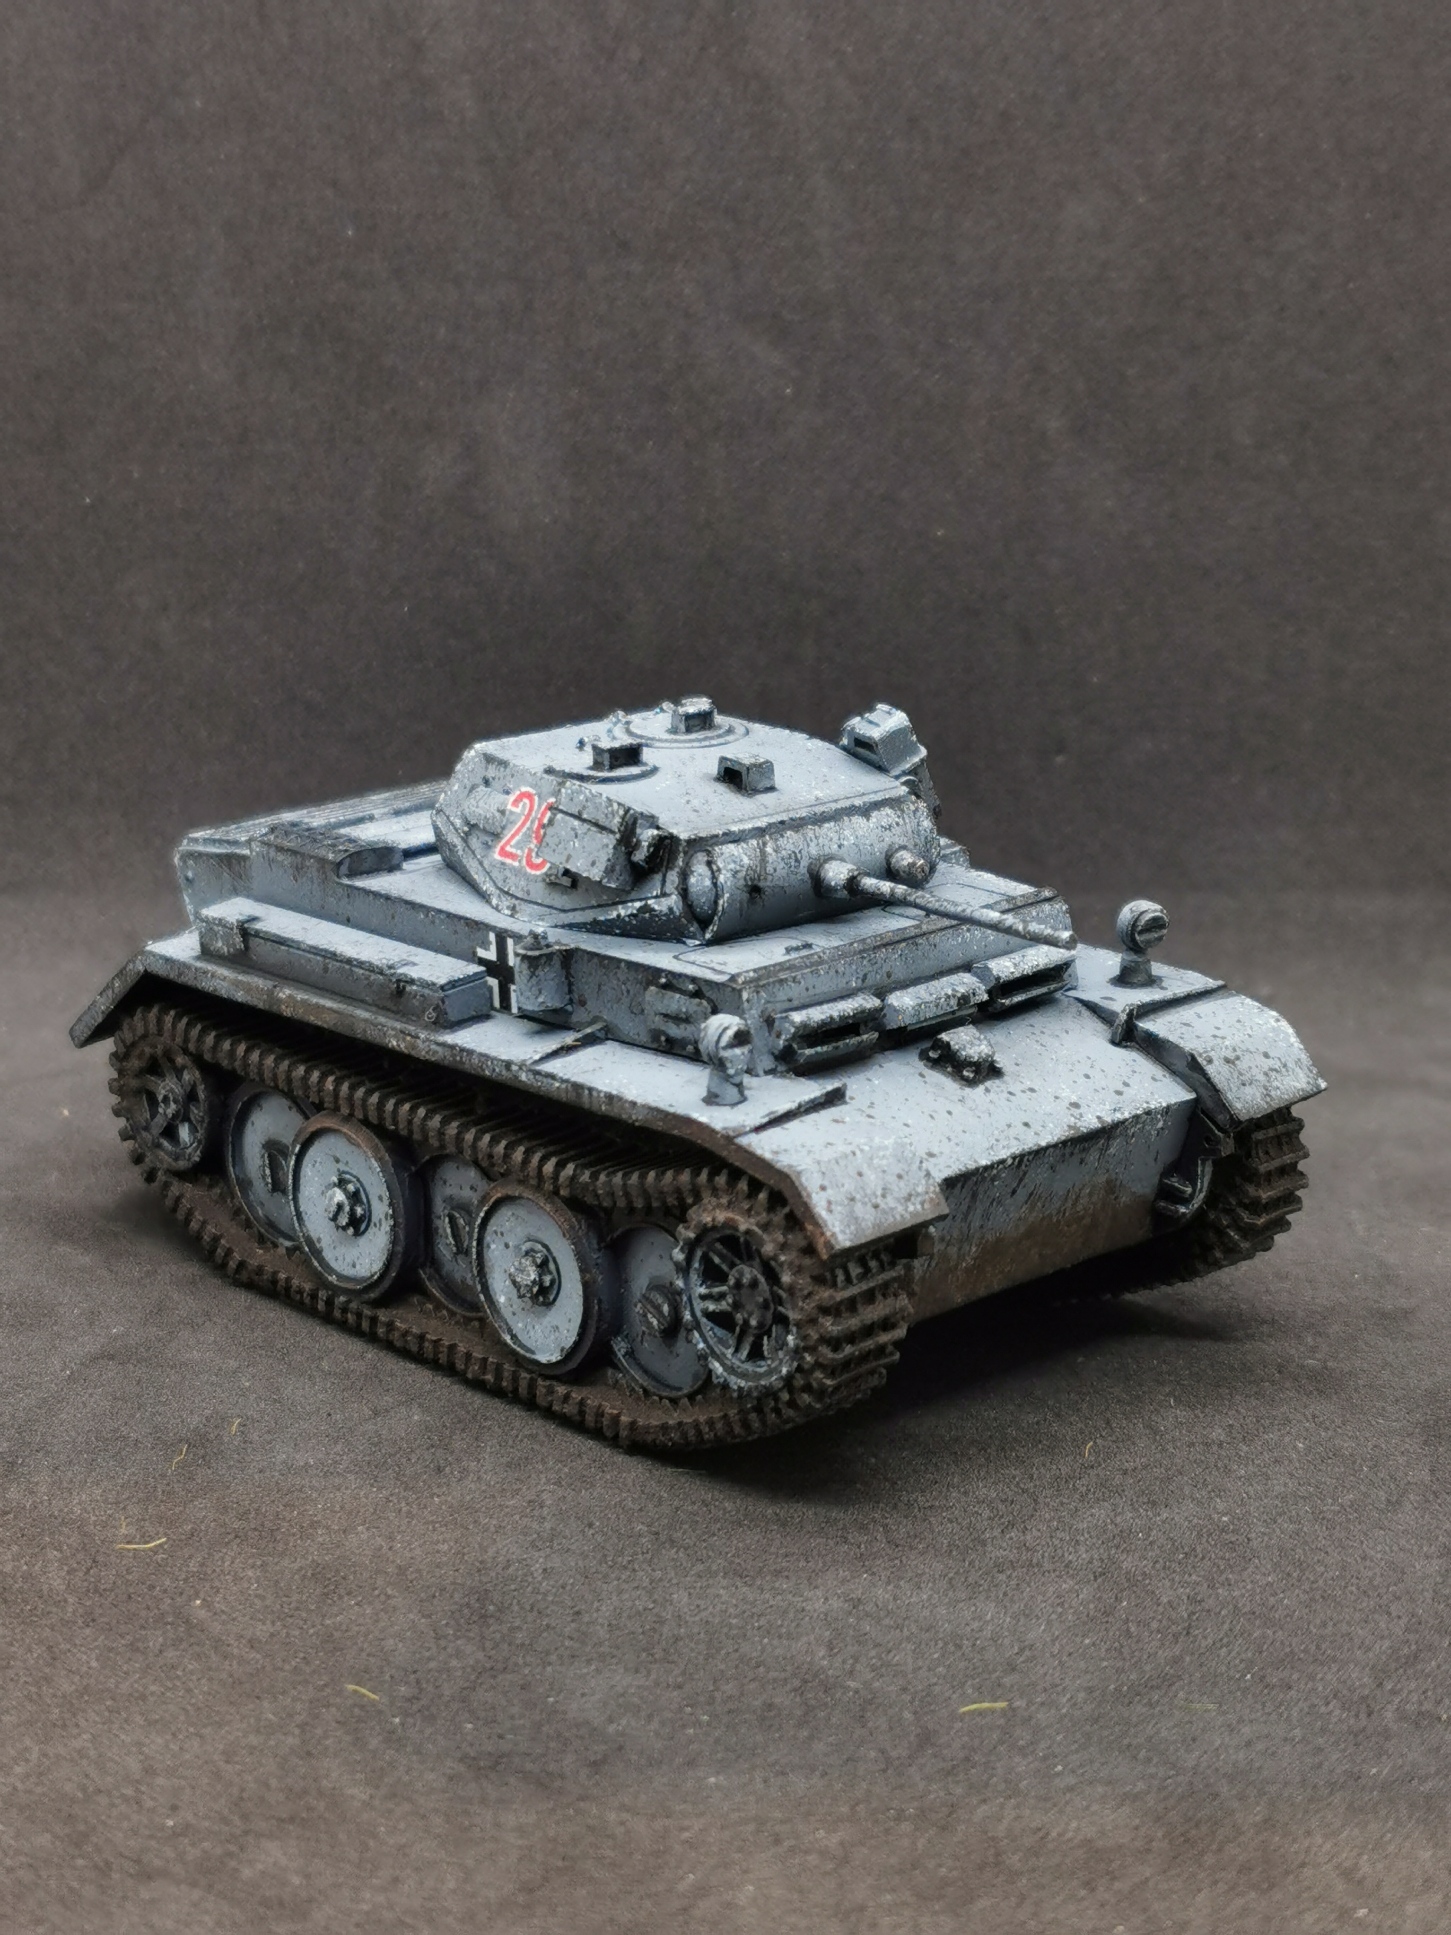
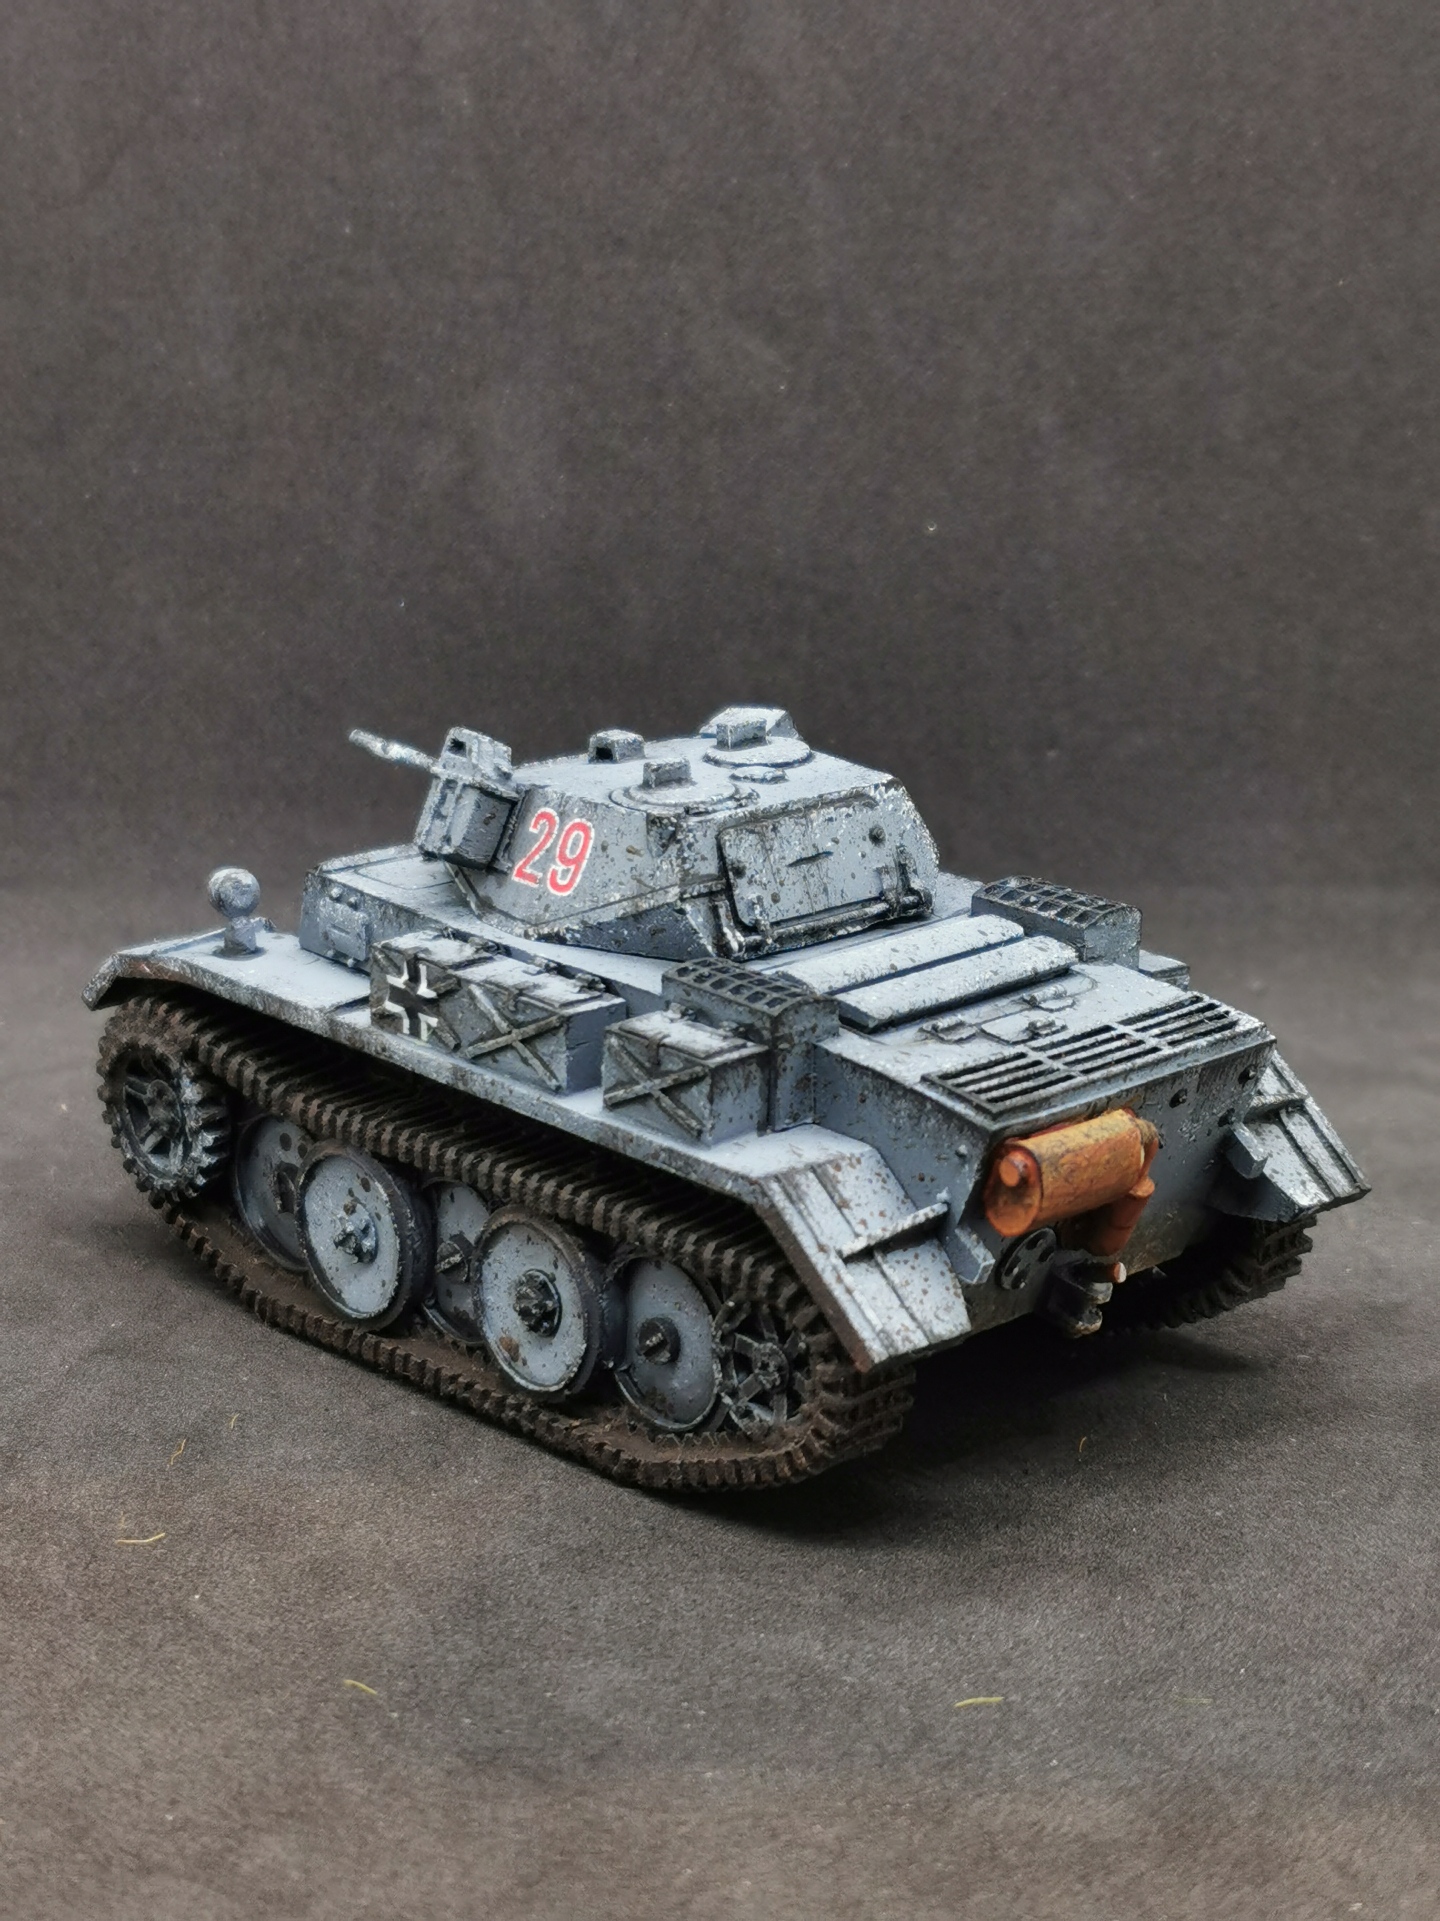
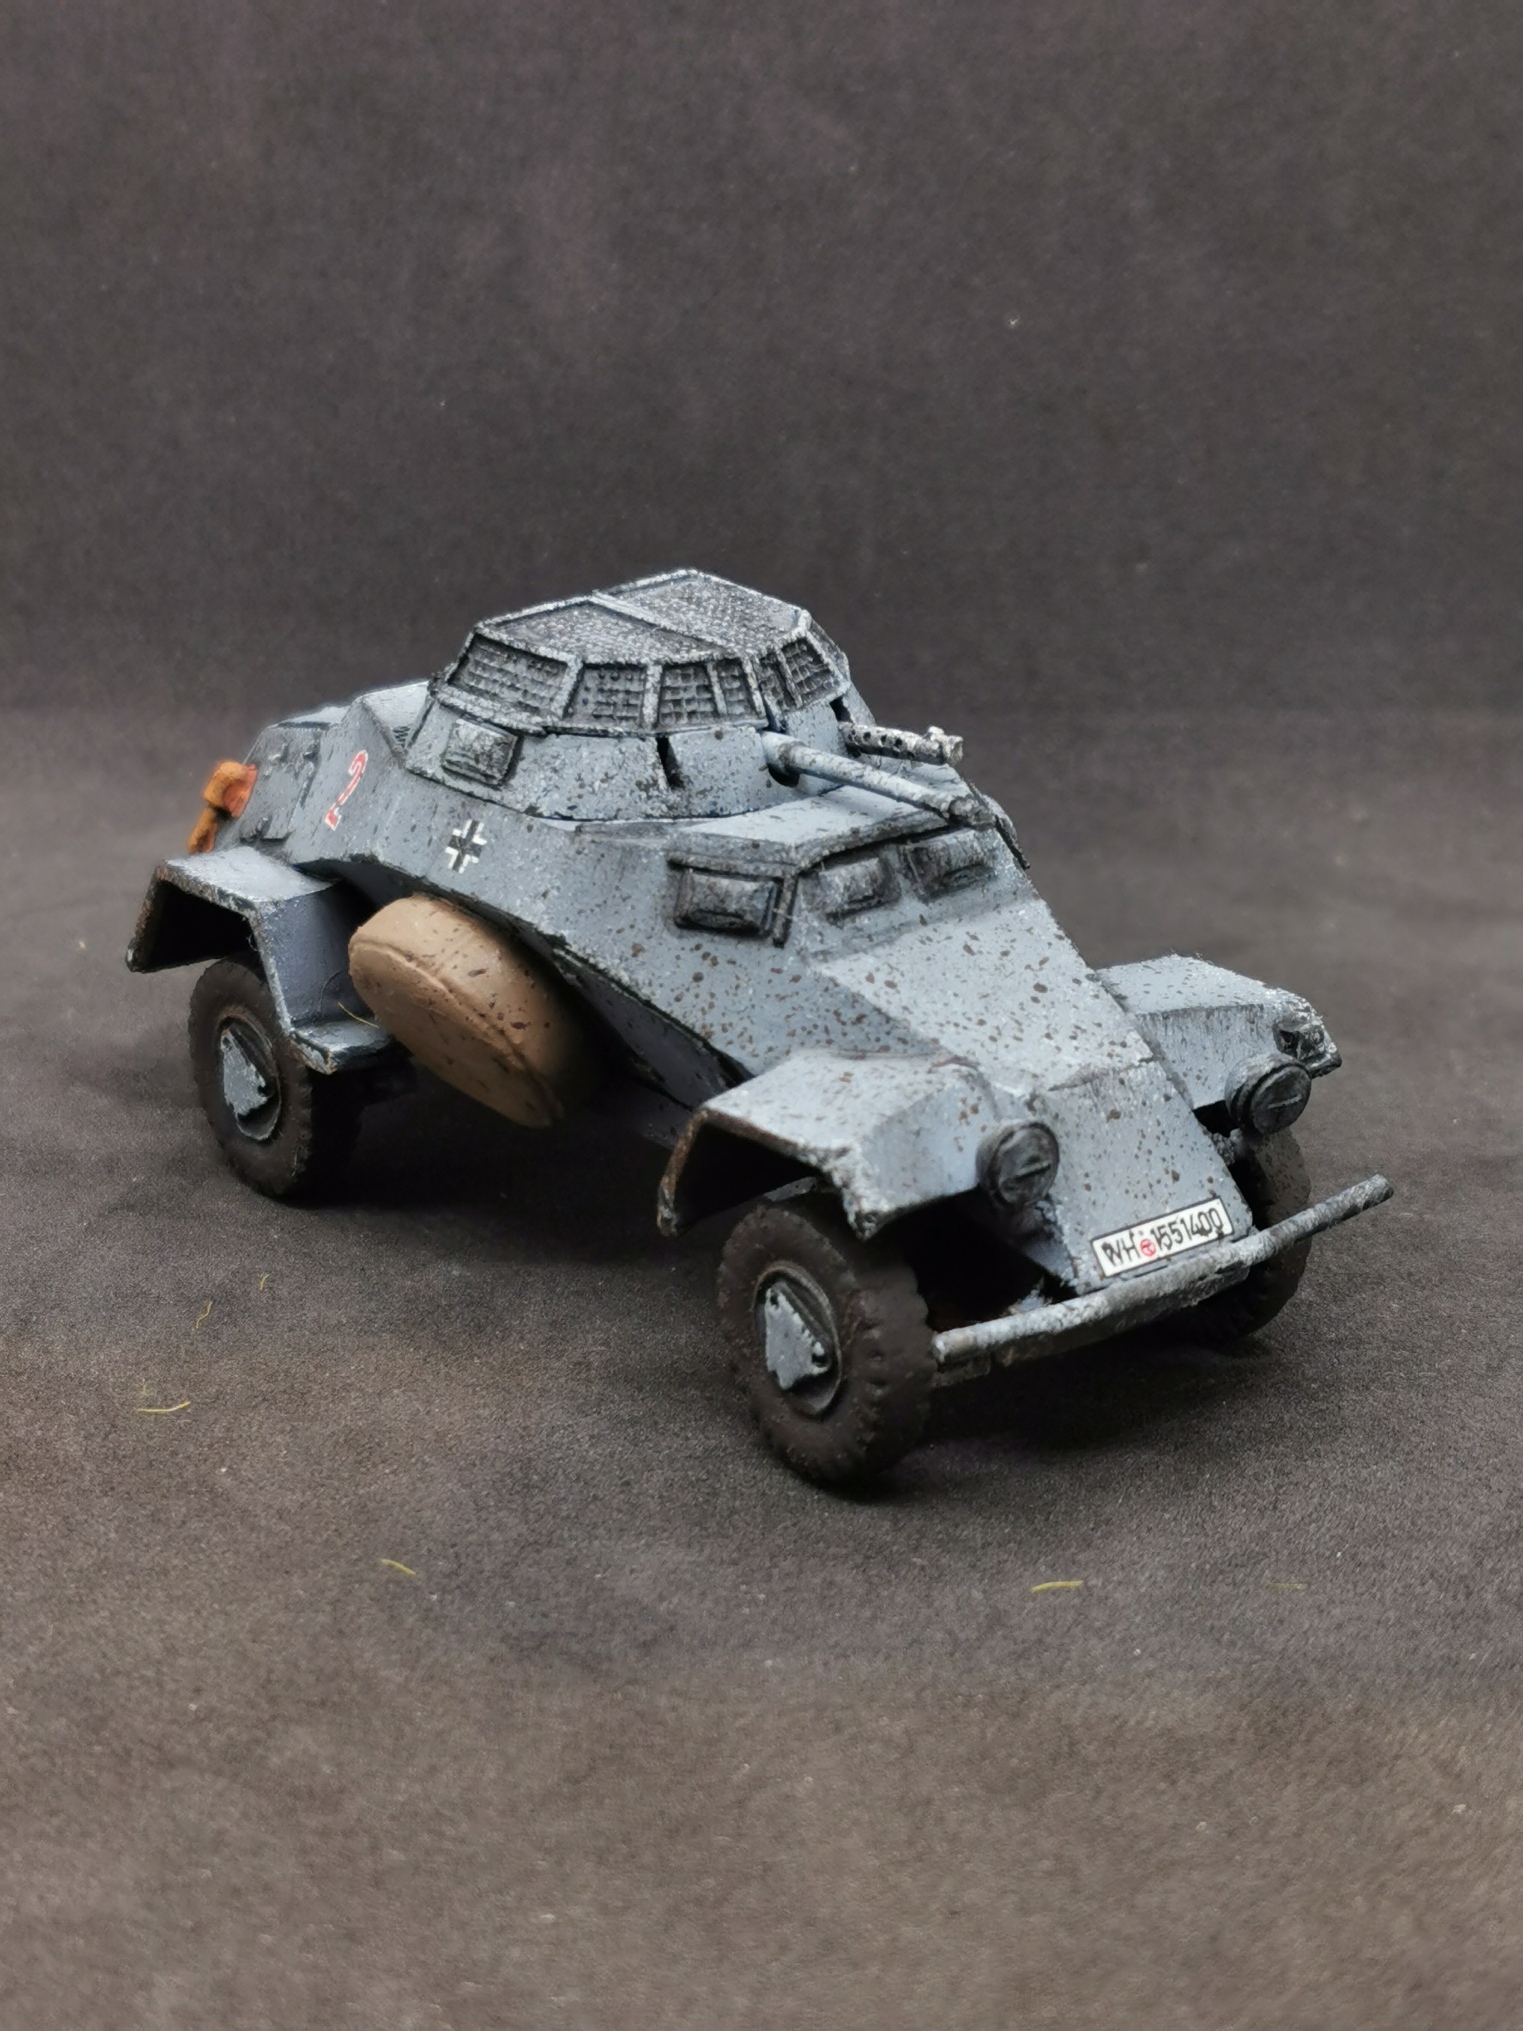
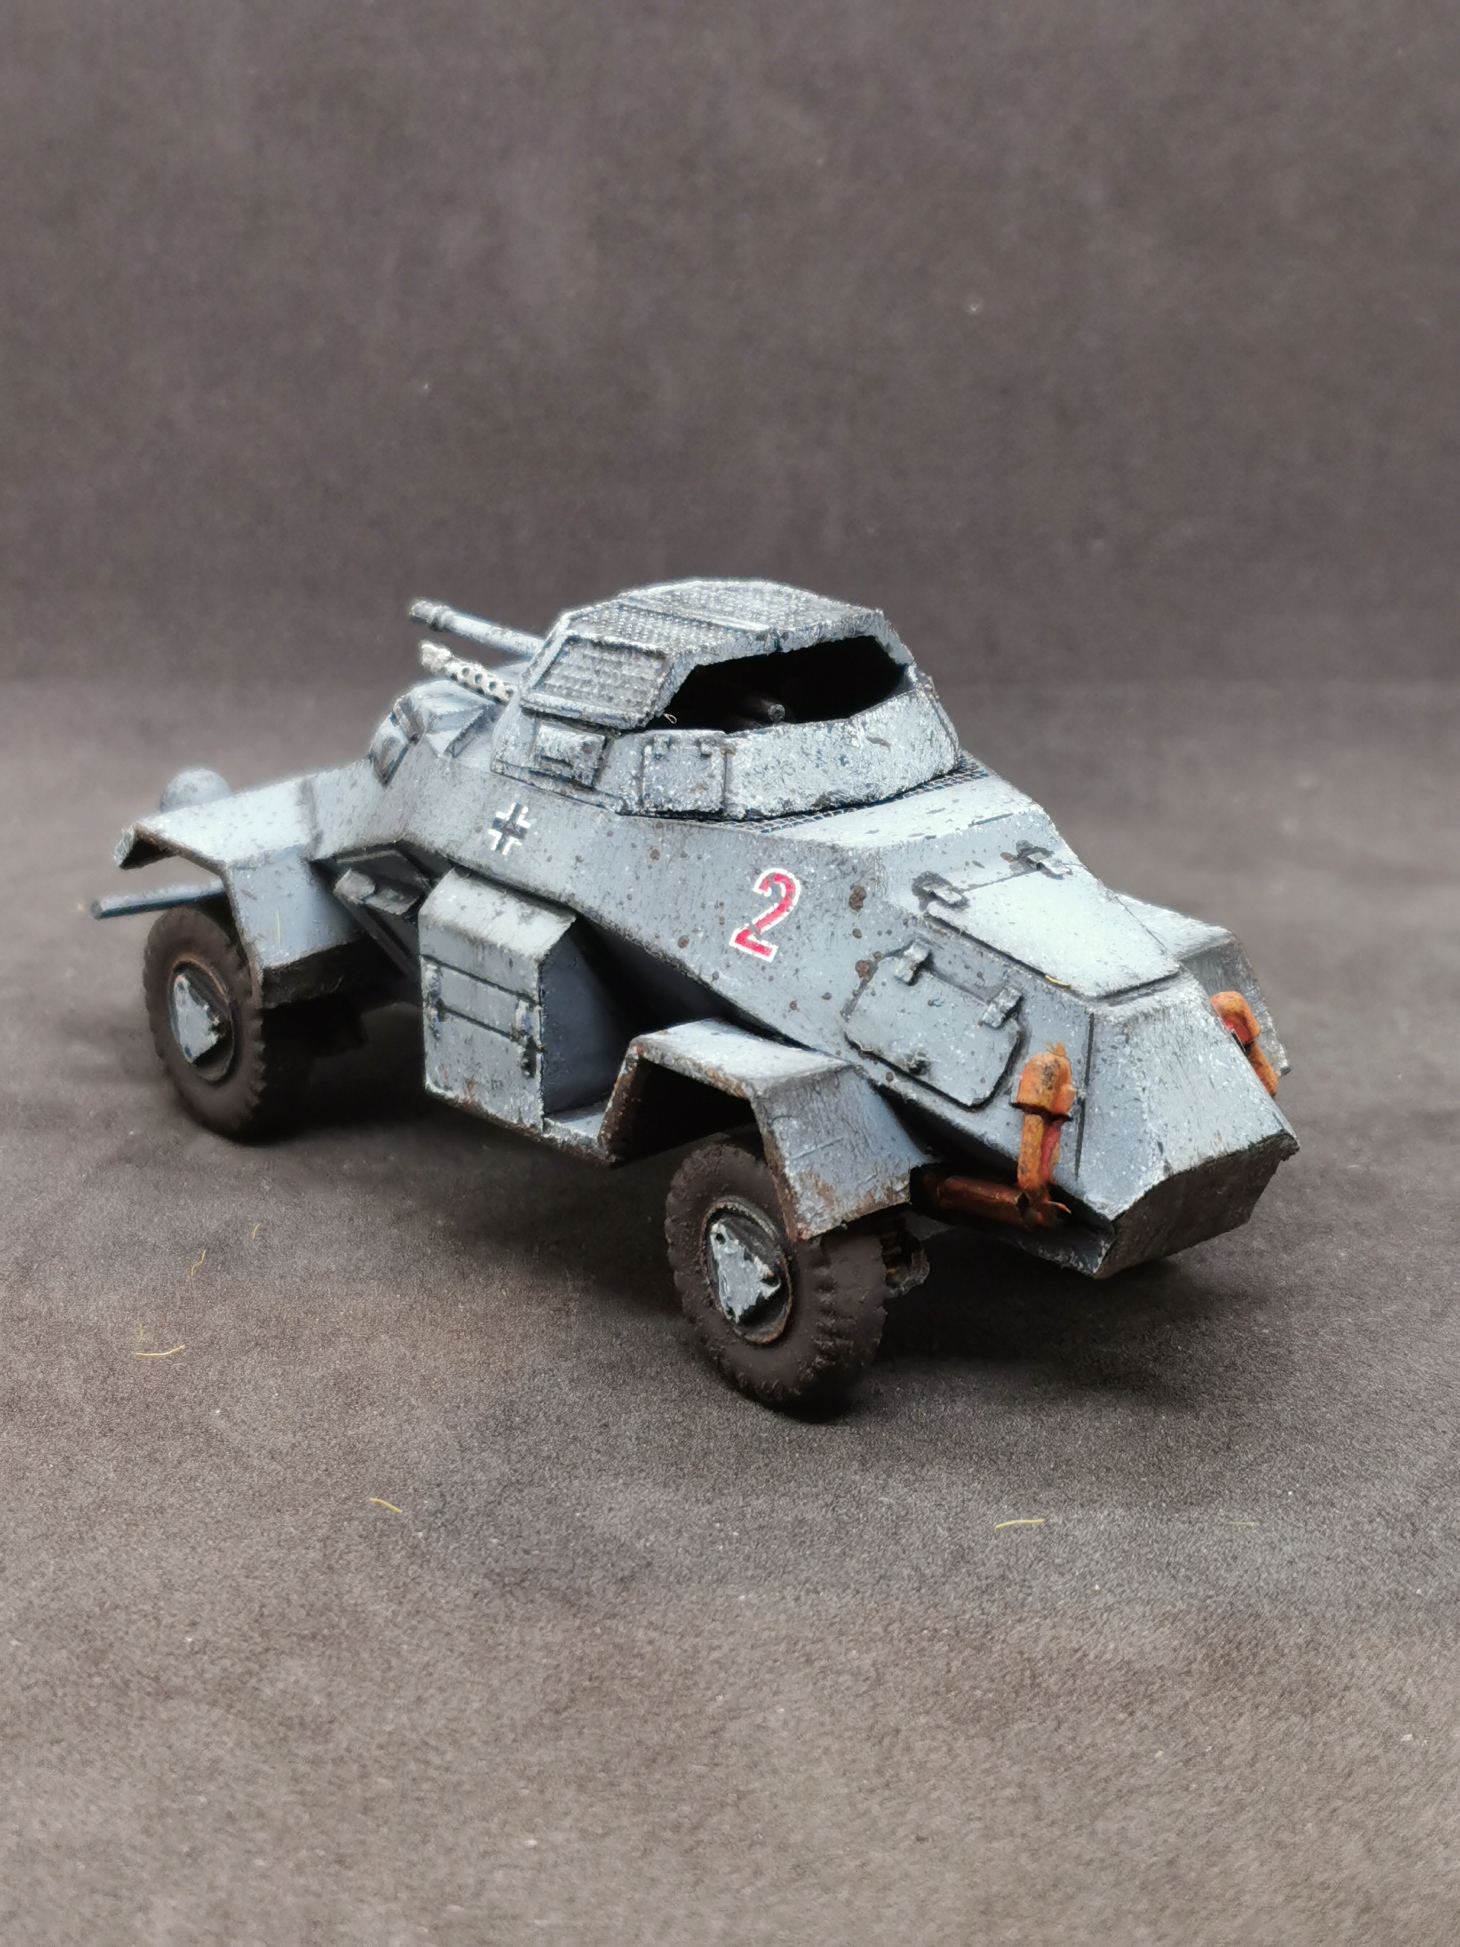
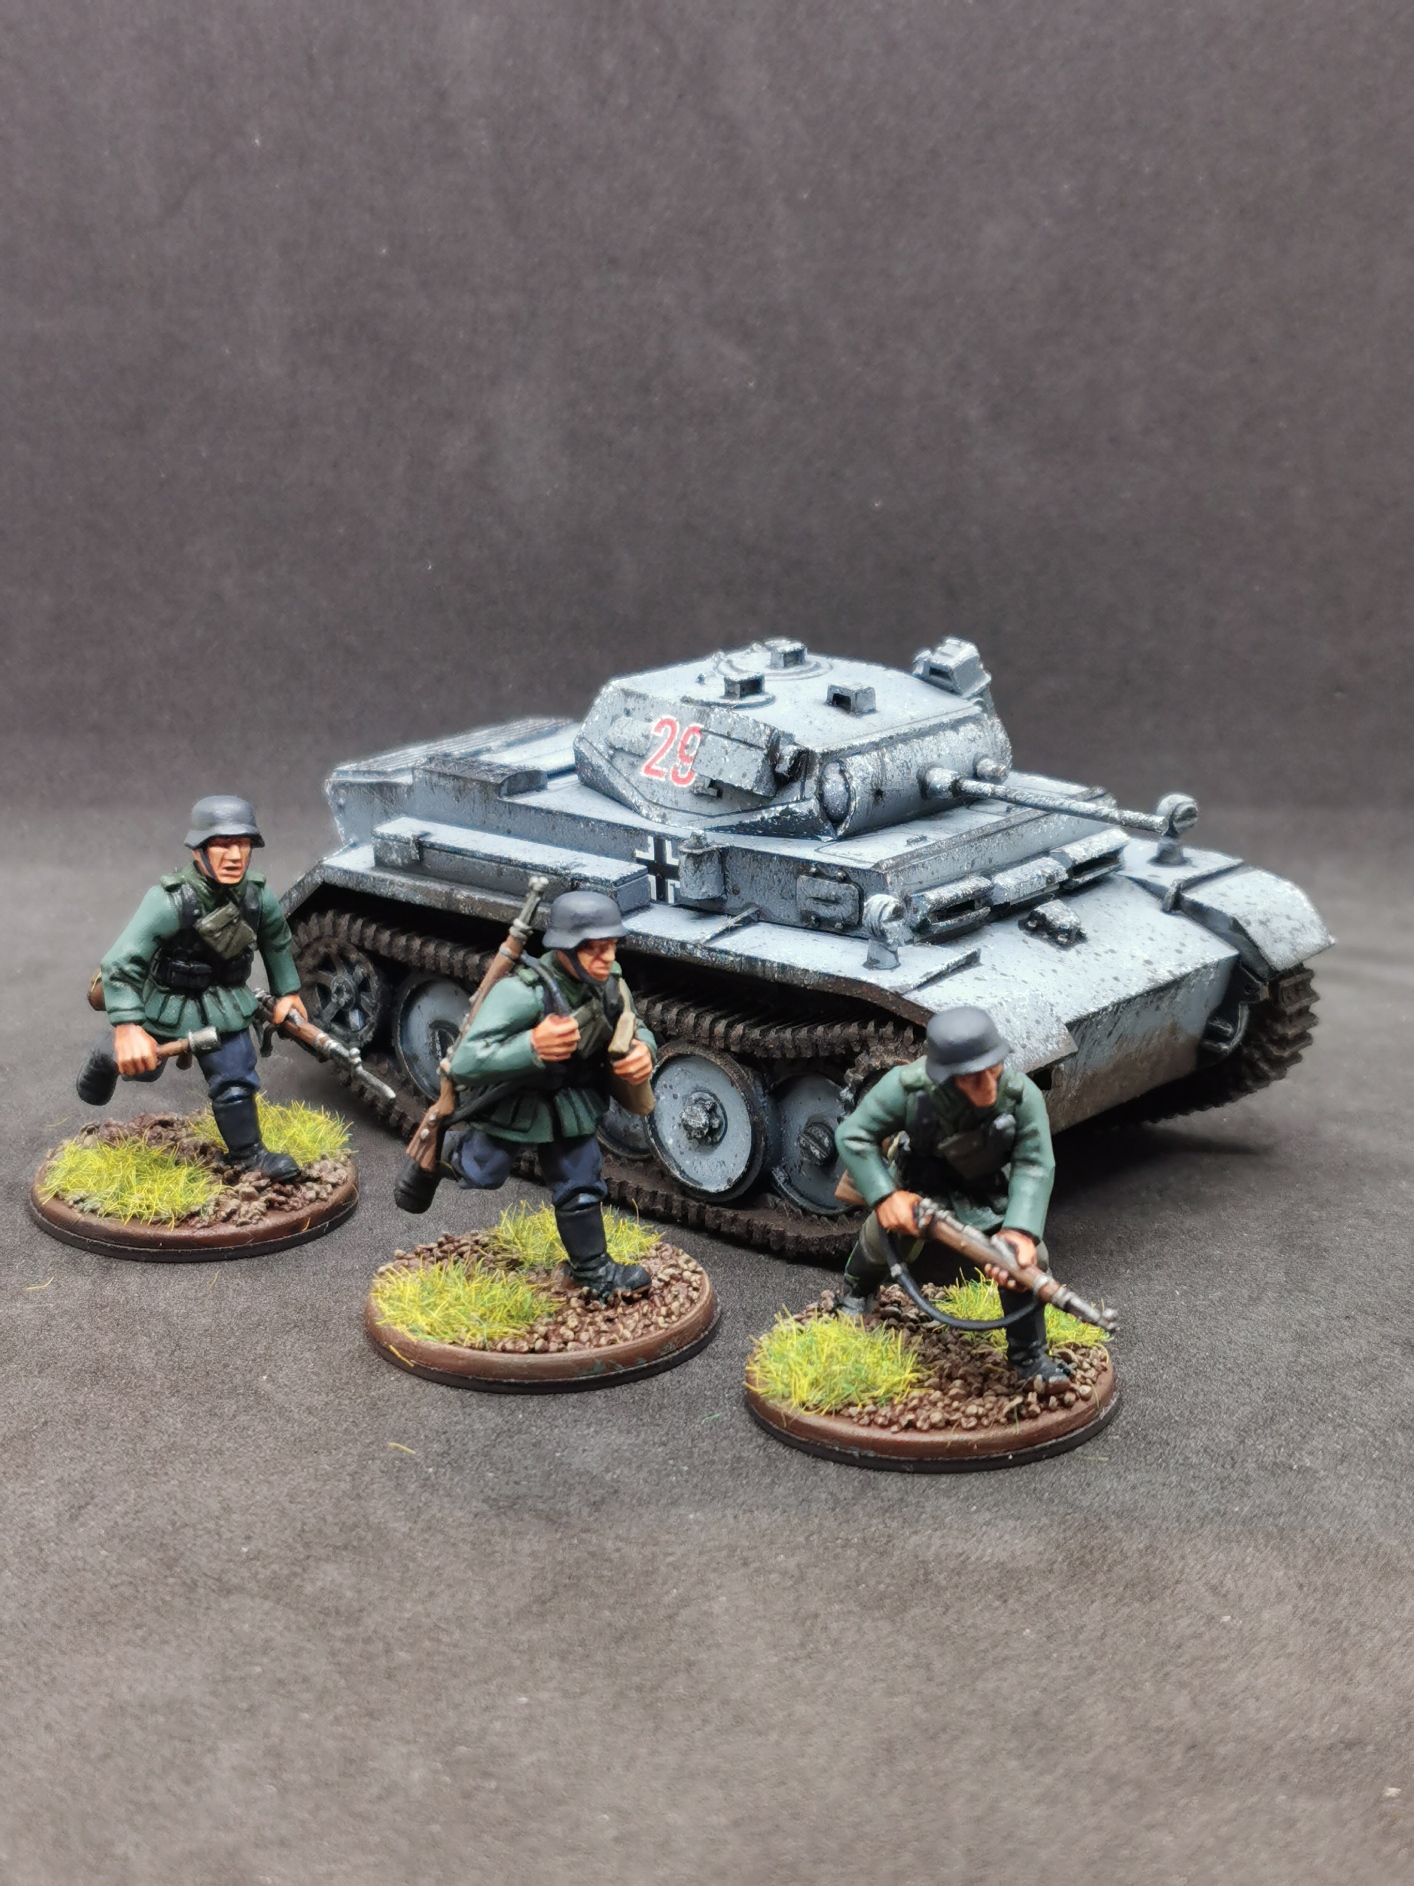
So the idea behind the Blitzkrieg tactic was hitting hard and fast. For the hard part I already added a lot of fire power (with more to come – don’t you worry) but for the fast part the SdKfz 222 could use some help in form of a fast armoured tracked vehicle with enough fire power to scare away enemy scouts: here comes the Panzer II freshly assigned to my German battalion.
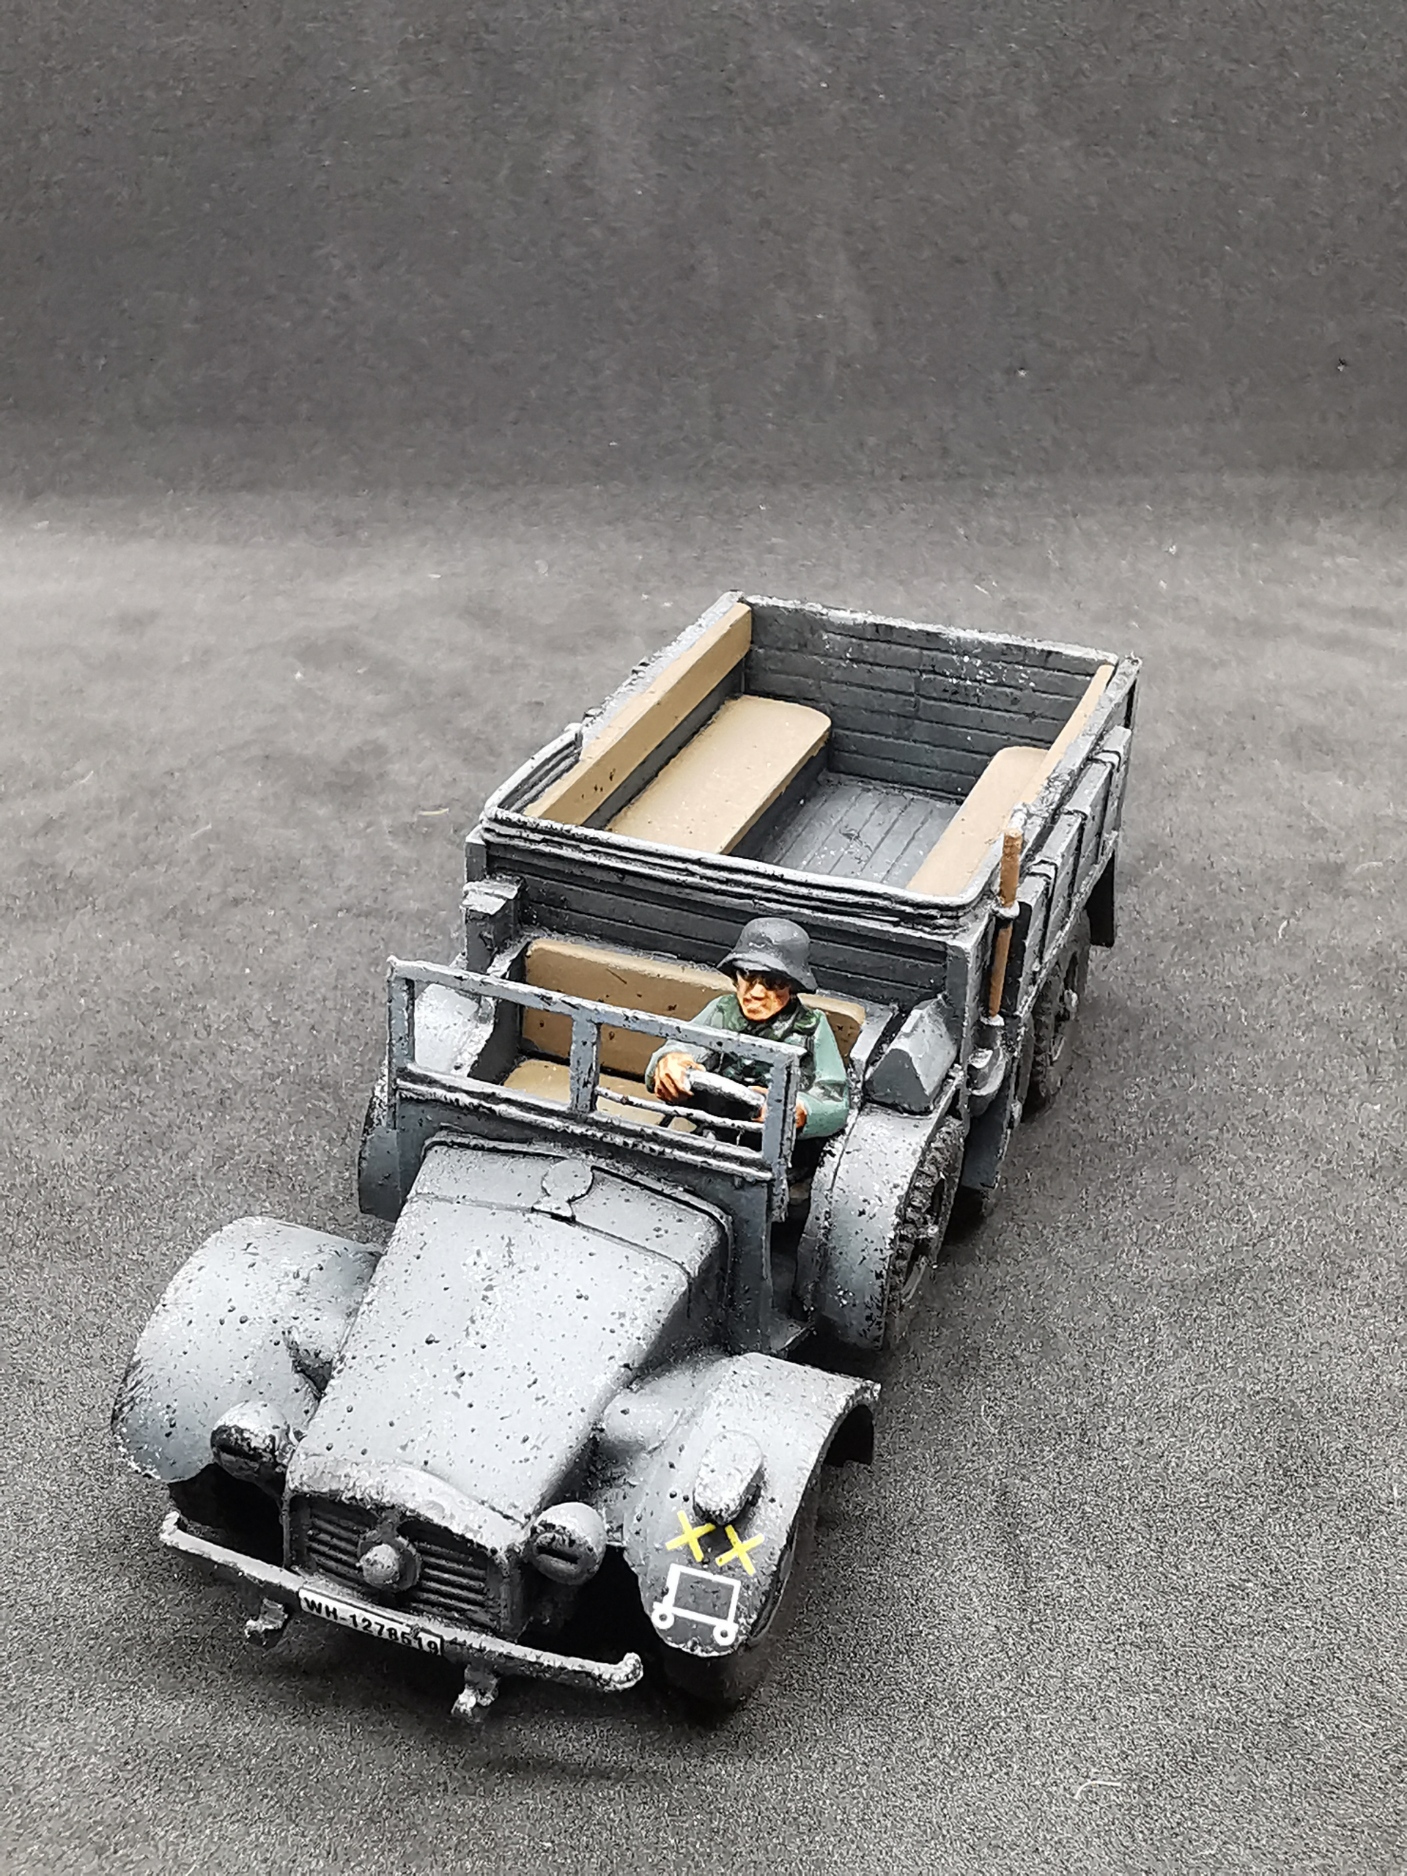
Fast advance also means fast supply or mobility for infantry fighting alongside the tanks, so it was time to add a supply truck to my force: the Krupp Protze.
It could transport ammunition, fuel or repair supply to the tanks in the field or deploy infantry to quickly move around troops where they are most needed or to keep up with the tanks to redeploy them to the front – a real workhorse of my army!
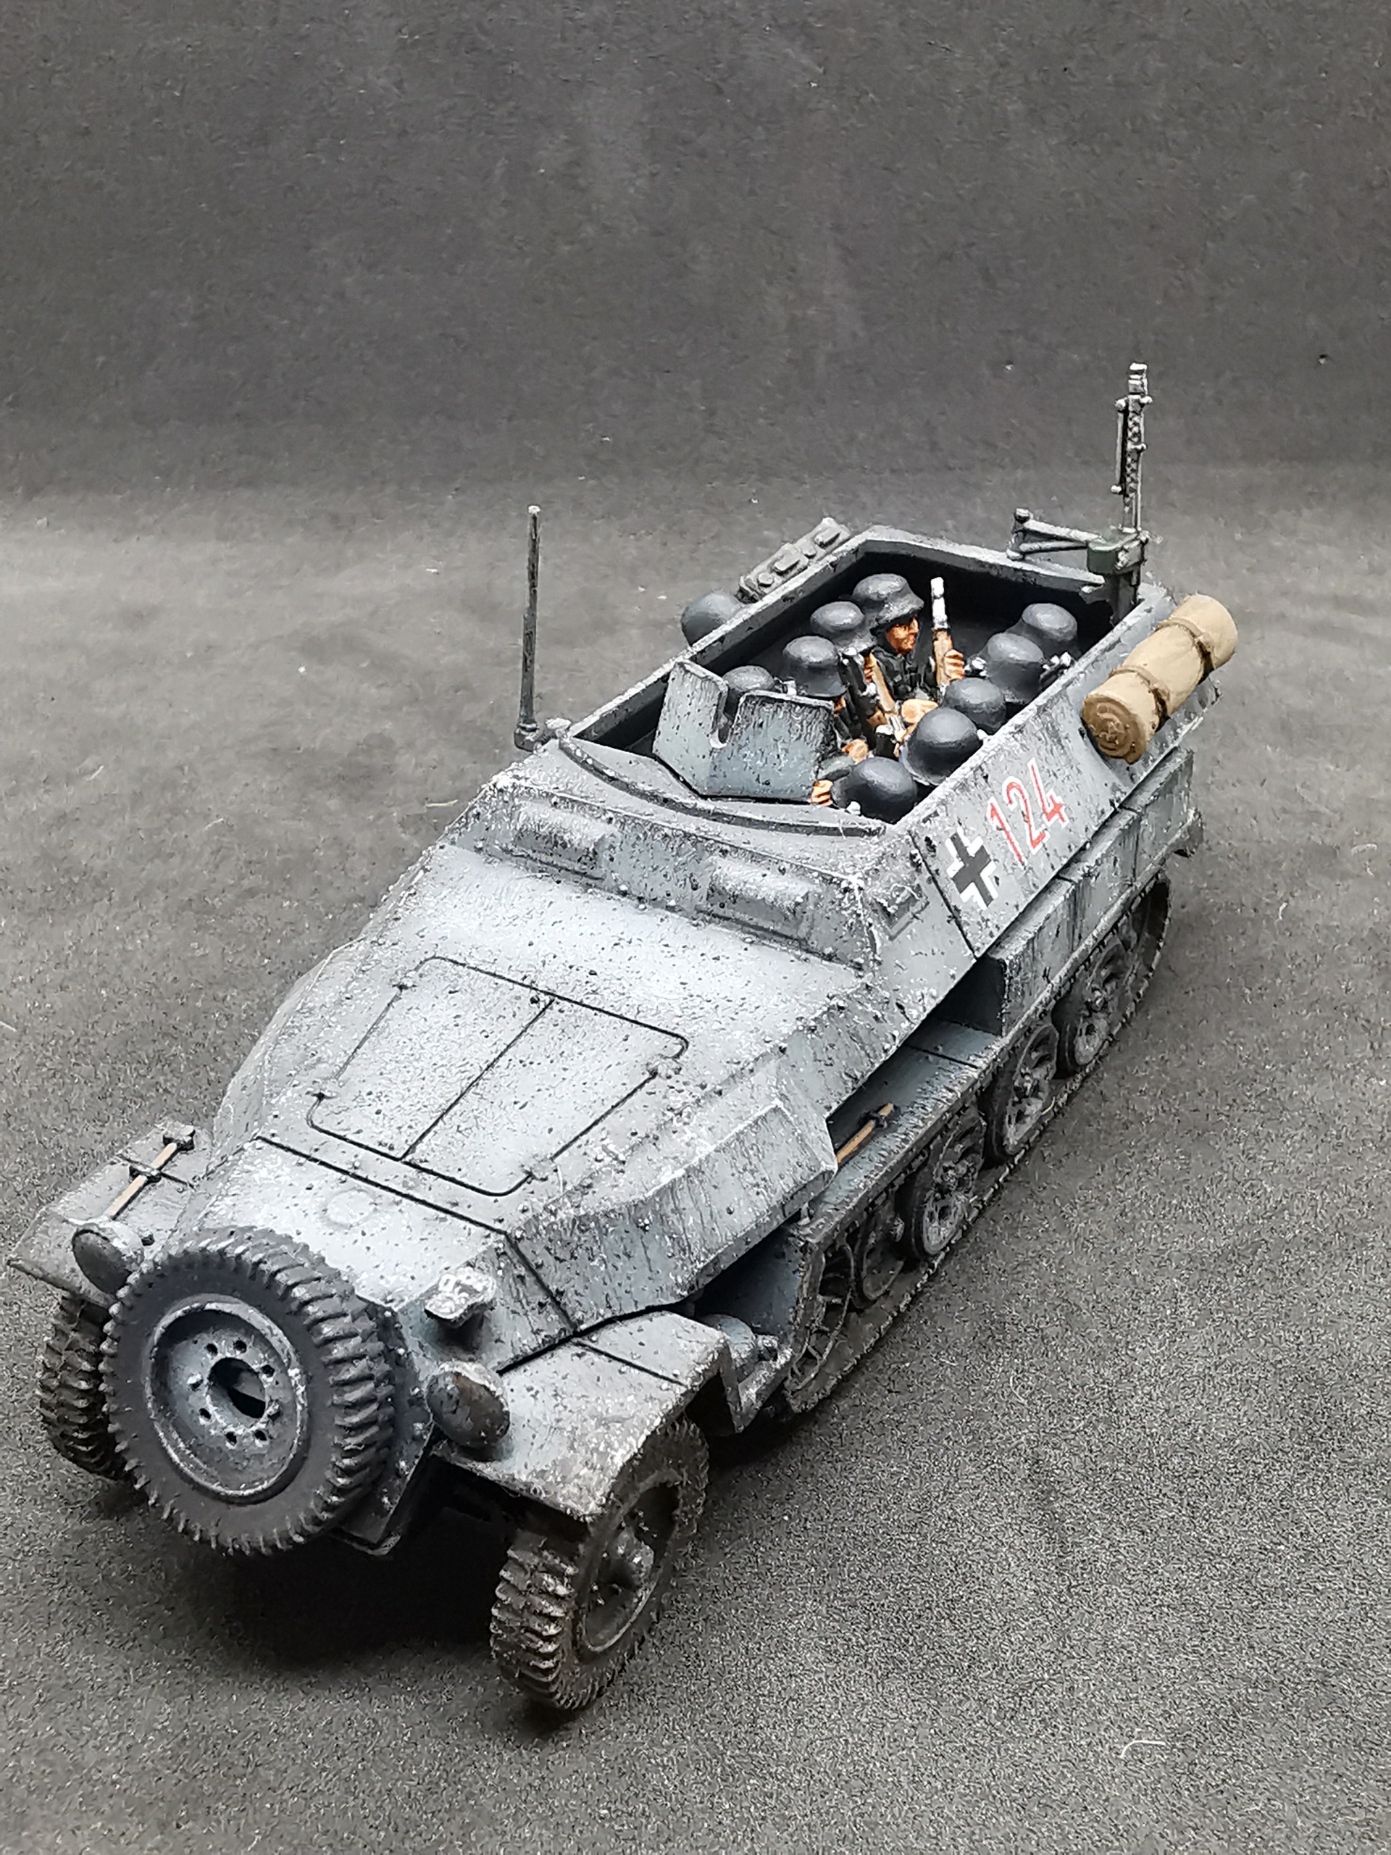
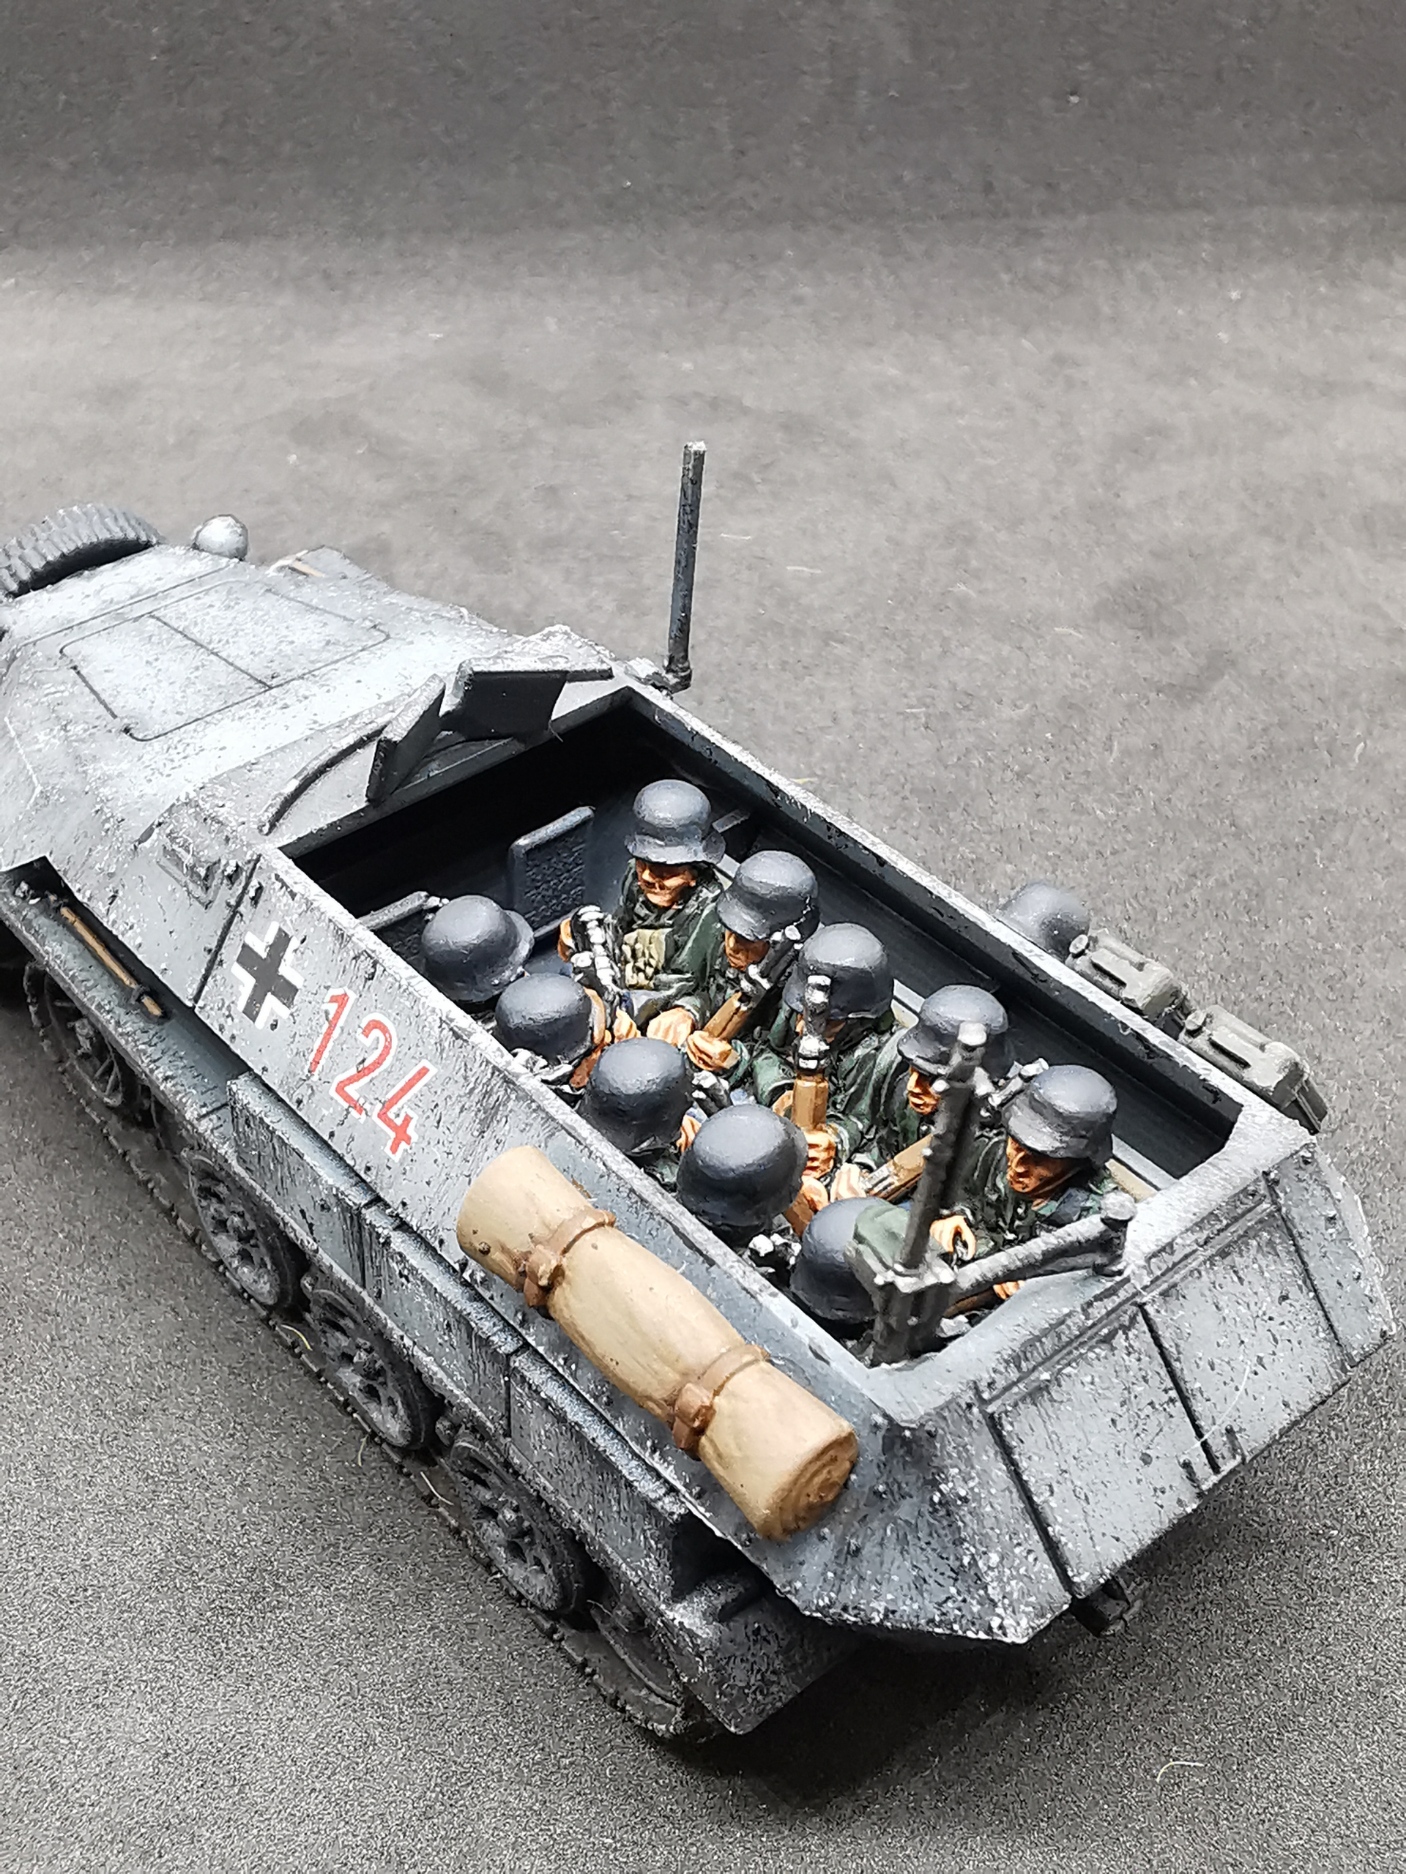
Speaking of deploying troops to the front the SdKfz 251 halftrack combines mobility with light armor and firepower to securly deploy troops. To represent that I added a seated infantry squad to my halftrack which can be swapped with the original gunner.