


2 warbands for Saga age of Vikings


Recommendations: 184
About the Project
I have always like Vikings (and pirates) and since discovering games like Saga i found a reason to buy miniatures. The problem i have is: I have no one to play with/no one willing to buy and paint models. Fortunately i do have some friends who like to play games (and 2 daughters, who might be tricked/bribed/lured into playing it with me) So my goal is to set up 2 simple 4 point war bands for Saga. There is one small issue at the time of writing this, i haven't been able to pick up the rules for Saga:Age of Vikings (I do have the basic Saga rules) So this is going to be my story (saga if you will) about what I am doing and how far i am. As I started out with nothing and to break the monotony of just painting mini's (and because i really enjoy it) I've also mixed in making some appropriate terrain to play in/on once i have these warbands.
Related Game: SAGA
Related Company: Gripping Beast
Related Genre: Historical
Related Contest: Spring Clean Hobby Challenge (Old)
This Project is Active
Update 5: Interior decorating
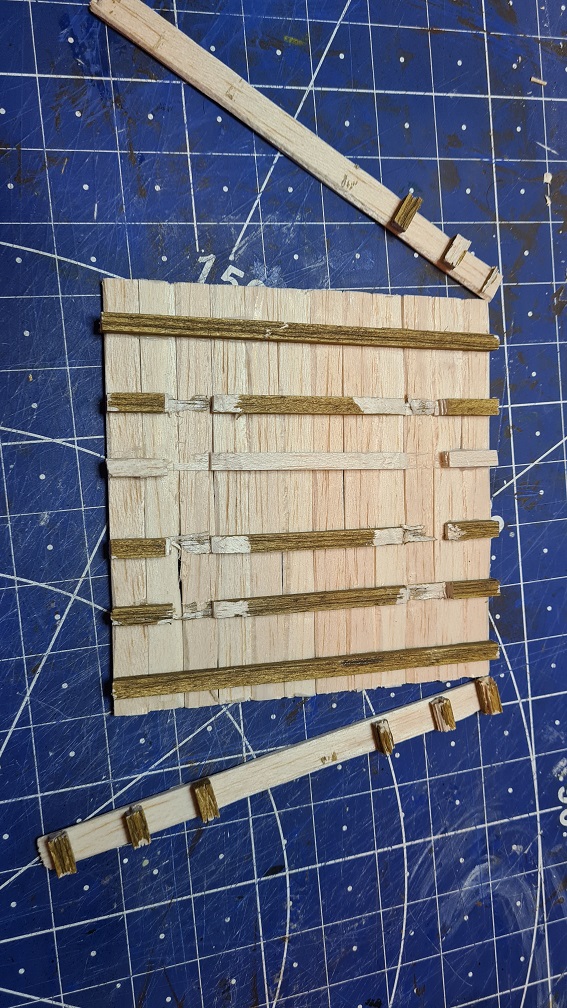
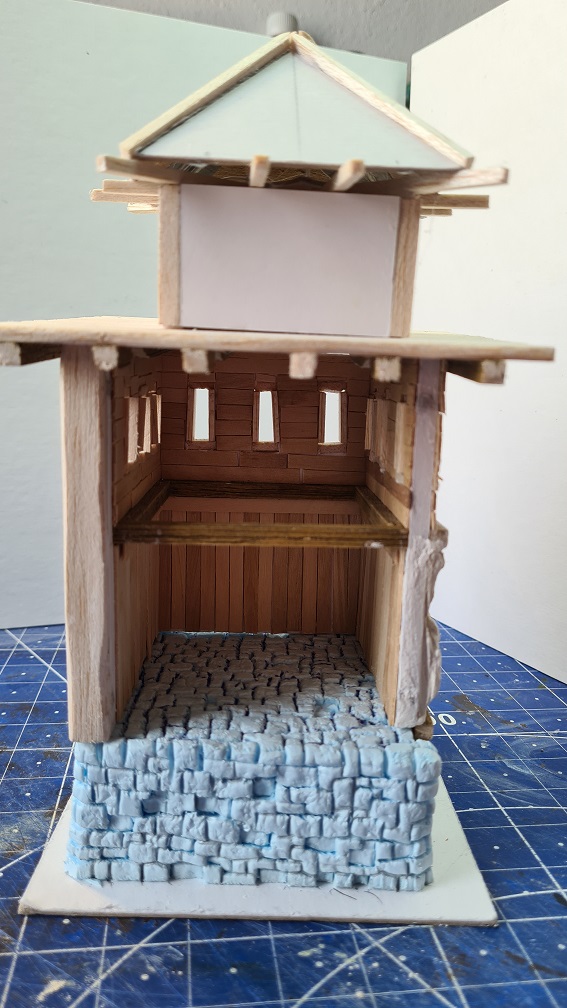
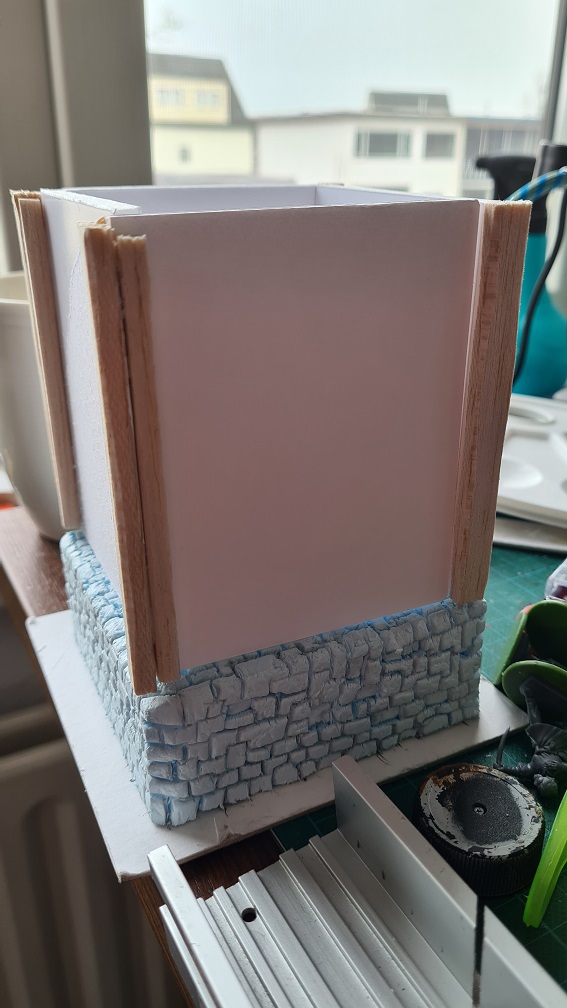
Progress on the tower has been slow but steady. I’ve lined all the walls with coffee stirrer sticks. I found out that instead of a hobby knife a pair of scissors also works fine with cutting through the sticks. And with the scissors you can take 2-3 sticks at a time making cutting the boards real fast

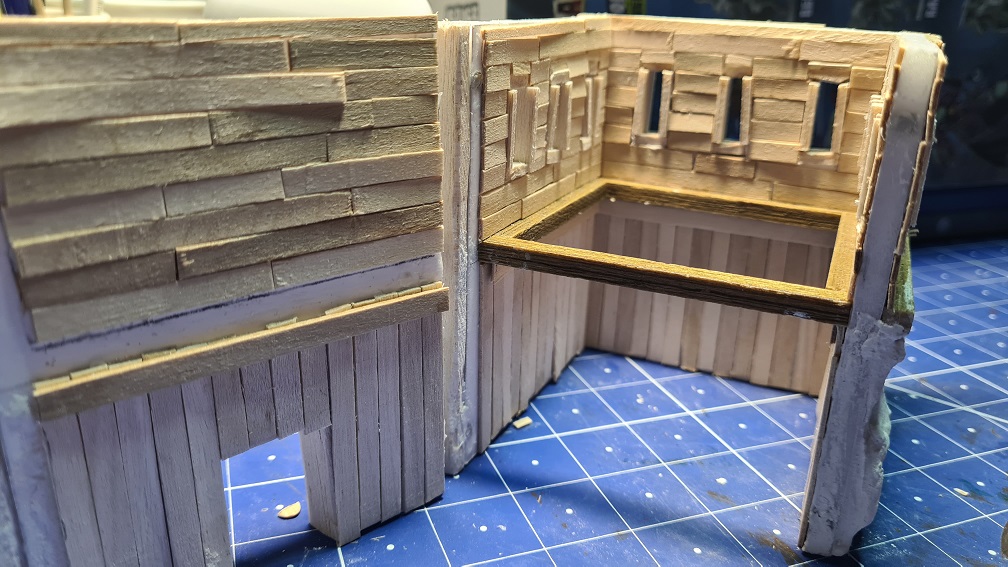
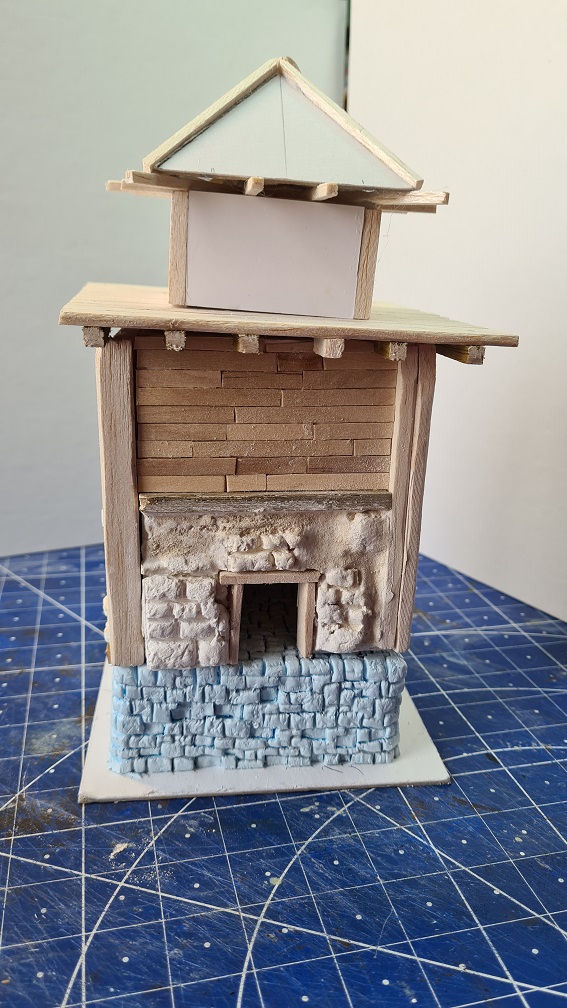
I already made a platform as top level, but found it a bit to bulky and big, so I decided to make it a bit smaller was as easy said as done
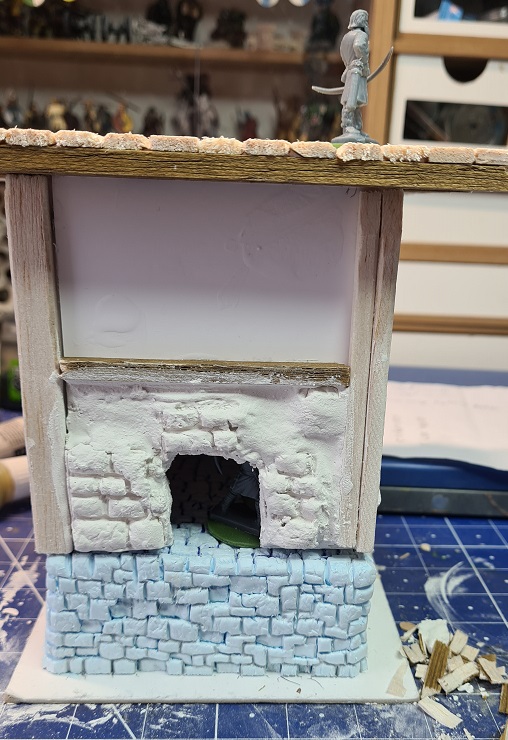
With the top platform now a decent size I started working on the top of the tower. I decided a small roofed top would look good. A door is to be added later, probably with balsa and coffee stirrer sticks


Update 4: Totally distracted / spring cleaning
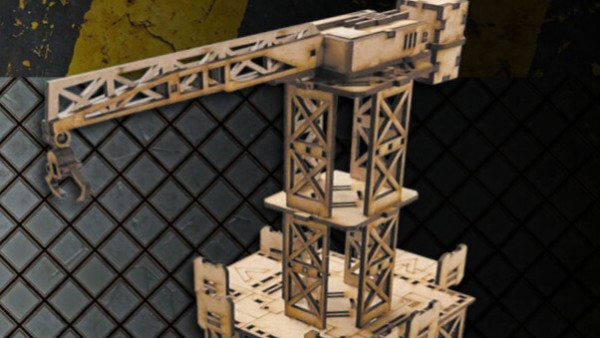
For some time i had the idea of a watch tower in my head, distracting me from actually painting my vikings. The concept is: it is used by vikings and the fundament of the tower is built on an older fundament, in my mind the fundament of an old roman watchtower. Where it is primarily in theme for my vikings the tower can be used in more games.
I like making my buildings so they can open and I can put models inside. In practice I found it had little use in gaming, but it is kind of hard for me not to do it (one might call it obsessive). So with that in mind, this tower should be made in such a way that models can be placed inside so the inside of the tower must also be done.
Materials I have to build this tower are:
- balsa wood (different sizes)
- XPS foam
- chipboard
- gypsum casting powder
- a3 foamcore boards
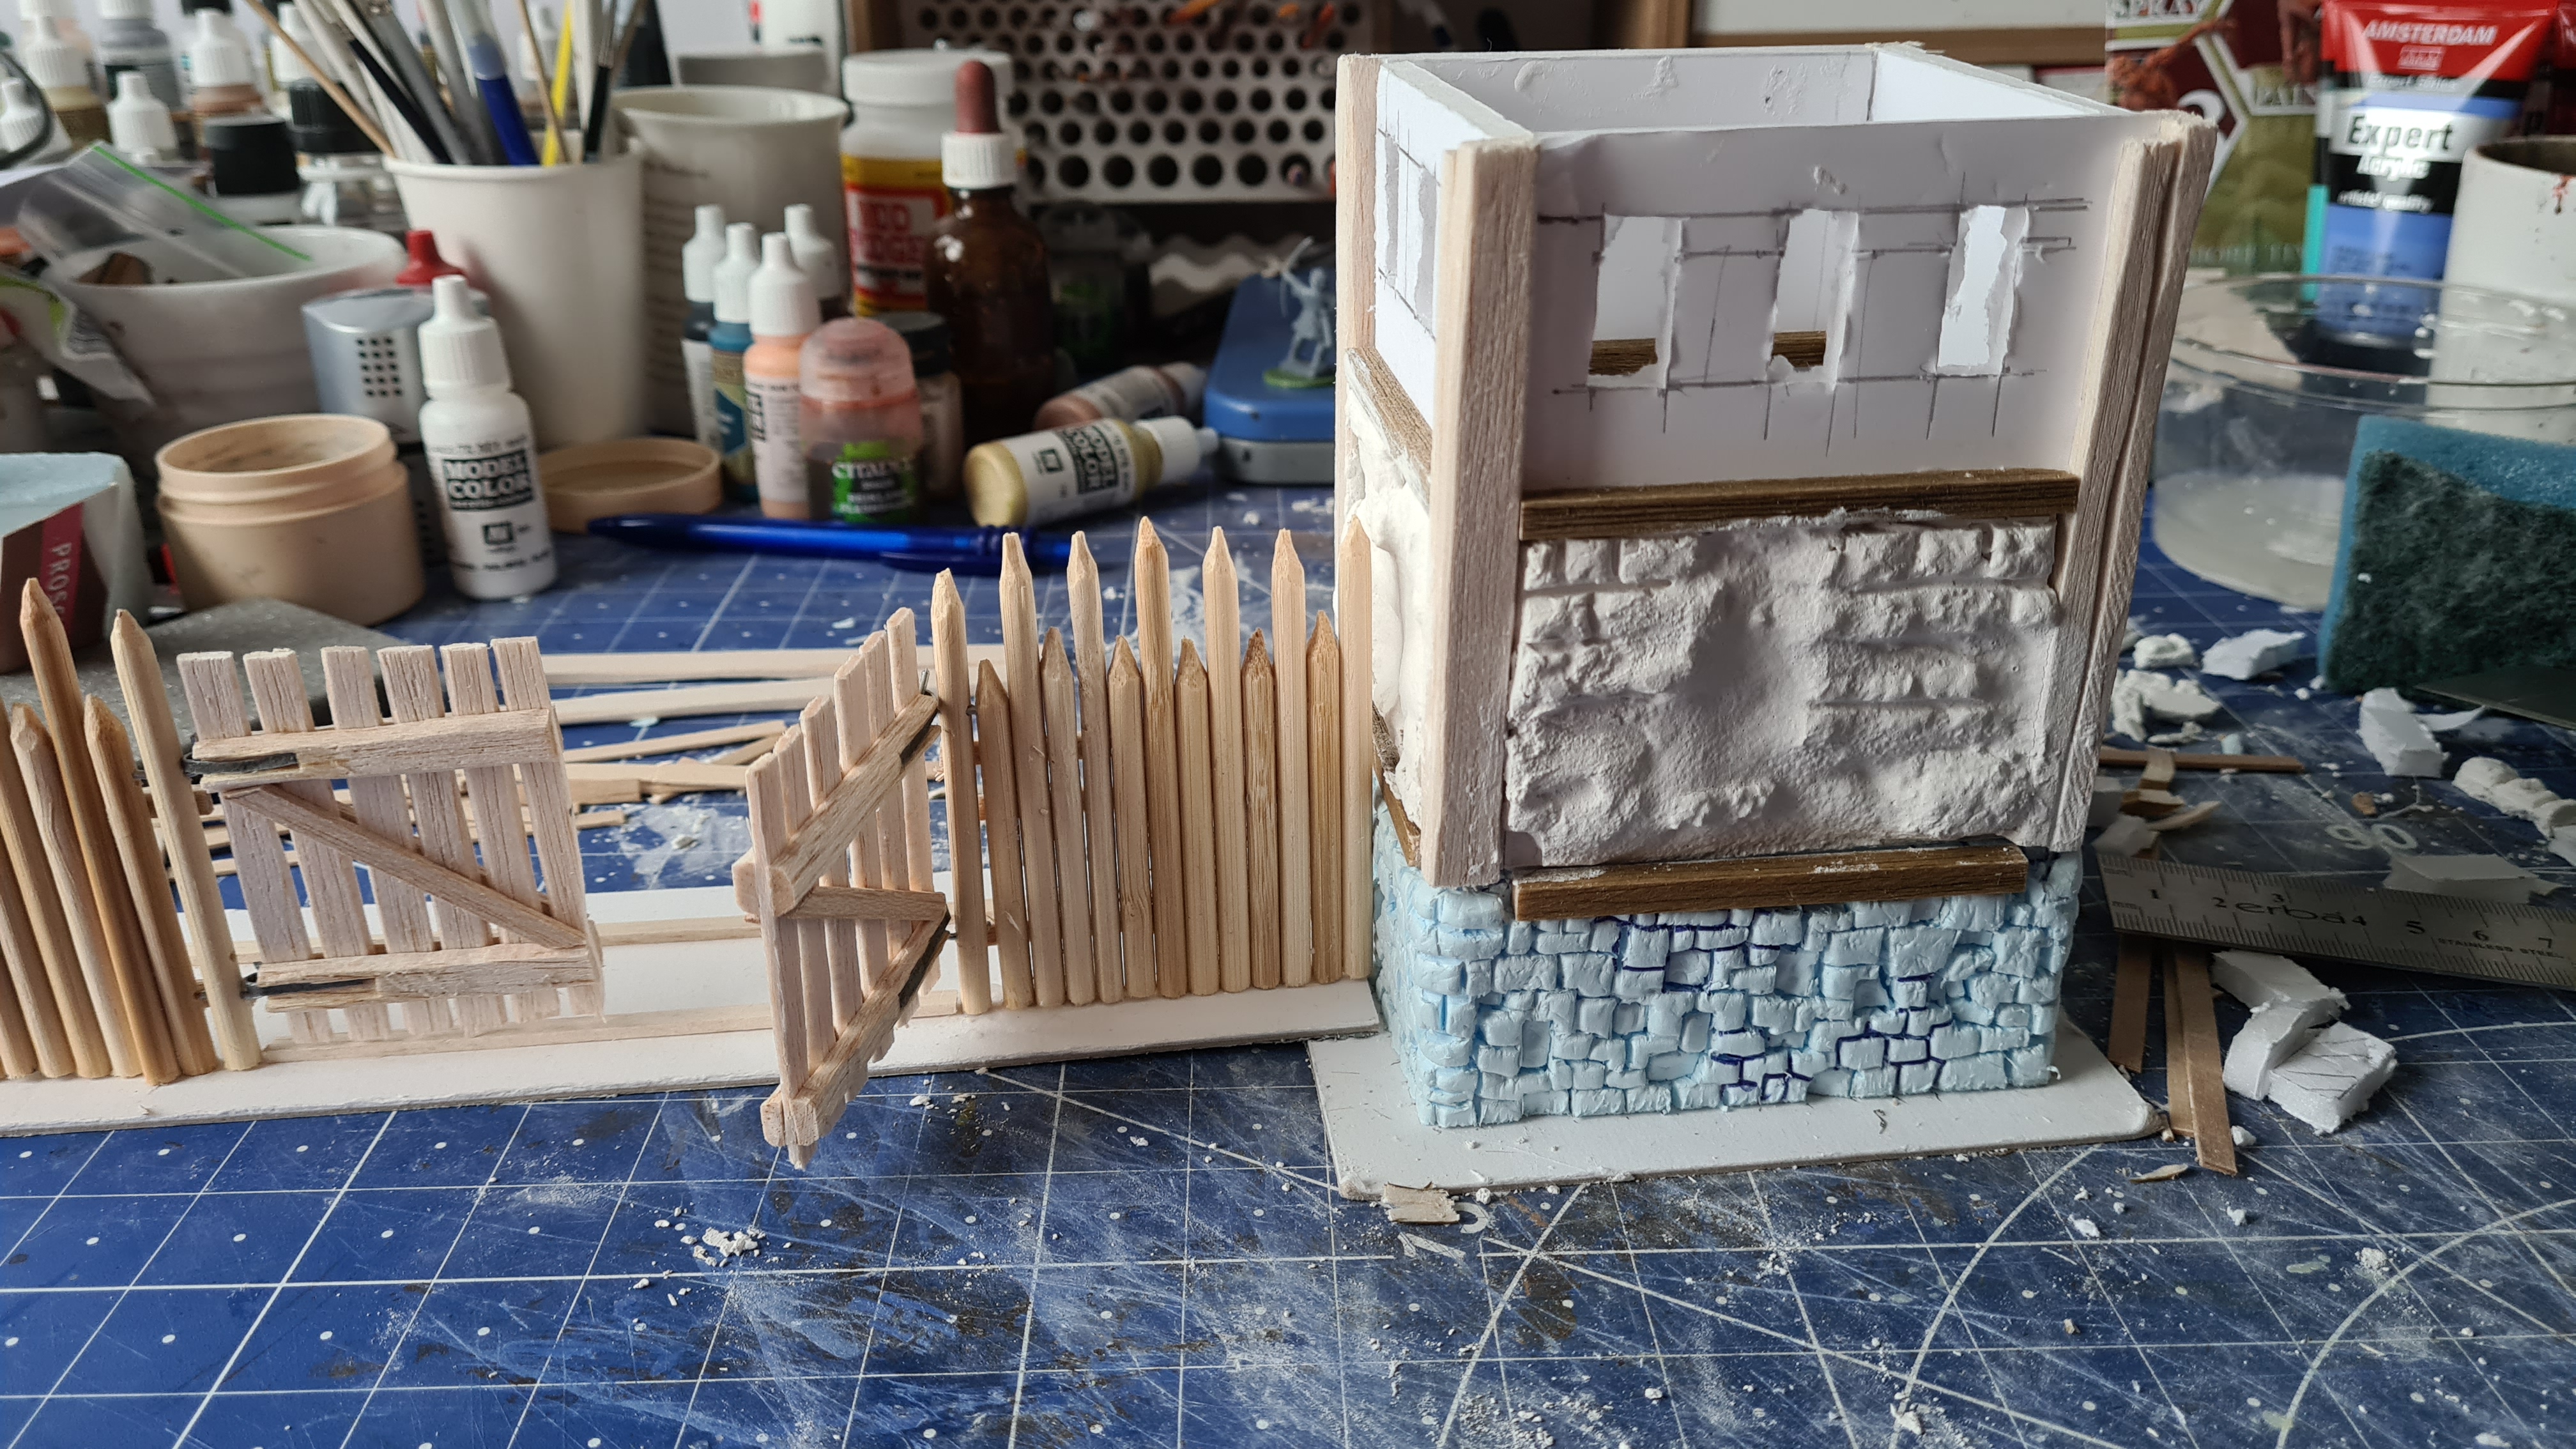
The first step was cutting a piece of foamcore ( 9×9 cm) and stick it to a piece of chipboard (12x12cm)
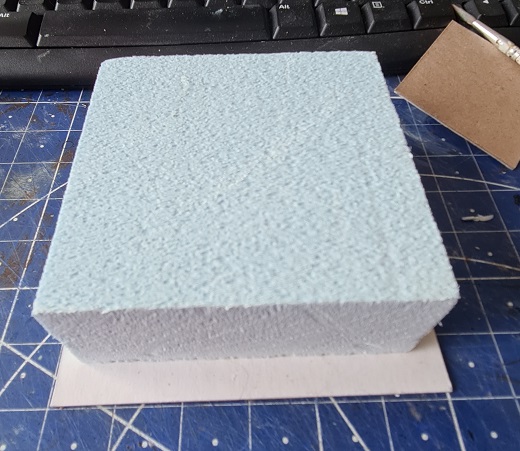
After that I’ve started drawing the stones into the piece of XPS foam. Done with a pencil and drawn over with a pen. Next up was the ball of aluminum foil rolled over the stones to give all the stones some texture. Next some individual stones were cut on the sides with a craftknife and then pressed deeper into the XPS to make it looked like the tiles were stacked and give it a more “old” appreance.

Now it was time to build some newer walls on the old foundation. For that I used the foamcore cut to 10cm H to 8cm W.
Not shown in these pictures, but the piece not attached was fitted with small magnets so it can be removed from the rest of the structure
The structure like this was on my desk for a few days while I was looking for more inspiration how to continue next
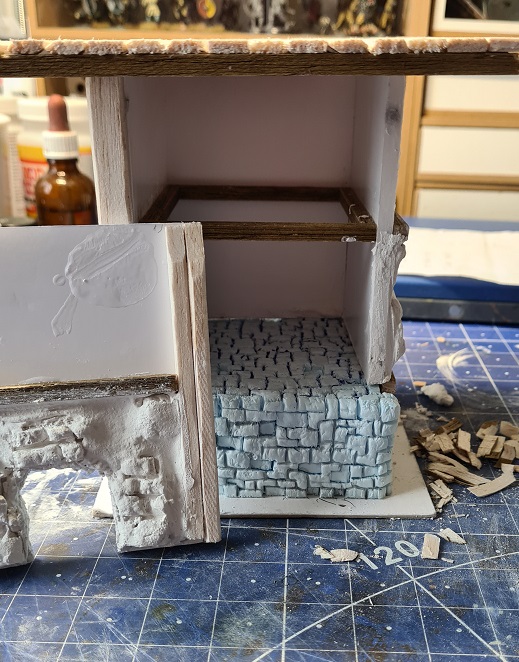
Now the first floor was up. I finished the lower half of the building with some stones i cast out of plaster from a homebrewn template and used wallfiller to give the walls a bit more definition.
The piece of the tower where it can be removed from the rest of the building is the “back” of the tower so it was fitted with a door where the occupants of the tower can enter it.
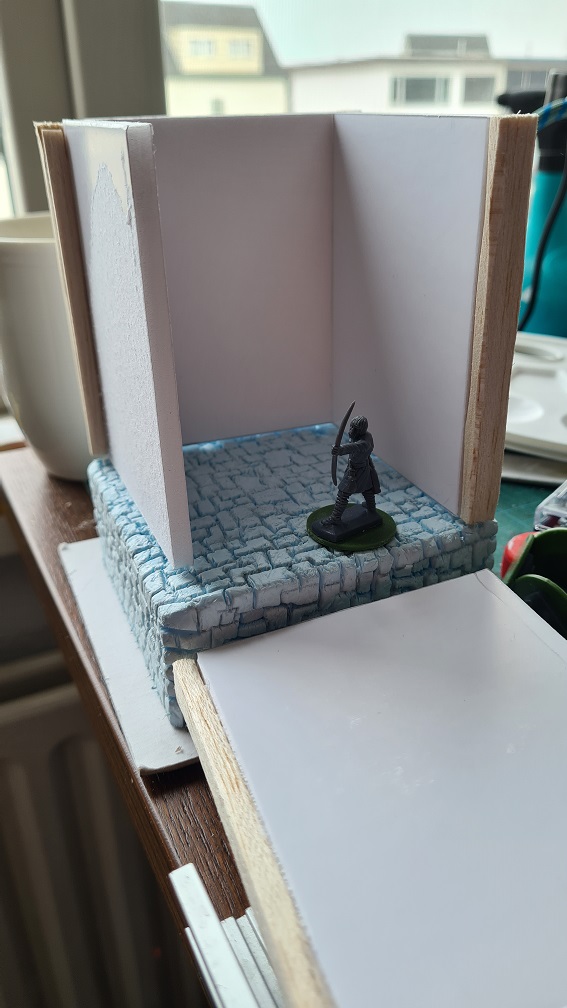
I also made a wooden platform out of balsa and that will be the top level of the tower. There is a 28mm archer on top for scale
And finally a shot of how it would fit with the walls that are also in a semi-build state. The tower can be used as coner piece for the walls and gate.
The next steps in this project will be building up the top floor with wooden coffee stirrer sticks so it looks like wood paneling and probably find something to do on the top level of the tower. After that the interior of the tower
Update 3
I didn’t quiet reach my goal unfortunately. I did get quiet far but i didn’t finish my my 4 models.
I did get quiet far, but i did get a step by step picture thing going.
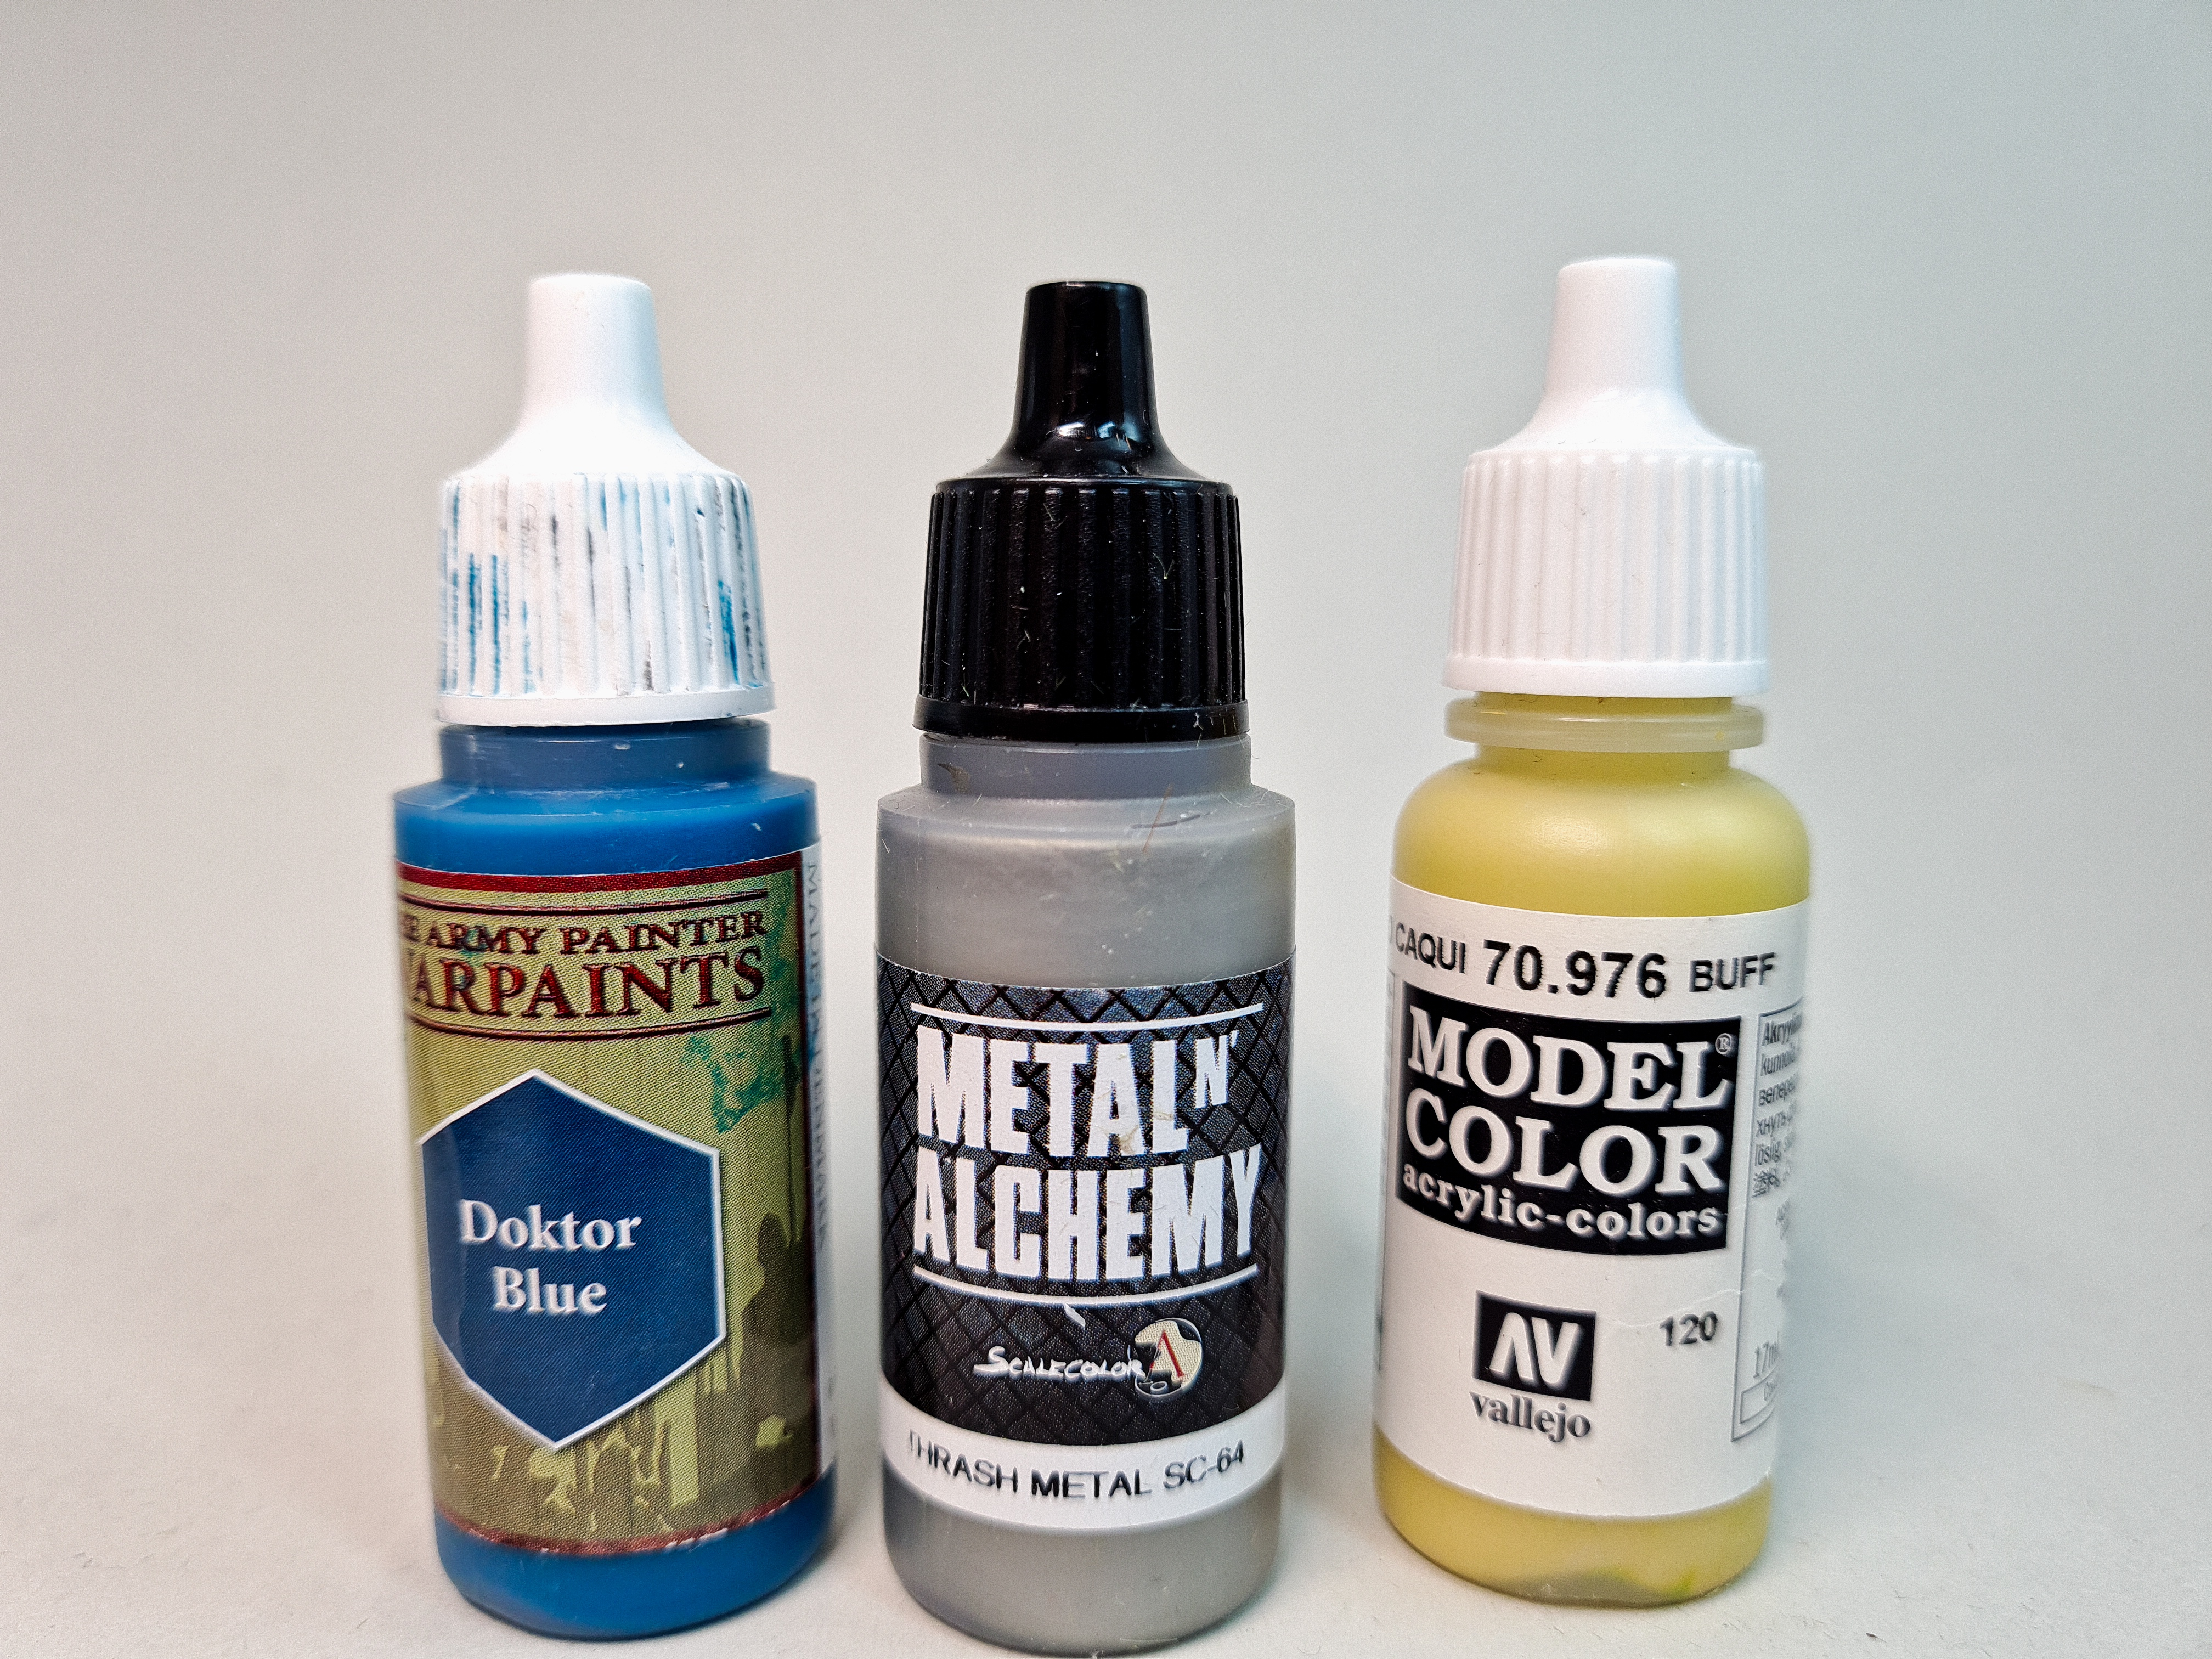
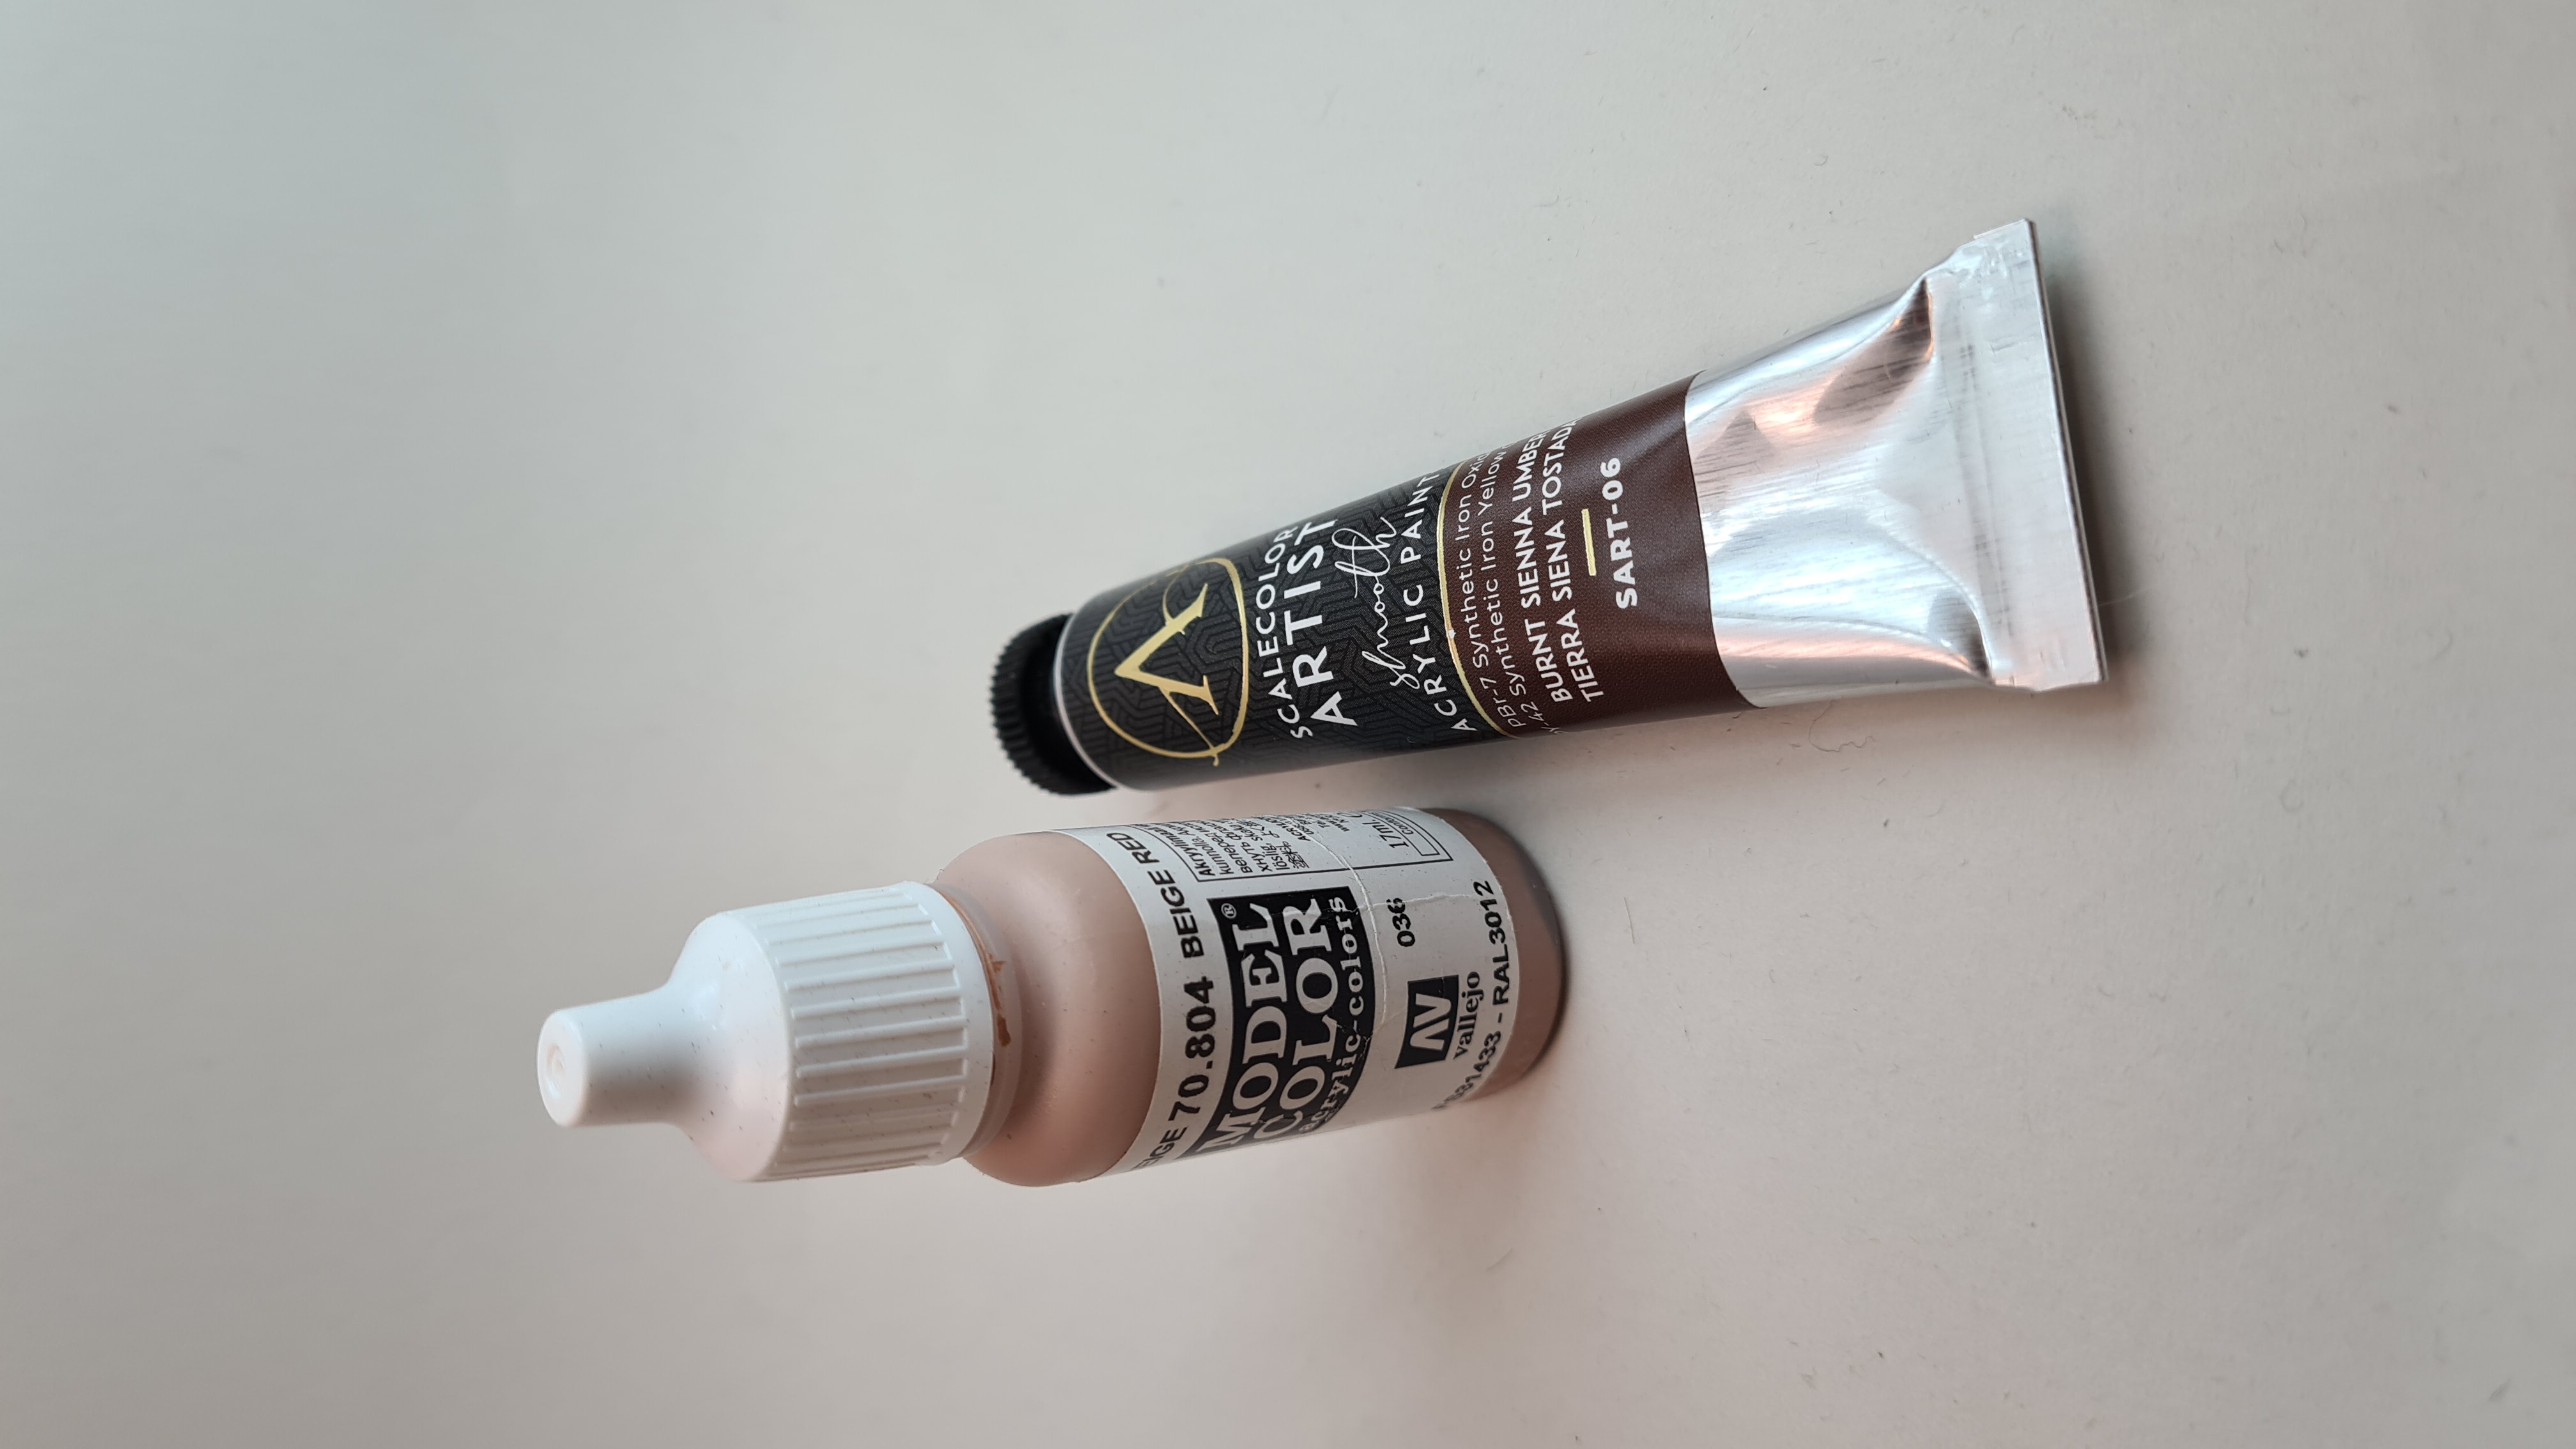
So I started out on the first night i had time i did the base colors of the the base colors are listed below. I focused on putting down a base color one the pants, the armor and the rest of the clothes.


the 2nd time I had some time i focused on painting the all the wooden parts and the skin.
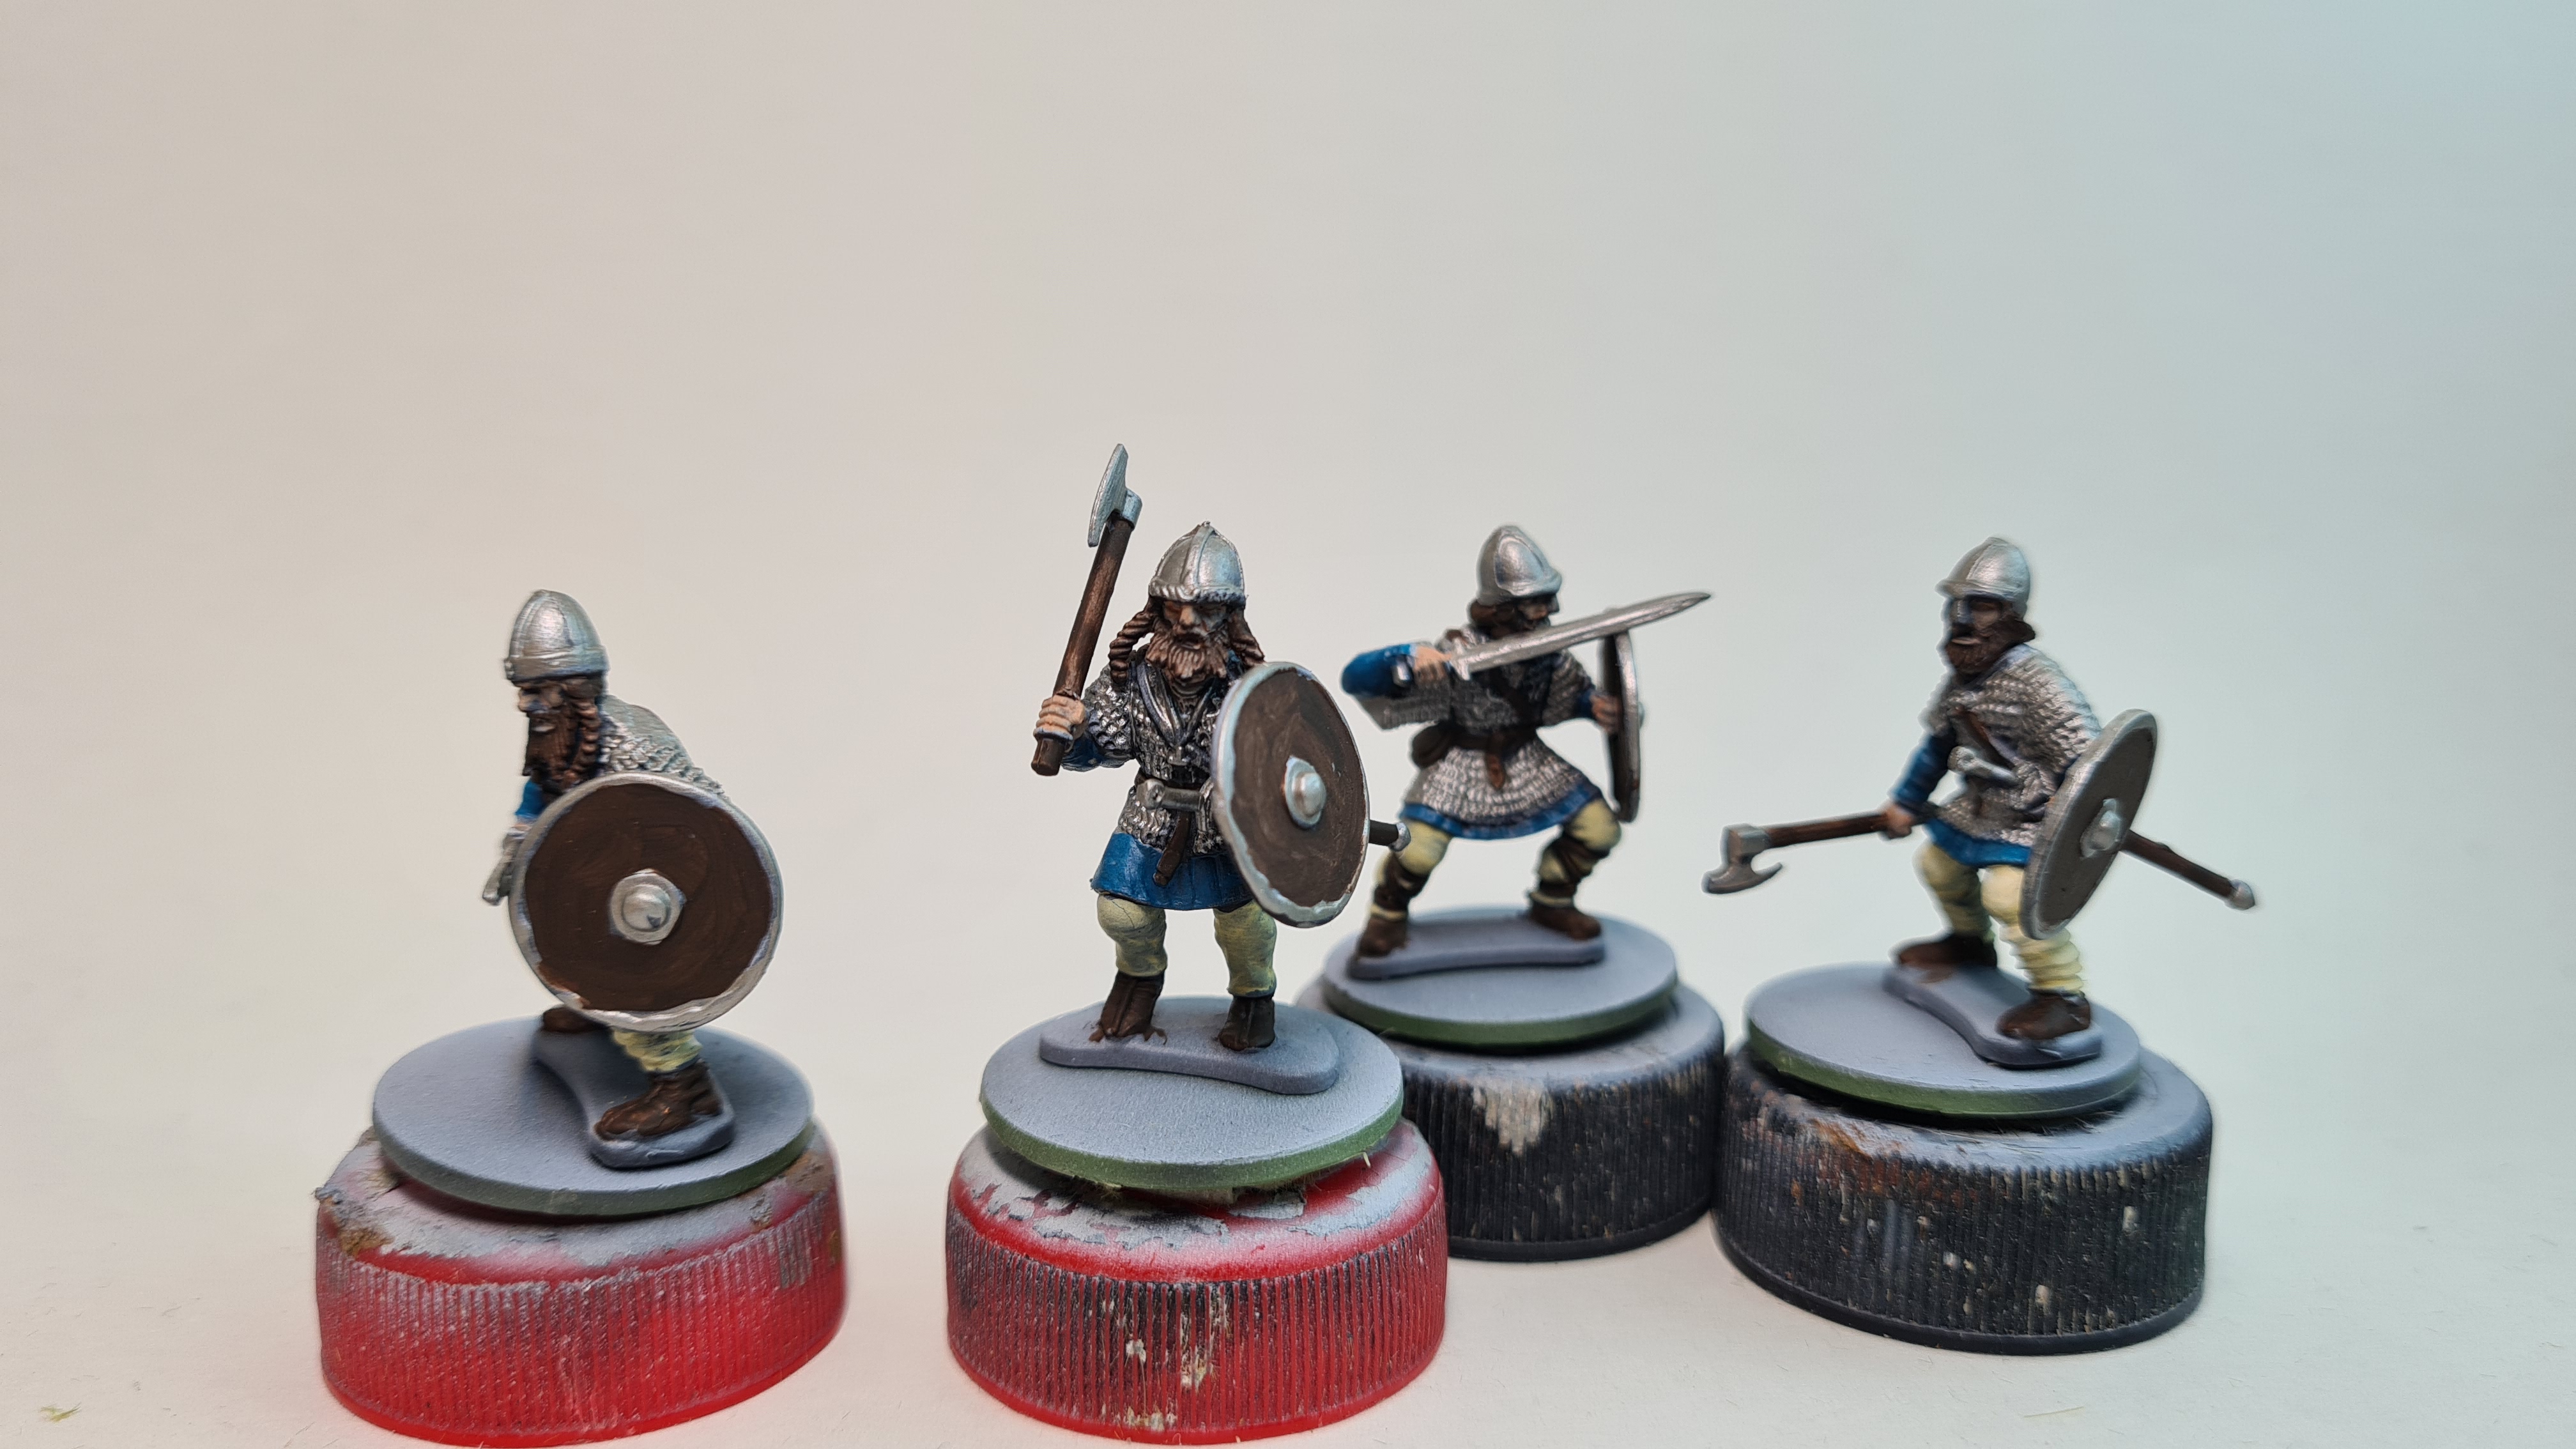
next on was shading, for this I used watered down dark tone by army painter paints. It was watered down by 50%.
once that was down i highlighted the blue and yellow with the orginal colors and some white added to it to get it lighter.
All that is finished now is the details and the bases
Update 2: and to the here and now and a plan for the future
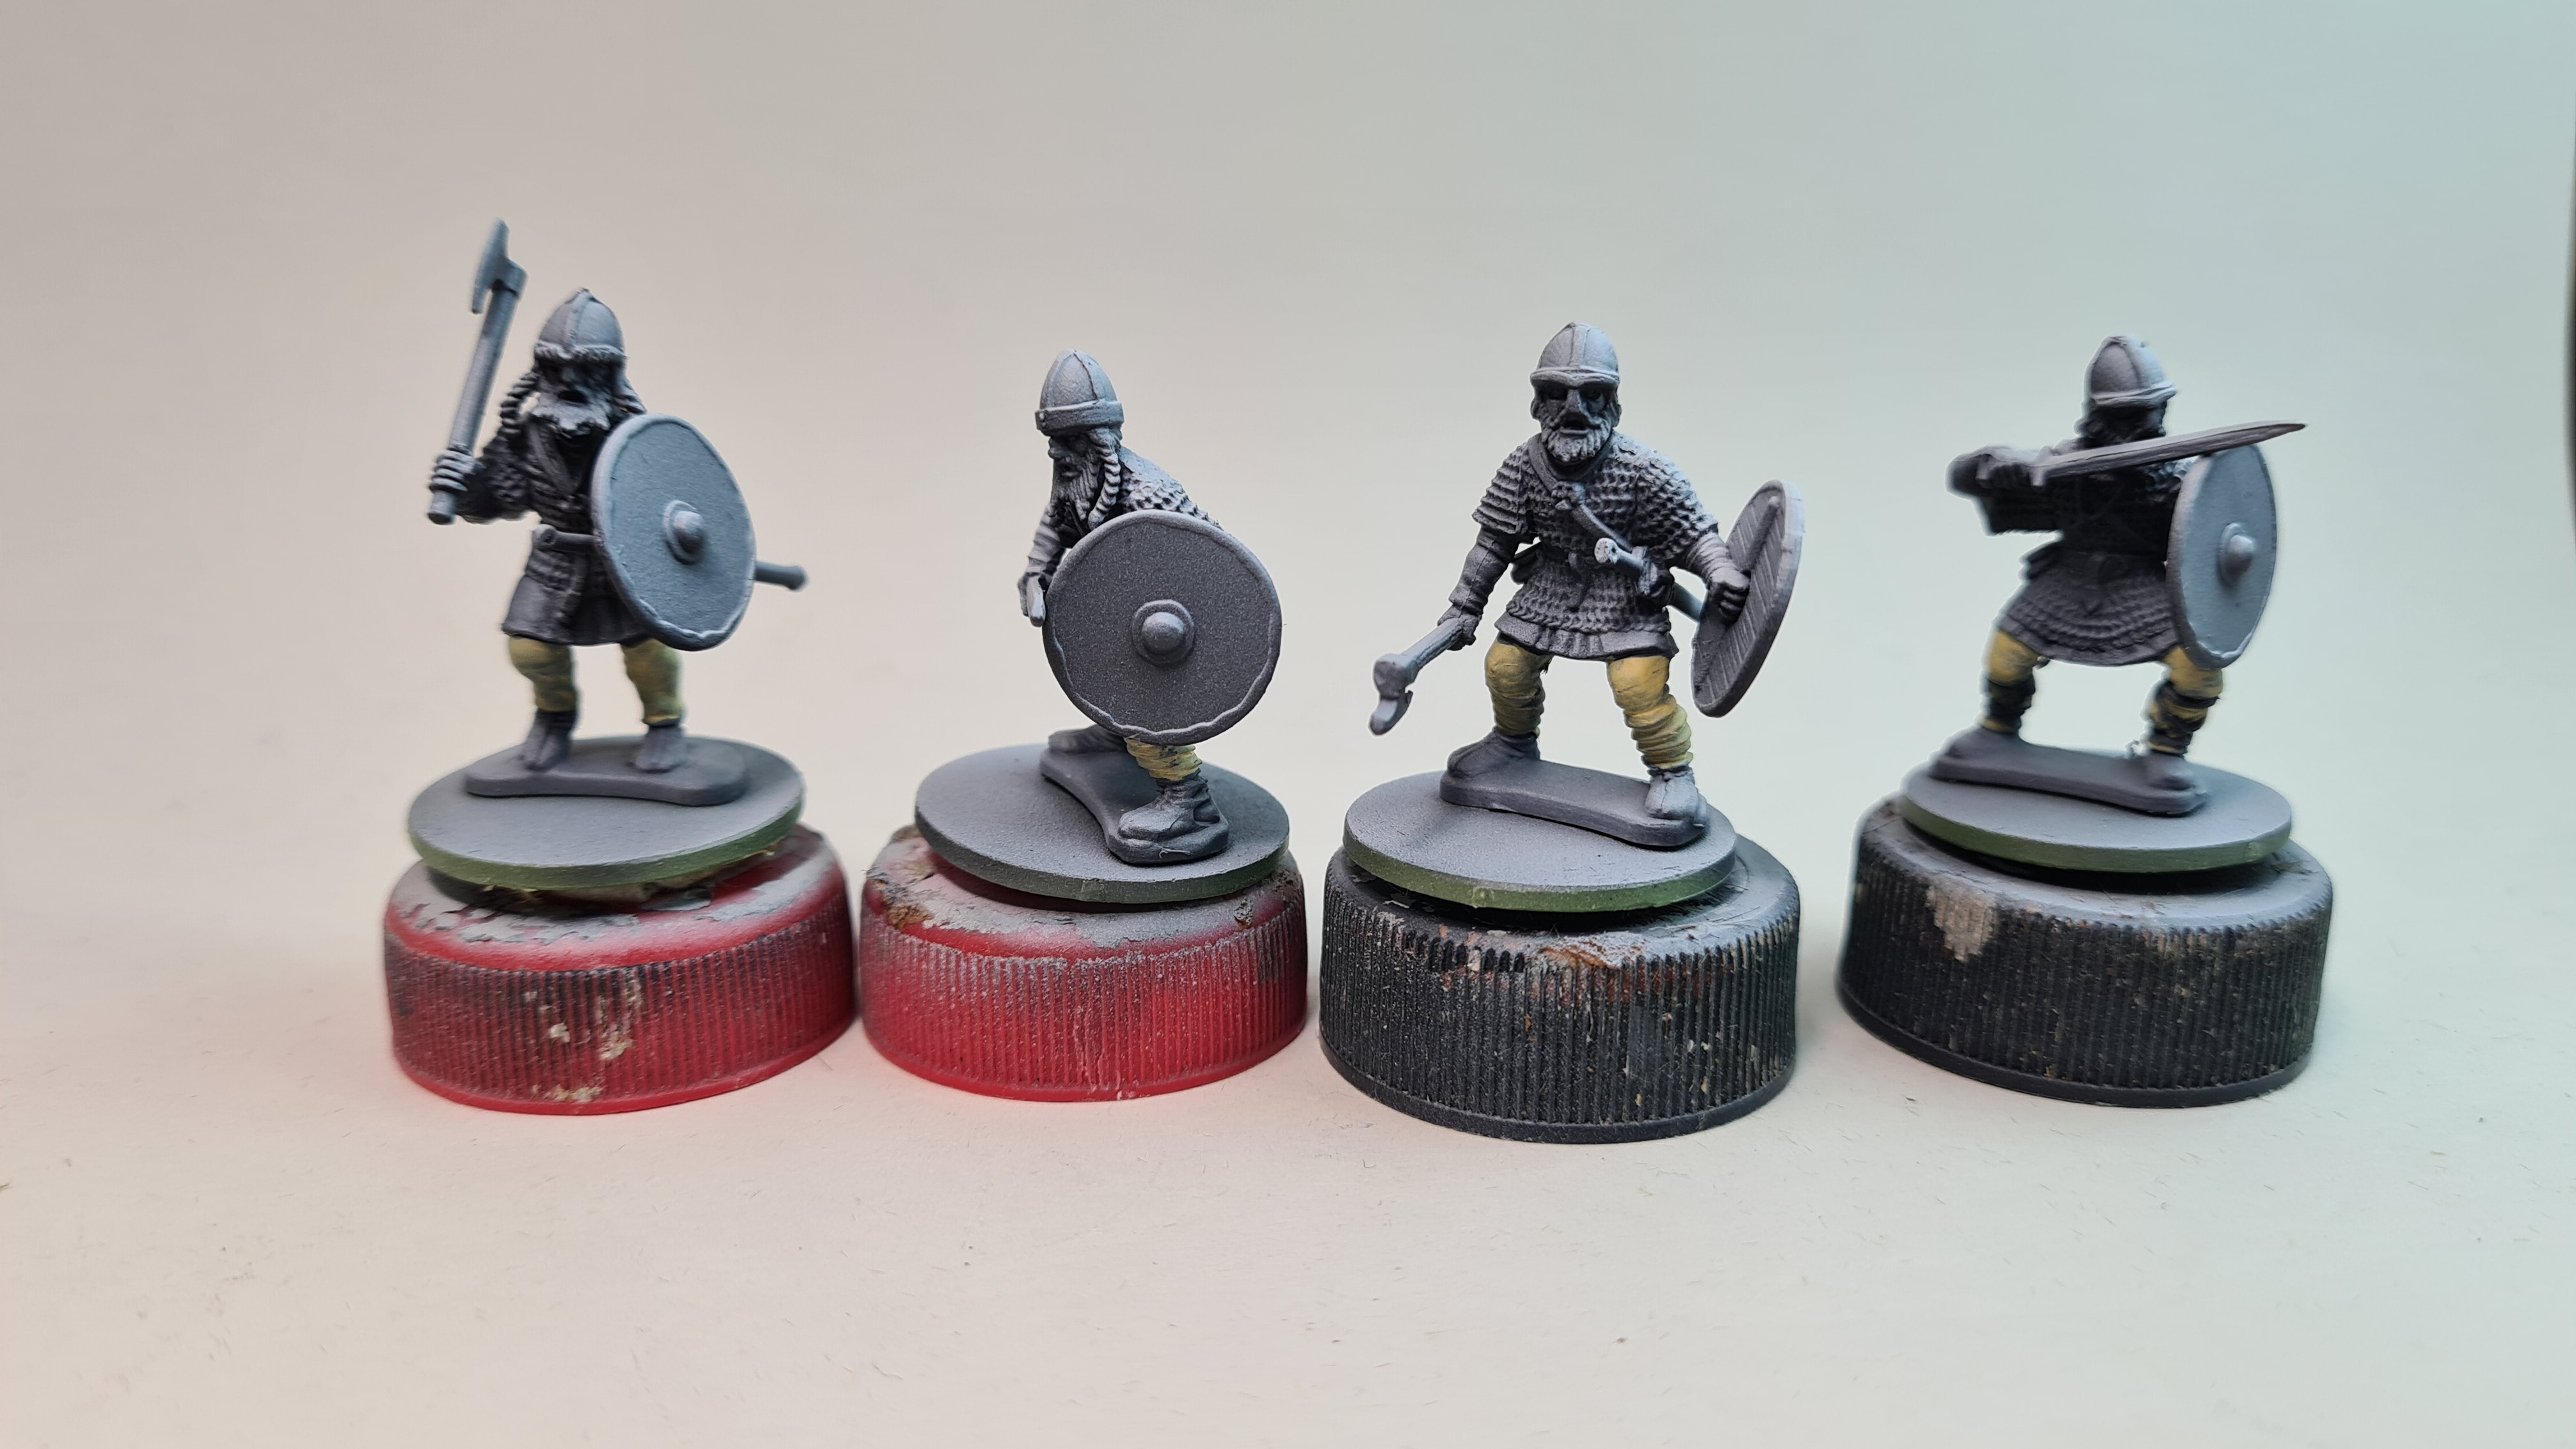
So with the parts I had primed now painted I was ready to move on to the next part. Glue, prime and paint the rest. The first part is was gluing (and making pictures of half assembled models)
It is a good idea to keep in mind at this stage to check for moldlines and remove them. So that is what I did and hopefully i removed most of them or at least the most visual ones

After assembling all of the models it was time to prime them once again. As before these were primed with an airbrush (just a cheap one with a separate compressor. Looking back at the set I have, I would advice people when they start doing this to get an airbrush compressor with a tank added to it. I don’t have that, than again for just priming it works fine. Its one of those sets where you get everything for around 100 euros.

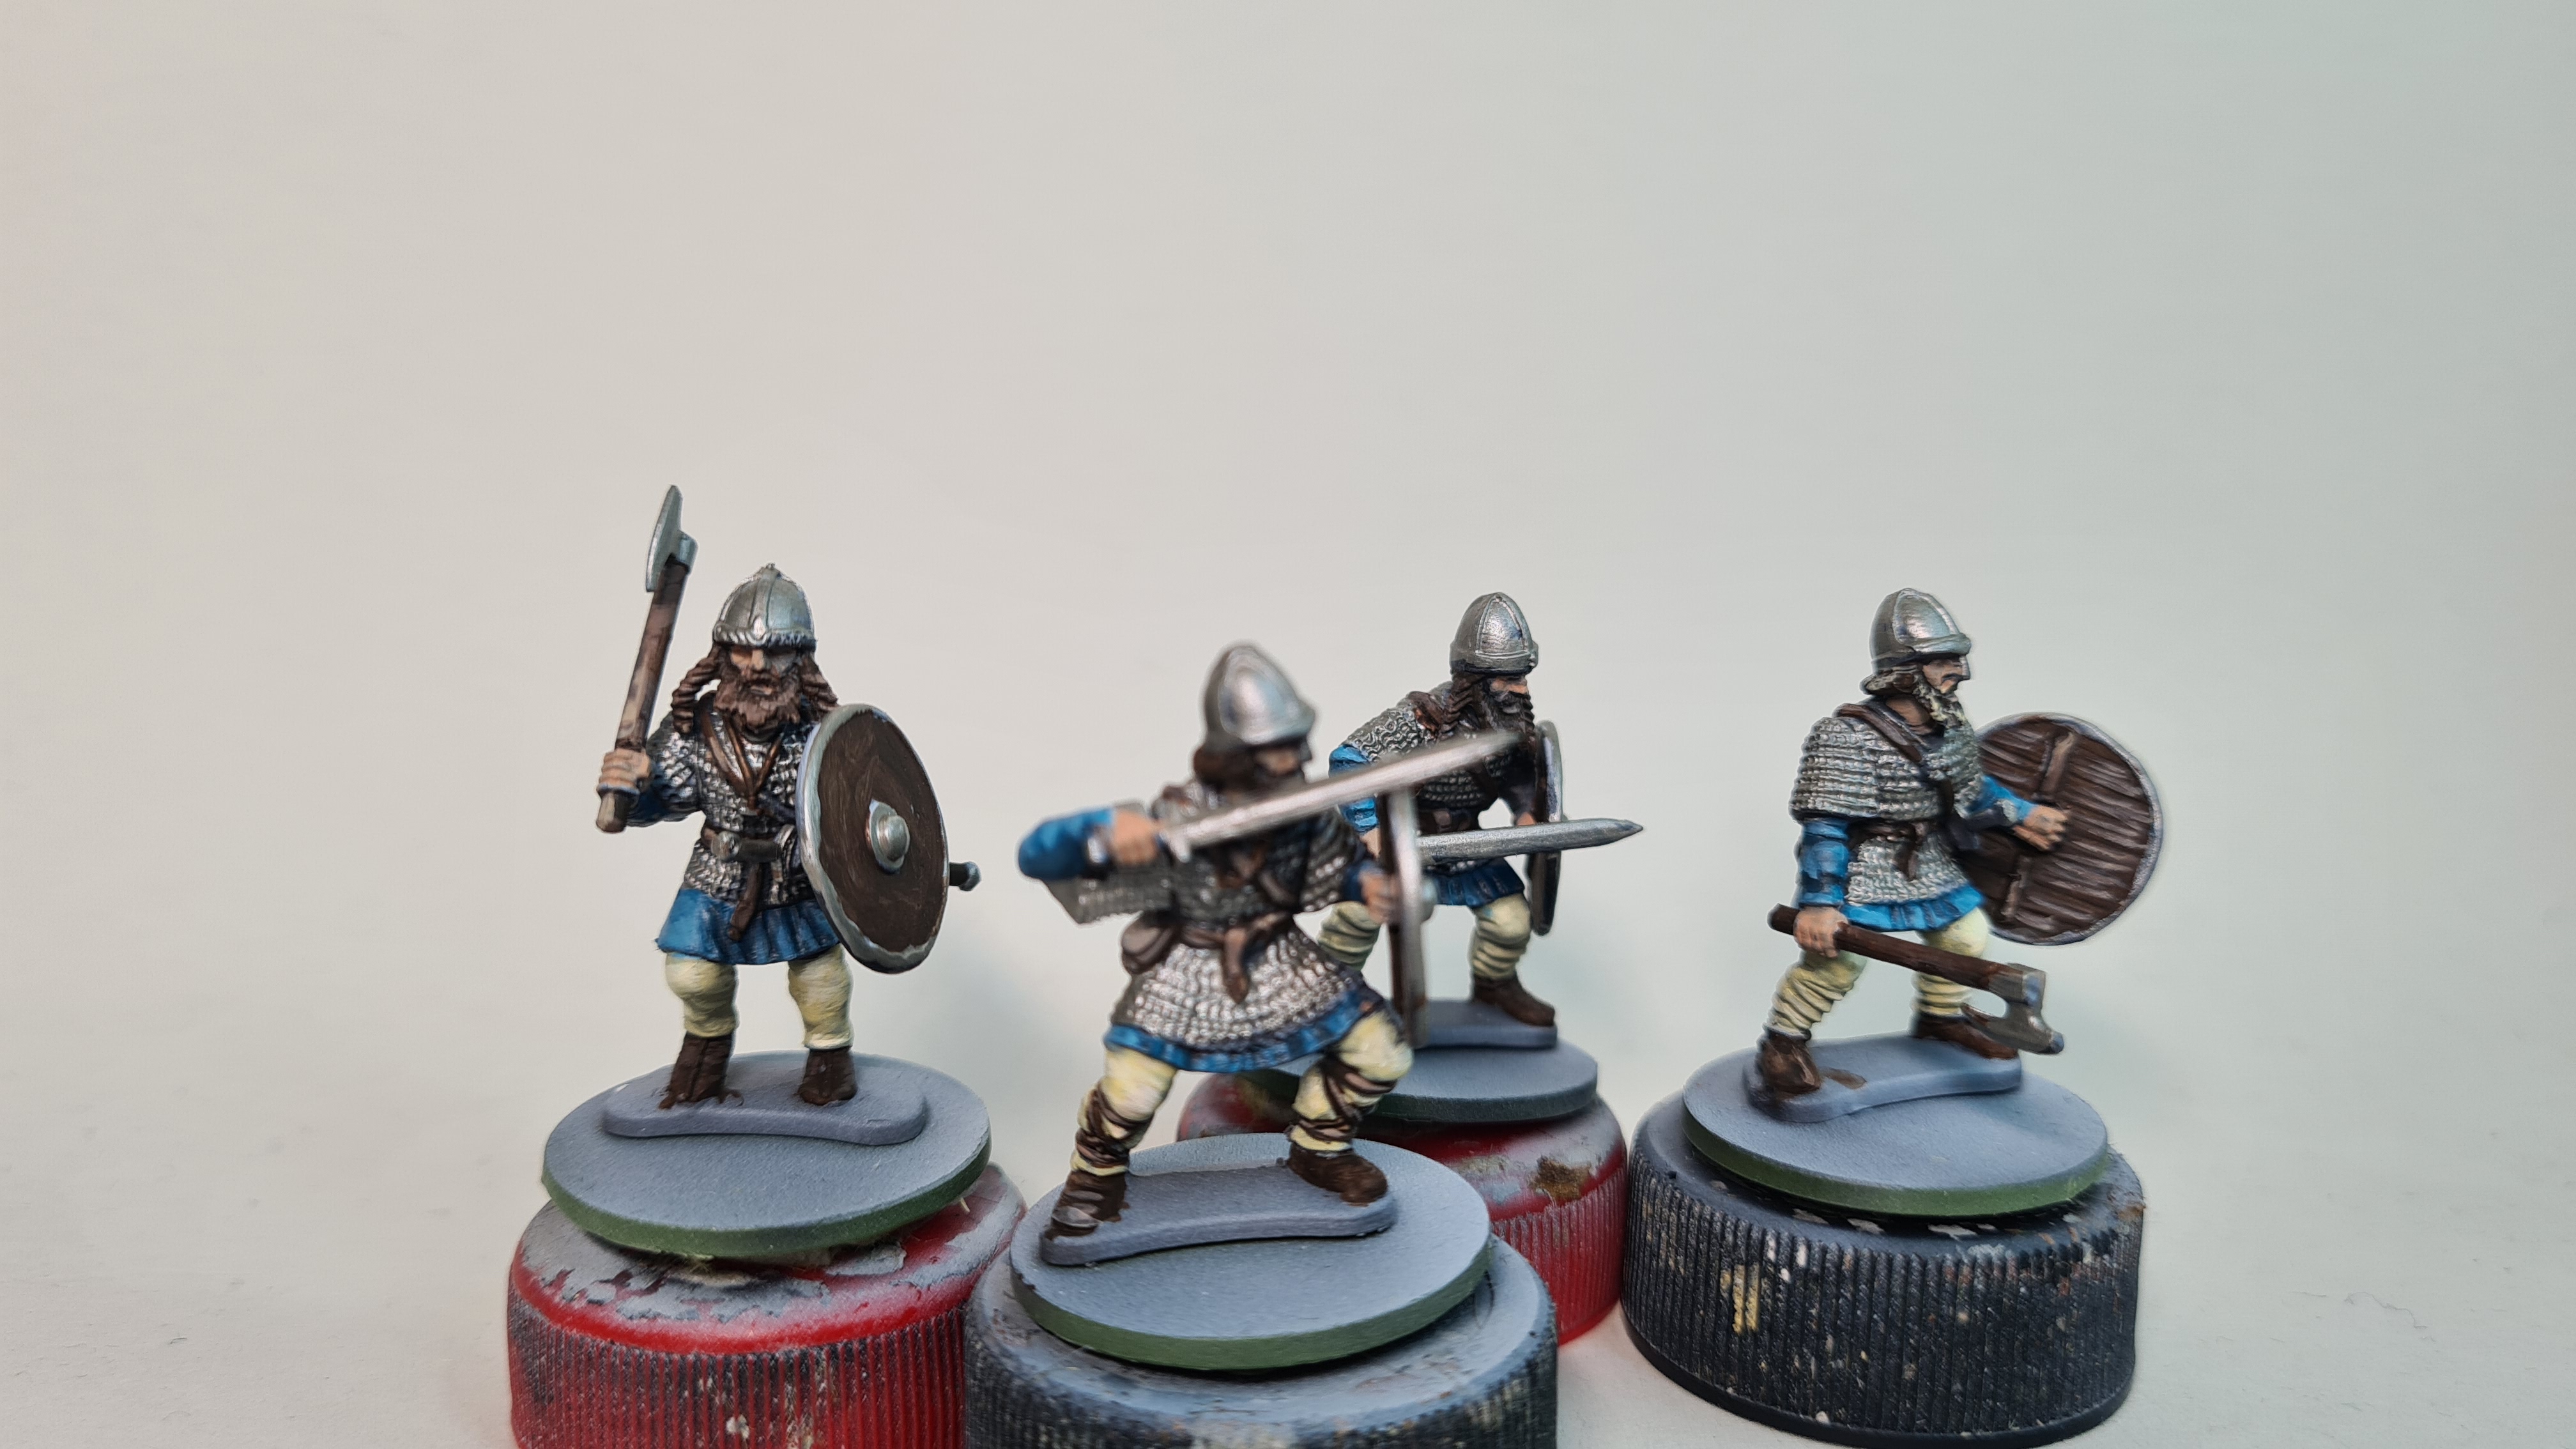
So as you can probably see from the picture the heart guard in the back are stuck on bottlecaps. I have used several holders to hold the miniatures when painting them, but i found this works for me. They are stuck to the bottlecaps with poster putty so i can remove them as needed.
Looking at my past record painting 4 mini’s a week to the level of detail i want is probably realistic. So my goal for coming week is to paint the 4 Heartguard and take a few pictures of each of the steps in the painting process.
The start
So the idea is to make not one but 2 warbands. The warbands need to be easily distinguishable from each other because I will probably be the only one to care enough about them to actually see the difference. But since i have at this time only one 4 point warband that is what I will start with.
For reasons lost in the sands of time I decided to glue and prime half of the Vikings.
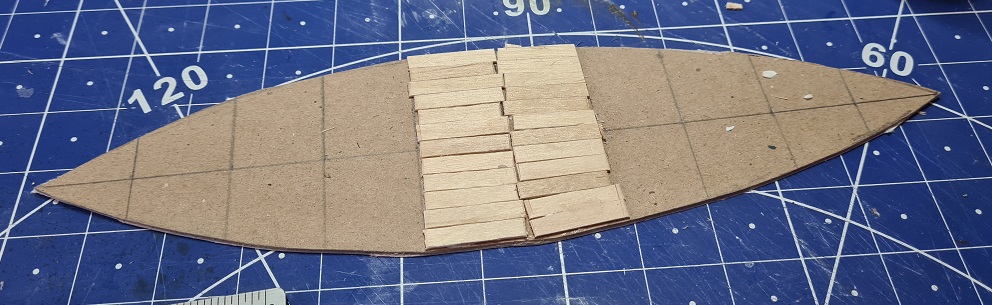
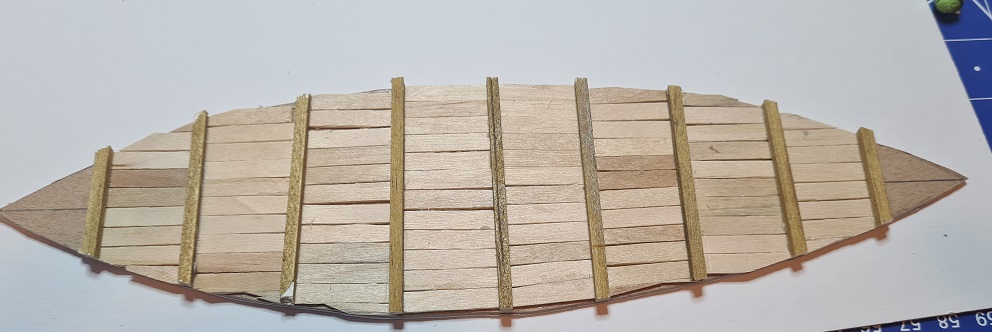
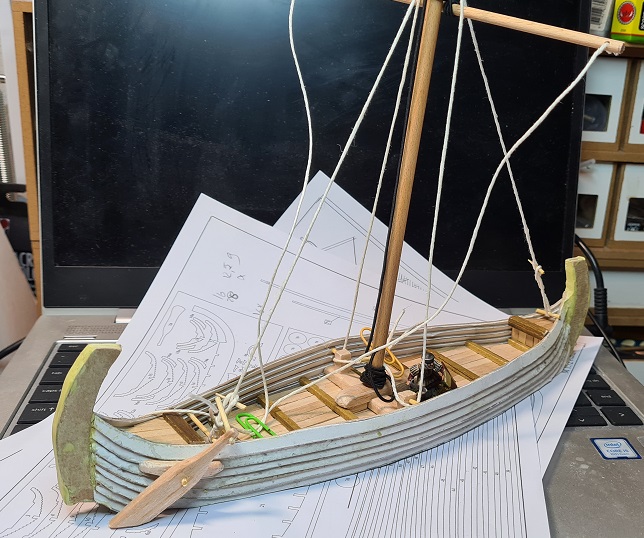
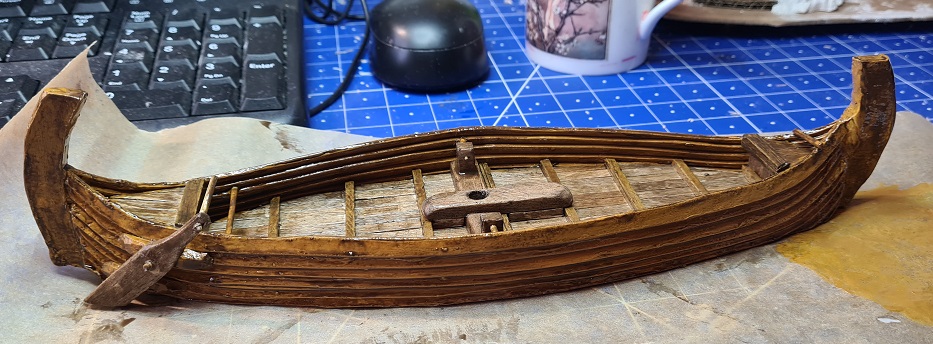
To get into the mood of painting these Vikings and while looking for interesting terrain pieces i stumbled upon a nice video by Landvaettr’s Lair https://www.youtube.com/channel/UC_L9l7YJD7_45tyla1gWIqA where he is building a Viking longship.
So with that in mind I started making my own.

So with that out of the way and my Vikings ready to be painted I was totally in the mood to start painting.
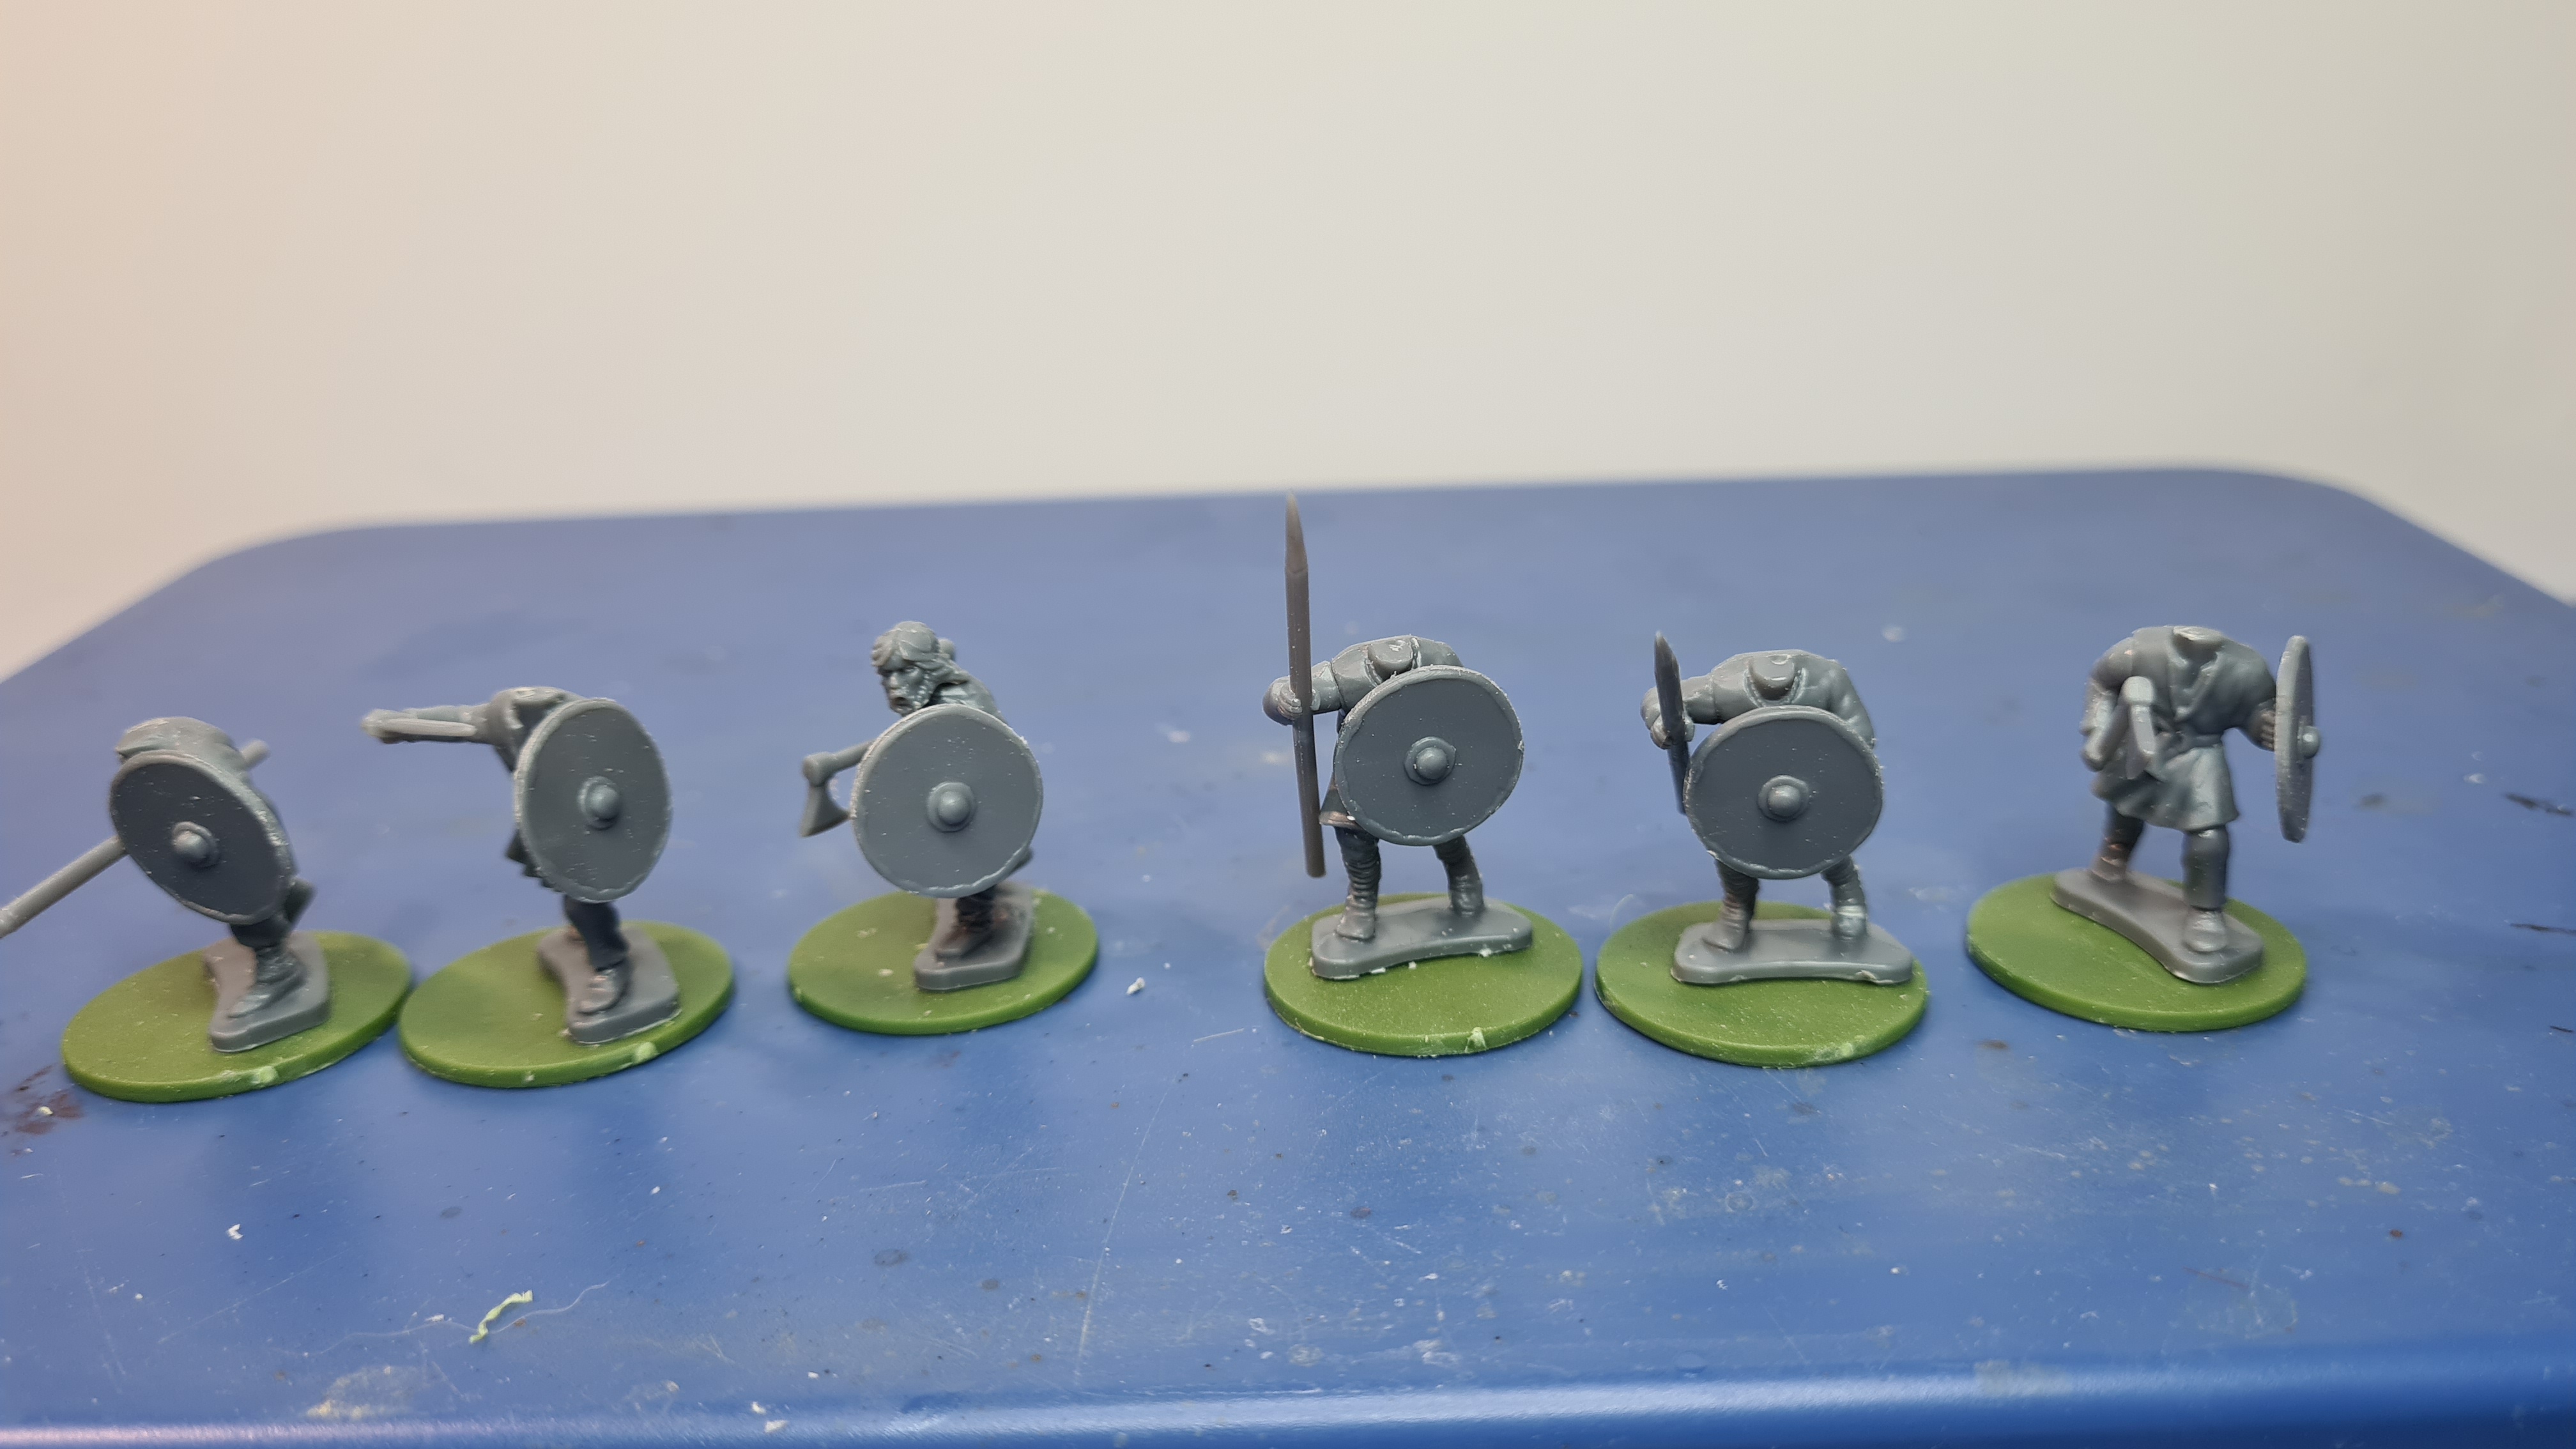
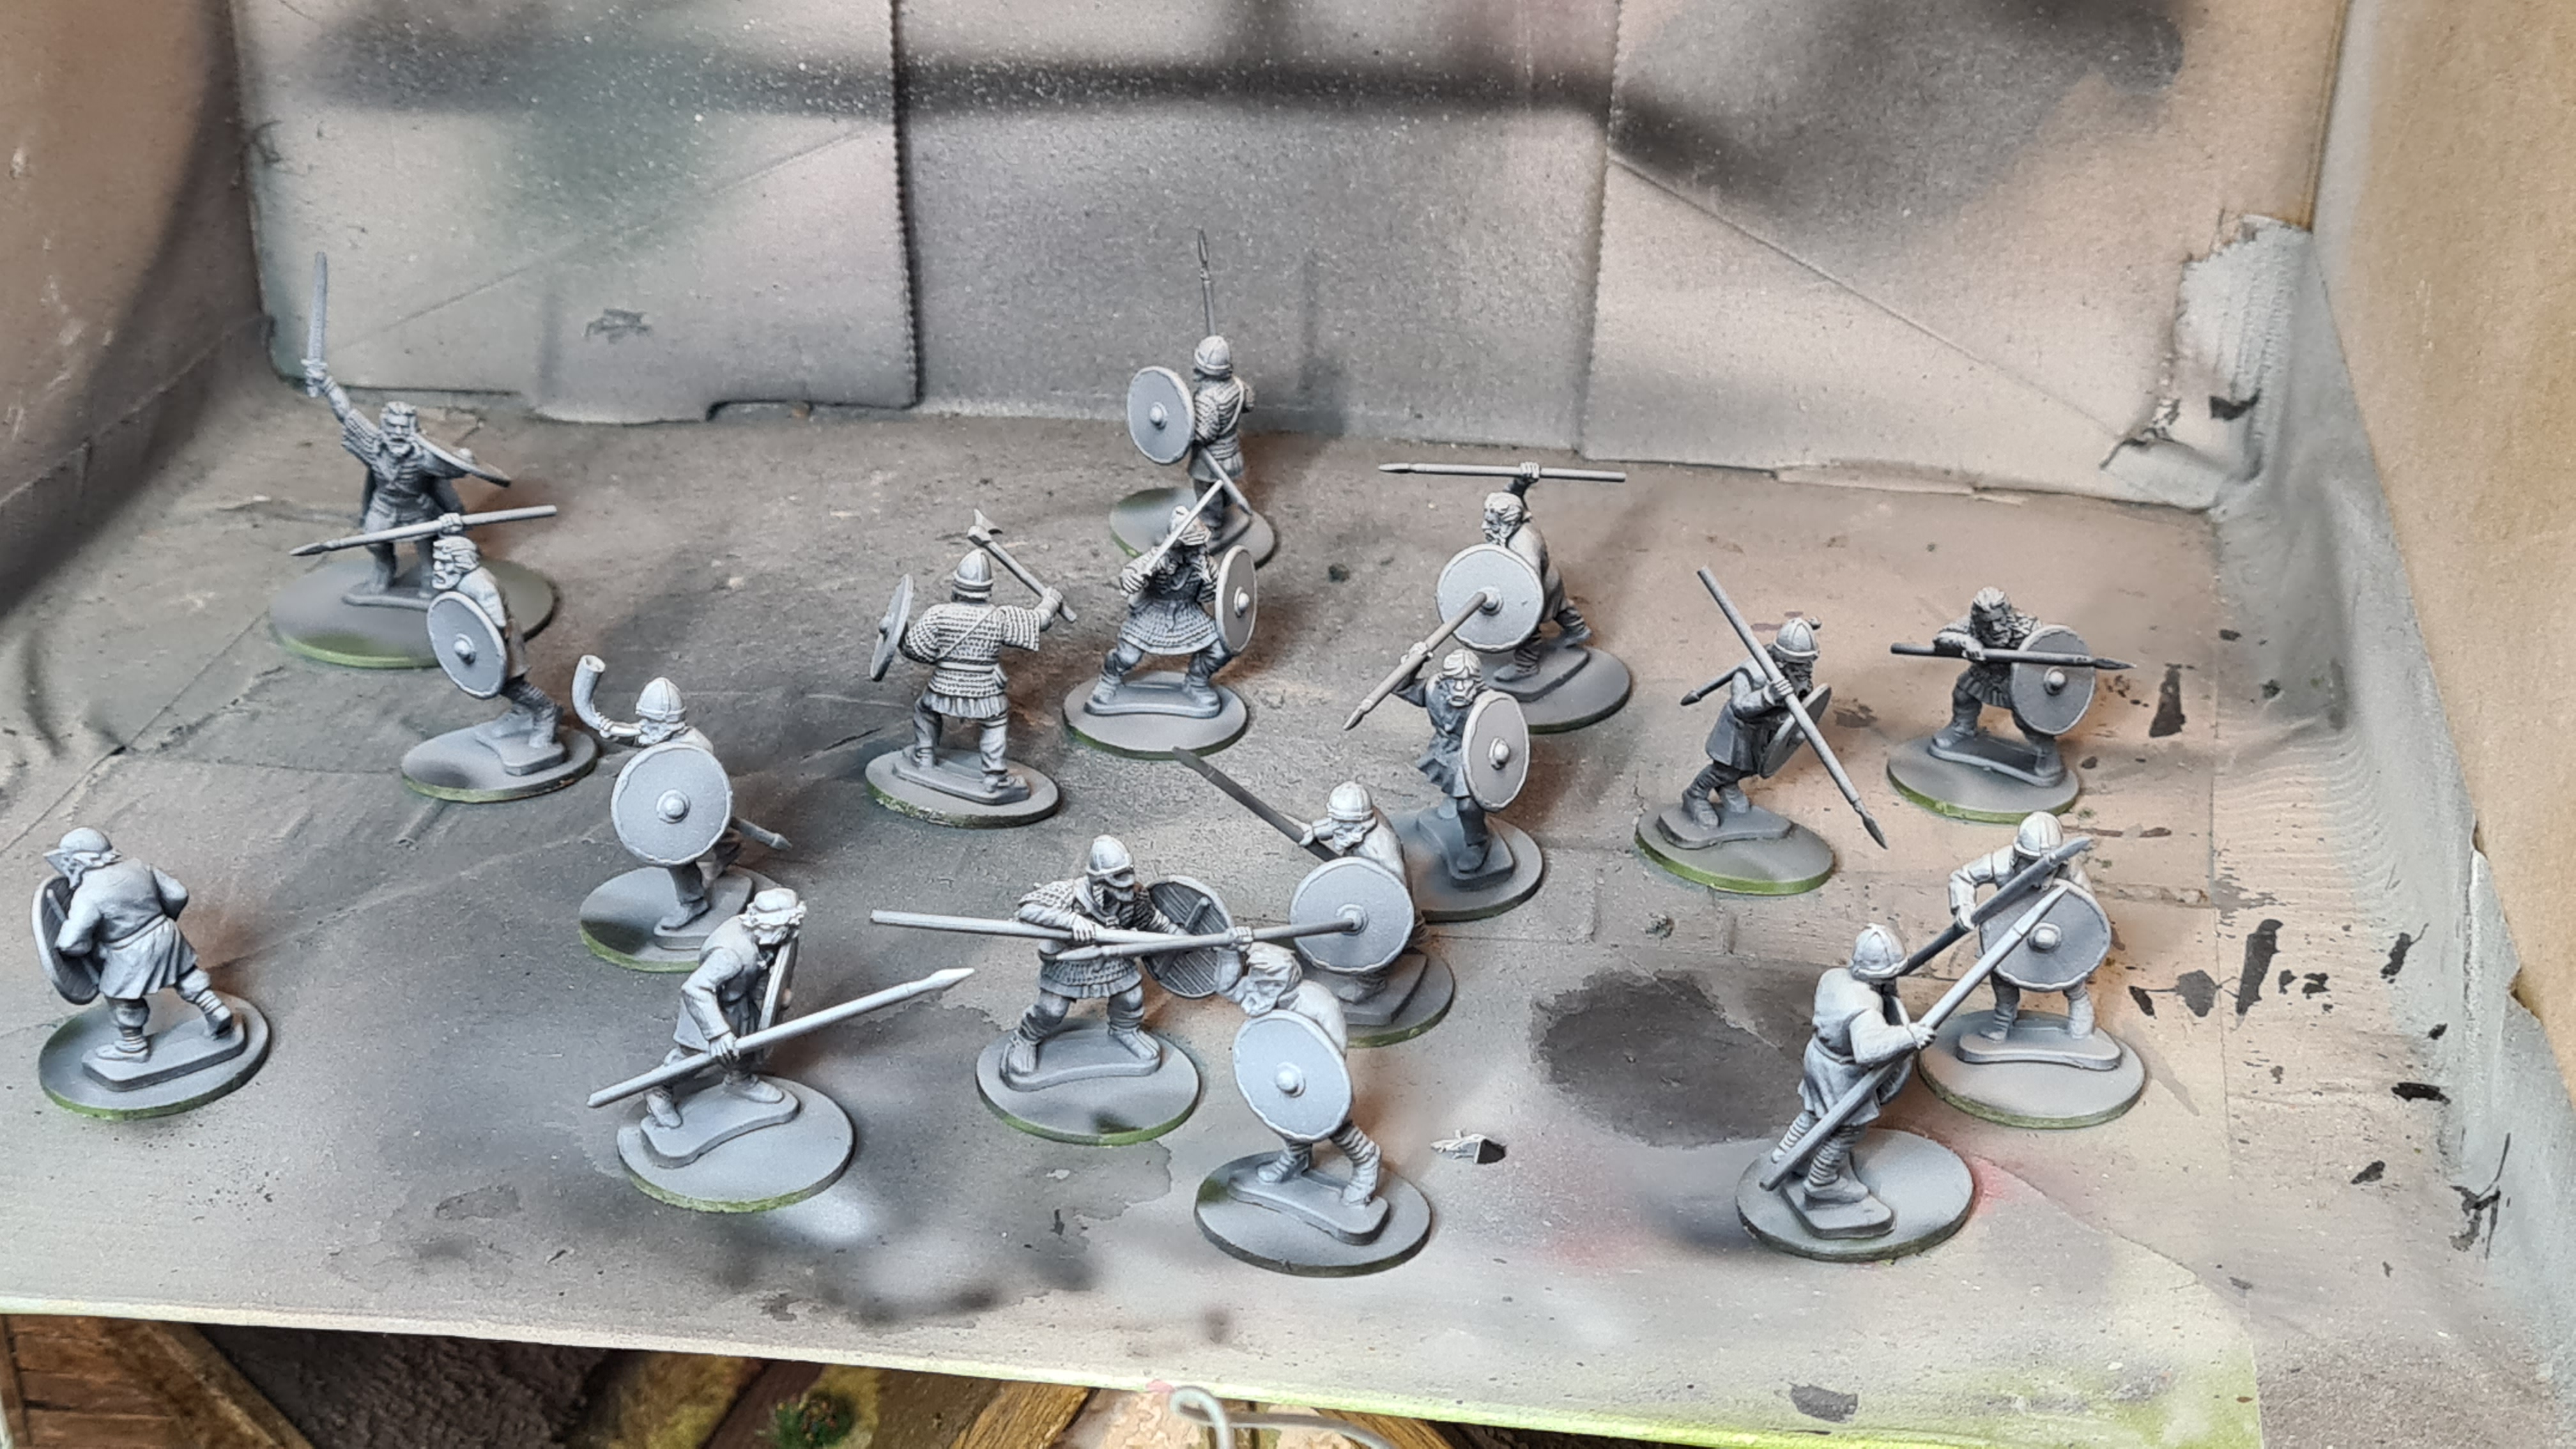
I like to do a zenithal highlight so it is a bit easier to see where the shadows are. For these i used an (cheap) airbrush to prime them. Starting out with an all black coat, especially look for spots only seen from the bottom. After that i did a grey prime from the top and the sides basically. And when that was dry i gave it all a pure white spray from the top in the hope this all will help me in painting.
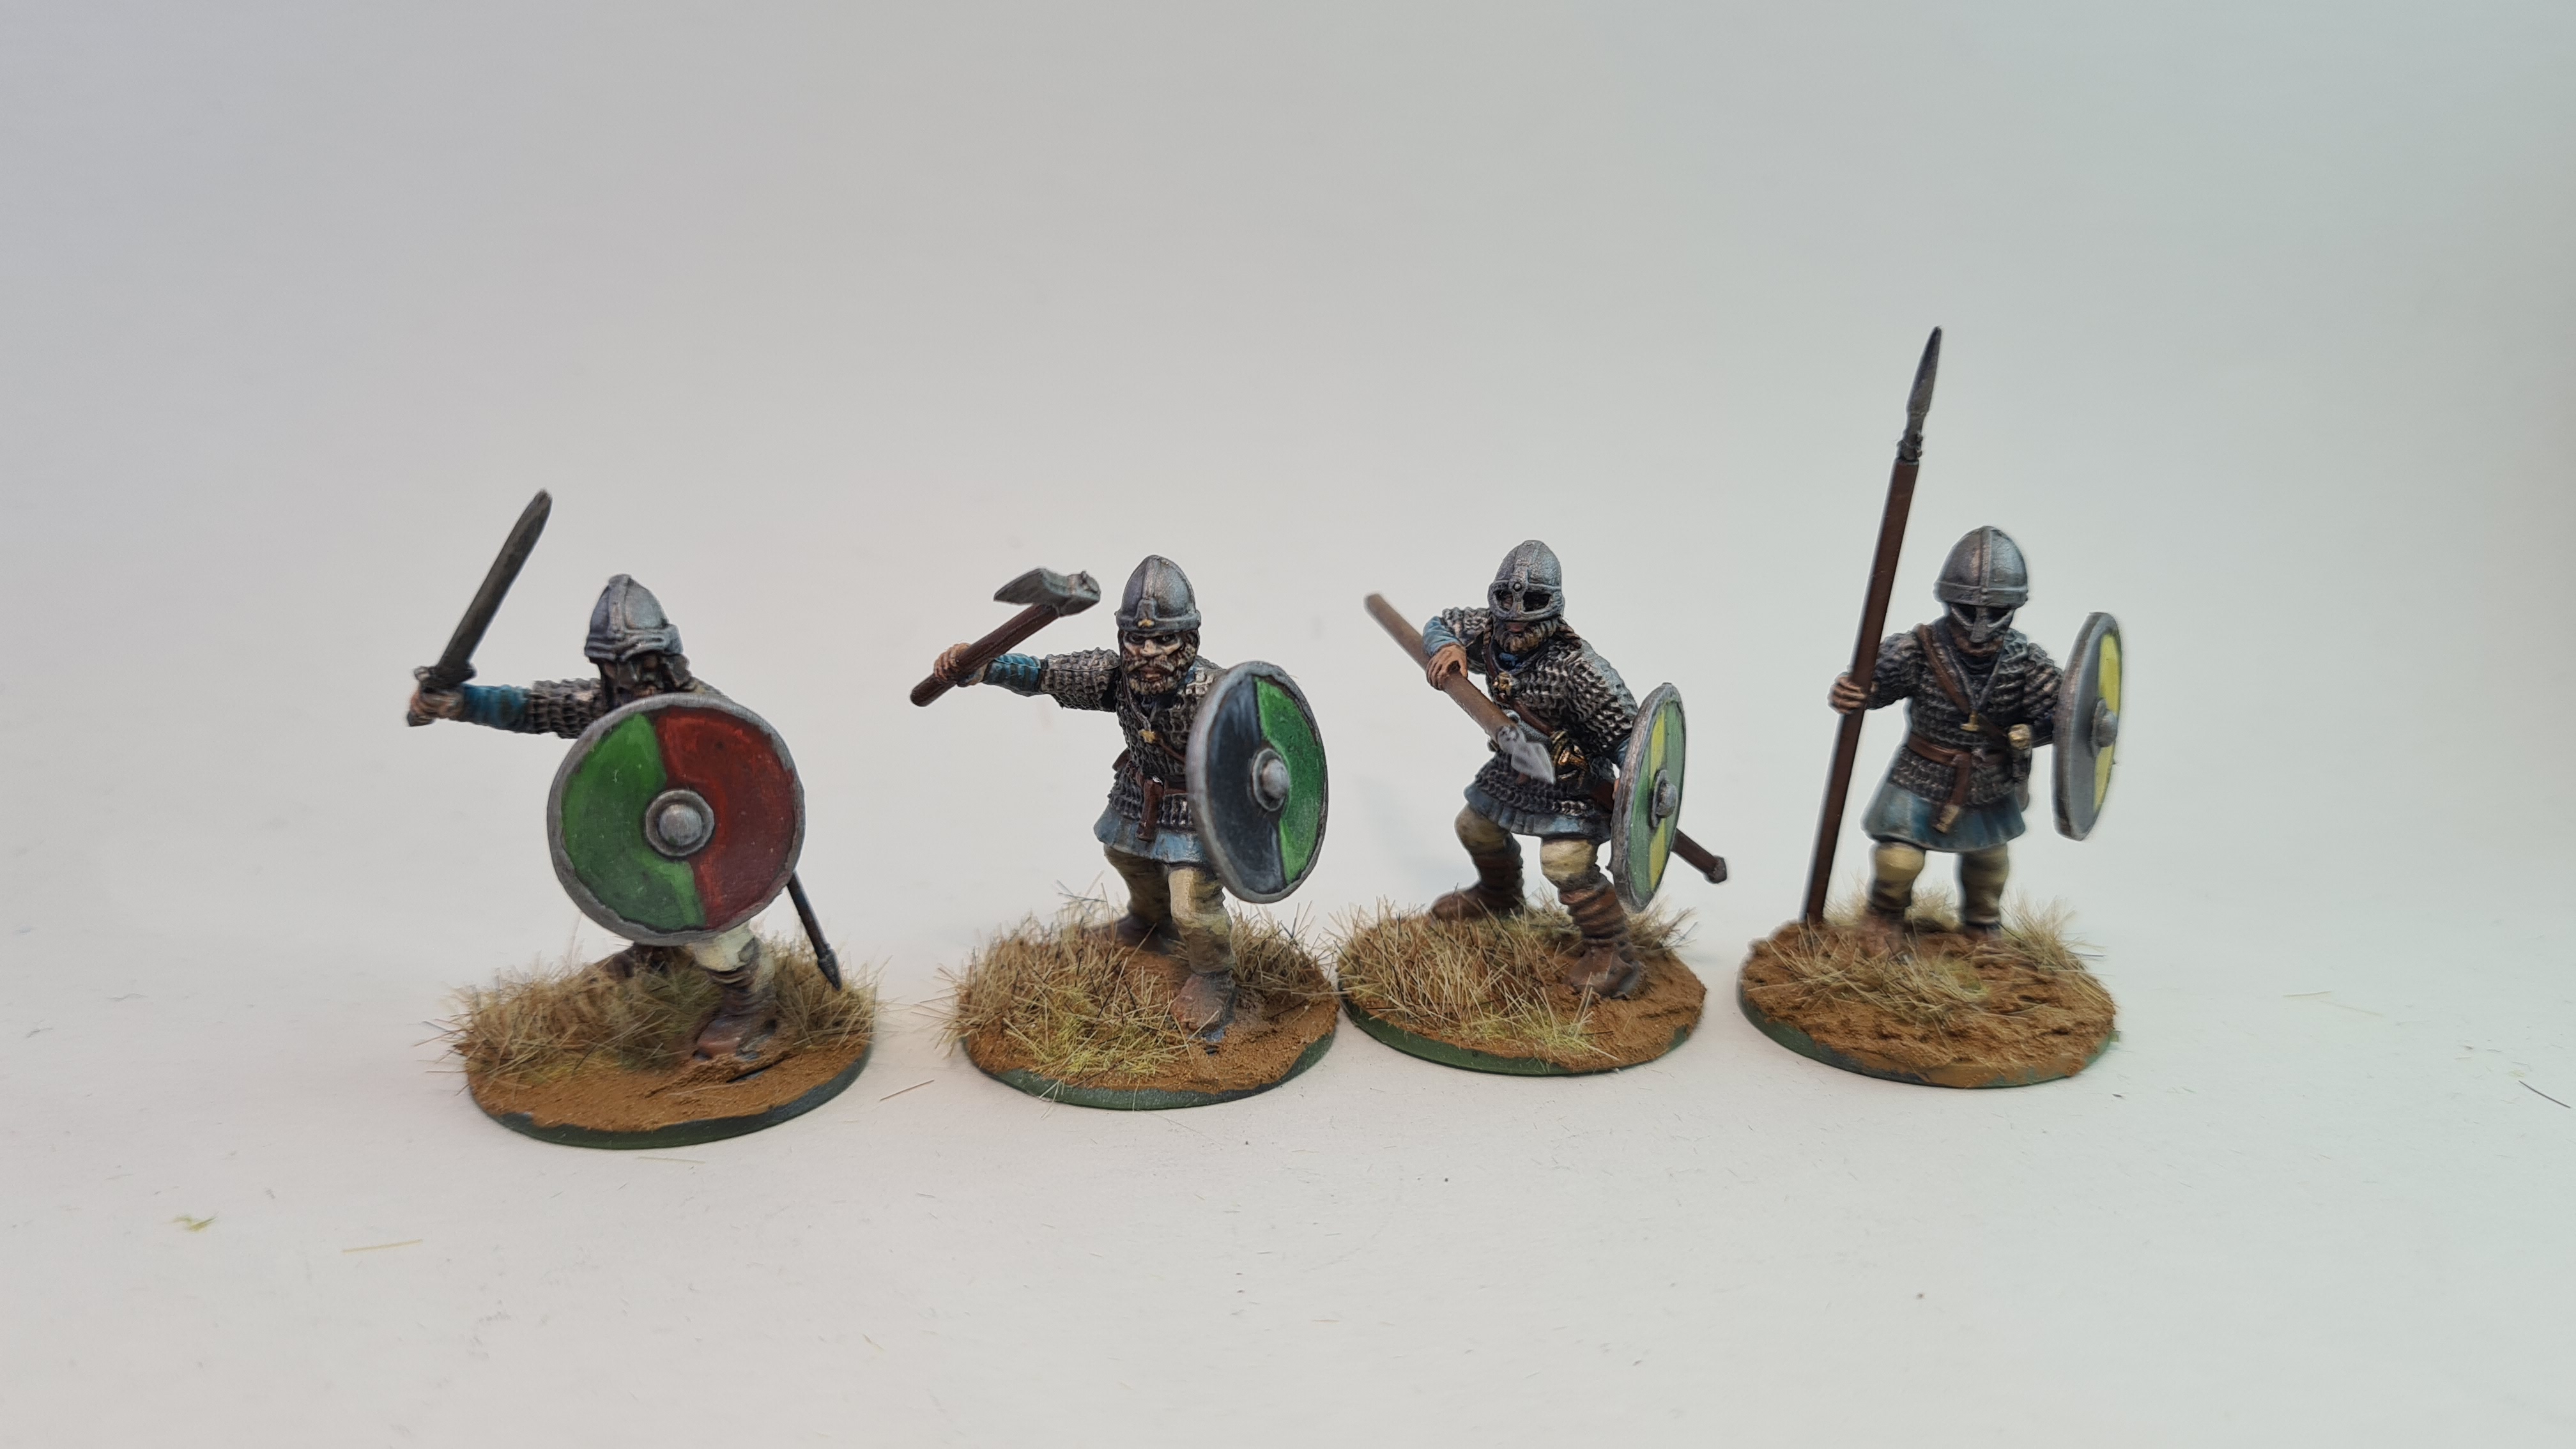
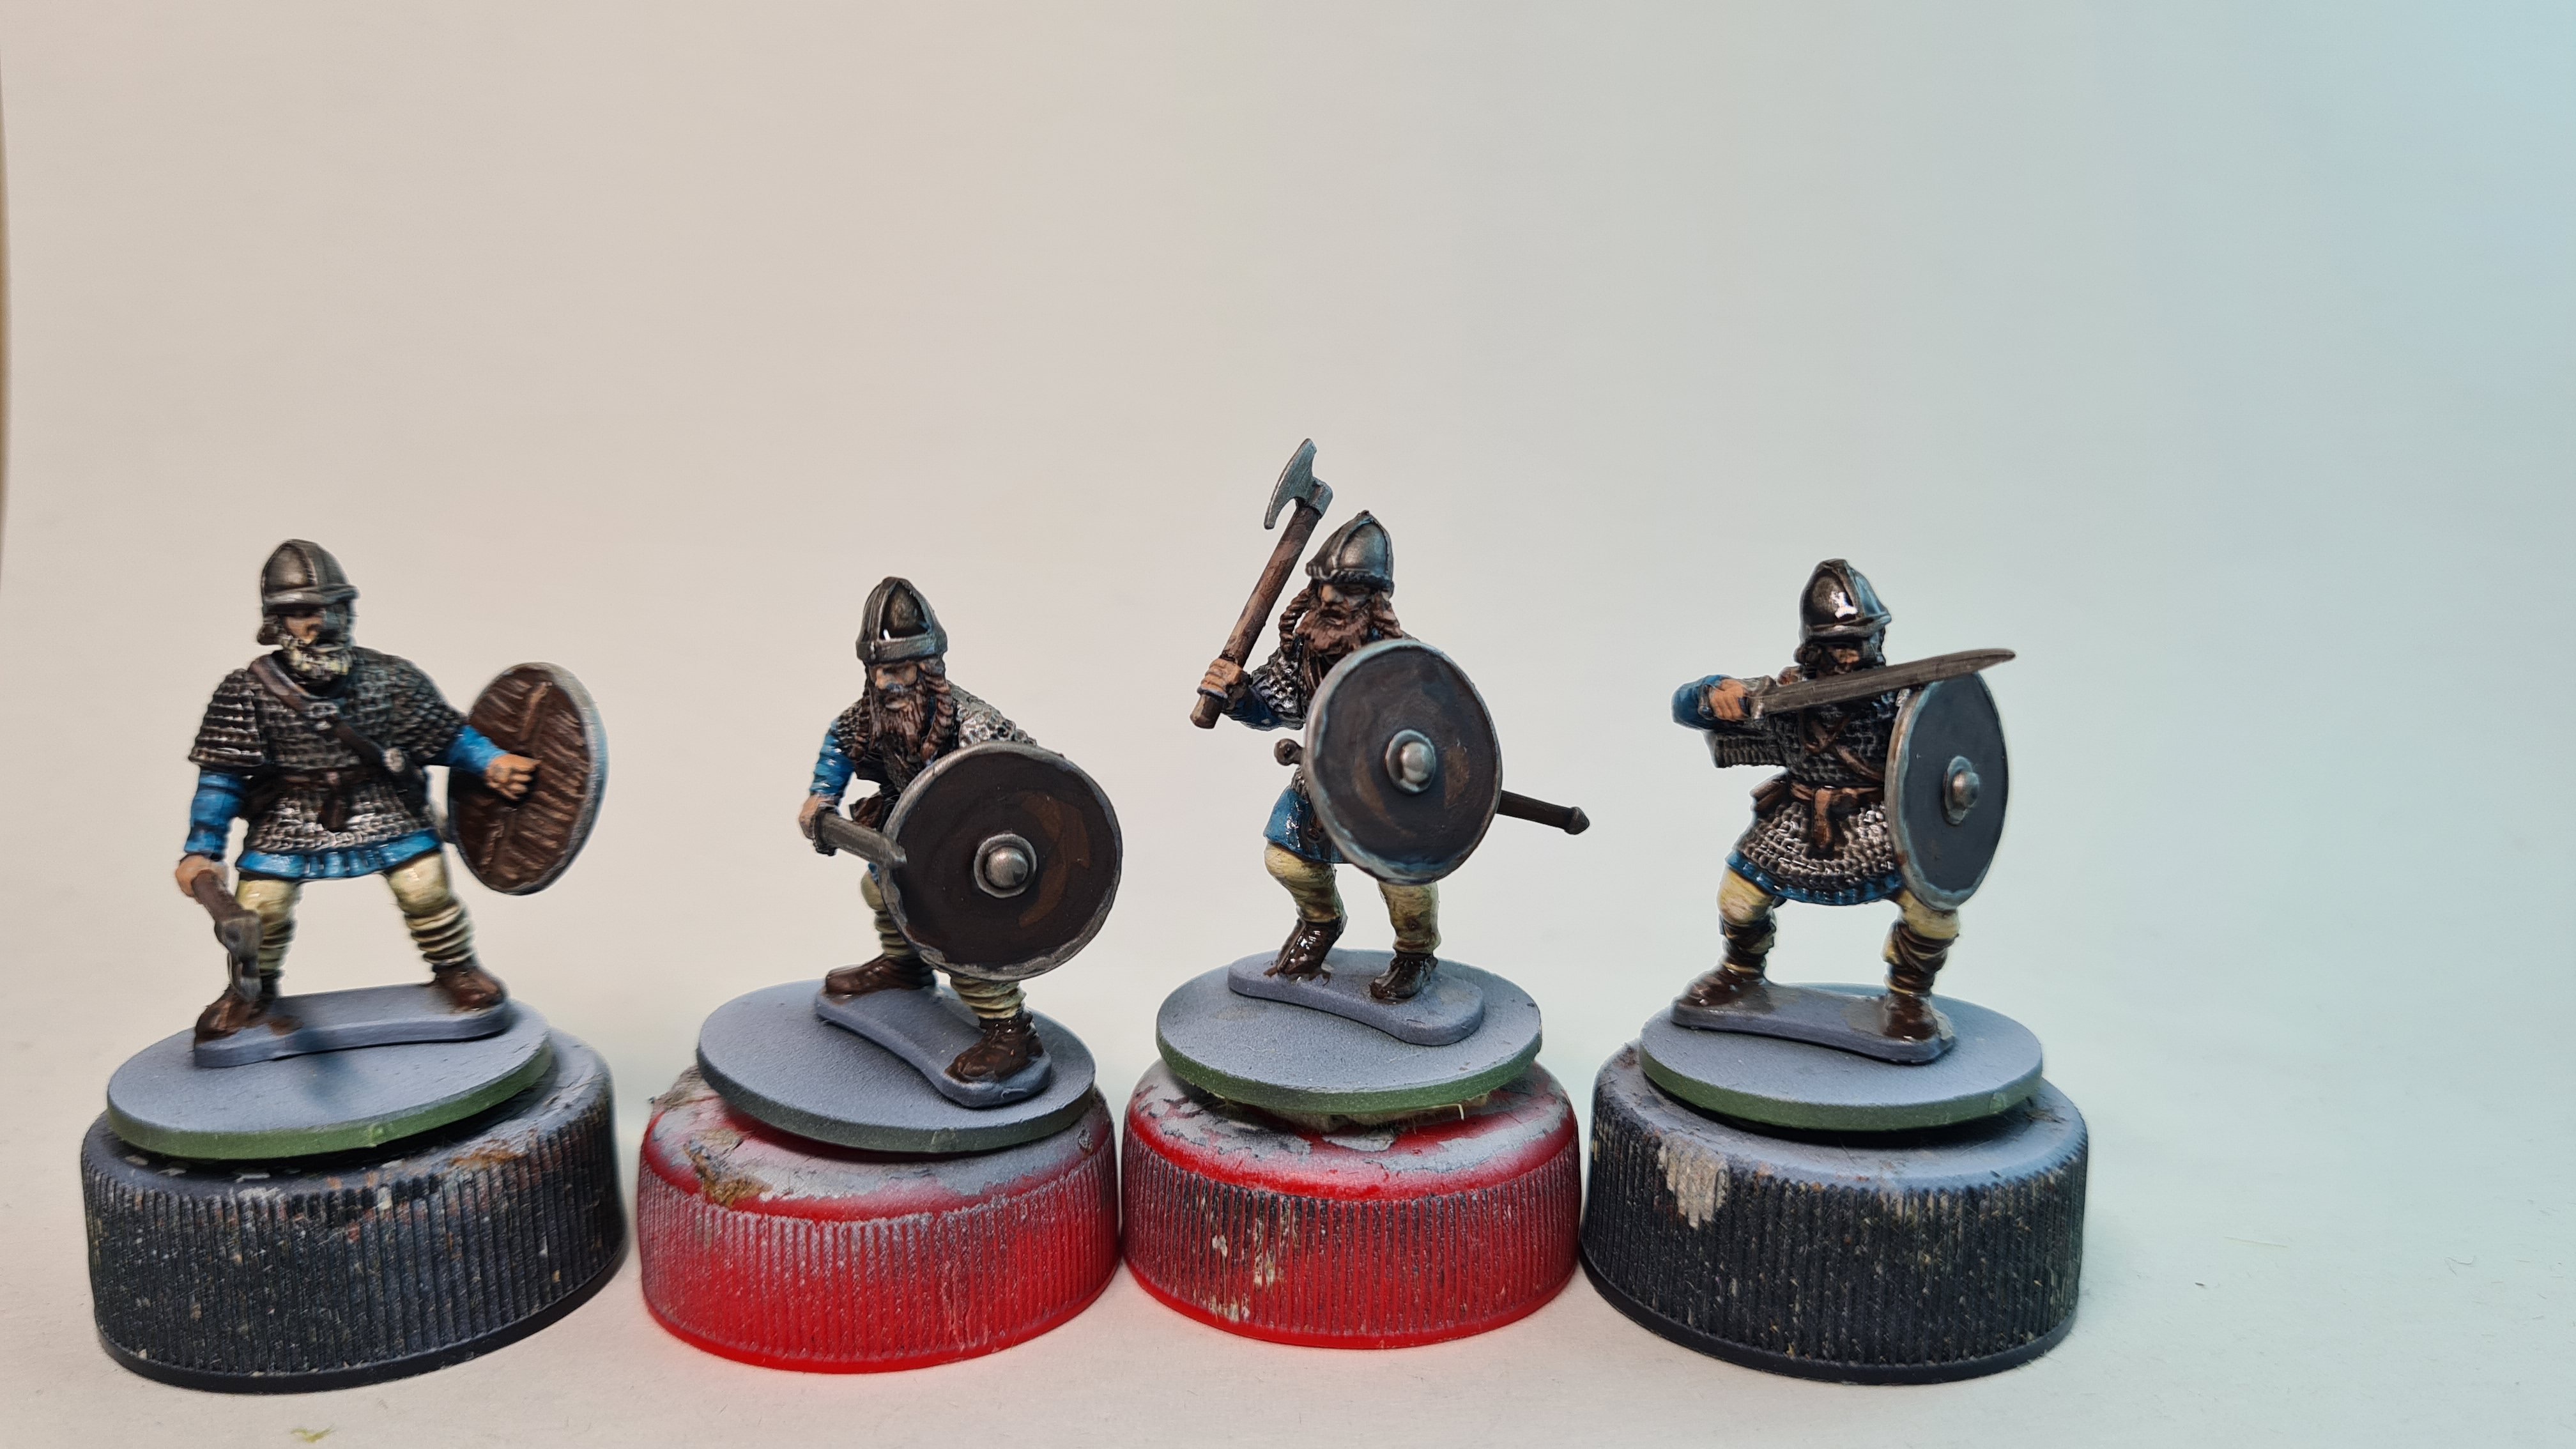
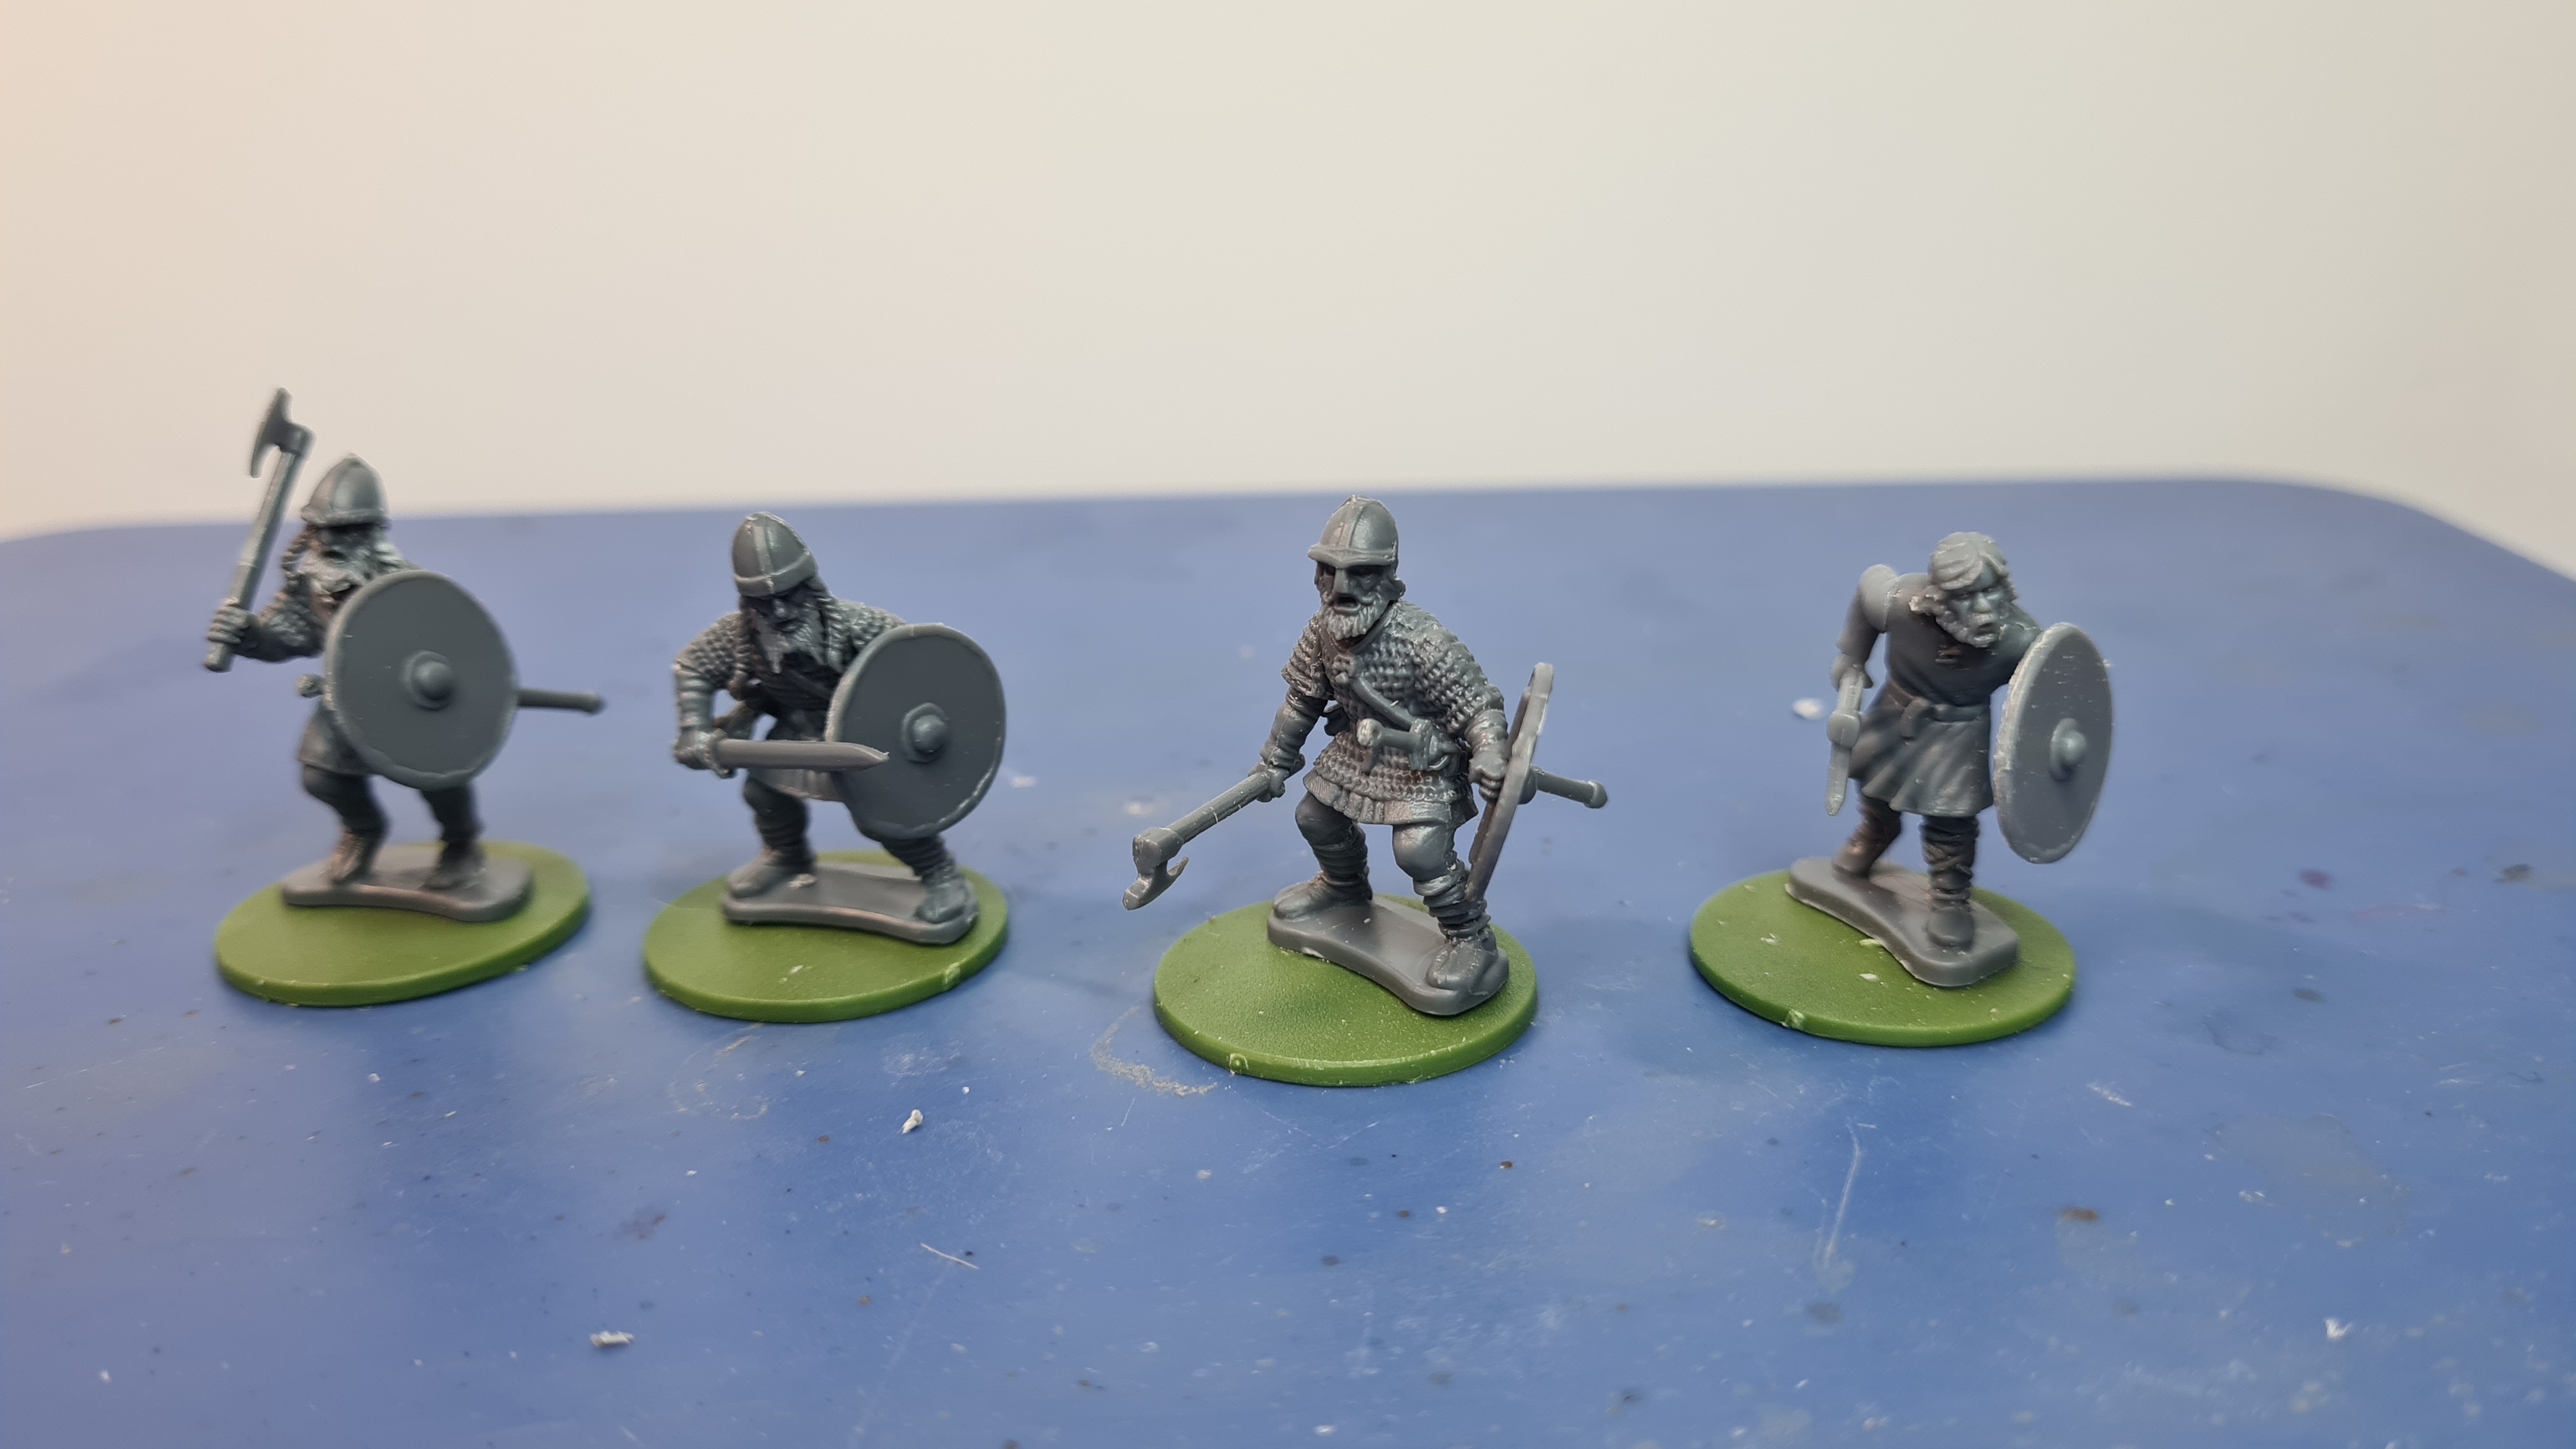
So after letting the primer dry it was time to start painting. First I started with painting 4 of the Heartguard.
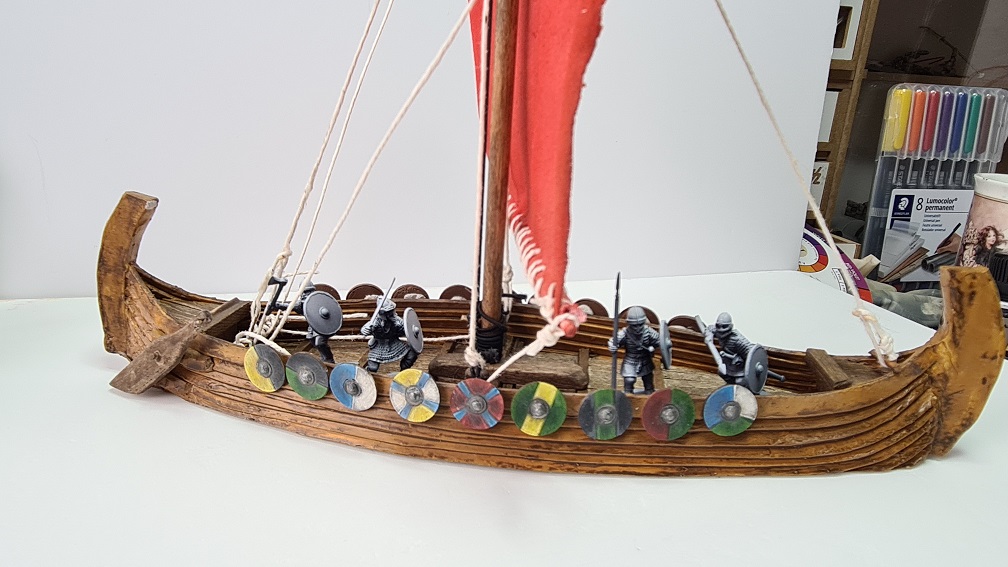
As said I wanted a color scheme that was easily identifiable from some distance so i went for a blue-offwhite color scheme.
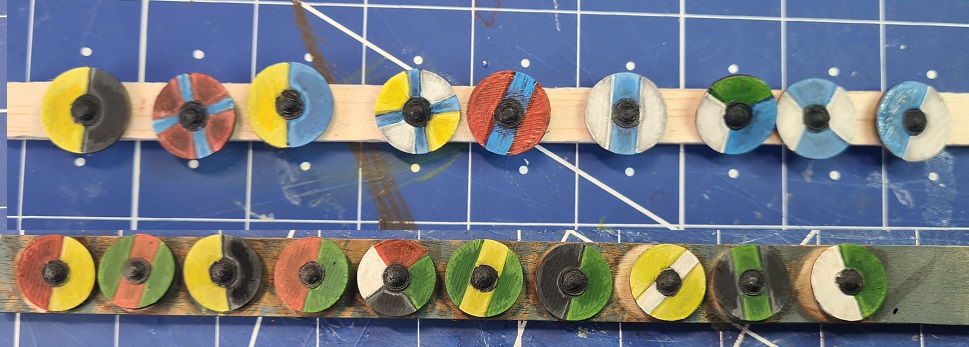
The shields I used for the longship were to be the heraldry of this warband. In my mind there would be 2 warbands. One of “Free men” this one, with all warriors having their own shields with their own colors. The other to be done in the future one, will have more of an “army feel” where a Jarl or other noble has his own raiding force.

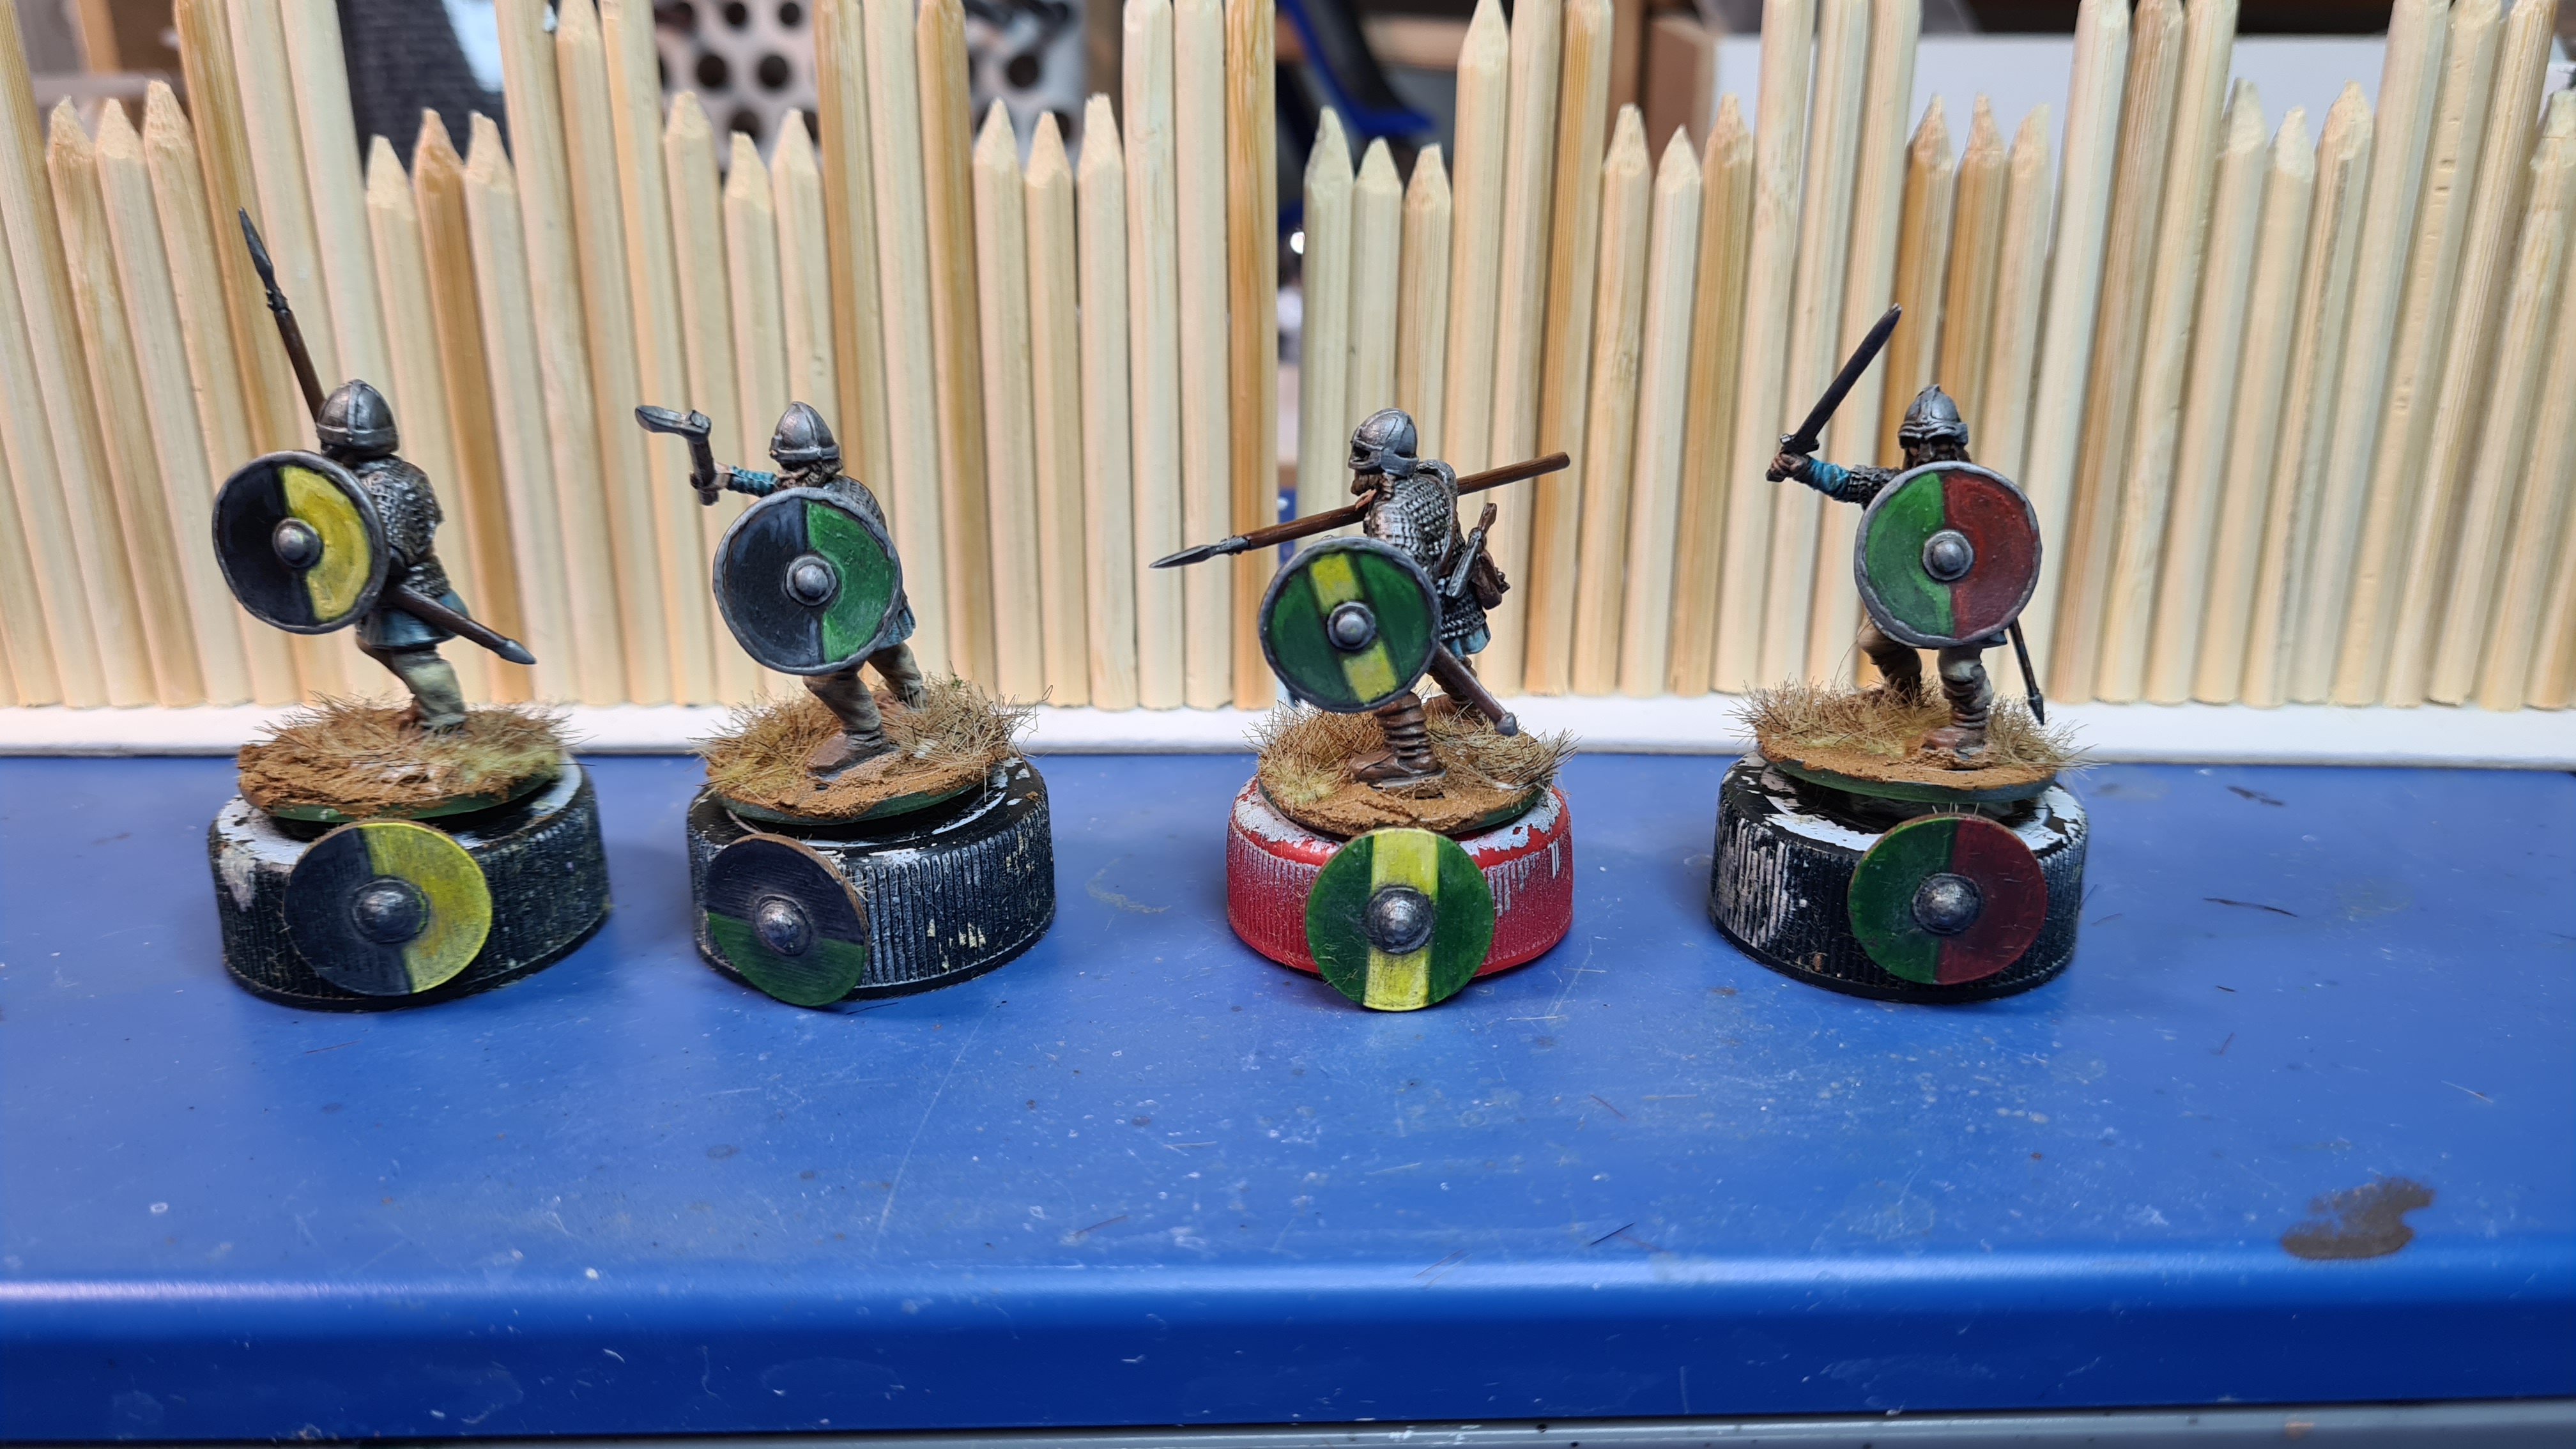

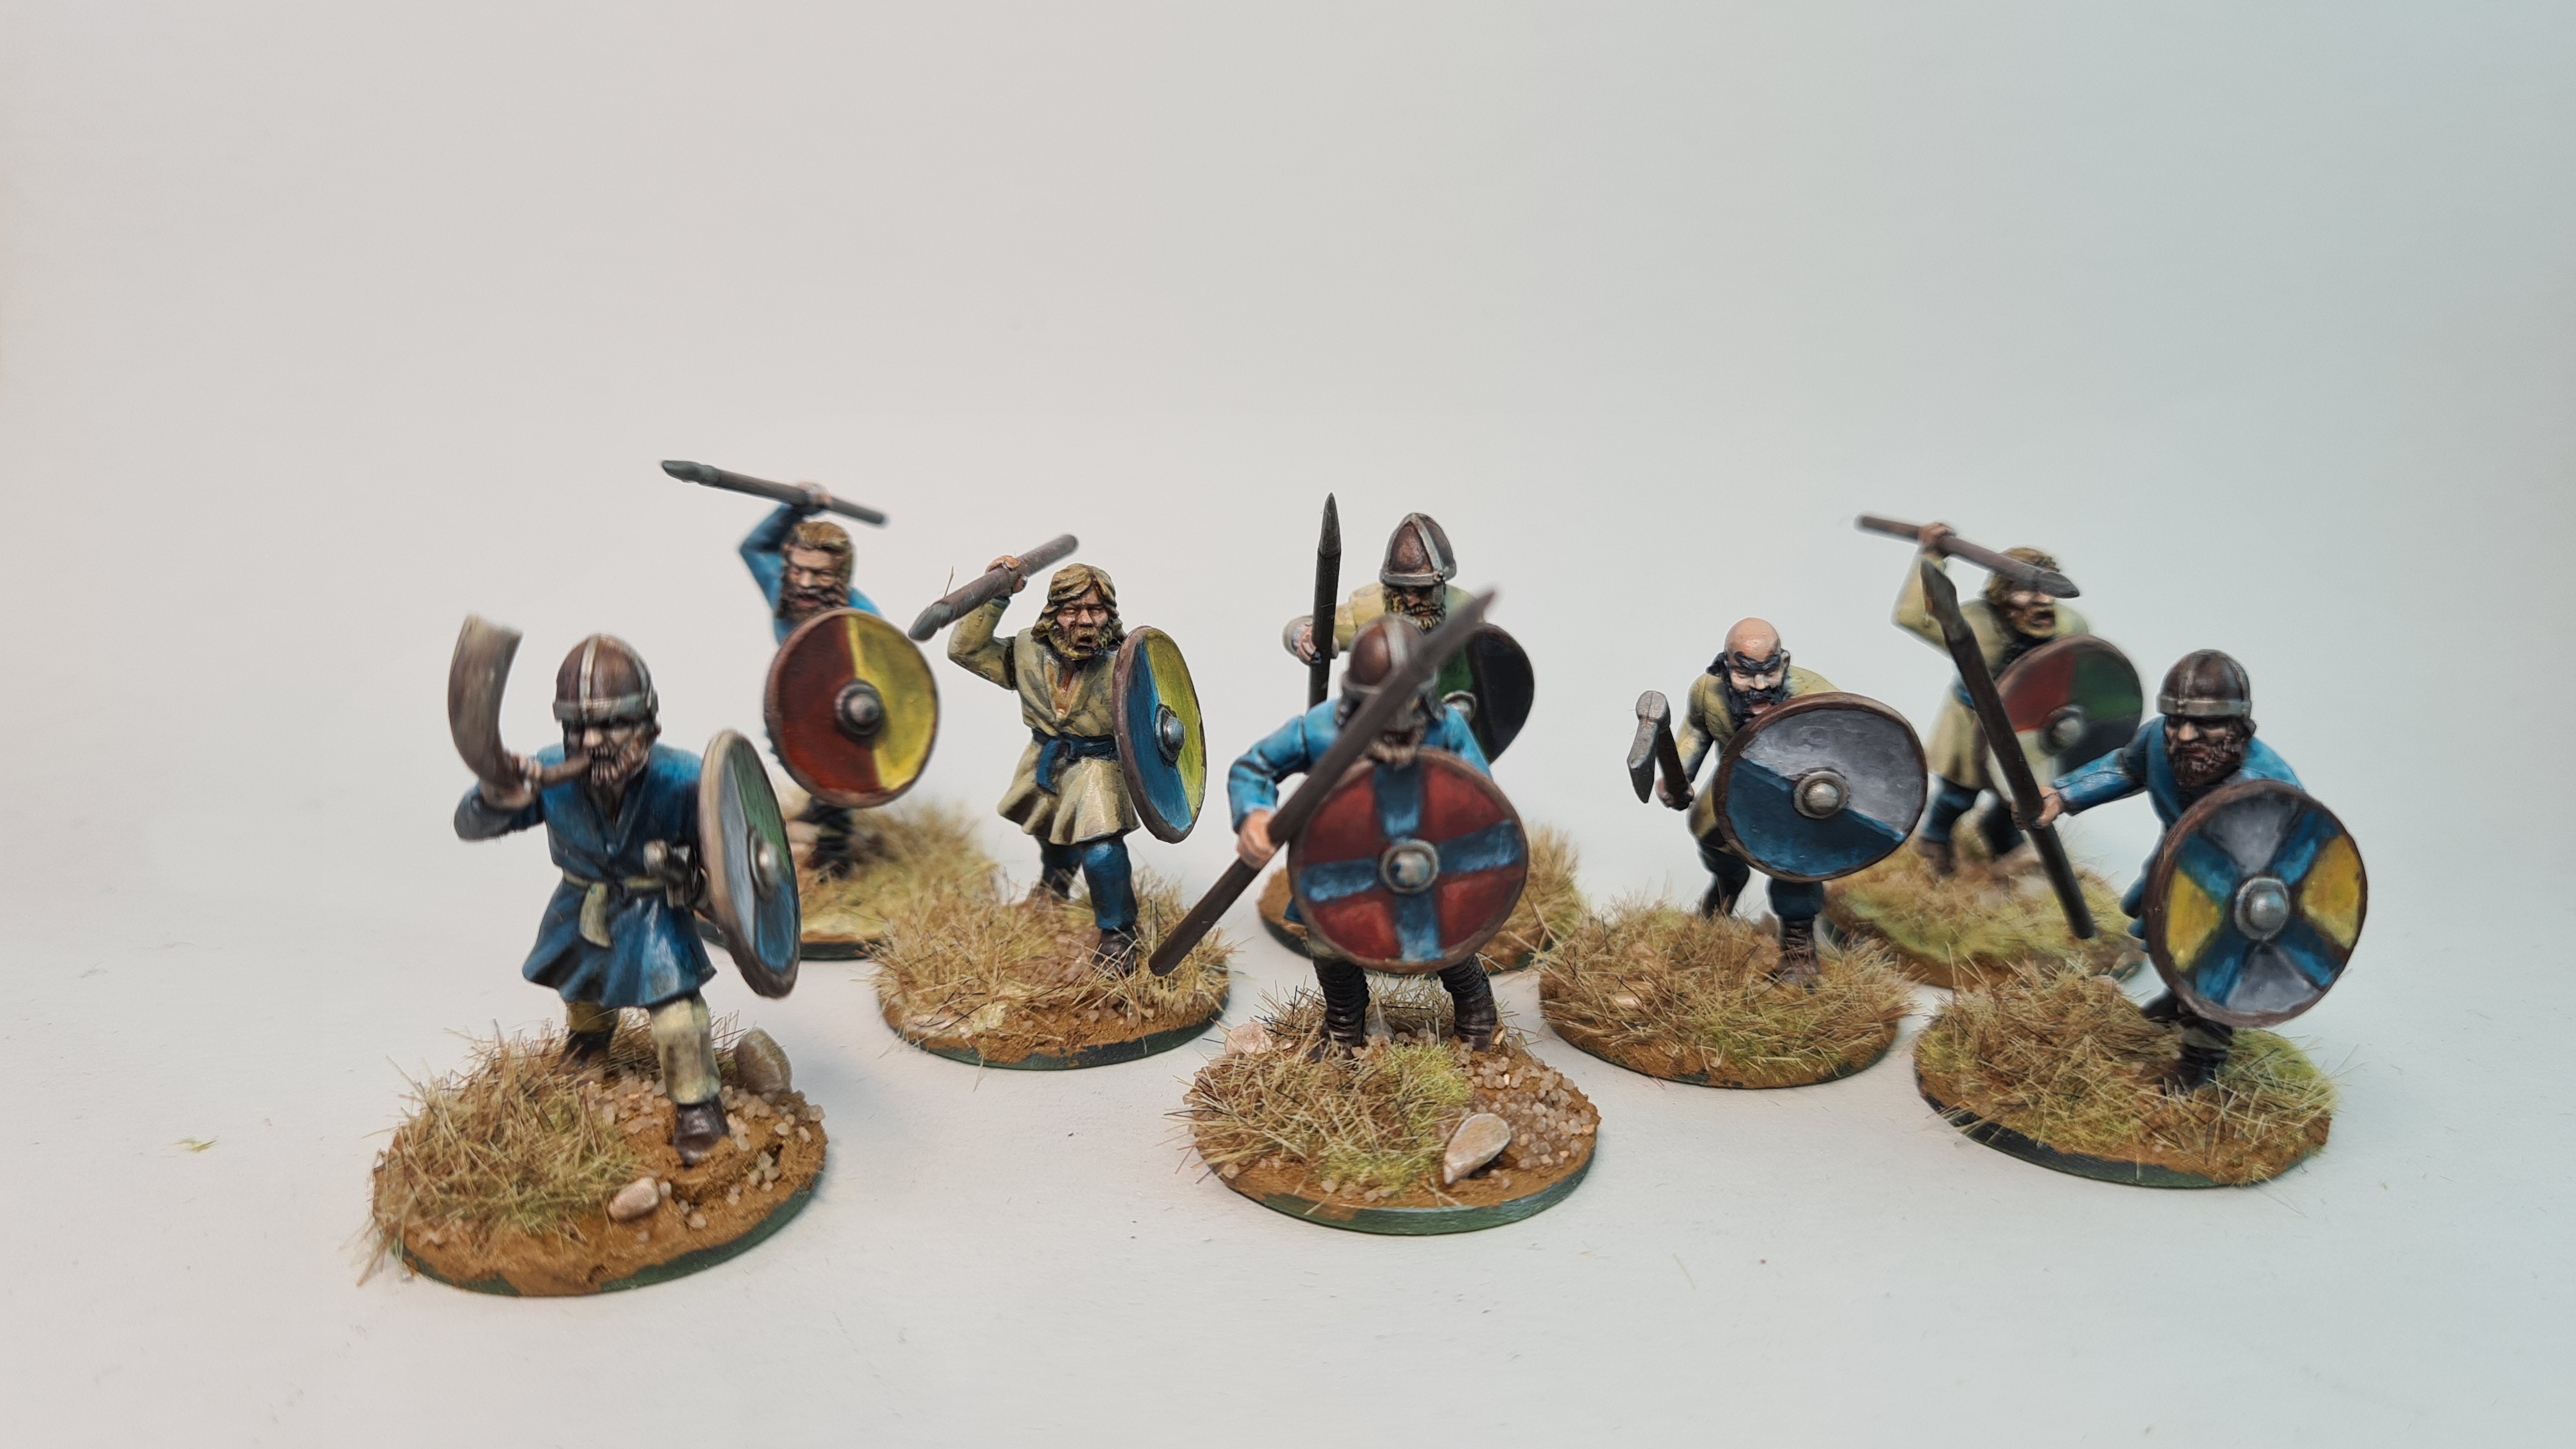
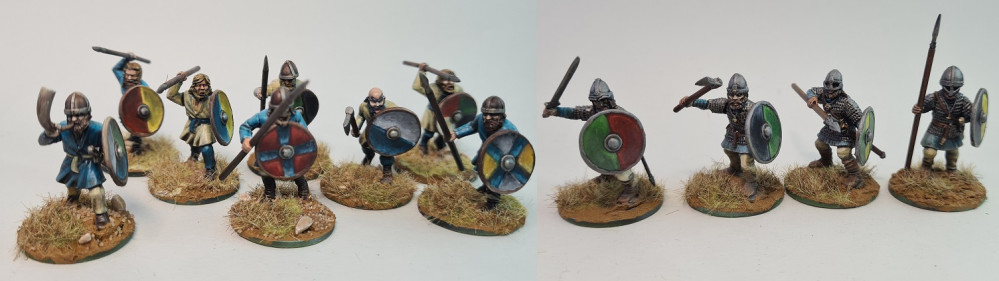
After the fishing the 1st point of Hearthguard it was on to the next unit. As i undercoated half of what i had the choice was already made and i started with painting my Warriors. To see what the optimal number was to batch paint I first wanted to paint all 8 at the same time, but that seemed like to much. So i settled on painting 5 in this go (and than have 3 remaining for this warrior unit afterwards)
Once again using the shields i made for the longboat as inspiration for these shields. Also getting more joy out of painting the shields than before. So I probably spent more time on it that i should have. Than again the most important thing is that one should enjoy oneself when busy with their hobby and that was one thing i surely was doing, enjoying myself.
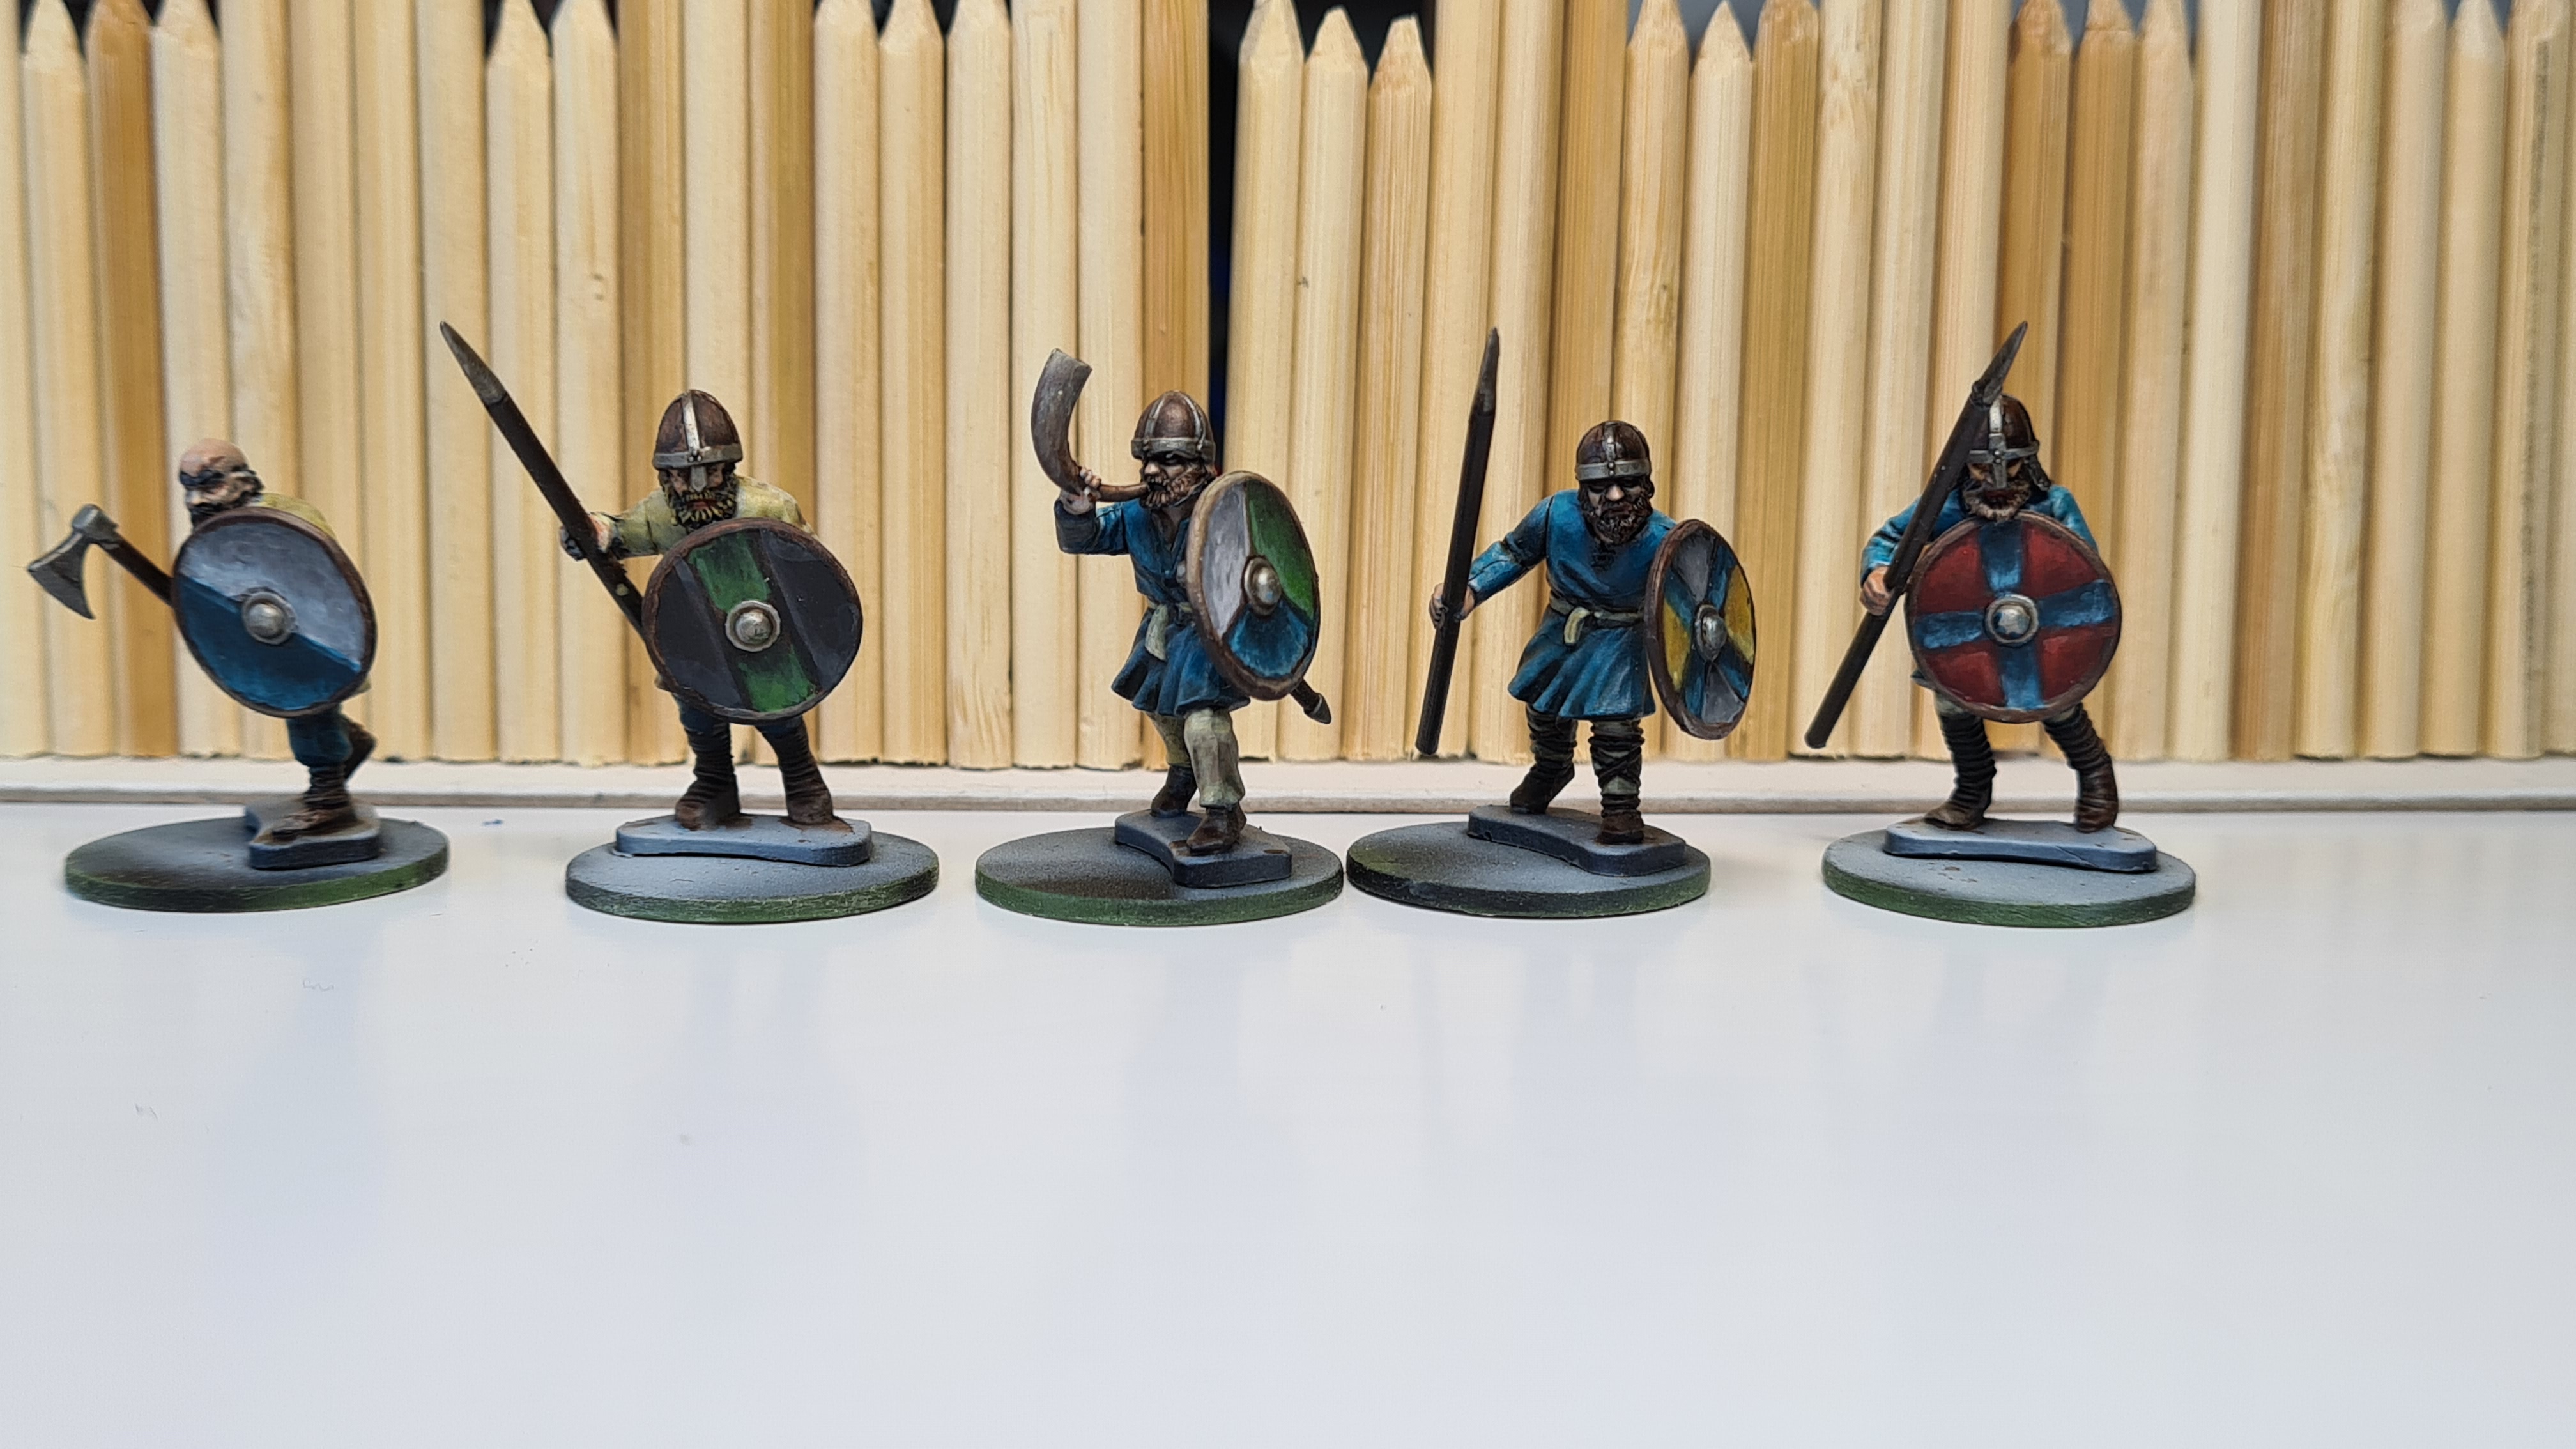
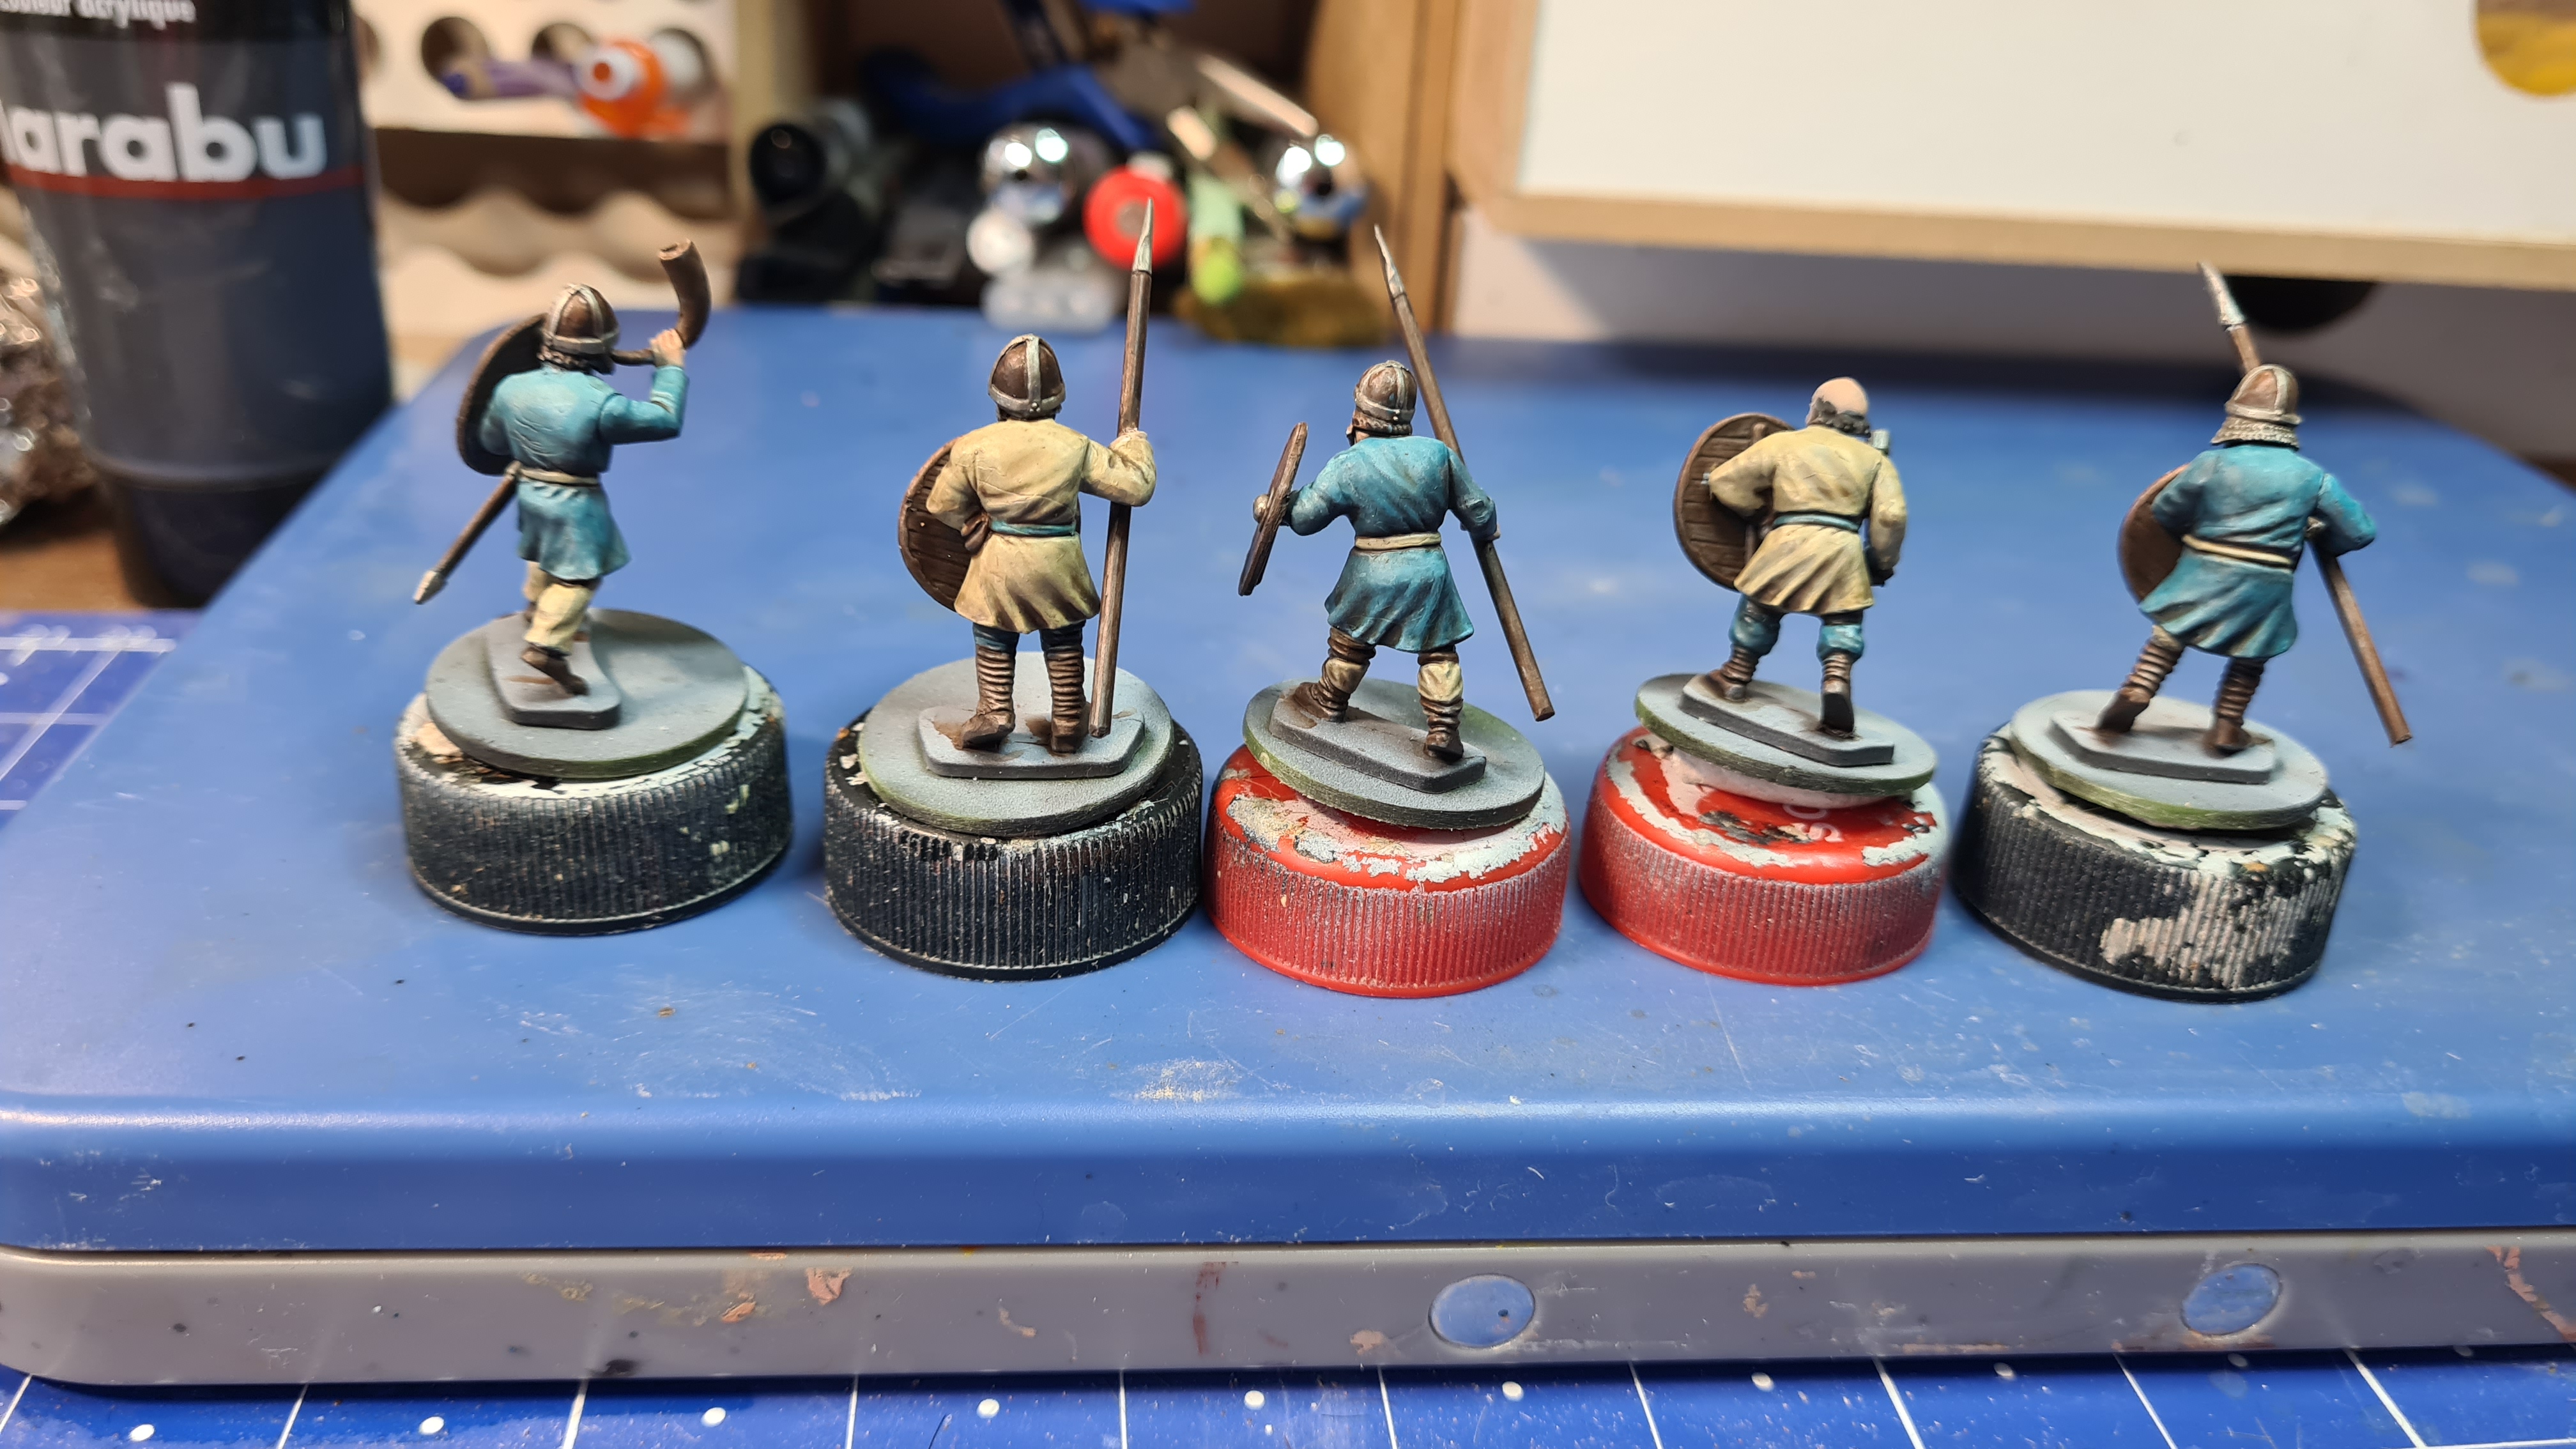

After the first 5 were painted and based it was up to the last 3 of the Warrior unit. Having some examples to see how you want to paint something does help a lot. So having some painted Warriors already did speed up the painting of the last 3. And to be honest i am quiet happy with how they look. I always feel a lot of other people make things way better than I do, and they really do! But still I feel that despite that one can still be proud of his own achievements.