


Know No Fear – Death Guard


Recommendations: 61
About the Project
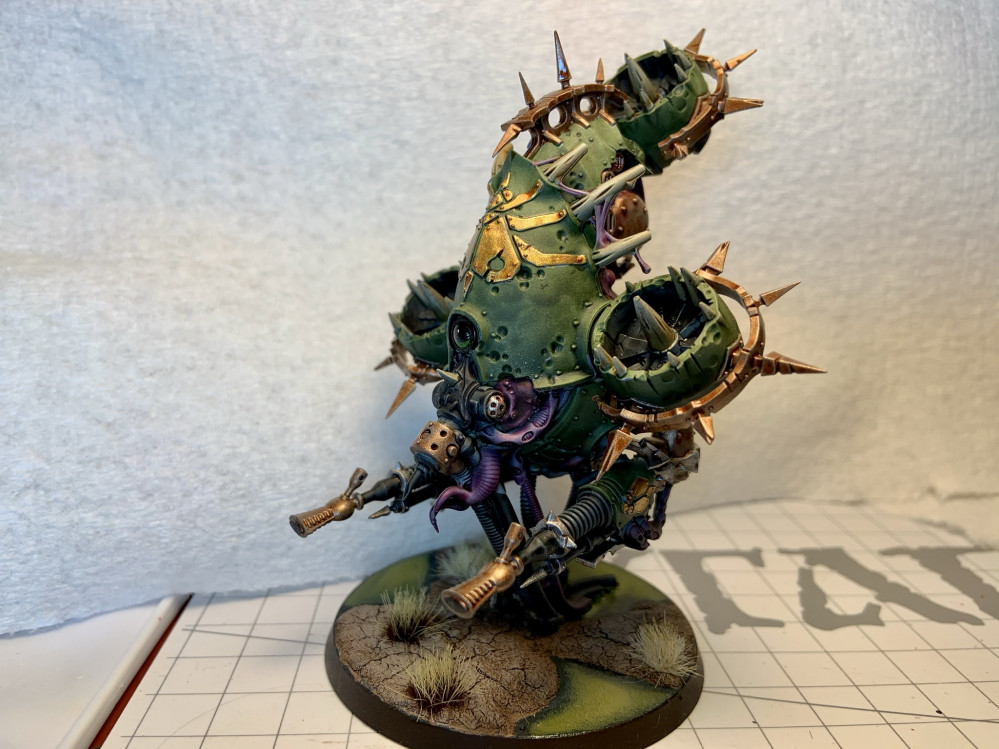
Hey everyone :). This project will be focused on finishing the Death Guard portion of the Know No Fear starter set for WH40K. I acquired these a while back and I'm now putting in a concerted effort to return to the hobby. My goal here is not simply to churn out painted models as quickly as possible...nor is it to spend untold hours on creating that 'masterpiece' for a competition. Rather, I'd like to use a variety of techniques to get the most 'bang' for the buck (the best results achievable with modest effort). For this reason I'll be using a variety of techniques where appropriate including: - Zenithal priming - Contrast, base/layer/highlight, and dry brushing painting methods - Variable sheen - Various basing techniques - 'Technical' commercial and DIY products I hope to achieve similar results to the Foetid Bloat-Drone in the header :).
Related Game: Warhammer 40,000
Related Company: Games Workshop
Related Genre: Science Fiction
This Project is Active
Magnetize!
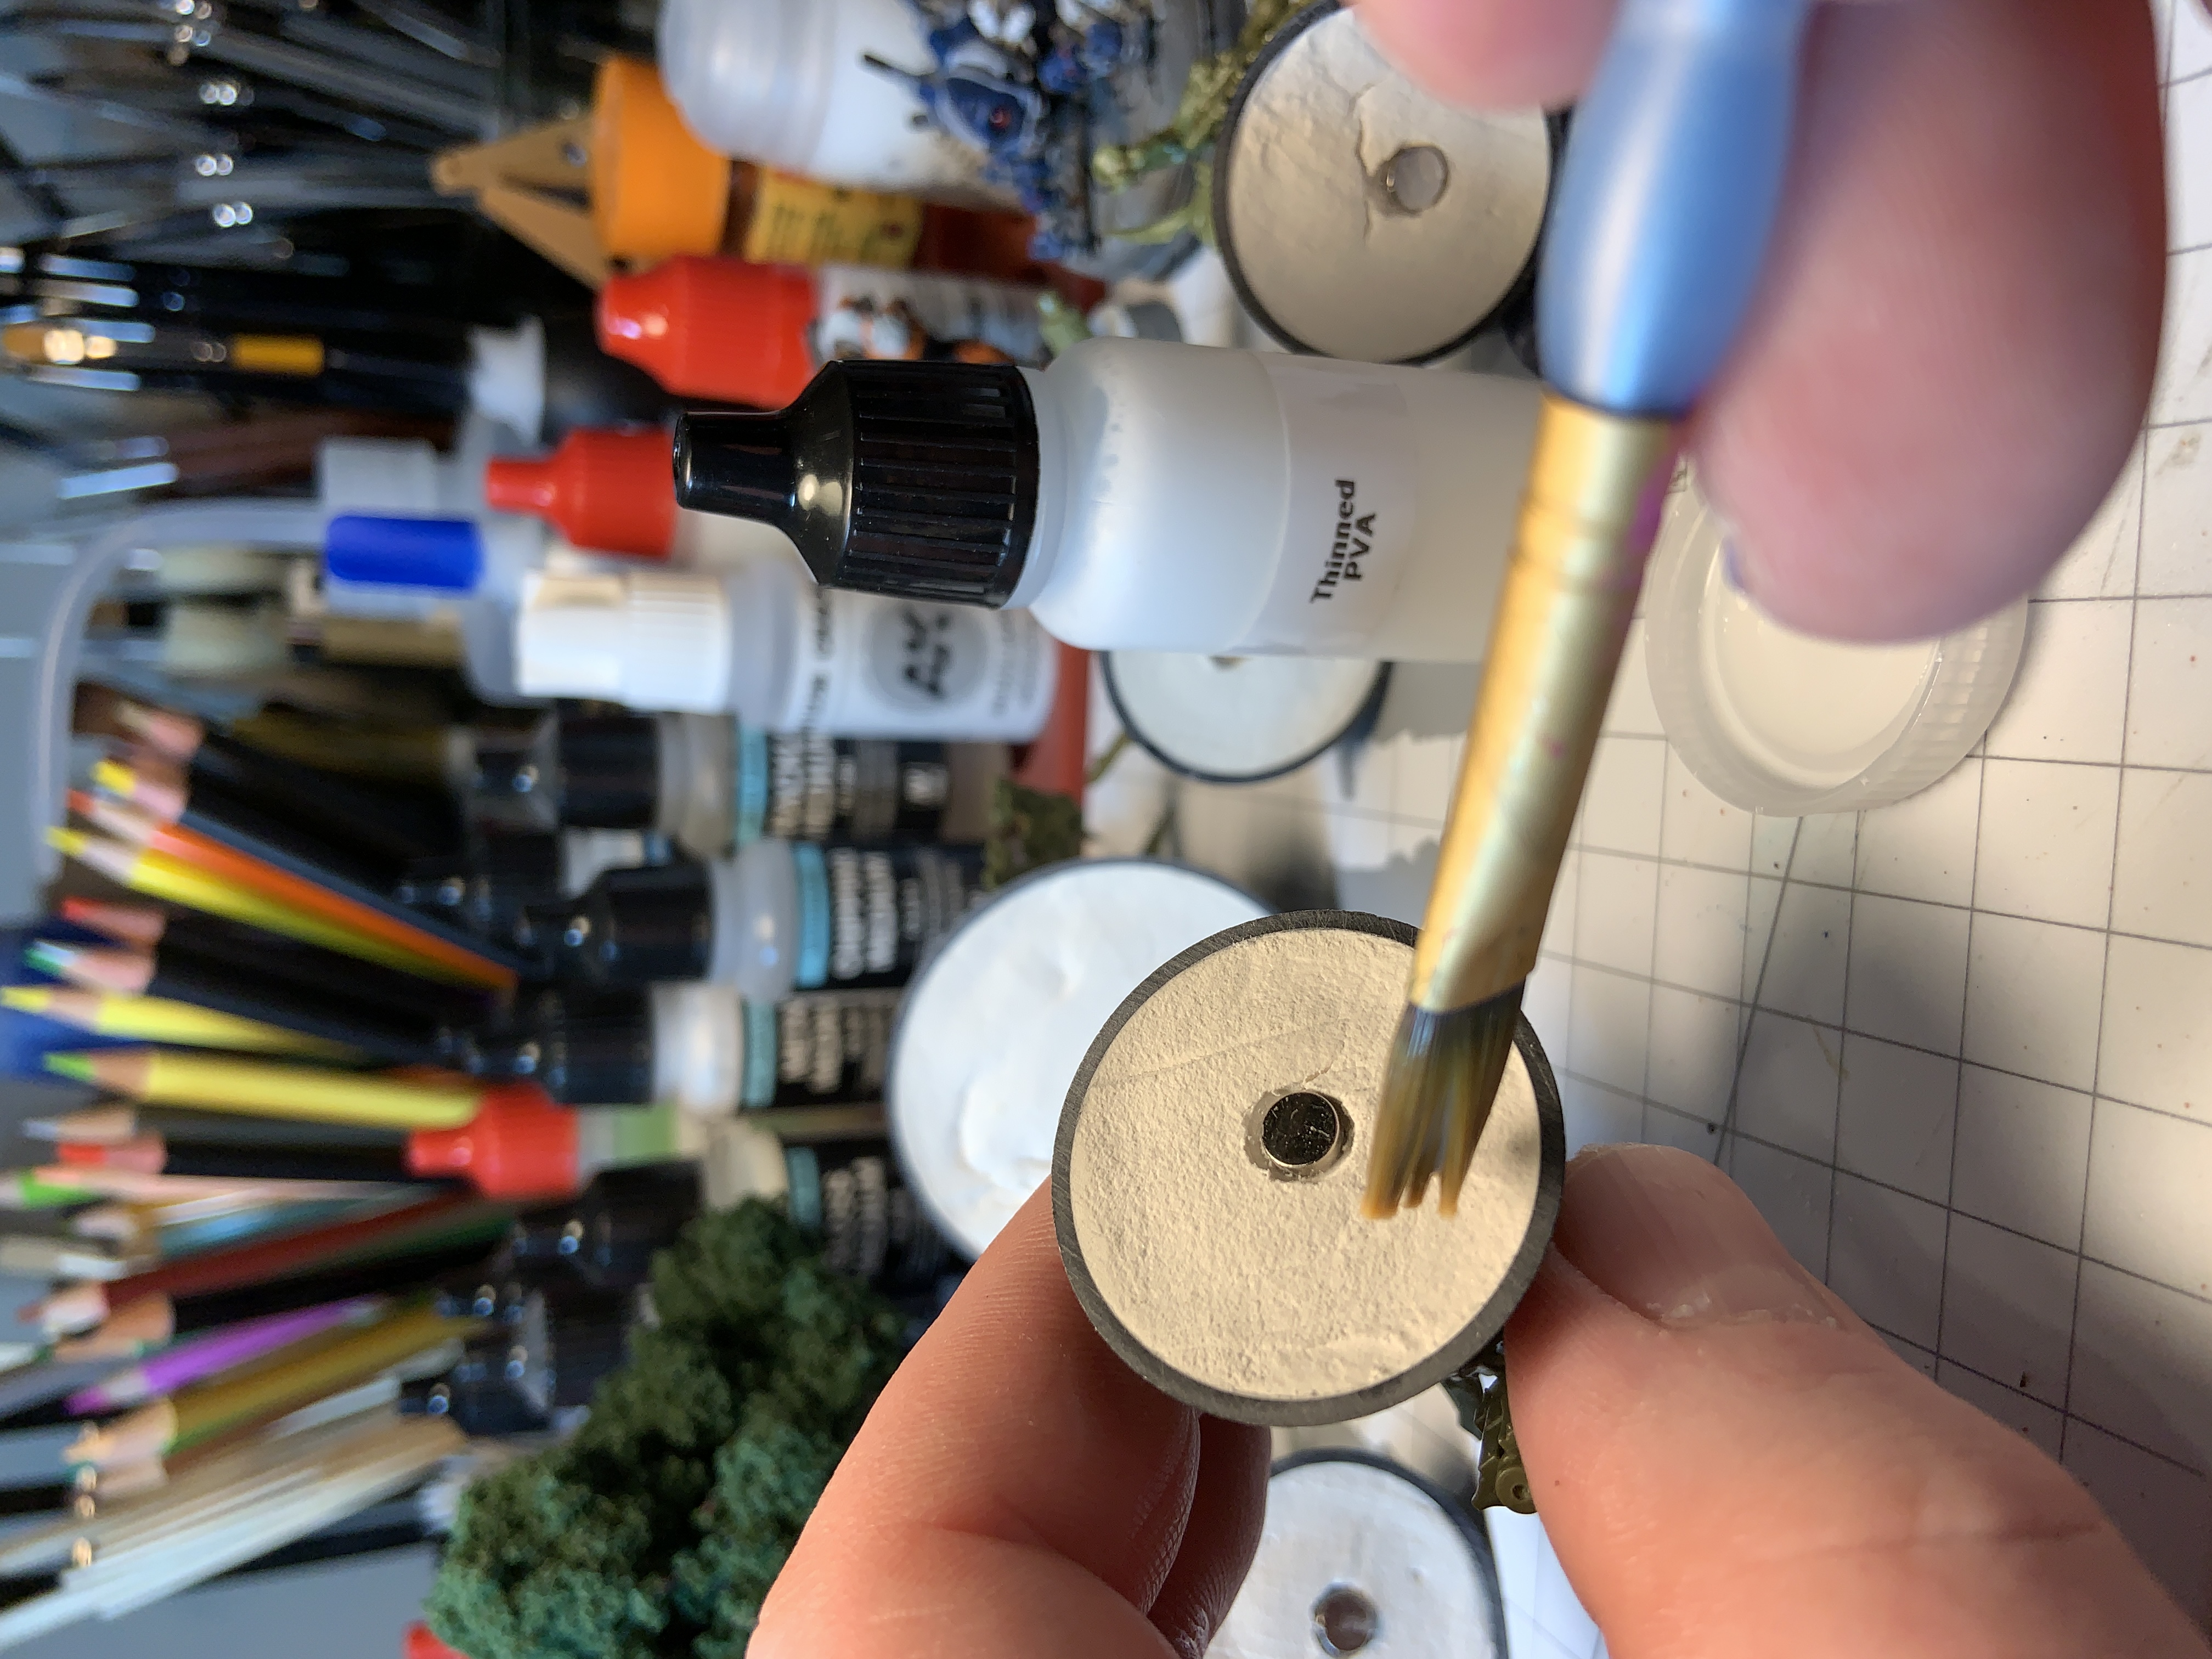
Starting with the Lord of Contagion and the Plague Marines, the first thing I’ll do is something I’ve gotten in the habit of…adding weight to and magnetizing the bases. My latest technique is to fill in the void of the bases with spackle (the dry time indicating type is particularly useful…it turns white when hardened). This probably doesn’t provide as much weight as gluing in a coin etc., but it does make it easier to add a magnet afterwards.
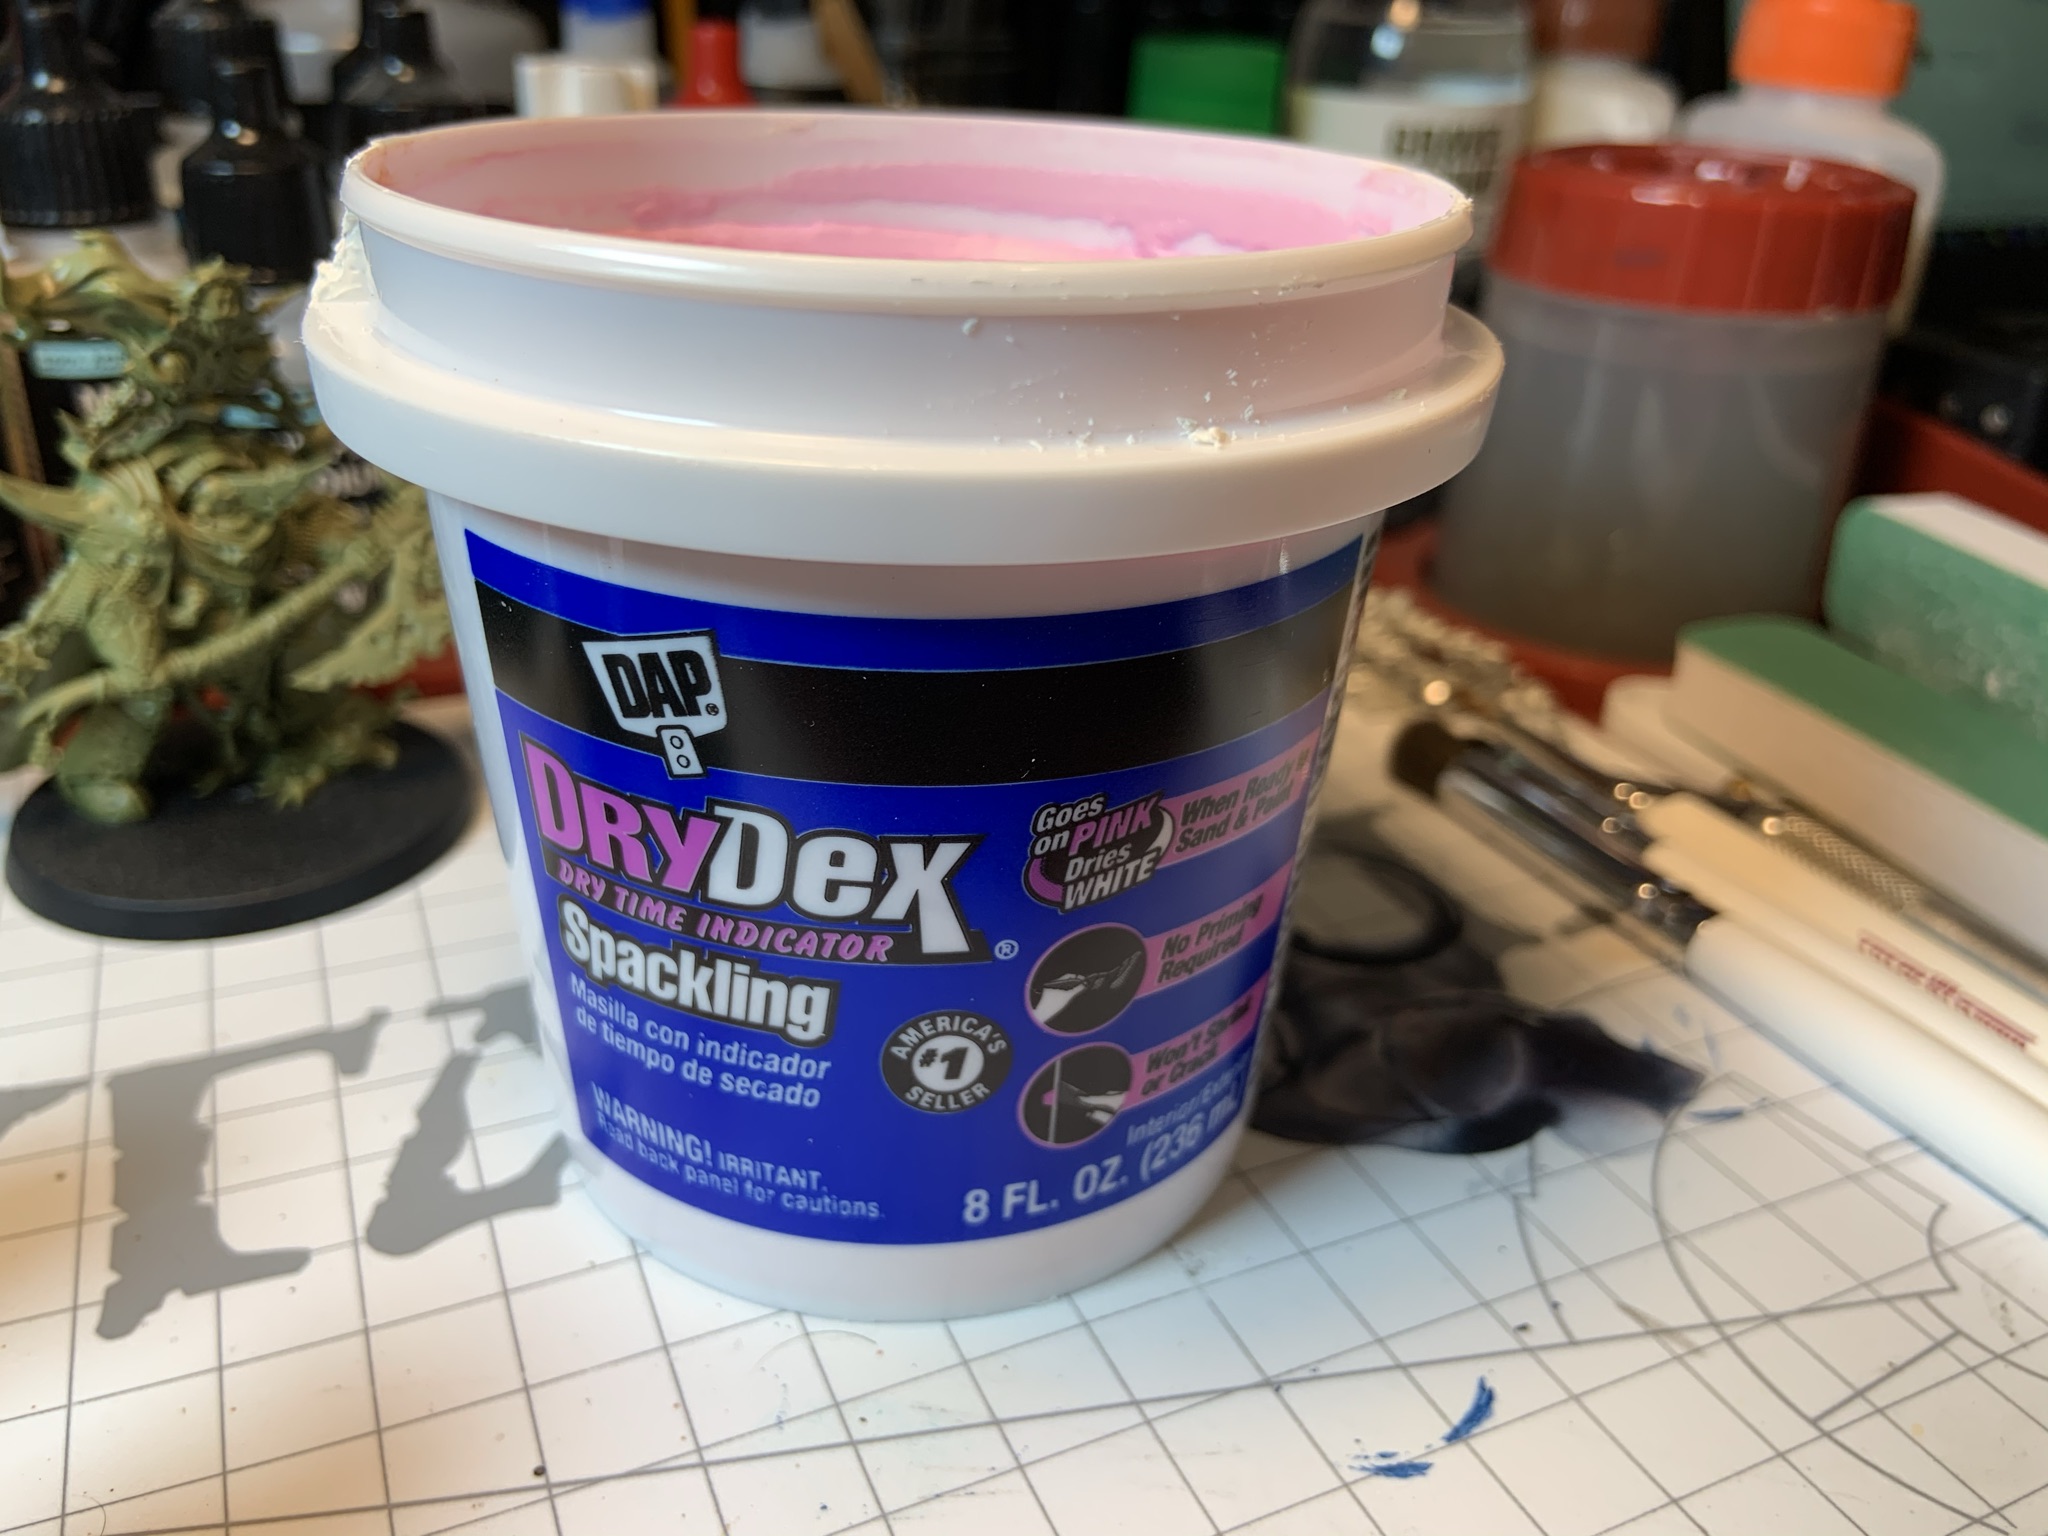
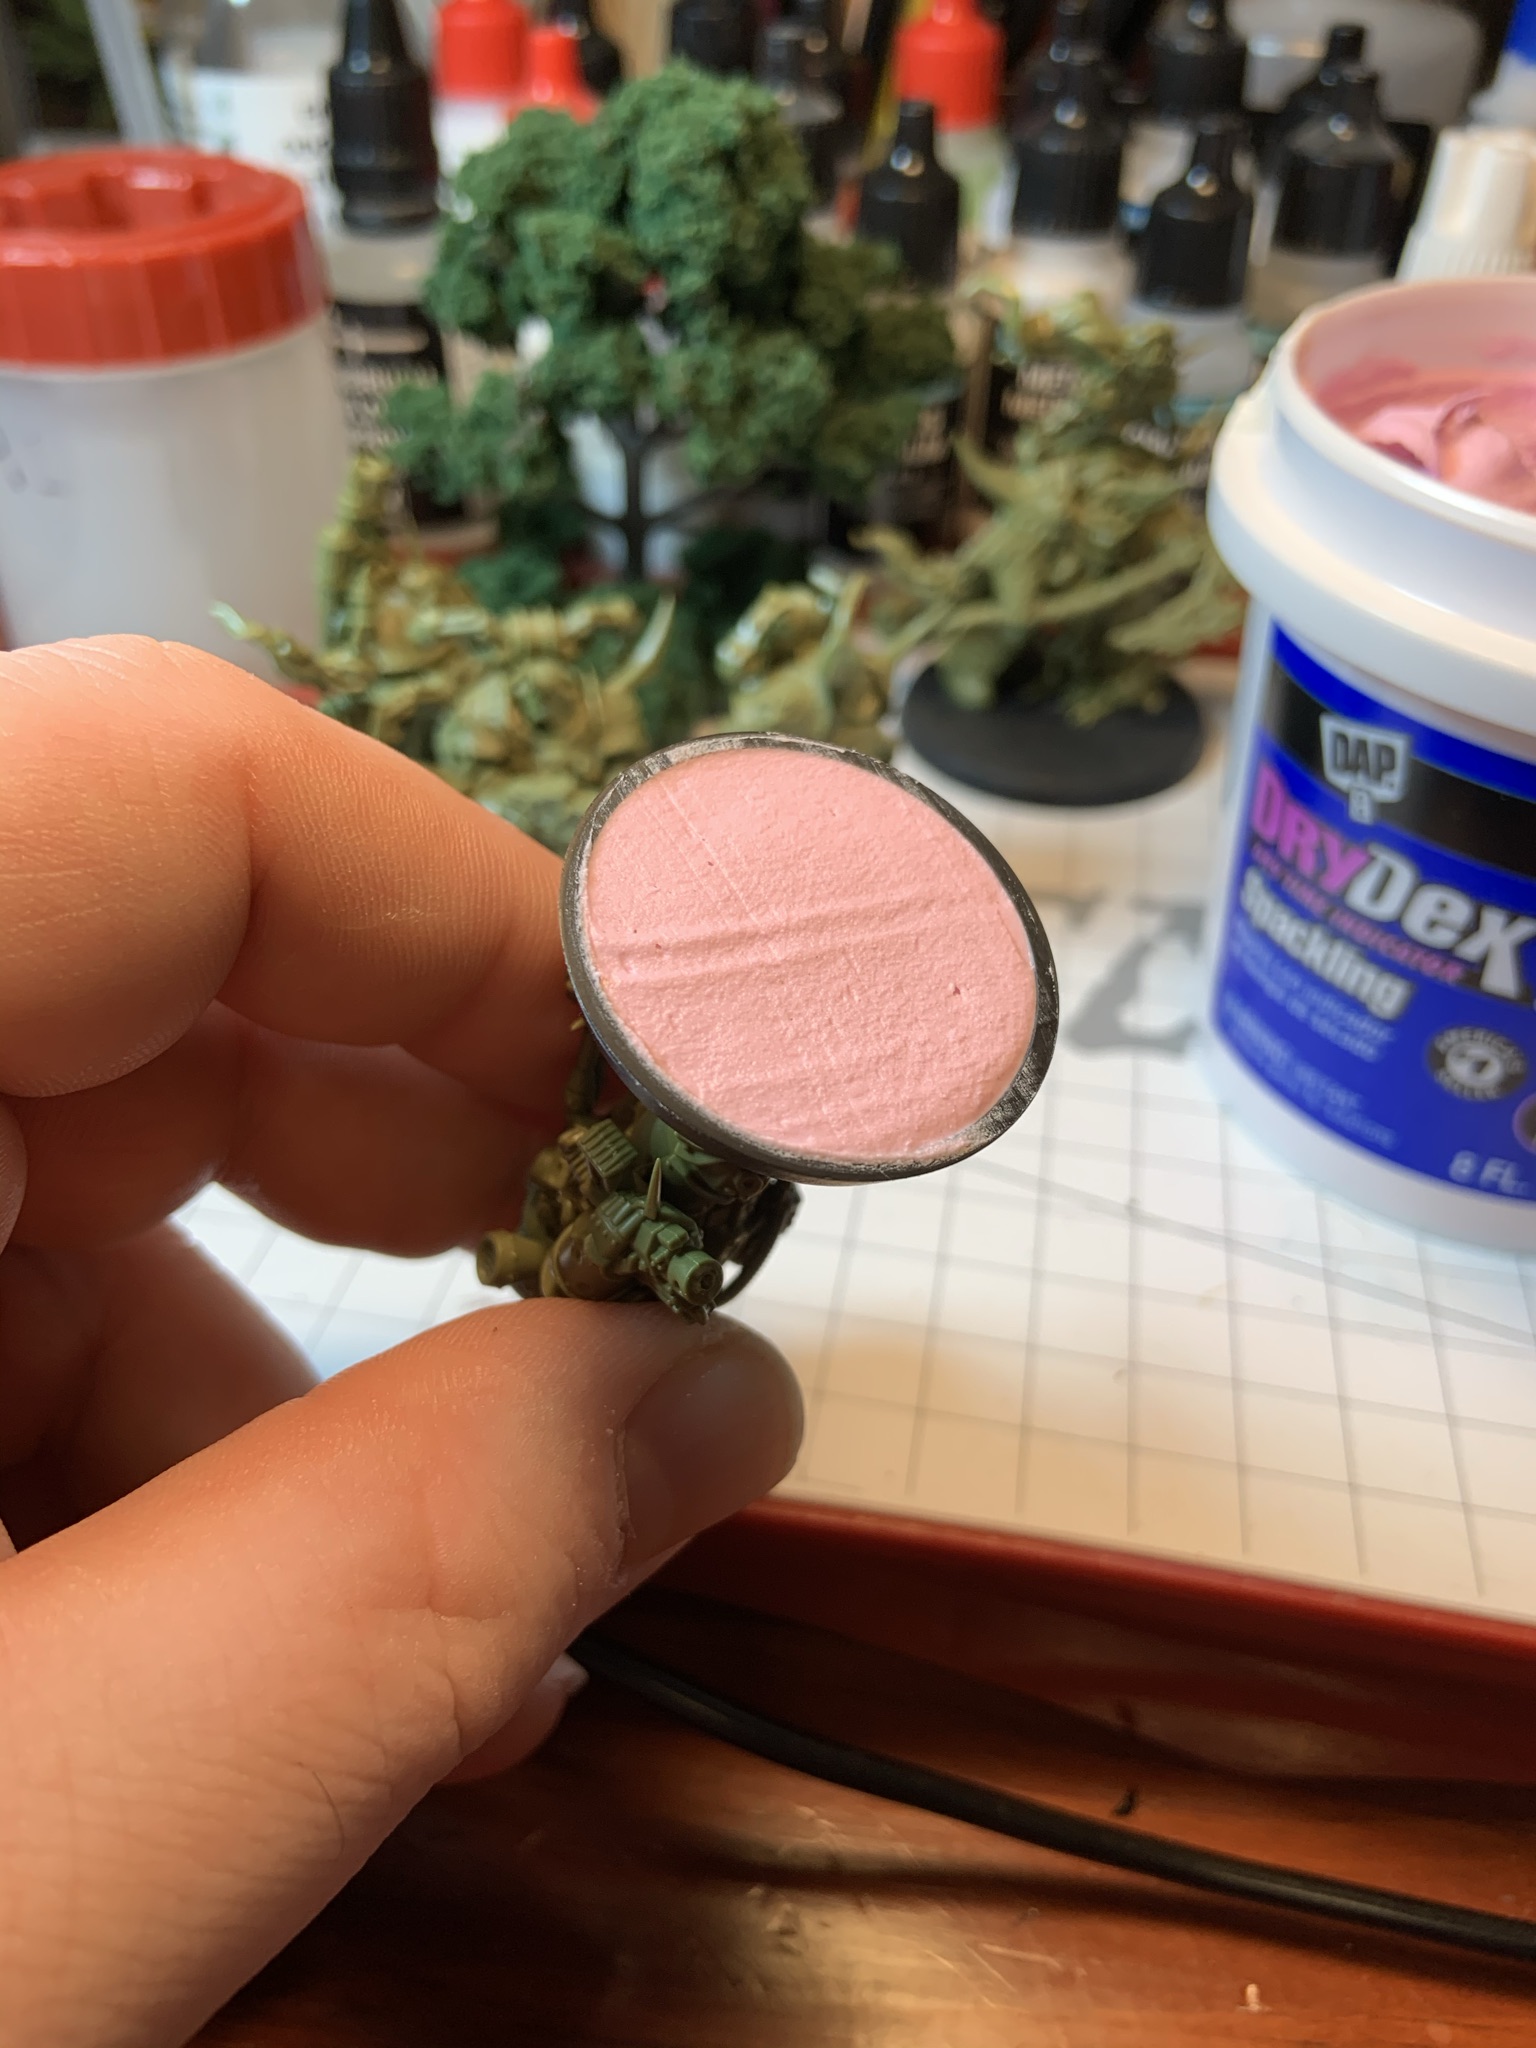

After a while the spackle will have dried (some cracking is normal, but won’t matter after the next step).
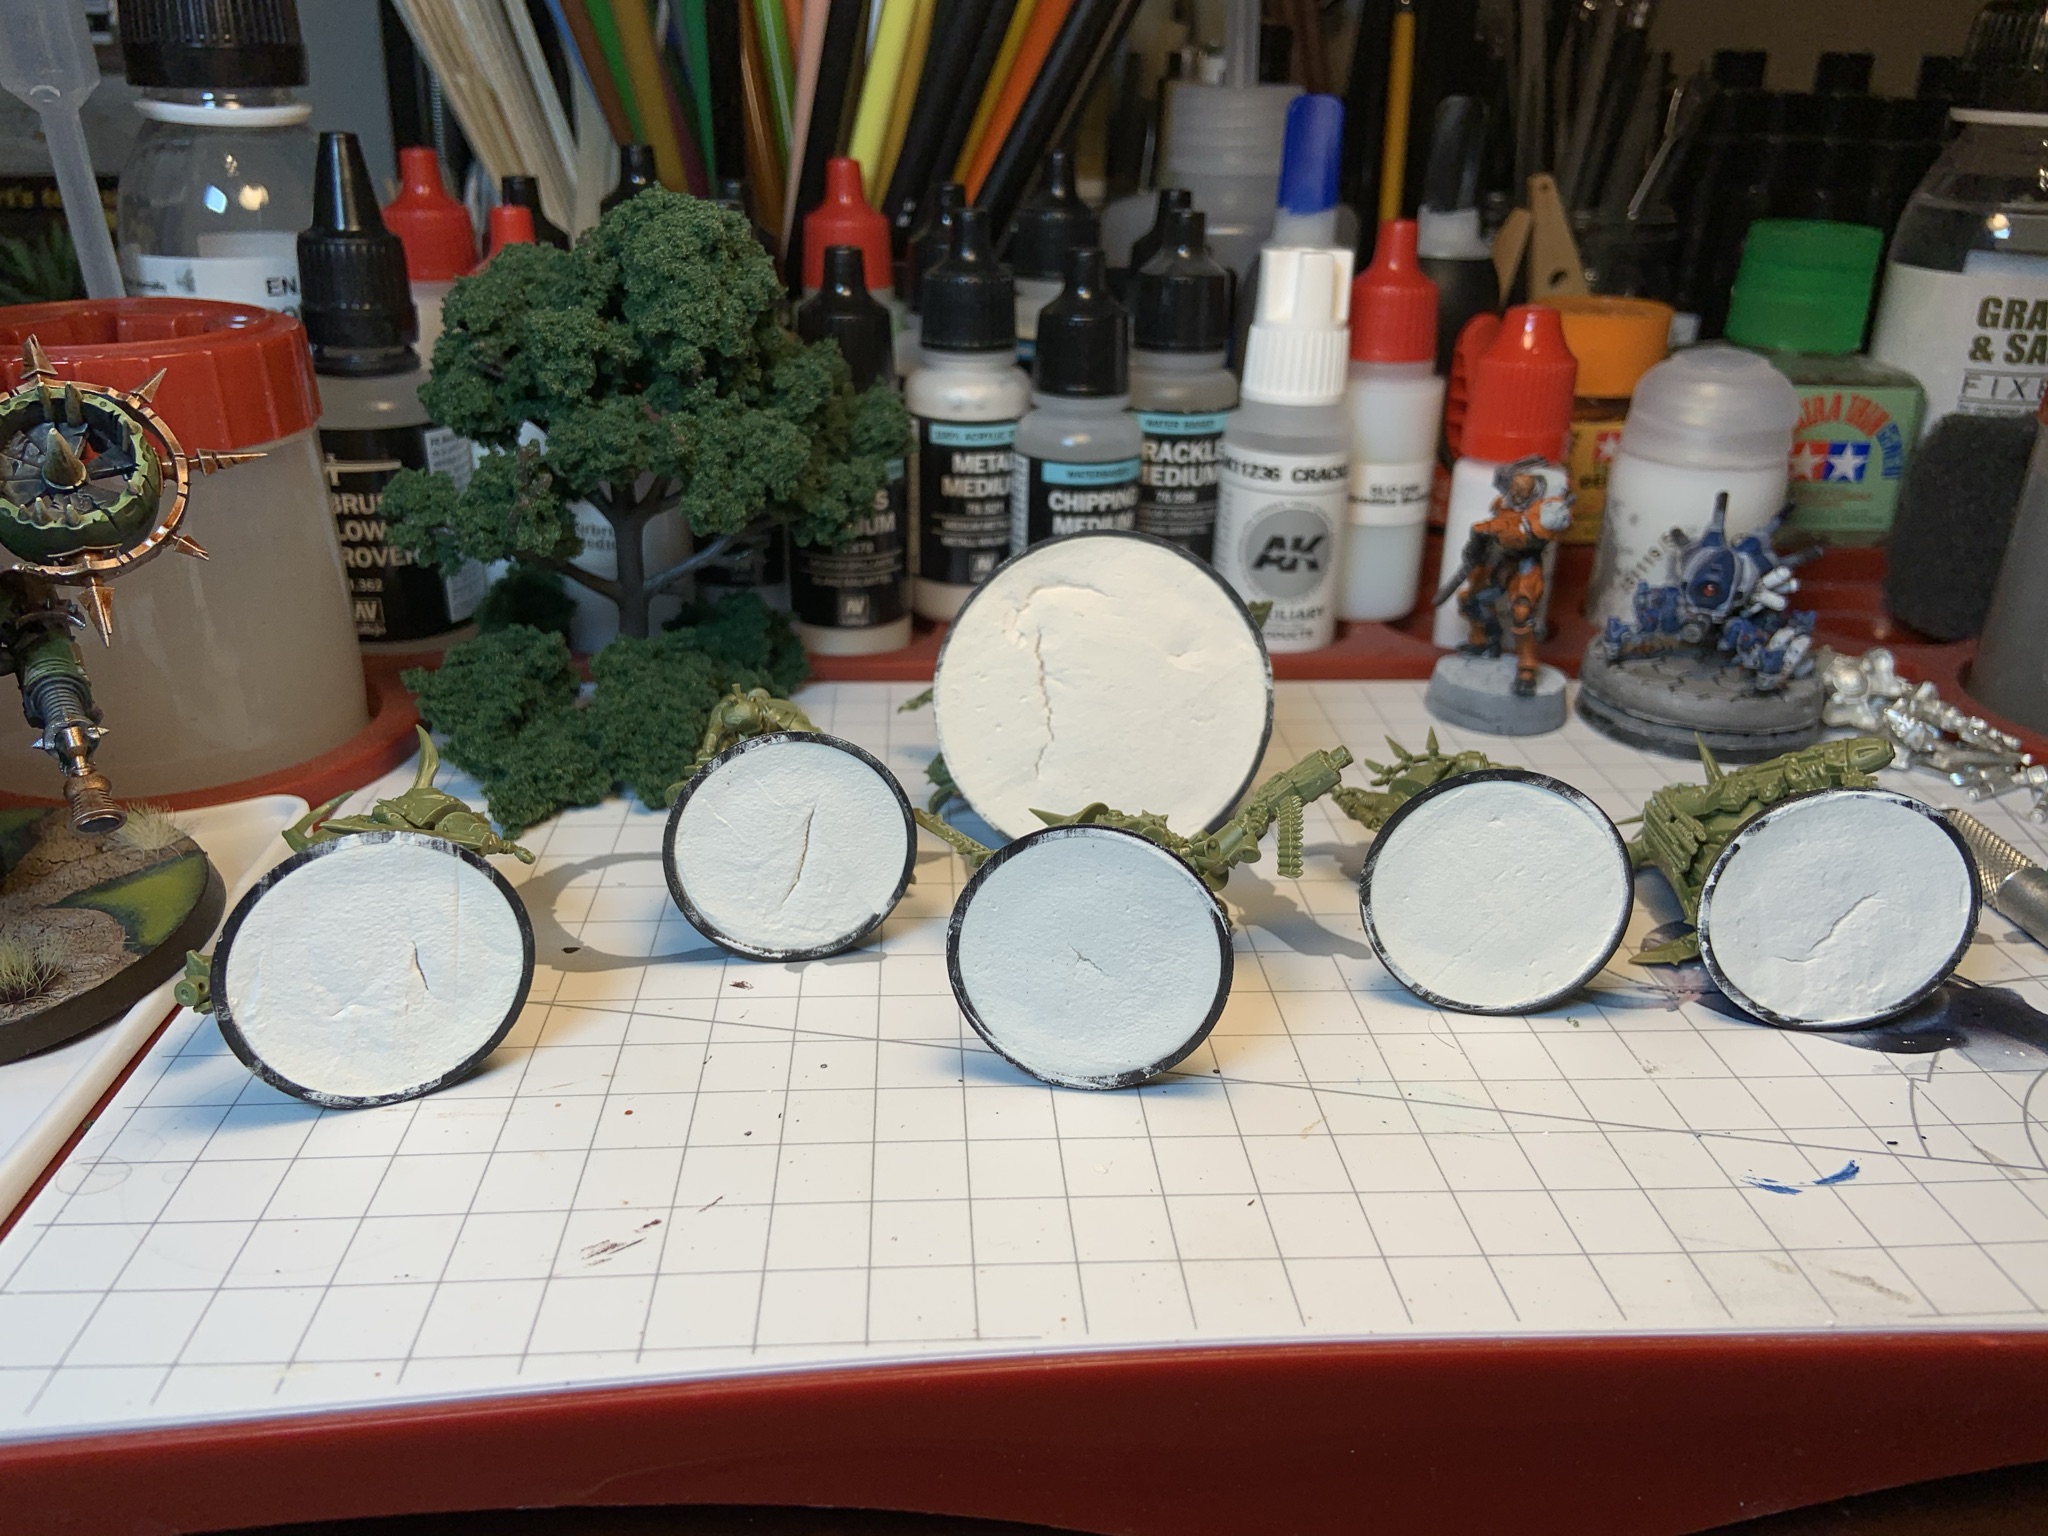
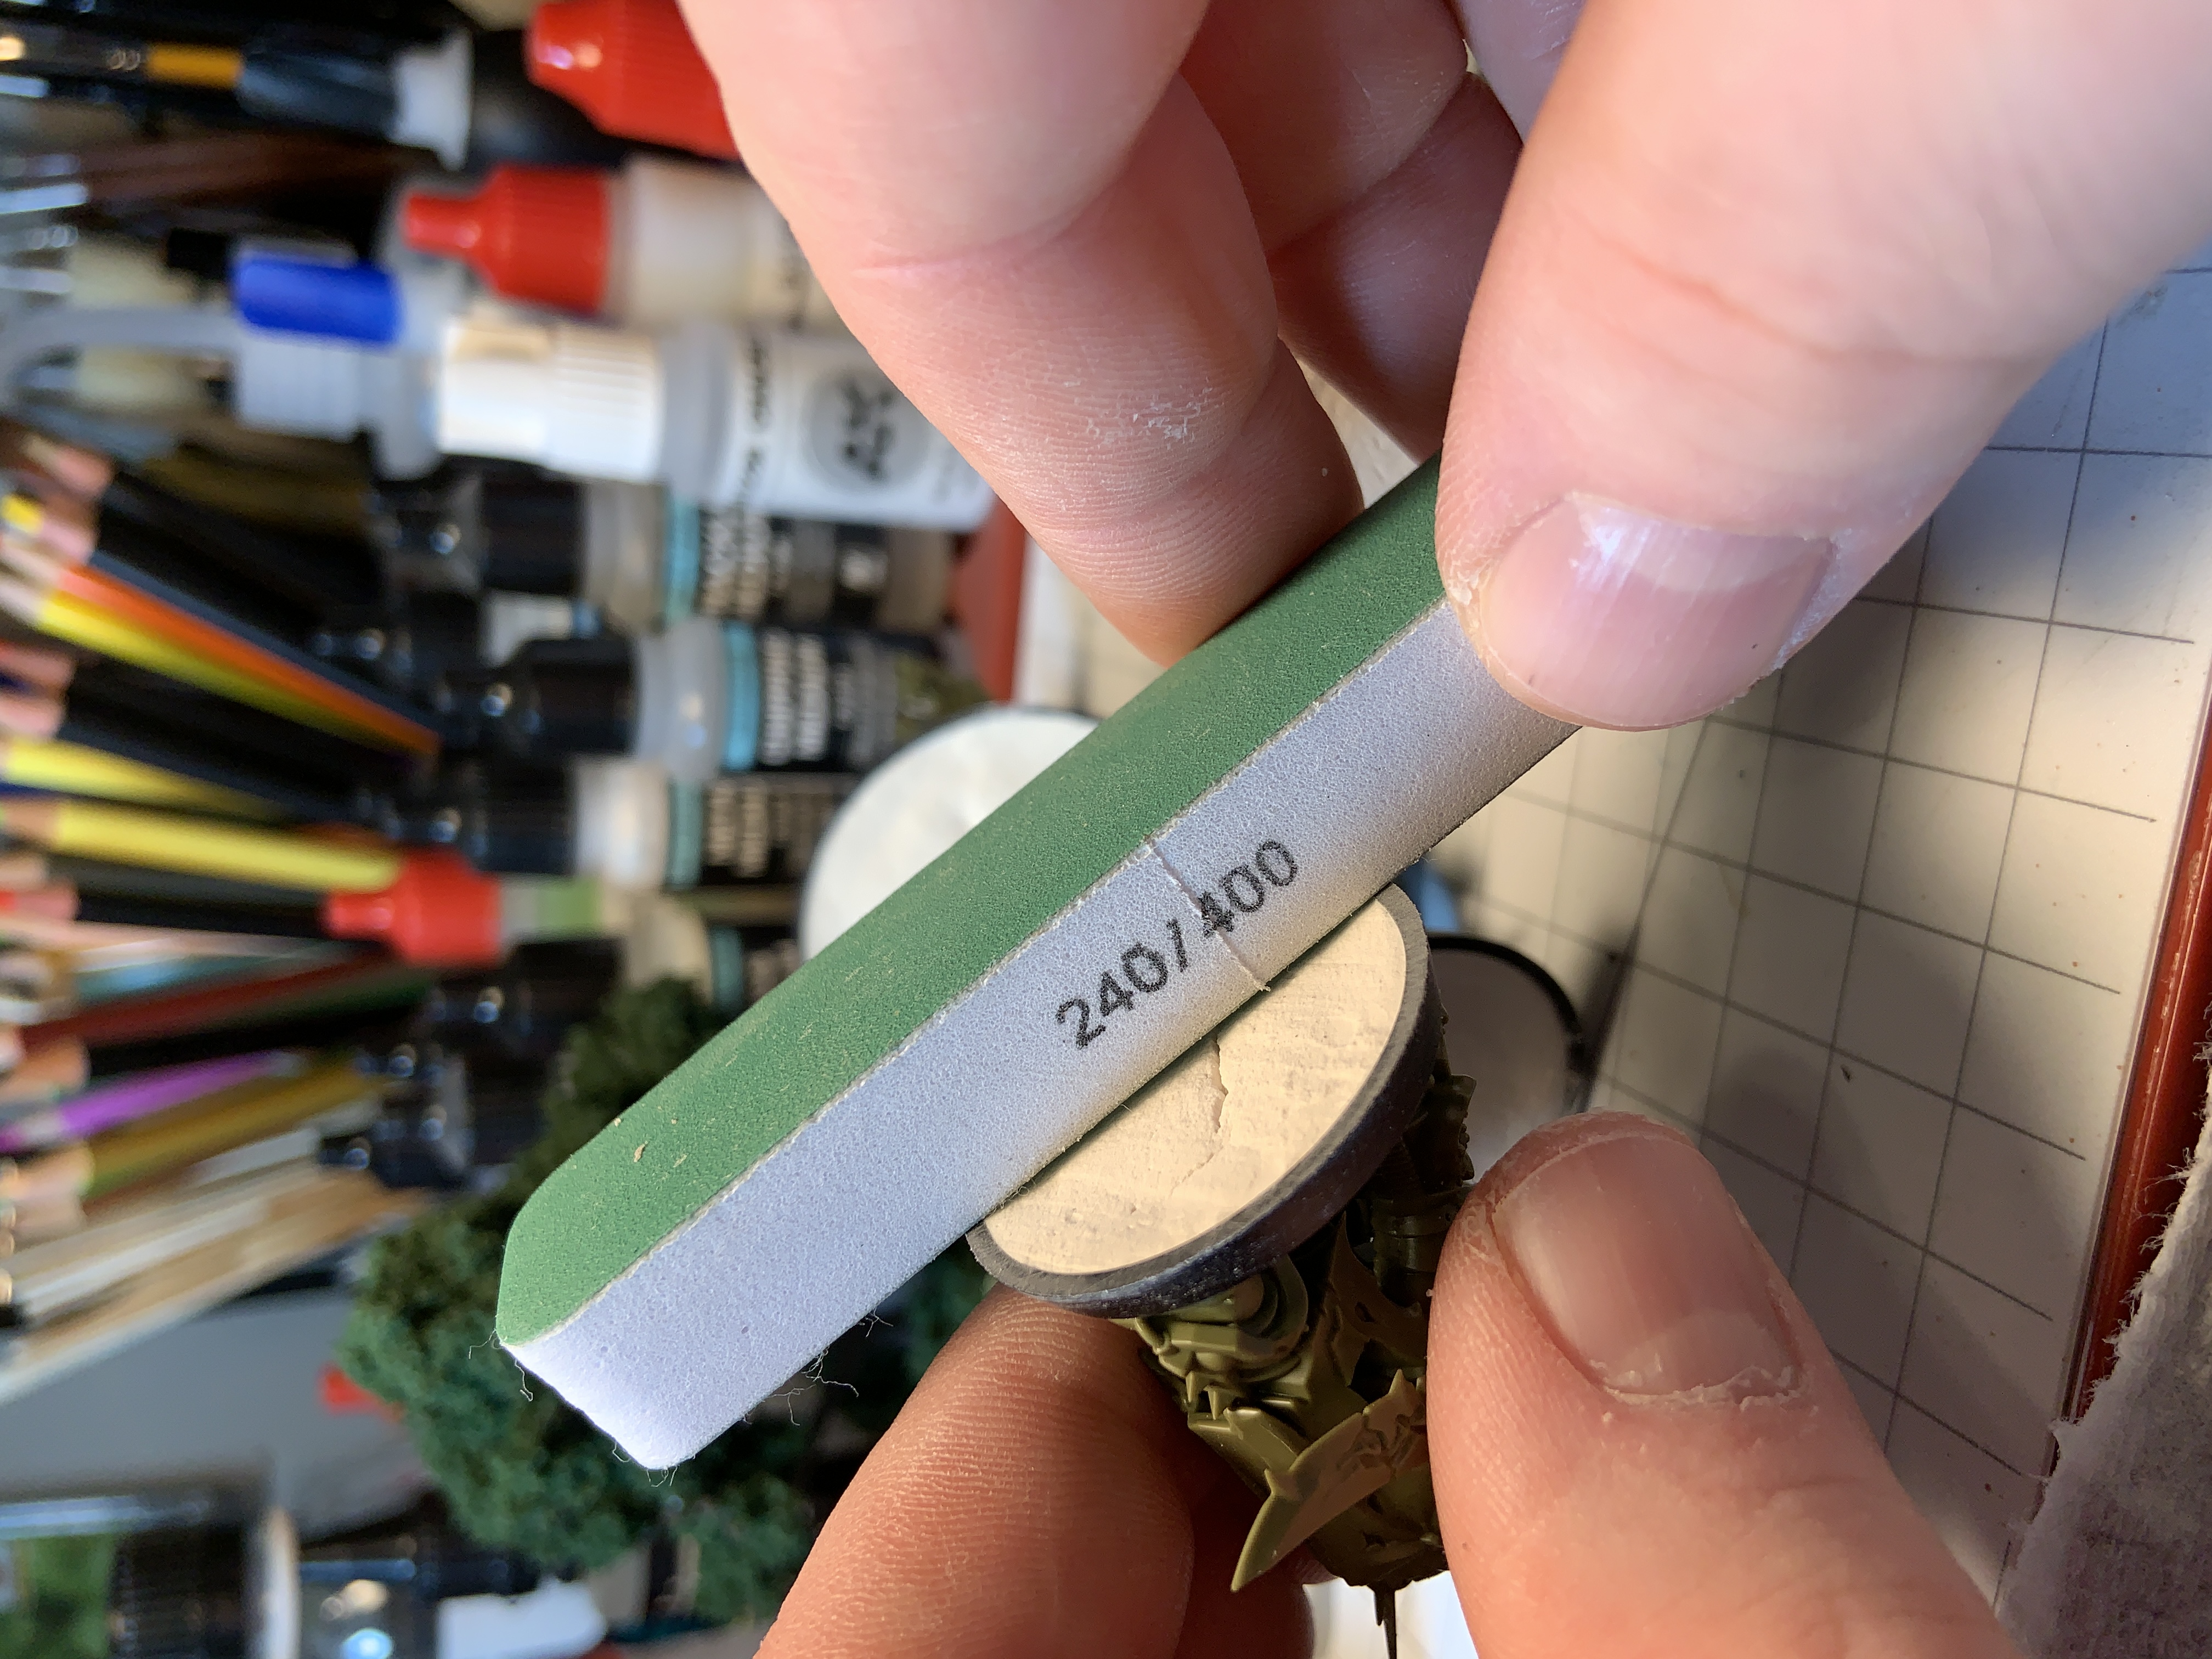
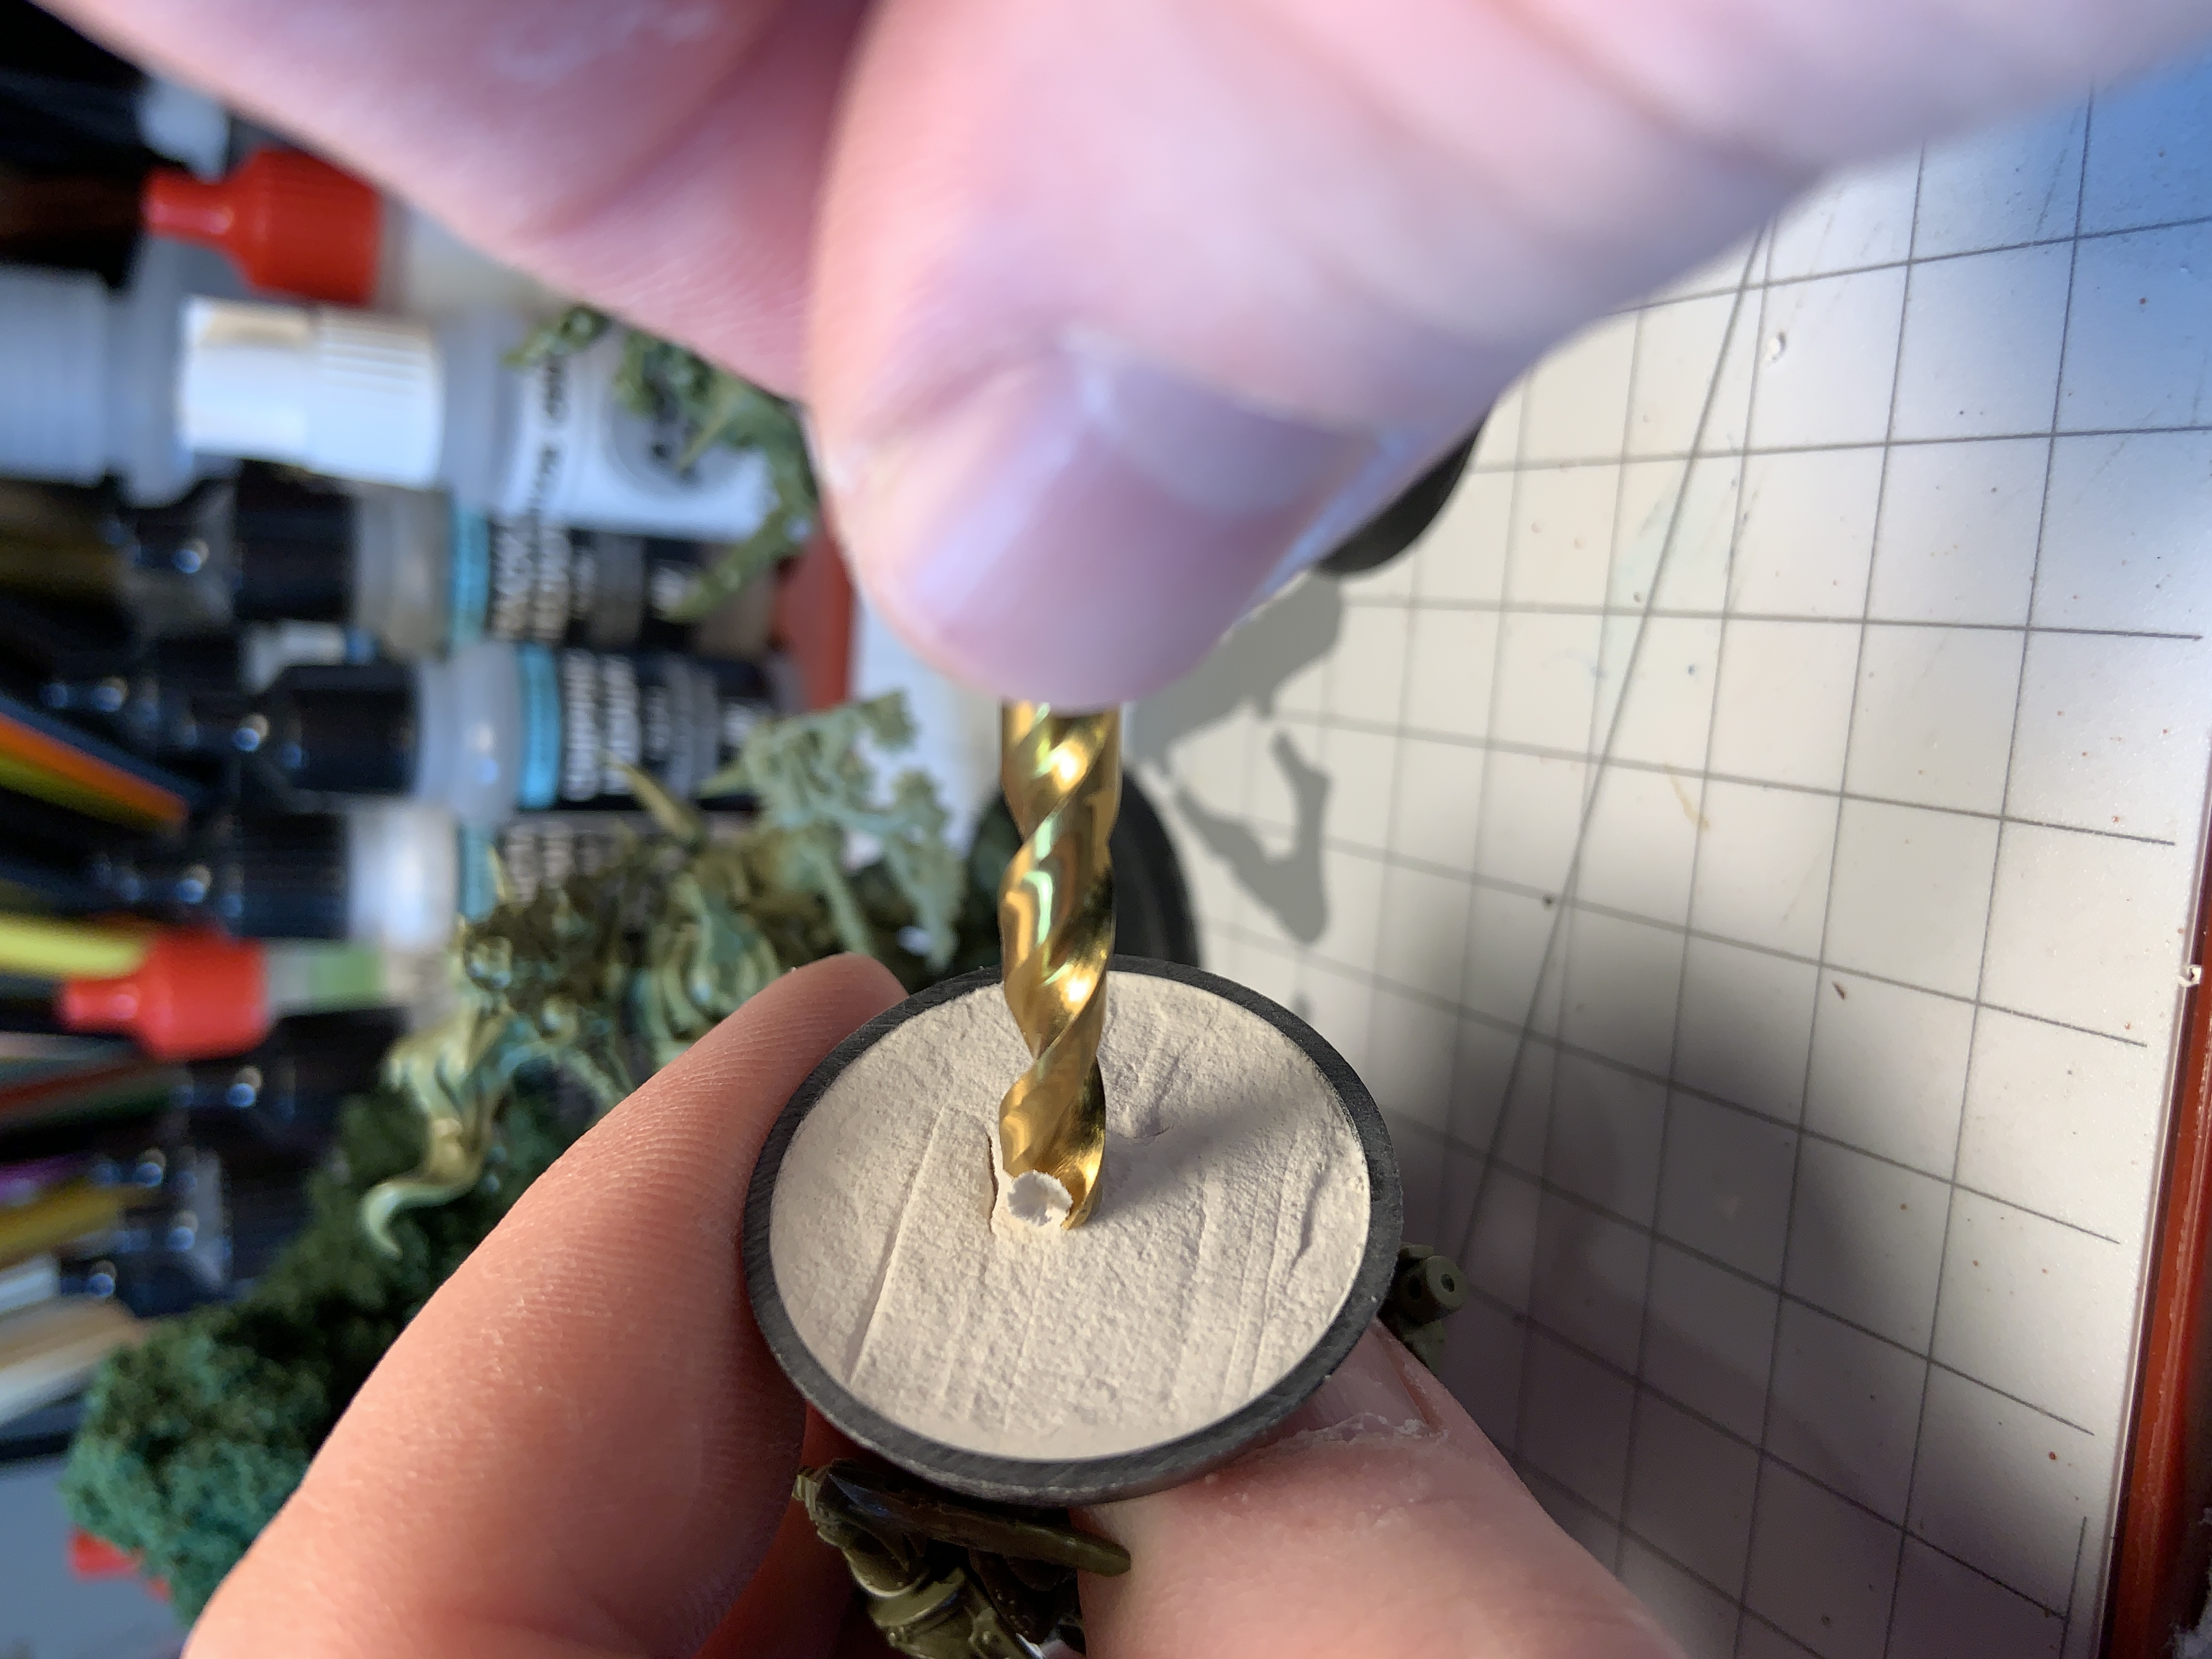
I used 400 grit sanding block to smooth out the surfaces. Next I drilled small holes for the magnets (easily done in the soft spackle) and then glued them in place with CA. I then sealed the bases with thinned PVA, followed by base coating them in black.

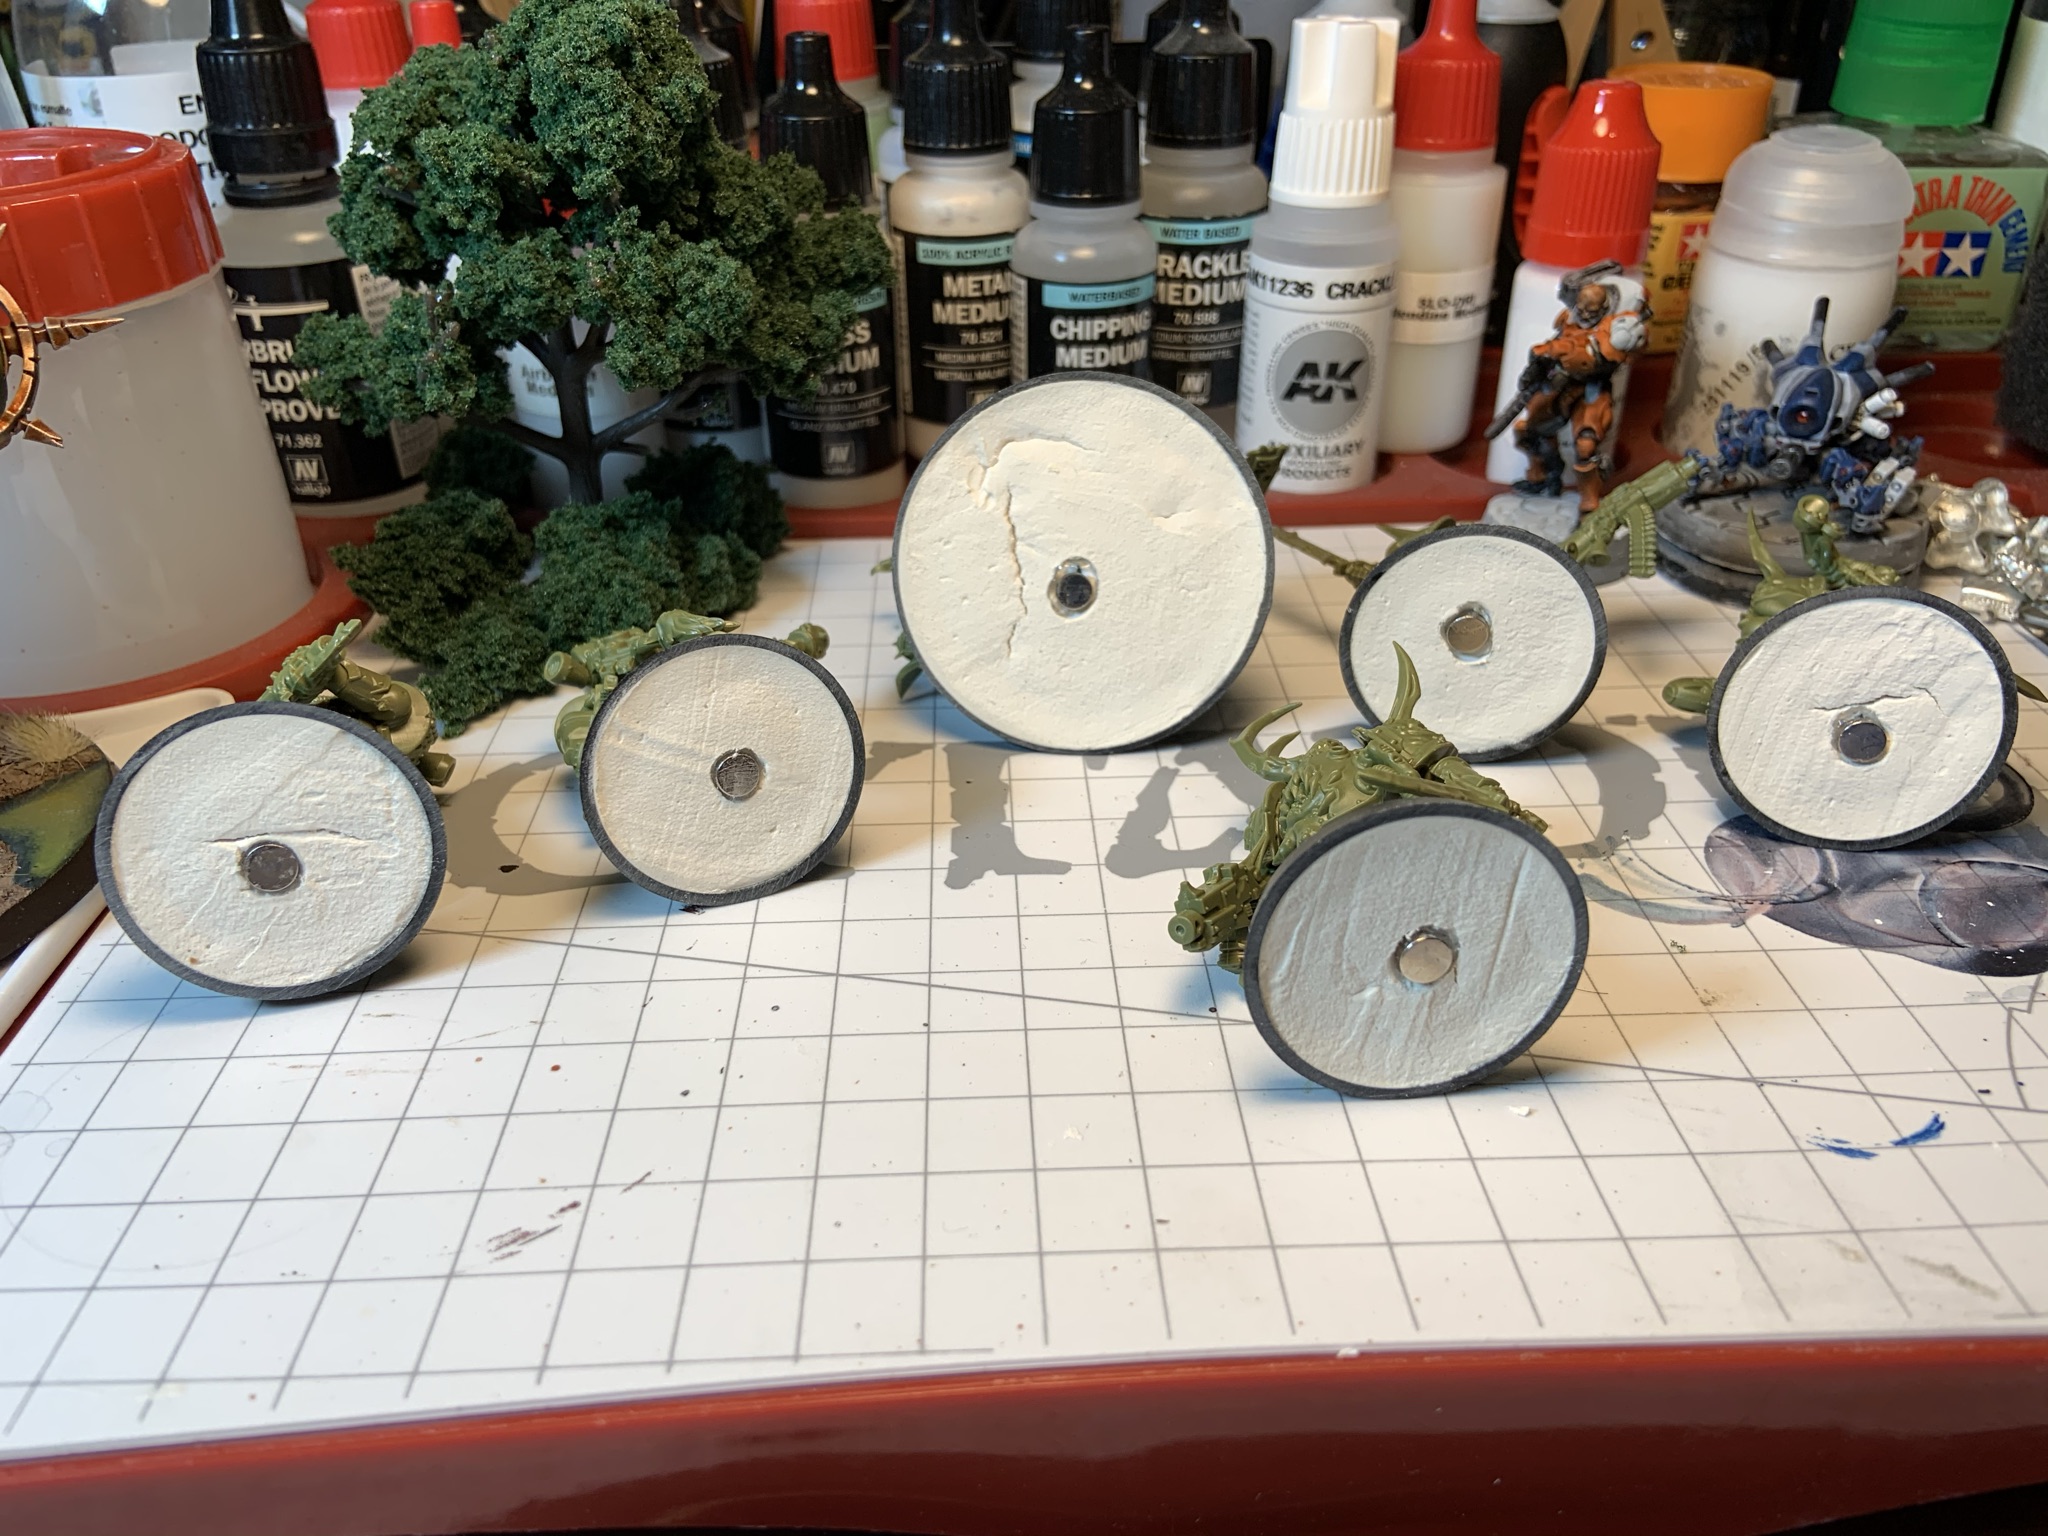
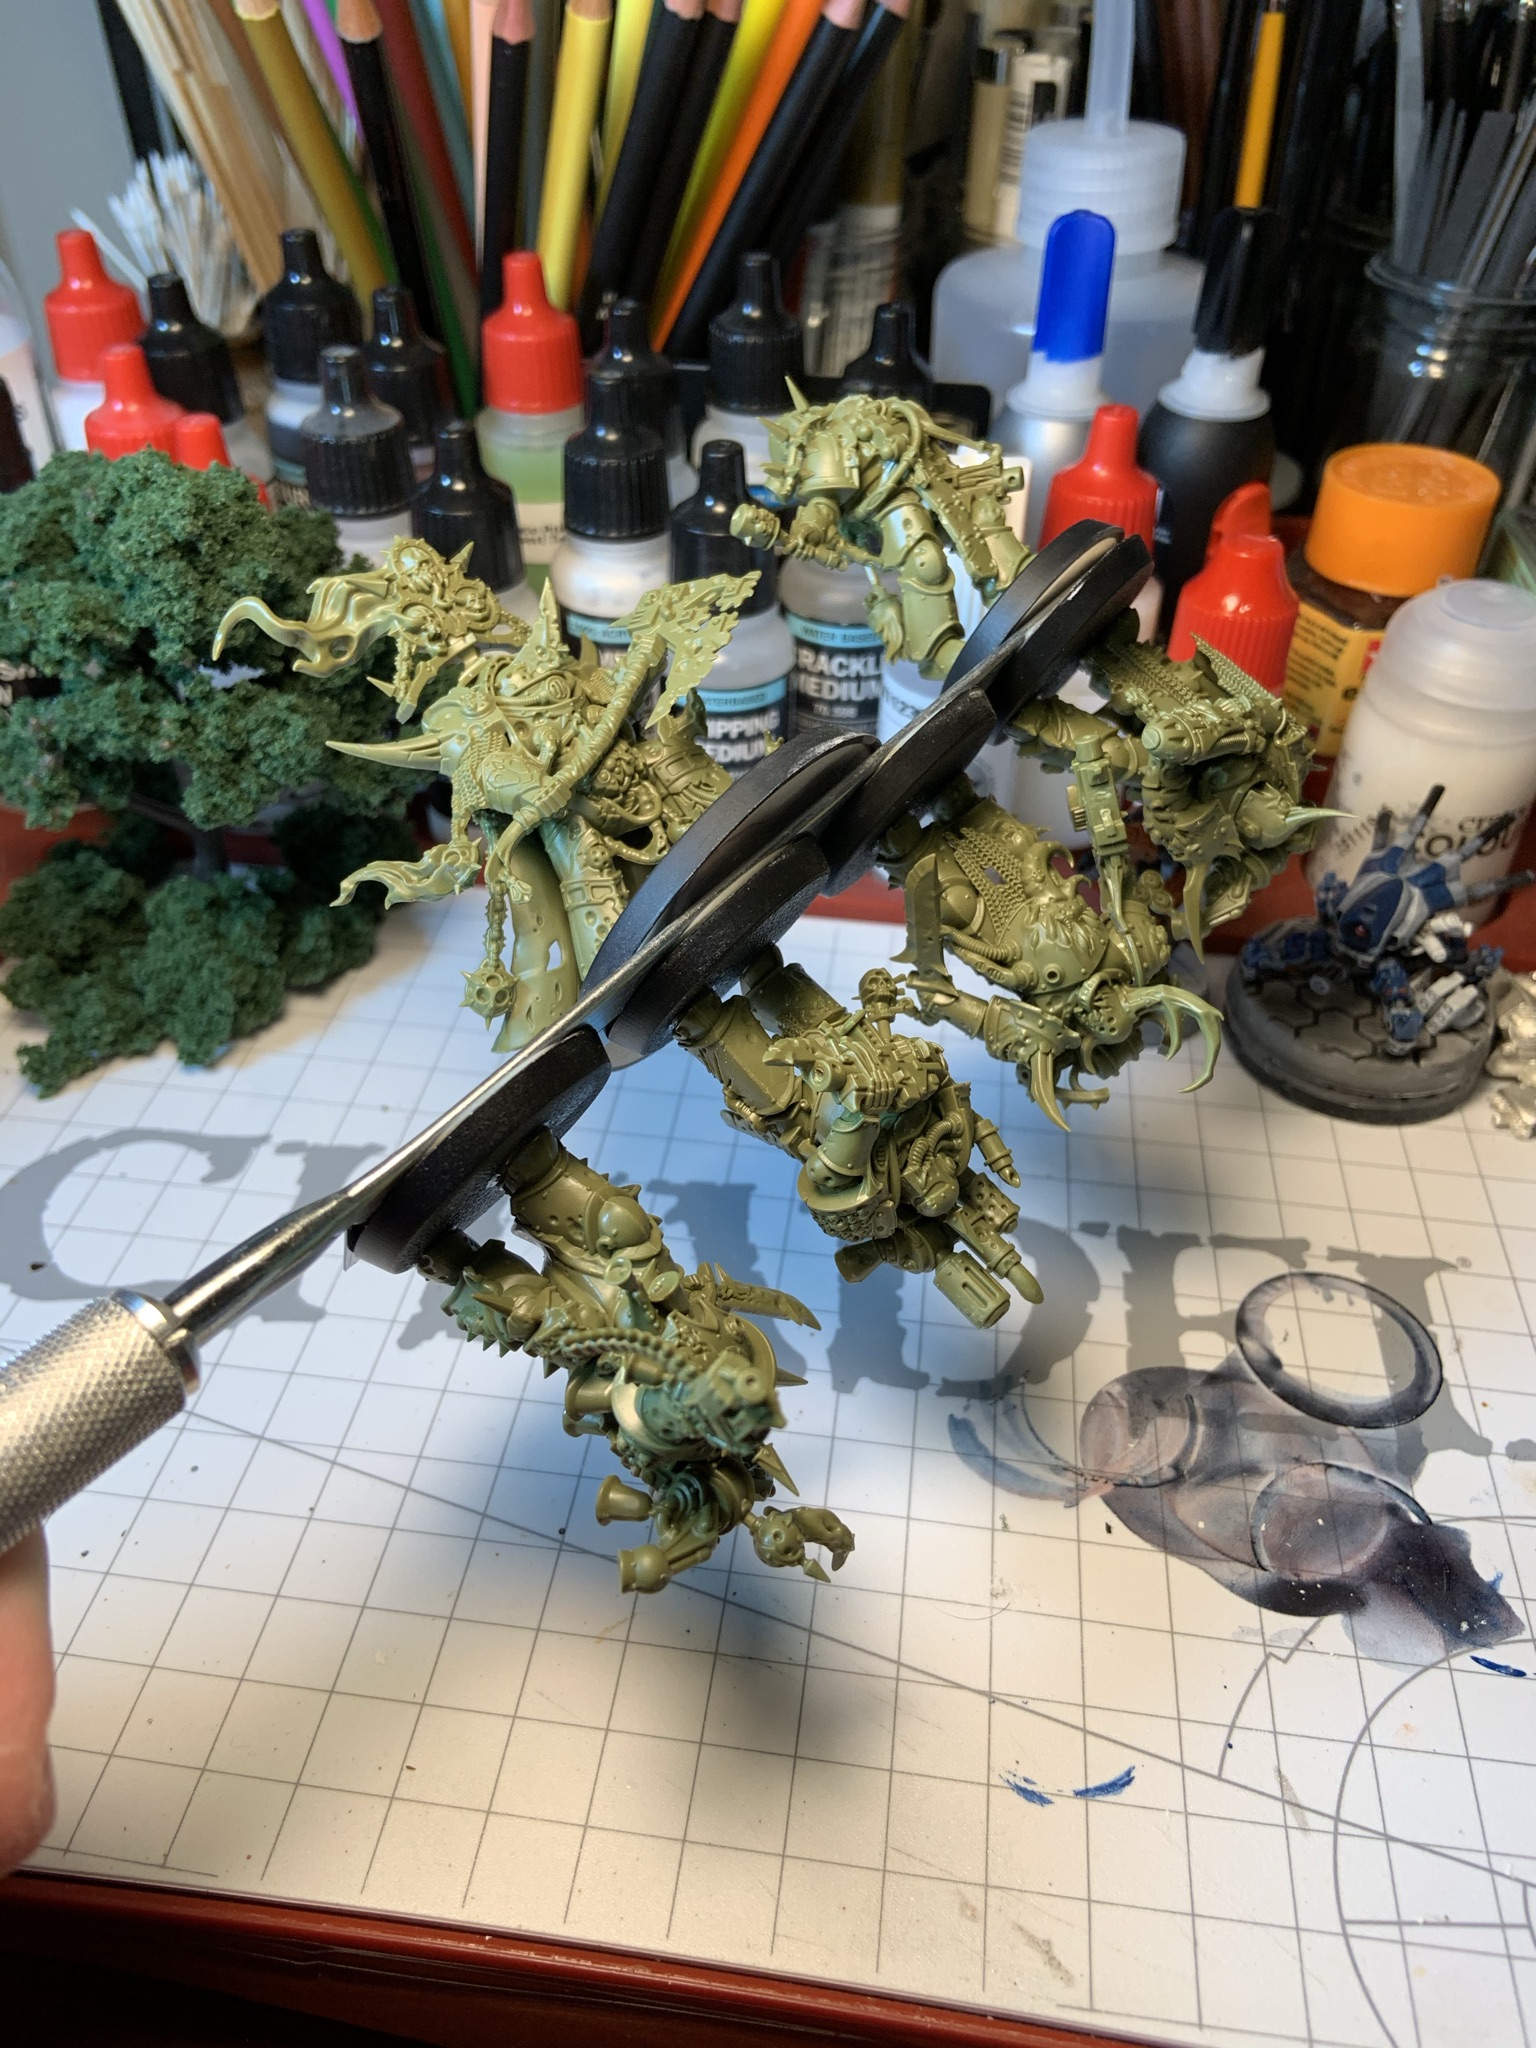
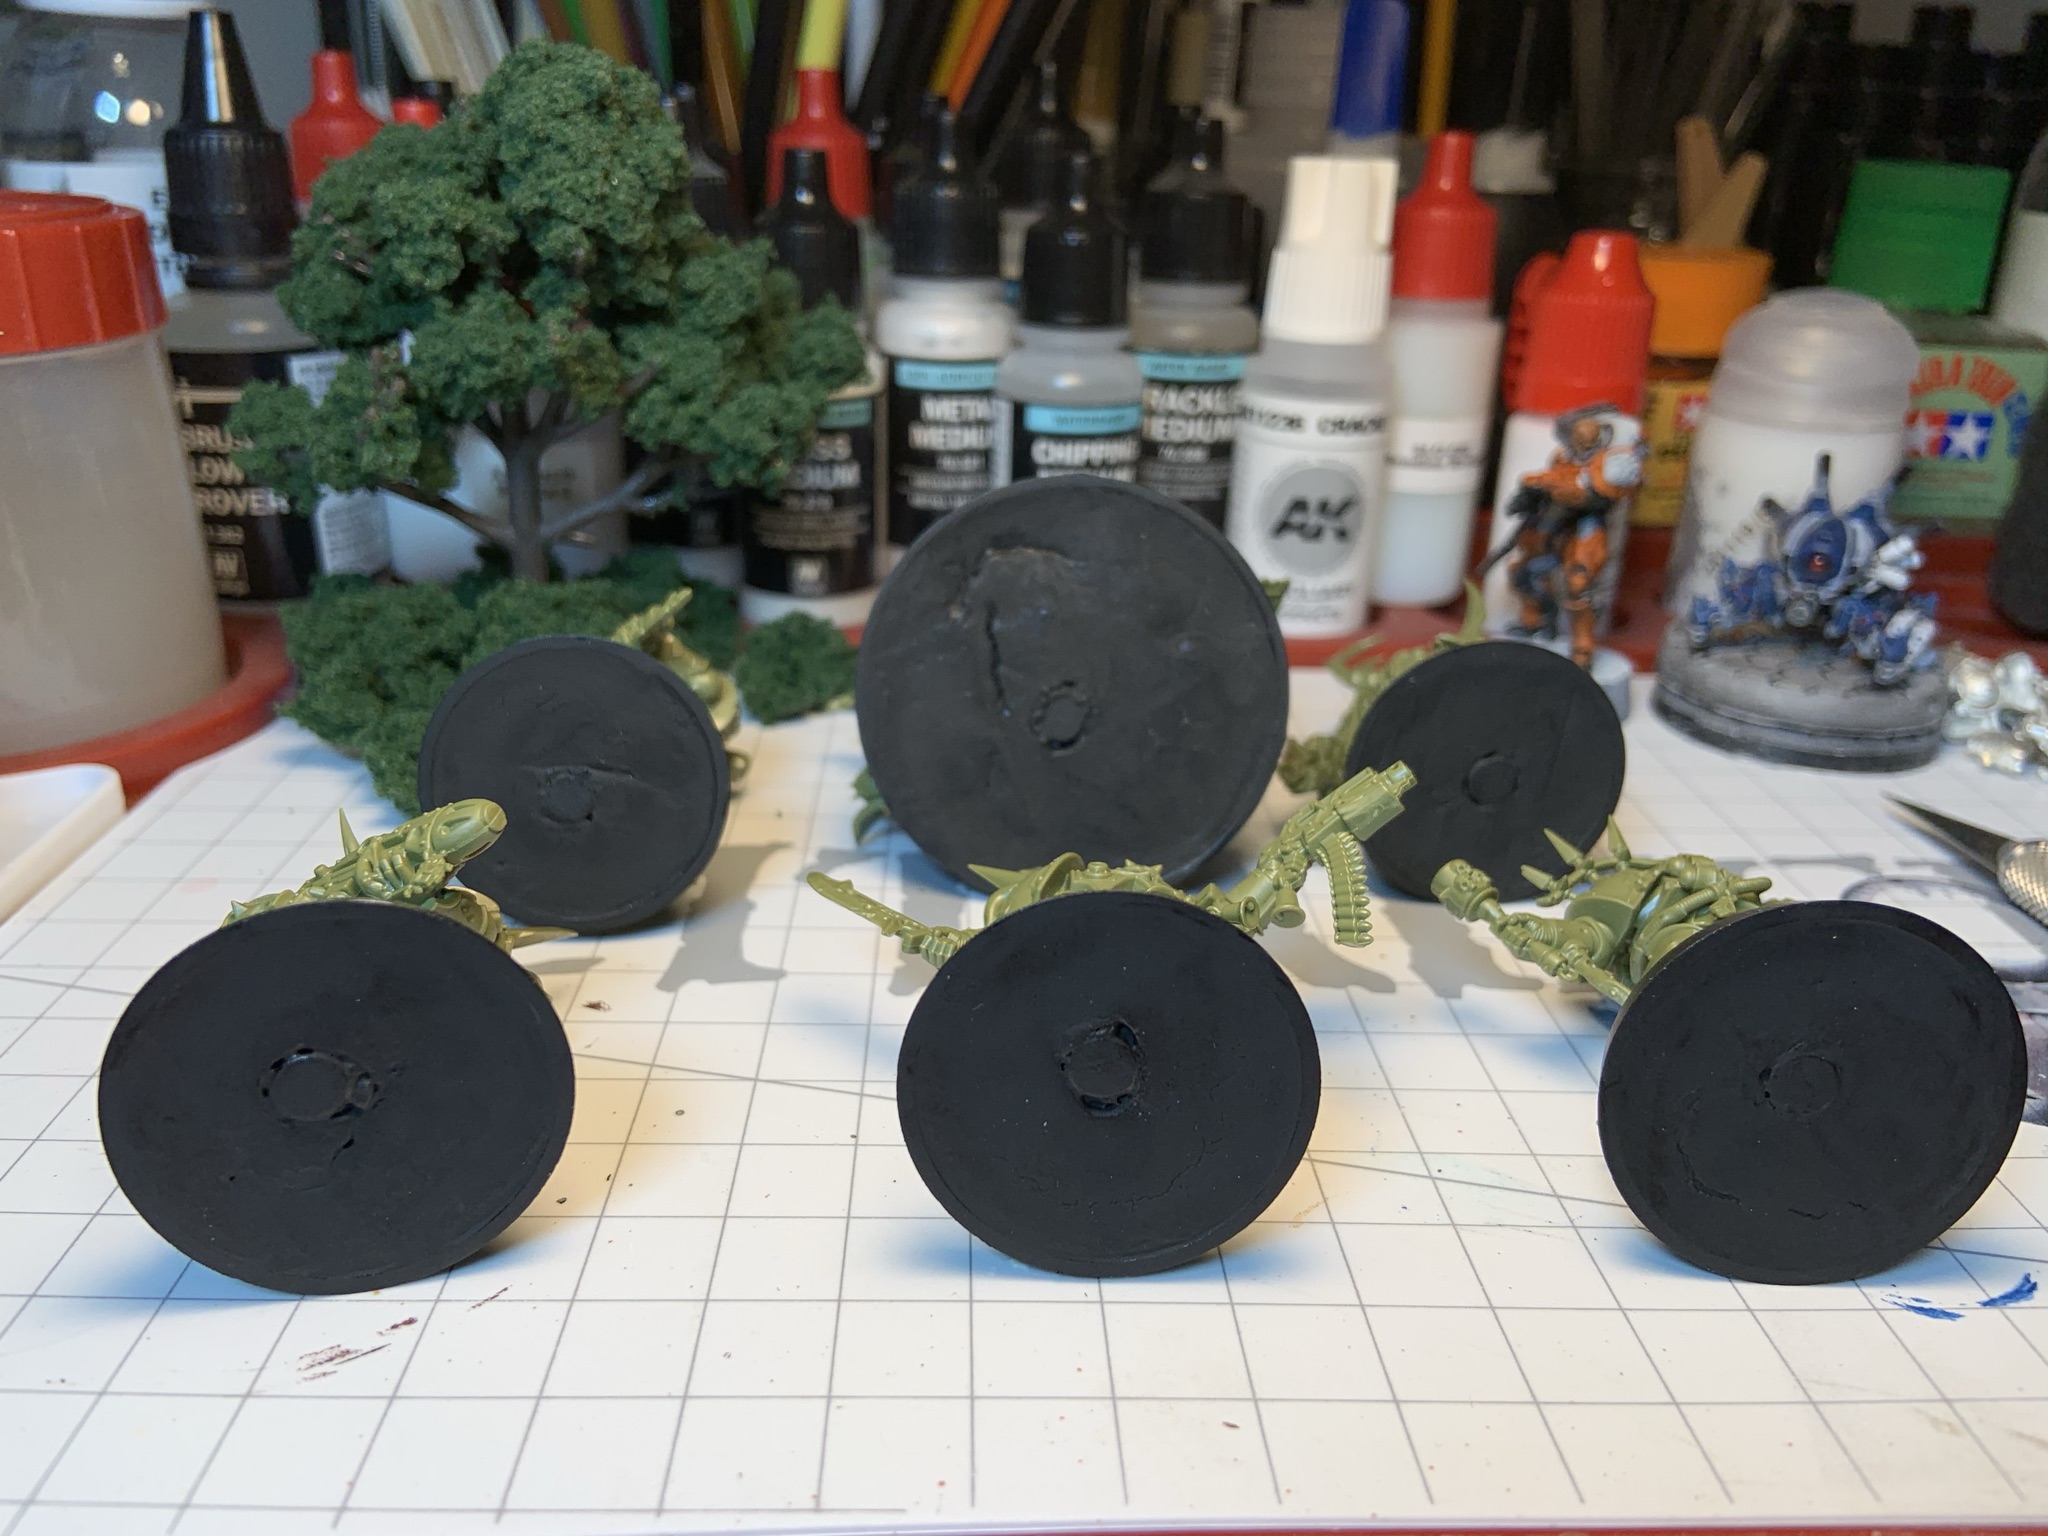 And here we are...ready for the next steps
Prime Time
The next step in my process is zenithal priming. I use a combination of techniques here that produces a nice smooth gradation of shade, but more importantly, makes the details in the model much more visible (which is very helpful for those of us getting on in age :). I use an airbrush for most of this…so first let me share a few hobby DIY hacks that I came up with…
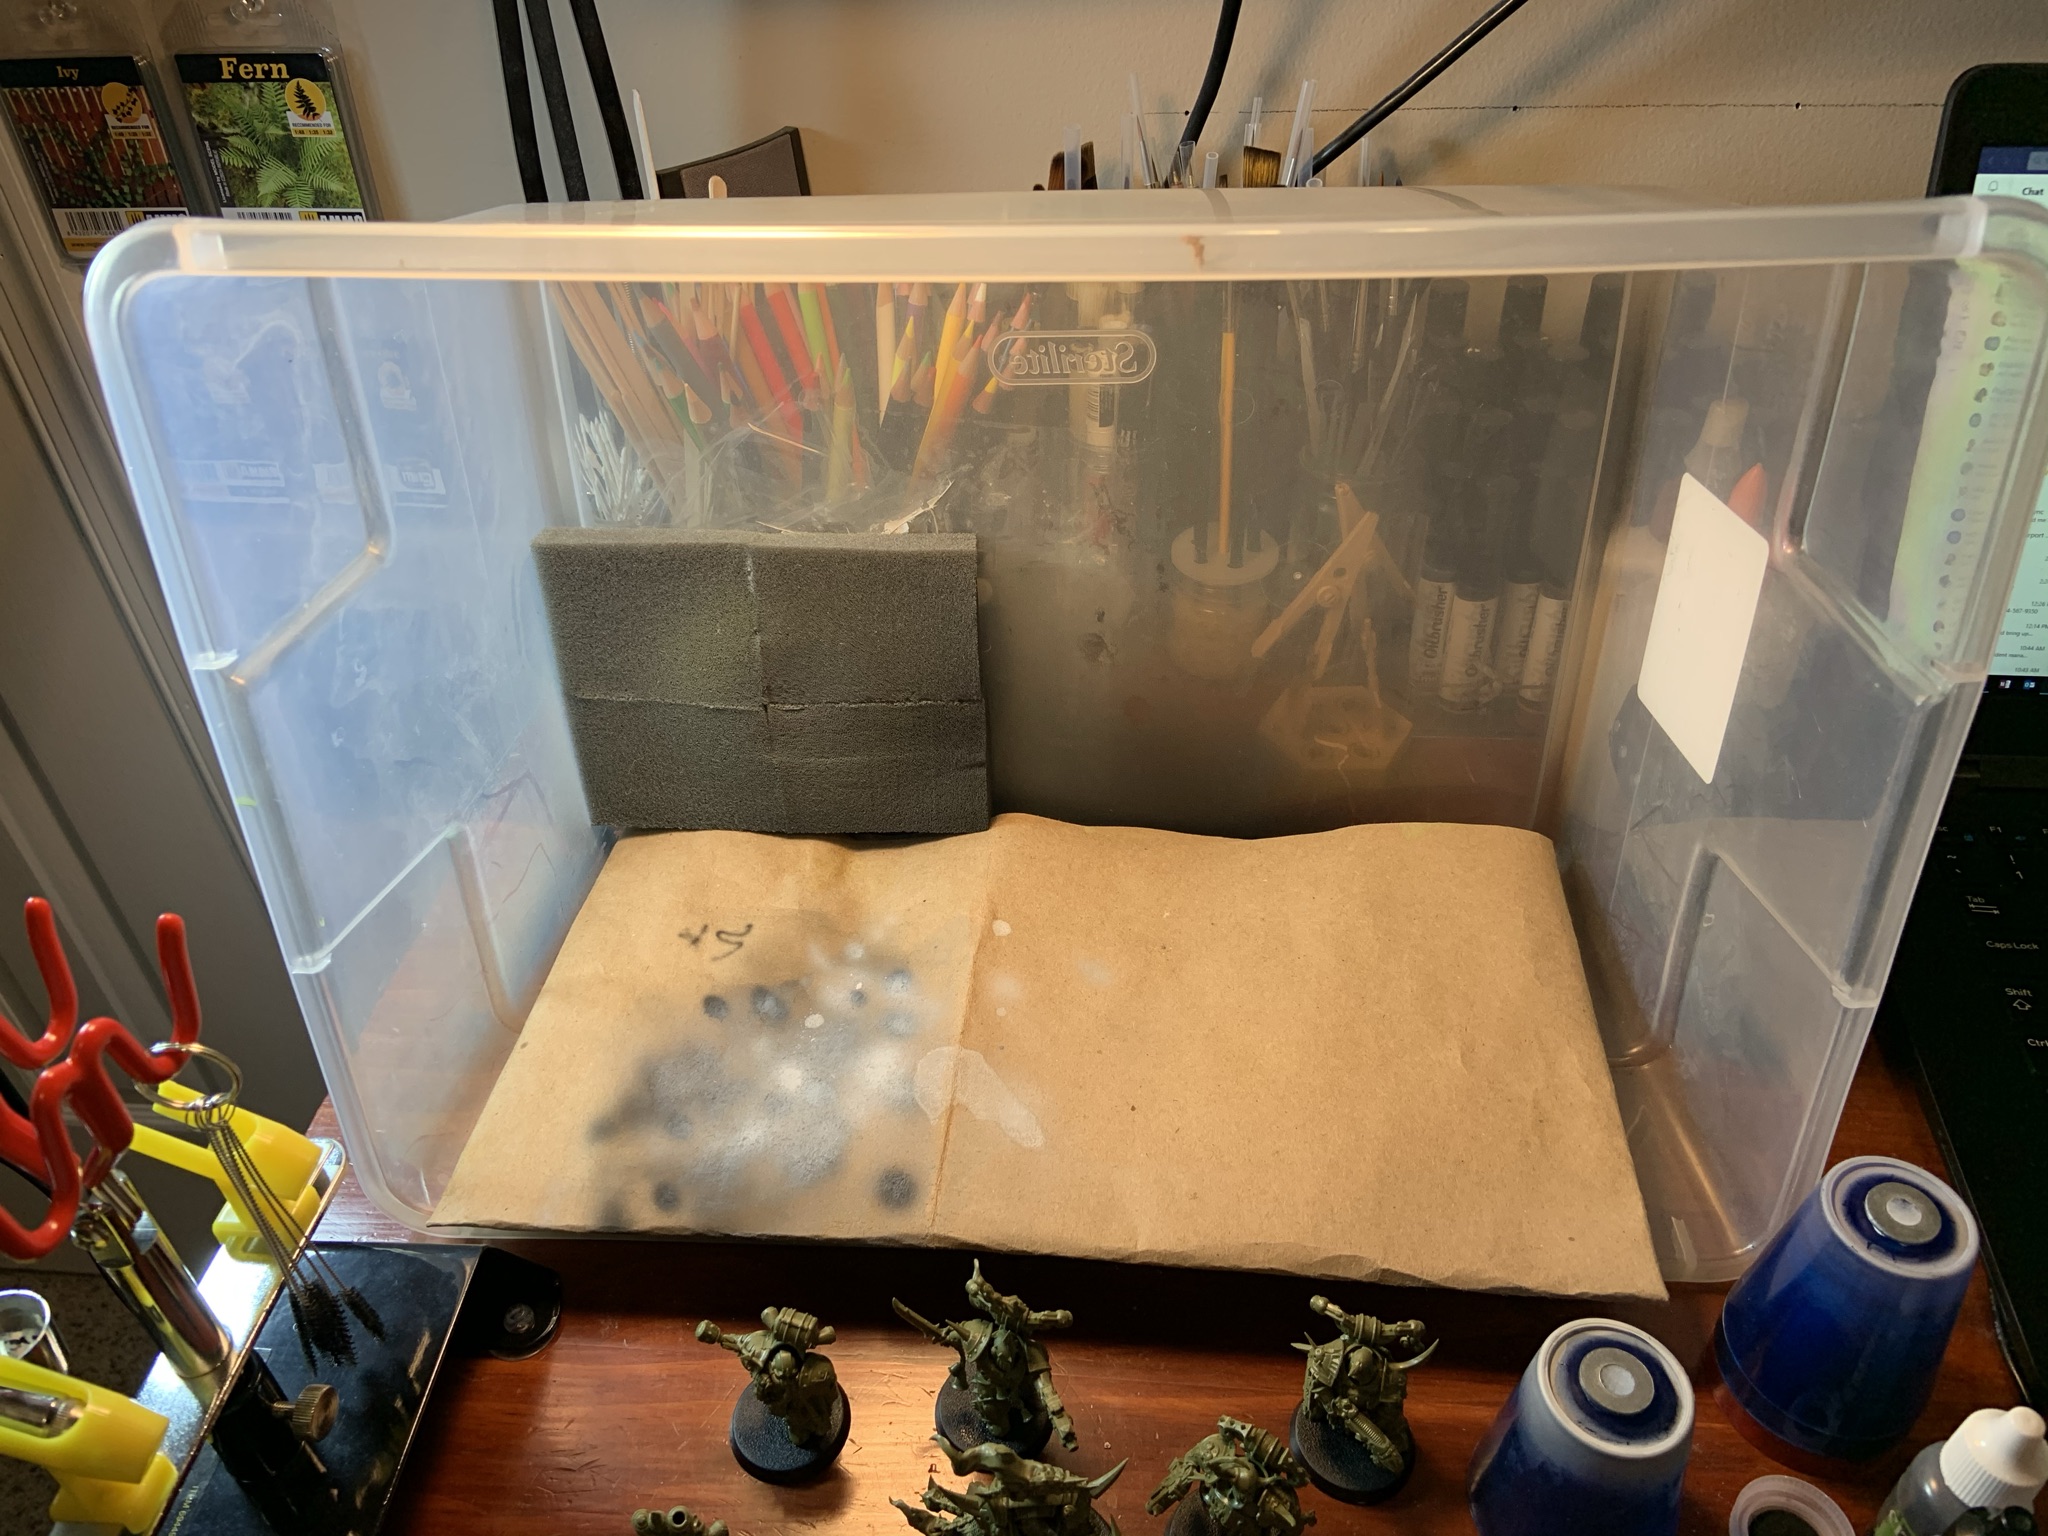 This is my homemade spray booth. It's a plastic tub that I've cut a hole in the bottom and secured a portable battery powered fan to. I then re-used some packing foam from some model kits and glued them over the hole as a filter. This cuts down on overspray quite a bit. Also, the clear container allows light from my desk lamps in. One more bonus is that I pack away my compressor and airbrush kit on top of the upside-down lid, pop the tub/booth over it, and store everything together (again upside-down).
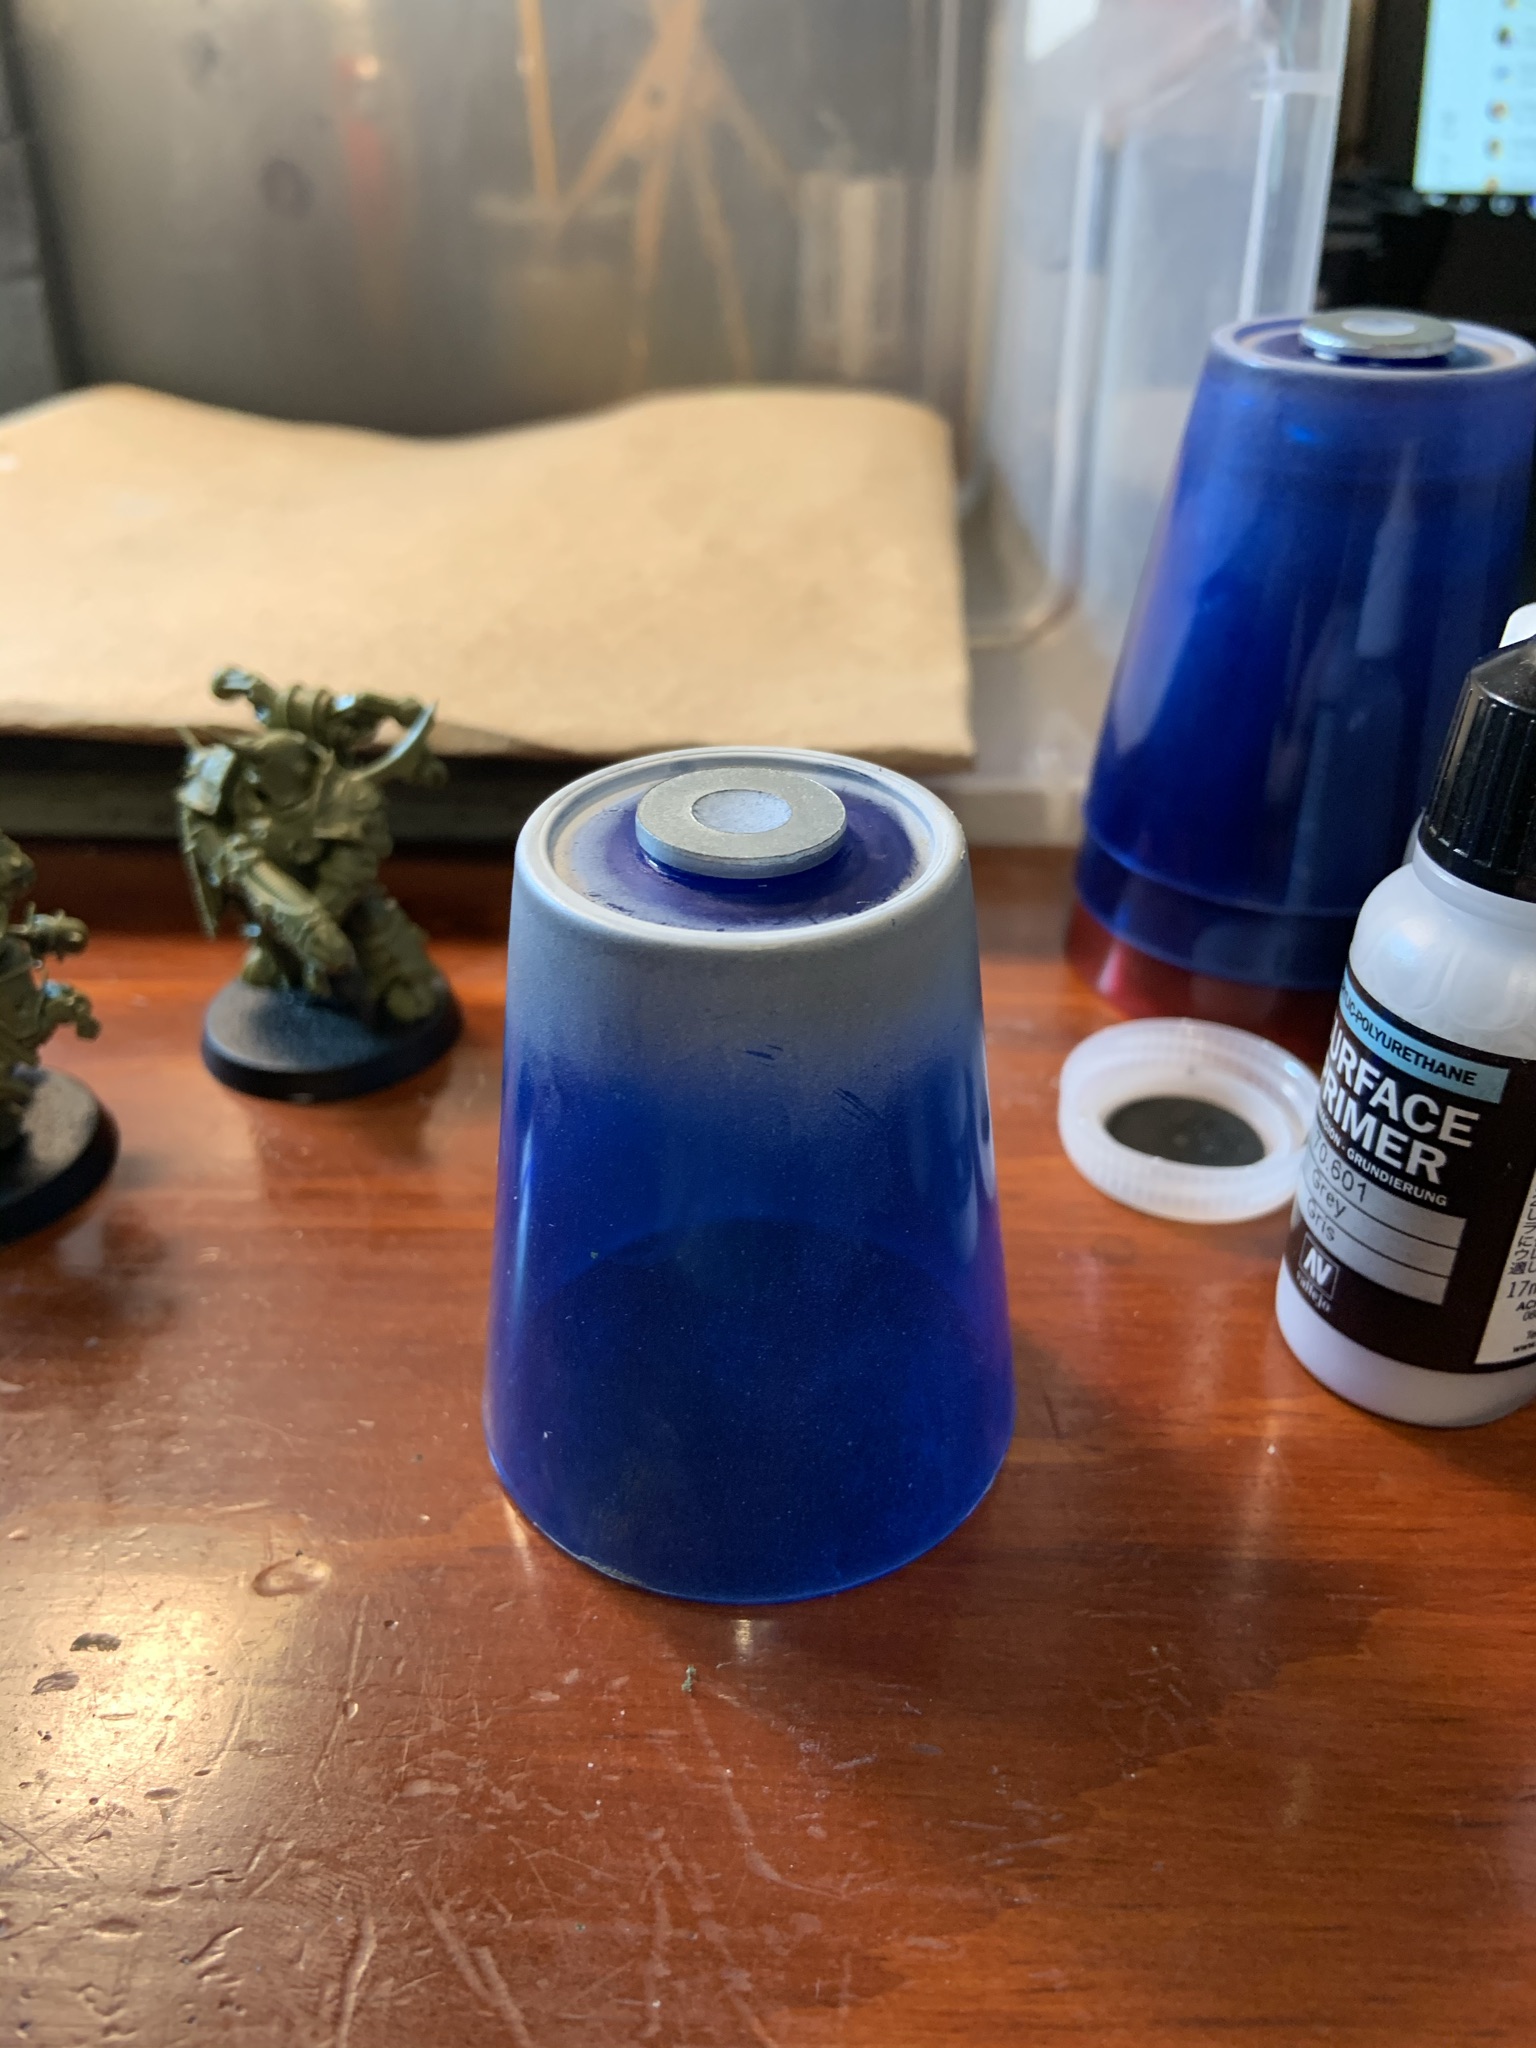 These are plastic shot glasses I purchased at Walmart for $0.20 a piece. I've super glued a washer to the bottom, so they make neat painting handles that I can easily swap magnetized models with (and I don't have to mess up my nice Citadel handles with overspray). The shot glasses also make it easy to dump paint/water/cleaner in when changing colors.
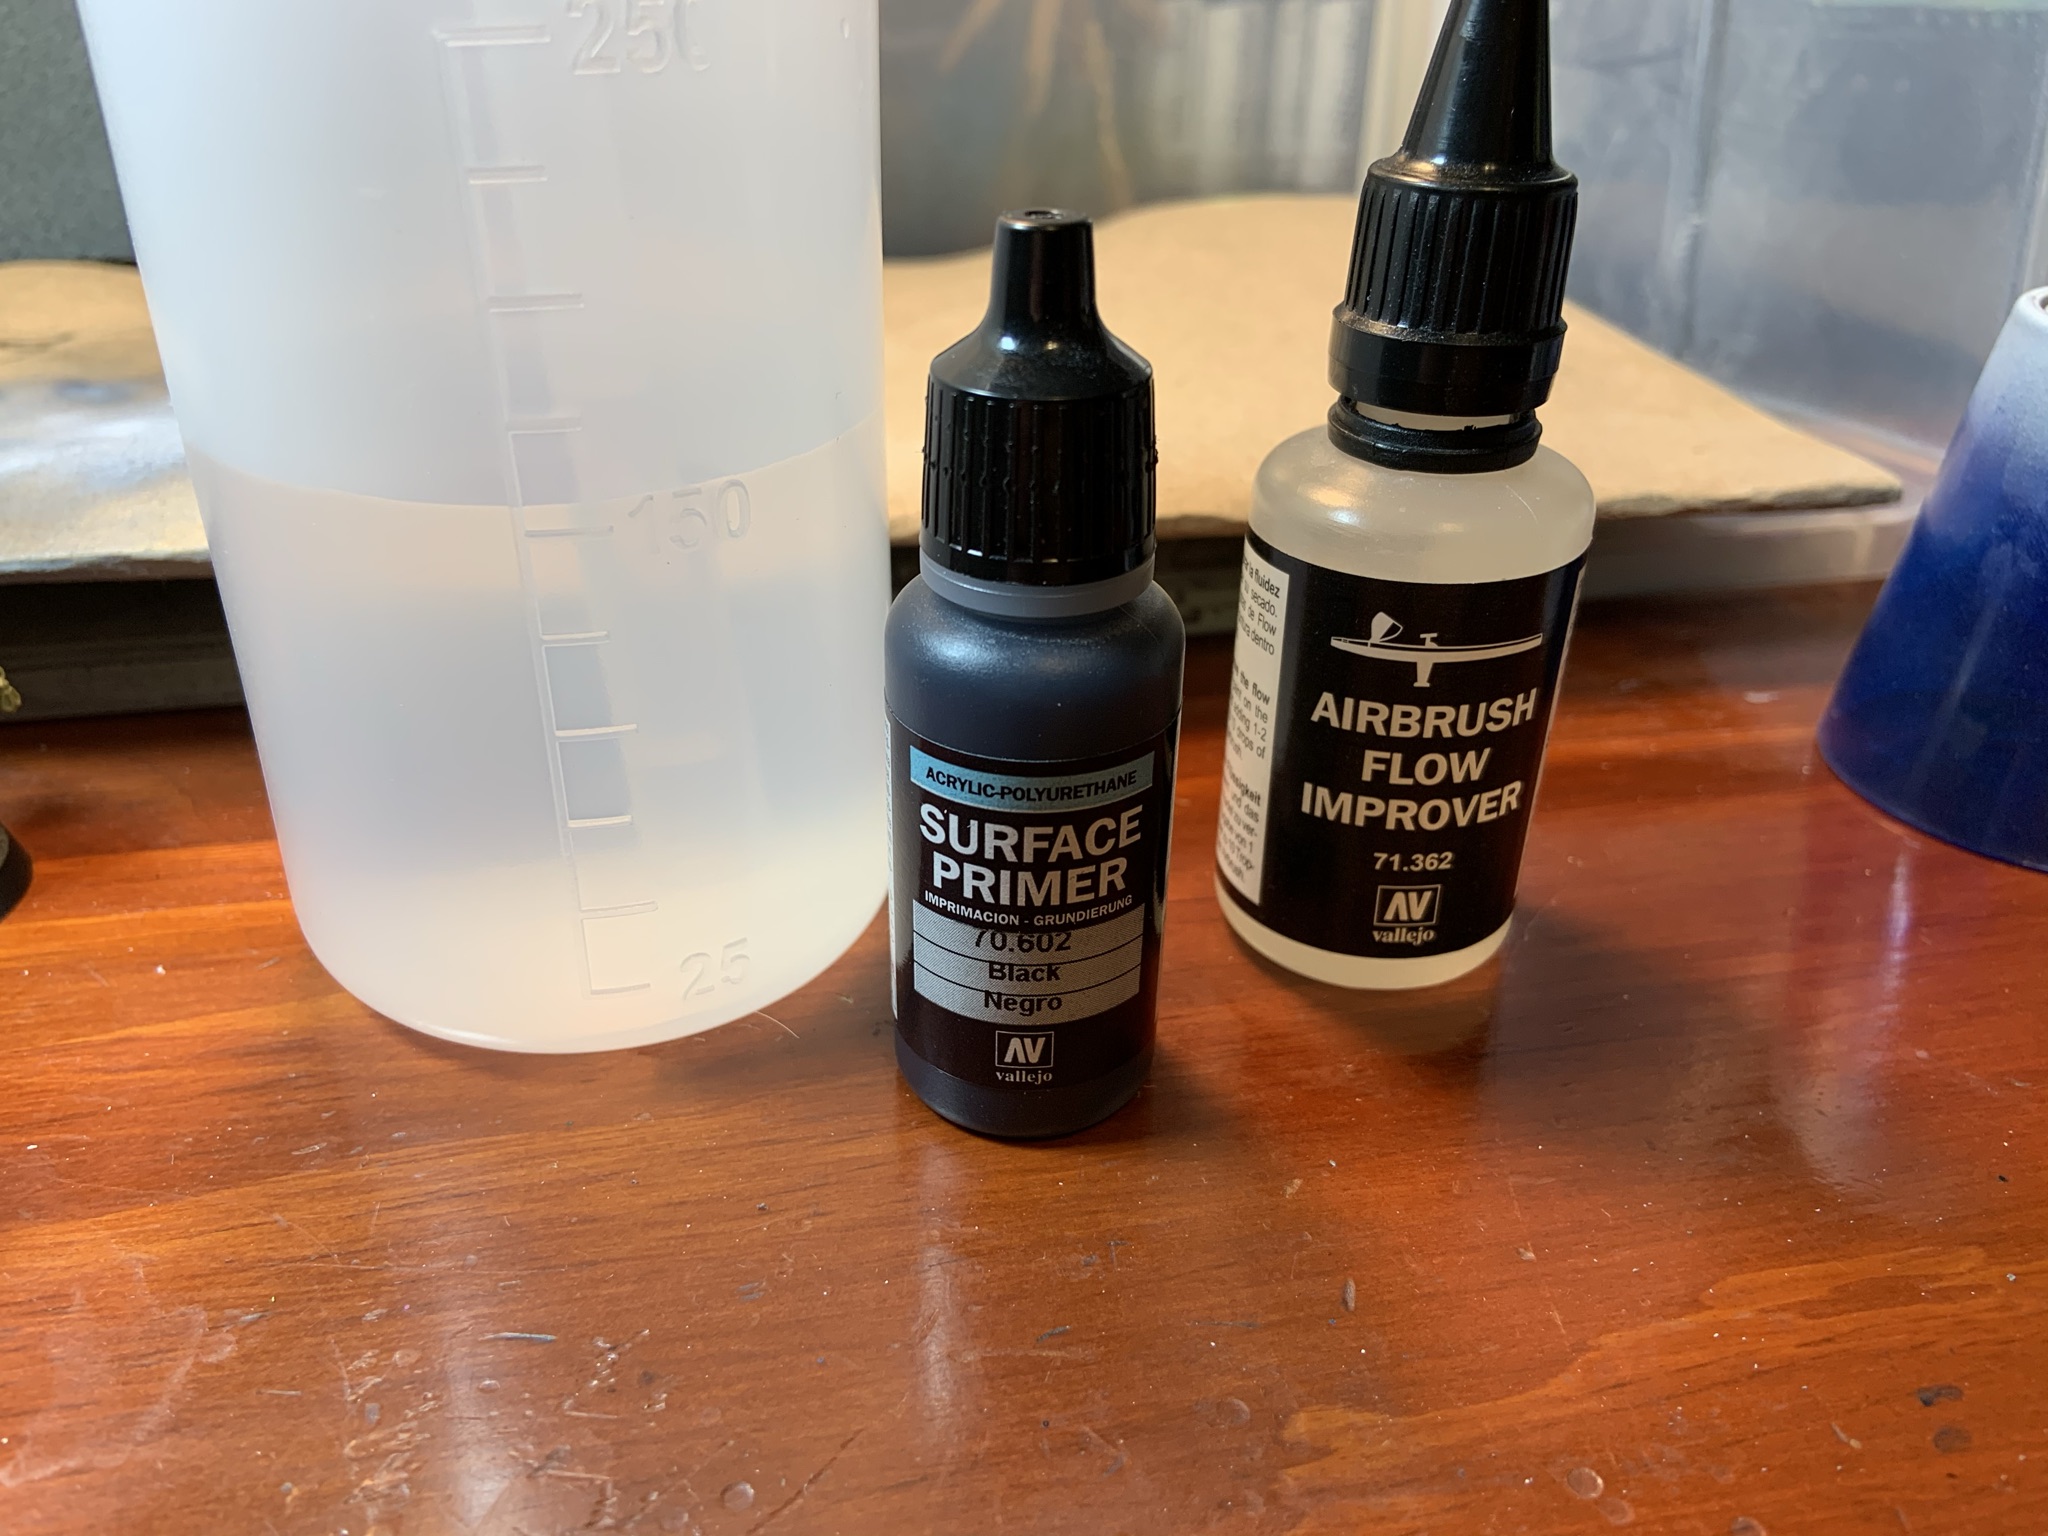 I start with Vallejo Surface primer (70.602 Black)...about 20 drops, mixed with 8 drops of Vallejo Airbrush Flow Improver and a little water. The flow improver helps reduce fuzziness on the model (as it extends drying time slightly) and reduces clogs a lot.
I hold the models at about 80 degrees tipped away from me to catch only the very underside them. After a few light passes (avoiding pooling or even the ‘wet’ appearance of too much paint) I also spray the feet of the model. Here are the results with just the black…
Next I use the same ratios with Vallejo Grey Surface Primer (70.601 Grey). This time I aim above horizontal (maybe 30 degrees…assuming zenith is zero). This covers most of the models in this very light grey except for the very tops of certain portions…
The next step is my clutch move for helping to see detail in the model when painting…I basically drown the entire thing in Citadel Nuln Oil wash thinned with a little water. This will darken the light gray slightly, add shadow to the original dark coat, and of course make the details pop.
The last step is to spray Stynylrez White Primer (same ratios as before) at zero degrees directly over head. This will only catch the very tops and protruding edges of the details, creating a nice high contrast effect…which of course is an ideal starting point for using contrast paints.

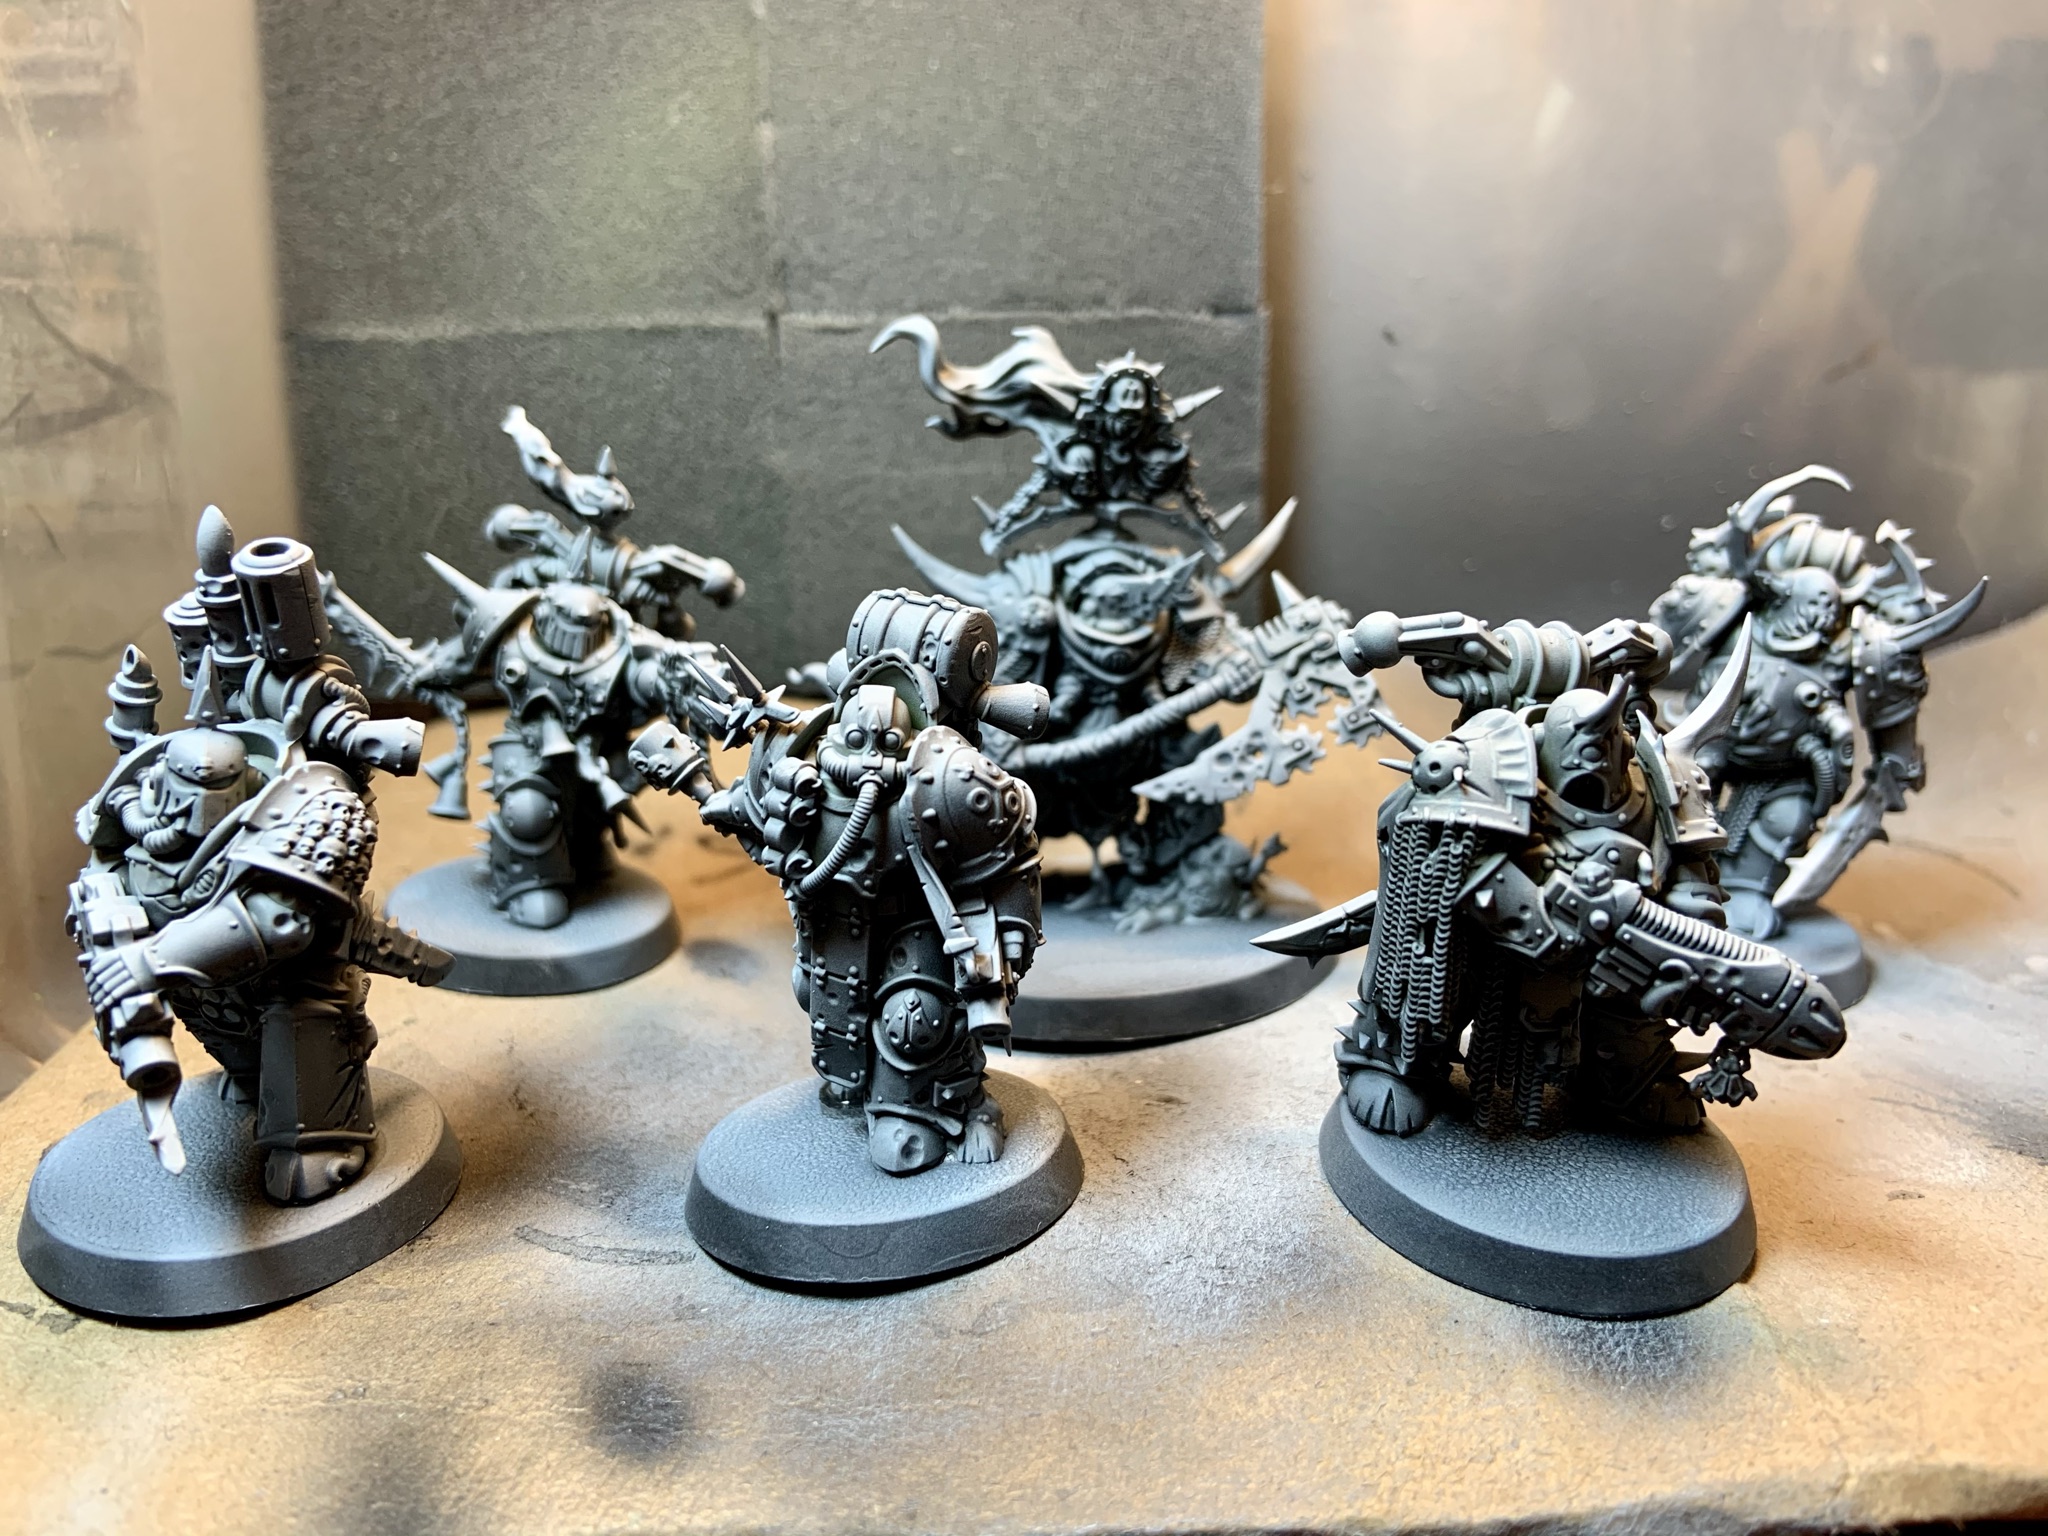
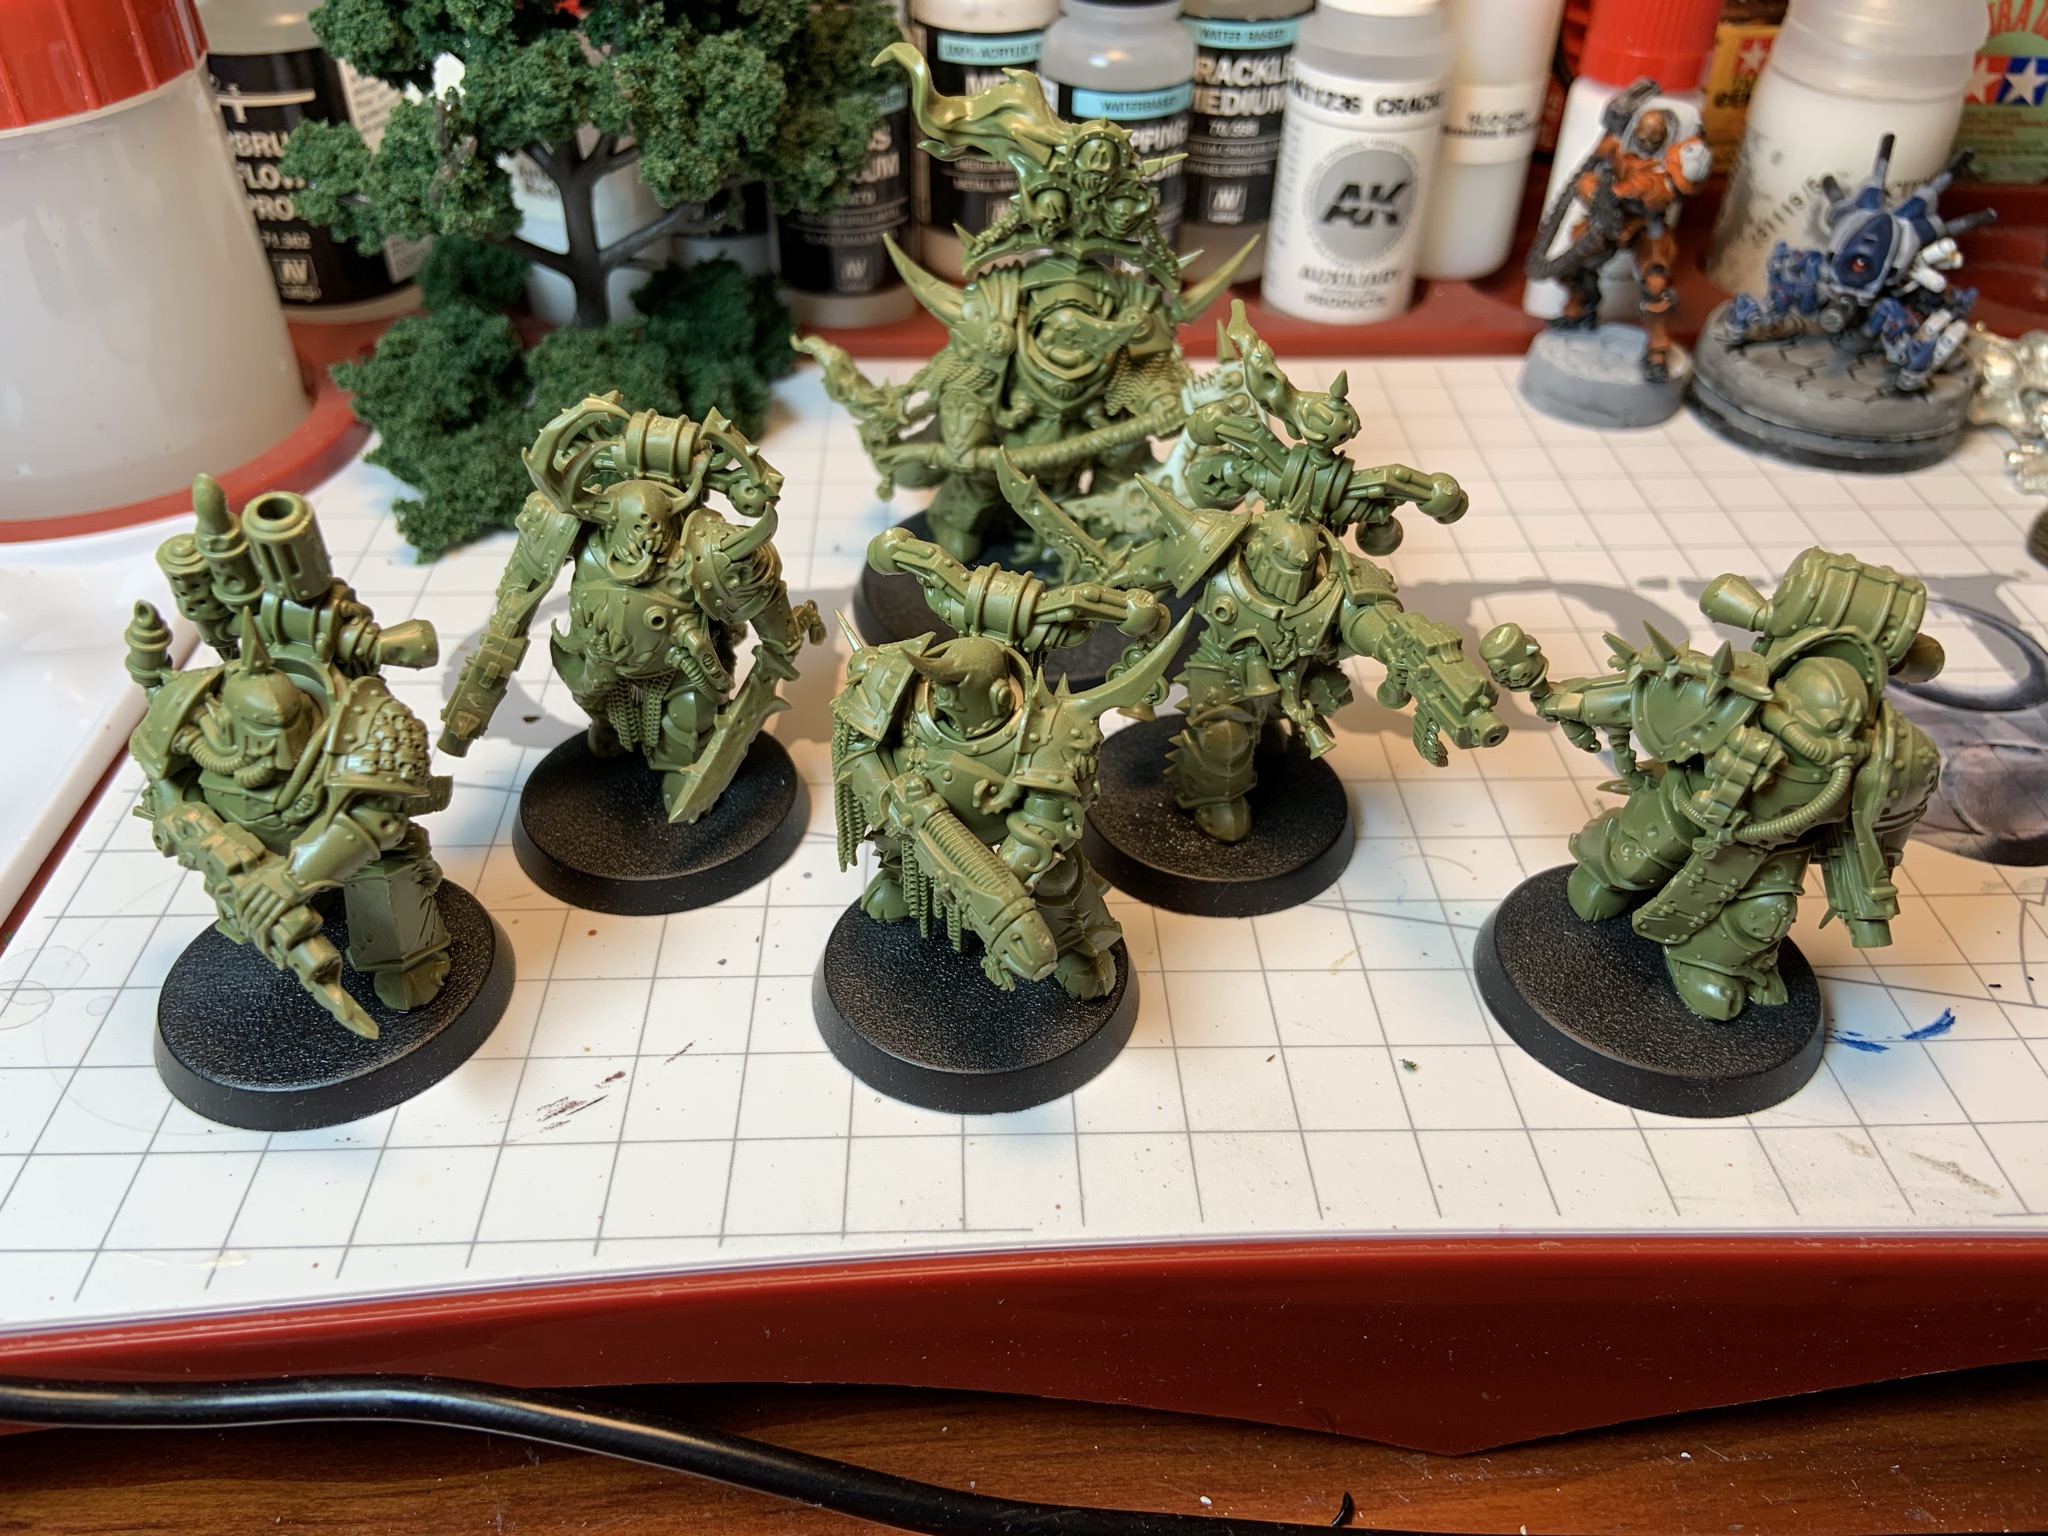
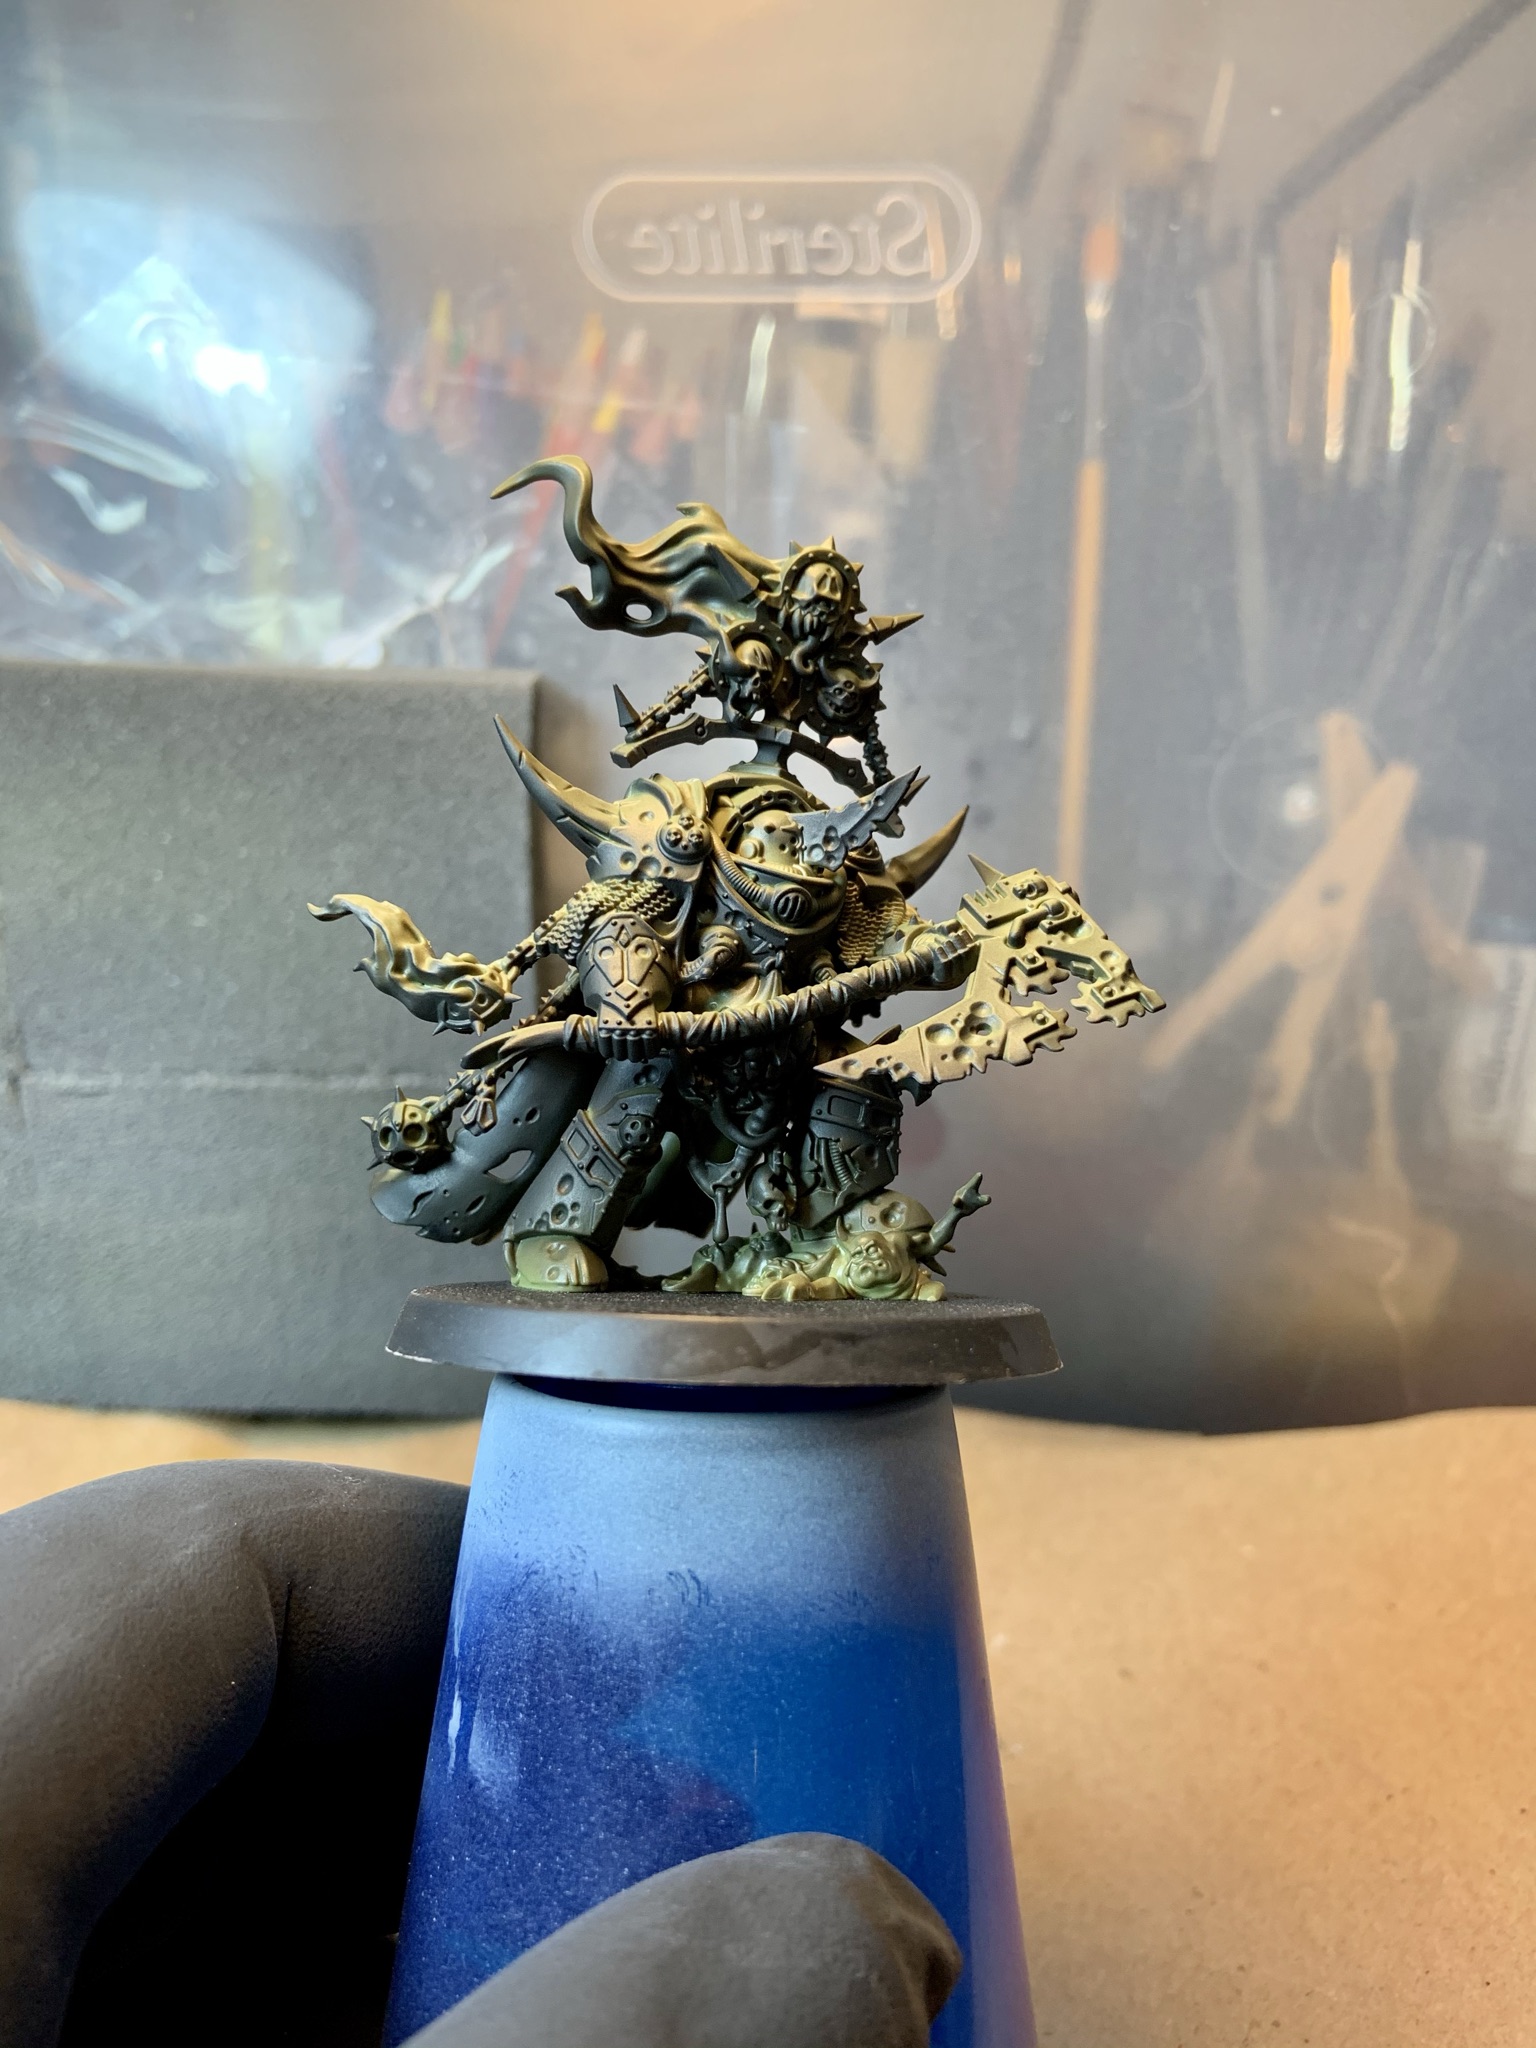
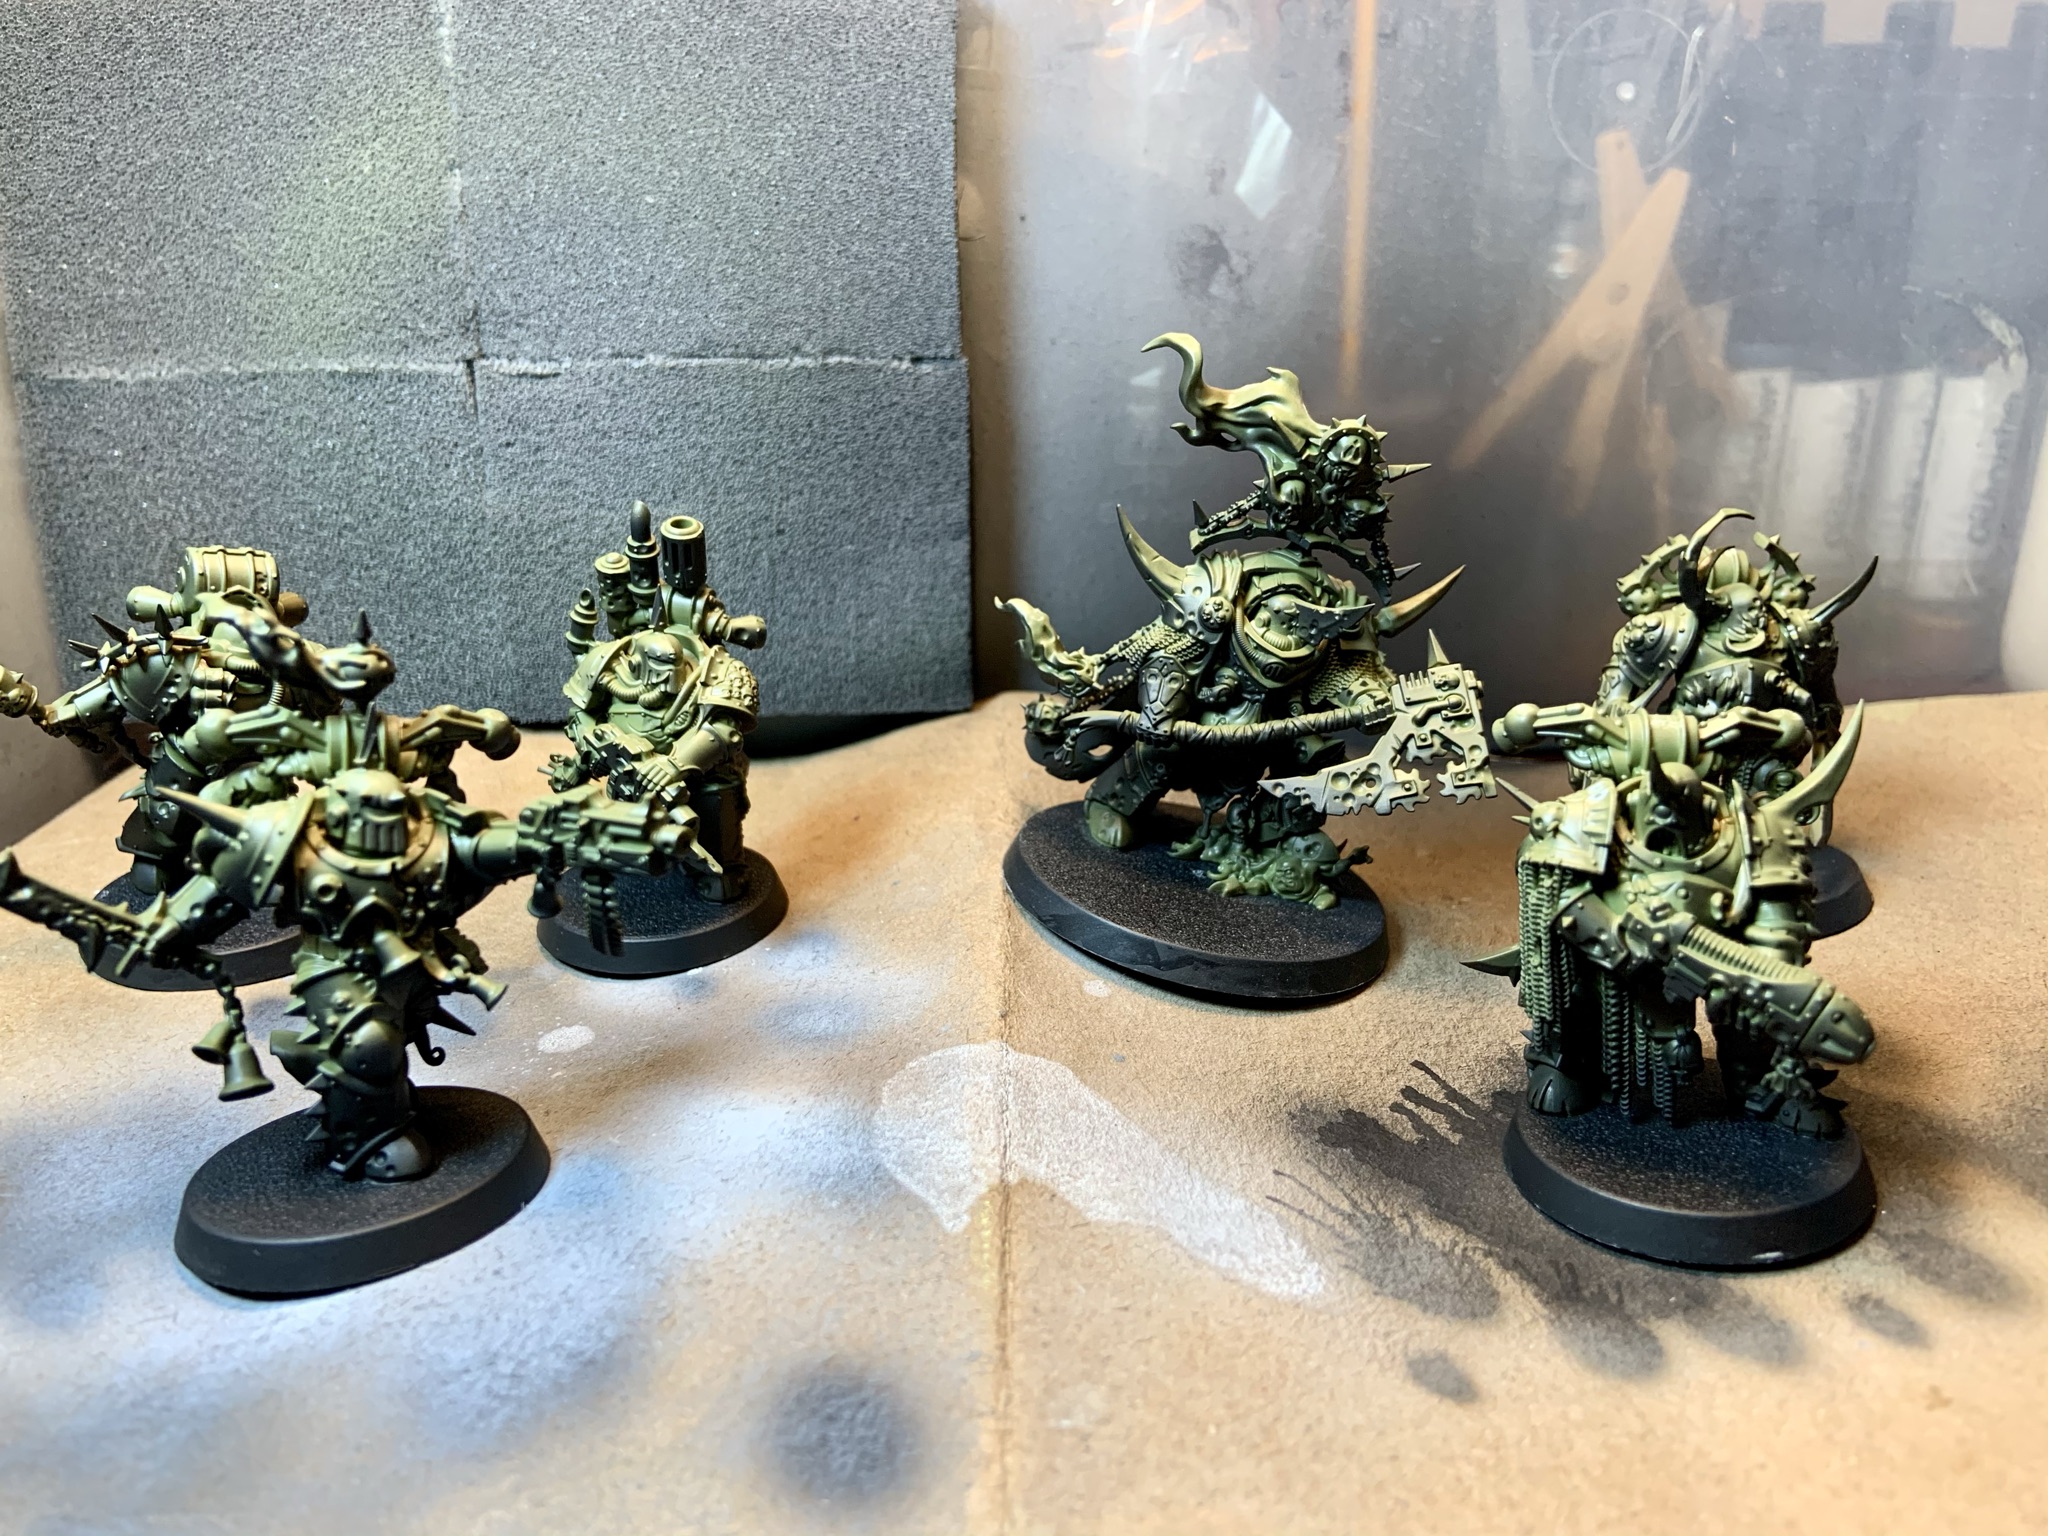
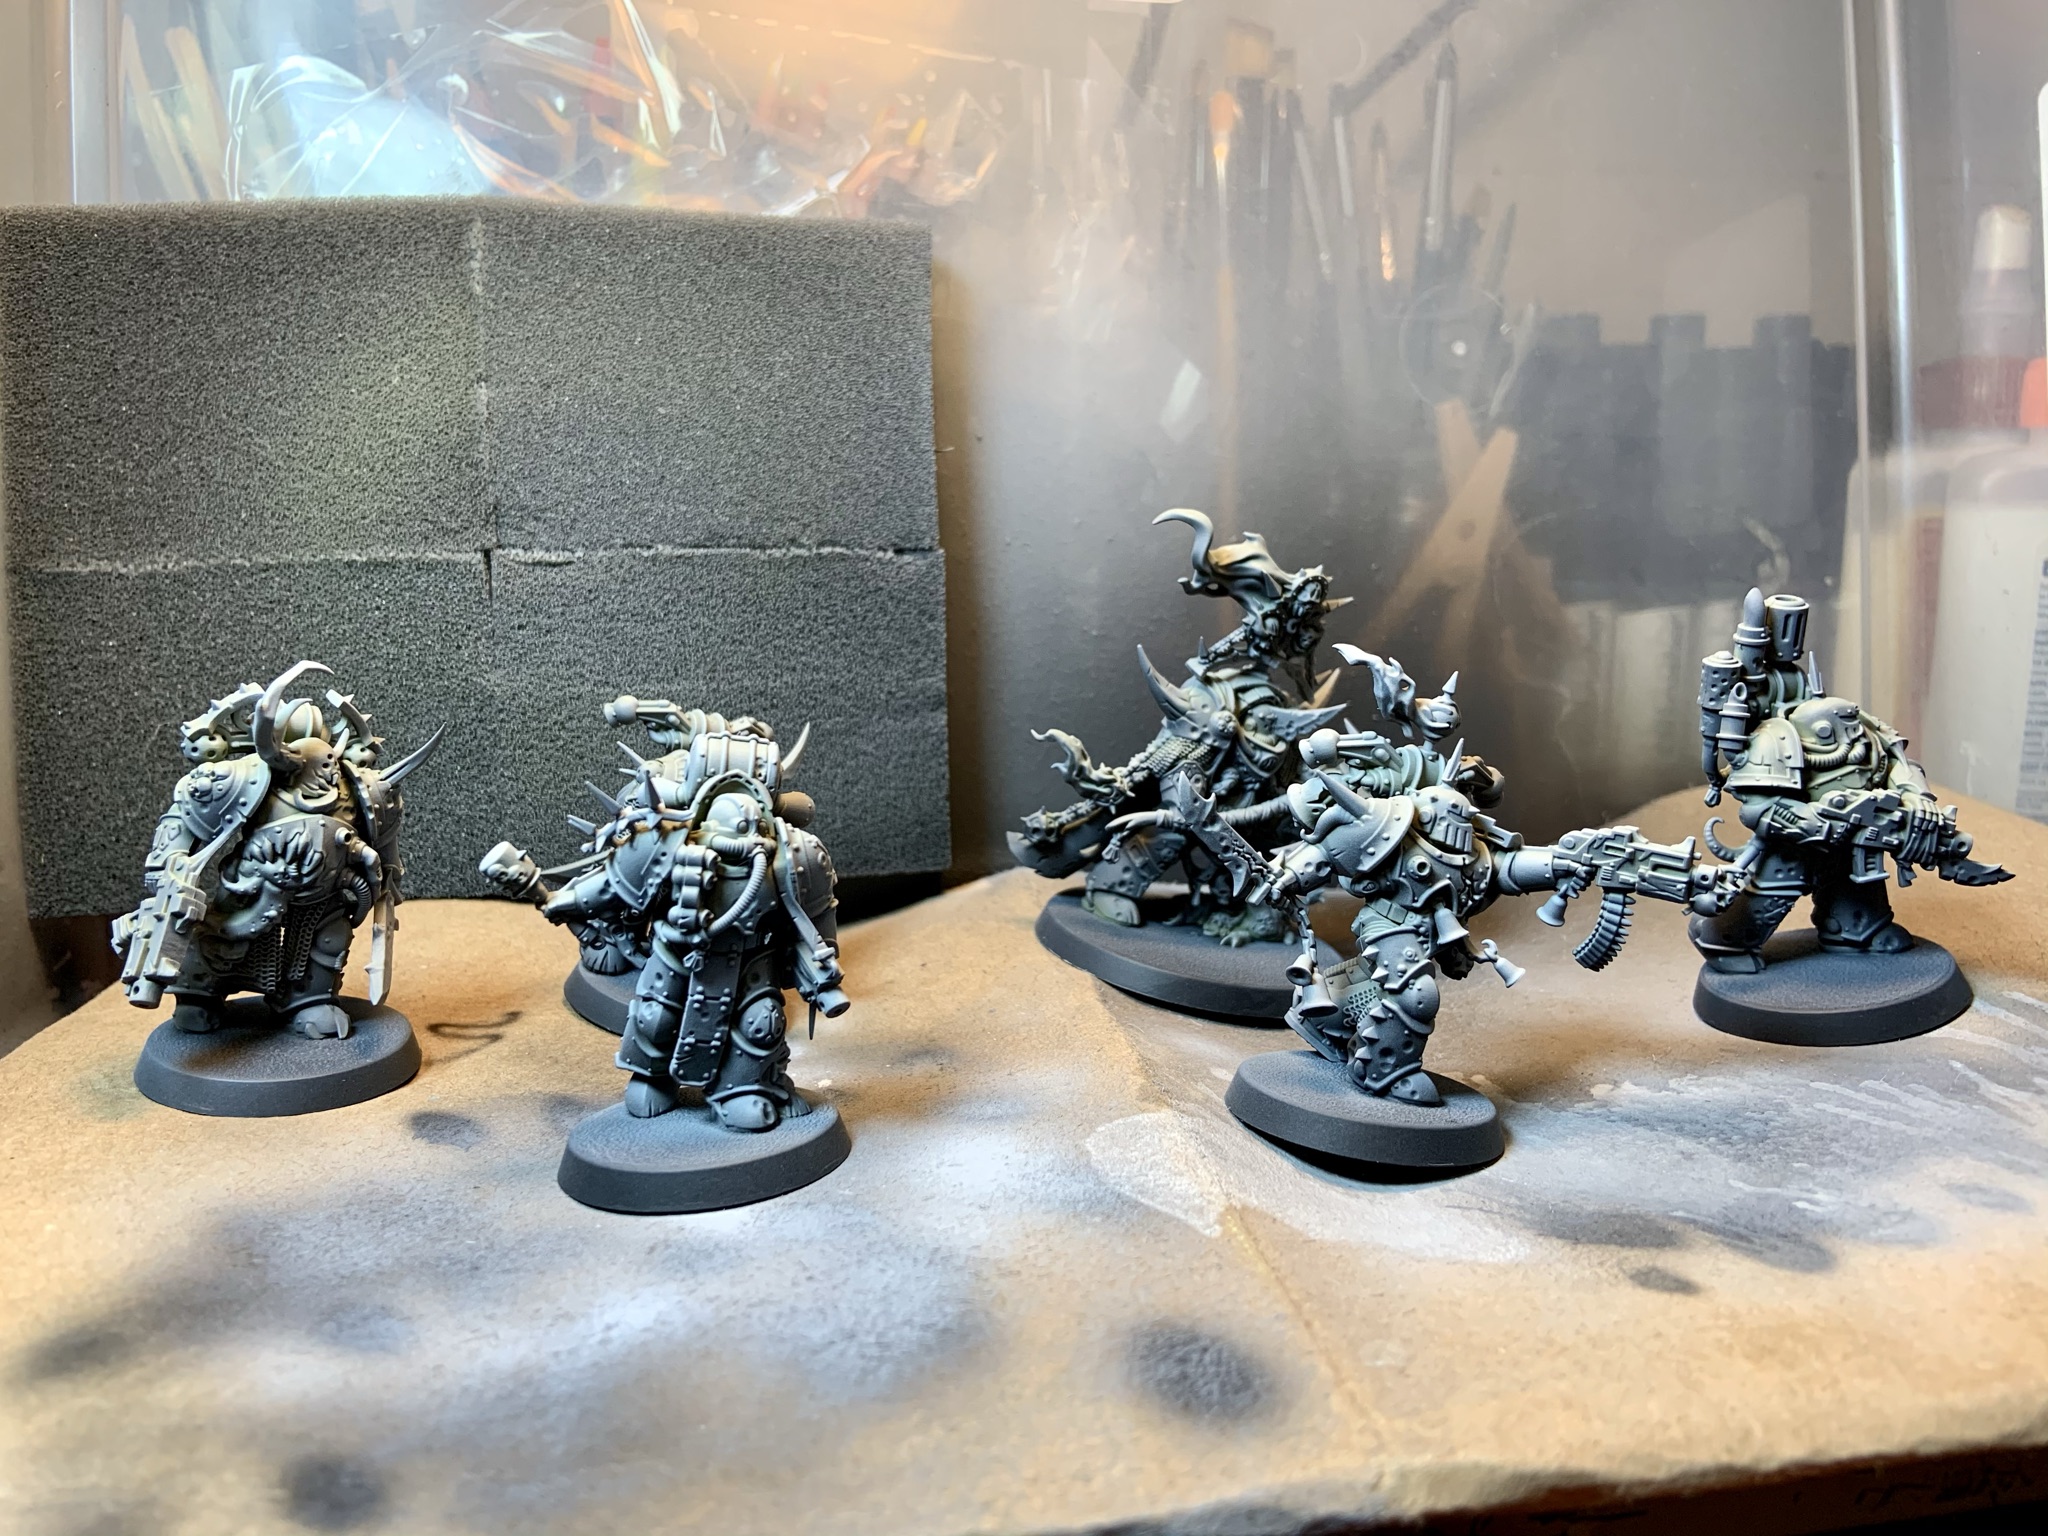
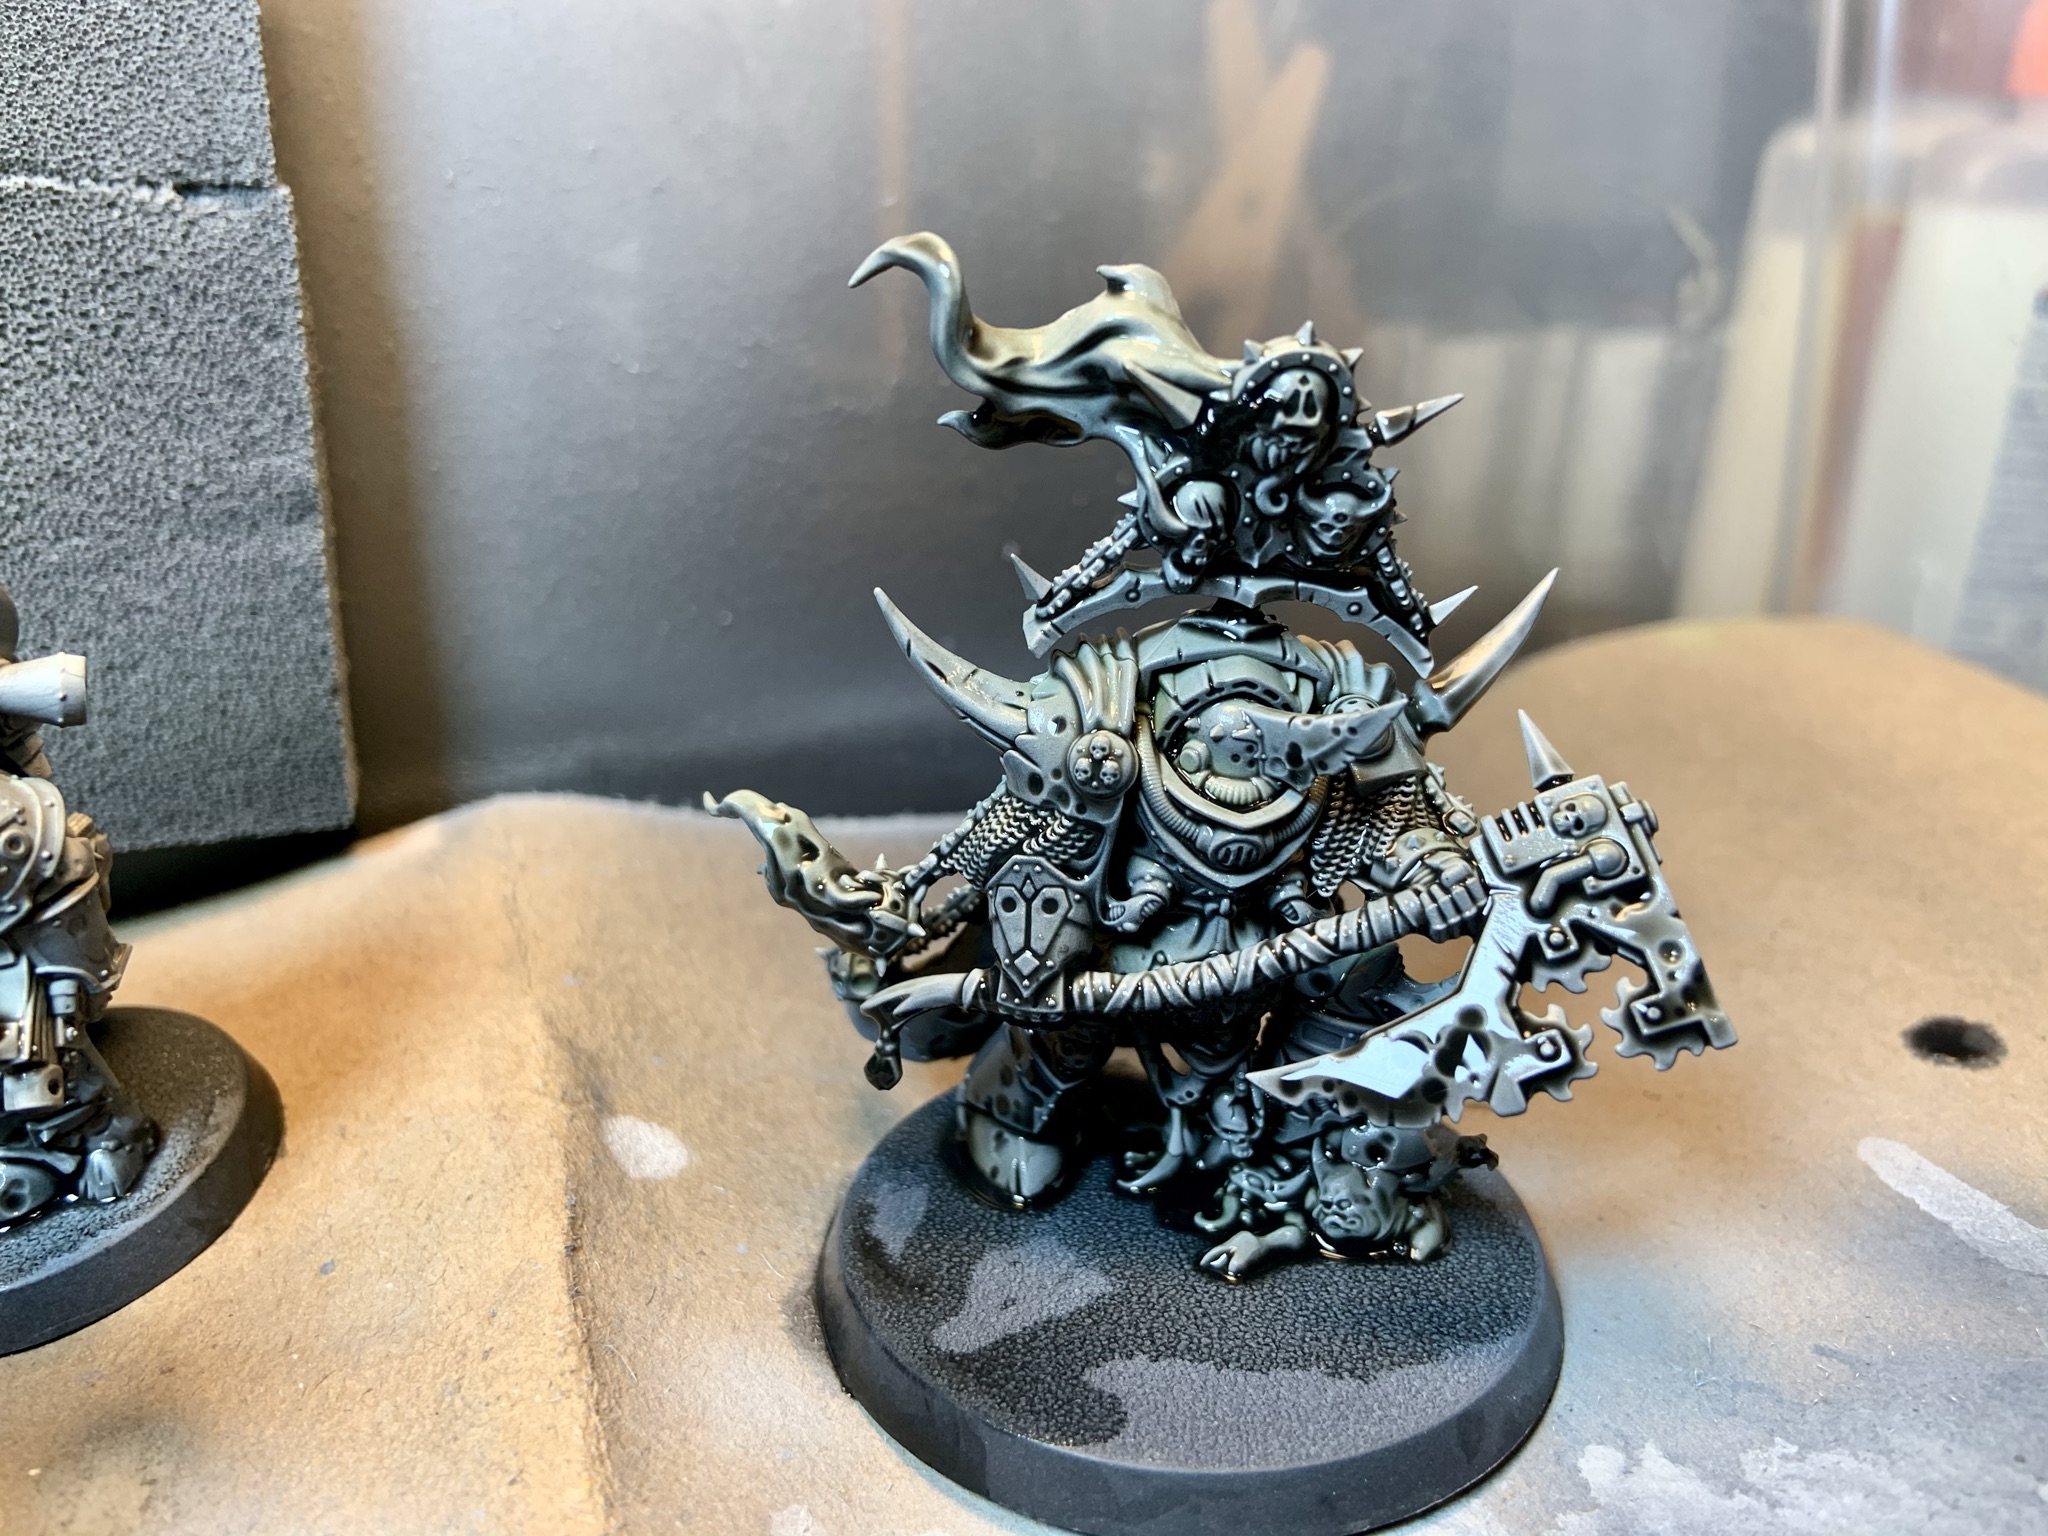
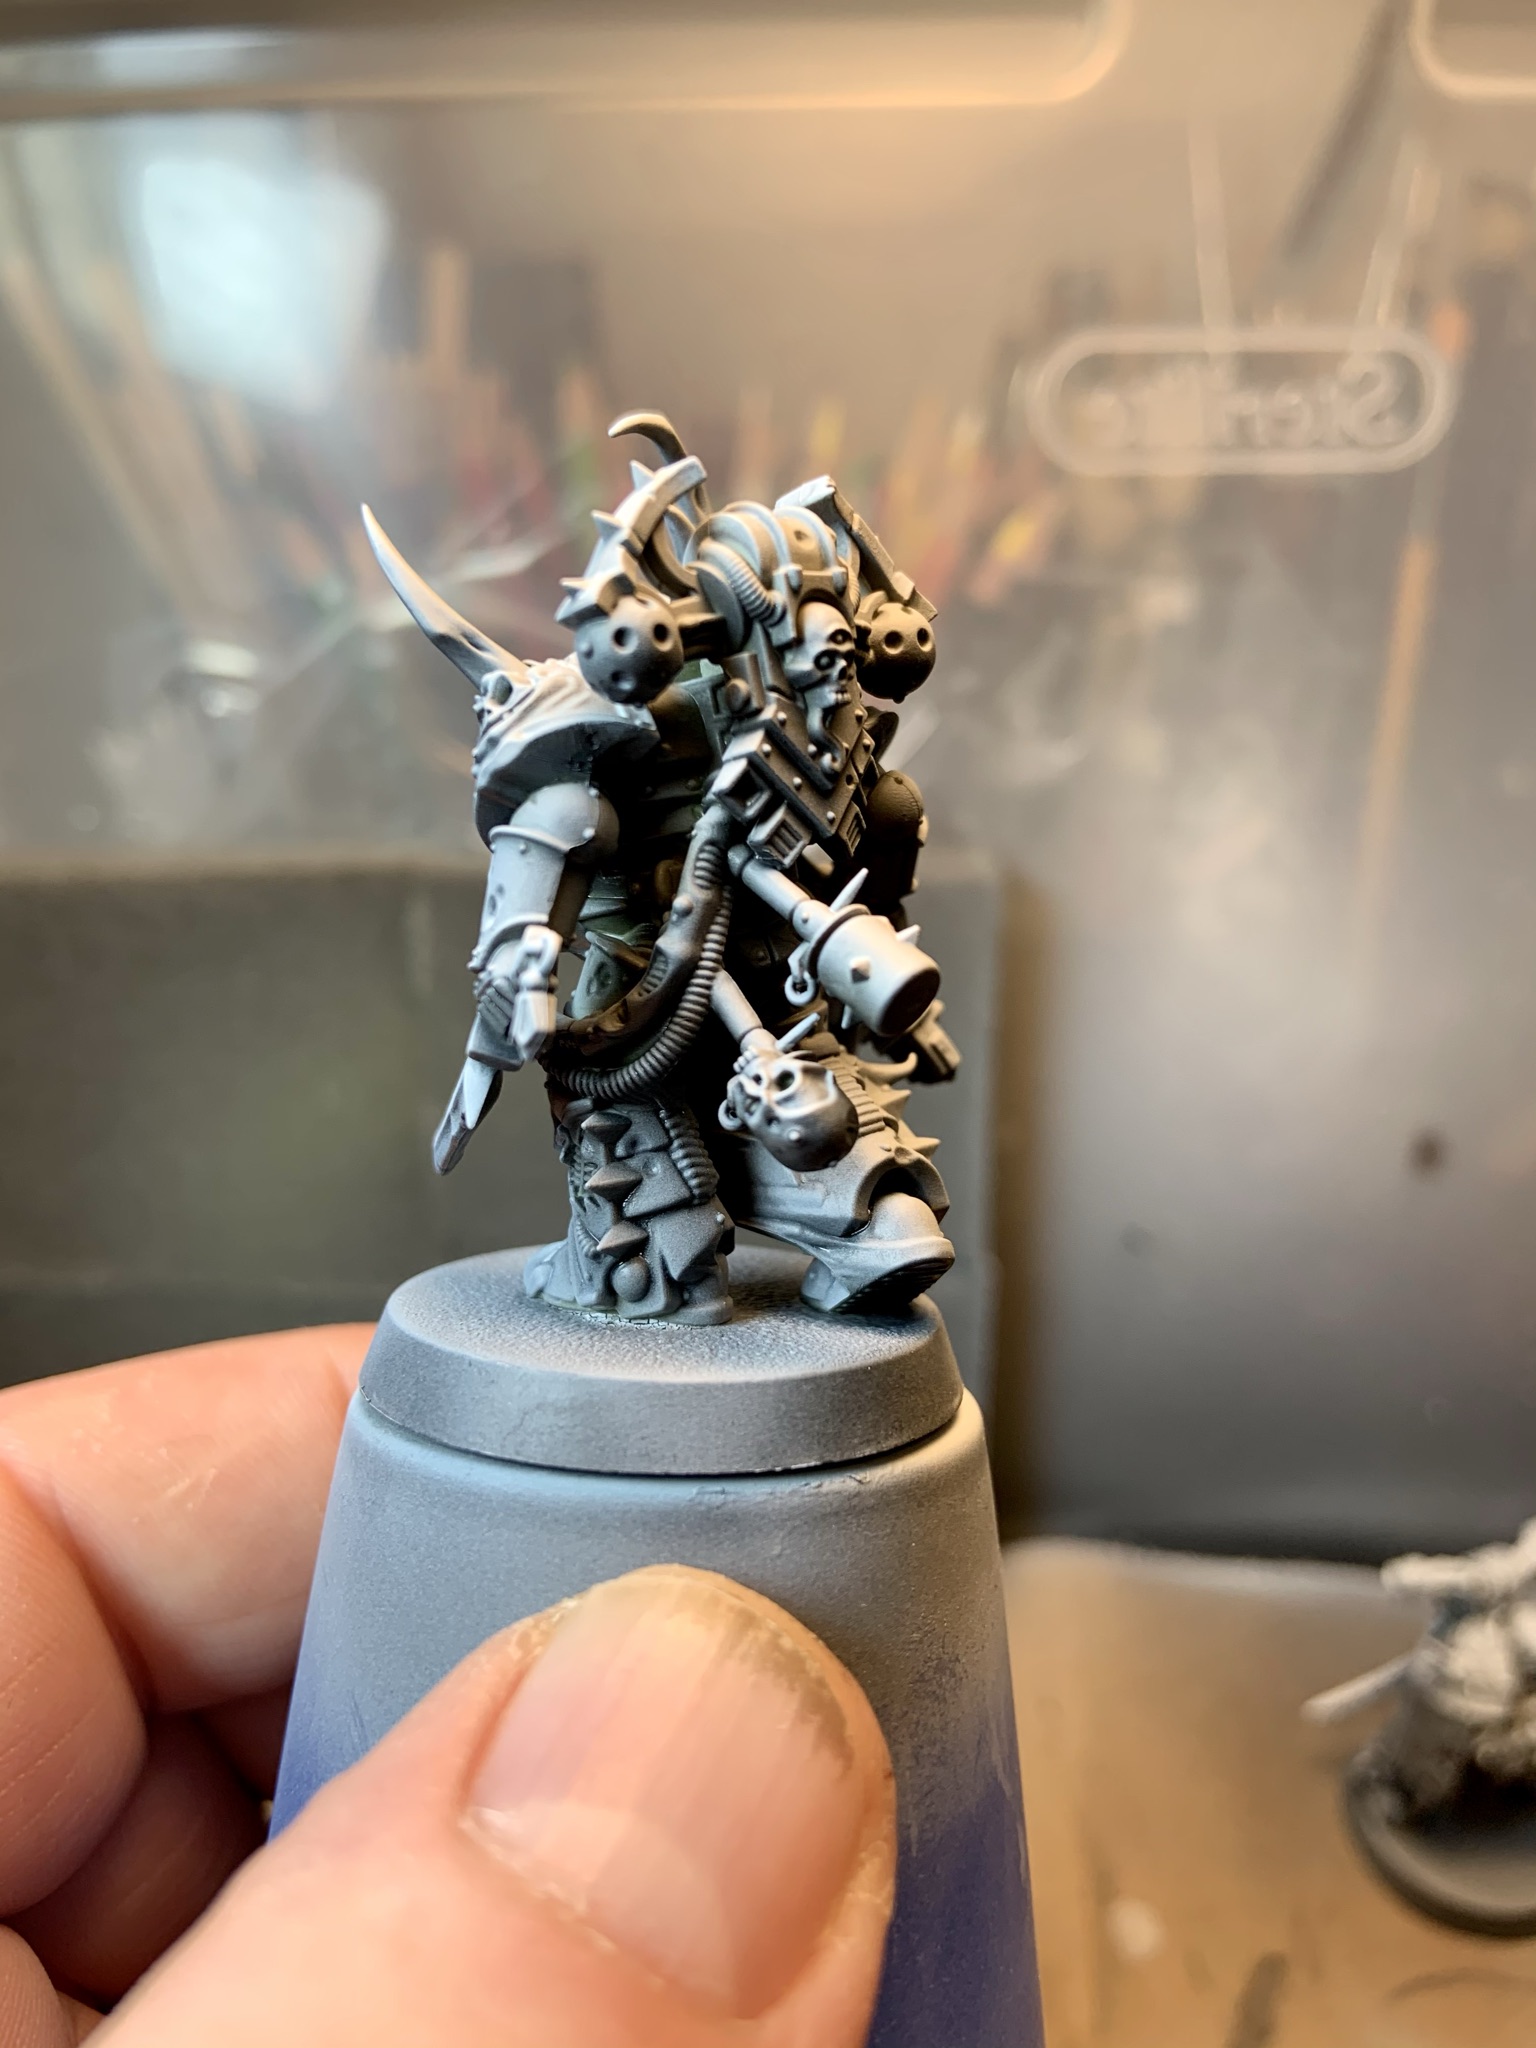
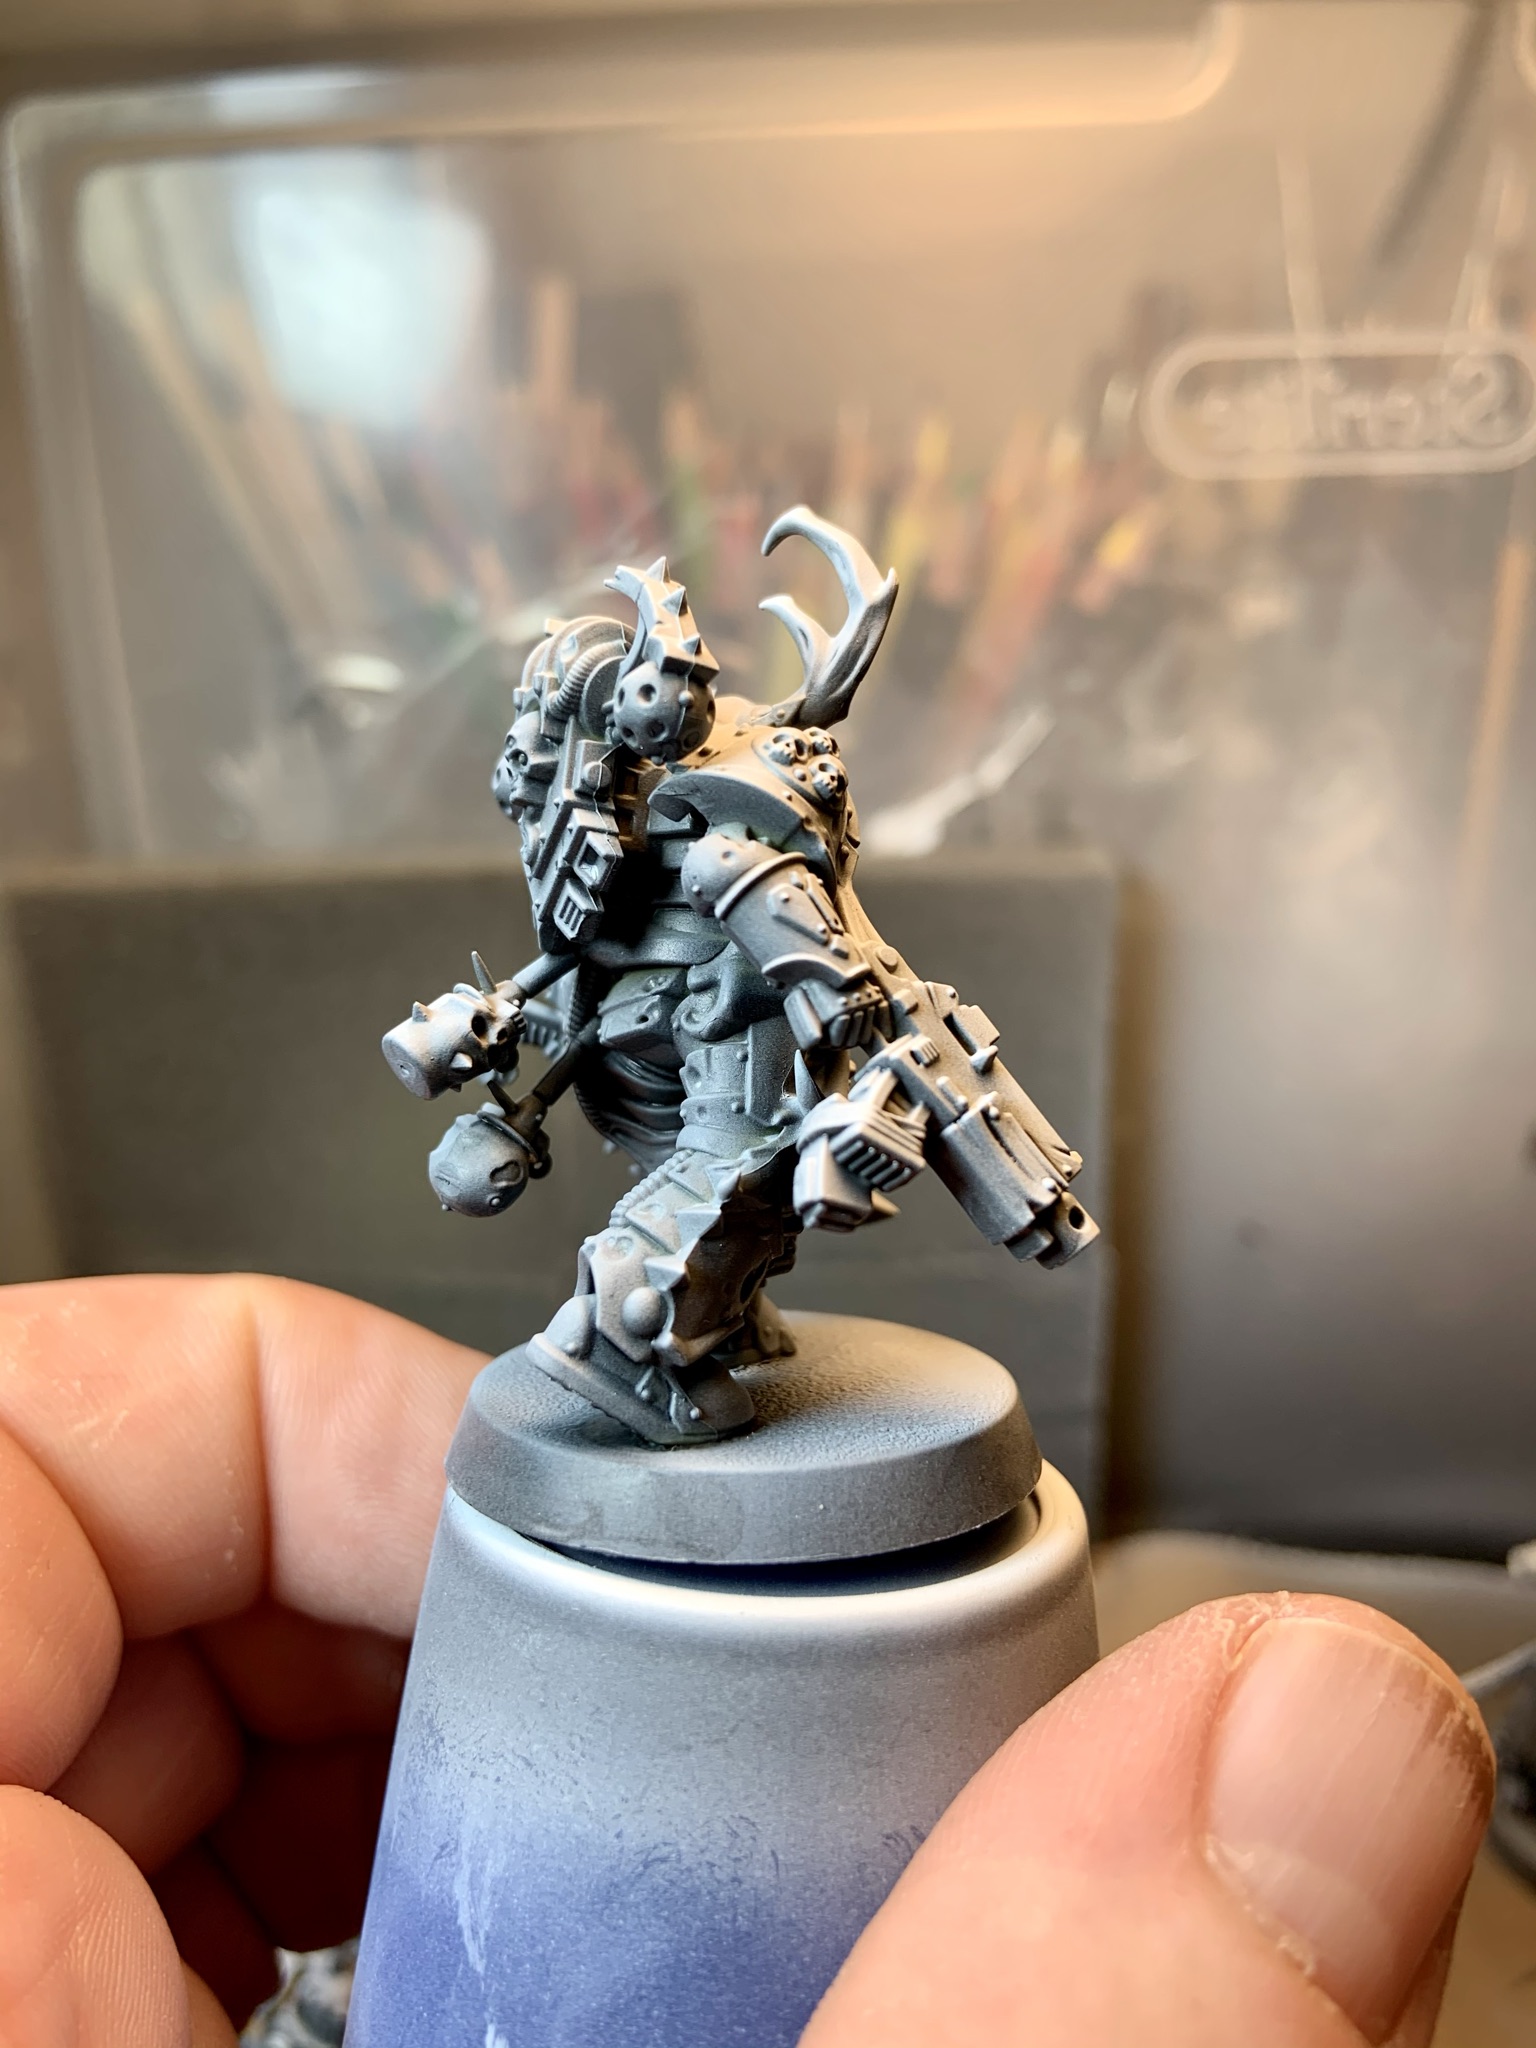
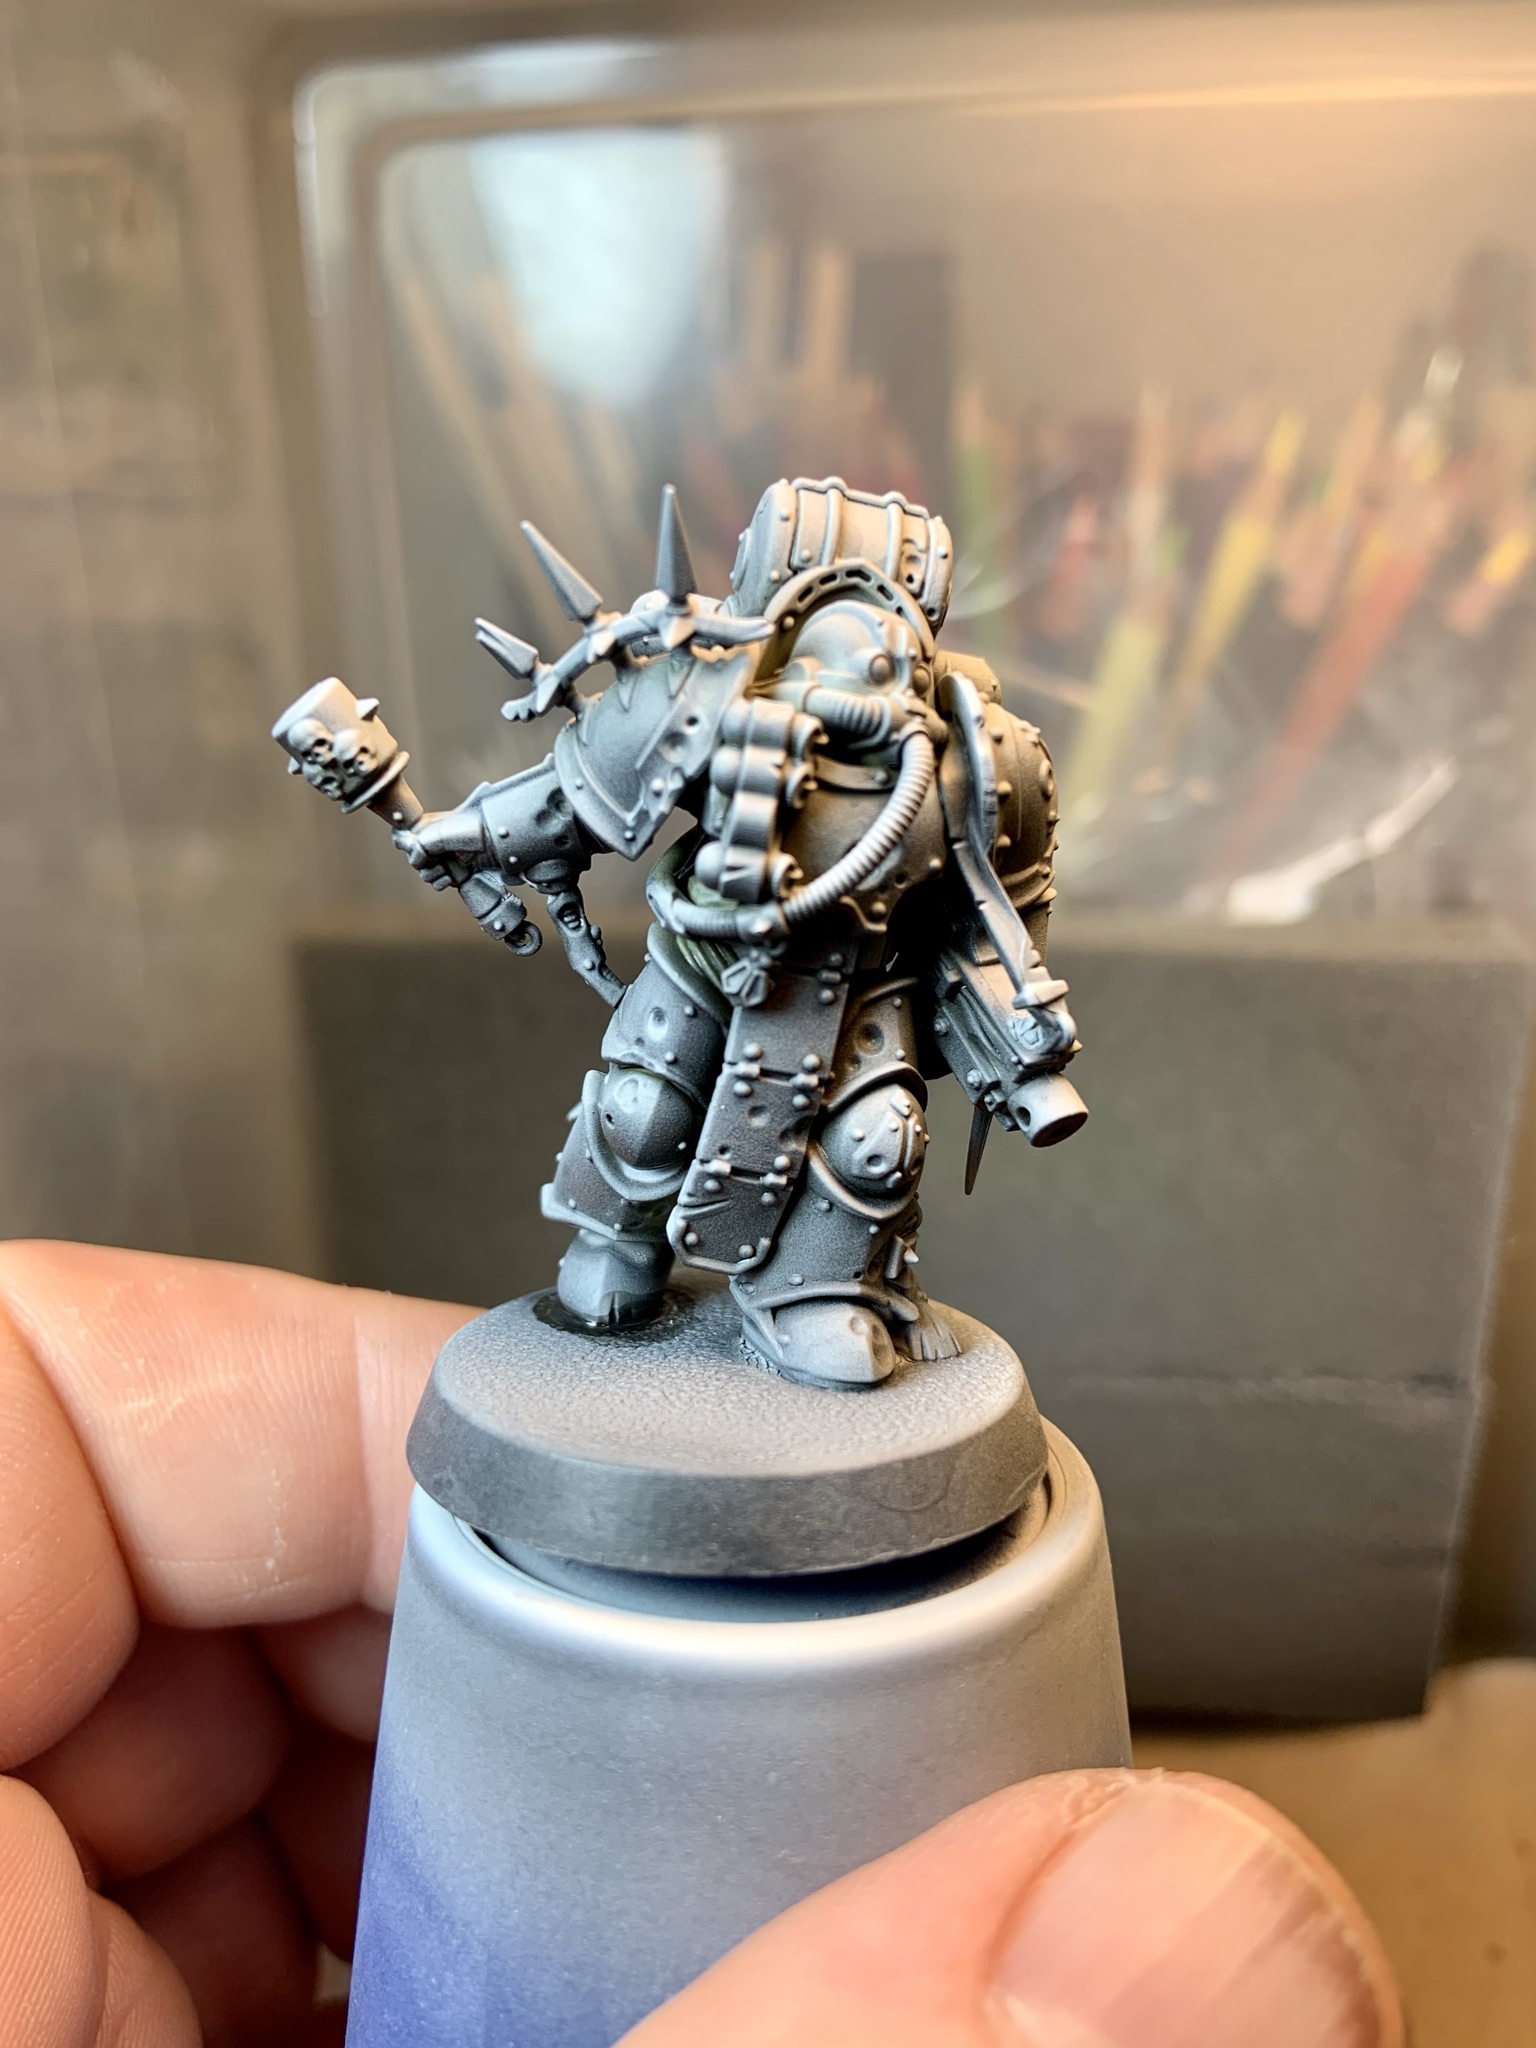
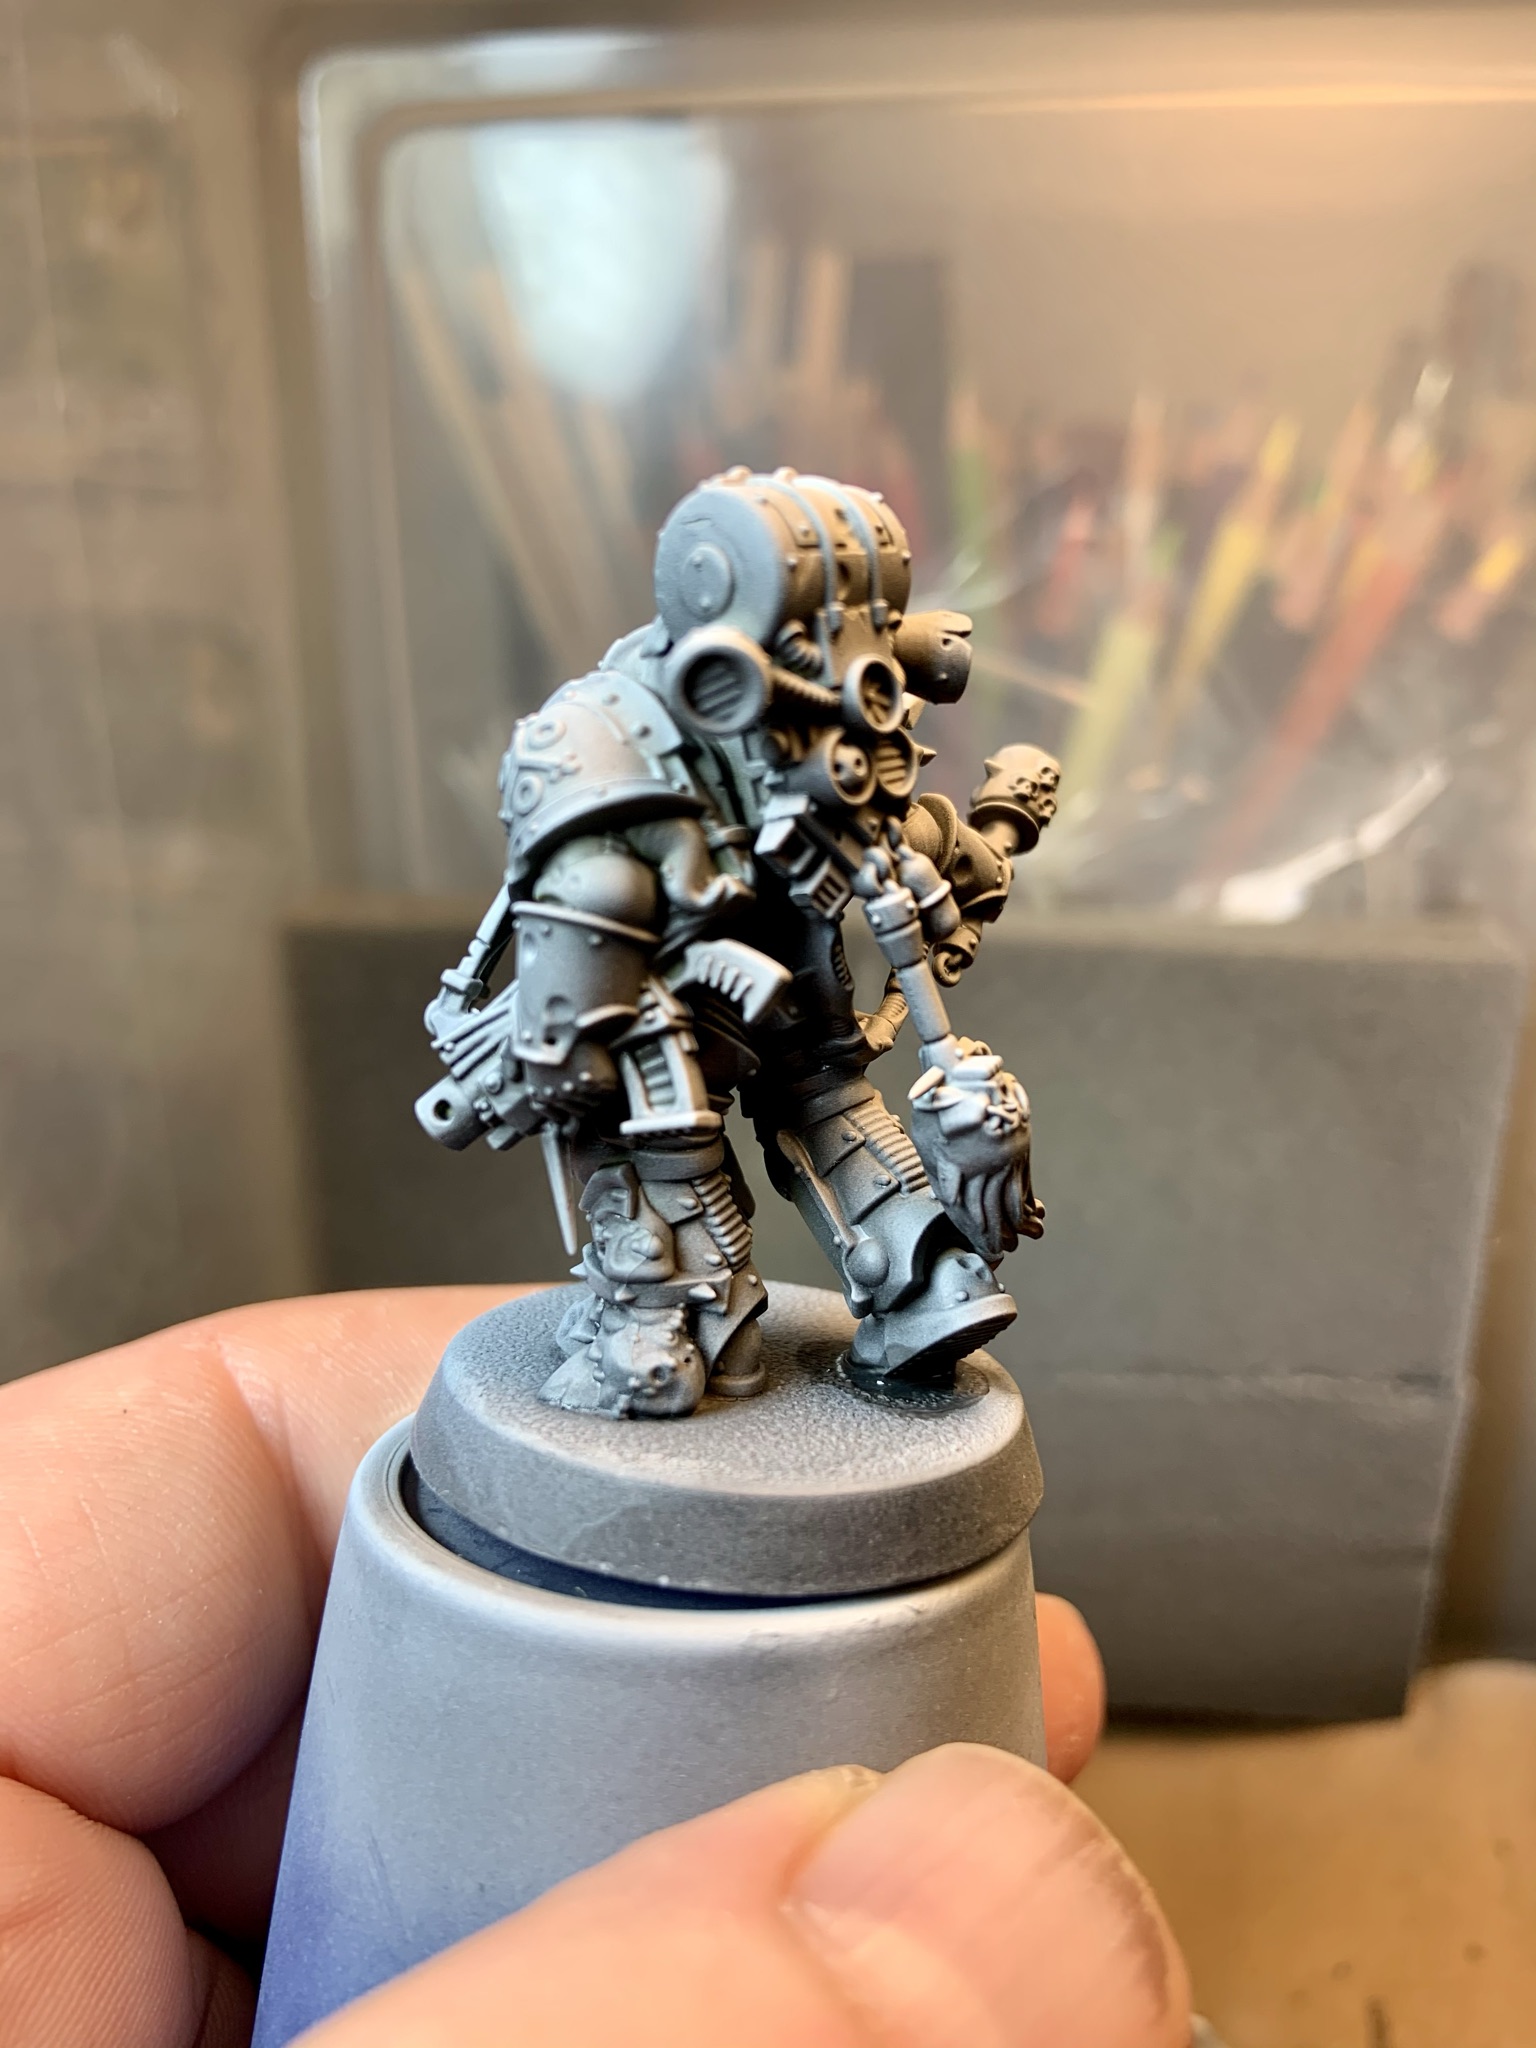
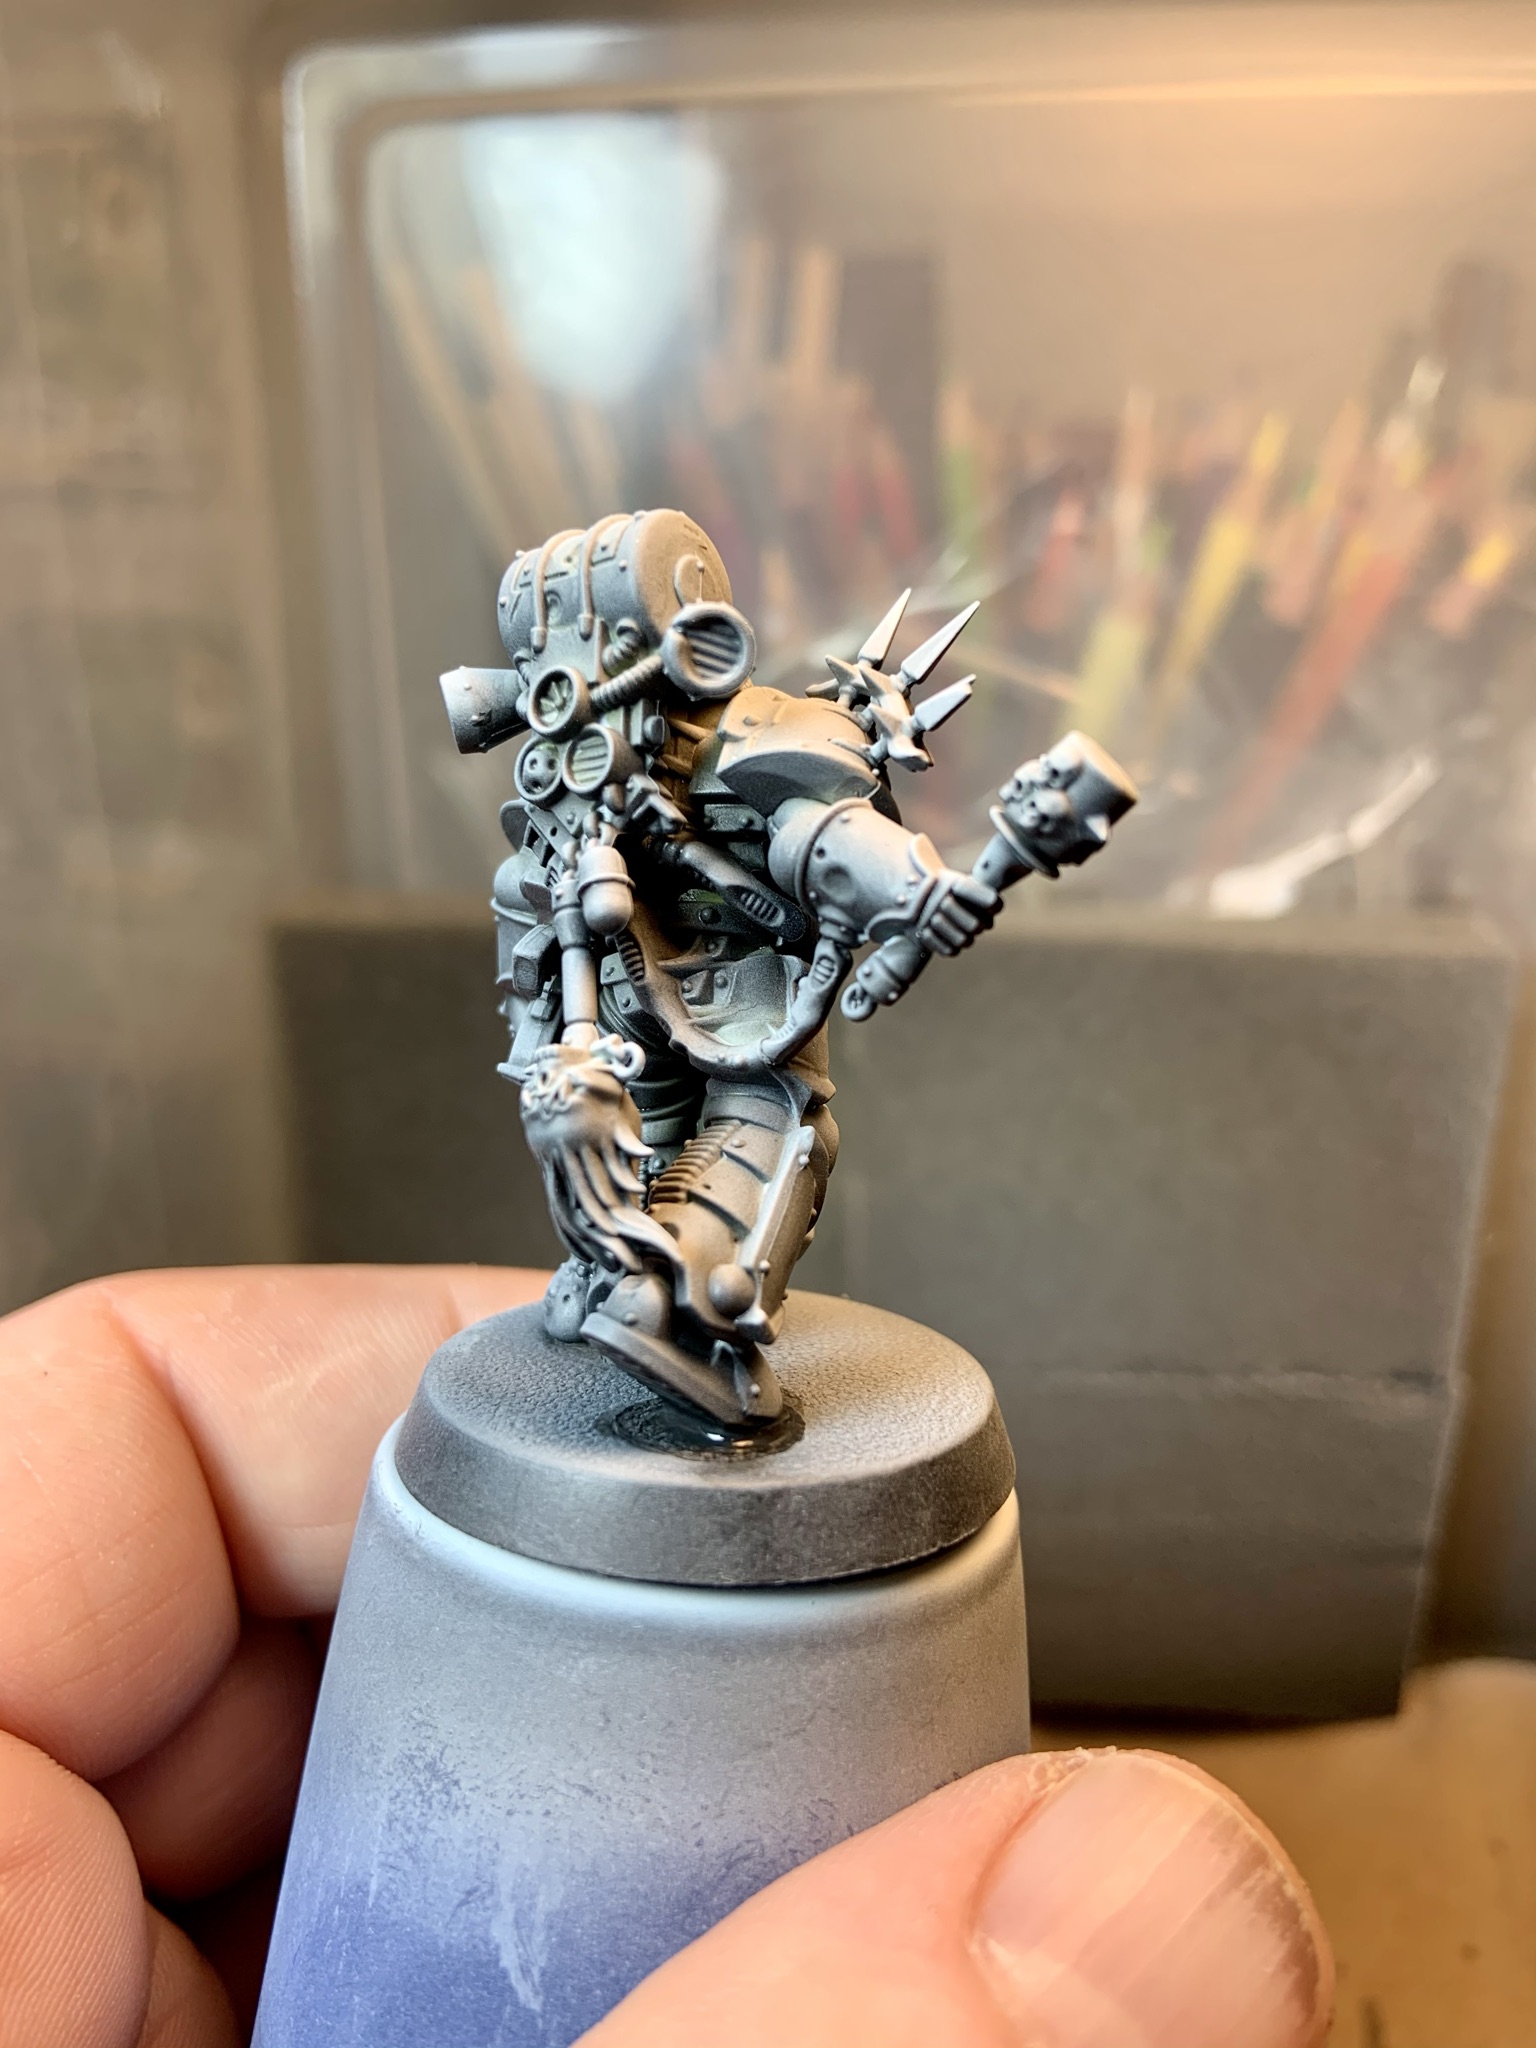
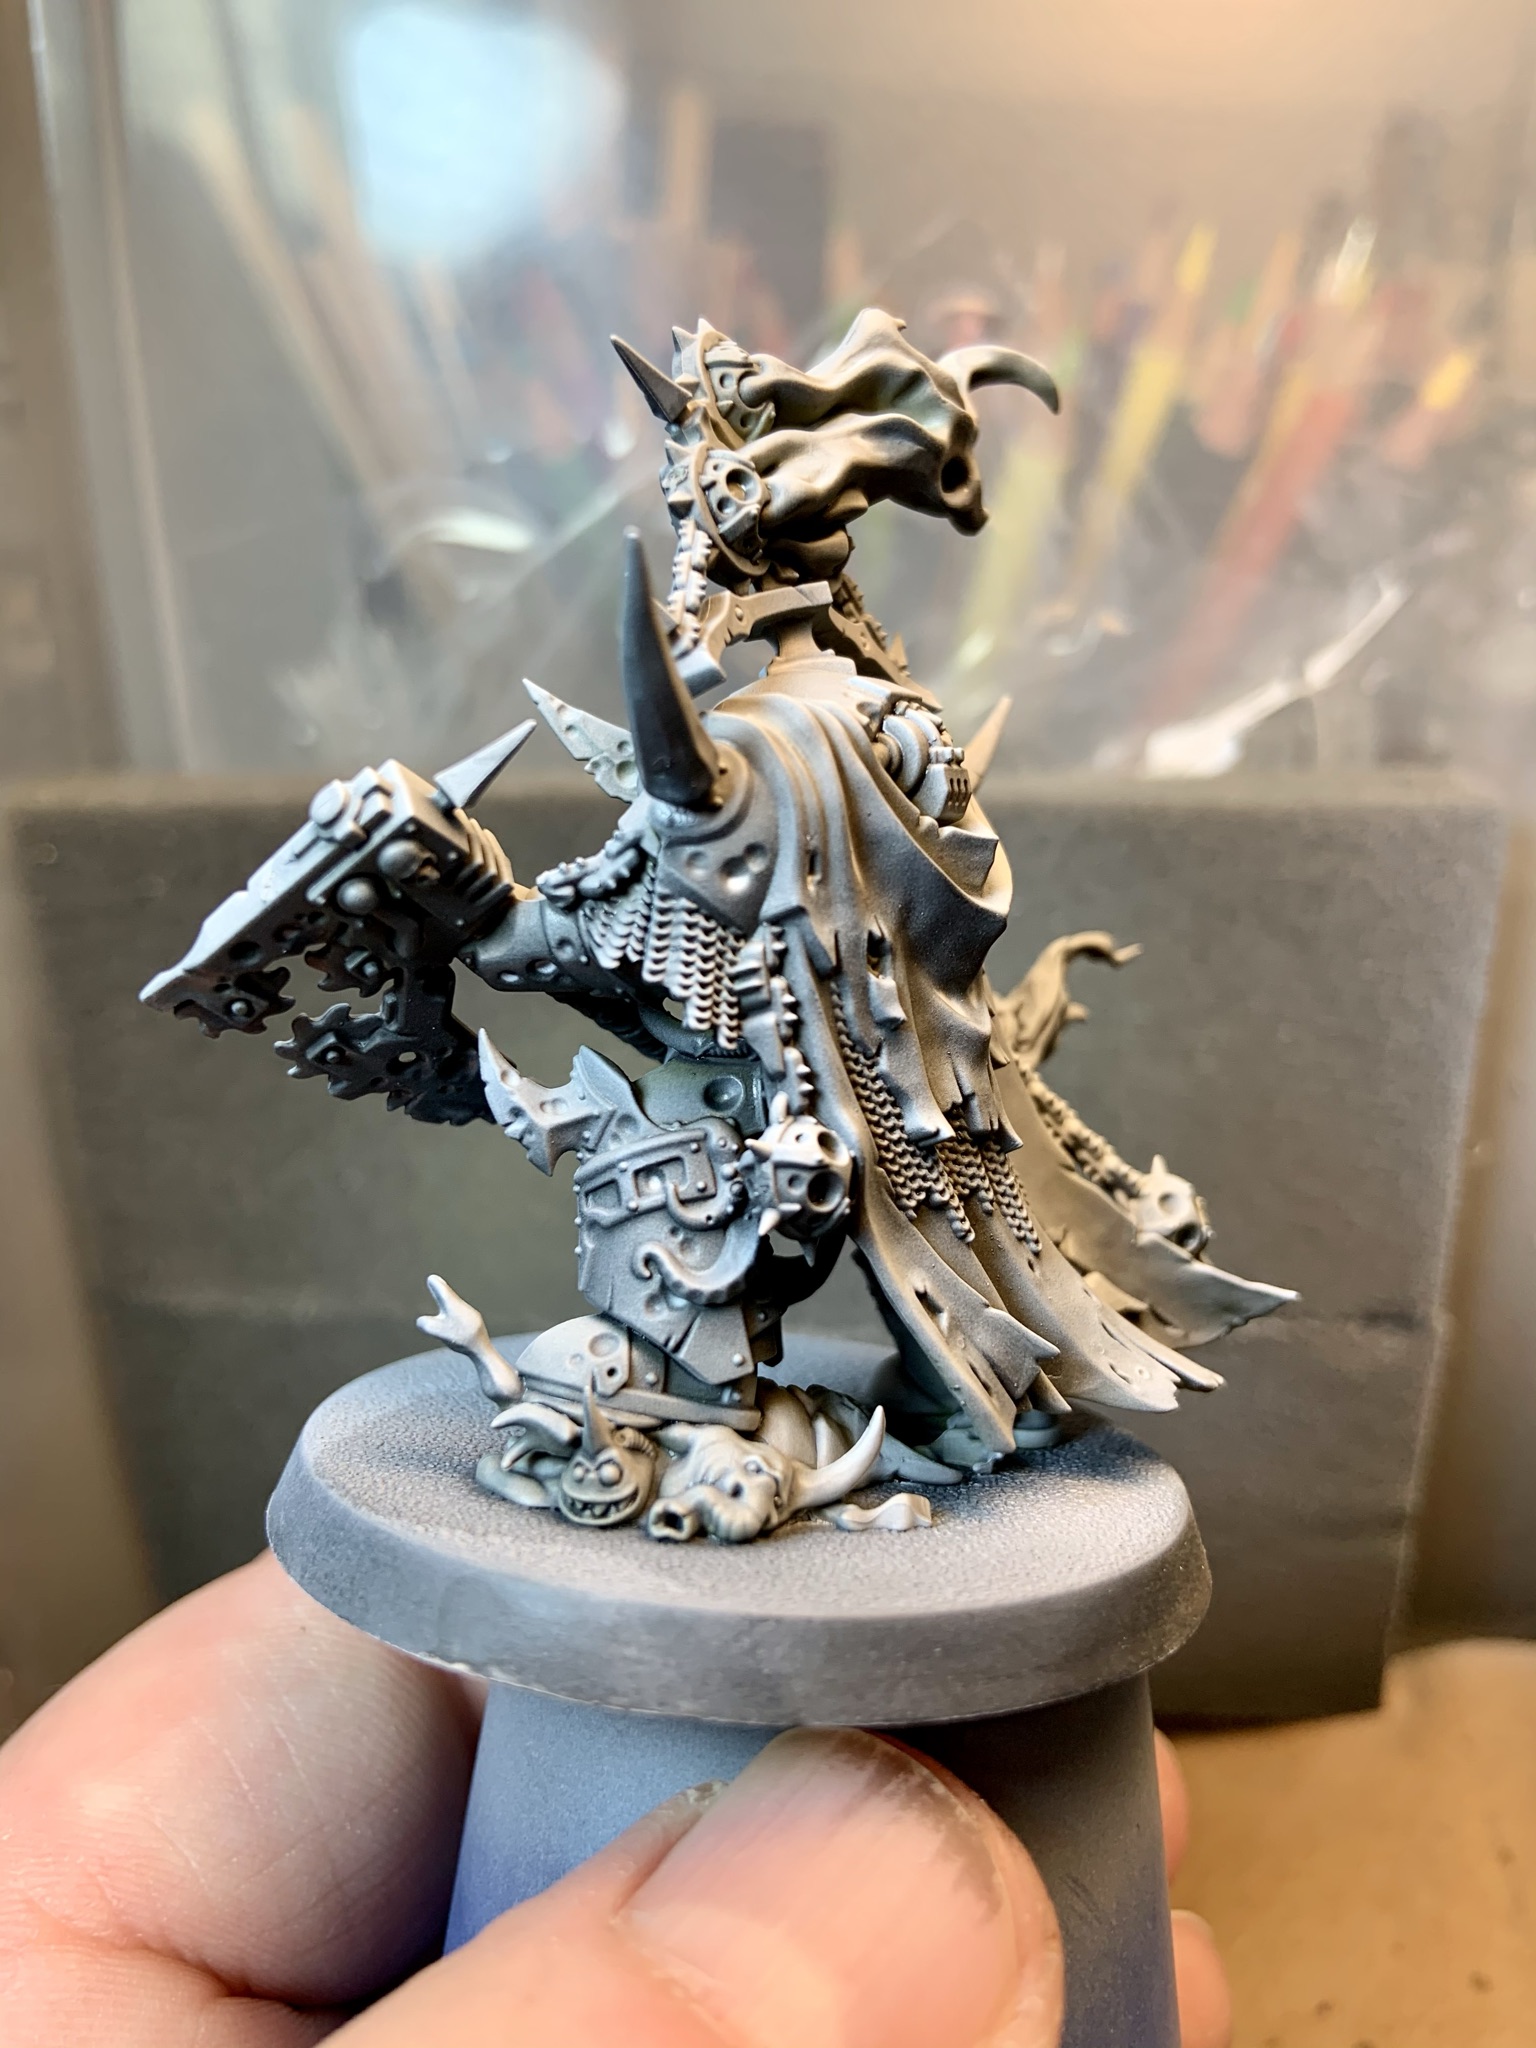
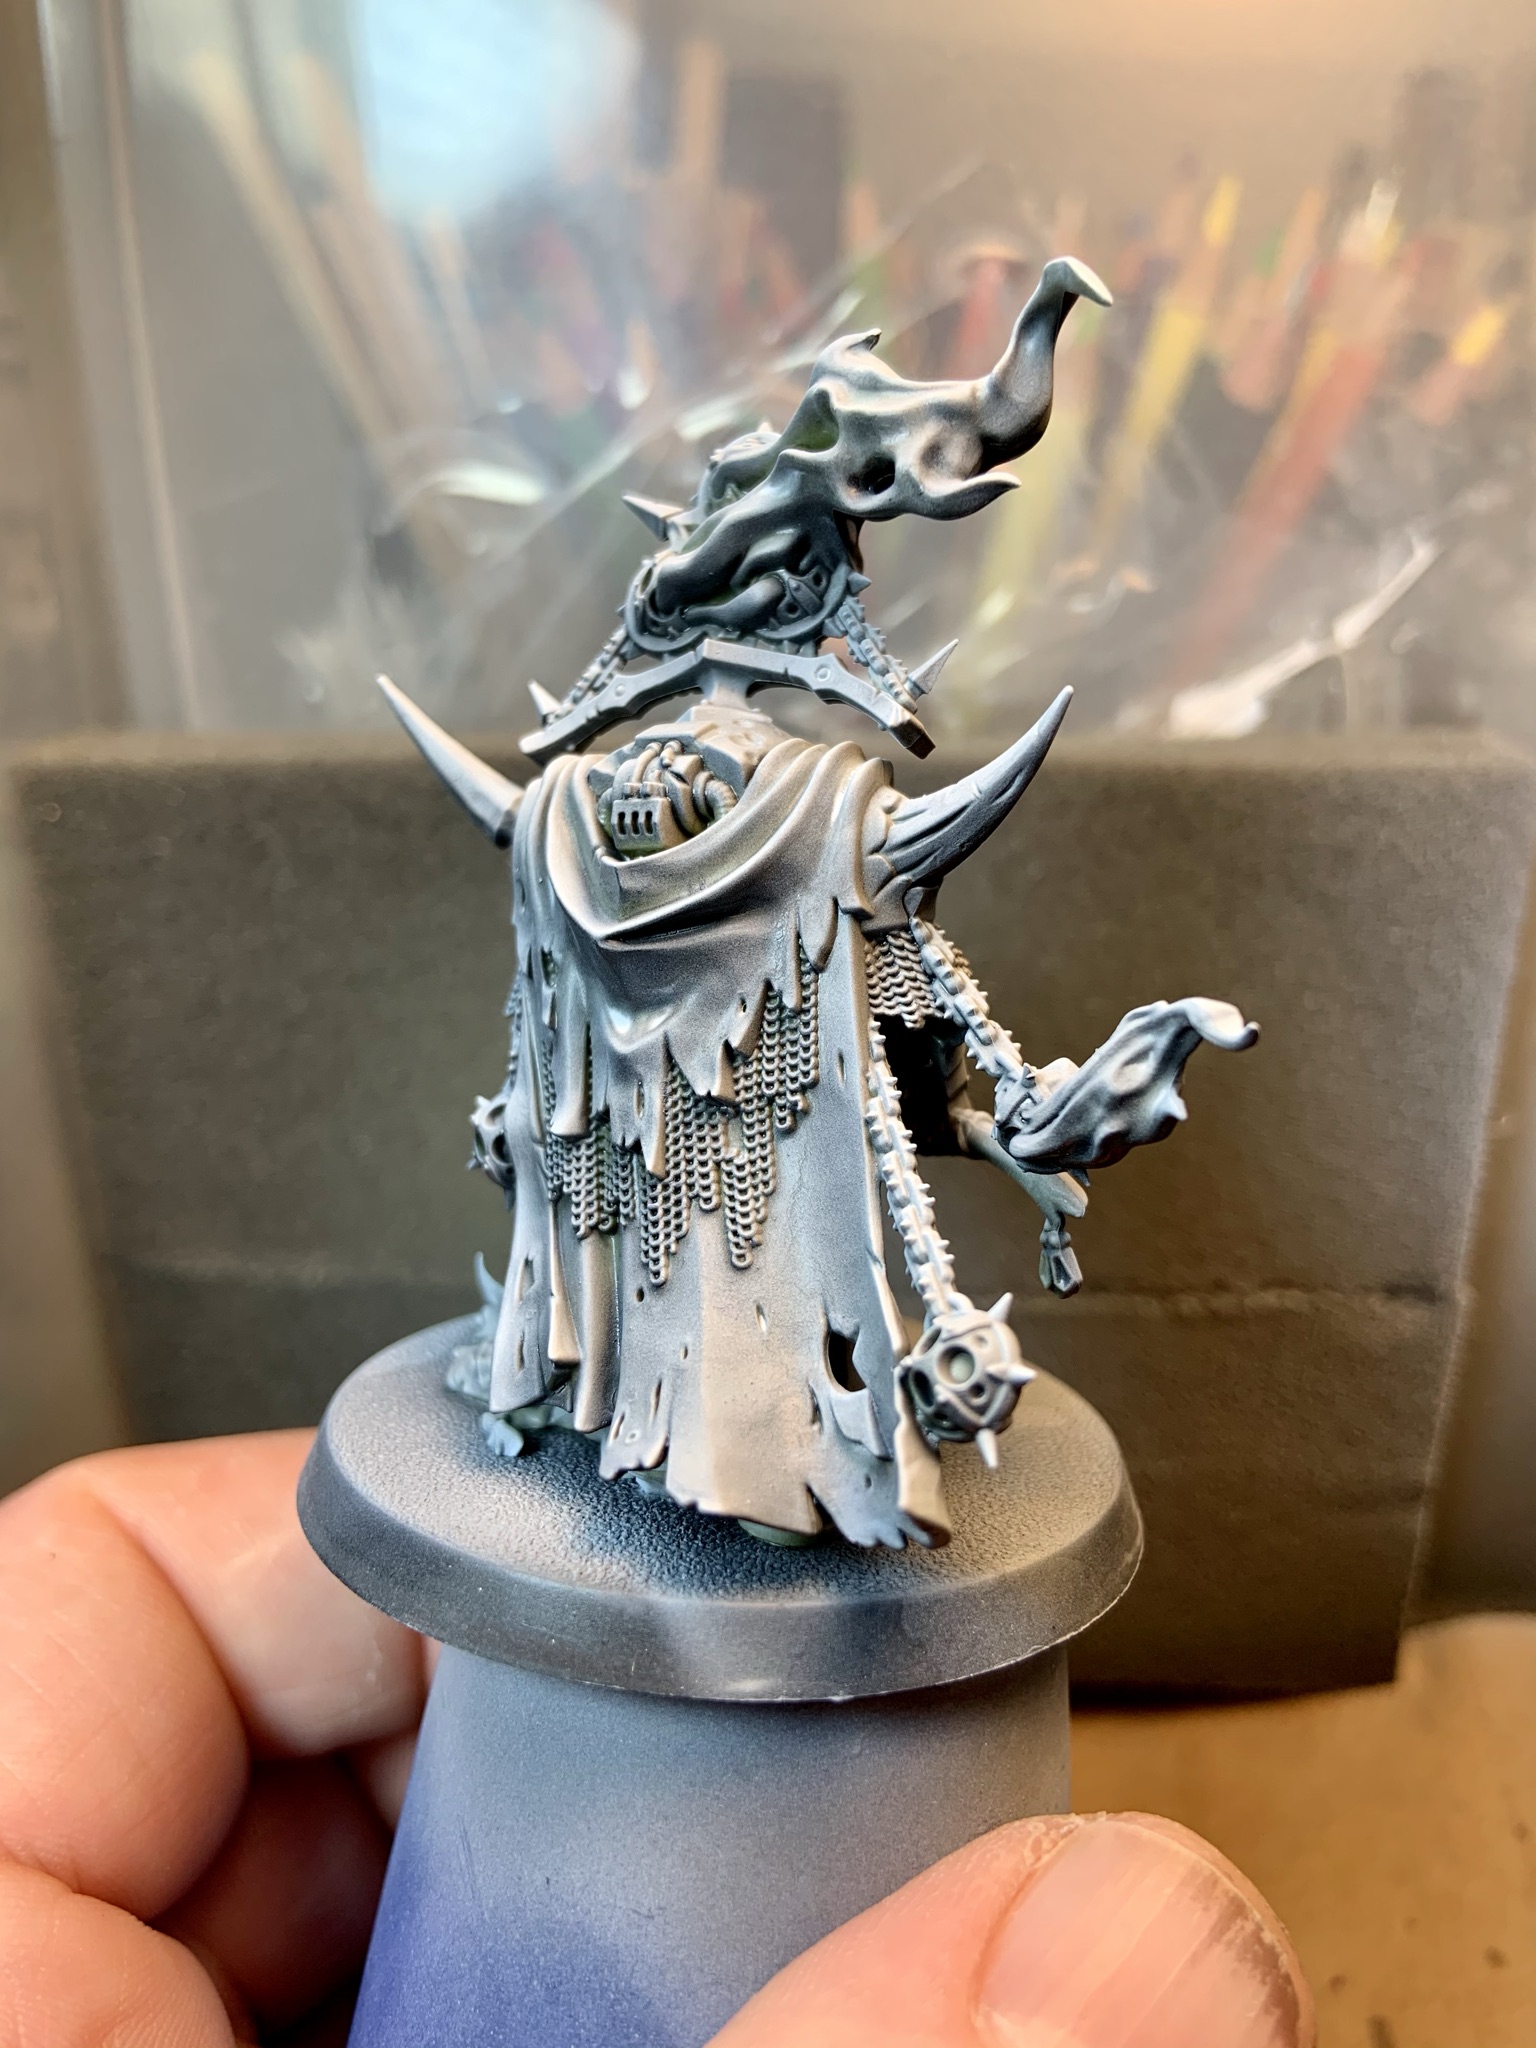
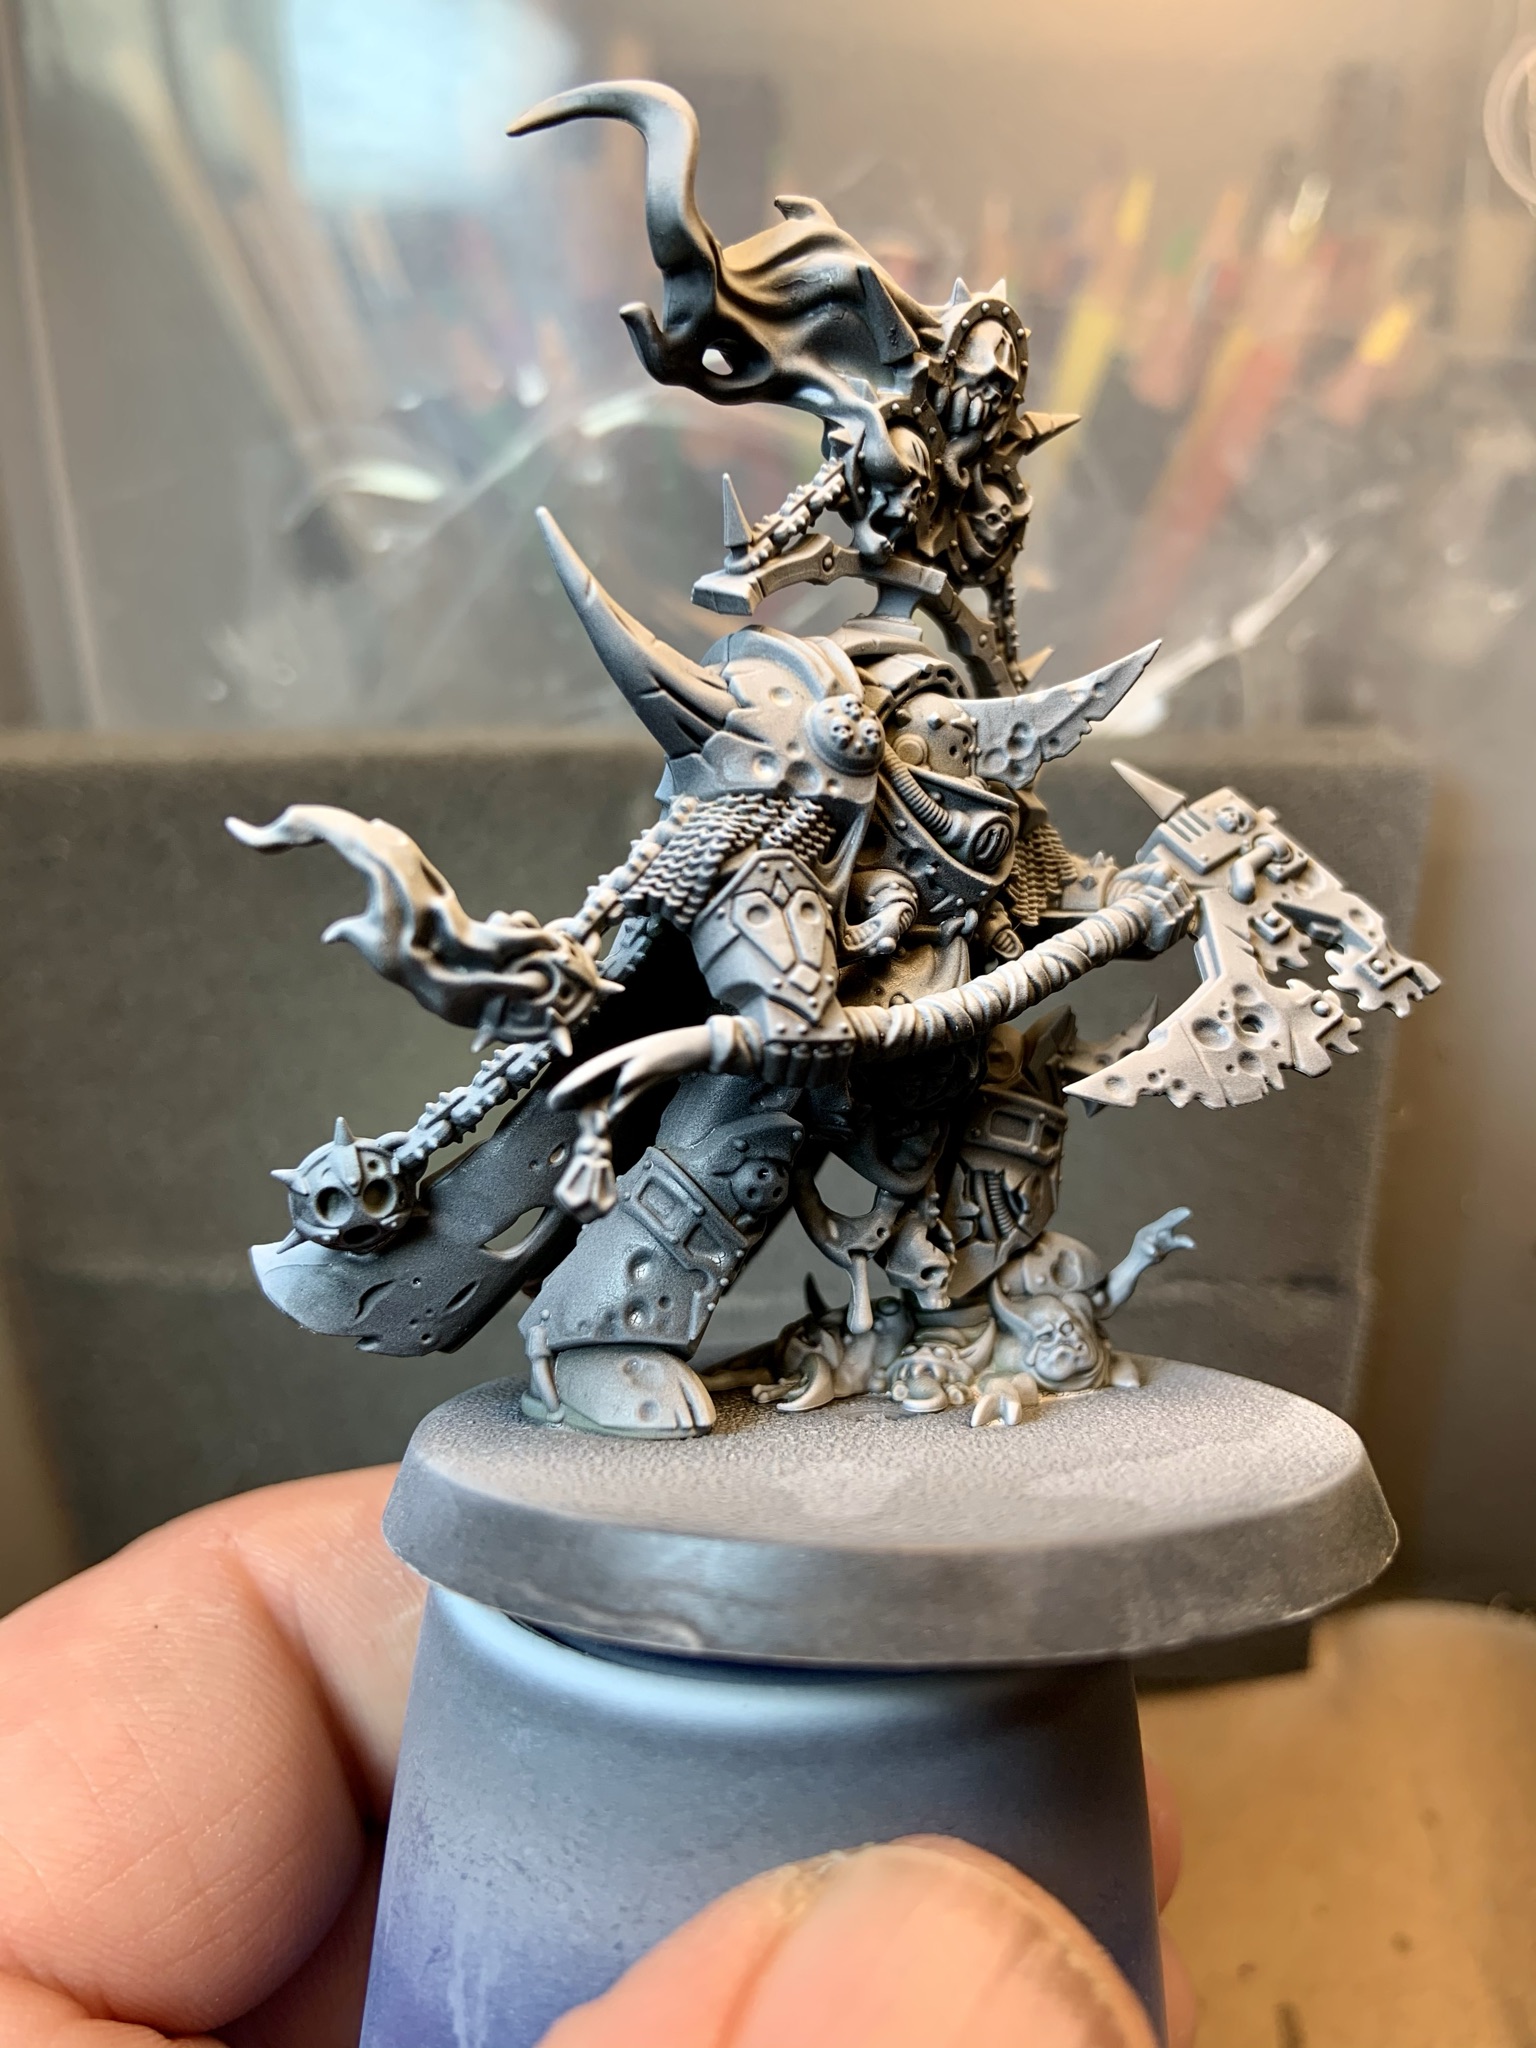
Priming Done
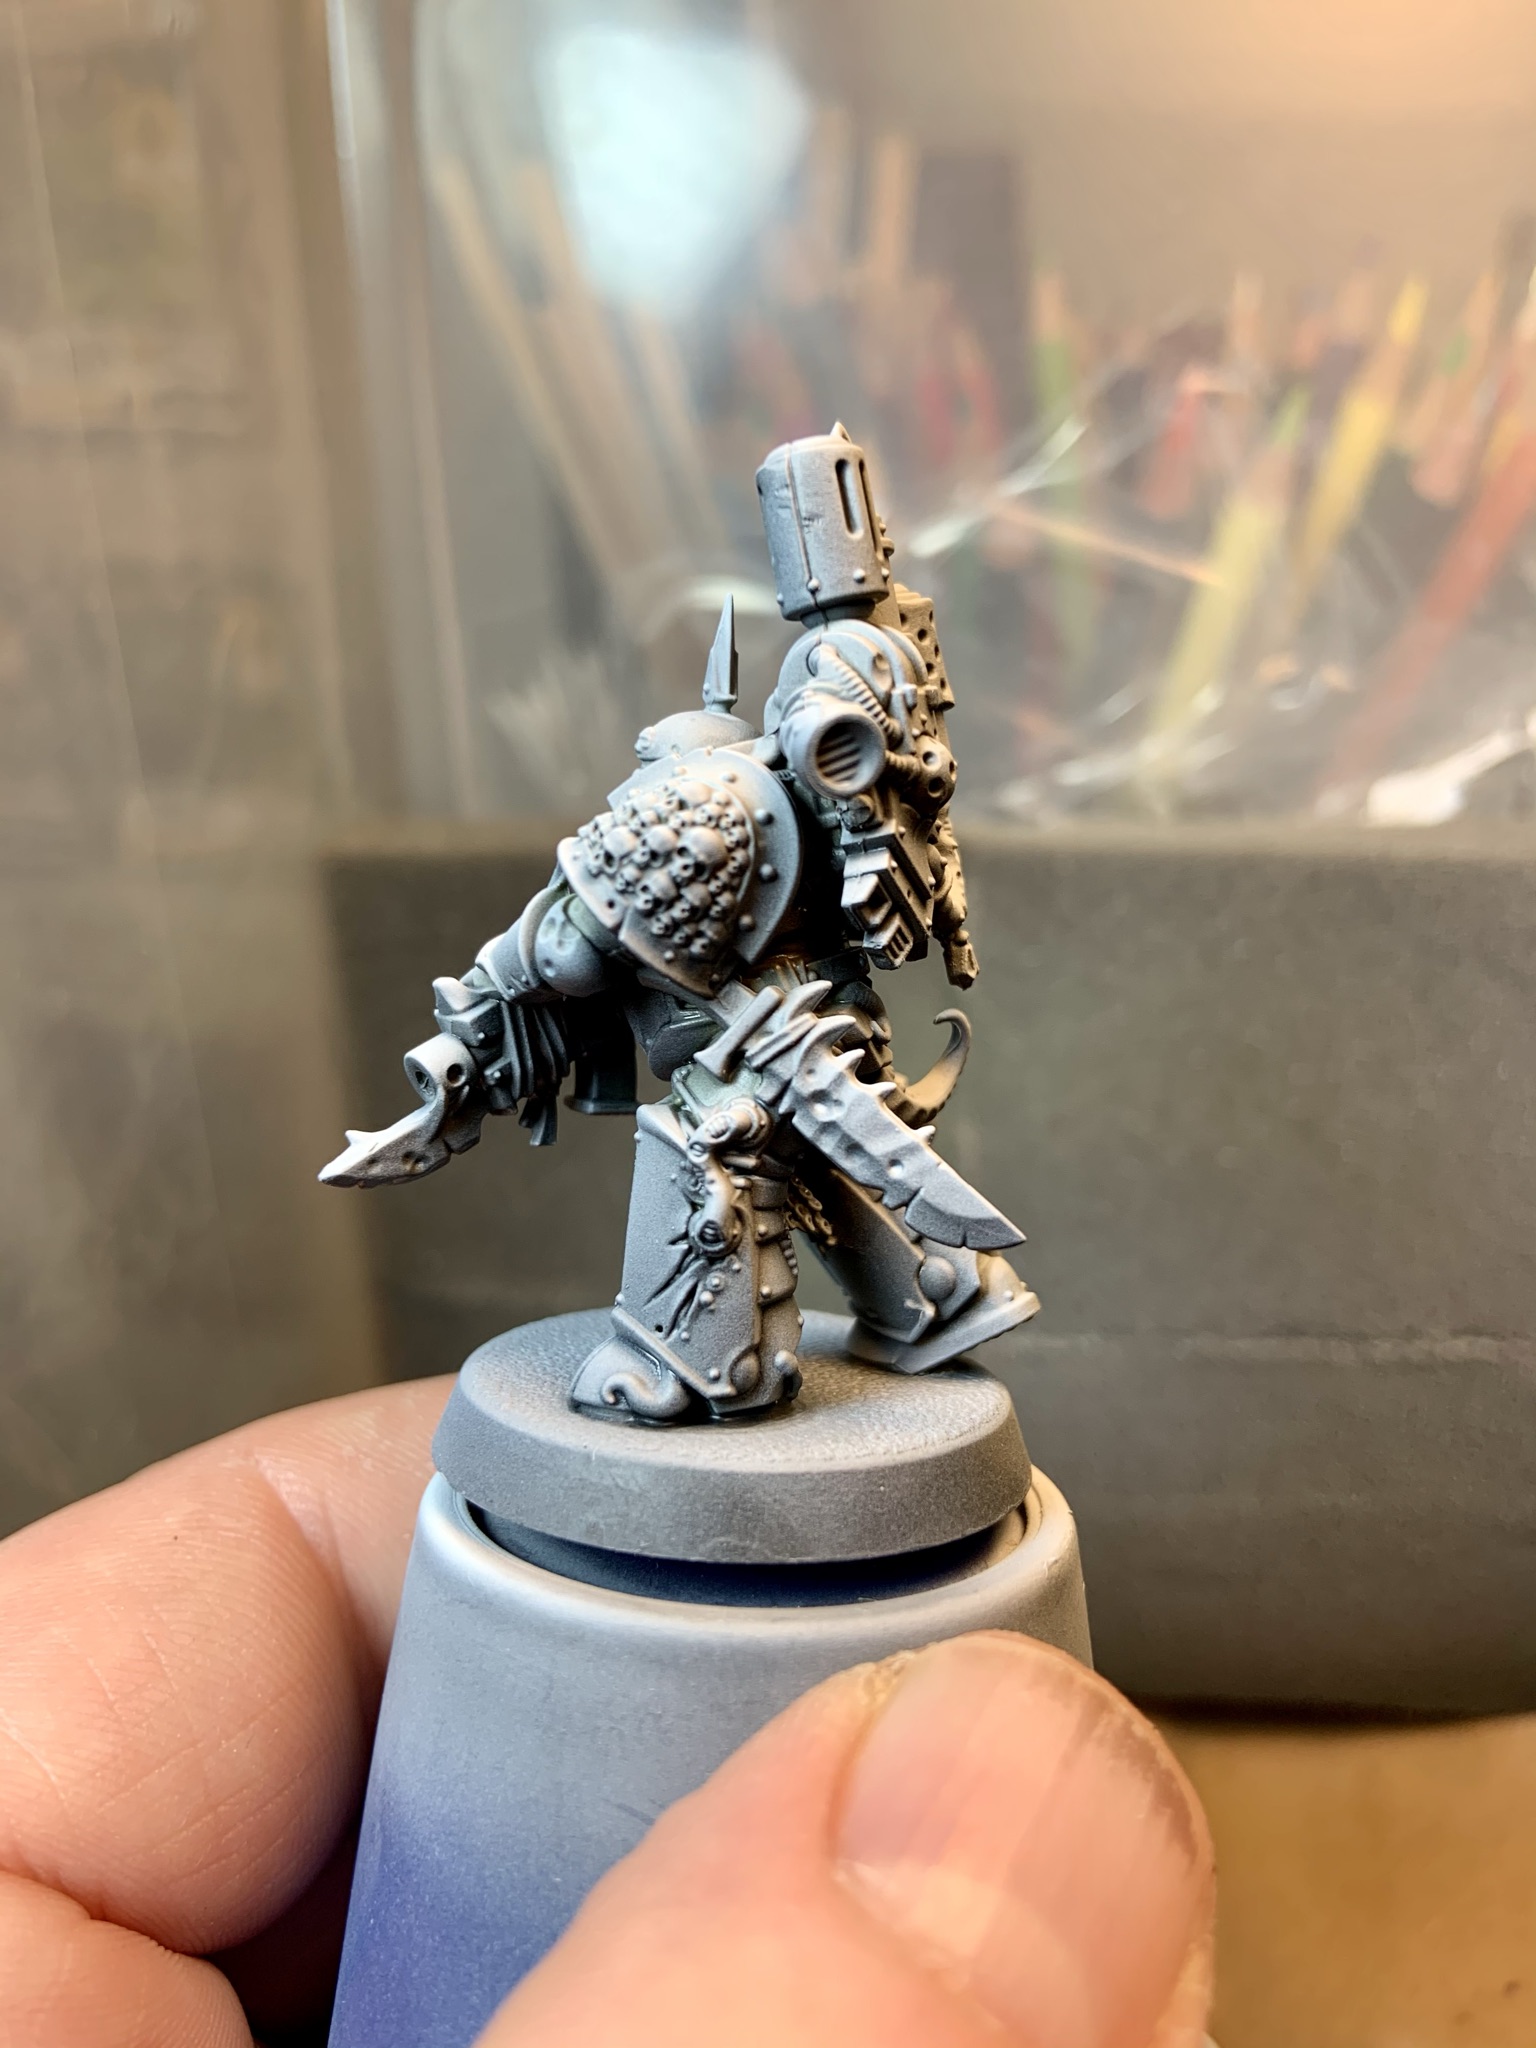
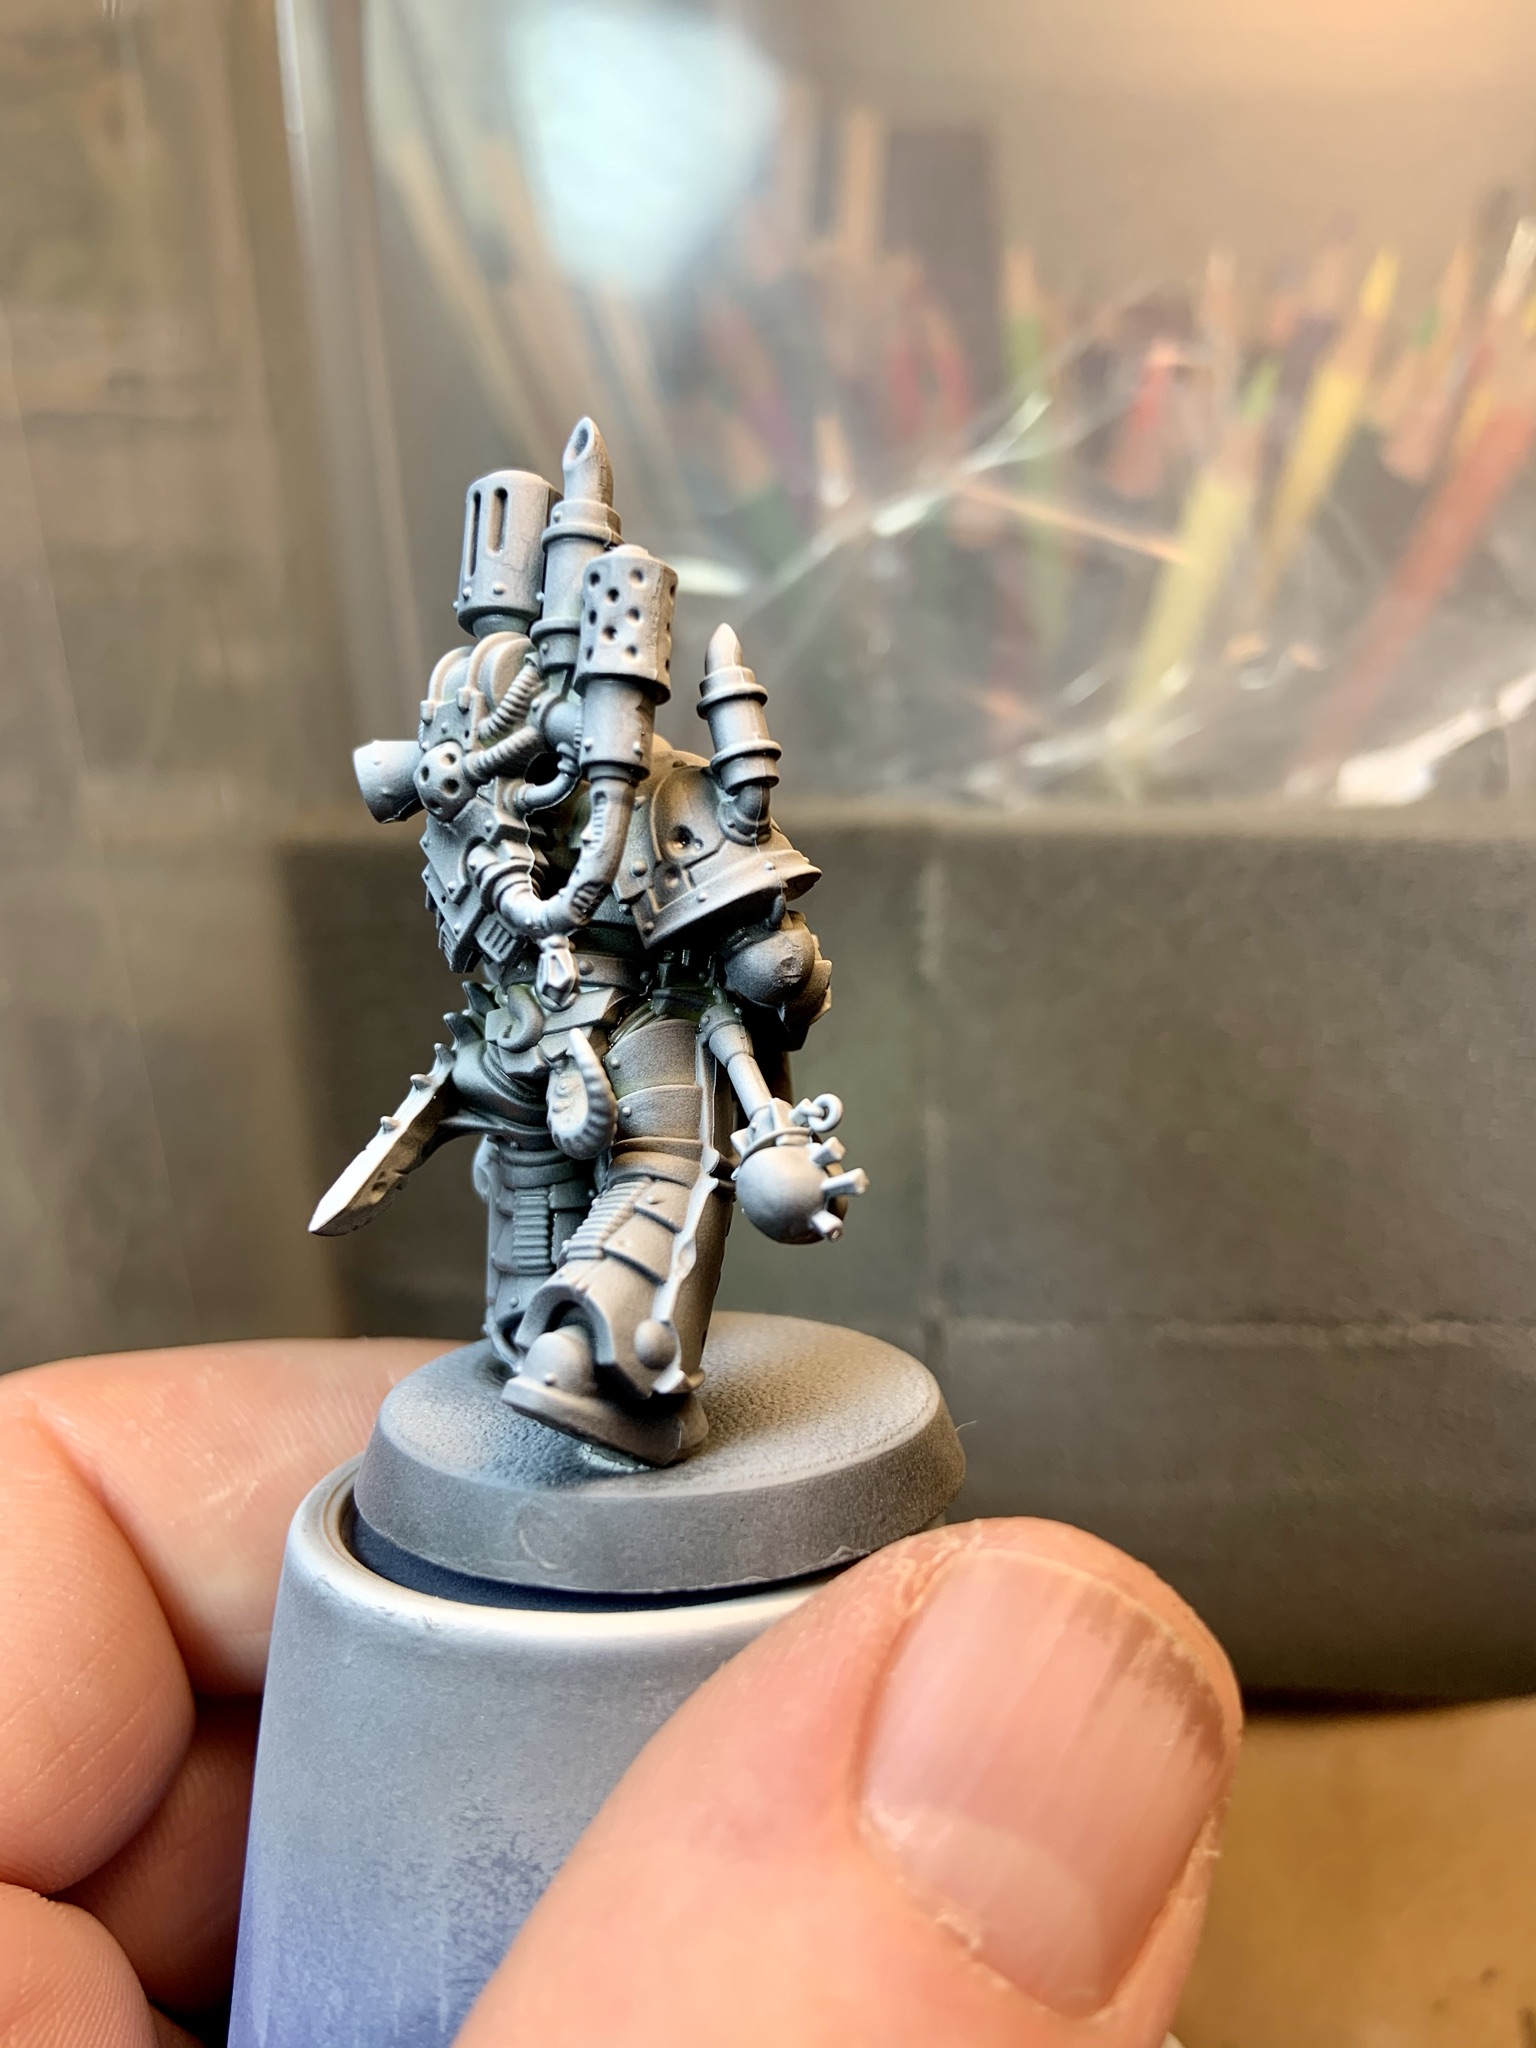
At this point I just thought I’d post images of the models after the zenithal priming process…I can’t help but admire the detail in these GW sculpts 🙂


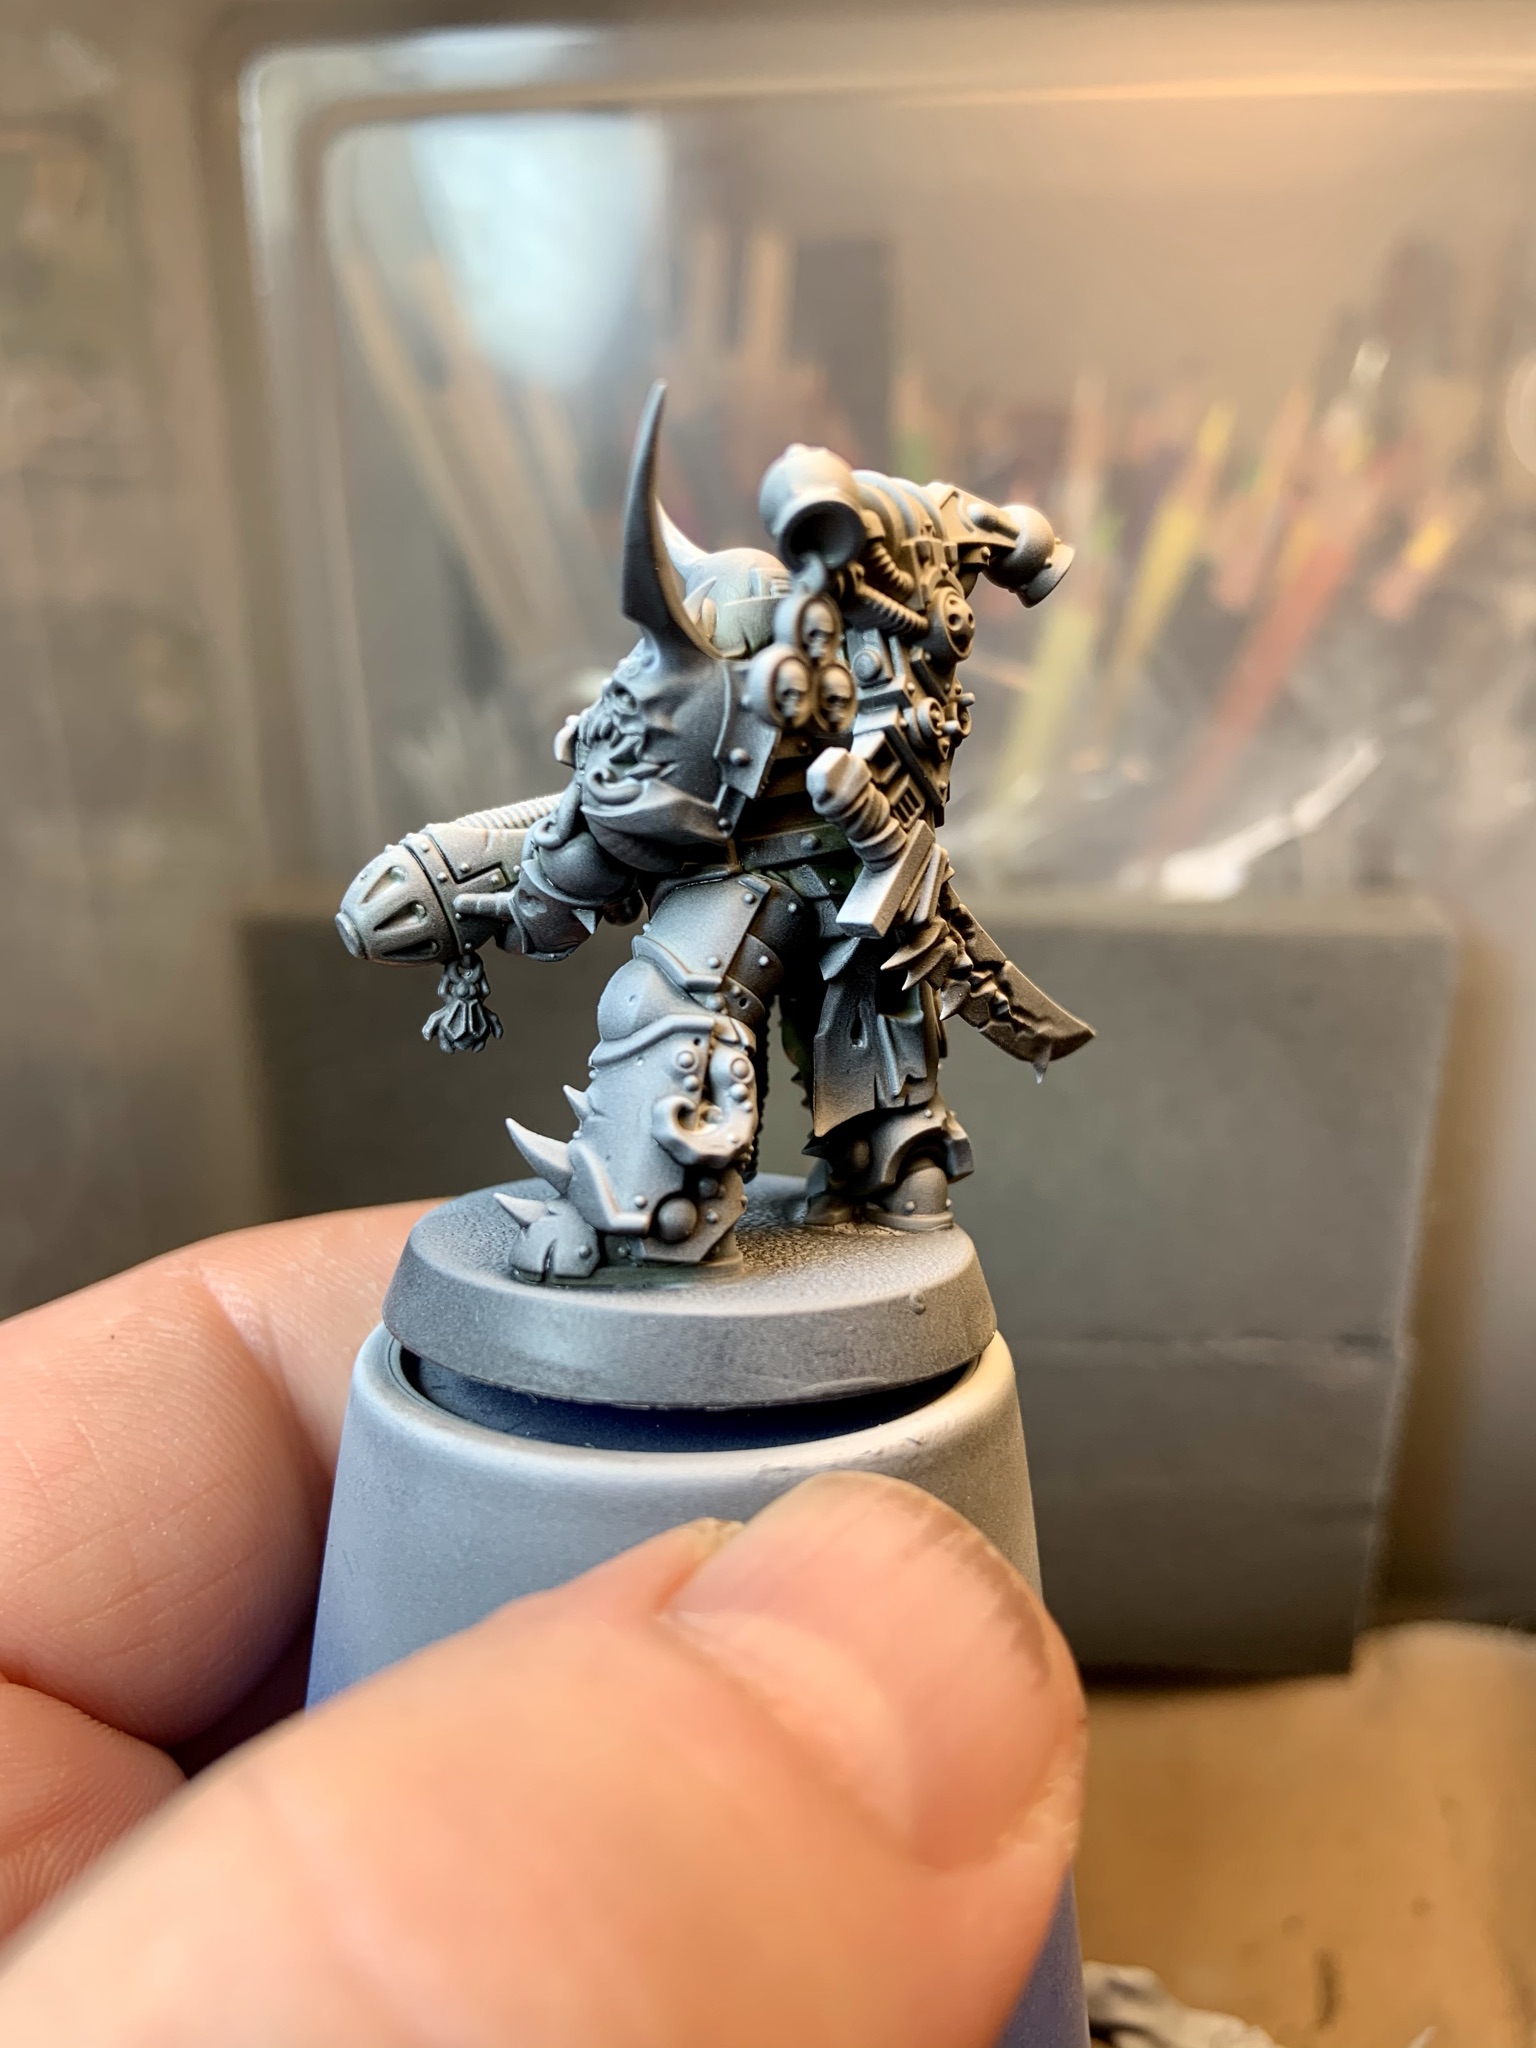
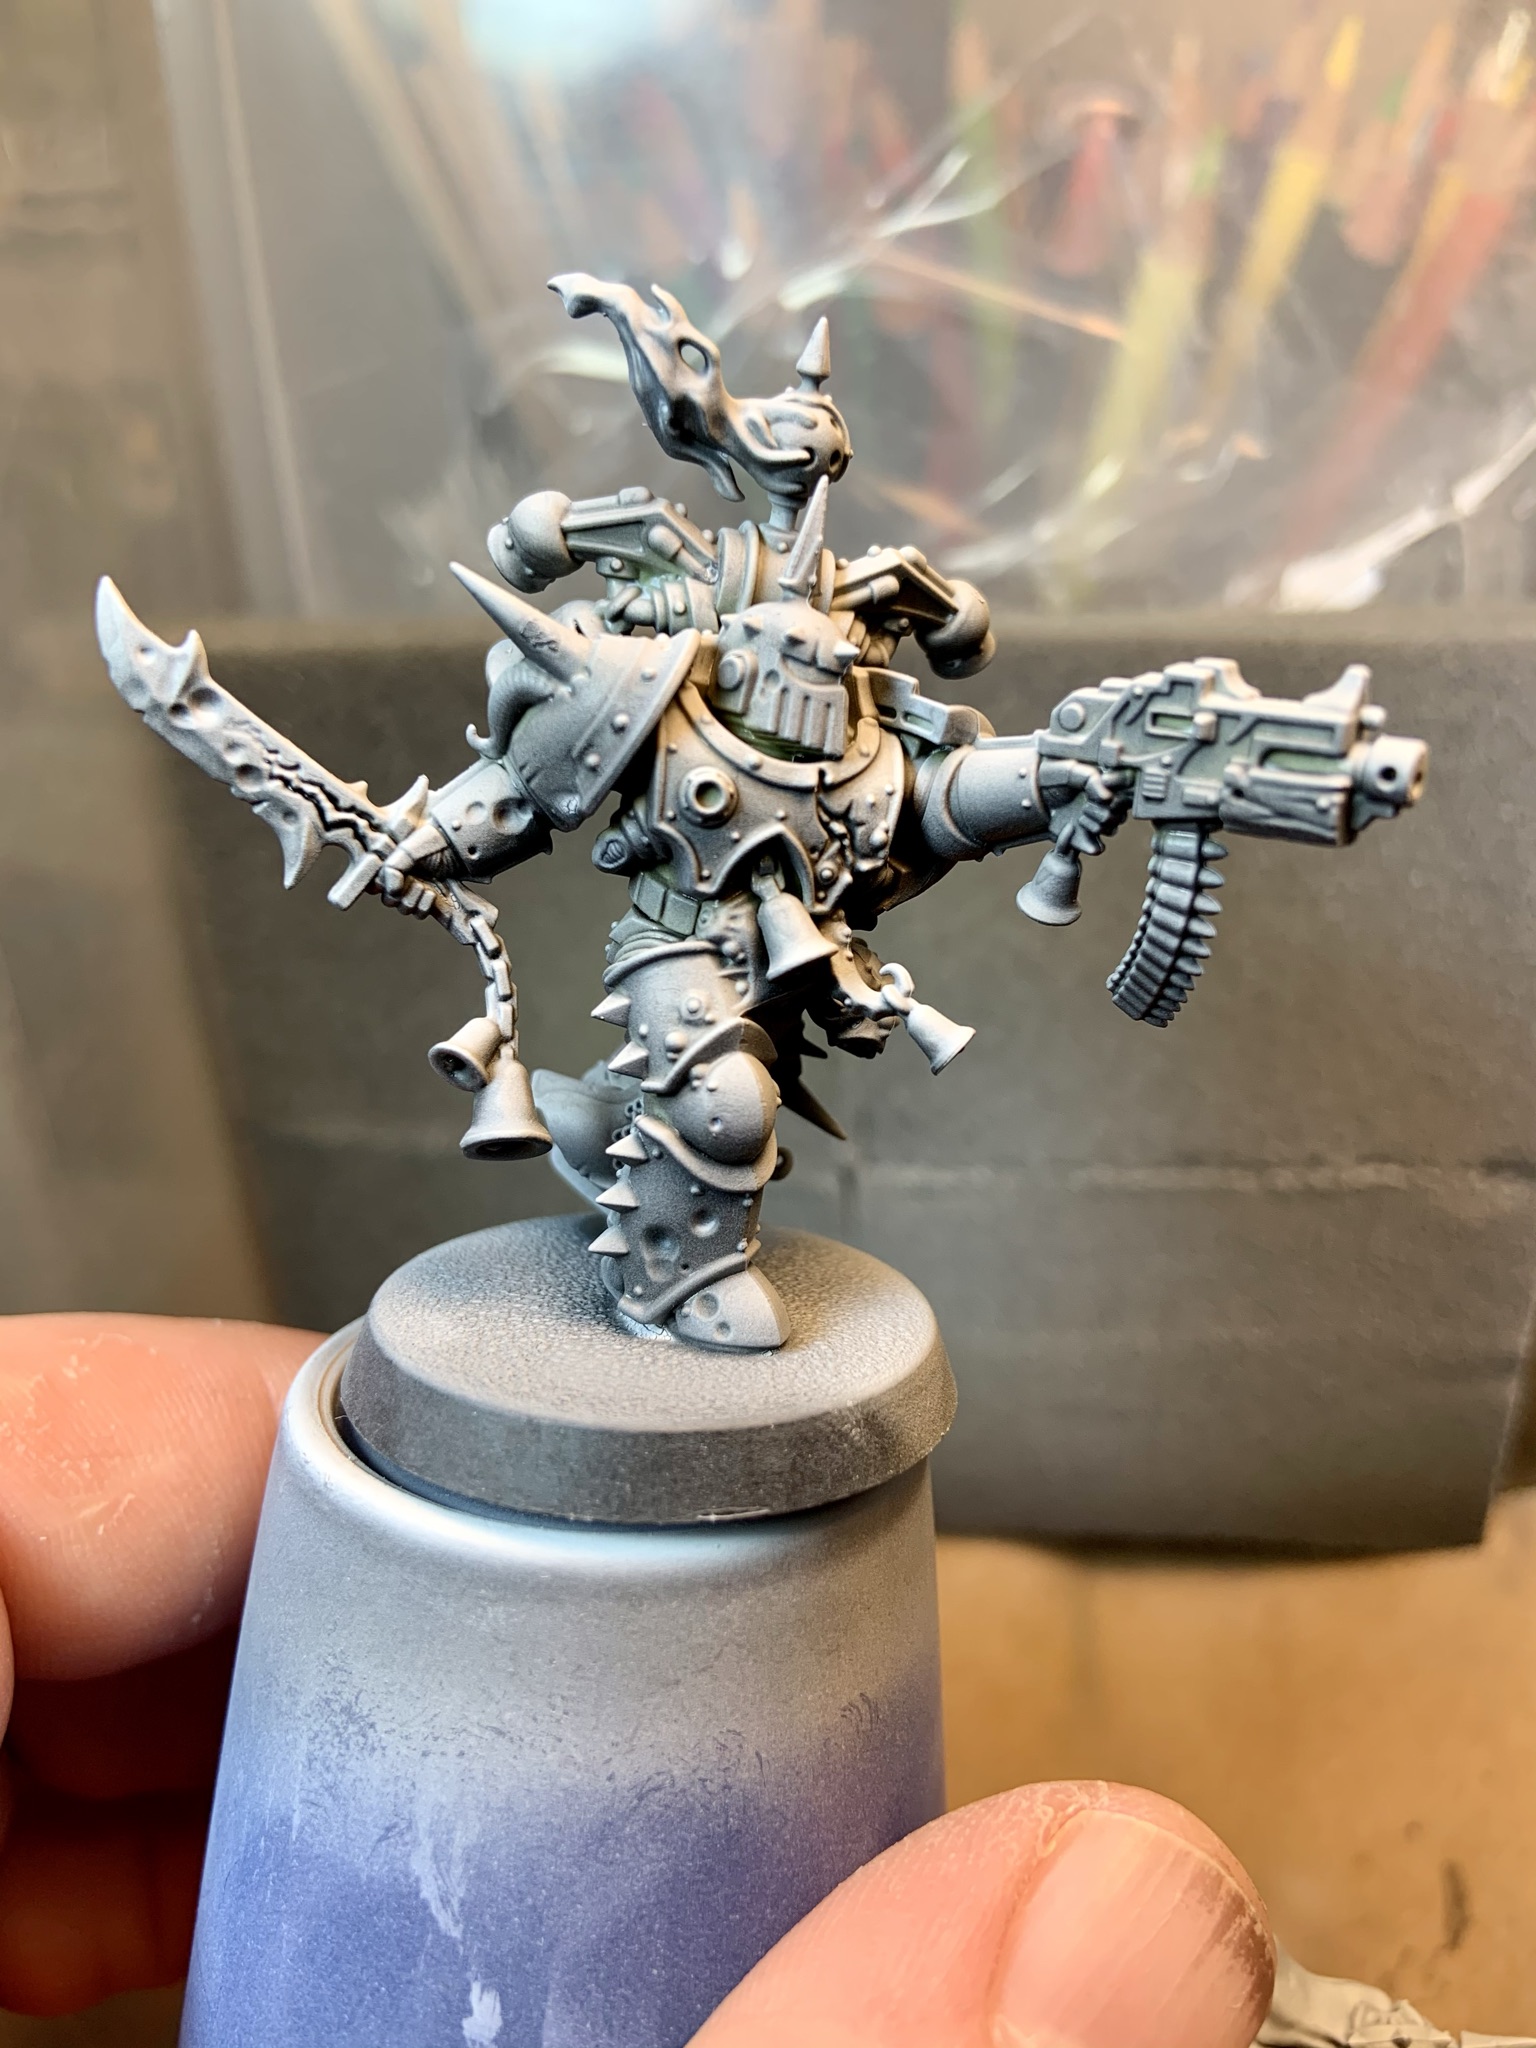


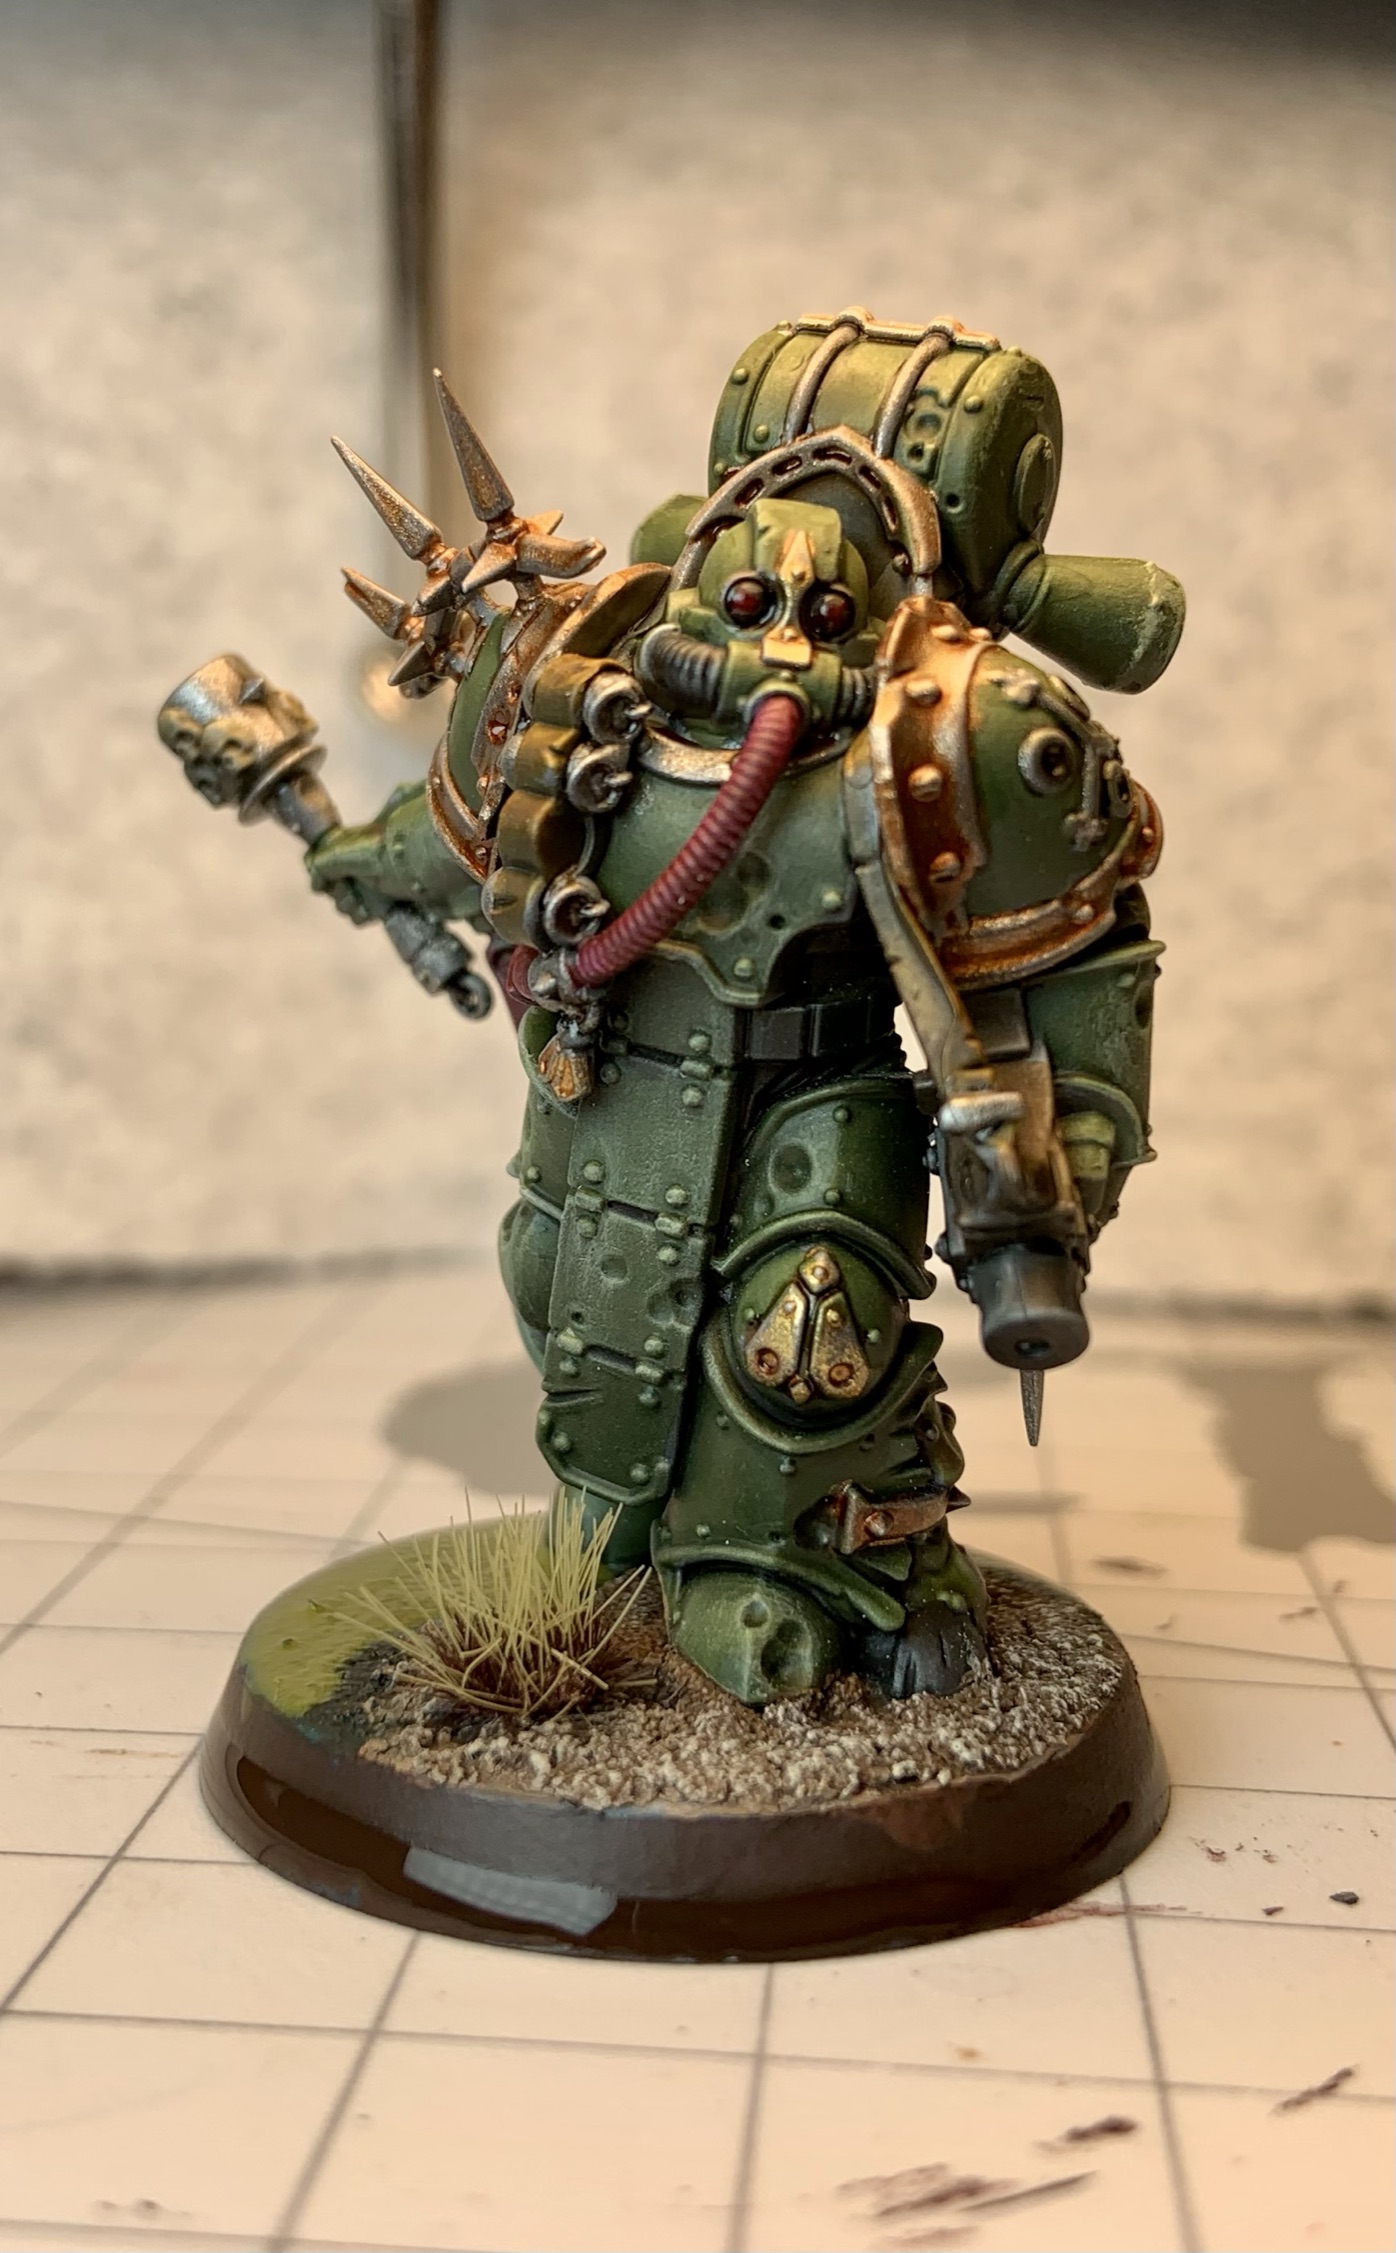
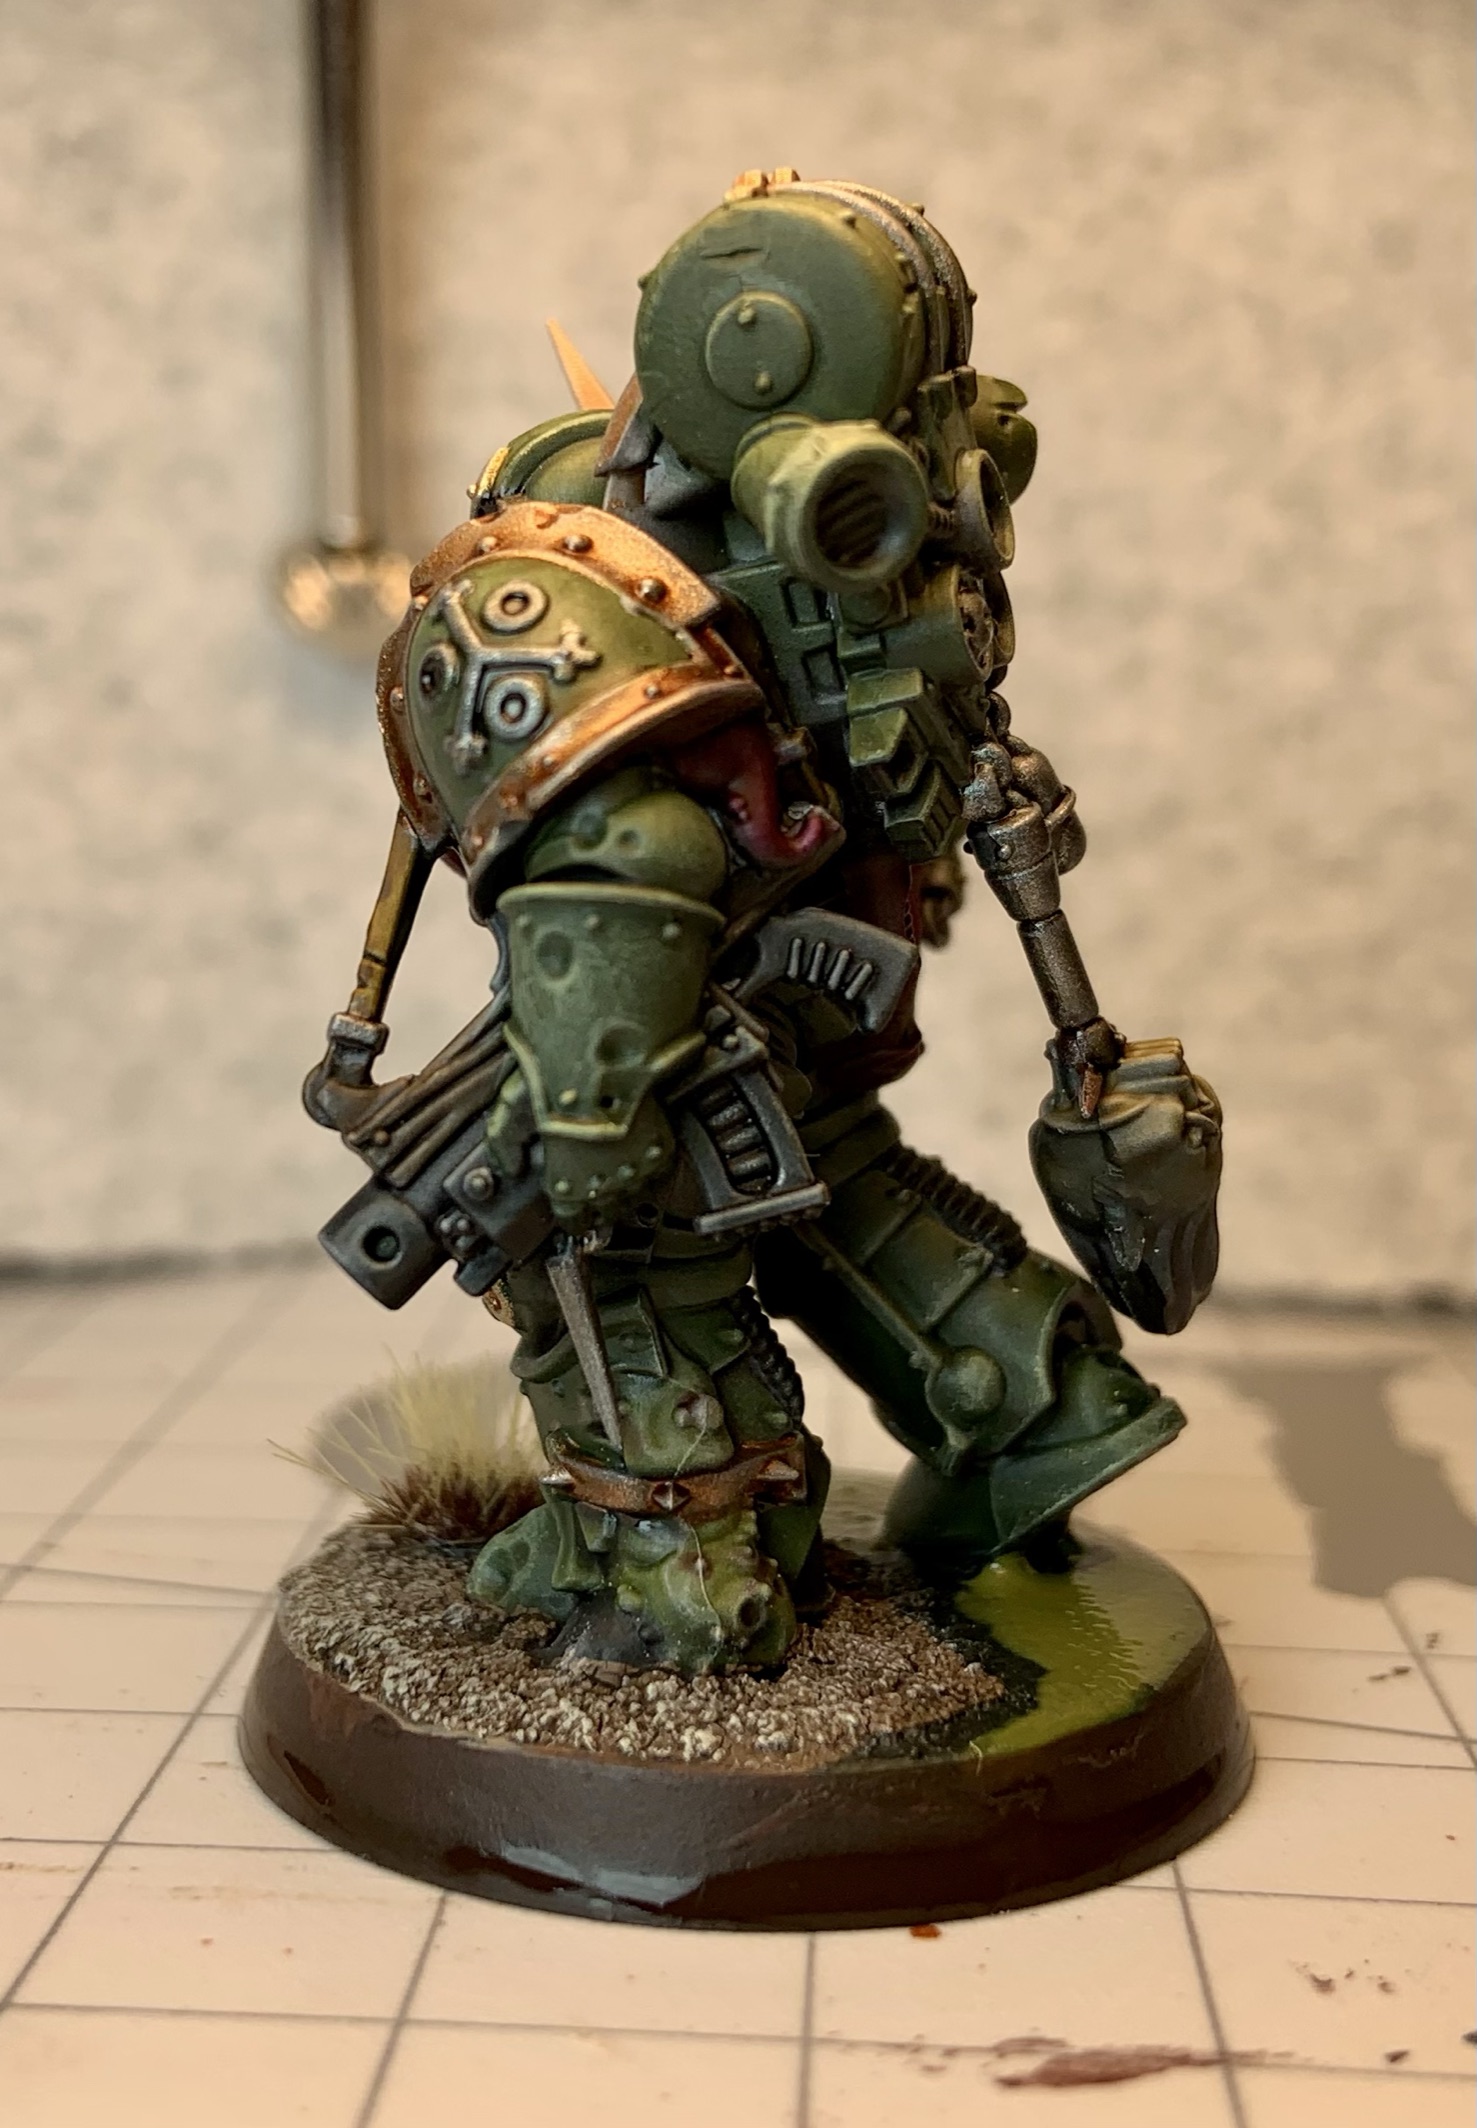
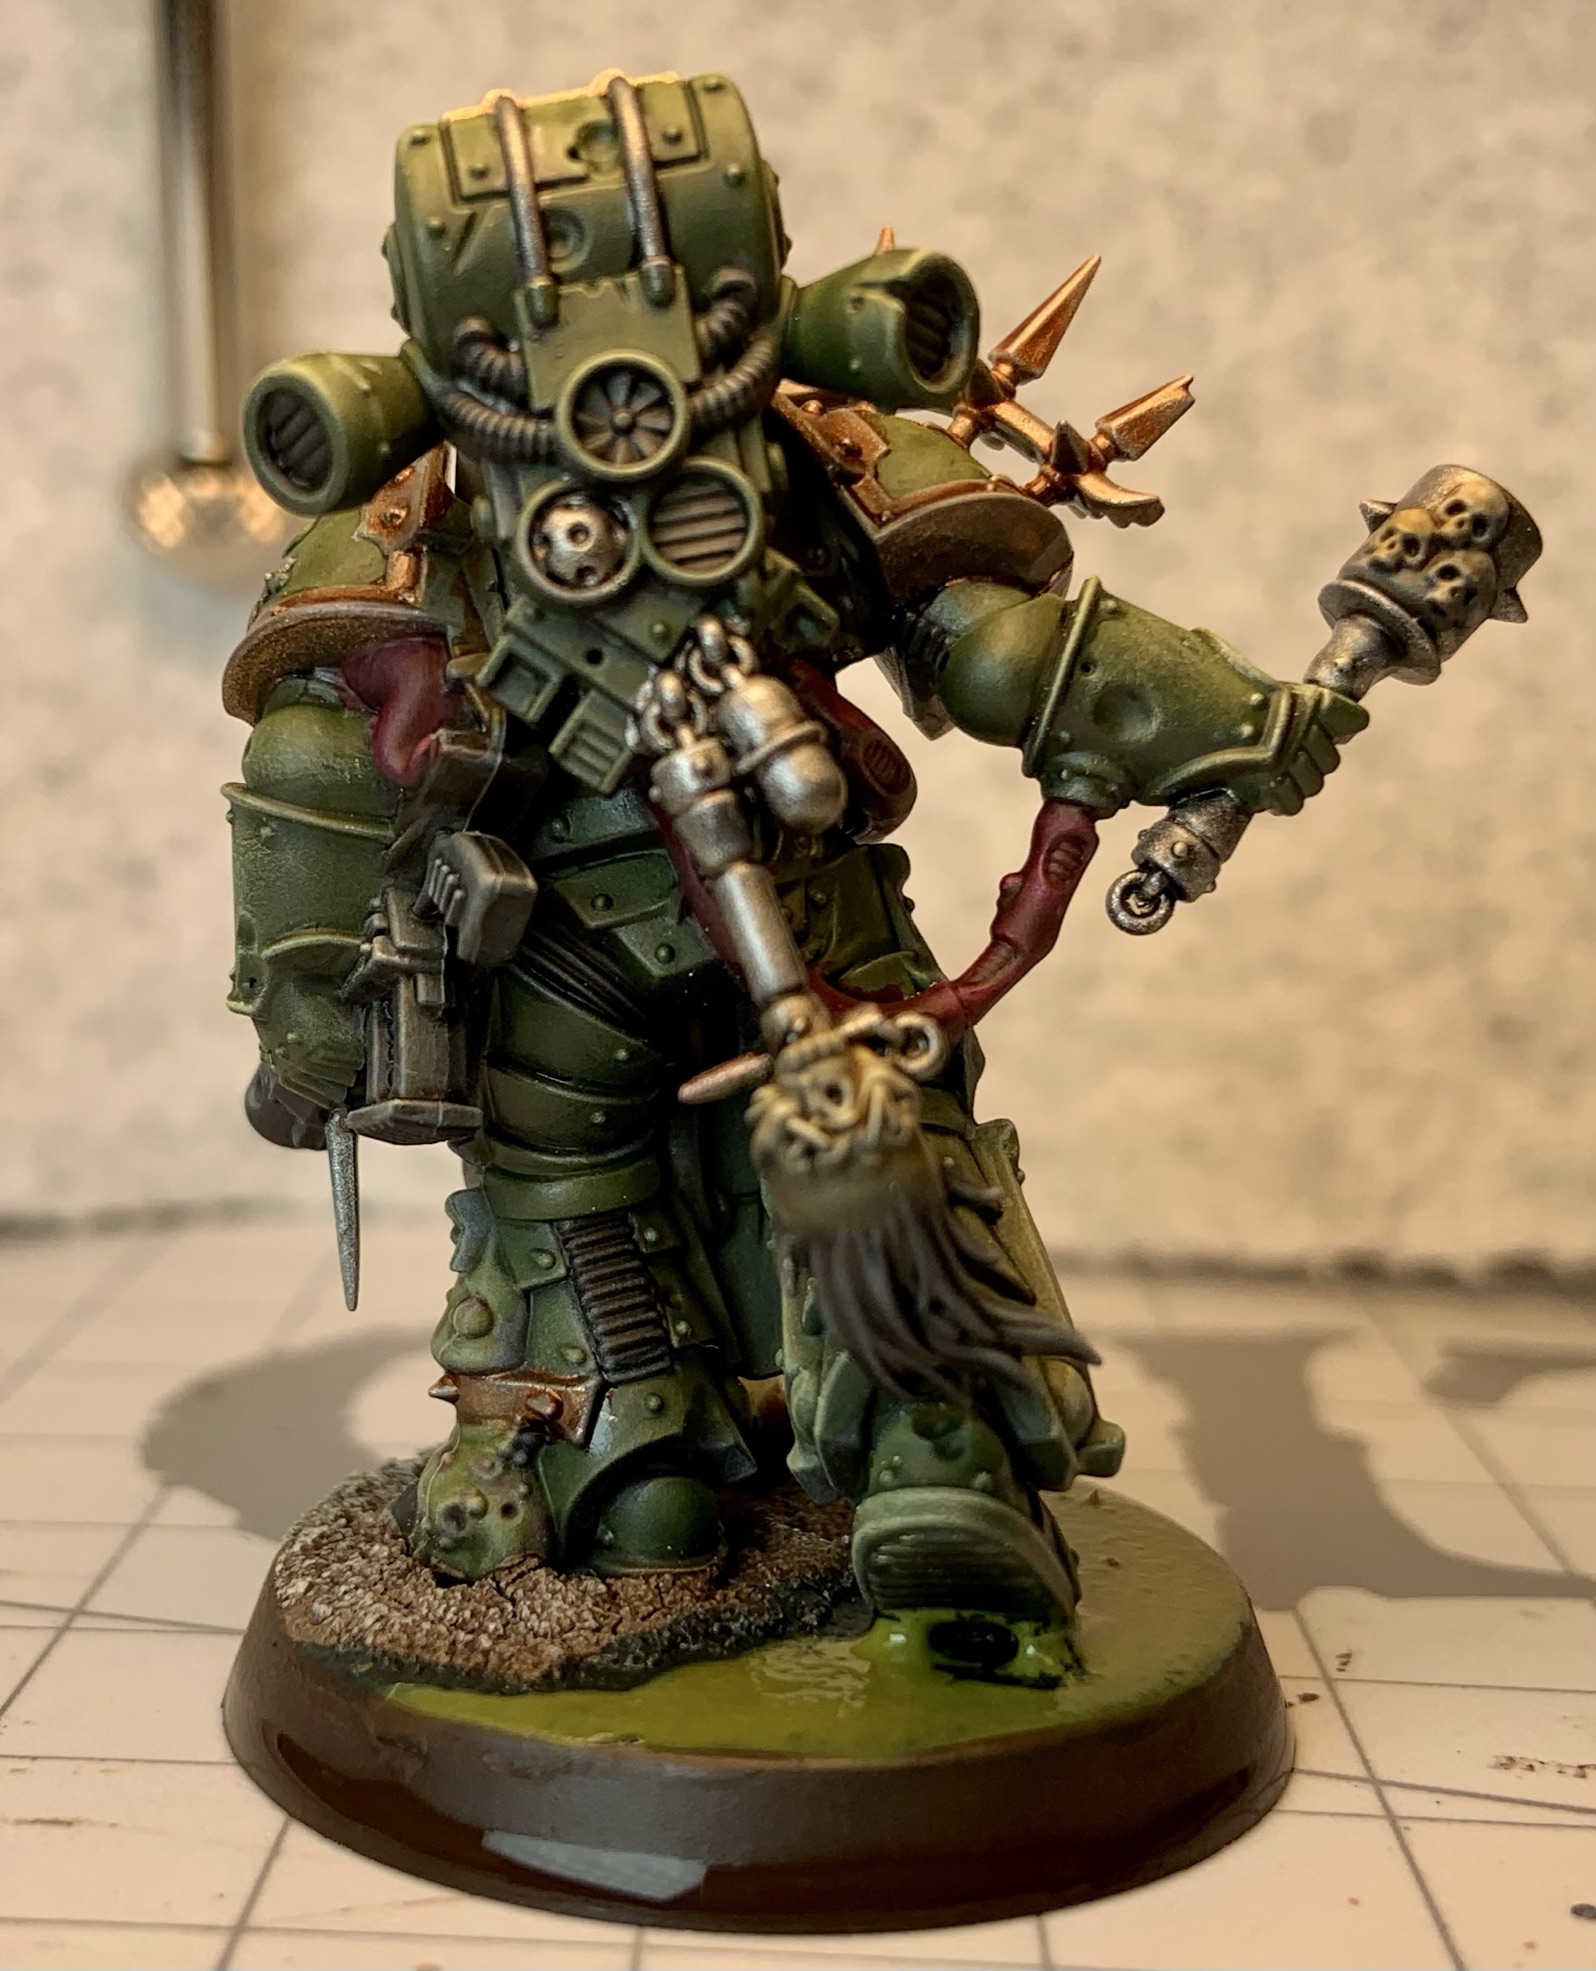
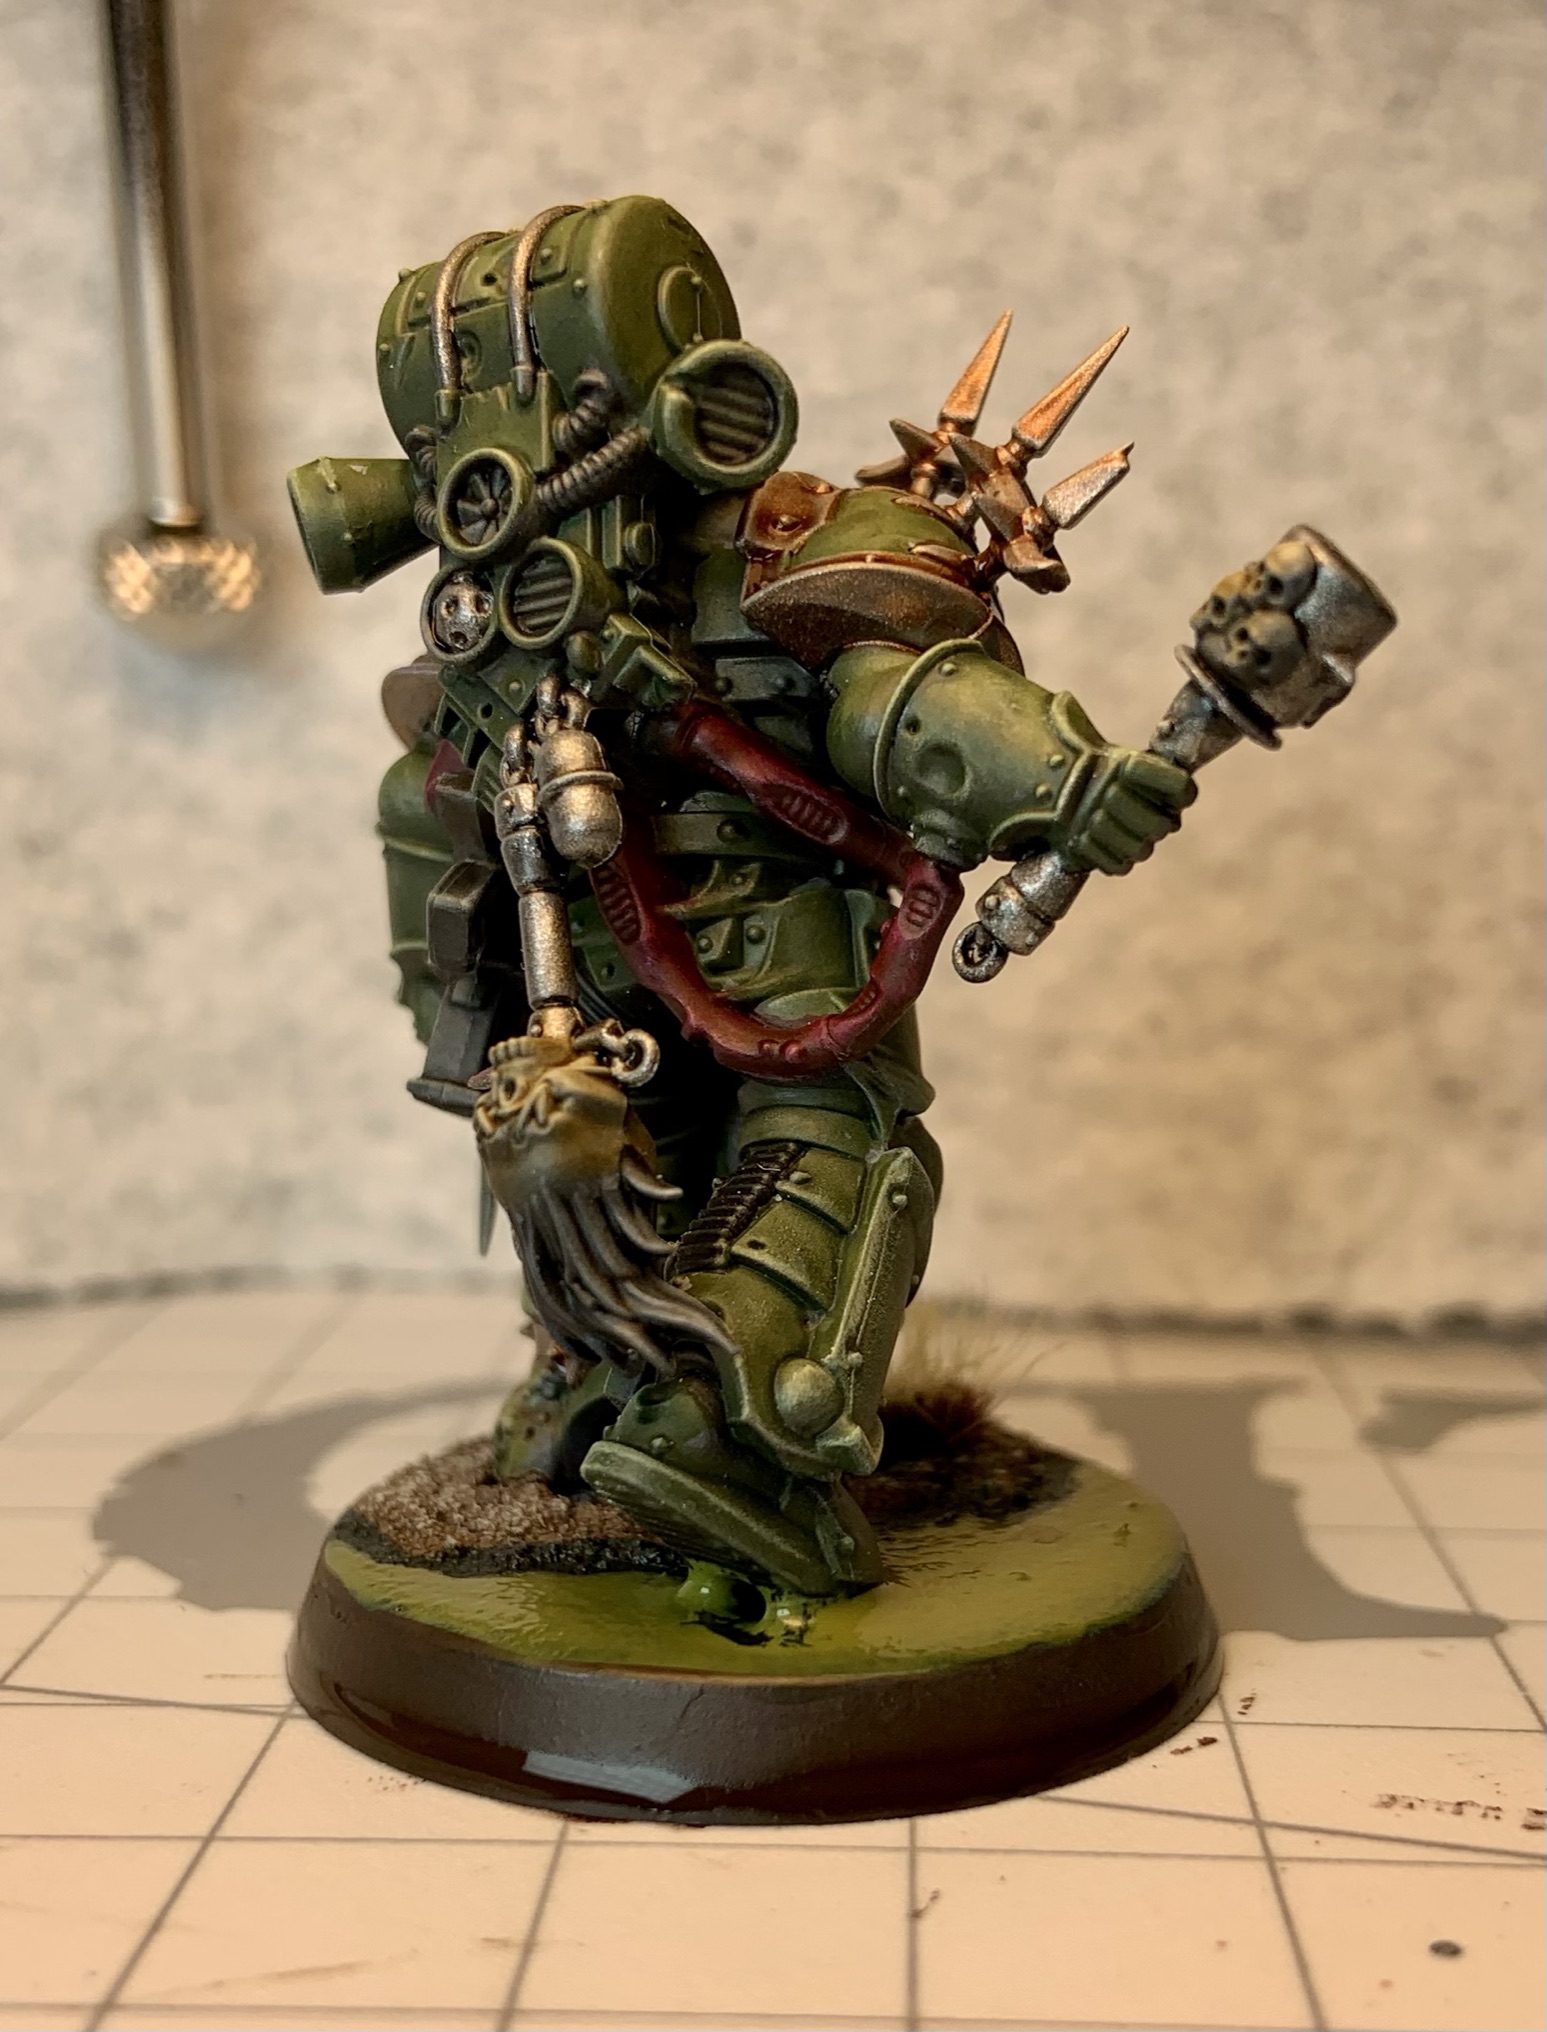
First Plague Marine
Rather than batch painting the remaining models I decided to paint up one more or less to completion (to be honest sometimes I feel better about finishing one model than having 5 models in some limbo state 🙂 )
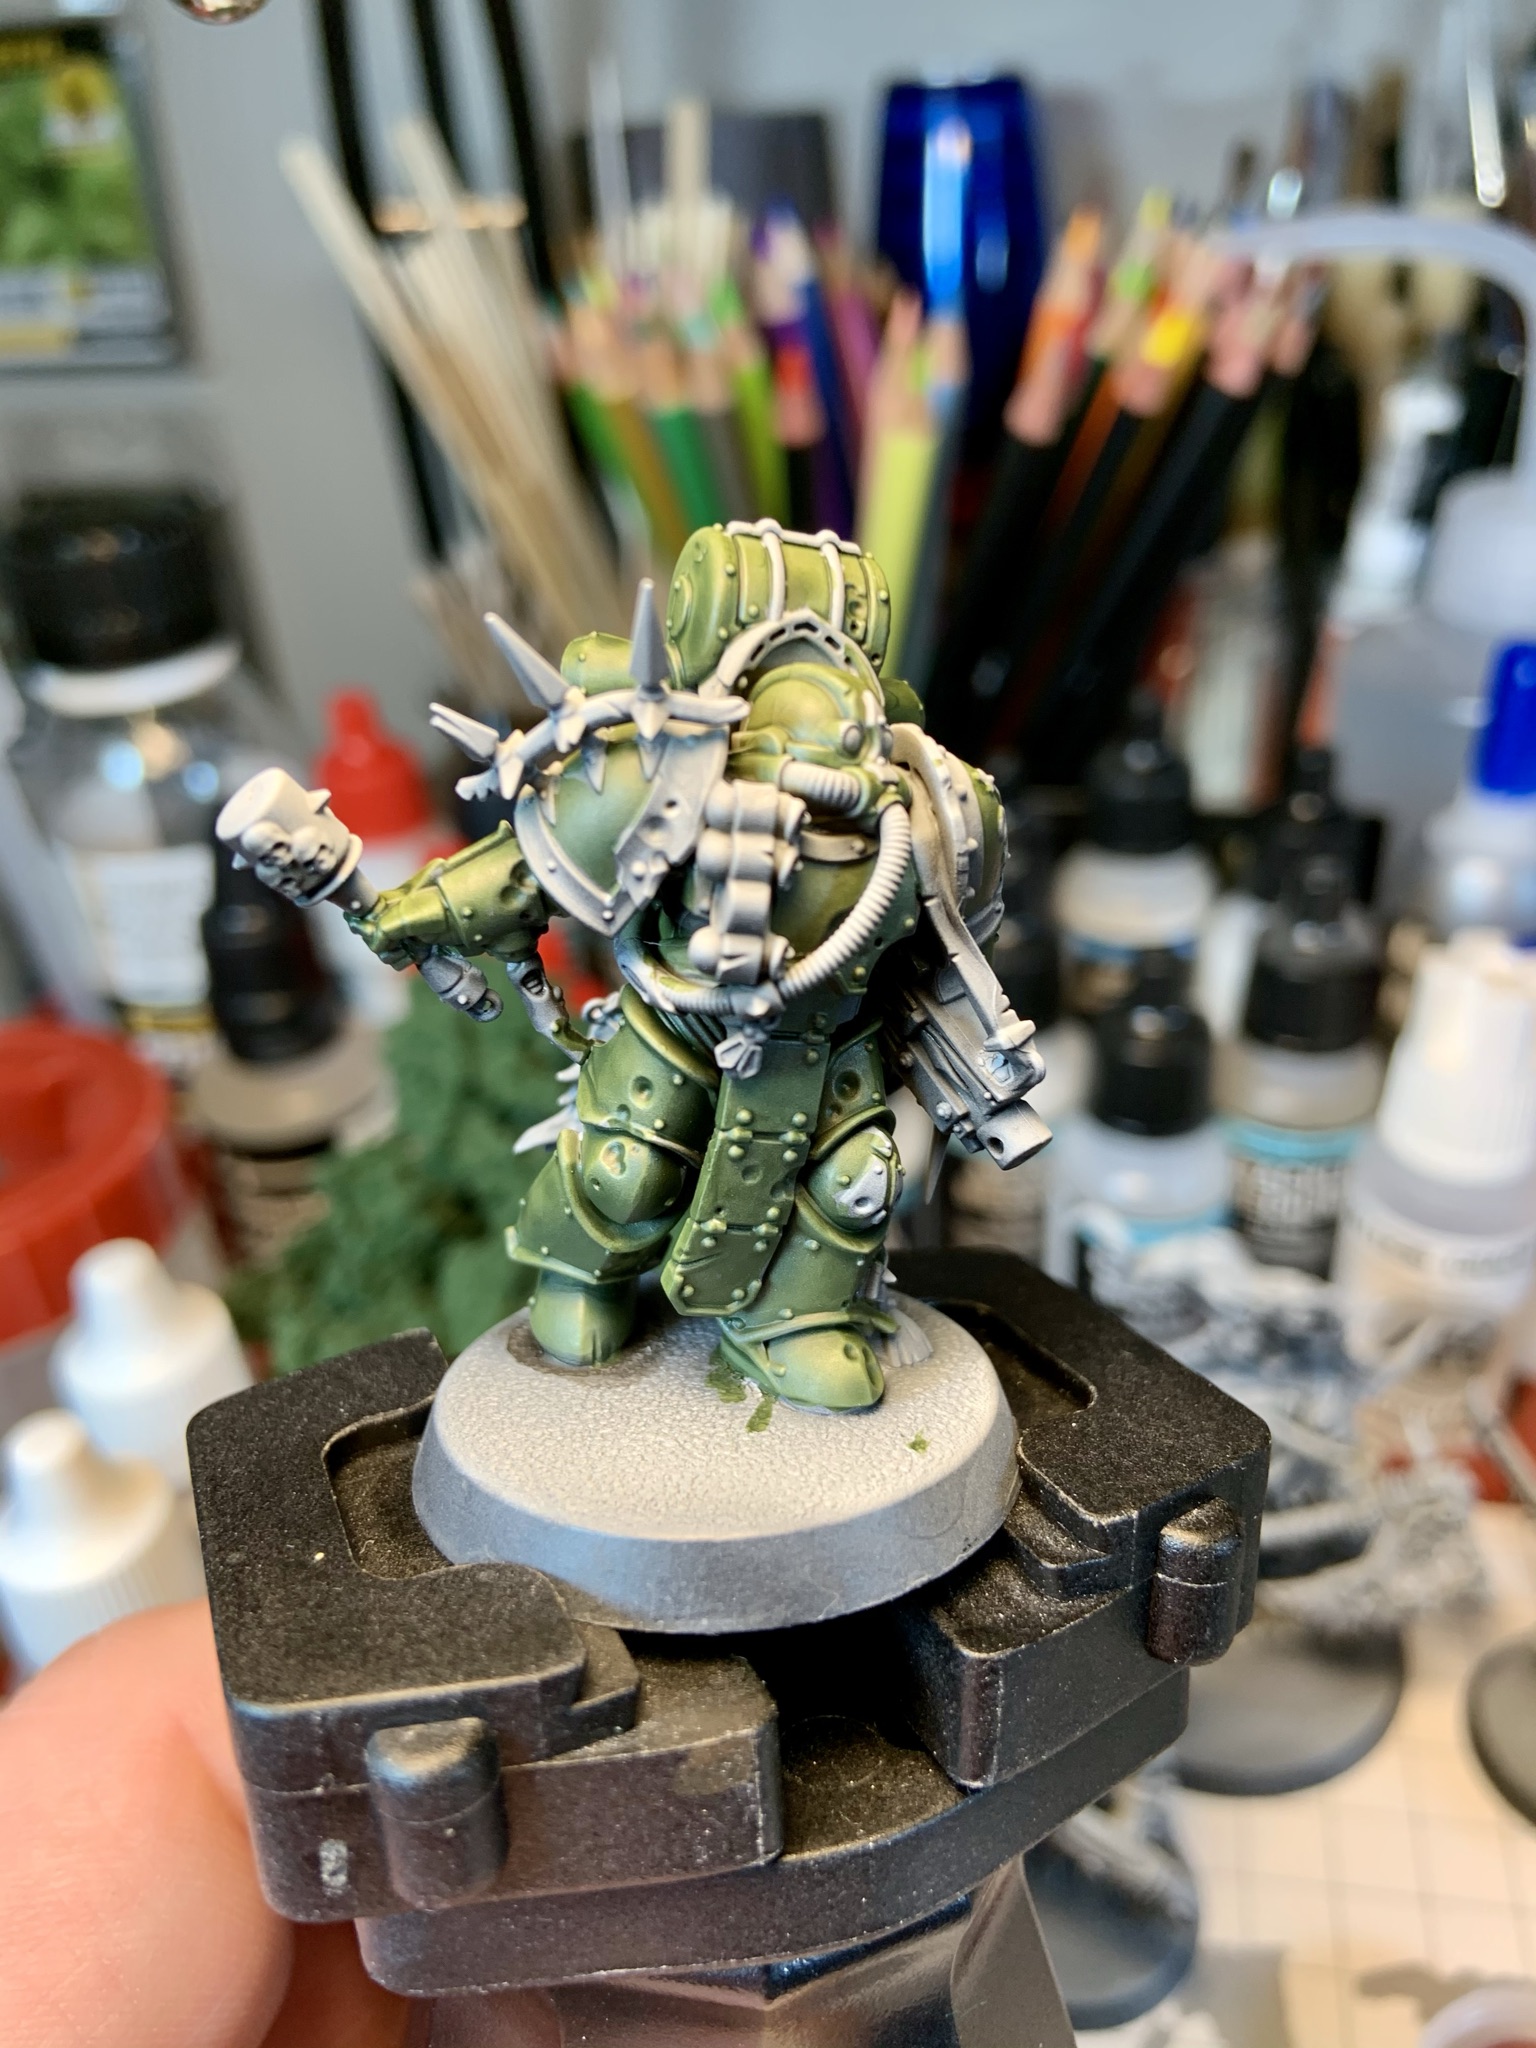
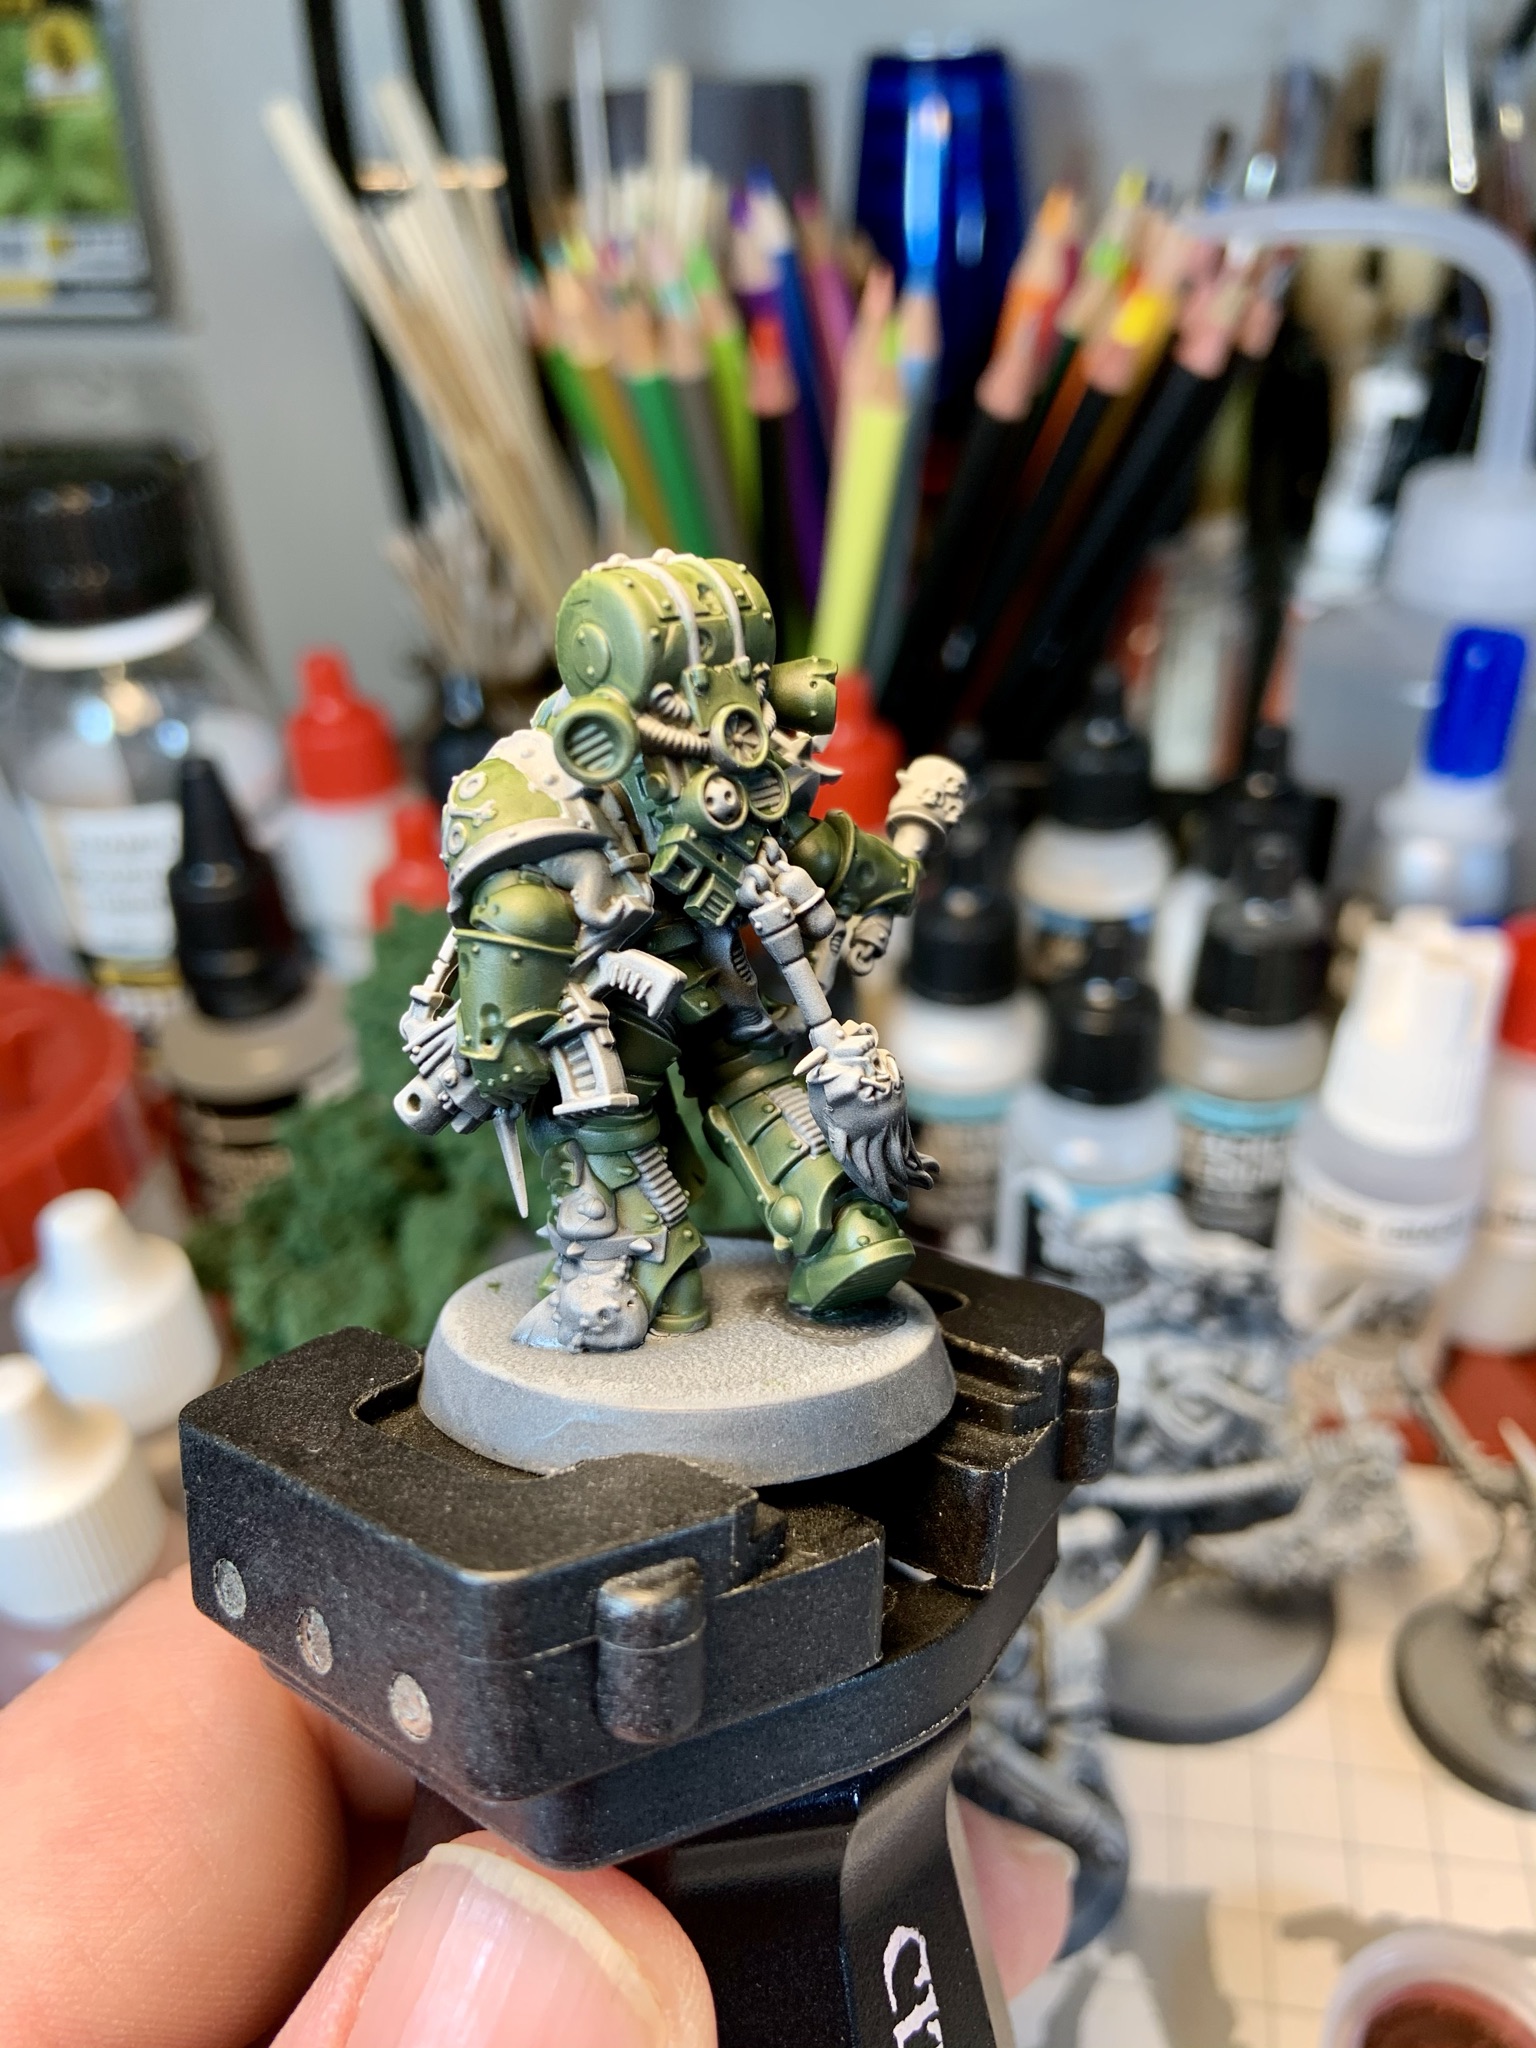
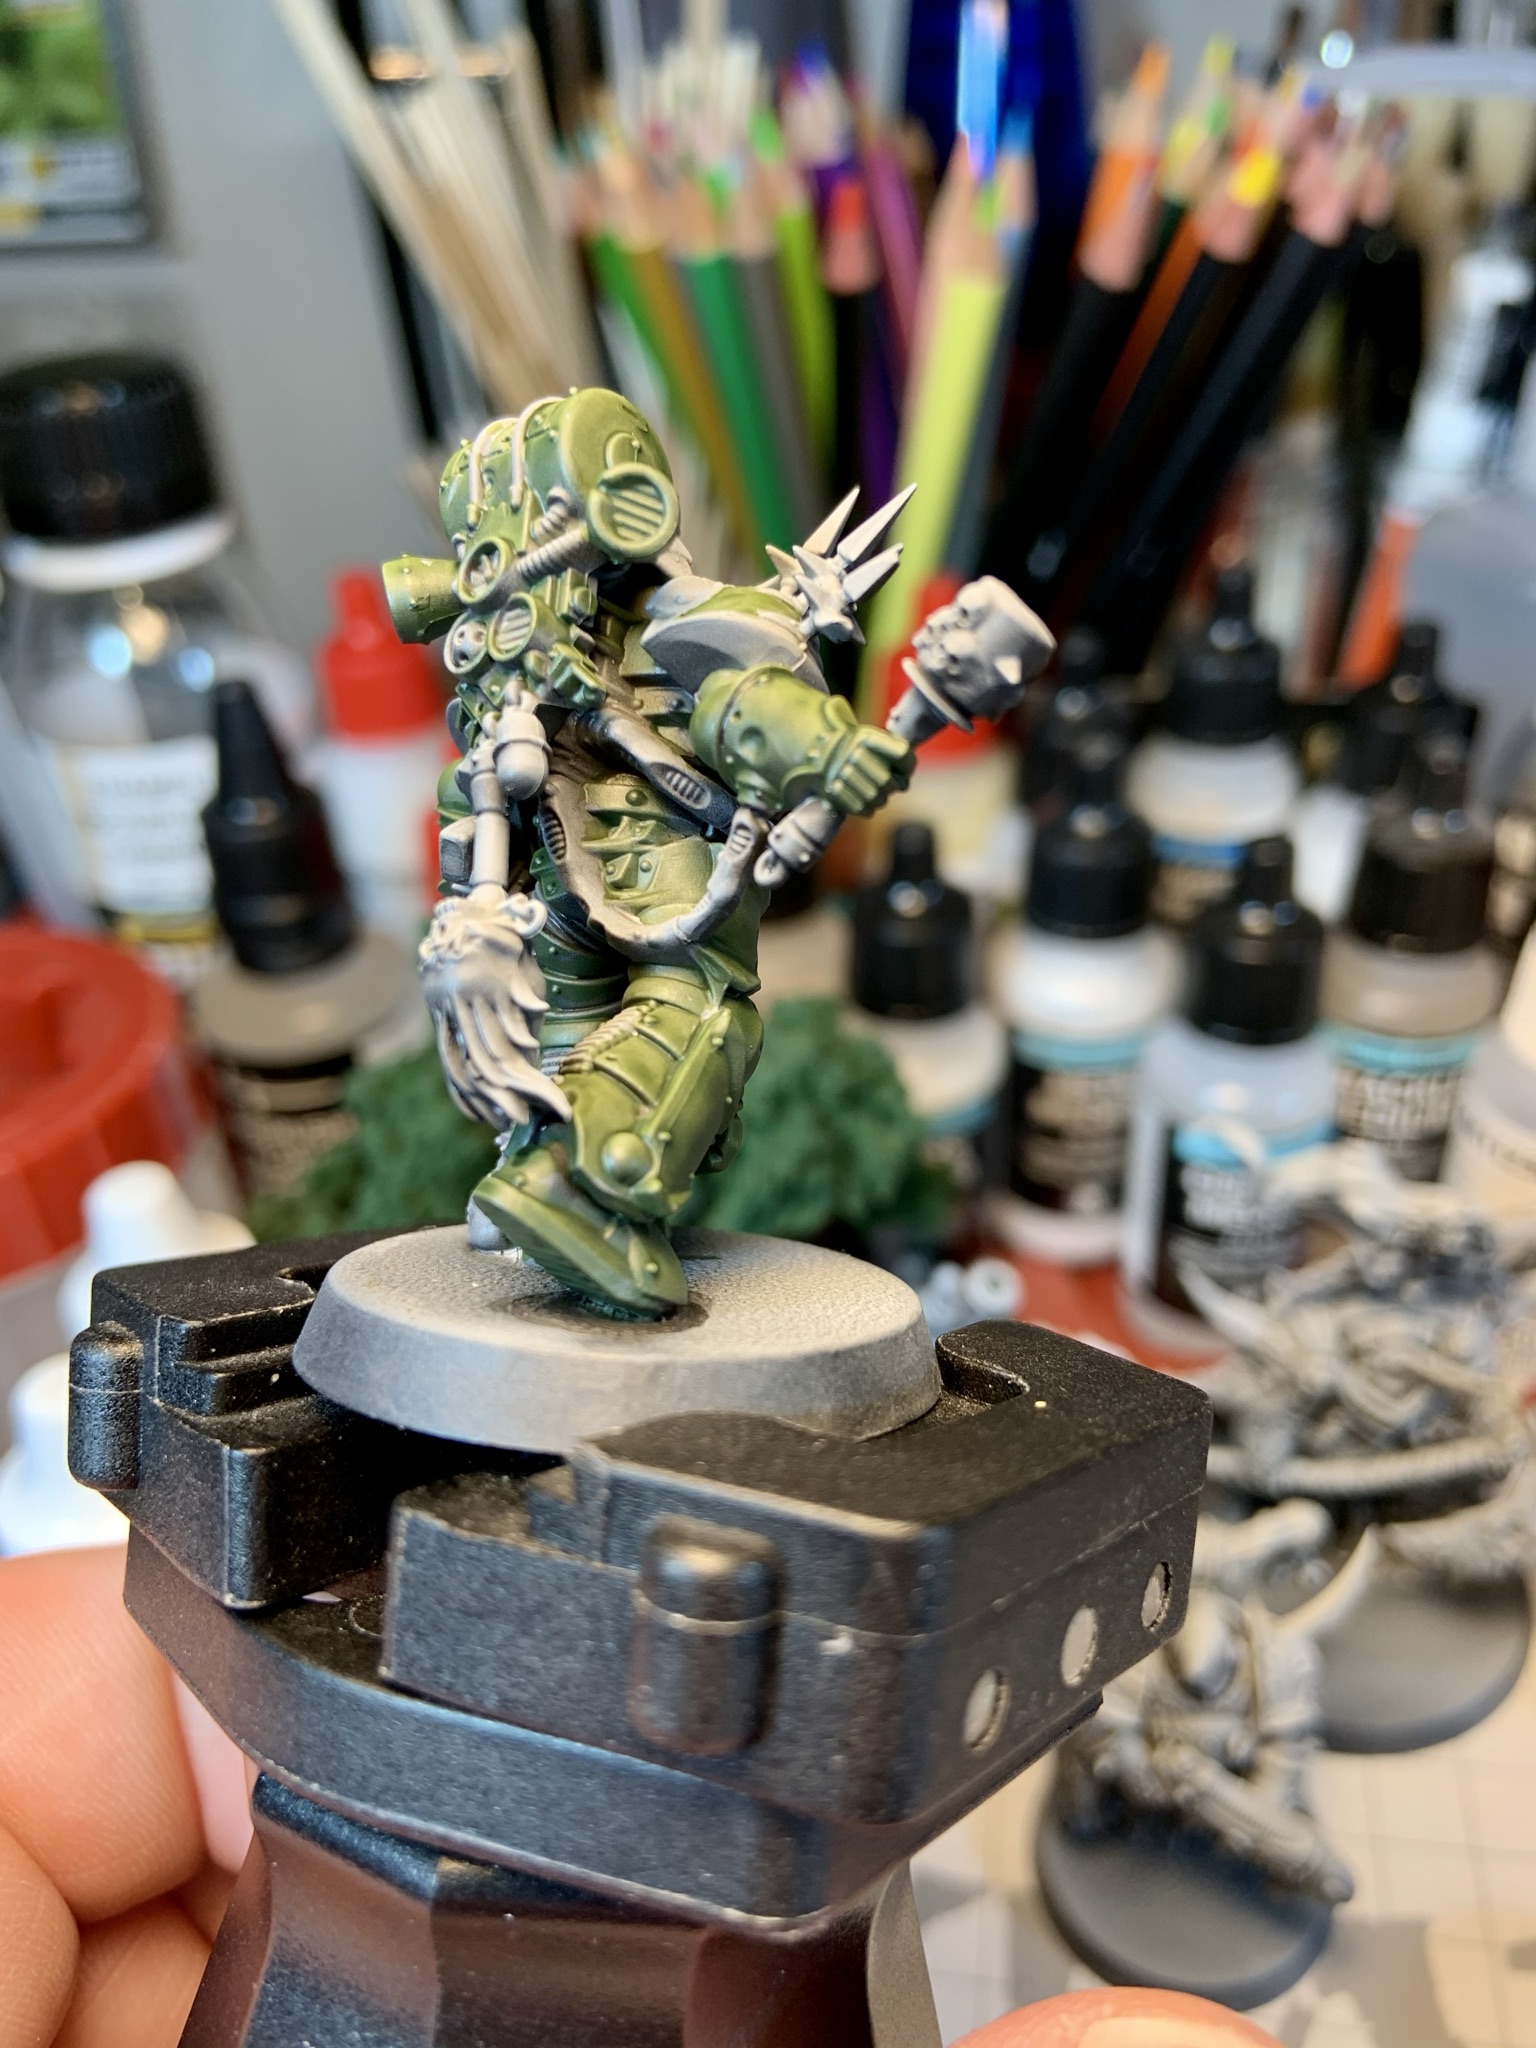
I started with the green areas by applying Citadel Militarum Green Contrast straight from the pot. The zenithal priming really helps boost the contrast here.
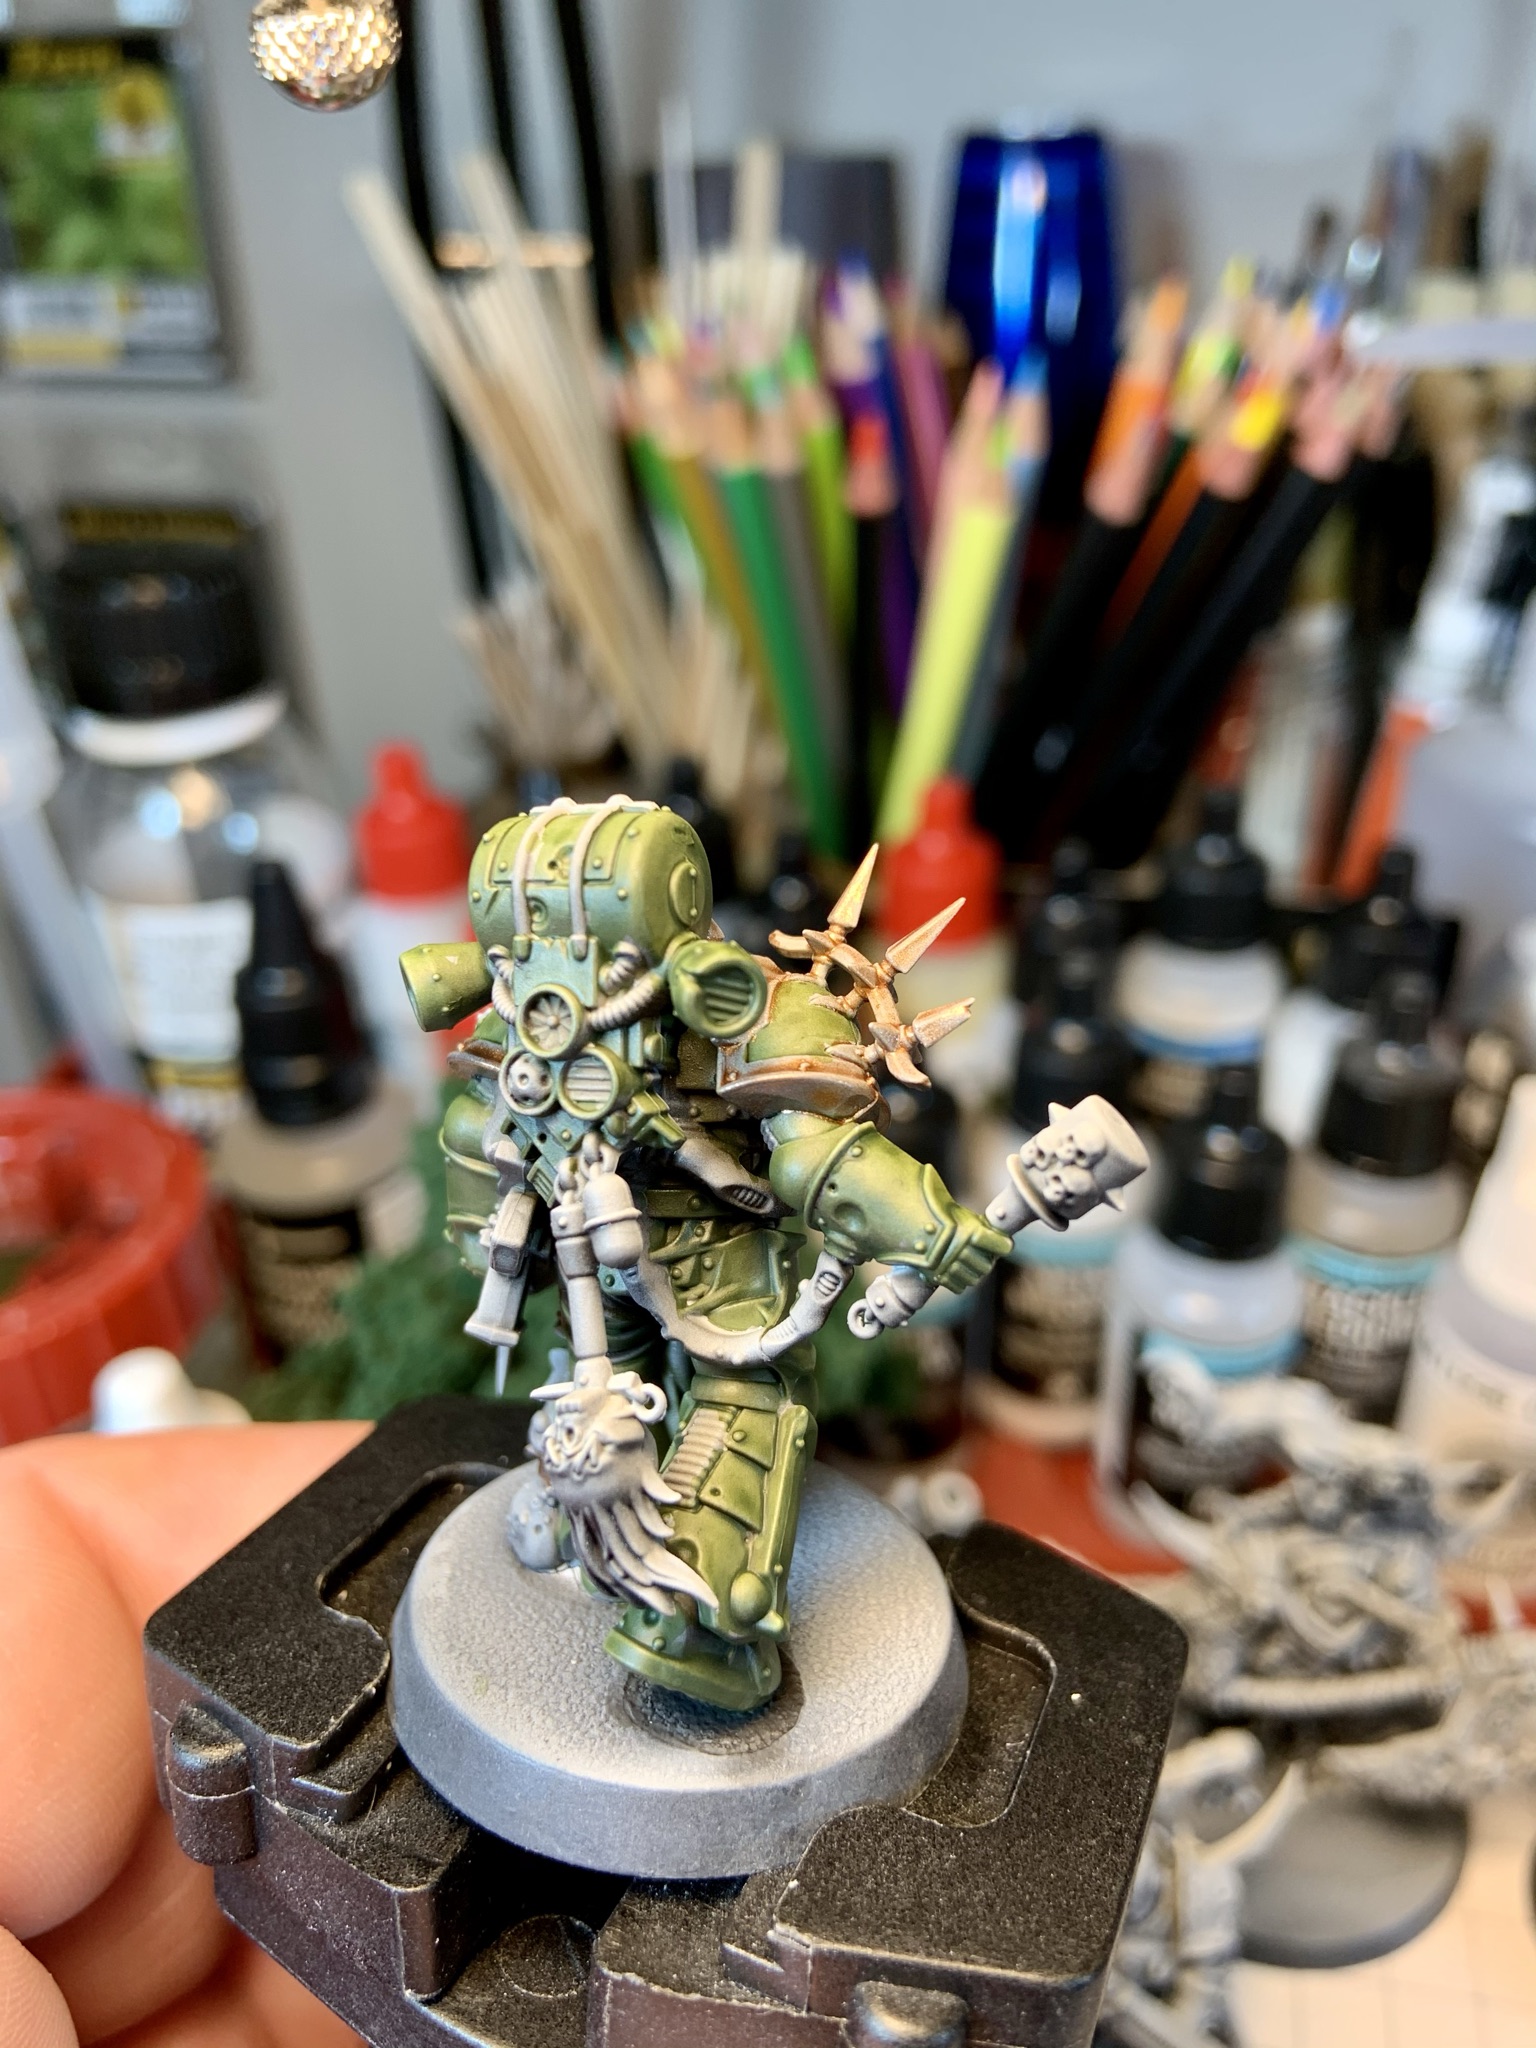

Next I’ve painted the bronze and gold areas with Citadel Balthazar Gold and Vallejo Game Color Polished Gold respectively. In both cases I’ve diluted them by about 50% with Vallejo Air Brush Medium, which makes them slightly transparent without over thinning (which is easy to do with metallics and water alone). I’ve also added a drop or two of Vallejo Airbrush Flow Improver to help the paint behave a bit like a wash…allowing some of the brighter pre-highlighted edges to come through. For mixing I use recycled water bottle caps. The depth of the cap allows the paint to pool, which slows the drying time of the acrylics a little compared to a traditional pallet (I find I can complete the area at hand without having to ‘re-load’).

At this point I’ve washed over the bronze and gold areas with Citadel Reikland Fleshshade Gloss Shade. This gives the TMM areas a sheen that really helps those details pop in addition to boosting the contrast. I’ve also used Citadel Snakebite Leather Contrast on the leather straps, Citadel Wyldwood Contrast on the receiver/stock of the gun, and Citadel Volupus Pink Contrast on some of the hoses/tentacle. Lastly, the skull details on the mace and the severed head were painted with Citadel Skeleton Hoard Contrast.
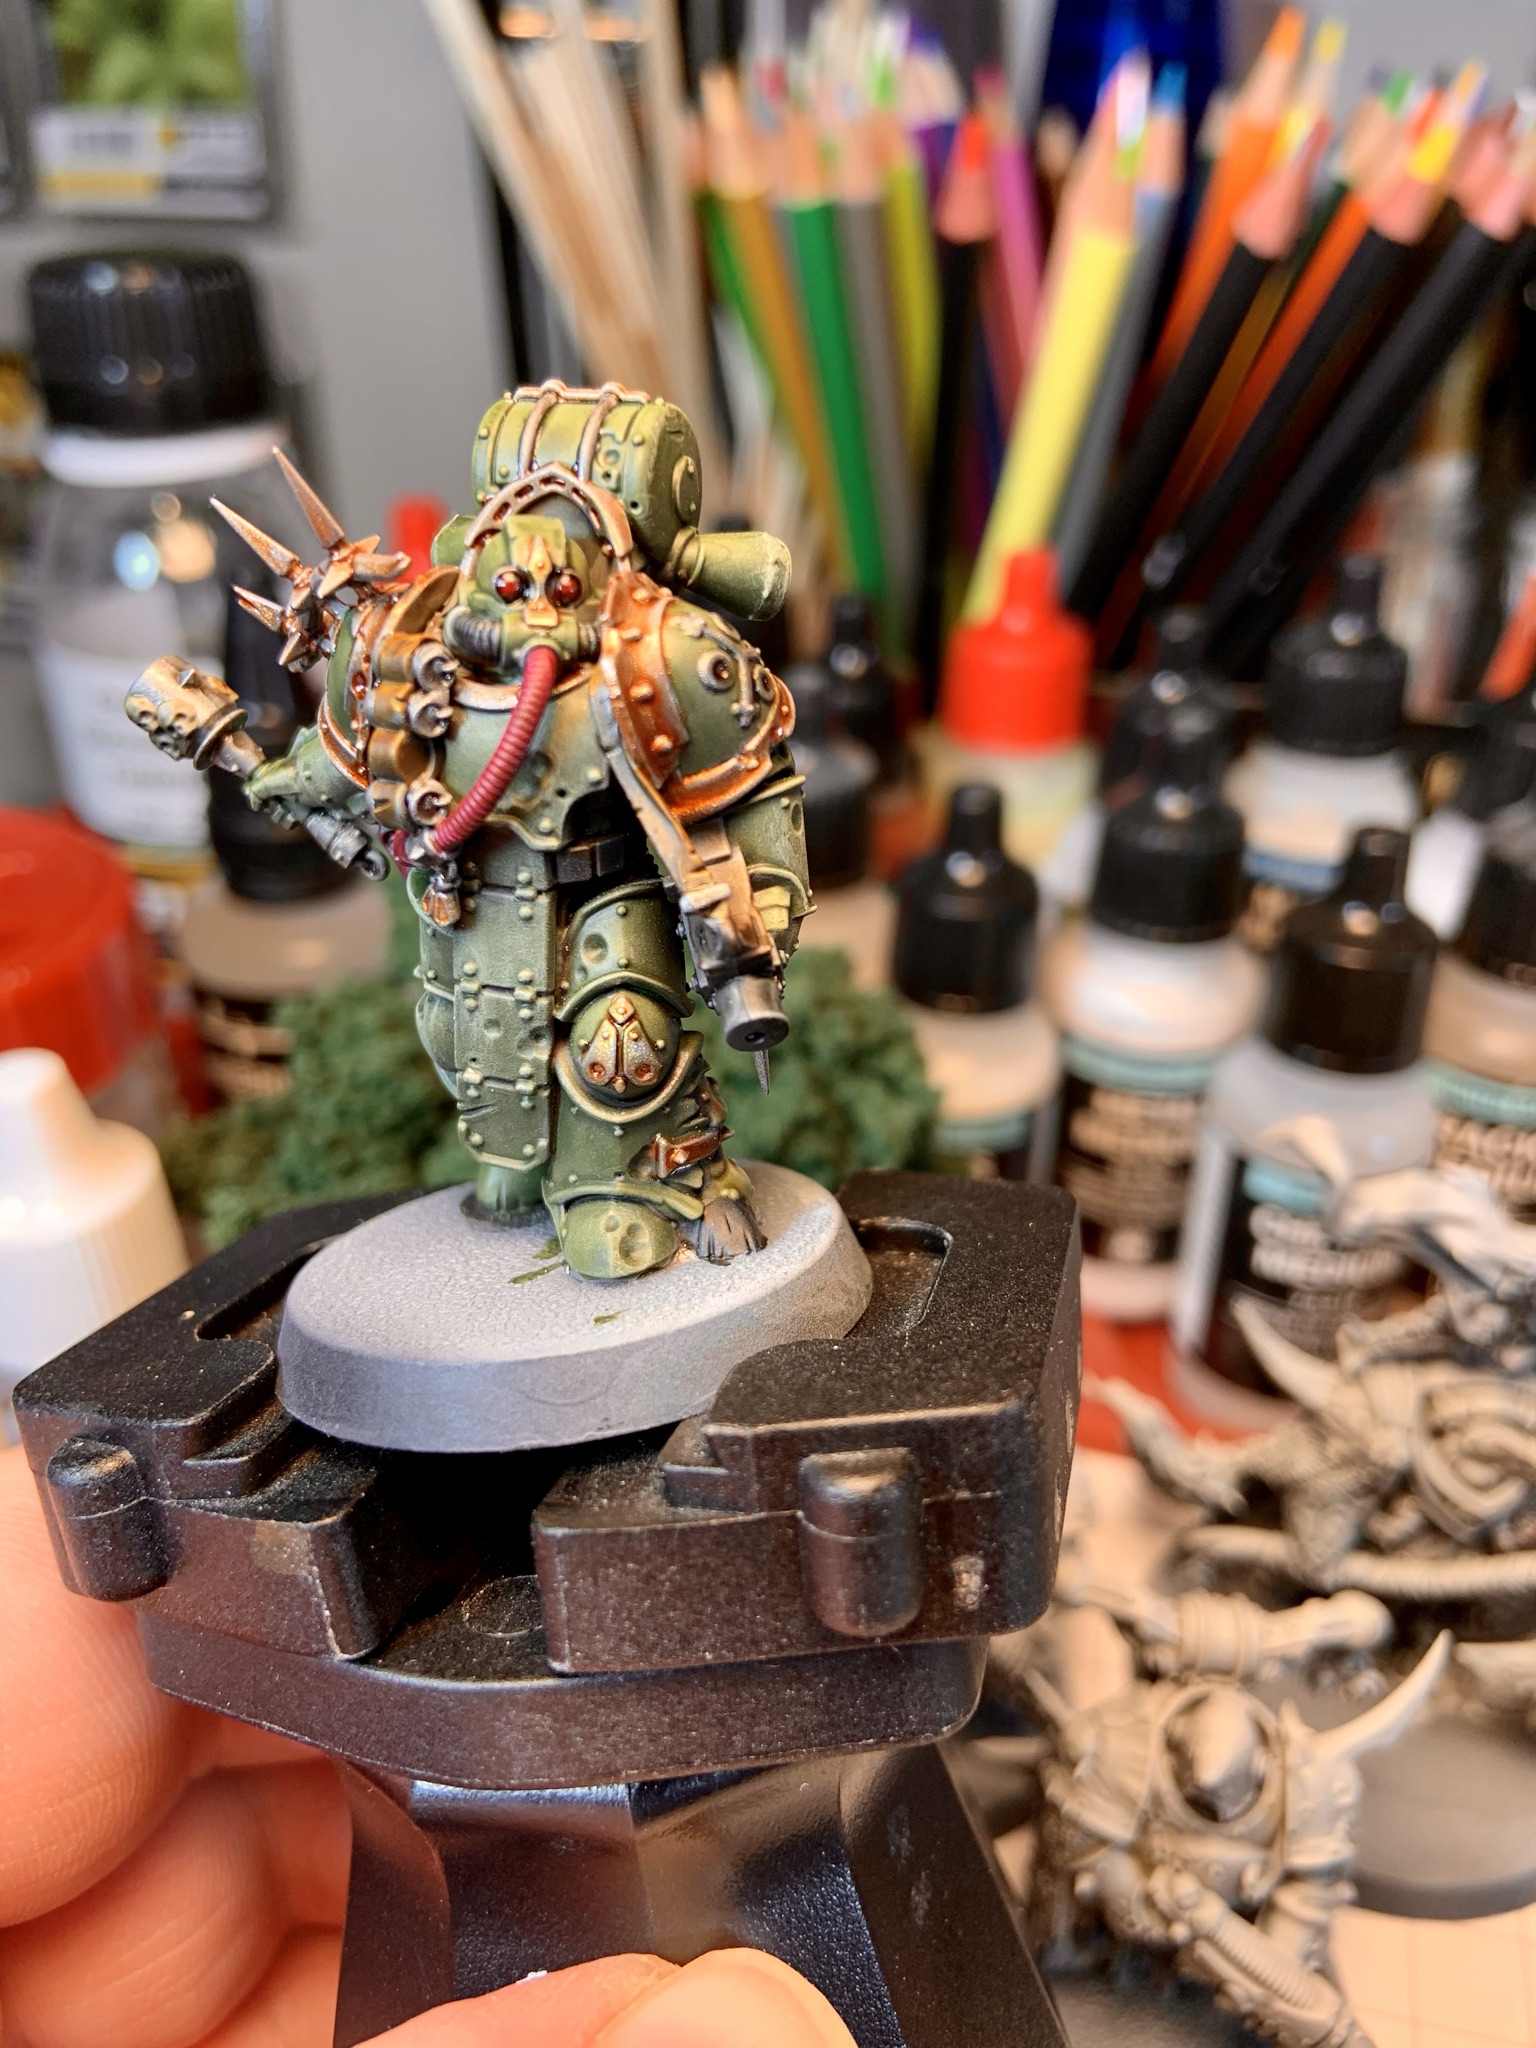
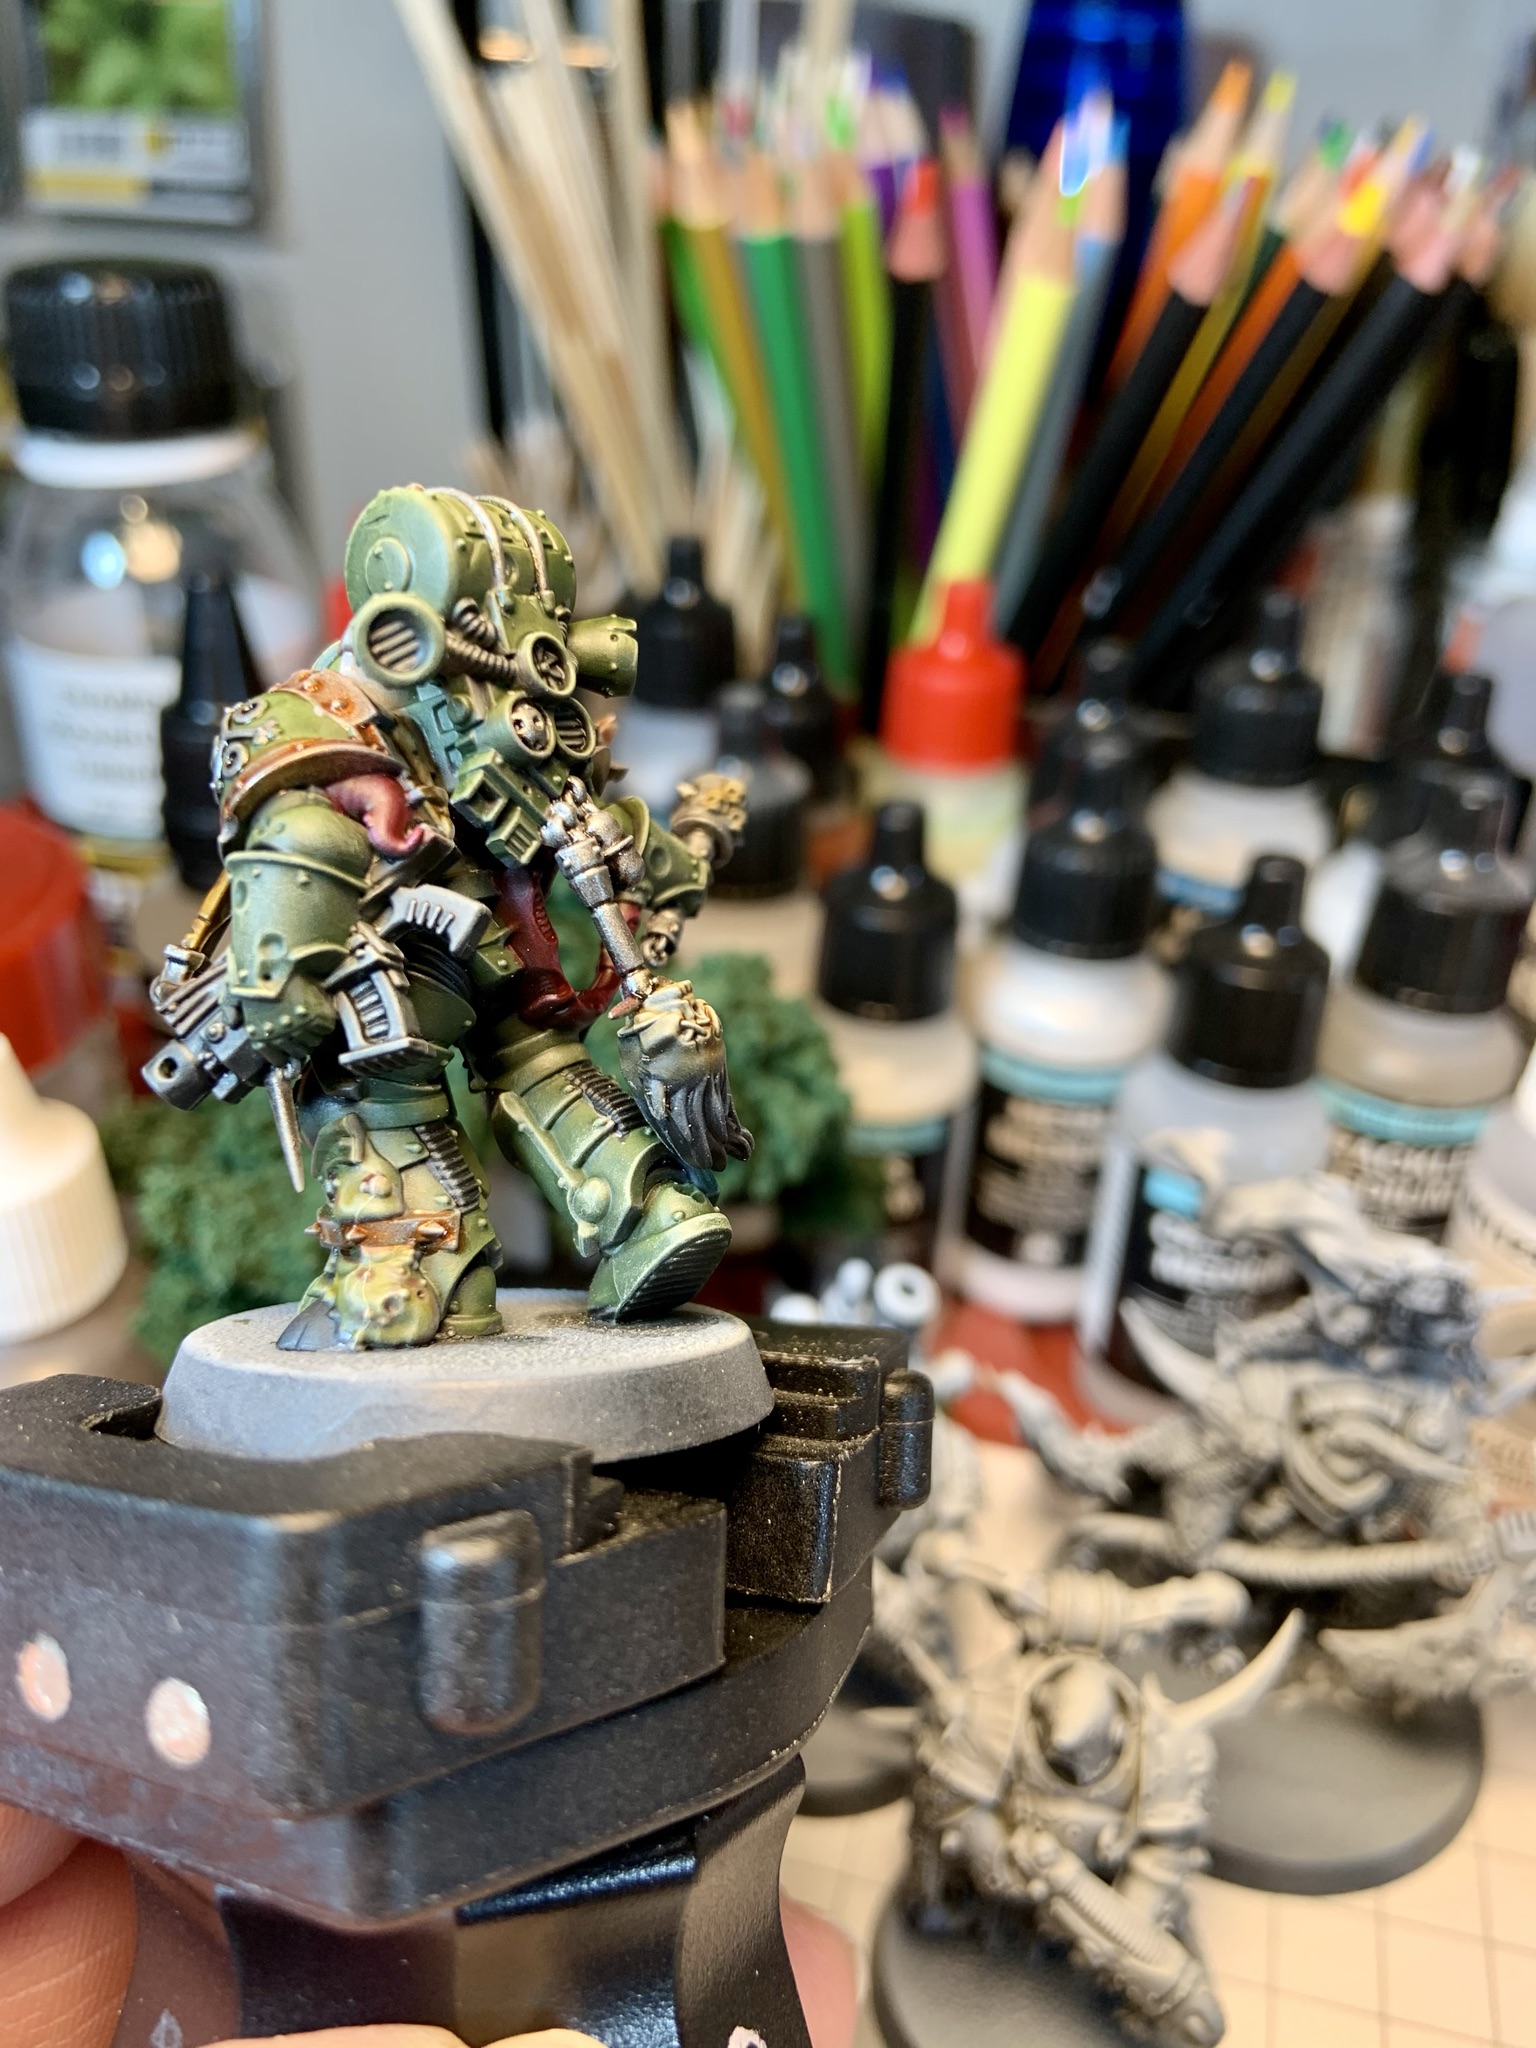
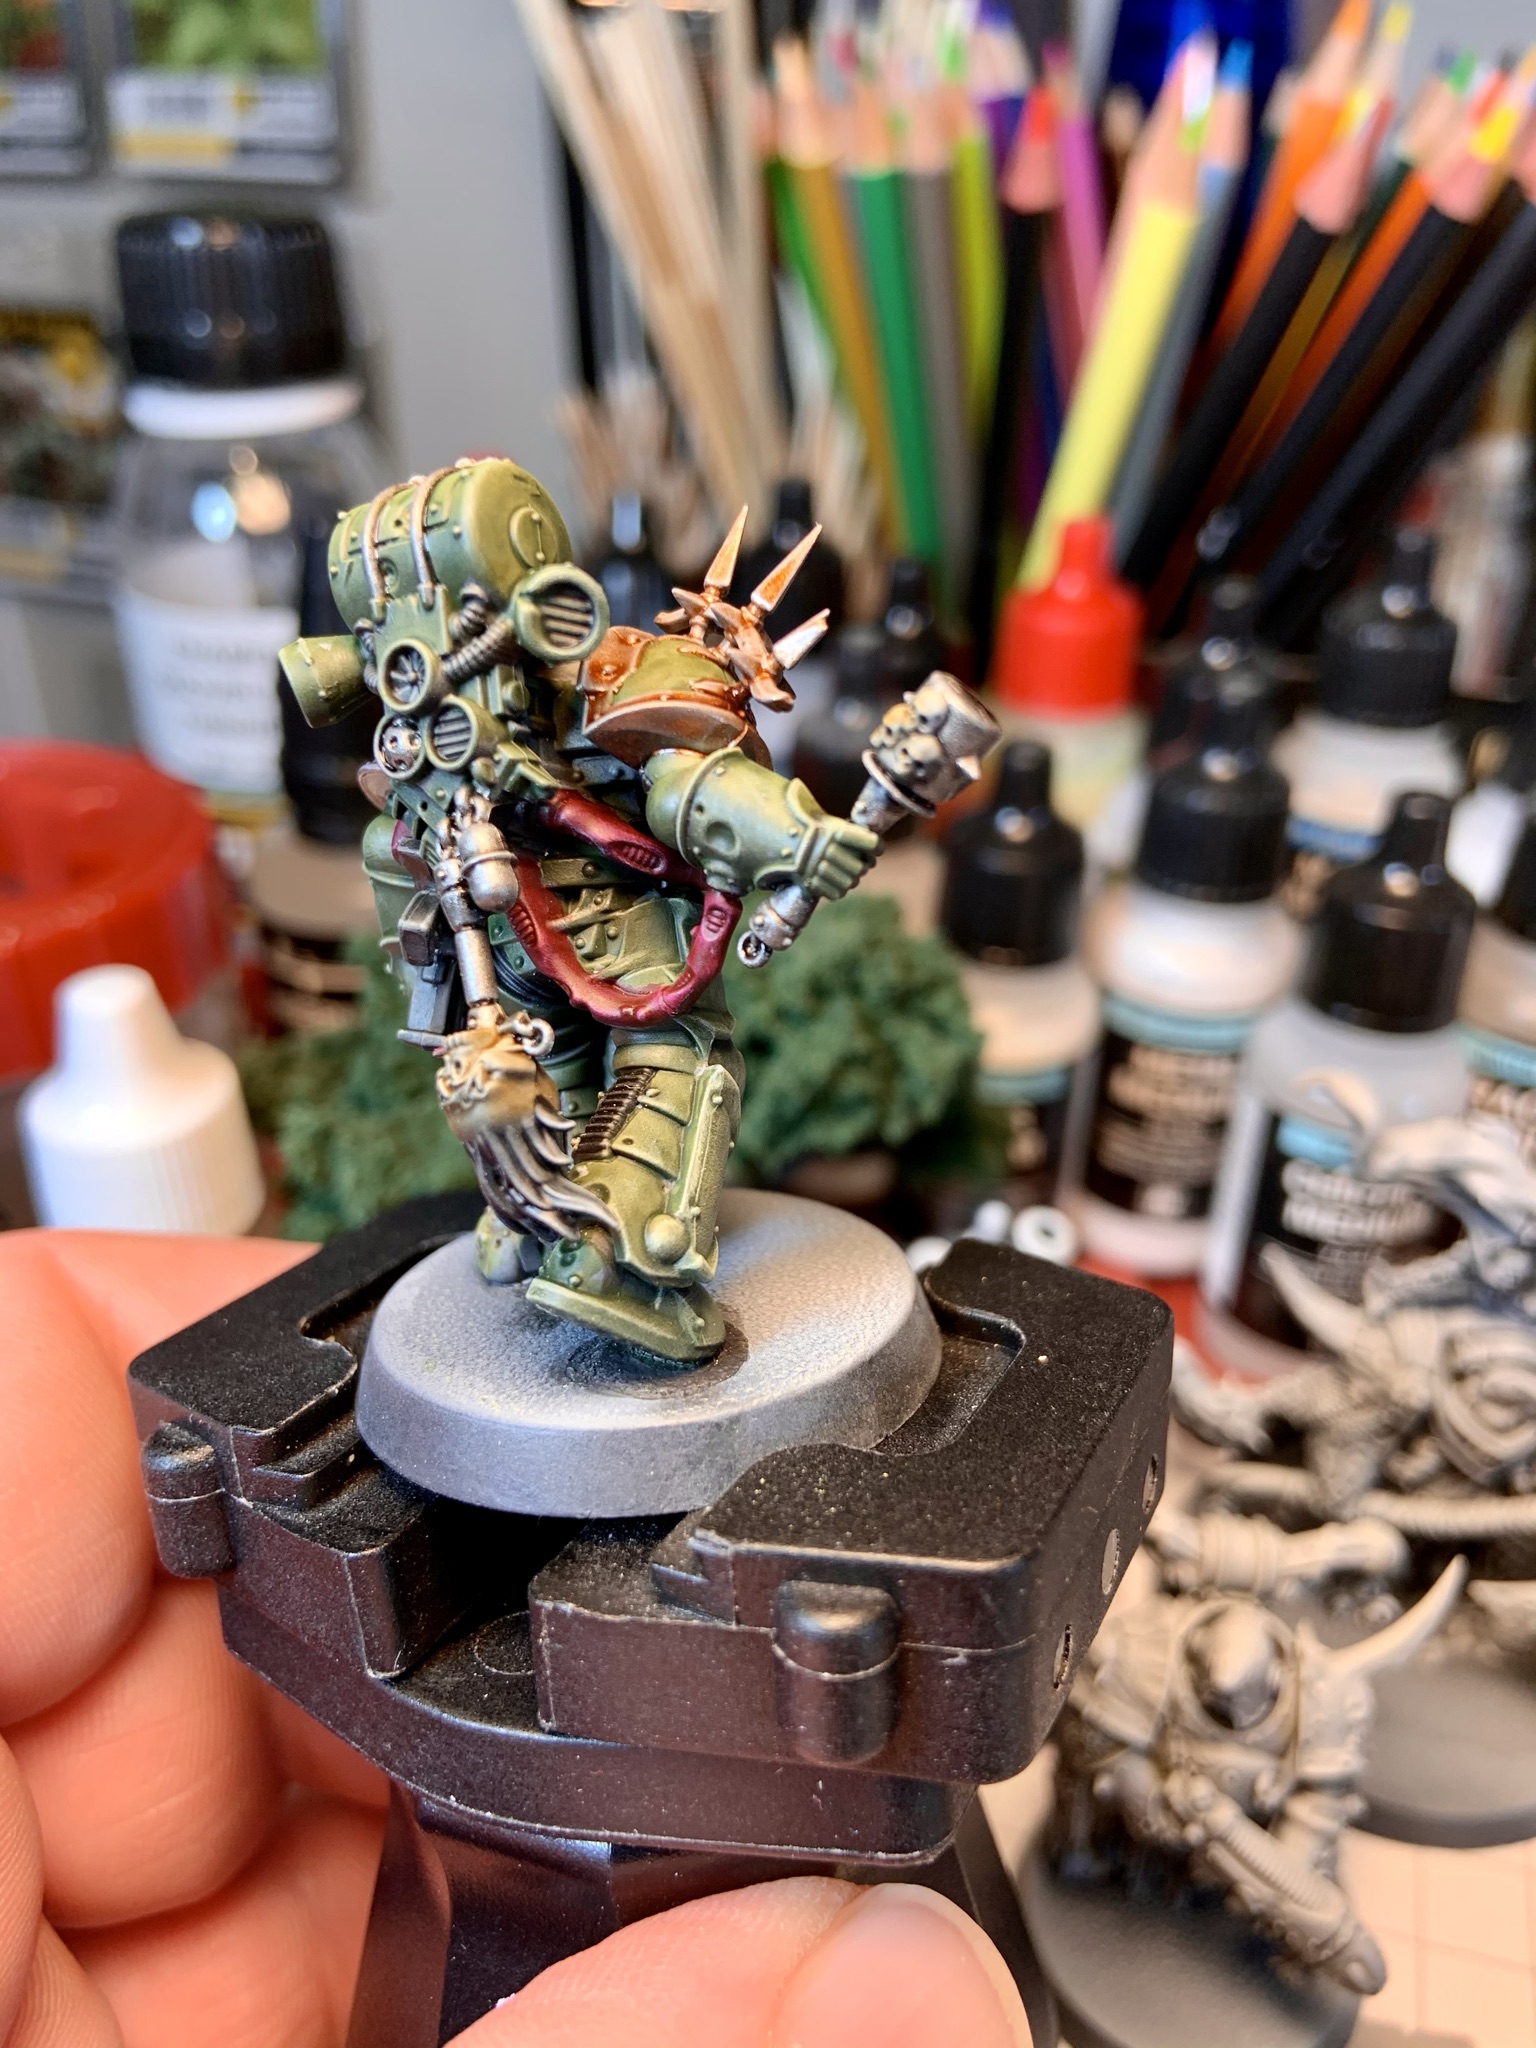
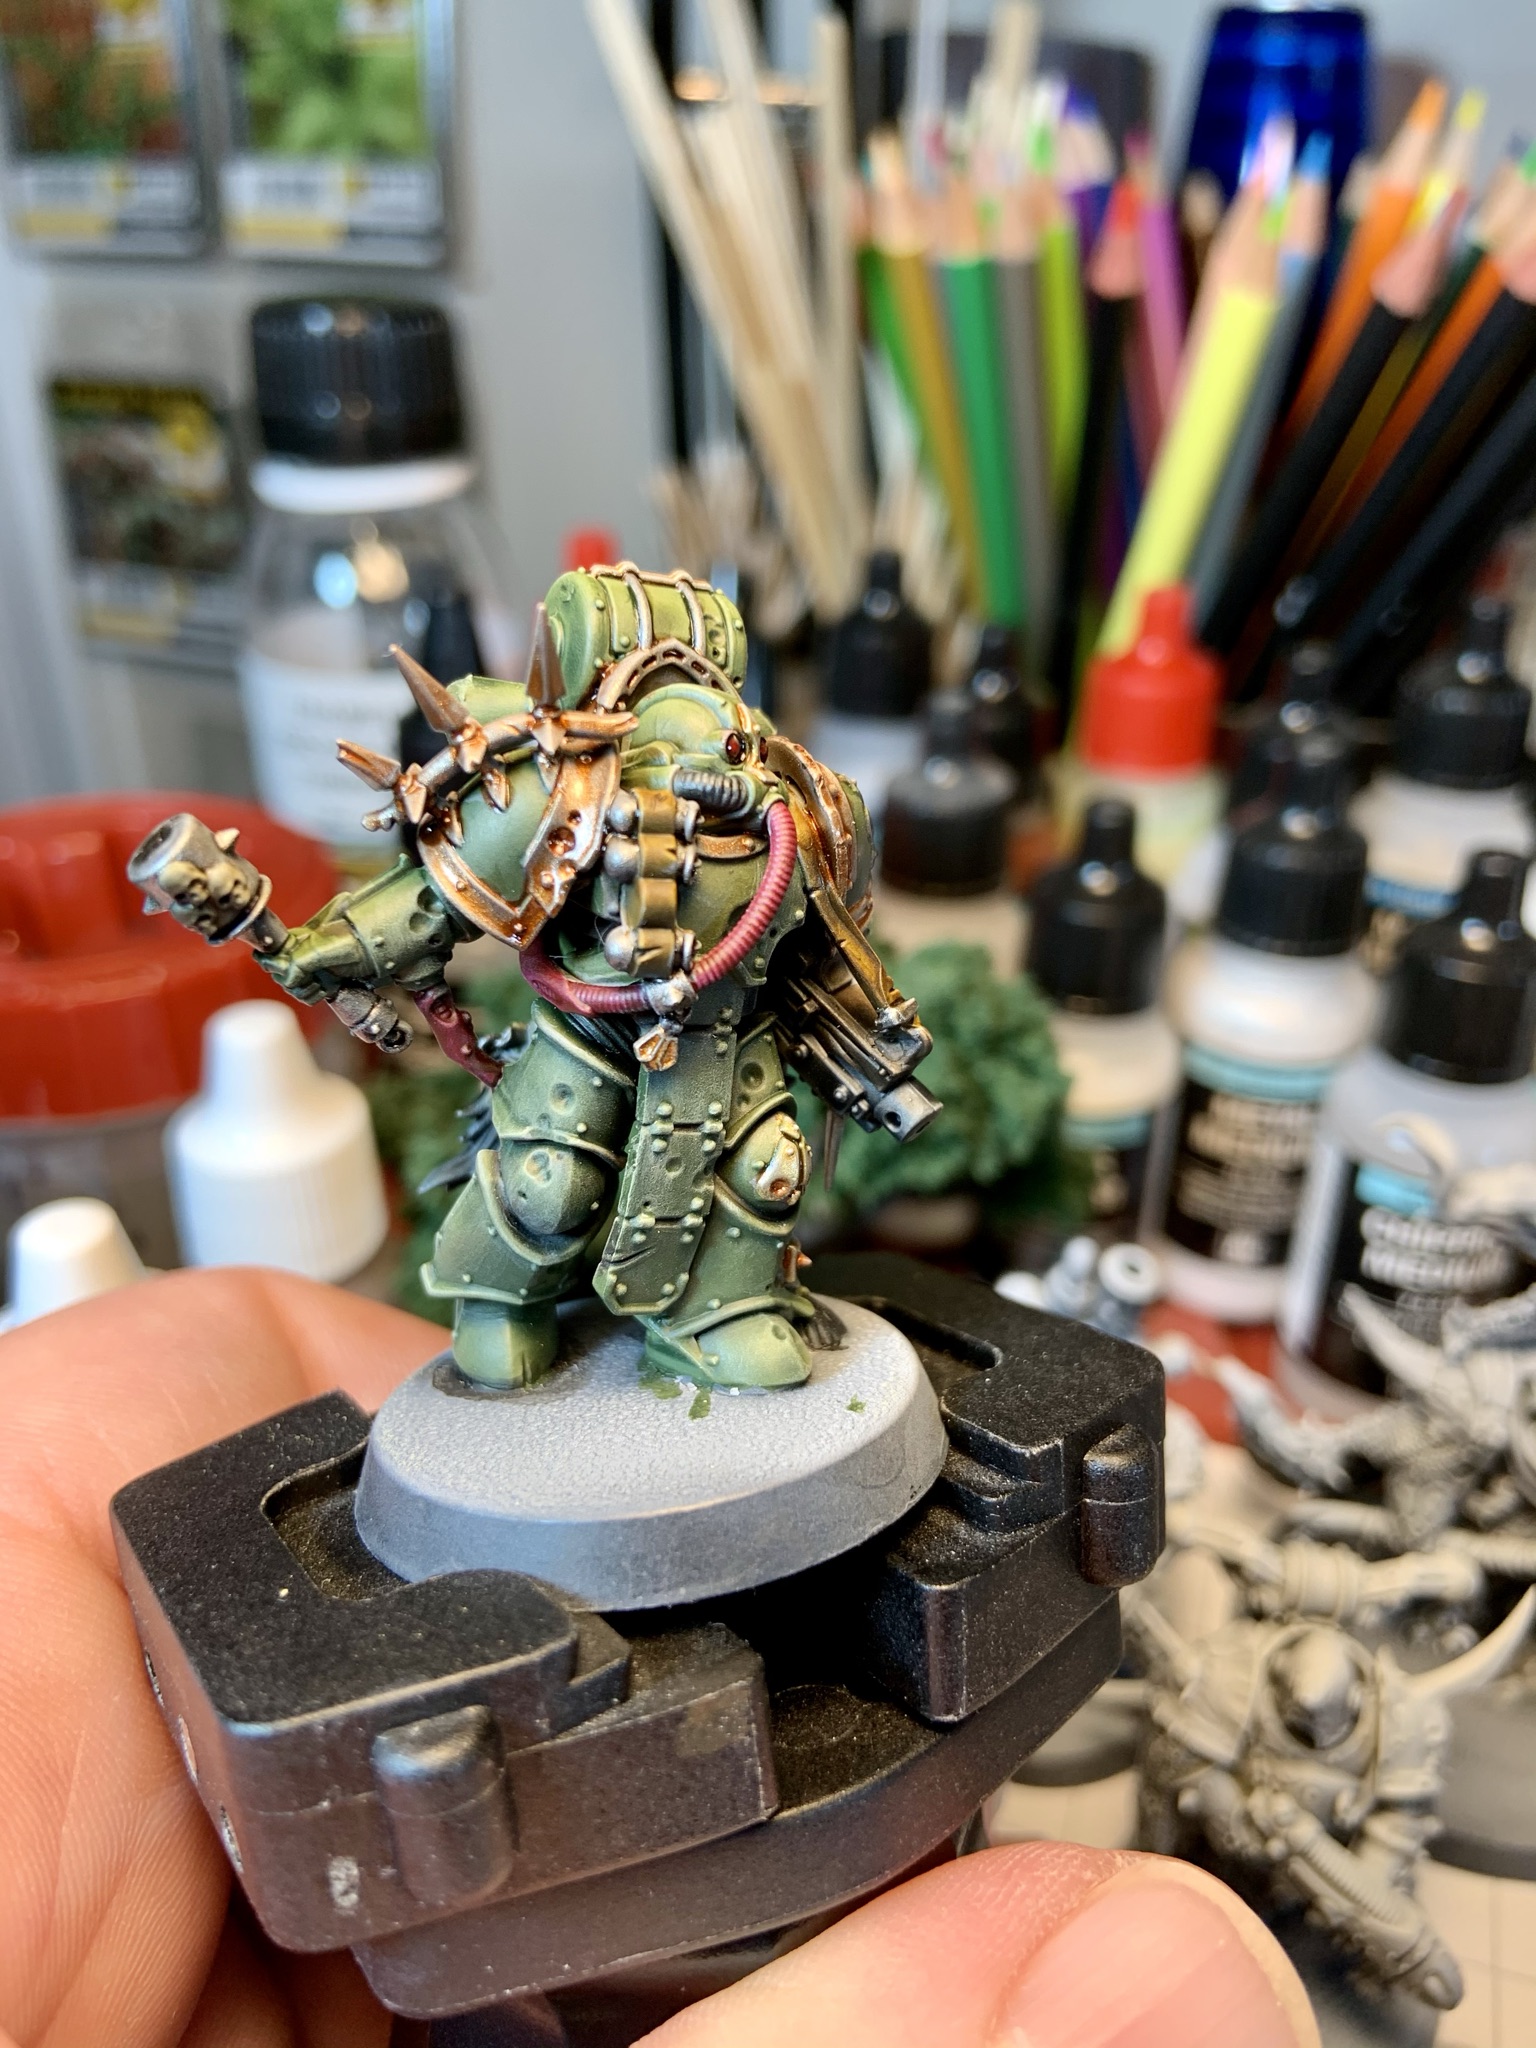
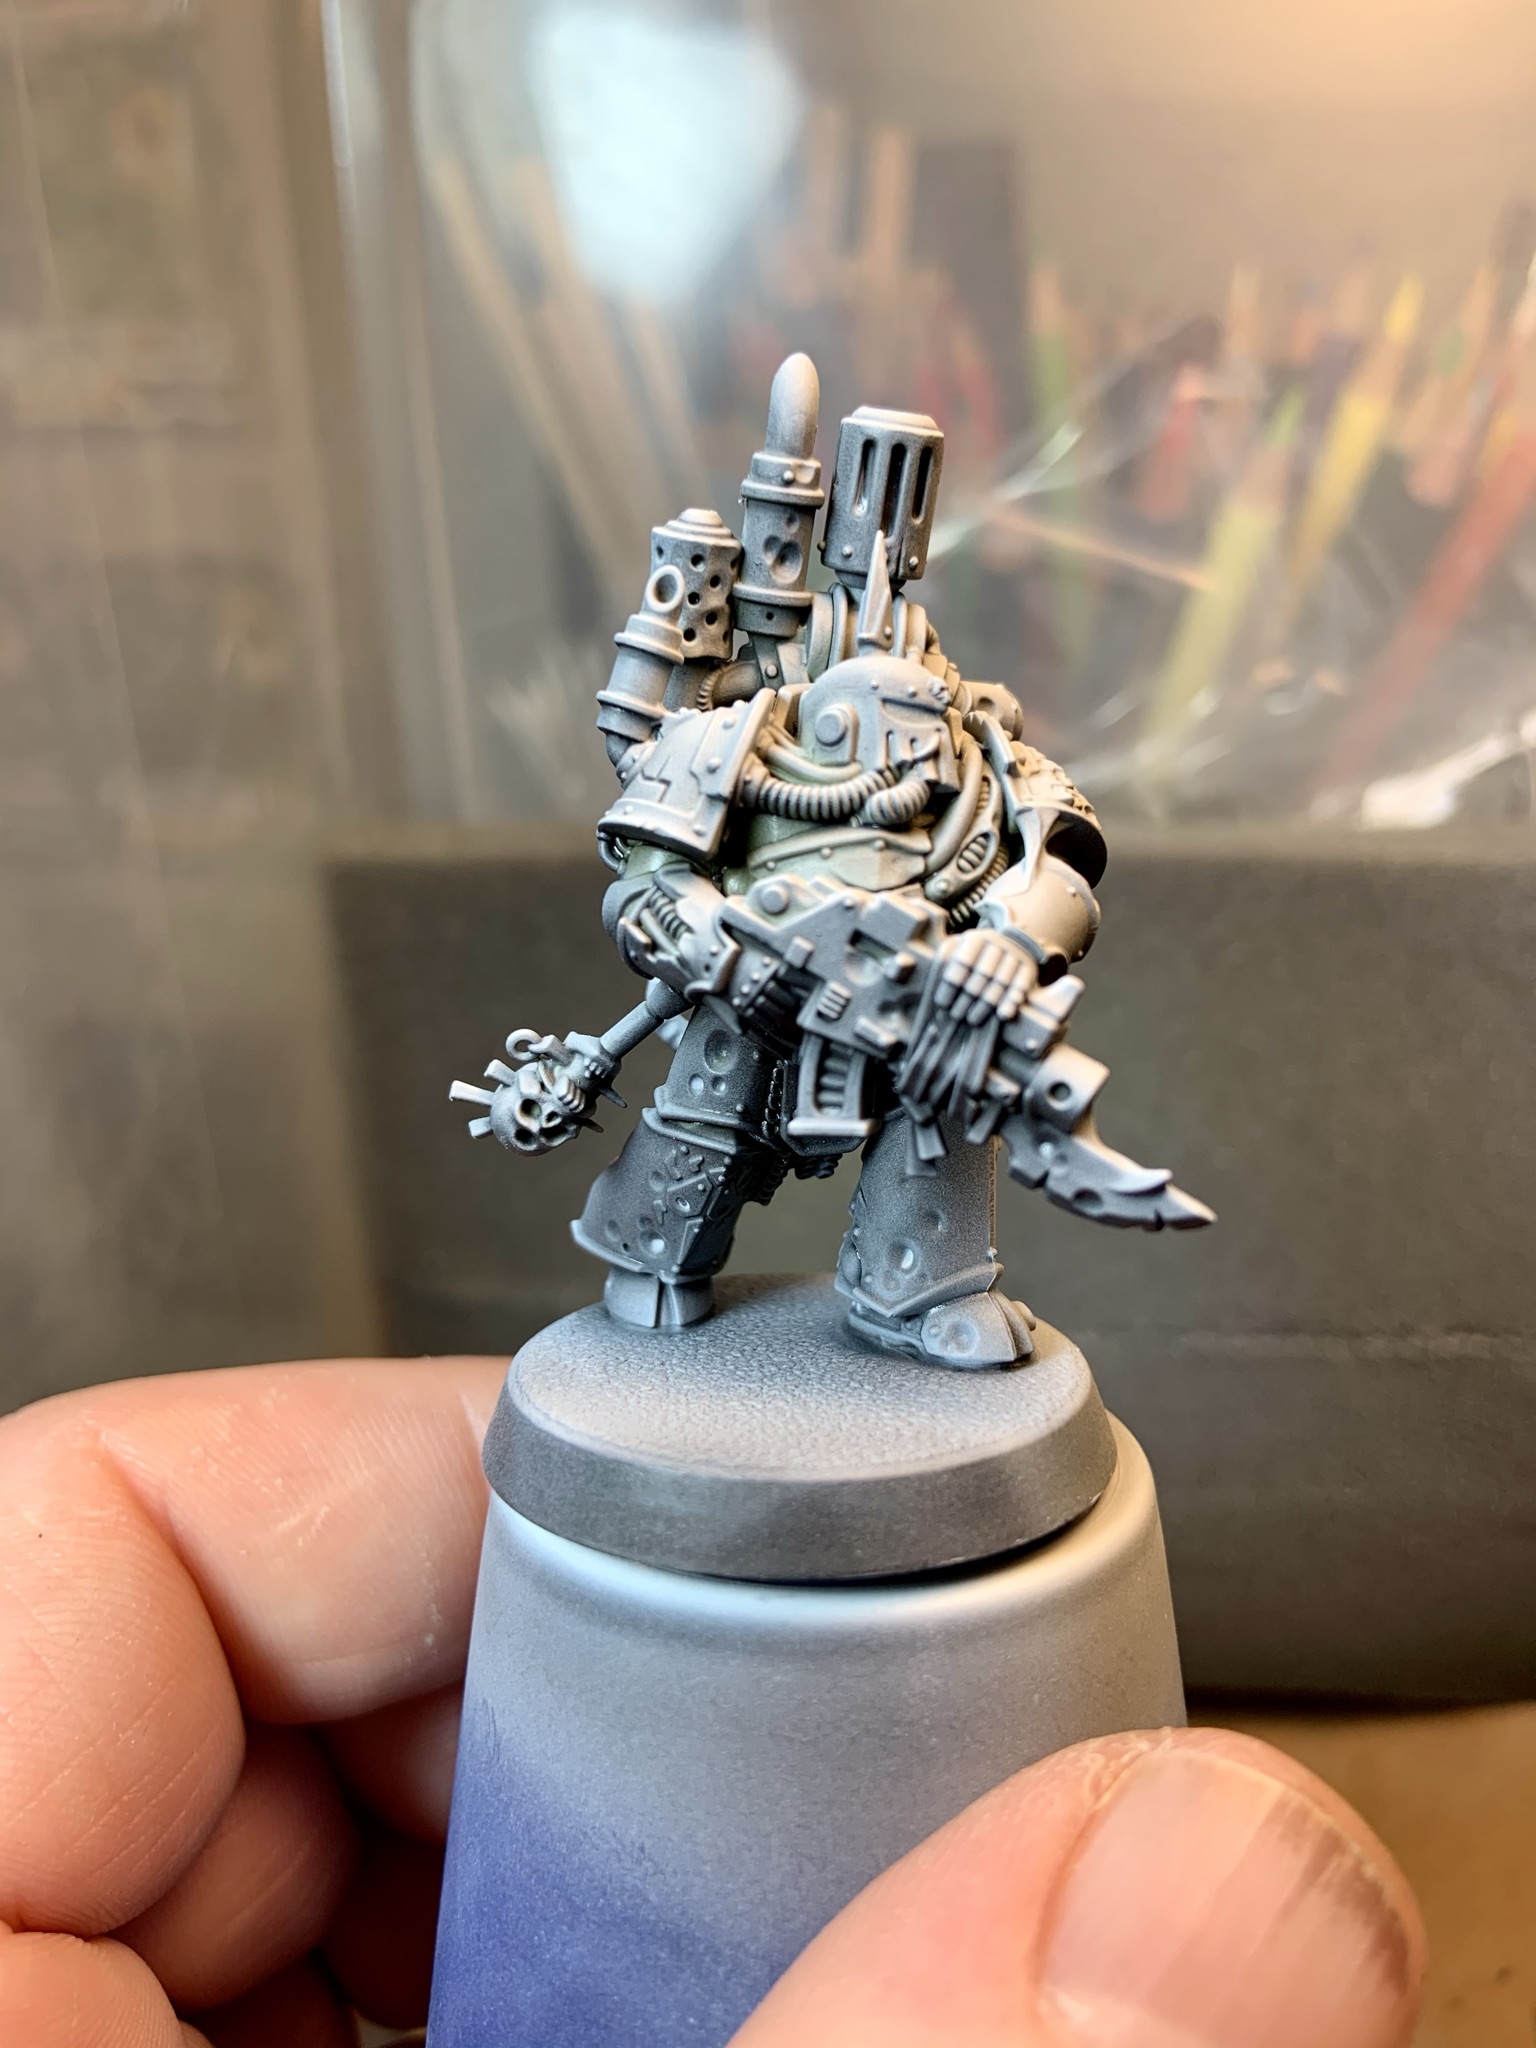
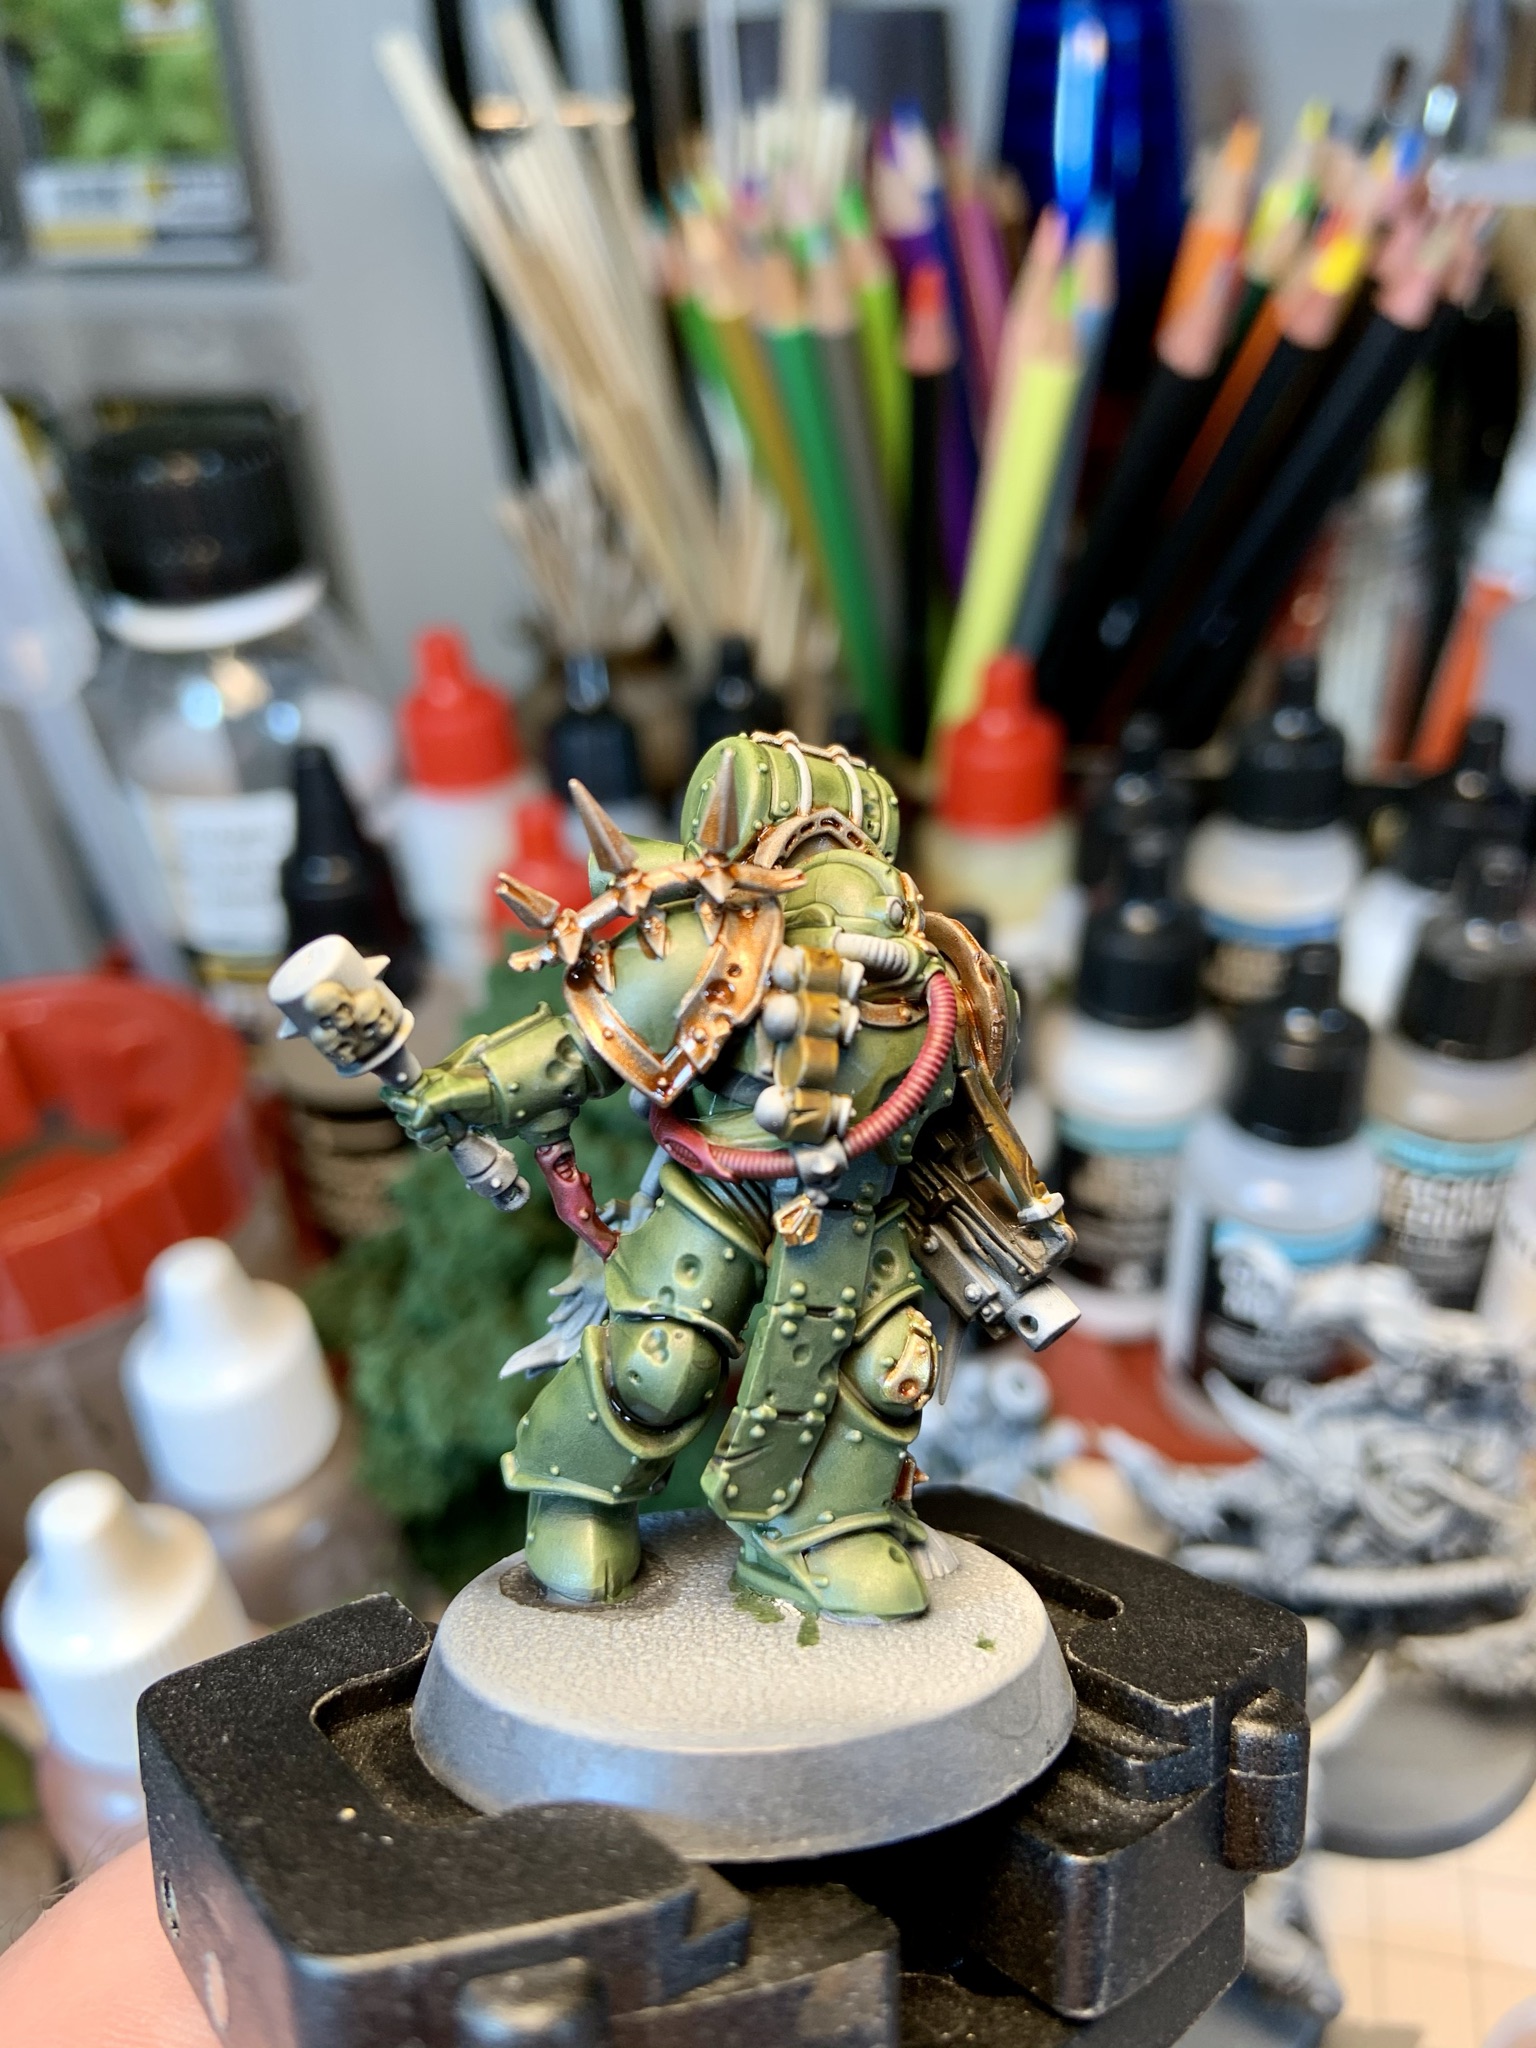
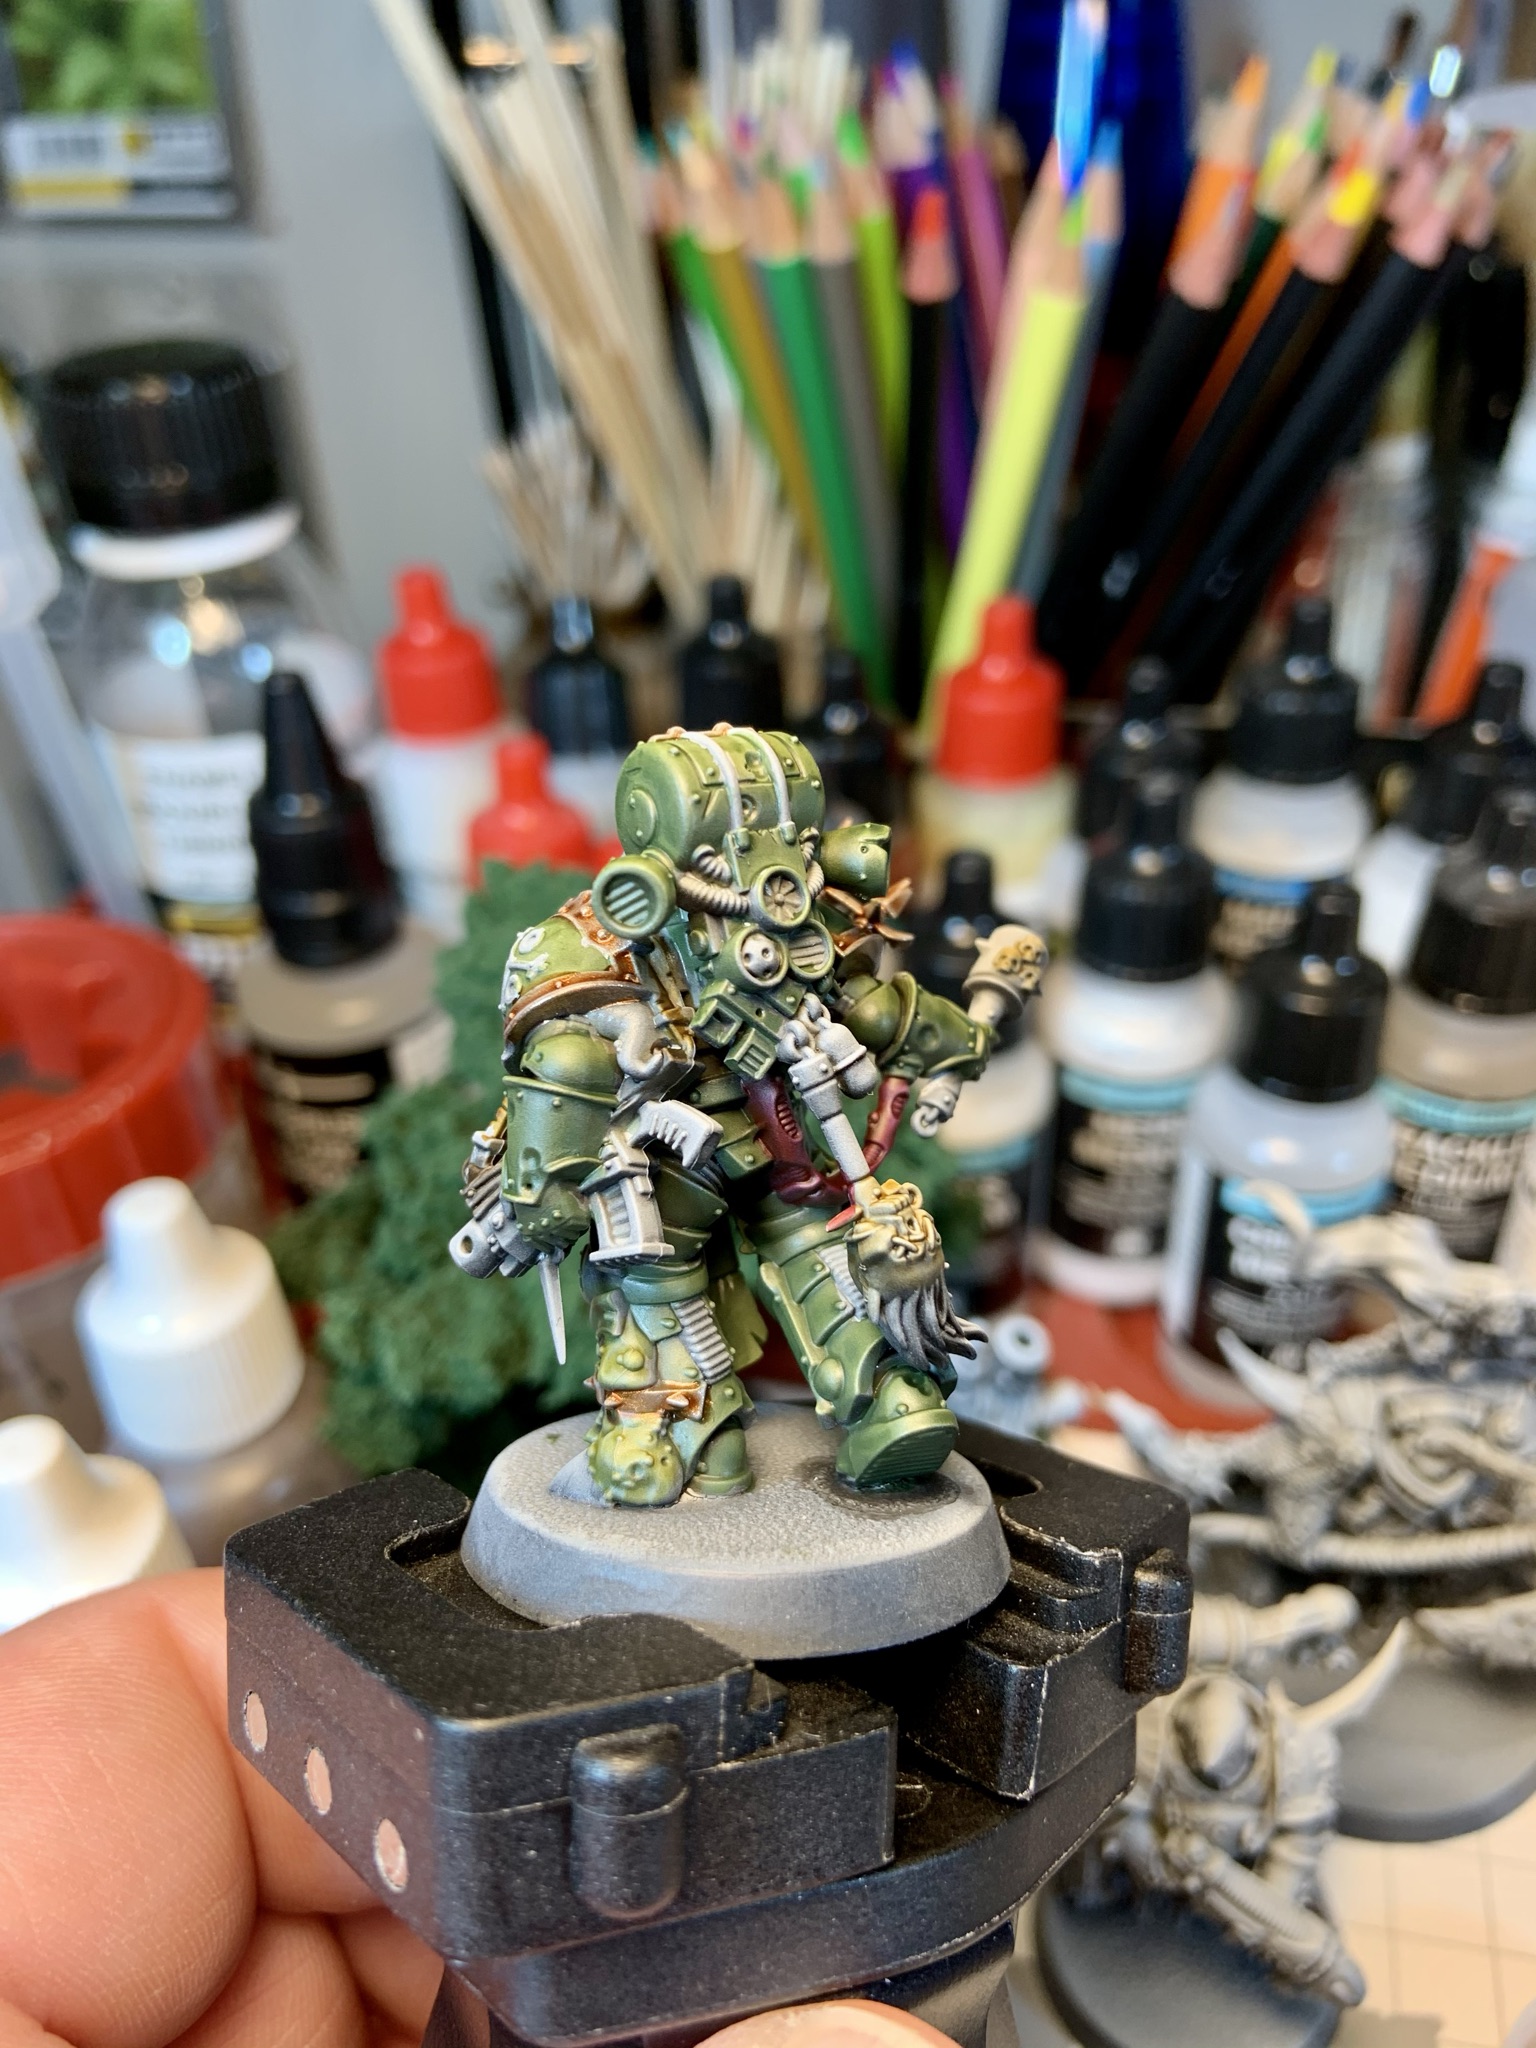
Painting is now finished on the model at this stage. I painted the silver areas with Citadel Lead Belcher (thinned as before with Vallejo Air Brush Medium and Air Brush Flow Improver) and then washed them with Citadel Nuln Oil Gloss Shade. The hoof protruding from the left foot was painted with Citadel Black Templar Contrast straight from the pot. The remaining grey areas (gun barrel, hoses, hair on severed head etc.) were also painted with Black Templar, but thinned 50% with Citadel Technical Contrast Medium to preserve the natural highlights. I used Citadel Plaguebearer Flesh Contrast on the nurgling strapped to the left foot. The eye lenses were started by washing with thinned (with water) Army Painter Red Tone wash. I then painted the lower third of them with Citadel Mephiston Red undiluted. Finally both eye sockets were generously washed with Citadel Nuln Oil Gloss Shade (the sheen contributes to a natural lens effect). Lastly, the armor was lightly washed in certain areas with Citadel Agrax Earthshade Shade and lightly dry brushed with Citadel Underhive Ash Dry paint (applied with a small ‘makeup’ style brush).
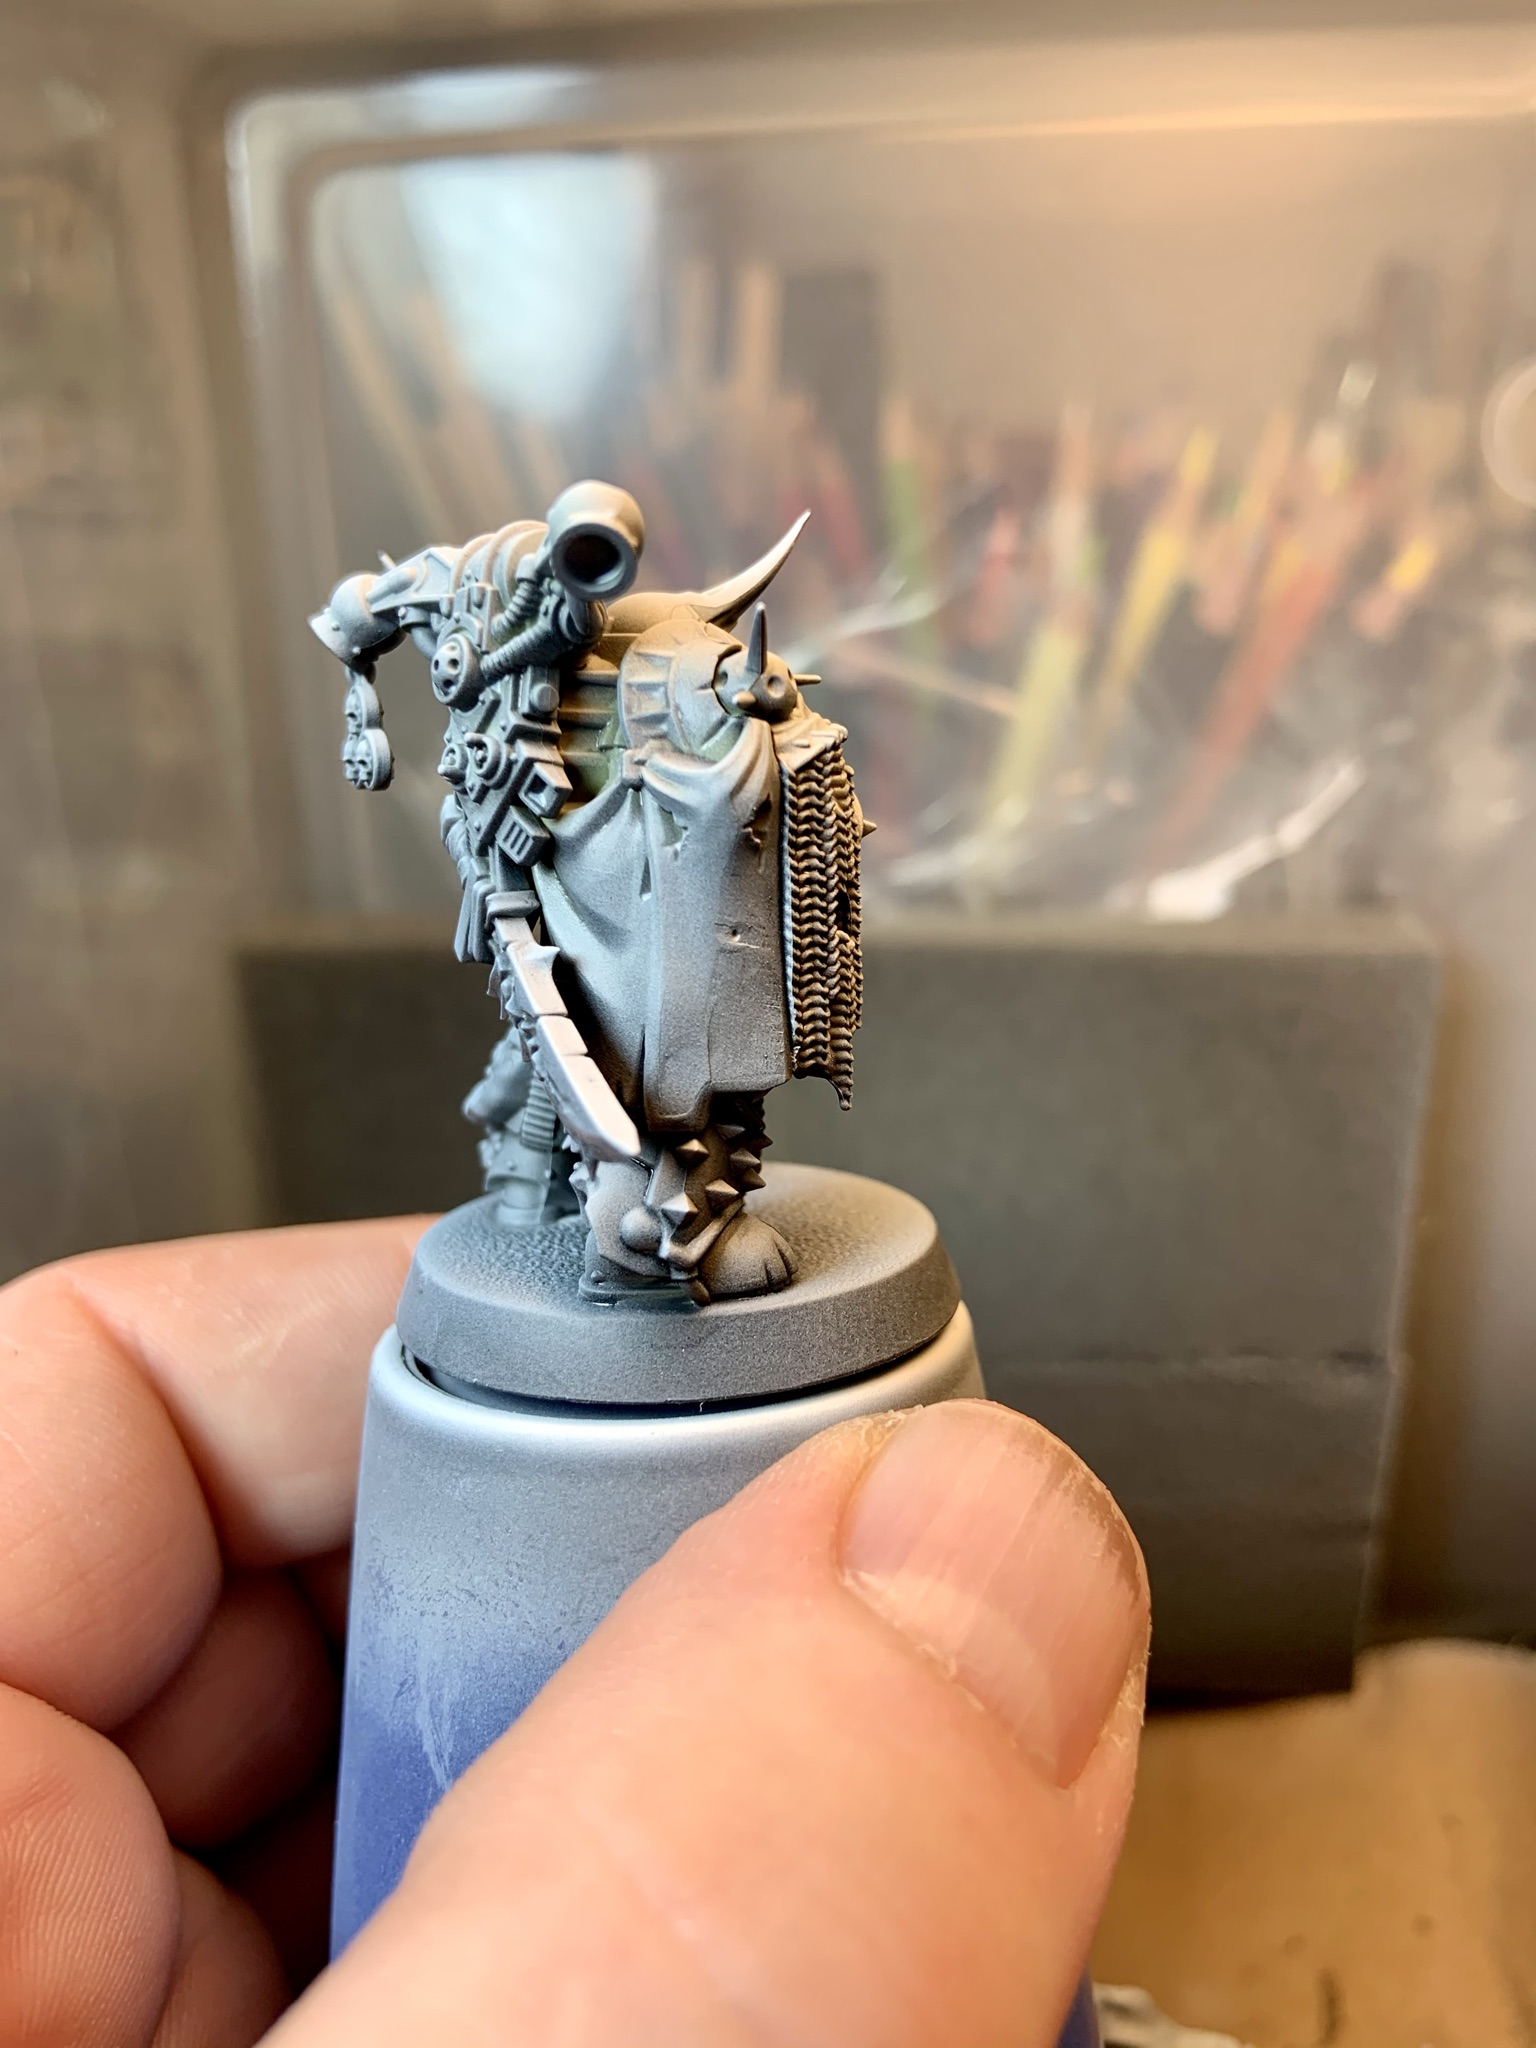
Next up will be the base and this guy will be finished...
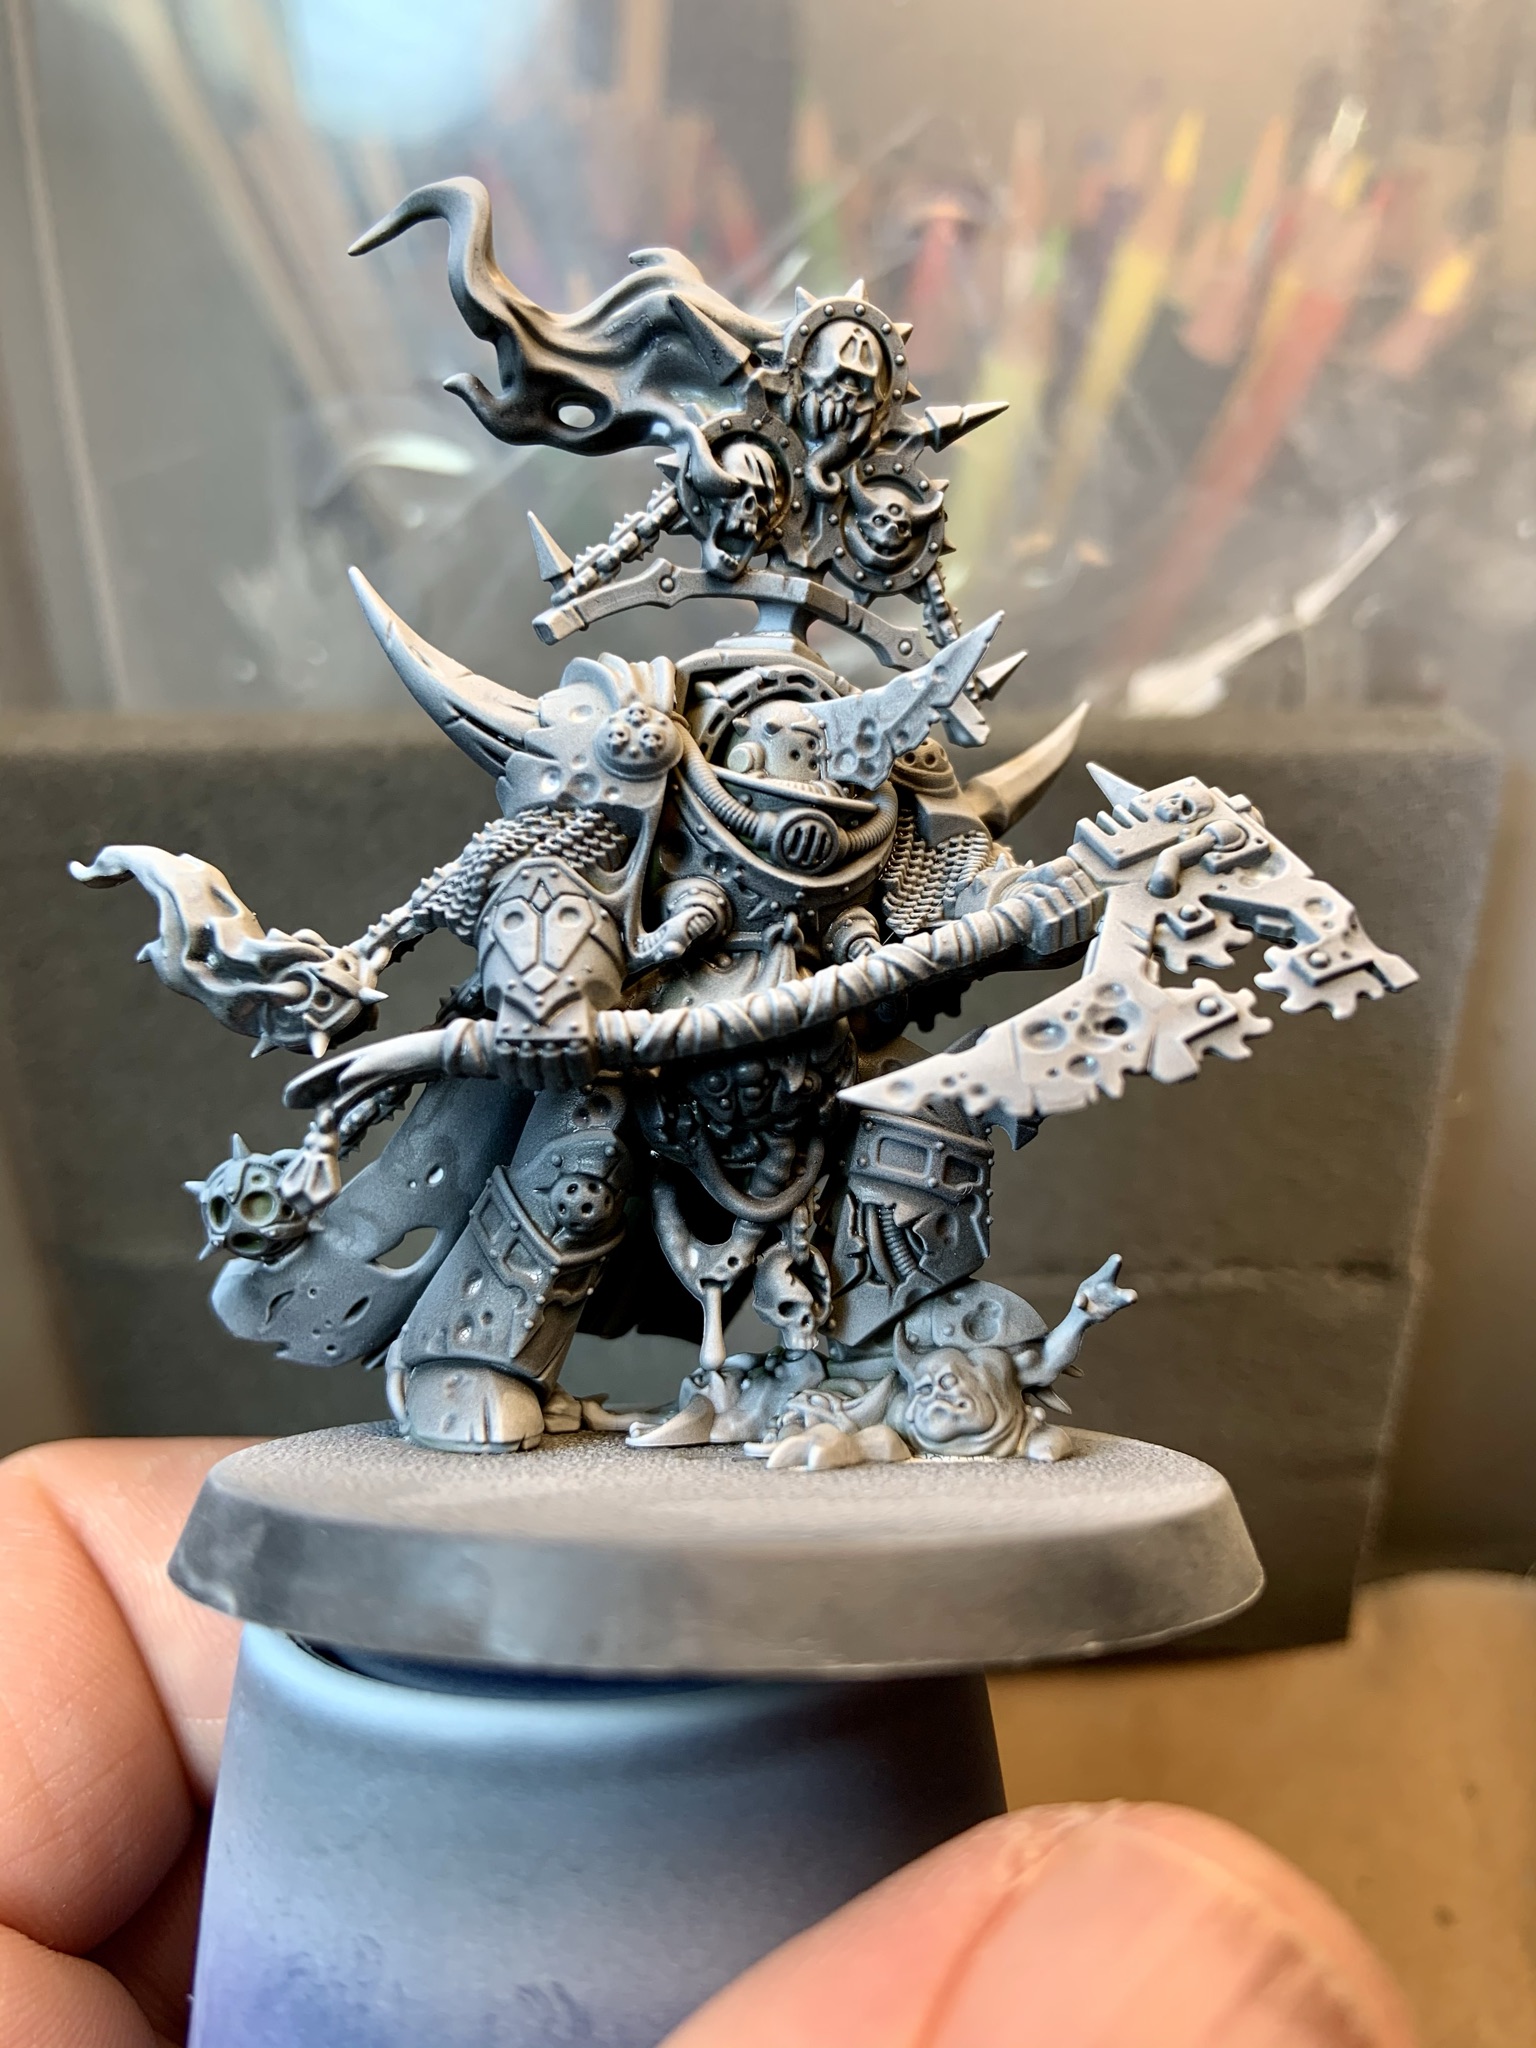
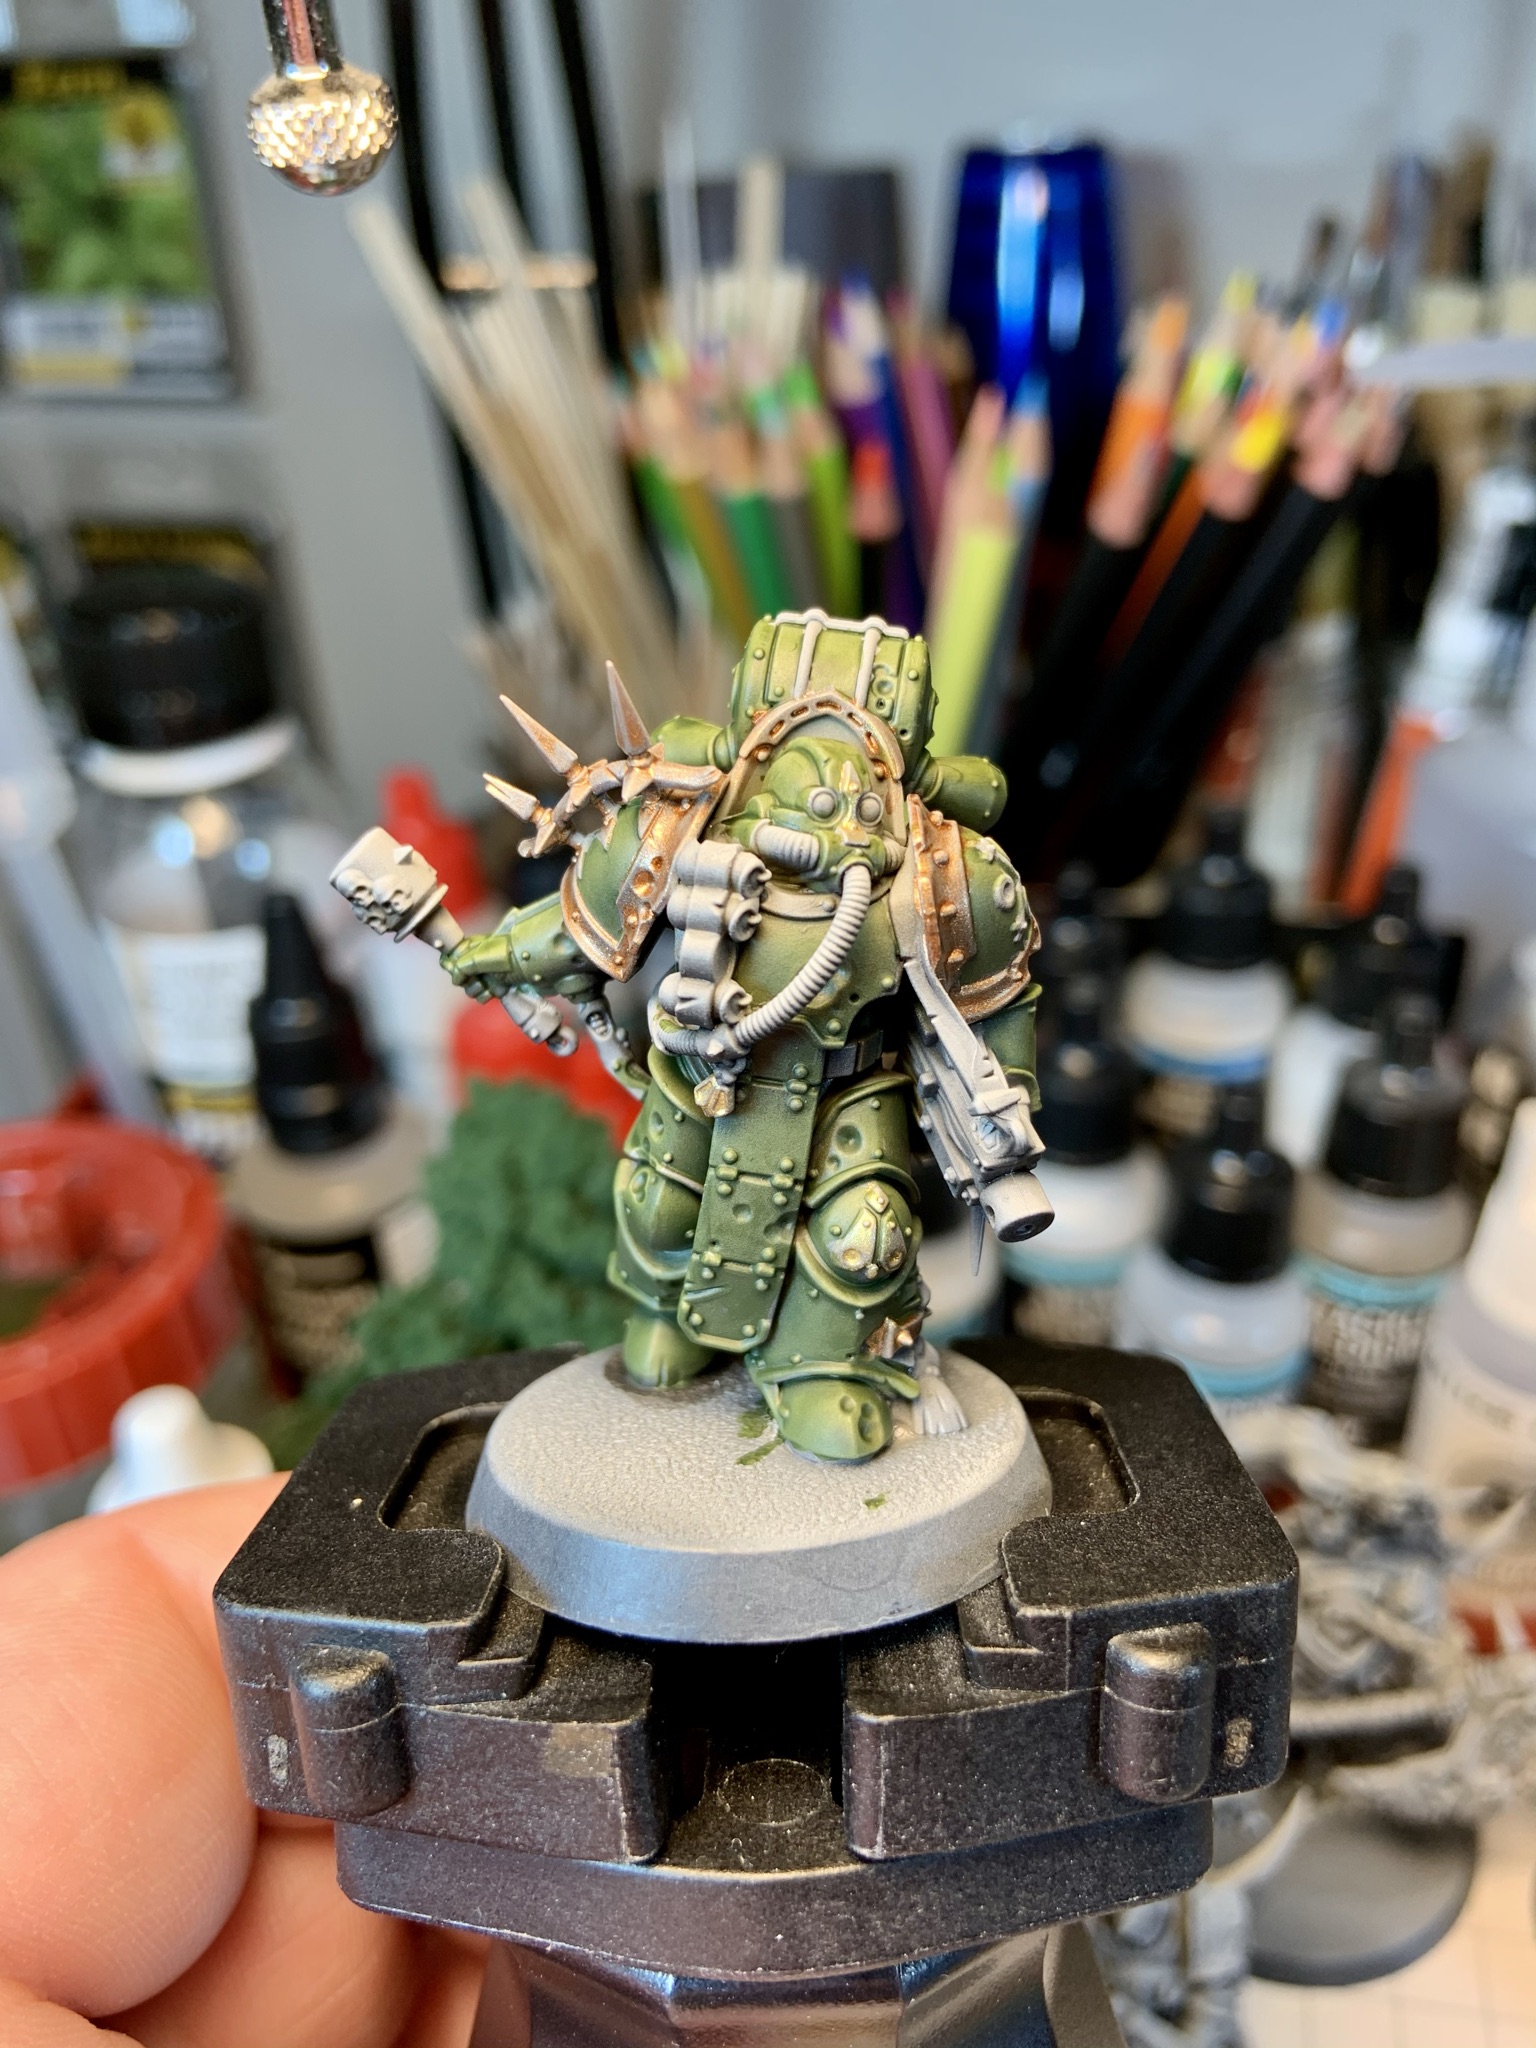
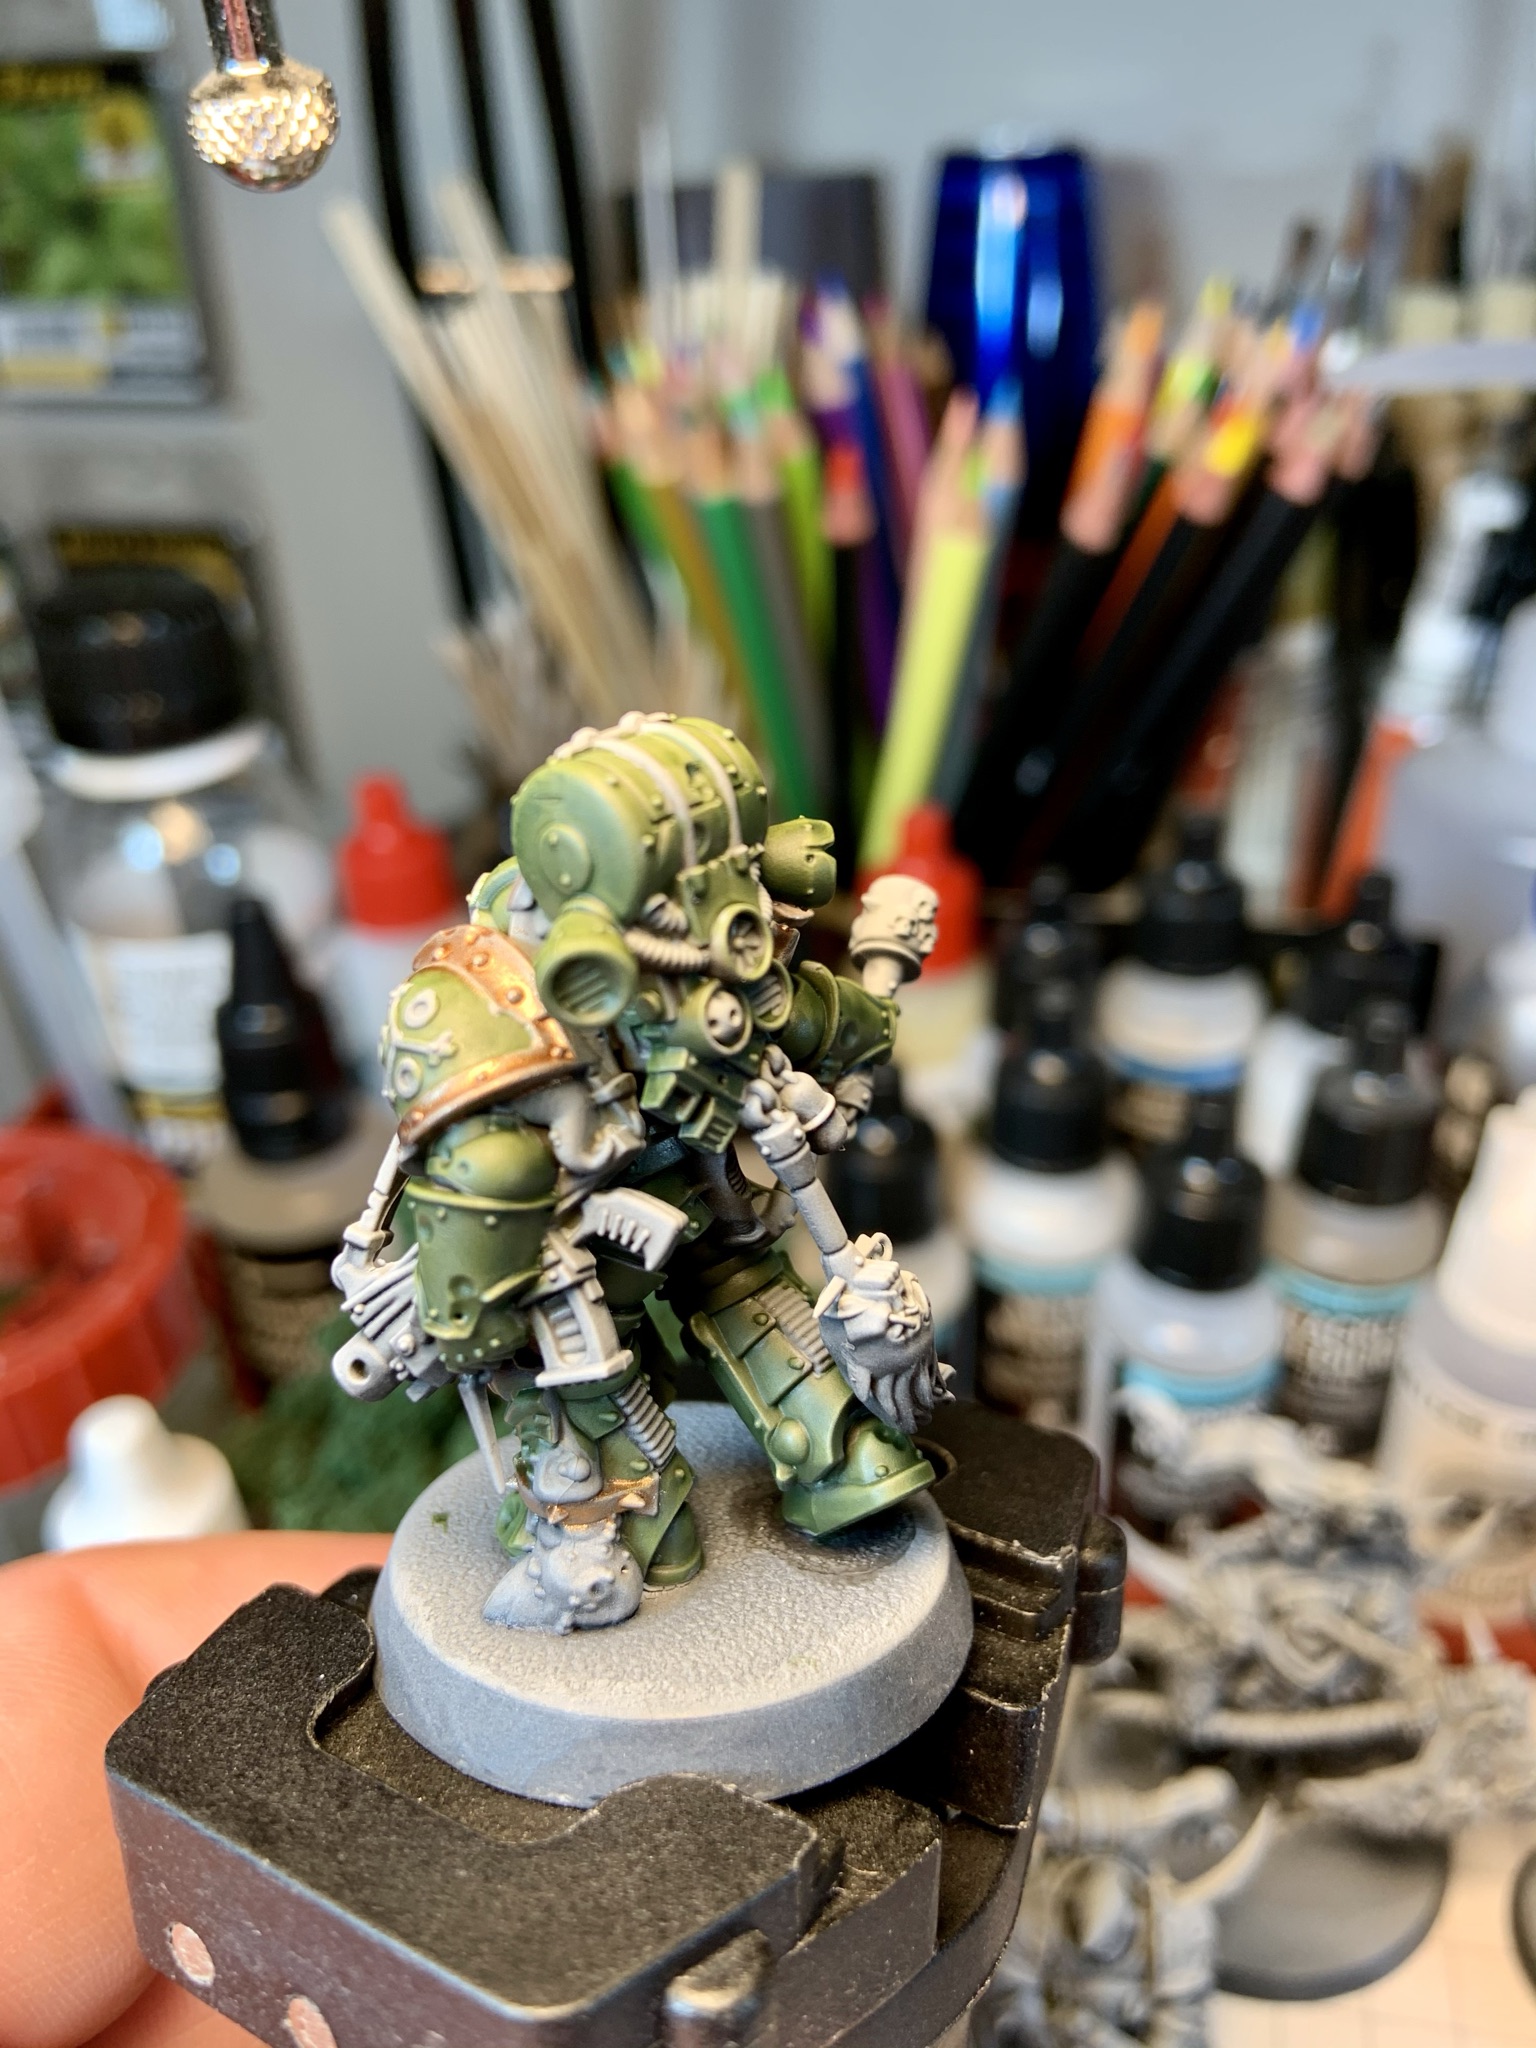
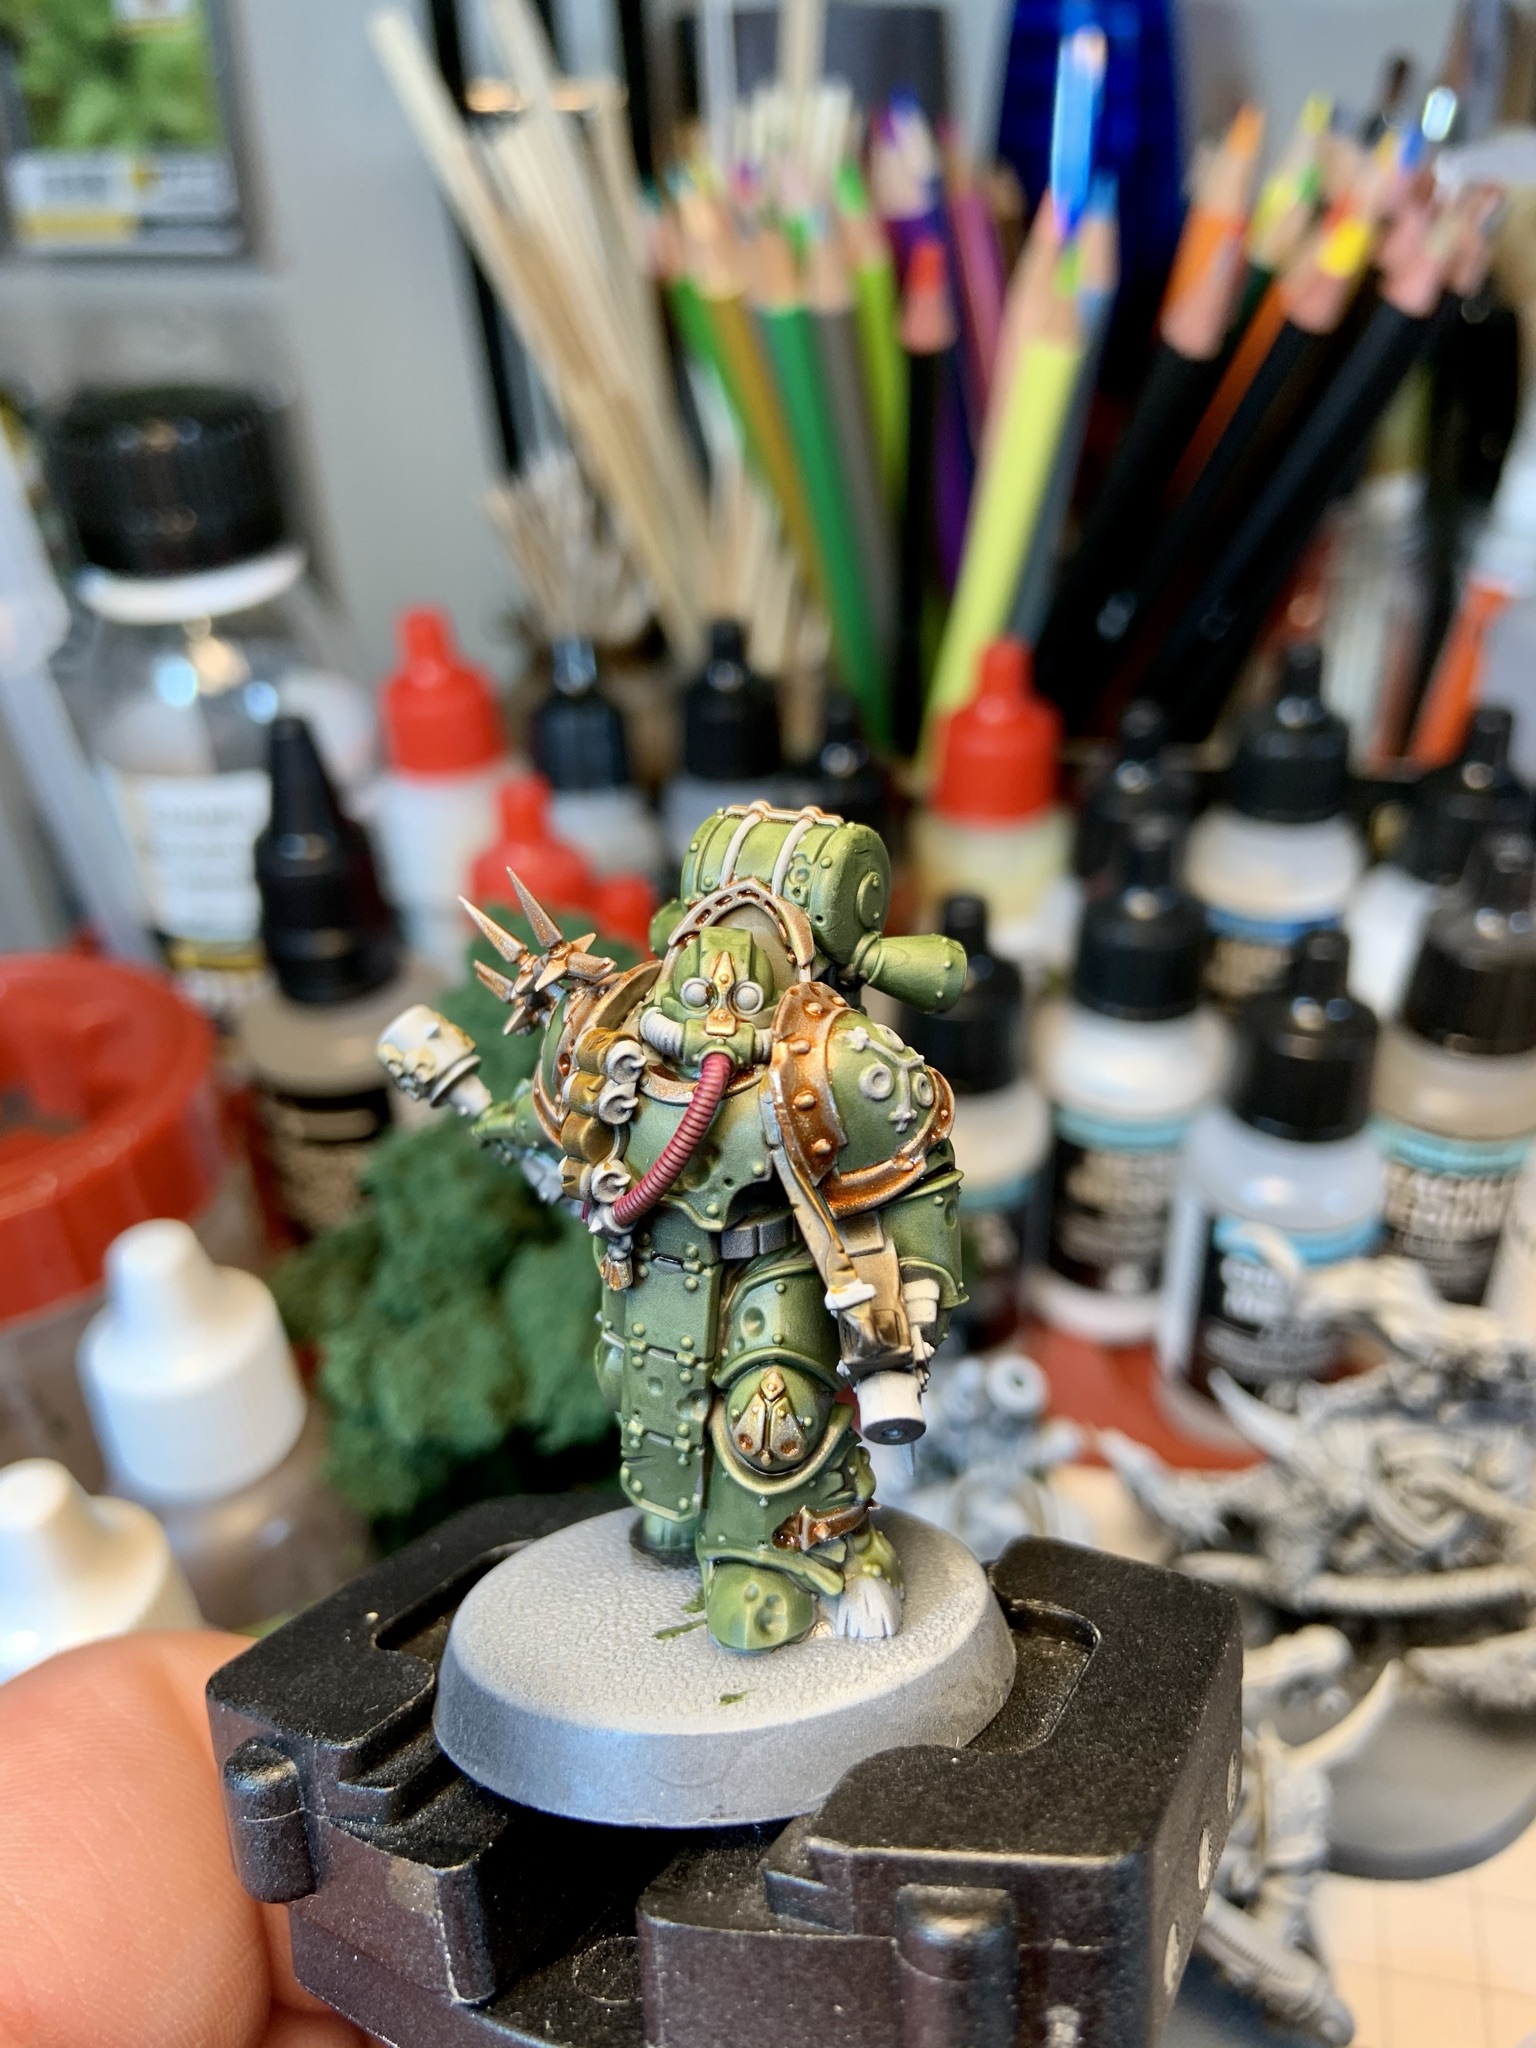
All about that Base...
I can’t claim credit for this basing scheme…GW posted a video tutorial on Death Guard swampy bases…but they do look really good and are really fast/simple (except for the first step). First I applied a fairly thick layer of Citadel Agrellan Badland Technical paint. The thicker the layer applied the deeper/larger the cracks will be after drying (which I usually leave overnight). This will simulate the ‘land’ area of the base. Once completely dry I washed the land mass with Citadel Agrax Earthshade Shade. The last step for the land area was to lightly drybrush it with Citadel Terminatus Stone Dry paint (applied with a ‘makeup’ style brush) to push the contrast. For the swamp area, I started by undercoating the area up to the edge of the land with Citadel Nocturne Green. I then applied a layer of Citadel Nurgle’s Rot Technical paint…leaving a couple of mils’ distance from the edge of the land area to make a nice transition to dark green. I finished off the base with a Wasteland Tuft from Army Painter and then painted the rim with Citadel Rhinox Hide.
The end result of this first Plague Marine is below…all of the same techniques/materials were used on the Foetid Bloat Drone earlier.

…sorry I didn’t wait for the rim to completely dry before snapping these (the Nurgle’s Rot however is completely dry).
The total time spent on this model, not including drying time, was about 2.5 hours (I did all of the model in one evening and finished the base the next day in about 30 minutes). To me the result strikes a good balance between table ready and competition ready…something to be confidence inspiring without spending too much effort :).
Next I’ll be batch painting common details on the rest of the models (horns, spikes, chainmail, cloth, smoke etc.) to illustrate my technique for these, followed by some photos of the complete group.