


Sláine: Kiss My Paintbrush!


Recommendations: 1006
About the Project
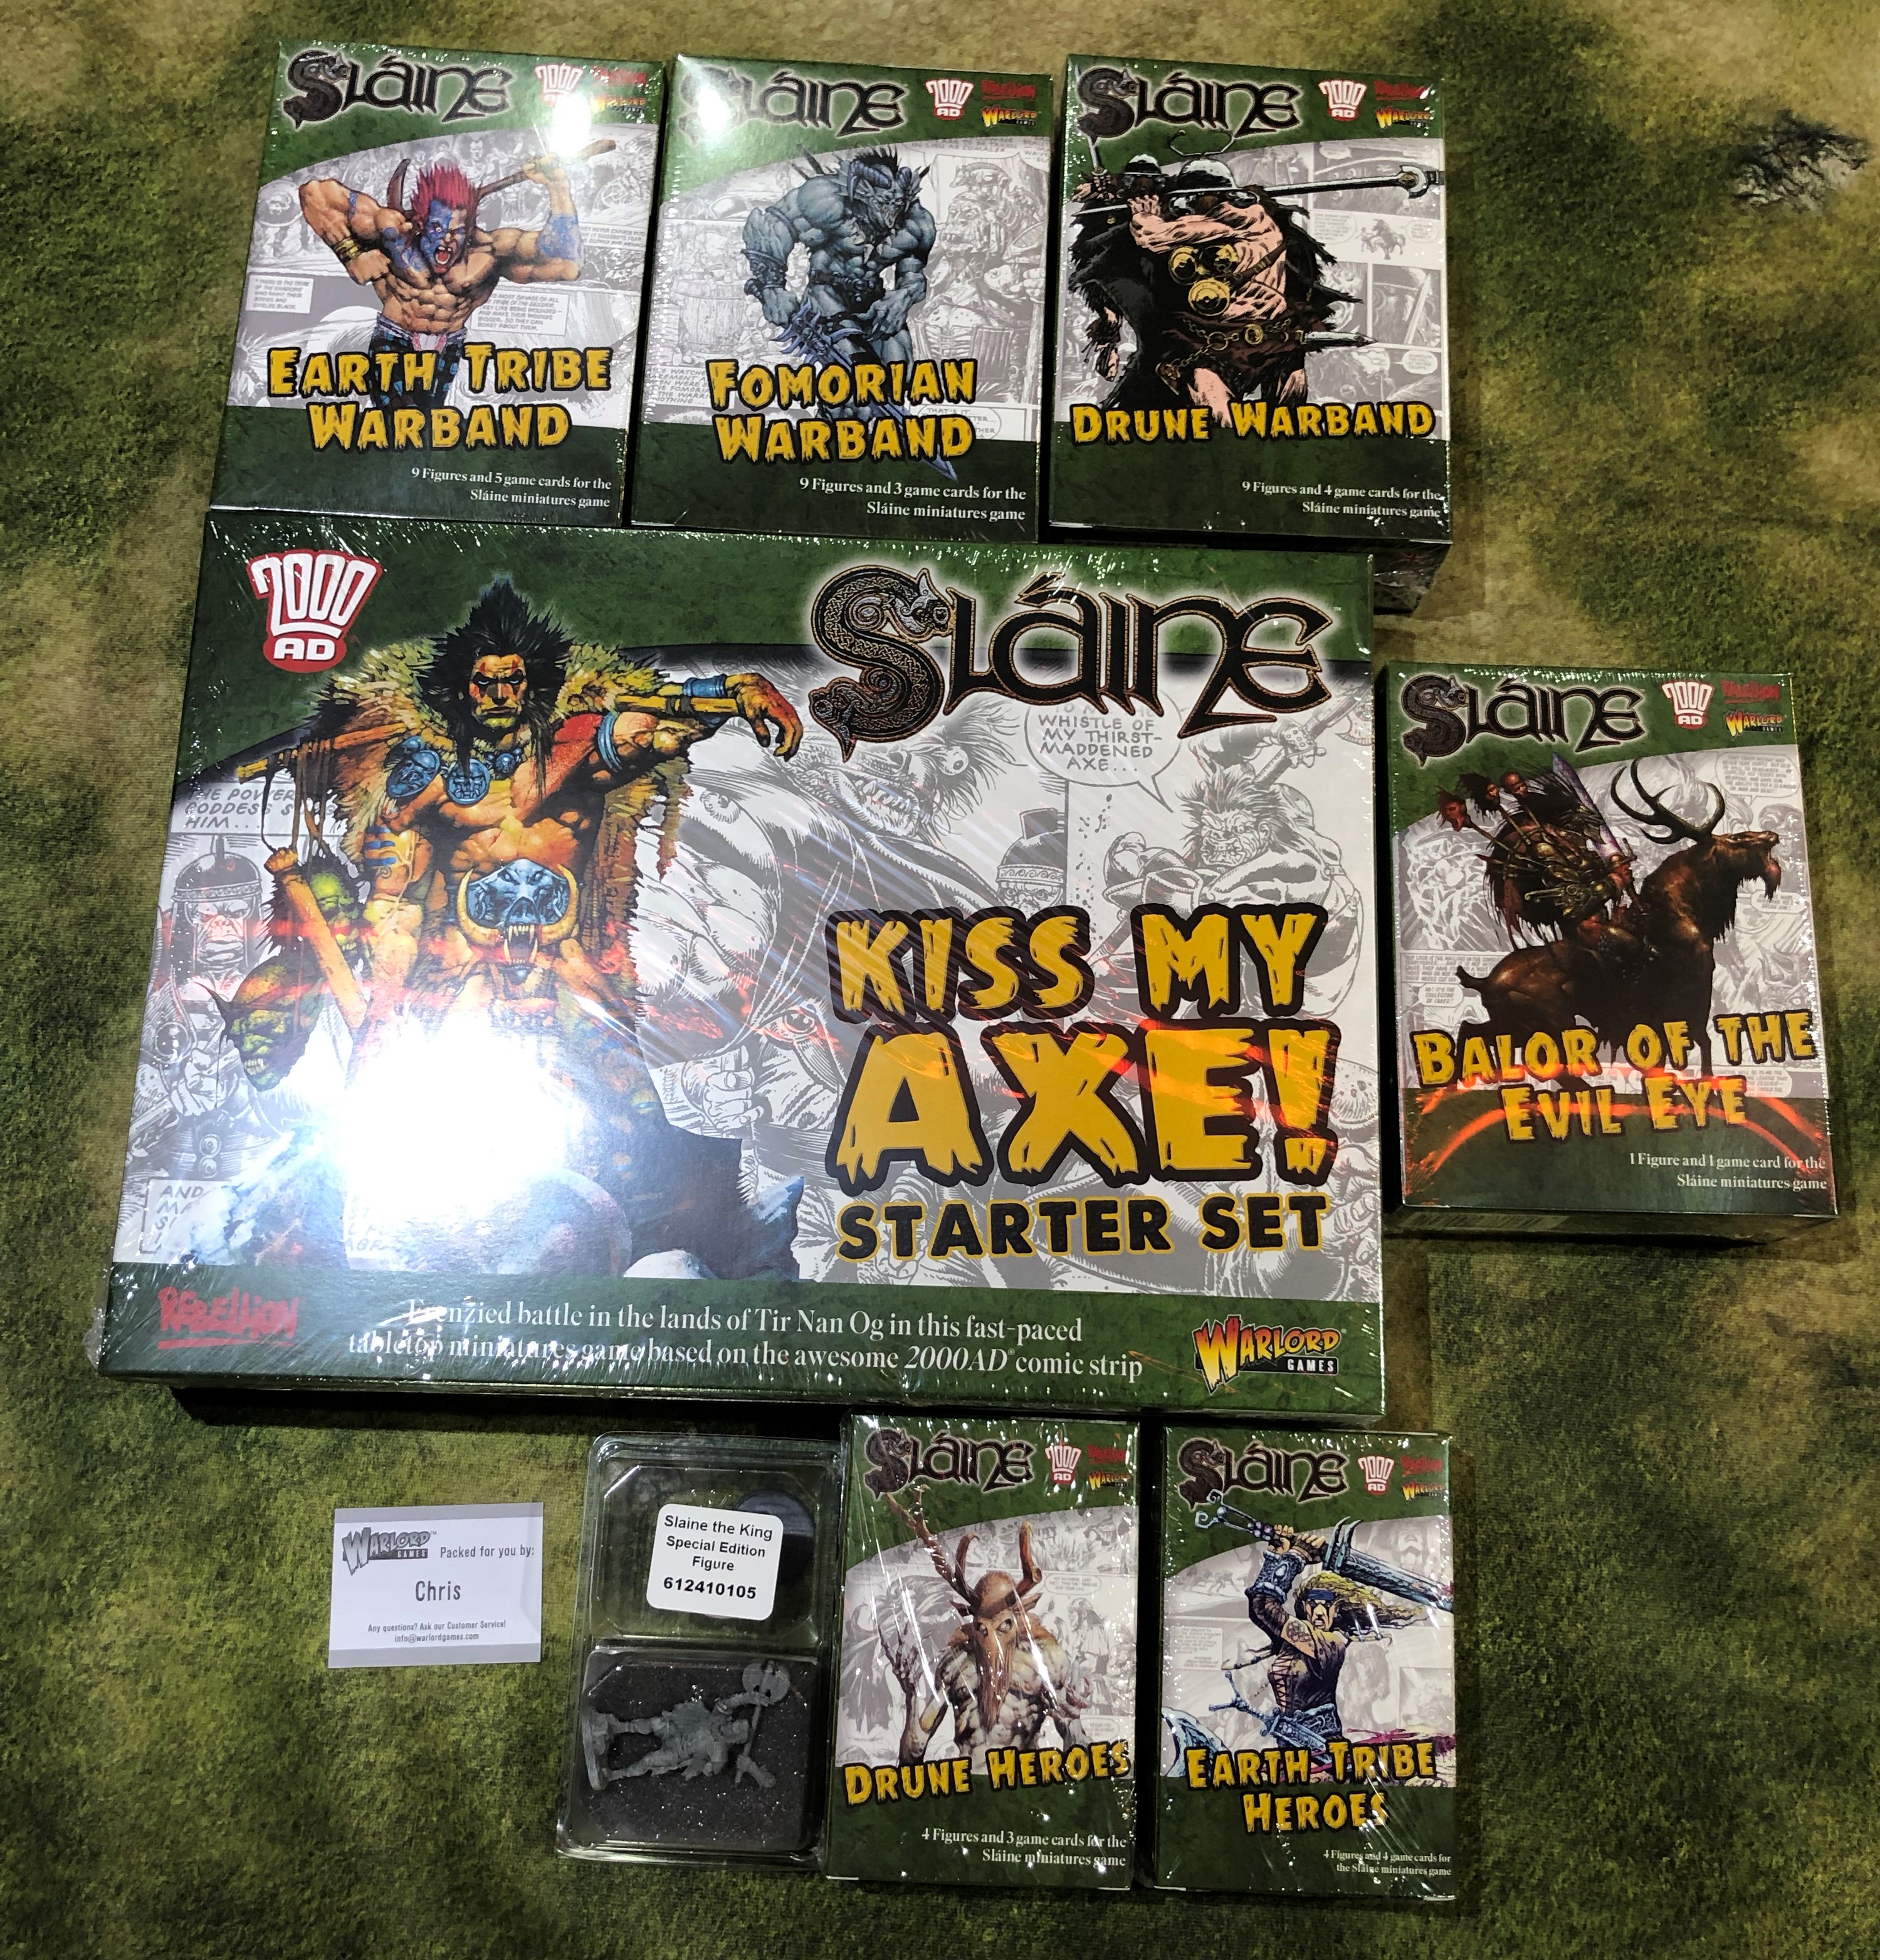
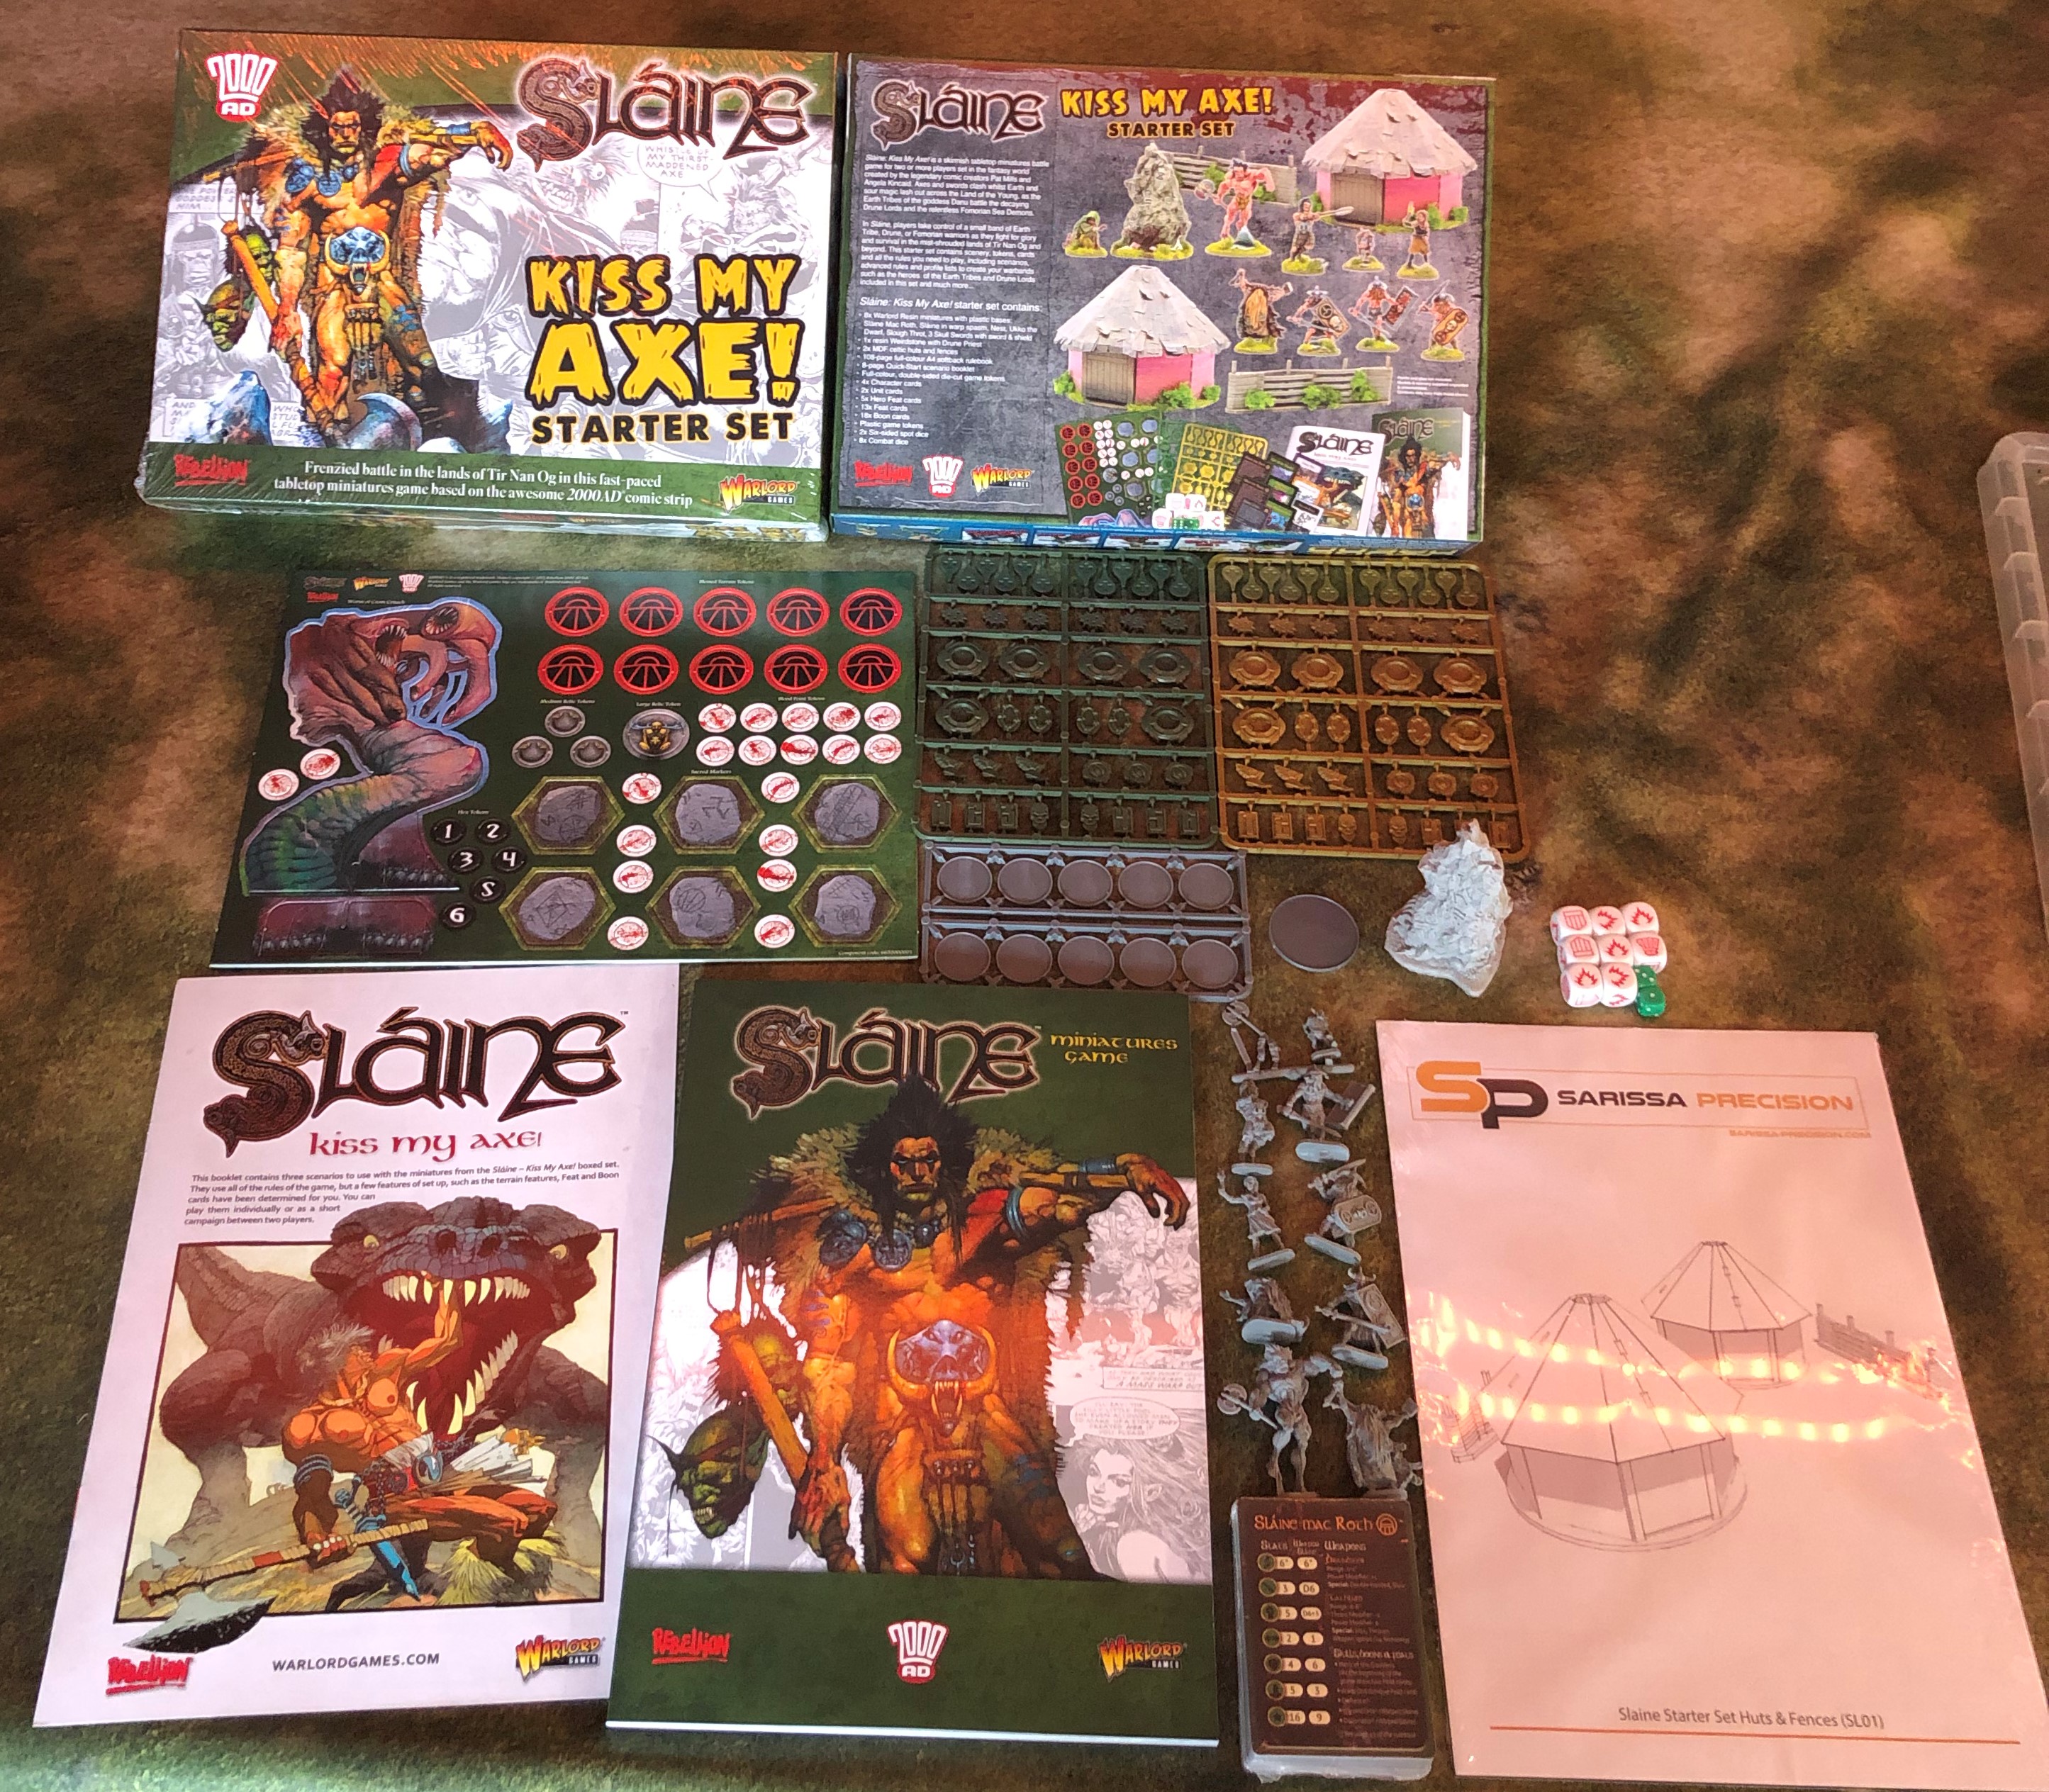
Sláine: Kiss My Axe is the new 2000AD skirmish game from Warlord Games. I pre-ordered it and went all in. Let's see how I get on...
Related Game: Sláine Miniatures Game
Related Company: Warlord Games
Related Genre: Fantasy
Related Contest: Spring Clean Hobby Challenge (Old)
This Project is Active
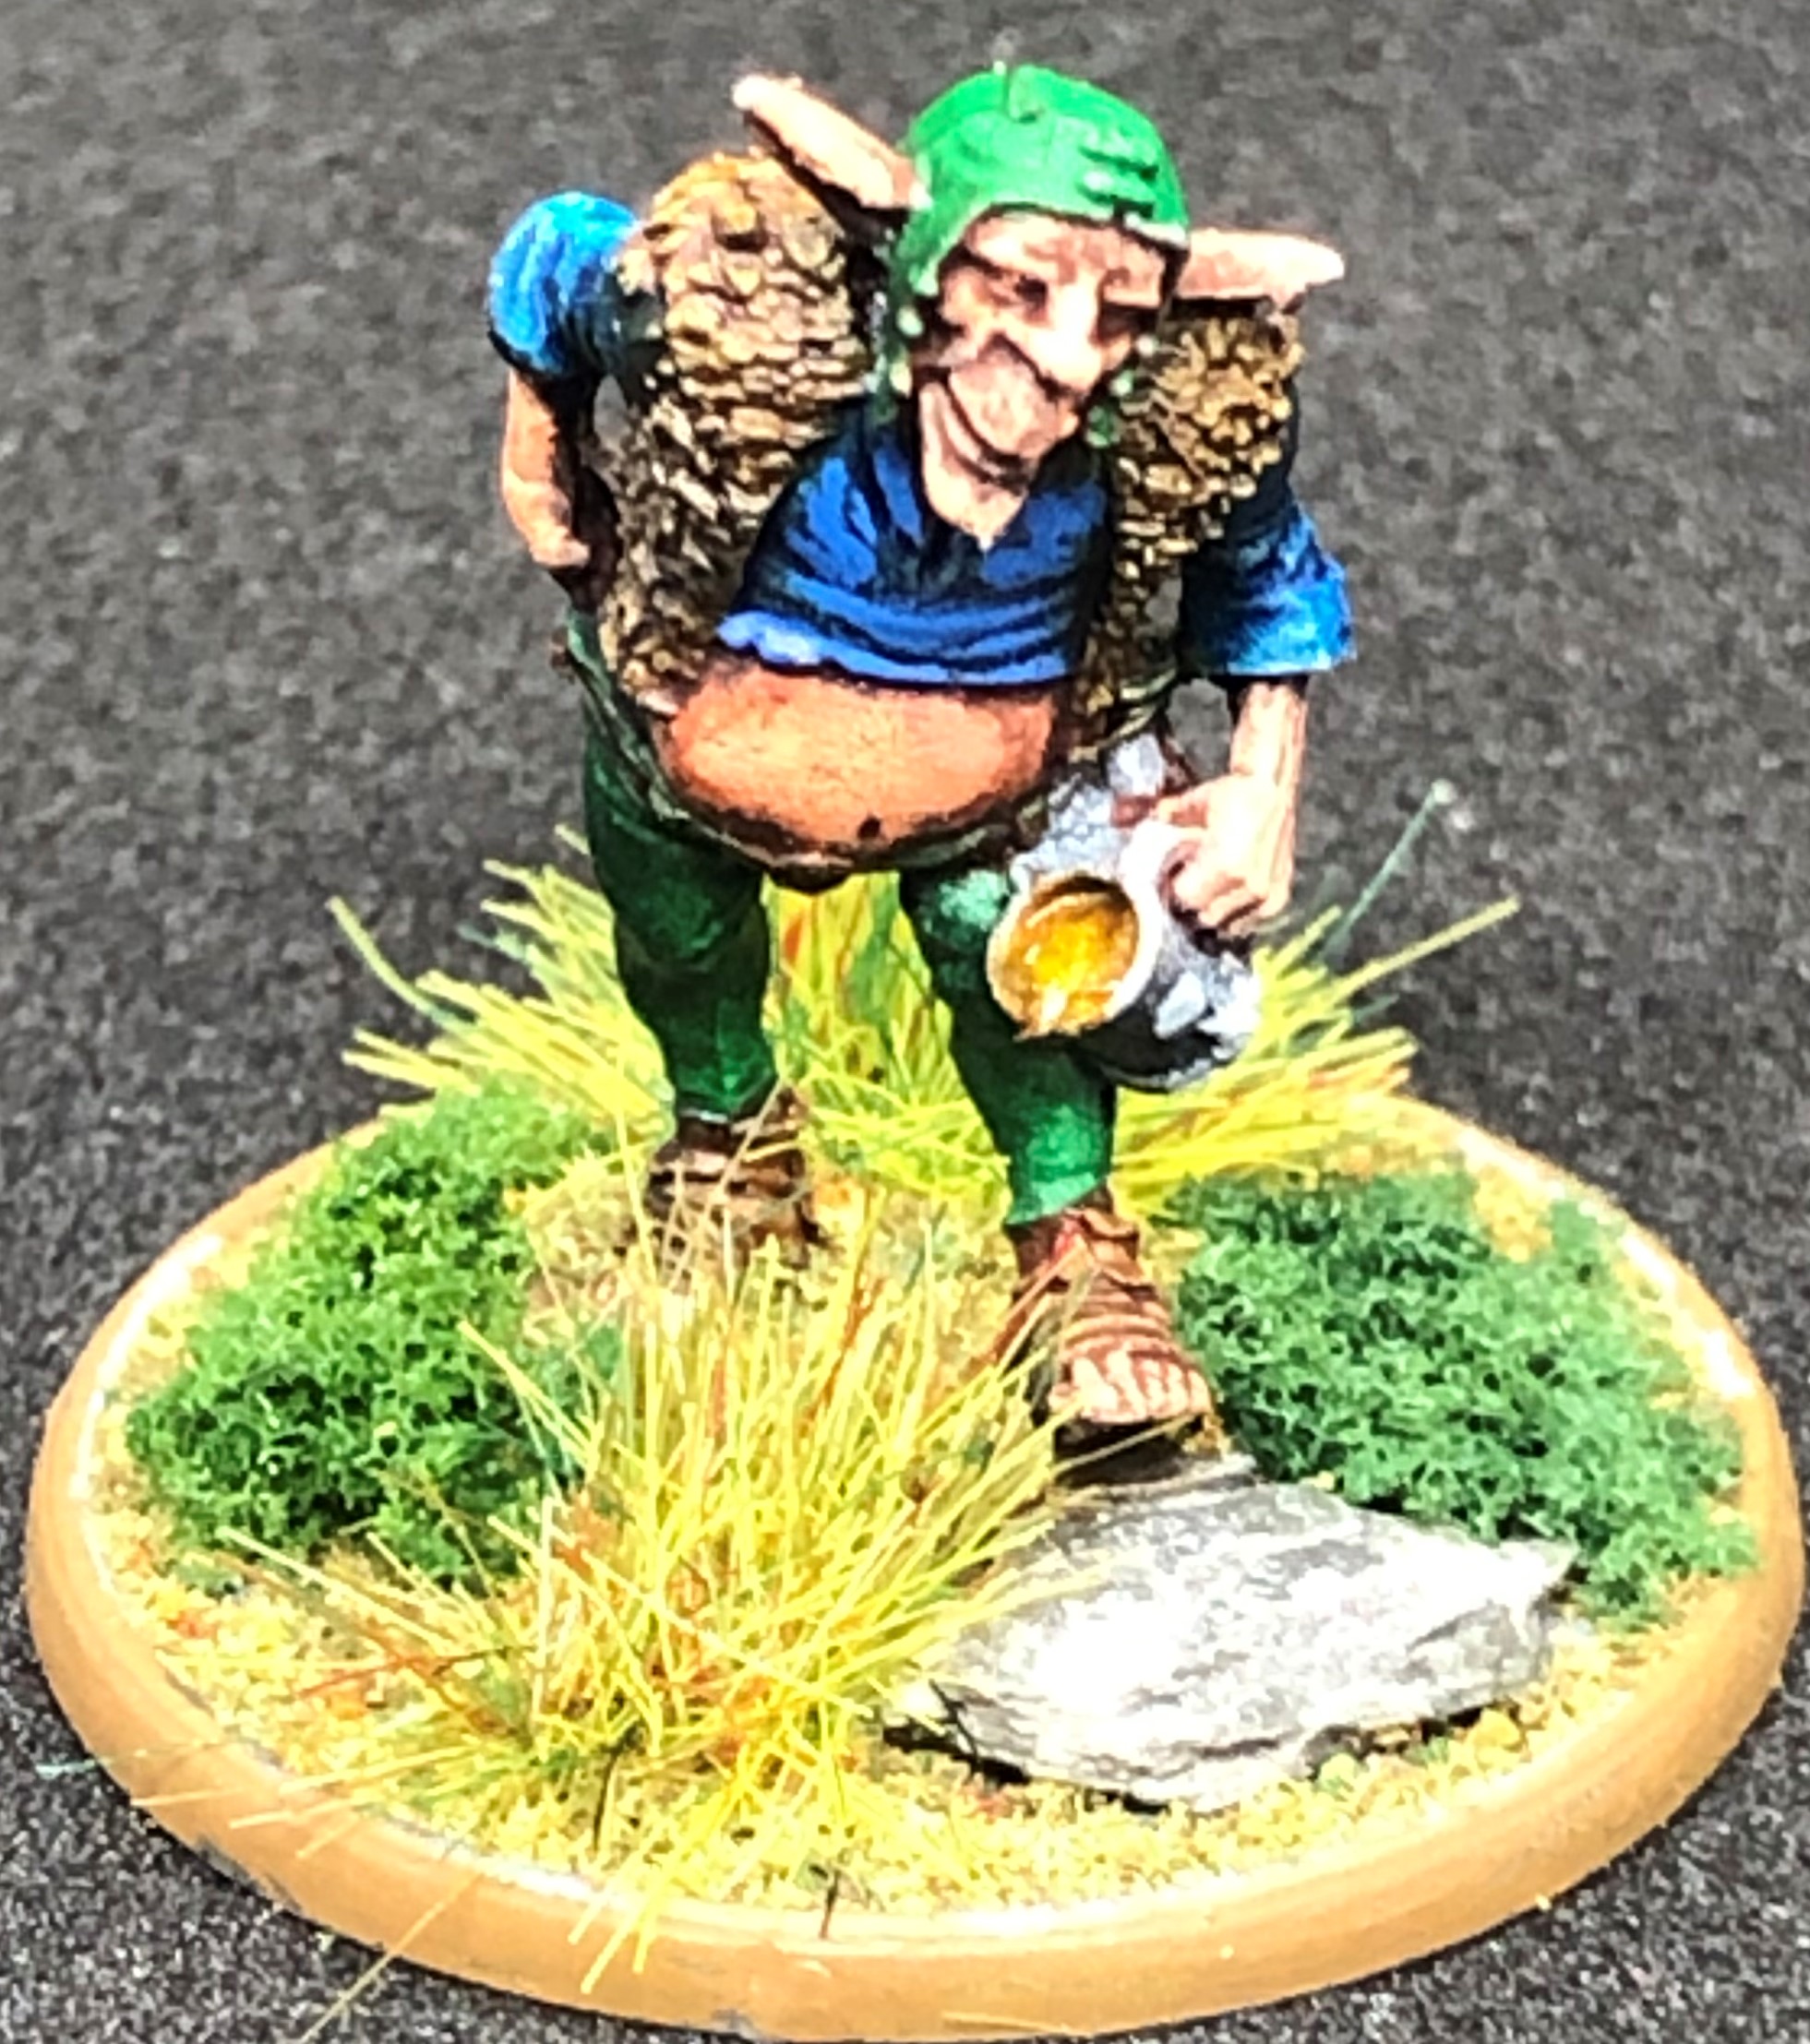
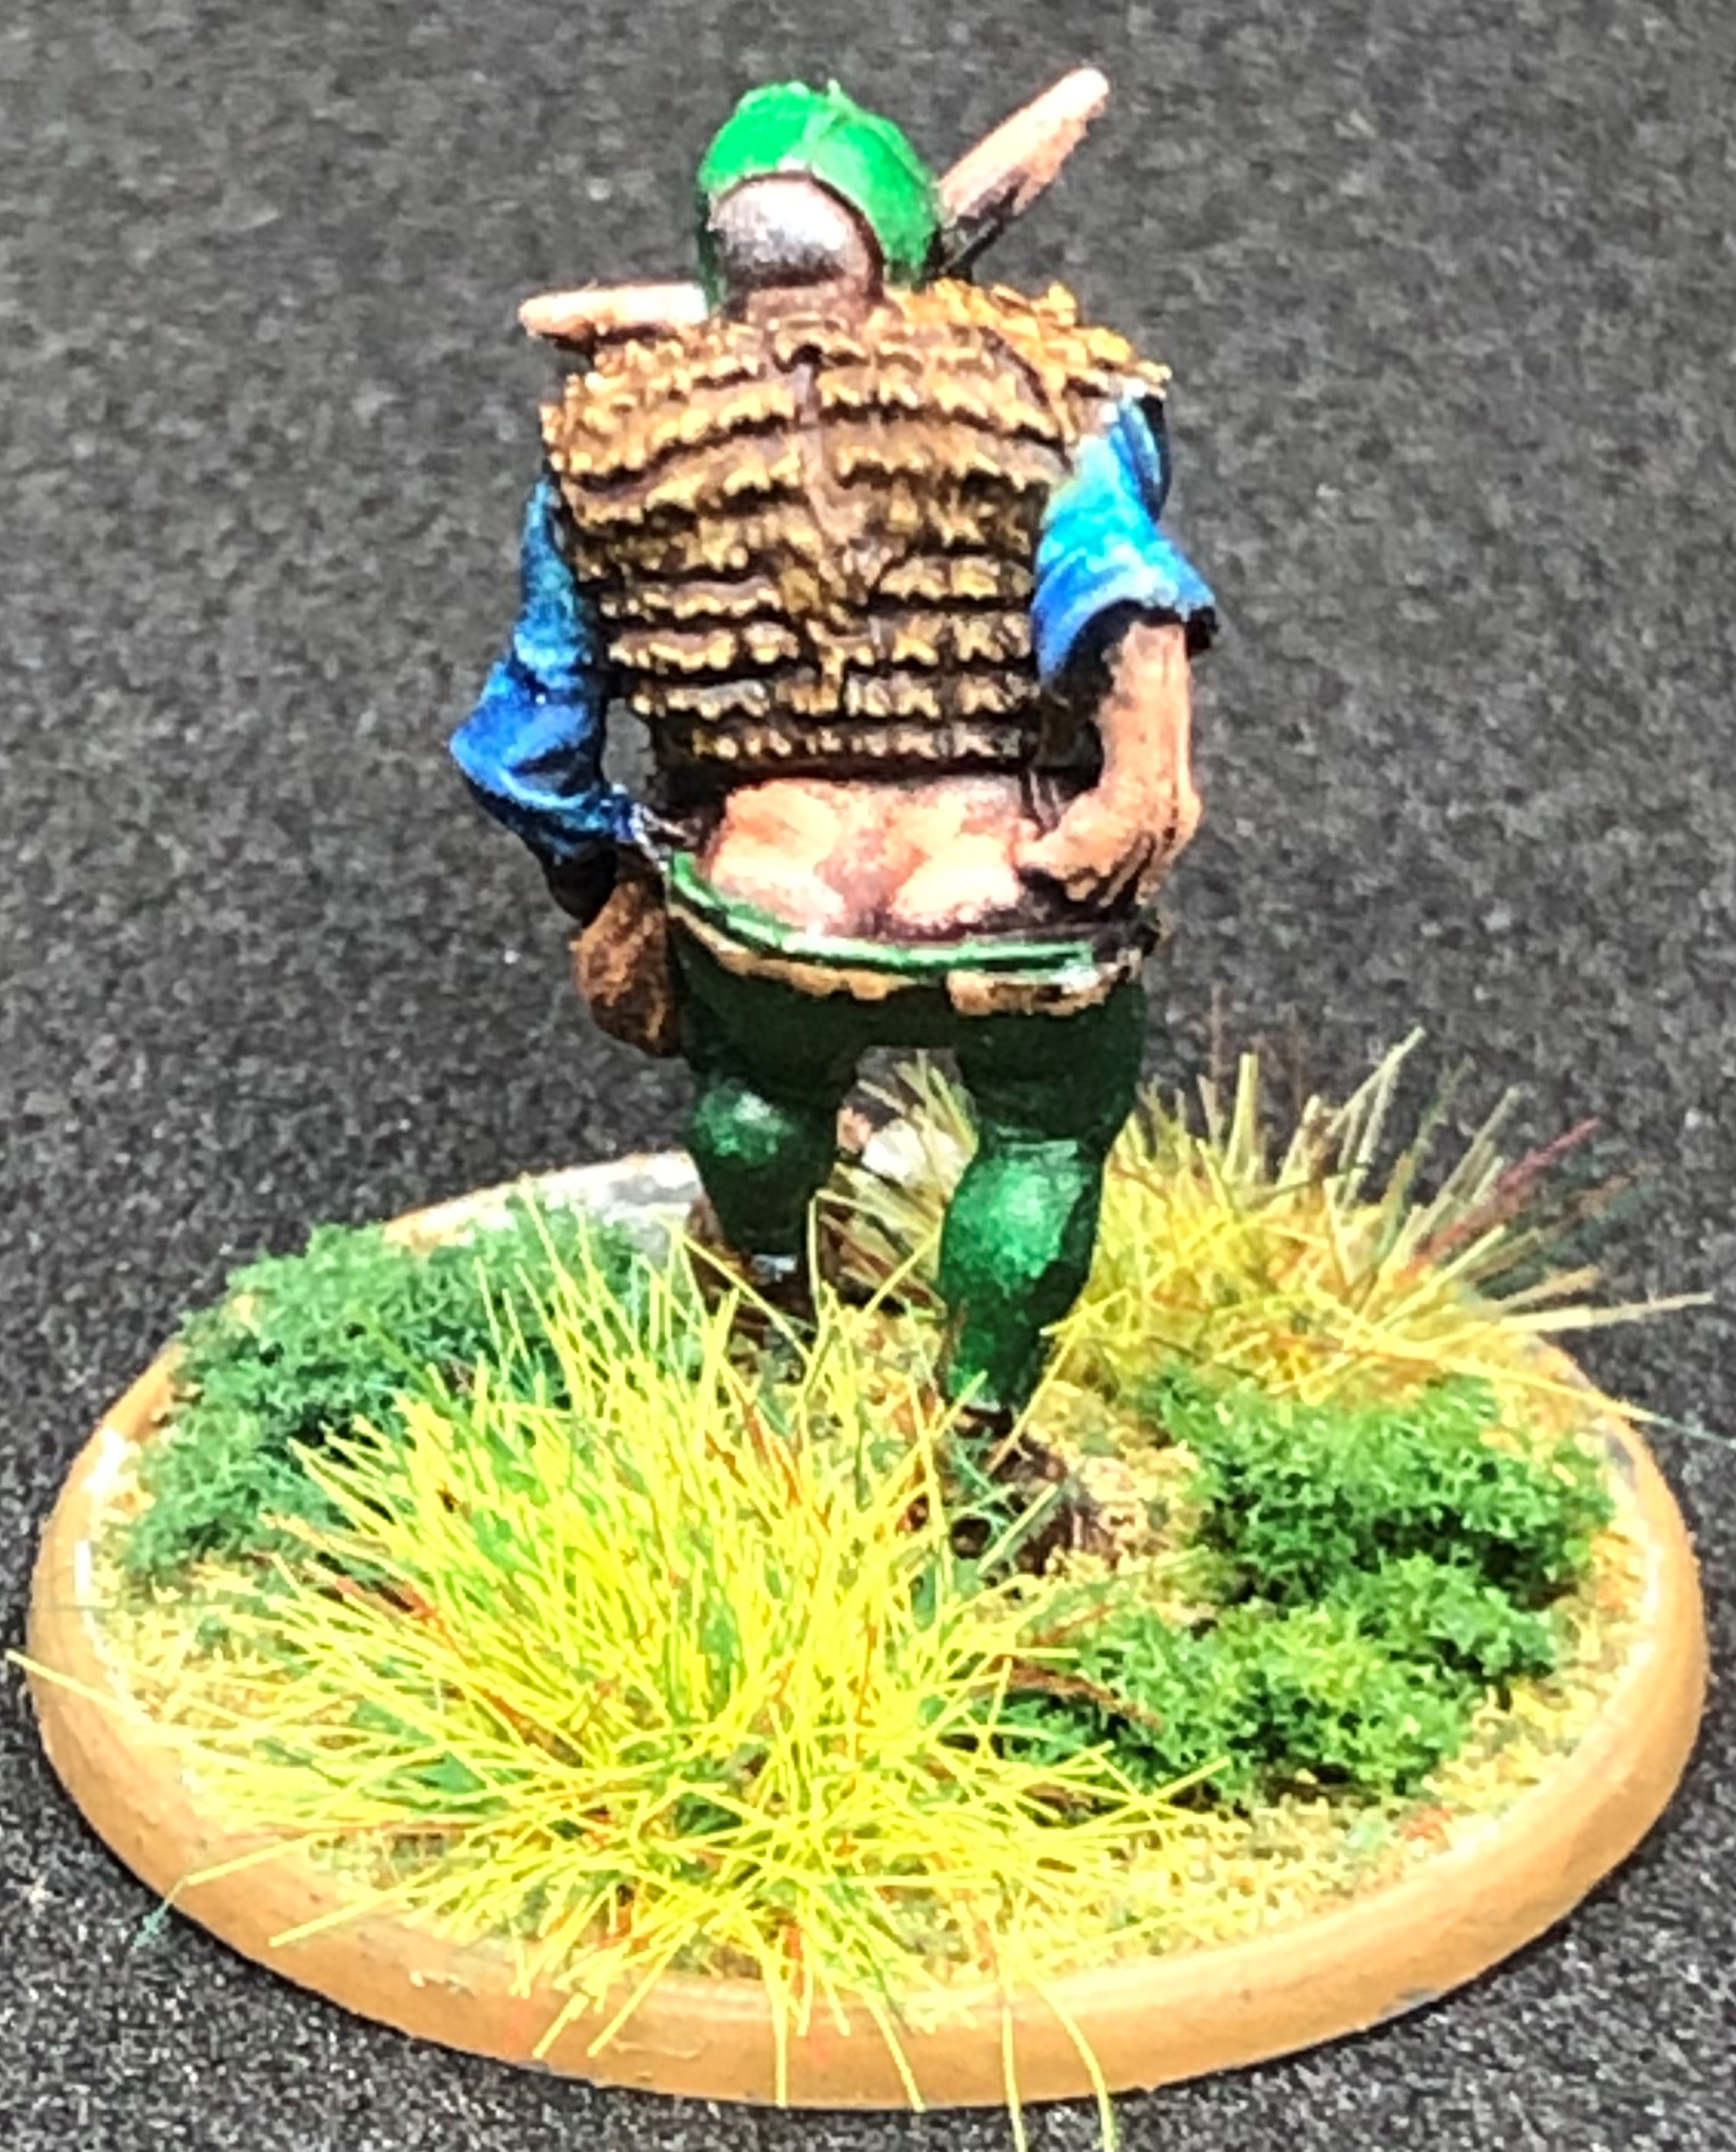
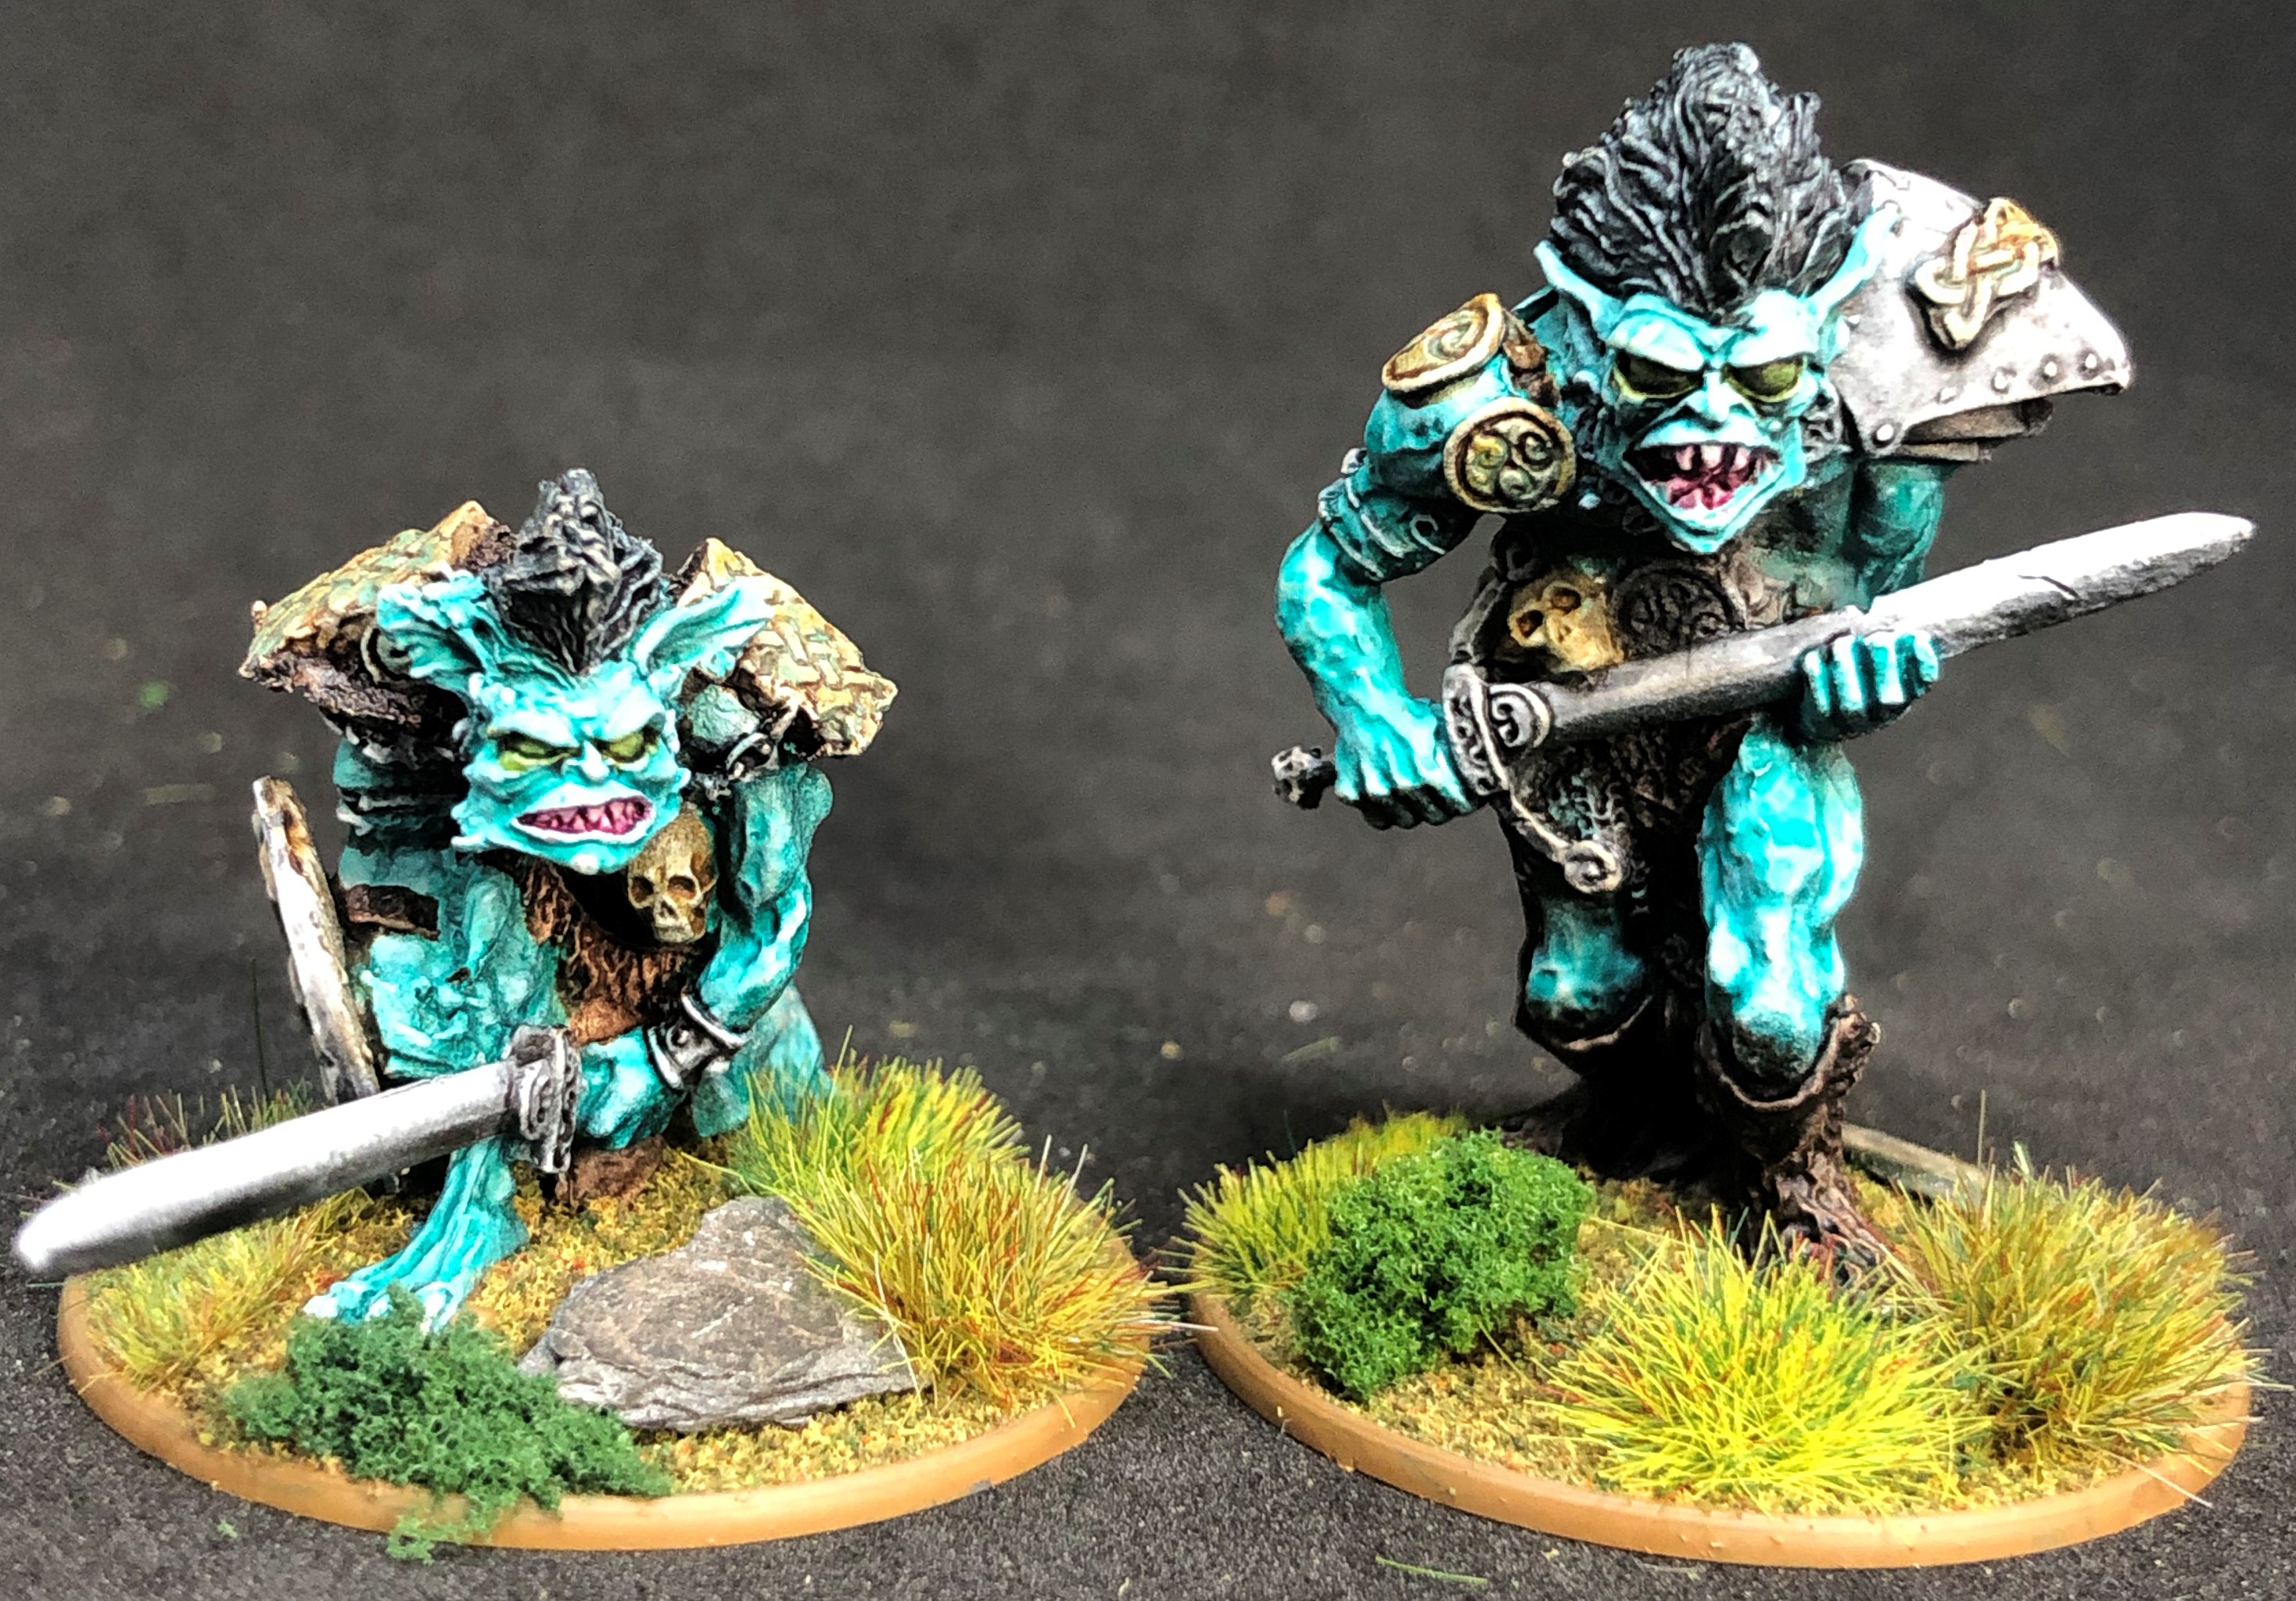
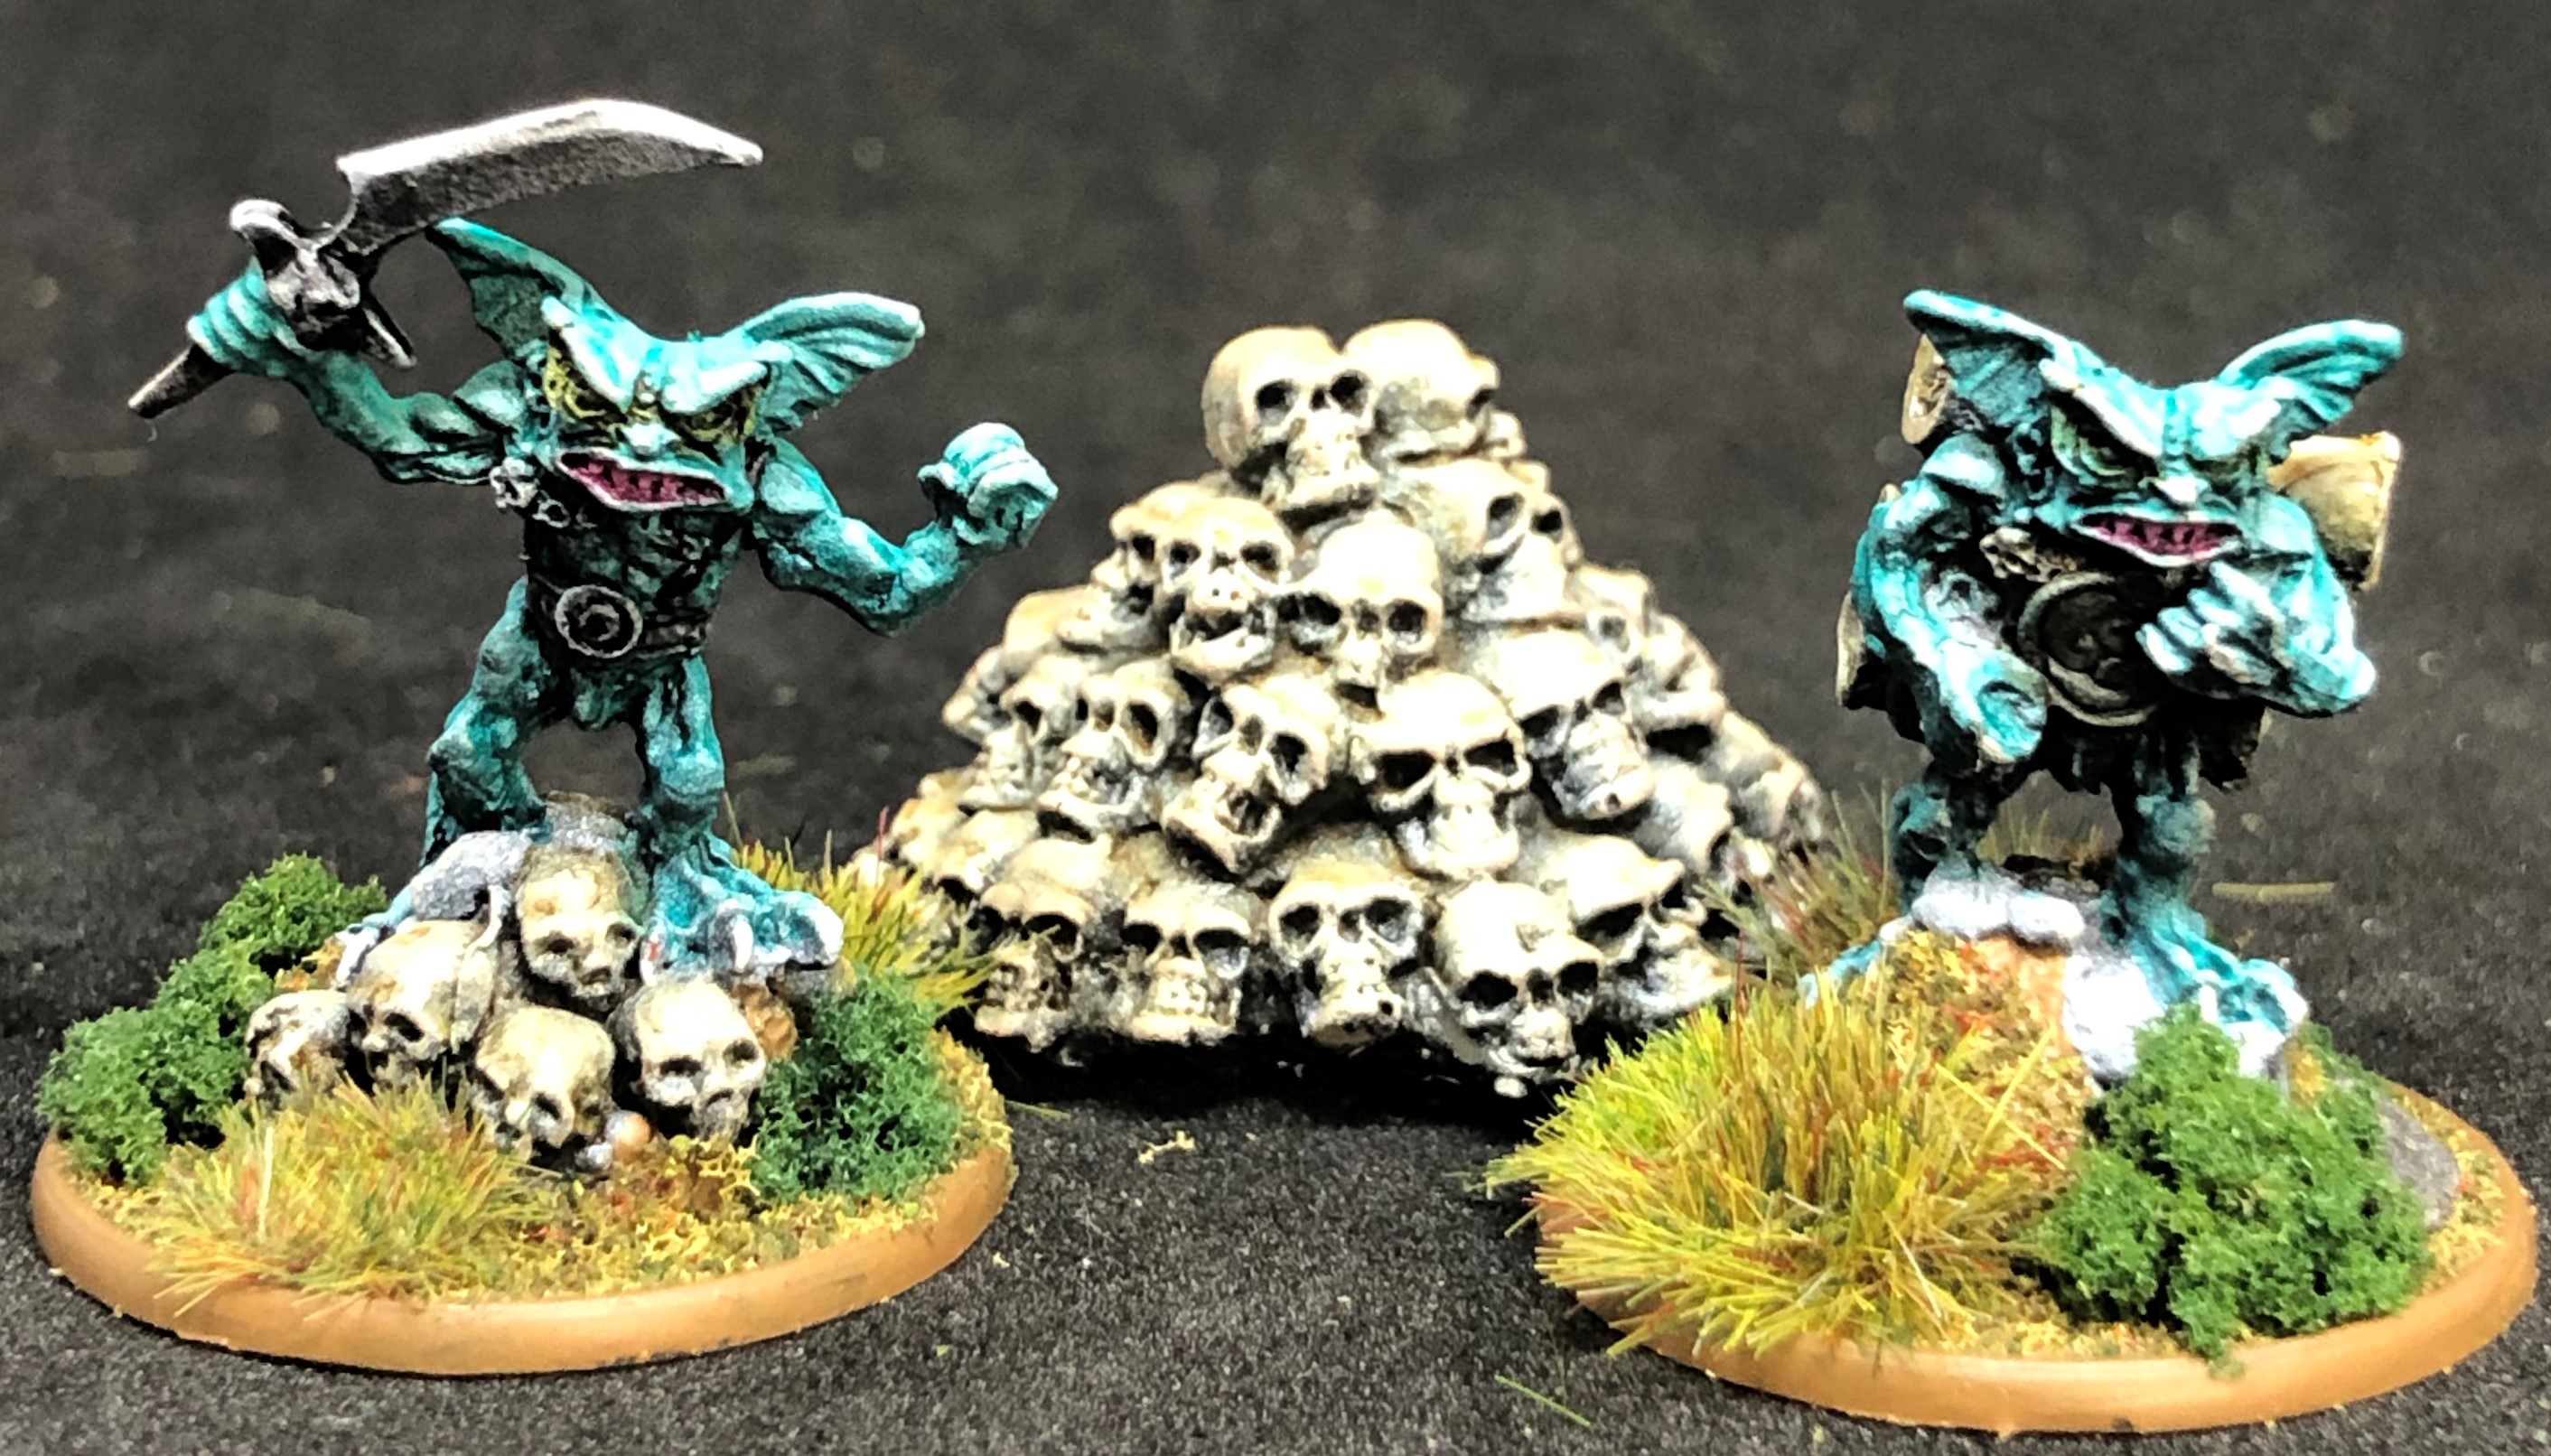
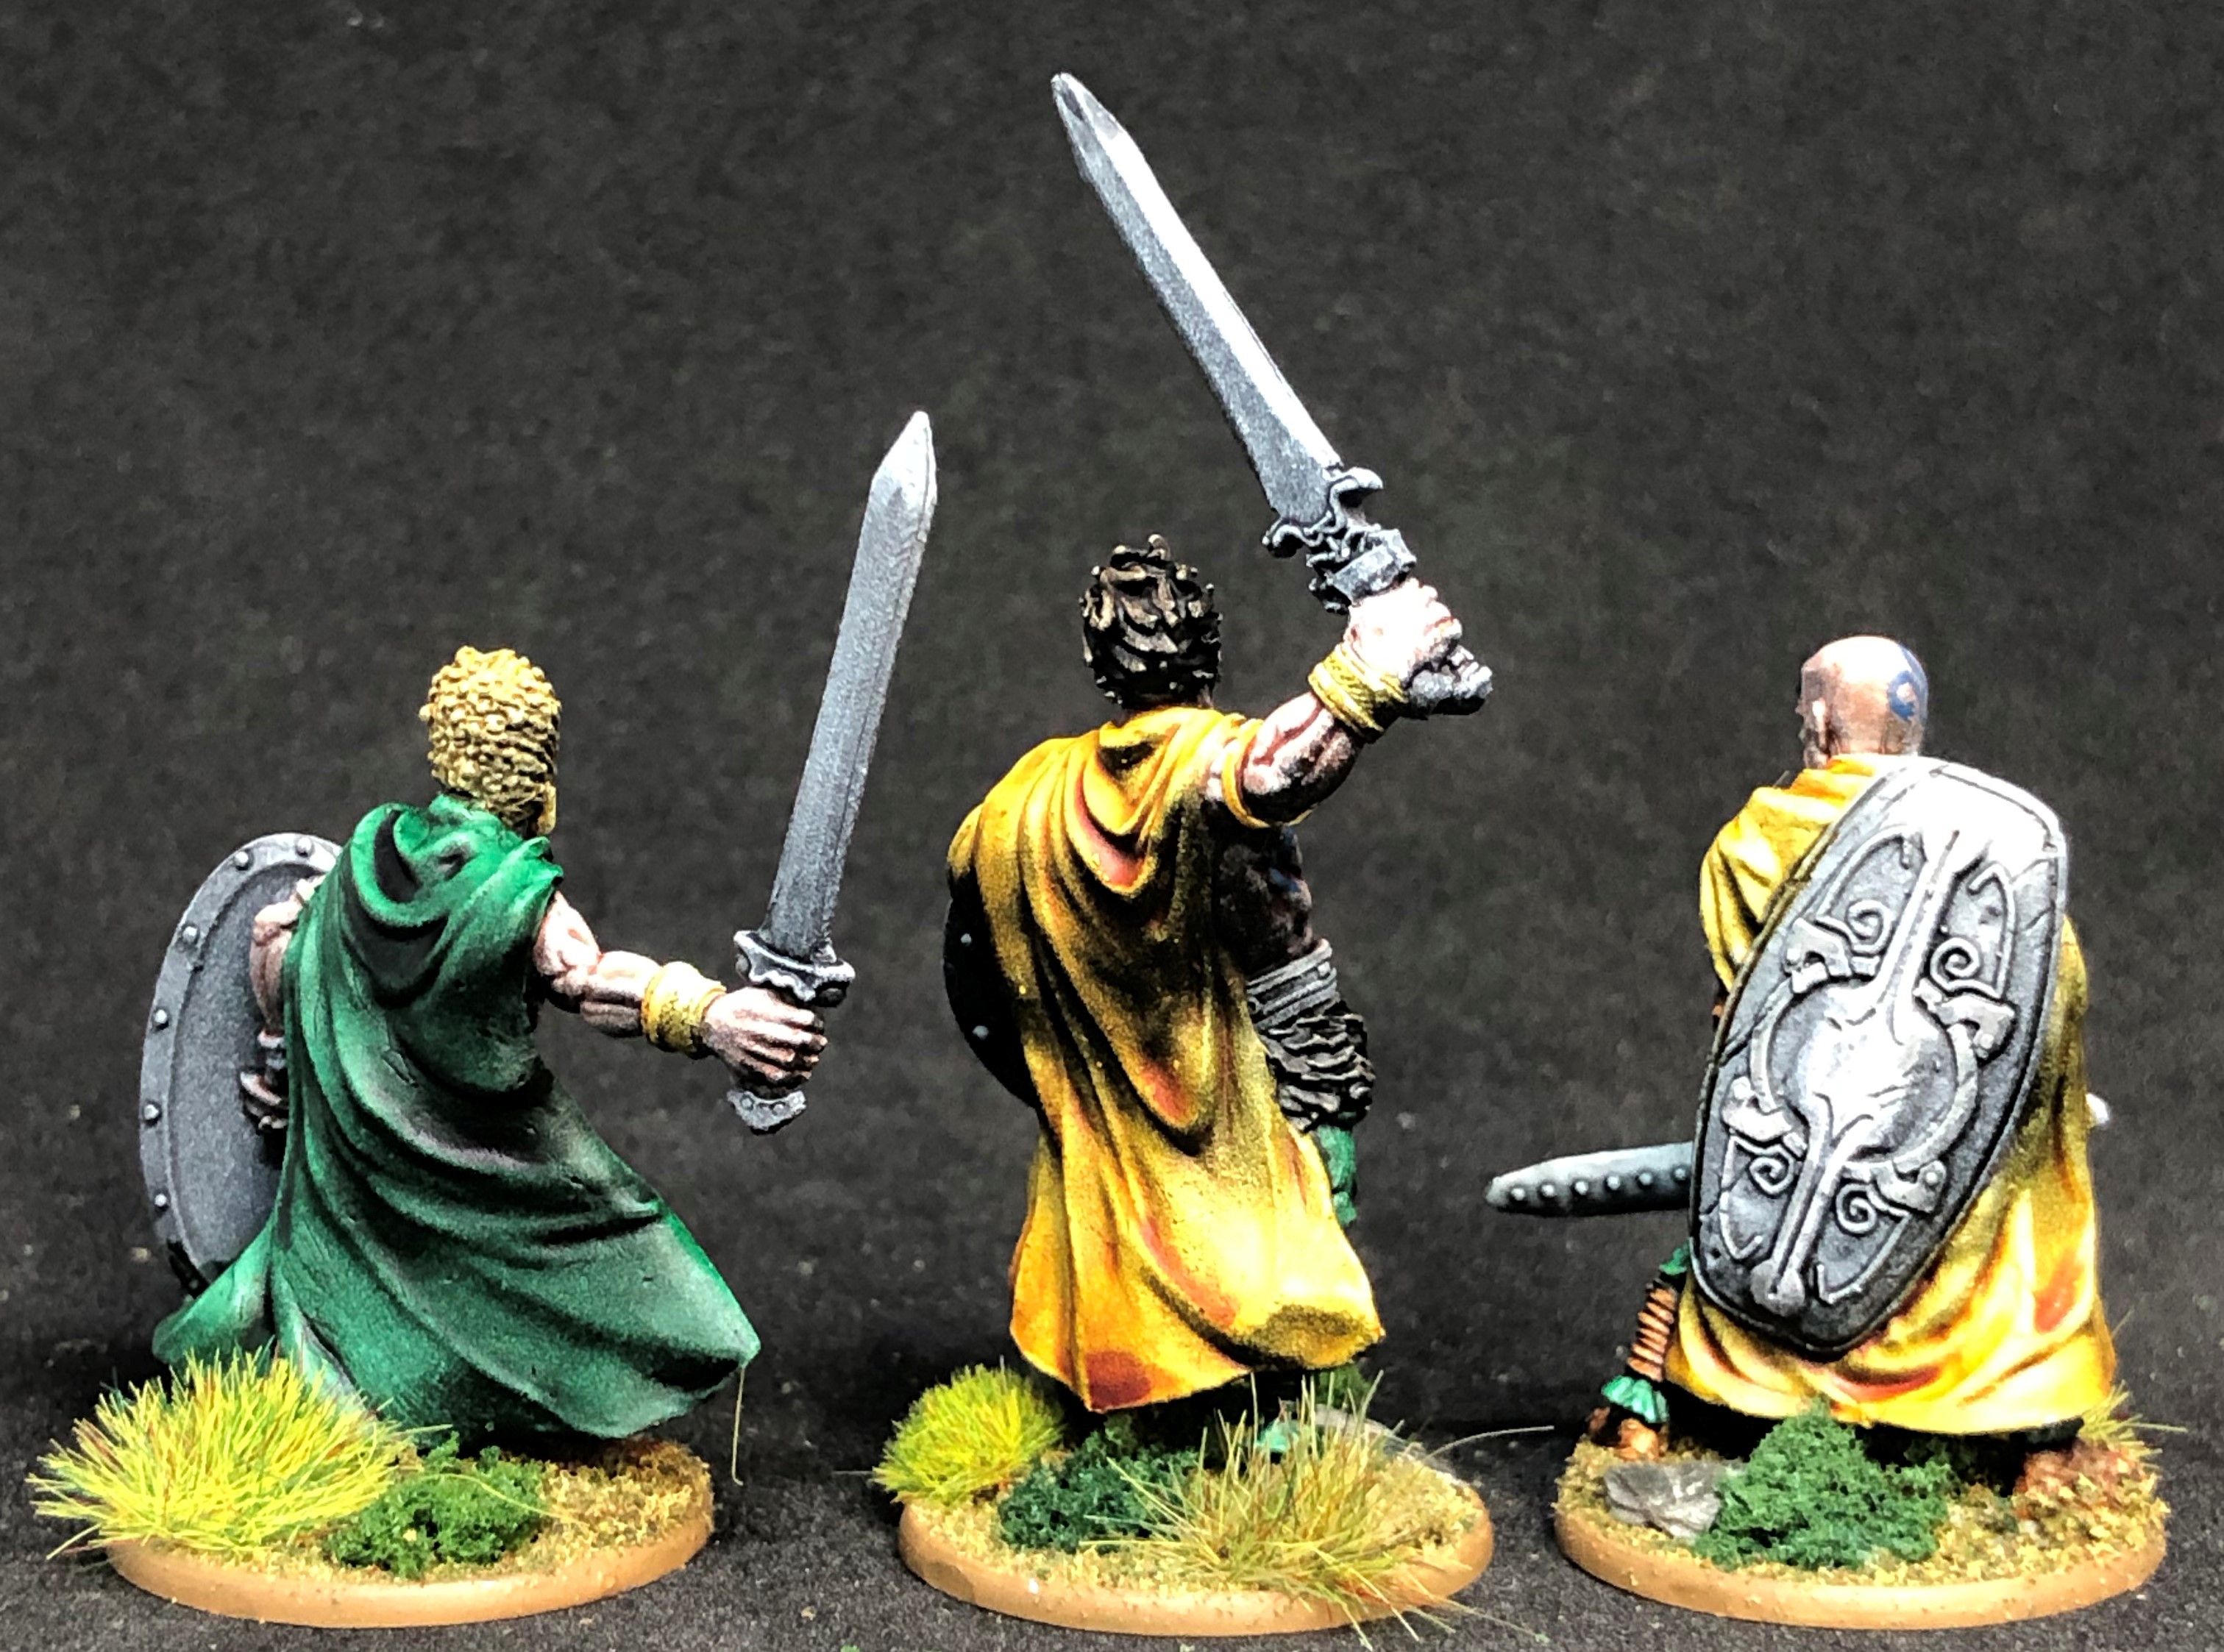
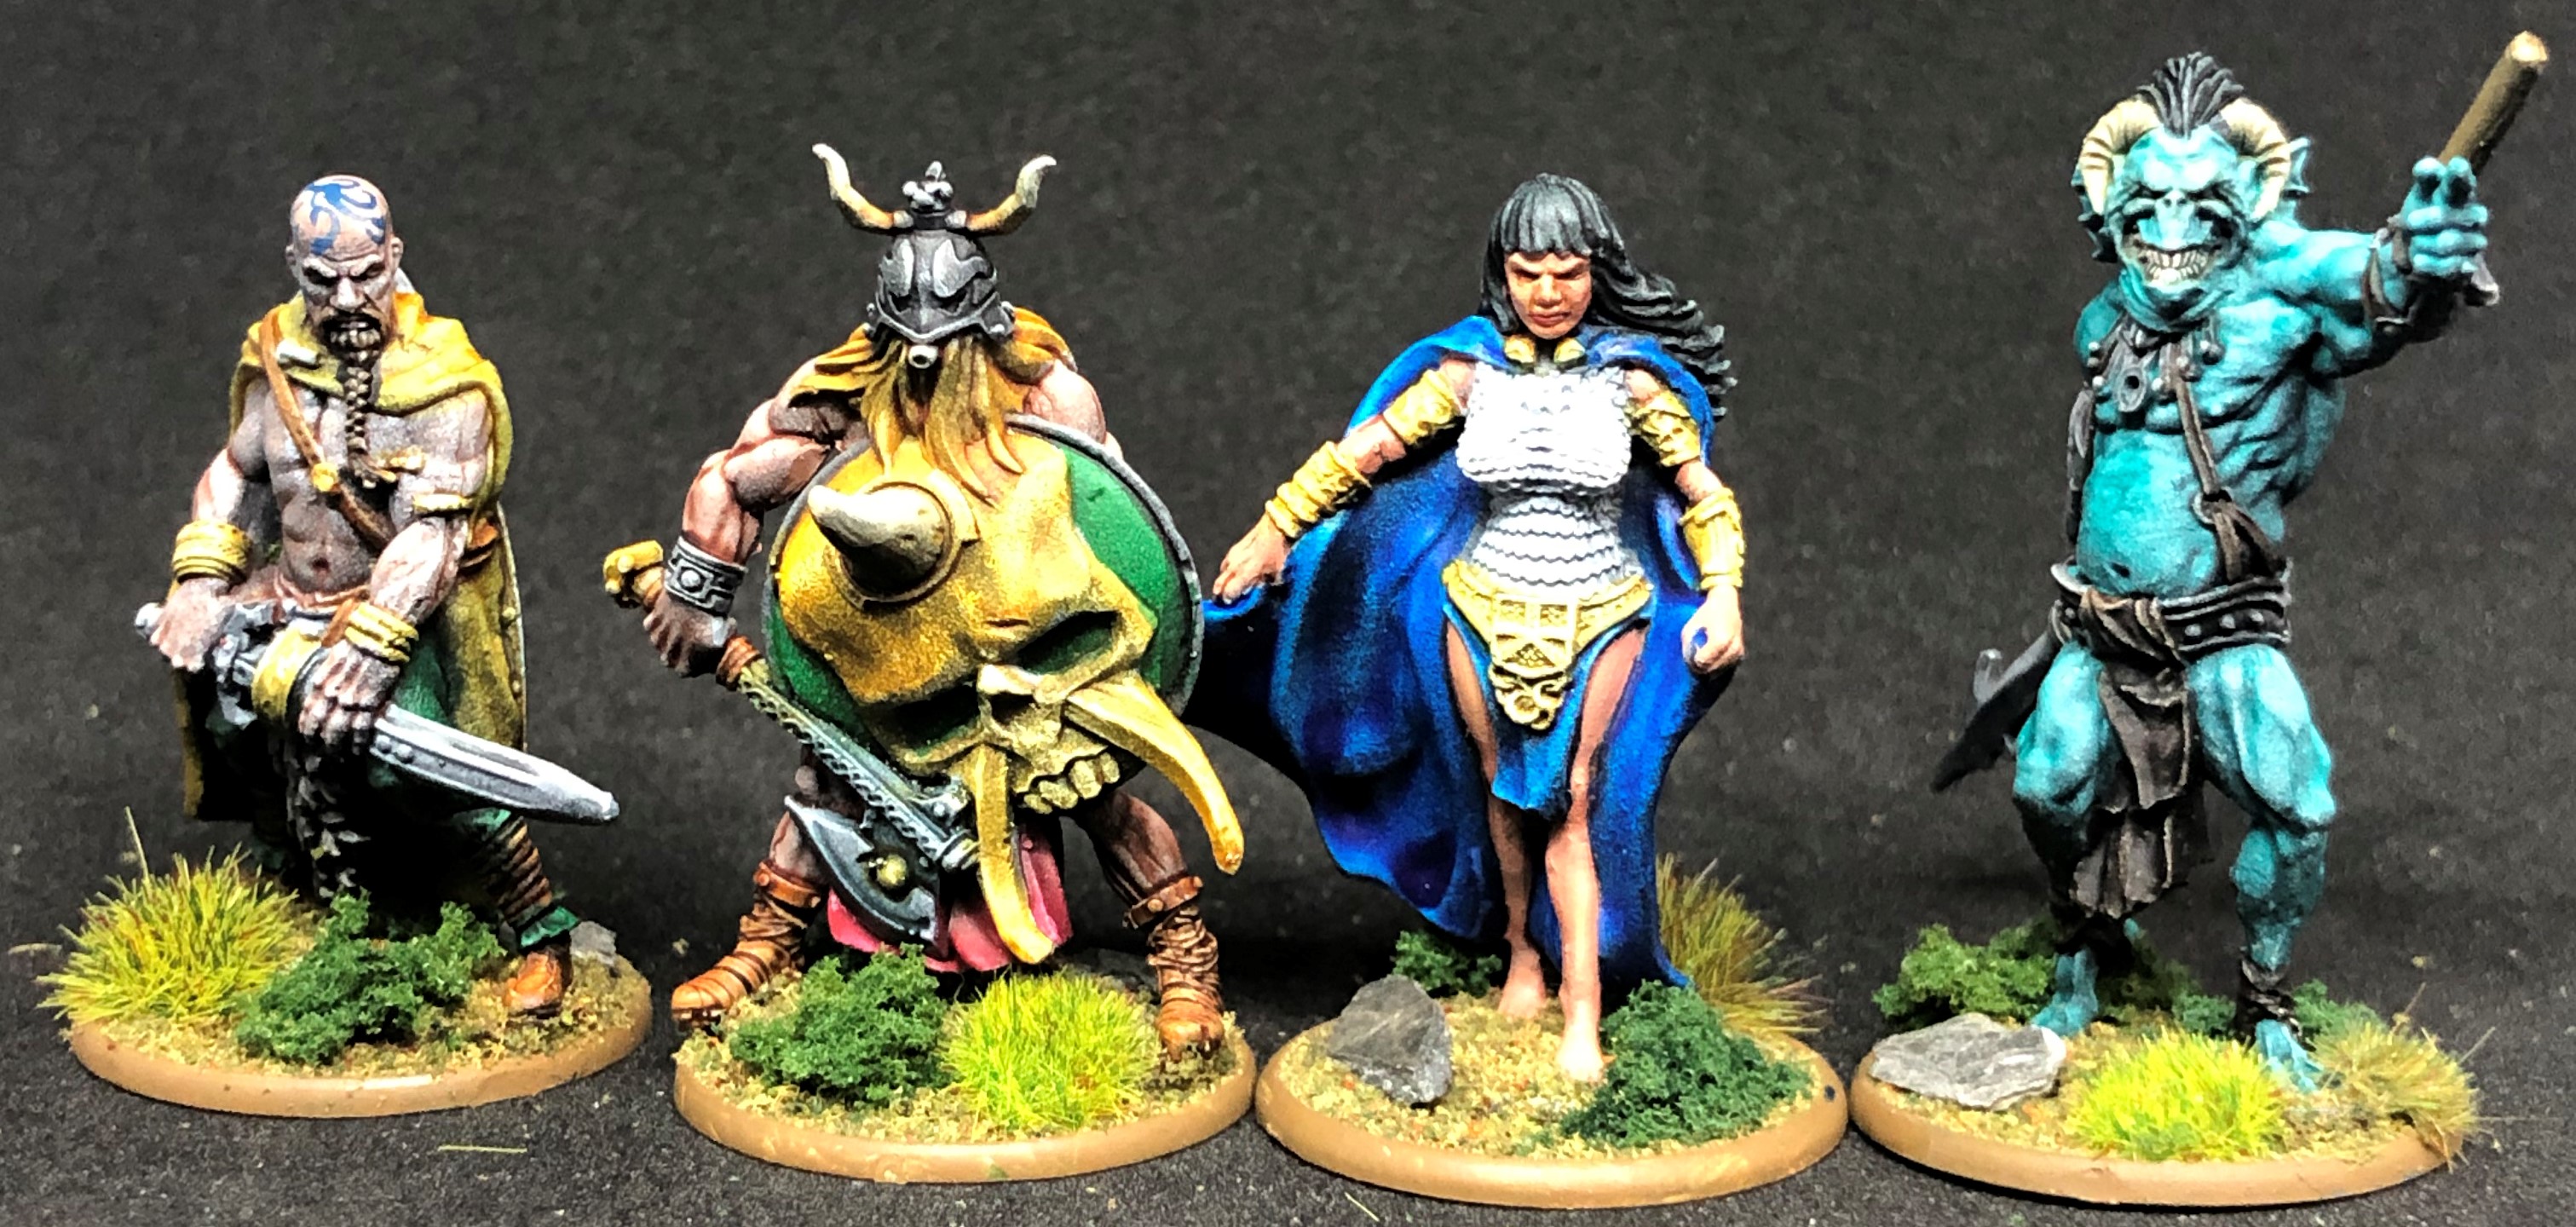
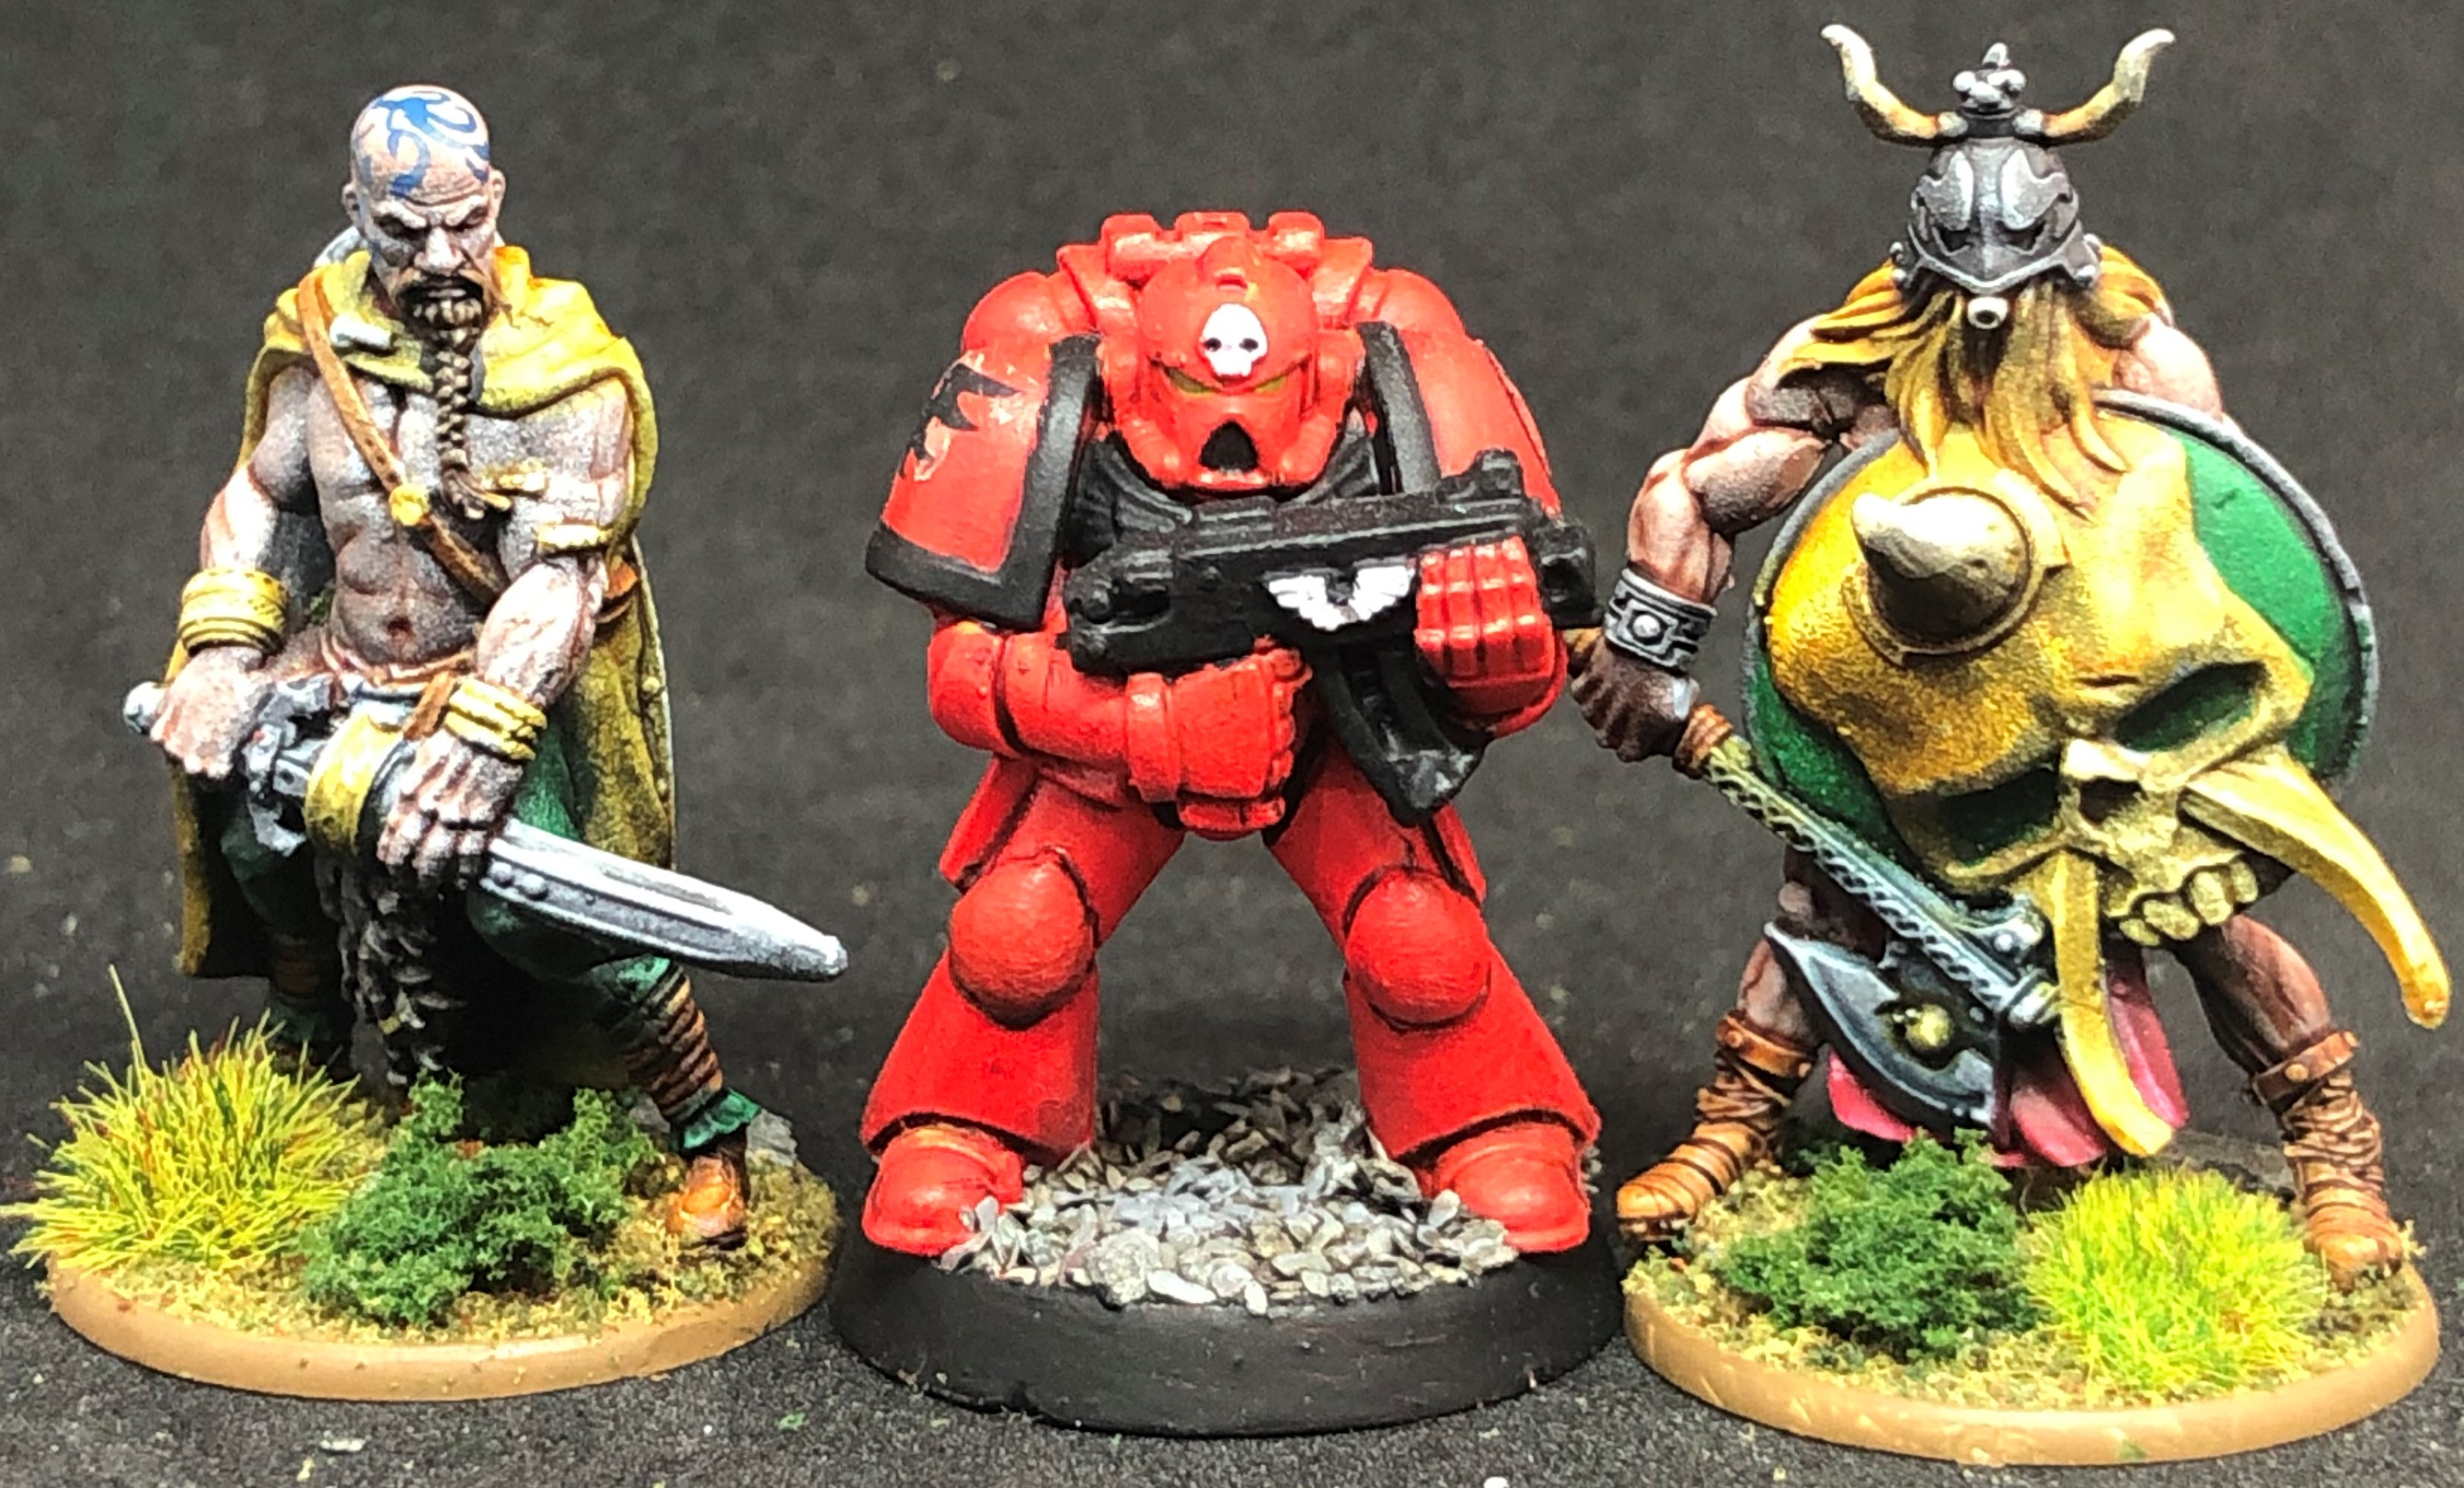
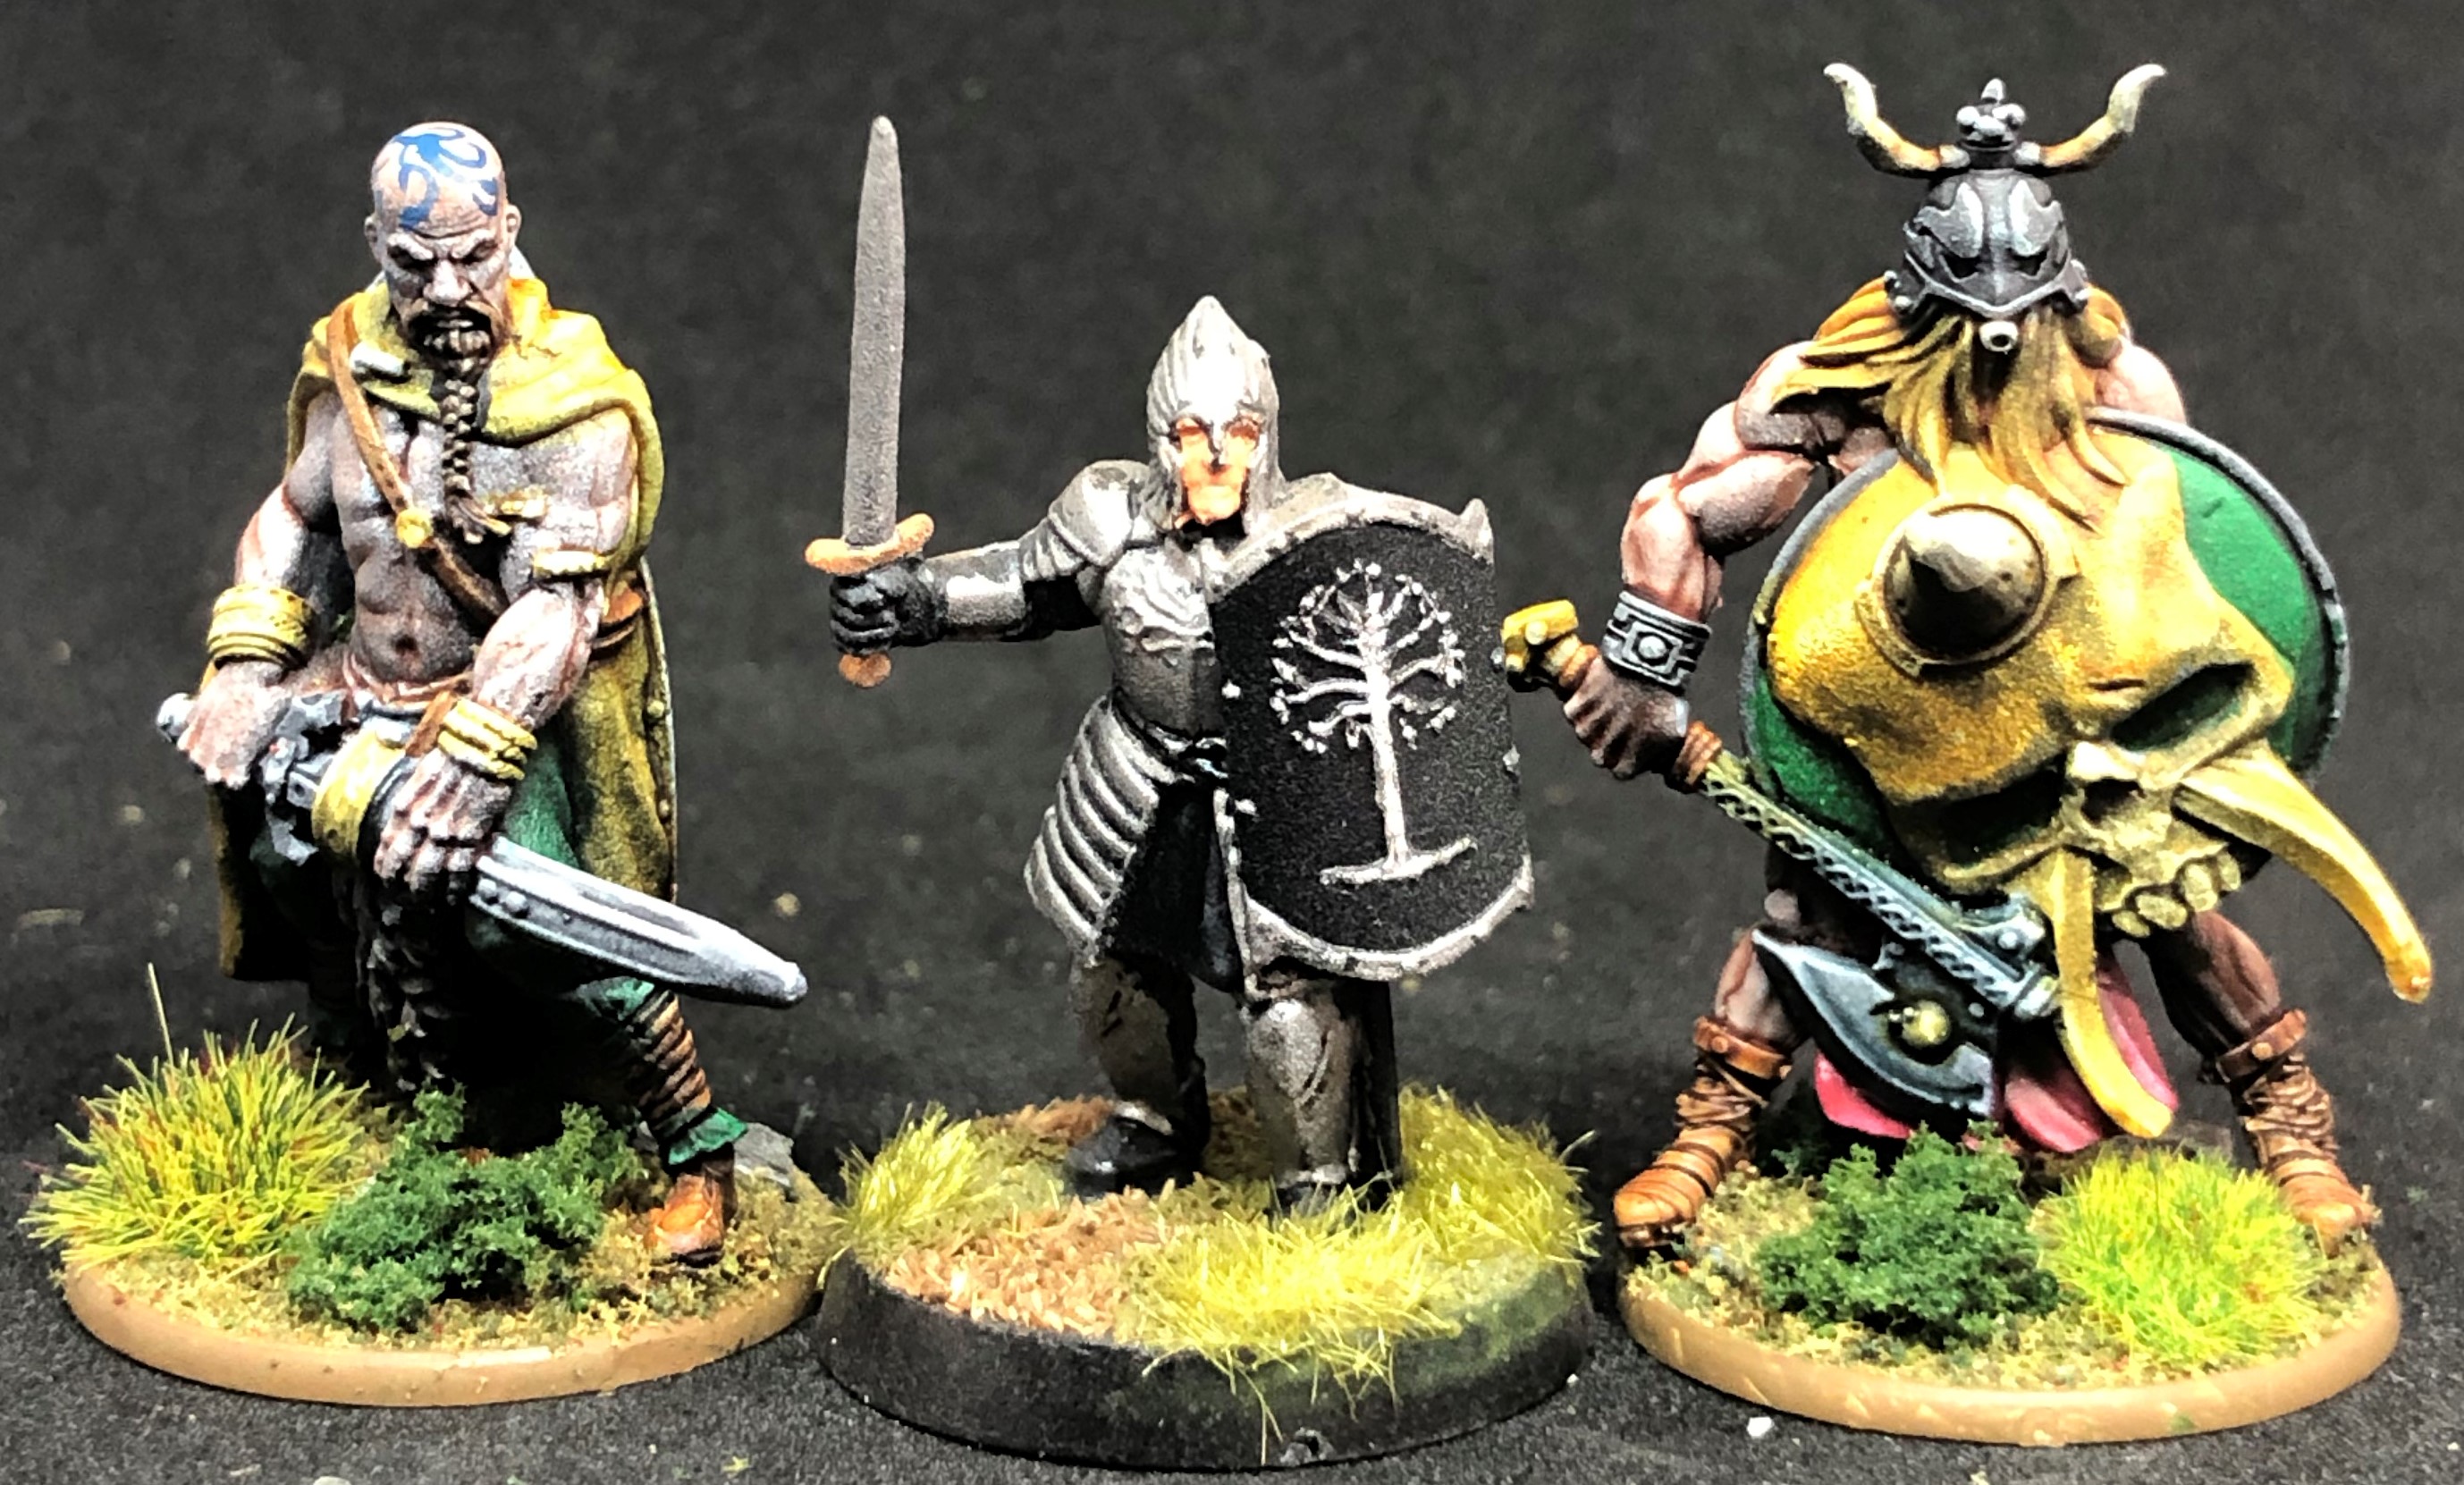
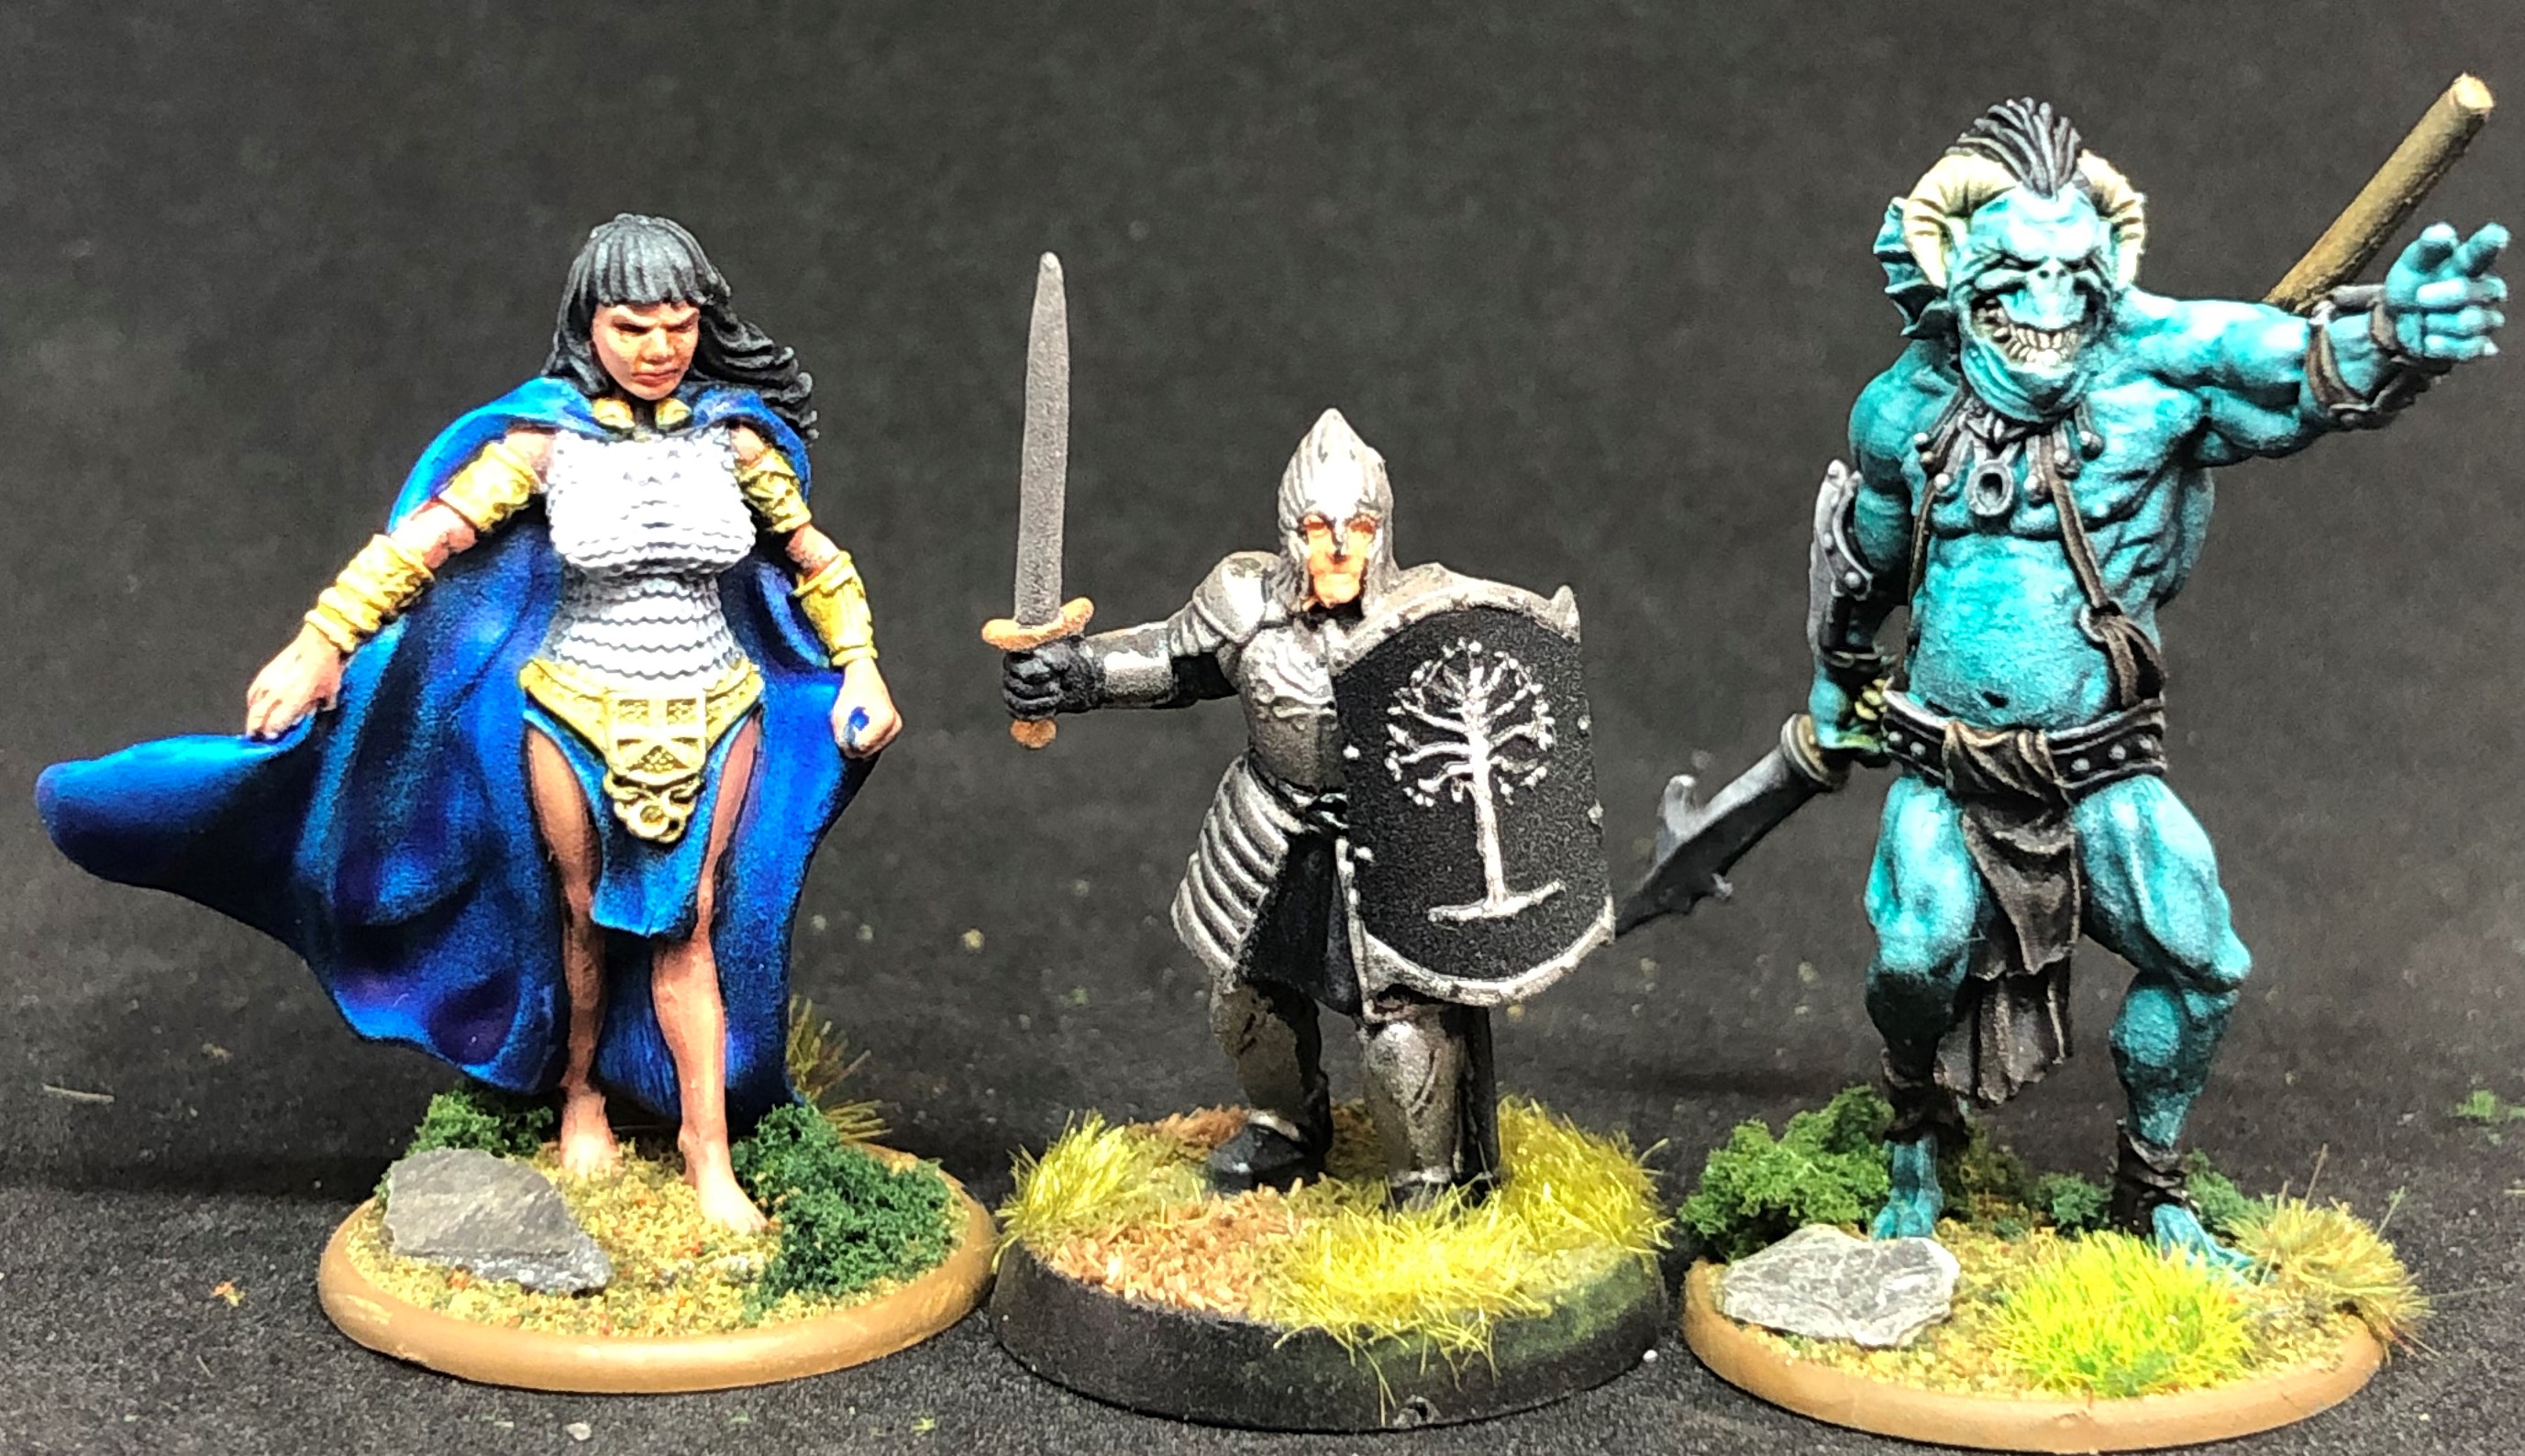
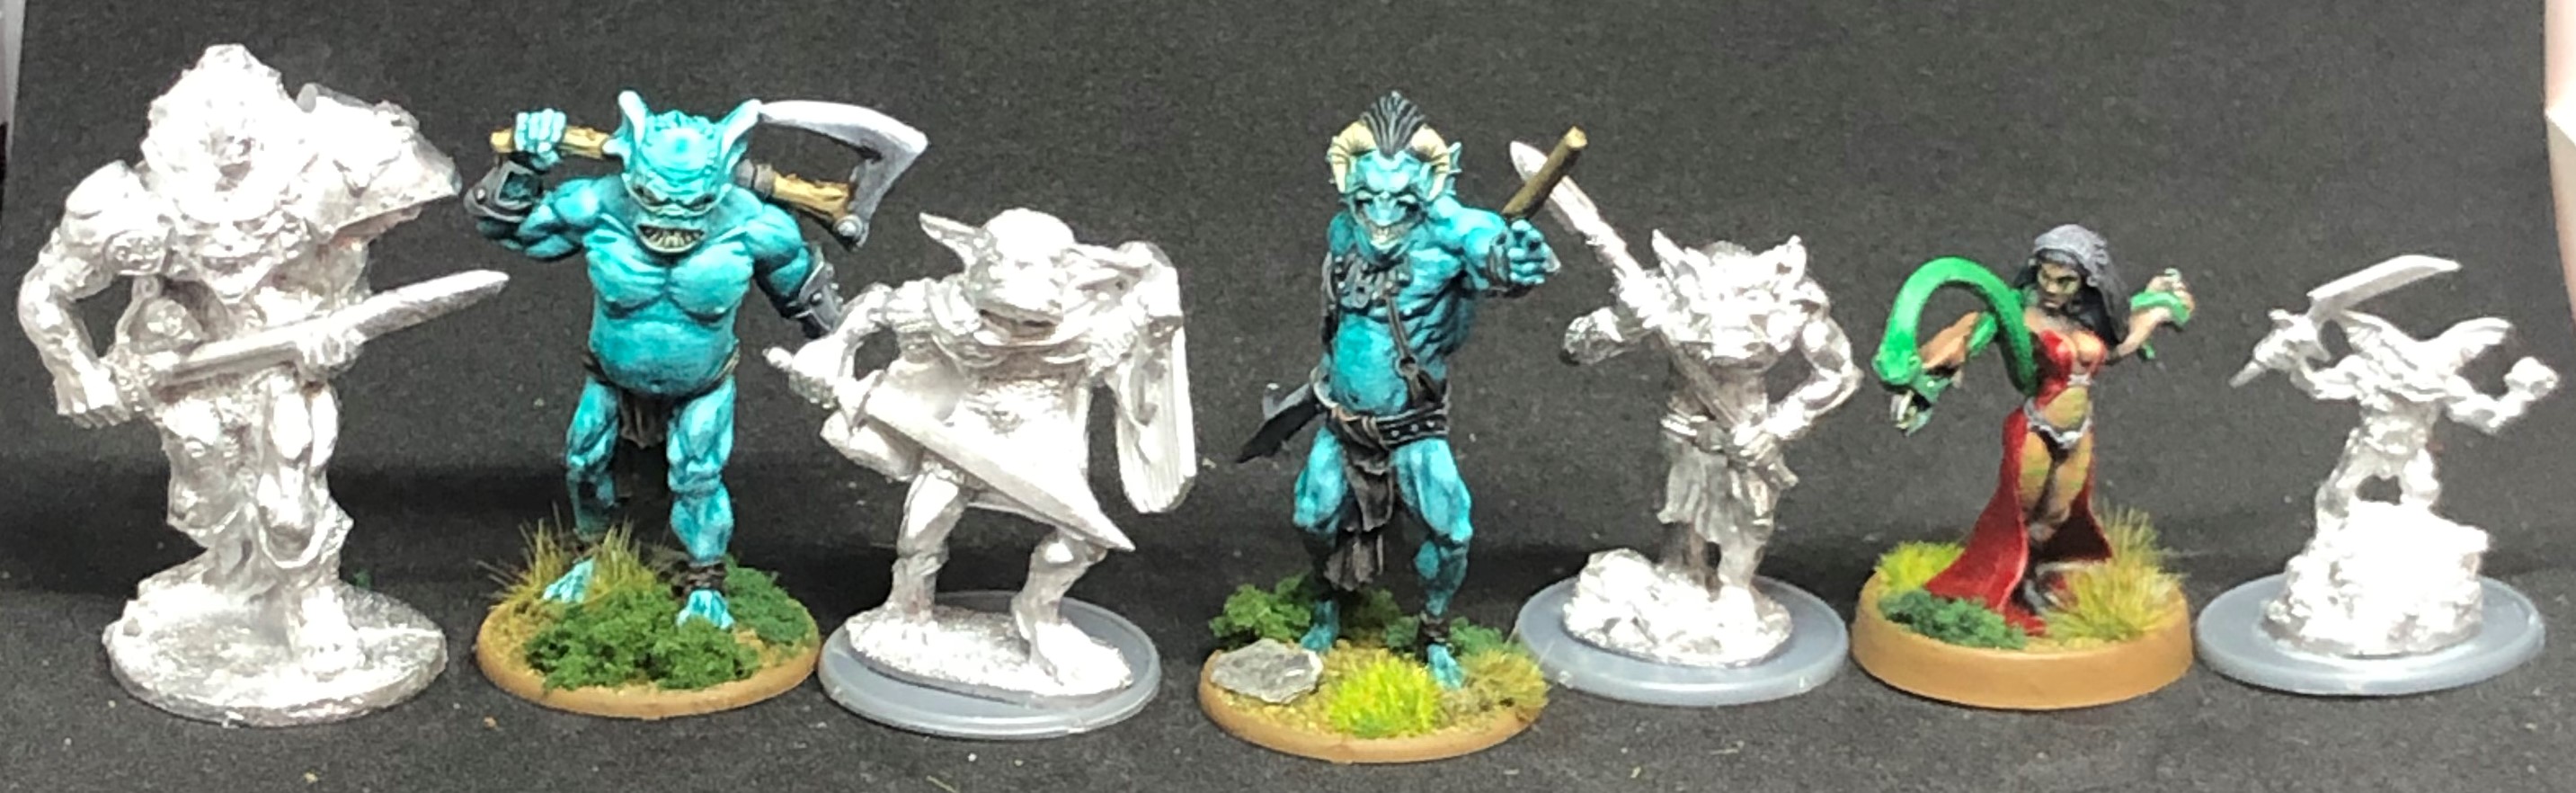
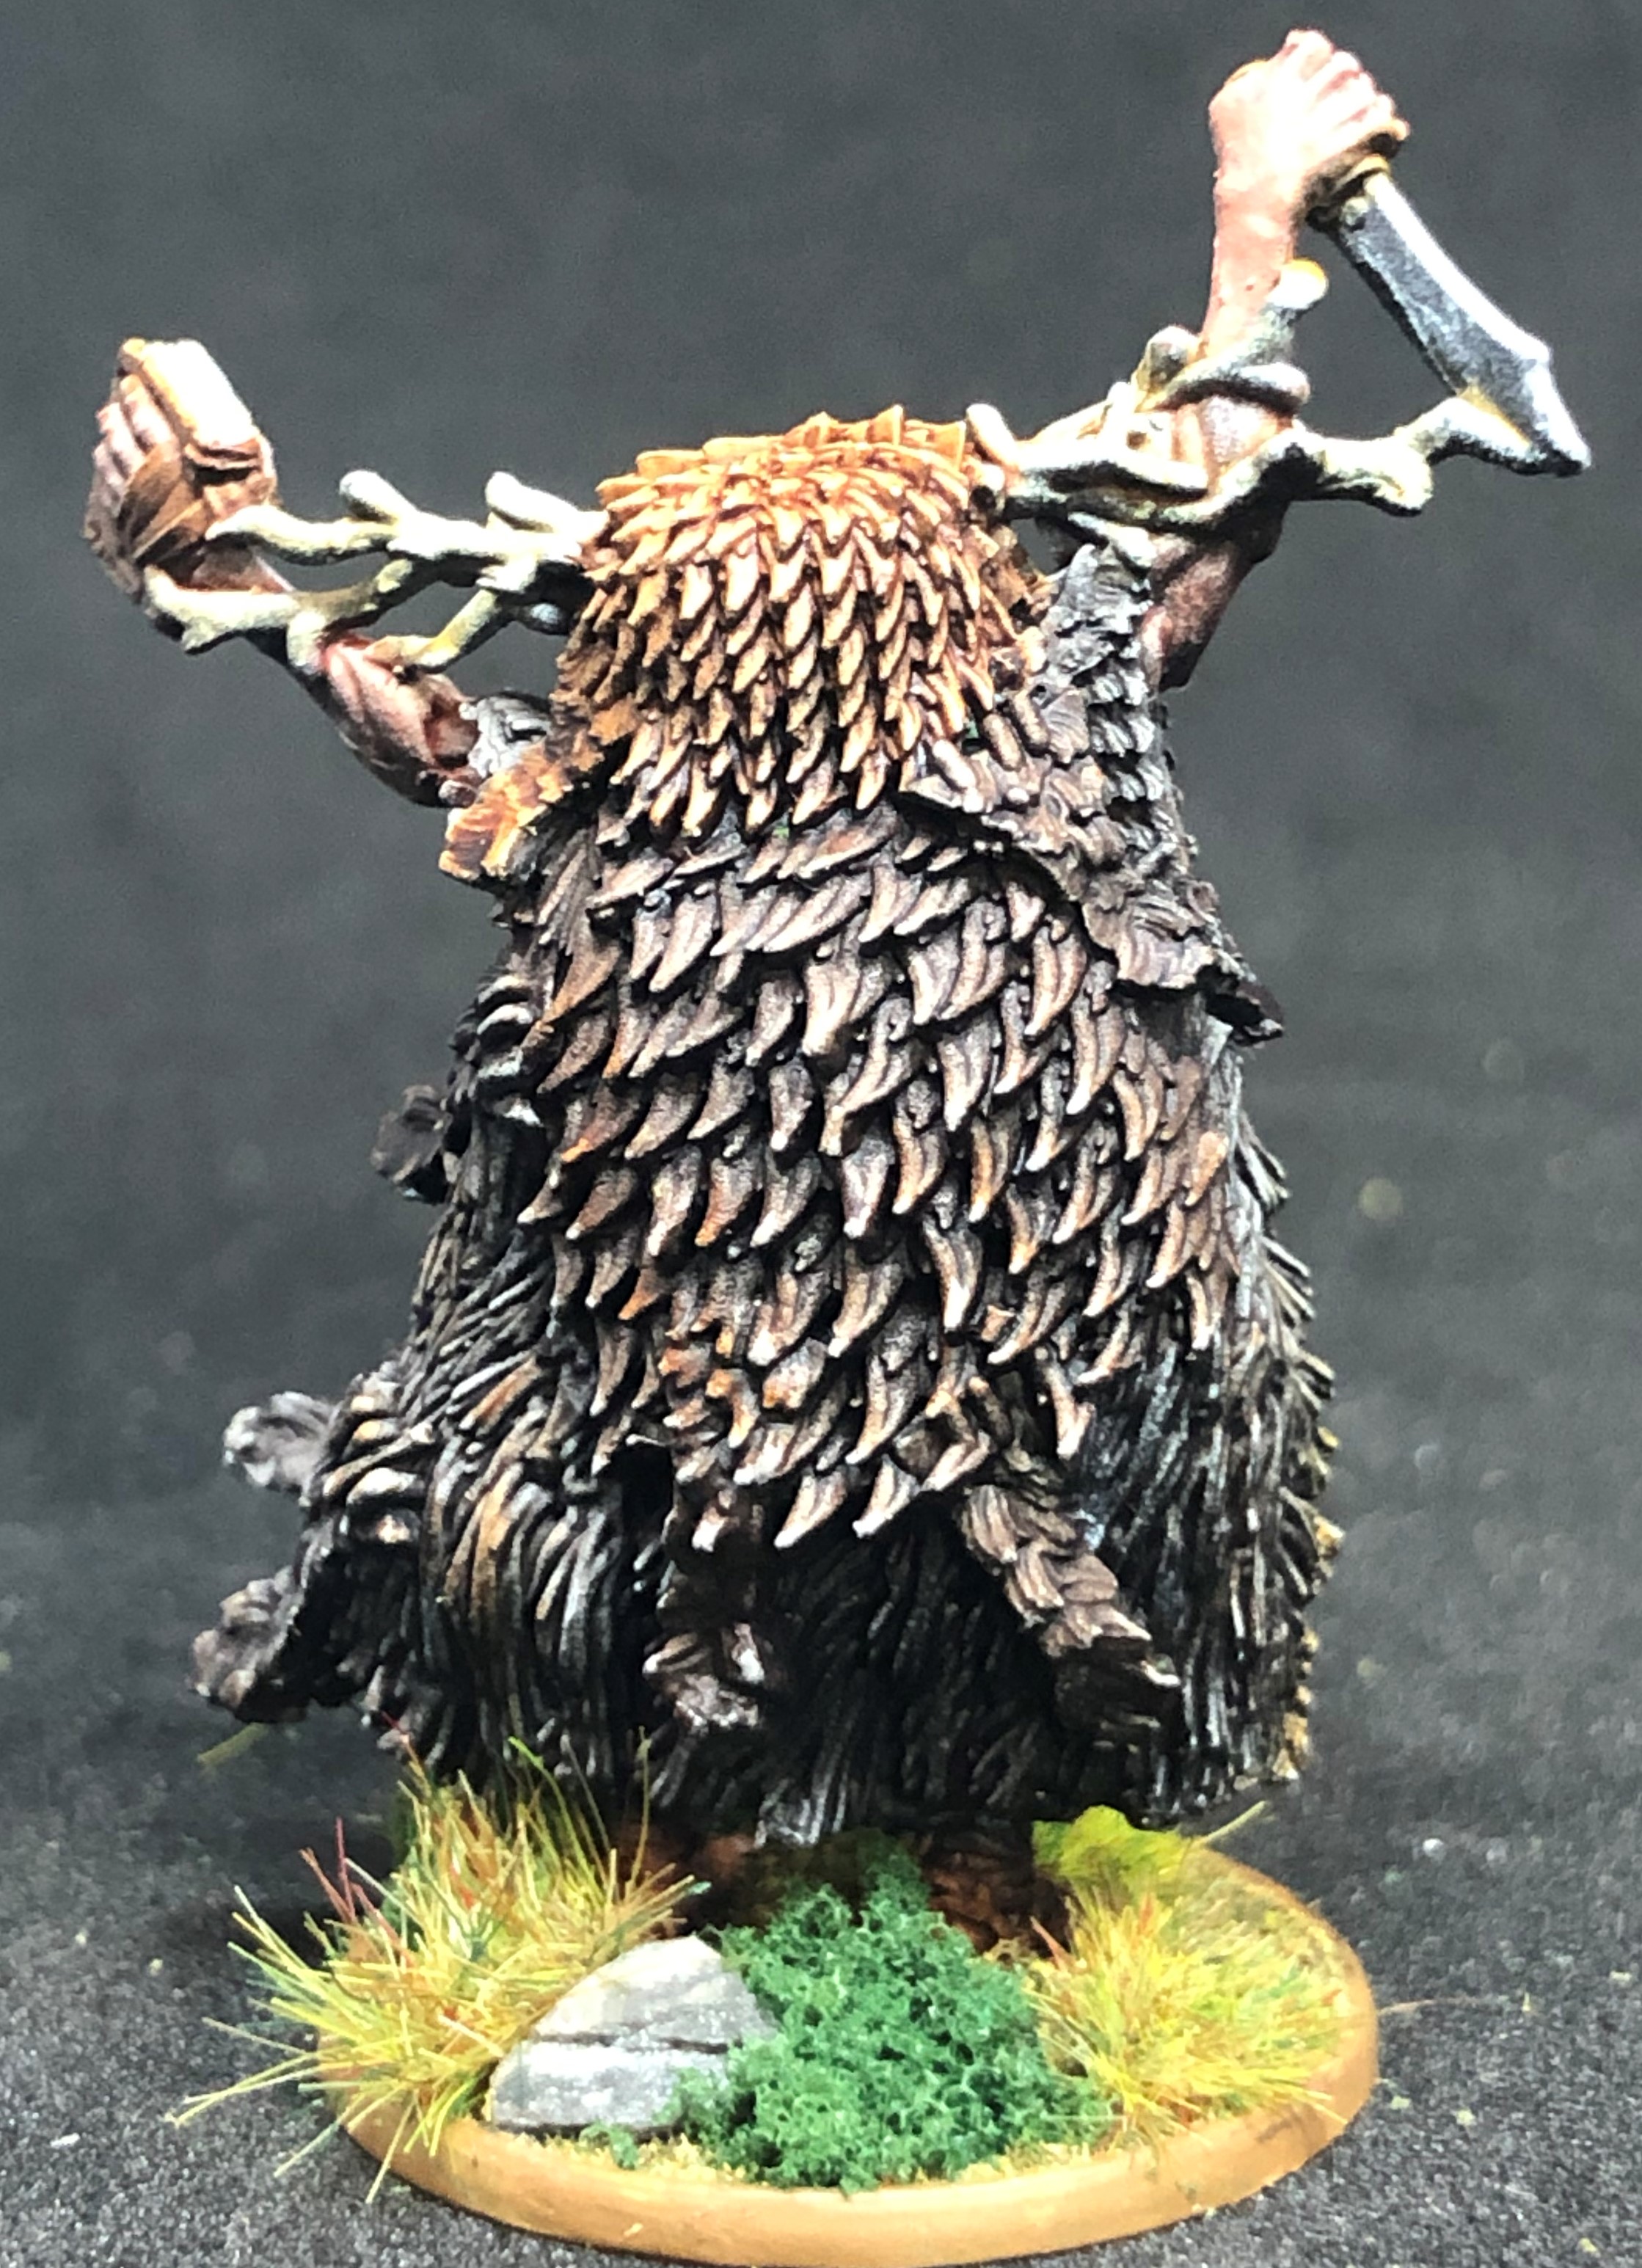
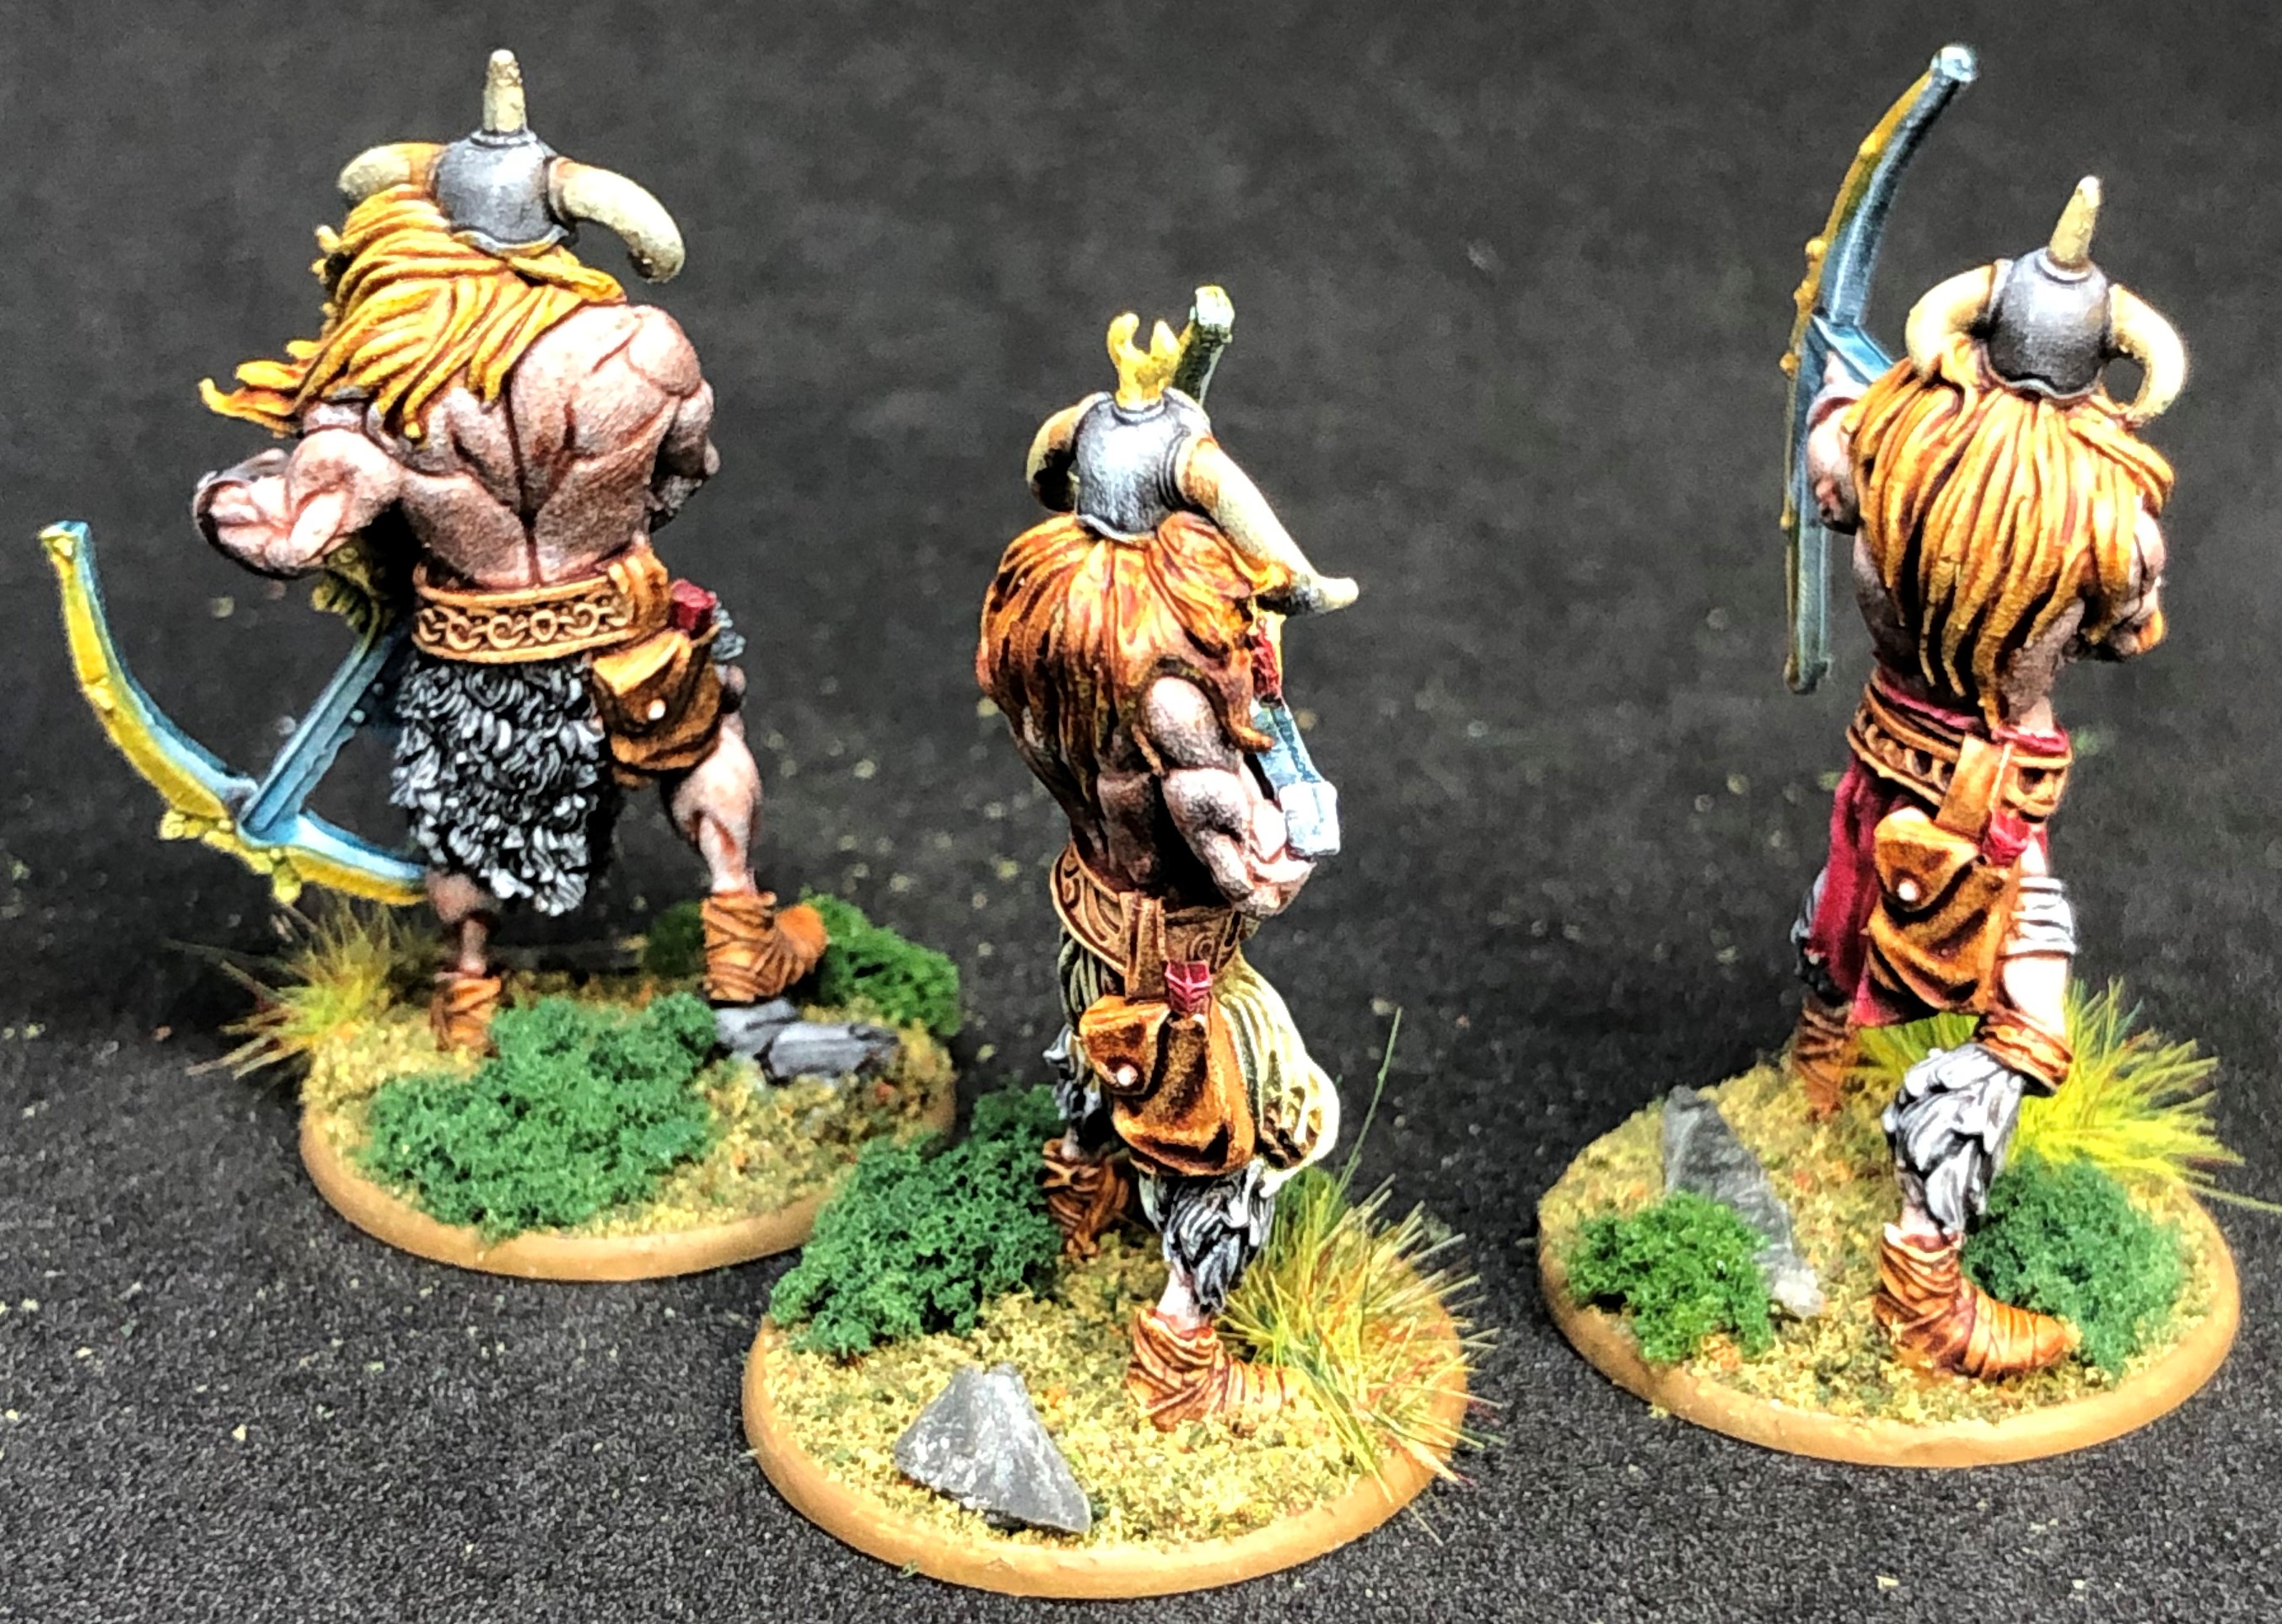
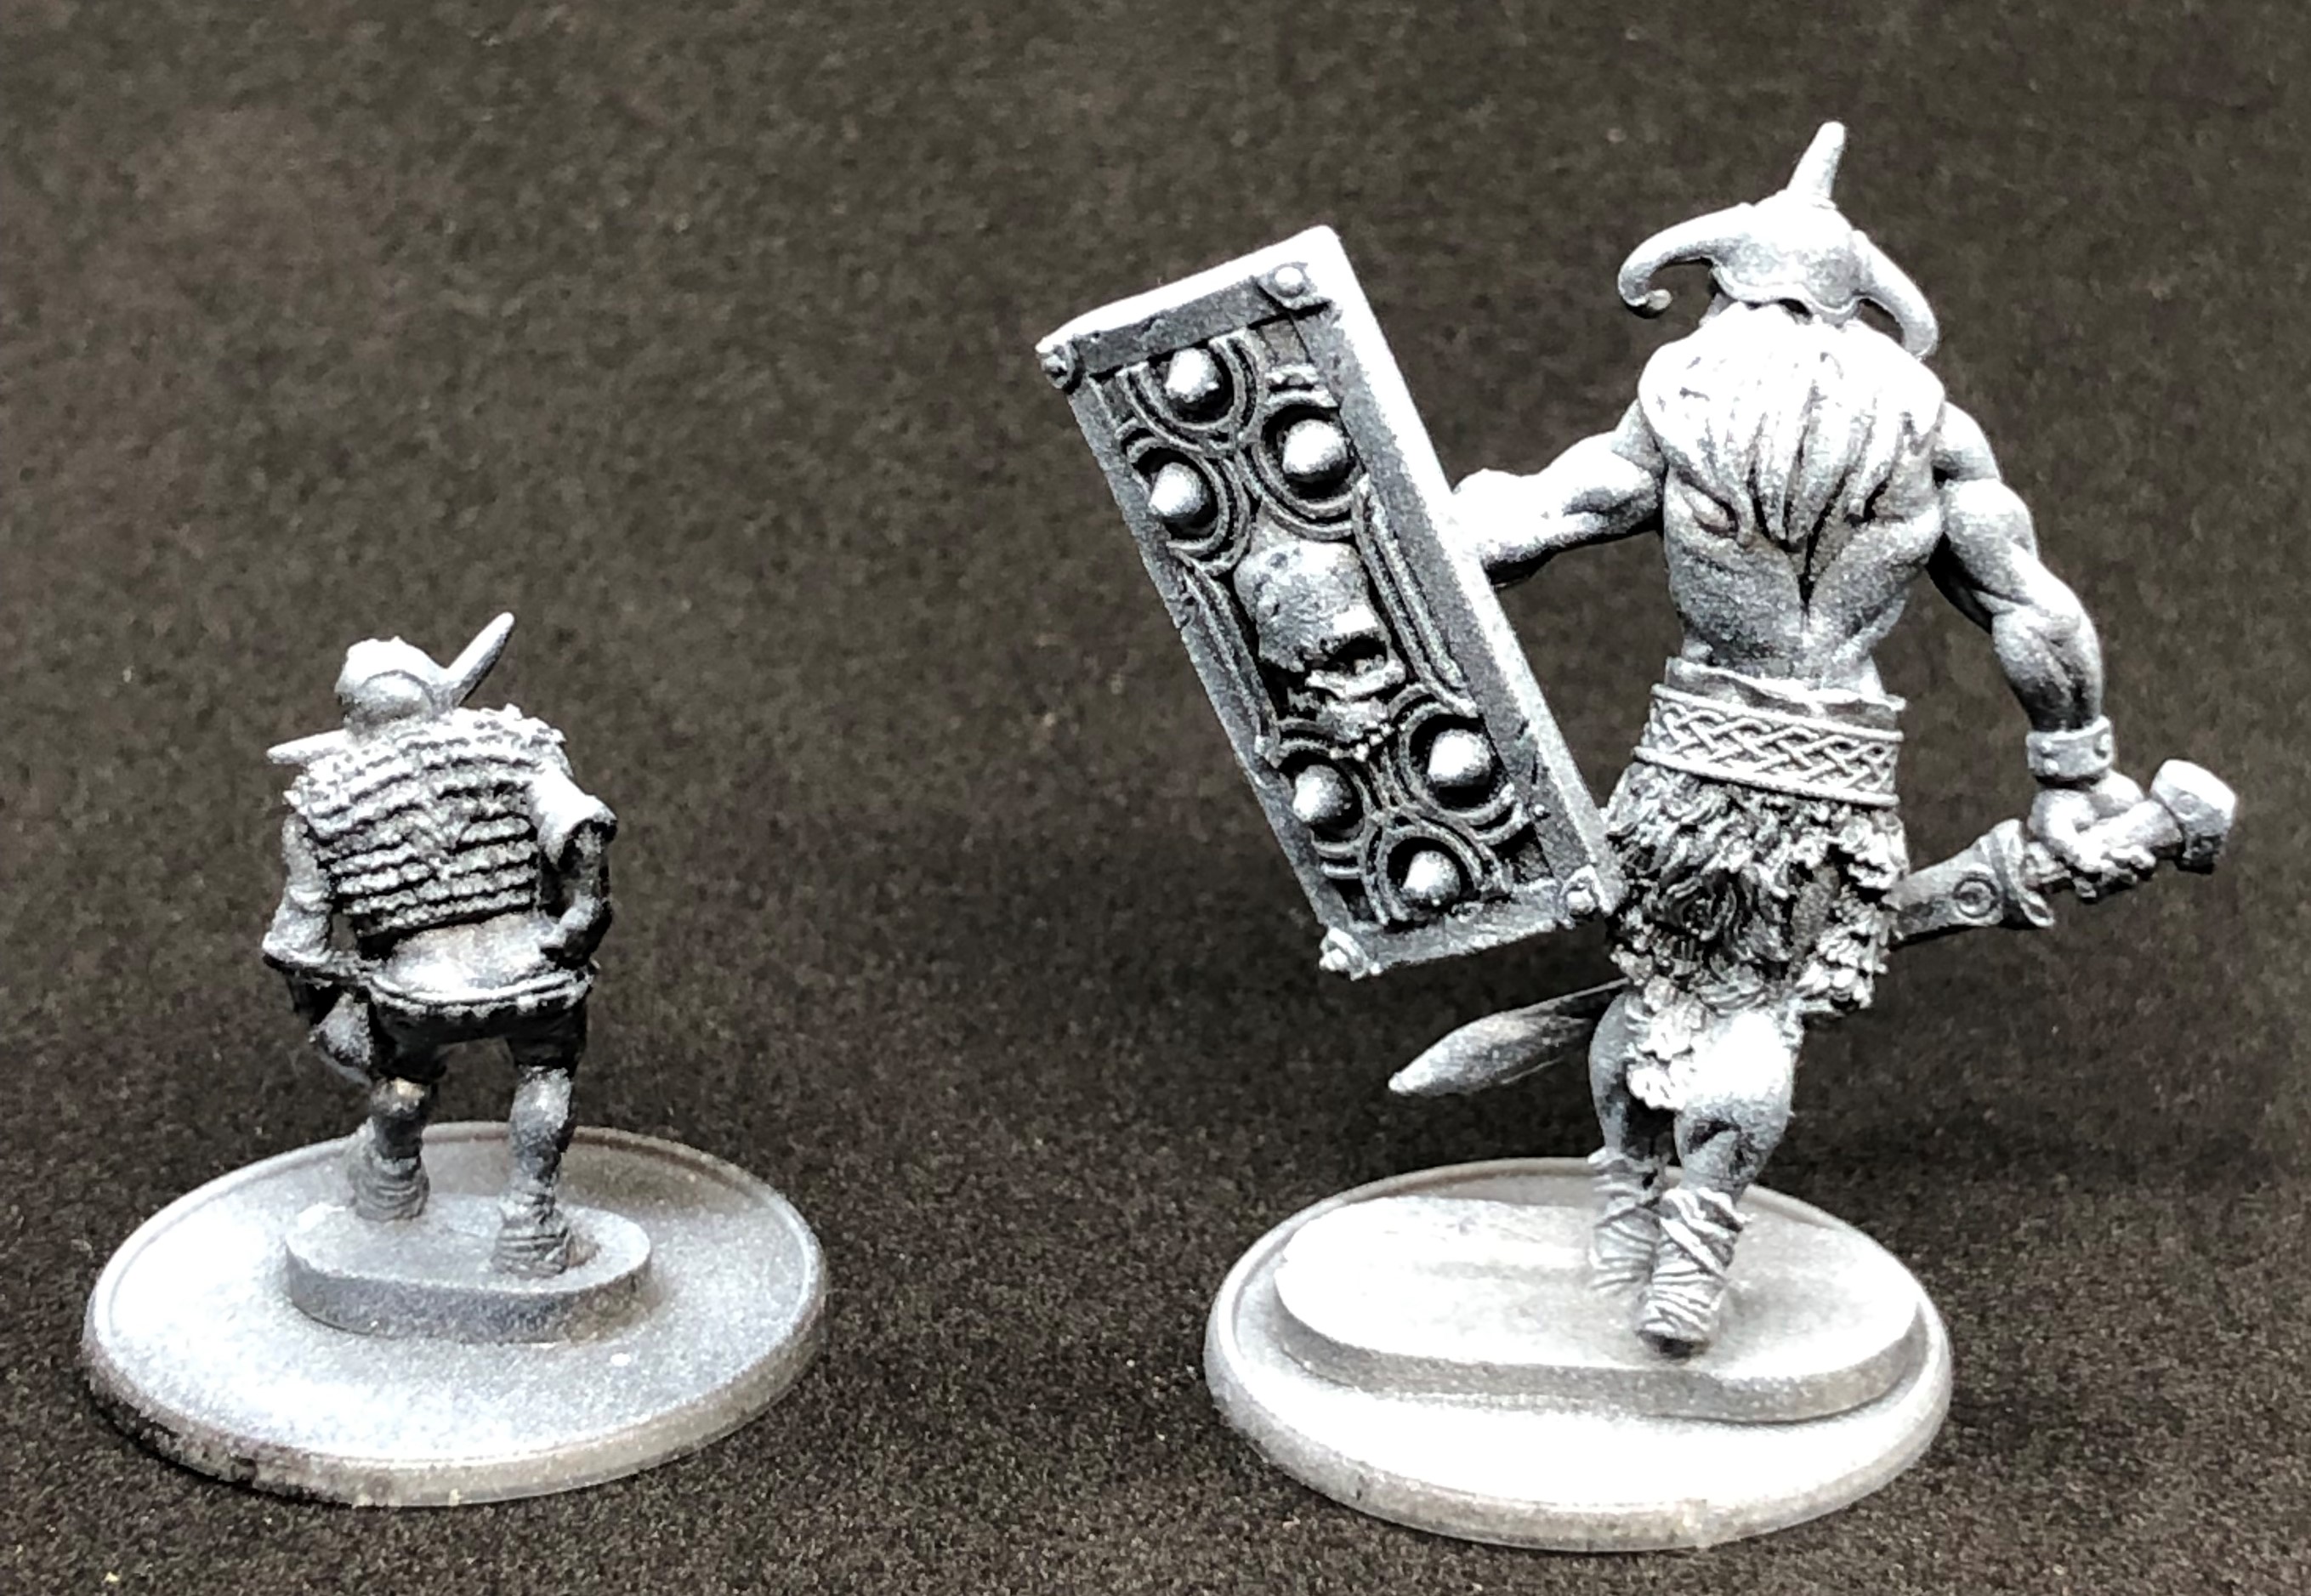
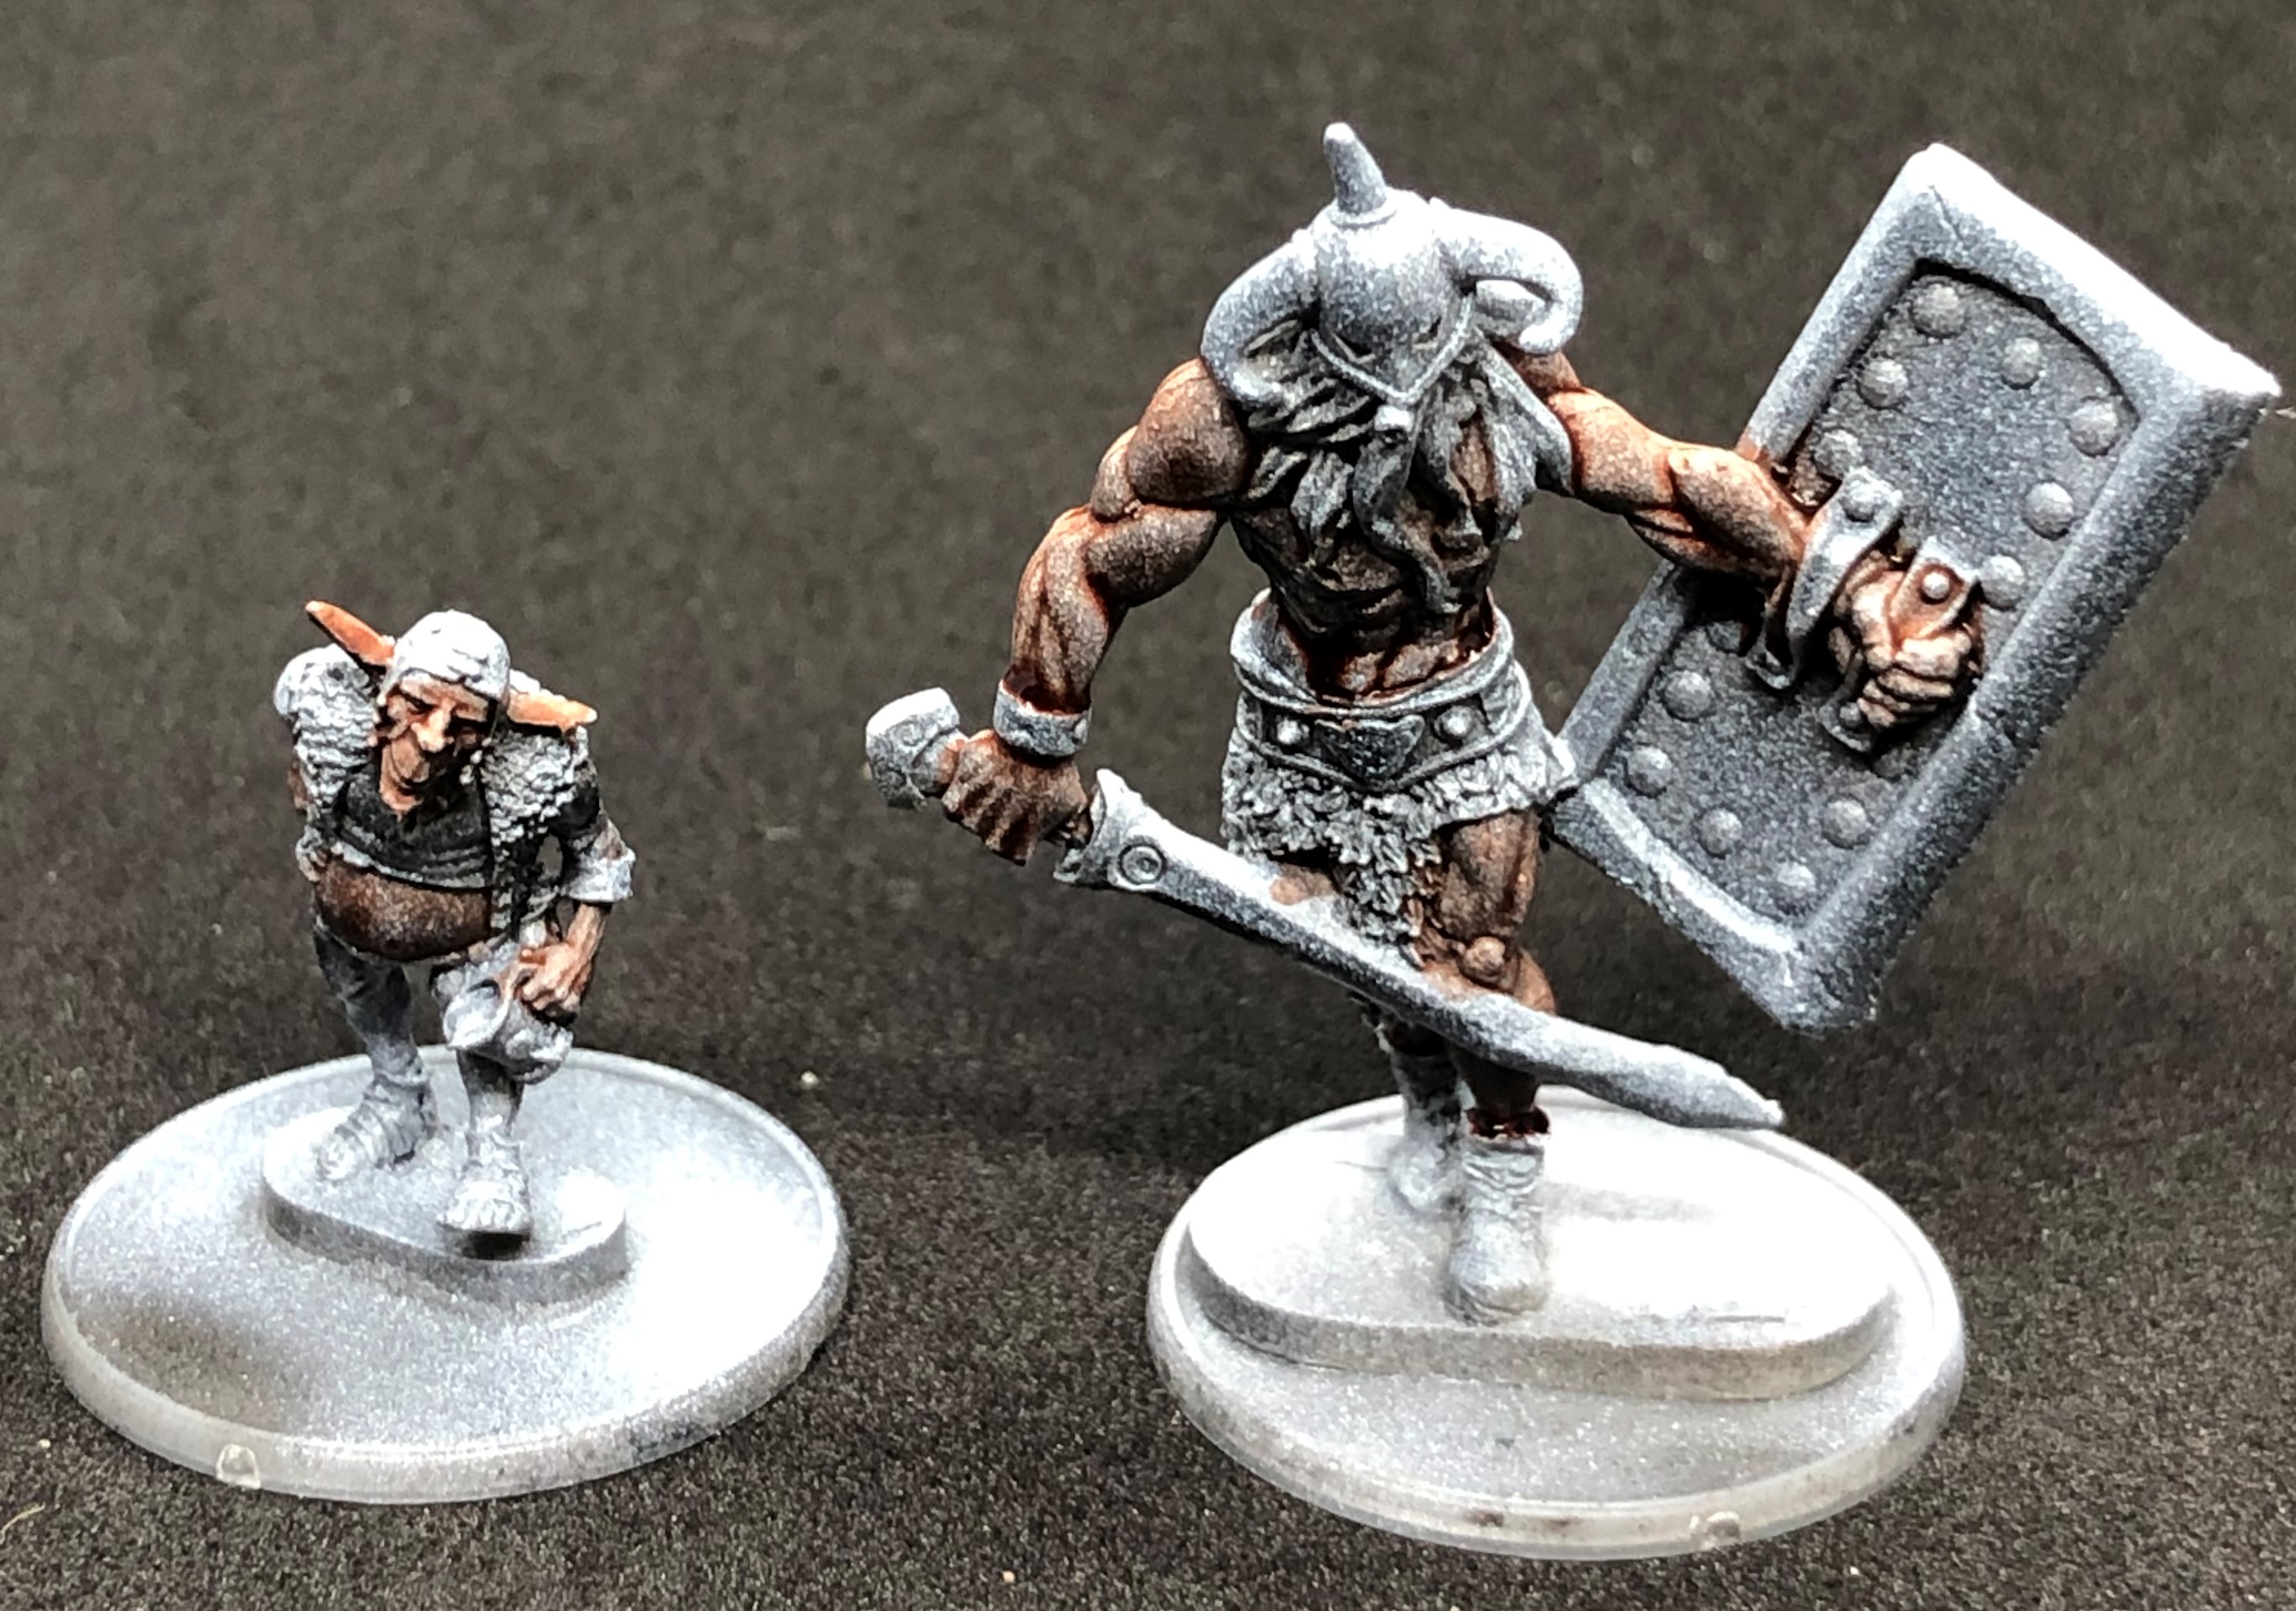
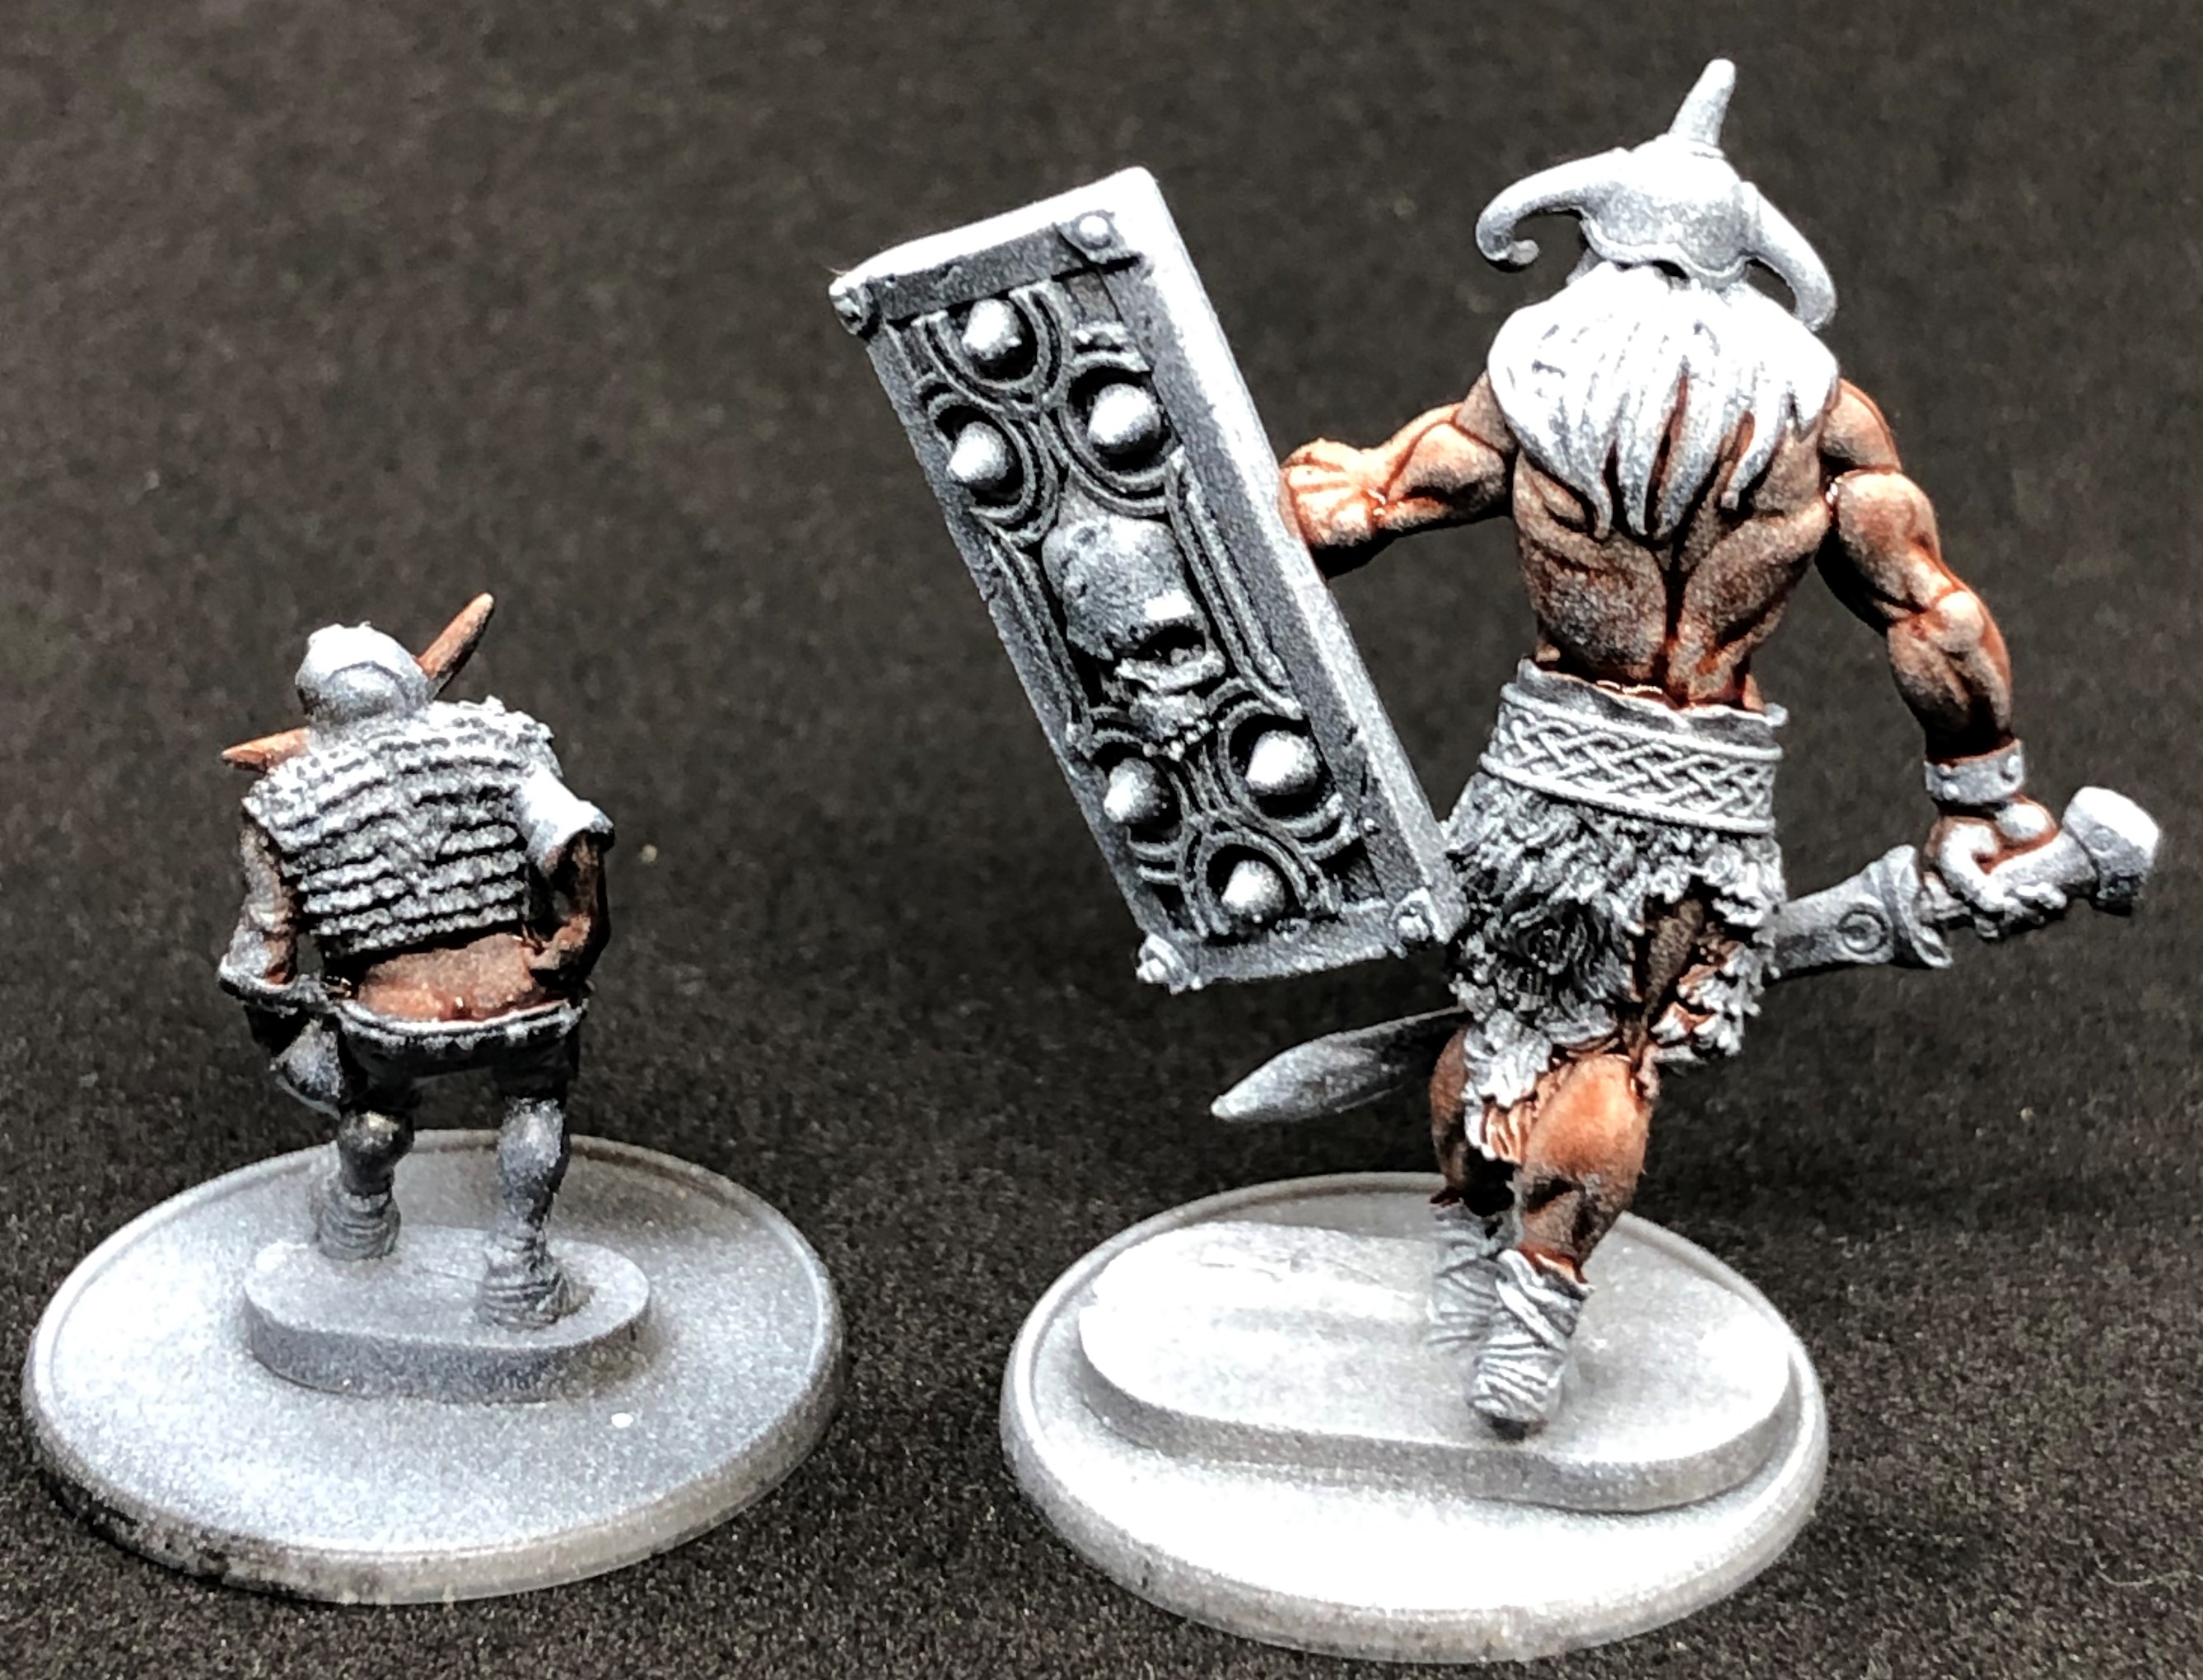
Fomorian Champions
The two Fomorian champions. Alternative Armies sculpts – and very meanicing they are too. These are bigger than the Warlord games models by a head (see my scale comparison earlier in the project) and they have been based on the 40mm rounds rather than the 25mm. Painting method is the same as the other Fomor.
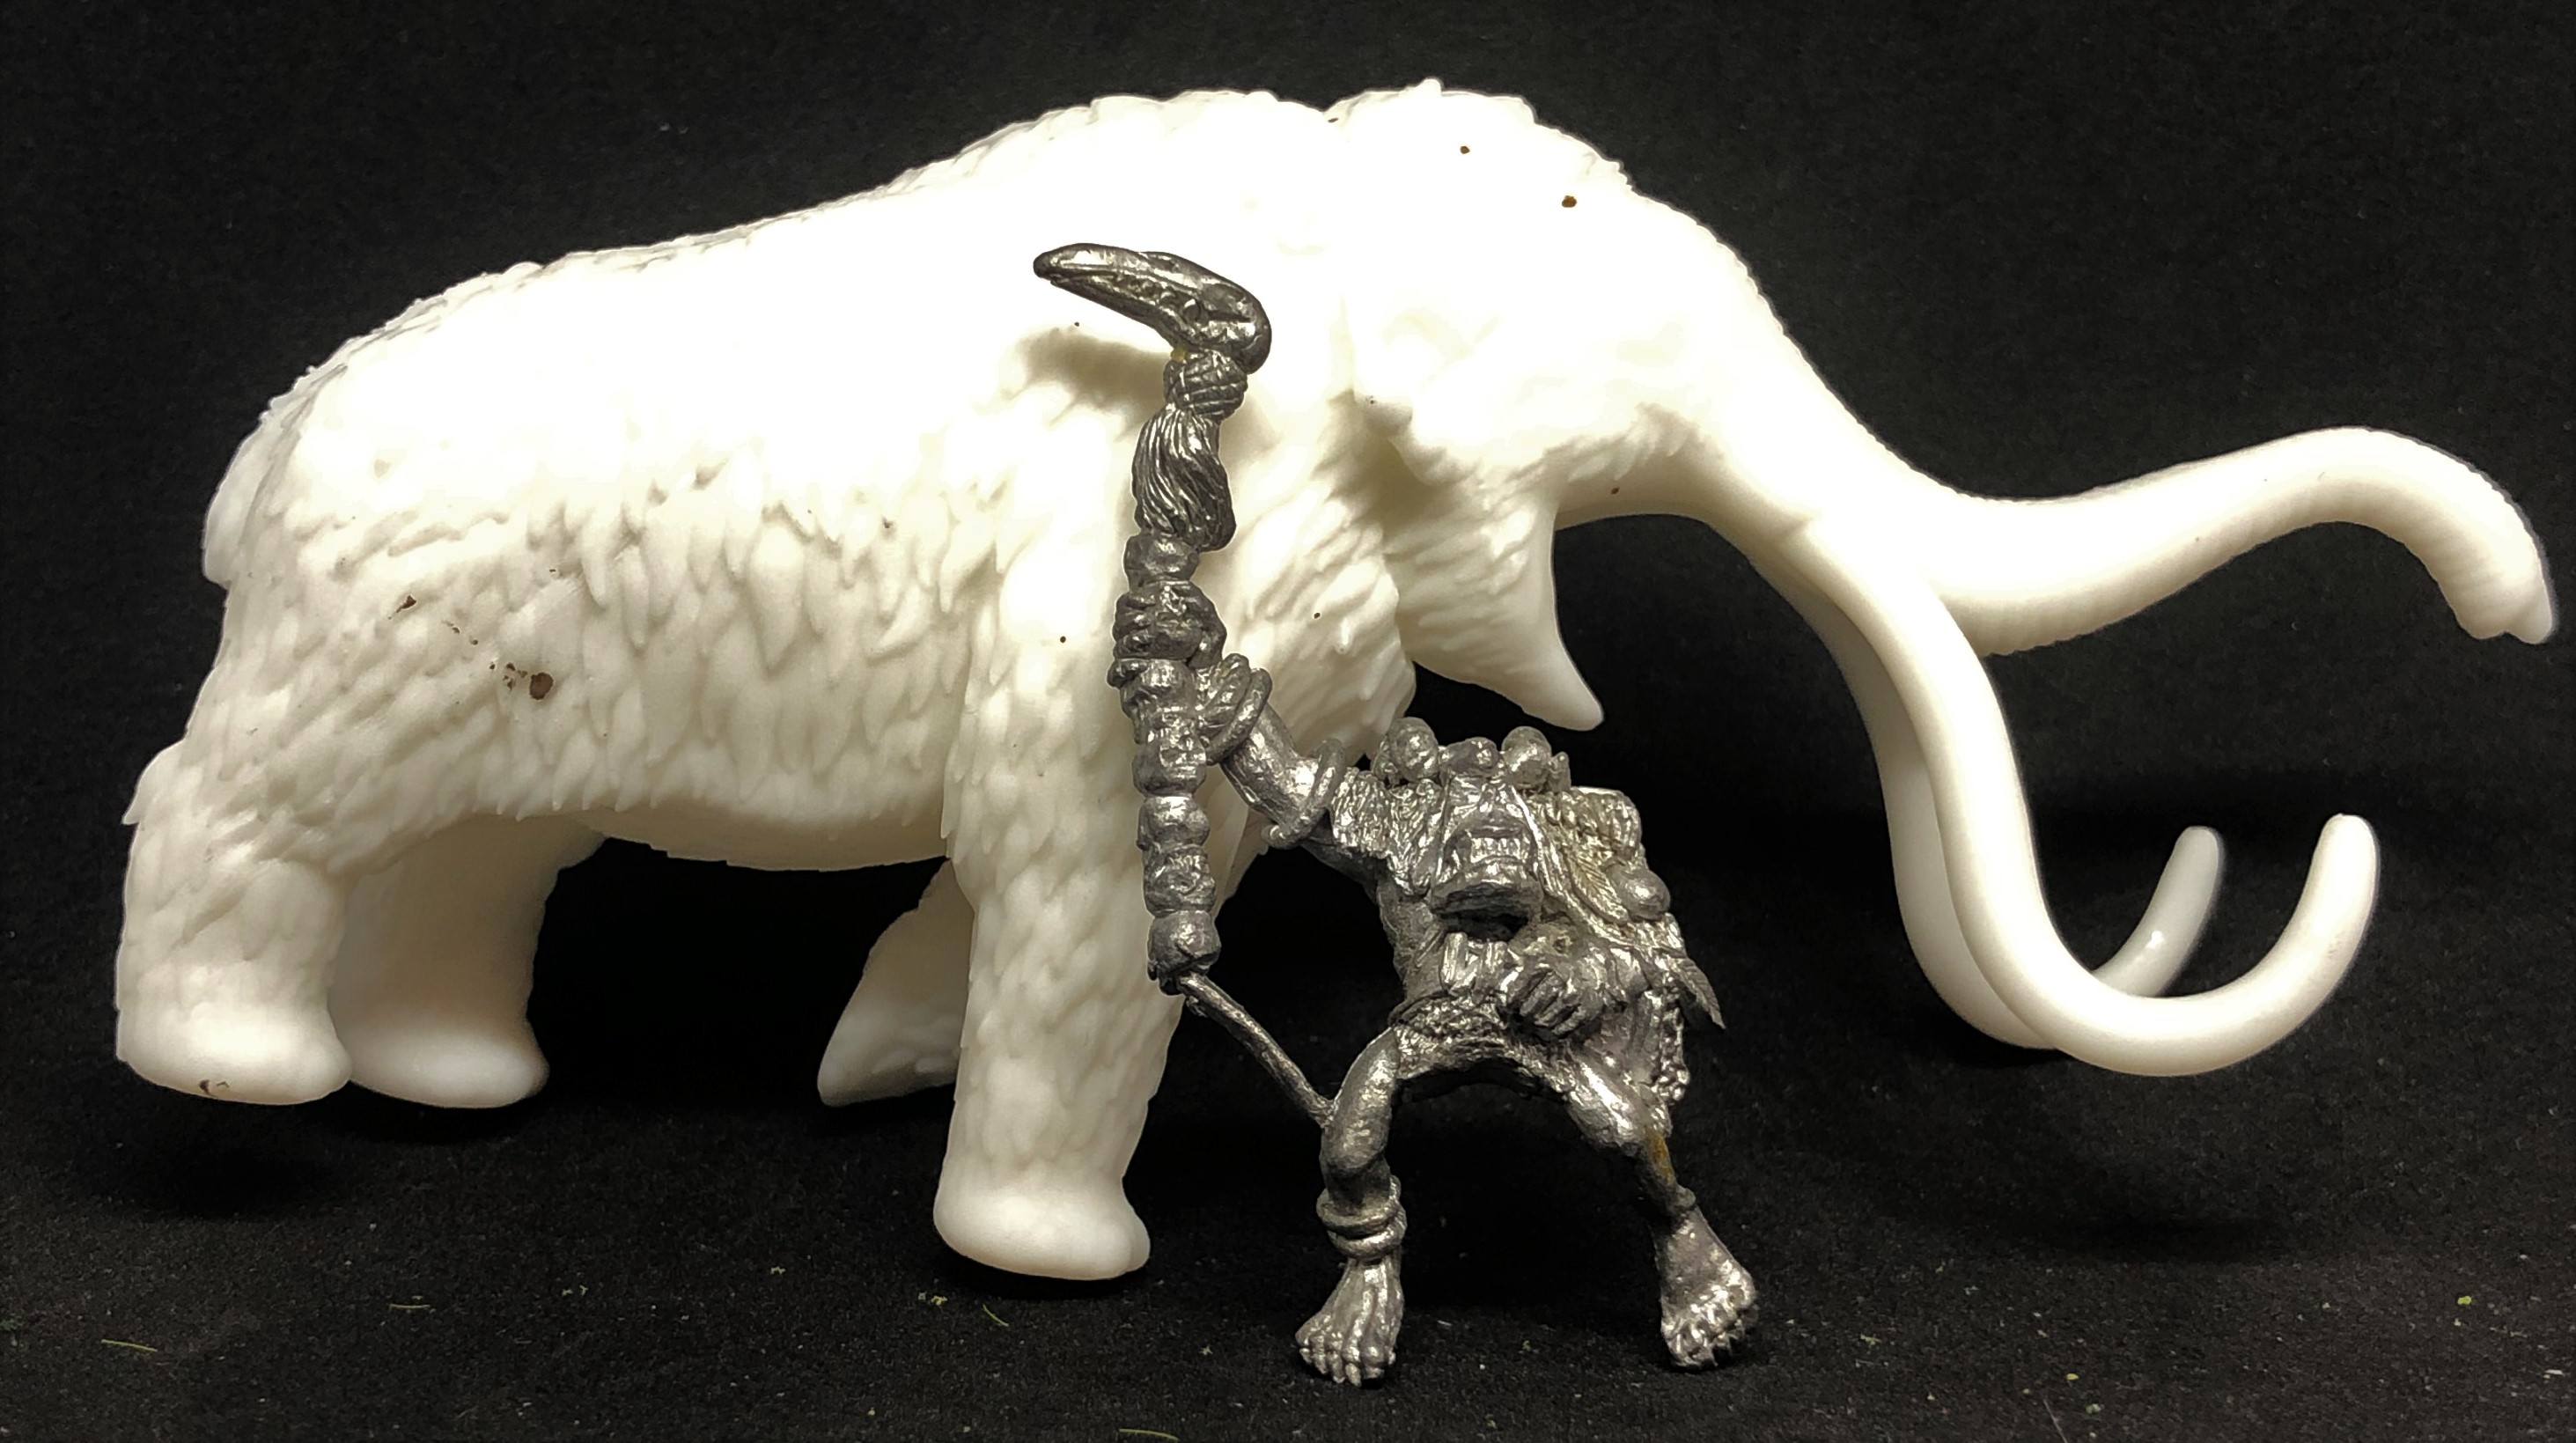
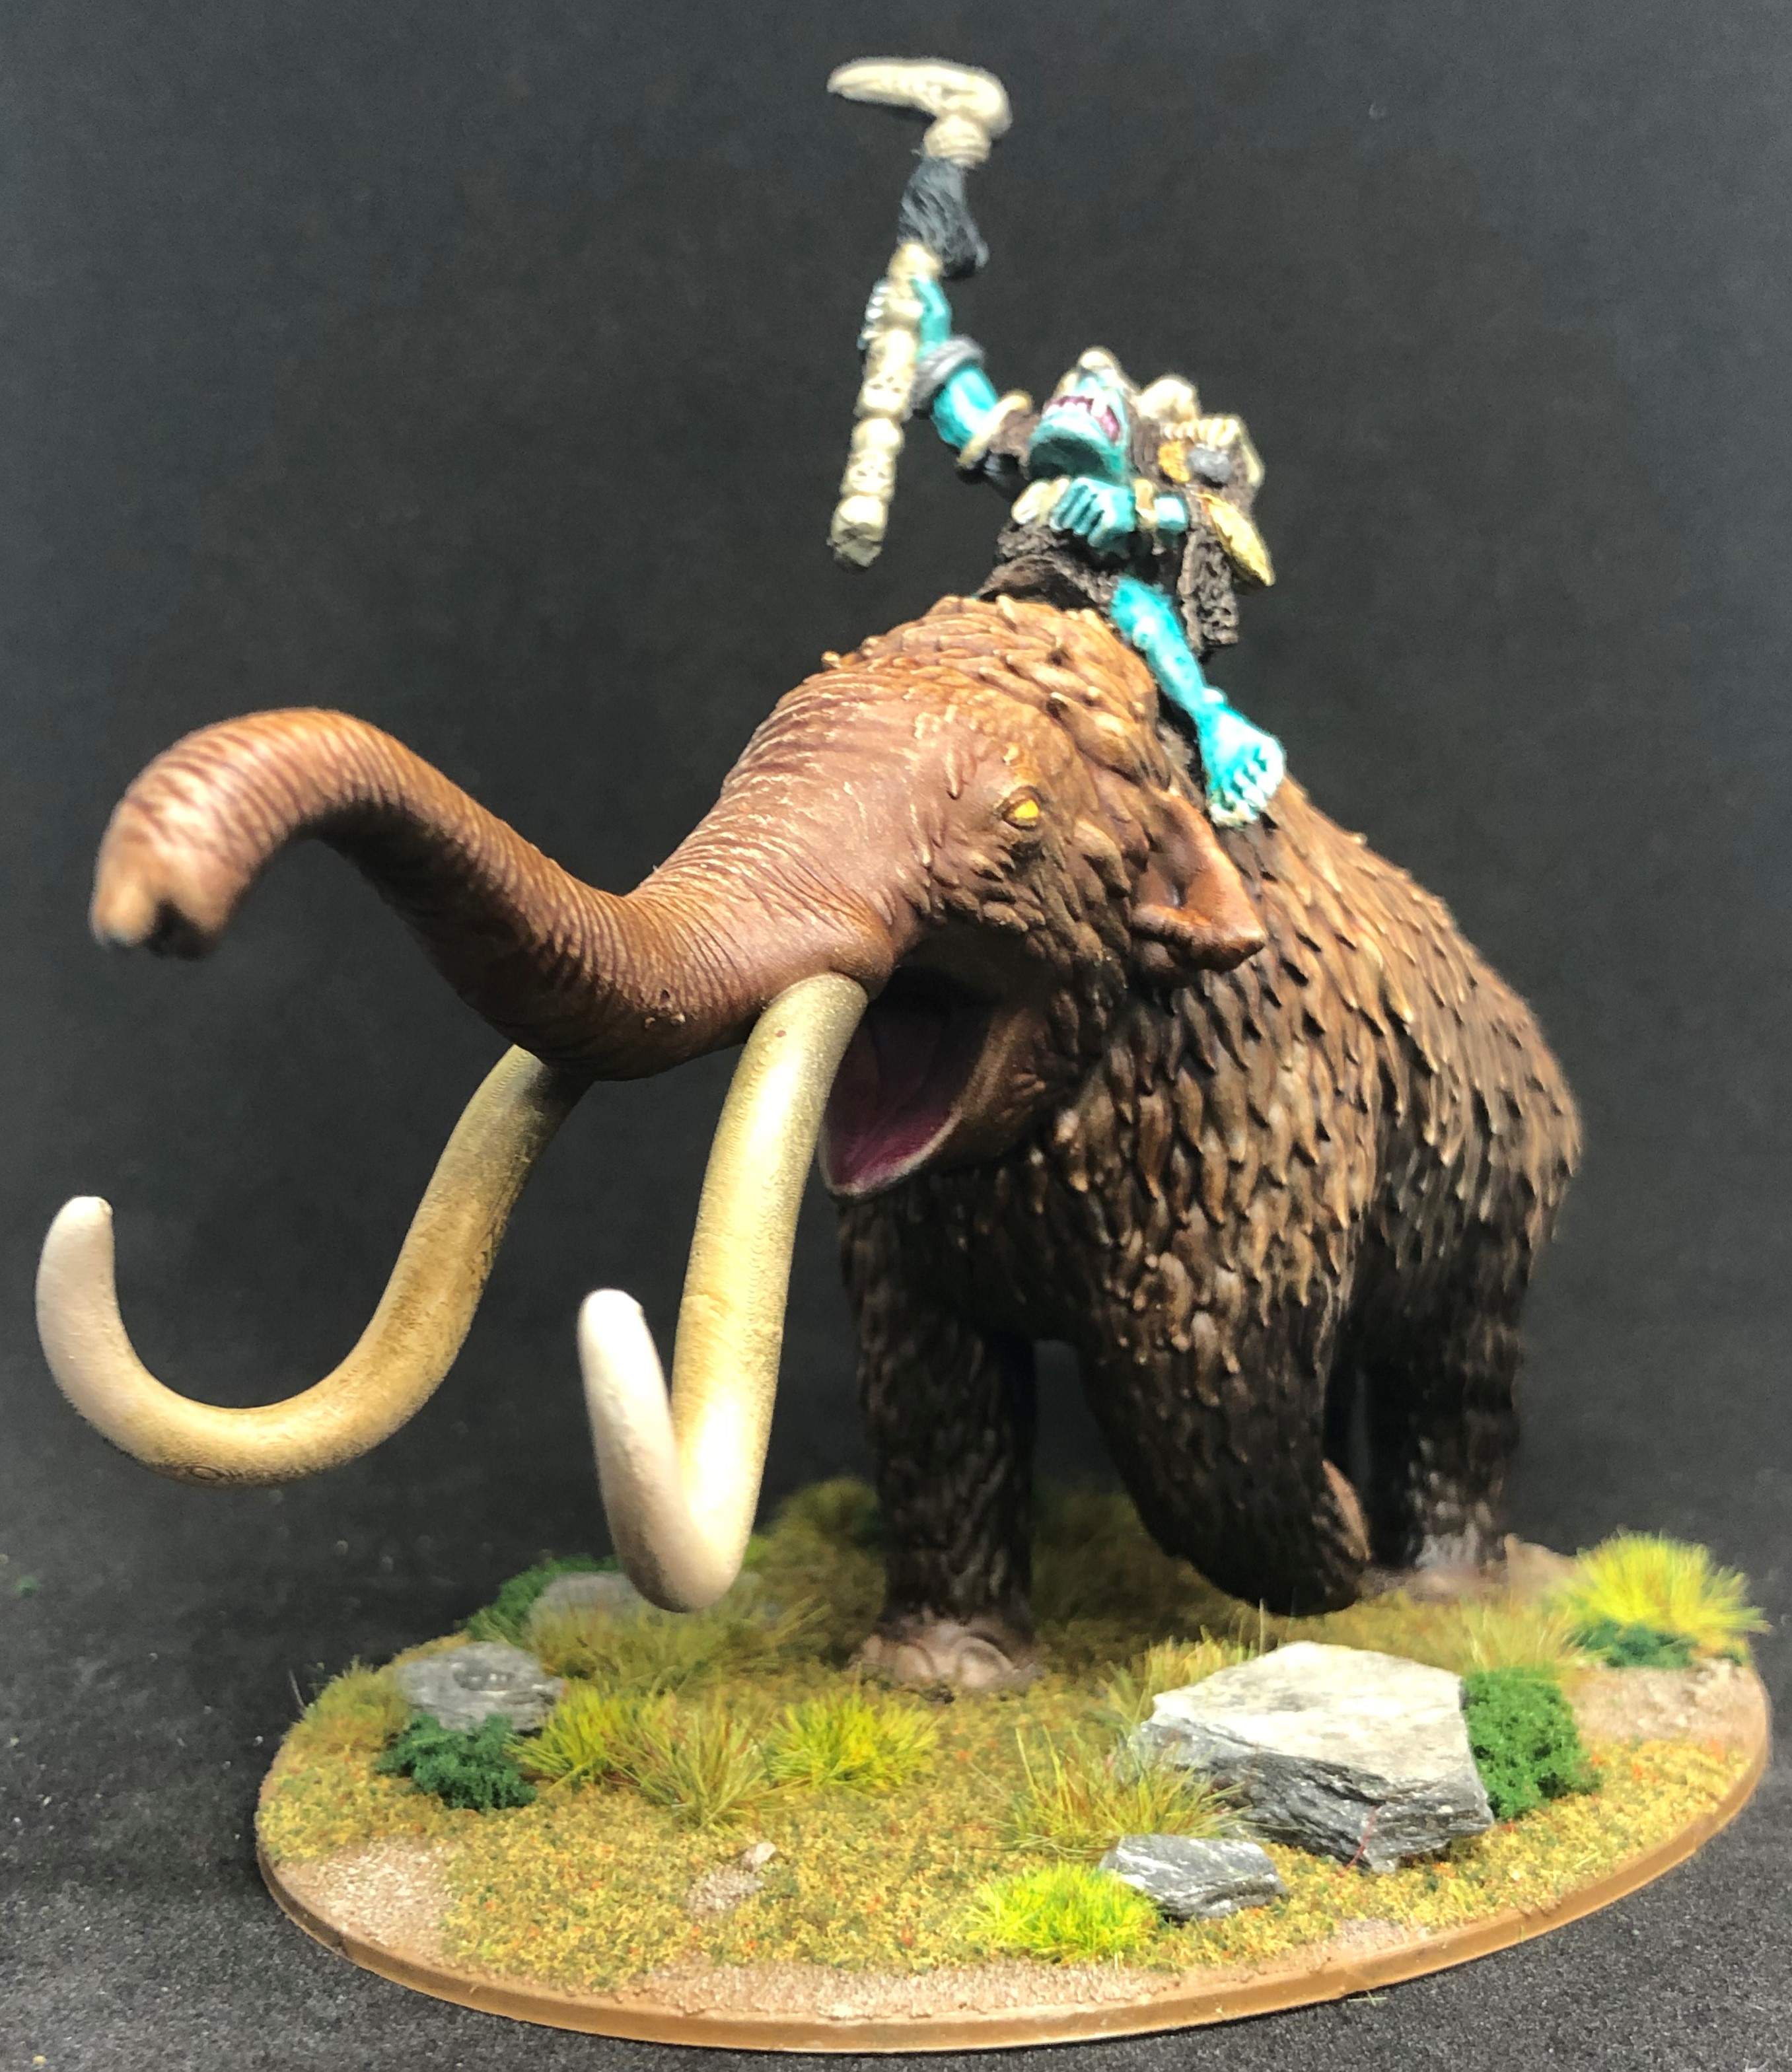
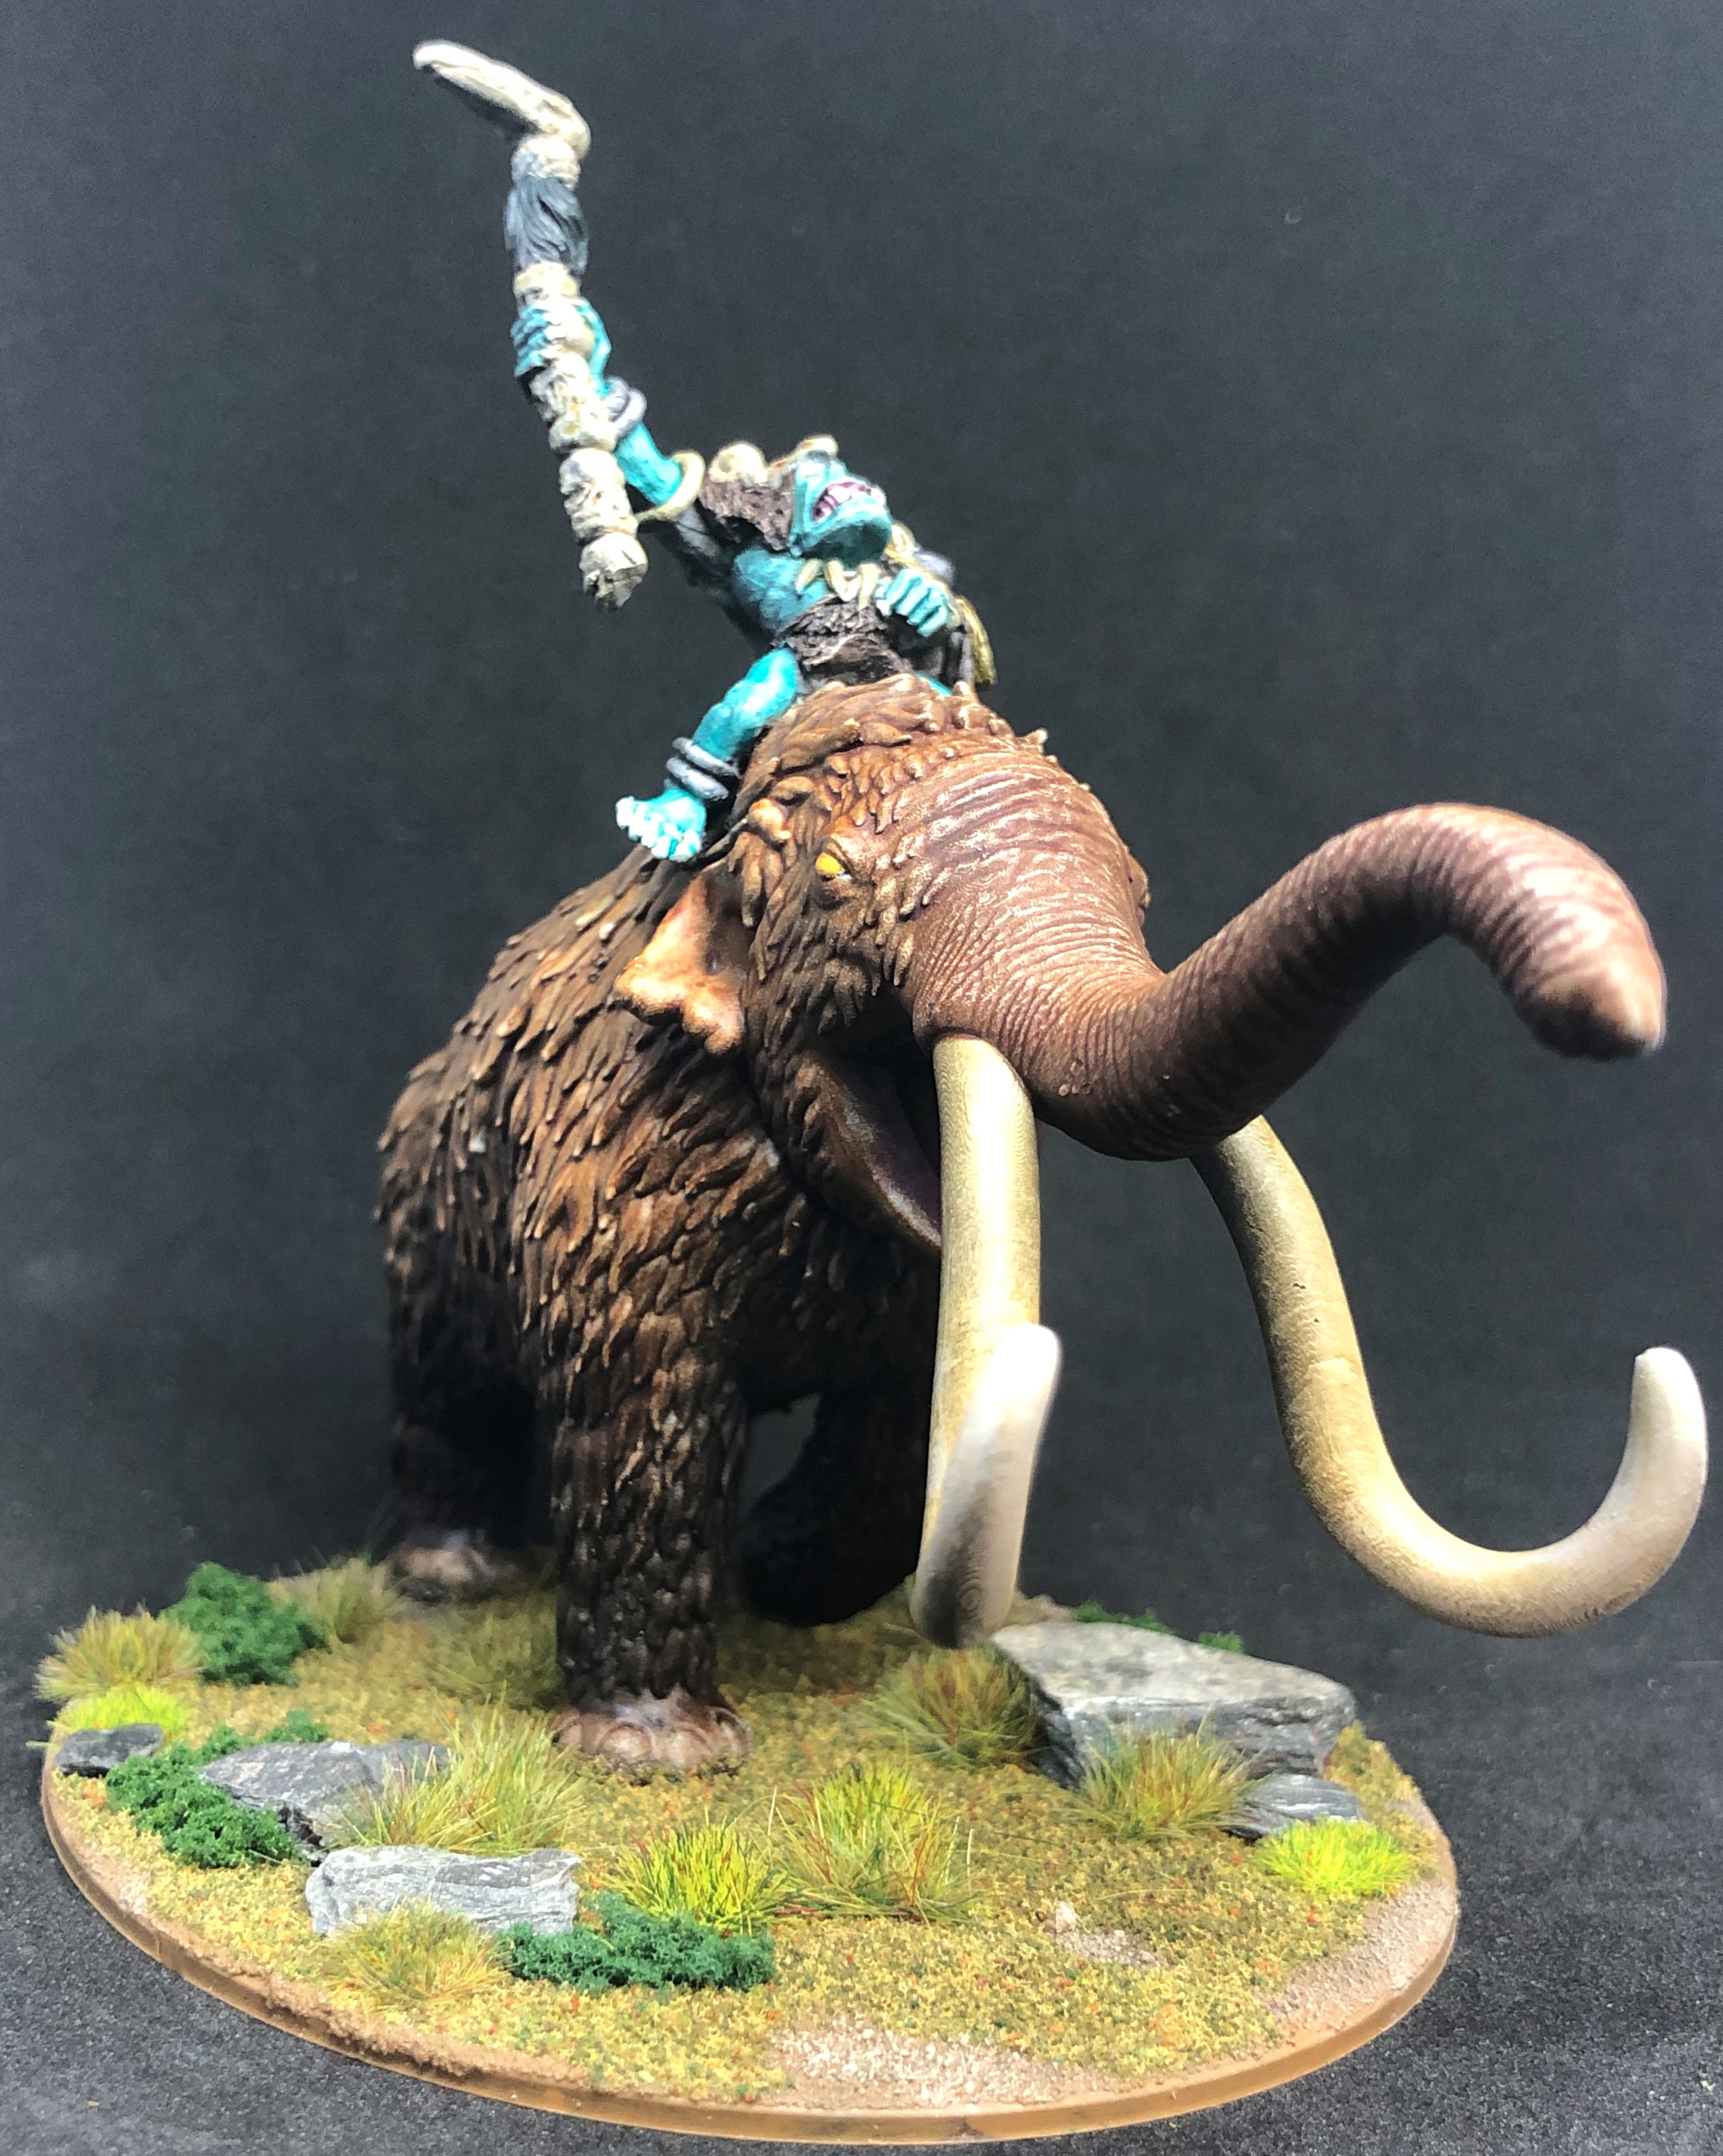
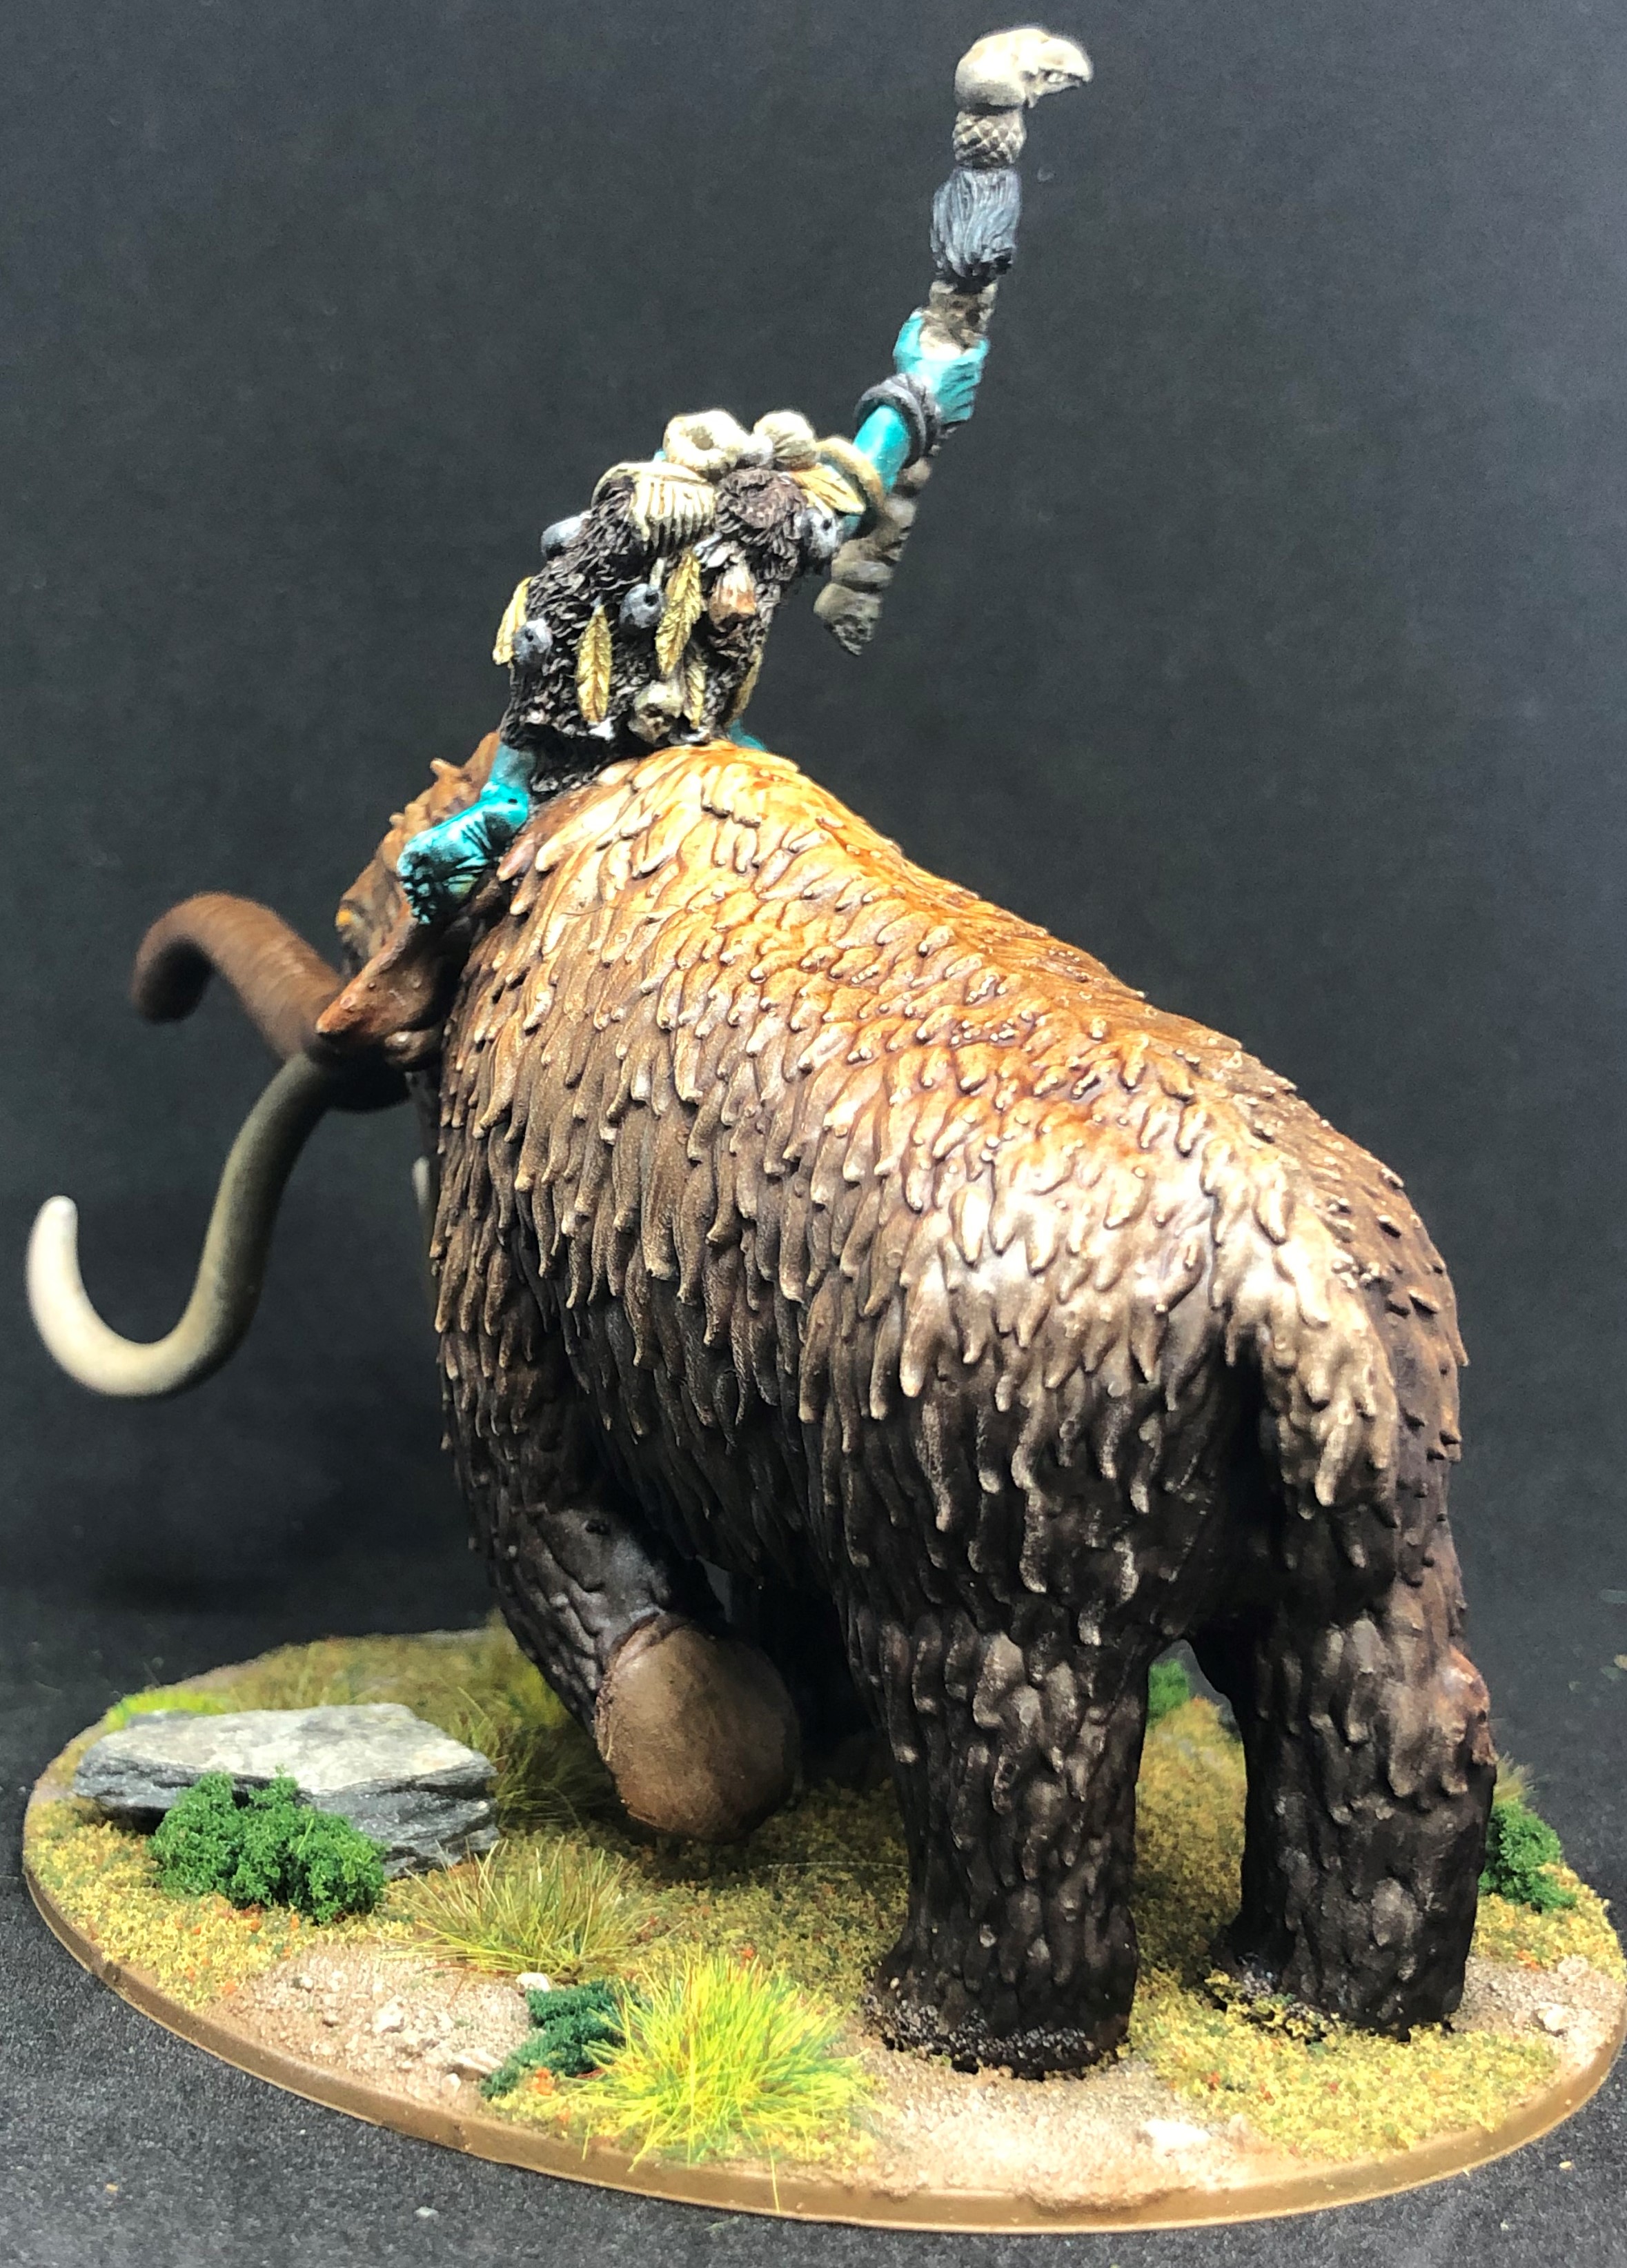
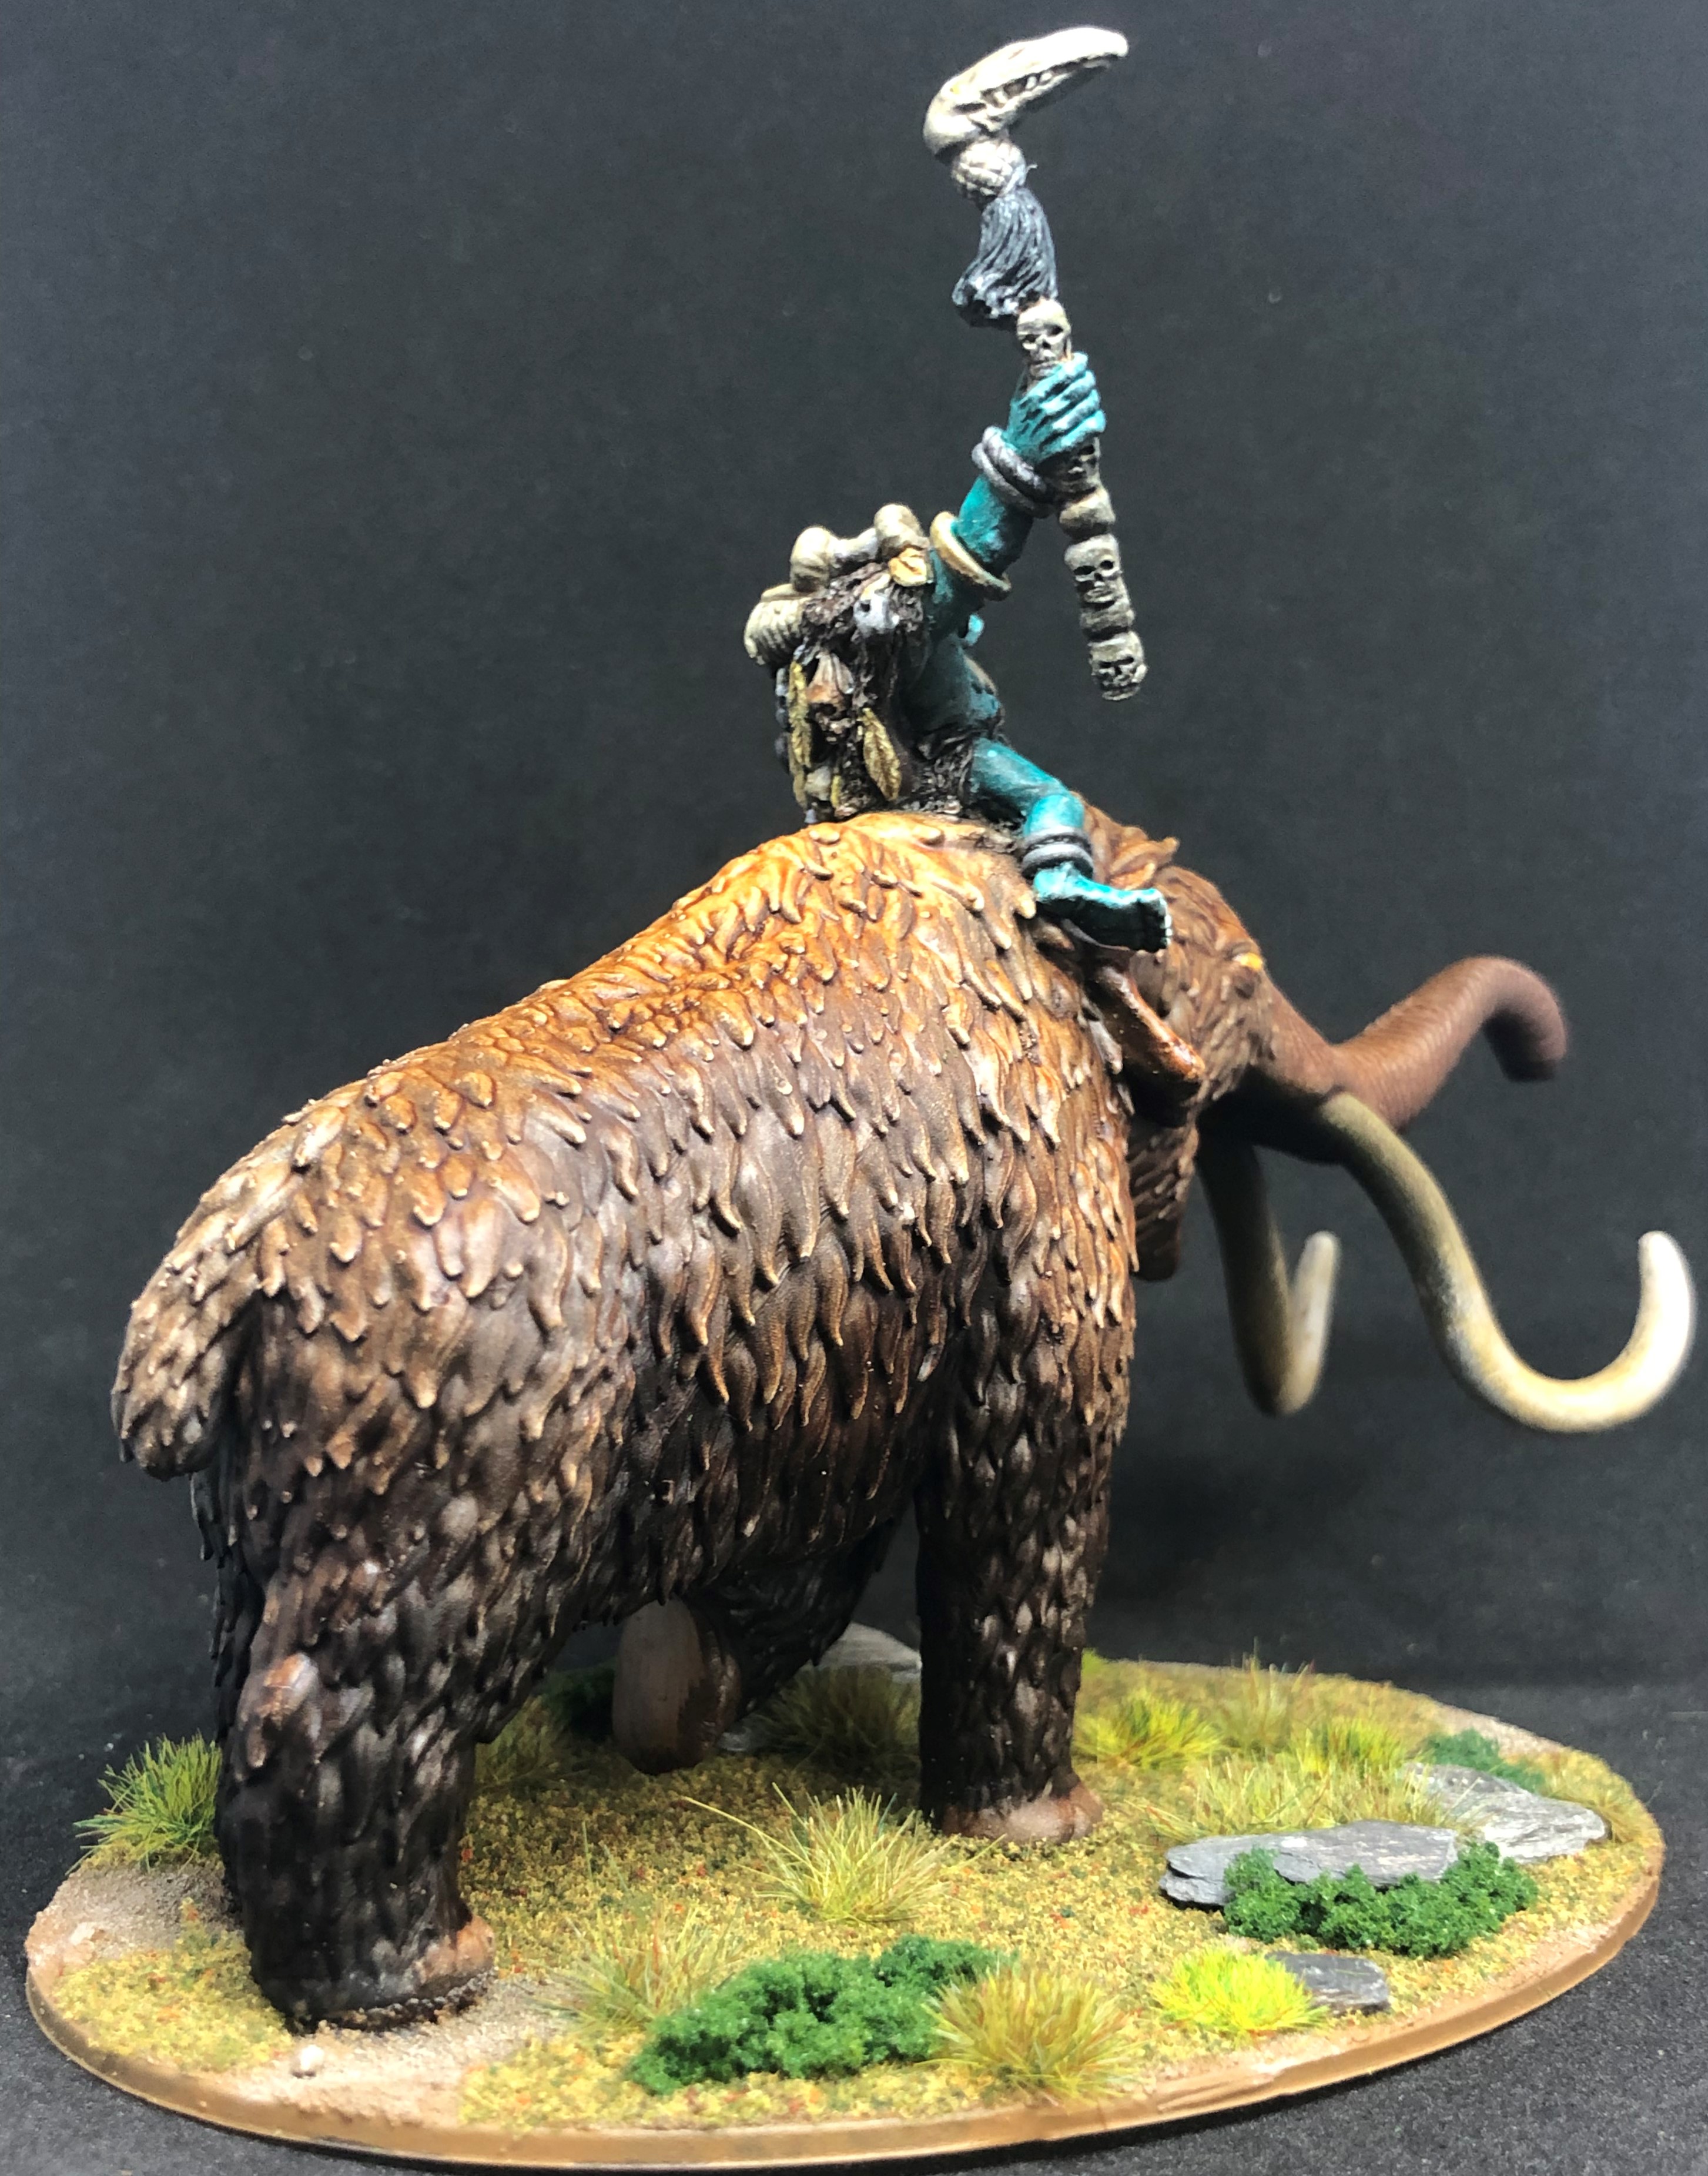
Fomorian mammoth
Each of my forces is being expanded by the addition of a big thing. Not in the rules but very evident in the graphic novels and hopefully this will work at the slightly expanded scale I’m planning on playing the game at. The Earth Tribes will get Slaine’s war chariot and the Drunes a sky ship.
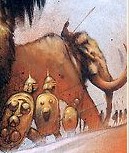
First up then the Fomorians with a mammoth. Here’s the art that inspired this choice:

The mammoth is a combination of a 3D print acquired at the Legionary show in Exeter last month and a Citadel Savage Orc shaman from eBay. I wanted a model with widely splayed legs holding something up vertically and this one fit the bill.
A bit of Greenstuff to cover the hole in the raised foot,green stuff a slight gap between rider and beast and a massive base and we were ready for painting.
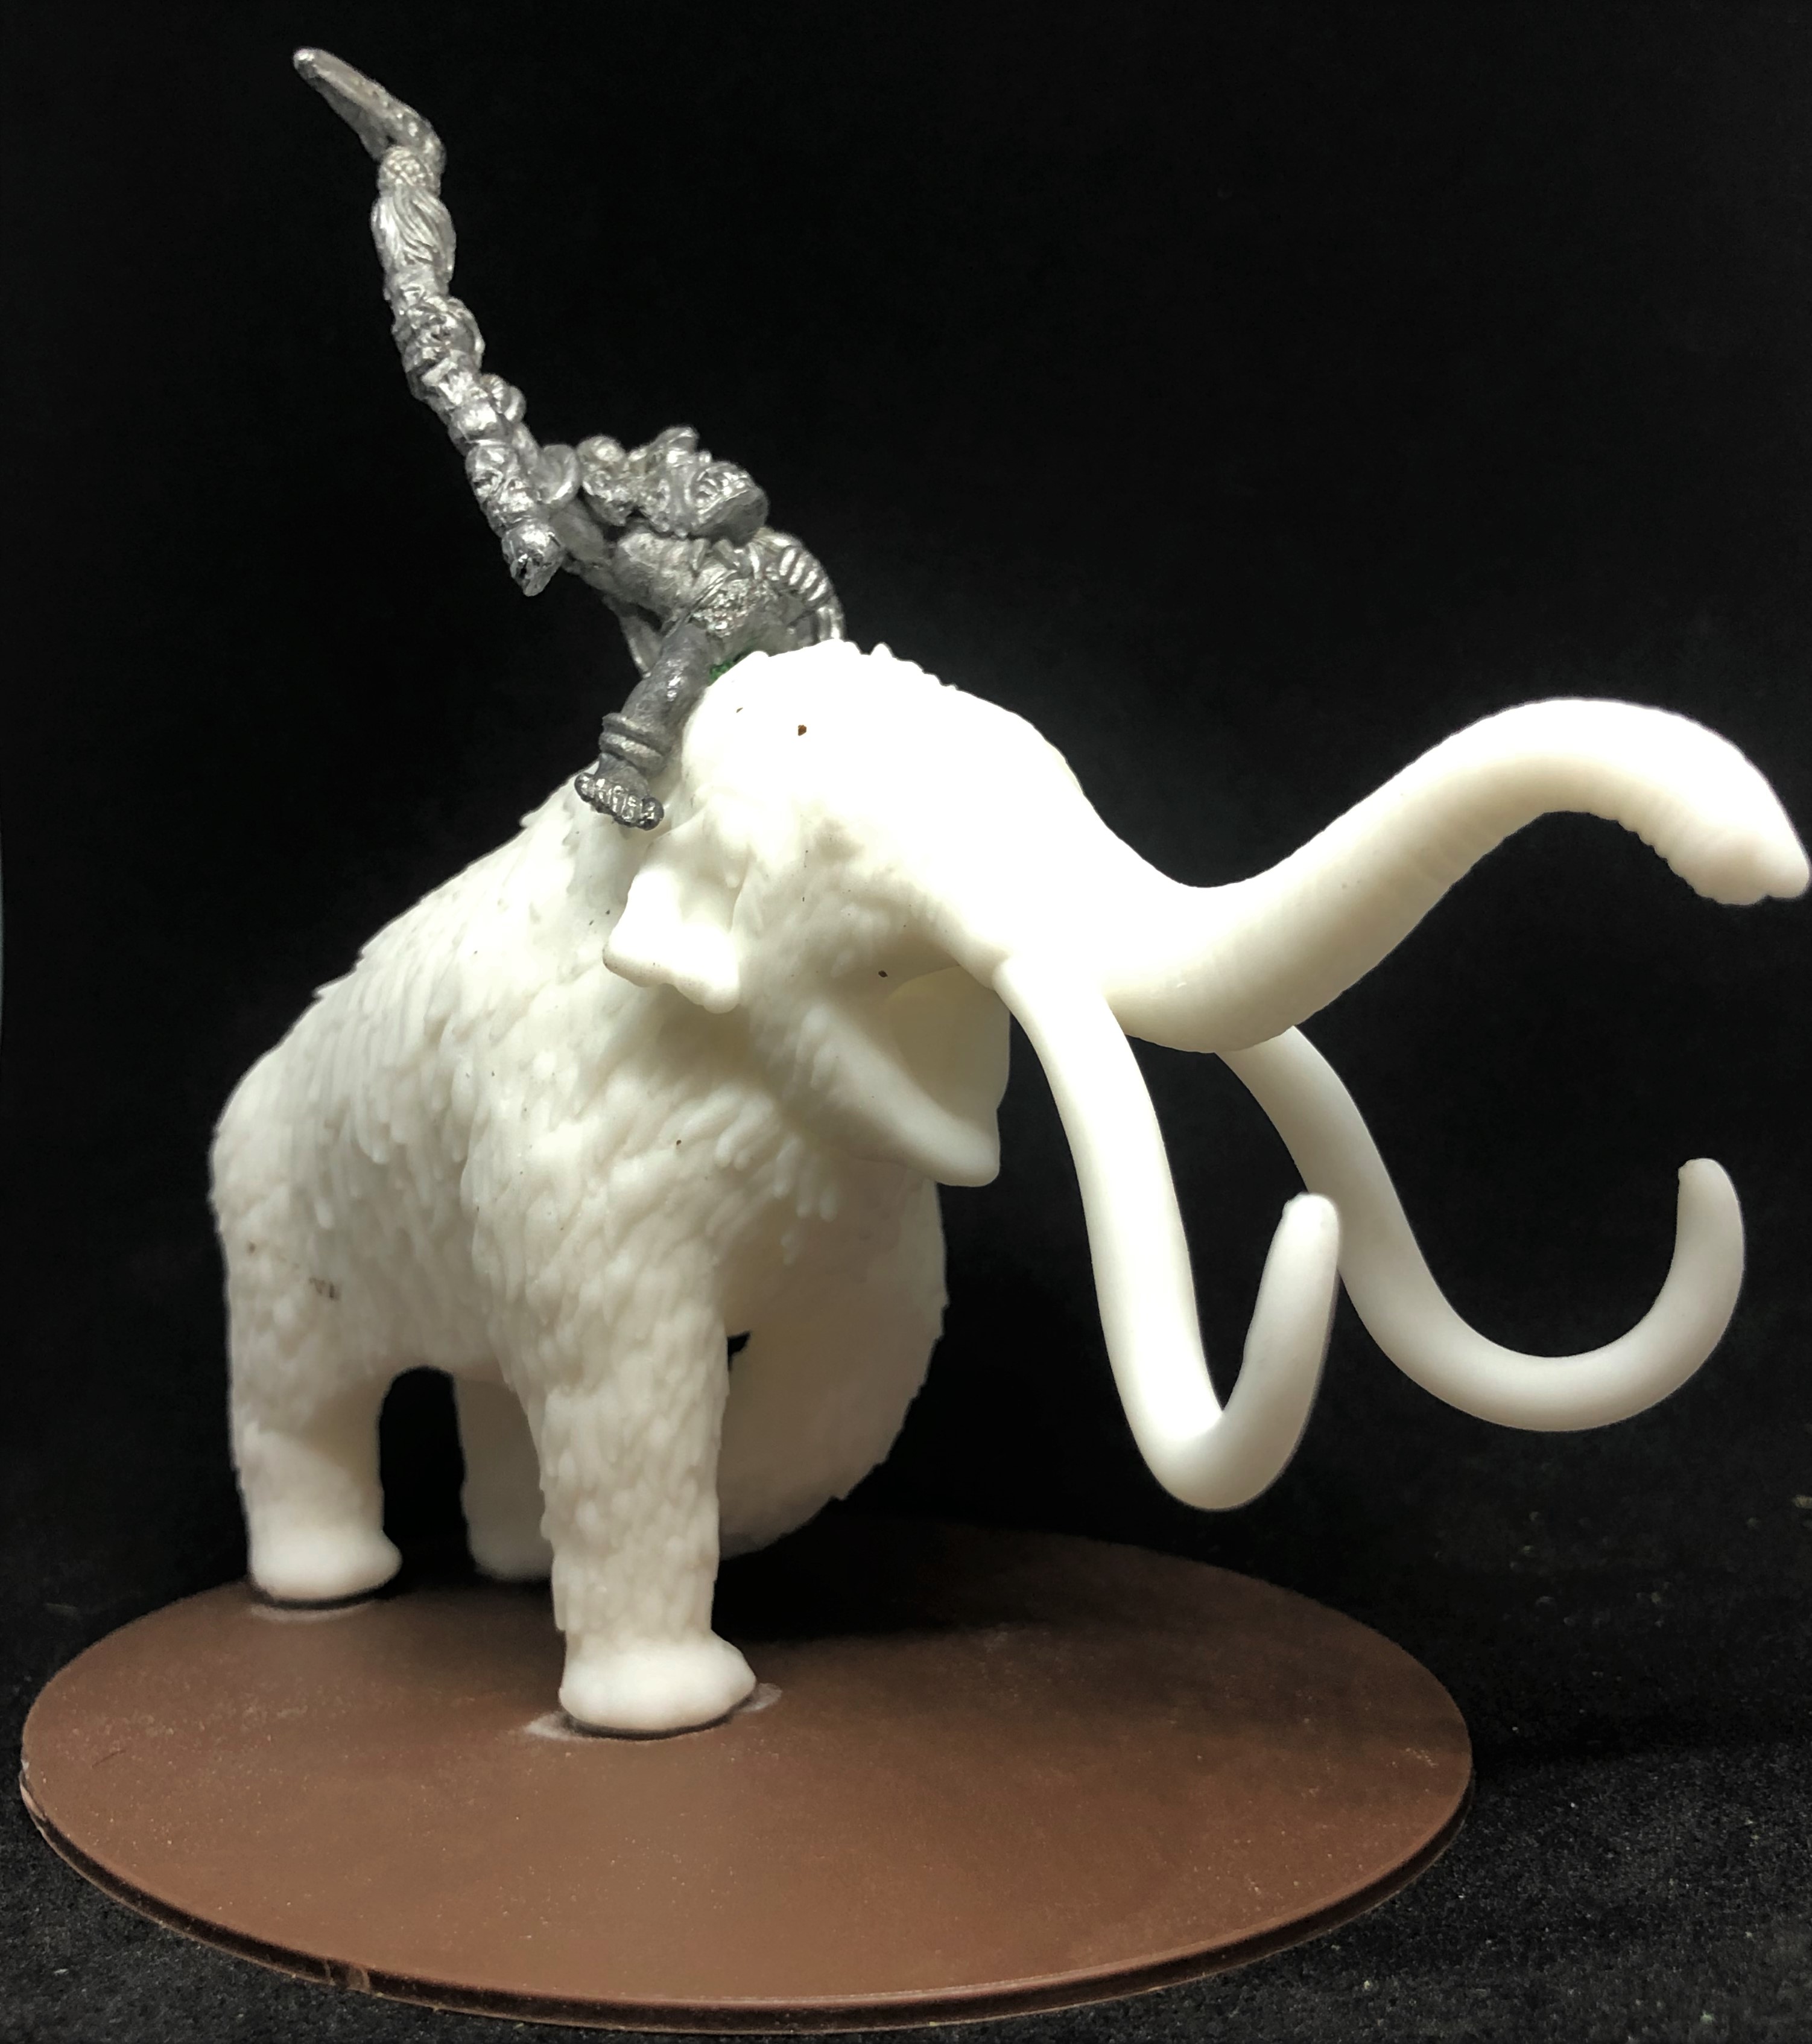
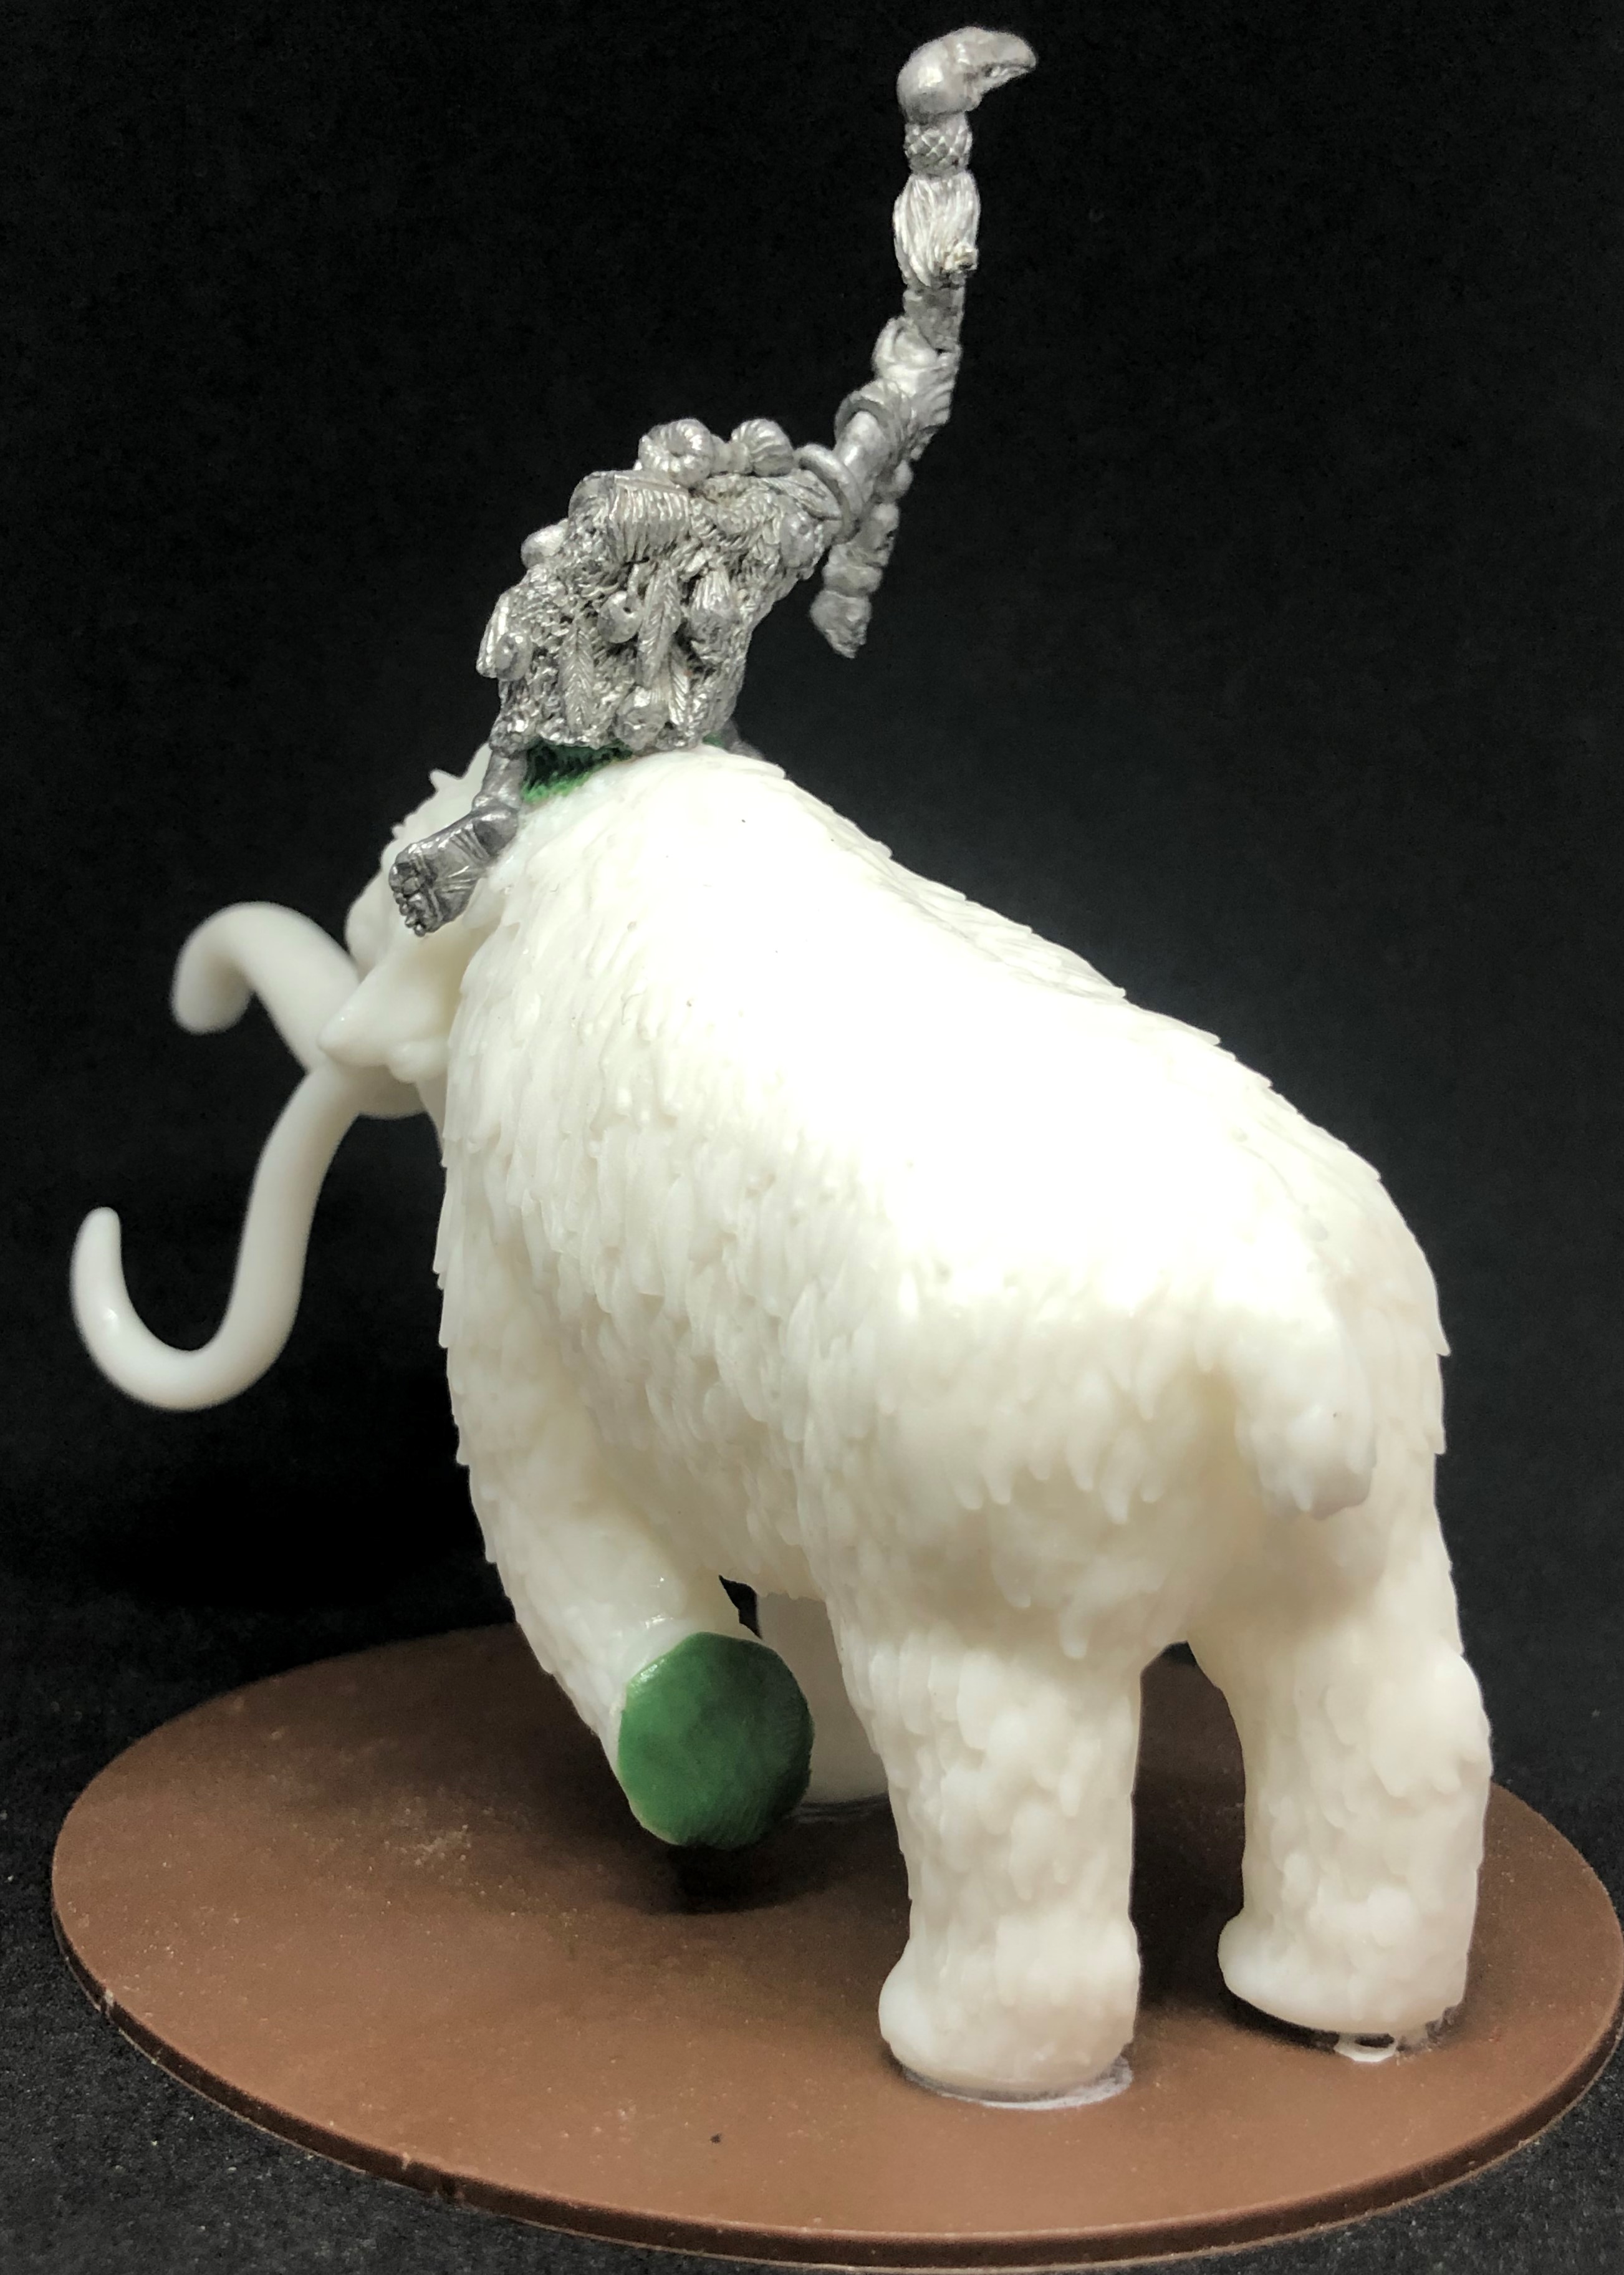
Mammoth was painted in the same way as the ombre graduated wet-blend I used on Slough Feg. The mammoth started darker with neat Dark Wood on the underside and inside lower legs; blending into Hardened Leather to about 2/3 of the way up, and the trunk; then Sand Golem mixed in until it was virtually neat Sand Golem across the forehead and down the spine. Tusks were Palid Bone and then decreasingly heavy dry brush coats of Dheneb Stone, Bone White and Ivory focusing increasingly on the ends and upper portions until the last colour was just on the very tips.
Fomorian was painted the same as the others although the feathers on the cloak were Zealot Yellow with a dry-brush of Vallejo Flat Yellow.
Alternative Armies Fomorians
Alternative Armies had a very good offer on their Erin models before Easter and Gavin was very helpful in sorting out the best deal. They even threw in a free skull pile. Great delivery turnaround too. Highly recommended.
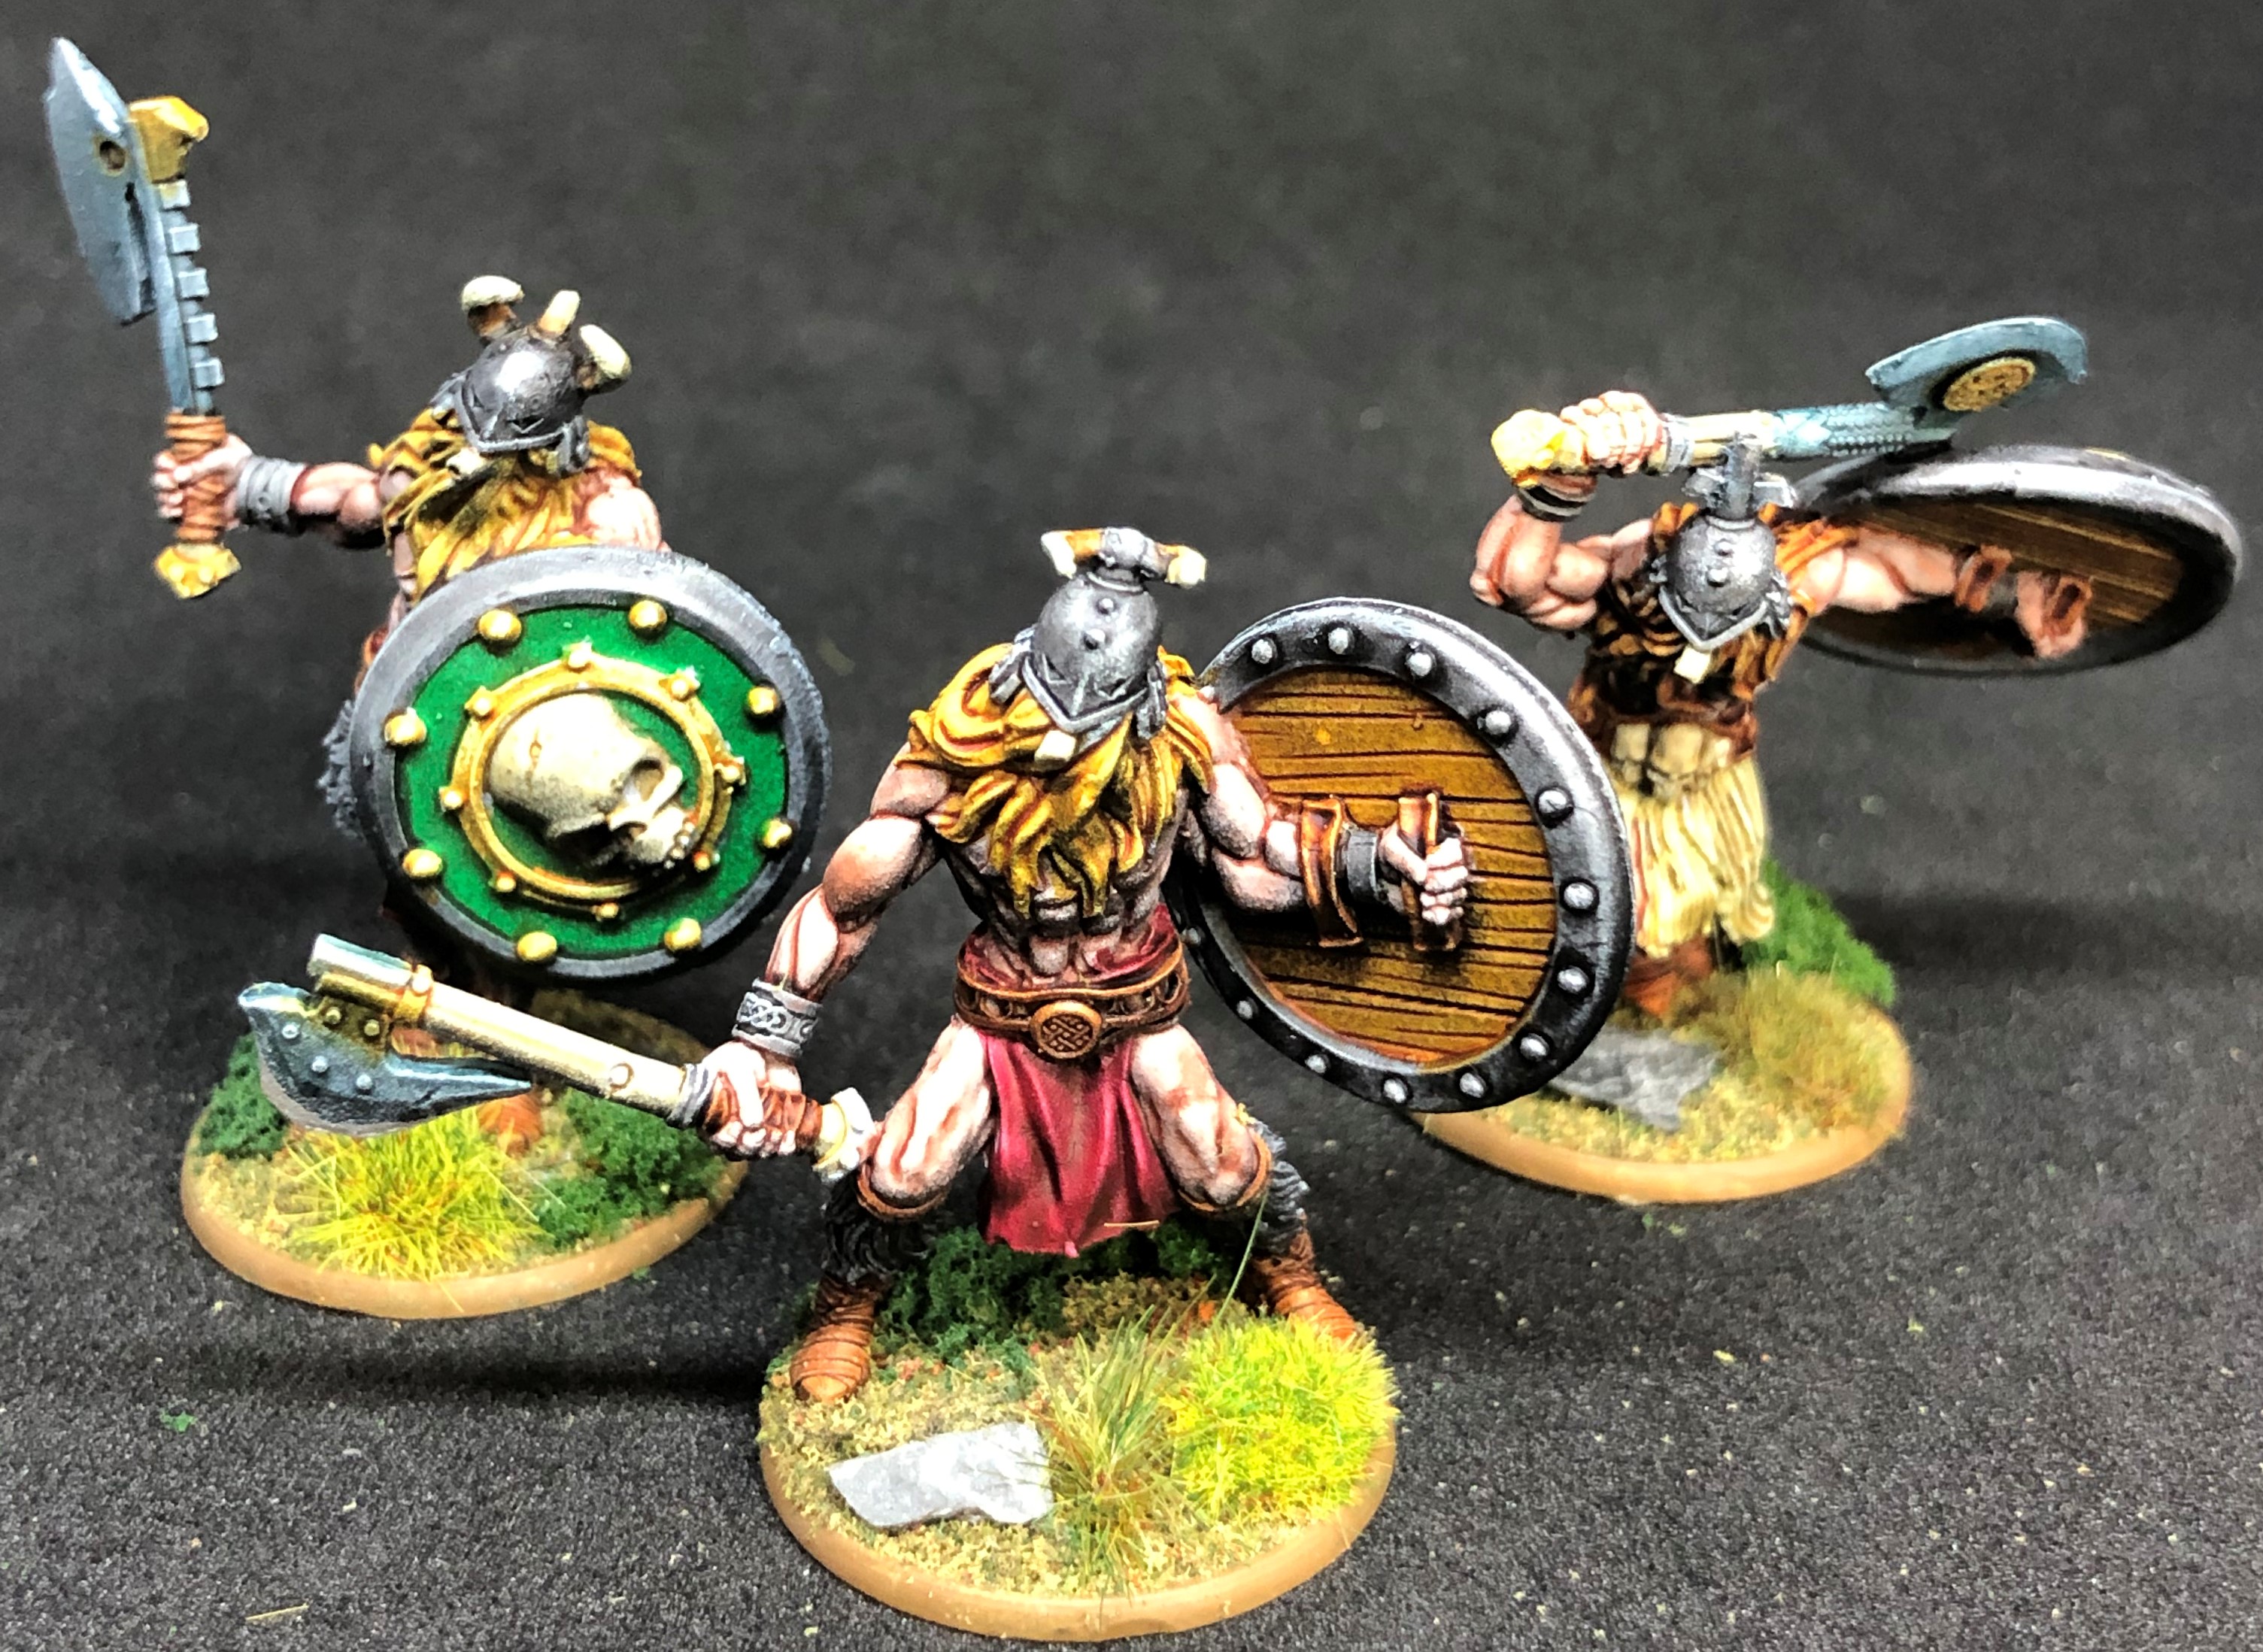
I overindulged somewhat, getting Fir Bolg, Sidhe and Fomorians. I’ve painted the latter now and baring some extra bases that will arrive Monday I’m done. They are painted with Plasmatic Bolt in the way I described in the original Fomorian entry earlier in this project. The NMM bronze effect on the shields and armour panels is a mix of Palid bone, Dark Wood and Speedpaint Medium. Verdigis is stippled Nihilakh Oxide Citadel Technical paint with the upper surfaces wiped back to the bronze tone.
I’ve got a group of three with Spear and shield.
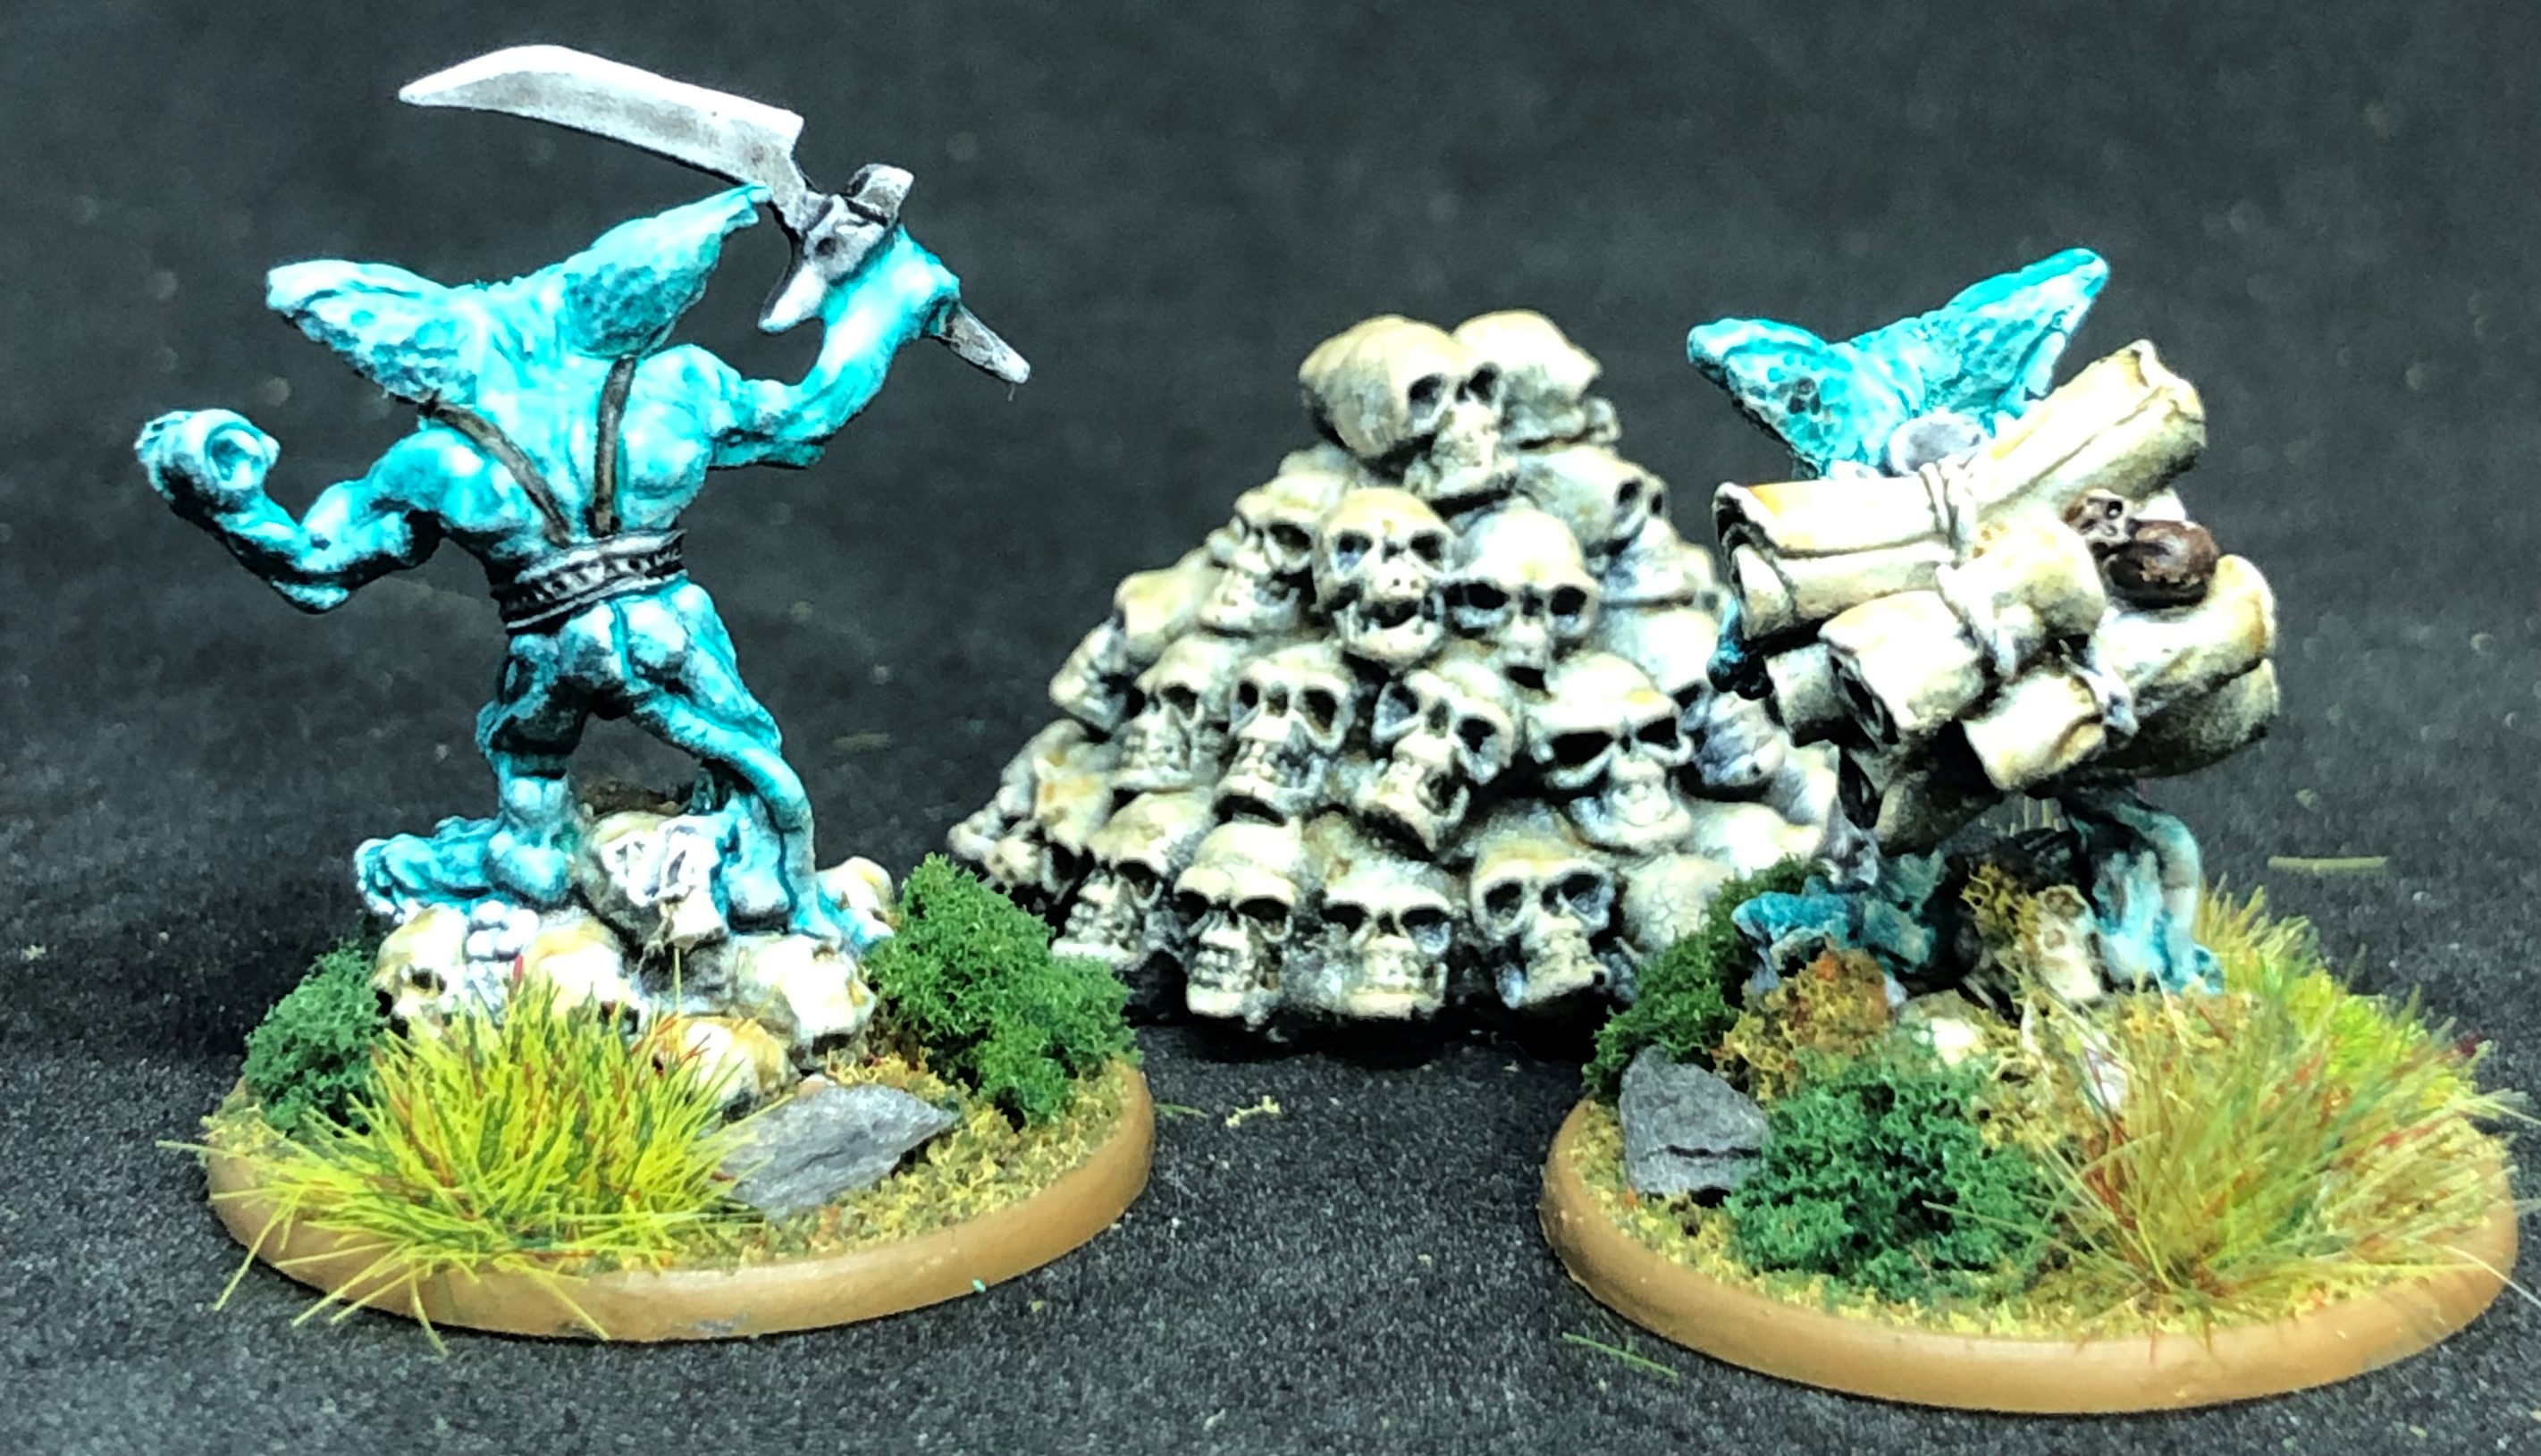
Two smaller Fomor called Pucci in the Erin range. These will make ideal companions to Fomorian characters in the same way as dwarves do for the human factions.
This is the skull pile I got as an extra gift from AA, thanks 🙂 Palid Bone then a drybrush of Citadel Foundation Dheneb Stone.
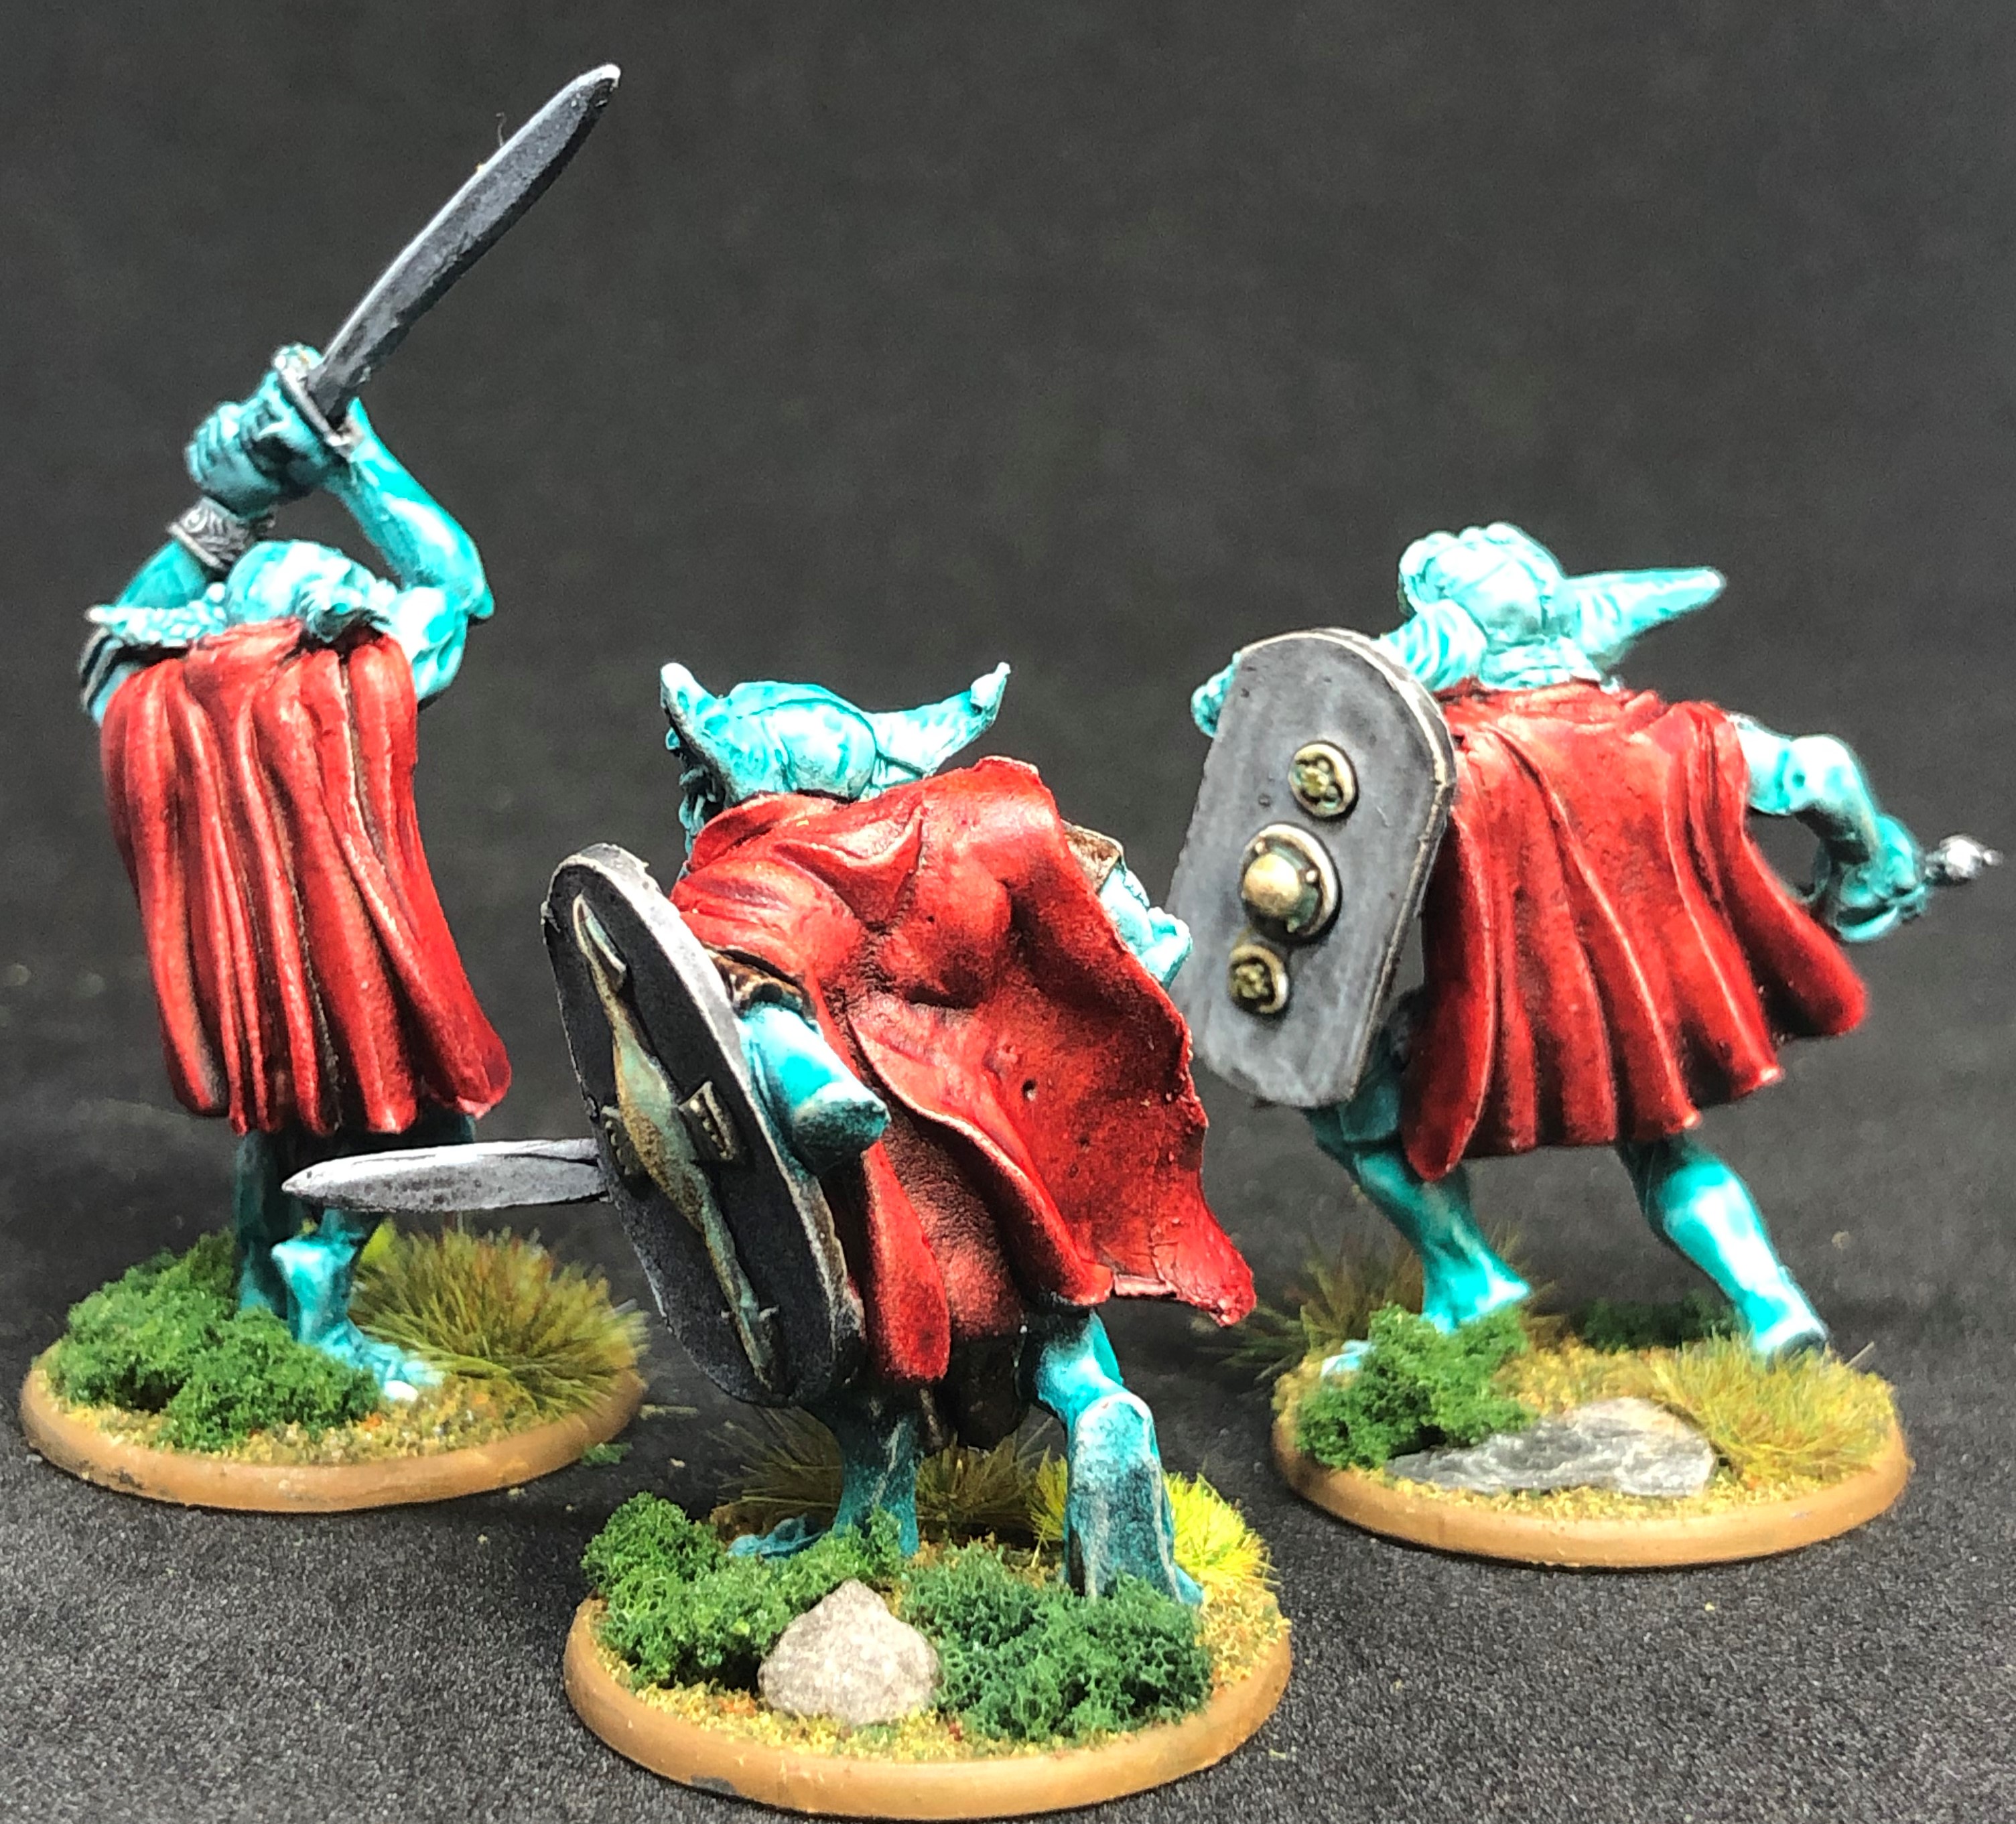
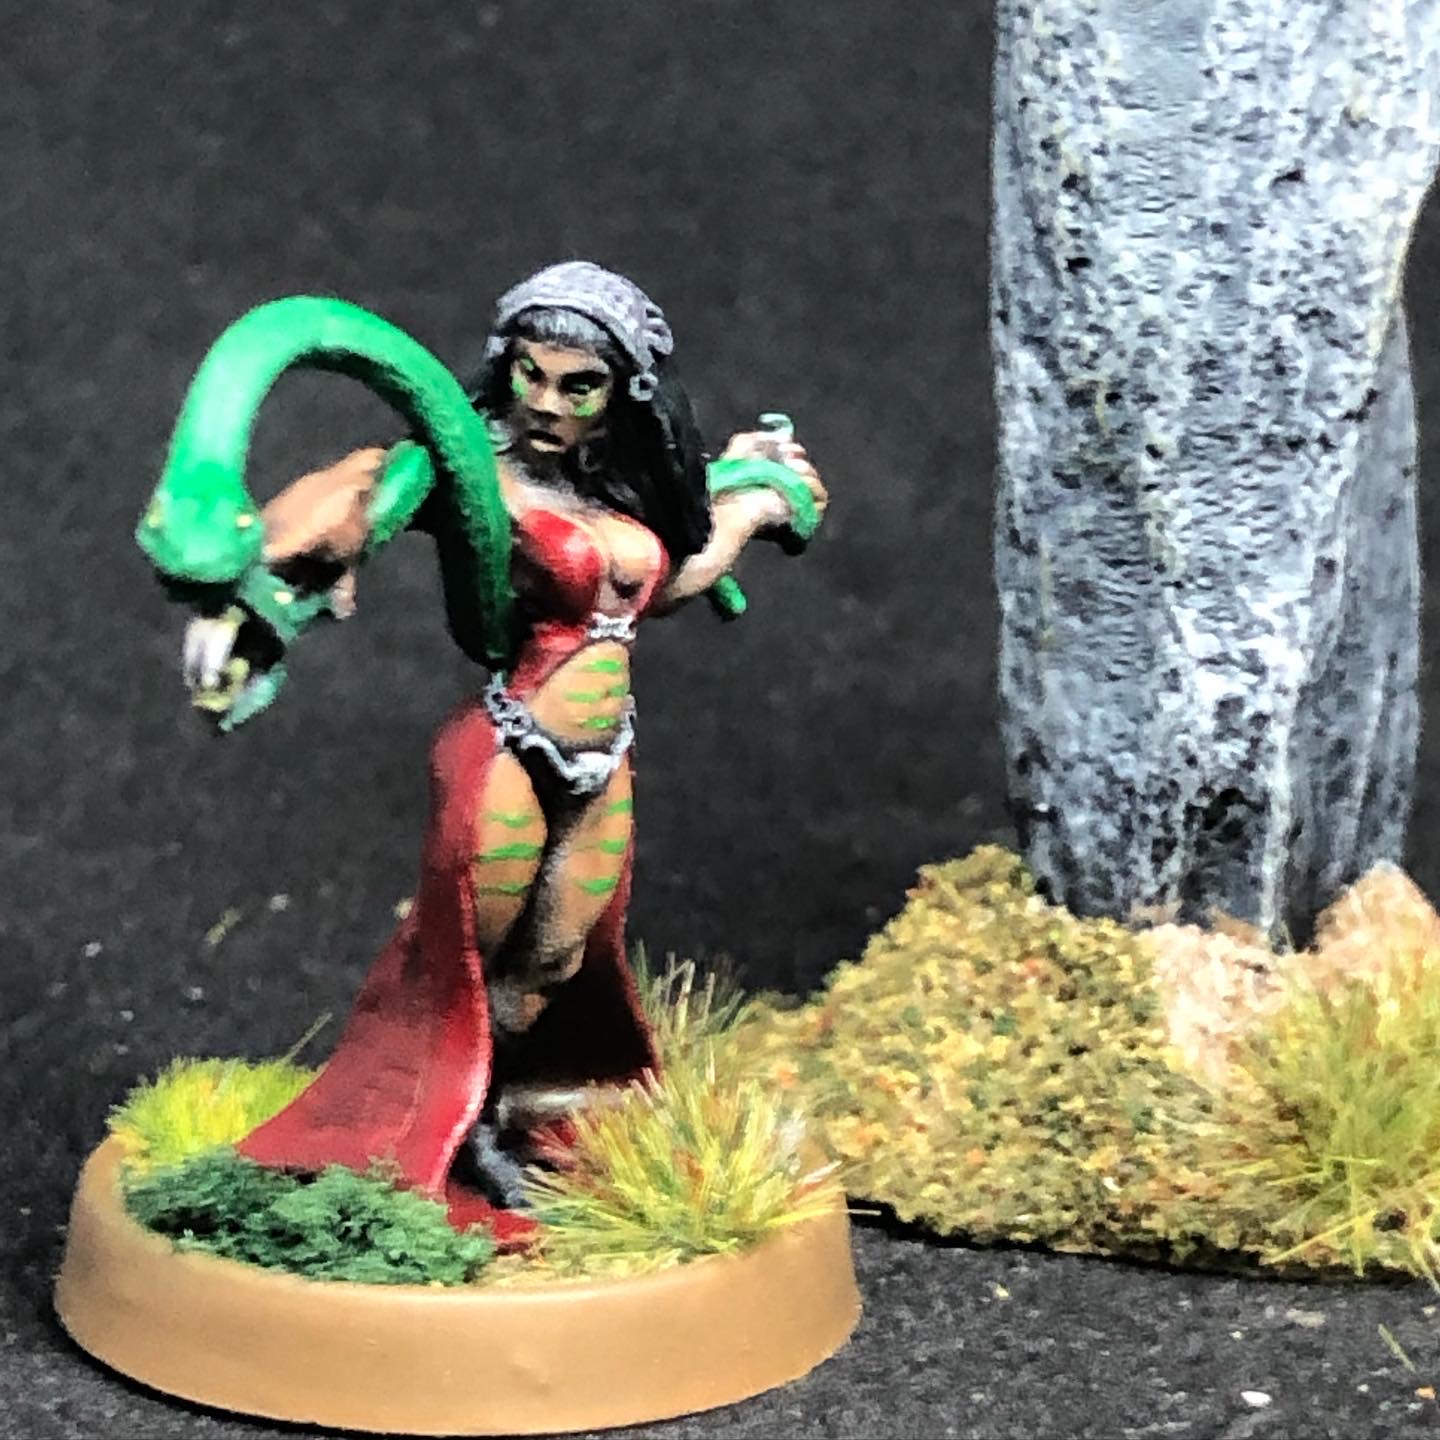
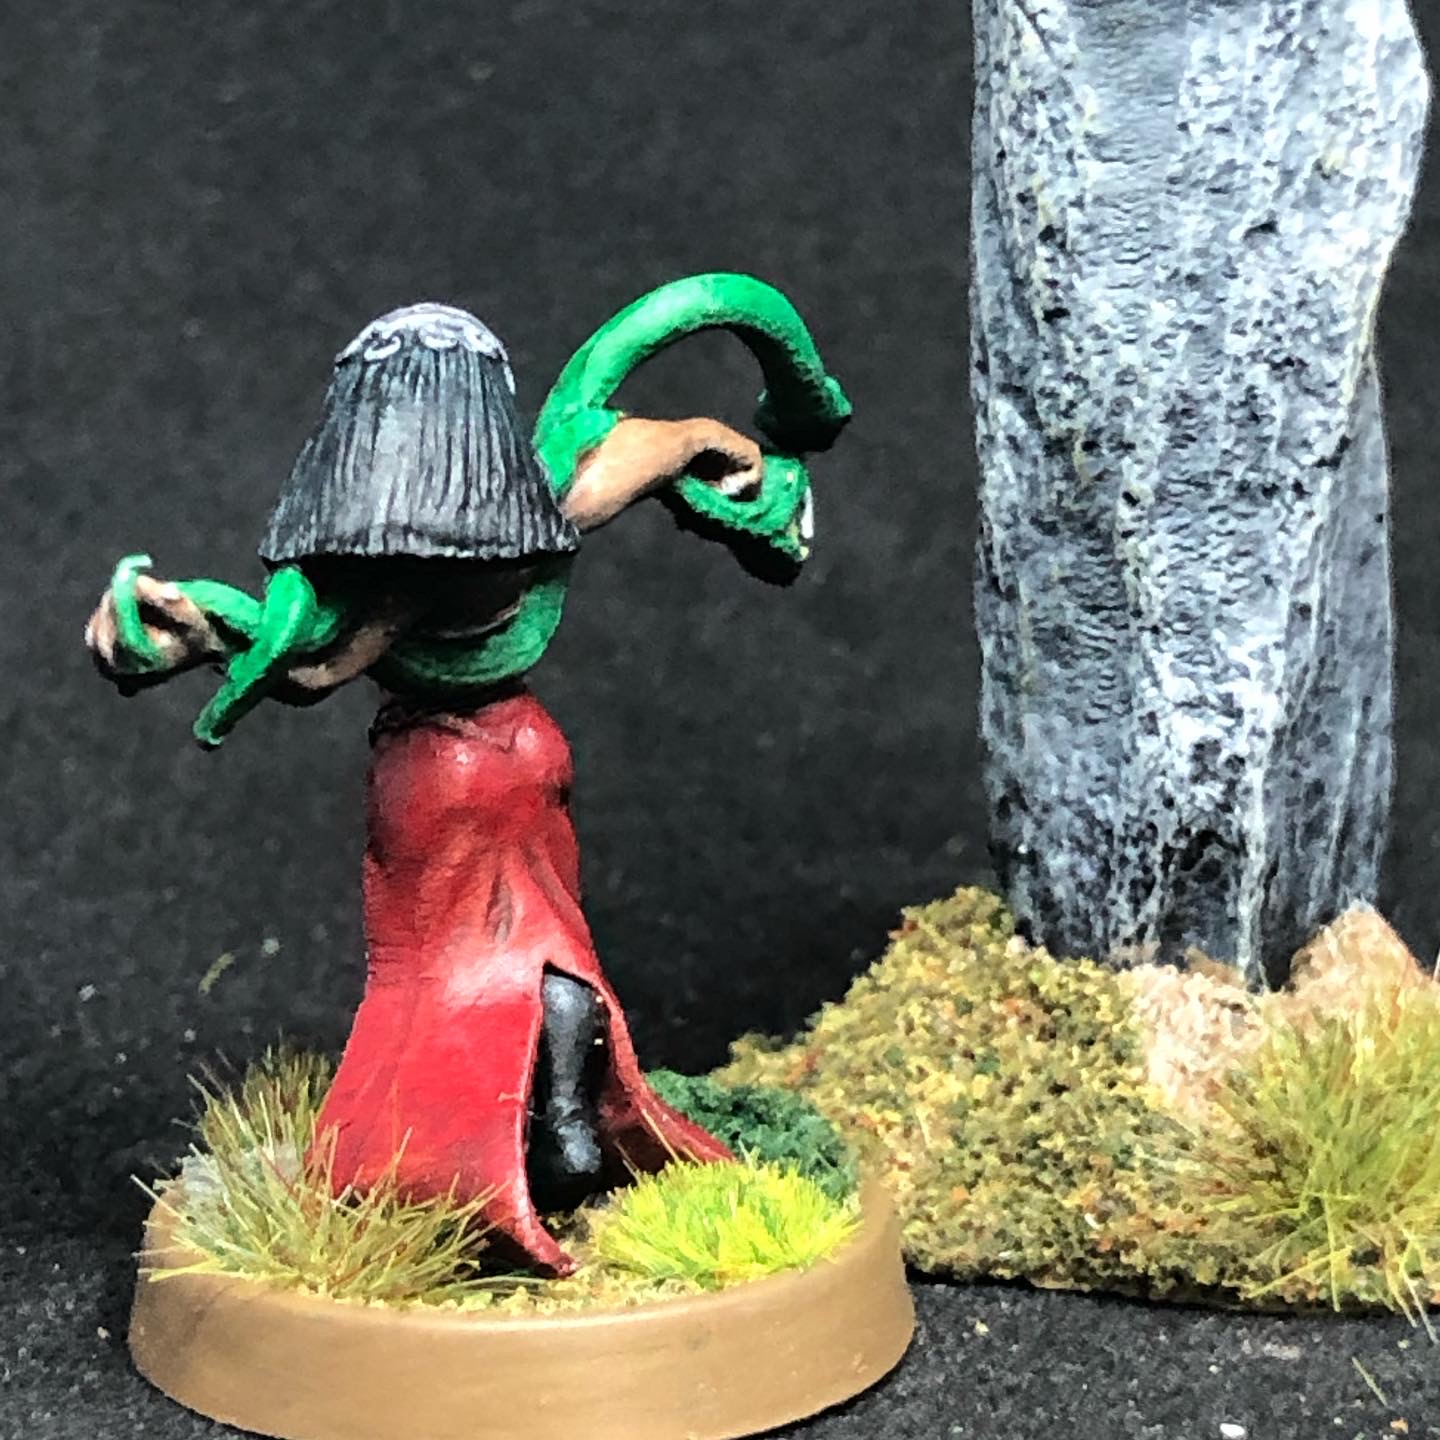
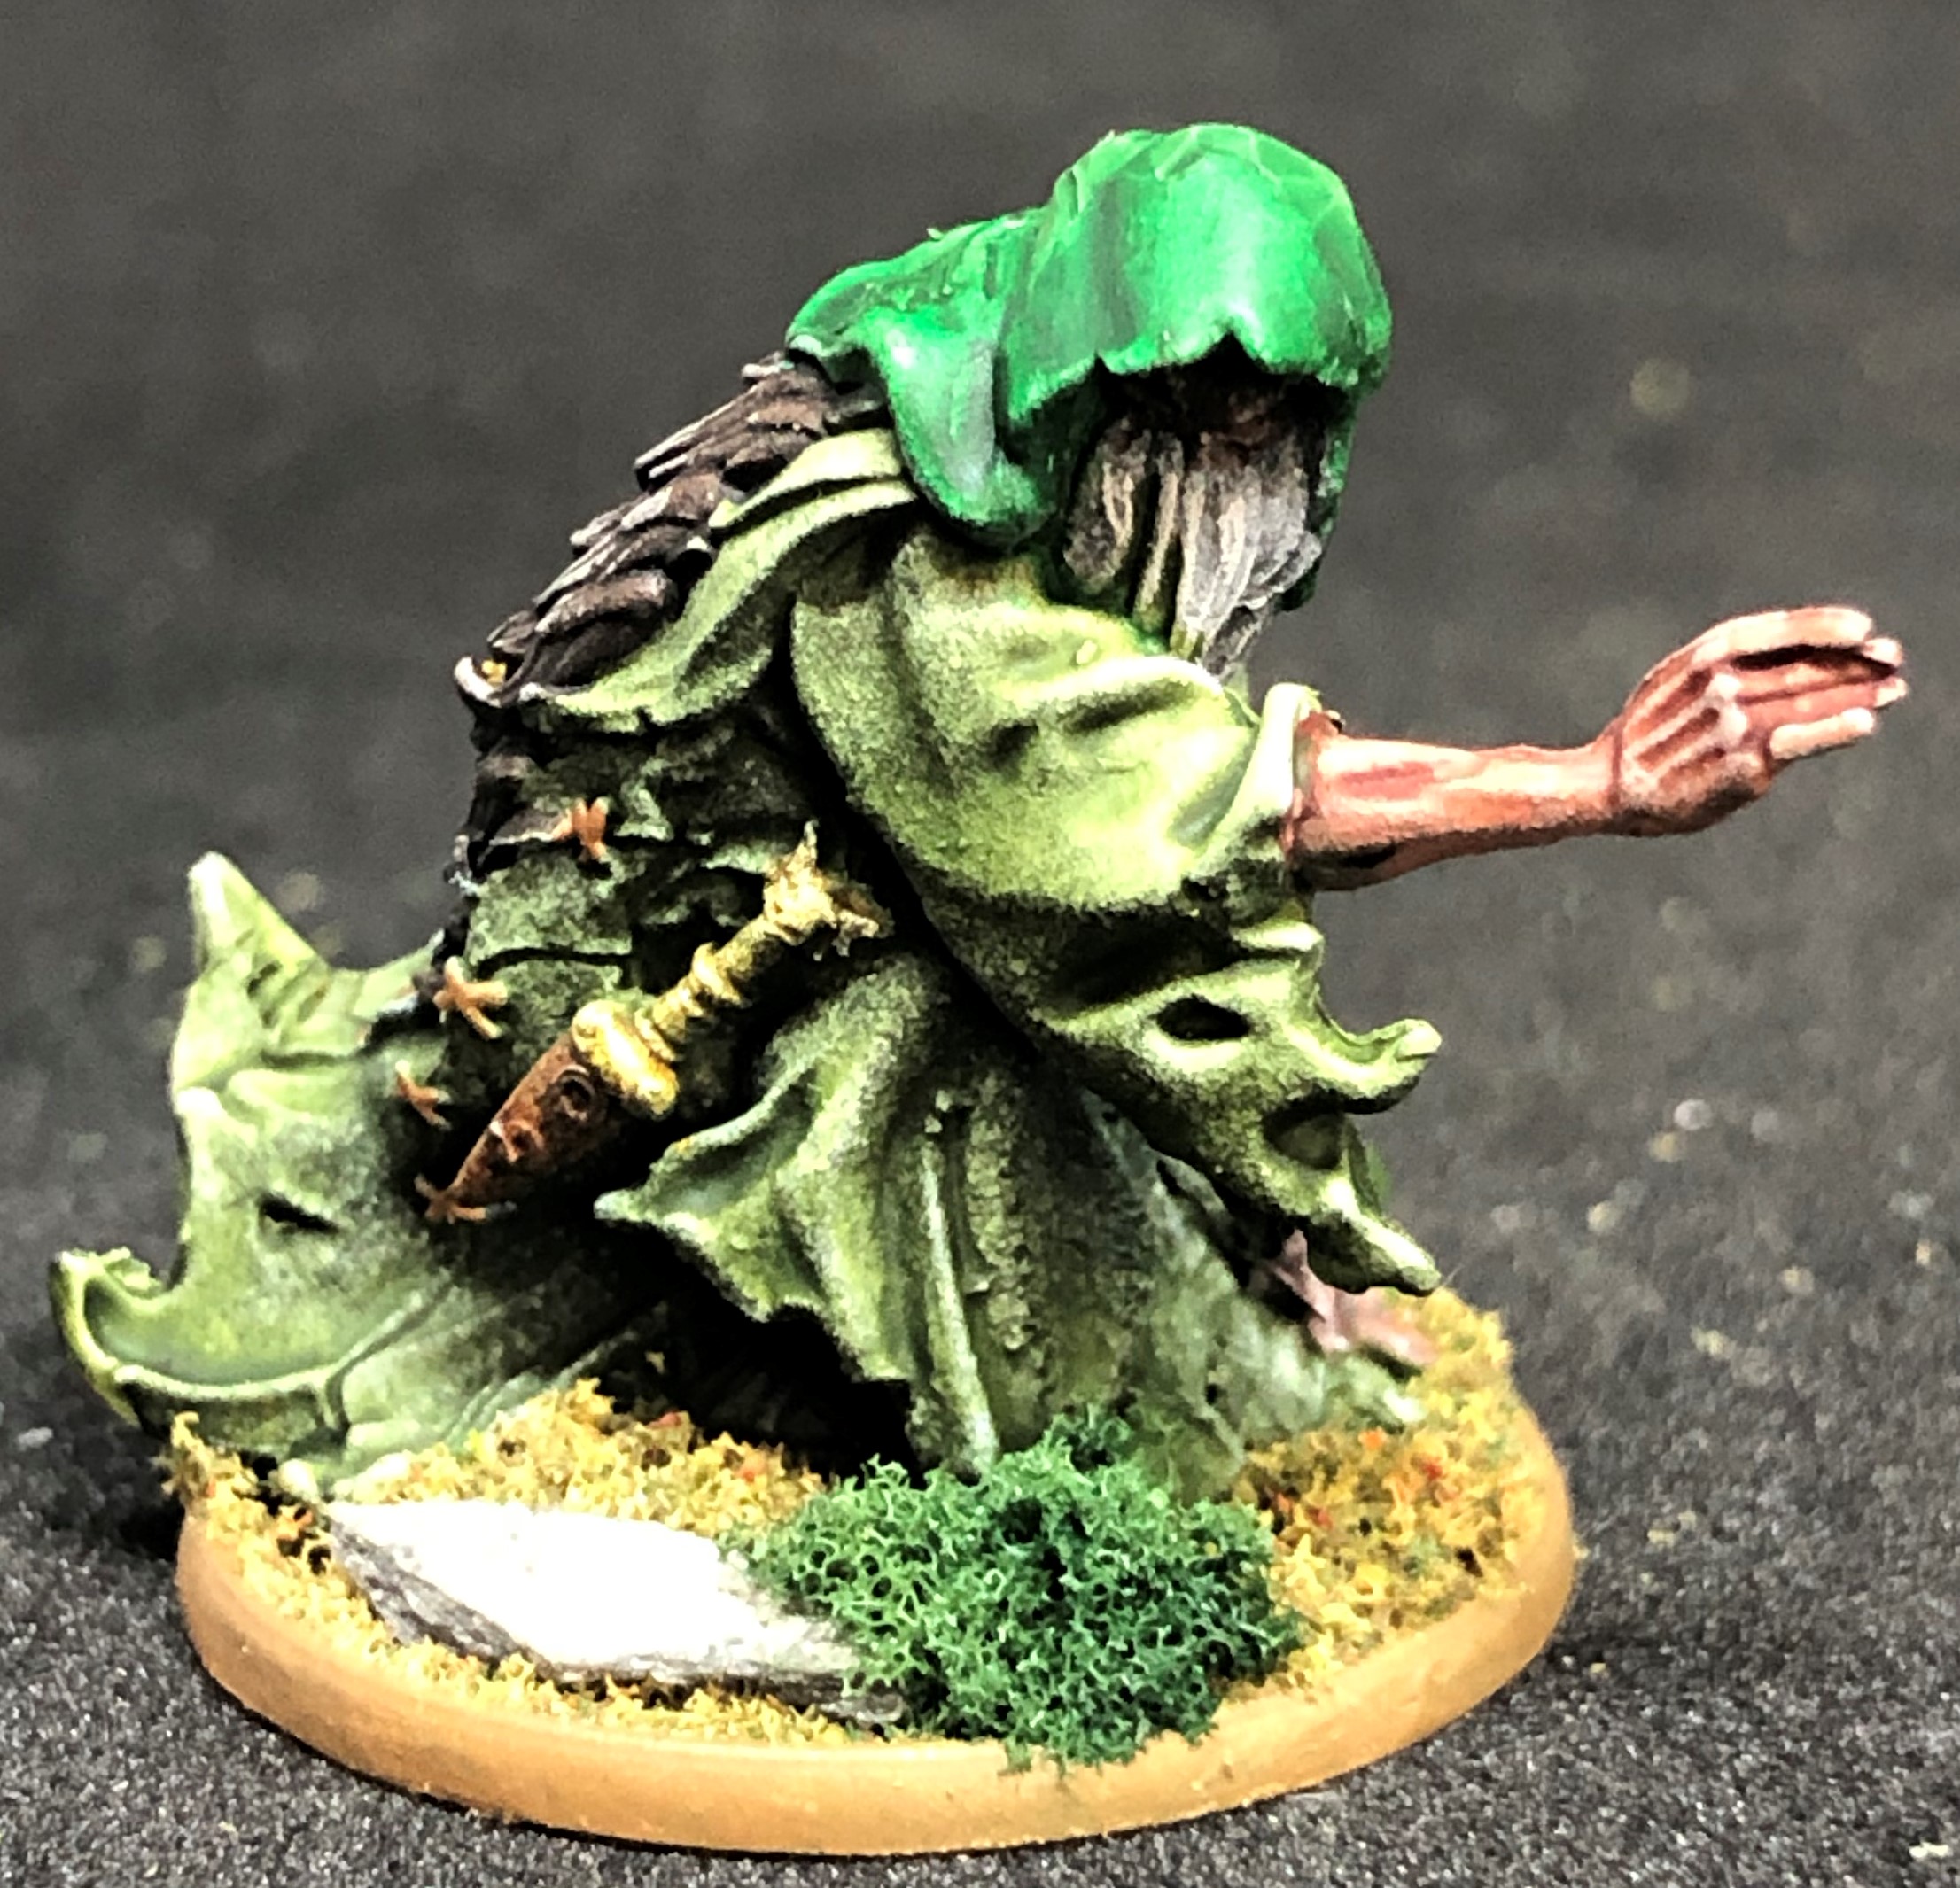
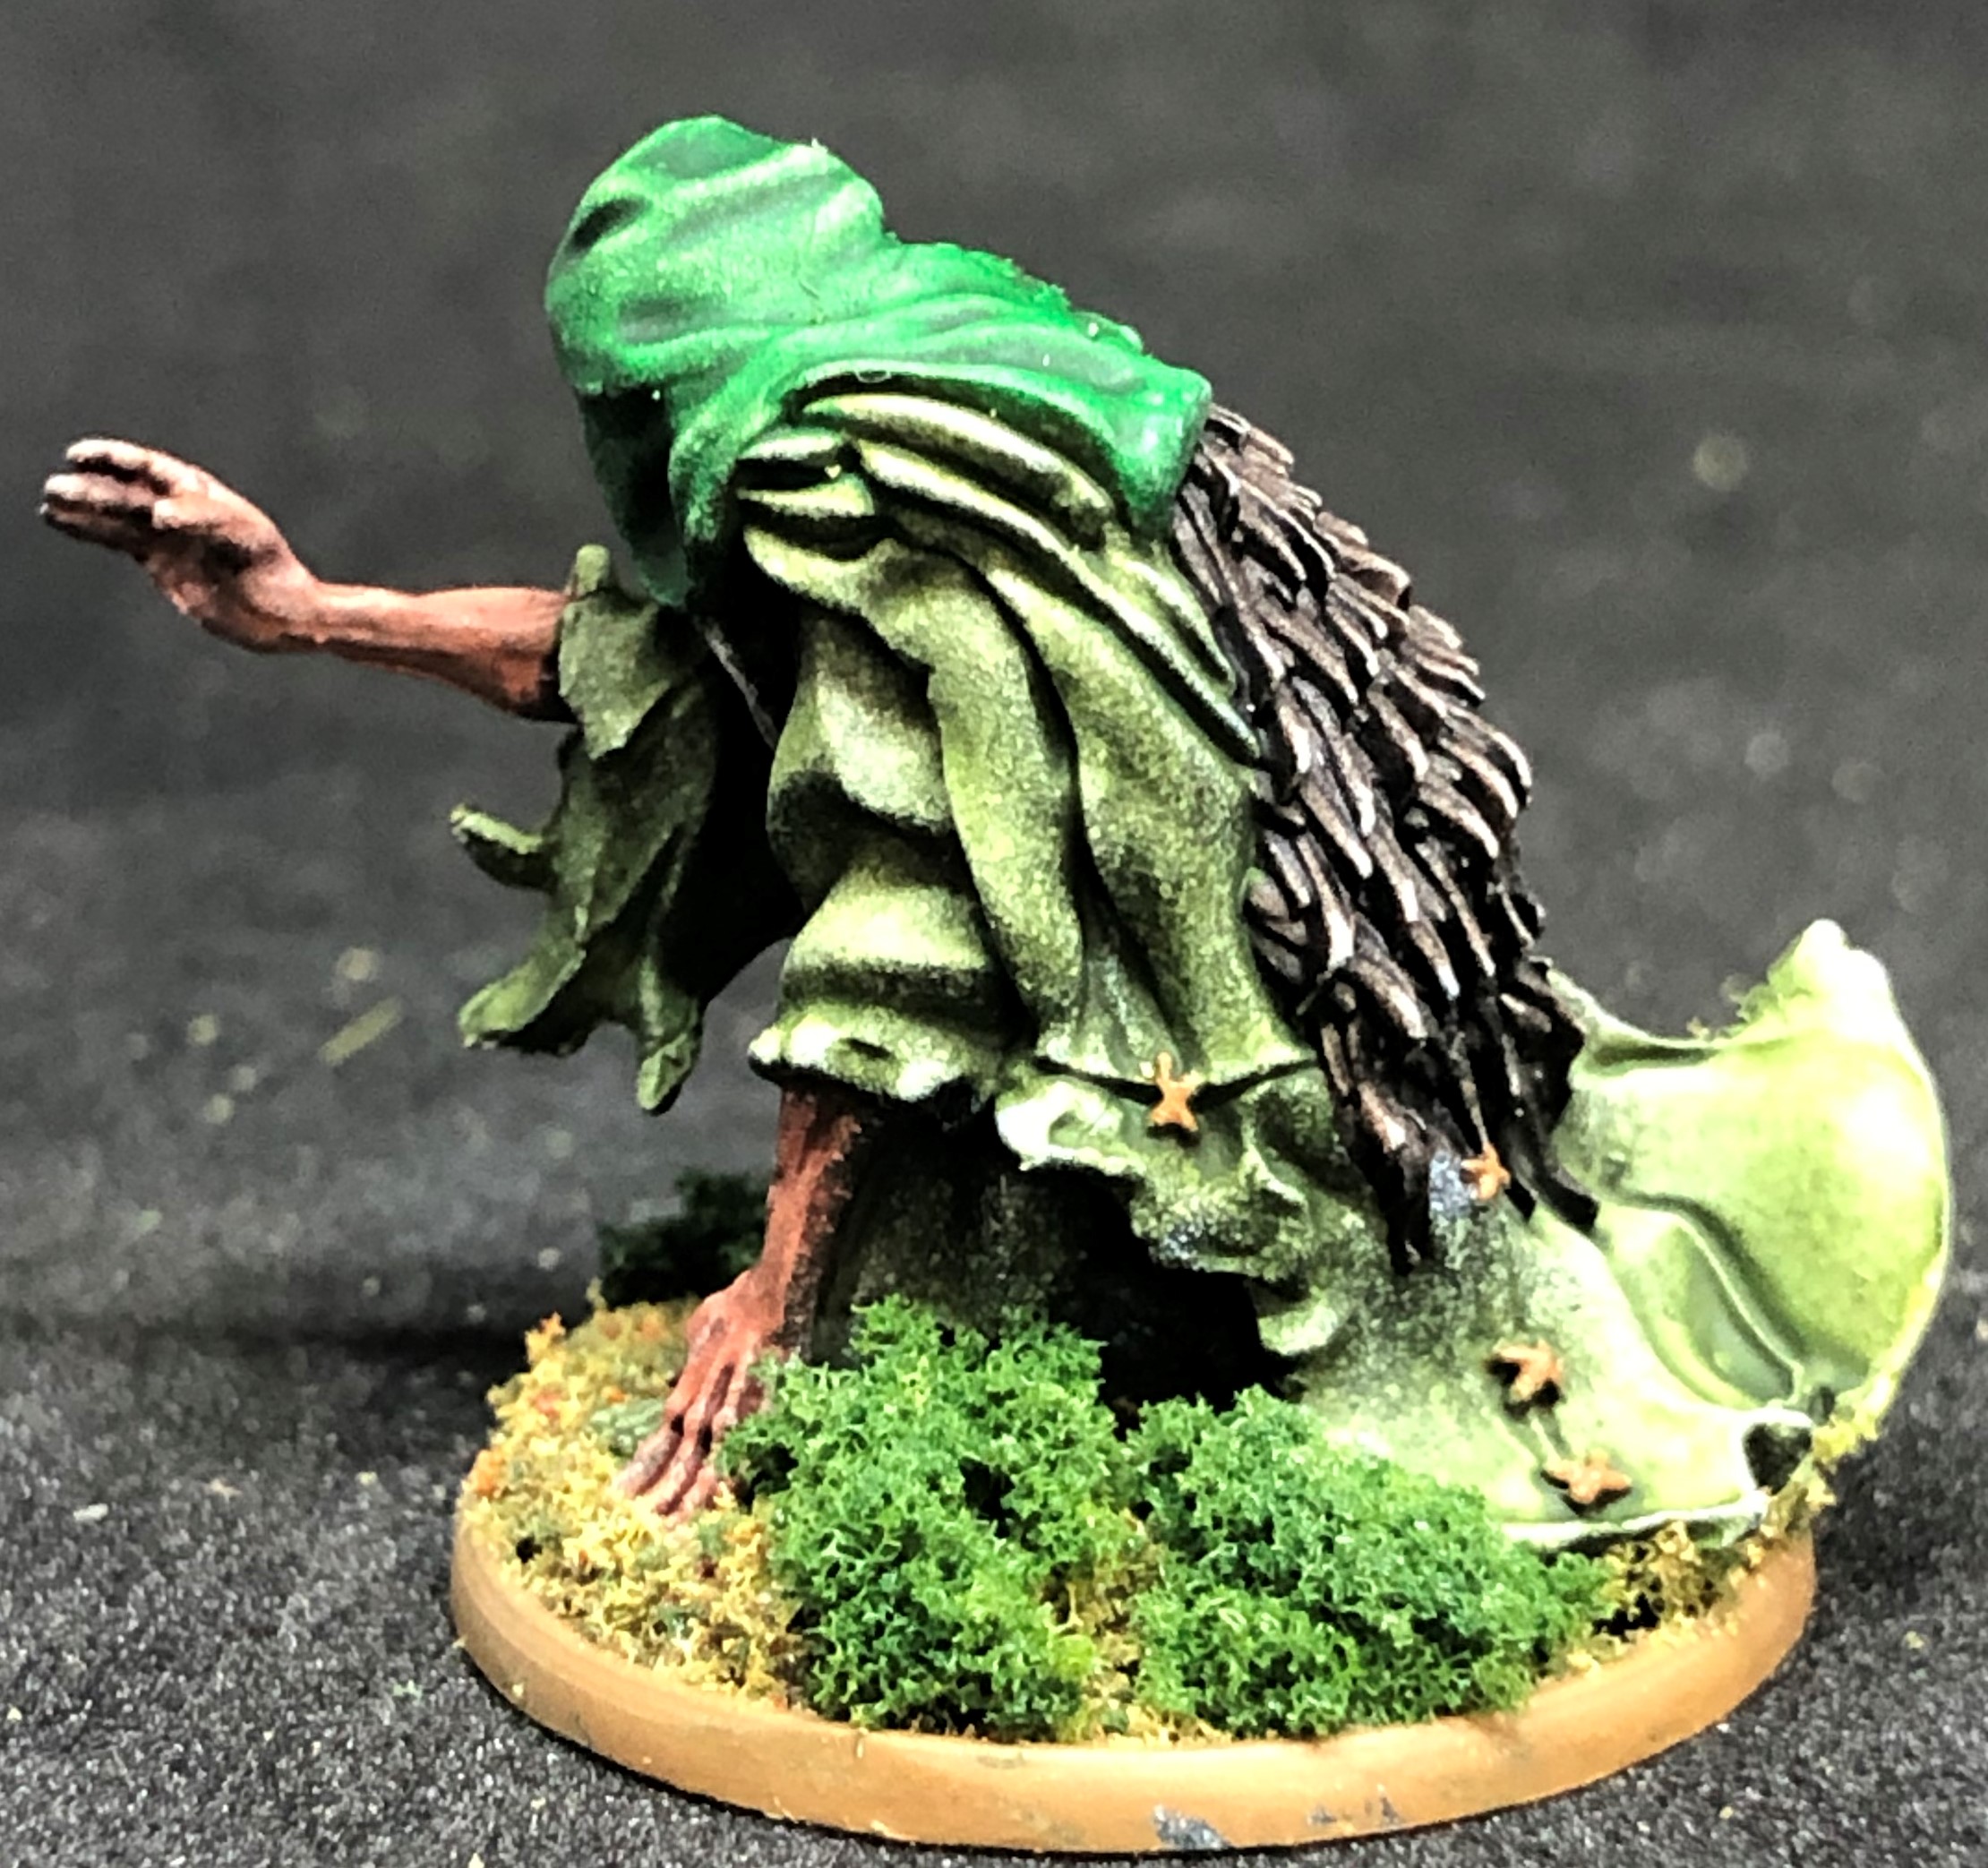
Now the witch’s guard with their long swords and shields and capes to match their mistress. The capes are Blood Red.

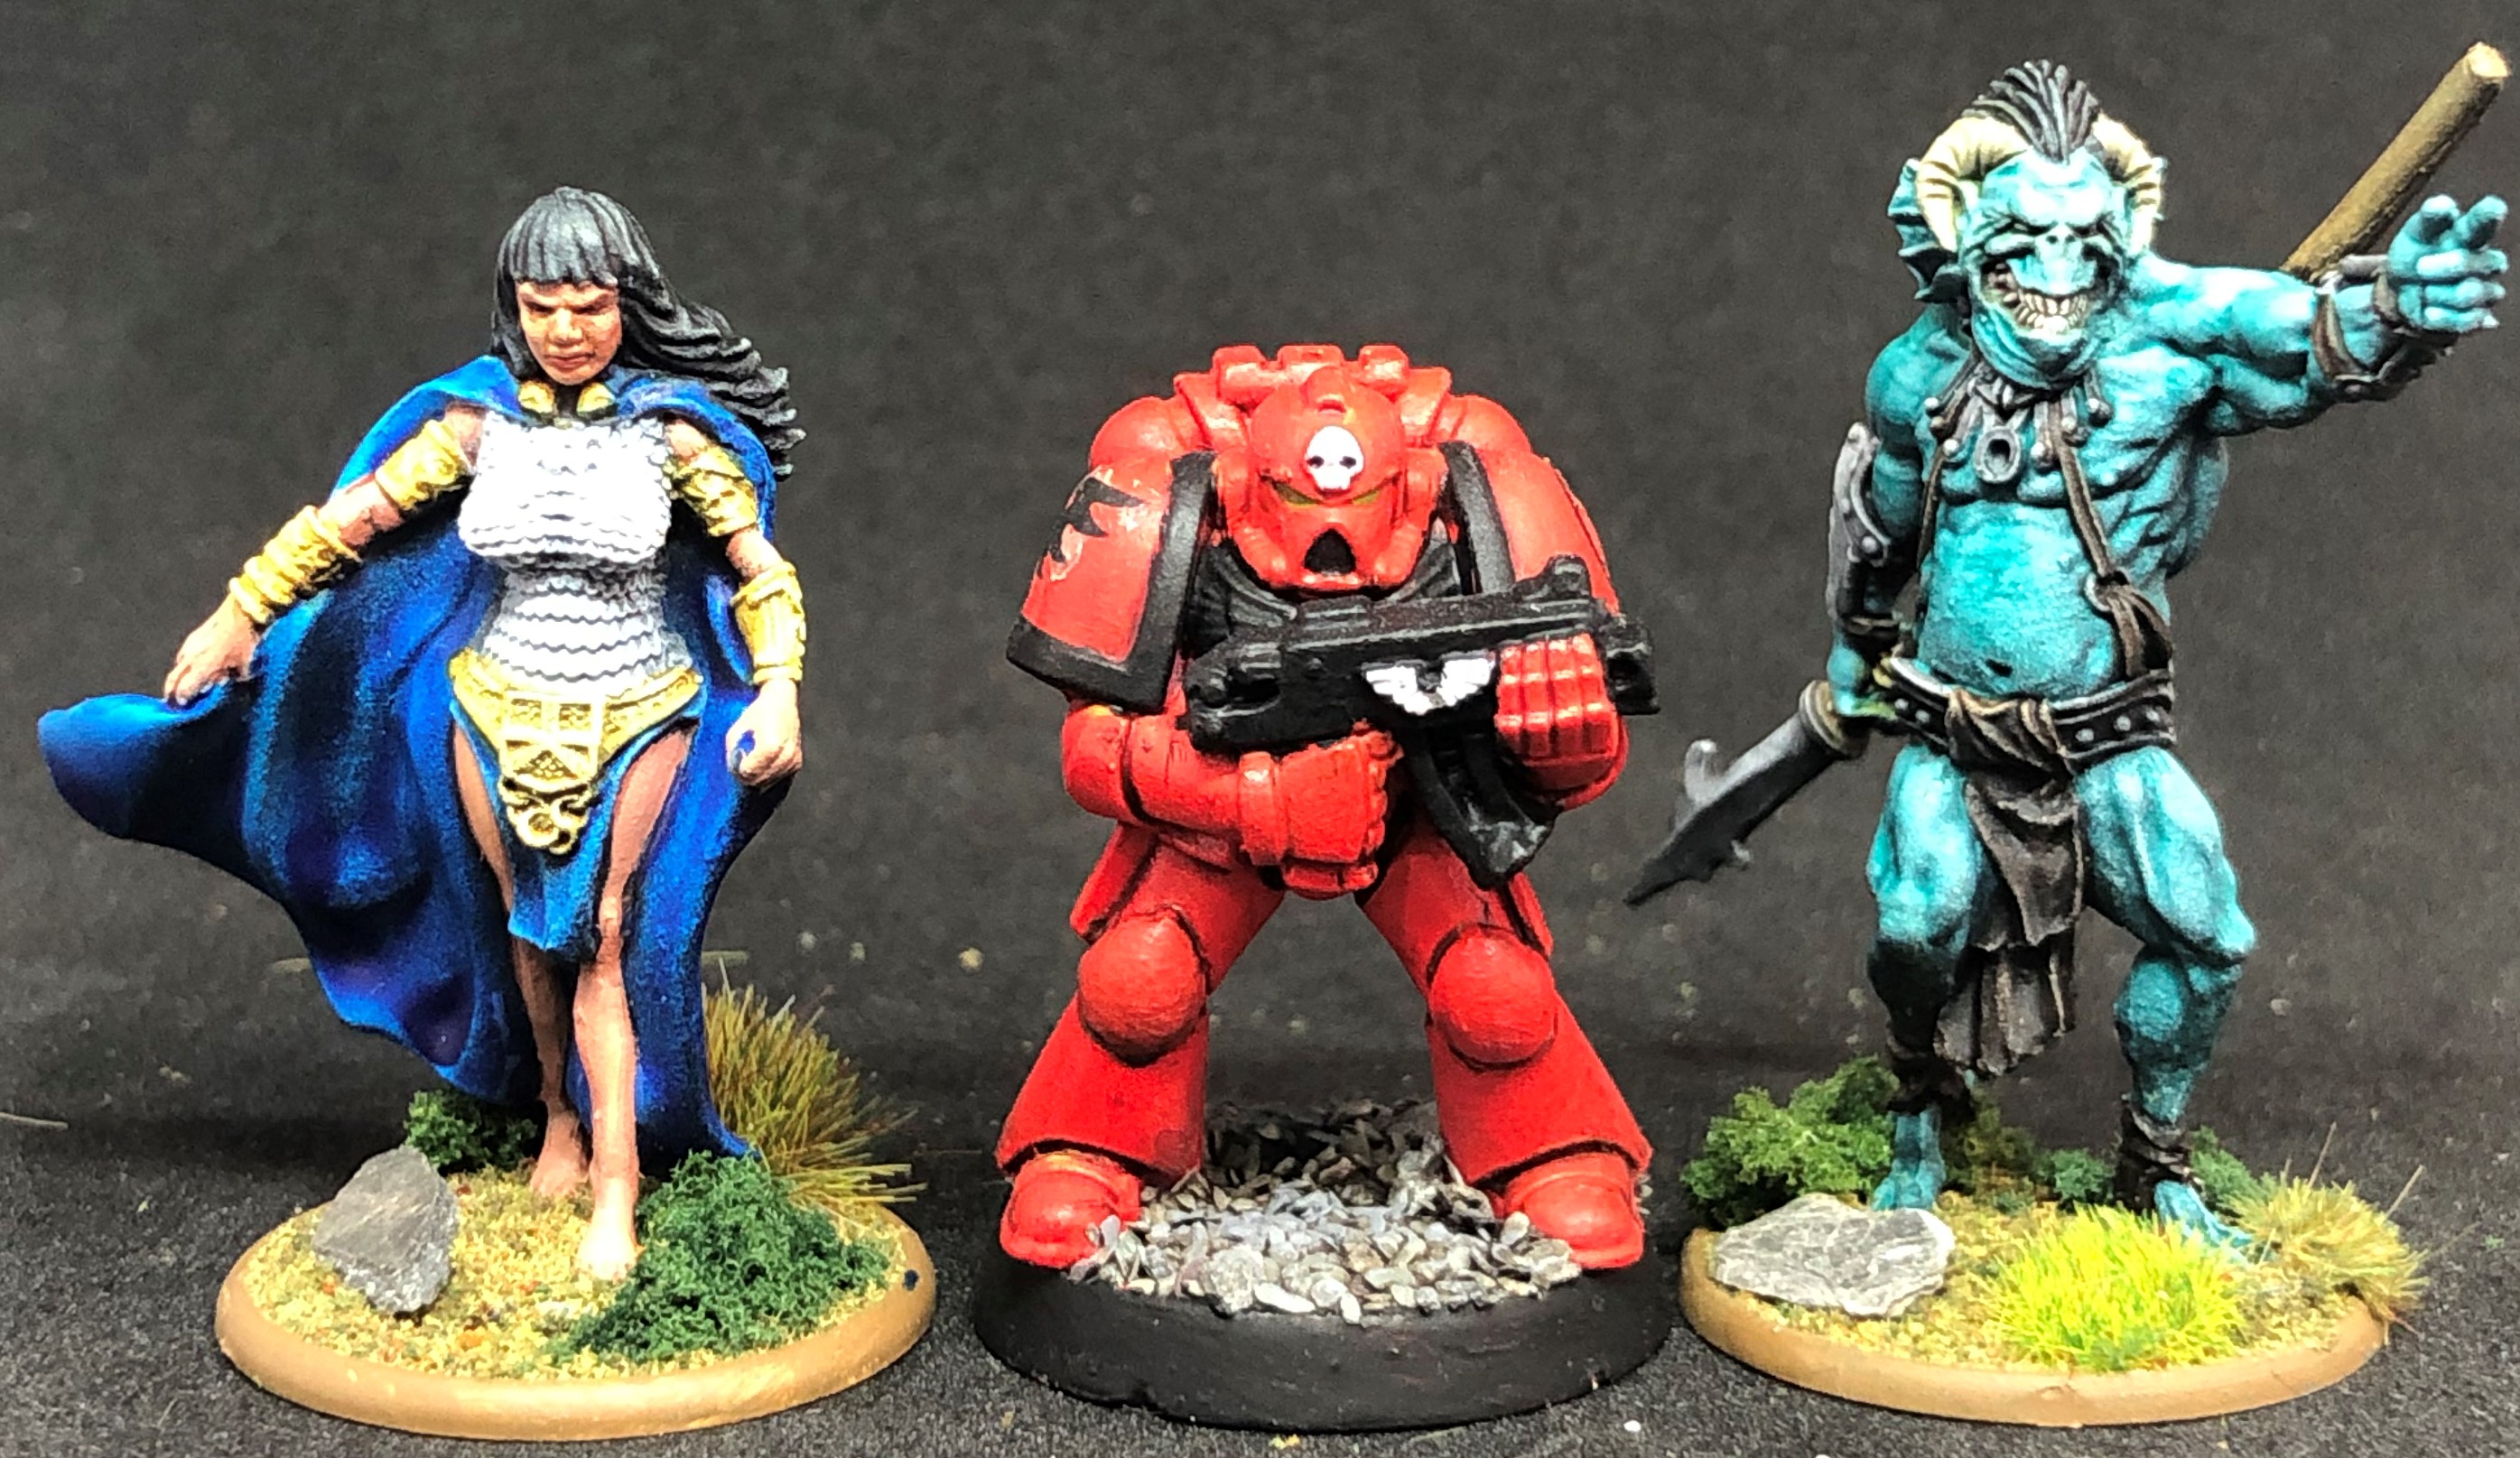
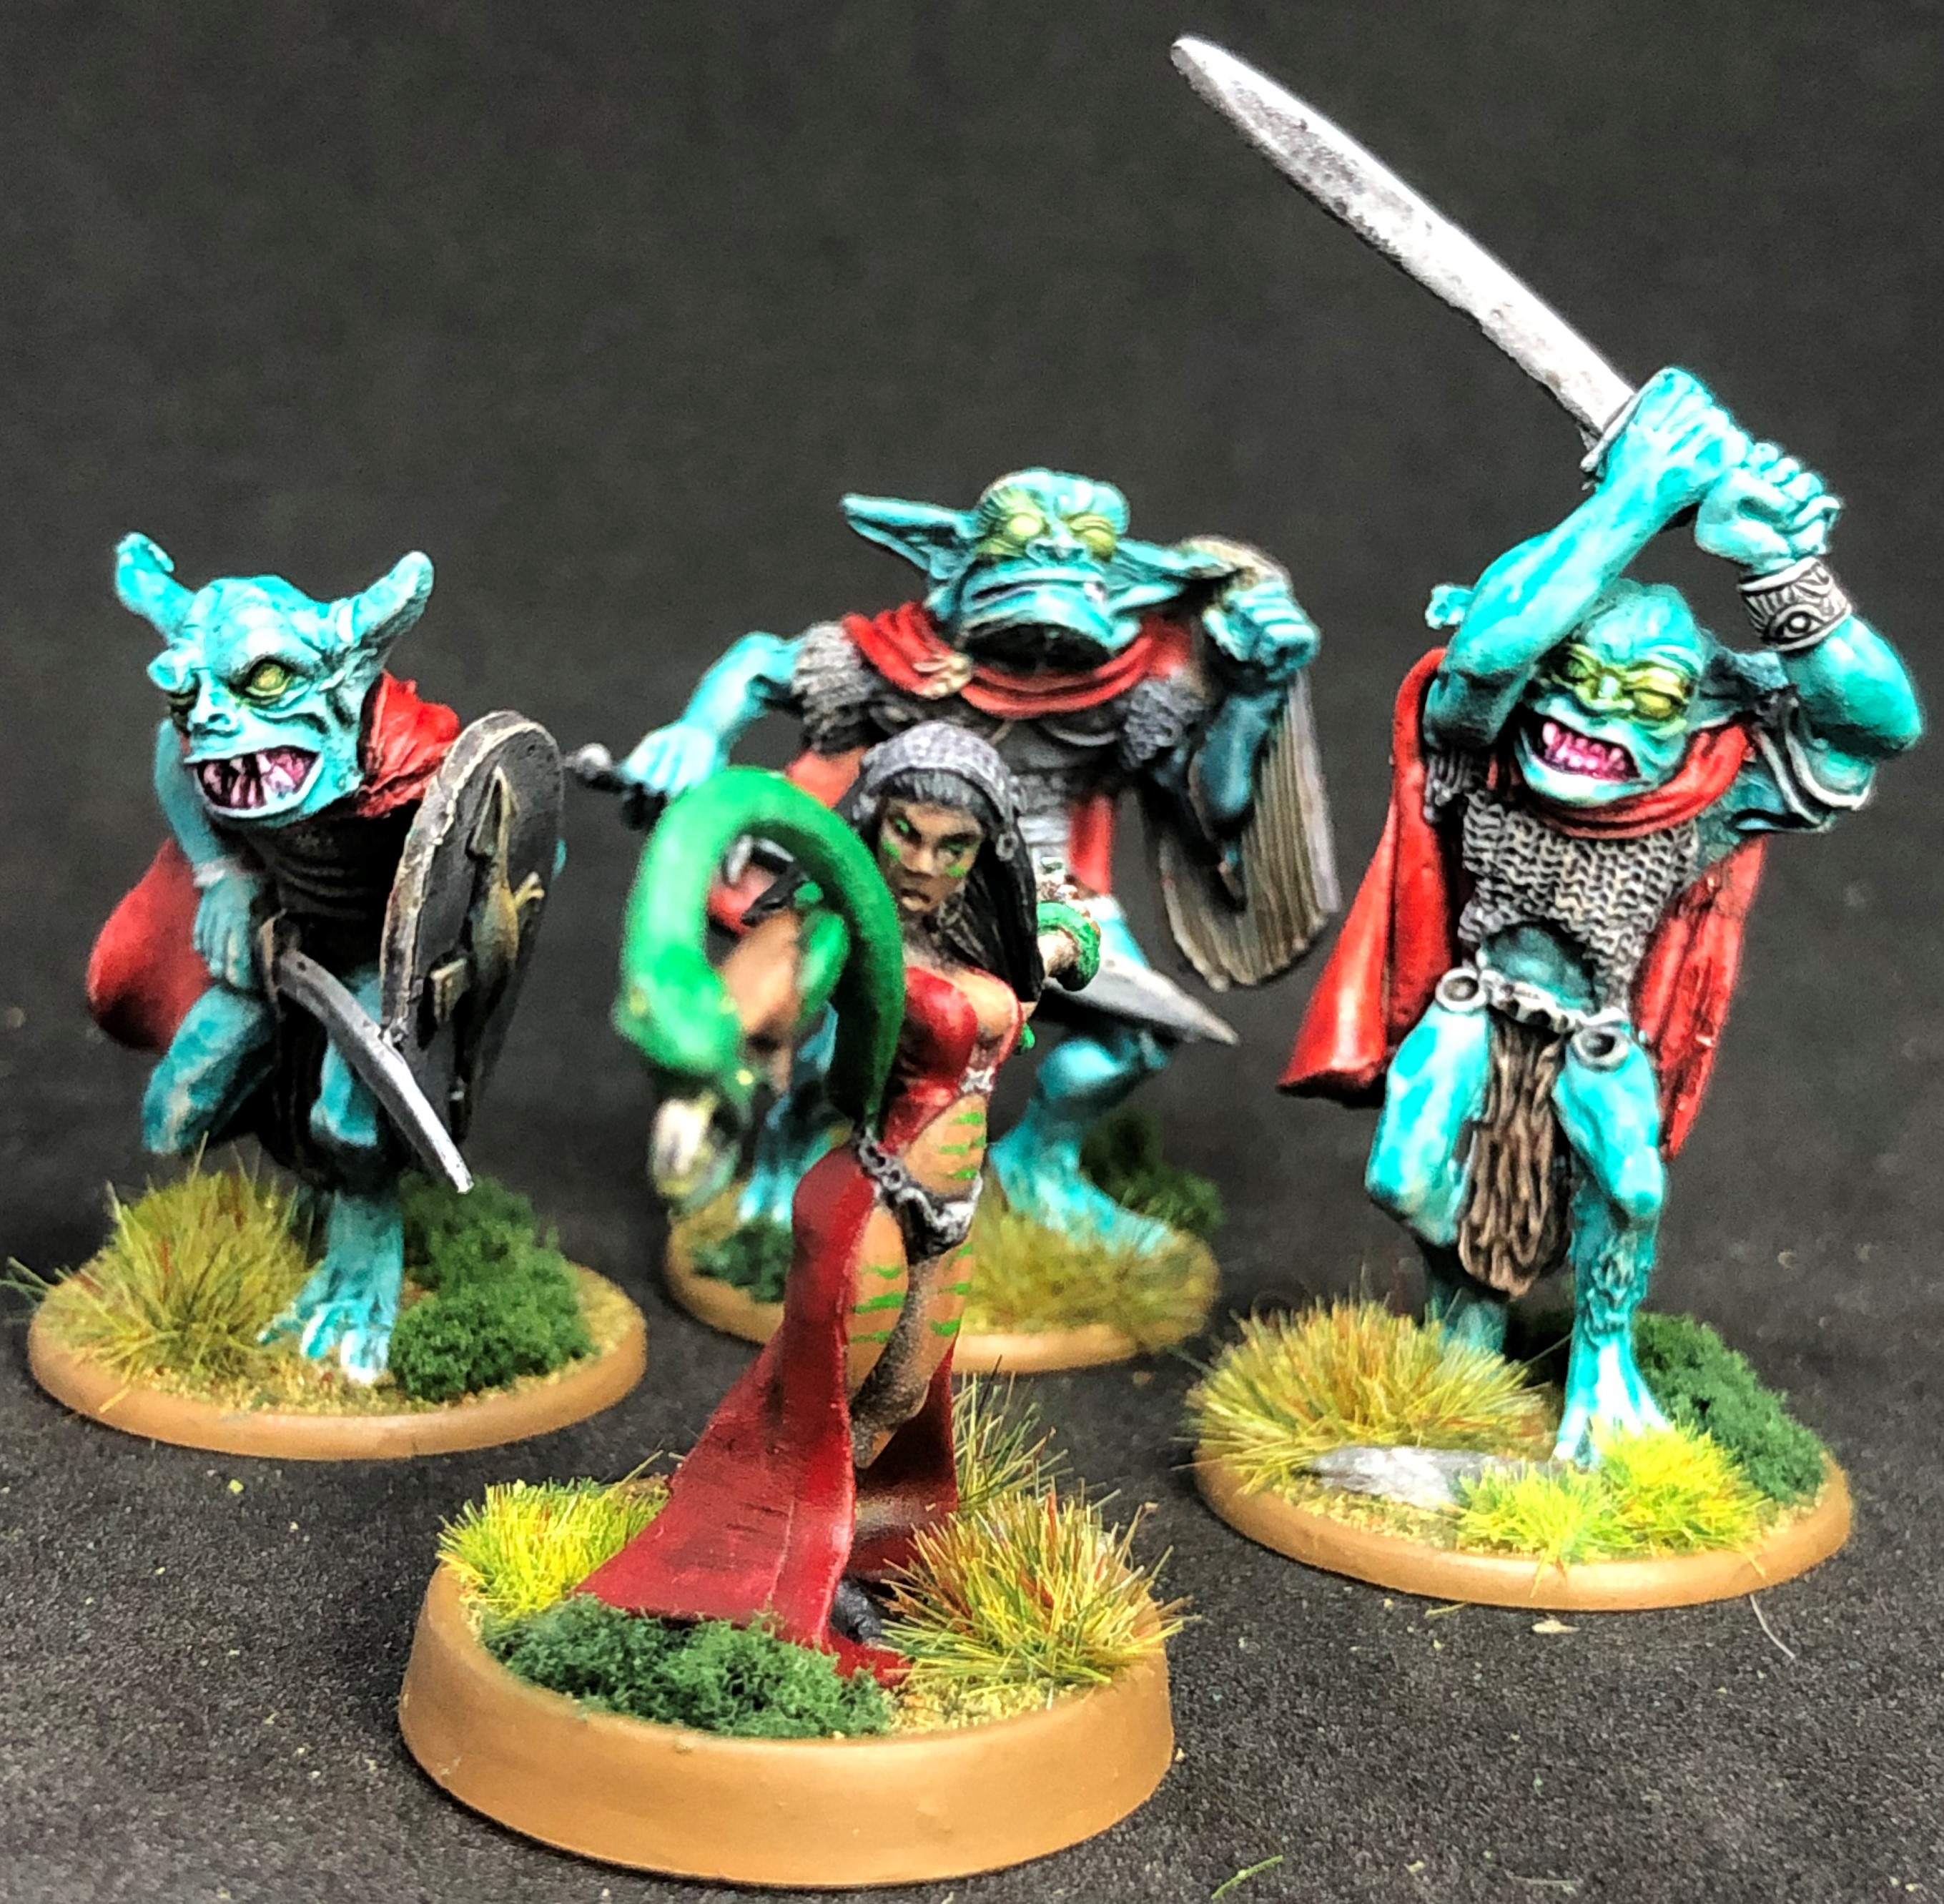 Fomorian witch and her bodyguards
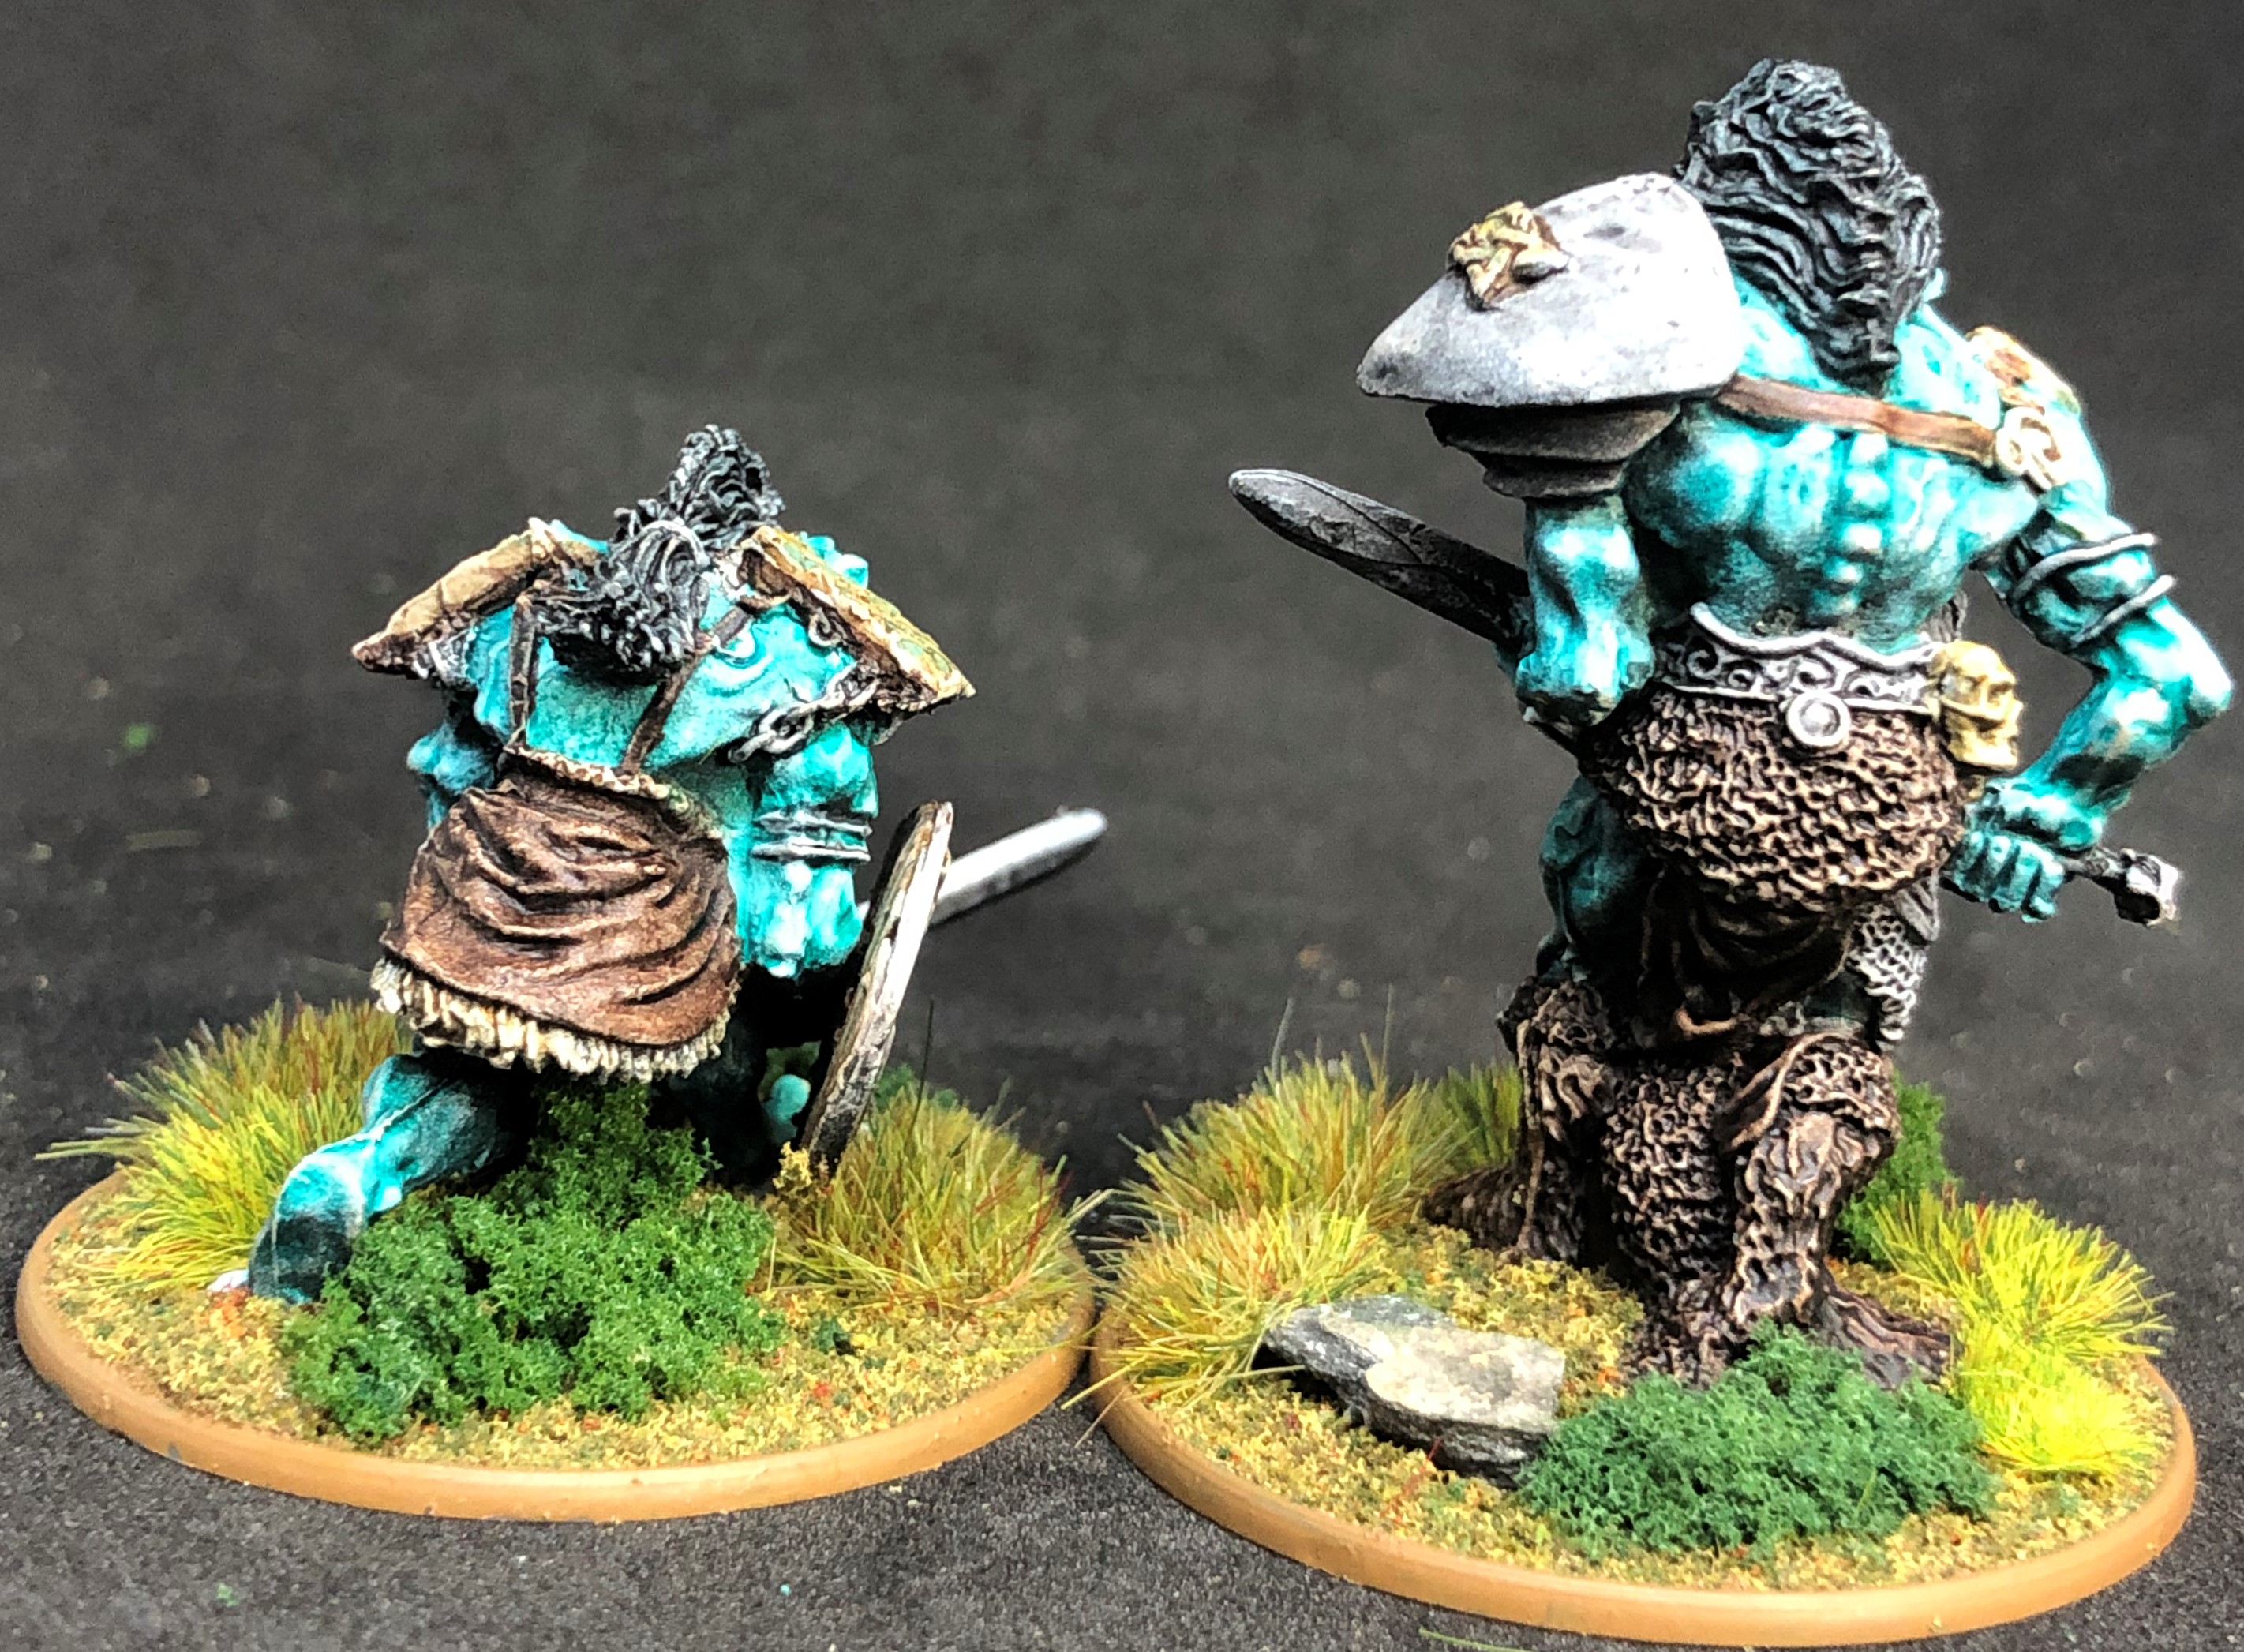
And finally a collective shot with one of the Warlord Fomorians for scale. I think they look great together and give less uniformity to the Fomorian force which fits better with my idea of what they are like from the graphic novels.
 Alternative Armies Fomorians with a Warlord version.
Sessair Earth Tribe Warriors, and how to do tattoos
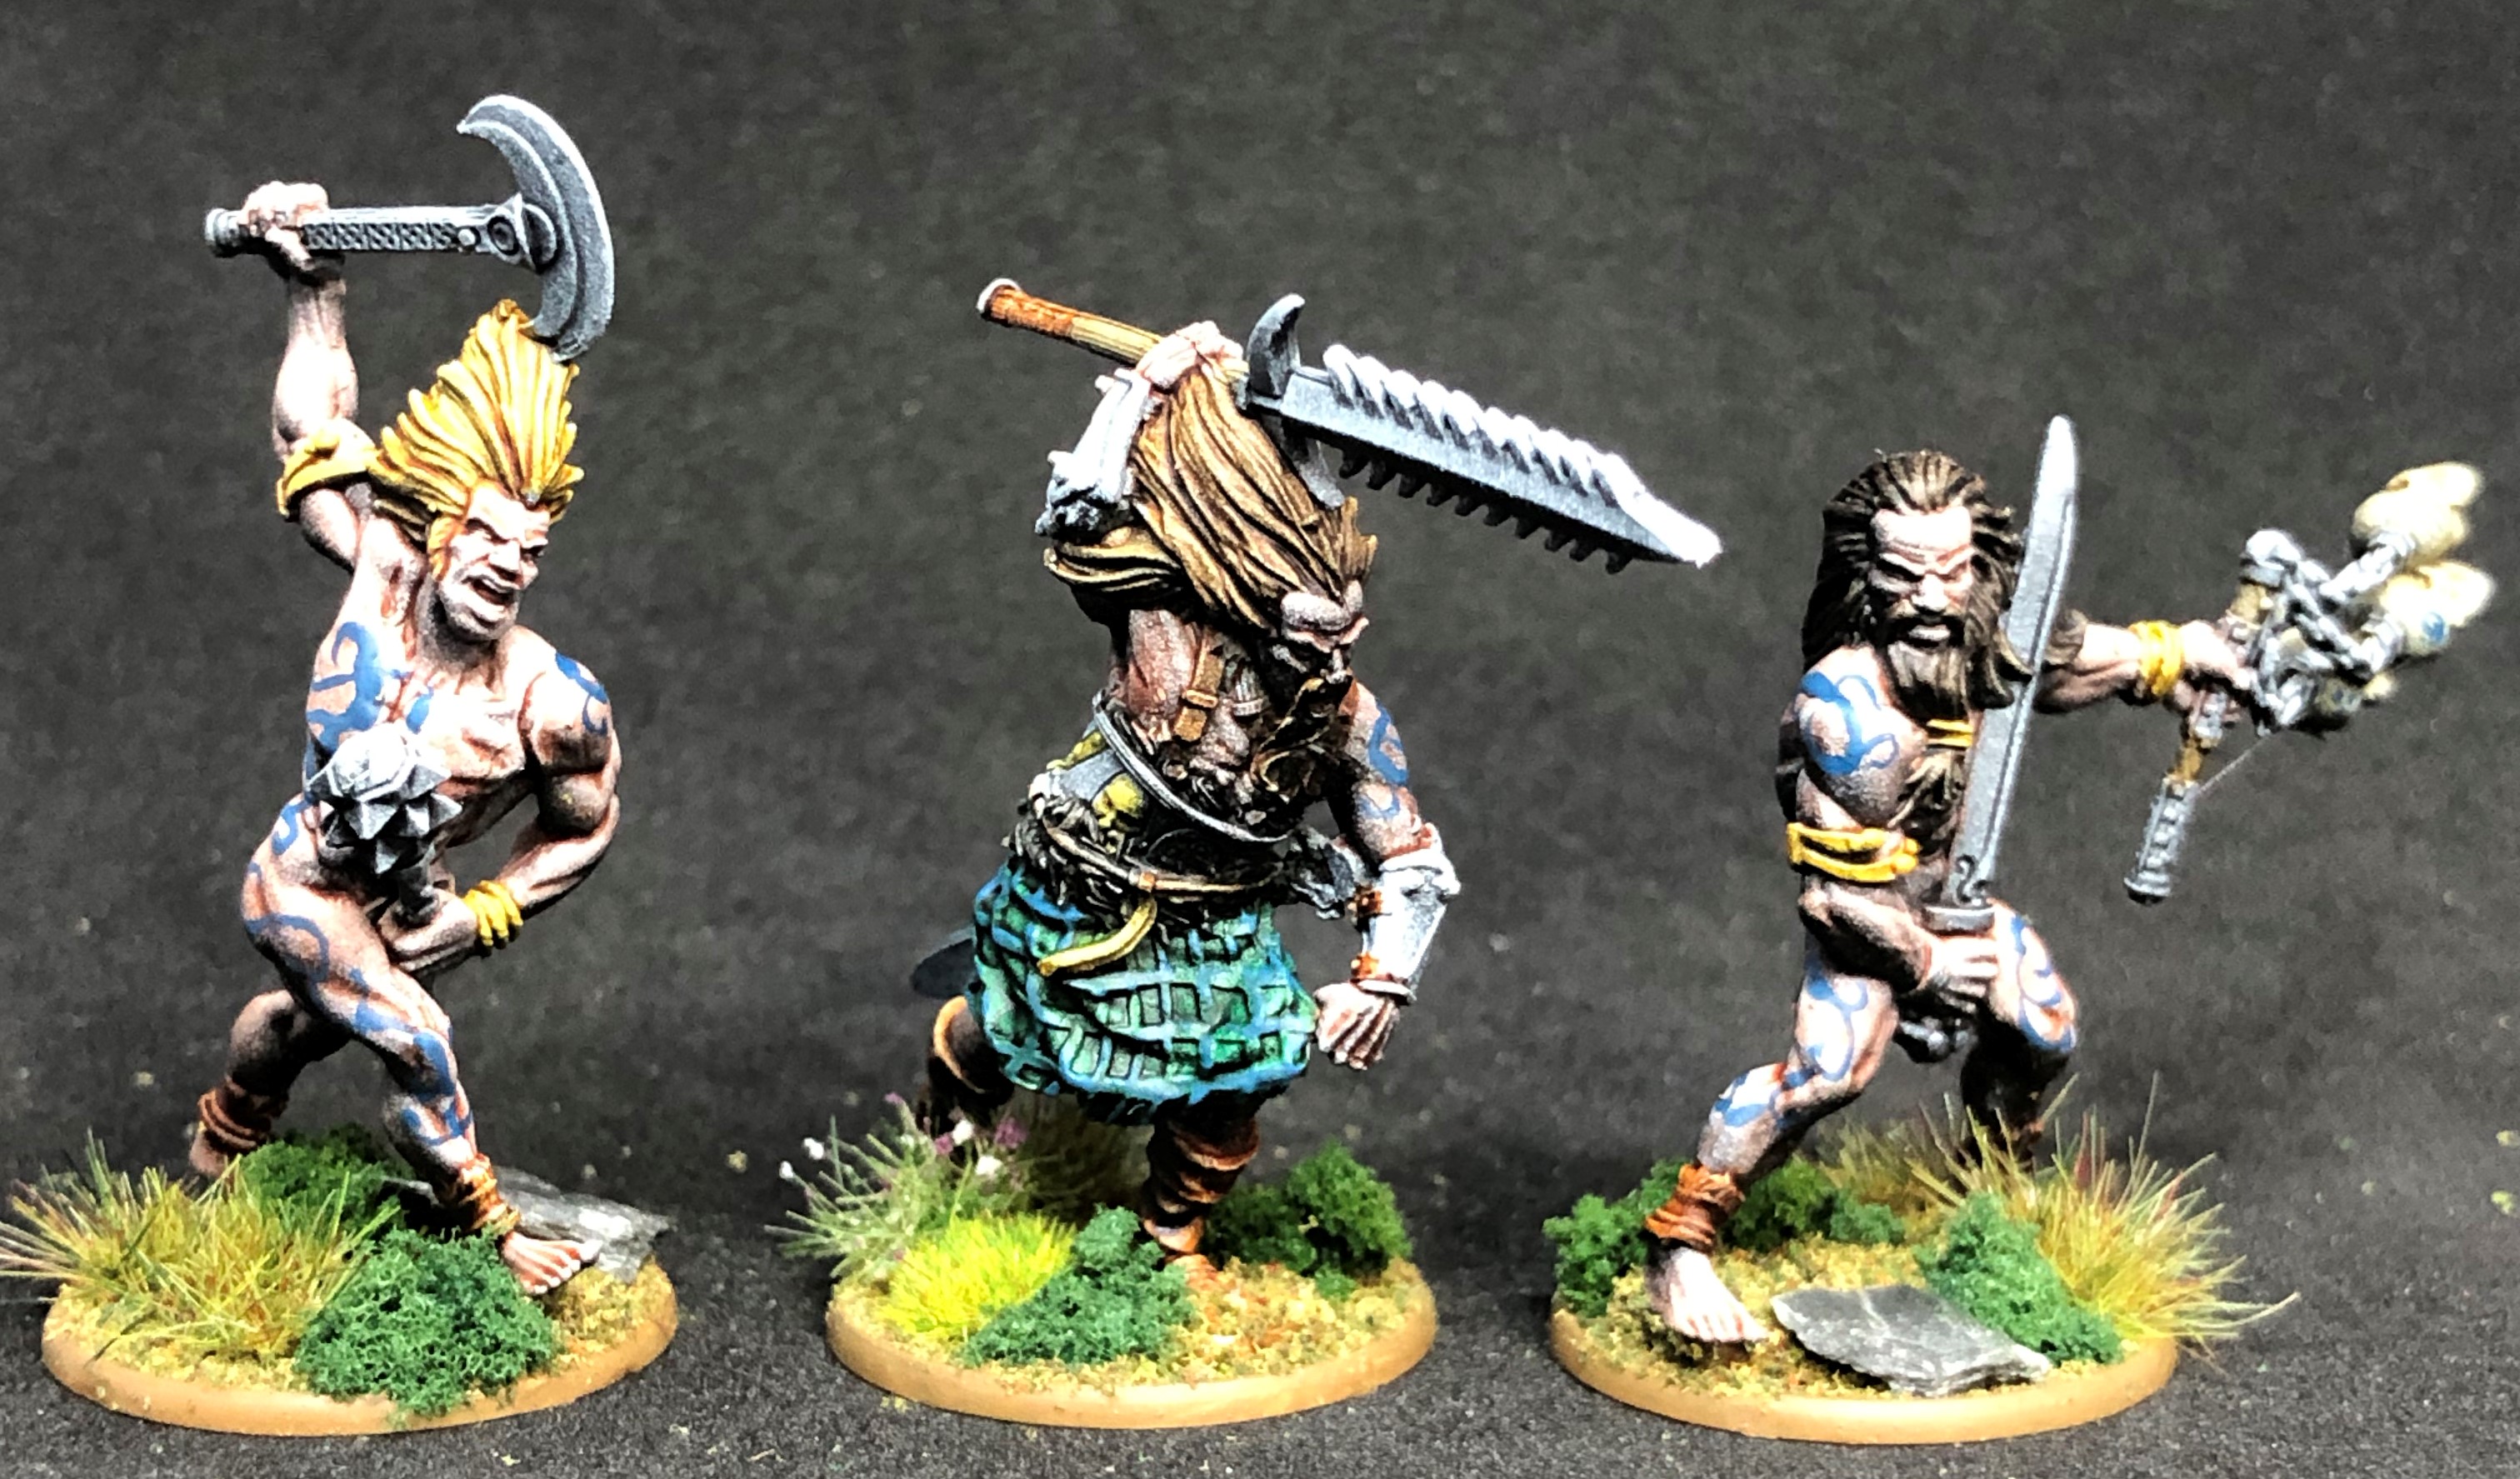
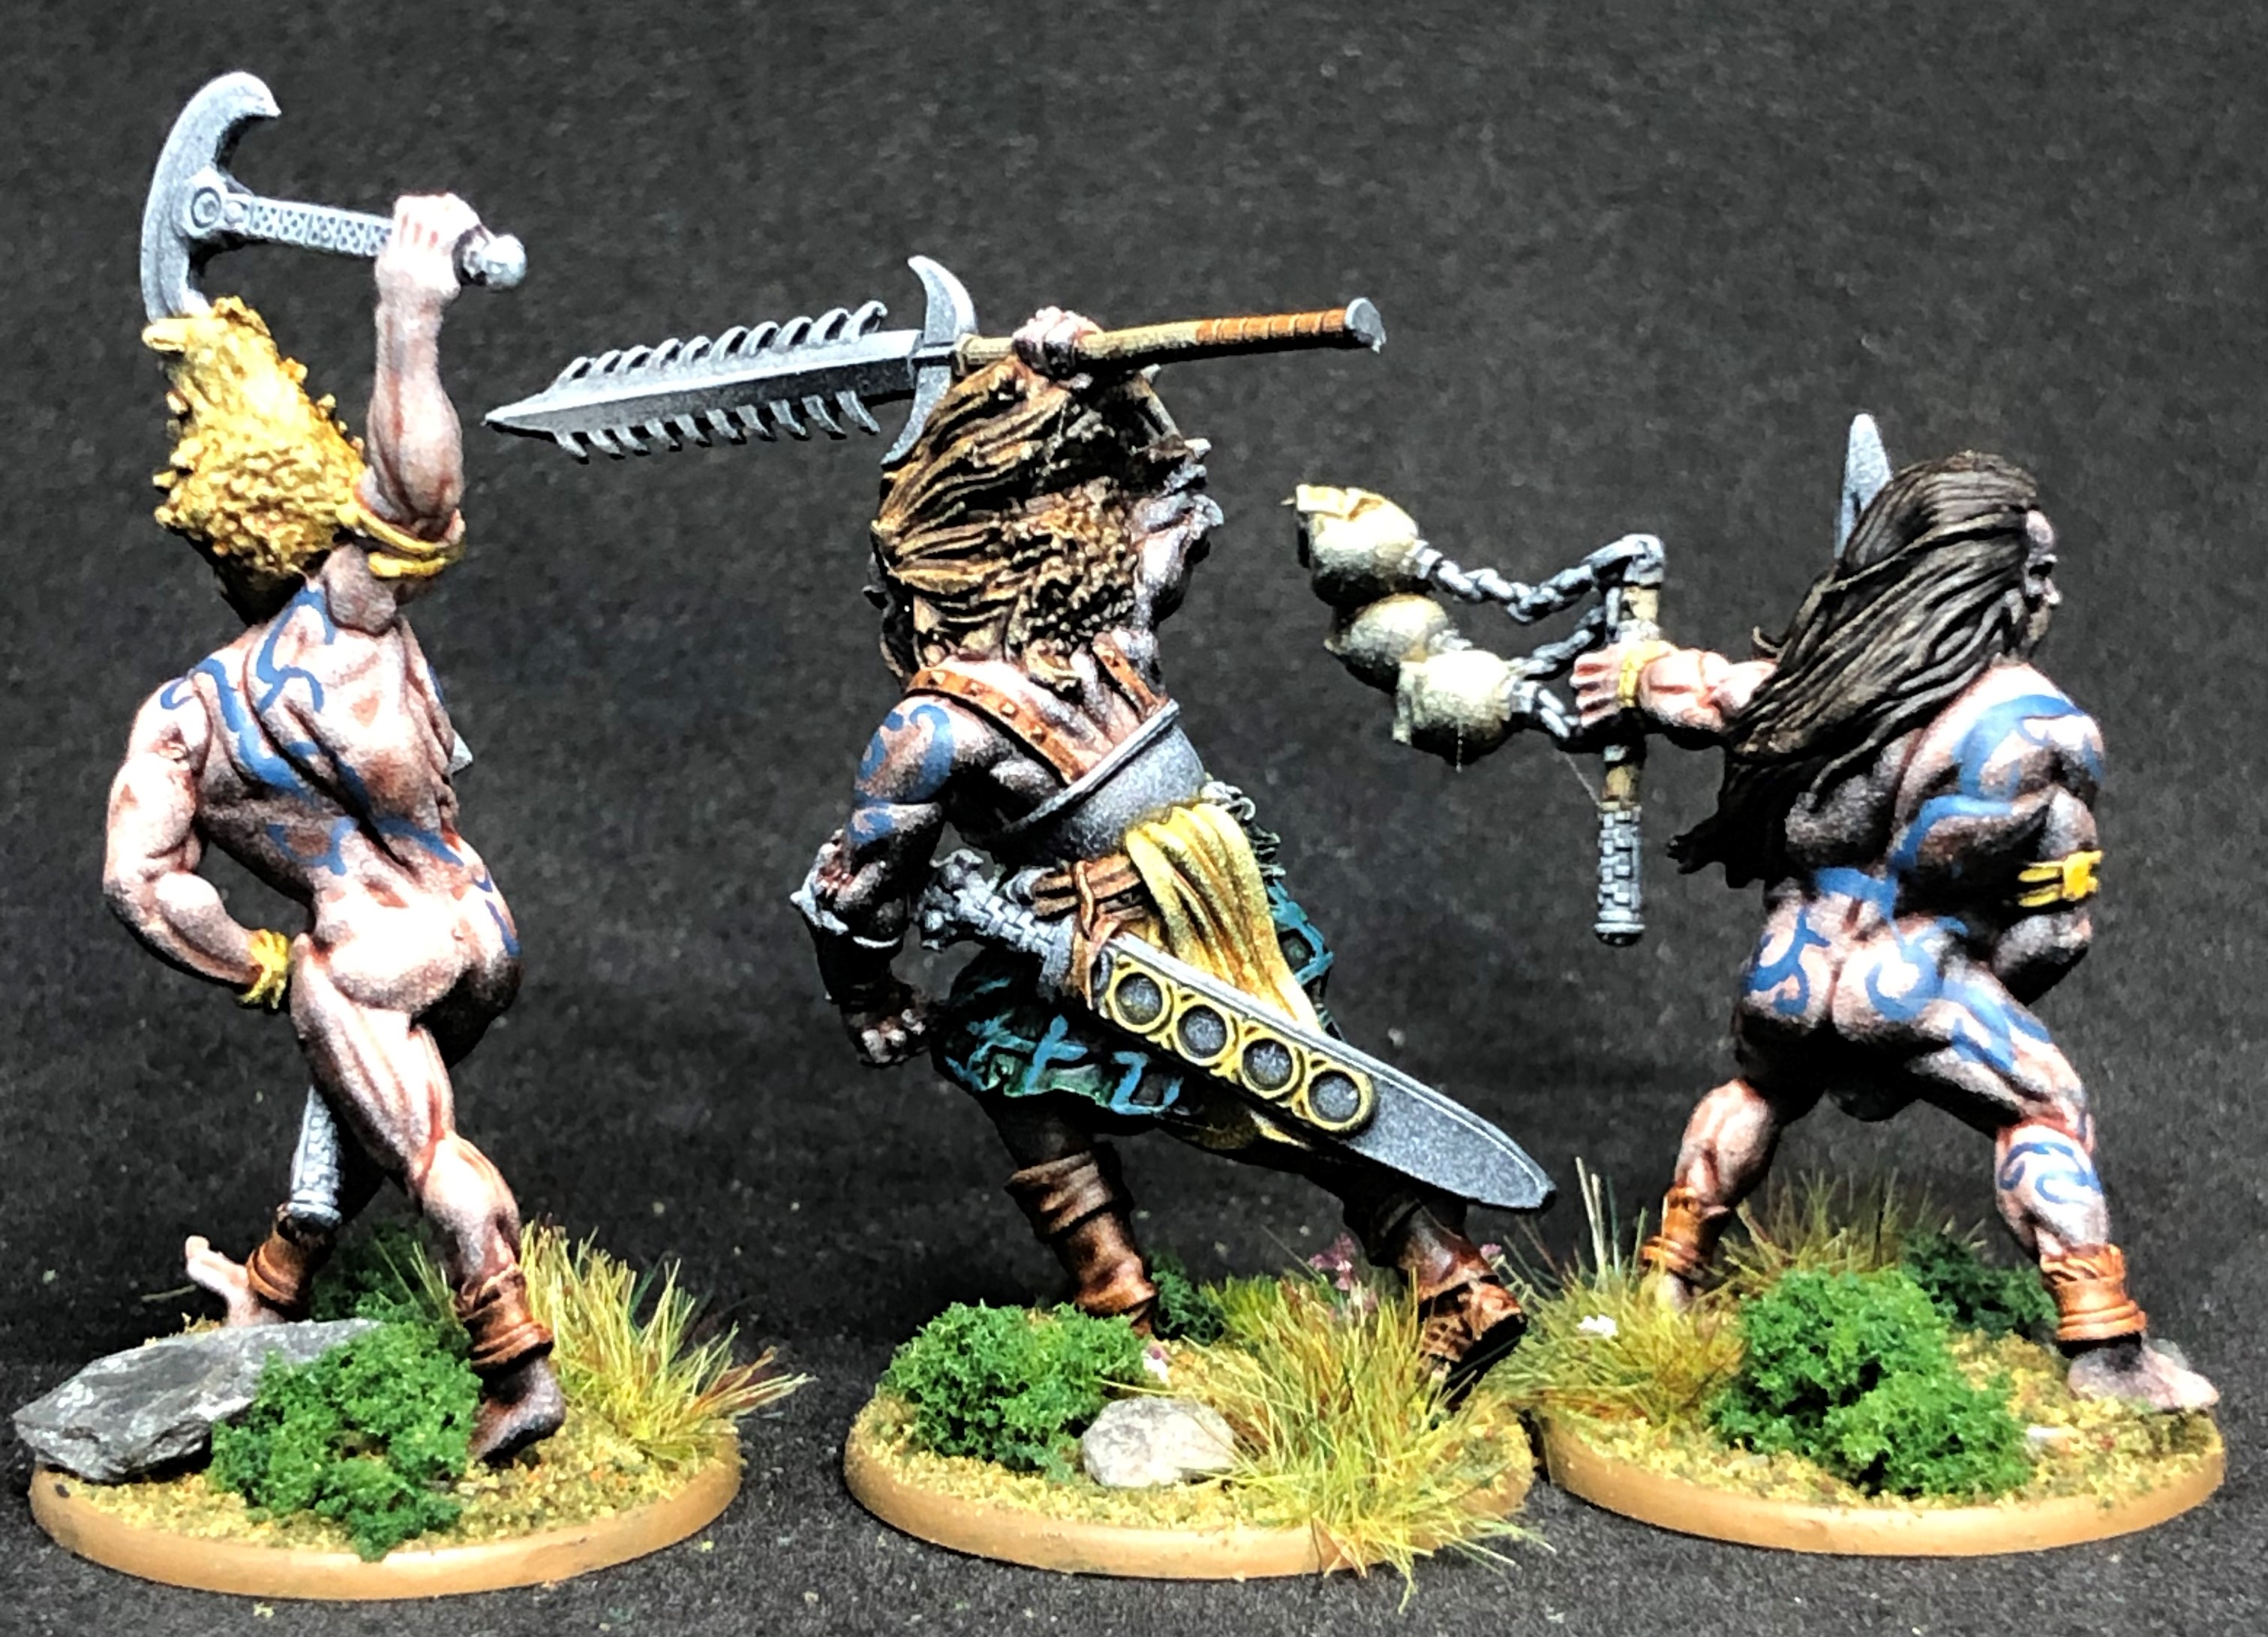
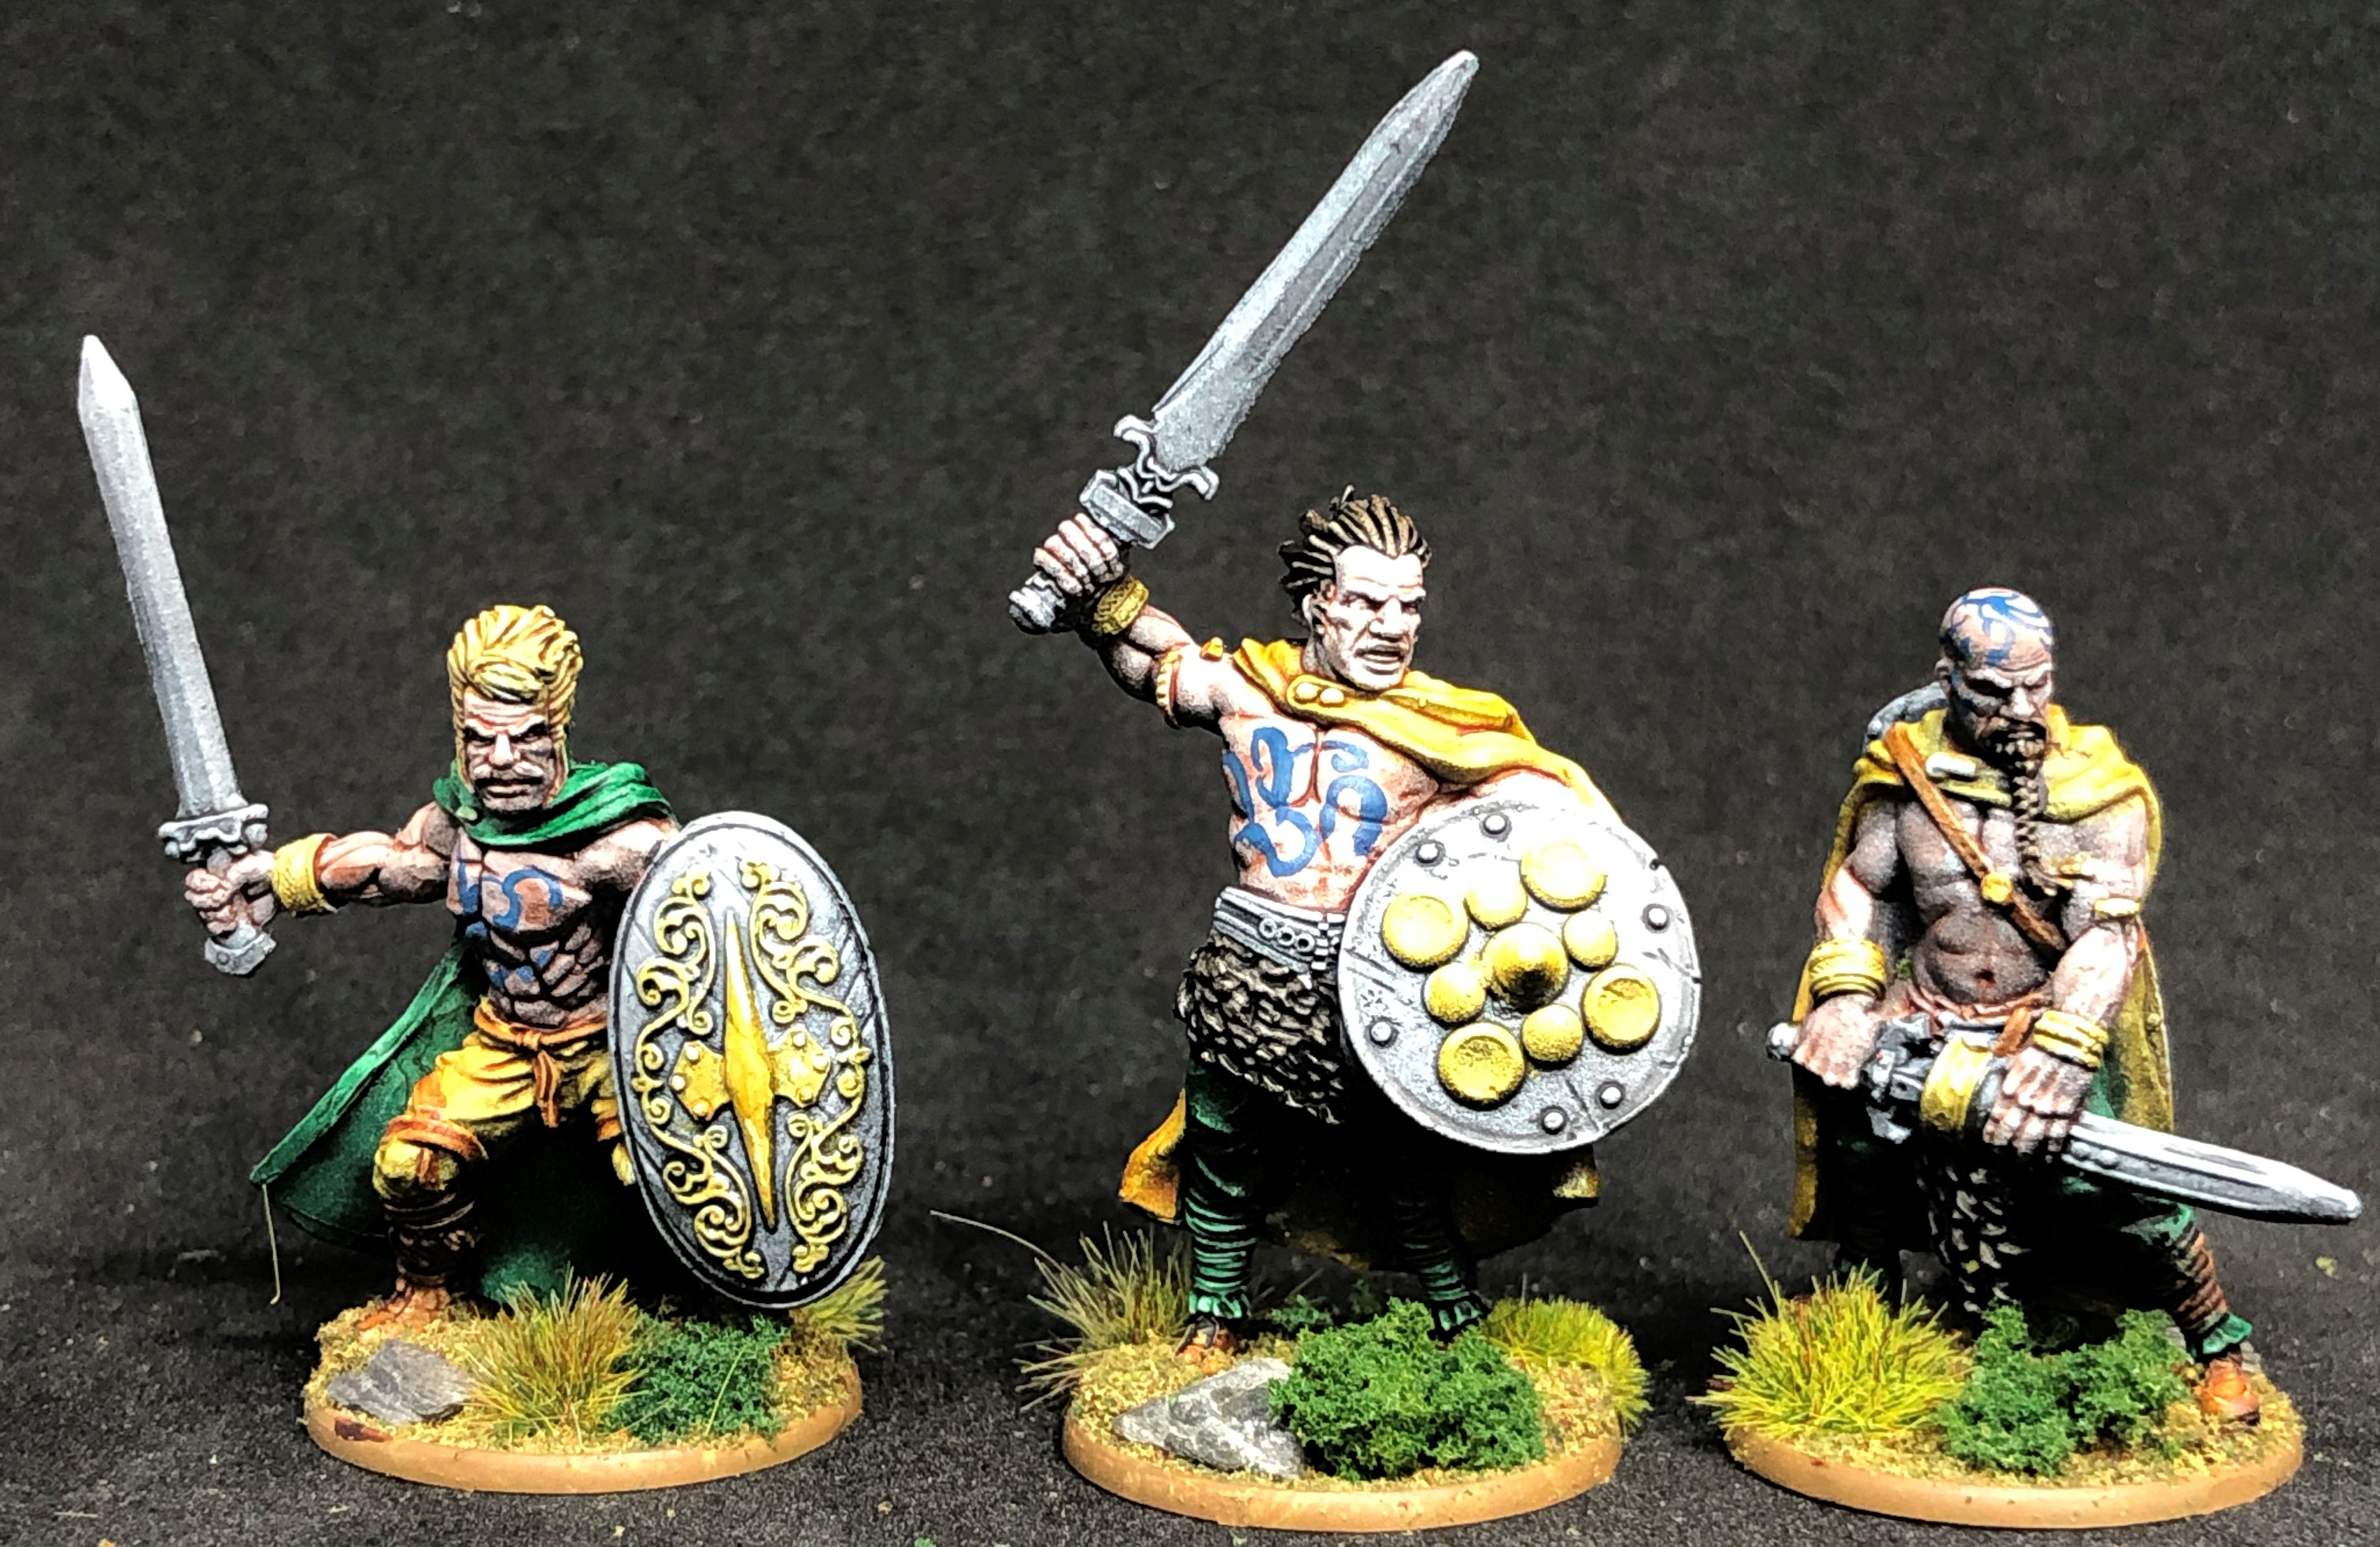
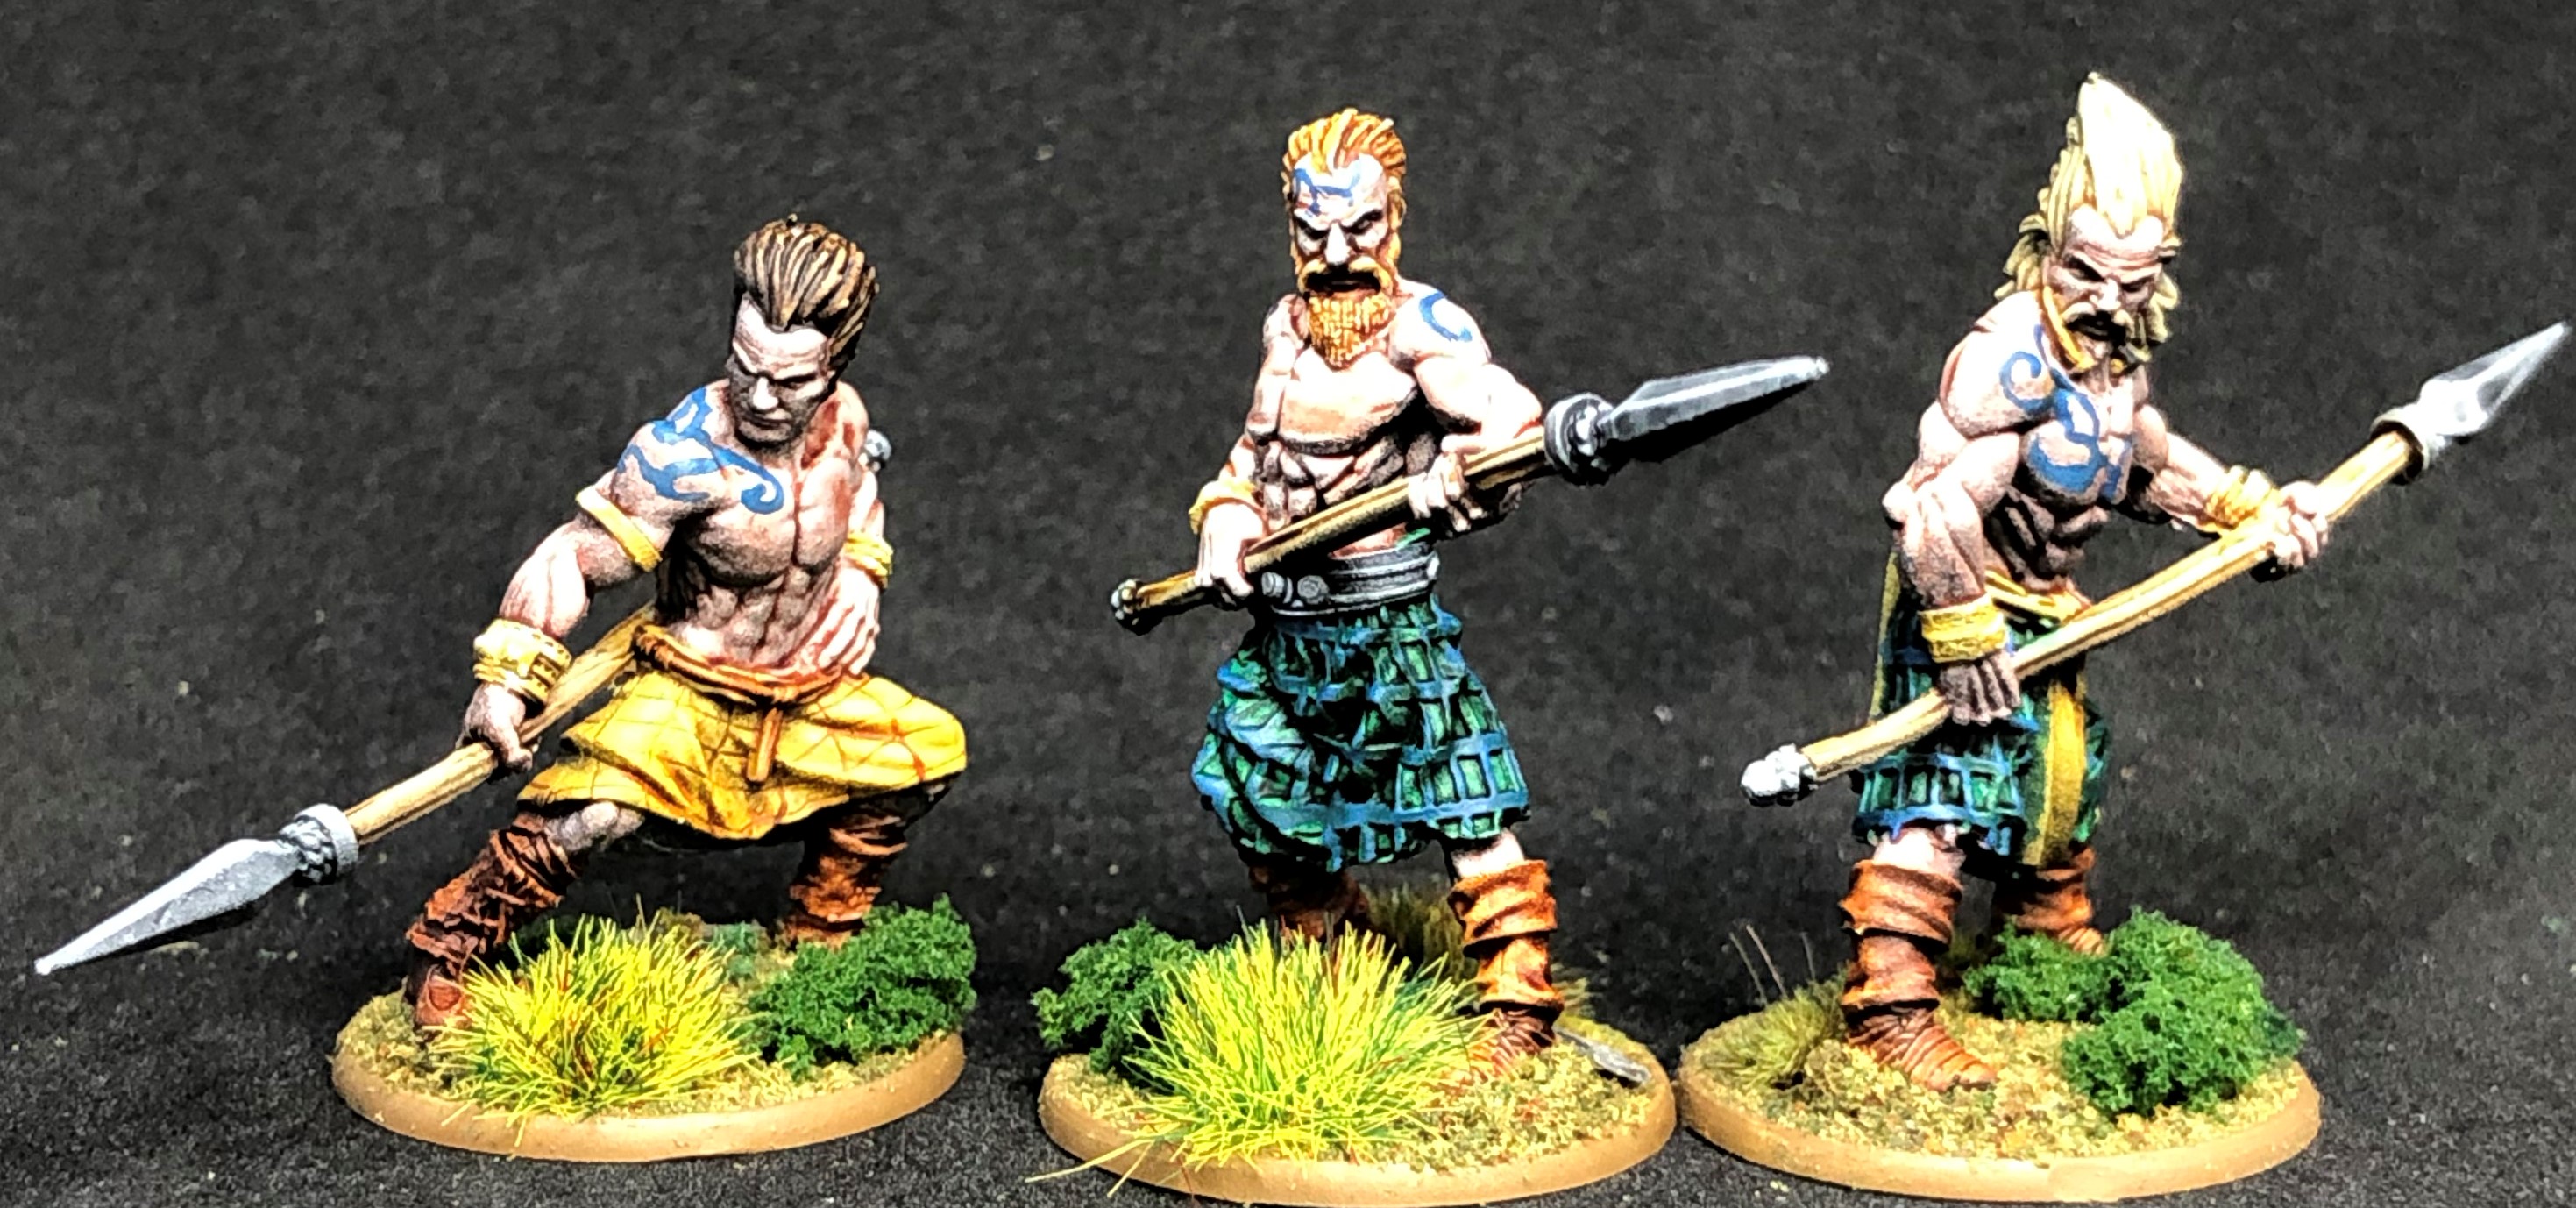
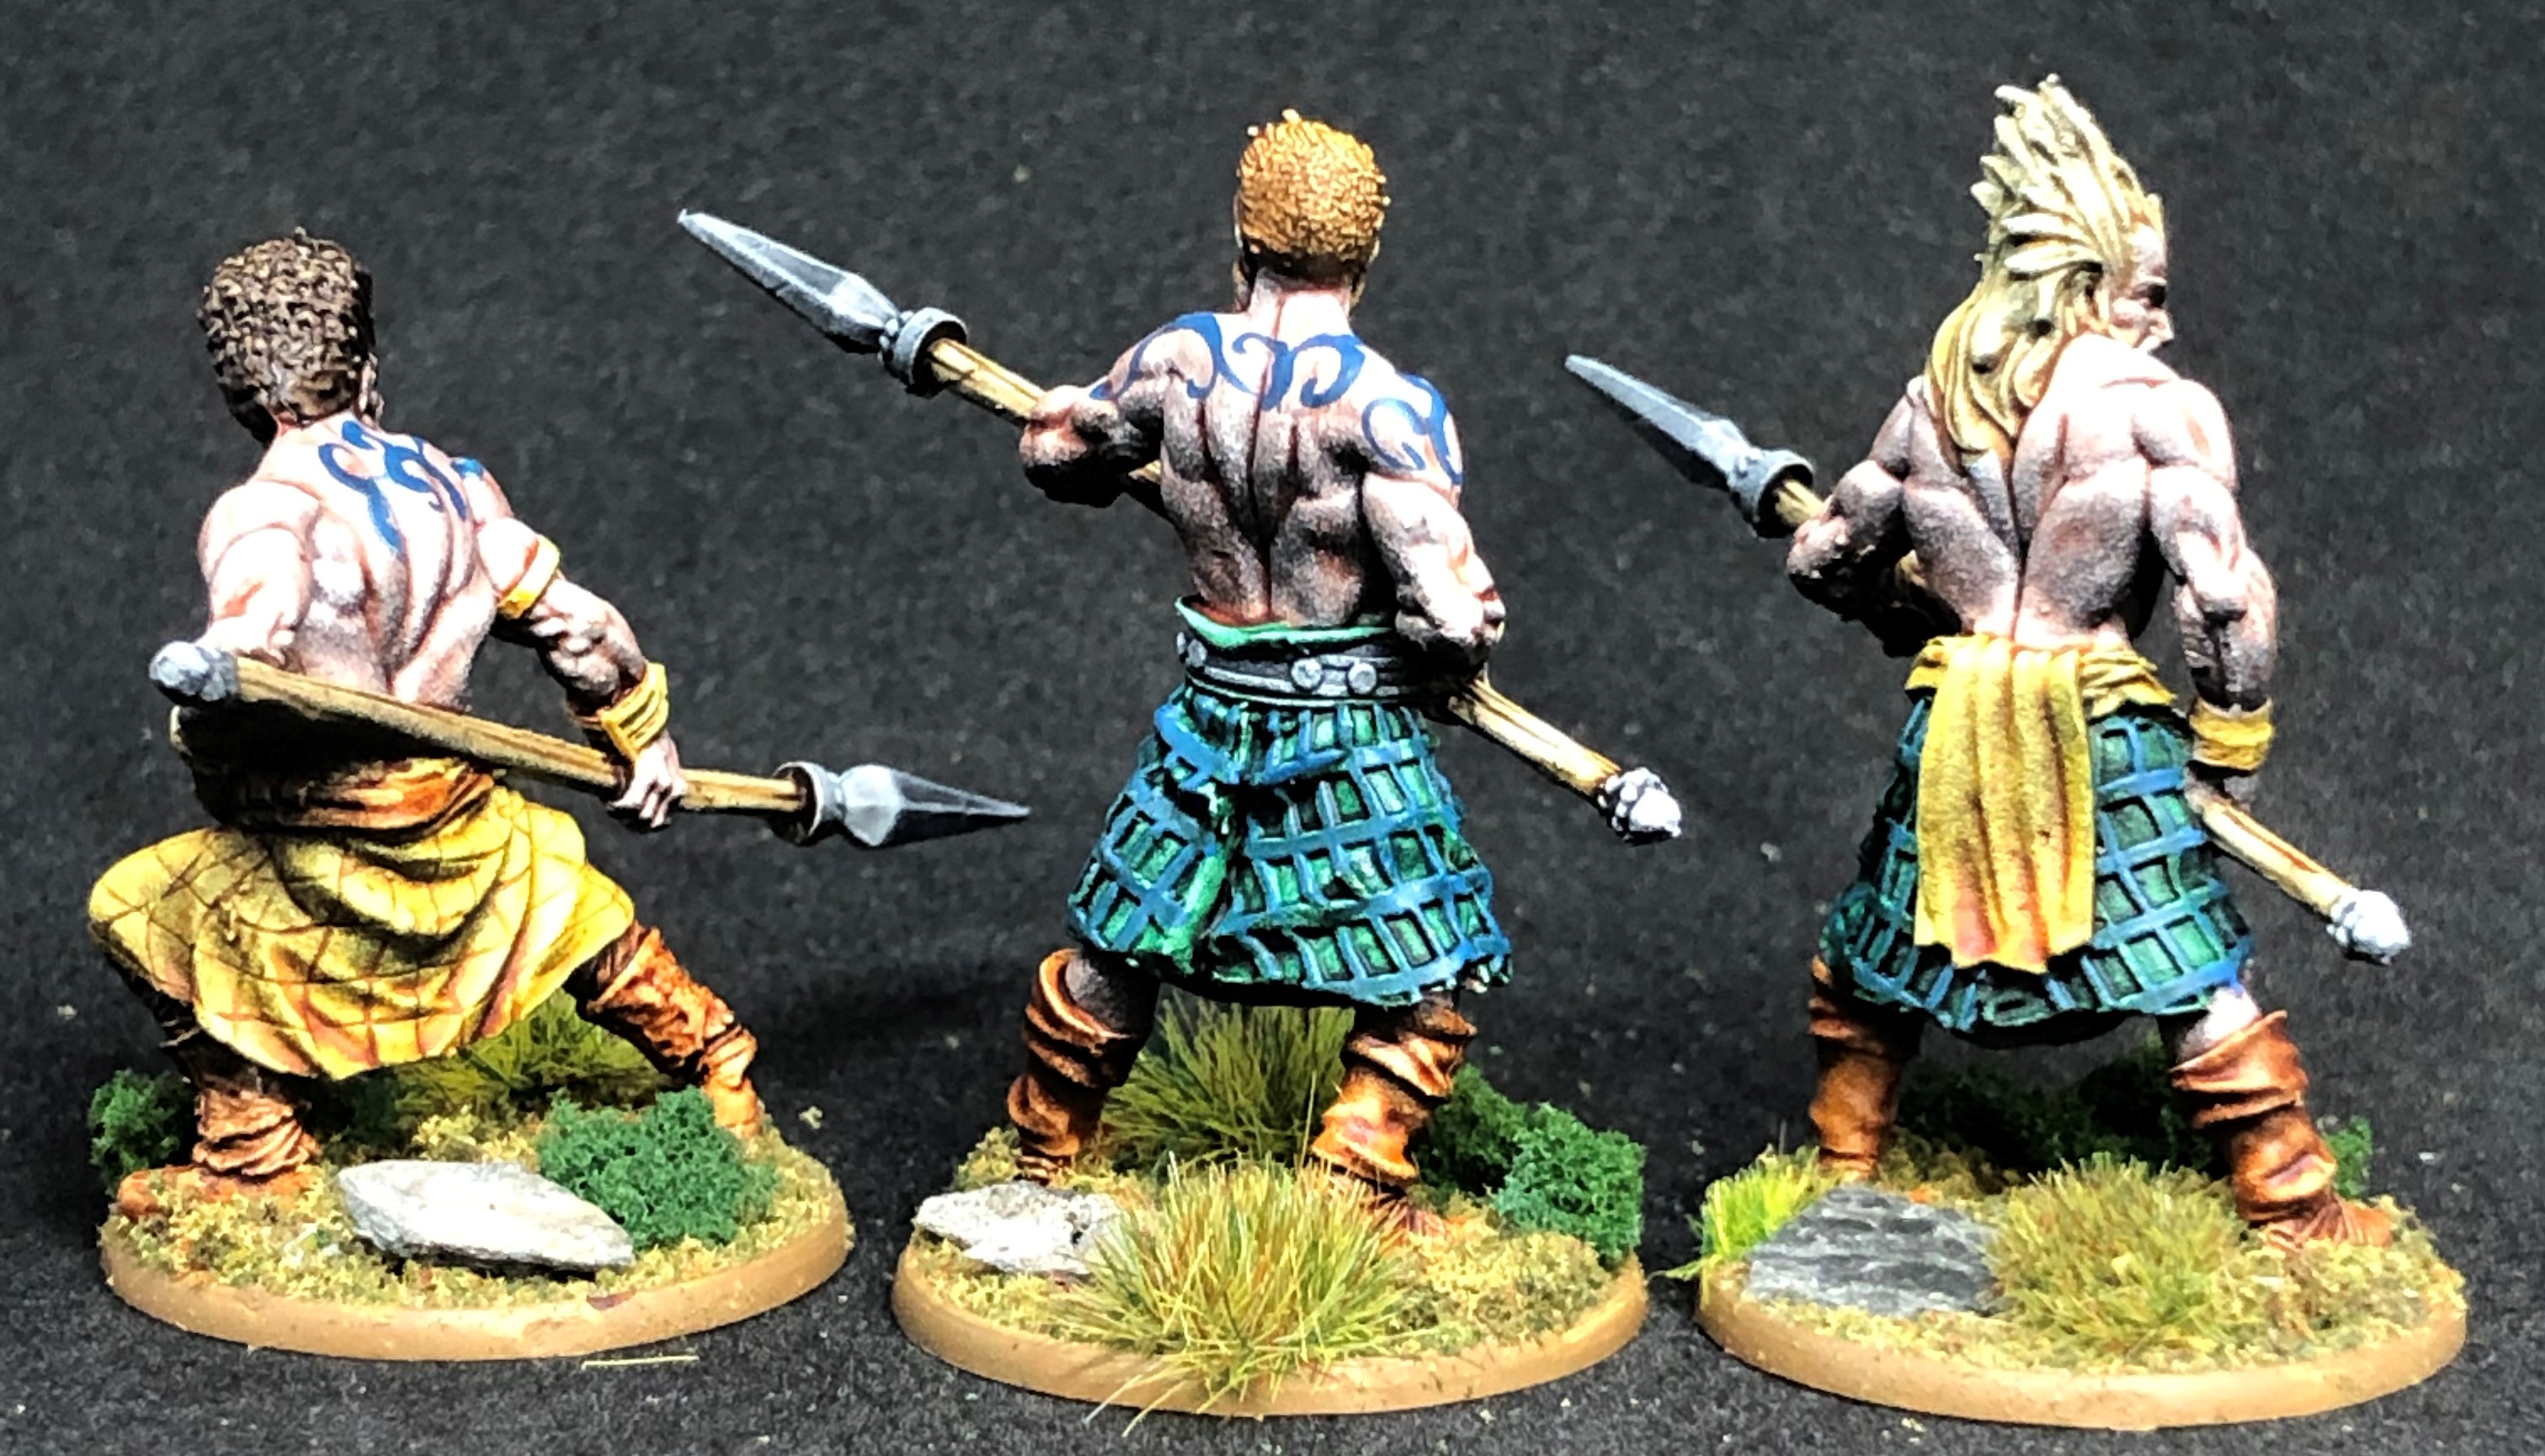
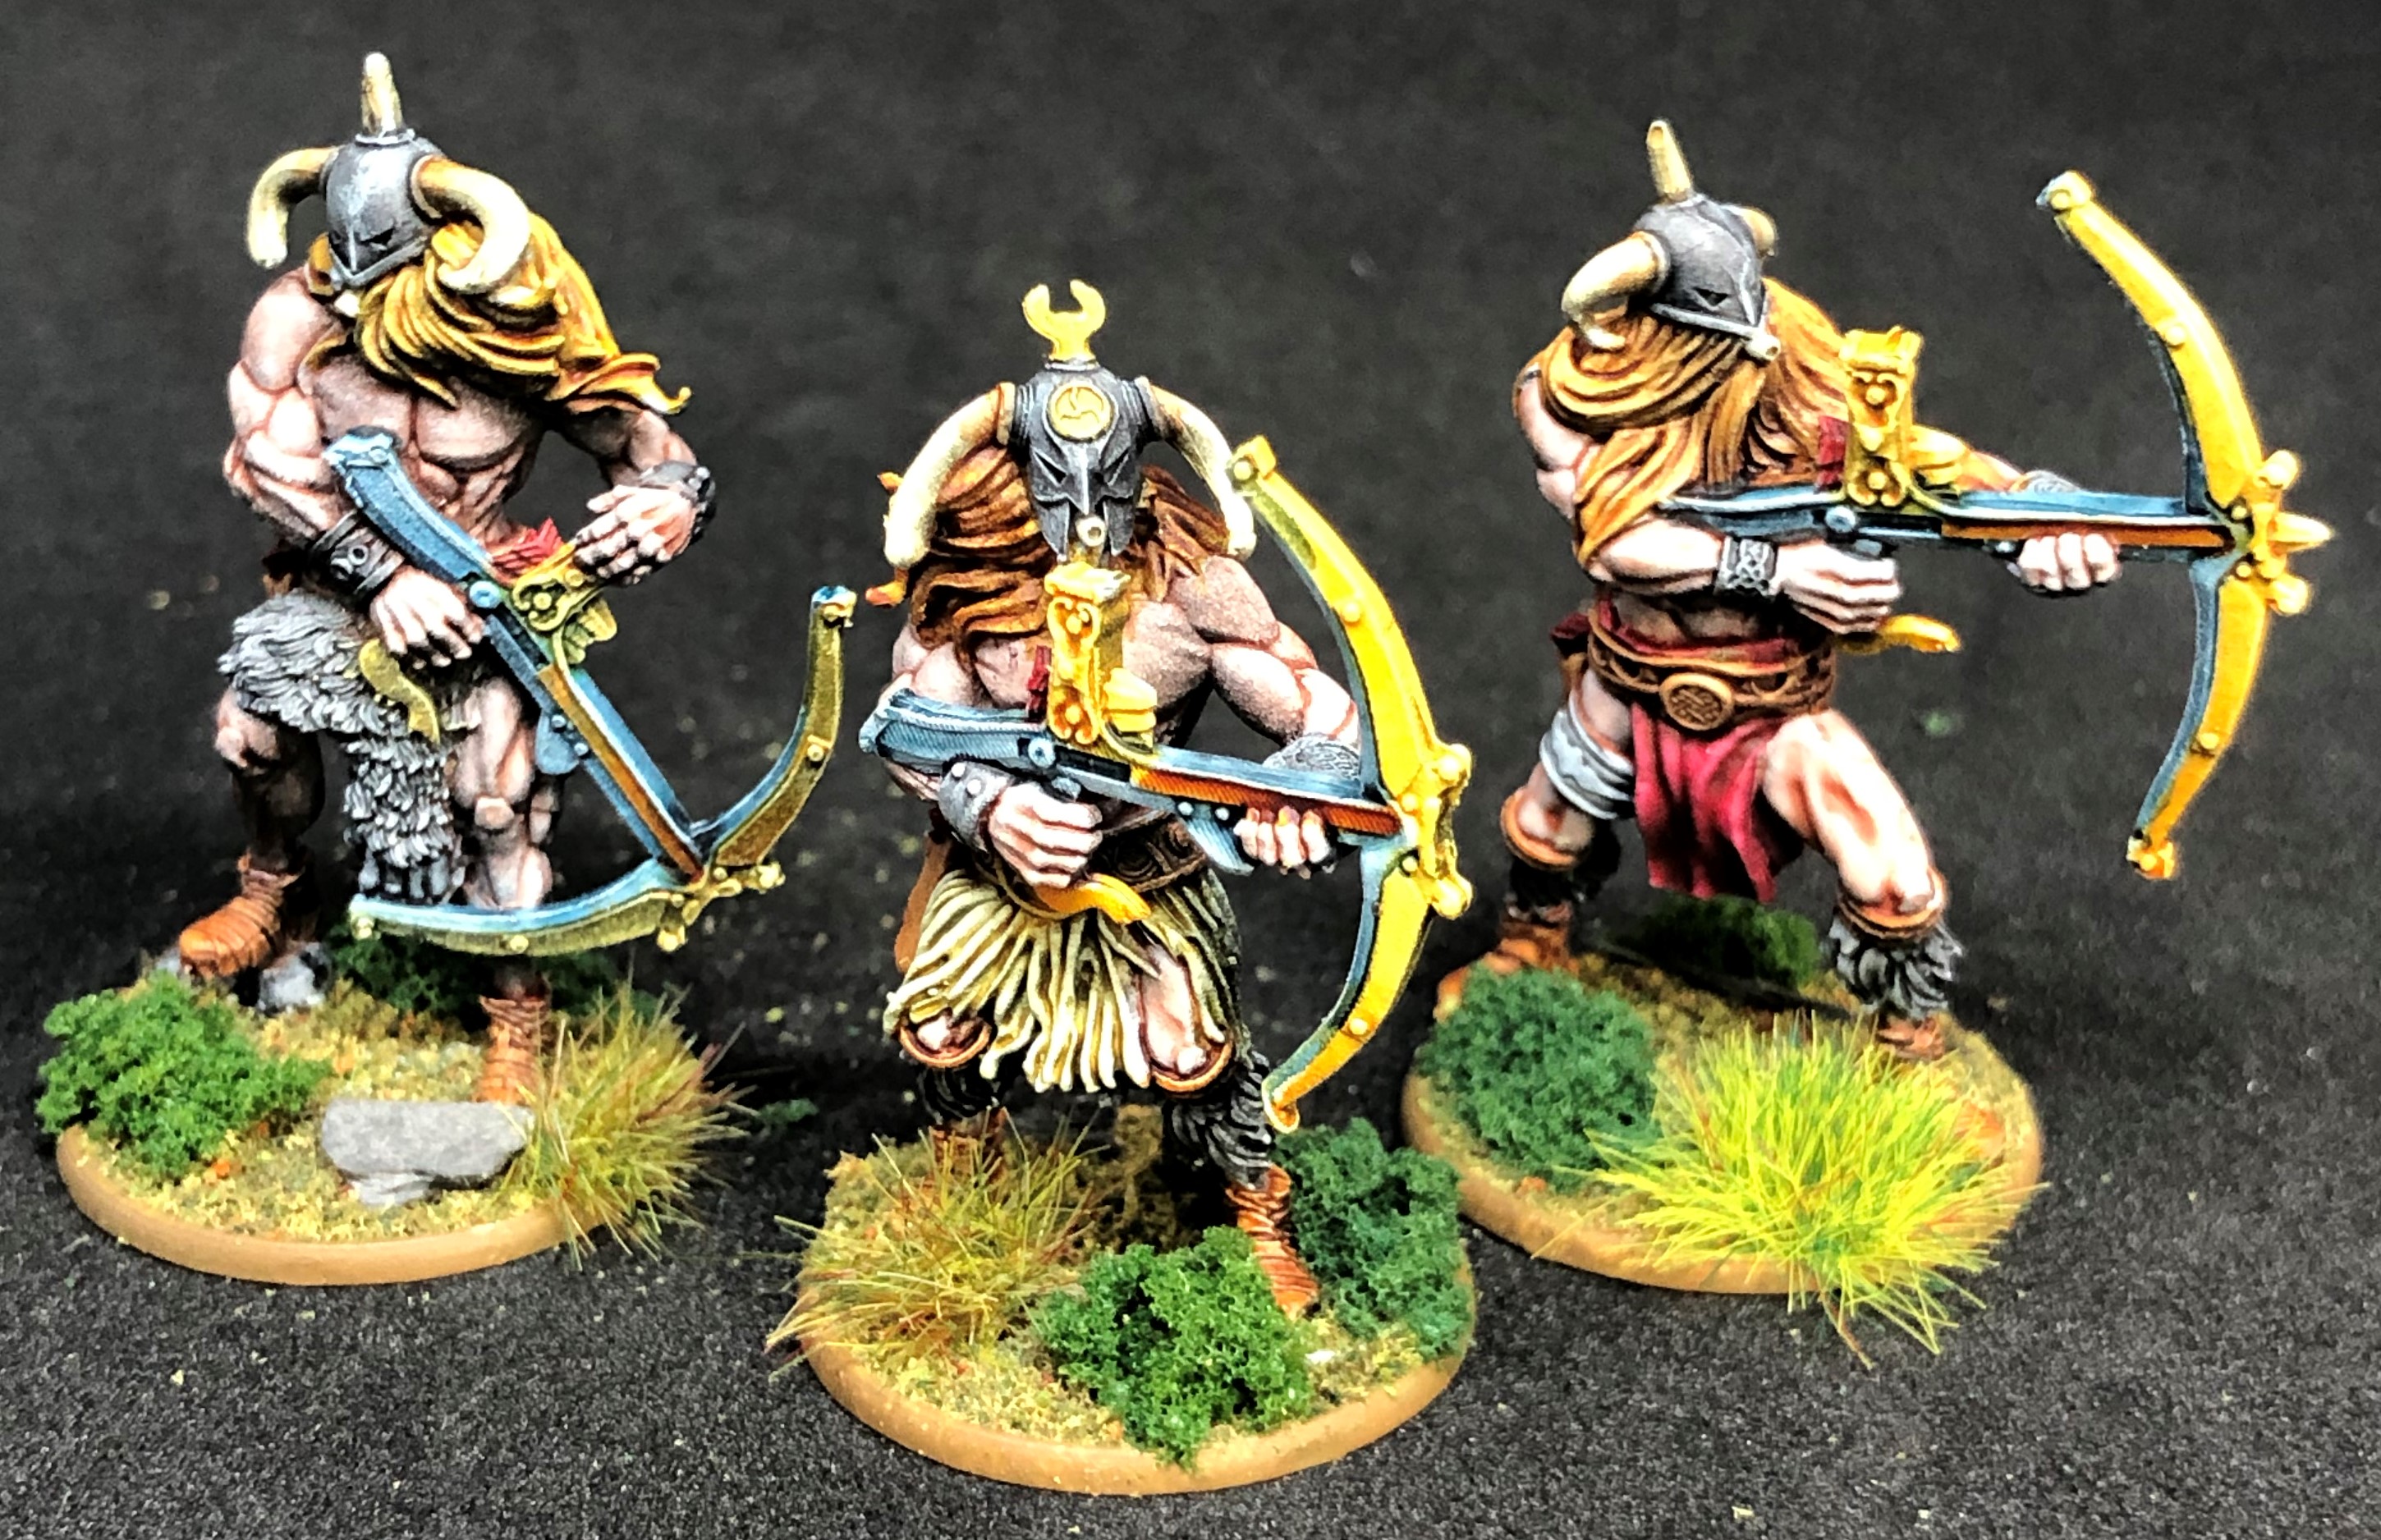
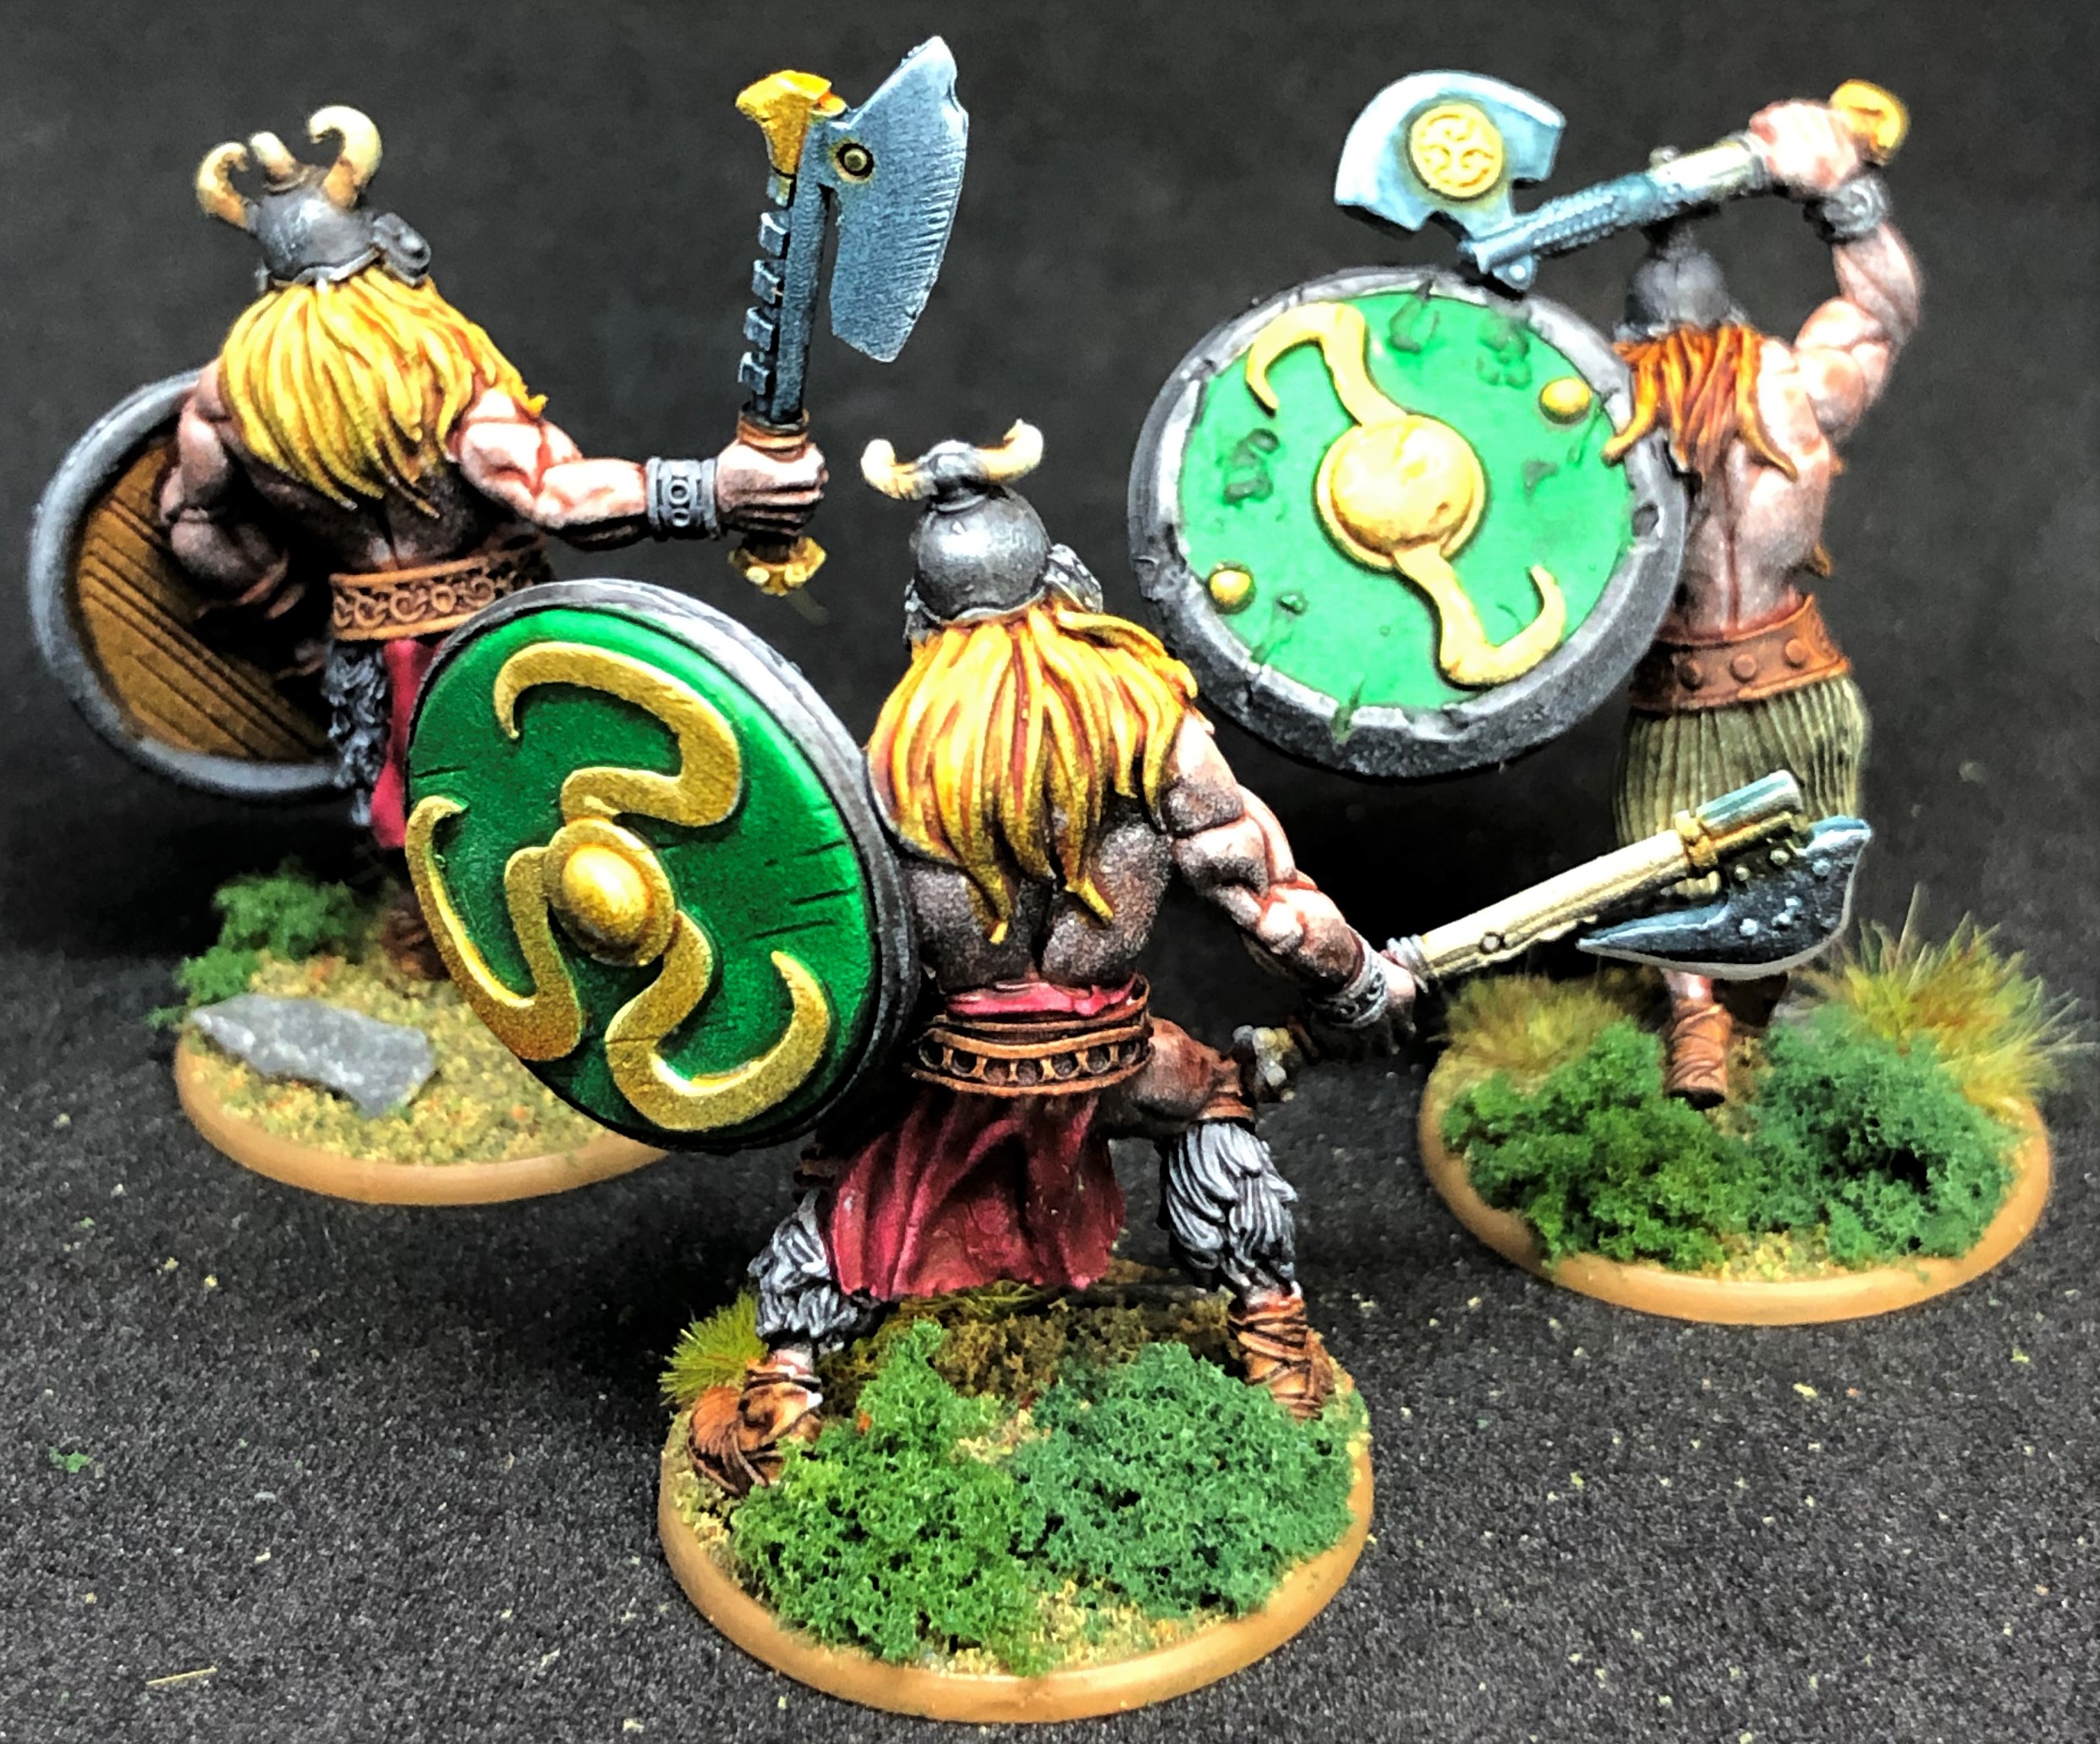
I got the Sessair done, including the Red Branch warriors with their funky weapons.
The main feature colours are Zealot Yellow and Absolution Green. Kilts have had the pattern picked out in Vallejo Flat Blue.
Tattoos are great fun. I did them the first time in my Celt-Iberian project and I use thinned down Vallejo Prussian Blue for the woad like colour. You need a good brush with quality bristles to make things easier. I find this proto-Celtic “Tribal” style pattern quite easy. The basic principle is to work from the middle towards the edges of a design, from thickest part to the thinnest. I pick a large skin area, then start from the middle of the pattern and press down slightly to get the wider part and then lift the pressue whilst moving outward in the curve of the pattern, lifting until only the very tip is is contact and exagerating the curve back towards itself to finish. Then back to the wider section in the middle and off again curving in another direction. I try to follow the raised contours of the musculature as this makes the pattern easier to see.
The raised parts of the pattern are highlighted with a 60% add mixture of white, keeping the paint quite thin using ink or an Air type paint. This can be used to cover any unevenness in the width of stroke from the first application.
Give tattoos a try, you’ll be amazed at how easy they are 🙂
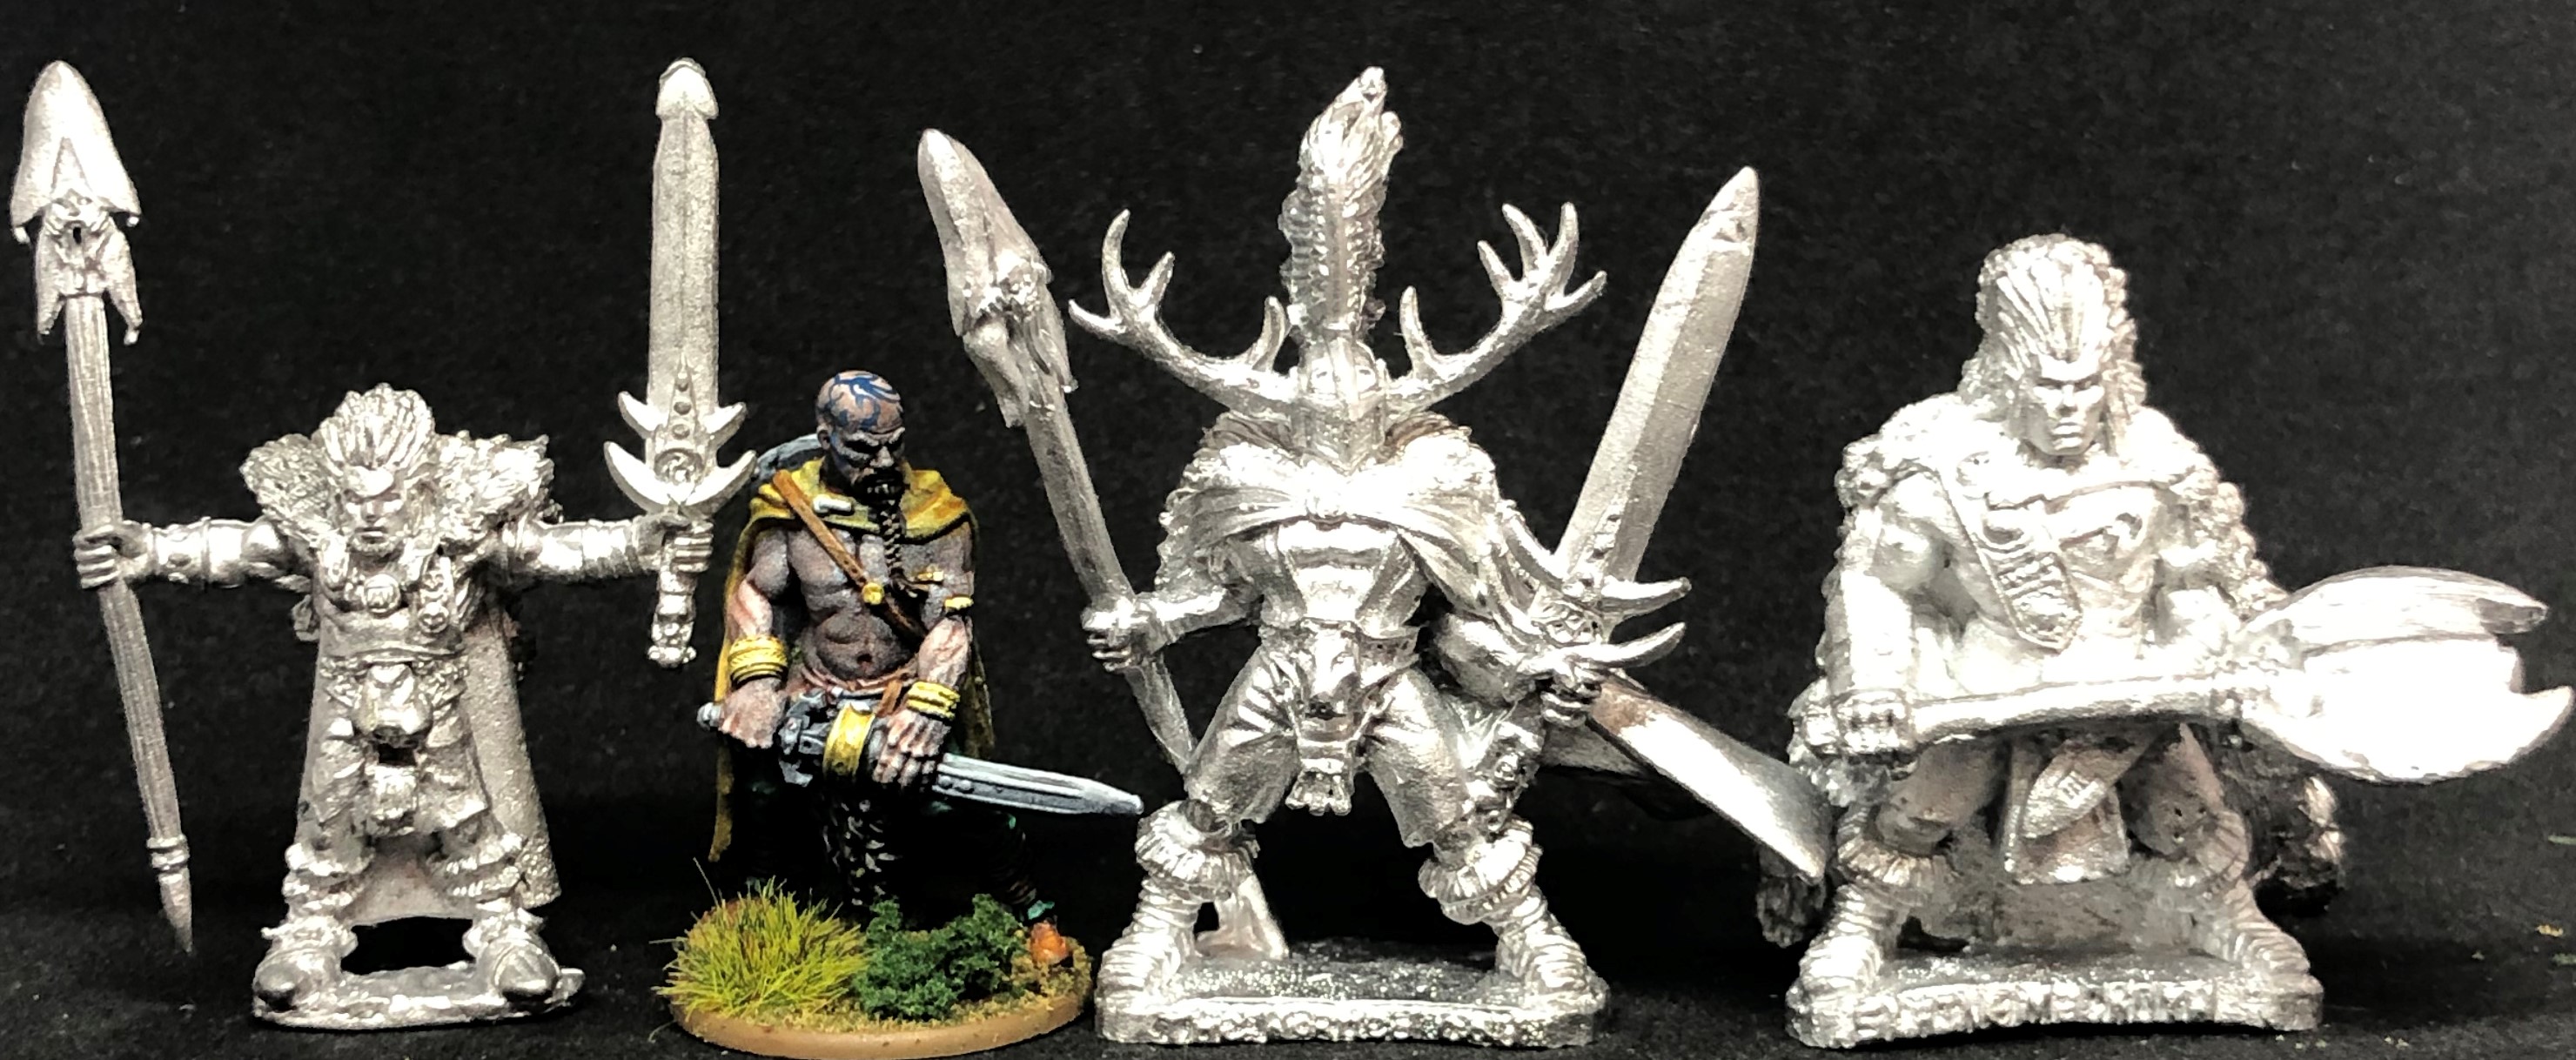
Size comparisons and alternative ranges 2
Ran out of layouts on the last post but still have more comparison shots:
 Warlord Medb, Celtos witch, Celtos Danu, Celtos Druid, Warlord warrior
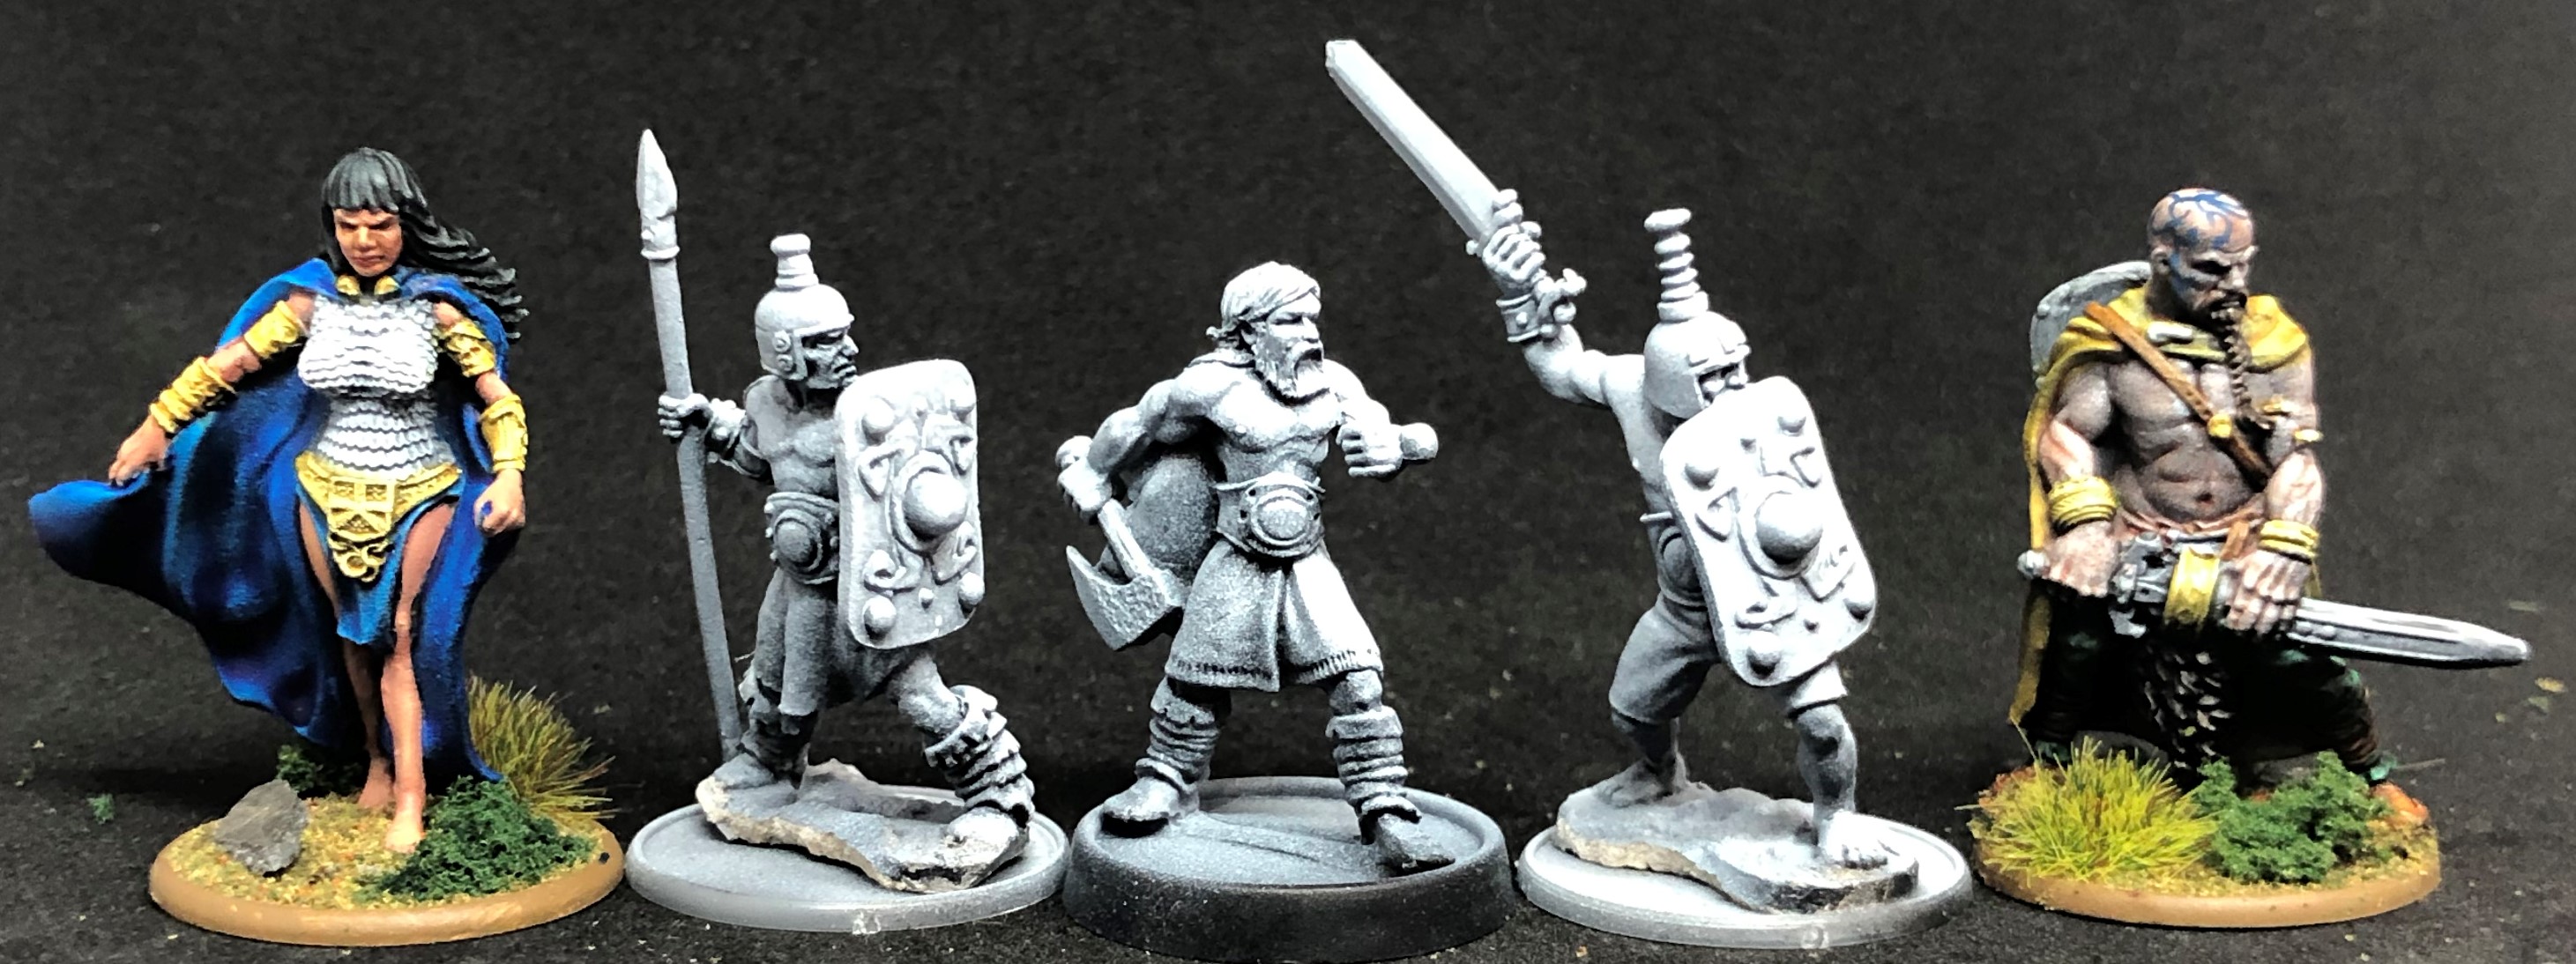 Warlord Medb, Eastland warrior, Harlequin barbarian, Eastland warrior, Warlord warrior
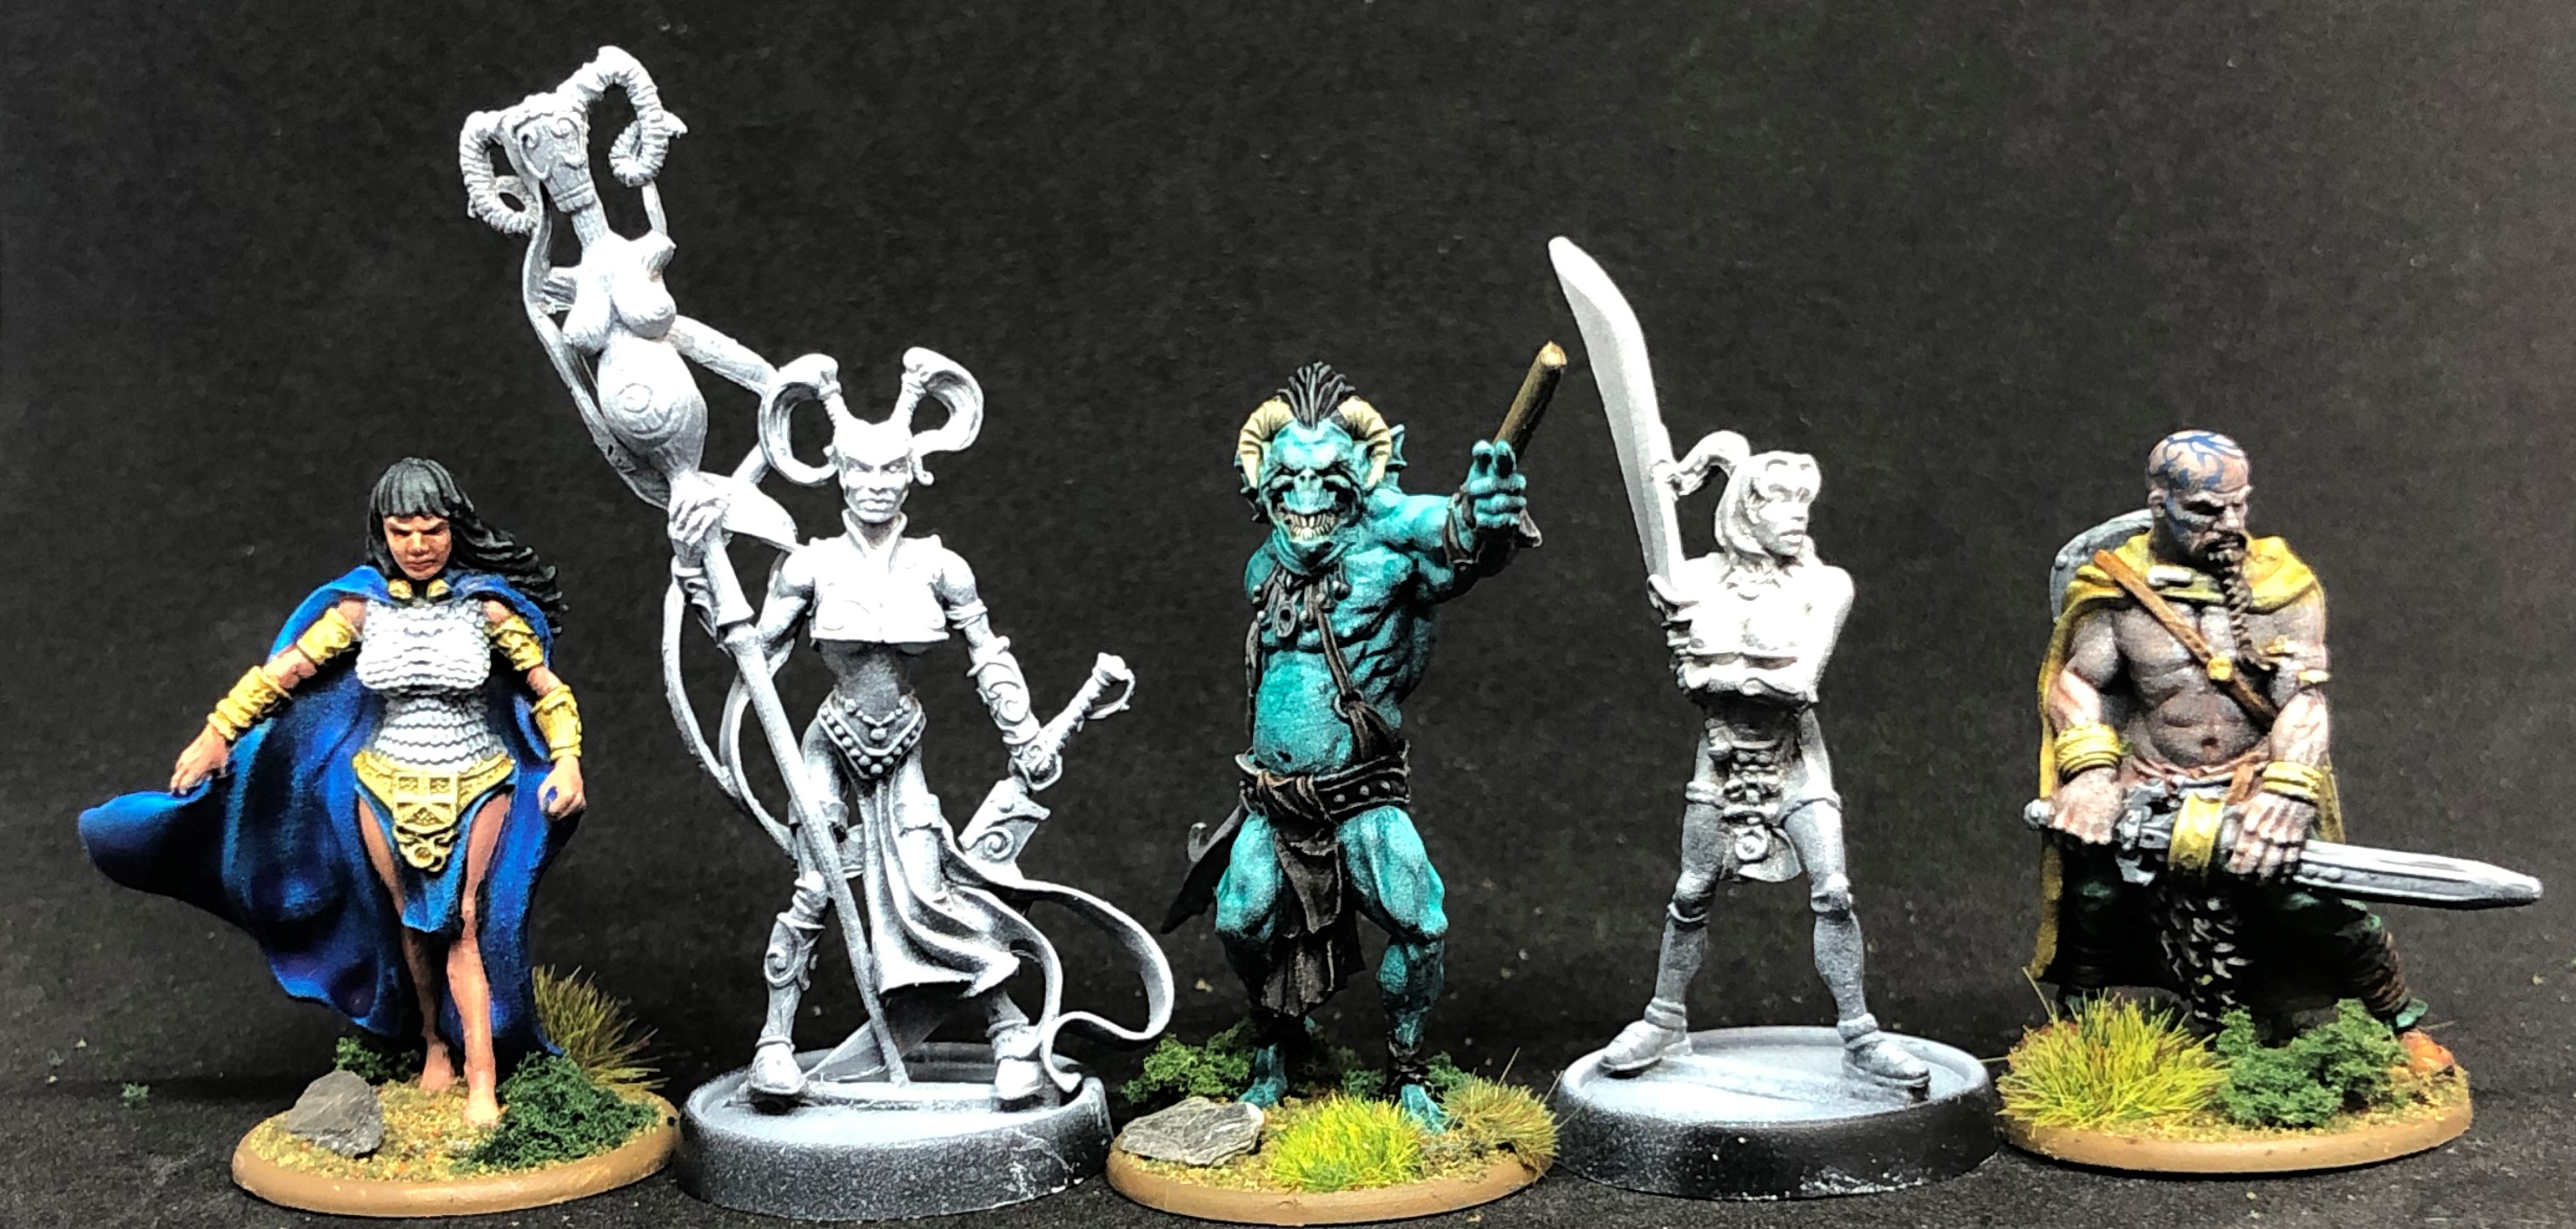 Warlord Medb, Confrontation Fianna, Warlord Fomorian, Confrontation Fianna, Warlord warrior
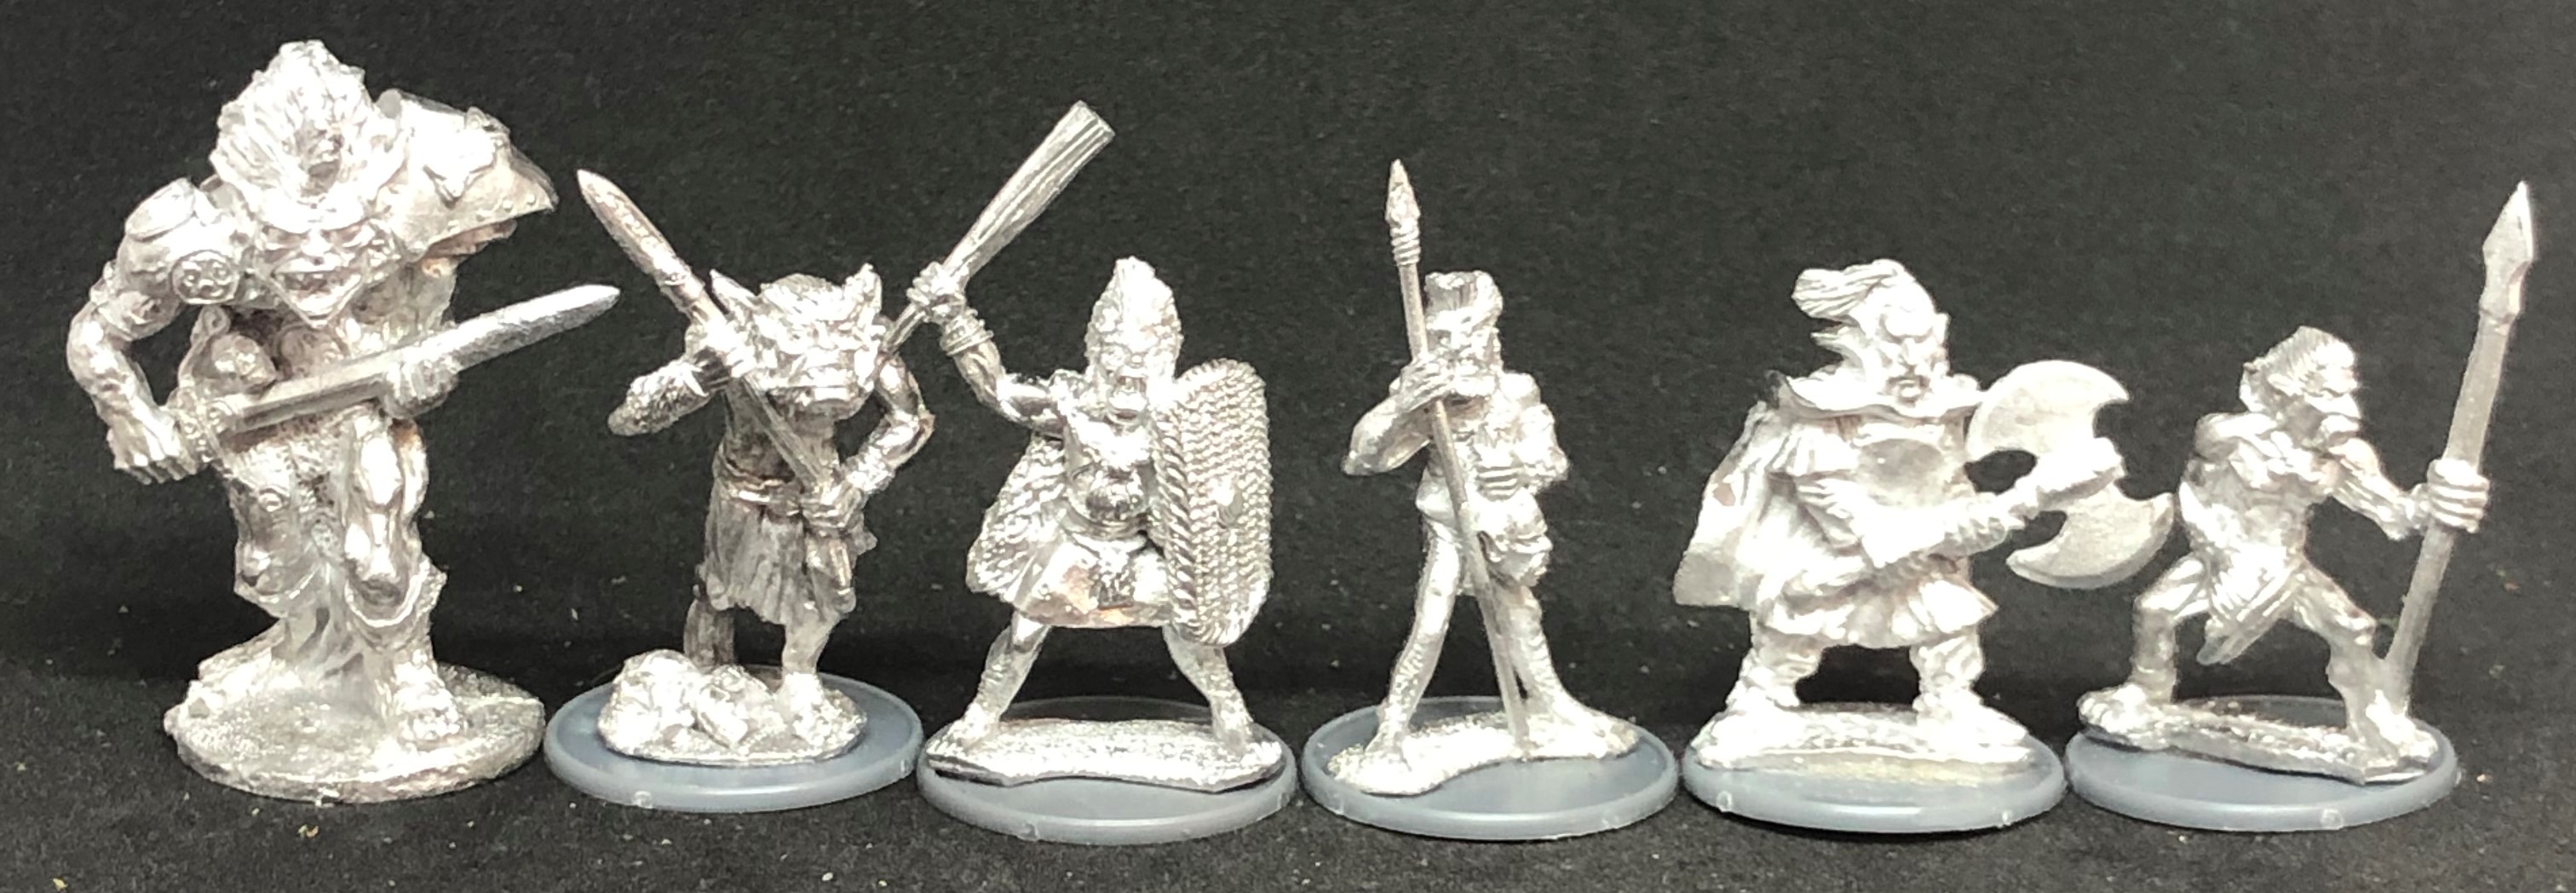 All Alternative Armies Erin: Fomorian x 2, Fir-Bolg x2, Sidhe x2
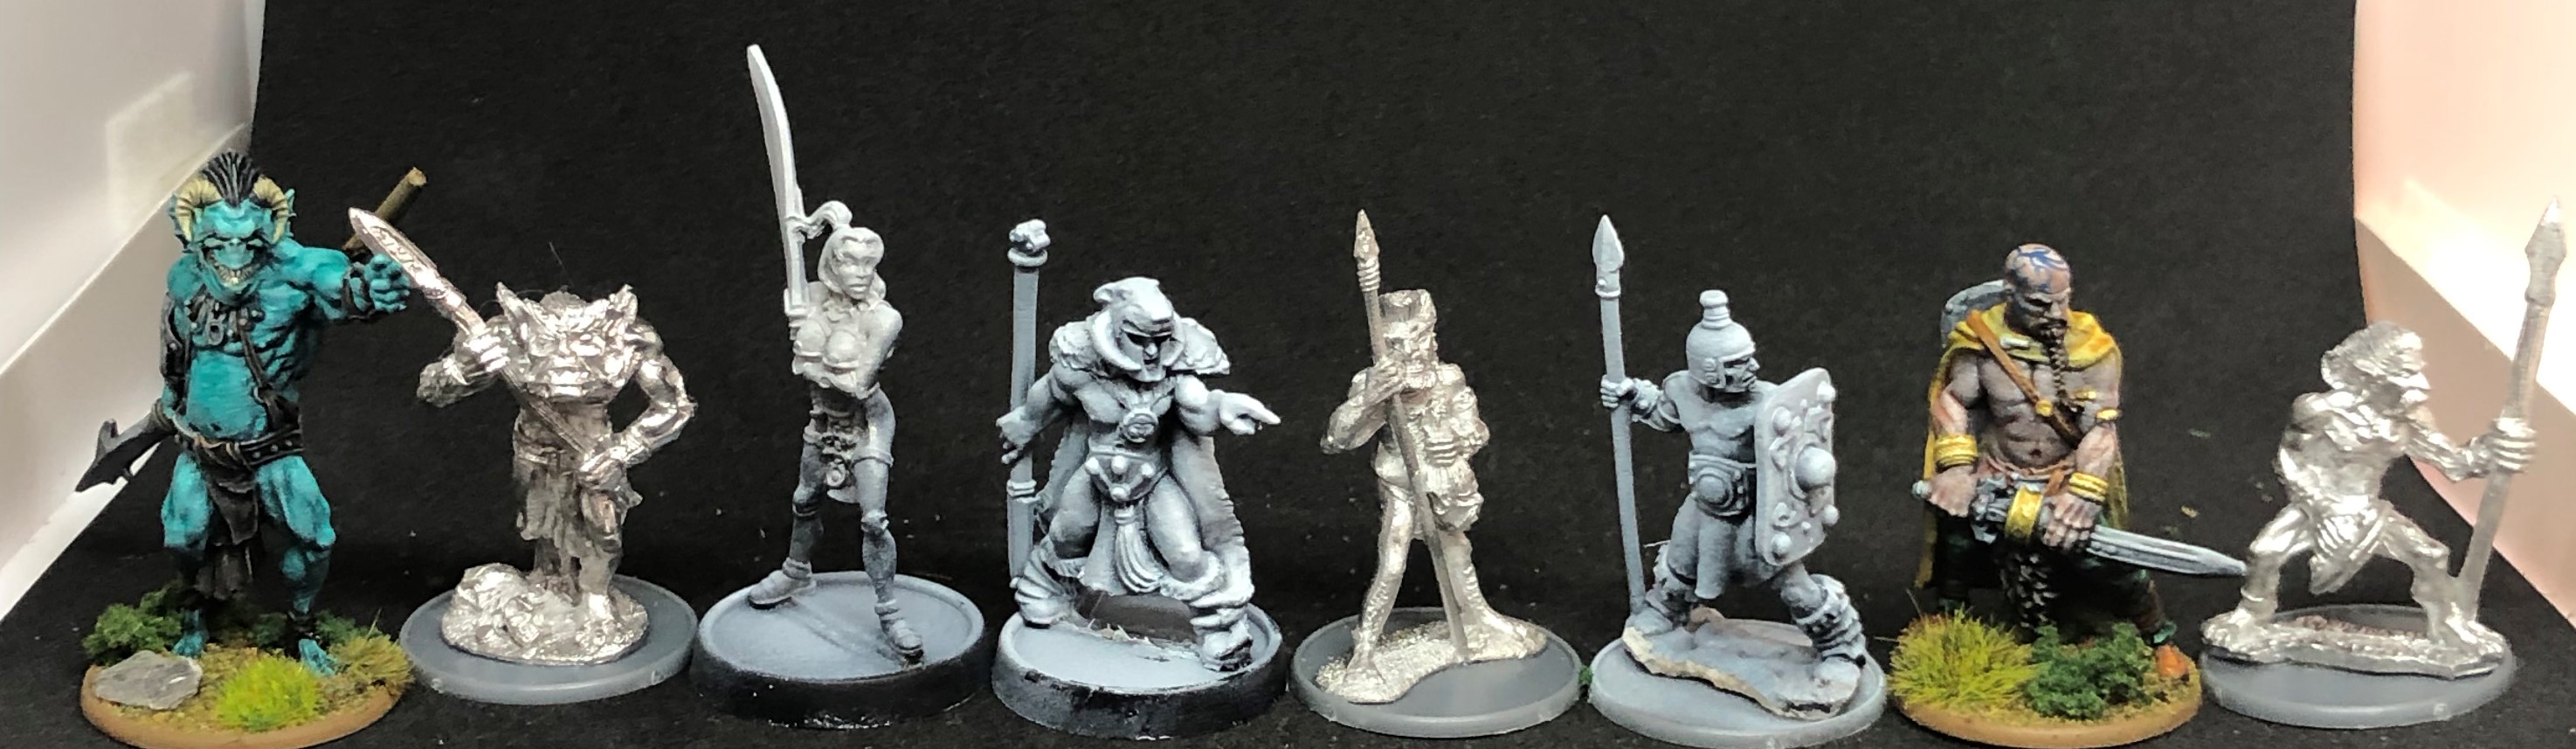 Warlord Fomorian, AA Erin Fomorian, Confrontation Fianna, Cronopia Hunter, AA Erin Fir-Bolg, Eastland warrior, Warlord warrior, AA Erin Sidhe
 Size comparisons and alternative ranges
I’m using non-Warlord miniatures in my project and @demonsub has asked to see some size comparison shots. There have been quite a few Sláine adjacent ranges over the years so this will take a few photos. Firstly, the Warlord models are 32-35mm sized but how big is that?
 Size comparison - Warlord only
Compare to standard reference monopose Space Marine and GW Gondorian swordsman:
Alternative ranges I’m planning on using are from:
Alternative Armies Erin, Brigade Models Celtos, Fantasy Forge/Harlequin (some of the Roy Eastland sculpts are available through North Star Figures), Wargames Foundry 2000AD range (oop),Warlord Chronopia (Target oop) and Confrontation Sessairs
First up, the main man himself:
 Foundry Slaine, Warlord warrior, Foundry Slaine Horned God, Foundry Slaine the King
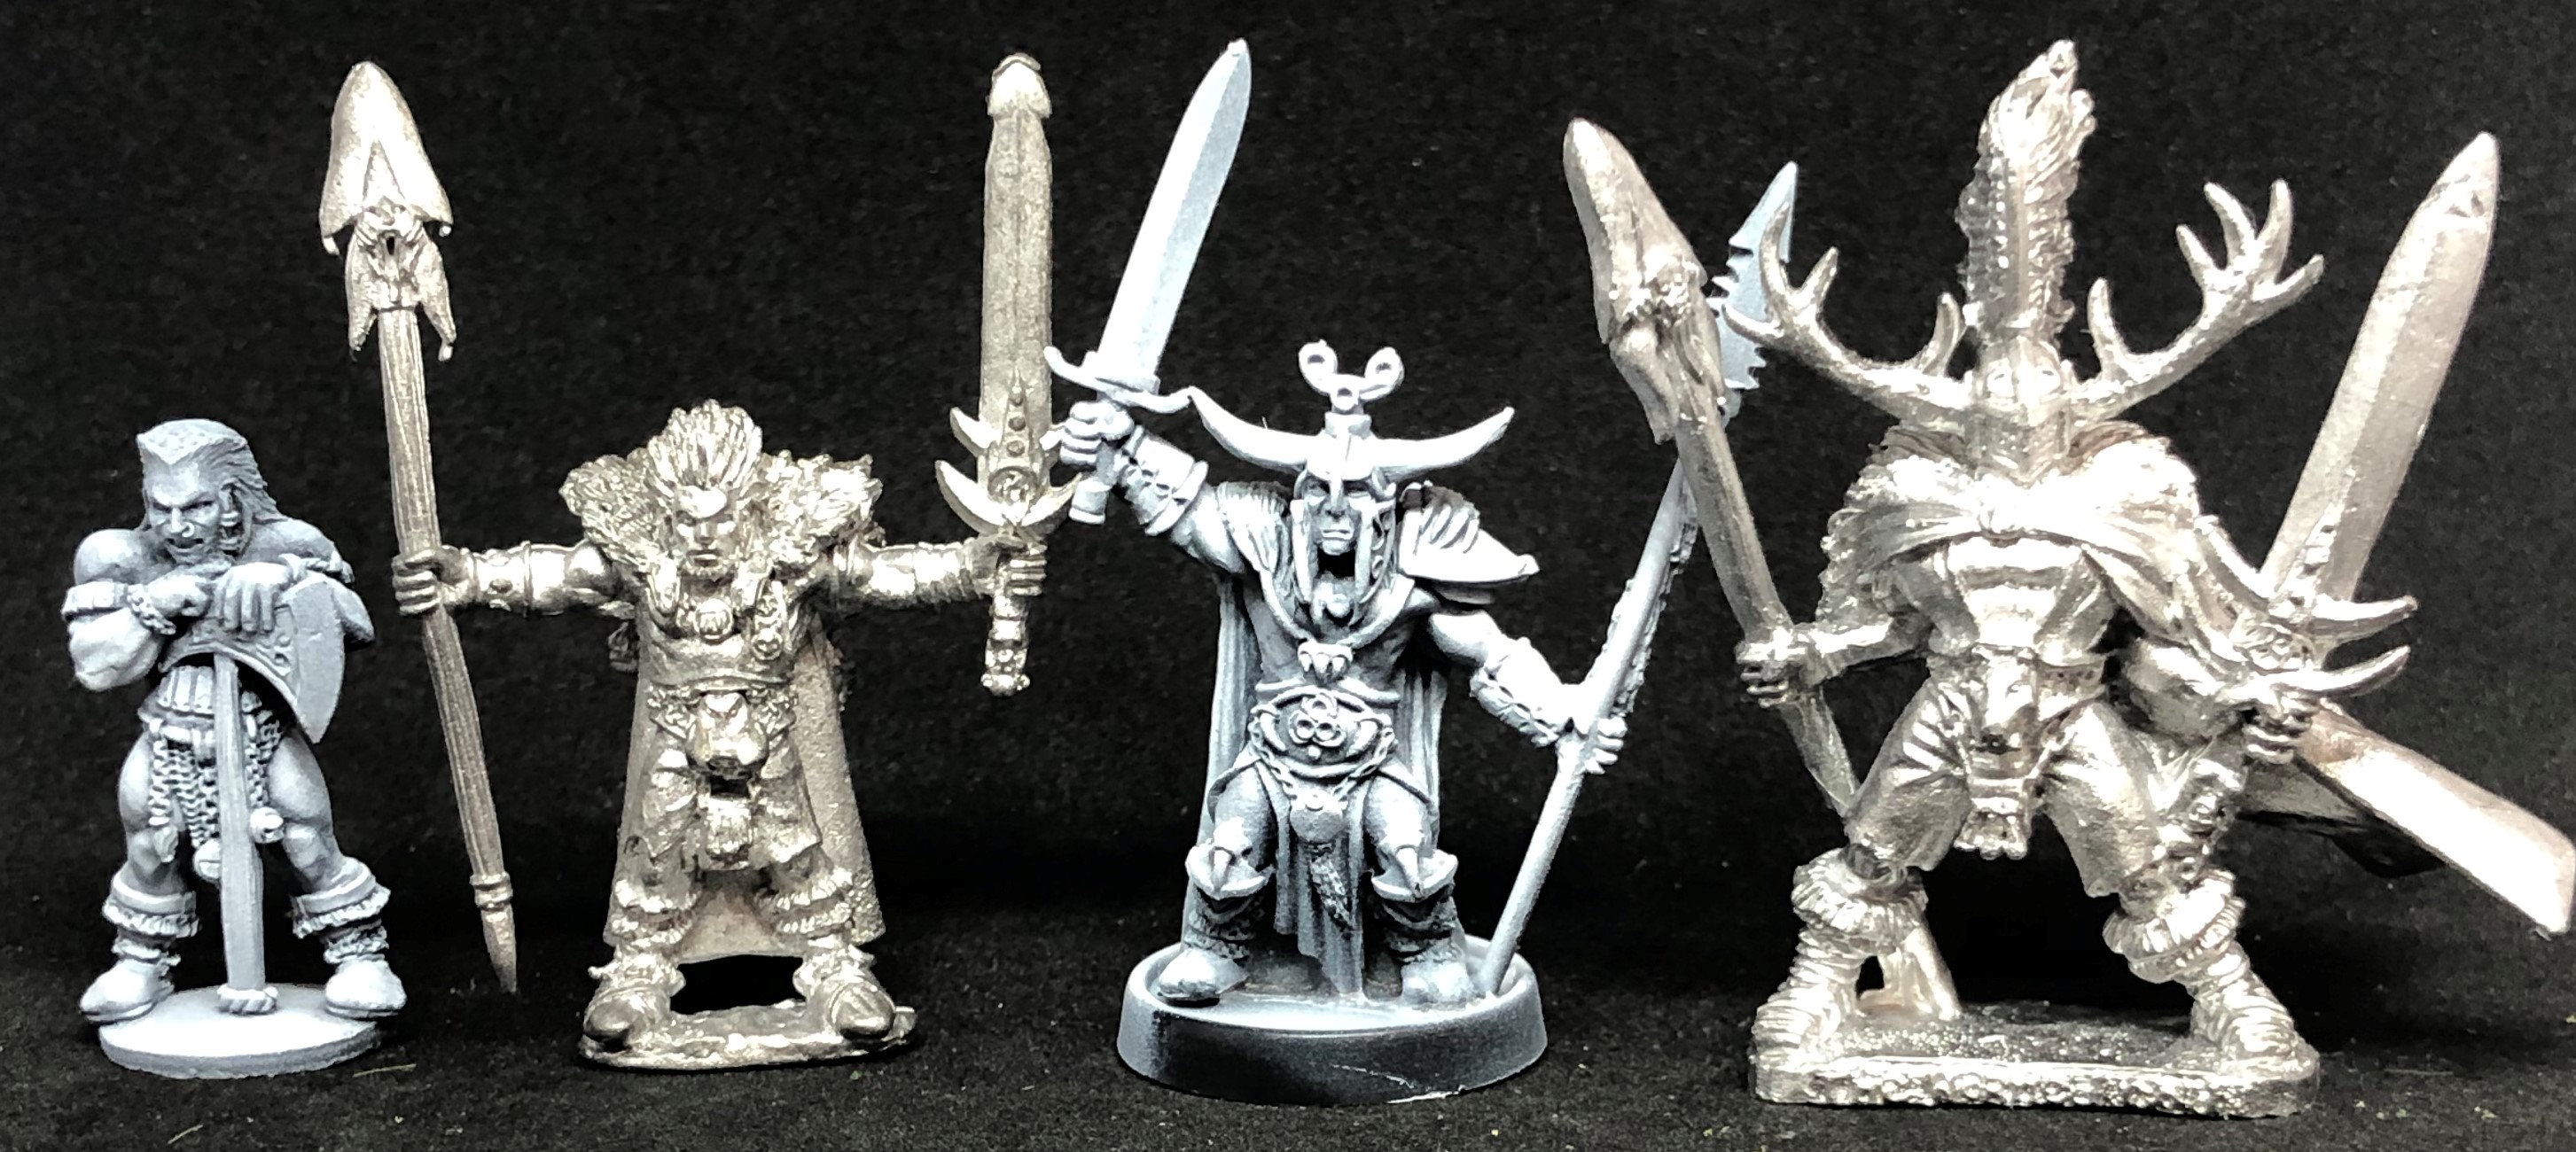 Harlequin, Foundry, Chronopia, Foundry
 Harlequin, Warlord, Foundry, Warlord, Chronopia
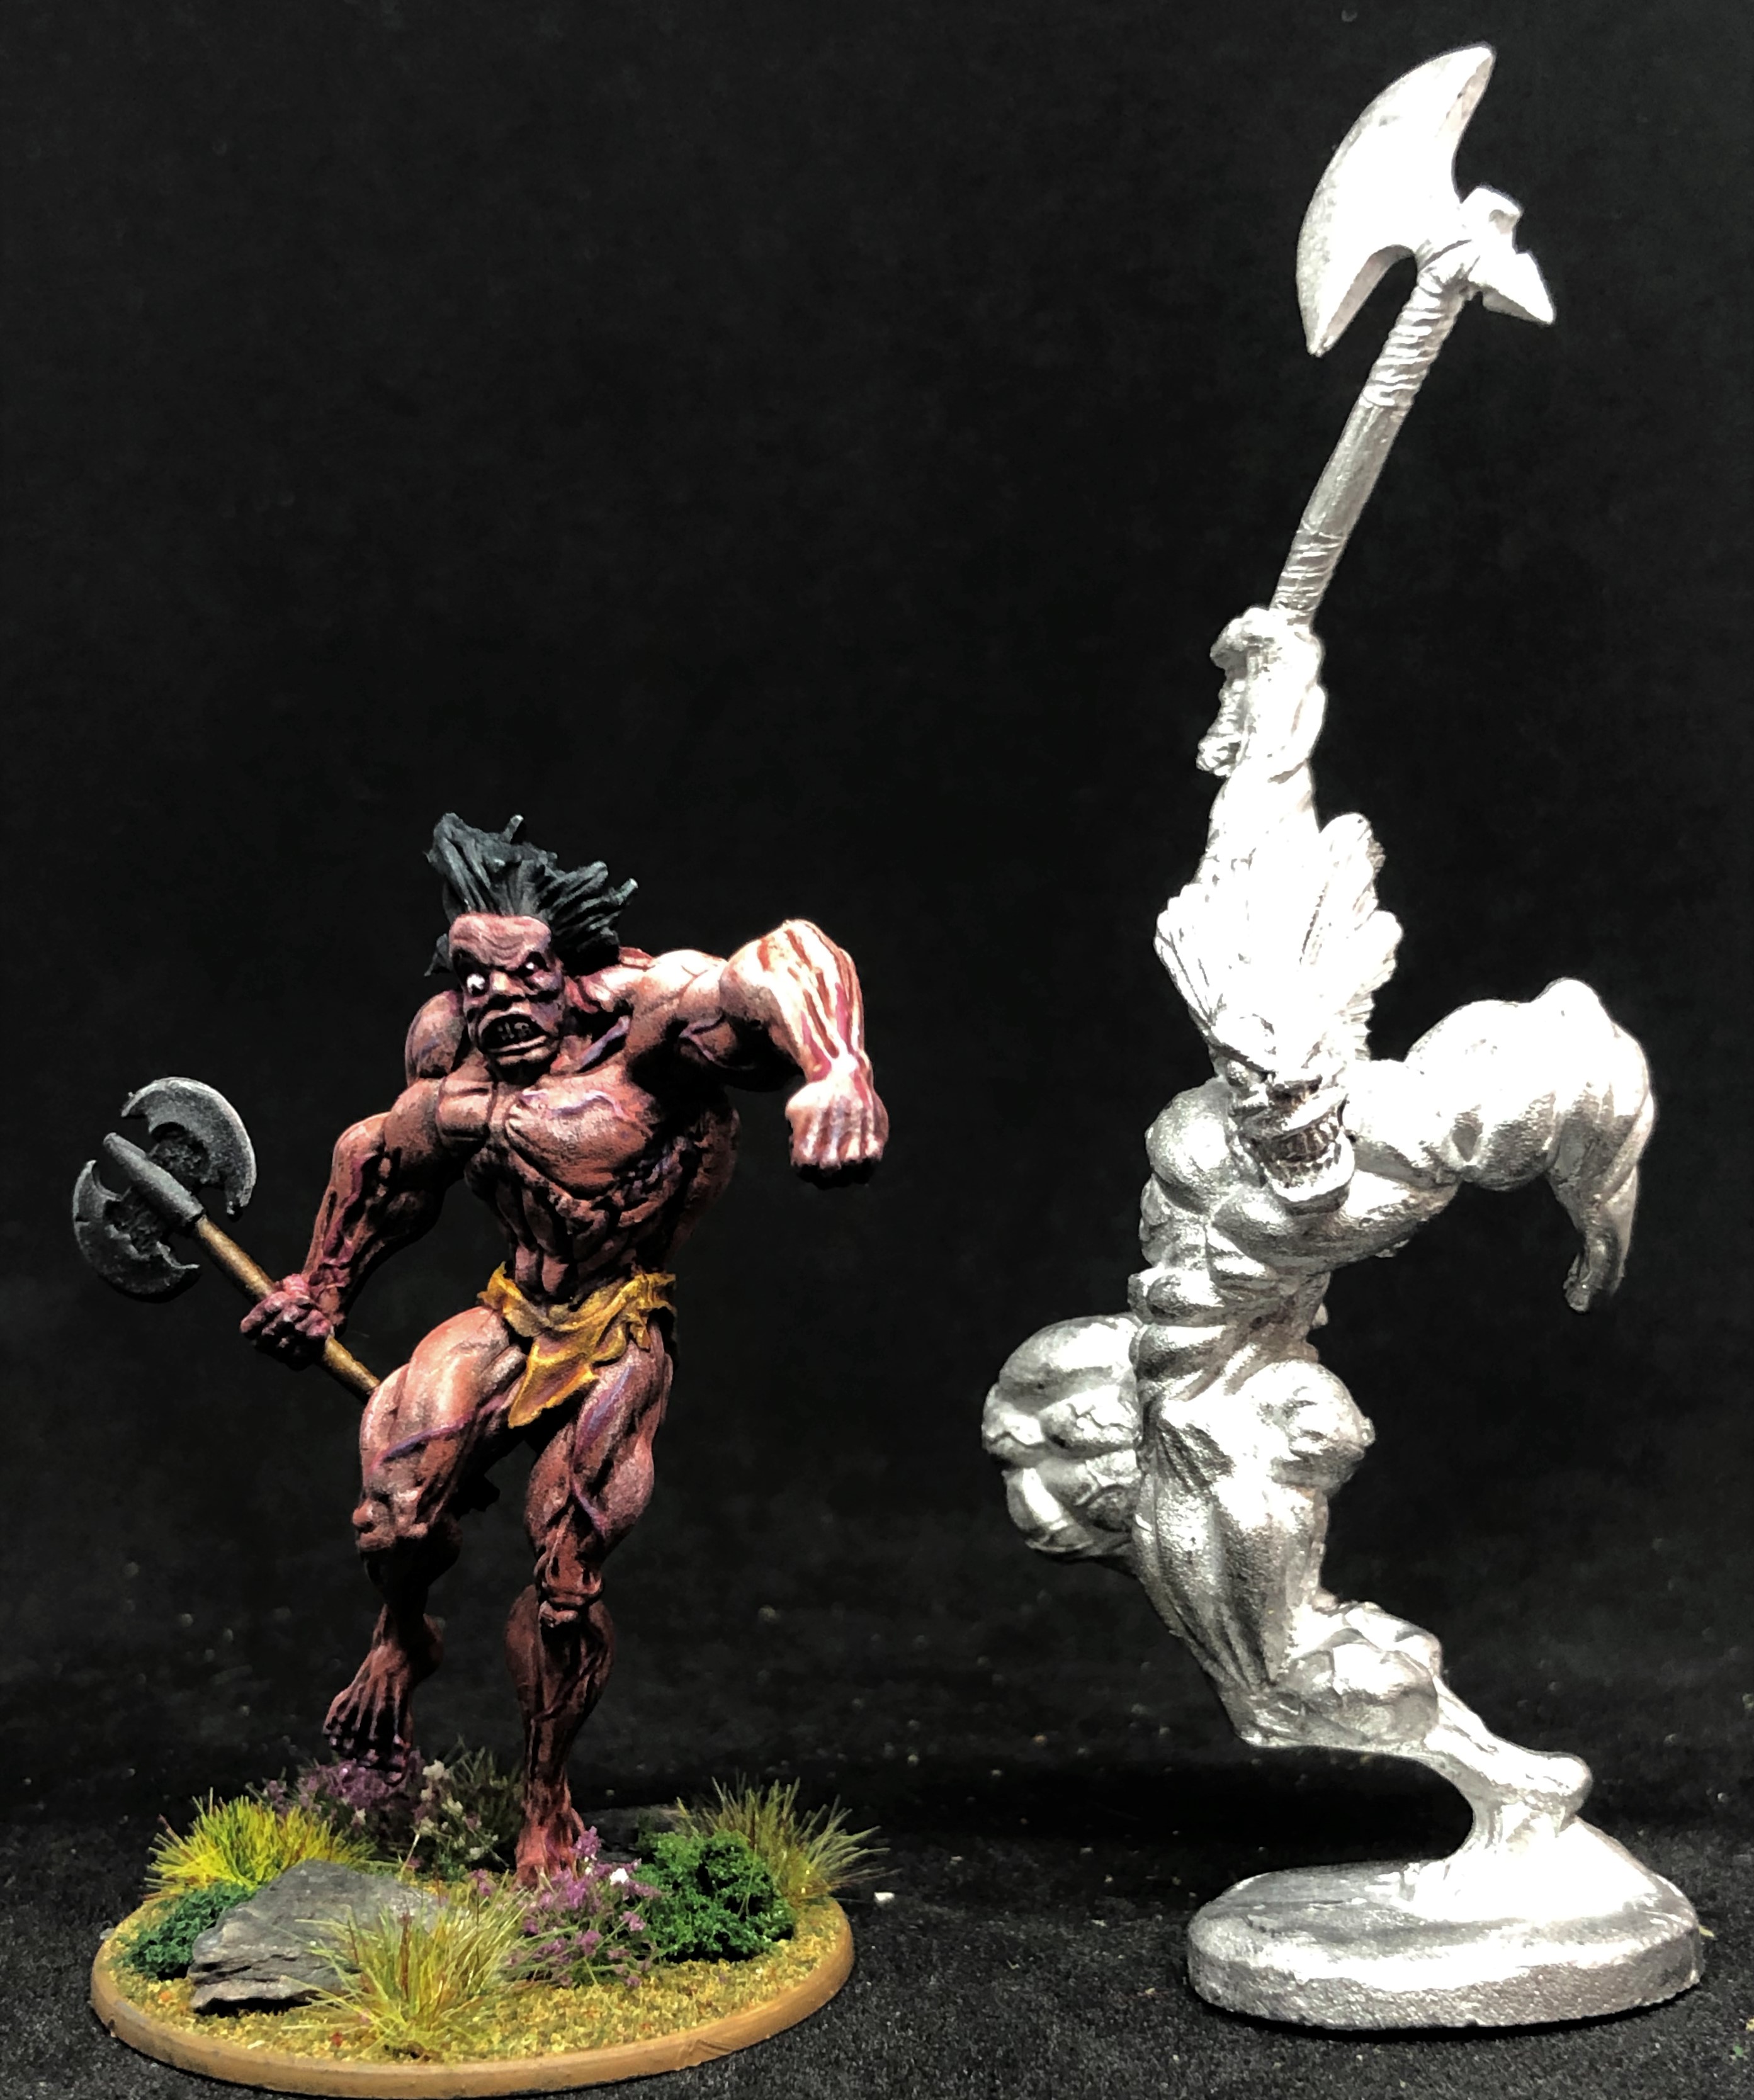 Warlord, Foundry
So we can see that ranges aren’t even consistent to themselves, Warlord’s two unwarped versions are different sizes and there is a huge difference in the various Foundry models. So far so unclear.
Next up the Fomorians:
 AA Erin Champion, Warlord, AA Erin, Warlord, AA Erin, Celtos witch, AA Erin Pucci
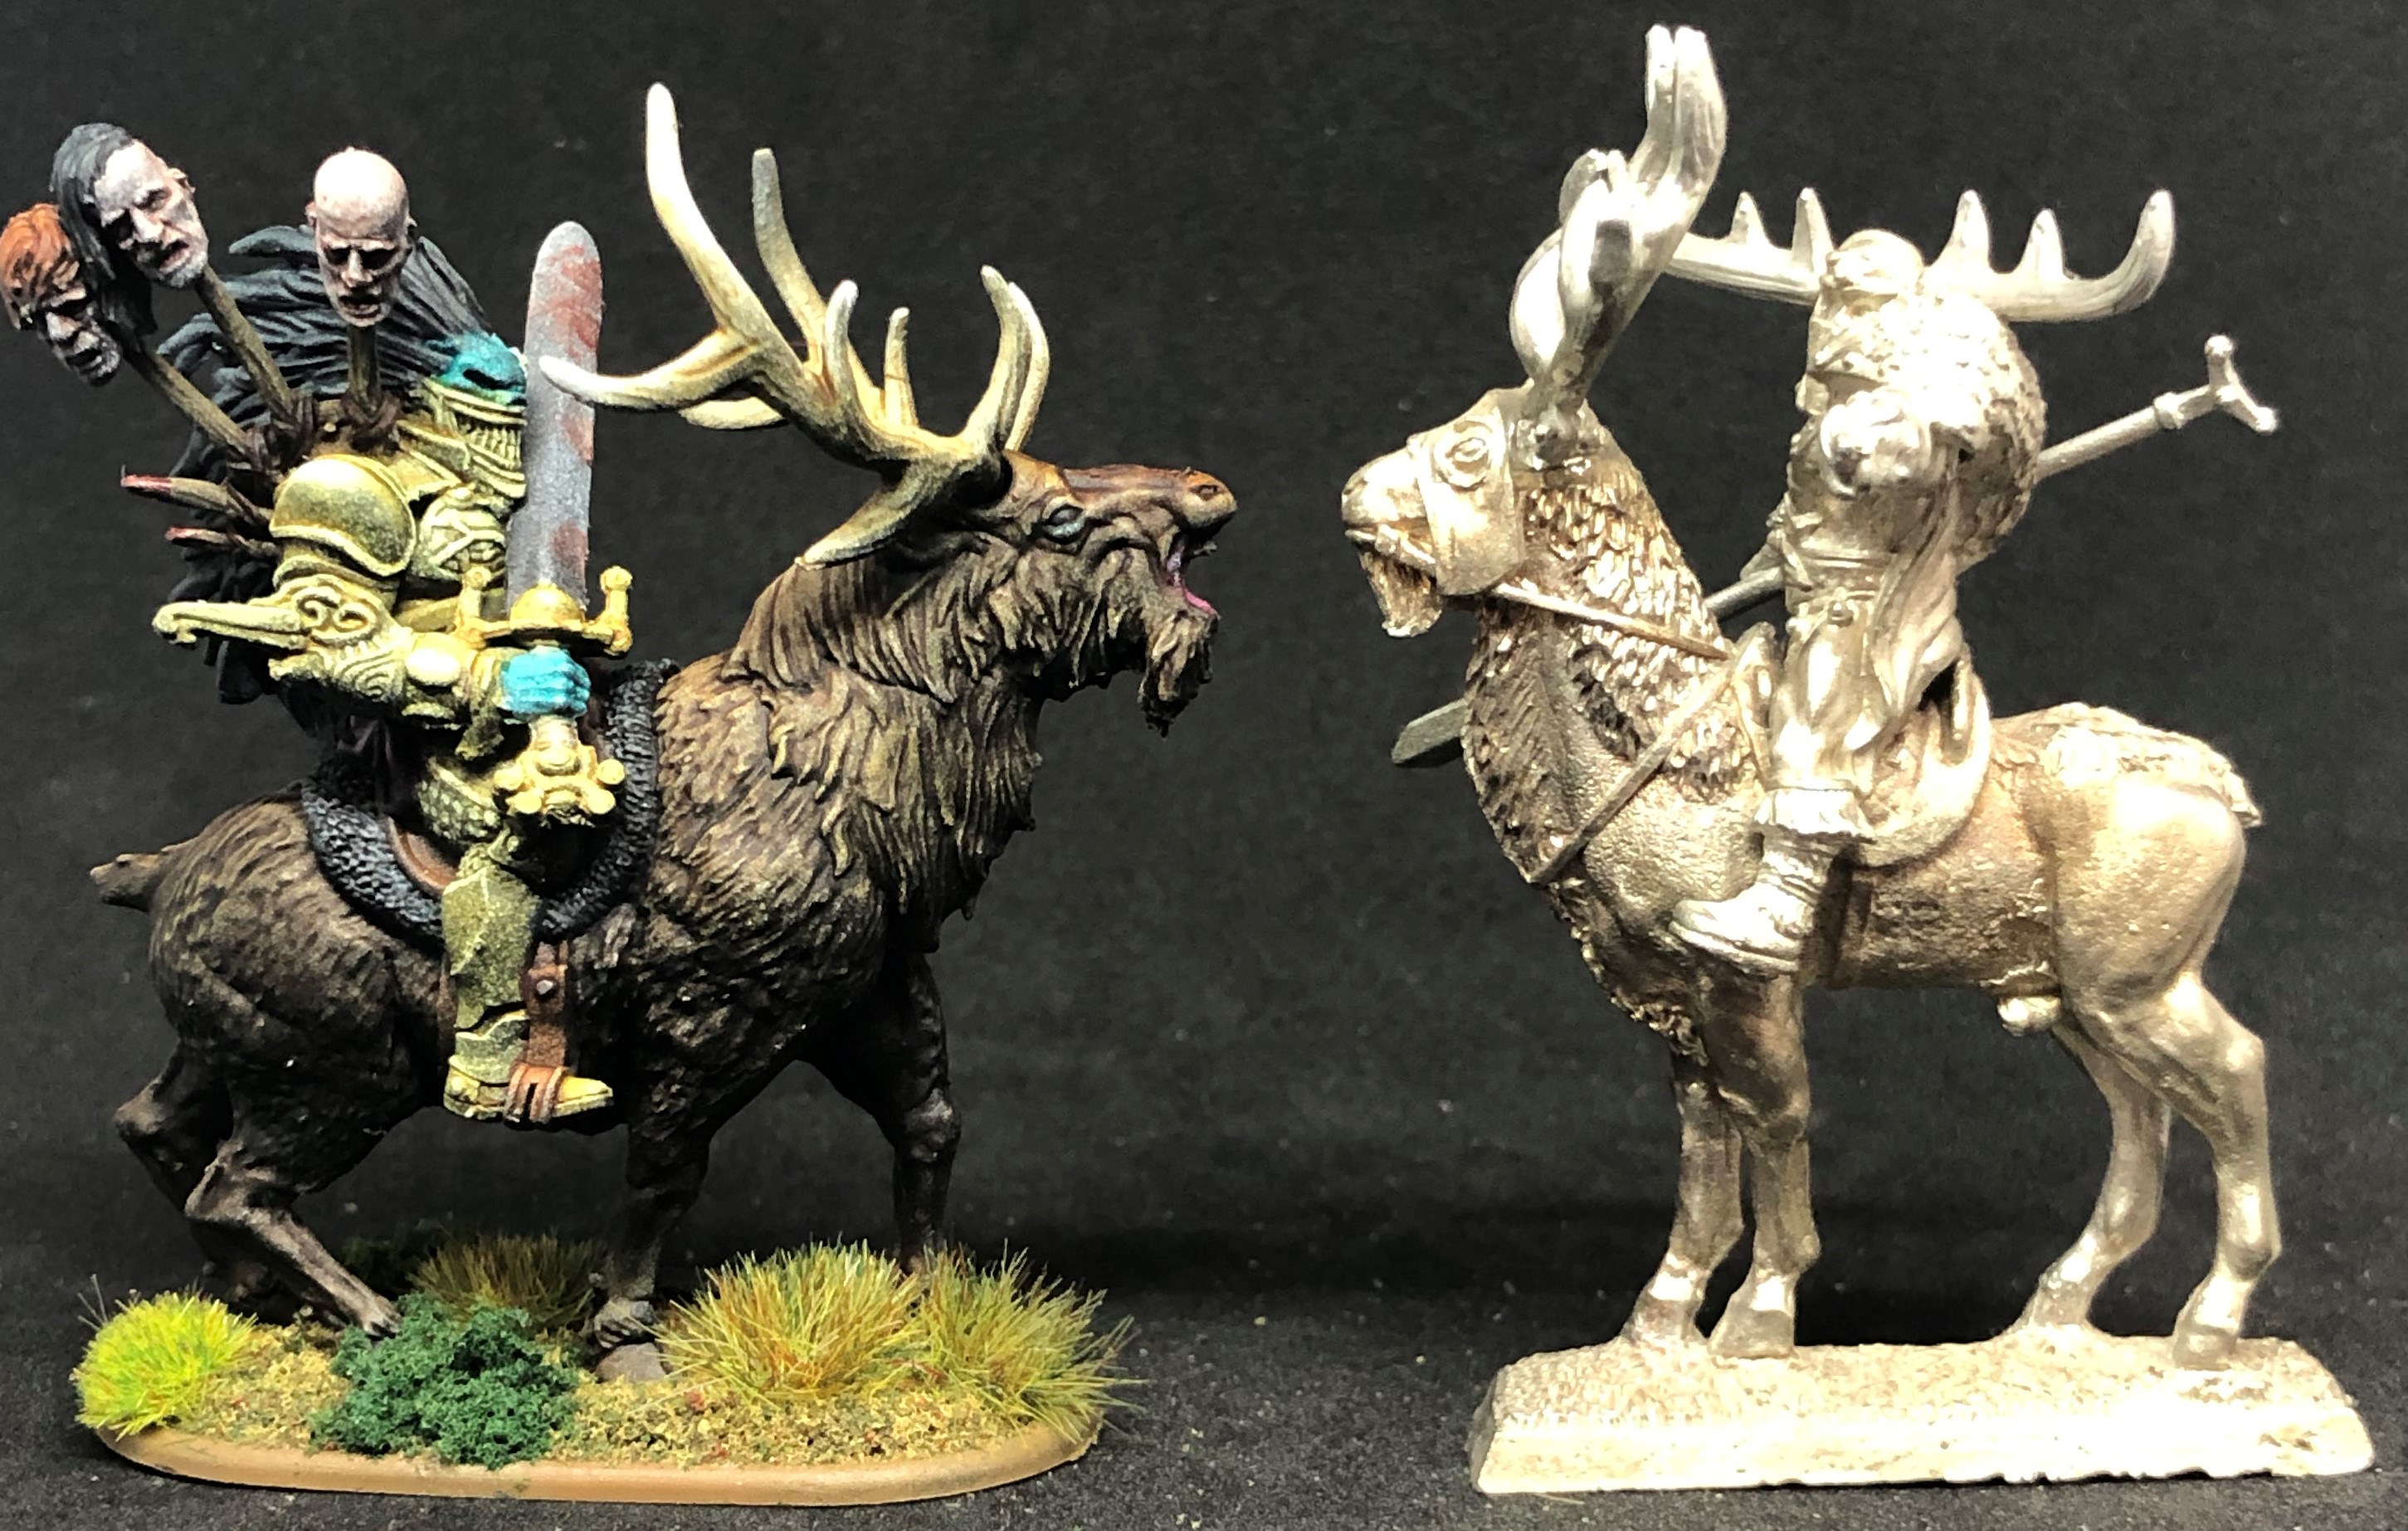 Warlord's Balor, Chronopia's Not Balor
 Fomorian Witch and last of the scatter
First finished miniature from another manufacturer. This one is a Celtos miniature, now sold by Brigade Models. Same AP Speedpaints as before – loving the Orc Skin on the snakes which I brightened up with some Plasmatic Bolt.
I’ve had a big order of Alternative Armies Erin miniatures arrive. I bought some more Fomorians, Fir Bolg and Sidhe to be able to add a couple of extra factions. Super excited about getting them done.
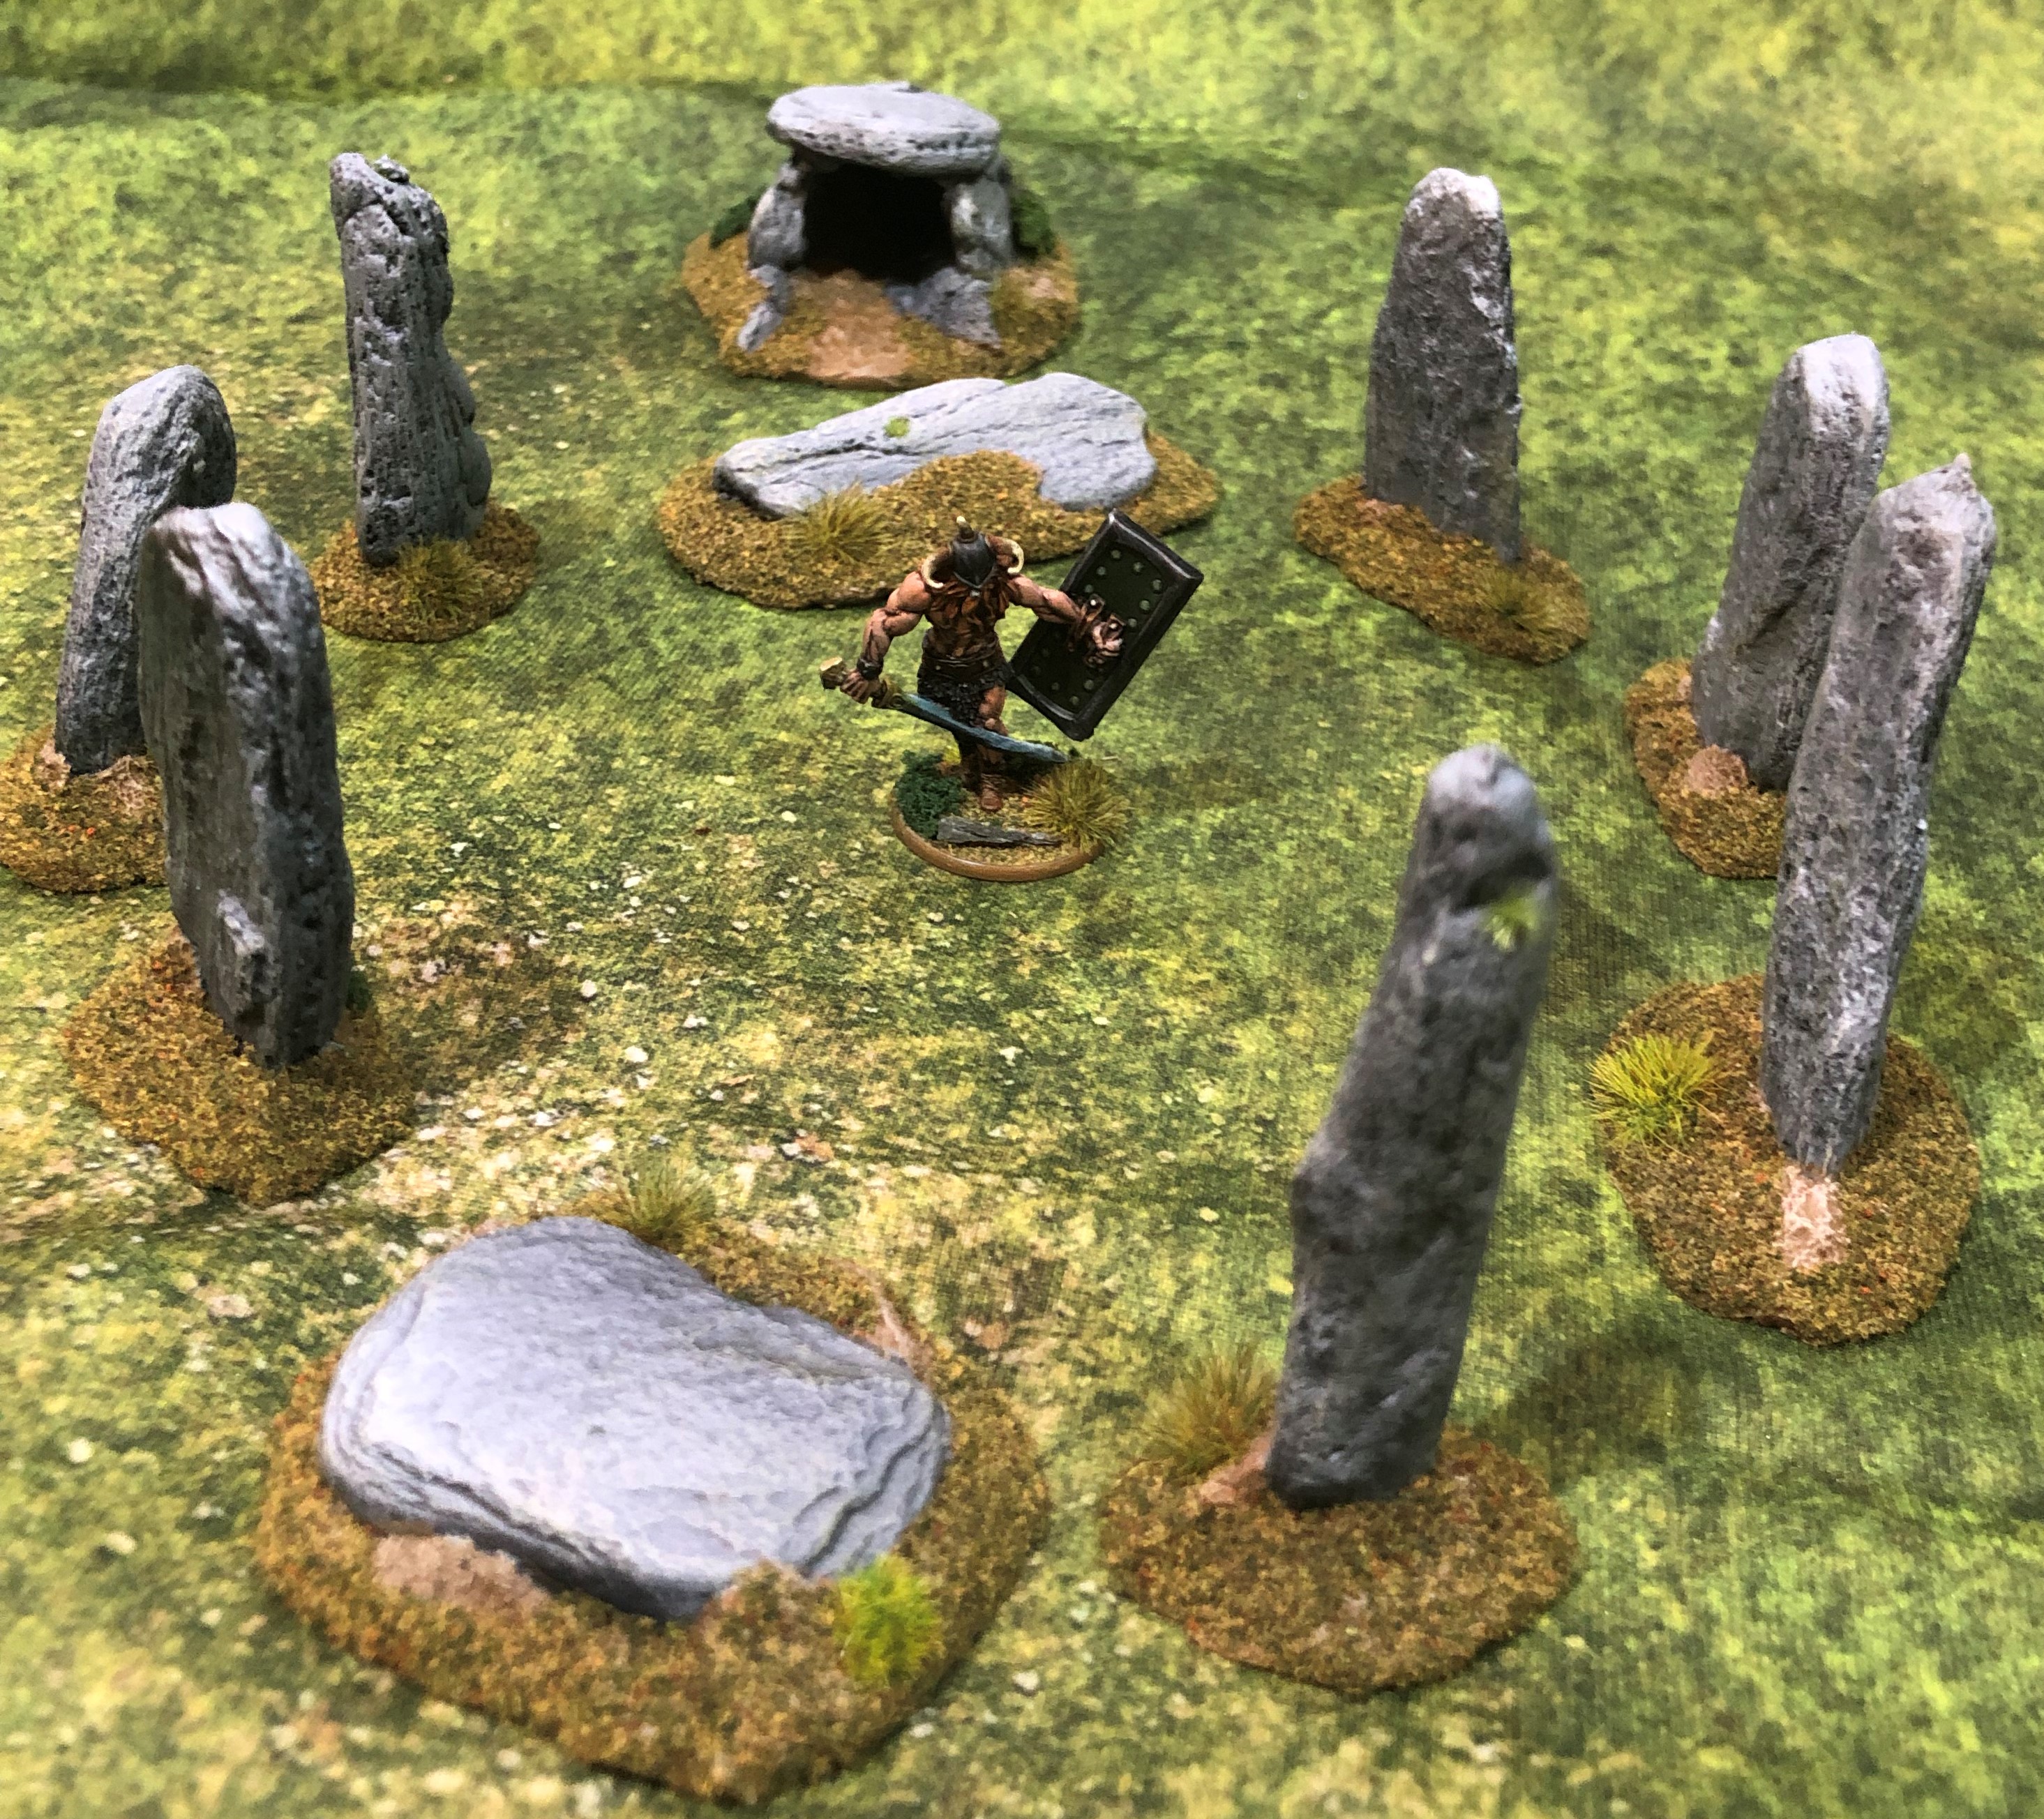
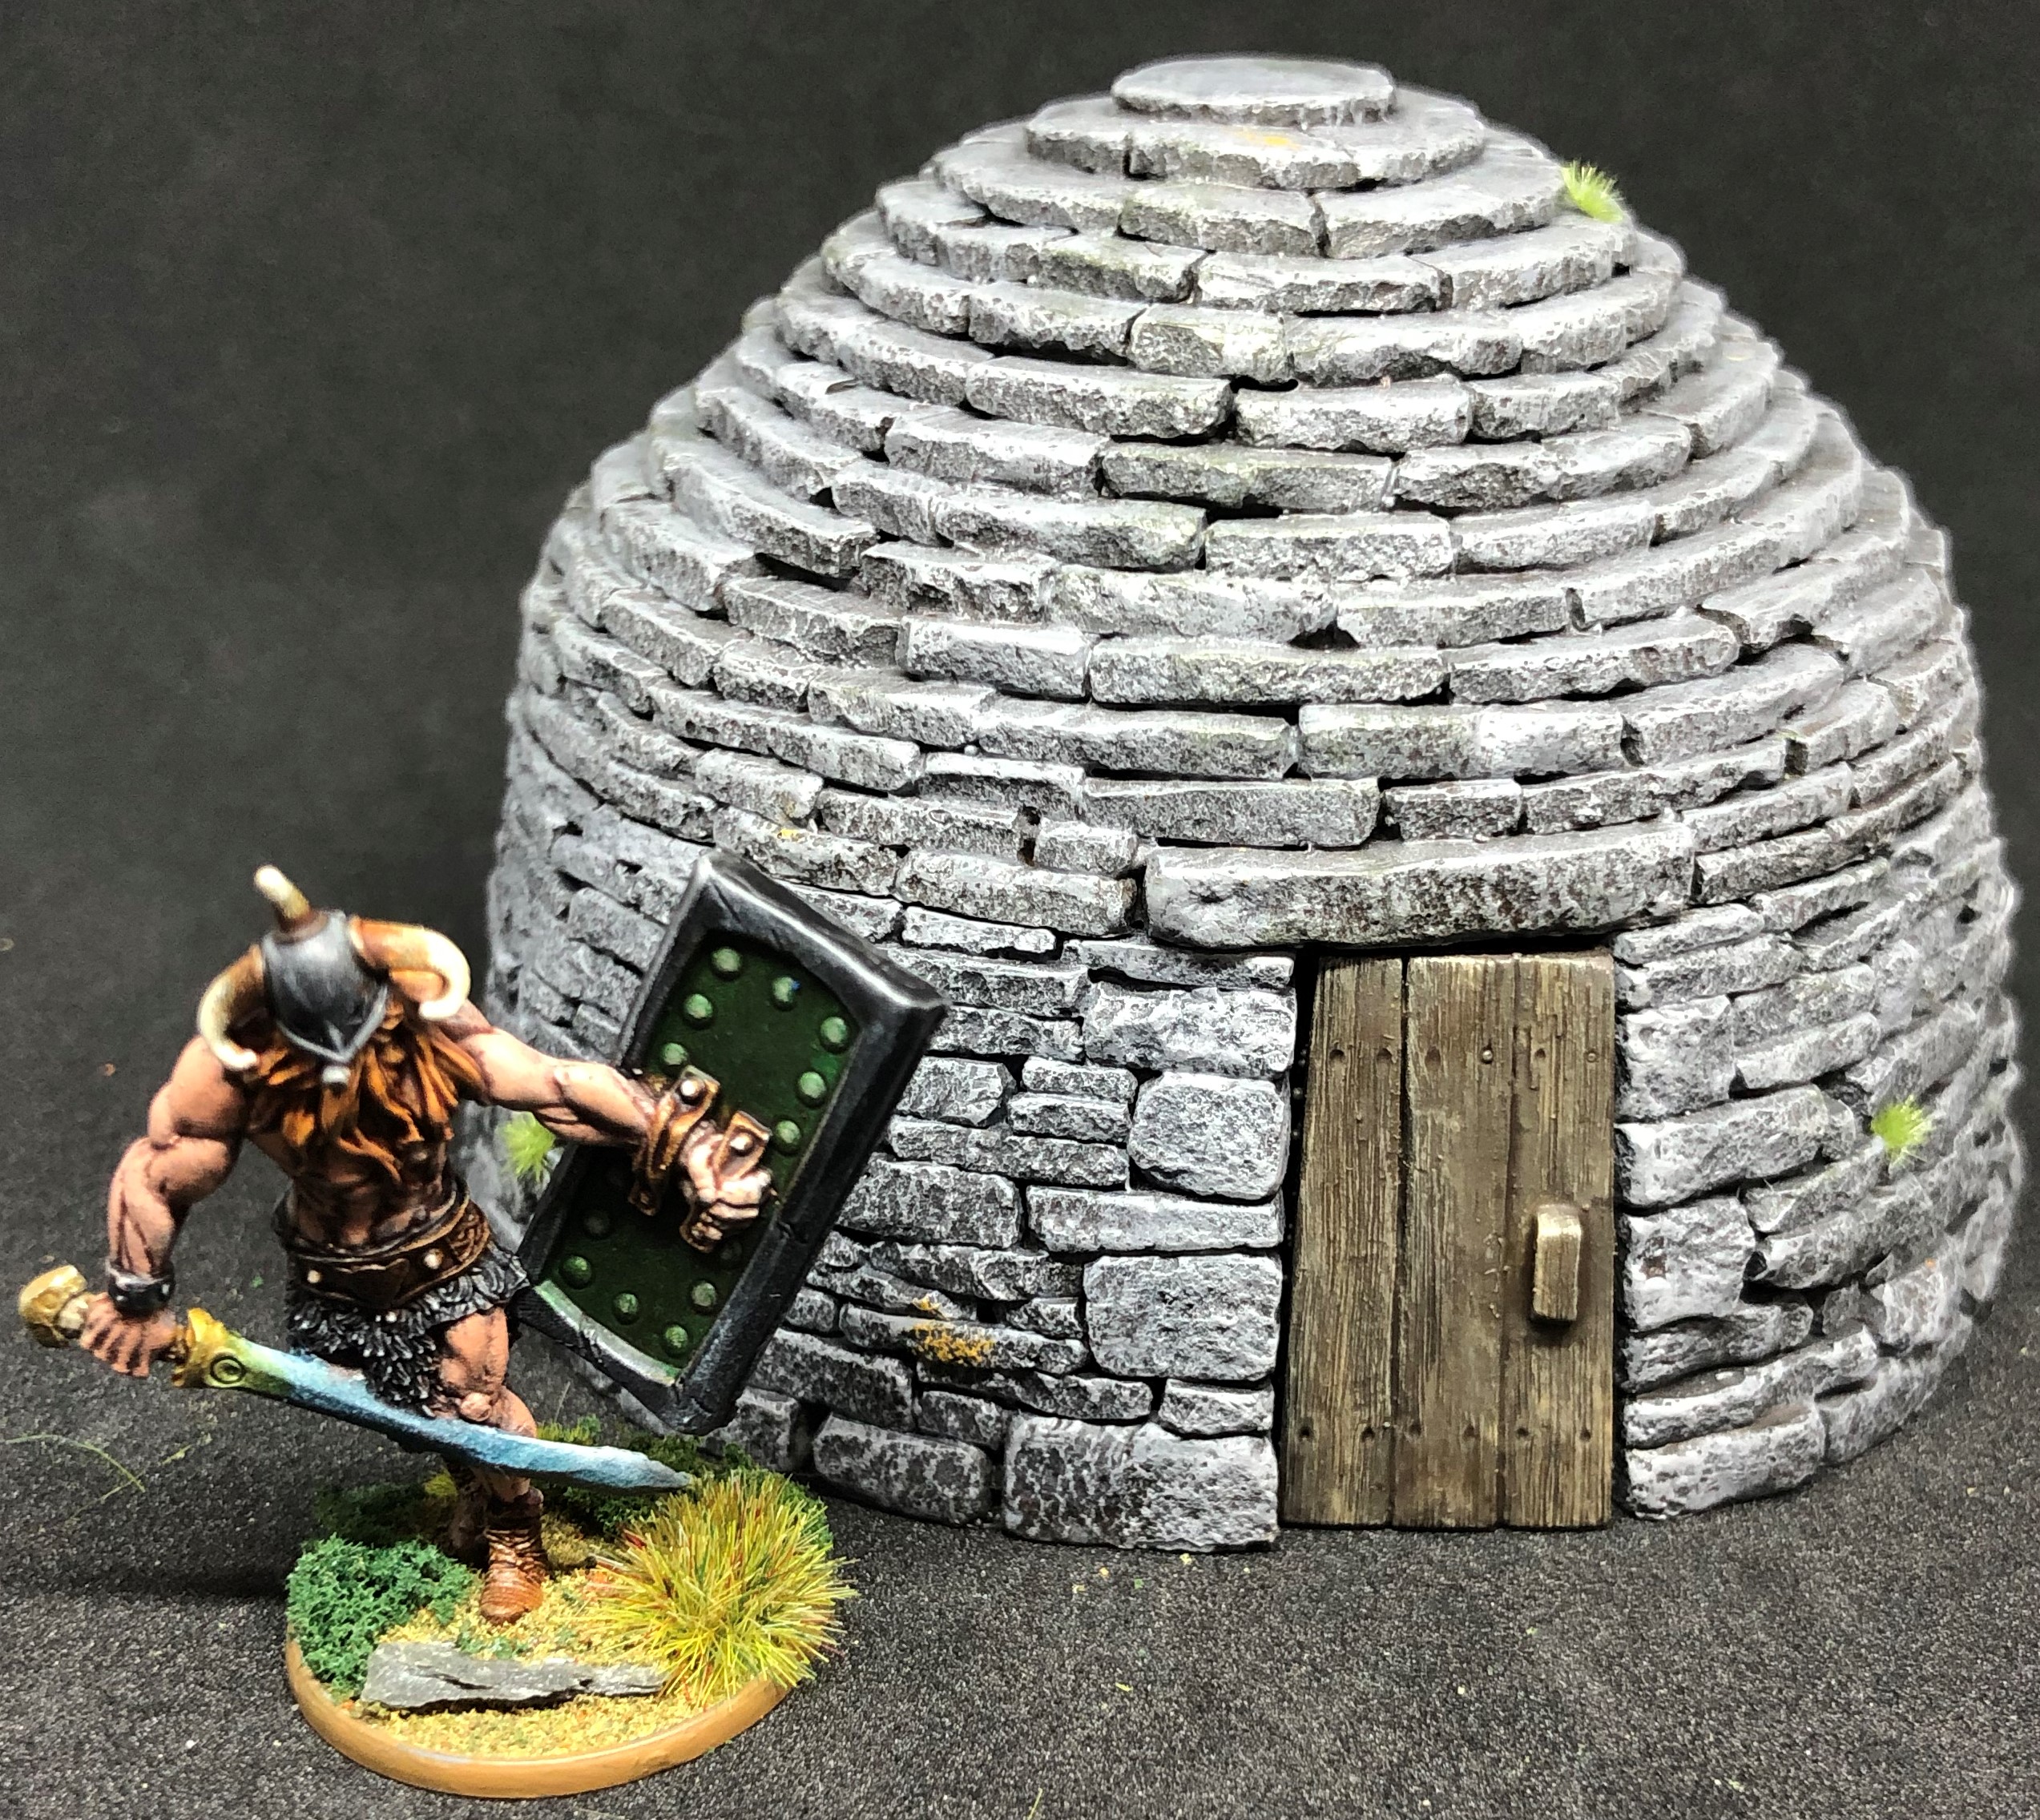
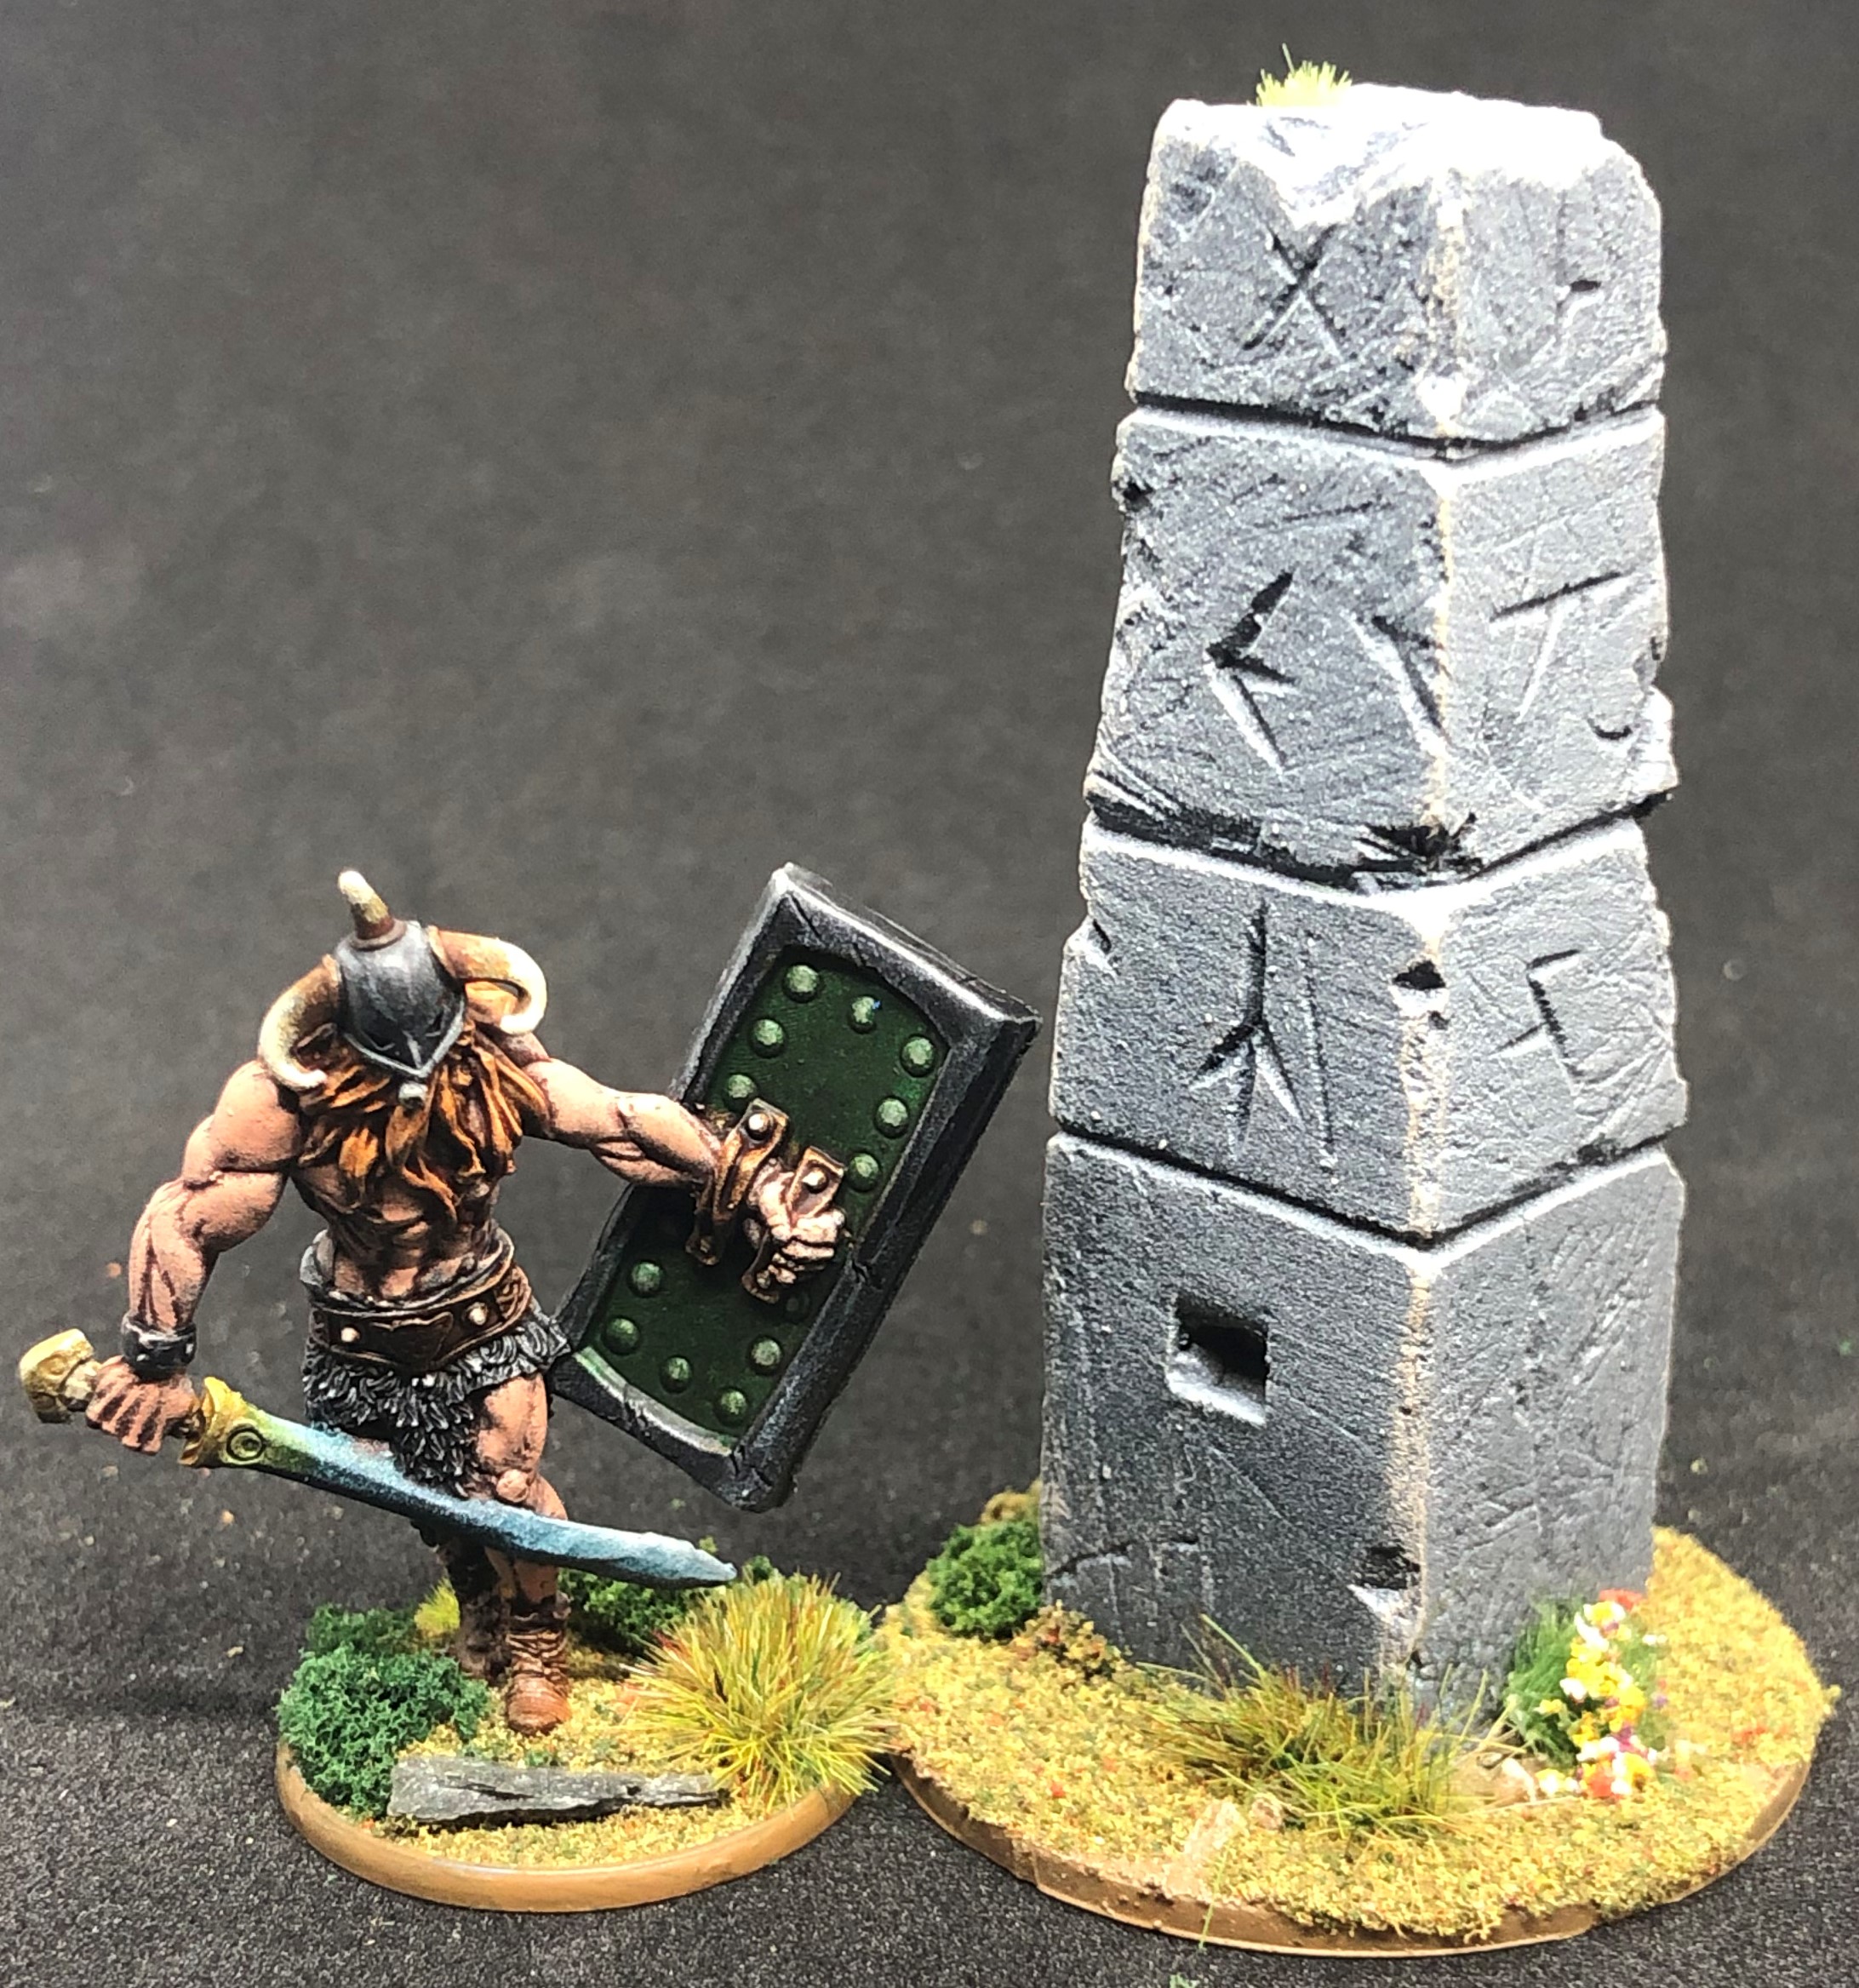
Finally there is some extra scatter from Ainsty Castings. Standing stones and a dolmen. Standard reference Skull Sword for scale purposes.
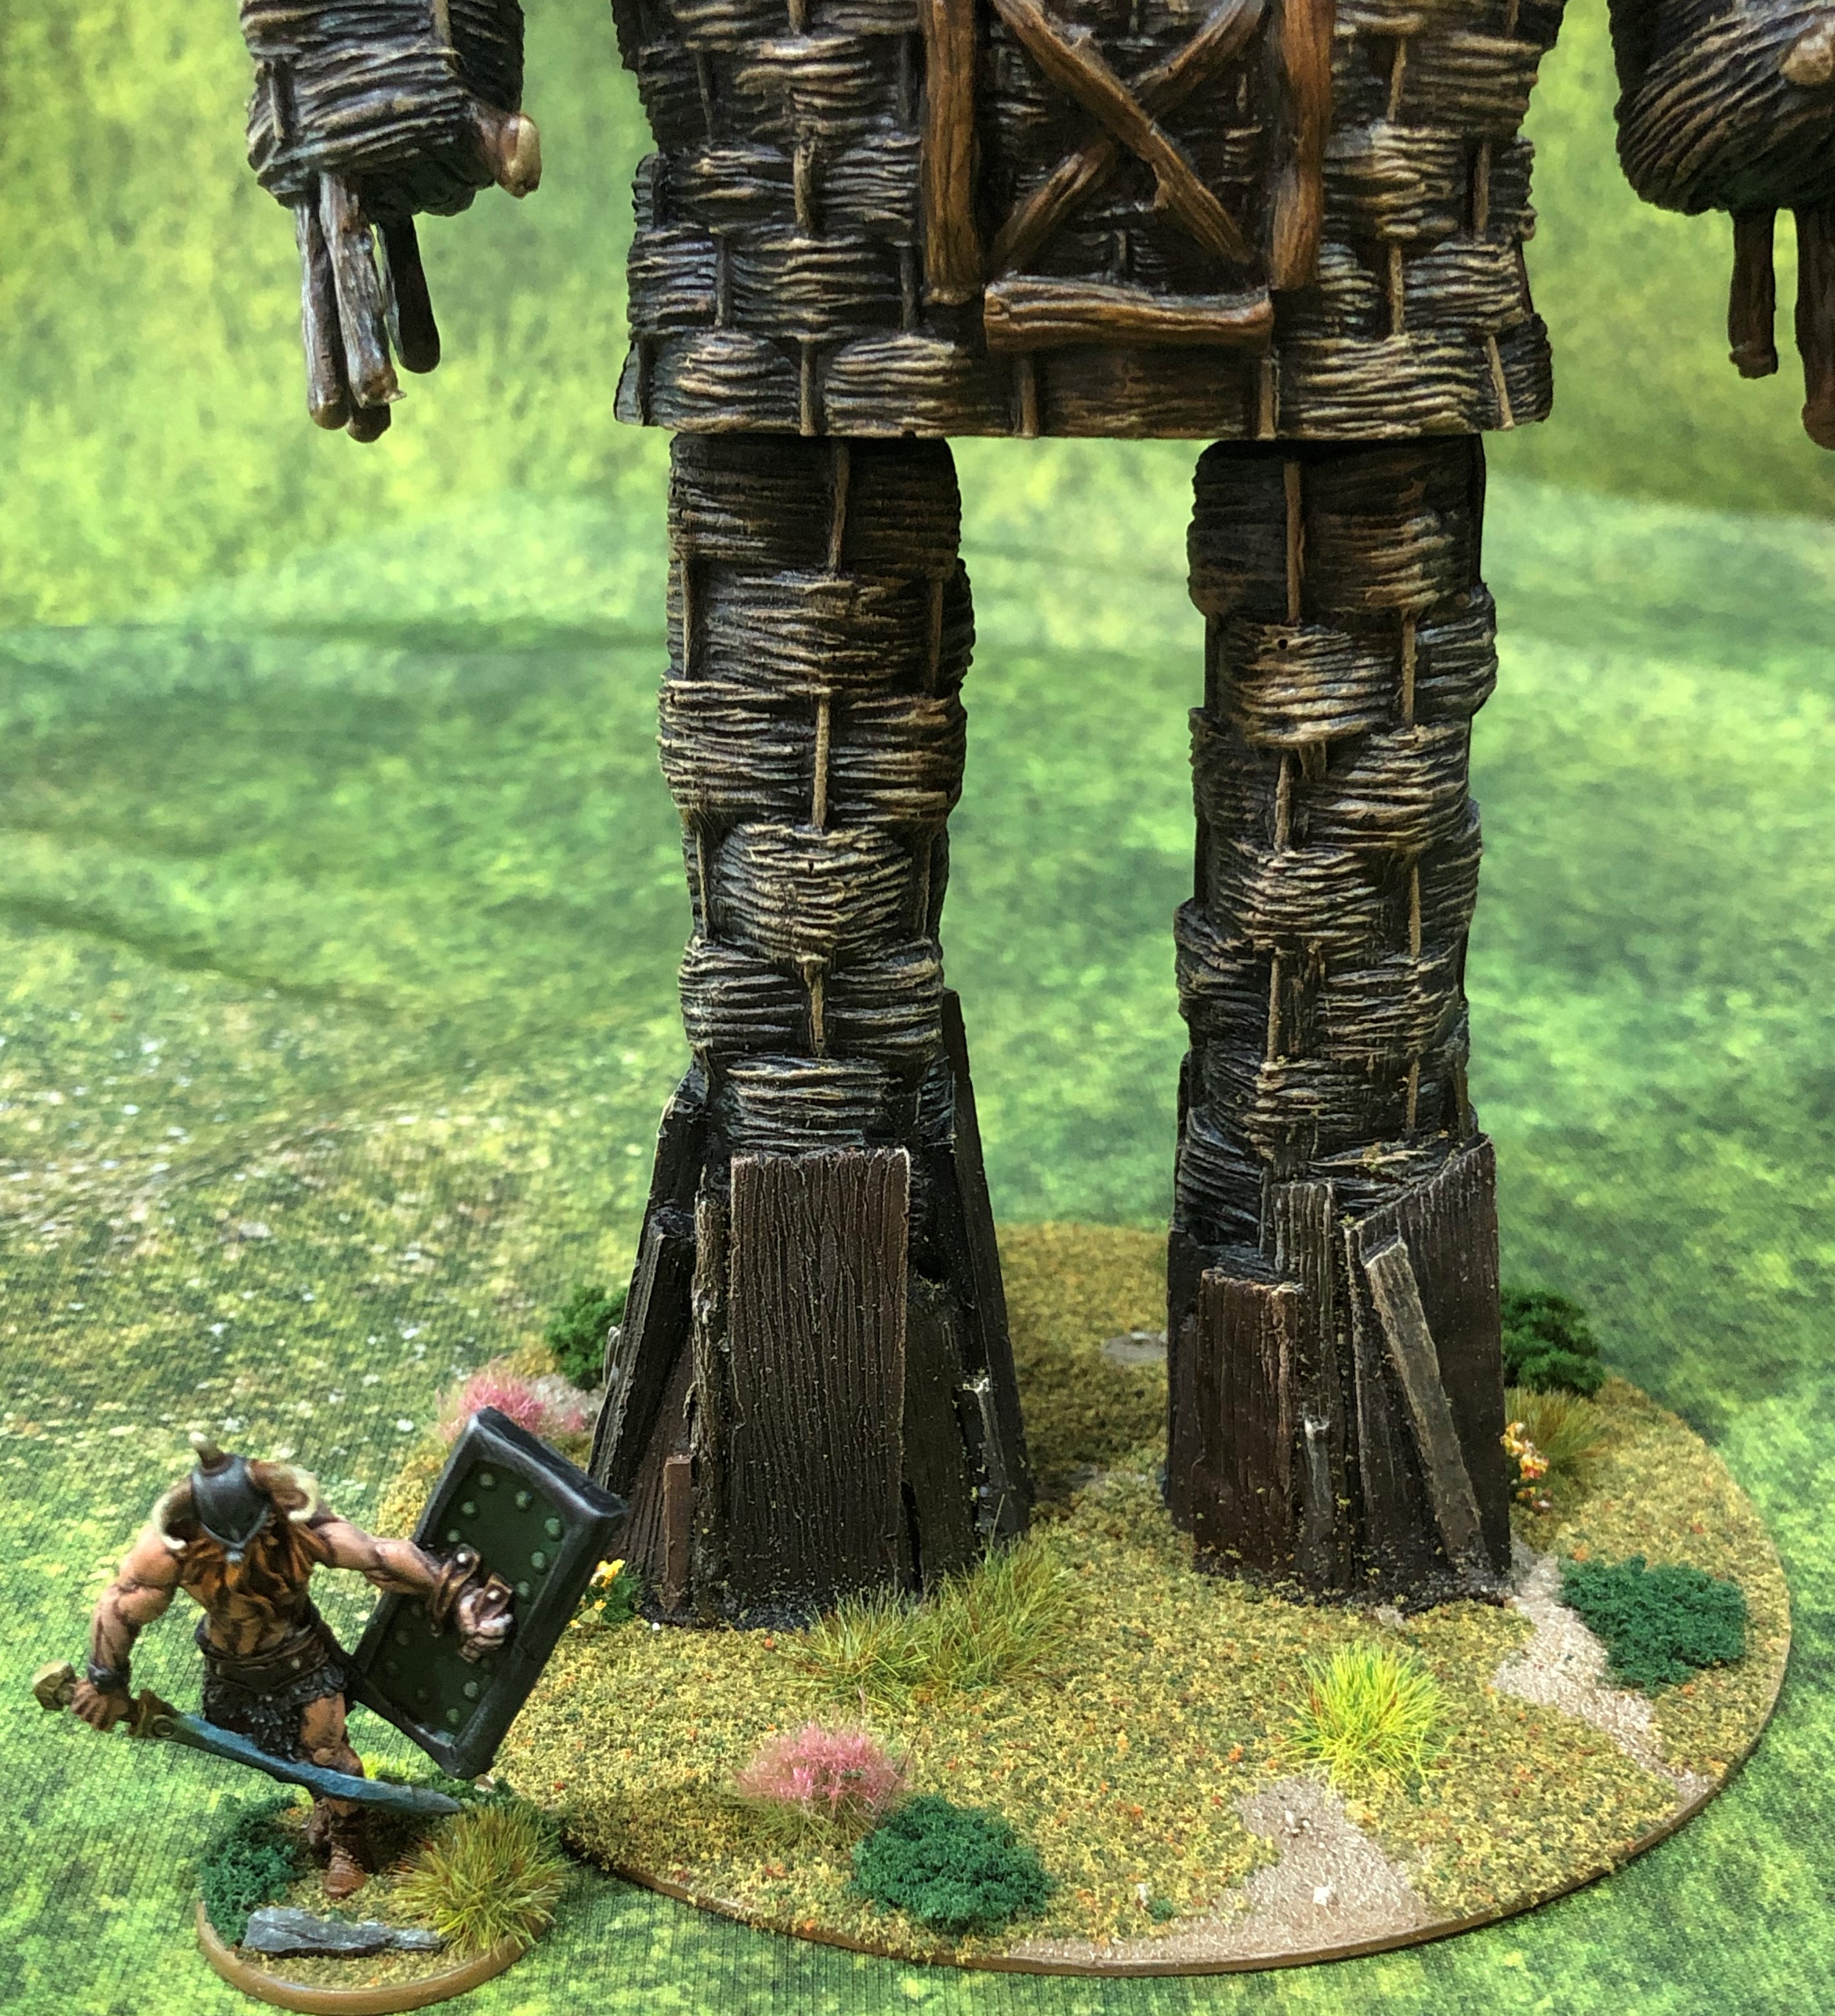
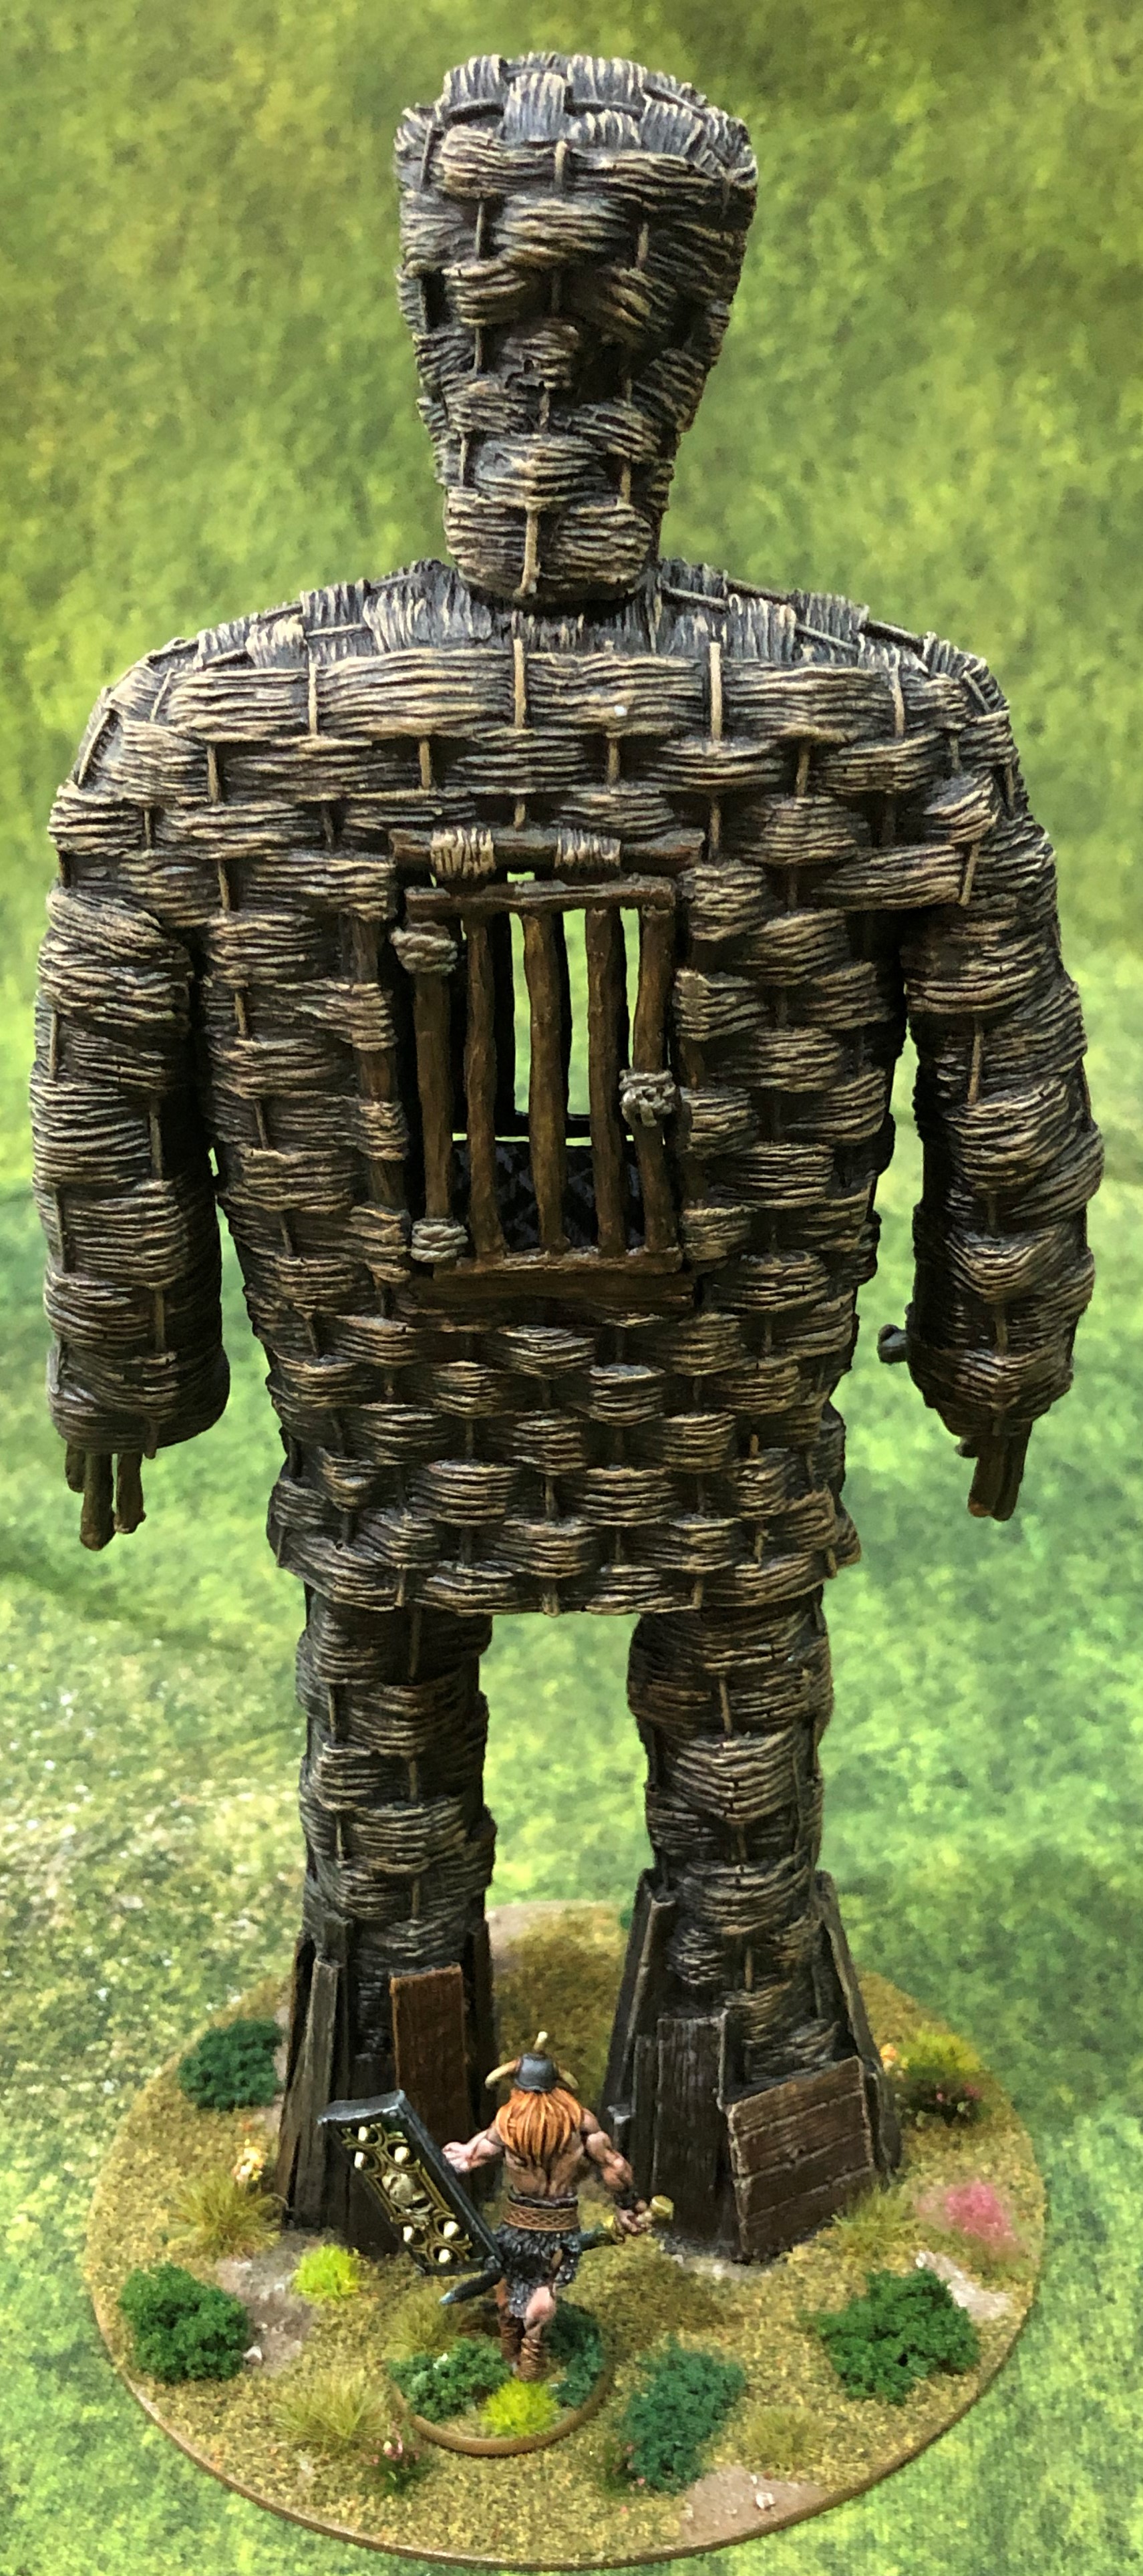
Wicker Man
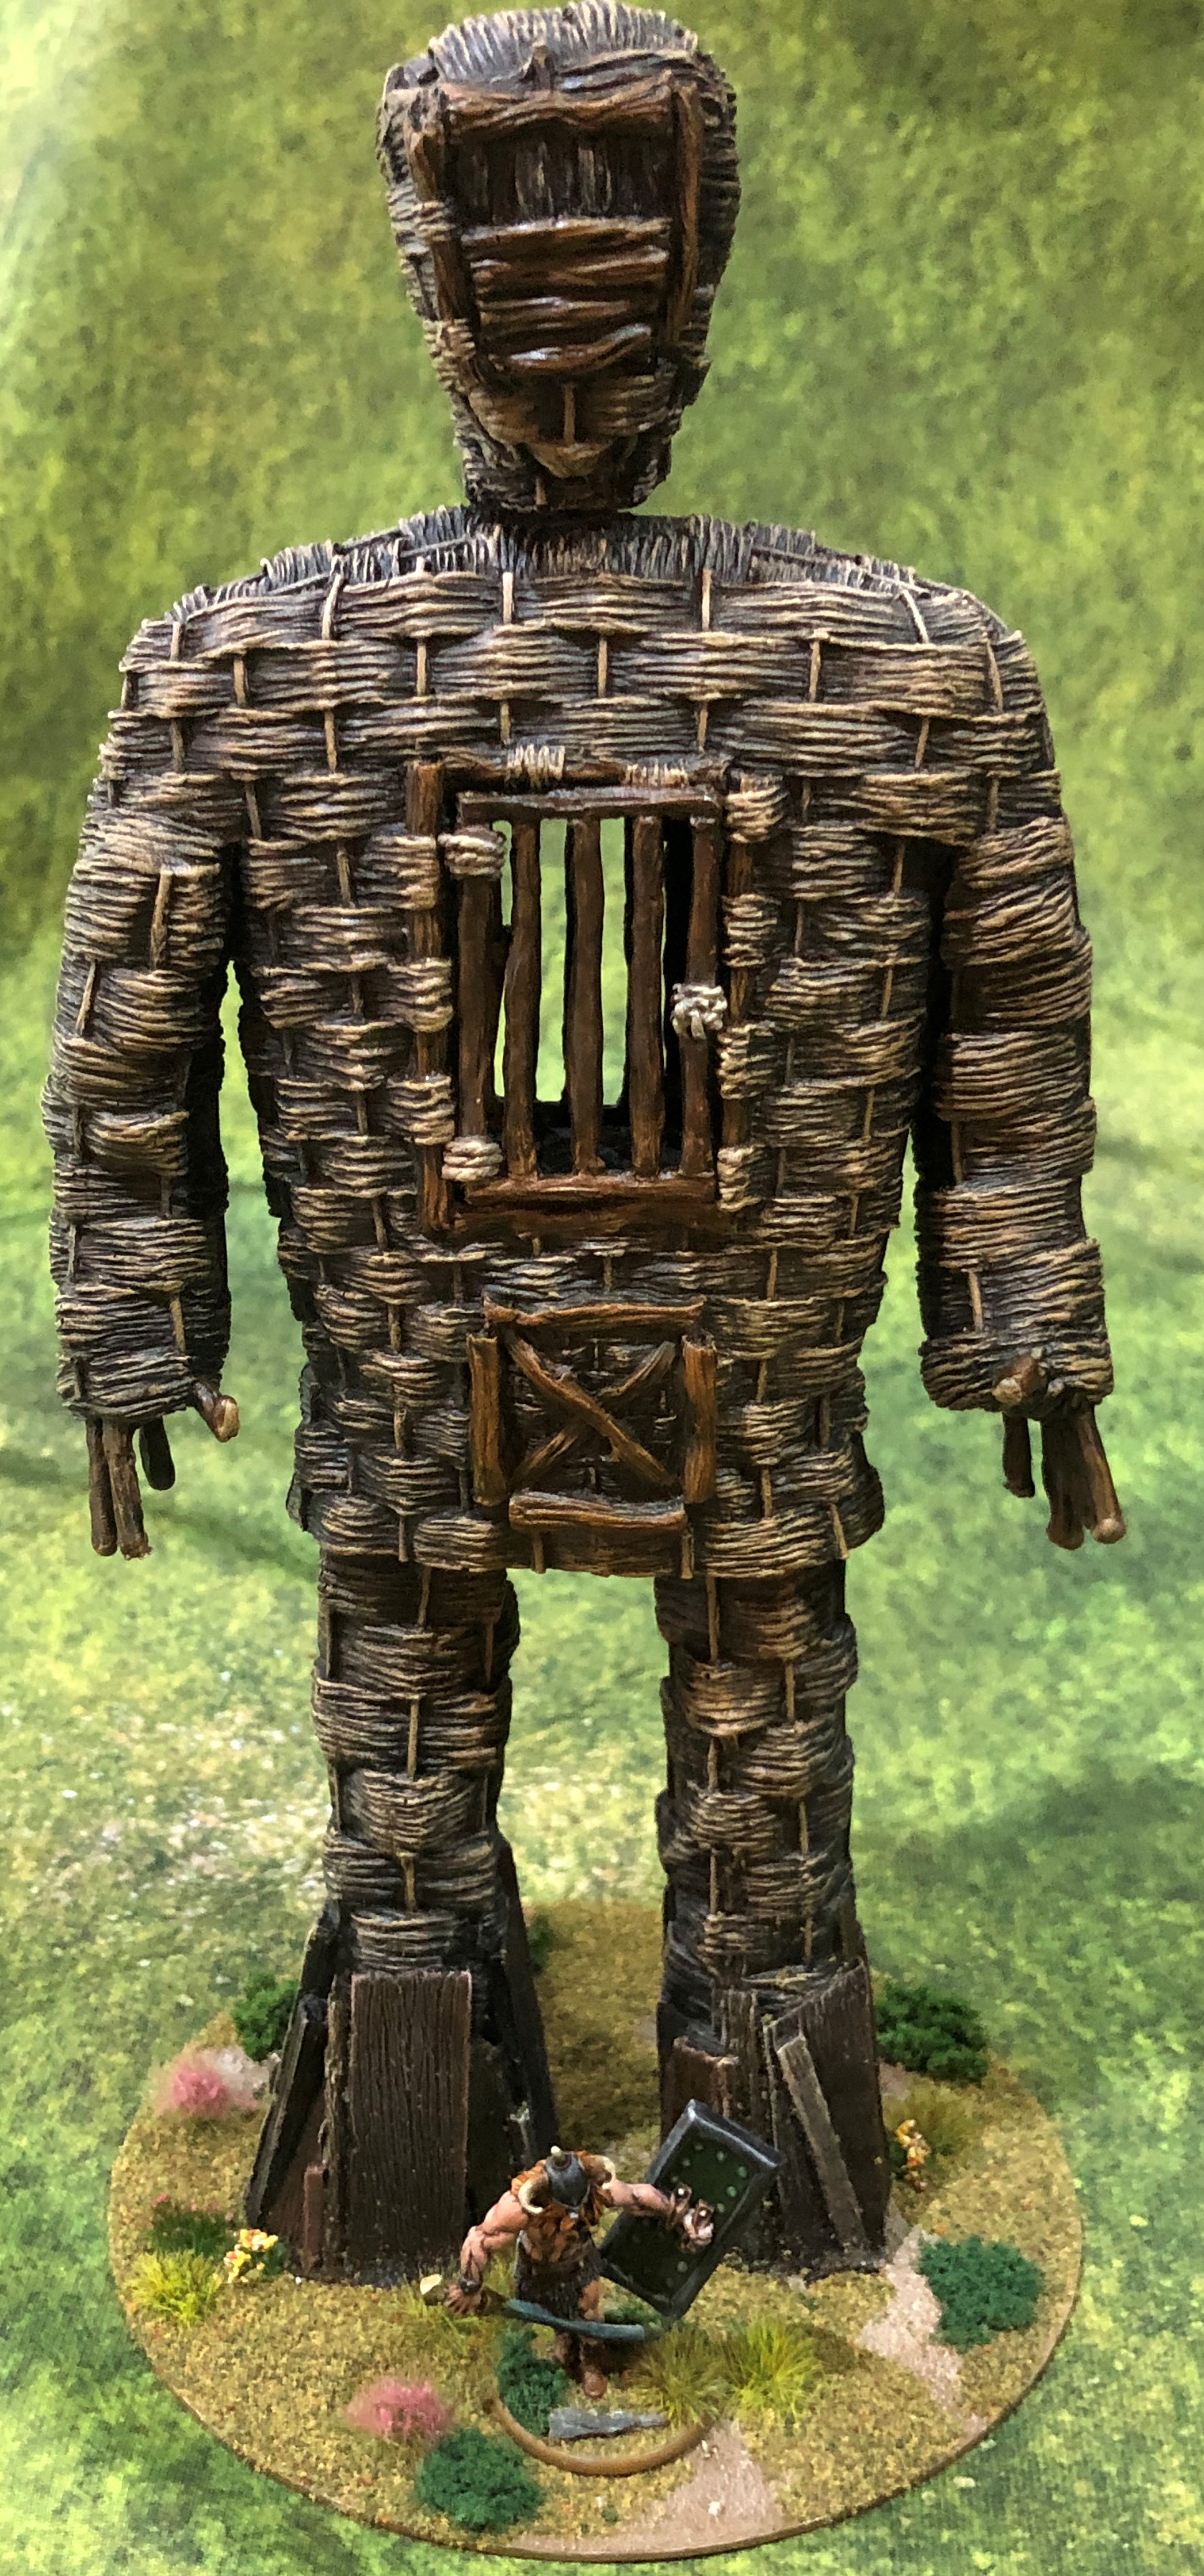
A Wicker Man is featured in a number of storylines. Warlord’s publicity table setup features this model which is called Alan and is from Ainsty Castings. He comes with an alternate head to make a wickerman monster and a Green Man mask for any folk horror weirdness you may want to get into. The basic version is great for us.
Black undercoat and then drybrushed with a makeup brush in progressive layers of: Citadel Khemri Brown, Vallejo Flat Brown (patchy), Vallejo Japanese Uniform WWII (patchy) and then a light drybrush with Citadel Dheneb Stone. It takes a while to build up the depth of colour that looks right and the two patchy colours provides a bit of colour variation across the surface which doesn’t show so well in the photos. Woodwork has been overpainted with Contrast Snakebite Leather and the wood around the feet has been tinted with a range of different brown colours, thin glazes to ensure the highlights show through.
The model is huge – 250mm/10 inches tall. Standard reference Skull Sword for comparison purposes.
Warped Sláine

The Warped version of Sláine was zenith undercoated and then I worked a blend of Citadel Contrast Magos Purple and Vulpus Pink into all of the grey undertones that escaped the white zenith. The idea behind the purple is that the Warp Spasm must cause an enormous blood pressure rush and therefore the complexion will be very purple. Once this was dry I switched to Speedpaints again and started with Purple academy to blend into the low-lights. I then mixed this into some Crusader skin for the mid-tone and painted this into the deeper muscle recesses. Remaining white areas were covered in neat Crusader skin.
As this is a character model some additional attention was paid with Vallejo Tan being used to highlight the upper areas of shaded muscles. This was then blended into some Vallejo Pale Flesh to create a lighter highlight which reinforced some mid tone upper muscle areas. The popping and bulging veins were reinforced with the pink/purple contrast. Then a final highlight withe the lightest skintone, and on the highest areas a very thin glase of pure Pale Skin.
Other details were painted with the usual speedpaints, Gravelord Grey and palid Bone for his axe, Brainbiter. The cloth is a blend of Sand Golem, Palid Bone and Zealot Yellow. Hair is Grim Black.
The eye sockets had a nice deep pink/purple from the first contrast layer. Eyeballs were picked out in white for a good effect.
It was the Exmouth Club’s Legionary Show on Saturday. First show I’ve been to since before The Event. A highlight for me is always the Bring and Buy. Once again the Fates shone kindly and I spotted these in a ziplock for £8. Thank you Earth Goddess!

These three are from the now OOP Foundry 200AD range. The Horned God and Sláine the King in the front and Warped Slaine behind. Now I can paint up the other Warped One and we can compare and contrast.
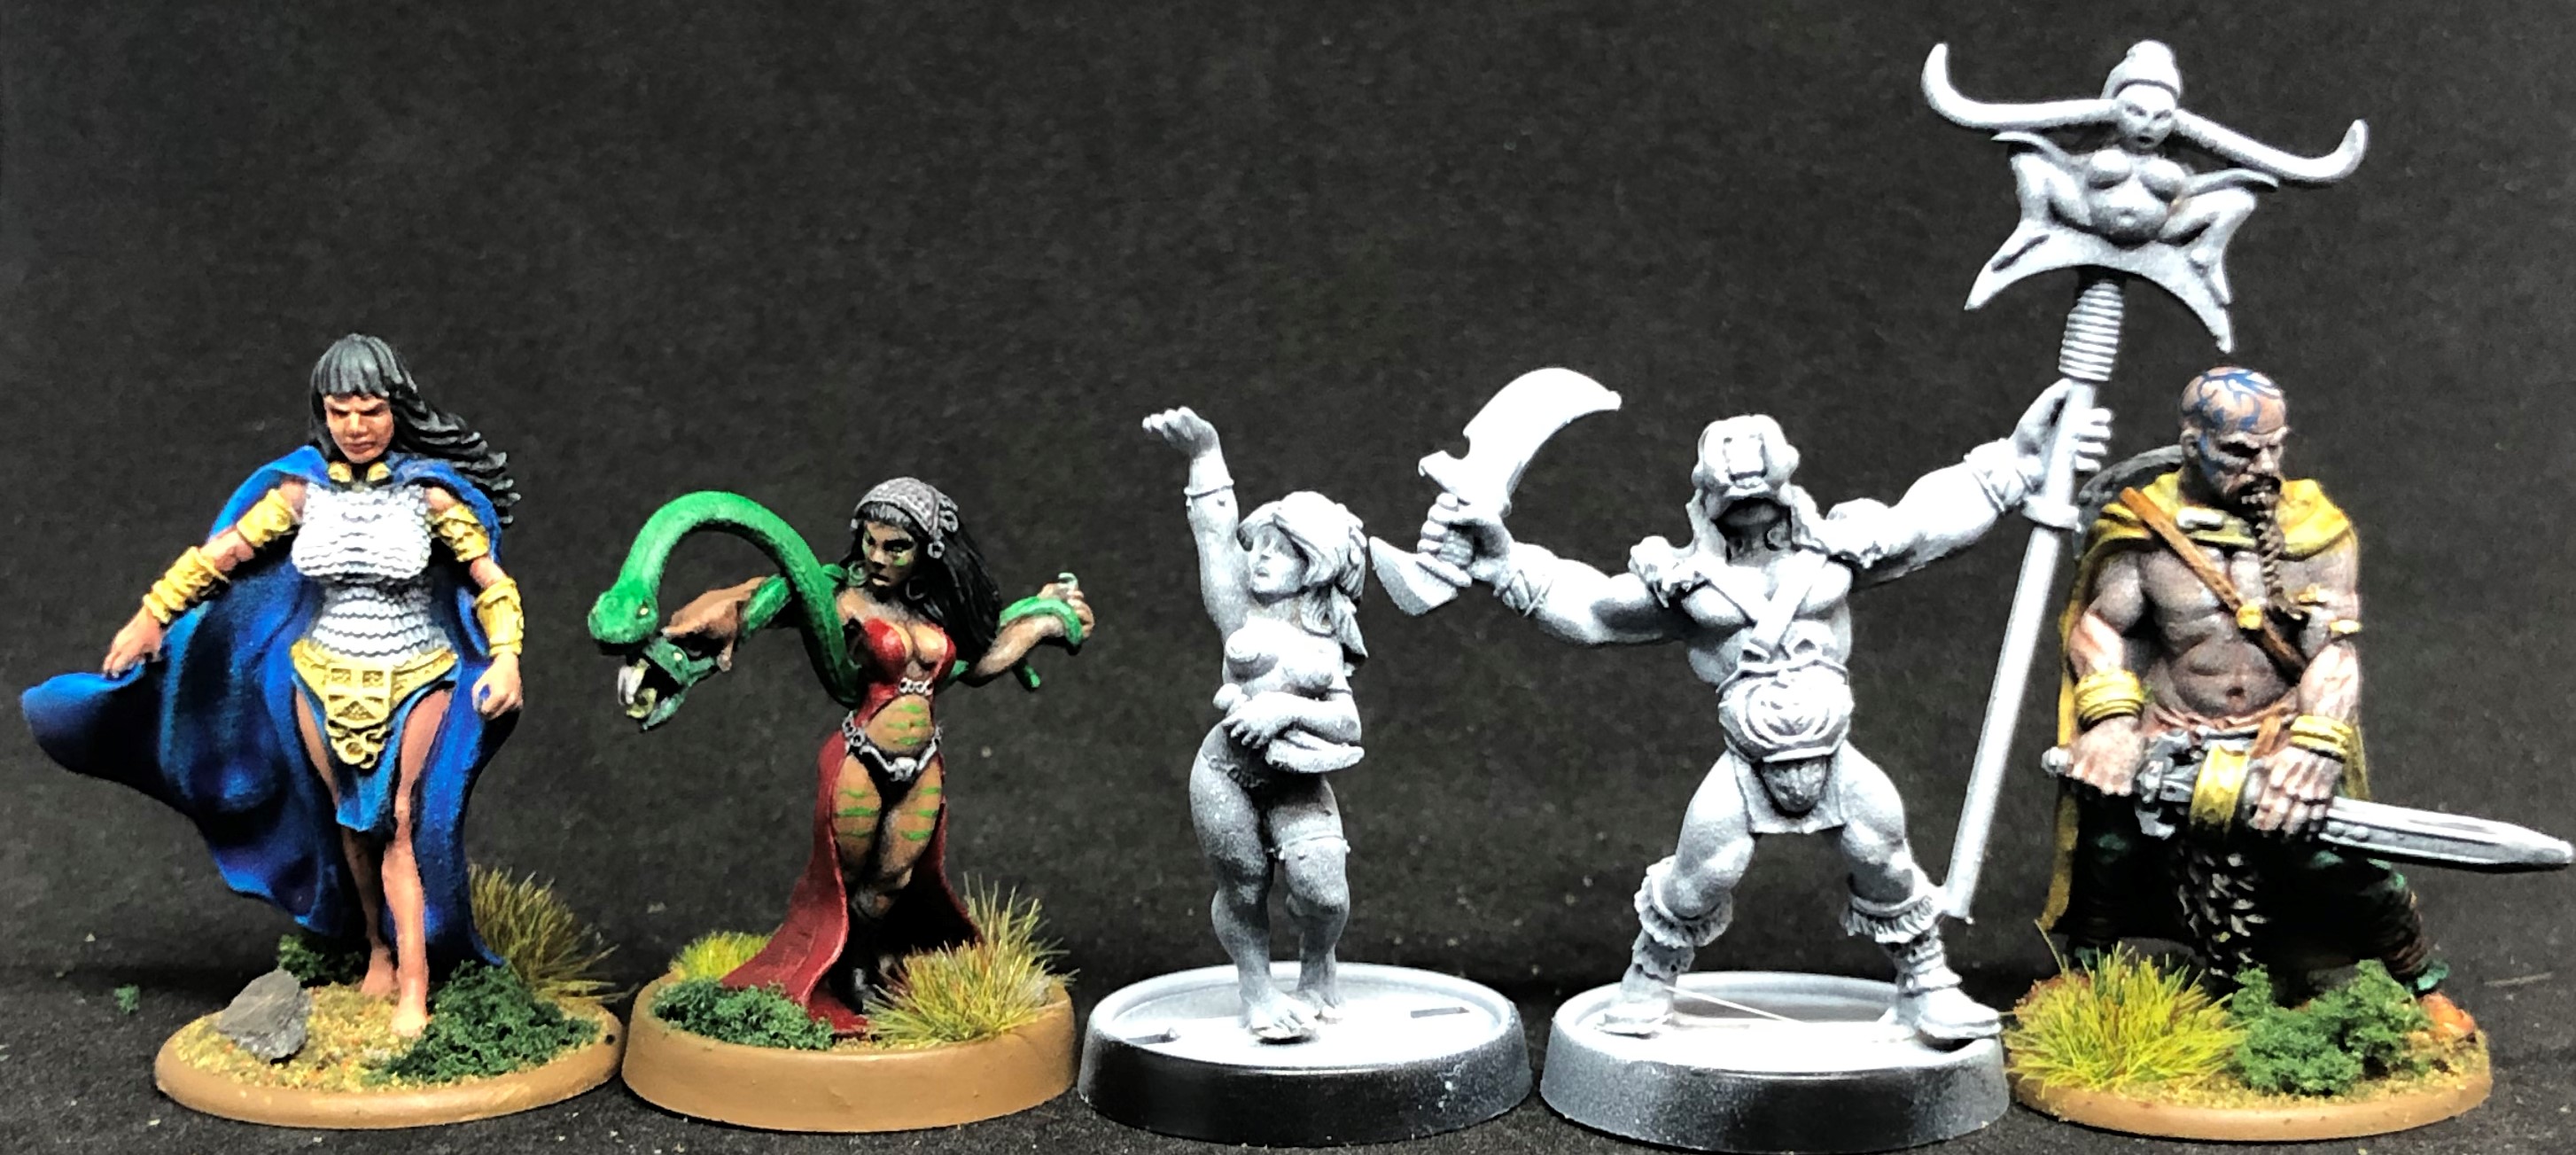
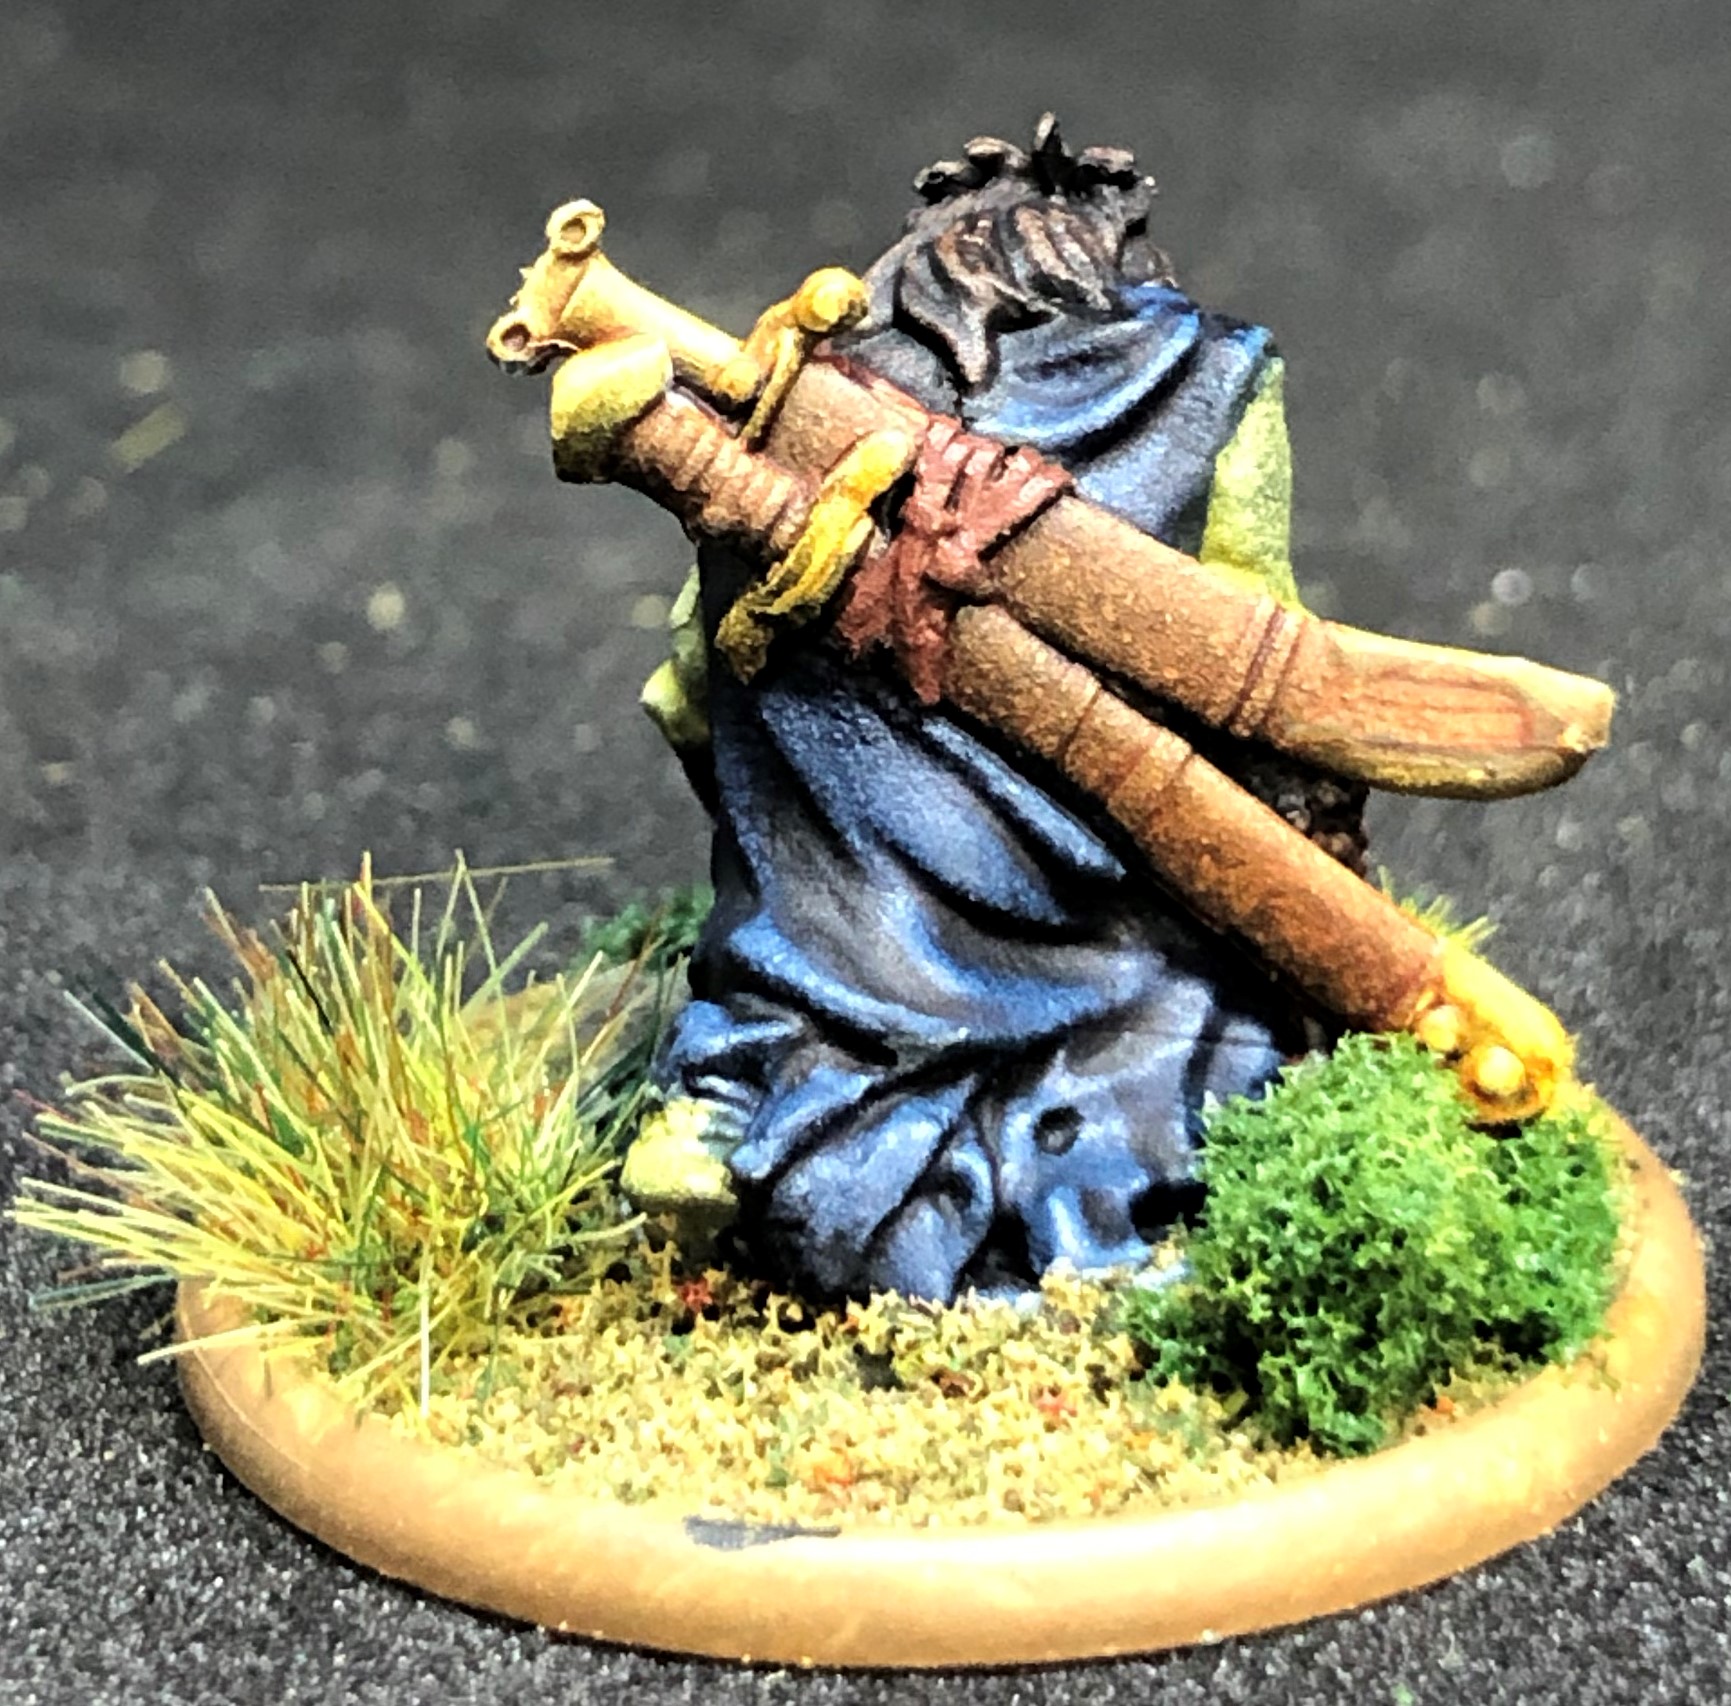
Drune Heroes (and a mystery item coming soon)
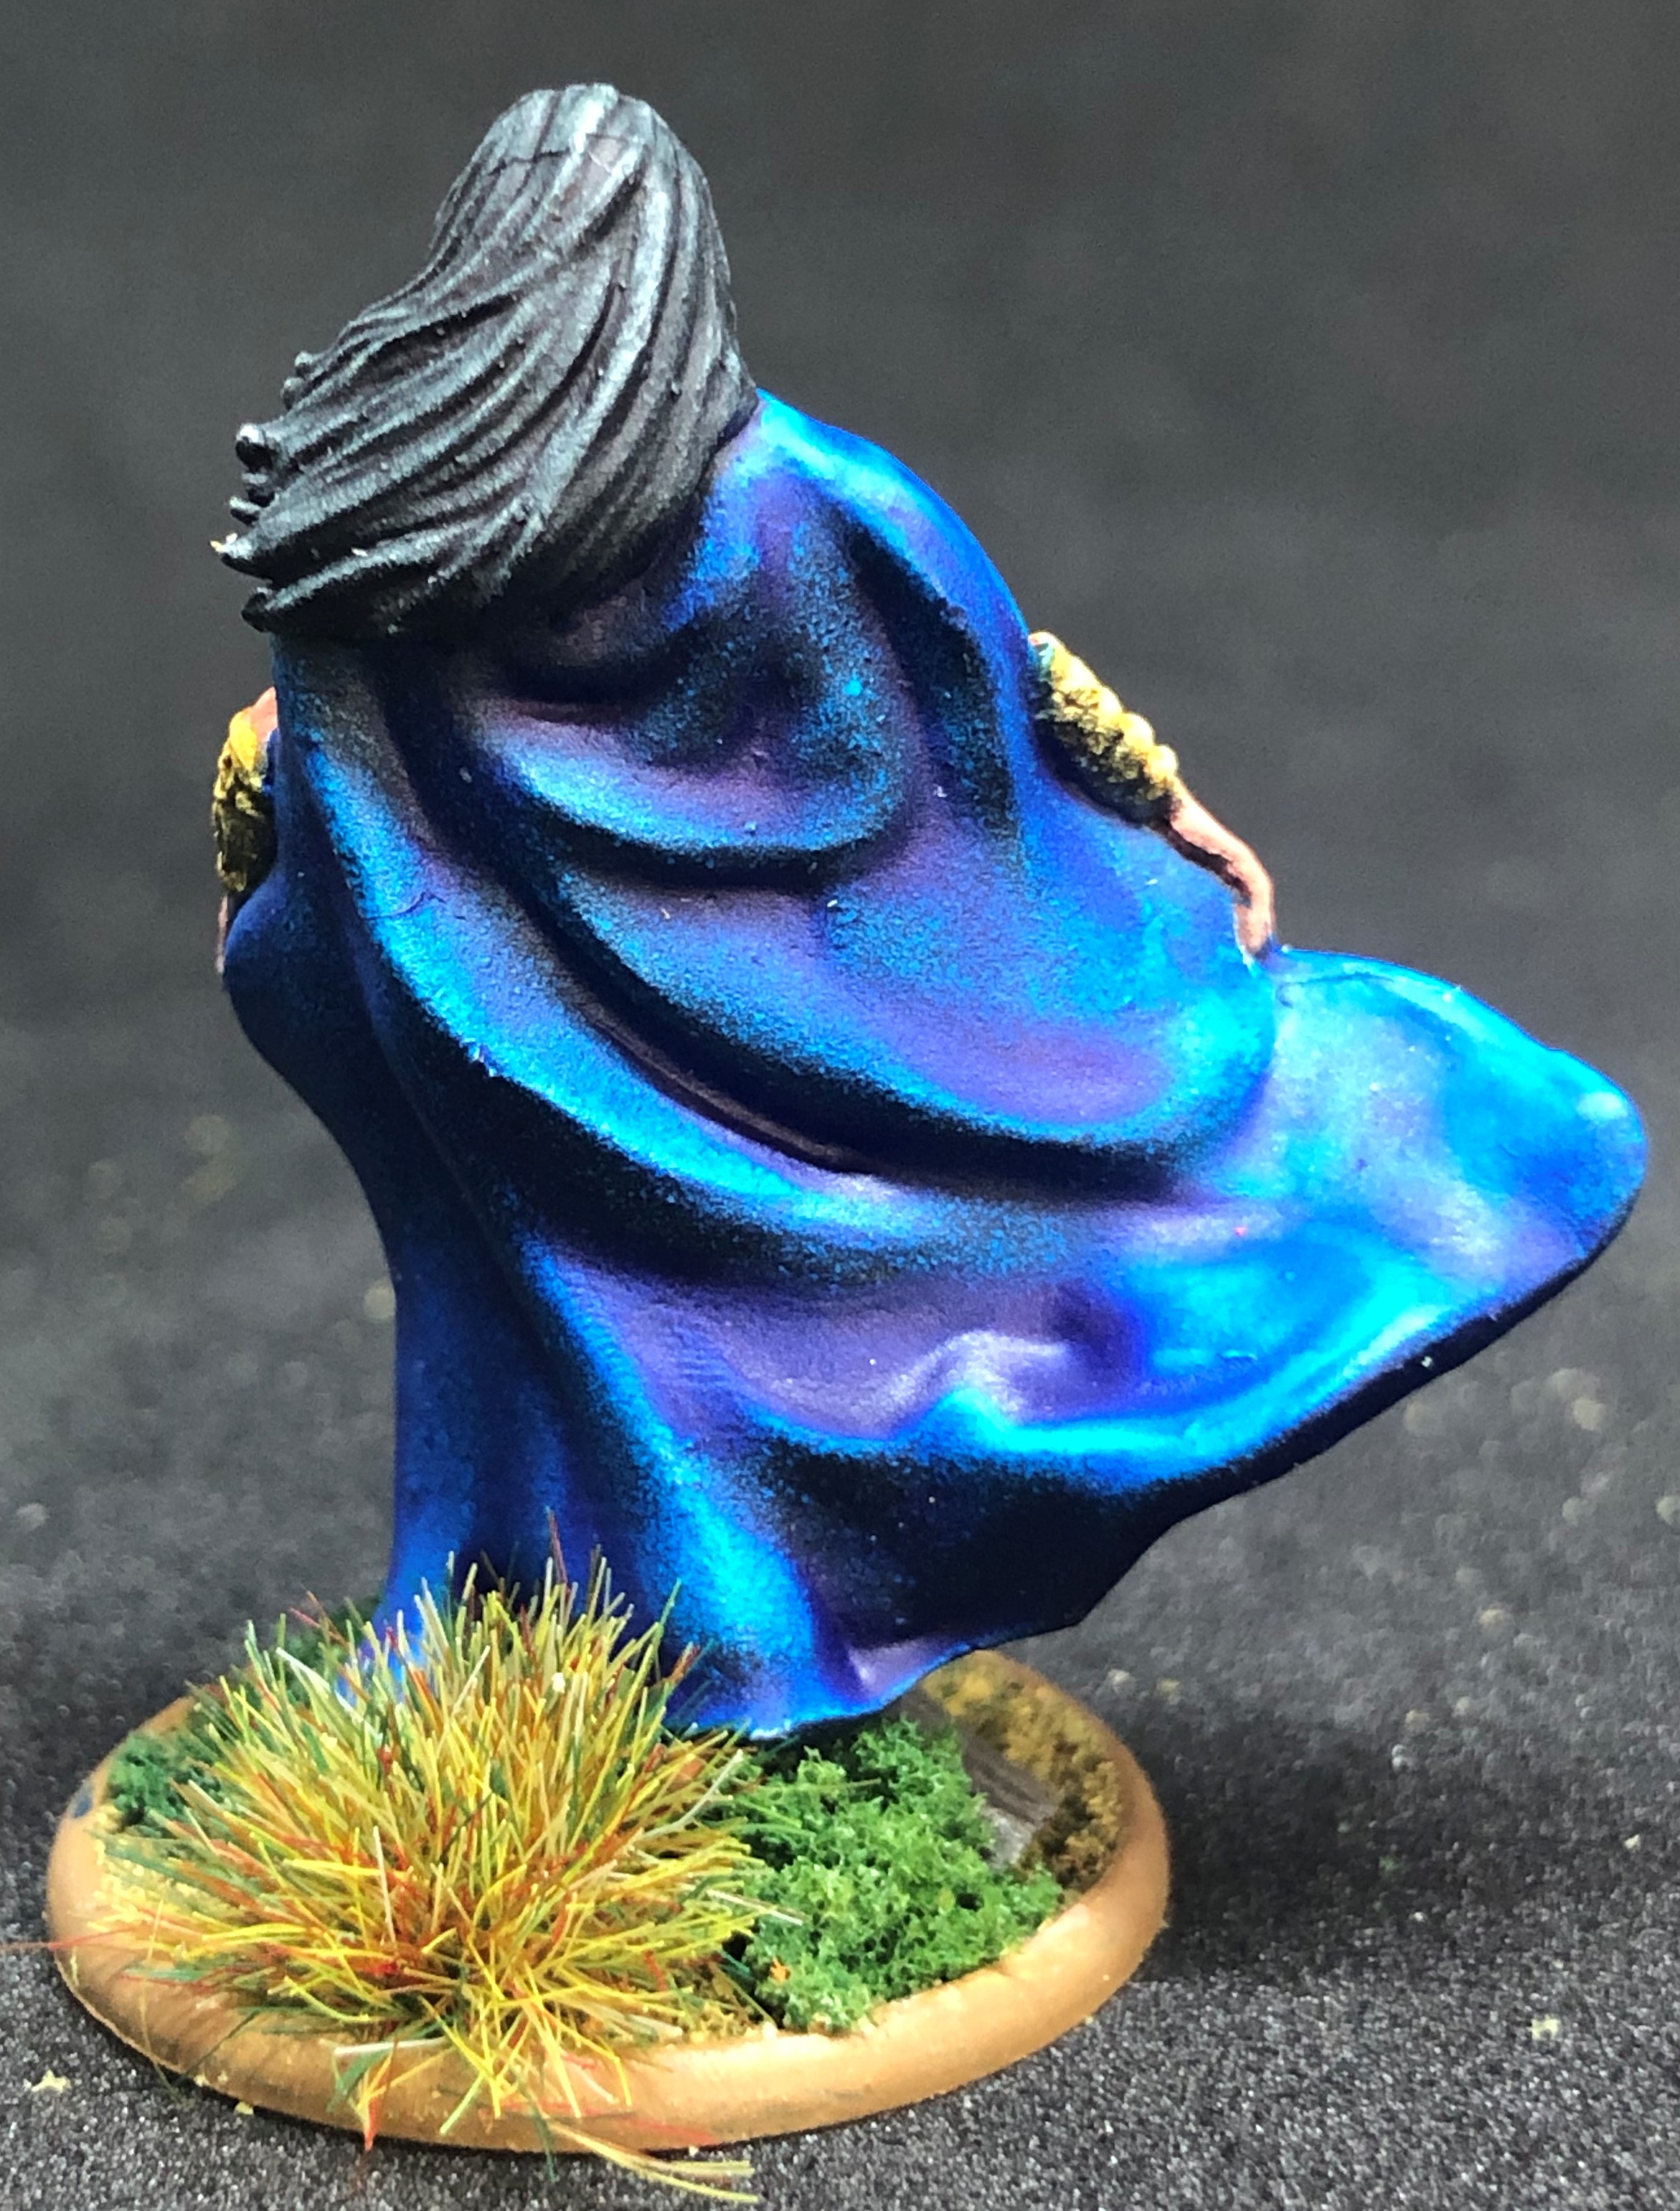
All of the Drune characters care finished. Speedpaints as before with some additional layering and highlights, particularly on the skin for Medb and Megrim. First up, Medb and Robym. Medb has a Talassar Blue Contrast cloak with some of the uneven blobs re-layered and highlighted. The chainmail is AP Holy White with a broad highlight of Wolf Grey and then selected highest-lights with White.
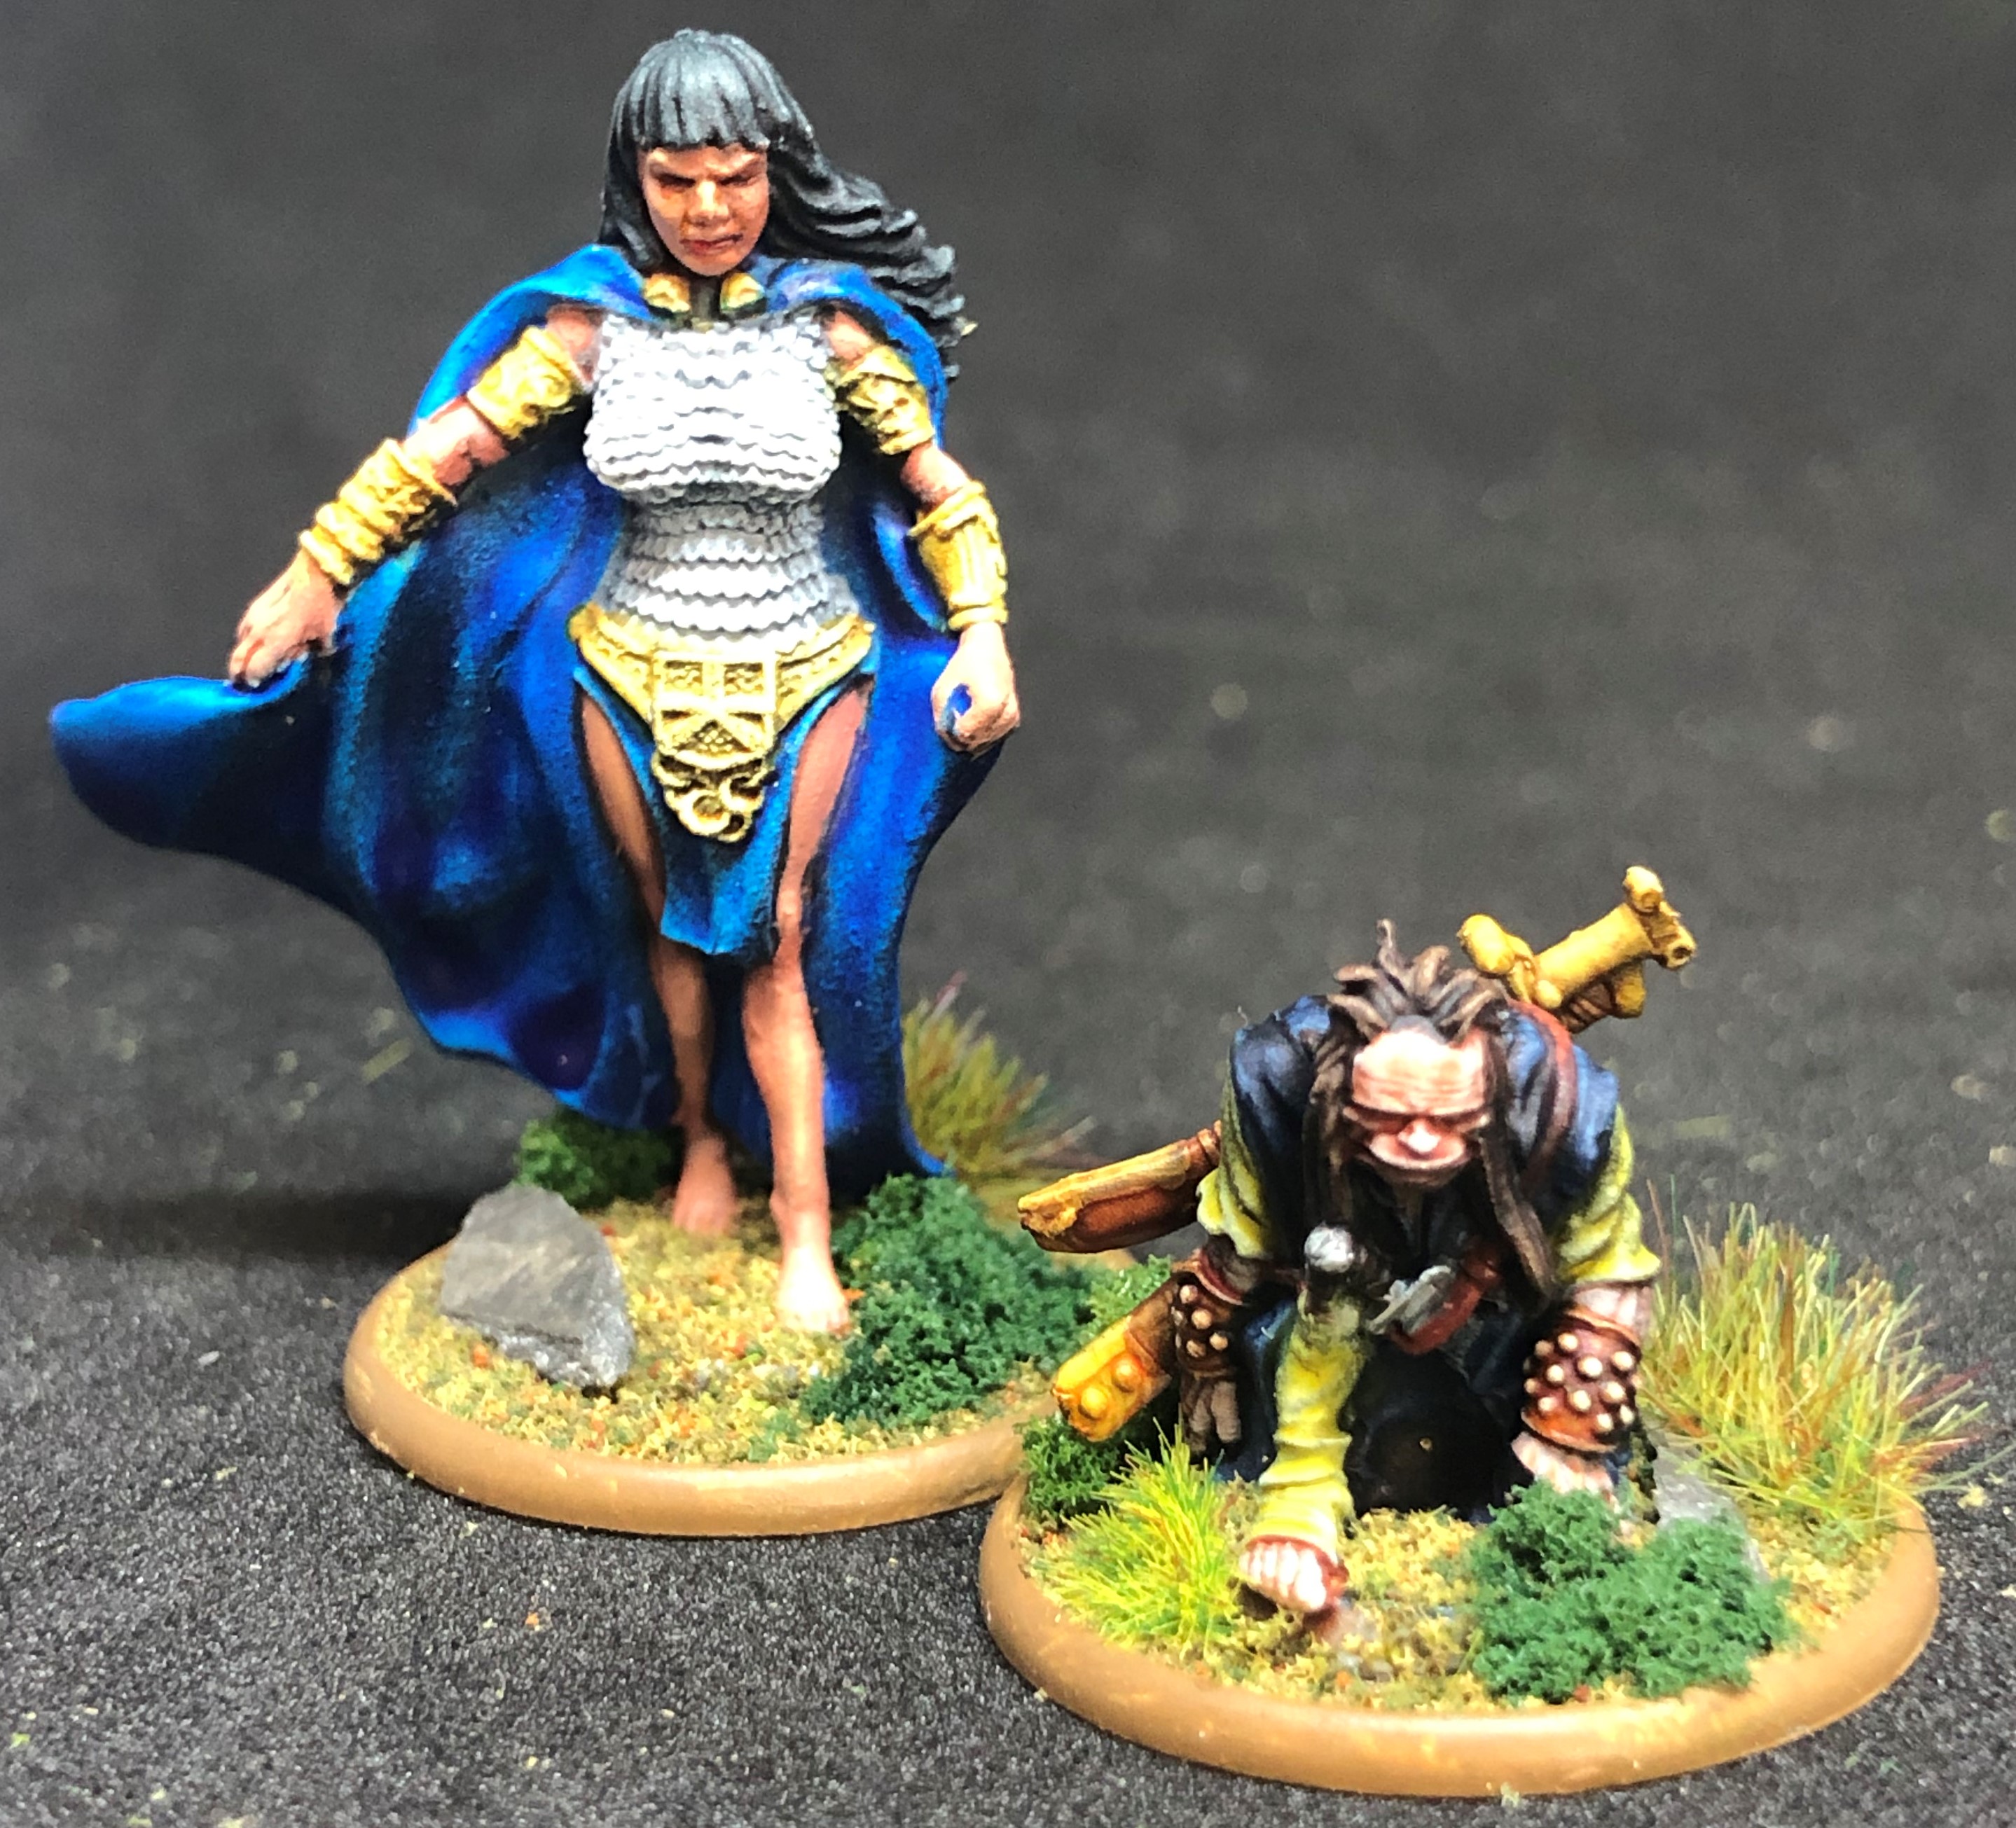


Megrim. I like a purple highlight over a black cloak, especially for “evil” characters. This was AP Grim Black with P3 Sanguine Highlight over the top.


Drune Priest.
Slough Throt.
And coming soon. What will this be…?
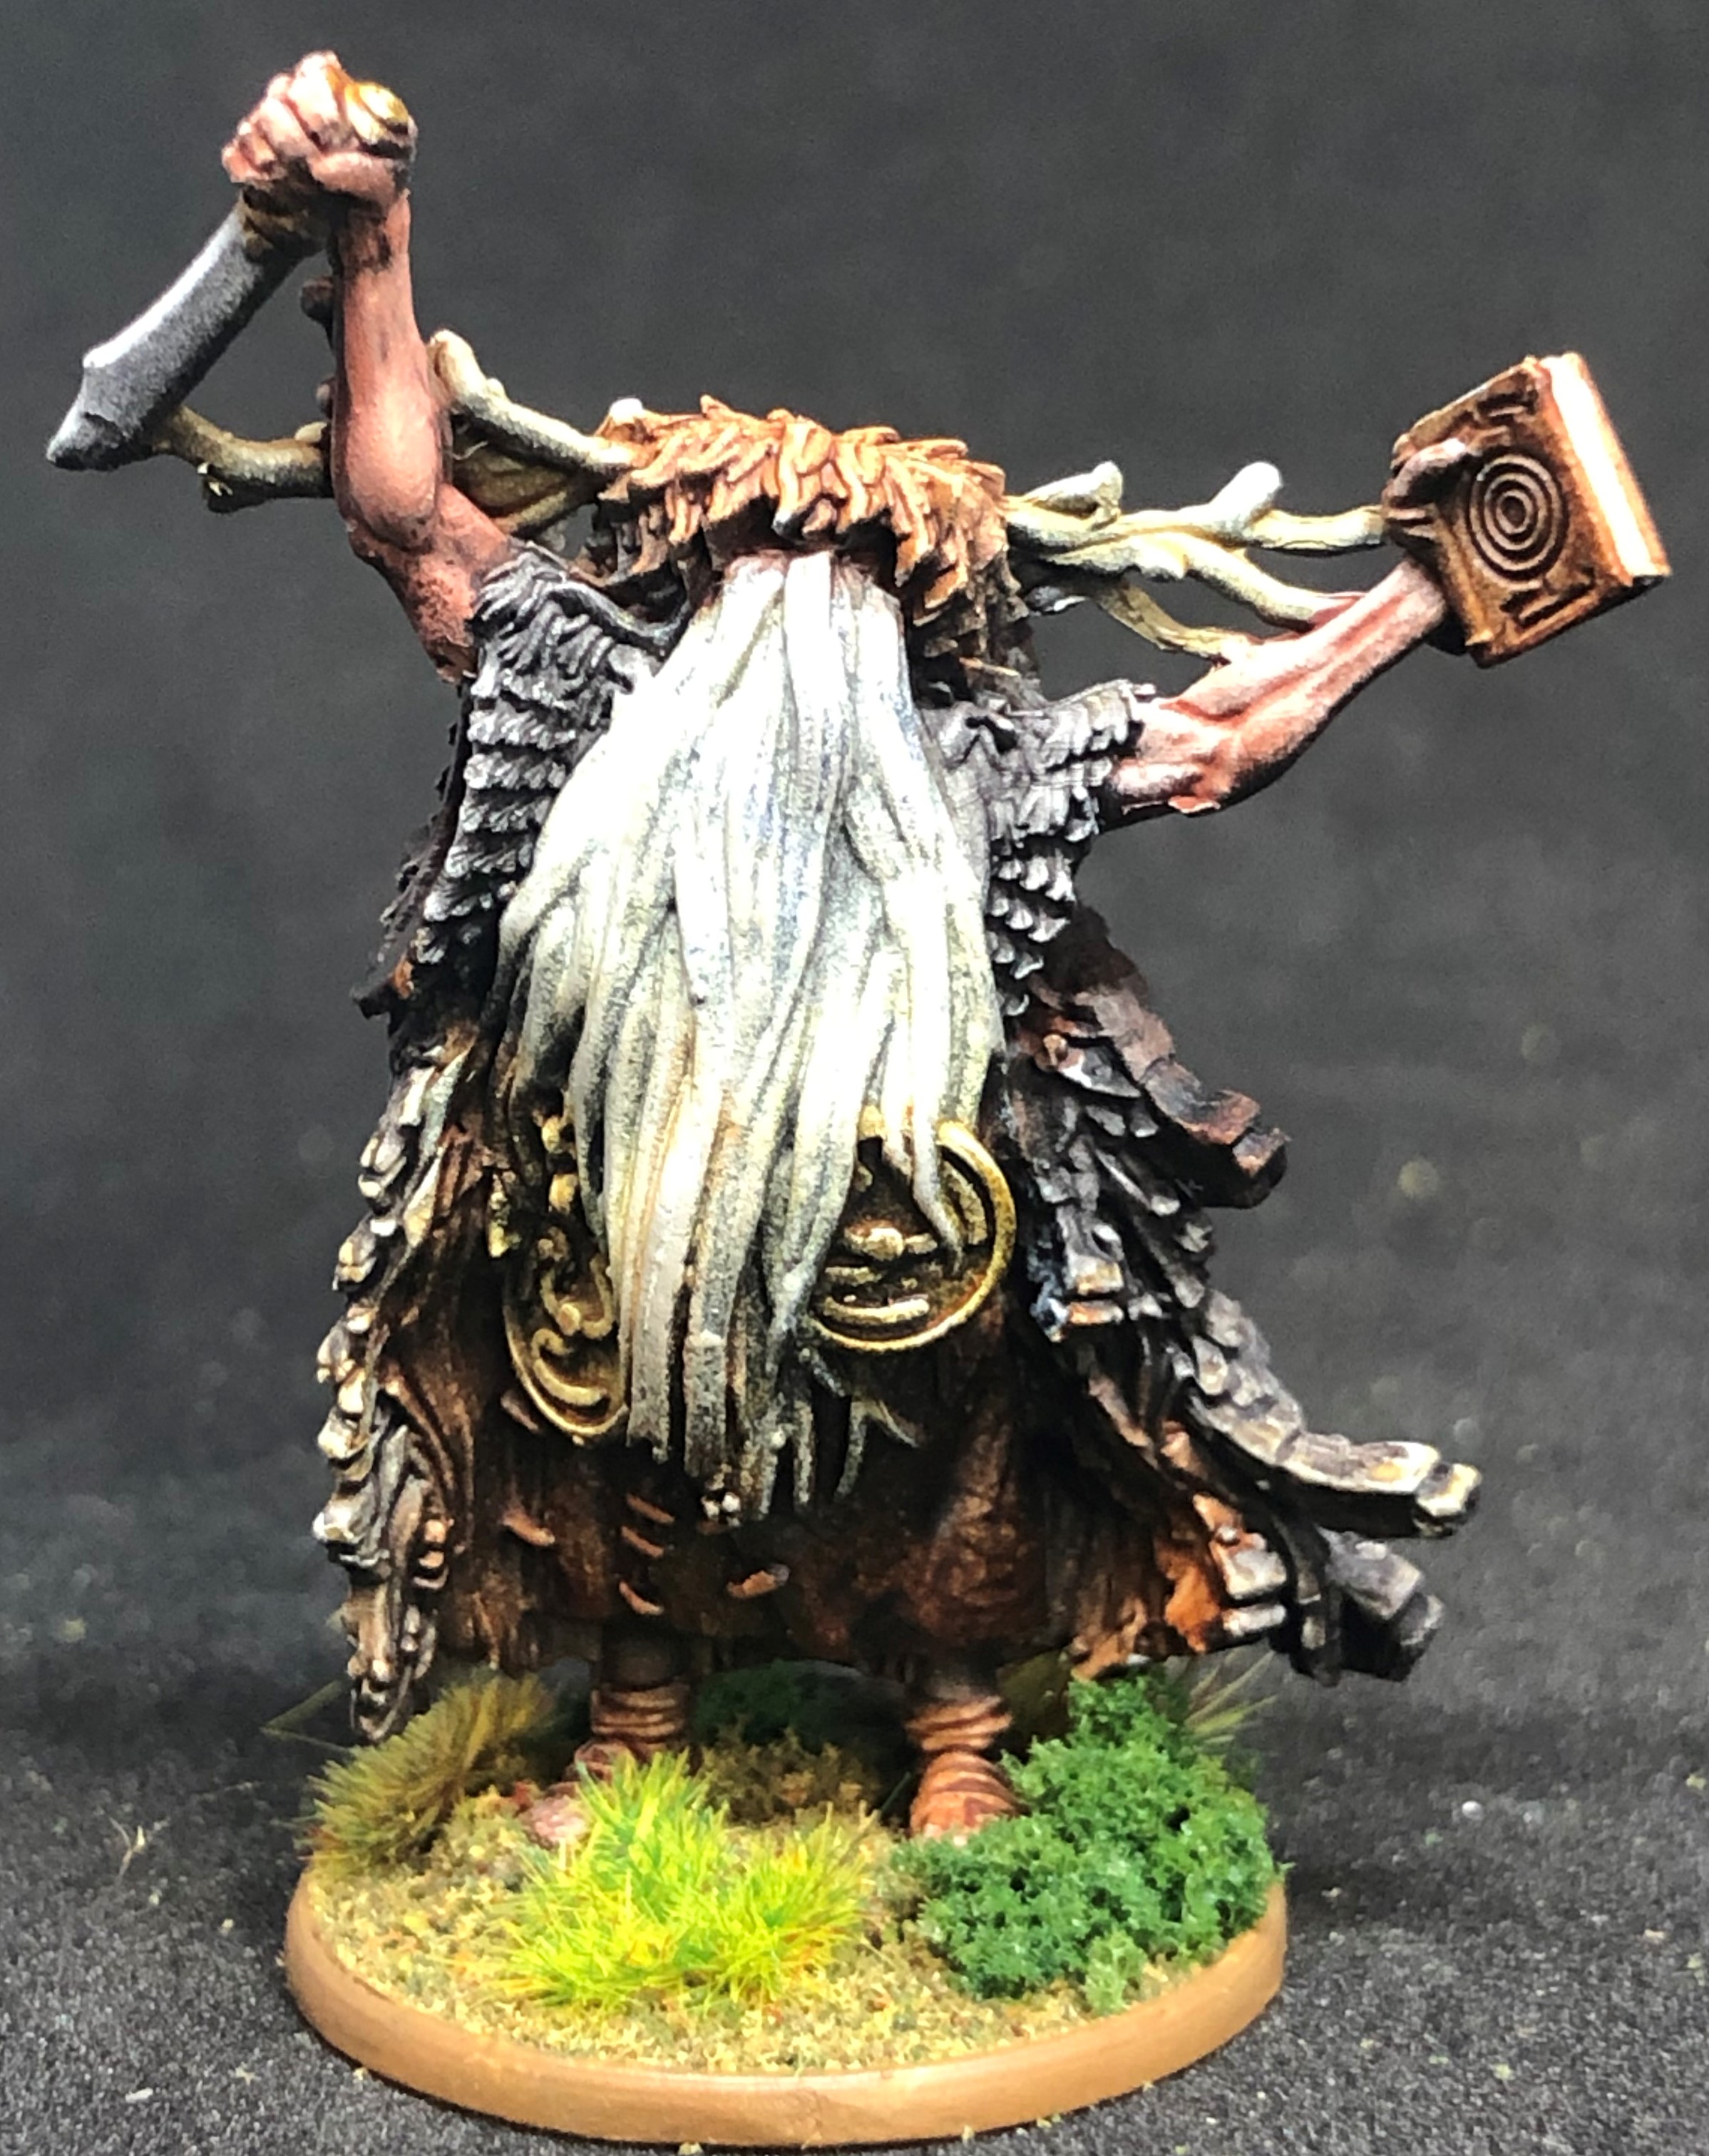
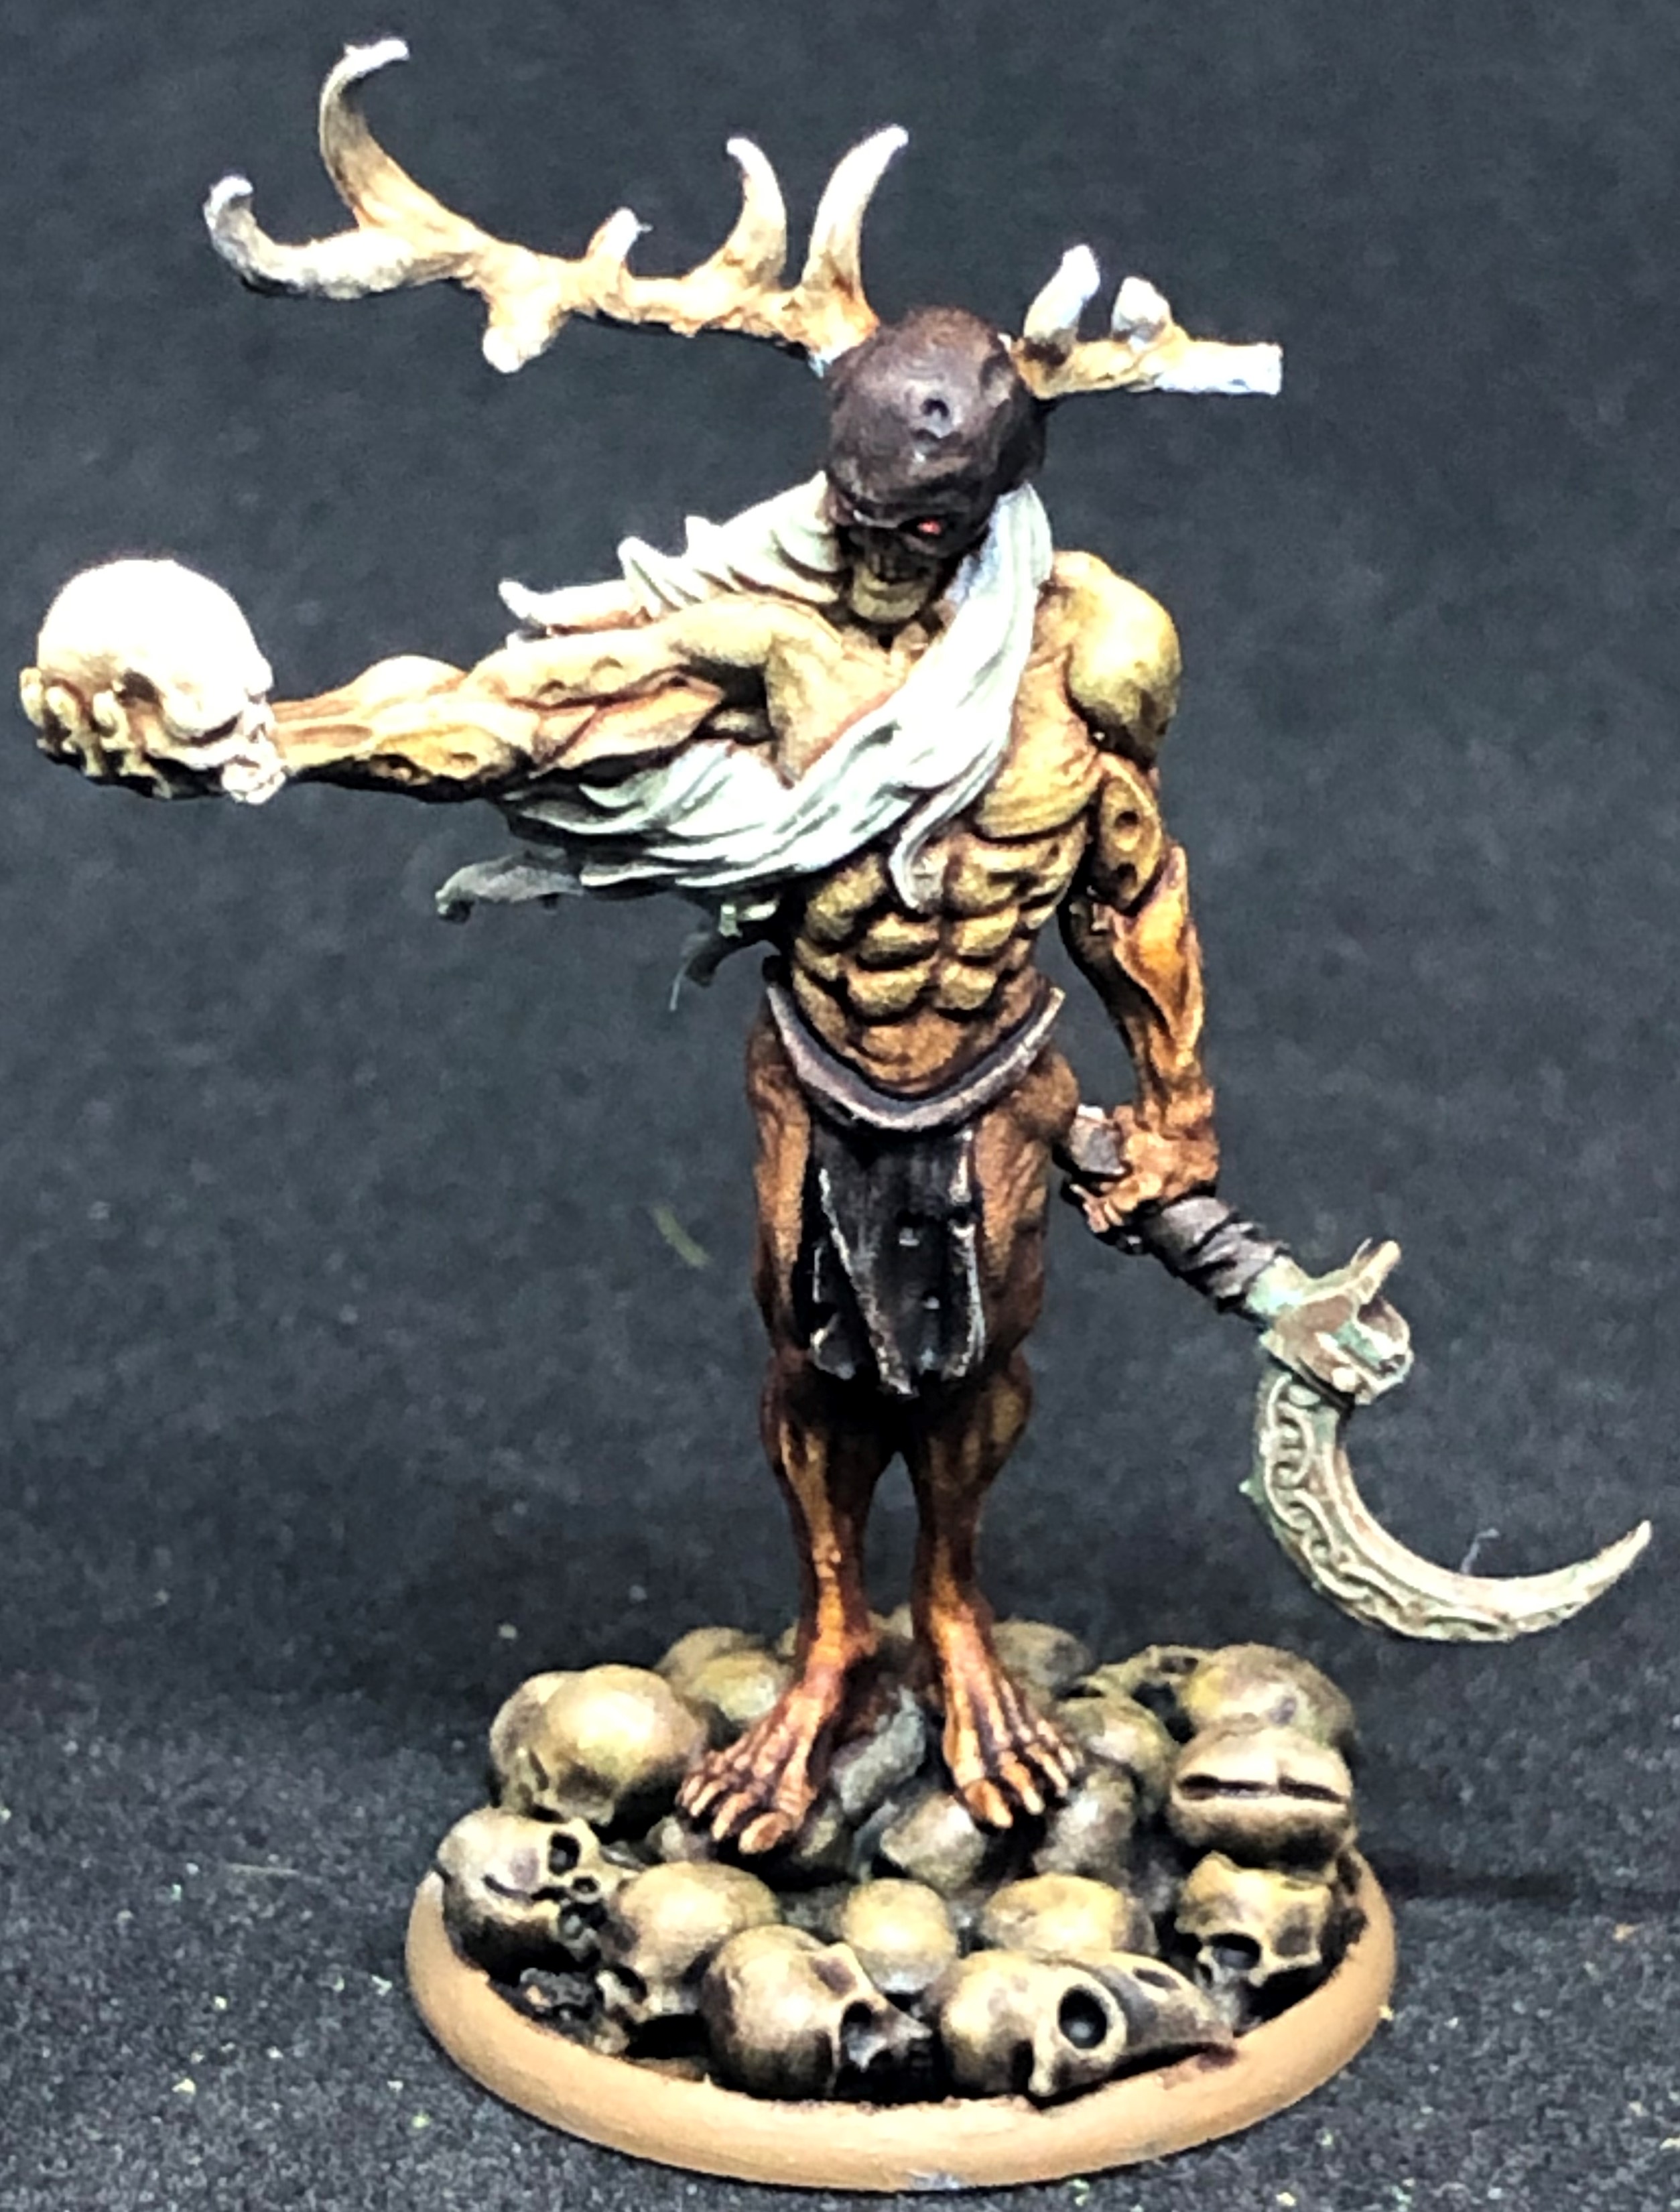
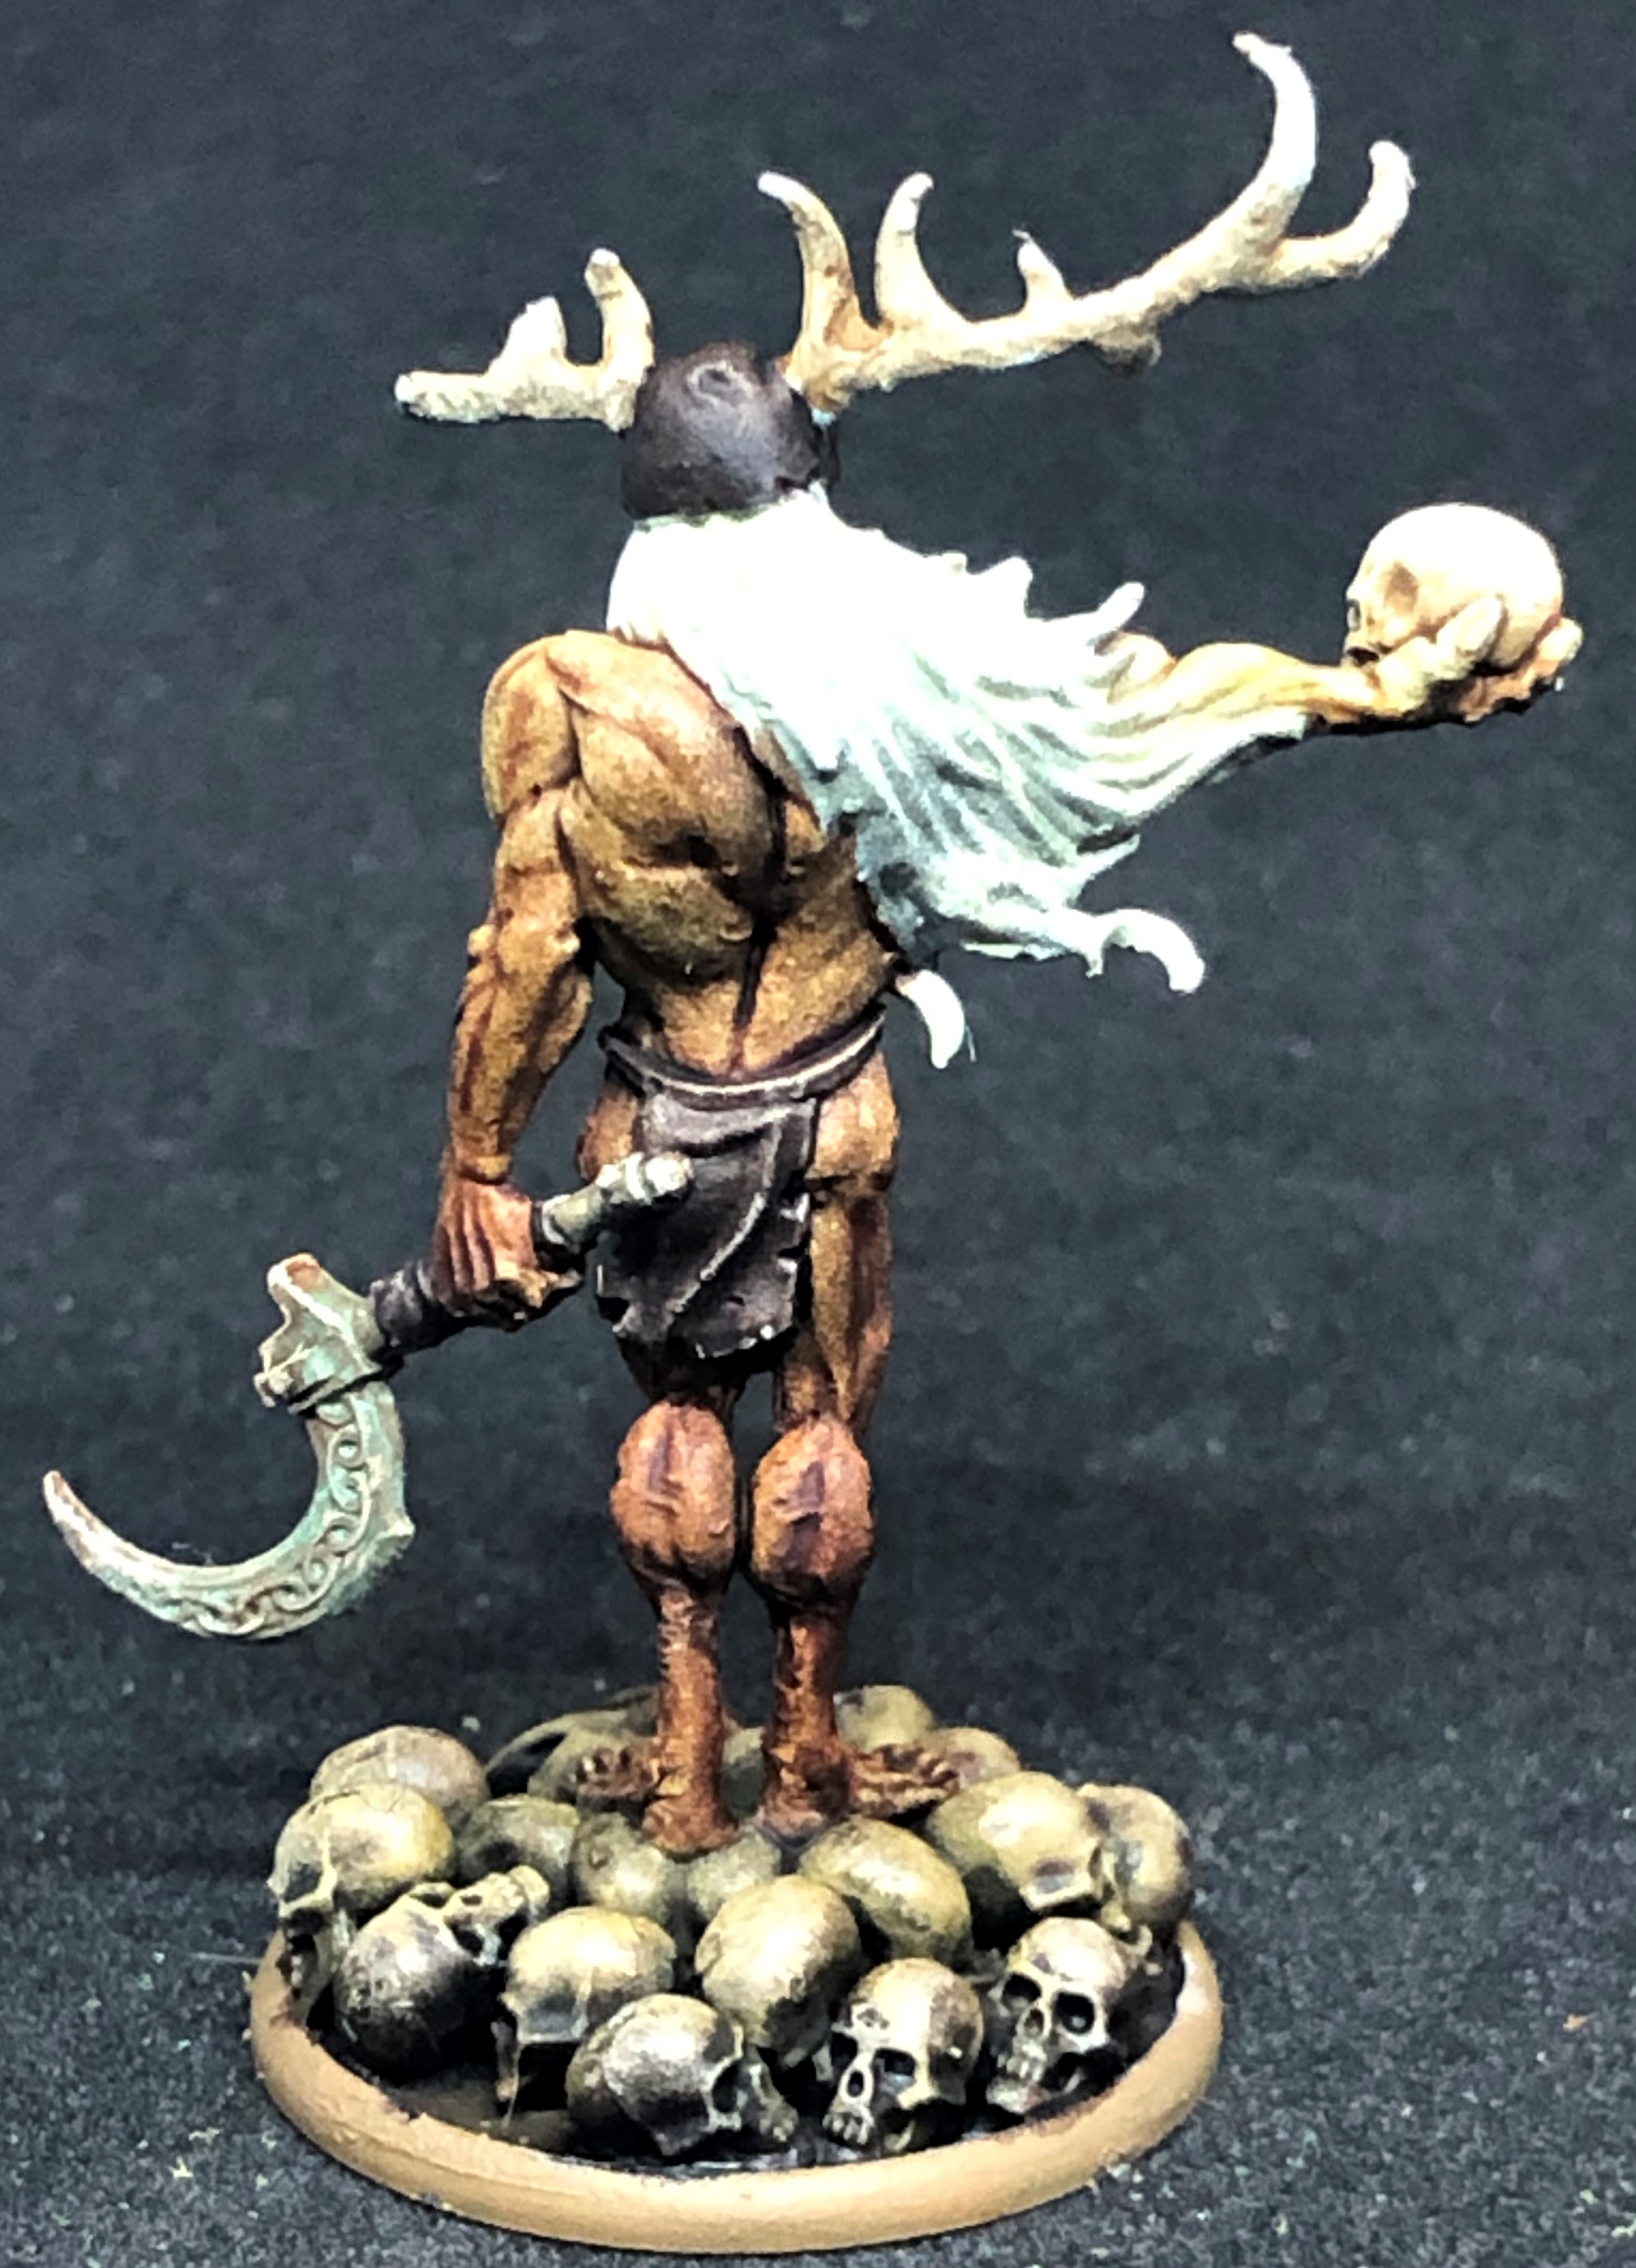
Lord Weird Slough Feg celebrates a Golden Button
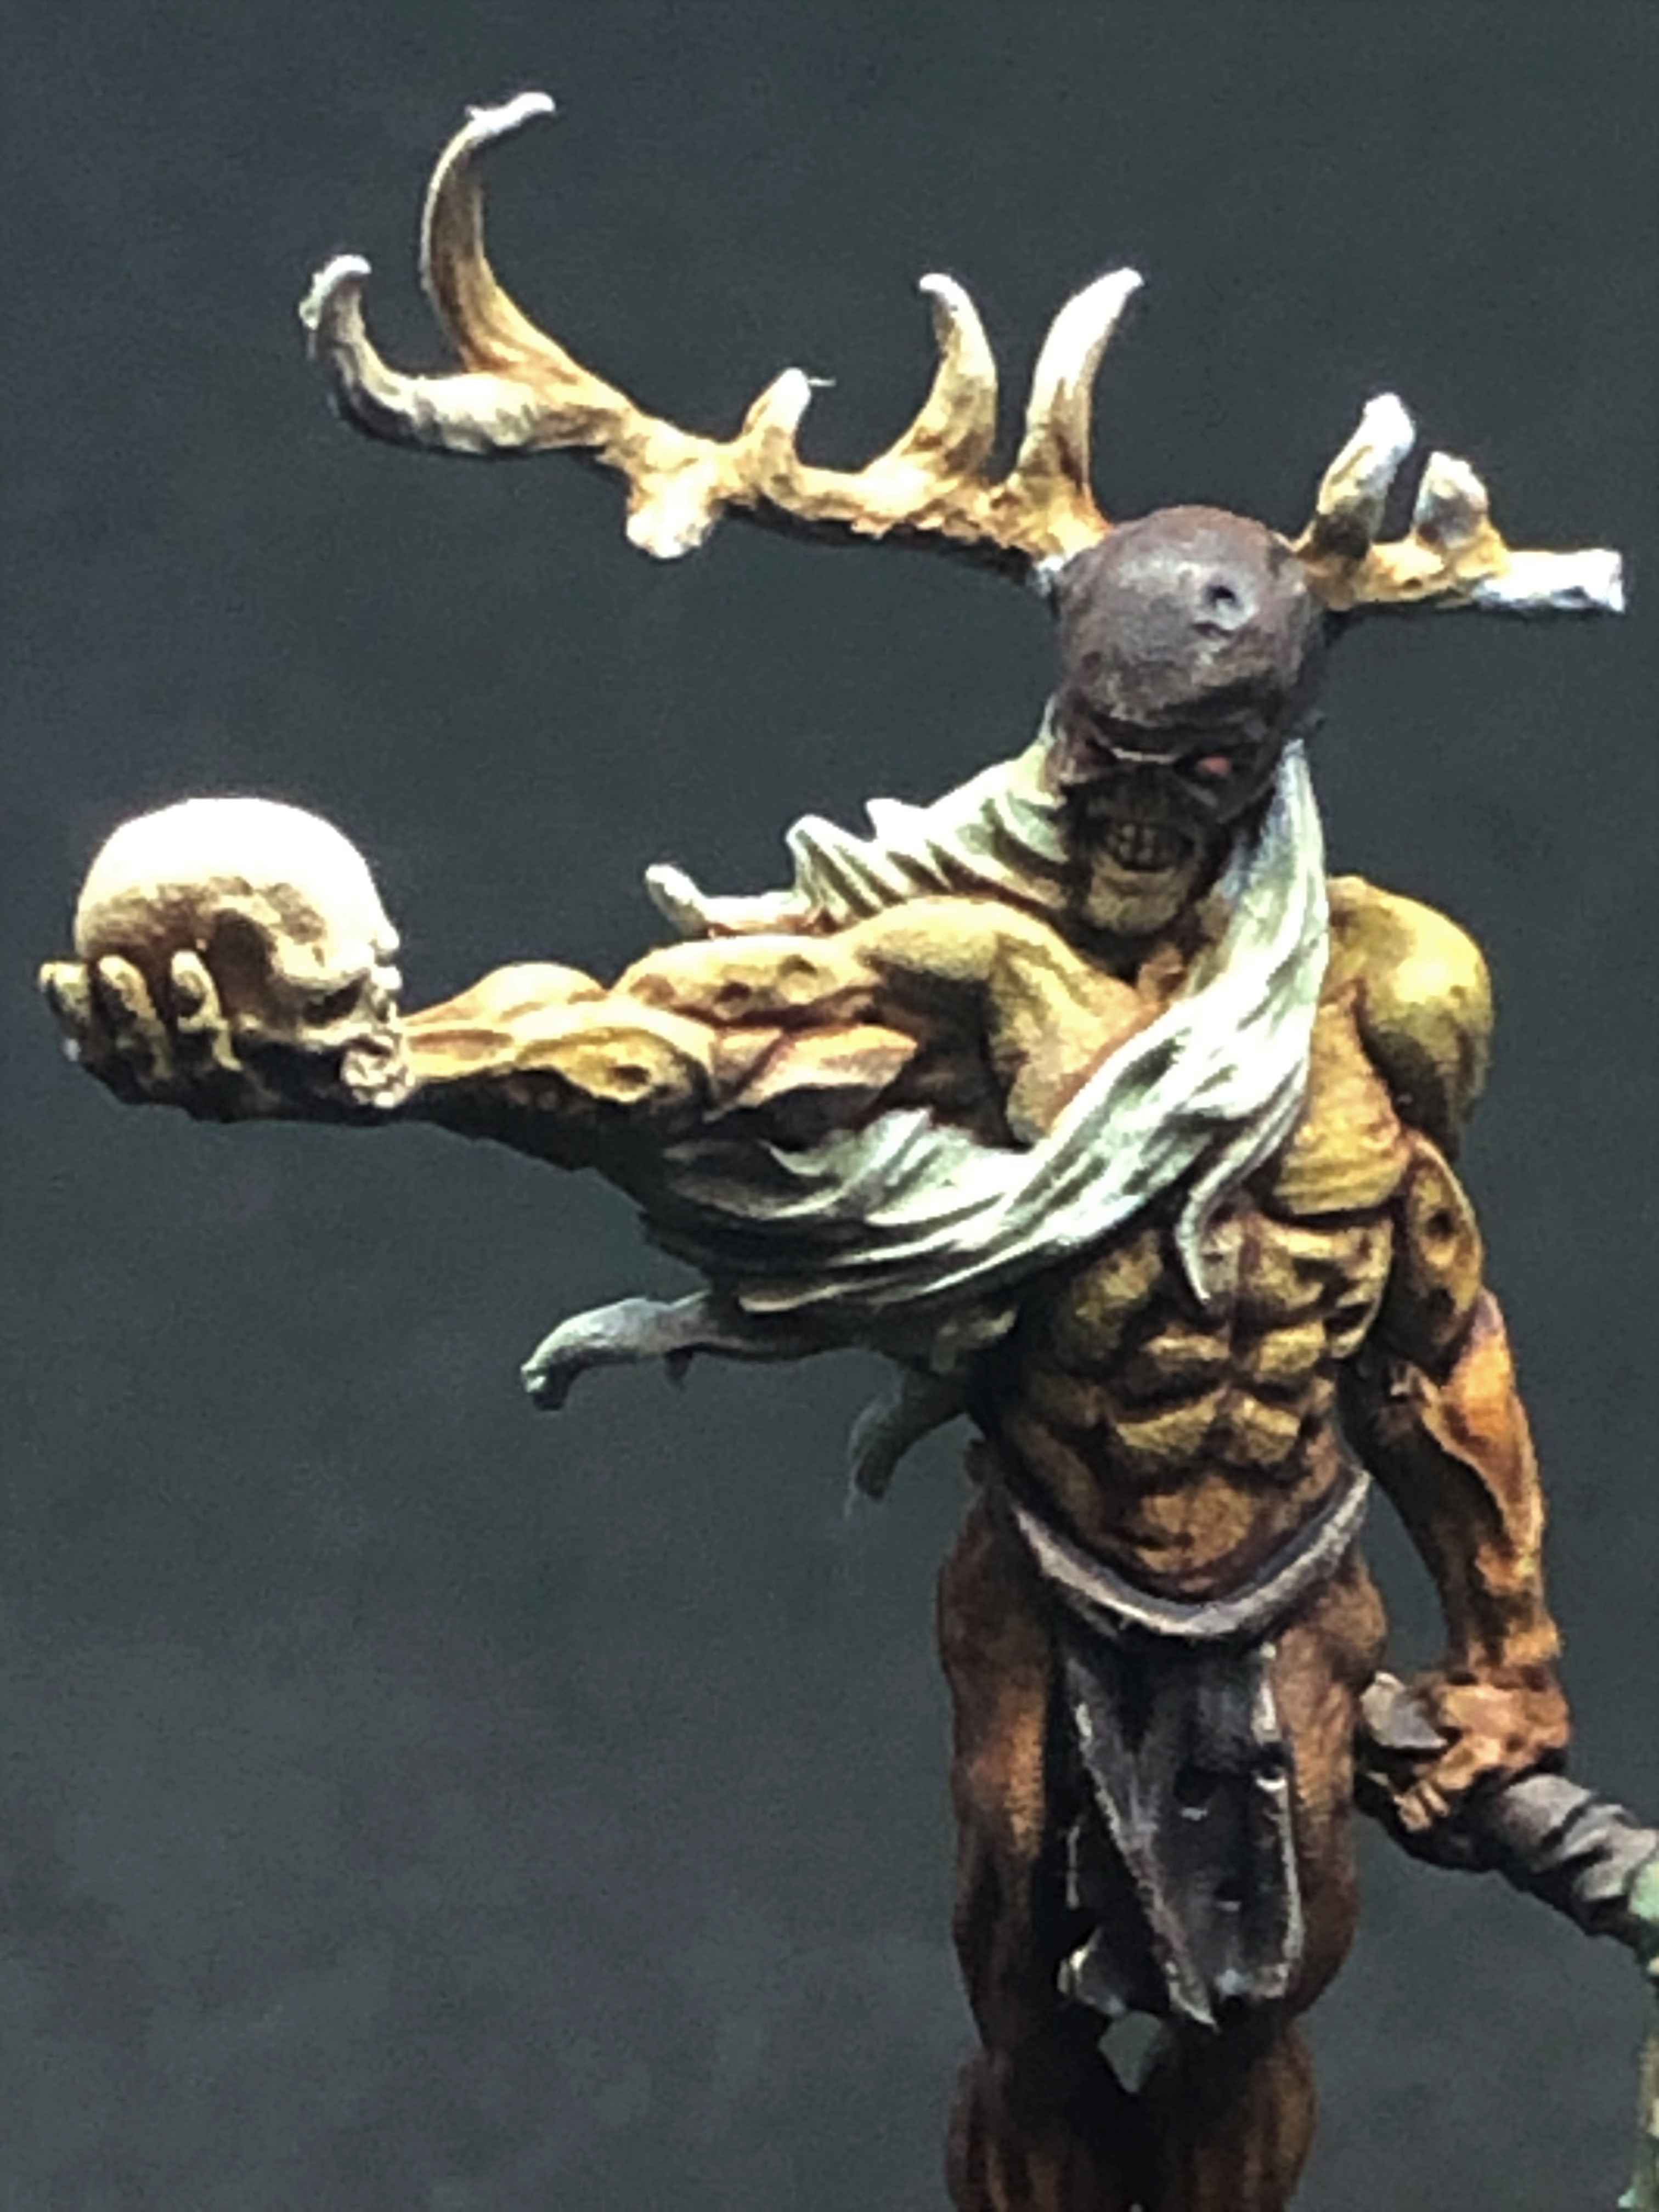 Lord Weird Slough Feg thanks you for the Golden Button
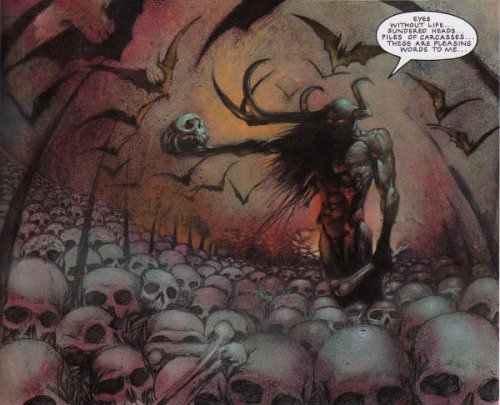 Simon Bisley art this model is sculpted after and the look I was emulating
For the Lord Weird I had a go at wet blending. These AP Speedpaints stay wet and workable on the model for a while and don’t stain the same way some inks and contrast paints will. This allowed a nice wet blend working up from a Dark Wood and Hardened Leather blend through pure Hardened Leater to a blend with Sand golem to pure Sand Golem with the zenith underneath helping the notion of light/tone transition.
Other parts were treated similar to previous models with the Sand Golem/finger wipe highlights on the antlers. The bone colour on the scull he is holding was reinforcesd with some Vallejo Bone White. The sickle bronze effect was a brown mixed as part of the wet blending on the skin. This was overpainted with Citadel Technical Nihilakh Oxide (why is it called that GW?) for the verdigris.
The base is the only one not in the standard flocking scheme. He is modelled to stand on skulls already, like in the art, so I filled the rest of the base with skulls from the Citadel Skulls plastic kit and the painted Dark Wood, wiping off the tops for the highlight.
Finally there was a thinned wash of Malignant Green added between the skulls and given to selected areas of the figure to give an unnatural look to him, he is well over 10,000 years old after all.
This week the project got one of these 🙂

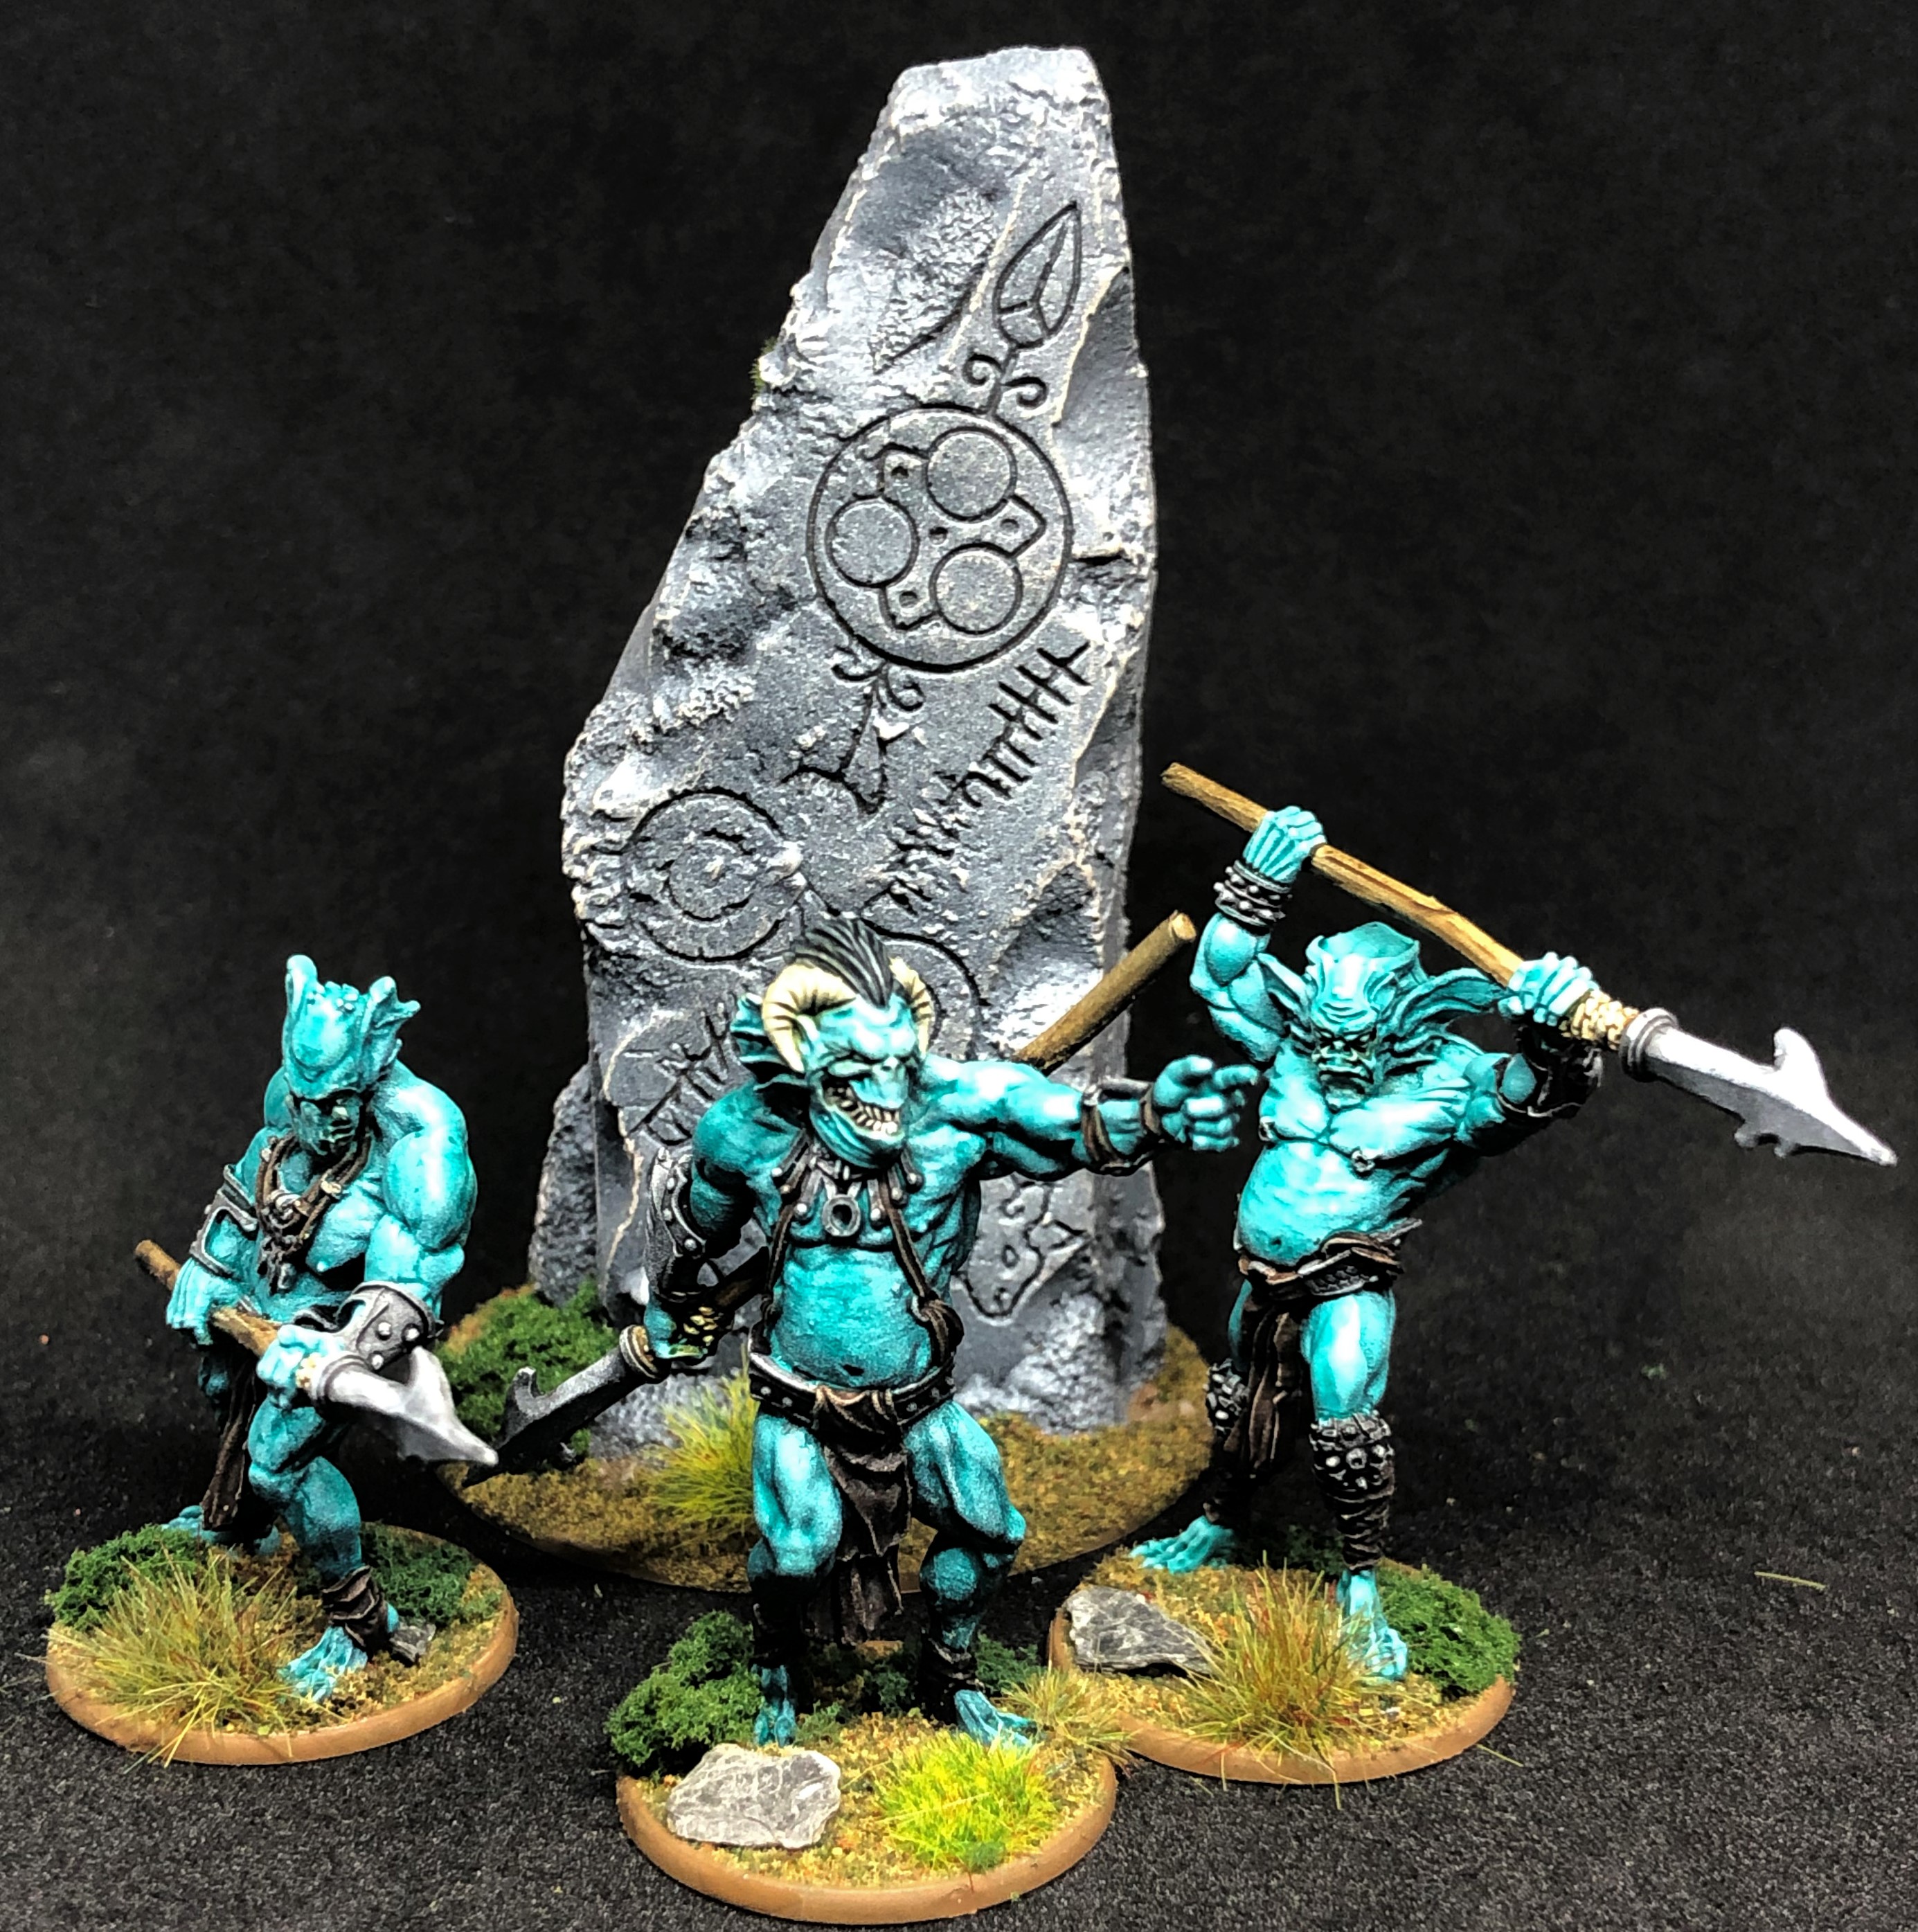
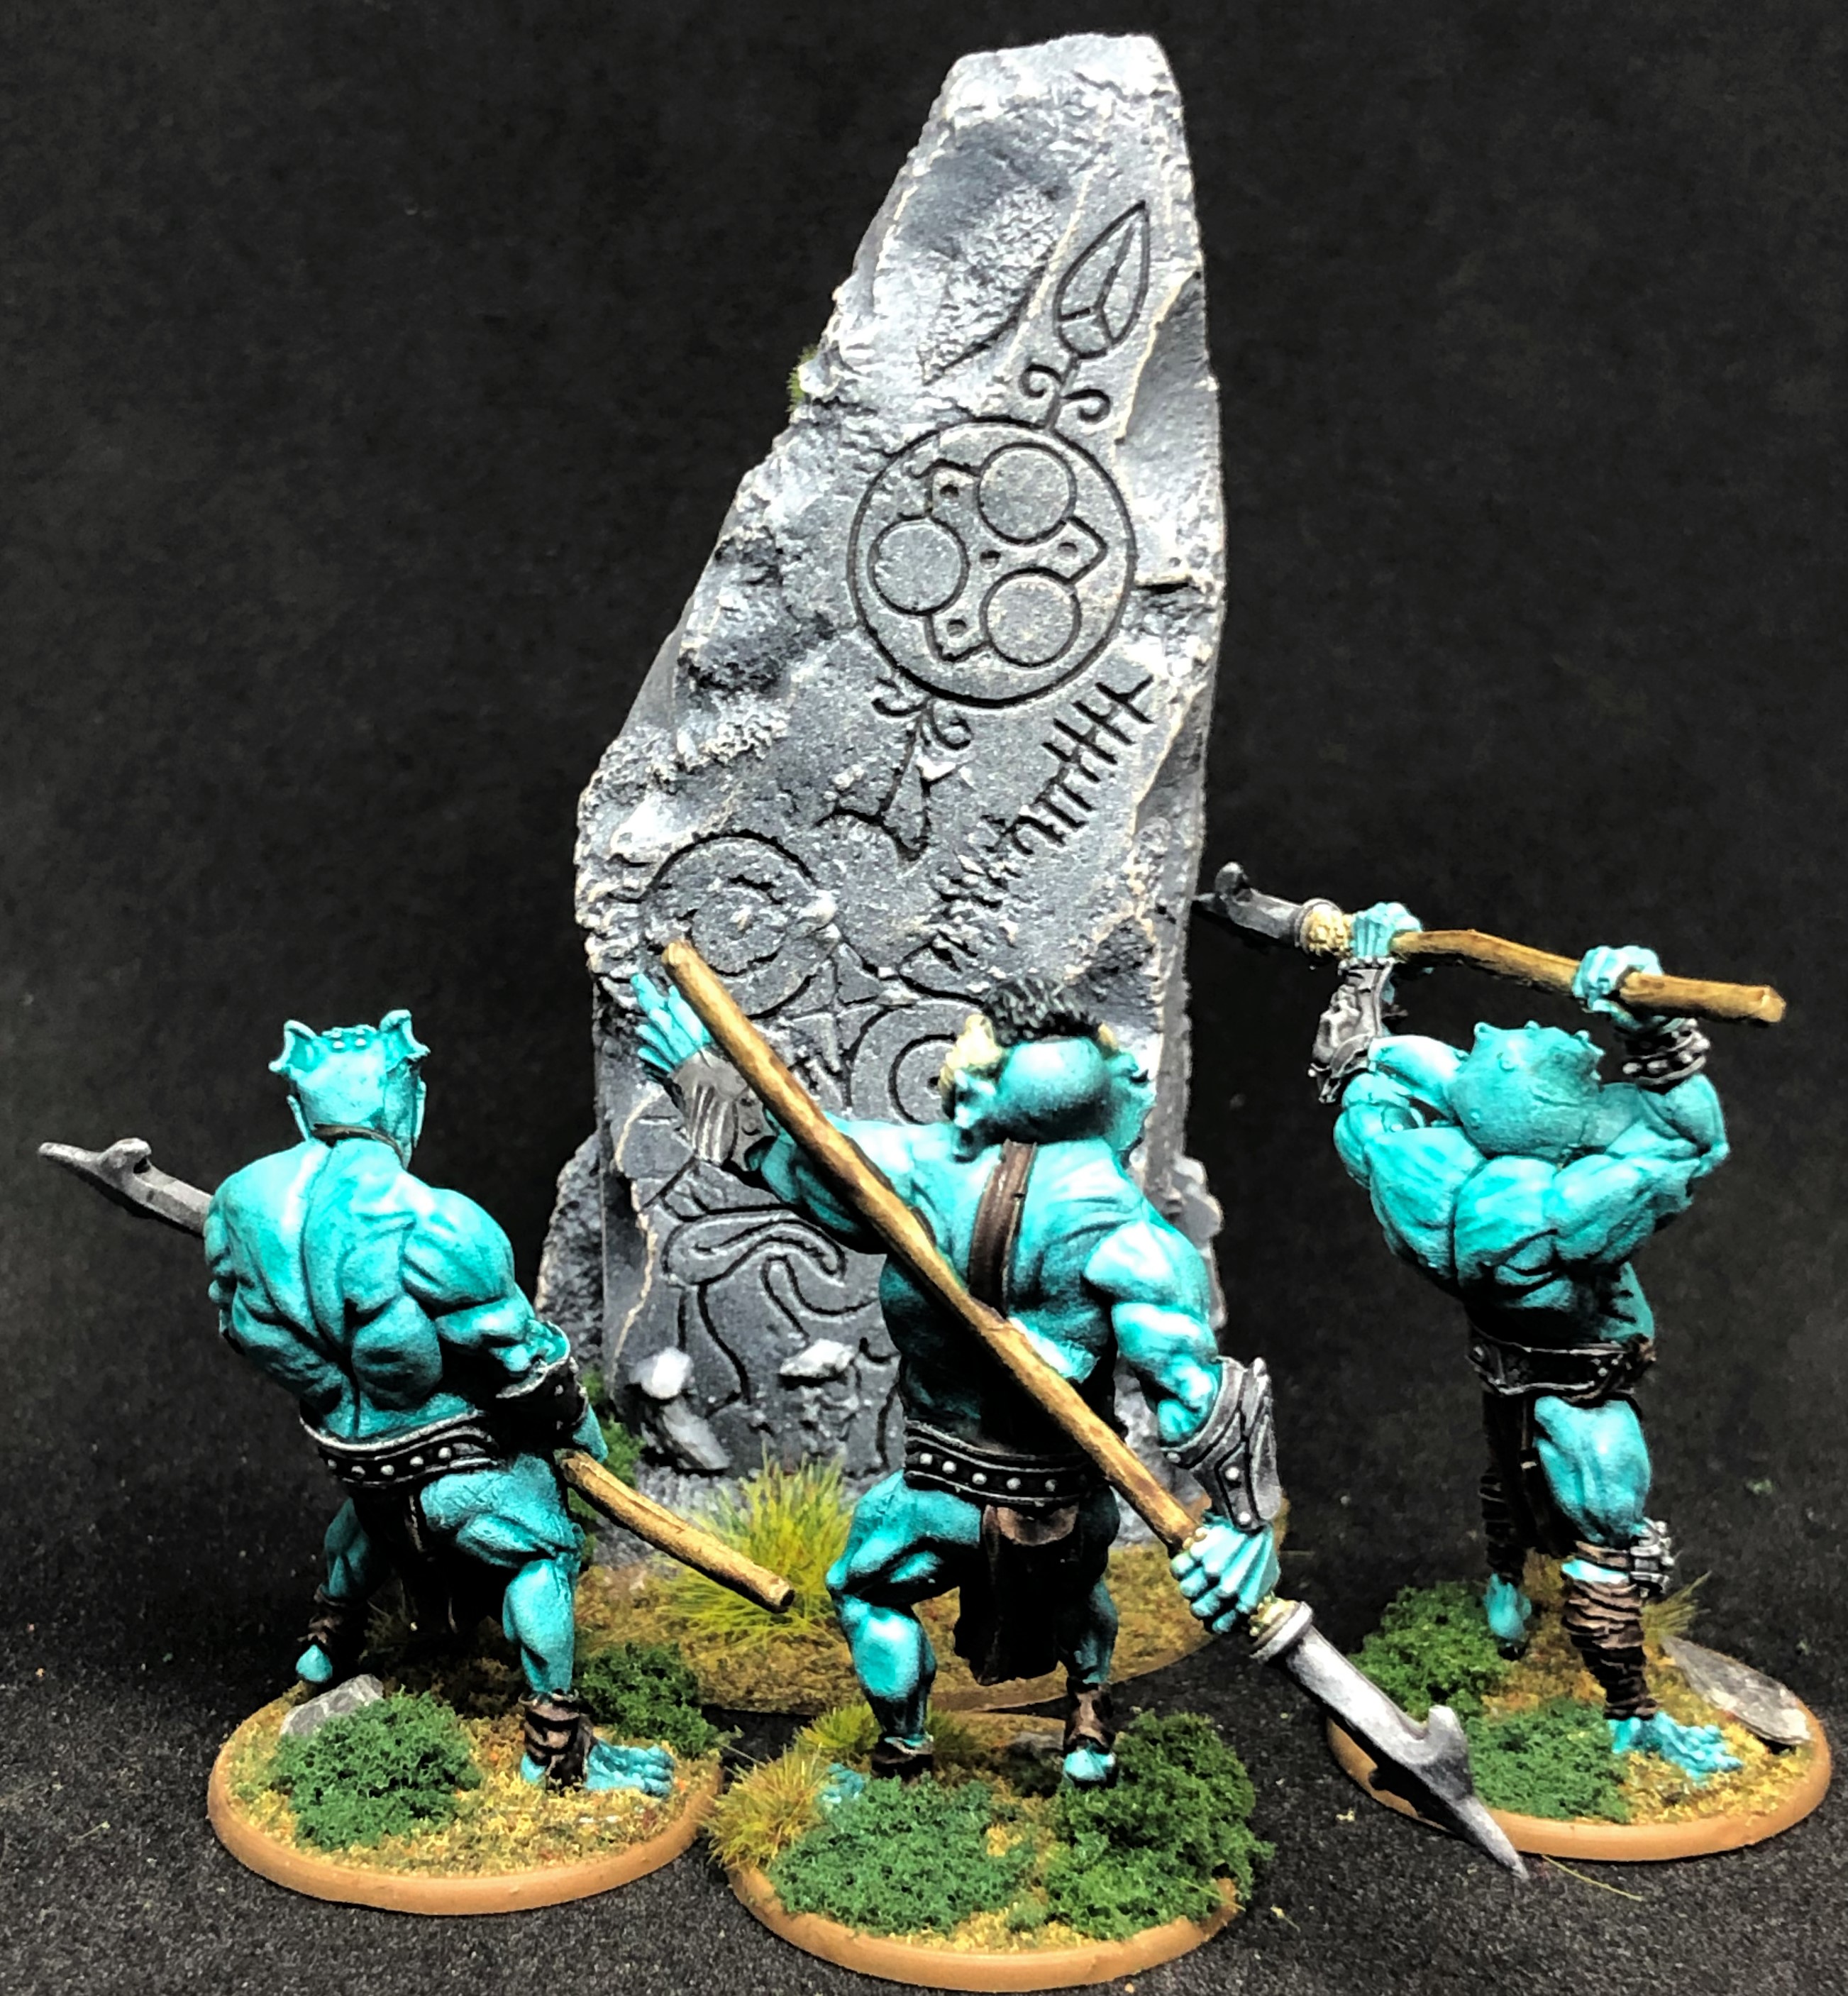
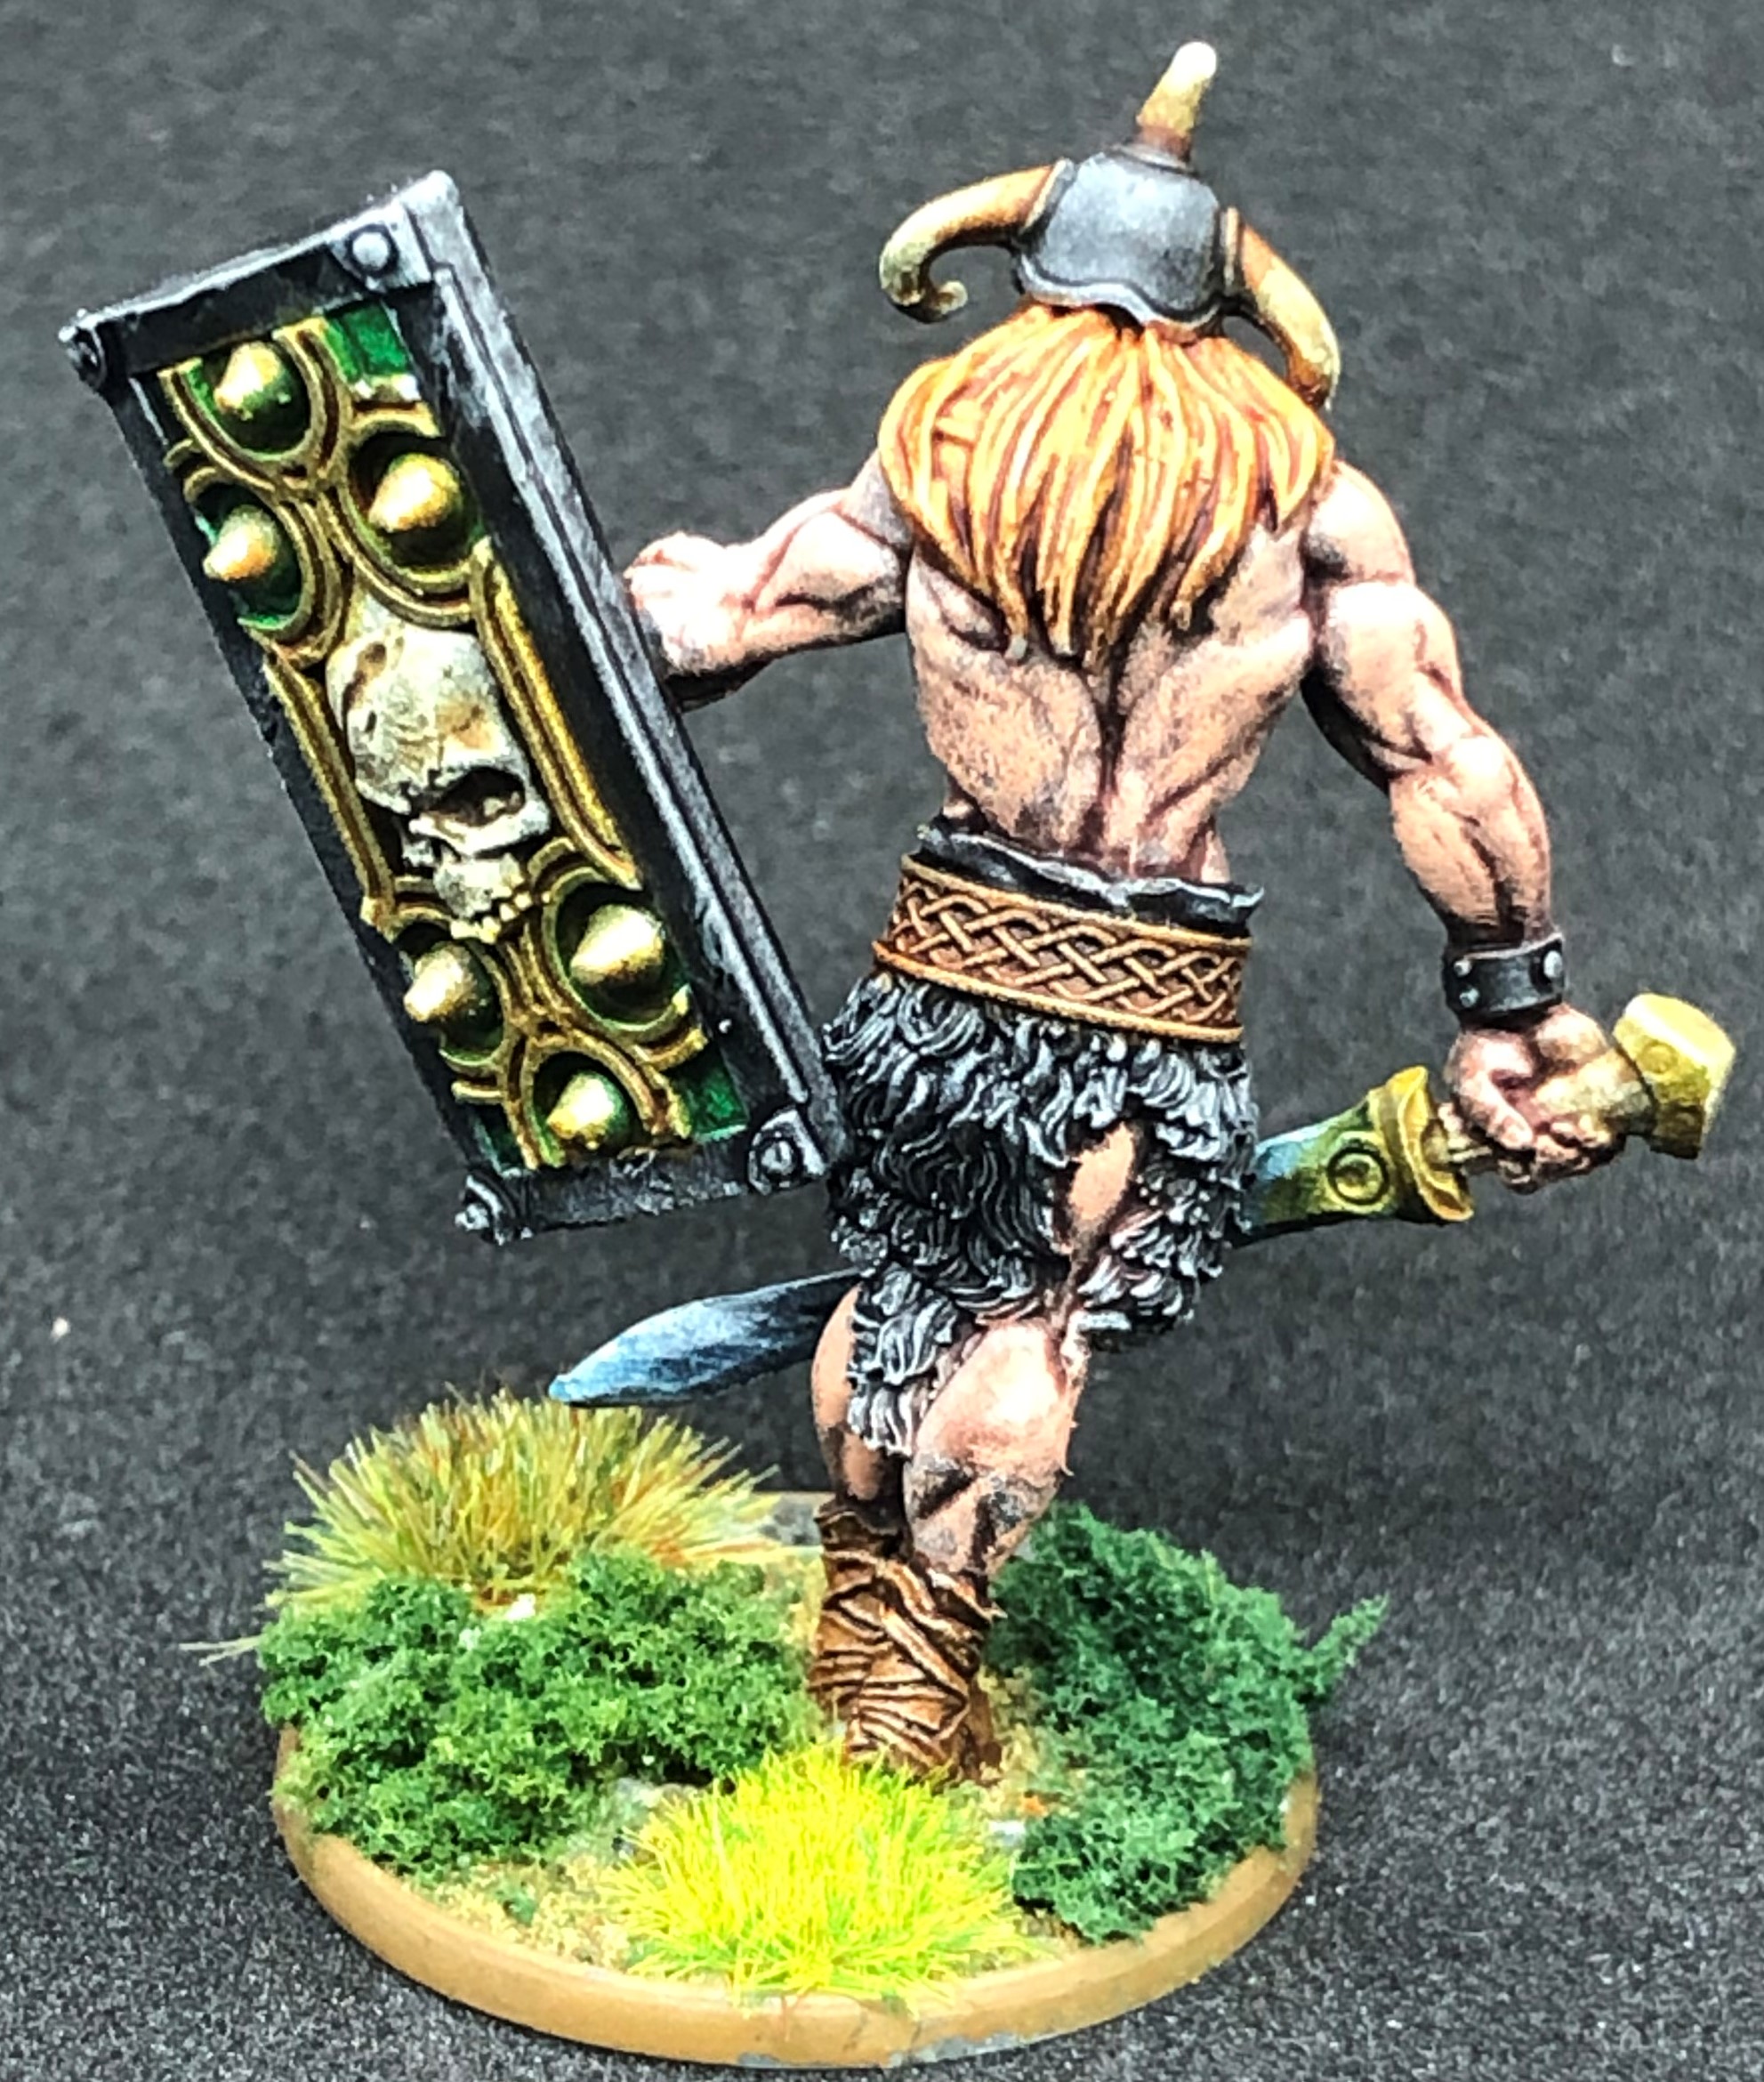
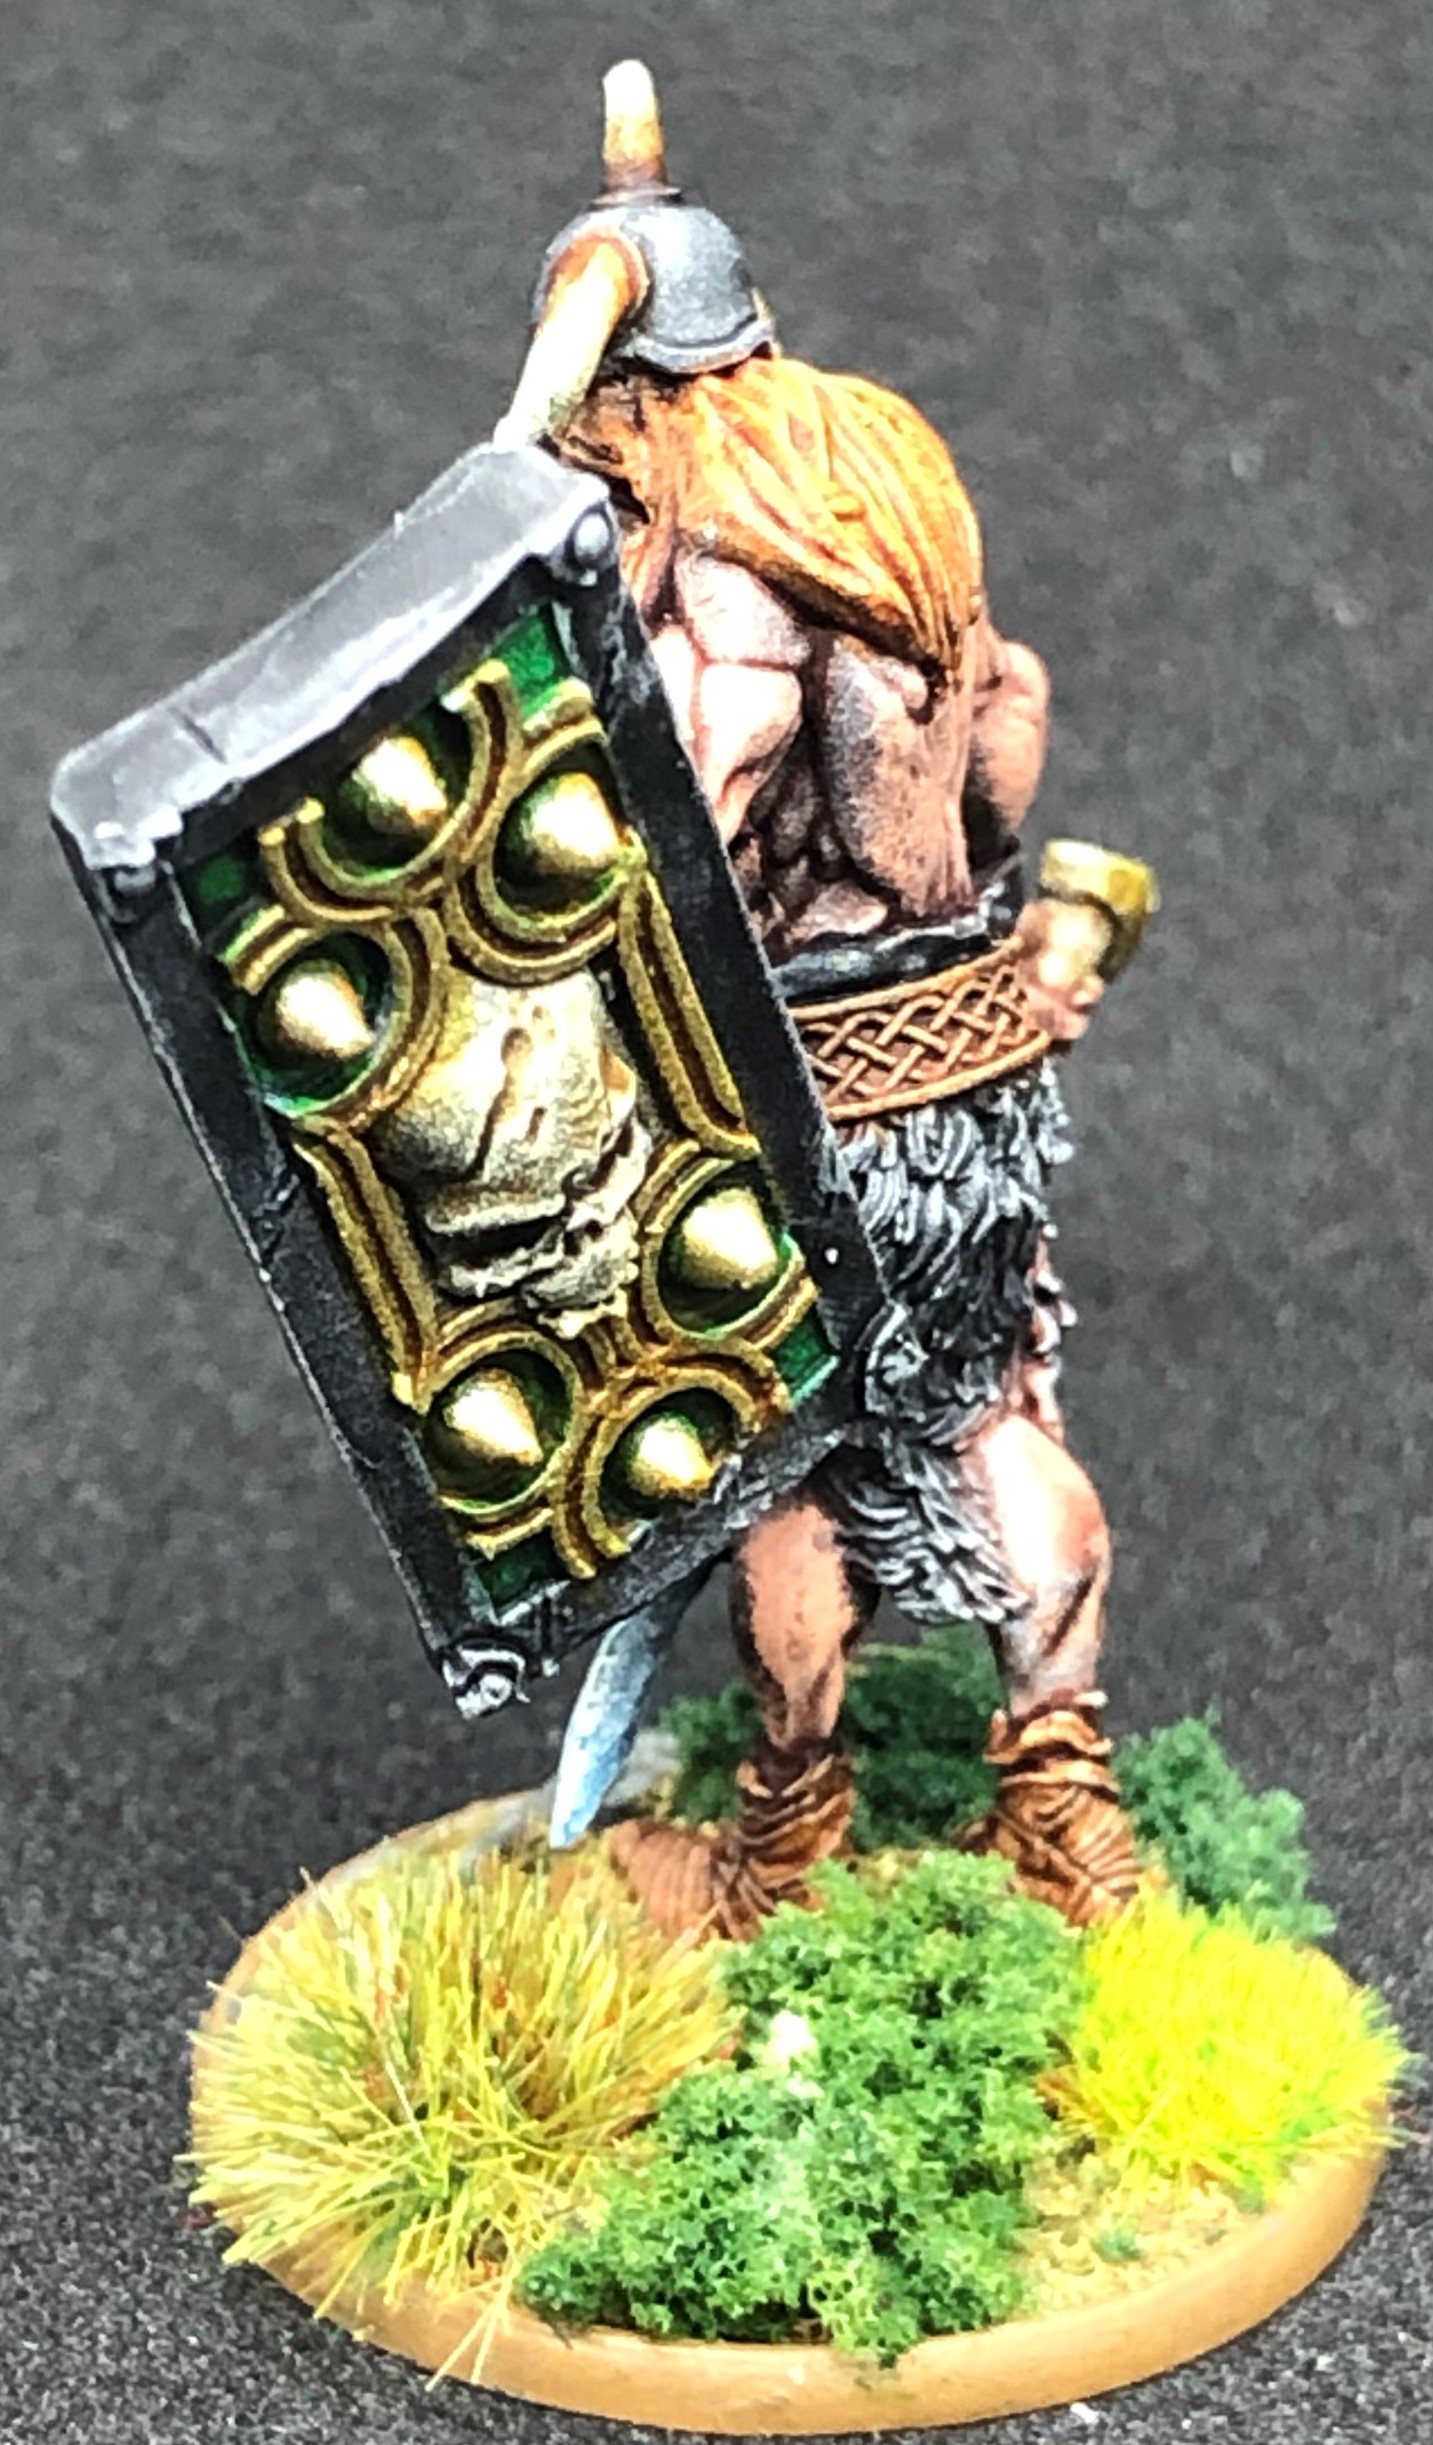
Skull Swords
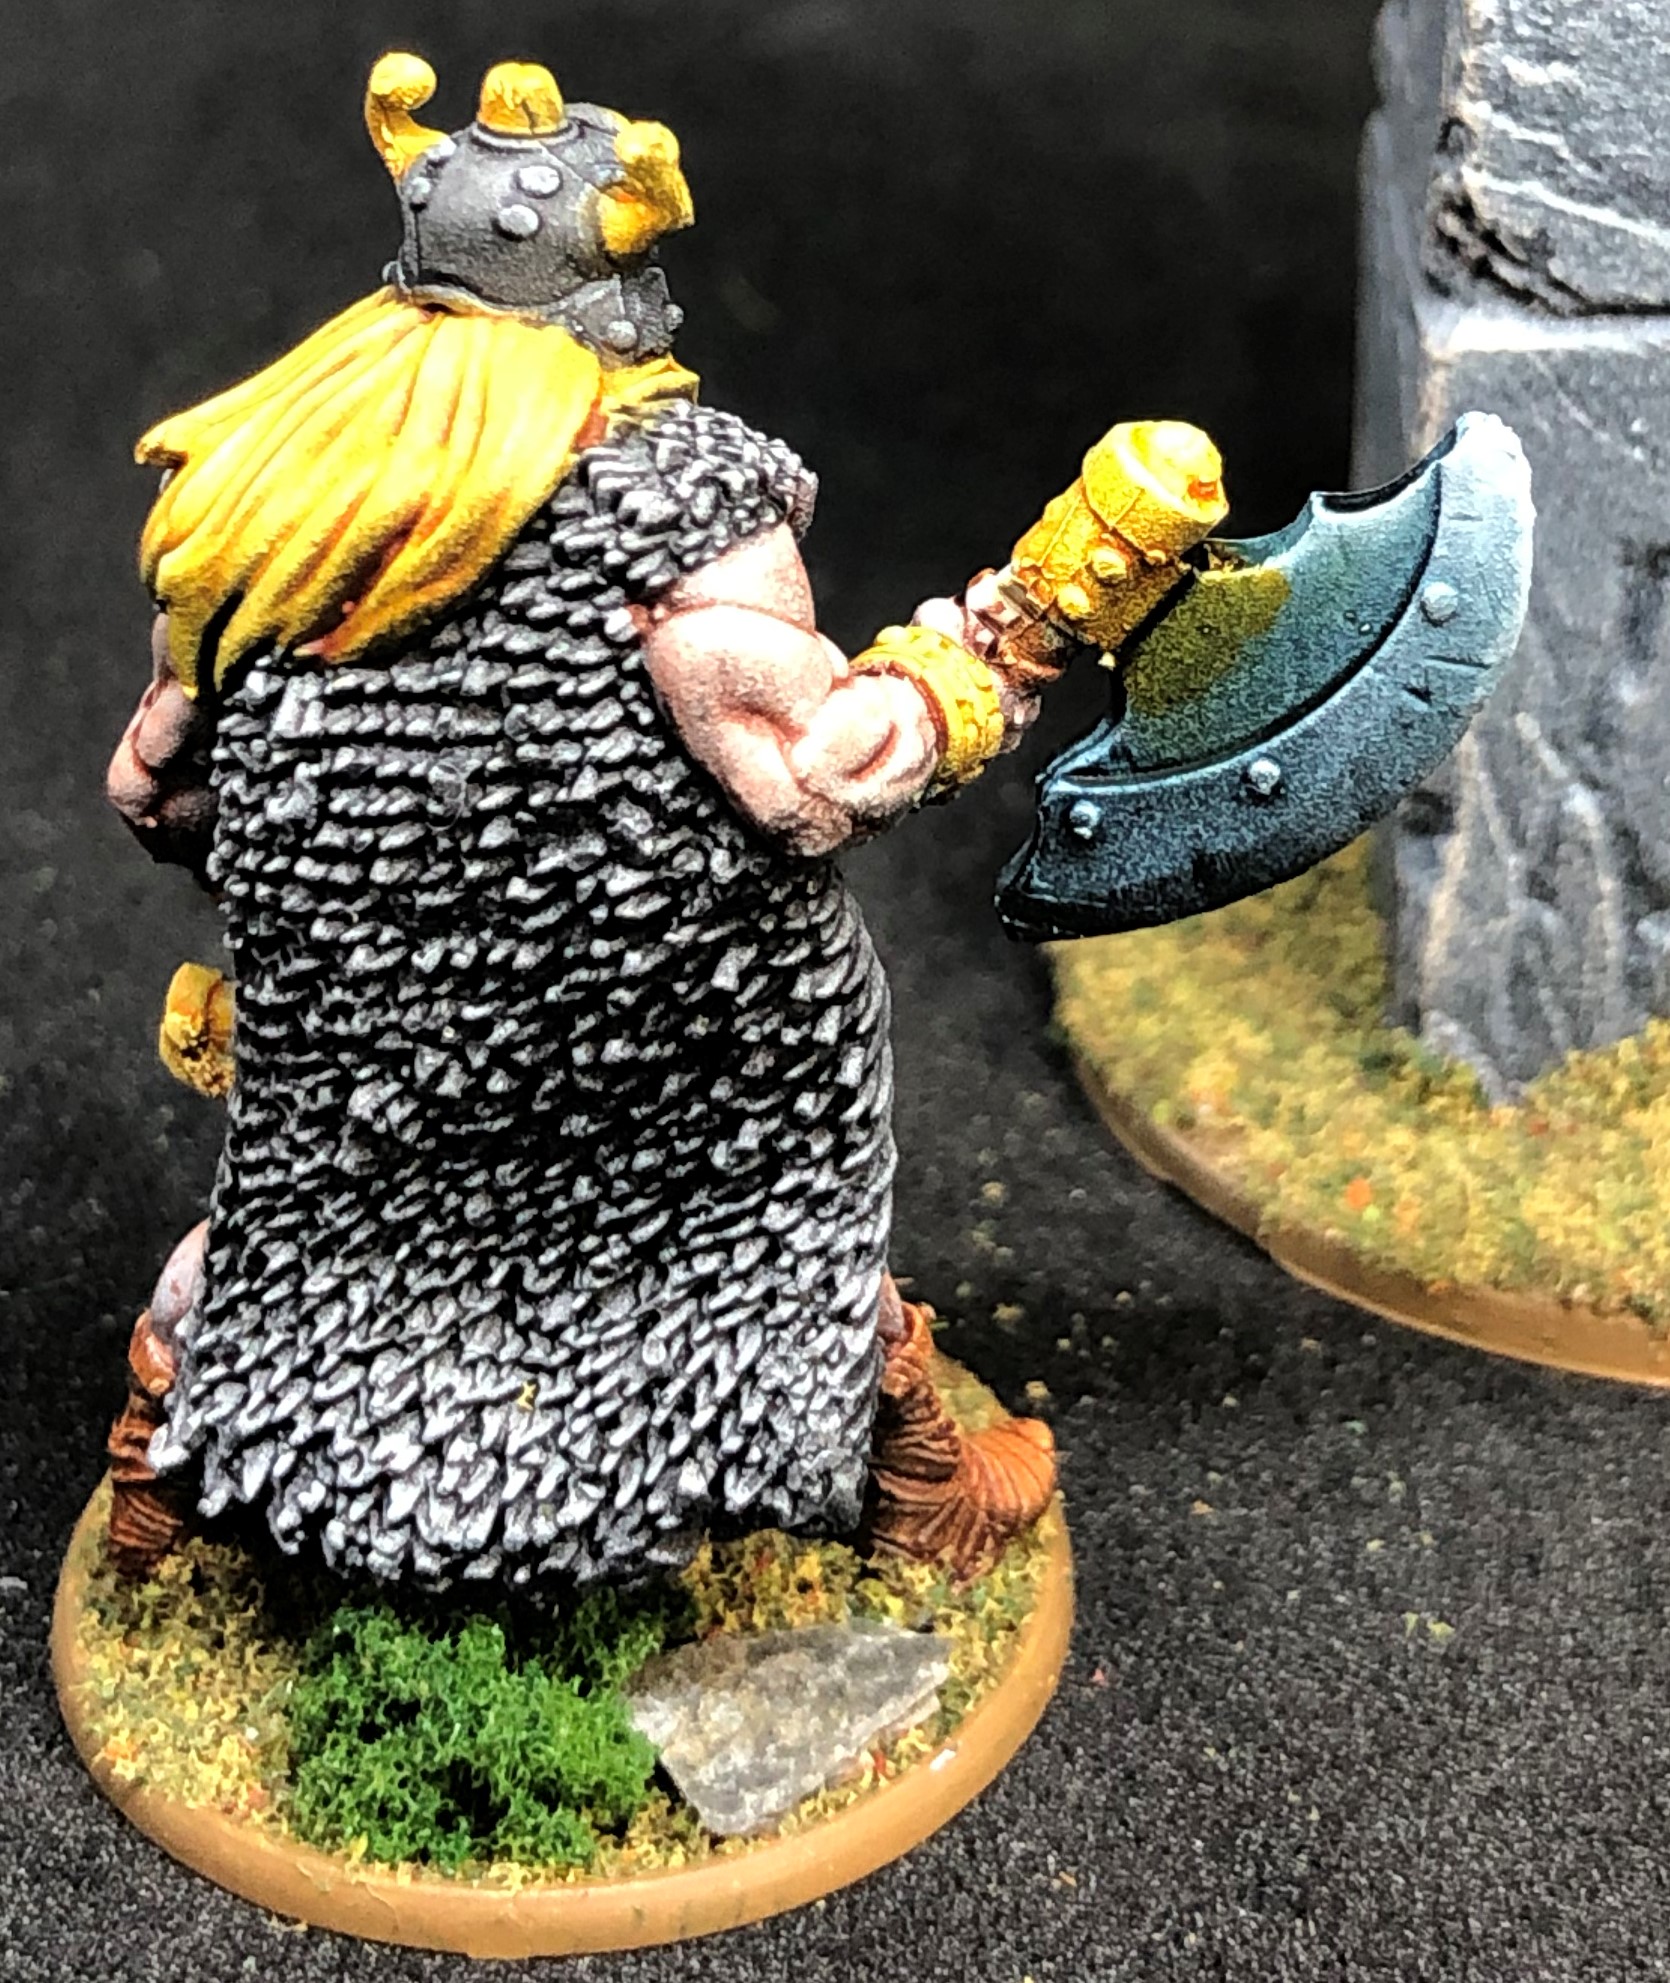
All the Skull Swords. Used the same scheme as the pre-release miniature. The cloth is Slaughter Red. I’m loving the NMM steel effect, especially on the champion’s 2 handed axe.
Here are the three units of Skull Swords:
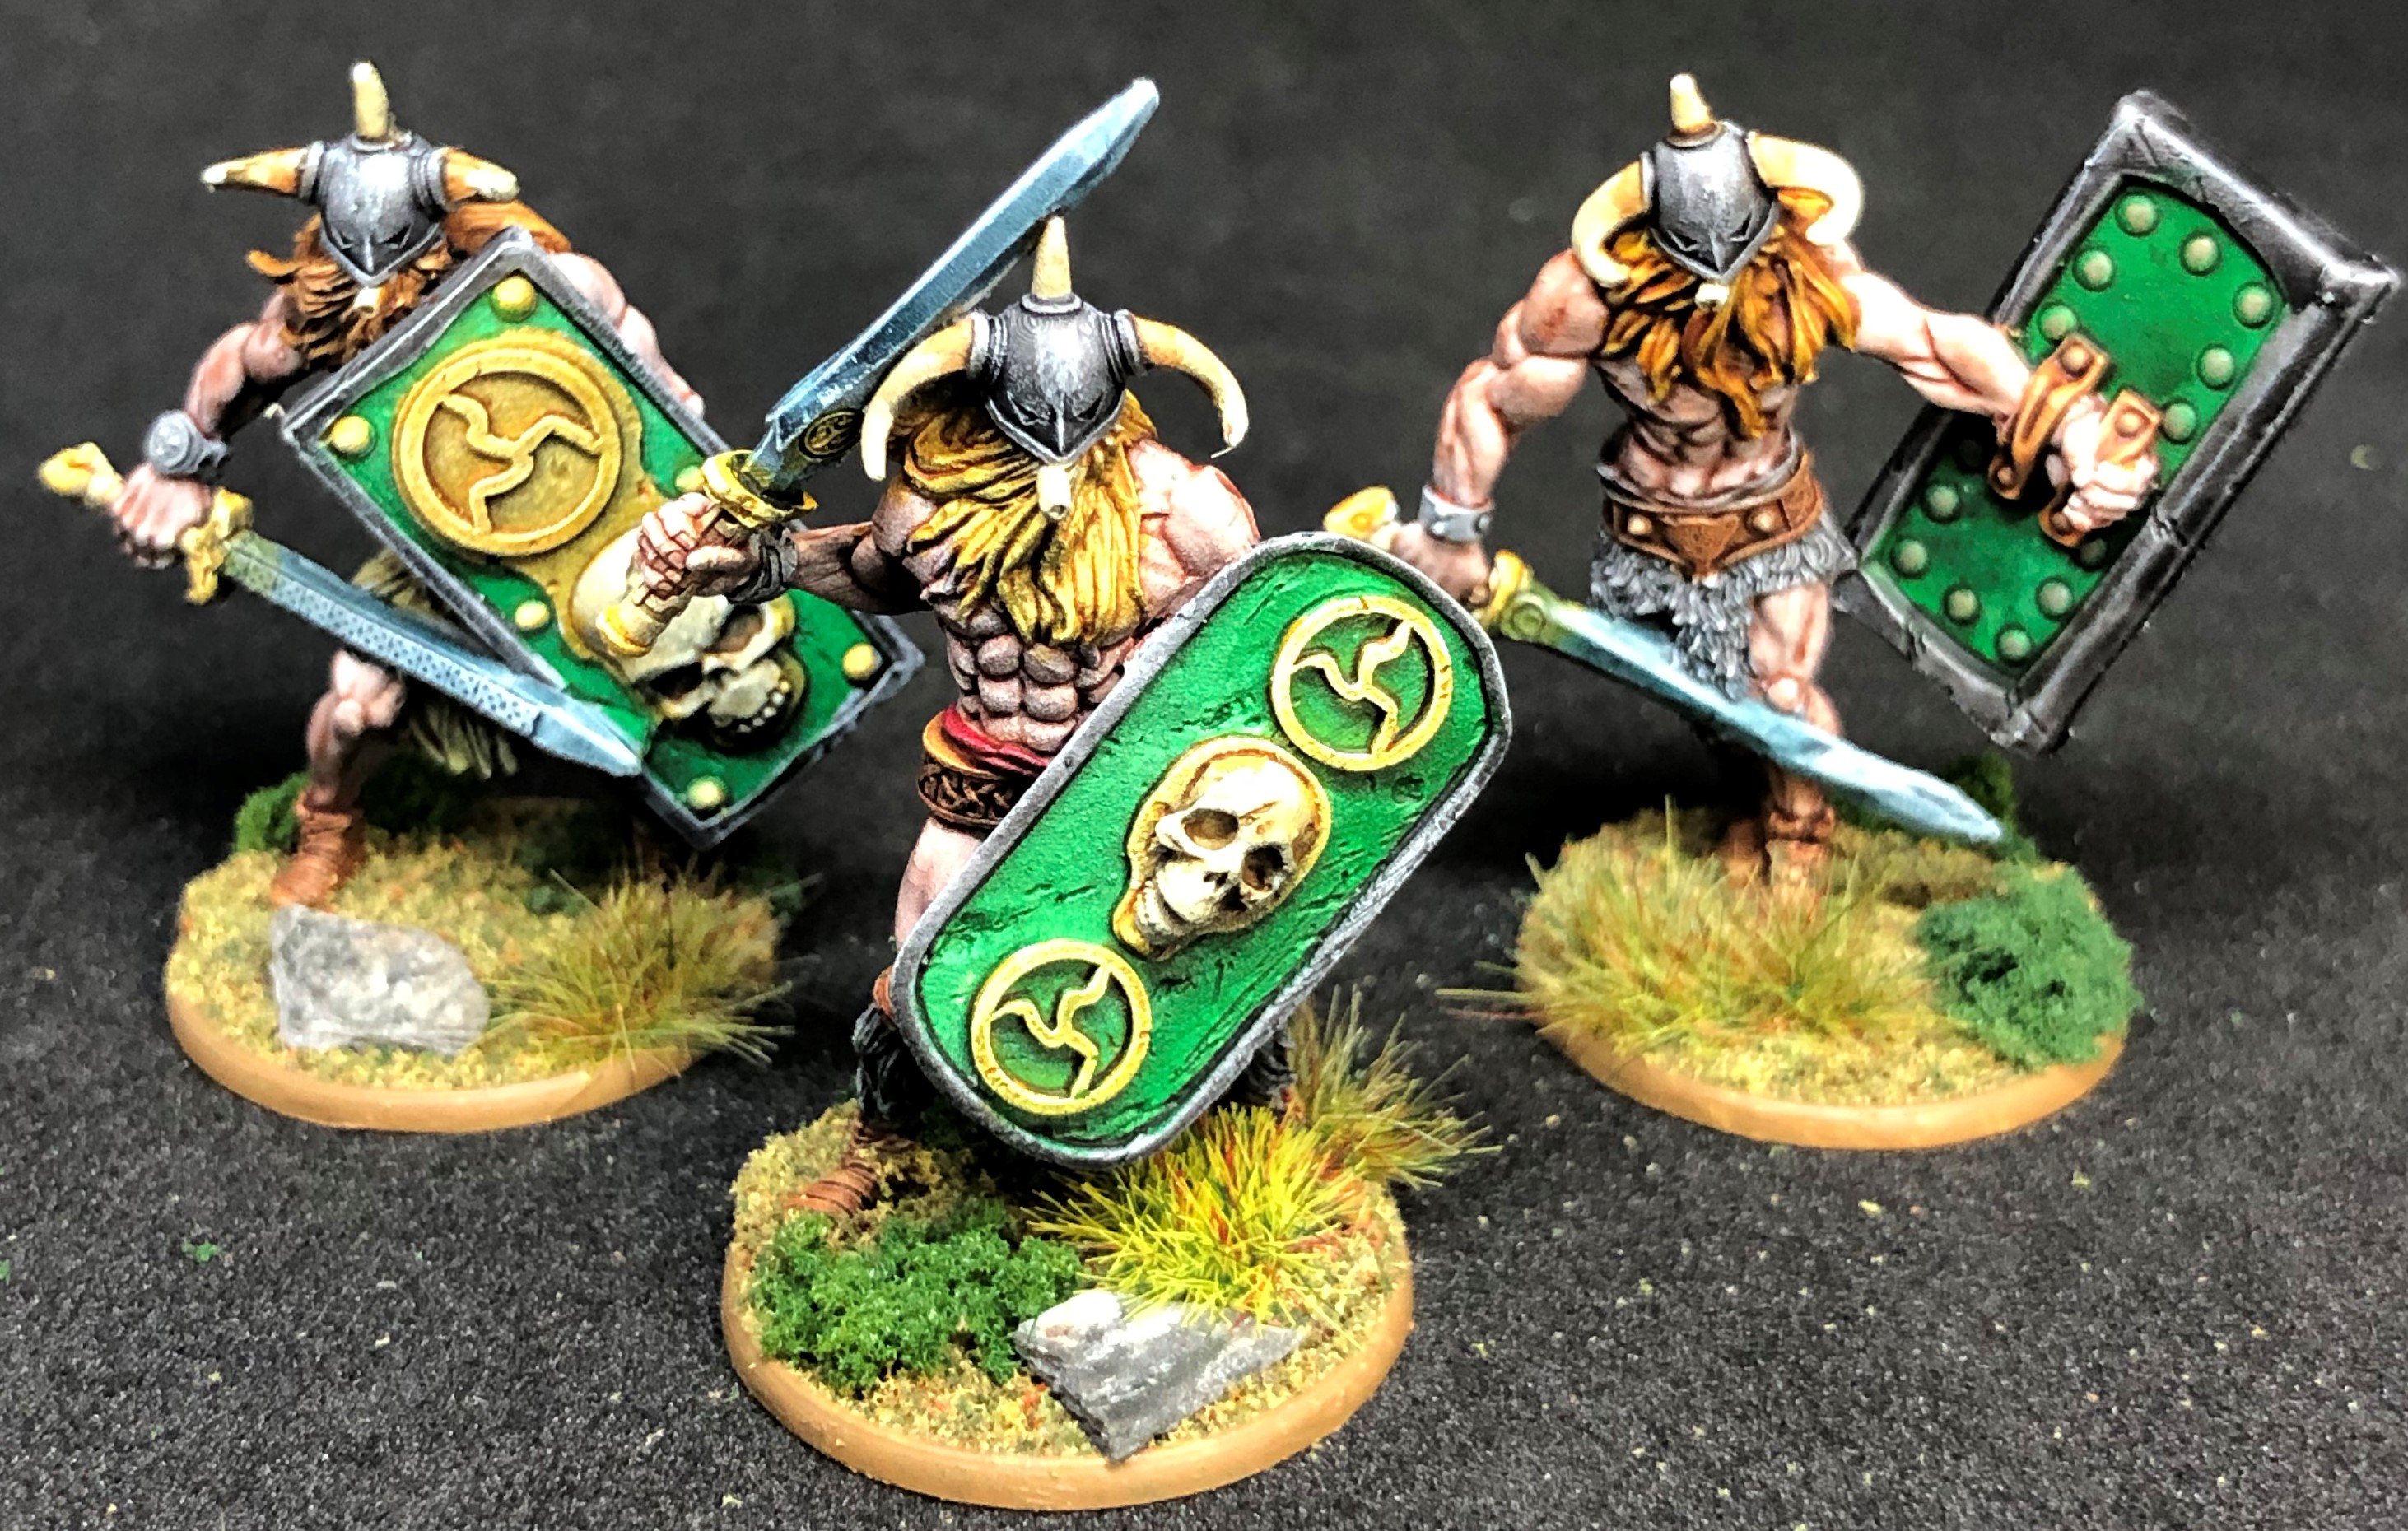
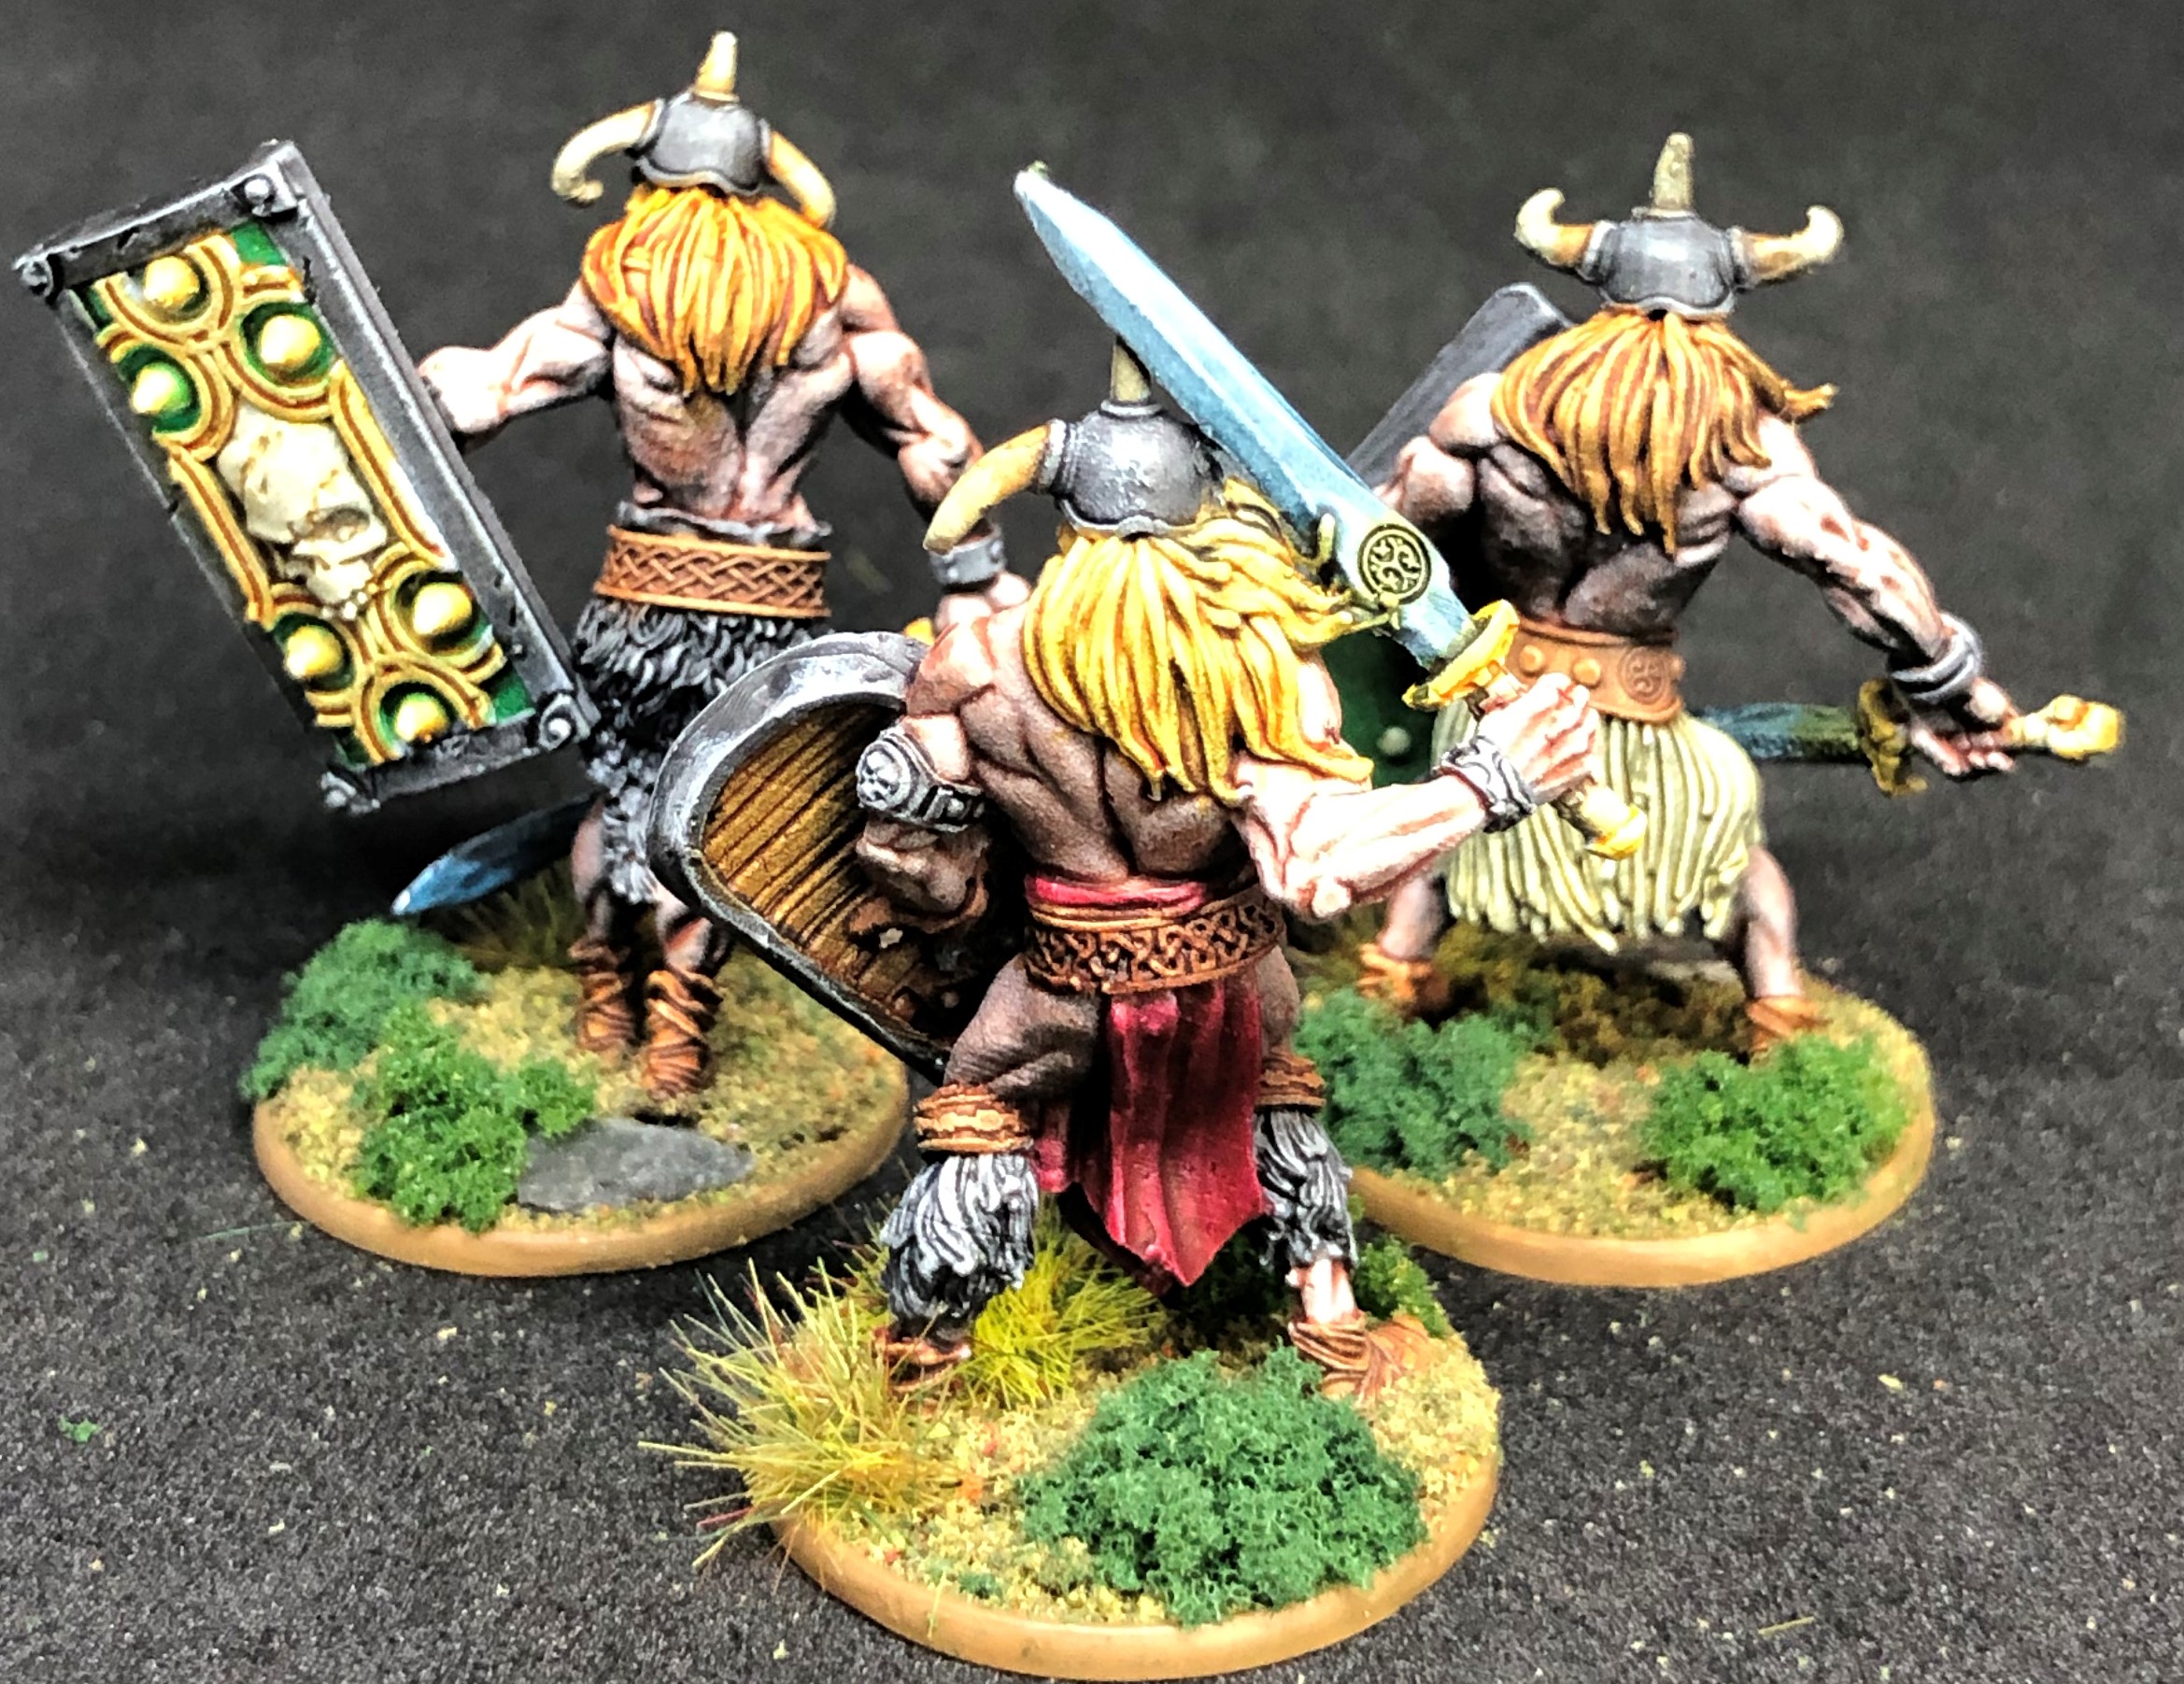
And these are the three champions.
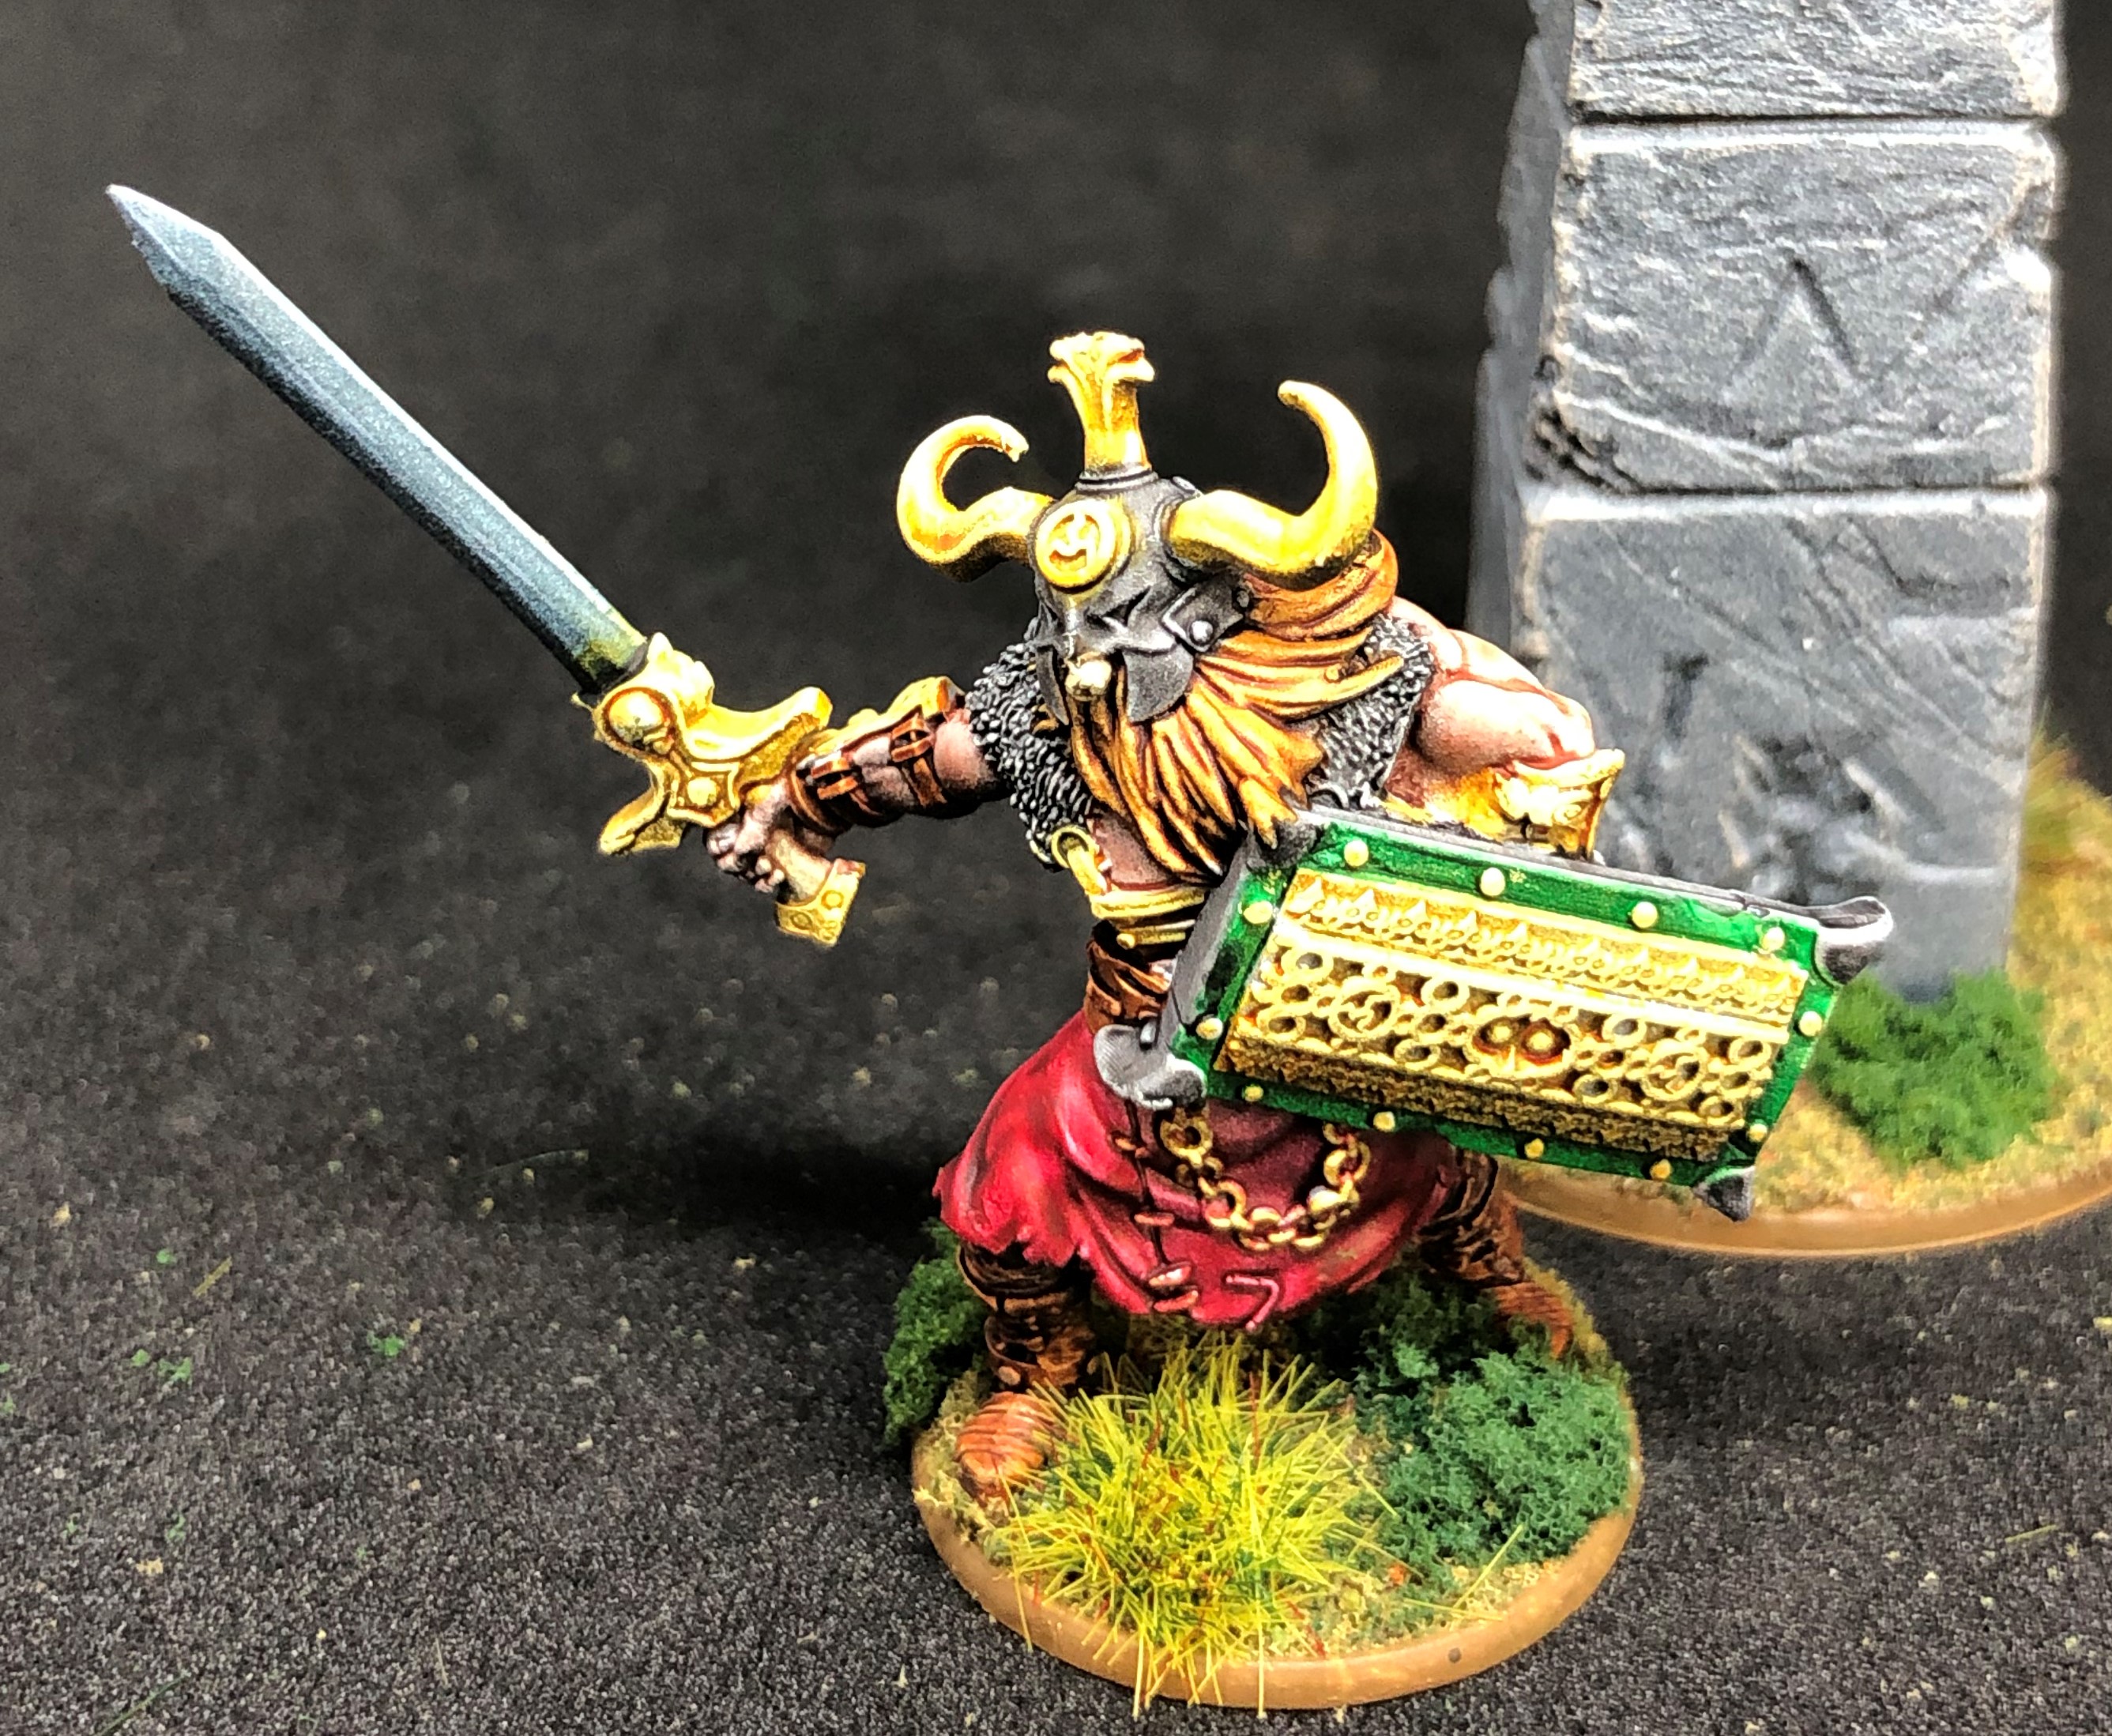
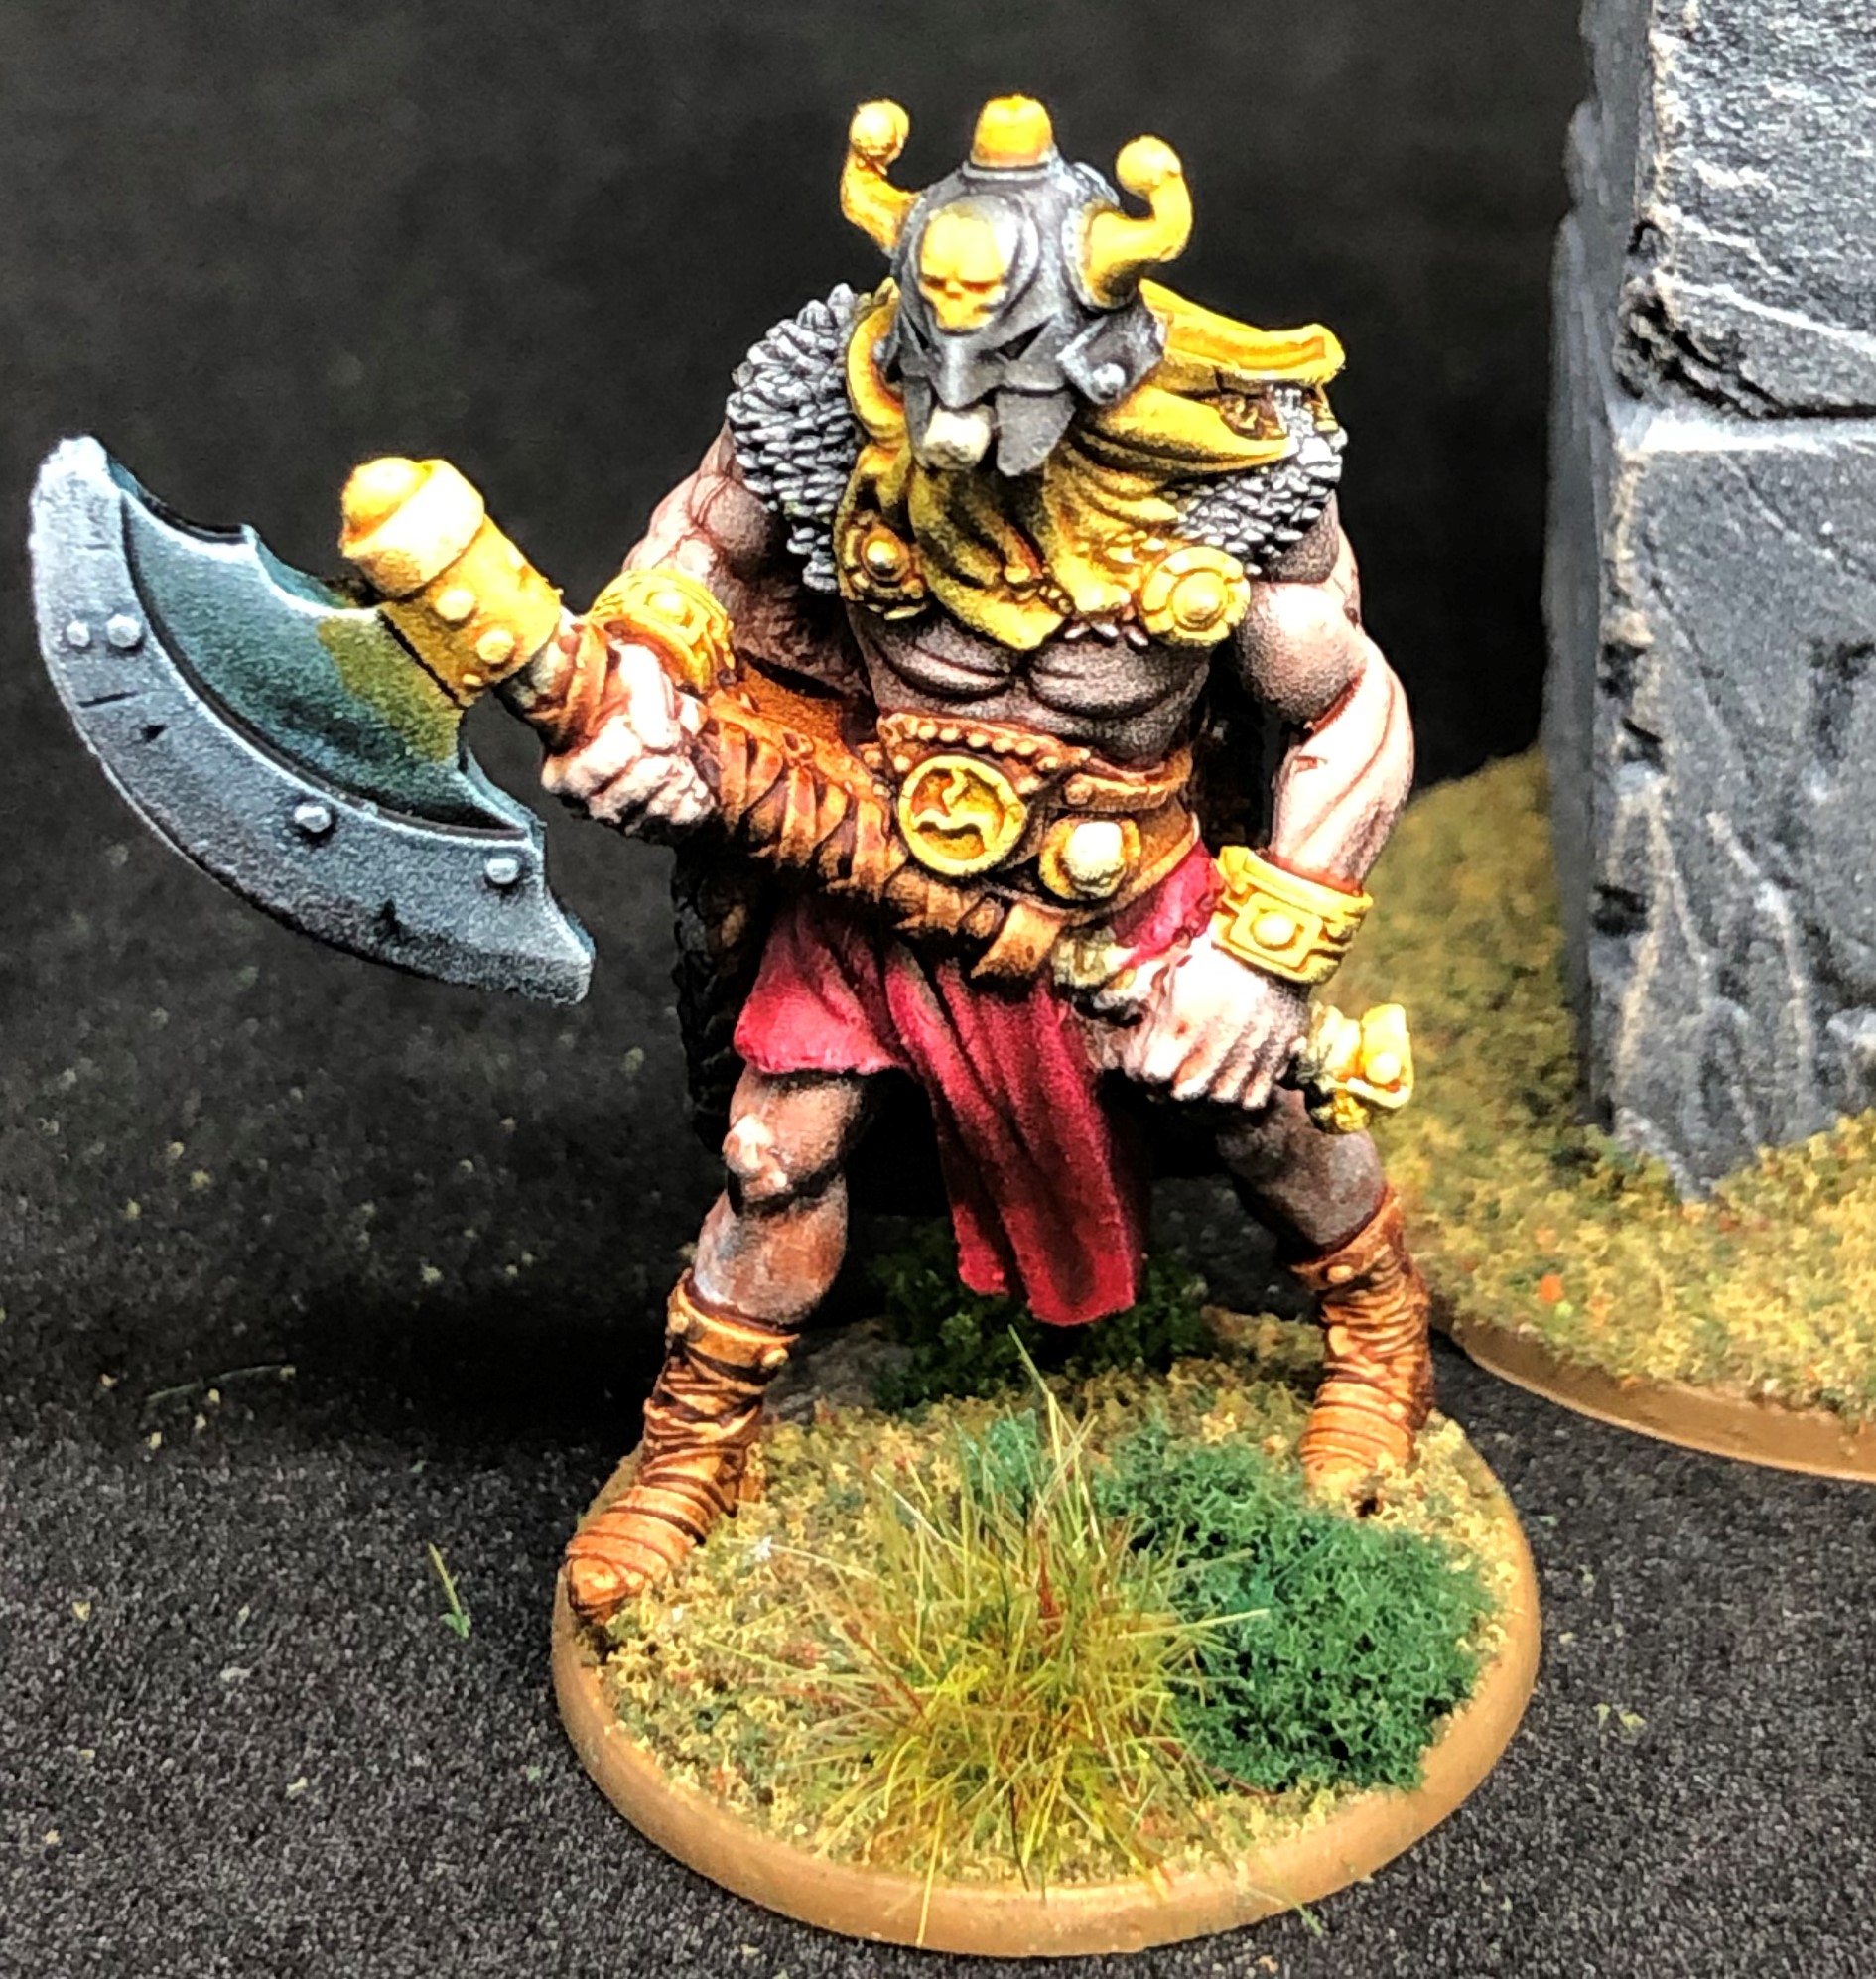

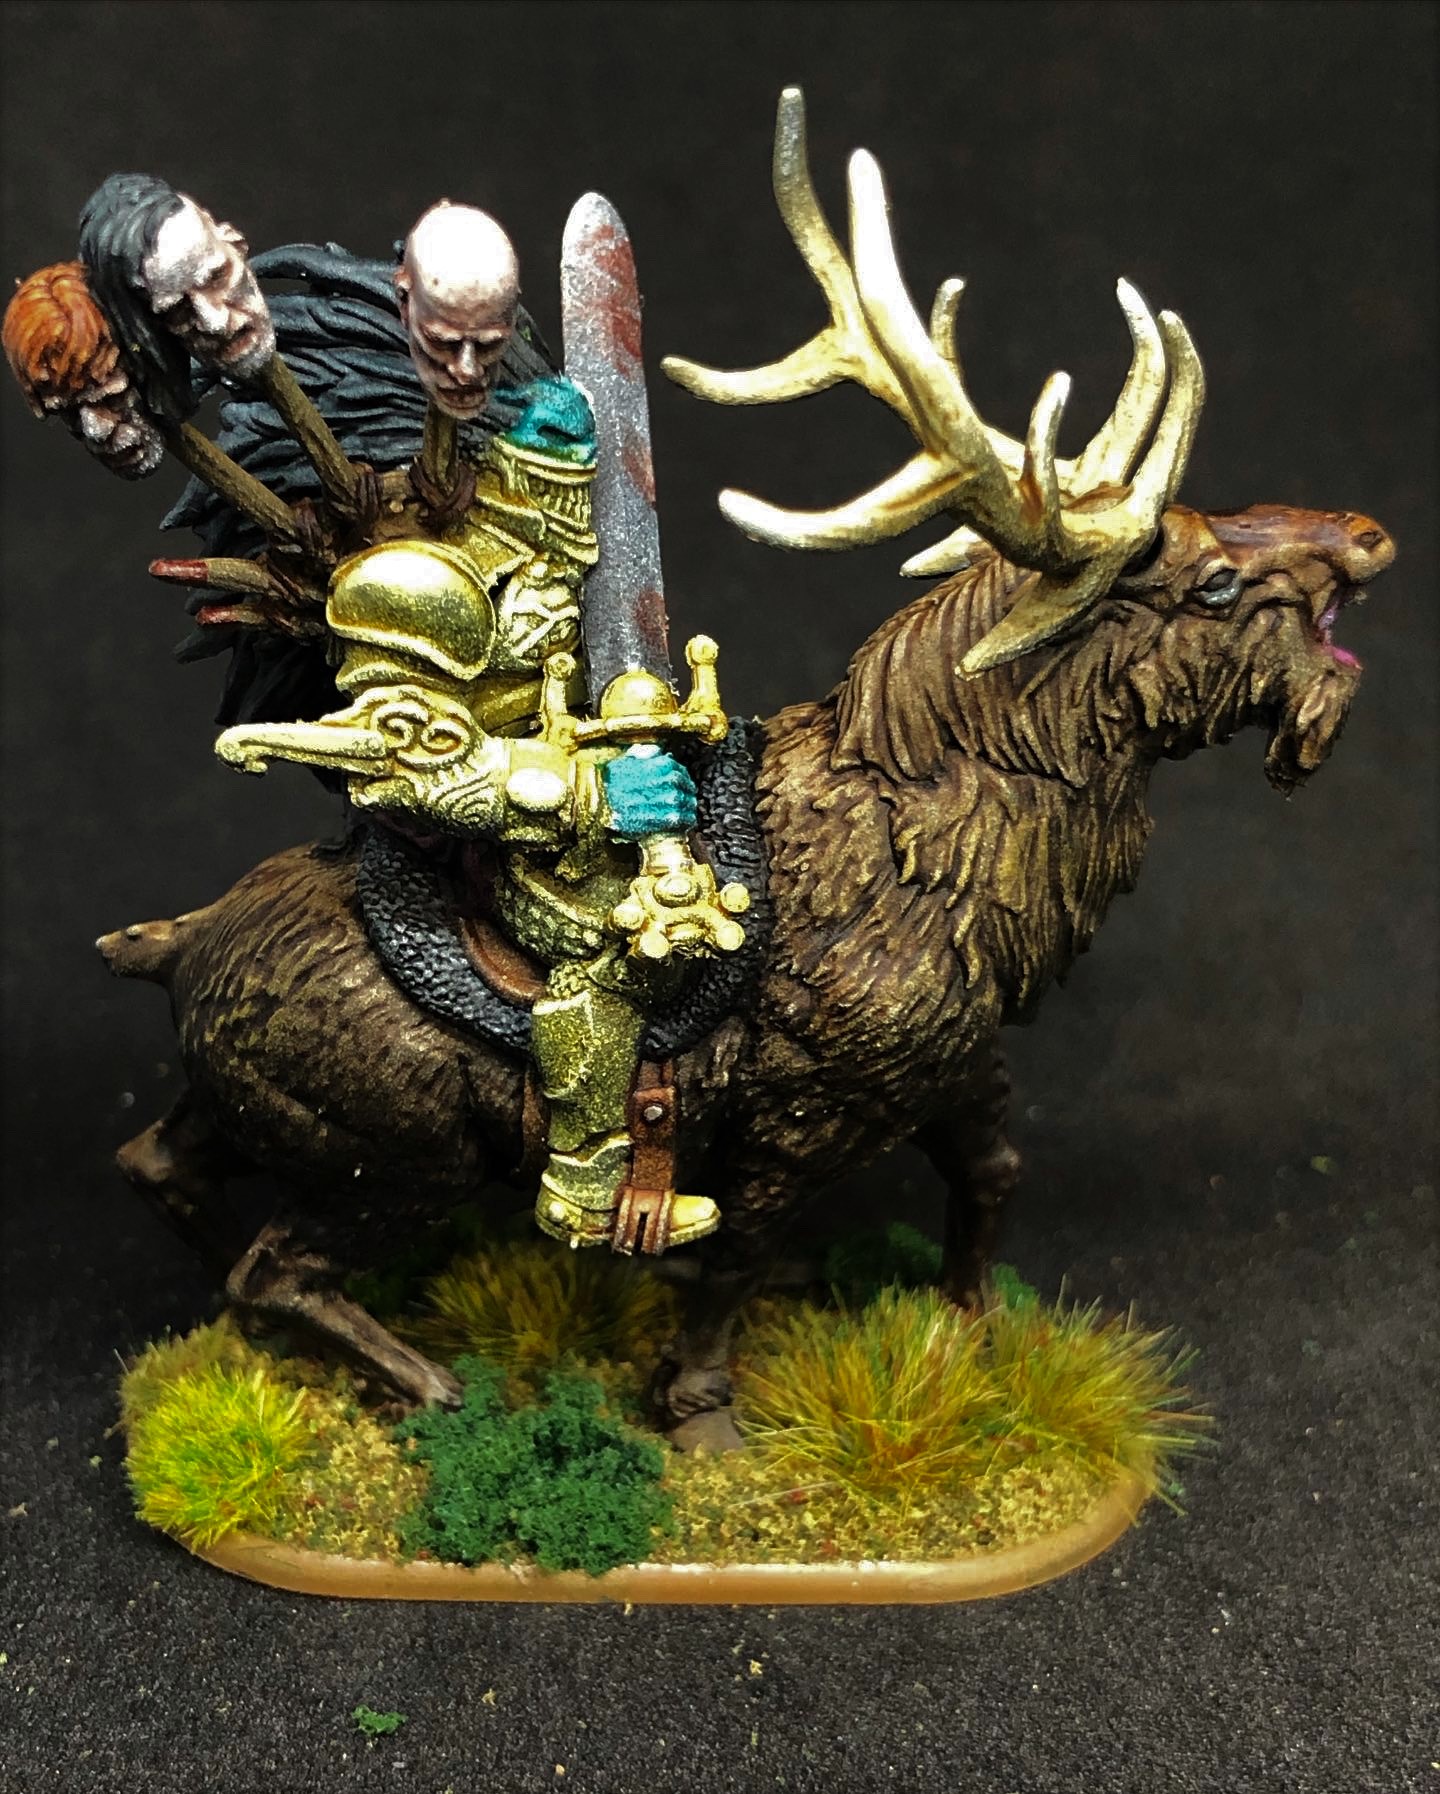
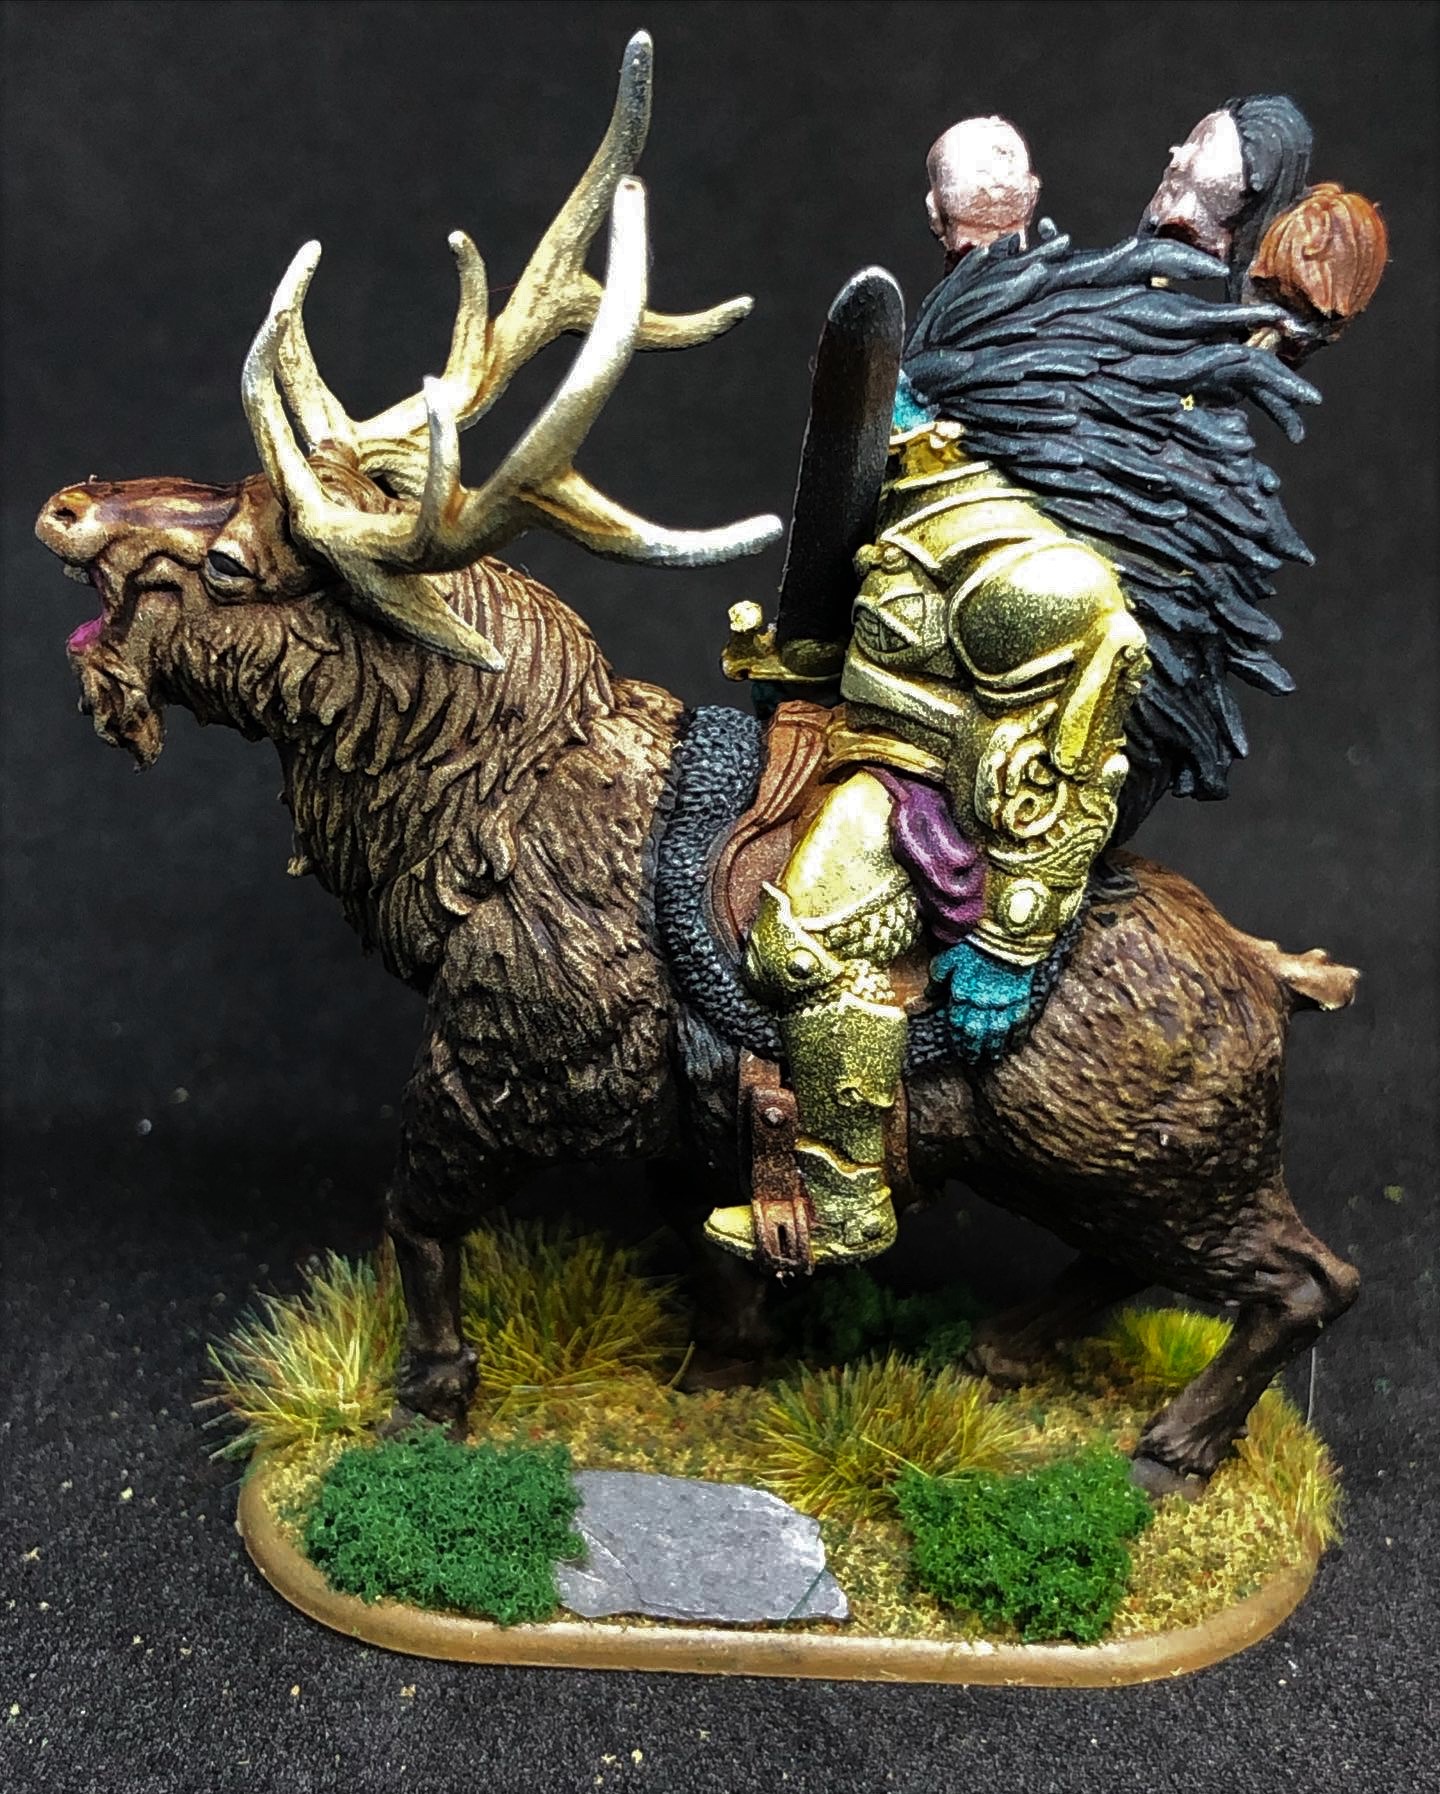
Balor and NMM
Balor of the Evil Eye. Superb sculpt based on the iconic artwork.
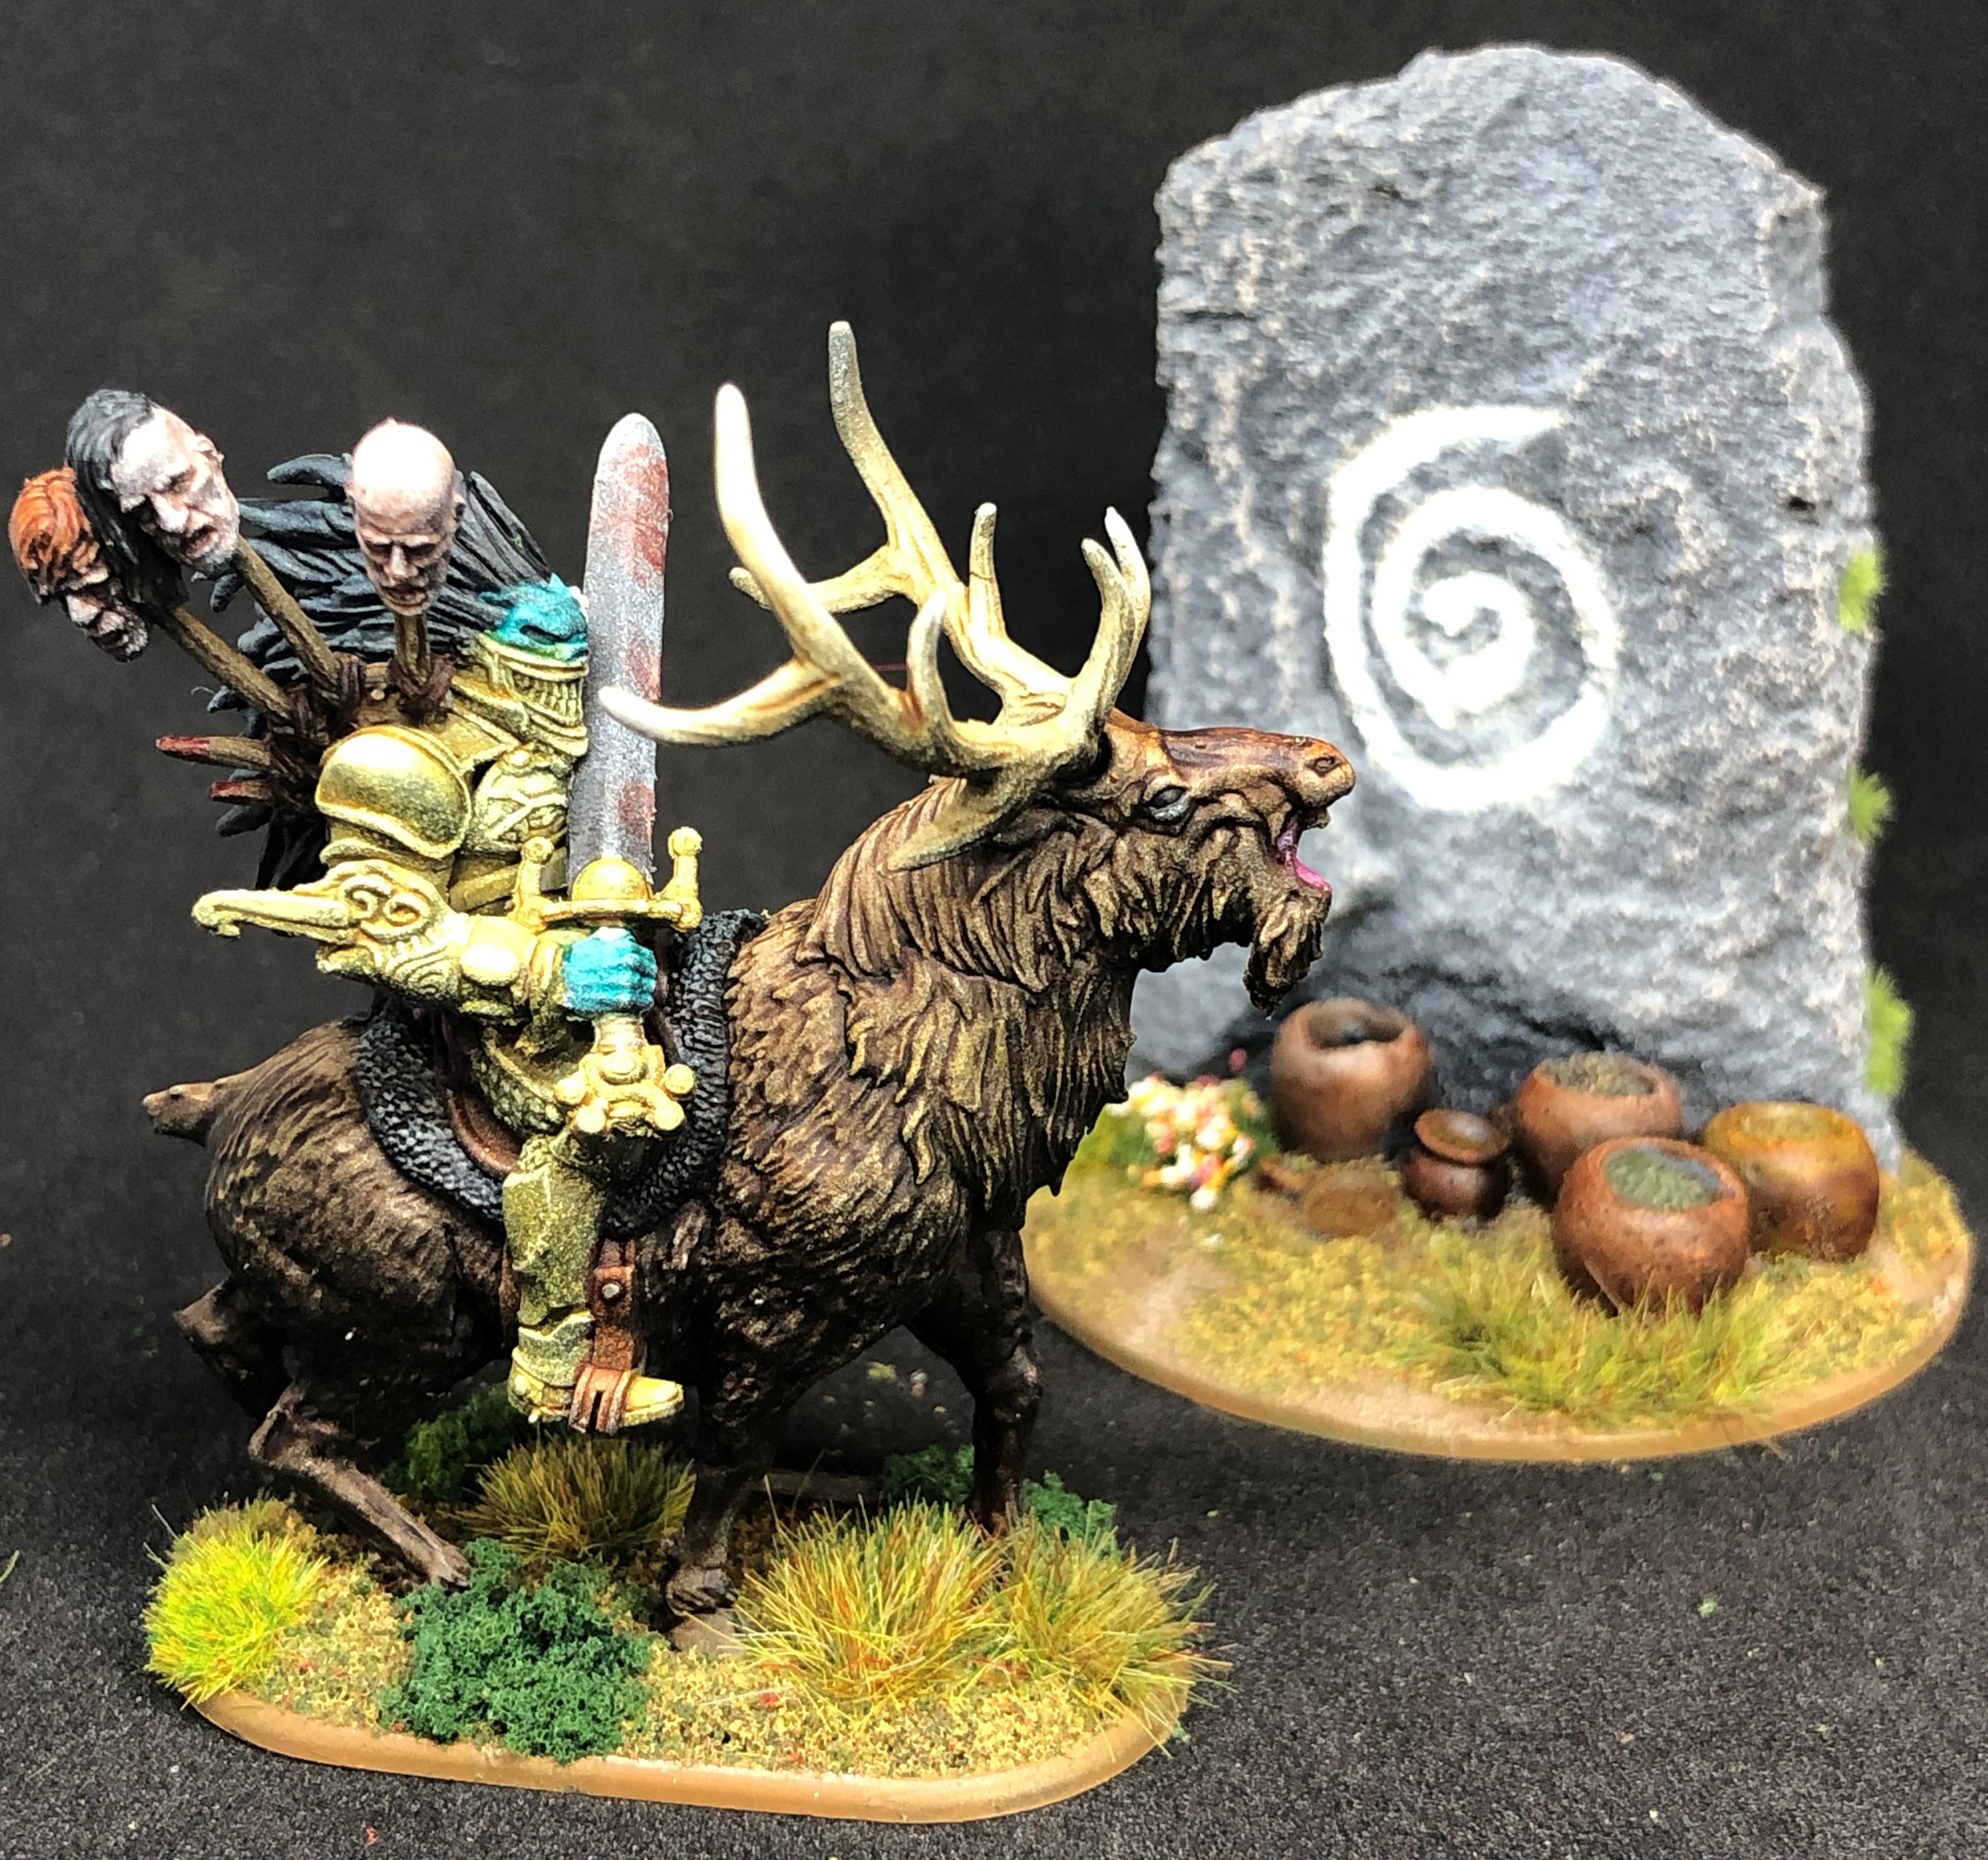
I wanted something pretty close to the artwork but with my chosen Plasmatic Bolt skintone (the art has a tanned skin colour).
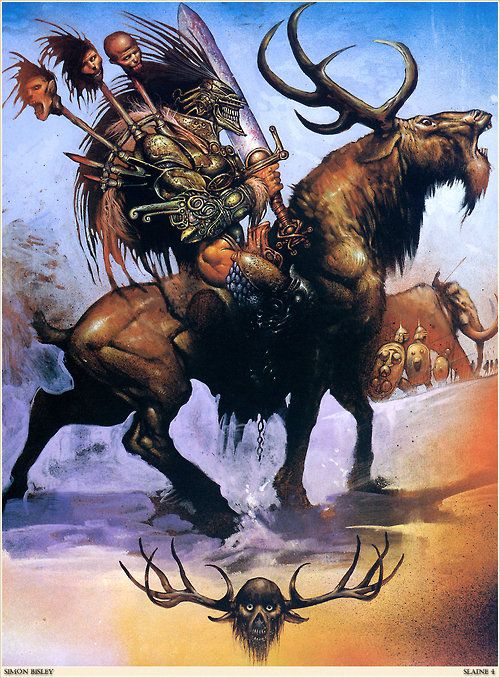 Simon Bisley Balor artwork
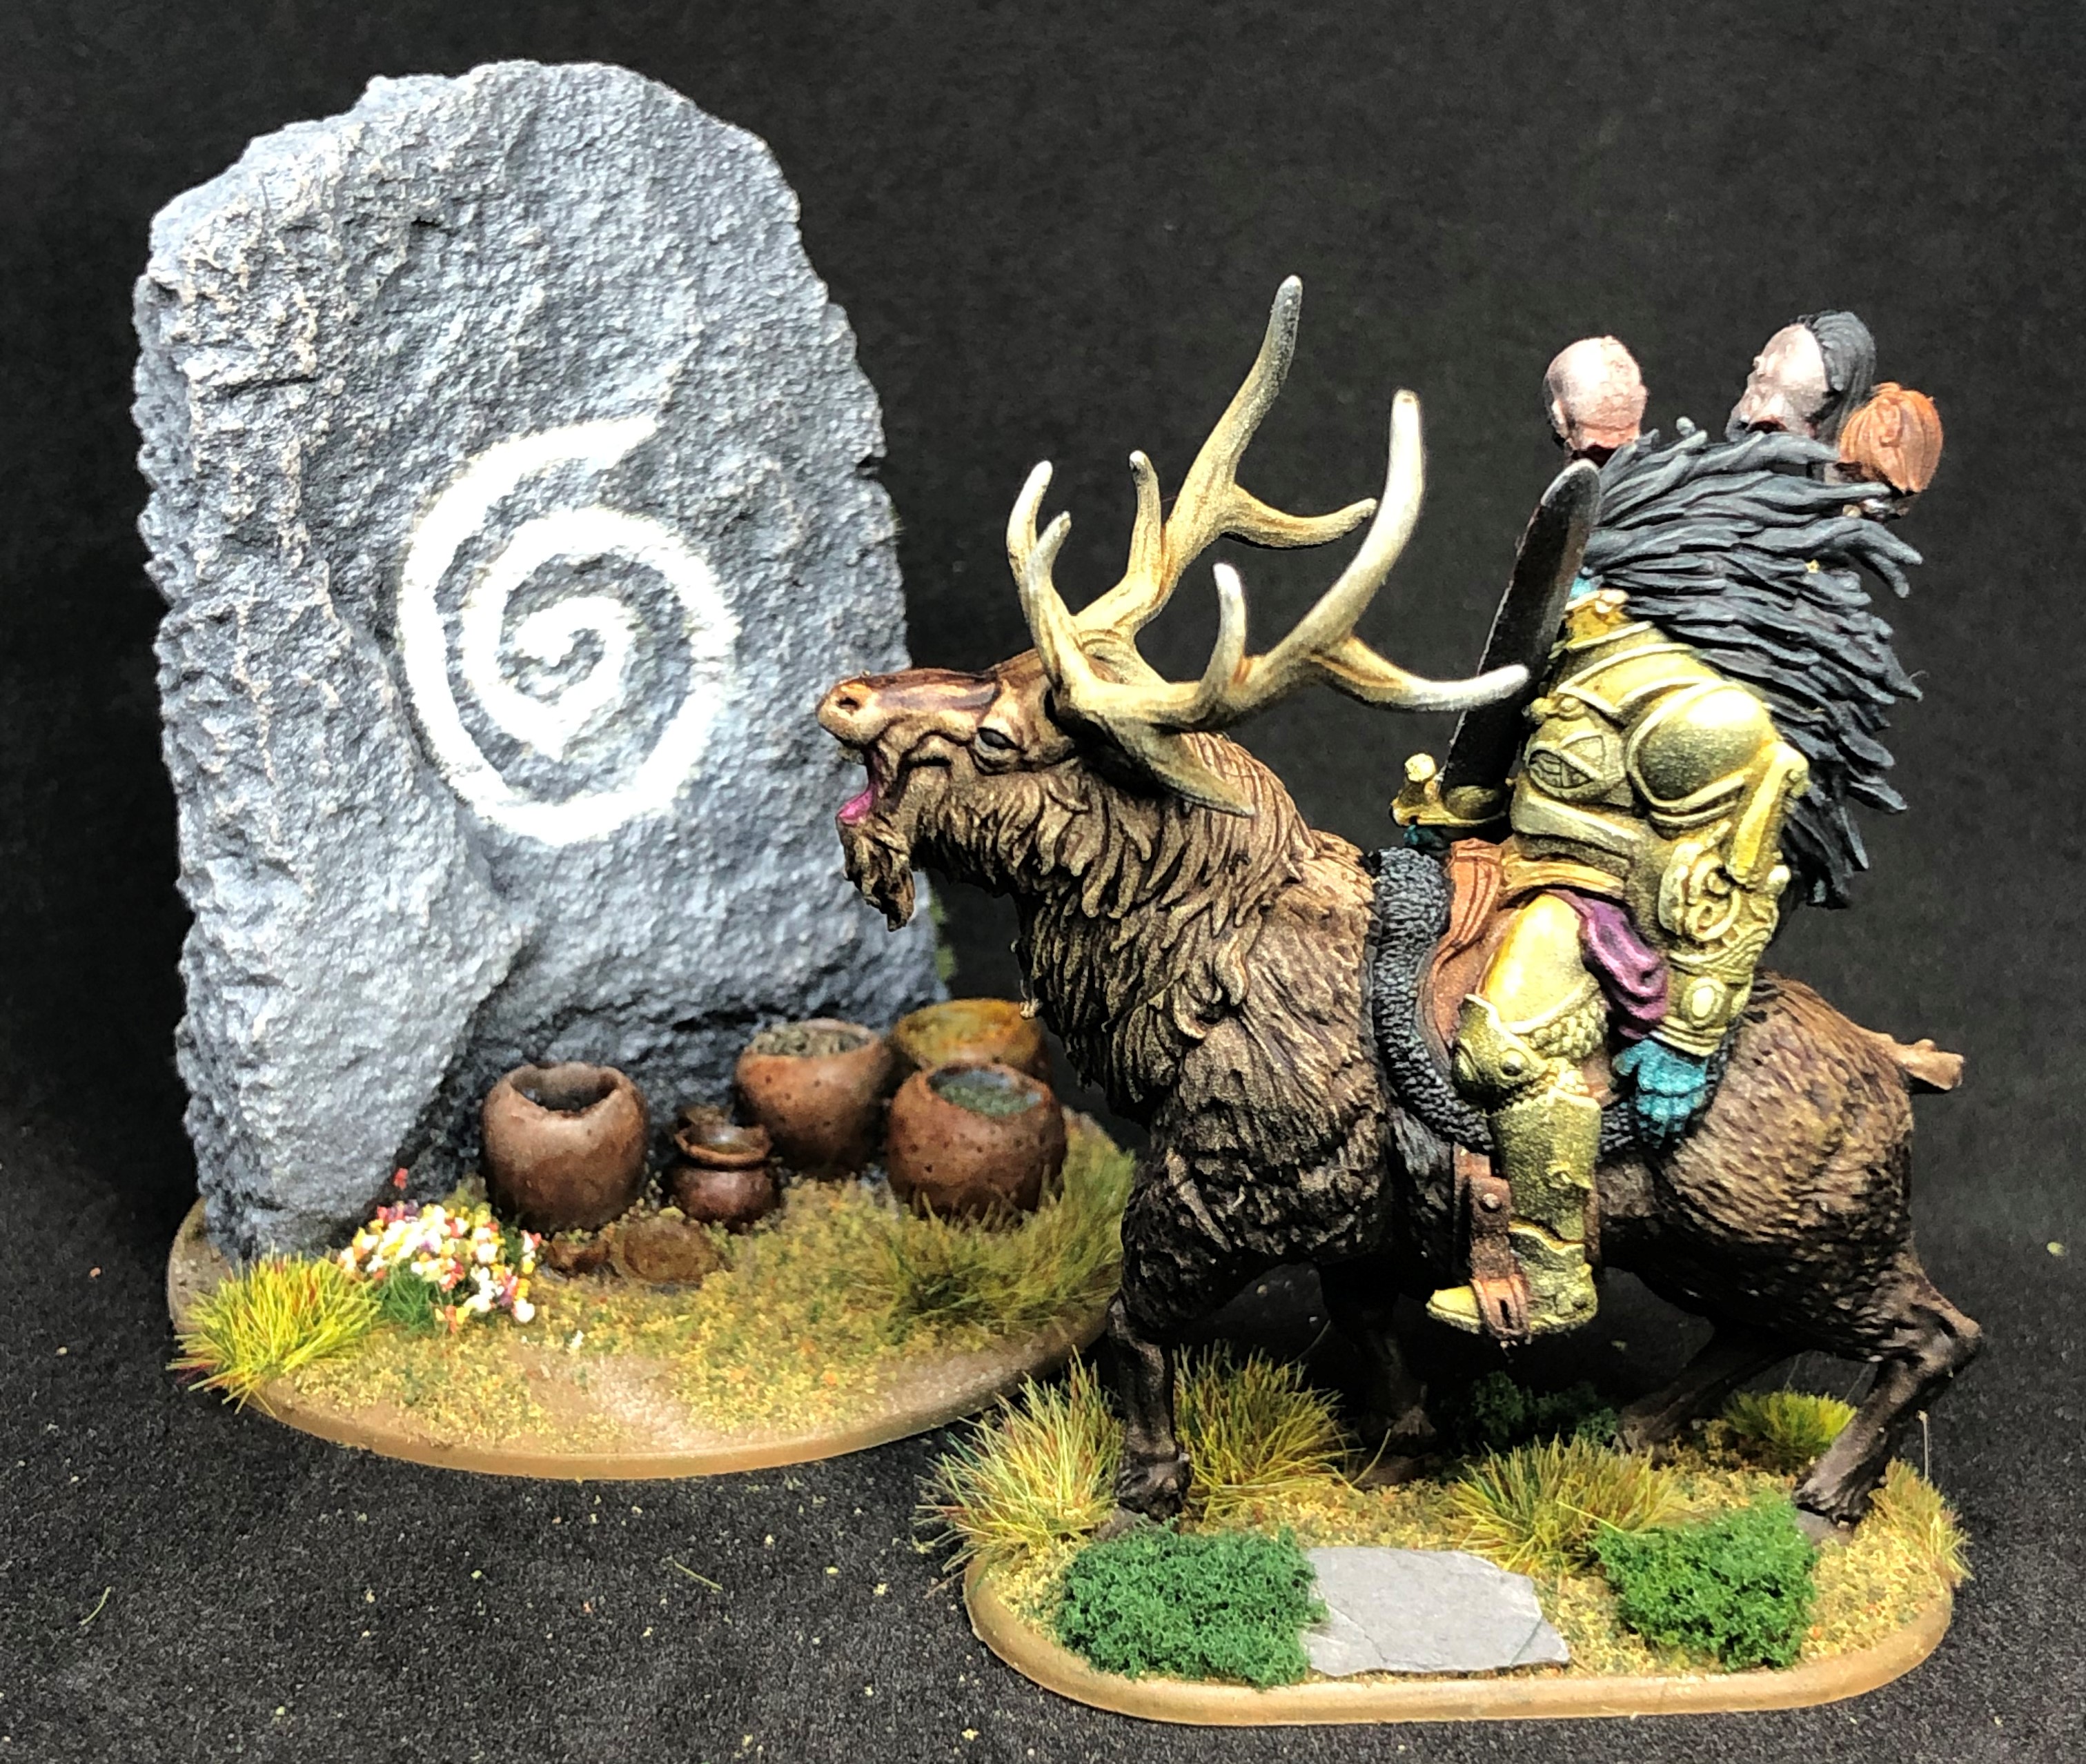
Painting the stag
I mixed a couple of blends for this one. I wanted a dark to light fur tone on the stag so started with neat Dark Wood and painted the upper legs, undeneath and a third of the way up the body. To this I blended in some Hardened Leather as a wet blend on the model and in a plastic pallette (these Speedpaints soak through the paper used on a wet pallette). This provided a band acorss the middle third of the model and up the underside of the neck and chin and down the legs. For the top surfaces I blended some water into the mix on the pallette and then added Palid bone and this was wet blended into the painted edge on the model and then blended up to cover the upper surface.
It all dried a tad darker than I might have liked but the effect I wanted is definitely there and I’m pleased with it. Antlers were pure Palid Bone with the ends wiped to create the highlight.
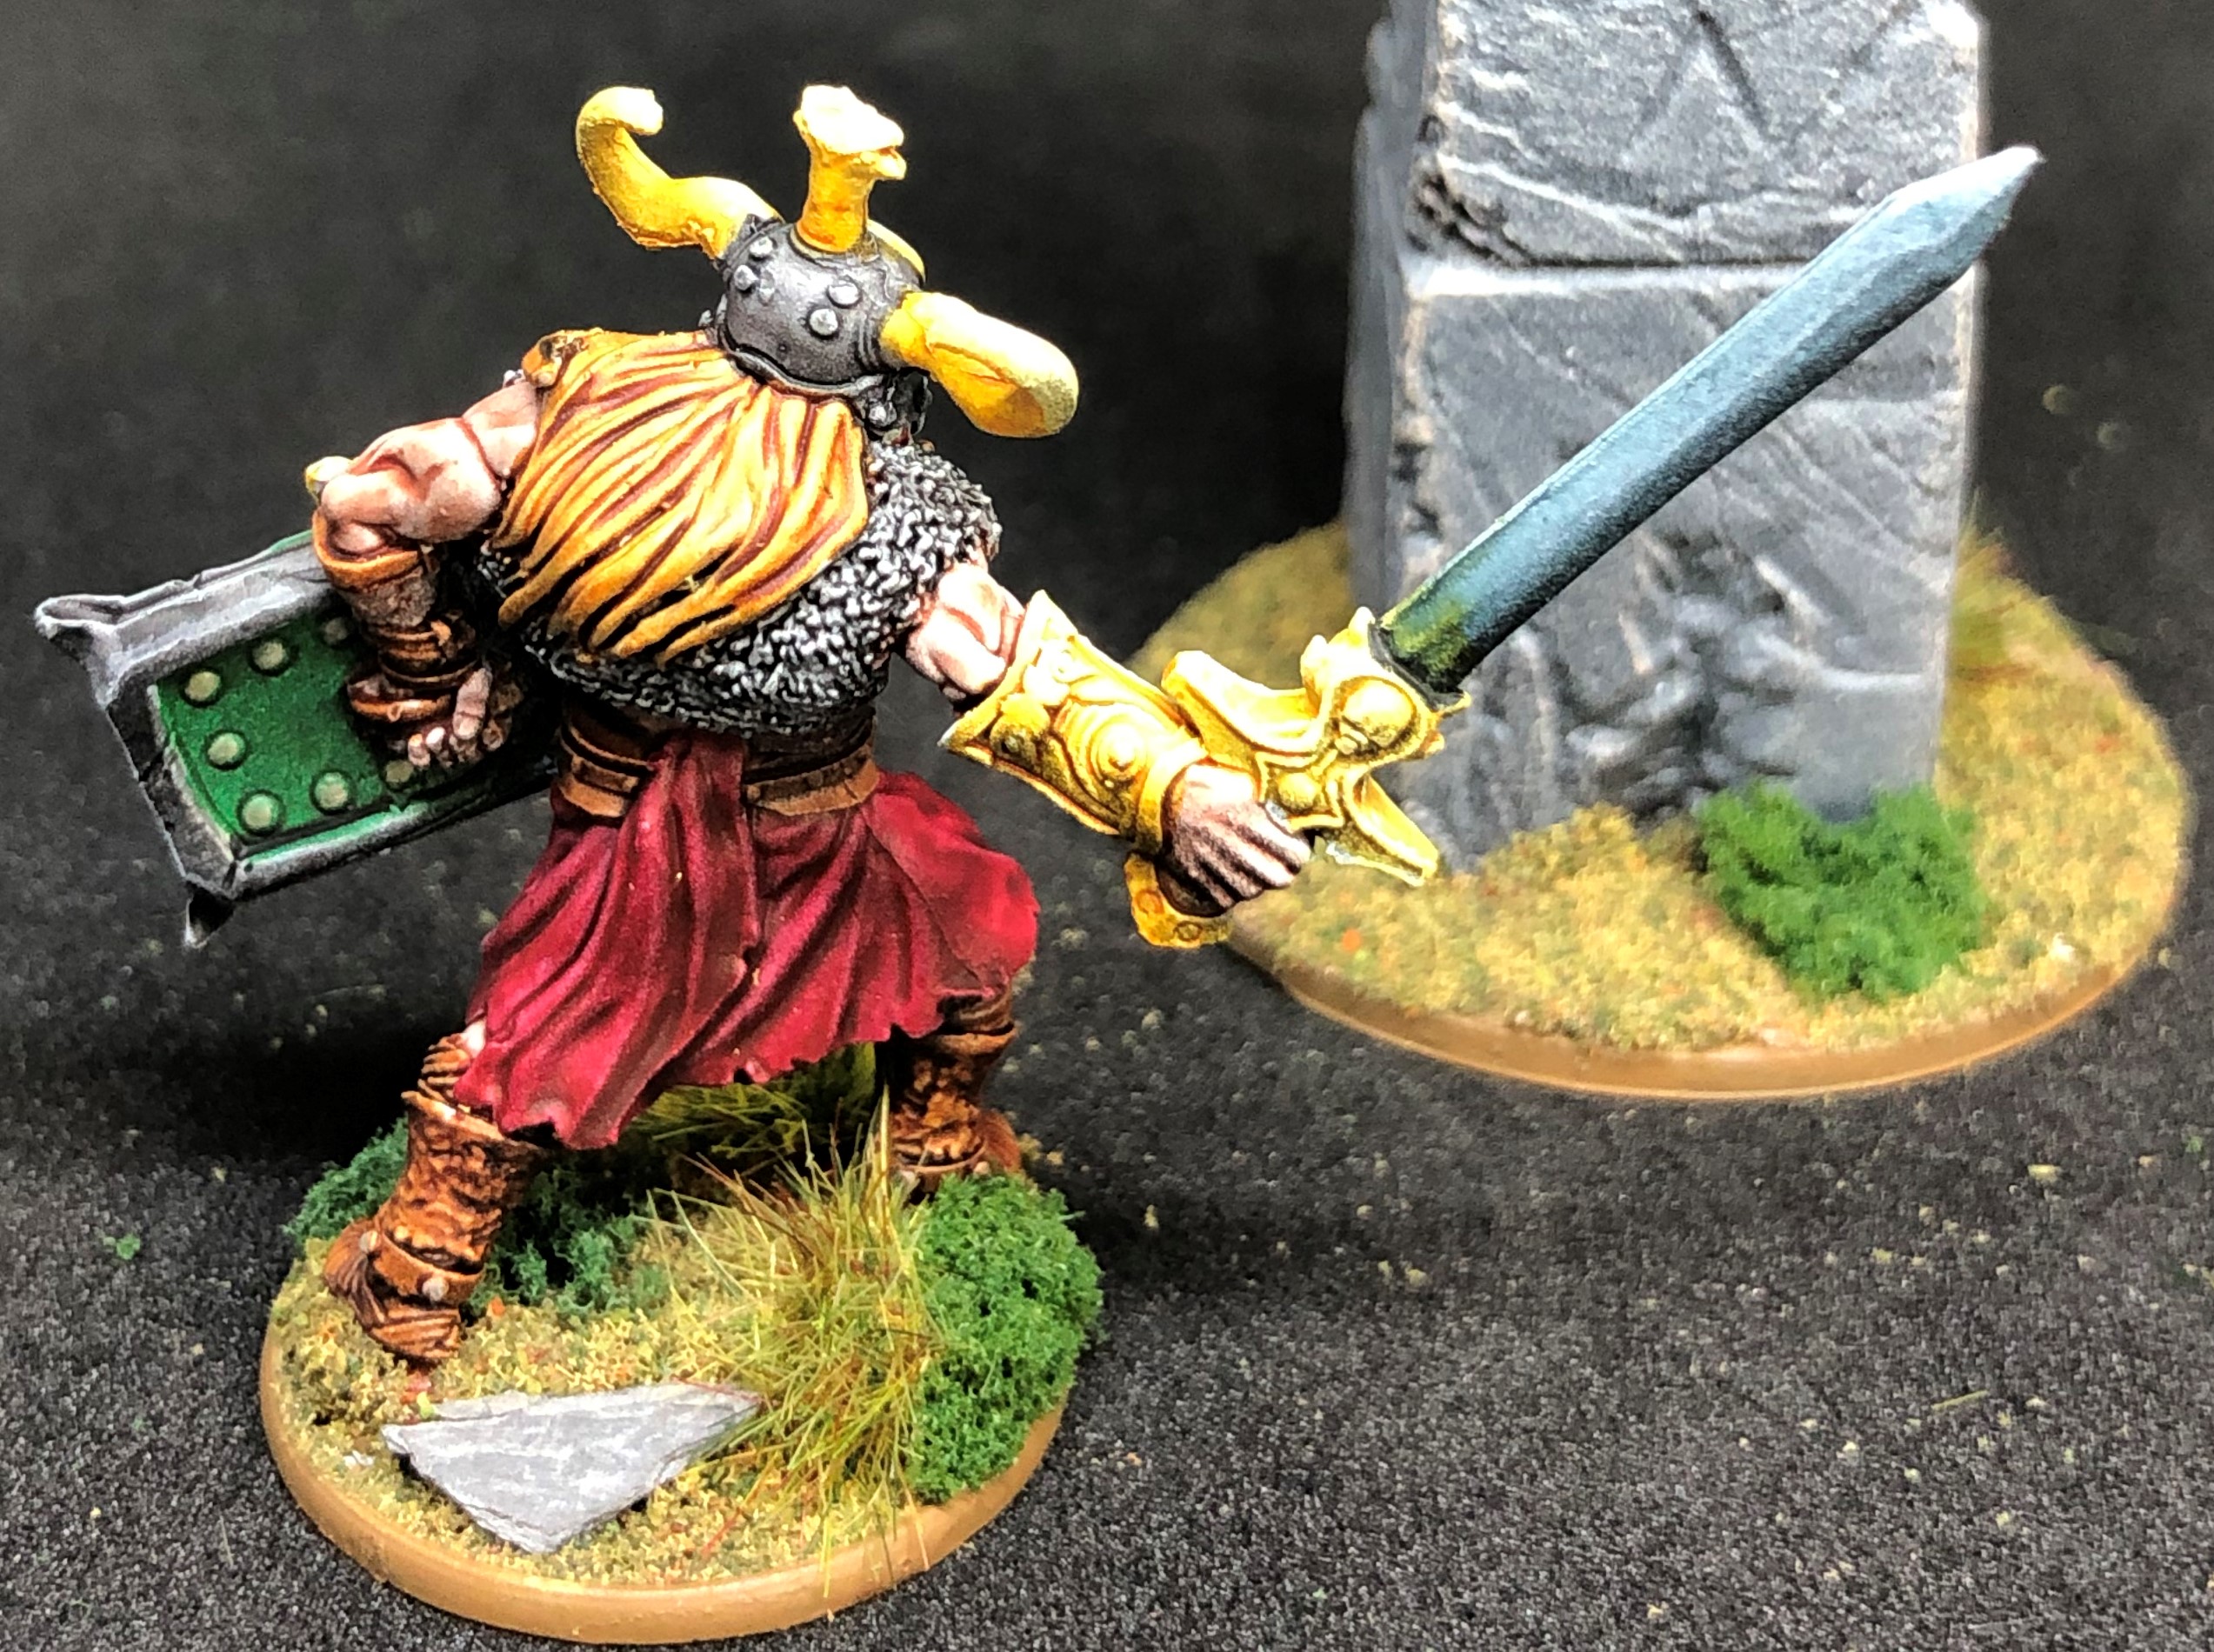
Painting Balor
Skintone in Plasmatic Bolt again (love this colour). He has a bit of cloth around his waist. I went for a dark purple using Hive Dweller Purple which is quite dark so got a very delicate highlight with P3 Sanguine Highlight (not a common paint in the UK, it is a mid tone blend of pink and purple). Hair is Grim Black with a dark grey highlight.
NMM
I’m using NMM throughout this project for the very poppy, graphic style. Sword blade was Greylord Grey and handle Zealot Yellow with a wipe along the edges. Blood effect from Citadel Technical Blood for the Blood God.
Taking inspiration from the artwork I’m going for a bright gold with a faintly greenish hue, but I don’t want the brown undertones Bisley used so this is going to be very bright. We won’t miss him on the table that’s for sure!
I blended drops of Zealot Yellow with Malignant Green and water (2:2:2) and got a very close match to the artwork. I really wanted it to pop so went for an edge highlight using Vallejo Model Air Duck Egg Green. As the name suggests this is a very desaturated green. I was so pleased with the results I glazed extra highlights to the tops of the shoulder pauldrons and the wrist ovals. I’ve got quite a bright lightbox so have turned down the Brightness by 100 on these images so you can see the highlight placement better:
Fogou goodness.
@Demonsub (check out his Slaine project) commented on my last post and that reminded me about the Fogou Skellig Michael buildings. They will be perfect for this. I’m not a fan of the rather angular Celtic Roundhouses supplied with the starter set – mine have gone up on eBay already.
I’ve got a suitable setup already:
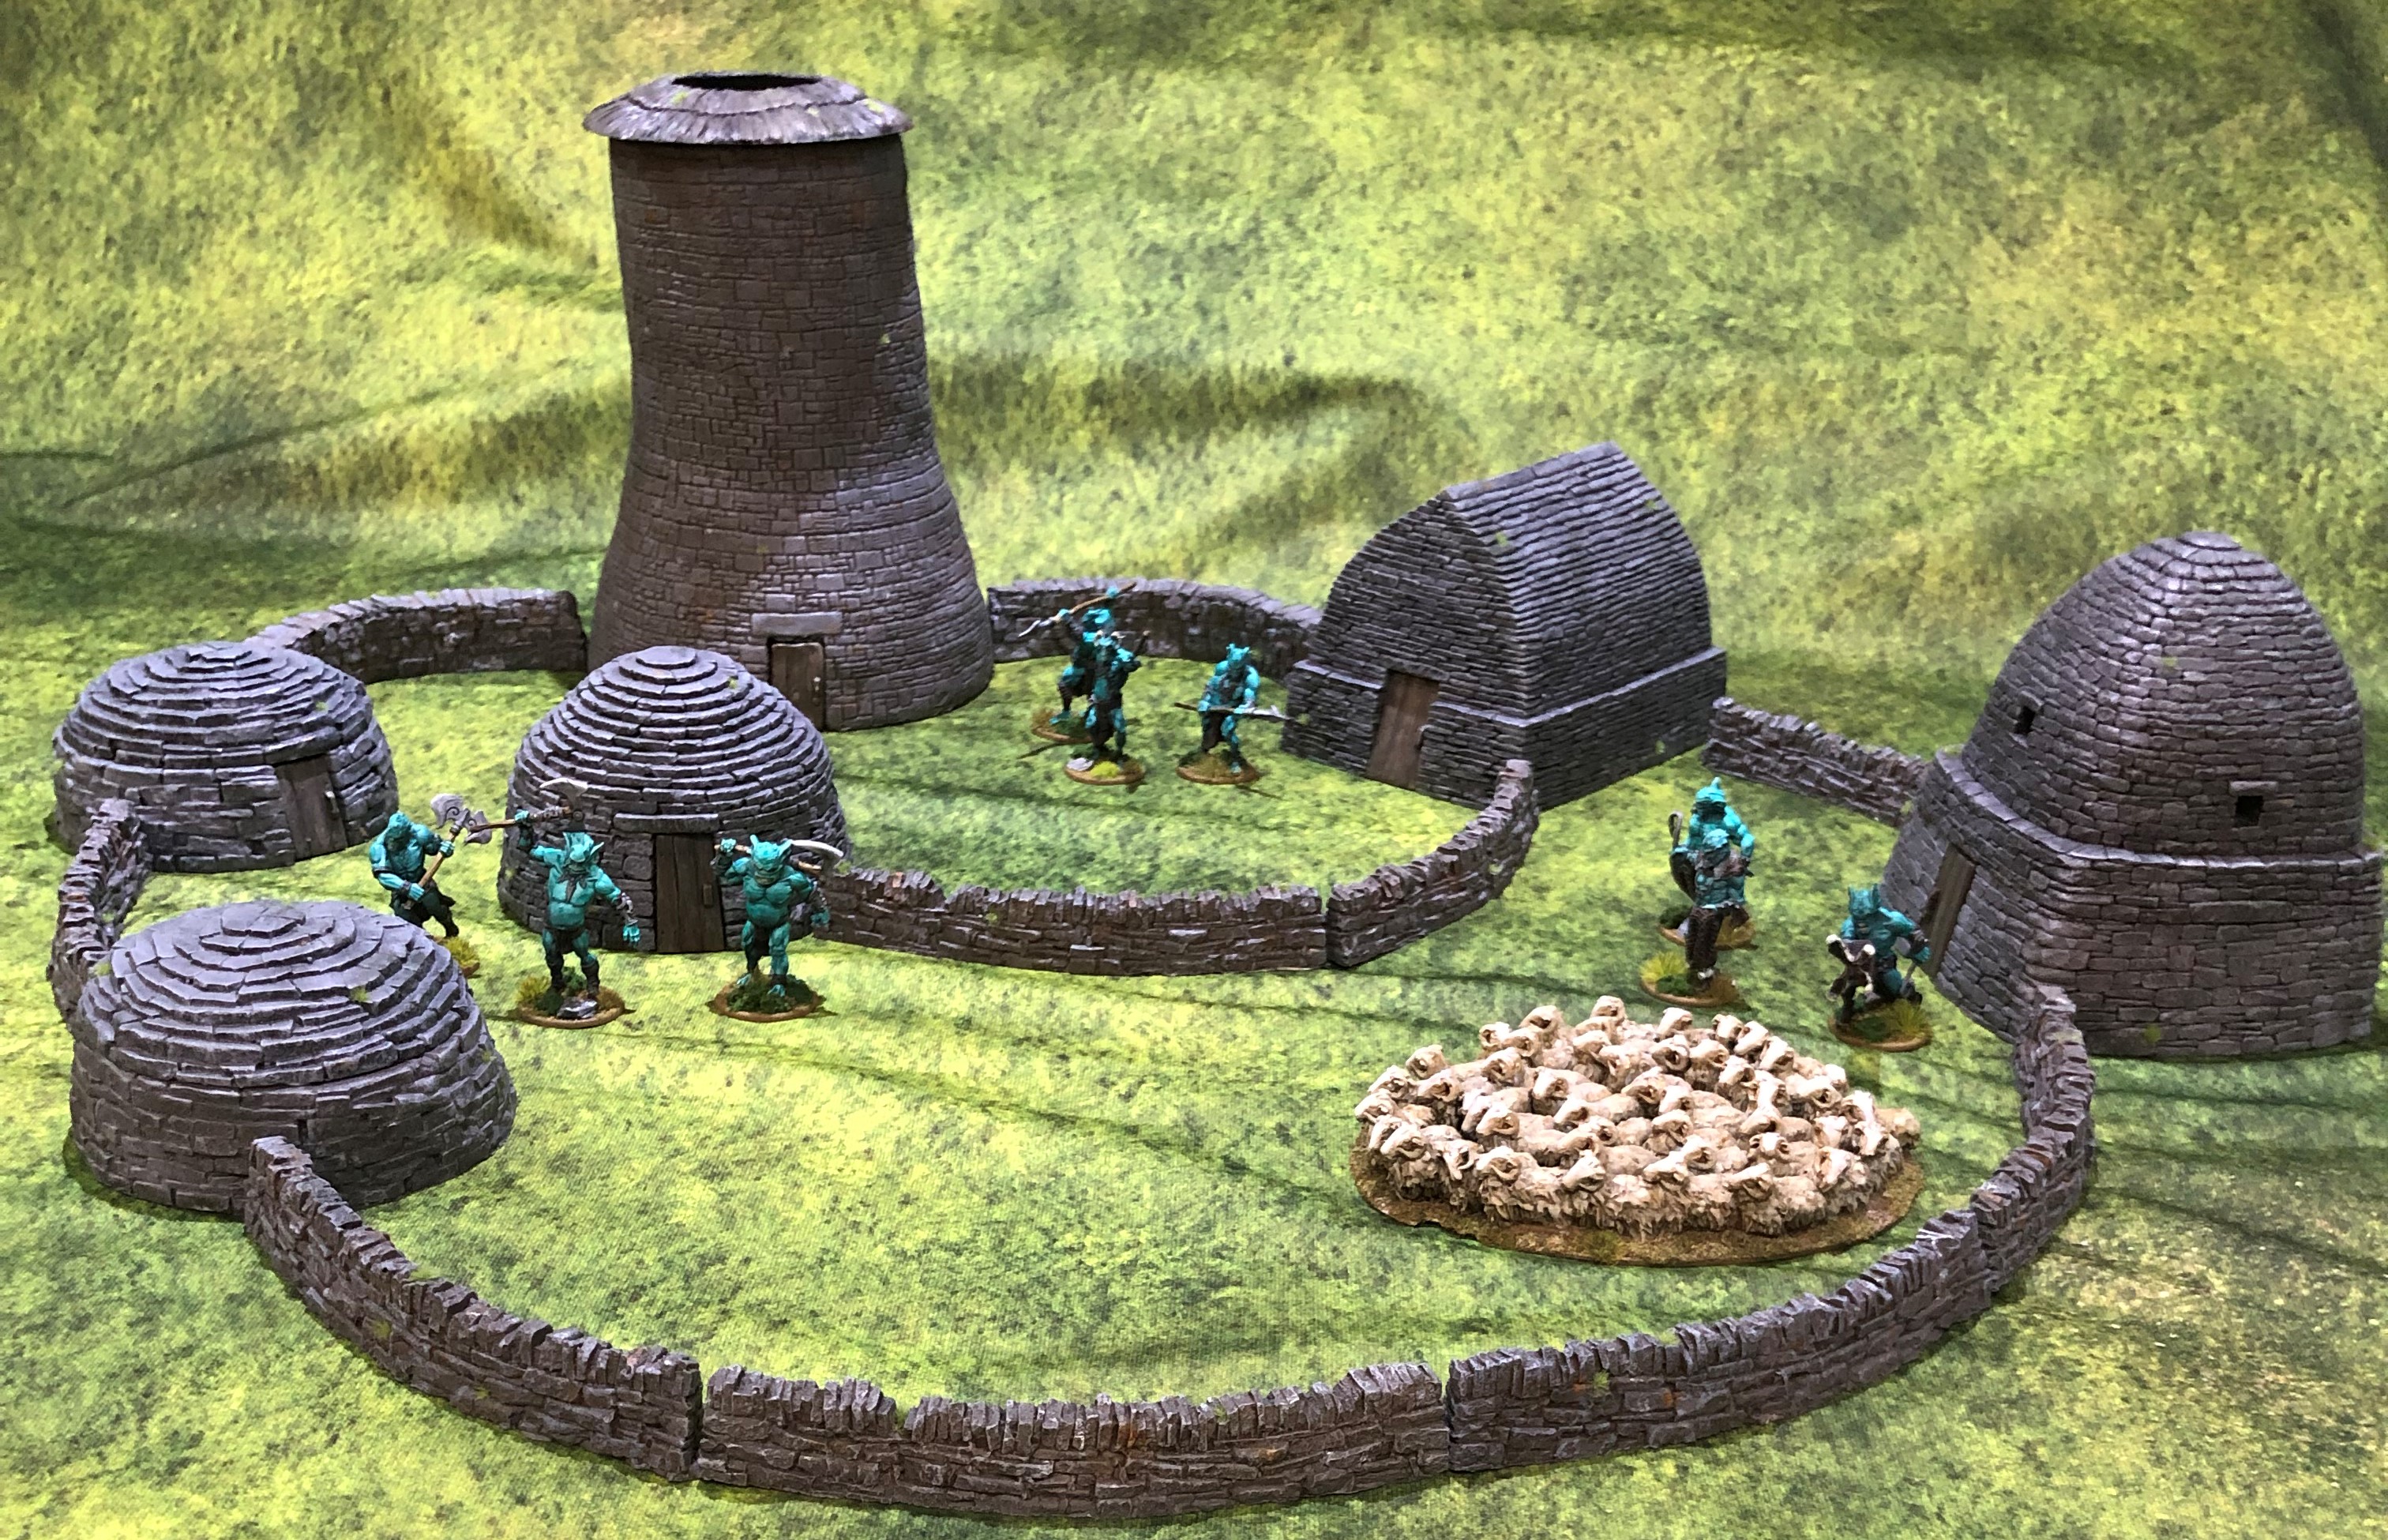
Five Fogou Models Skellig Michael buildings. The Broch is from Monolith Designs. I’m not sure where the walls were from. The sheep are First Corps. Raiding Formorians are Warlord Games.
Some closer shots for ideas of relative size:

On reflection they aren’t too clear so here are some straight on with the Skull Sword:


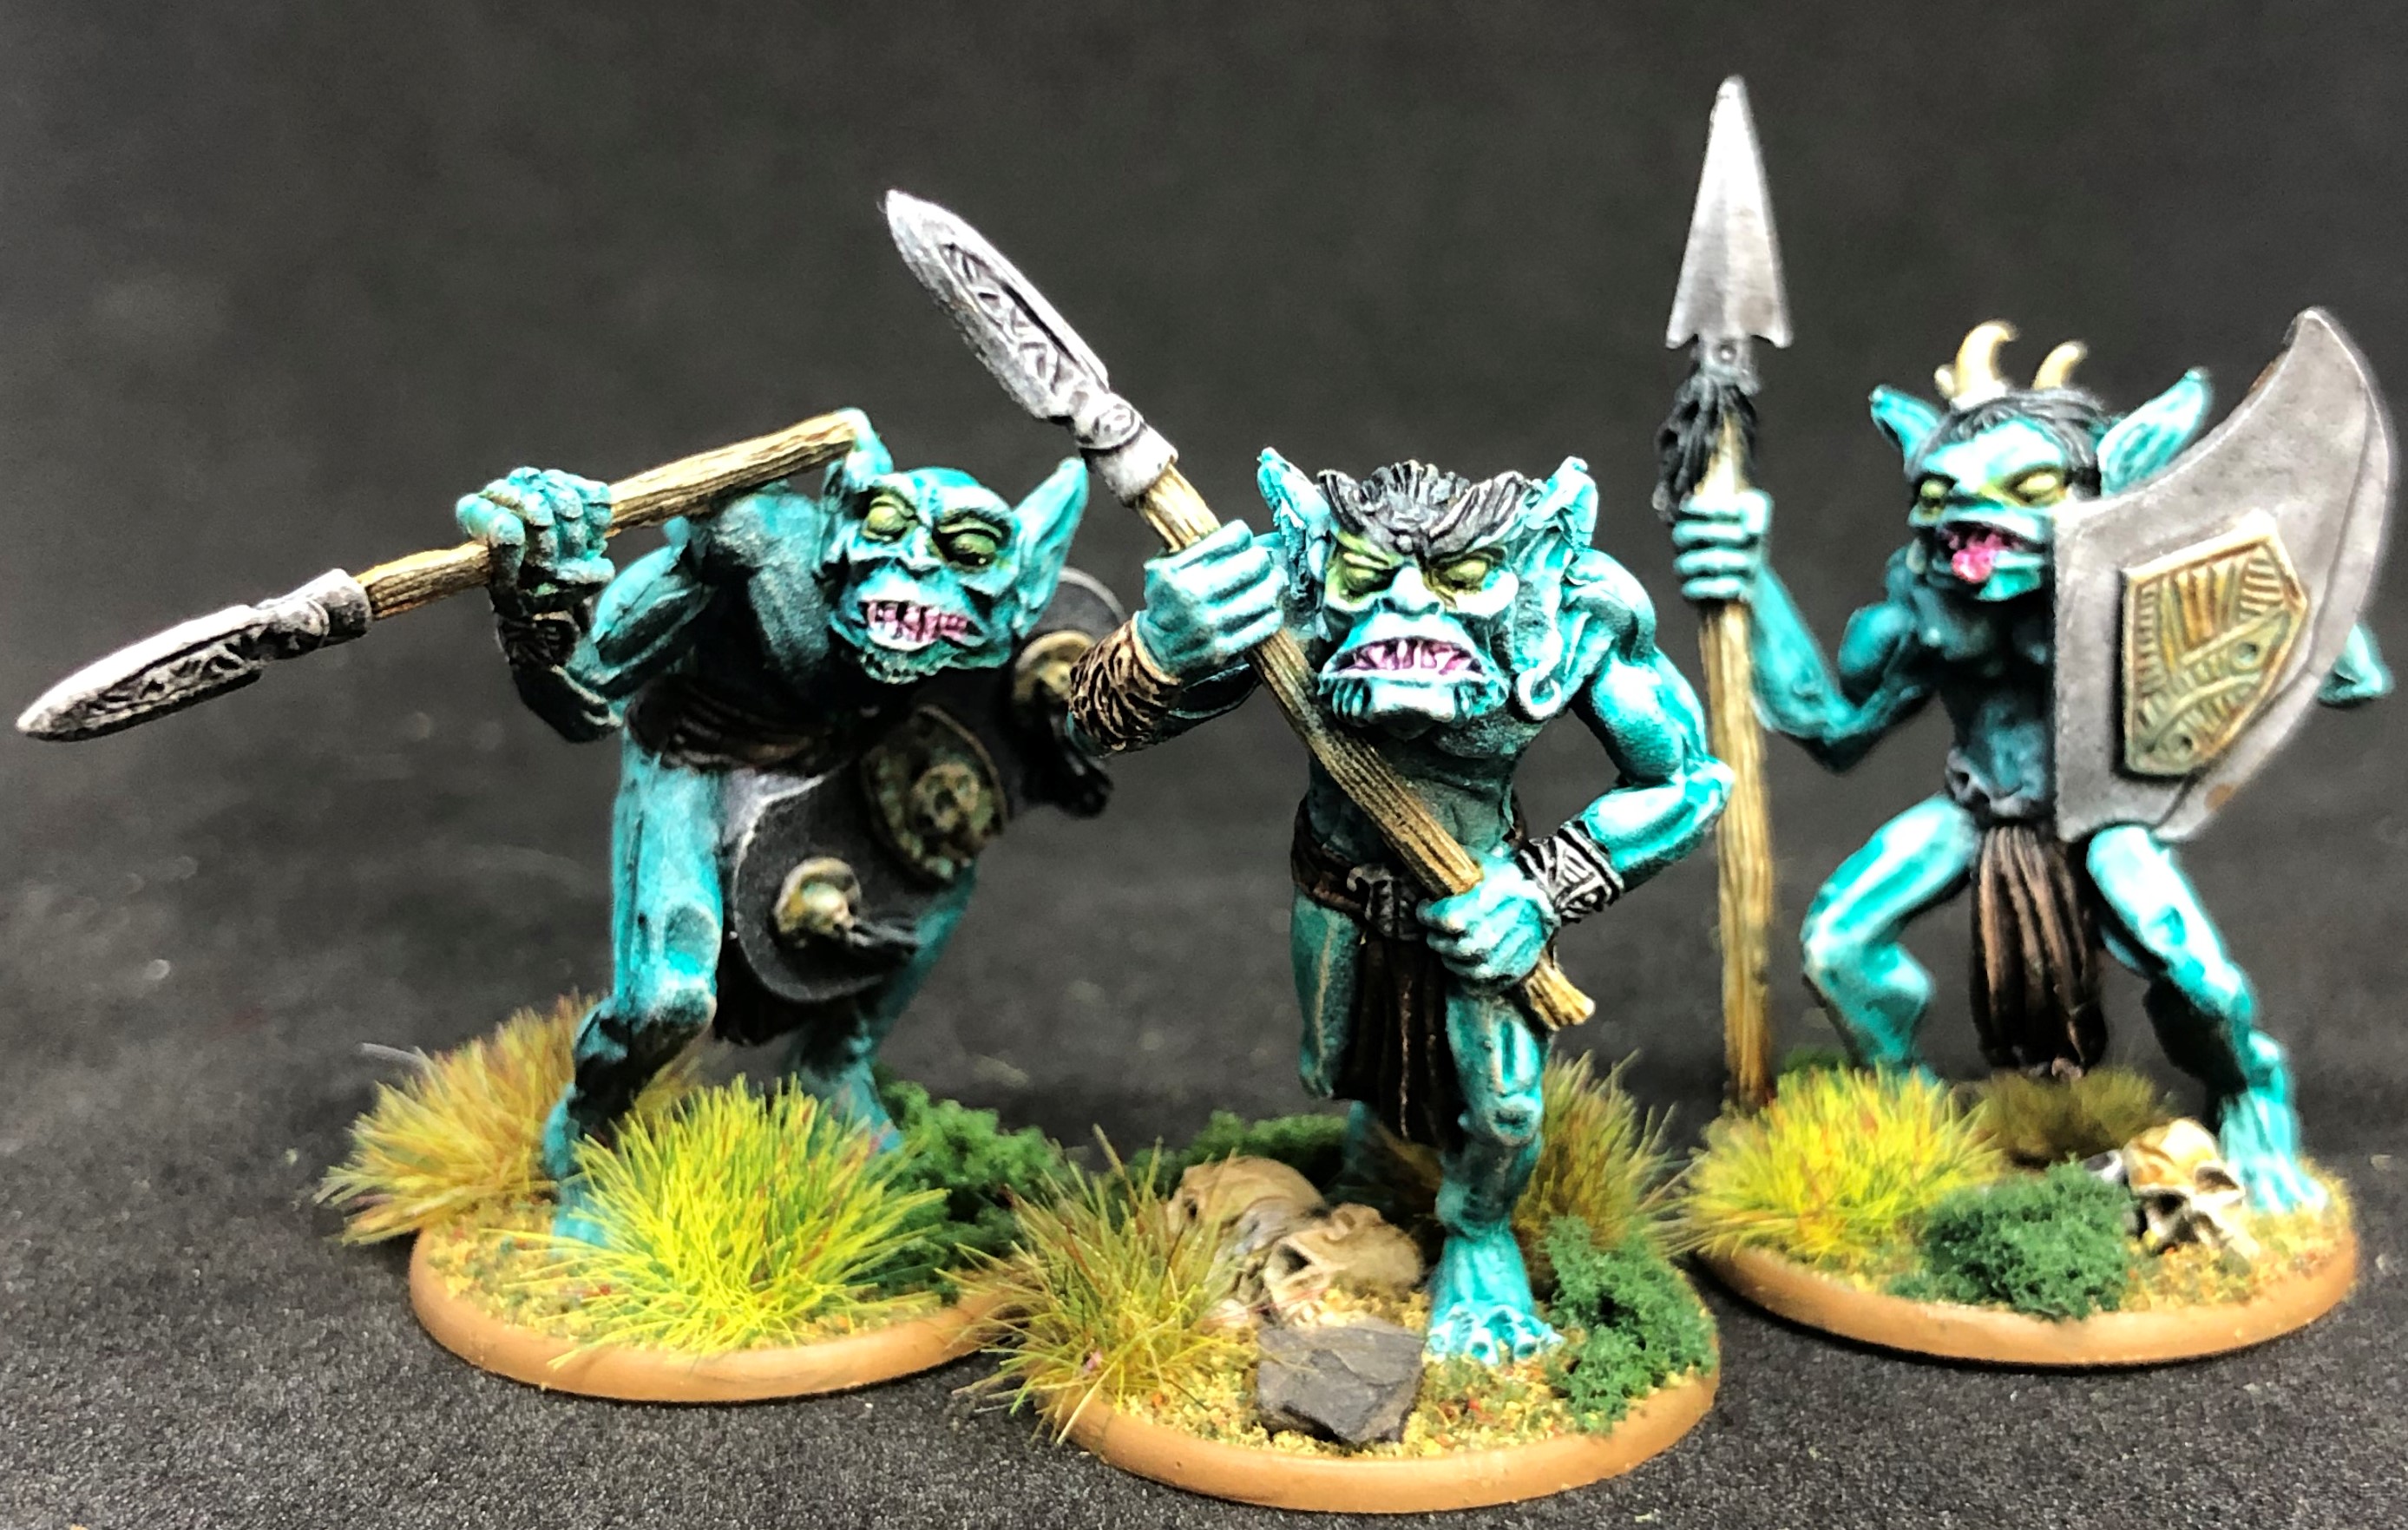
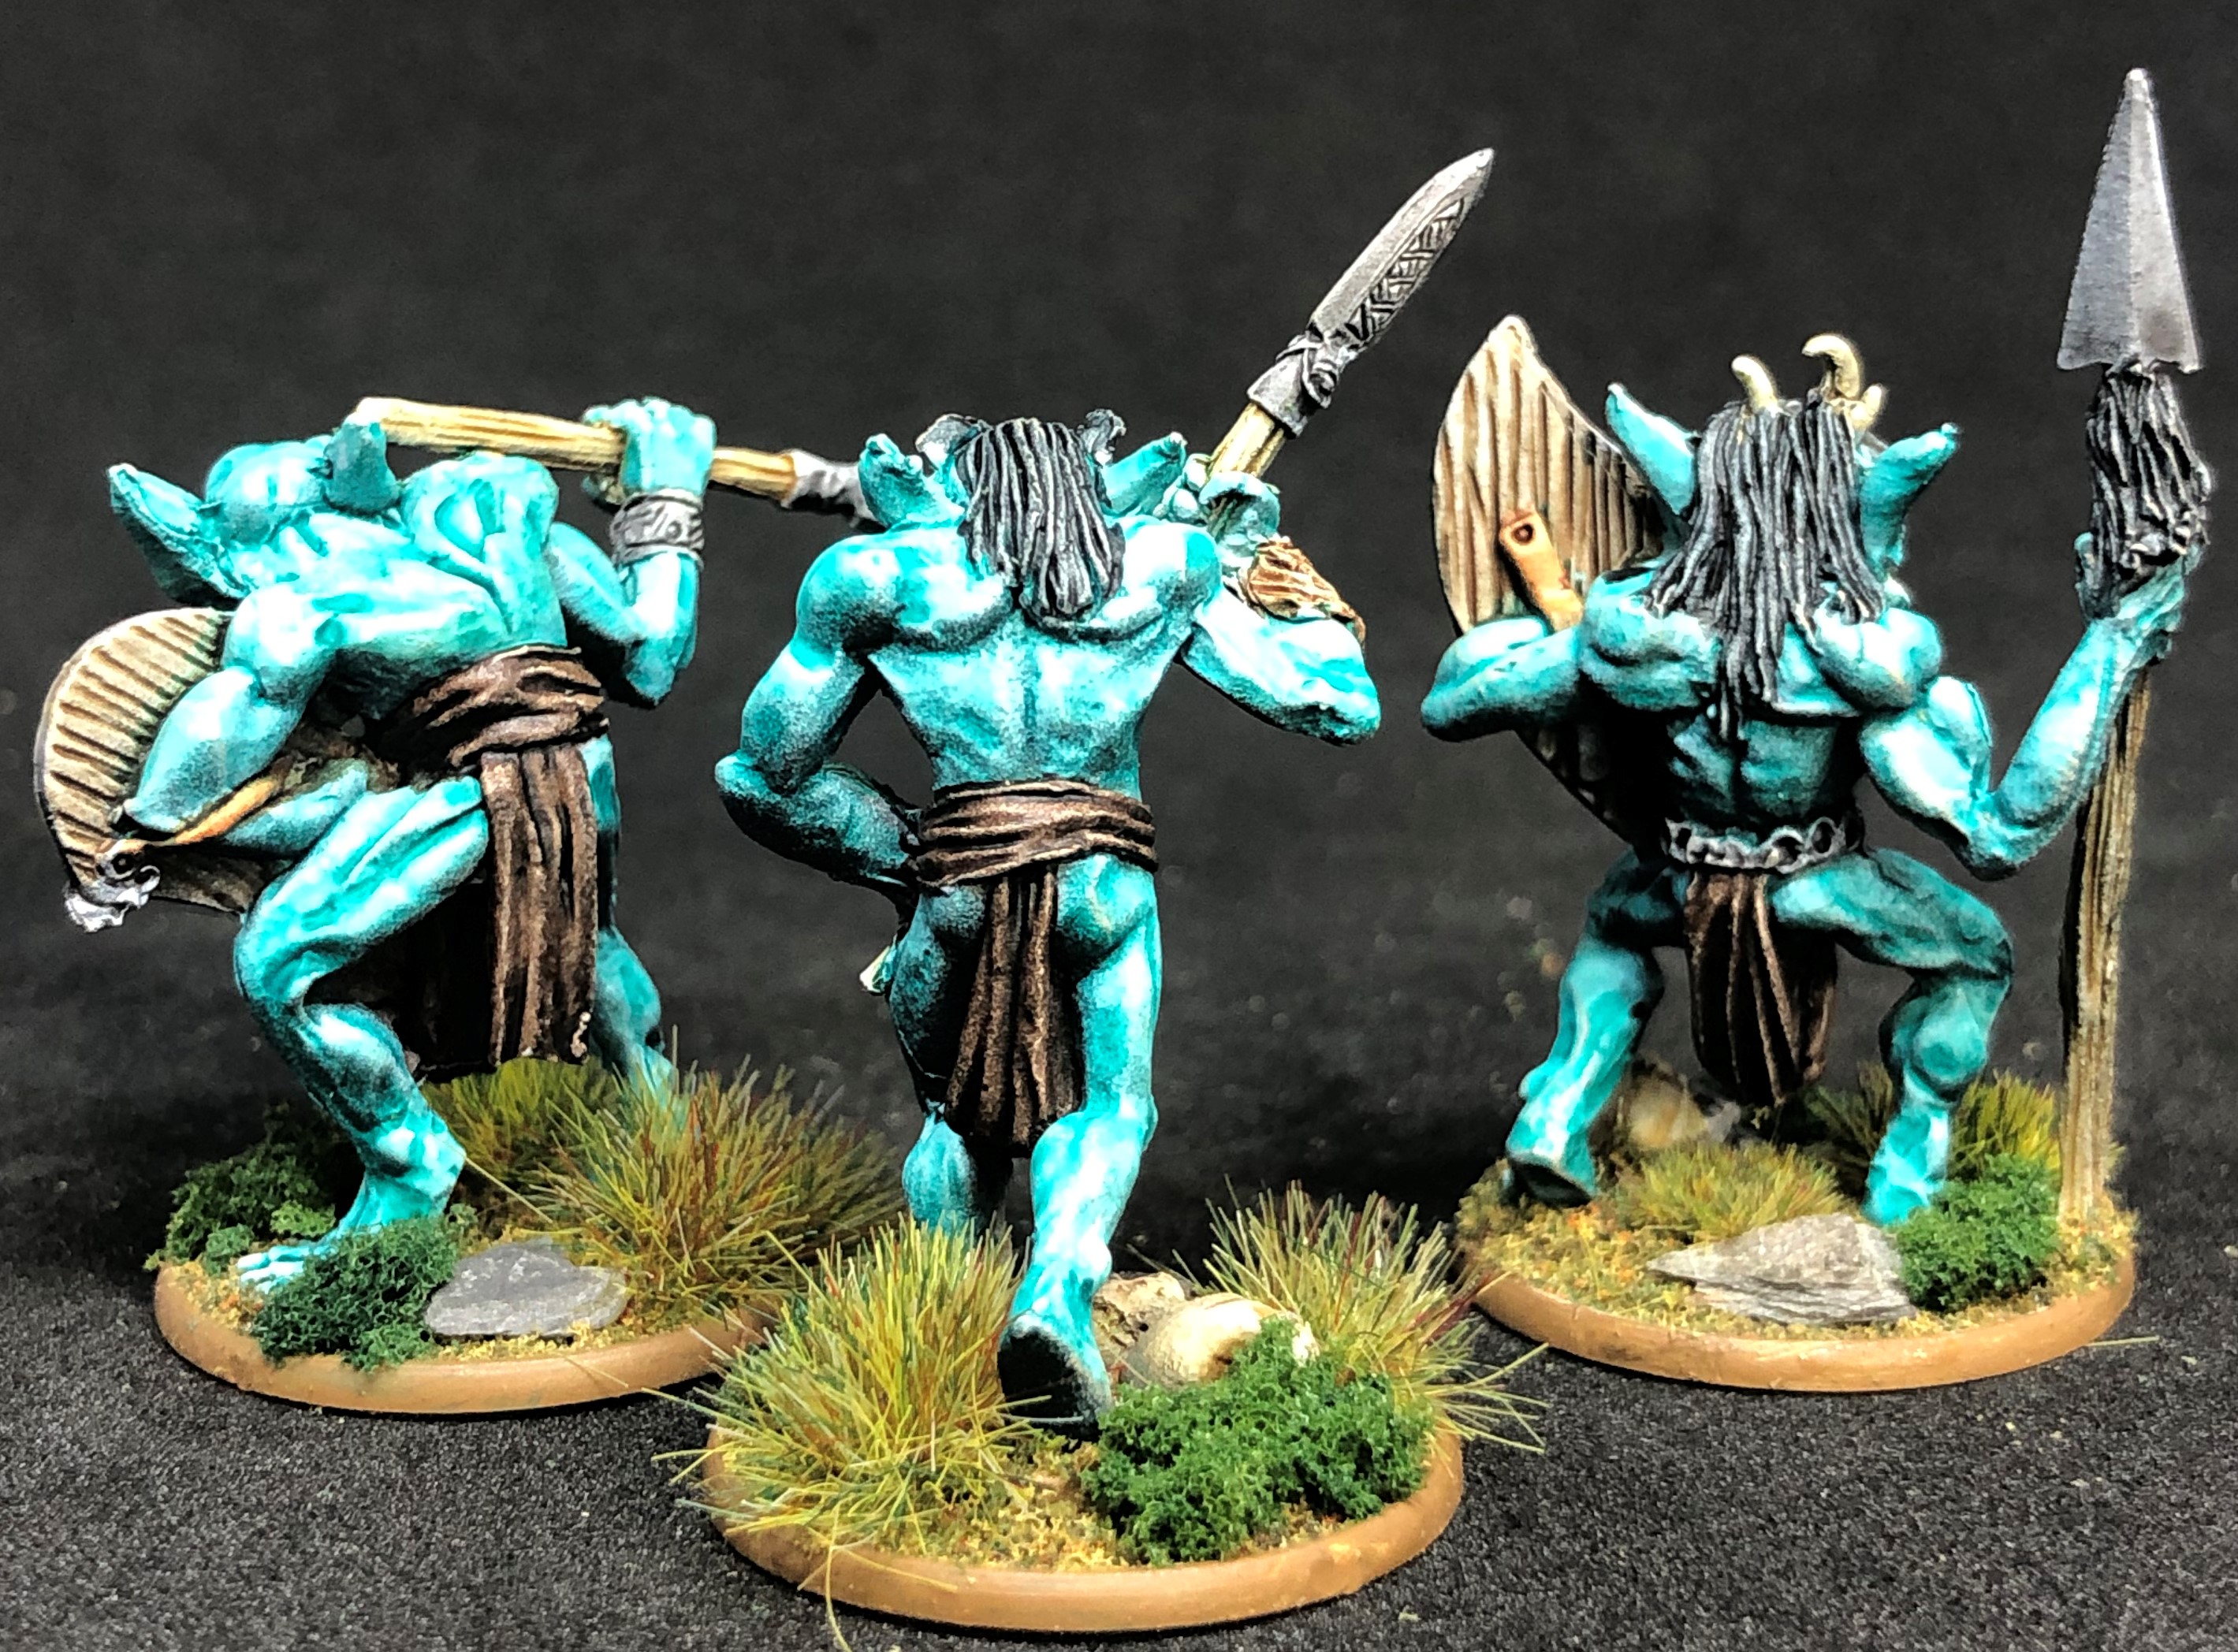
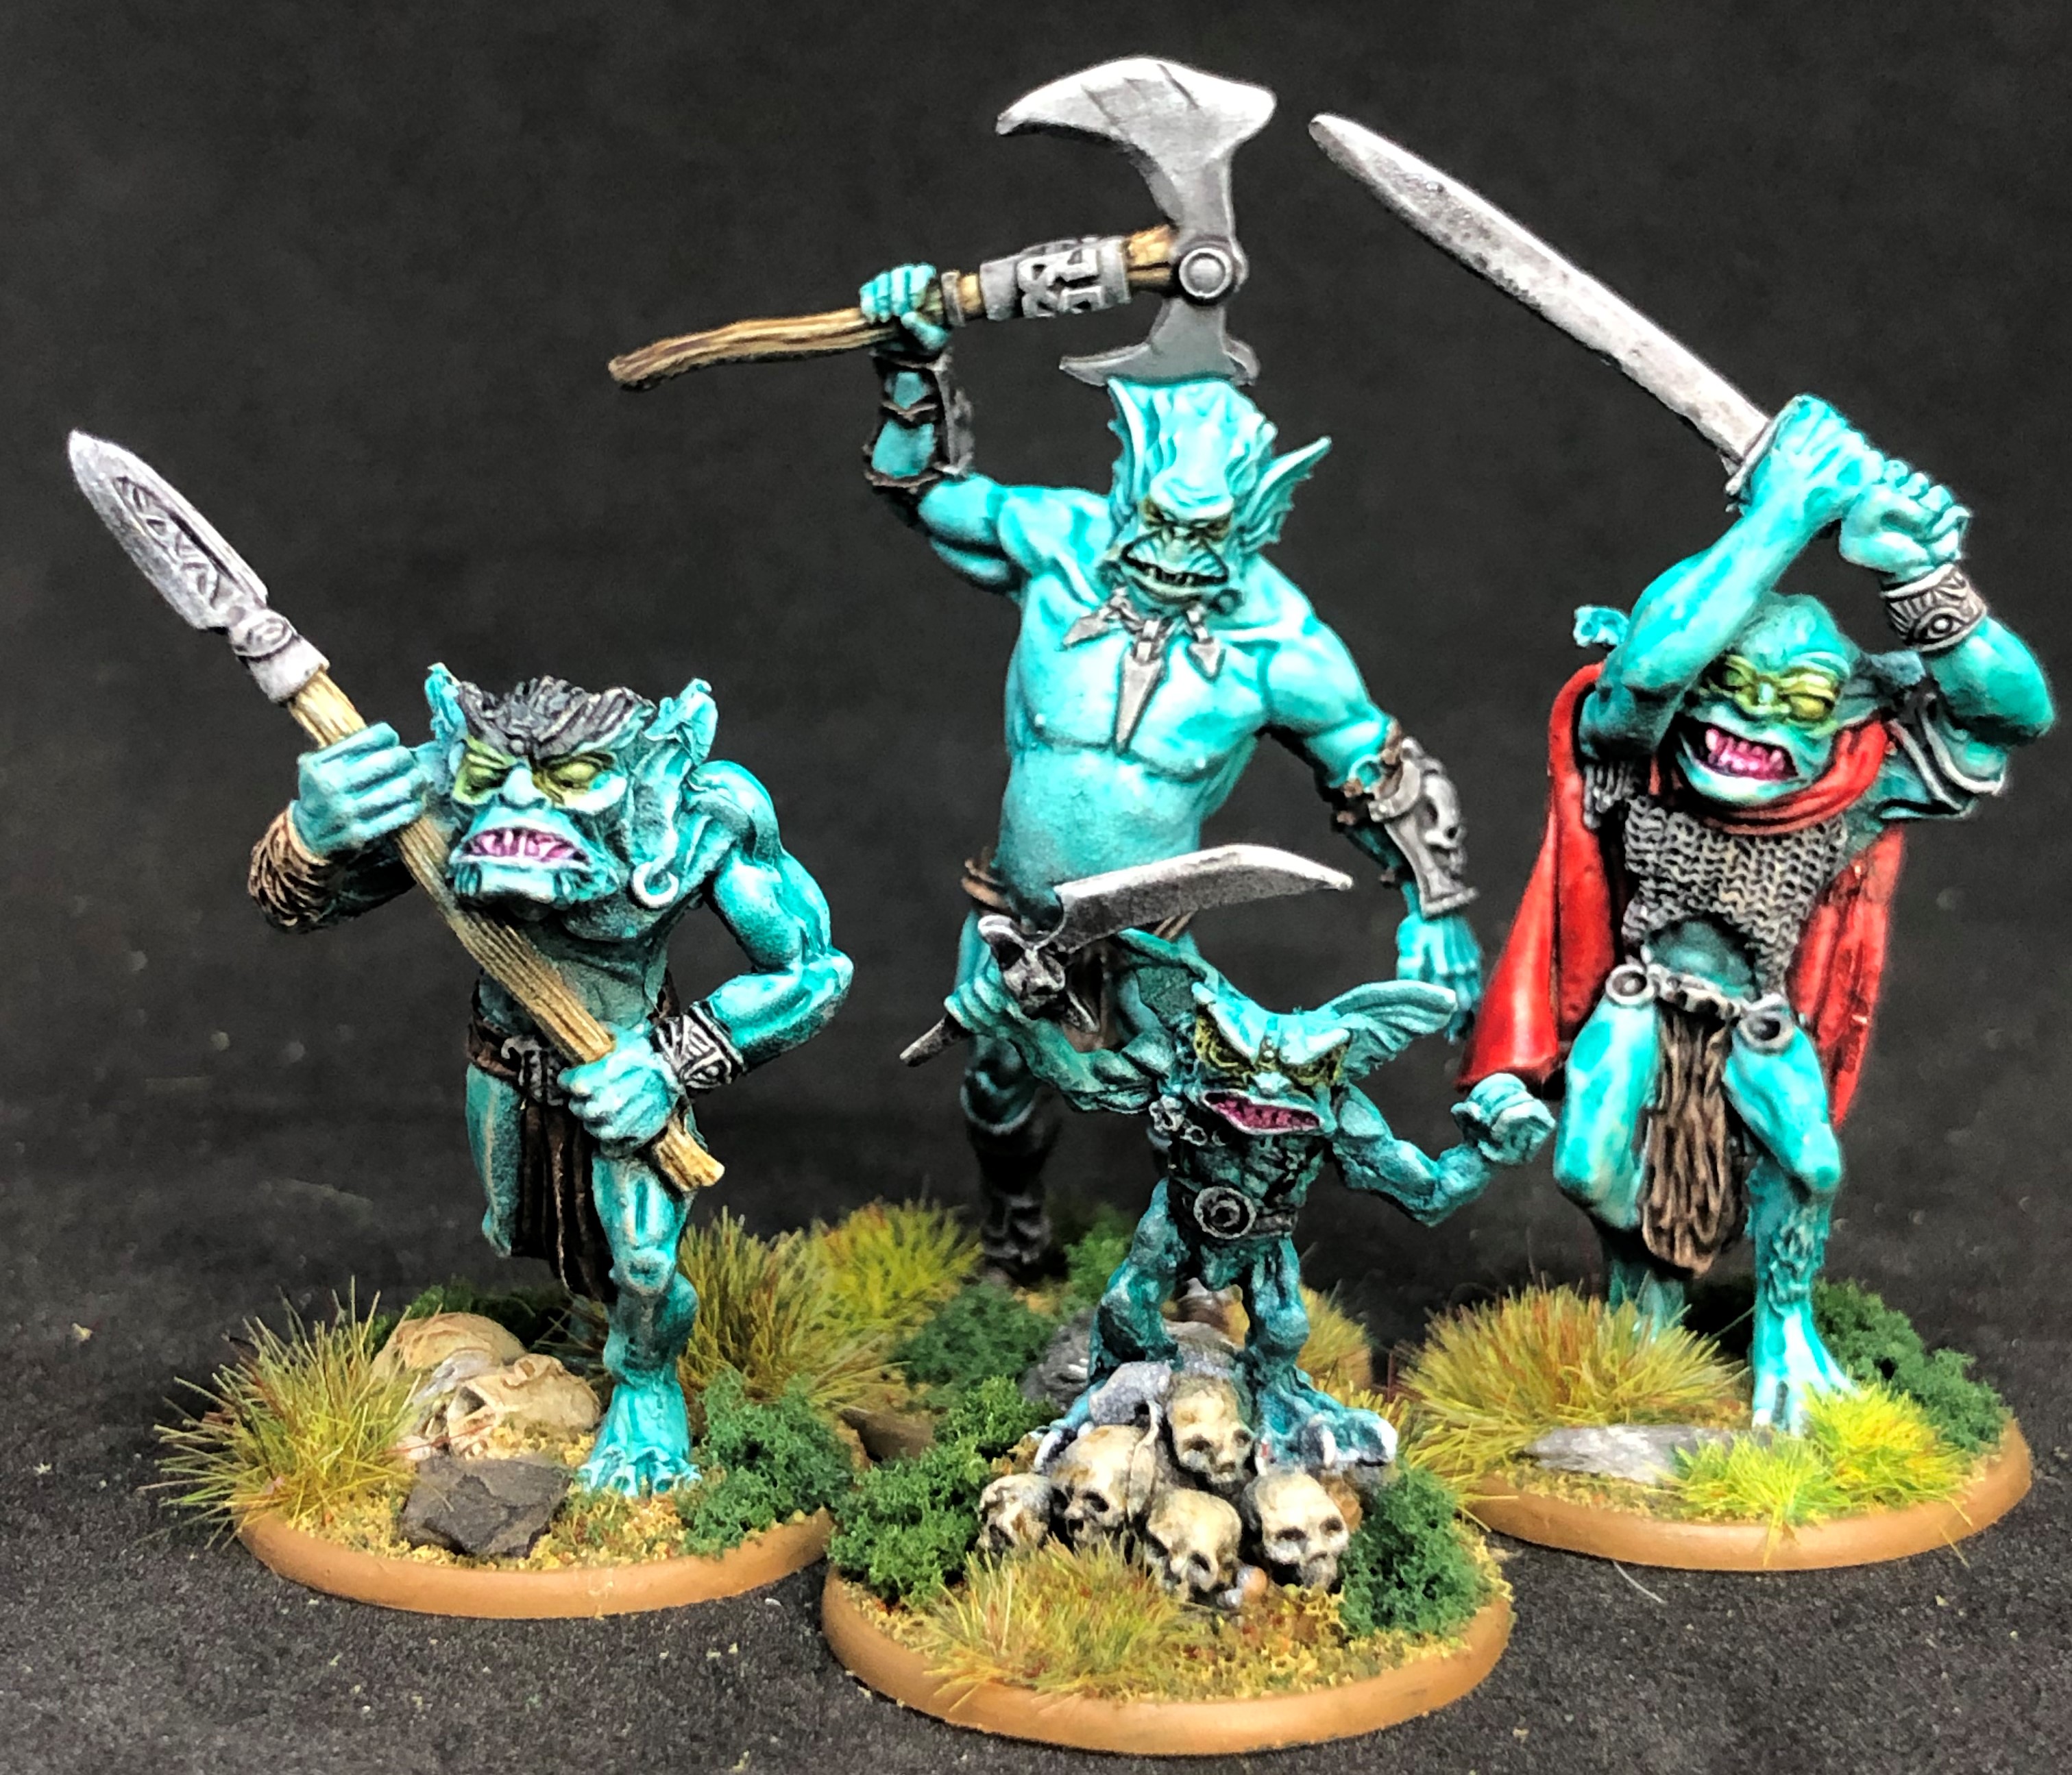
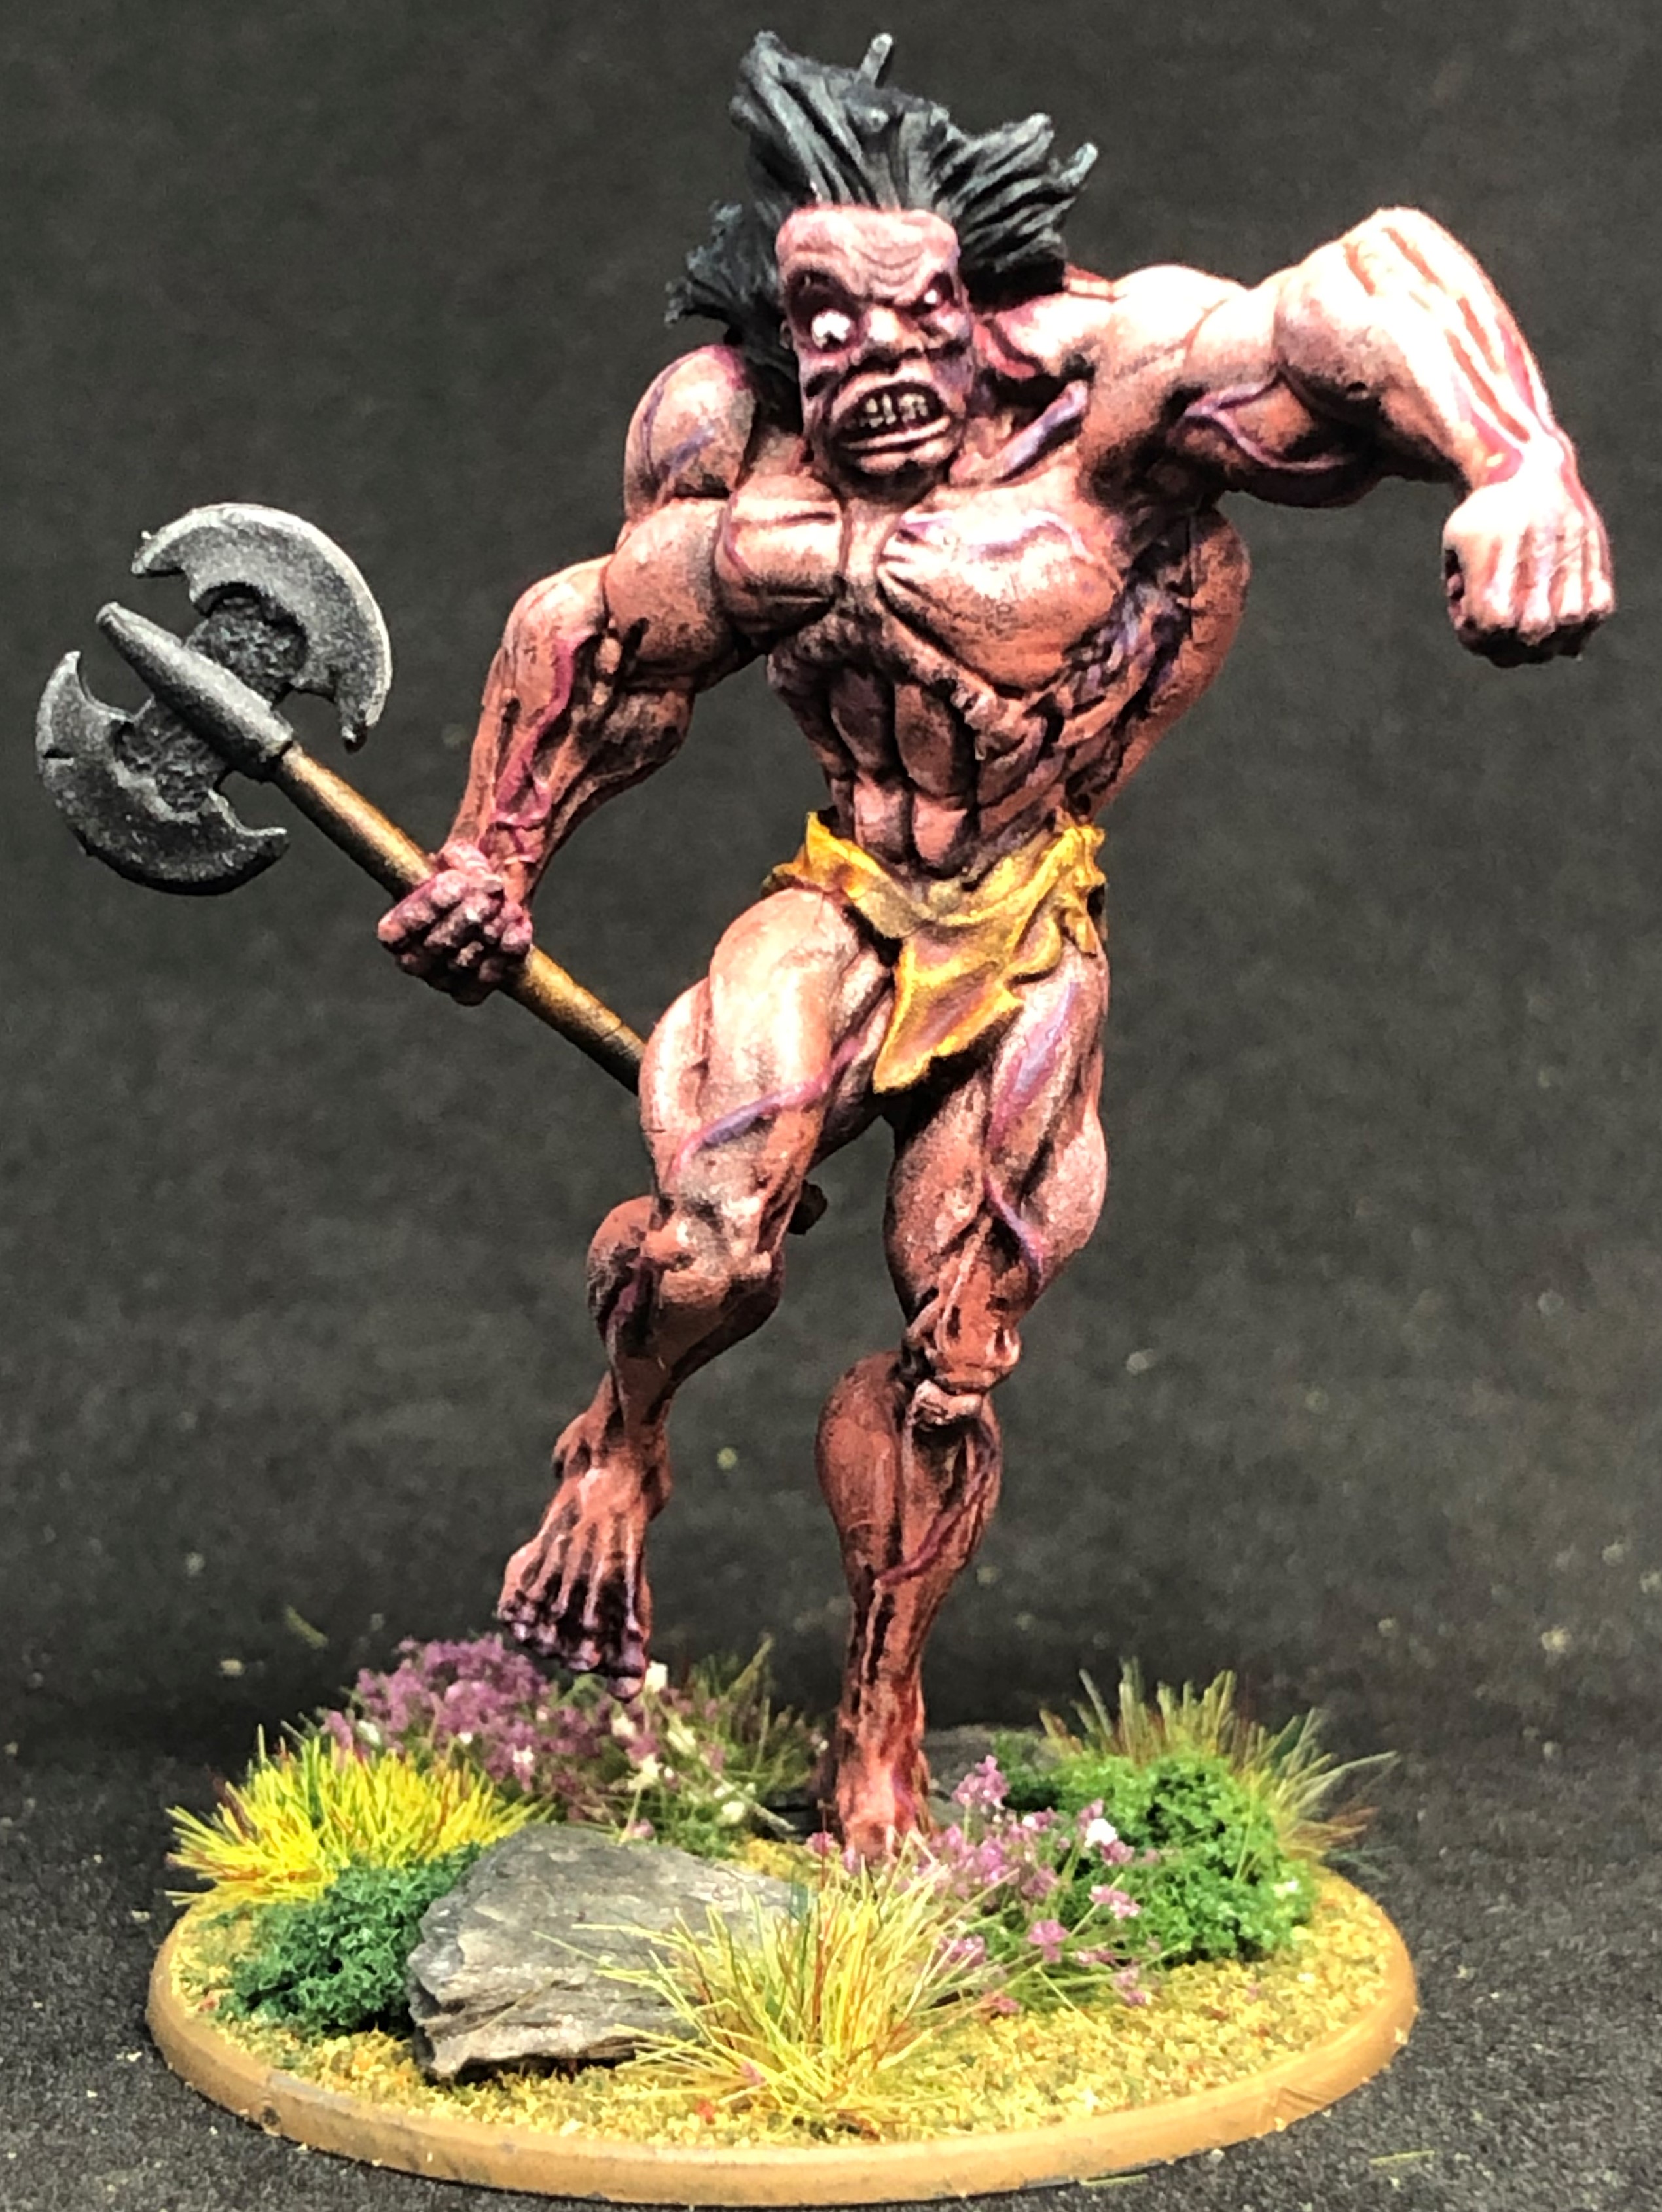
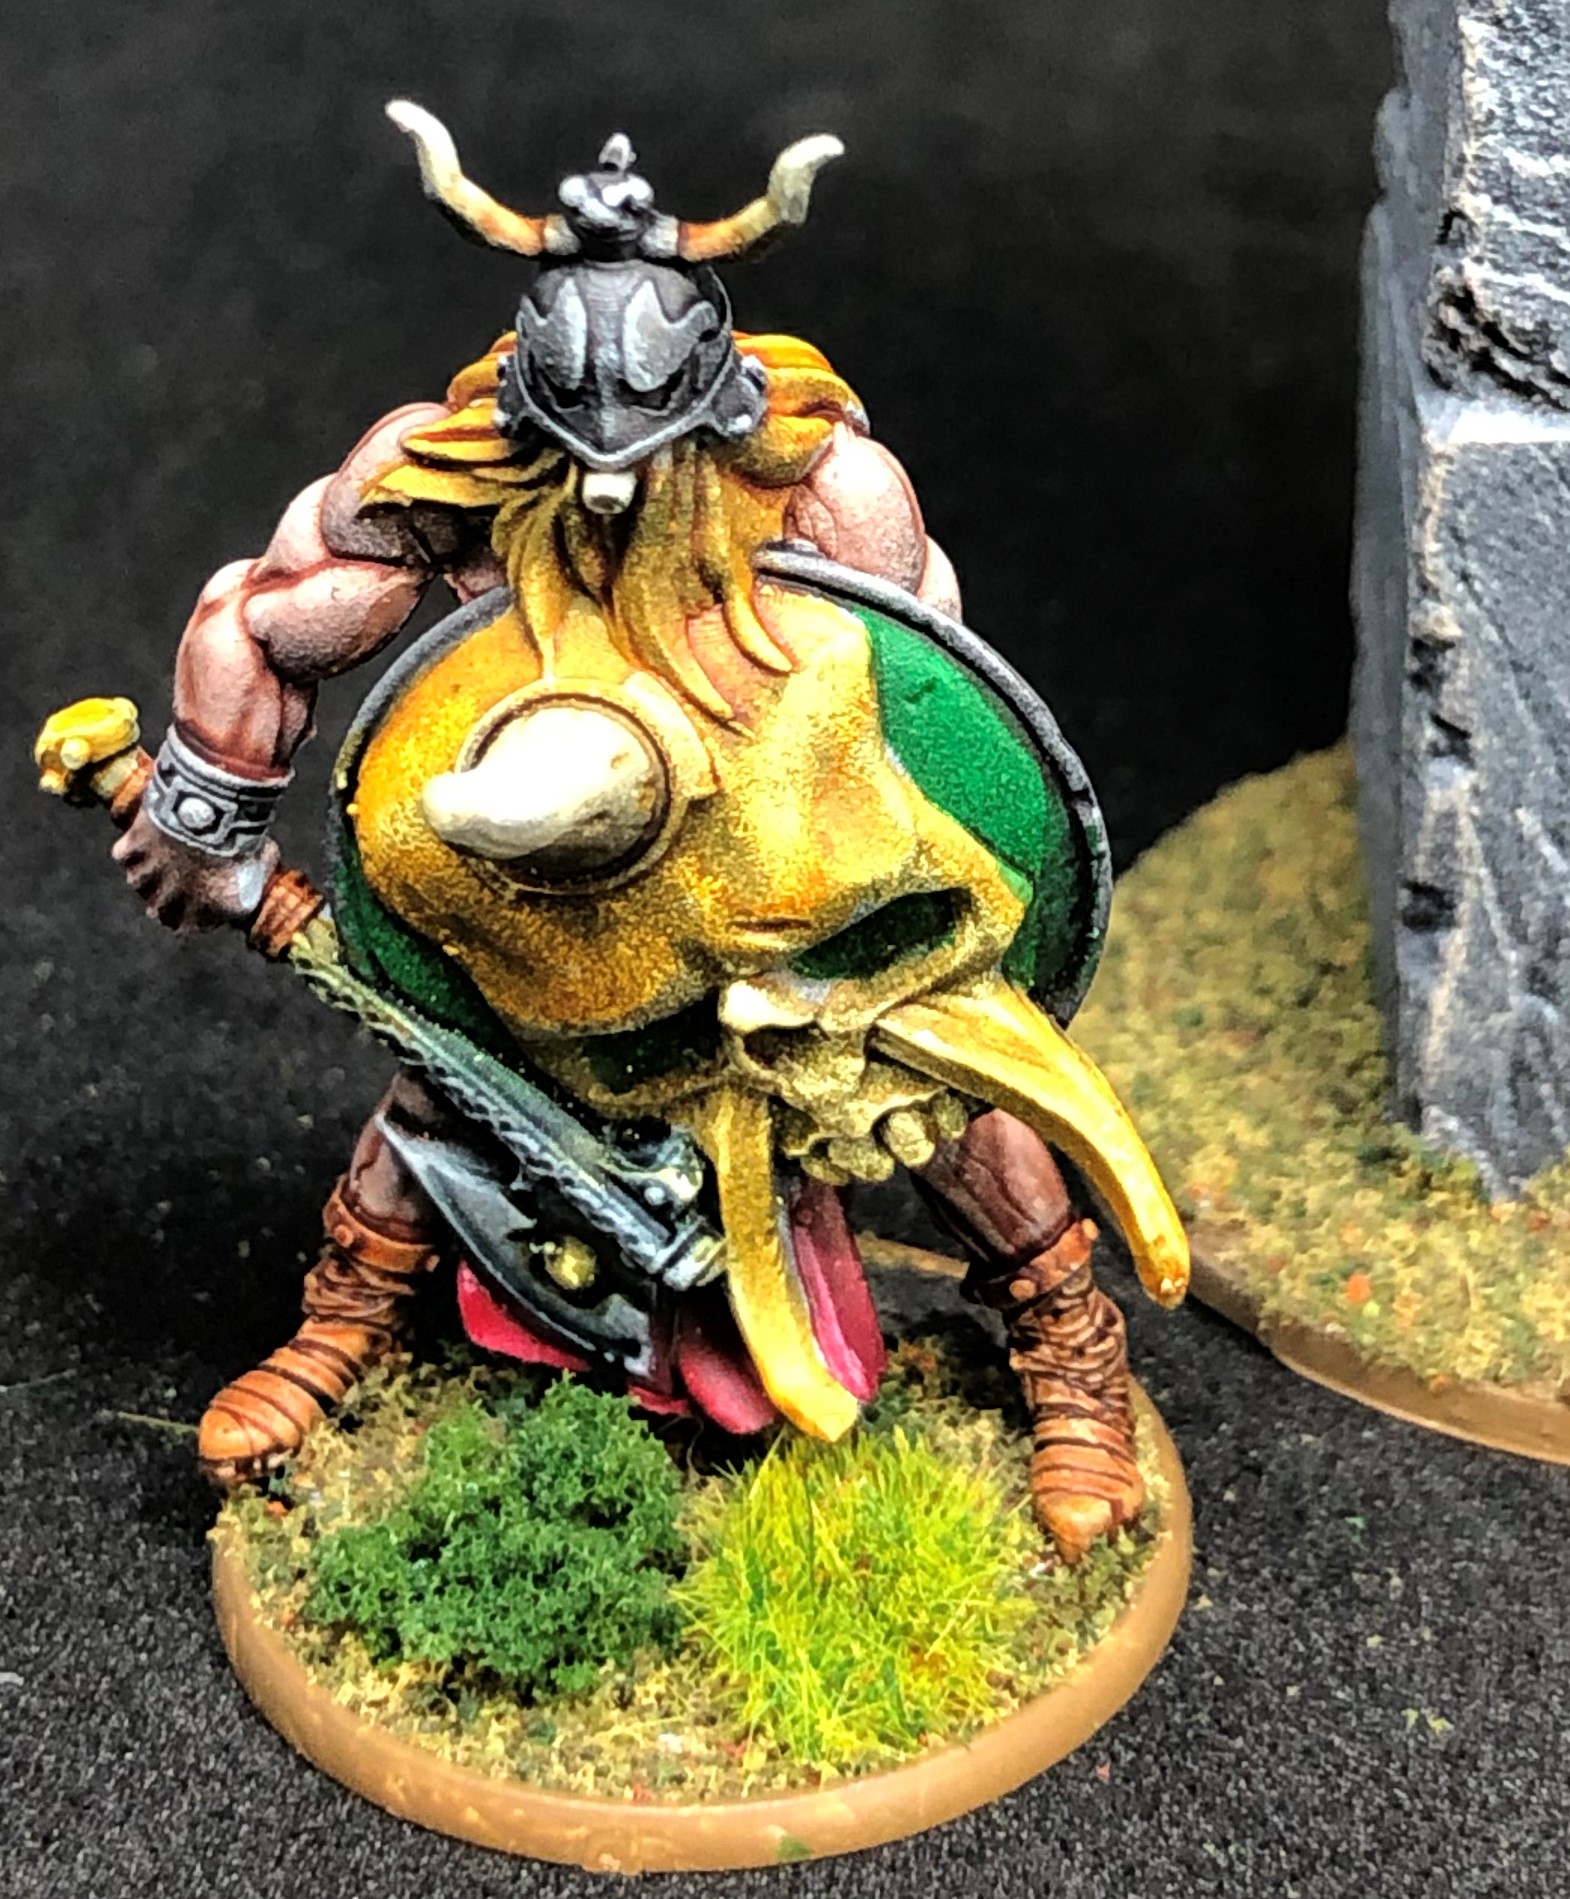
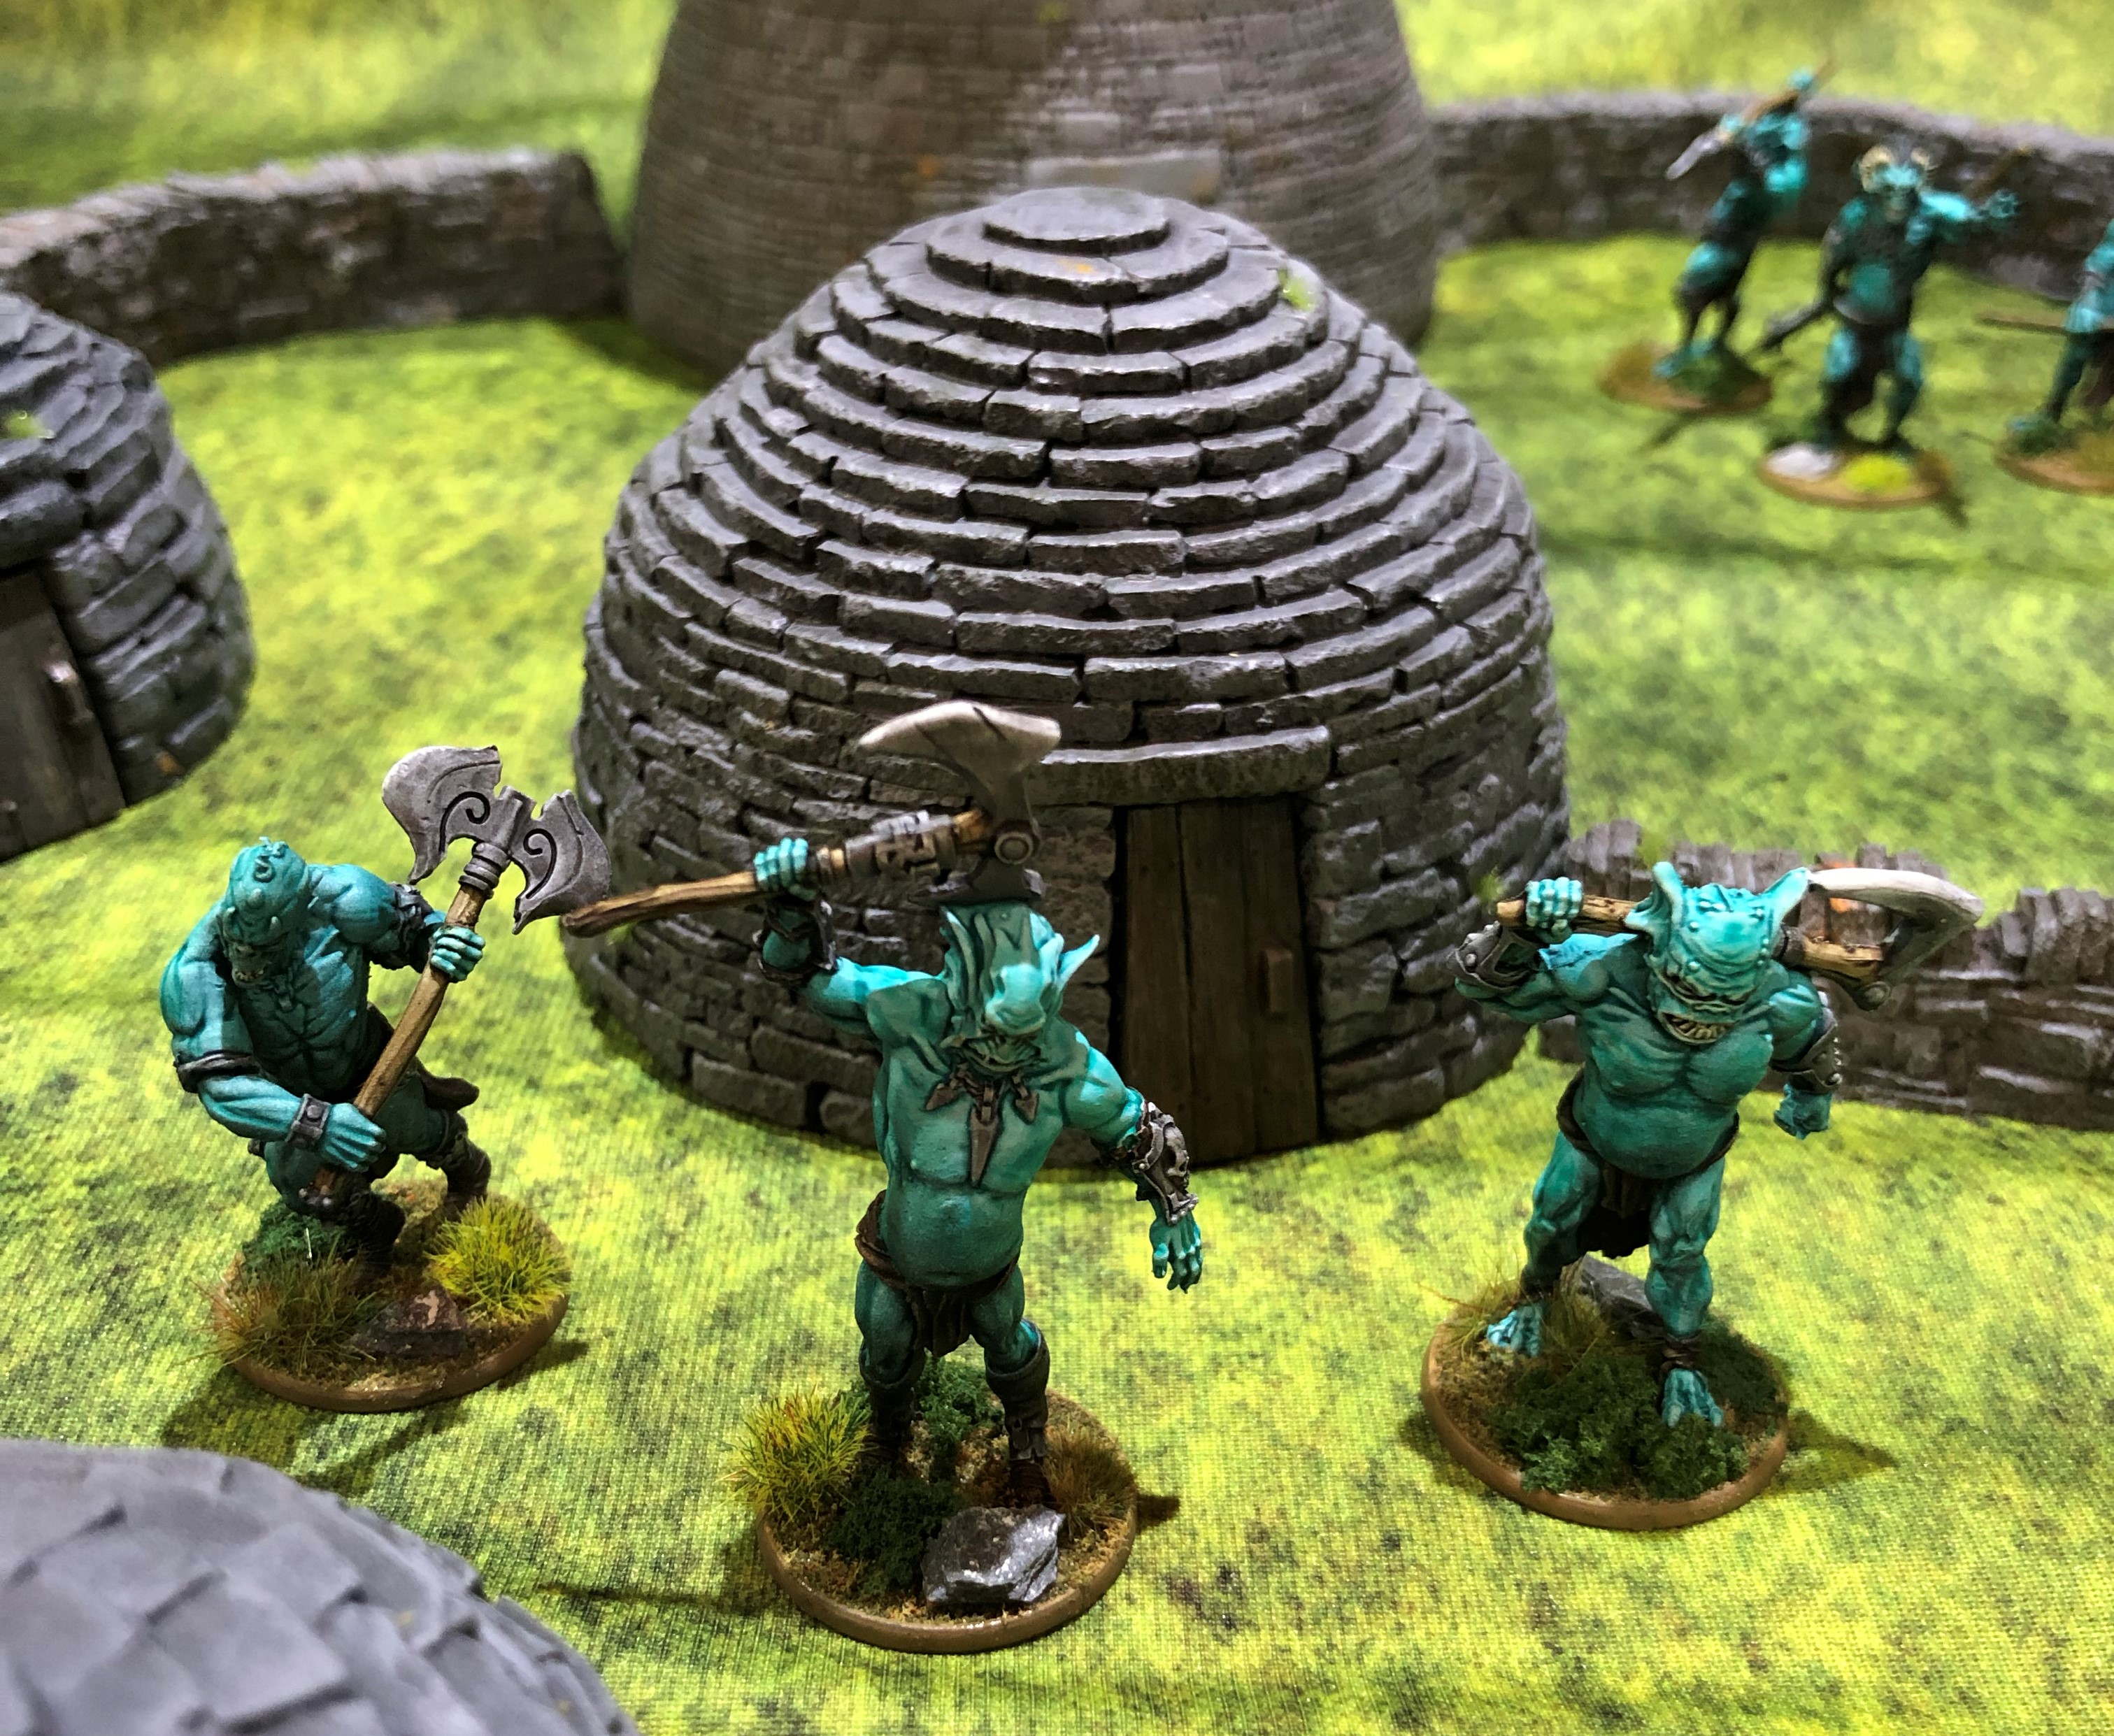
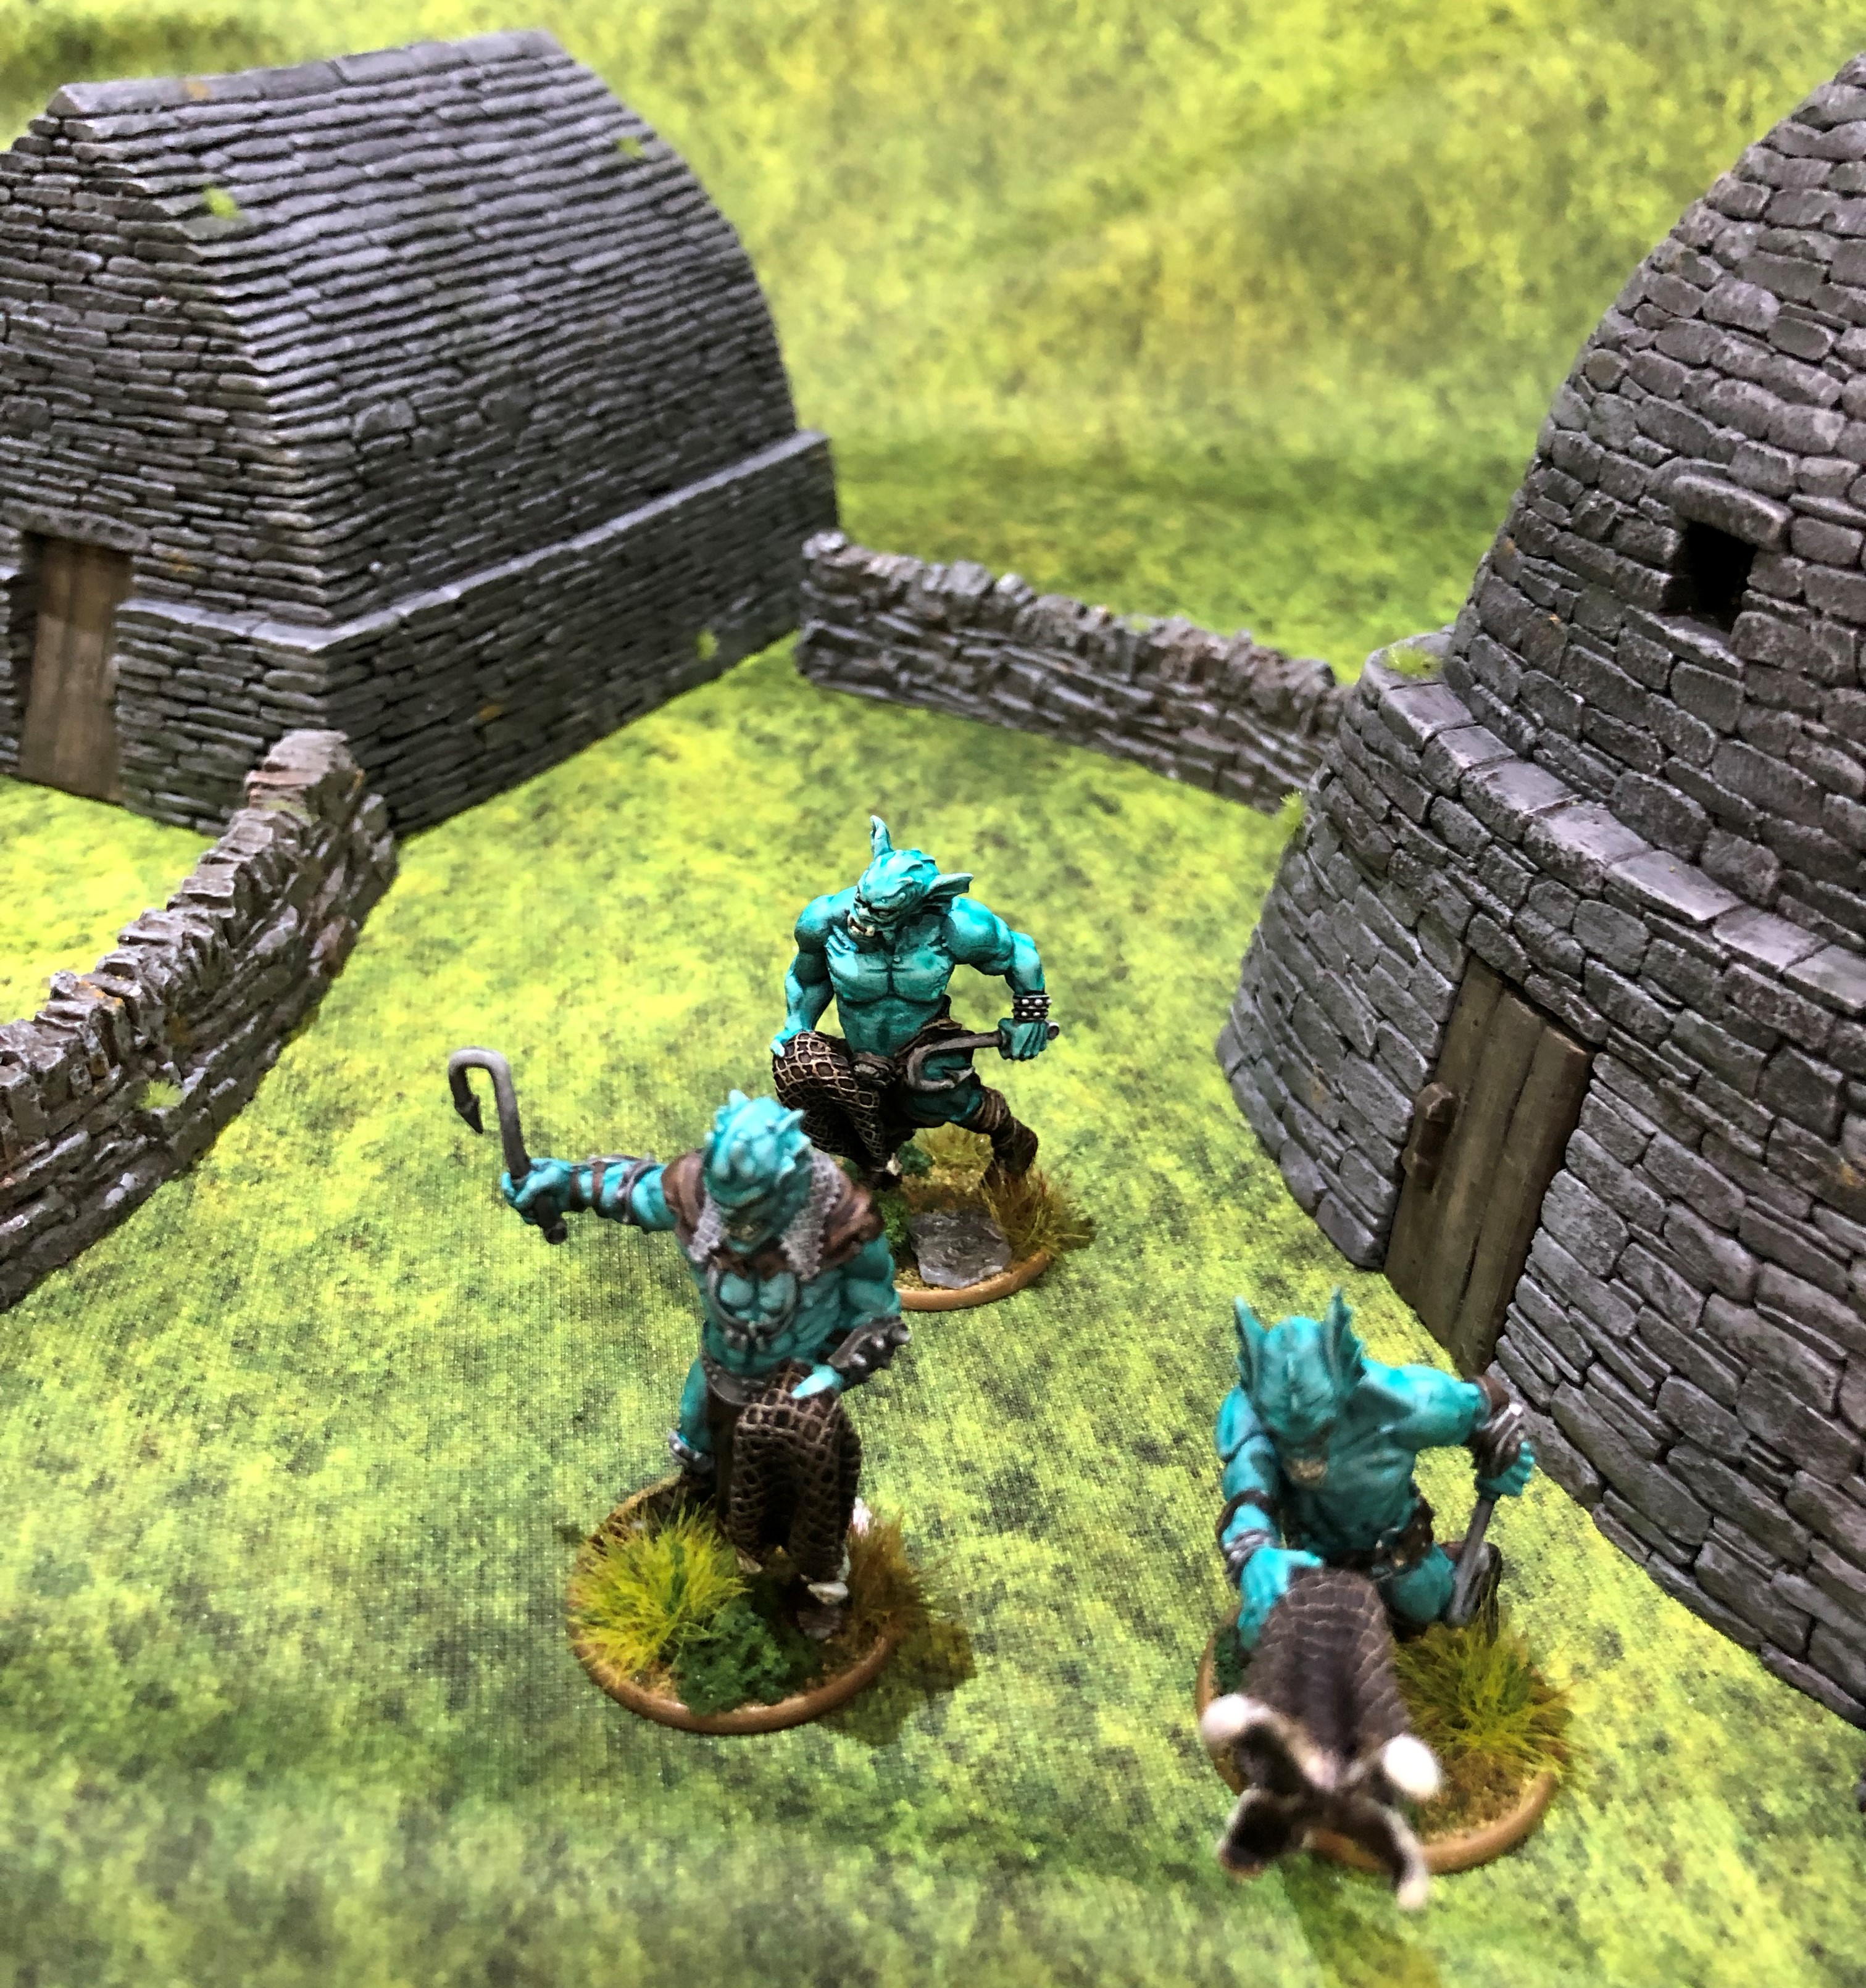
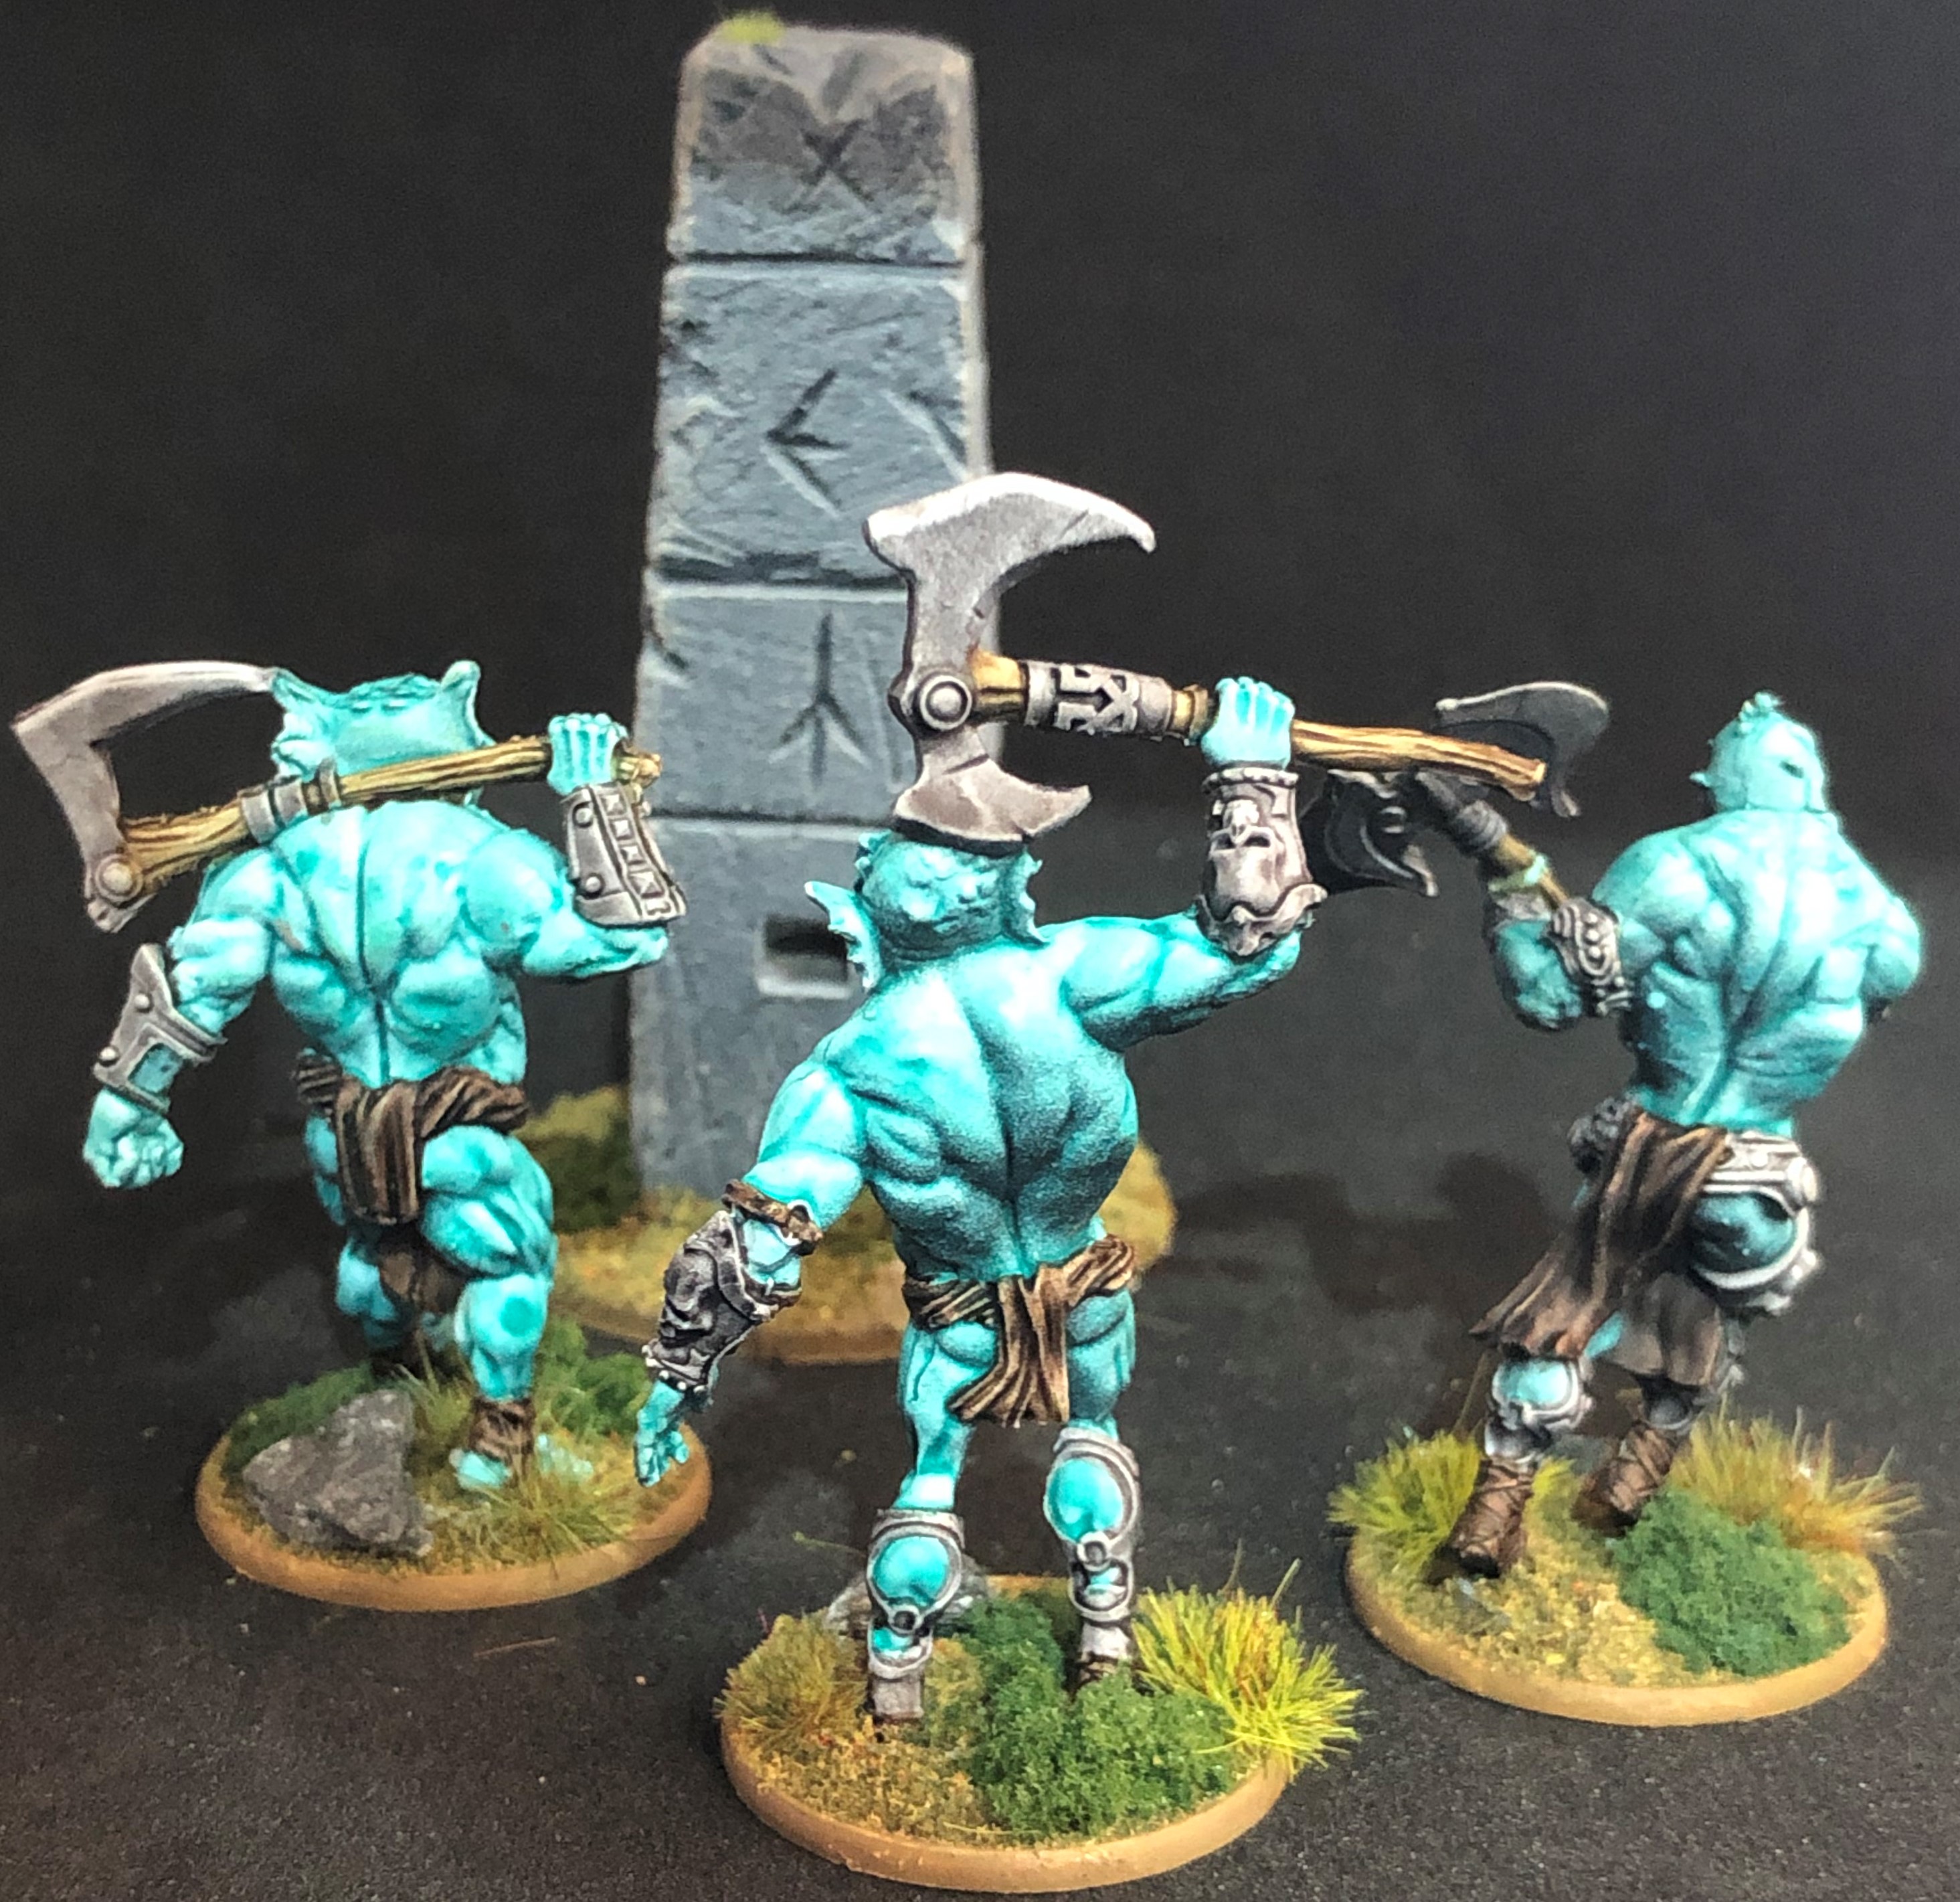
Fomorians.
I had an absolute blast painint these. These AP Speedpaints are brilliant over a zenithed basecoat. Learning from the test on the Skull Sword I went very heavy with the white topcoat:
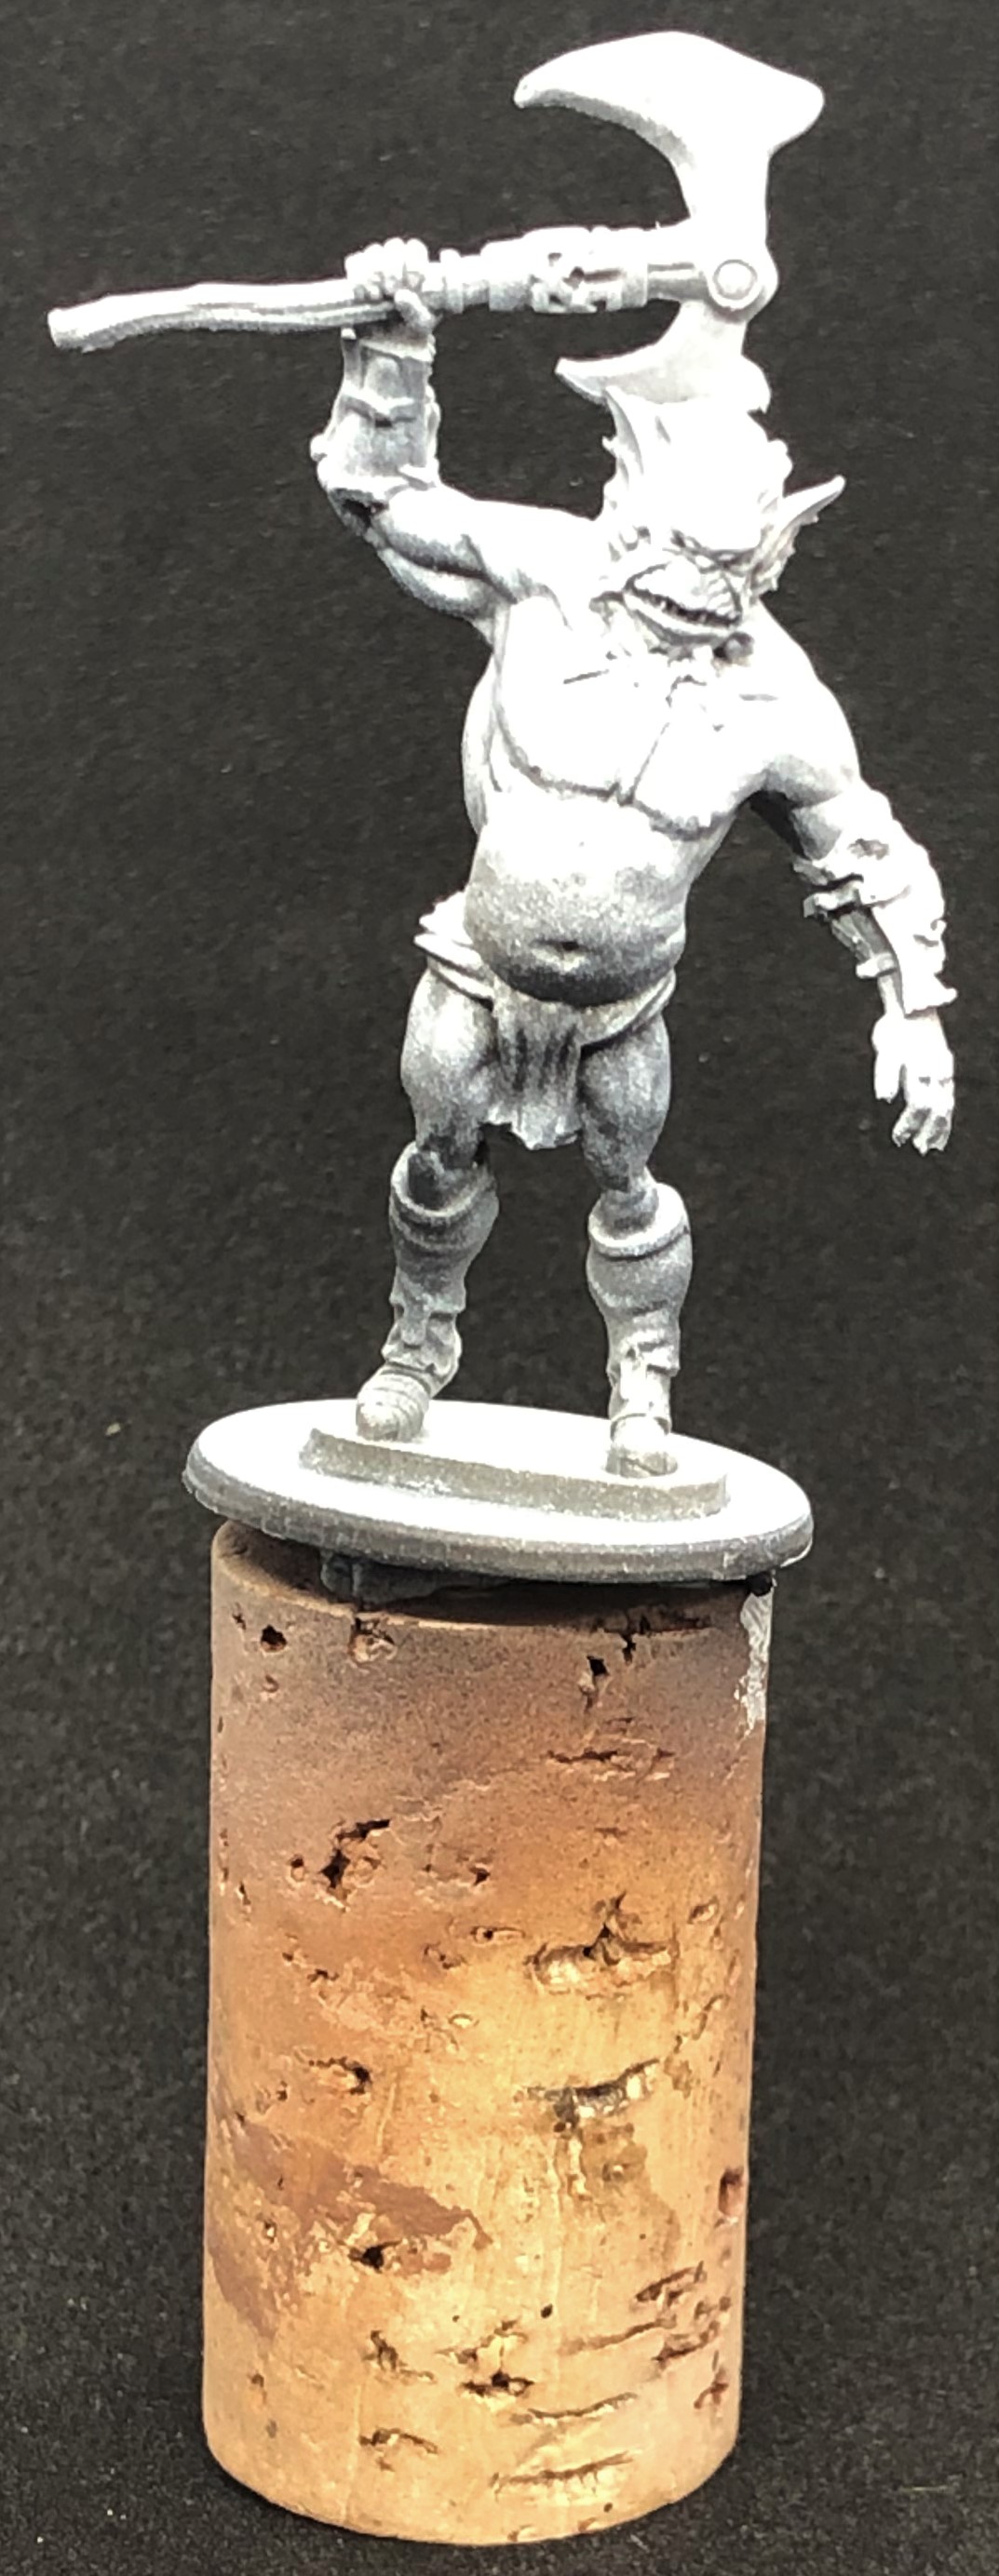
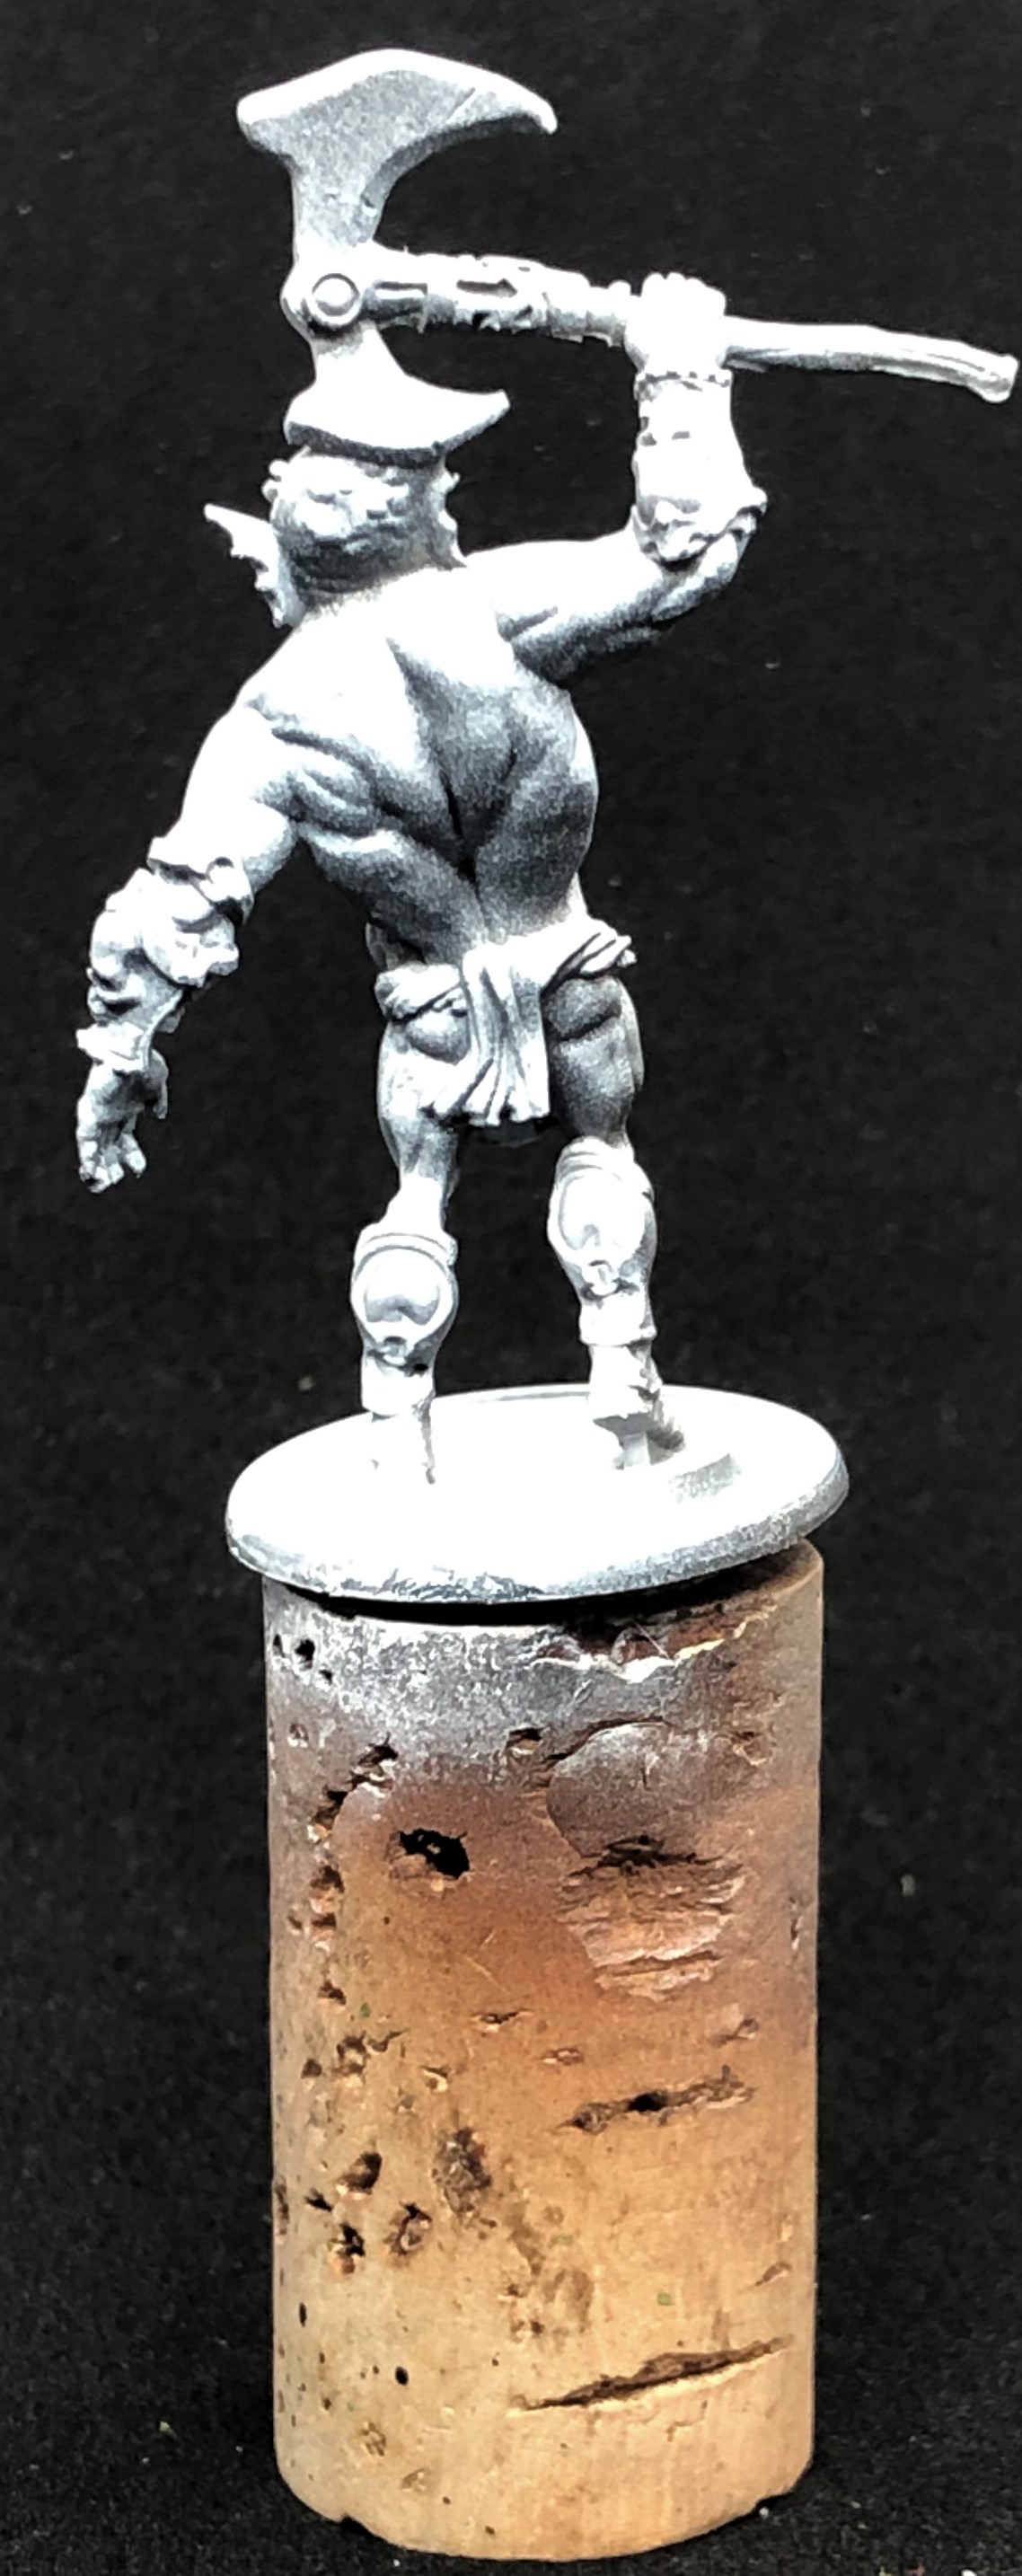
He looks almost white from the top. (the Stynylrez white has a slightly grey tinge to it). From underneath there is still a fair amount of grey showing.
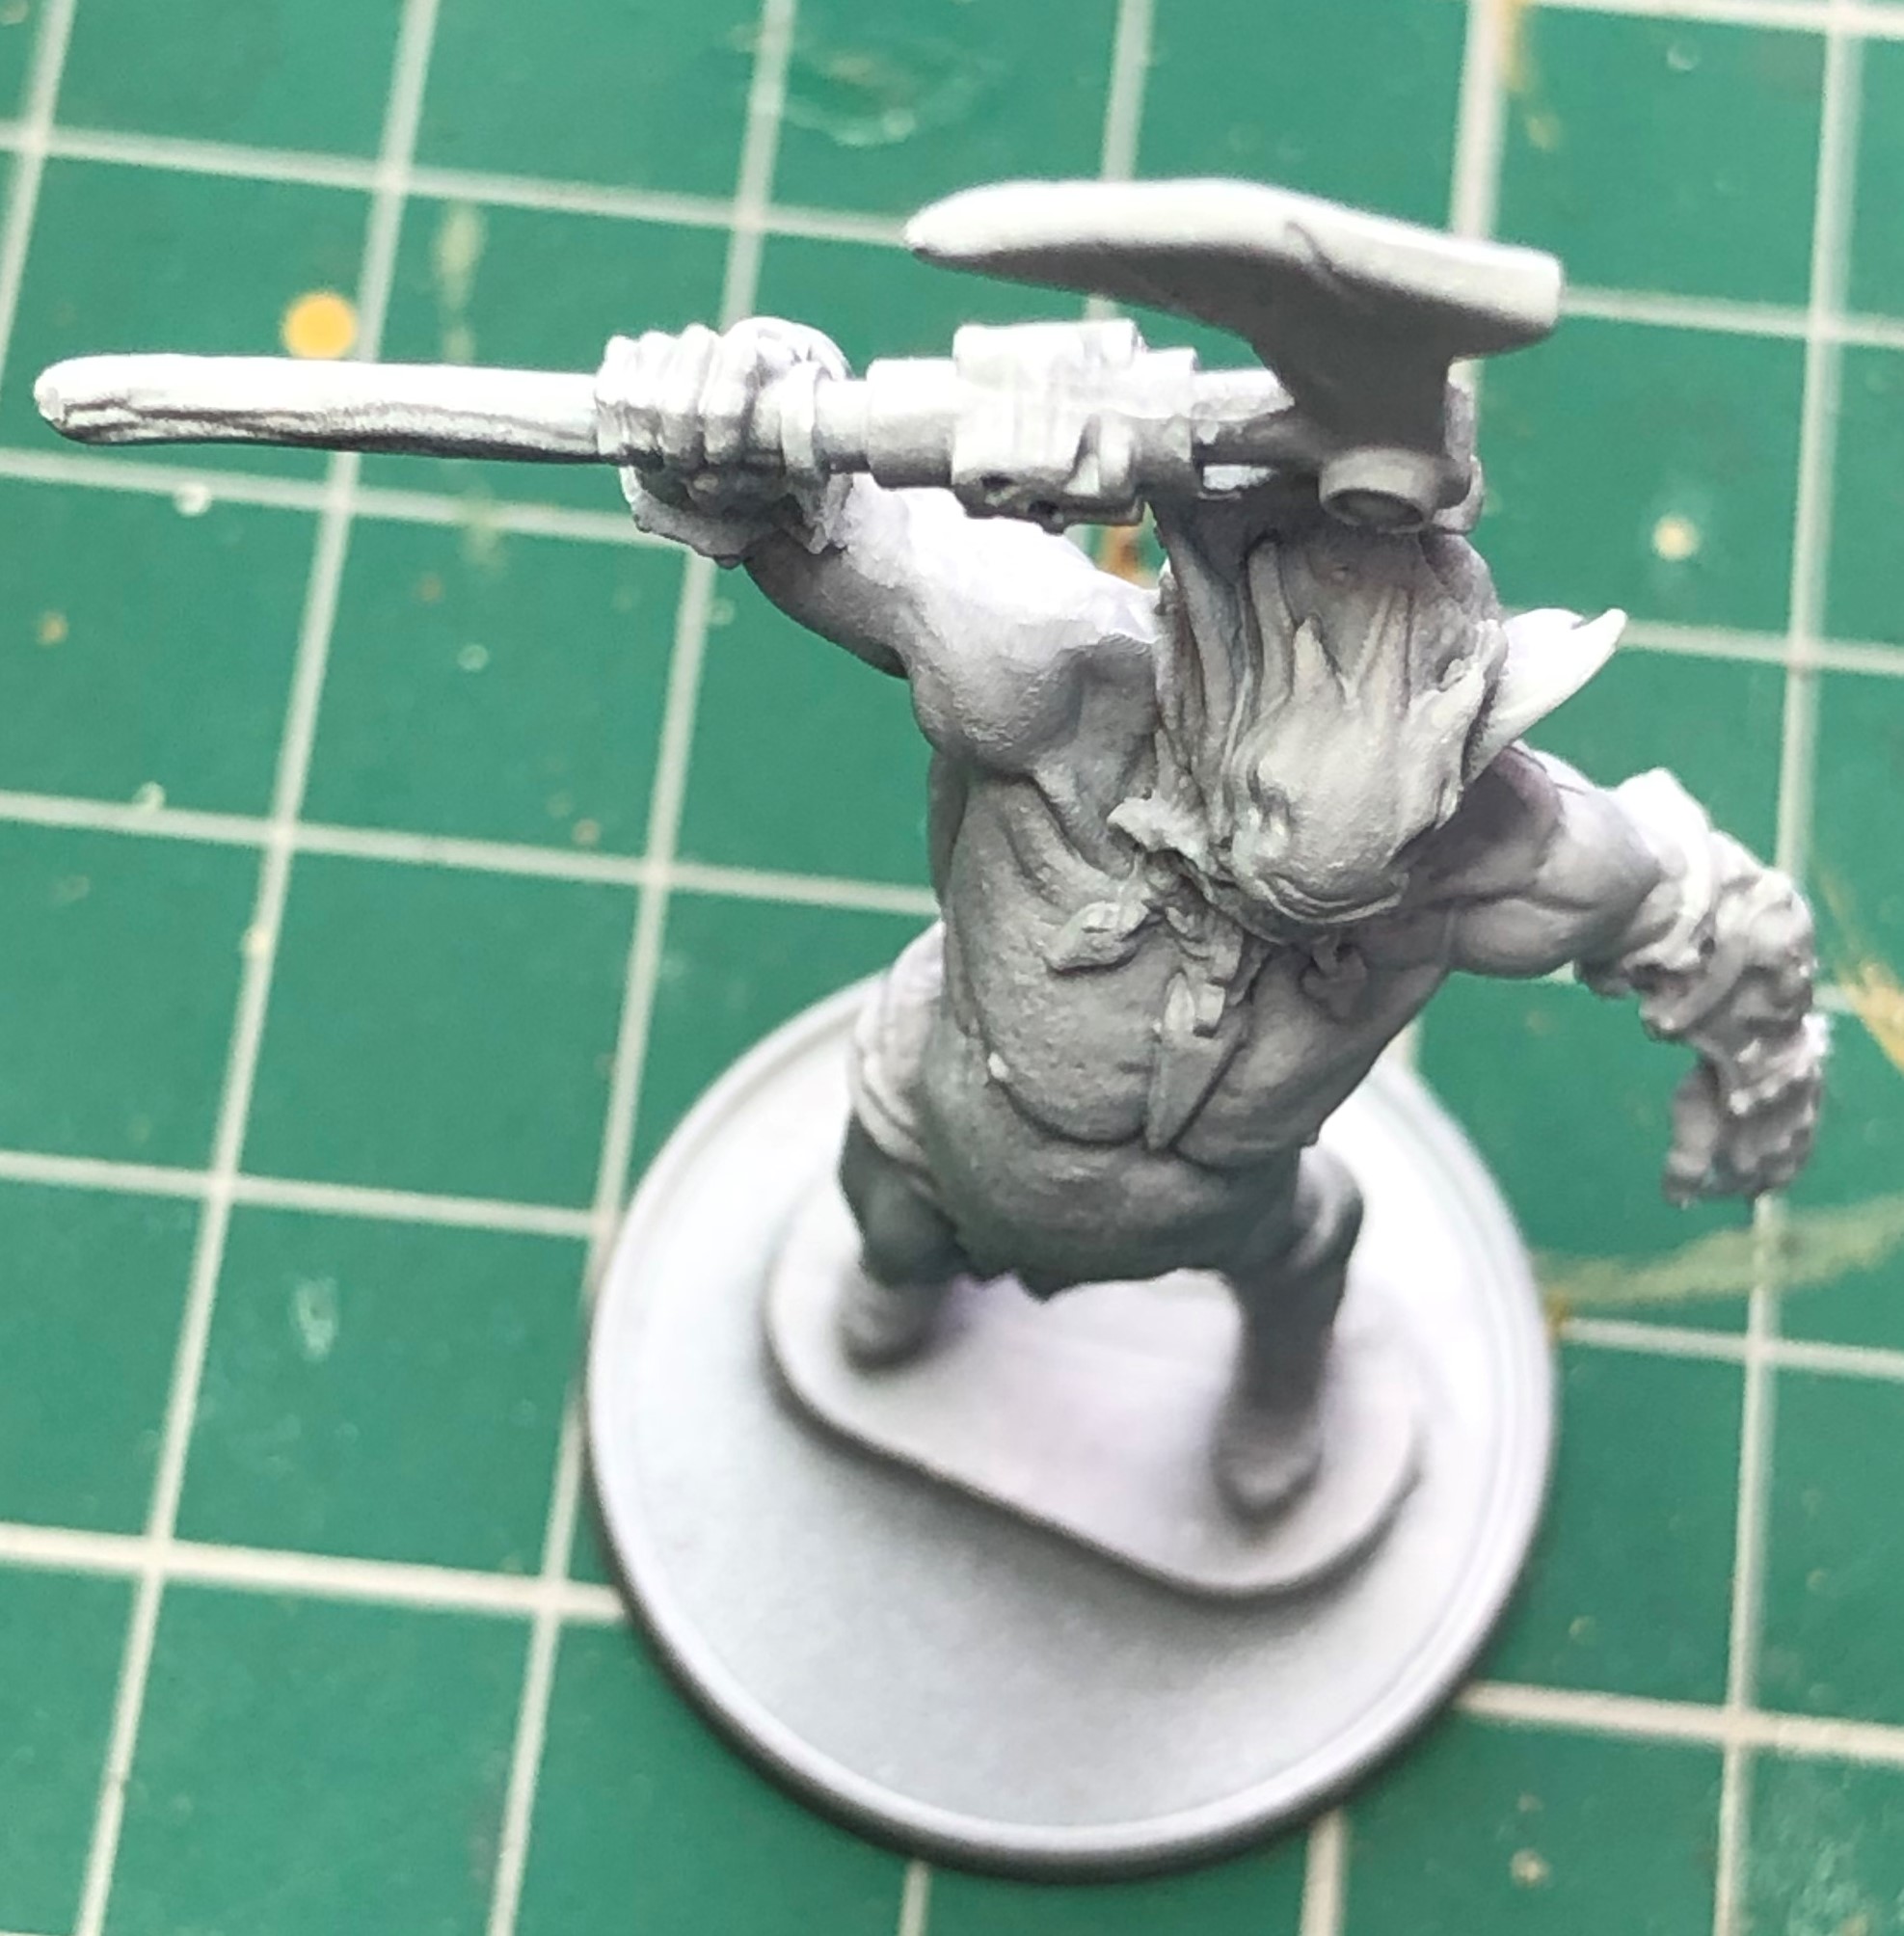
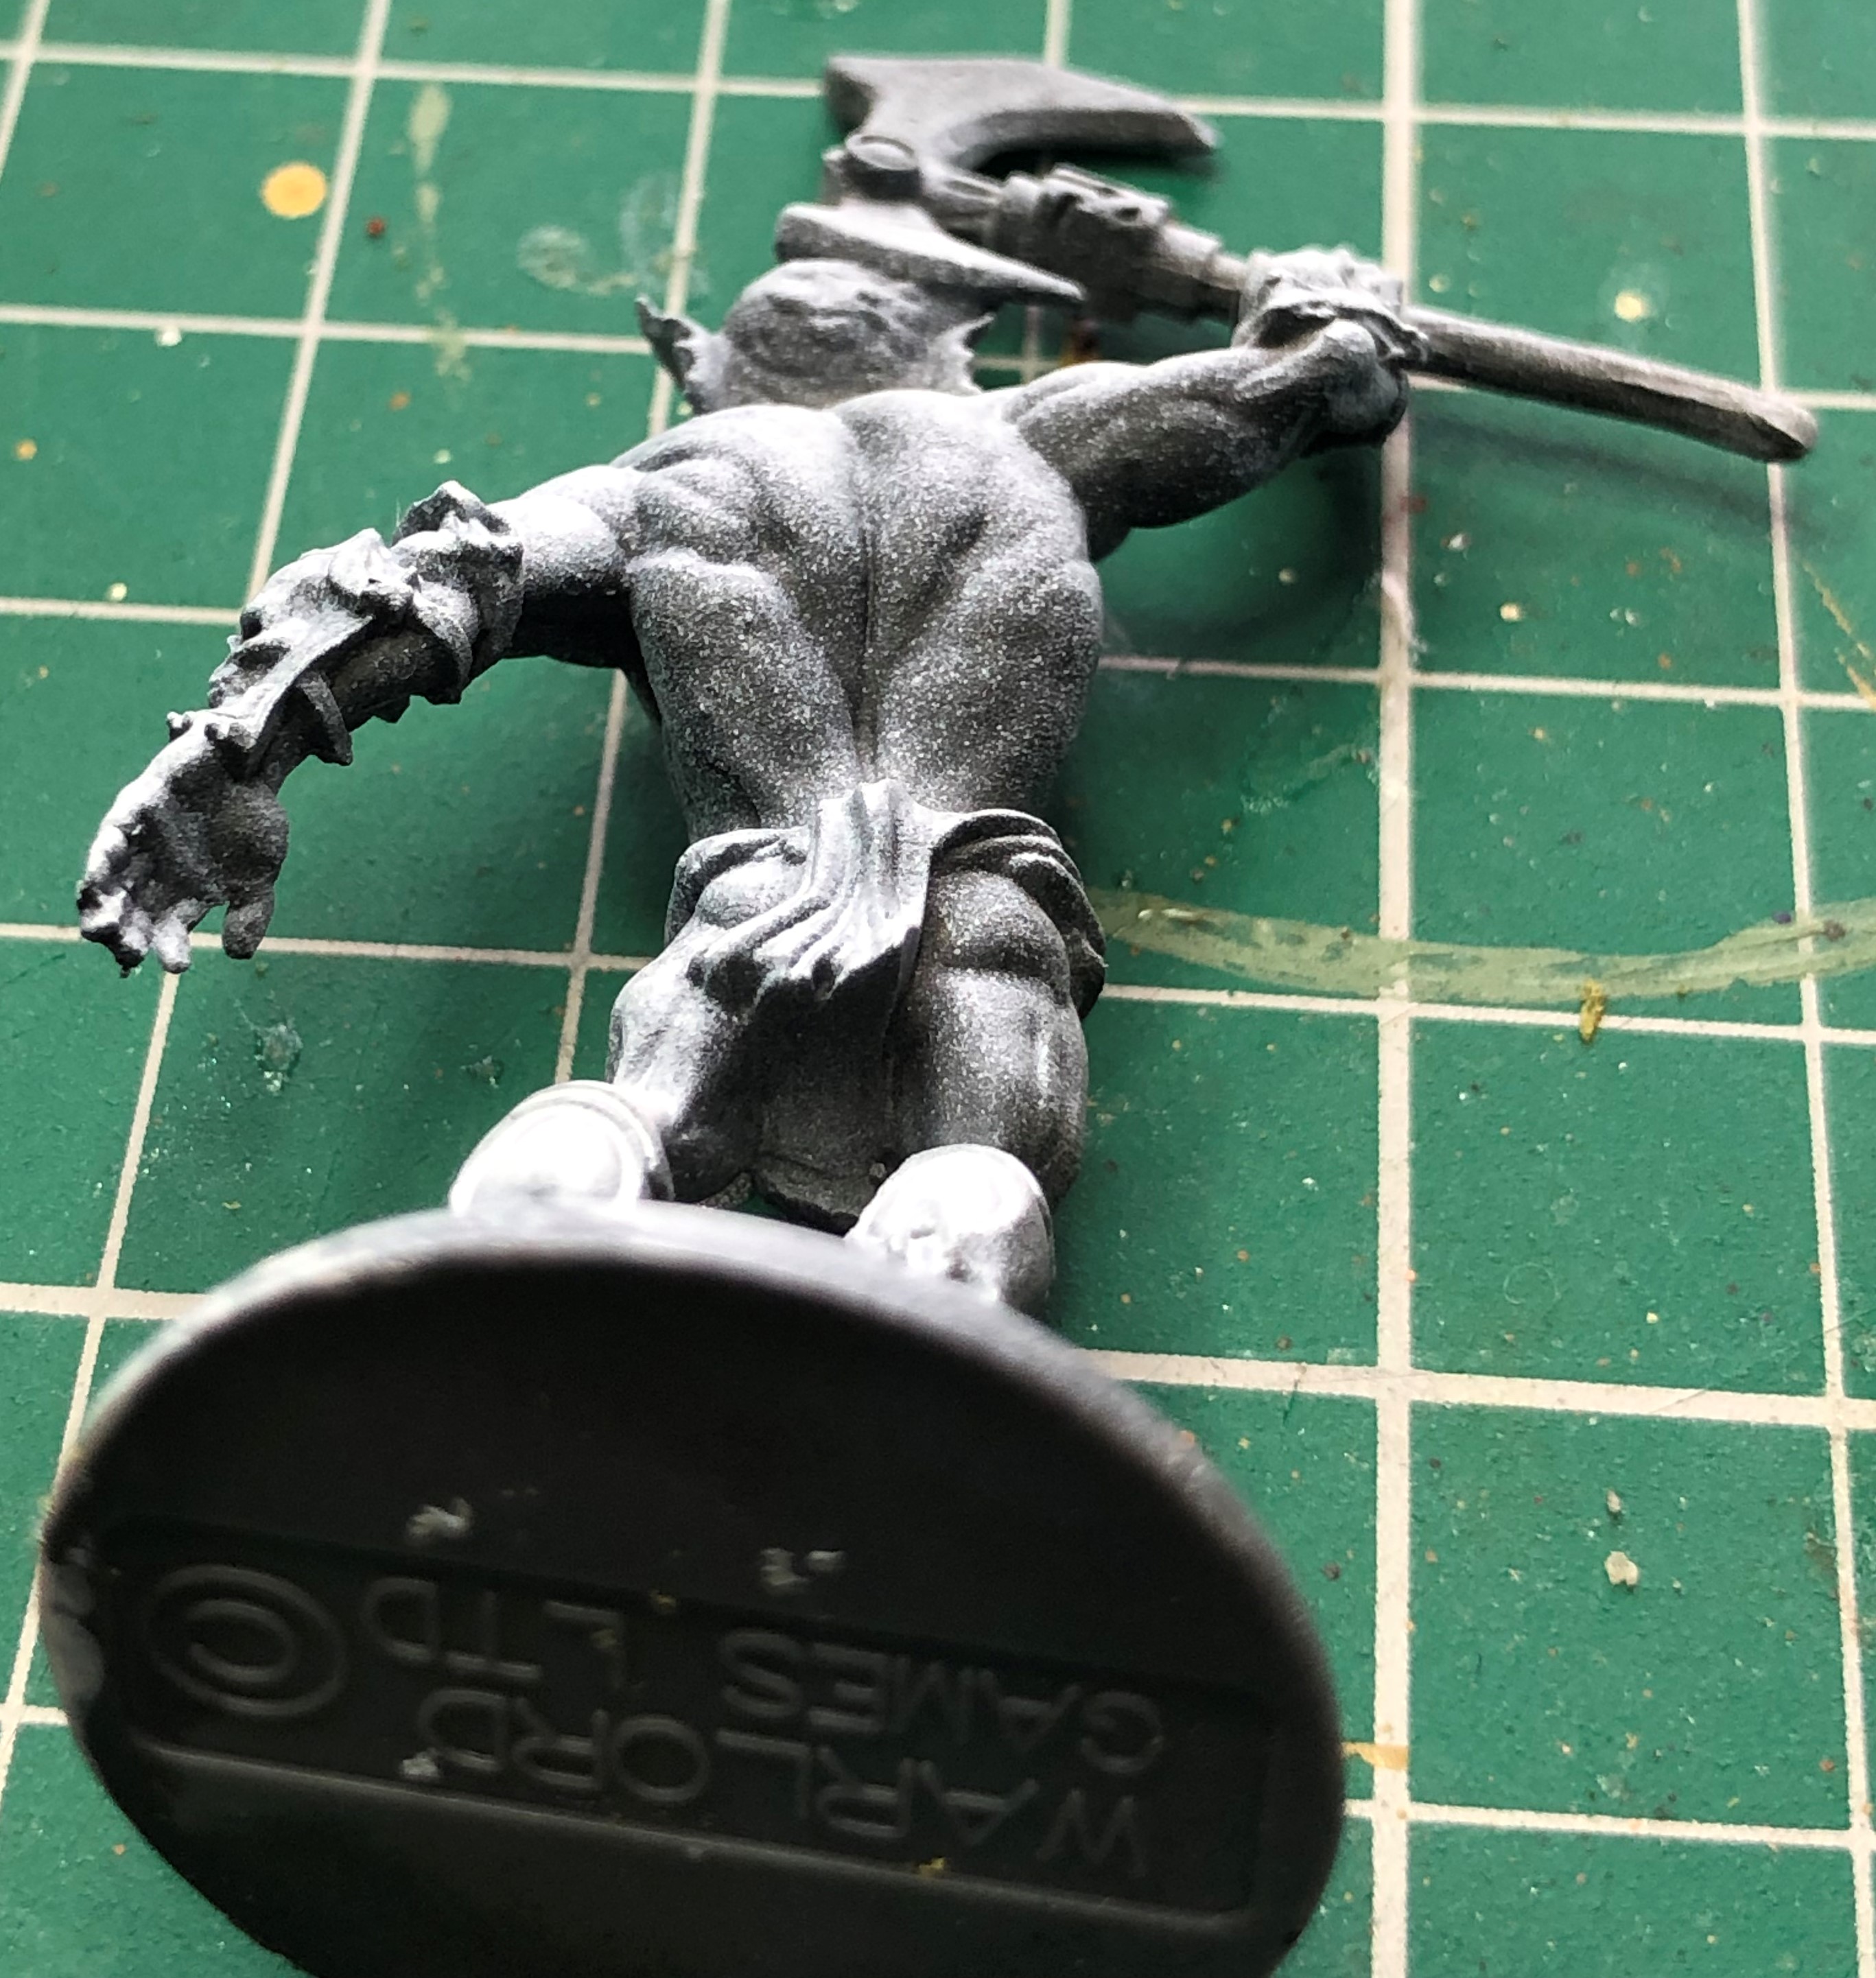
The main colours were in order of application:
Plasmatic Bolt (skin)
Dark Wood (leather and nets)
Sand Golem (weapon shafts)
Greylord Grey (metalwork)
The only technique to this was using my finger to wipe away the Greylord Grey from the upper facing blade sides and the raised details on the armour to give an instant highlight. This can be done during application or after finishing the colour on the model. It stays workable for a good while and if it is drying will reactivate with a tiny bit of water. Unlike contrast it doesn’t tear so is ideal for such a simple technique. This is what we had at this point:
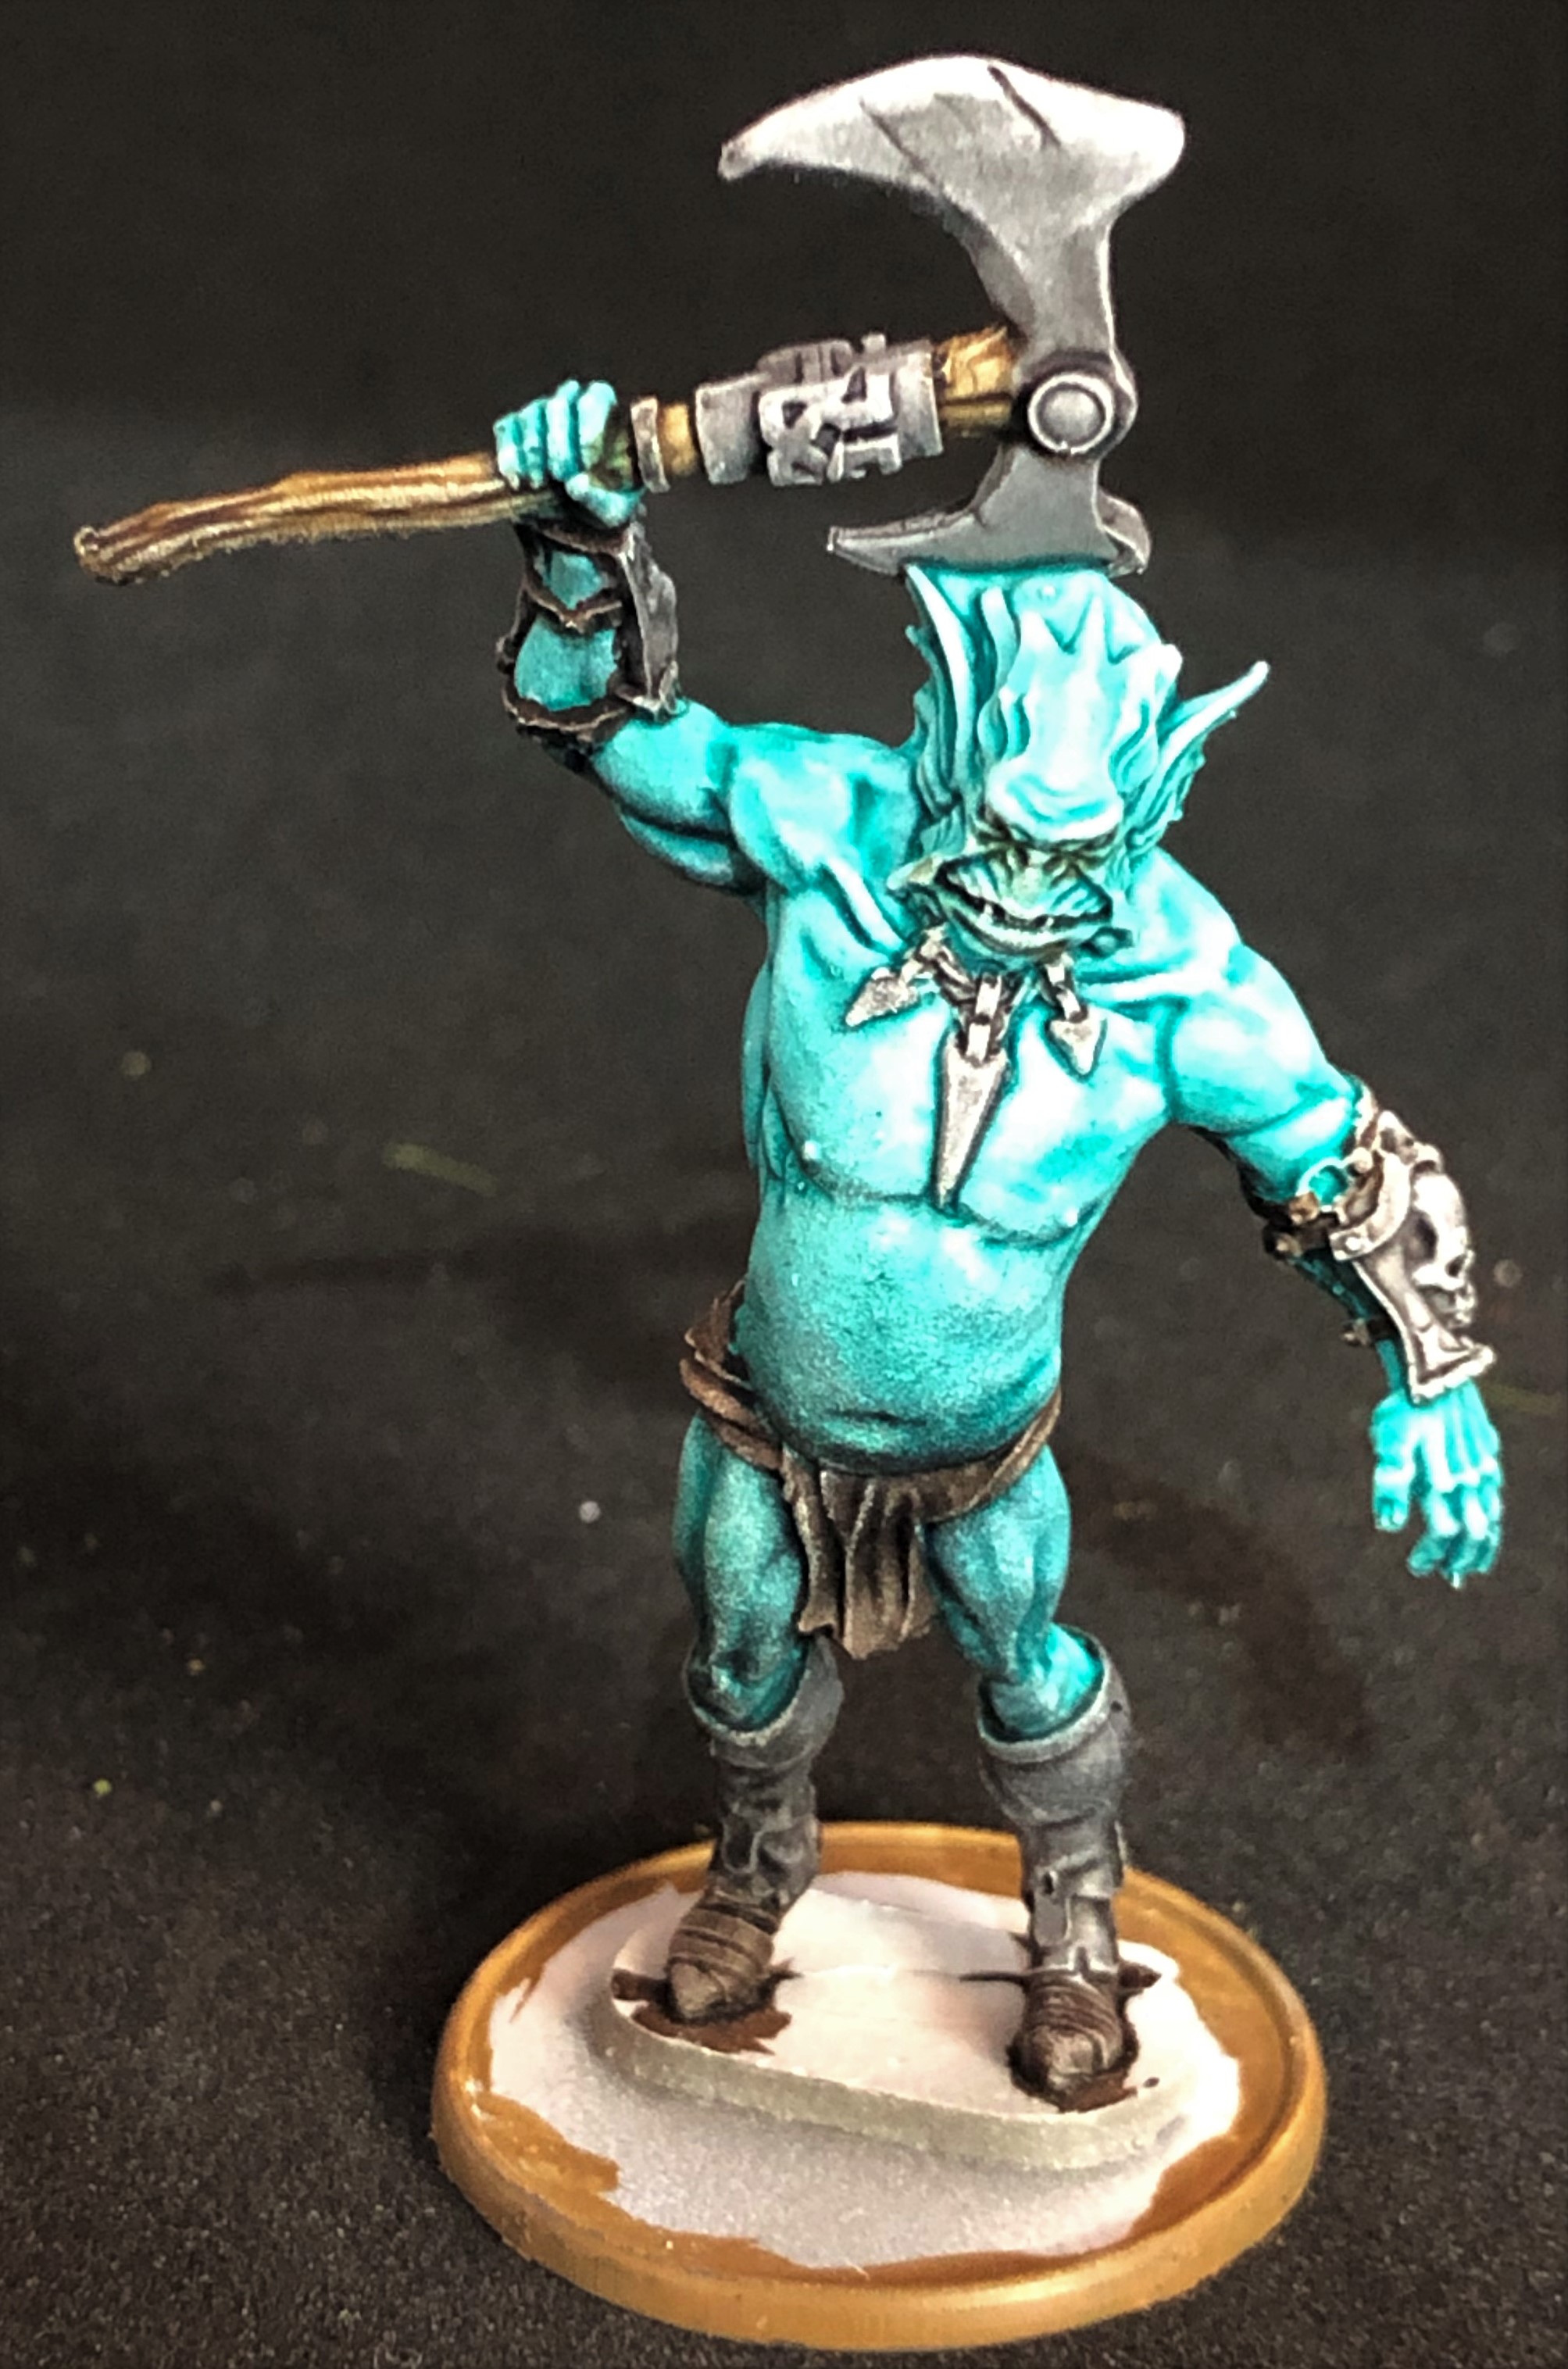
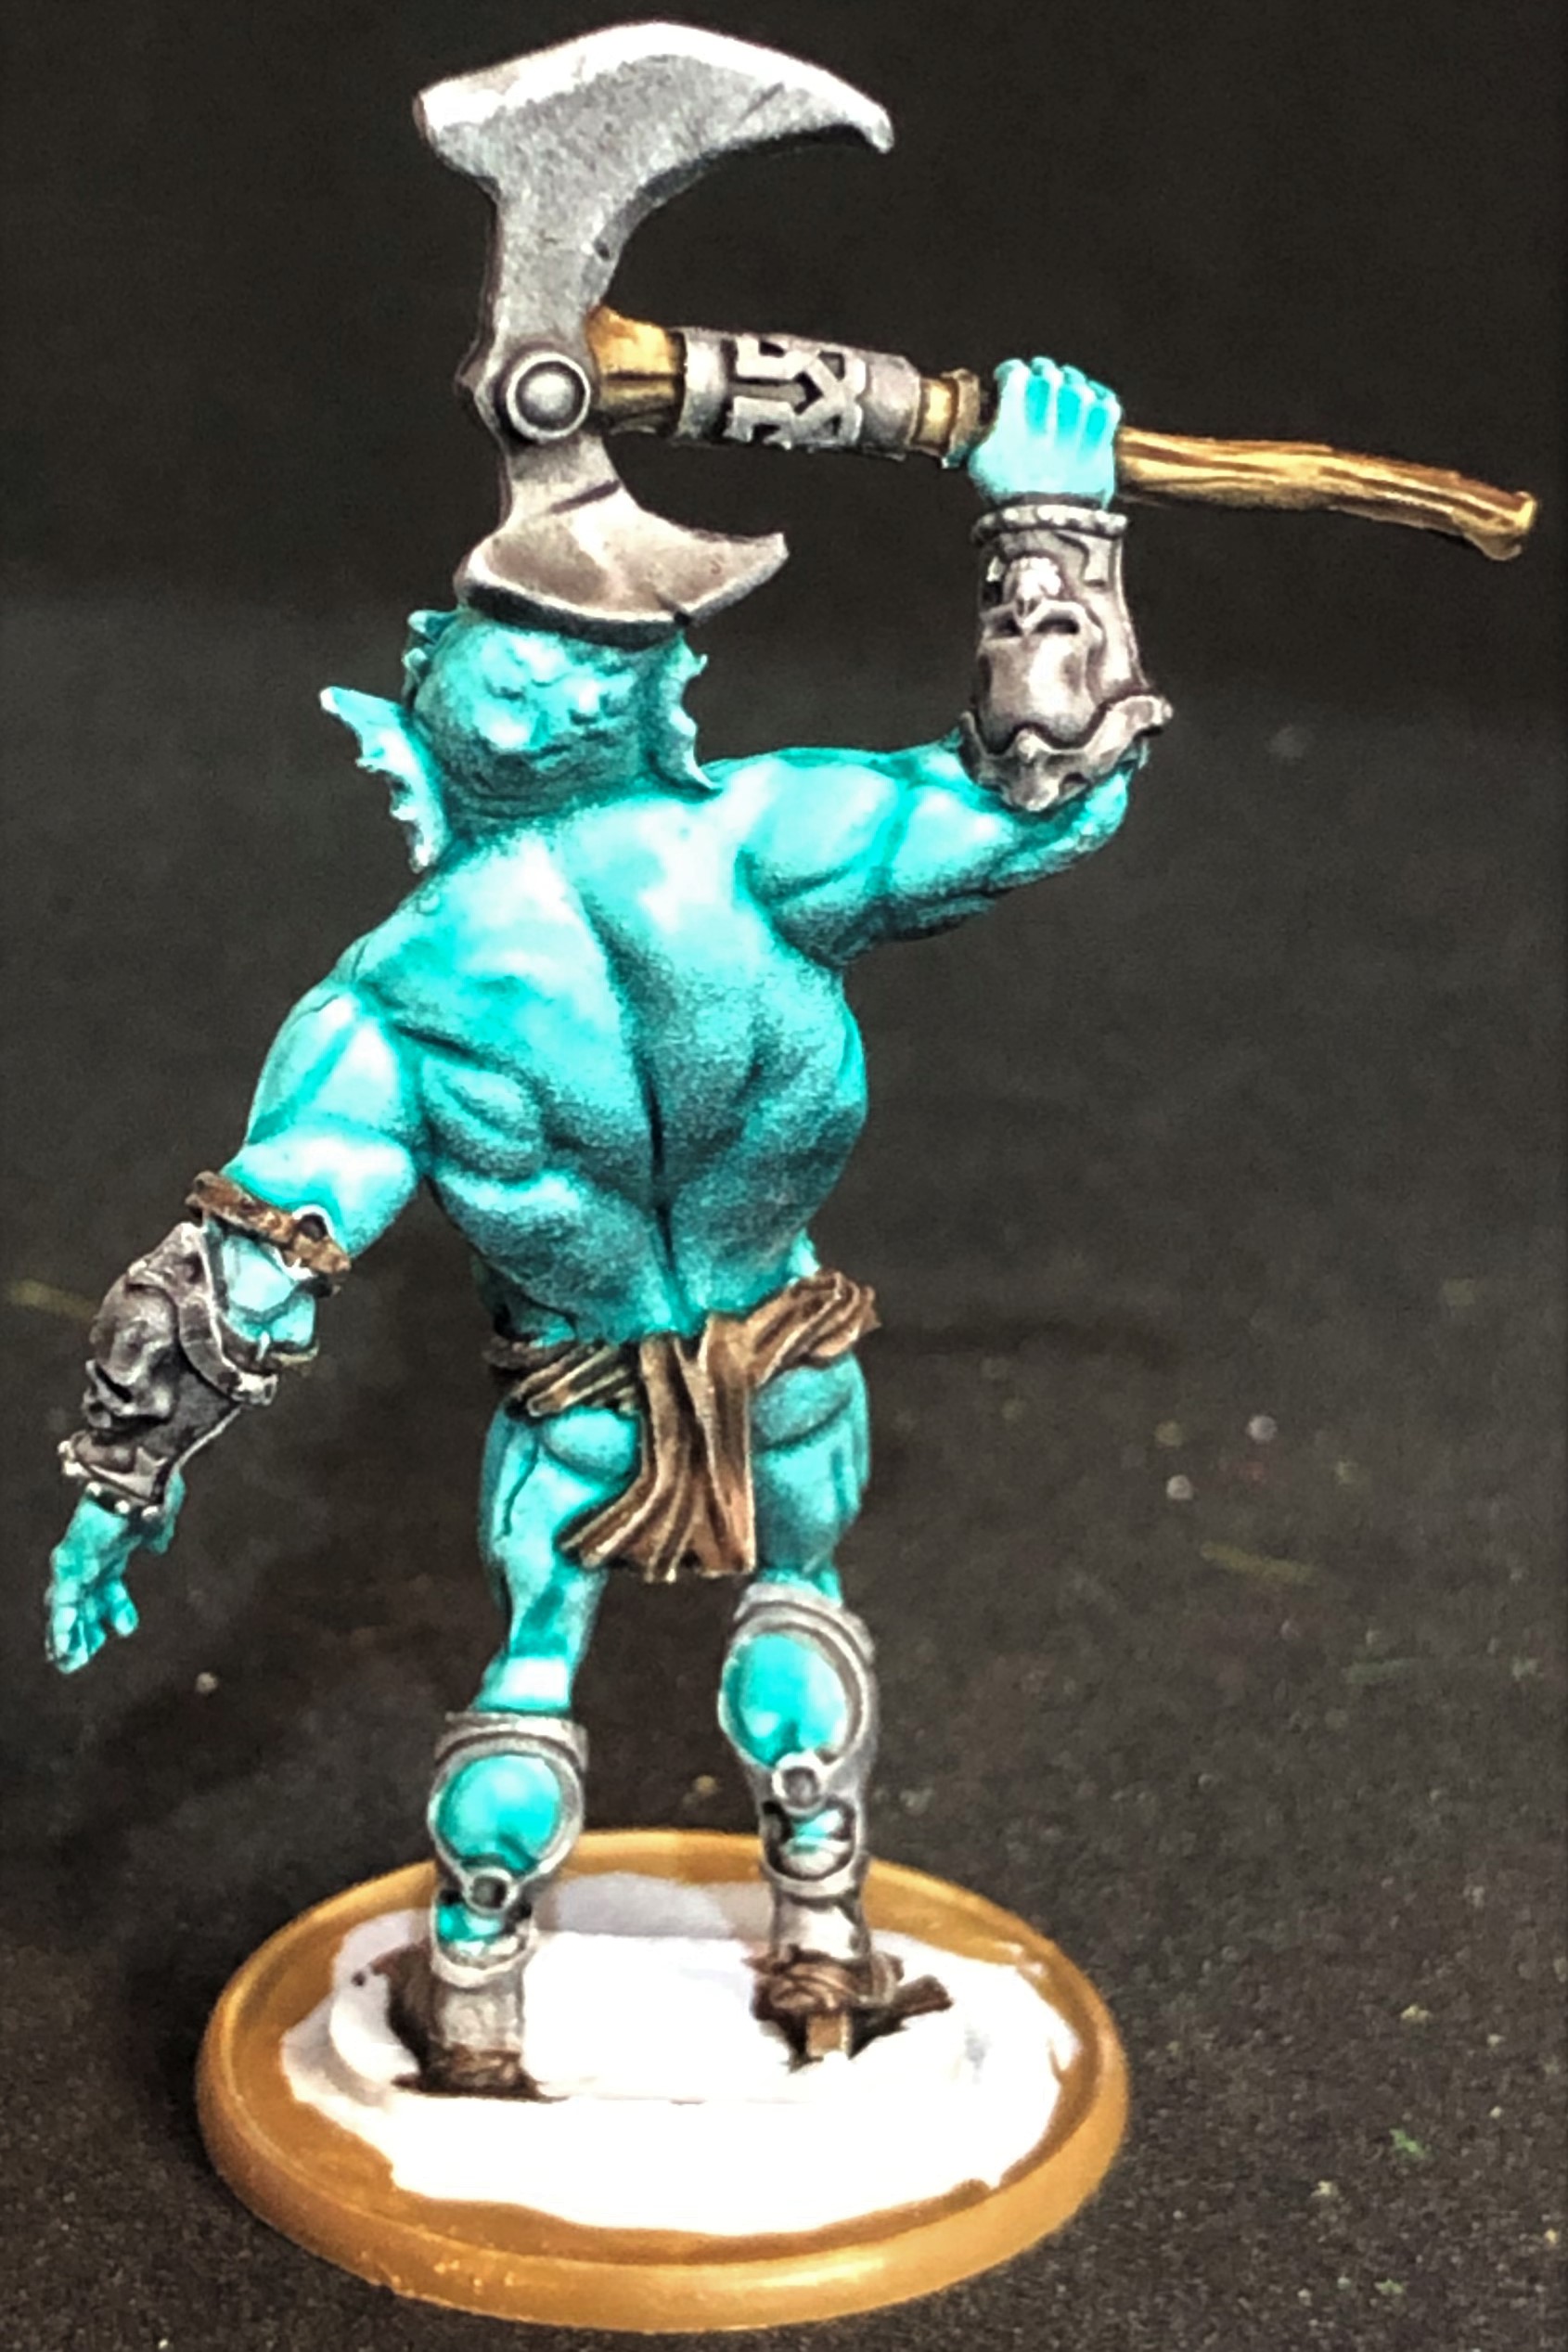
The only “proper” paint used was Vallejo Ivory which did the netting, shells on the bottom of the nets and teeth. I also used it for a very light drybrush to emphasise the highlights on the leather and heads. Done!
Fomorians with axes:
Fomorians with hooks and nets:
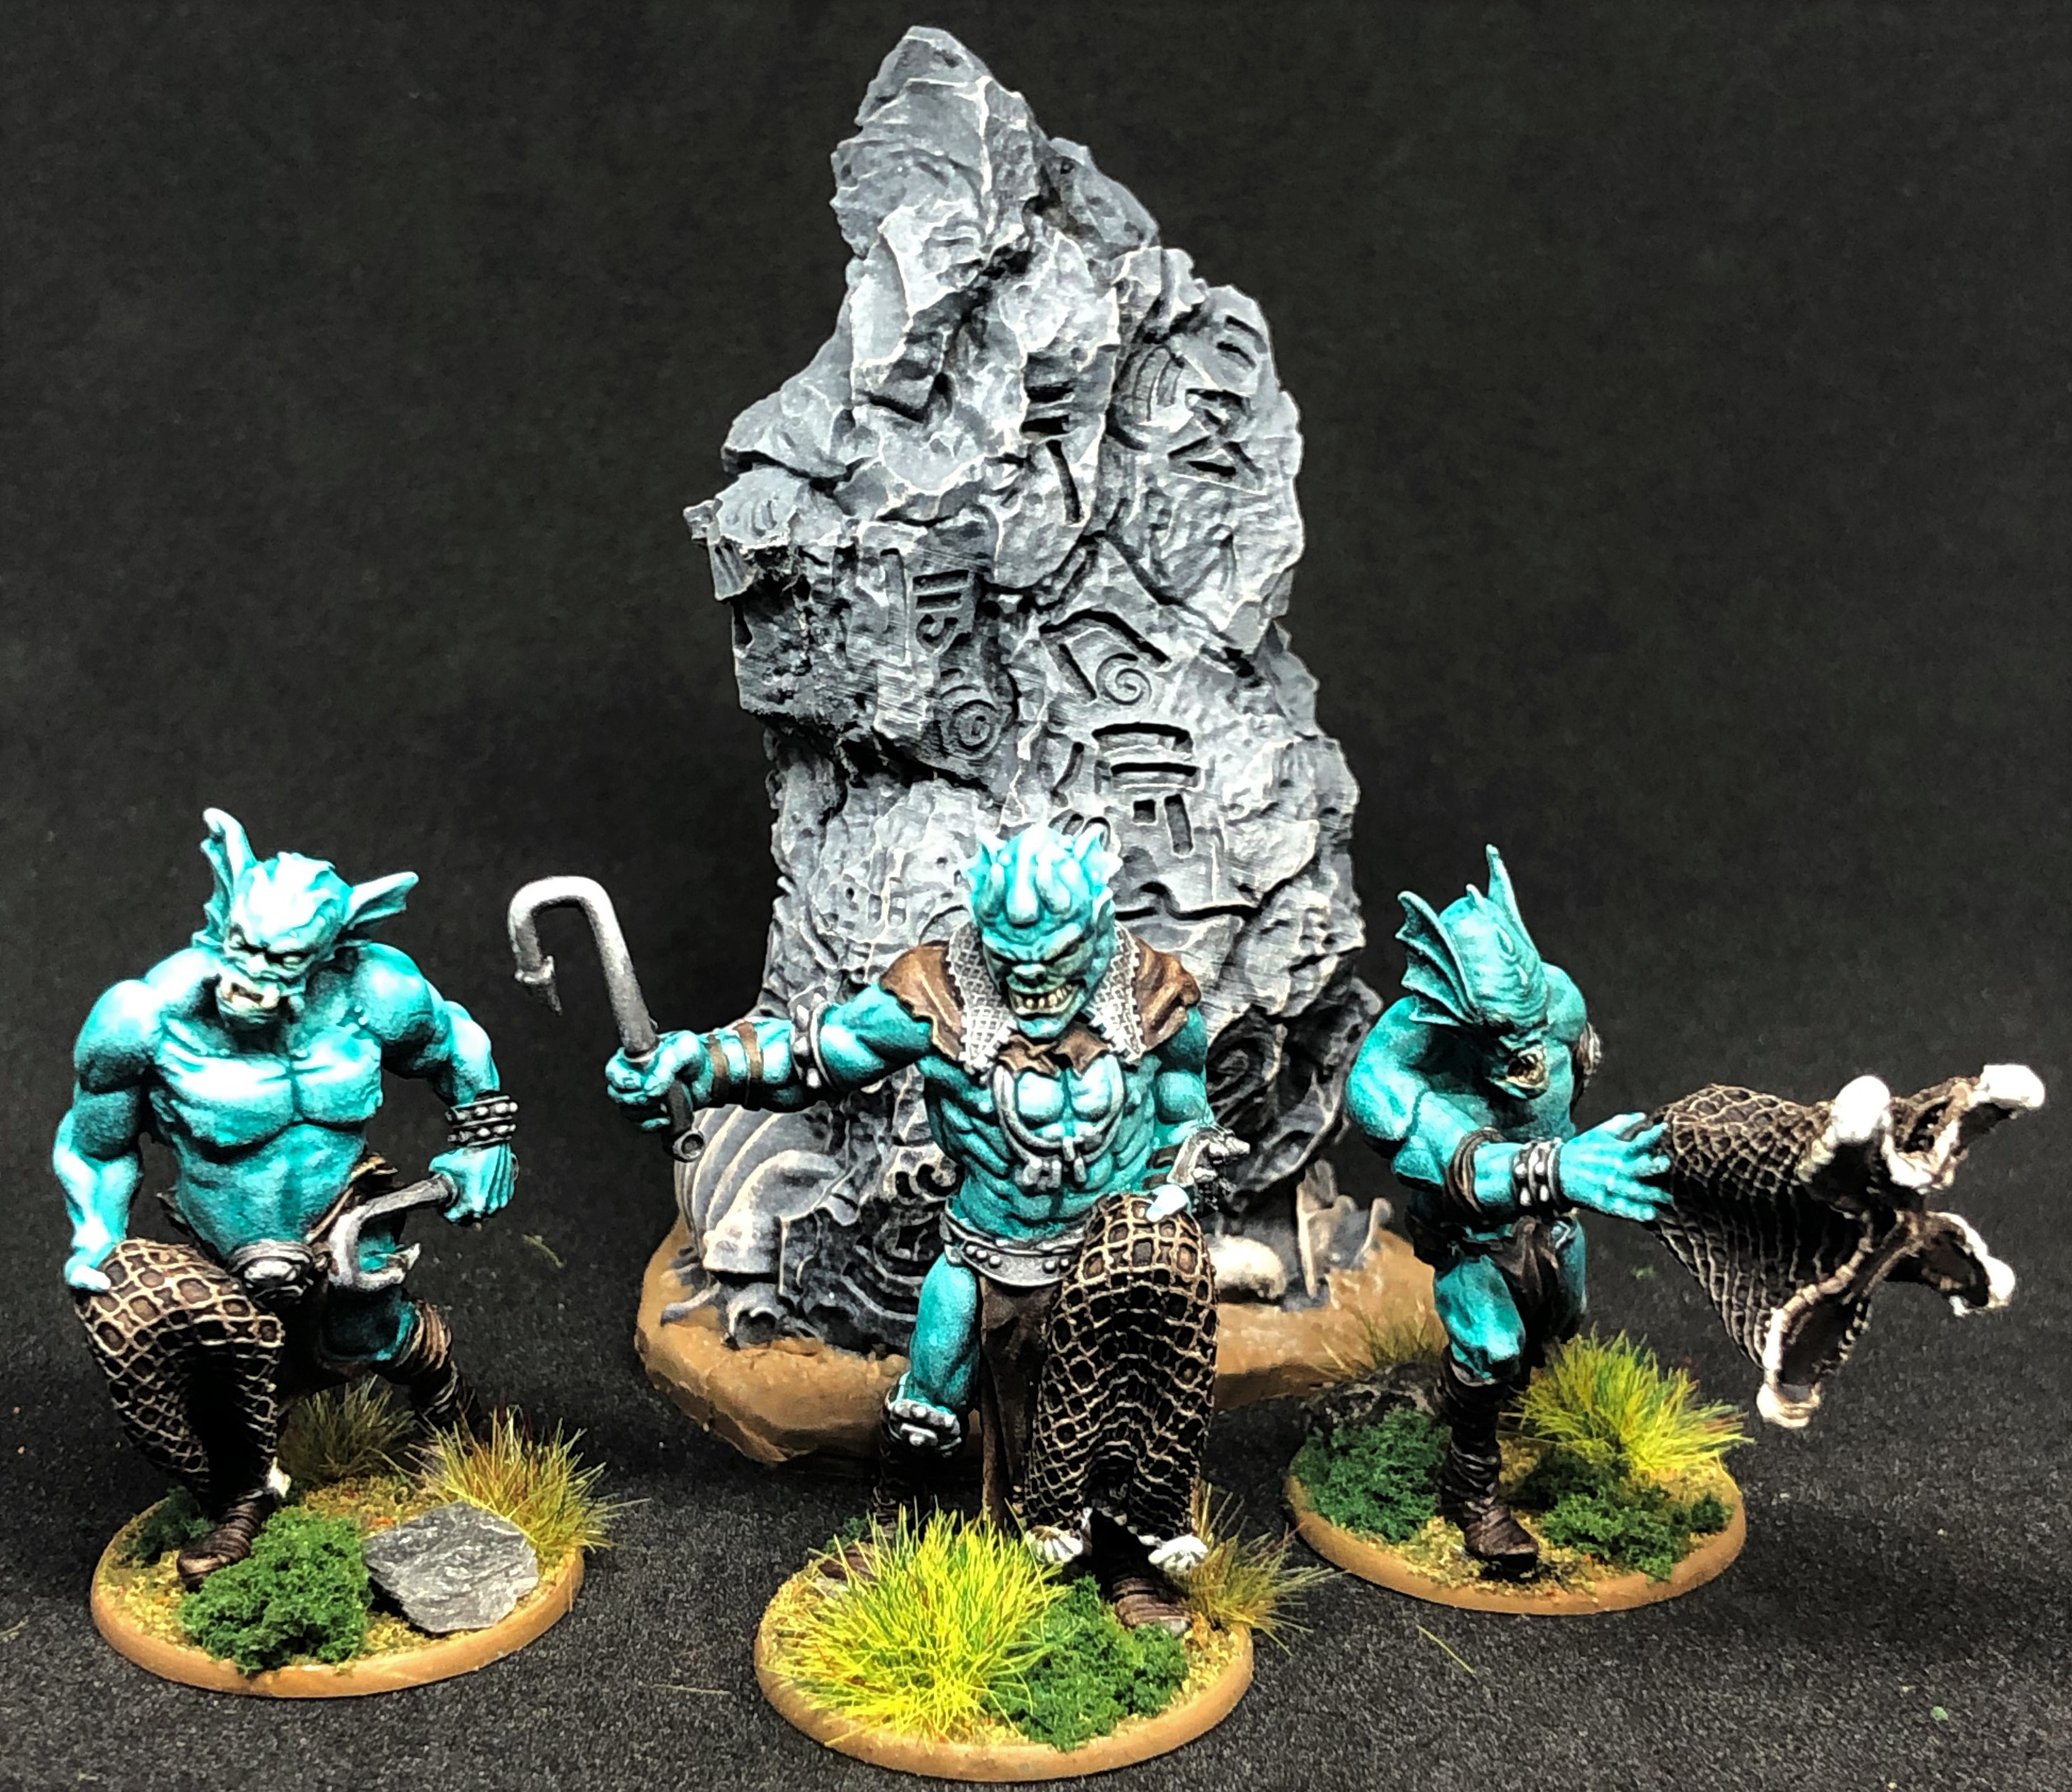
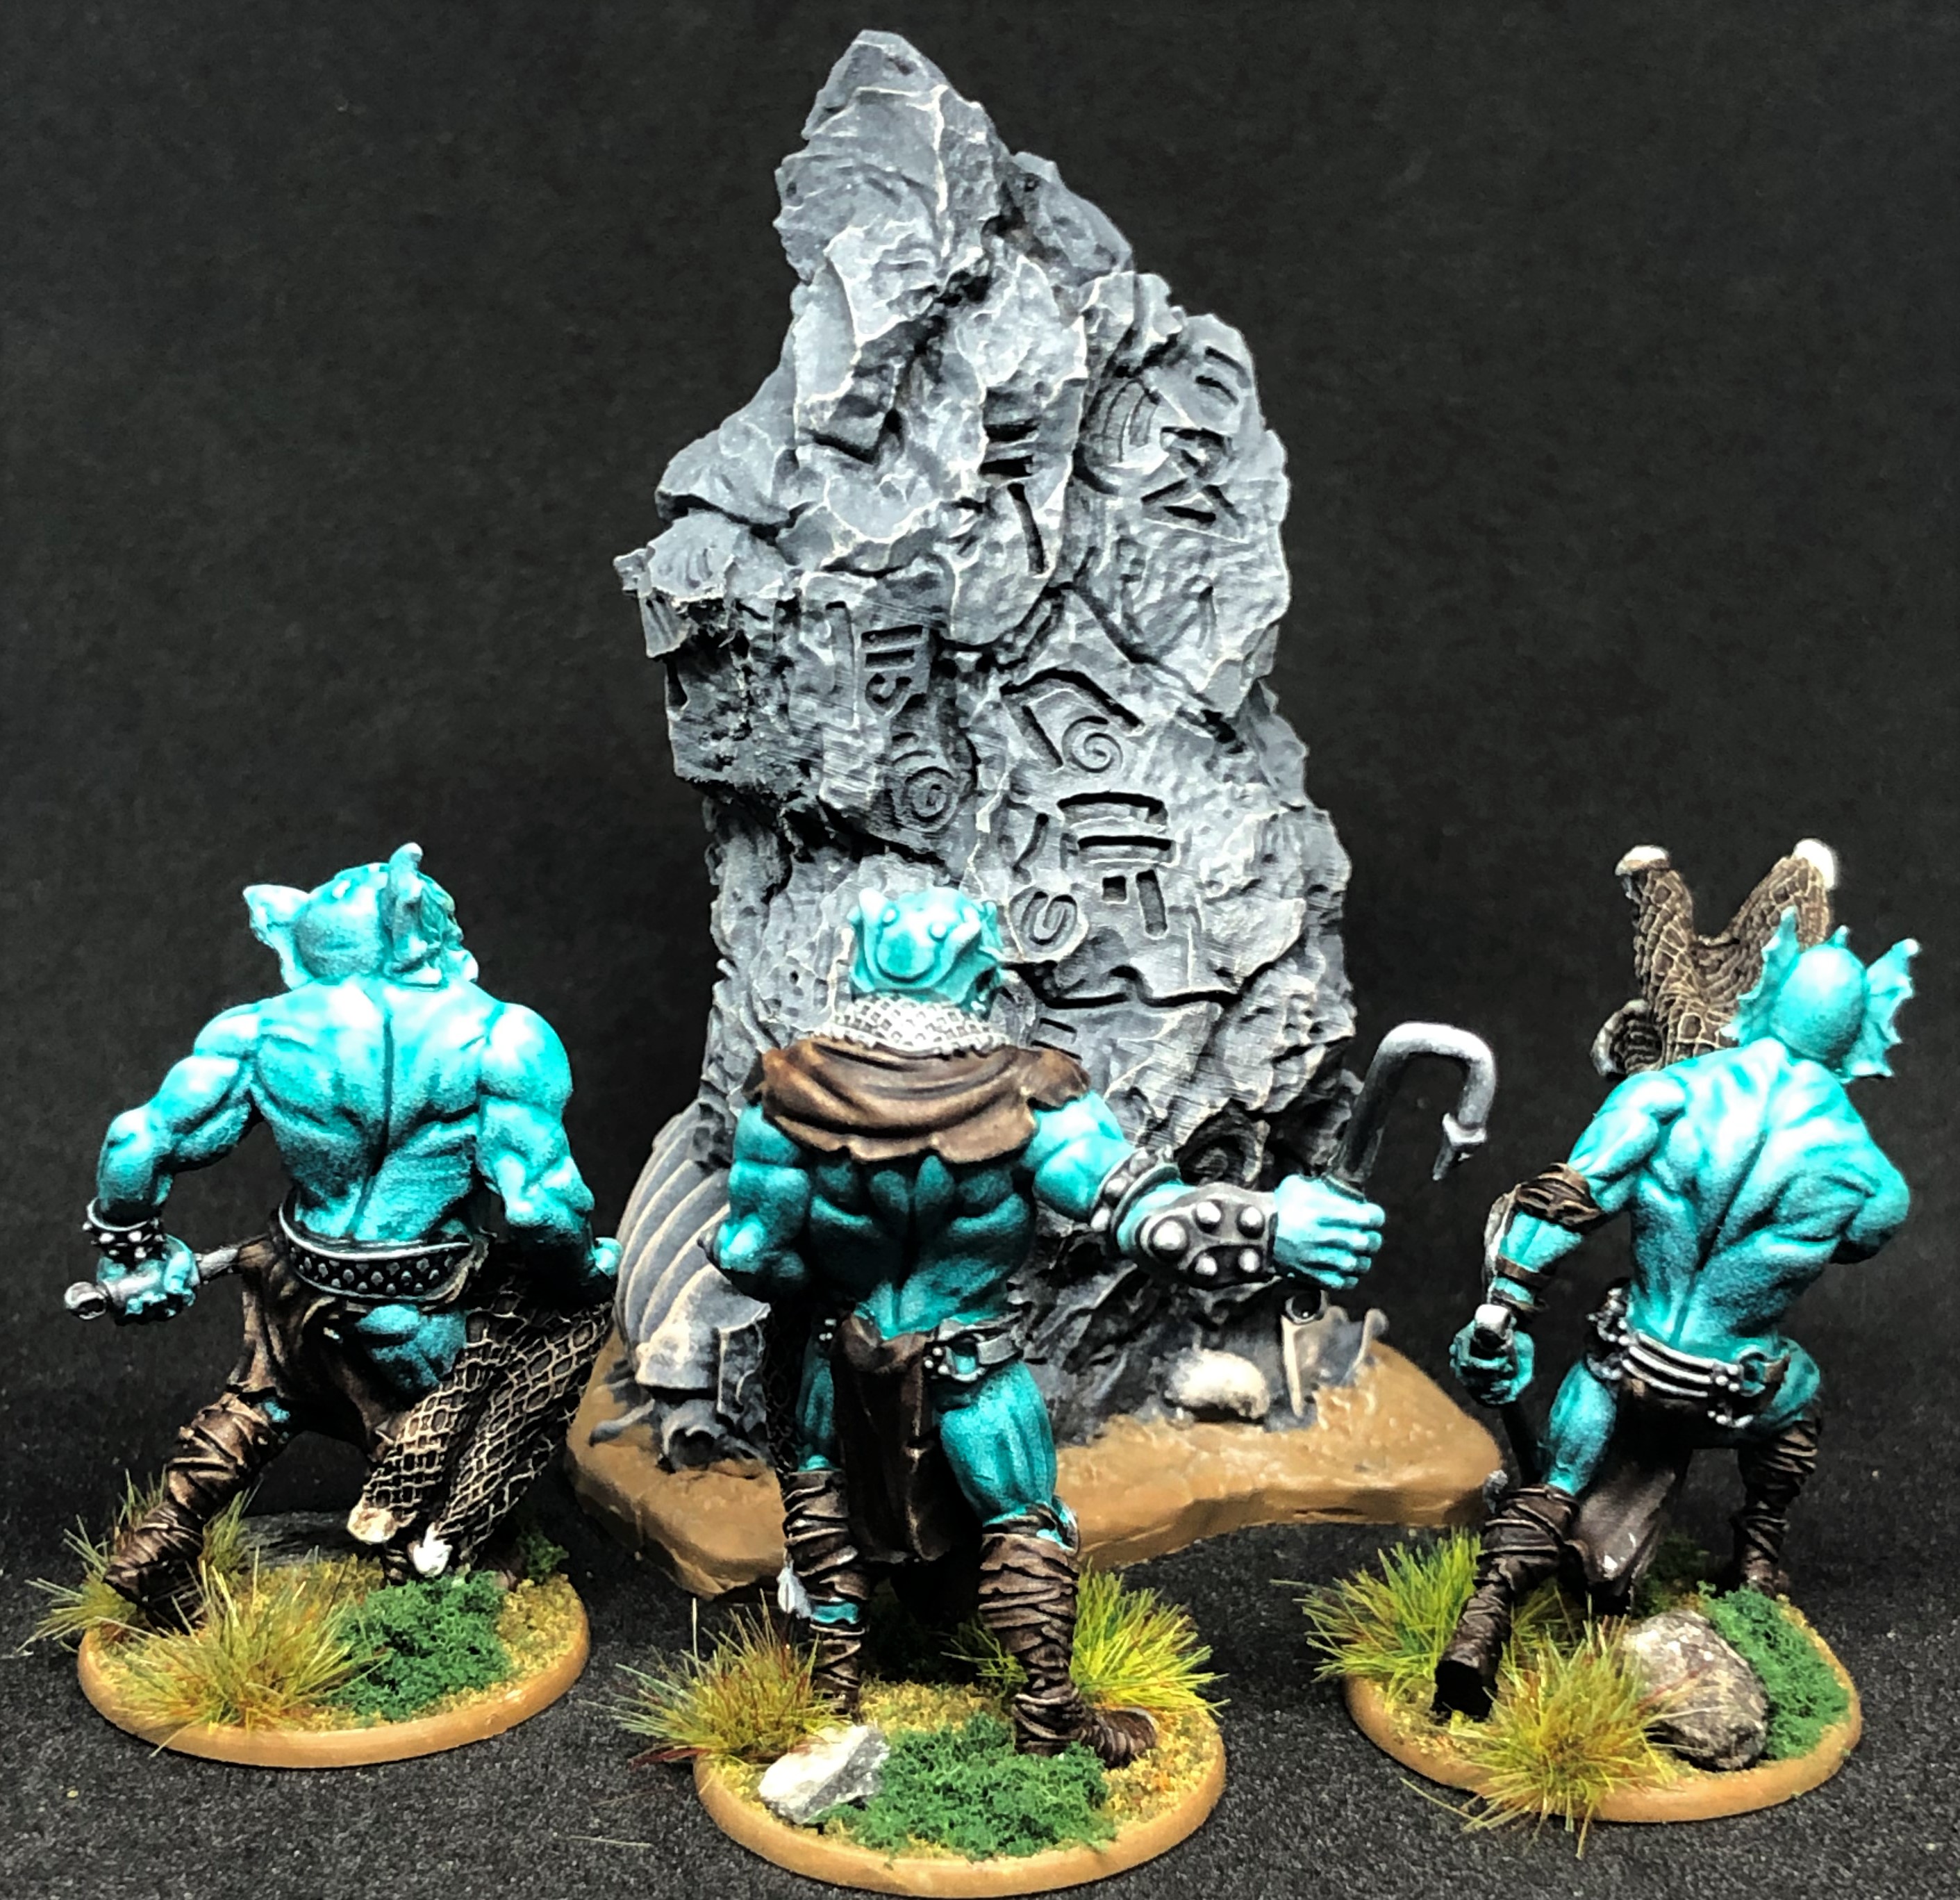
Fomorians with harpoons:
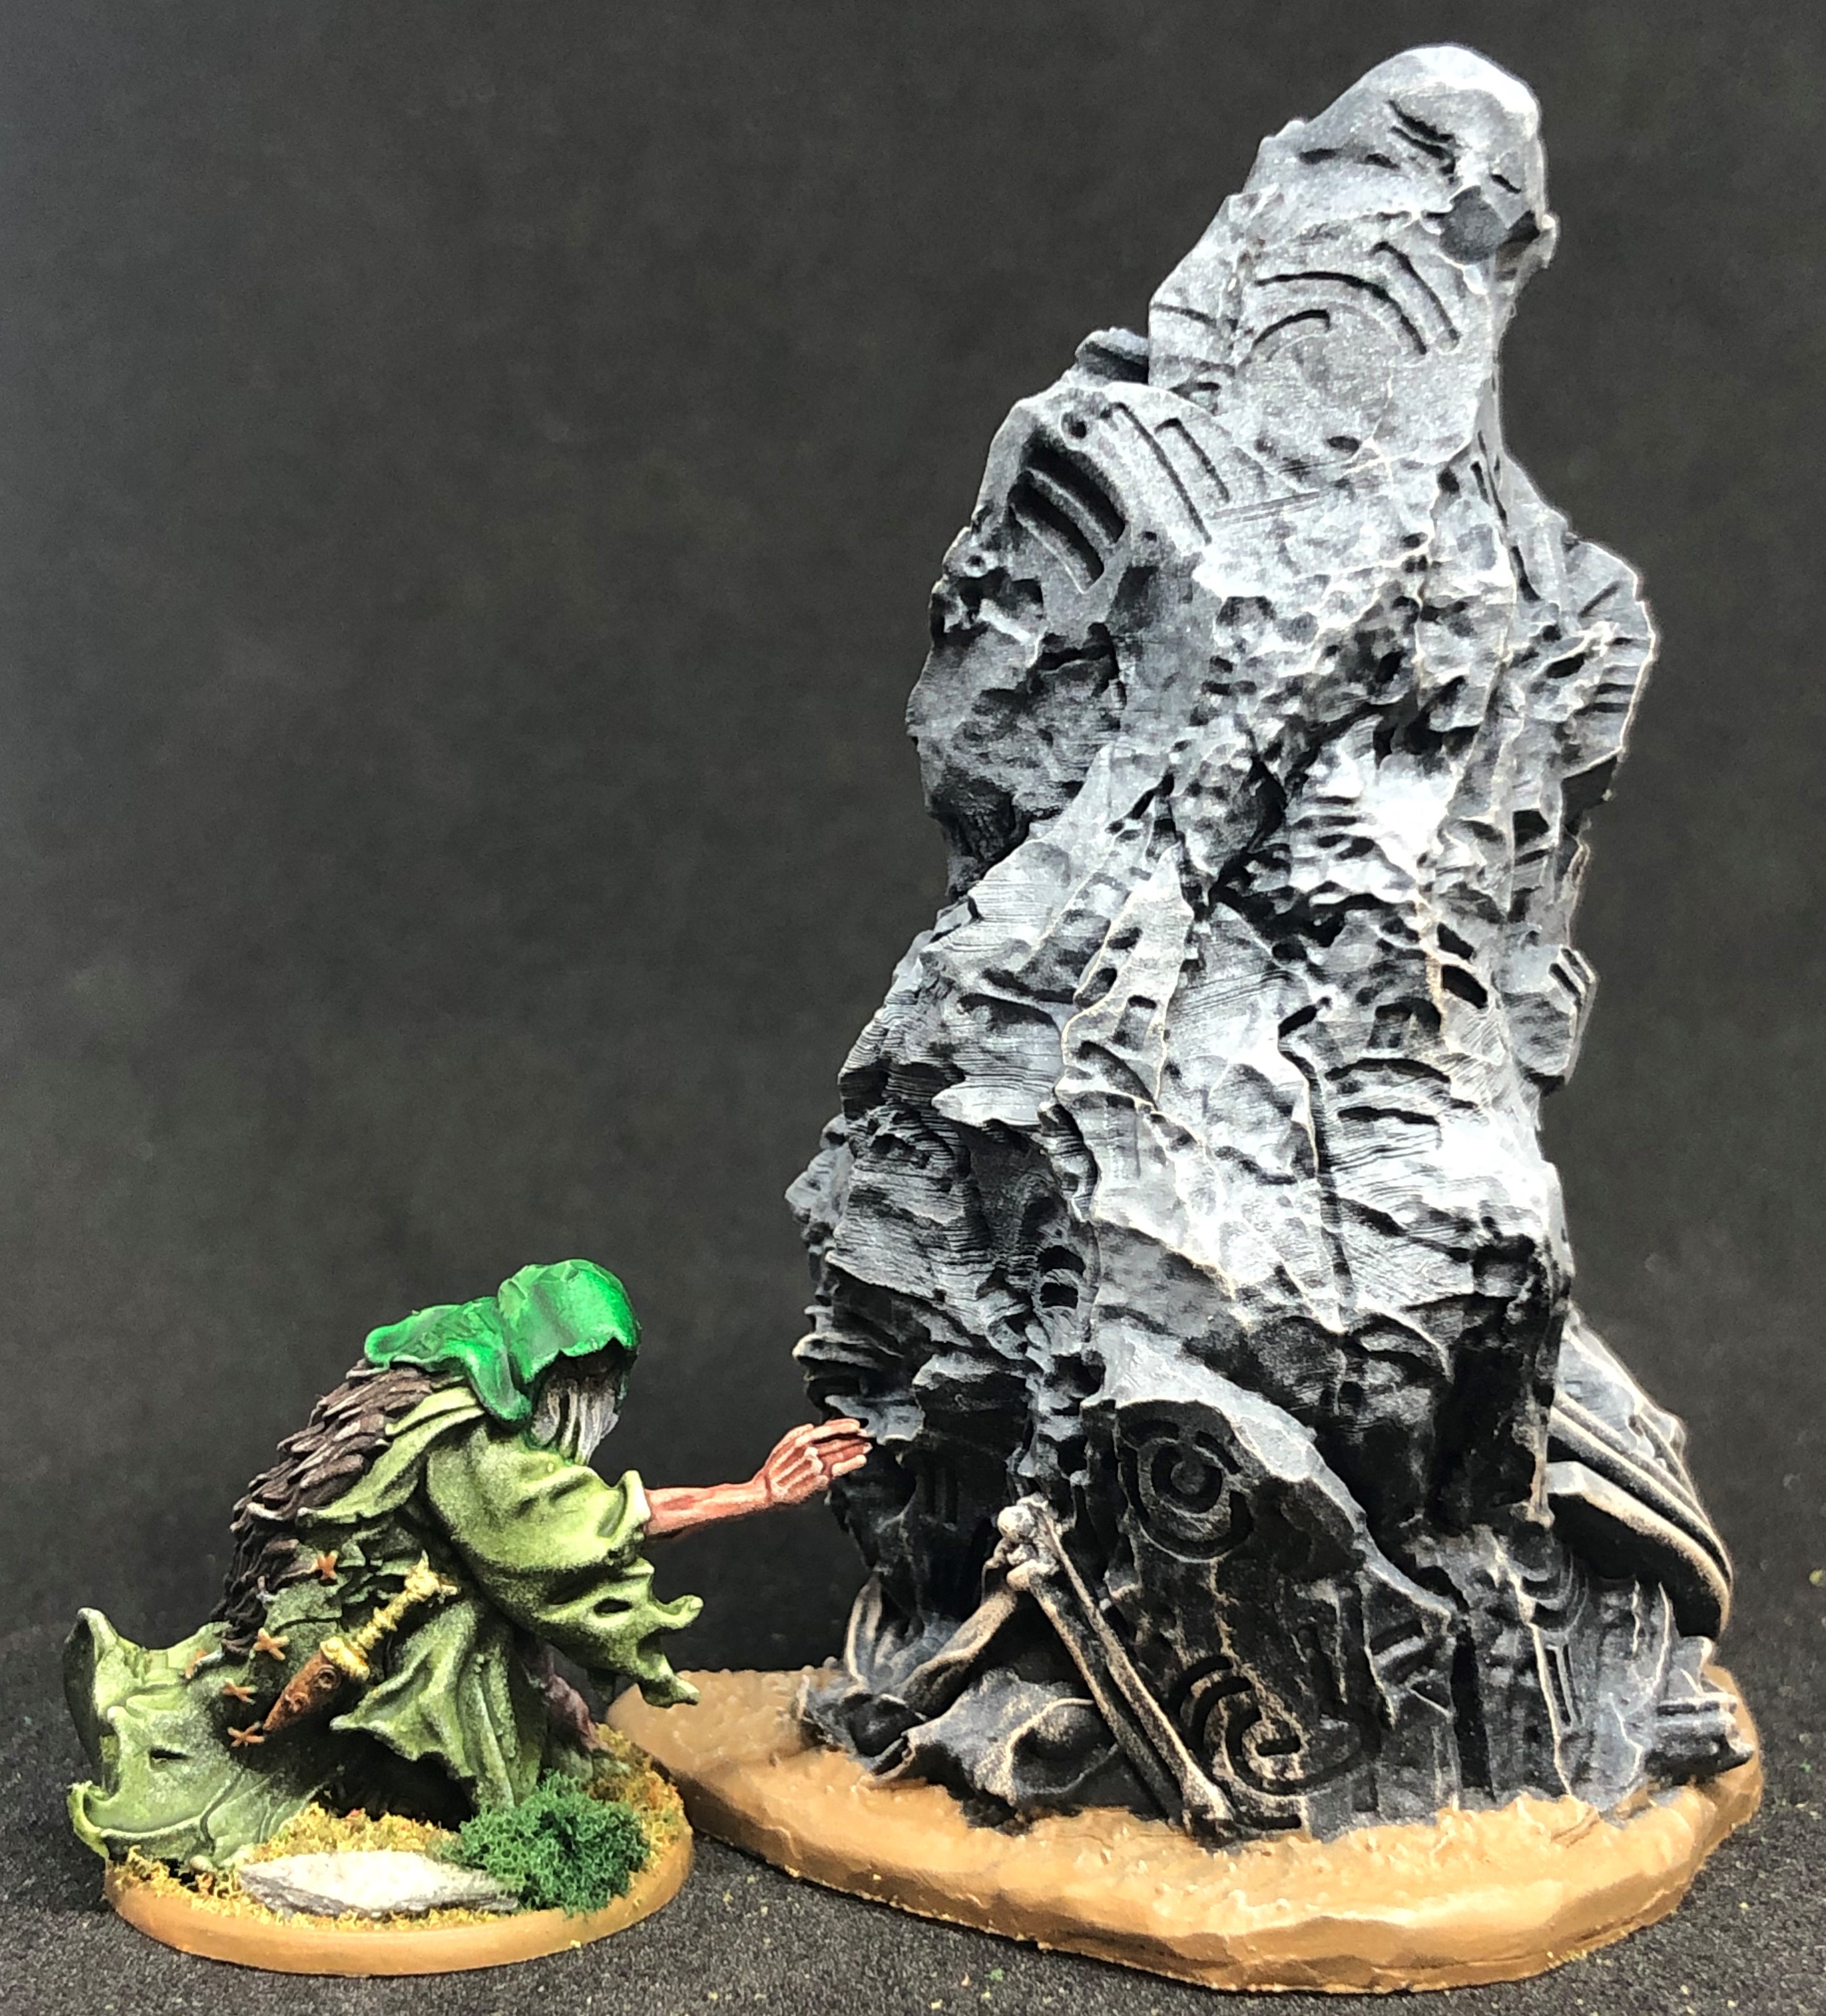
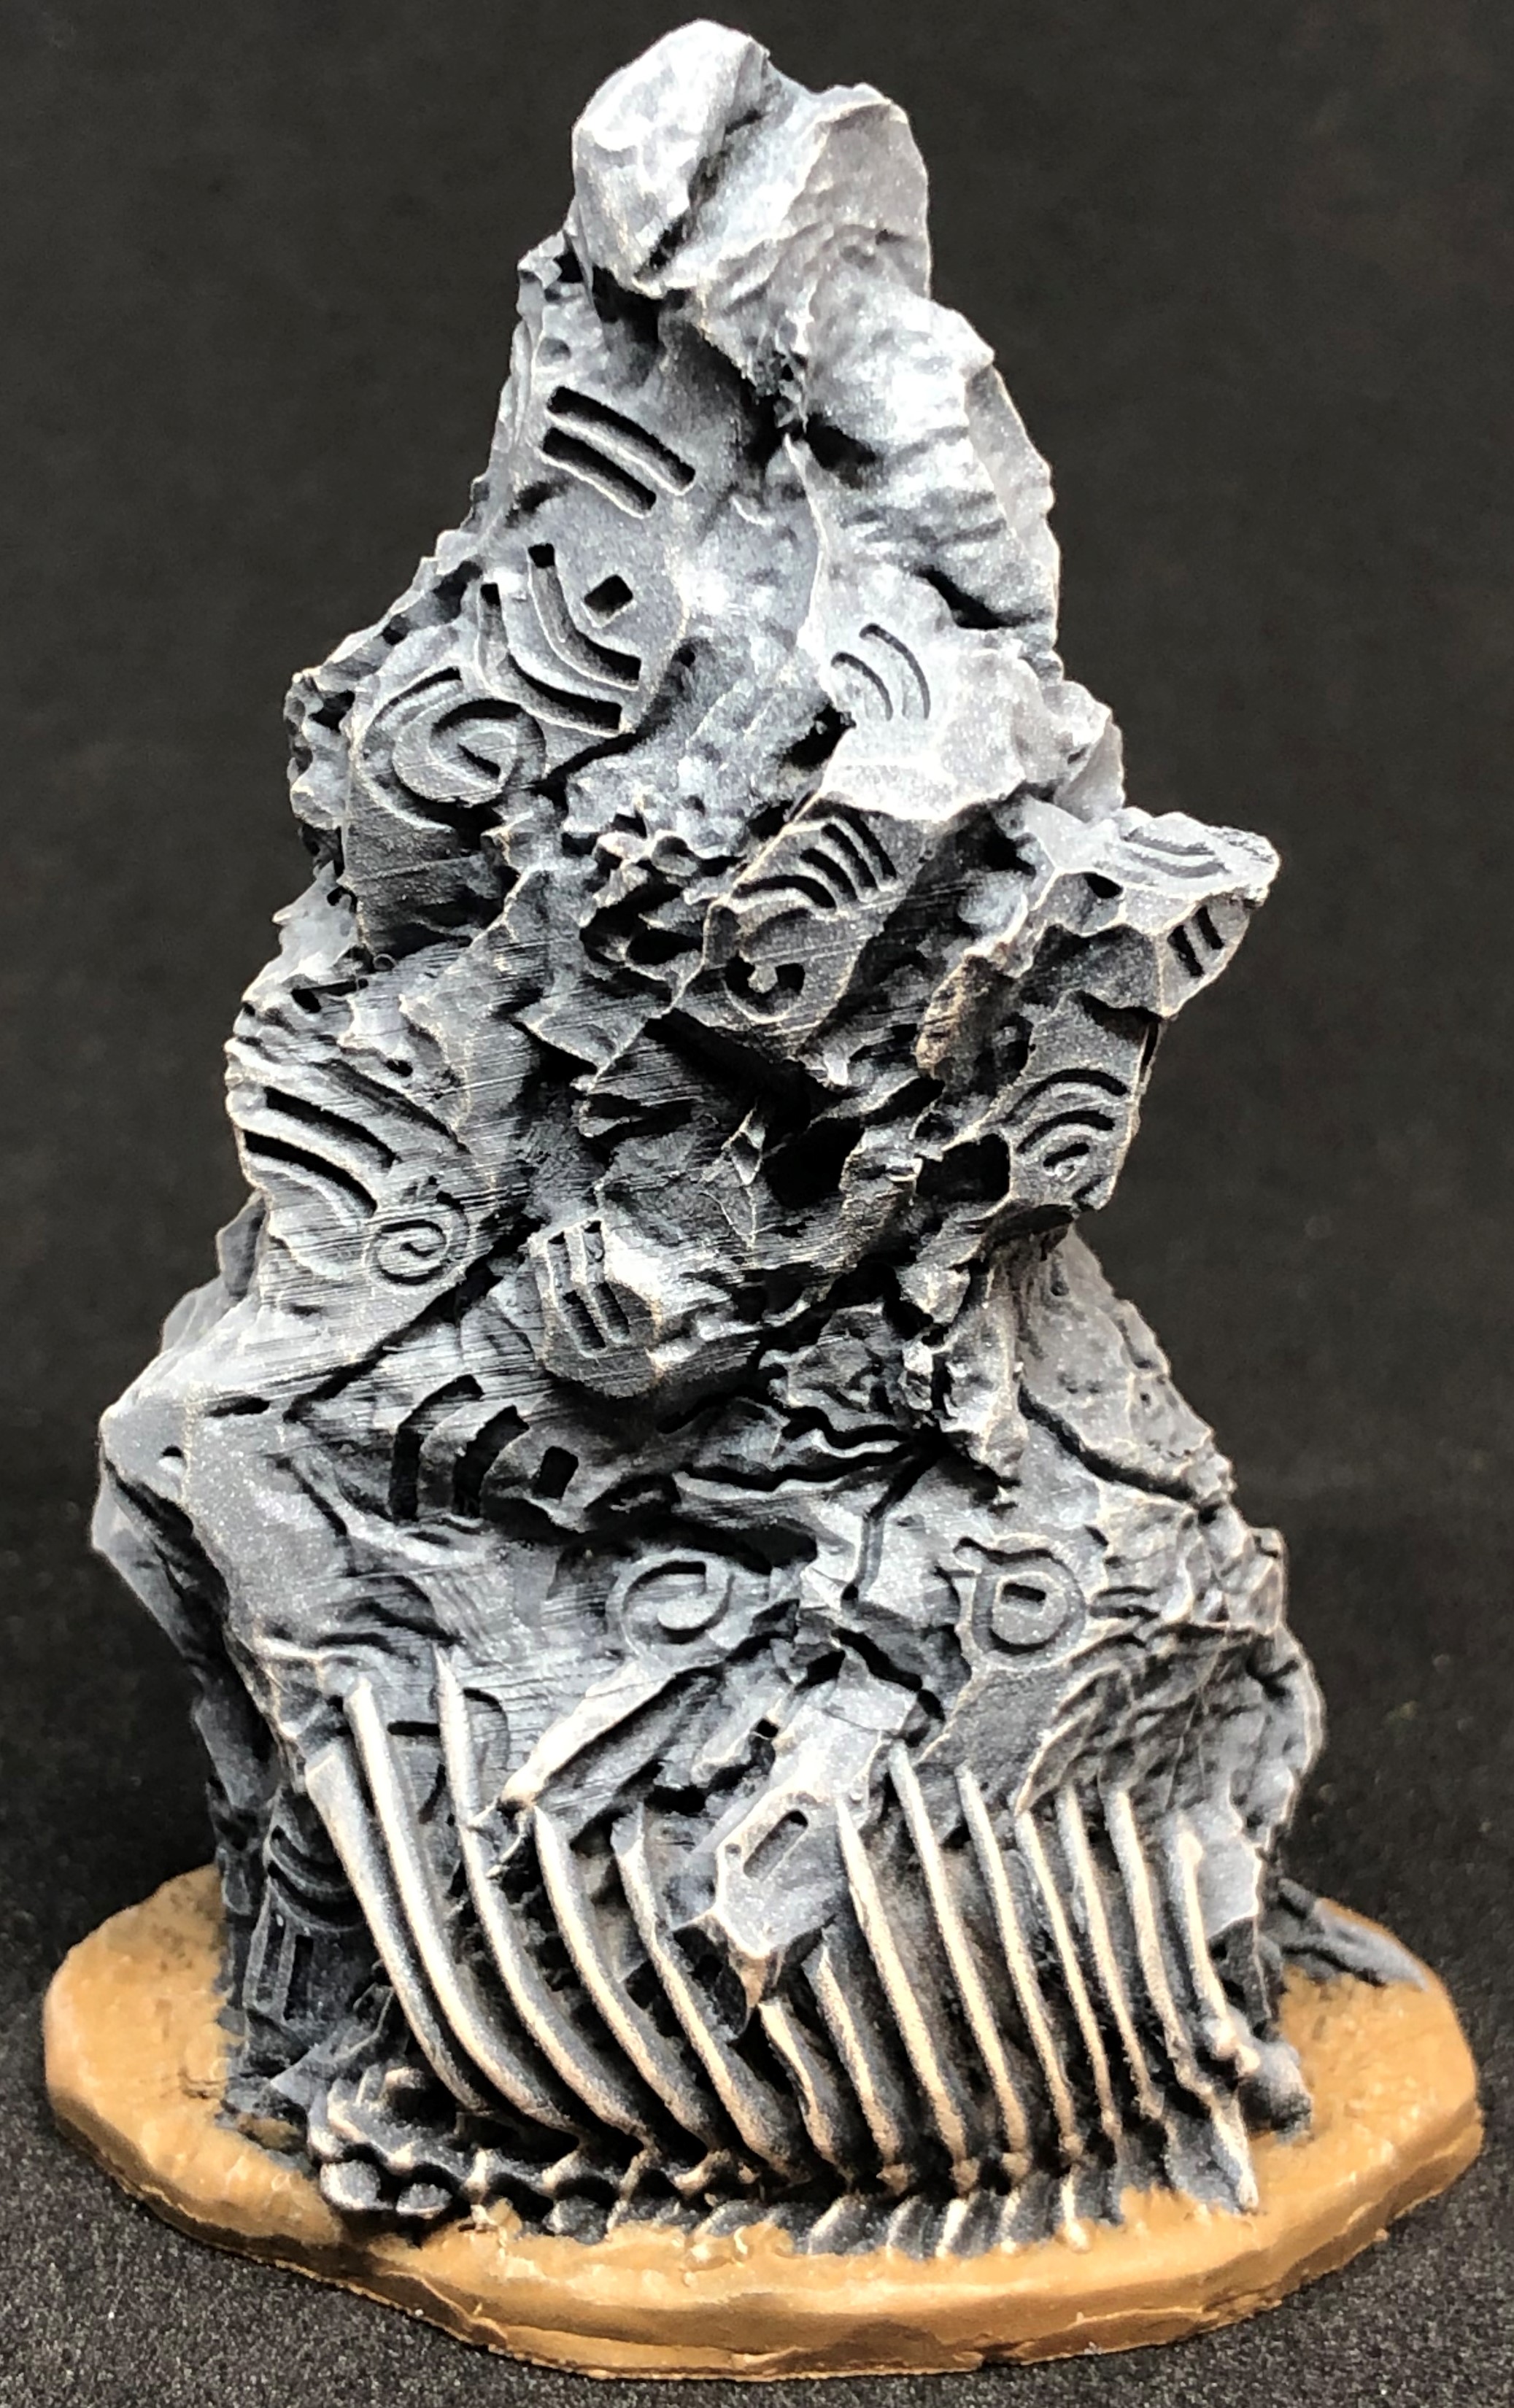
Weirdstone
Got the Weirdstone from the starter set finished. Same technique as the rest of the scatter pieces.

Scatter
Having preordered, I knew this game was coming and got some suitable scatter from a couple of resin producers whilst I was waiting. They are based in the same way as the miniatures but using the first step to add the bare earth texture. In addition to that scheme I added some tiny dark green moss tufts from miniNatur (717-21 Short tufts, spring).
Painting is straightforward. As with all cast resin, wash in slightly soapy water first. Using my airbrush and Stynylrez paints; undercoat black, heavy zenith grey from about 60 degrees above horizontal, very light dusting of white from directly above. Finally drybrush in a pale cream colour, my current choice is Citadel Foundation Dheneb Stone.
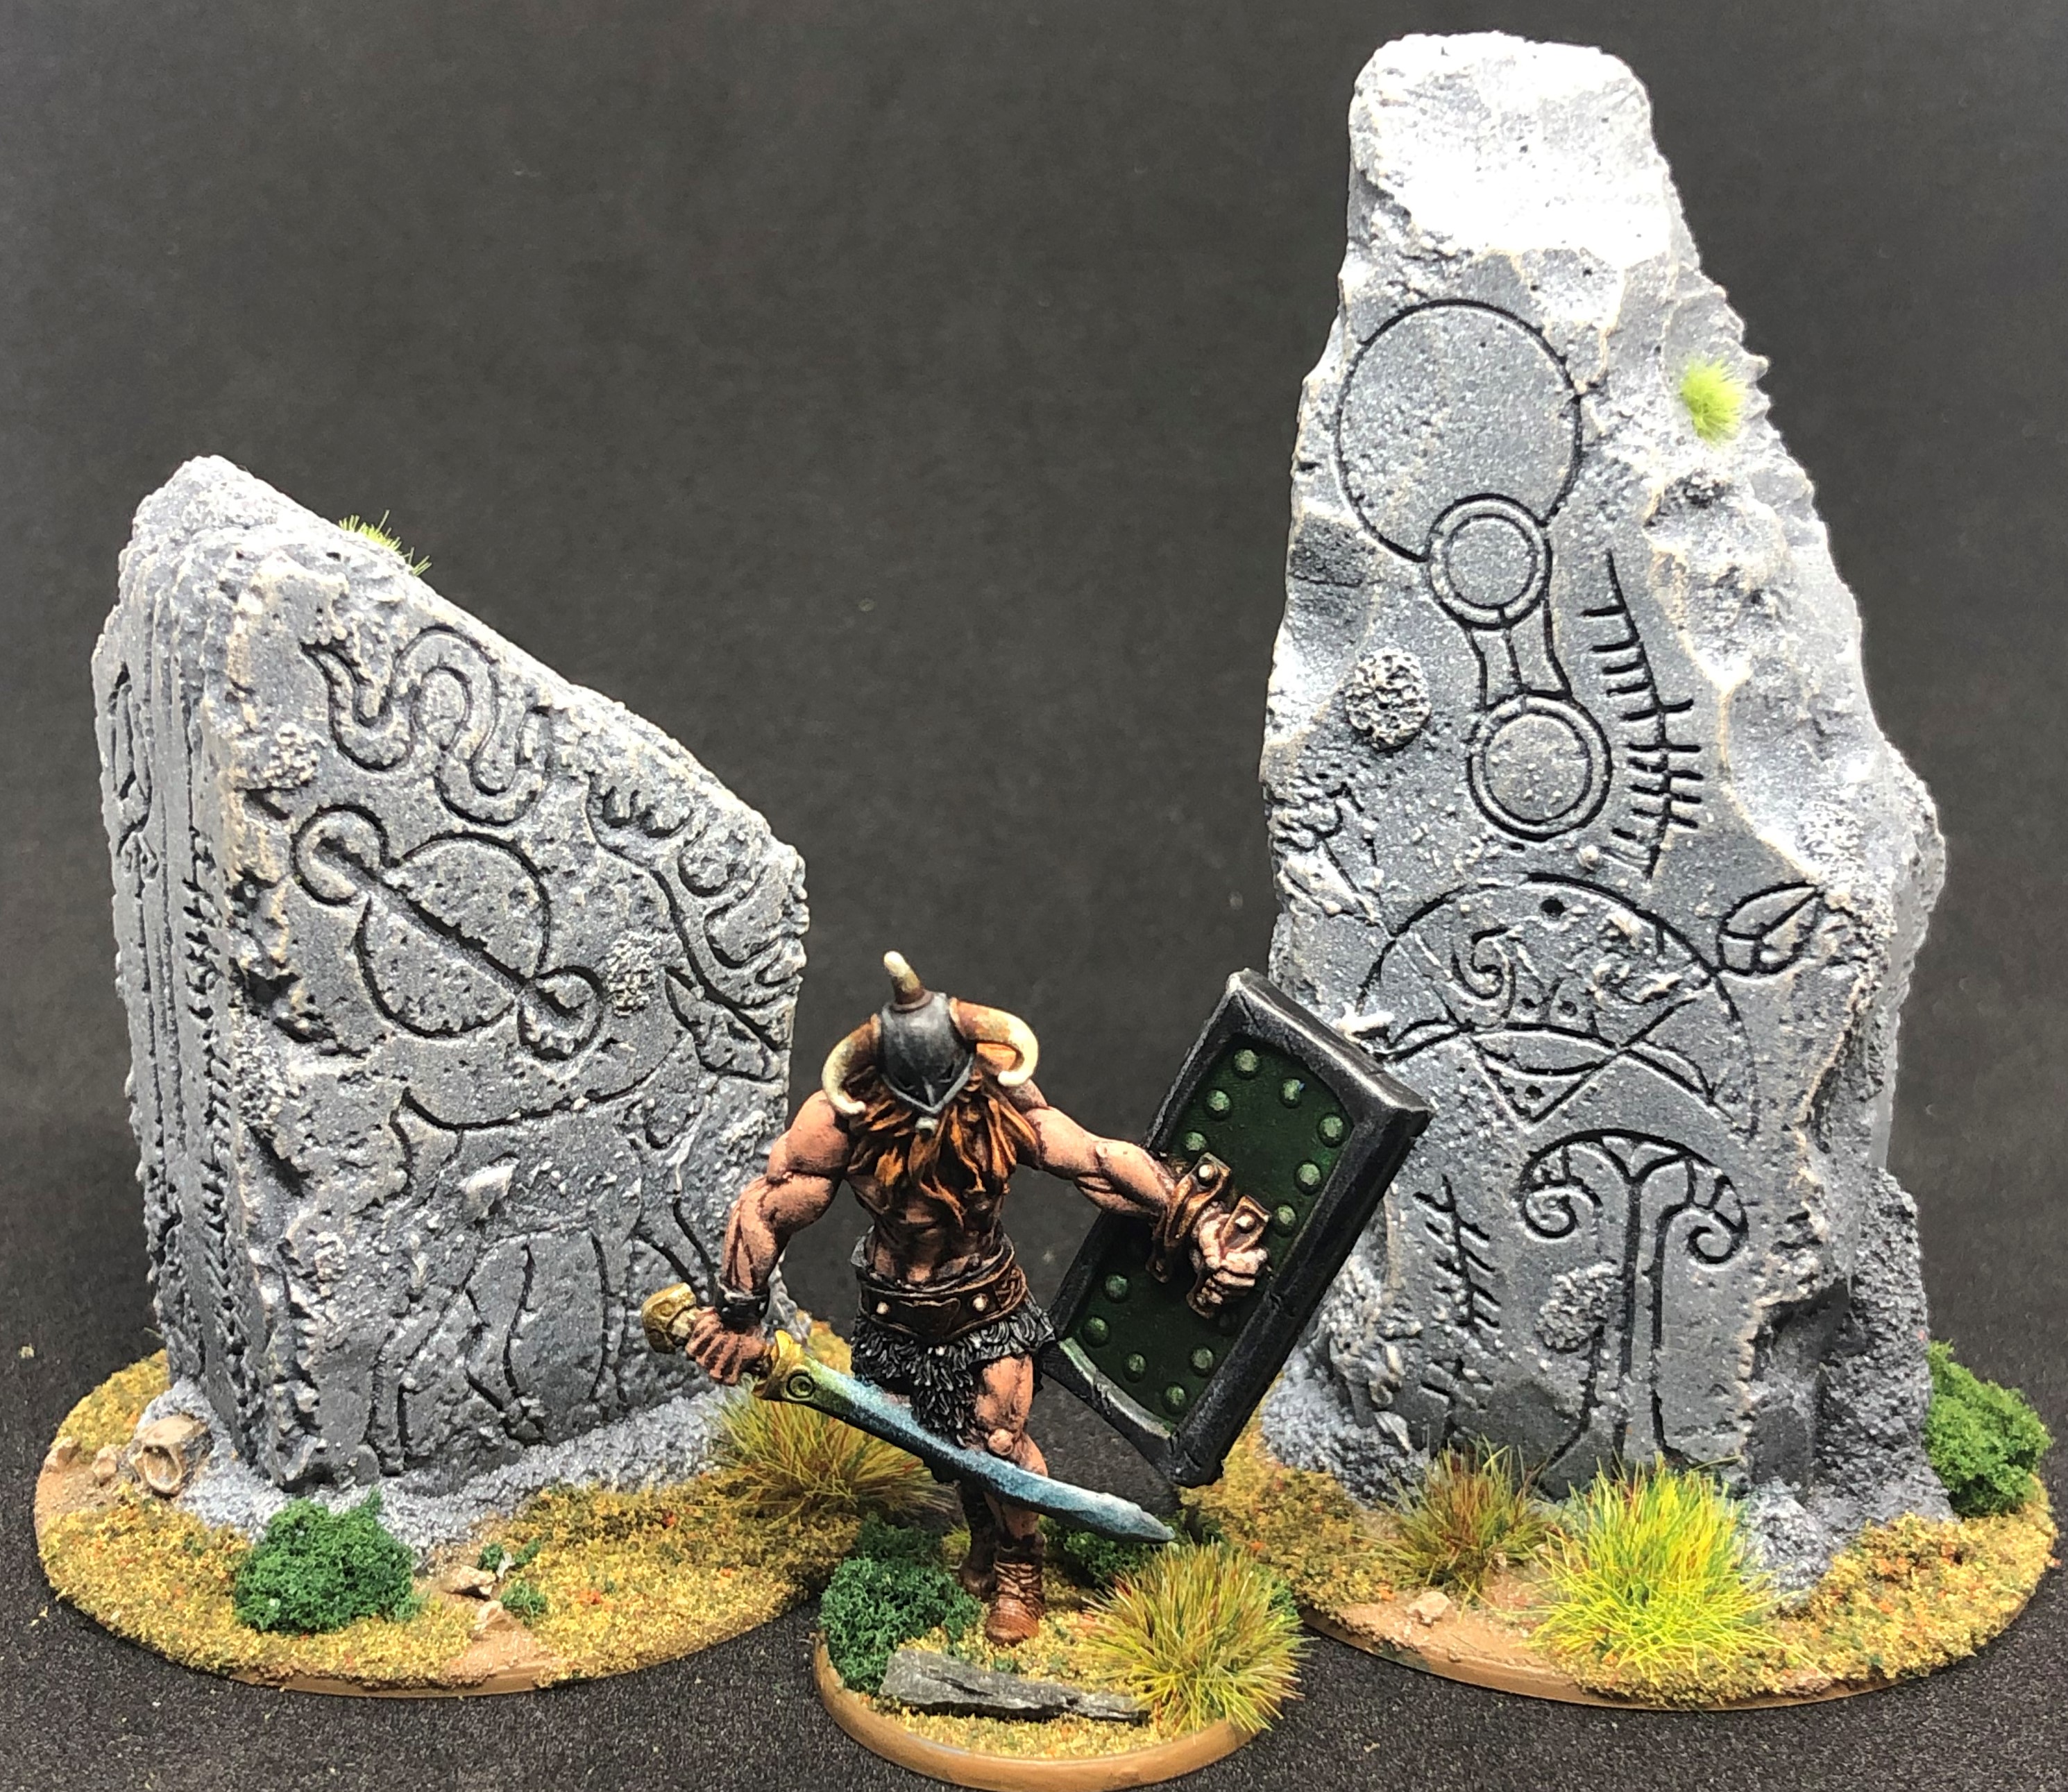
First off we have Scotia Grendel, Celtic Standing Stones:
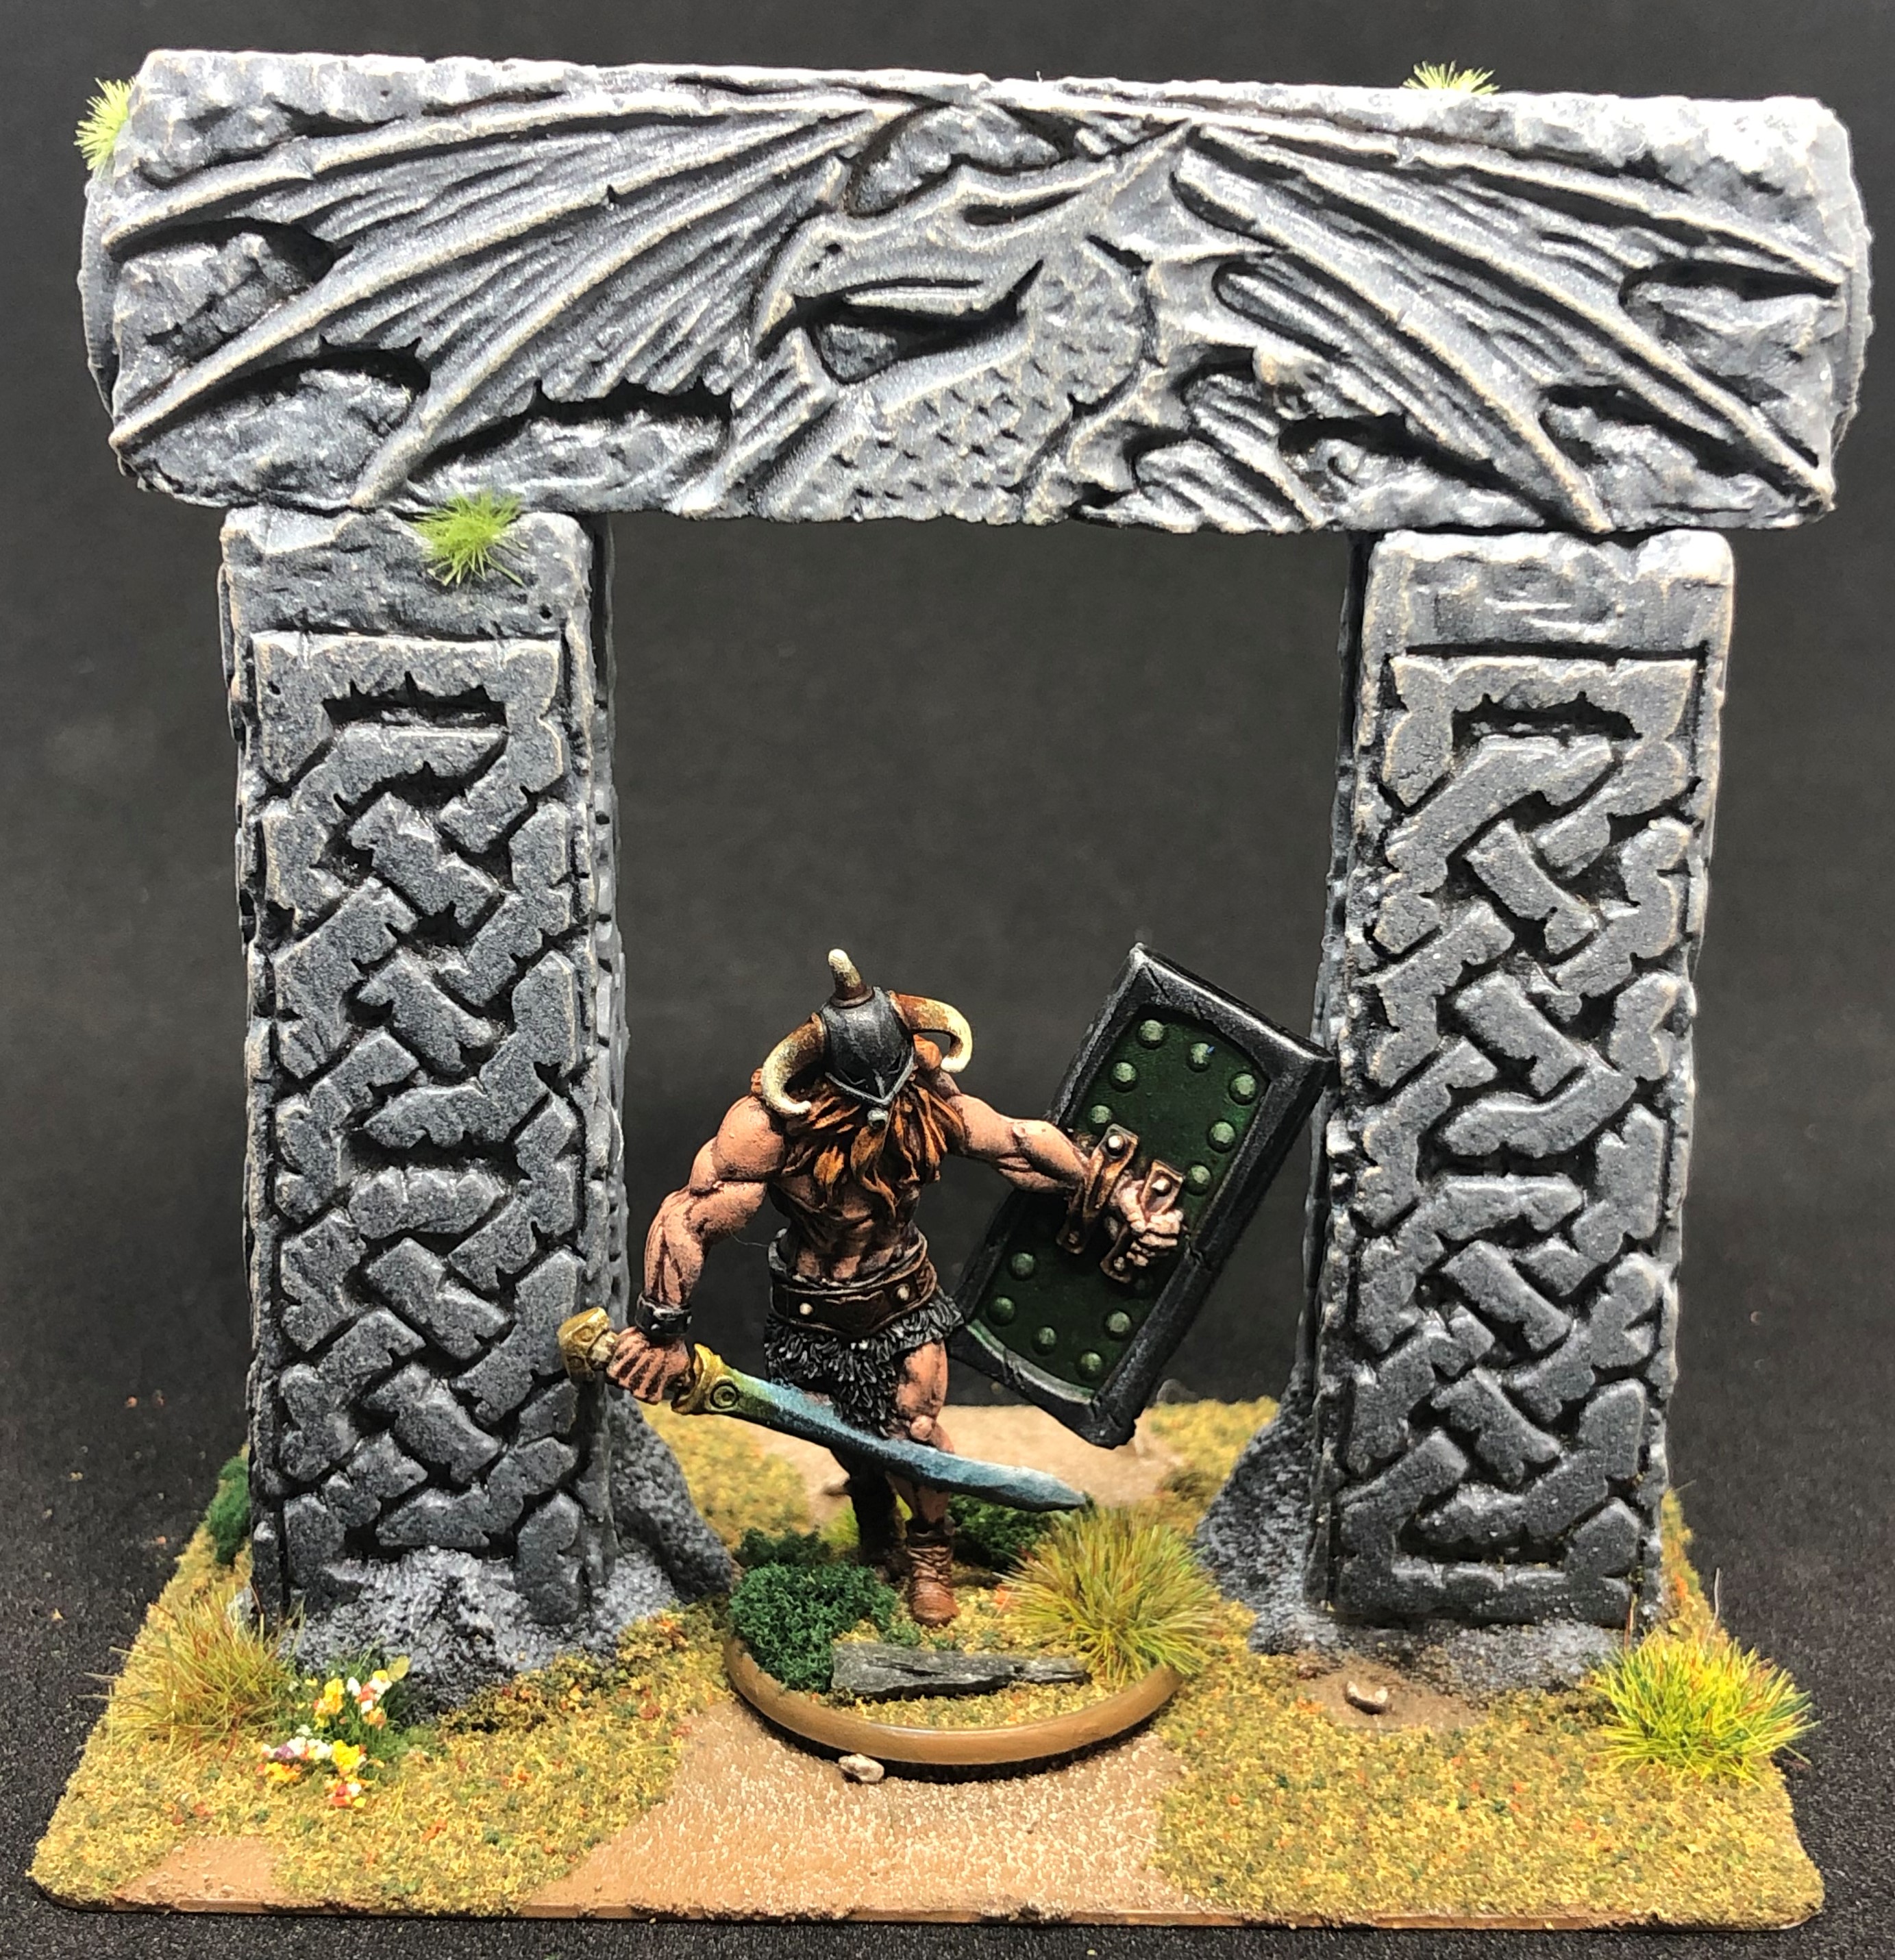
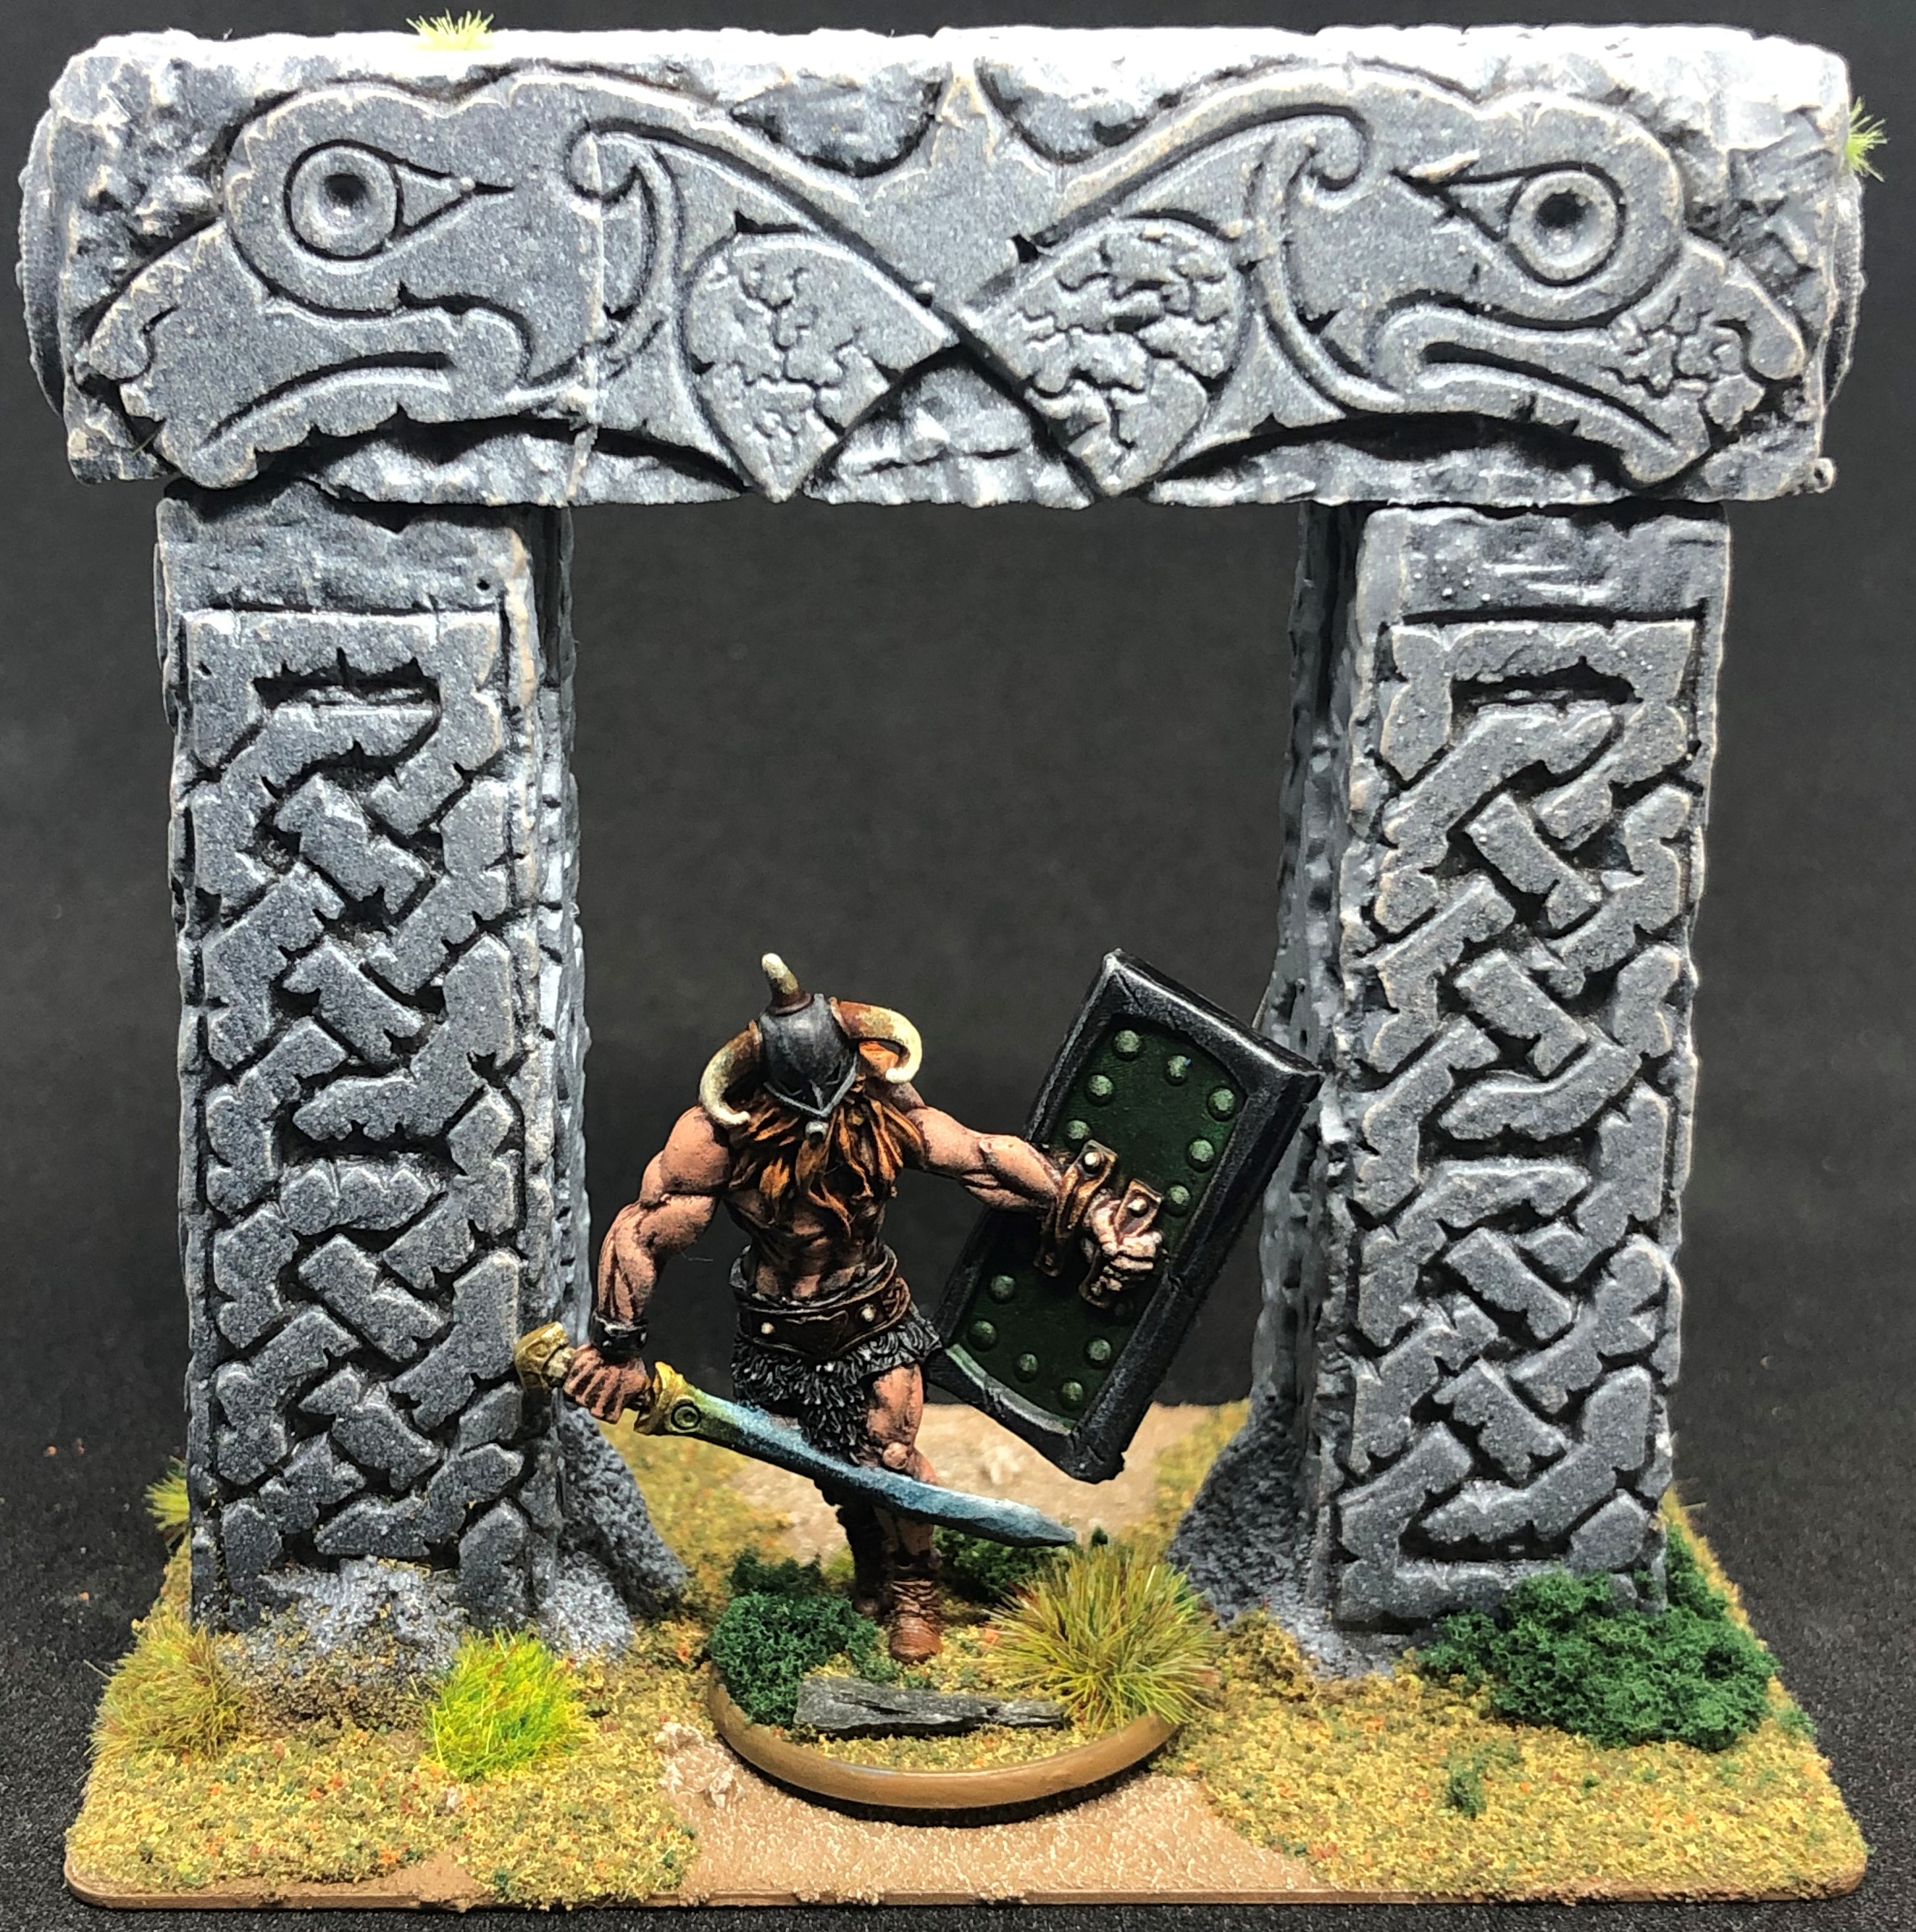
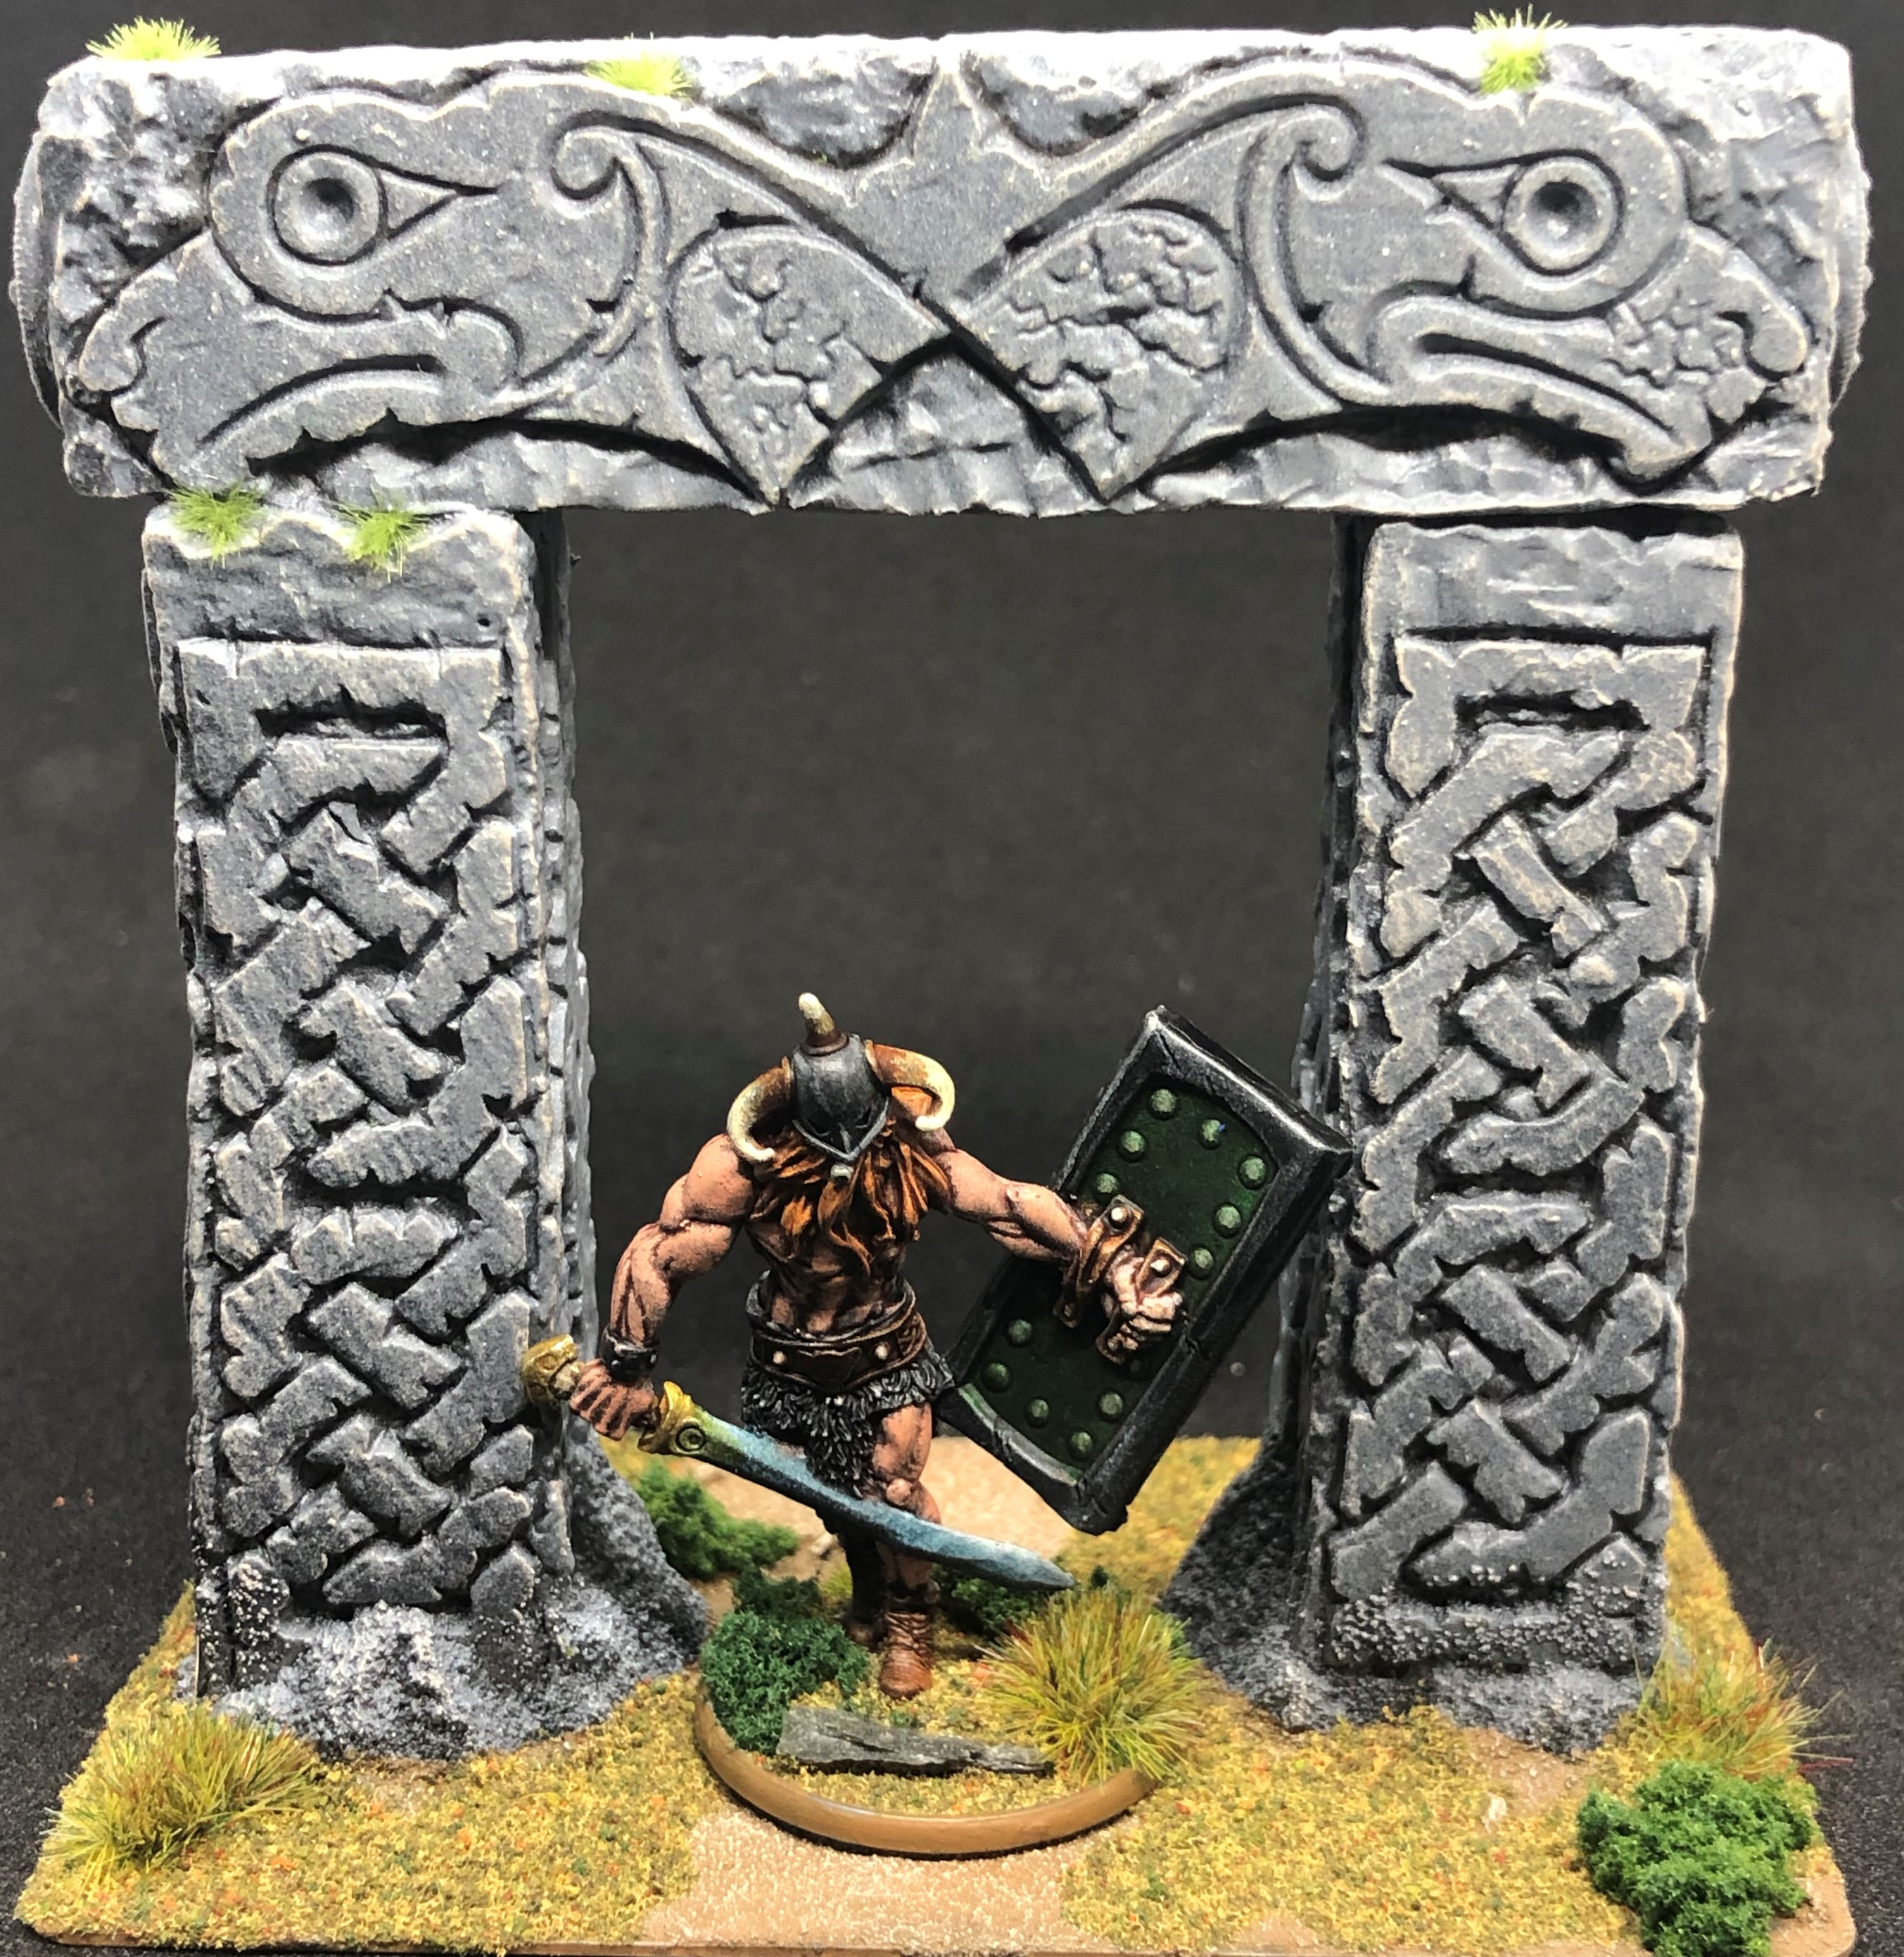
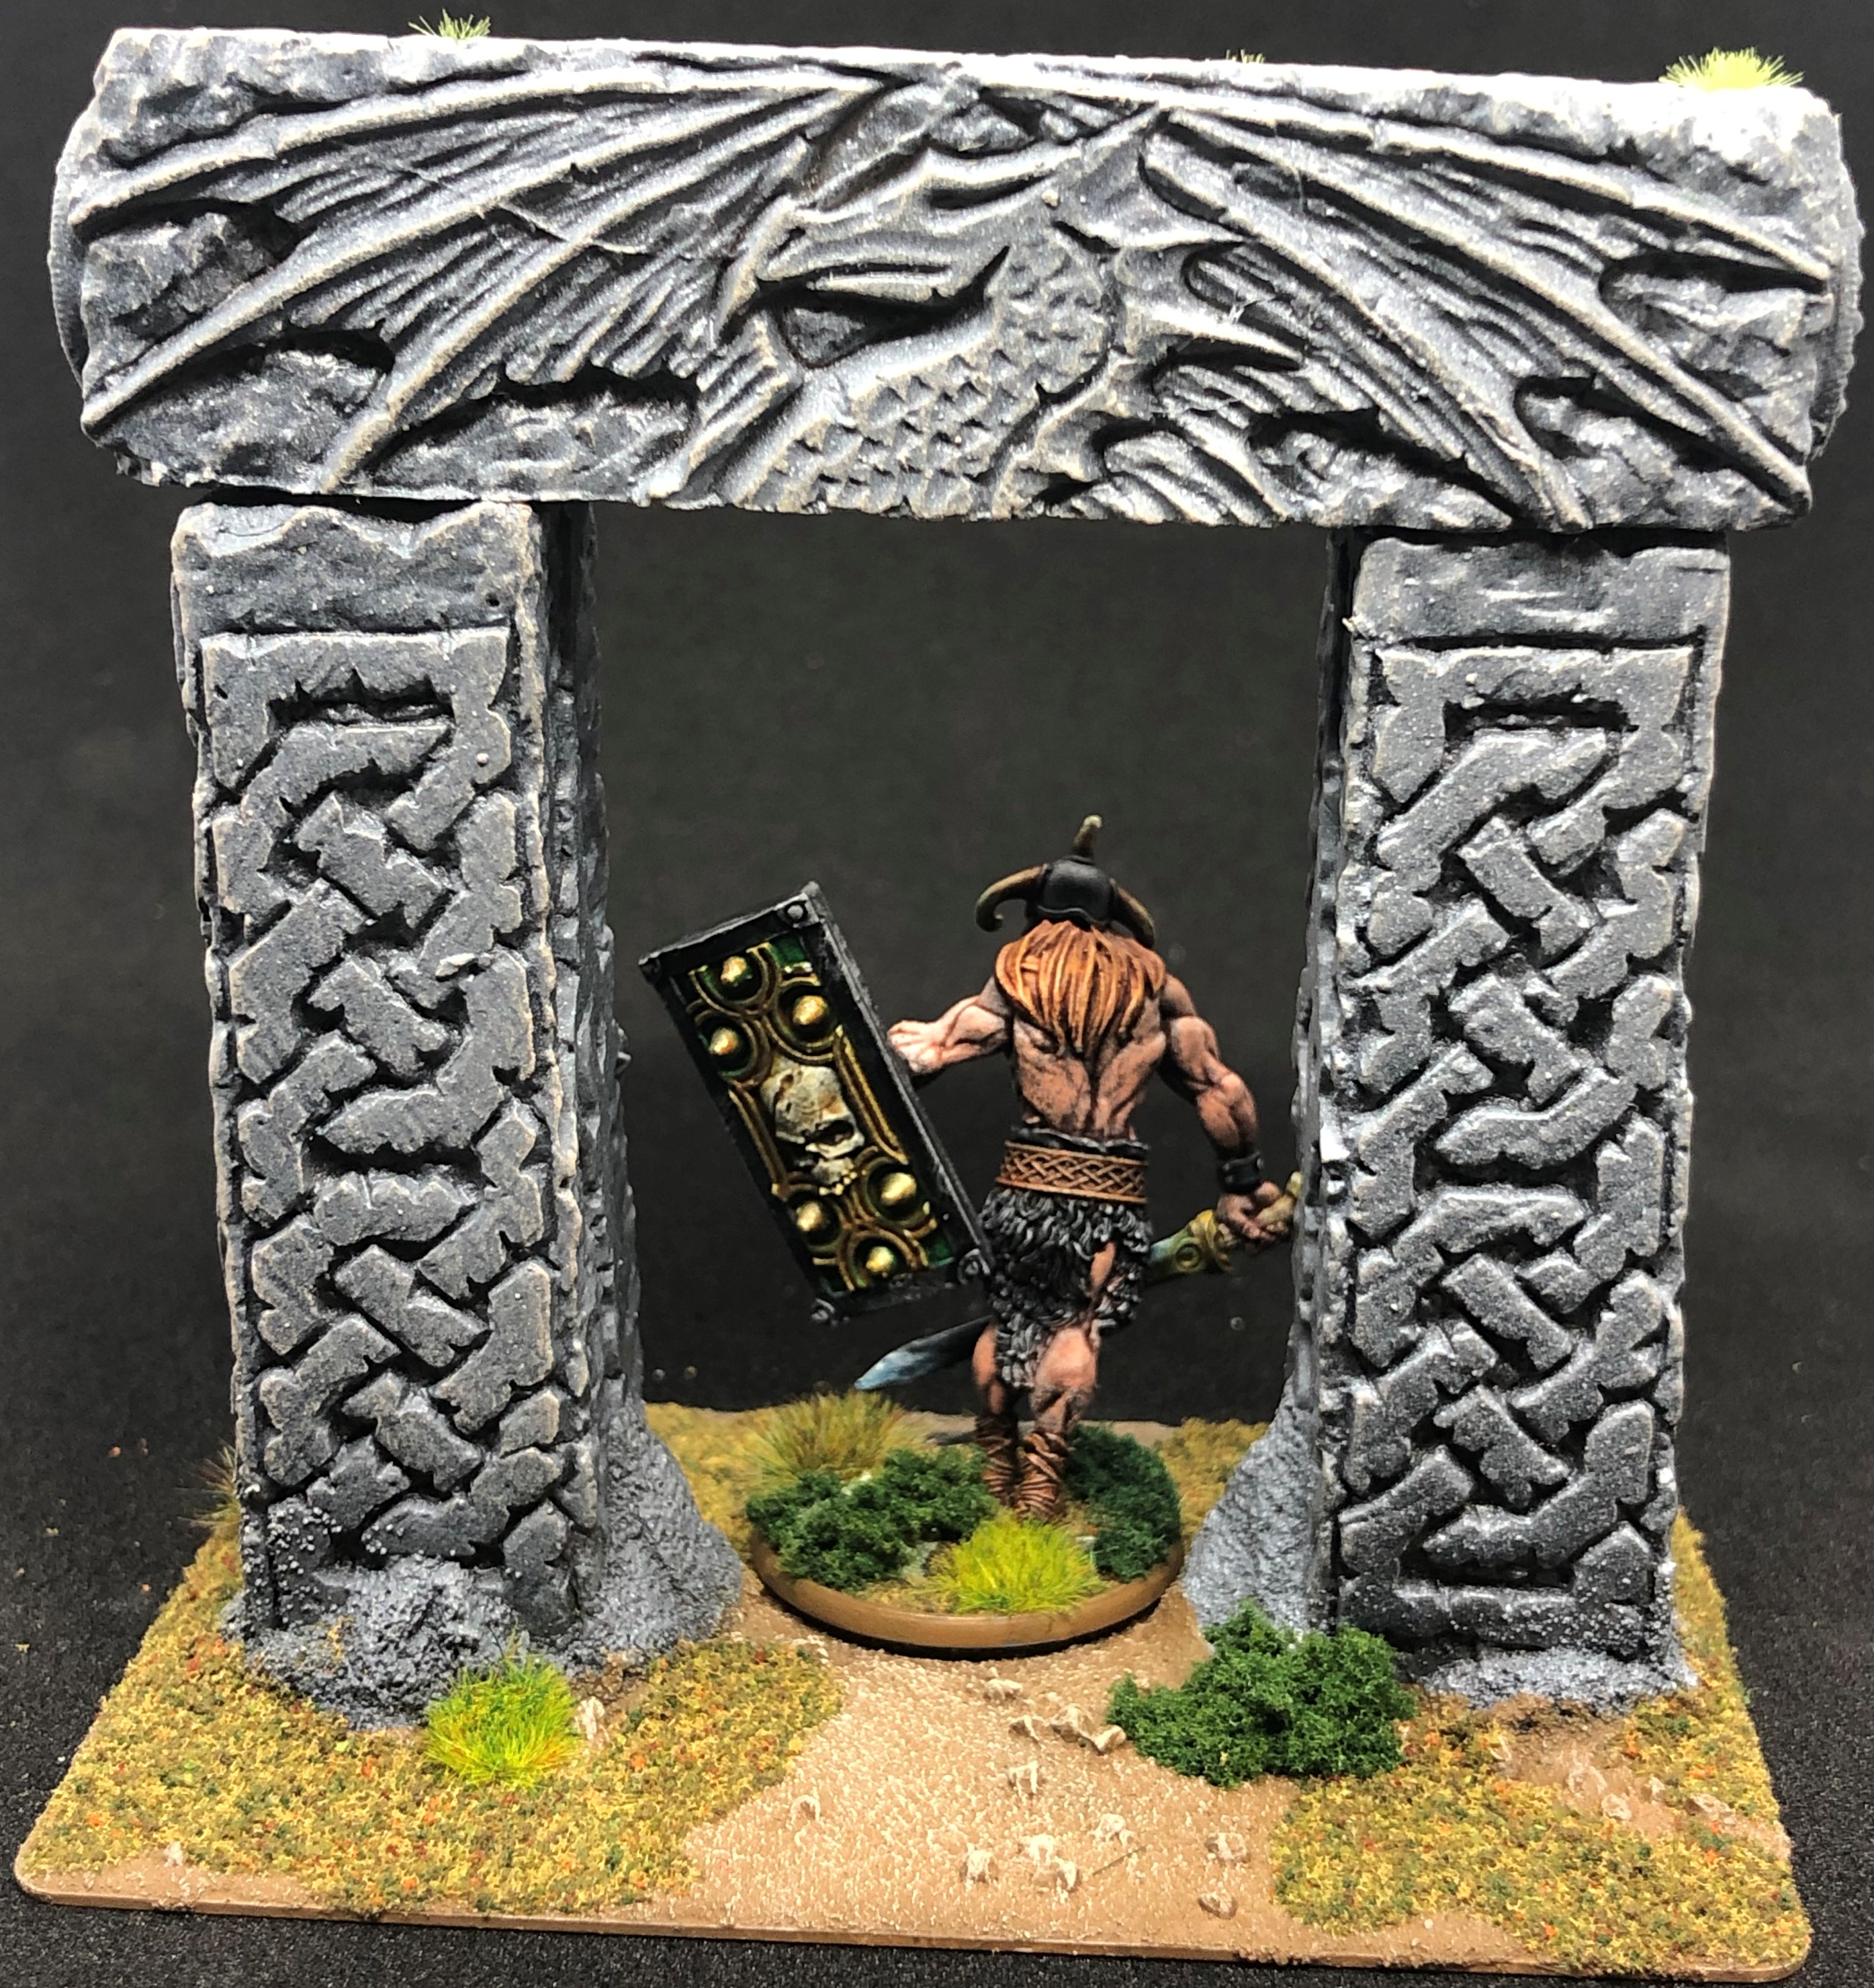
Some Standing Stones with carved Pictish/Ogam symbols that will see service as Weirdstones in the game.

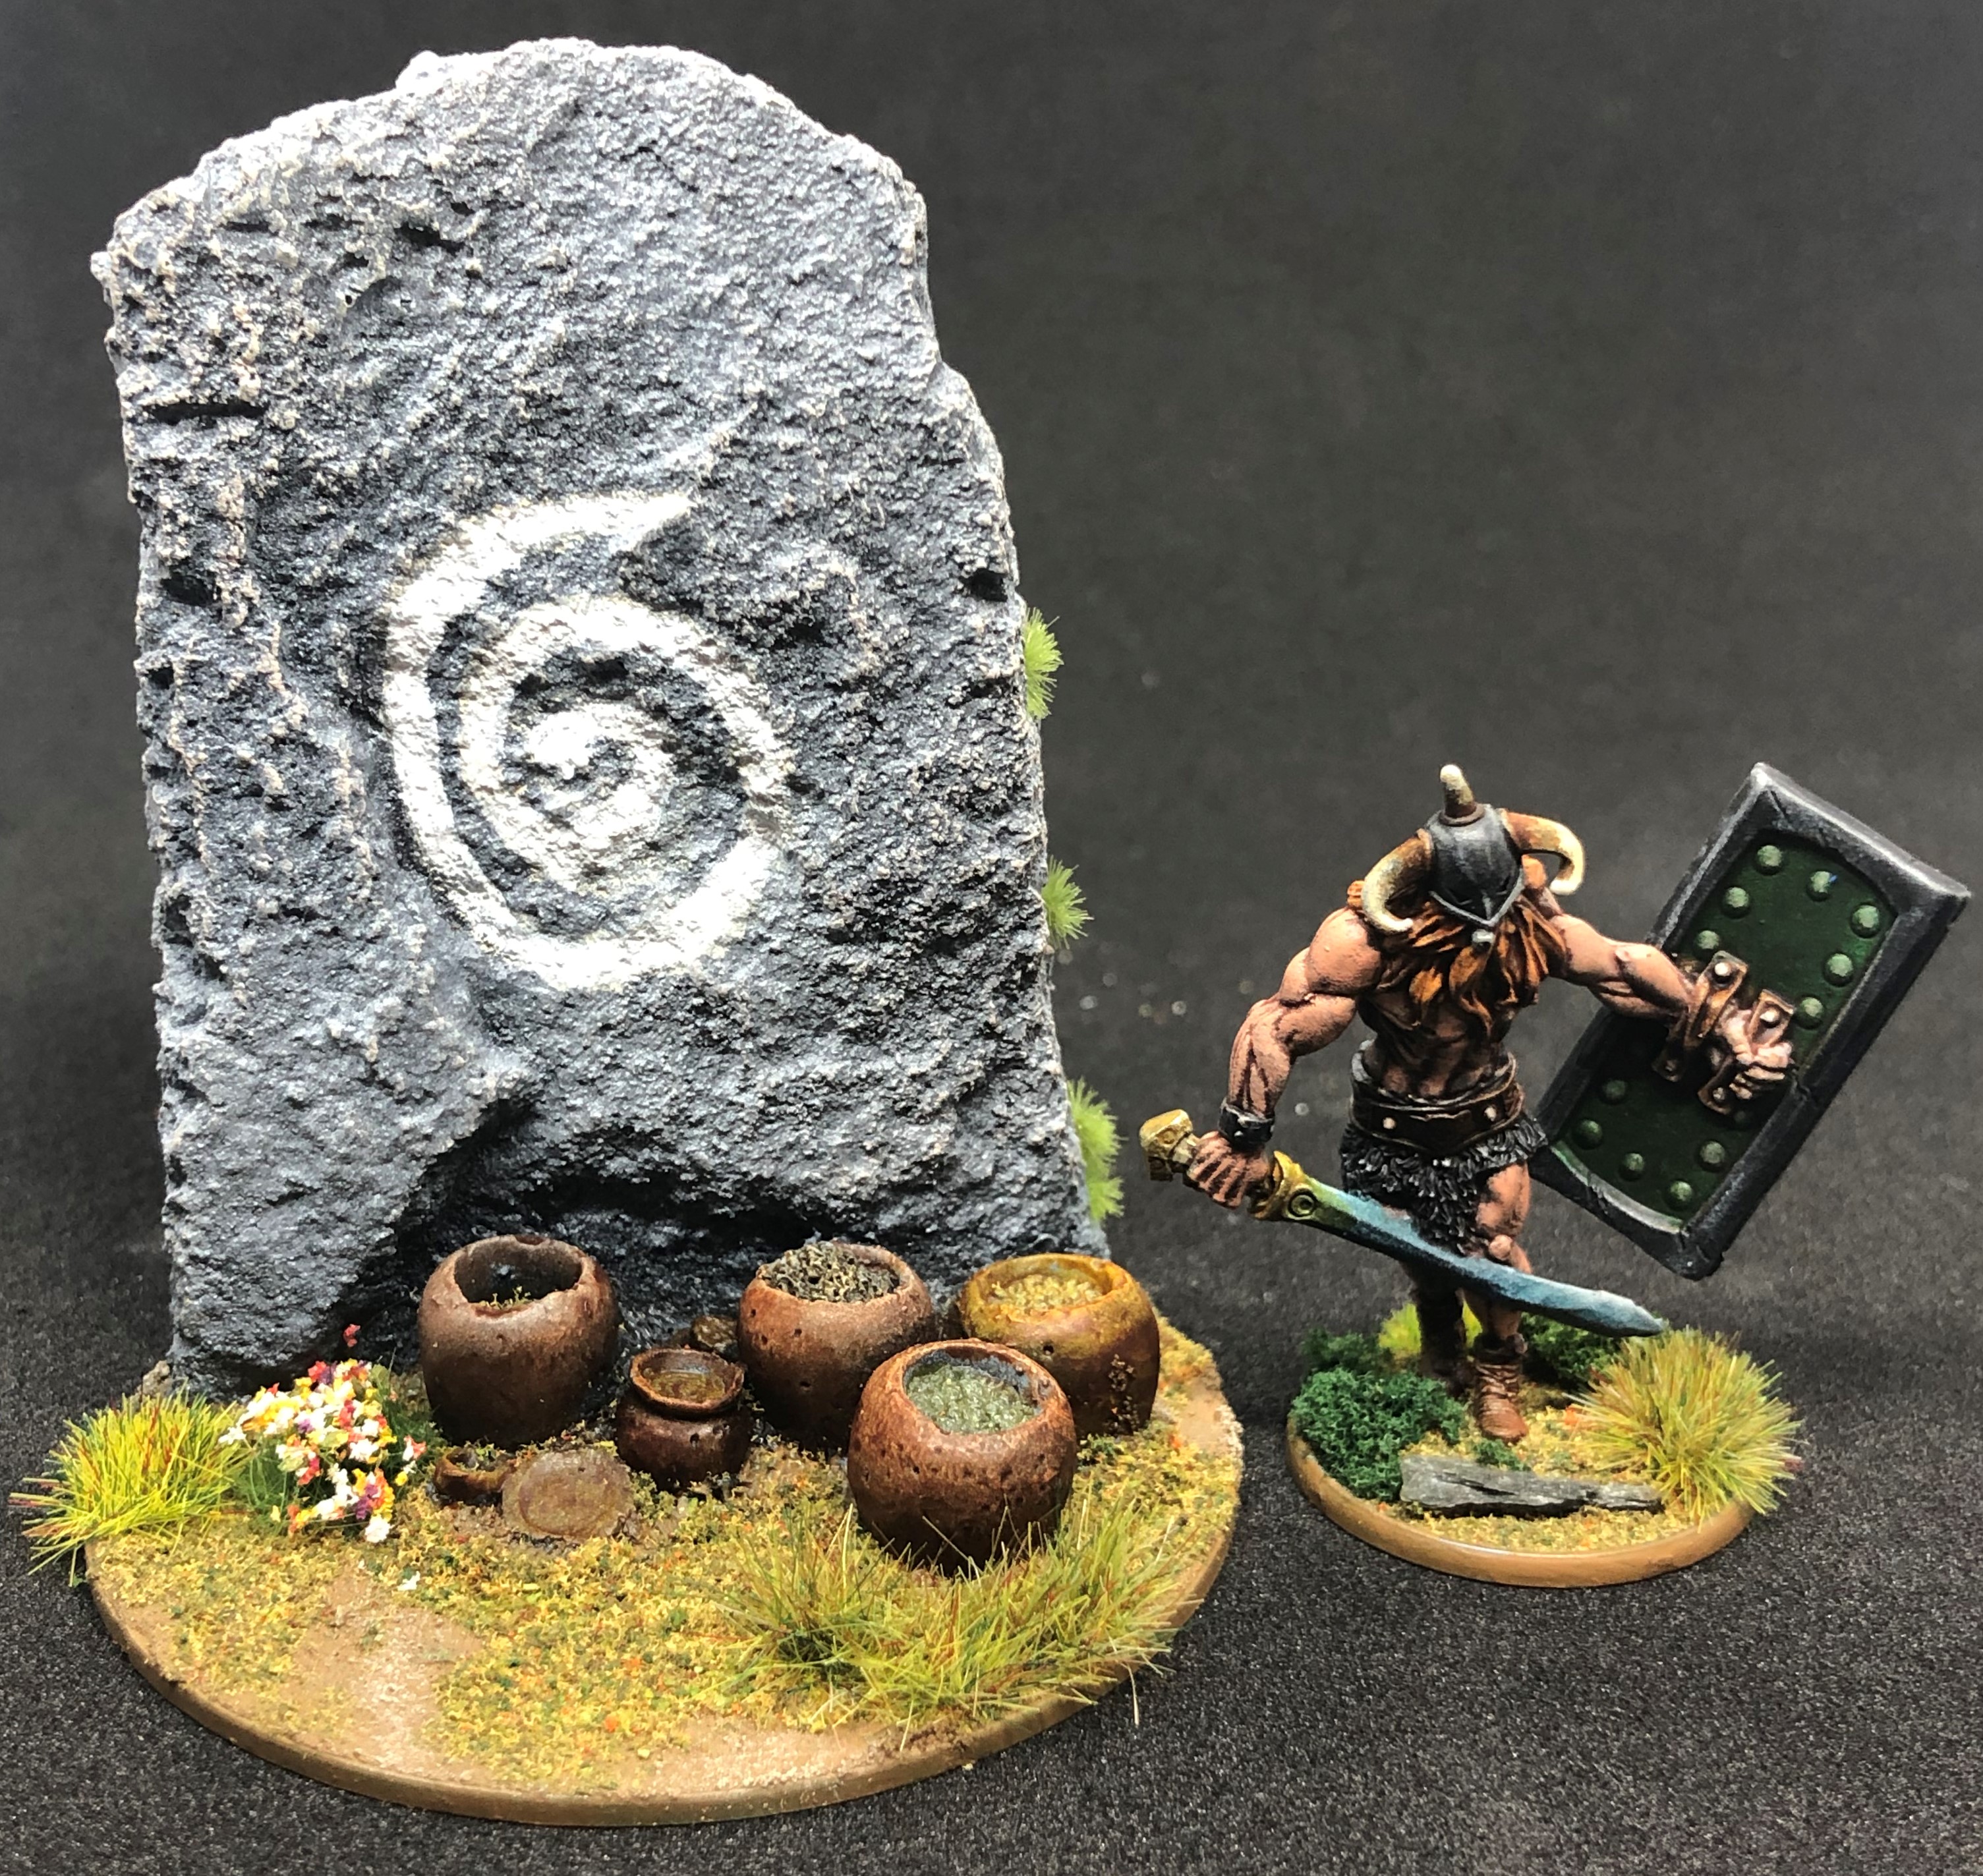
This one is called a rune stone but doesn’t have a rune carved on it so I thought I should paint one on.

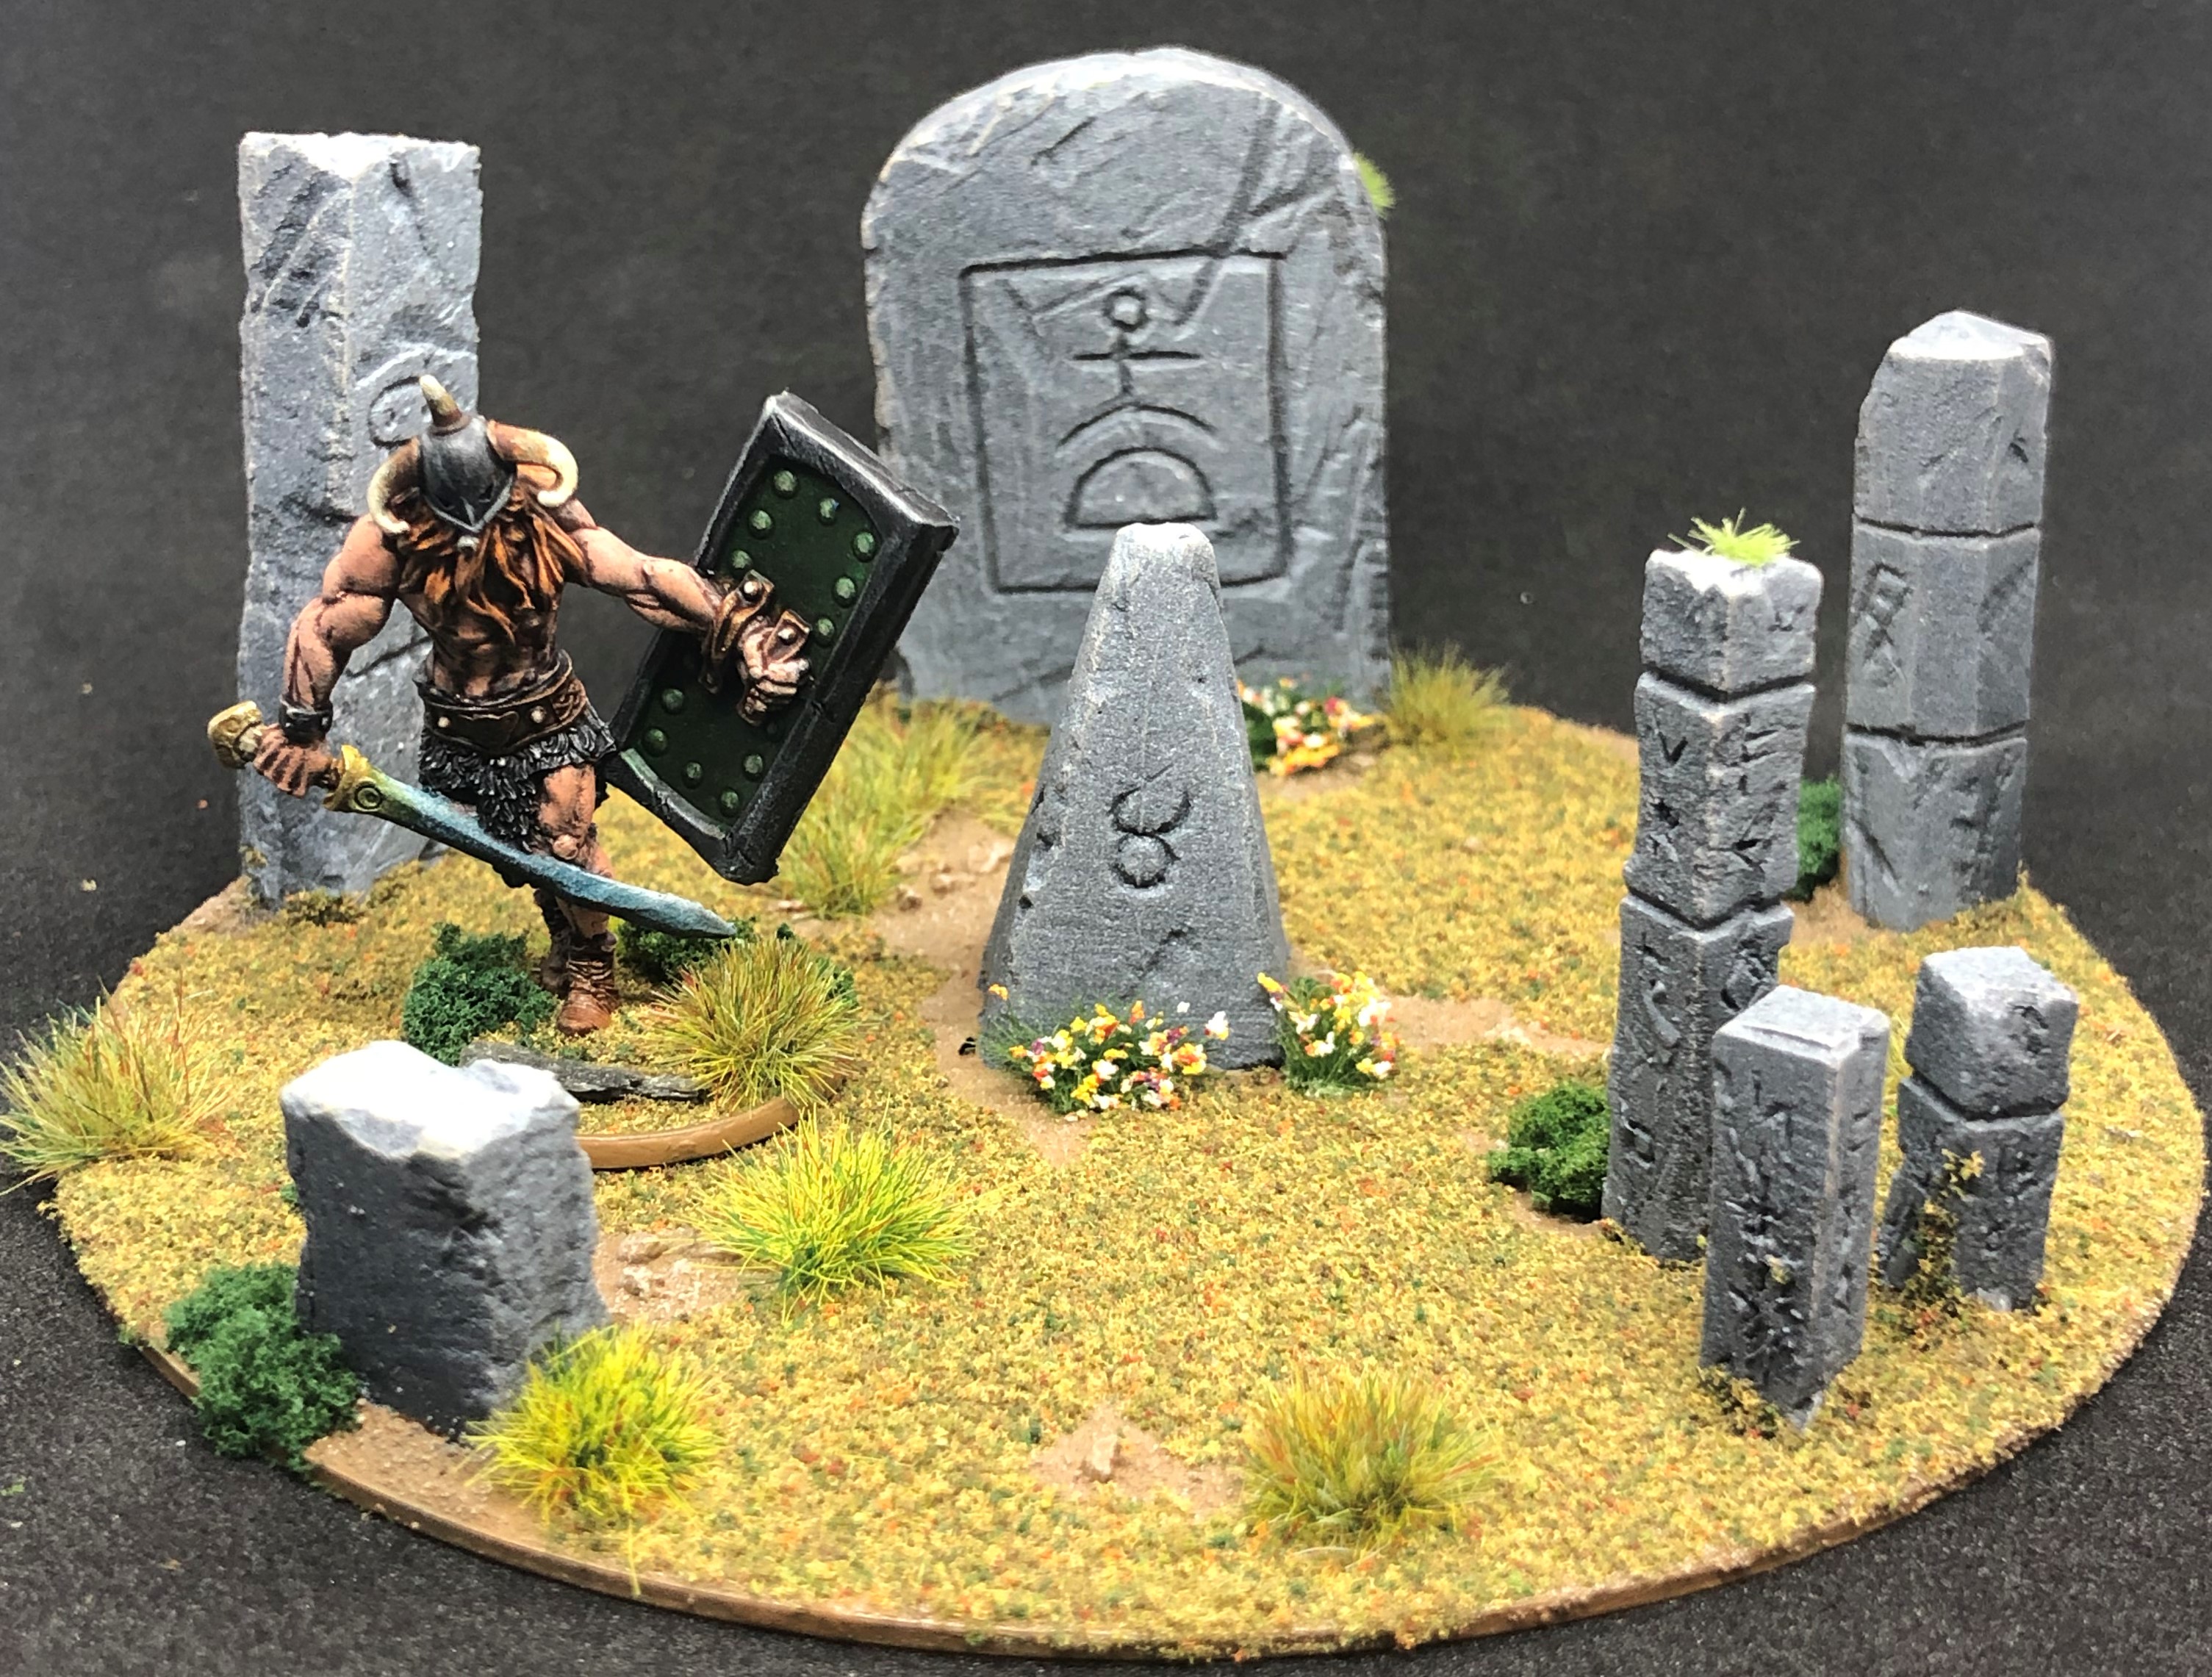
Finally some standing stones from Fenris Games. Super quick service from them this time which is appreciated. A collection of small bits that I chose to base as a small standing circle (based on a CD) and then a single monolith.
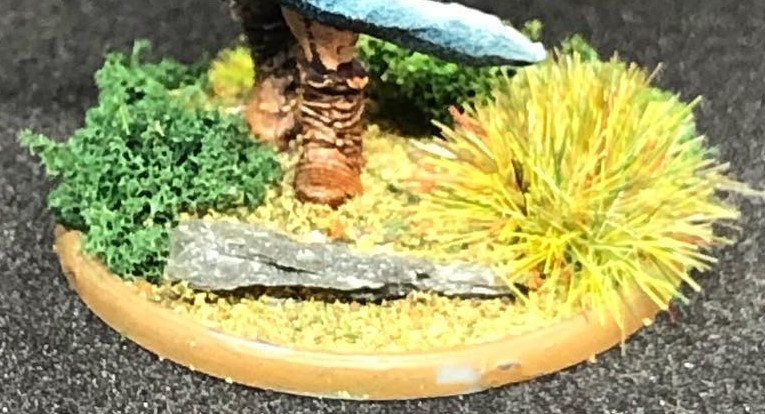
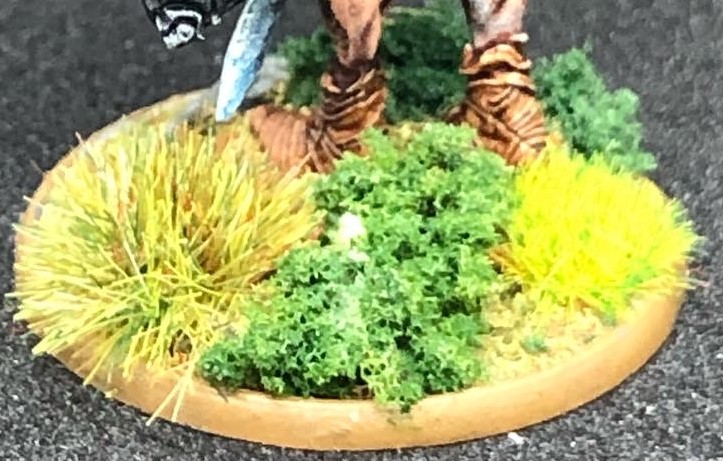
Basing Basics
@Lloyd has commented on my basing technique before and wanted the recipe so here it is:
STEP 1 – Normally I would apply a layer of PVA to bases and then top with a layer of dried sand pit sand mixed with tiny stones. This would then be painted Vallejo Earth and then lightly drybrushed with Vallejo Bonewhite.
On these Sláine miniatures I’m omiting this stage. This is because there is a very prominent puddle base as these are Siocasts.
 Prominent Siocast puddle base
ASIDE 1 – I’m using the supplied Warlord round plastic 25mm bases. These come with a lip around the outside that provides a slightly lower inner surface, presumably for the height of your basing to meet the top of the outer rim.
As you can see from the photo the Siocast puddle extends well above the rim height, it is at least twice as tall. Therefore I need a basing solution that disguises this prominent, regular shape.
STEP 2 – I use a pre-mixed fine flock to give the basic grass surface. This goes onto between 1/3 and 7/8 of the base, depending on how arid the terrain is.
ASIDE 2 – The same proportion is used for every model in an army. I use this blend on nearly everything so all of my miniatures look consistent when placed next to each other, regardless of which army they were based for. Here’s the blend:
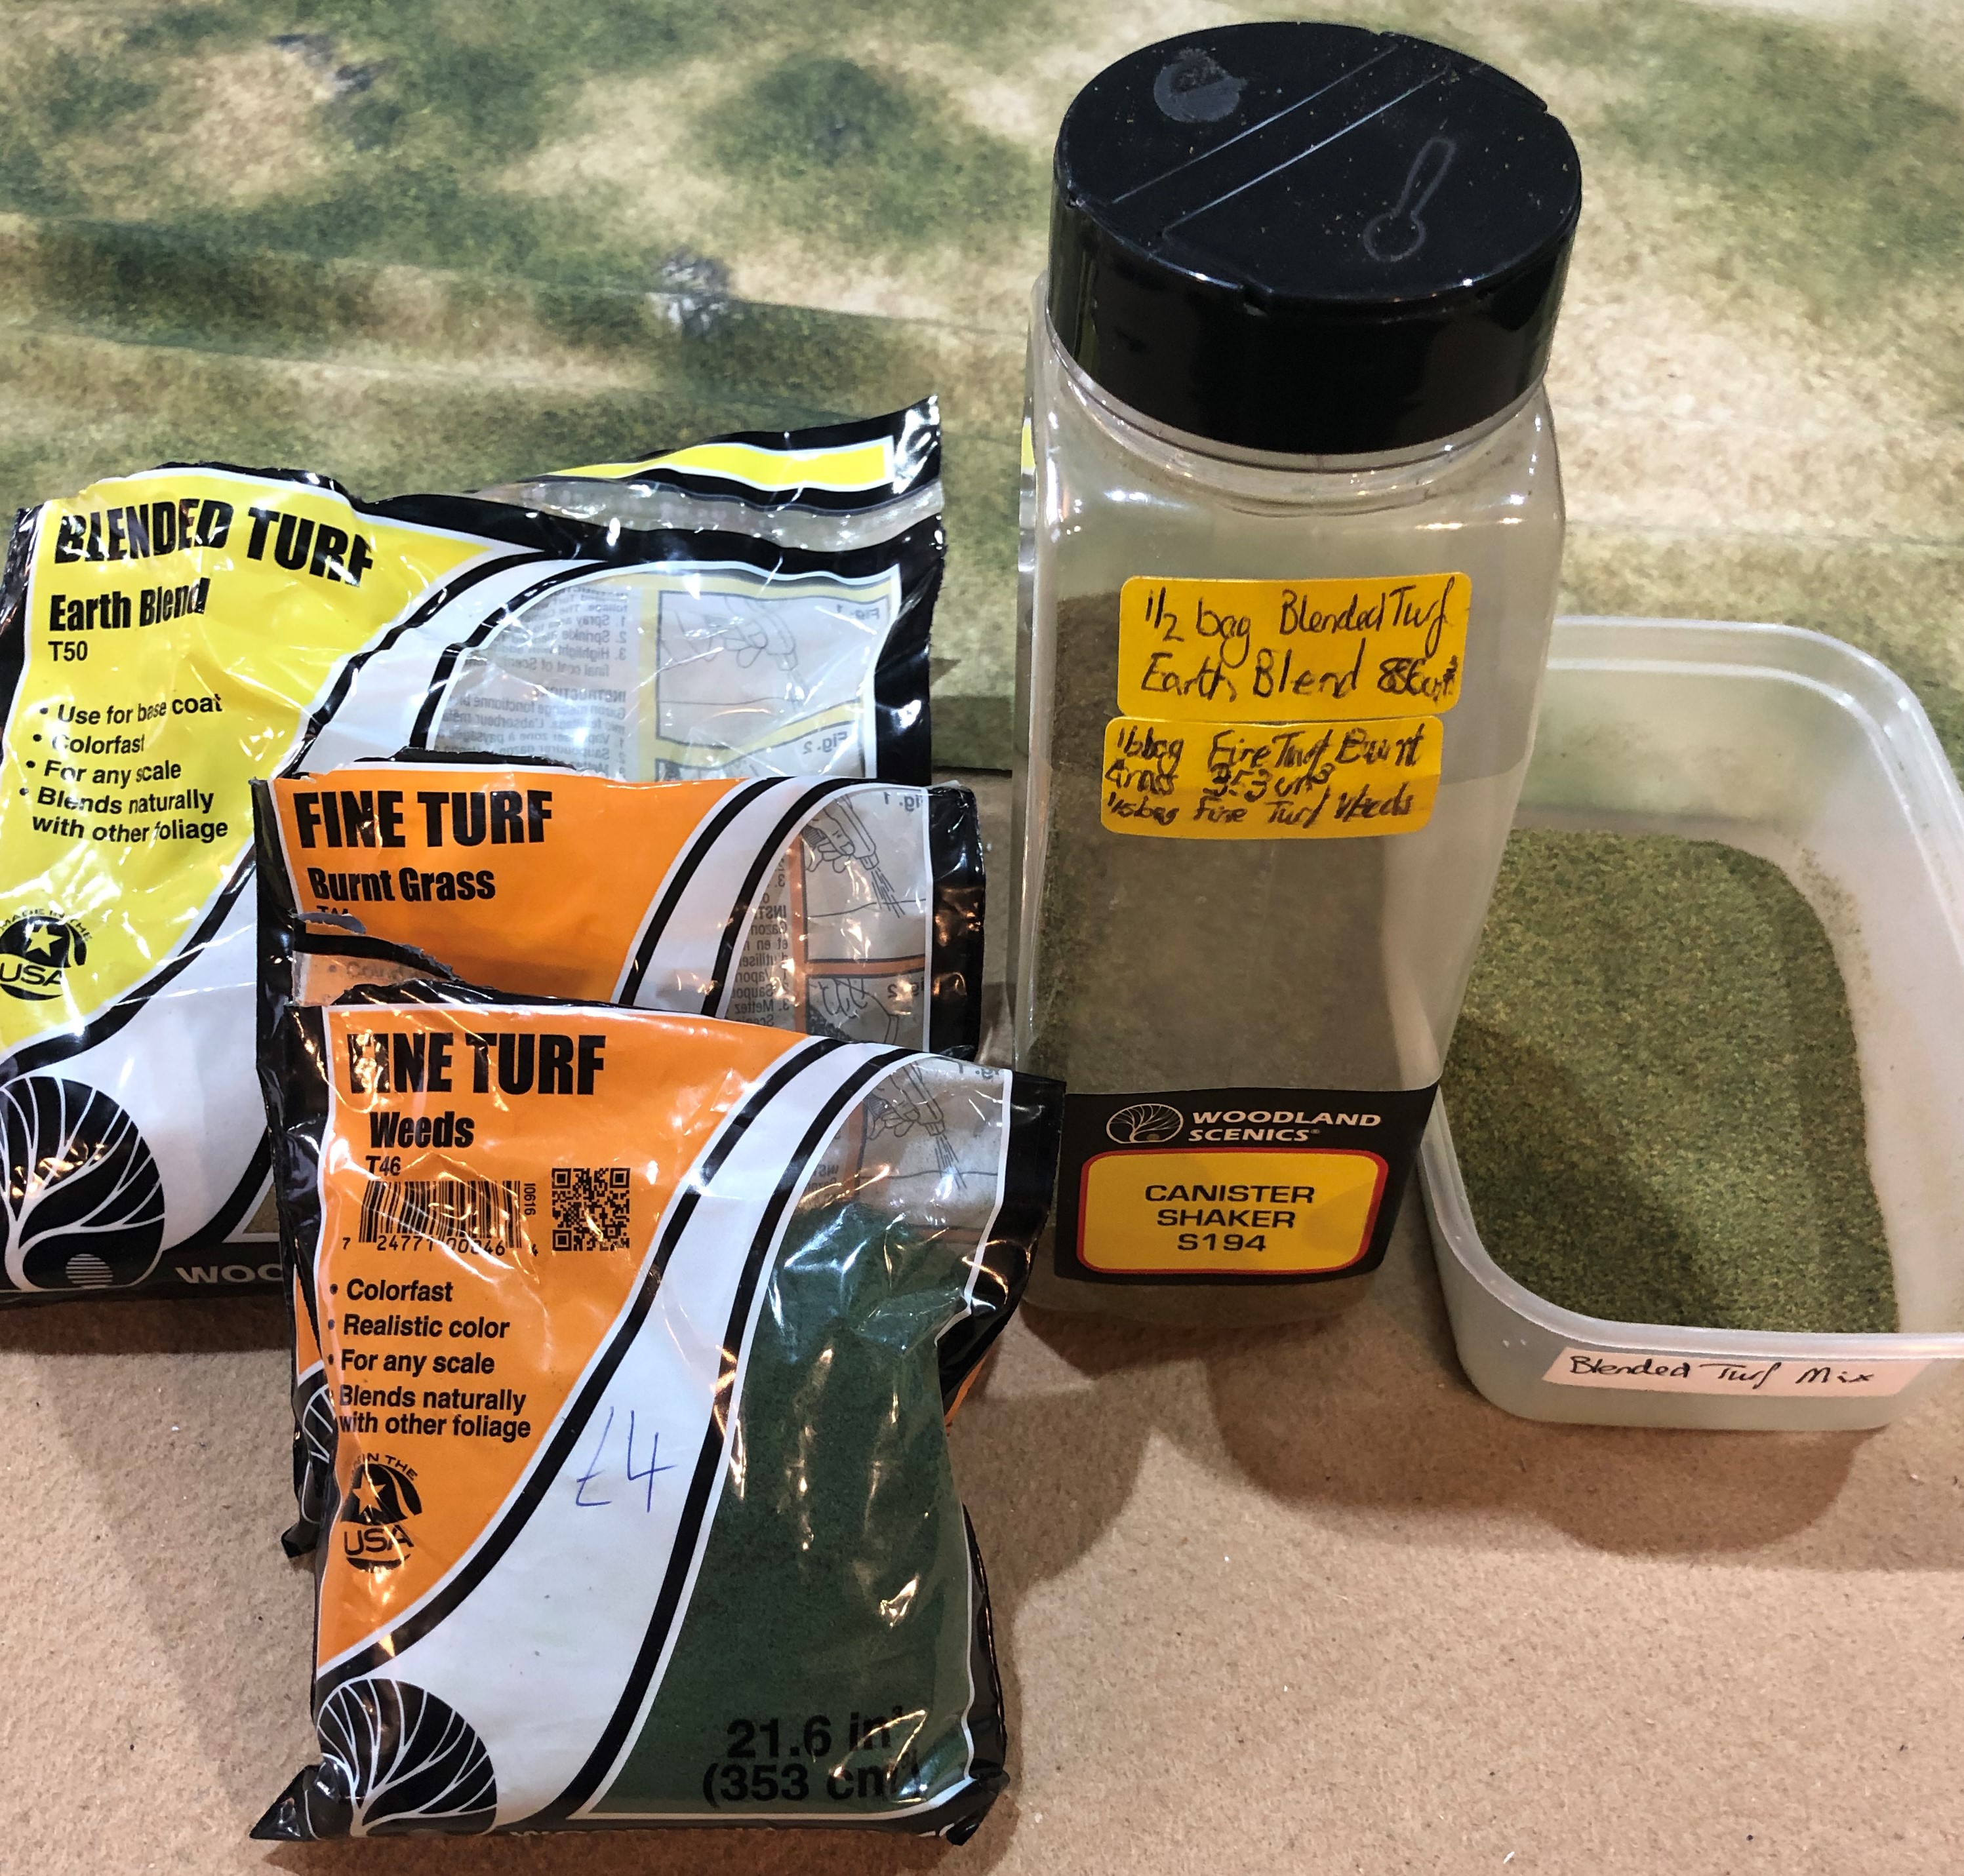 Basic grass flock mix
The recipe is:
1/2 bag Blended Turf Earth Blend
1/2 bag Fine Turf Burnt Grass
1/5 bag Fine Turf Weeds
I mix the flock using the Woodland Scenics canister shaker. I think you get a much more natural look by having similar shades but with some different coloured bits mixed in. As you can see I wrote the recipe on the side of the canister to remind me when refilling it. The take away tub is half filled and then used to dip the base into when applying.
STEP 3 – I apply a thick layer of neat PVA to the surface of the base to be flocked and then dip into the tub. After a few minutes the PVA has soaked through the flock. I re-dip the base again and set to one side for 3-4 hours to completely dry. Any loose excess is shaken off back into the tub.
For the Sláine miniatures I left a thick layer on the base after dipping and pressed it down with my finger to ensure a good thick layer. This was done to 100% of the base surgace as there is no earth texture underneath having omitted Step 1.
STEP 4 – It is normally at this stage that I varnish the model. This helps to fix the initial flock layer. I use Mr Hobby Flat Matt Topcoat.
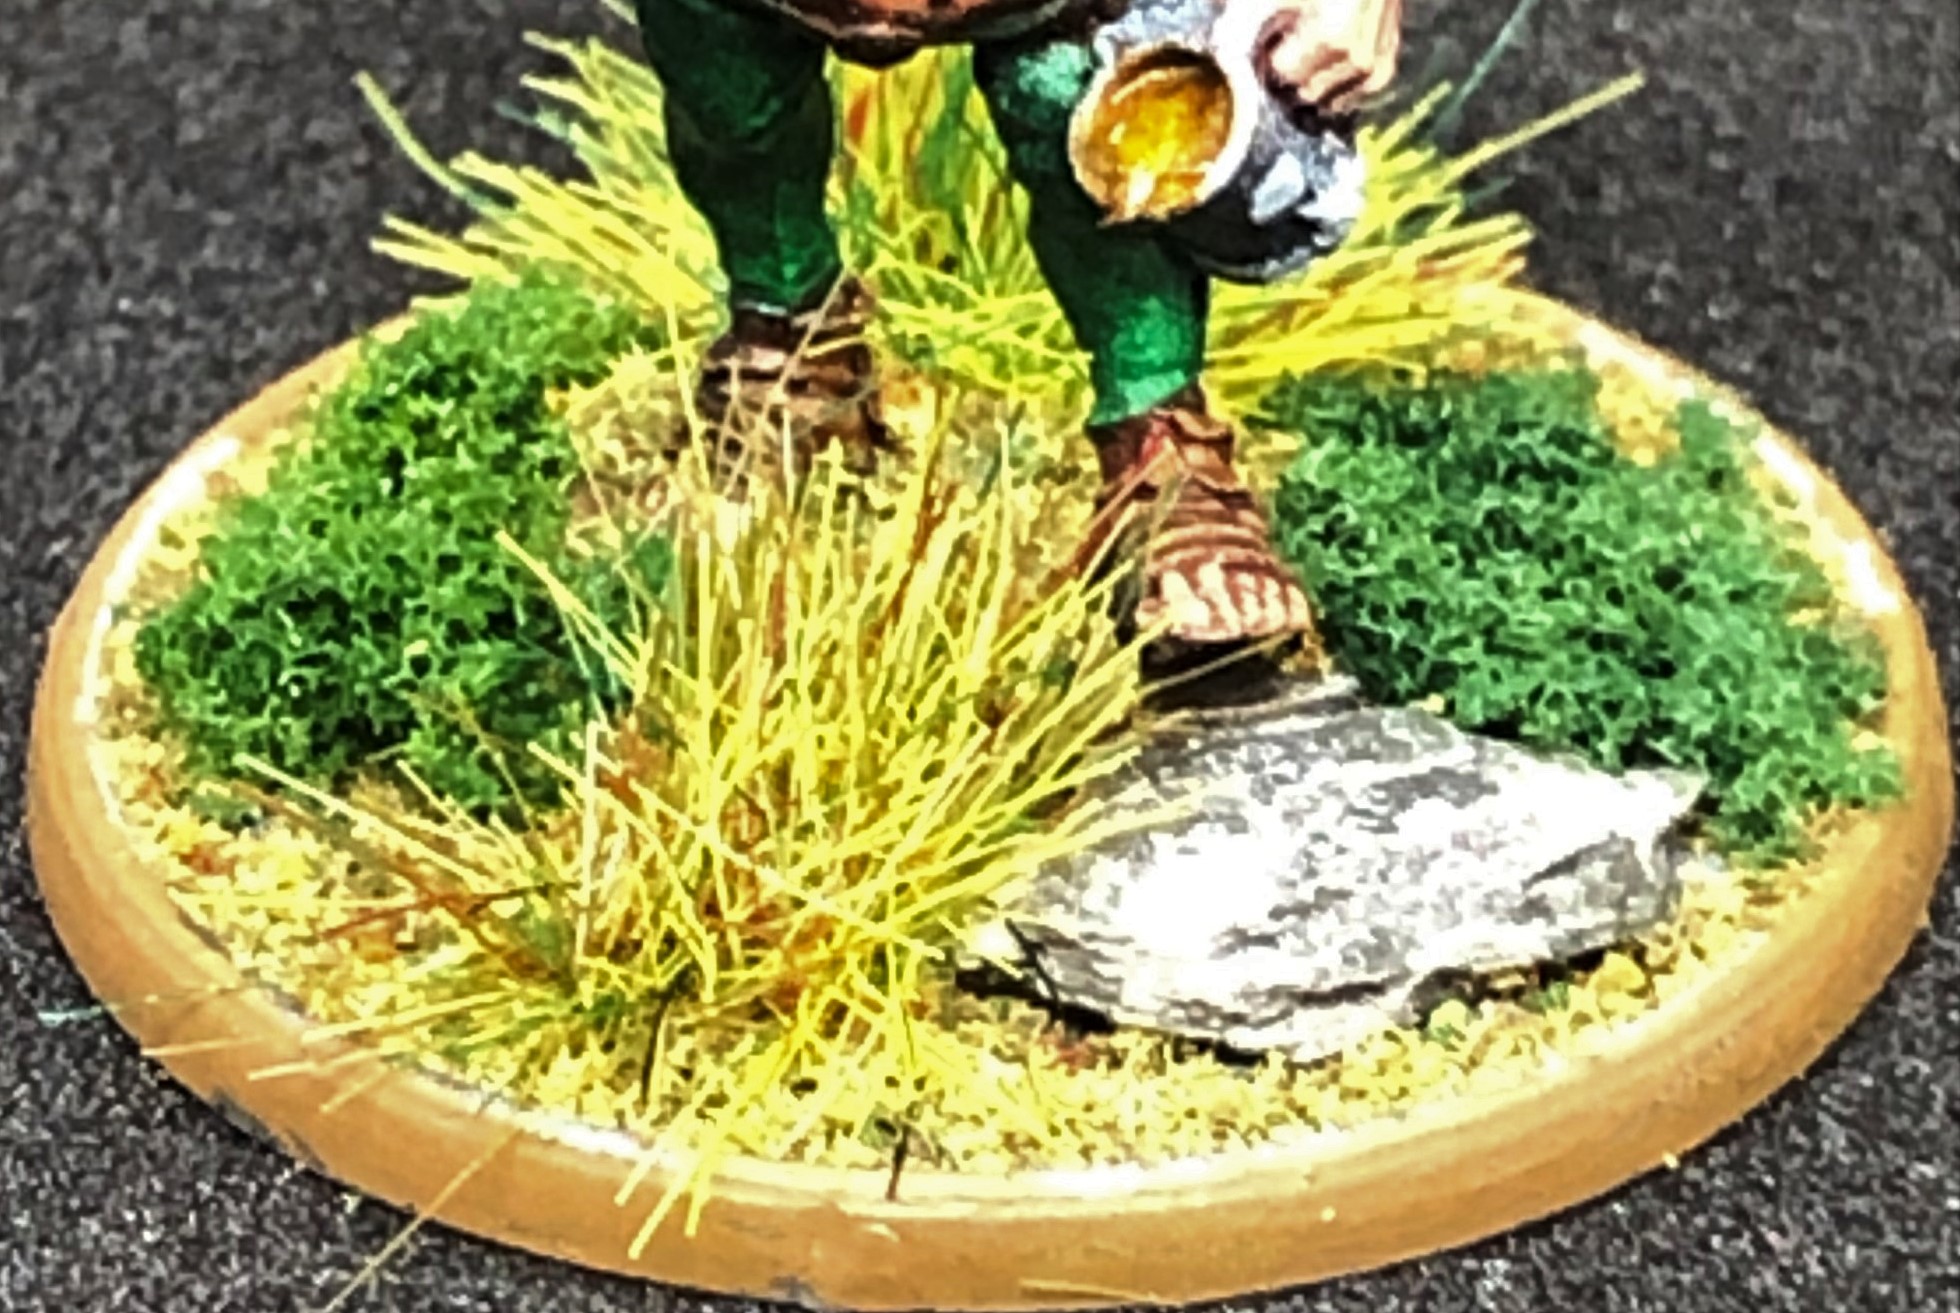
STEP 5 -I have some natural slate pieces and these have a good thickness to them. One piece will be stuck onto each base, covering up the longest visible straight edge of the puddle base. Usually I’d paint these as natural stone doesn’t look quite right when used in scale but I’m going for a more graphic look with these minis and I quite like the slightly incongruous edge the natural slate gives.
STEP 6 – Clump foliage and tufts. I use 5-7 different types of top dressing in each basing scheme. Usually this would be 5-6 different types of static grass tufts and one of flower tufts. The flowers are used to mark leader bases. I’m a big fan of the Gamer Grass sets as you get four different colours of tufts in a coordinated set. My go to tuft supplier is Tajima1 great range and you get a free sheet of wild grass (pictured) with every 5 other sheets. Nice to support a (relatively) local business too. The selection for this project includes:
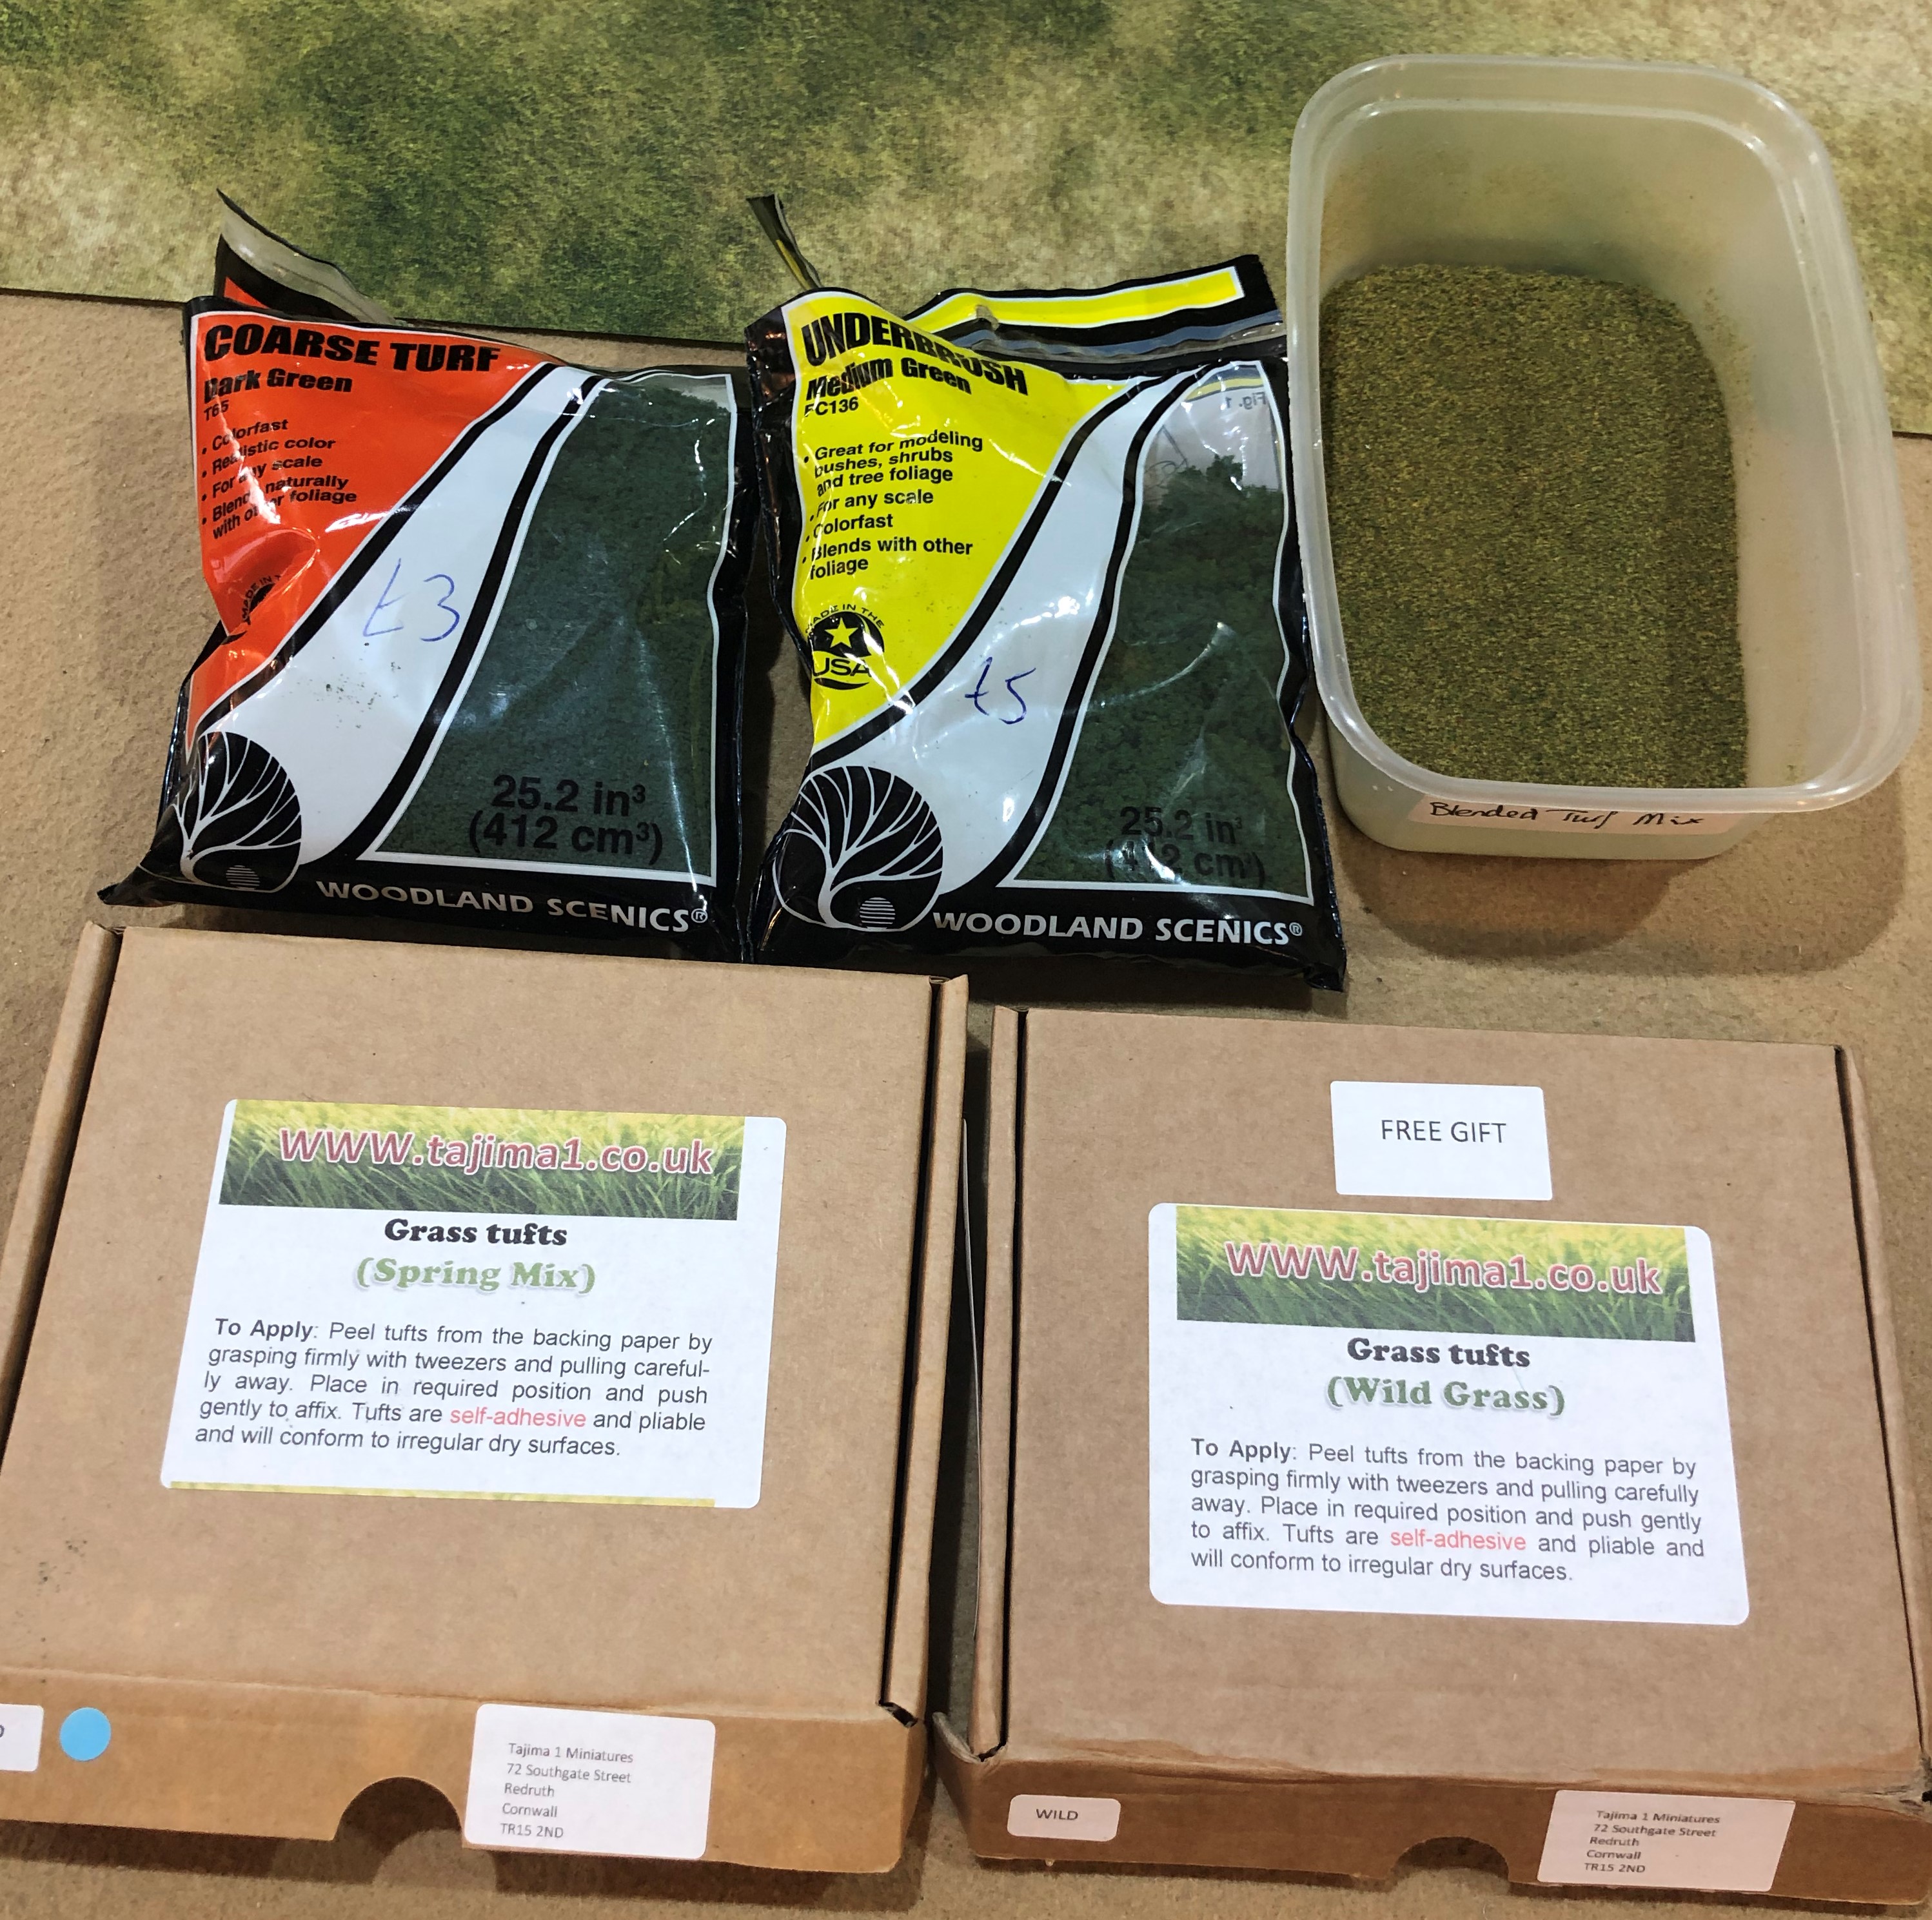 Top dressing
I went for some bright colours and wanted a verdant look for Tír na nÓg. I chose two dark green clump types, one fine and one coarse. These are stuck on with PVA or, if I’m impatient, some superglue on the end of a cocktail stick.
This is followed by the tufts. I used a wild grass for a tone closer to the base flock and then the brightest green I have which is the Spring tufts to help enhance the graphic contrast and make them look a bit more in keeping with the graphic novel asthetic and colour scheme from “The Horned God”.
This gives these bases 5 top dressing elements. I always put these on in uneven numbers. For historical minis 3 is usually plenty and some bases may only have 1. These high fantasy models benefit from a busier base I think. Additionally, and importantly, this approach has allowed me to almost completely cover the line of the puddle bases.
STEP 7 – Base edges are rimmed with Vallejo Earth.


Pre-release goodies
I was lucky and spotted a couple of pre-release Sláine models on eBay and they arrived last week. There was a Skull Sword Drune Warrior and Ukko, both from the starter set. There was a bit of a Zanzibari backlog on the painting table but I got to them this week.
Having just got the full Speedpaint set from Army Painter I decided to follow the painting guide from Warlord. They do a Speedpaint only and Speedpaint + (highlights and metalics) and I mostly follows the Speedpaint only version.
First step was a zenith undercoat that was applied with an airbrush (Stynylrez White zenithed over Stynylrez Black).

I did bolster the colours a bit with some additional highlights in areas where my zenith was a bit dark. You can see that this first coat of Crusader Skin is a bit dark on the lower half of the front of both models.
With the Skull Sword leaning forward he was shielded from quite a lot of the zenith highlight and this was remedied with some manual highlights across the skin areas usinf Vallejo Beige Red and then a blend of Dwarf Flesh and Beige Red for the top highlight that was very gently drybrushed on.
Other colours were as per the painting guide although I did tweak a couple of the colours here and there with a bit of mixing of Speedpaints to get a paler colour, especially the yellow under the gold on the shieldwhere I cut the suggested Zealot Yellow (which is quite orange) with some Pale Sand.
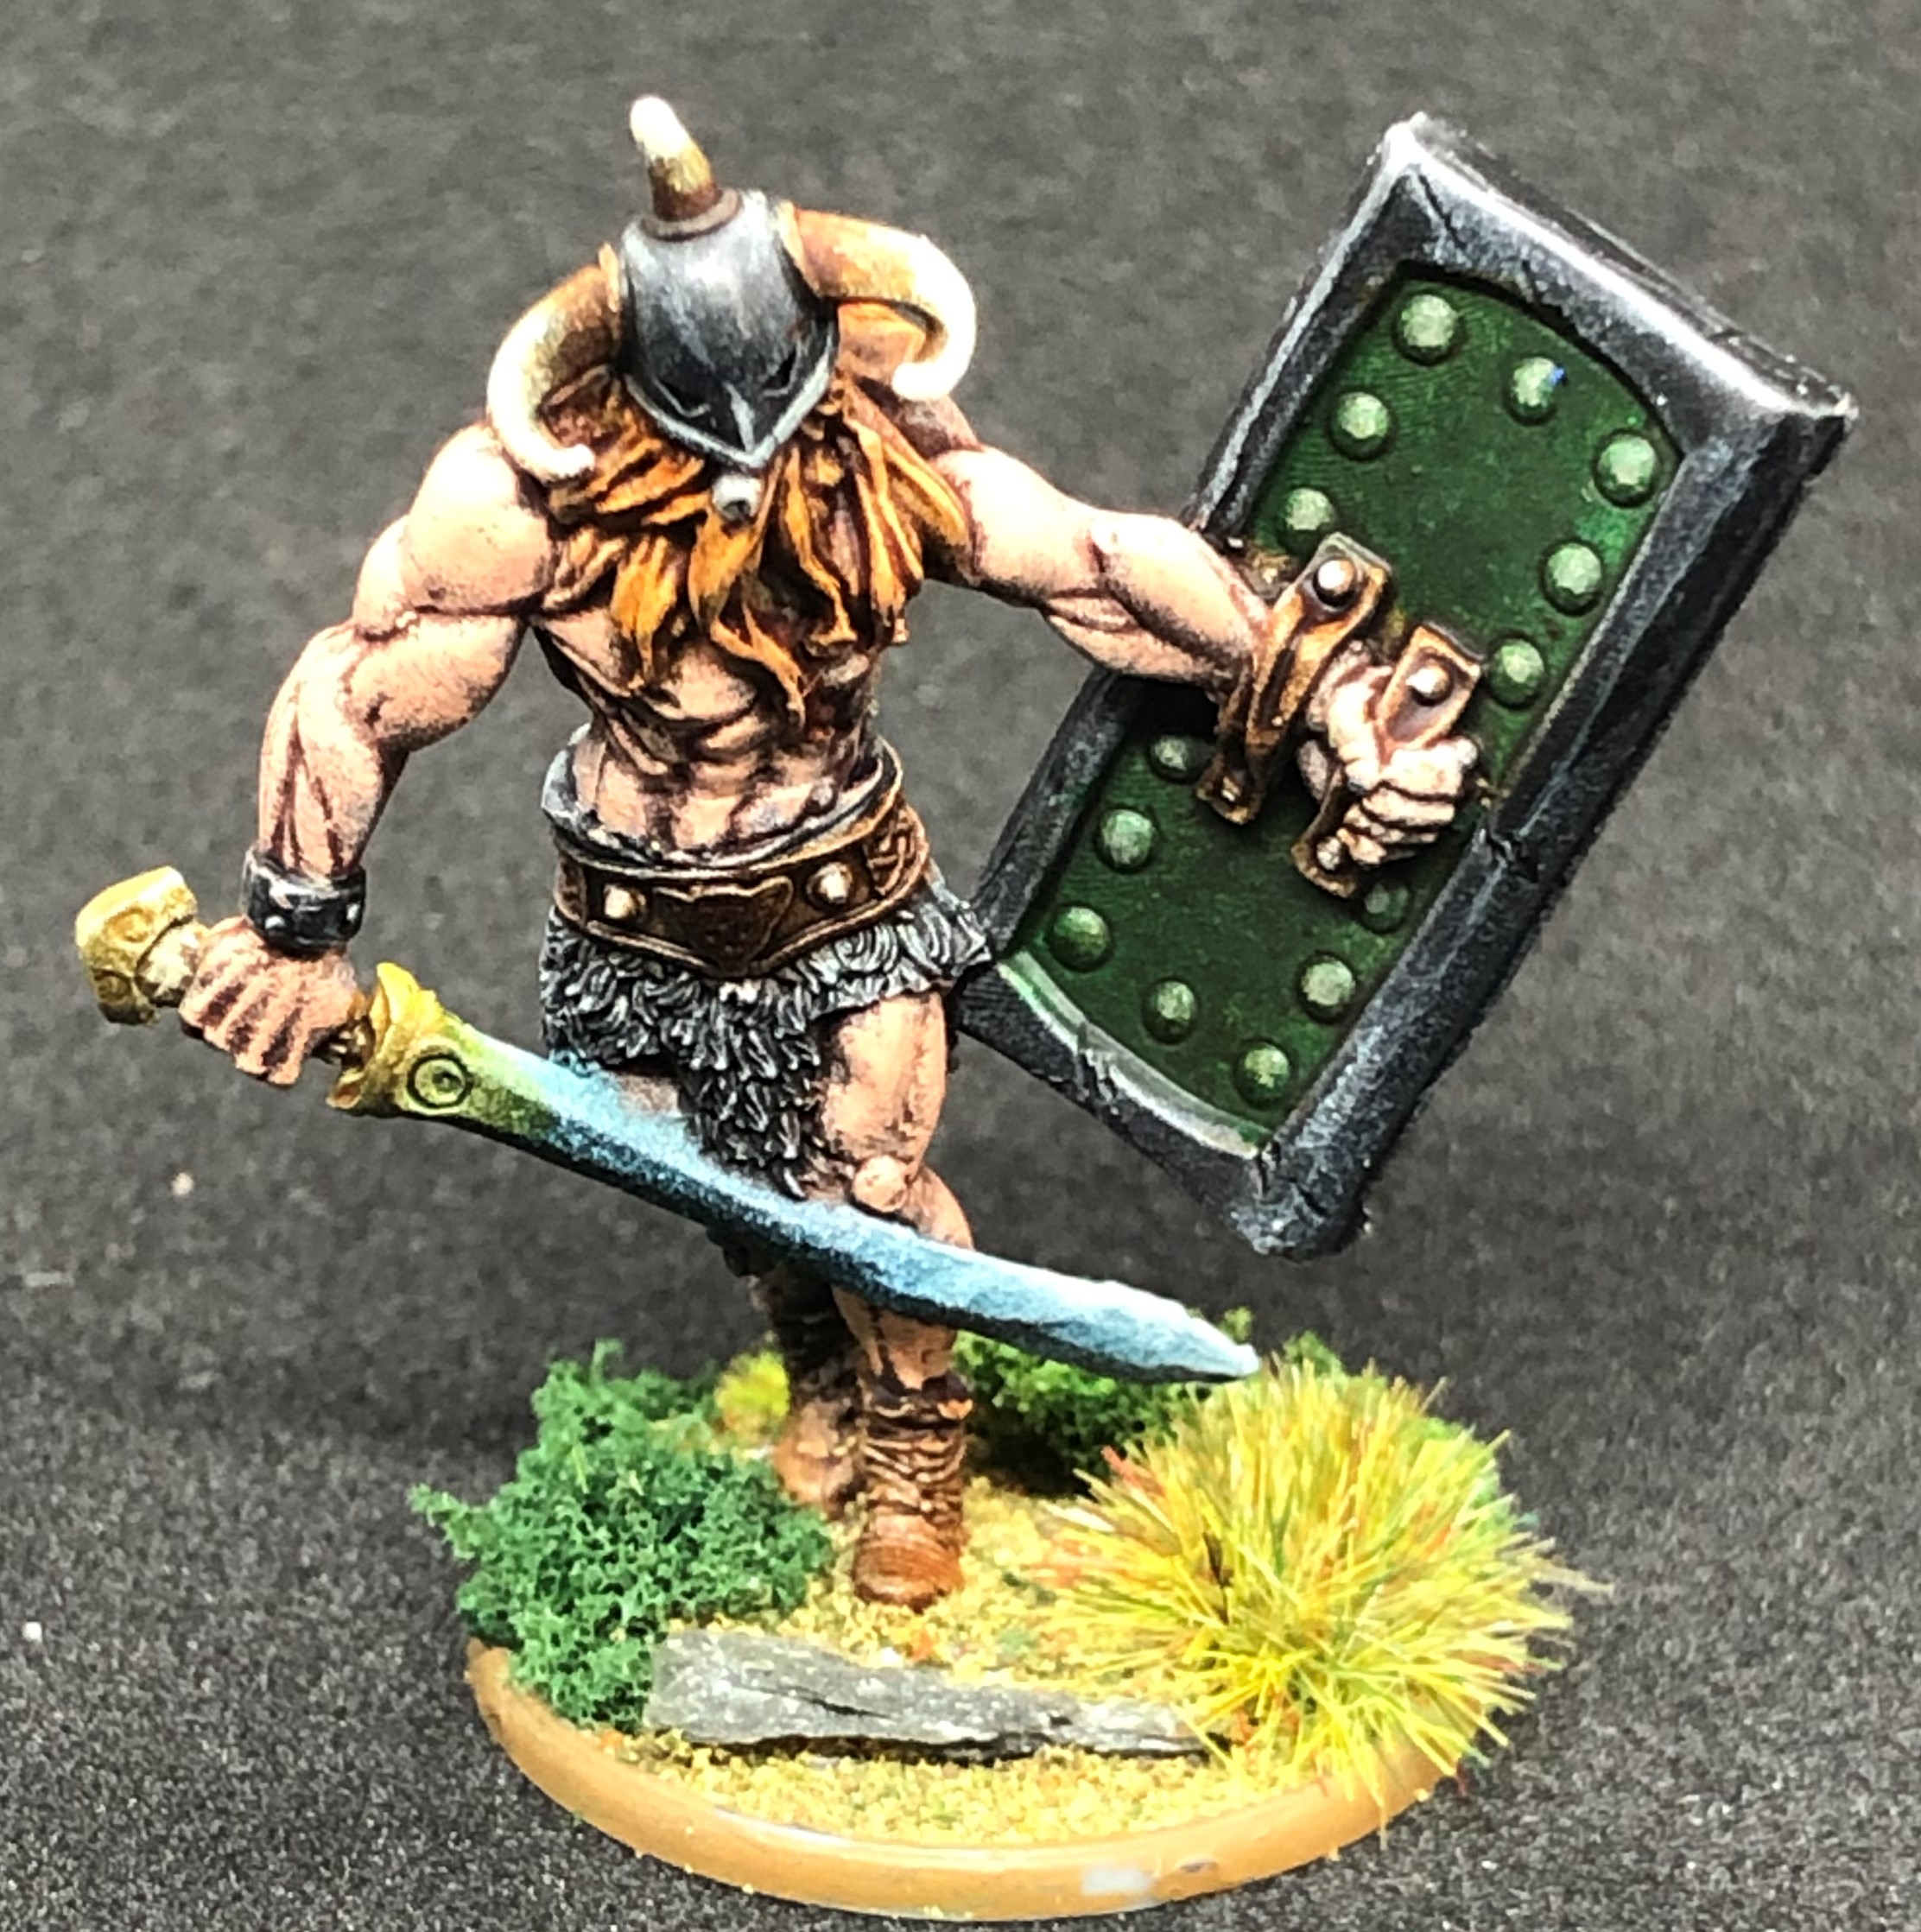

There were also some final tweaks and highlights as follows:
The sword was a blend of Runic Grey (rather than Gravelord Grey) and Highlord Blue, thinned with water, 3:1:2. This has given a very blue-steel look which I think fits well with the brighter comic asthetic look that I’m after.
Shield studs and edge highlights and some very subtle highlights on the helmet were in Vallejo Cold Grey.
The horns has a bone white highlight with pure white at the very ends.
I was tempted by a NMM approach with just the Speedpaints but went for a bit of added bling in the end. The sword hilt and gold work on the shield got a highlight of Vallejo Metal Color Gold after the Matt Varnish layer was applied the the whole model. This ensures the metalic isn’t dulled unnecessarily by the varnish.
Ukko was painted in the Simon Bisley colour scheme from The Horned God: