


2mm Strength & Honour


Recommendations: 302
About the Project
The new Strength and Honour rules for ancient army level battles have me intrigued. I've played and enjoyed Blucher and this seems to offer the same level of command and control so we can feel like we are making grand tactical decisions like Caesar, Vercingetorix or Boudica. I haven't used my resin printer yet and this seems the idea time to learn how.
Related Game: Strength & Honour
Related Company: Too Fat Lardies
Related Genre: Historical
This Project is Active
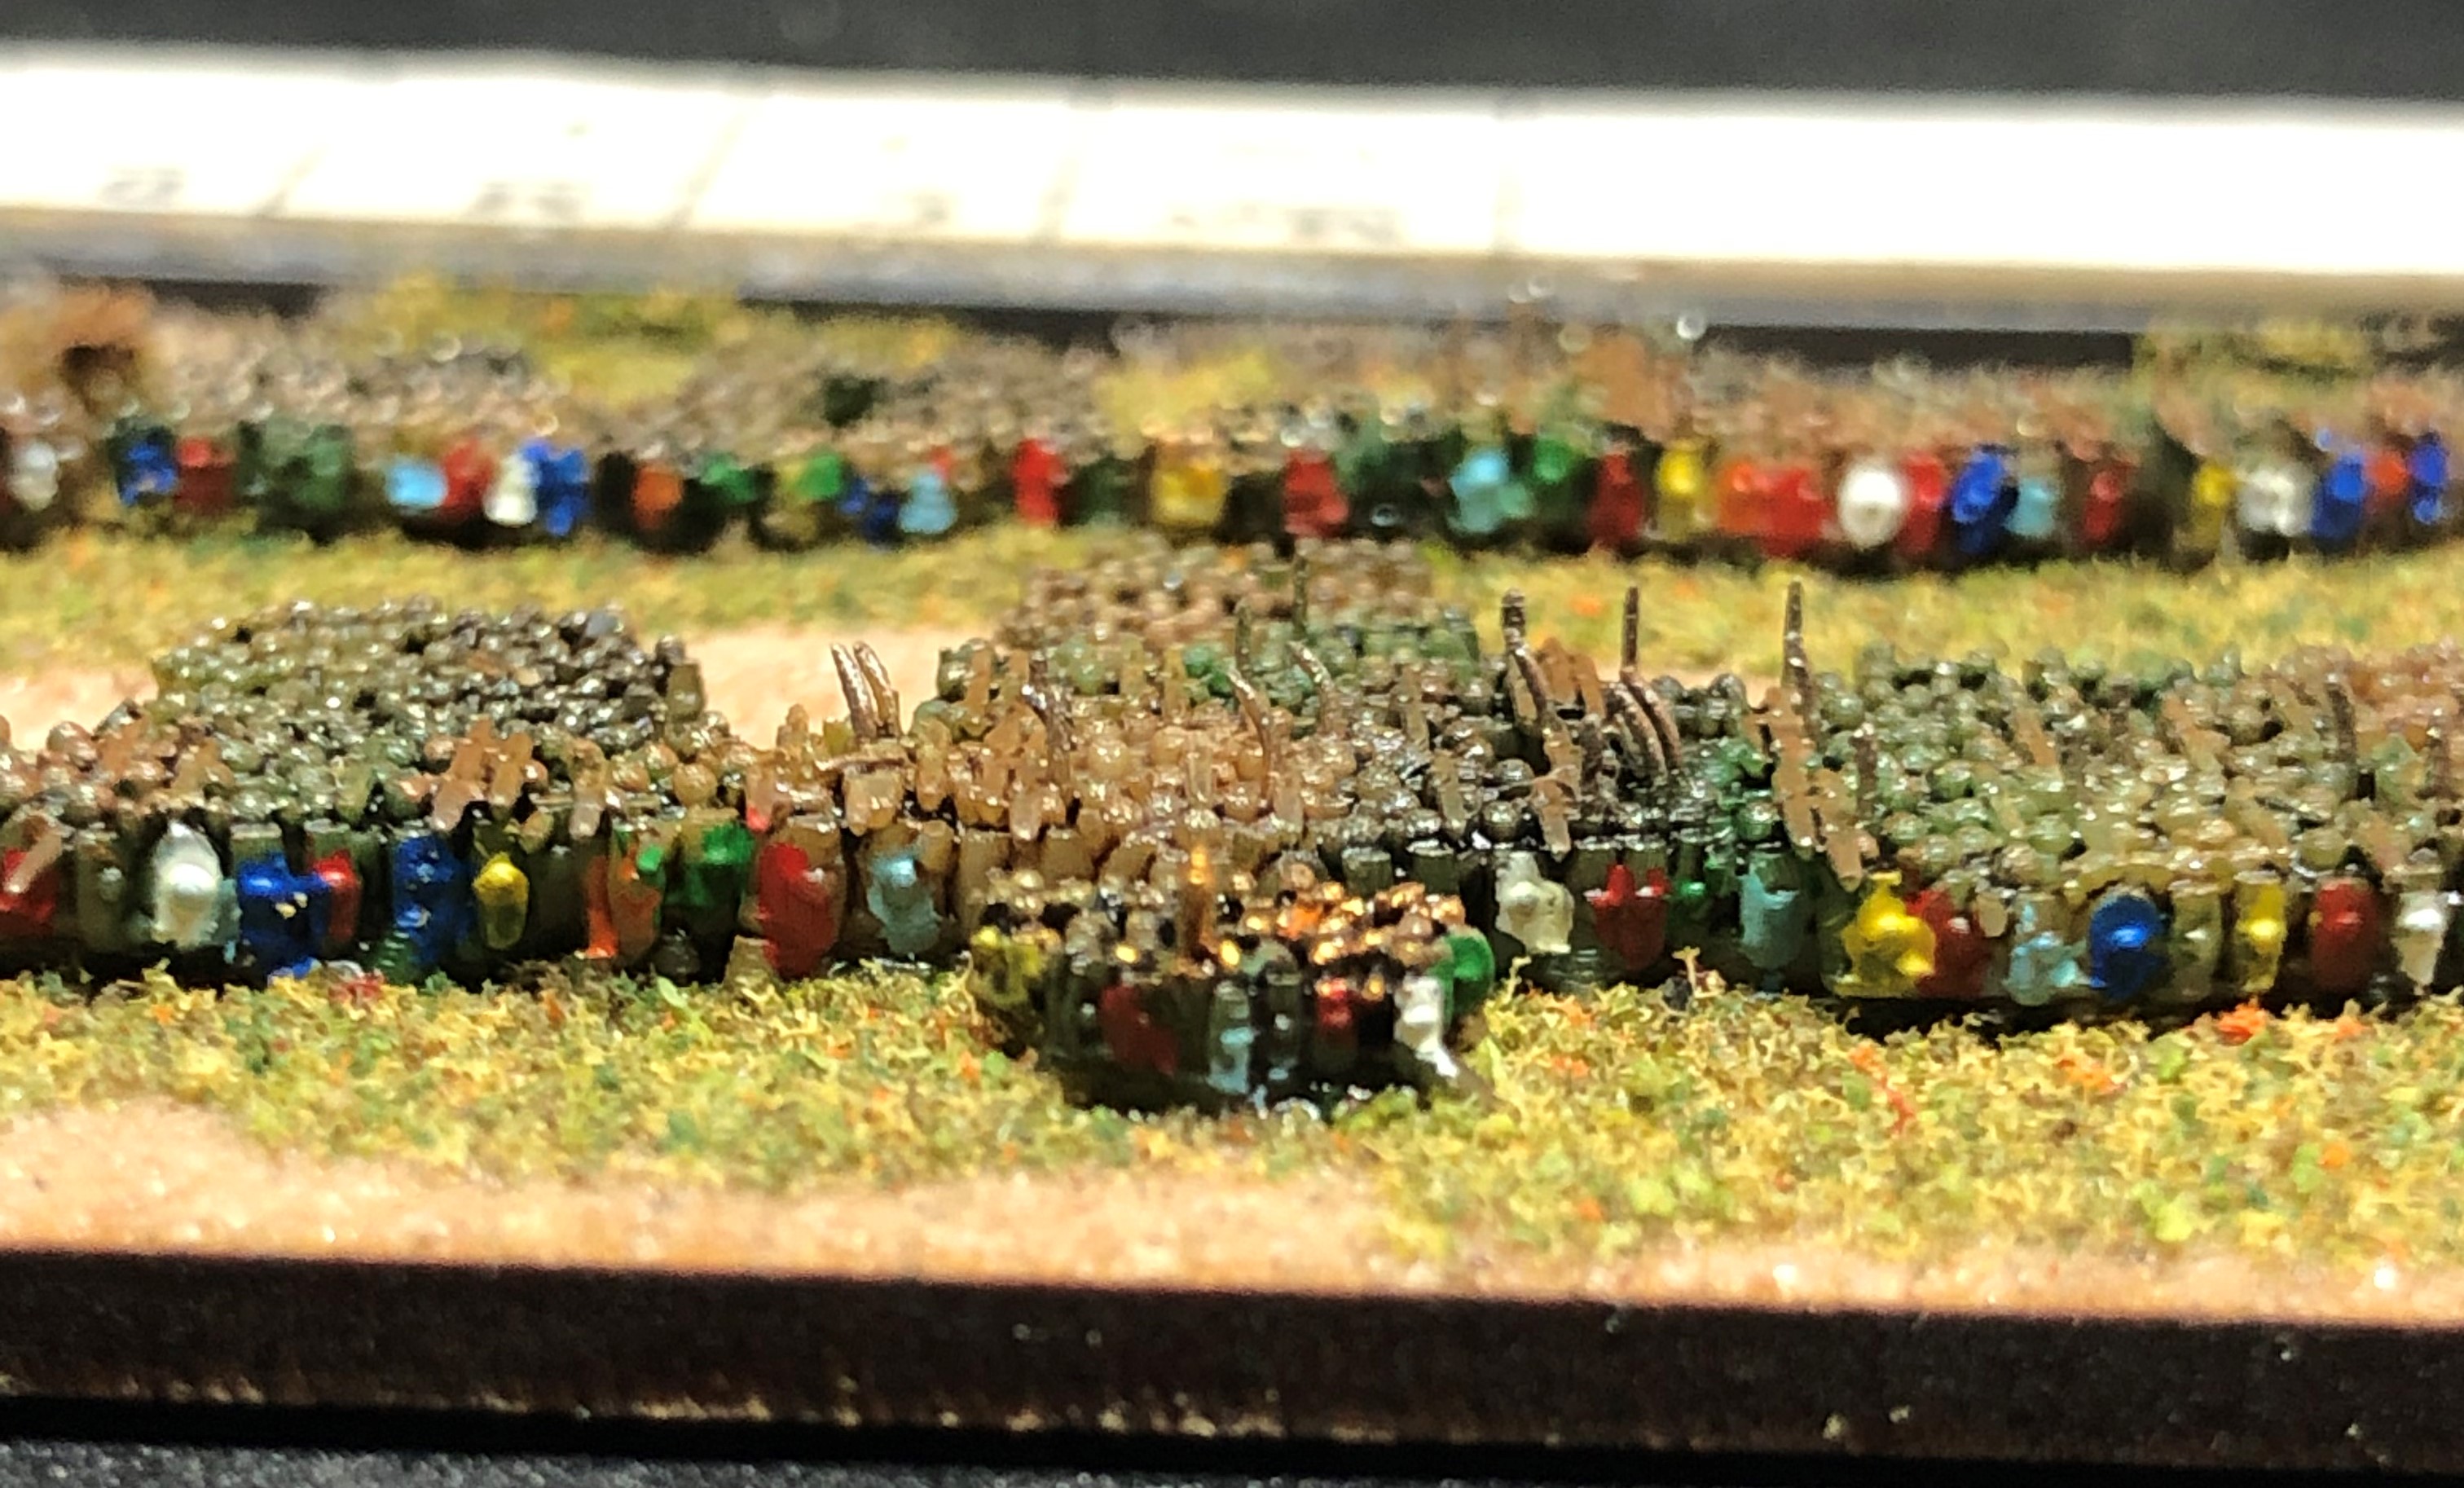
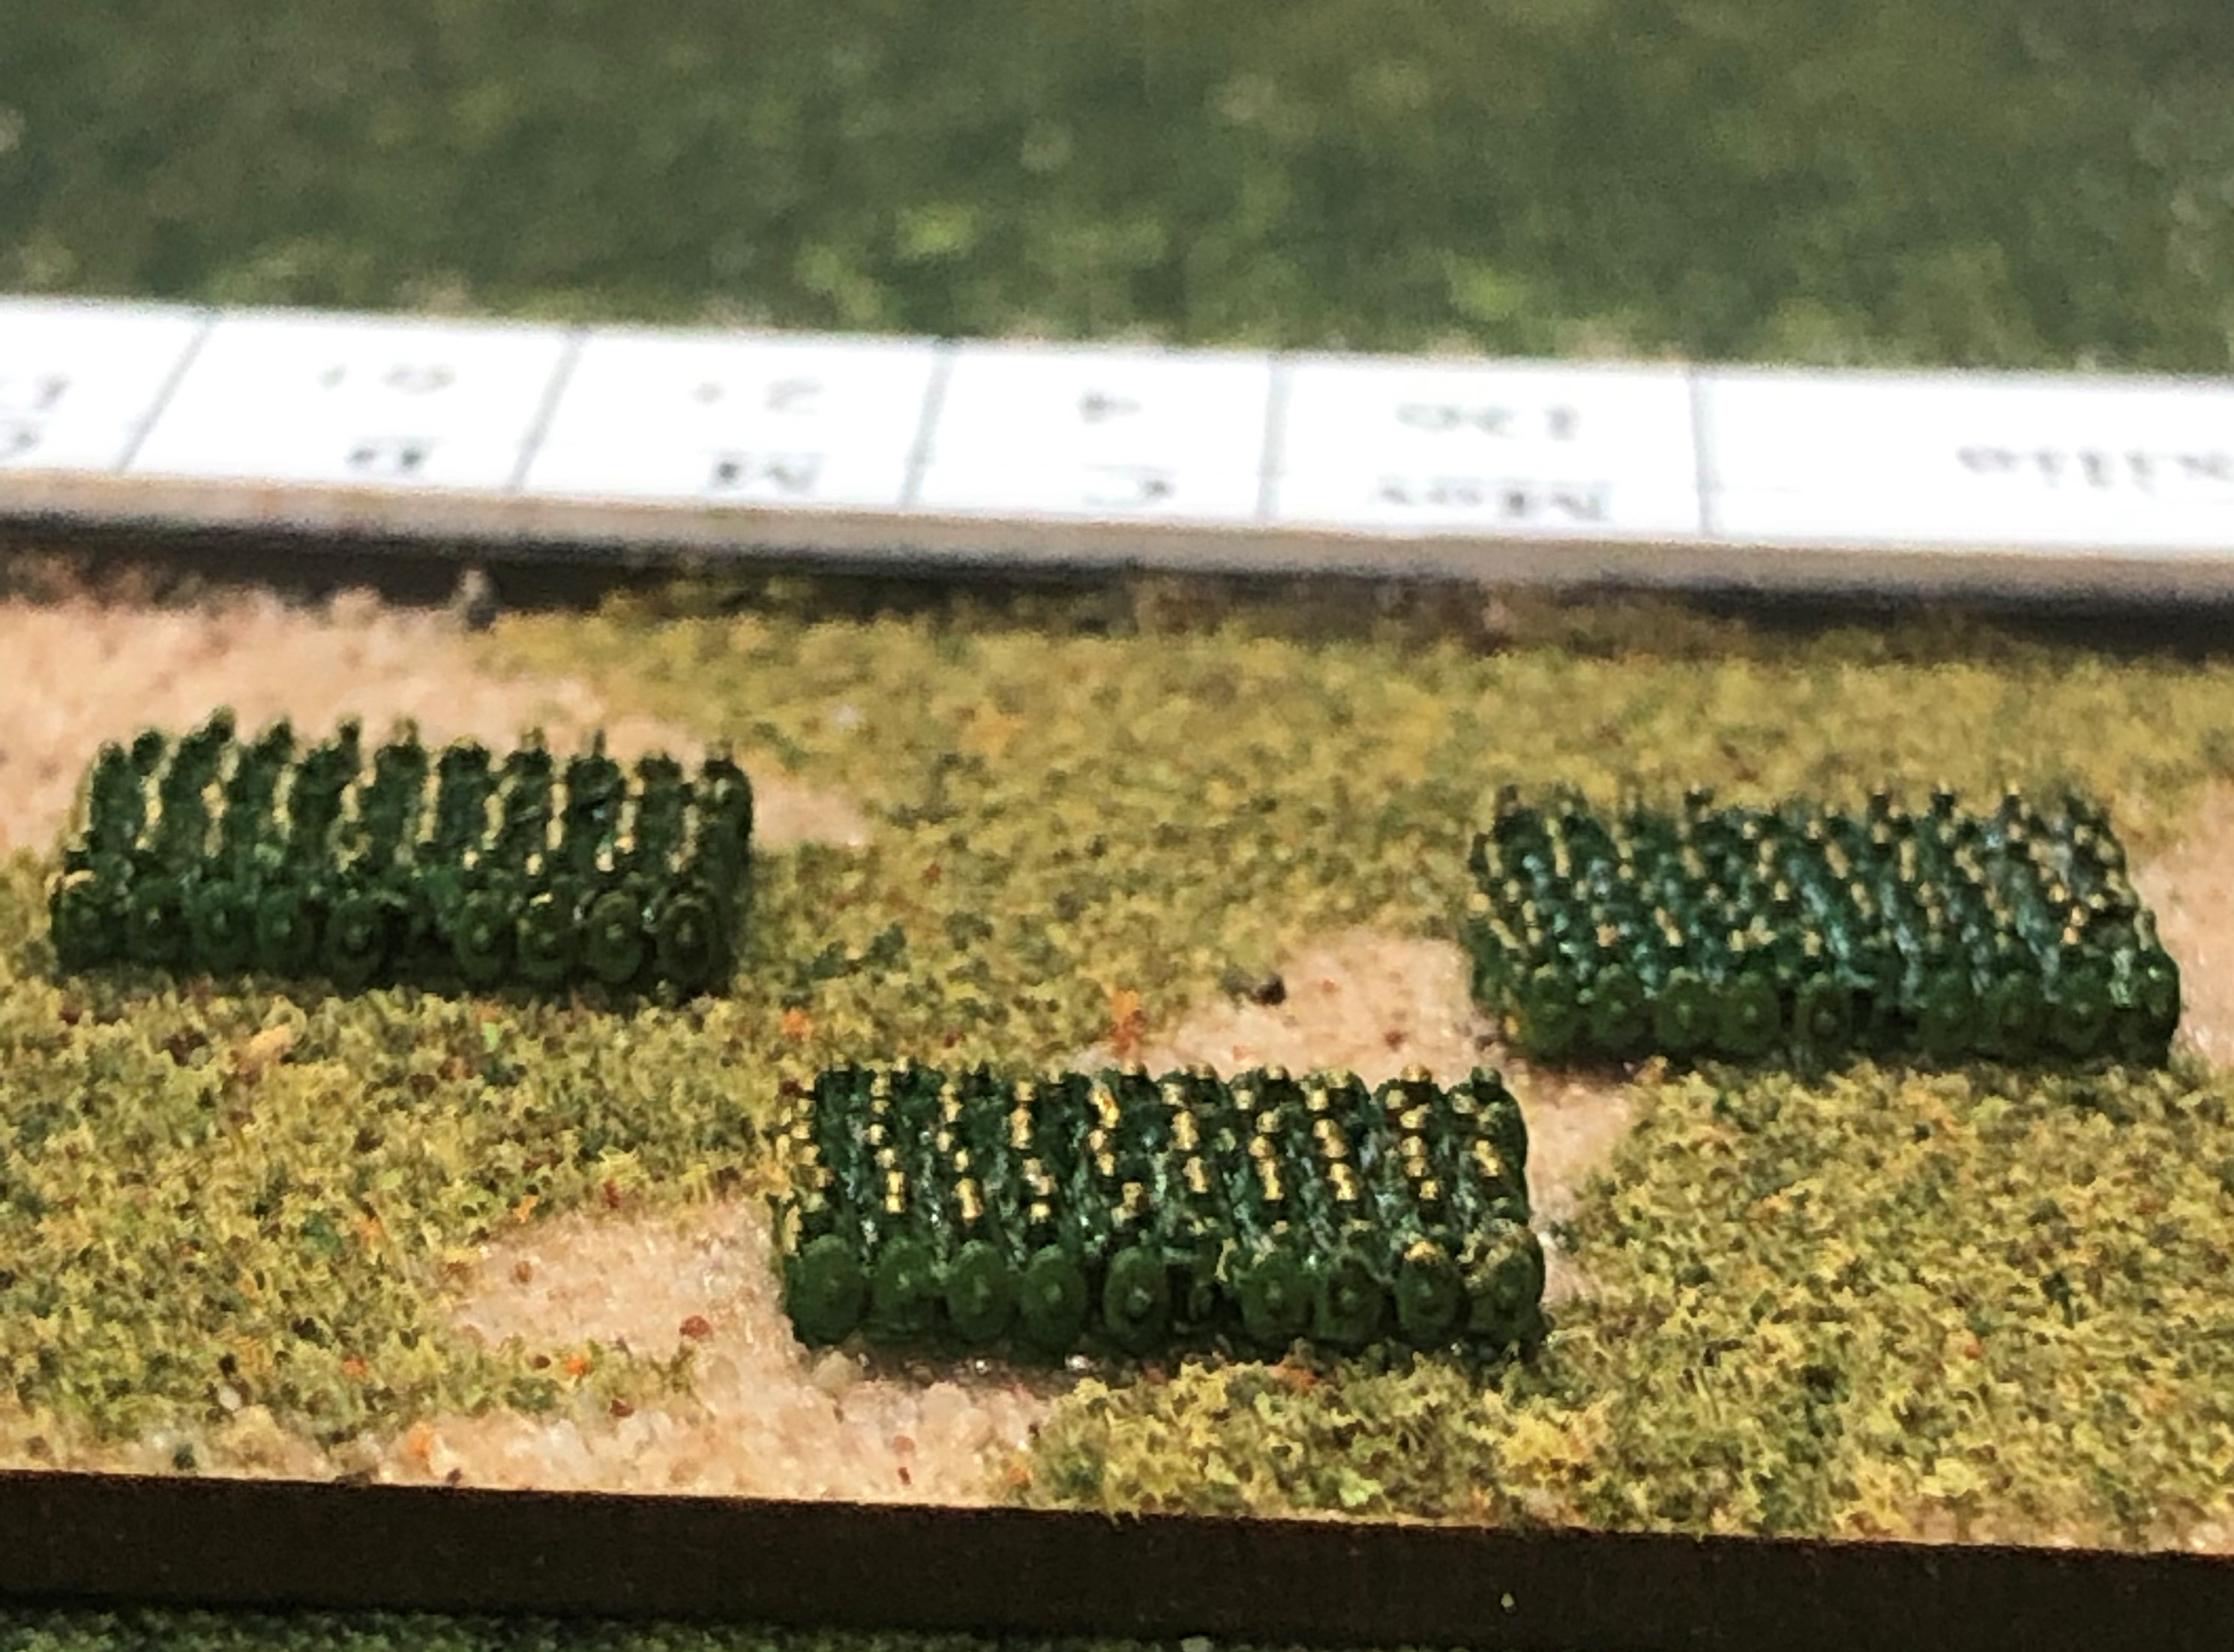
Roman reinforcements
Two more Roman Legions. These are Caesar’s crack veterans the IX Hispana and X Equestris.
Firstly the Ninth – the legion that disappeared from the historical records some time in the late first century CE. Paining followed the previous method outlined.
Only joking 😀
Here are the two new legions ready for the tabletop:

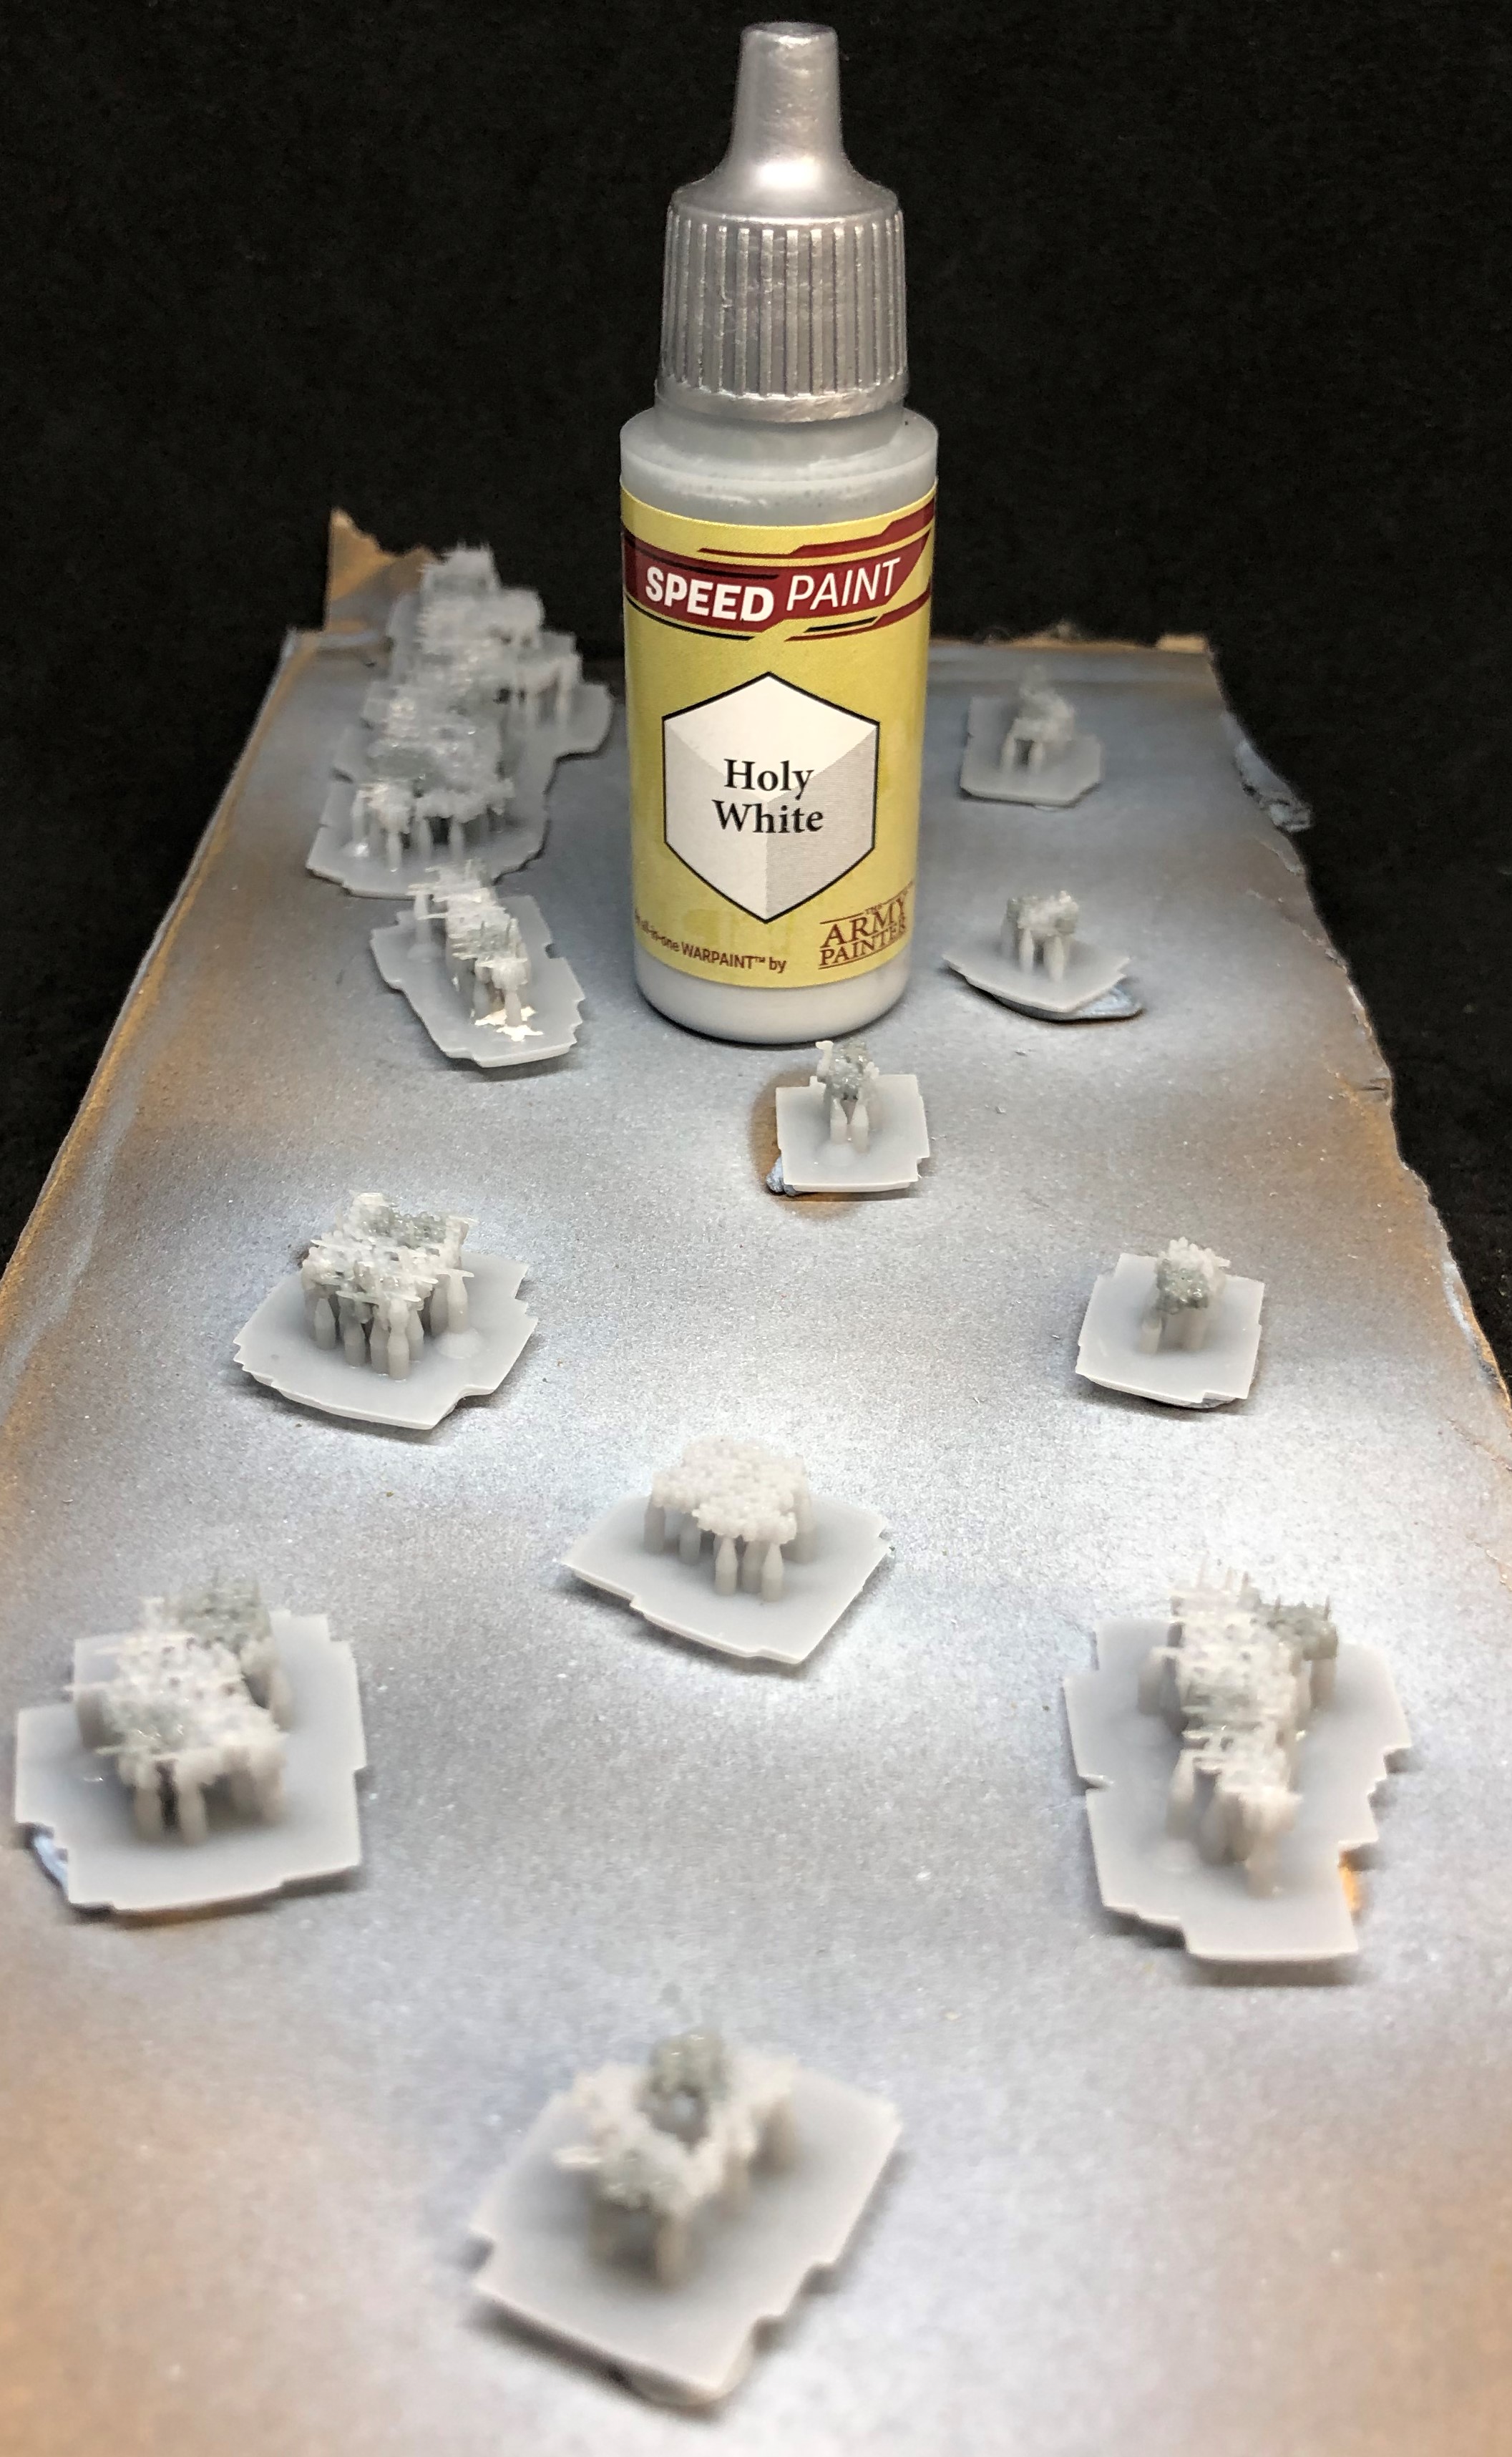
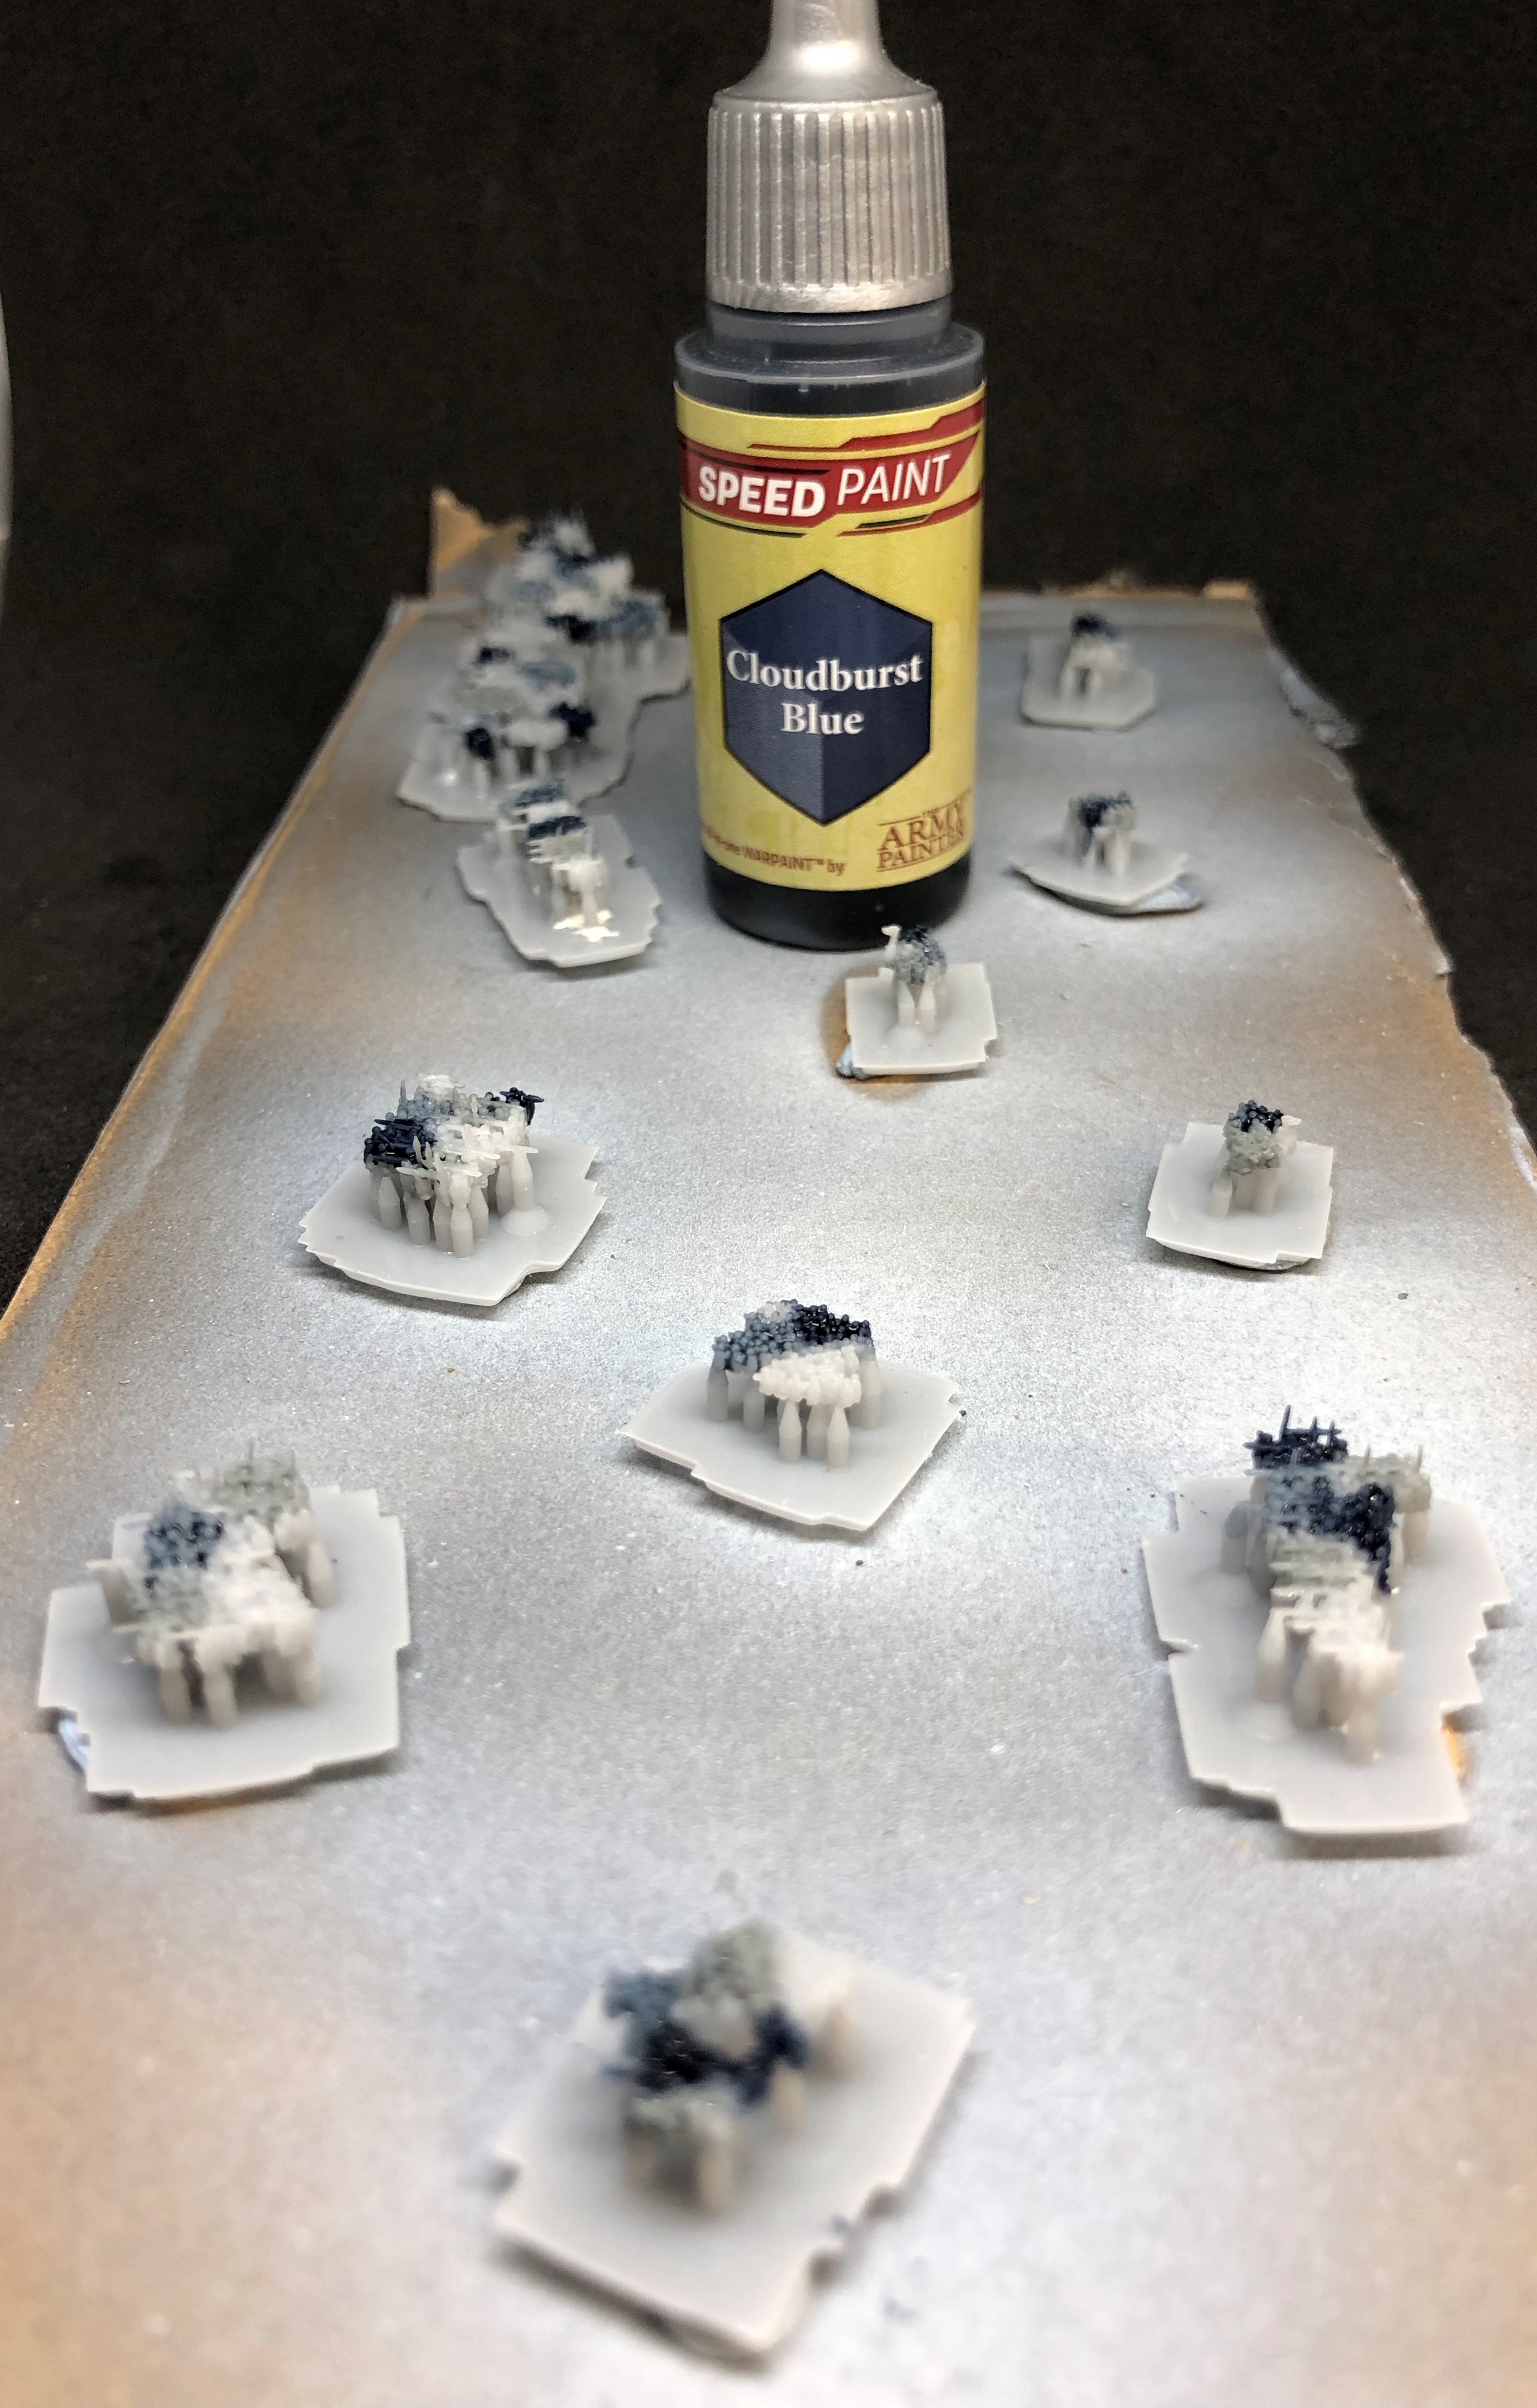
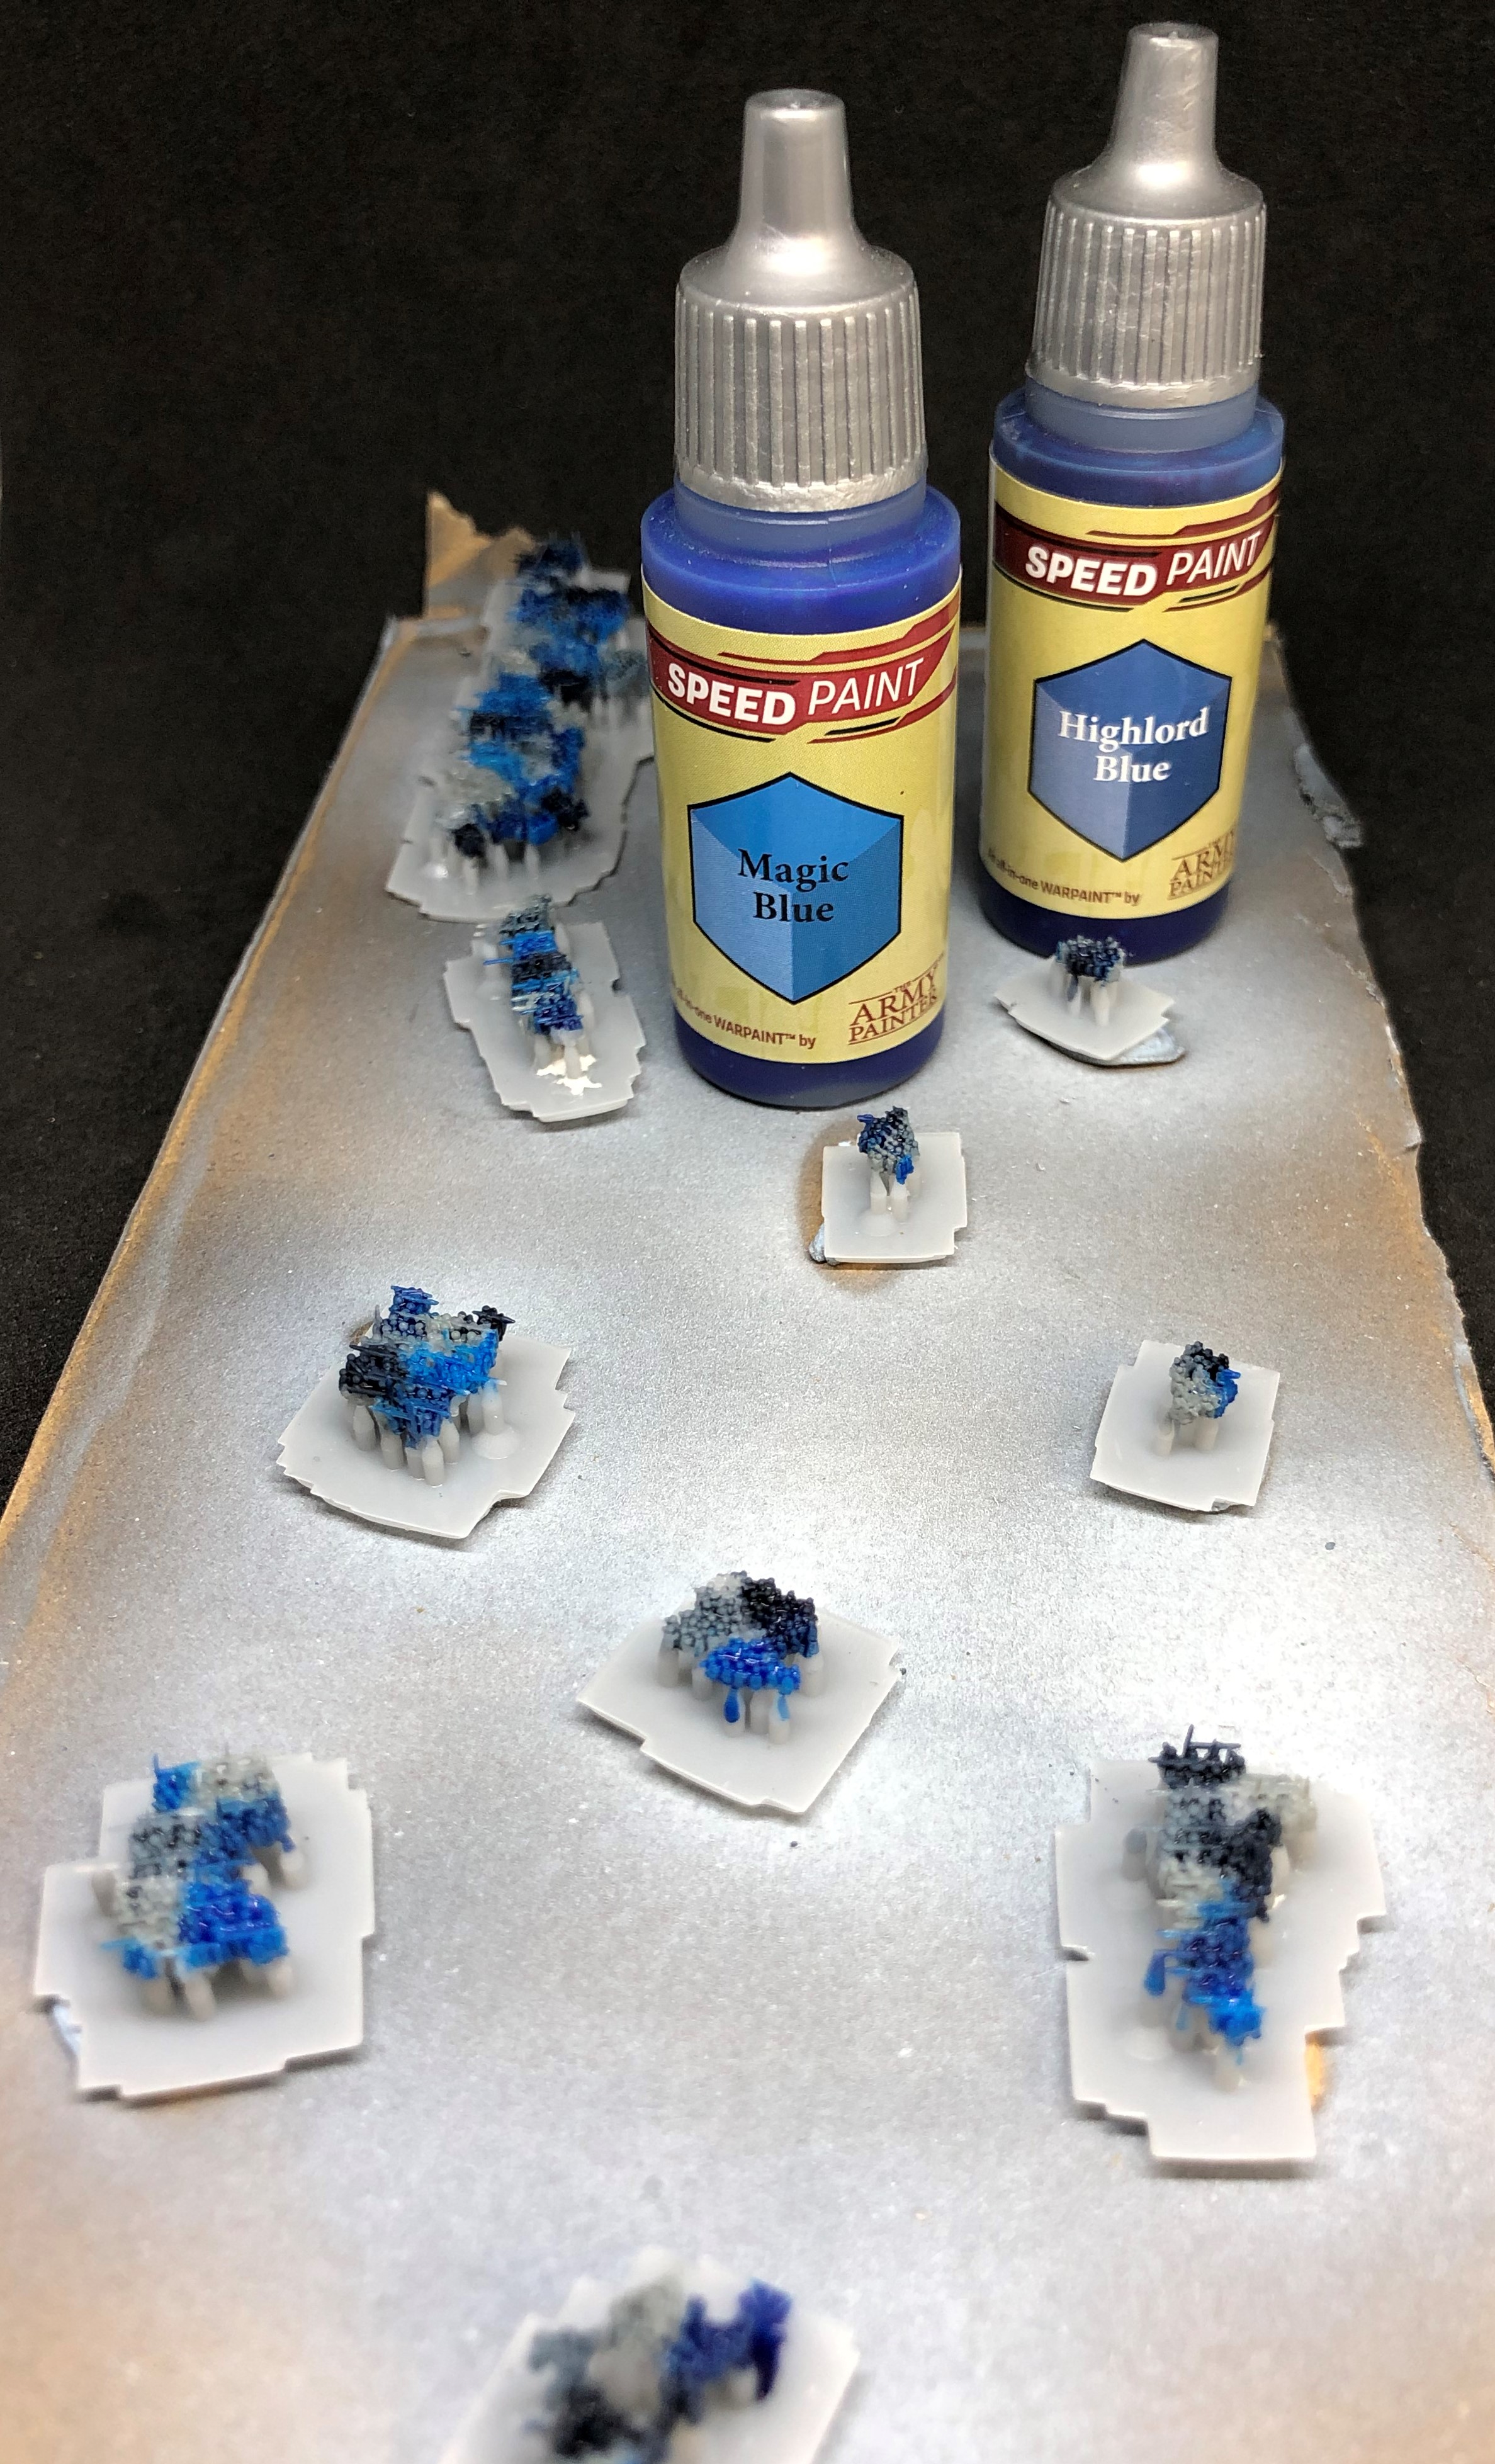
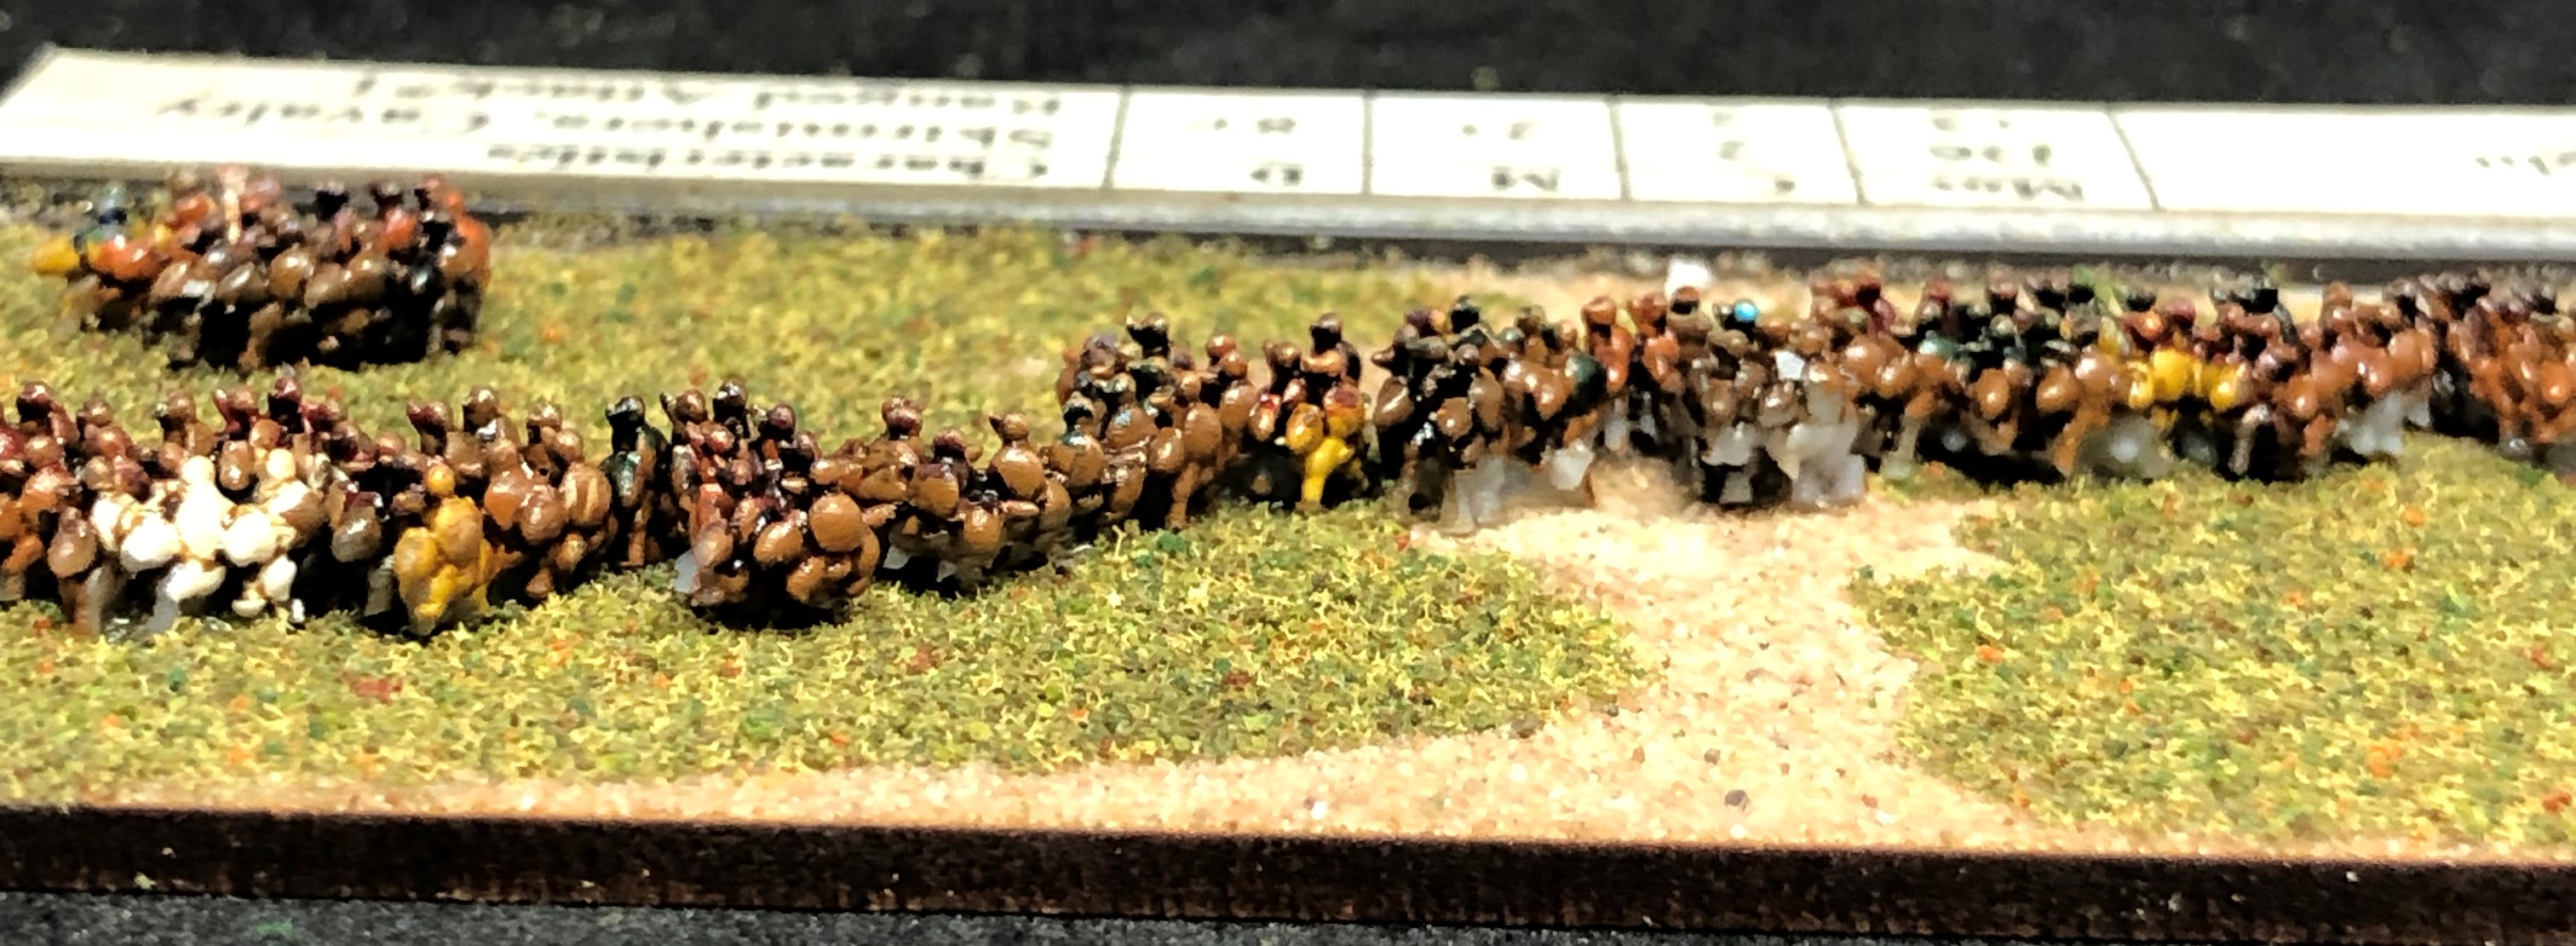
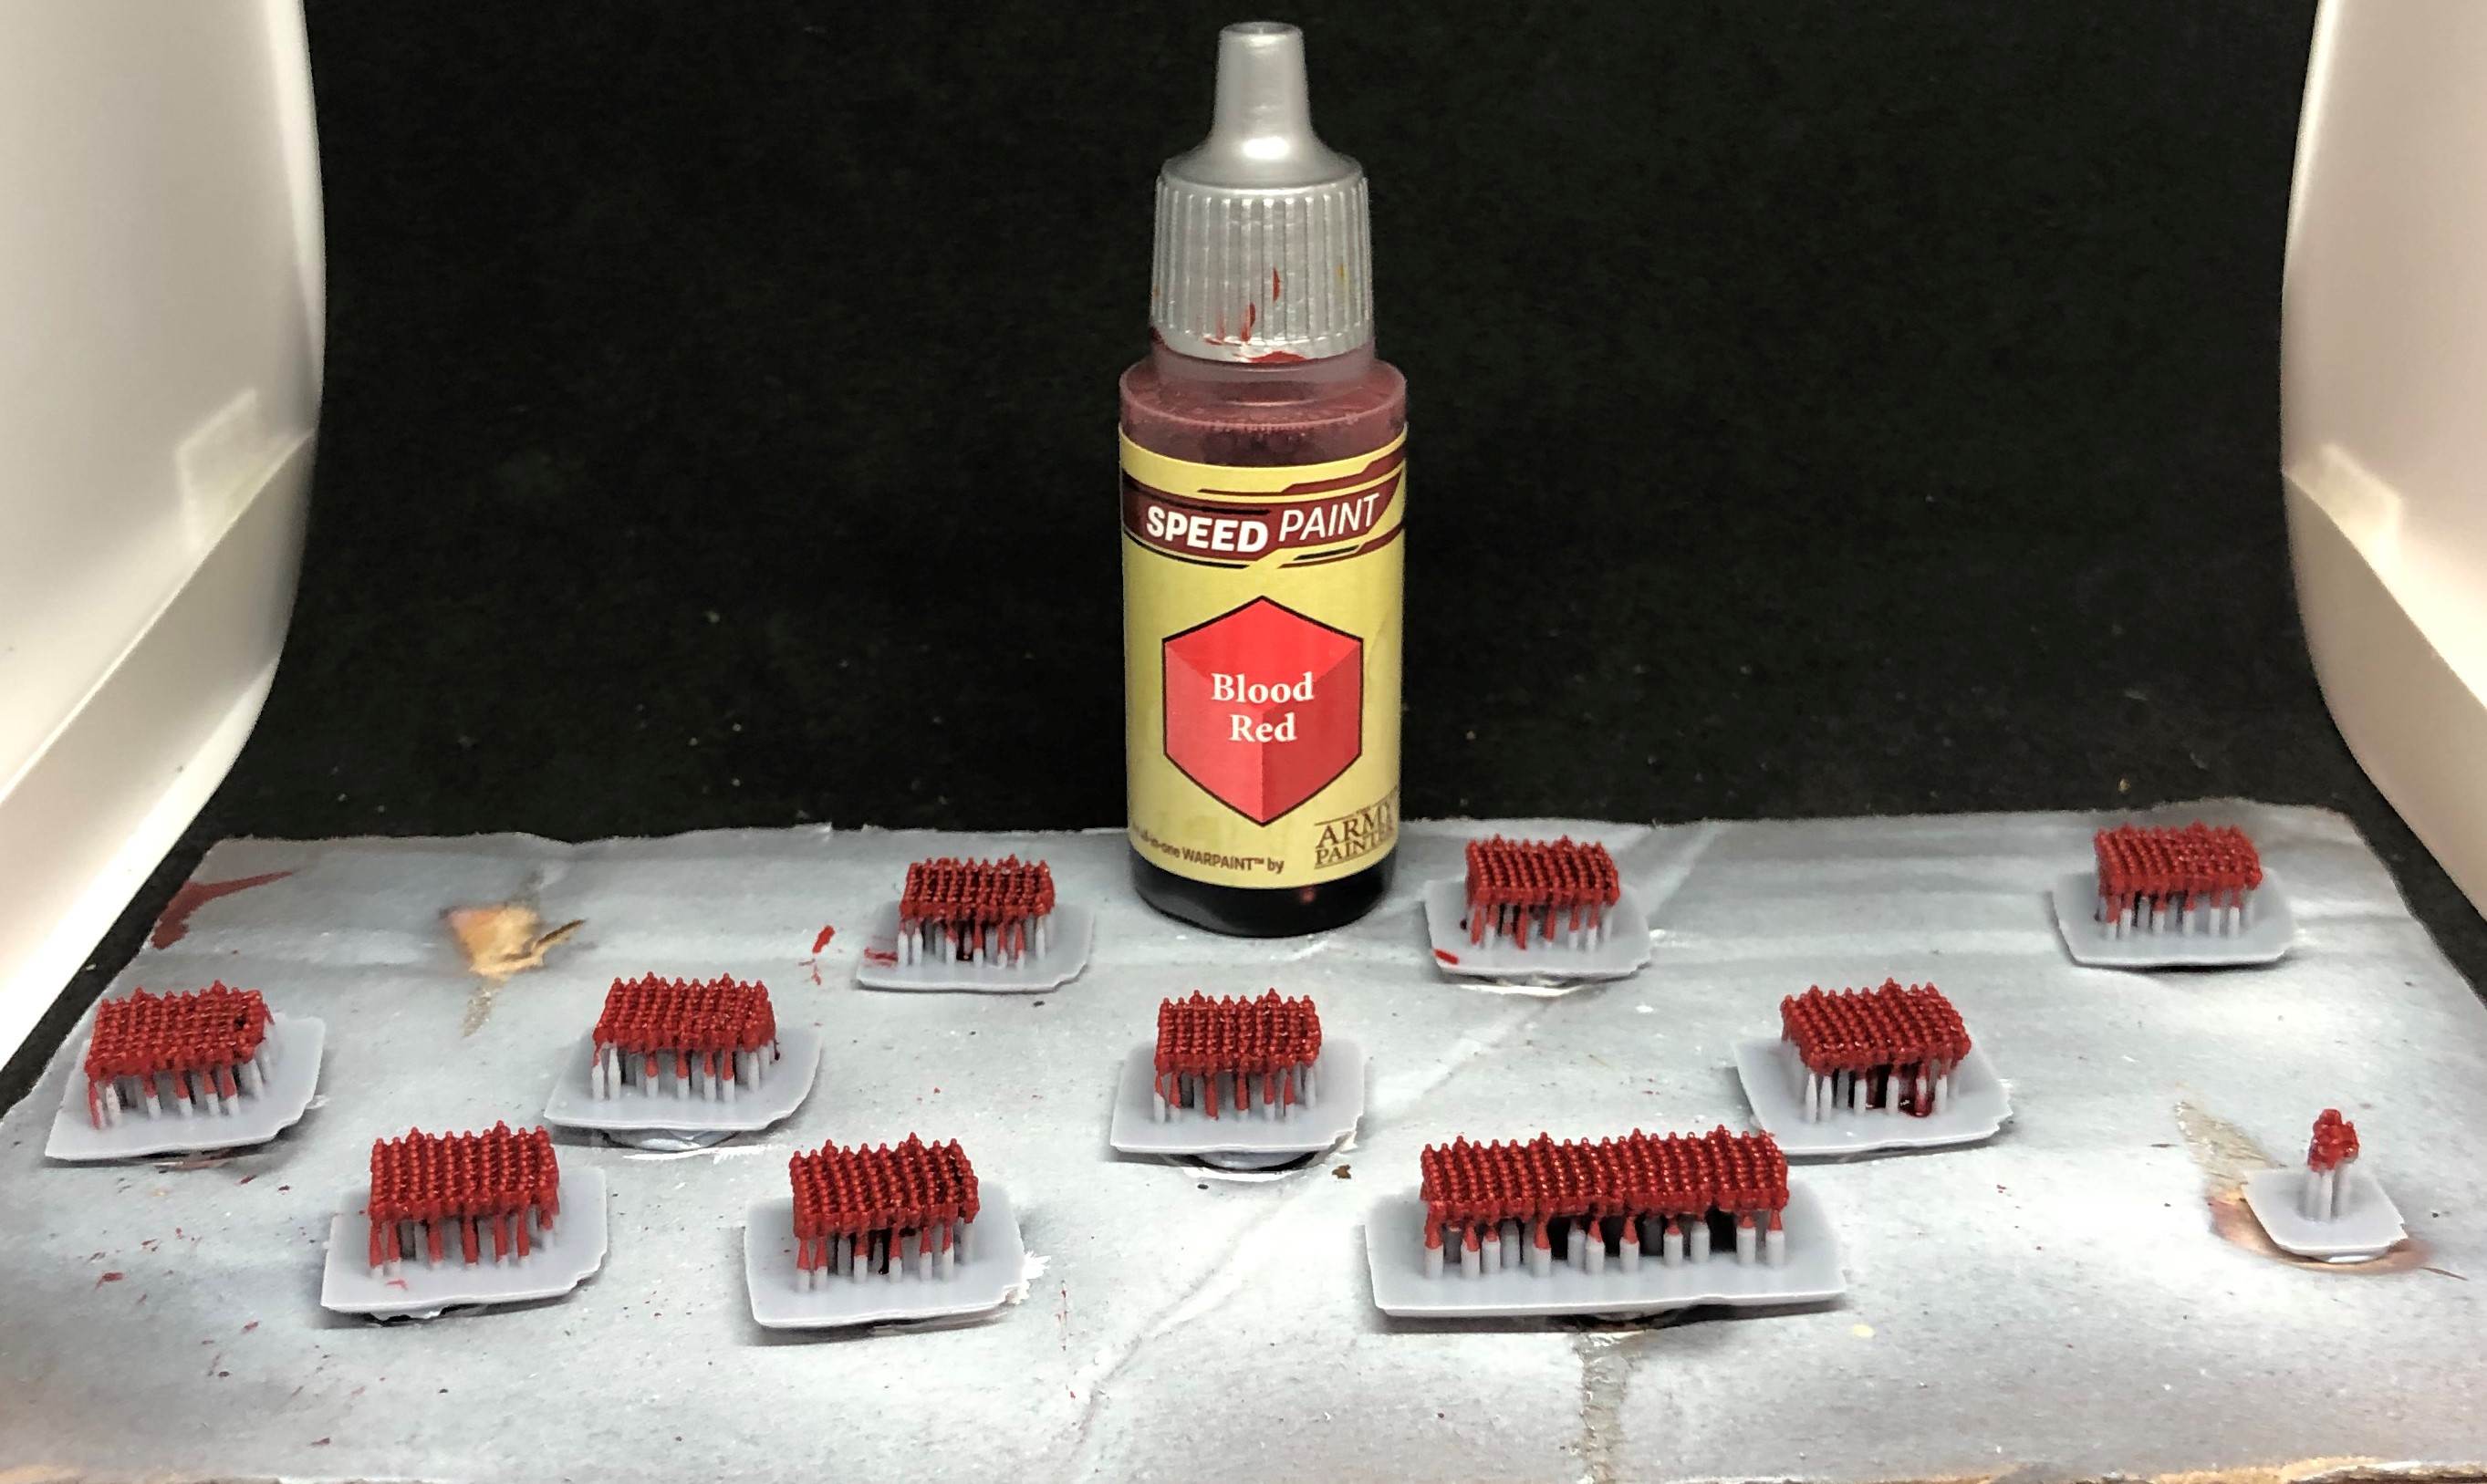
Road to Vosges - Numidian skirmishers
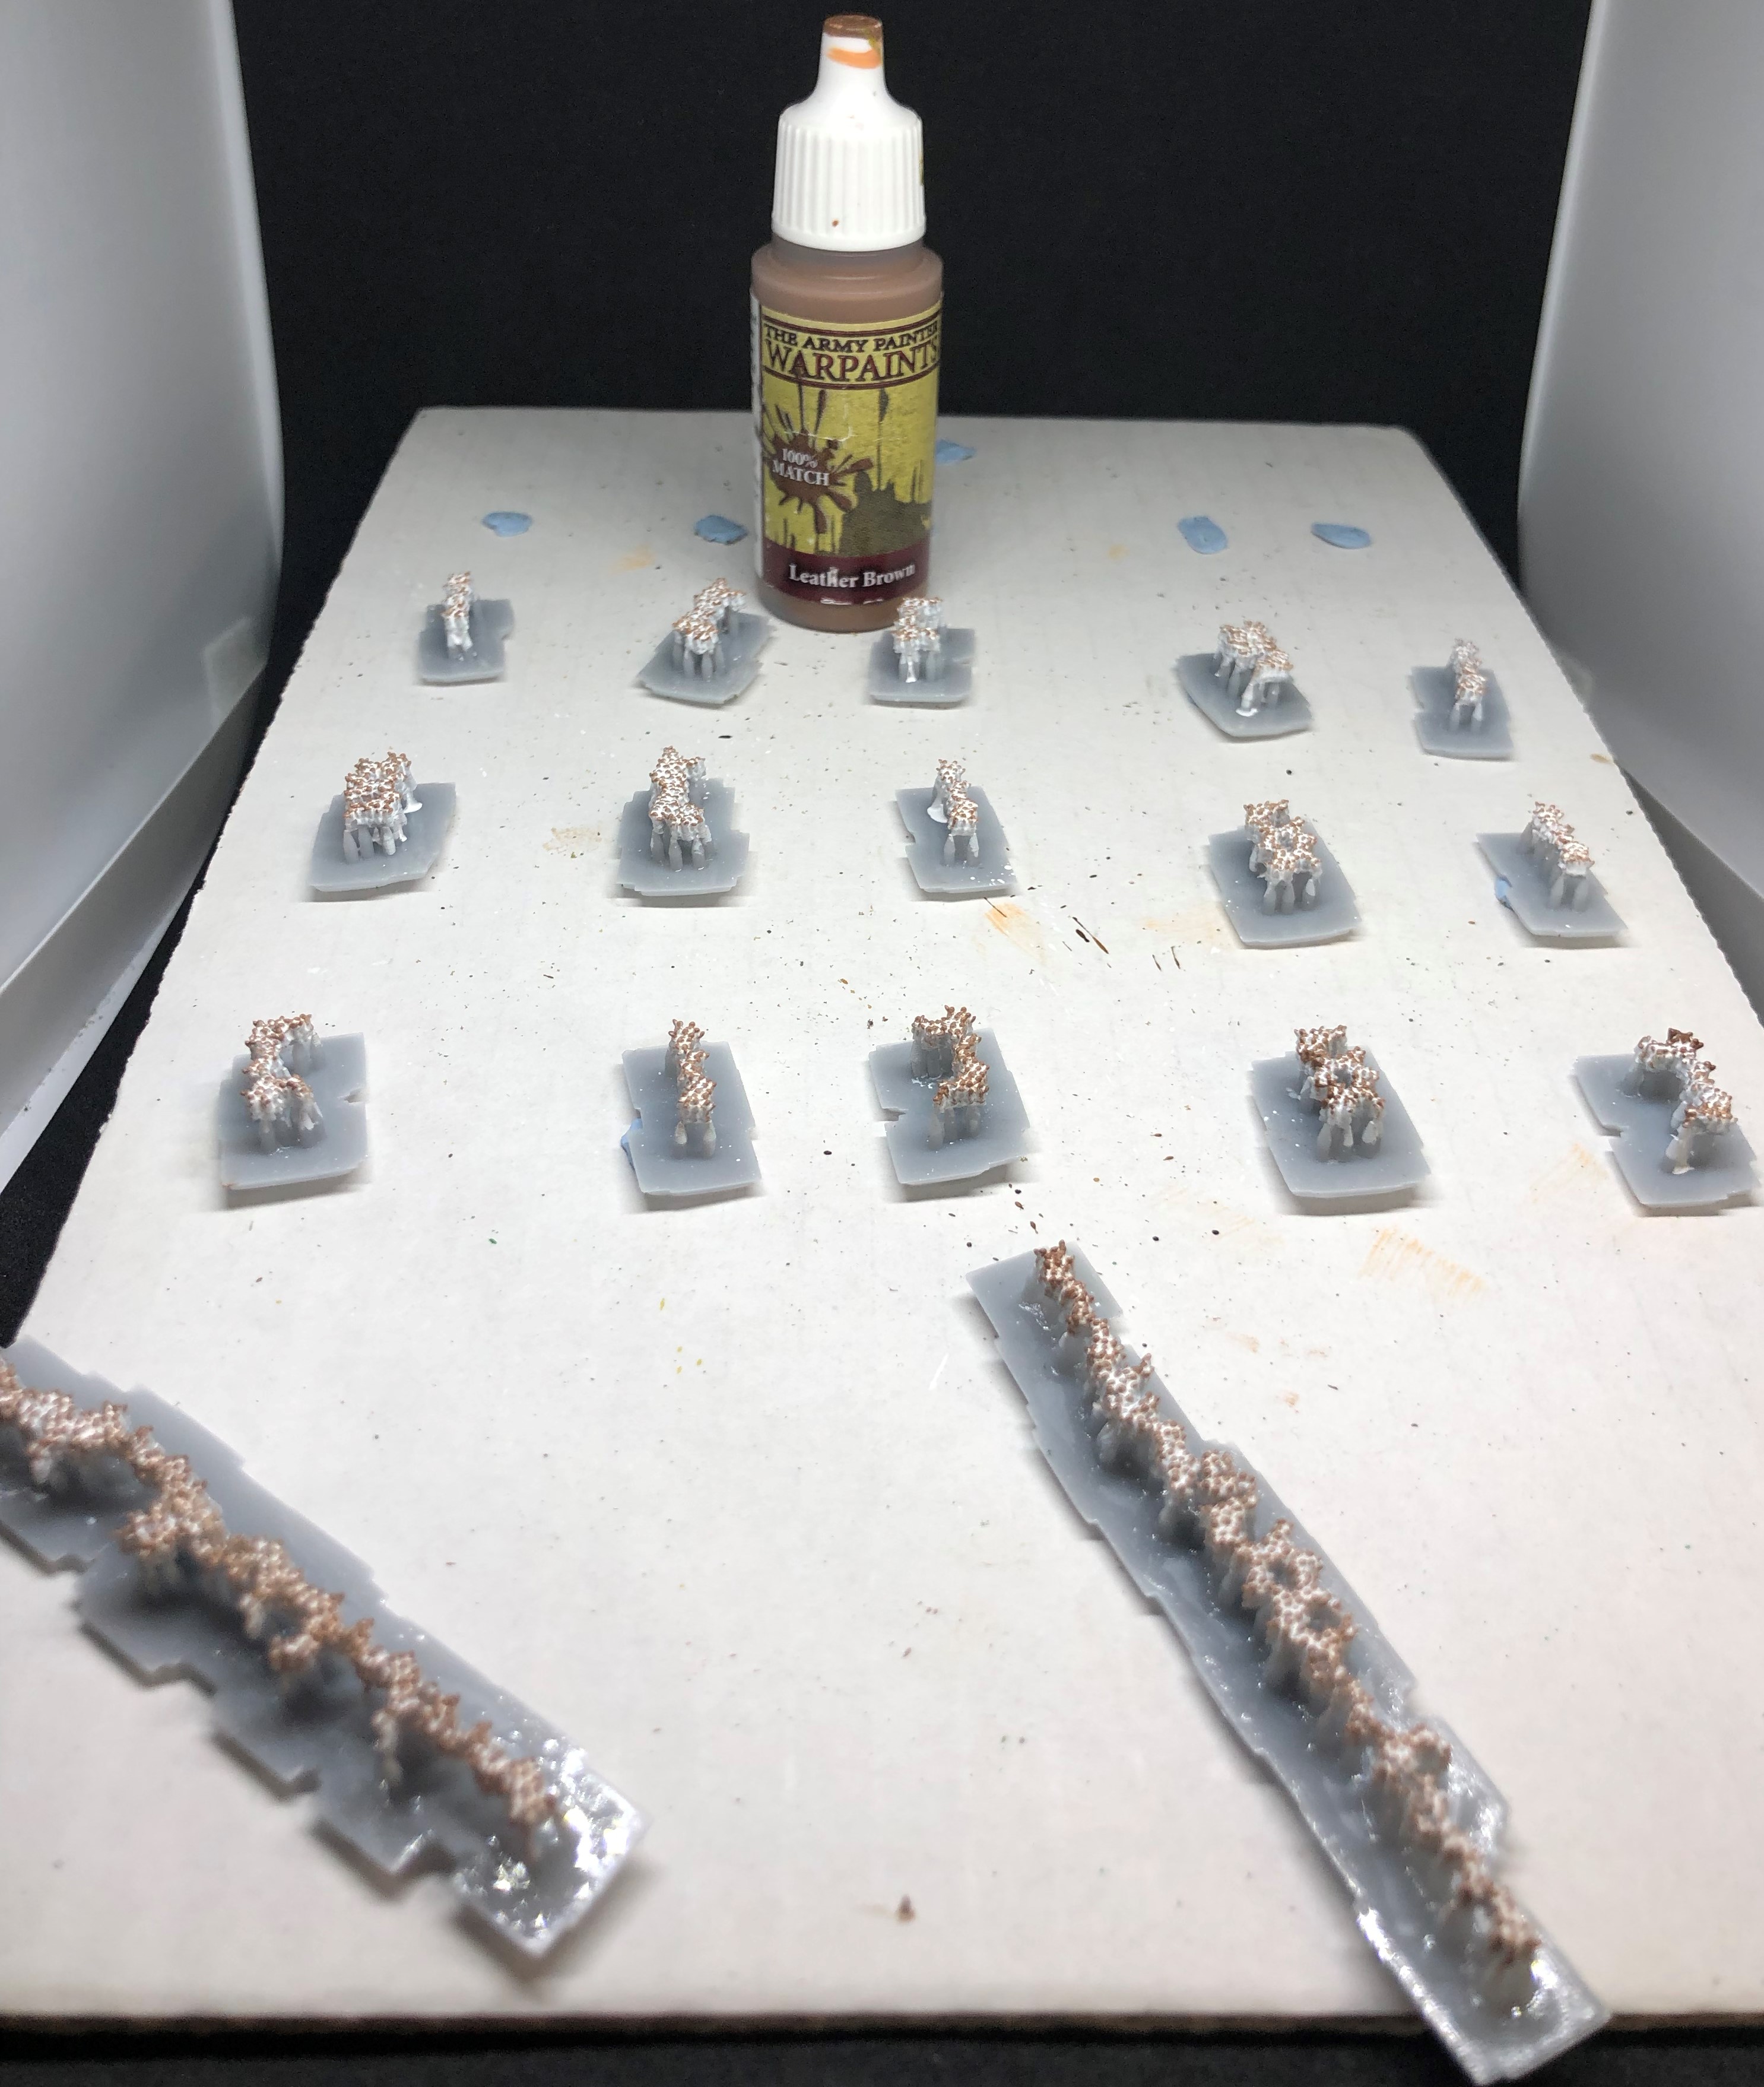
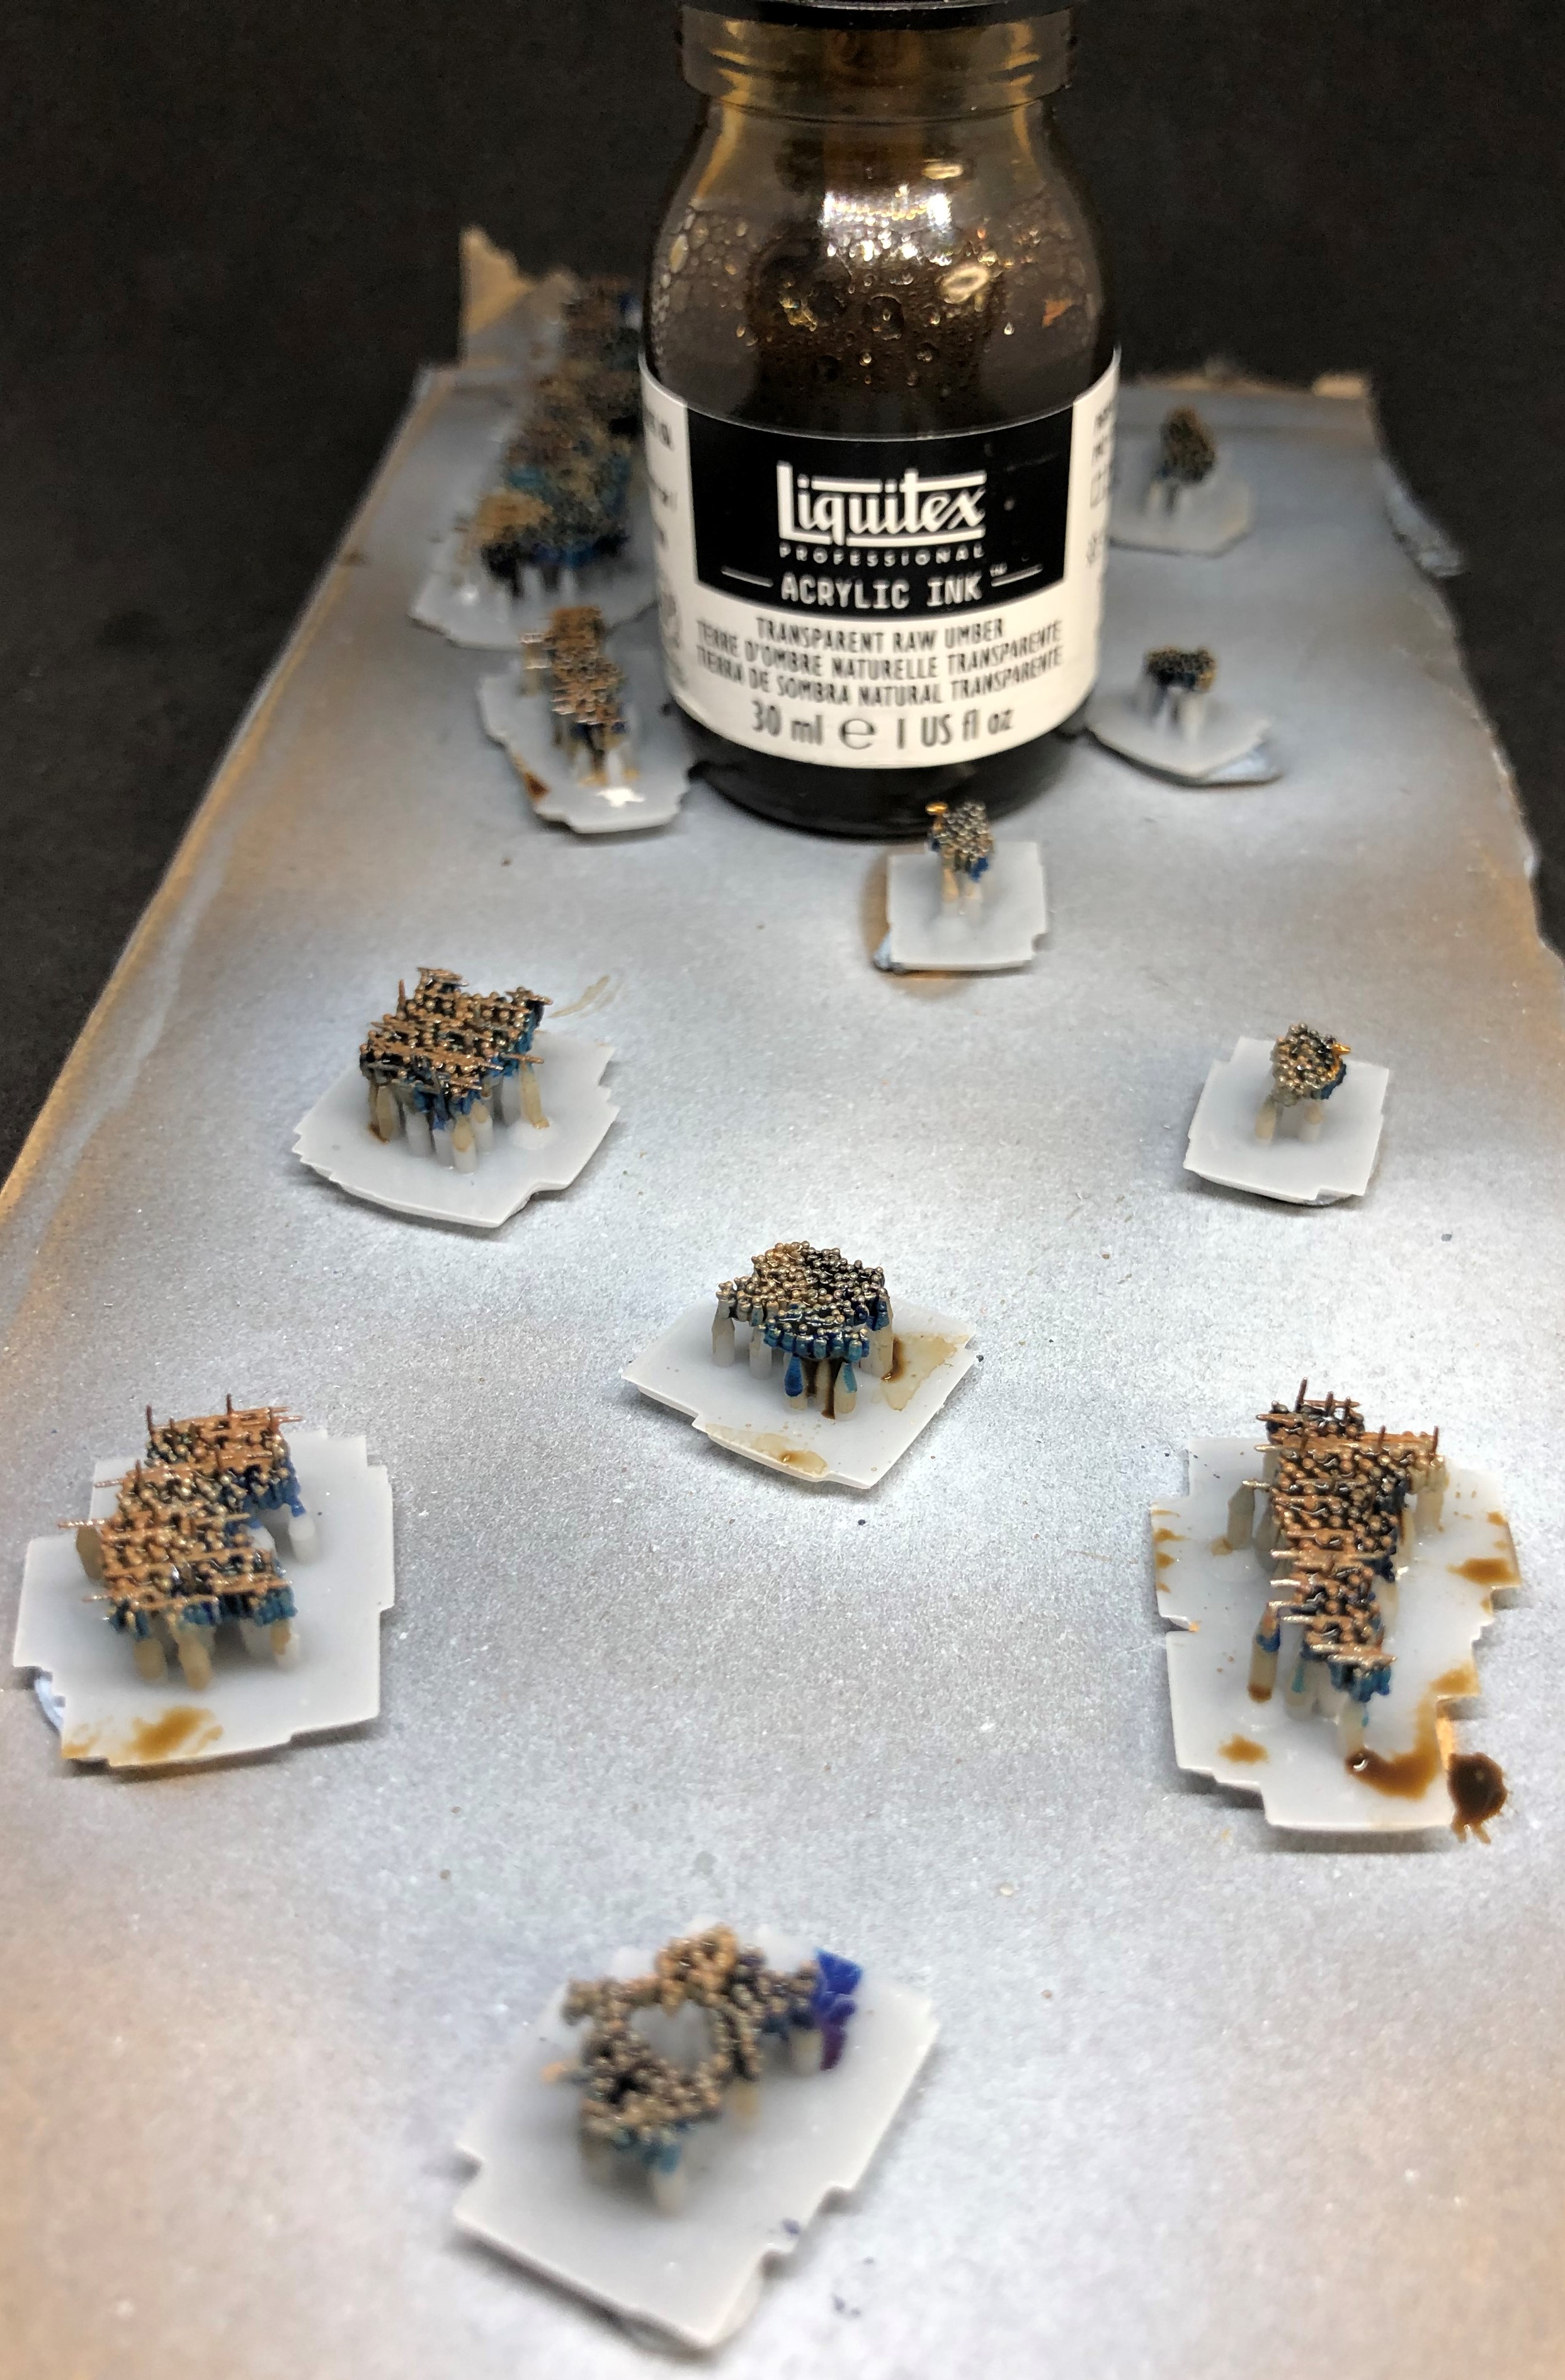
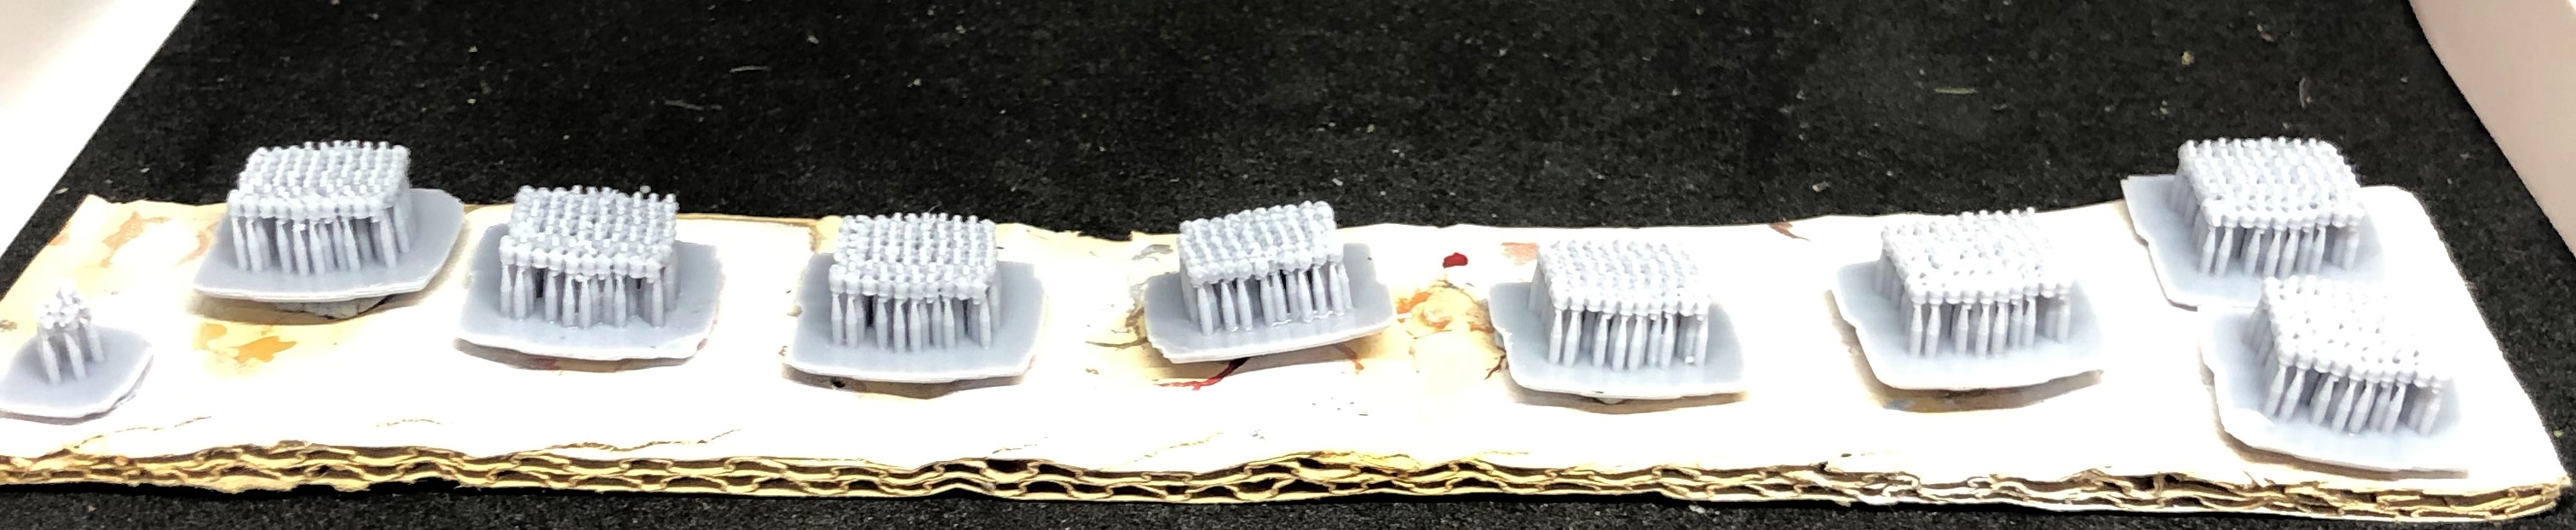
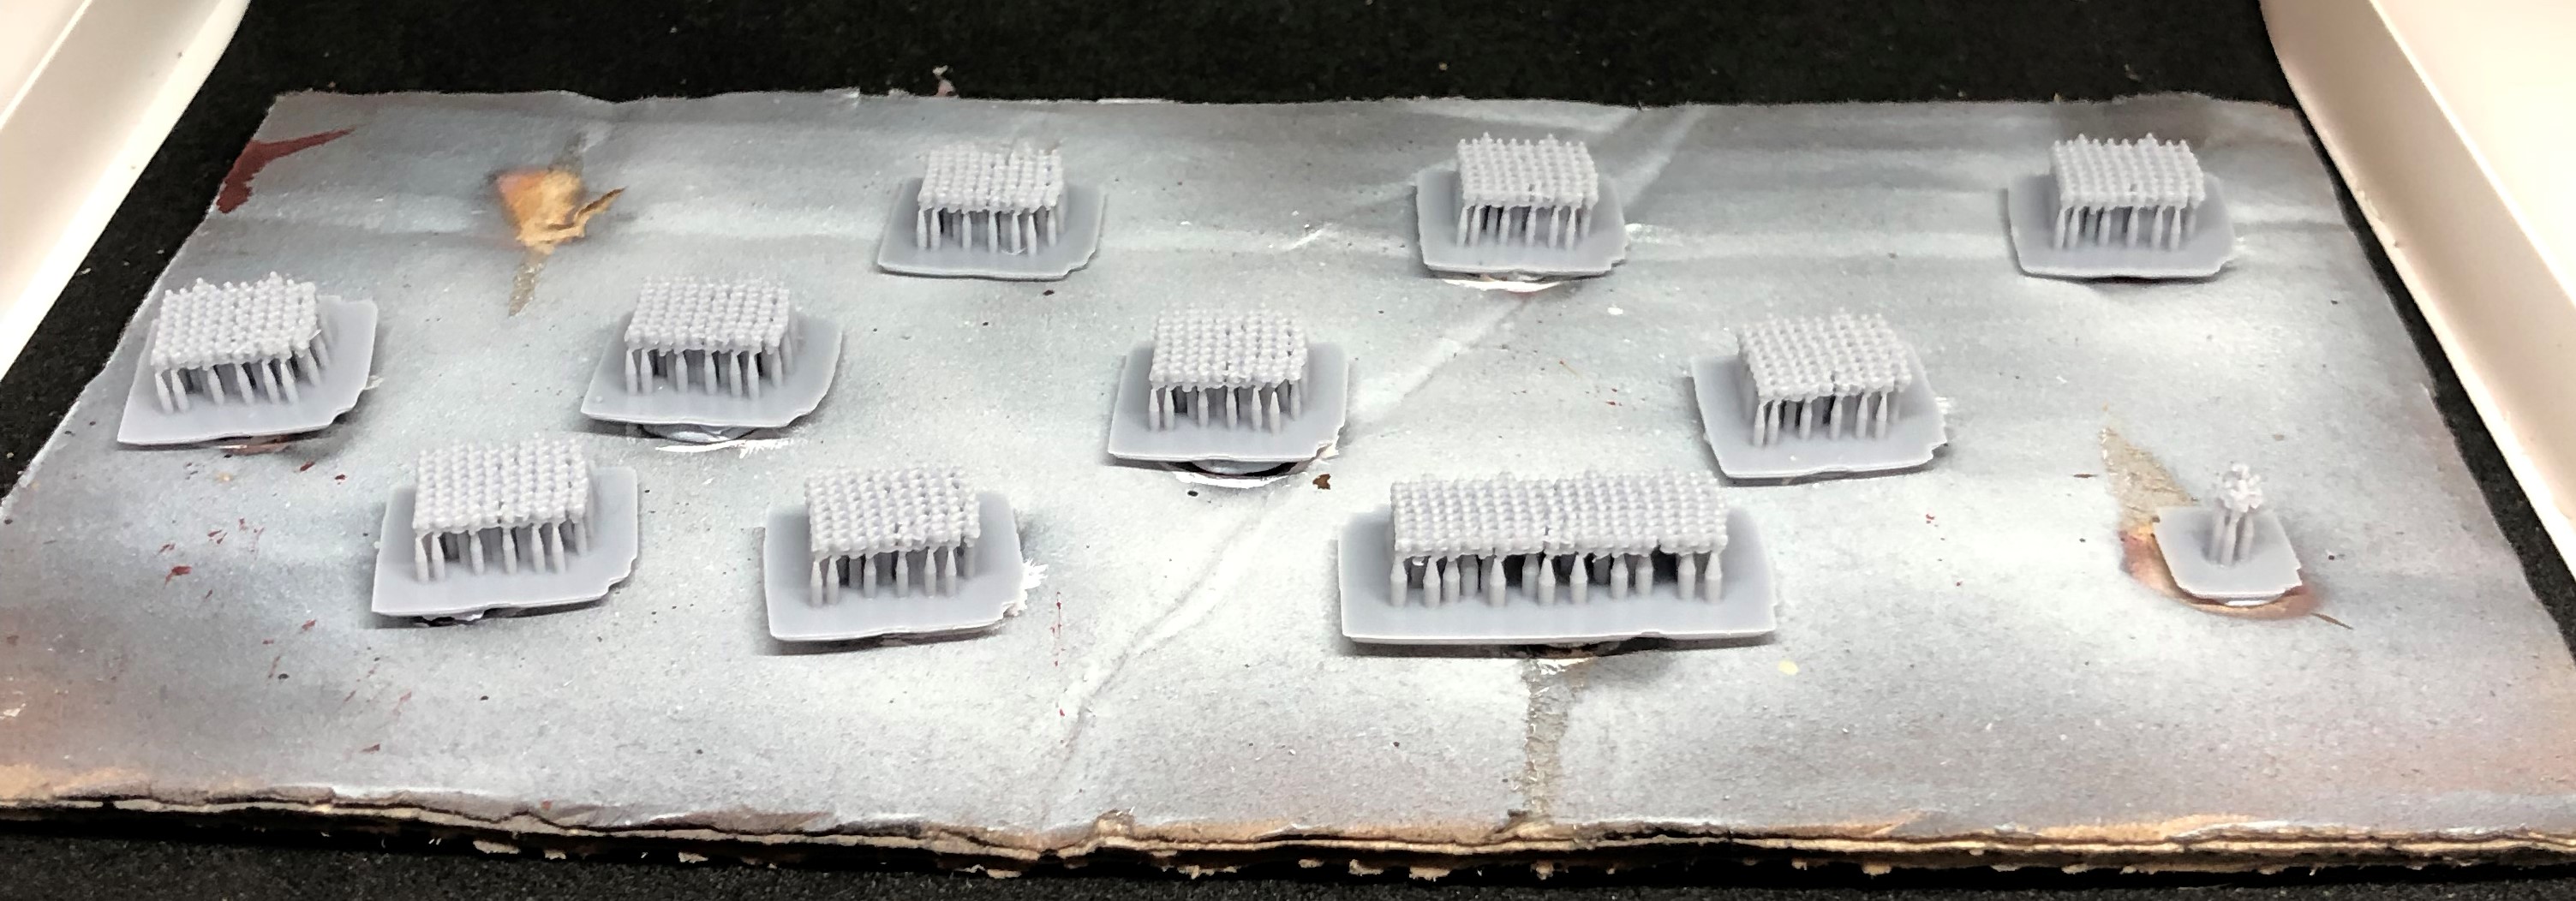
Vosges is the next scenario, Caesar versus the invading German hordes in Gaul. For that the Romans need four more legions and some Numidian skirmishers. To that end here are the Numidians. Firstly undercoat in white. Slop it all over, you want to cover the entire model:
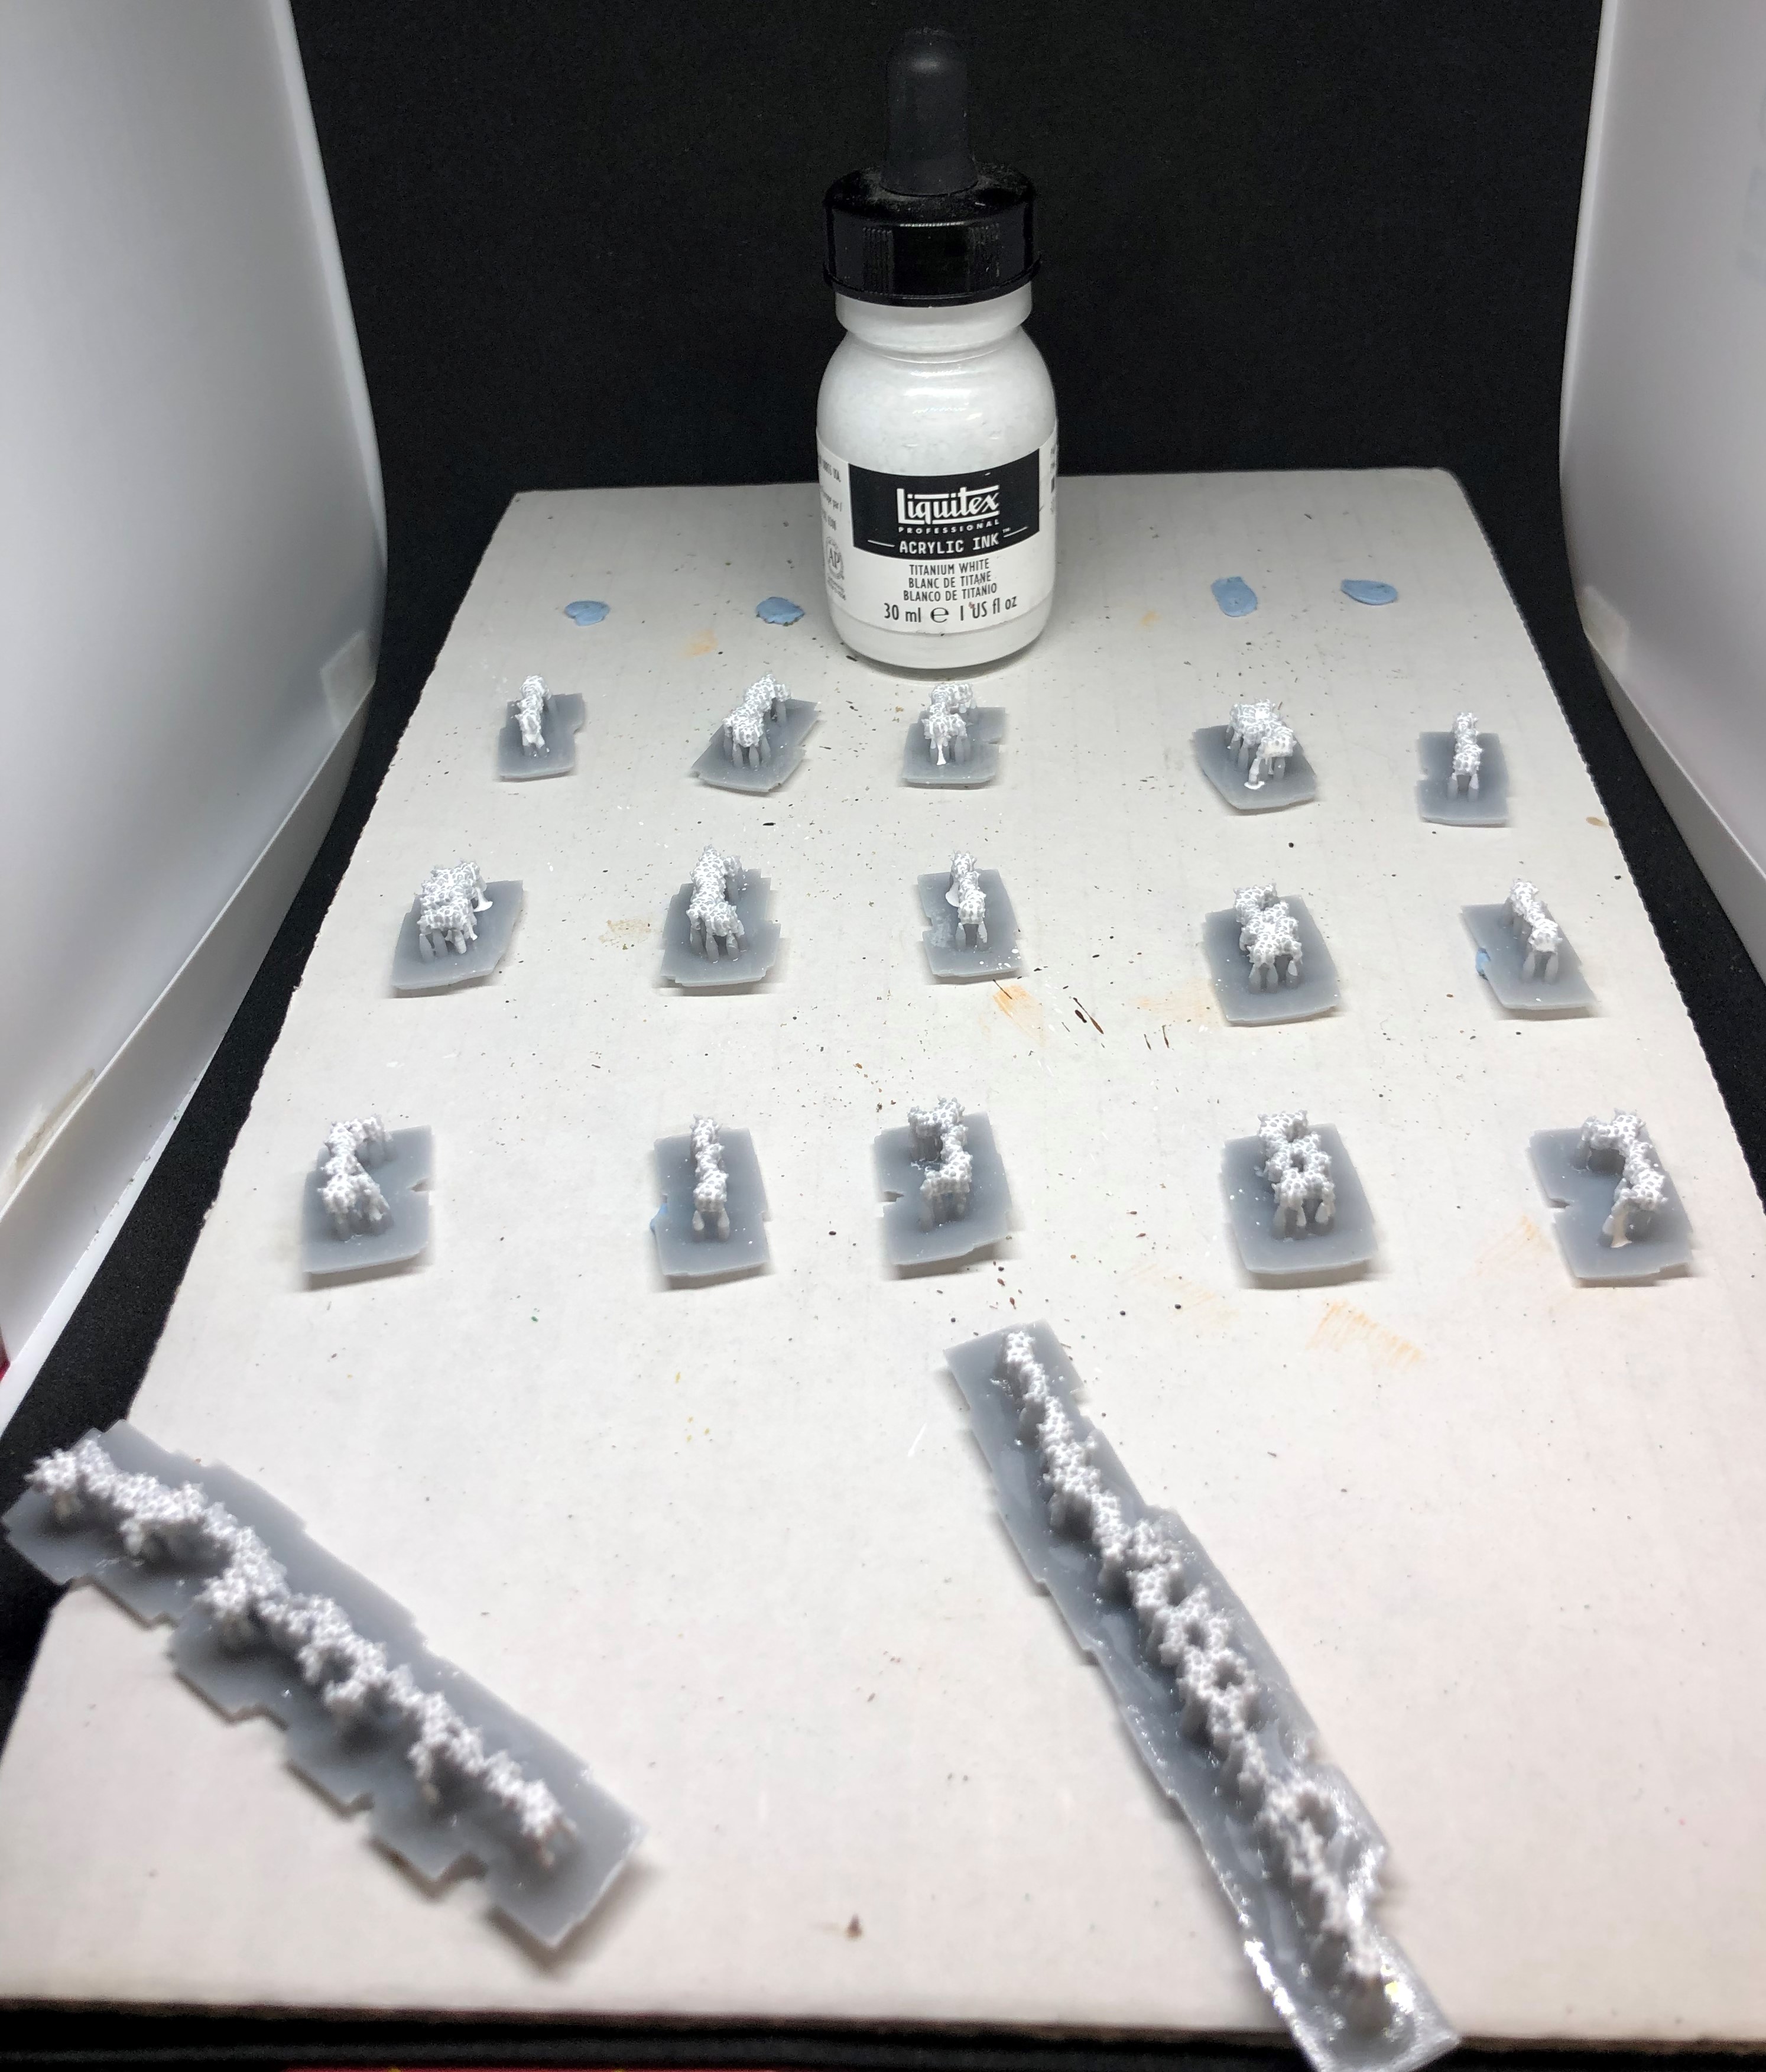
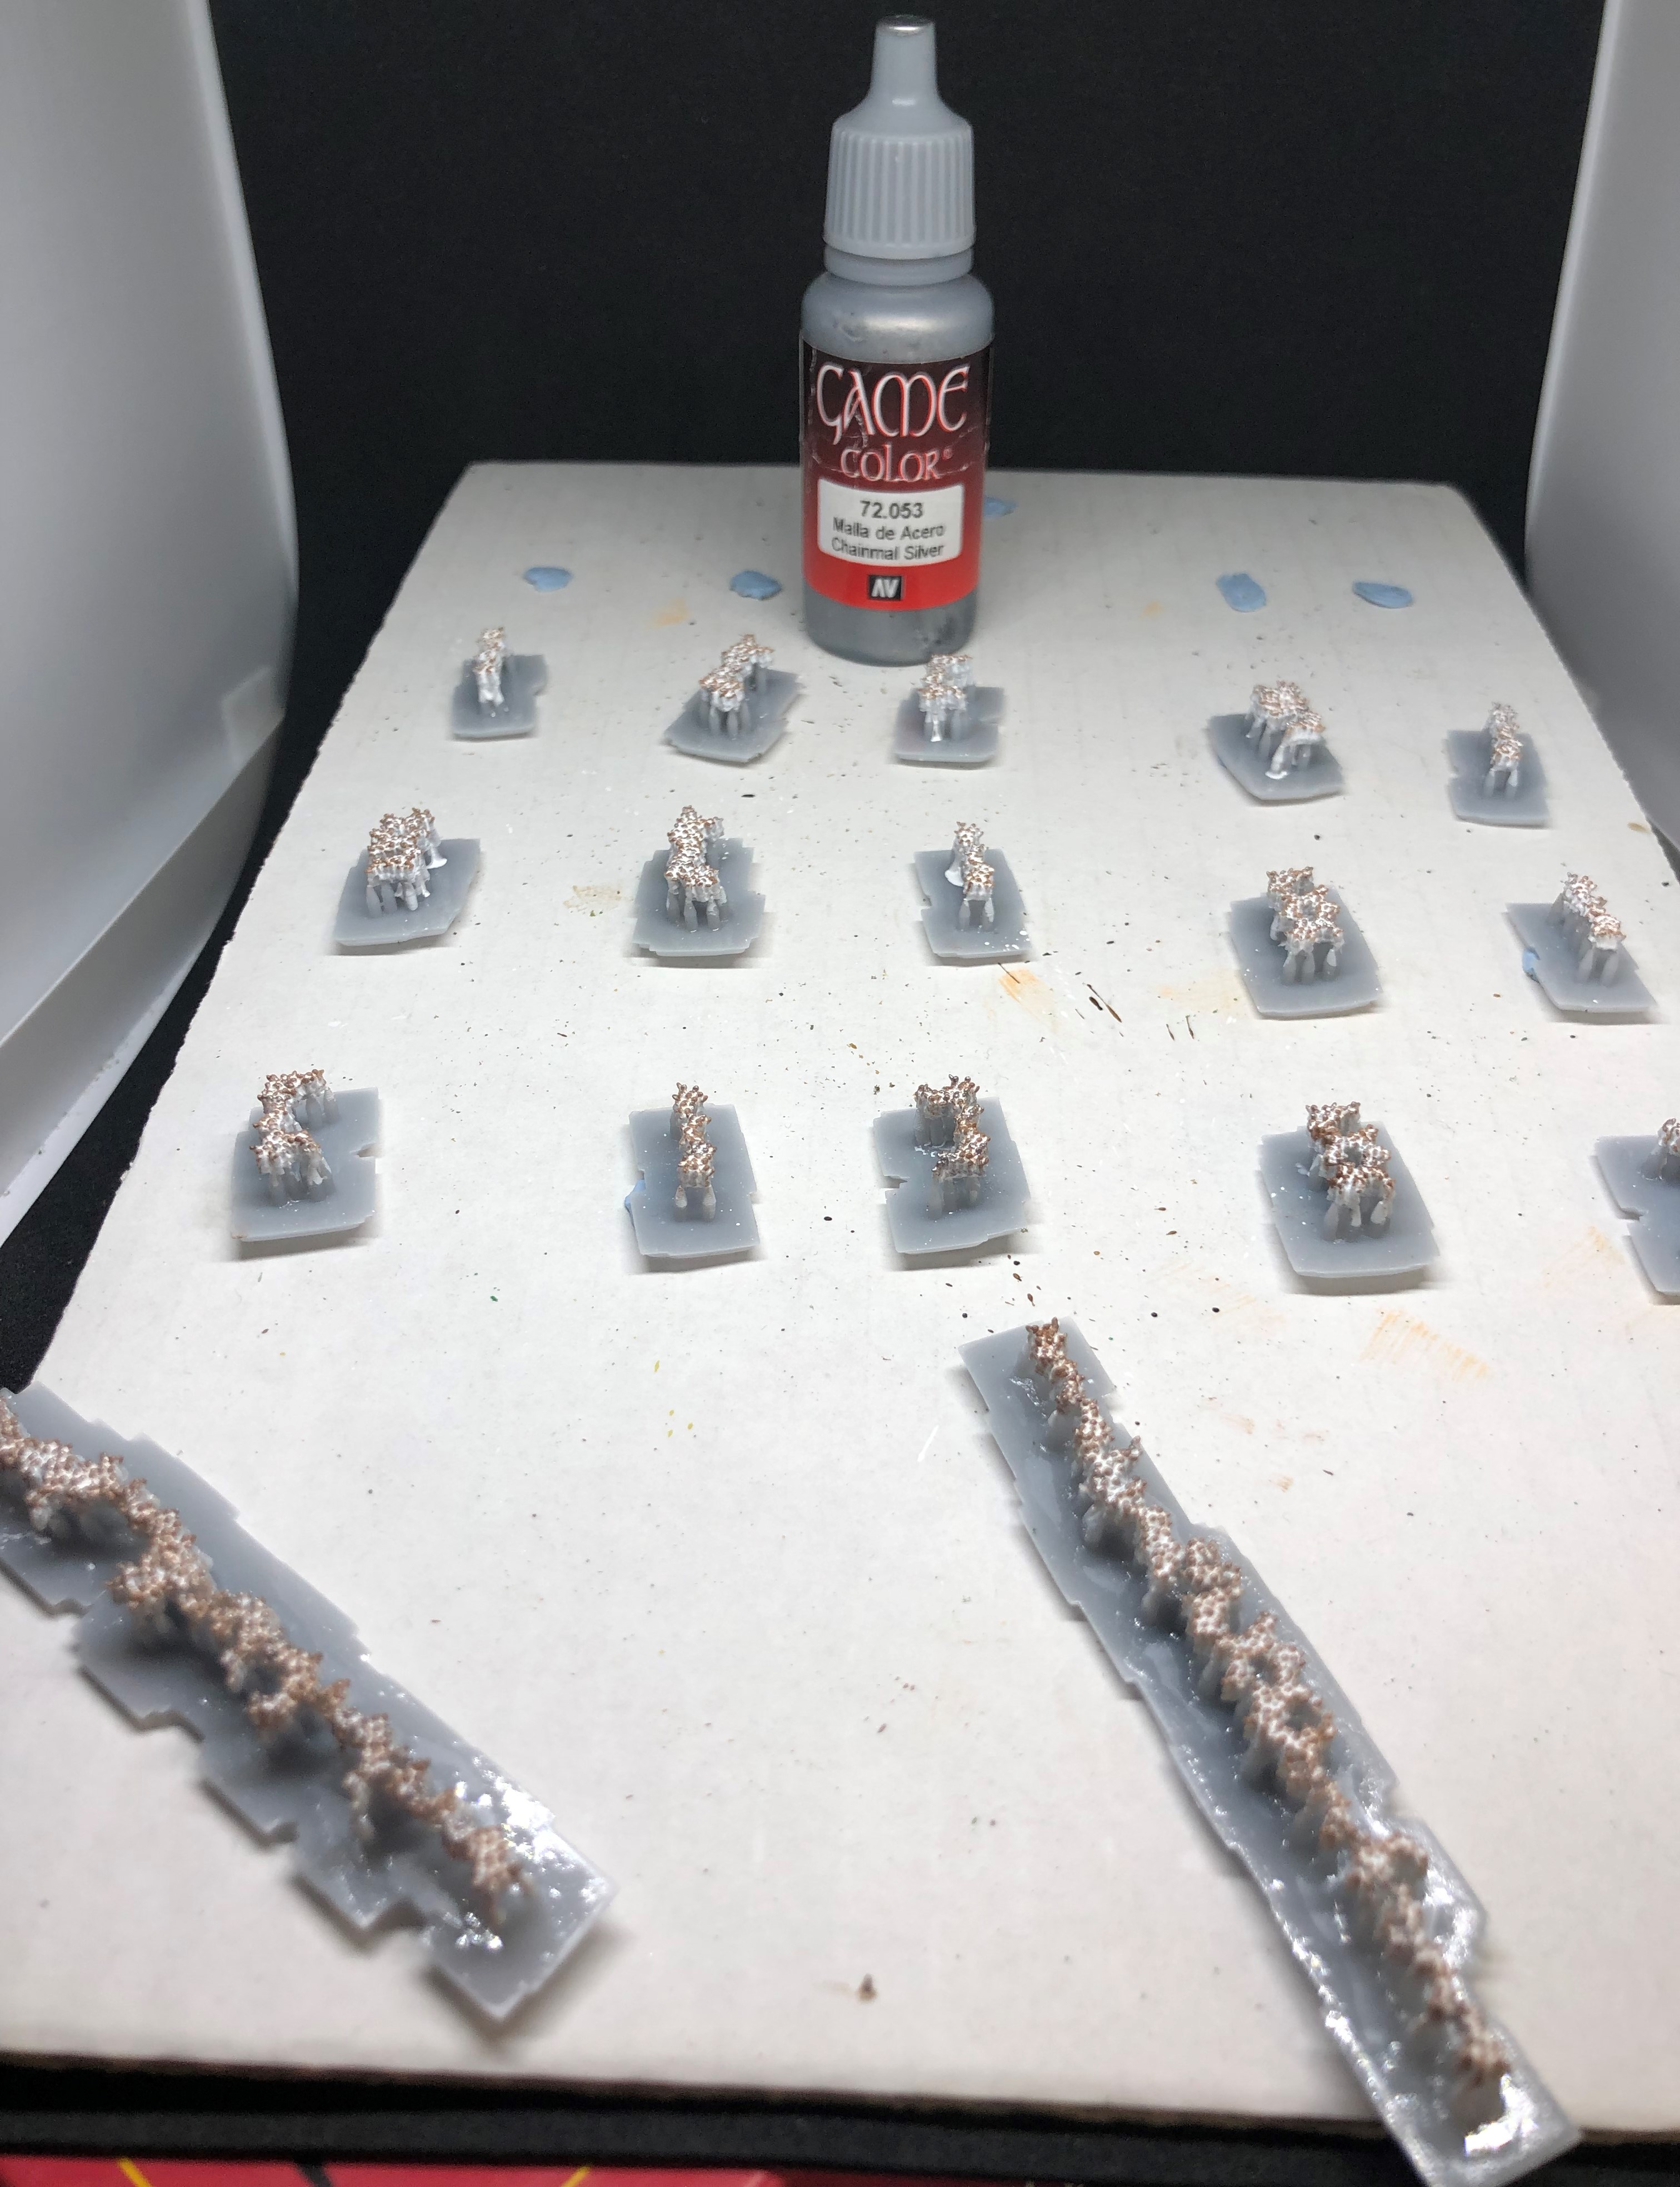
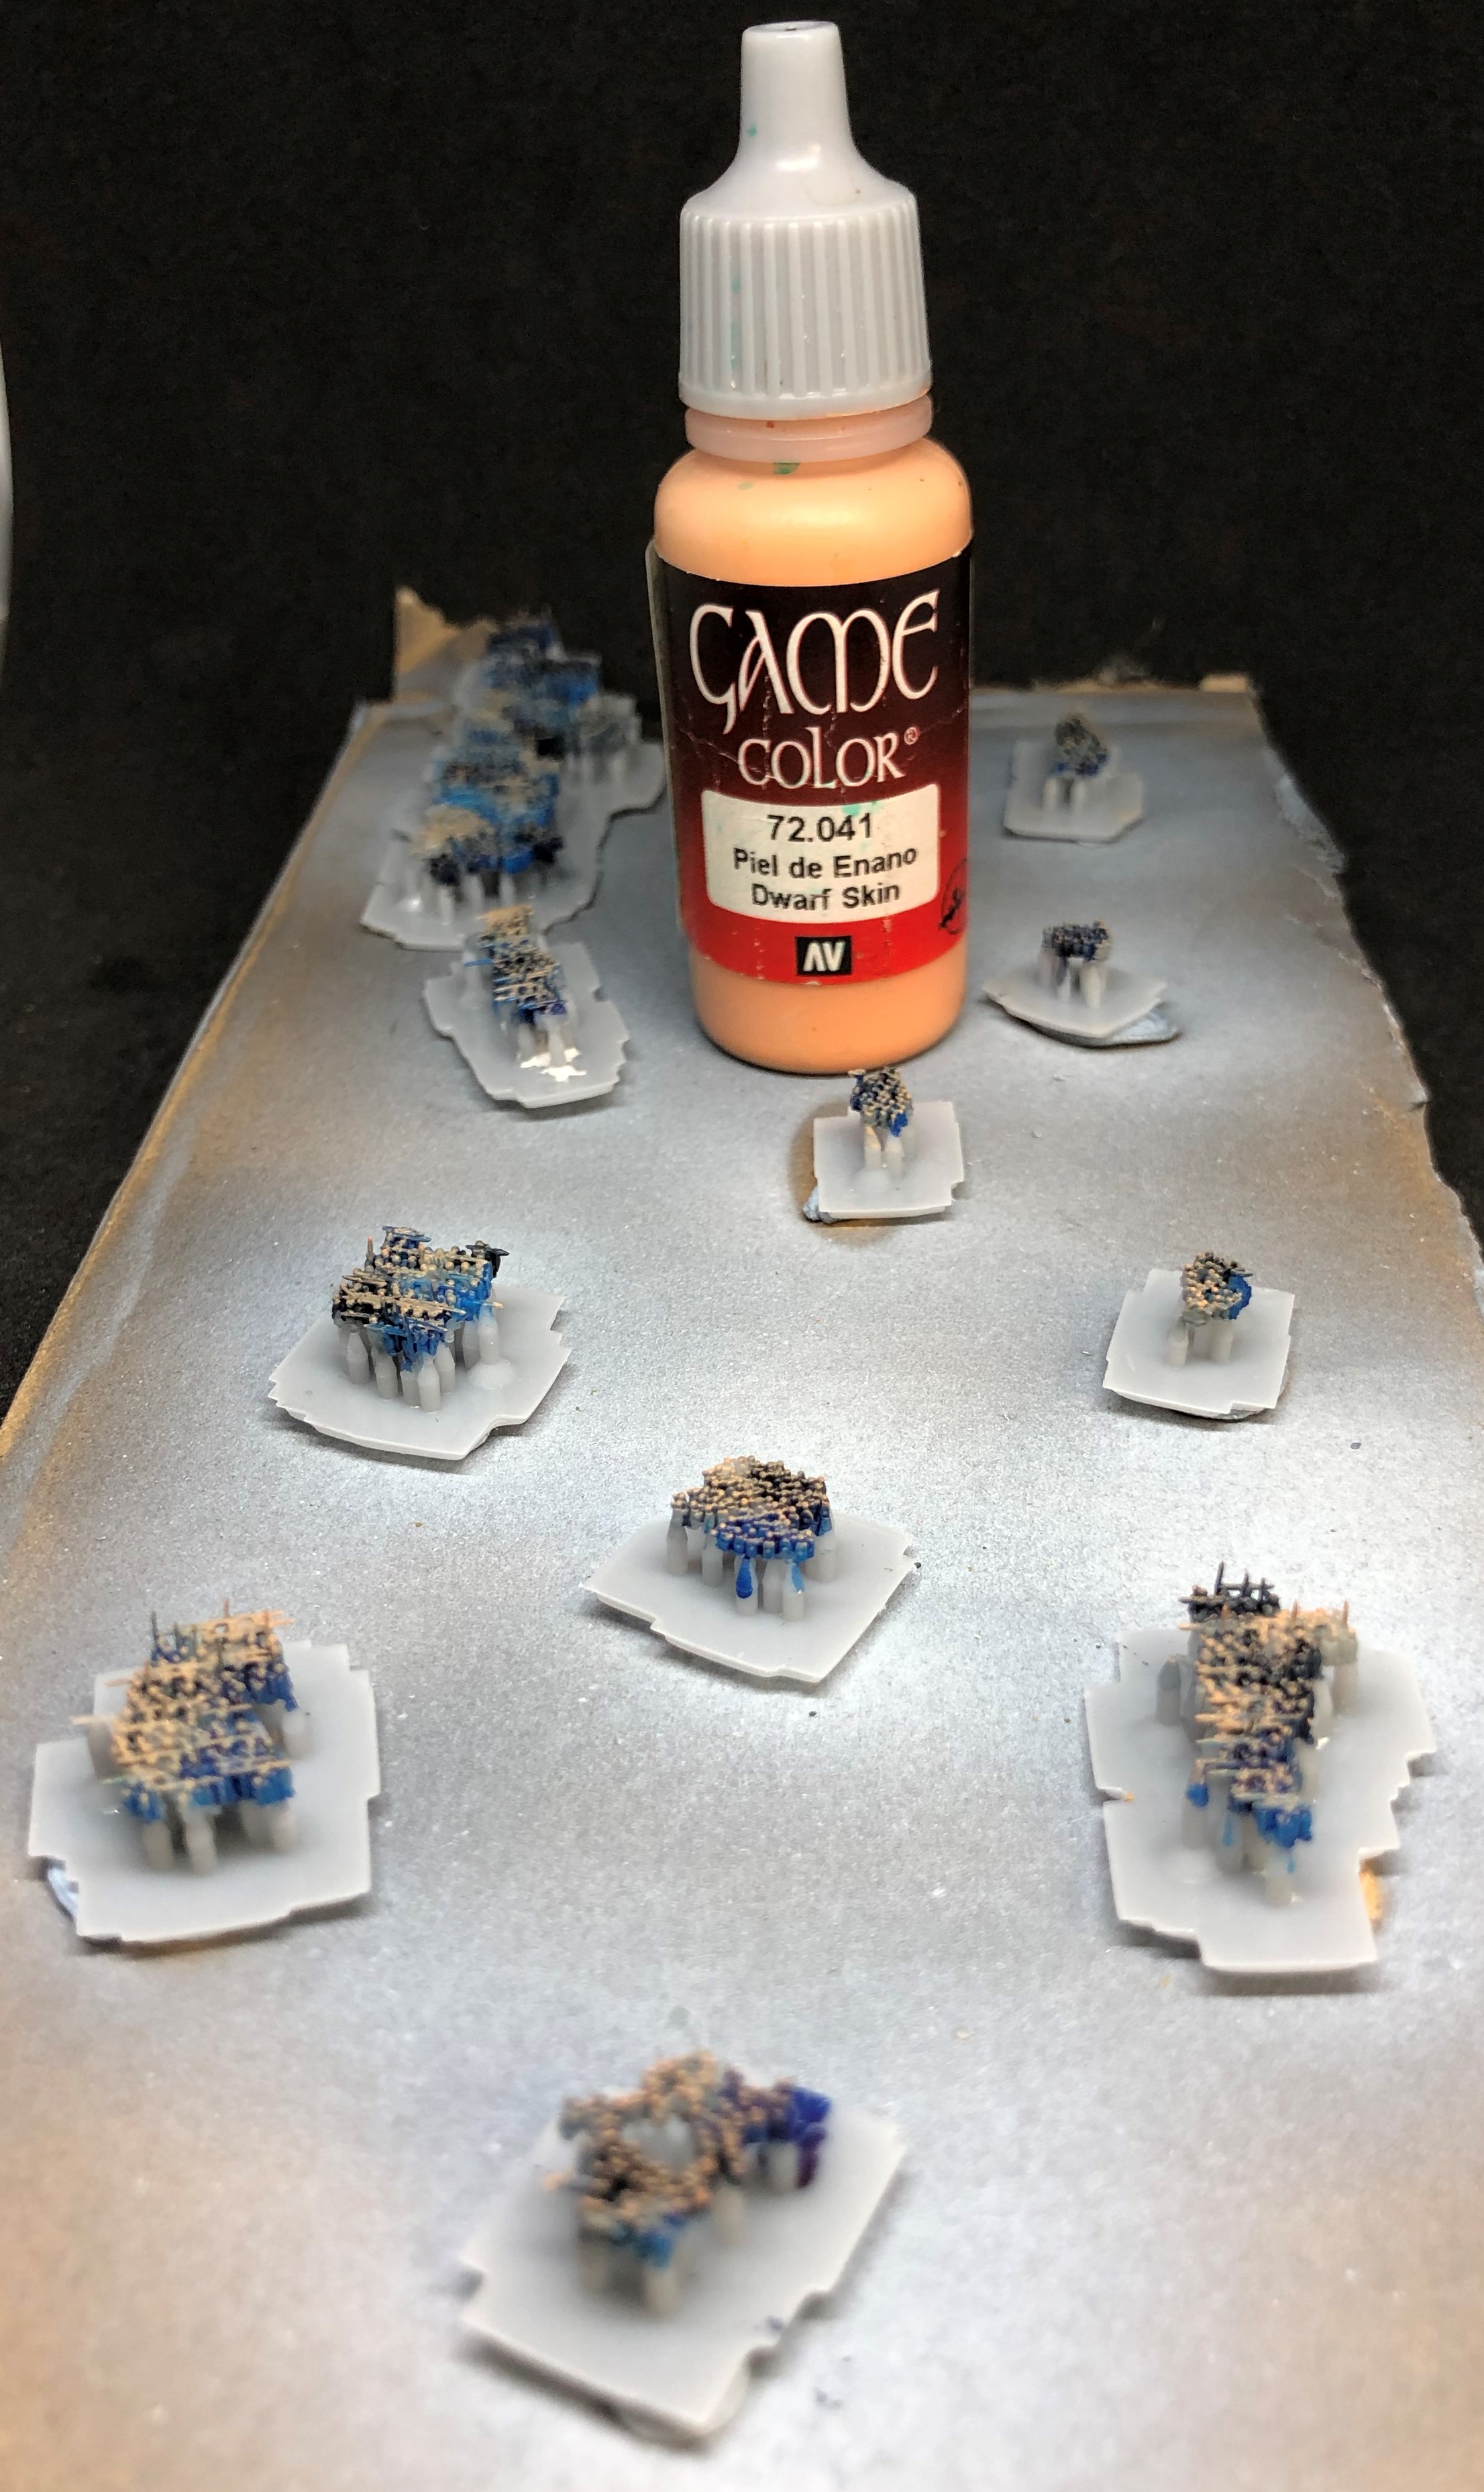
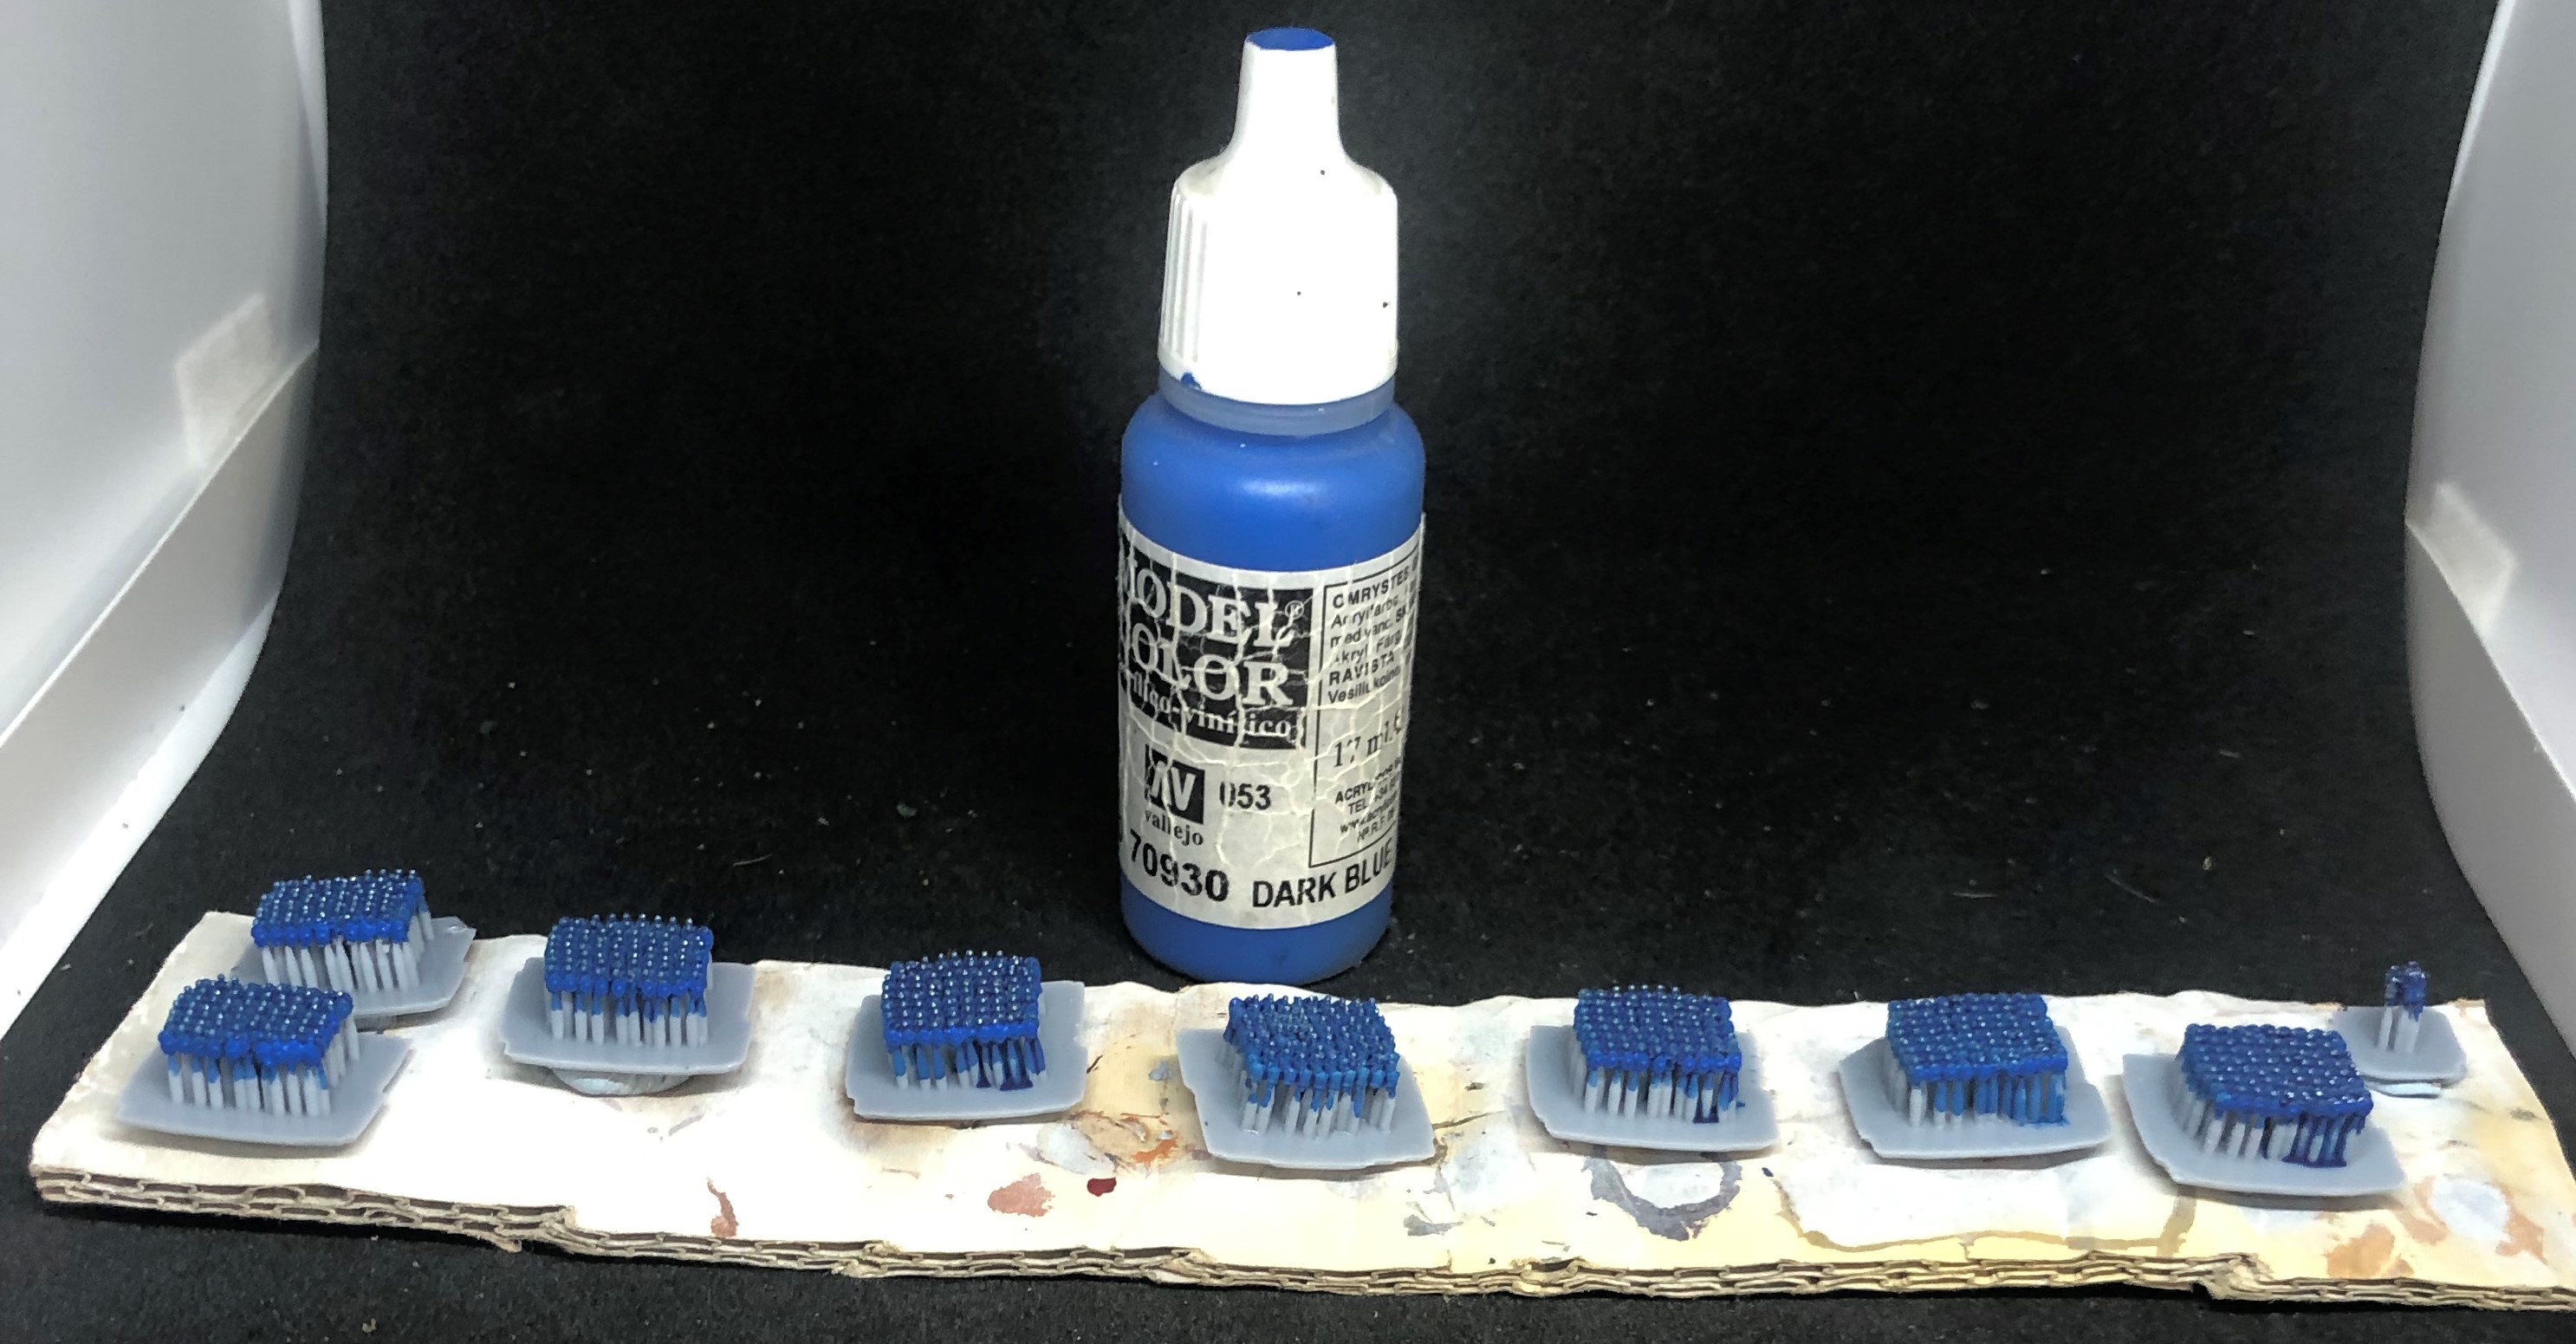
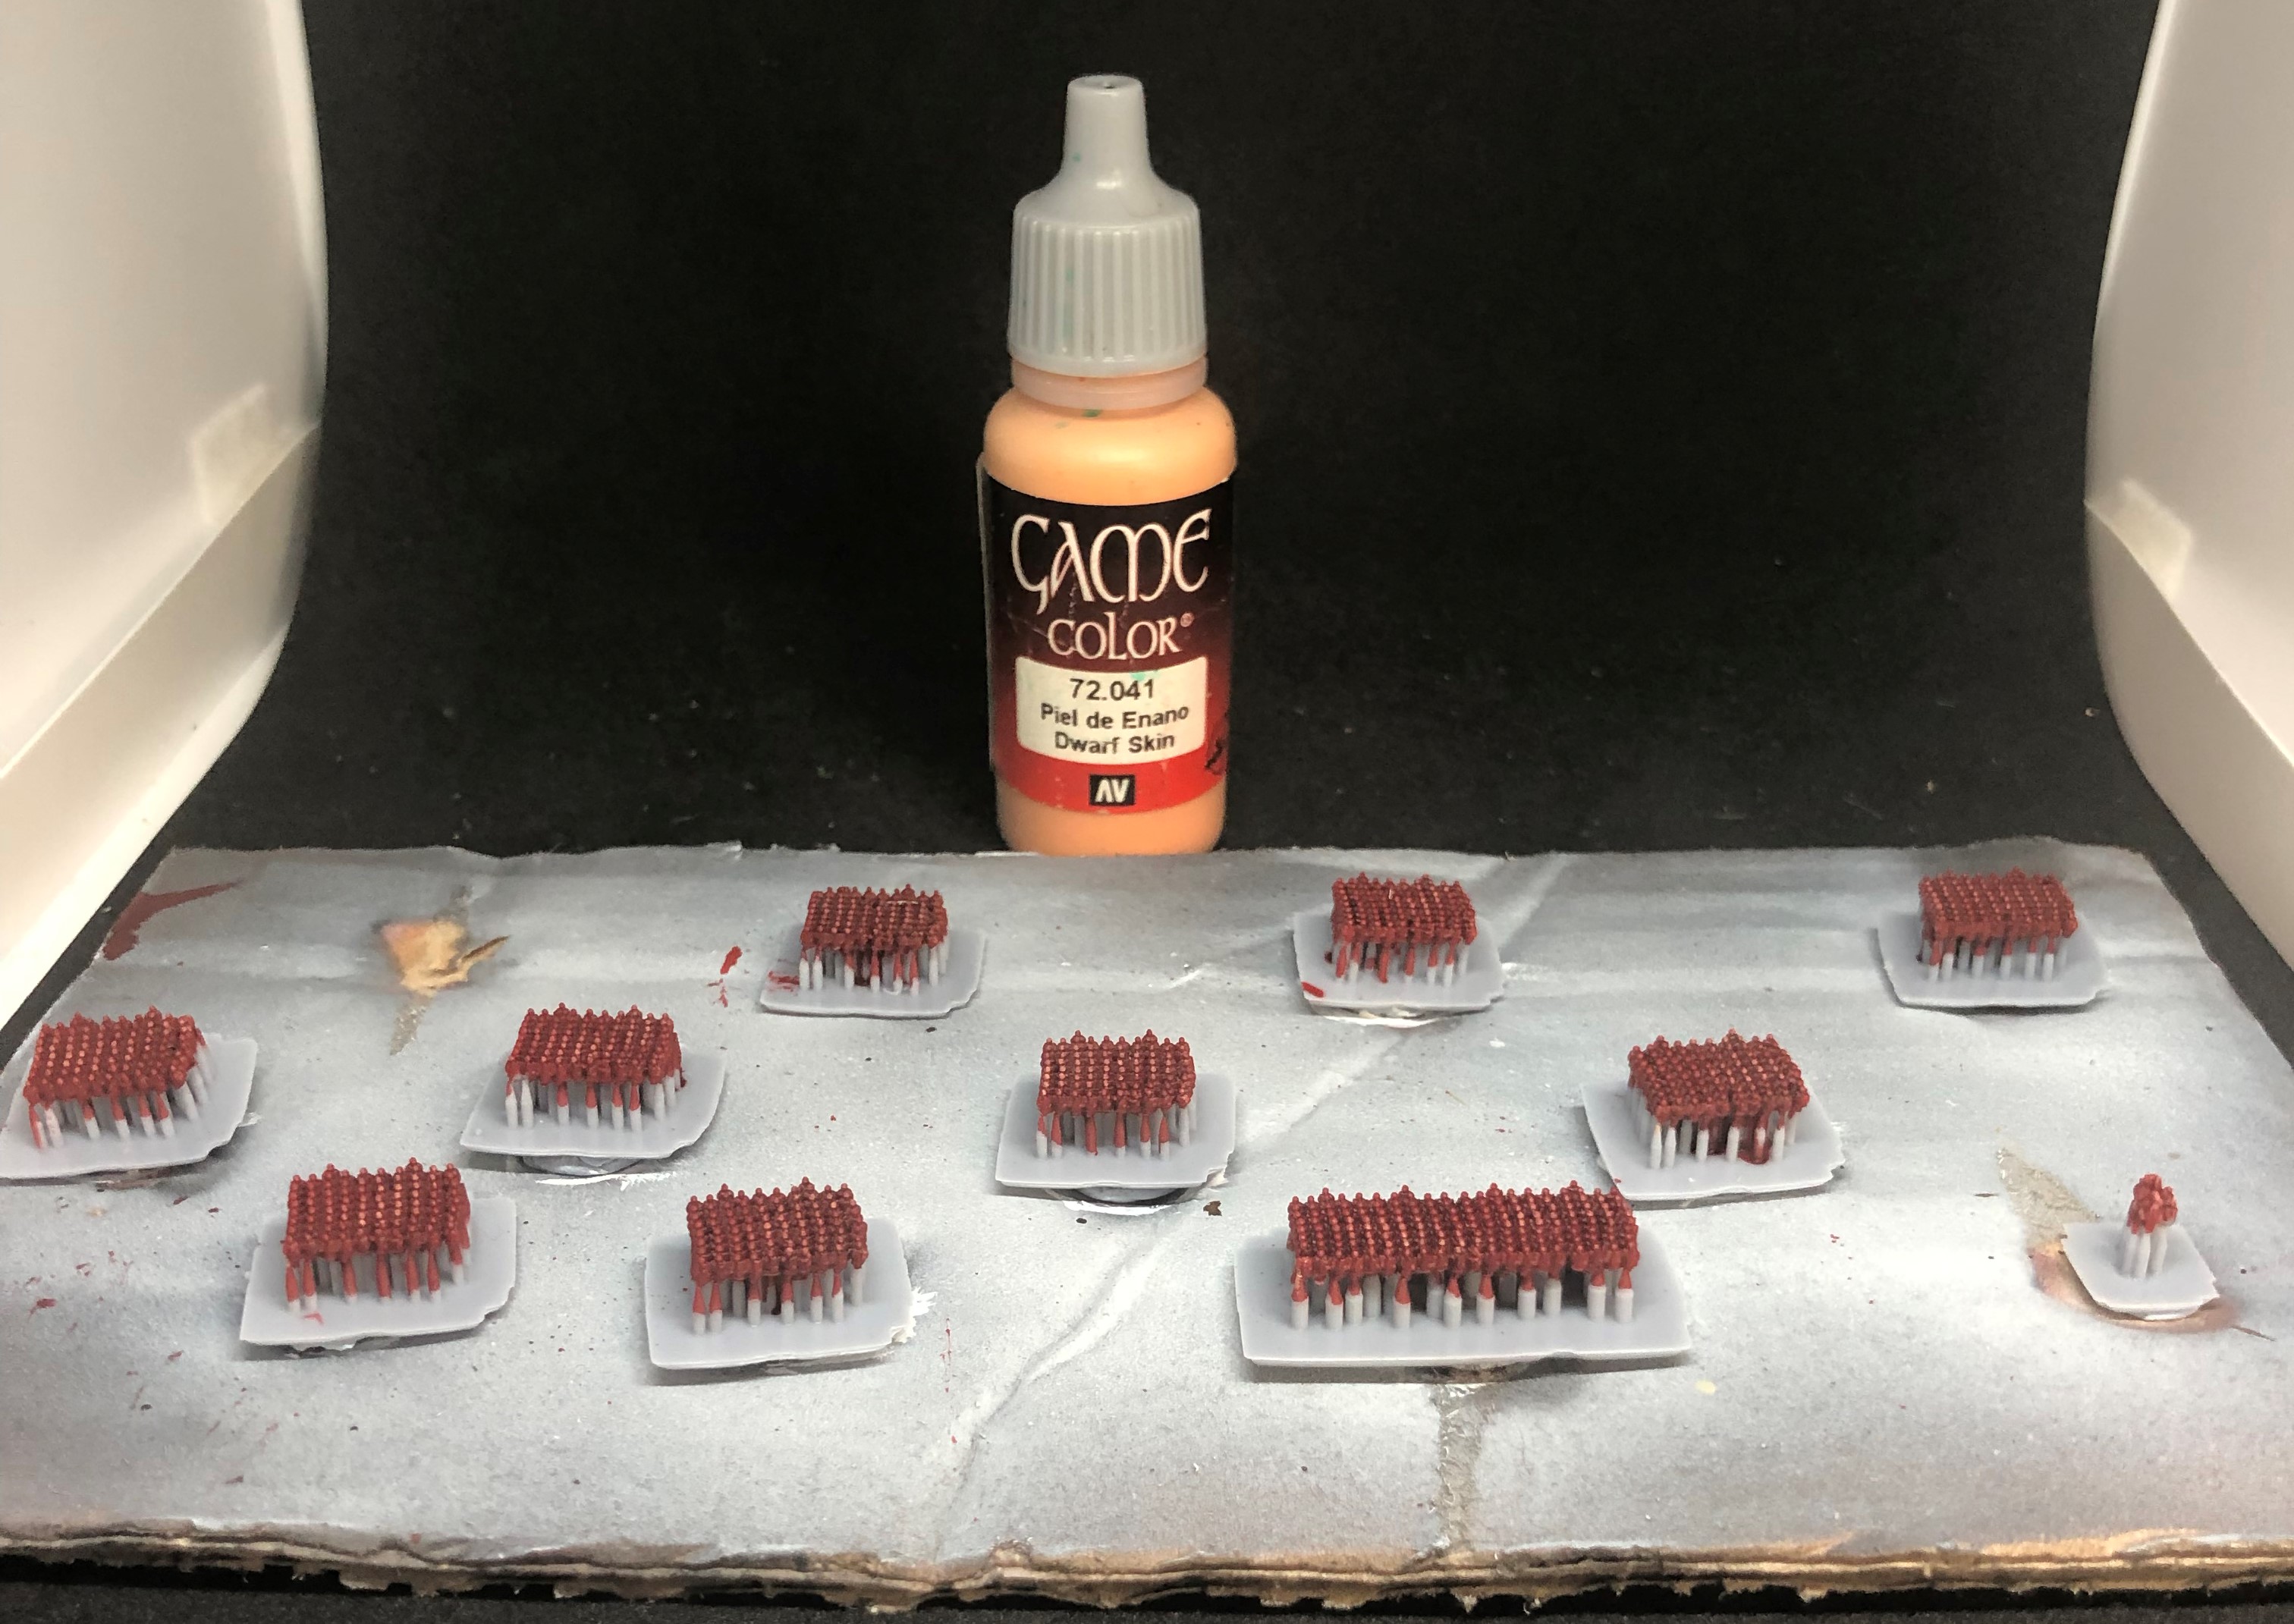
Next it is the skintone. Heavily drybrushed over the top half of each block.
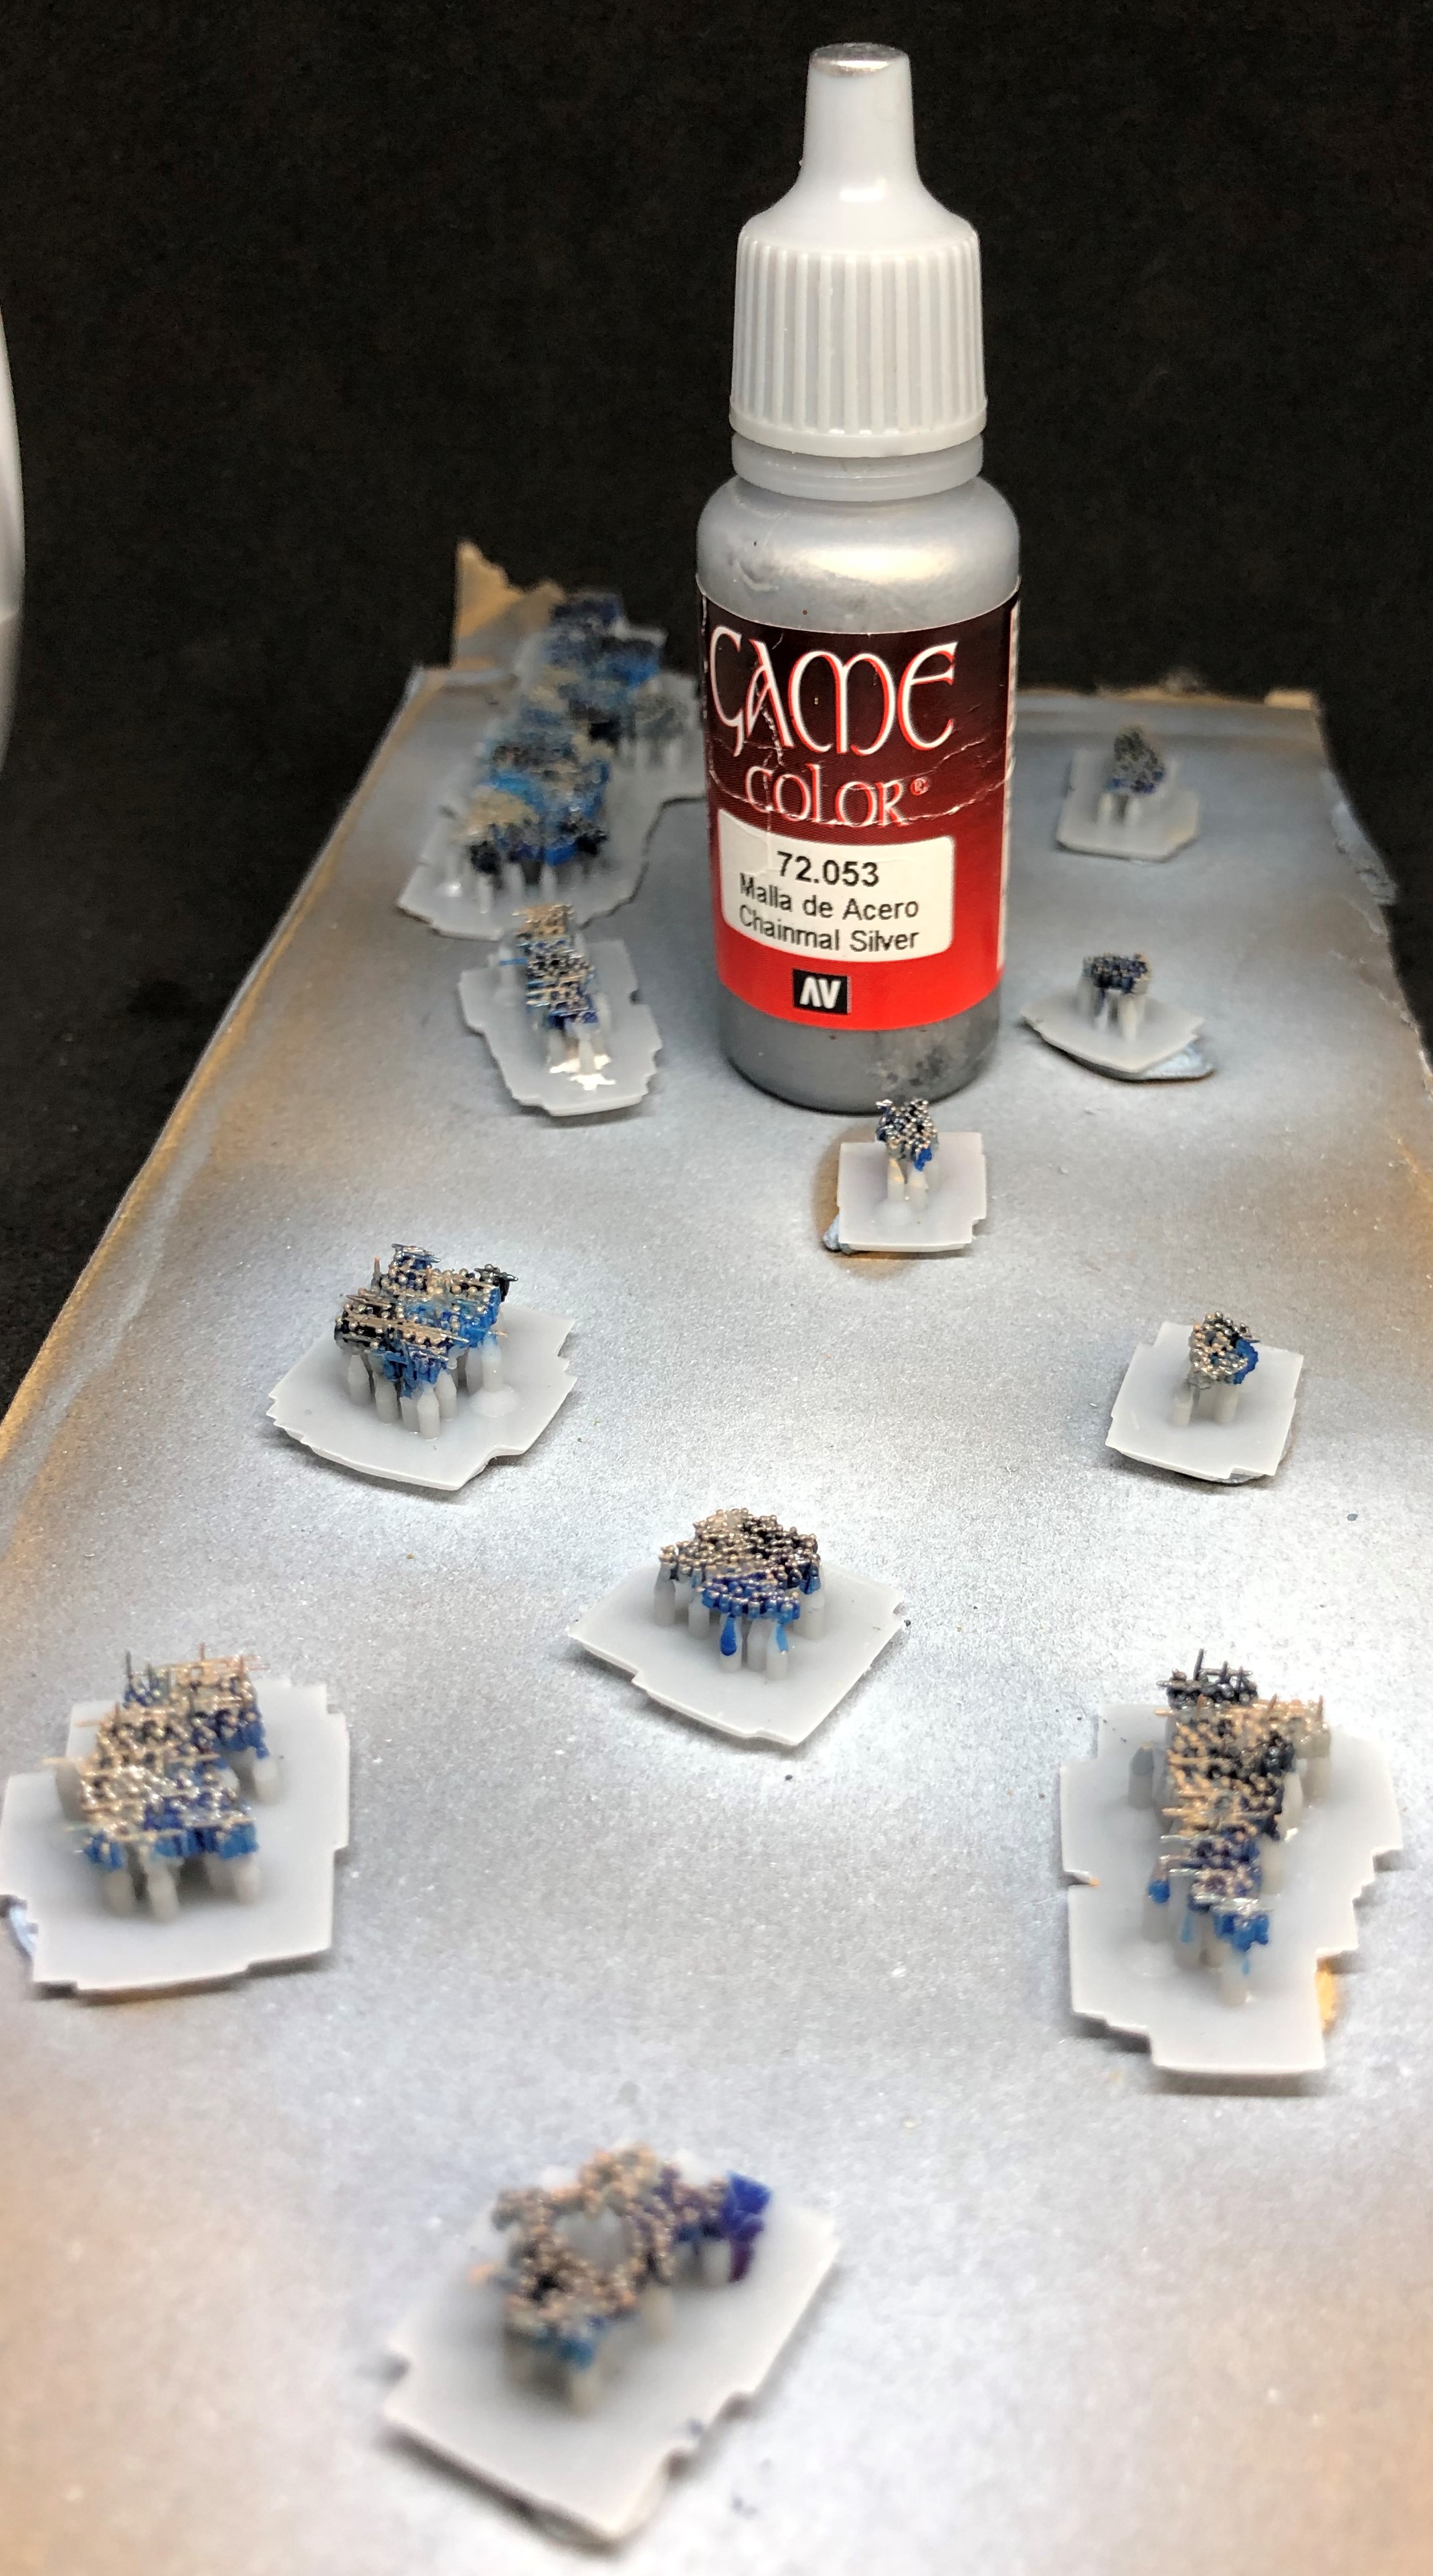
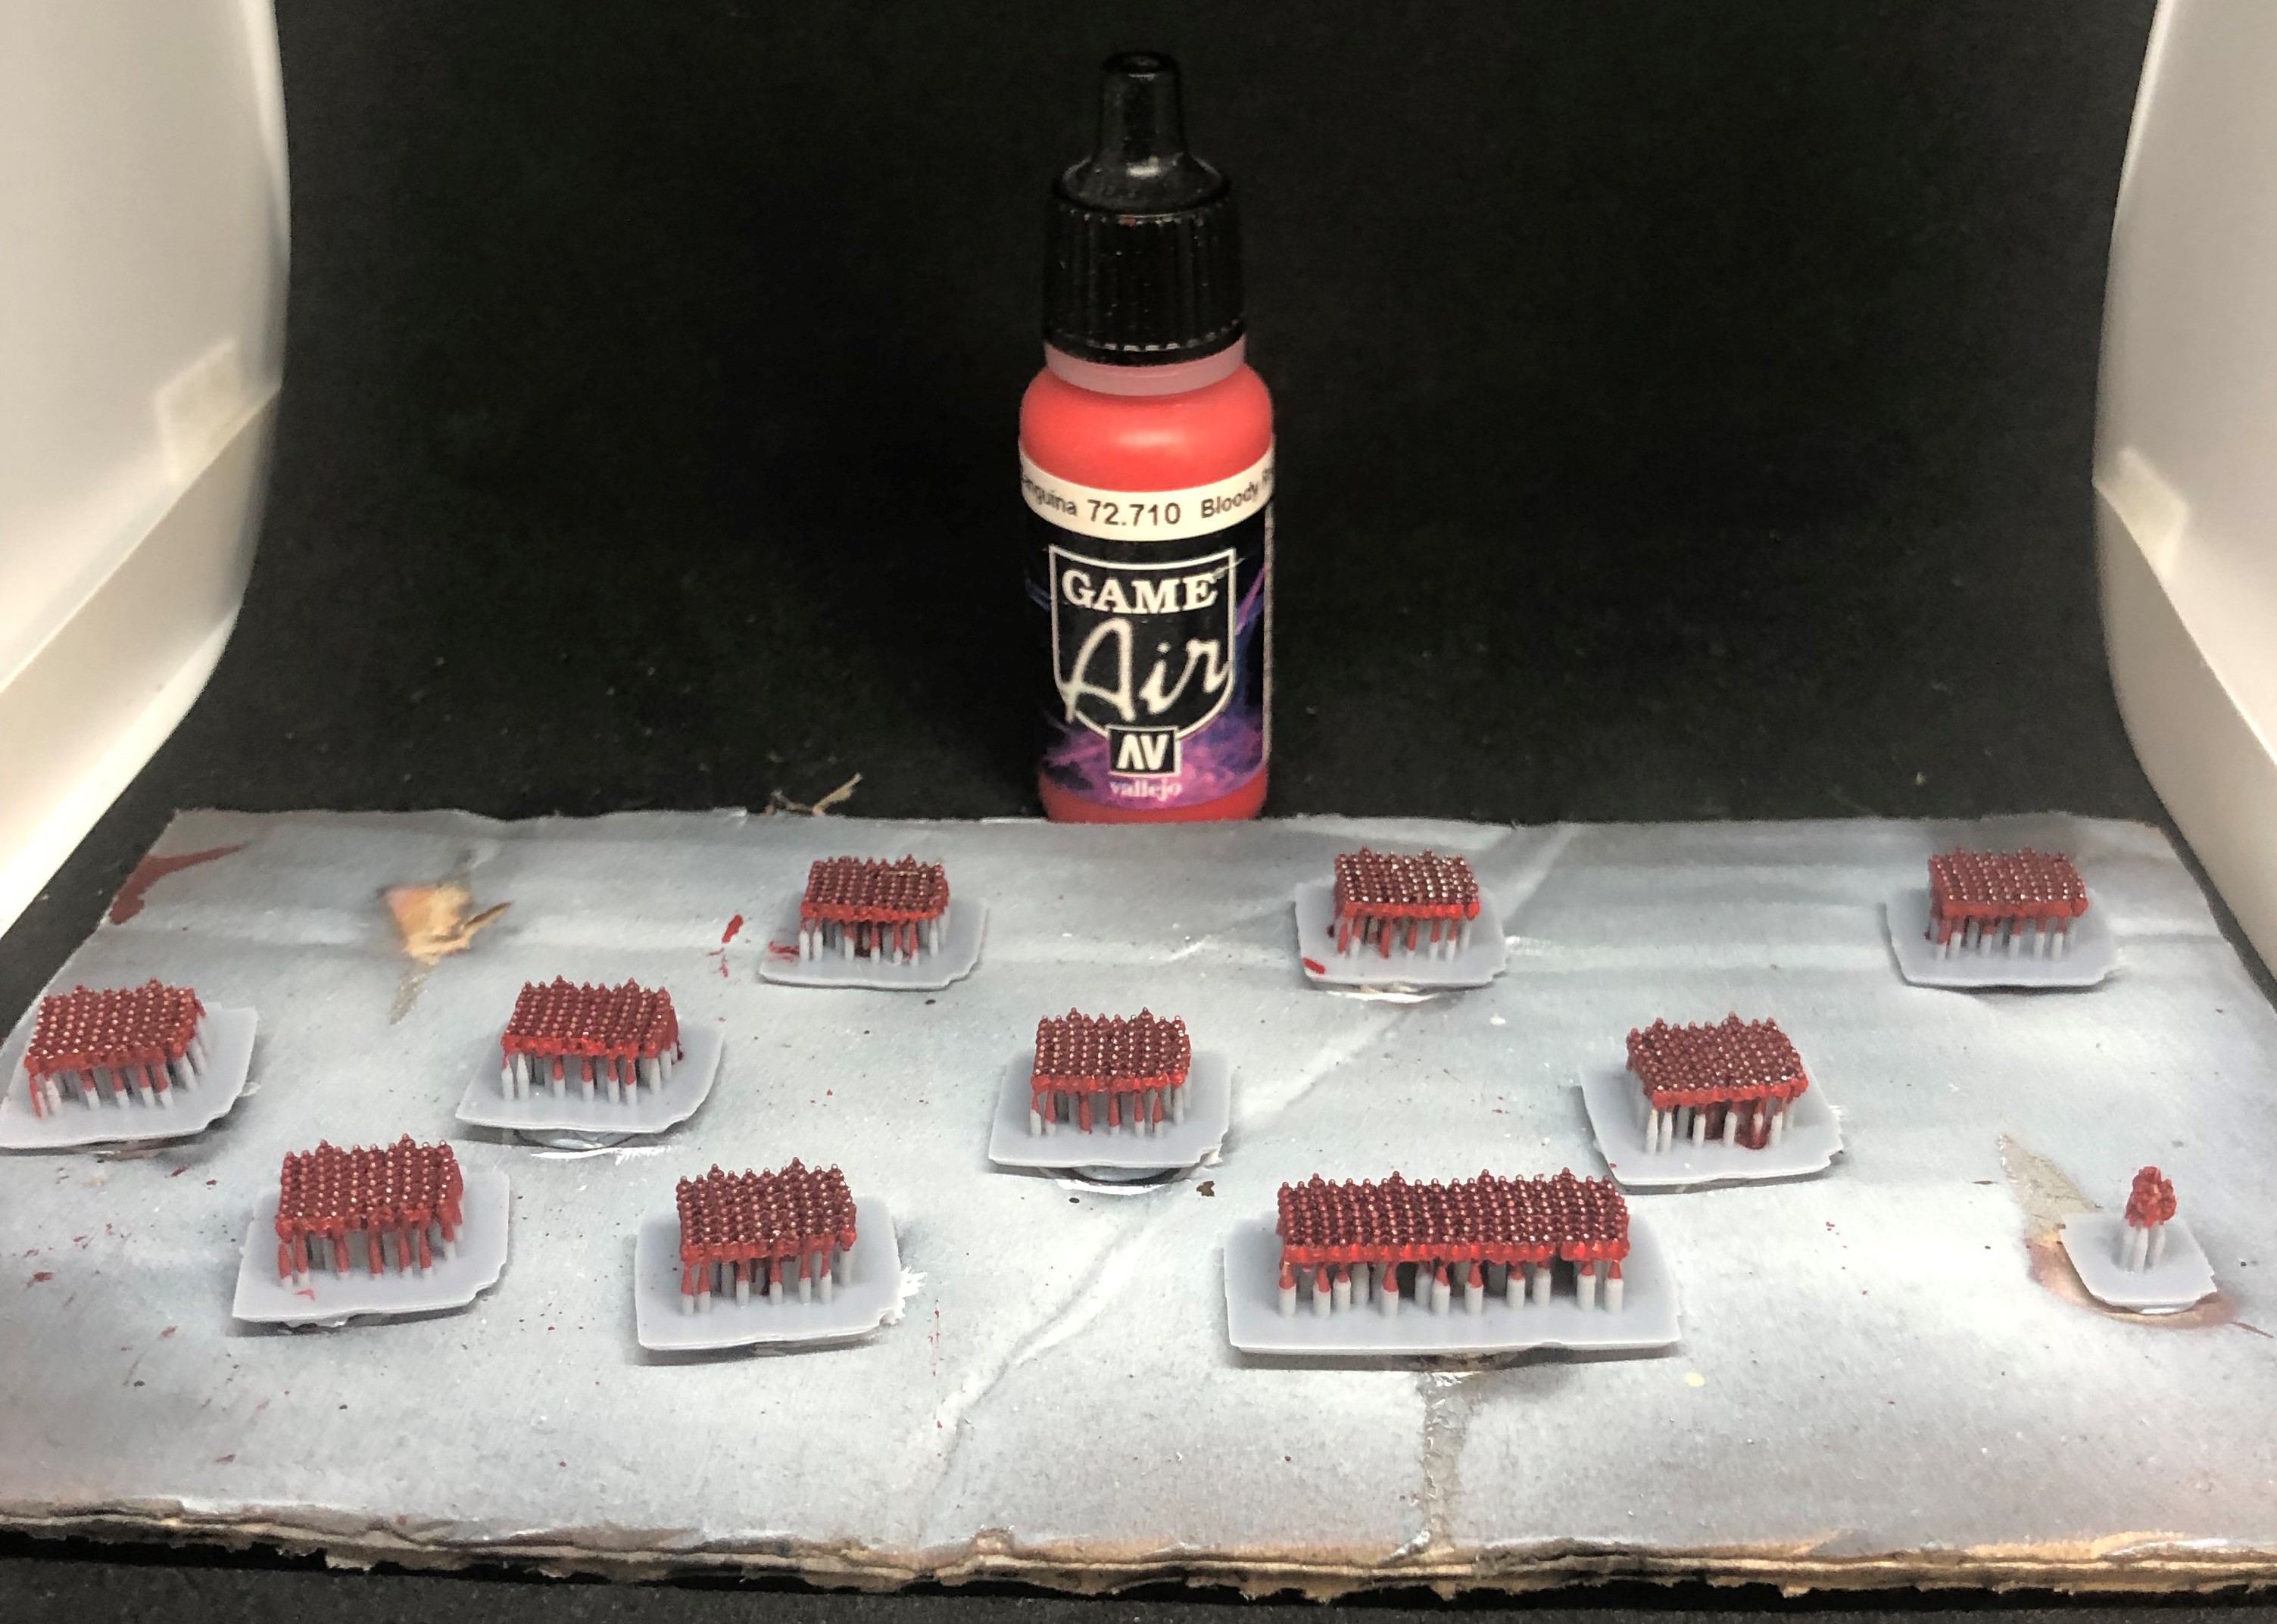
Then we do the weapons and any minor bits of armour they may have scrounged. Light drybrush of the chainmail colour in patches, here and there on the blocks.
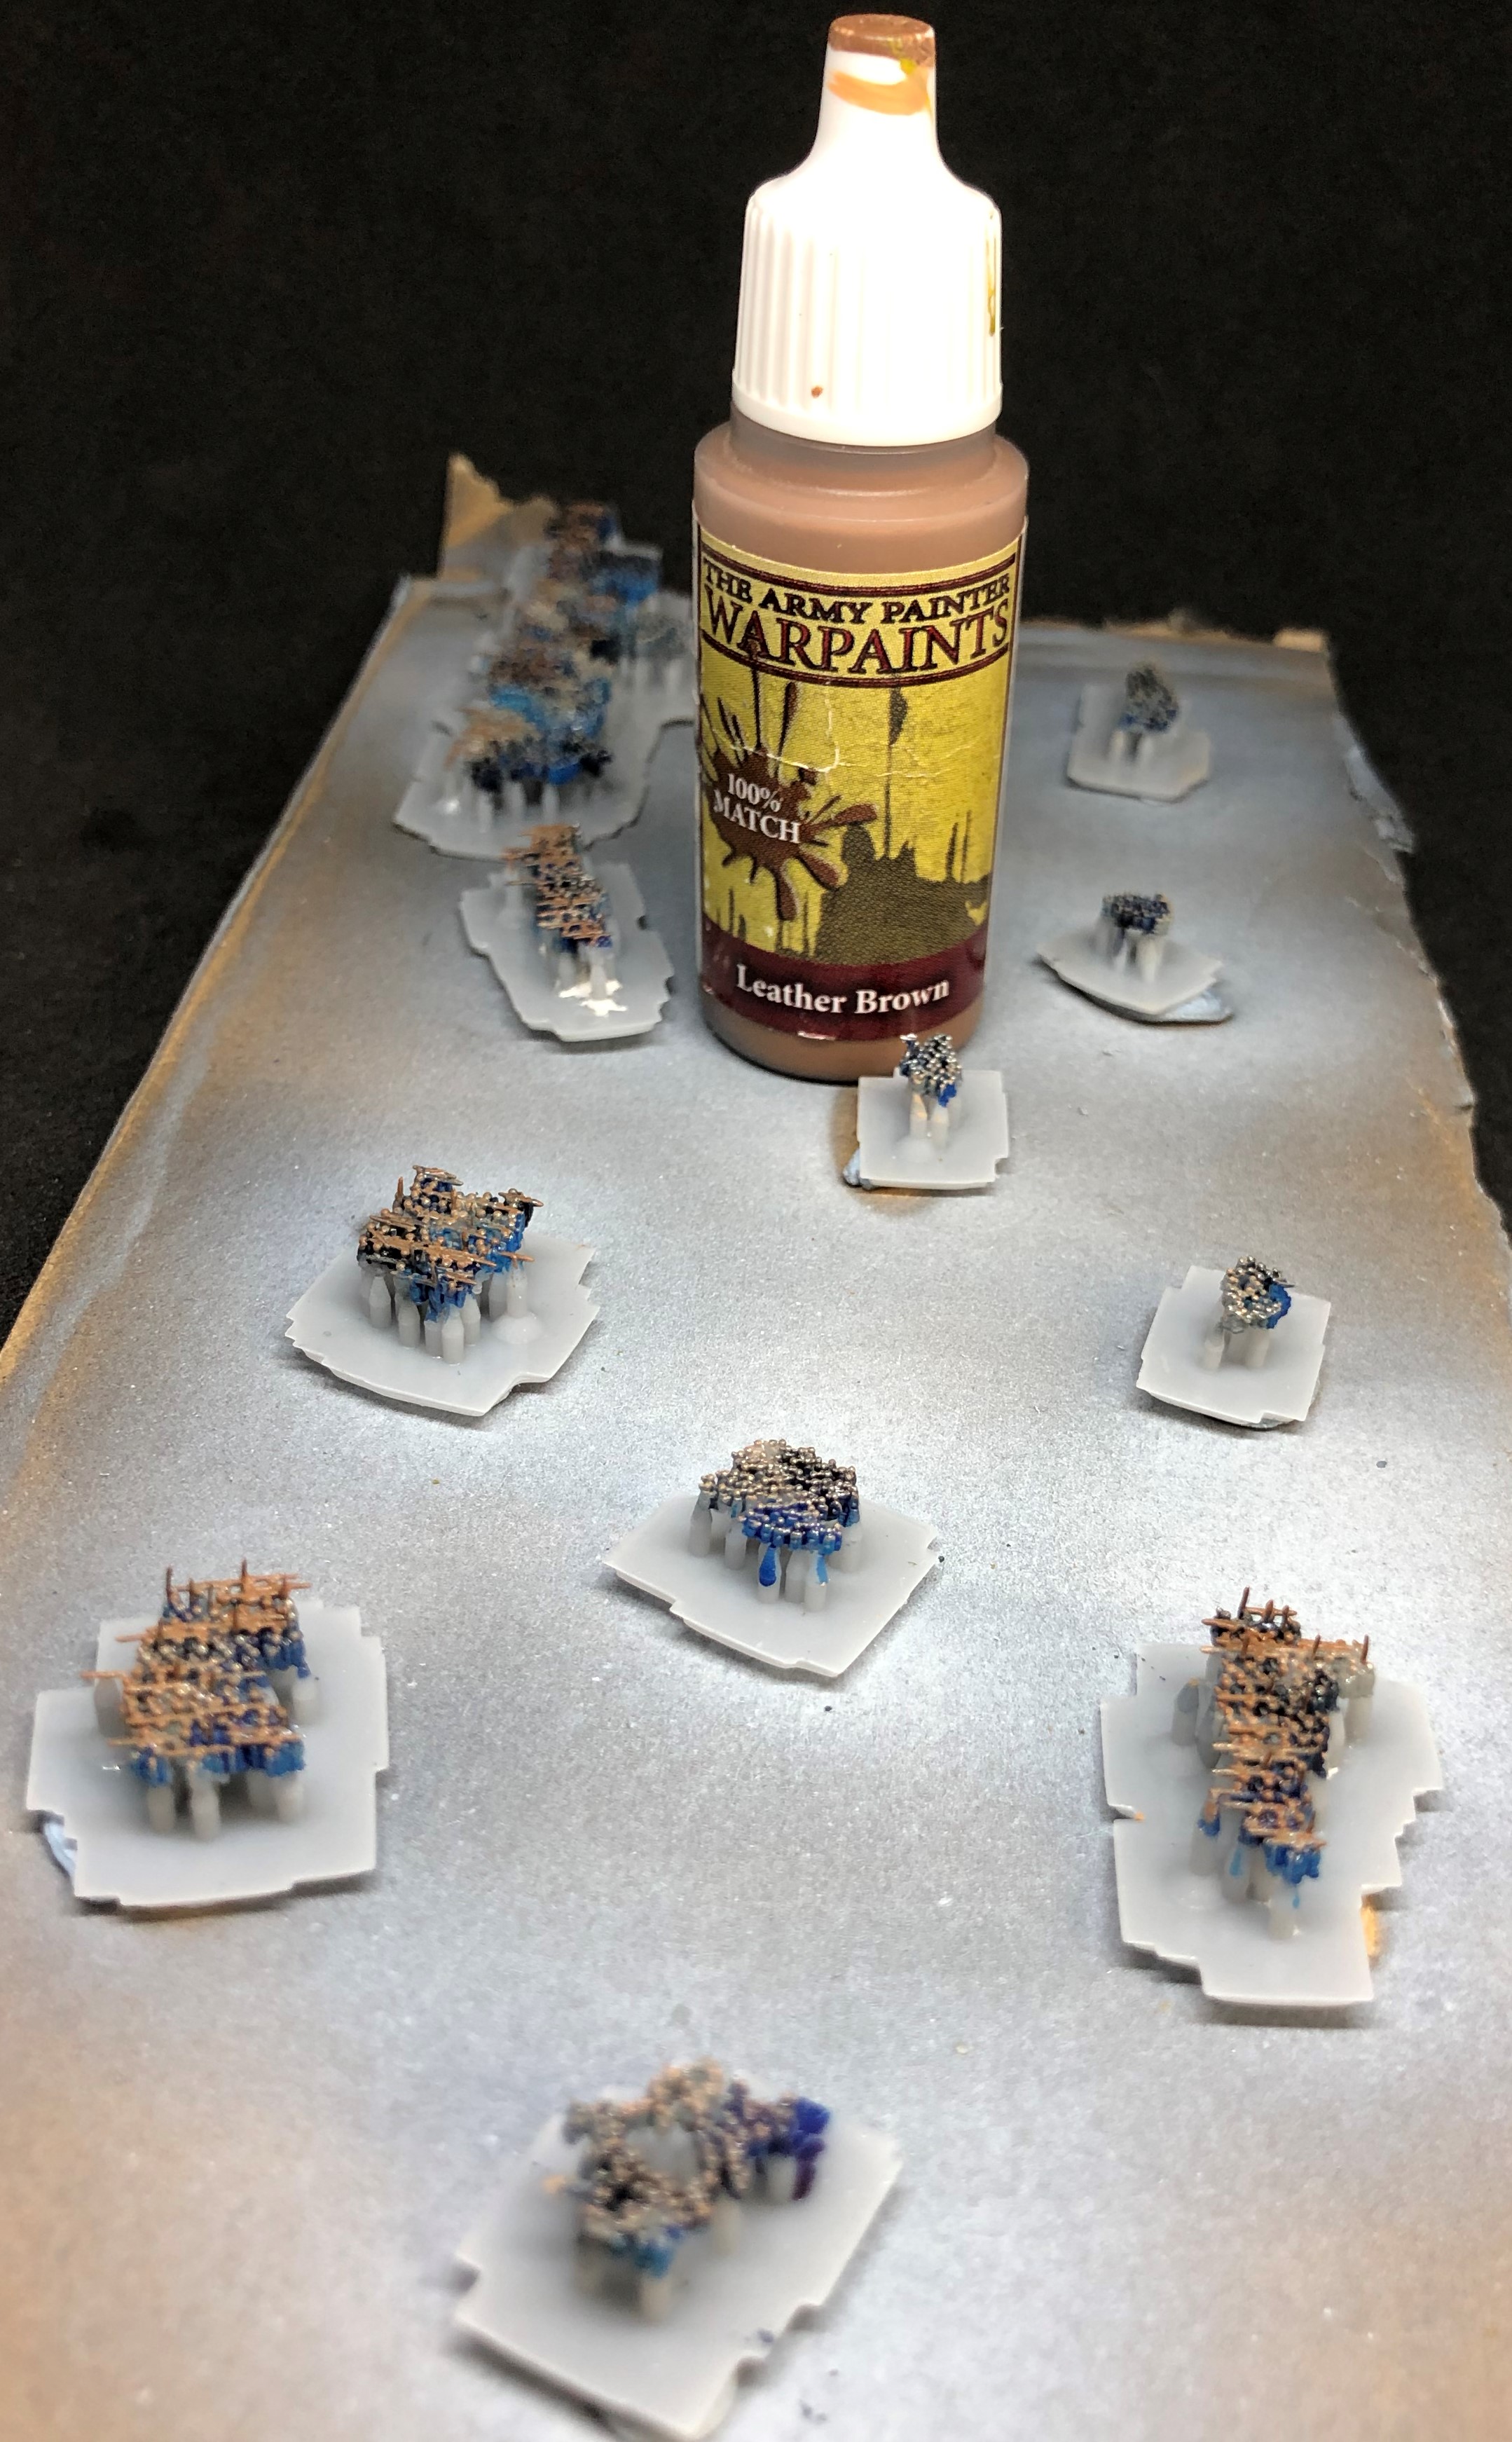
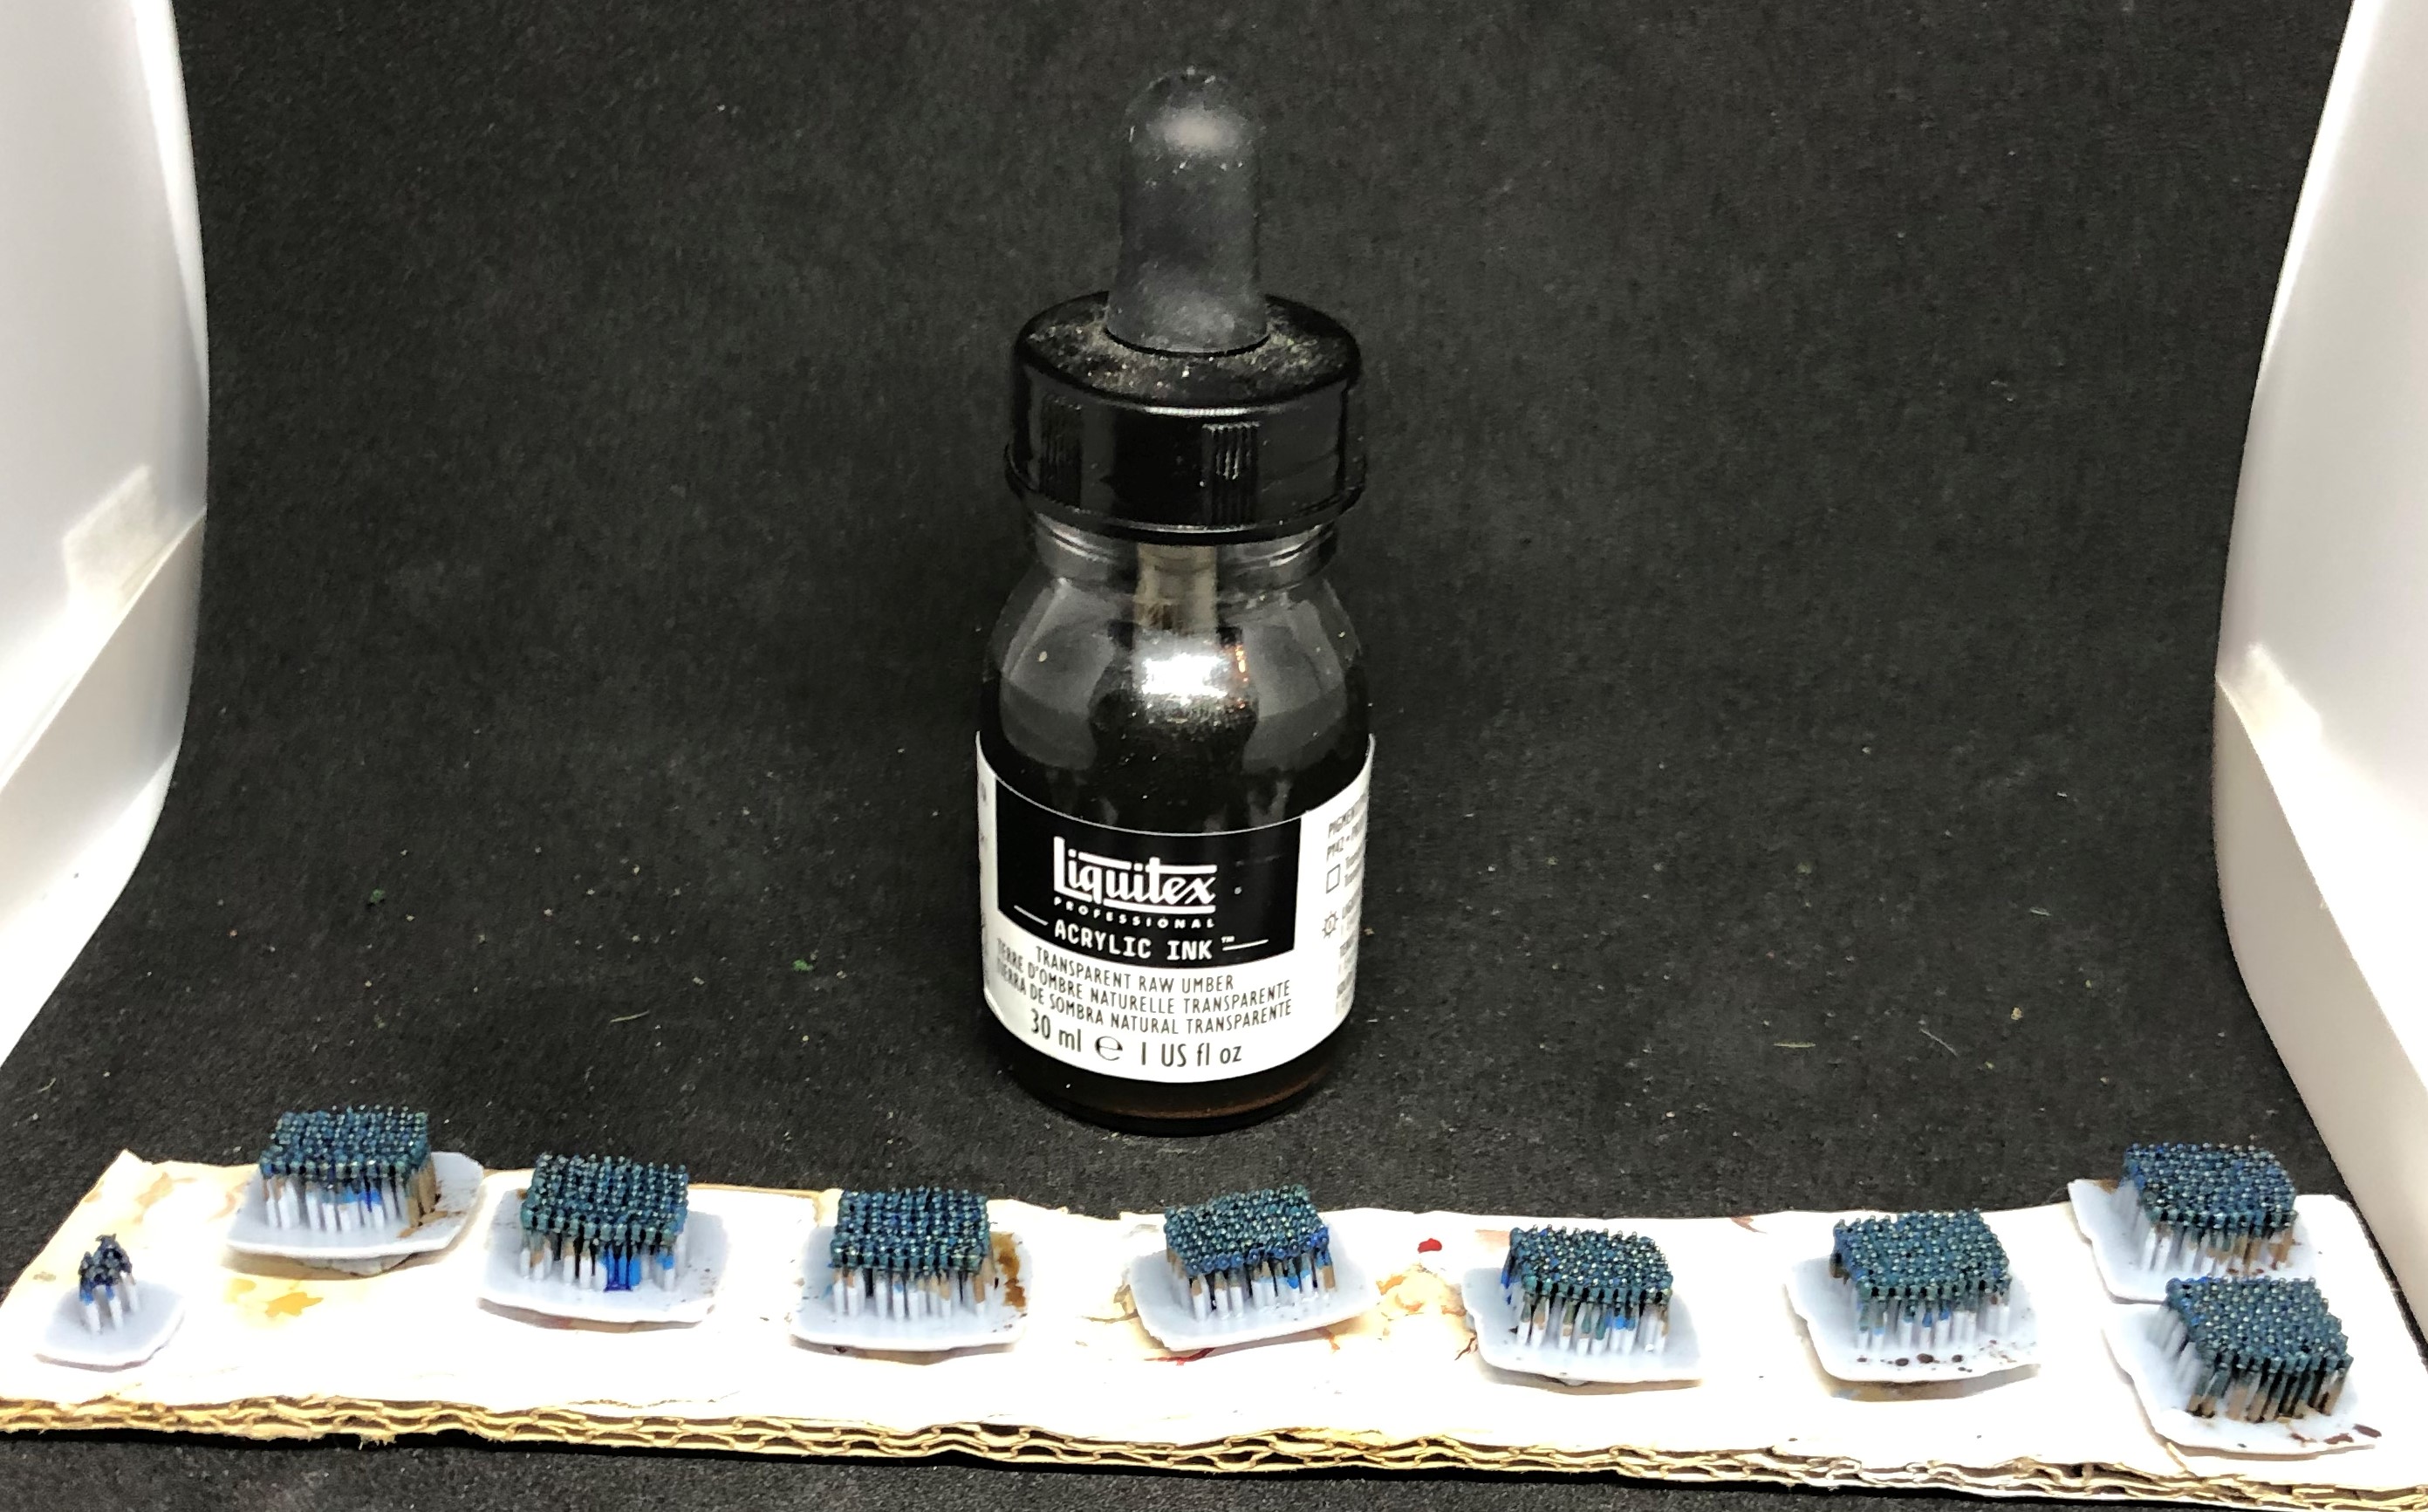
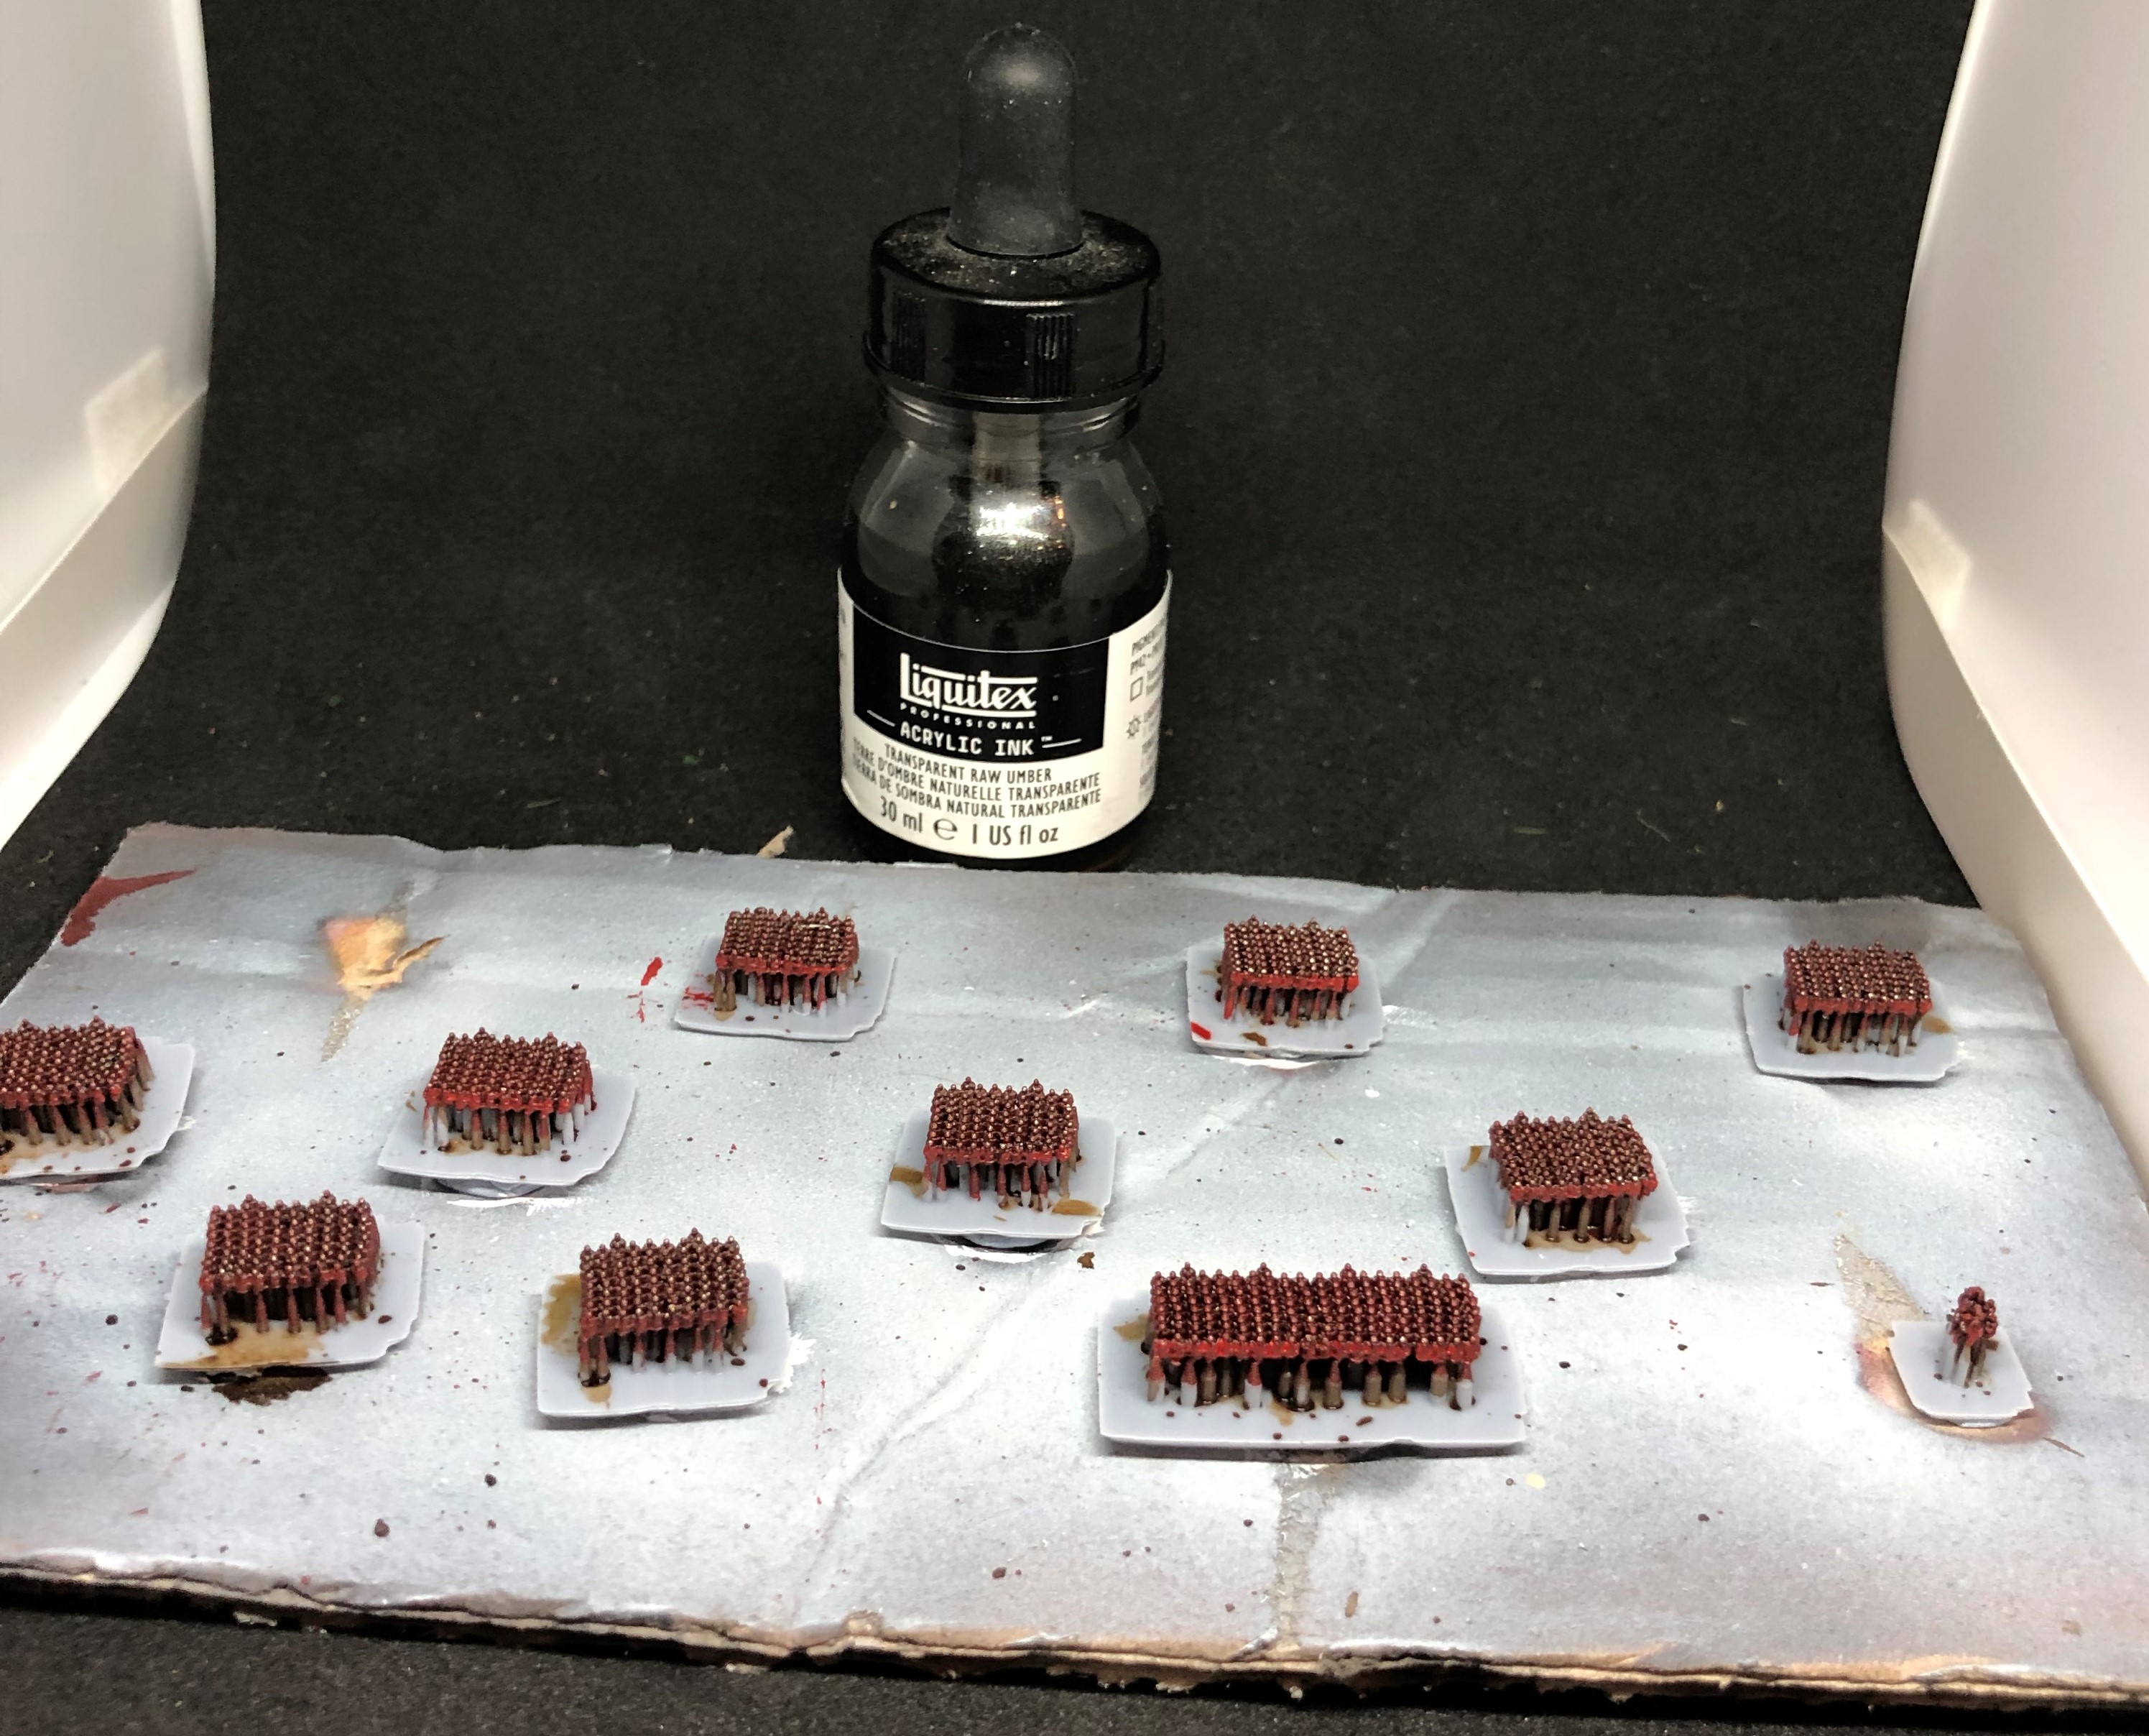
Finally the raw unber for shading. This has been applied in a more patchy fashion than usual in order that some of the white will still show through so the clothing looks a bit like a mix of white and more basic unbleached cotton.
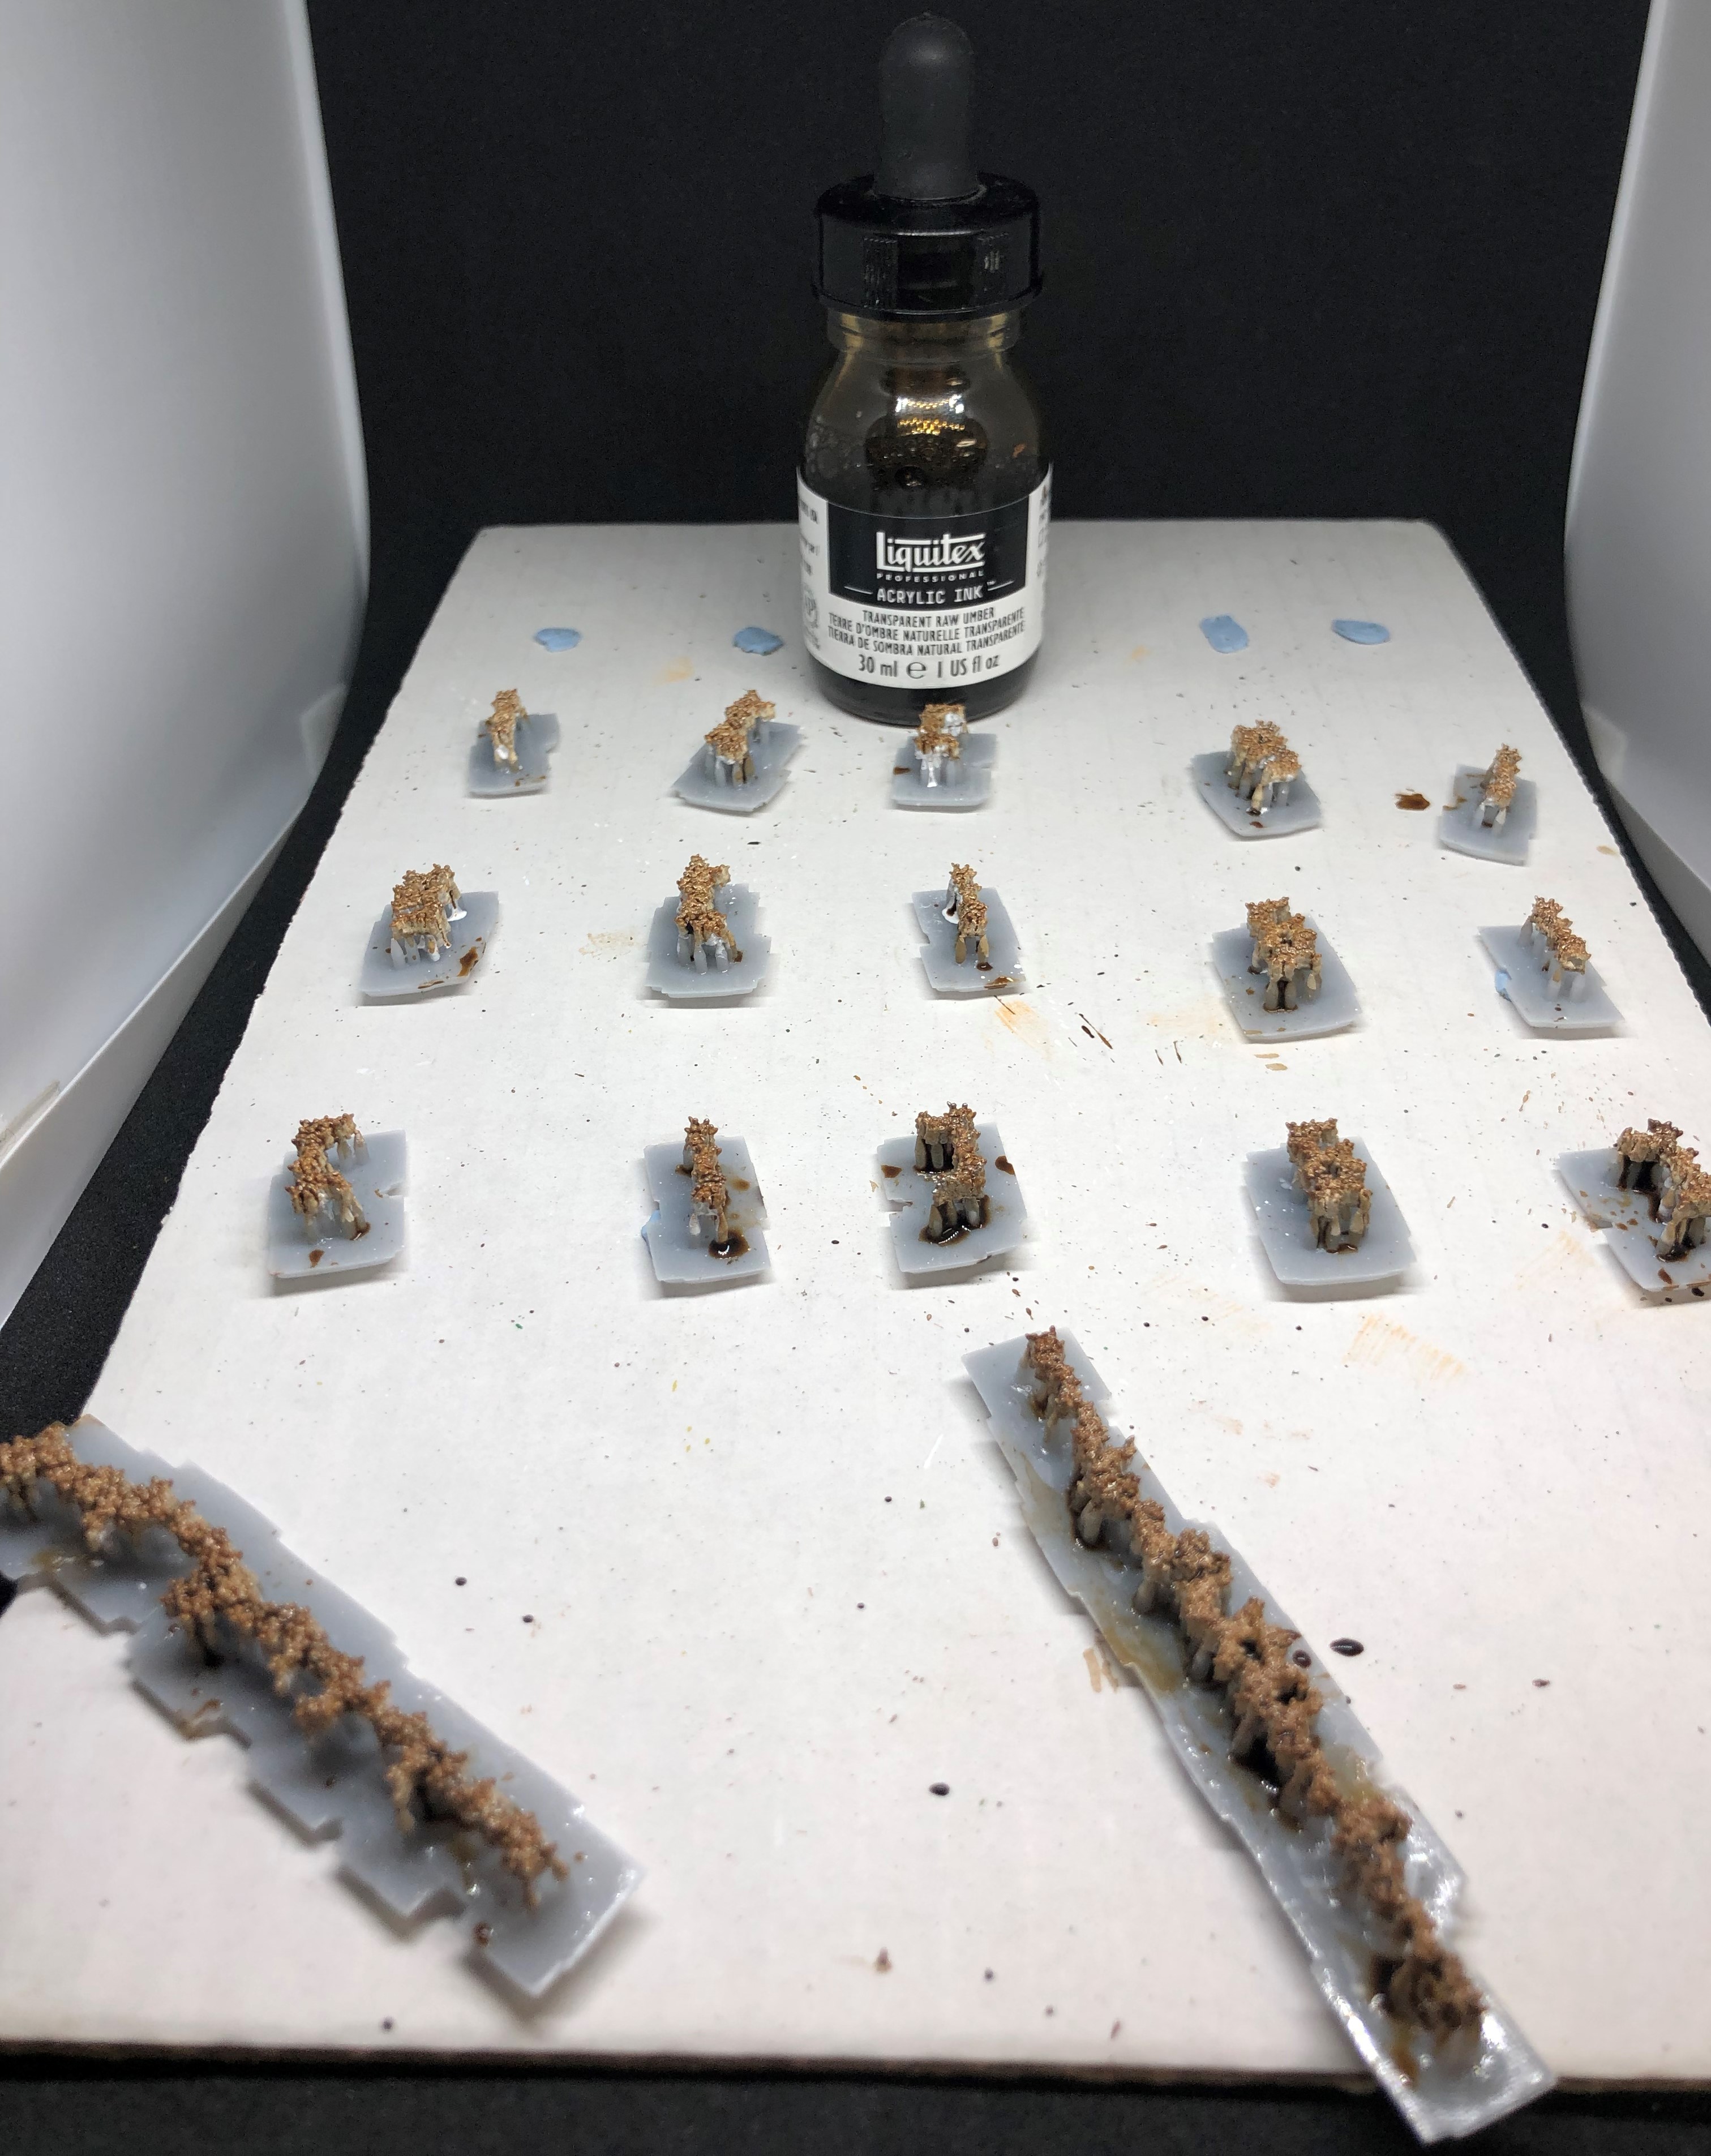
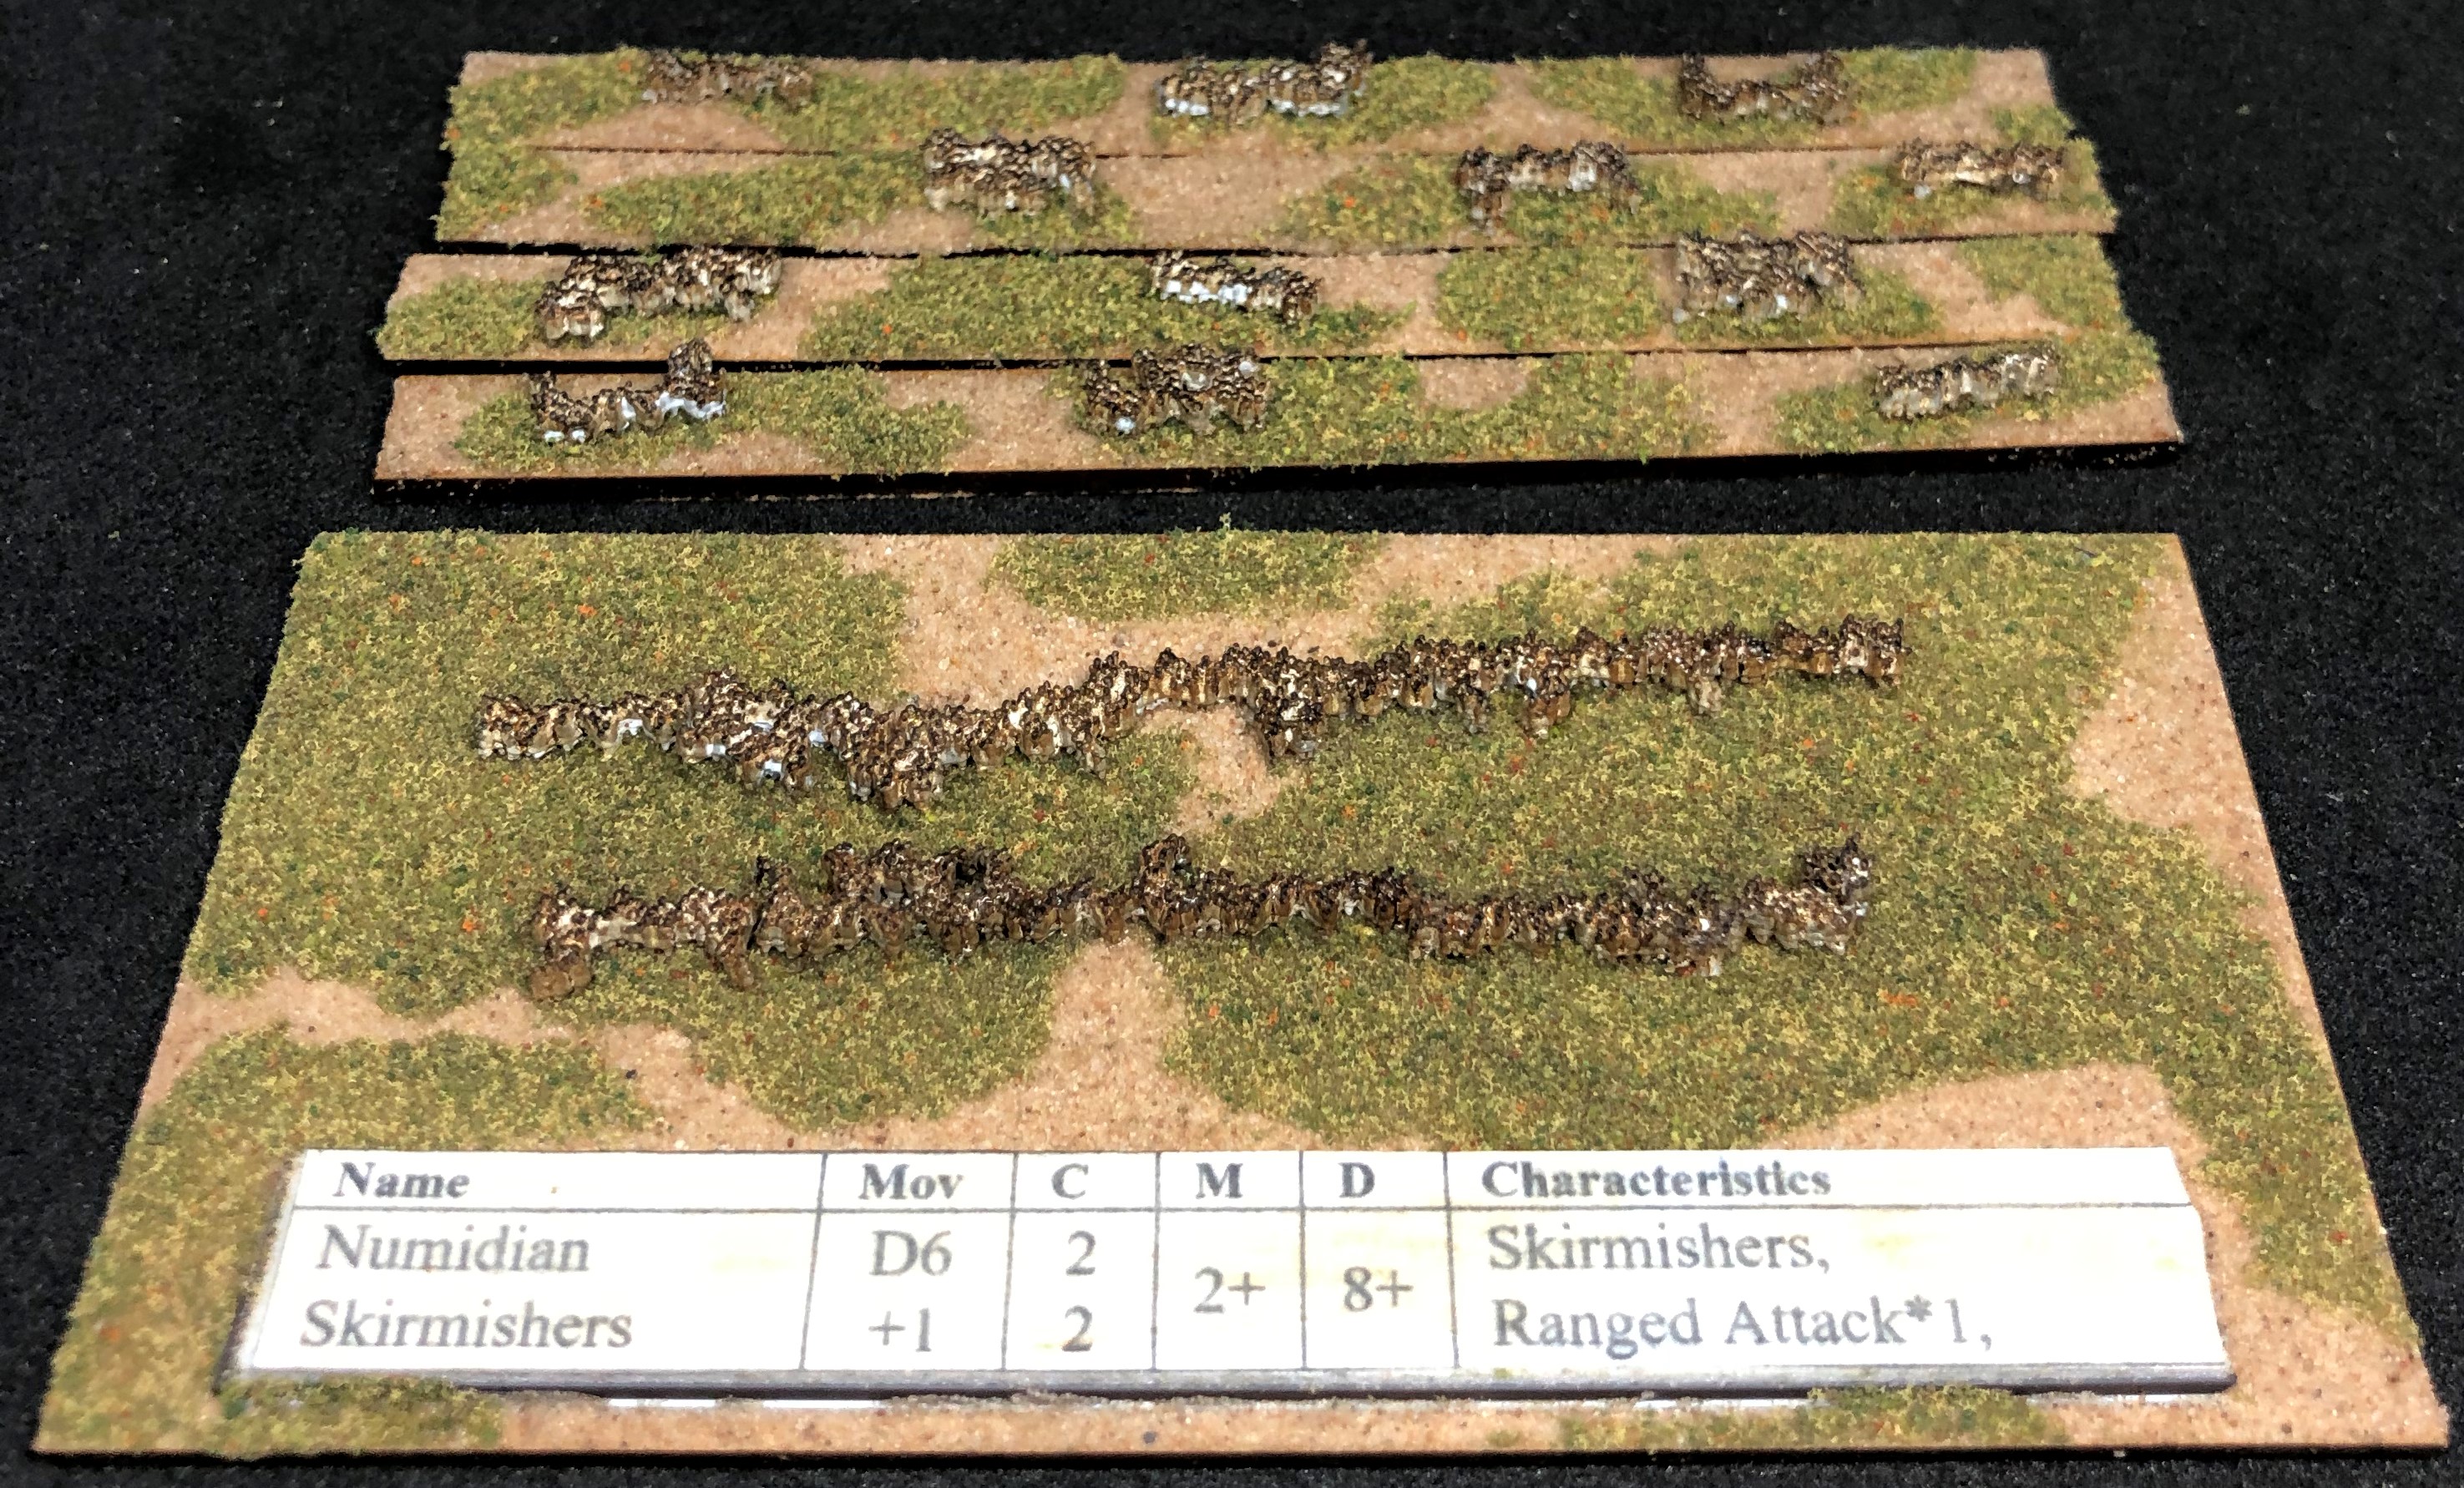
Finally a very light drybrush of black was applied to the very tops for the hair. and here we go, a single base which can aslo be converted into 4 skirmish support bases.

Battle Report - Watling Street
We got our first games in today. For the first test game I played the Britons and my brother in law had the Romans. The scenario was Watling Street.
Setup:
The Roman governor of Britainnia Paulinus gathered all available forces to oppose Boudica and her tribal alliance that had defeated the Roman garrisons and towns in the South East. They met on Watling Street (now under the A5), many think at Mancetter. Paulinus found a narrow elevated position flanked by dense woodland on both sides. Boudica drew her huge force up backed by the wagon laagers of her armies camp followers.
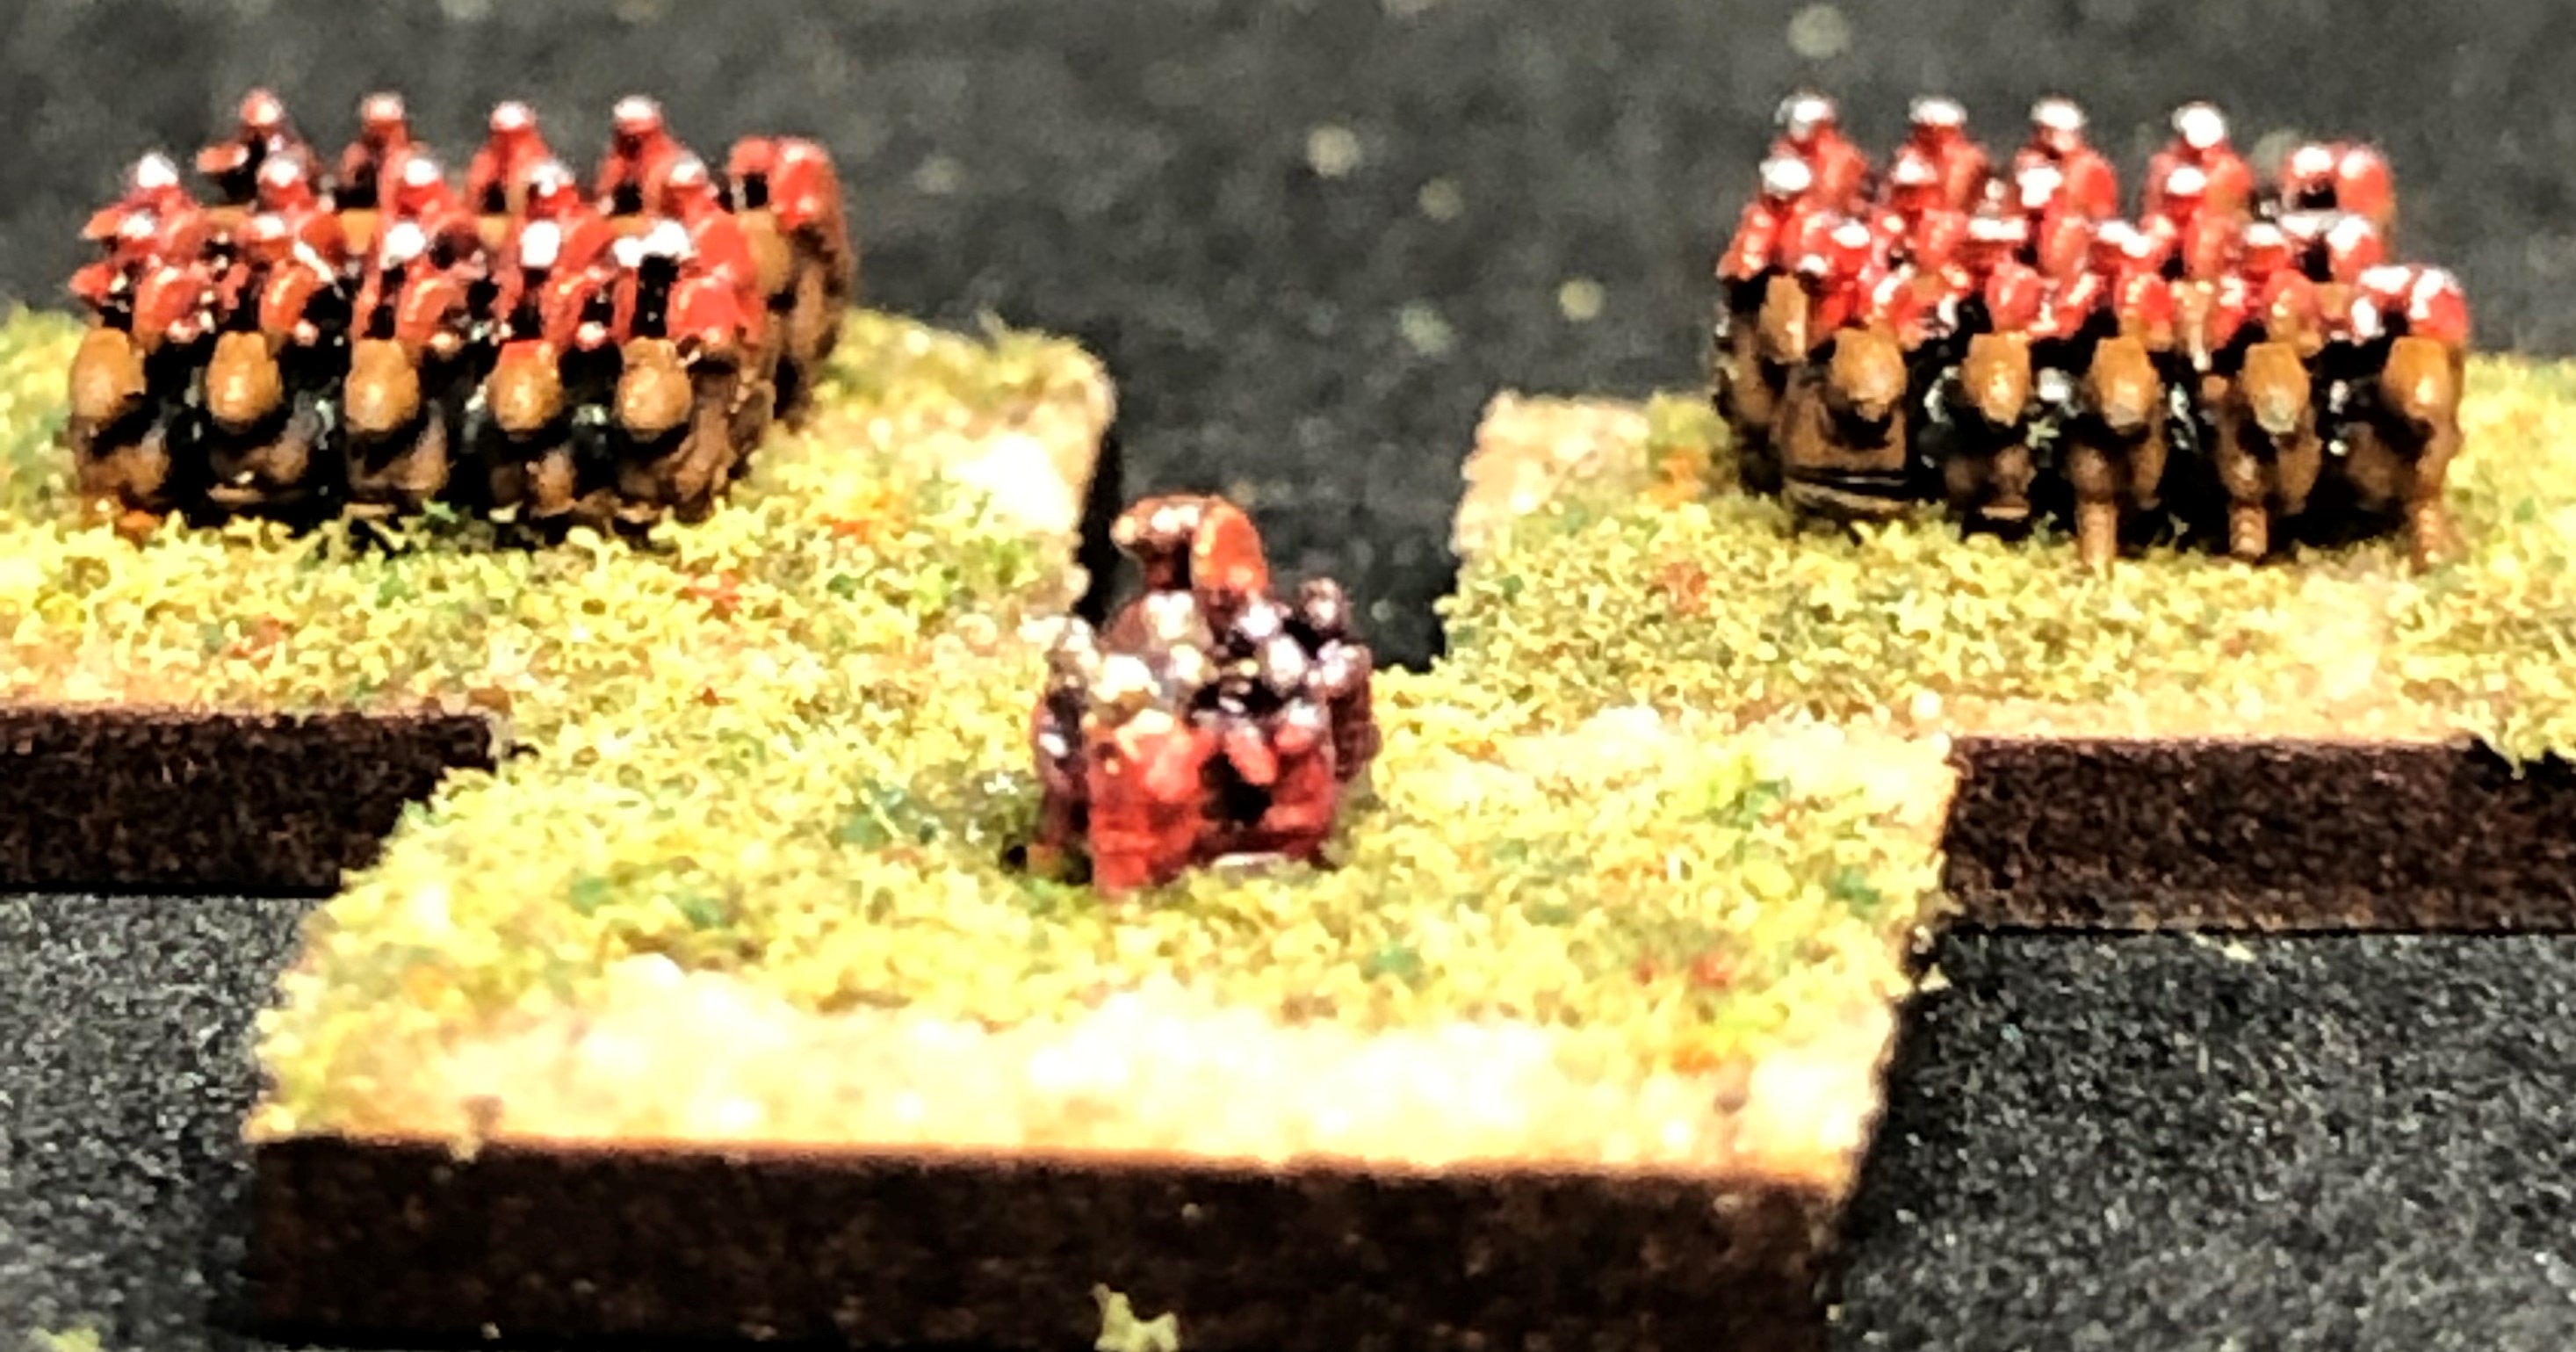
In our version I decided to set out the warbands with the skirmishing chariots and infantry in between. This allowed me to attach the skirmishers to the warbands which conveys combat bonus.
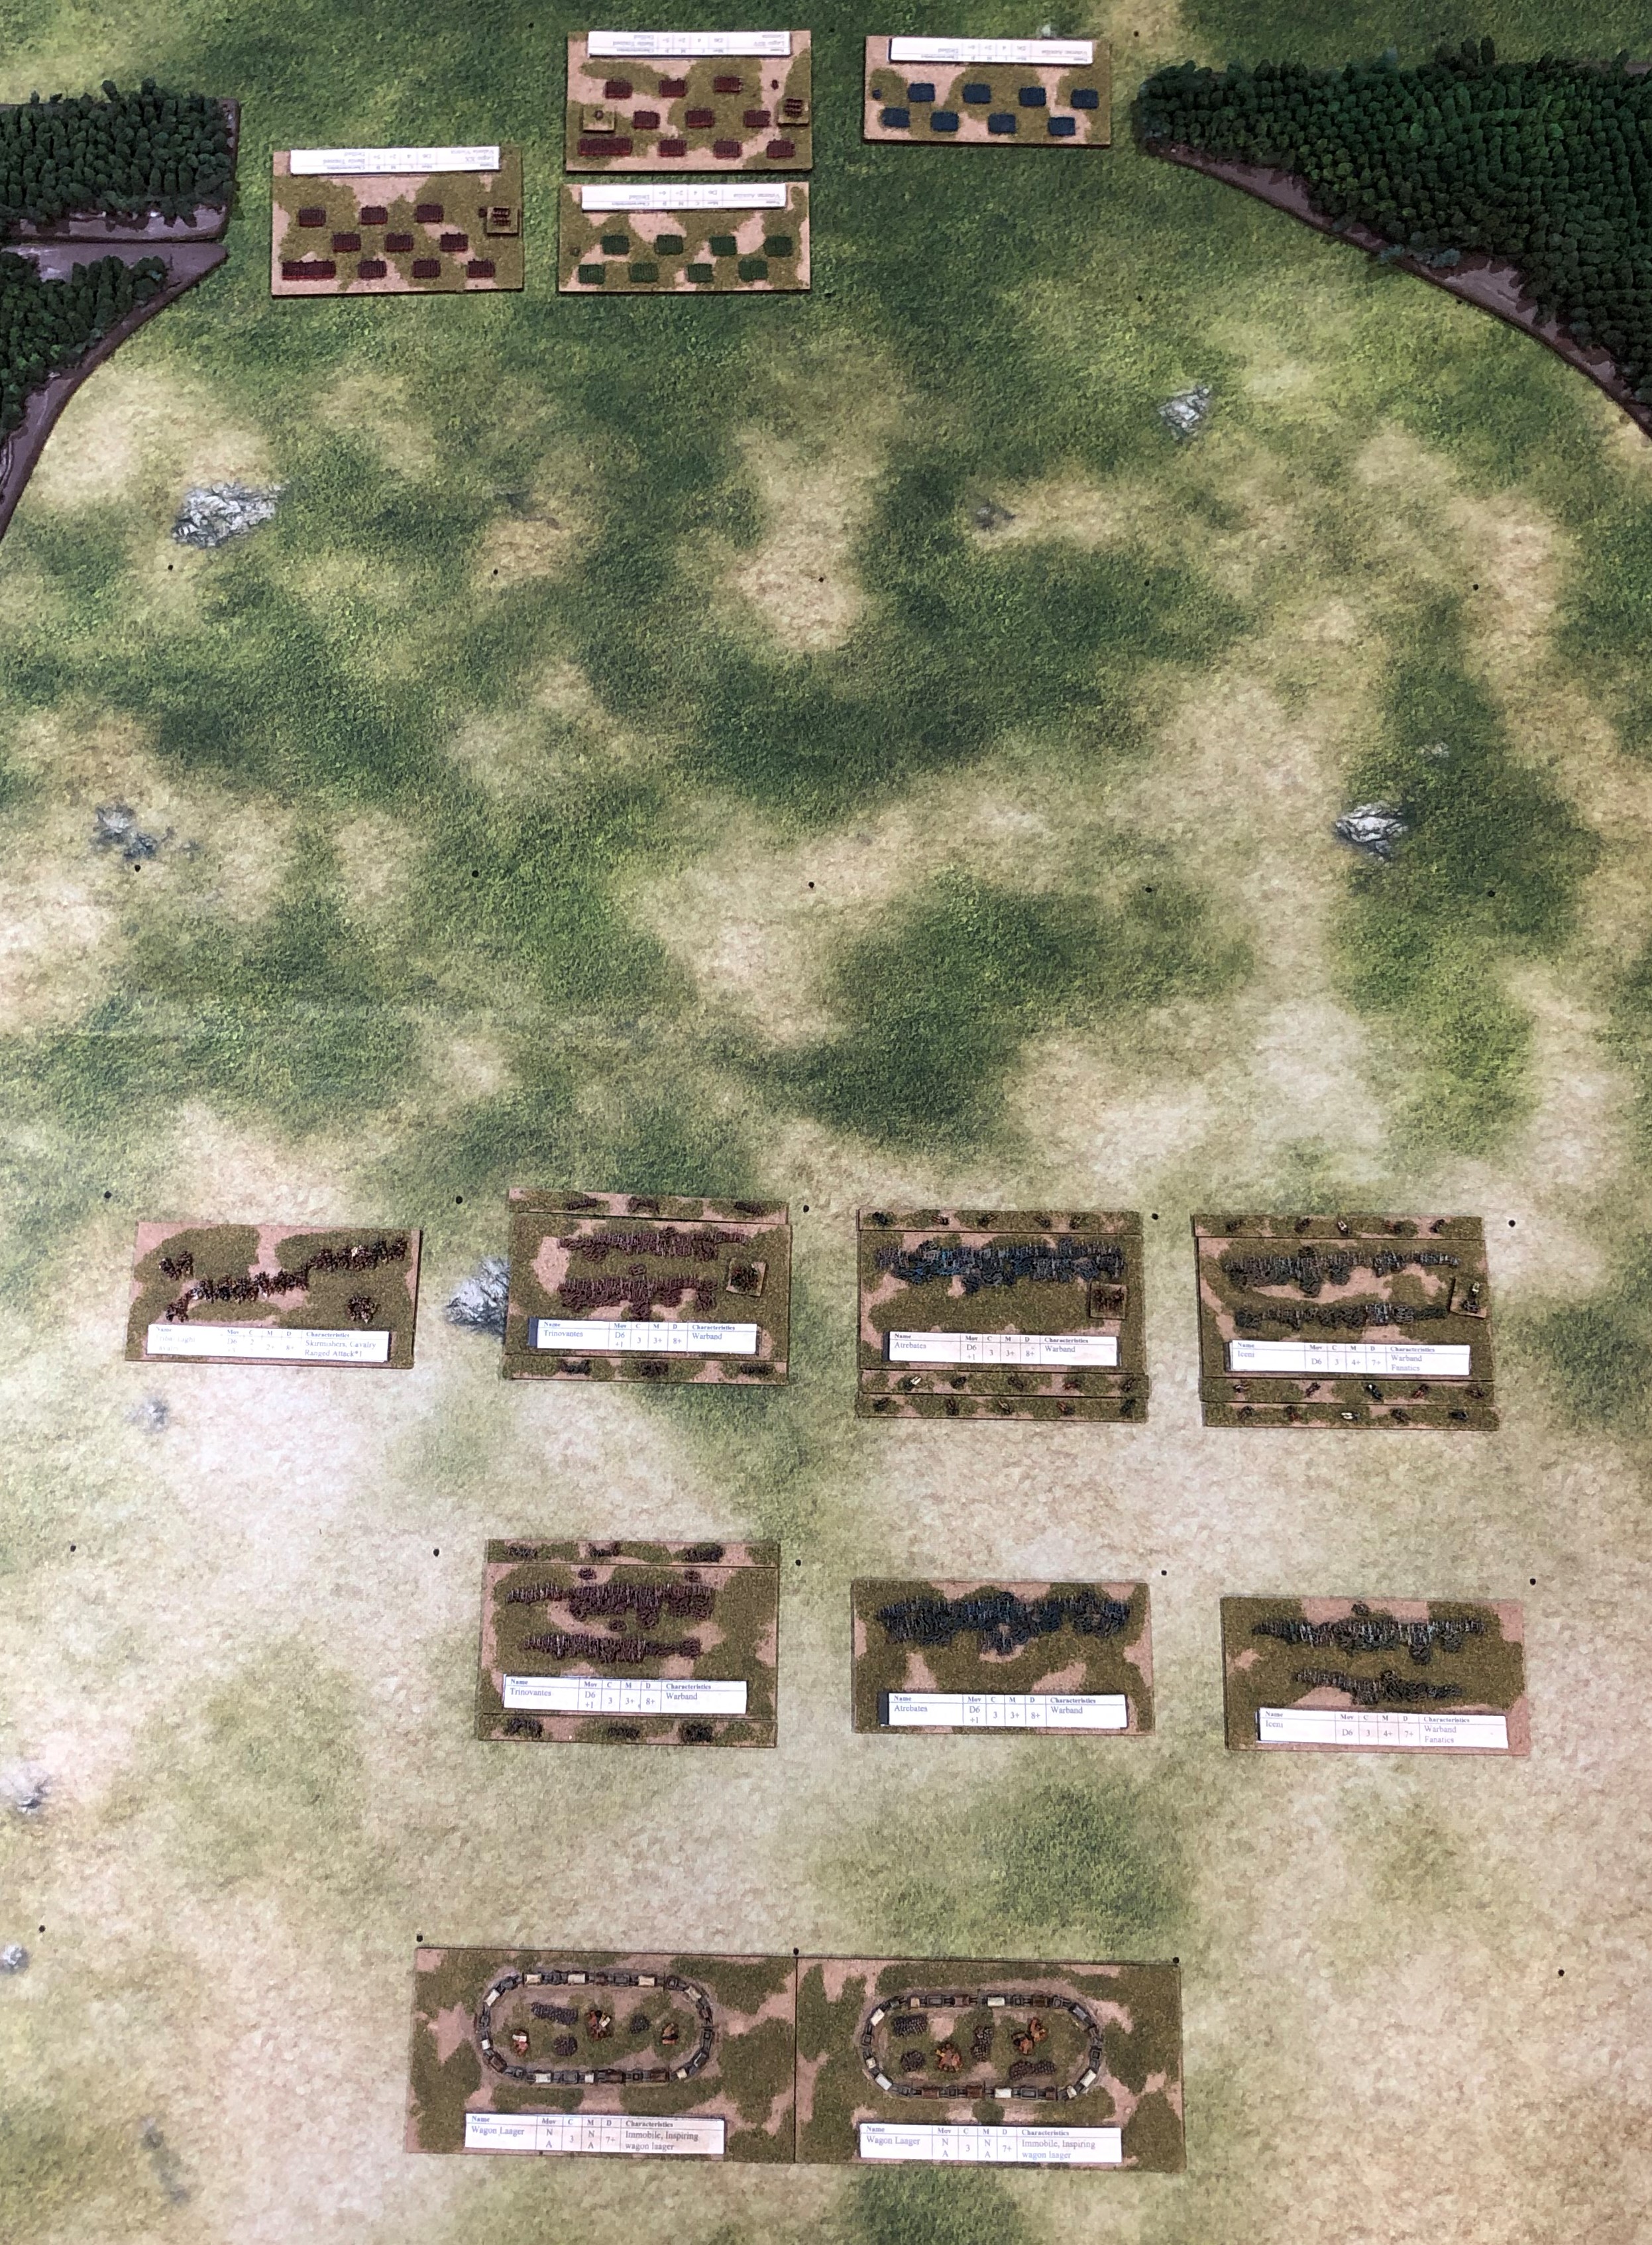
The three blocks of warband close up and can be activated in pairs when there is a supporting base in position. The light cavalry on the left advanced to the woods. The Romans open up into a line of three with the legions on their right and centre and the auxiliary troops on the left.
The warbands advance with the Trinovanti (in red) going up against the legion in the centre and the Atrebates (blue) got mauled by the the auxiliaries with the lead element routed and the rear pushed back. The Iceni (in green) are a bit isolated on the right with no opposition to their front.
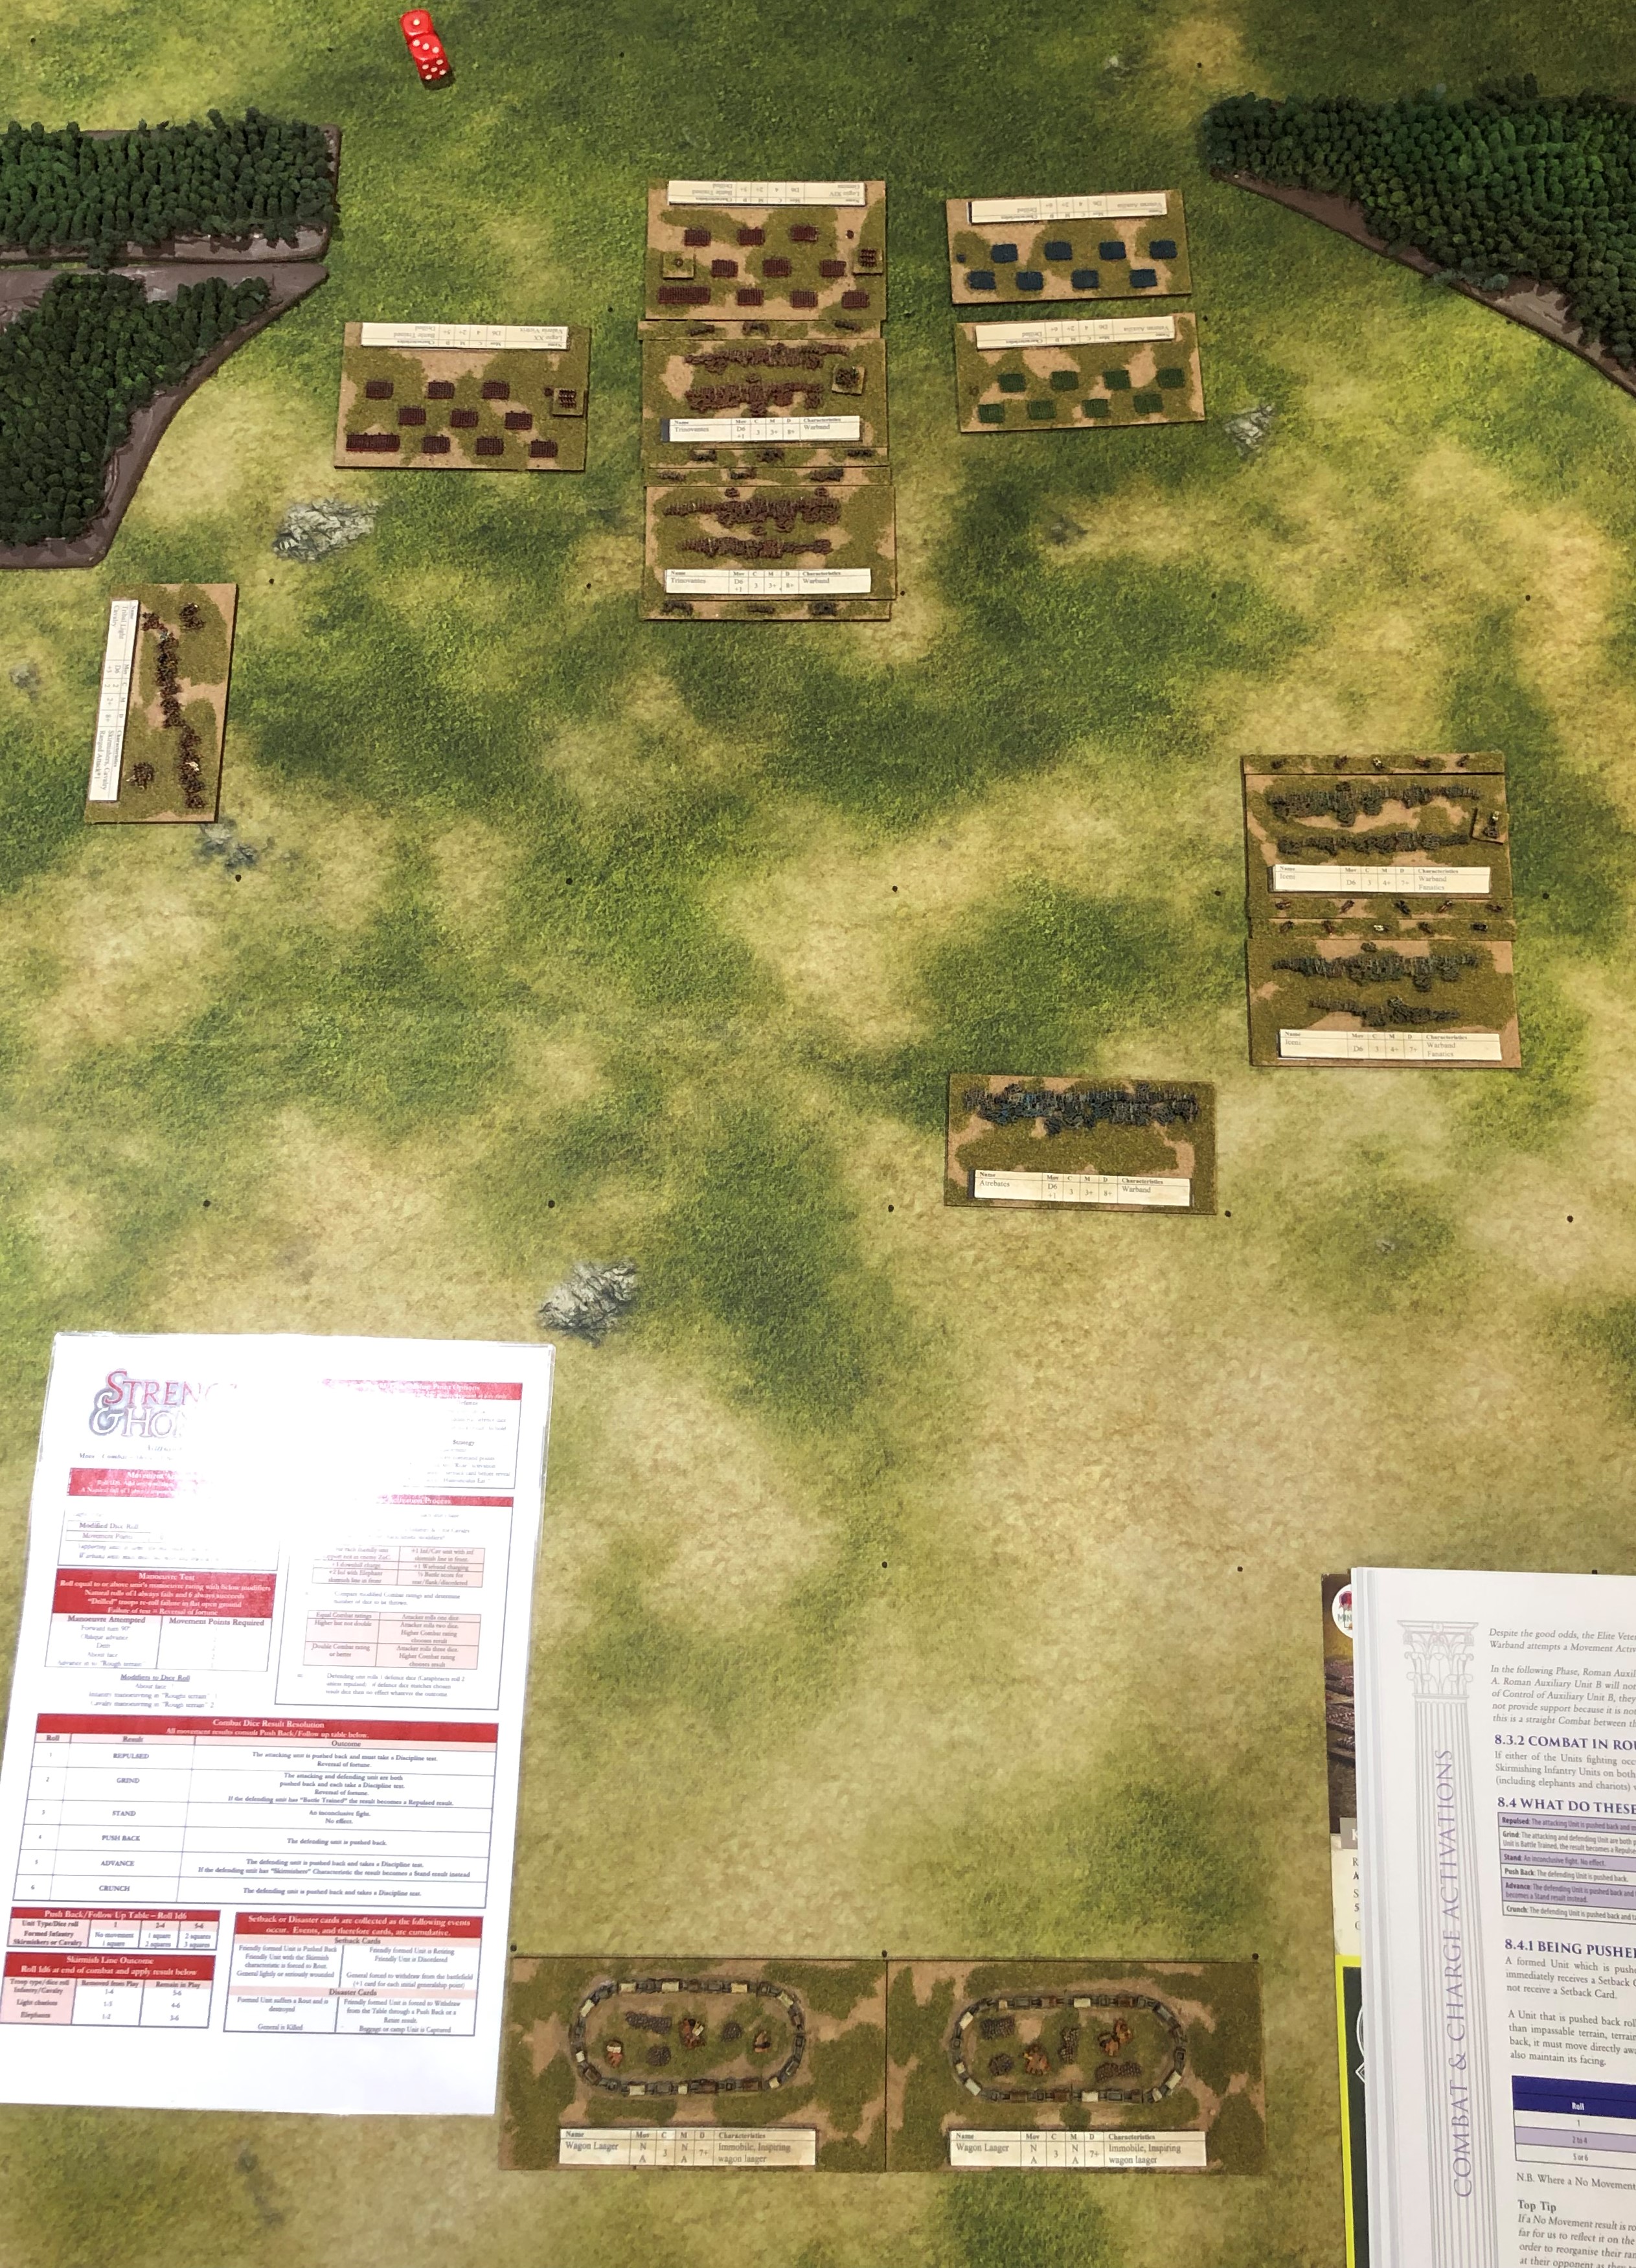
The auxiliaries advanced down the hill and one turned into the flank of the Iceni. The Trinovanti and legionaries exchange blows but can’t find a decisive result. On the Roman right the legion is worried about advancing and allowing the Light Cavalry to hit them in the flank so stay still. Paulinus calls Homunculus Est! where the cards that the Britons have taken for the various push backs and routs are revealed and counted. If the army break point is reached the Britons are defeated. Boudica uses a Generalship point to cancel this action in the vain hope that something better might happen in the next combats.

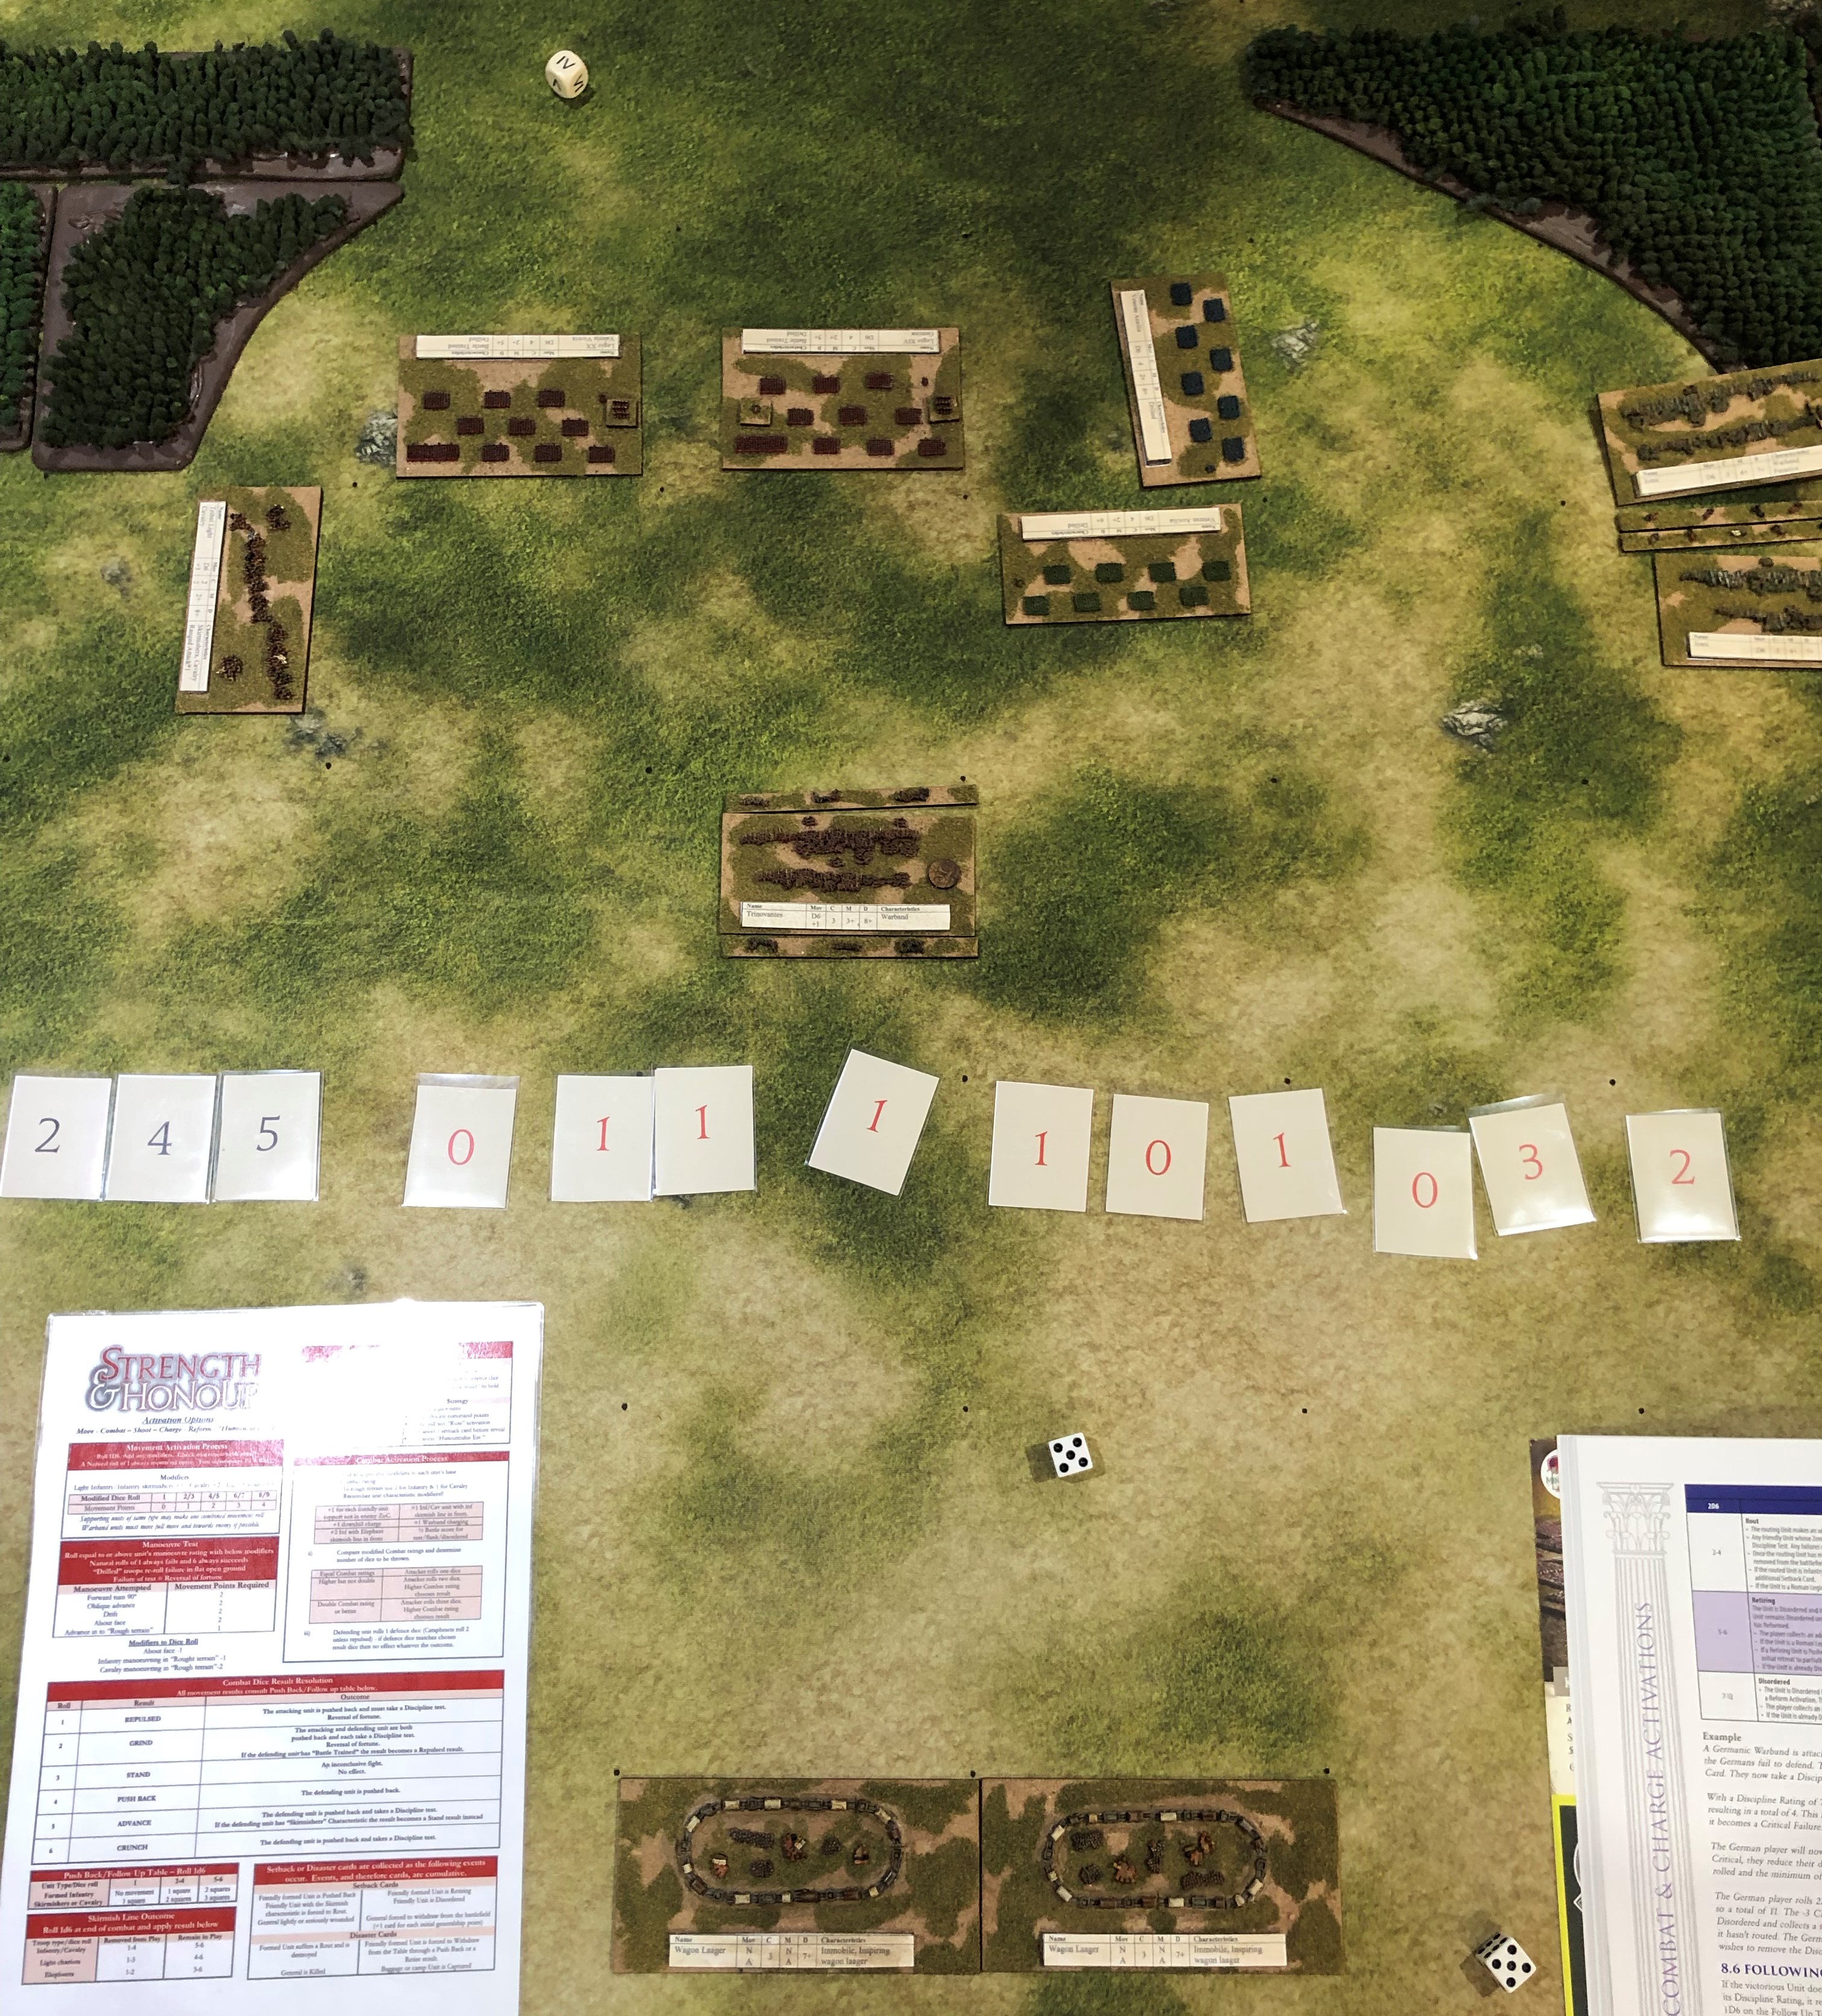
The auxiliaries defeat both the Atrebates who rout and the Iceni who are pushed away into the woods on the Roman right. The legion finally vanquish the Trinovanti, routing the first warband with the other being pushed back. The Romans call Homunculus Est! again and the Britons have to reveal their Setback and Disaster cards. A total of 21 sees them pass their army break point of 18 and lose the battle.
Second game:
We reversed command and played again. The Romans won again in a much tighter encounter. This time the Britons held all of their skirmishers as full units and they tied up the Romans quite badly. Although a legion lost a combat exchange and was disordered the auxiliaries came to their rescue and the Romans pushed the Britons back down the hill onto the wagon laager, and despite having a hand of cards that would probably have ended up losing the game, they got a decisive Homunculus Est! call in and won again.
Thoughts:
The basics of the game are pretty easy and although we forgot a bunch of stuff in game one we still had a good time. Things got easier in game two, especially after we reviewed the playthrough videos on Lard TV. We struggled to get on top of exactly what happens after combat and the finer detail of movements into contact but the videos helped.
Overall the game experience is excellent. You do feel like you are commanding a big army and the mechanics make most decisions important and the order you do things in can really affect the outcomes. Yes the Romans won both times but it was really close the second time and could very easily have been the other way round. The rules feel balanced but the armies play in a nicely asymetric way with different problems to solve for the two commanders.
Celts finished. Ready to play.
The Iceni (mostly green) and Trinovanti (mostly red) are done too:
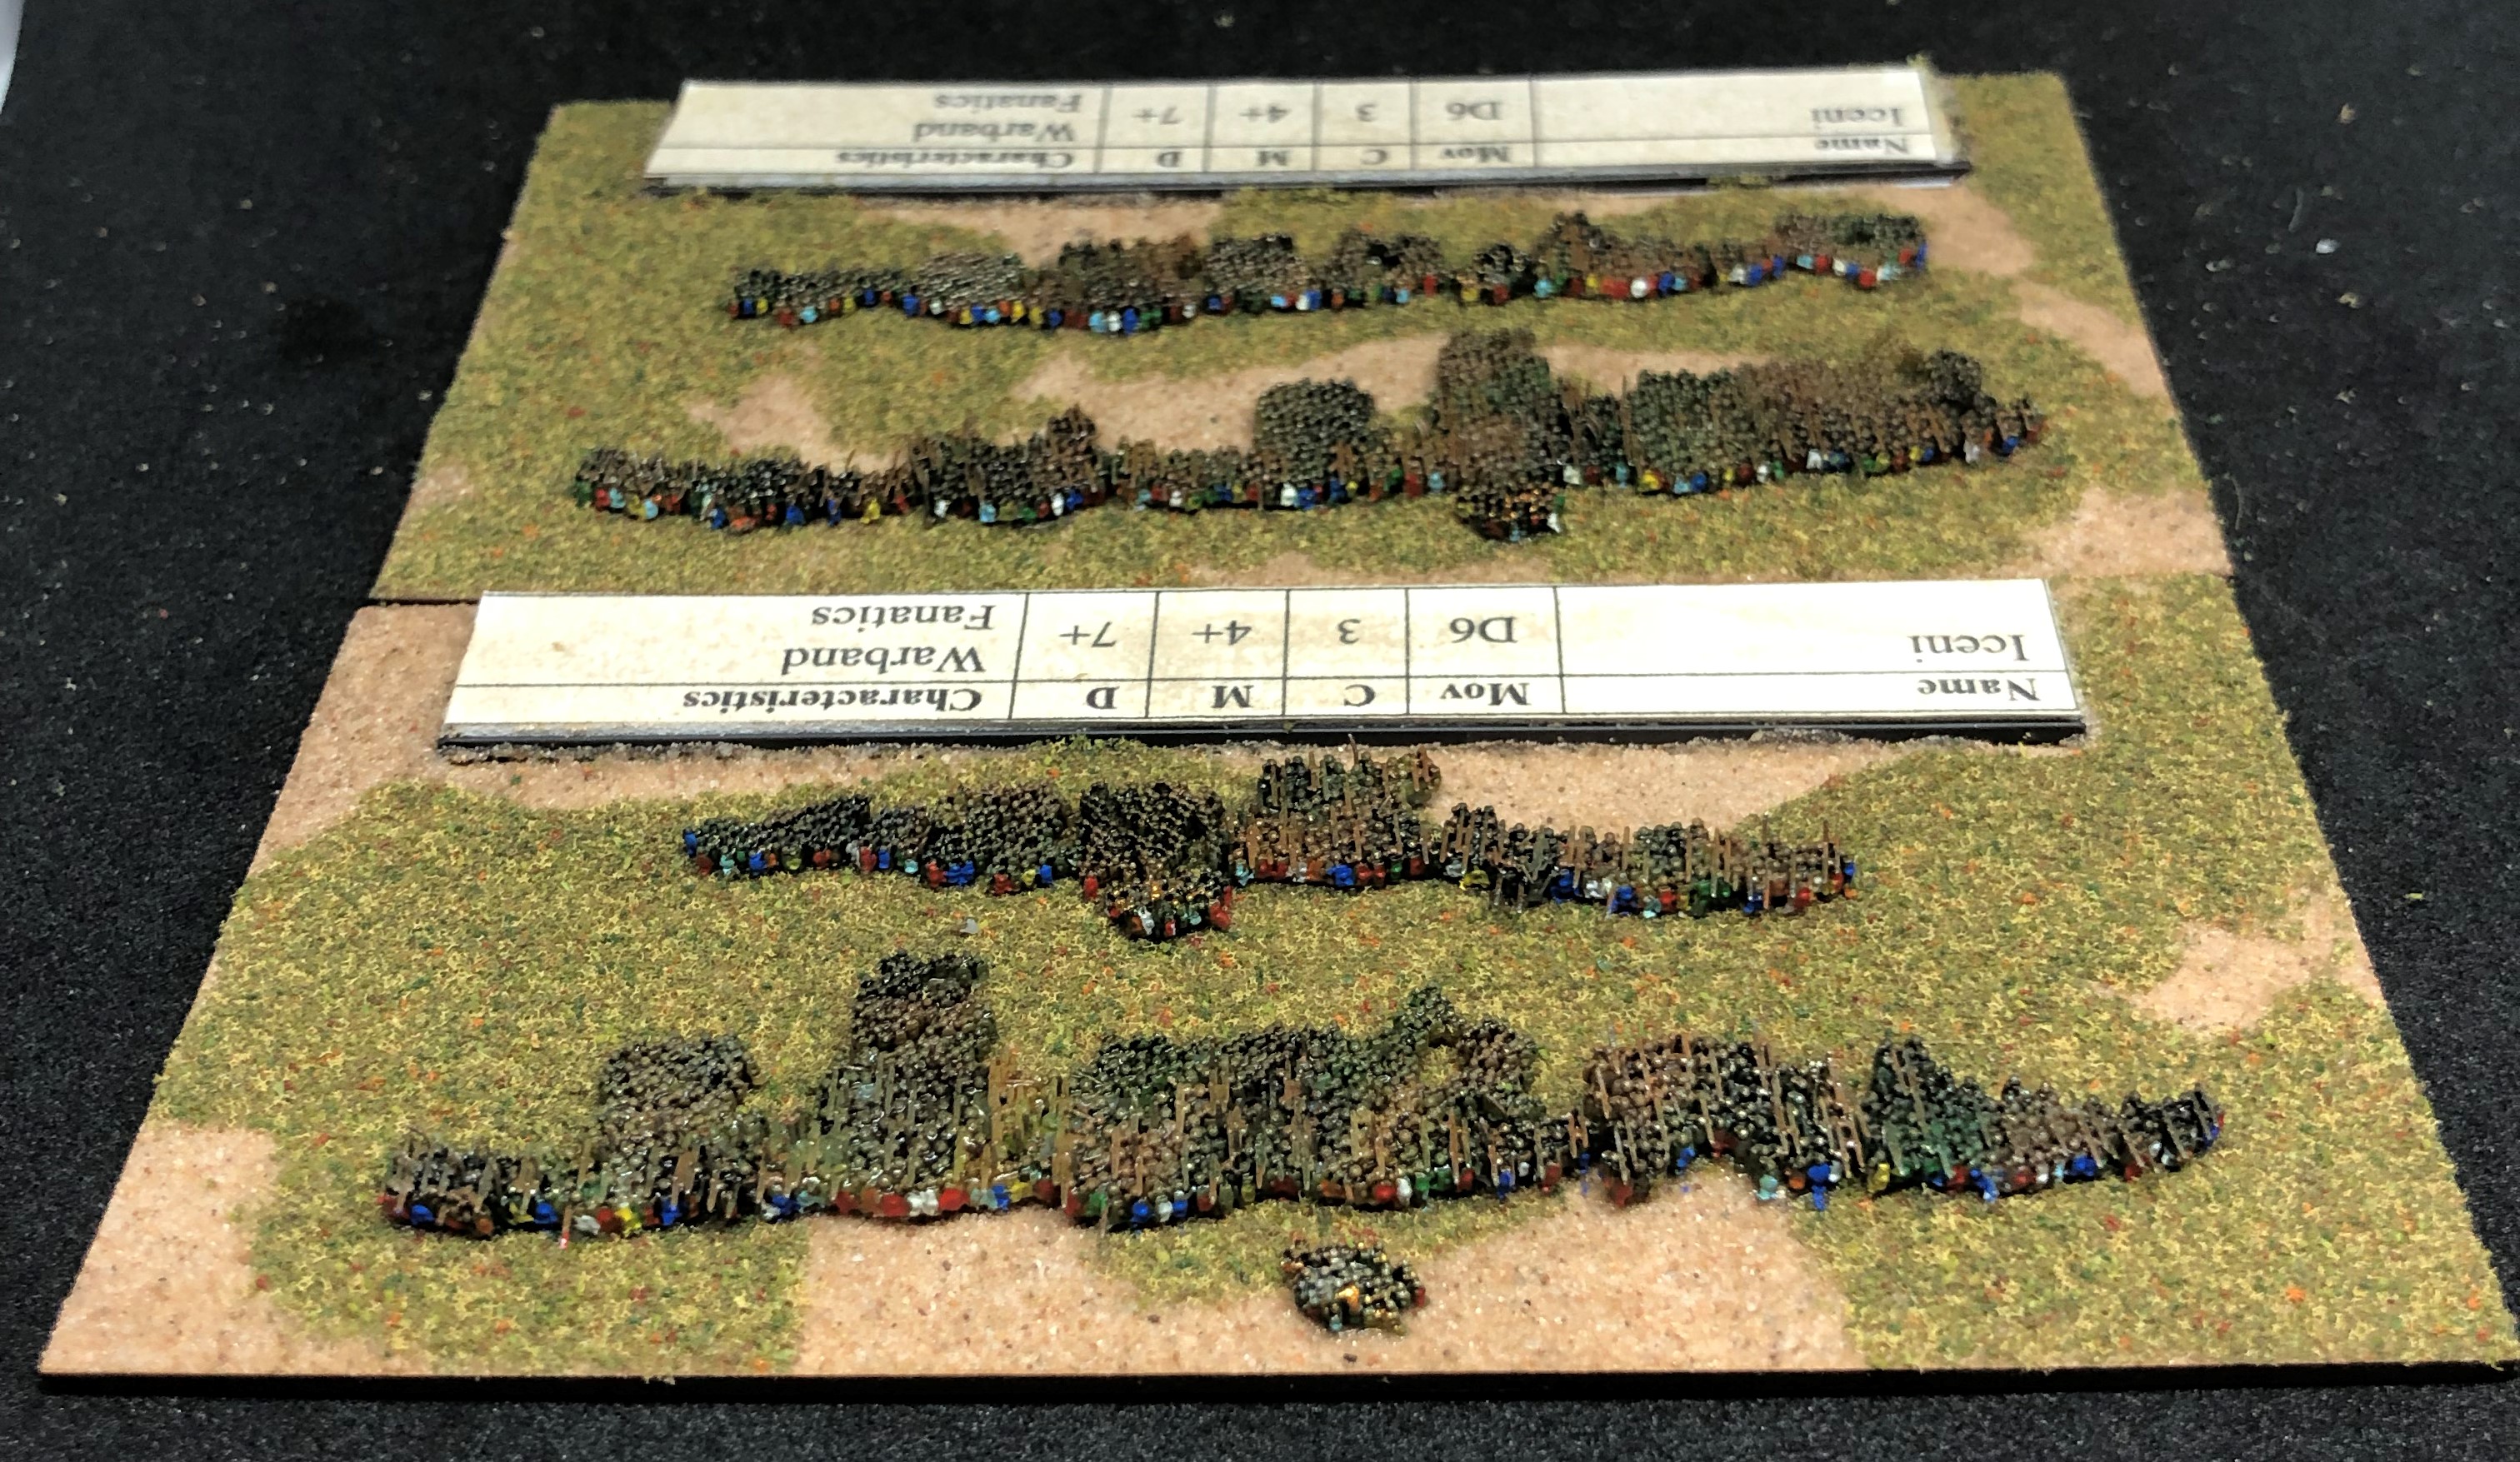

Both sides ready to face off. First game is tomorrow.
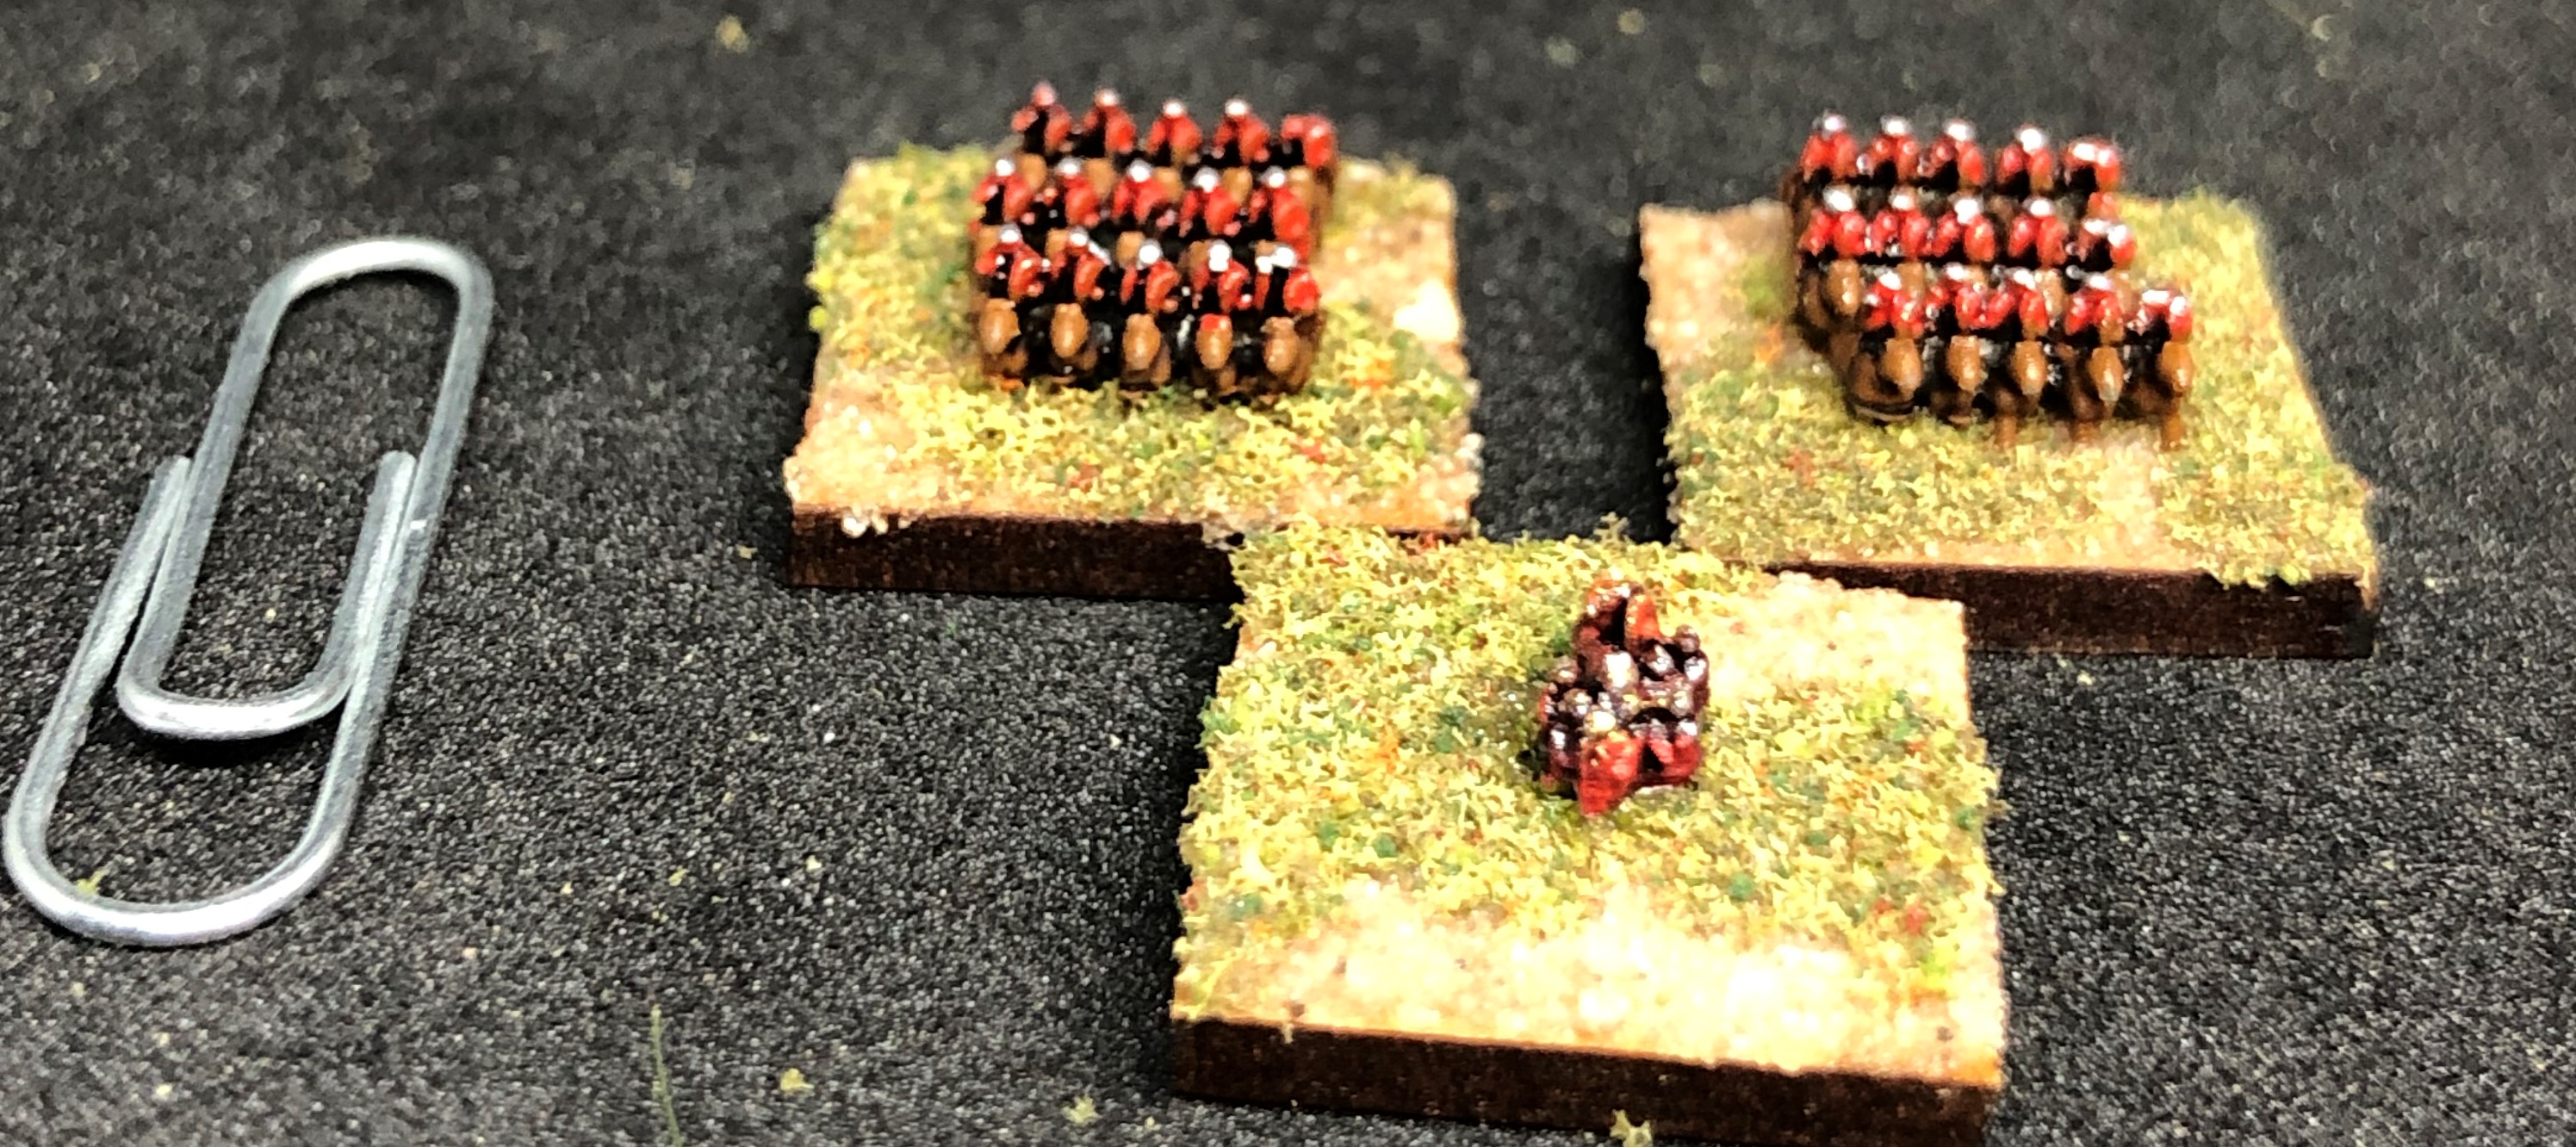
Celtic warbands - painting guide
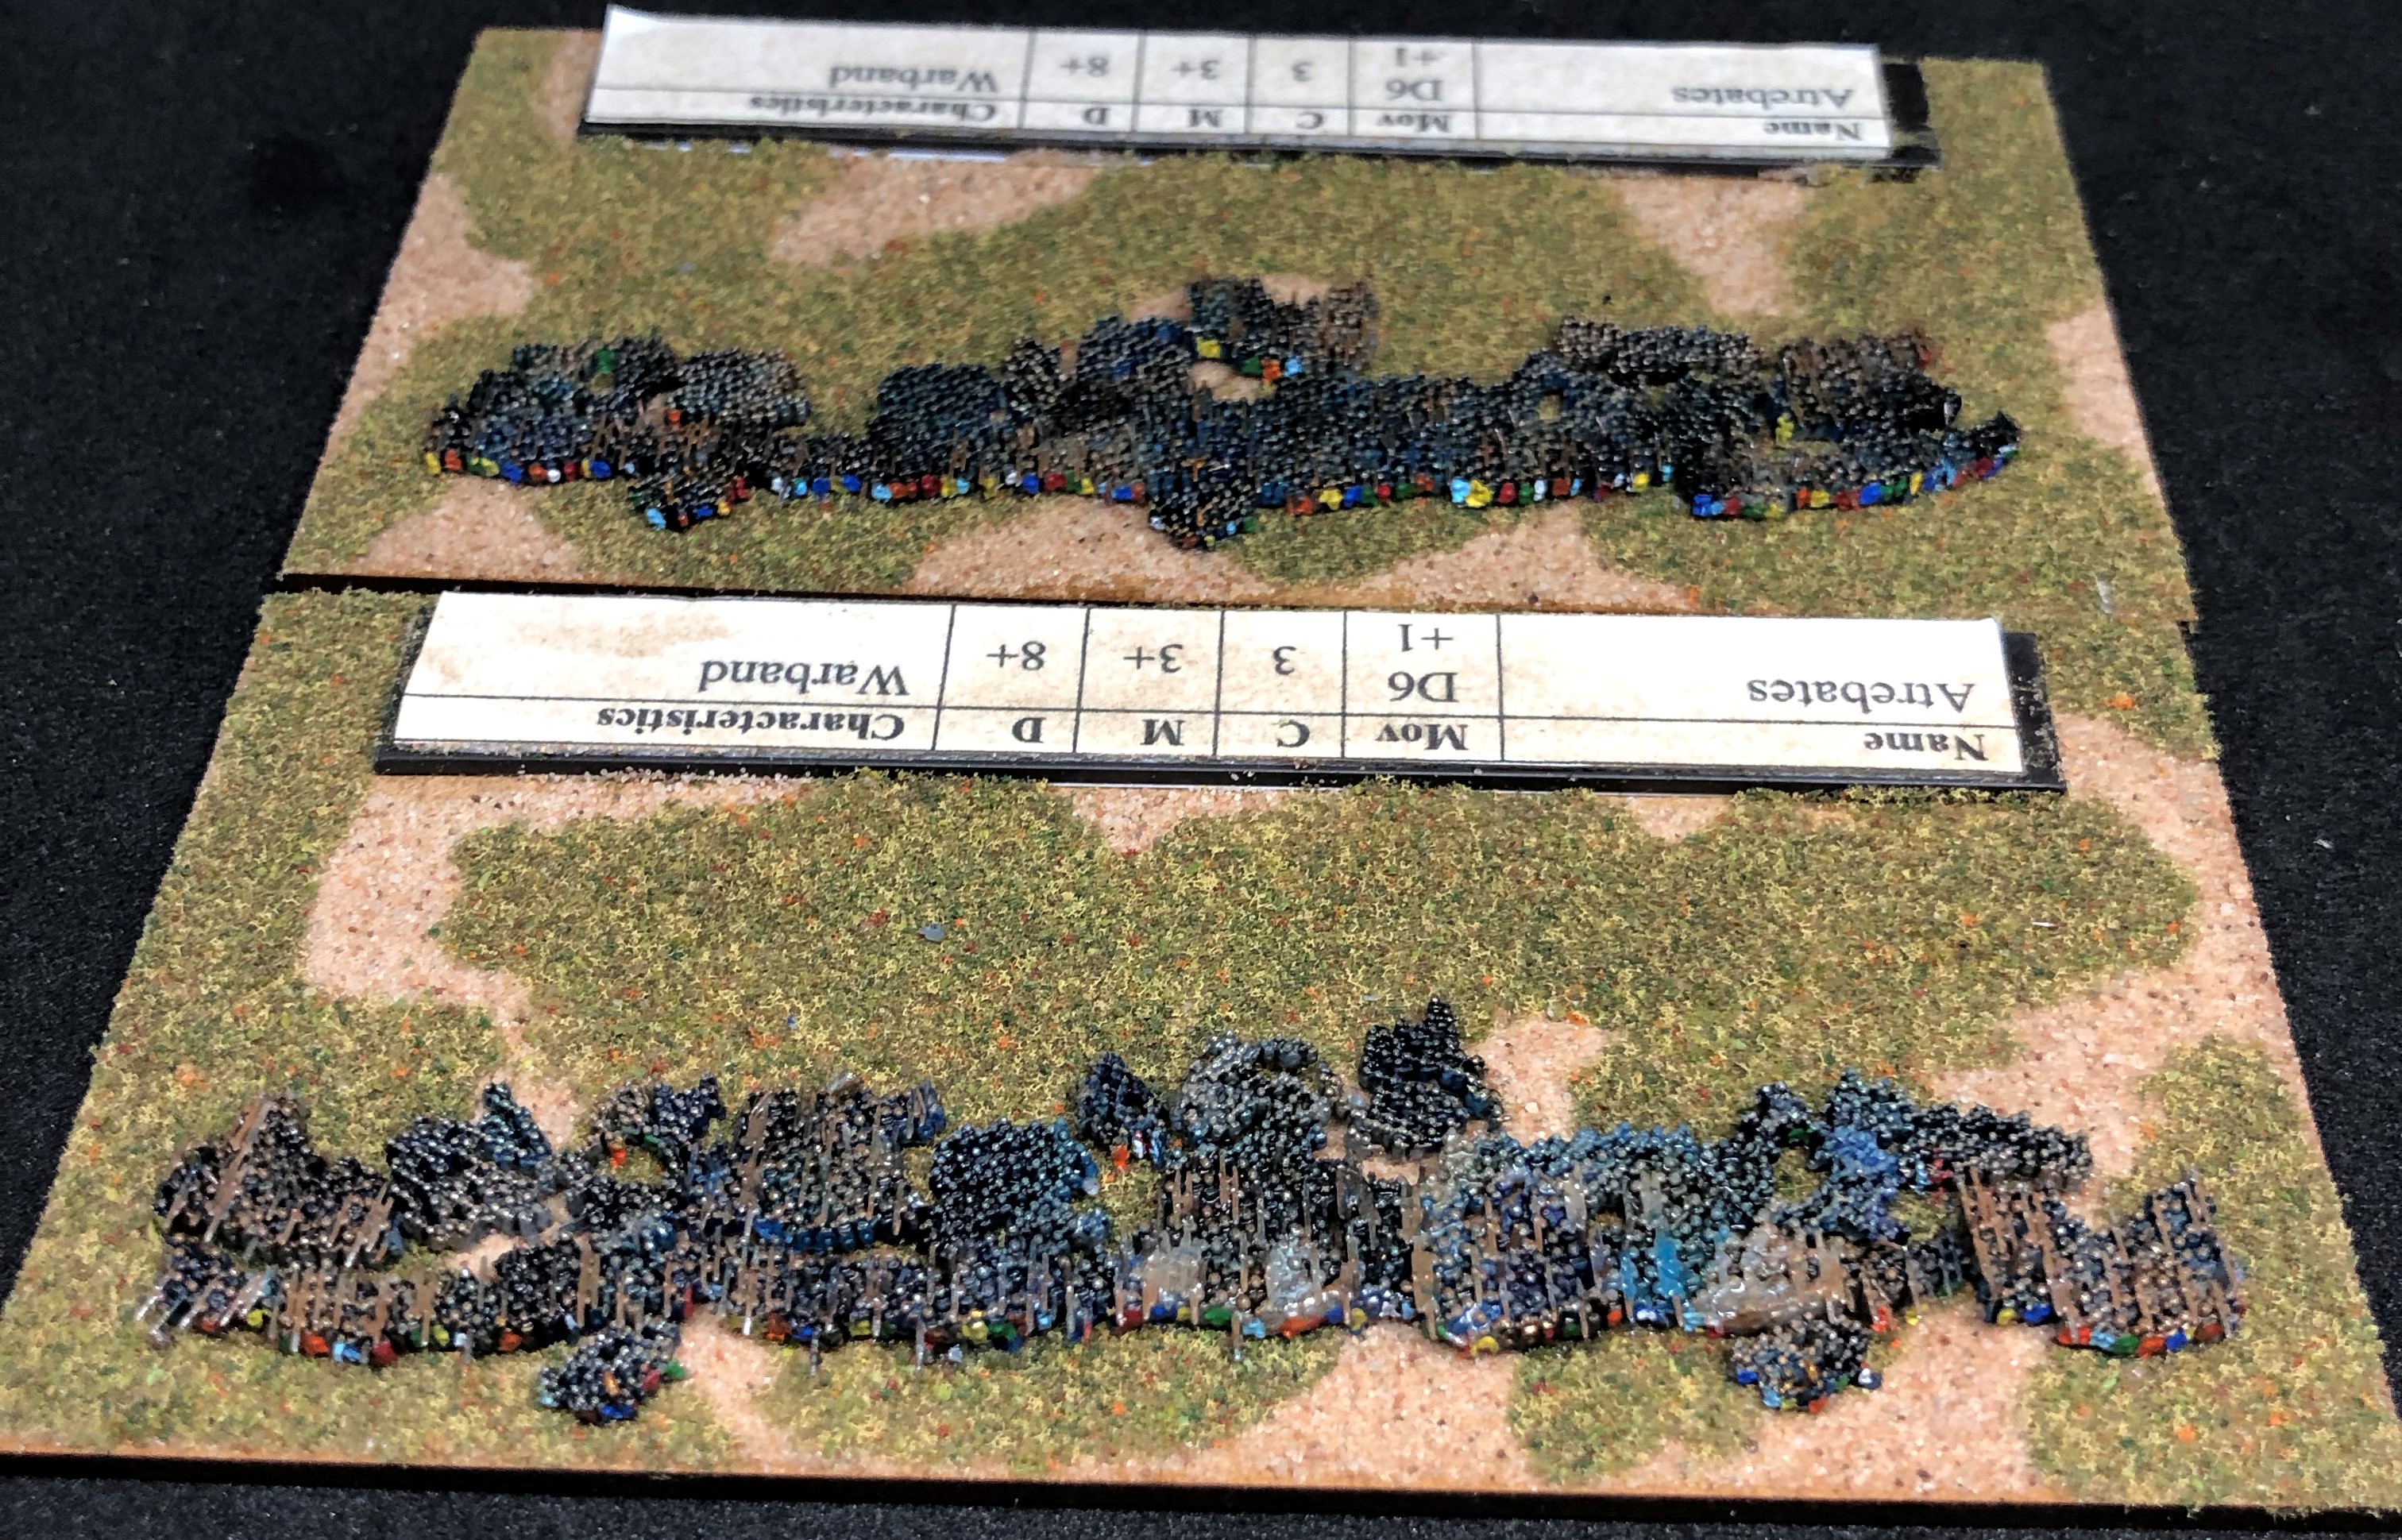
Painting the warbands is a similar process to the Romans but with a broader range of colours. First we take a series of similar colours and paint them in blobs on the miniatures. This is one set which will make up one warband base 60mm x 120mm. These will be Atrebates who I’ve decided to do mostly blue. They will also be put onto their bases in a single mass to emulate the closer fighting style of their continental brethren.
First the clothing colours:

Then the flesh and armour drybrushes. The flesh tone was a much heavier coat than for the Romans and the iron colour was a bit patchier to show not all warriors have helmets or armour.
Next is the spears. Using a narrow pointed brush and with parallel stripes the levelled spears are painted. Then the ones that stick up vertically are covered with a side to side motion.
The spear tips are drybrushed again with chainmail silver and a touch of gold picks out the carnyx and a couple of helmets in the command groups. Then everything is washed with raw umber and left to dry.
Finally a selection of bright colours are selected and dots applied along the shields at the front of the formation. These are built up one colour at a time until most have a nice bright shield.
They are finished. Two Atrebates warband bases ready for Watling Street.
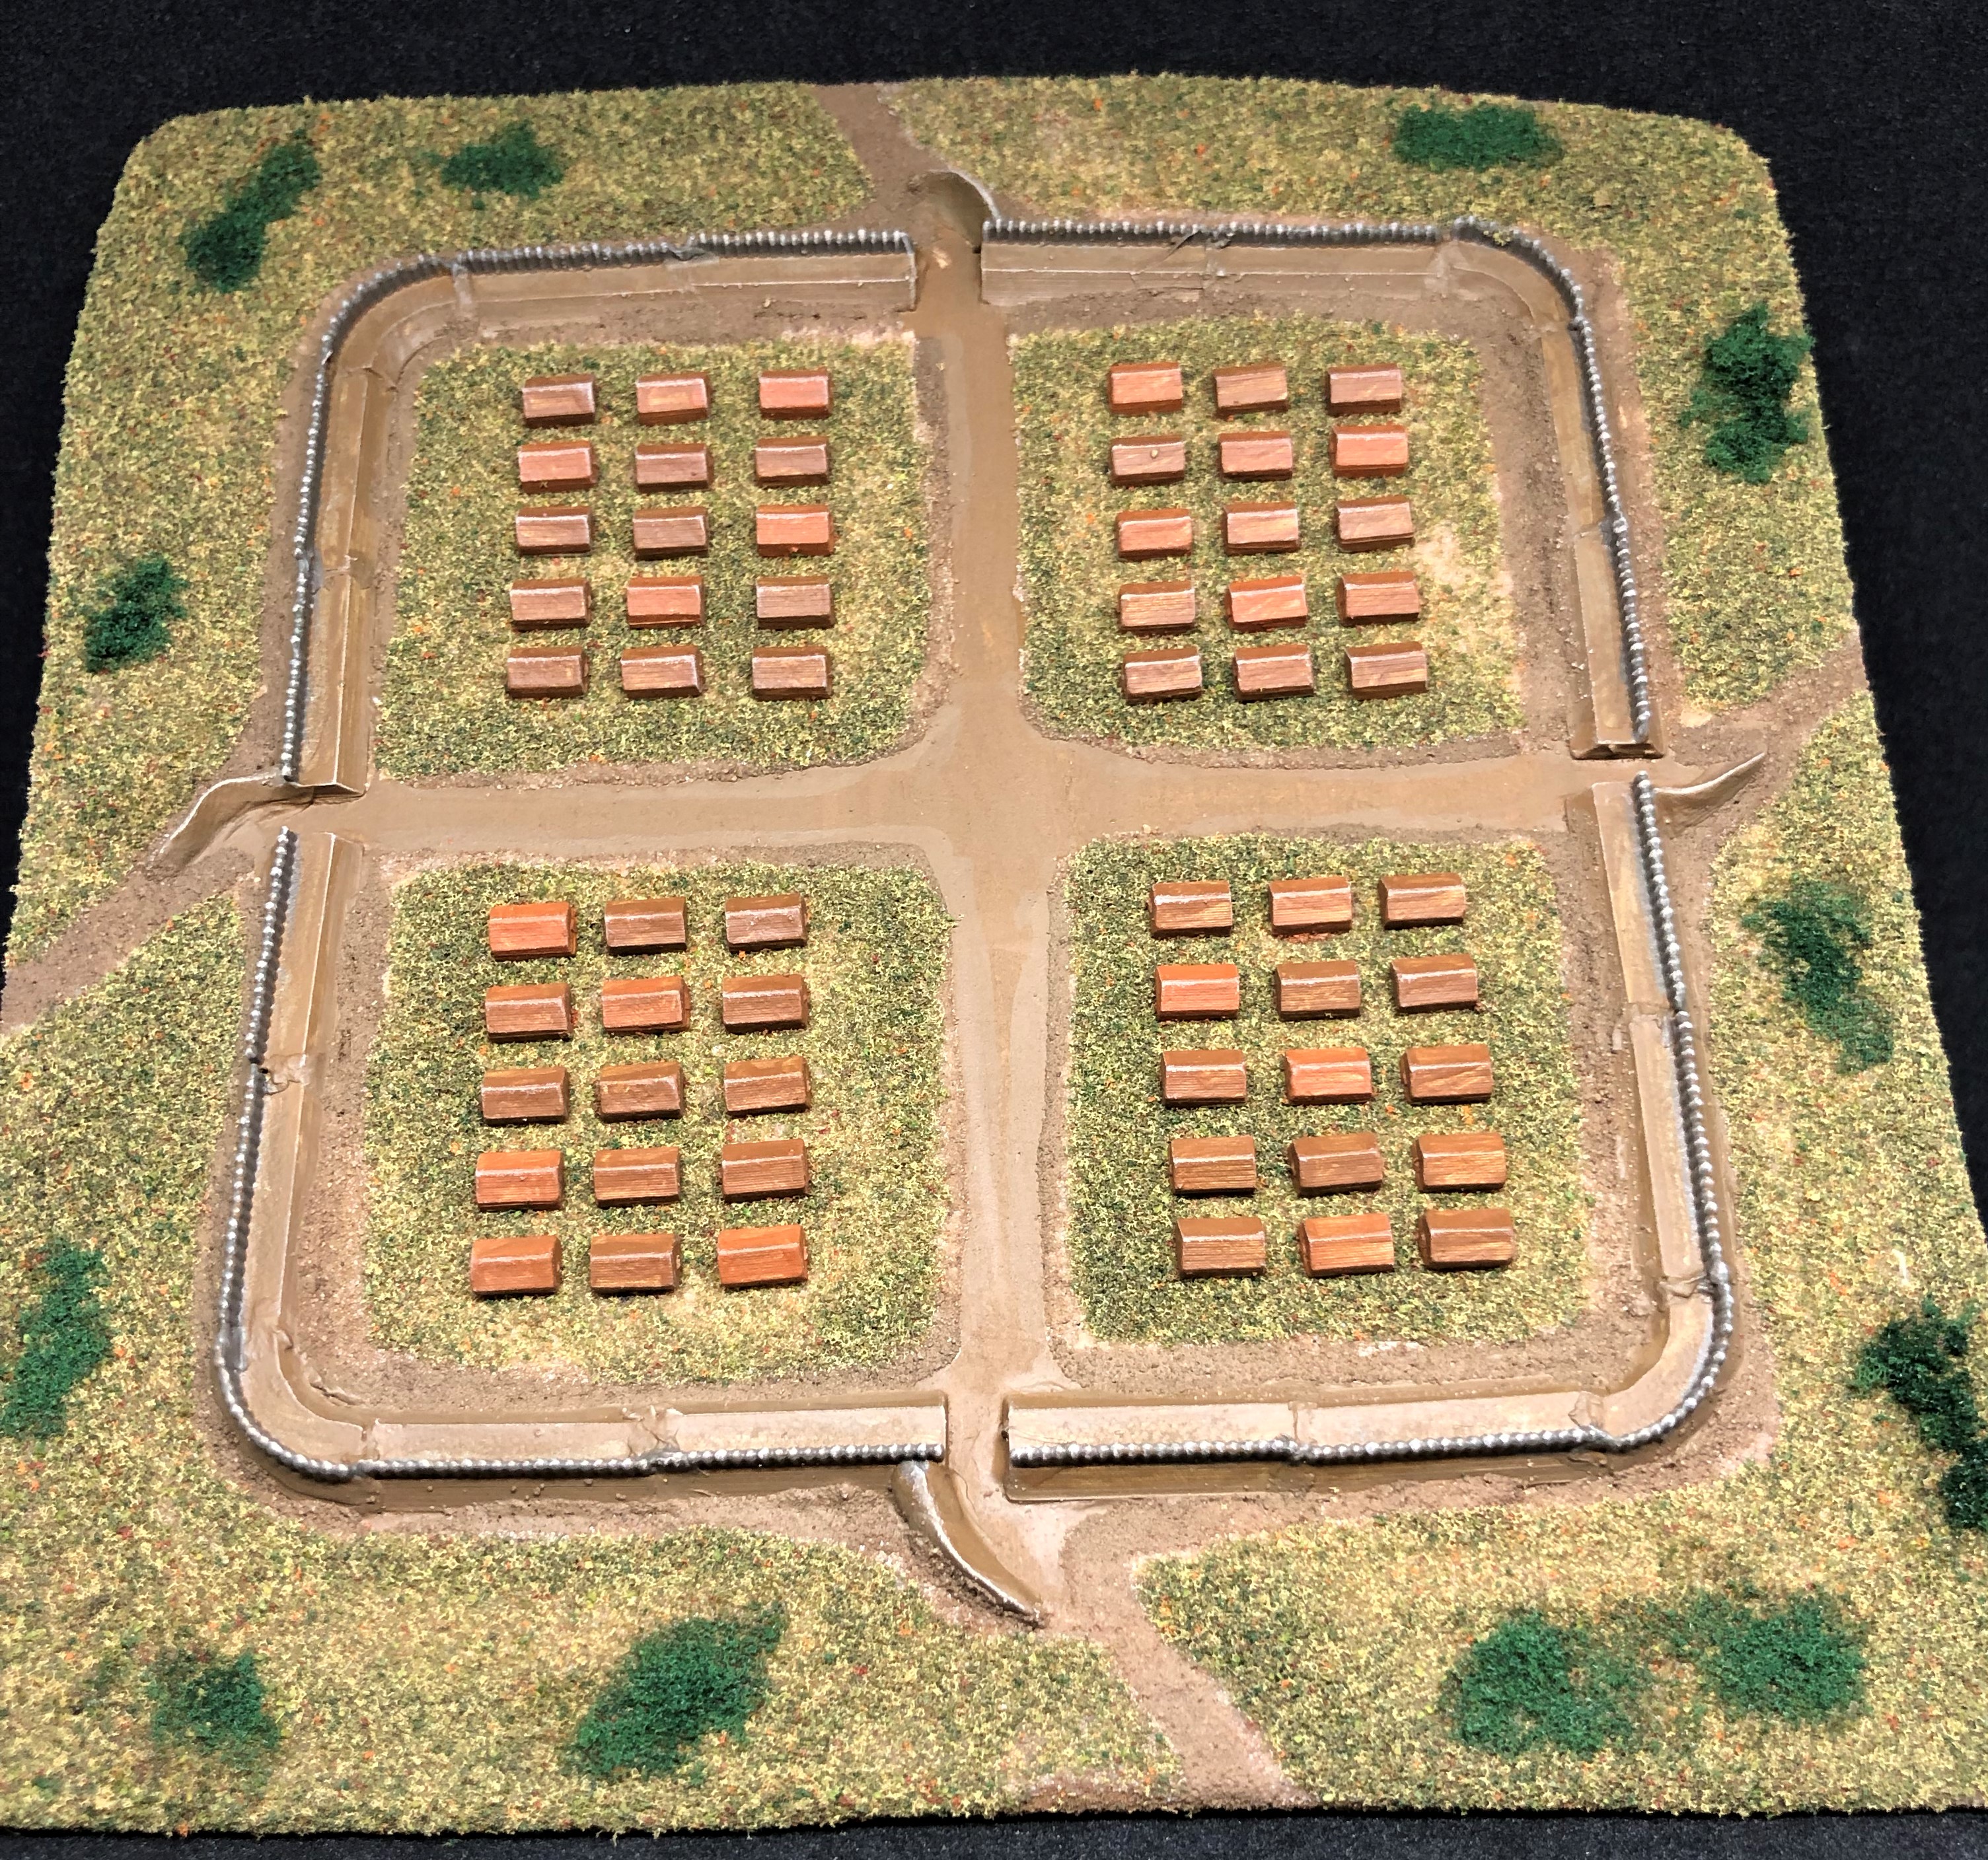
Wagon Laagers (and horse scale)
The rules use camps that are active units in the game. For the Watling Street scenario I’m using wagon laagers to represent the camp followers who accompanied Boudica’s army. They were drawn up in a tight mass that lined the Roman road behind the army and created an almost impassable barrier. When the battle turned against the Britons, this trapped their warriors between the advancing Romans and escape leading to mass slaughter. The scenario suggests having one base but I’ve opted for two to provide a longer physical barrier to any retreating Britons.
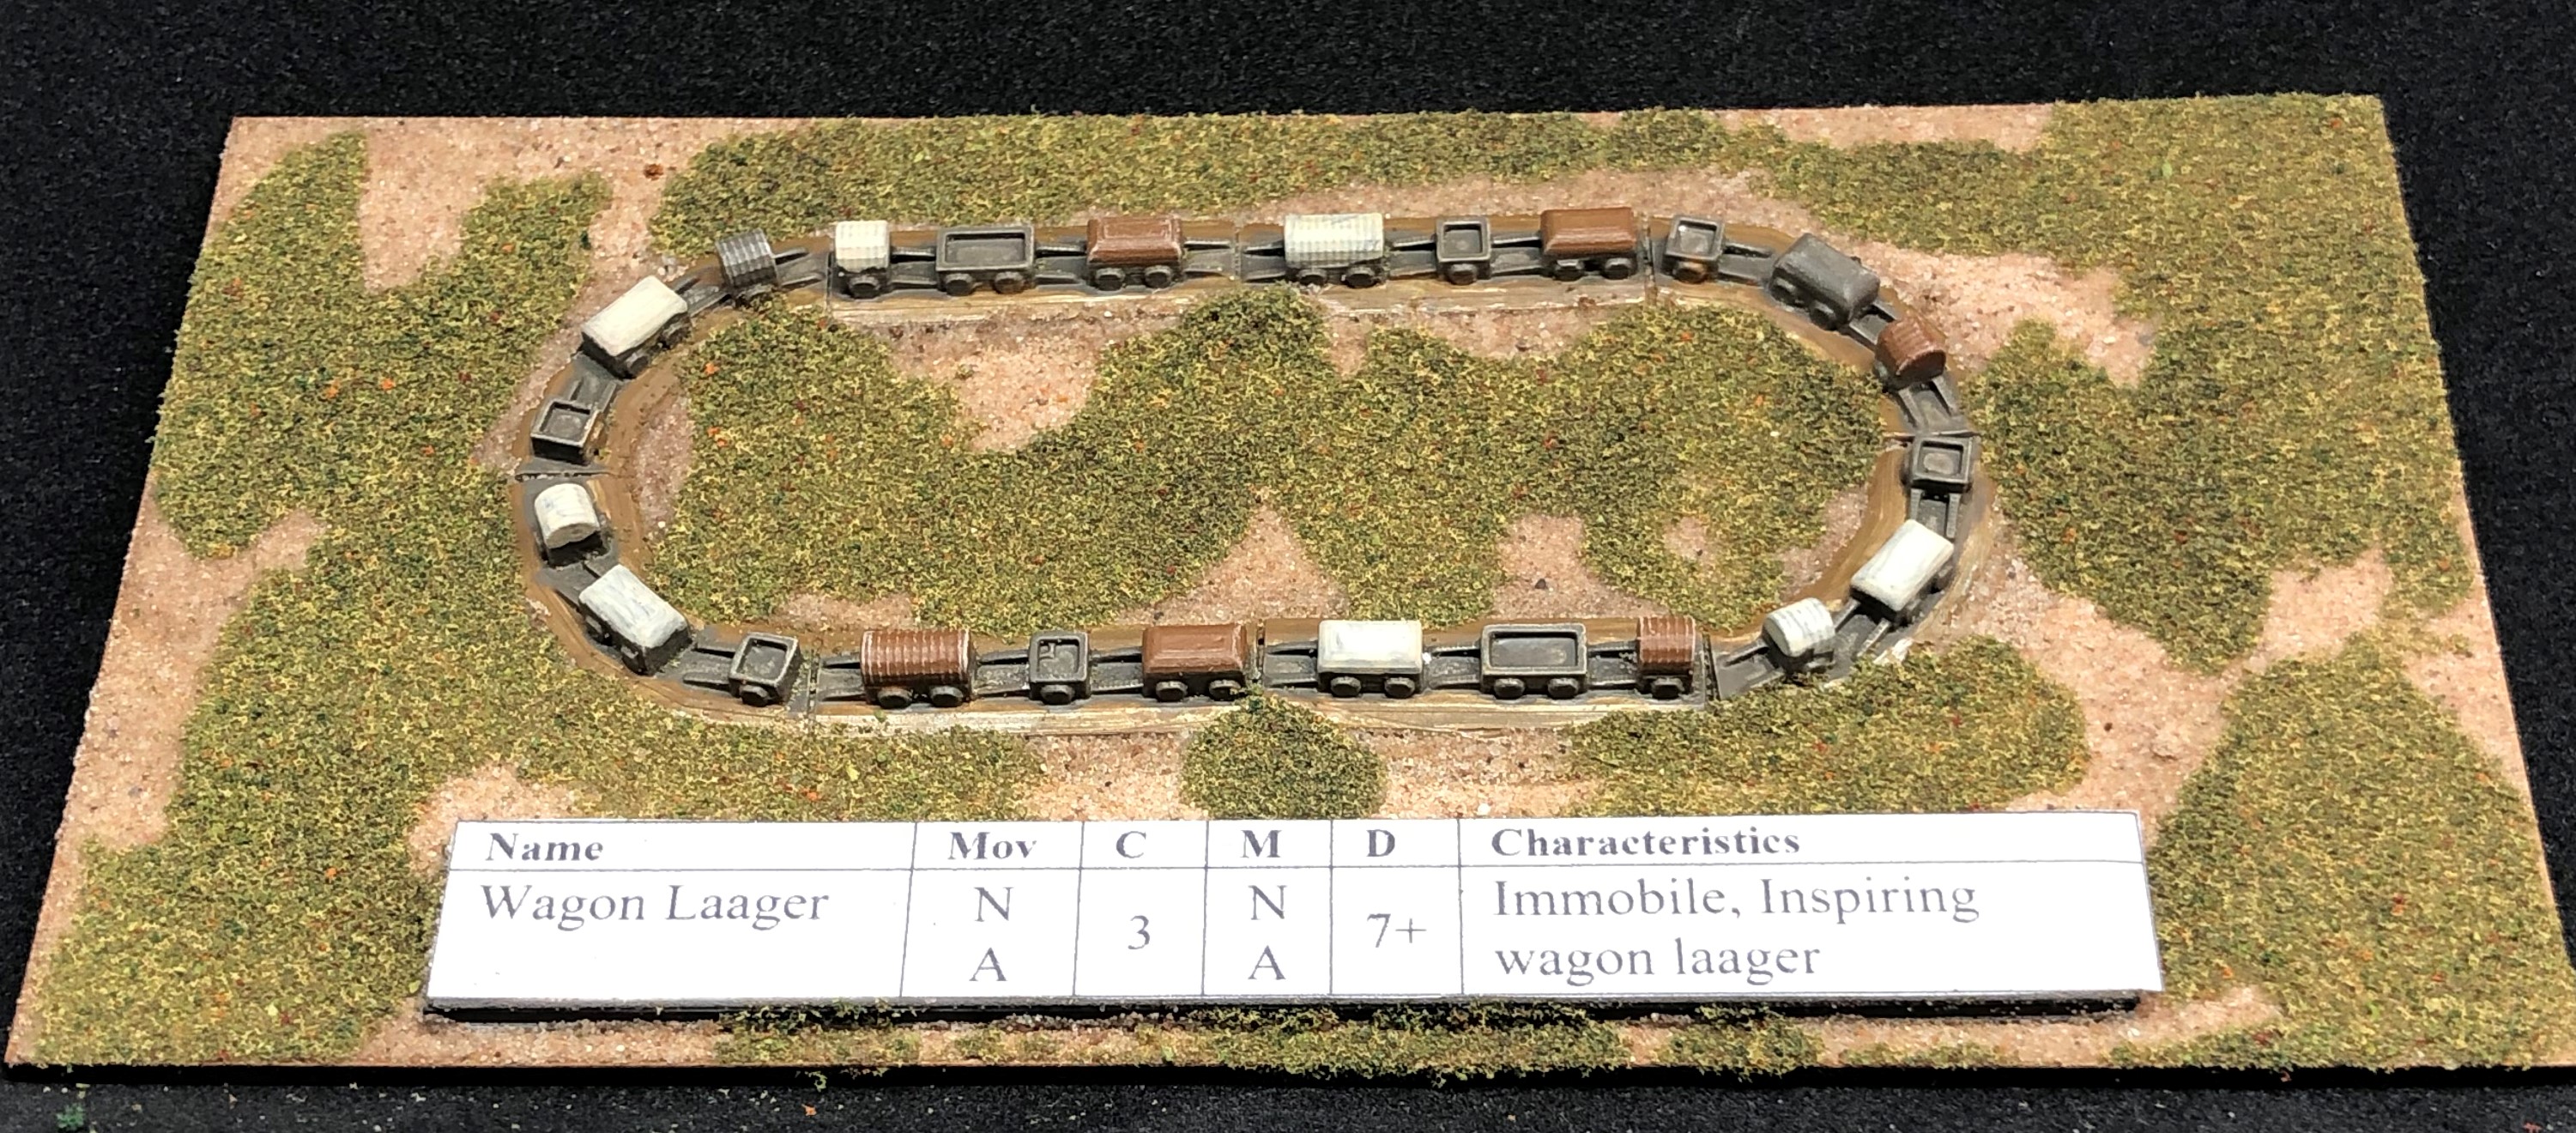
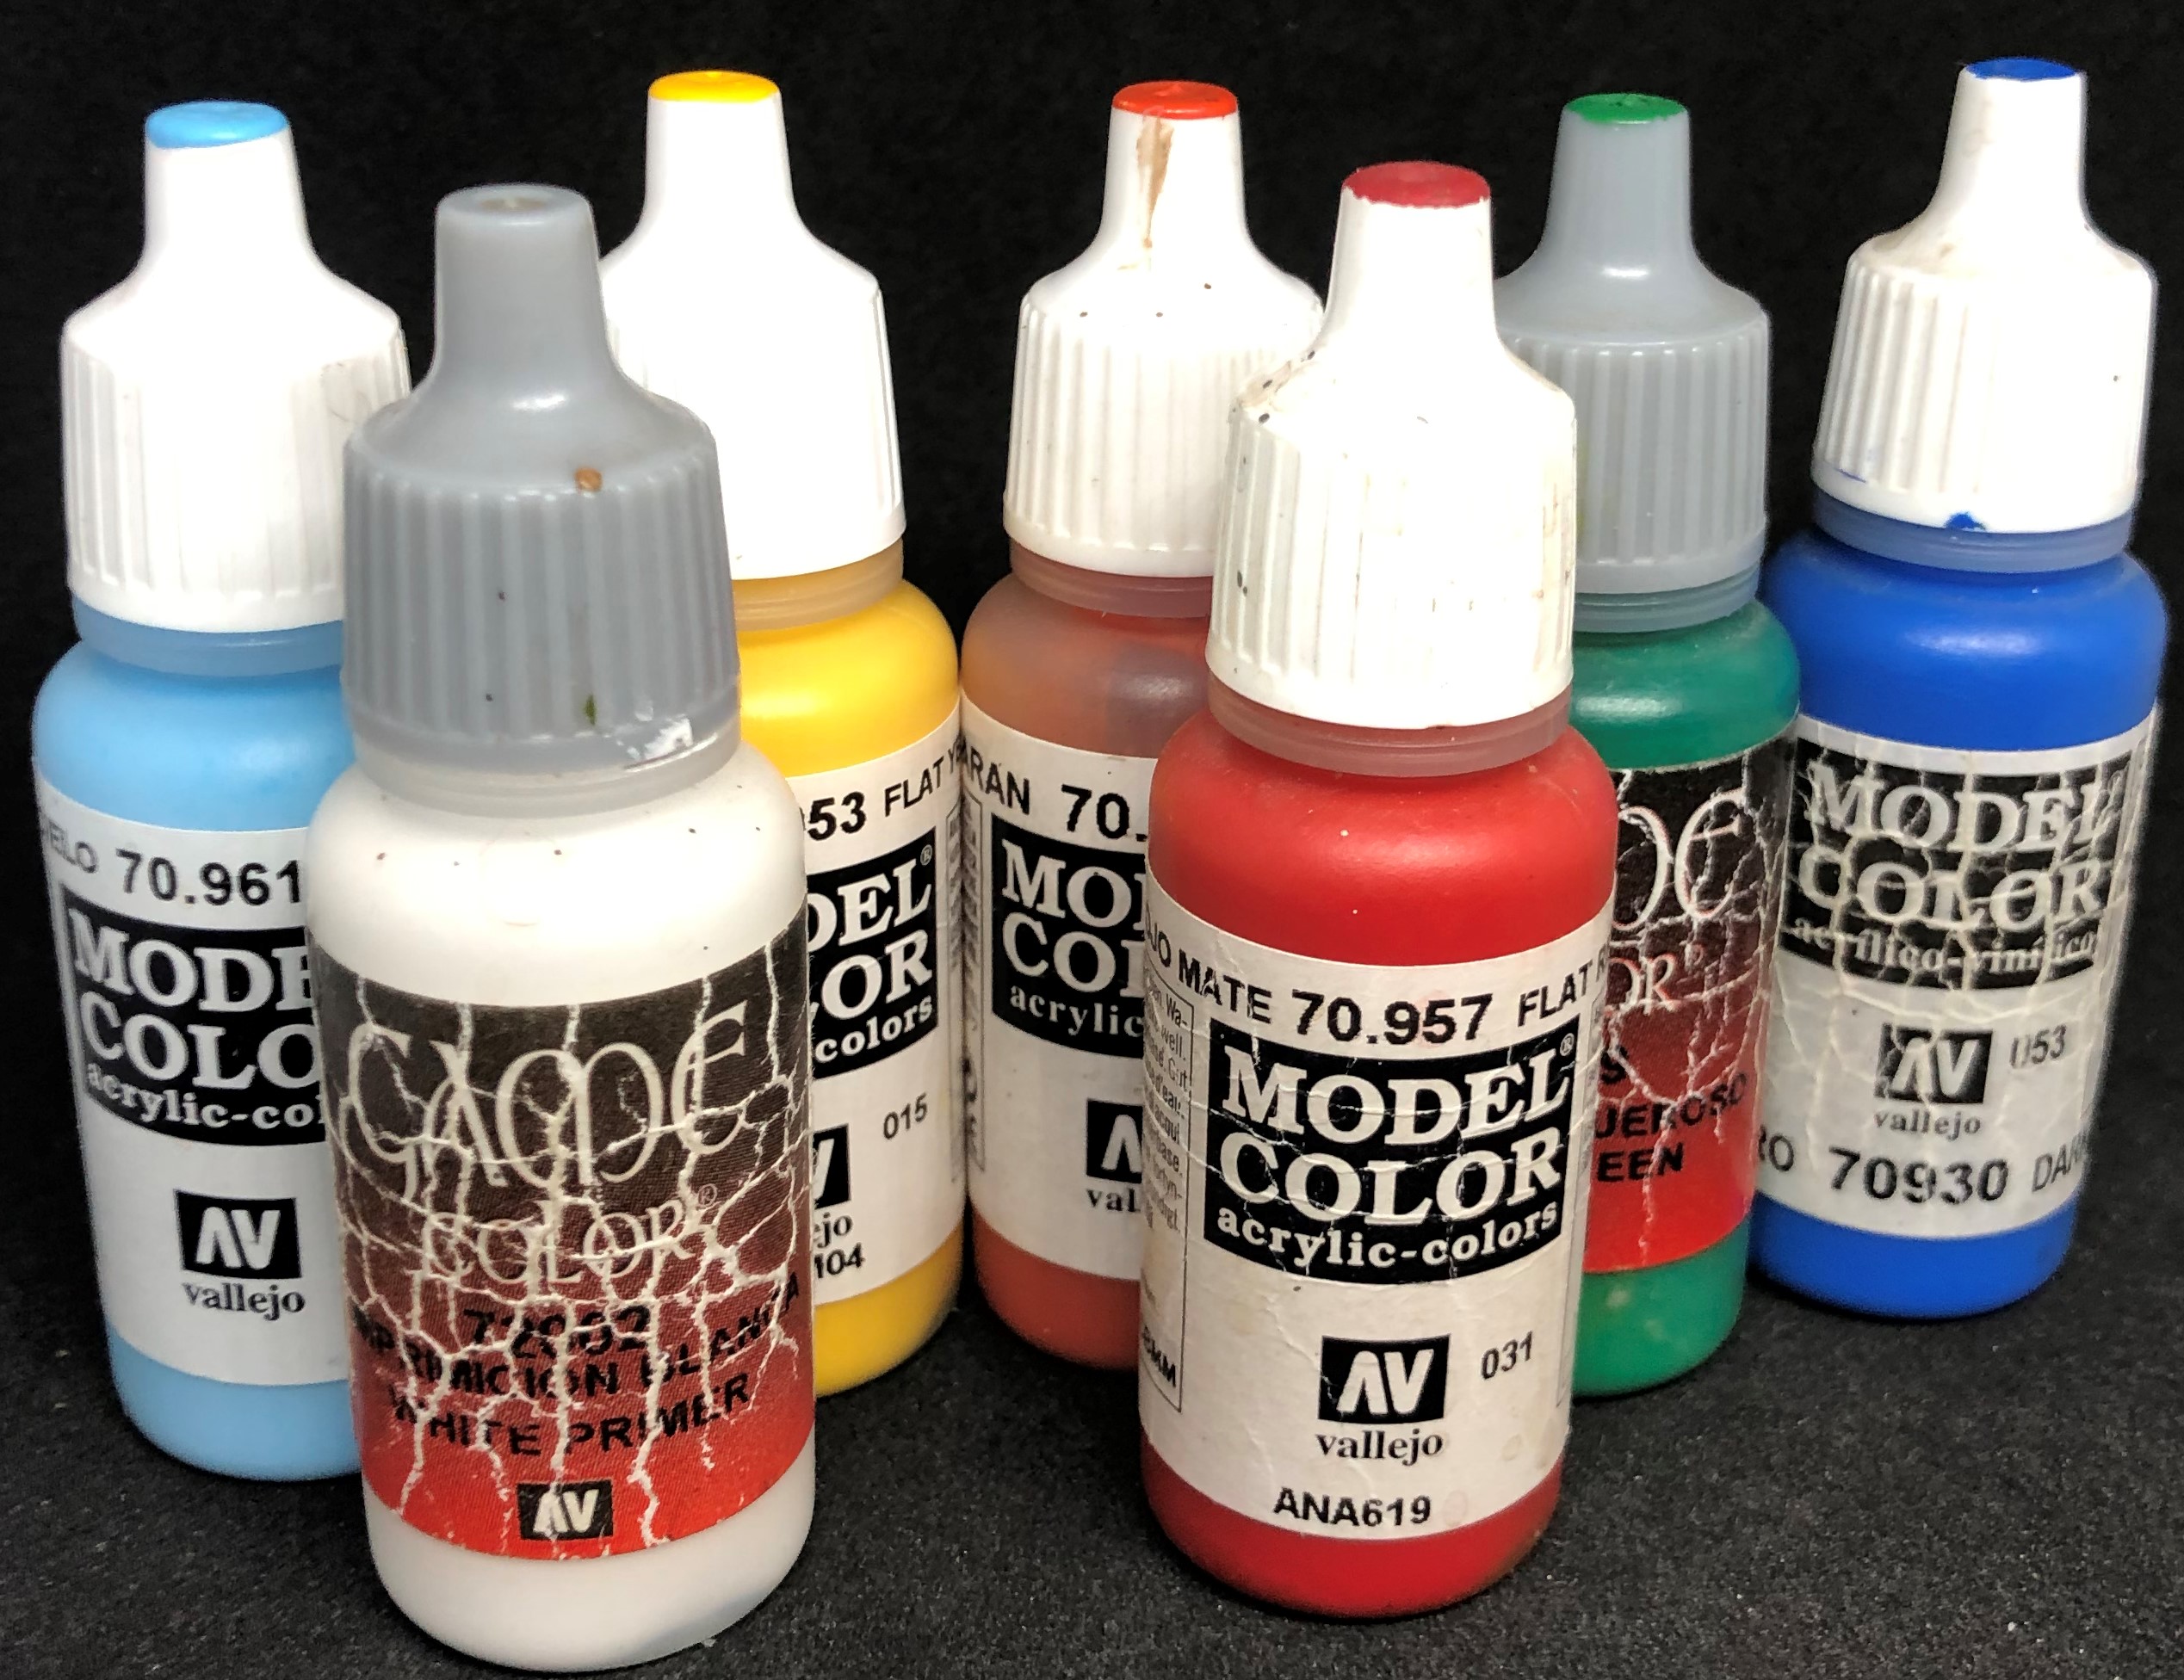
Started off sticking the wagon bases onto a flocked 50mm x 150mm base. These were undercoated in Vallejo Concrete. Then the canopies were painted either leather or canvas (white). Miniatures are metal from Antonine via Warbases. One pack provides enough wagons, horses and camp followers for a single base like this.
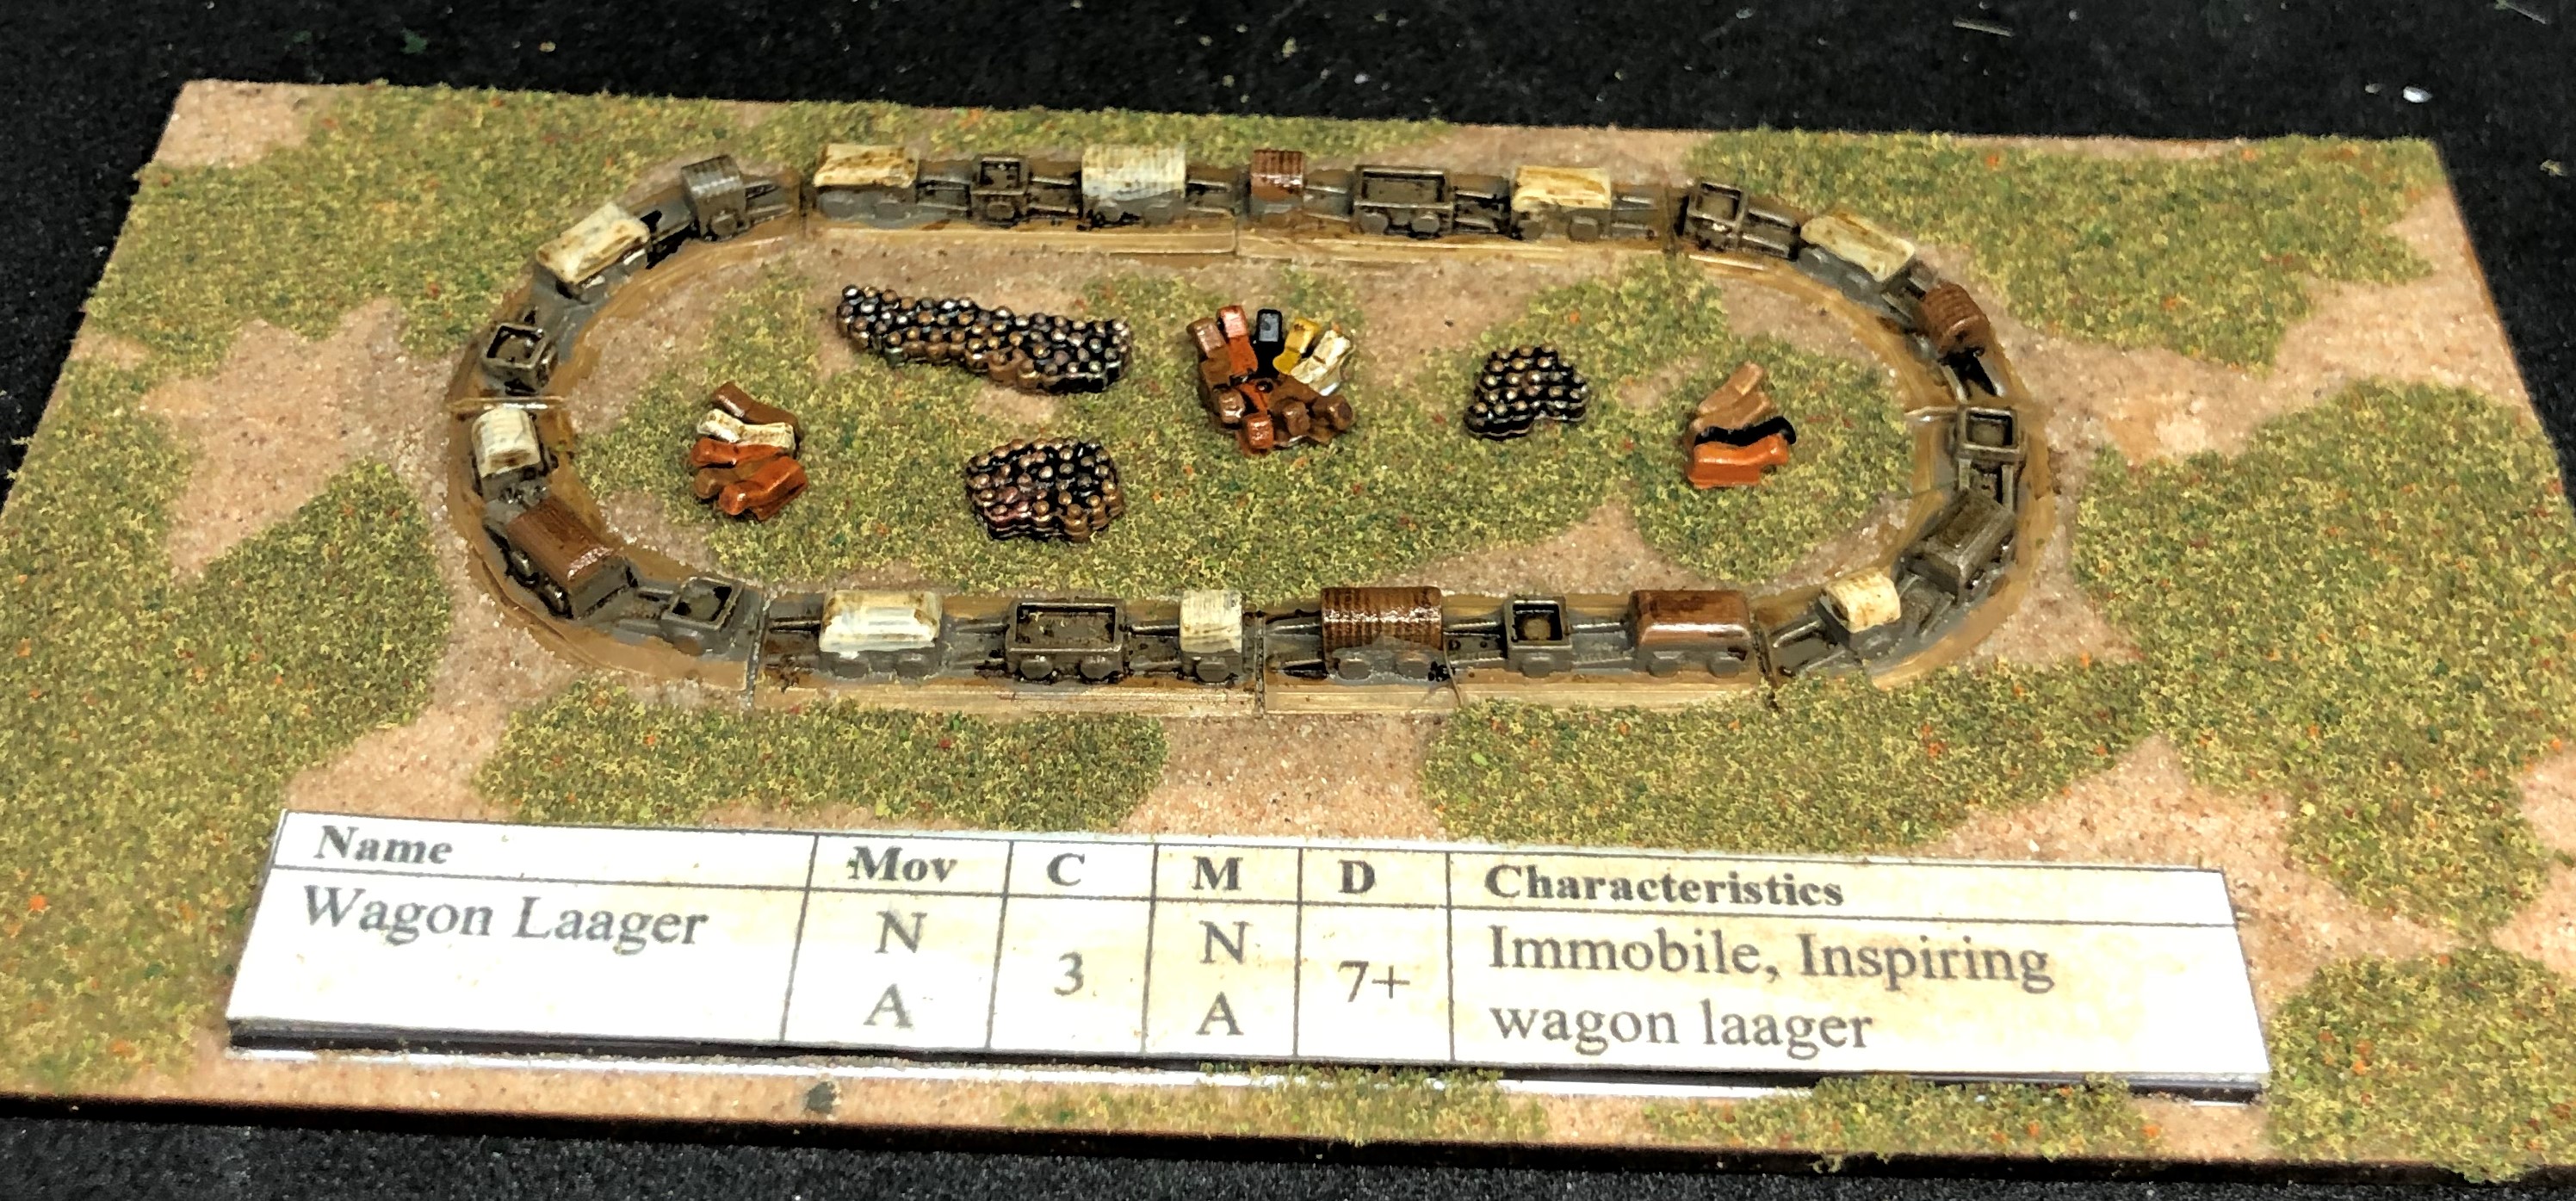
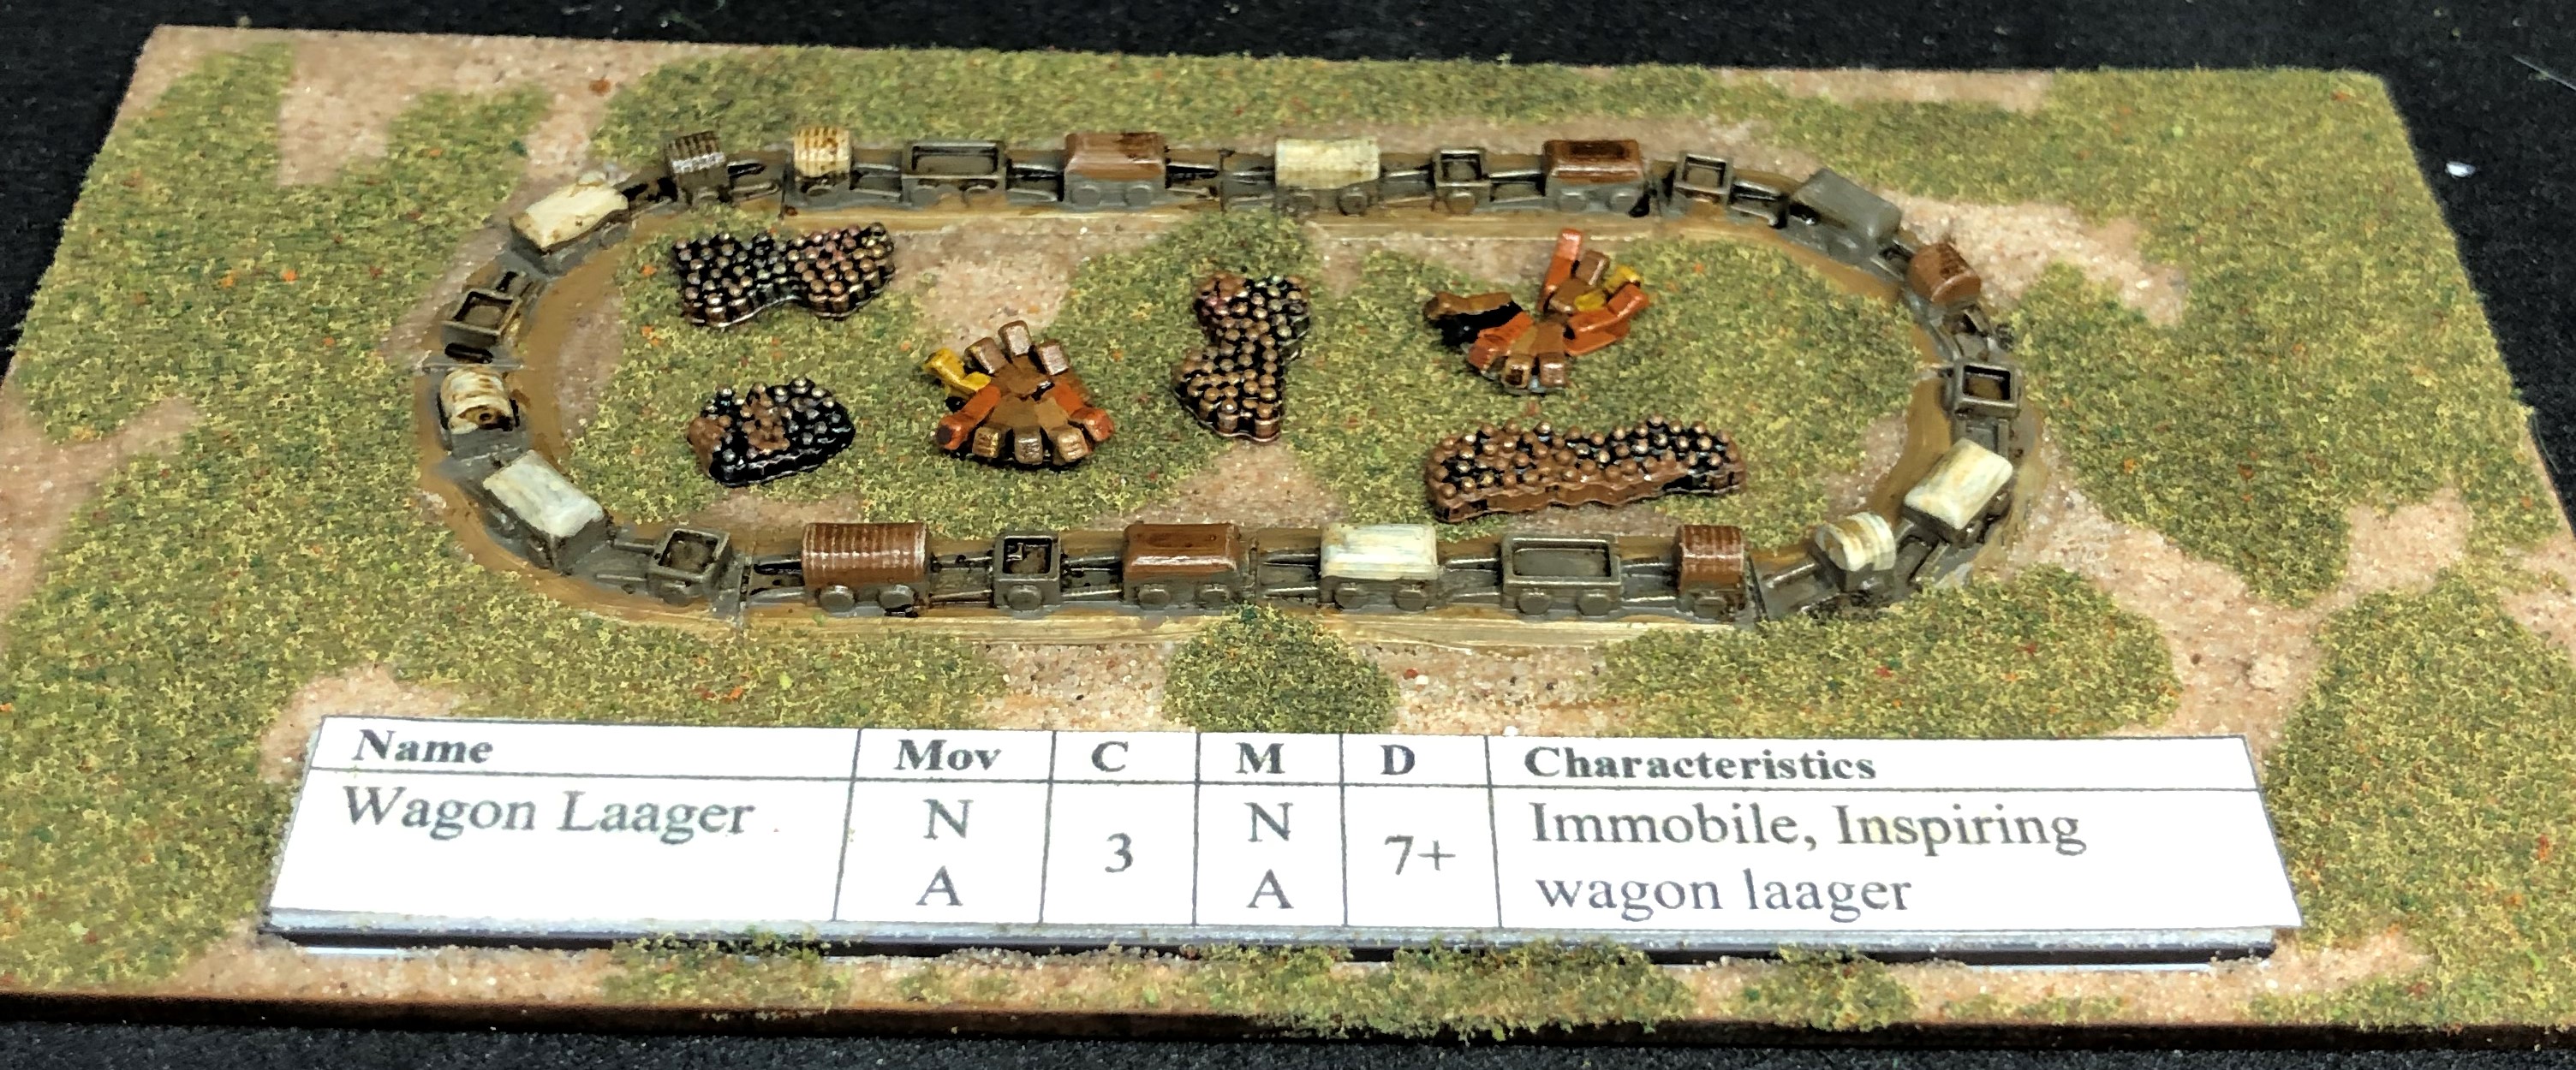
The horses and camp follower bases were painted separately and then stuck down and everything was given a raw umber ink wash.
The horses from these Antonine sets are HUGE. They are more than double the volume of the 3D printed horses being both taller but also much wider. They are at least 3mm scale and maybe a bit bigger and aren’t particularly naturalistic proportionally. That said they only need to give the suggestion of horses from the gaming distance and they manage that perfectly well.
It does show that it won’t be possible the mix the 3D prints and the Antonine on a single base, or possibly even in adjacent bases in an army. I’m happy with the Antonine camp sets but will stick to 3D prints for the armies.
Chariots! And a word on painting tiny horses
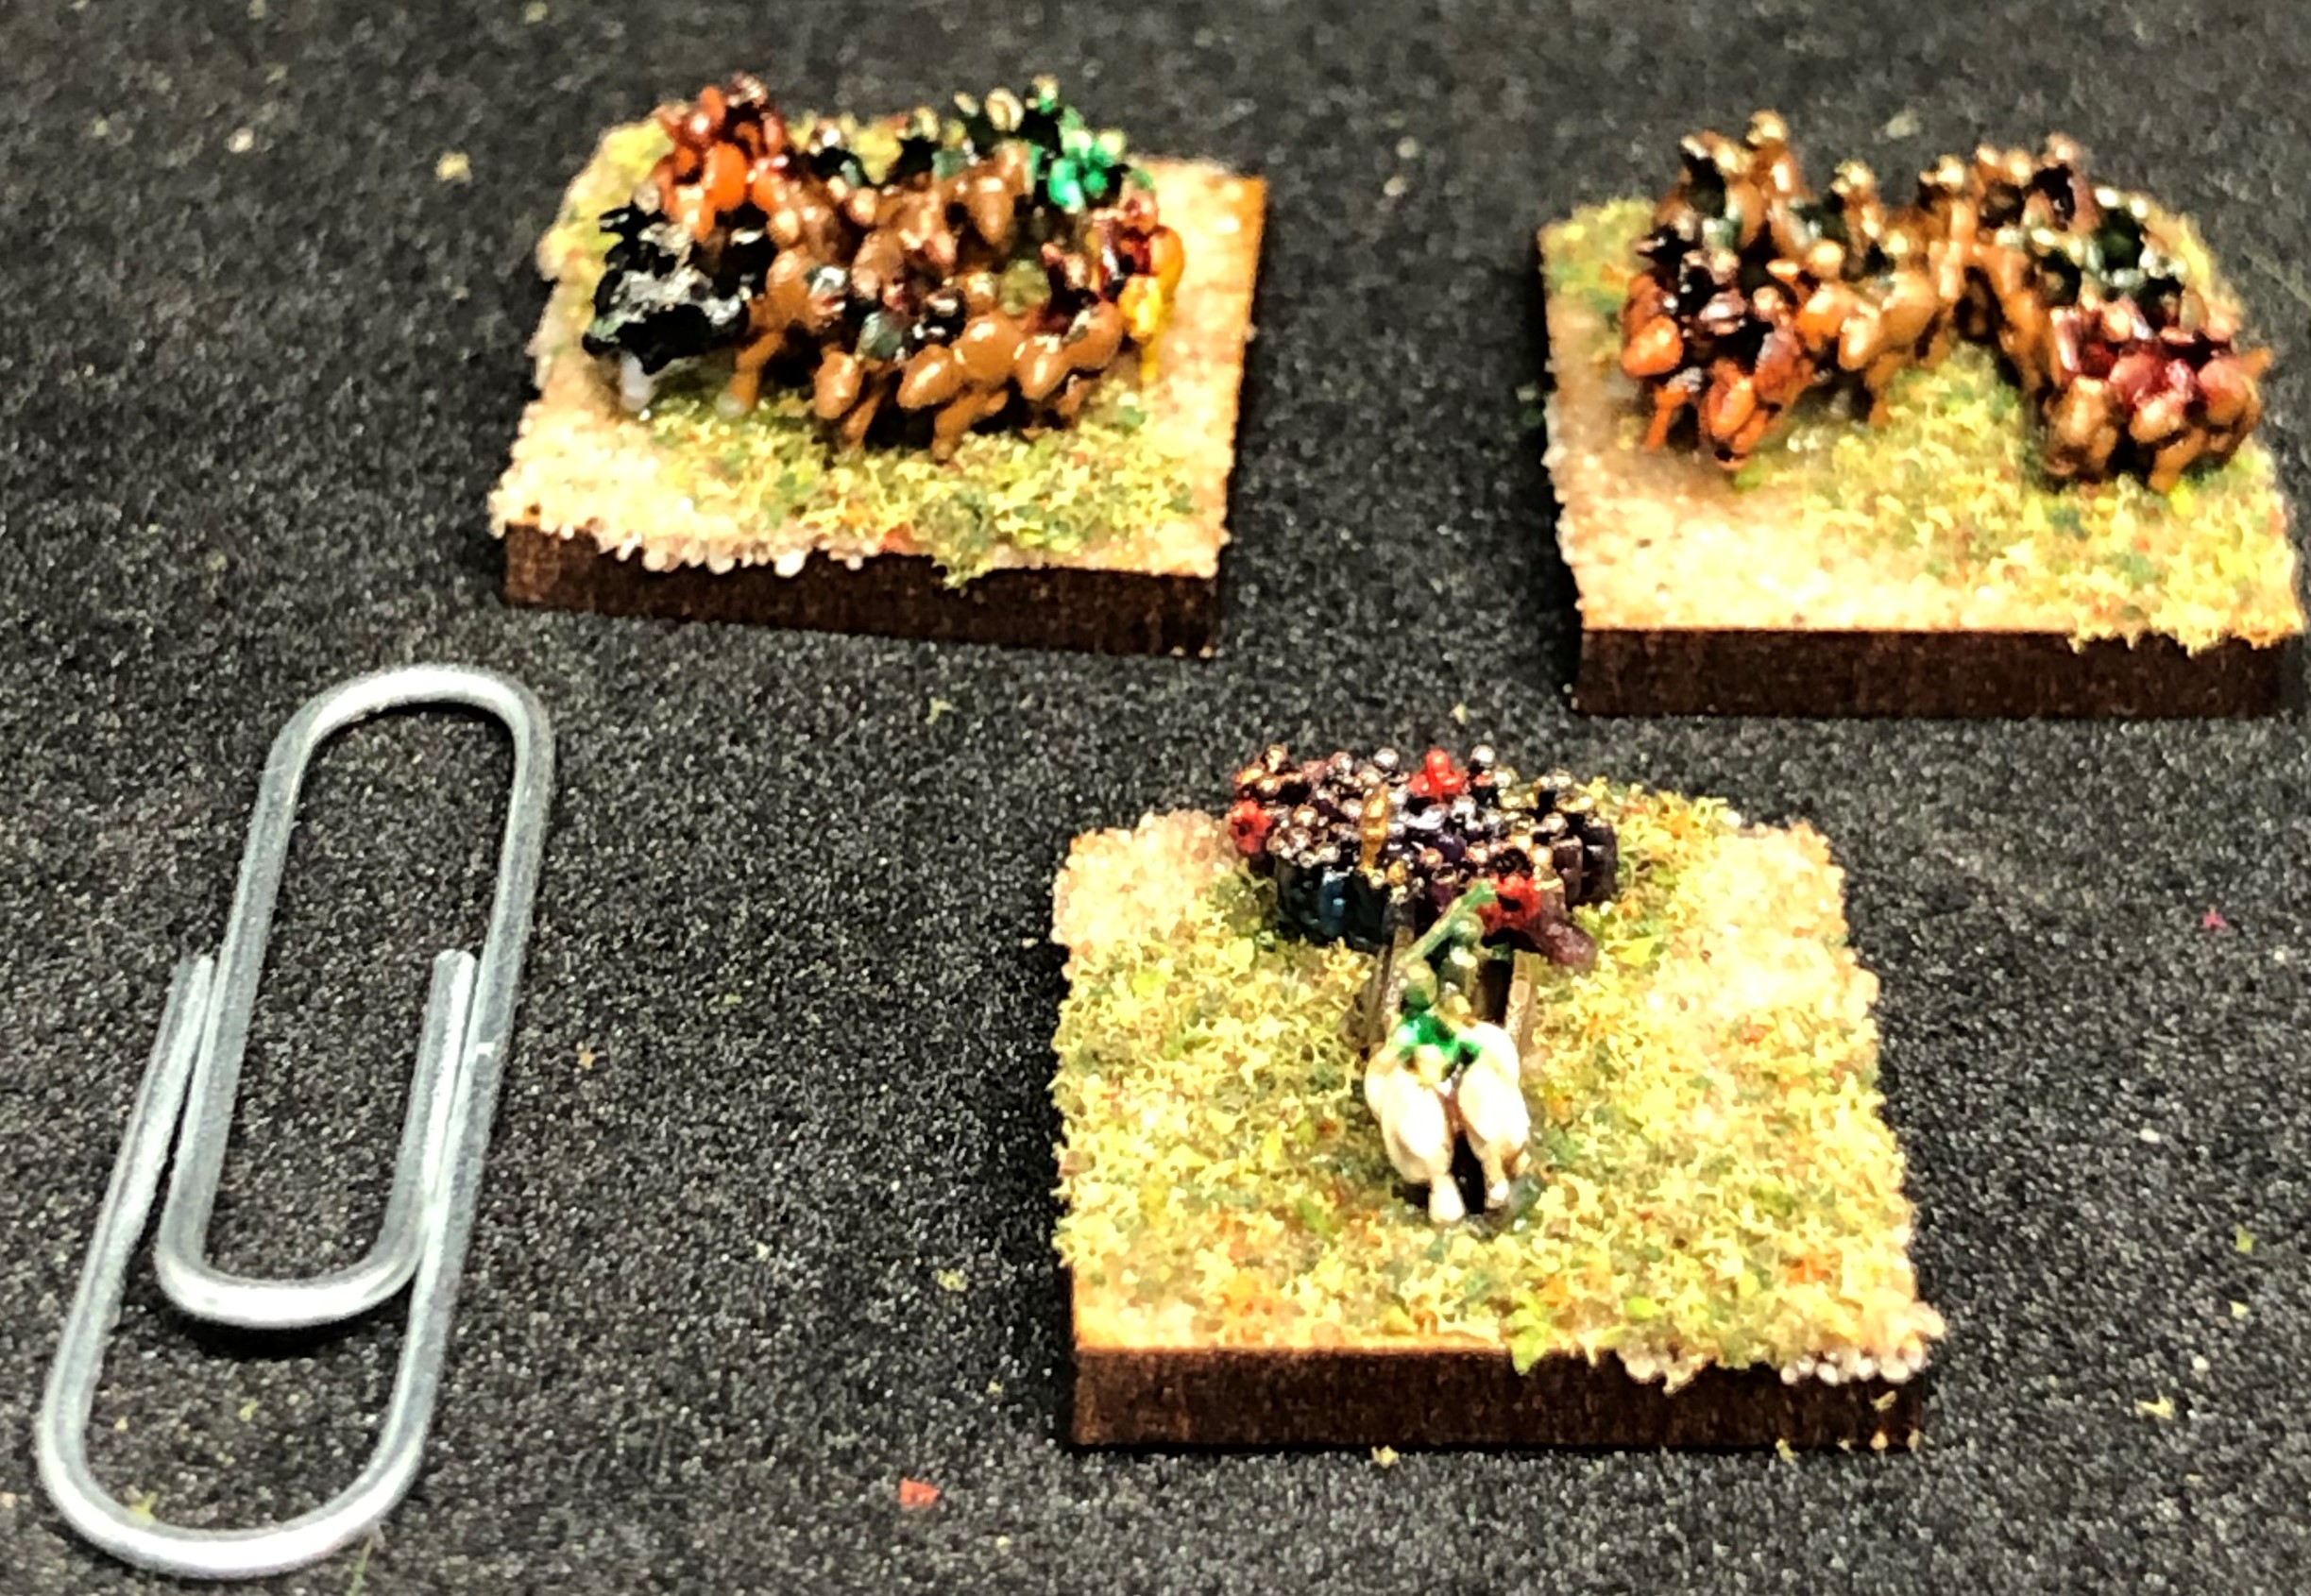
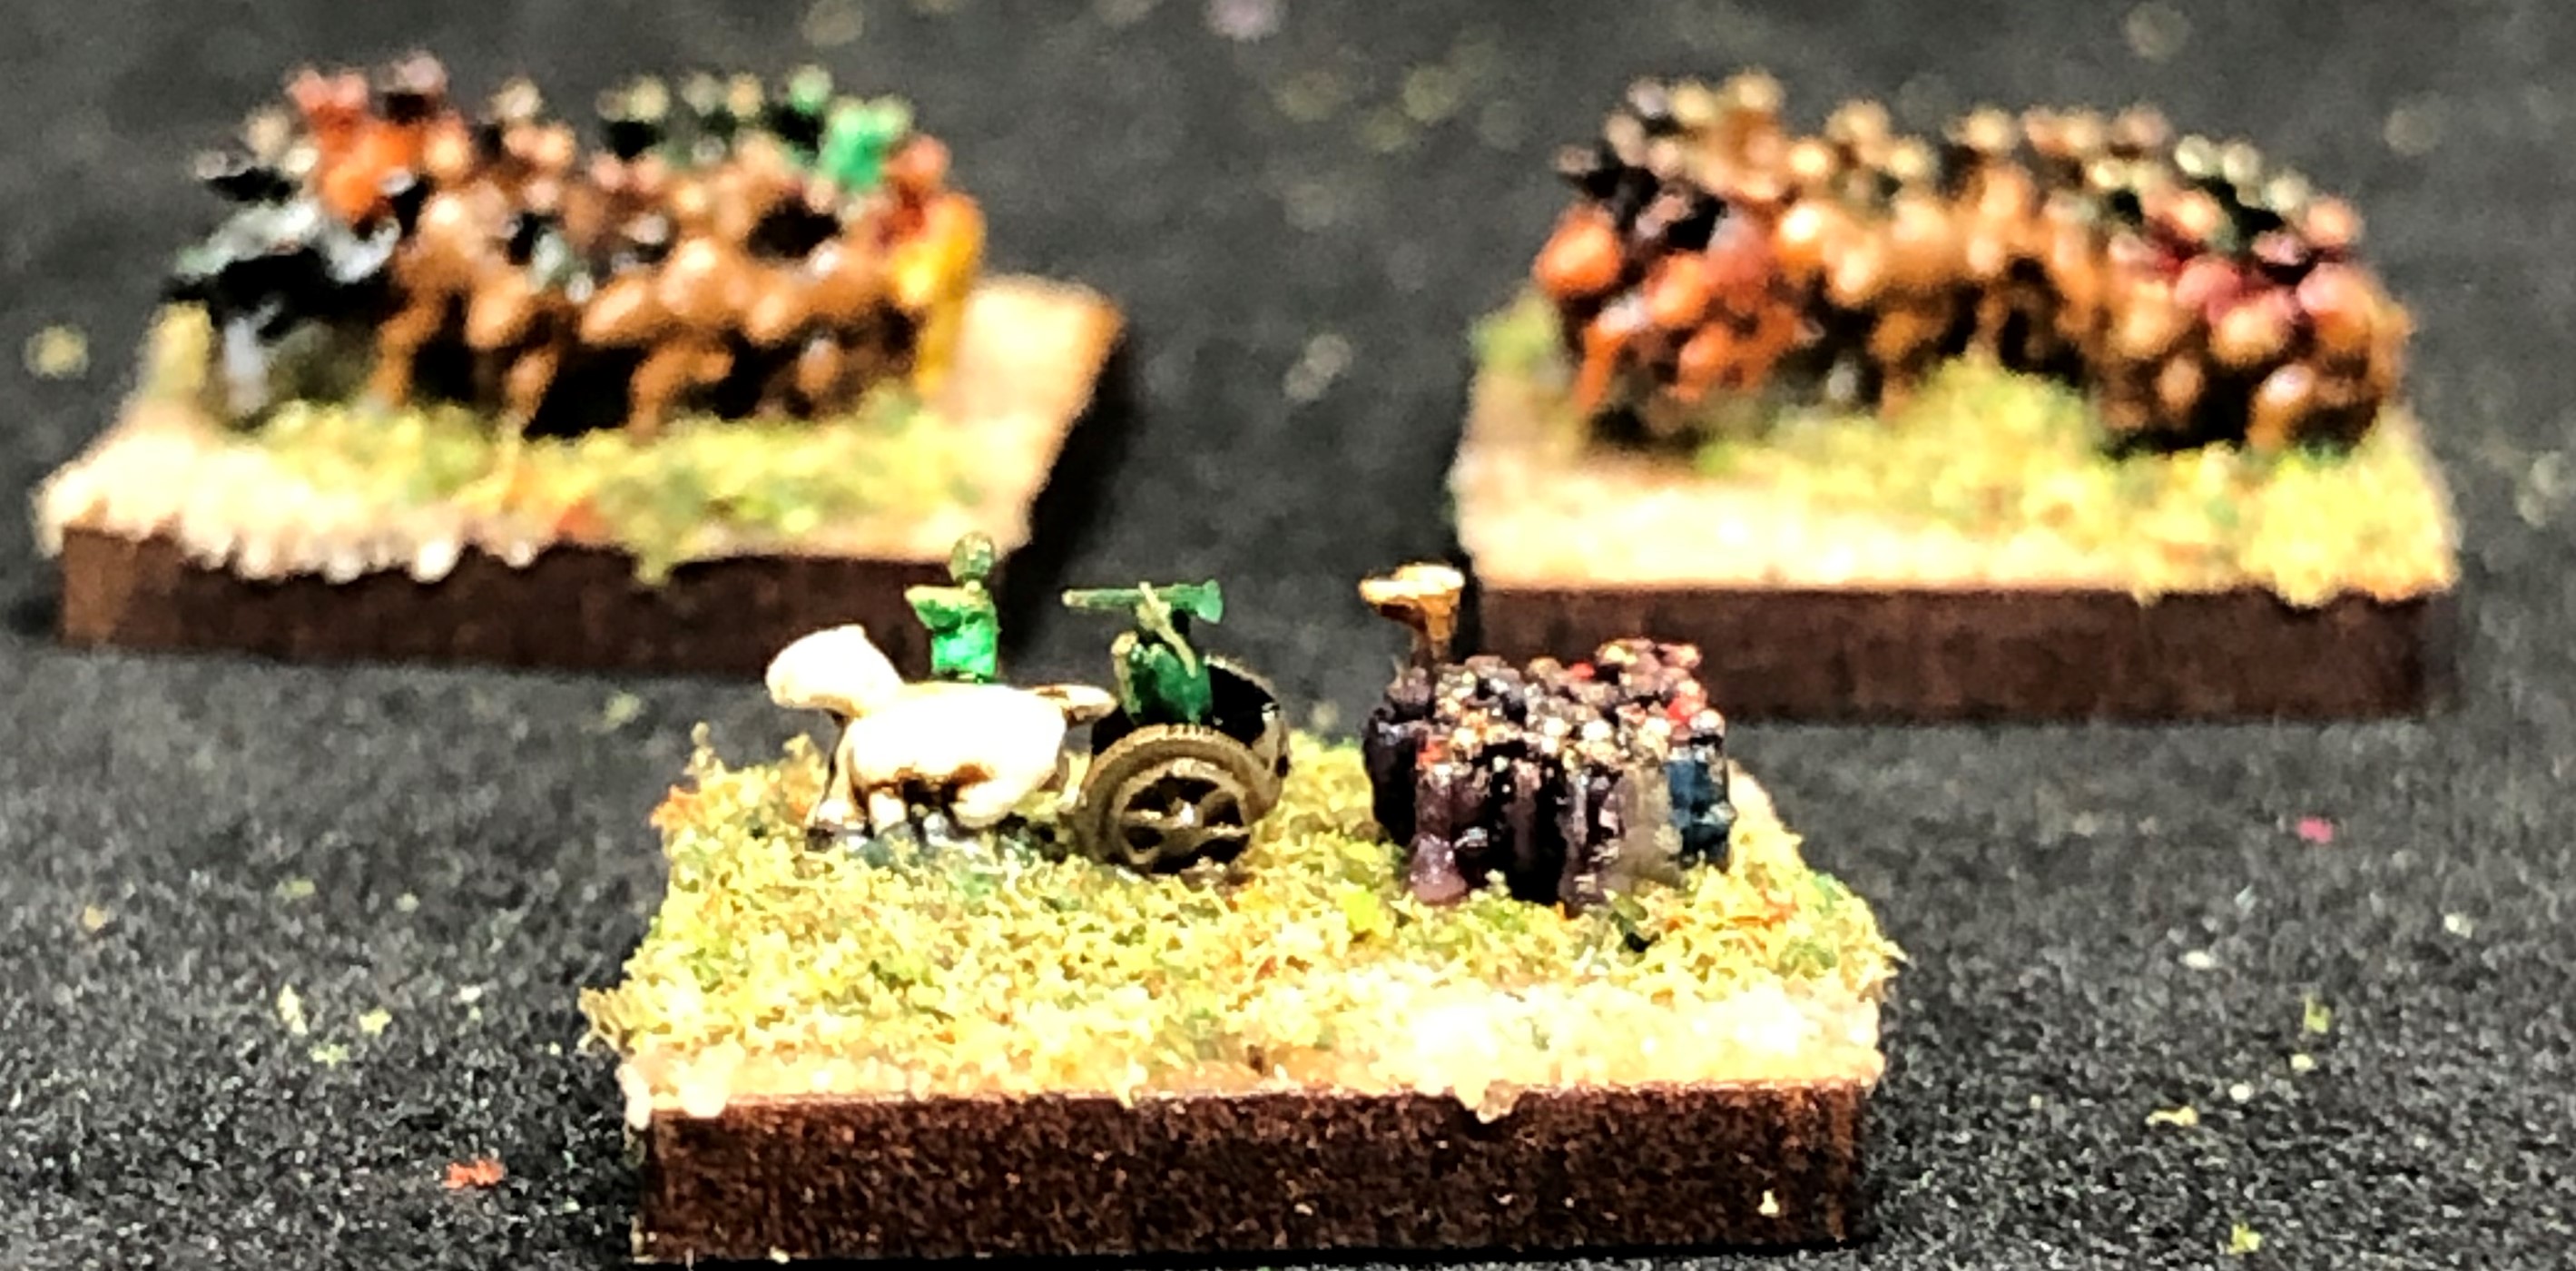
Celtic chariots are done. The Project Wargaming files have 4 variants and when colours of the horses are mixed about we get good variety.
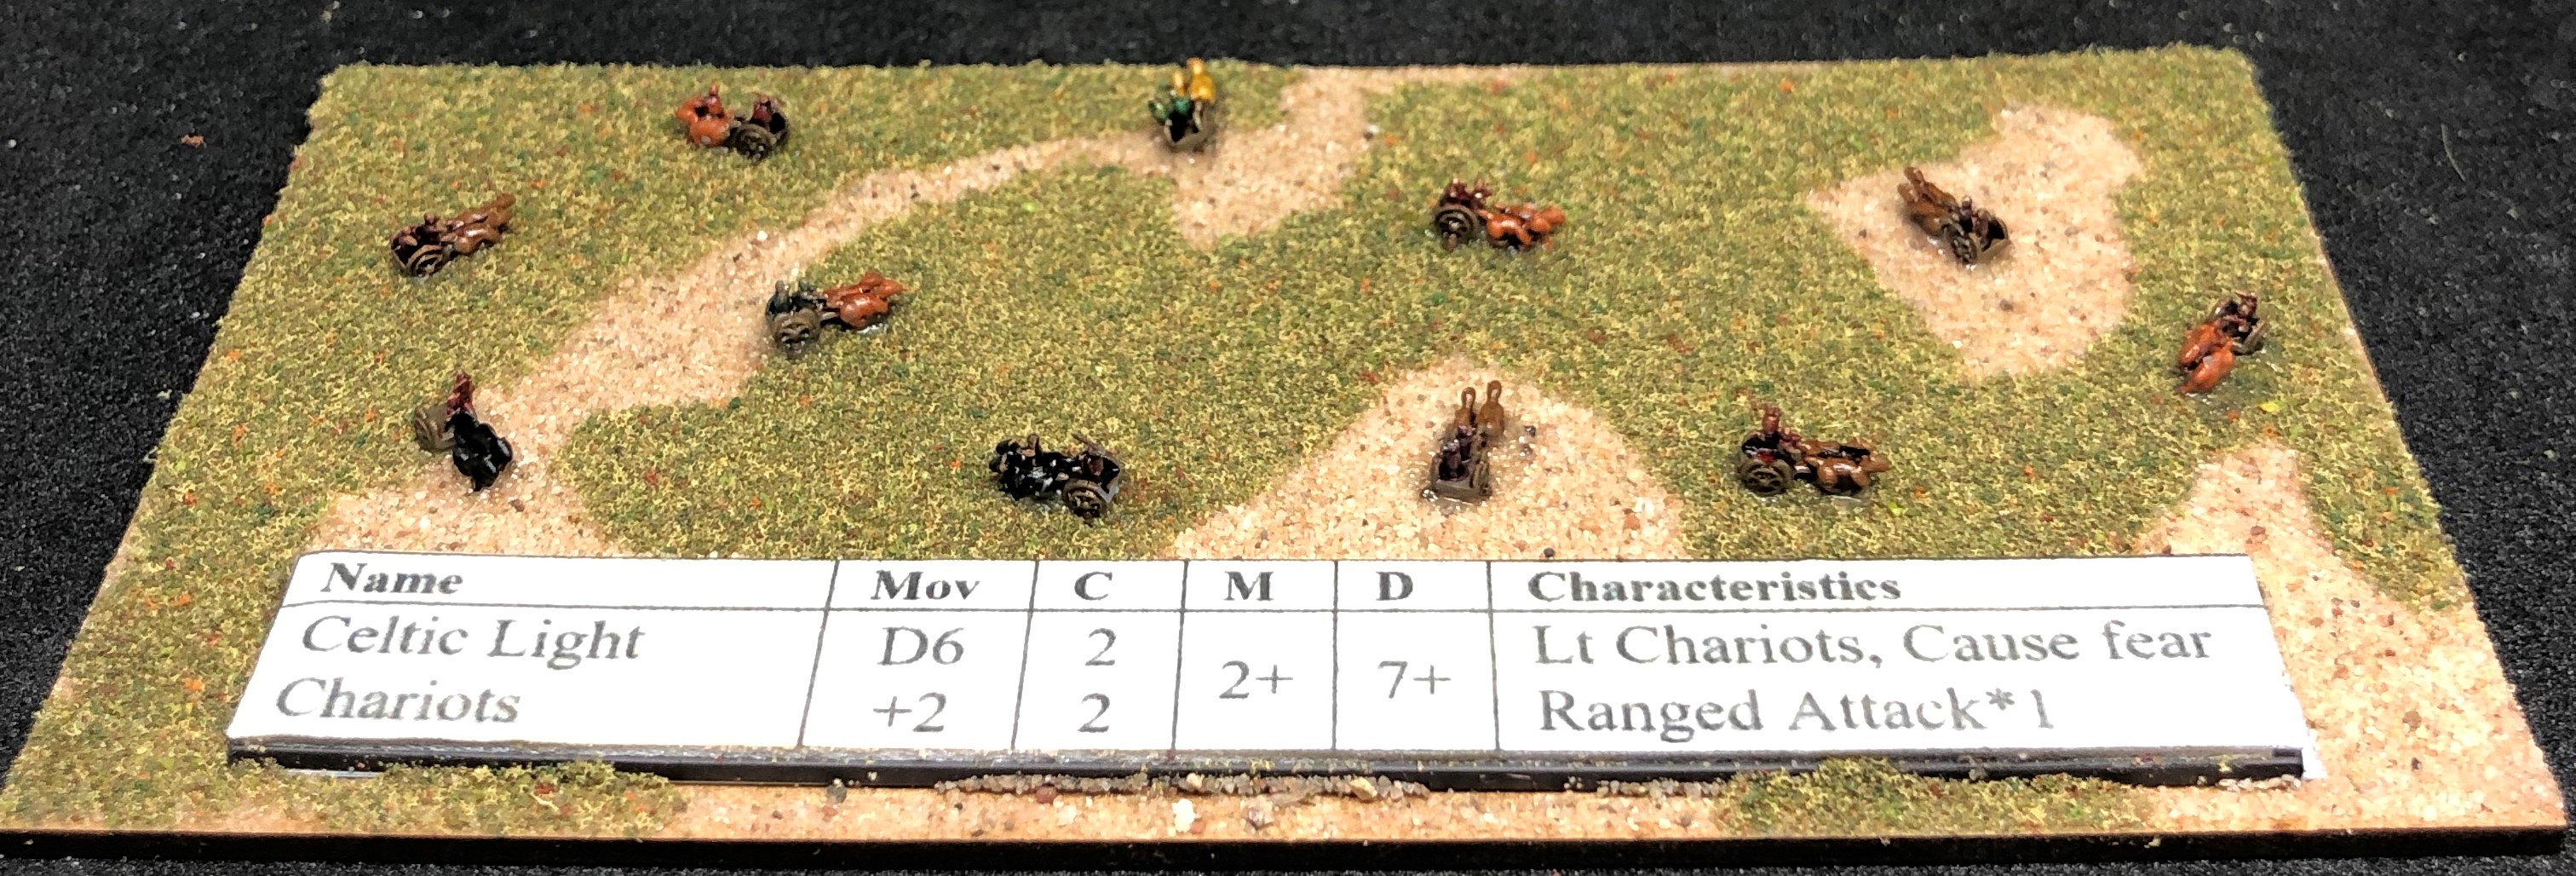
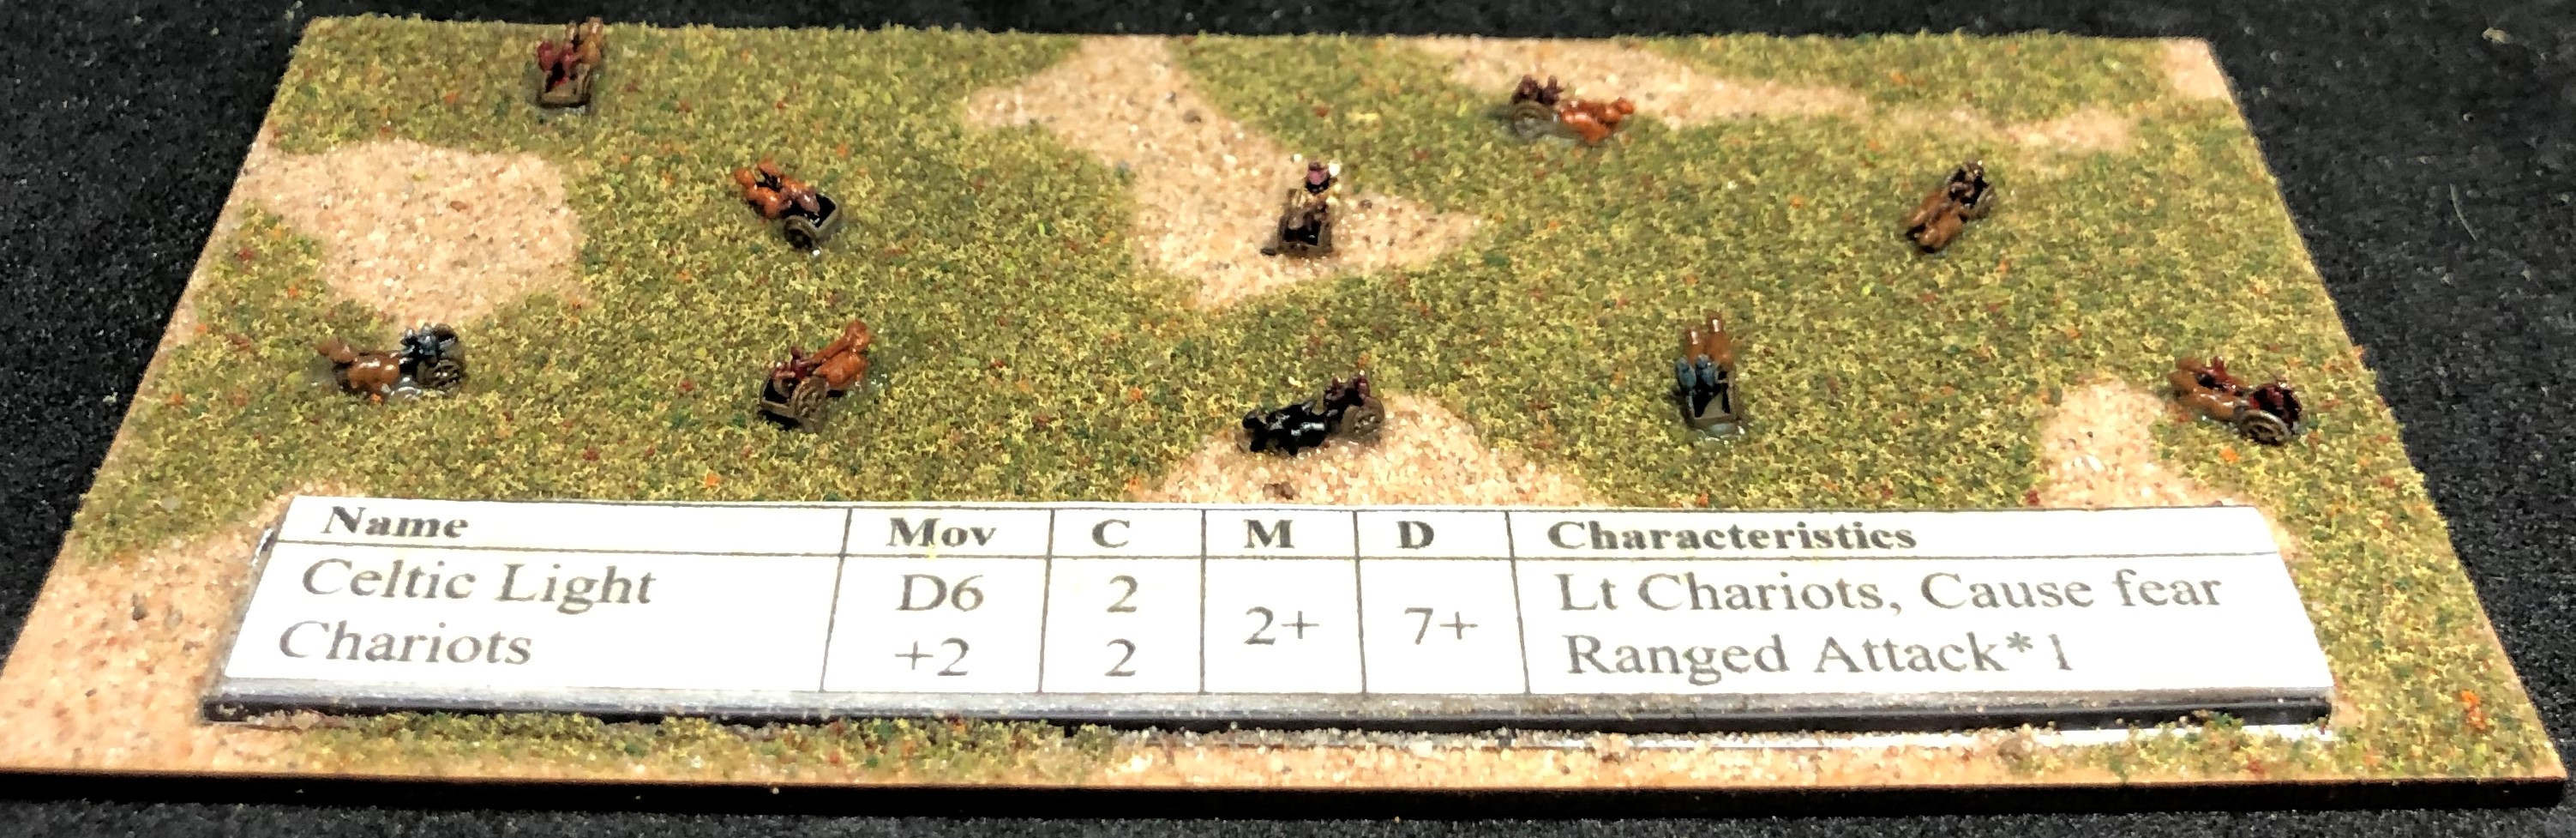
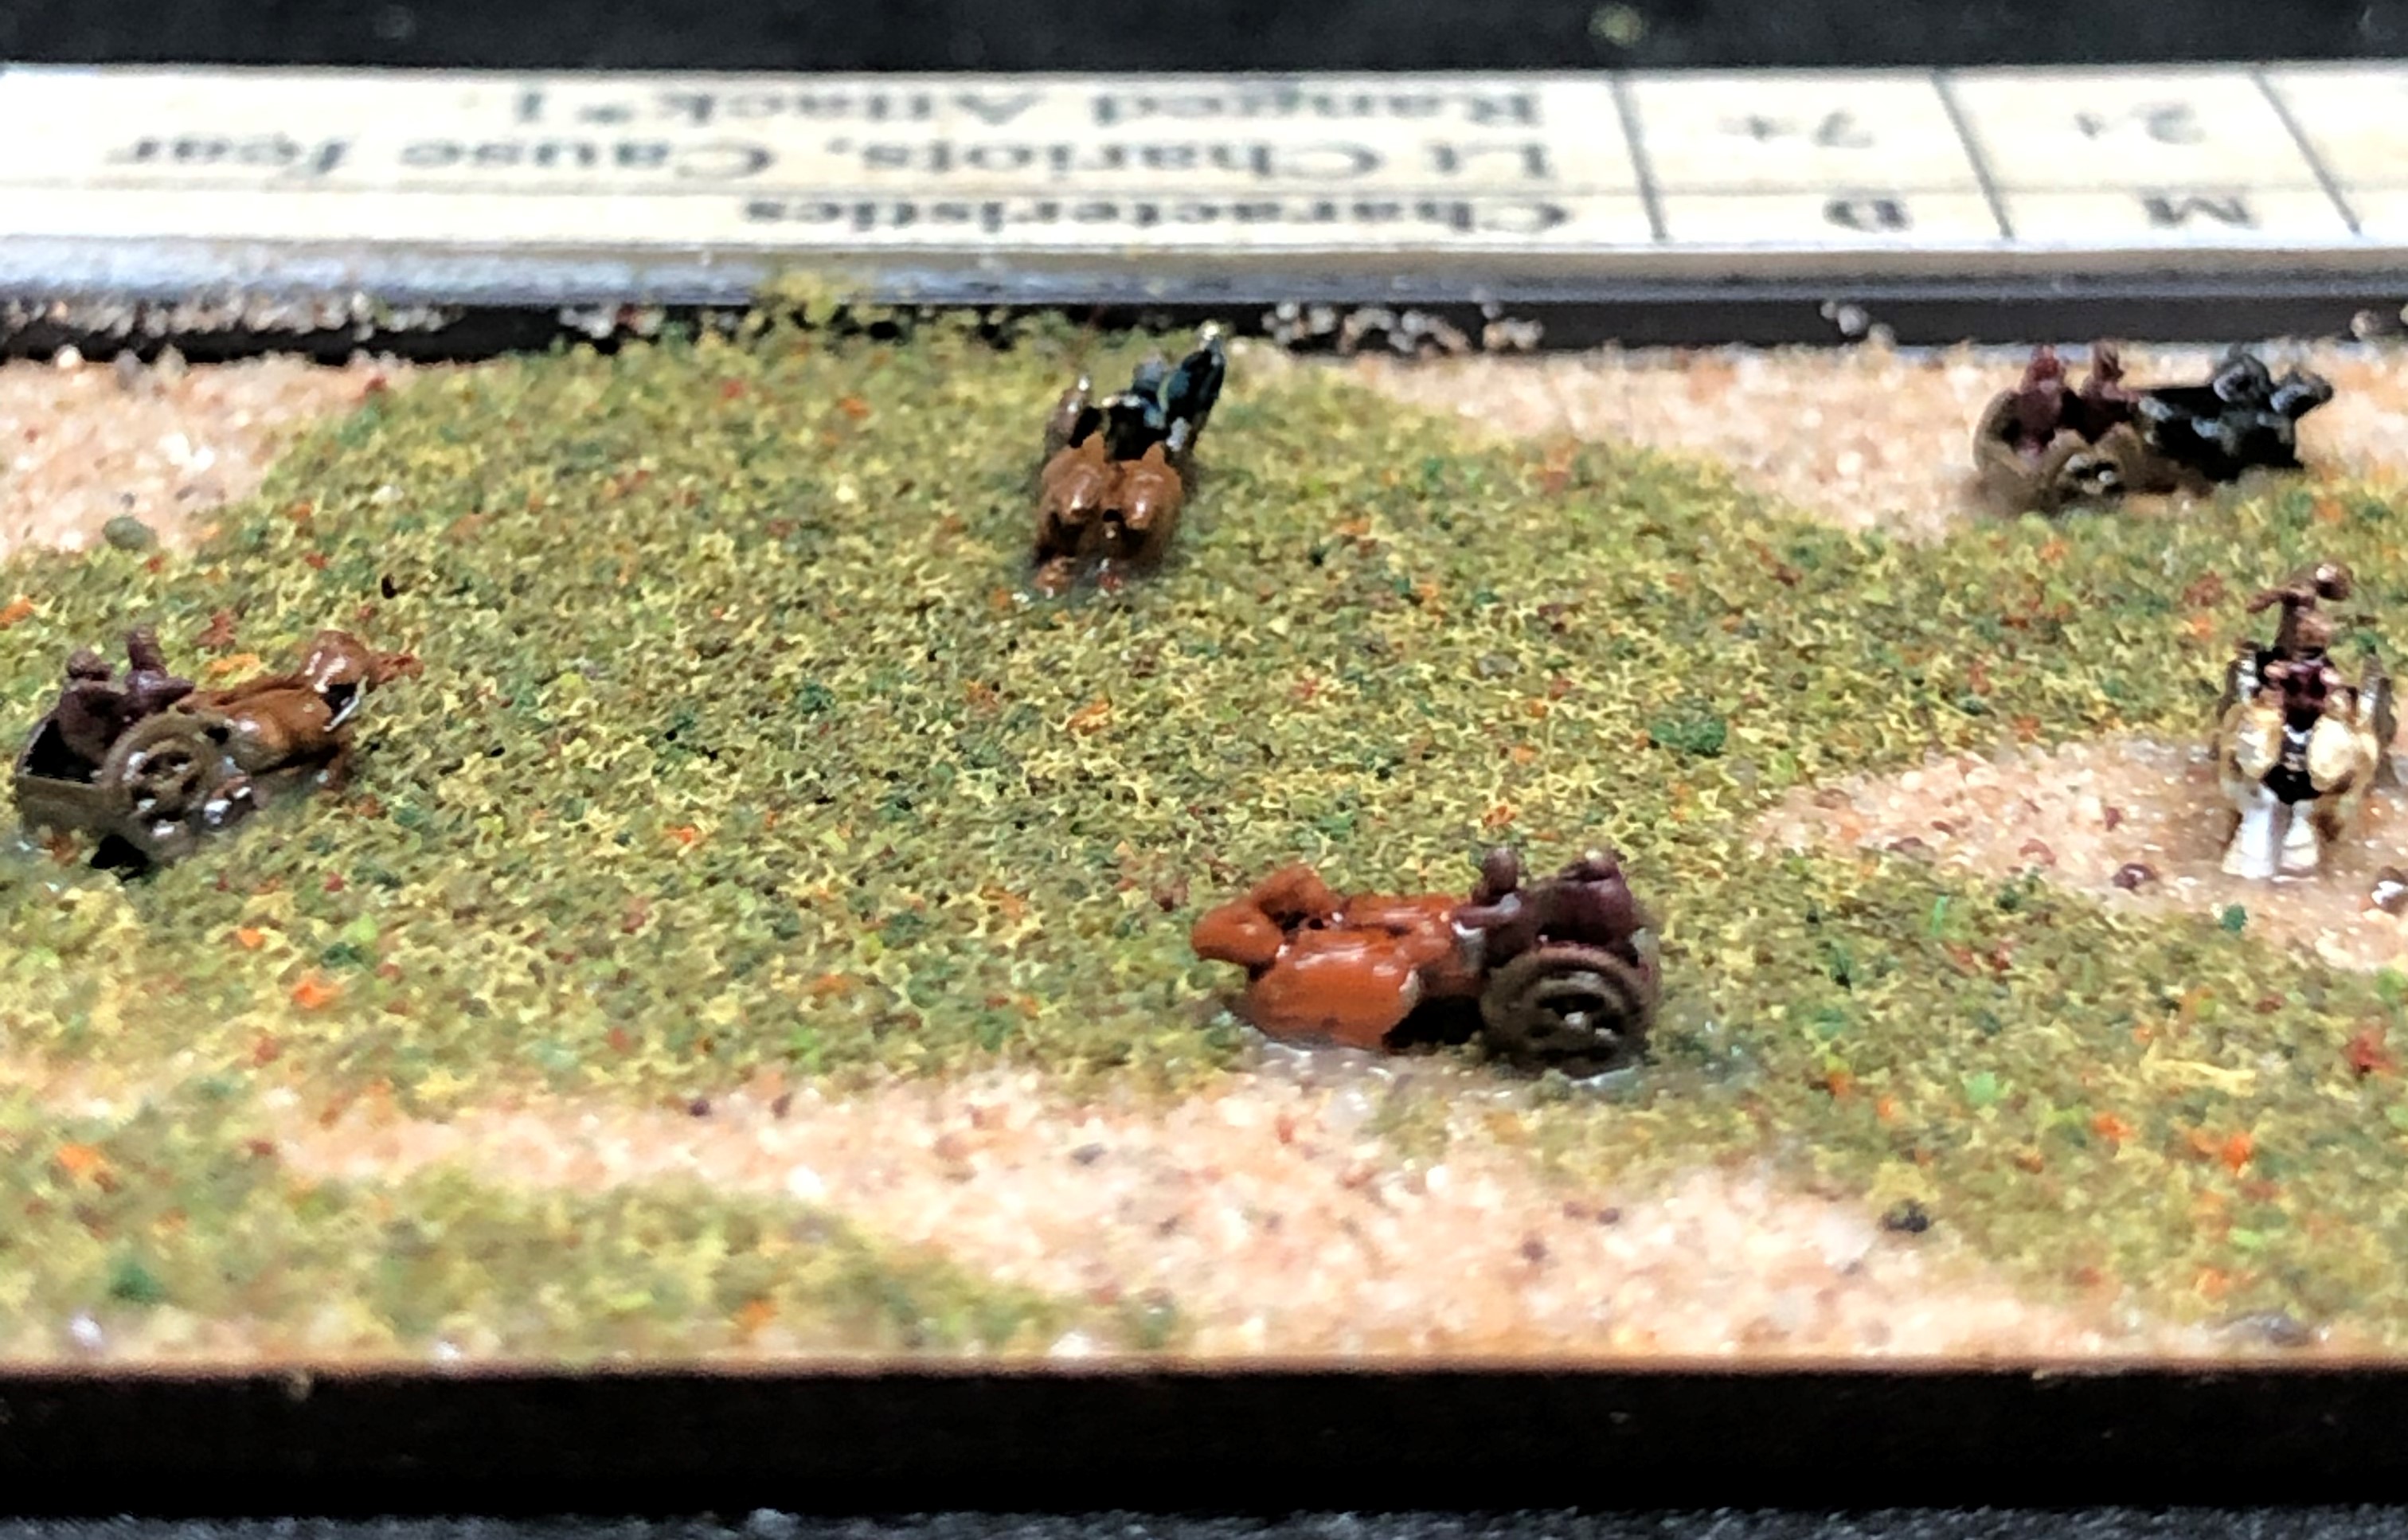
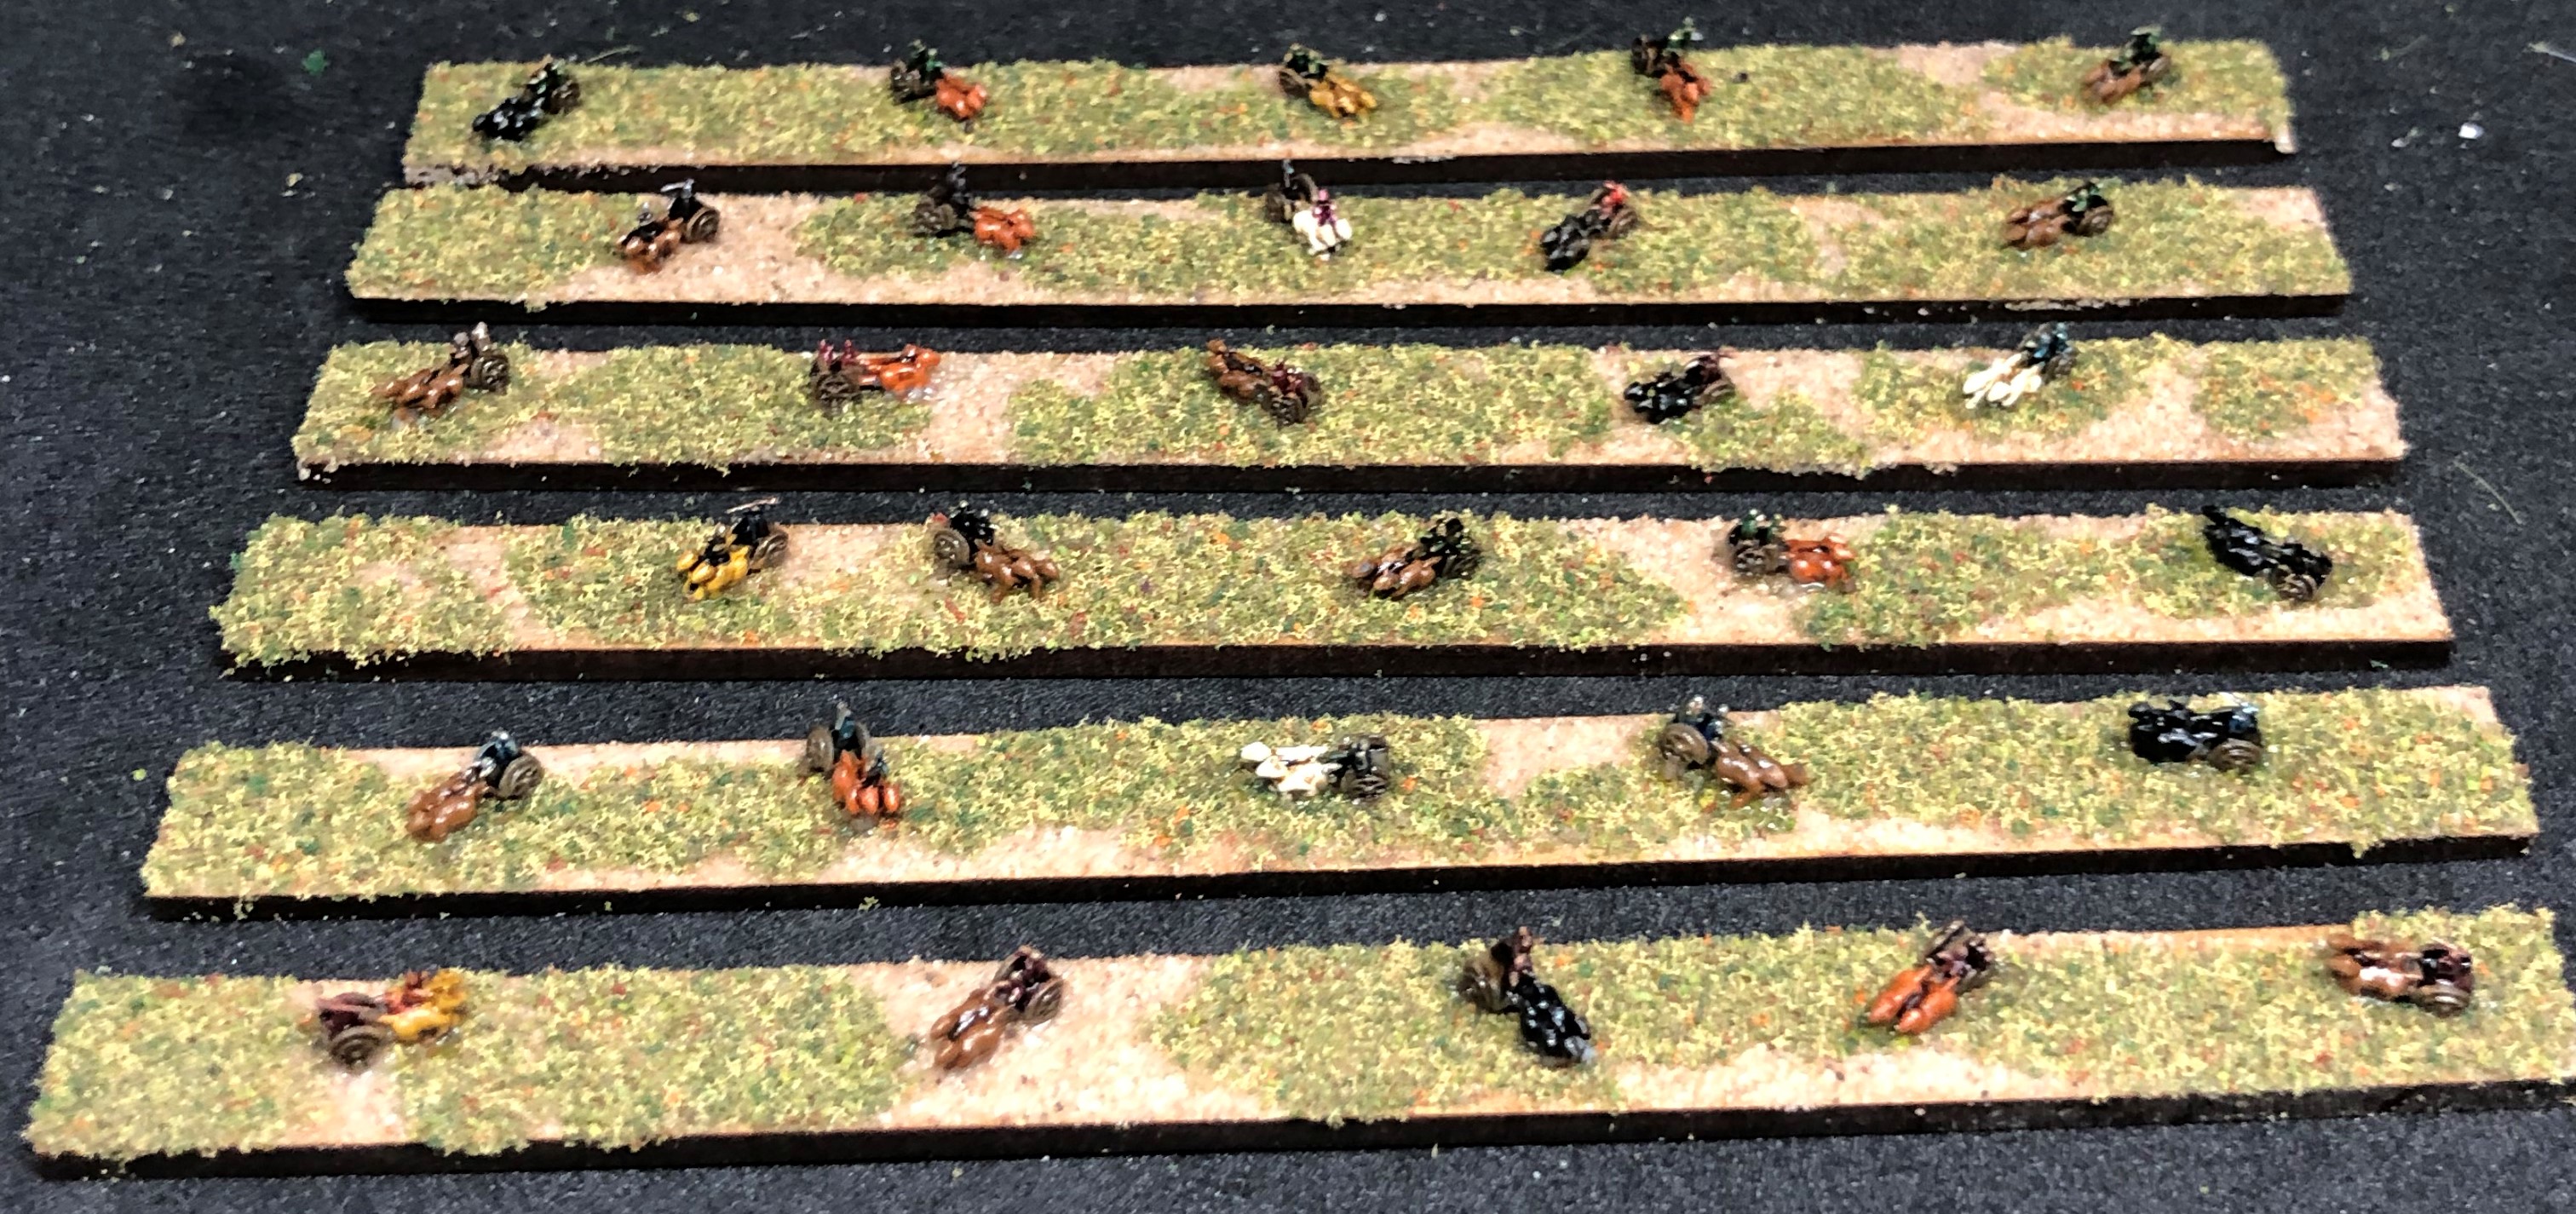
Two Celtic light chariot bases. Just like the light cavalry these can be broken down at deployment into skirmish lines that attach to other units. Light chariot units split onto three bases, hence the six 15mm x 75mm bases from Warbases.
I find horses pretty straightforward to paint under normal circumstances and in 2mm they need a bit of care to make sure they look okay.
Here are the basic colours:
 Horse colours grey, dun, chestnut, bay, black.
People seem to struggle getting the right colours on horses. Horse colours are a combination of the skin tone and the colours of the hair in their coat. There are complex ones with different hair colours mixed together in the came coat. We aren’t bothered about any of that though. We need the most prominently visible colours and the most common are:
Grey (from nearly white to a fairly dark grey colour)
Dun (a dull yellow or khaki coulour)
Chestnut (a orange red to reddish brown, mane and tail a lighter colour than the coat)
Bay (same coat colour as chestnut but with black points i.e.mane, tail, ears, lower legs)
Black (solid black coat)
These are the predominant colours and although many specific breeds have a general colour type you’ll see all of these colours in most breeds, especially chestnut which is a recessive gene and the most common colour. Almost all horses have some white on them, usually on their face and leg/s.
Coloured horses (mixed colours, usually in patches) also known as paint horses for you Americans, are also remarkably common, especially in cross-breeds.
In 2mm we can stick with single colours and don’t have to worry about different coloured points, manes and tails. Chestnuts and bays are the most common and then probably dun (a more common colour in ancient horses as this most common in the foundation breedstock). Grey and black were rarer so used more sparingly. The charioteers reportedly used paired horses, probably very close in colour so they were all painted as matched pairs. Ther light cav were done with blobs of different colours next to each other. Here is what they look like after the horse colours go on:
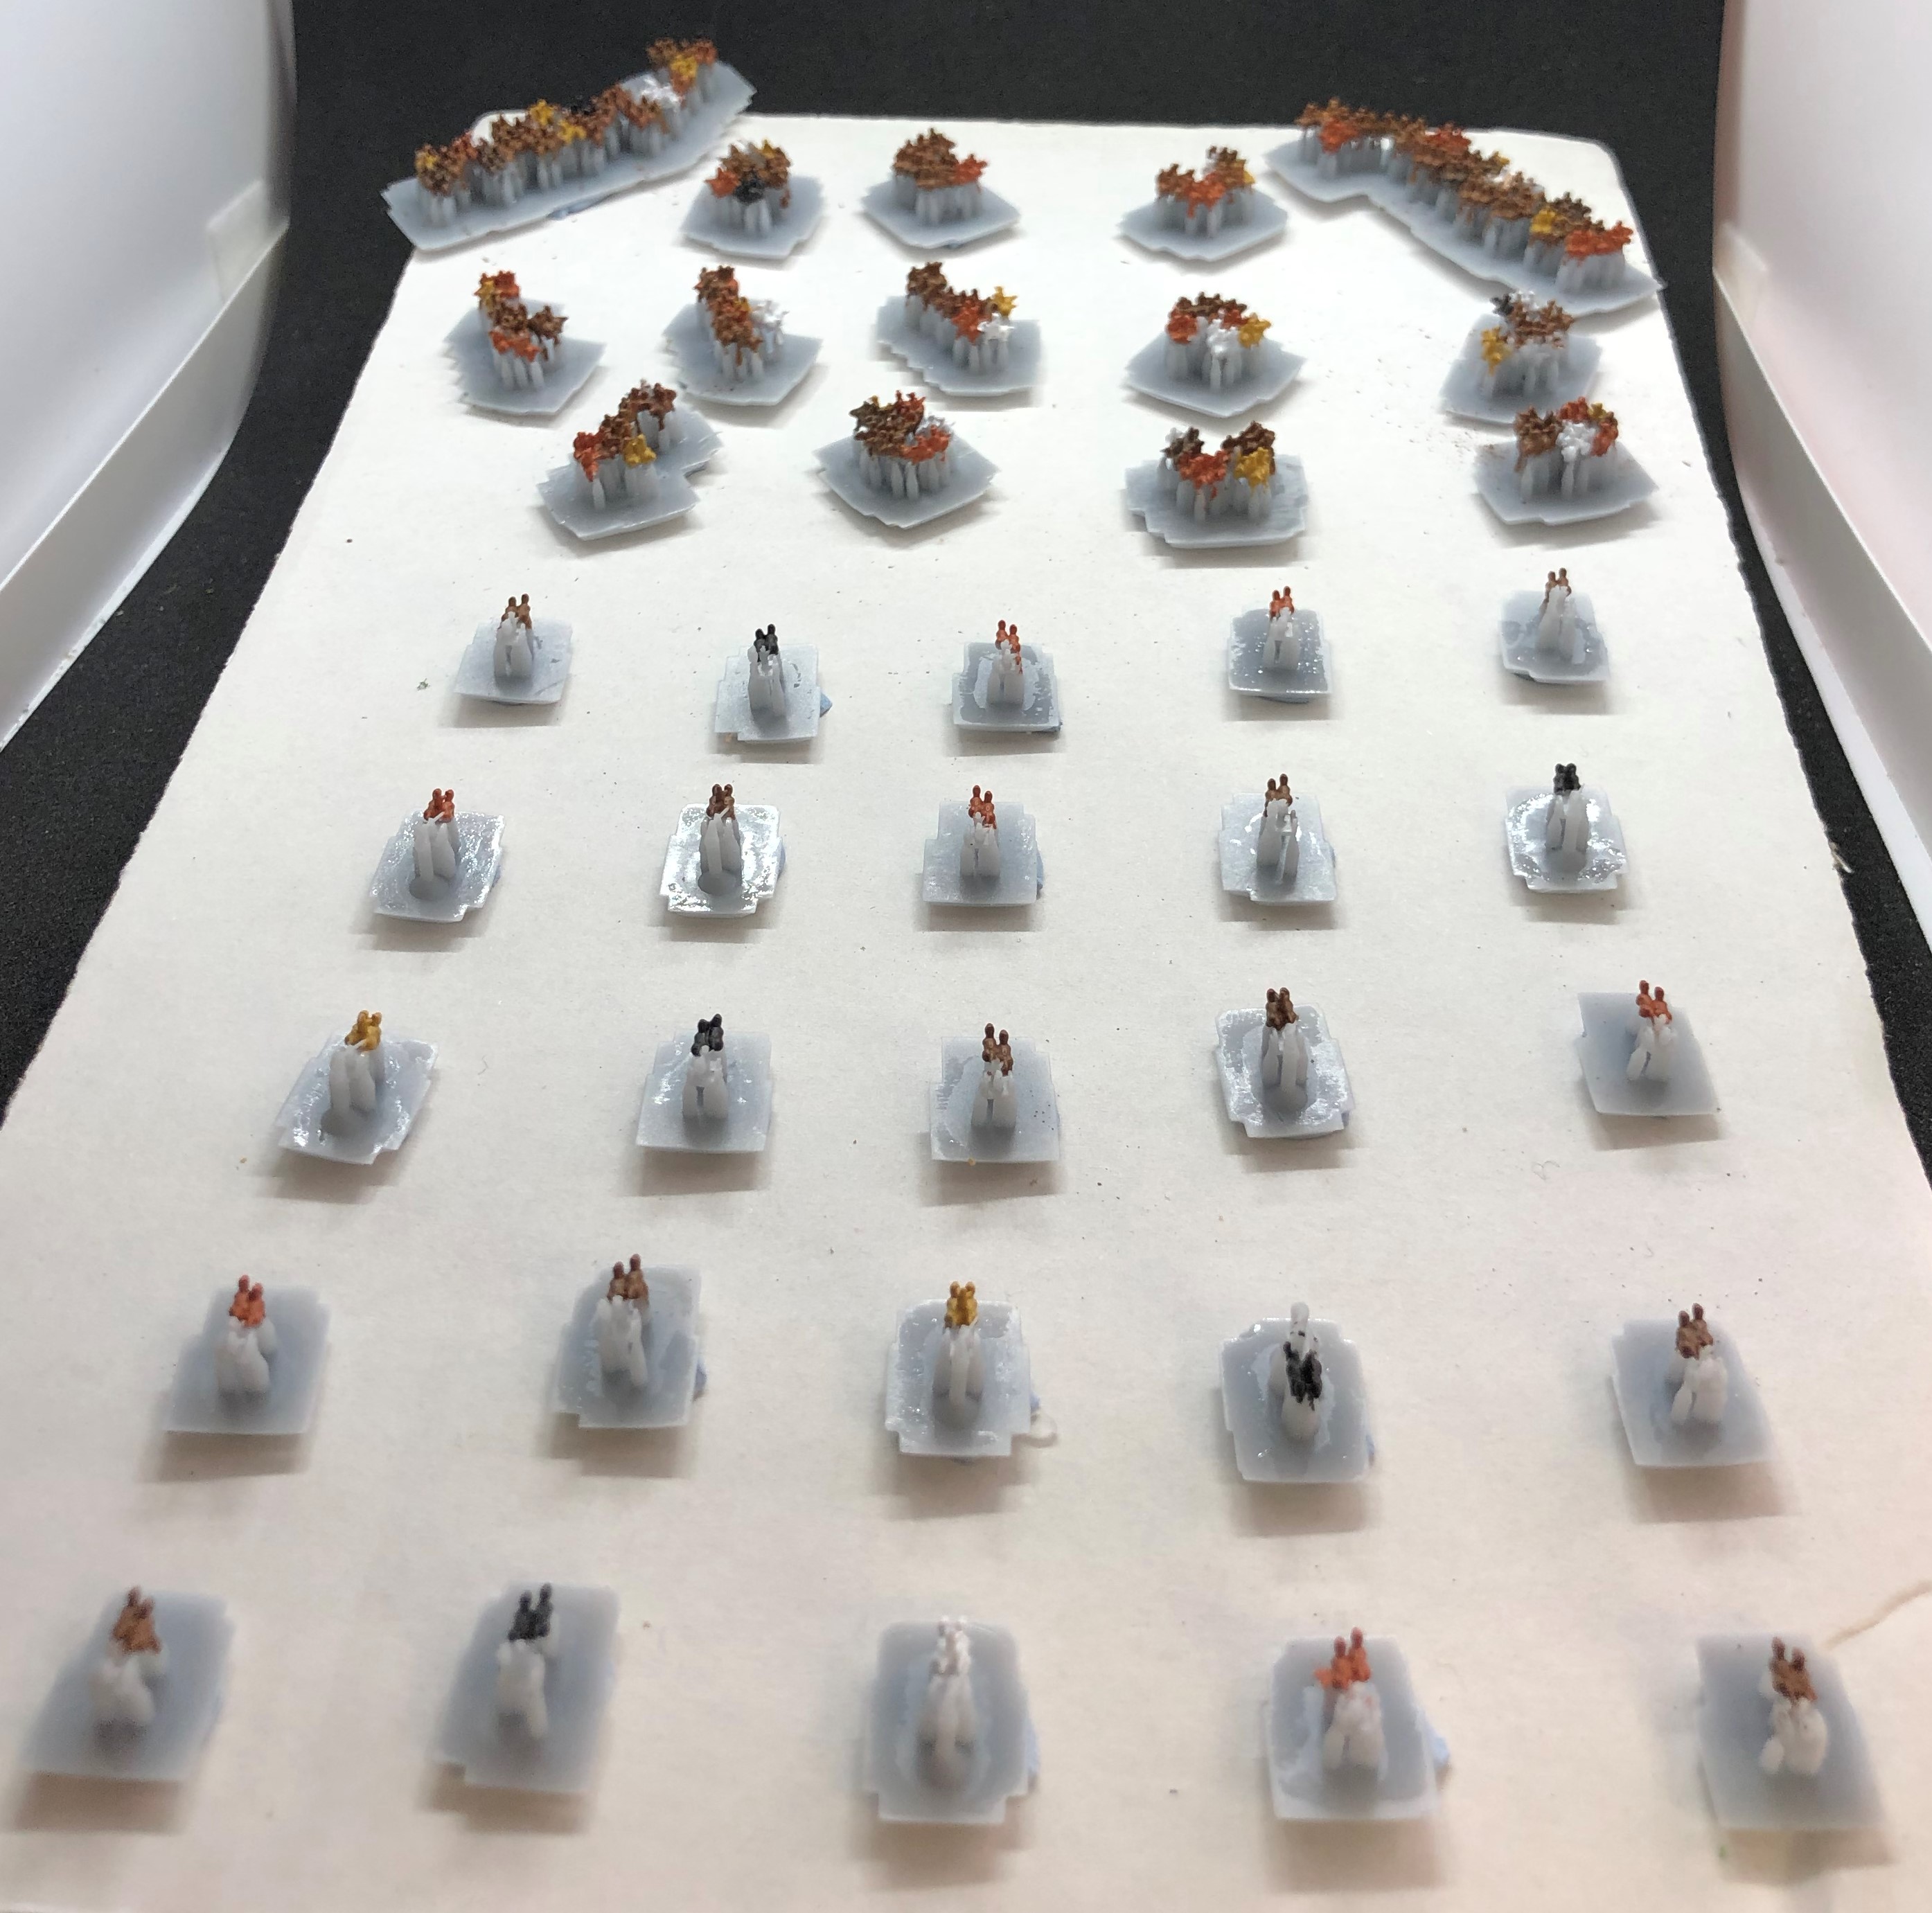
Chariots were painted in Vallejo concrete which looks ace after the raw umber wash. For the riders and chariot crews a range of different colours were blobbed on, in different patches to the horse colours. Here’s what was used:

Once dry everything got the raw unber ink wash described in the Roman painting guides. Fin.
Commanders, Cavalry and a Camp
Finished off a few sets of bases. First the commanders, who are accompanied by two small cavalry reserves who are additional options in all of the army lists and the Roman ones are needed in the Watling Street scenario.
Looking at that close up I think the general’s head has come off. Oh well, Can’t see that detail in play so no problem. Next the Celtic leader and small cavalry reserves.
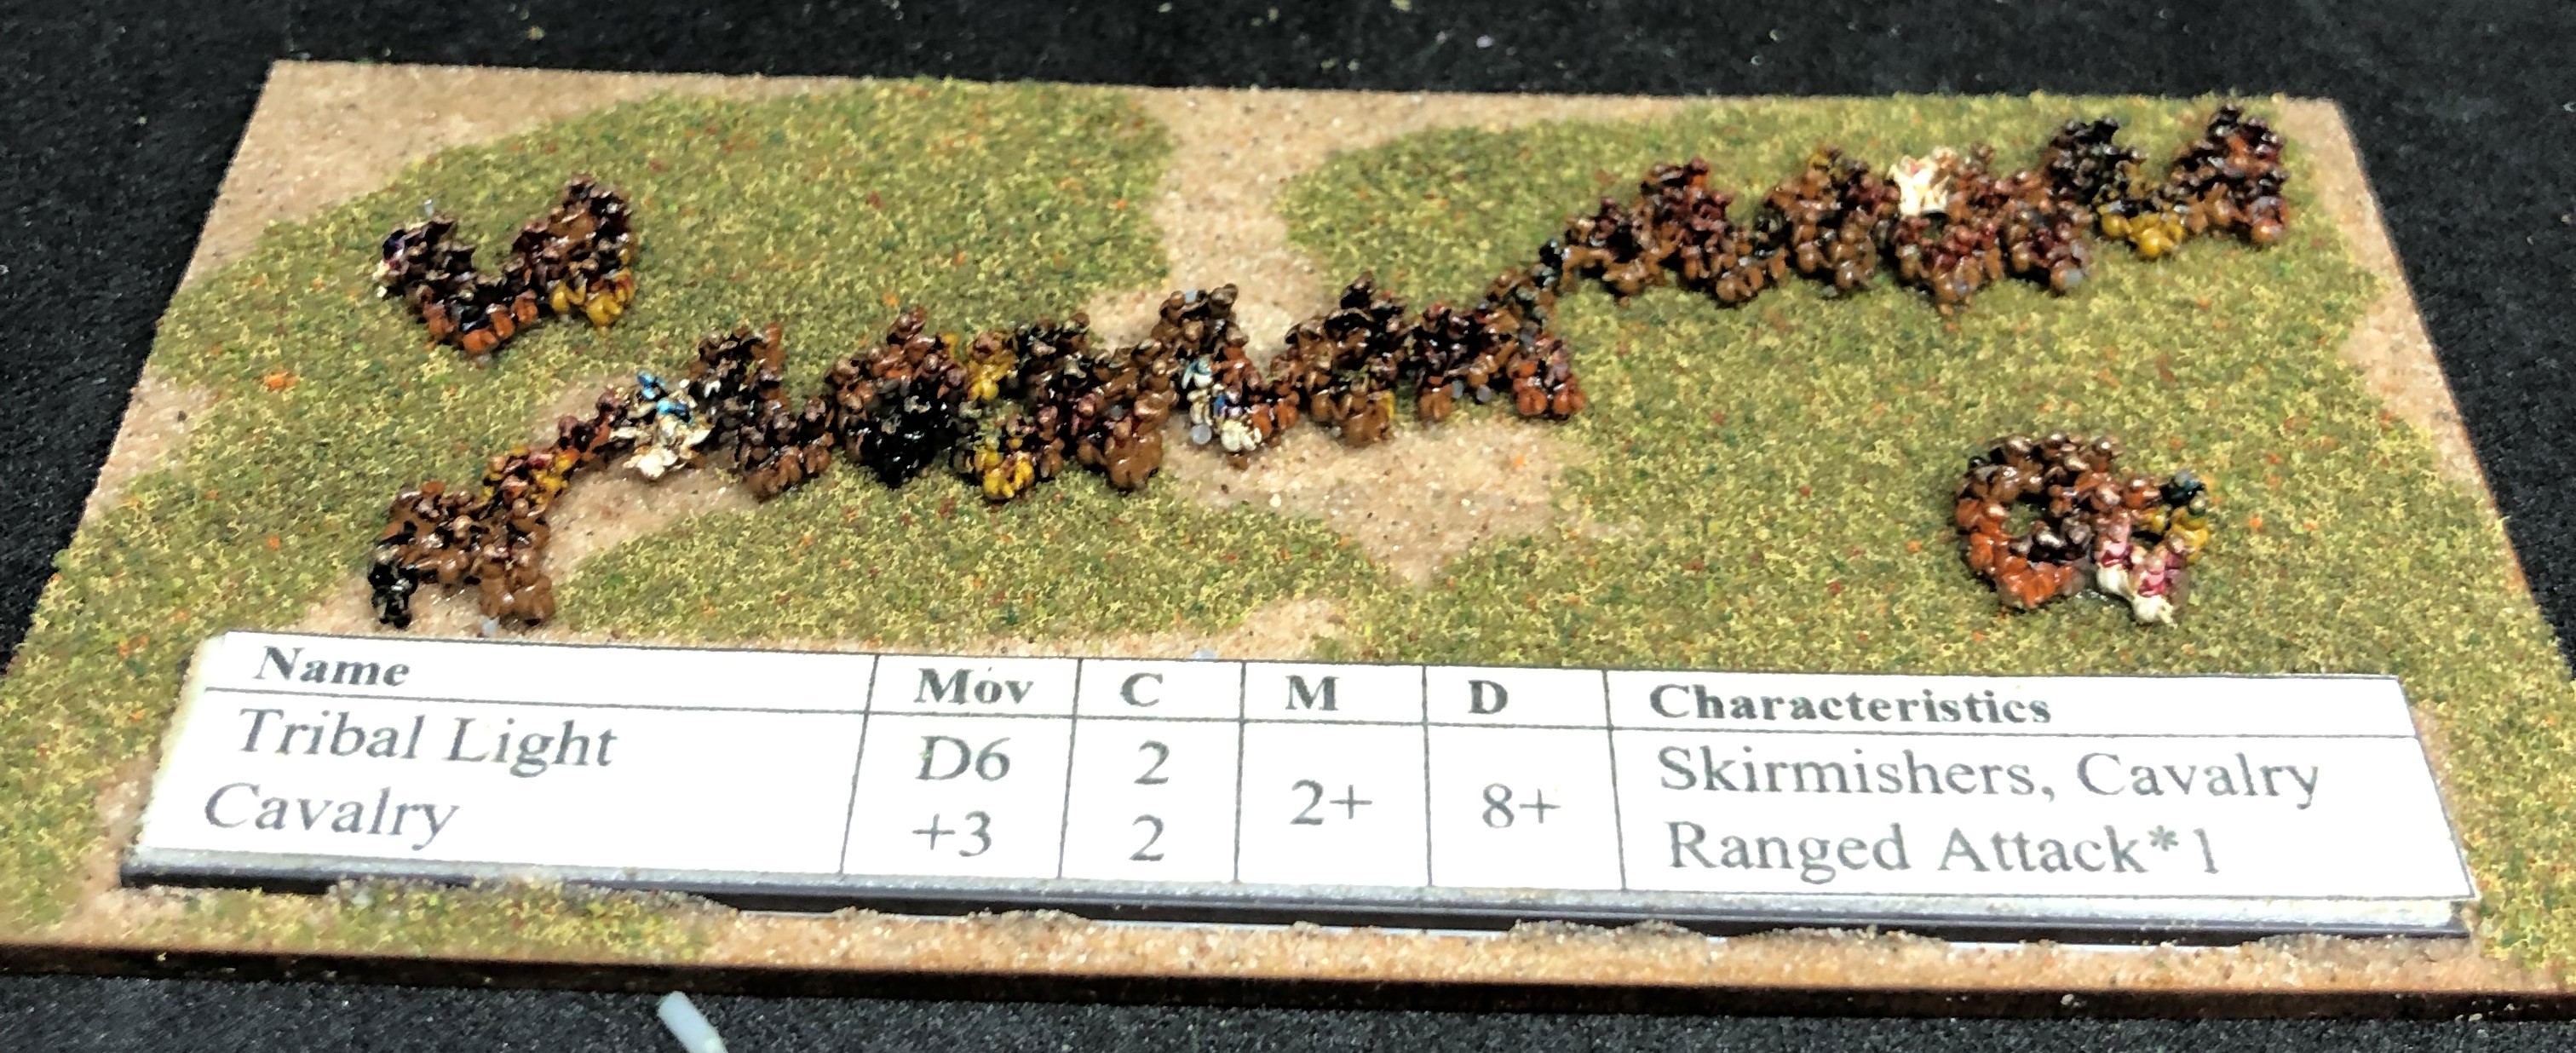
Tribal cavalry are done. One base and then the four skirmish bases they break down into if deploying as skirmishers attached to other units in the force.

Roman marching camp. These are metal castings from Antonine Miniatures by Warbases. I added the gateway ramparts in greenstuff. This is two packs combined and placed on my own 150mm square base in 3mm mdf. According to my research Roman tents were made of goatskin, didn’t know that but happy to paint in a range of leather tones accordingly.

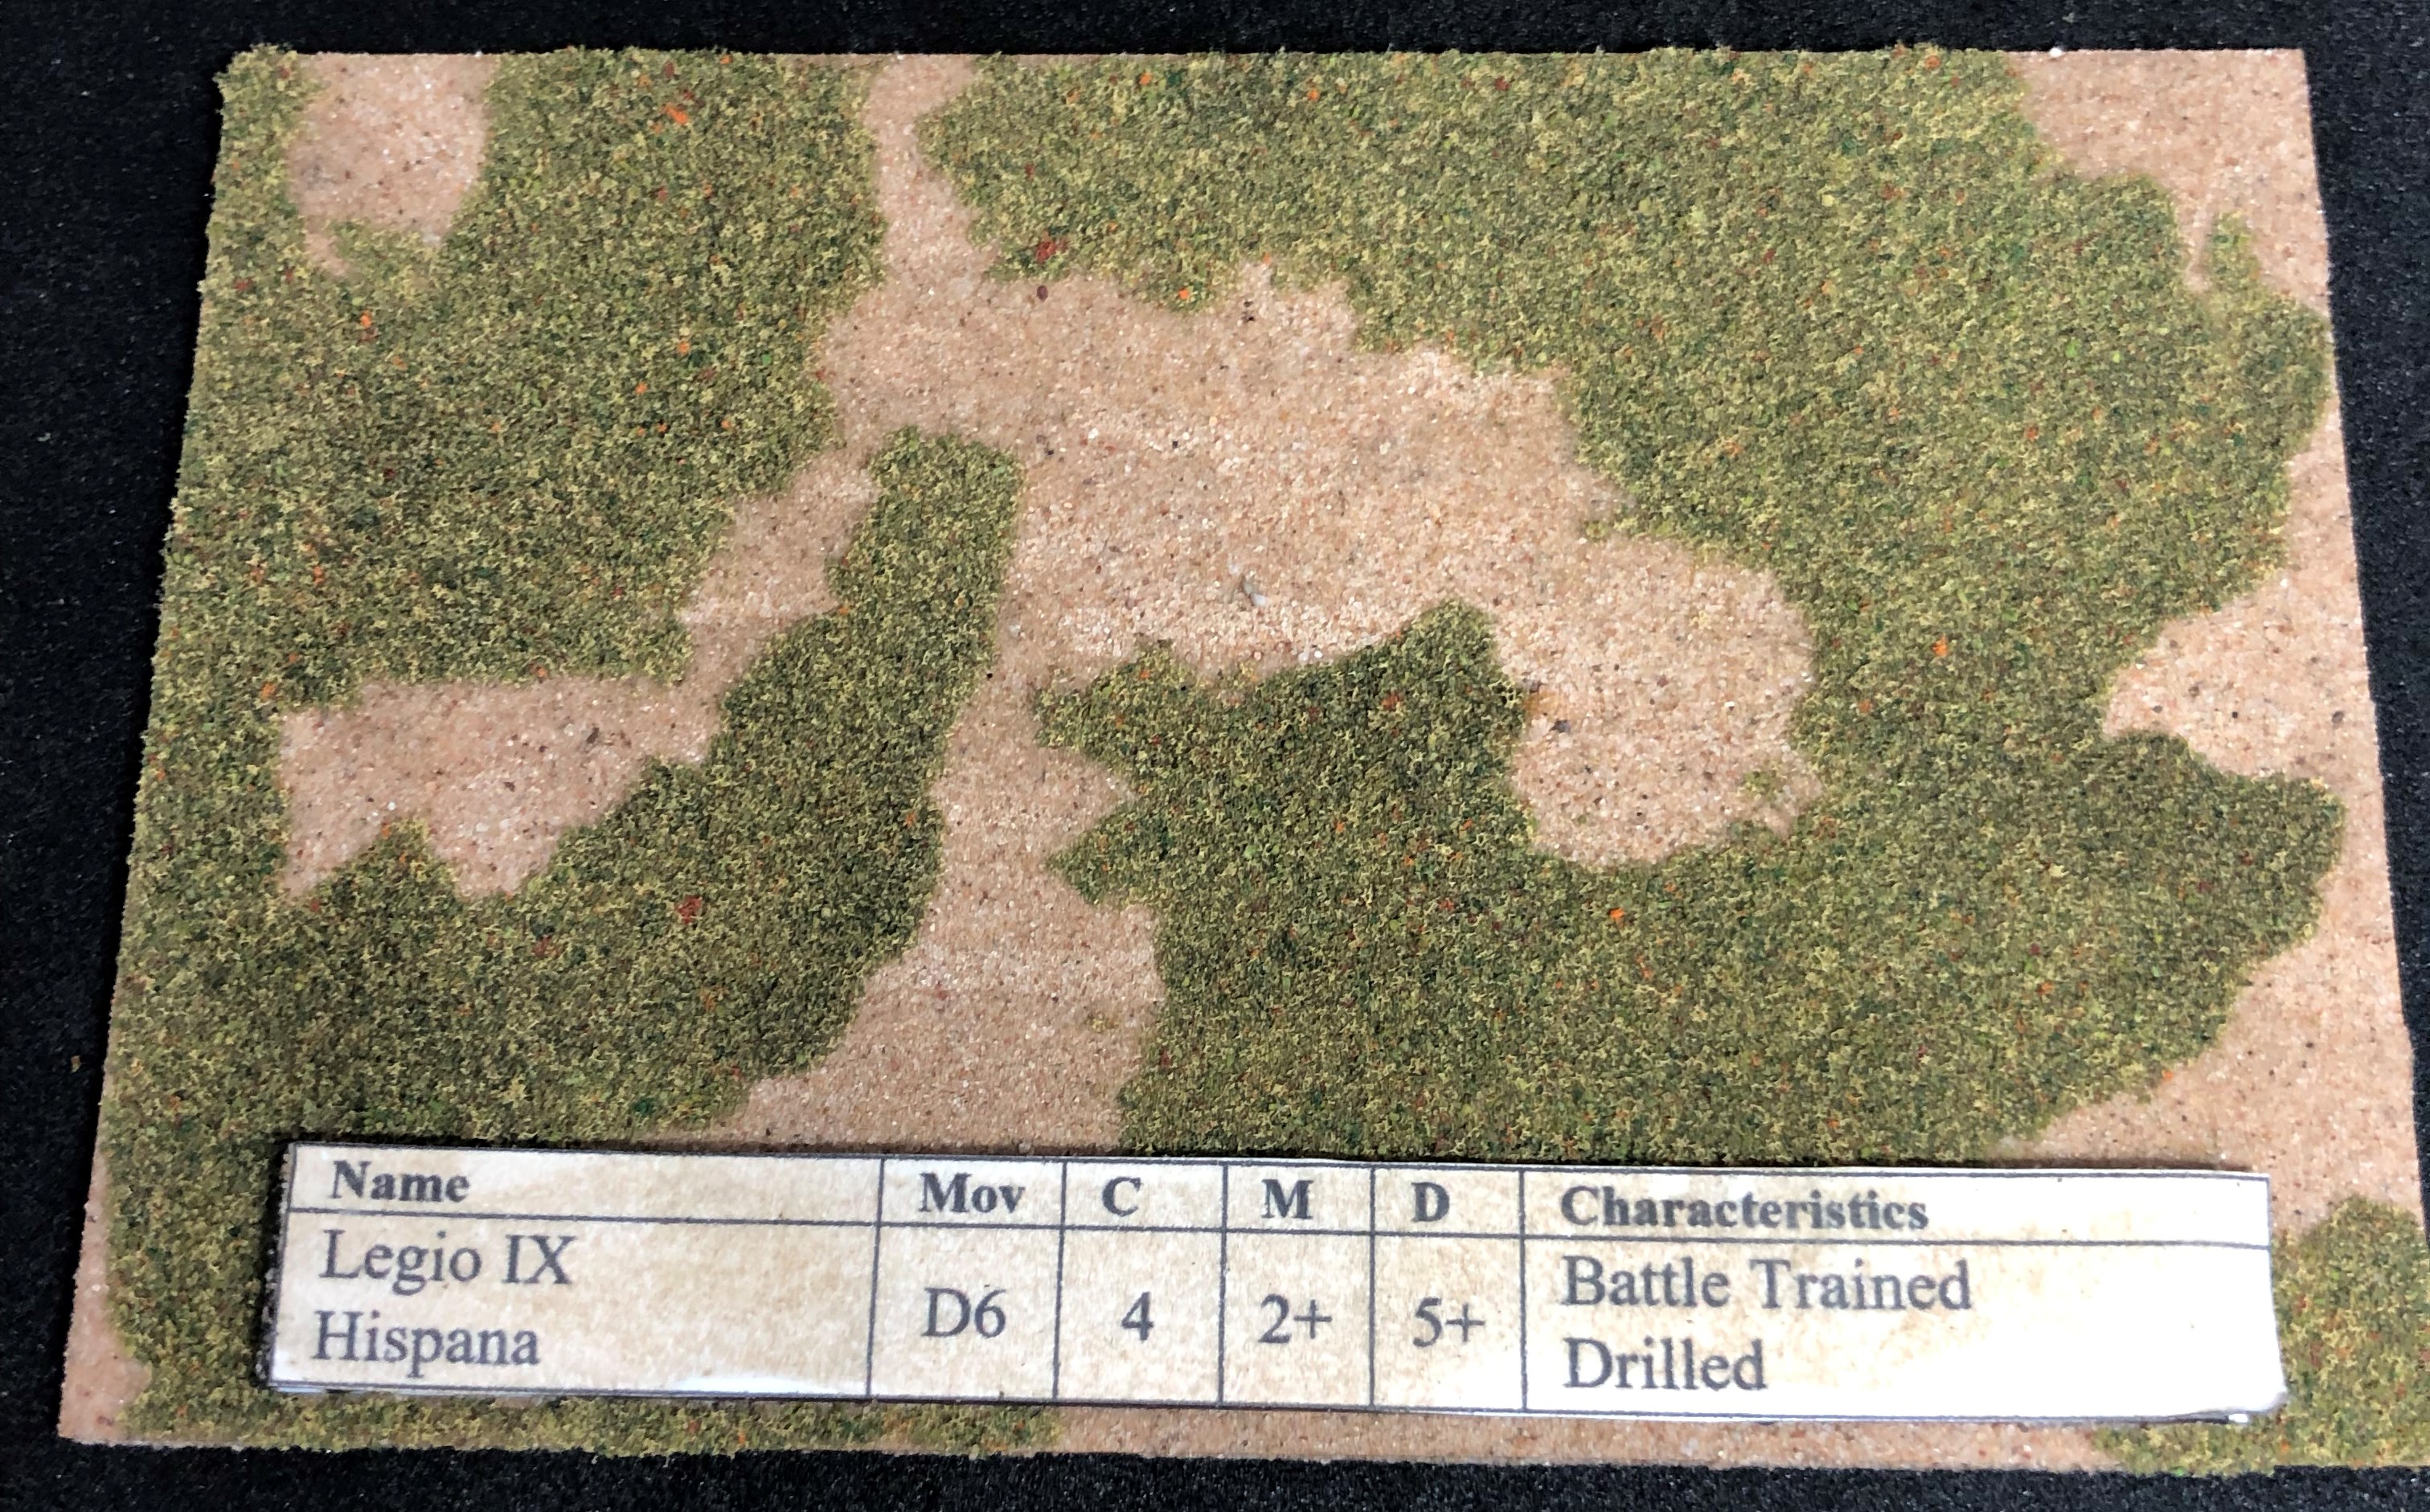
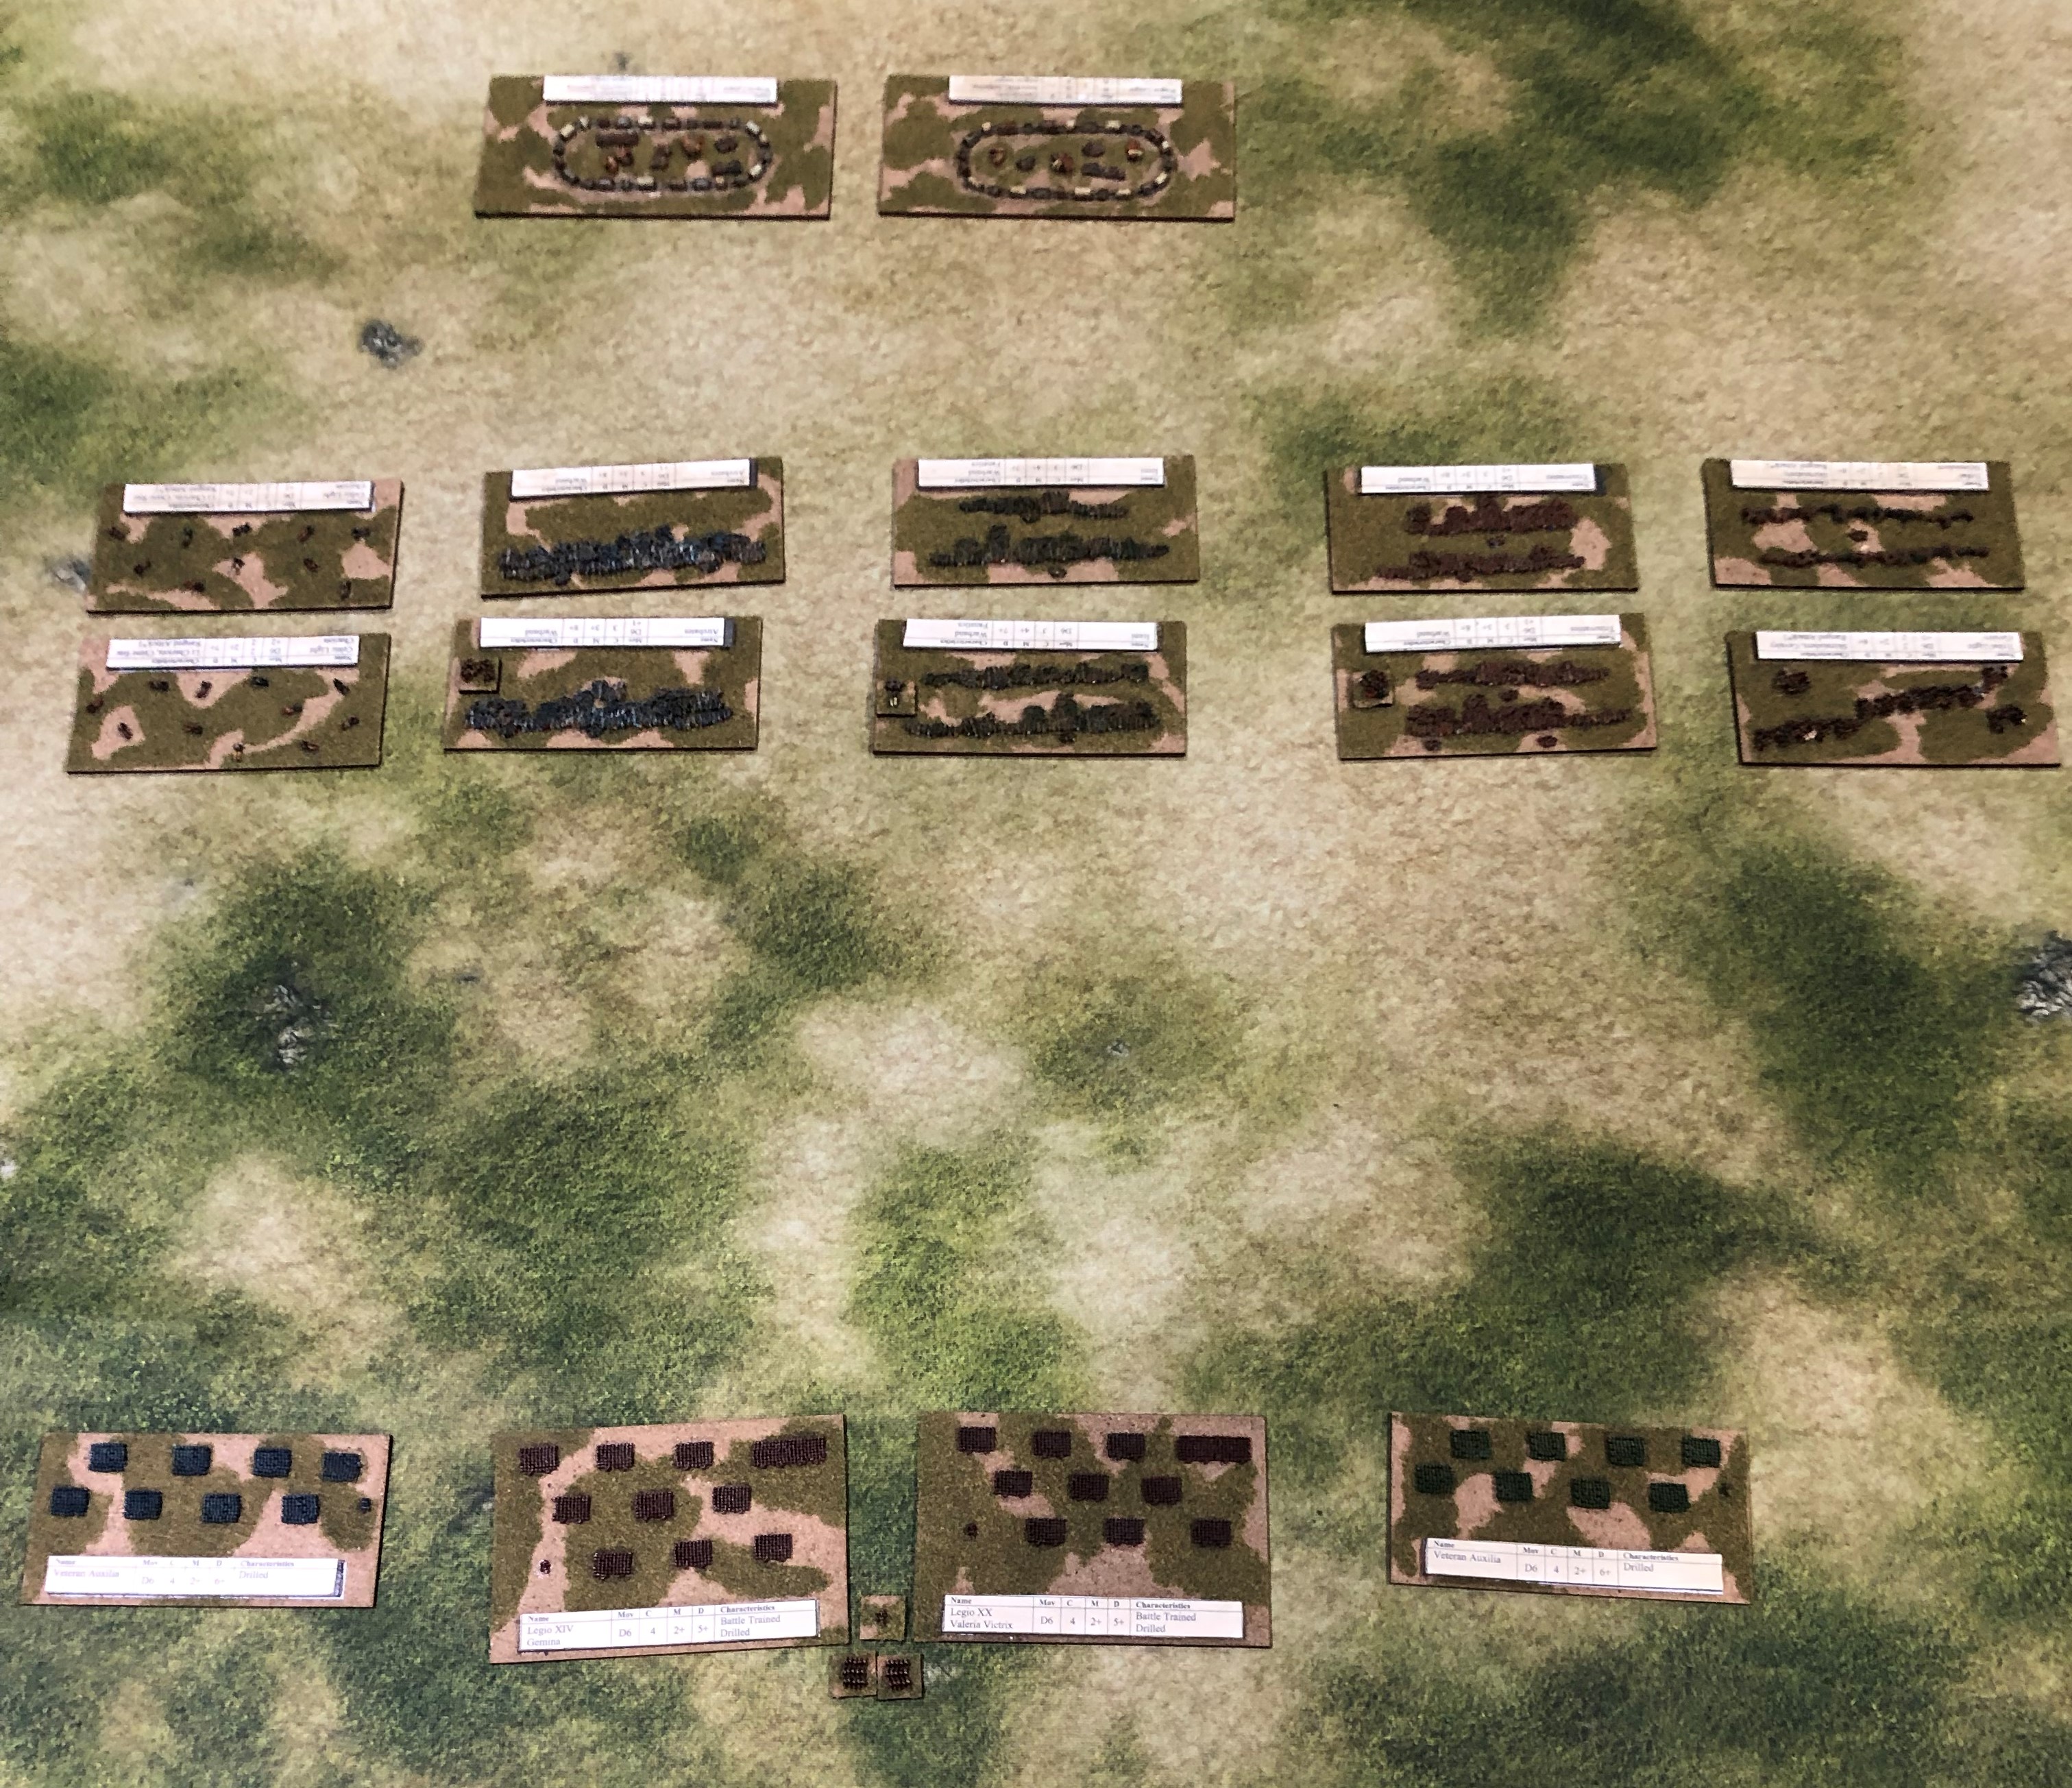
Basing Romans
Bases are 120mm x 60 for all units except Roman Legions who are 80mm deep due to their Triple Axis formation.
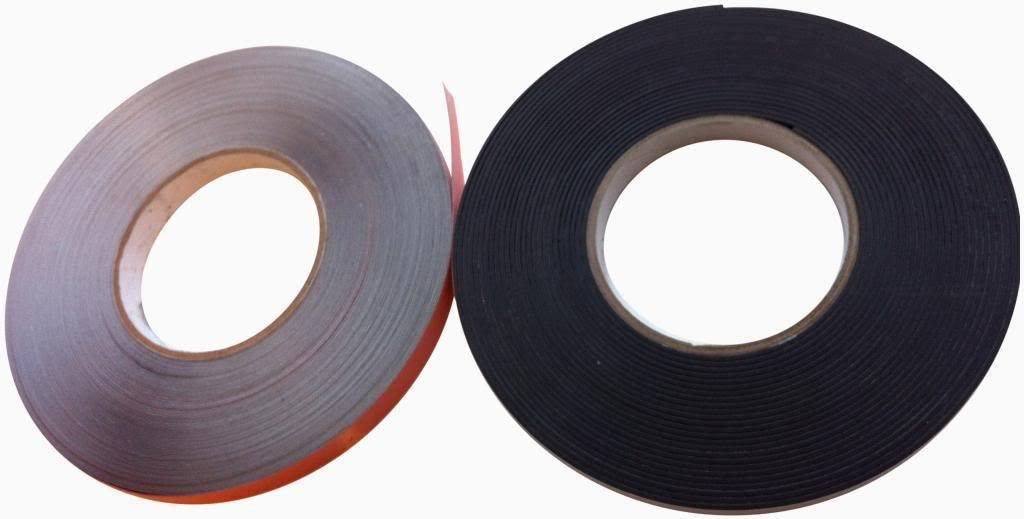
The label materials arrived. Metal strip 12mm wide, 5m long with matching magnetic strip. Both with self adhesive sides. They were found on Amazon. This double pack was cheaper than the magnetic strip on its own.
The metal strip was cut into 100mm lengths. I needed tin snips for this. Each base gets a strip stuck onto it, then the remainder of the surface is covered in PVA and dipped in sand. Once this is dry then a Woodland Scenics bended turf mix is applied, the recipe used is here.
Painted cohorts are cut away from the supports and then stuck onto the flocked base with PVA. The bases are stacked on top of each other so the weight helps hold the models in place while the glue dries.
Labels were designed and printed in Word and stuck onto the magnetic strip.
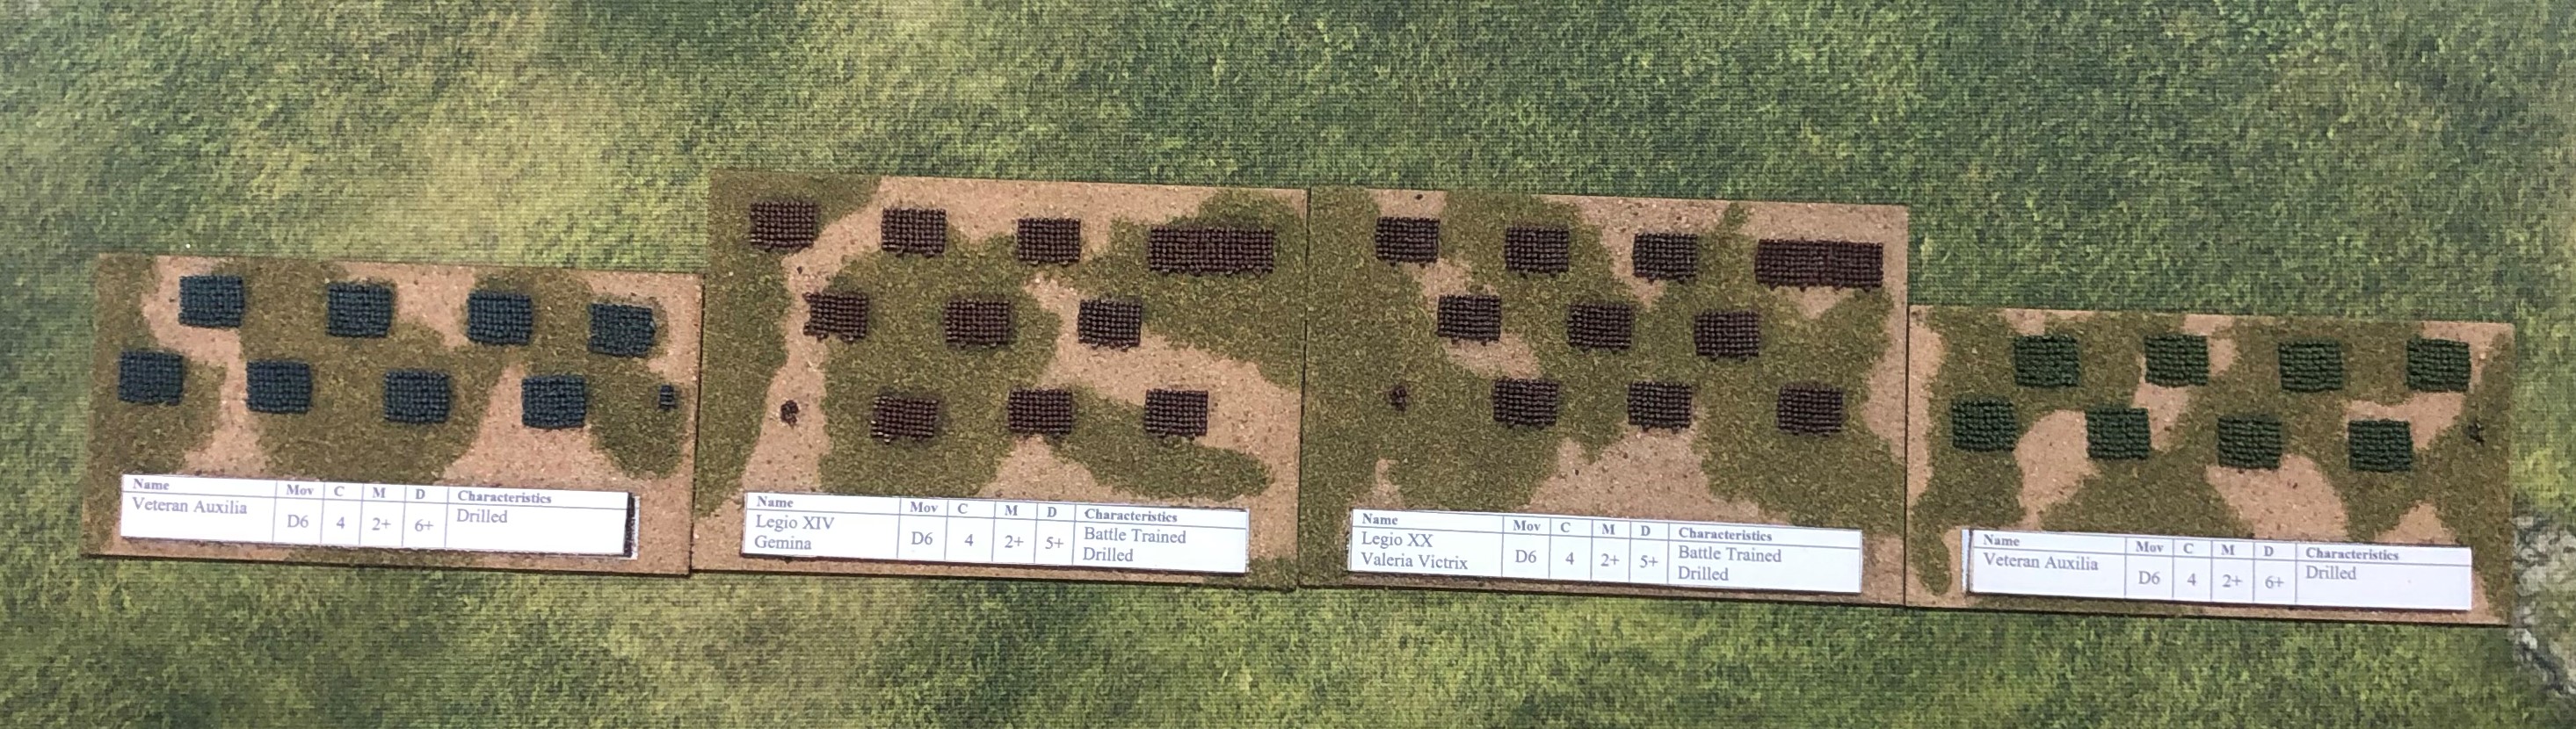
The stark white labels are a bit intrusive. A quick Raw Umber ink wash and they will tone down nicely.

That’s better. The green Auxilliary unit had a gold drybrush to indicate bronze helmets rather than the iron the blue unit have. Even close up they look pretty good, not that my eyes are good enough to see them this size!
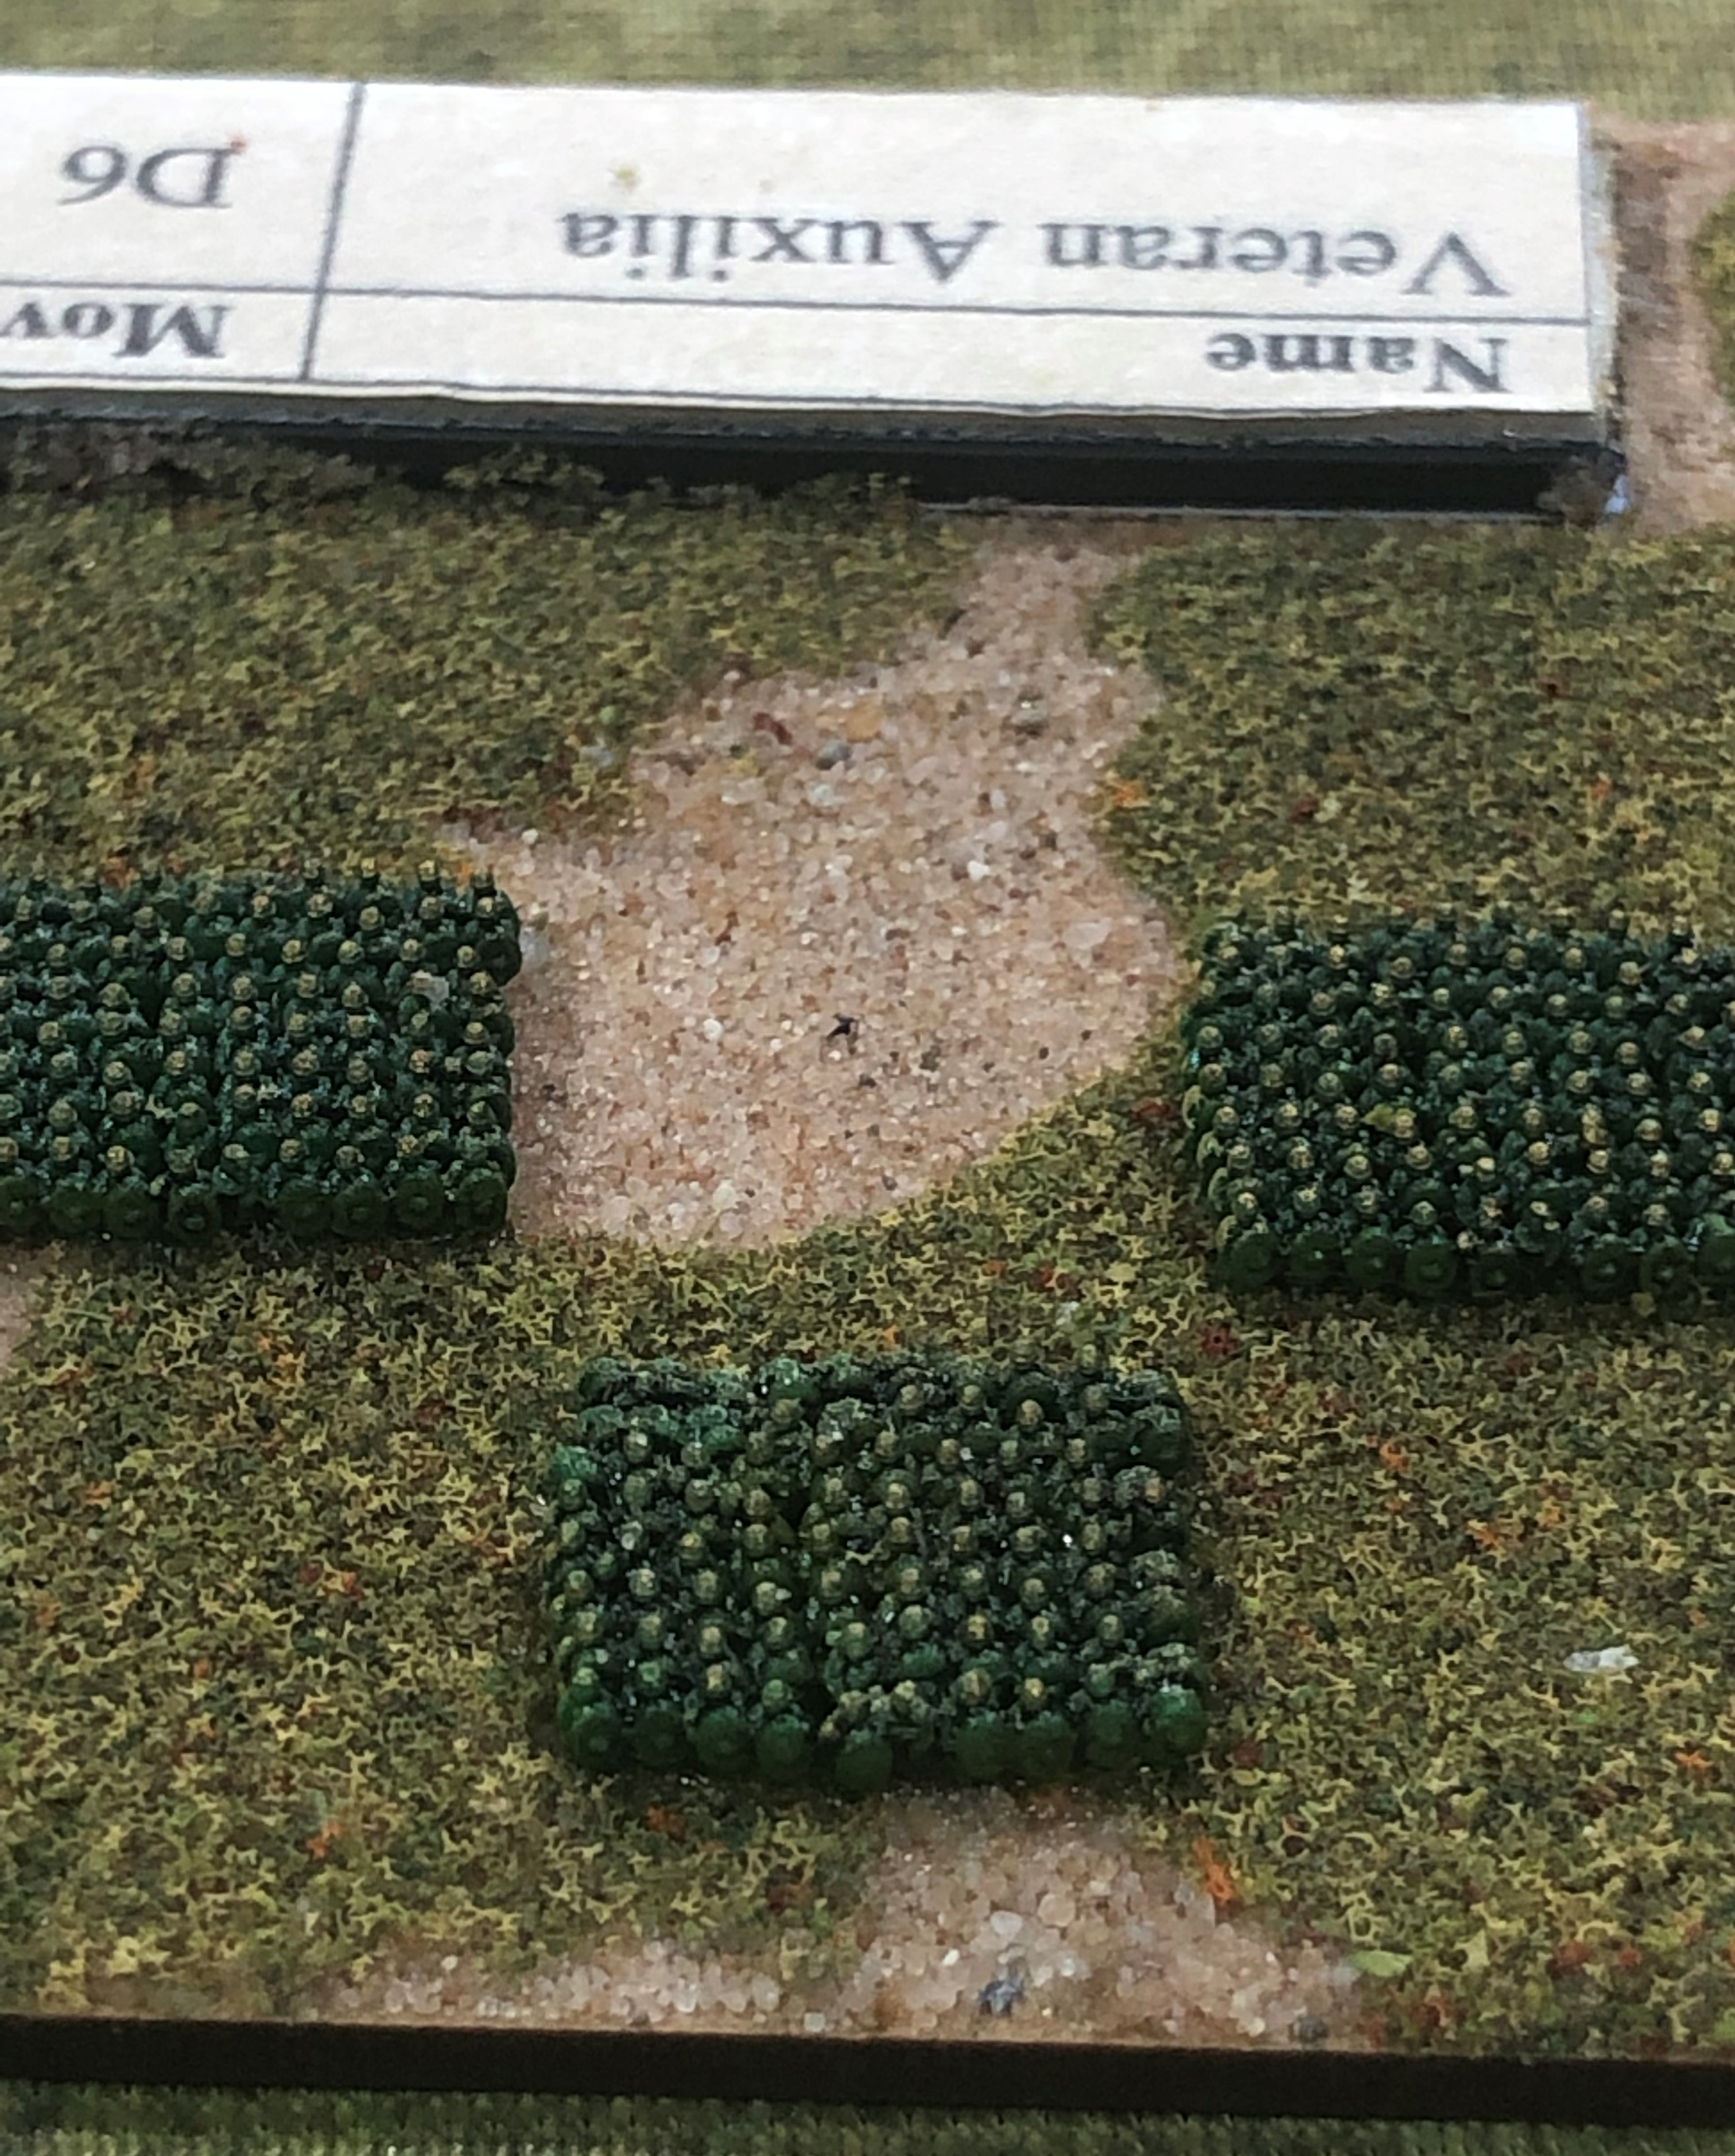
Roman Auxiliaries - painting guide
Still waiting for Royal Mail to deliver my interchangeable label making kit so can’t do the basing yet. In the meantime this is how I paint Auxiliary infantry. I decided on an 8 cohort layout:
Then the main colour. This is the brightest blue I’ve got. As before, slop it on and cover everything.

Flesh drybrush with a narrower brush to target legs on all sides, faces across the top and arms on the right side of each block.

Armour. Heavy drybrush mostly focusing on the top.

Shields – a thick line across the front and dabs along the left hand side.
Finally the raw umber wash to shade and help combine the look.
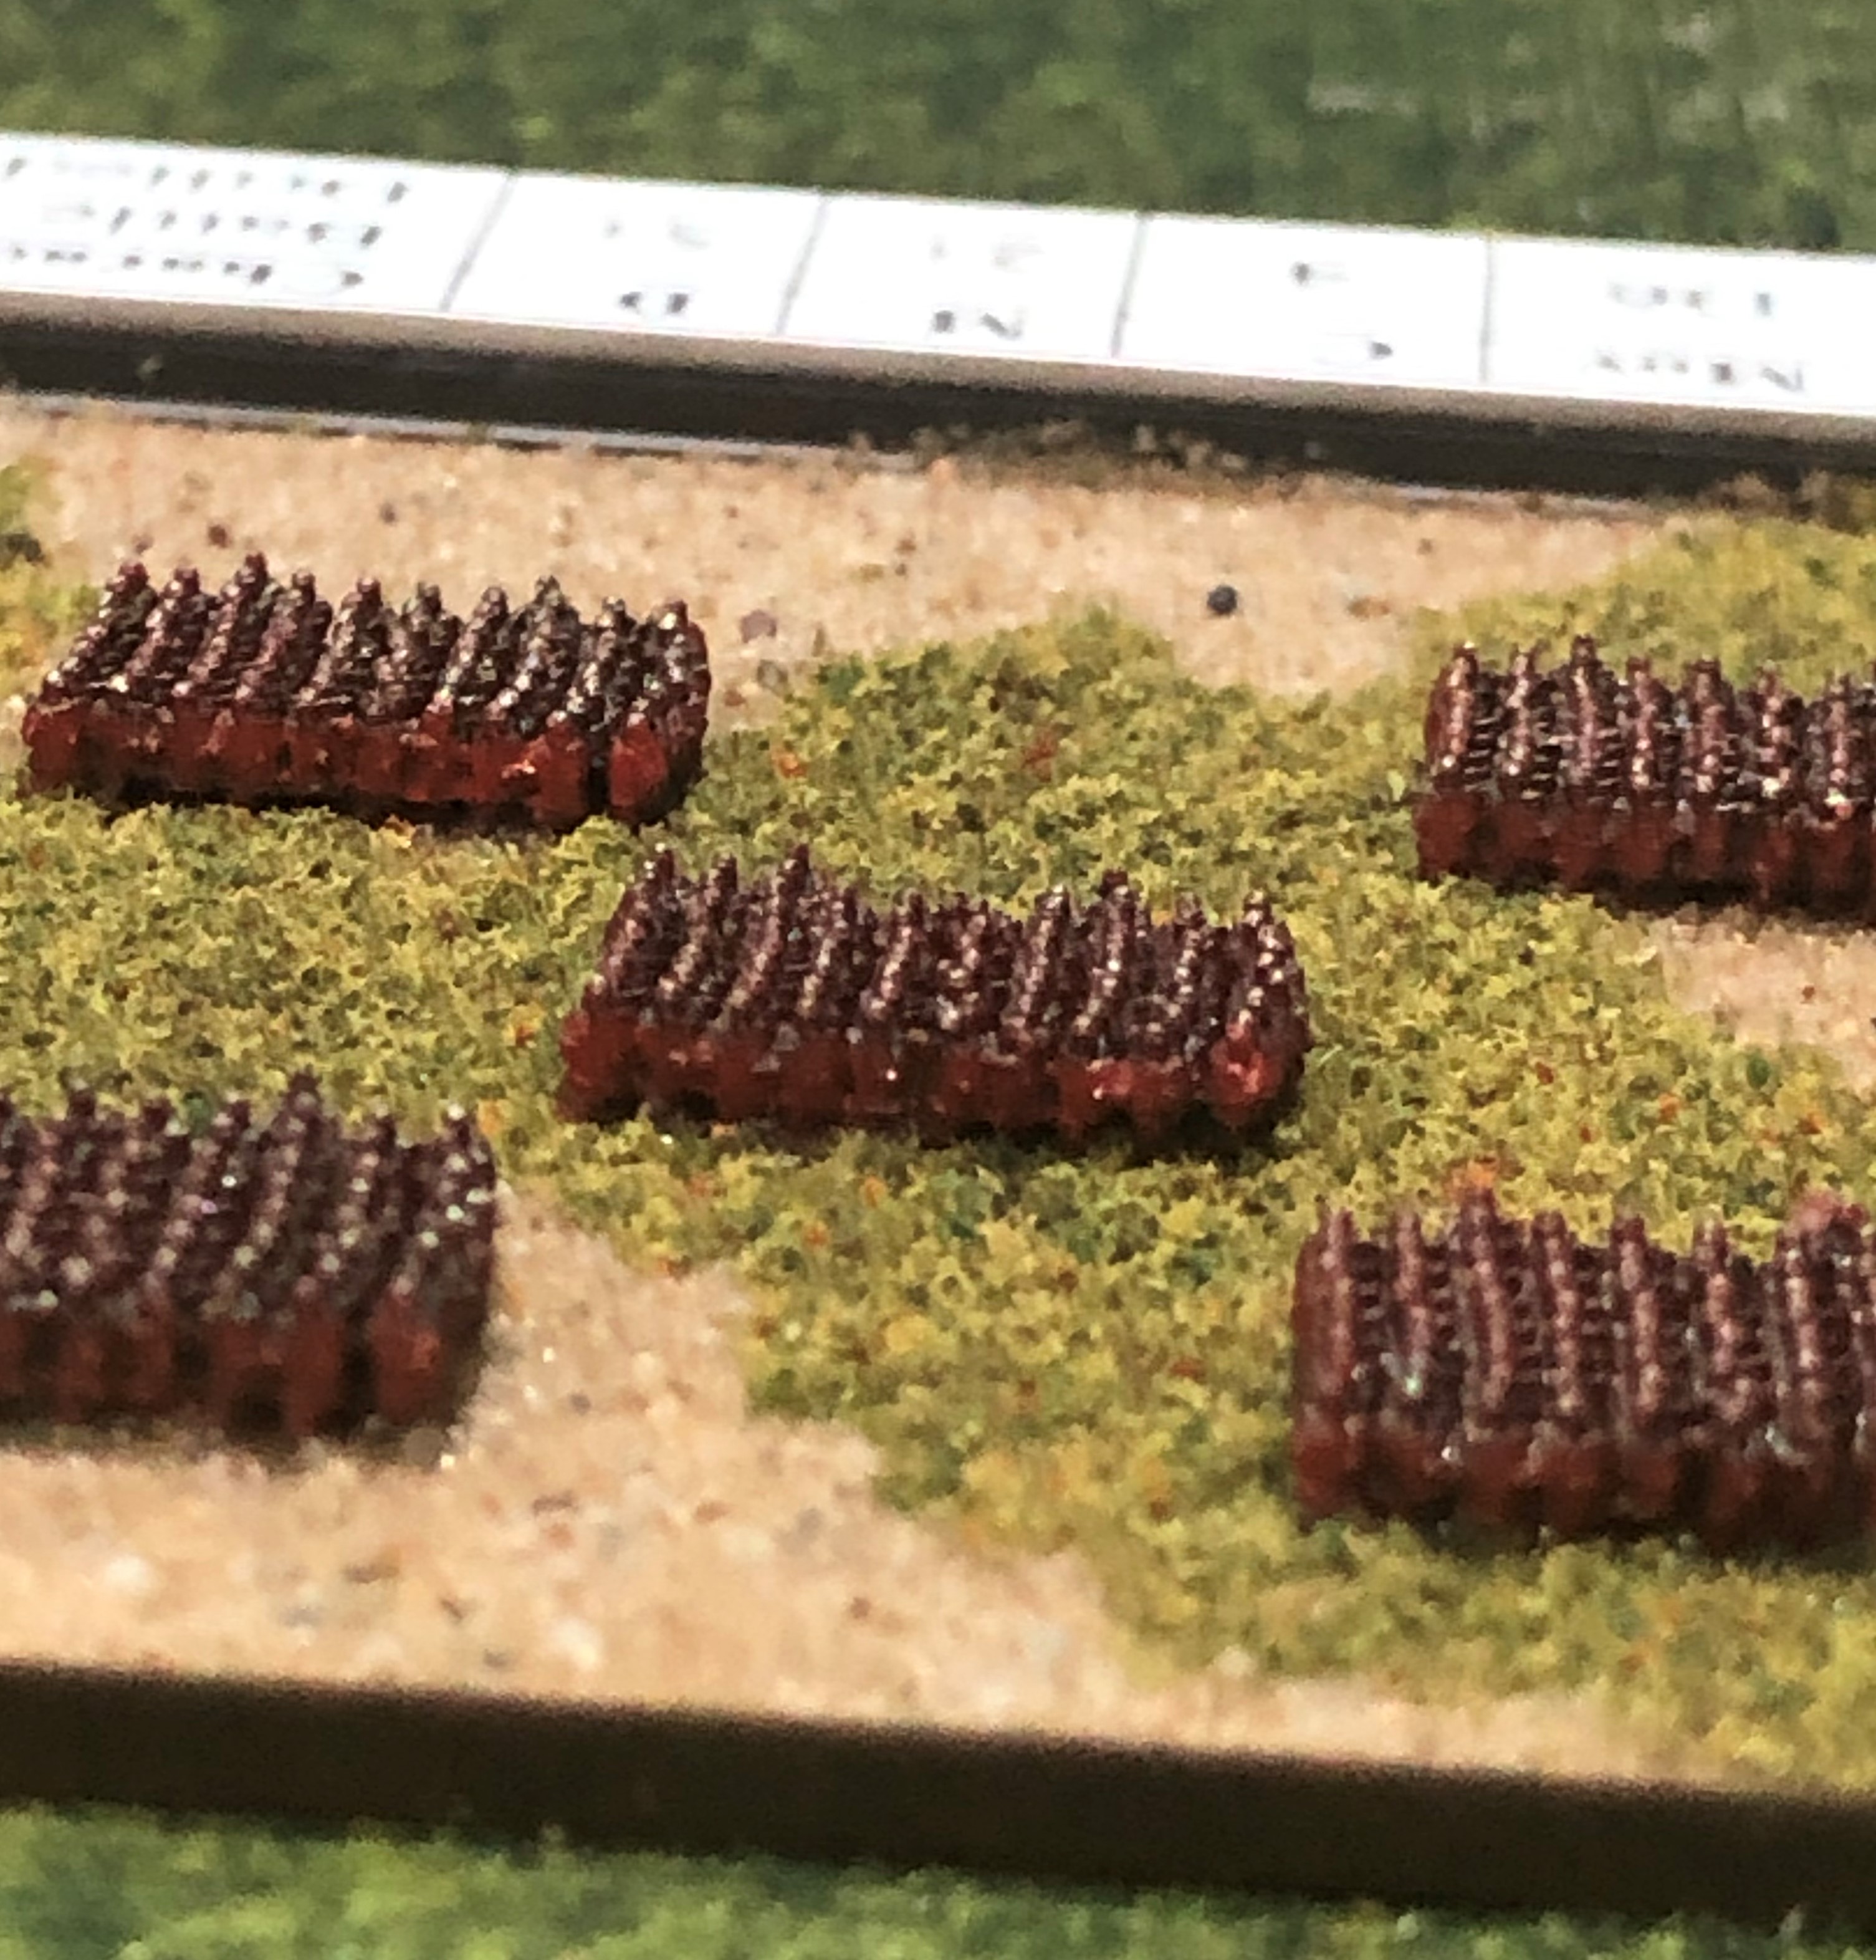
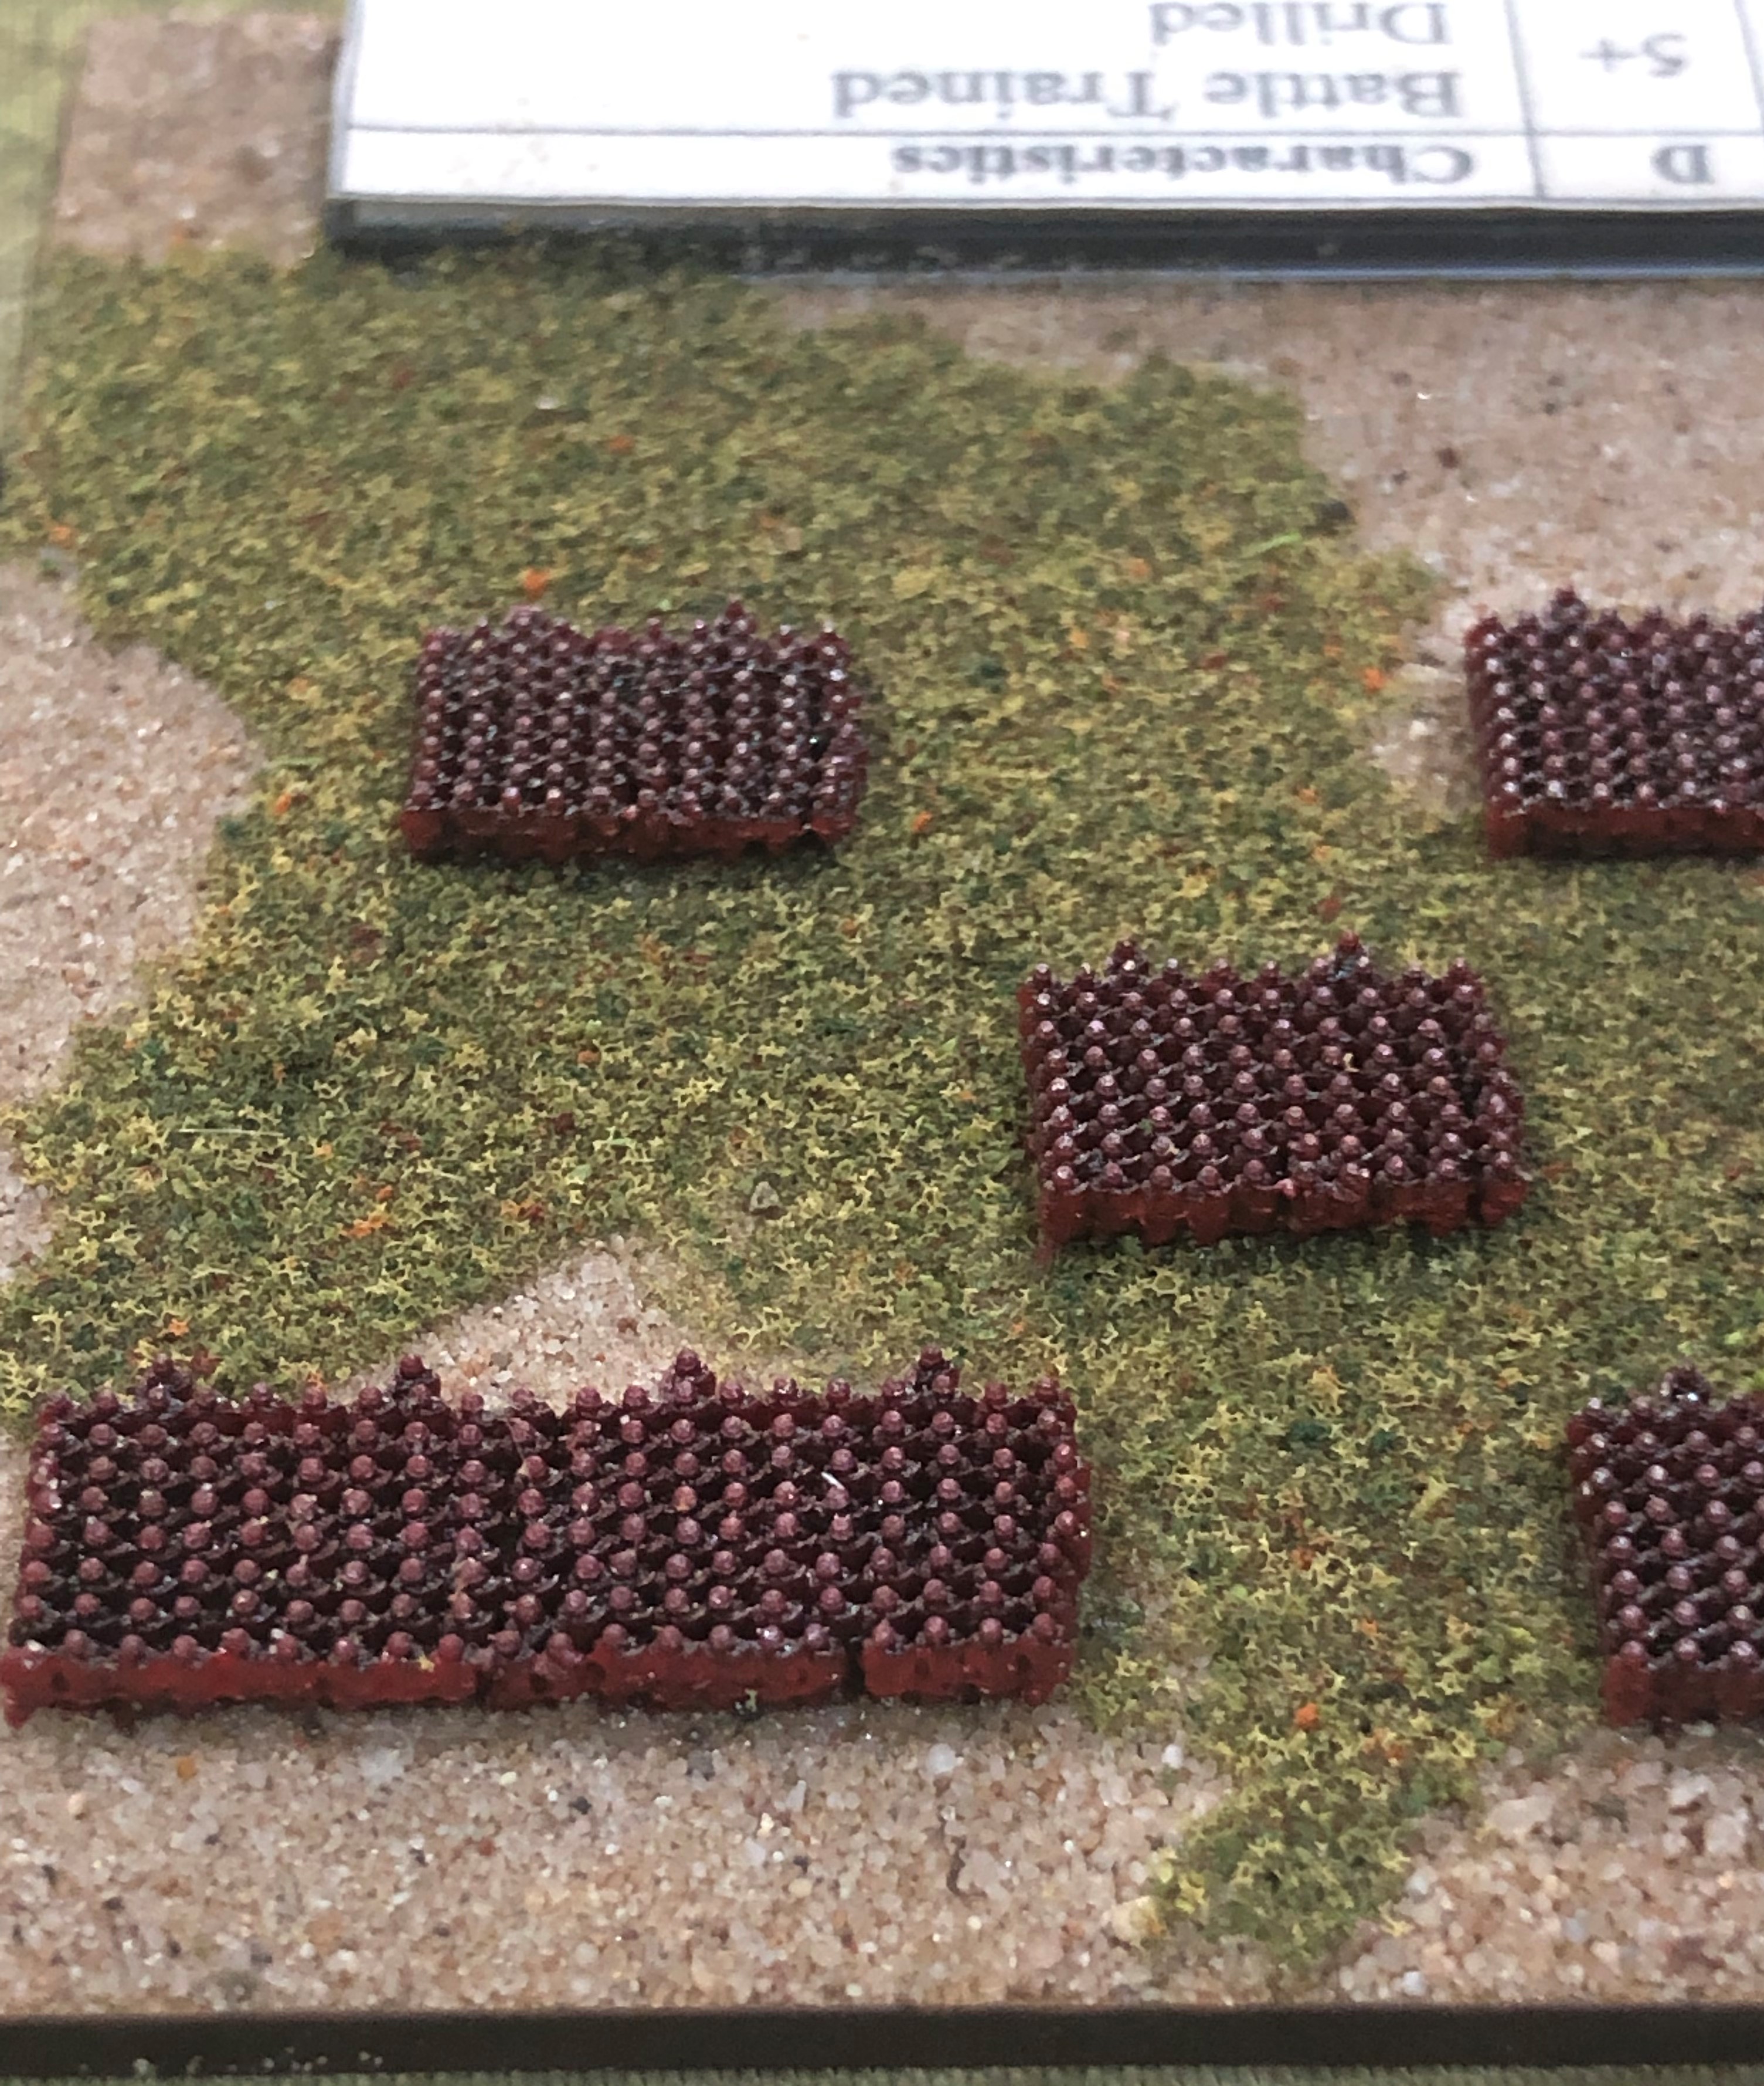
Painting a Roman Legion
Now that we’re up and running with the prints I’m following Project Wargaming’s 2mm Painting Guide. He was painting Persians but the basic instructions will do for Romans. The steps are:
Mount a legion’s worth of prints on a card. Here we have one double sized cohort for Cohort 1. 9 regular cohorts and one tiny legate and officers.
Get a big soft brush and slop on red speedpaint all over.
Let it dry. Then focusing on the left had side and lower legs, dry brush on a bit of flesh. I also brush at random some small patches across the heads but I’m not sure this is visible on the final models.
Next we’ve got armour. Most visible on helmets and shoulders so a dry brush across the tops is sufficient.

Now a relatively good narrow brush and a straight line of solid red across the front of each block covering all of the shields. A few quick dabs onto shields on the right hand edge too.
Finally cover the whole block in a fairly heavy coat of brown ink with the biggest flat brush I’ve got. I used Liquitex Raw Umber but any ink or wash will do. Ensure you cover all four sides as well. Instant shading.
Tap the card firmly on the desk to work the was right down between the figures and into the supports.
It will be dry in a day or so. Next to basing.
Printer setup from an absolute beginner
I got a Voxelab Proxima 6.0 for my birthday in January from my brother-in-law (Thanks Nick 🙂 ). It has sat unboxed until a couple of weeks ago when we decided to try to get it up and running.
After cleaning and checking the components and very straightforward assembly we were ready to go. I was given Voxelab basic grey resin to start. Knowing I wanted to print some 2mm miniatures for this game I purchased a set of Roman Legion stls from Project Wargaming. $4 for the files to print an entire Roman Legion – great value.
After a bit of experimentation and some failed prints this is the setup:
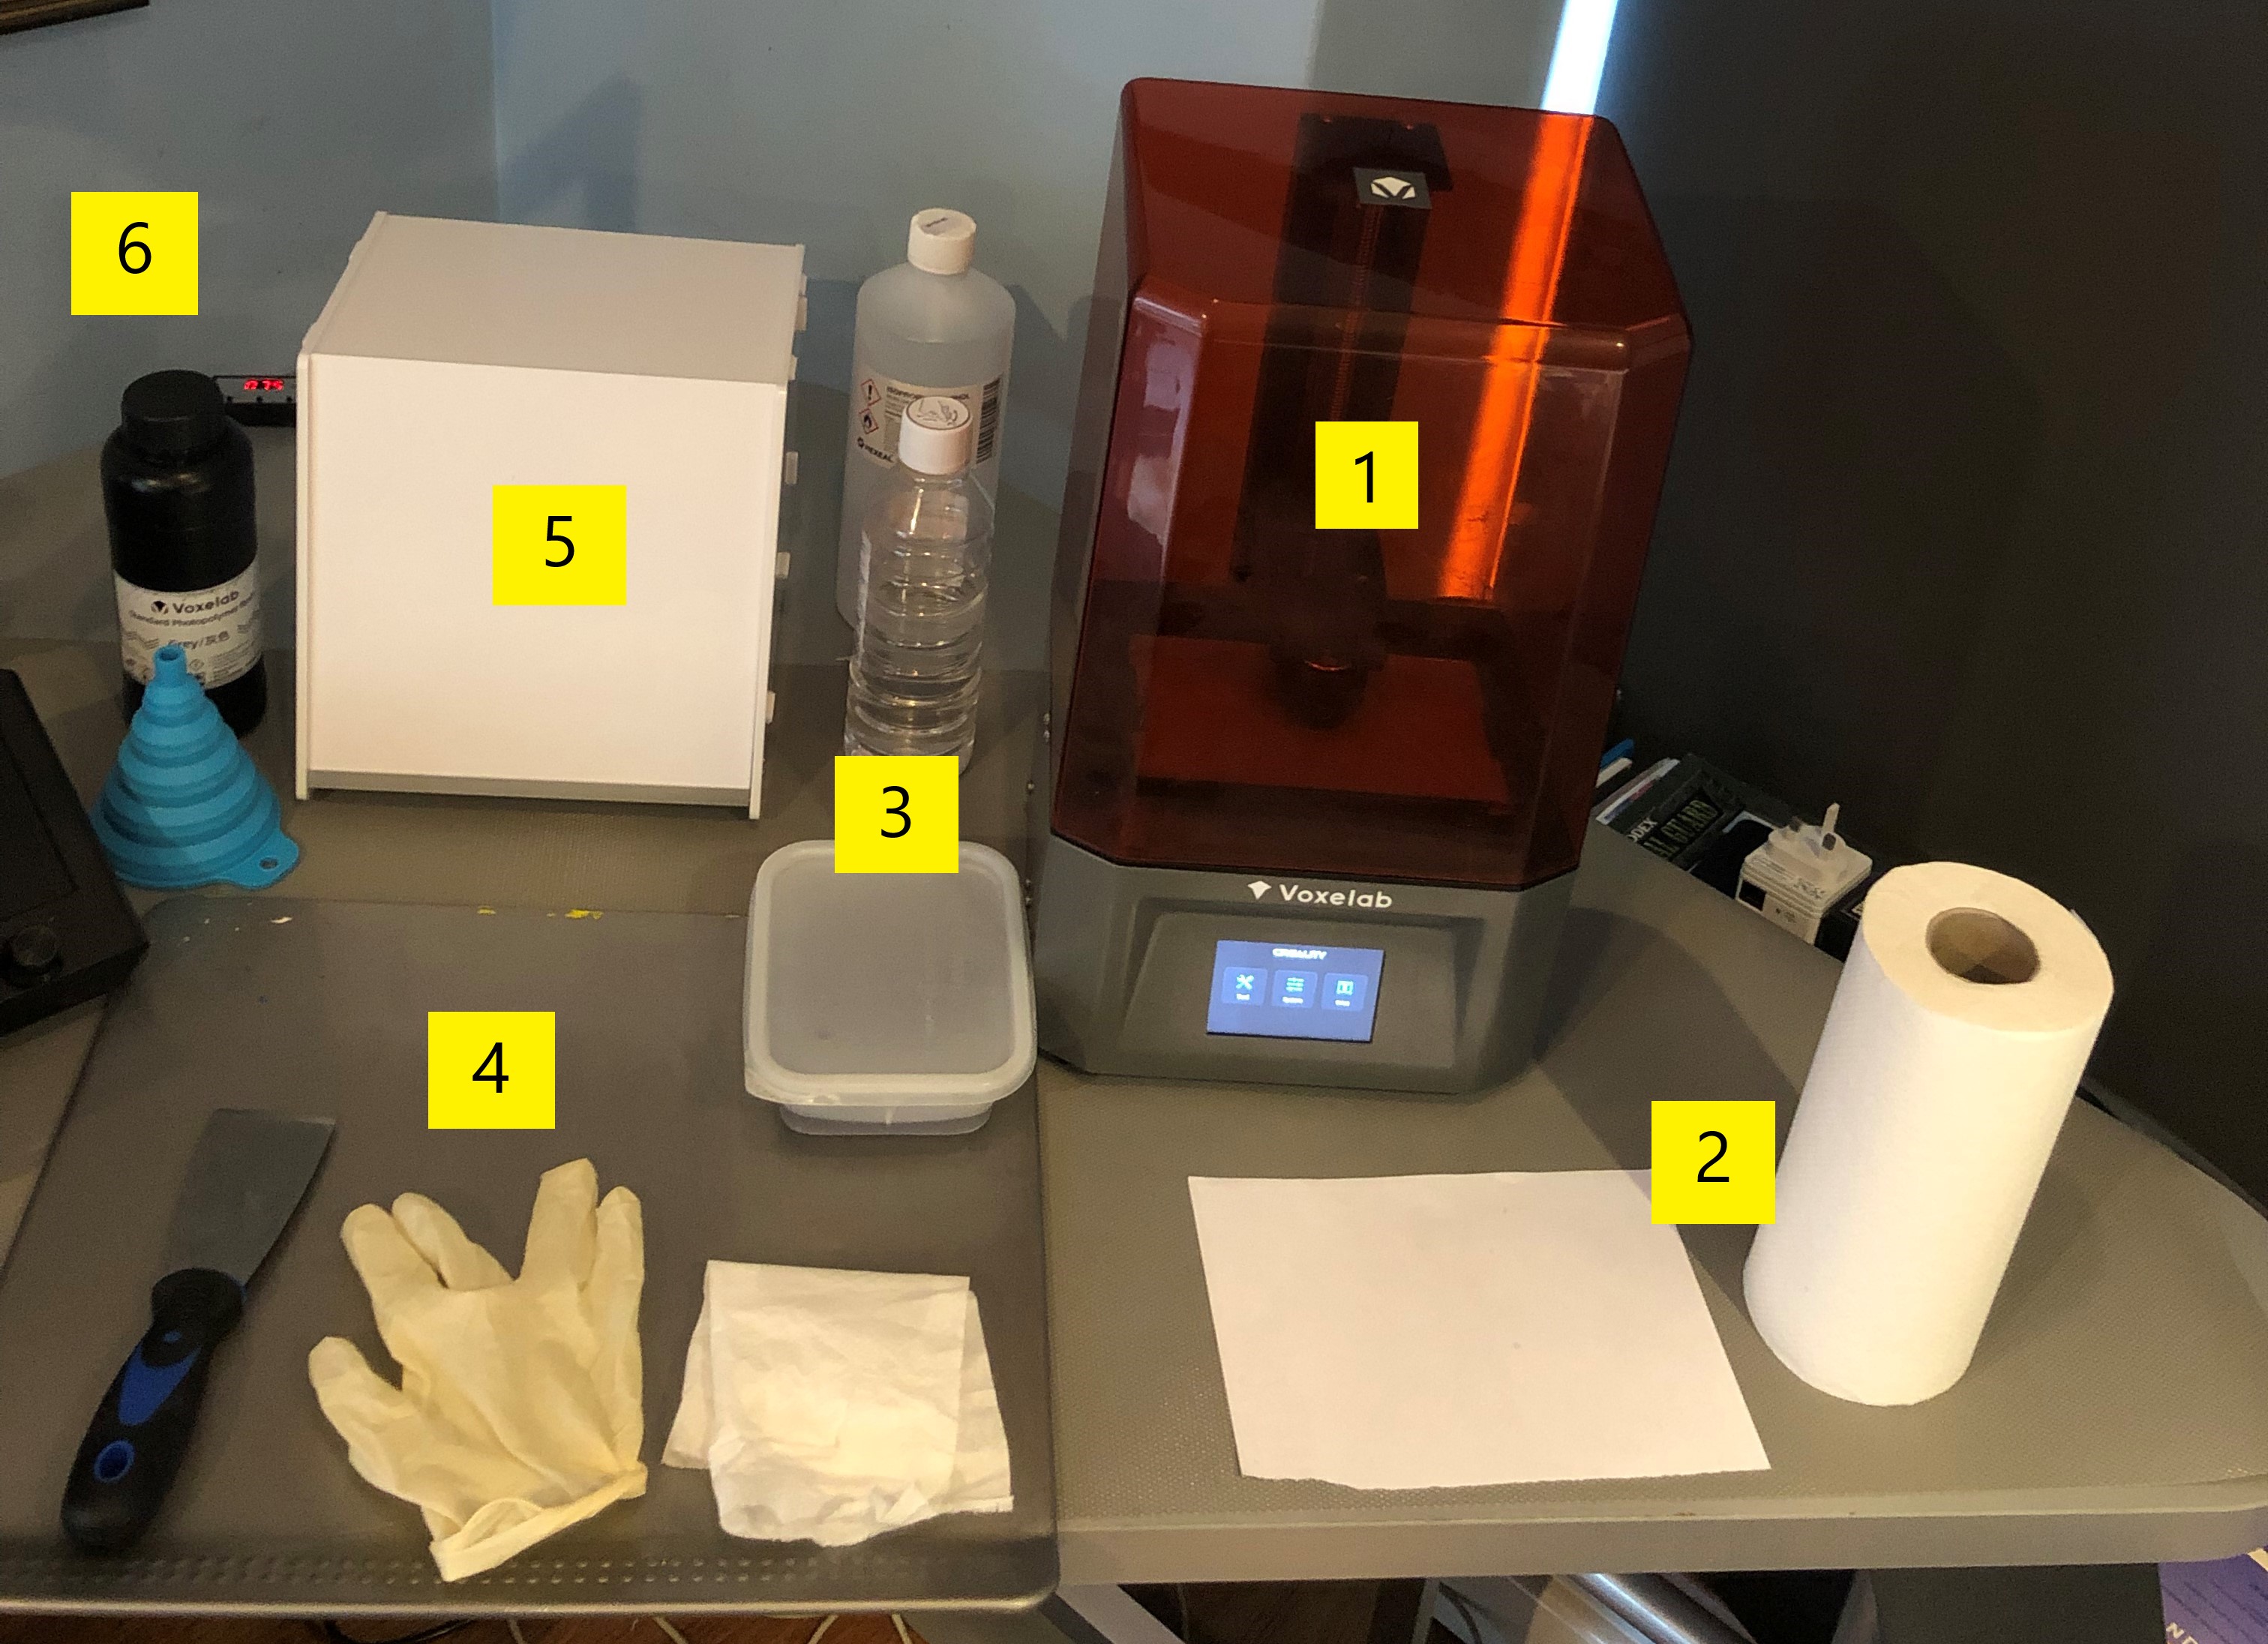
1 – Voxelab resin printer. The observant will notice it has a Creality screen showing. More on that later…
2 – Paper products. A half sheet of A4 for leveling and a roll of paper towel for cleaning and mop up.
3 – Alcohol. The takeaway tub is the cleaning bath, half full of isopropyl alcohol (99%) the parts are prised off the print bed and dropped straight in. A minute or two soaking and gentle swirl and they come out clean. Behind is the half litre bottle I use for pouring over the print block to clean it and the big bottle is one of the five that Amazon supplied.
4 – My work area. An old metal tray from a GW paining station is used as the surface that the prints are removed and cleaned on. A metal spatula is essential to get the prints off the bed. Latex gloves also essential and not in the photo is my breathing mask – the fumes are unpleasant and dangerous.
5 – UV light curing box. Part of my birthday present was this box. Came flat packed but simple assembly. It has a simple turntable and UV LED light array inside with a timer switch on the power lead. These are small prints so 75 seconds in here seems to be enough to cure them.
5 – Resin. This is a basic grey. The collapsible funnel is to assist with decanting resin back from the printer bath back into the bottle. I use paper filters specifically designed for resin (available on Amazon). You can use domestic coffee filters but they get clogged easily apparently.
Issues before it worked:
1st, 2nd and 3rd failed prints – print bed not level or far enough down – not enough bed adhesion so prints ended up stuck to the FEP film on the bottom of the bath. Also spilt about a third of a bottle of resin when the funnel collapsed because it was too full. Learned to hold it and pour SLOWLY!
4th failed print – printer stopped accepting the Chitubox slicer files. I was using the Voxelabs standard firmware and Chitubox 9.0+ isn’t compatible apparently with this older style printer. The fix was on Reddit. This printer has a Creality motherboard and is therefore effectively a Creality LD-002H. Ran the firmware upgrade supplied on Reddit and hey-presto I’ve now got a Creality printer 🙂 The print is now sticking to the print bed as I’m using platforms and upped the base layers to 8 from 6 and the exposure time to 50 seconds. Still some missing sections – print bed too crowded. Deleted about a third of the intended prints, you can’t totally fill the bed as I had and must leave a gap between each model and offset them on either side of the bed. Just over half of the bed surface covered is about right.
5th failed print – poor fine detail. upped the exposure time to 4.2 seconds for all layers and upped from light to medium supports which were already set to 74% density following guidance from the designer.
6th print – fine. Very minor detail missing but good enough for me.