


Bushido


Recommendations: 39
About the Project
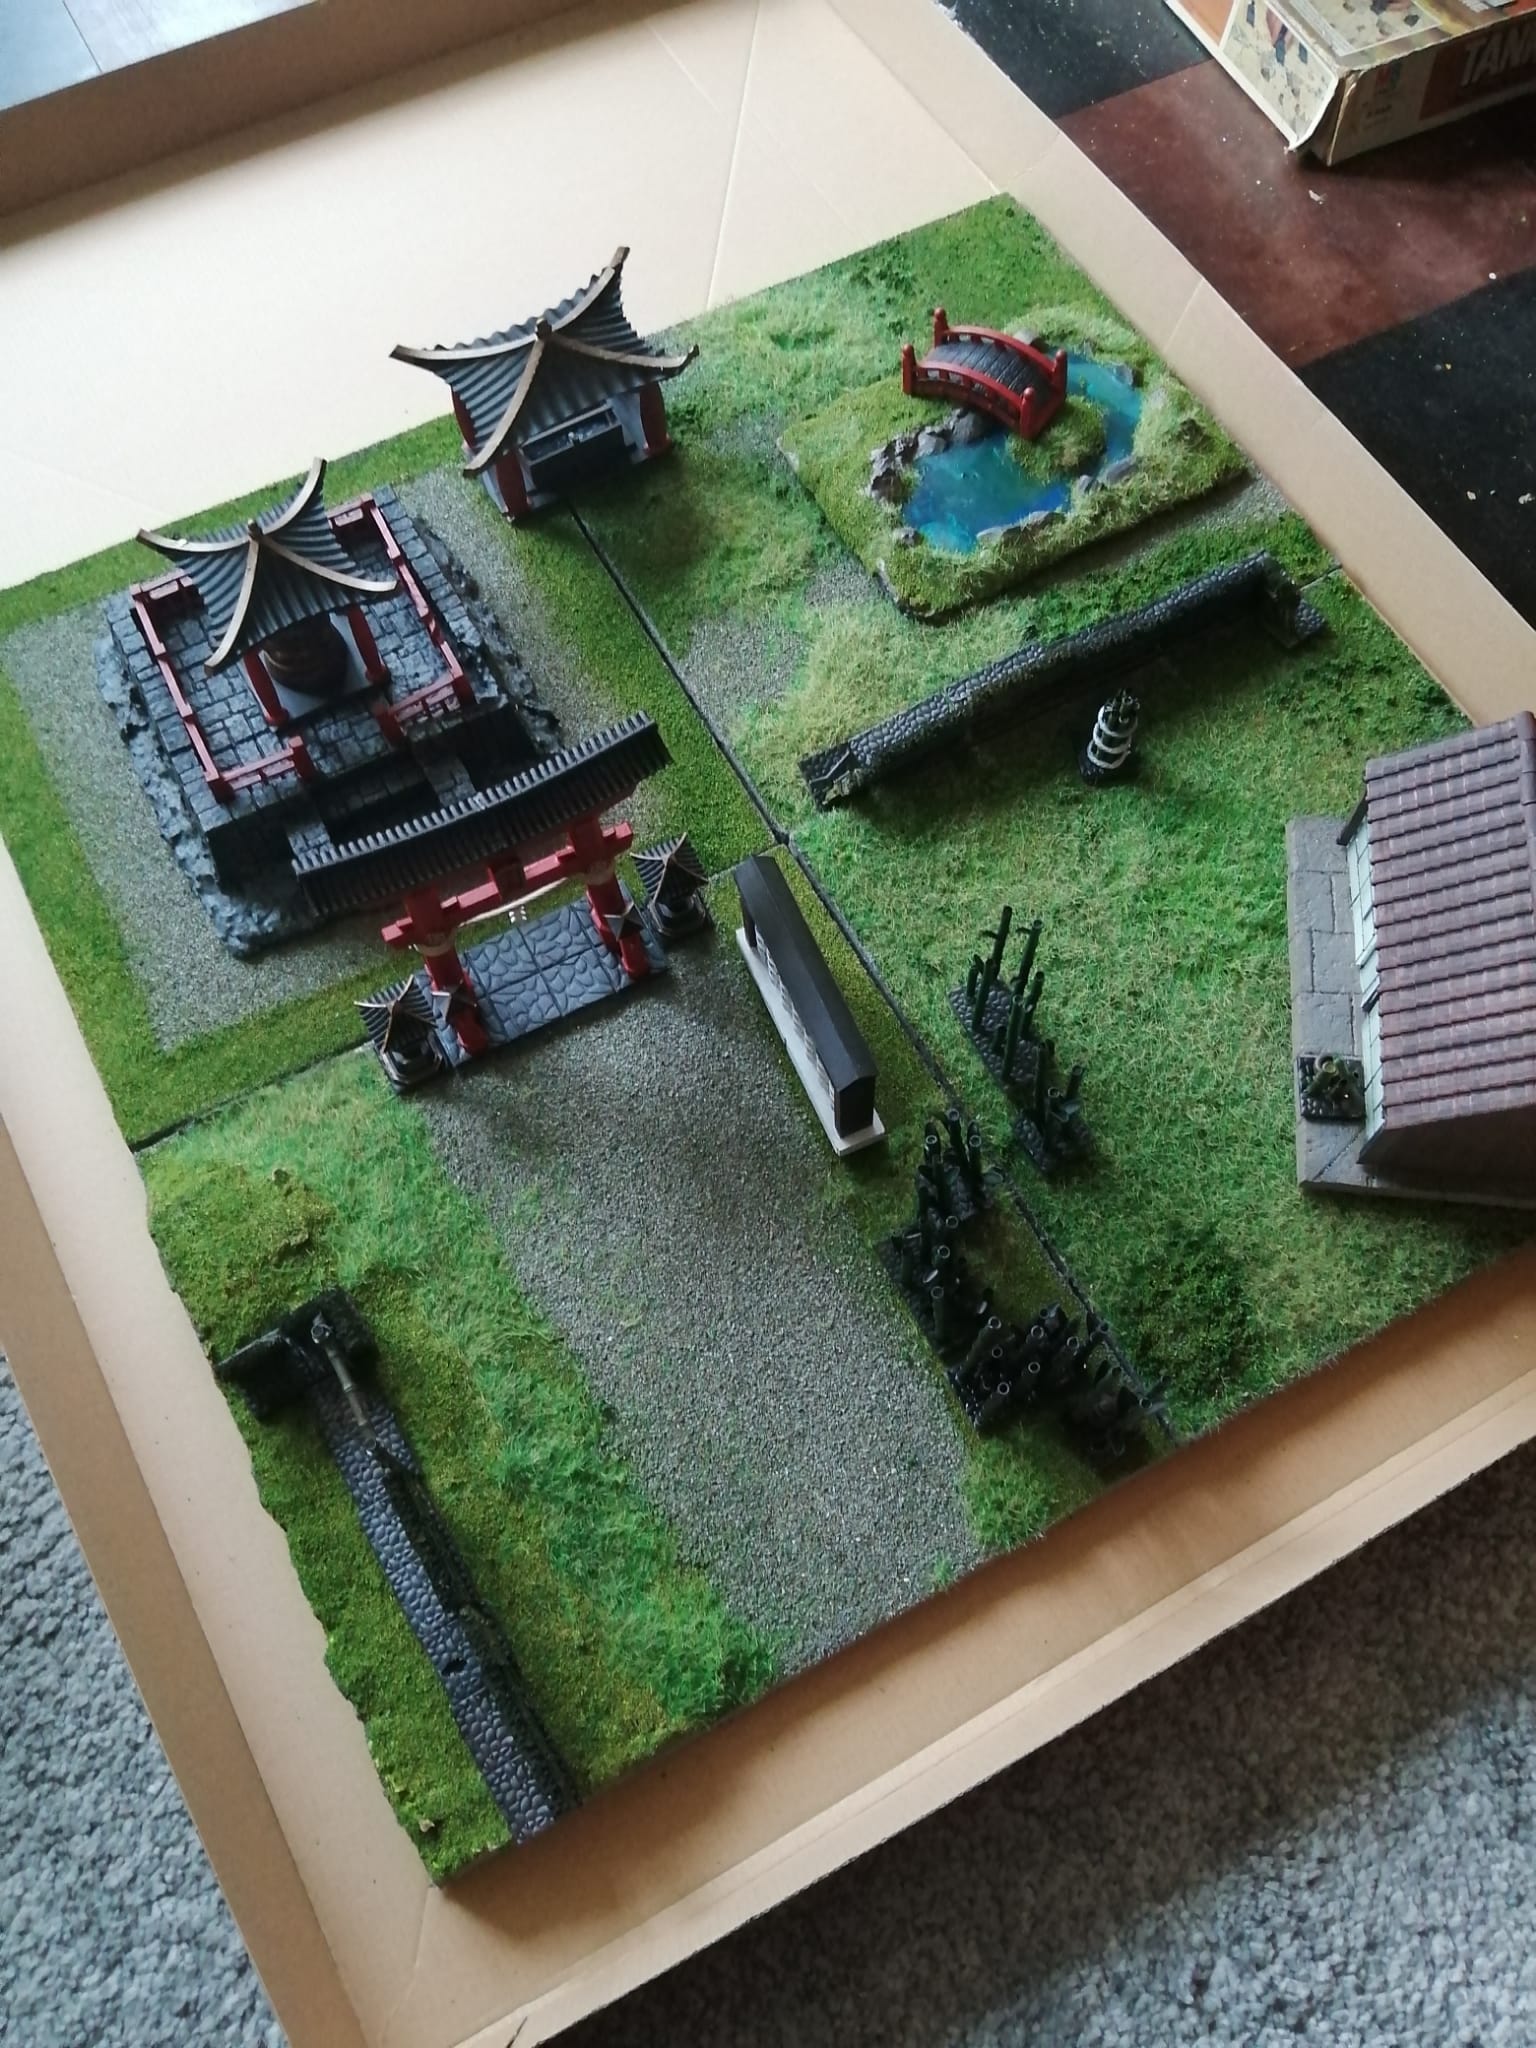
For the launch of the new games club next month I decided a new (to me) and interesting game would be good just to show it's not all GW or Historic and Bushido seemed the perfect game for this - small board, beautiful minis and some interesting game mechanics. So I decided I needed a special board to play on. I started with the idea of 4 distinct areas so got my hands on some 1 foot square plywood and then started the trawl through the net for some free Japanese Terrain pieces. Thanks to Tabletopteacher, Toakamate and Mojibake for the various models. I'm sure there are others I have left off and I apologise as my laptop crashed and had to re-install Windows, so lost a bunch of stuff. The pond is an original design which failed on the print and I ran out of resin so is a mix of 3d print and Geek Gaming modelling compound - the water is the bit of clear printer resin I had tinted blue.
Related Game: Bushido
Related Company: GCT Studios
Related Genre: Fantasy
This Project is Active
Bushido Minis
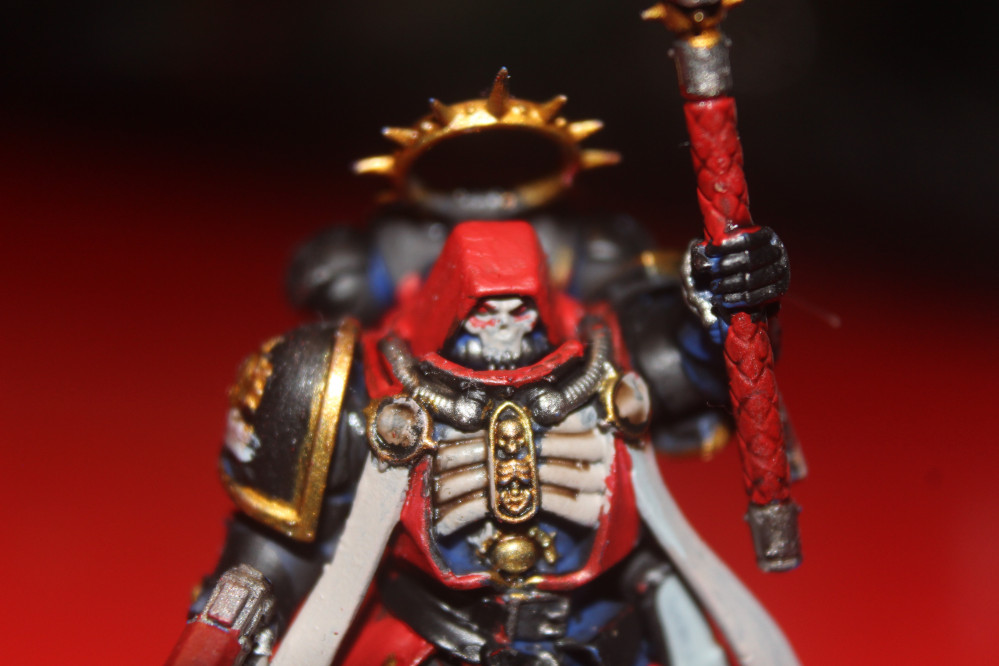
So with the board finished and enough terrain to play varied games, it’s time to start on the minis. At the moment I only have the Risen Sun Starter set and I also wanted to try out the Army Painter Speed Paints I recently got (just the basic set). So here goes.
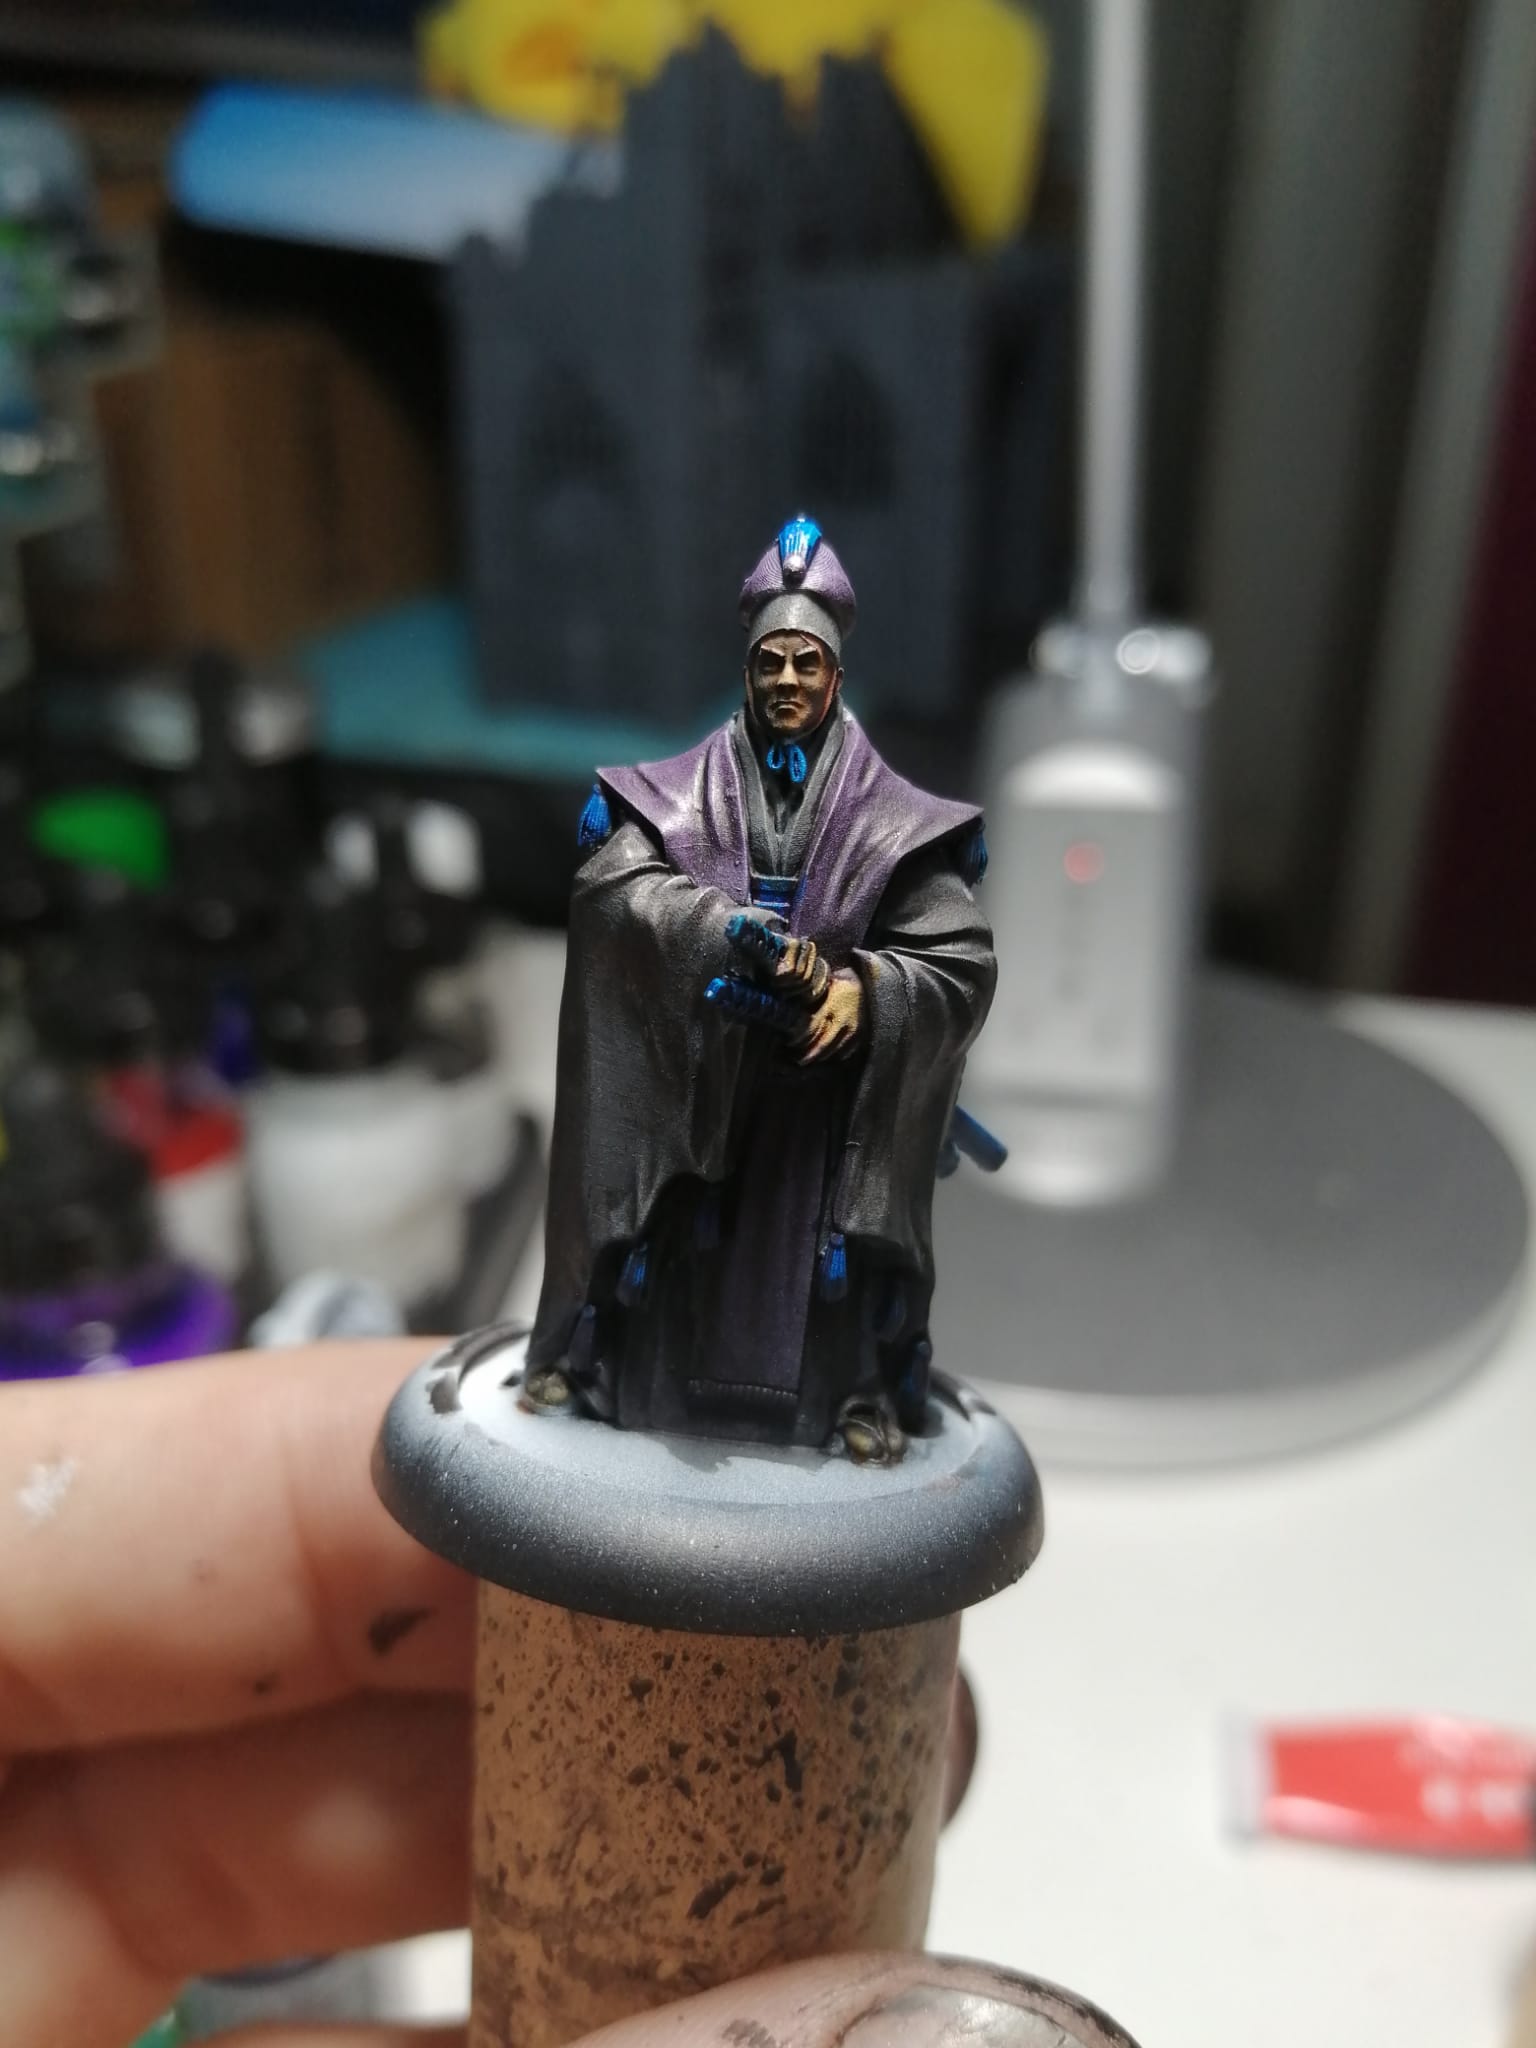
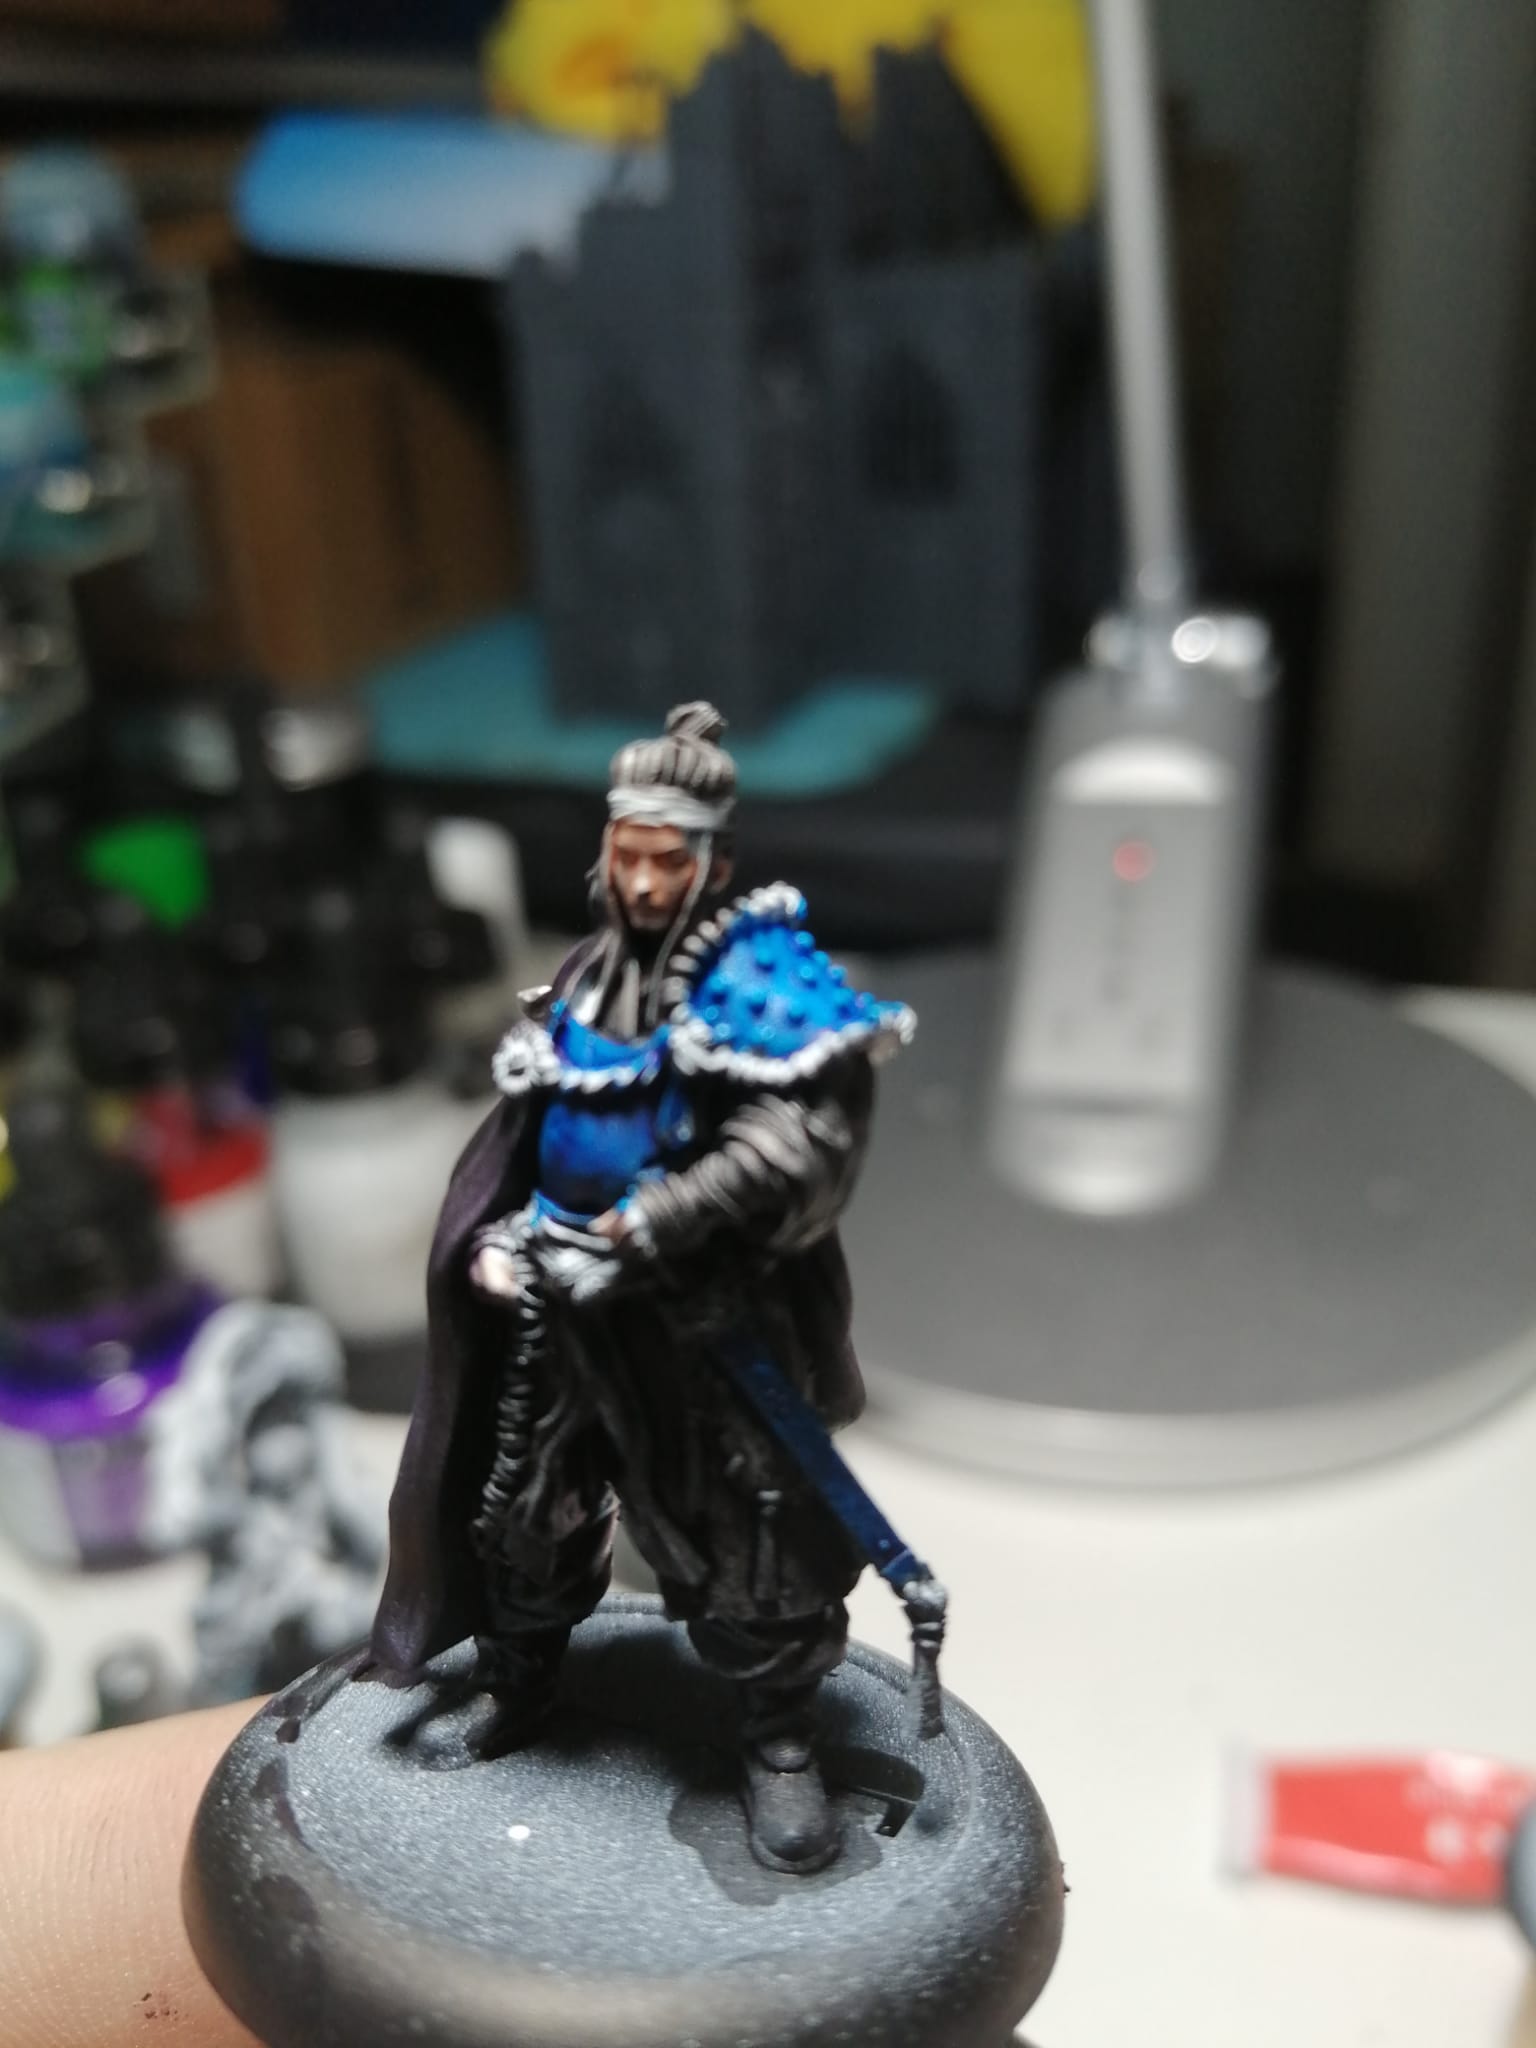
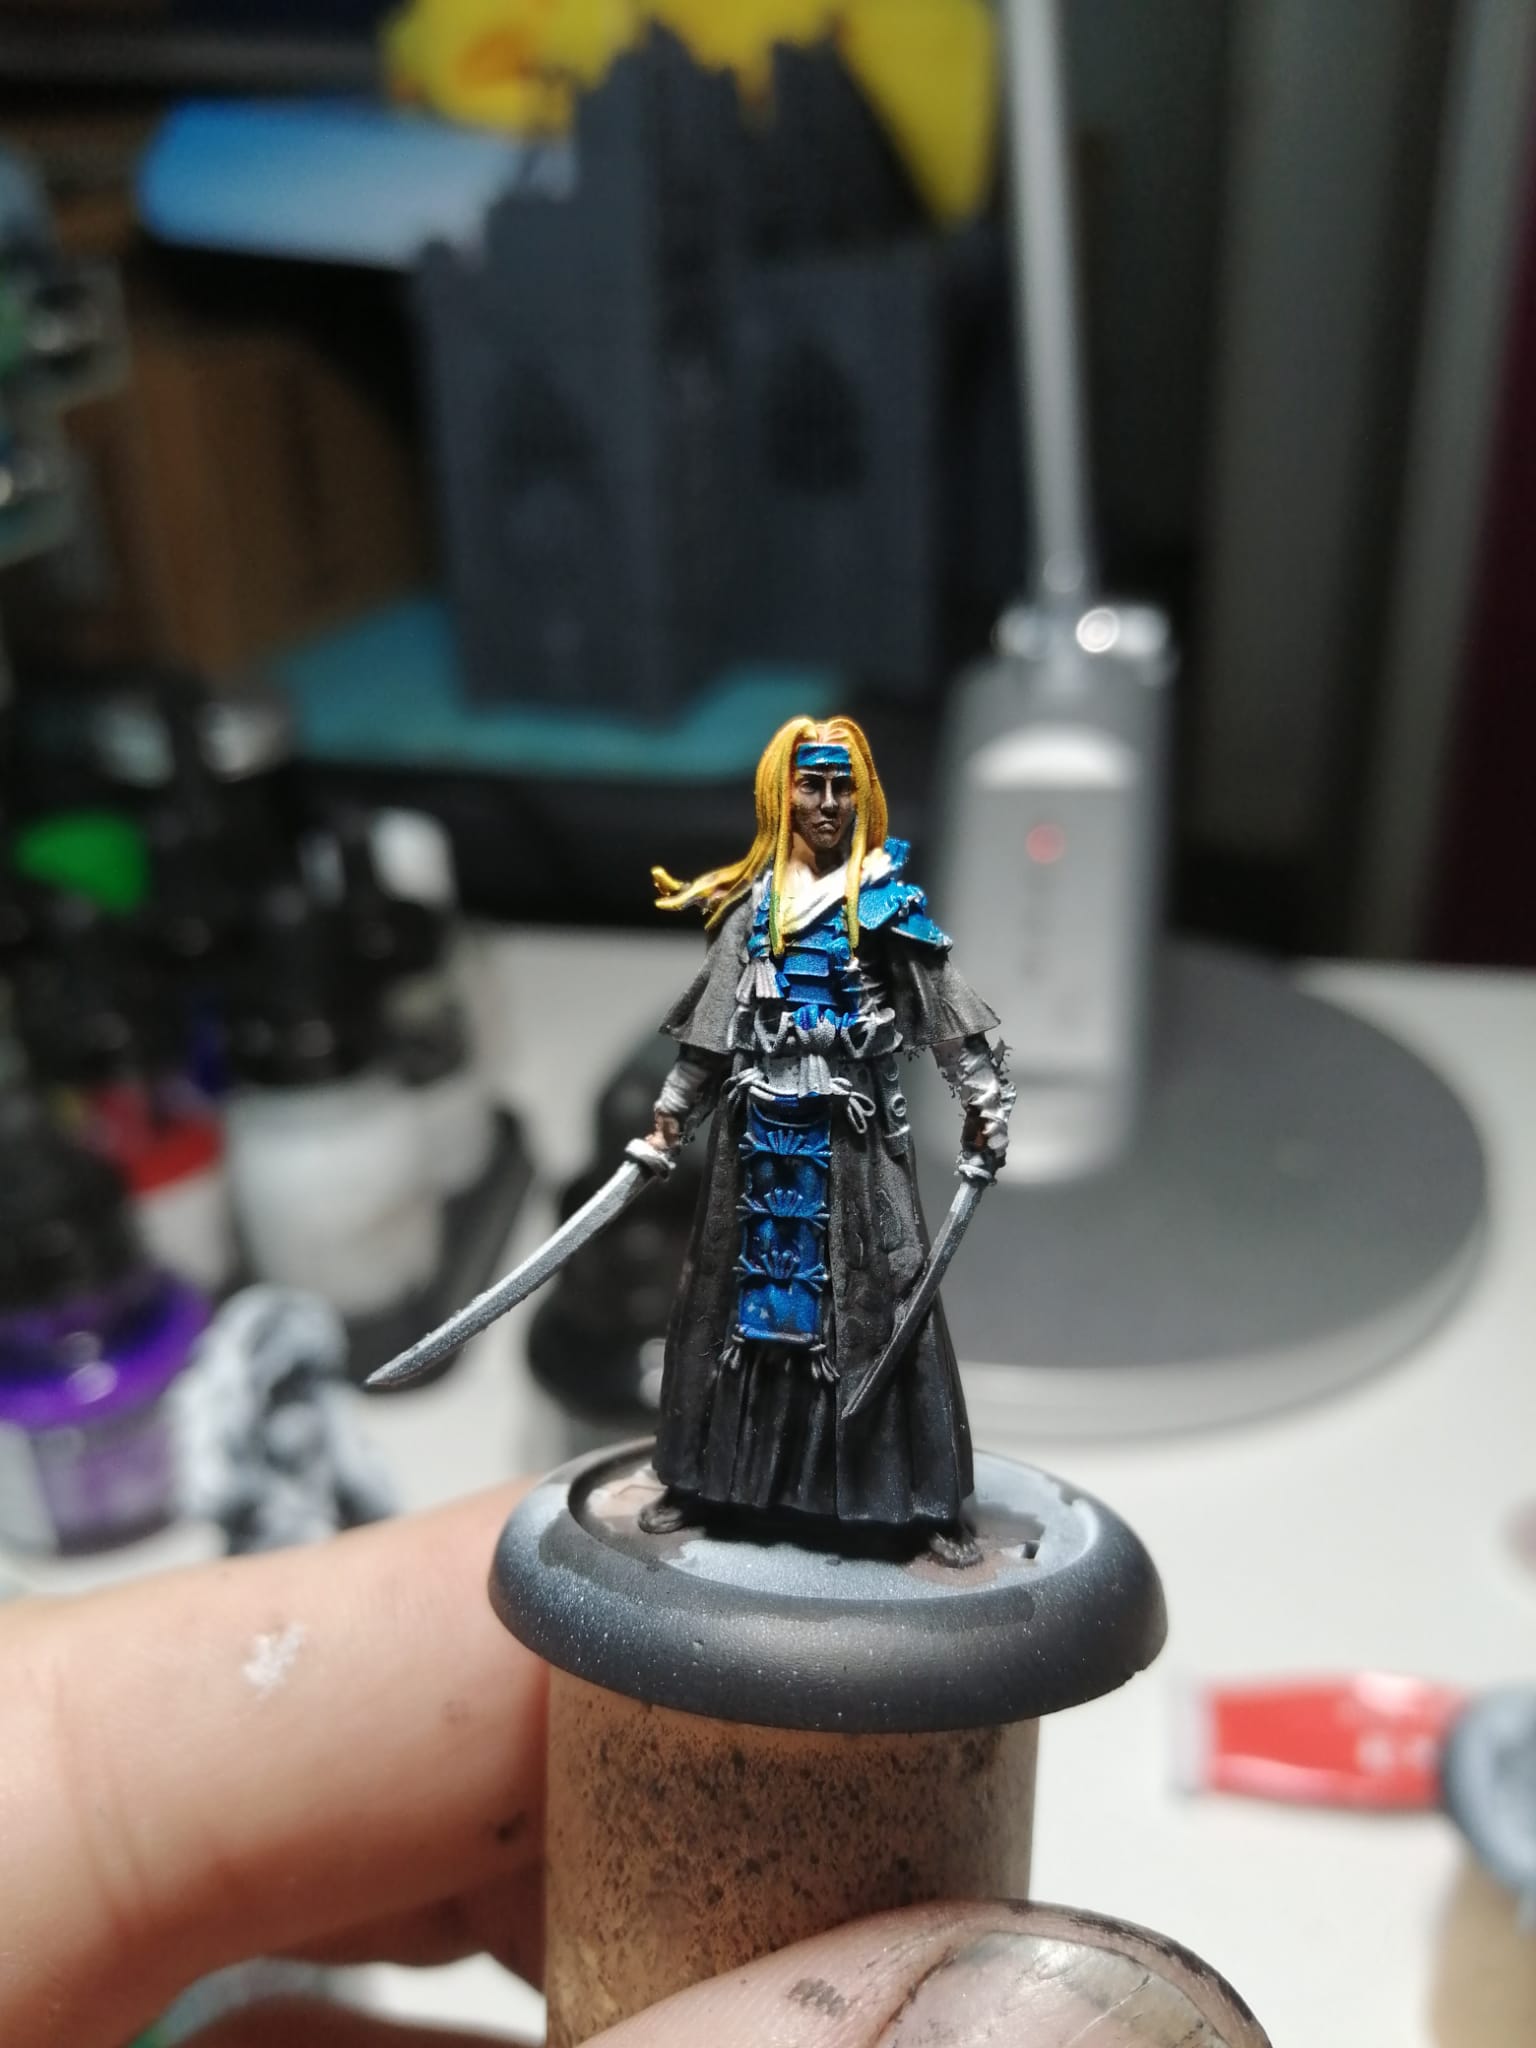
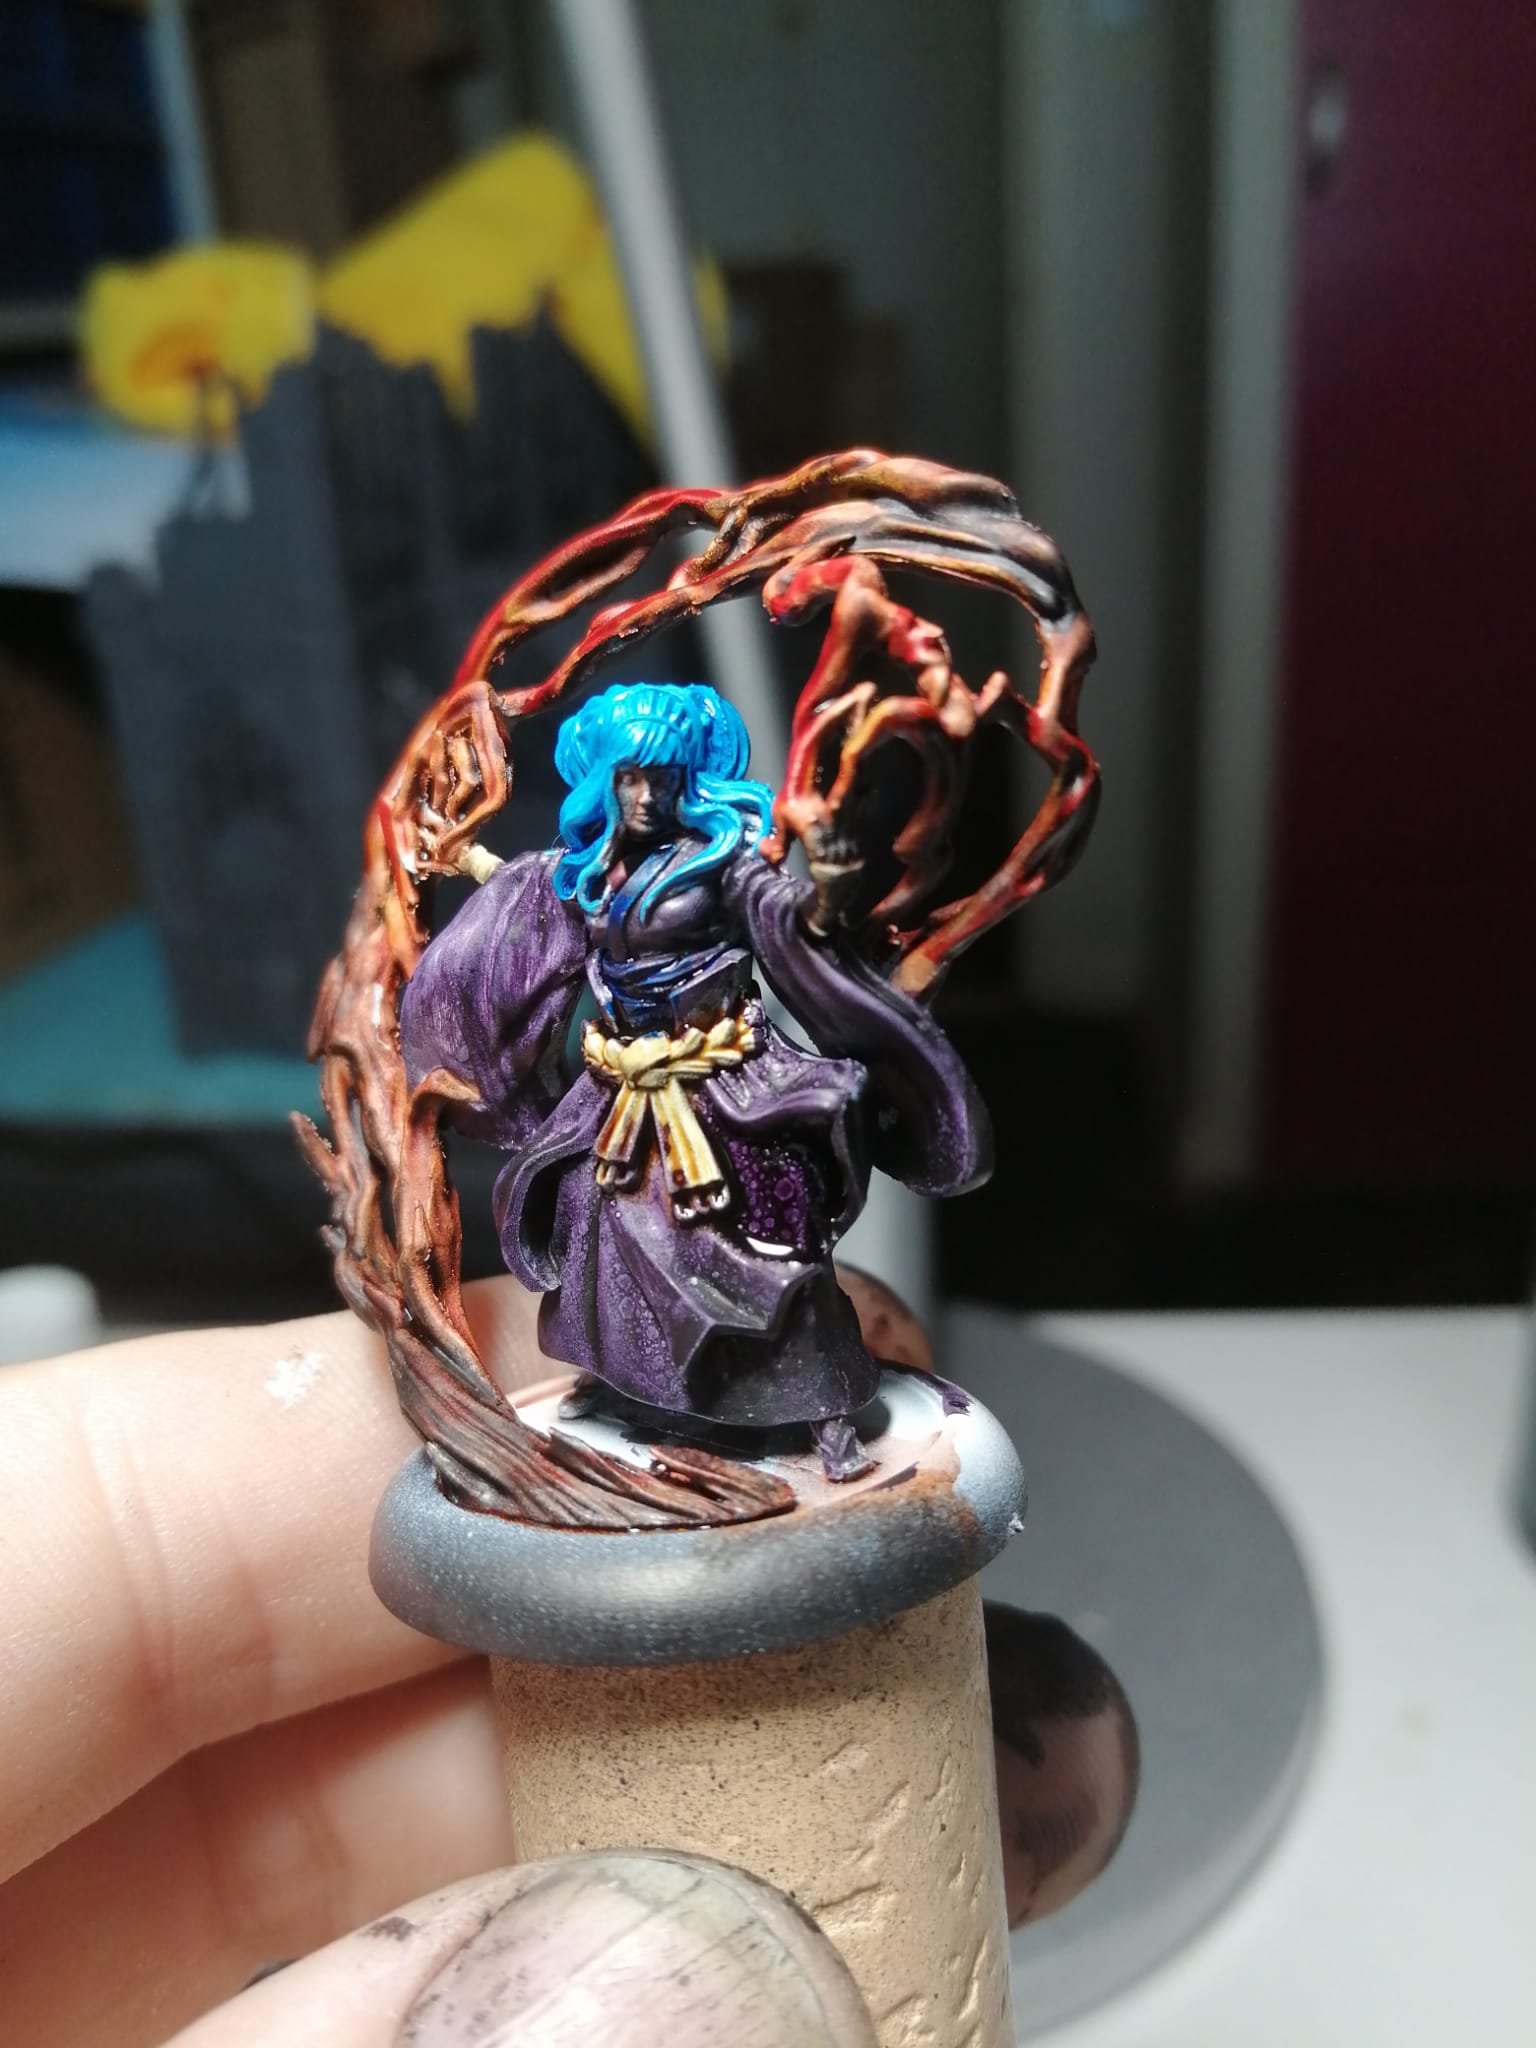
Have to admit, very pleasantly surprised by the vibrancy of the colours. The blue hair was achieved by mixing a white paint with the blue speed paint to get the light blue colour and then a wash applied using a watered down blue speedpaint.
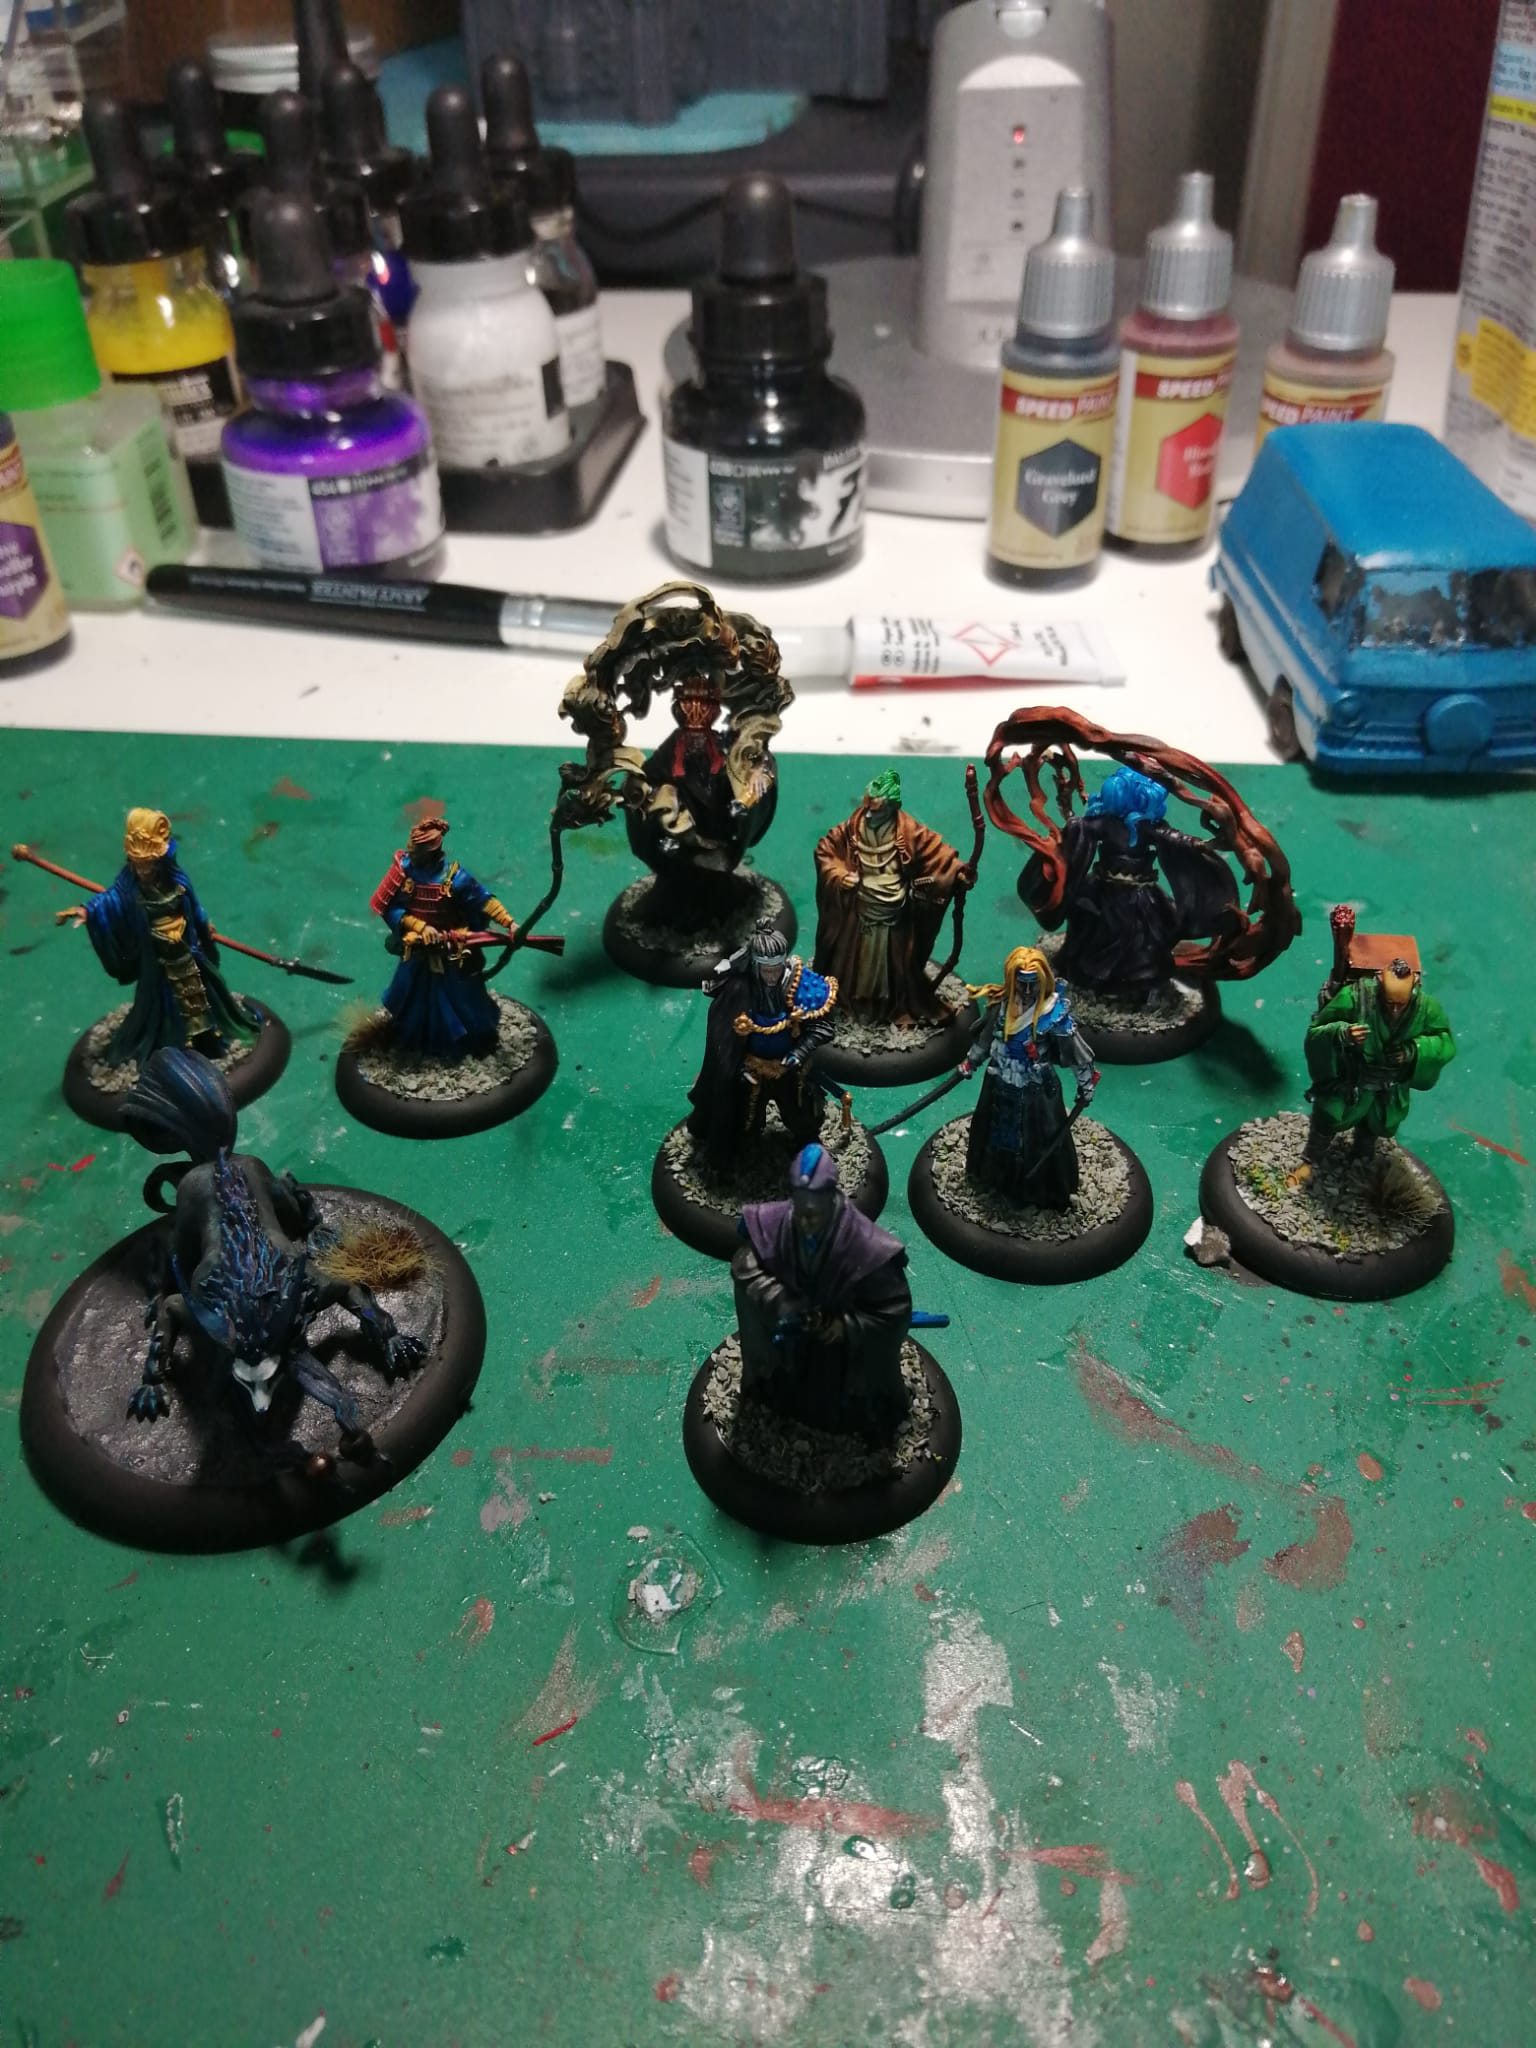 All built and based - I'll add better pictures soon
Bushido Board
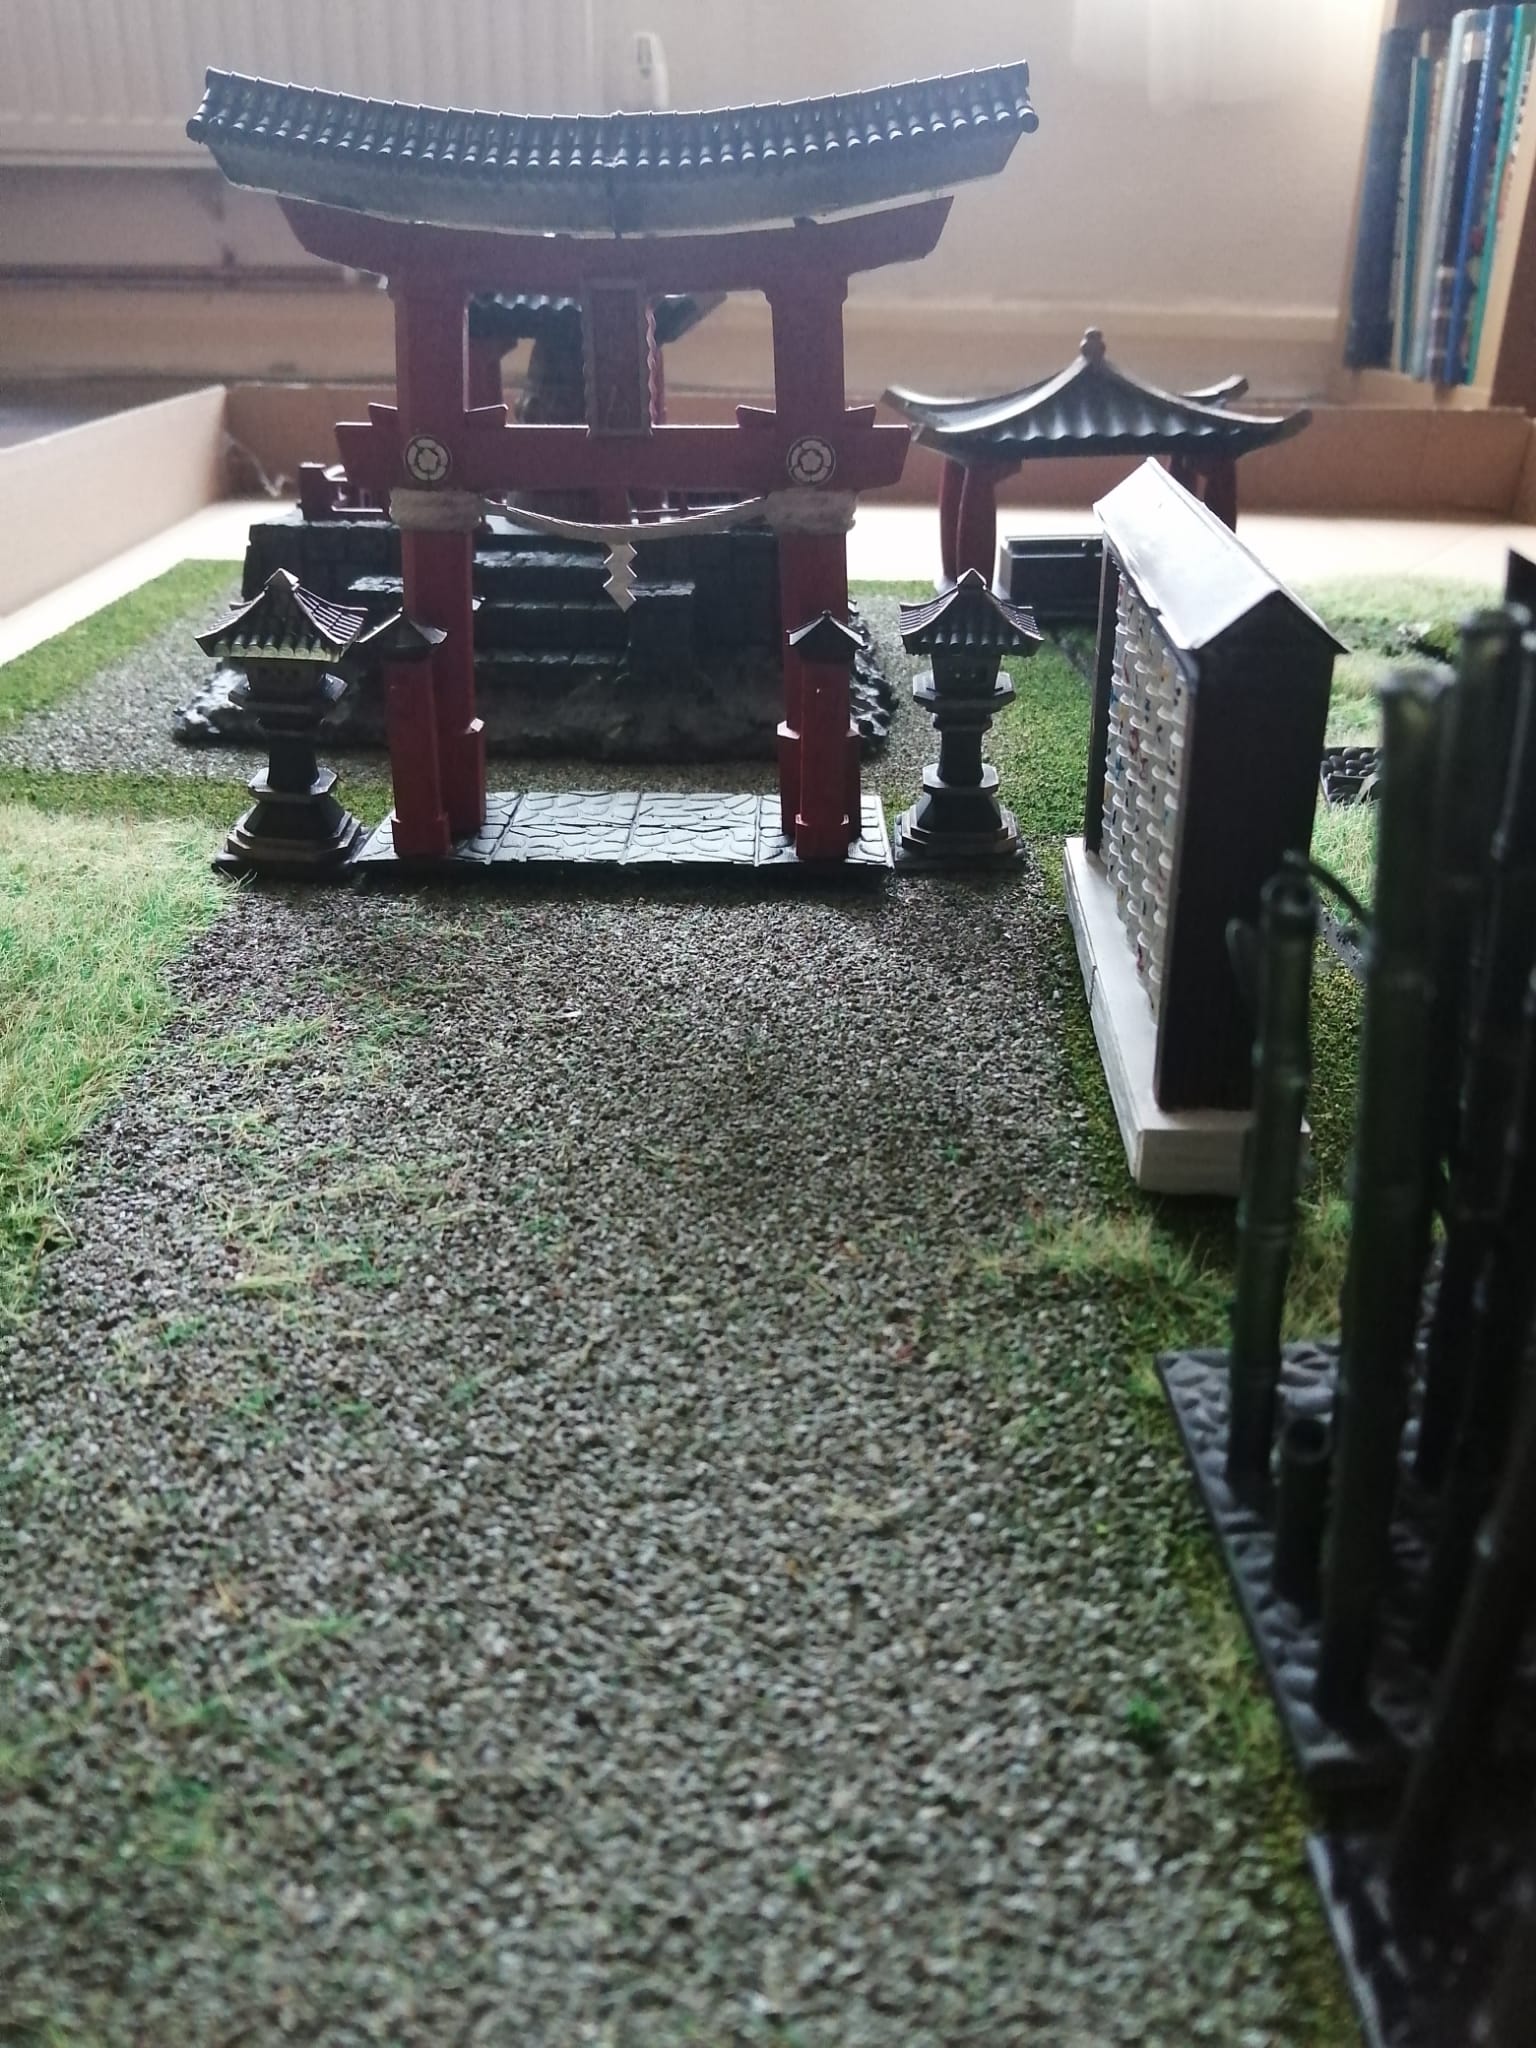
I decided to loosely base the board on a visit I made to the Meiji Shrine in Tokyo combined with some of the other buildings and Shrines I saw on my trip, so I knew I needed a Torri (the gate), a Sake offering and a Temizuya (Hand Washing)
So the start was to print out the structures I had sourced.
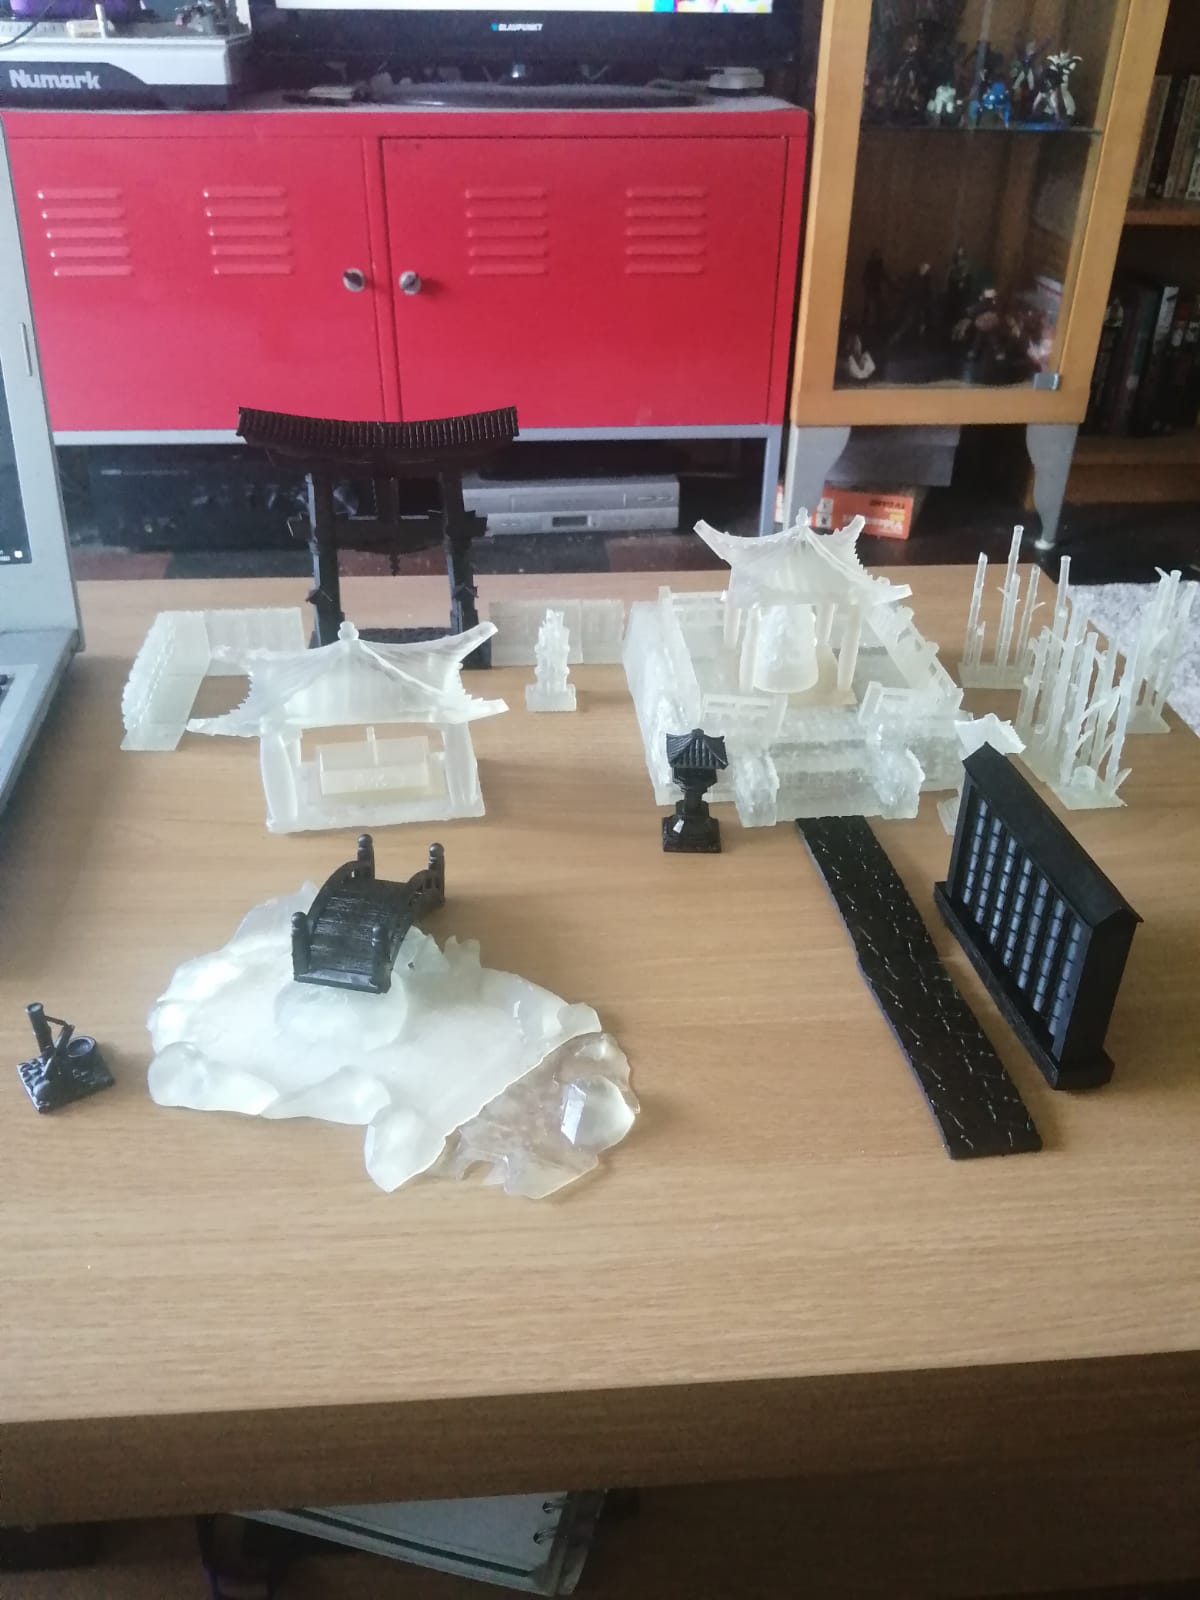 3D prints - some primed
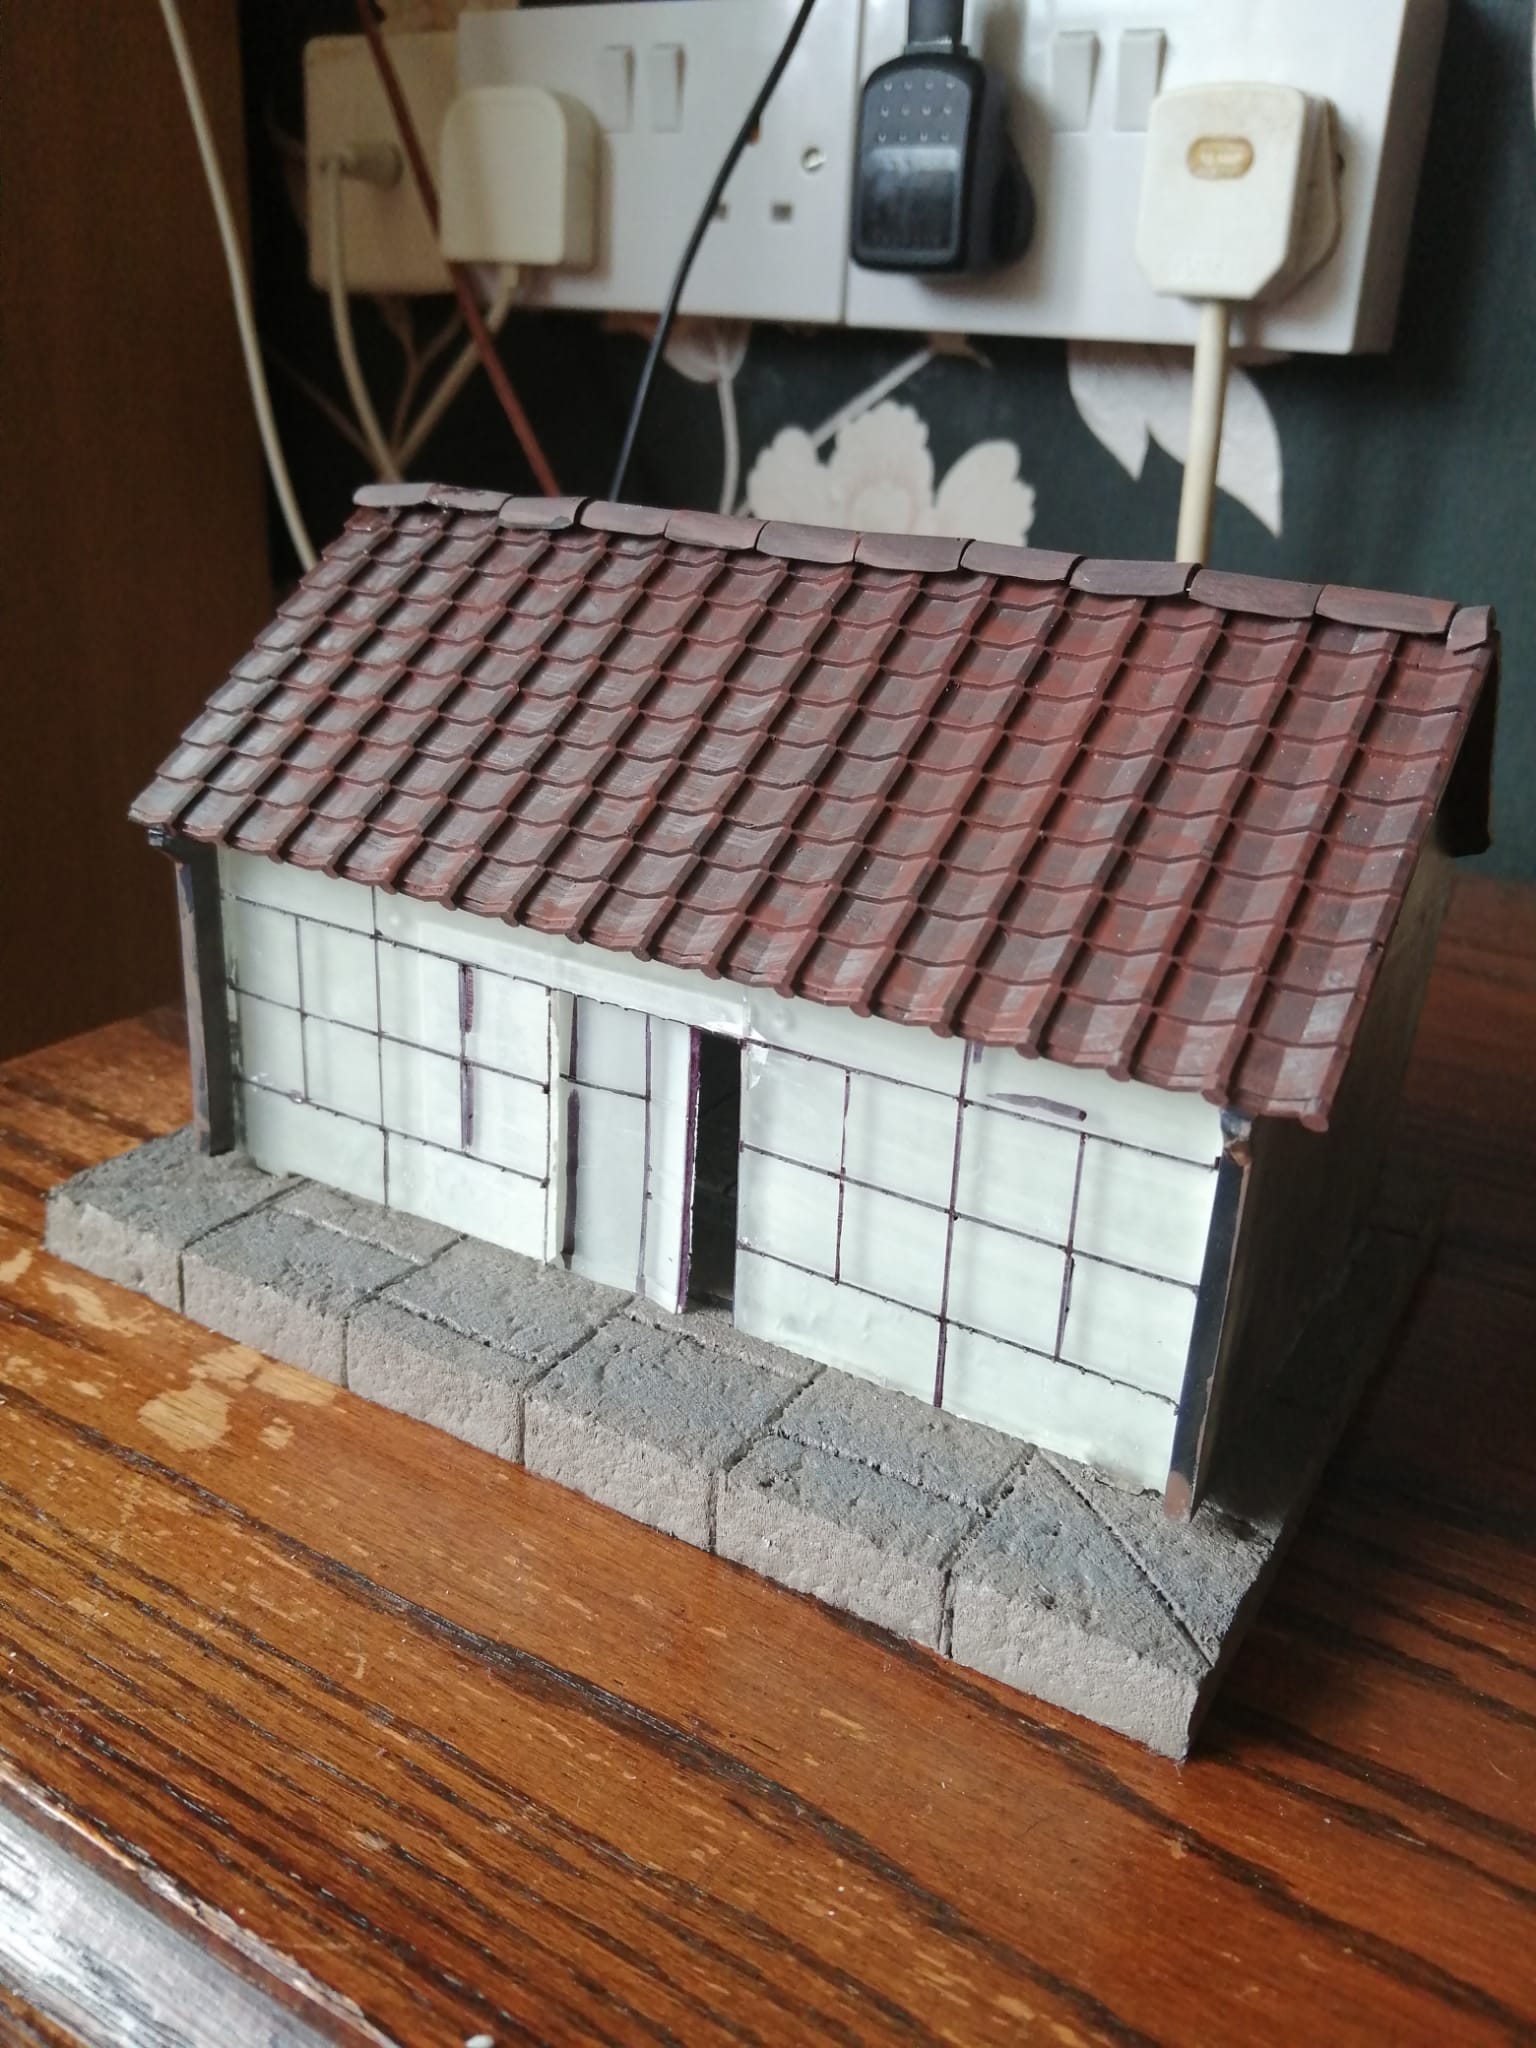
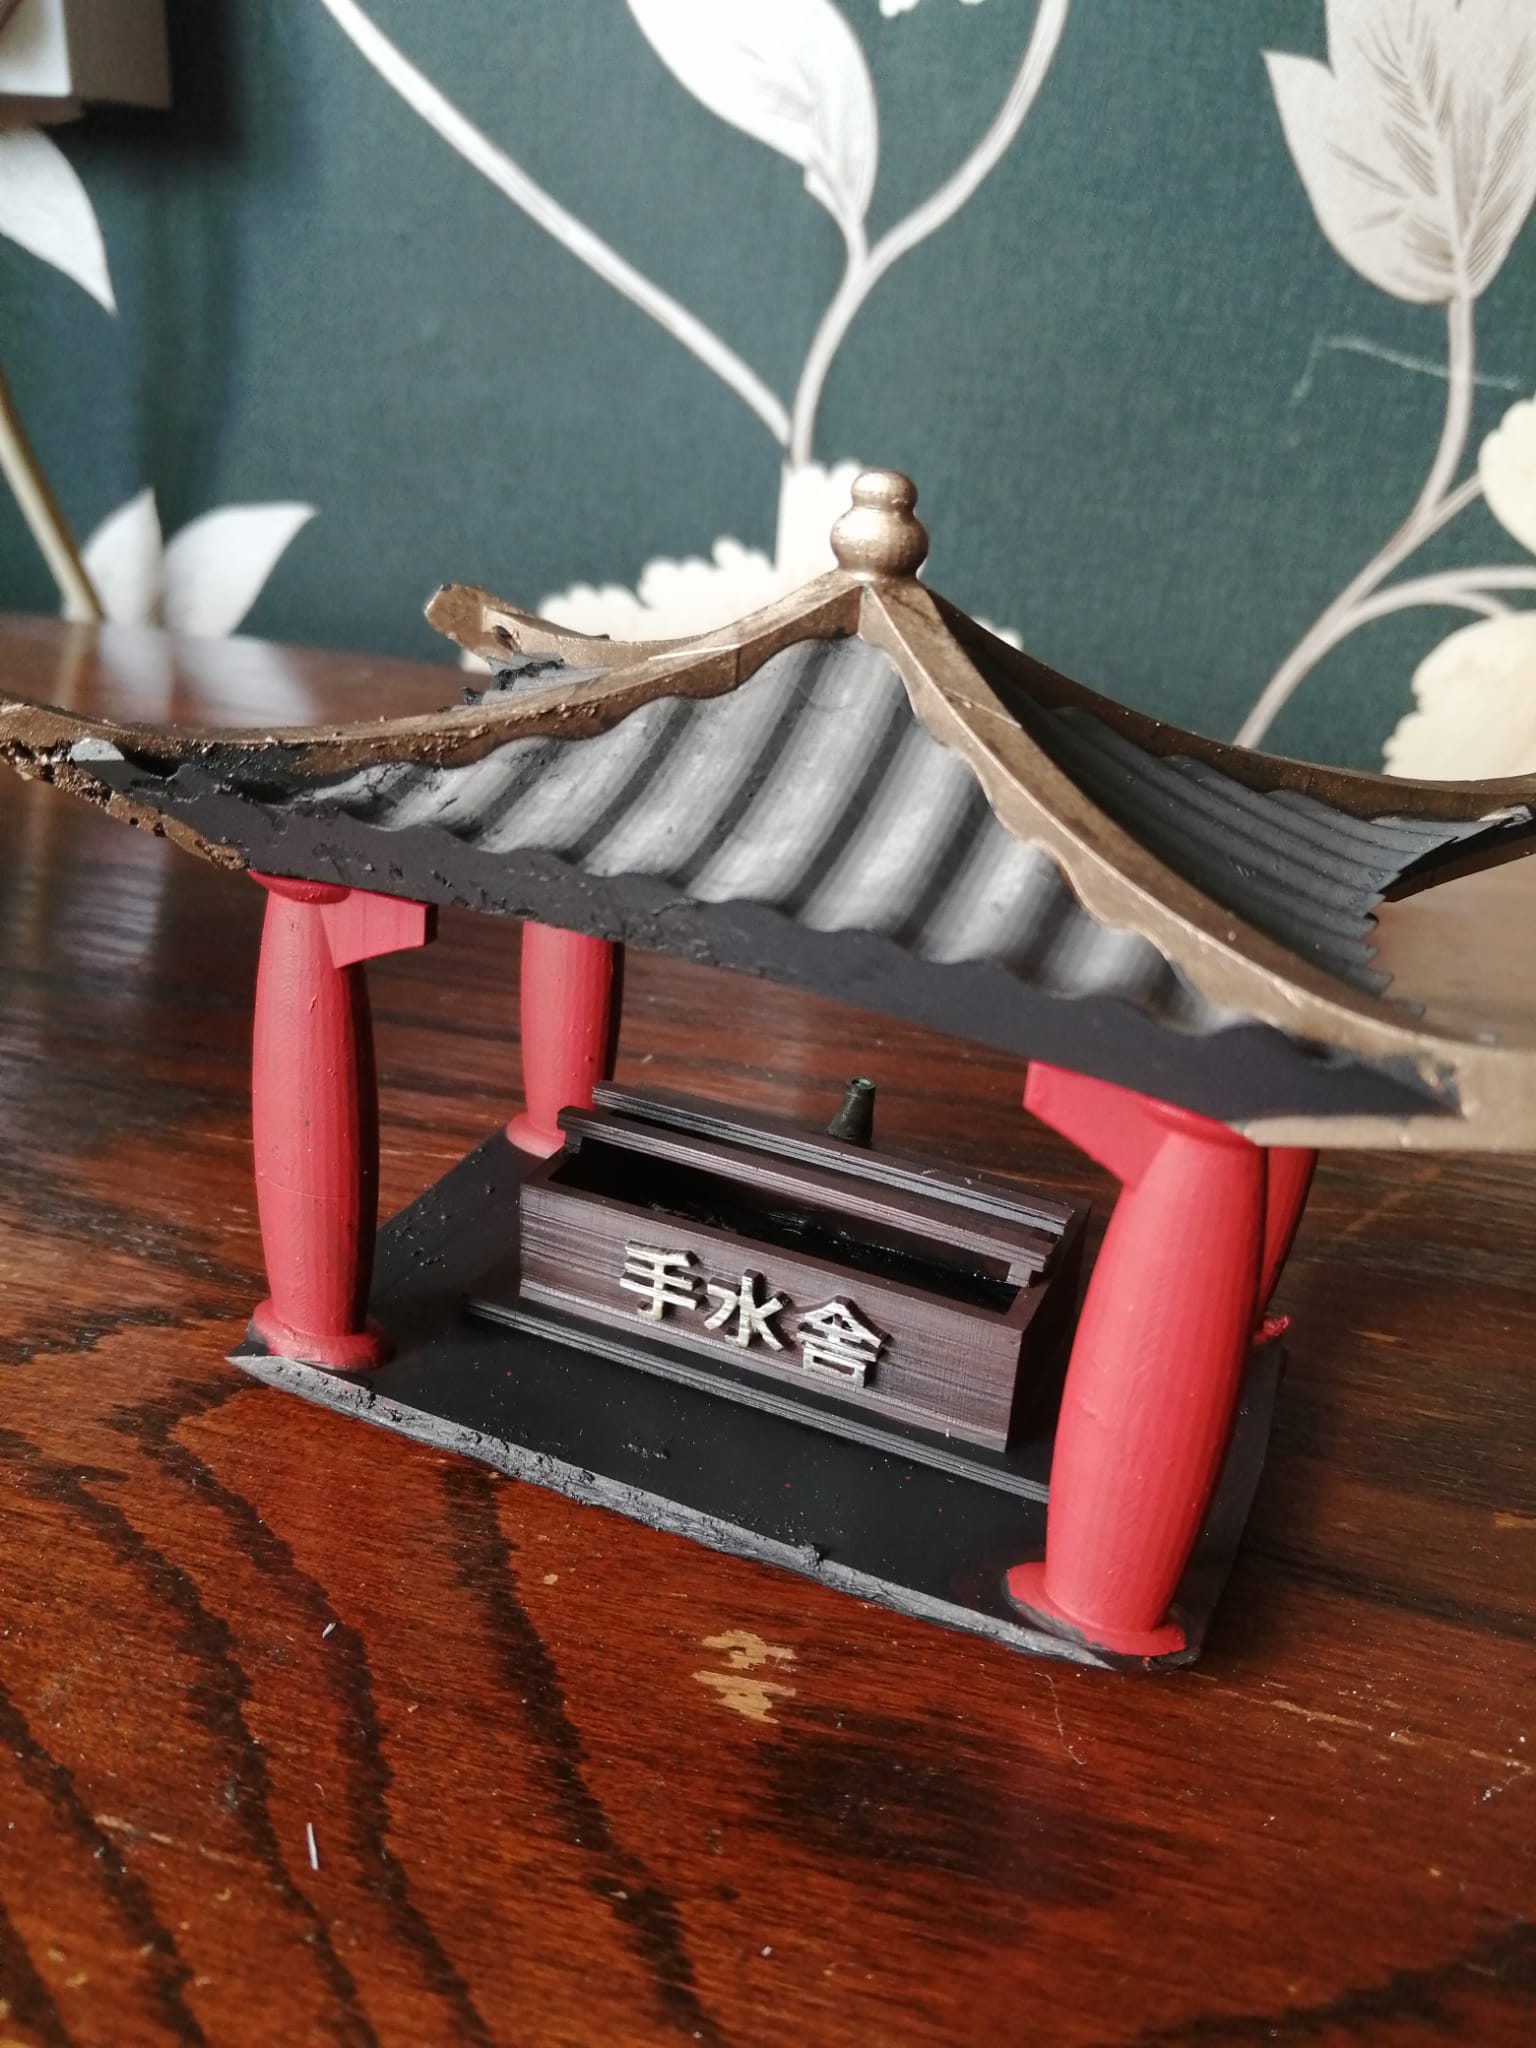
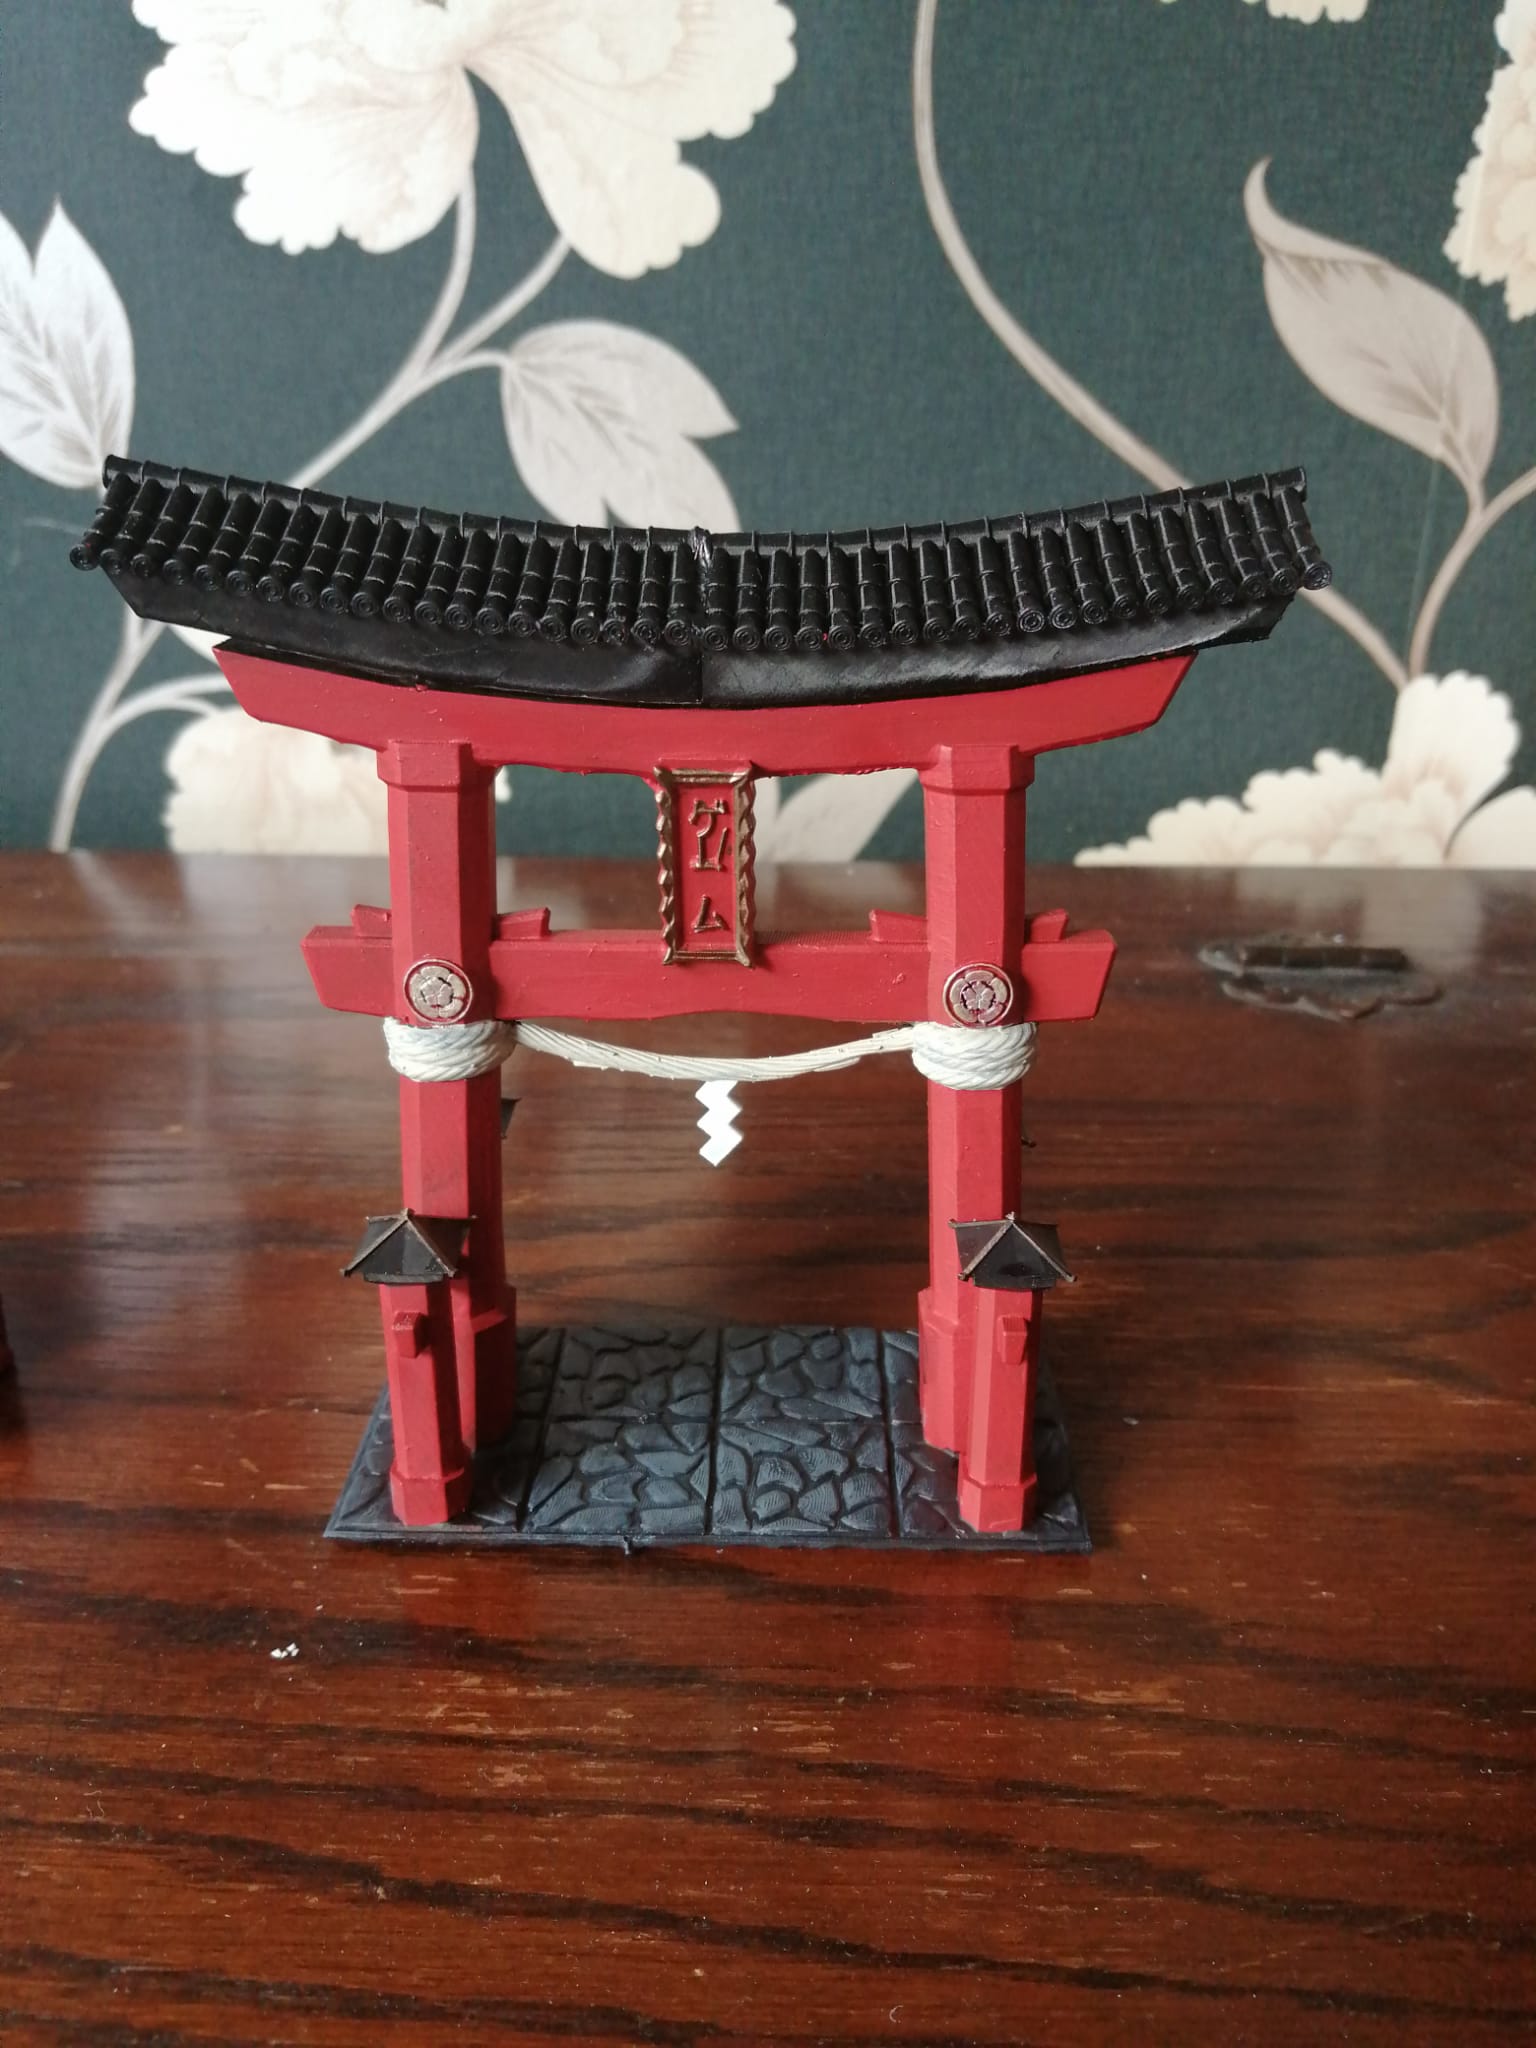
So I decided to go with a traditional (ish) black and red colour scheme for the more religious artefacts. You can’t see it but there is ‘water’ in the Temizuya using tinted 3D printer resin. Interesting effect is it appears to have ripples after using a UV torch cure it.
As the resin I was using was clear, I painted the back of the ‘paper’ walls in white ink which gives a translucent effect – the cross pieces where simple black Sharpie, although I slipped in places and you can’t clean it off. I mounted the house on a piece of XPS foam textured to give it a stone appearance.
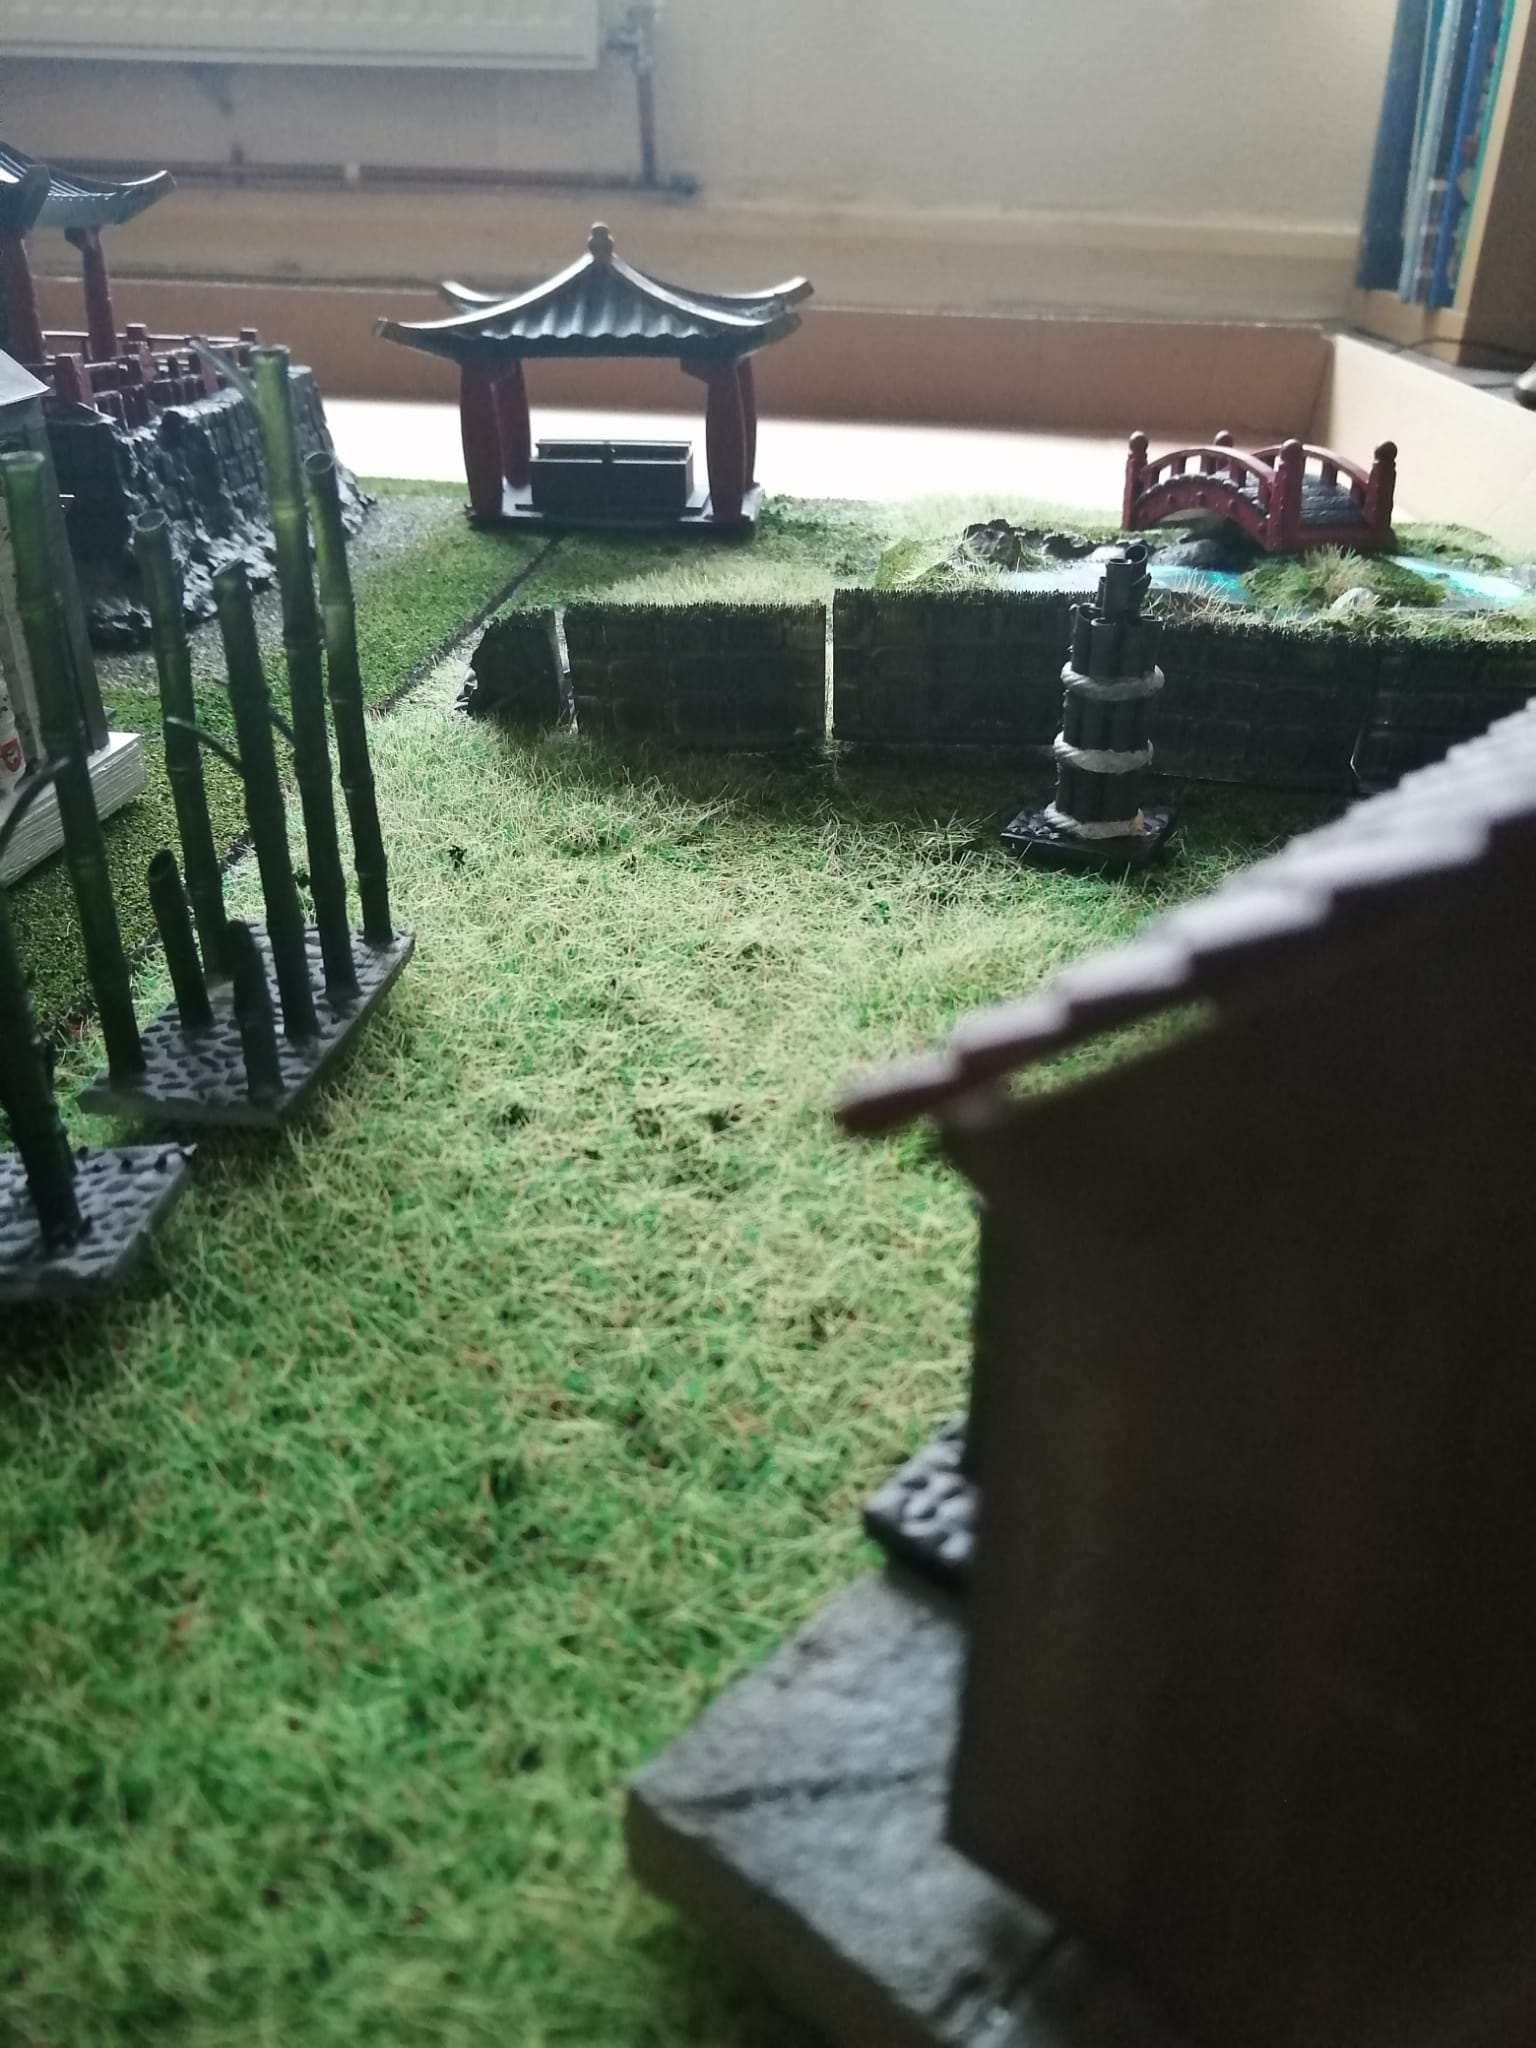
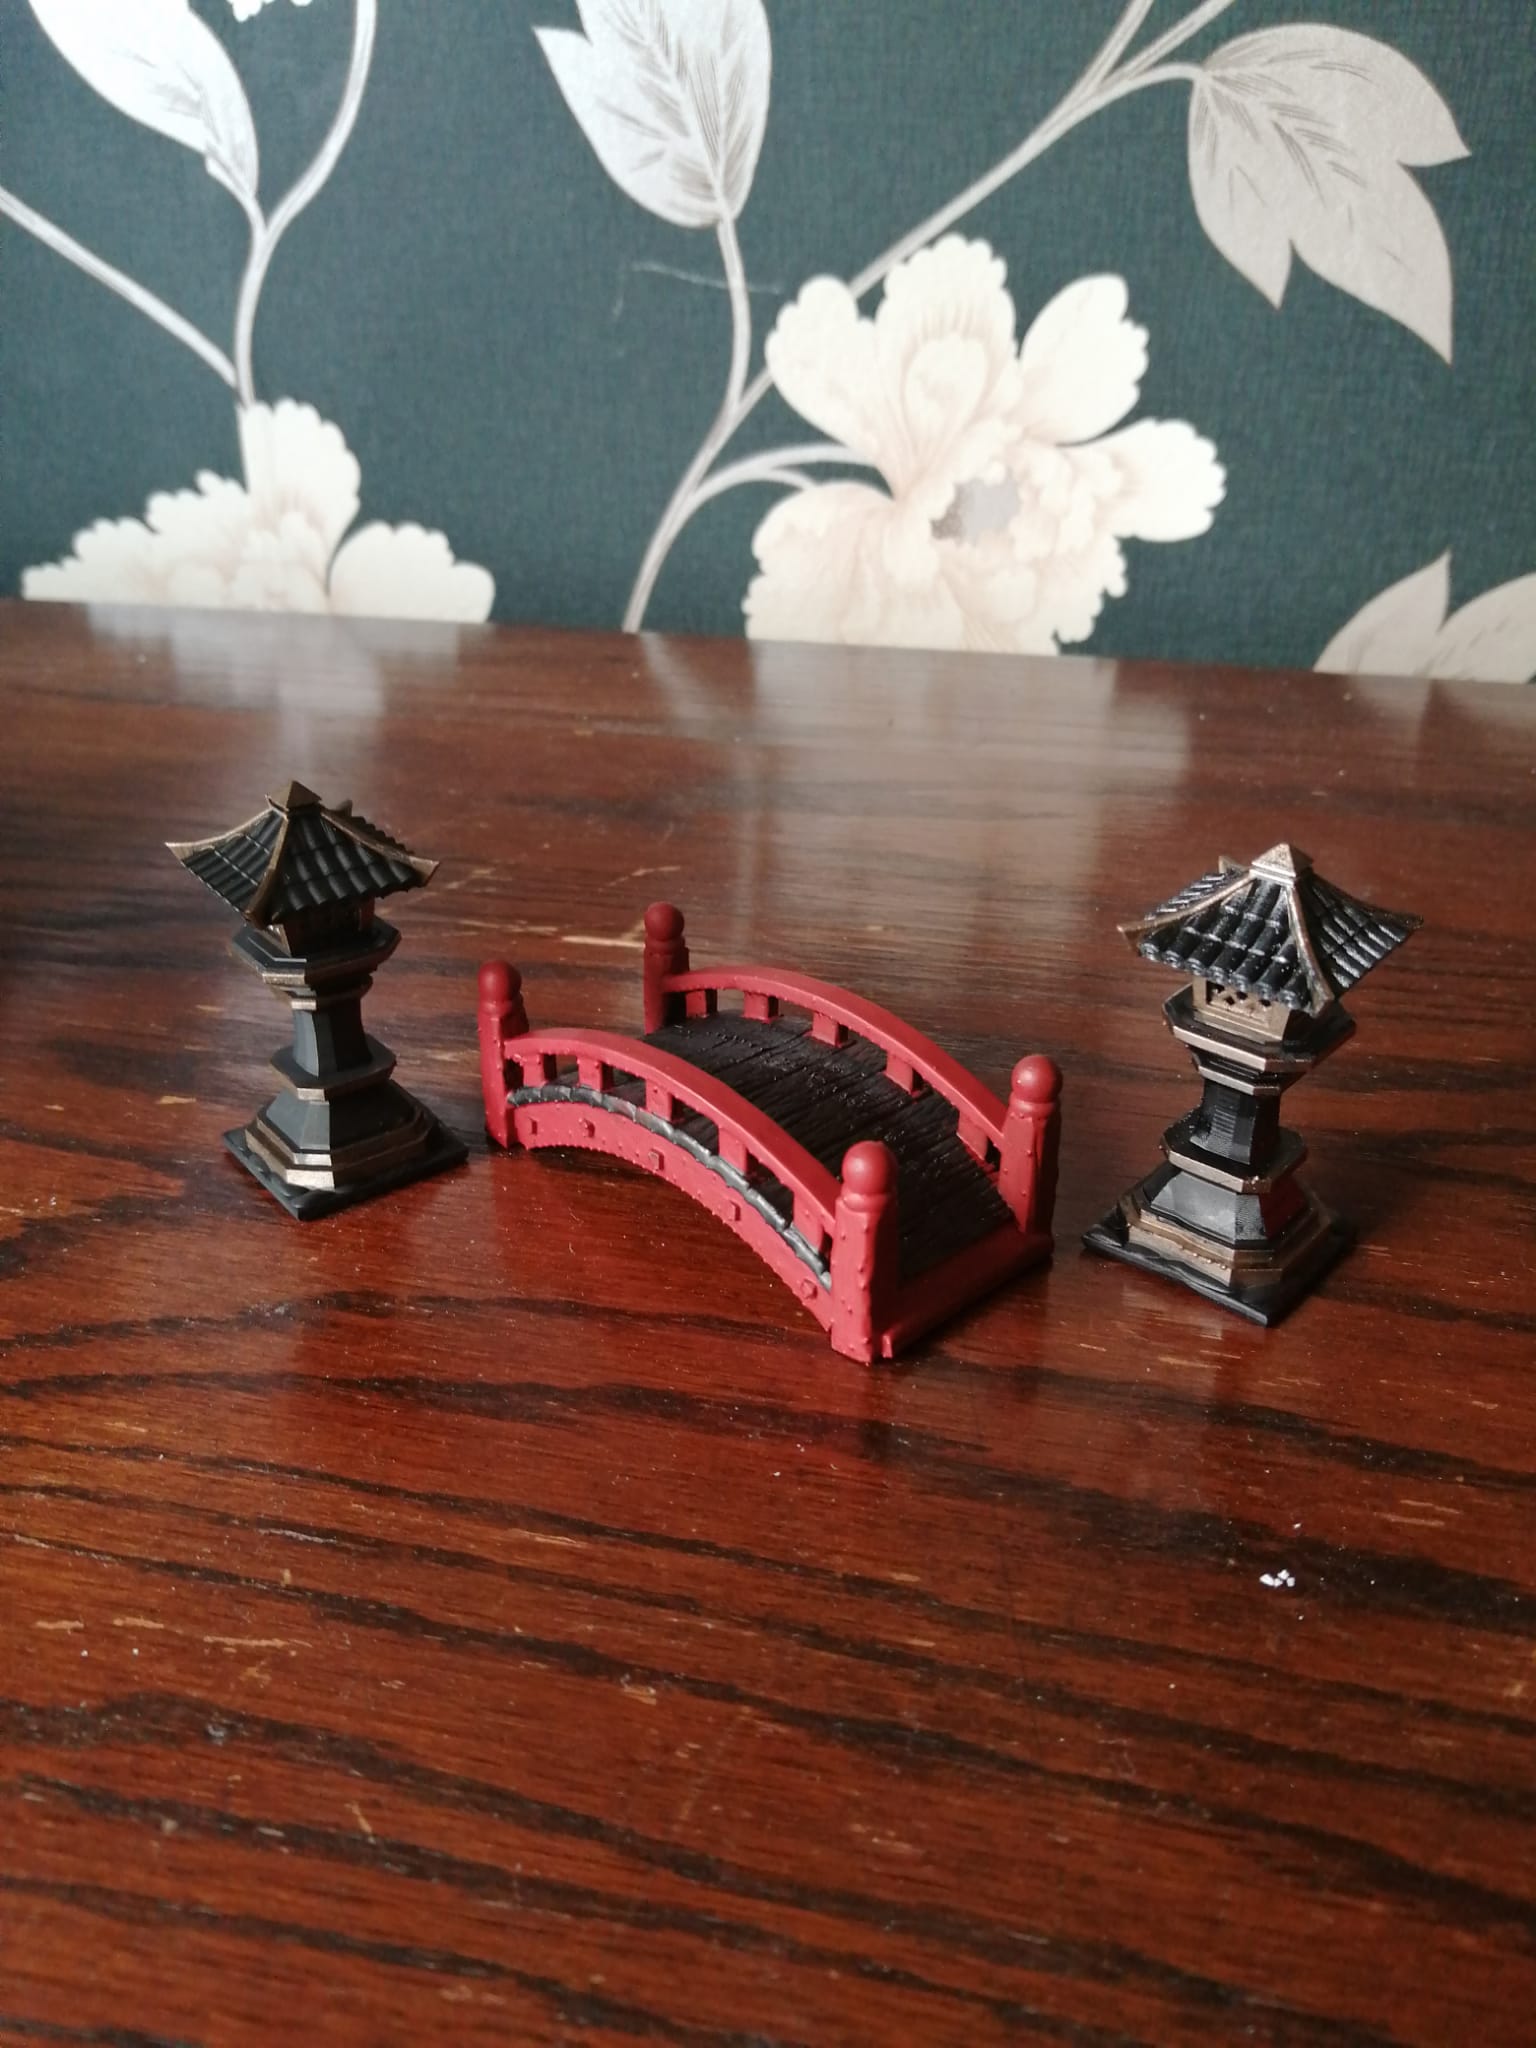
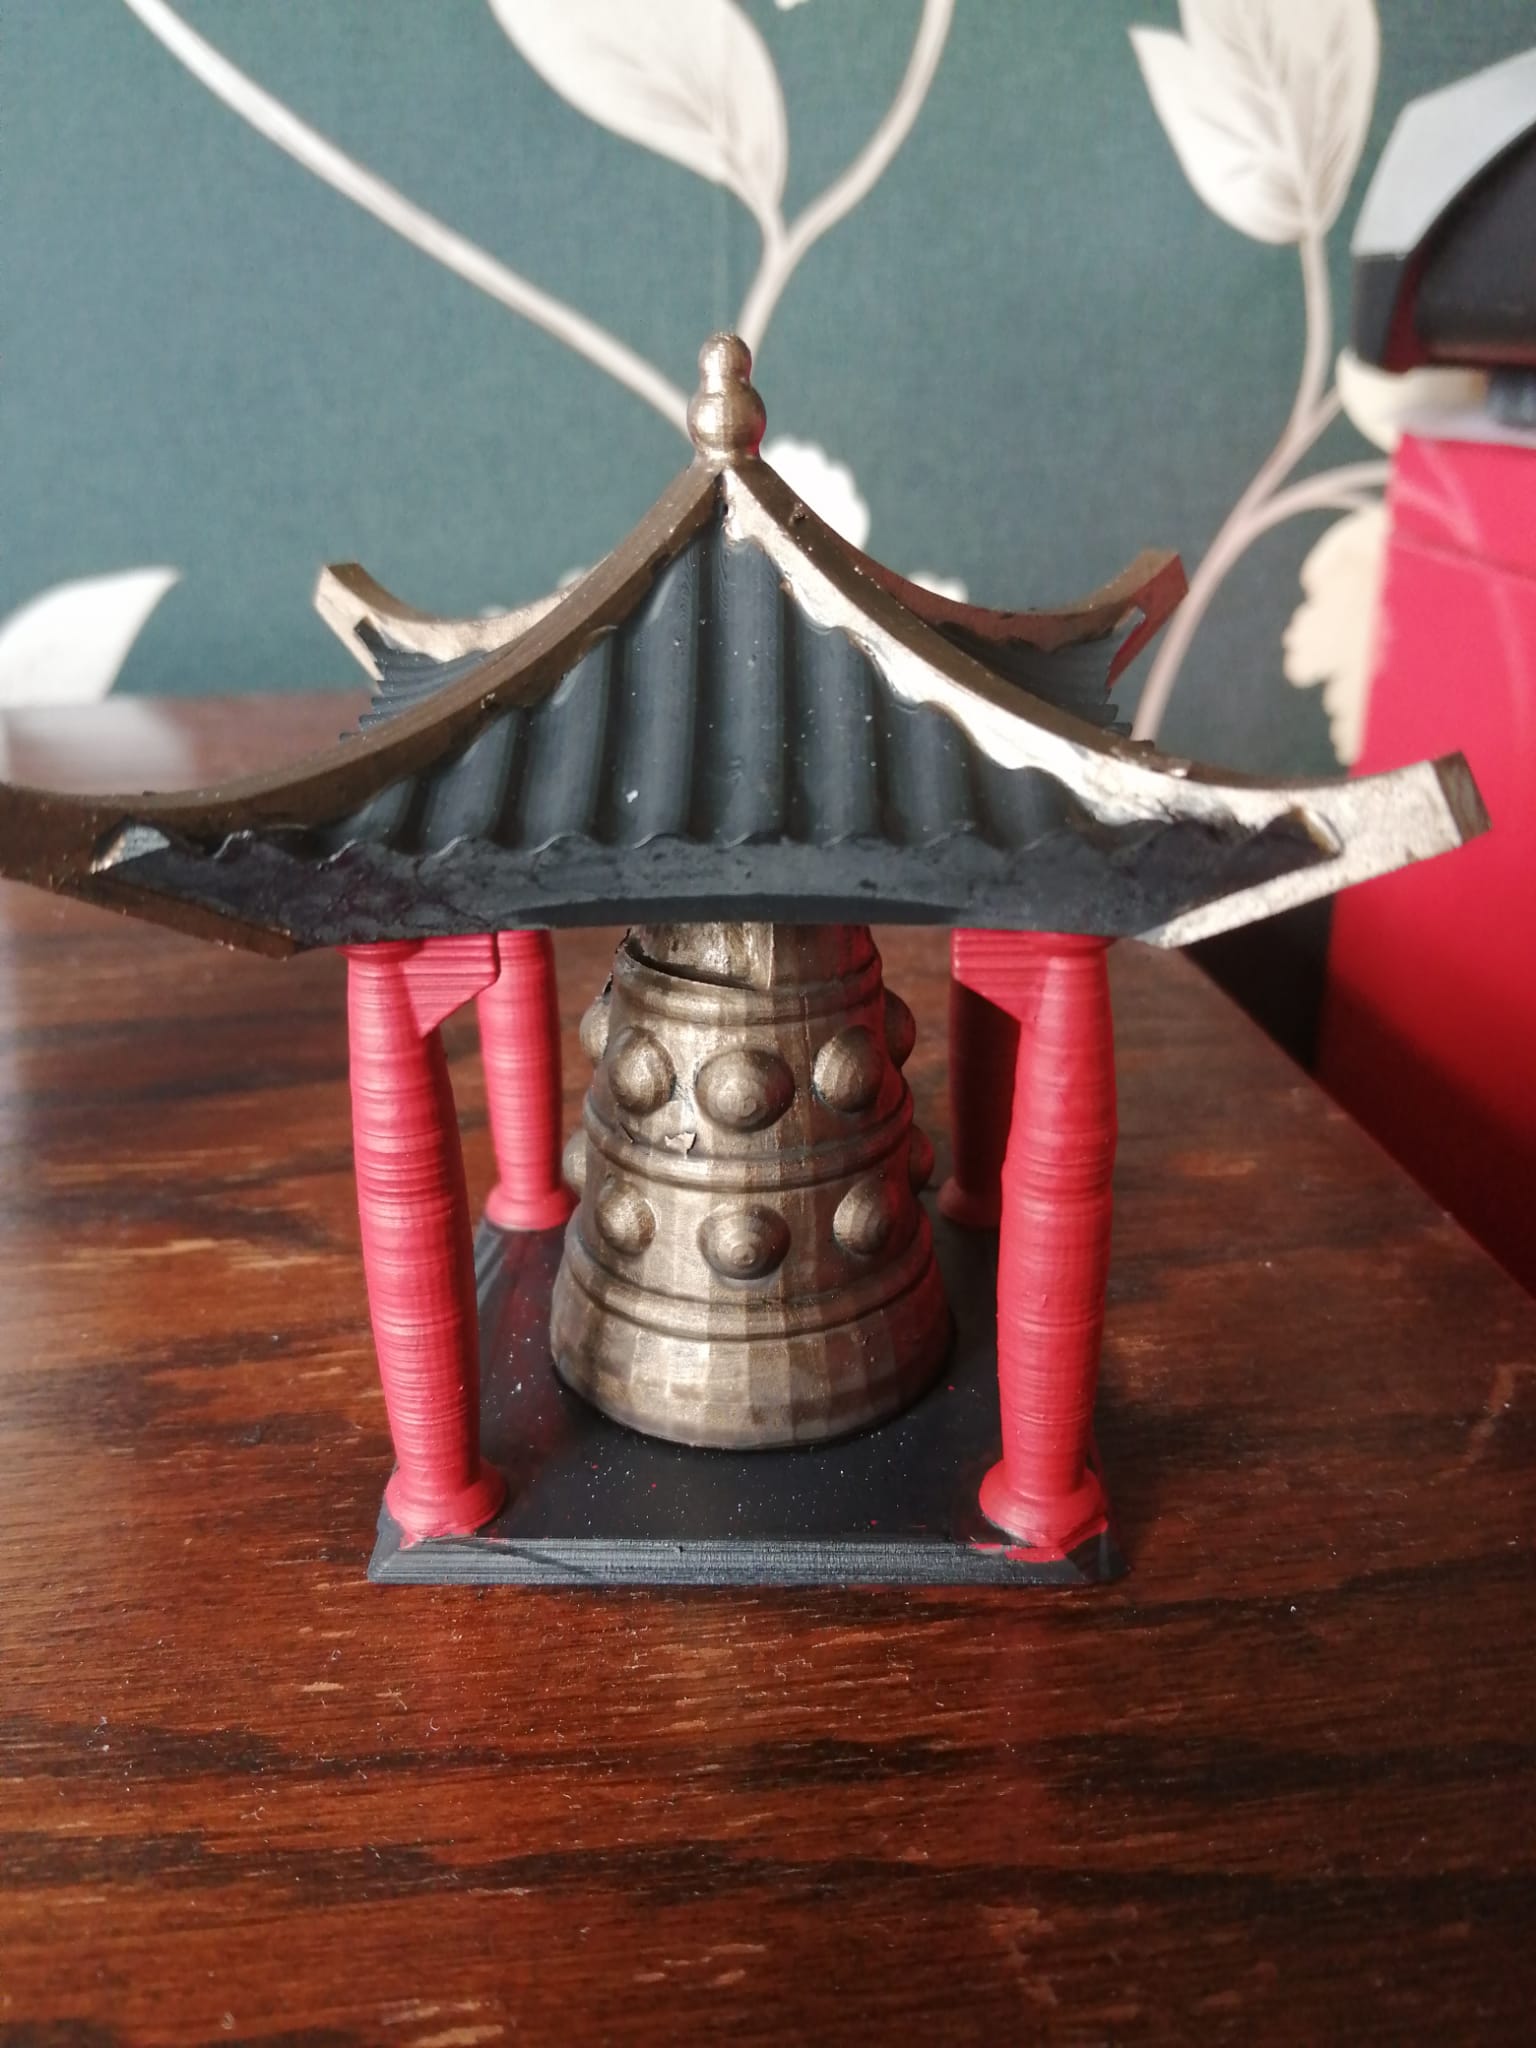
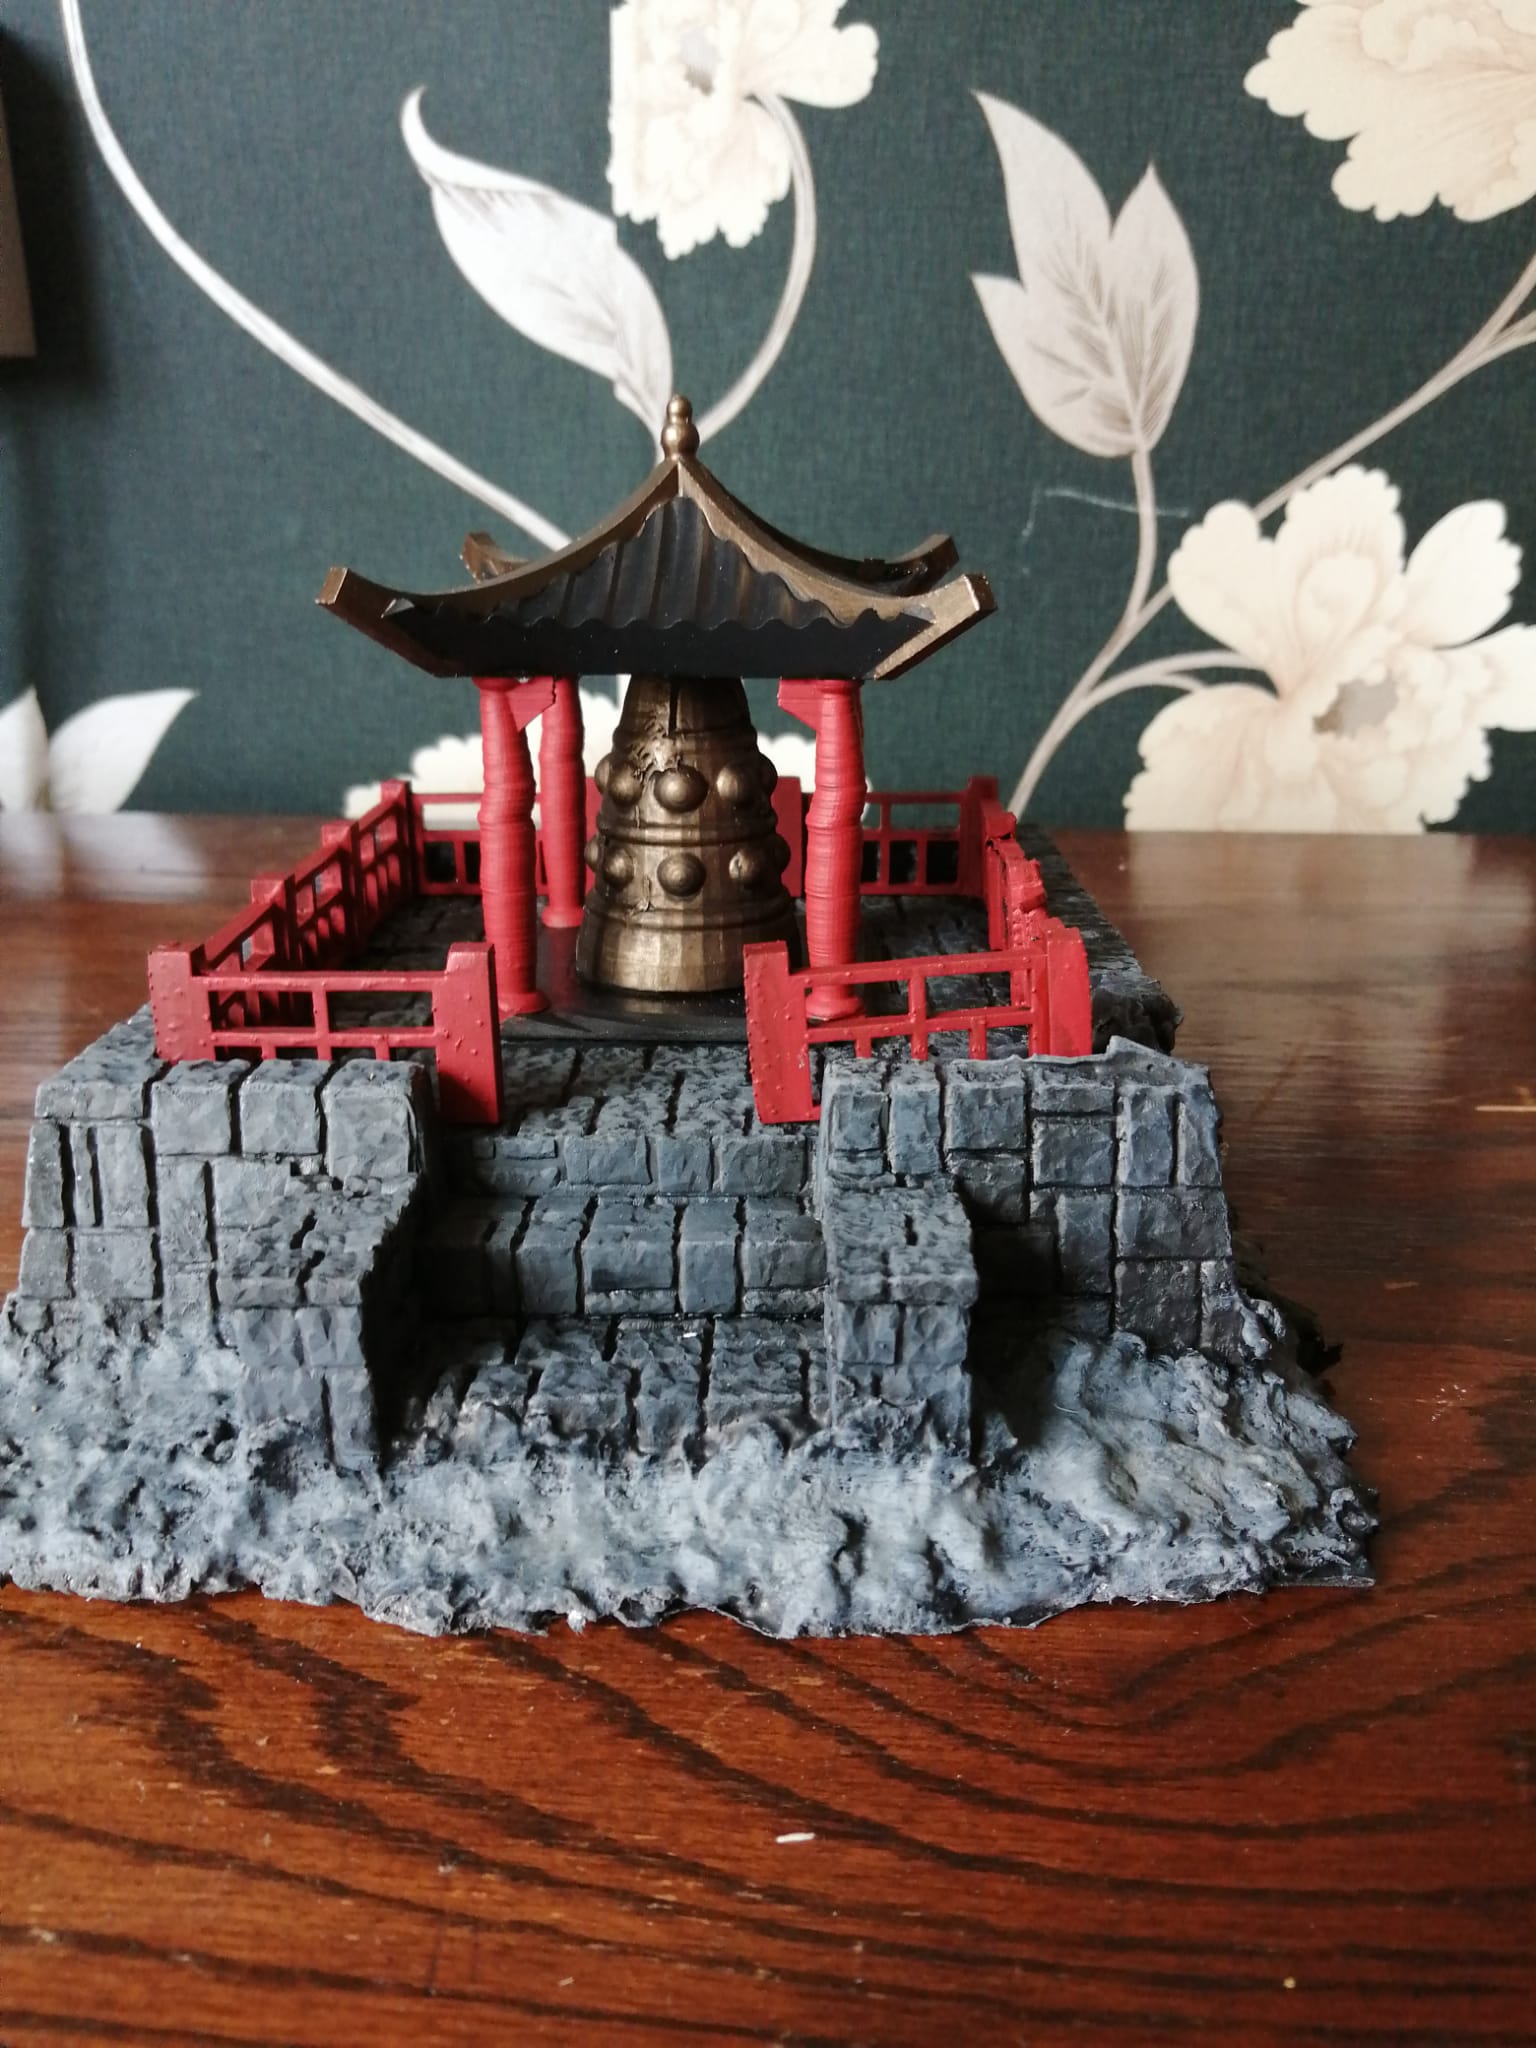 The Bell Shrine on an elevated platform - cover and elevated with restricted access/egress.
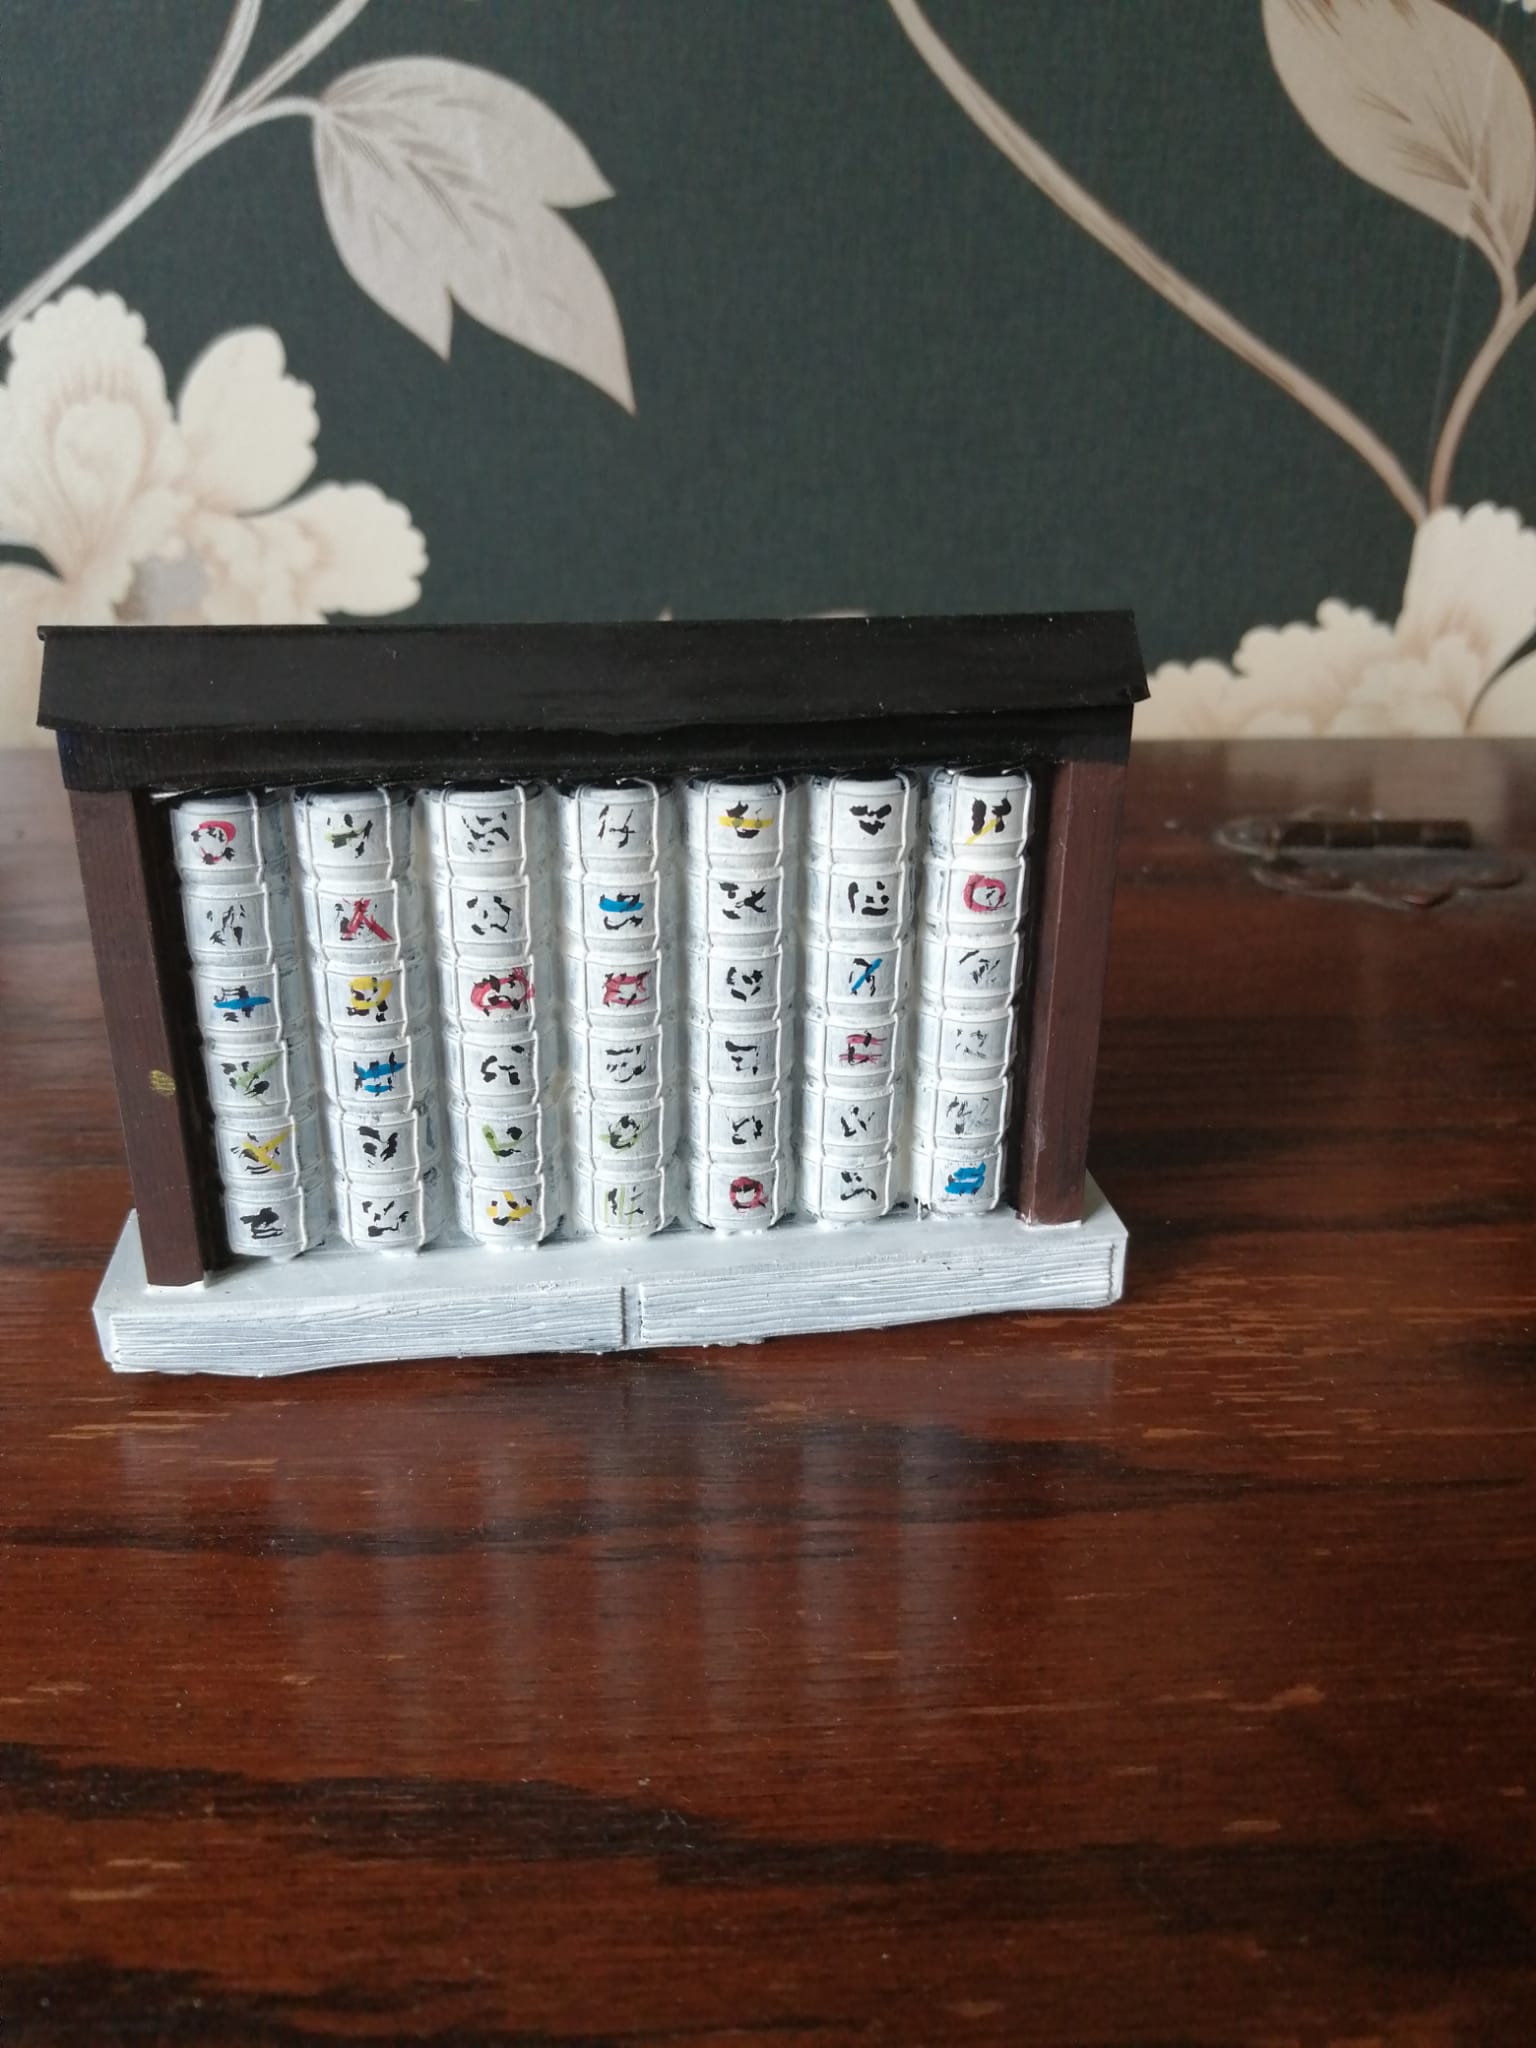 The Sake Offerings to the Shrine a nice piece of thematically suitable blocking terrain.
So basically that is the terrain pieces built and painted and it is on the the board. Bushido is played on a 2 foot by 2 foot. I had previously purchased some 1 foot square pieces of 3mm plywood from Amazon and had some large expanded polystyrene sheets from some furniture deliveries. I used PVA to glue the foam to the board and left it a couple of days before cutting the foam to size. I wasn’t looking for much variation in height on the board and decided to simply have one embankment that would run along one side of a road, so used some scrap foam to block out this. I then used some of Geek Gaming Scenics Modelling compound to smooth this into a more realistic embankment. The final element of the stage was to paint some watered down all purpose filler over everything to protect the foam (just add a bit of water to the pot of filler and stir to give a thick paint consistancy).
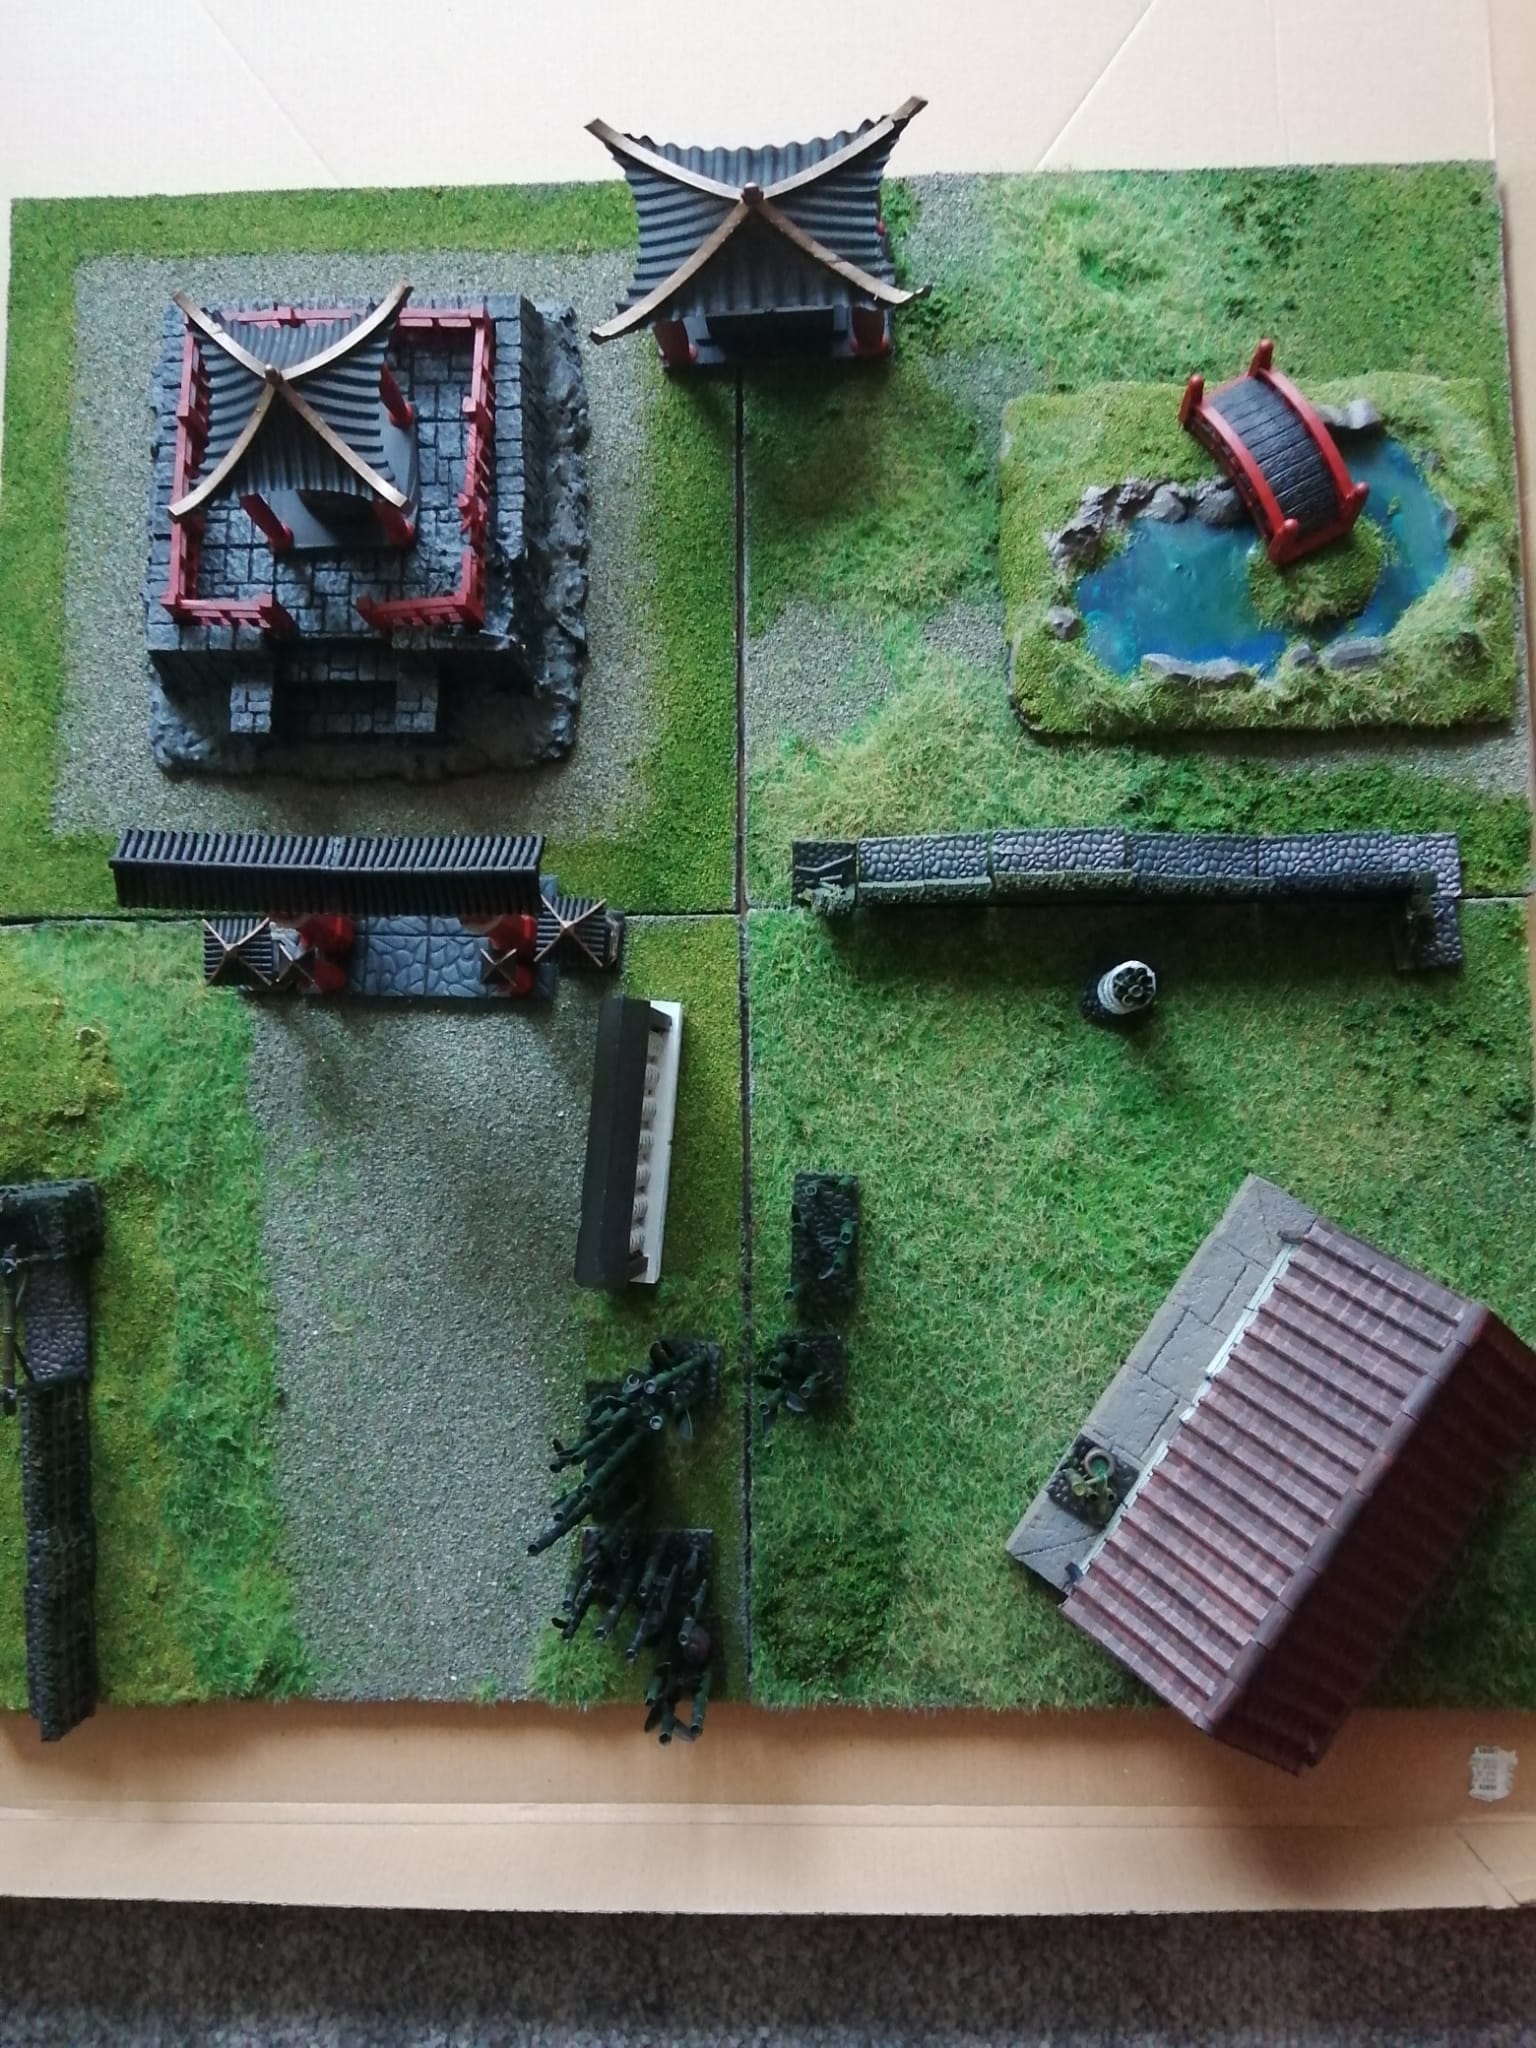
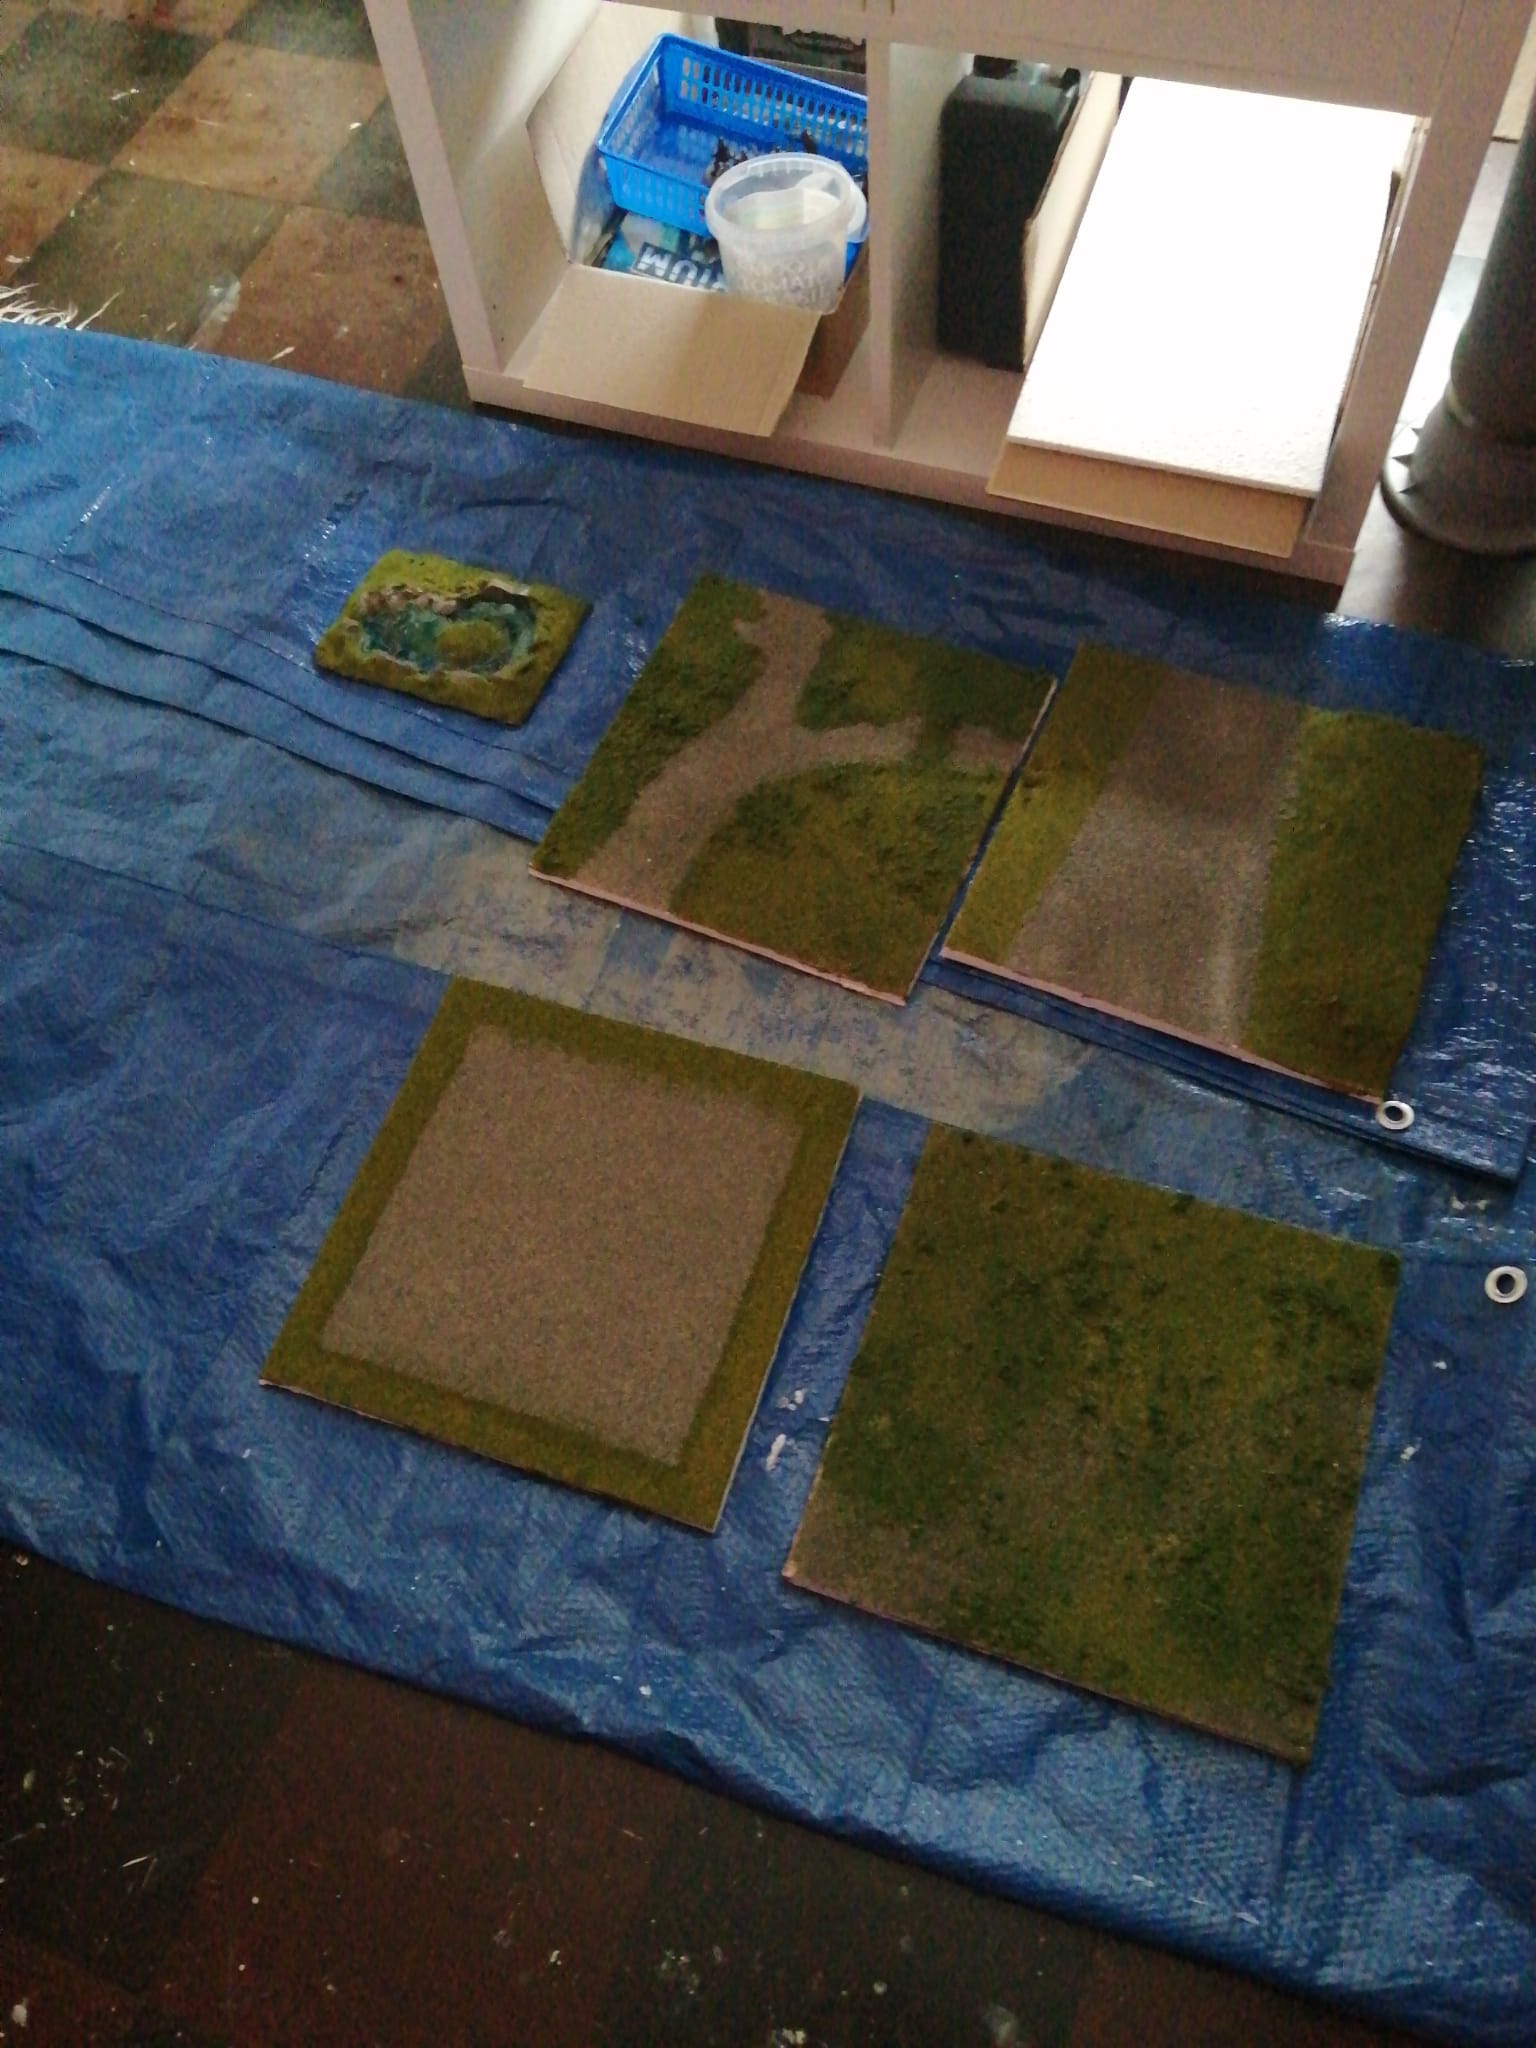
Board Logic
The traditional logic when building a gaming board is to ensure that the edges match to give one coherent board, no mater how you lay it out. However for this board I wanted 4 distinct areas, which I could always create new ones for in the future.
So my choice here was:
The Shrine – this would be a gravel square bordered by grass, very plain, very neat.
The Road – this would be a straight section of gravel road, flanked on one side by a grass embankment and a plain grass verge on the other.
The Path – a winding path through a grassy area, probably an area where bamboo grows.
The Wild – an open piece of scrub land that could be used for anything.
 Board elements waiting for glue to dry