


Malifaux Title Masters


Recommendations: 278
About the Project
Wyrd has been releasing new titles for every master in Malifaux. This means that every crew is getting a new model to represent the Master, and at least one other model to go with the keyword. I have a huge Malifaux collection, and as a result I have been buying all of these boxes as they have been released, and they have mostly been going in my pile of shame. Lets see if we can fix that.
Related Game: Malifaux
Related Company: Wyrd Miniatures
Related Genre: Western
This Project is Active
Fancy hats and murder
Well if you like morally gray characters, this box isn’t for you! One of these men is a violent misogynist who is responsible for untold deaths, and the other is a violent misogynist who is responsible for untold deaths and brings his victims back with necromancy… pretty typical for Malifaux I s’pose.
My Seamus crew is done up on wood floor bases since he is known for breaking into shady brothels and killing and then raising all of the ladies. It was an older basing scheme when I was just getting my feet wet in the hobby, so I might go back and redo that crew at some point.
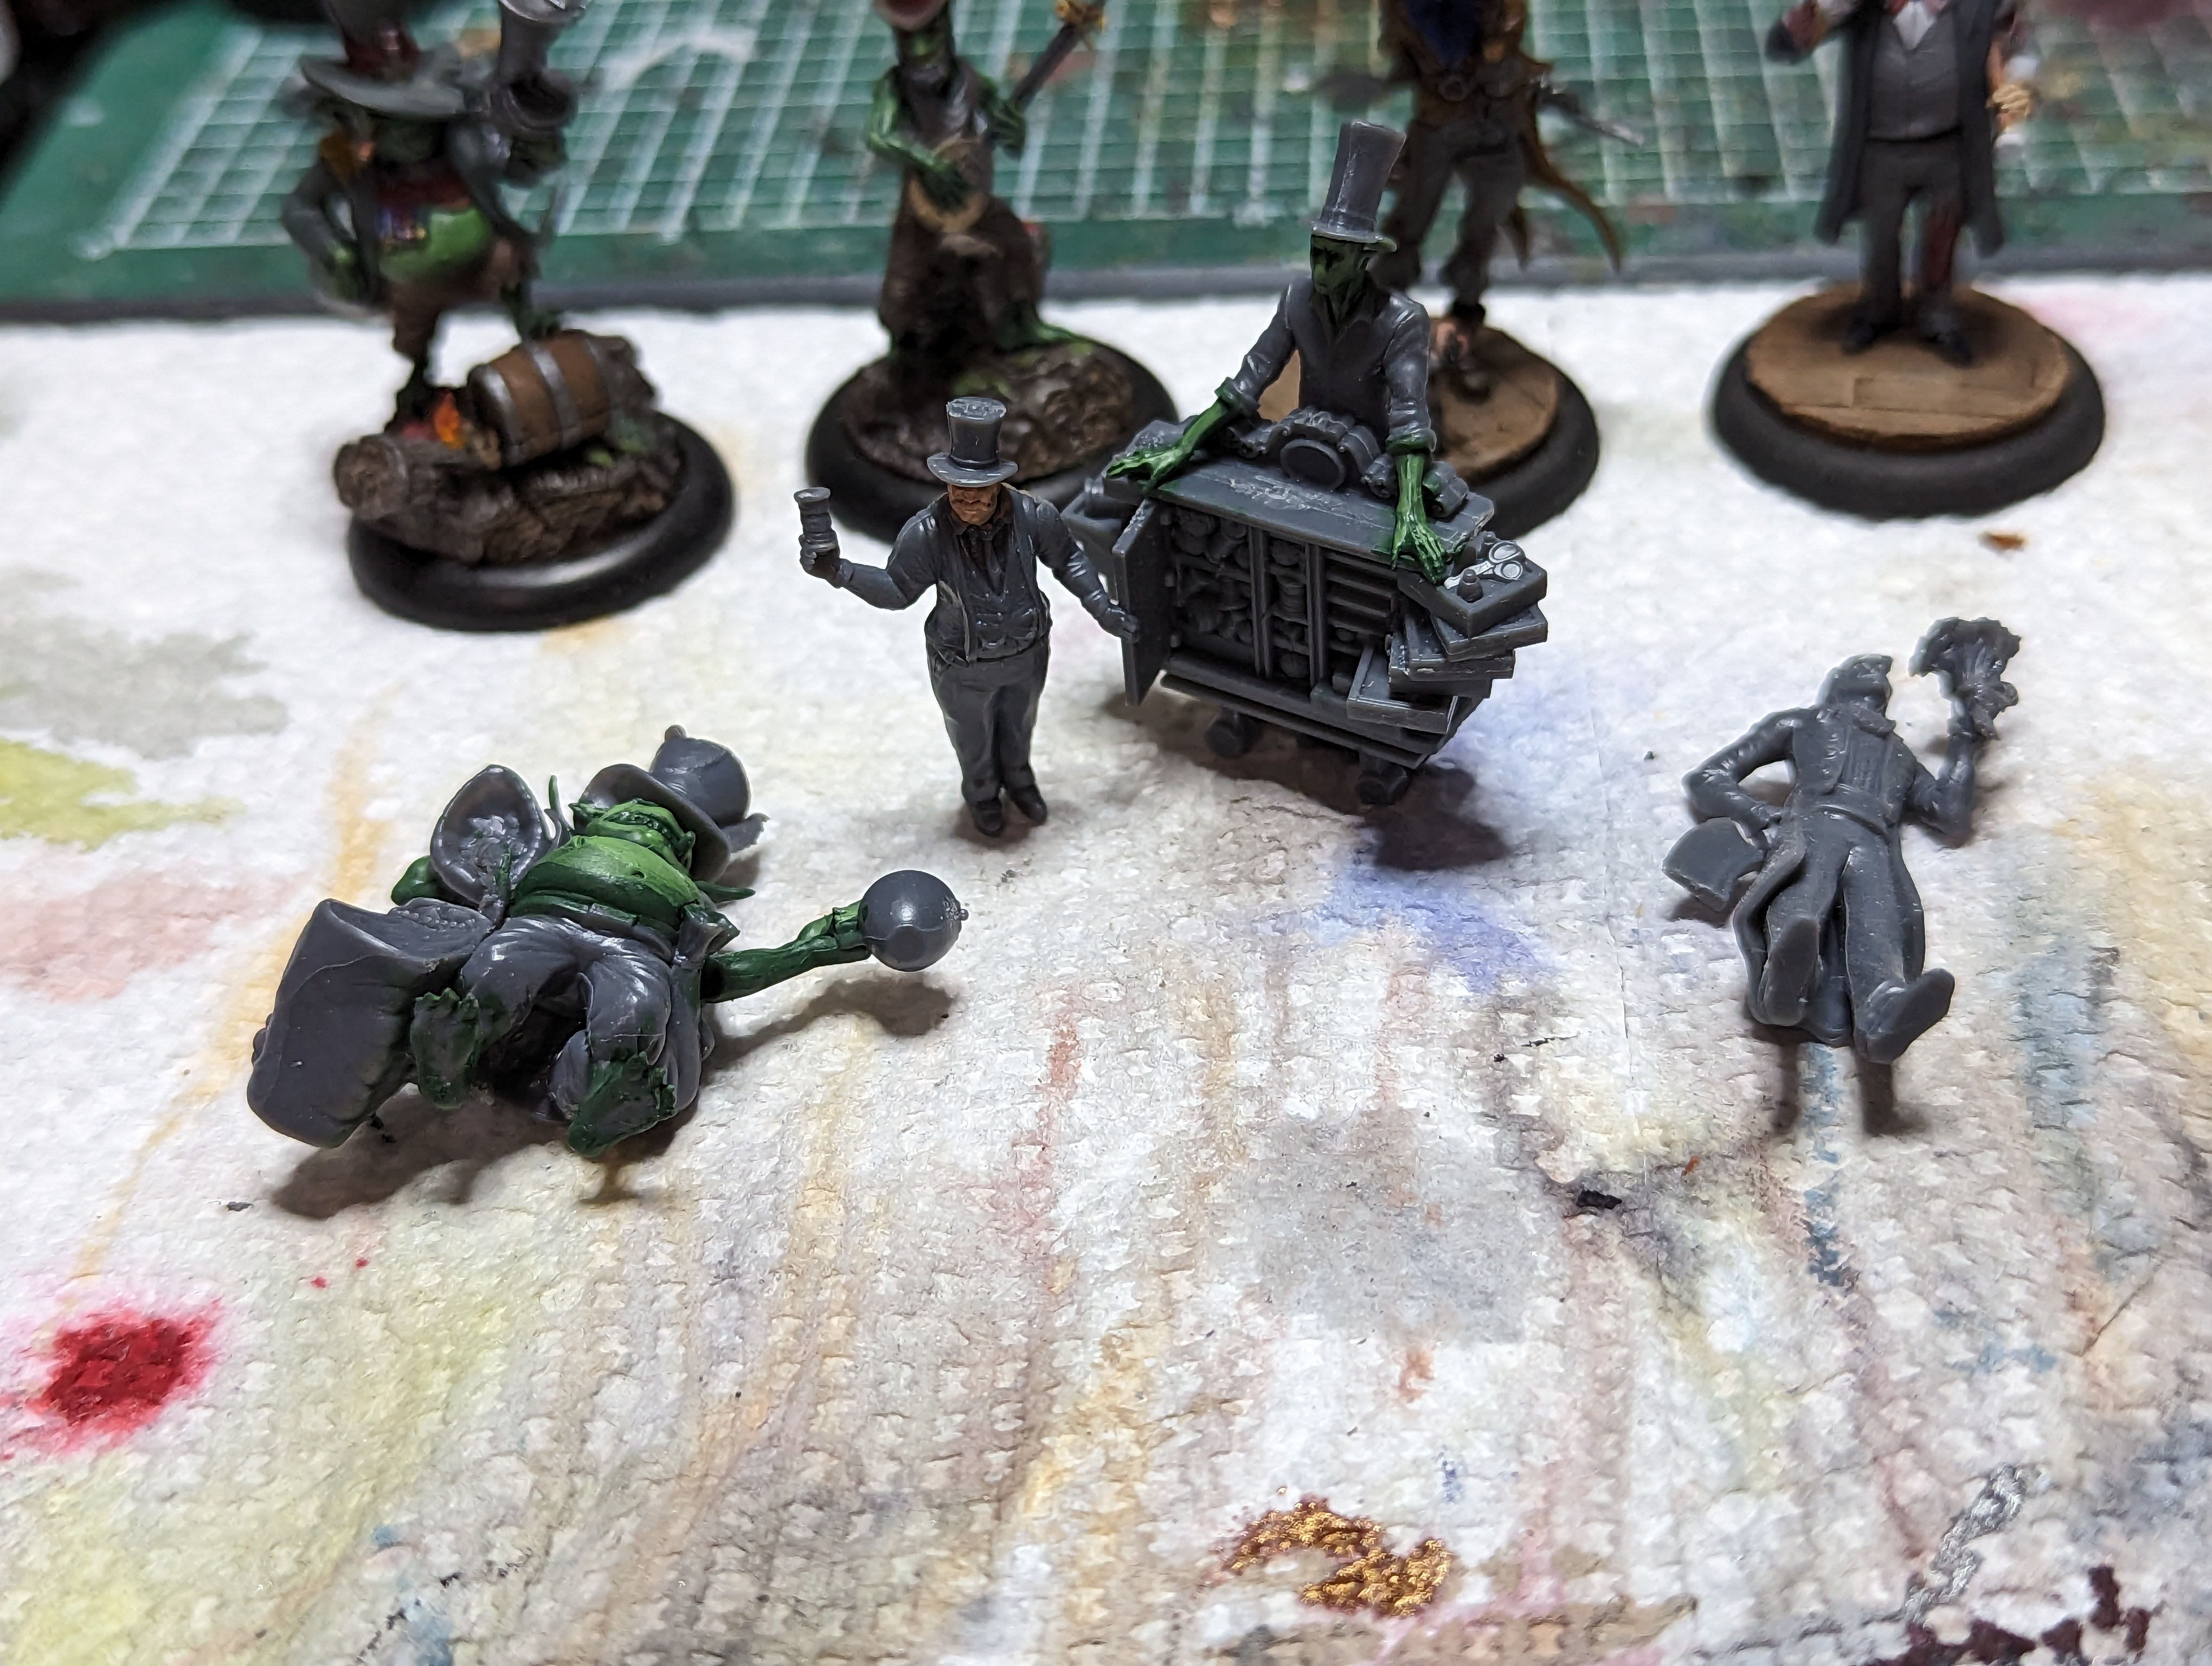
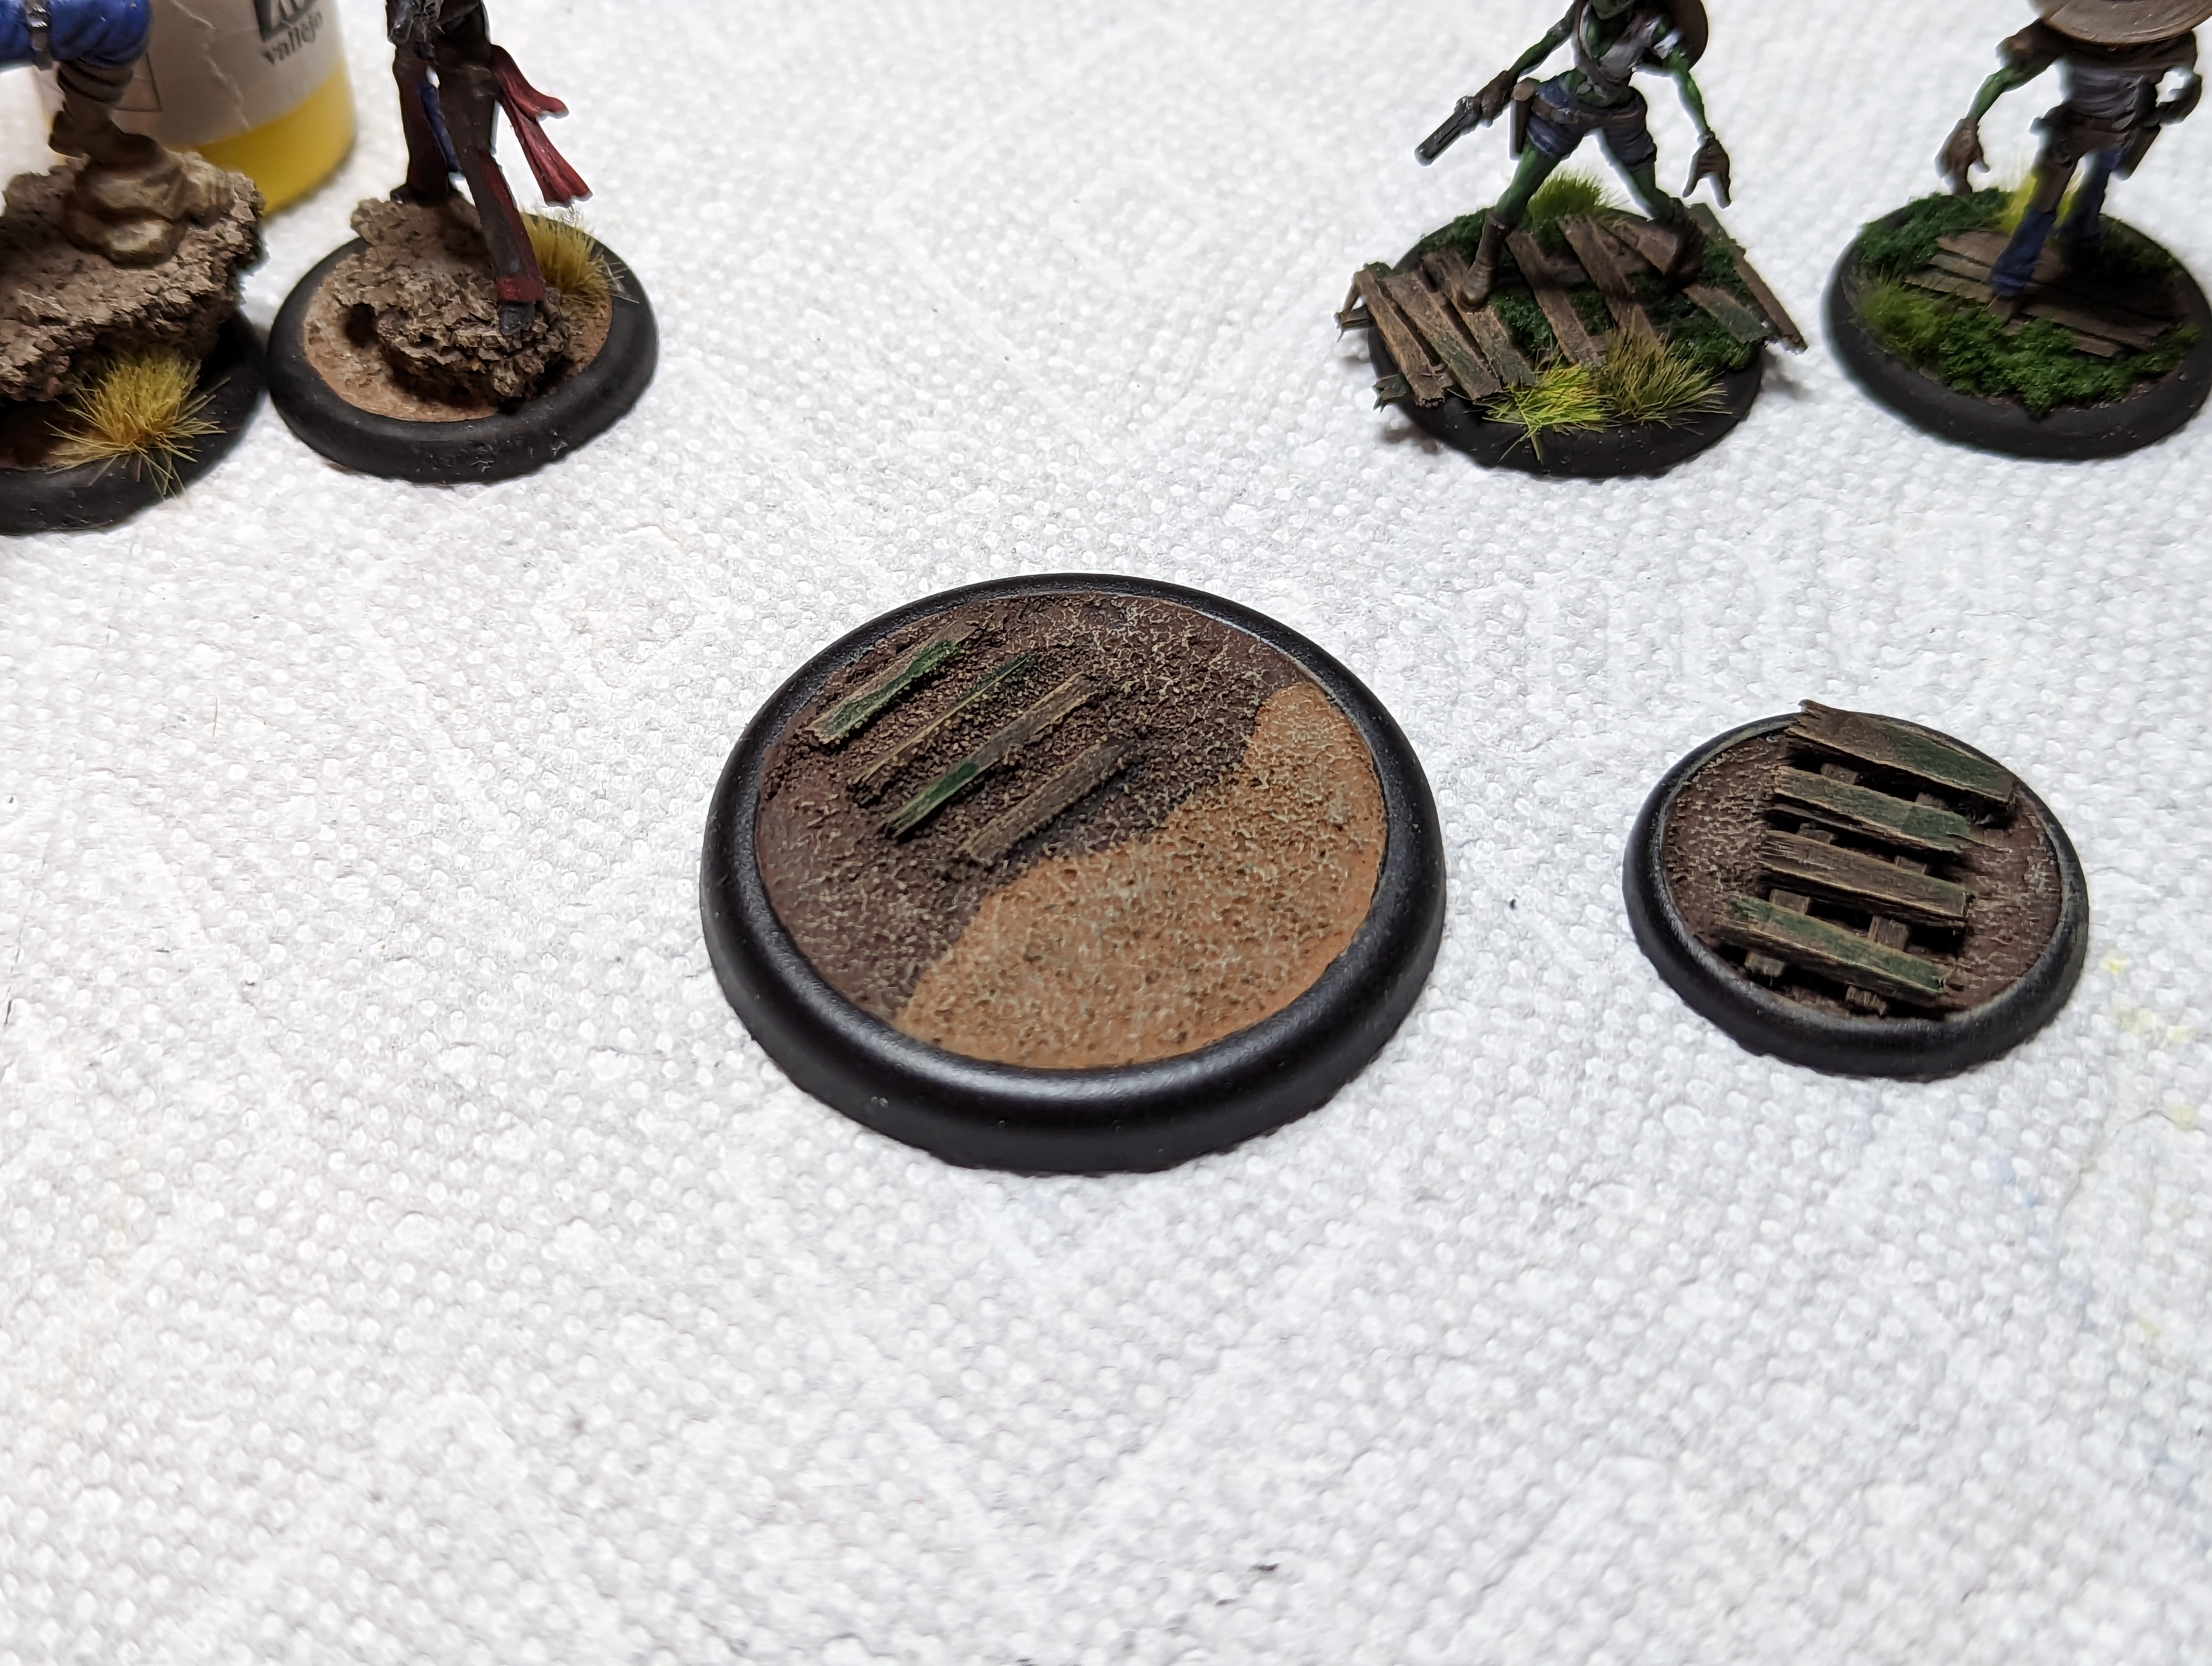
Som’er is one of the many Bayou crews, and there are only so many different varieties of bayou bases I could come up with. So for his crew I decided to buy these little plastic base inserts to spice things up a bit. It’ll be interesting to try to find a way to blend them.

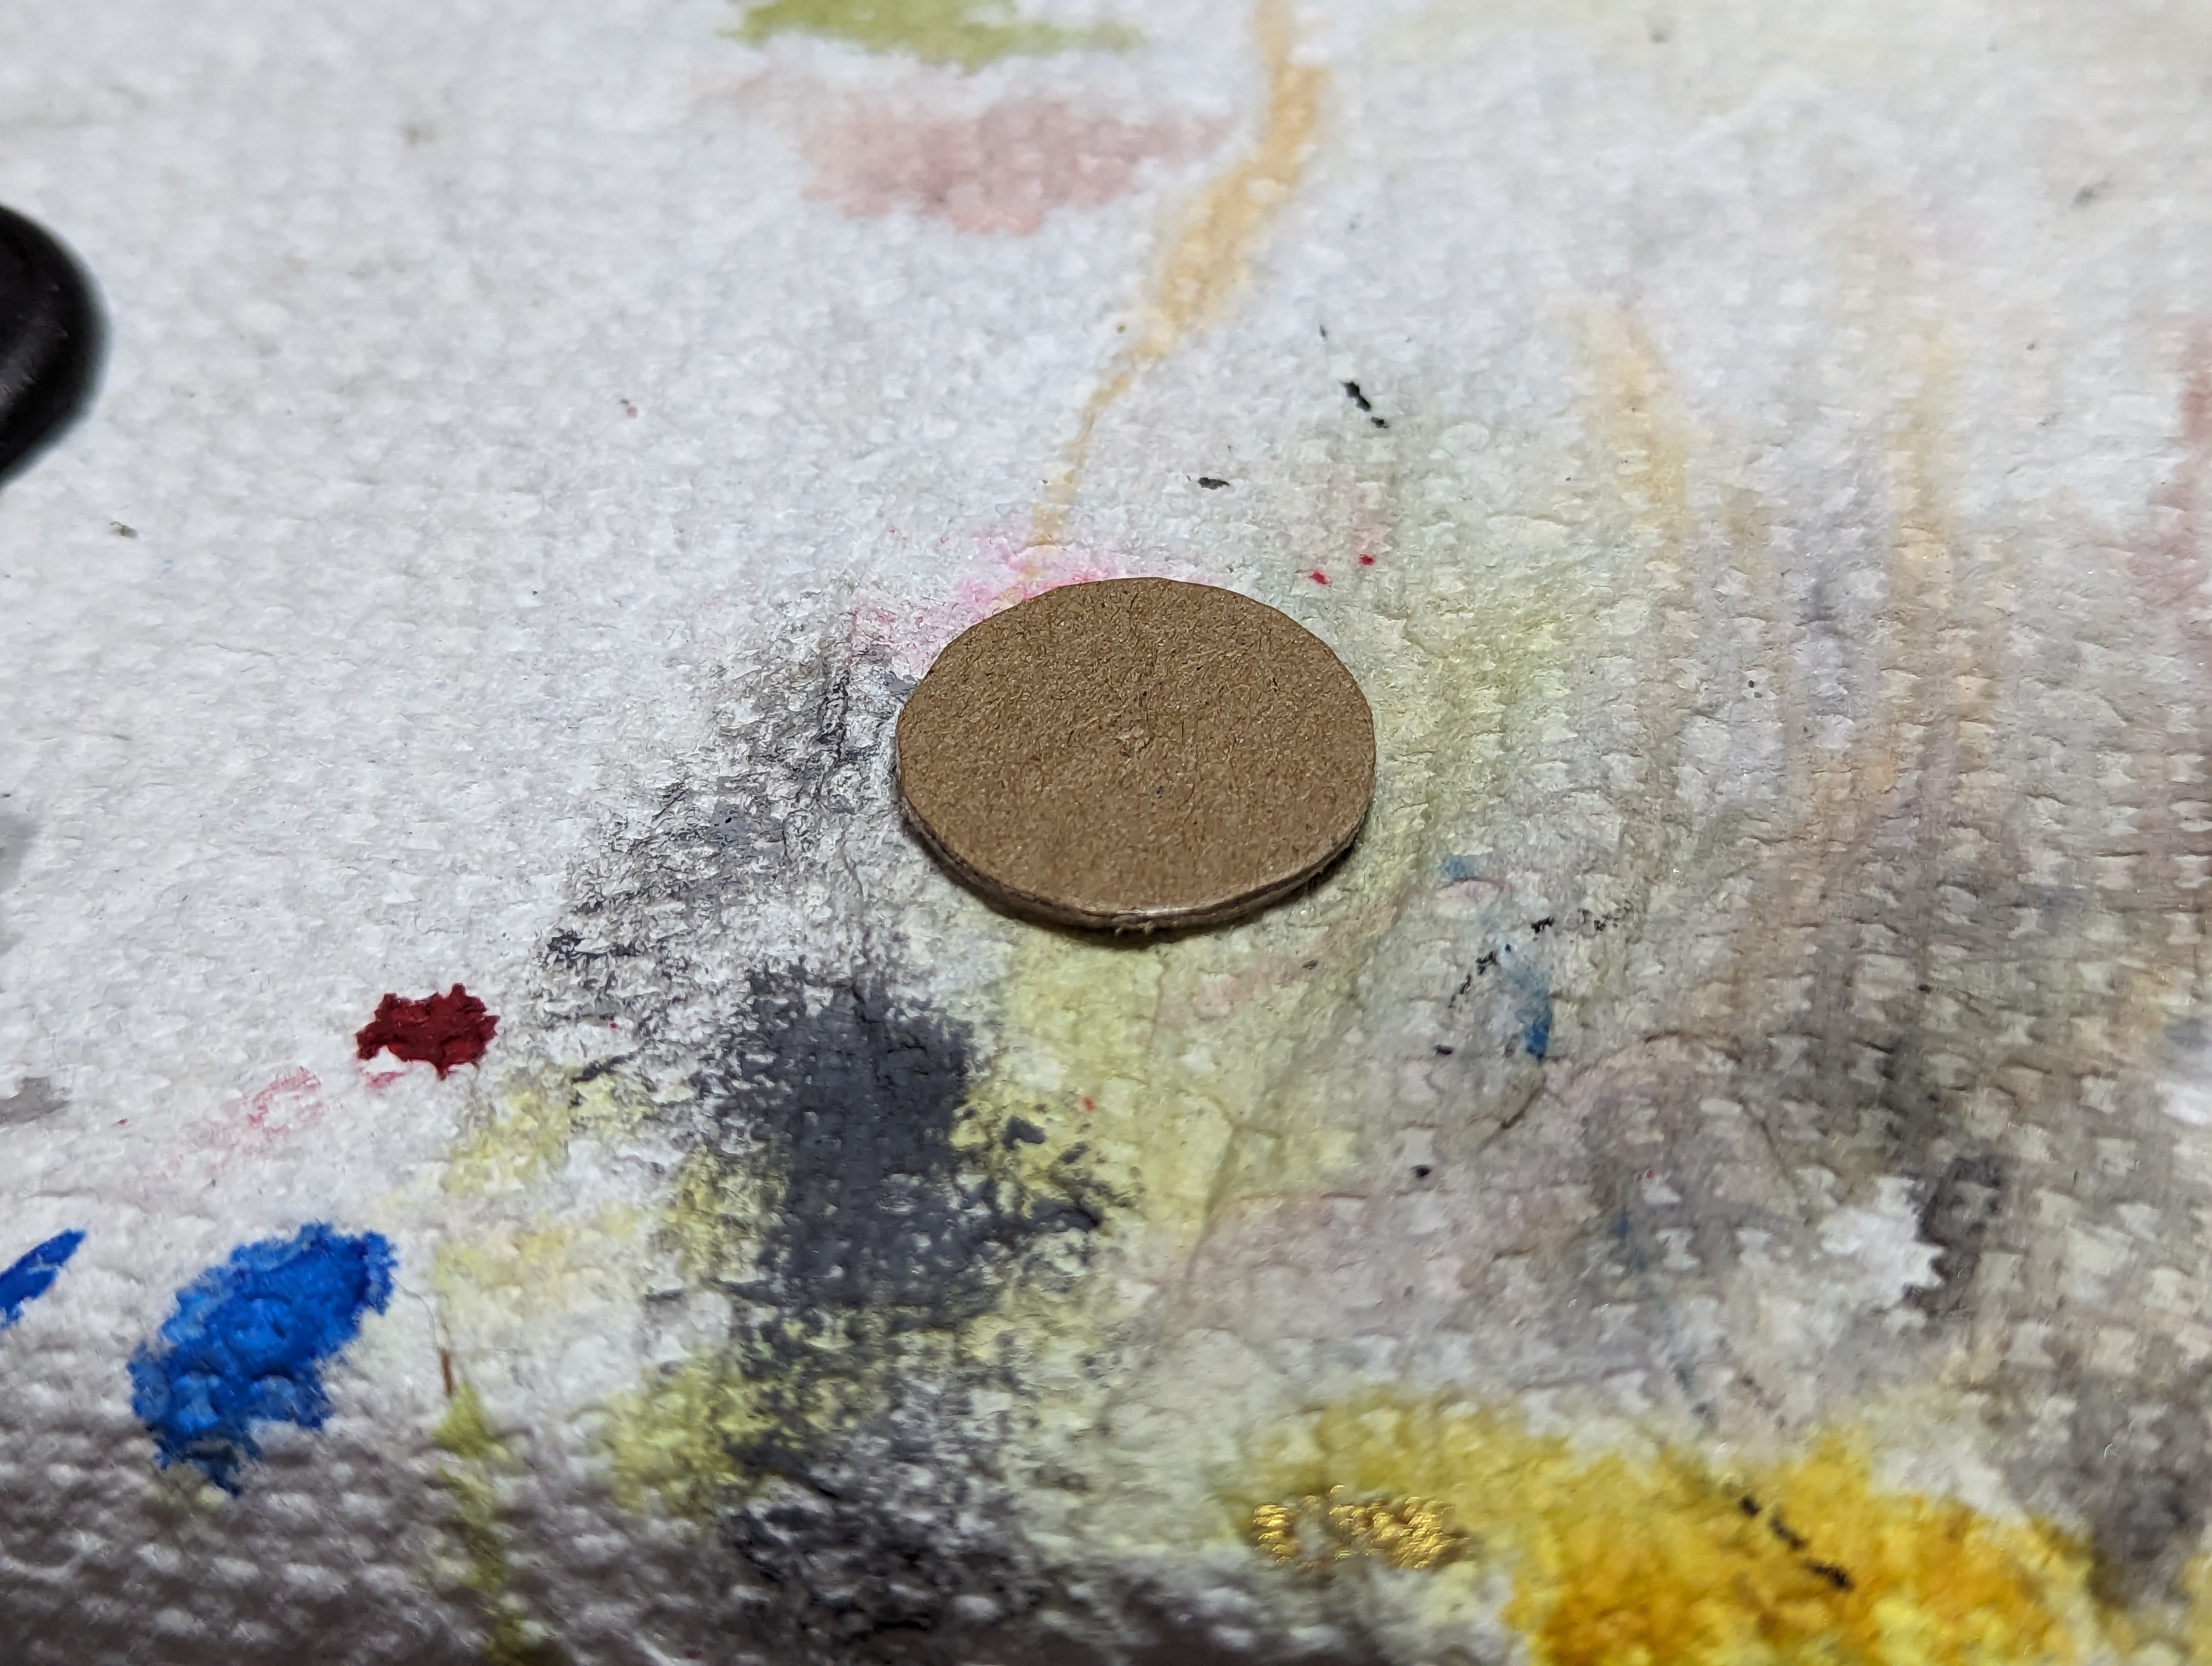
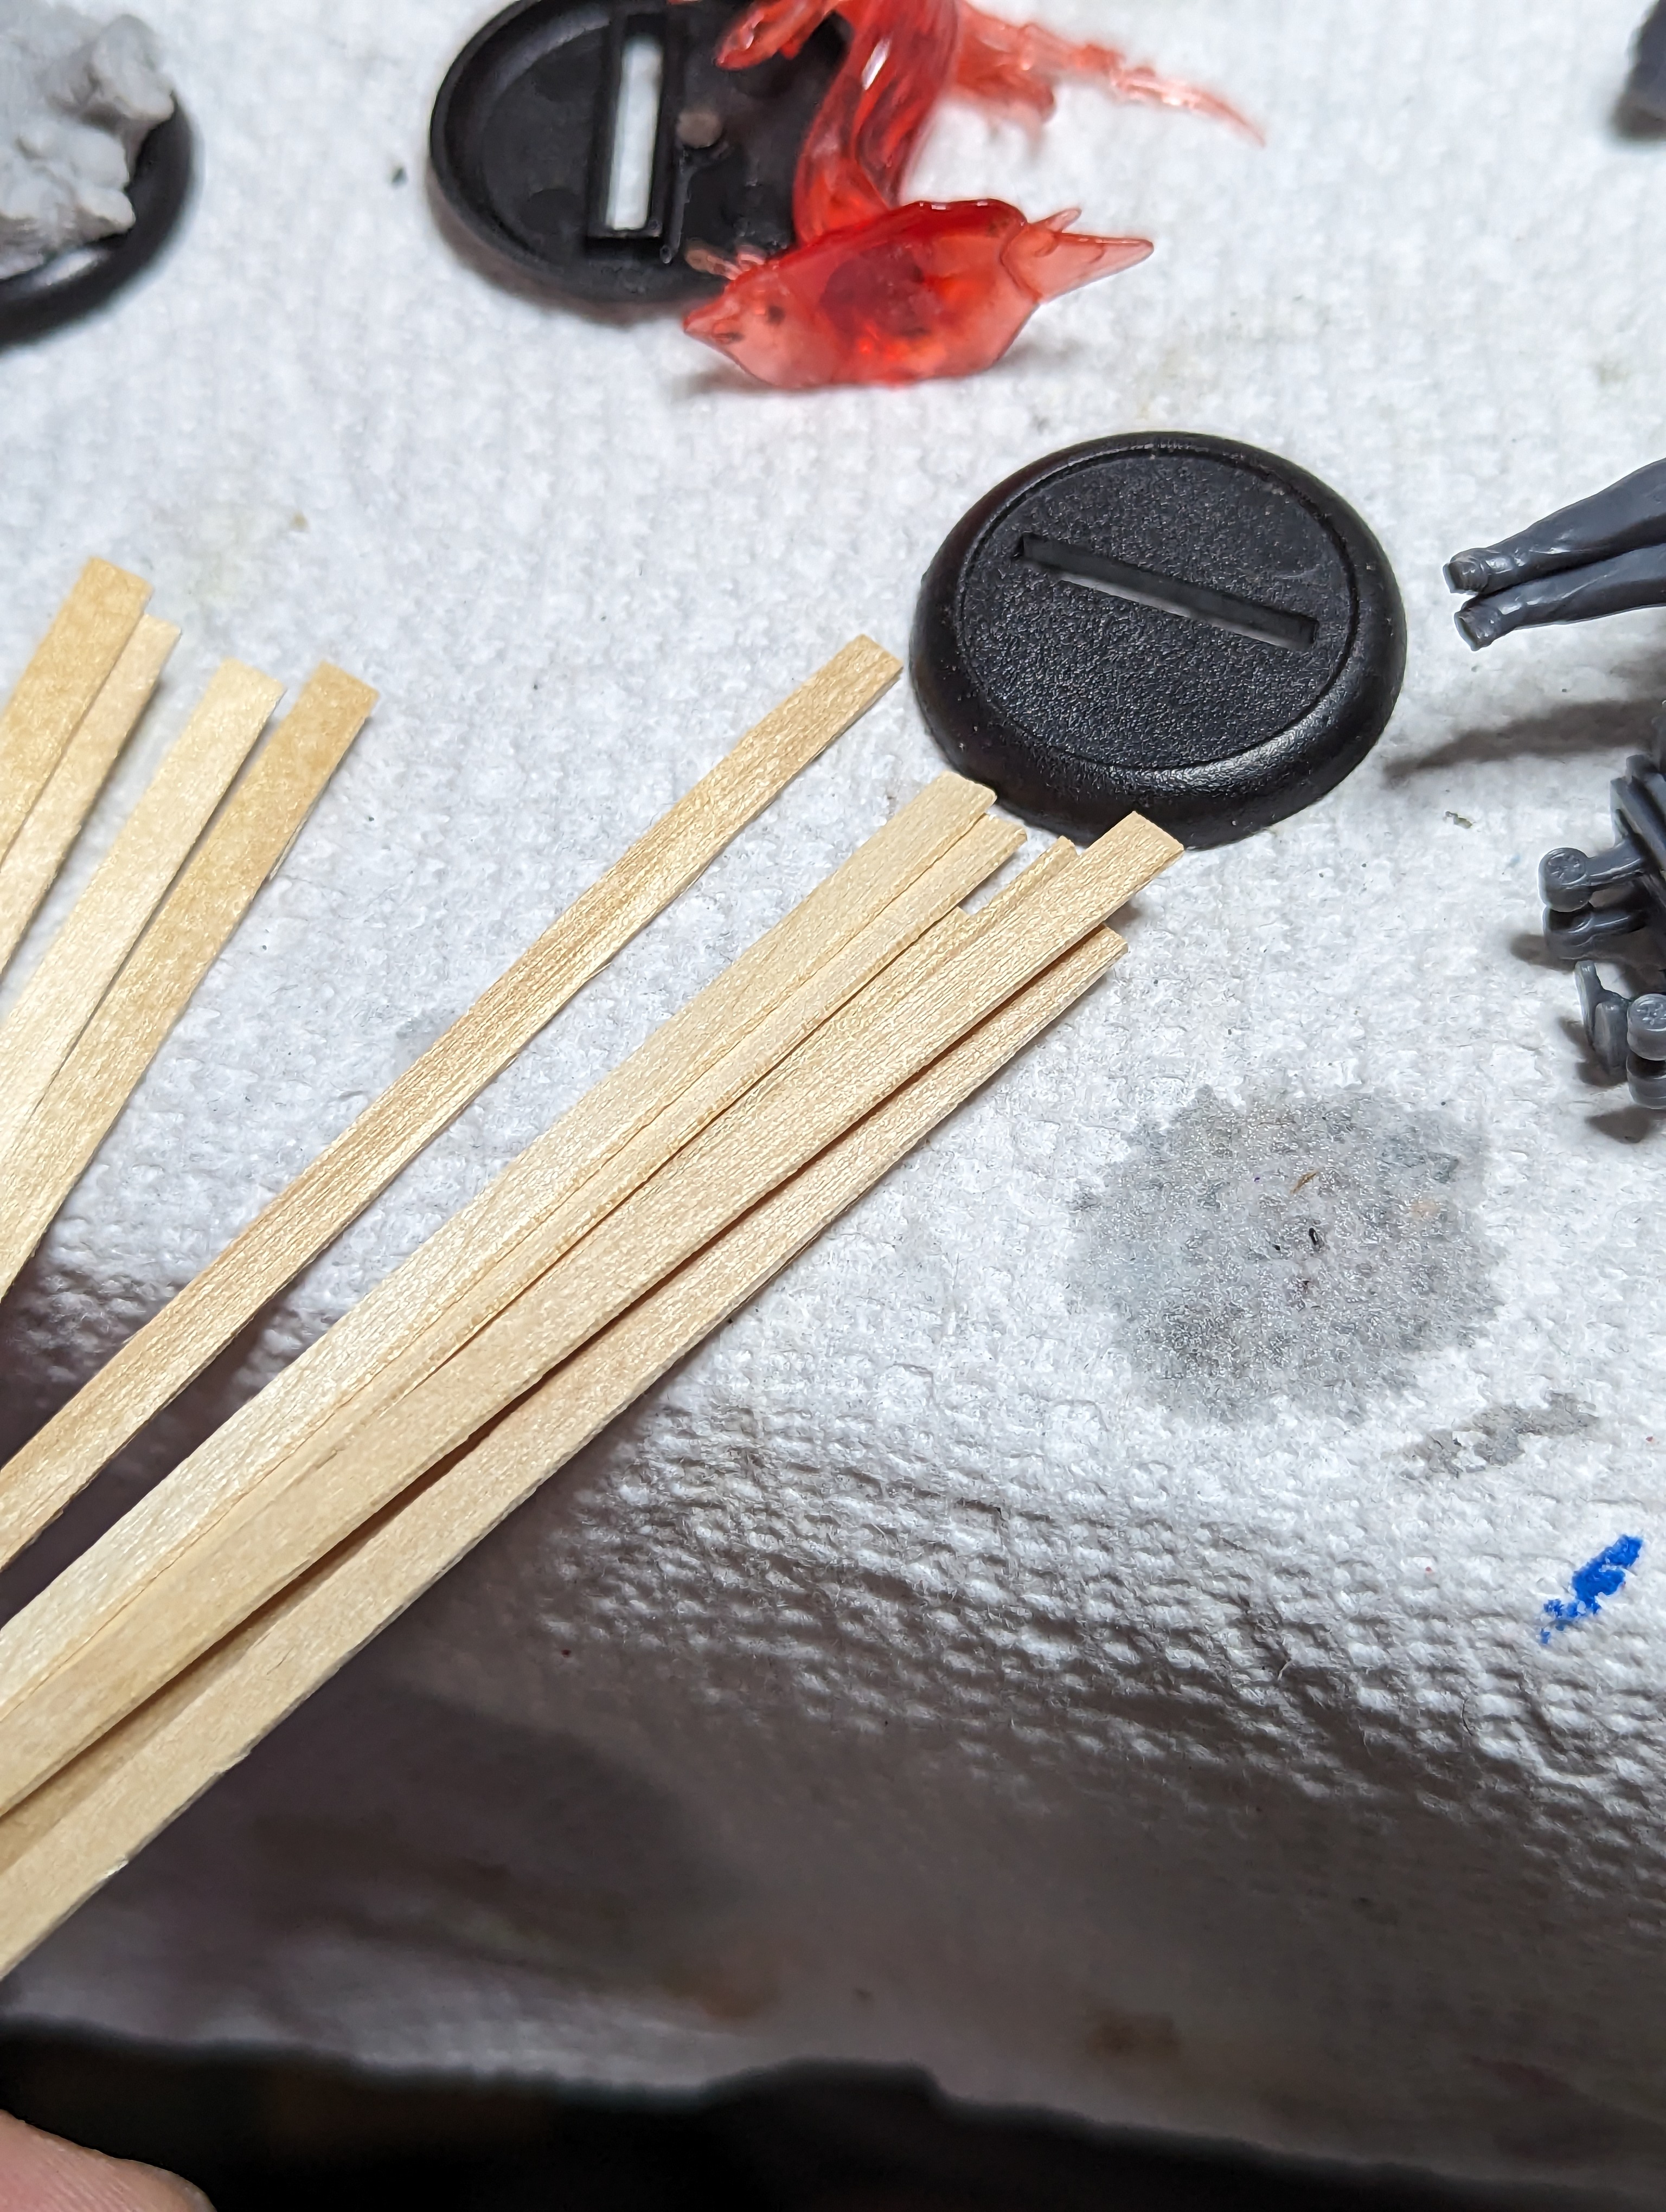
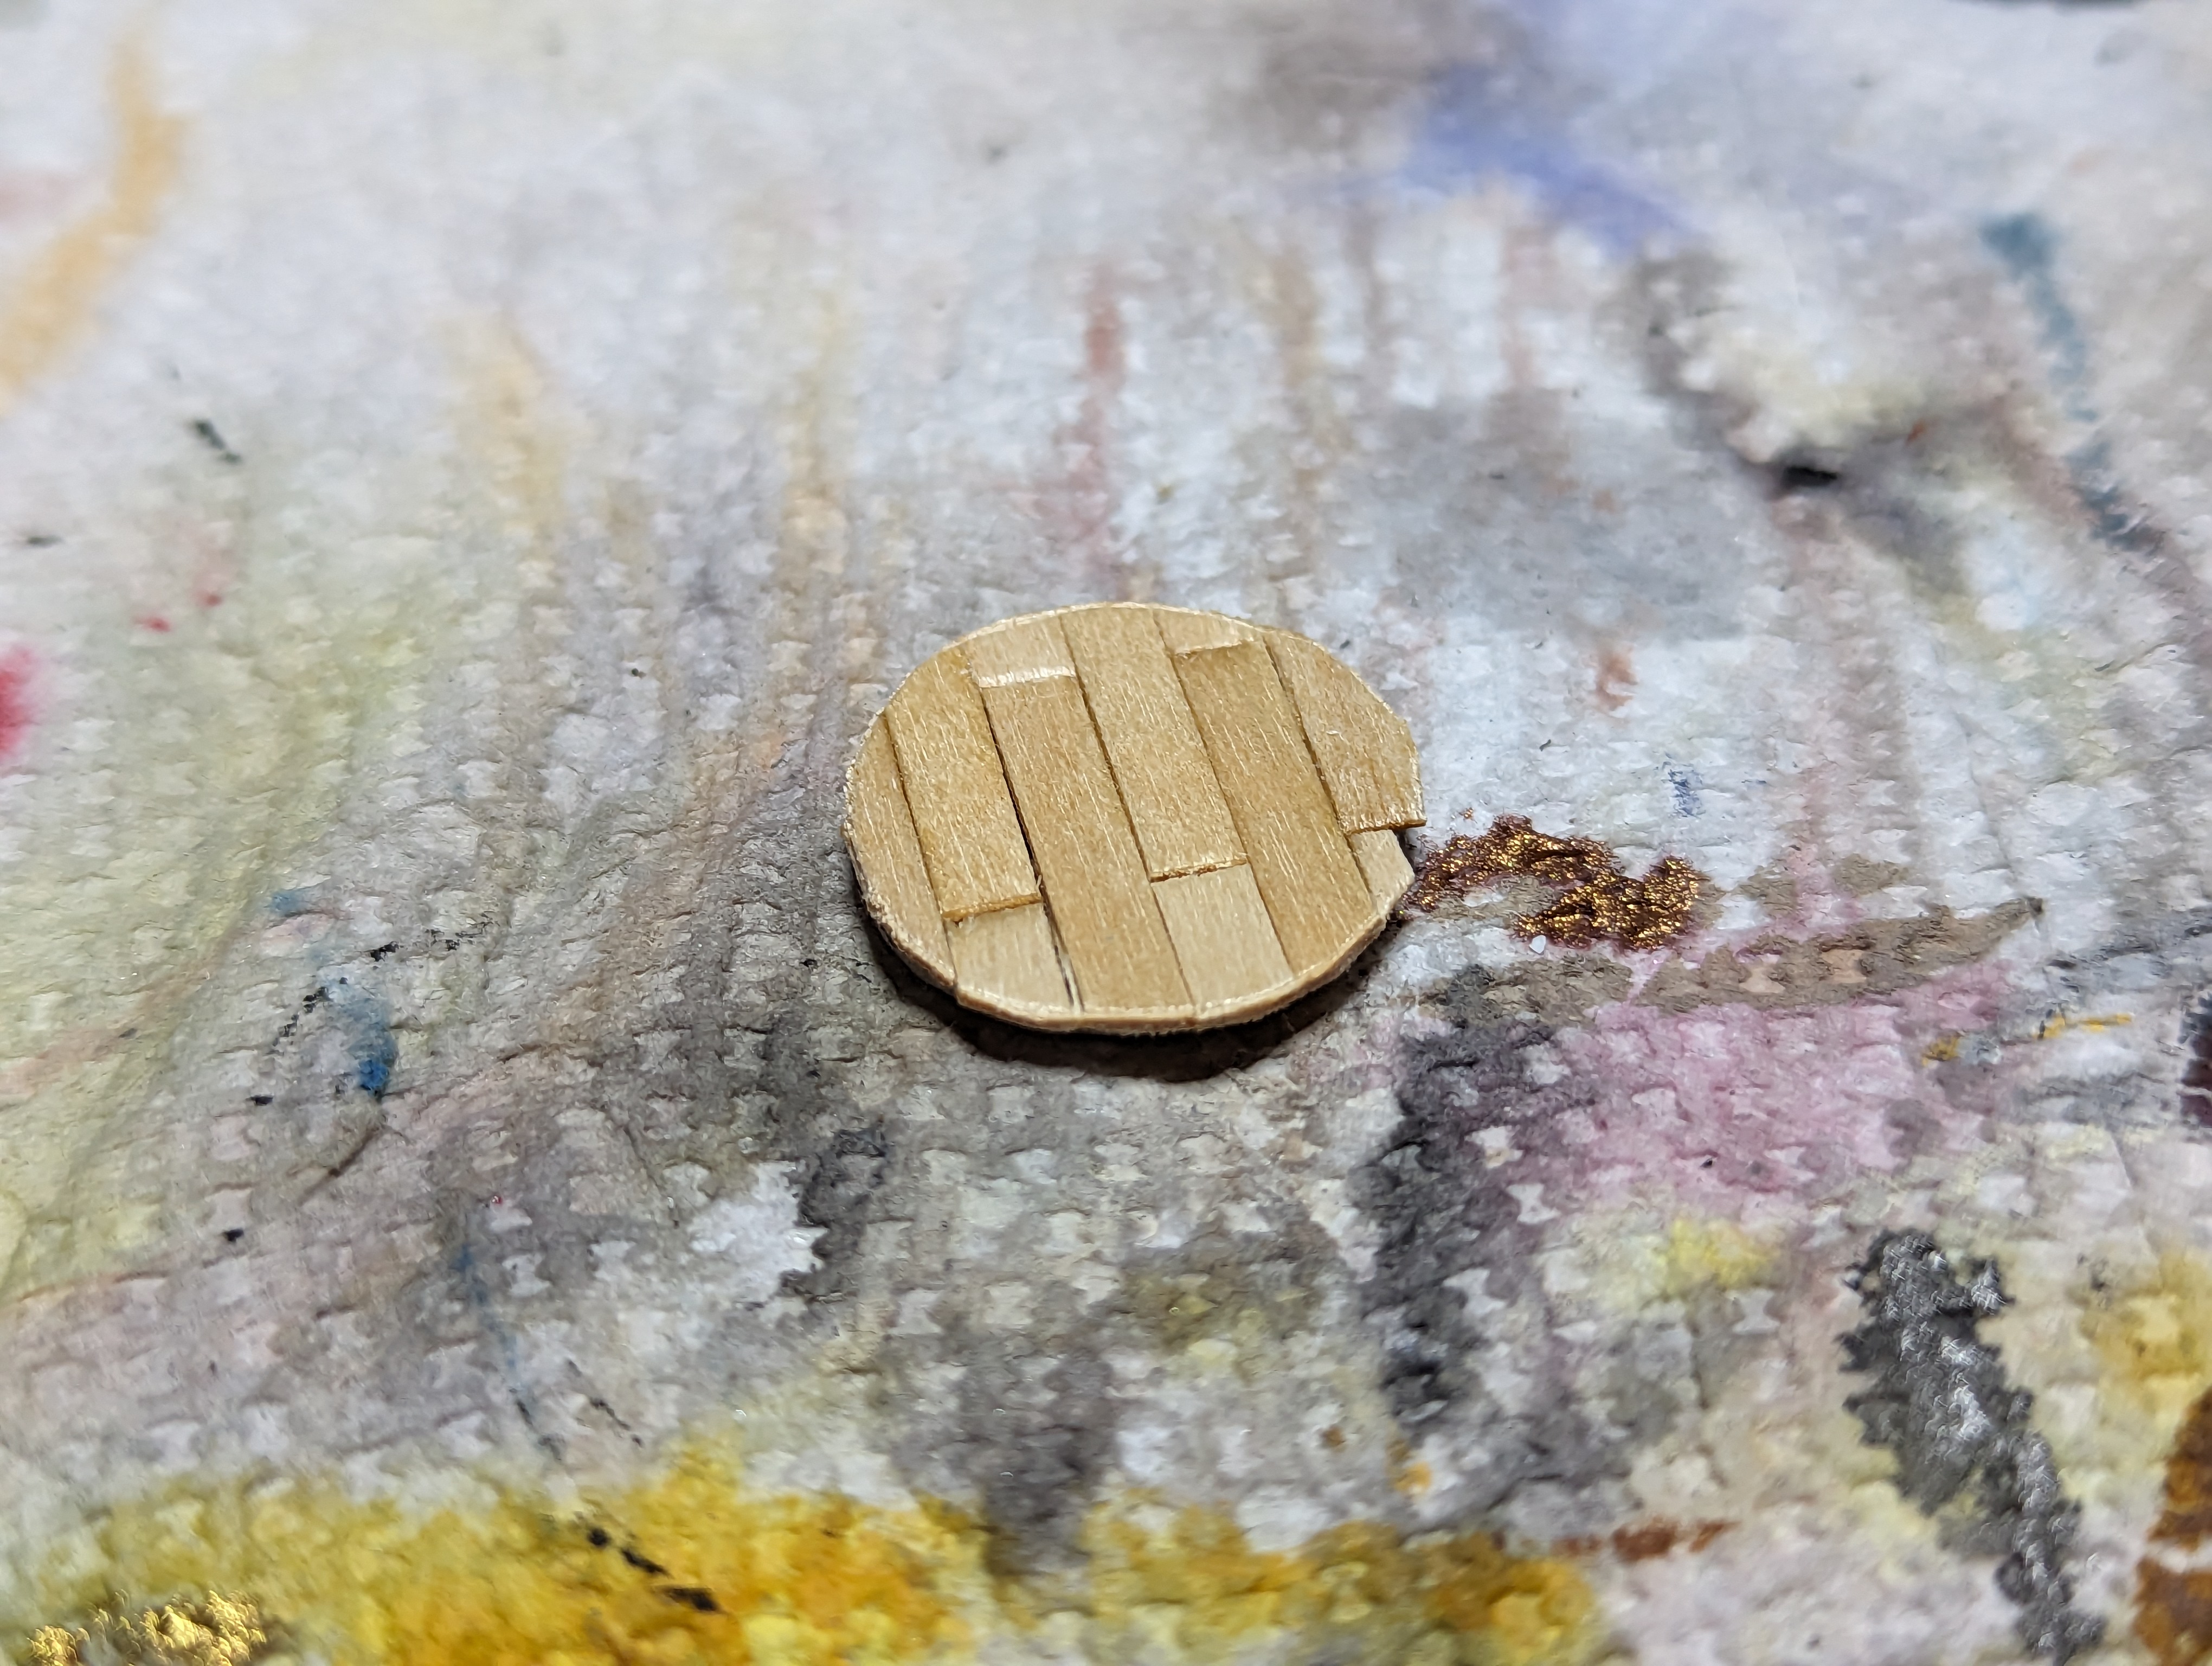

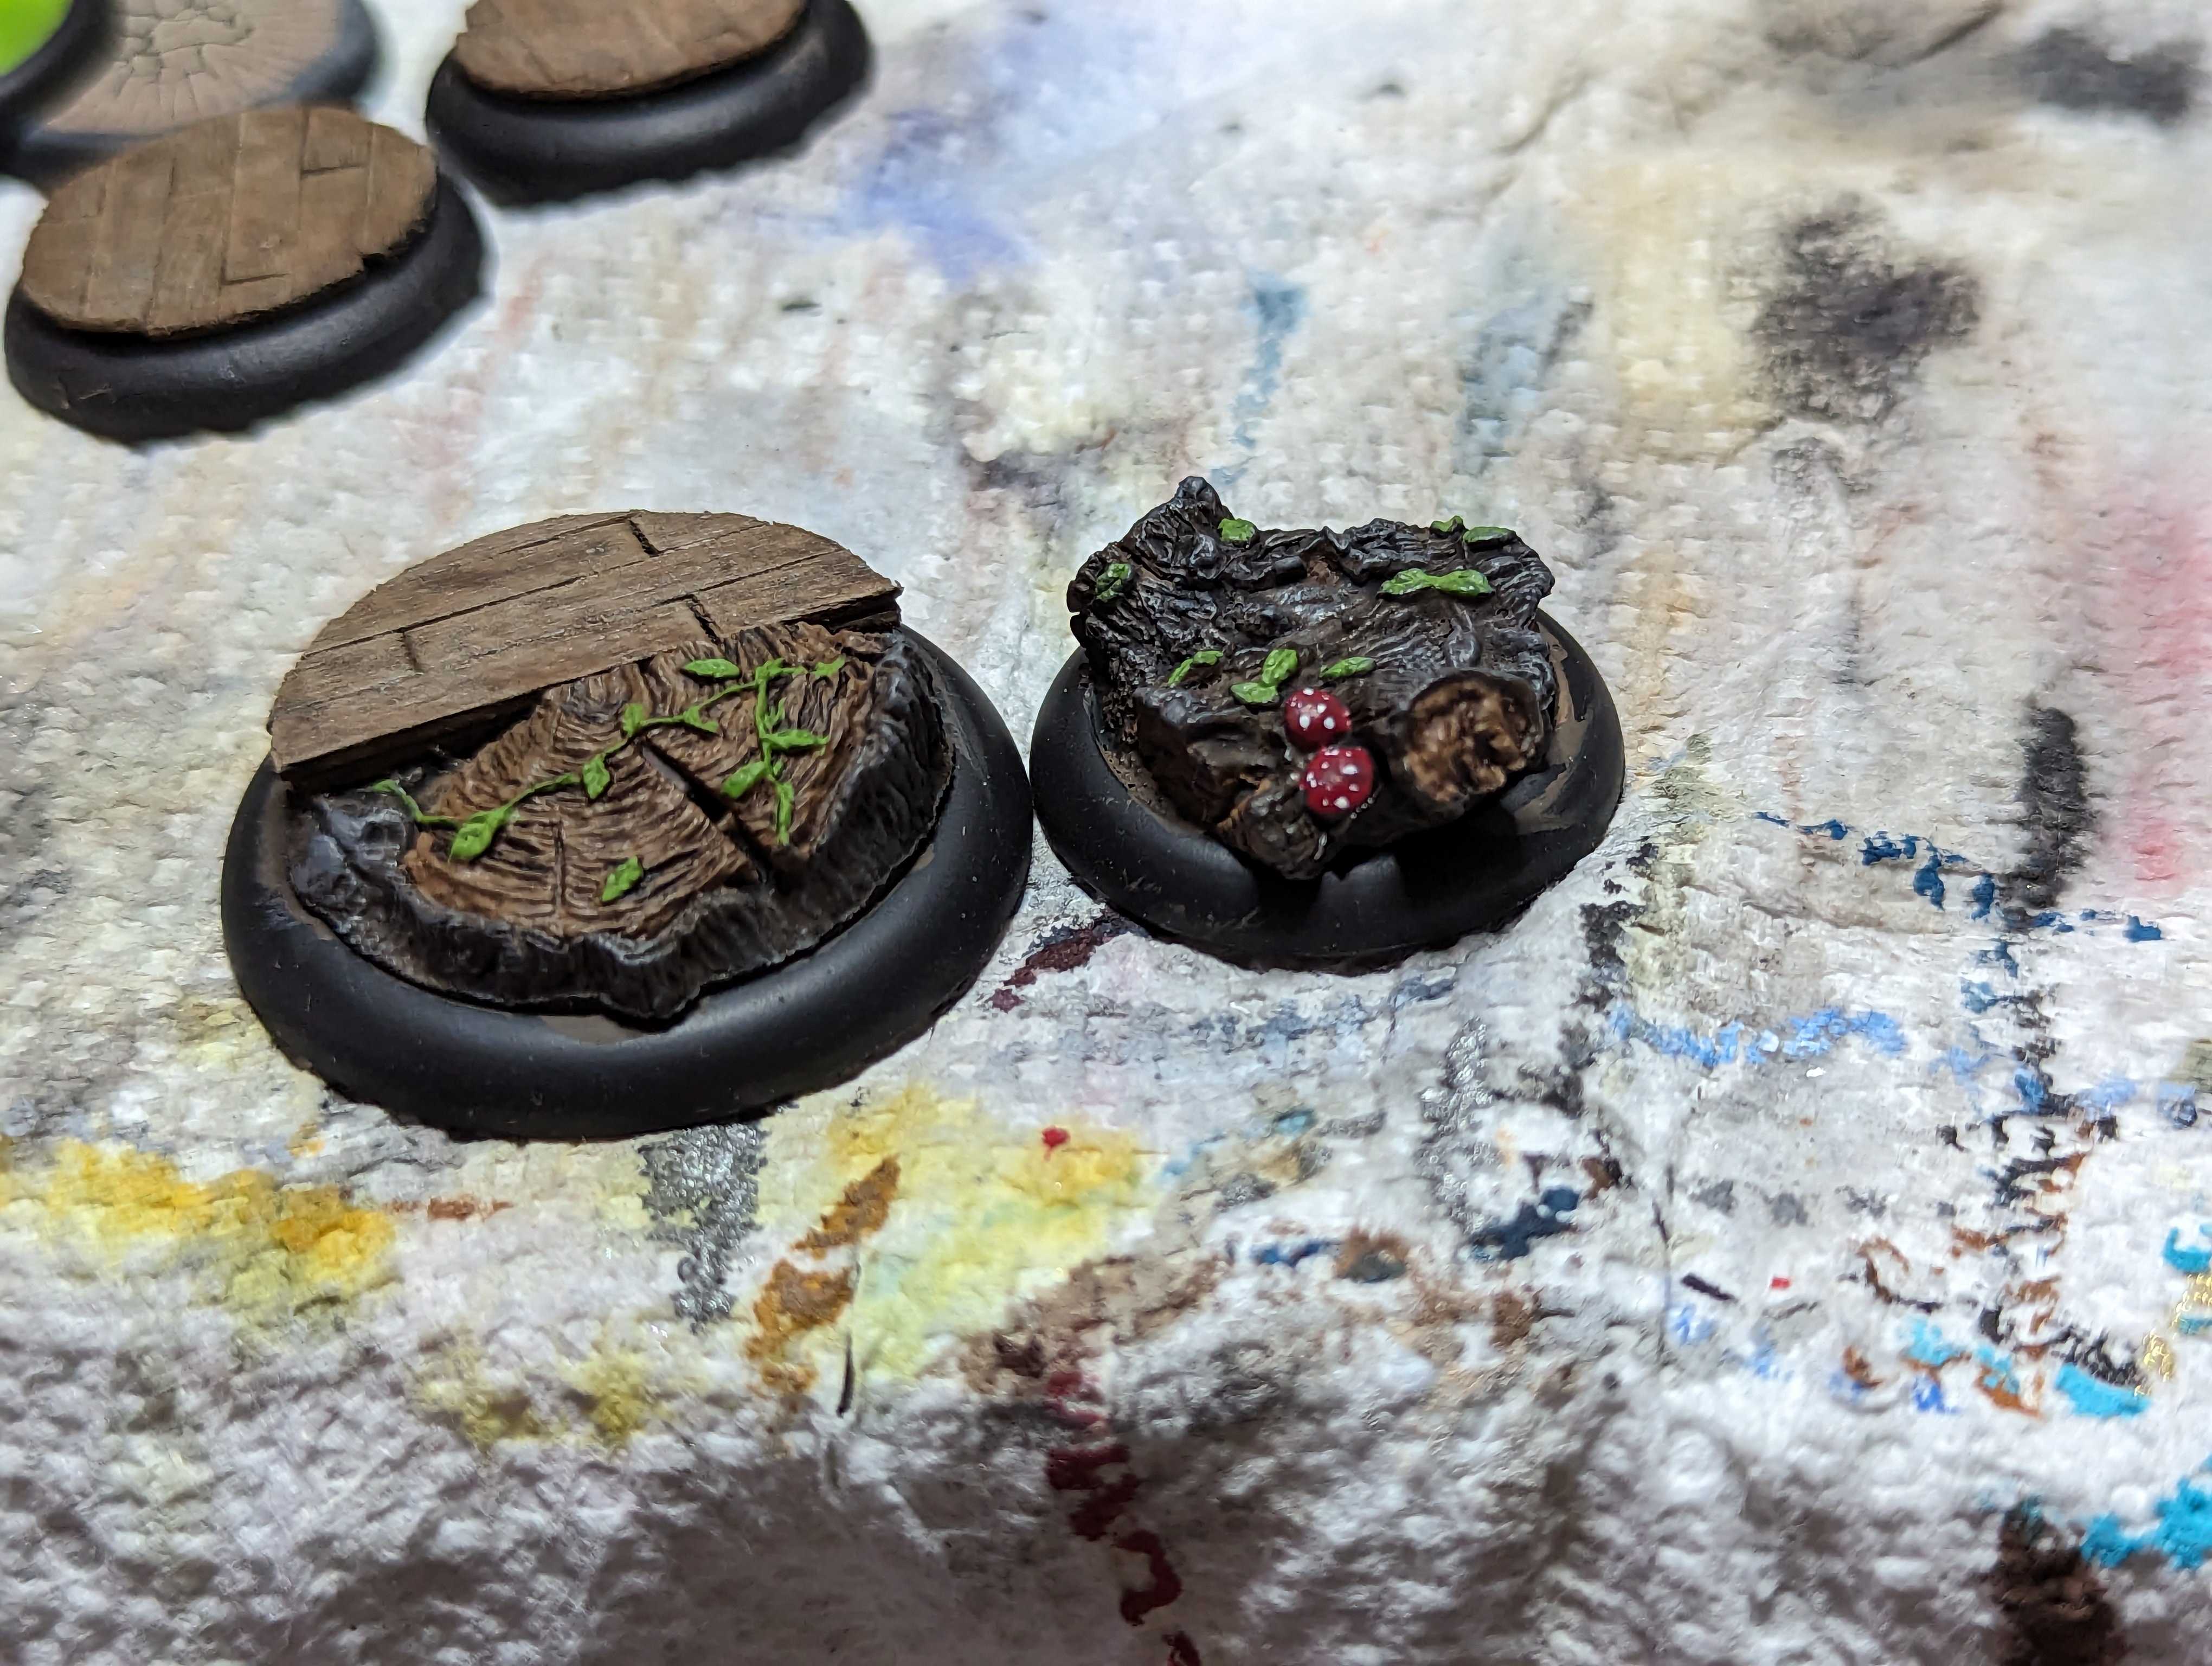
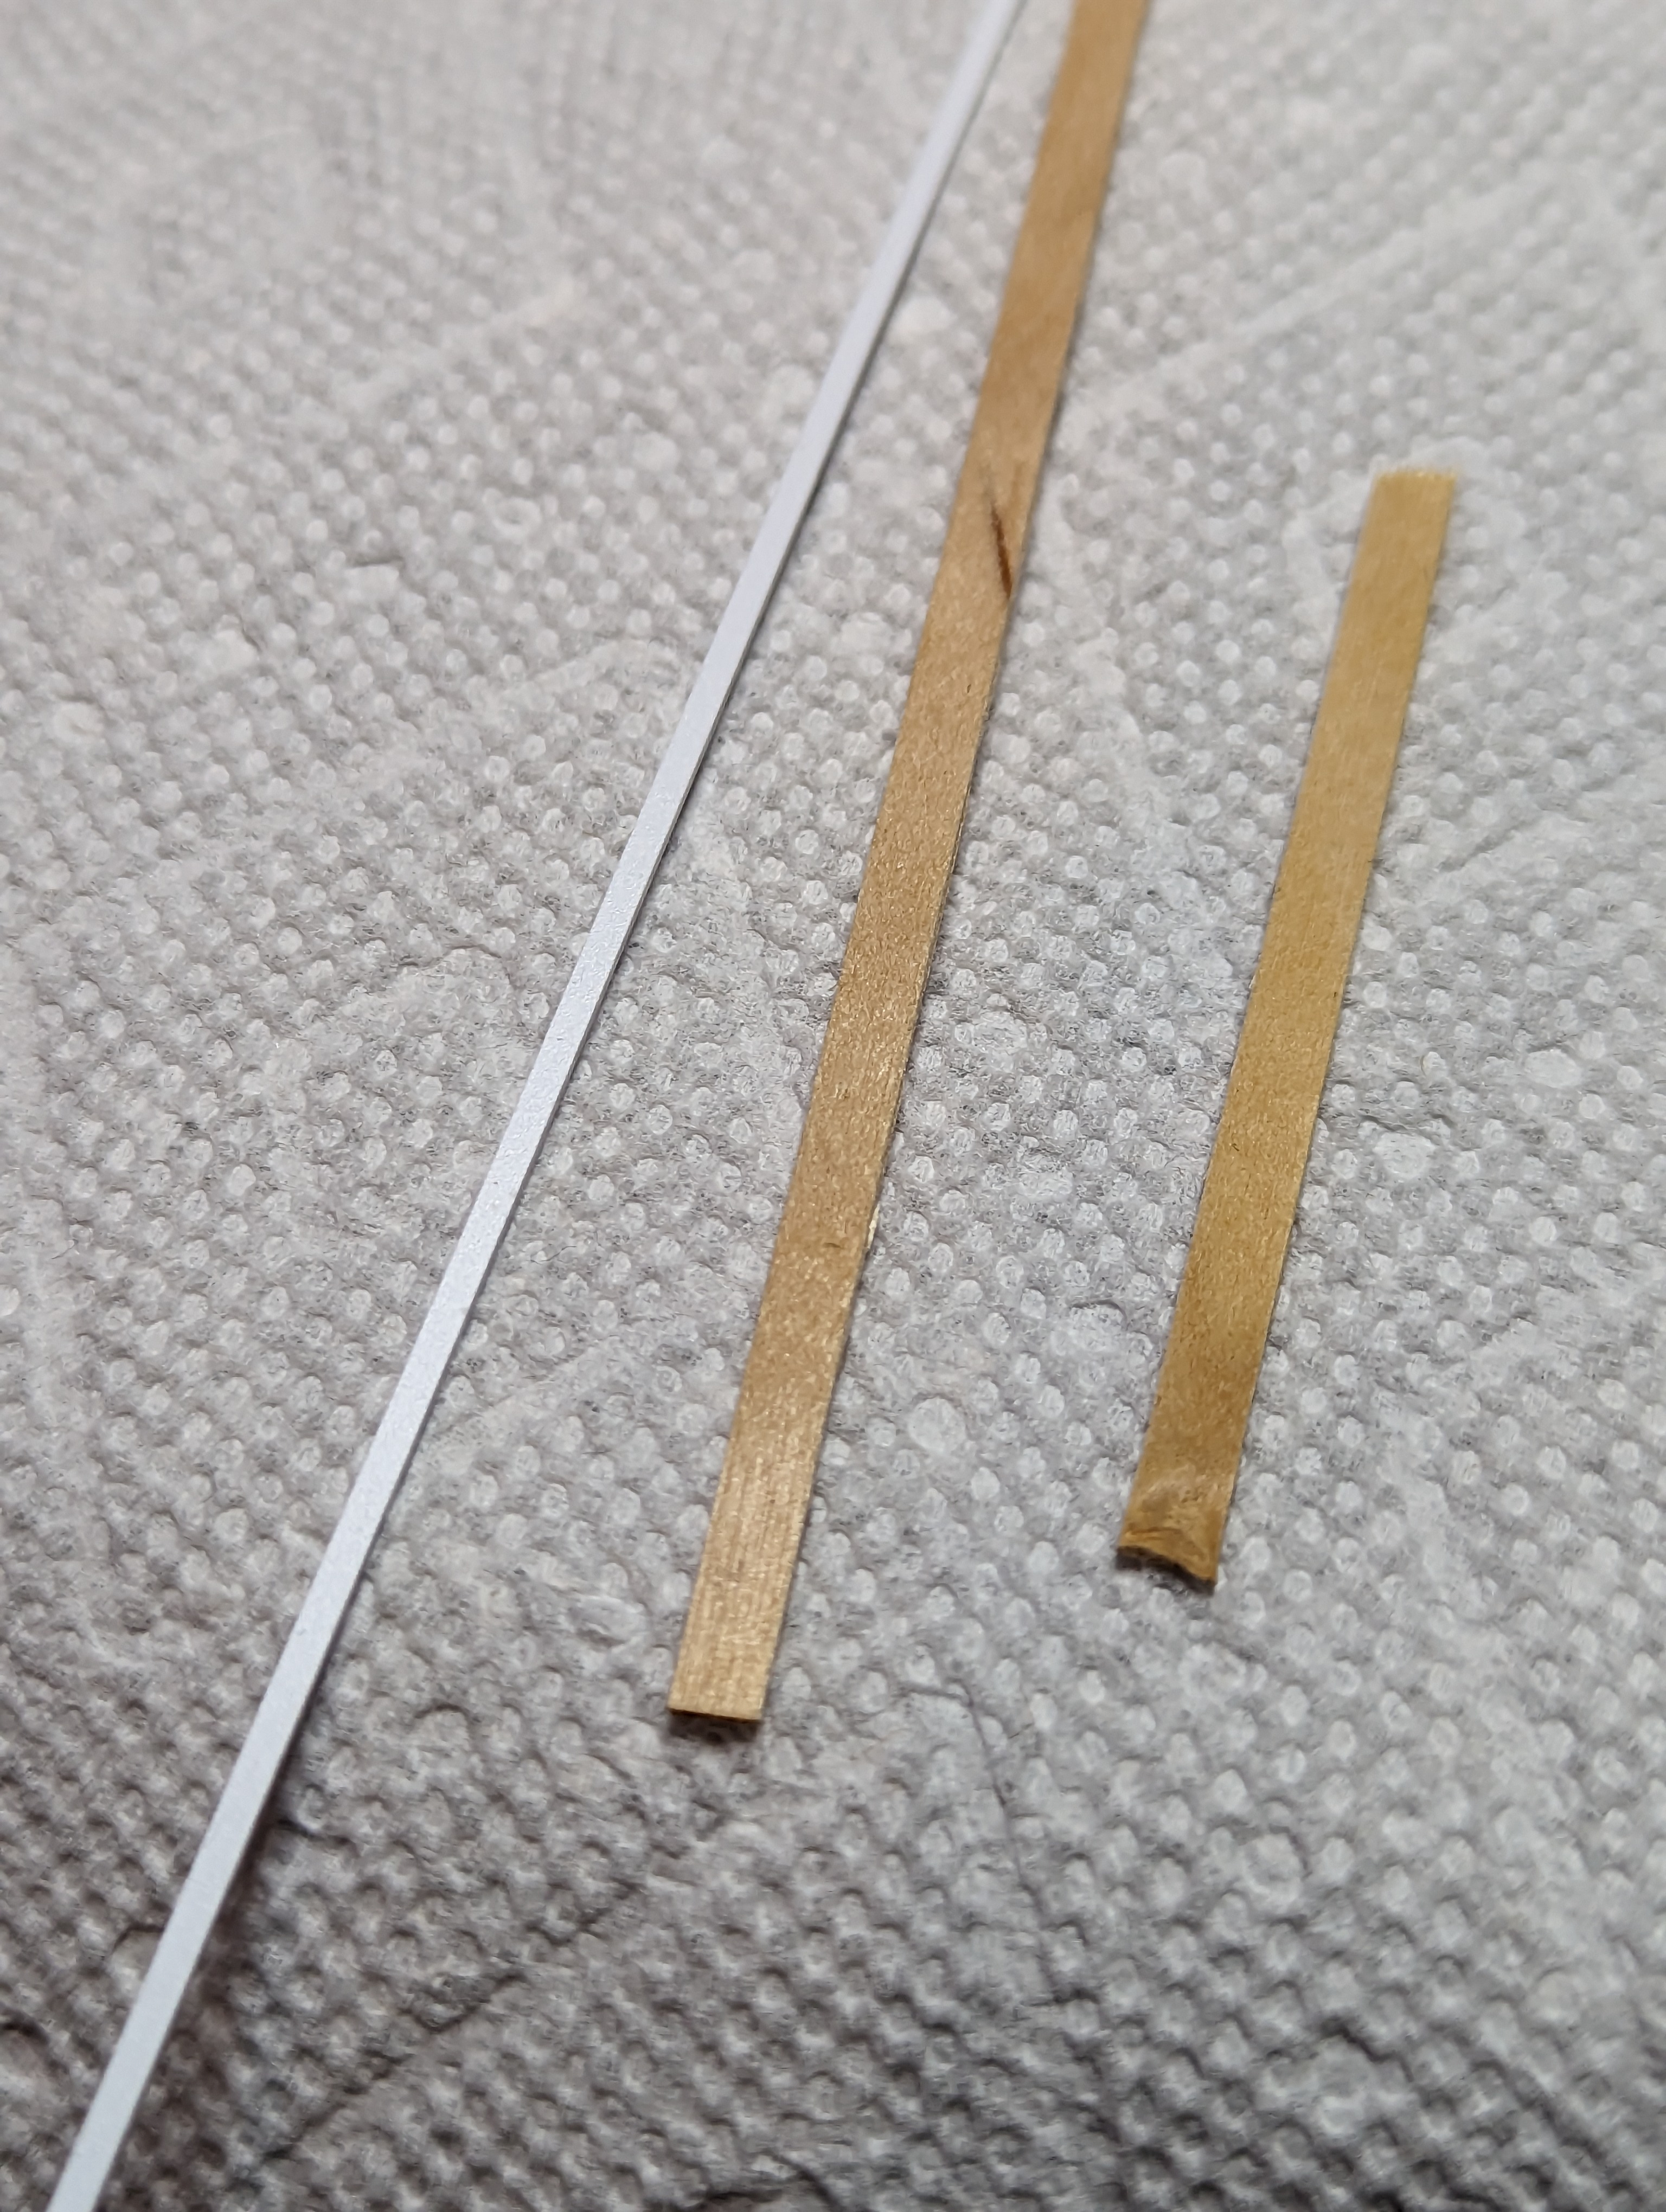
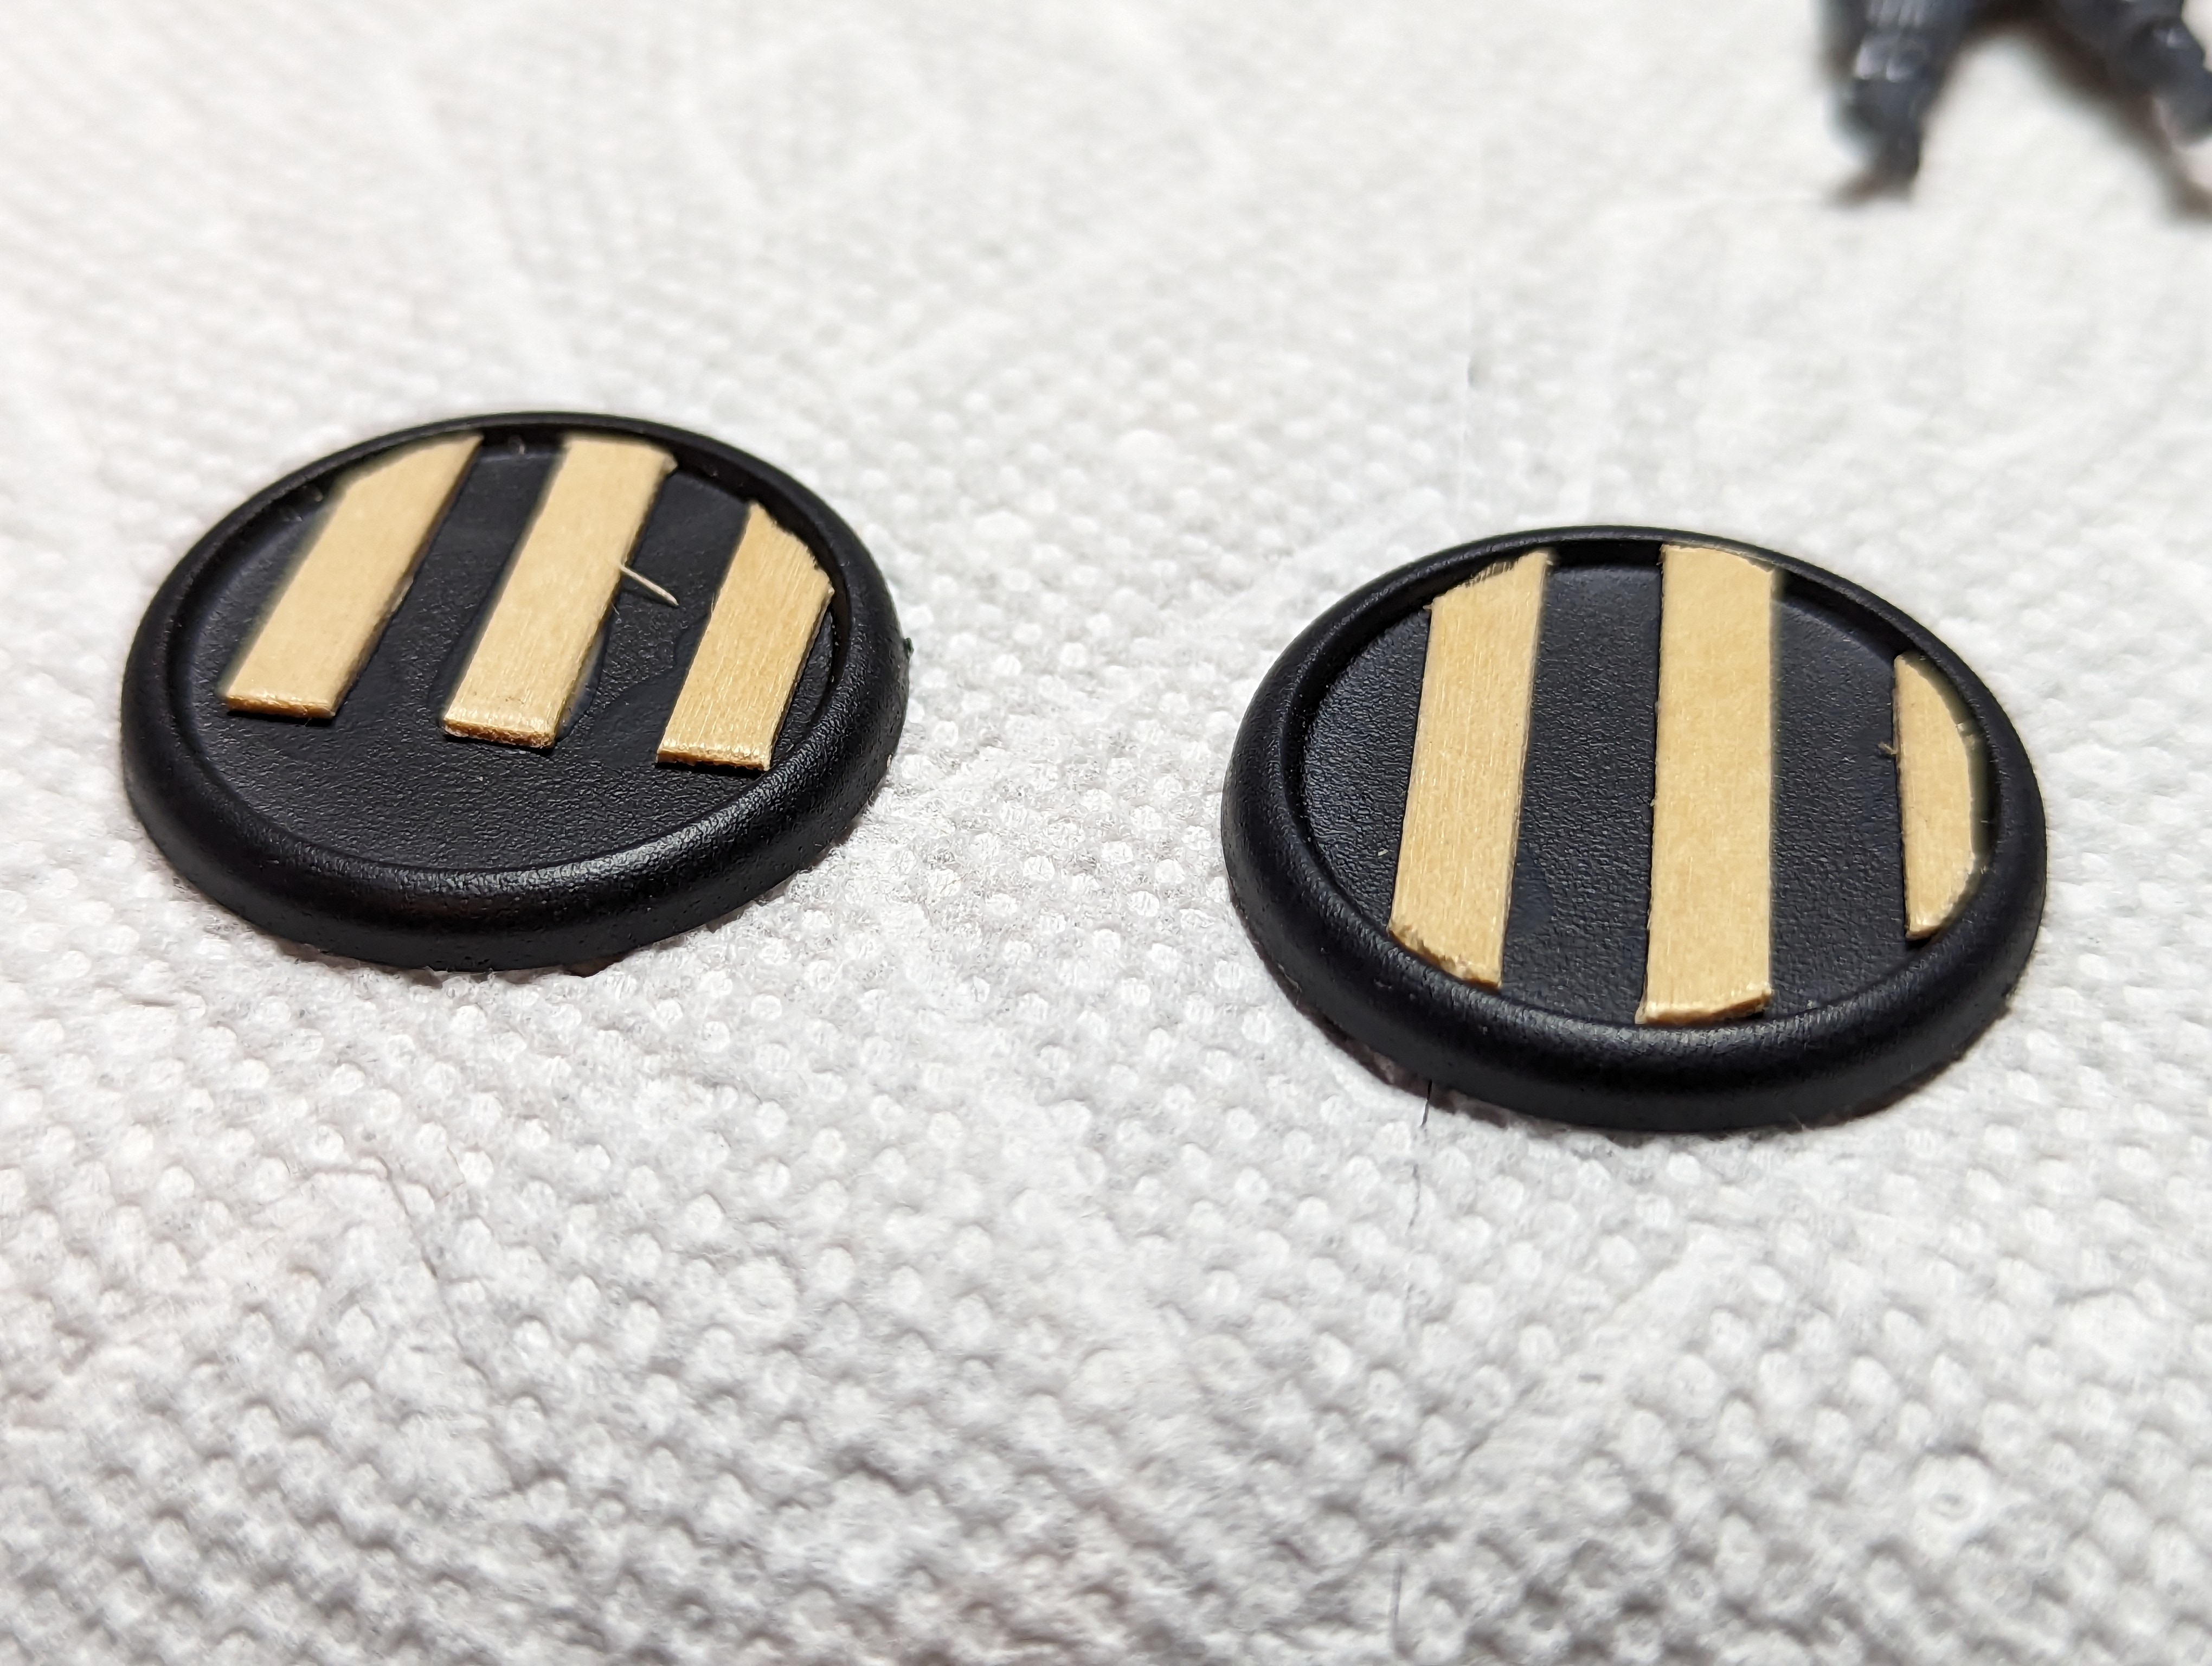
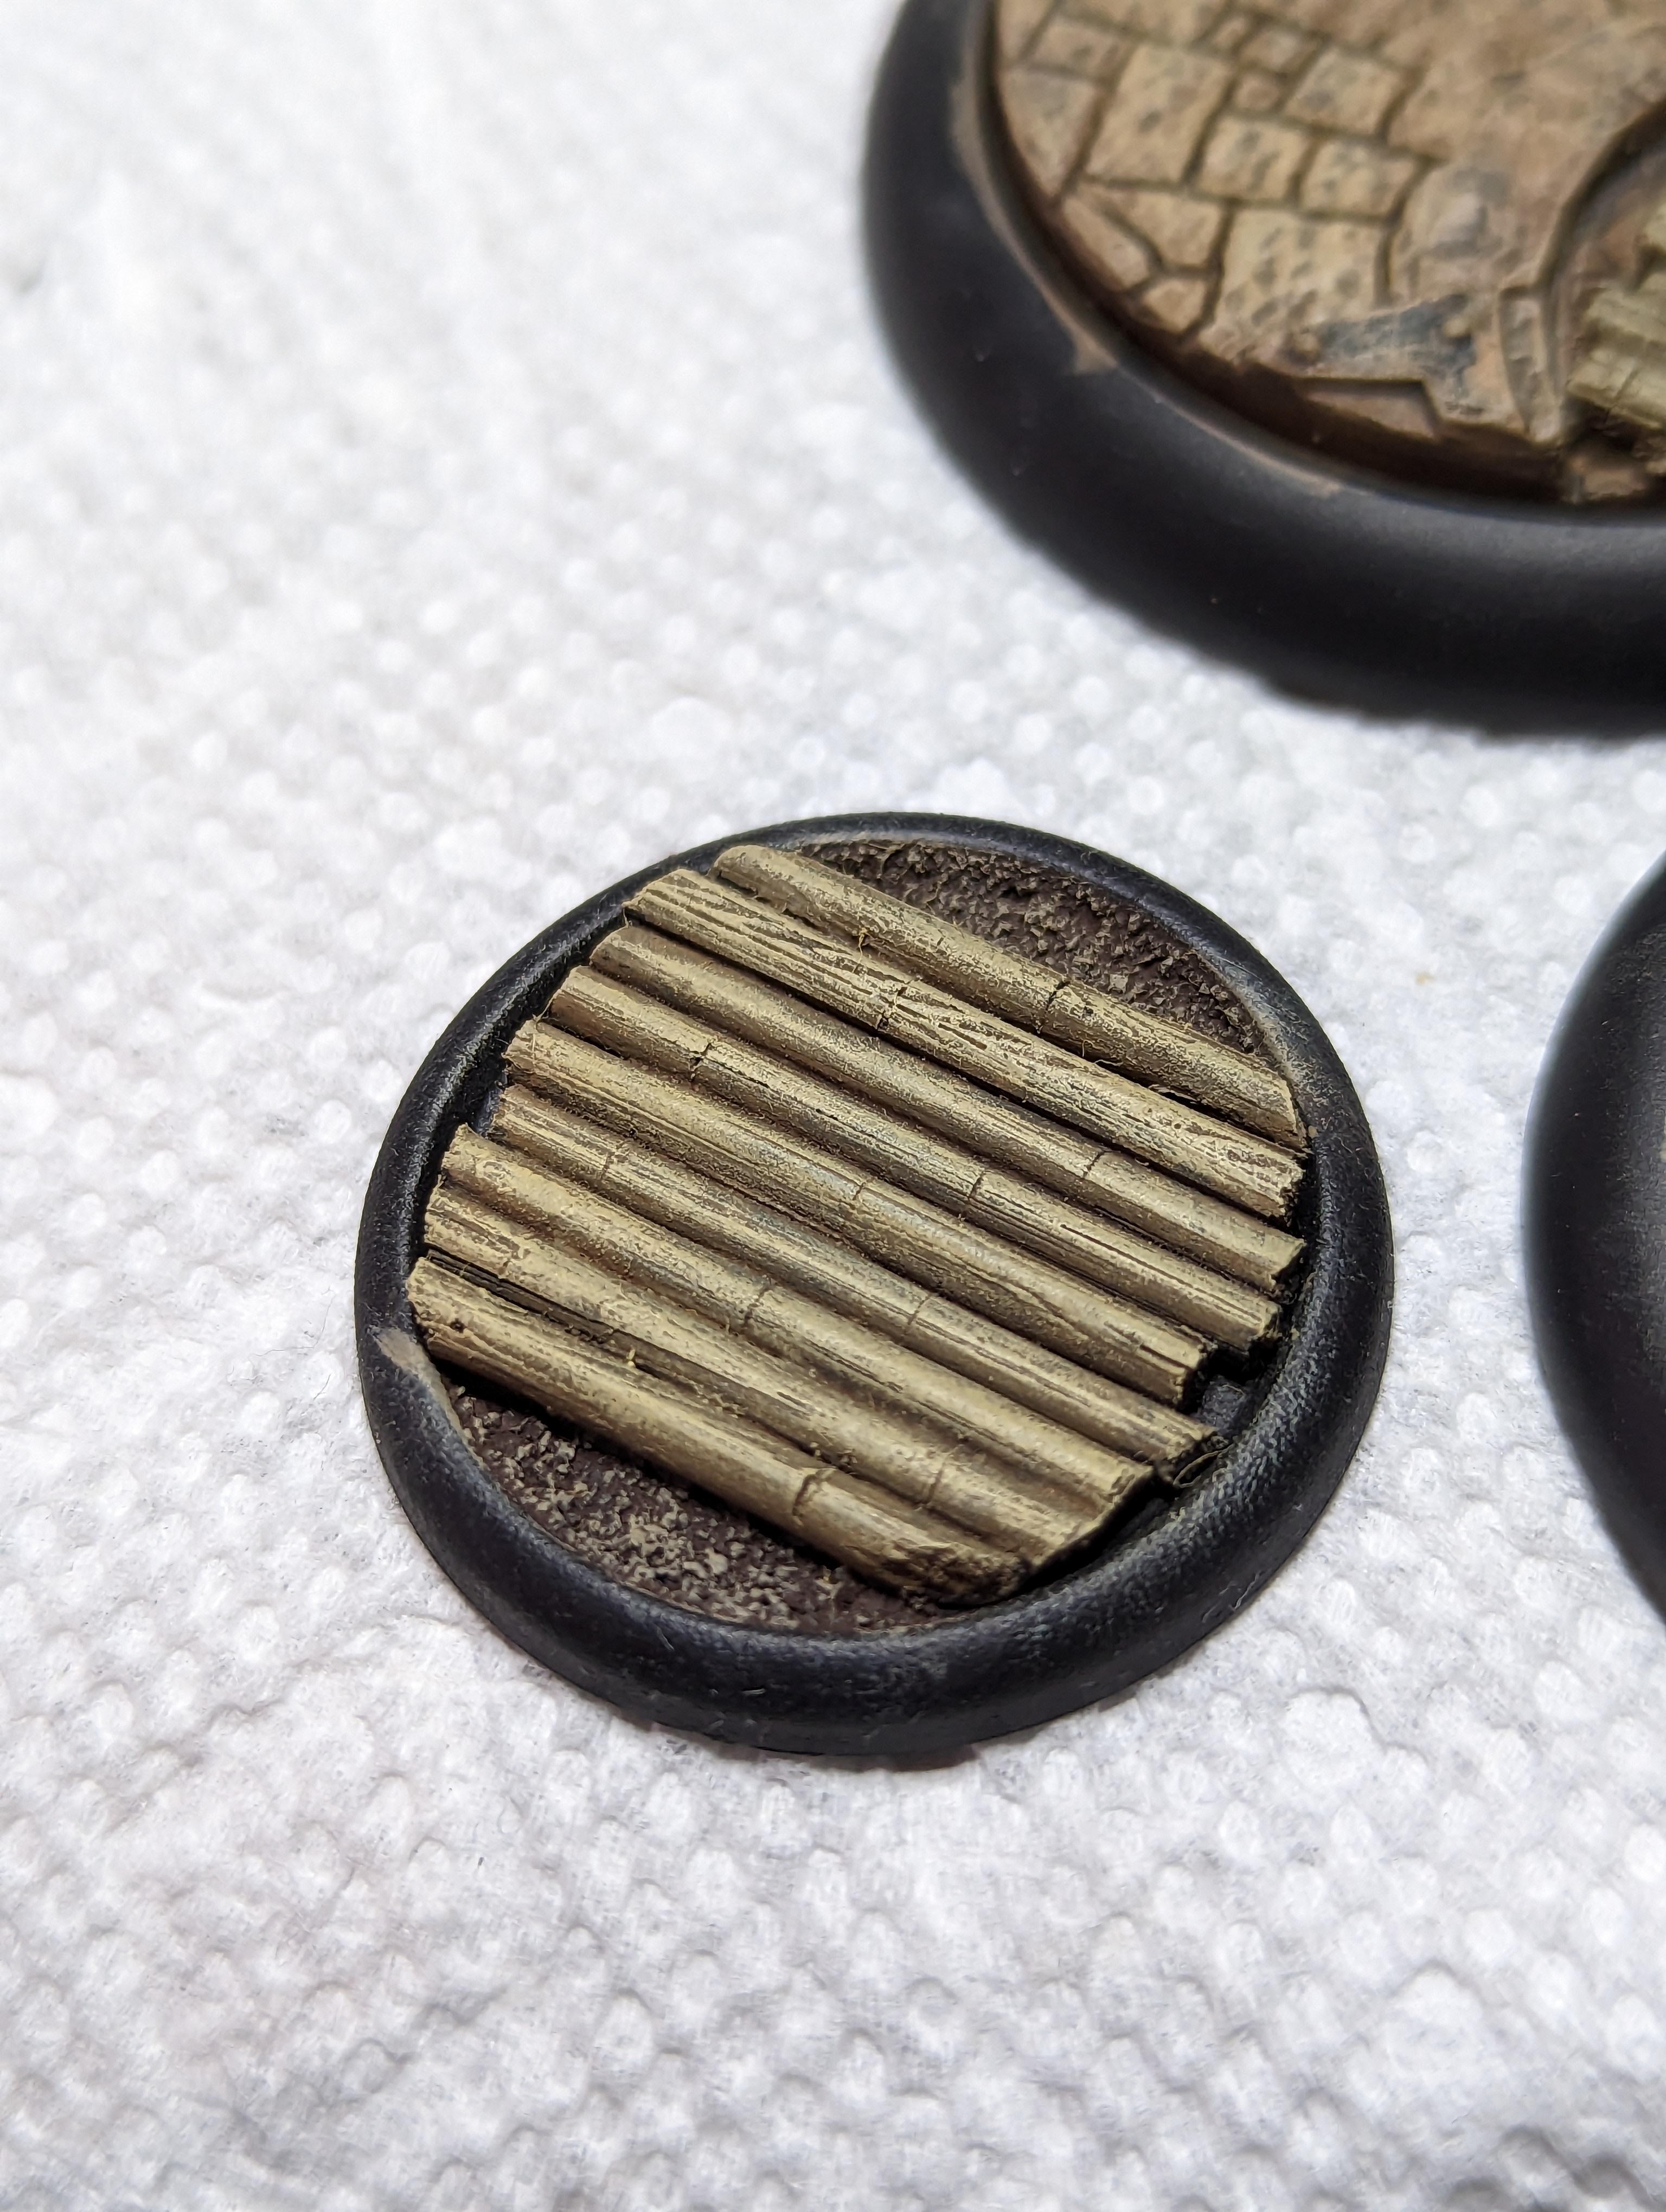
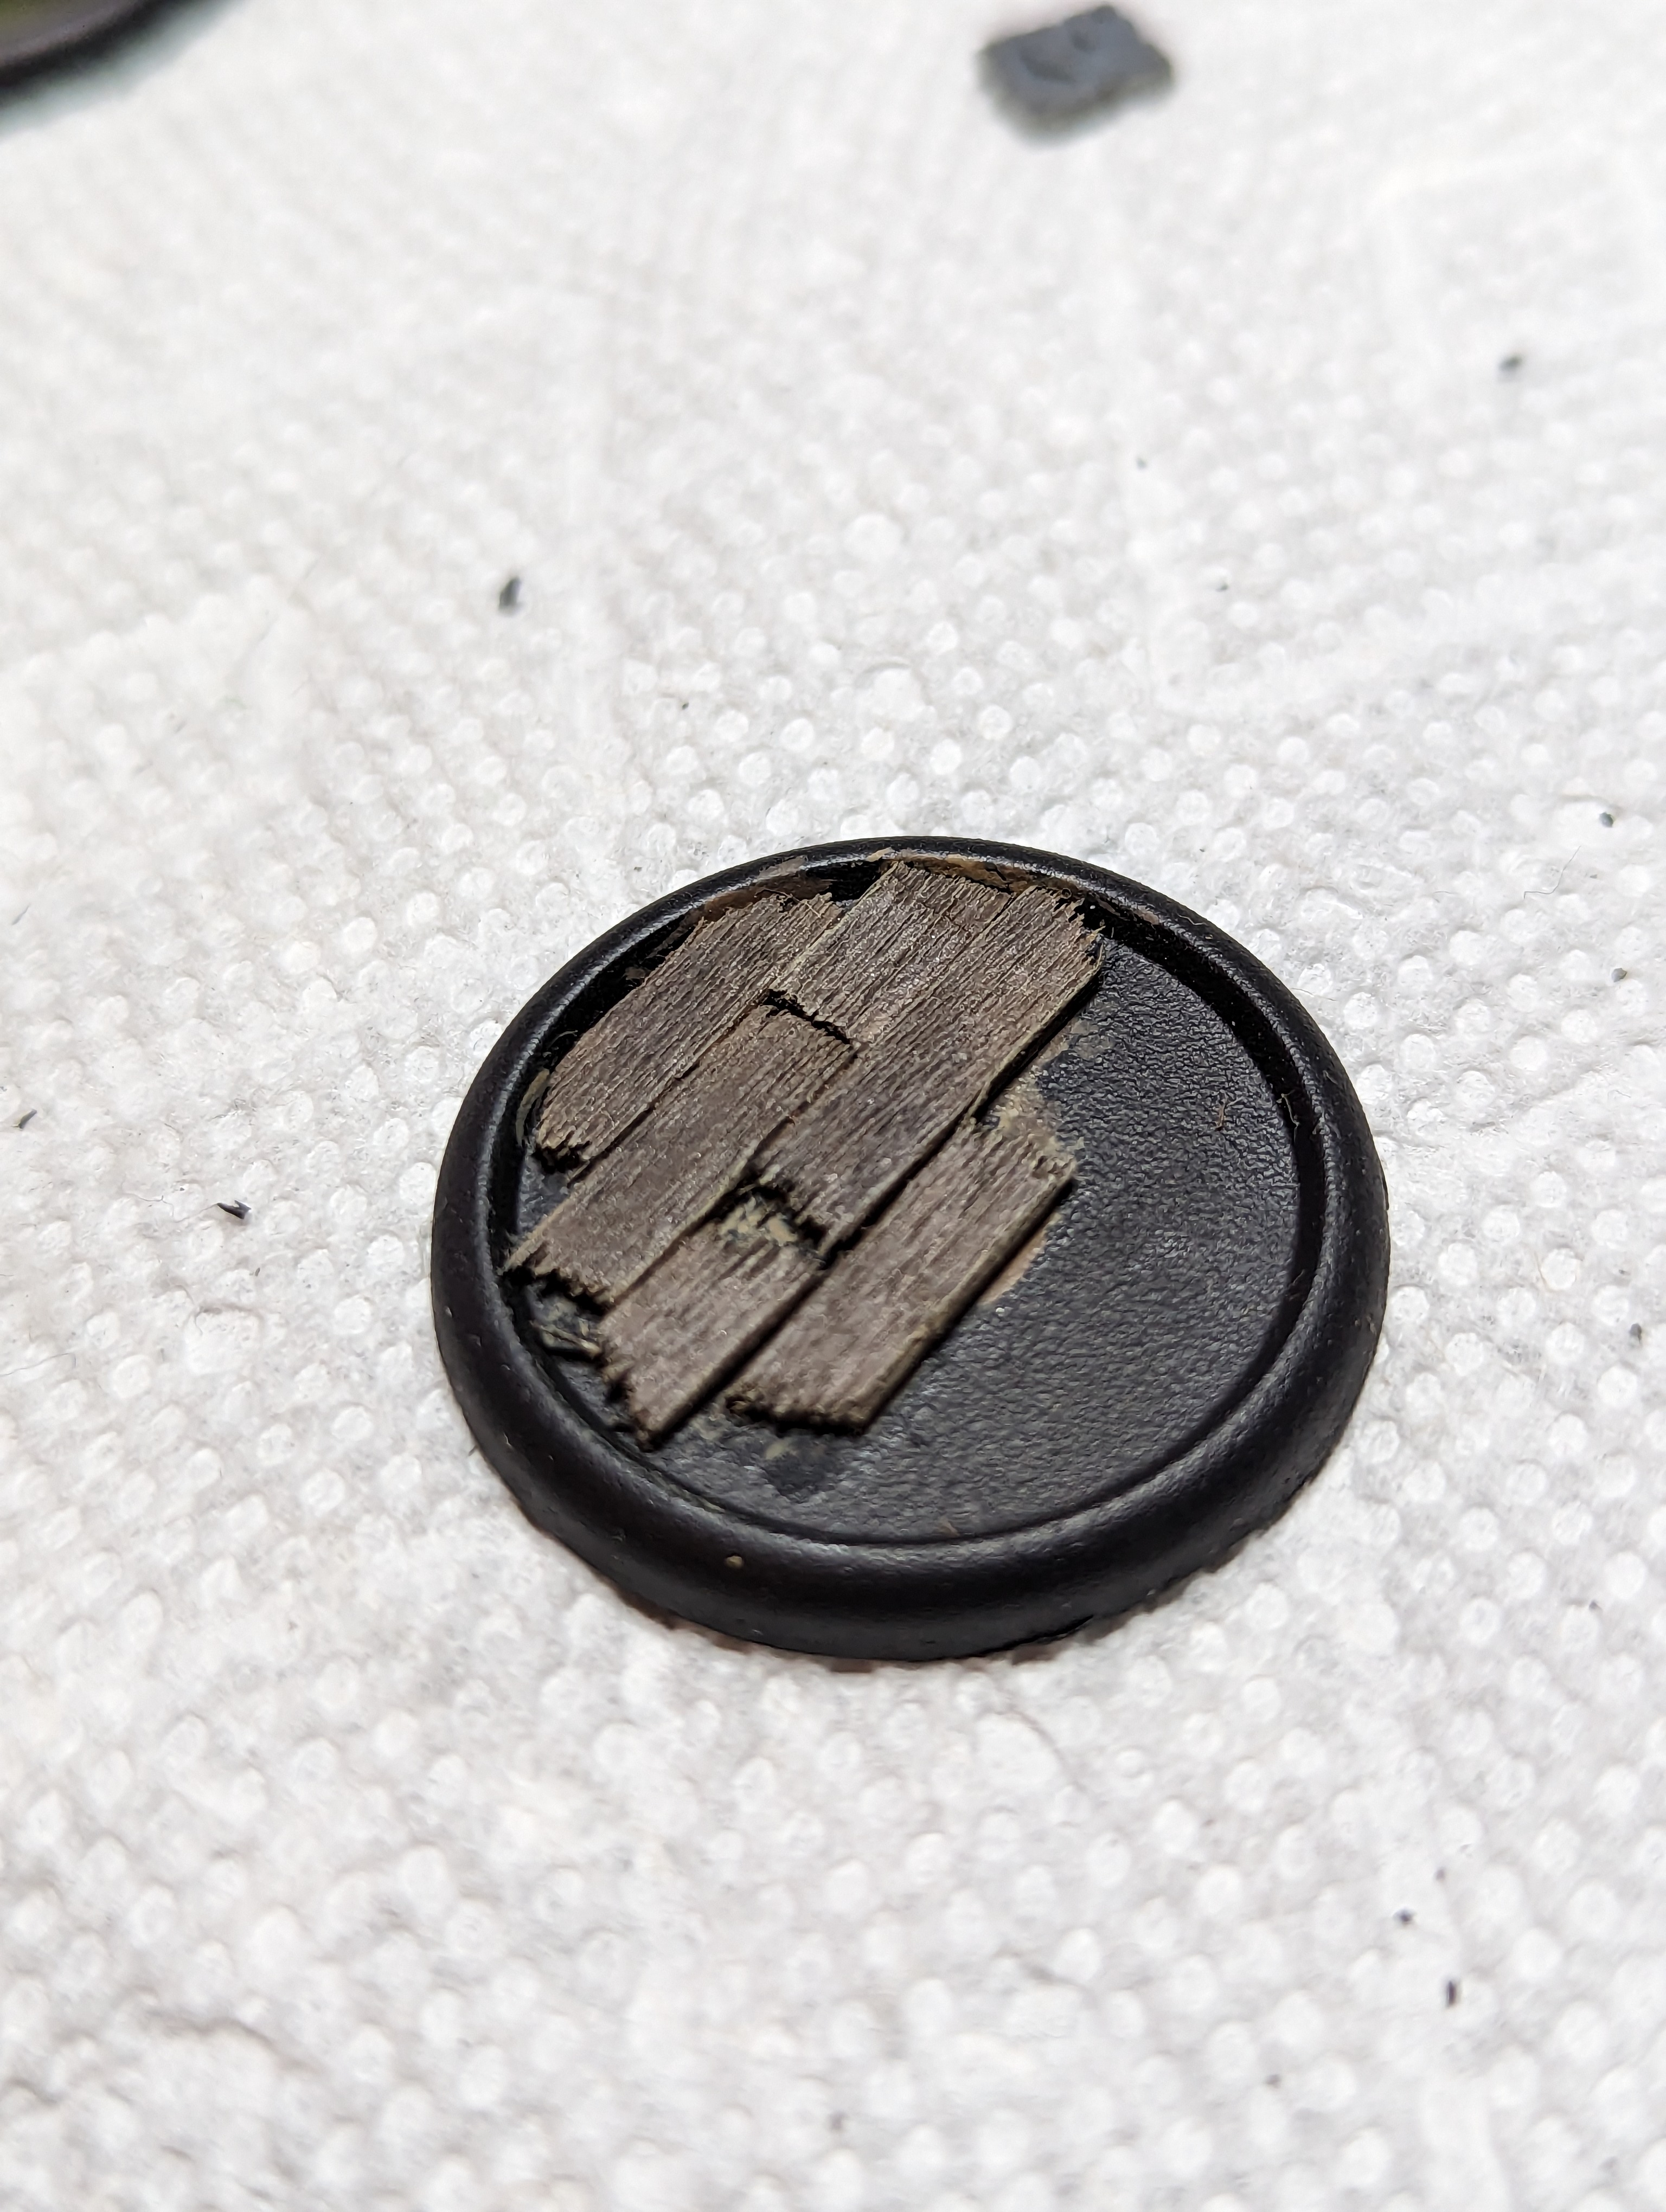
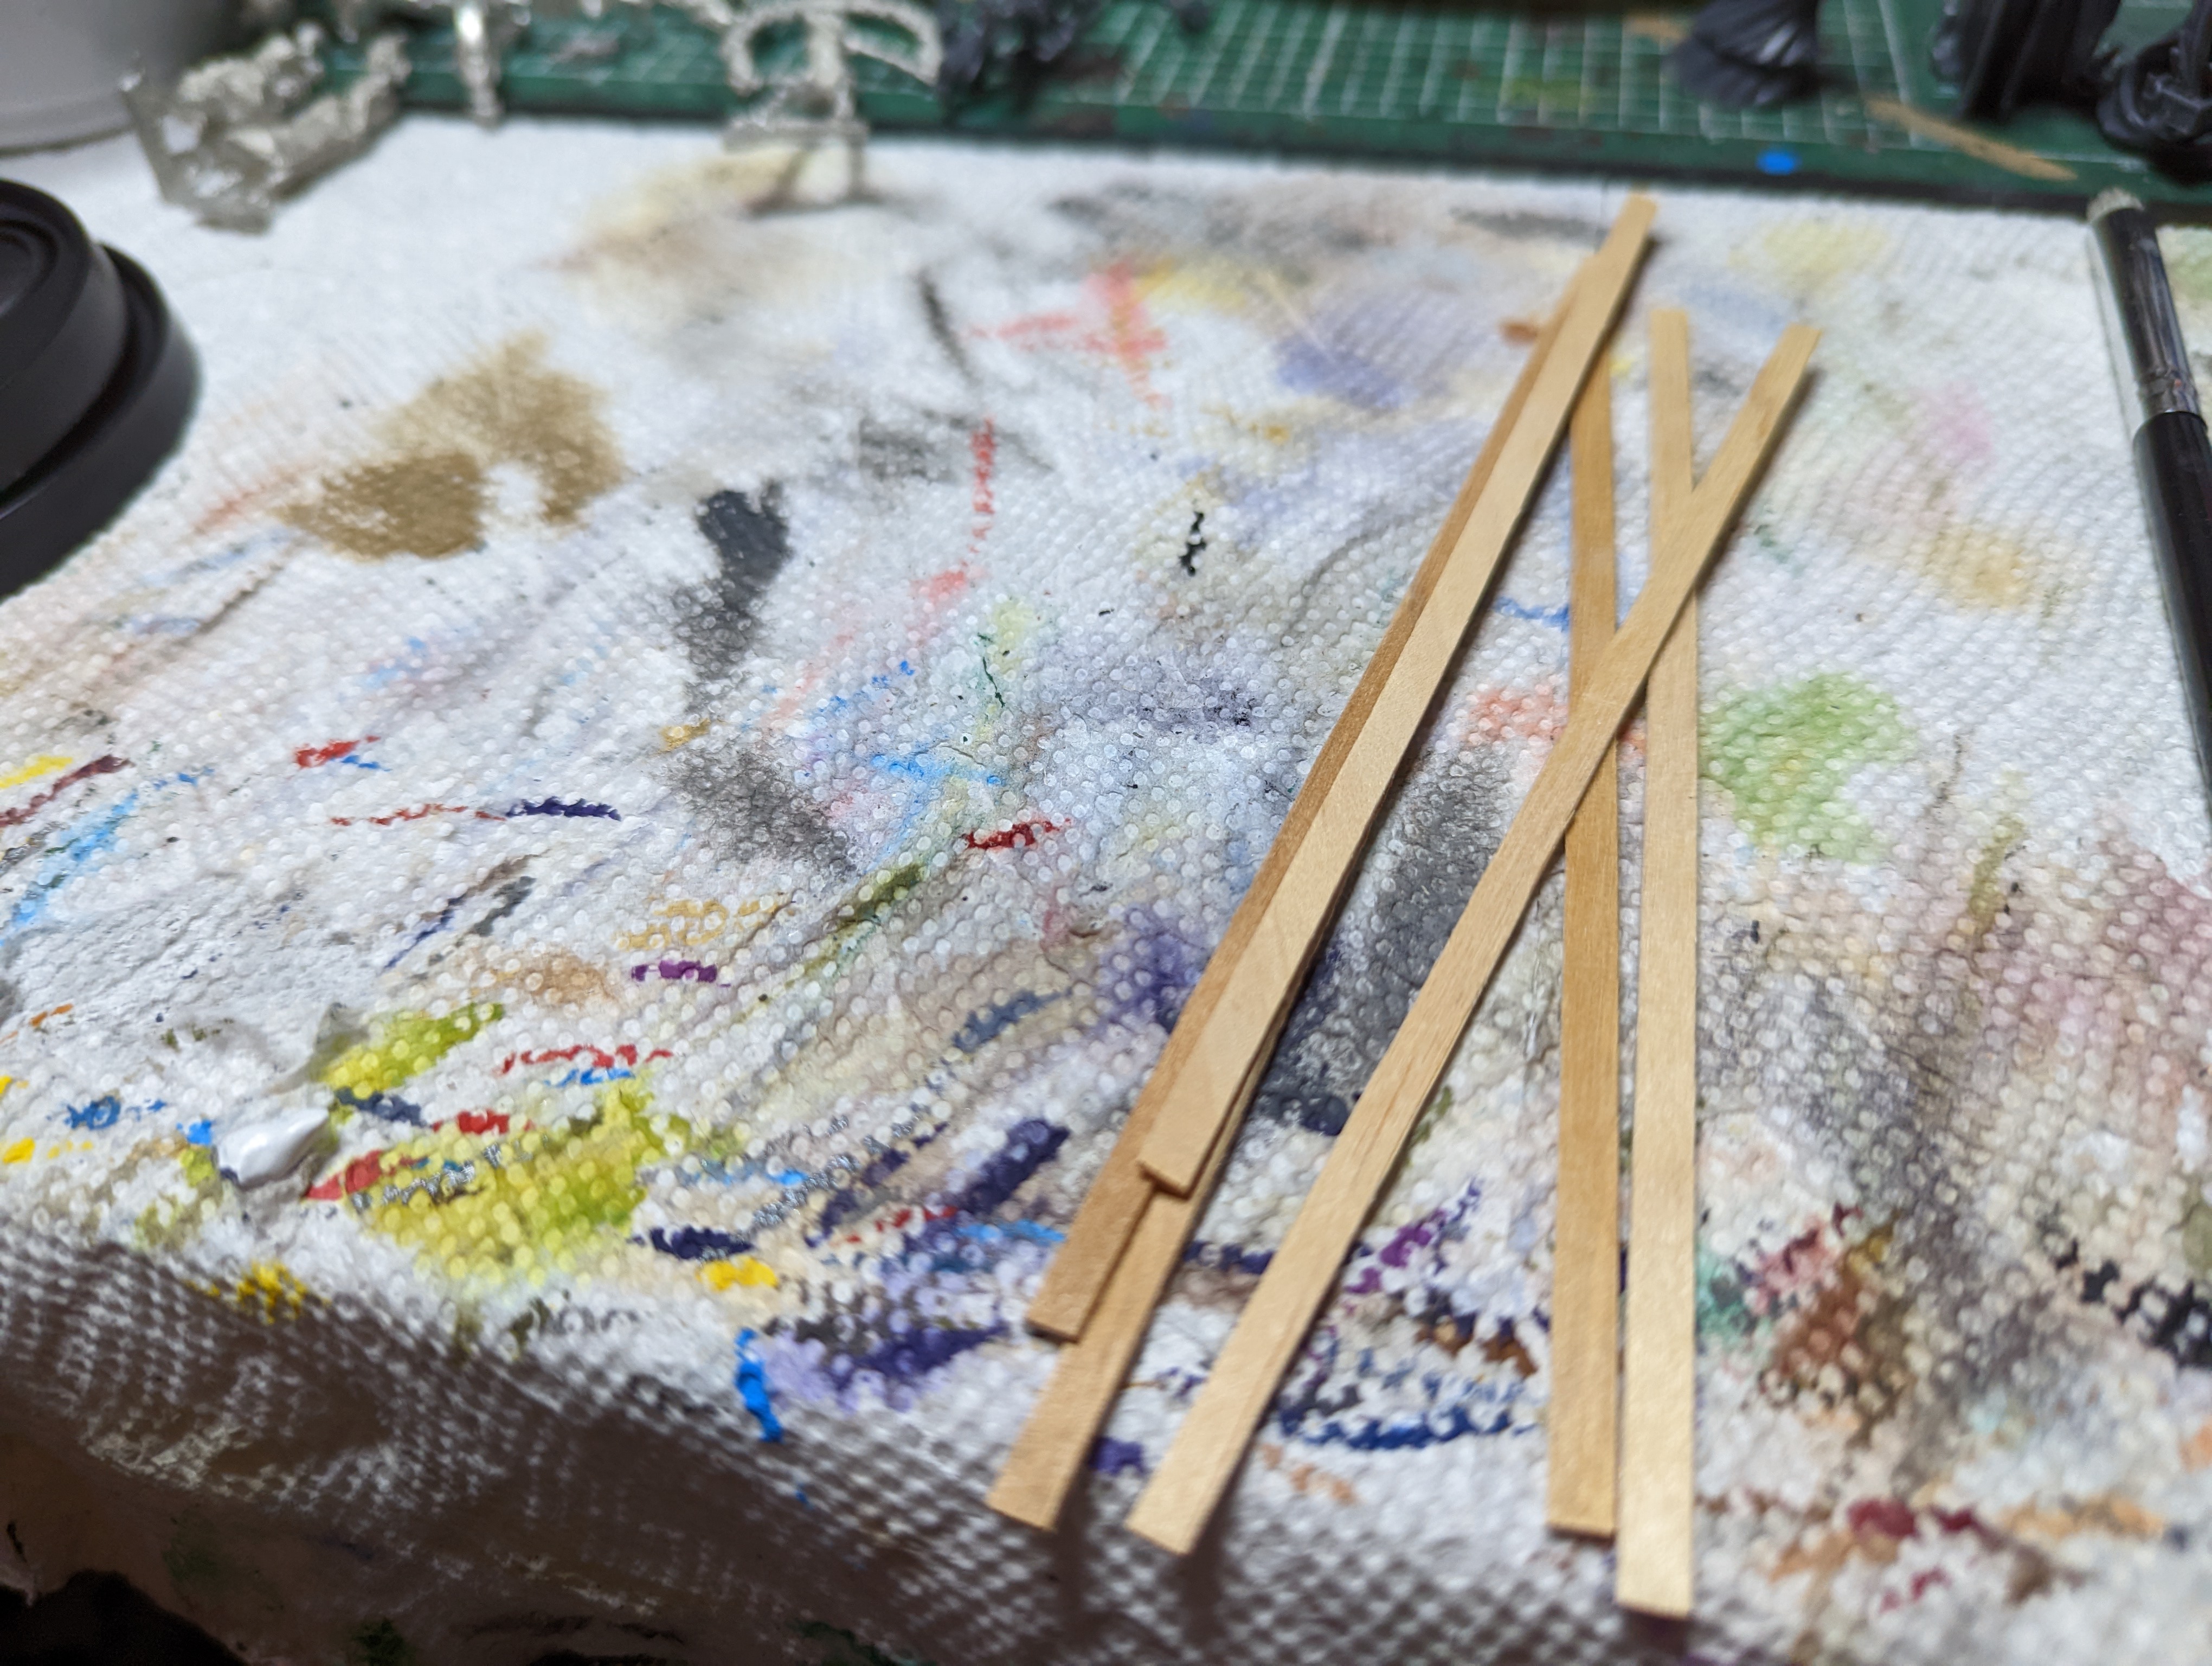
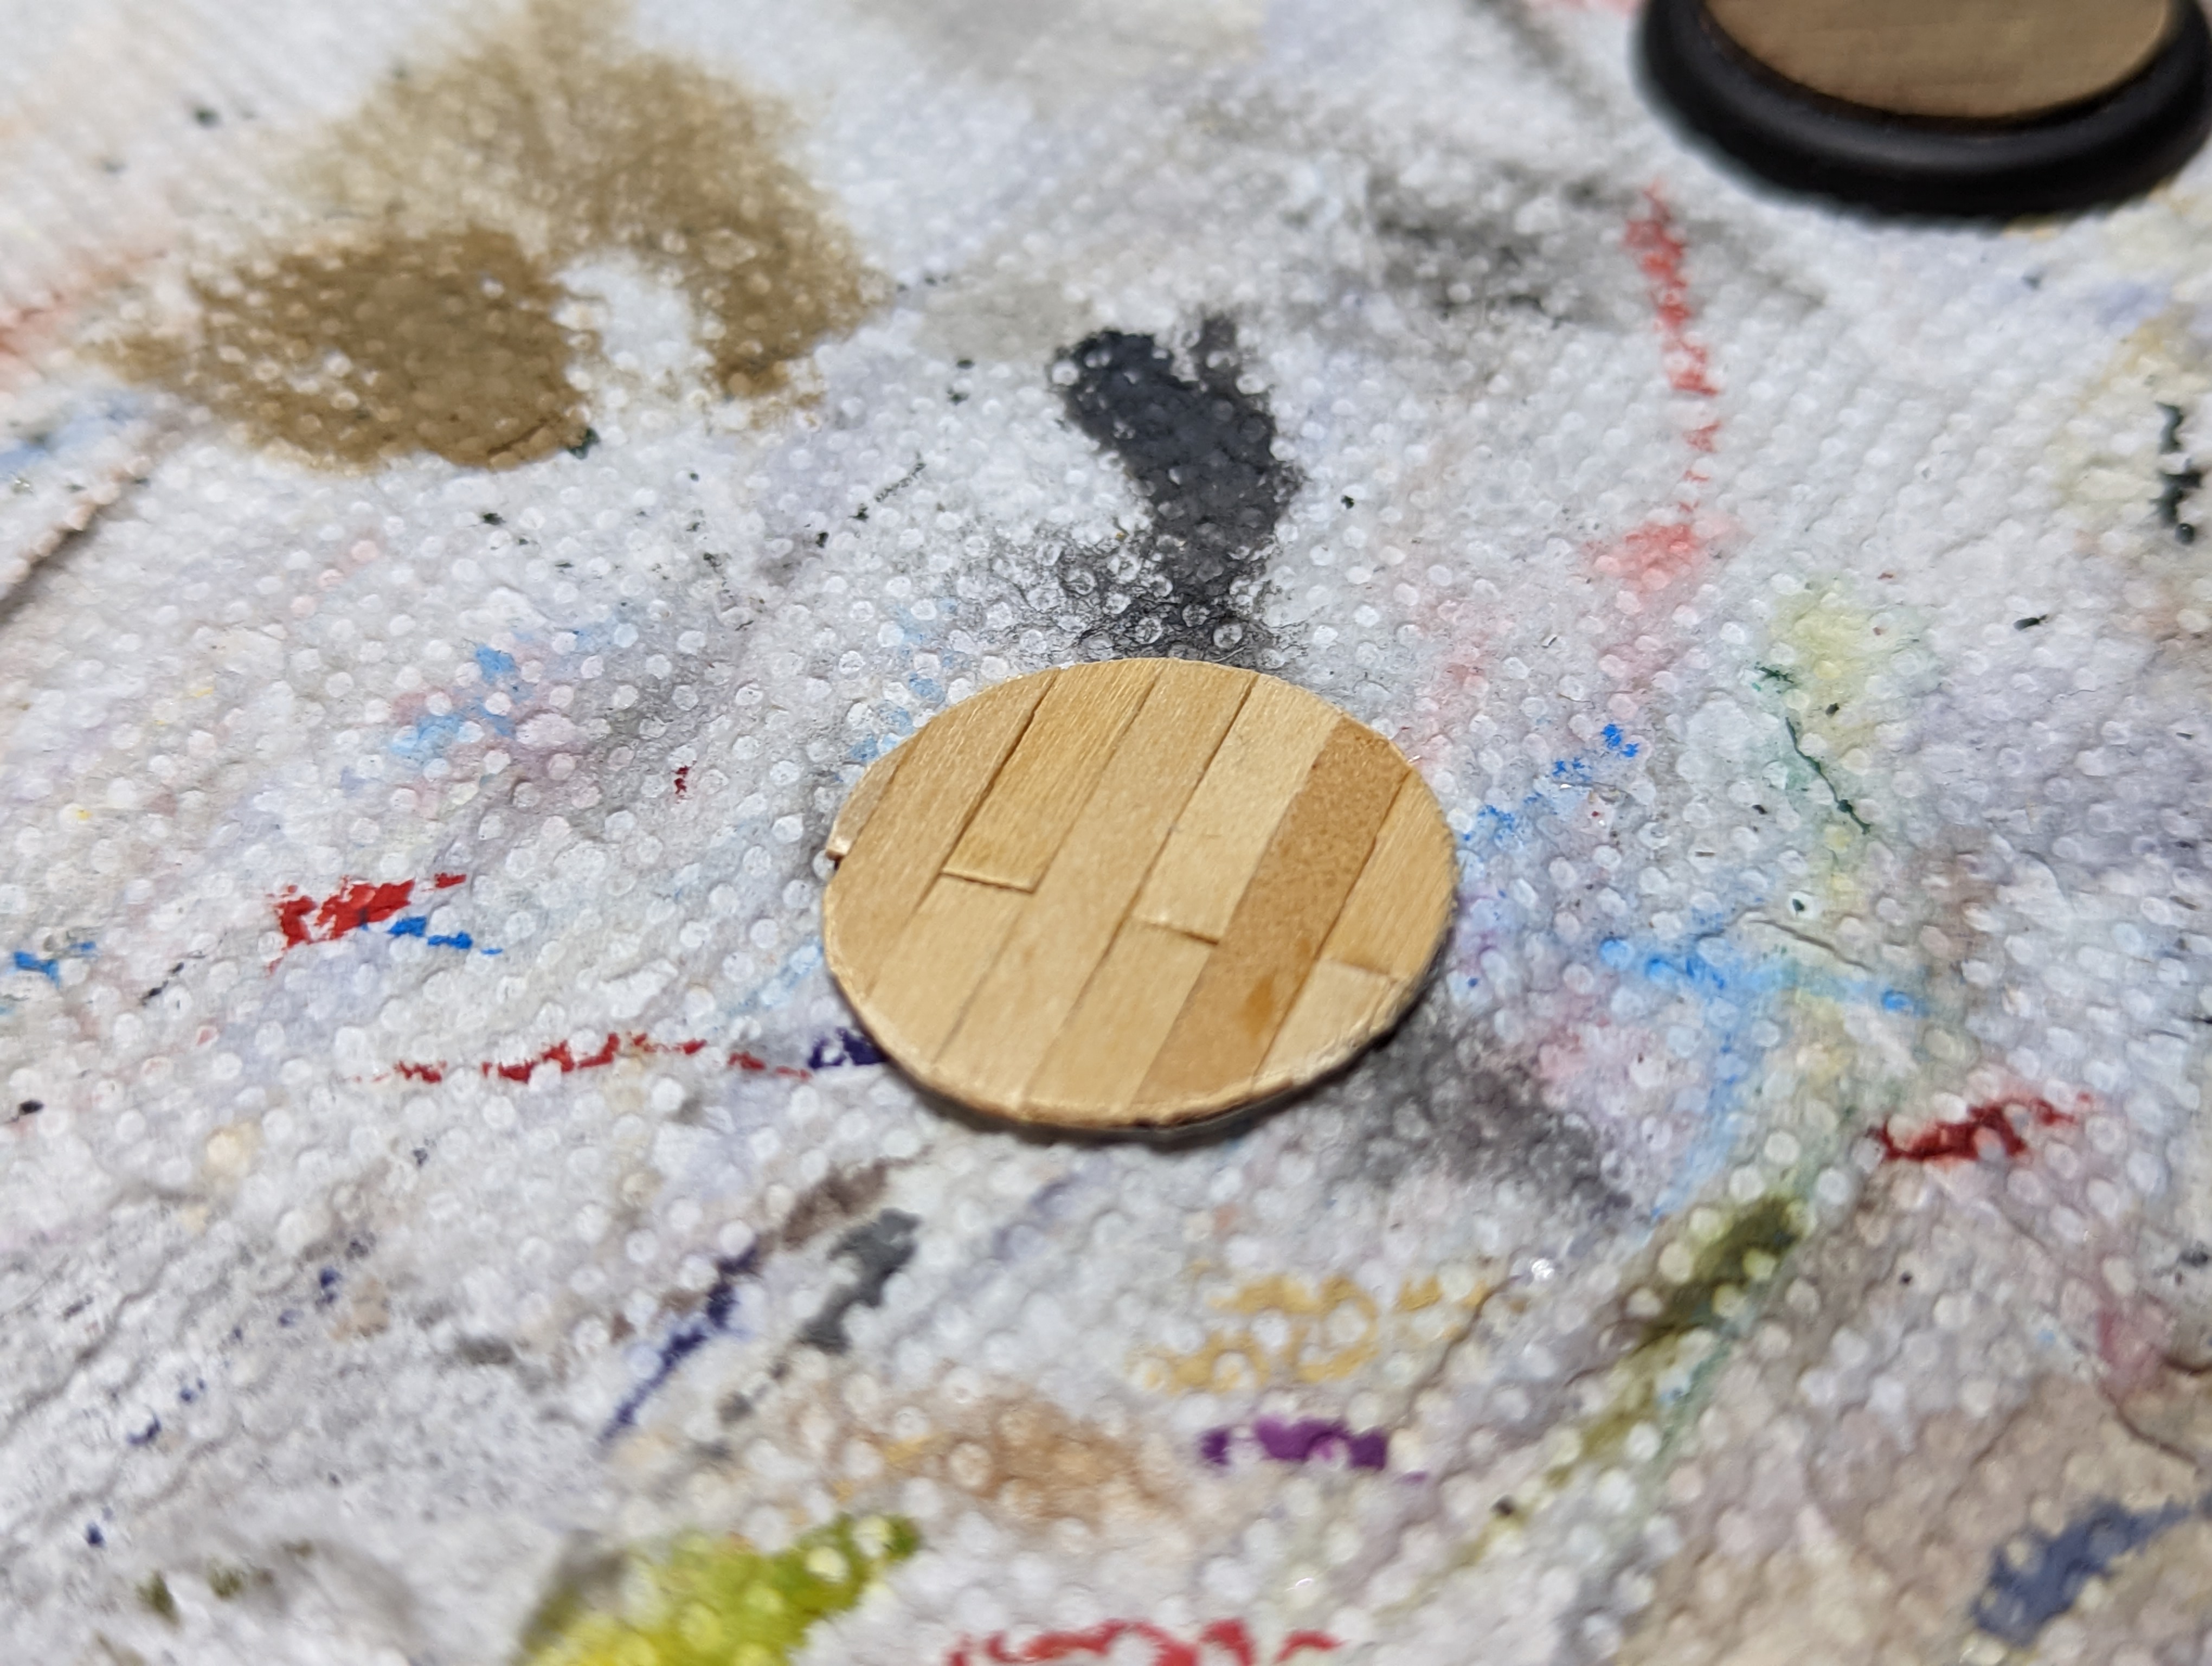
This is the easiest way I have come up with to do wood floors. I start with a little disc to sit inside the lip of the base, you can use whatever material, its mostly just there to be a guide. Than I take coffee stirrers, and glue them to the disc. Trim them up with some snips and then maybe sand the edges if its too rough, and youre pretty much good to go. You can cut some lines along the boards if you wanna bring out the texture, or poke holes into the ends to represent nails.
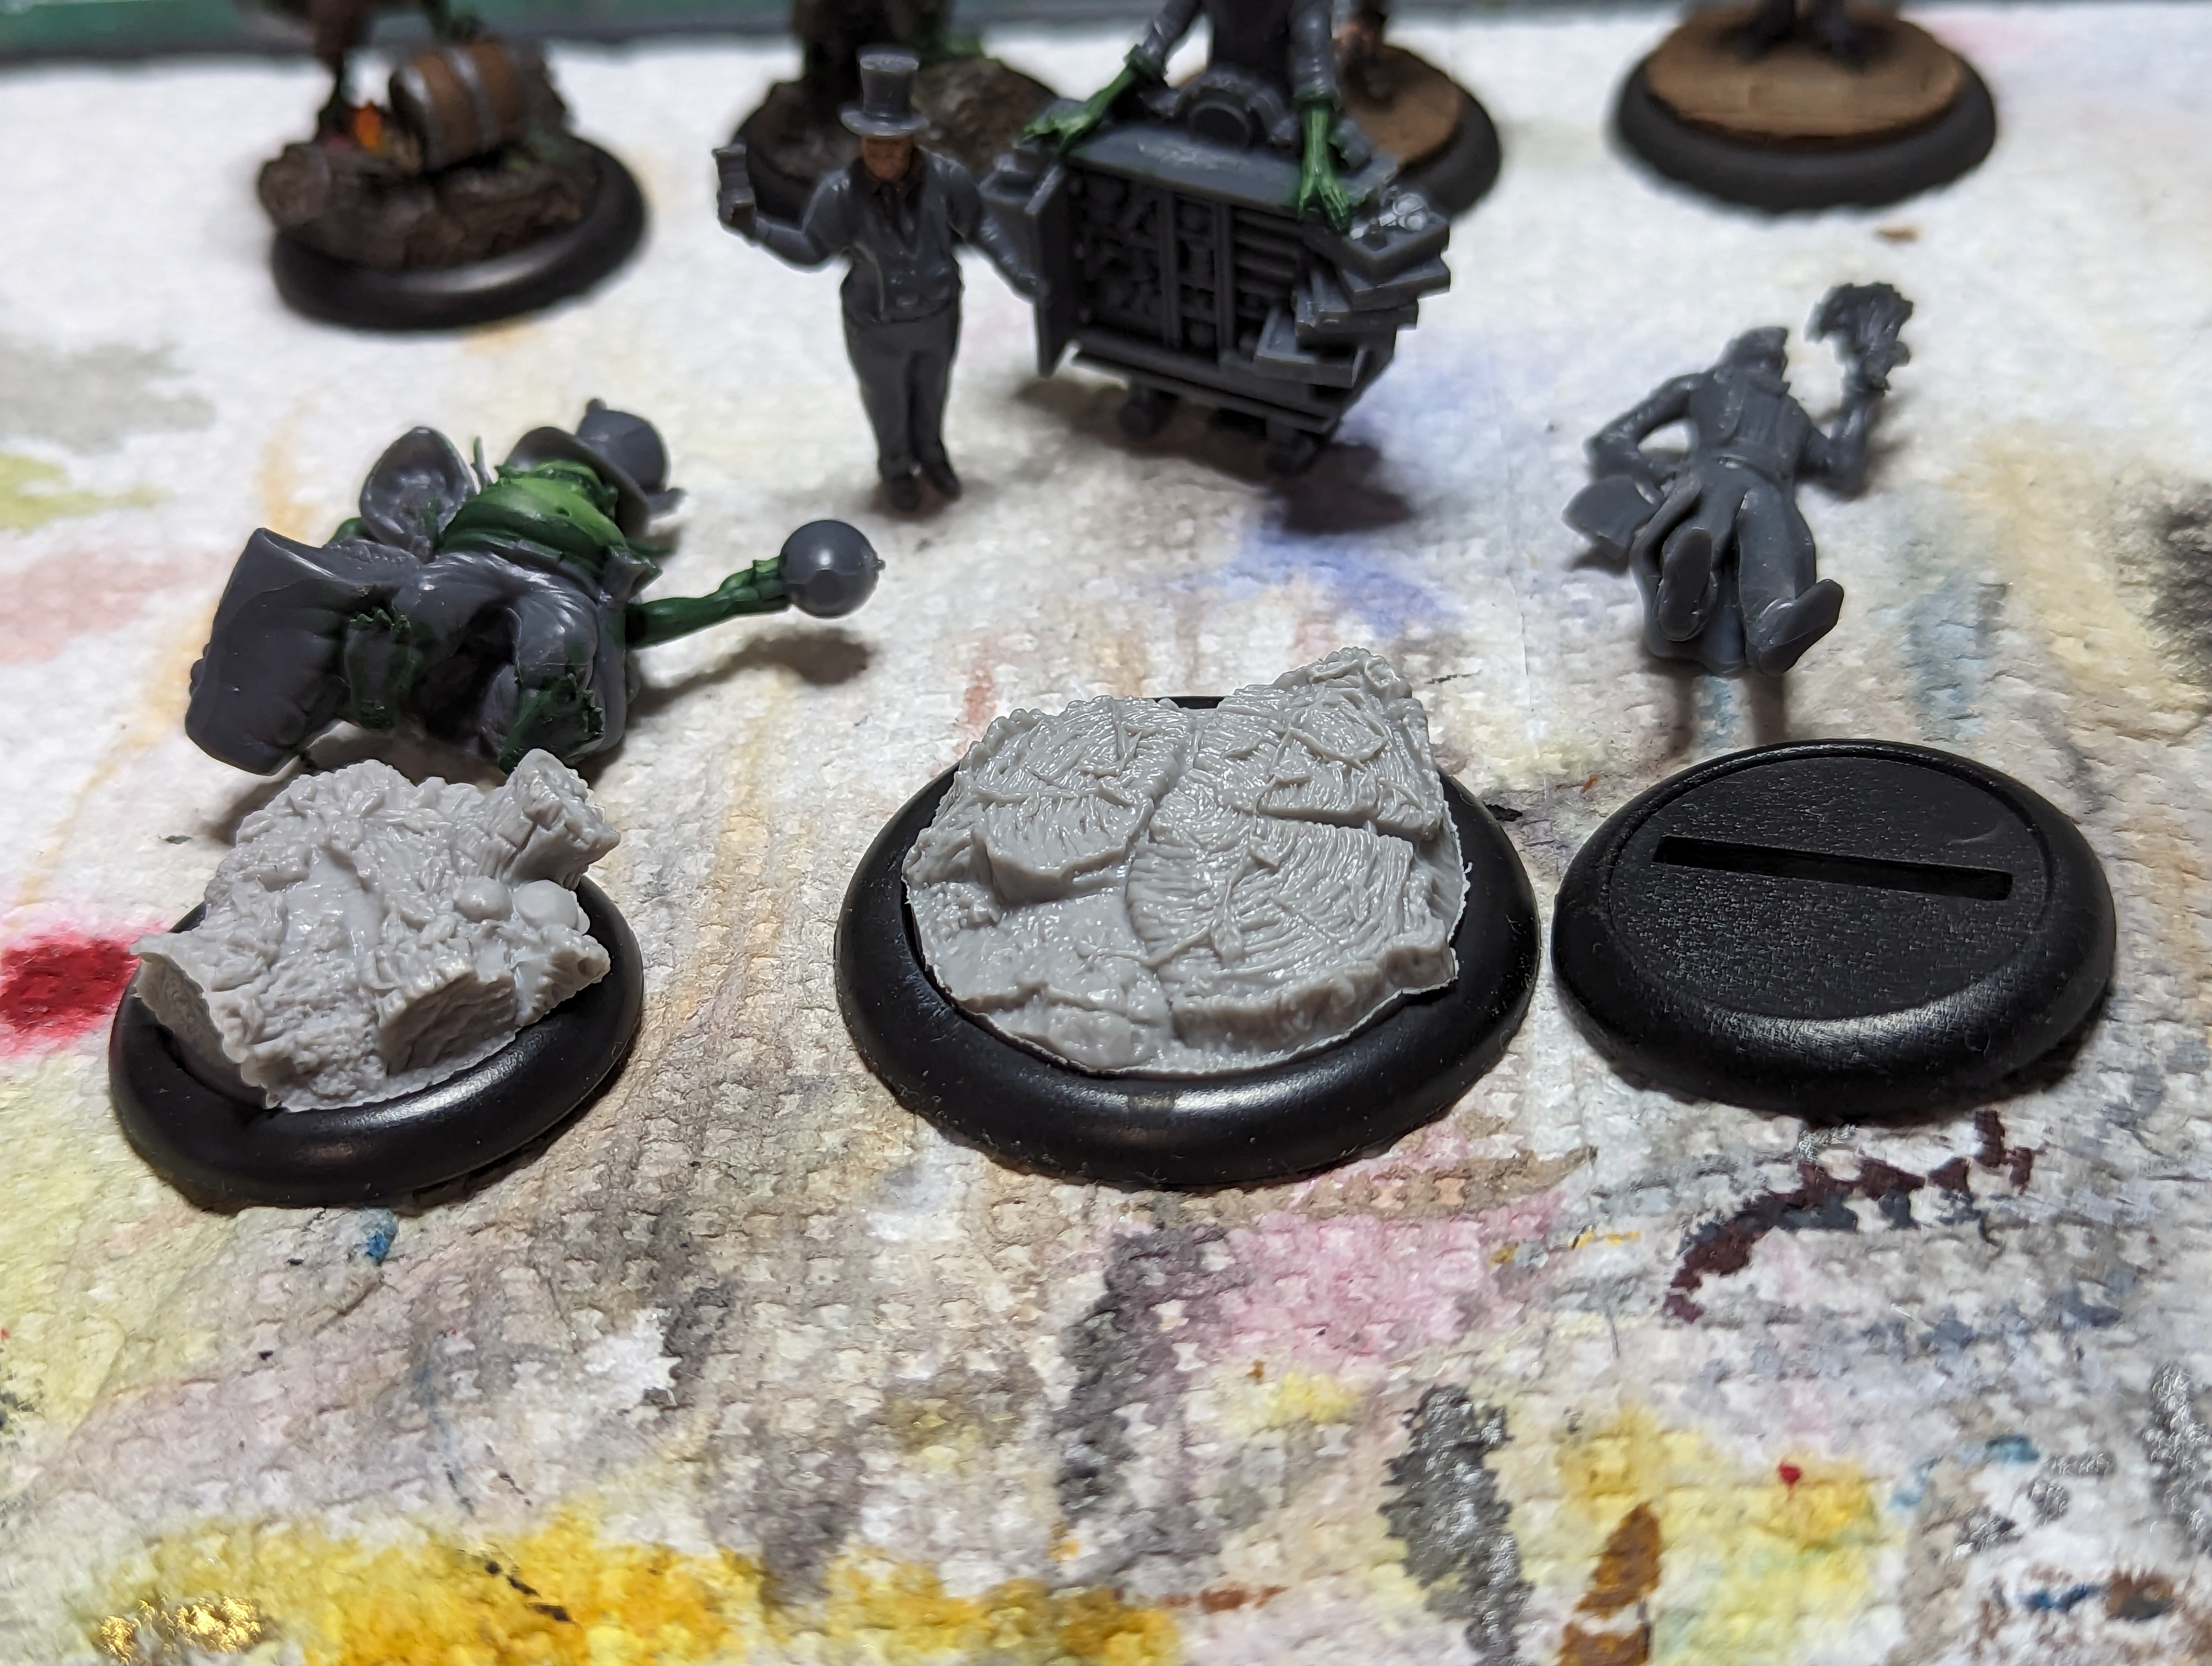
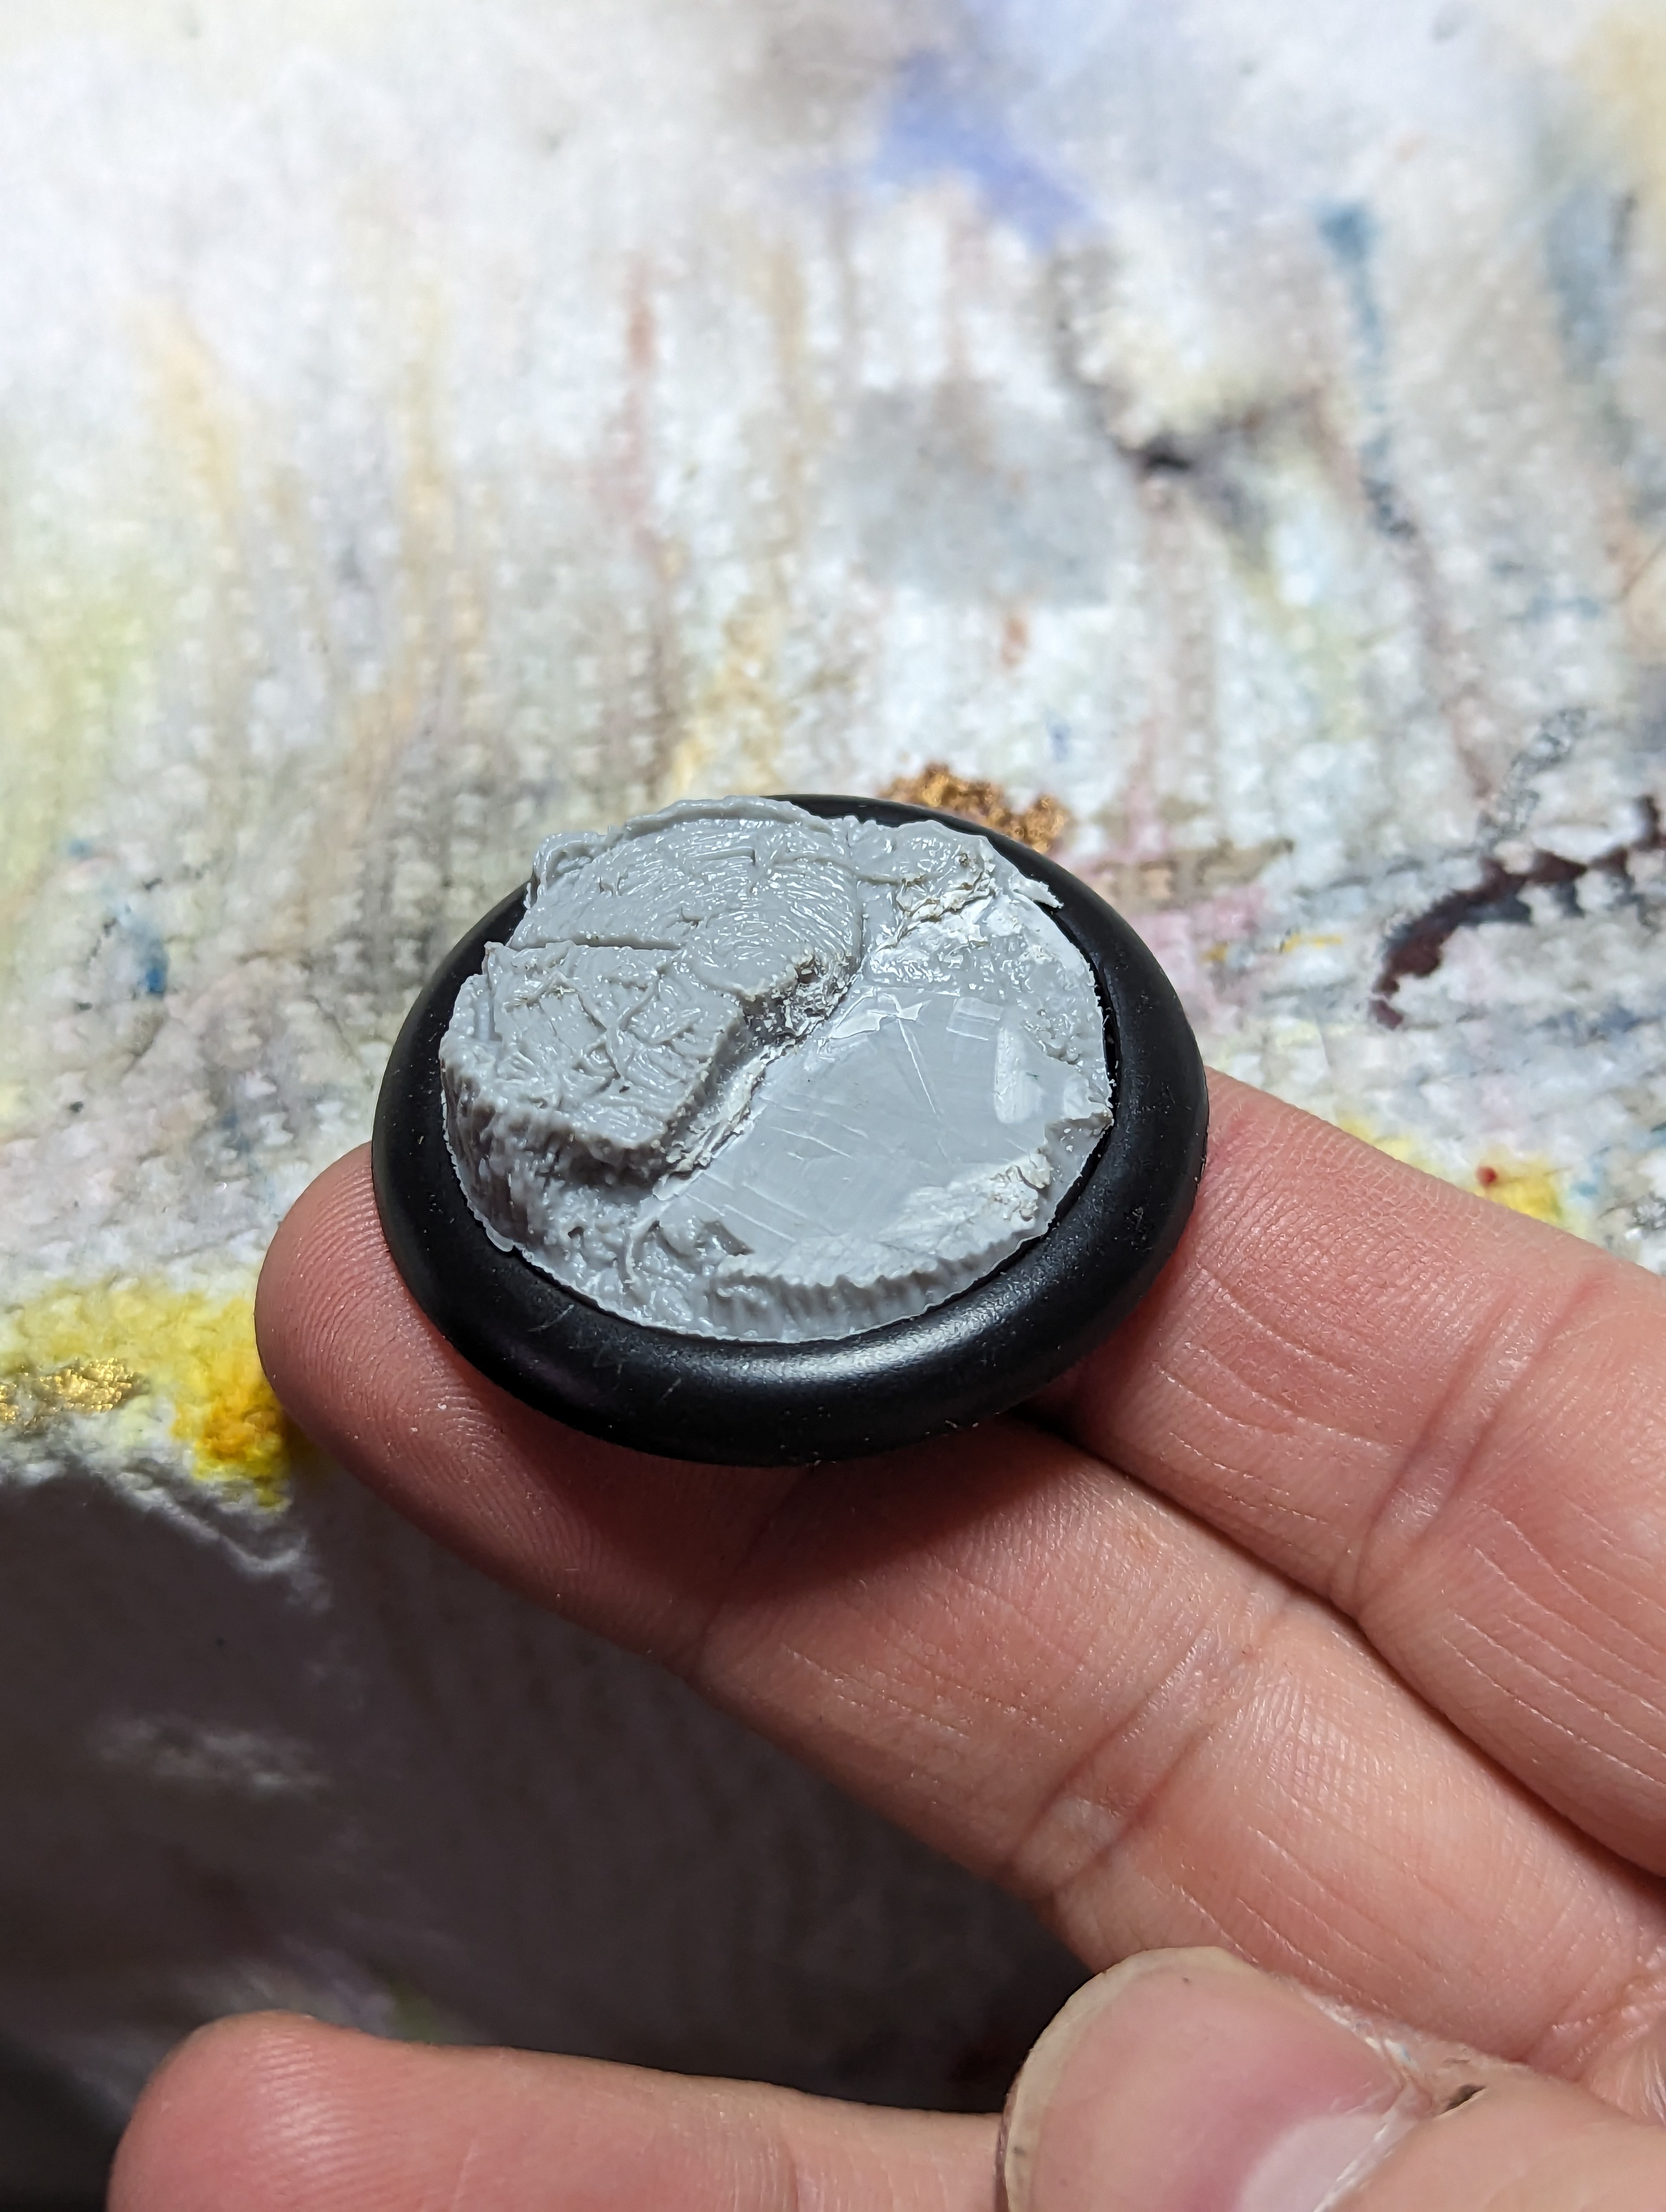
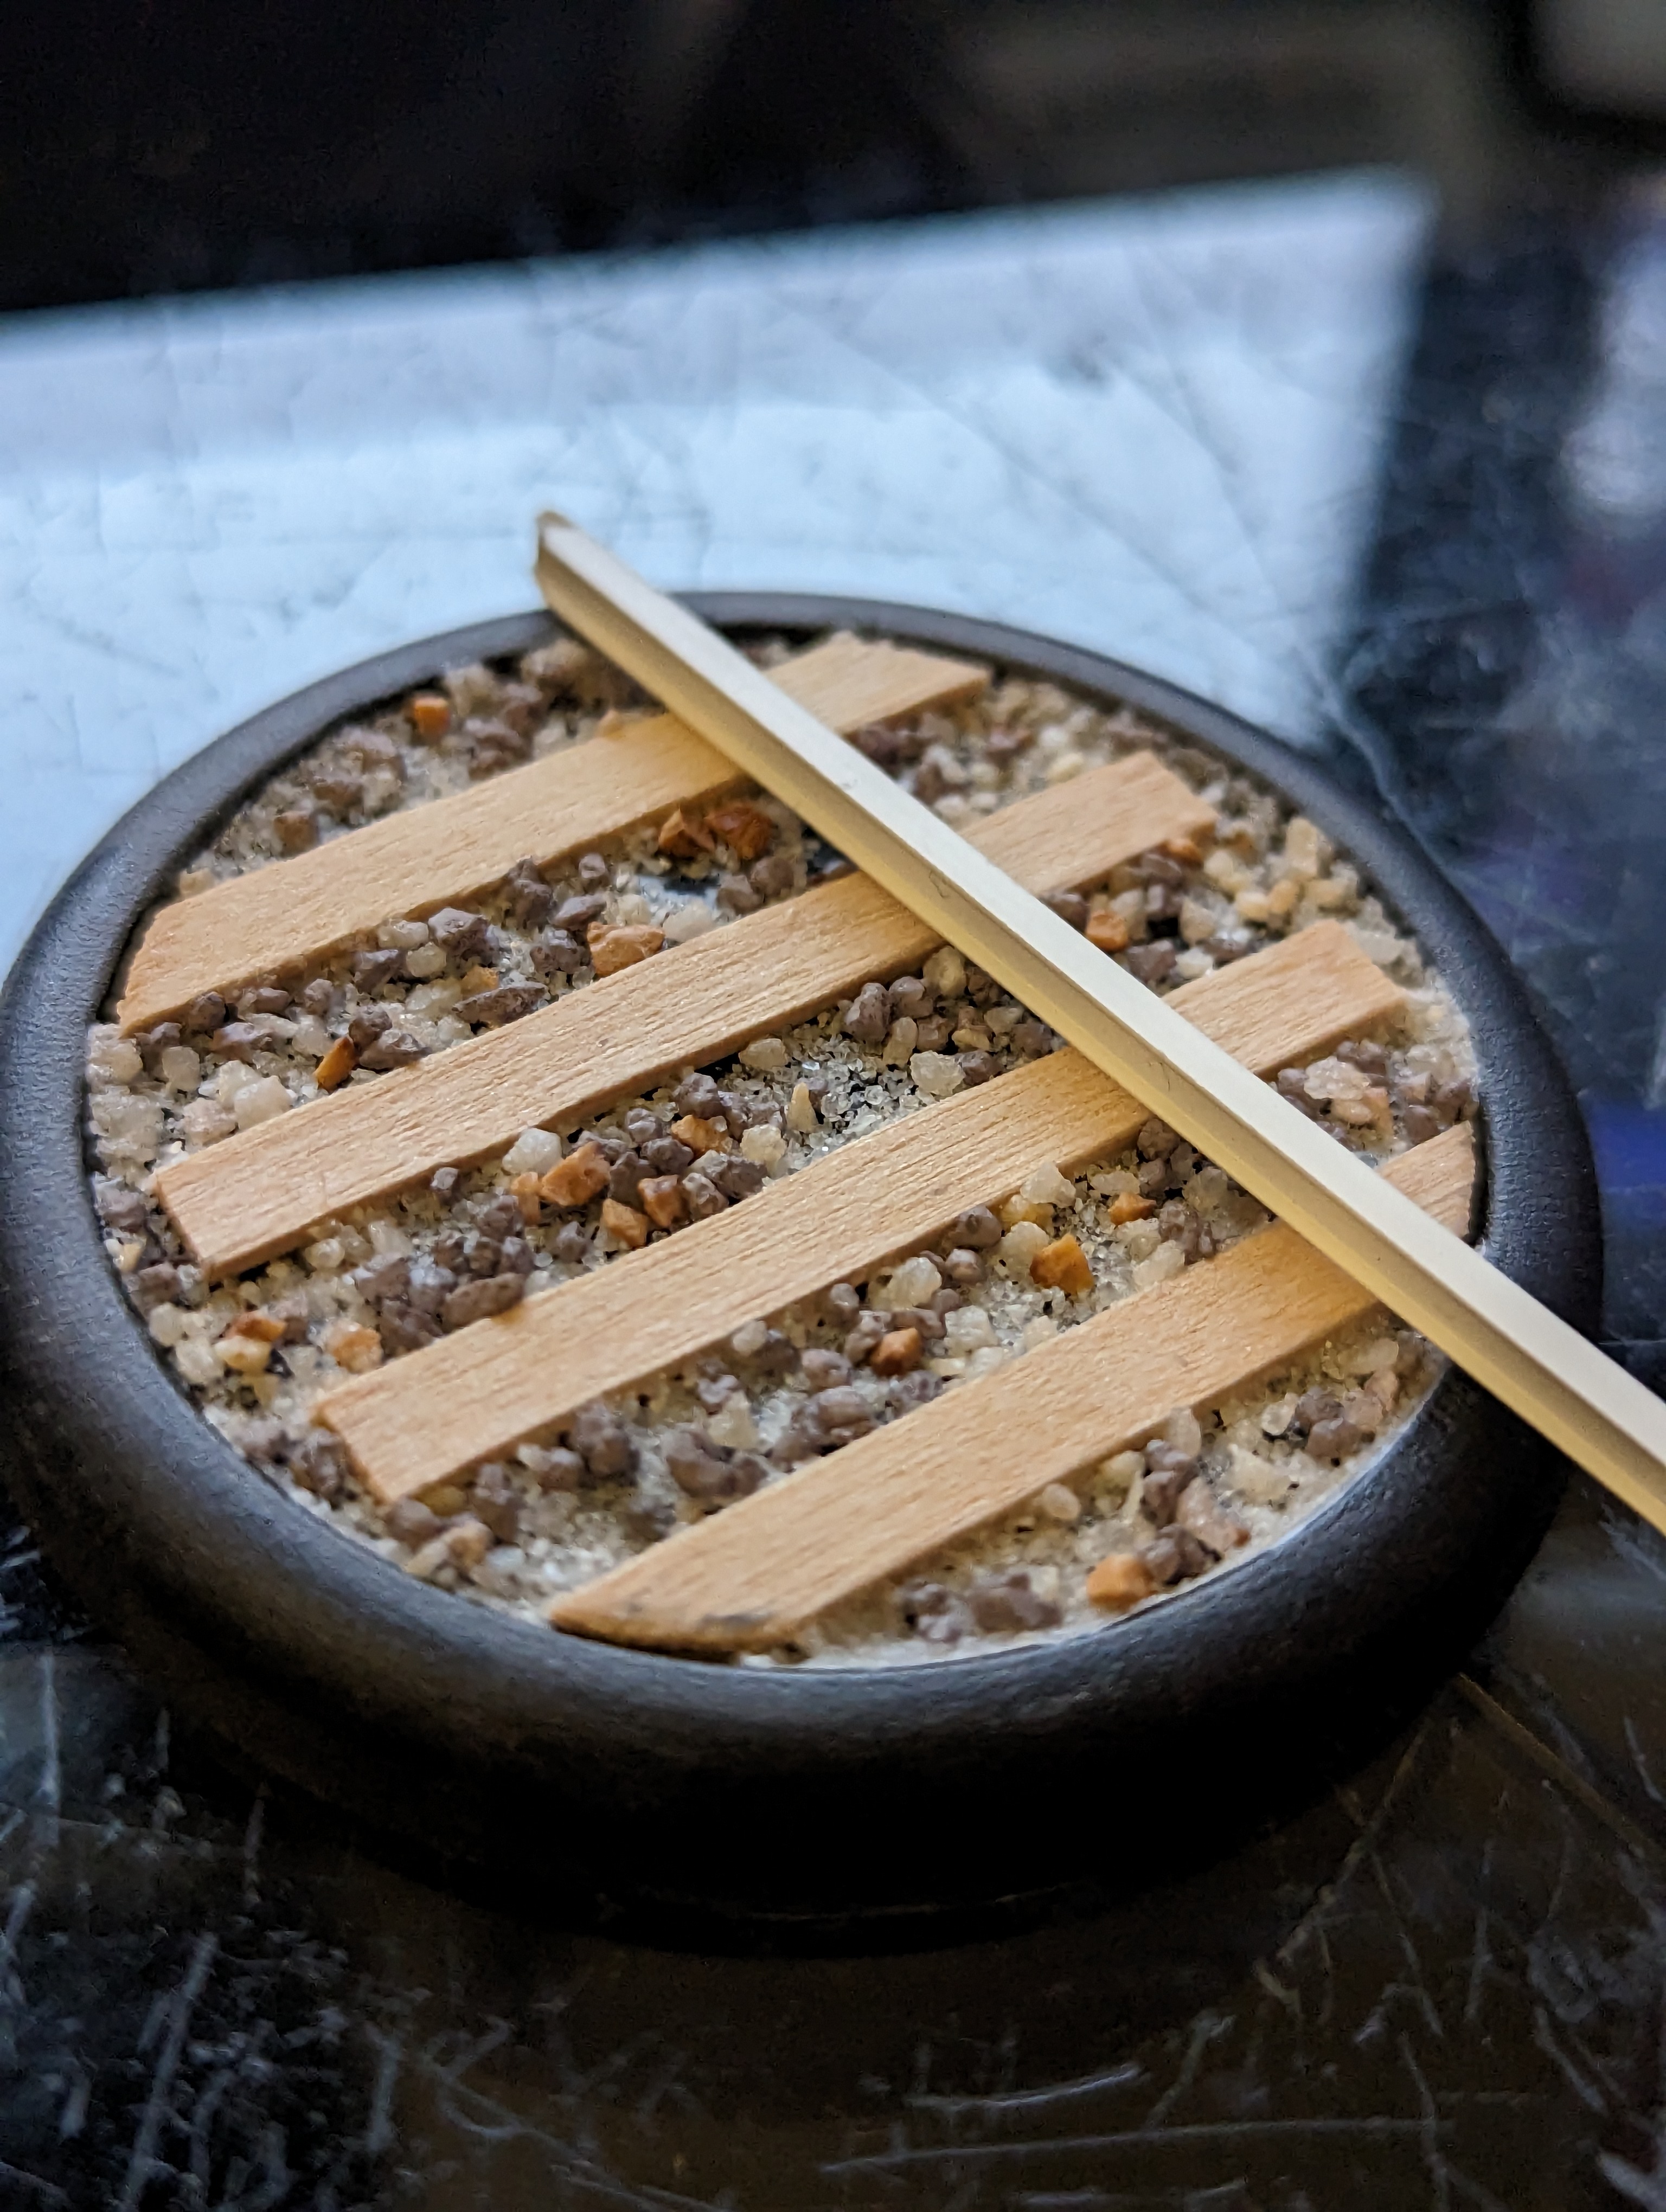
The base inserts for Som’er are pretty tall, but I decided that I liked the idea of just cutting a bit off one side and making it look like a little platform in the bayou along a tree stump. Maybe the White Rabbit Co. have set up a platform to sell their wares to the gremlins without getting the cart all muddy.
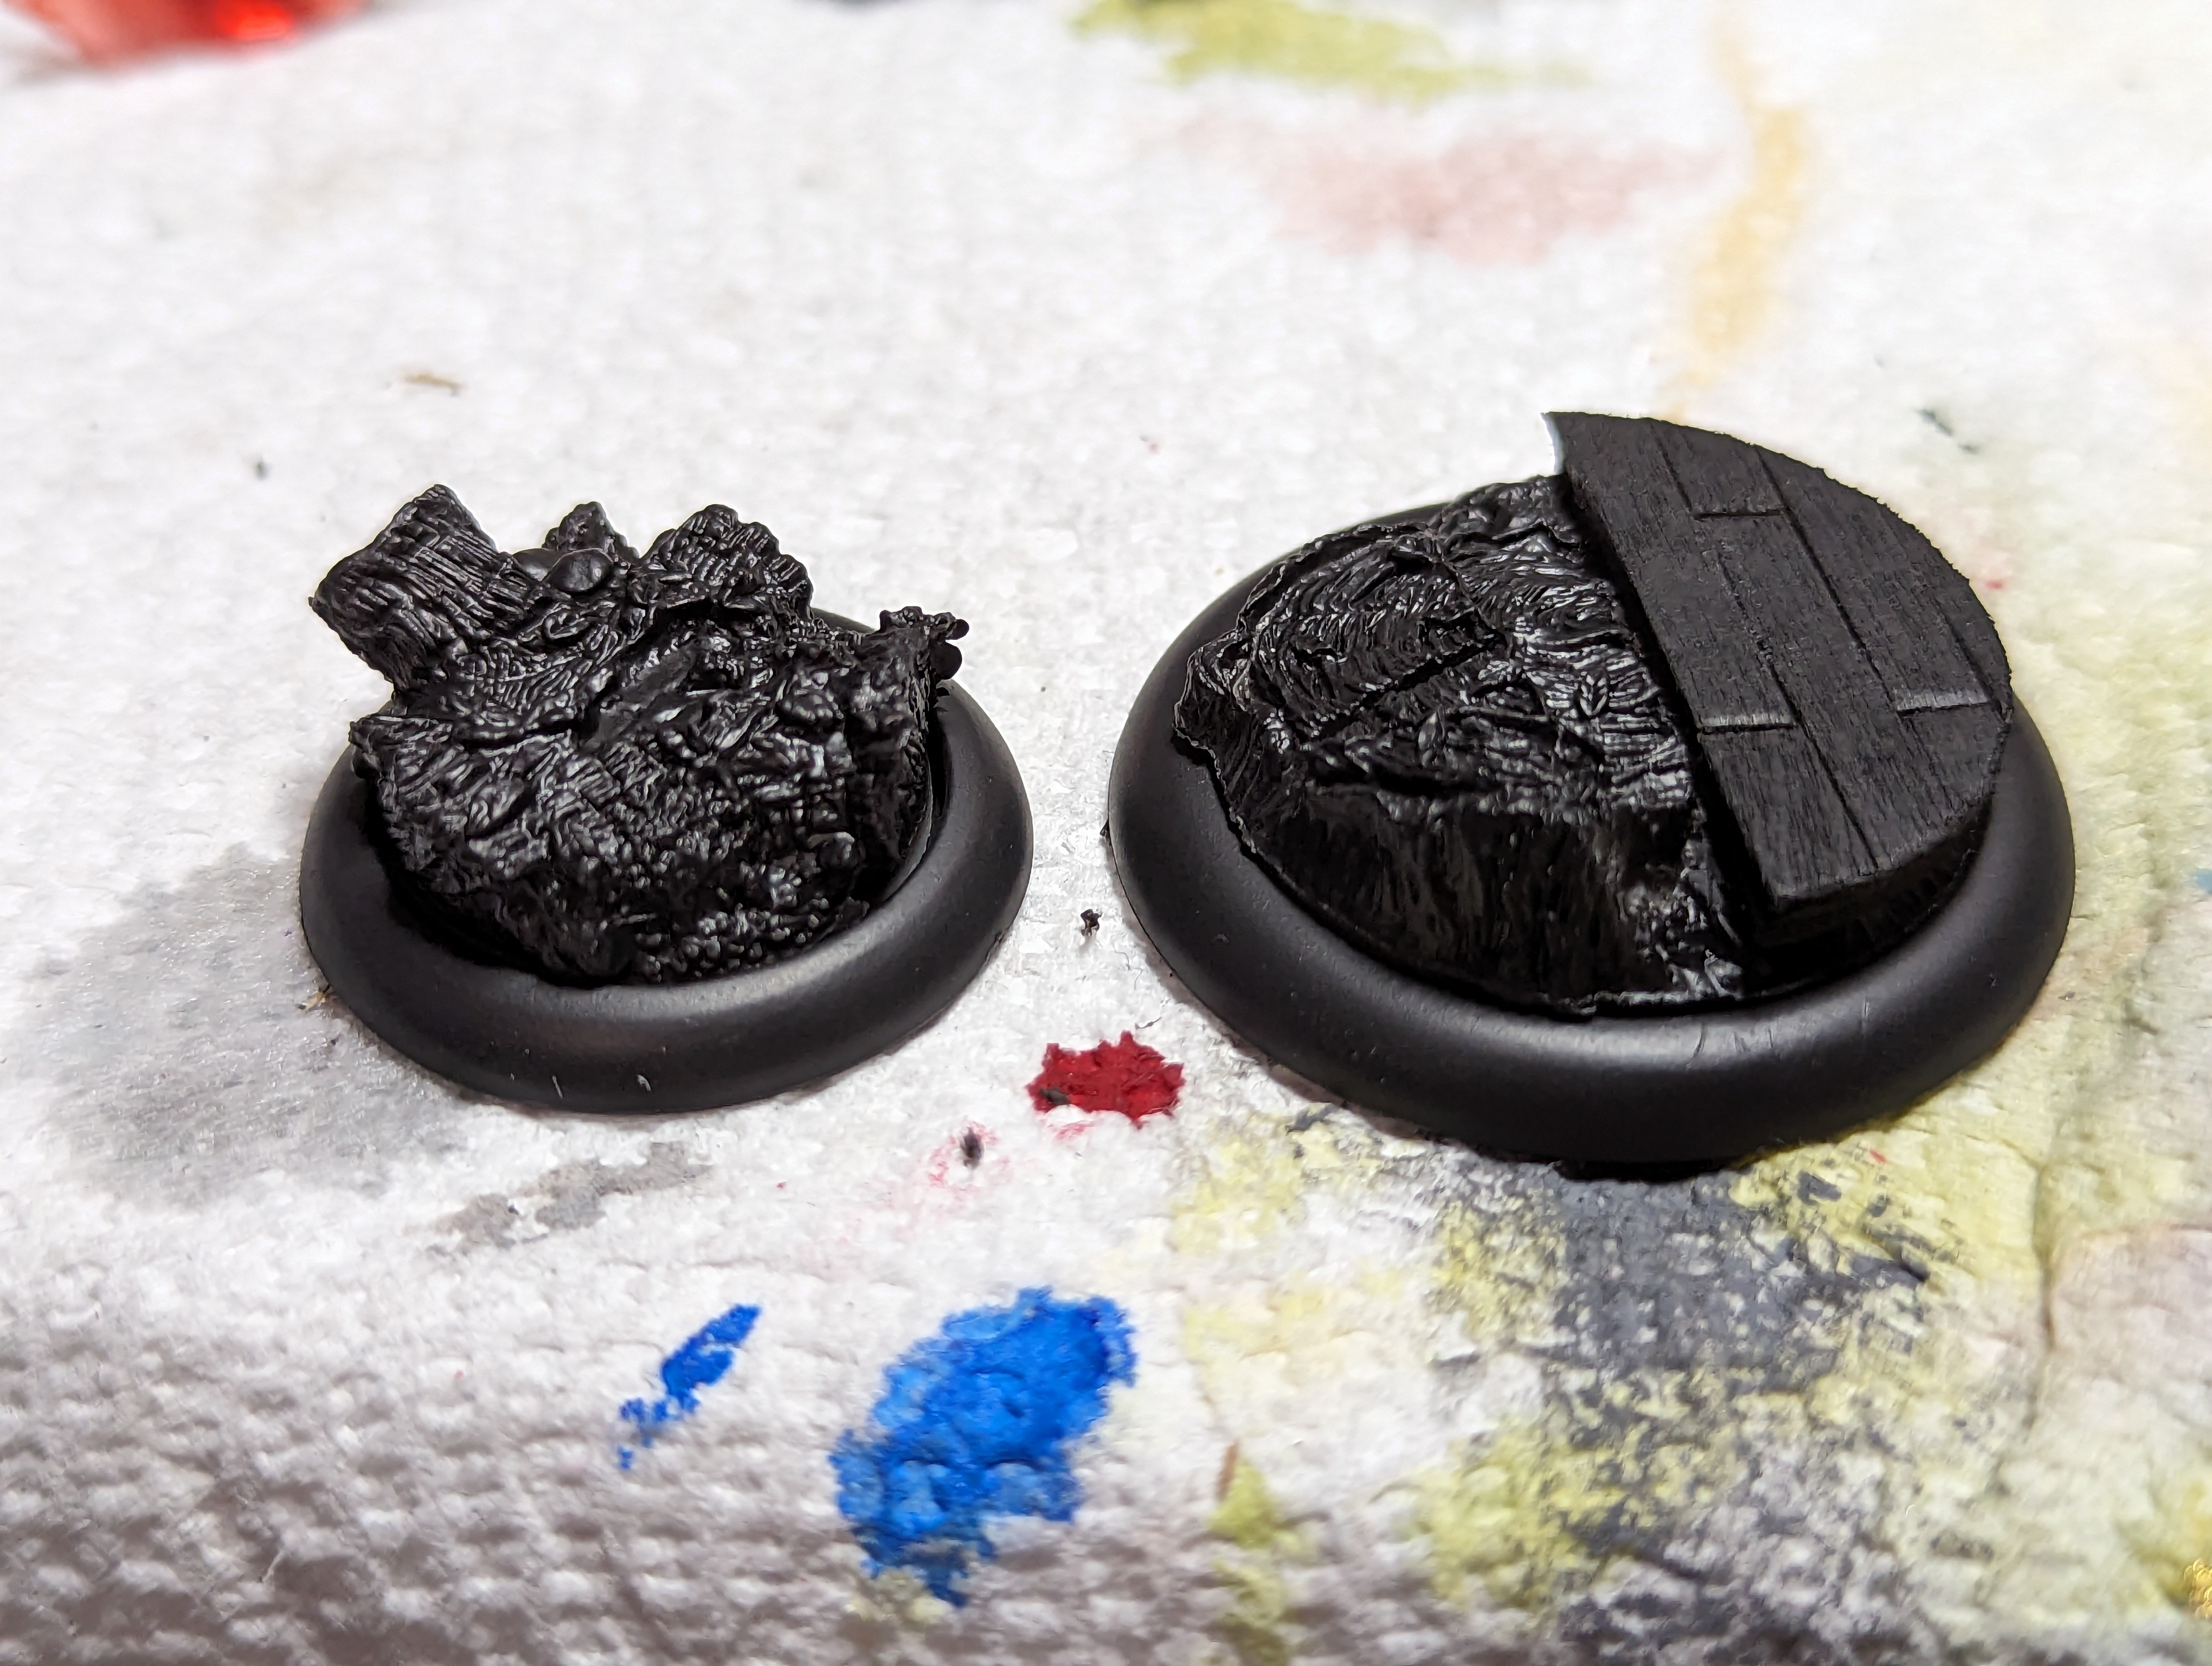
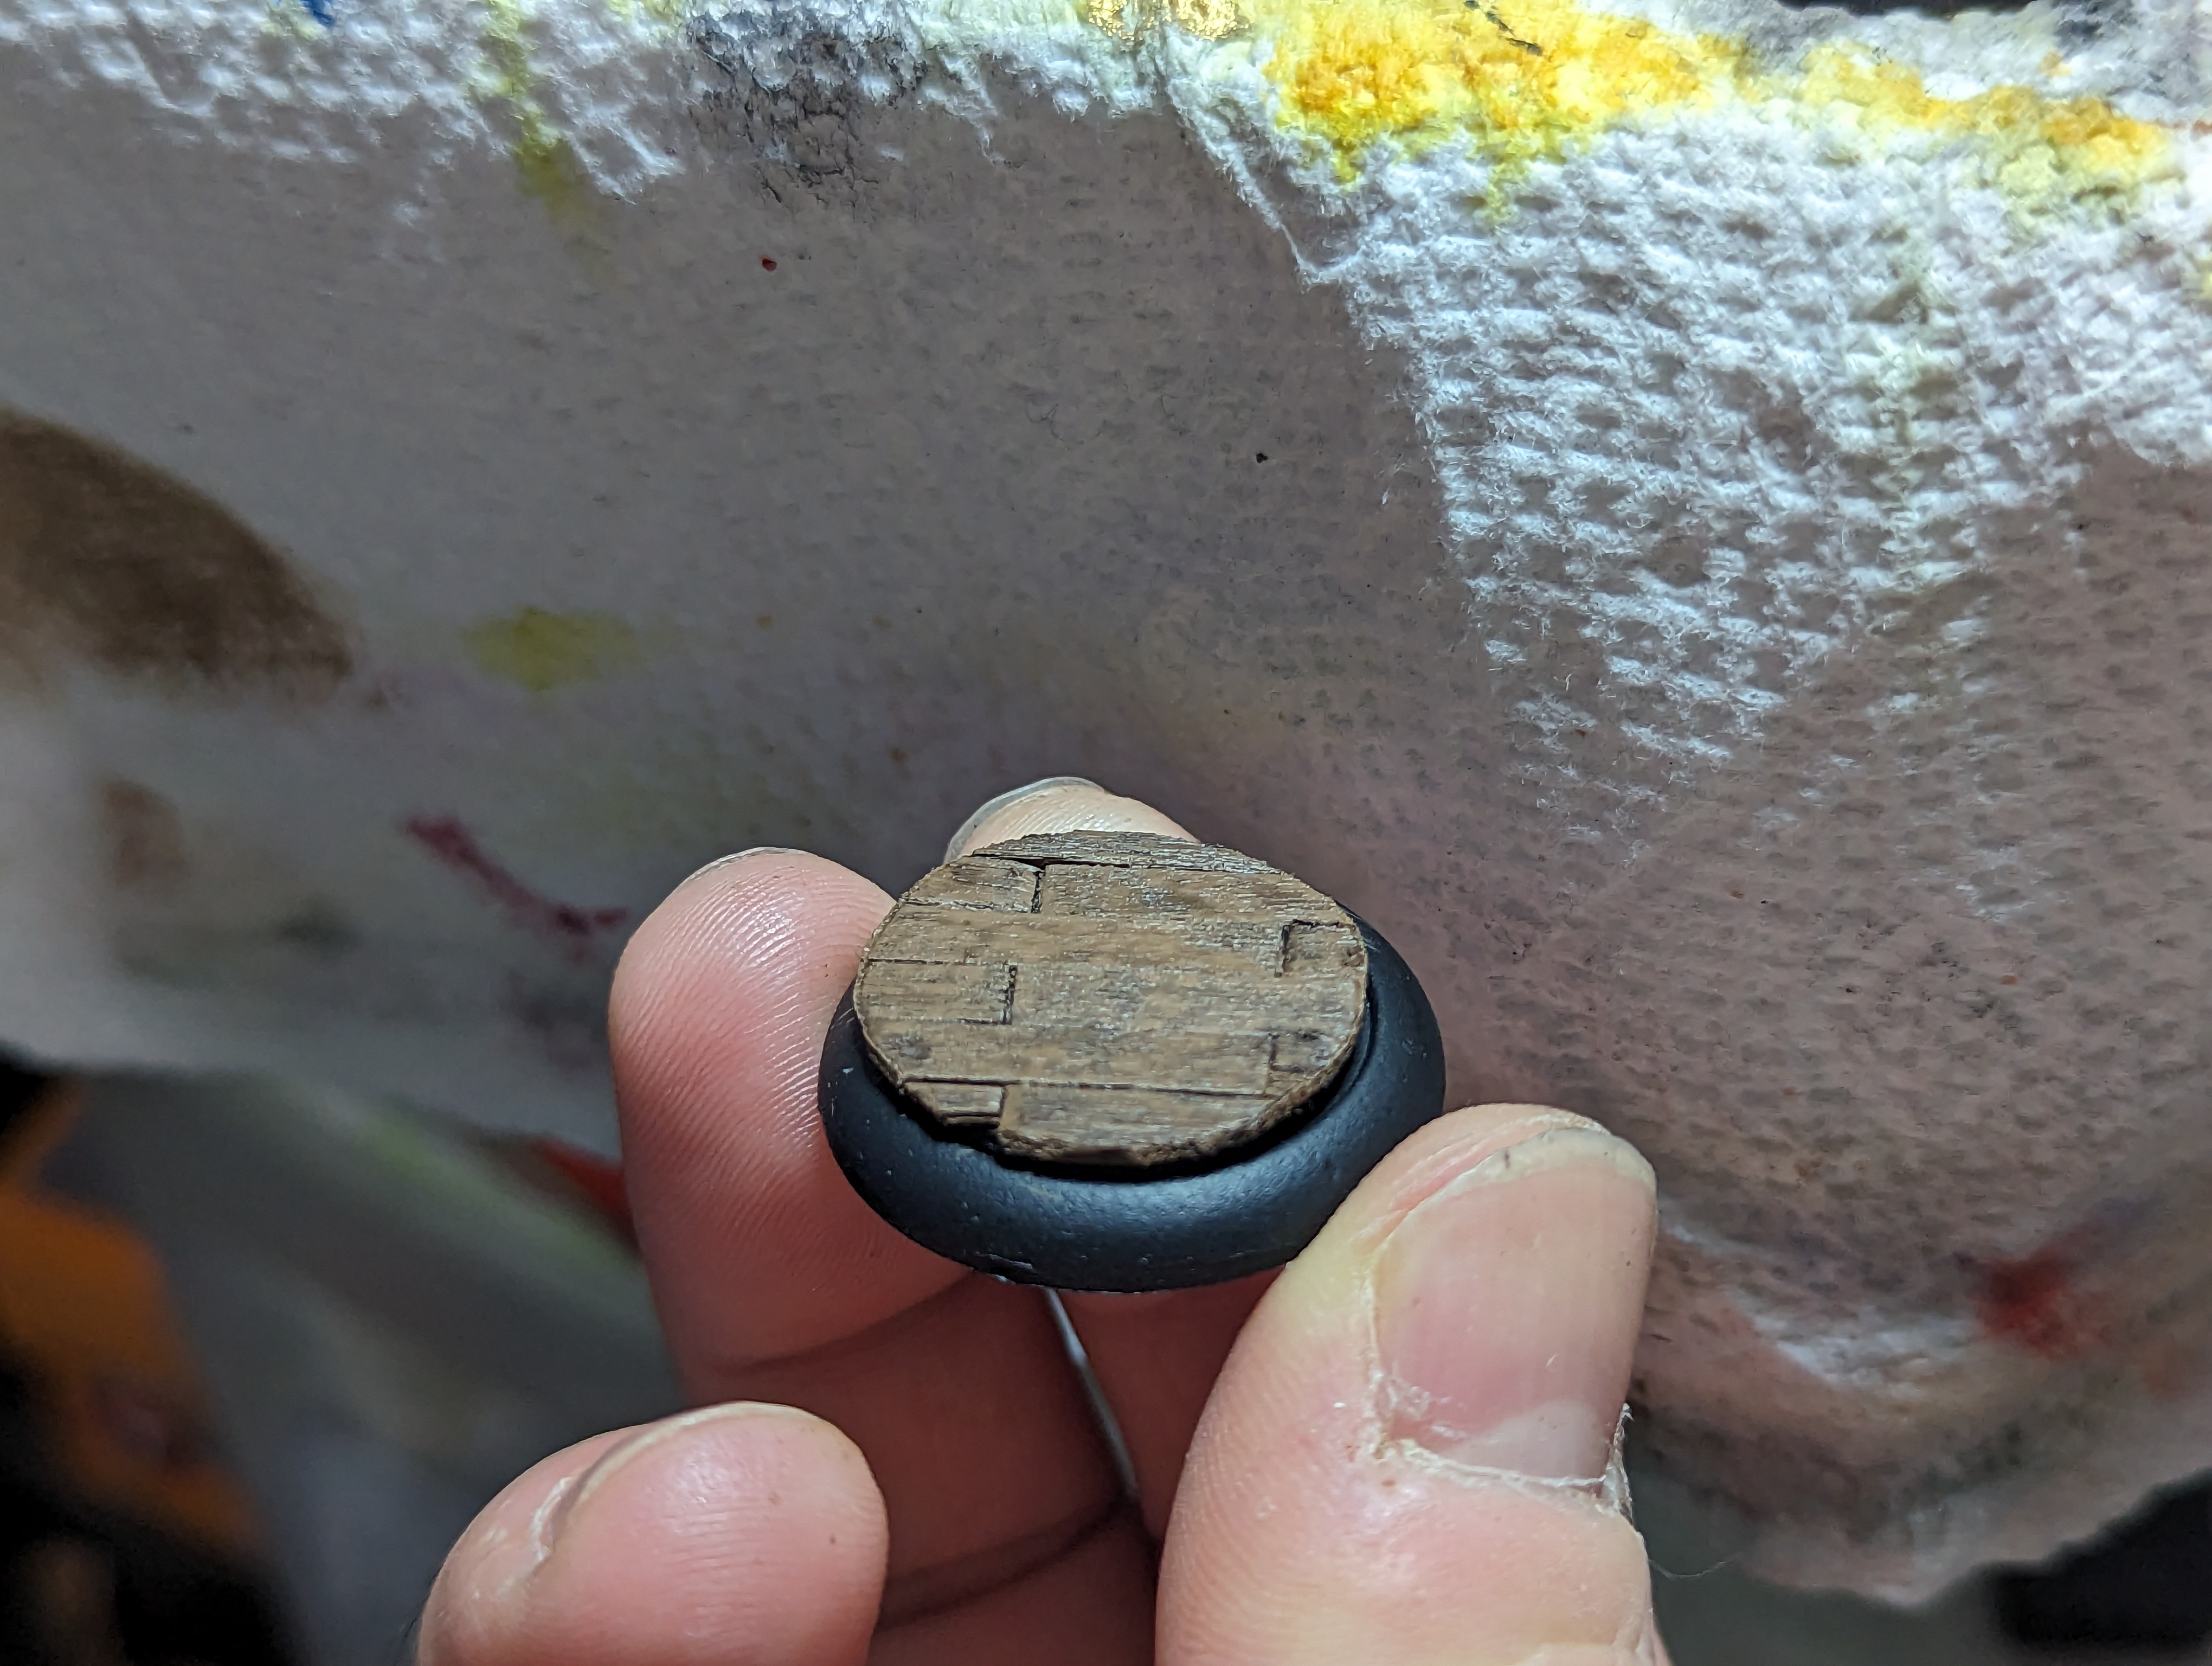
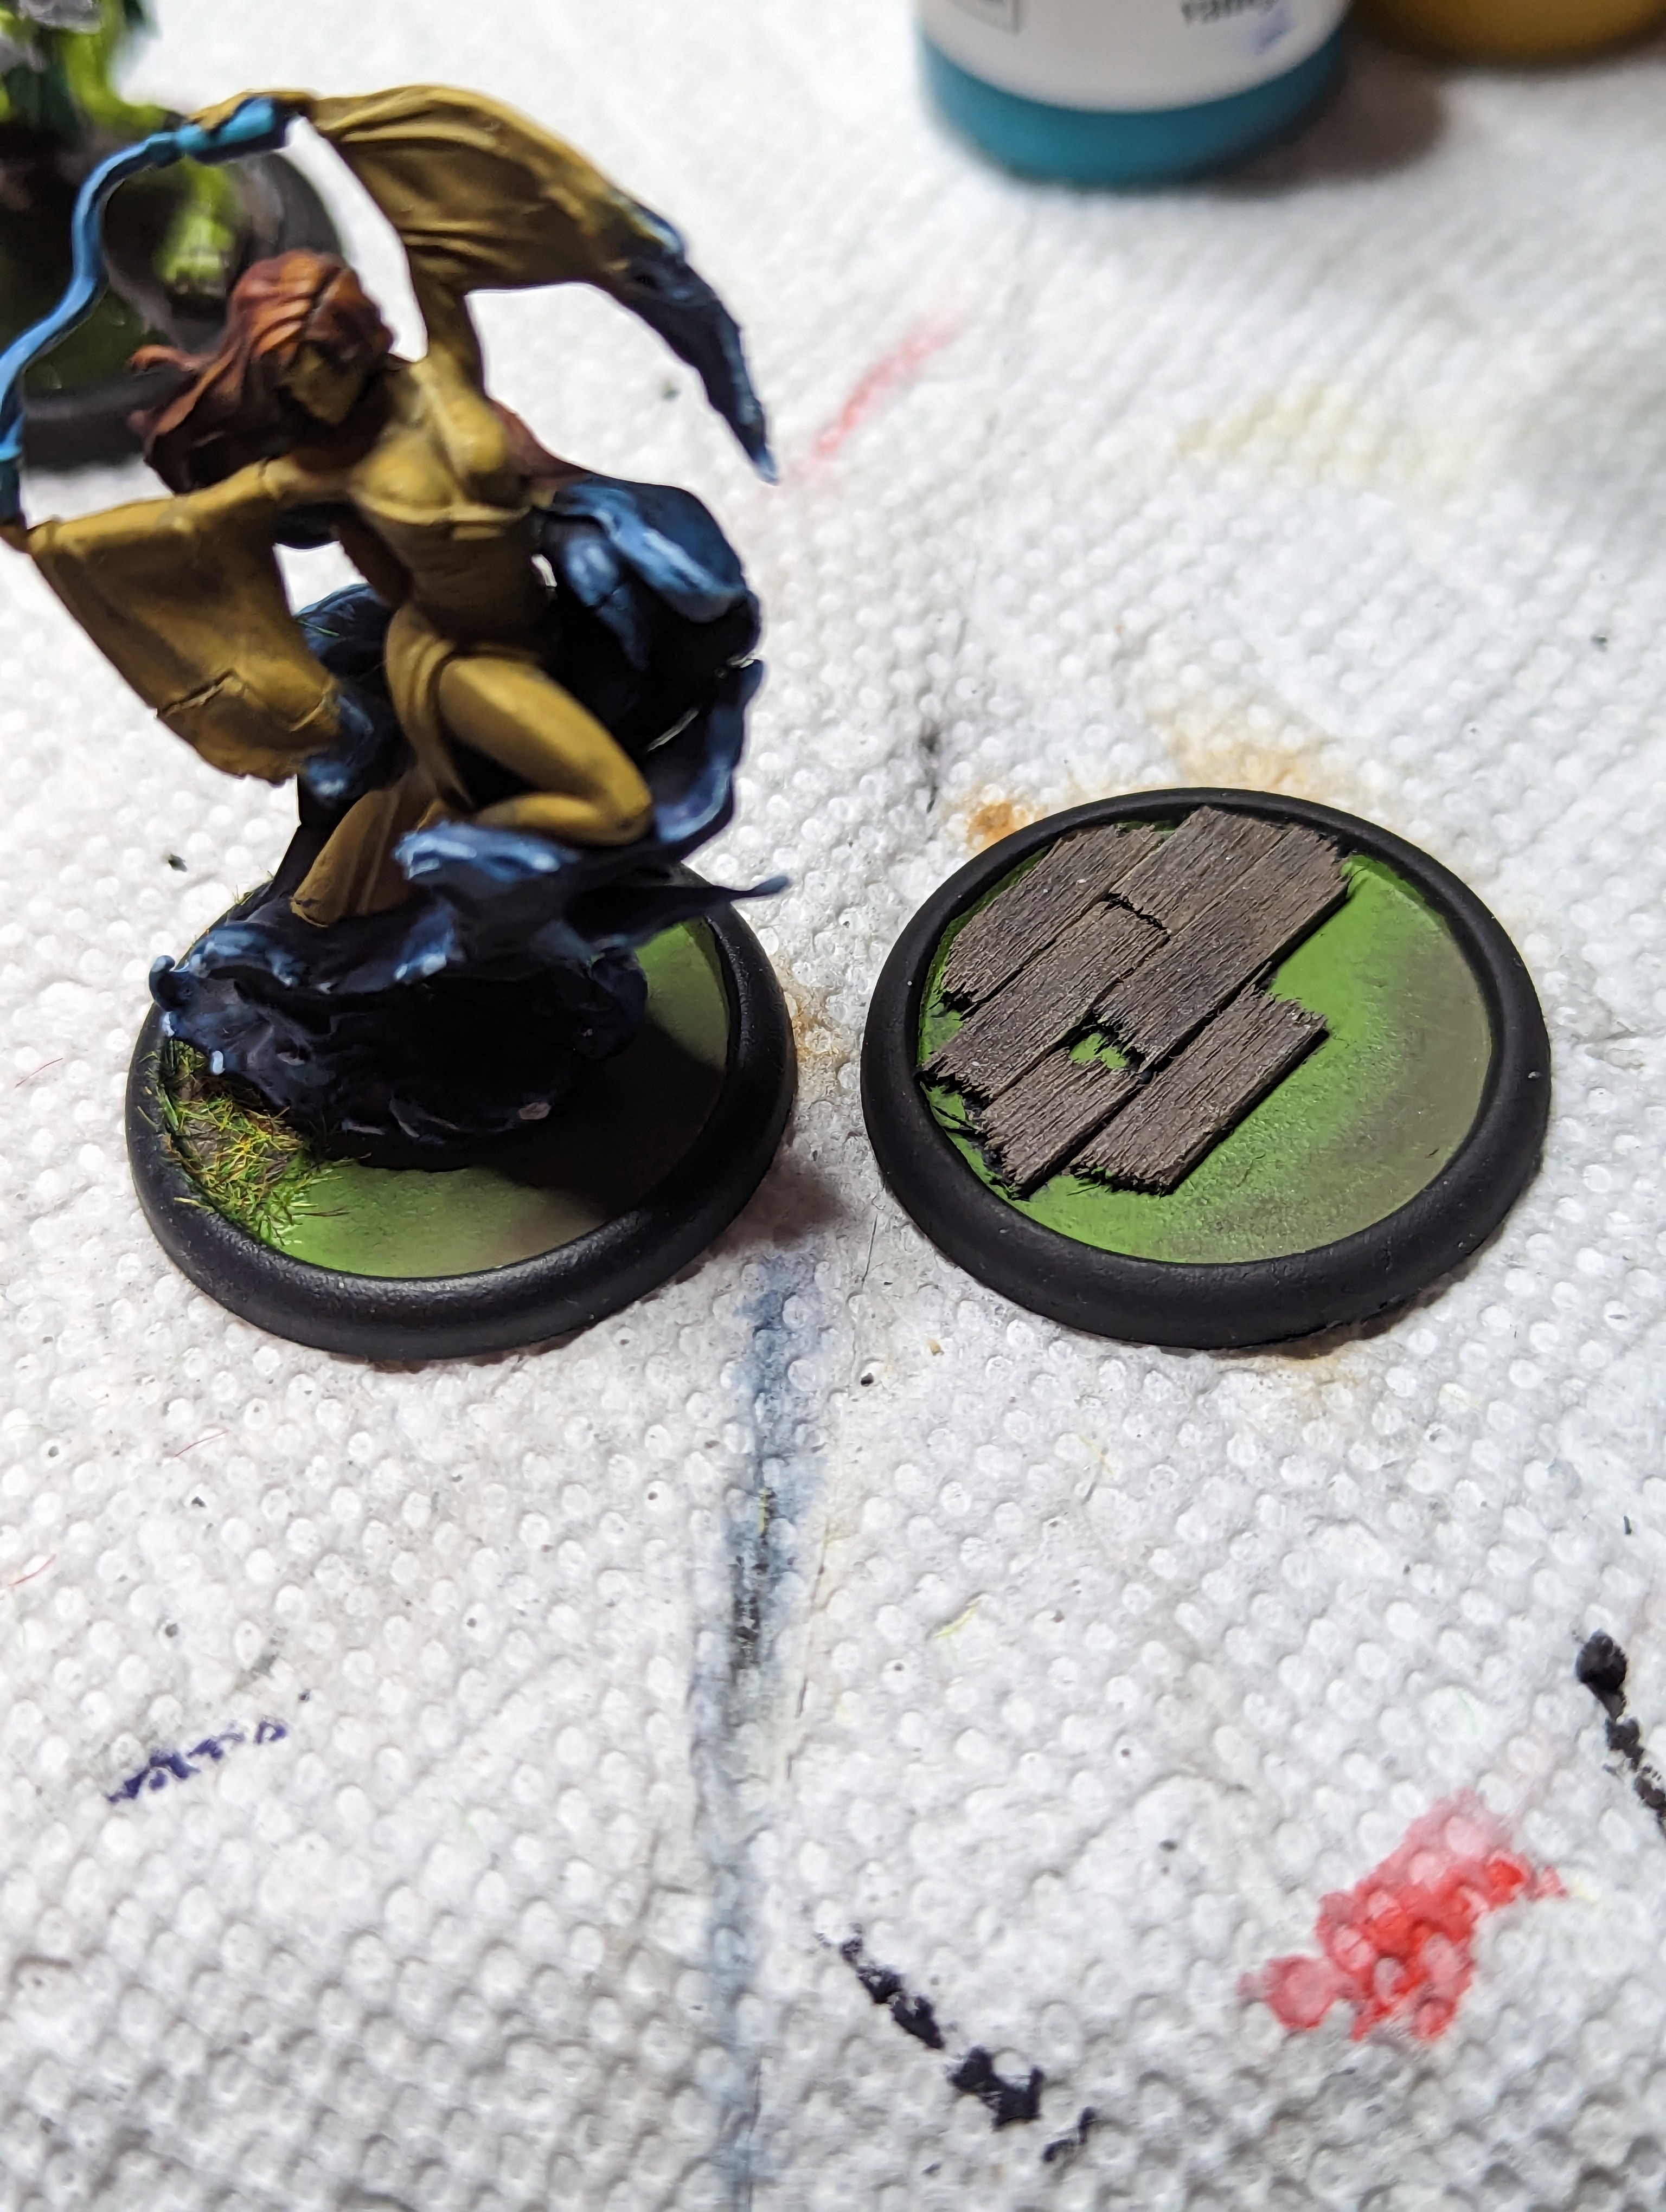
After I cut down one side of the base, I made a half disc of wood floor and fitted it to the empty area. Then everything got a black primer, and a simple paint job. Light brown for the wood, wash and drybrush. Gray drybrush on the bark and 2 greens on some of the vegetation.
Somehow I always forget to take WIP pics of the models…
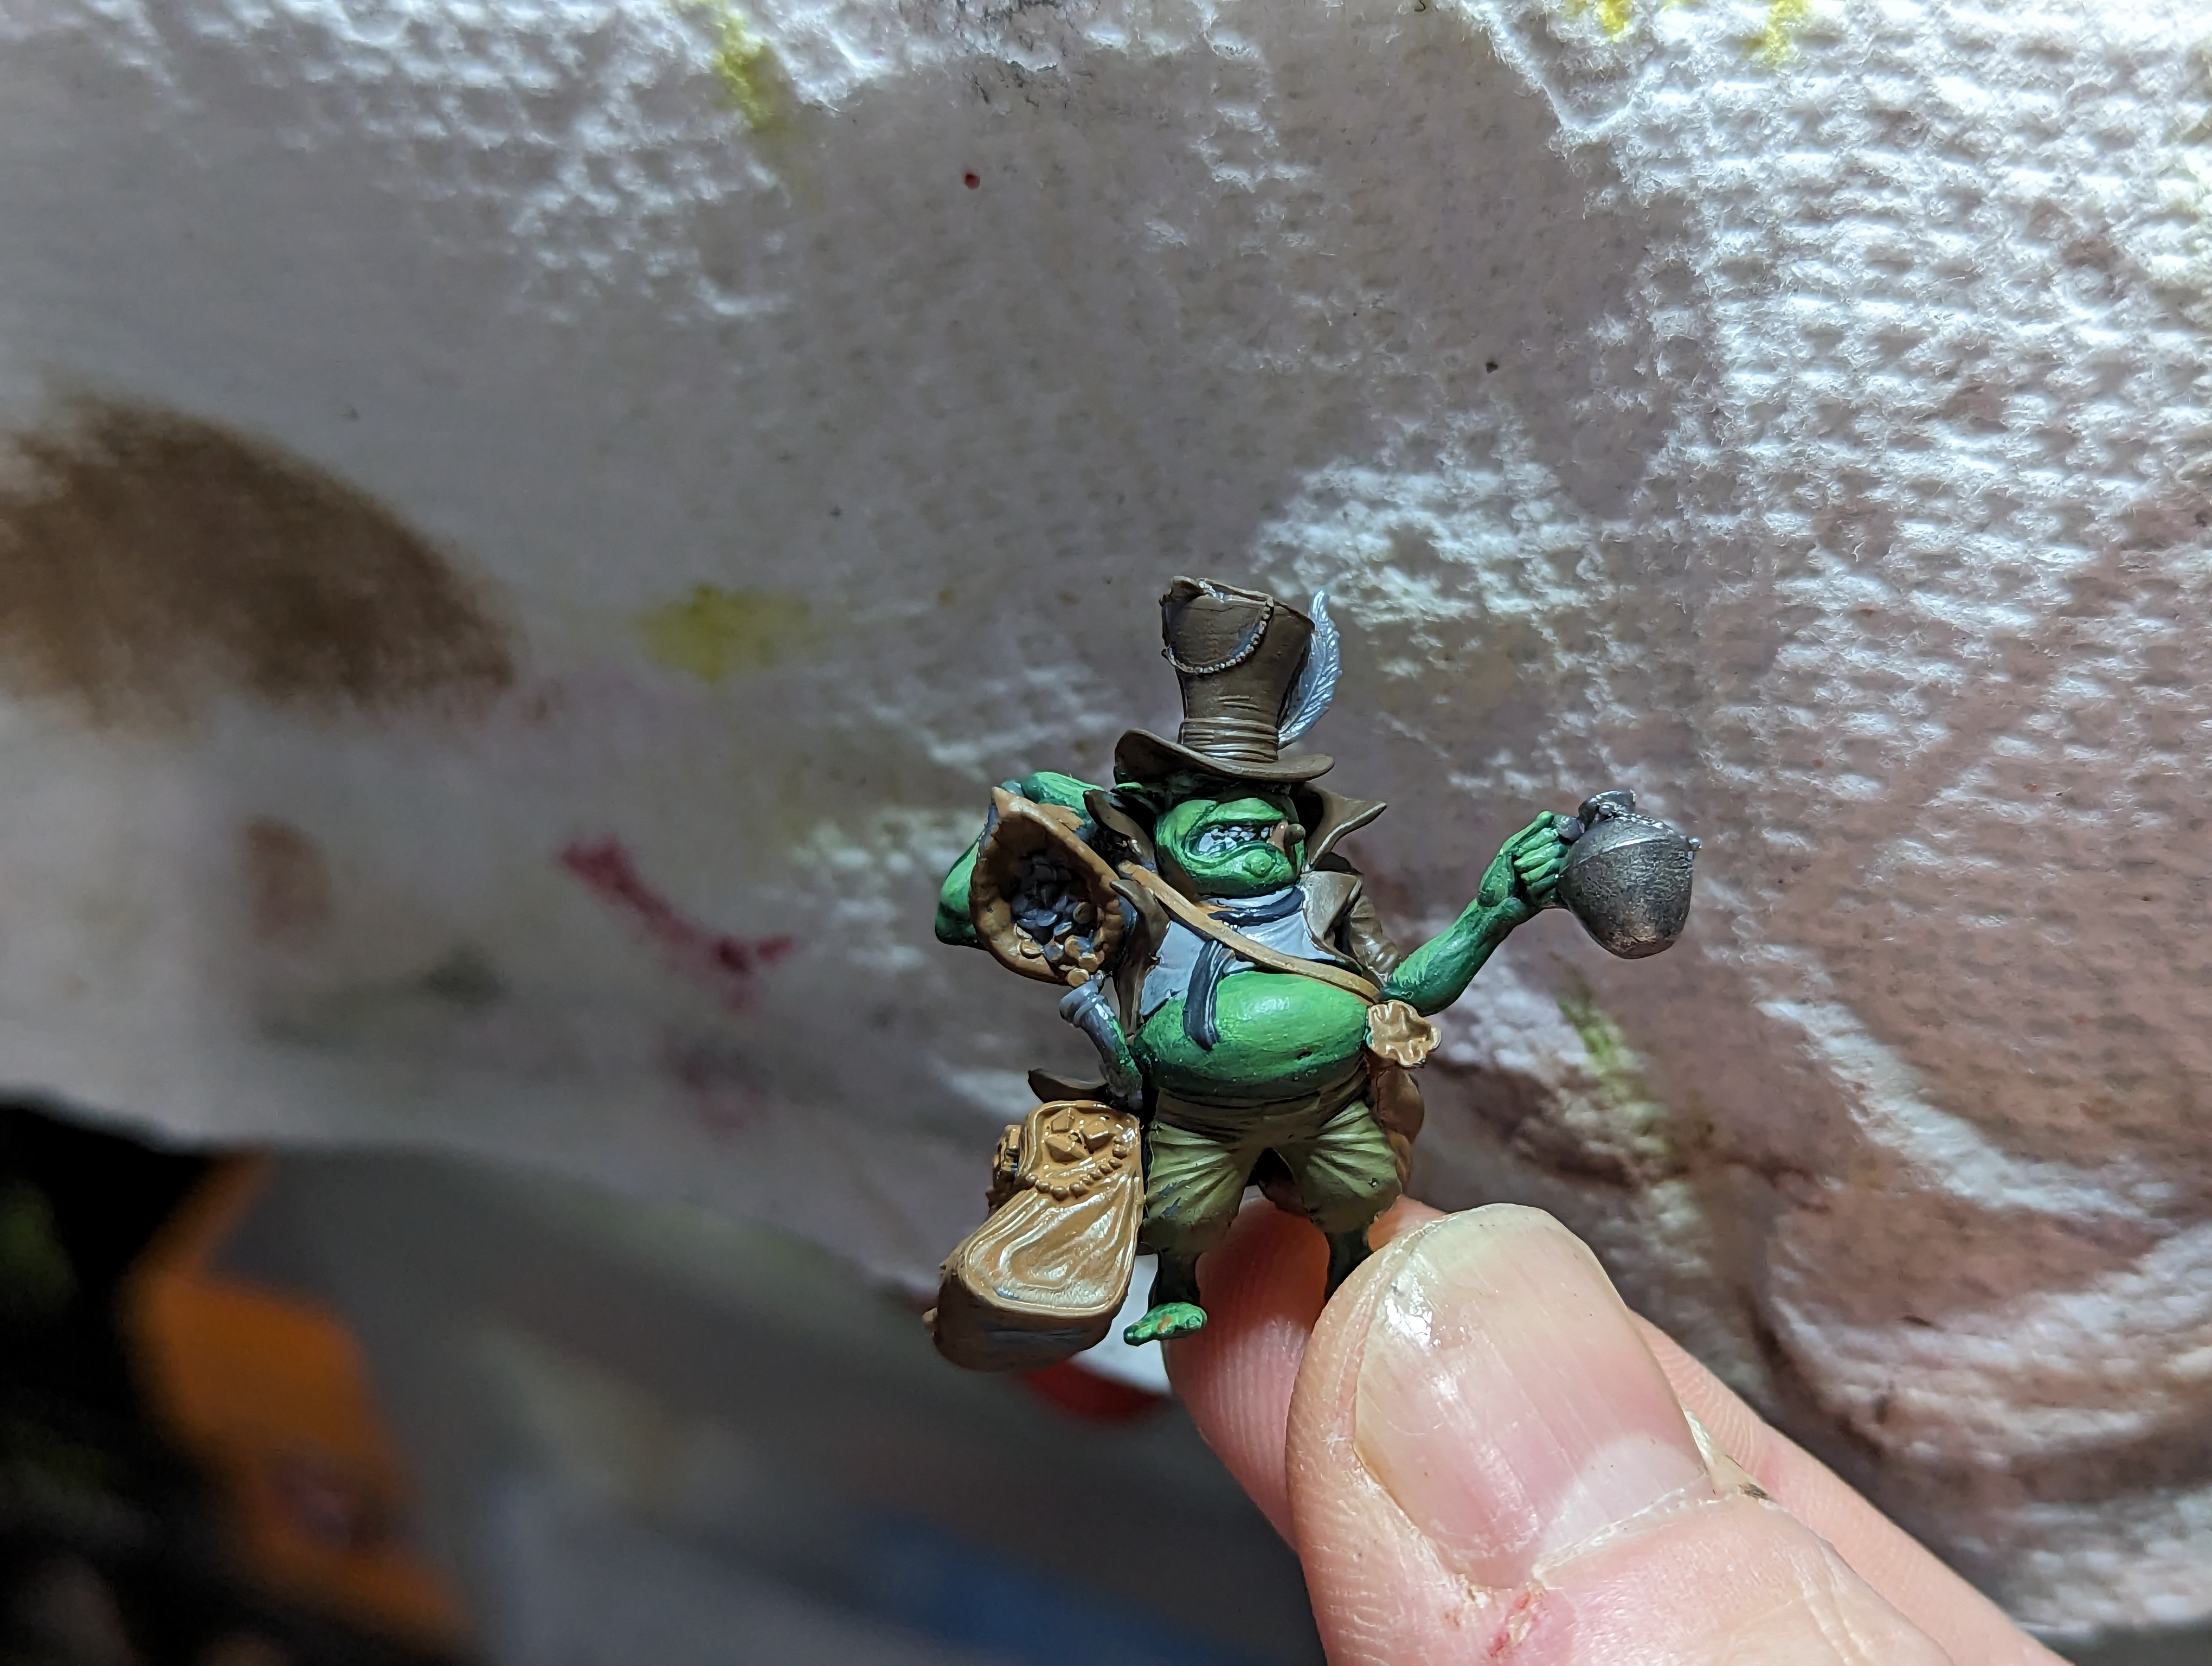
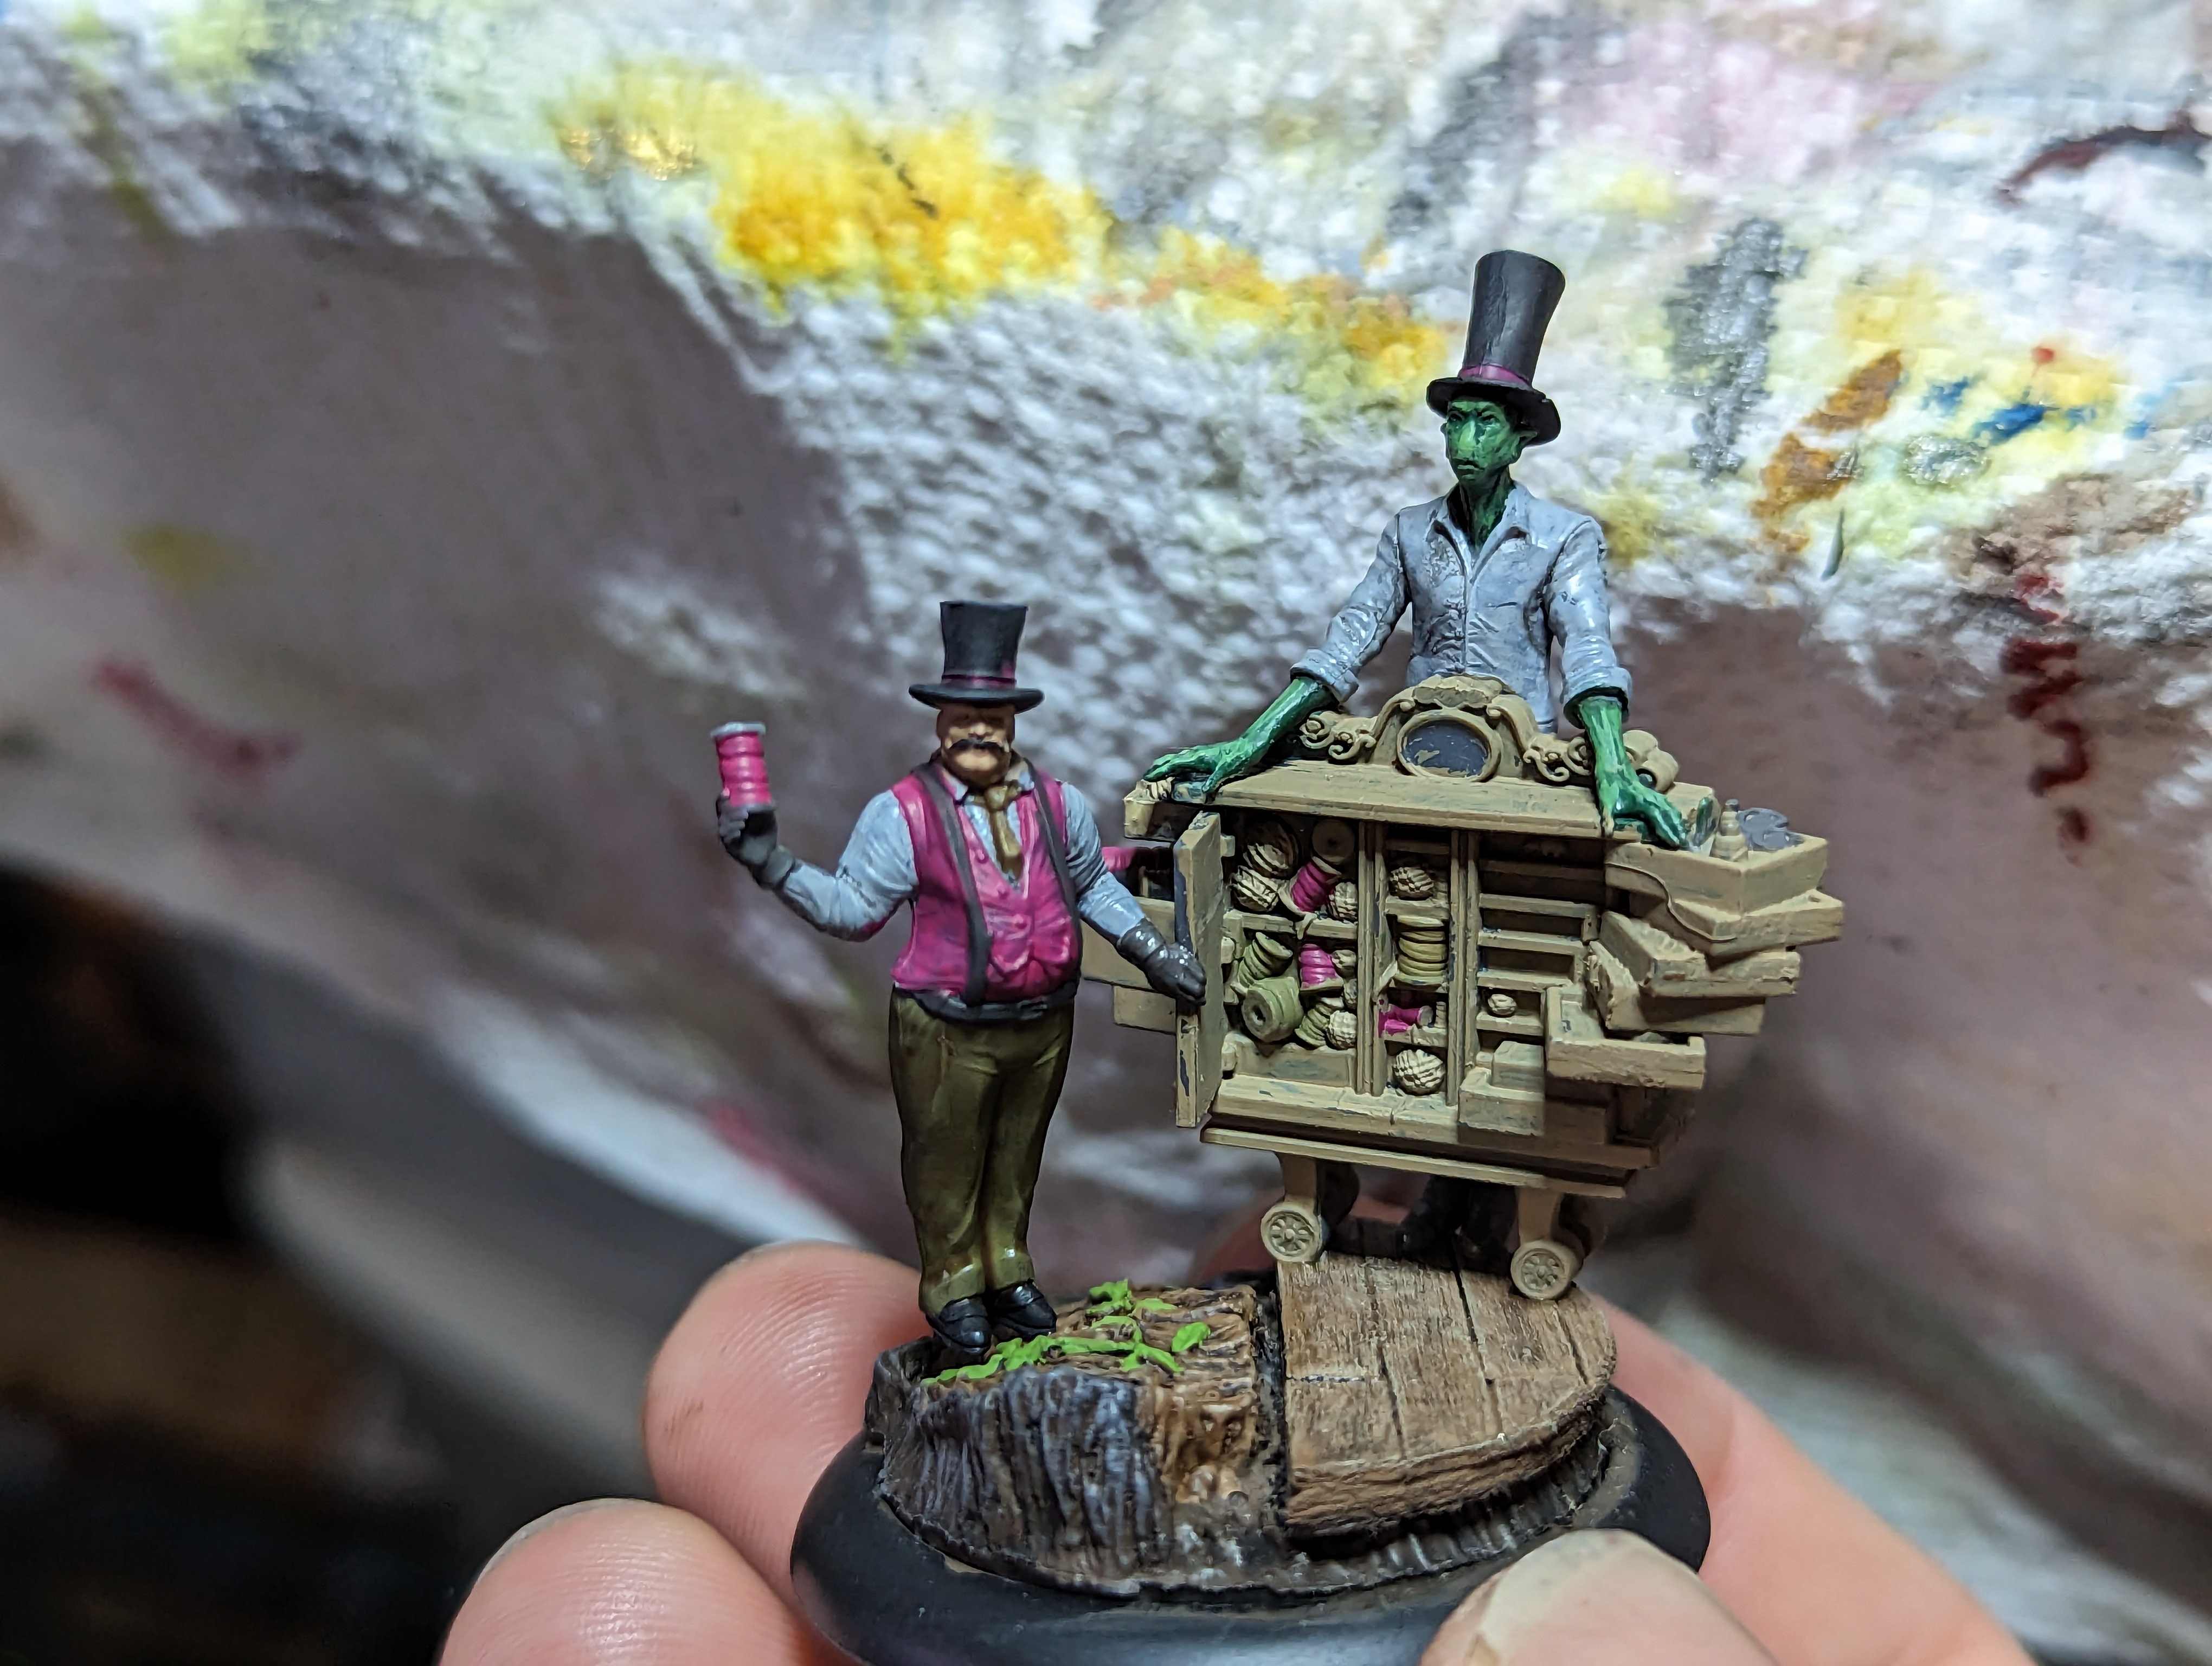
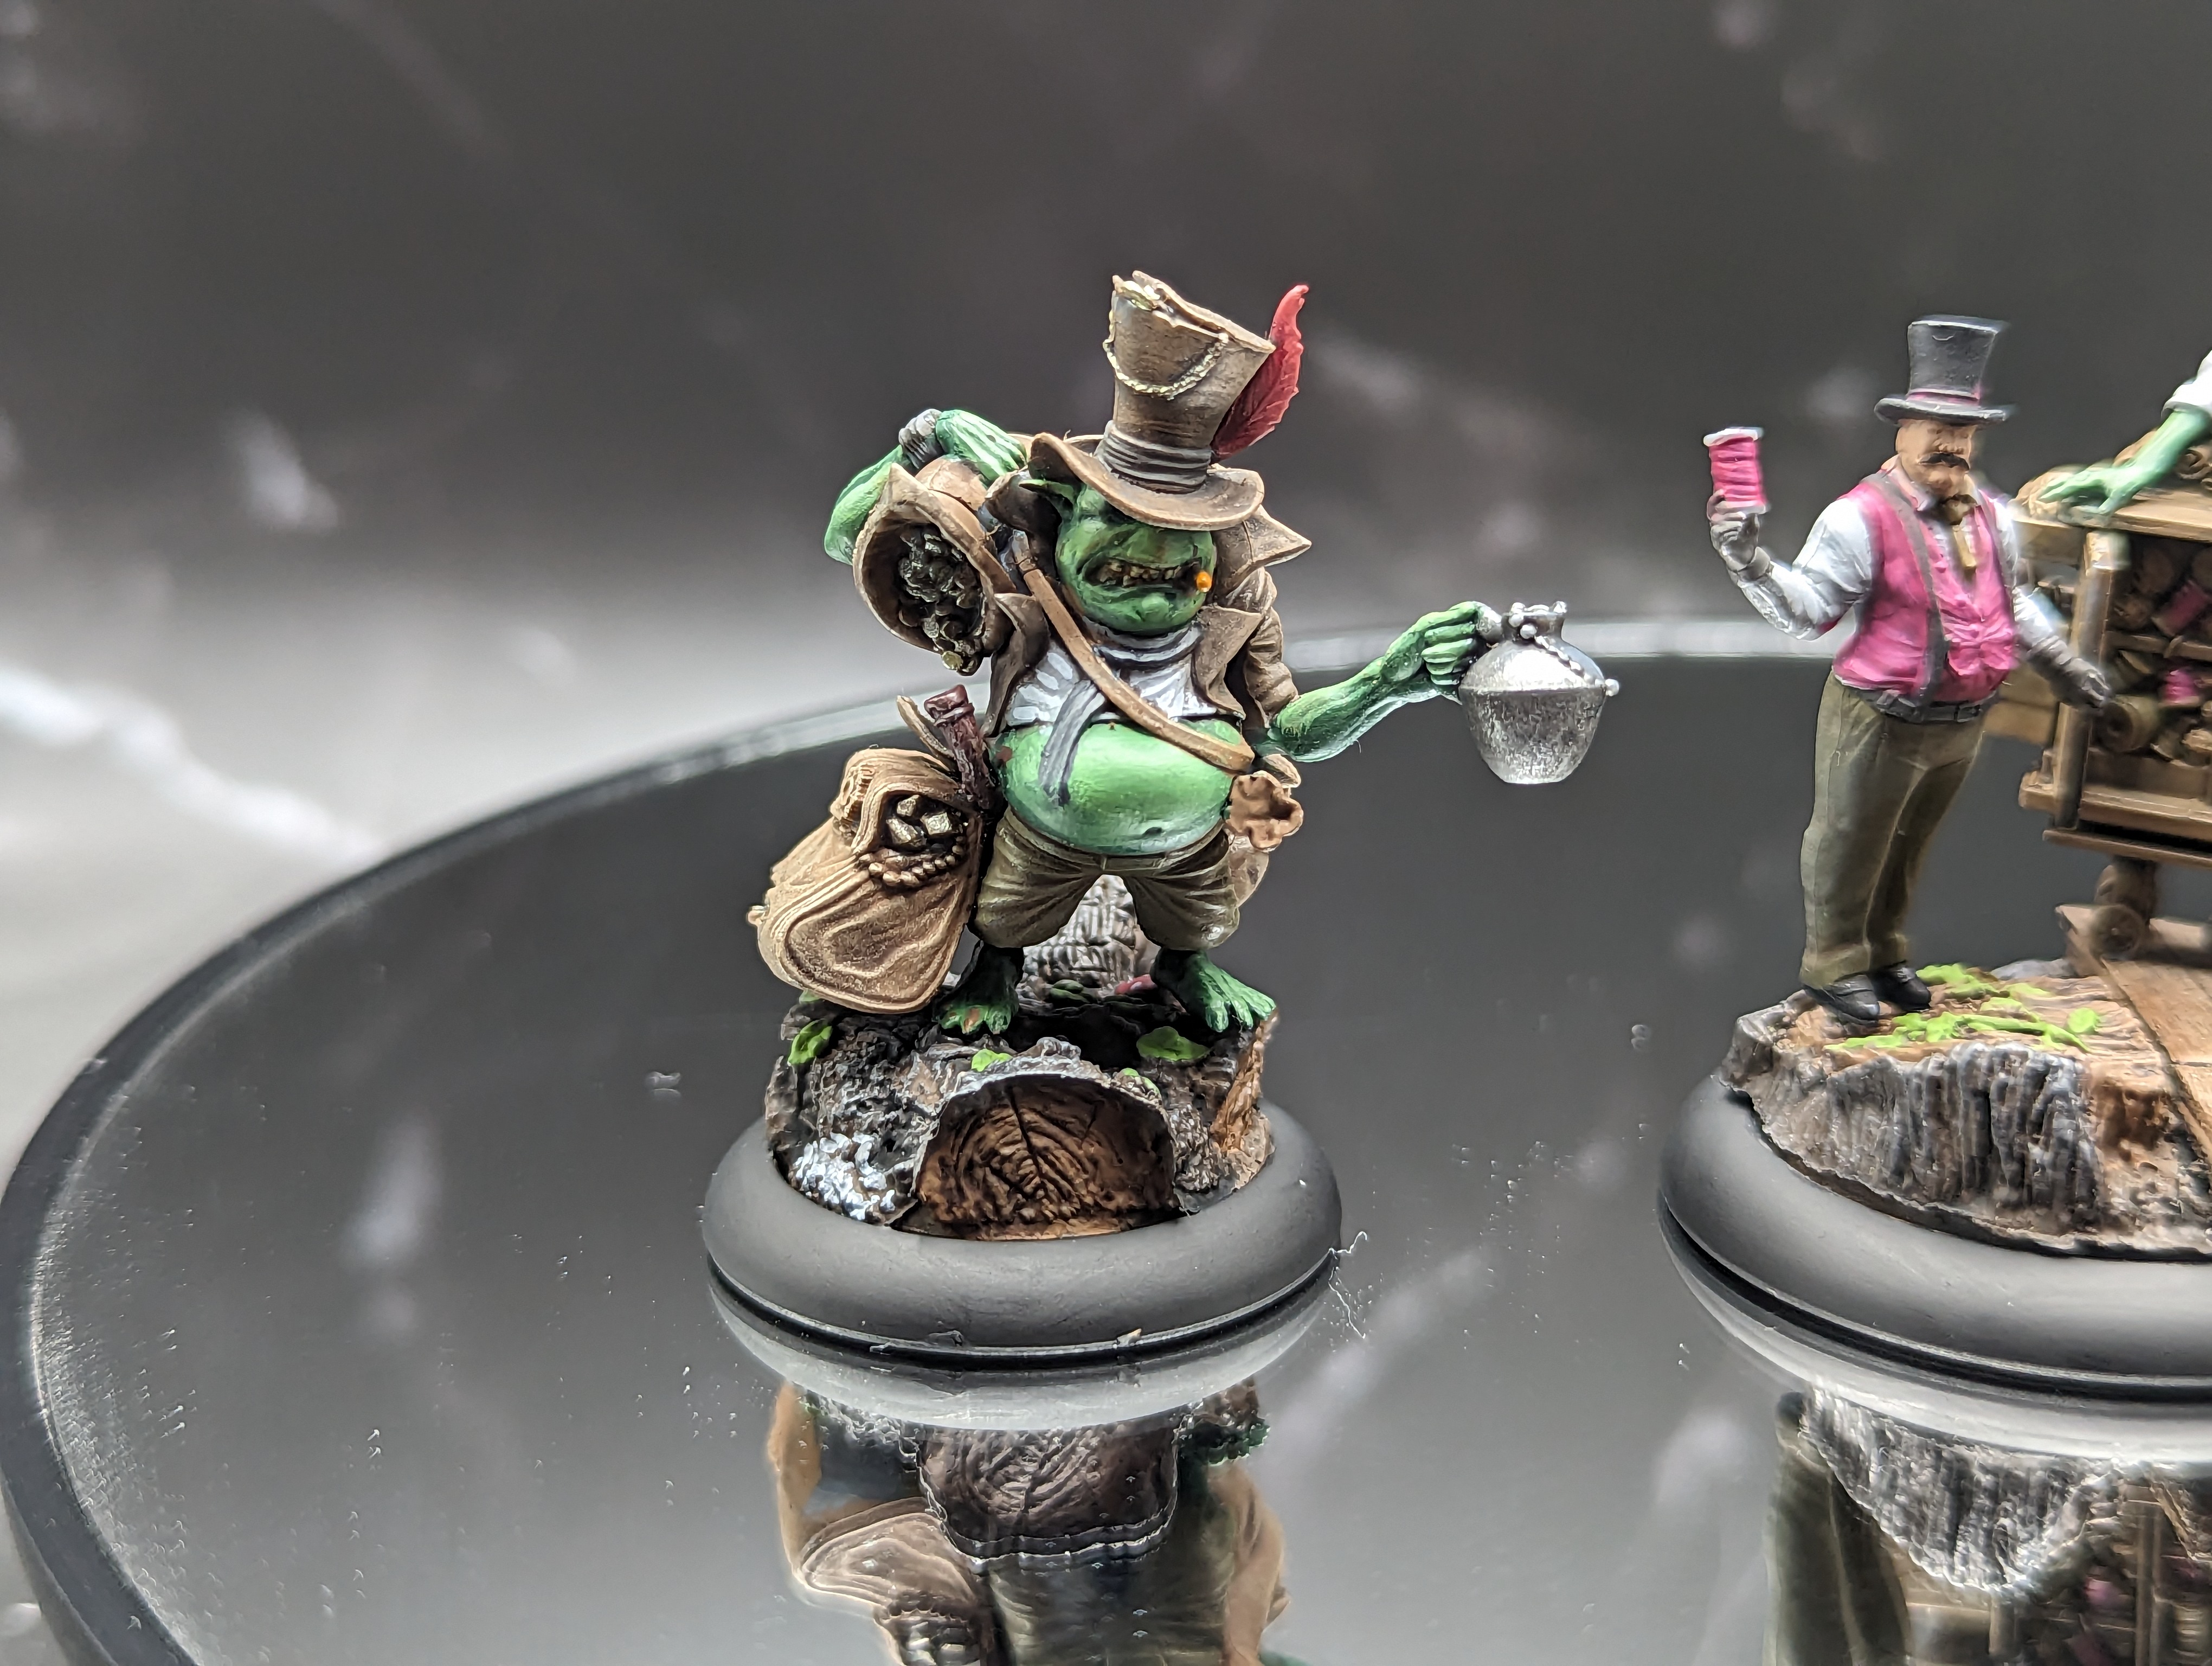
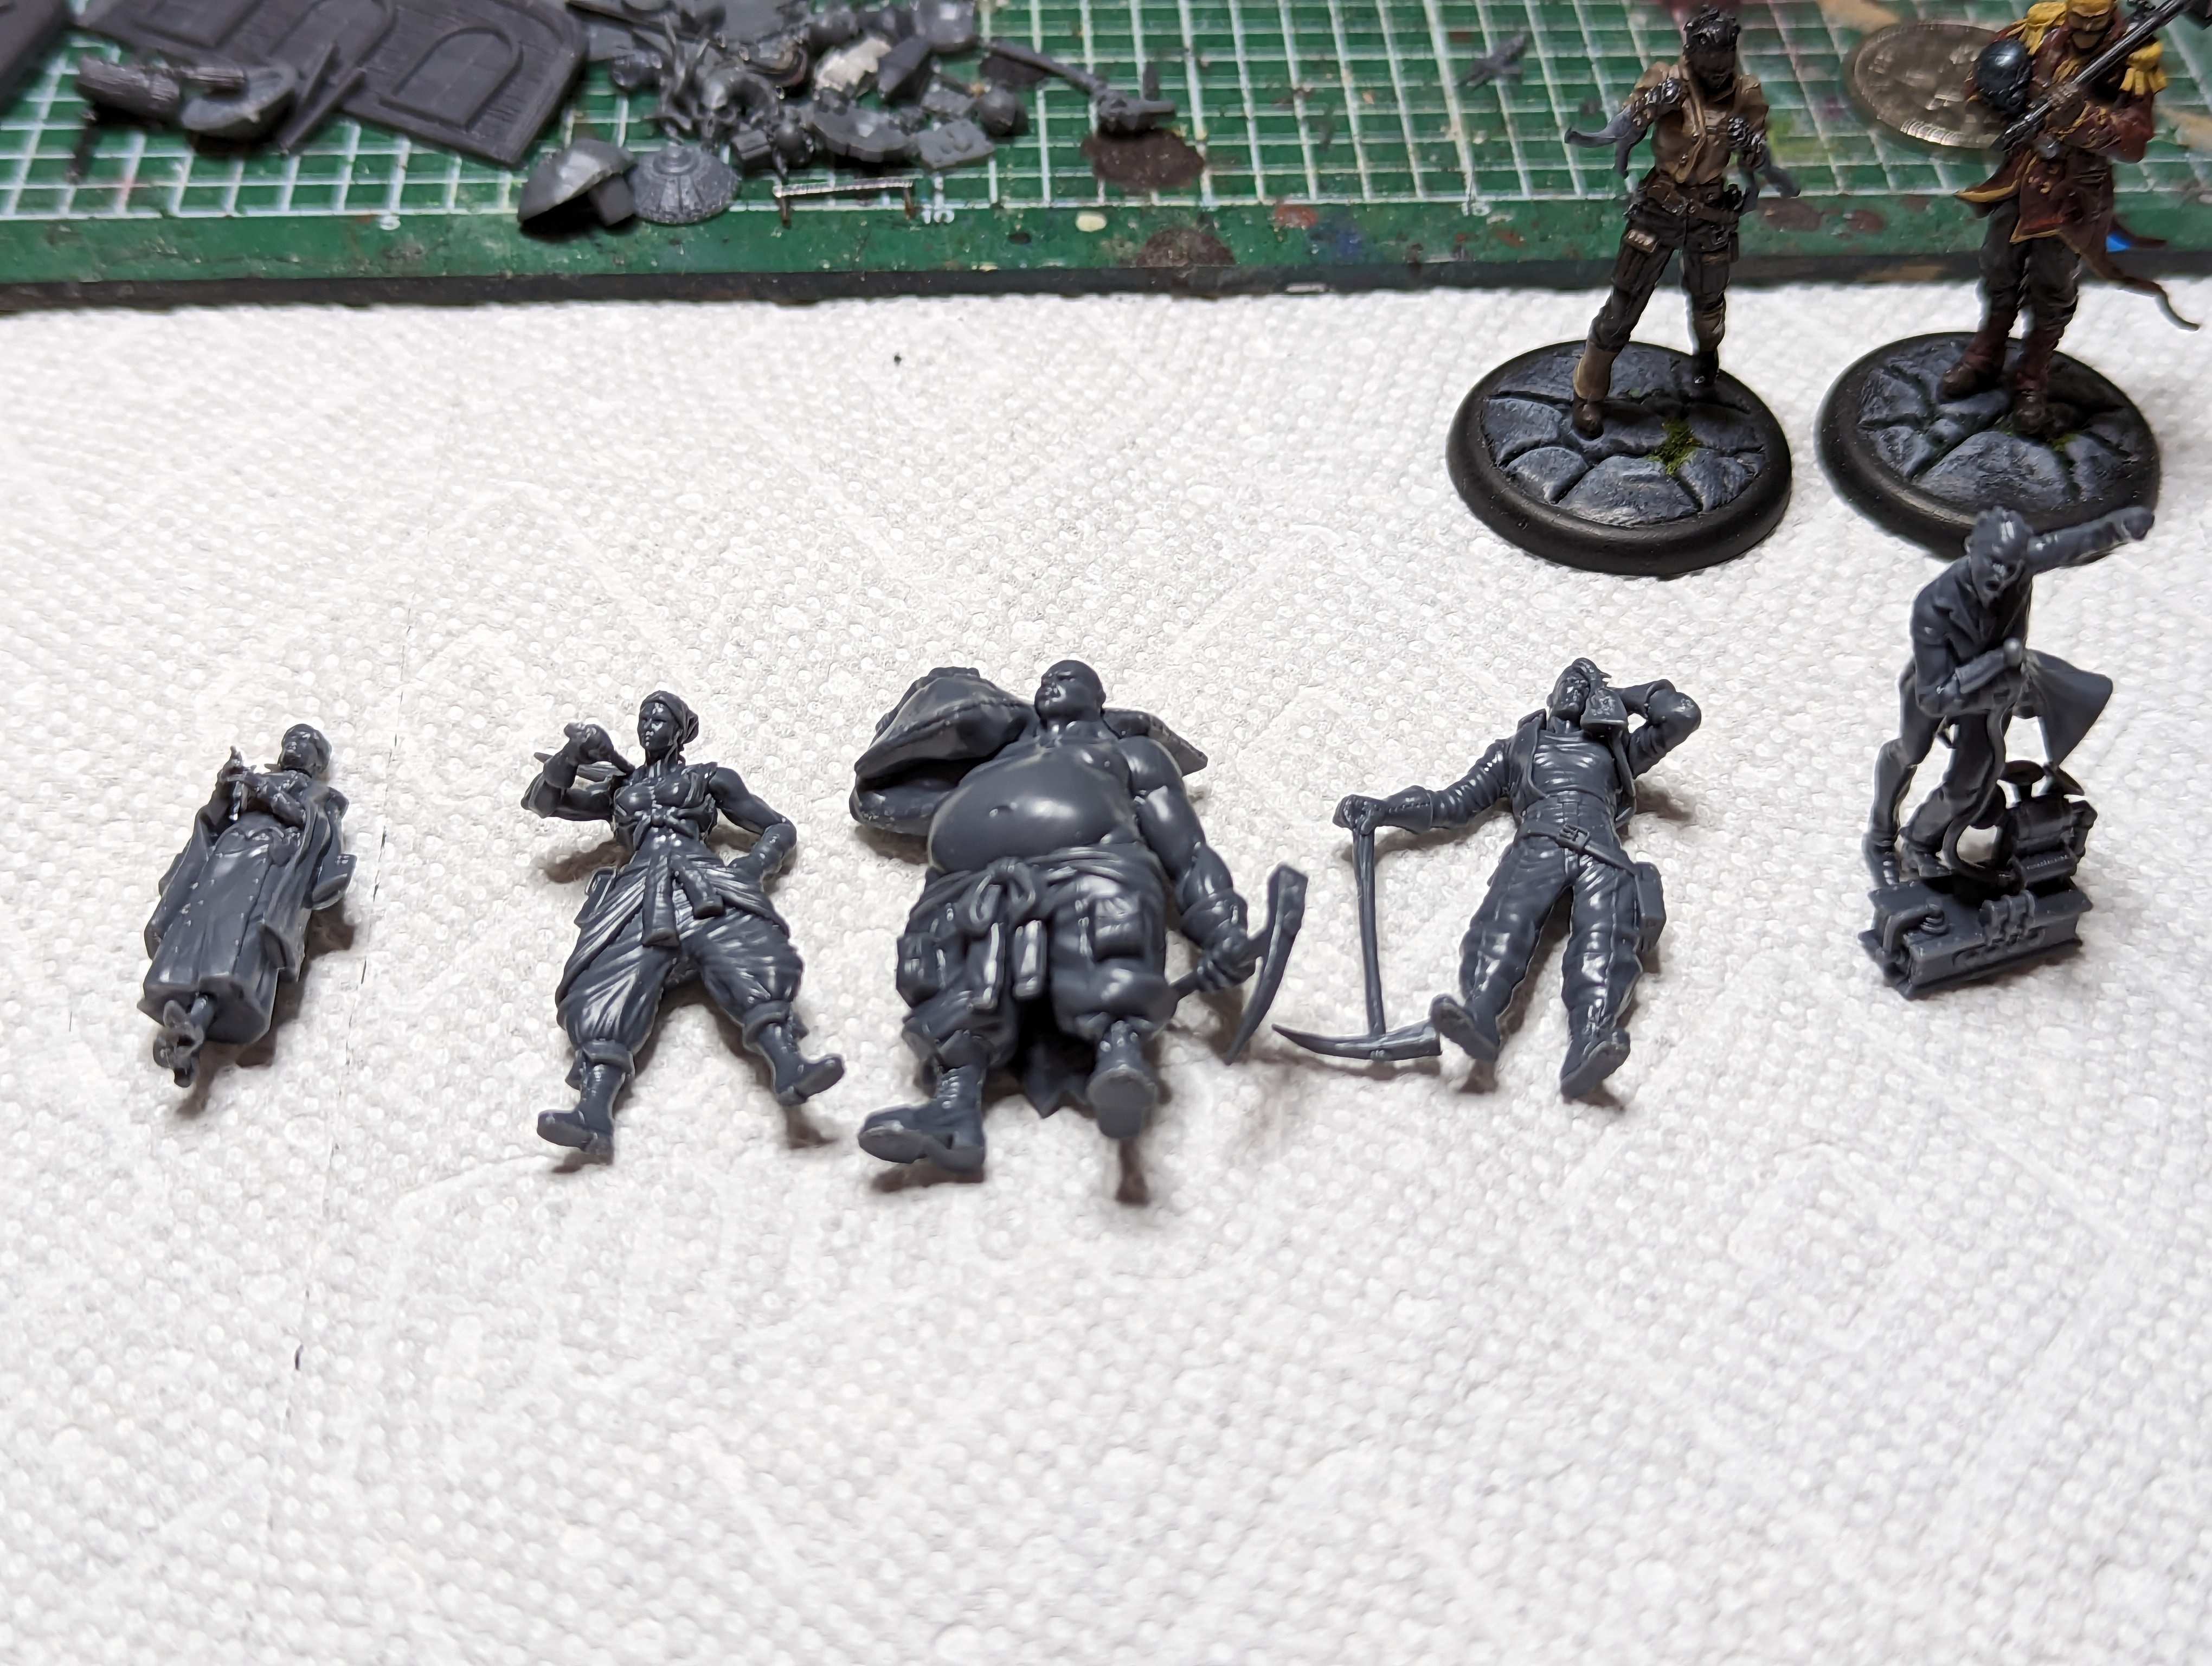
There wasn’t anything especially unique about these paint jobs, except that Som’er and the White Rabbit Co. have a ton of little bits. This version of Som’er is all about looting, so he is carrying all kinds of crap, and the White Rabbit Co. has all these little spools and tools and stuff in its cart. Mostly just time consuming to hit all the little bits.
I tried to focus on a few areas that looked particularly interesting. Seamus’ flowers, Som’ers feather and cigar, and the pink on the White Rabbit Co. guys clothing. I think they pop pretty good.
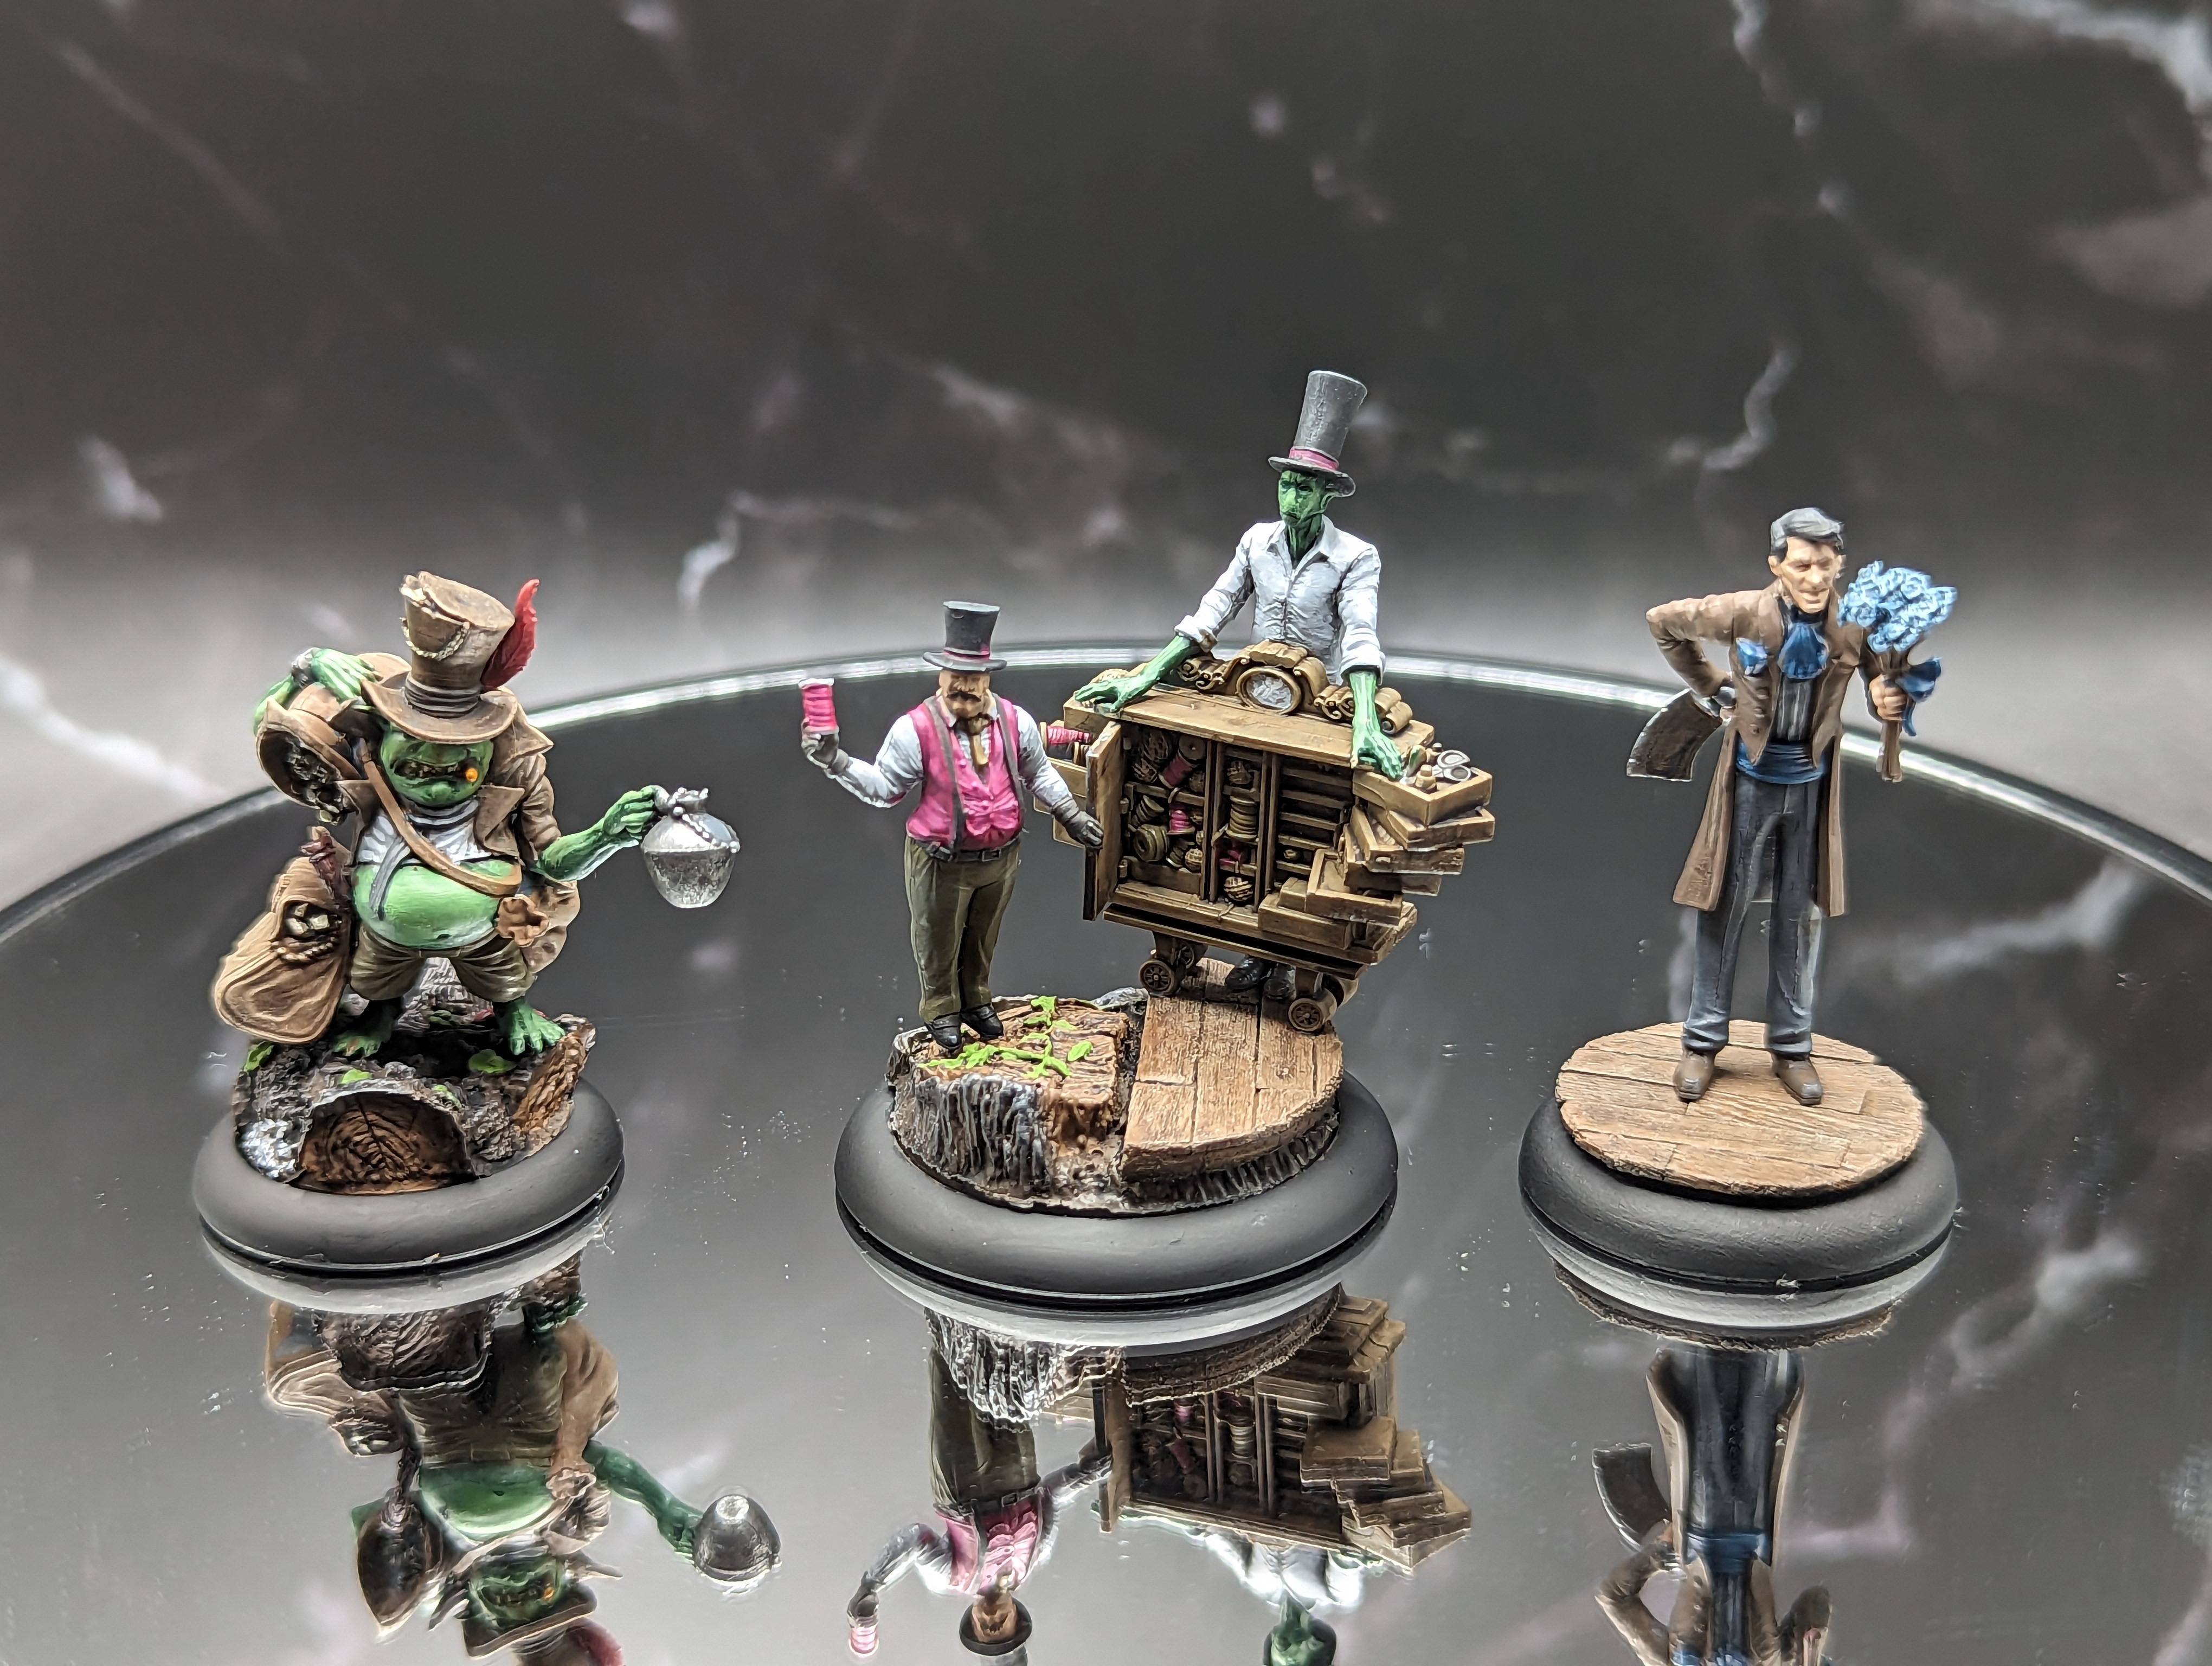
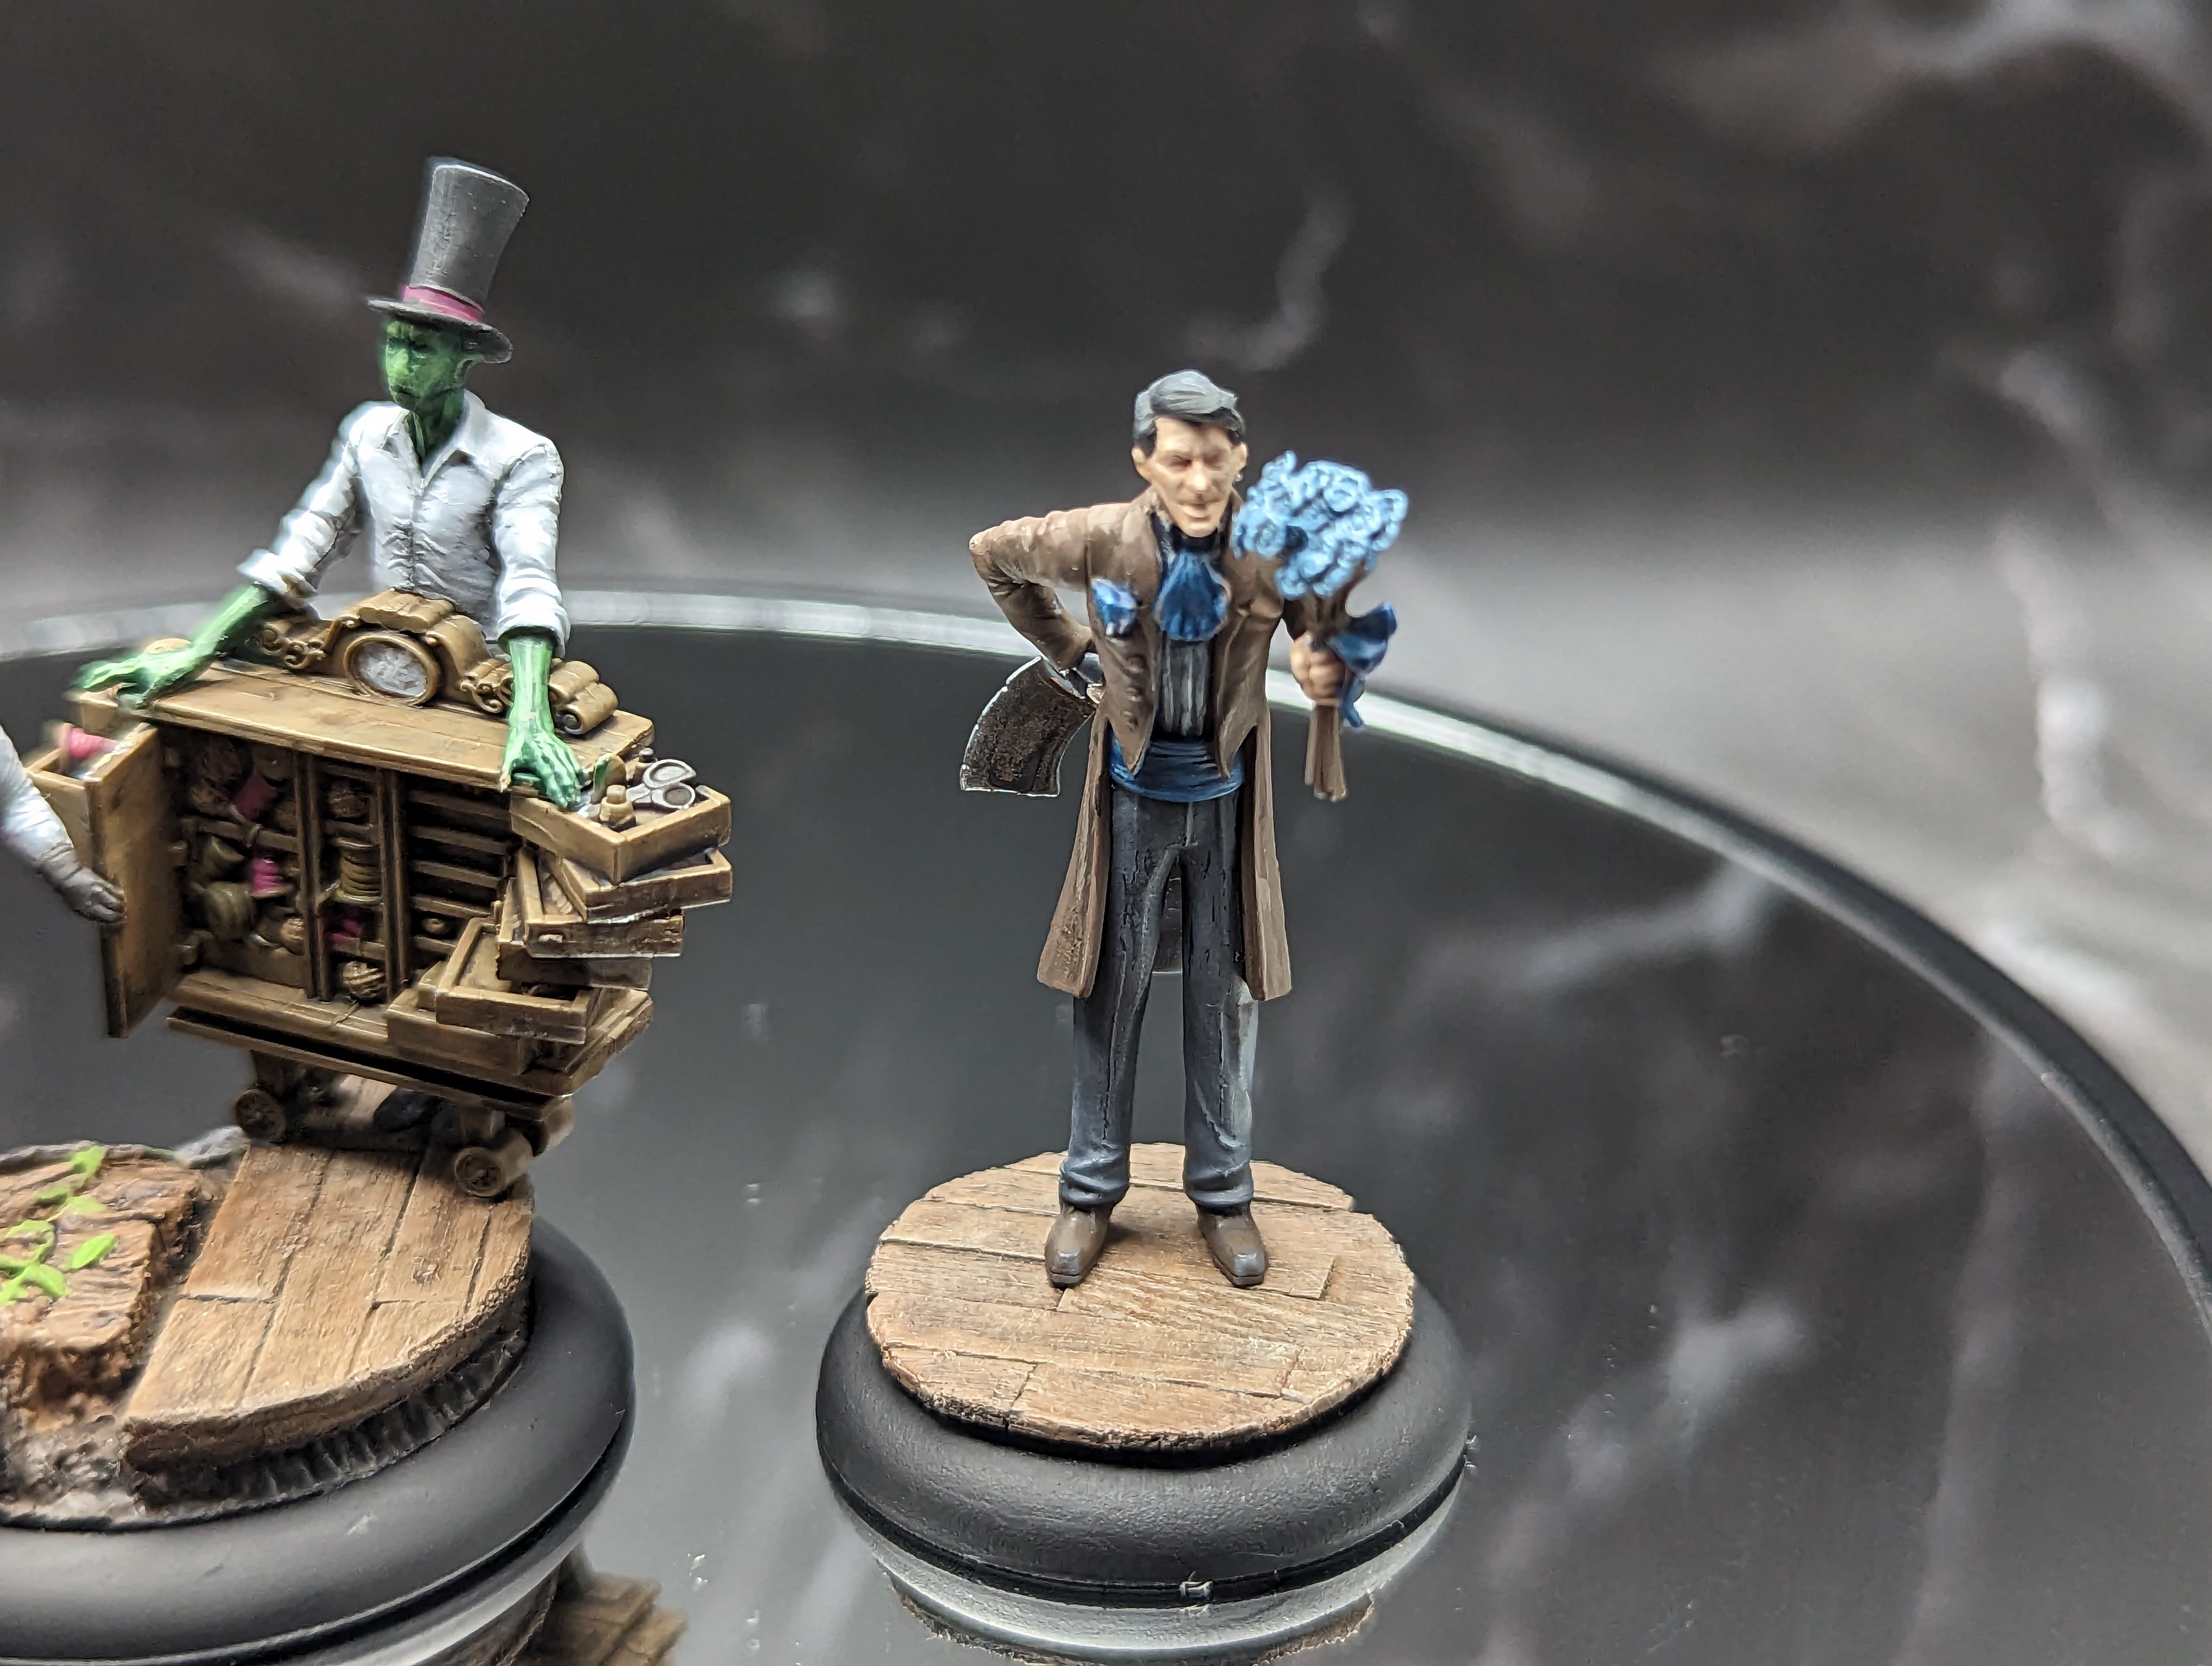
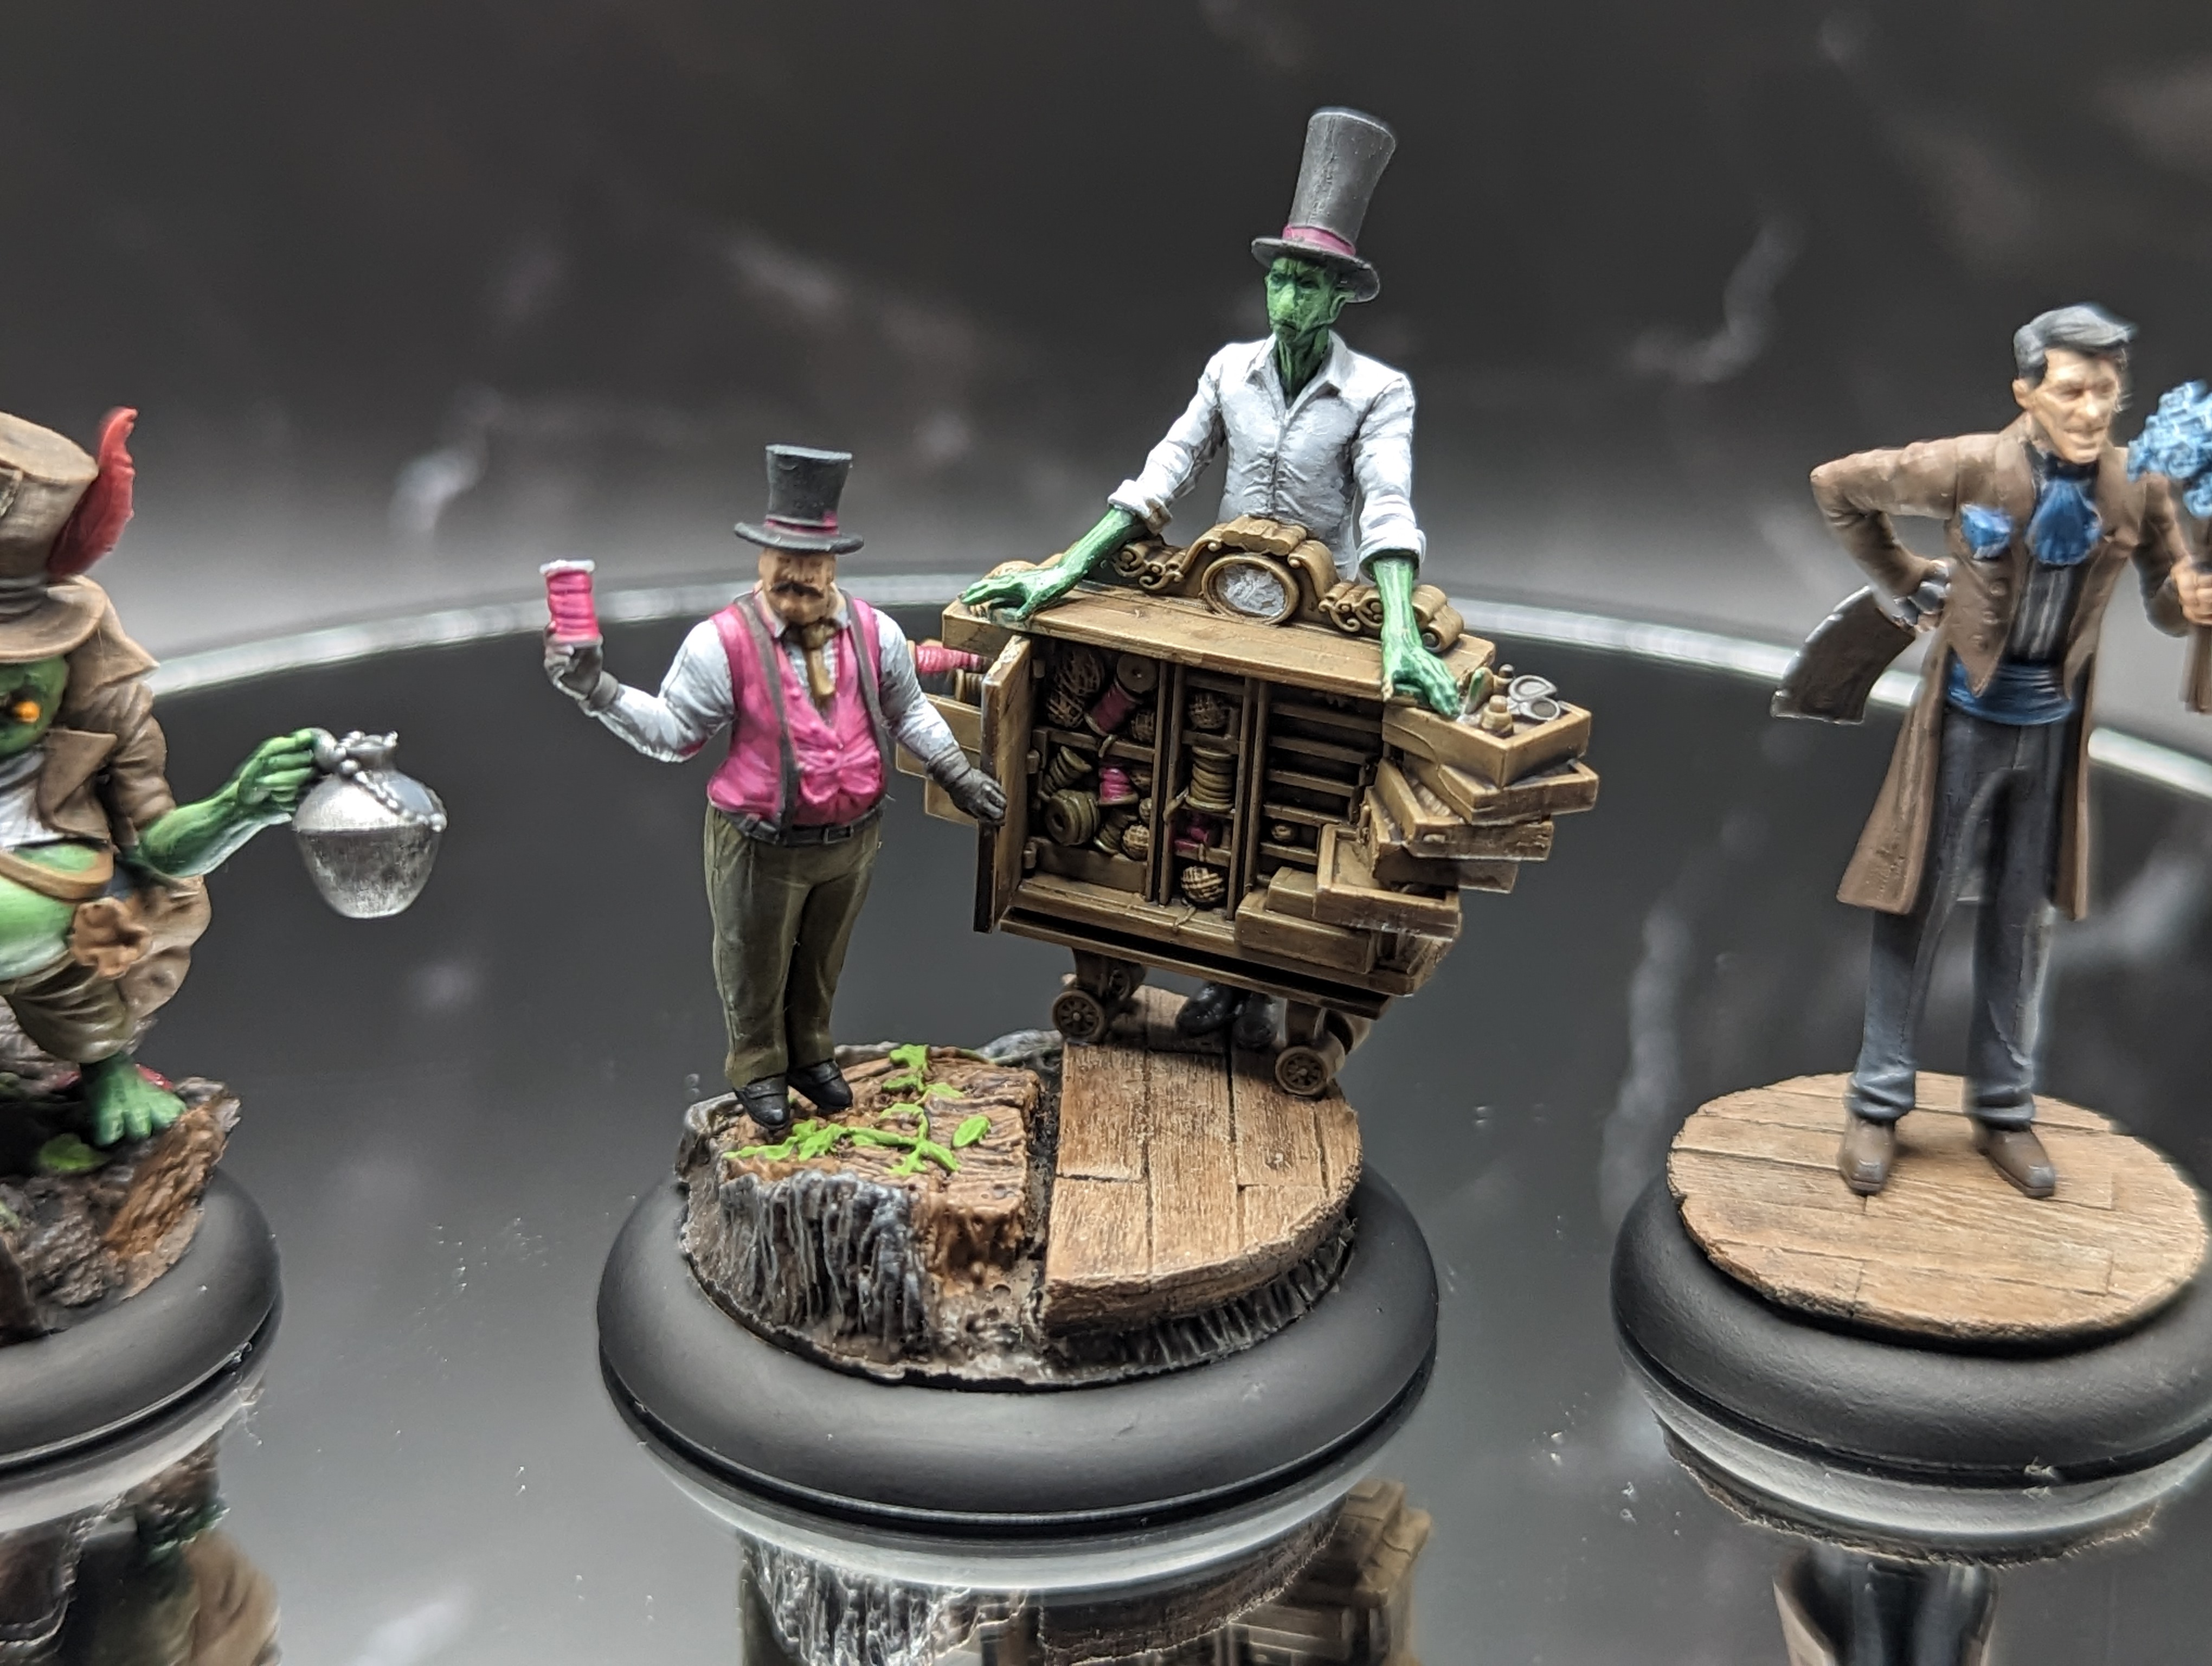
They all look kinda friendly and inviting when you see them like this. Don’t let them fool you, they are all horrible.
One step closer to having all of the title boxes done. But now for some lore!
Mr. McCabe and the good doctor
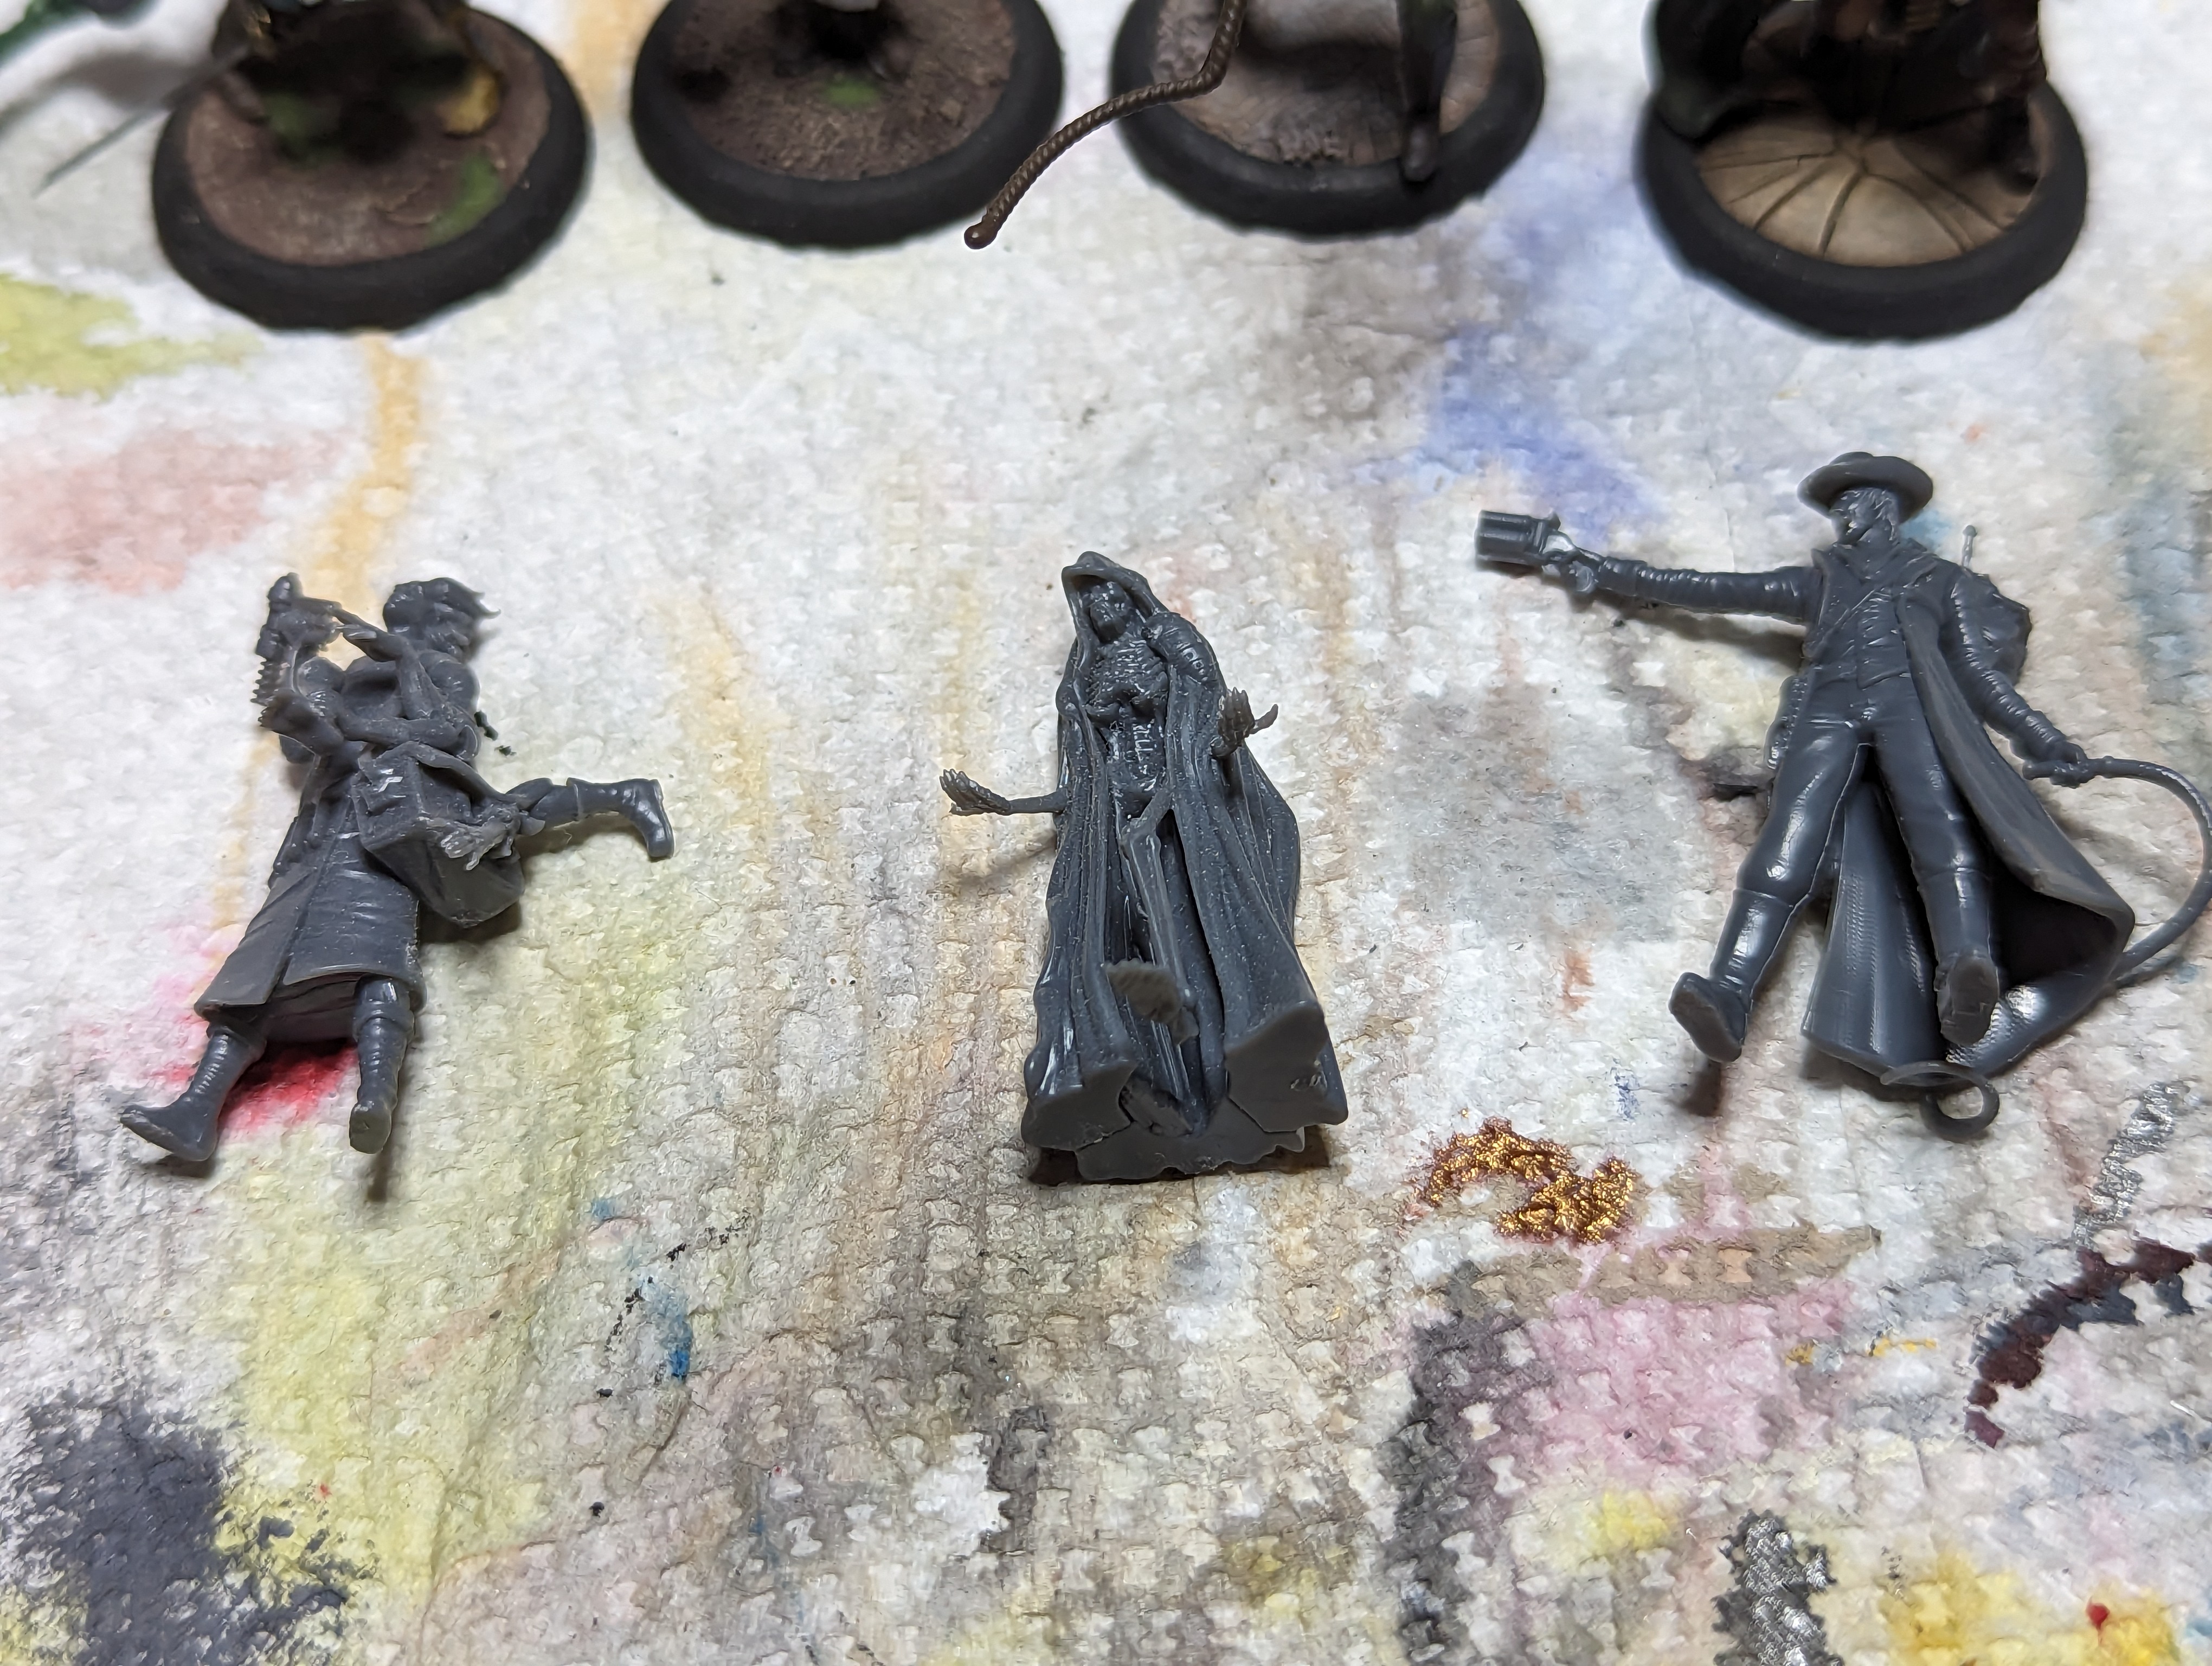
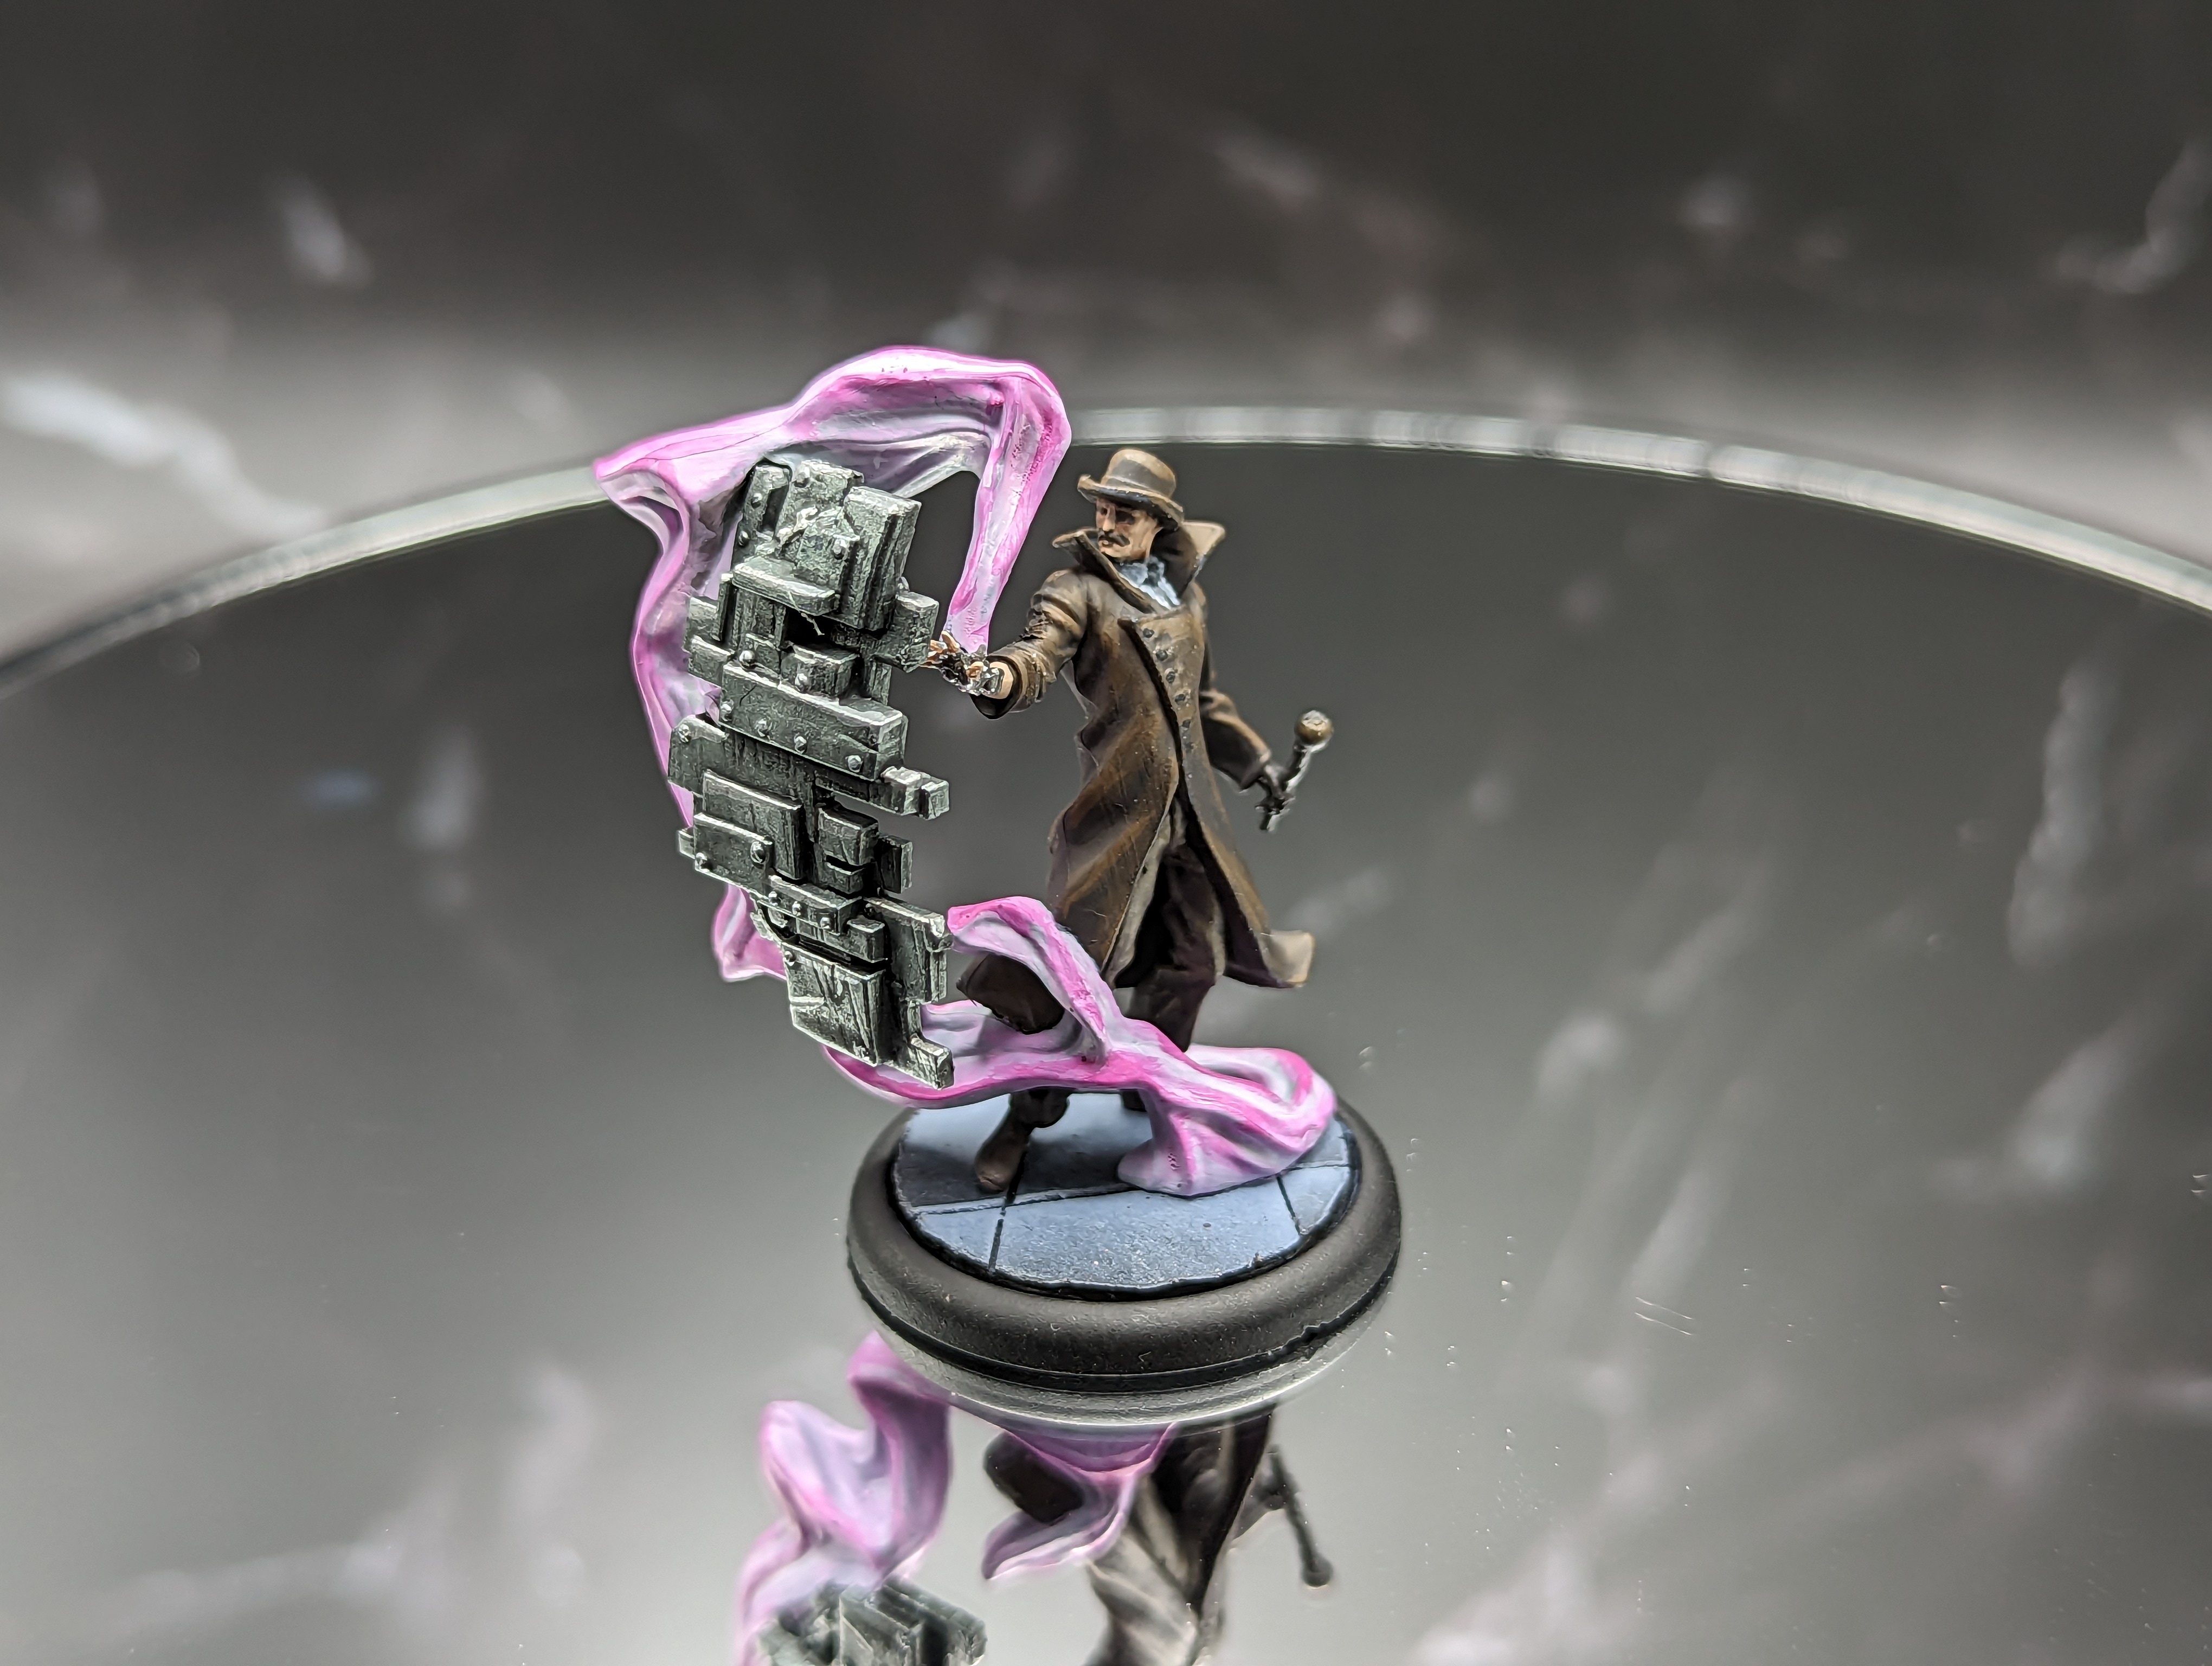
Next up we are tackling Lucas McCabe and Dr. McMourning. Both upstanding gentlemen, never done anything to hurt anyone. Certainly not.
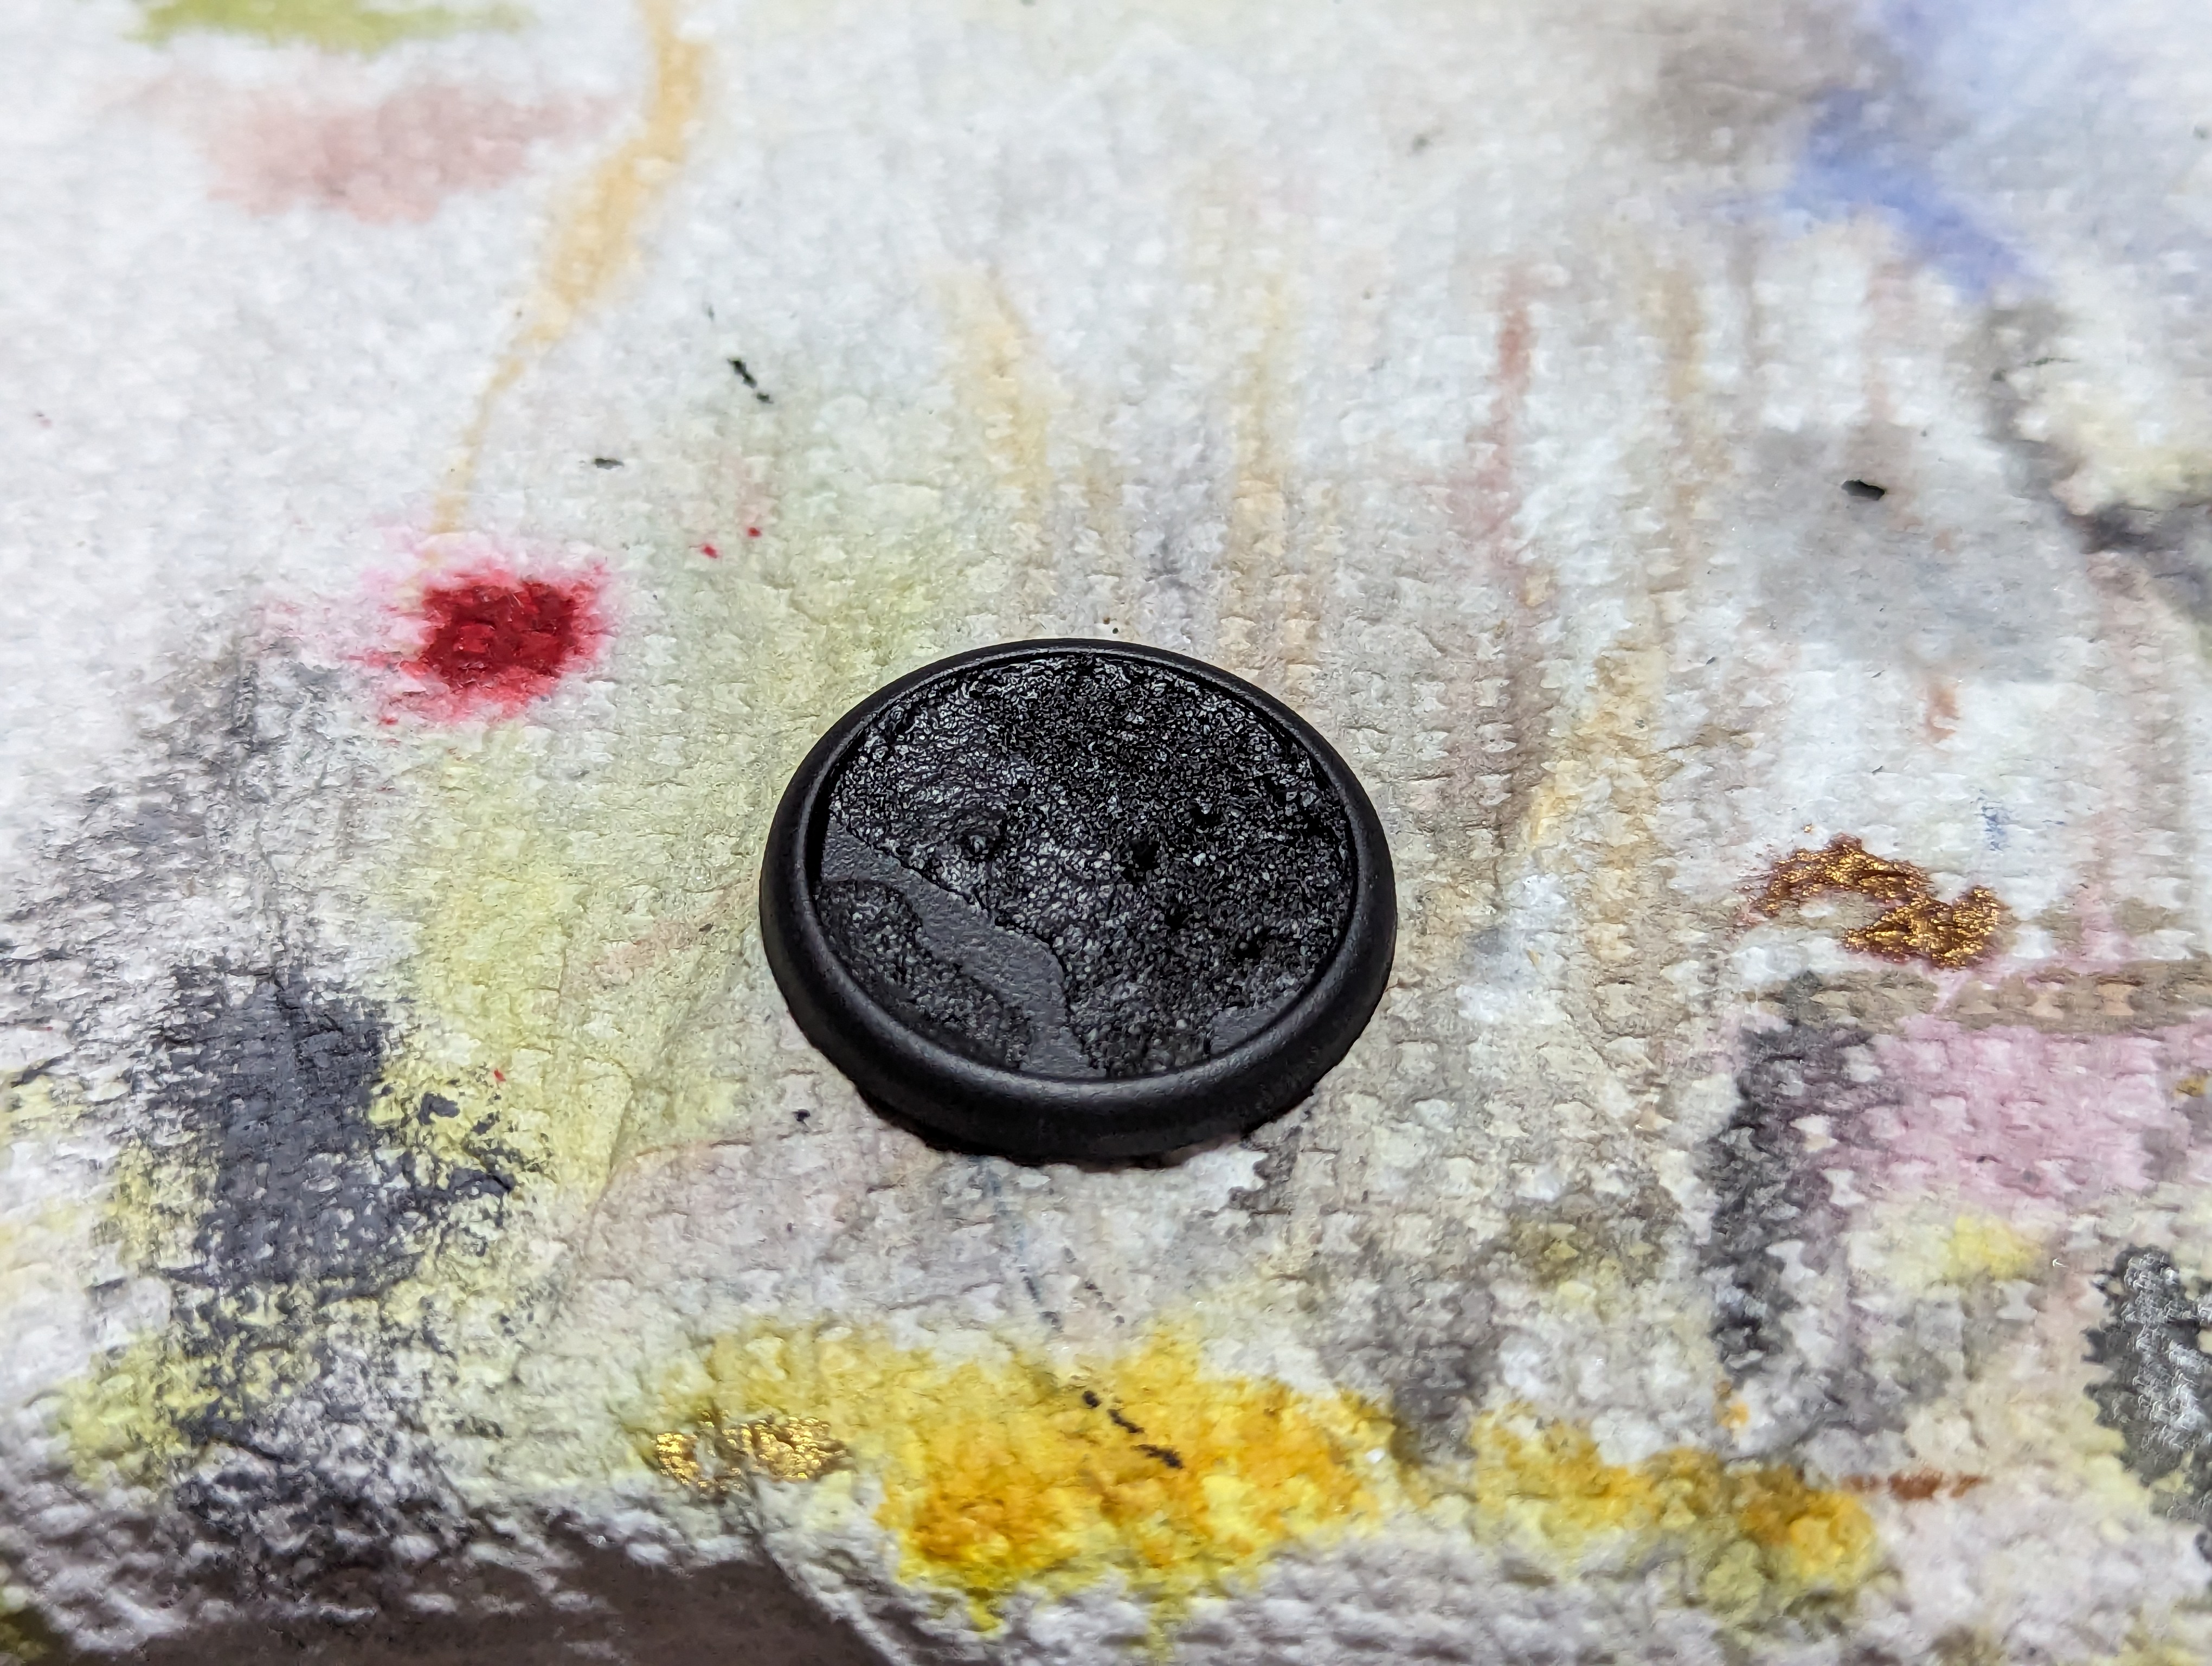
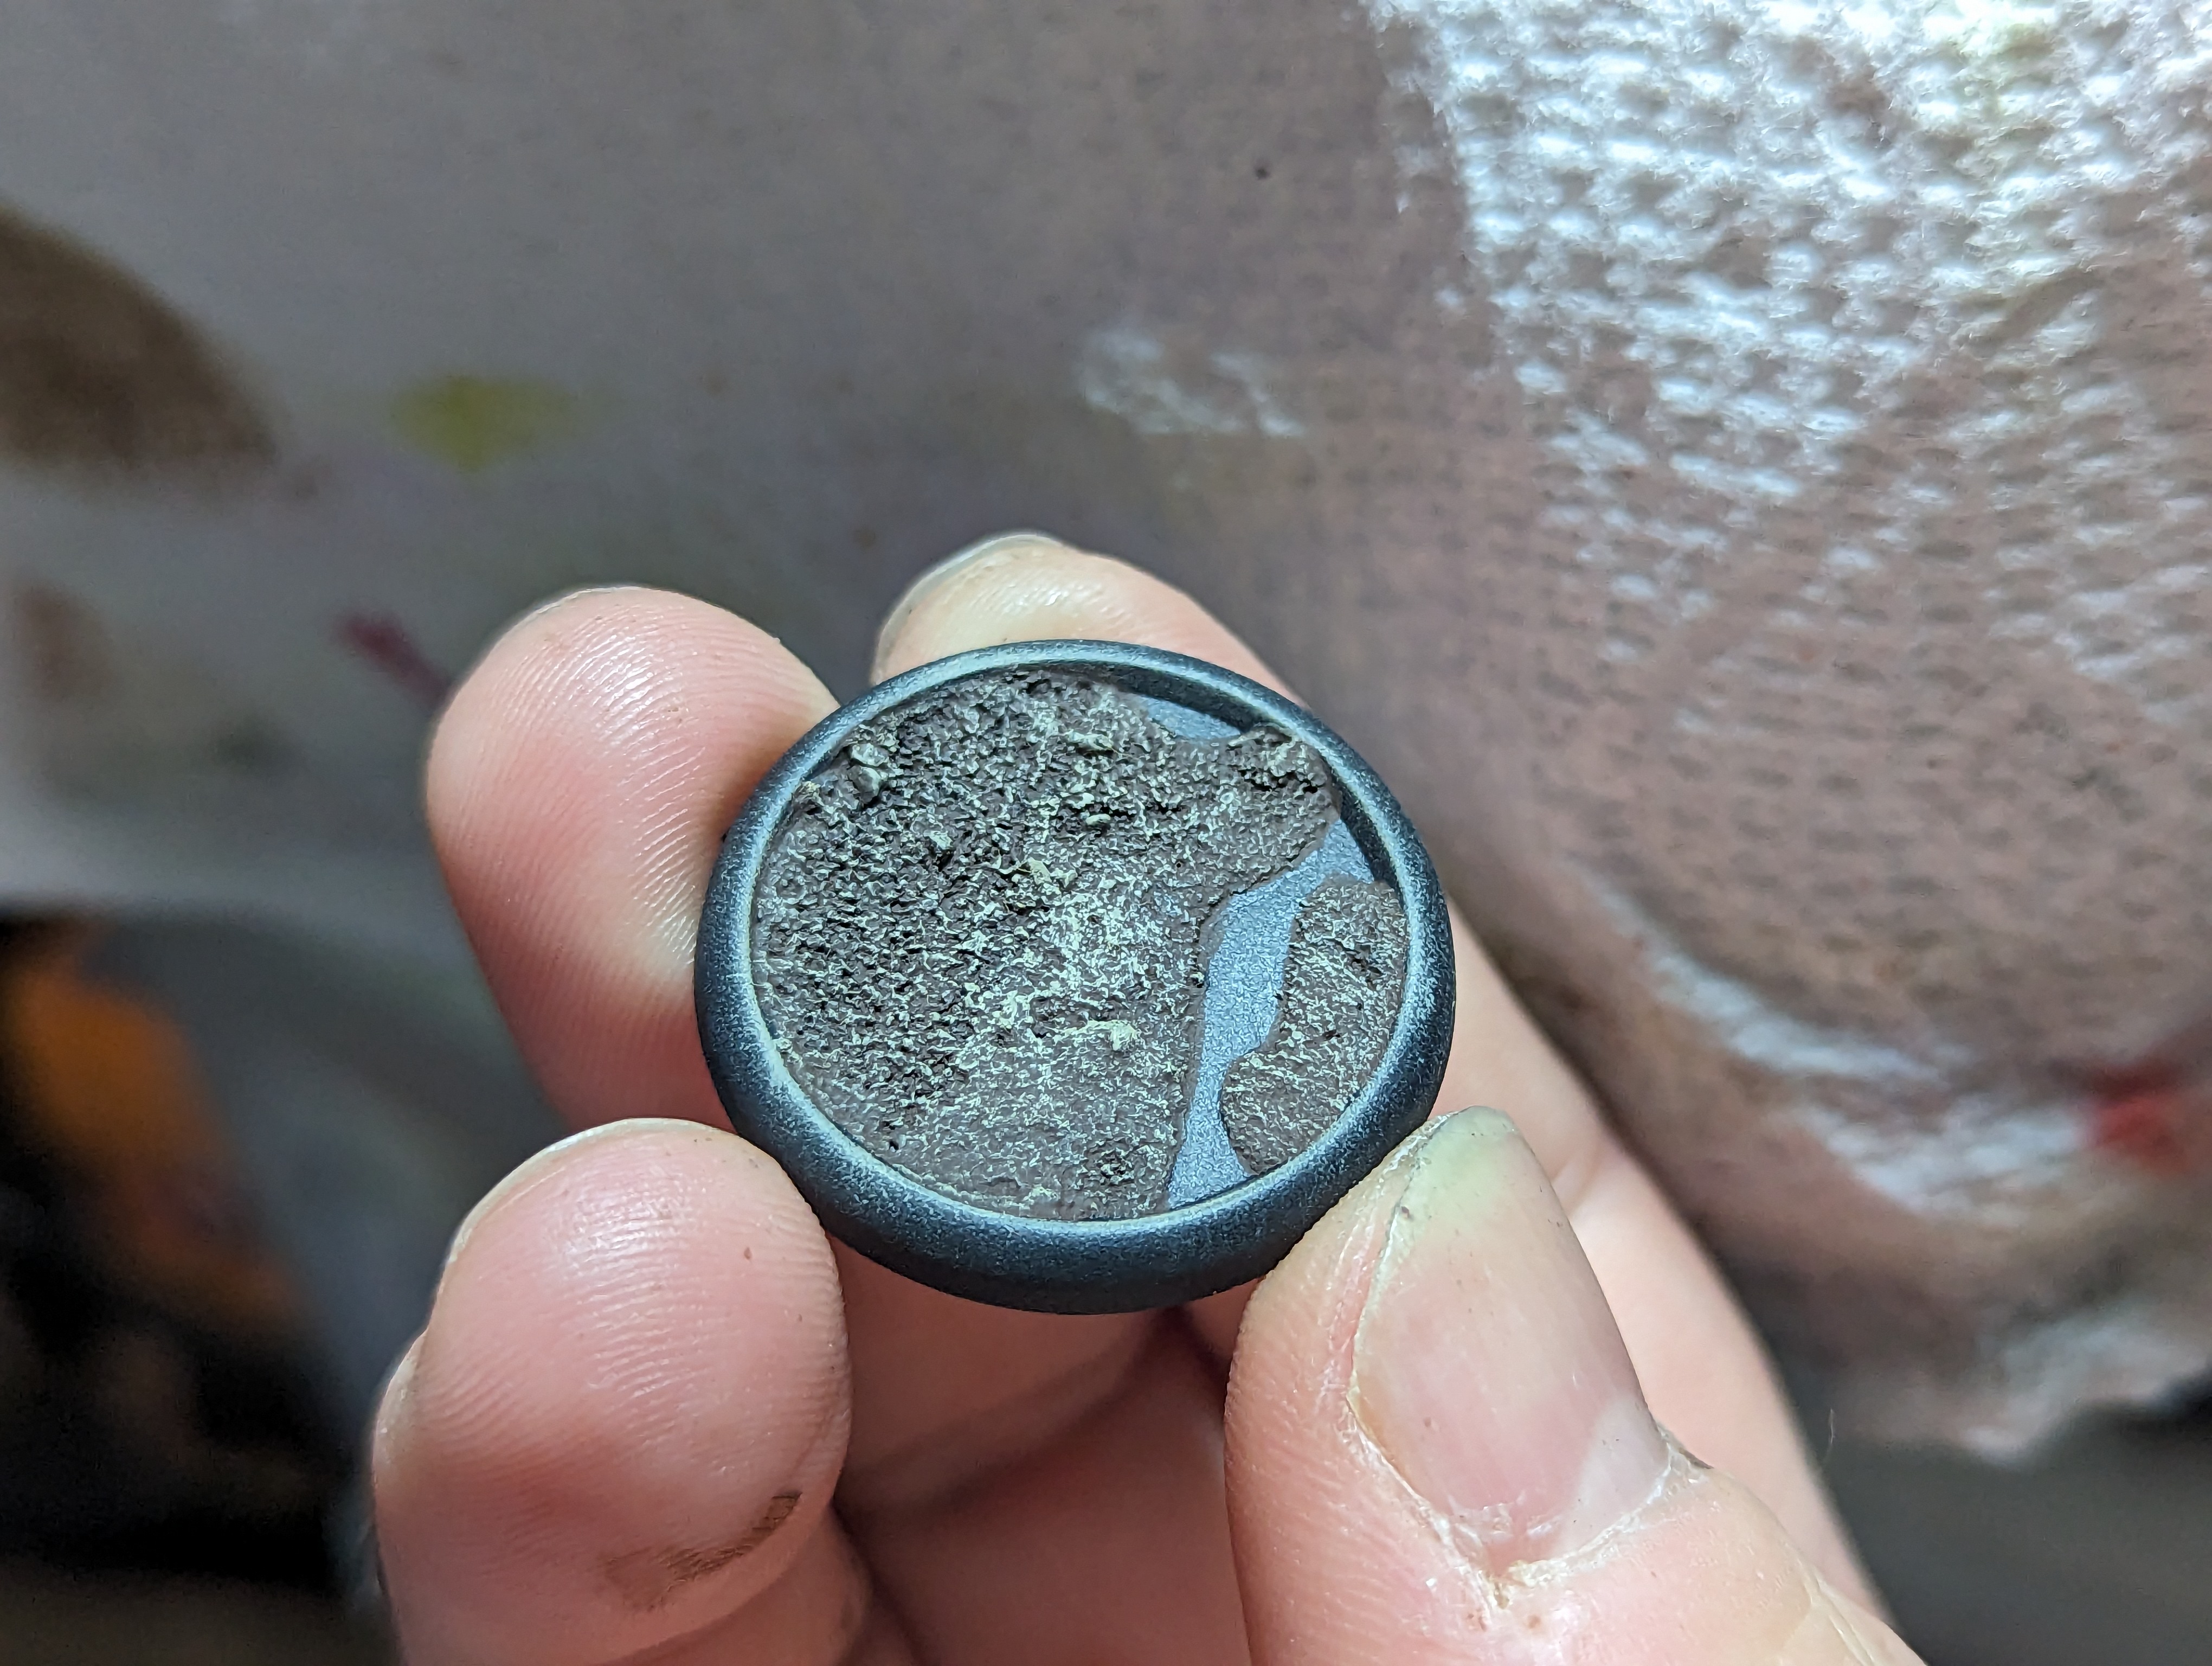
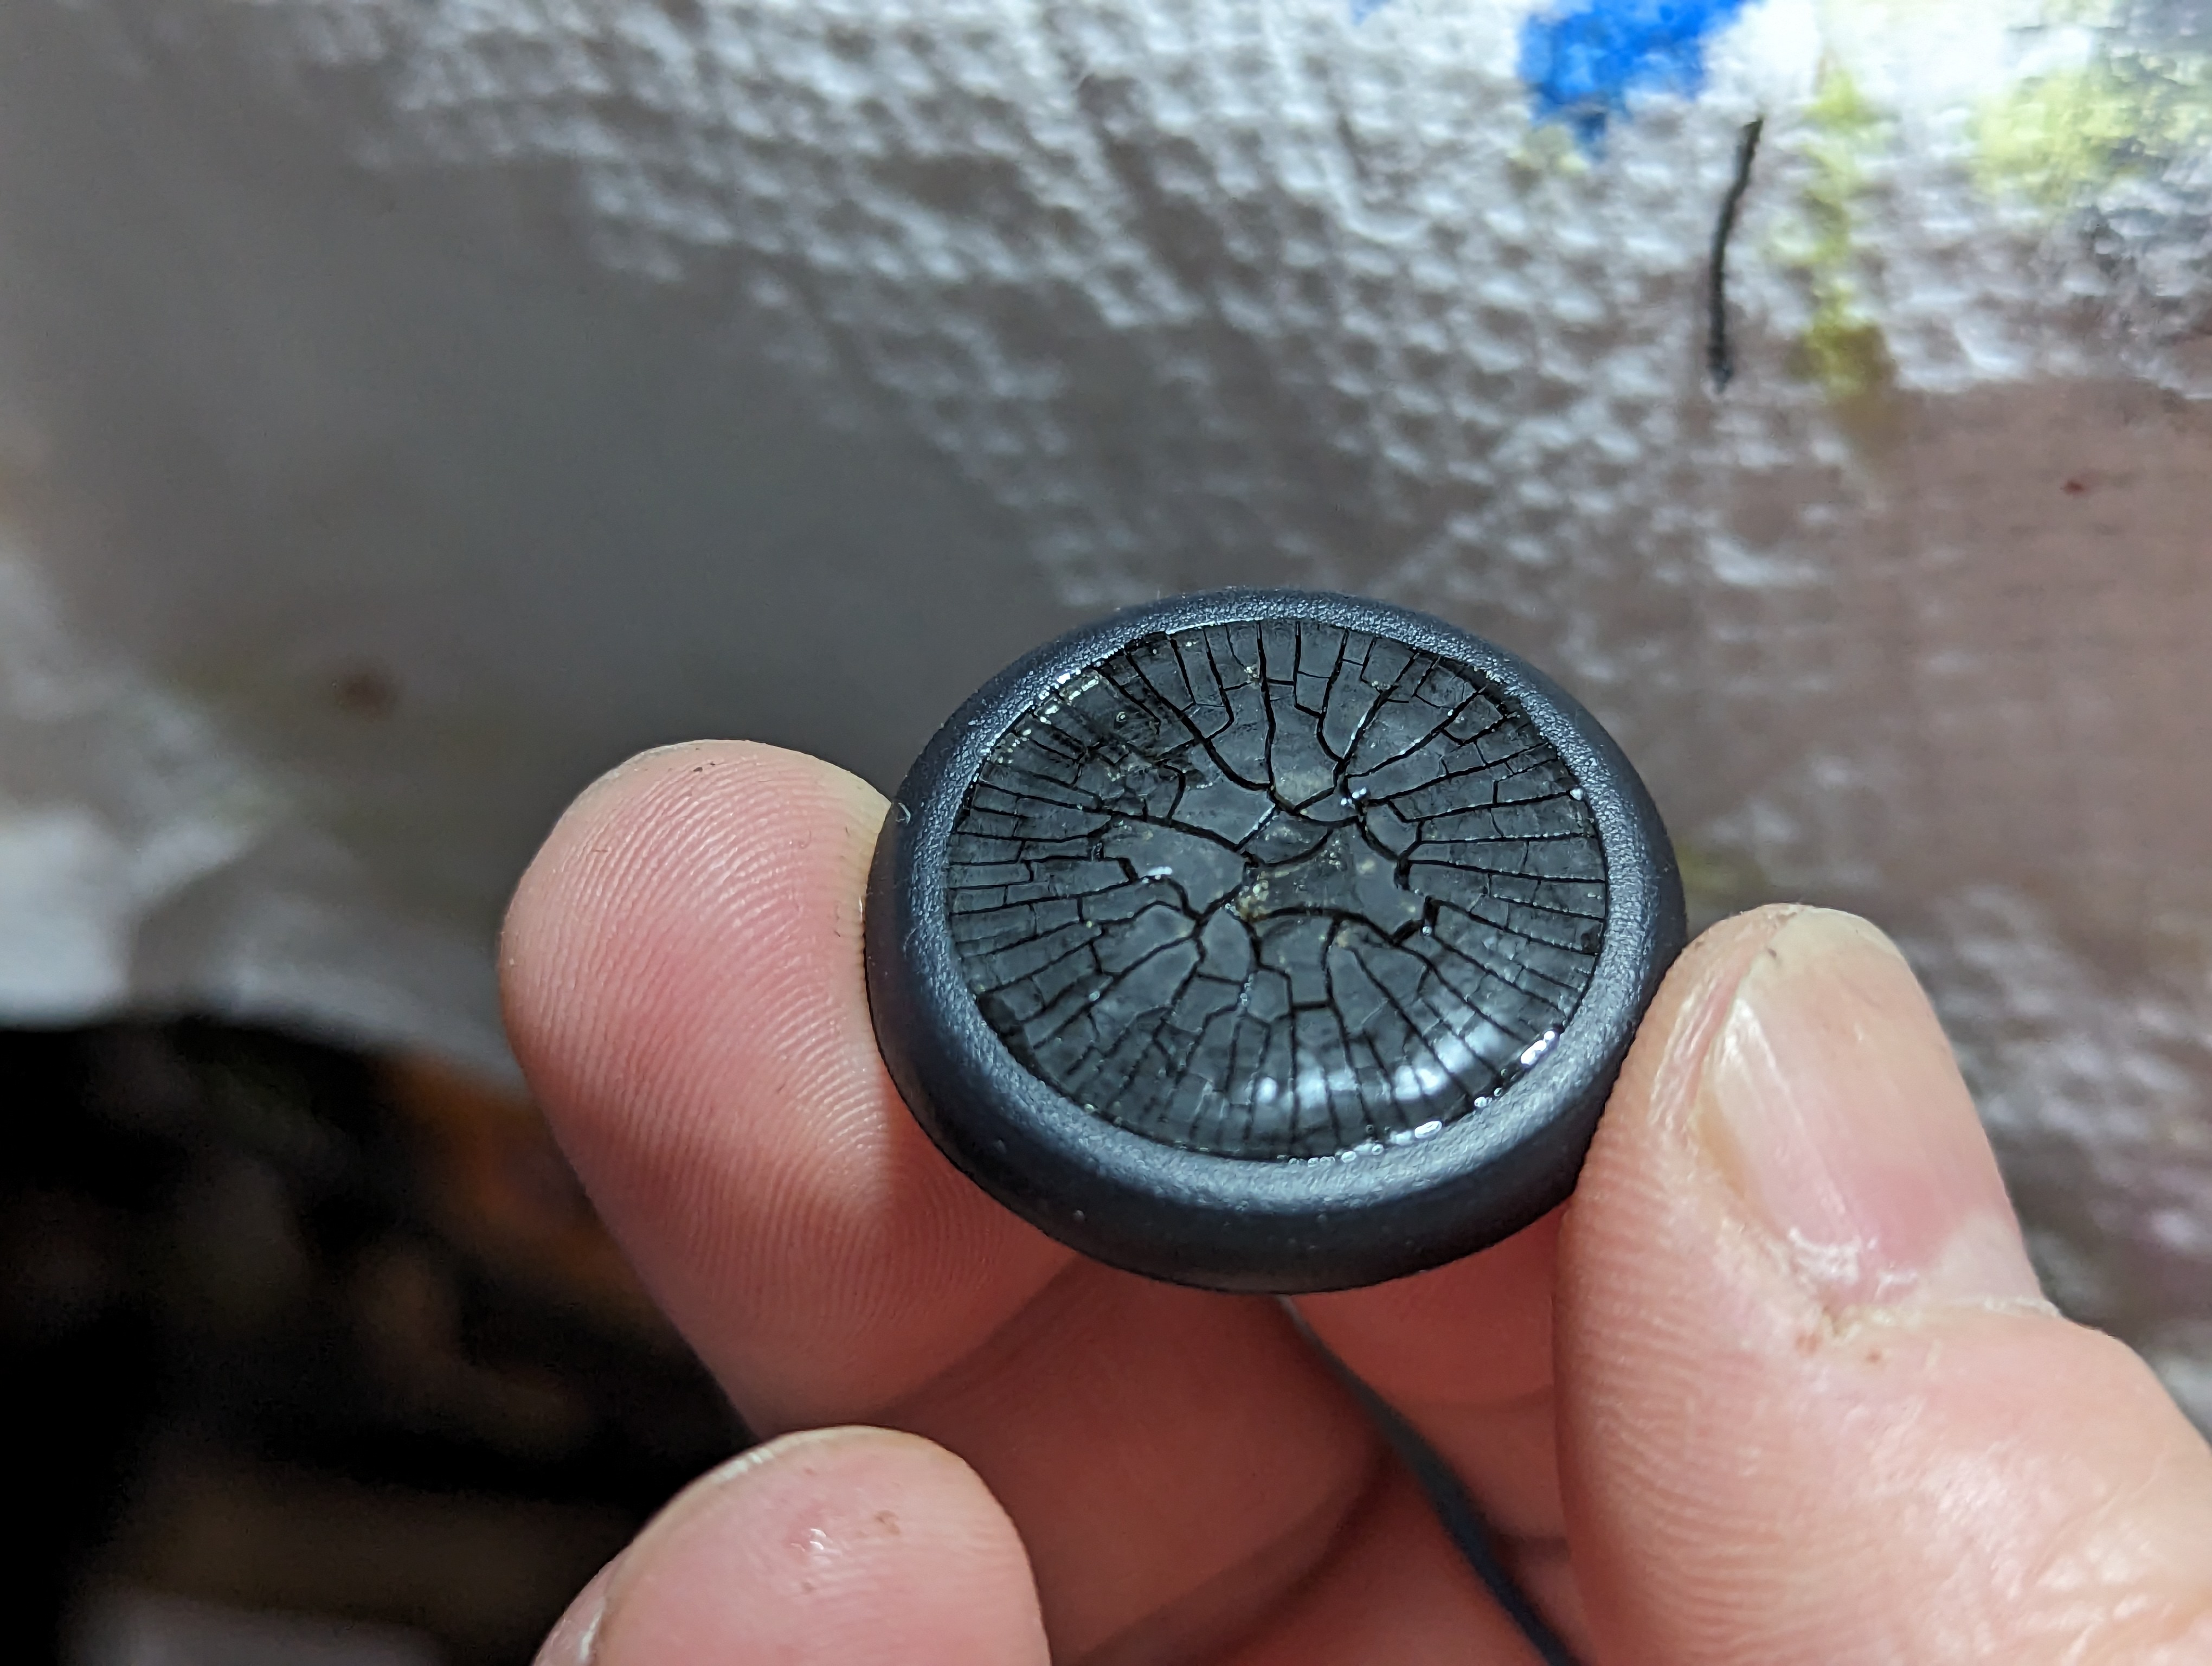
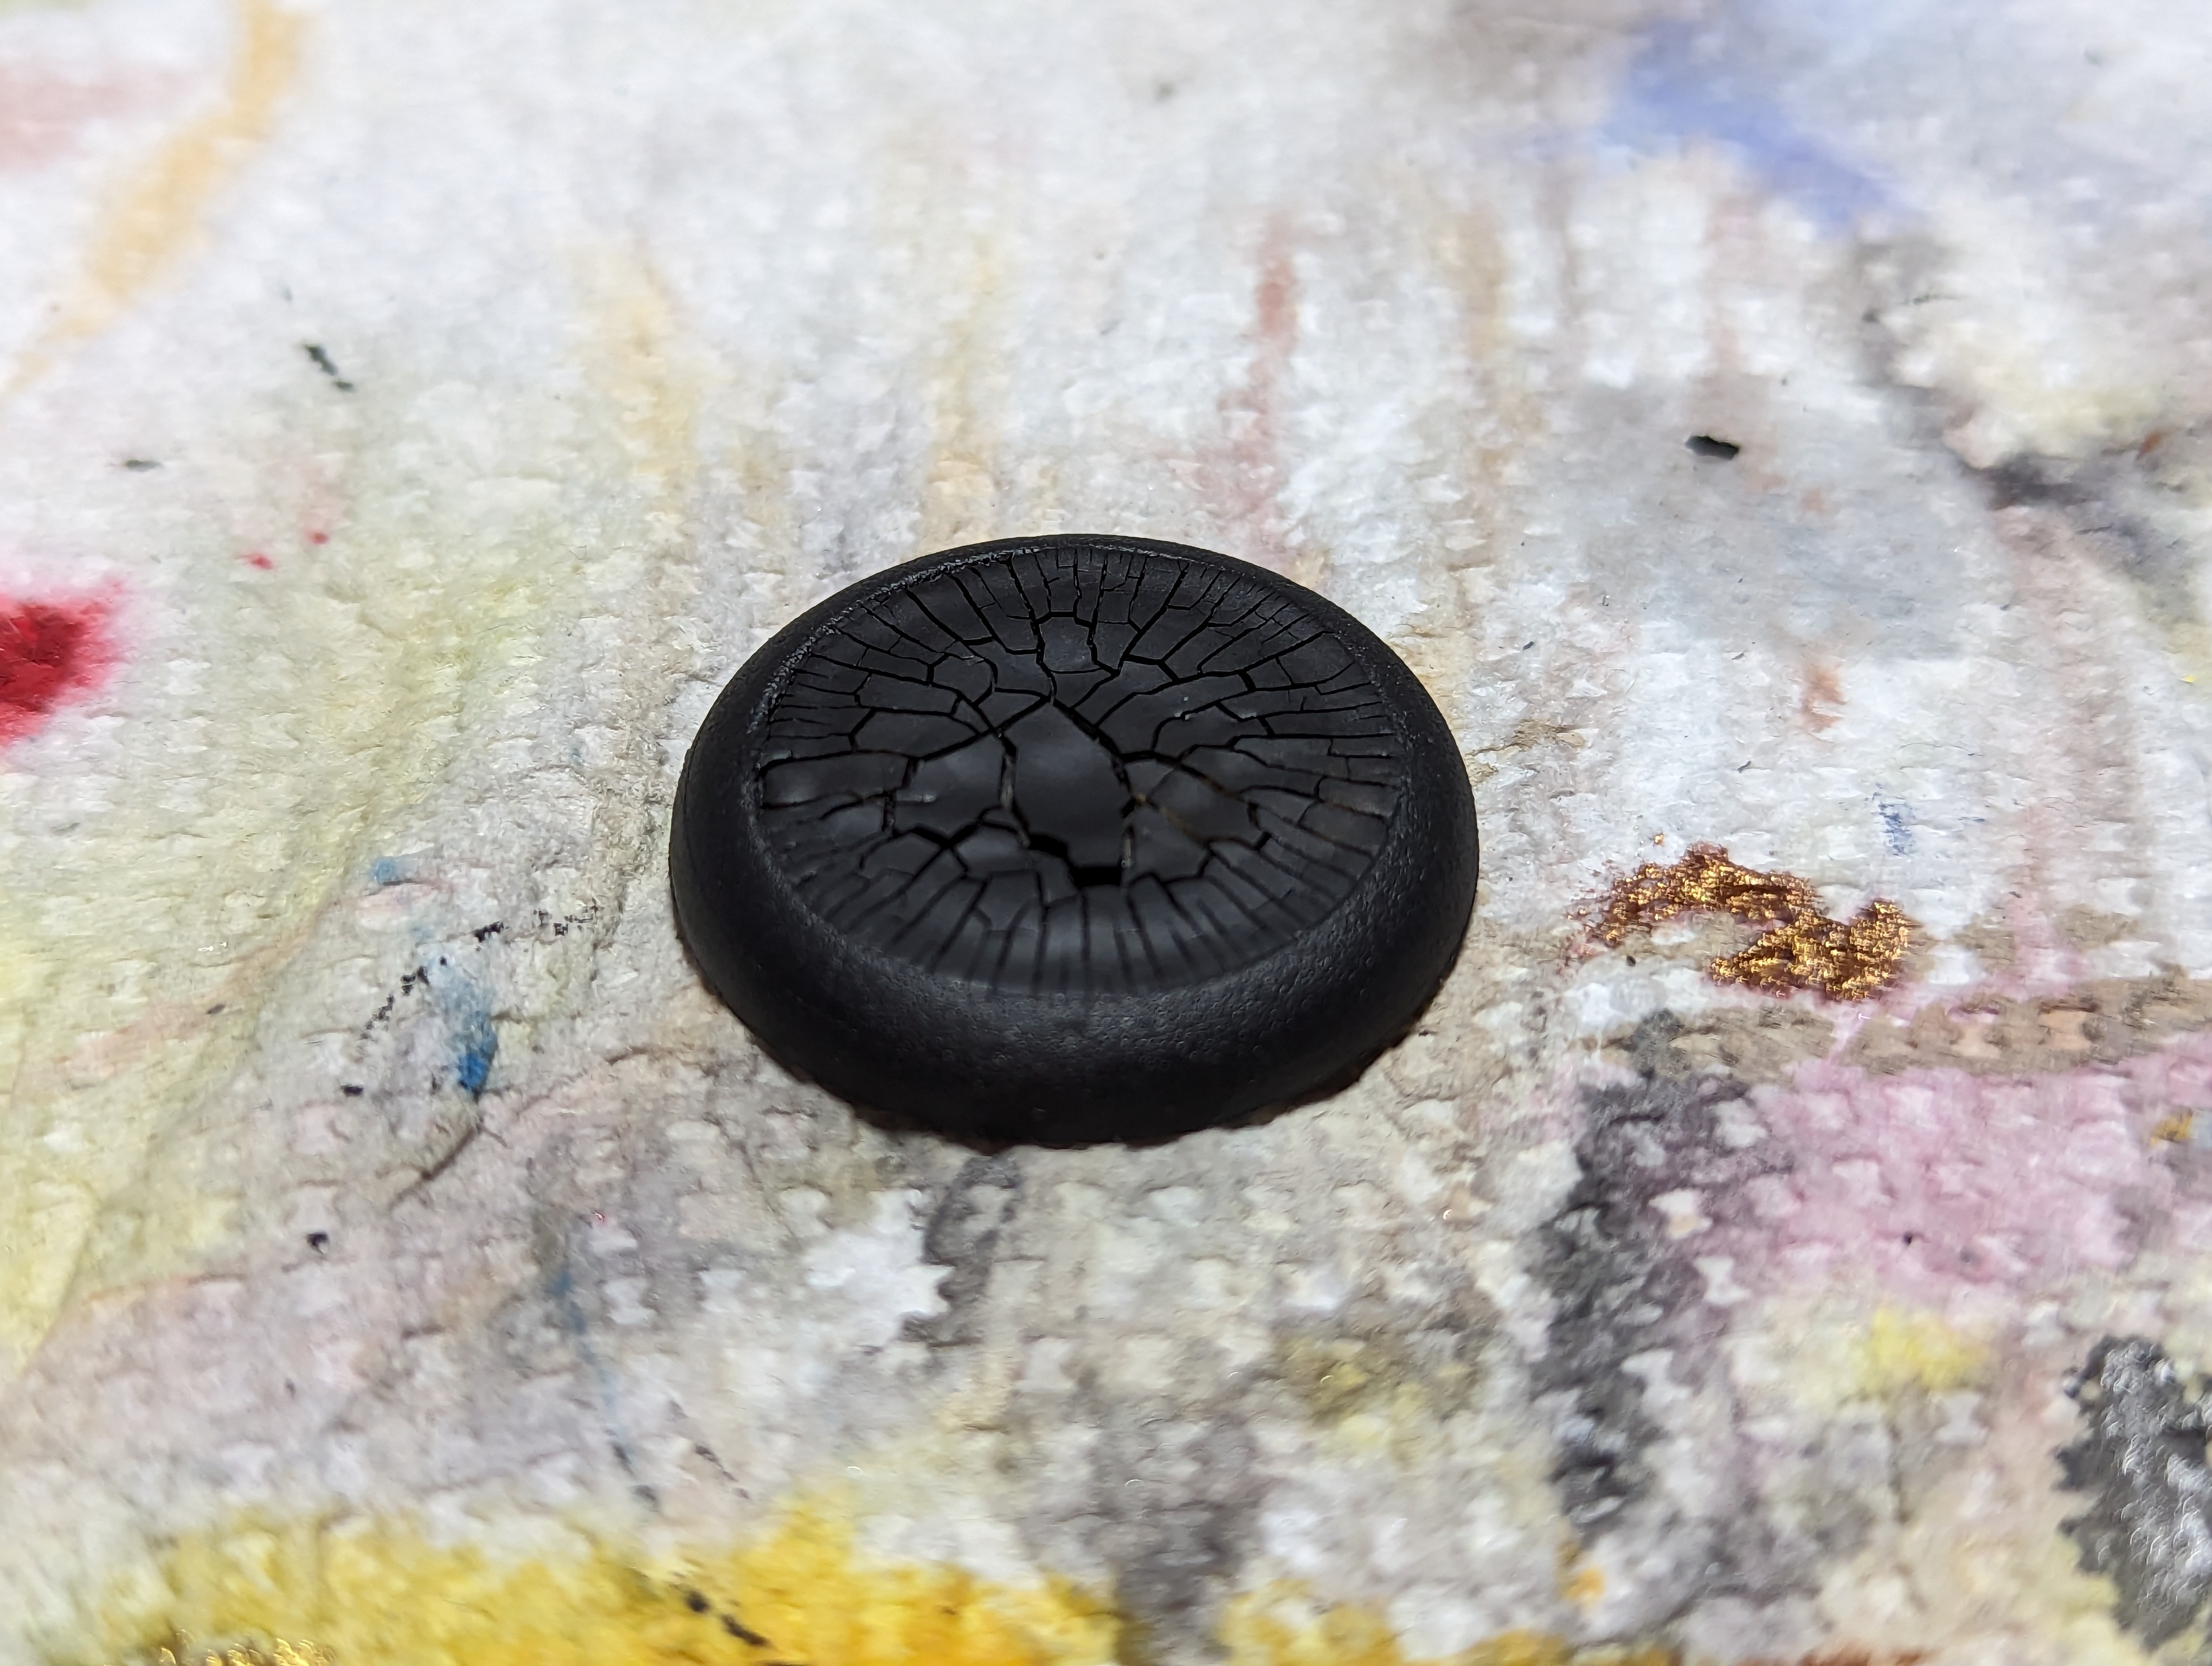
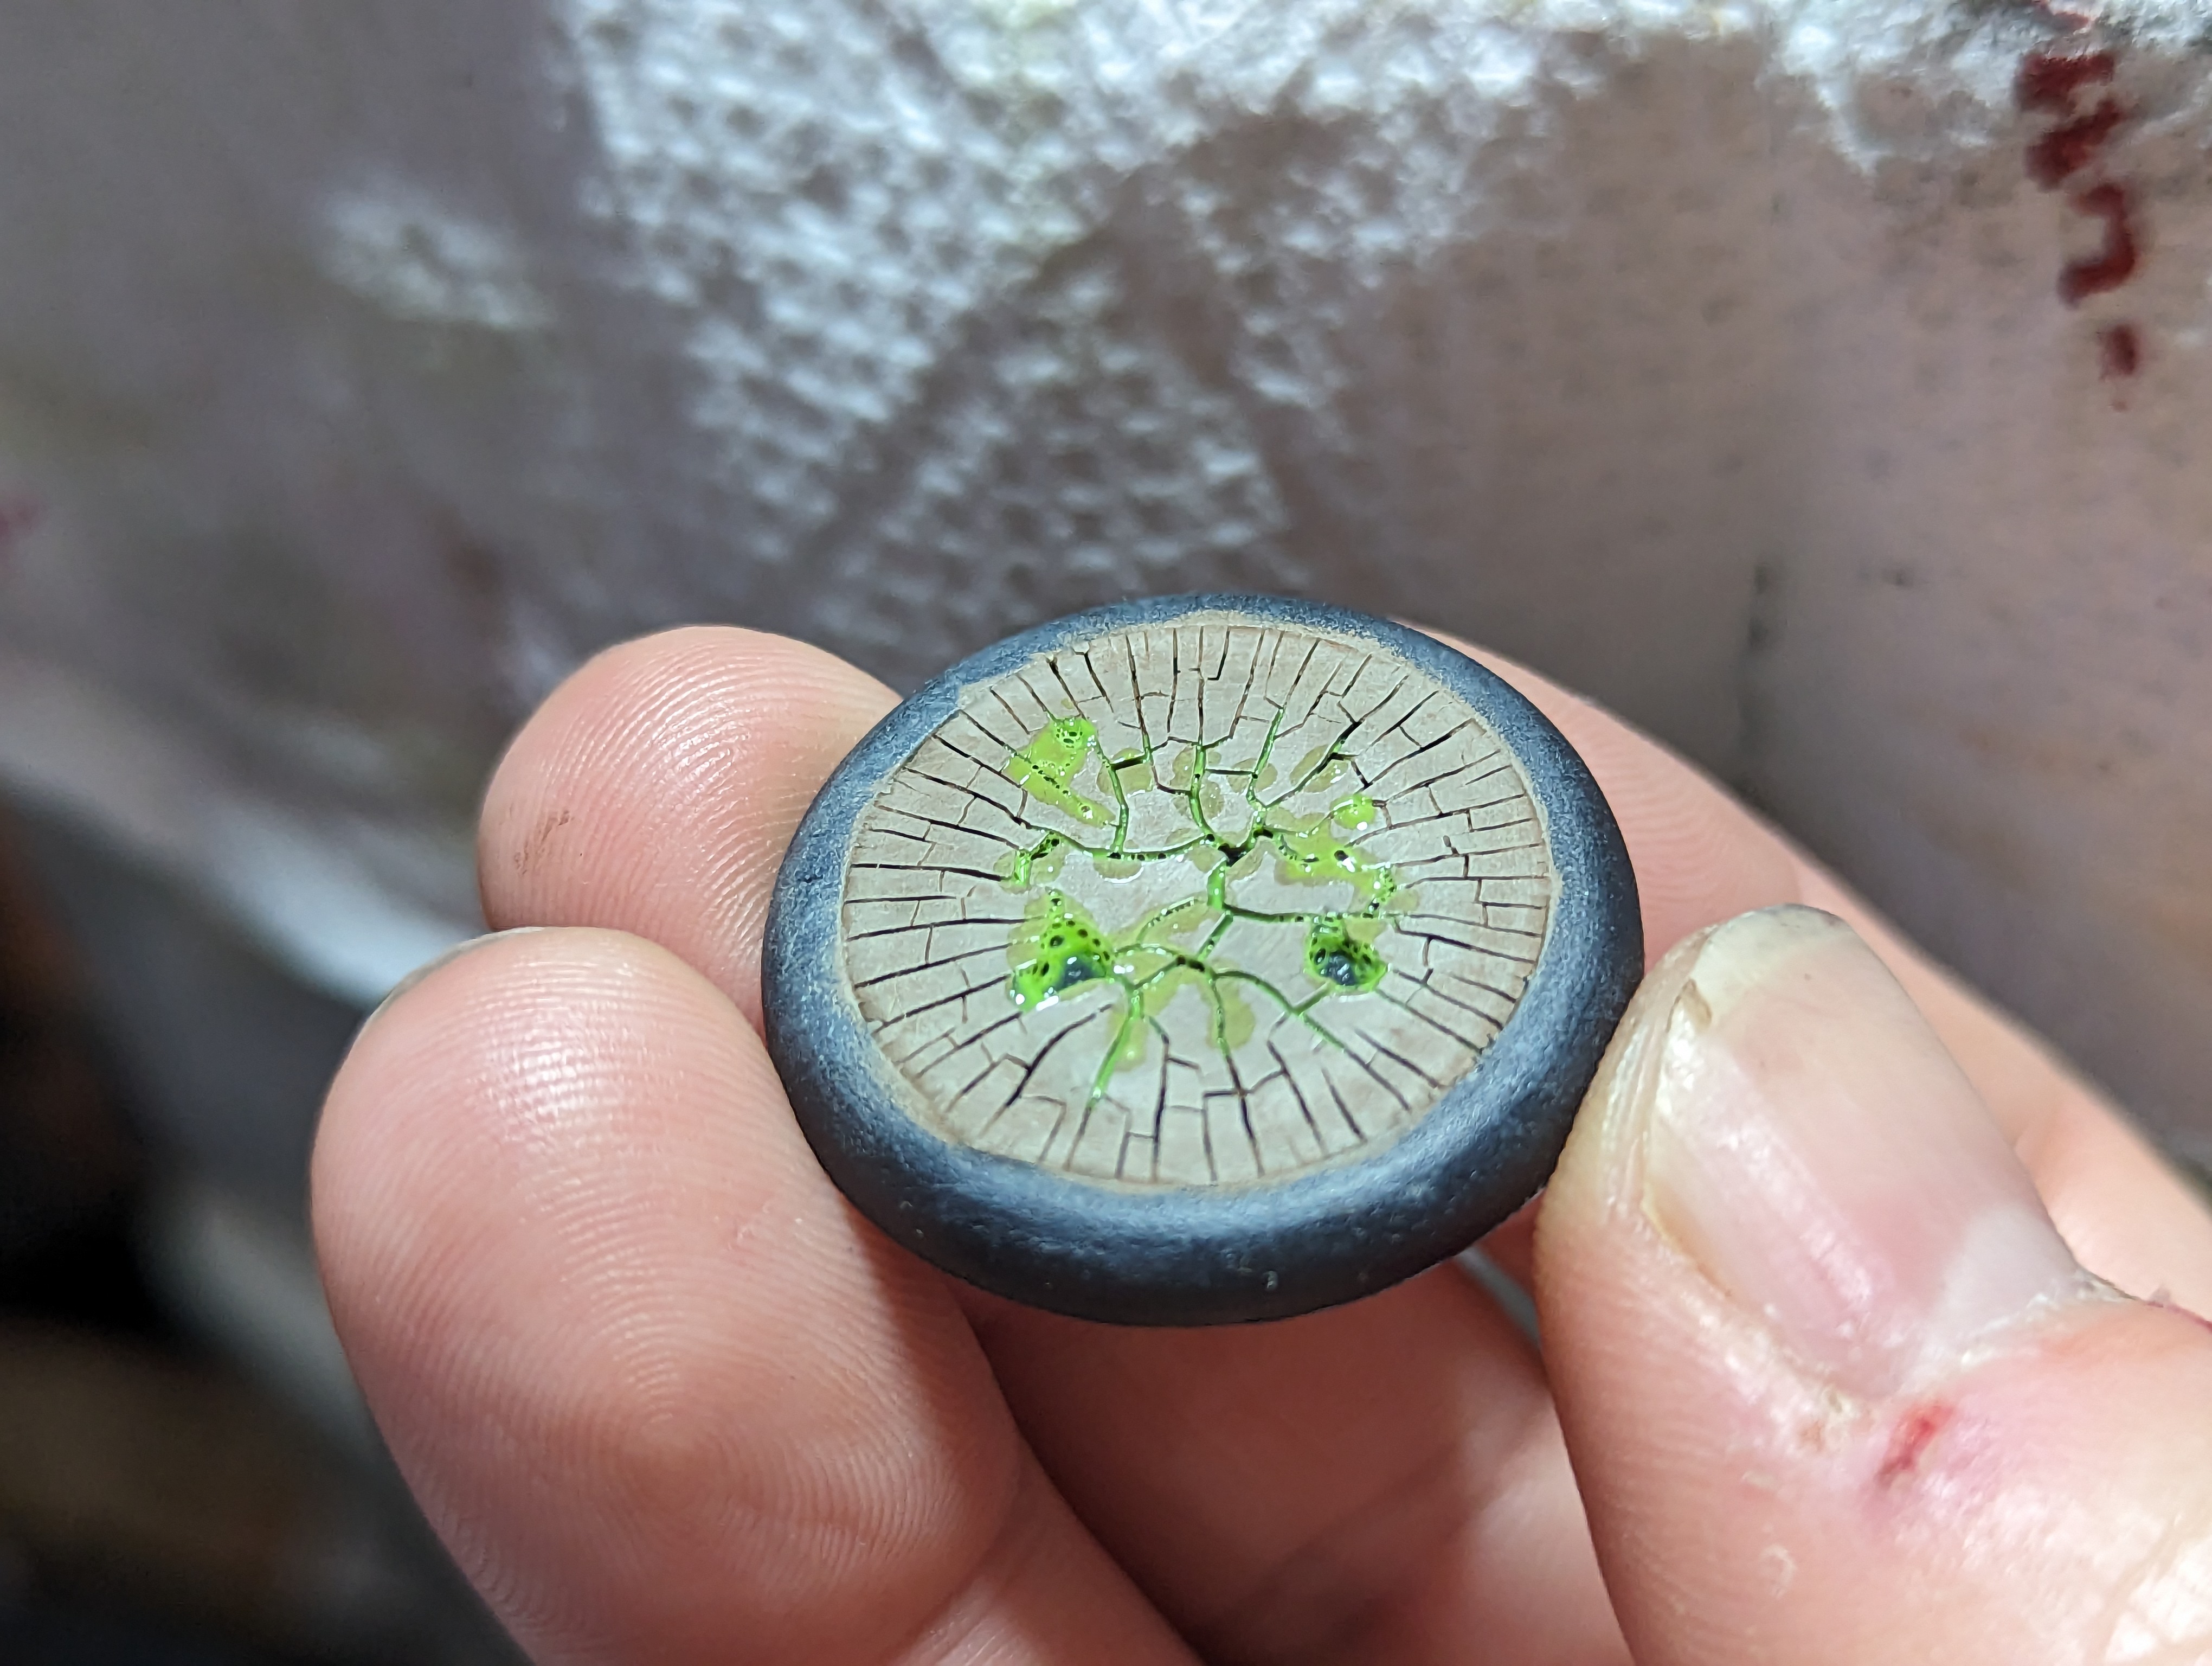
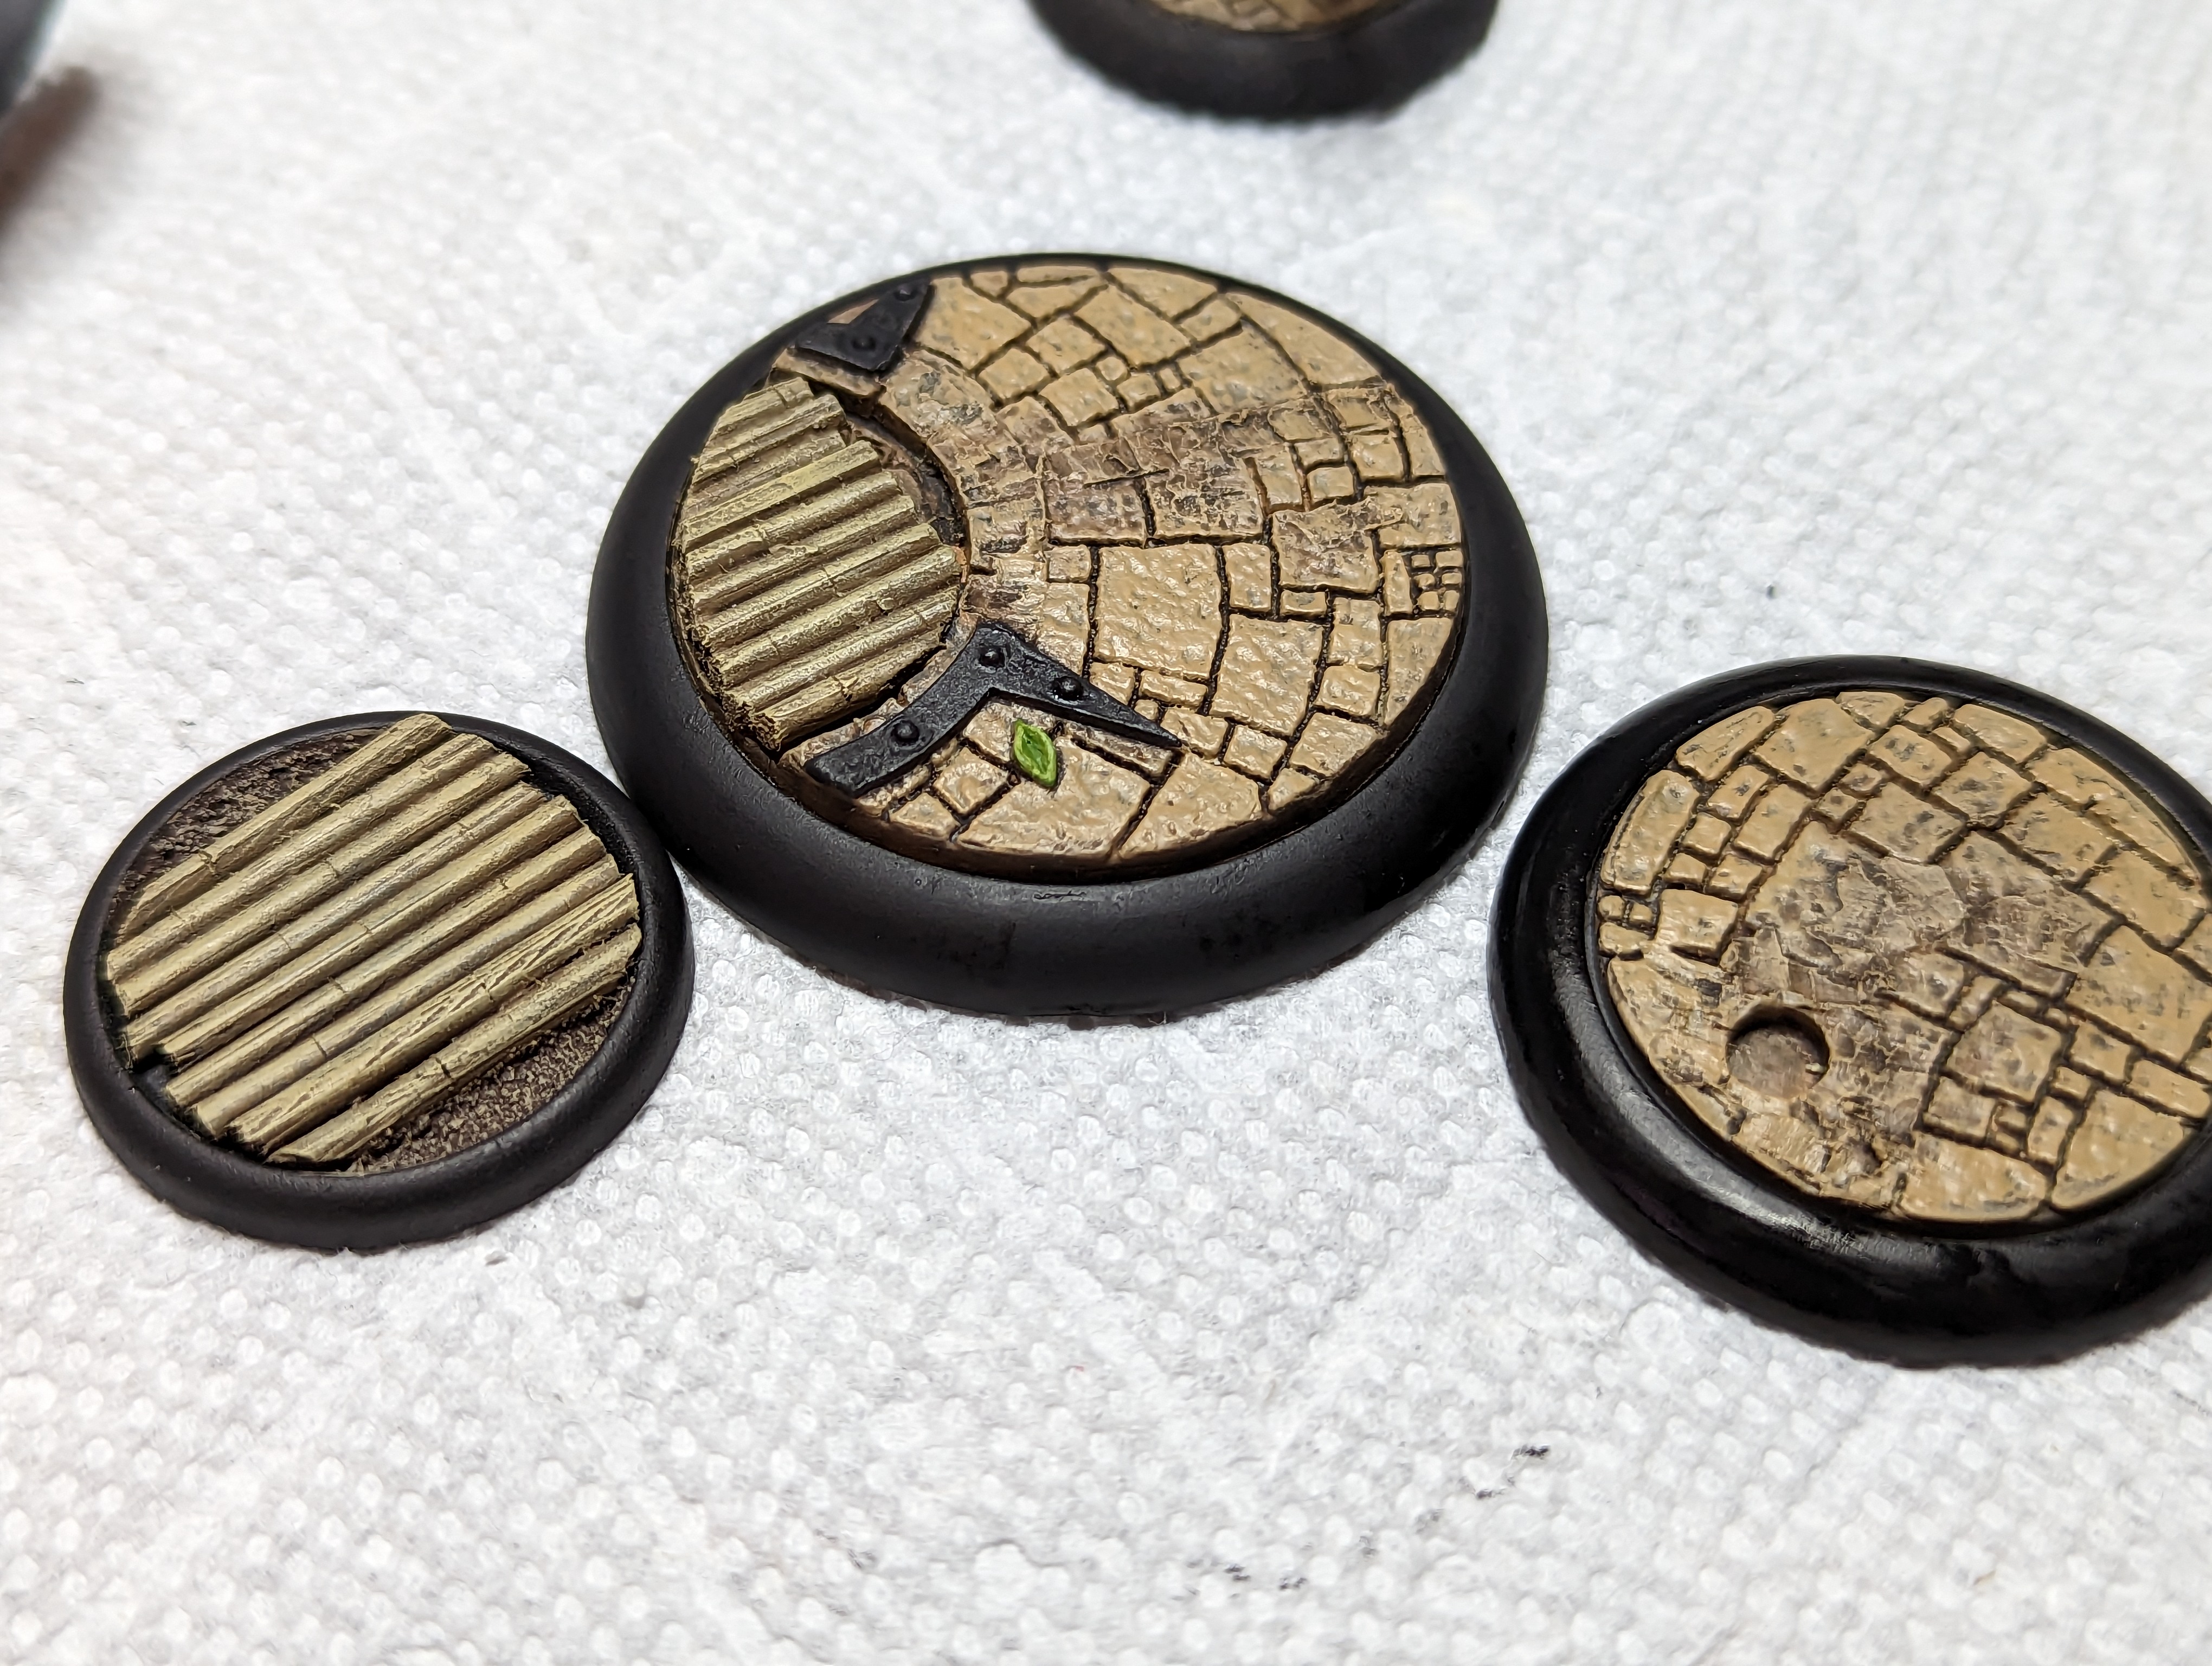
McCabe has a story that takes place in the Sahara Desert, so when I did his crew, I used crackle paint to make these desert type bases. They are a little boring since its hard to add variation.
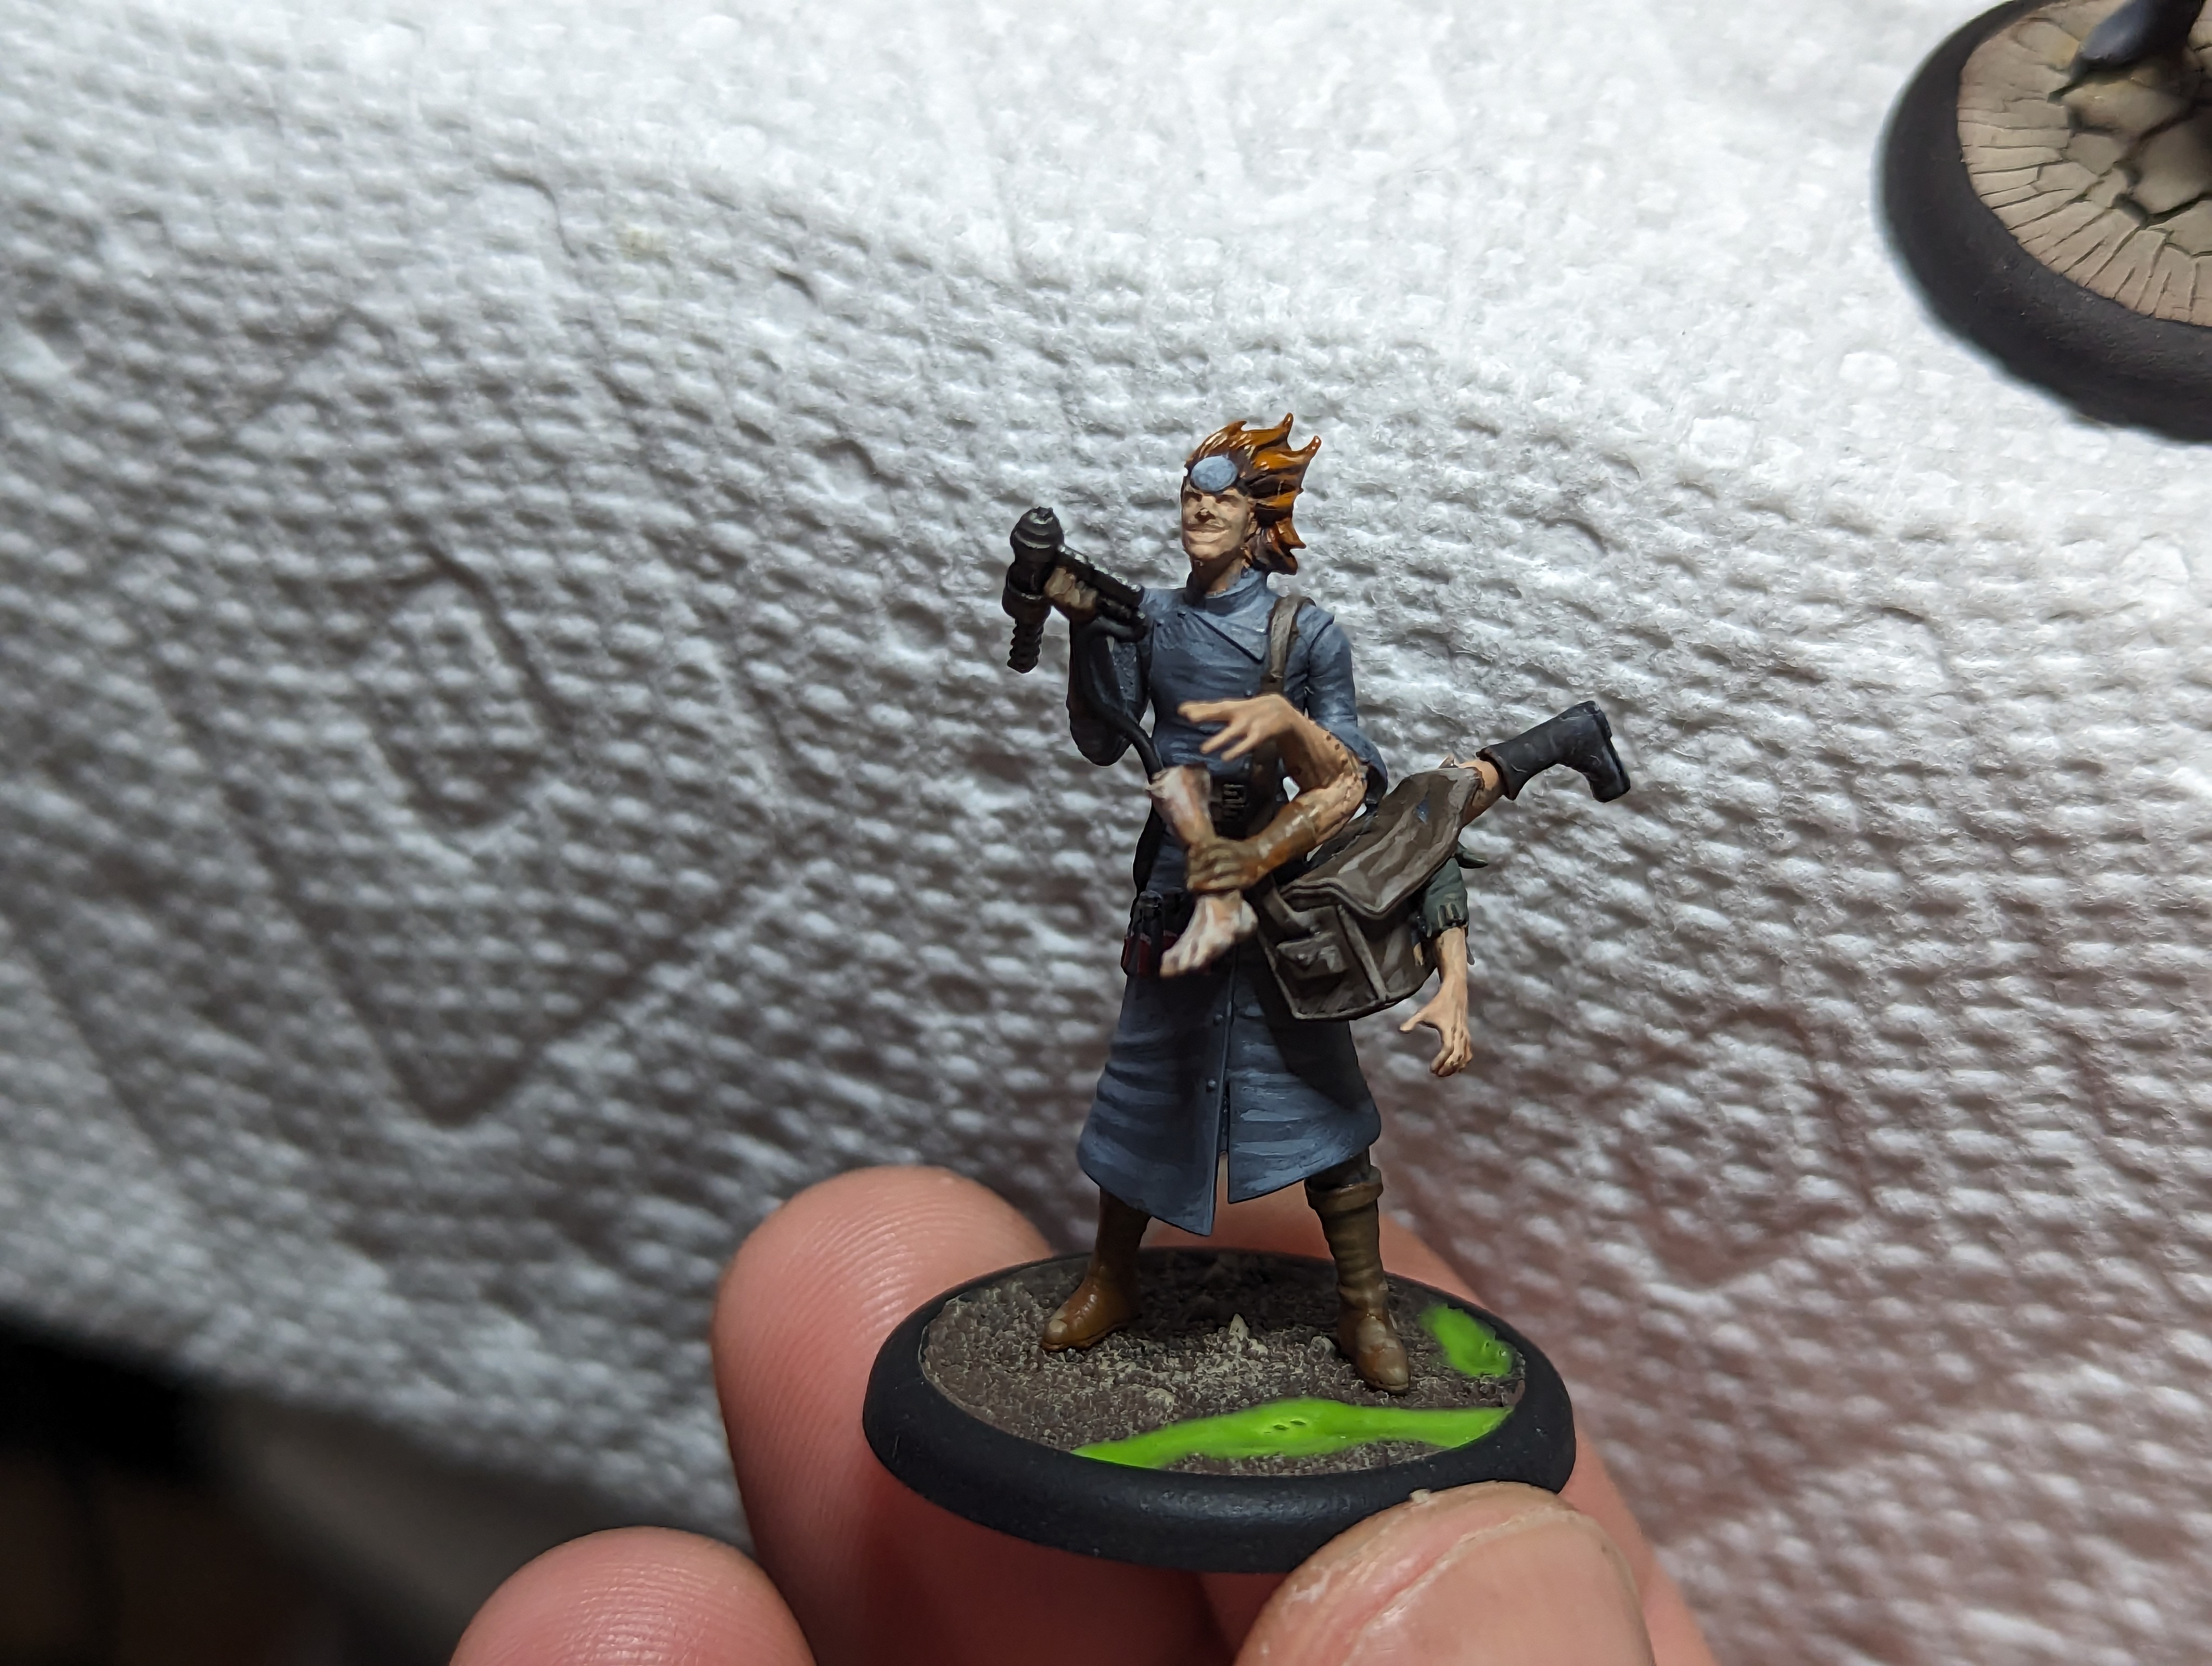
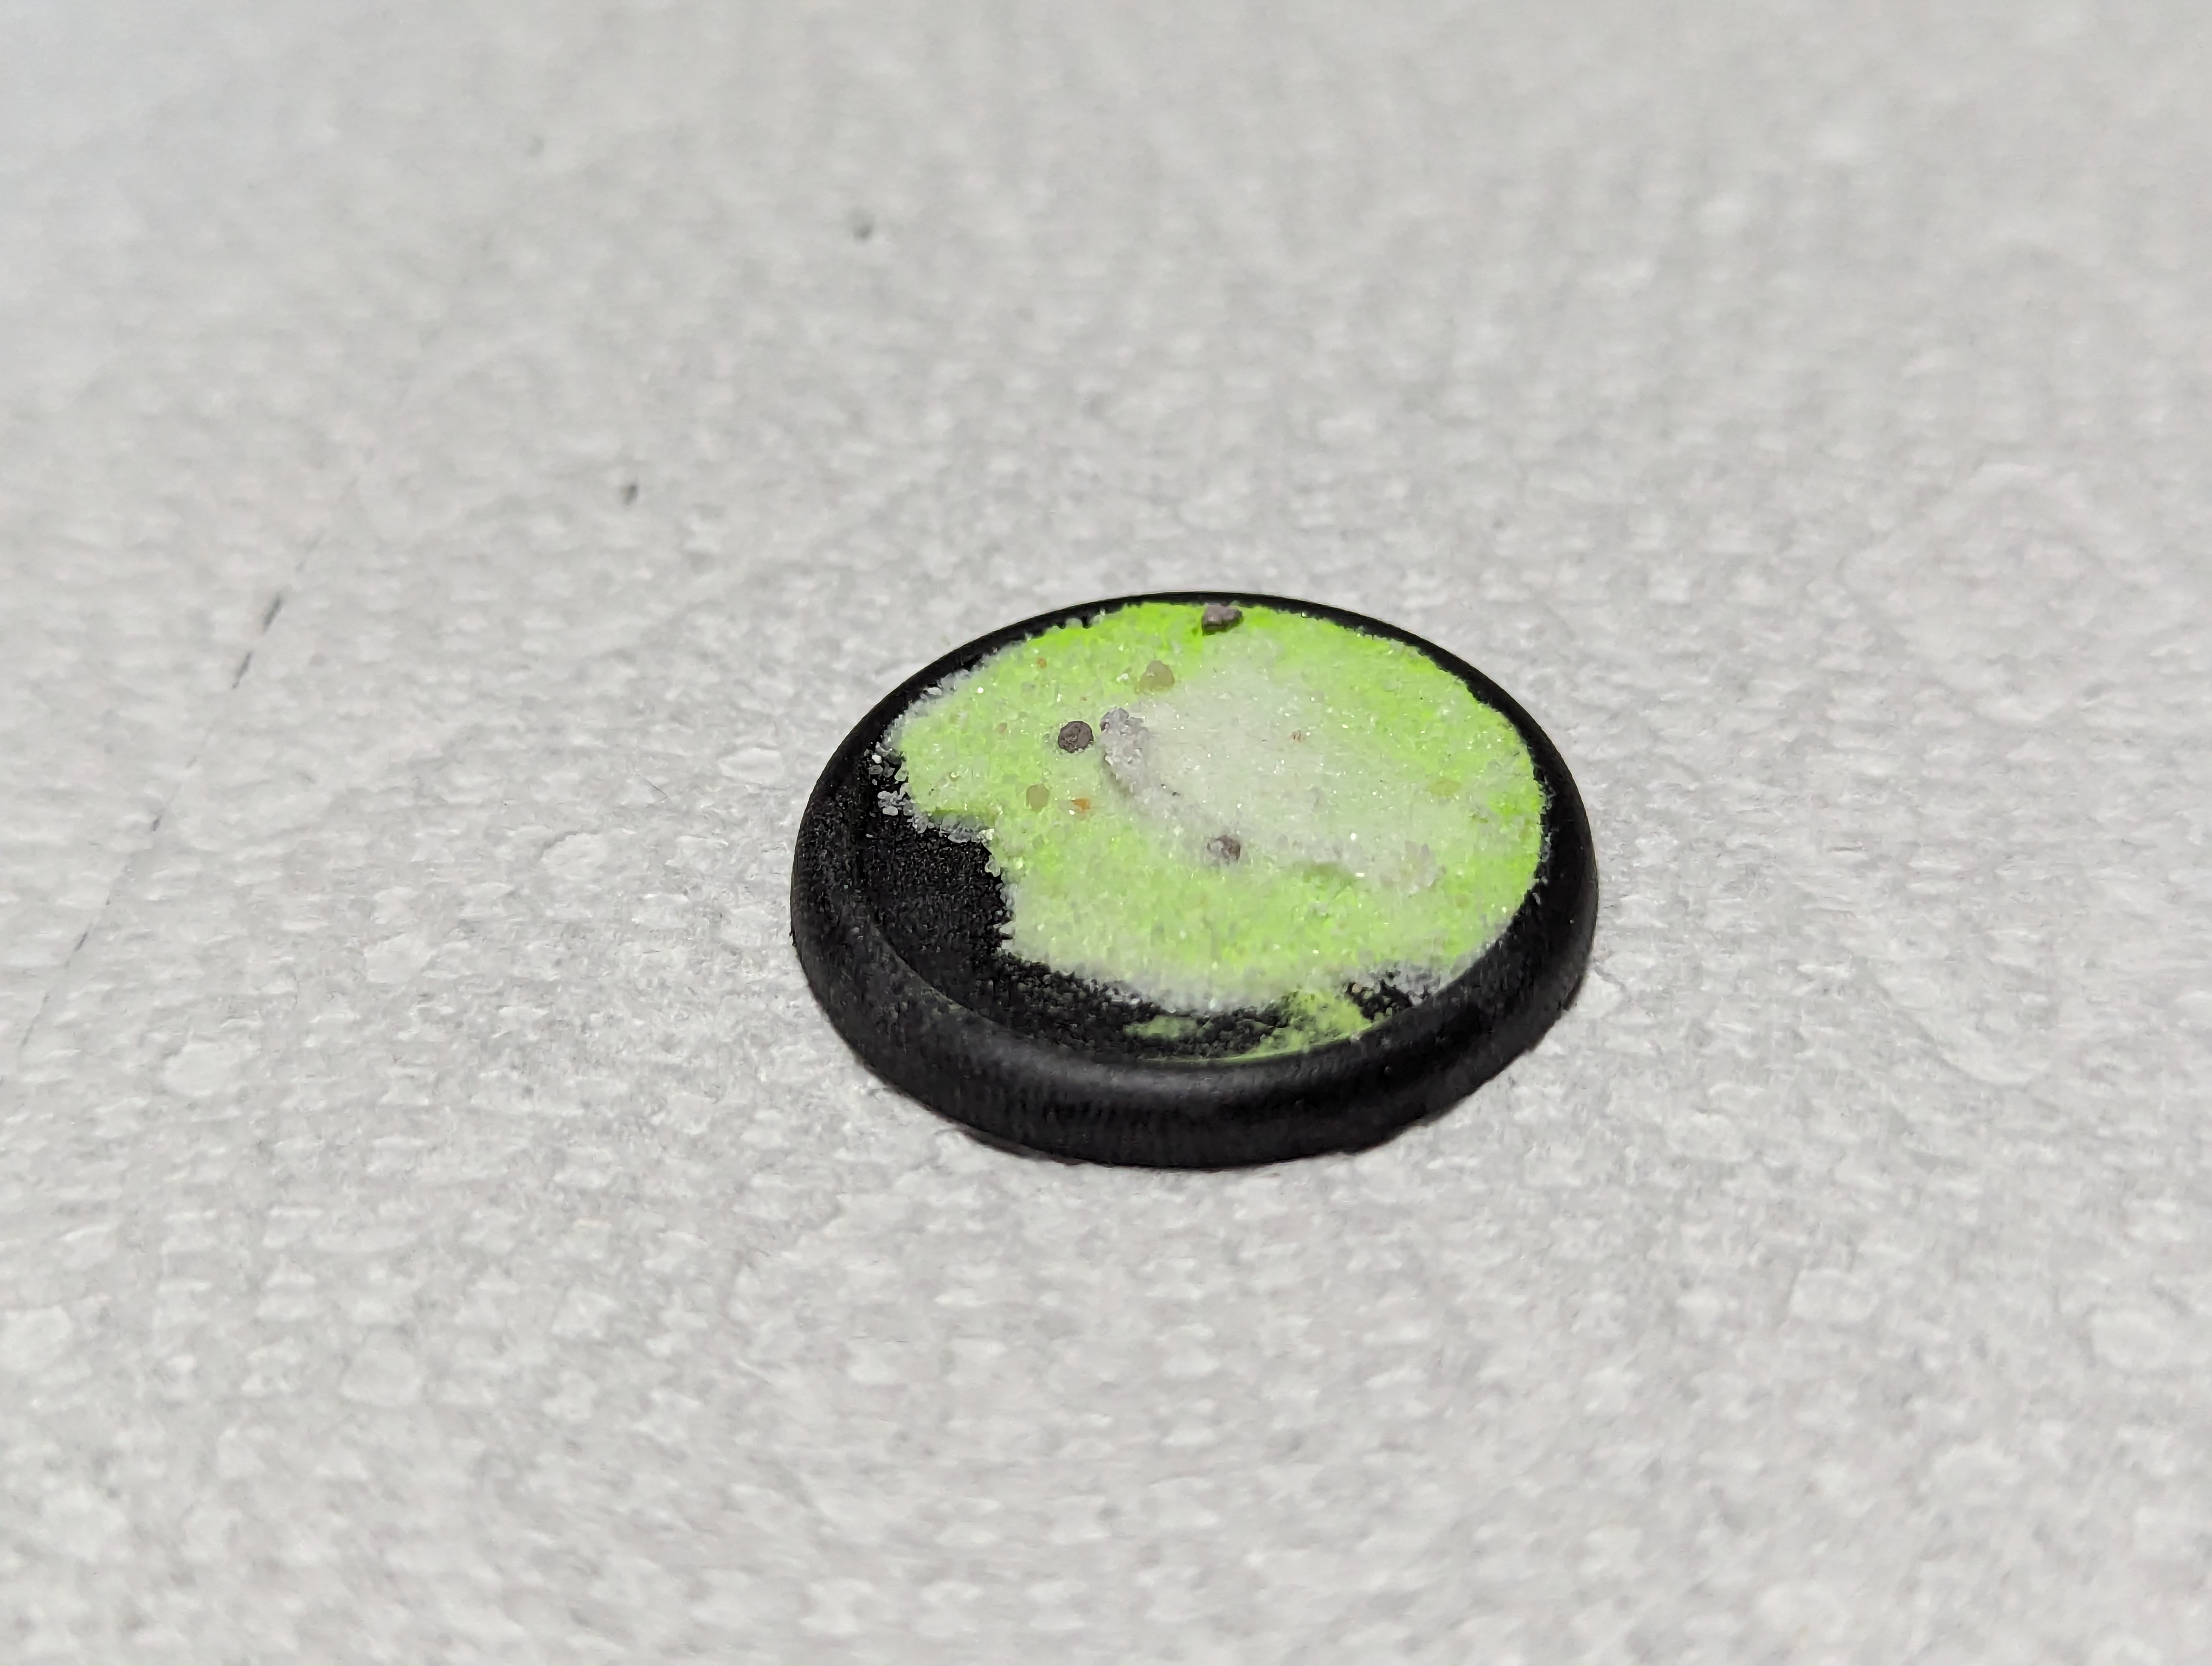
McMourning is all about poison, so his crew is based up on simple dirt bases with little rivers and puddles of poisonous fluid.
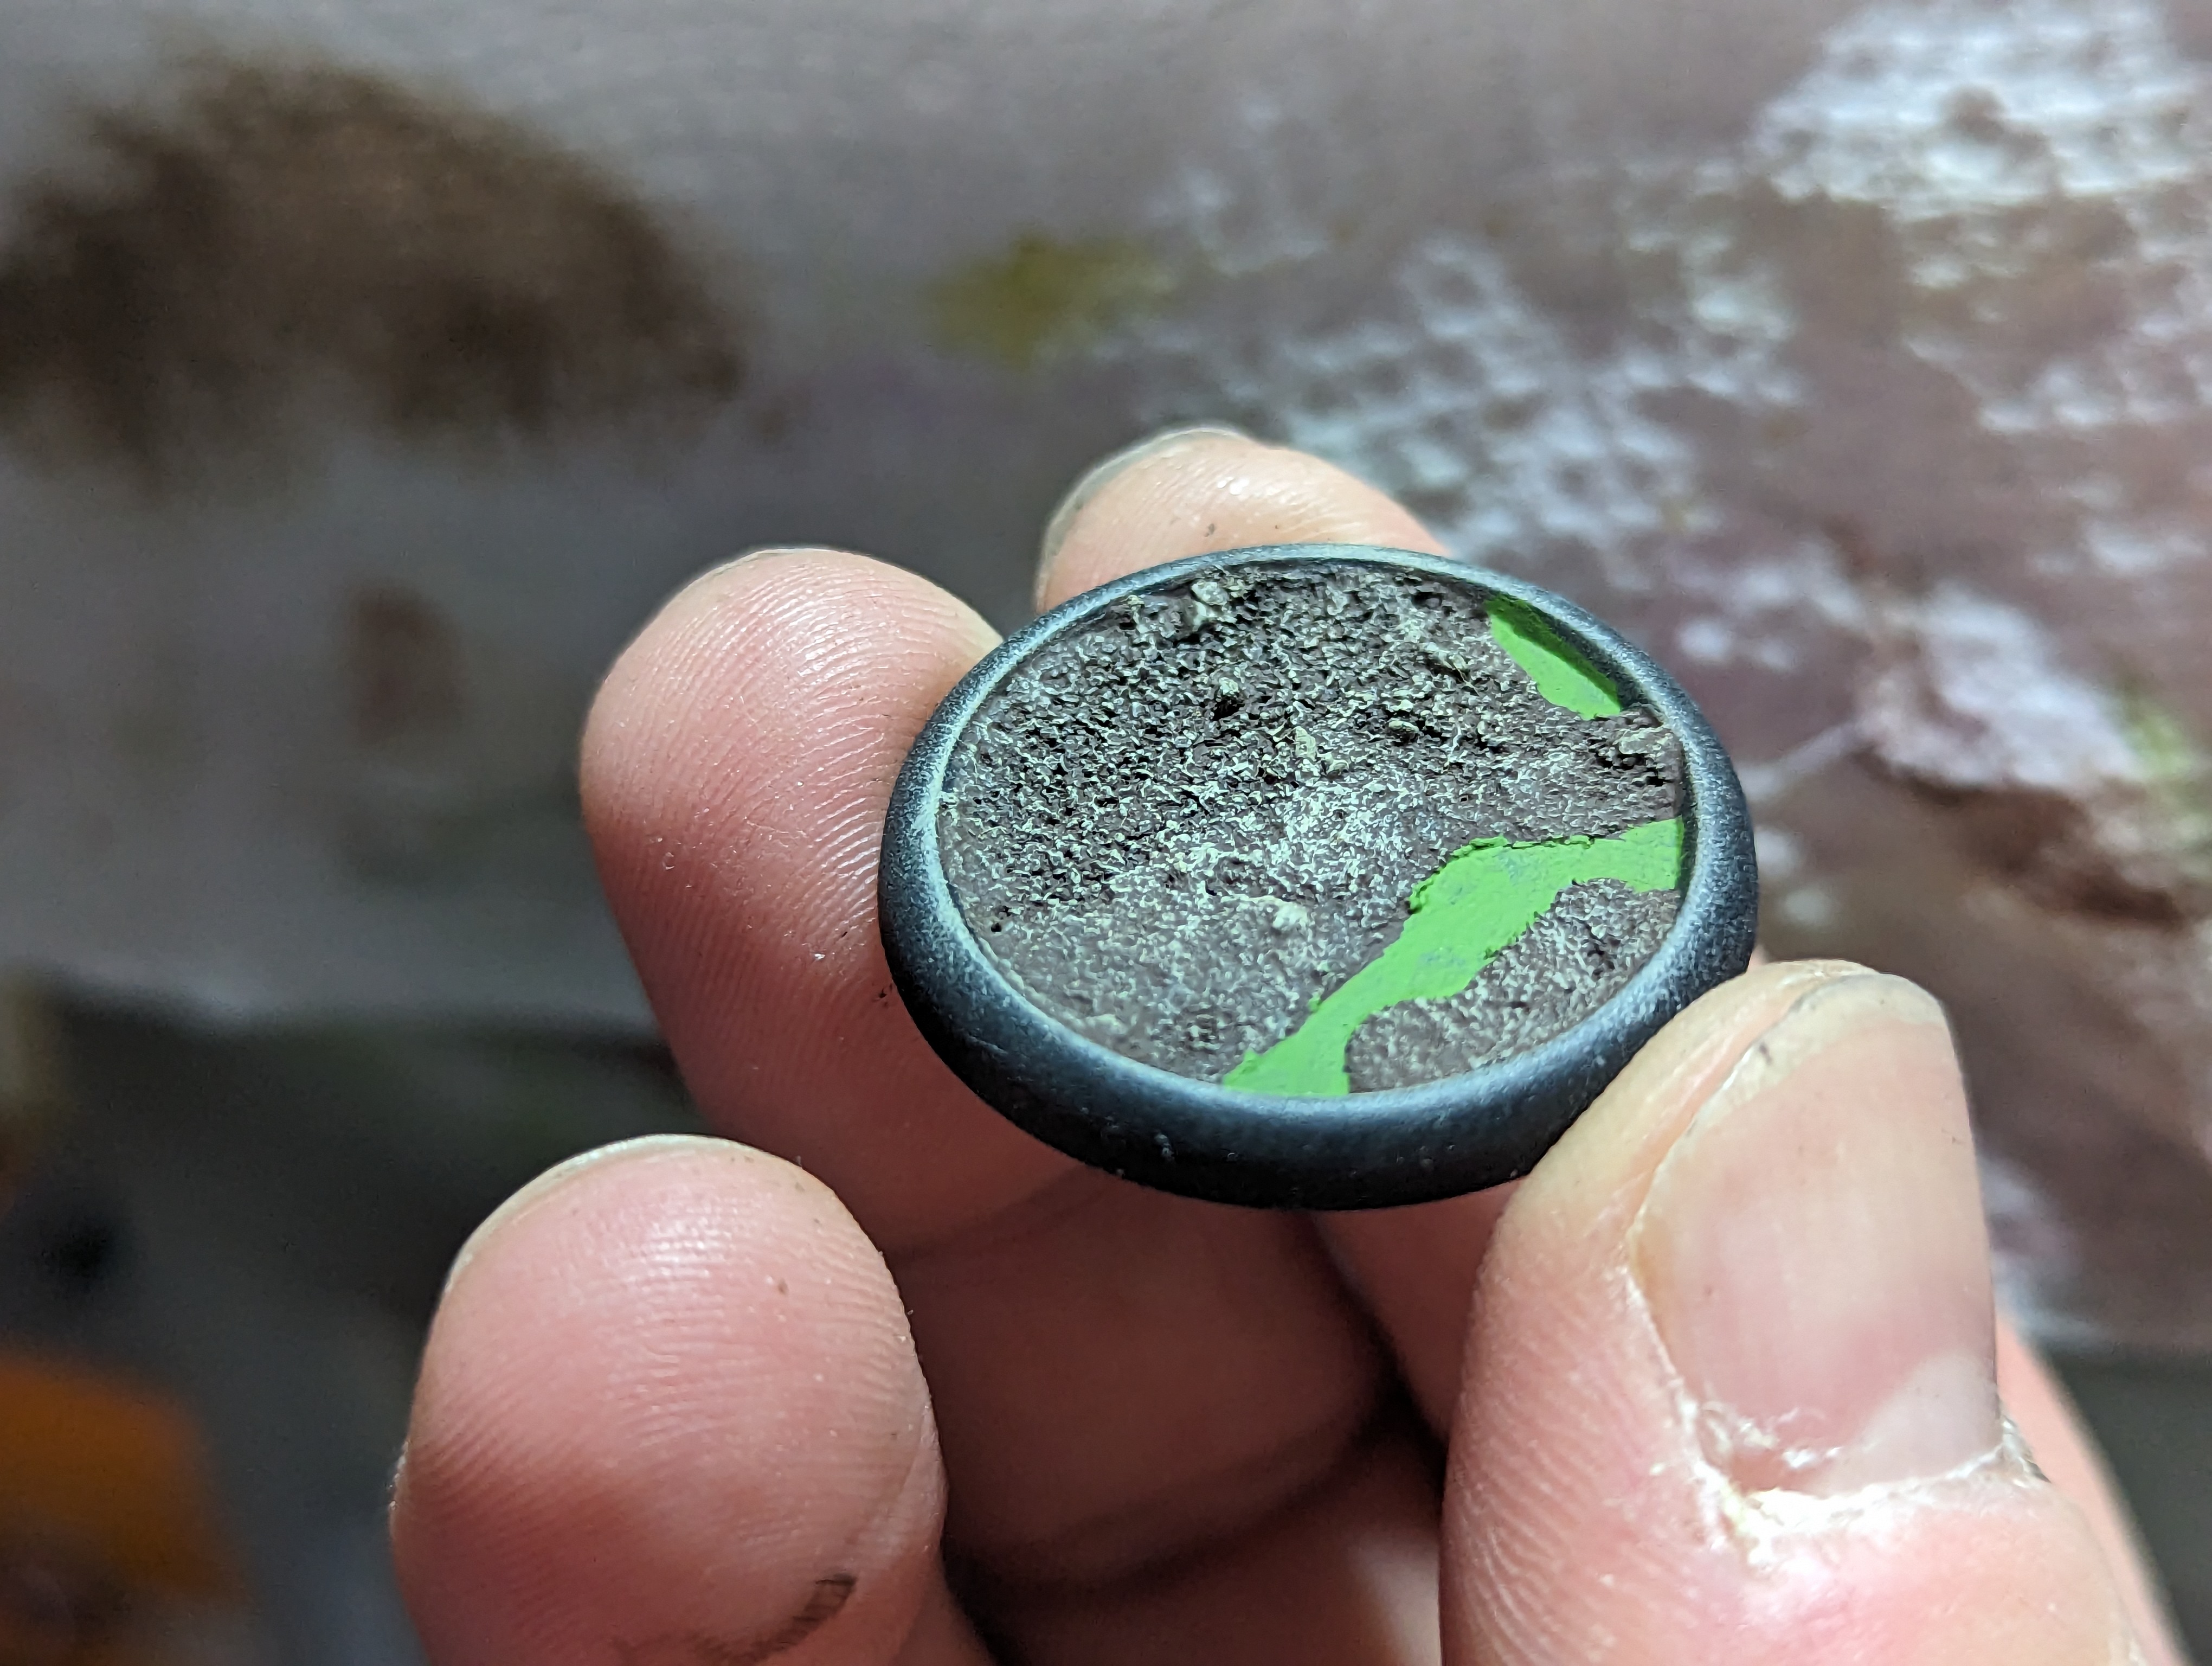
To combine them, I think ill do a desert base and put some green liquid in the cracks. Ezpz

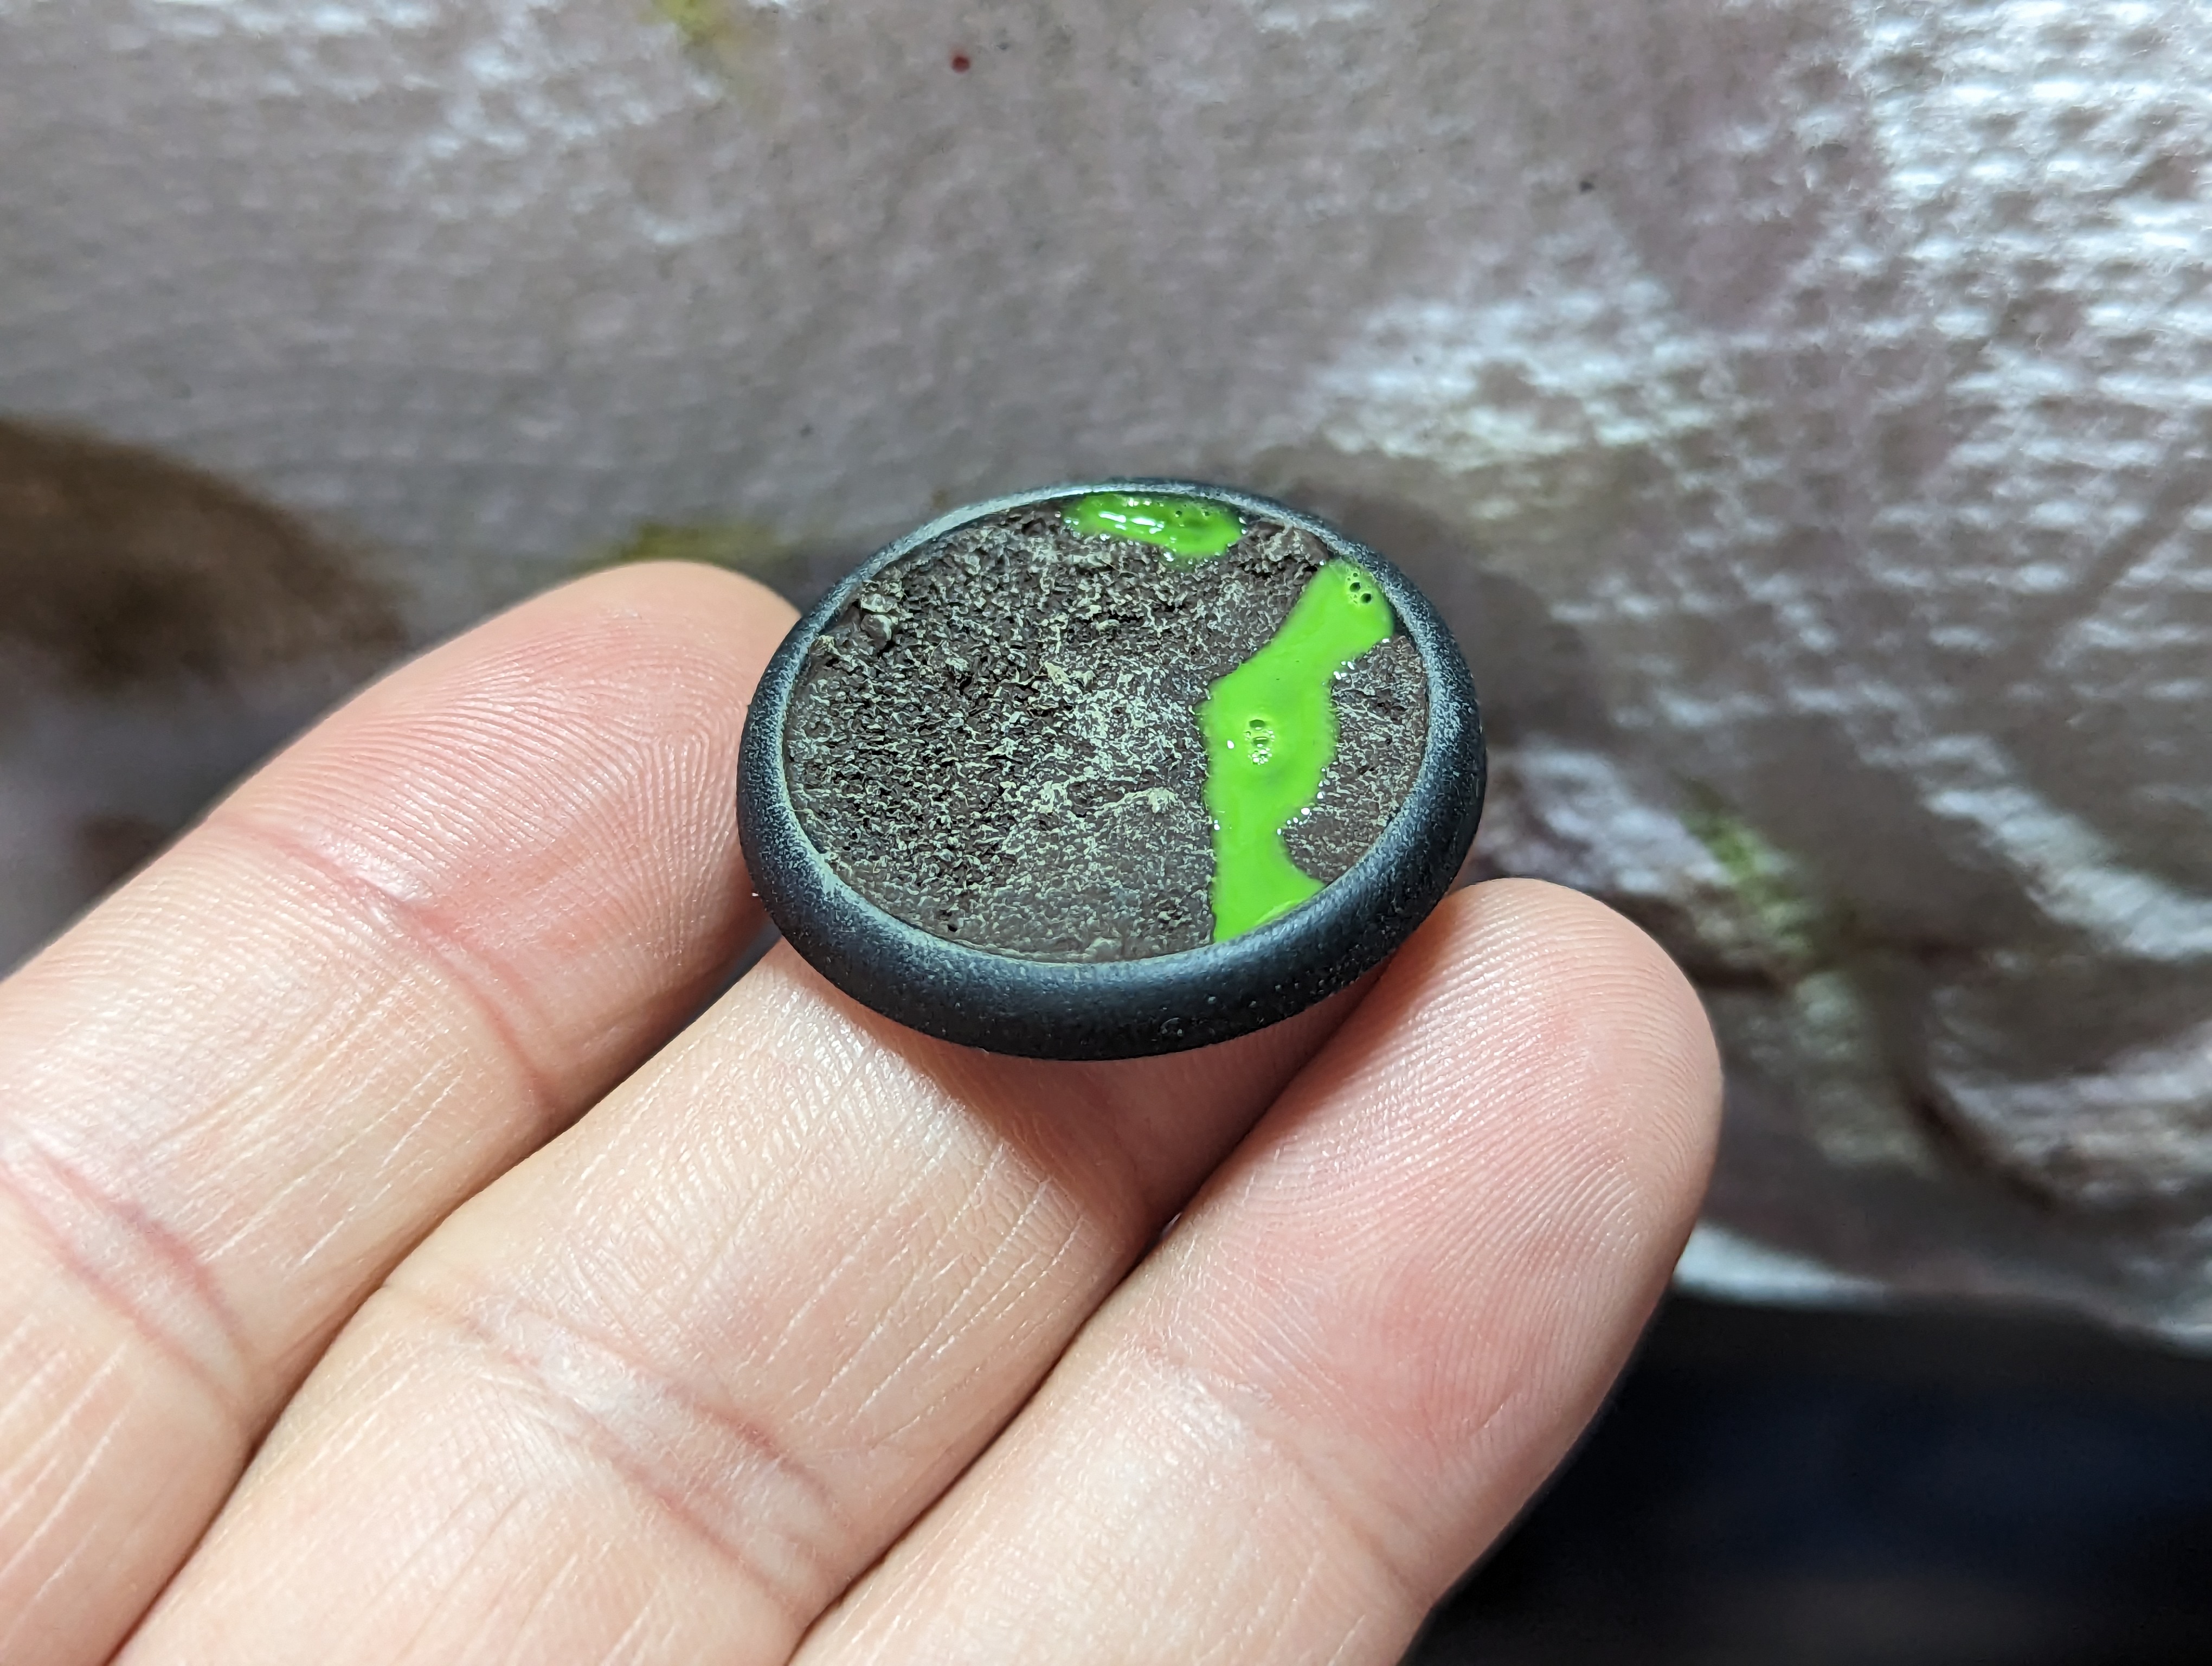
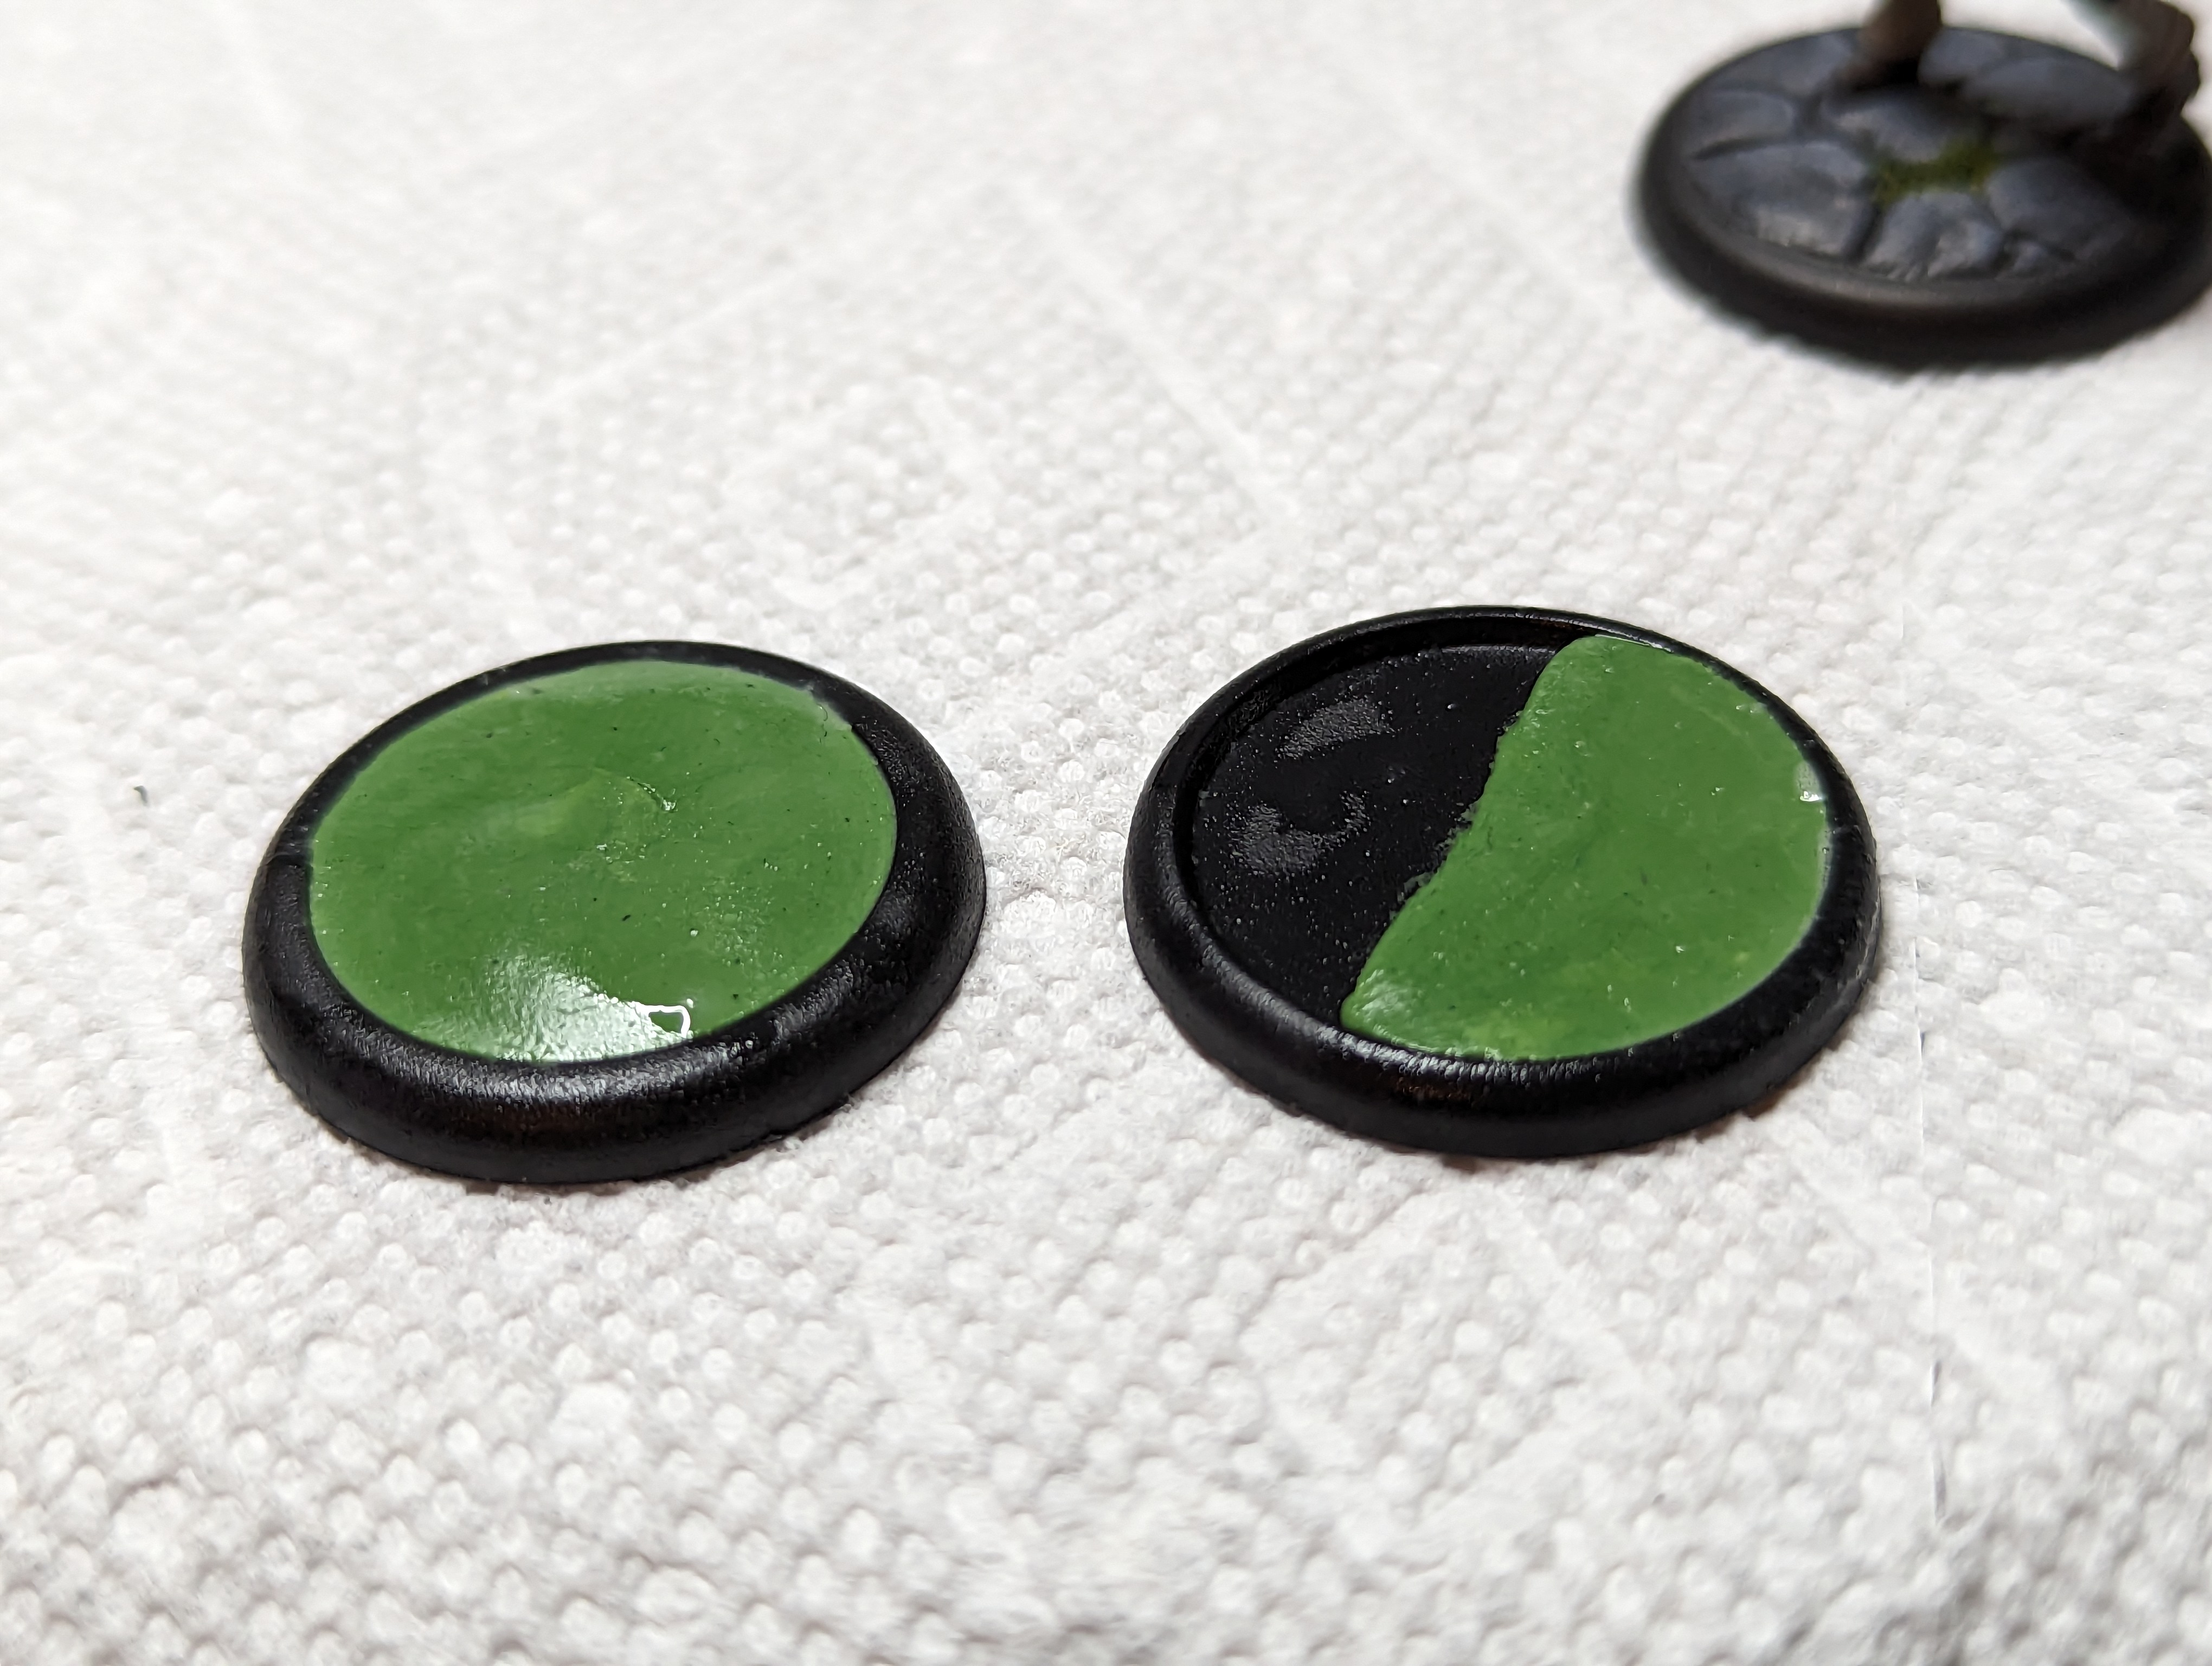
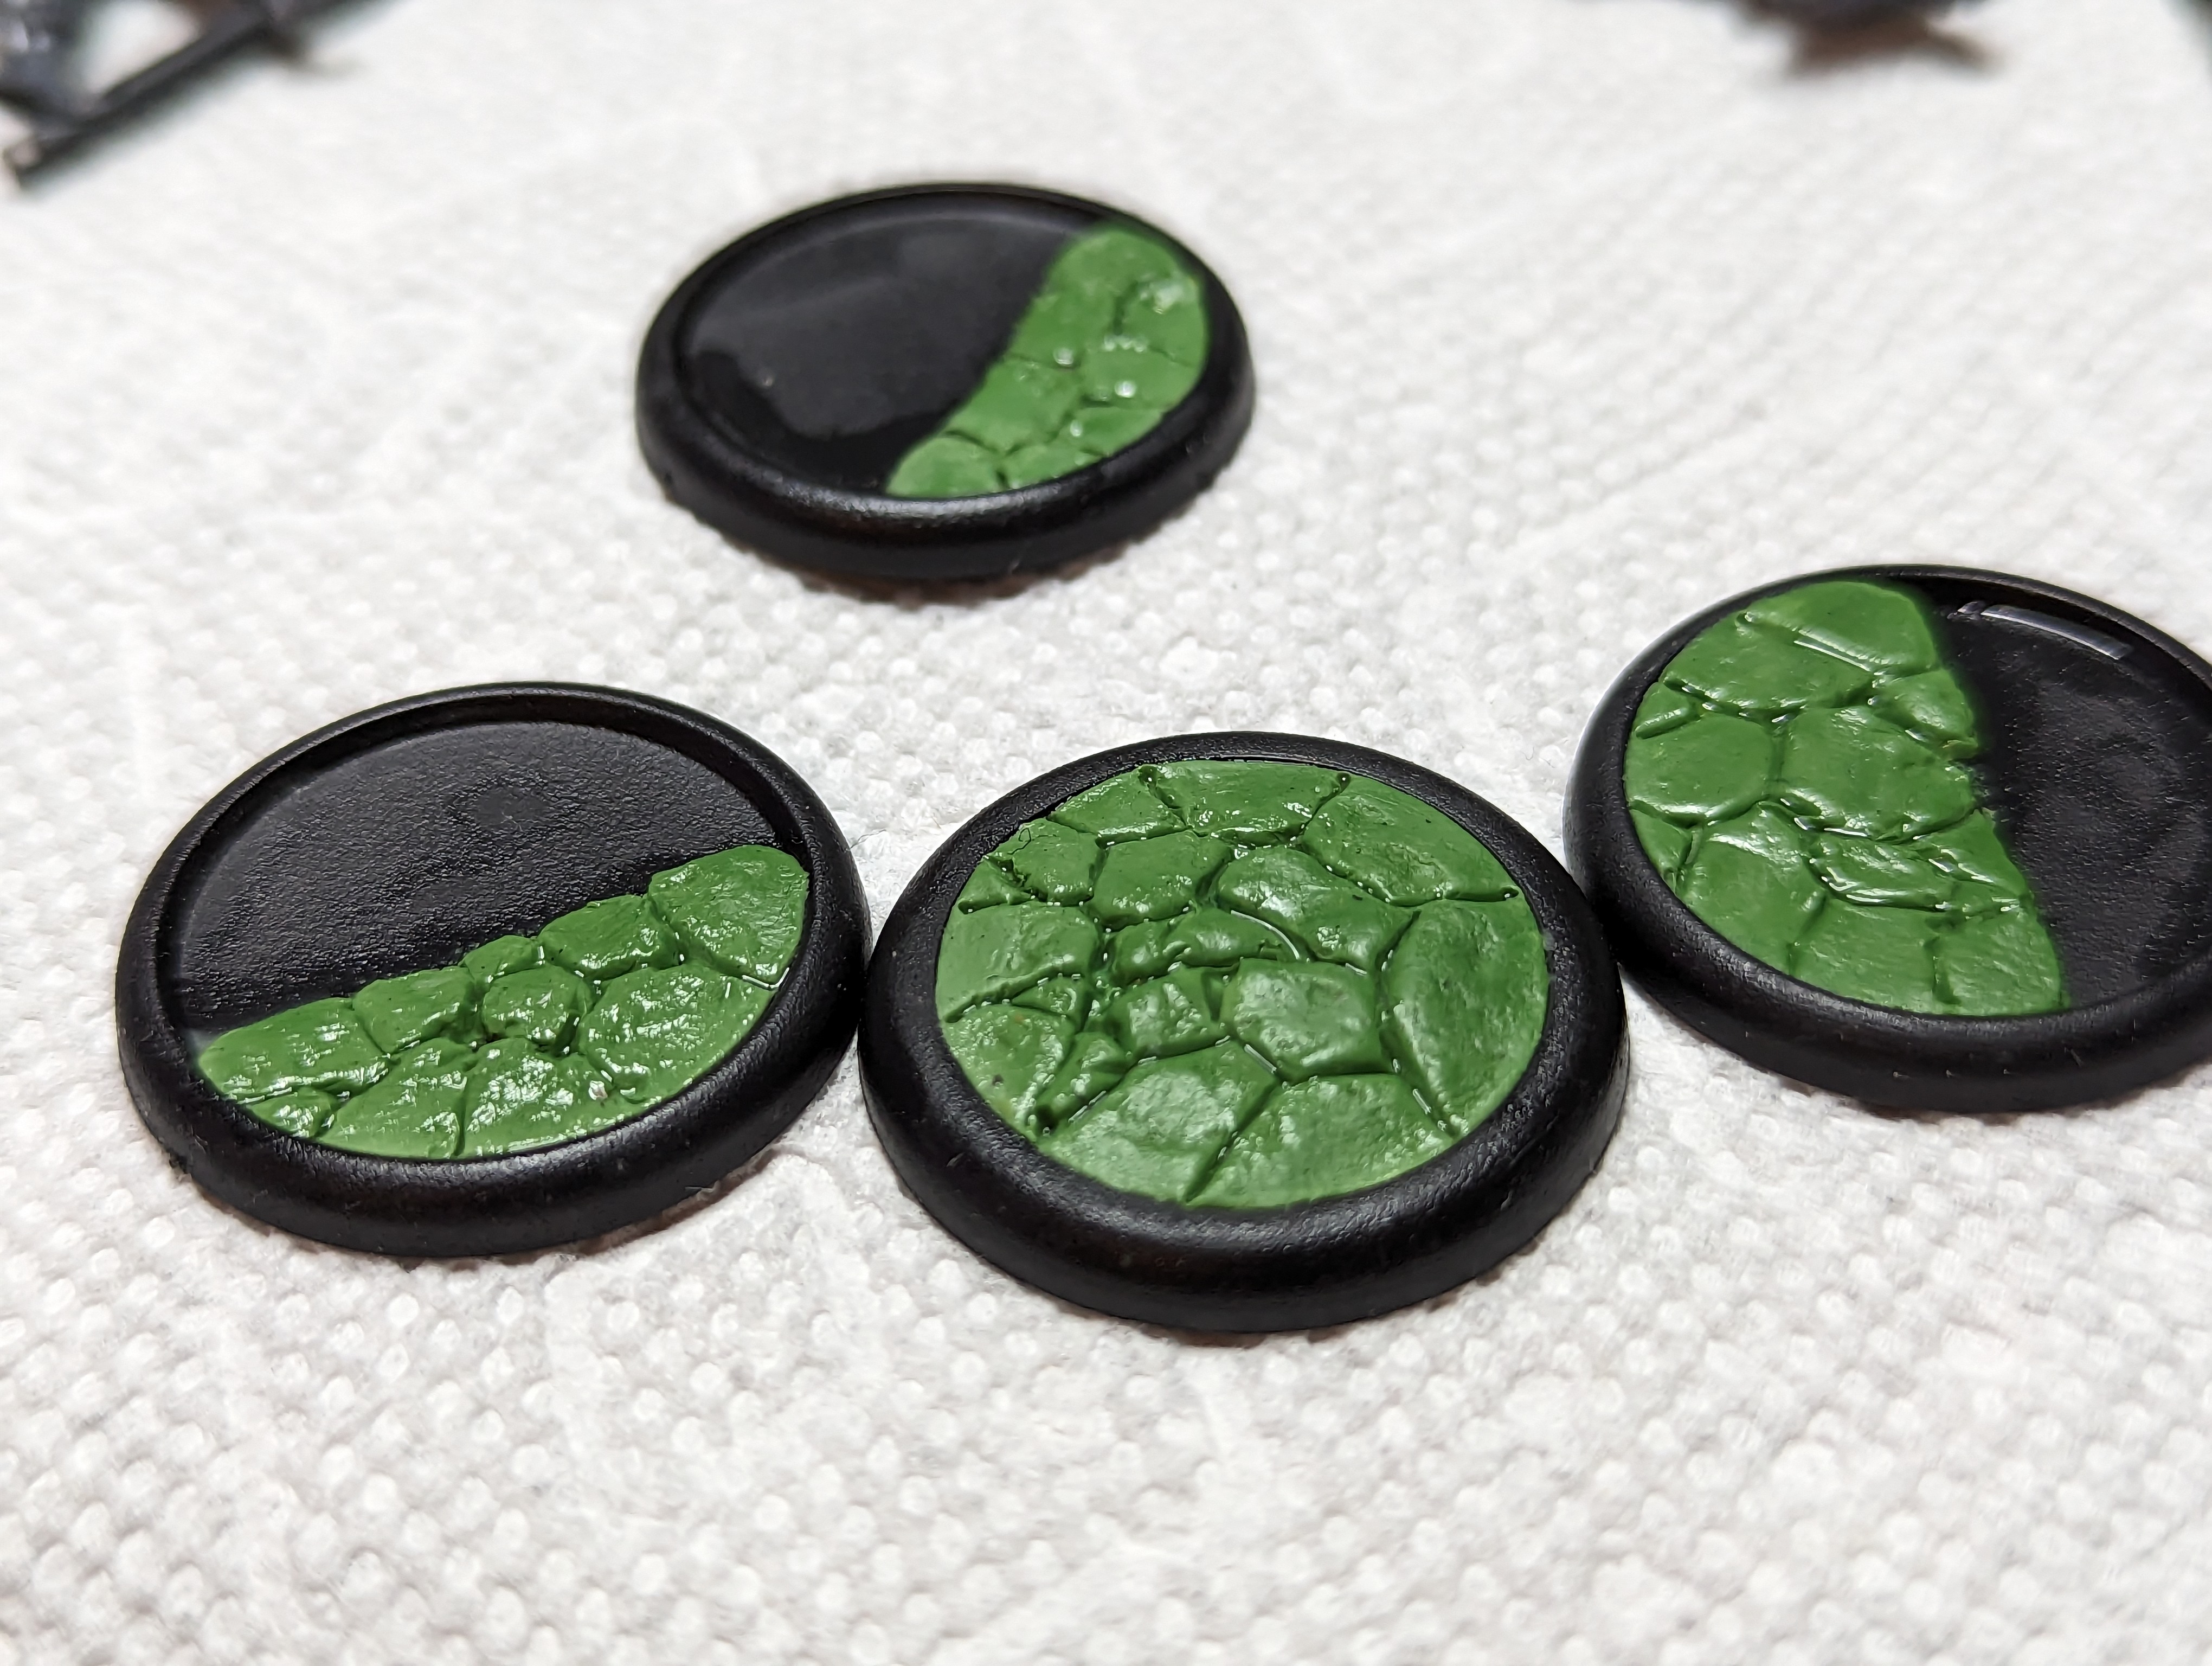
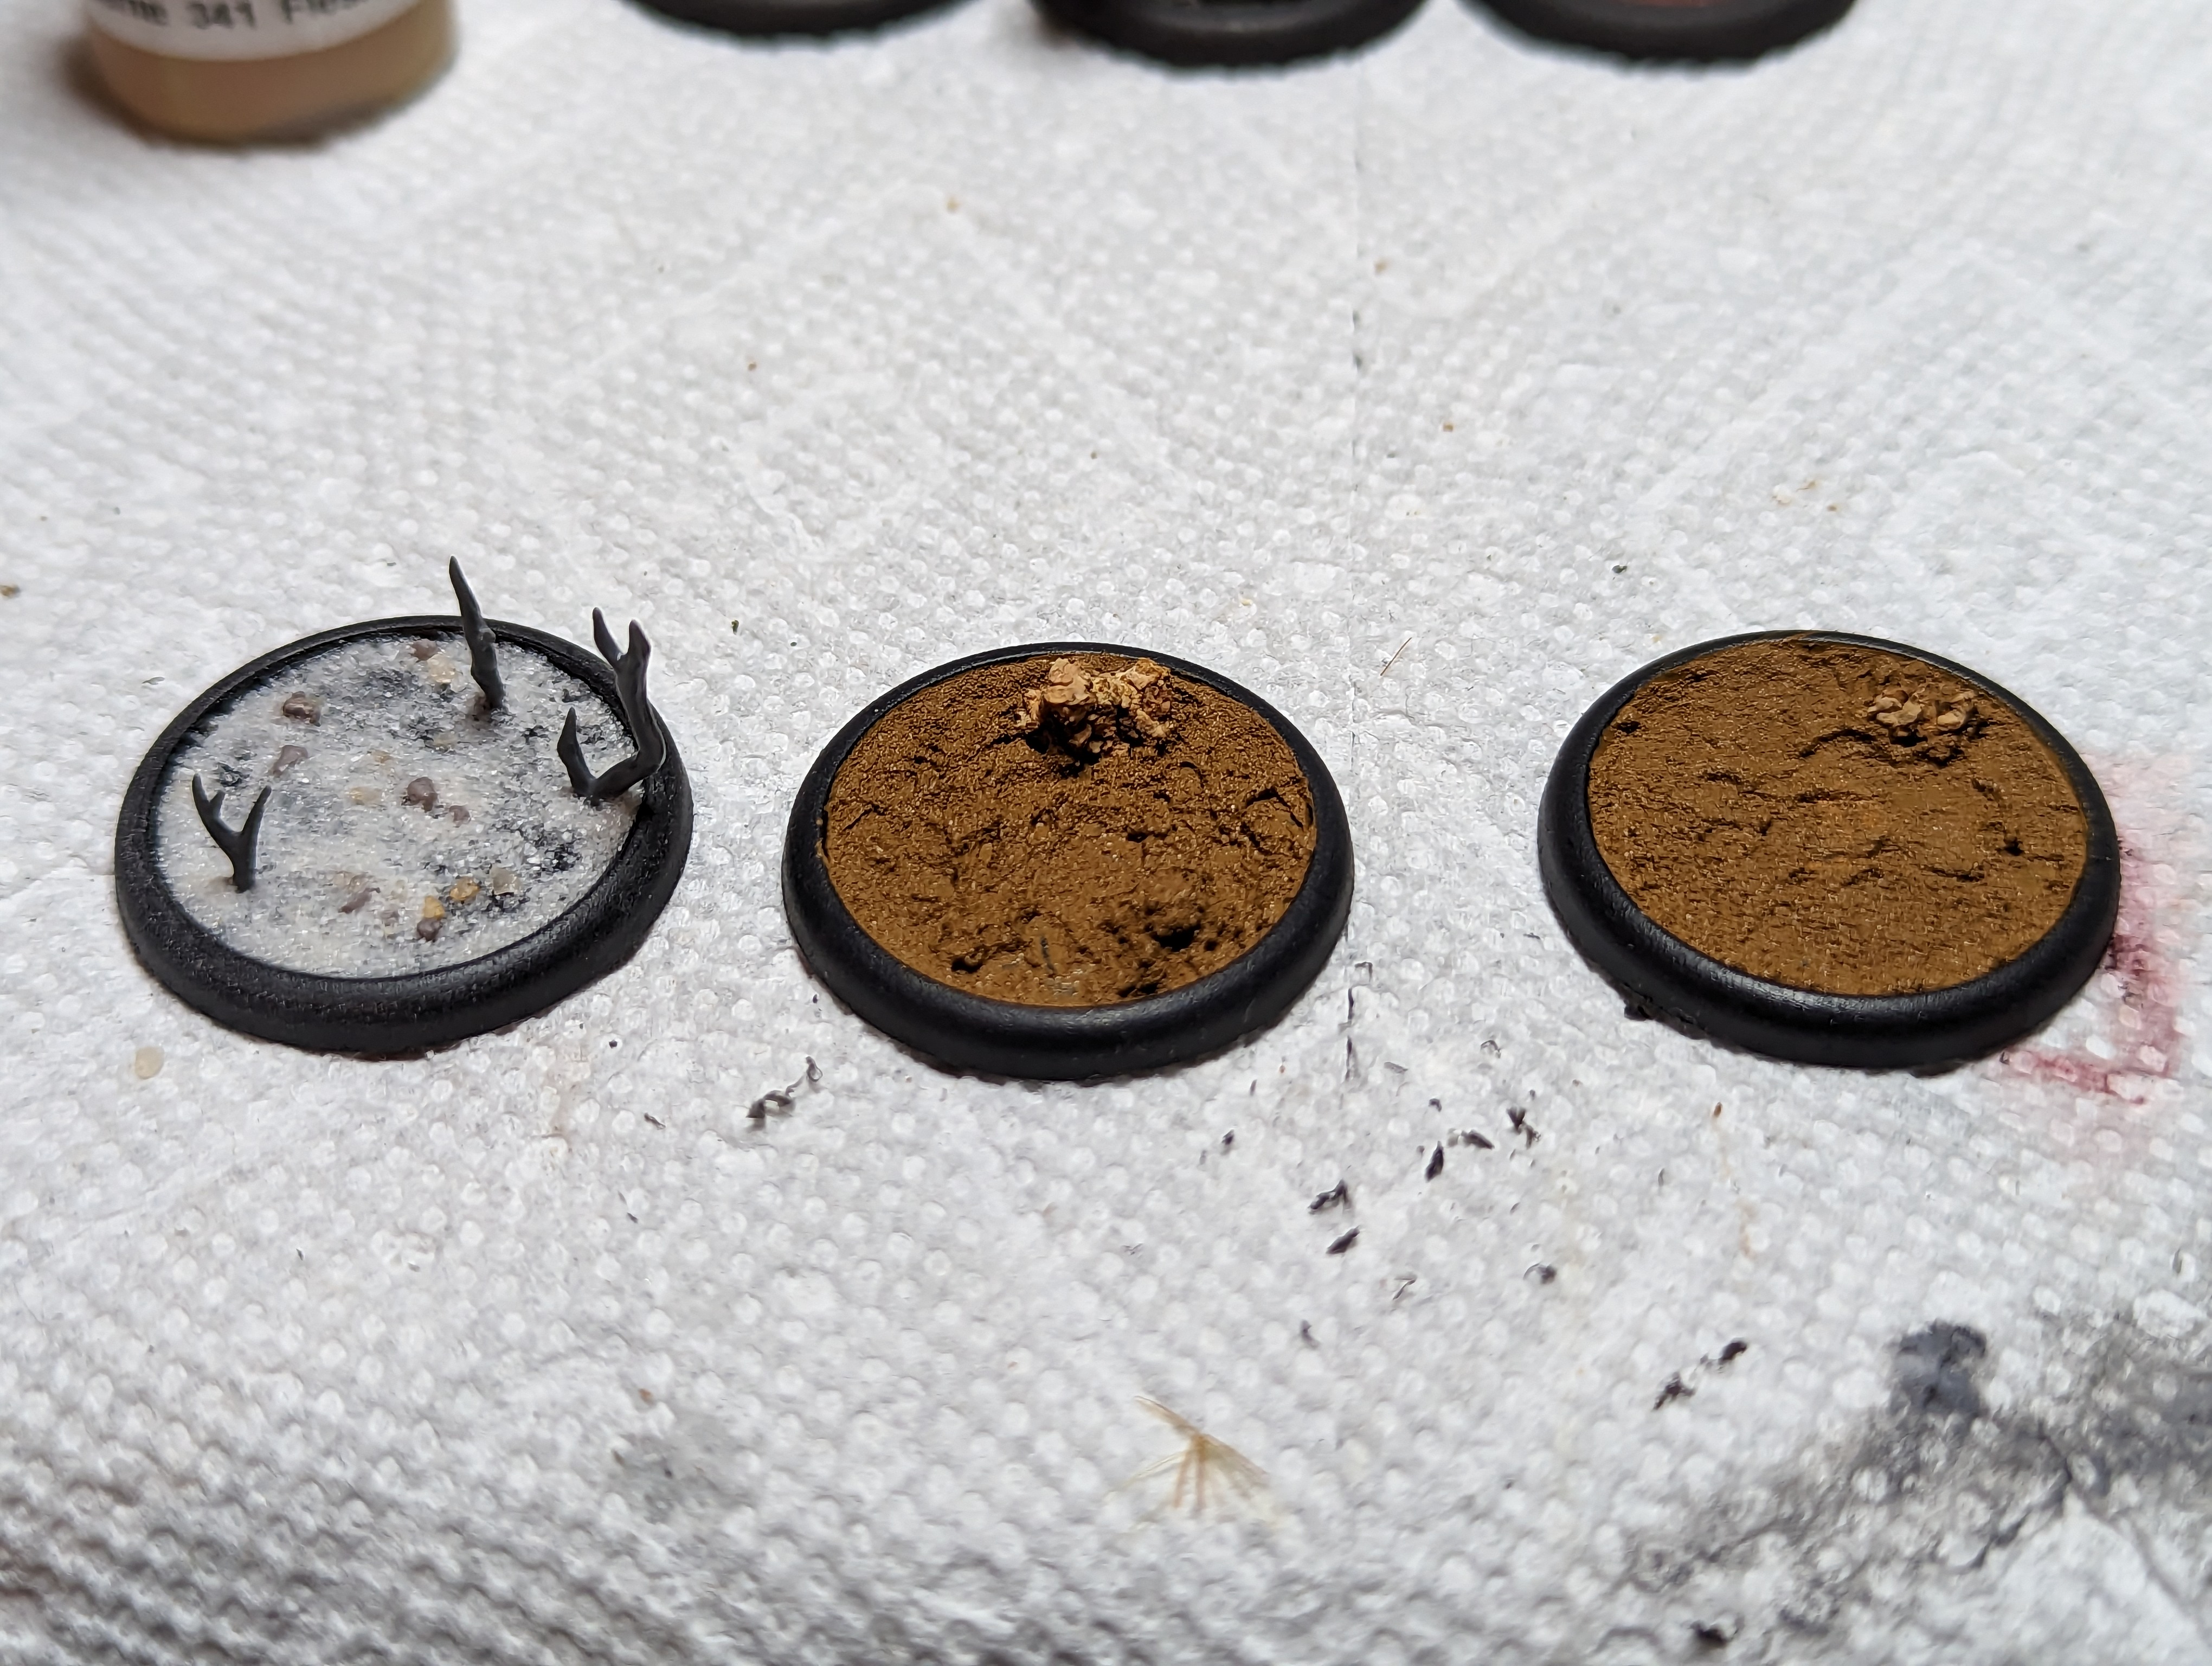
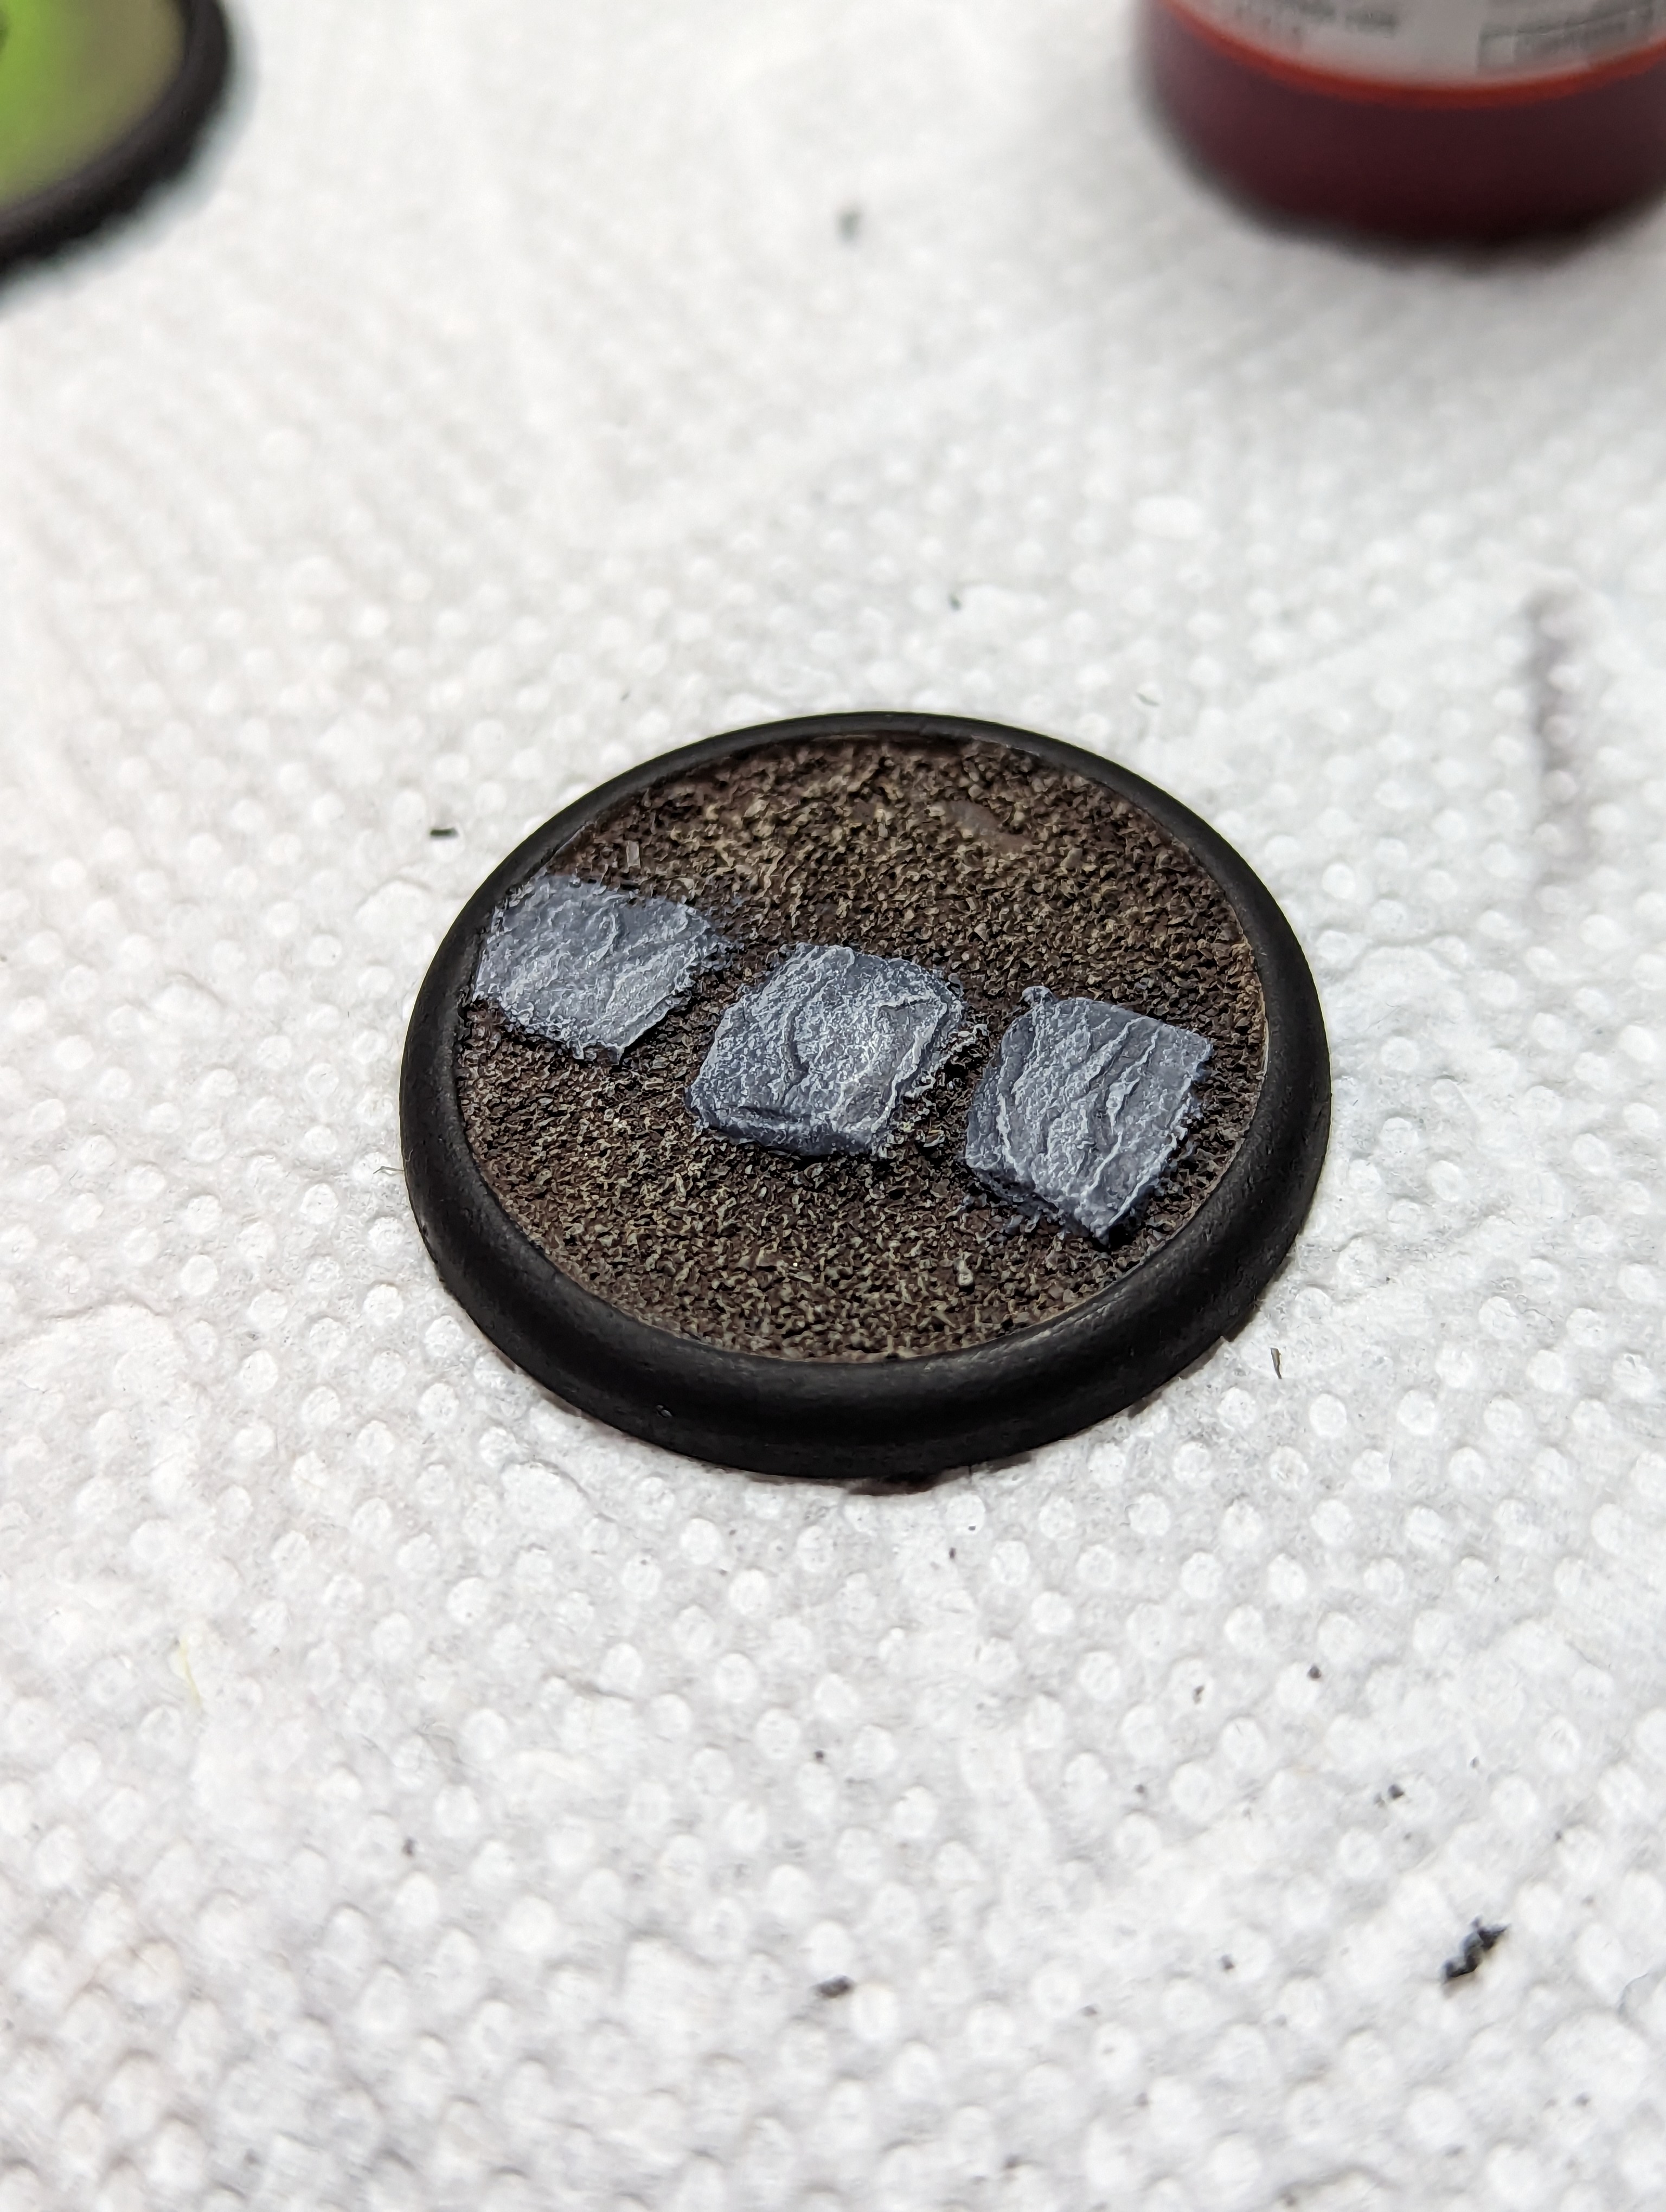
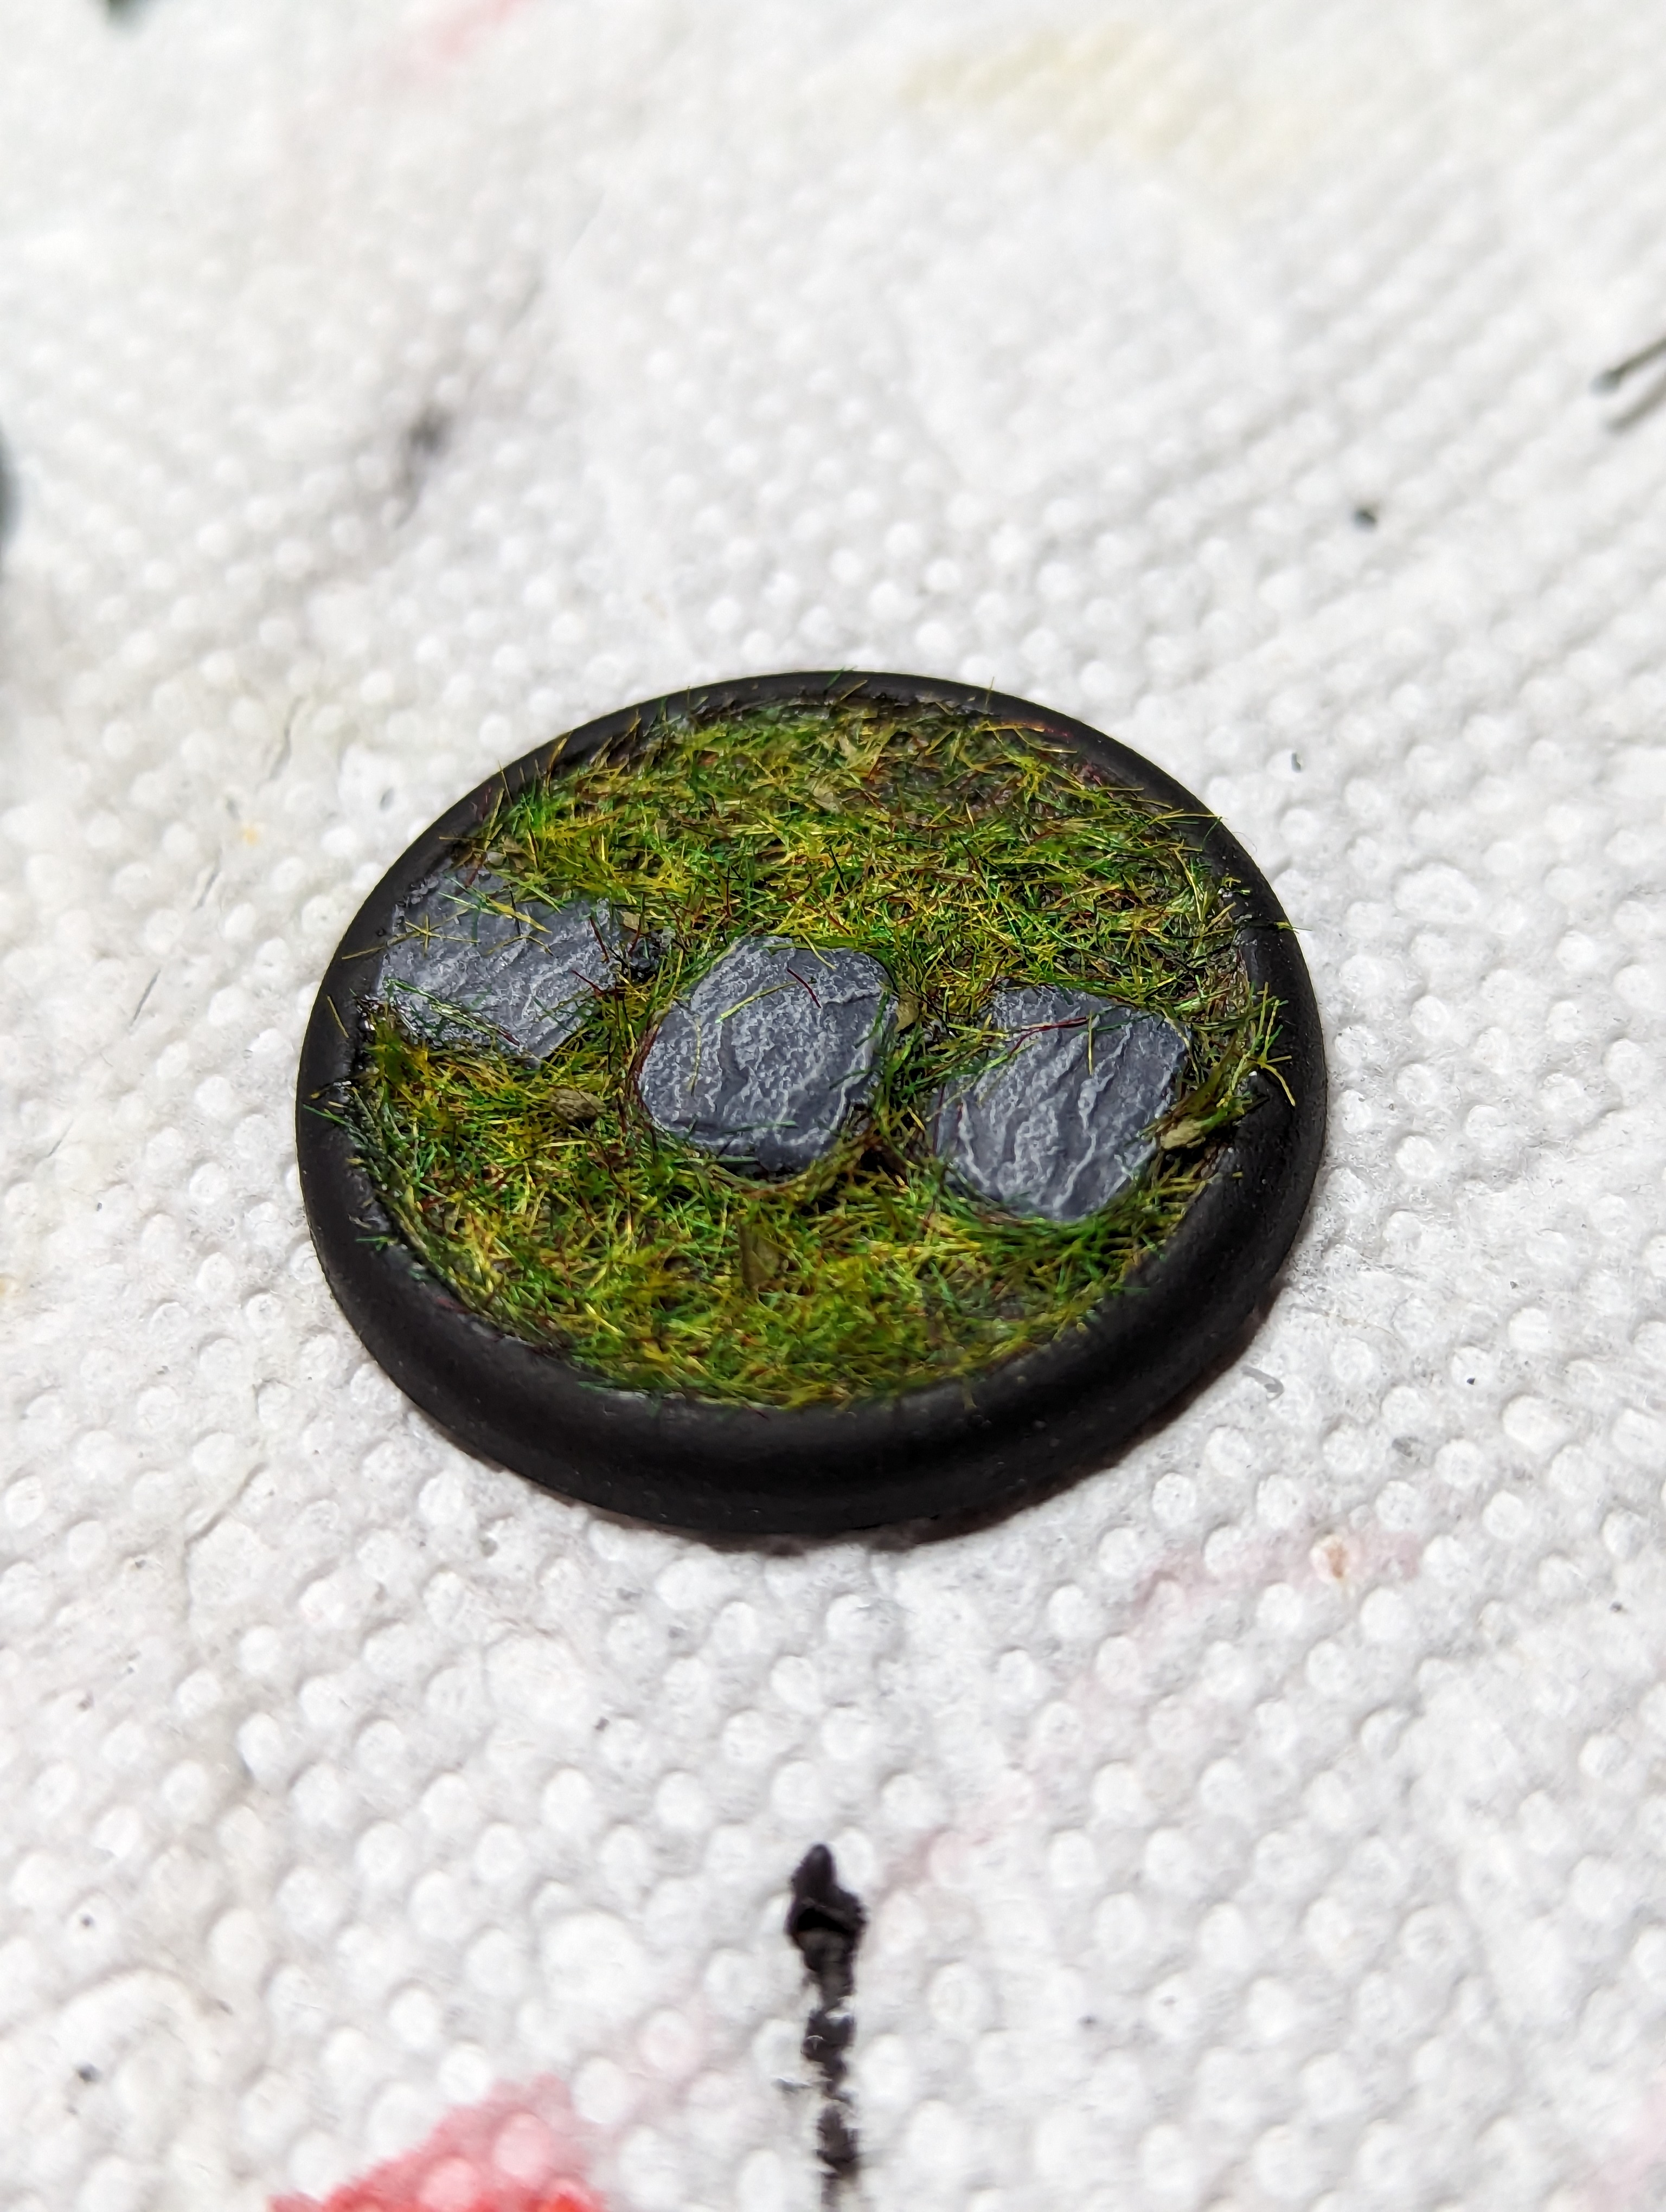
For the poison base, I started off with a simple sandy base, leaving a little channel for the water effects. I primed it, painted it a dark brown, and then drybrushed up to a tan. Then I painted 2 different greens into the channel, and filled it with water effects.
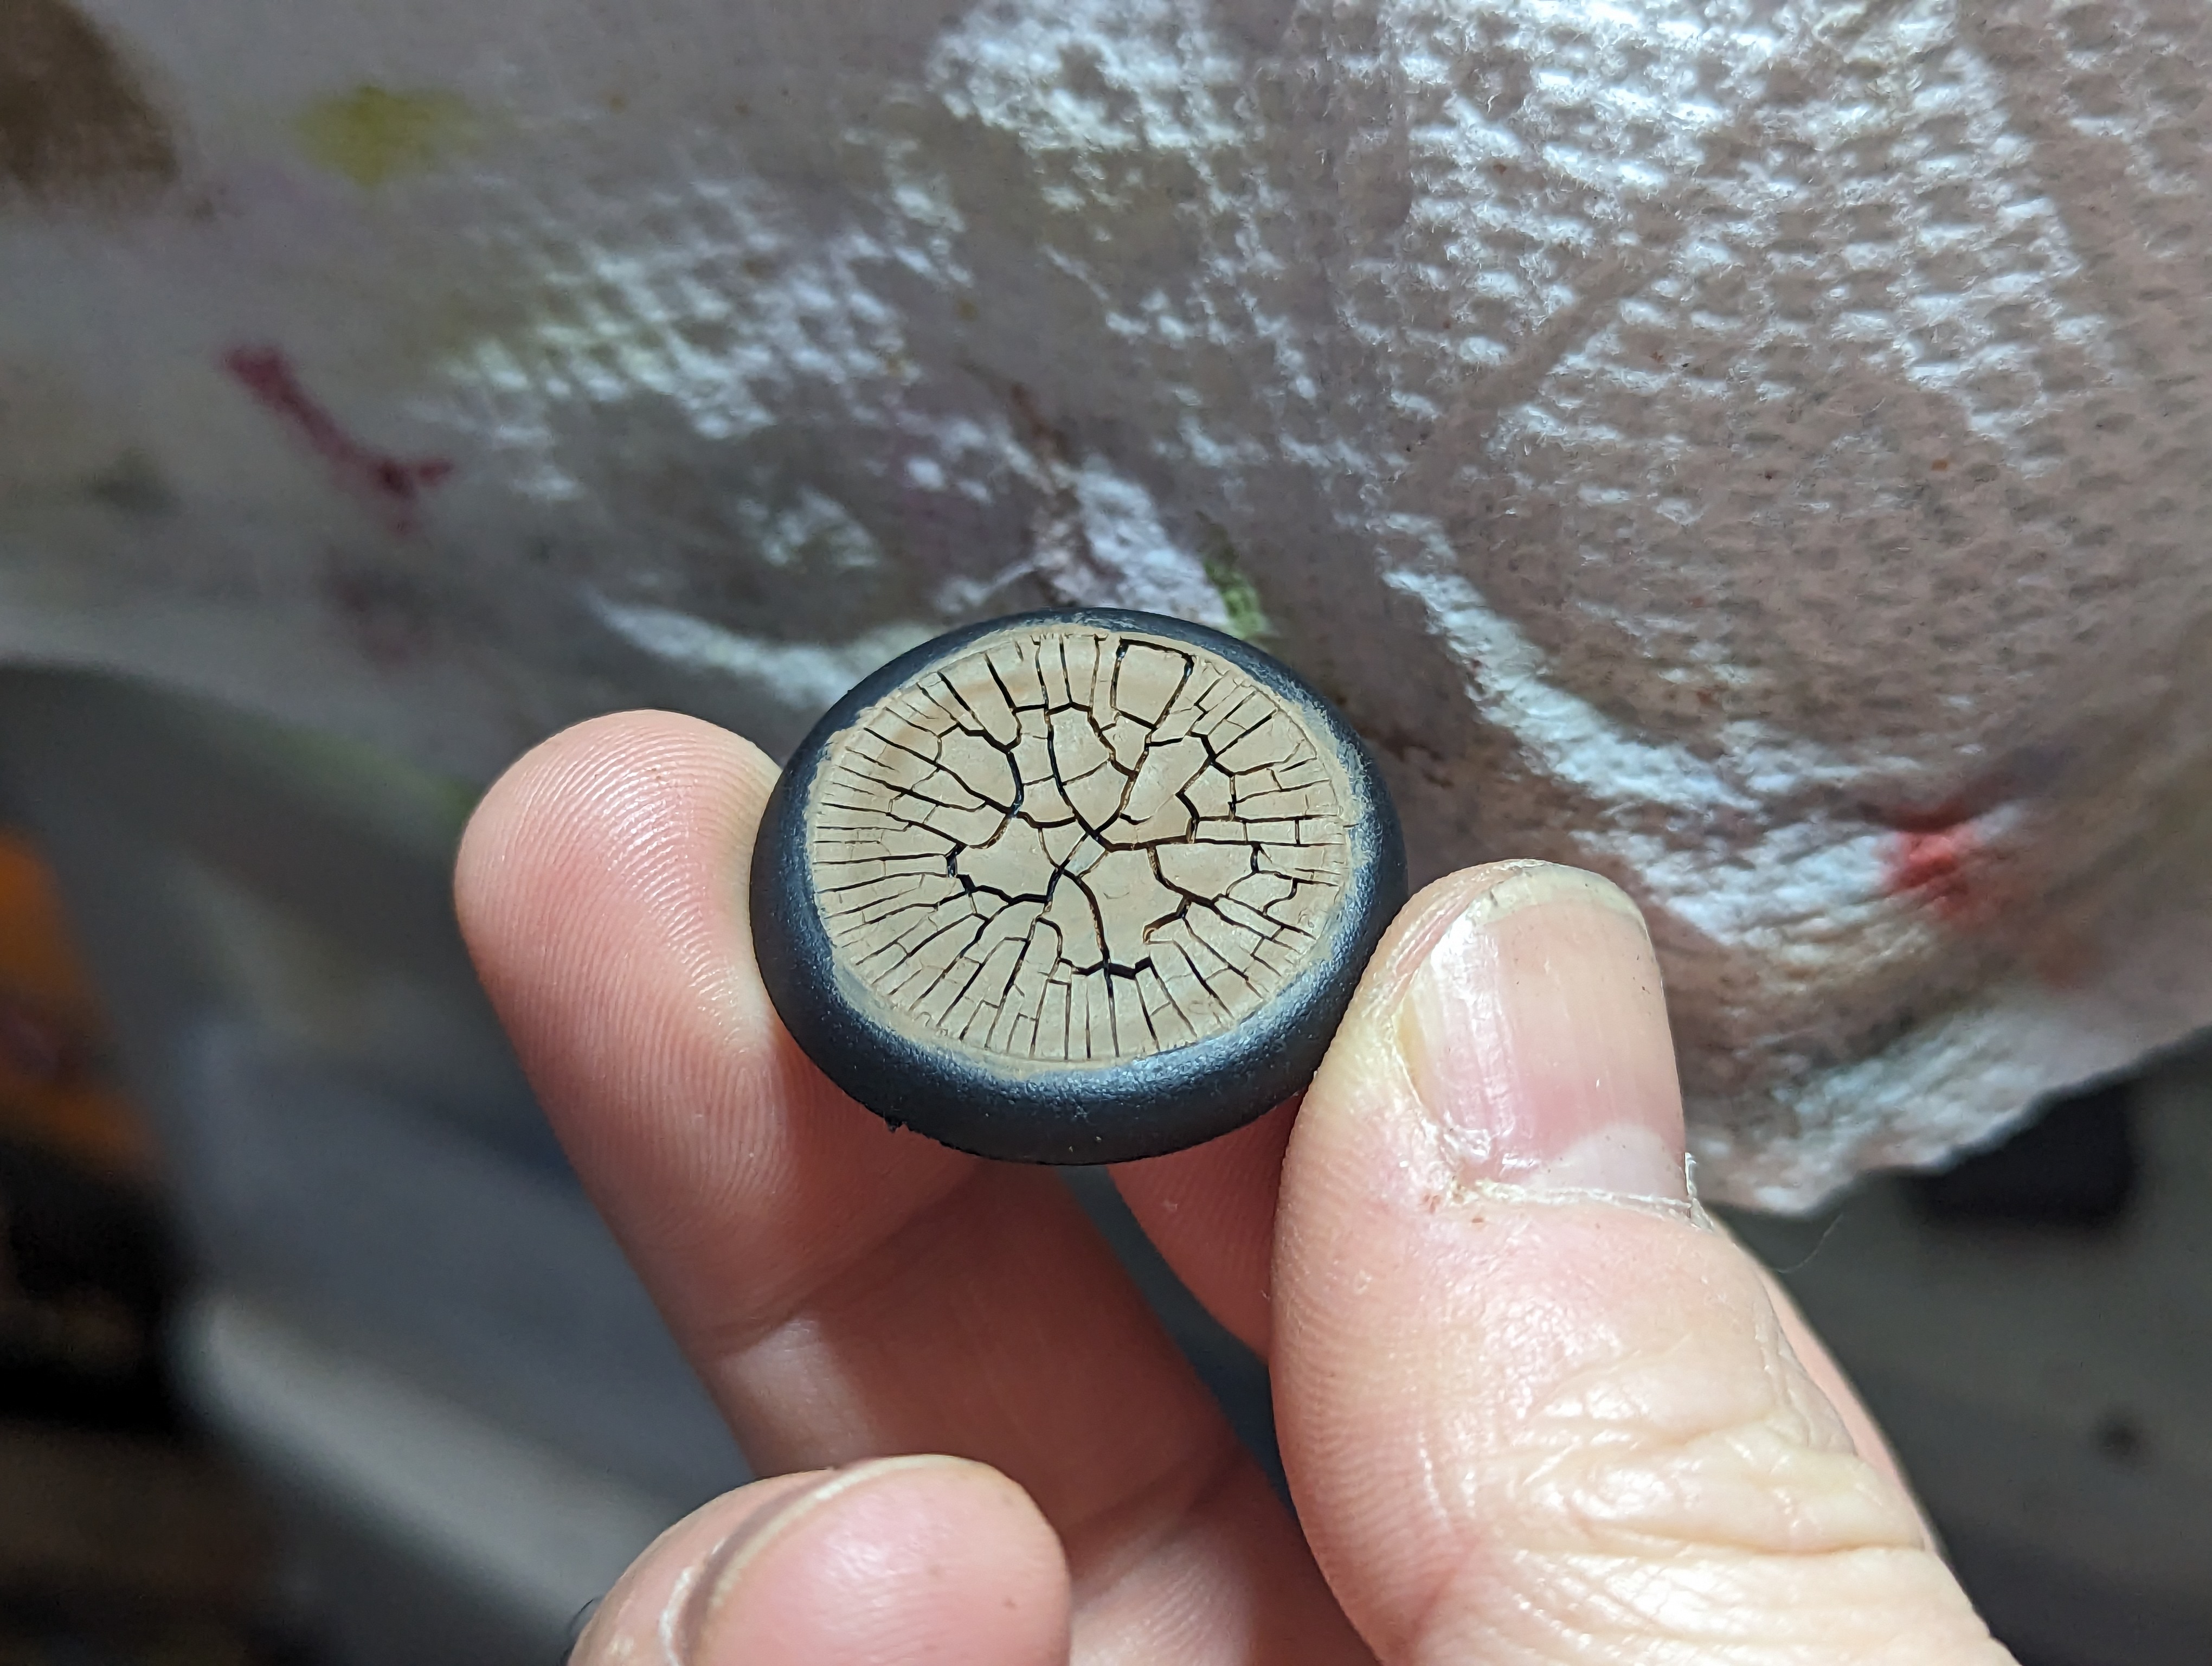
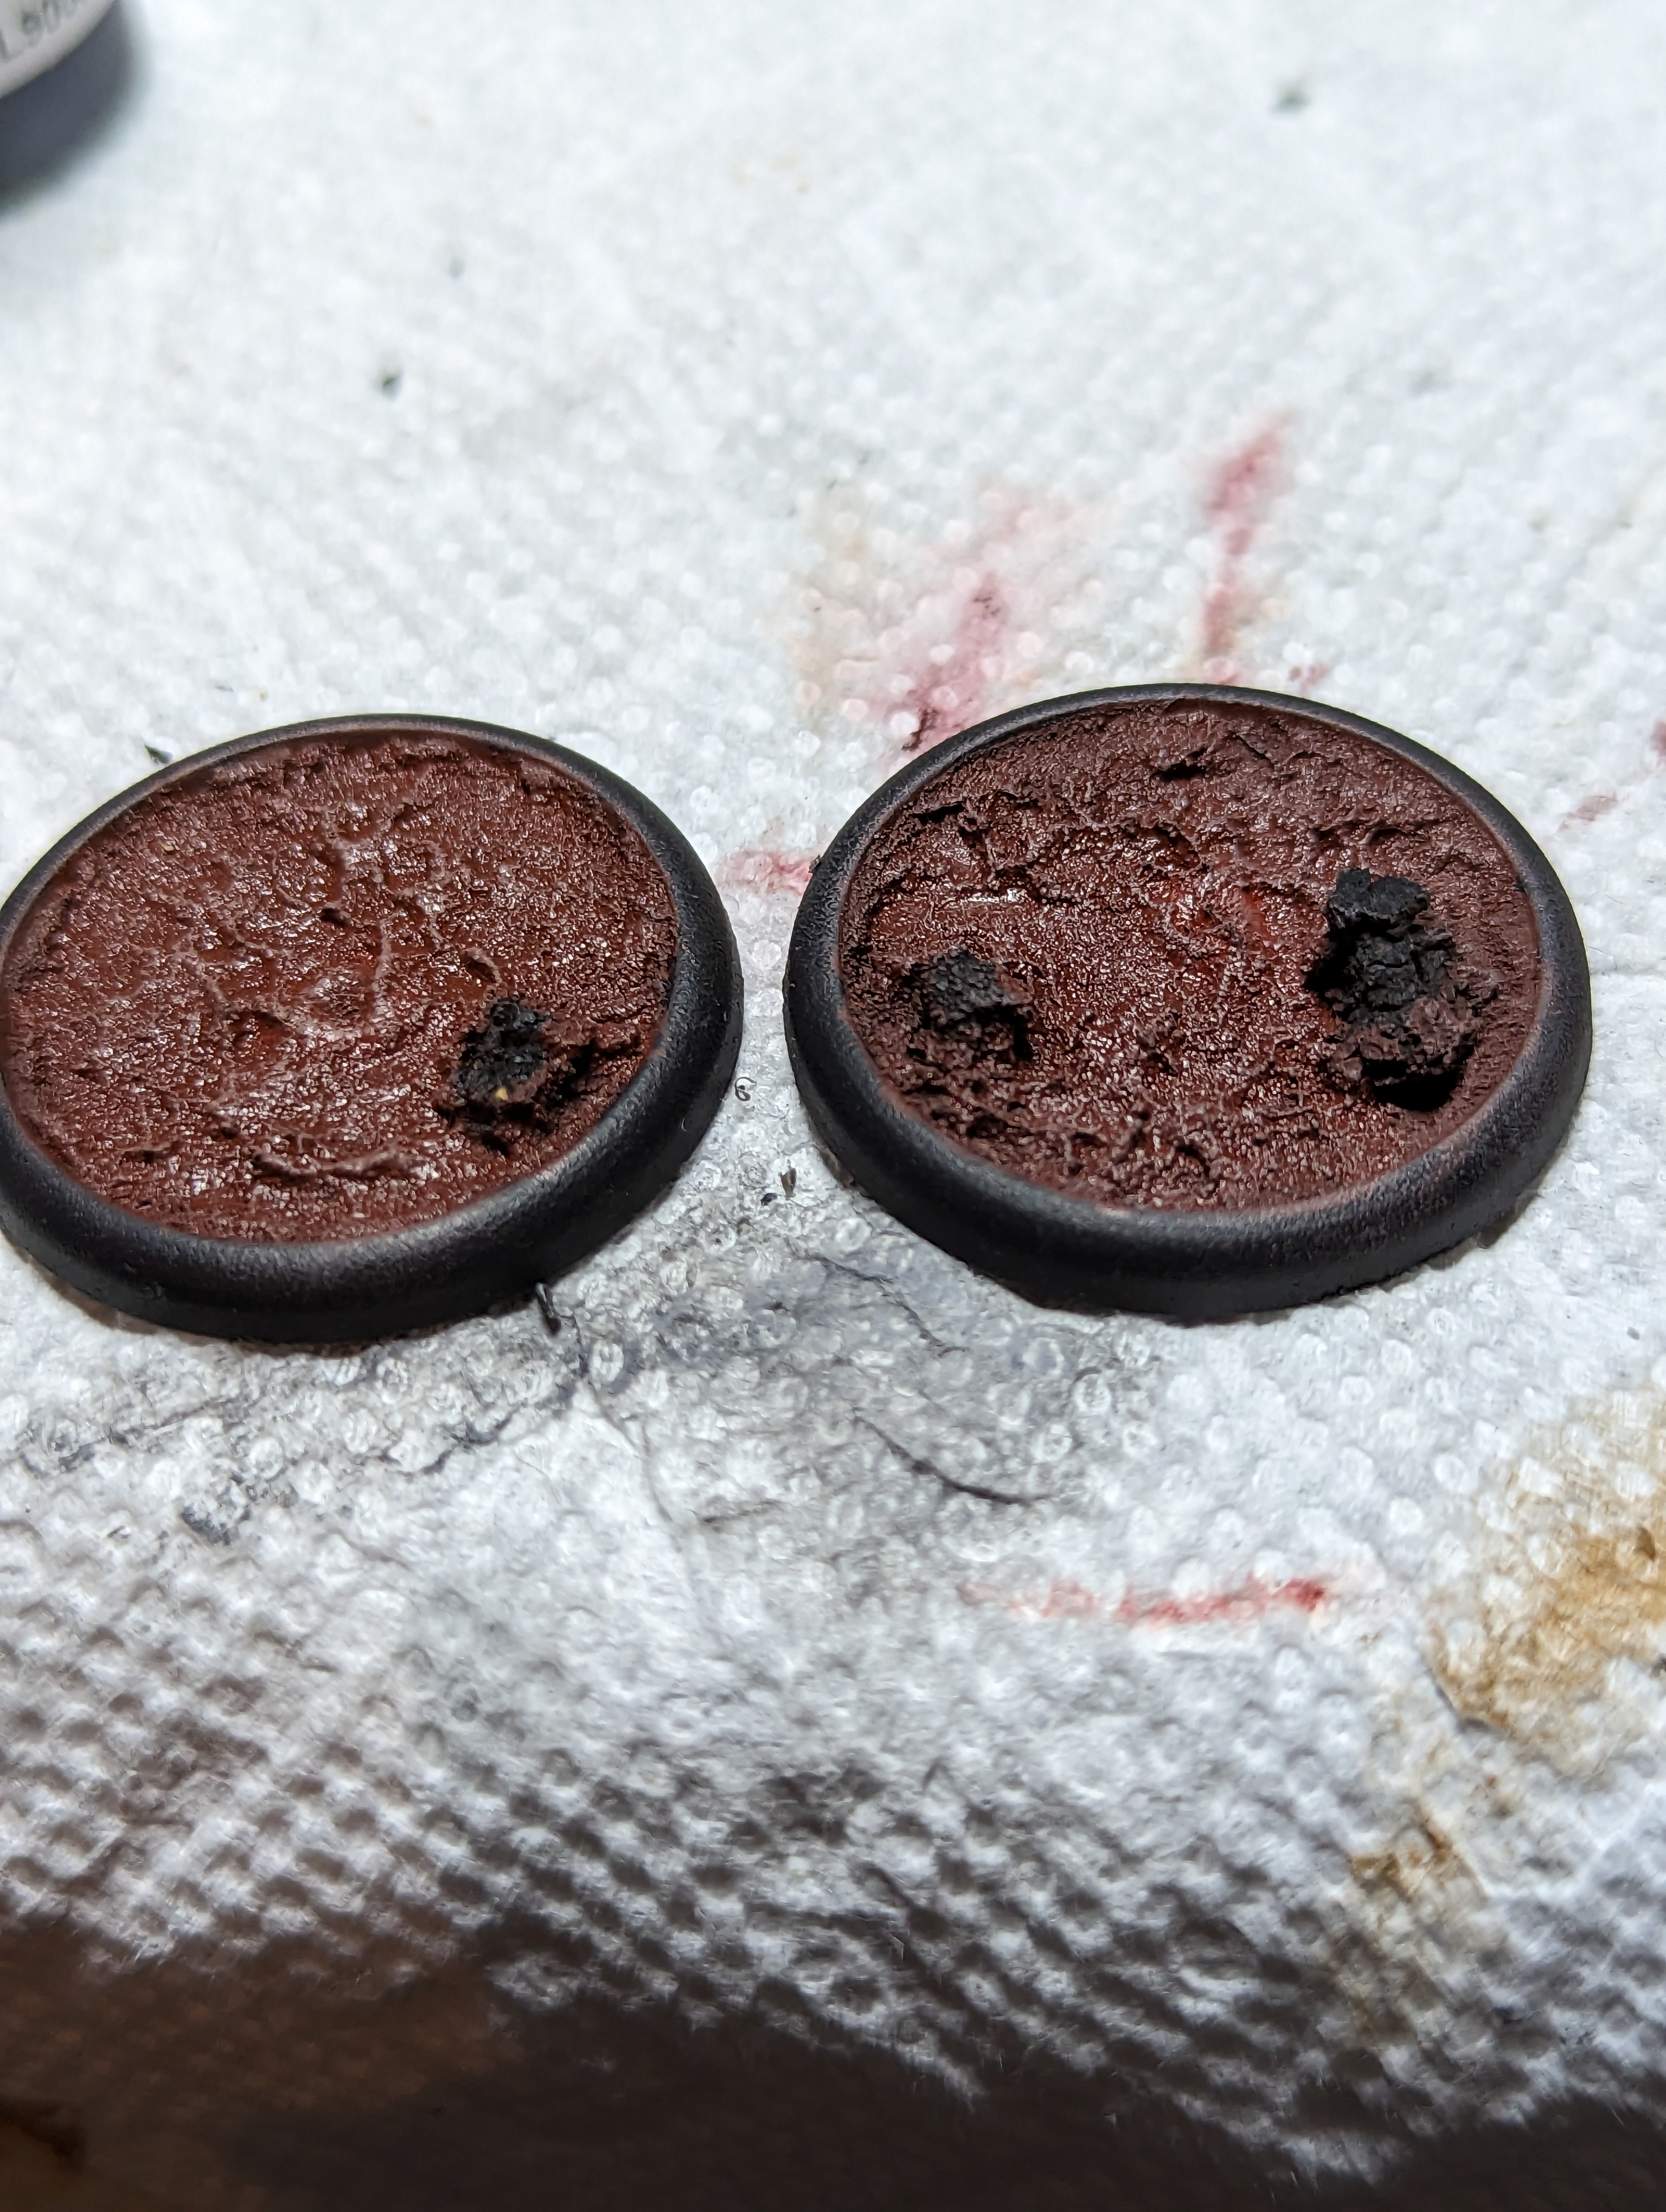
The desert bases just need to be covered in some gloss coat, and then covered in spackle paint. After a base coat of a light brown, I drybrushed some lighter sandy colors over top until I liked how it looked.
The third base I did the same way, but then I cut some of the crackle paint out after it had dries. Into the holes I put some of the green water effects. I’m not sure I love the result, but it does the job.
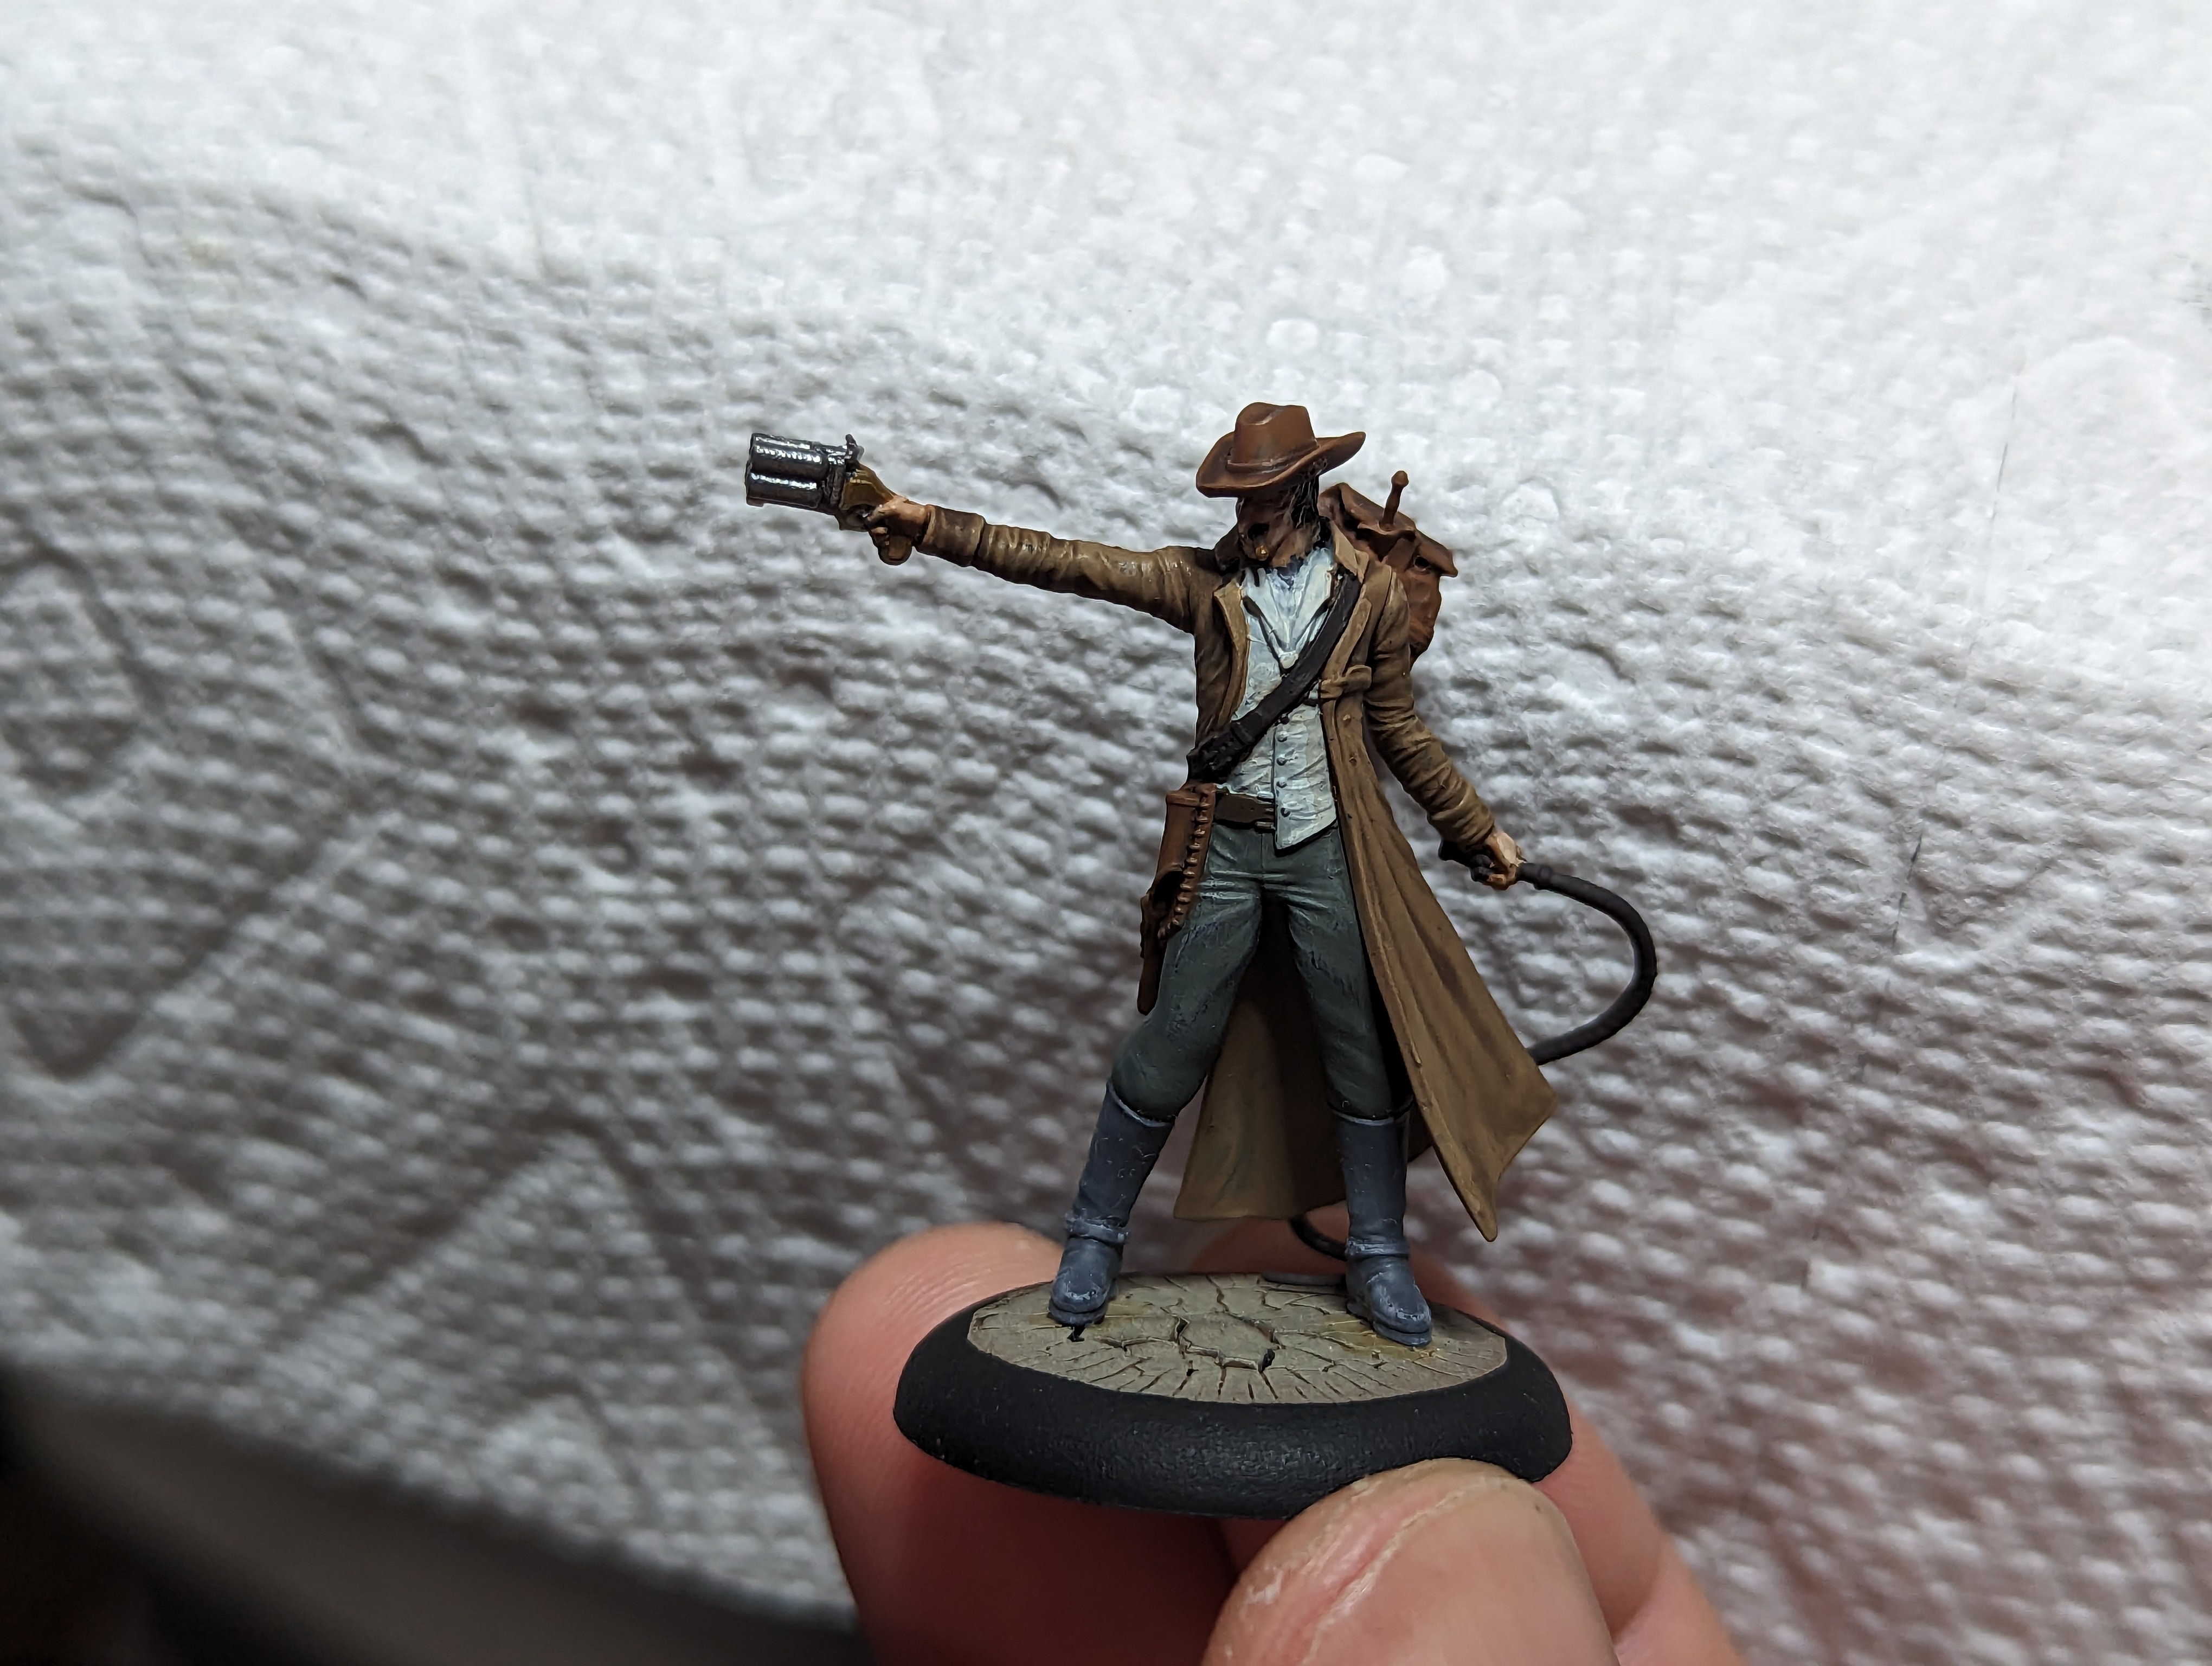
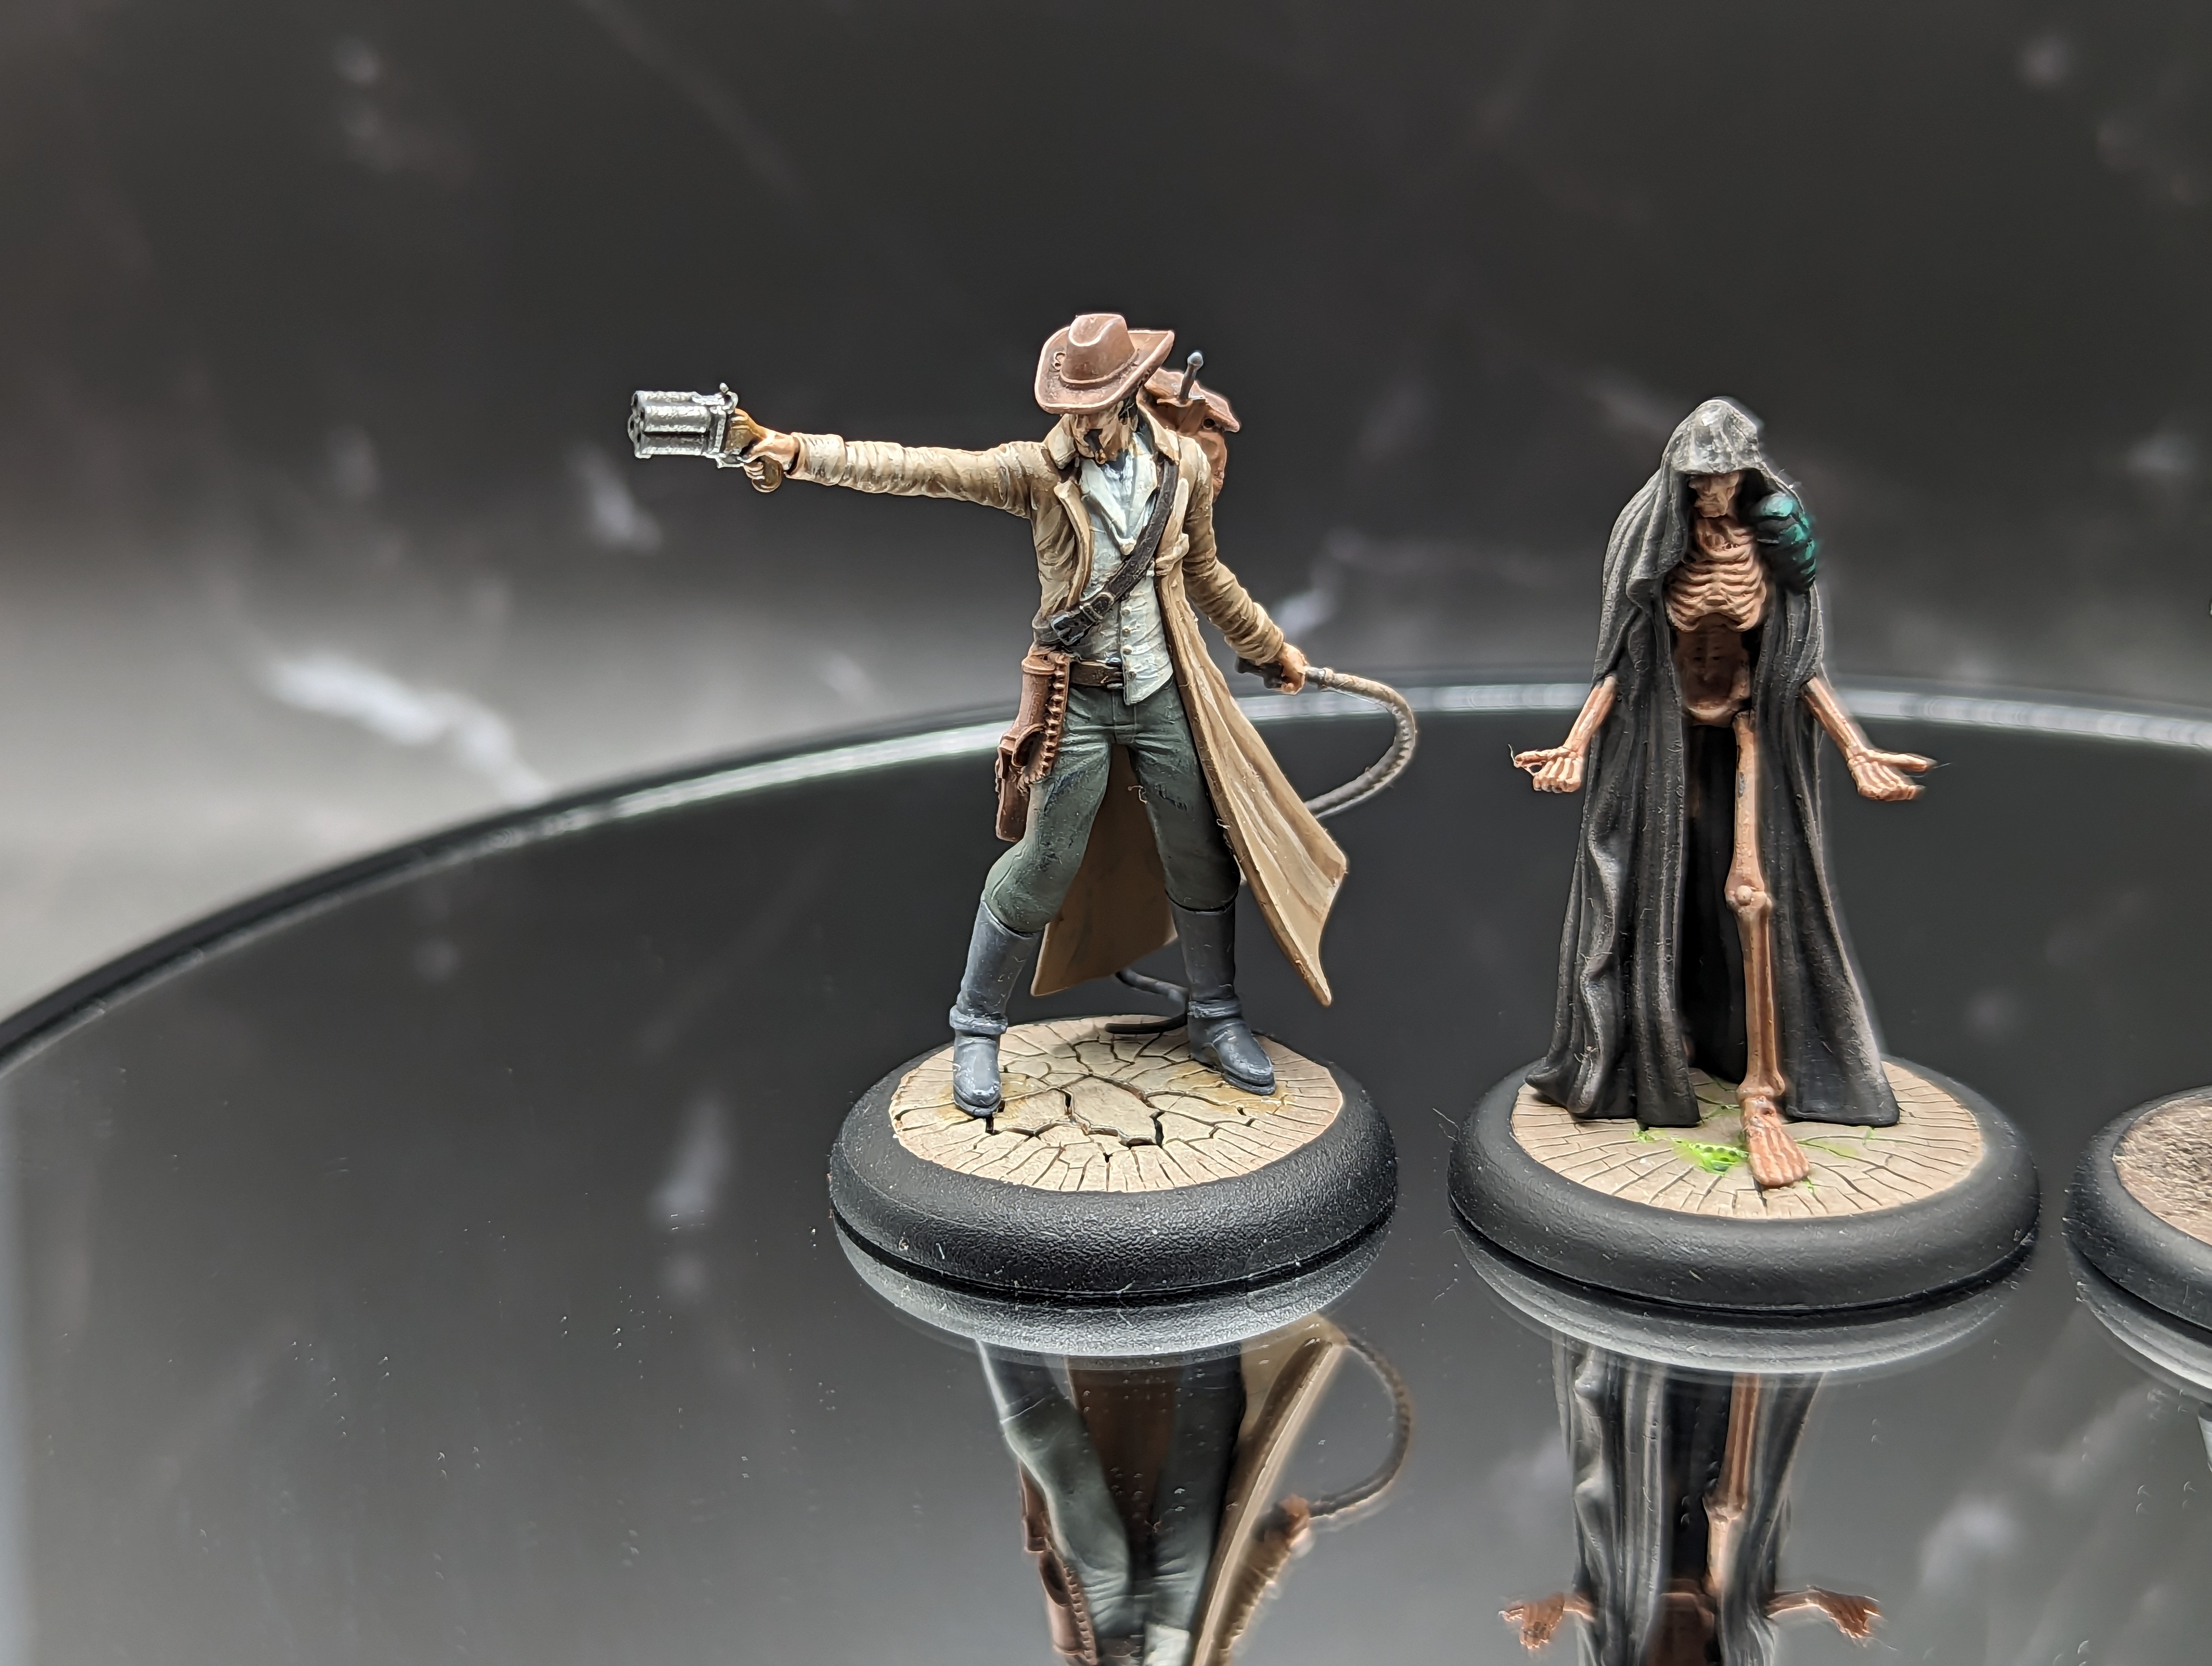
McCabe 2.0 trades in his horse for a cooler gun. If you paint as much malifaux as I do, you get good at painting up leather. I picked out a brown I liked, hit it with a darker wash, and then did a careful drybrush to bring out the worn and faded look.
McMourning has a few new limbs, but otherwise its just like painting up any other ginger. I’m not sure I captured the crazy look adequately, but usually noone does.
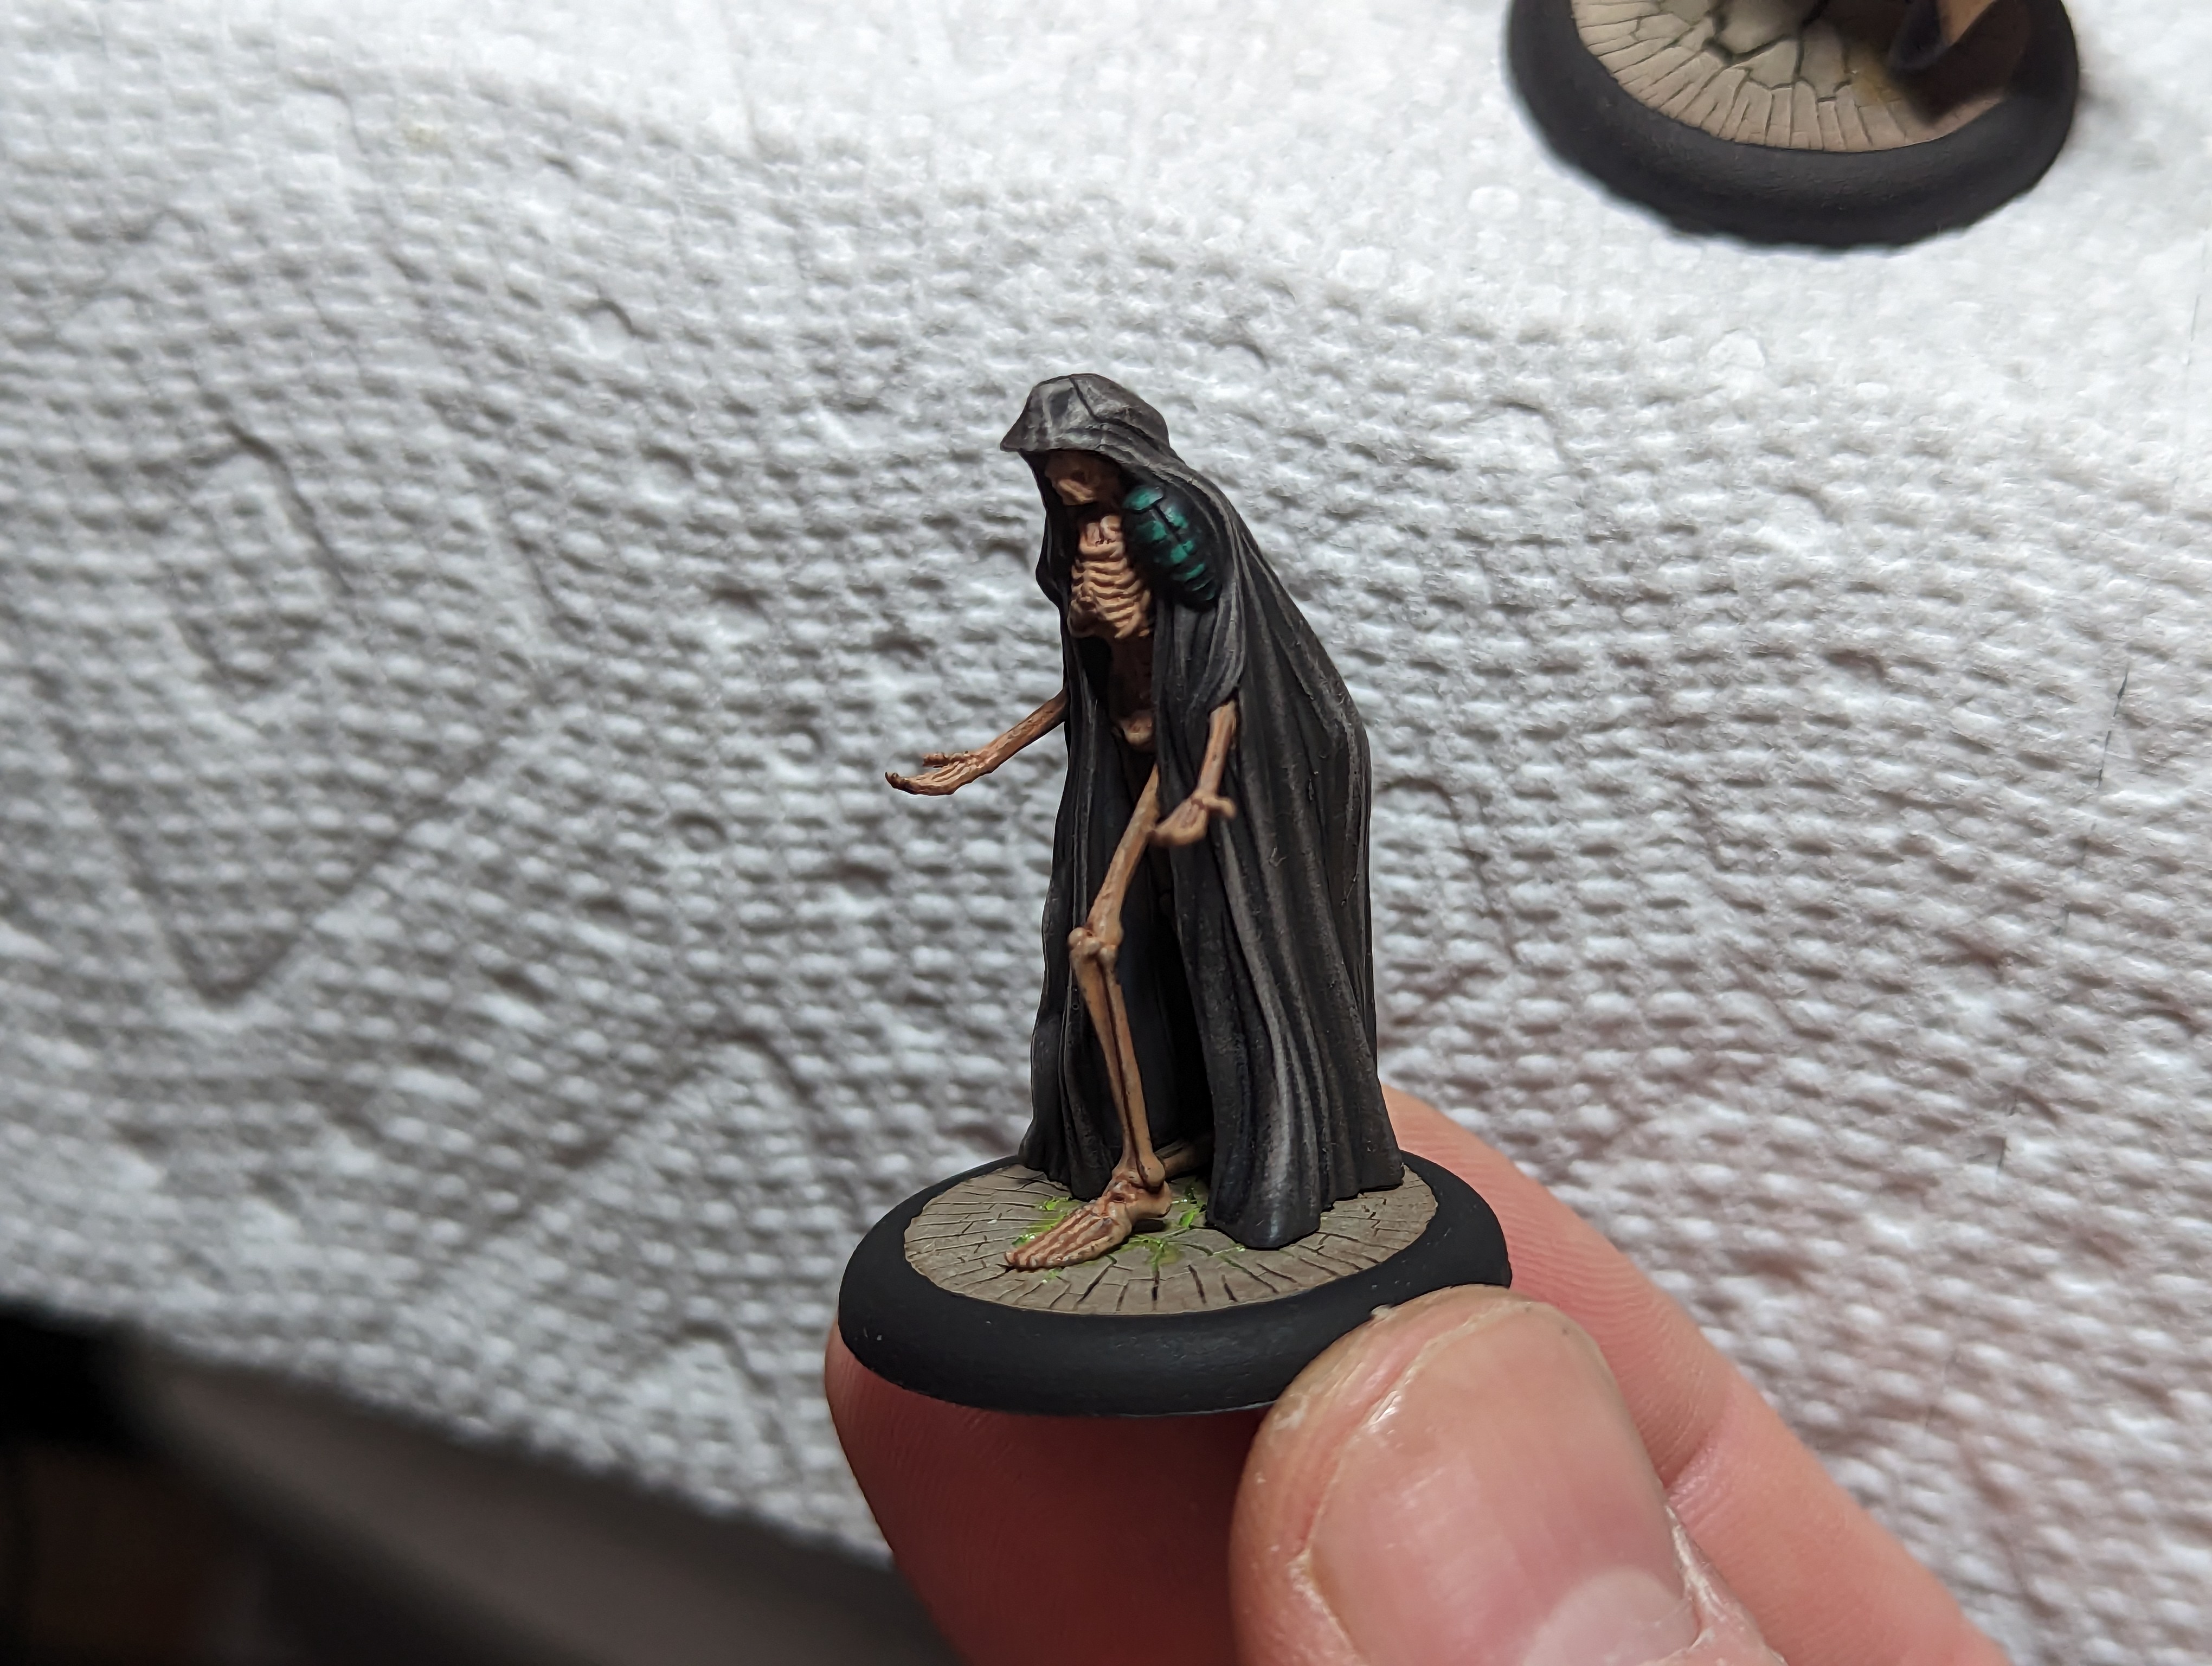
The corpse curator is just a skelly with a cape. Which is pretty cool tbh. But a fairly simple paintjob. I always do my bones the same way, paint them off white and then do a light sepia wash.
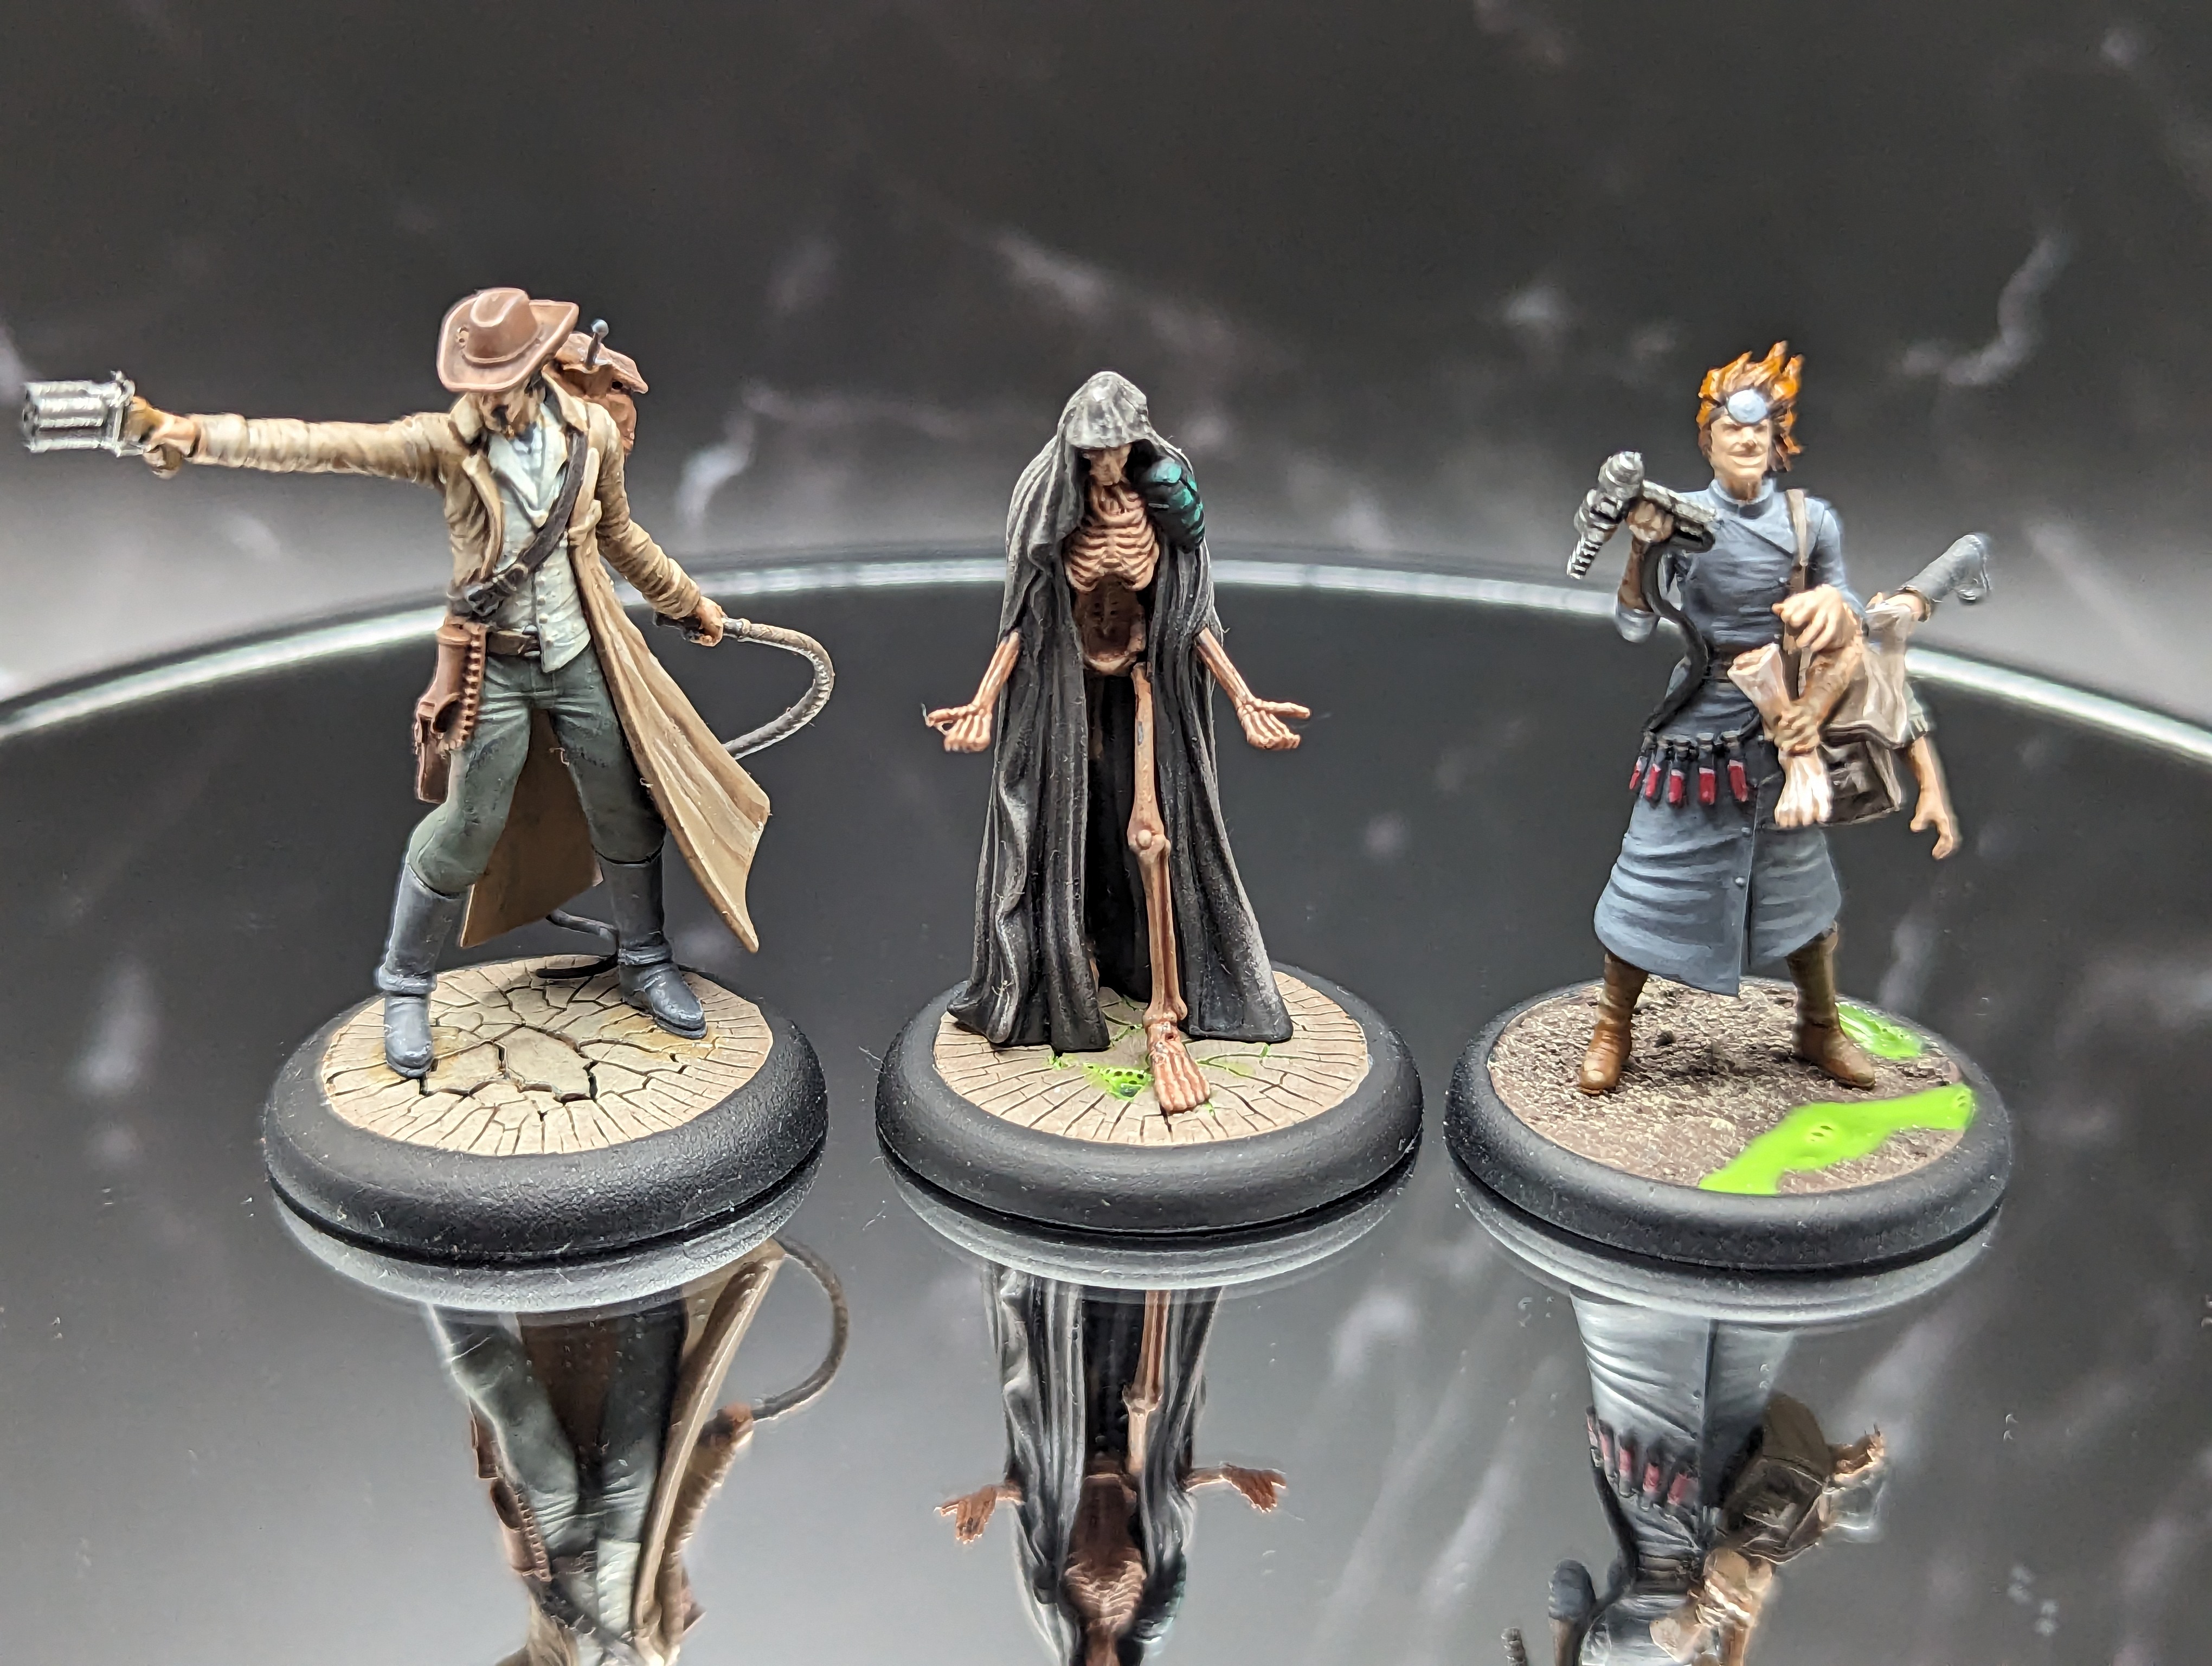
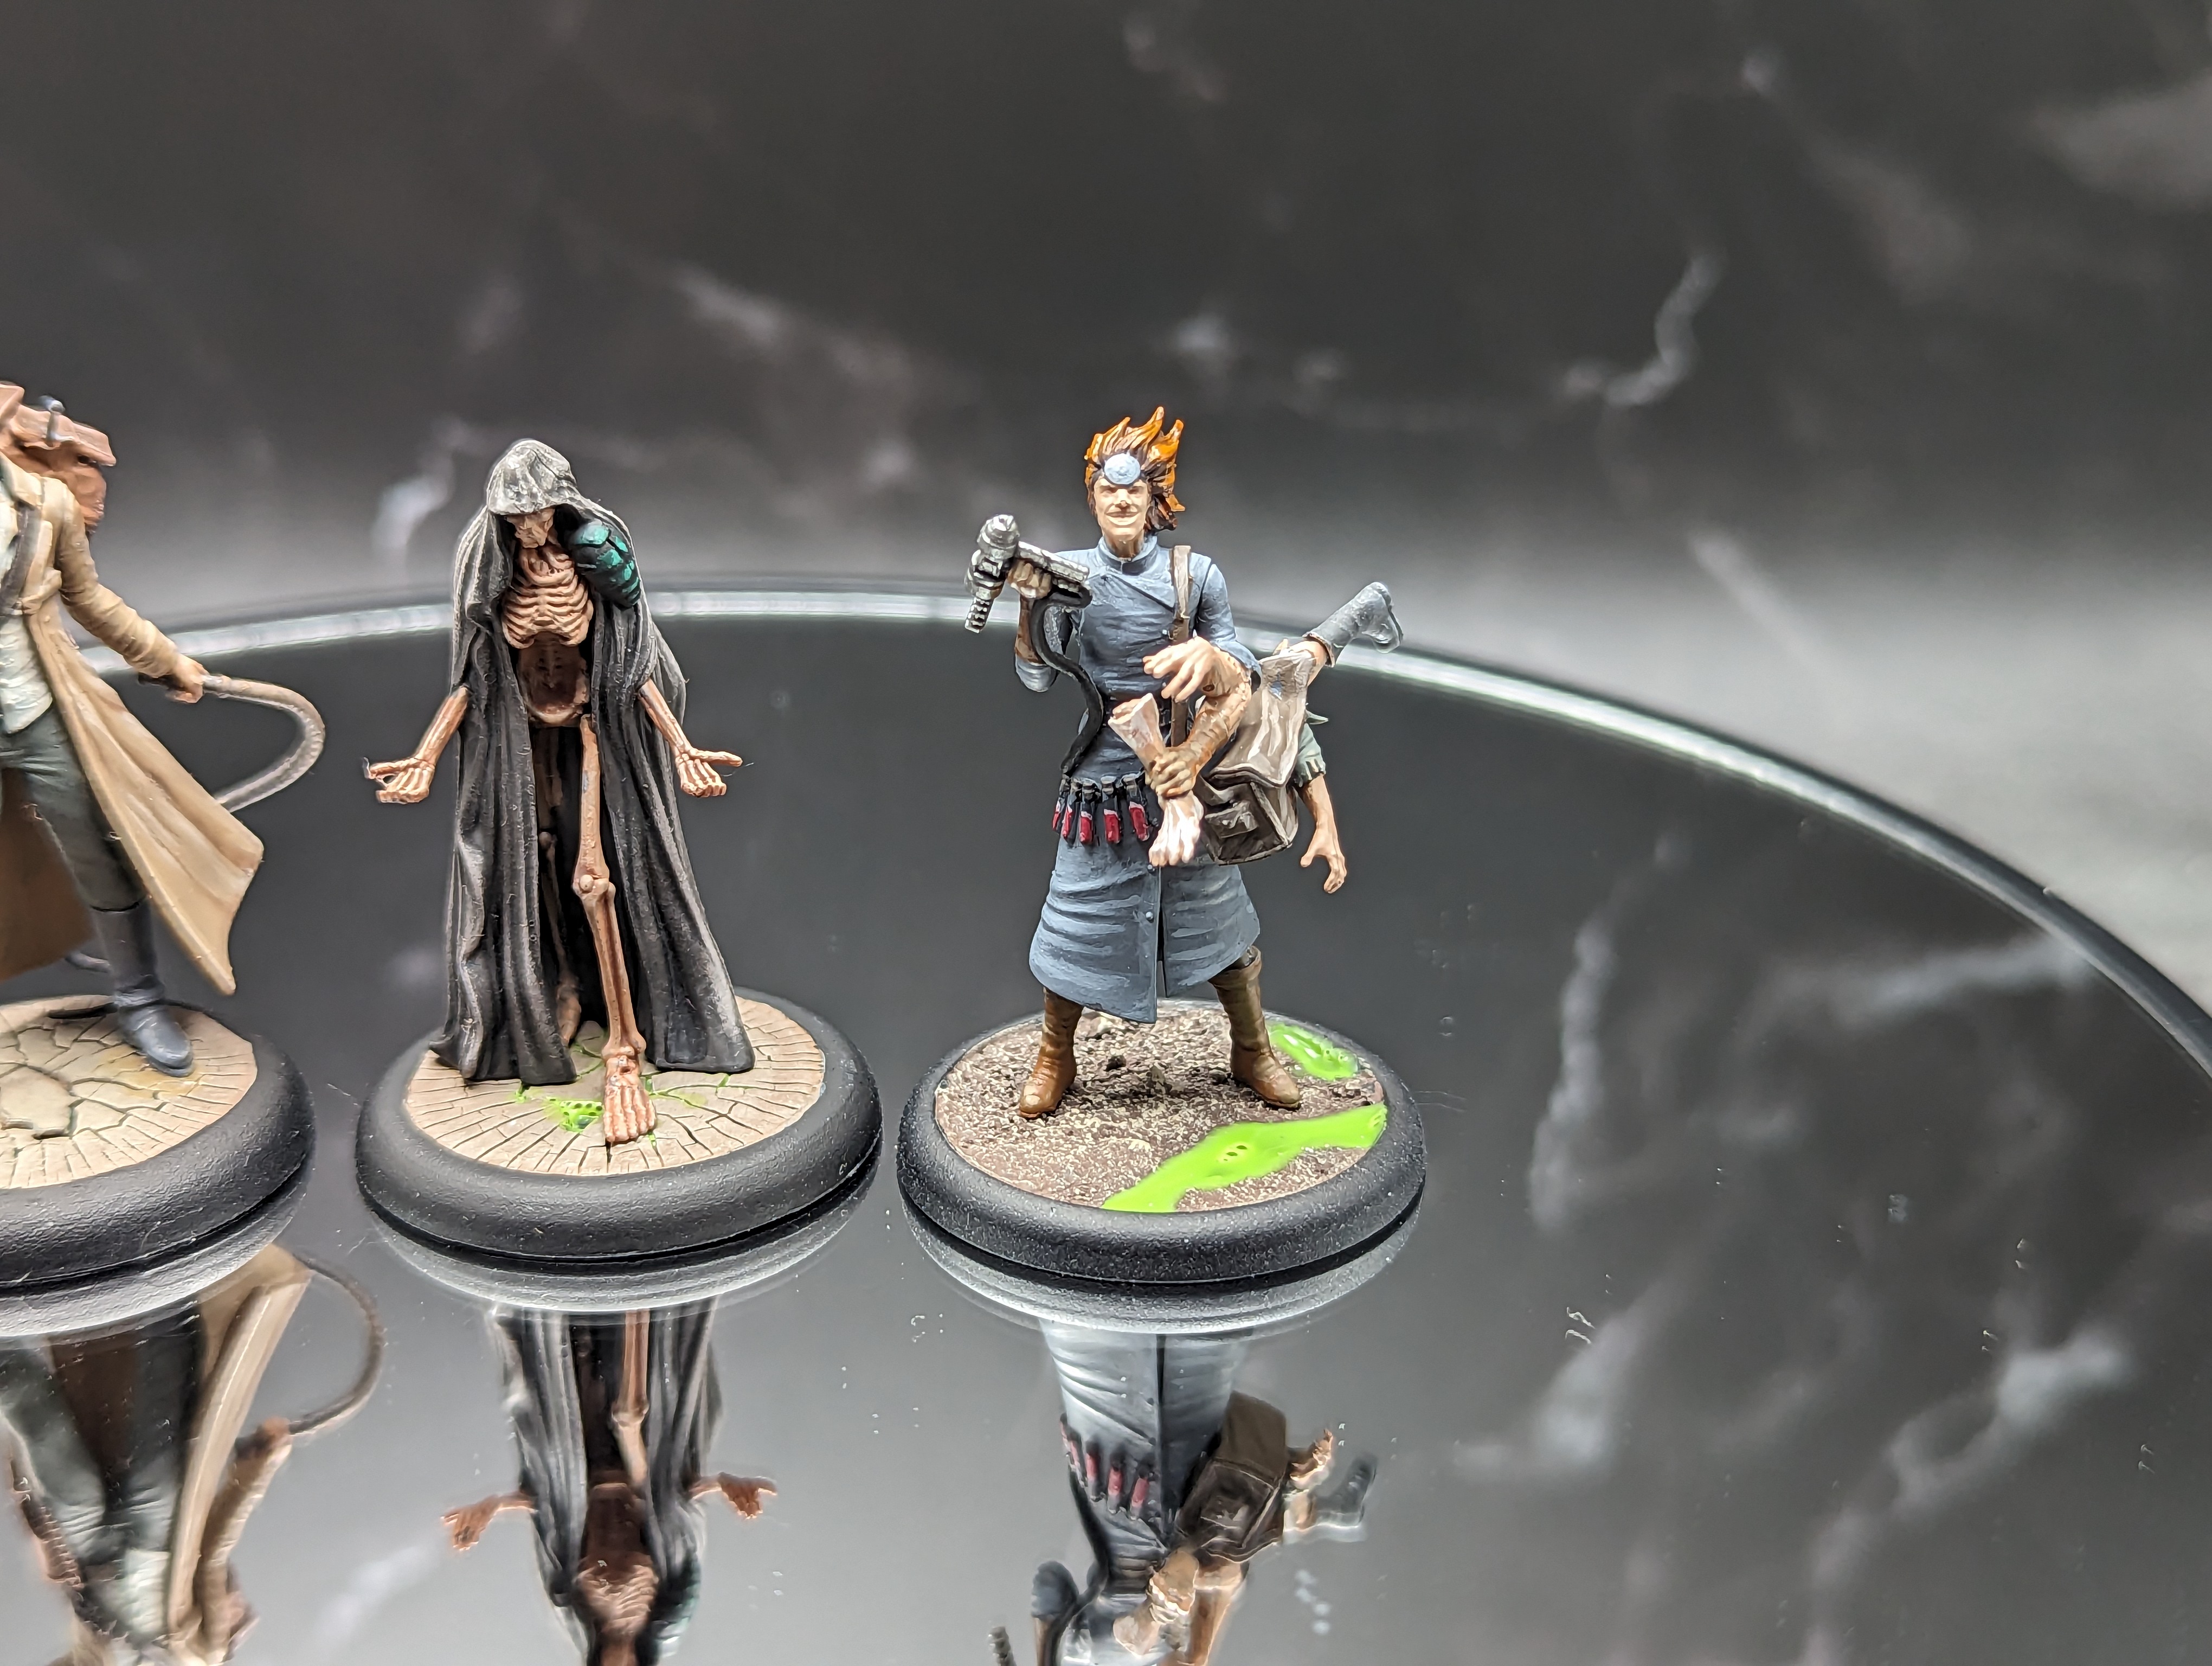
And thats them. I was pretty happy with how the little vials on McMournings hip came out. I may need to go back and fix his face though. I usually dont paint the eyes or the lips, but his are big and emotive enough that I think it deserves a little work.
As always, some lore for anyone who is so inclined.
Shadowy figures
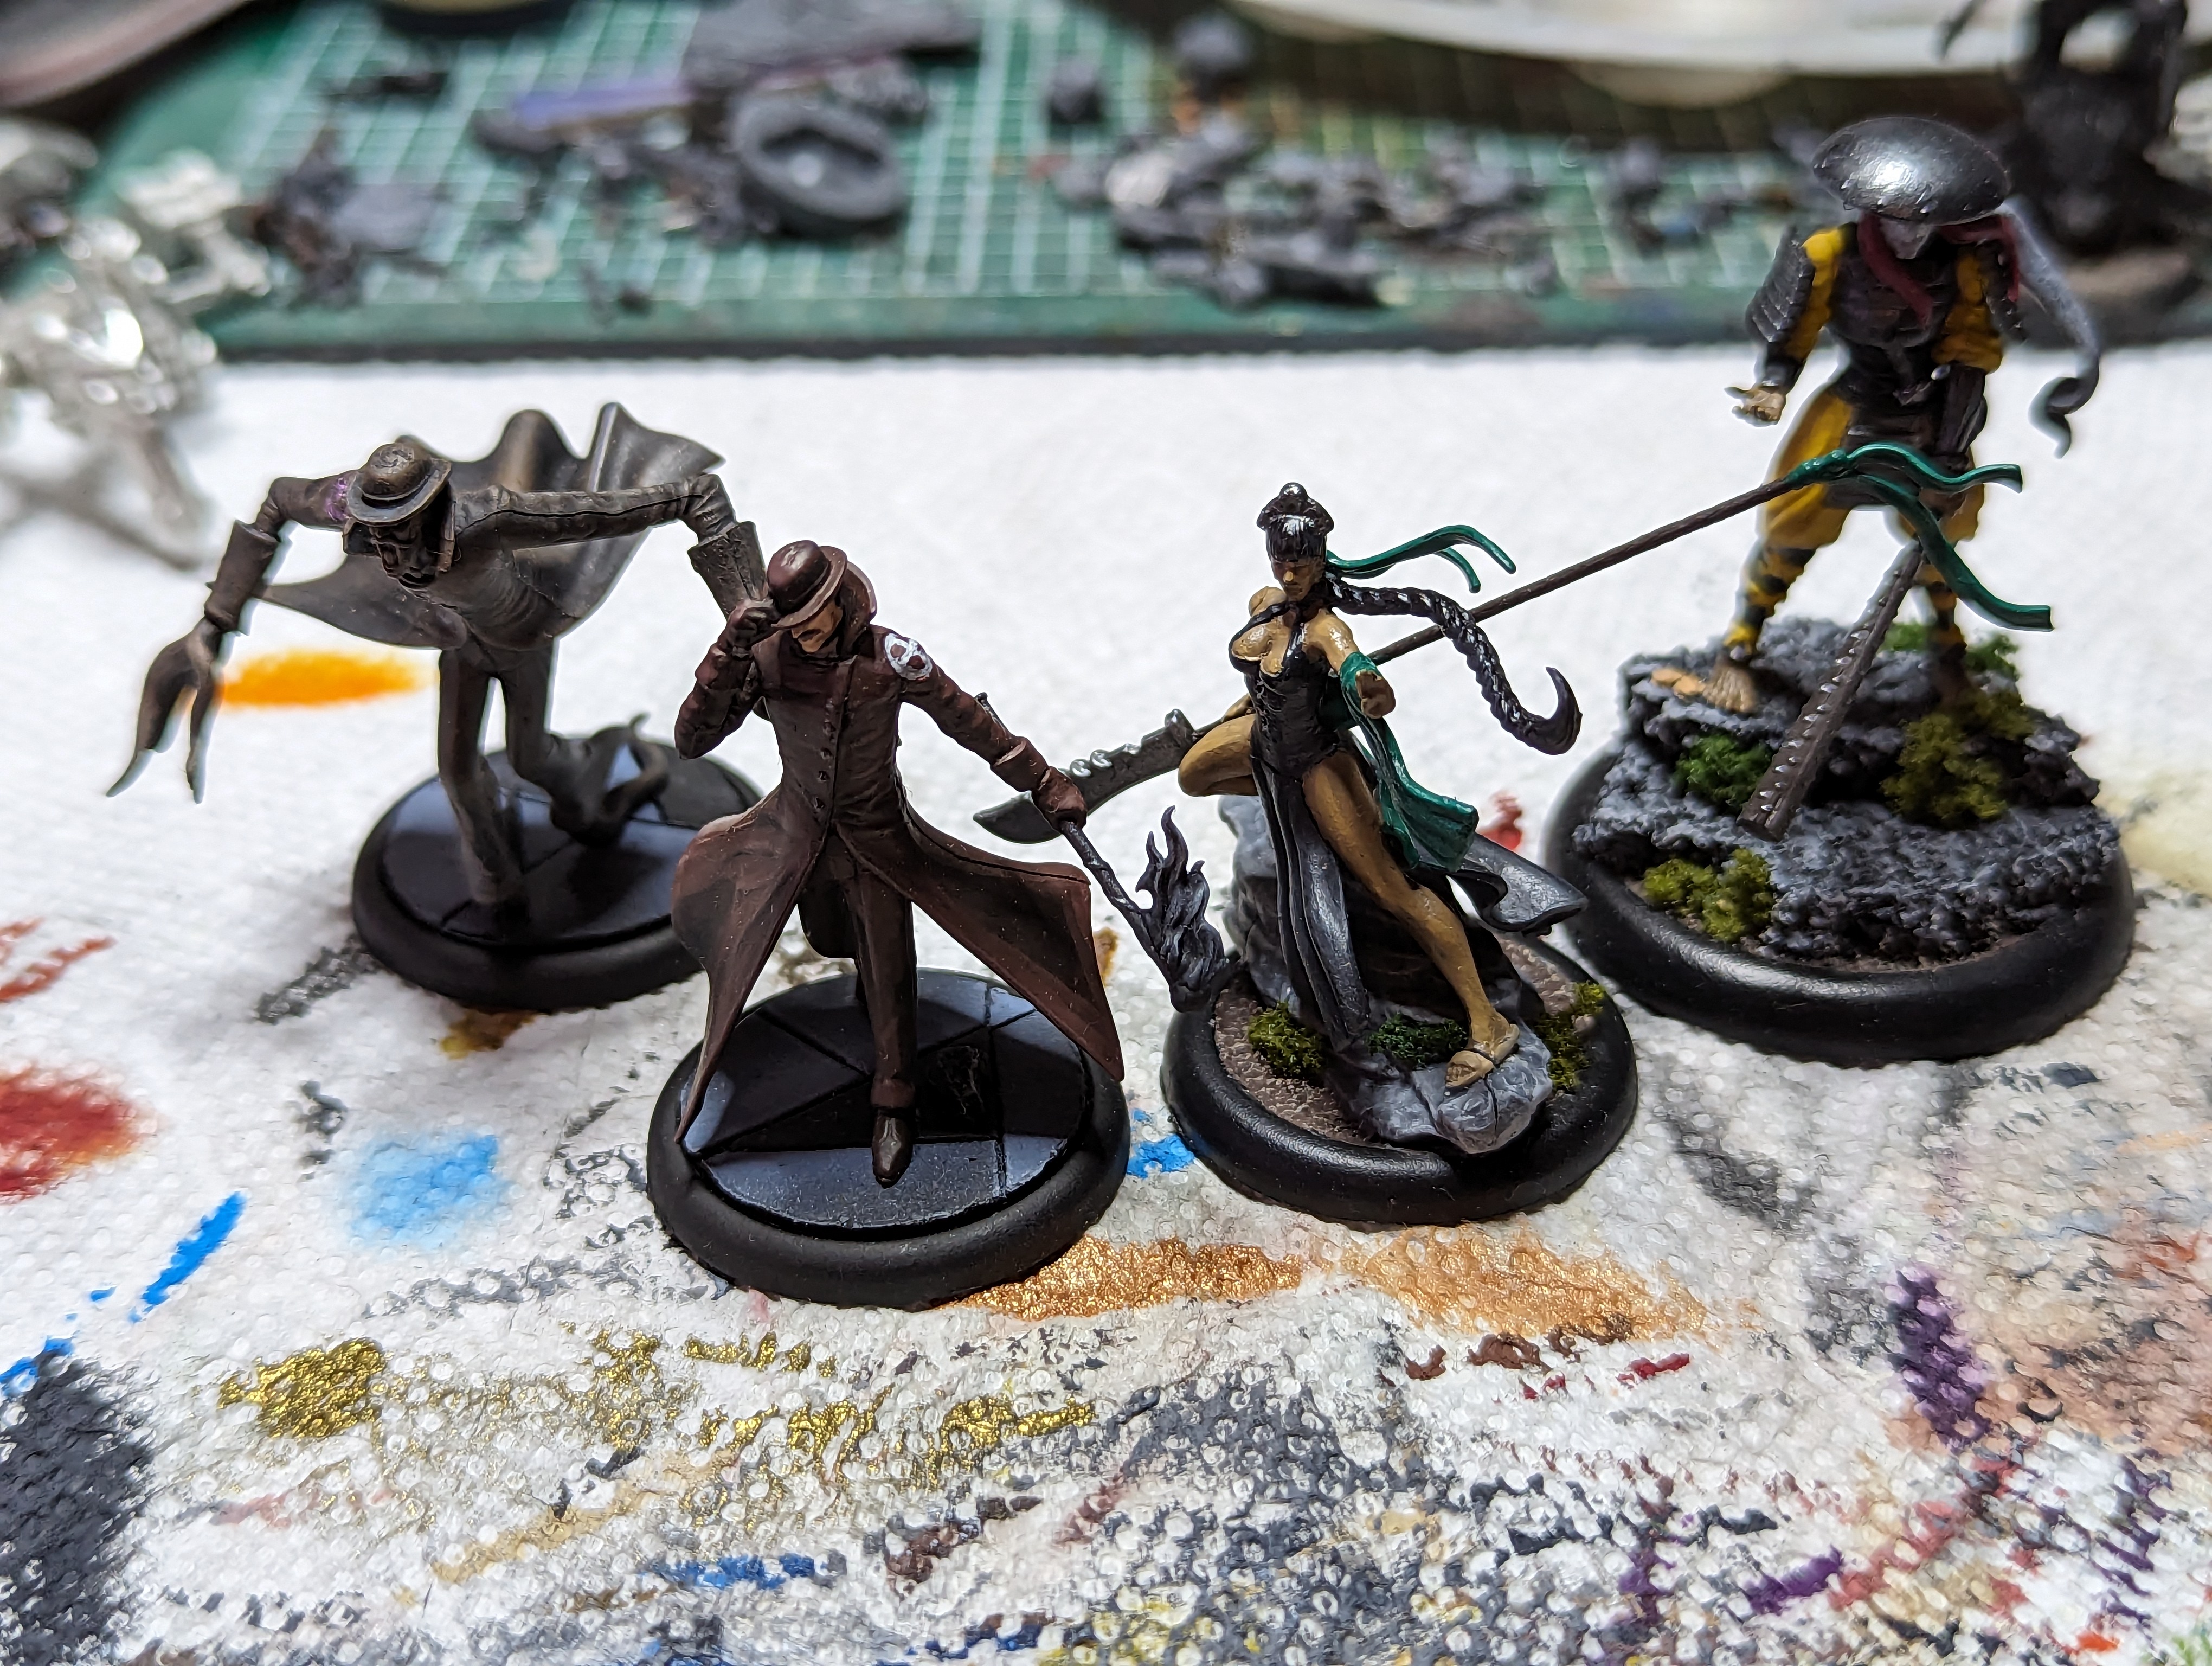
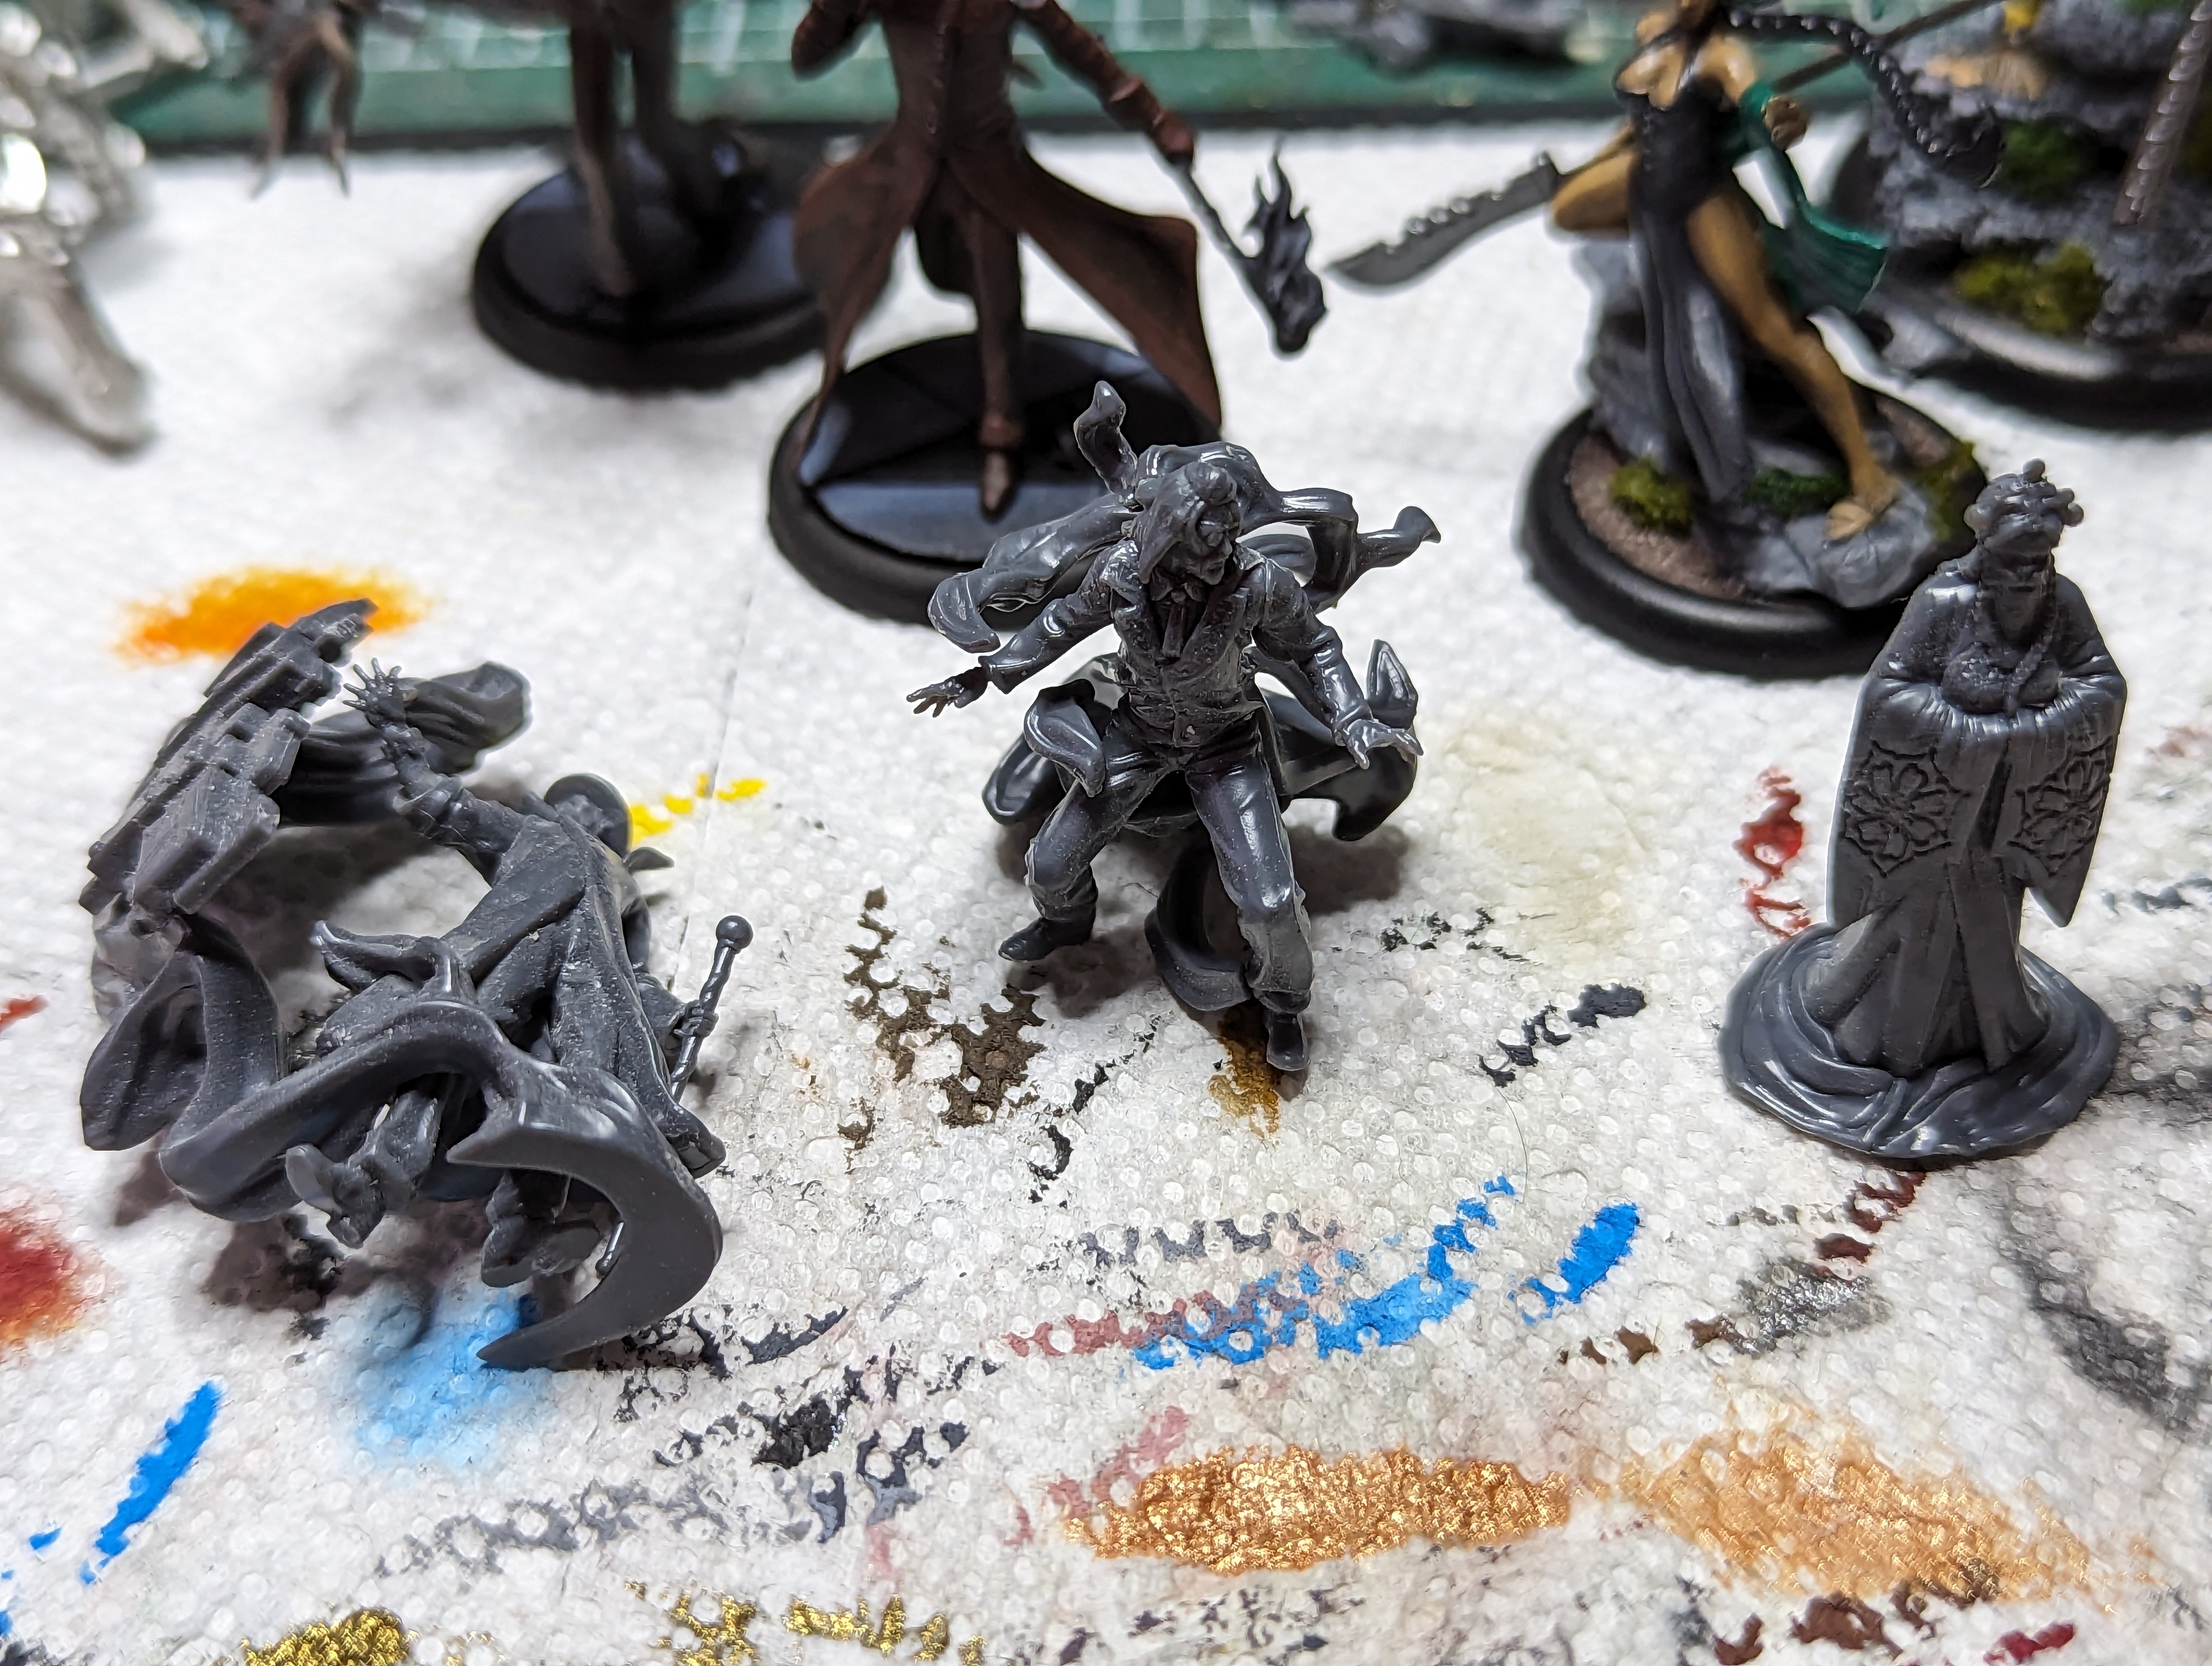
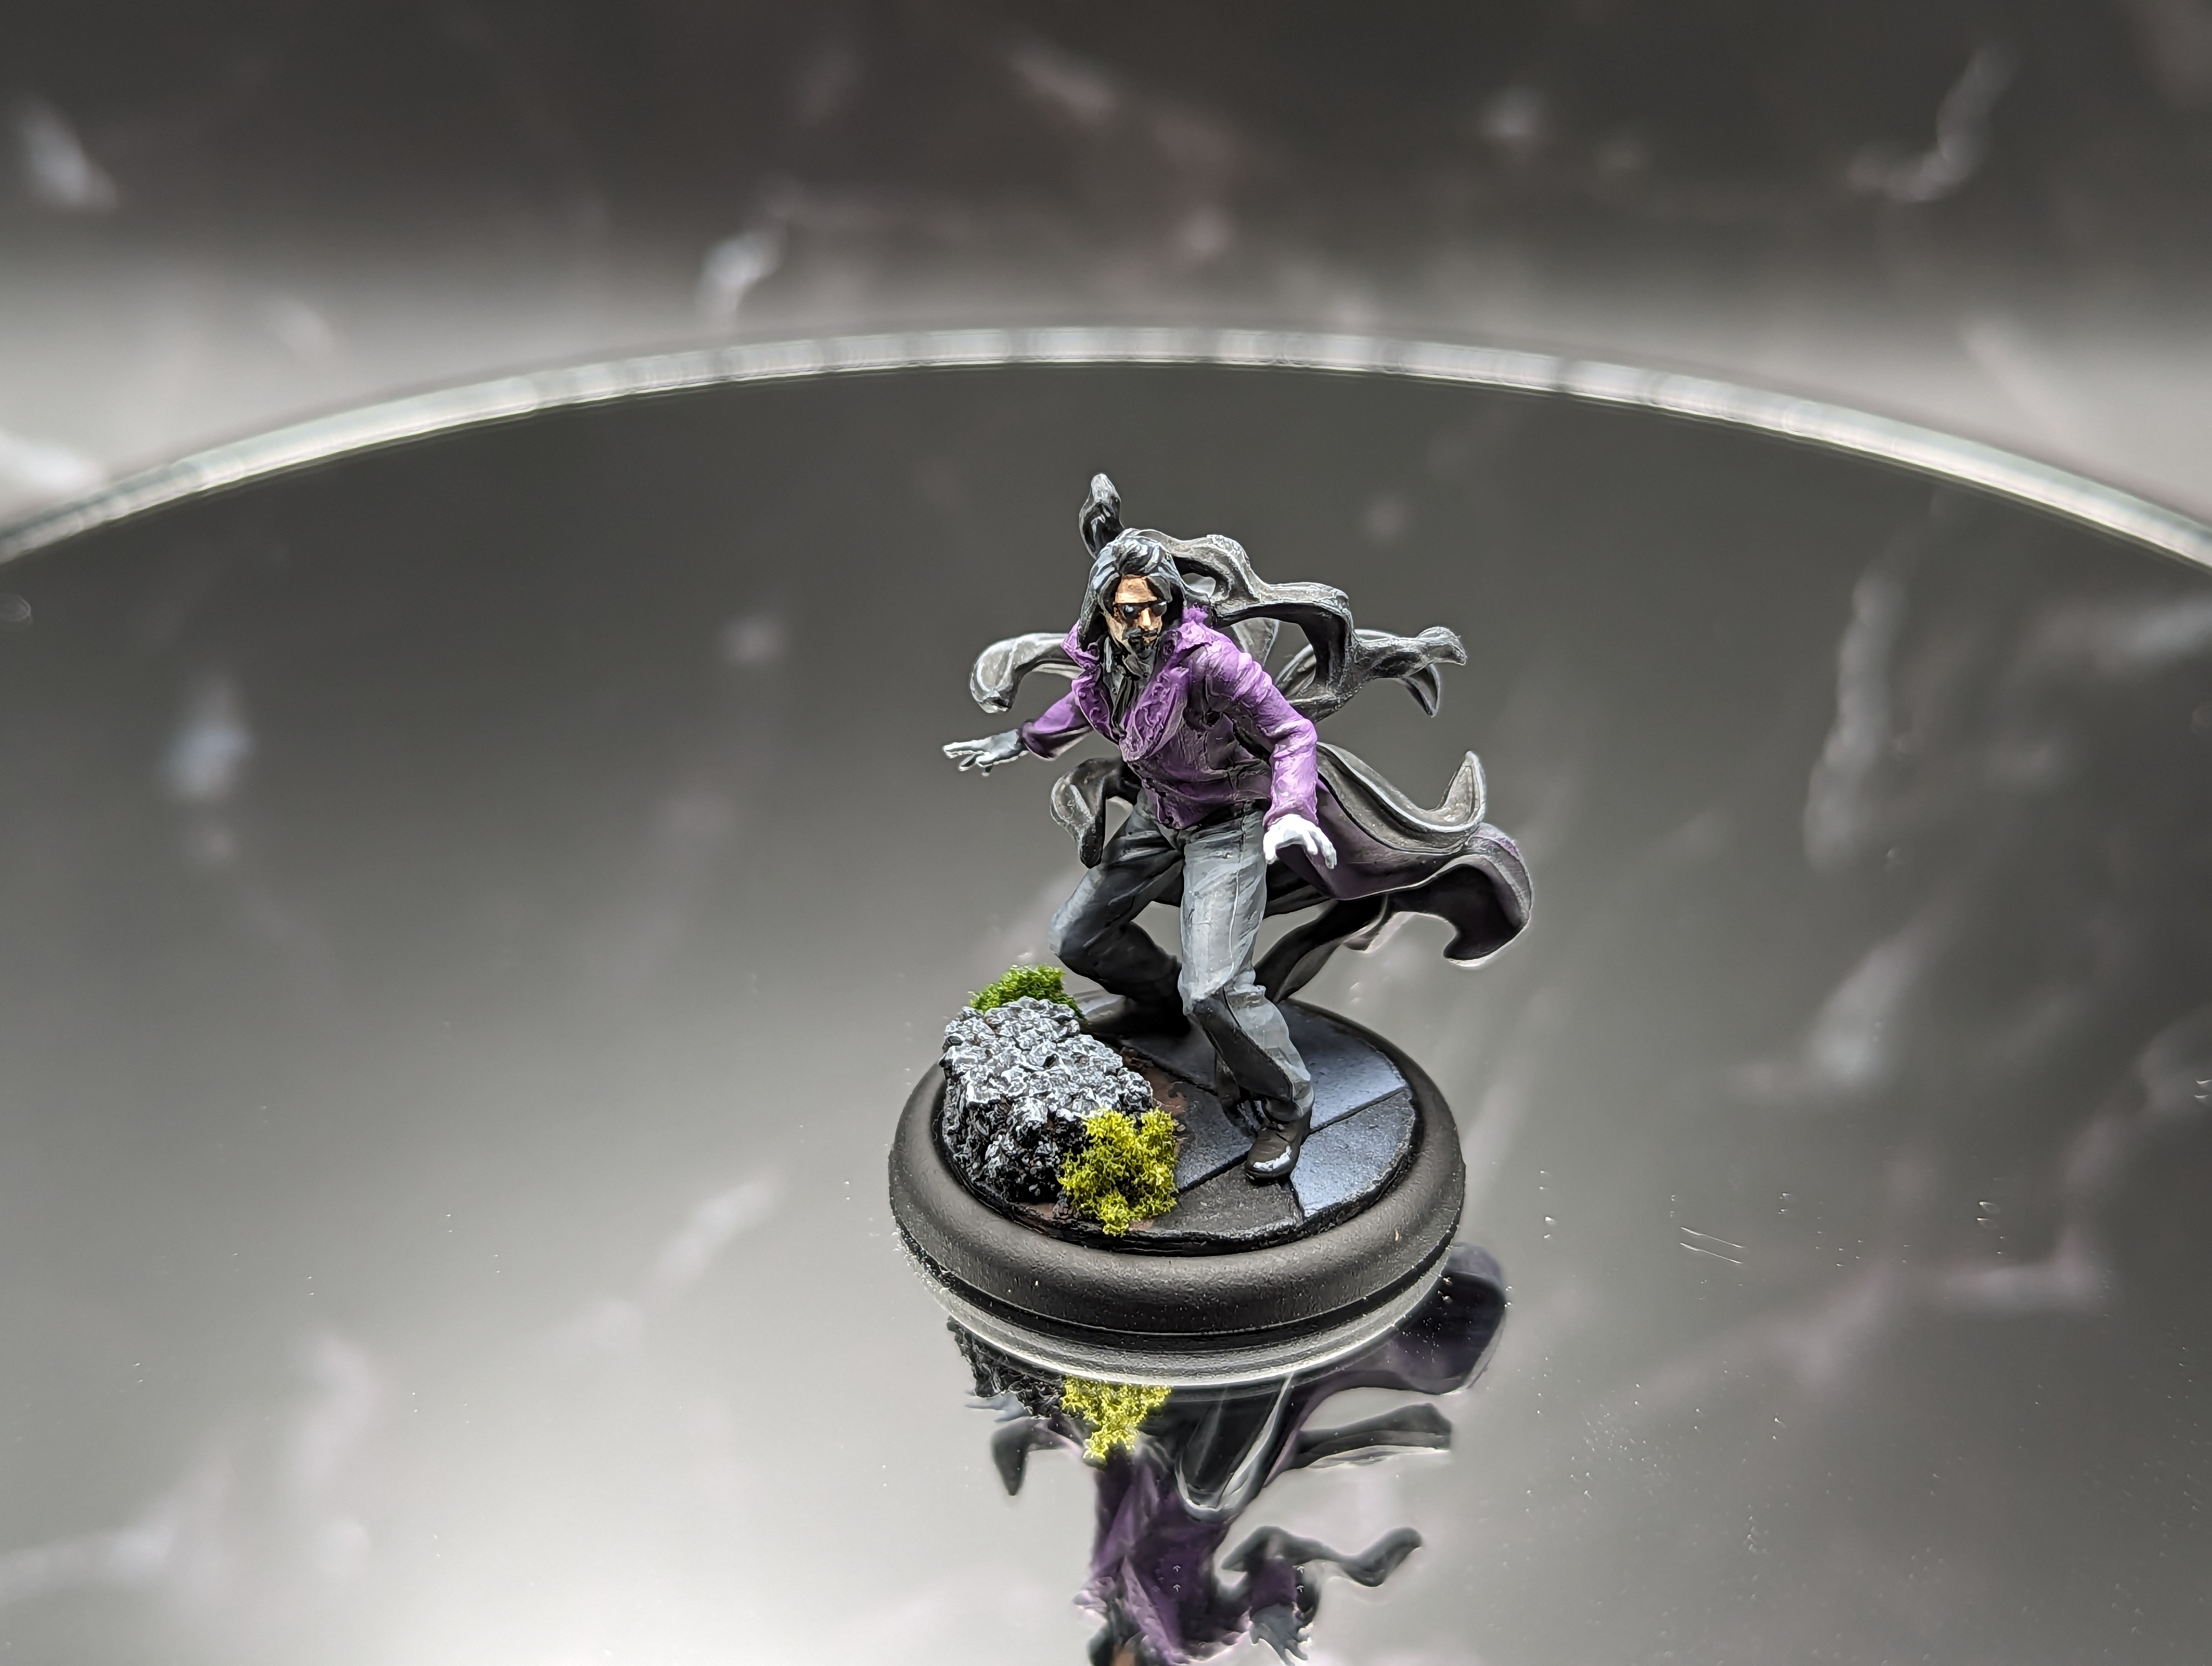
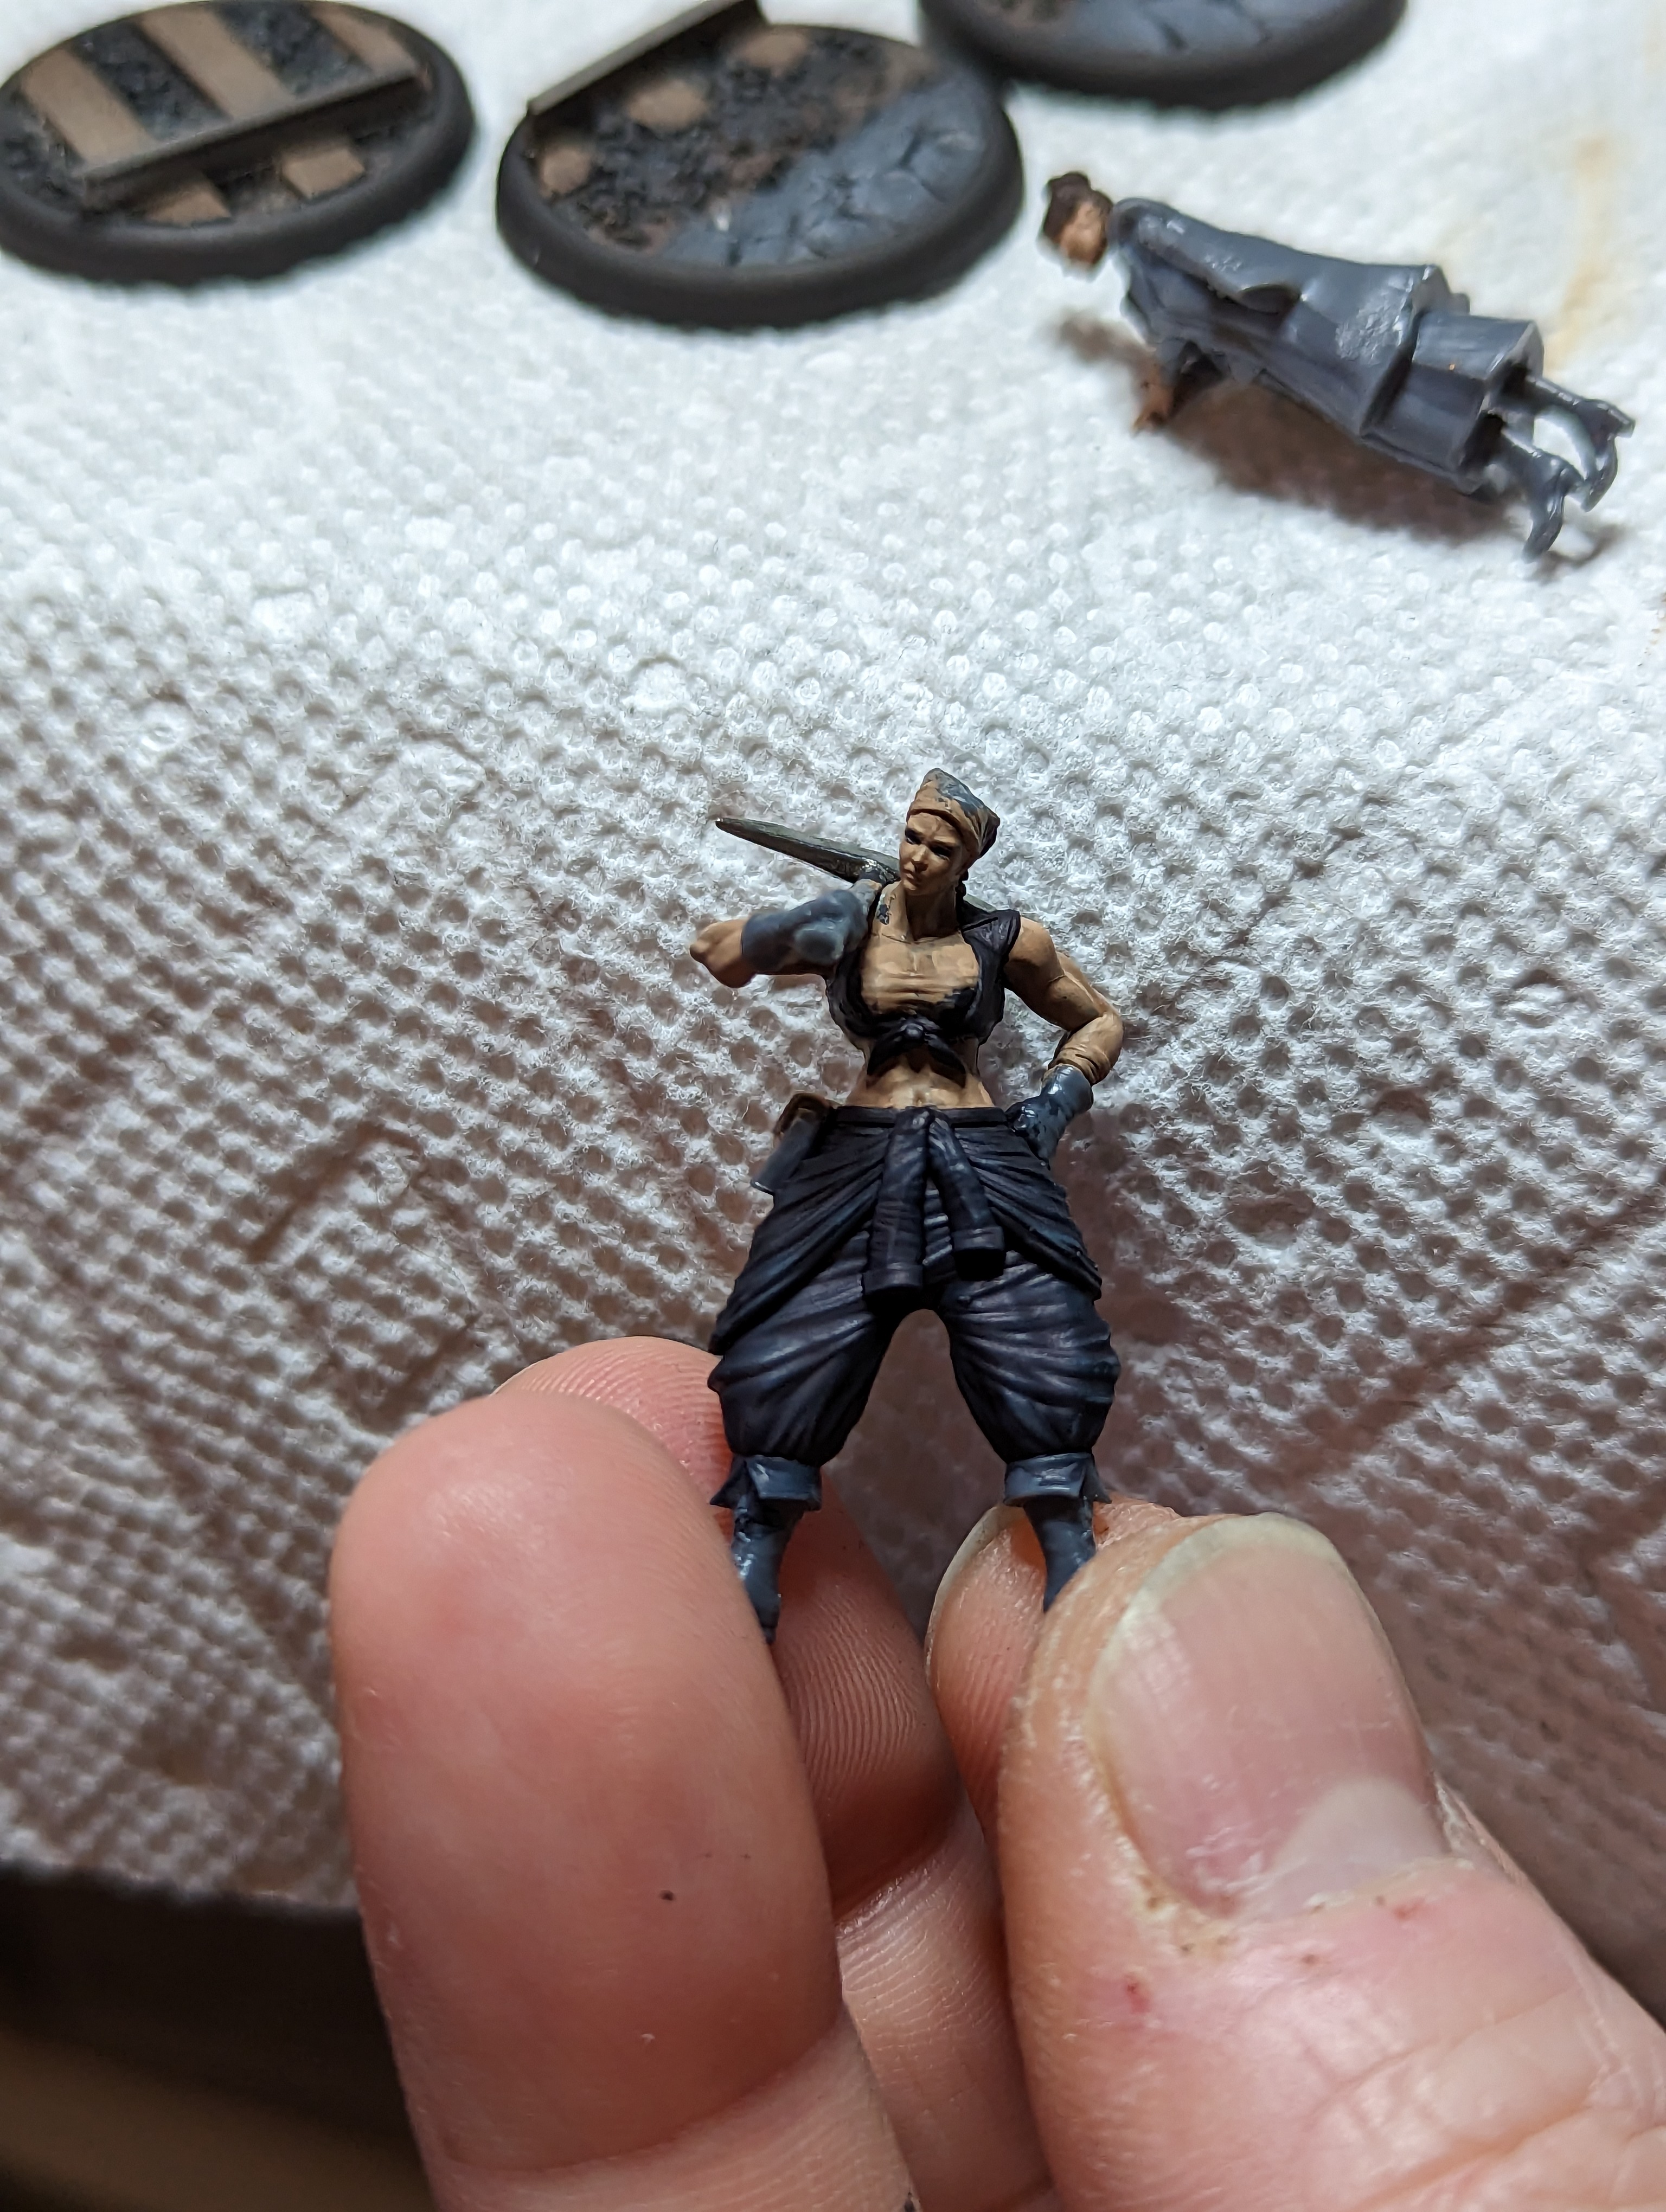
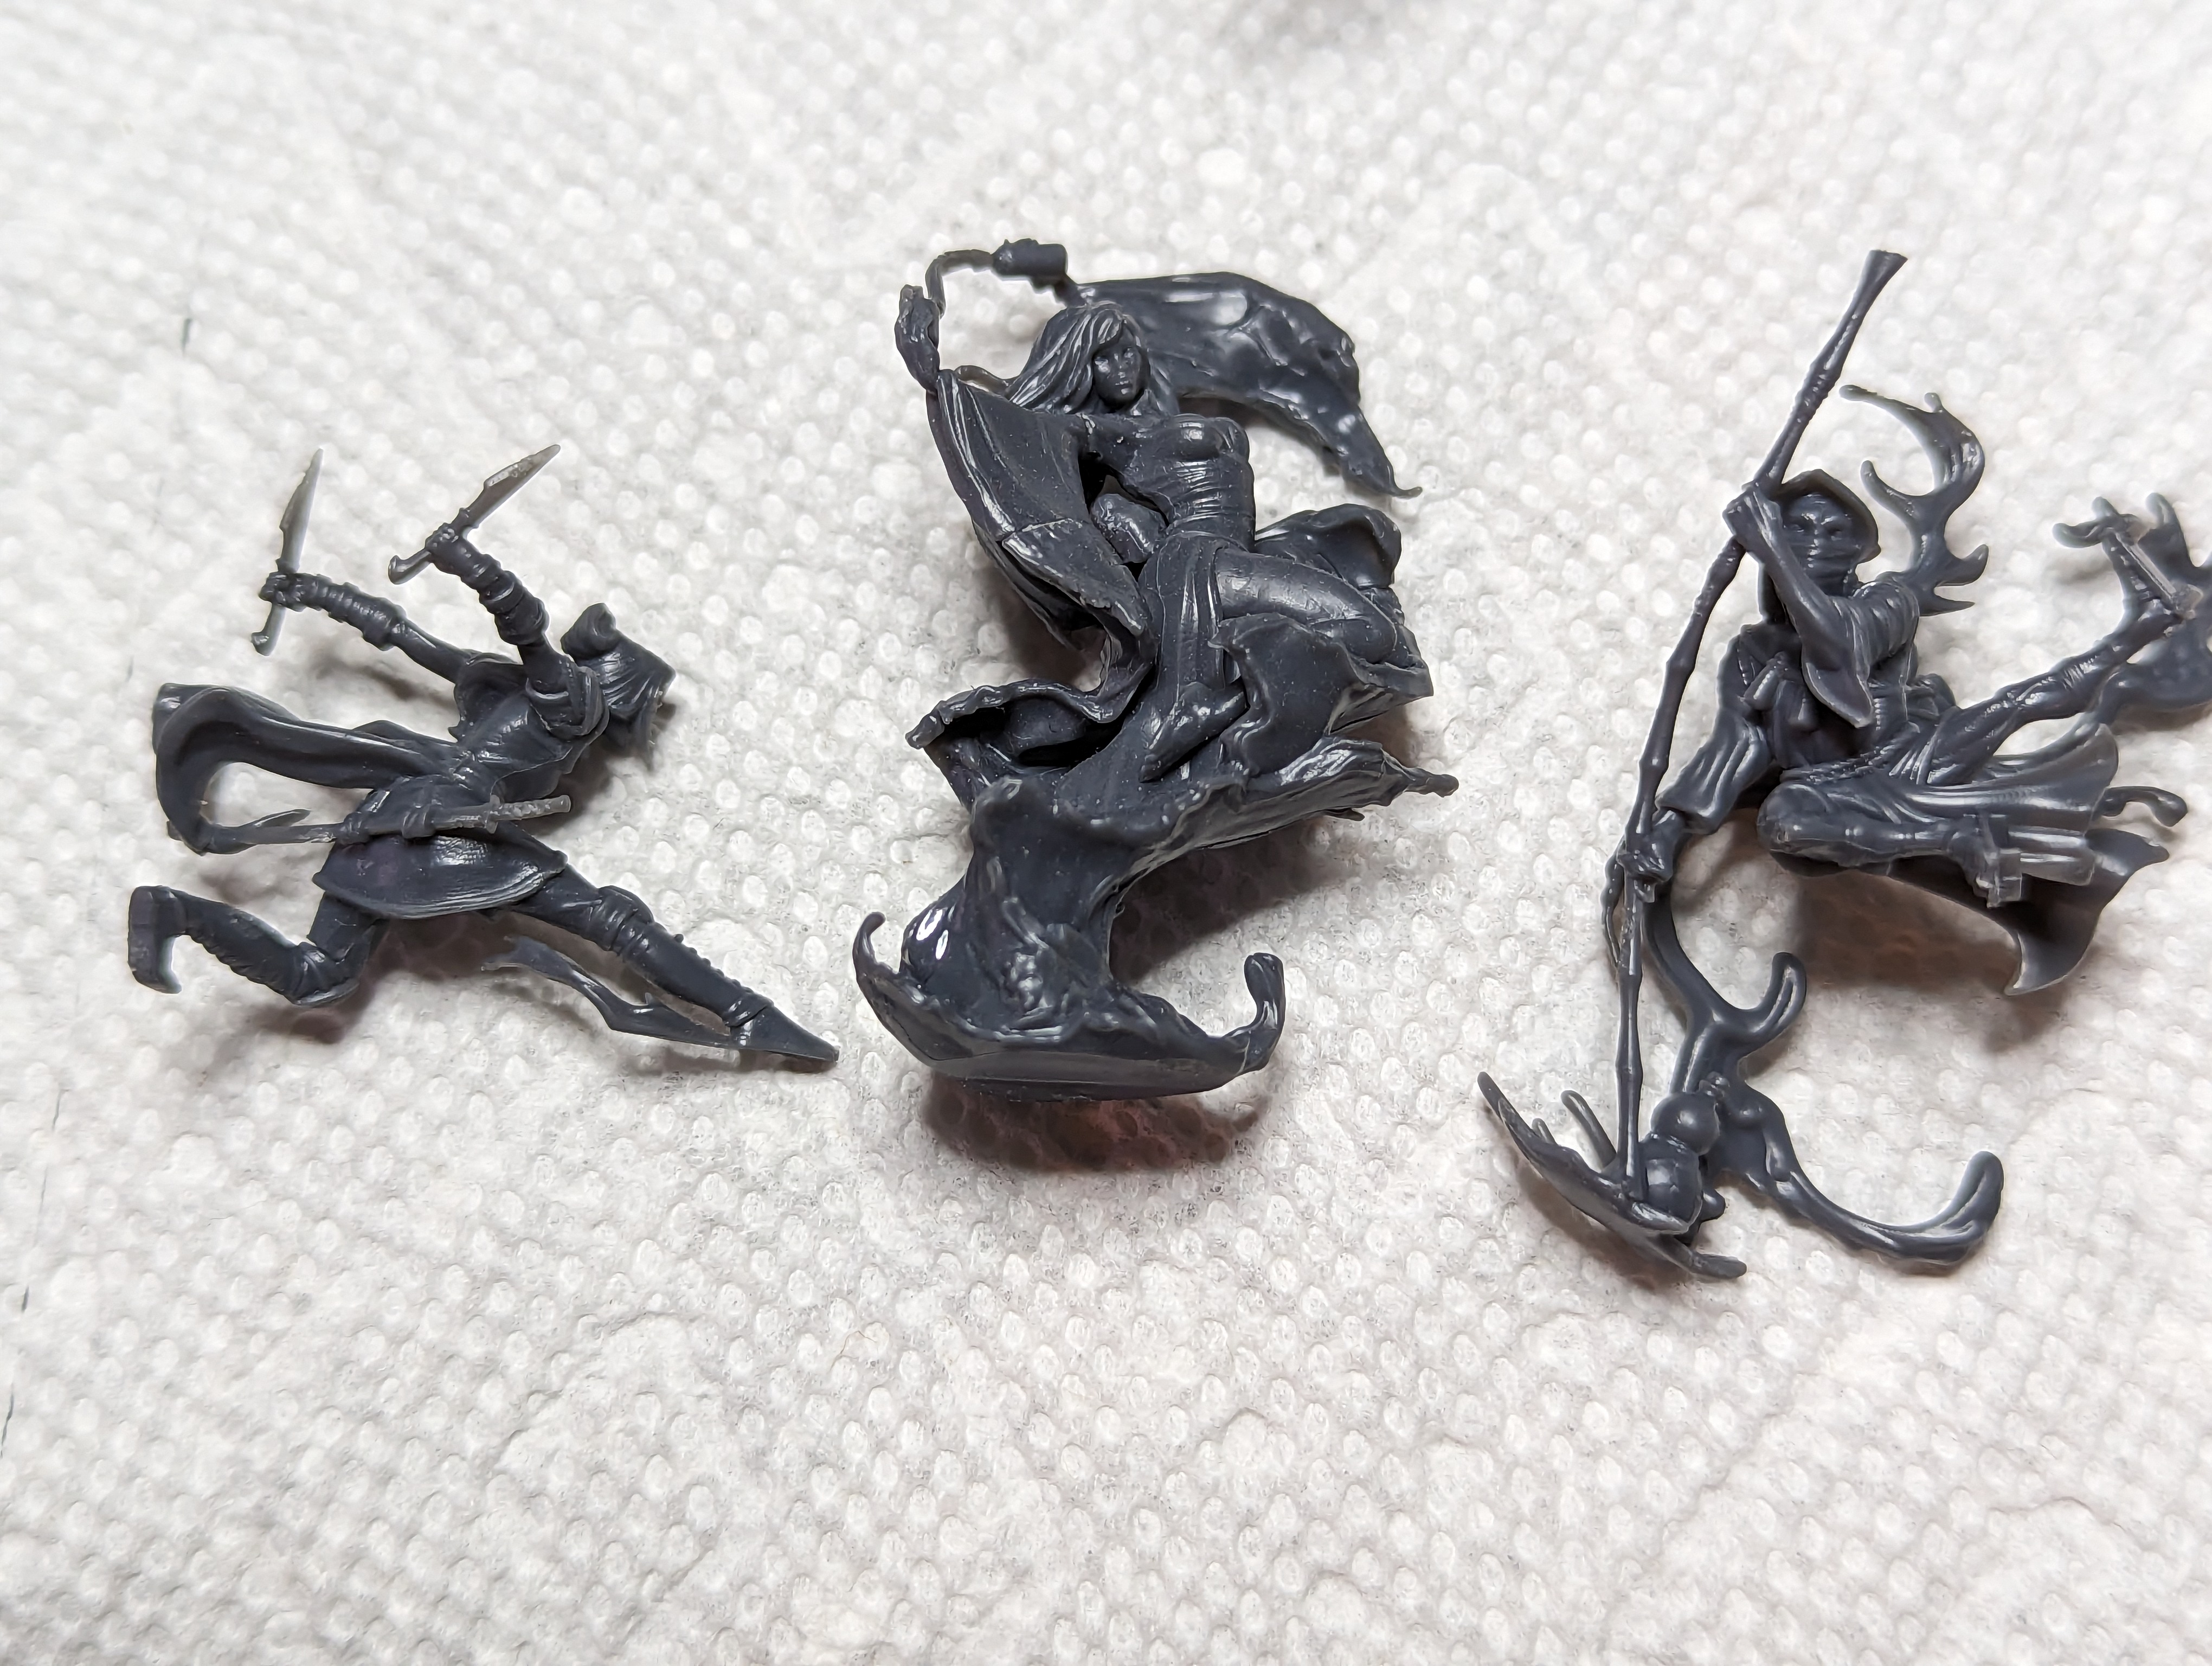
Misaki was my first master for Malifaux! She always had these really dynamic poses for her older models, but her new model is very subdued (for story reasons).
The version I used for her is actually her 1st edition sculpt that they redid in plastic as a special edition. In that sculpt she is standing on a rock, so thats how I did her whole crew. I kind of hate when models come with basing features, but oh well.
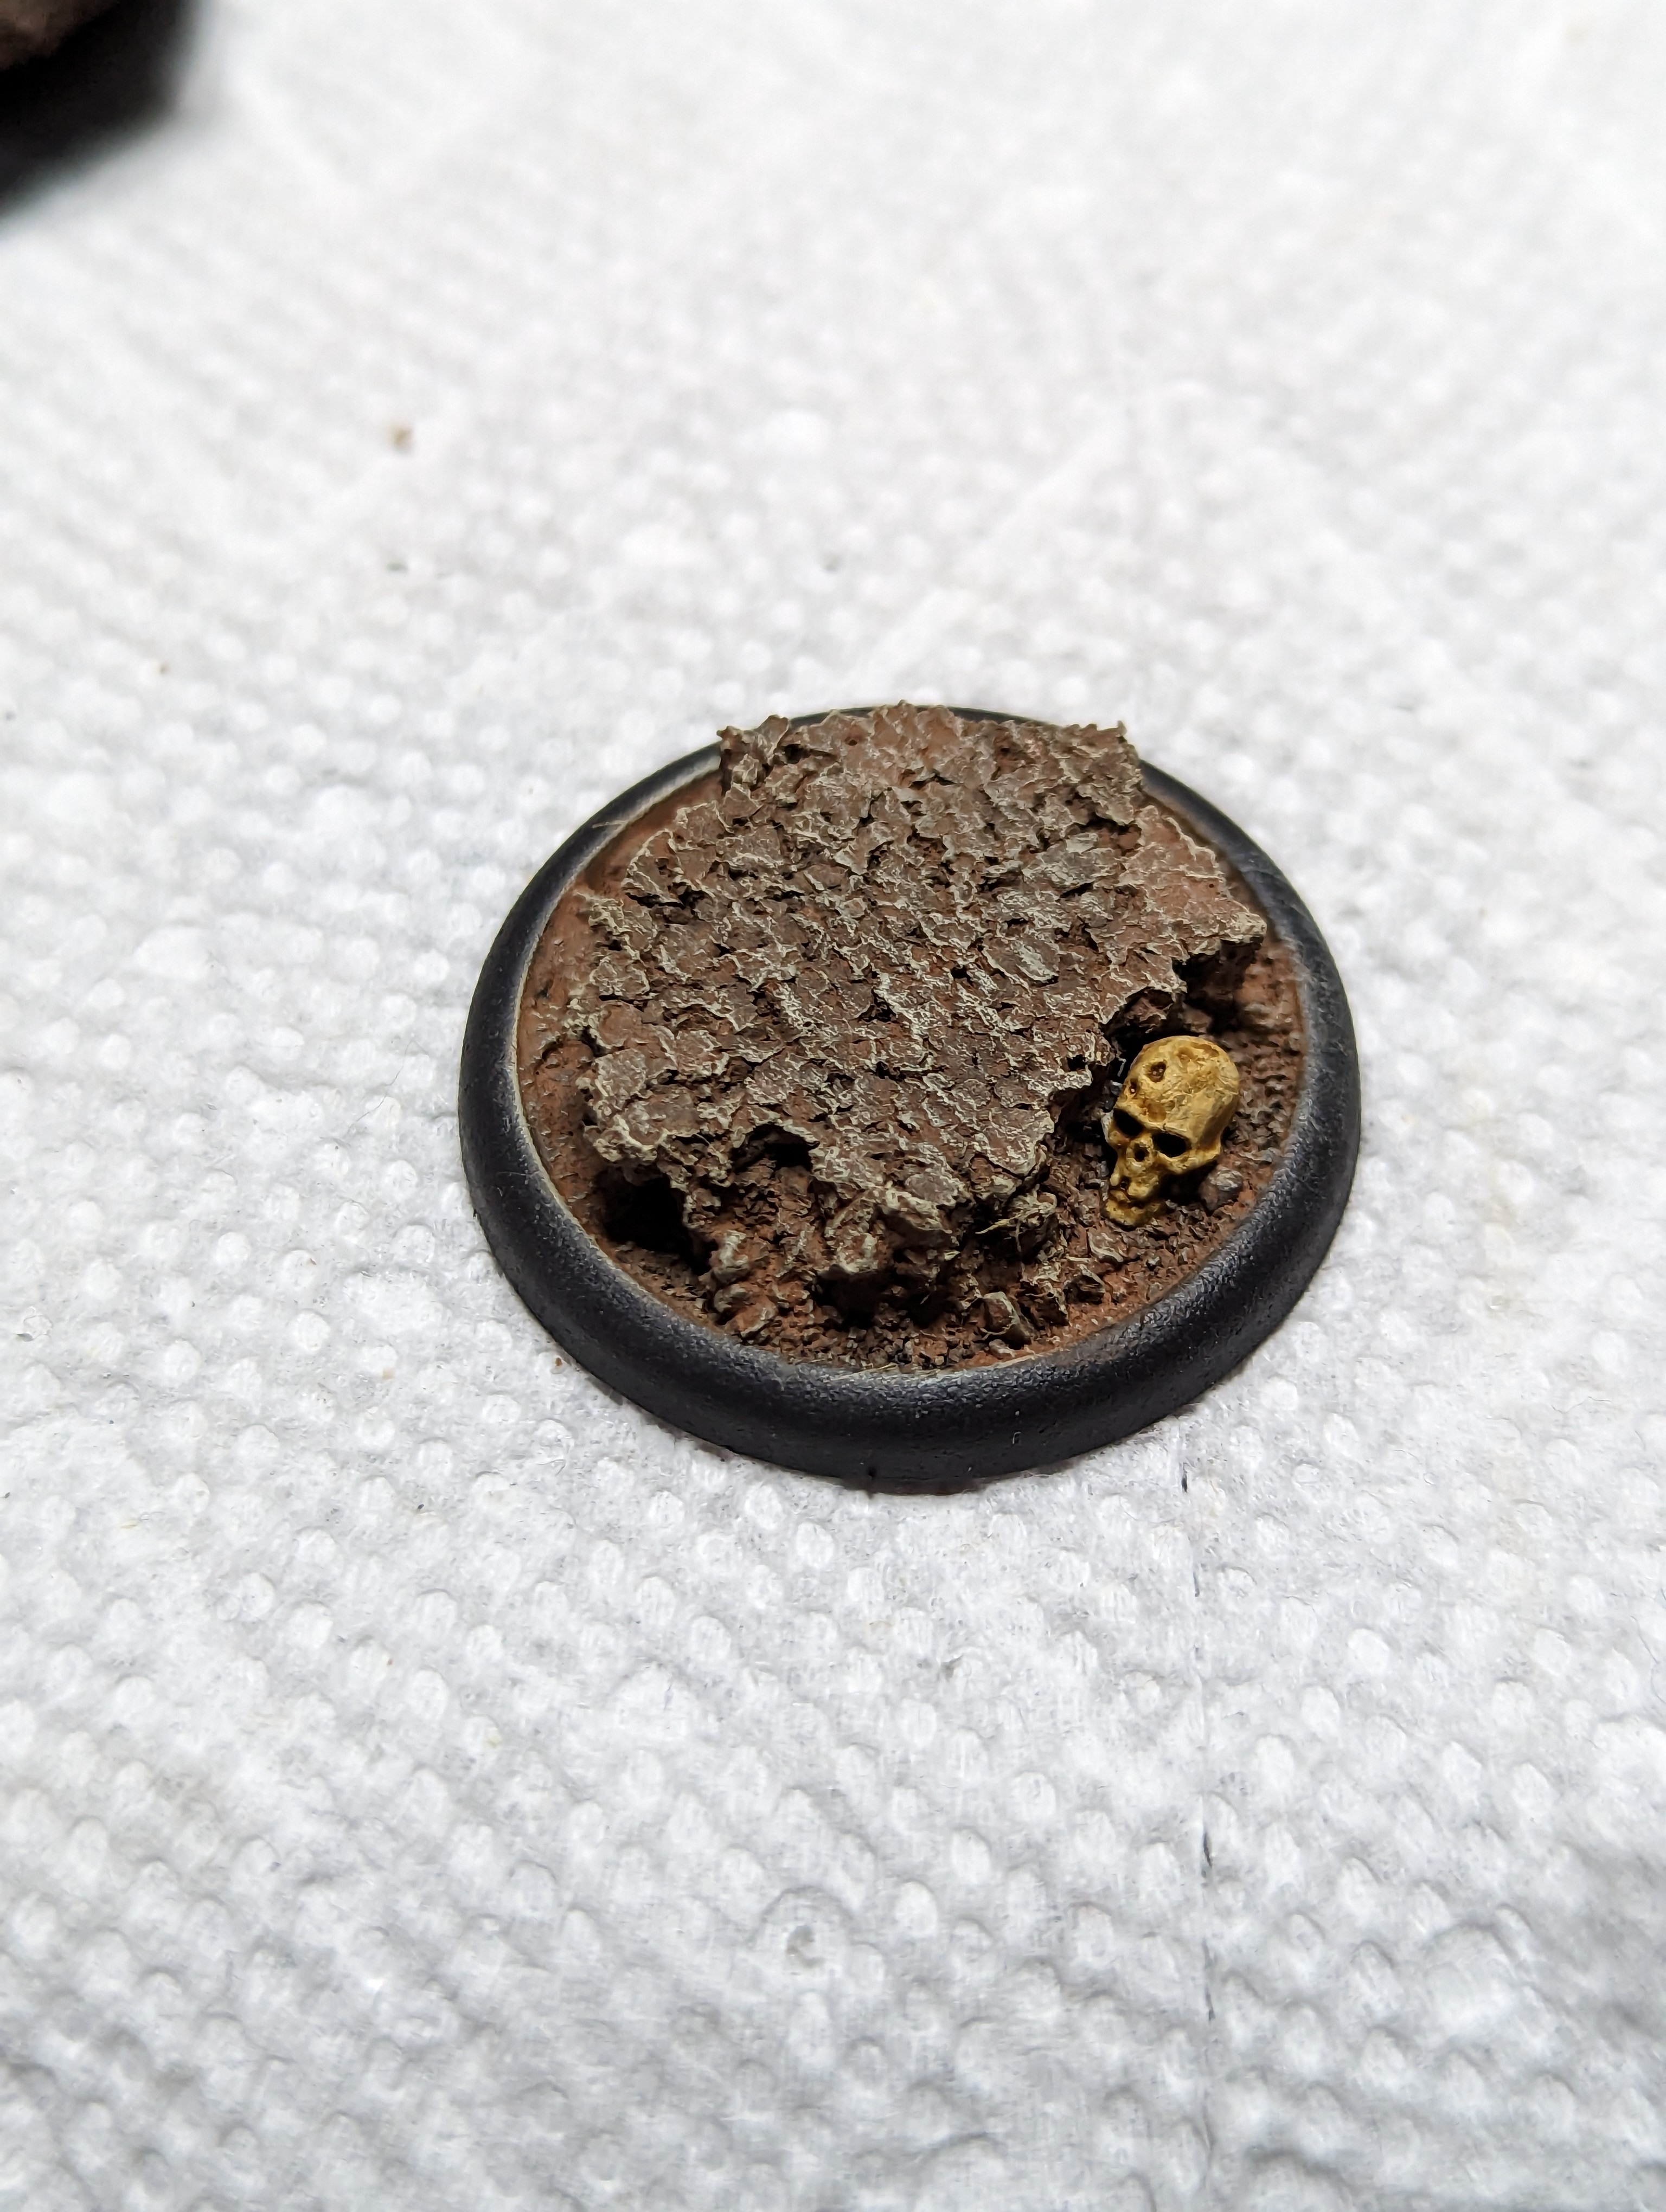
English Ivan is the other master in this box. He is a shadow man that summons shadow monsters. I found a cool tutorial from Eons Of Battle for blackstone fortress bases. They have these lines in the floor with osl, and I like the way it plays with shadows and lines, so I decided to base my Ivan crew like that. Mixing the 2 will be weird.
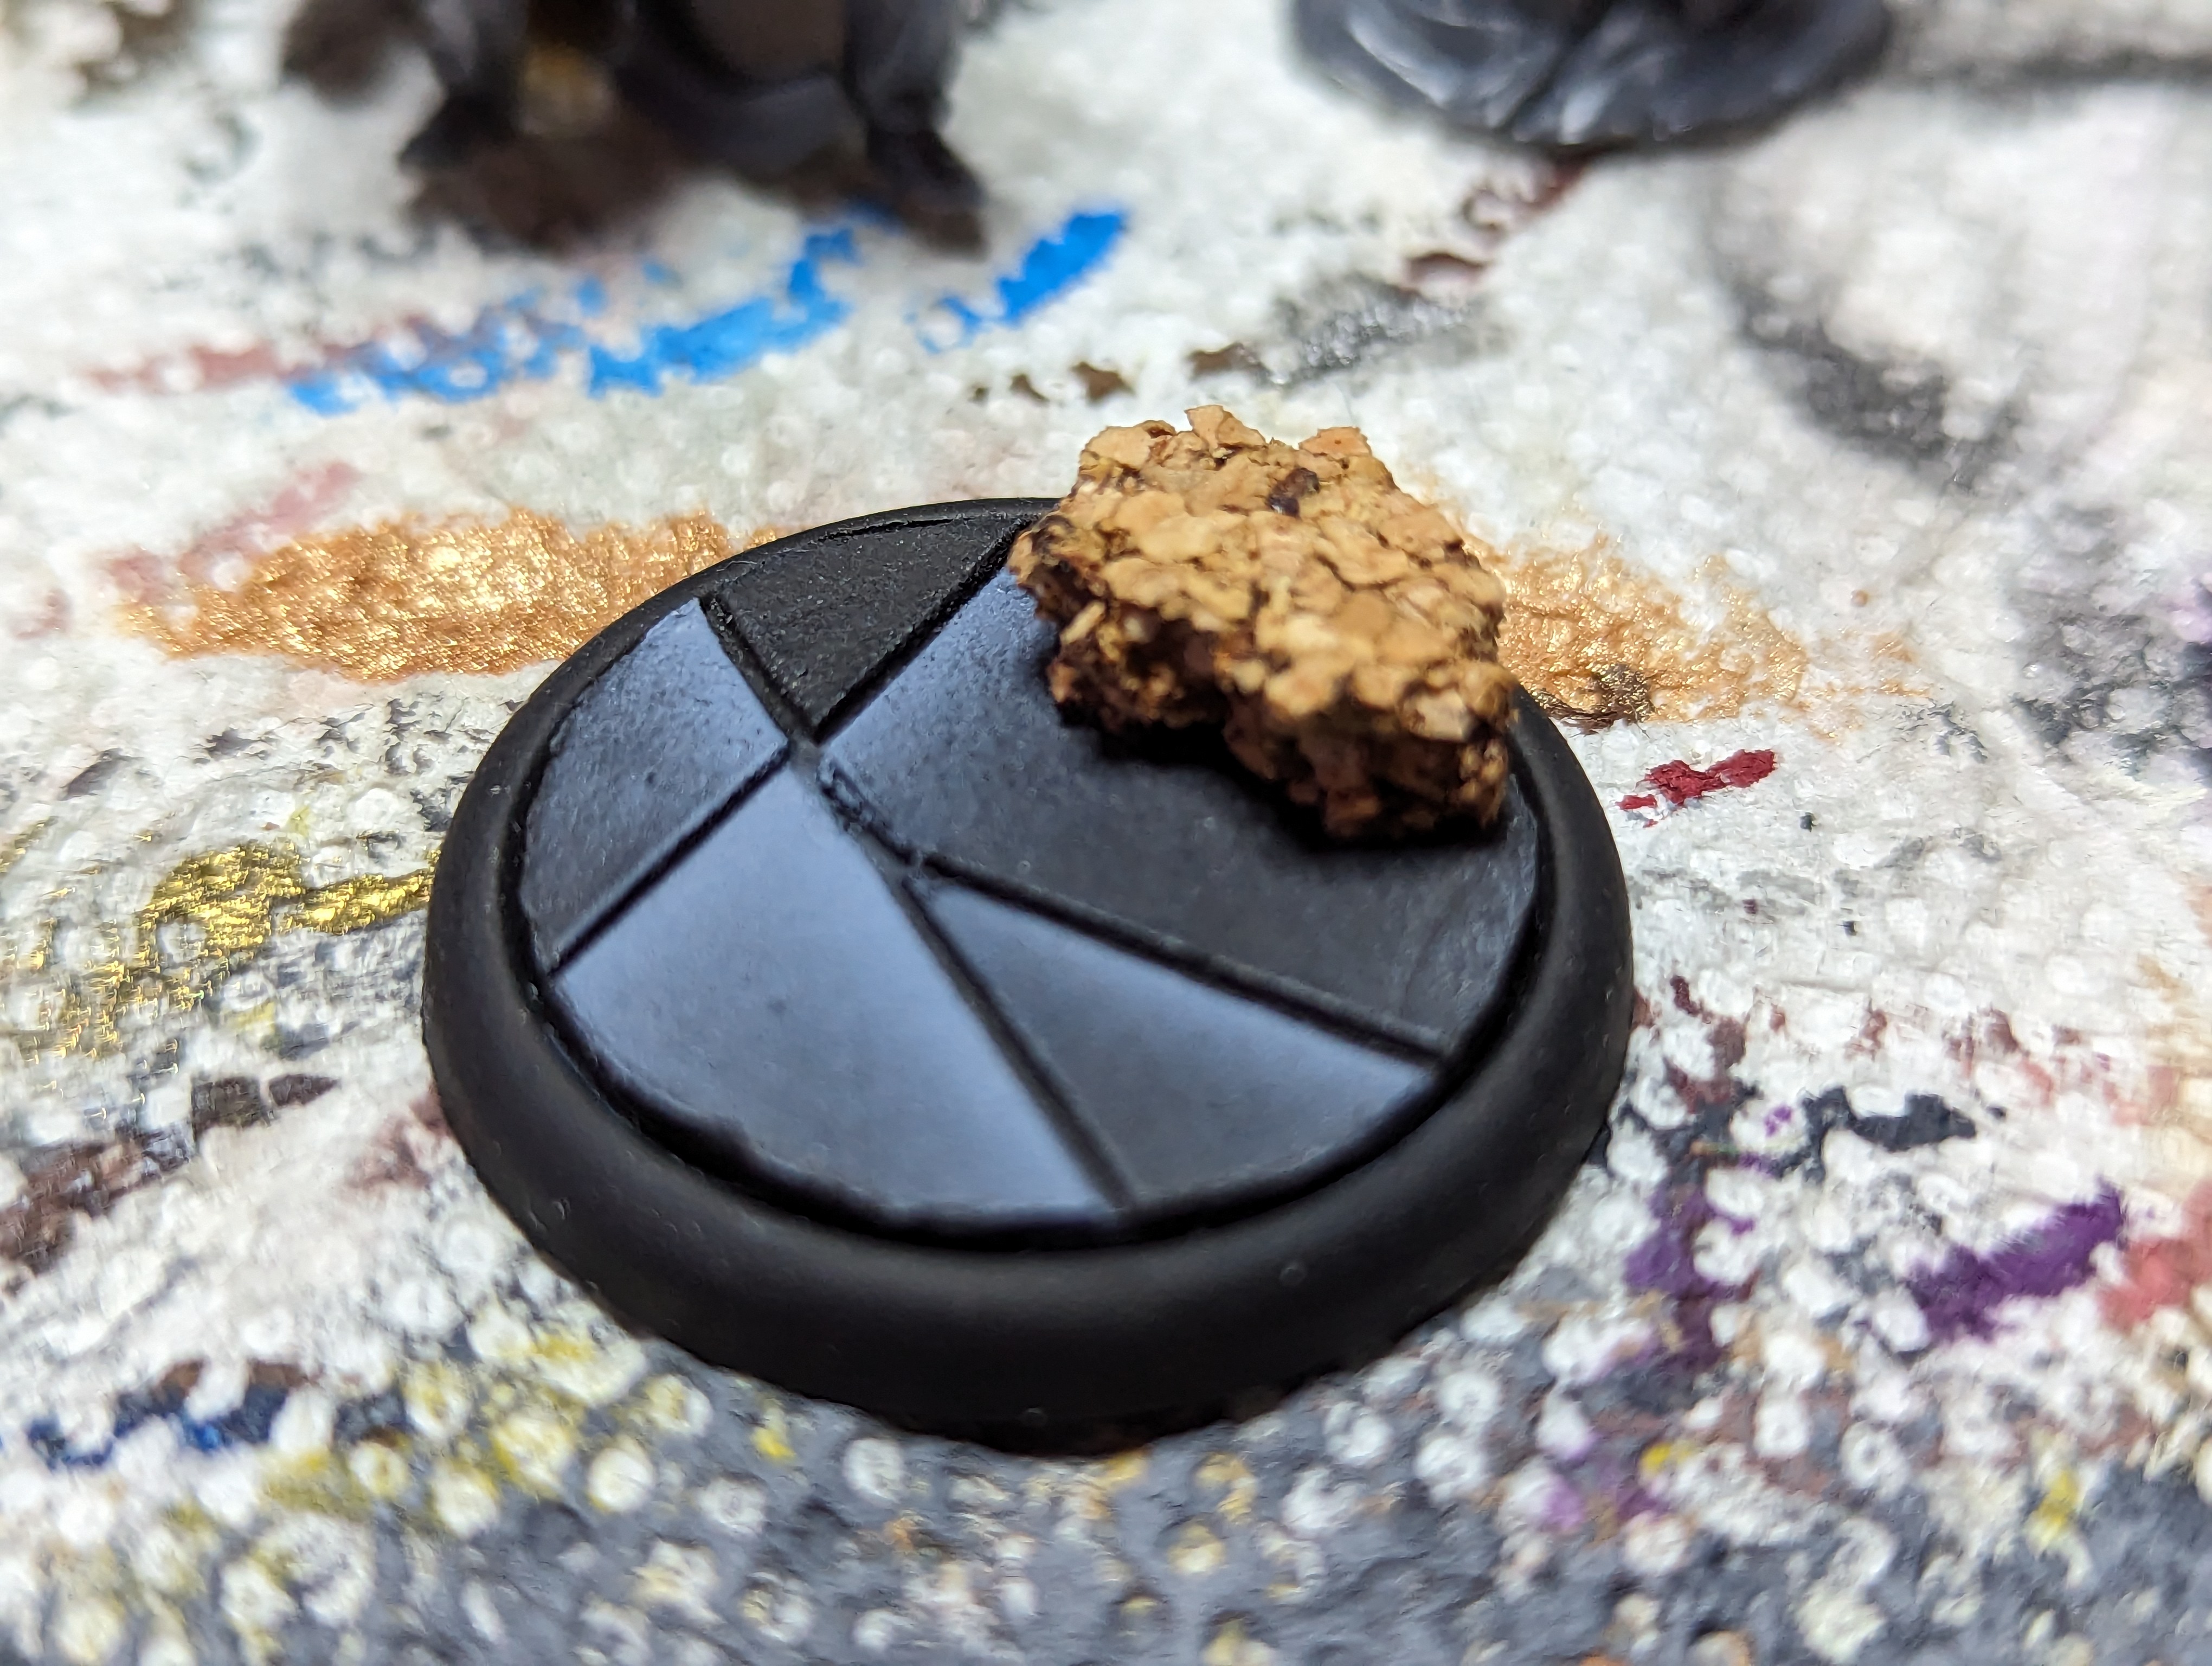
I had 2 Ivan bases already made up from when I did the rest of the crew last year. Basically they are made with cut plasticard, and then spraying the airbrush along the seams, but using a card to block one side so the light only goes one way. Its a cool effect and easy to do.
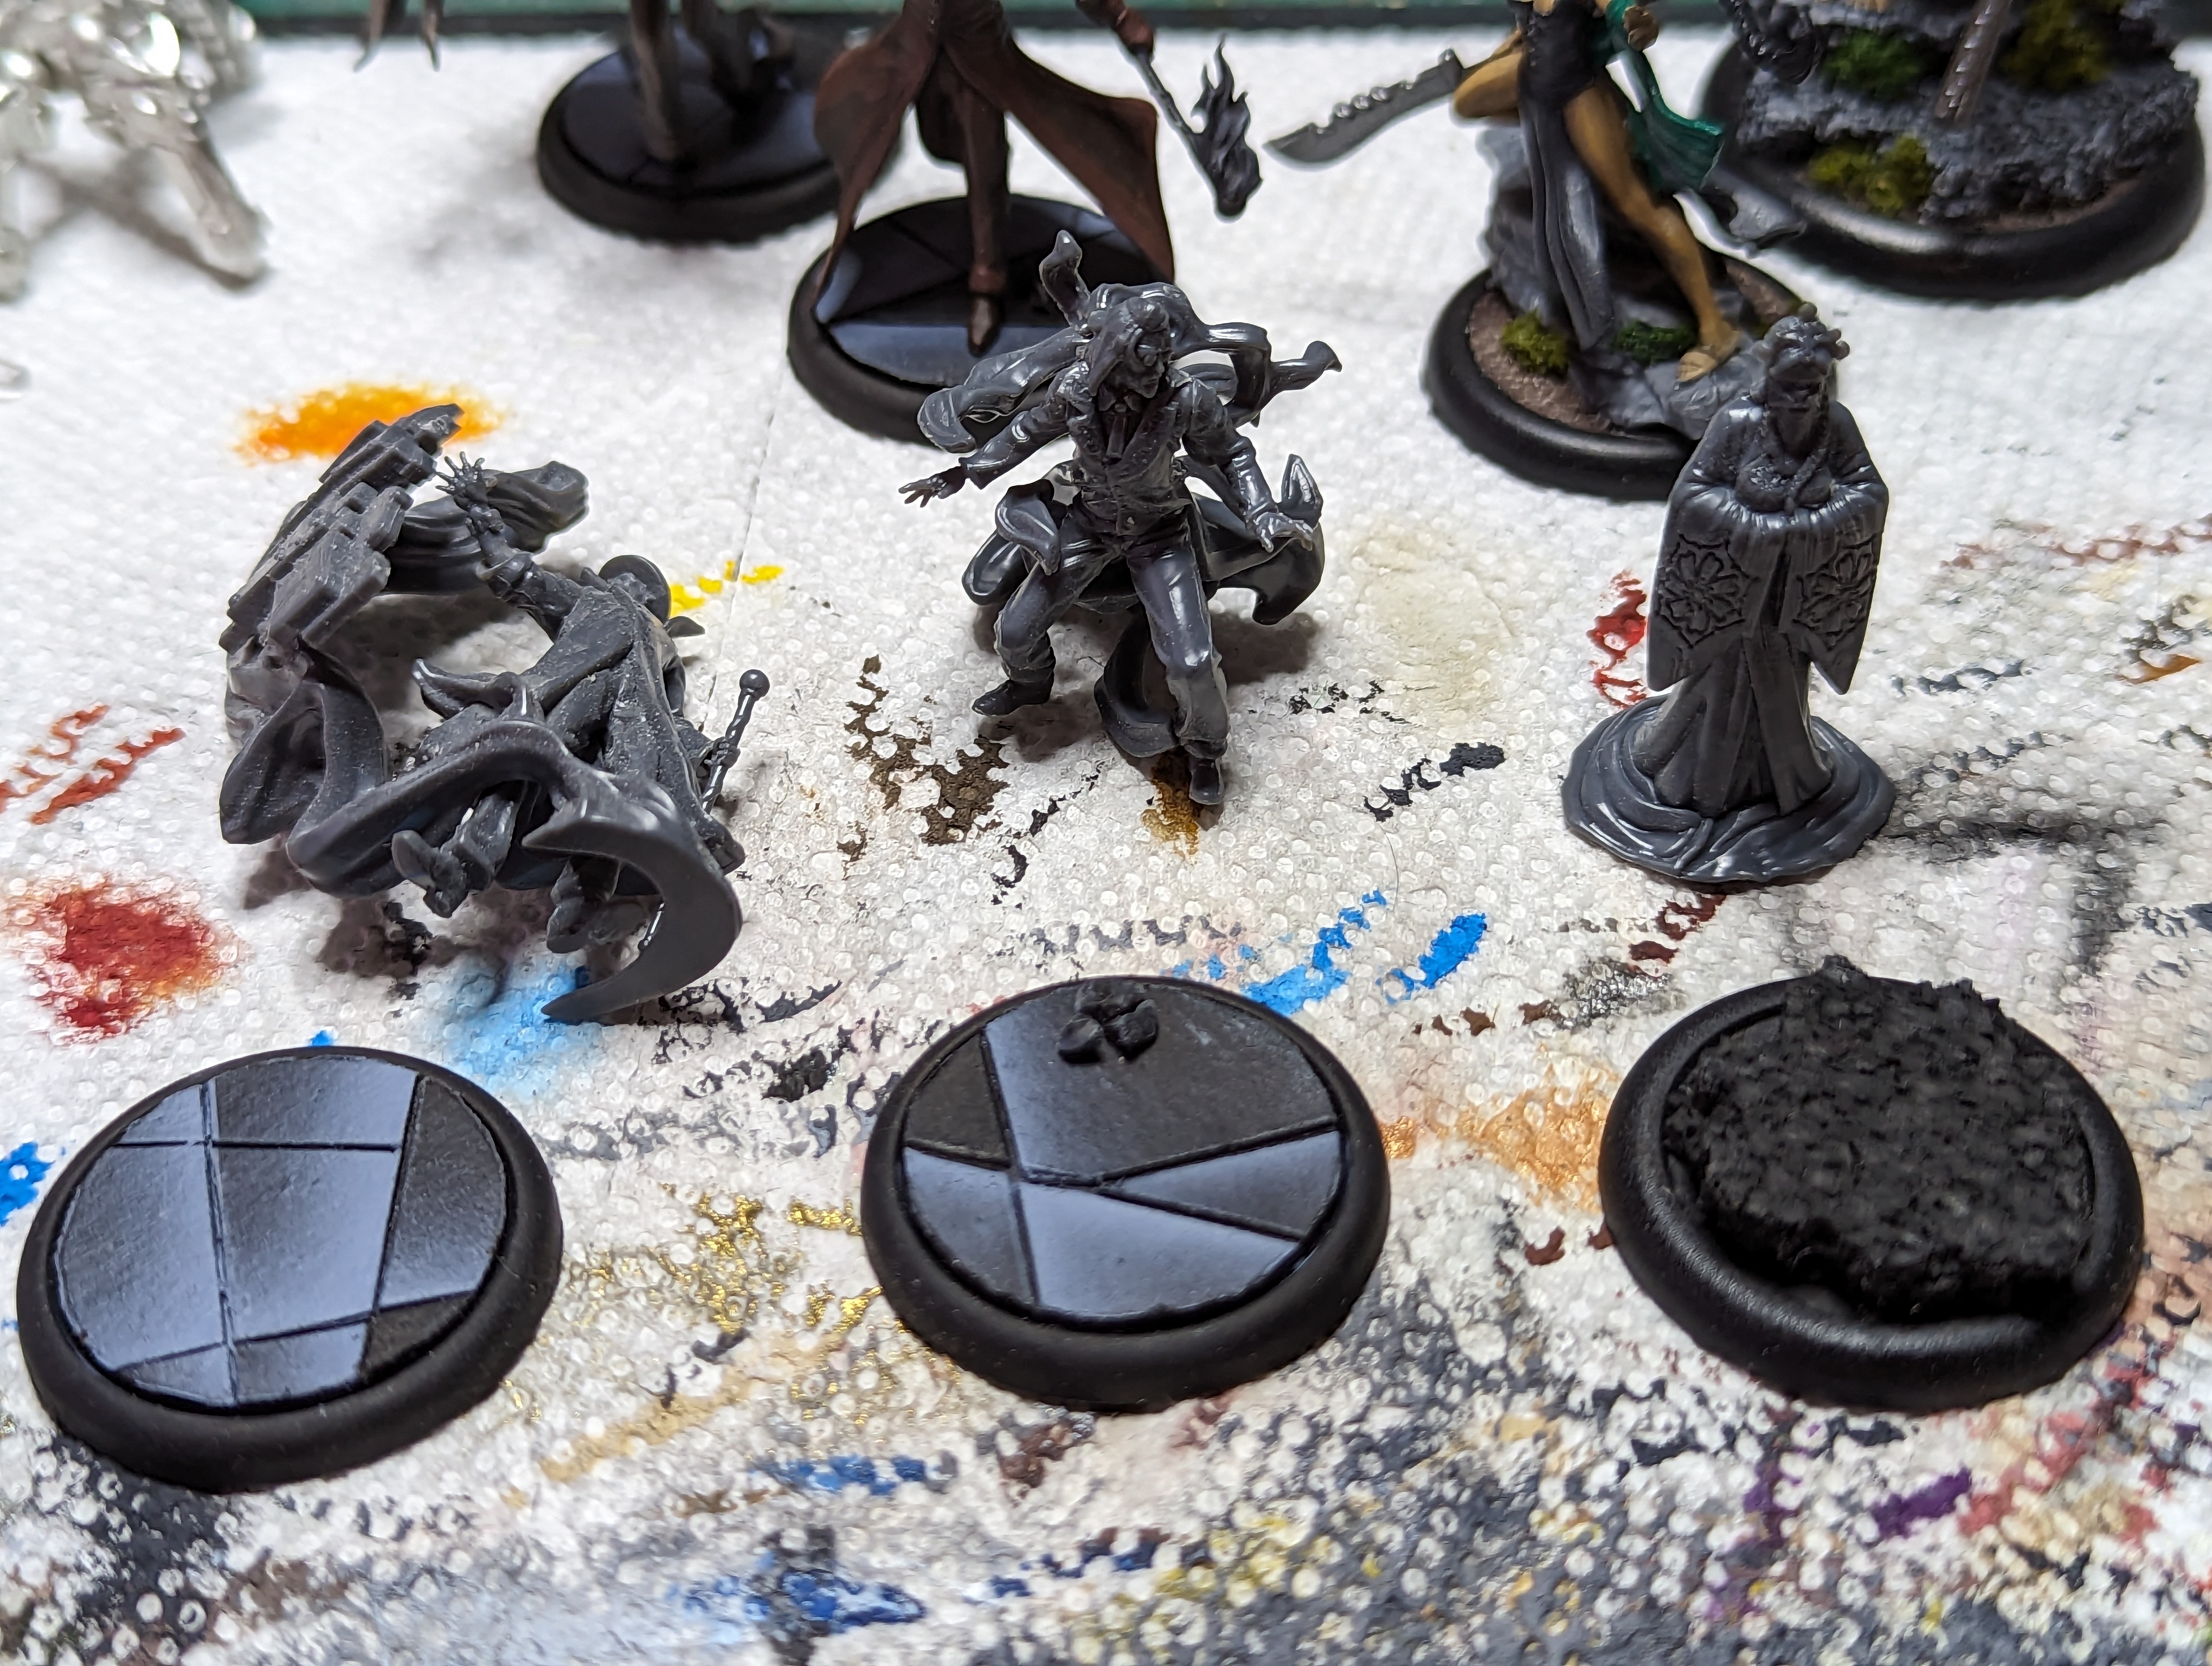
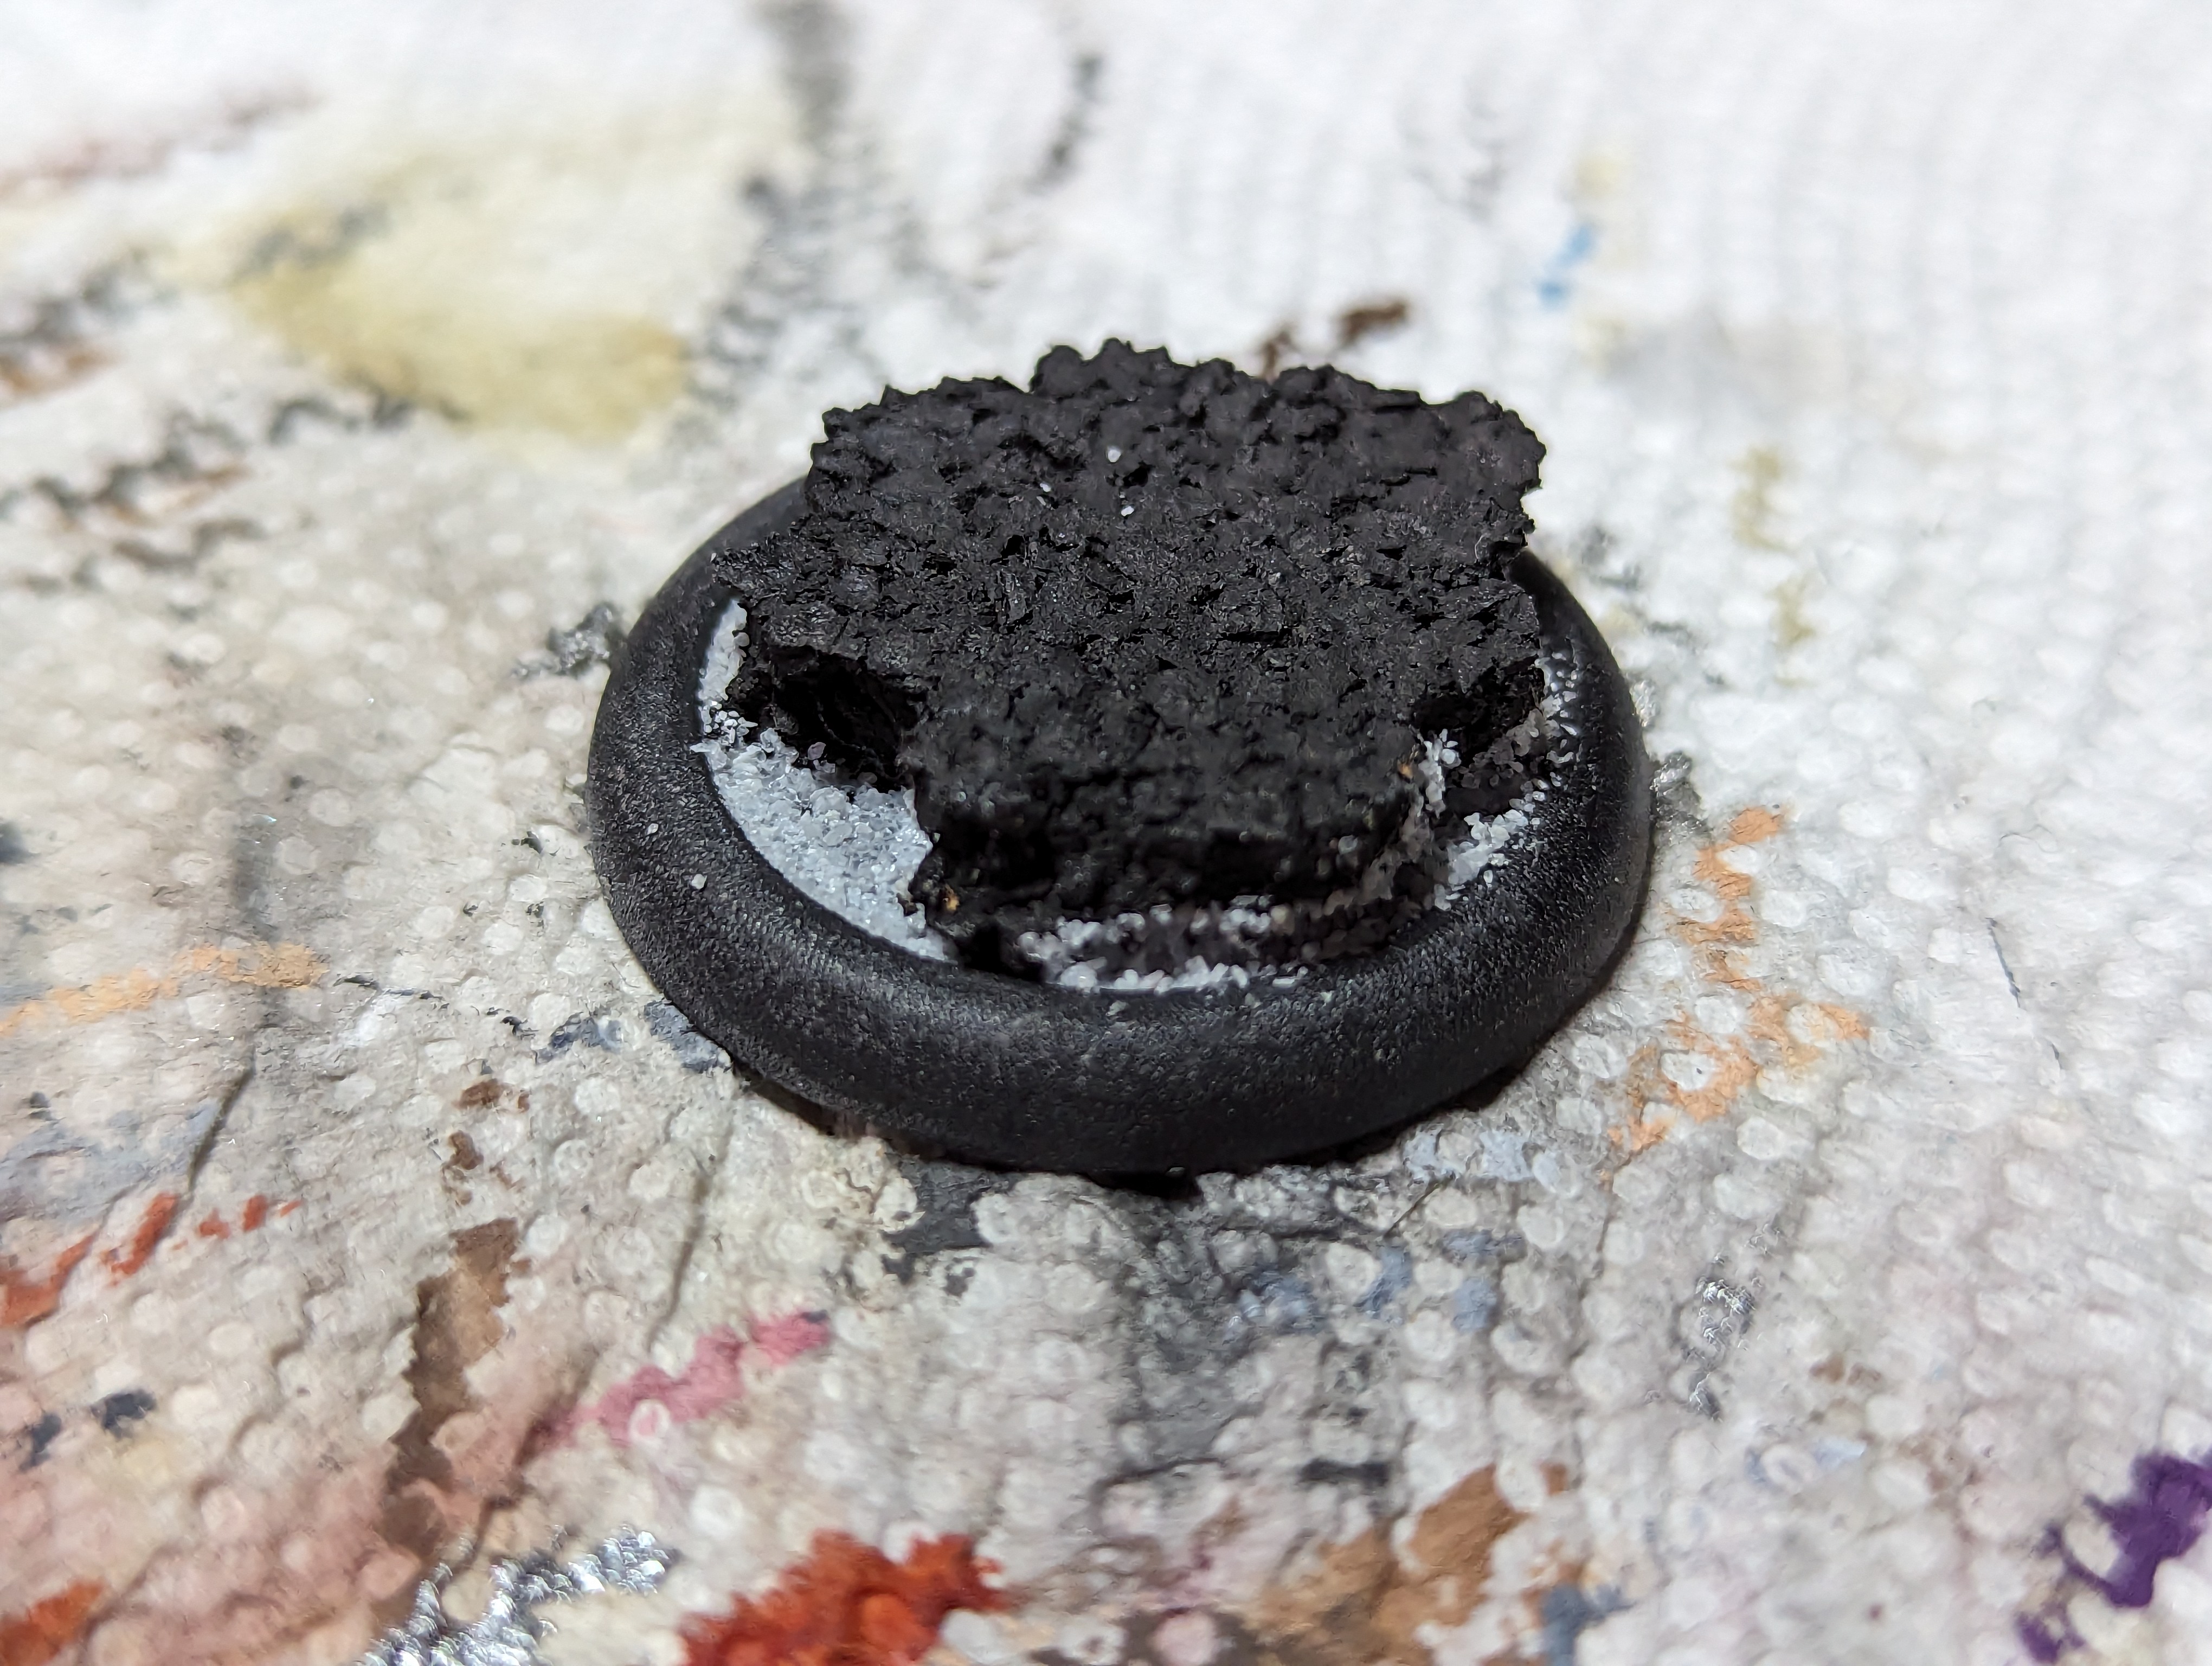
For Misaki I started with trusty cork sheet, ripped into a small piece that will fit her feet. I then filled in around it with sand. For the mixed base I decided that it is going to look like the darkness realm is phasing in to the forest where Misaki is, so I added some cork to the edge of one of the Ivan bases.
Some easy highlights on the rocks to make em look like rocks, and brown with a light brown drybrush on the sand, and they are all set. Simple but effective.
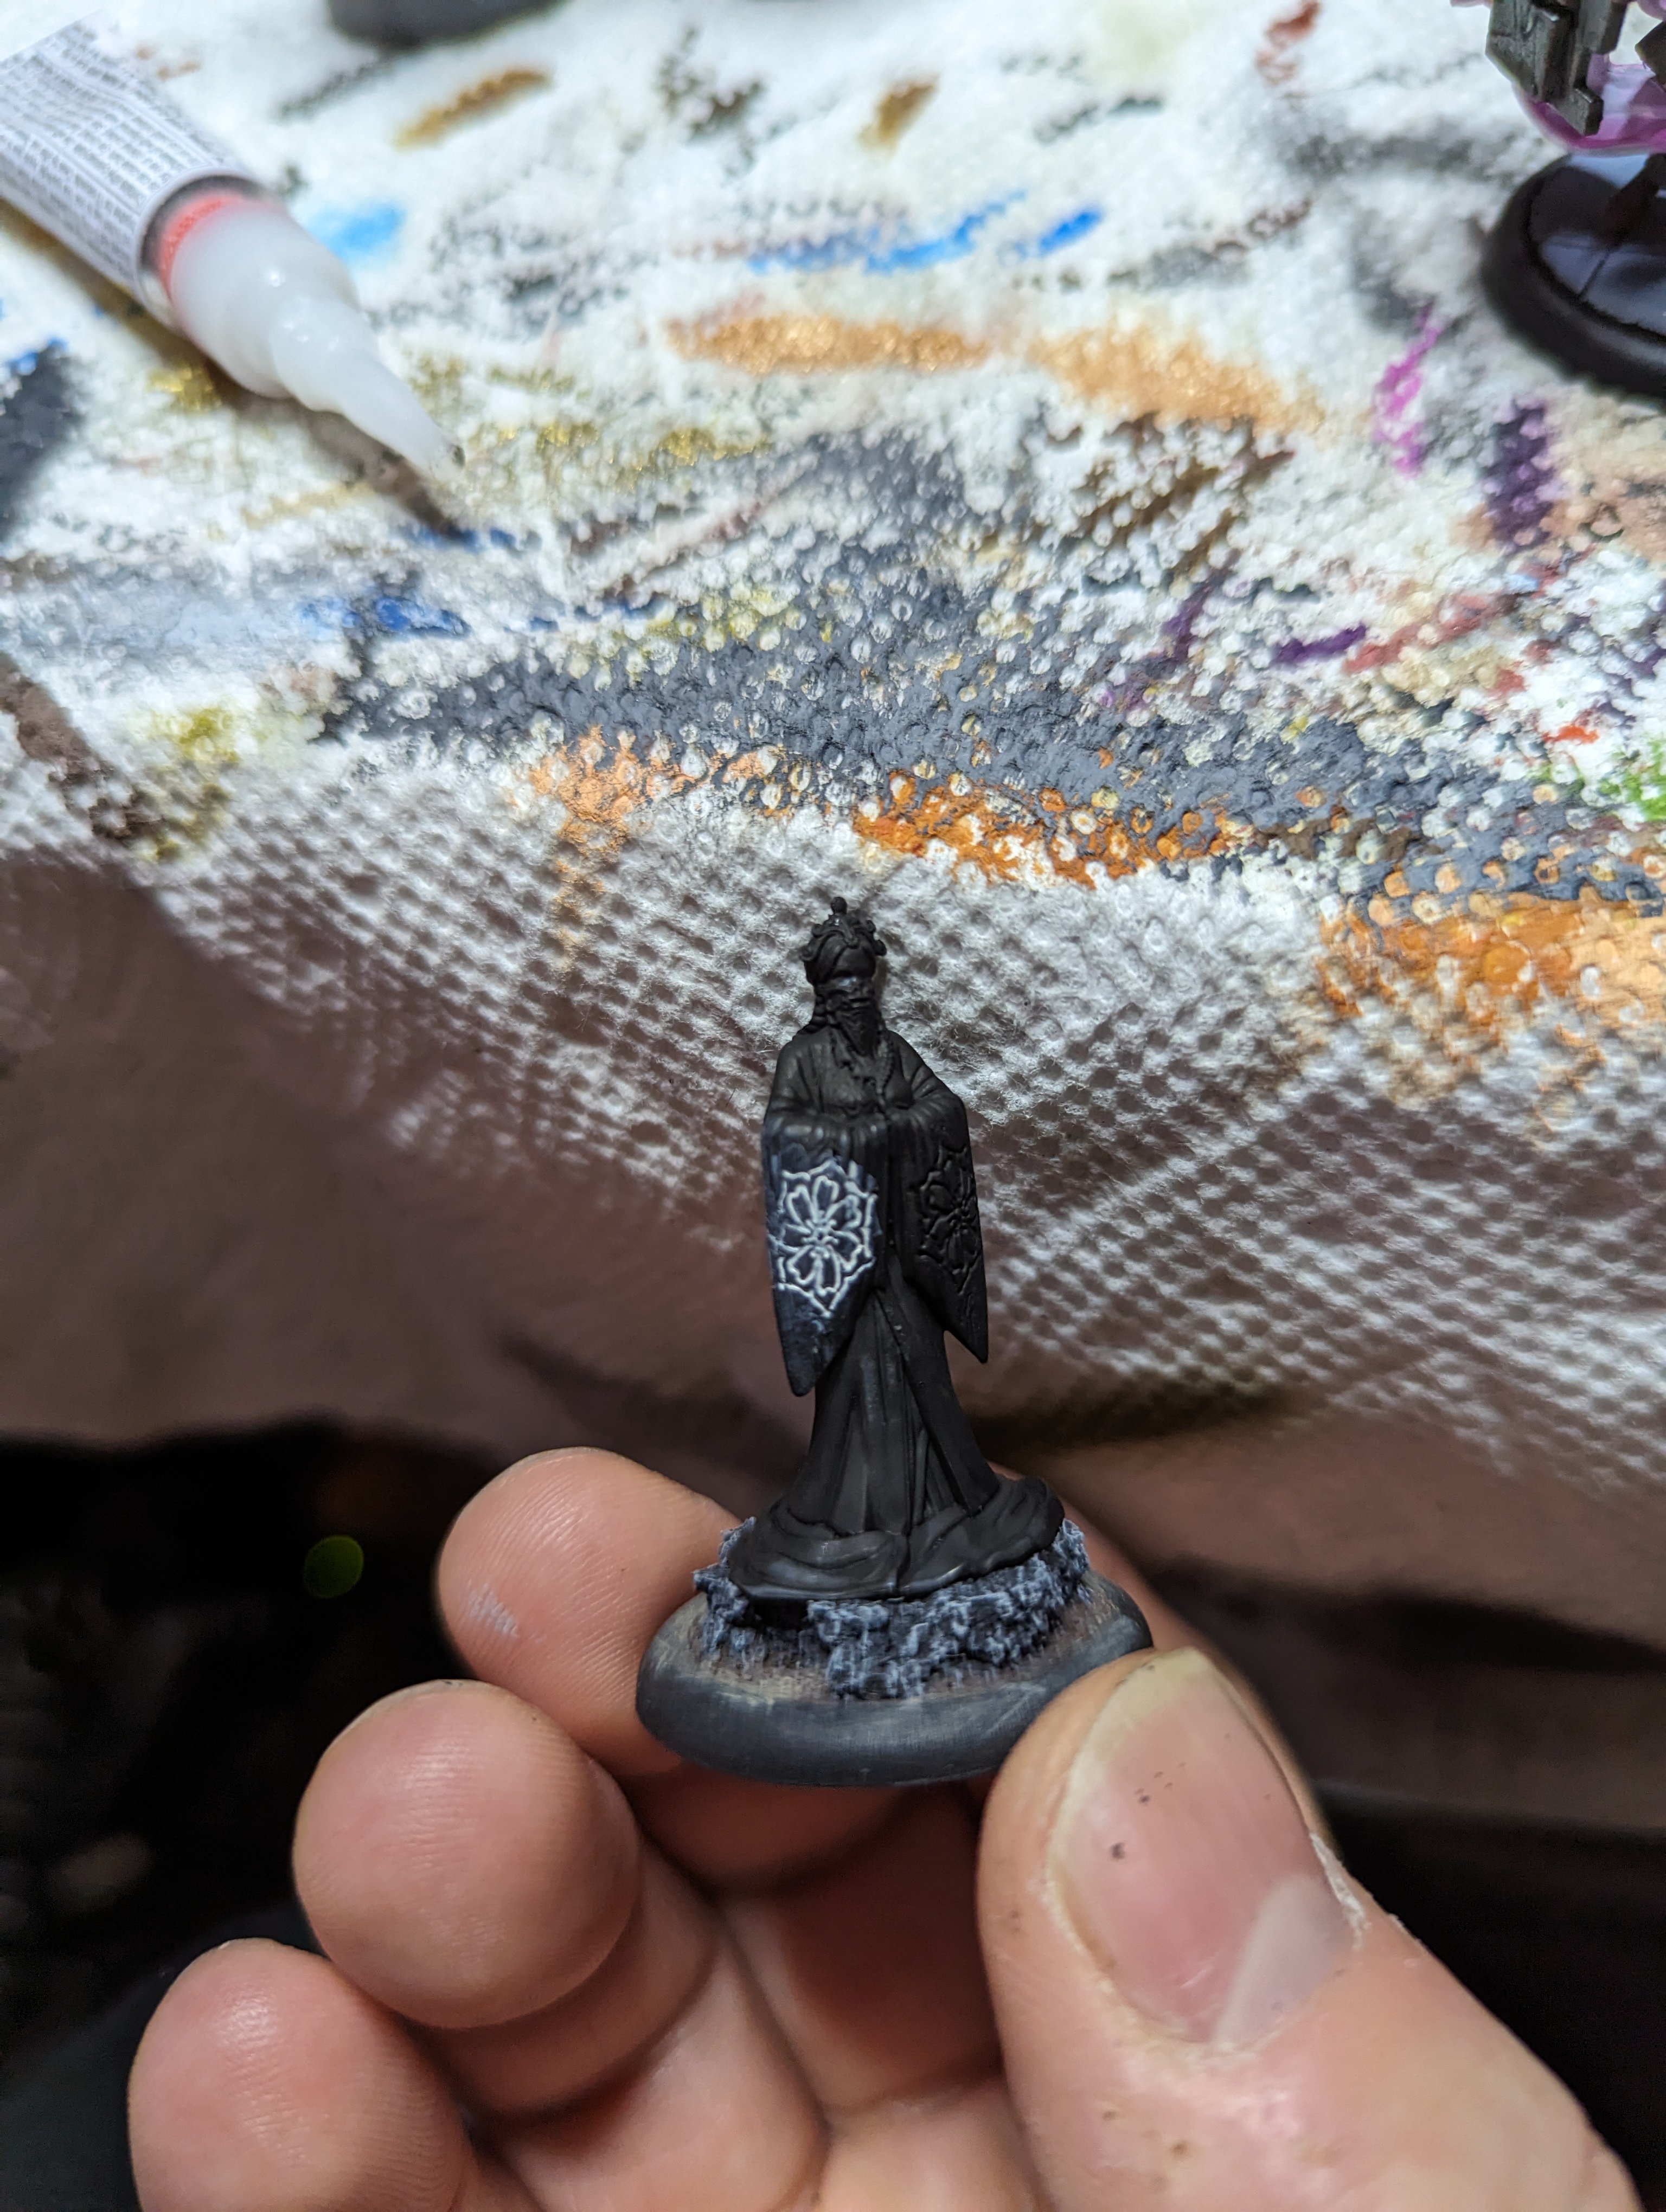
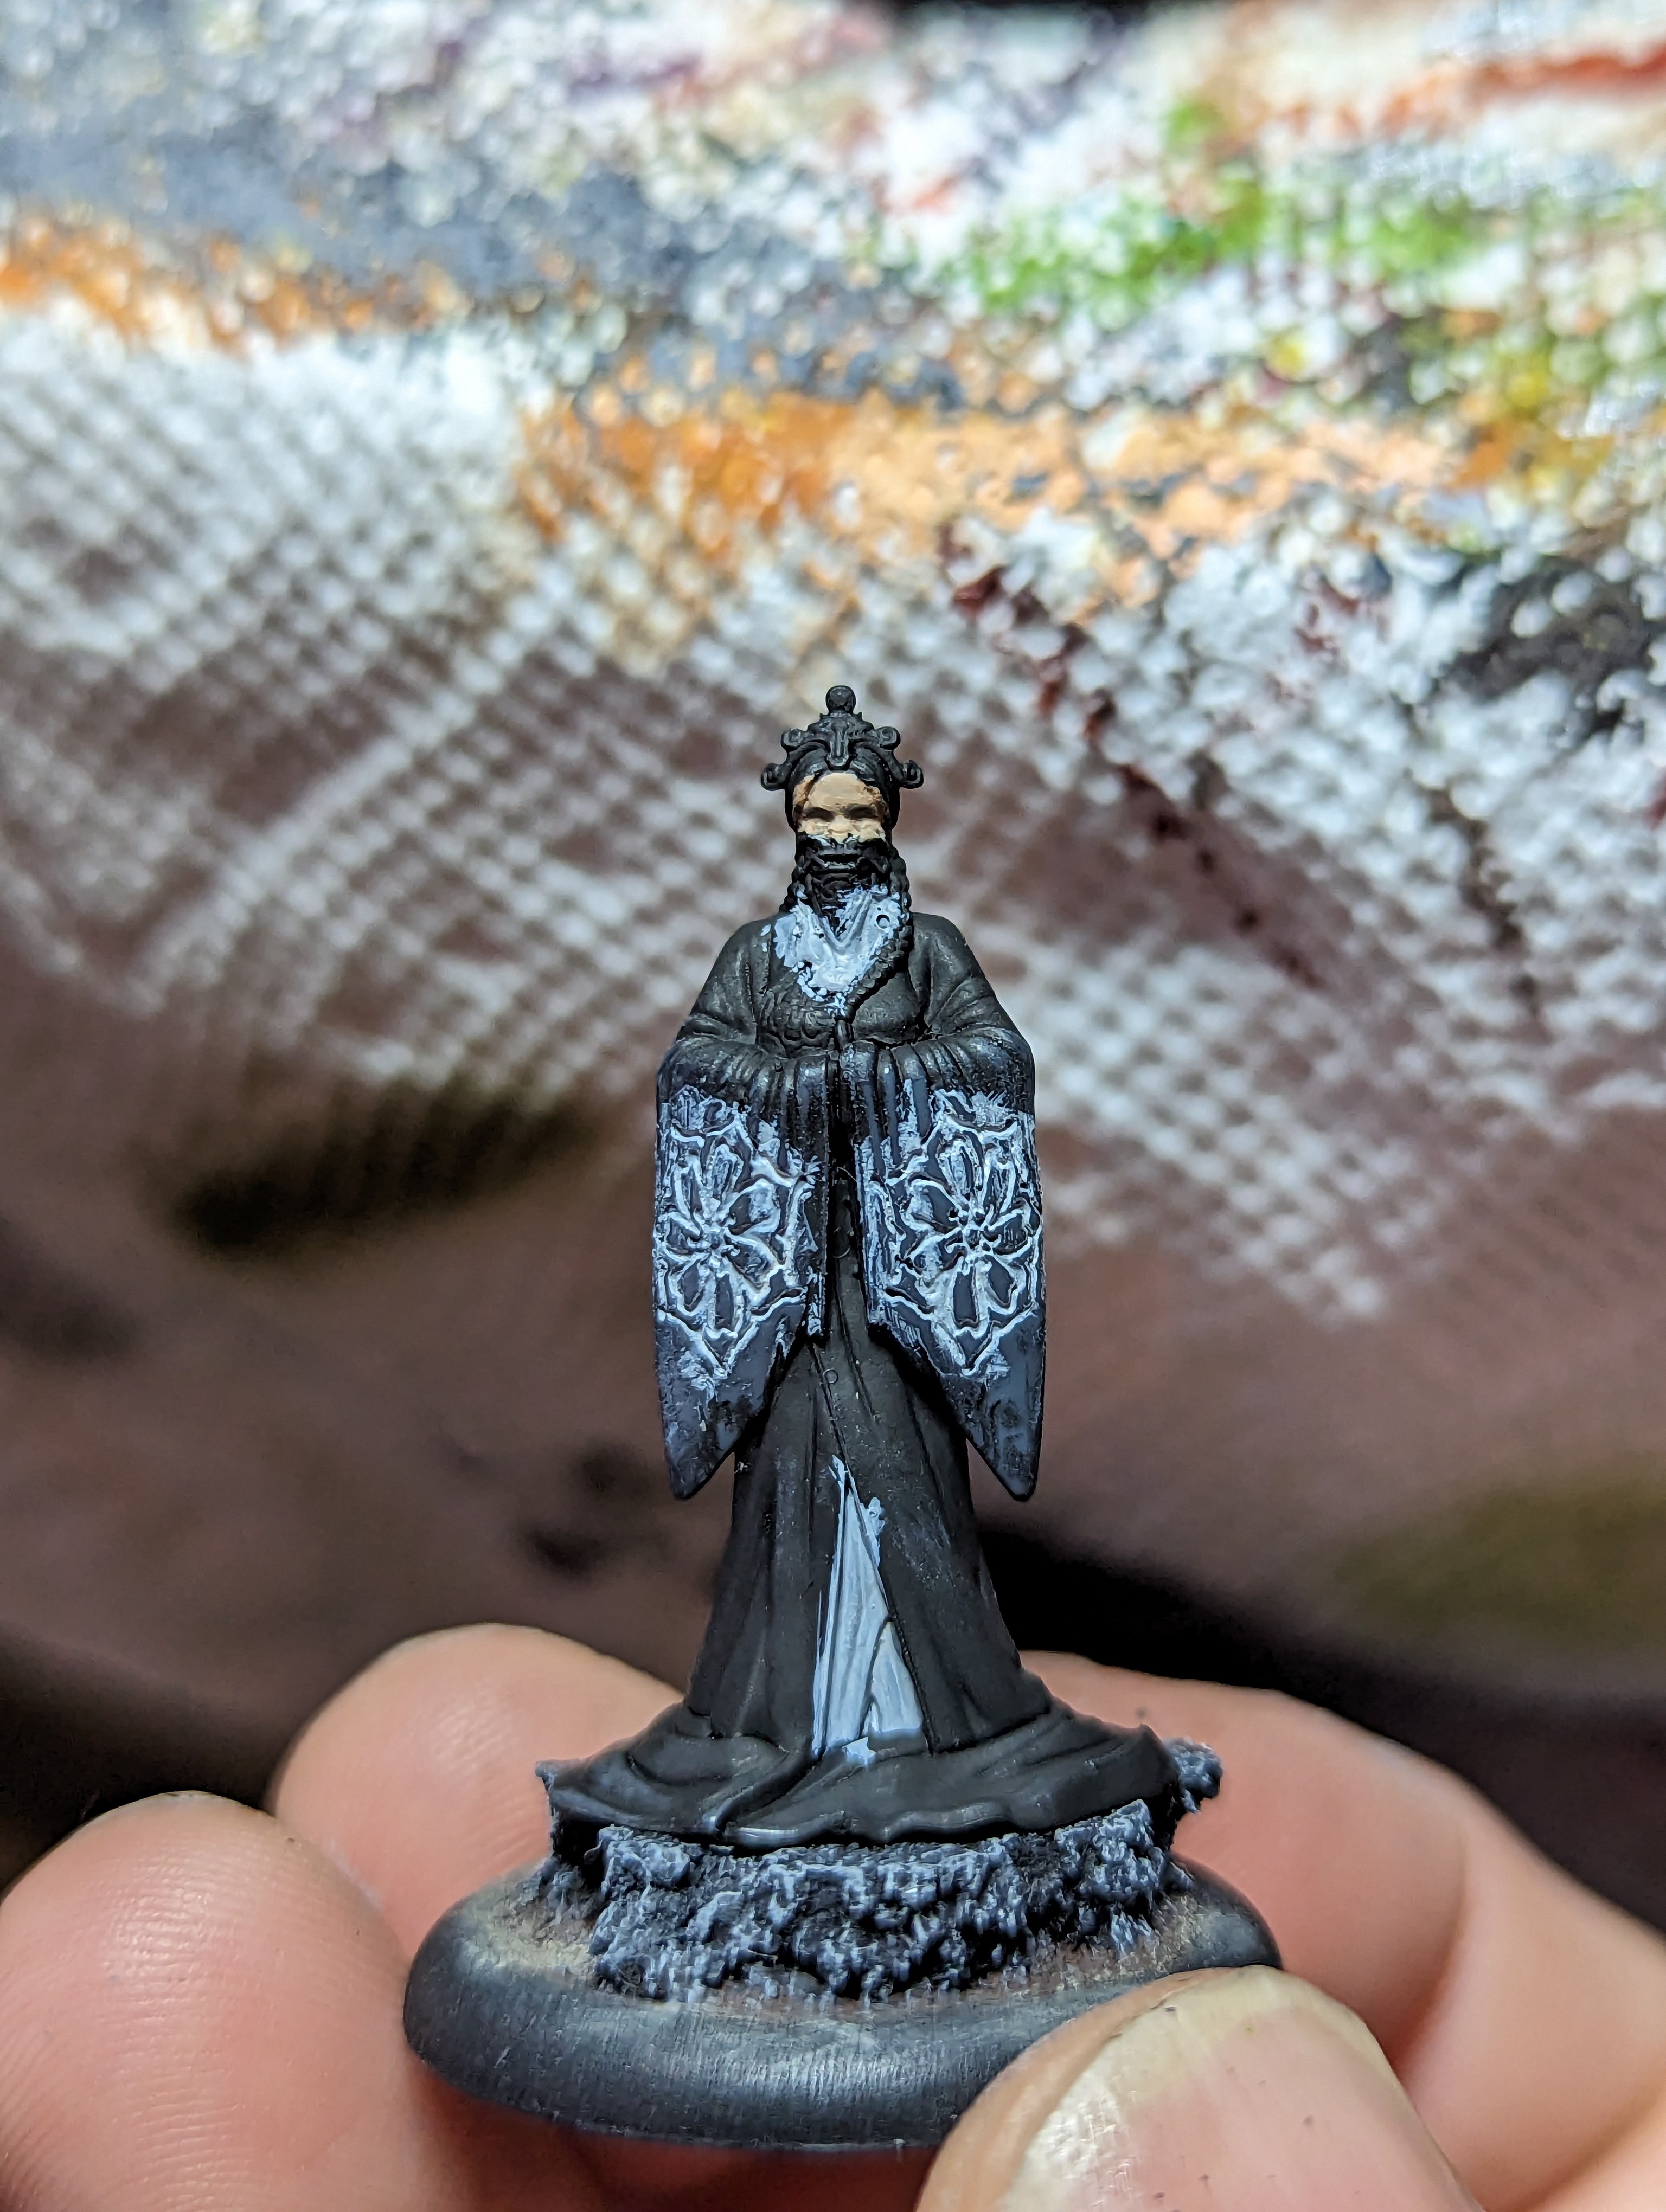
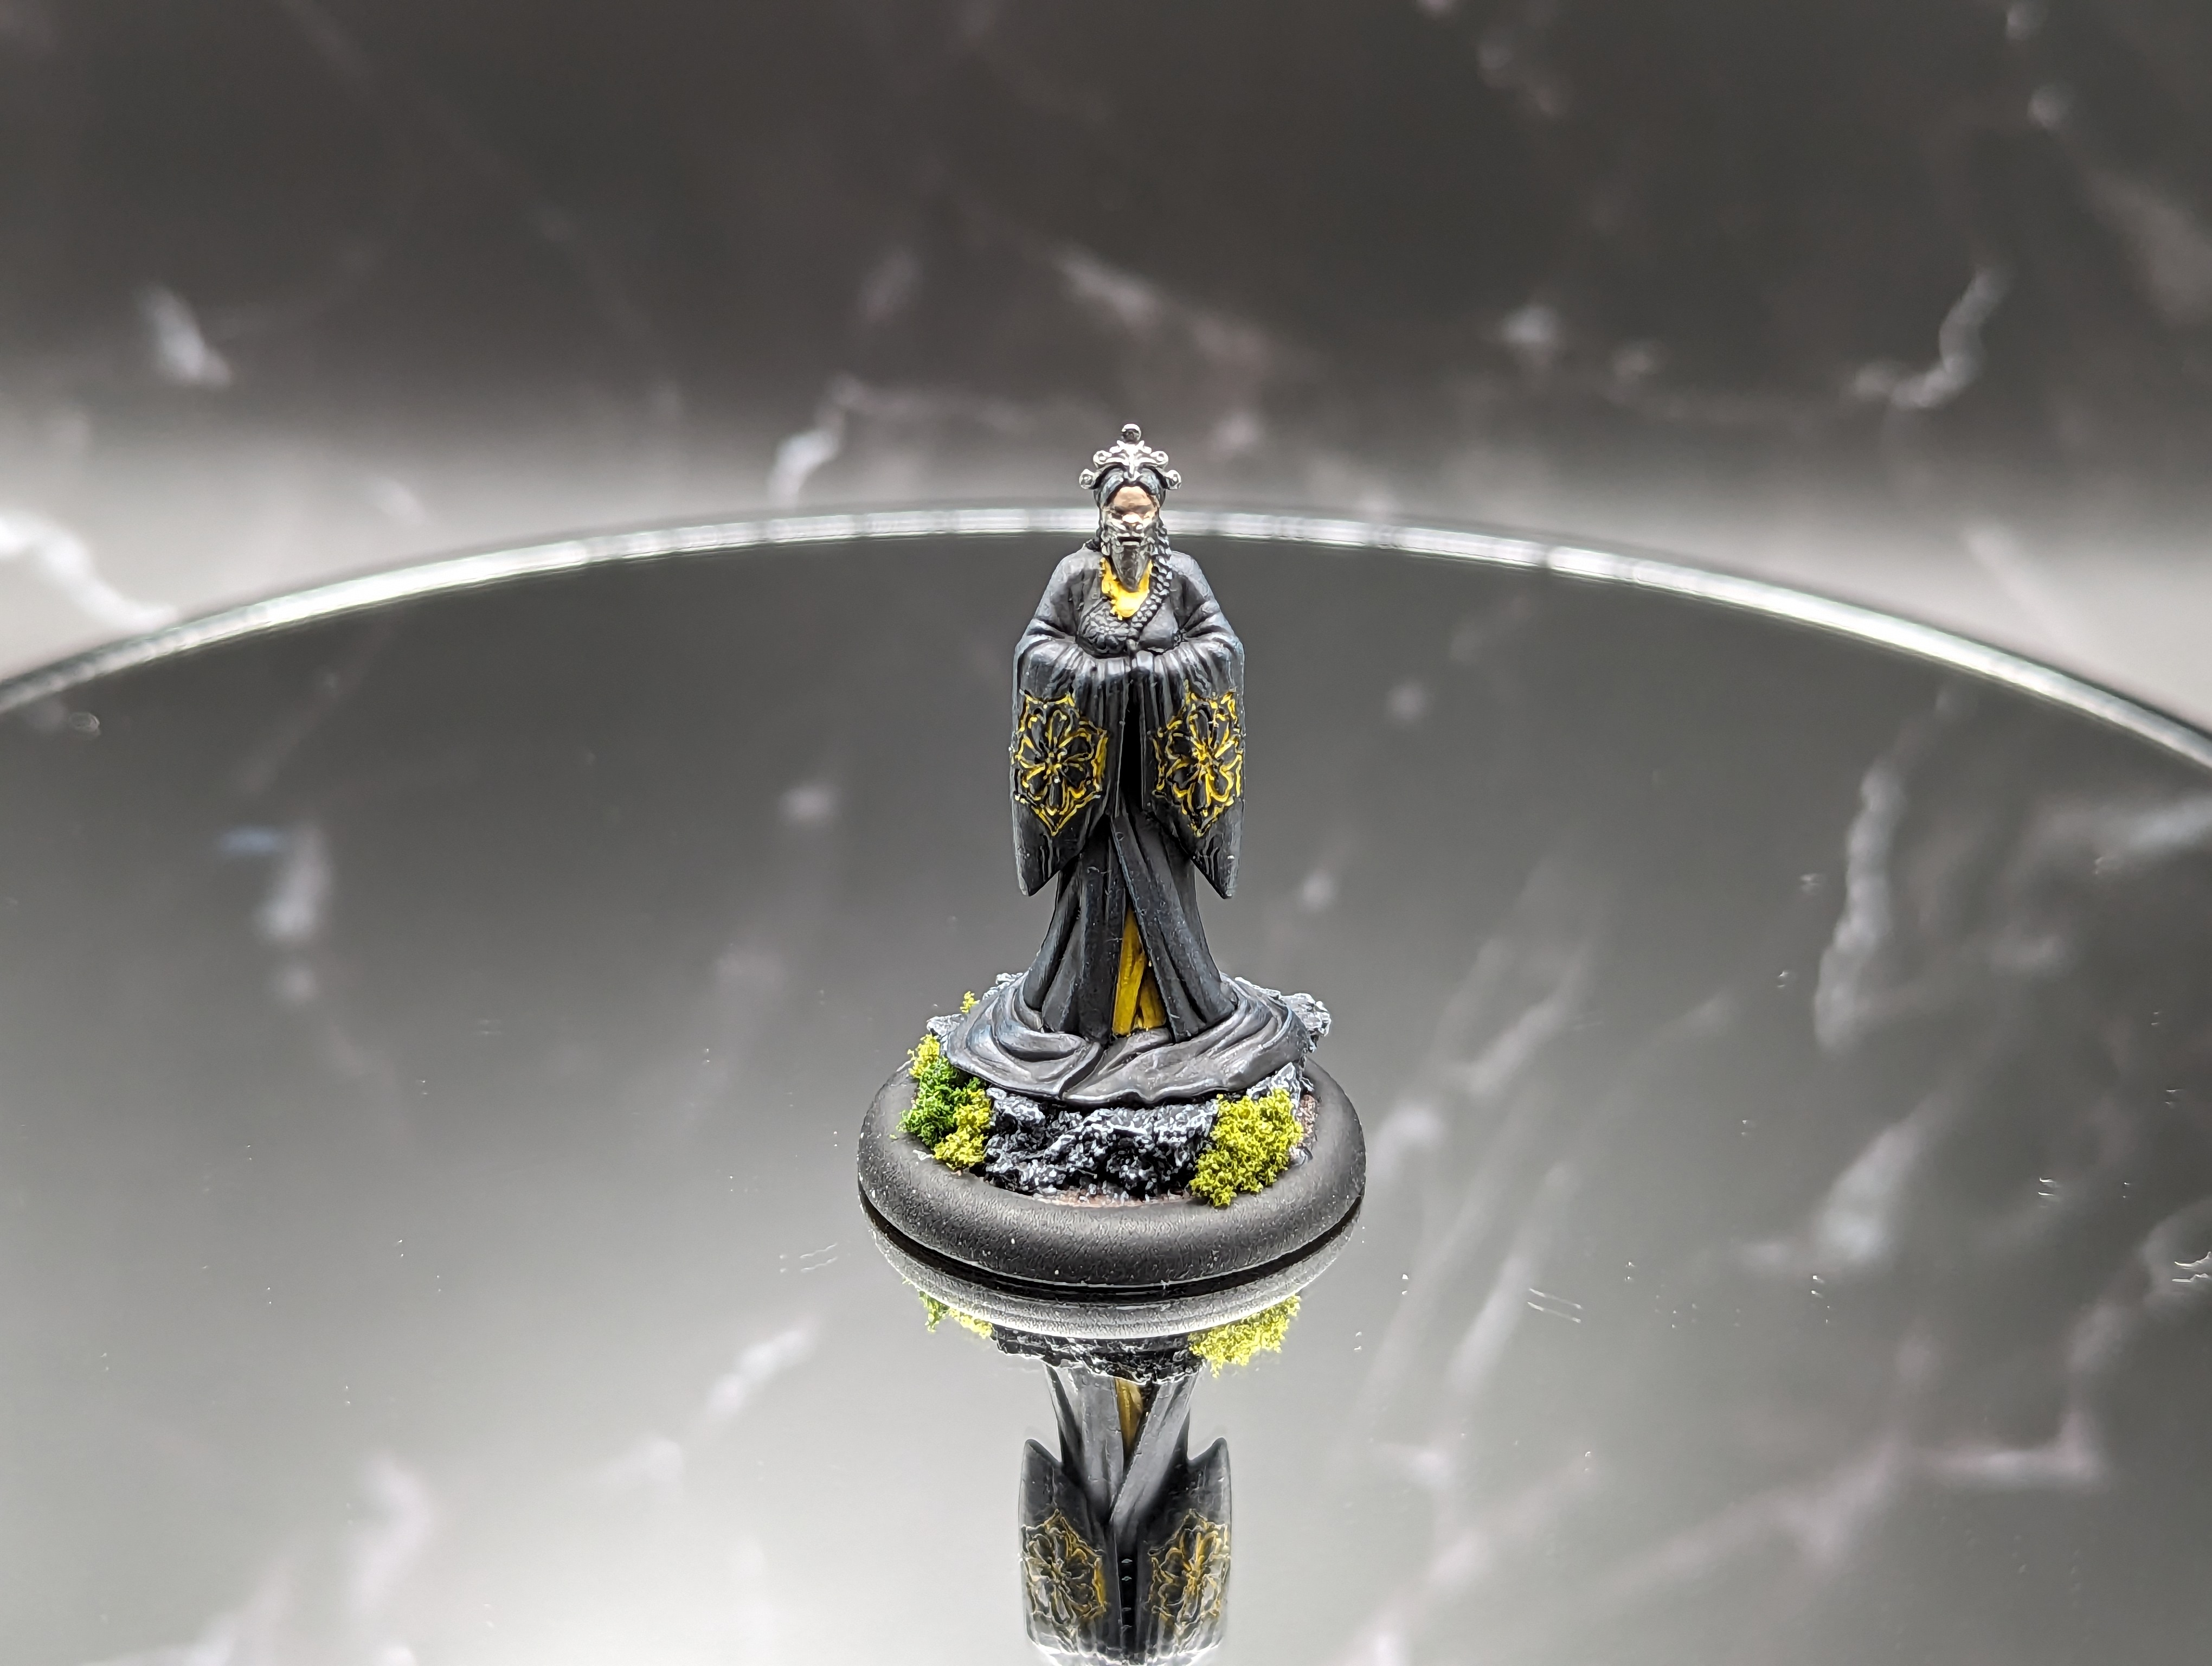
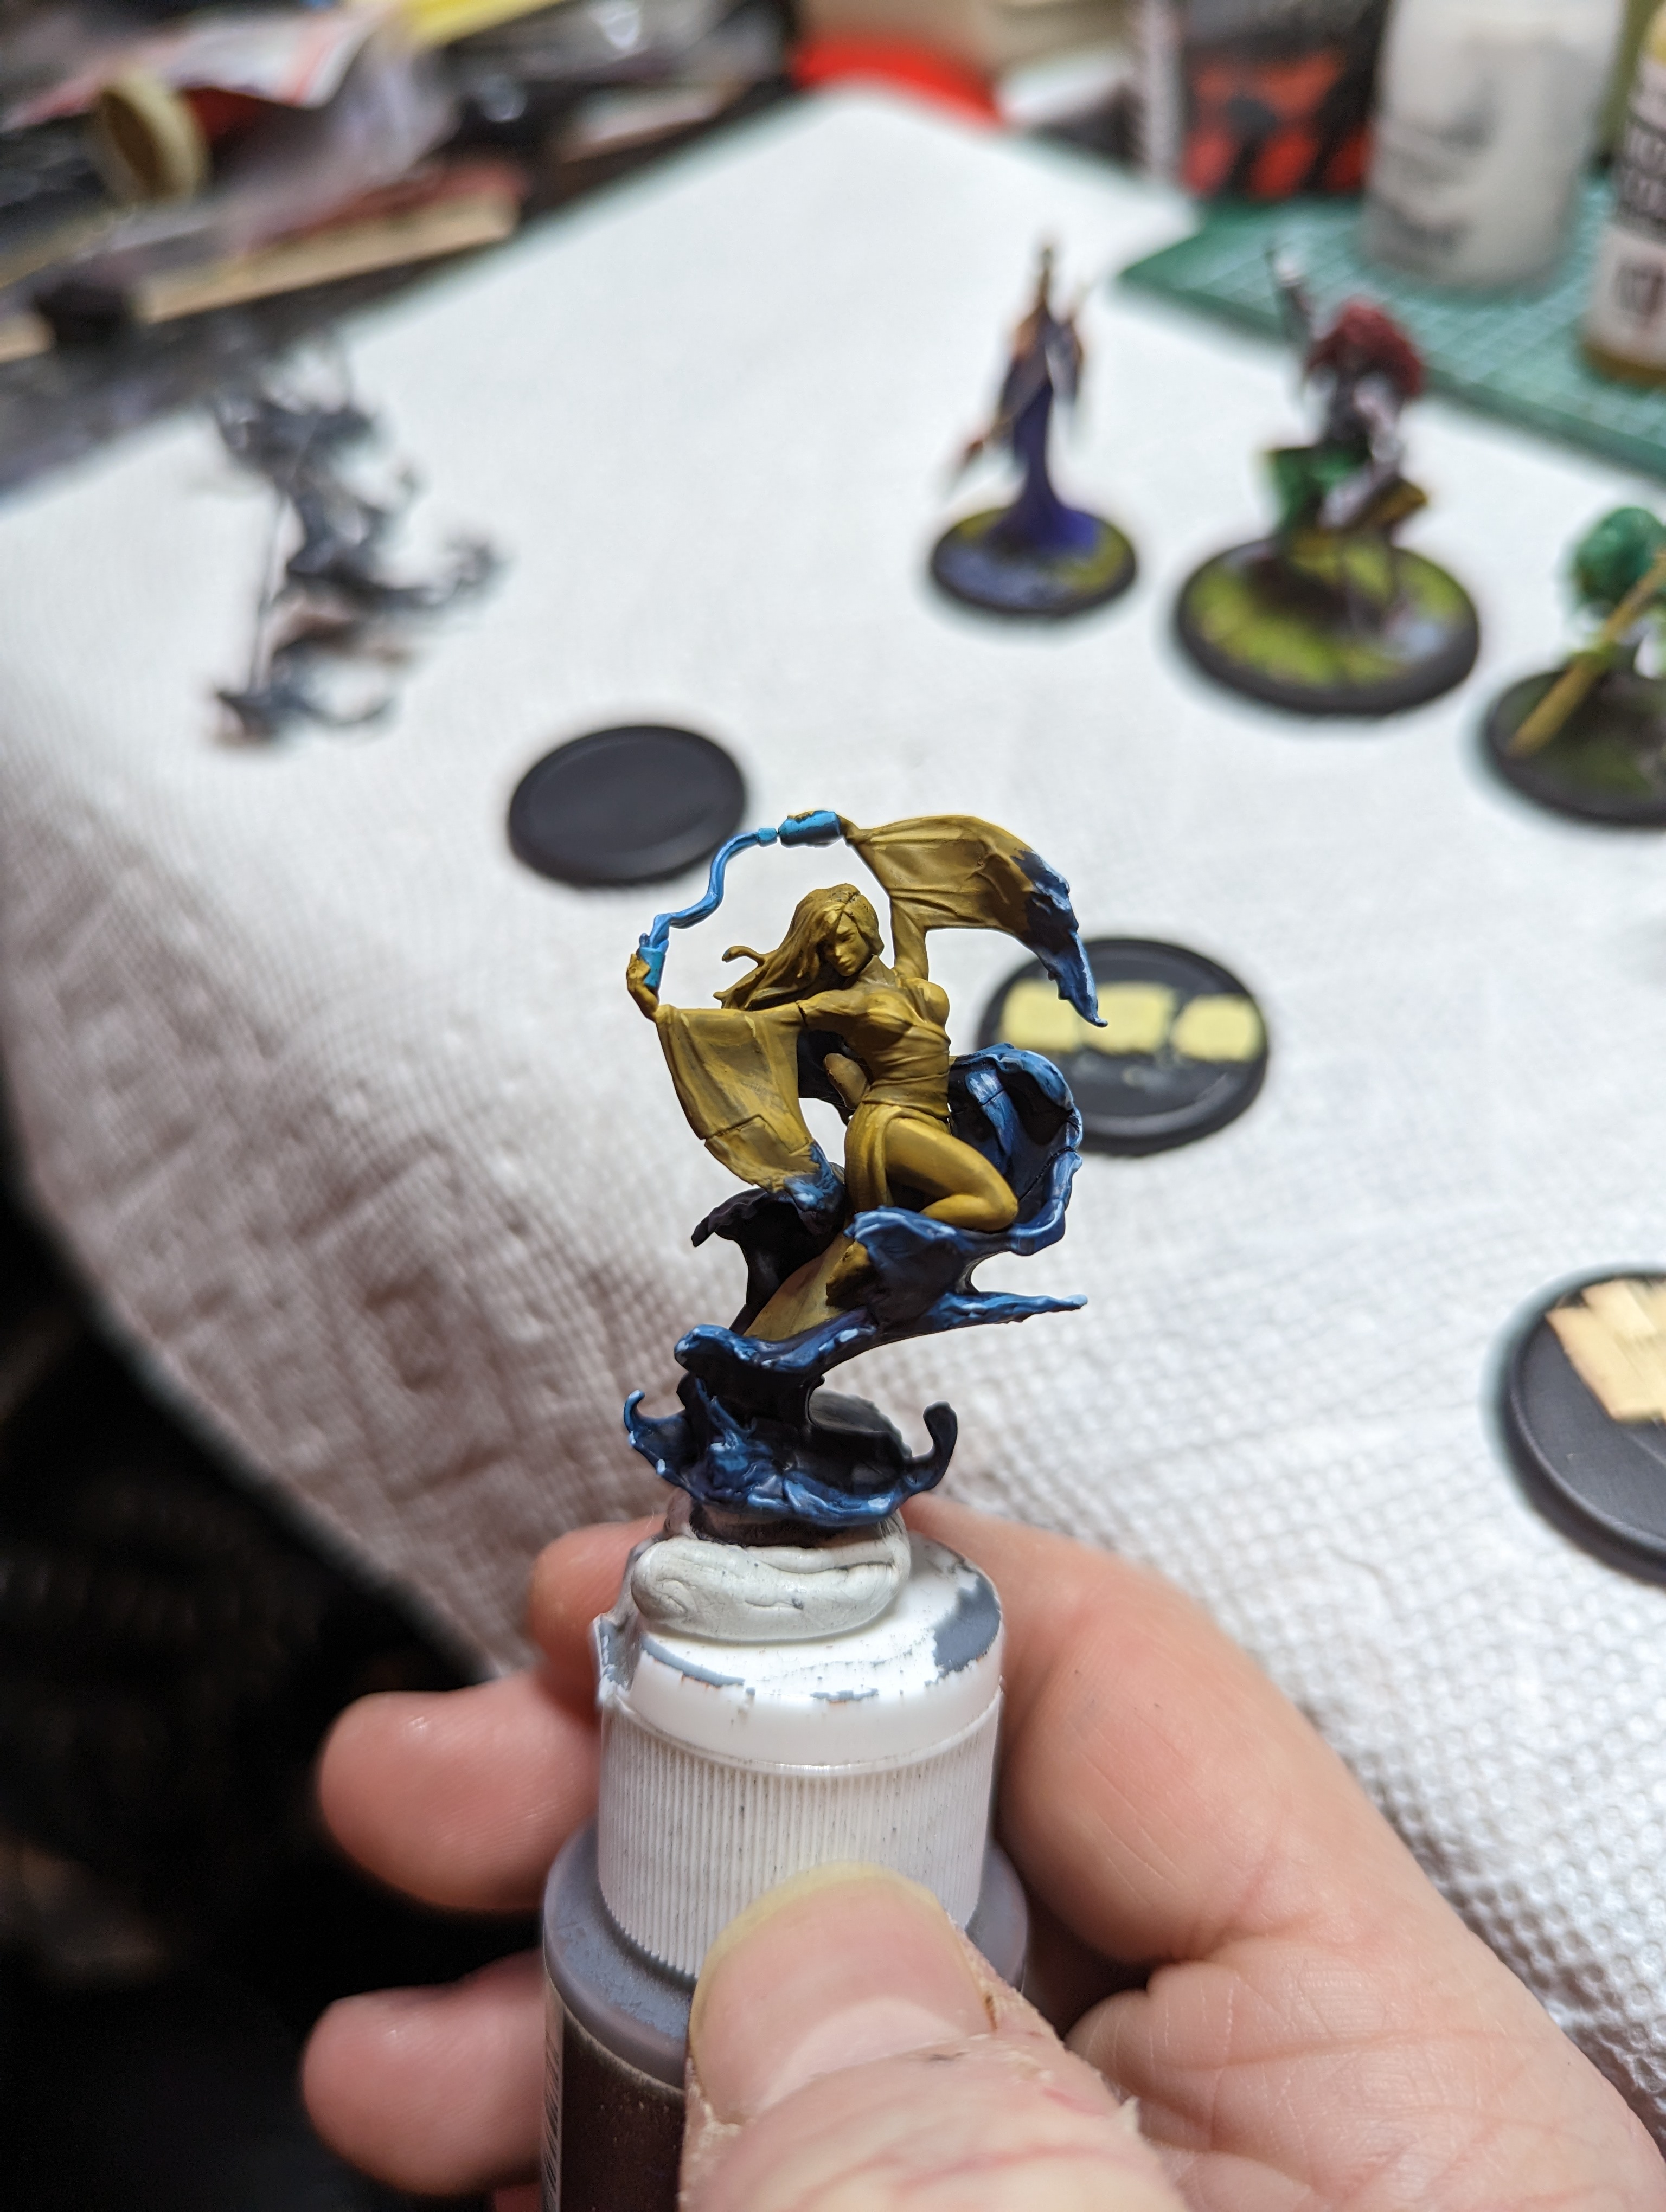
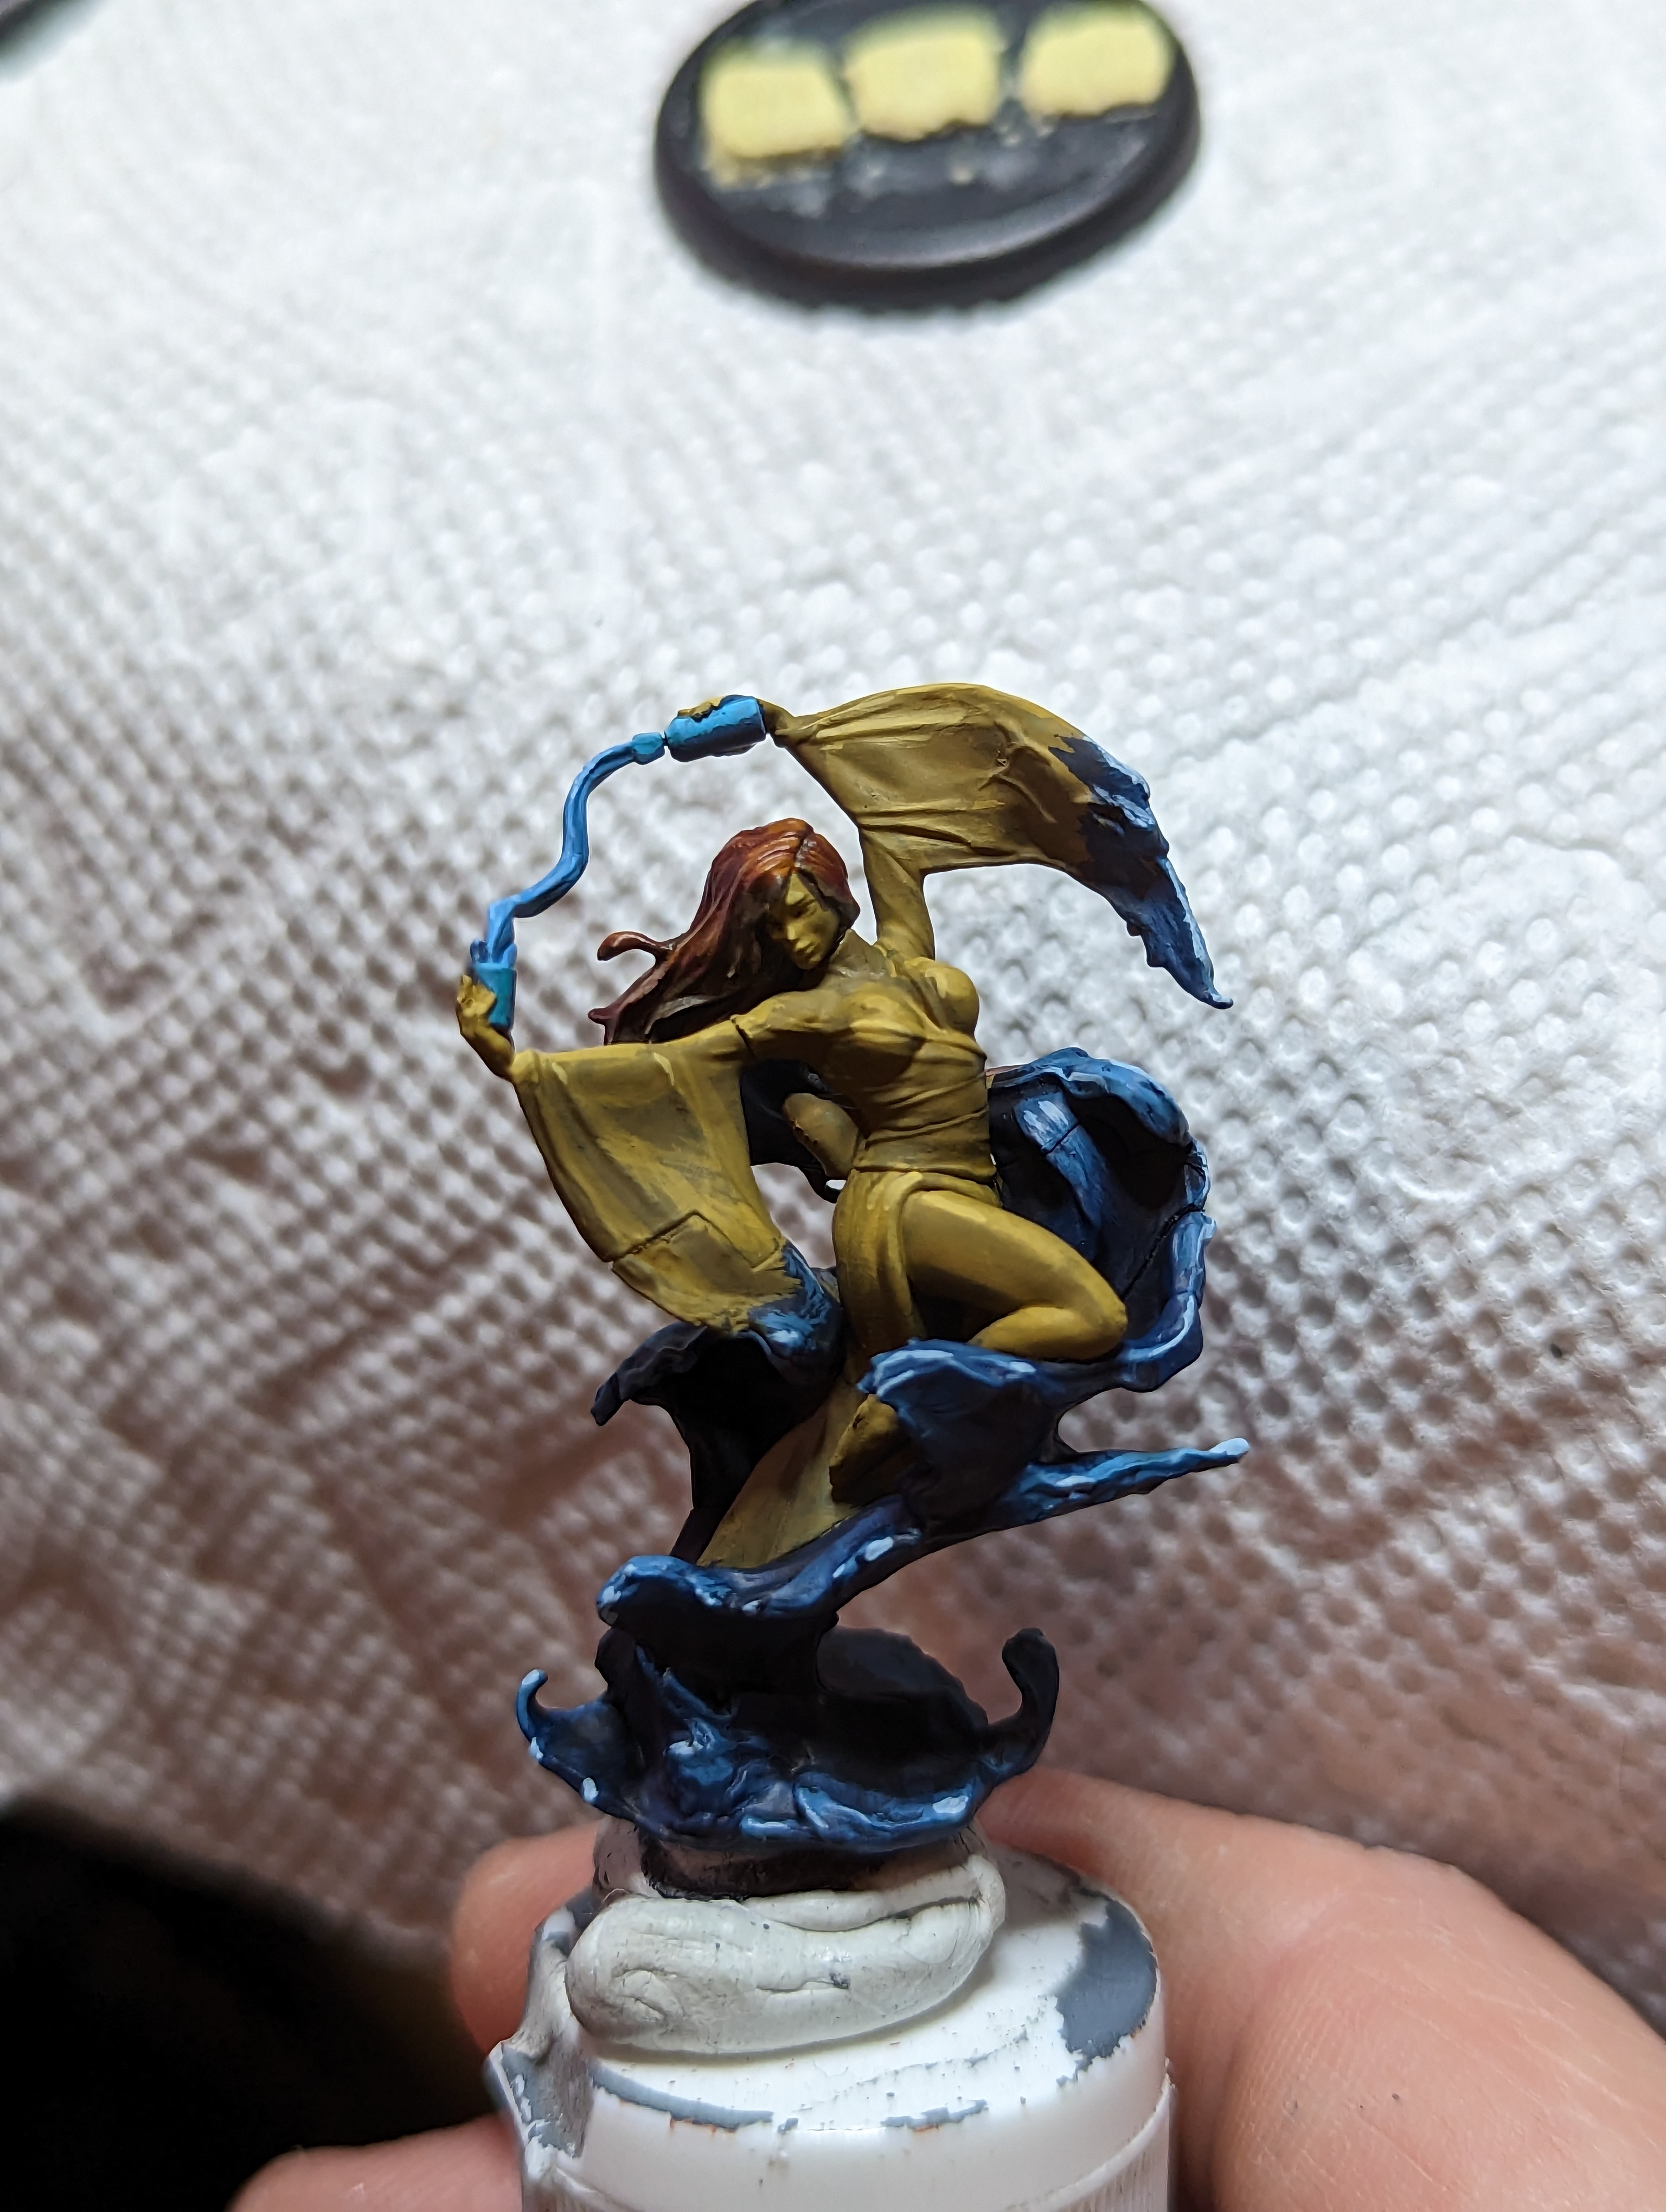
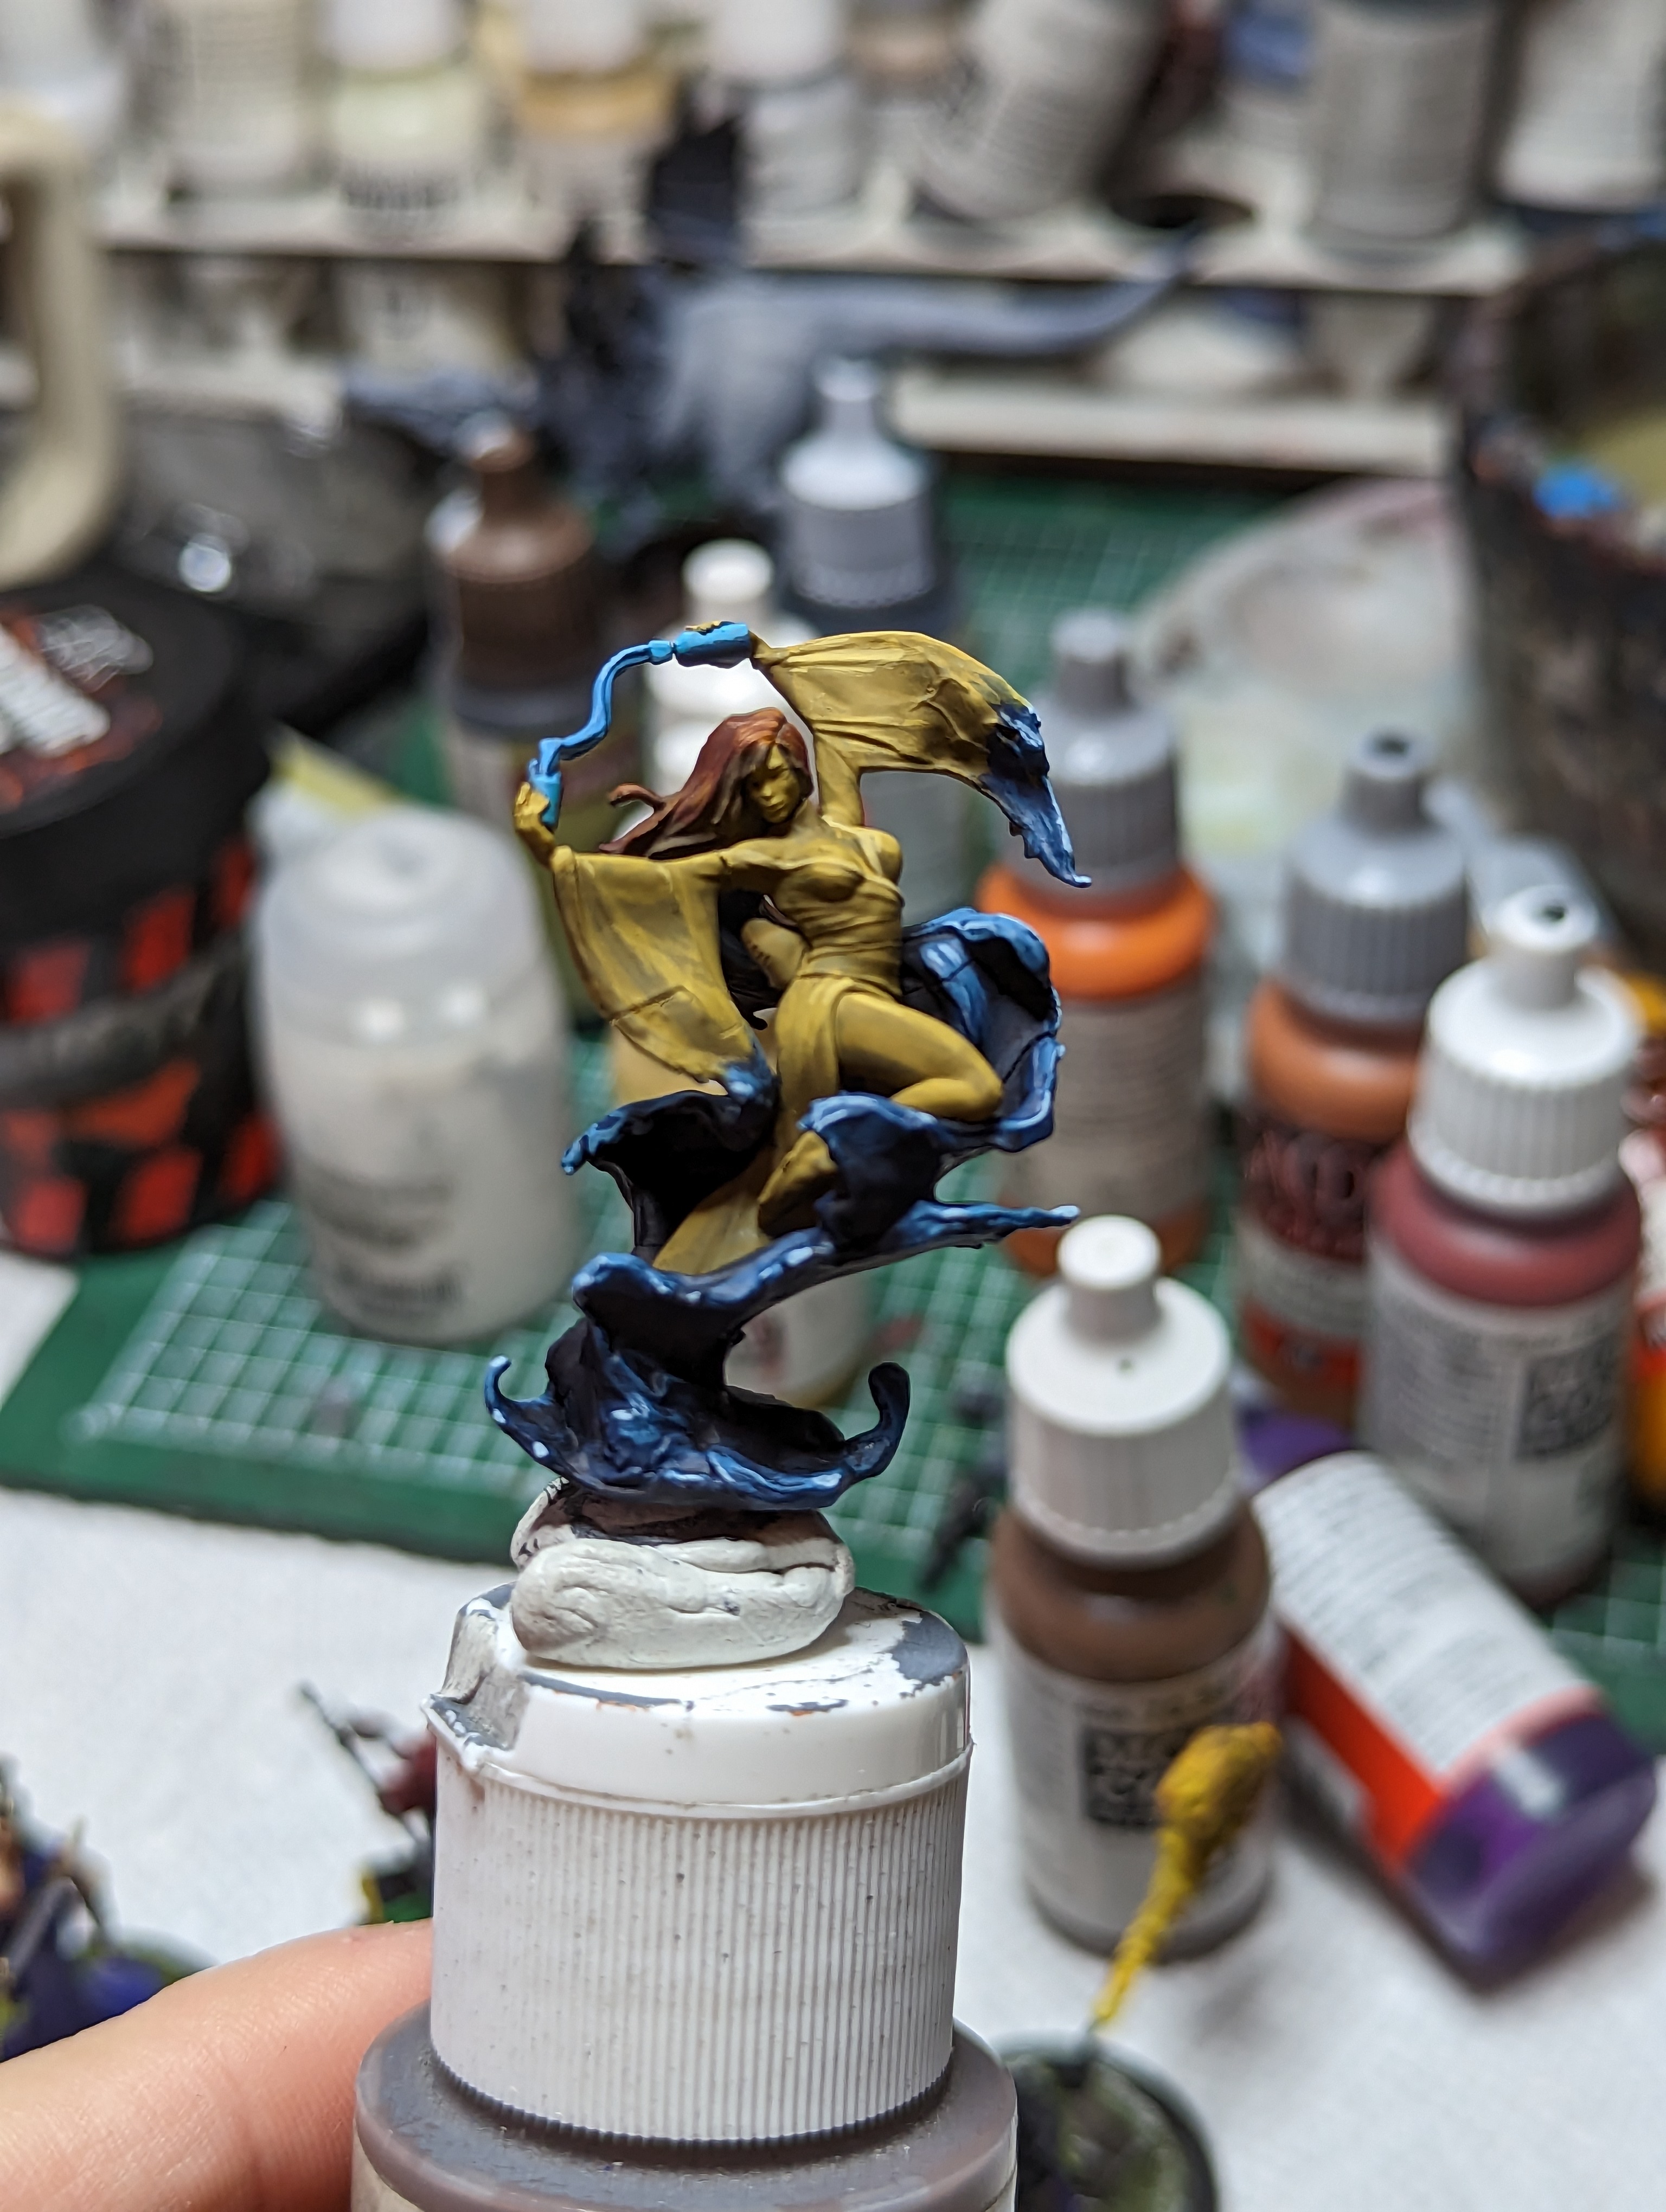
Misaki looks like a simple paint job, just a bunch of flowing robes and a mask. But in reality, the sleeves of the robes have this small pattern sunken into them that is yellow in the art.
I started them off by thinning down some light gray and painting it into the recesses. I wasn’t too careful doing this cuz it was all going to be painted over anyway. After that I did the same with the yellow, only thinning it a bit more than normal. I then just wiped my finger across the top, which did a good job of removing the yellow on the raised parts. When it came time to do the main part of the robes, I just did a very careful overbrush to fill in and bring out the pattern. For some reason the highlight on the robes dont look as bright in the pictures, but I’m happy with how it all came out.
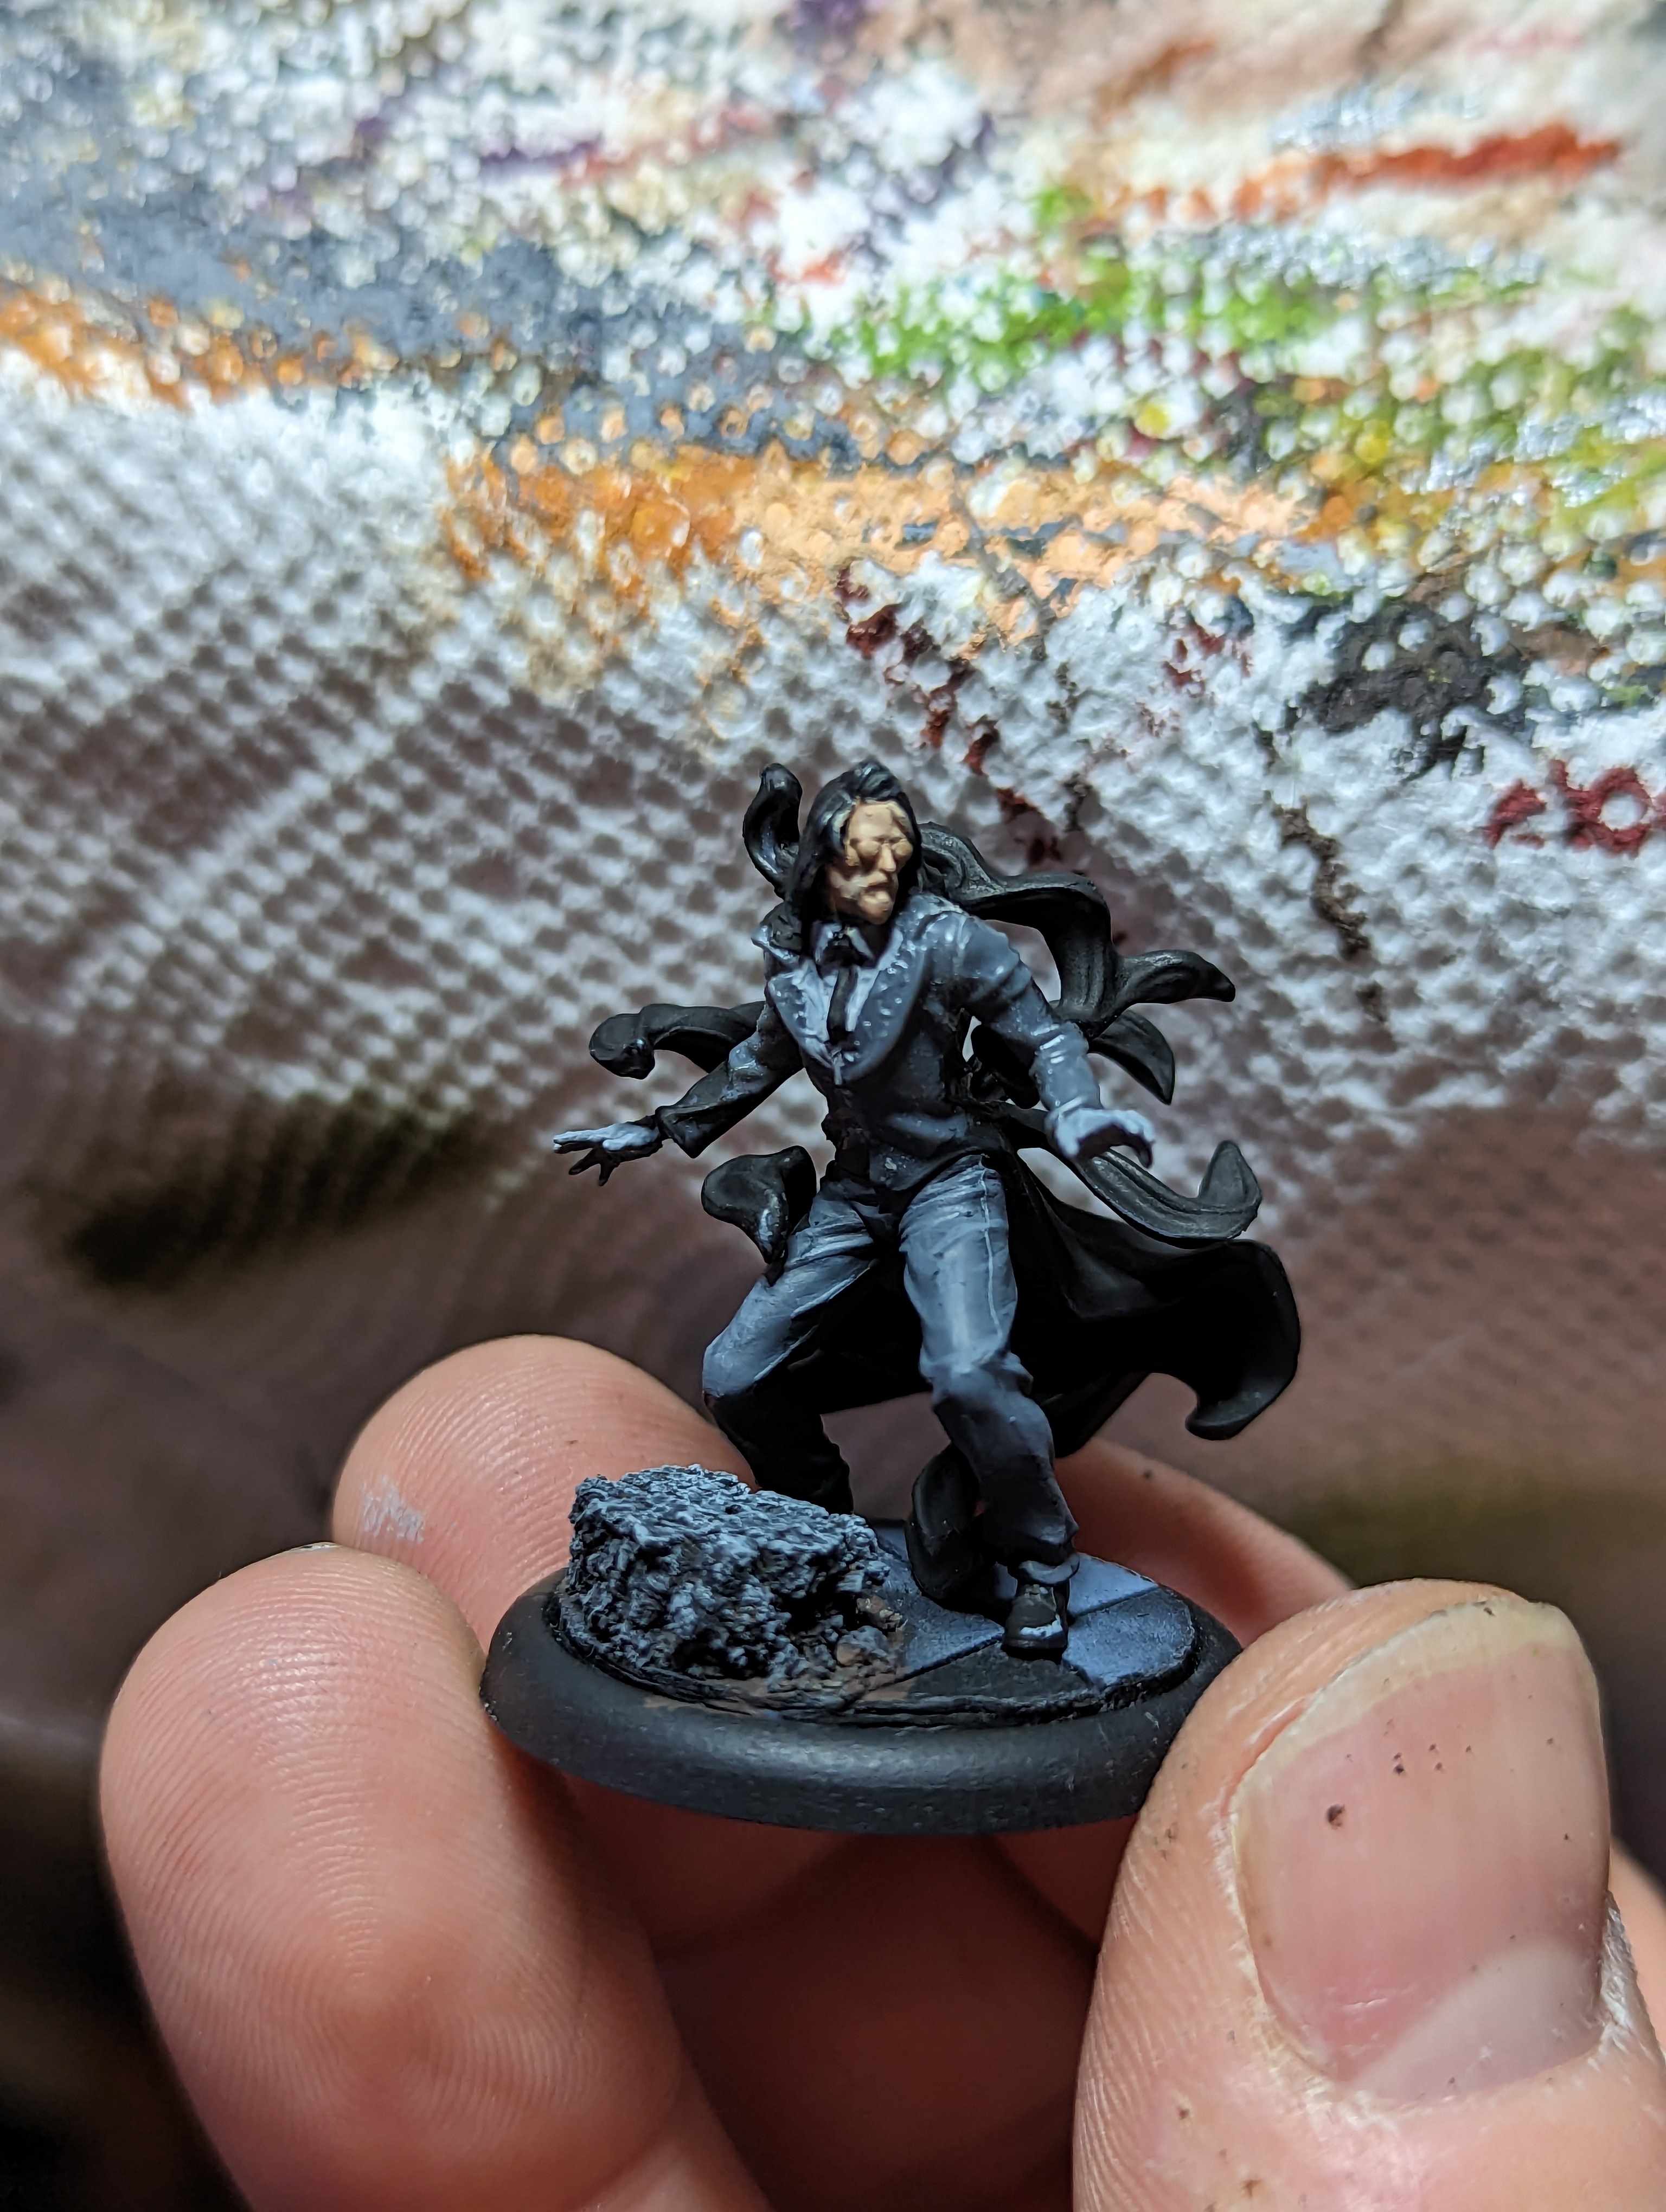
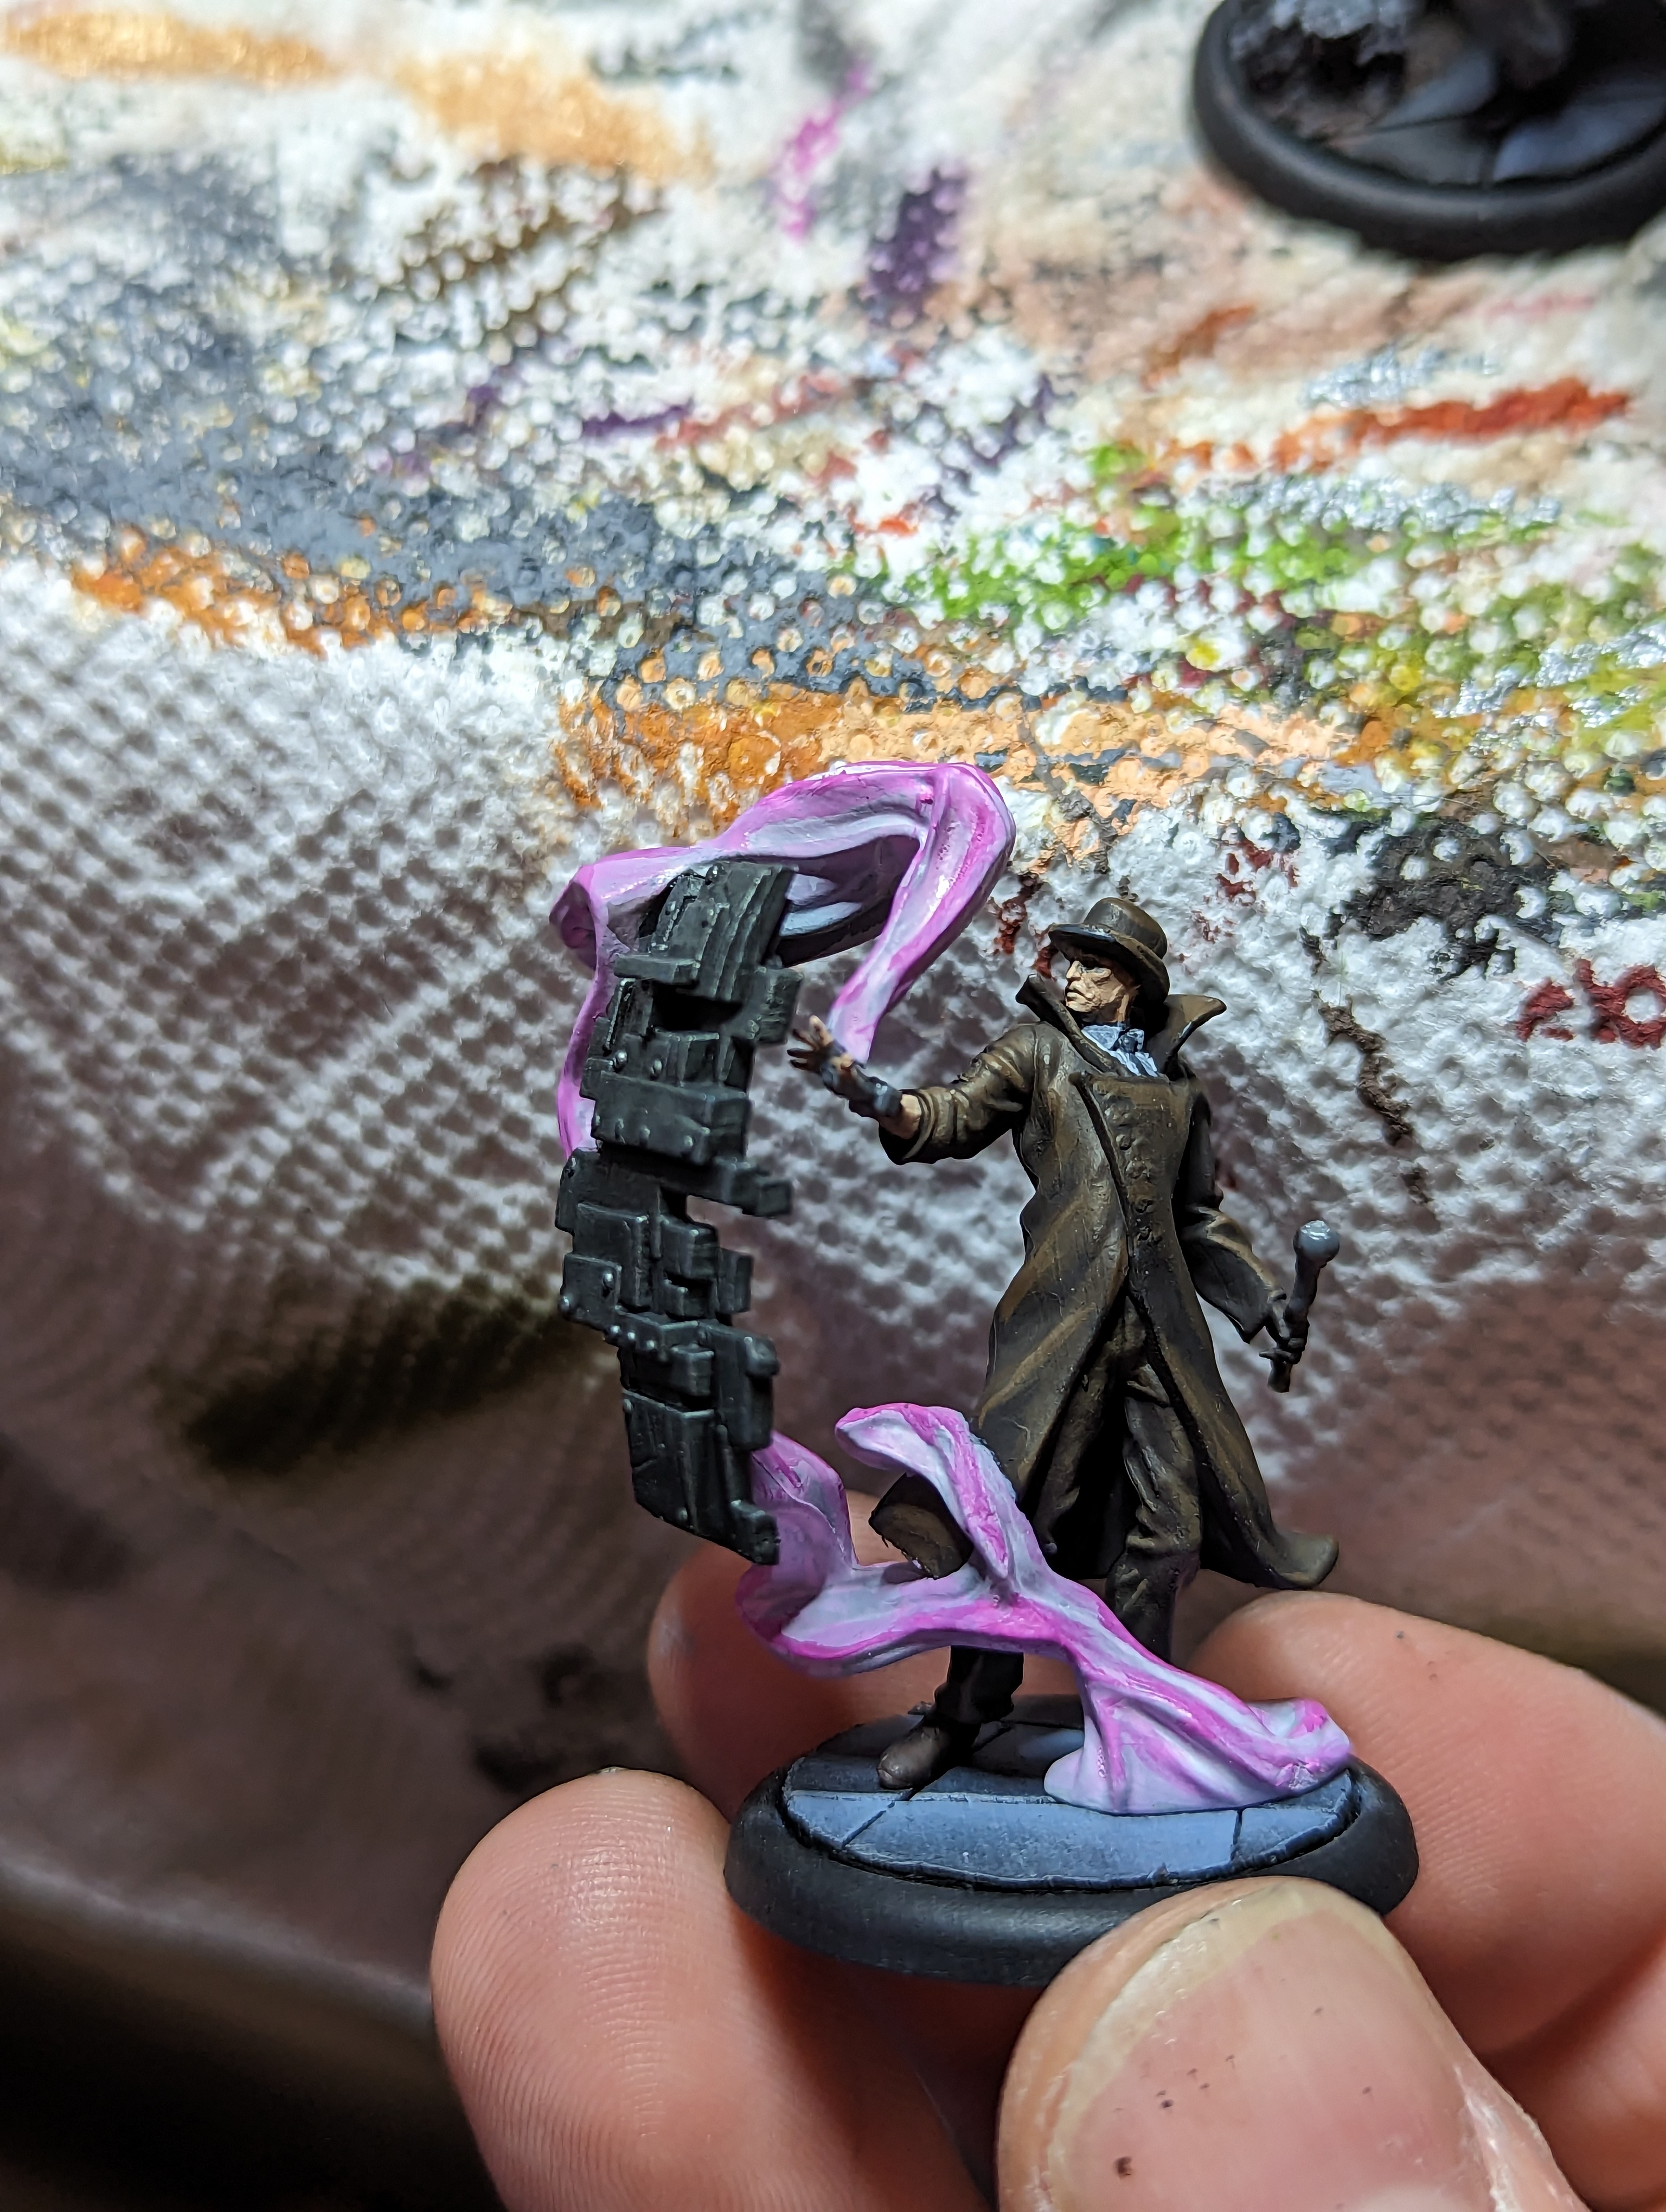
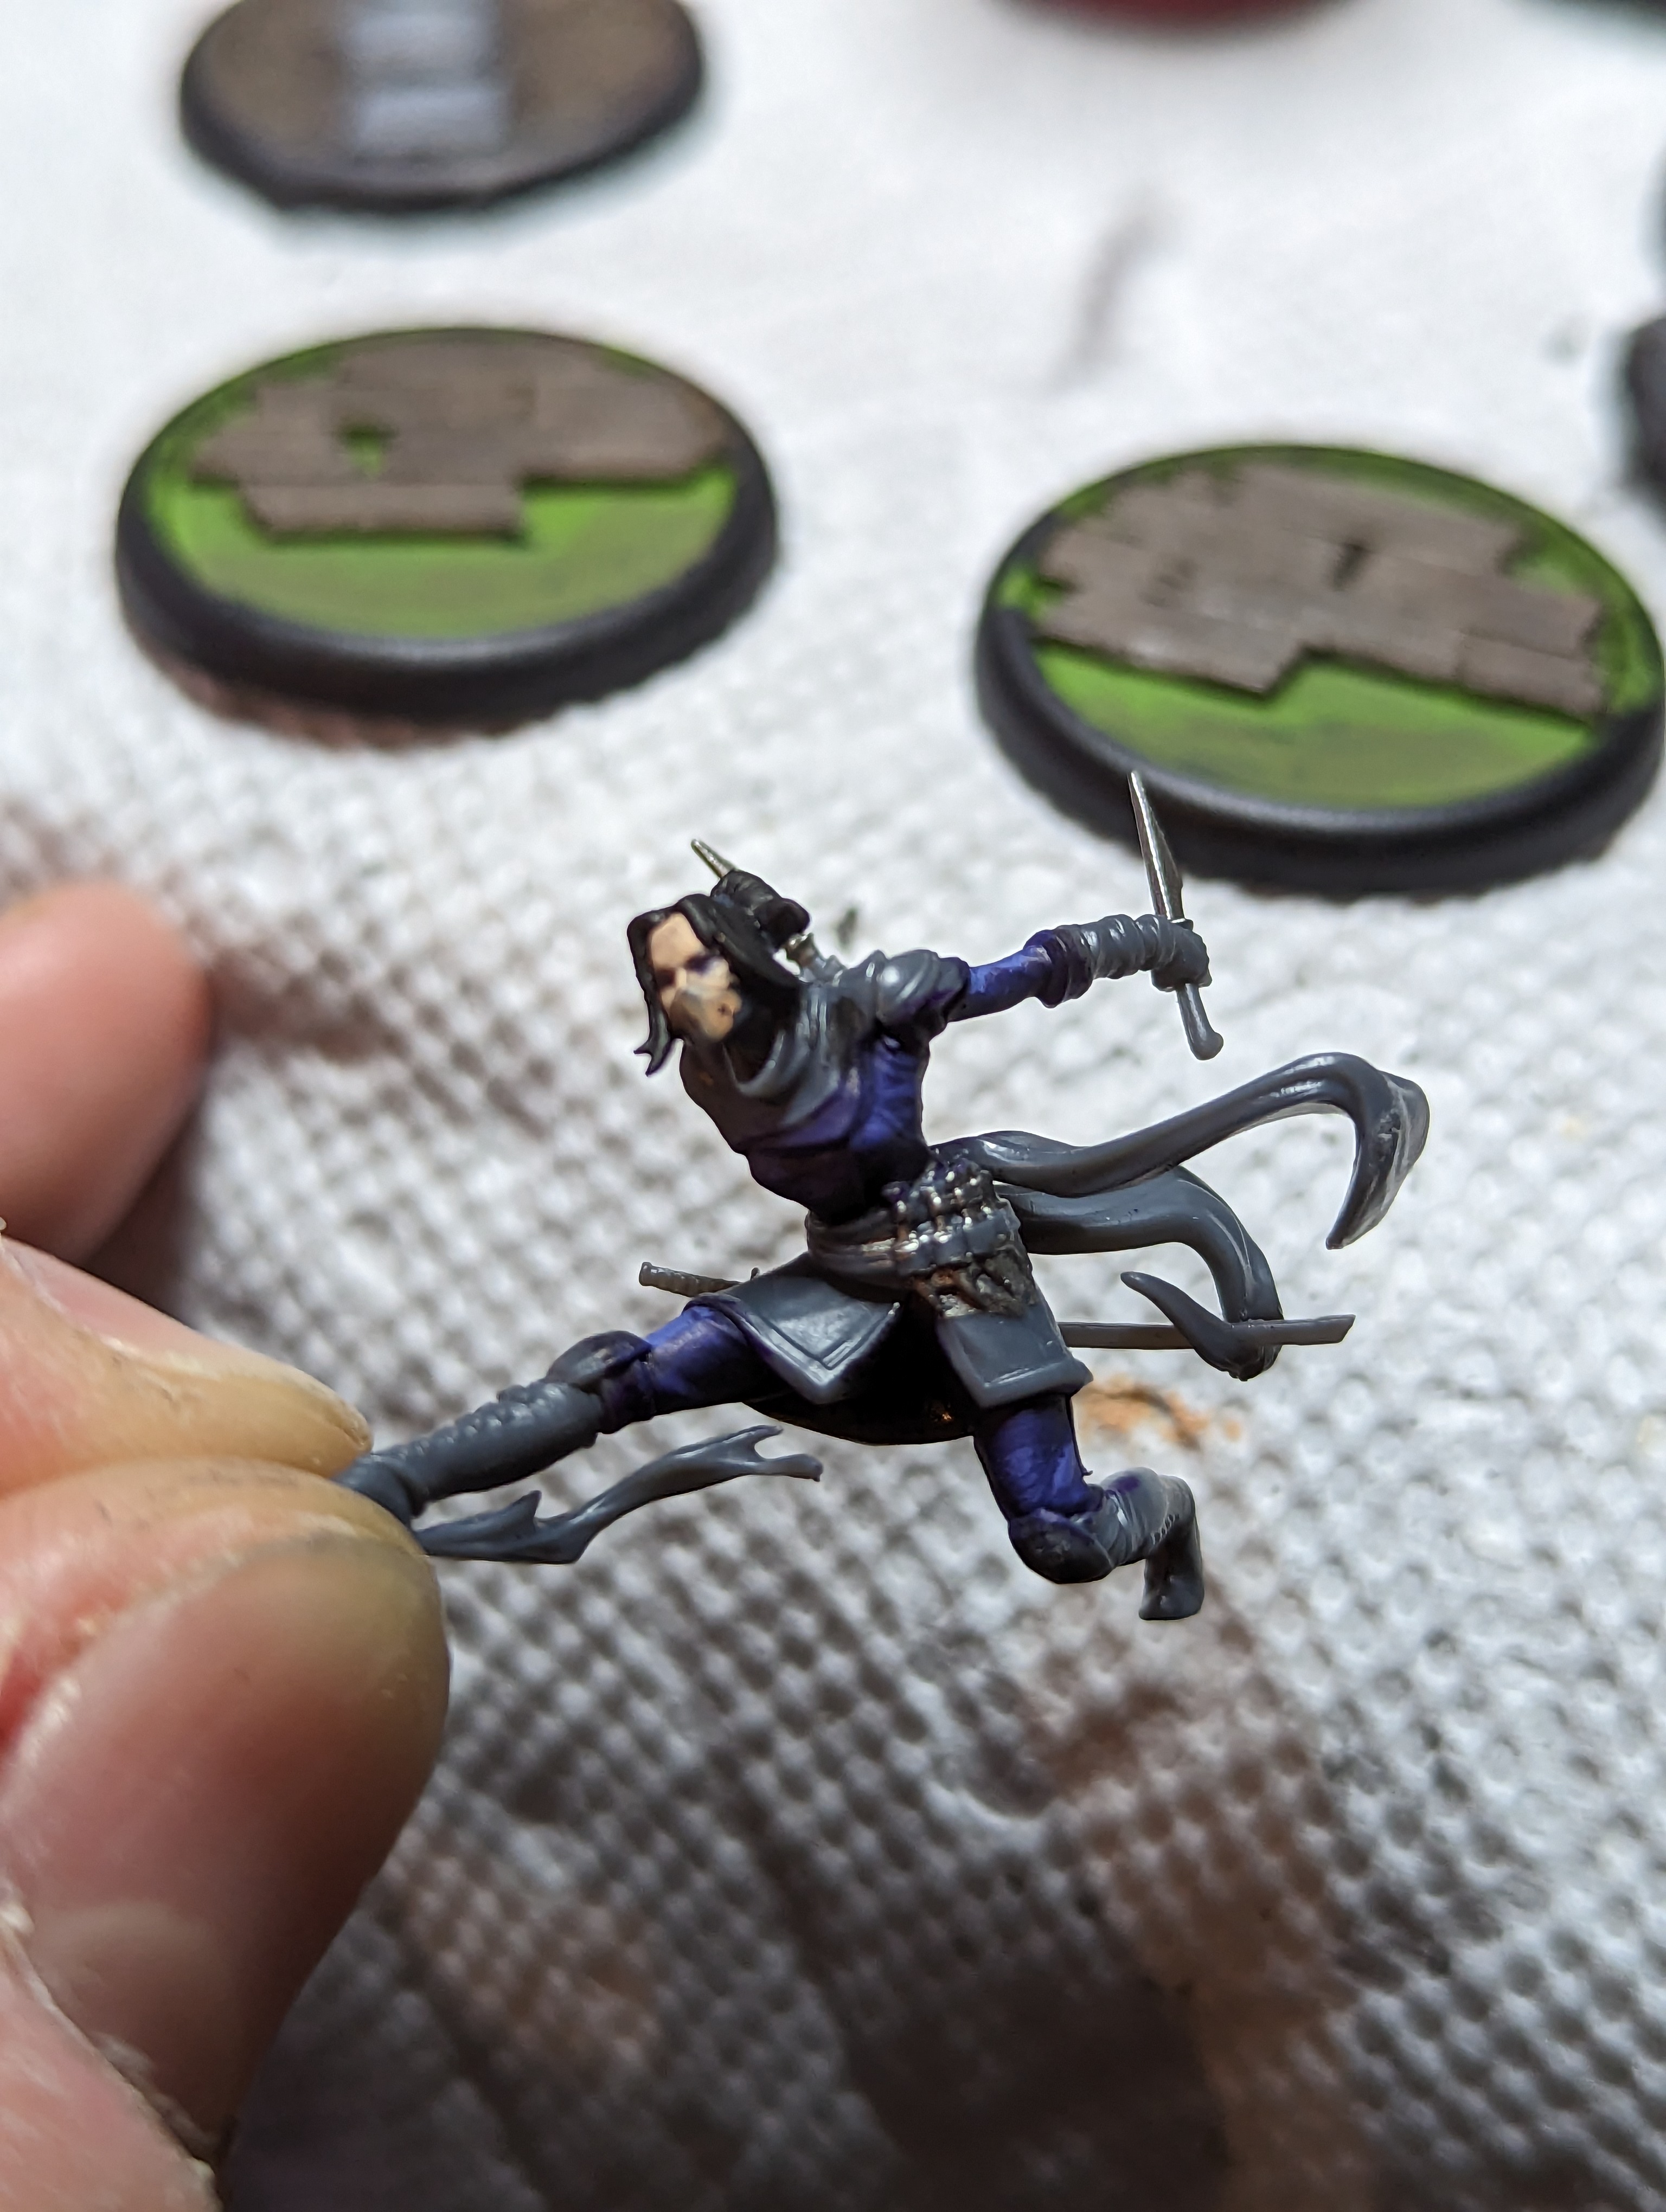
Ivan and Jin were more simple paint jobs, with the exception of the now signature magic swoosh that seems to show up on half of these models. For Jin the magics were coming out of his coat and I had to sort of blend them together which was interesting.
For Ivans jacket I did a dark brown wash over brown, and then drybrished with an orangey brown, to give it a leather look. I like how it came out. I used to do the highlight with a gray-brown but that give it a more worn look. This way is better.
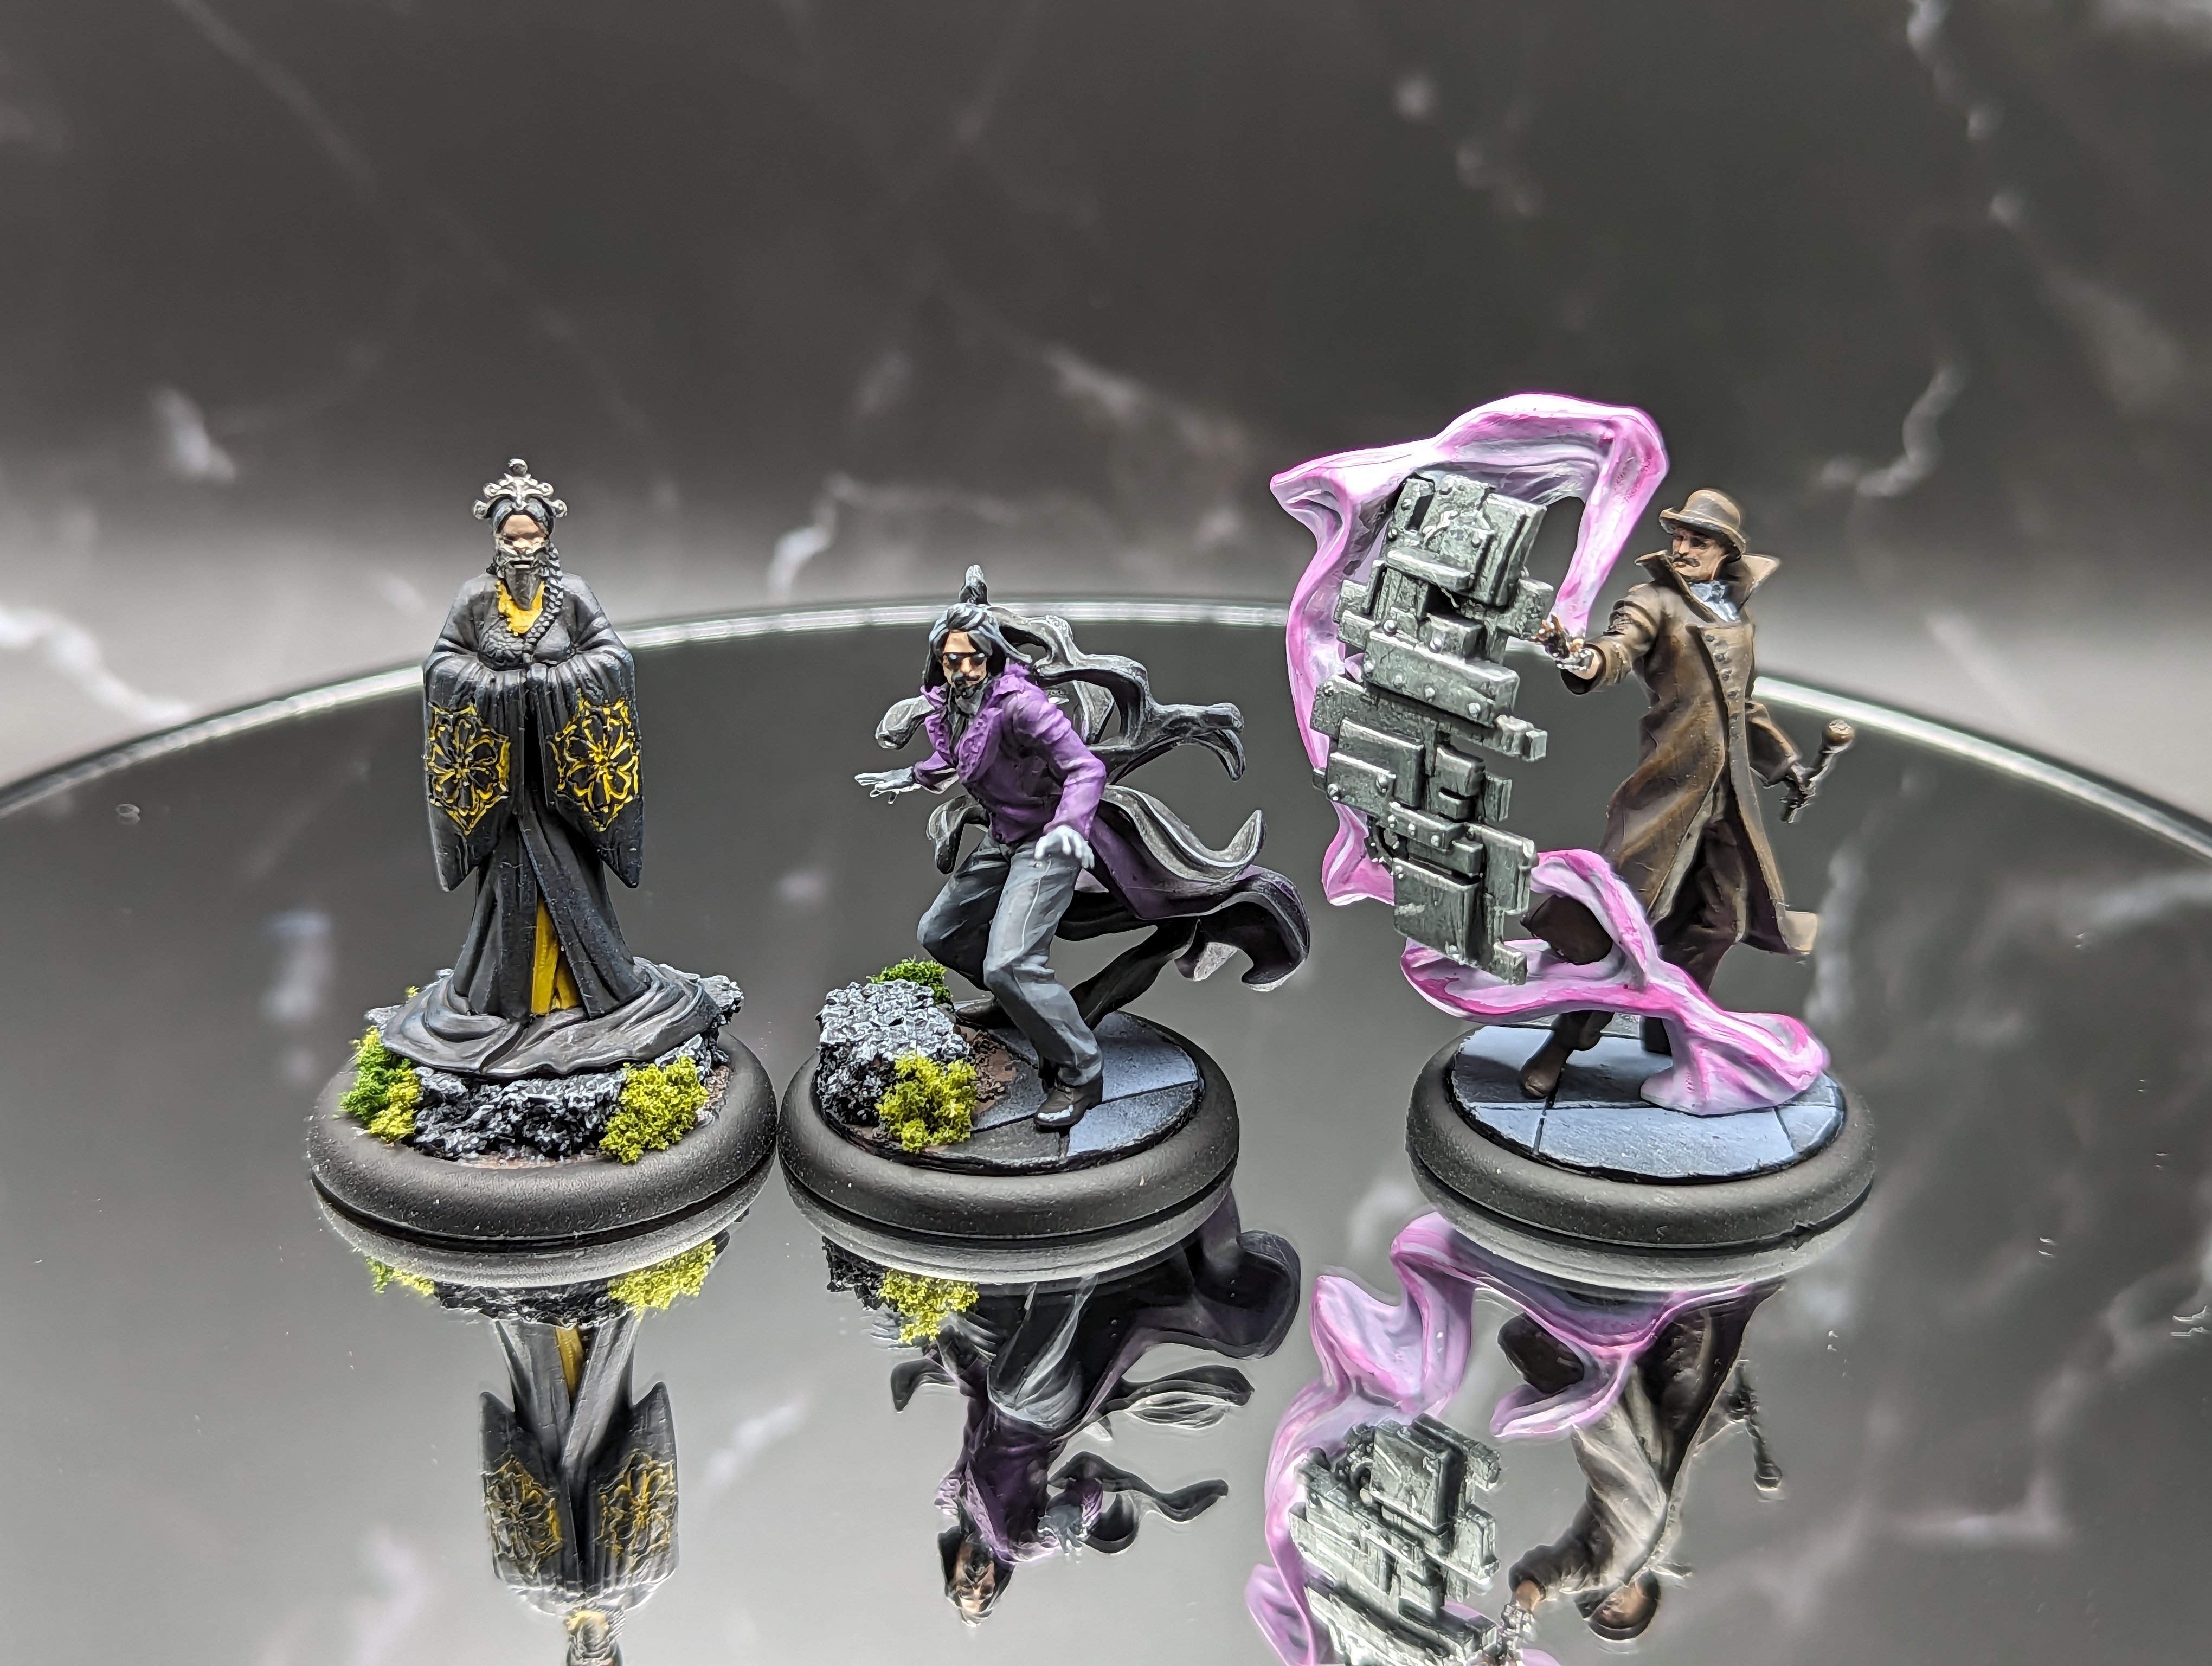

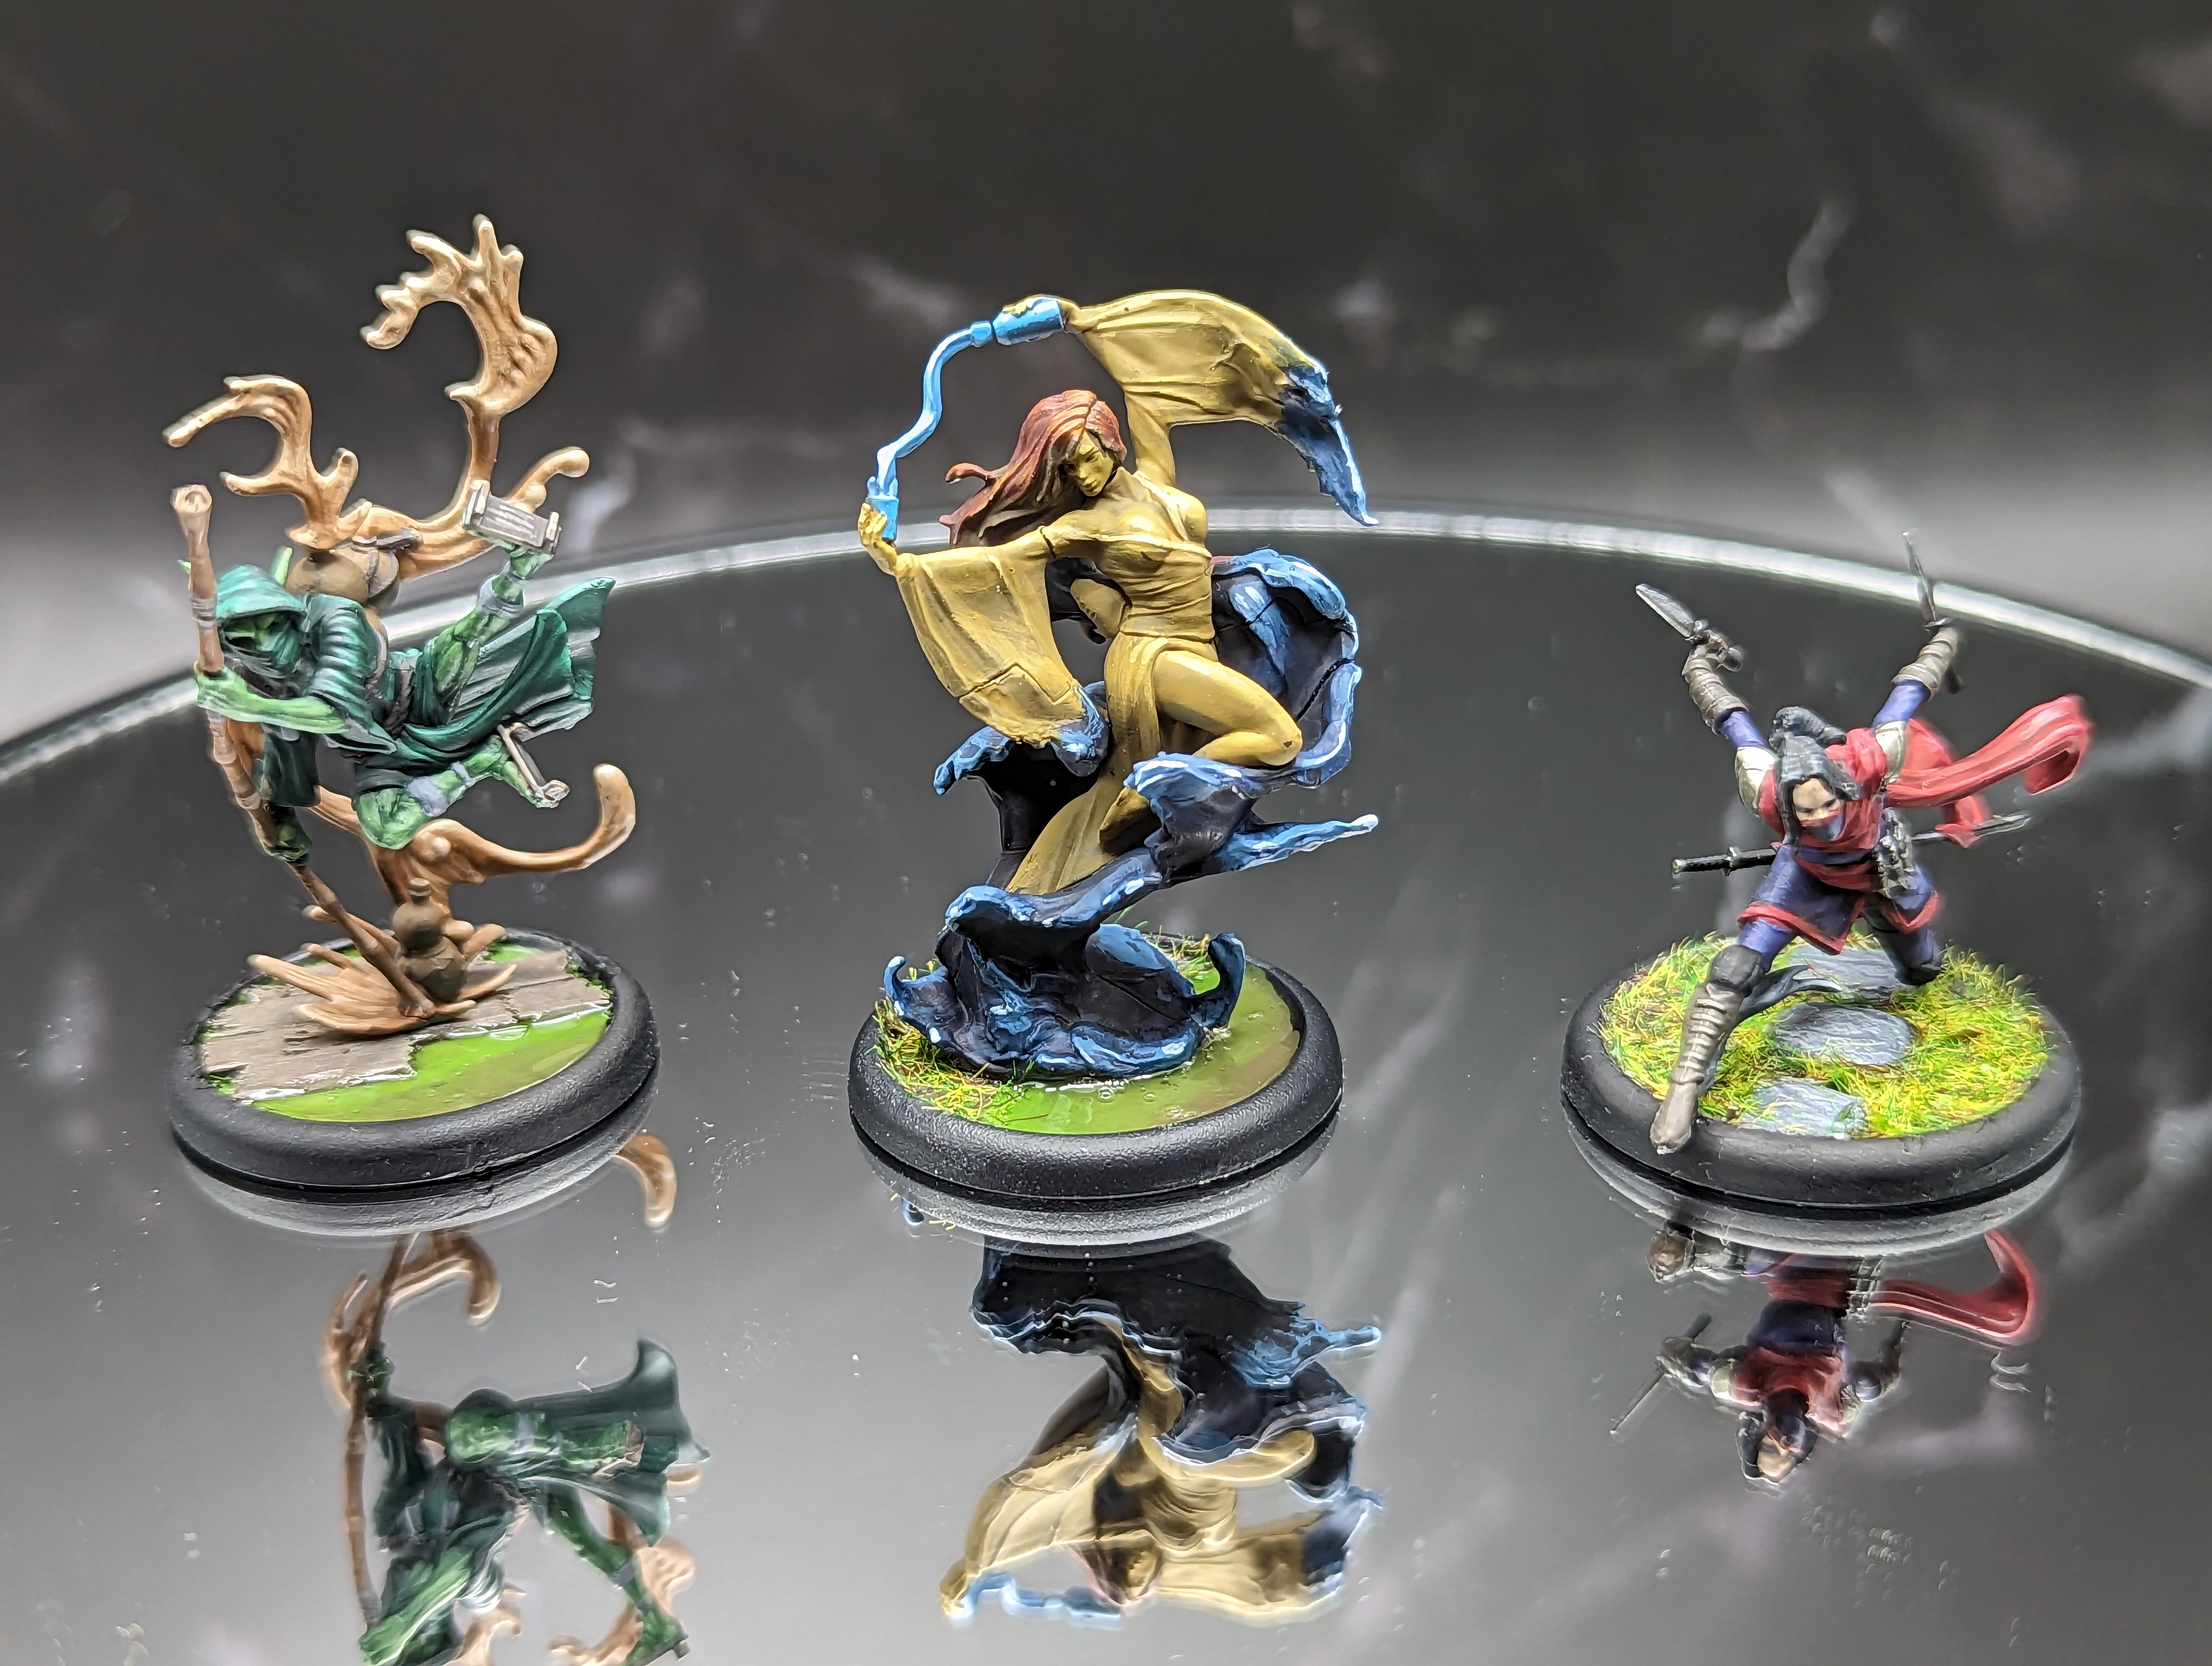
Getting close to the end now. Adding the bushes to Jin and Misaki’s bases makes them tie in a lot nicer, and im surprised at how well the 2 styles blended. His basing style is a tough one to mix, but hopefully I won’t have to do too many more like this in the future.
And now some lore!
Wyrdoes
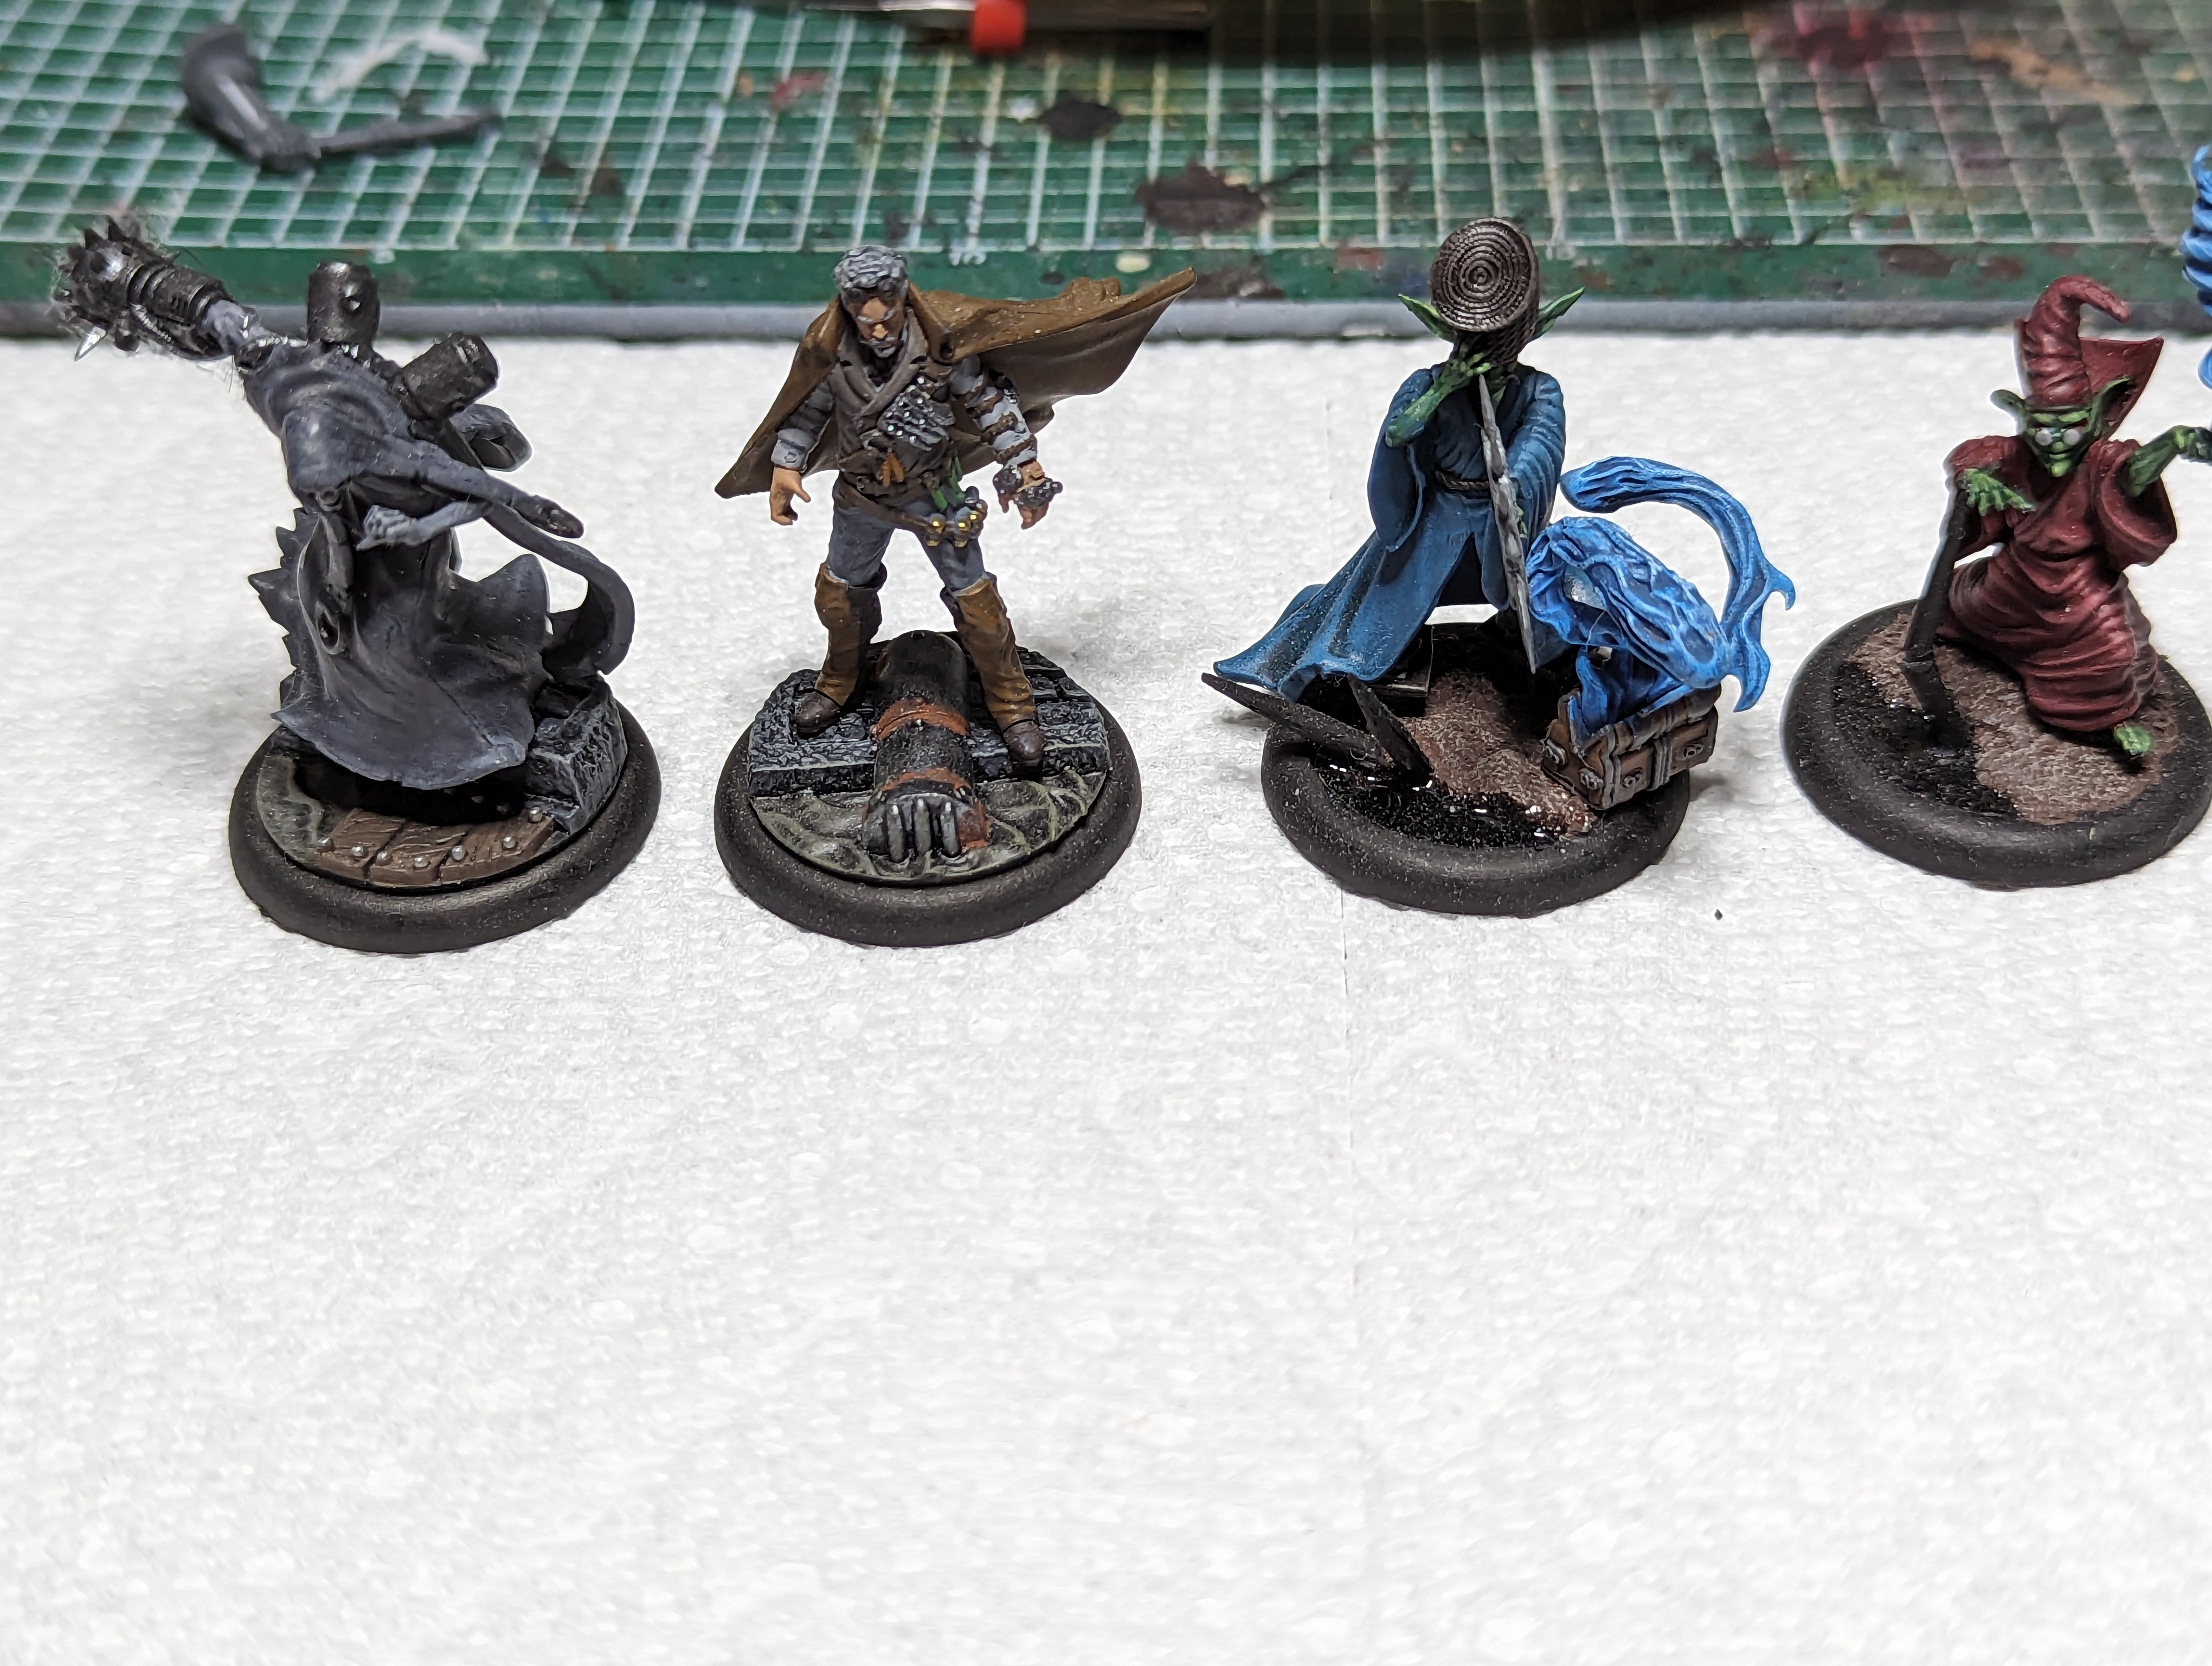


Von Schtook and Wong are up next! They are some of the weirdest masters in the game.
Wong doesn’t appear in the story much, but he did go on a little adventure to Kythera, the ruins of a mystical machine that opens a portal to the grave spirit (Eldrich god of death). So for his bases, I did them like a swamp, but with black water and these curves black spires that look like dead spider legs.
Von Schtook lives in the sewer, so I based him up on Wyrds plastic sewer bases. I actually already painted up some extras last time I worked on that crew, so they are all ready to go.
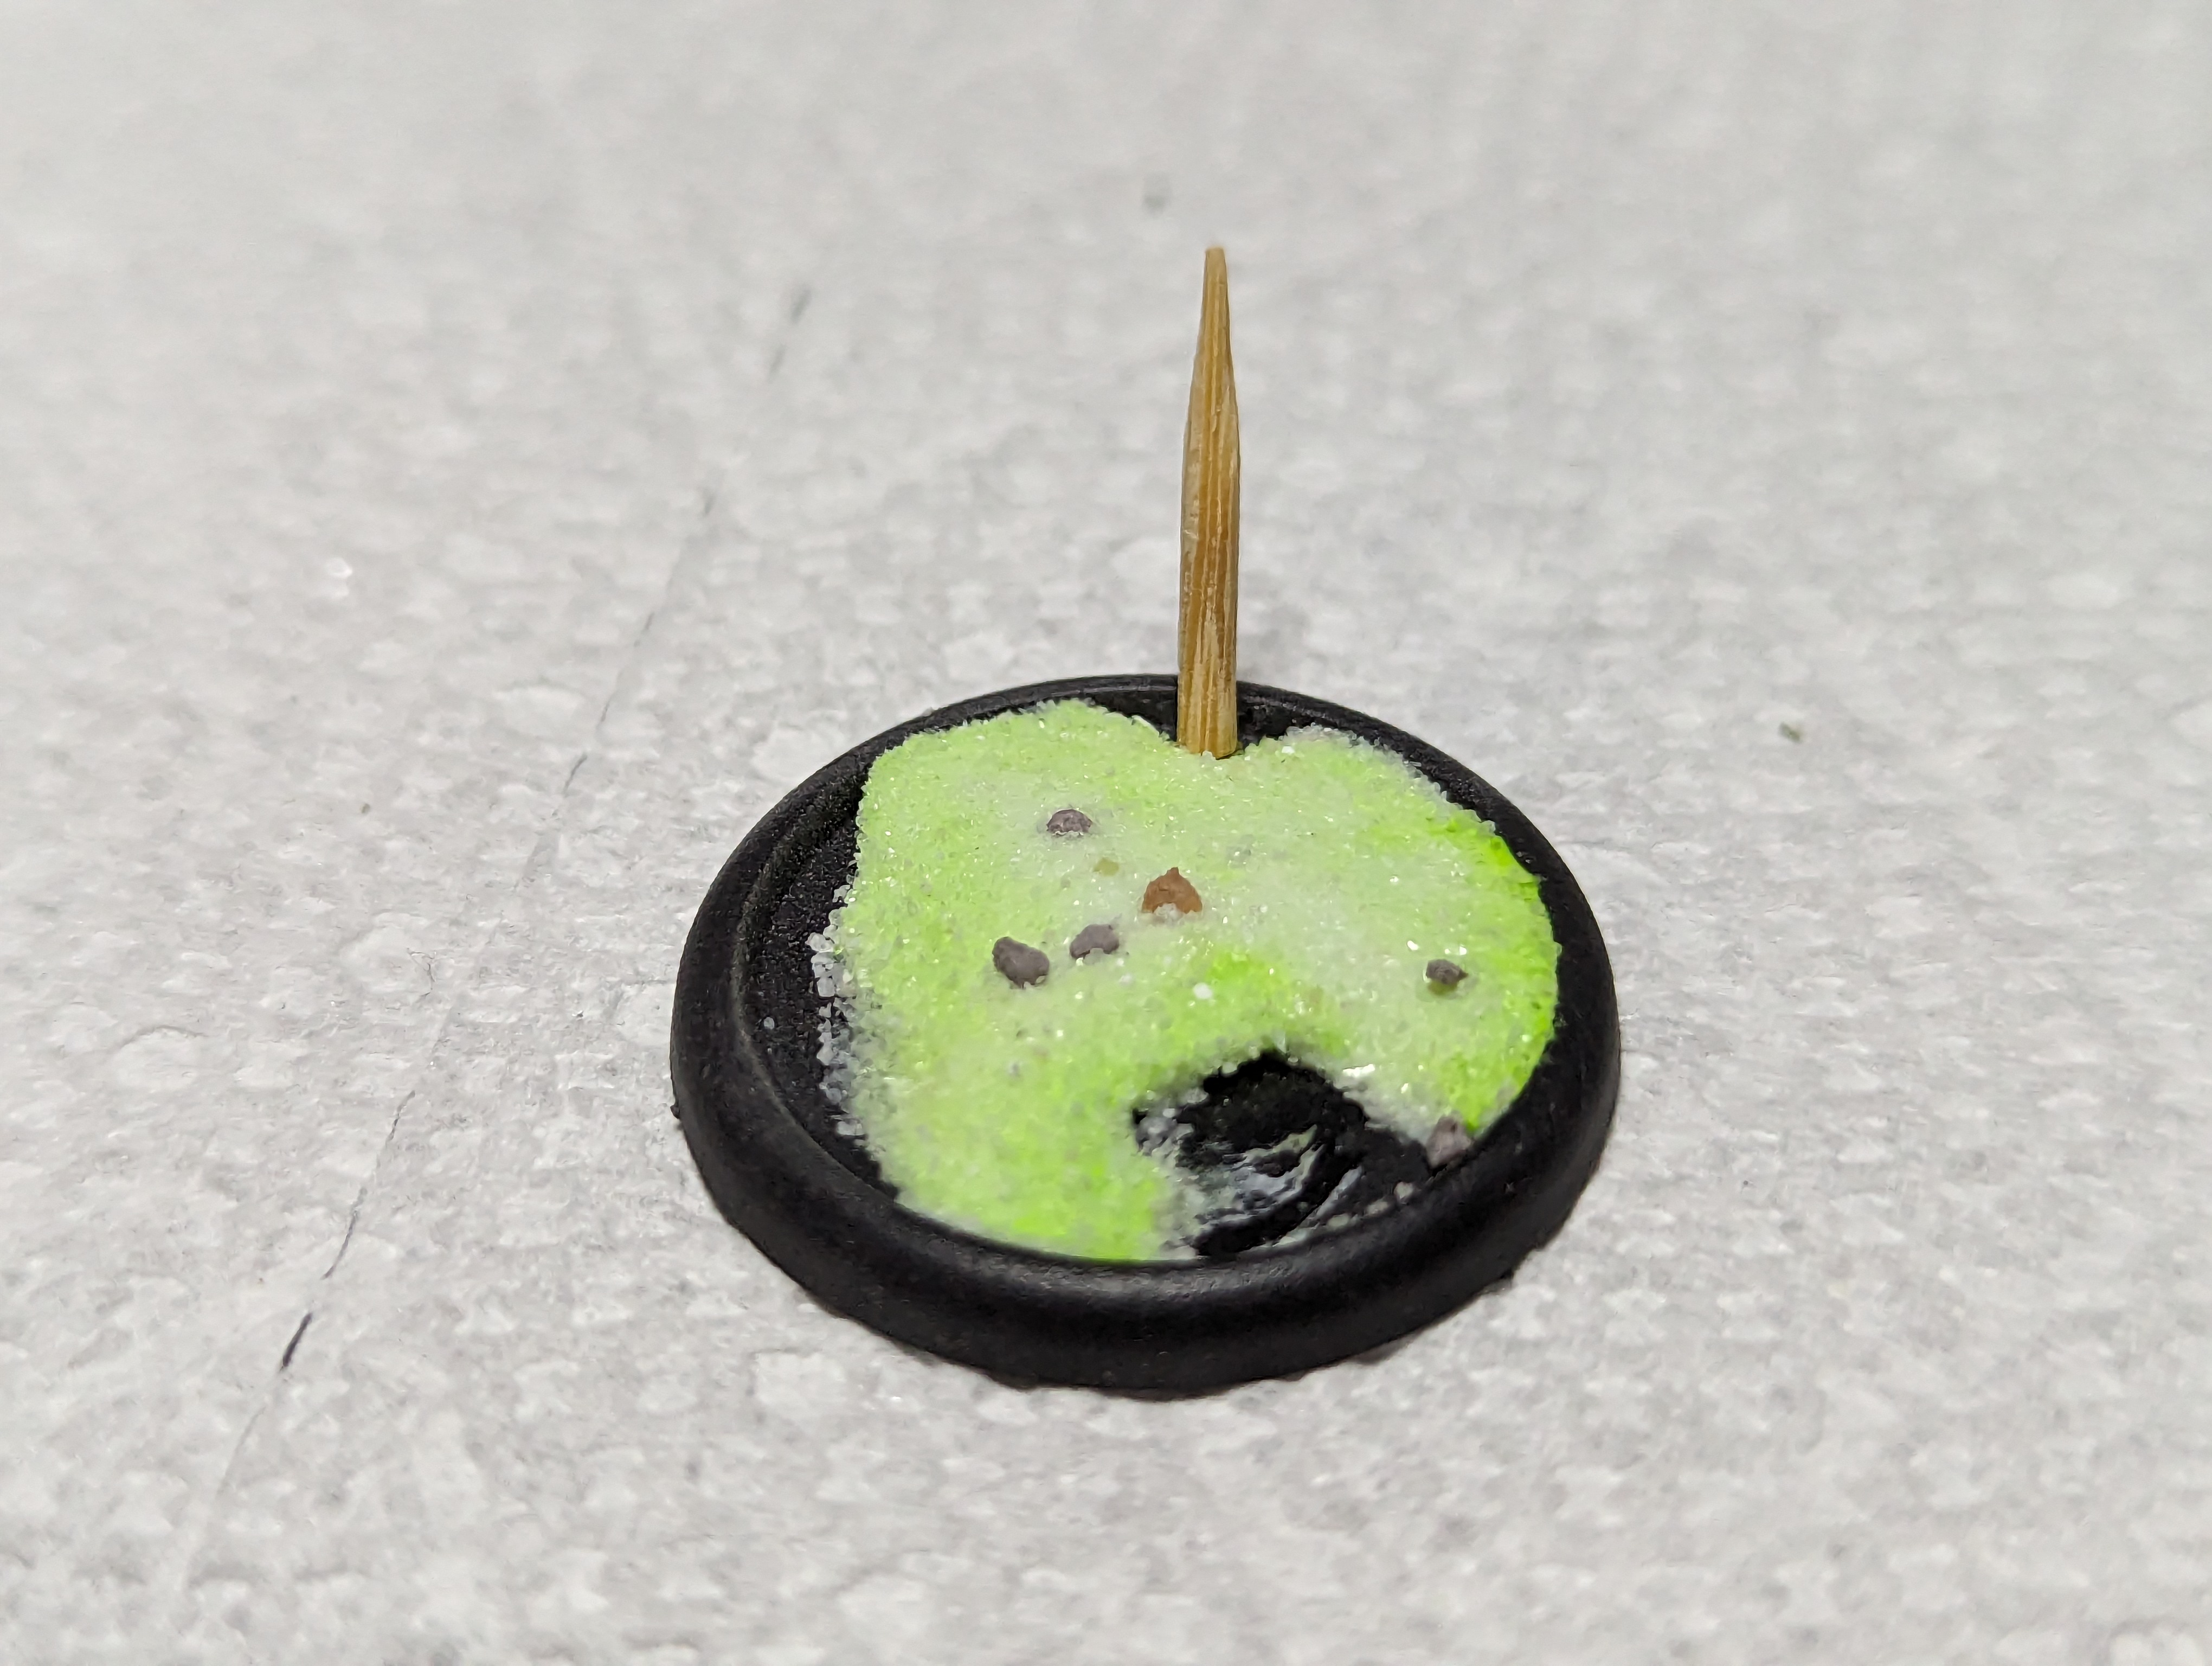
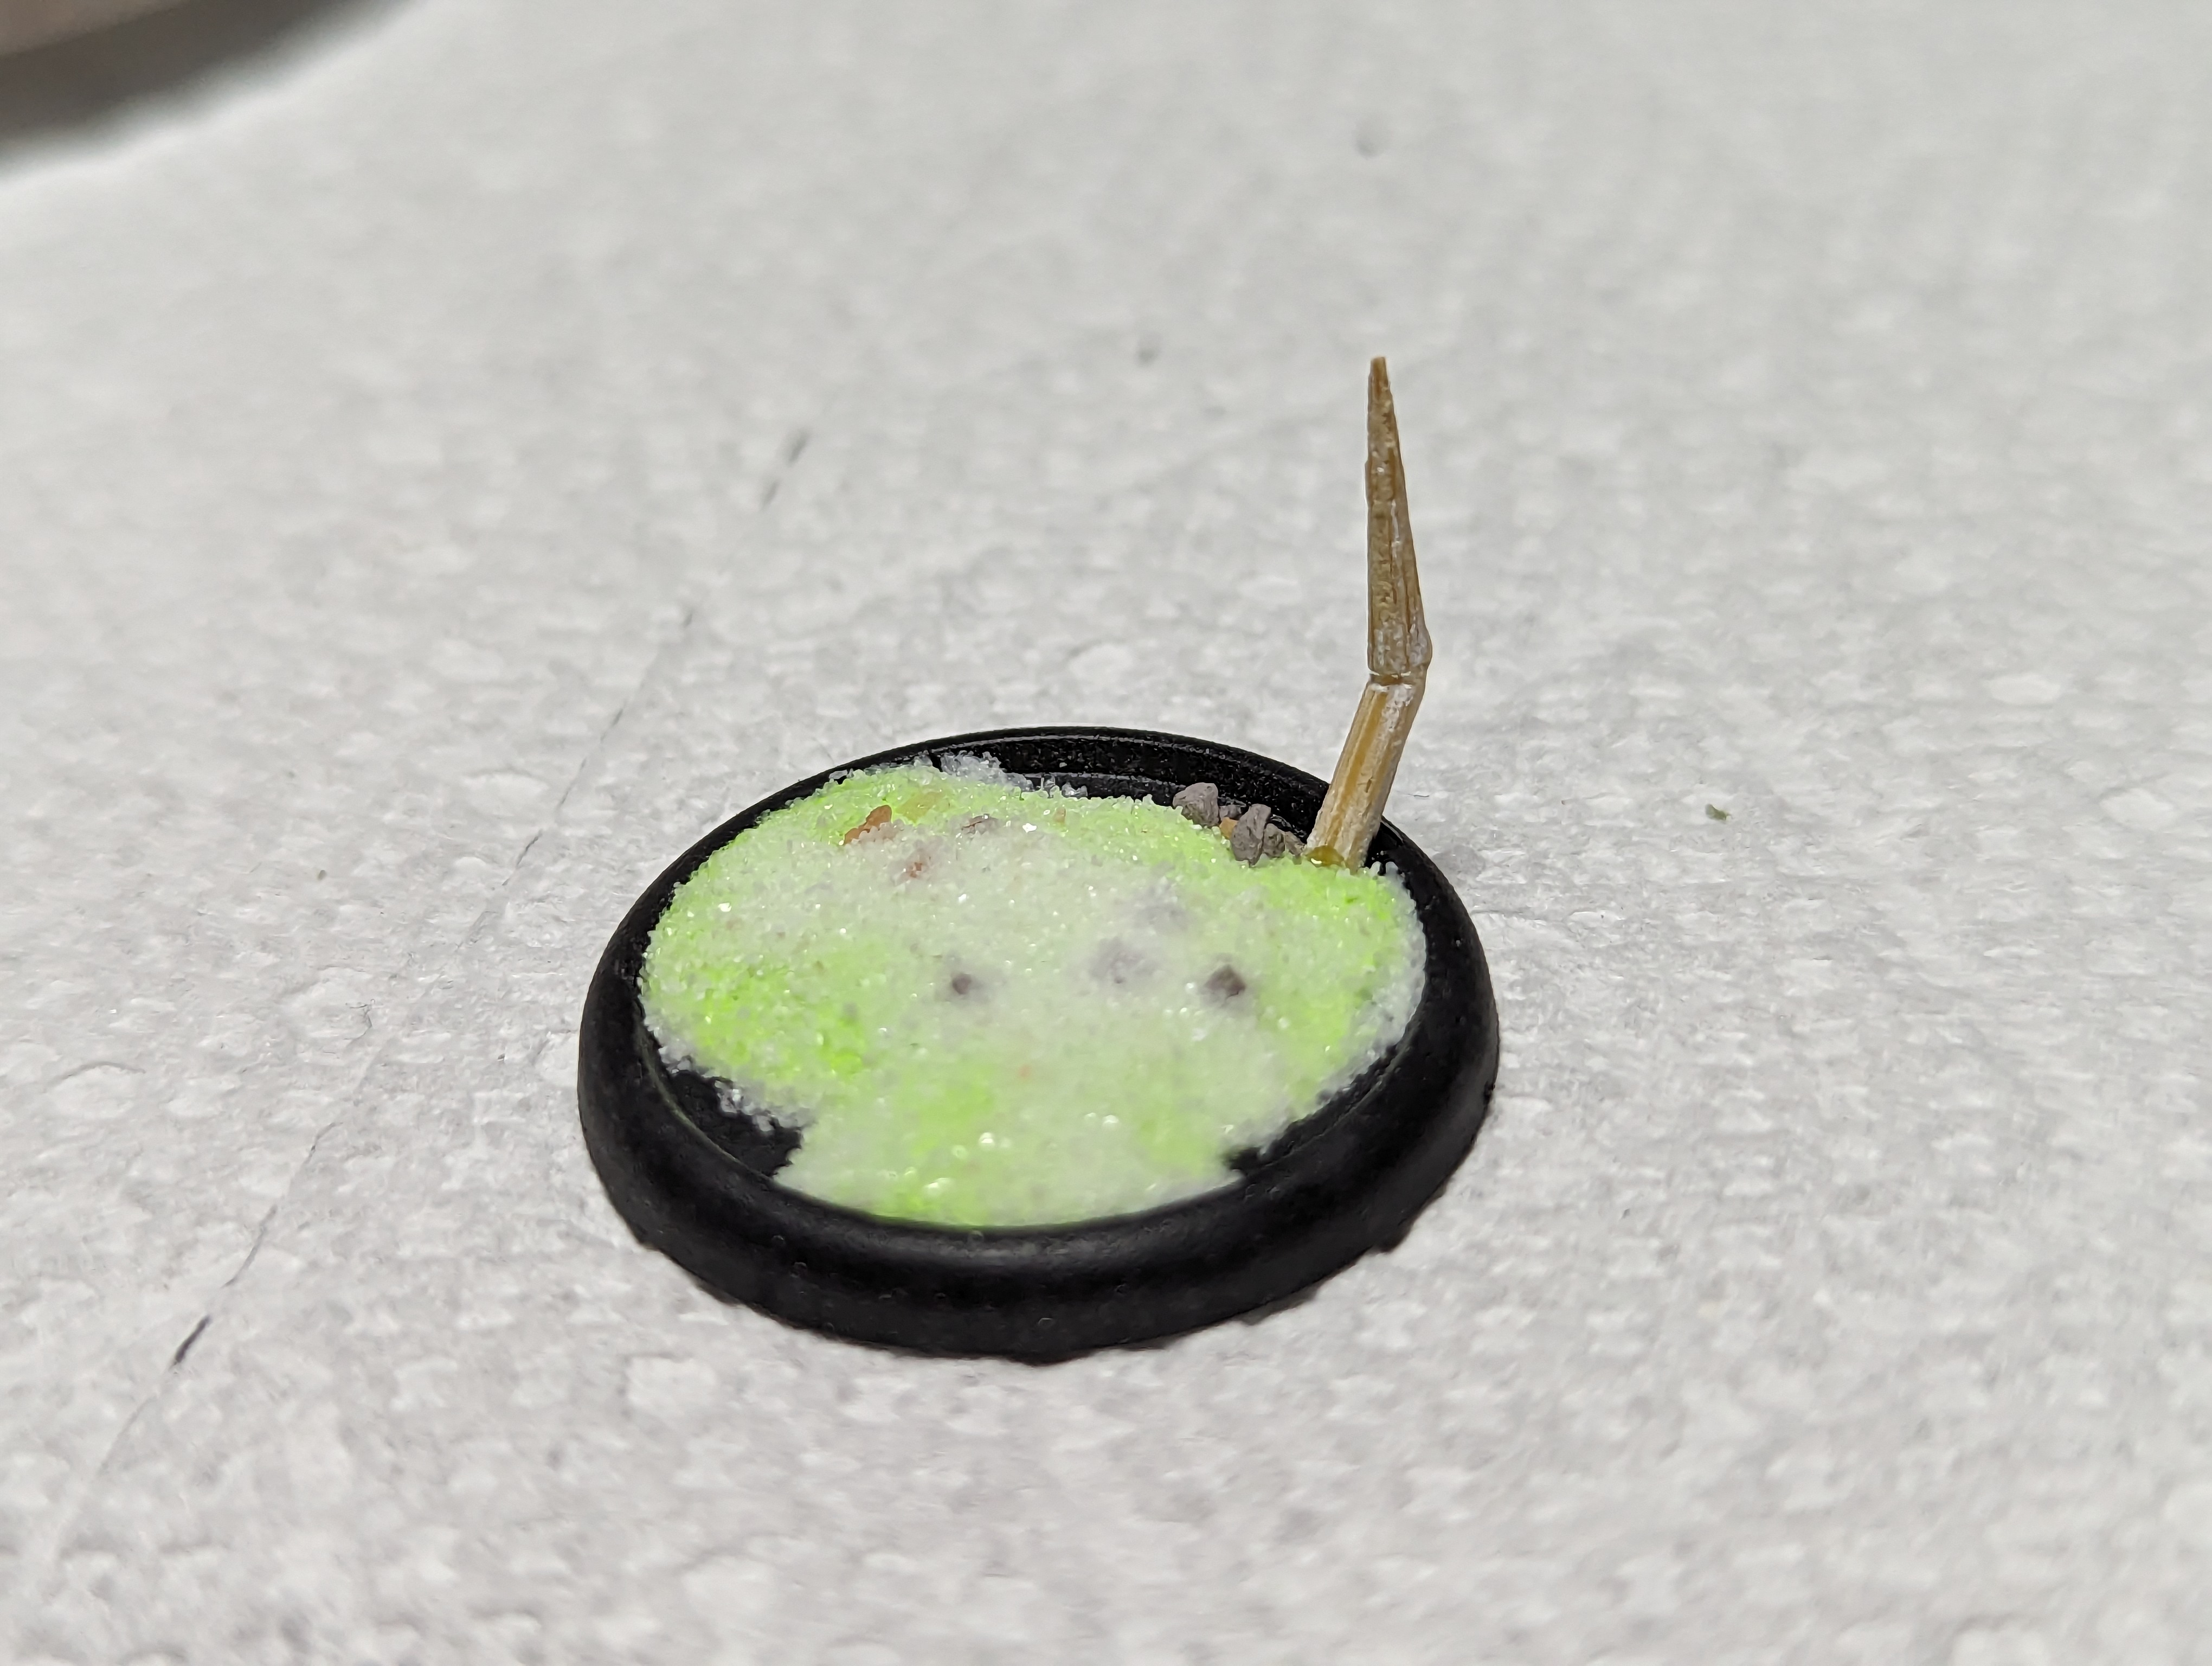
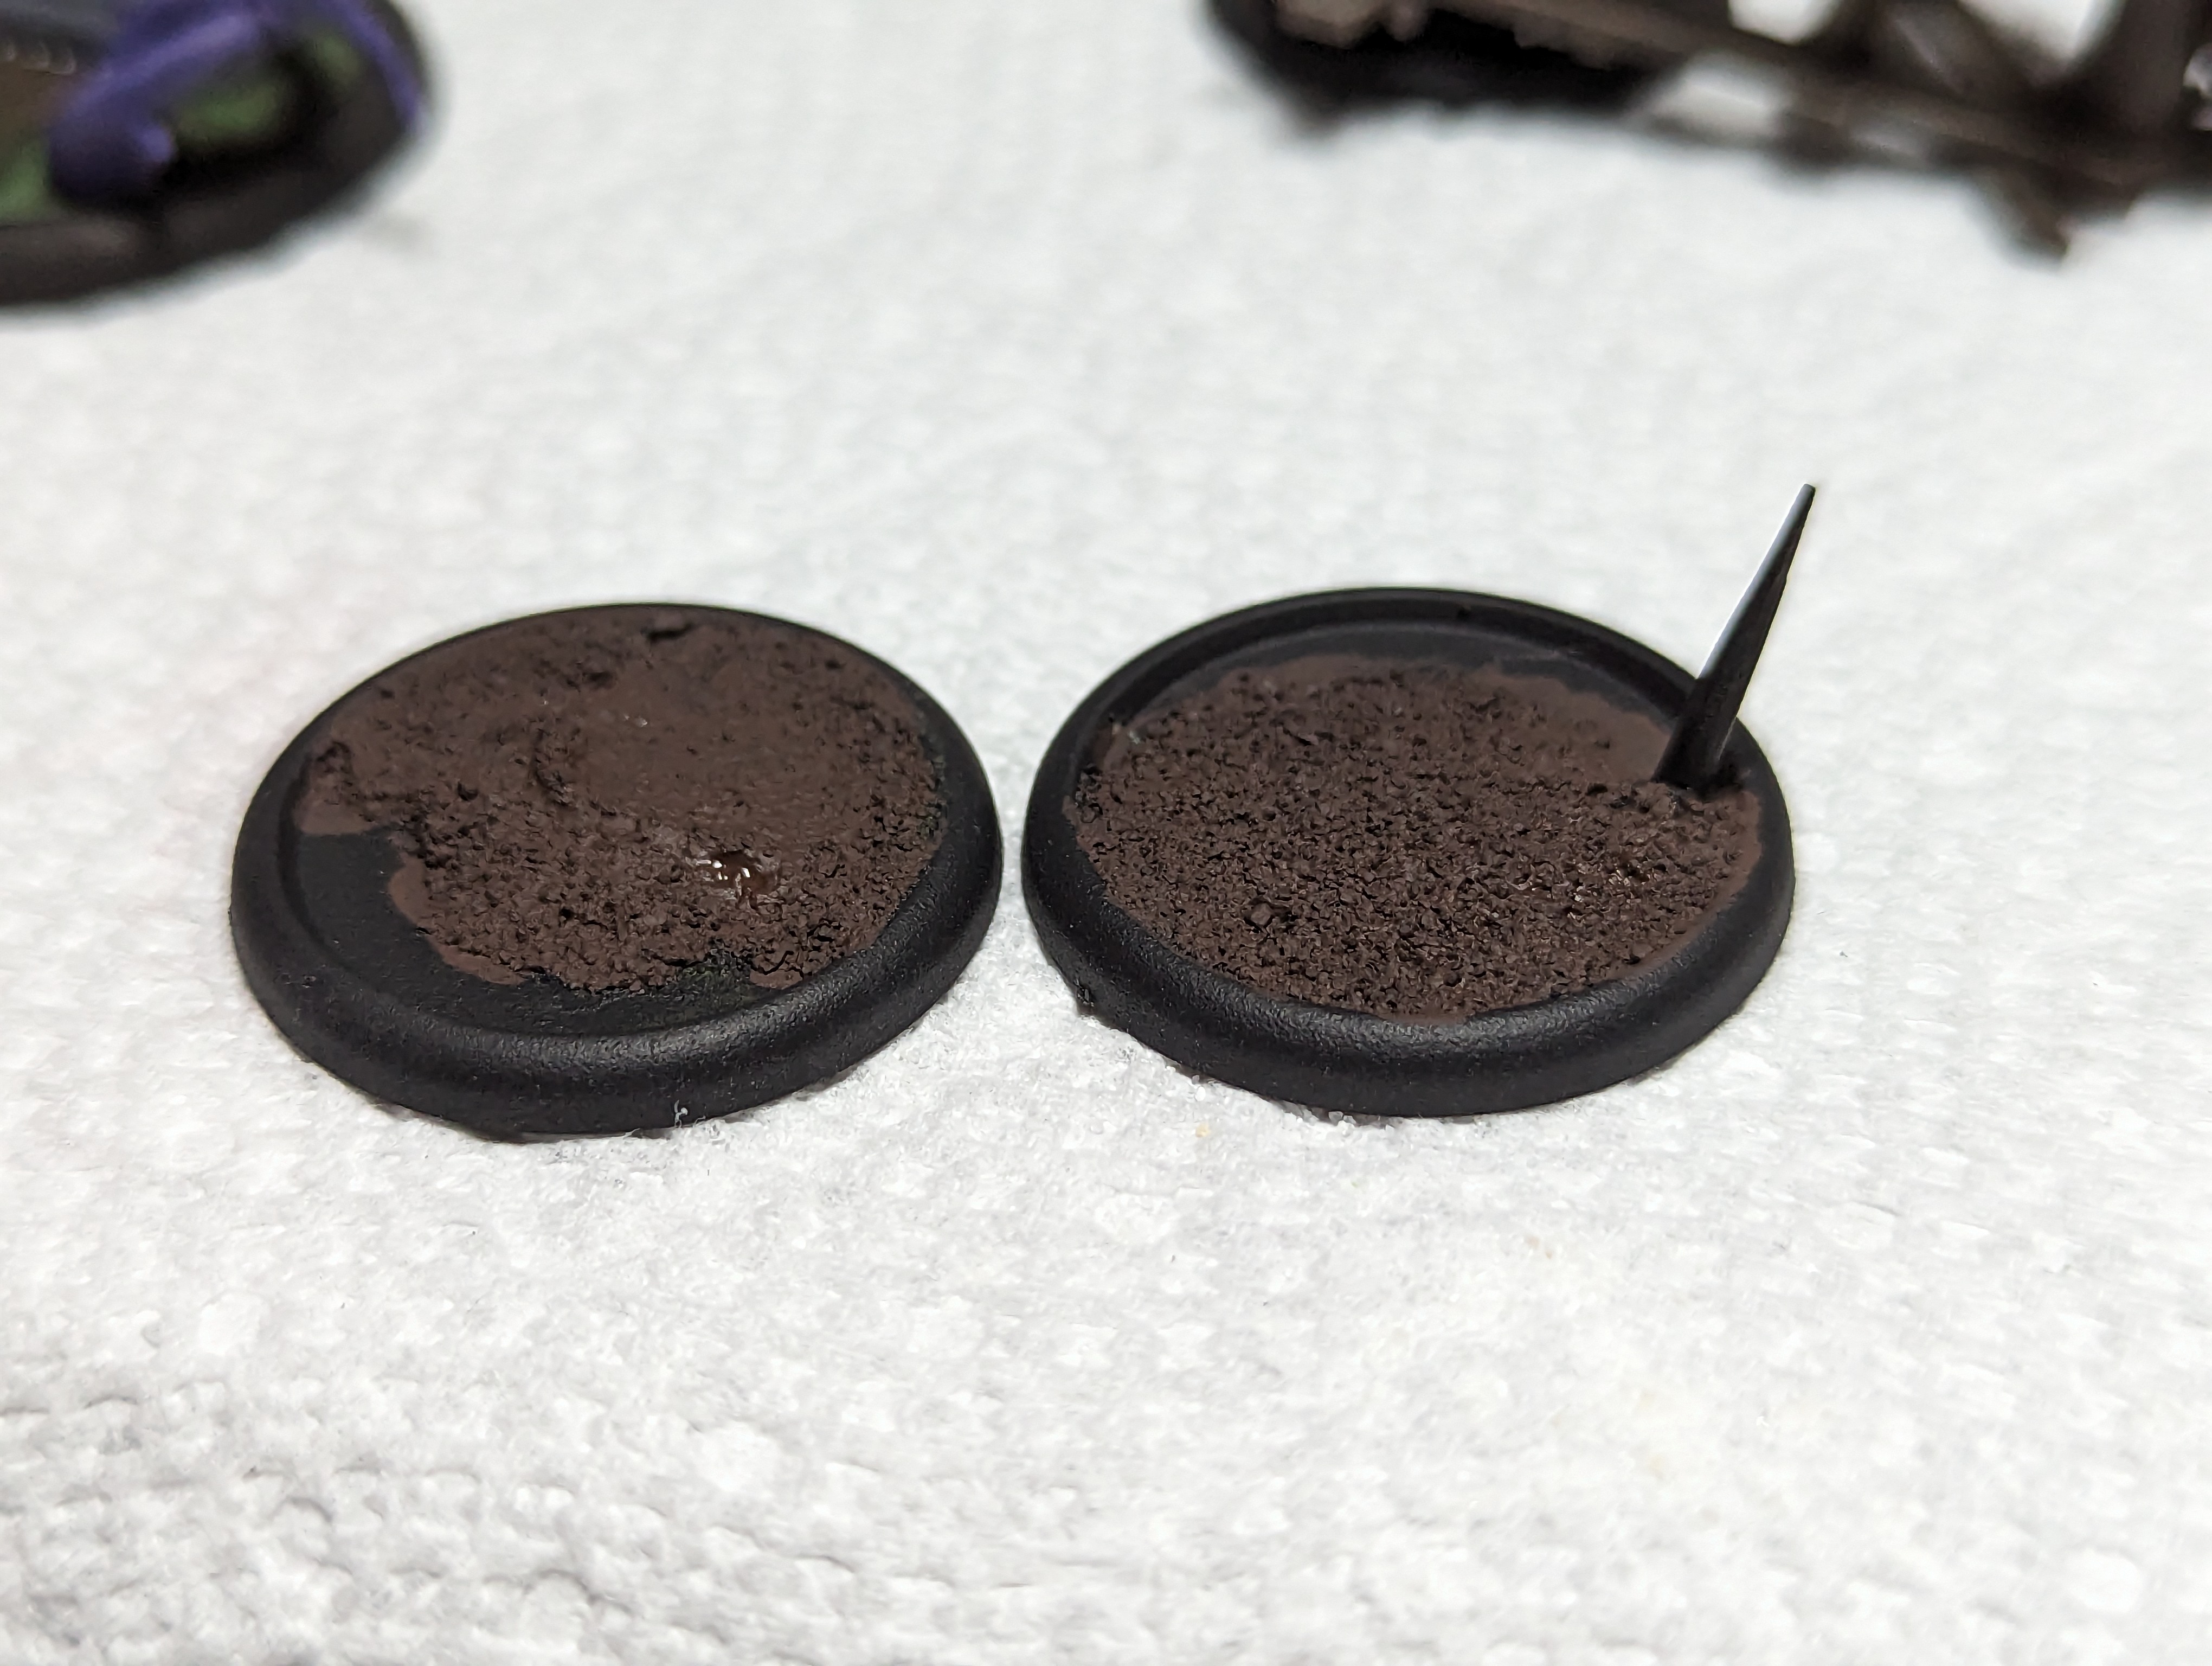
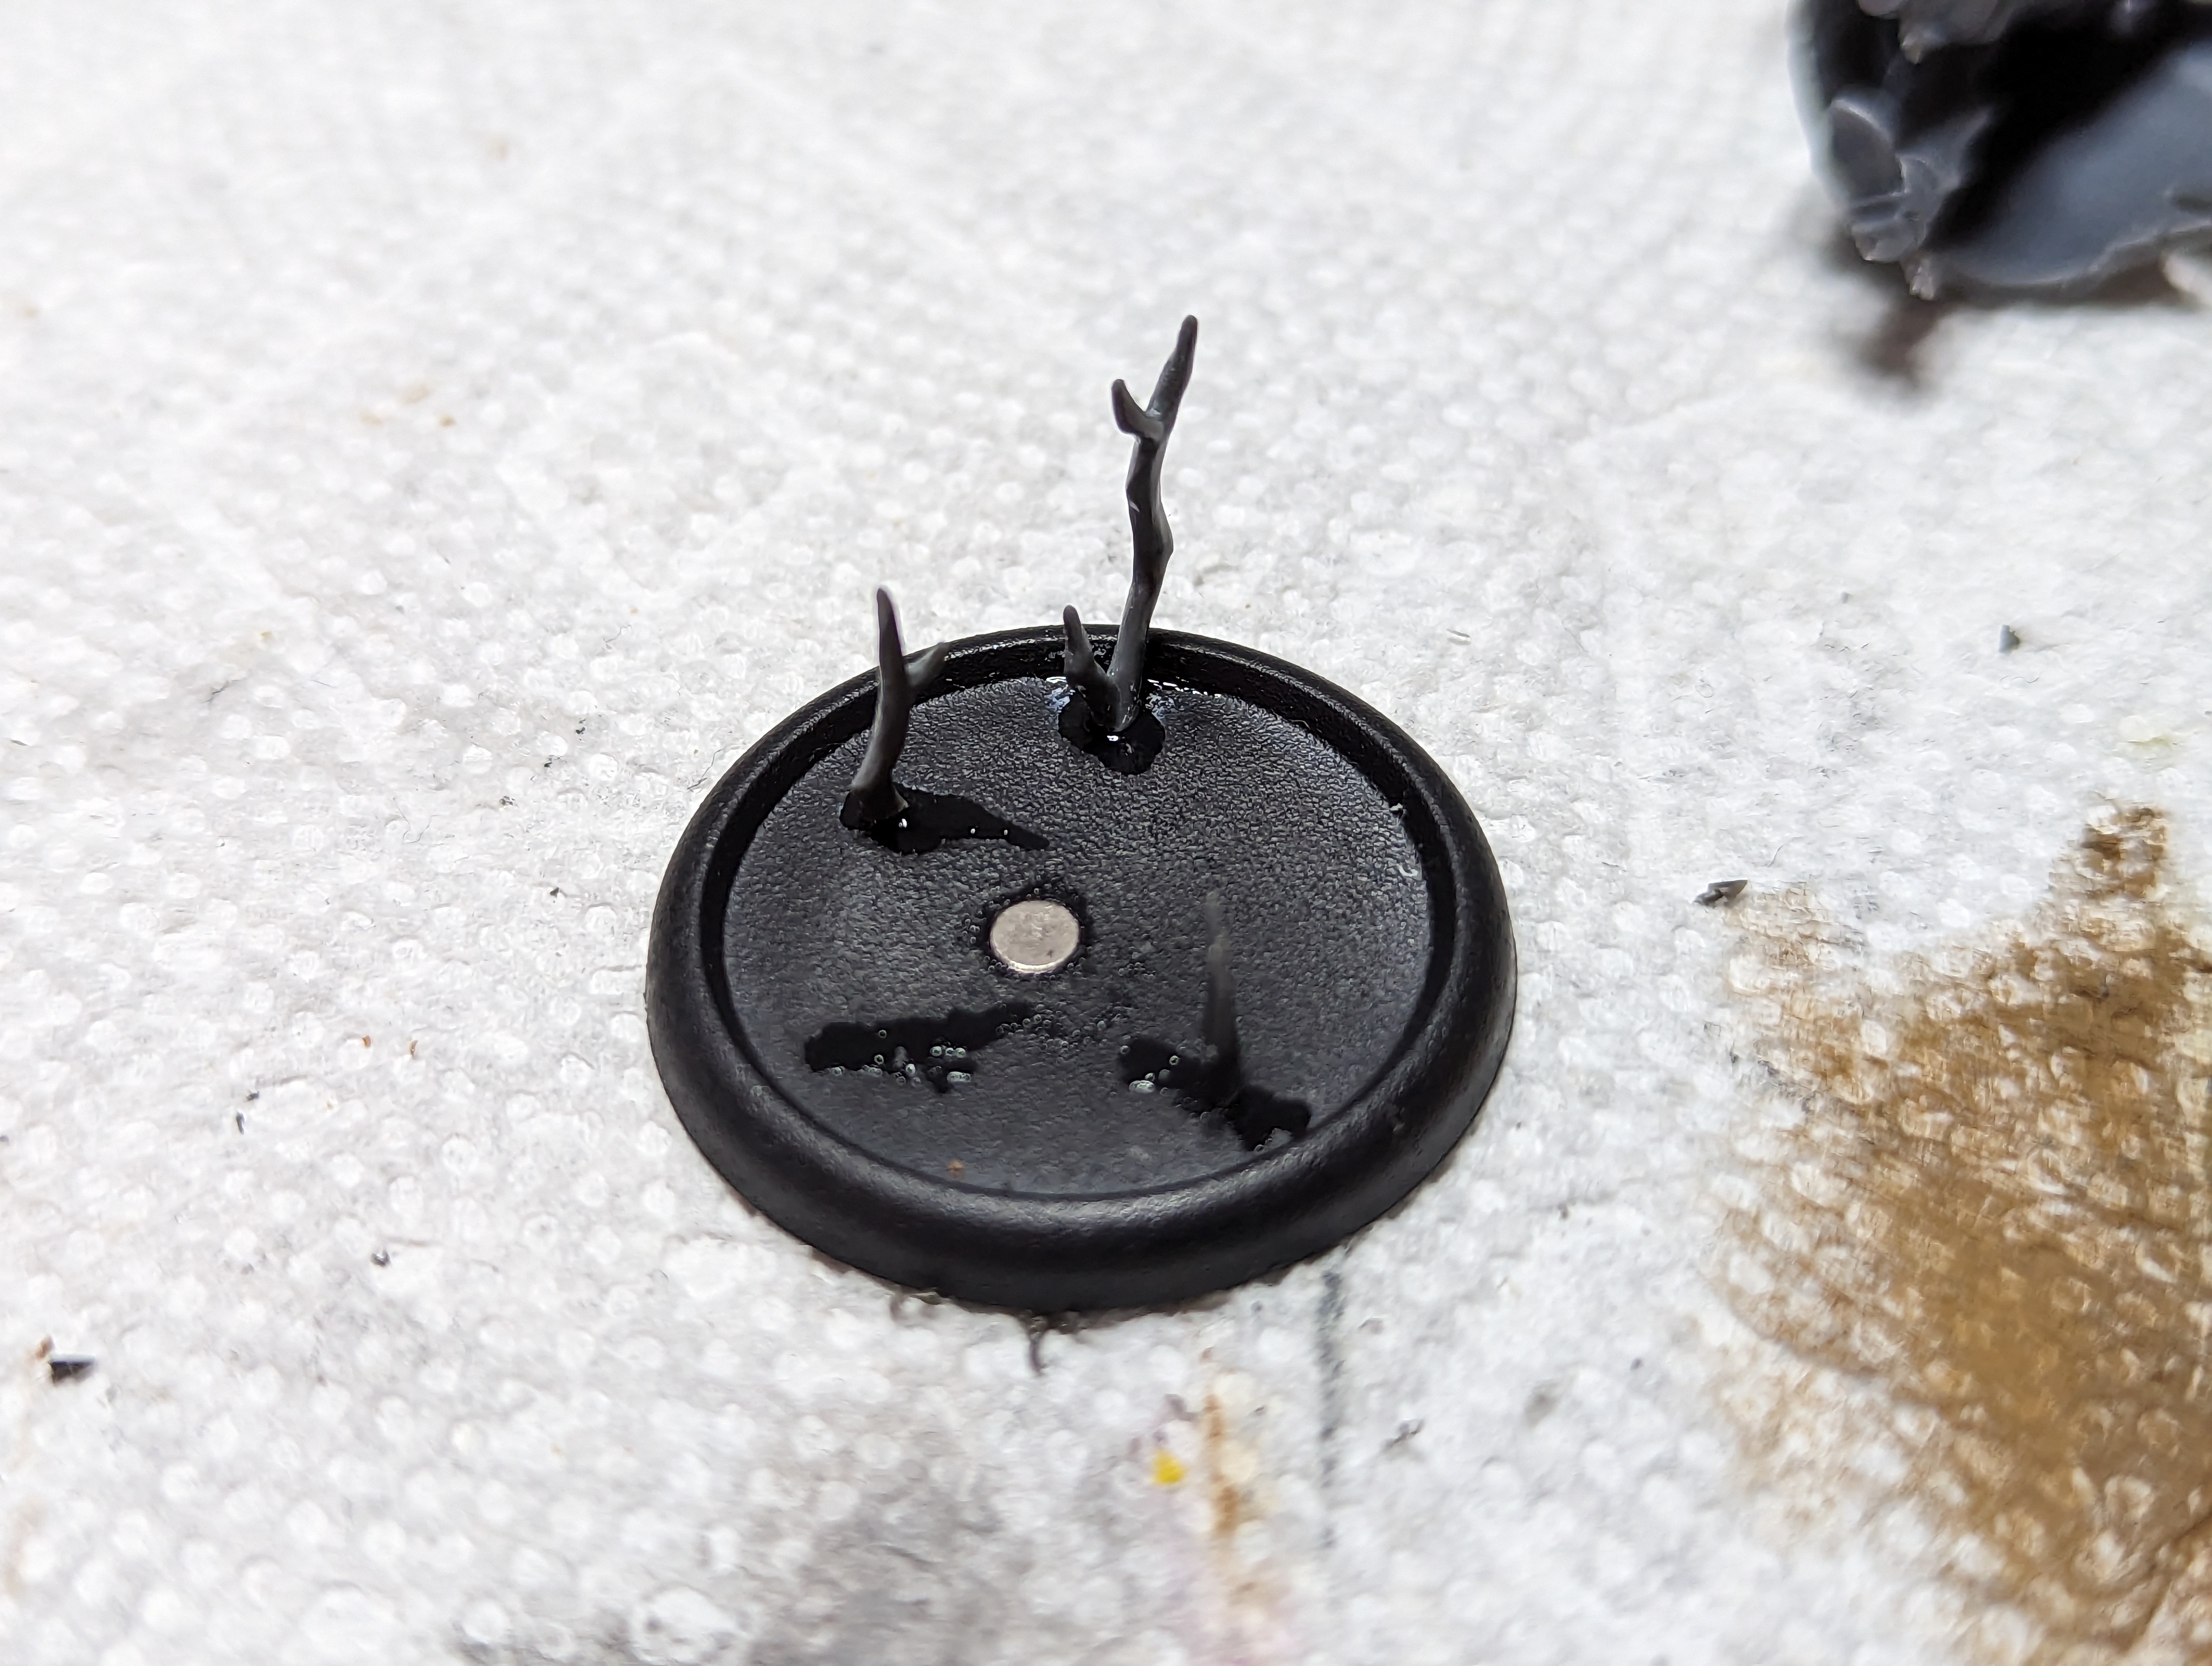
For the swamp bases, I started with an irregular patch of sand to leave space for water effects. I then broke up a toothpick and glued it back together at angles to make a curved shape.
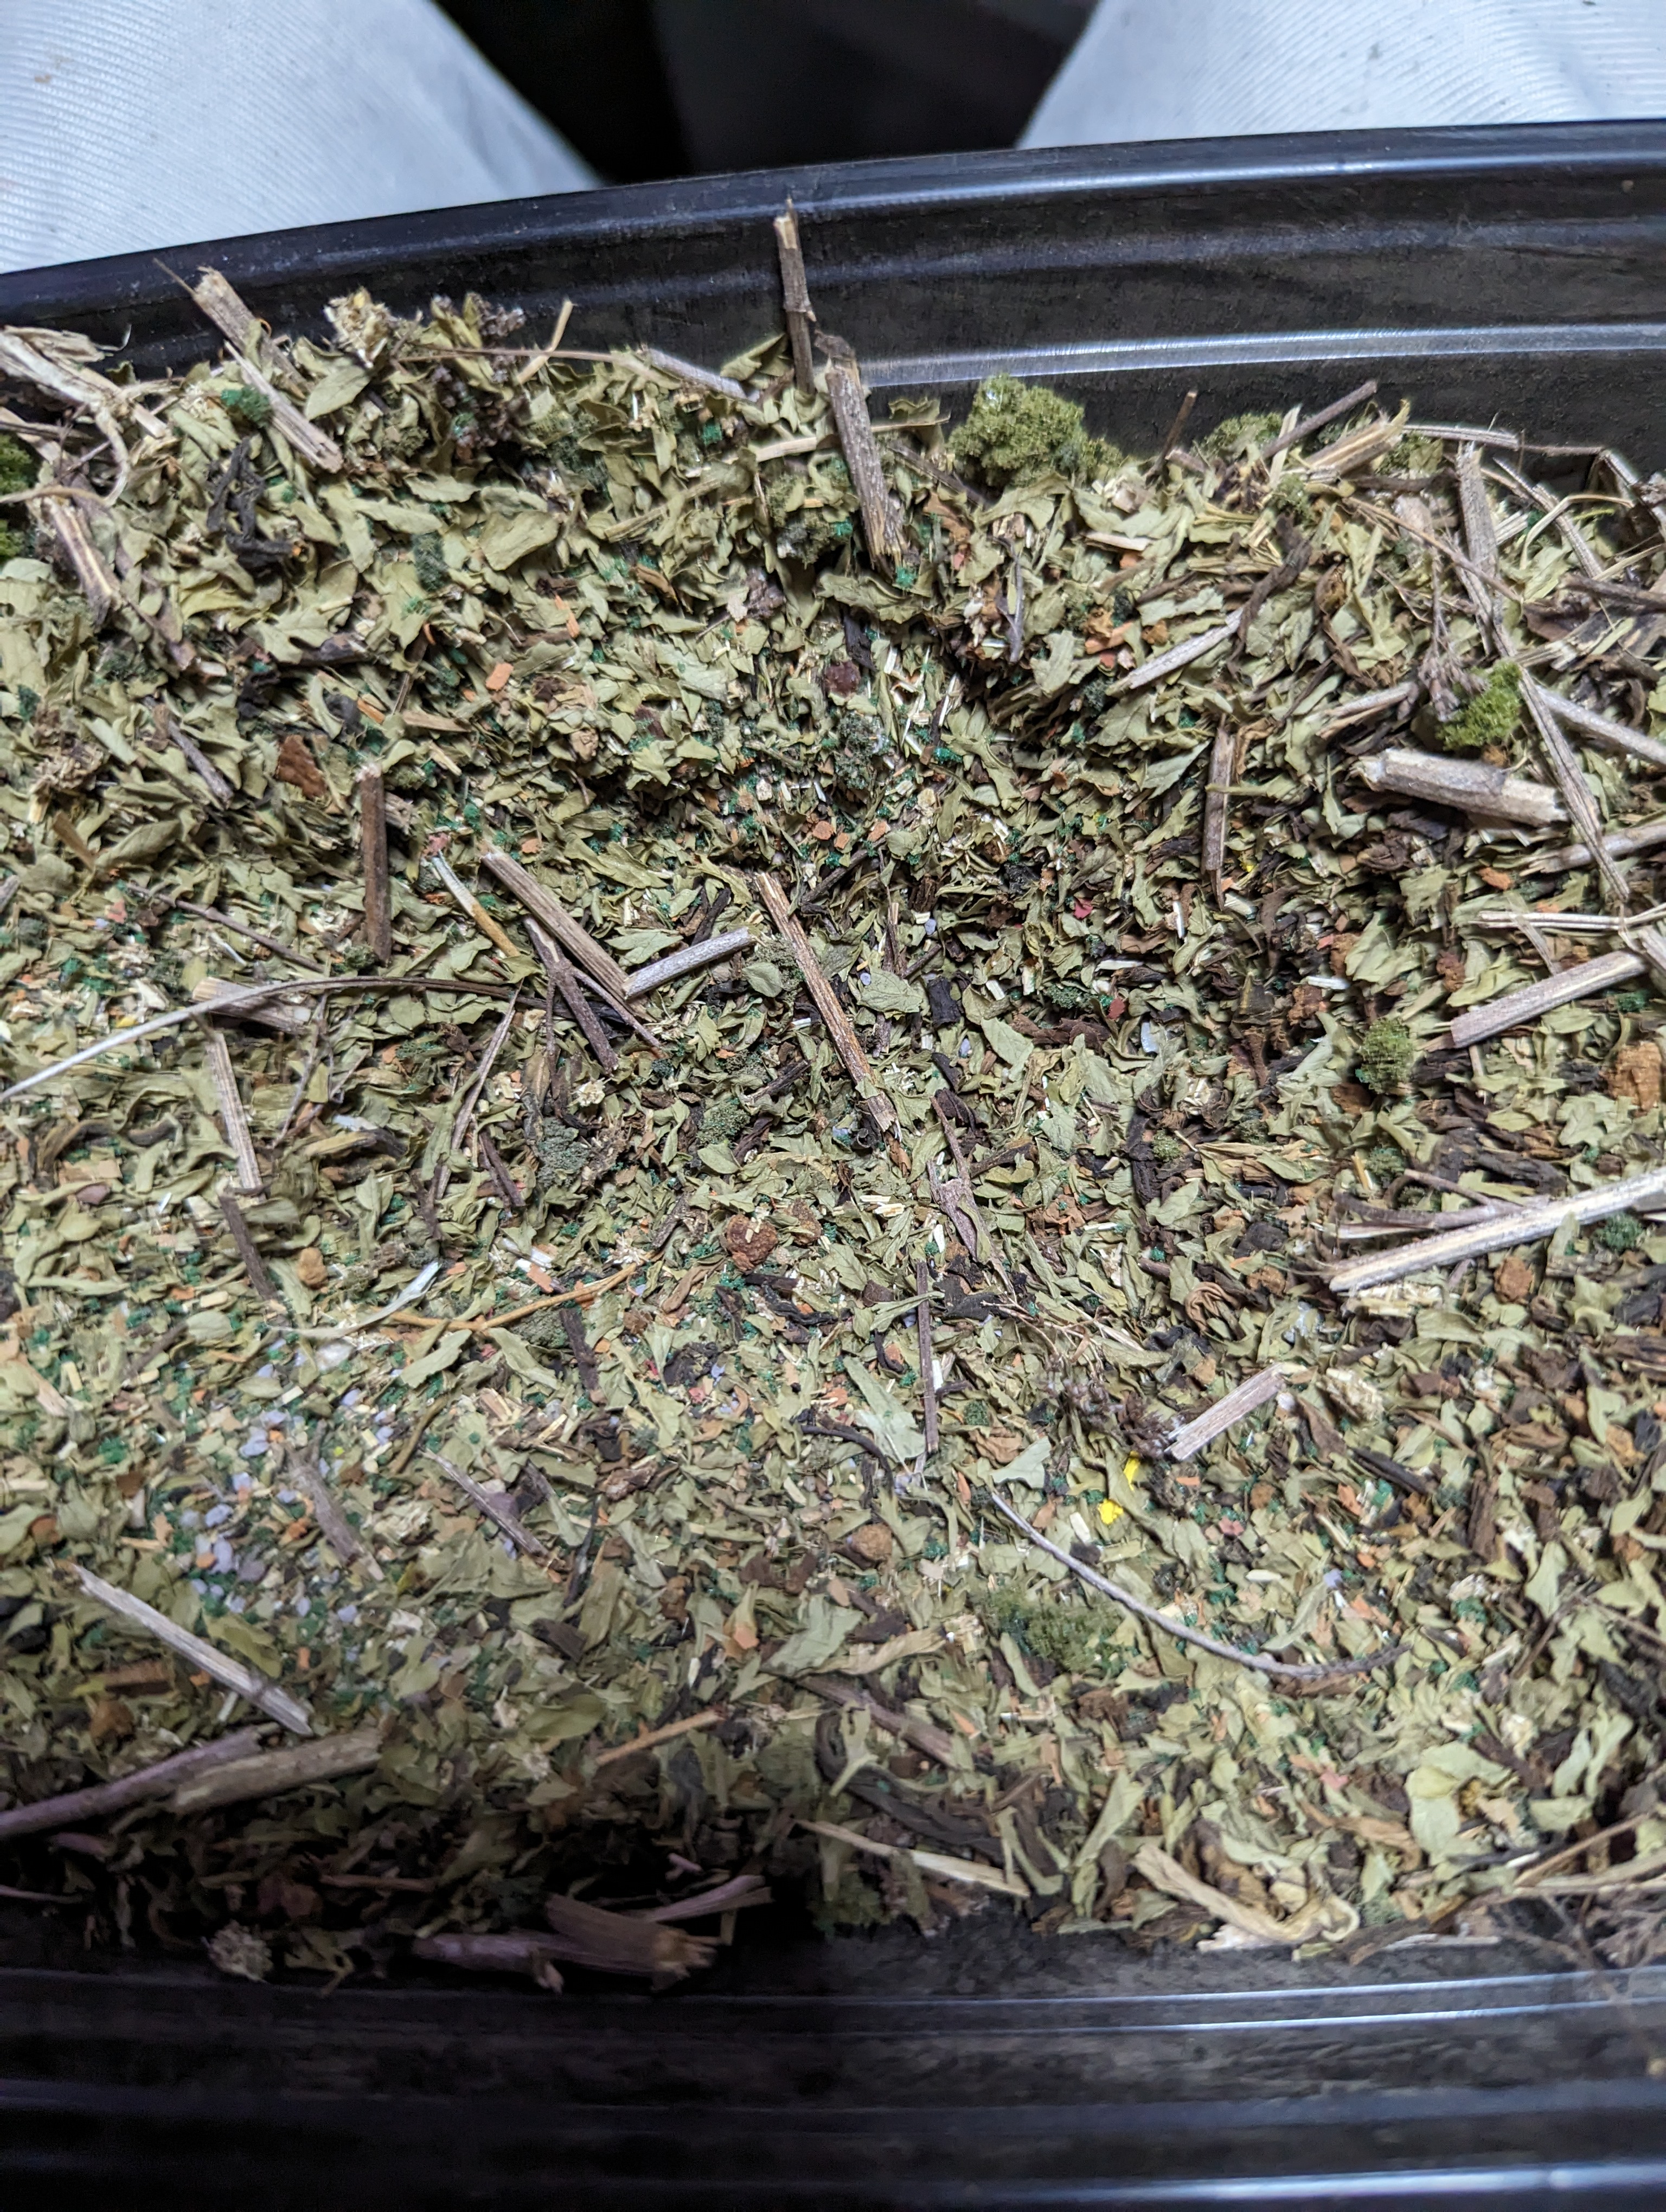
I primed the base but then covered it in this jungle mix I made up. Its a combination of flock, sand, lots of old herbs from the spice cabinet, and broken up twigs. Its makes a pretty good natural ground covering.
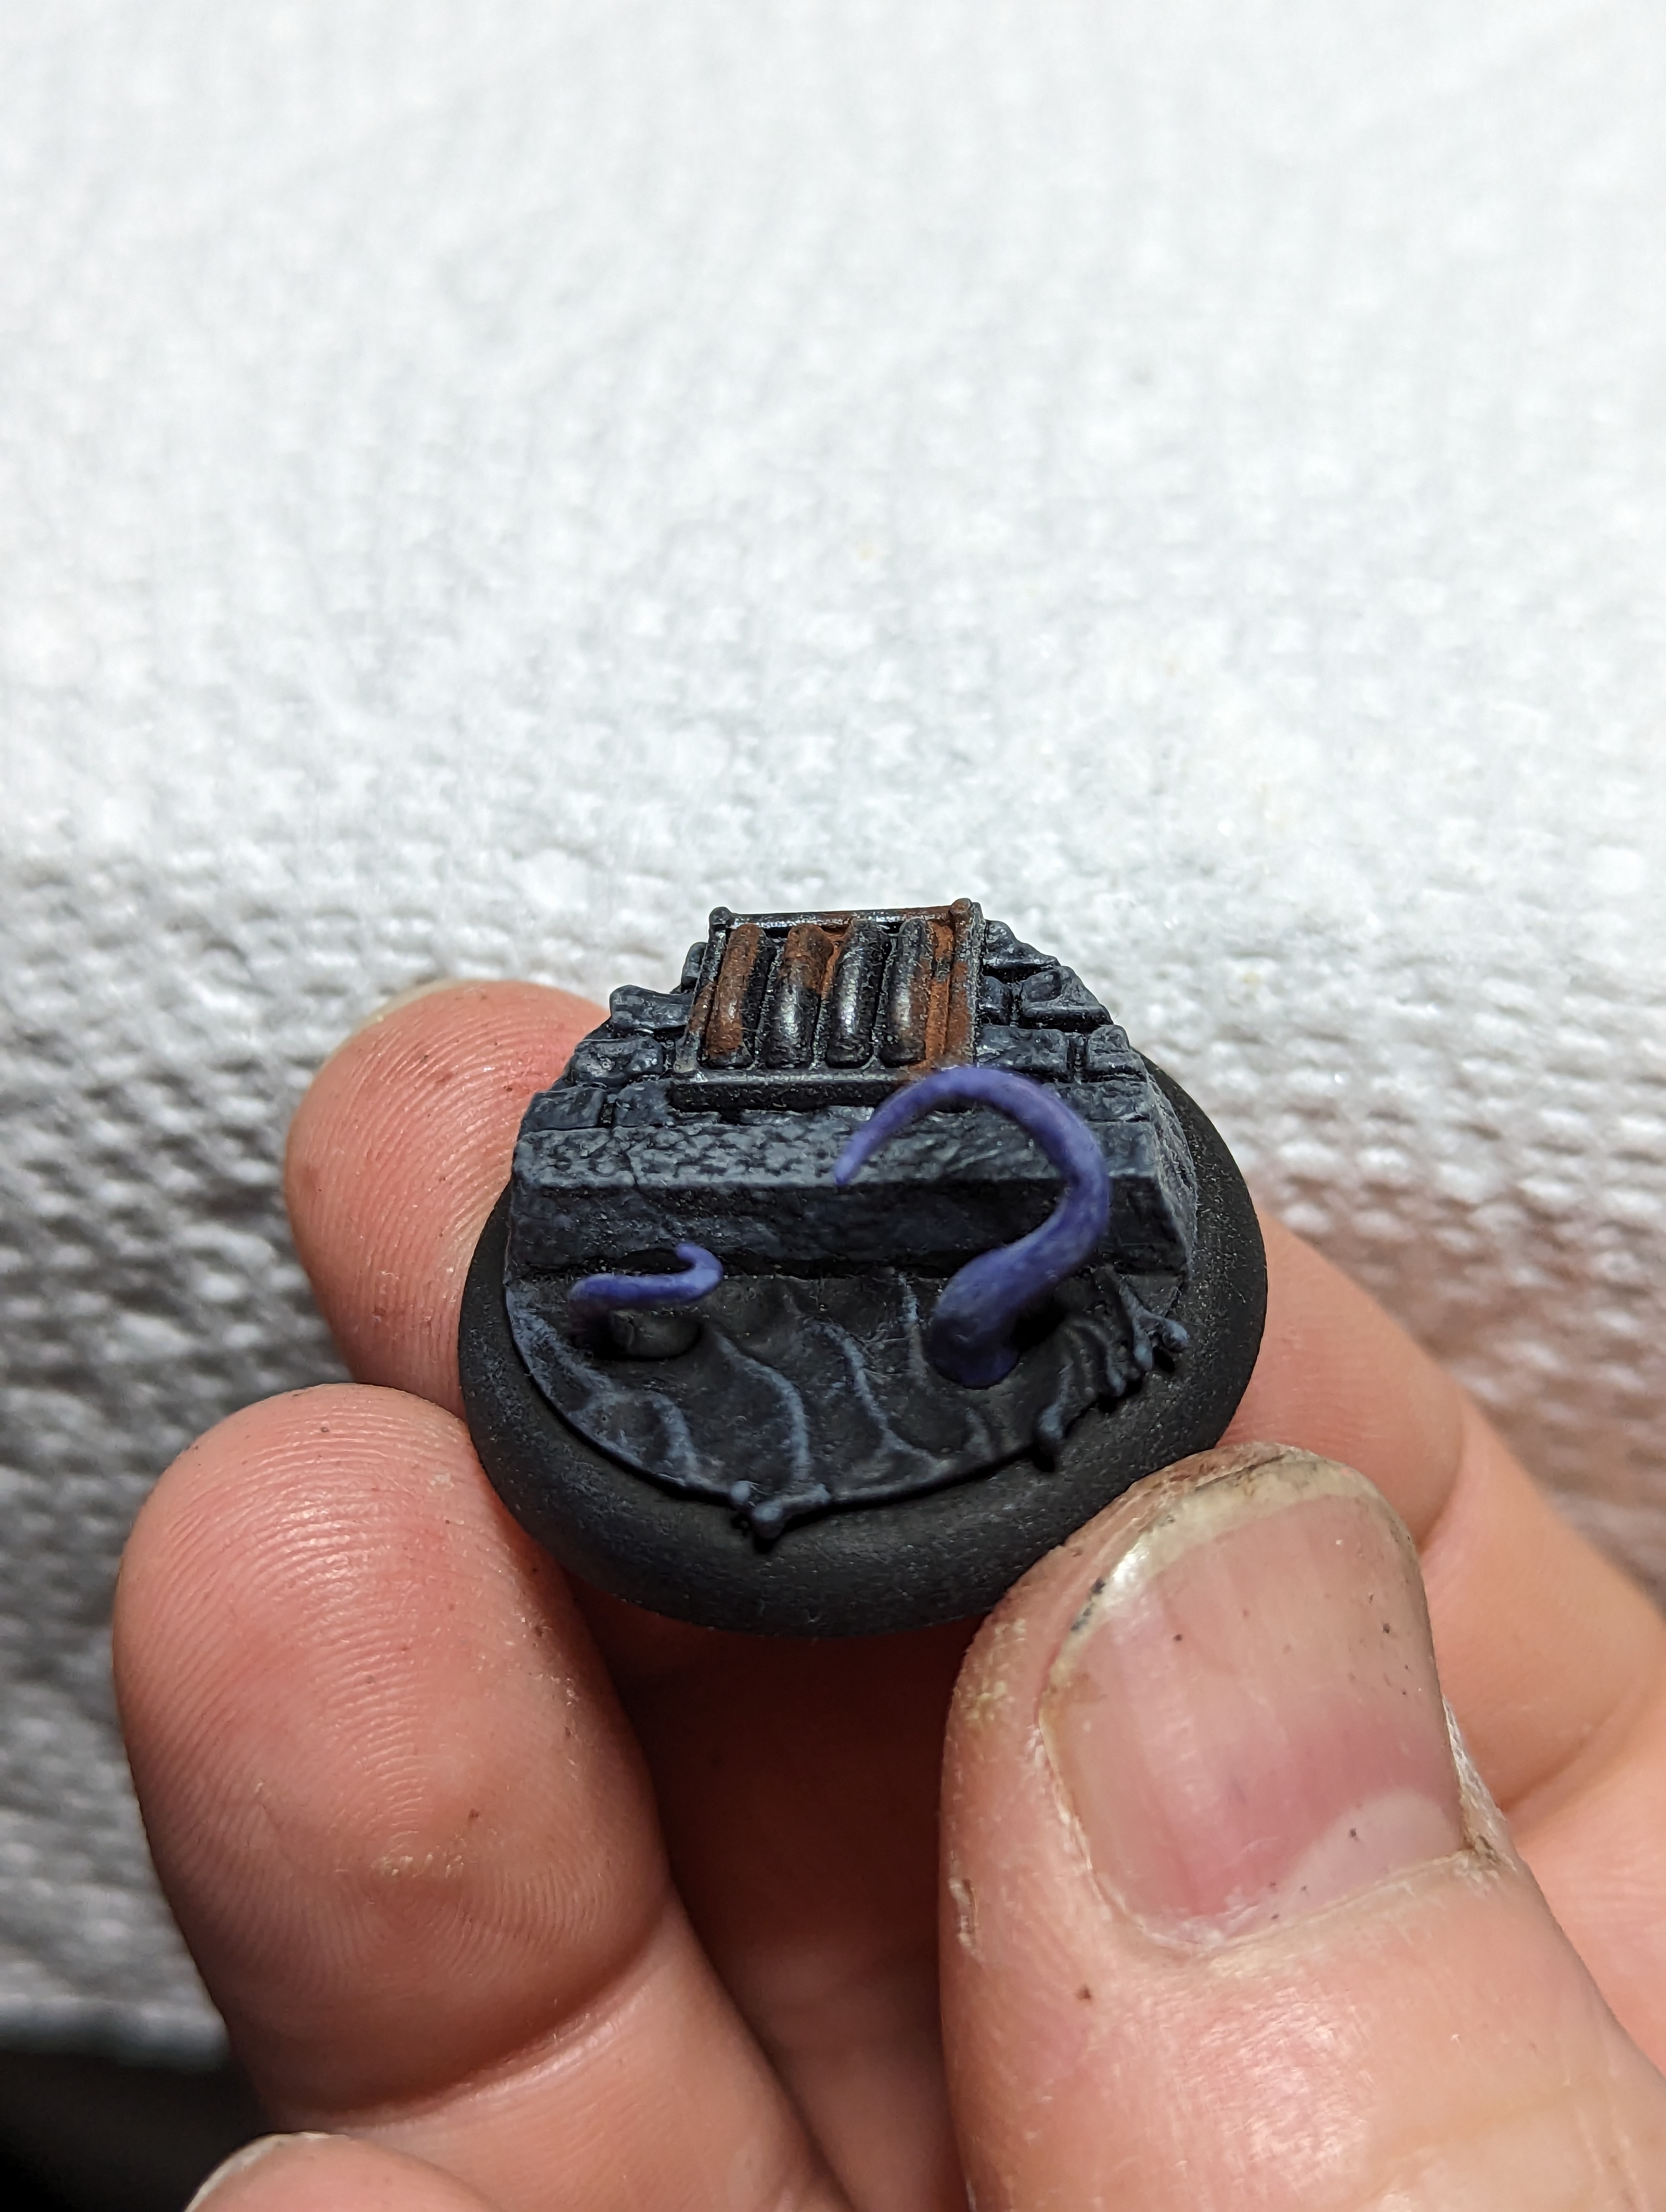
I couldn’t really think of a way to split the difference between sewer and bayou easily. So I just took this base that I already painted, and changed the water to black. That ties it in a bit with Wong, I’m probably the only person who will even notice, but that’s all that matters.
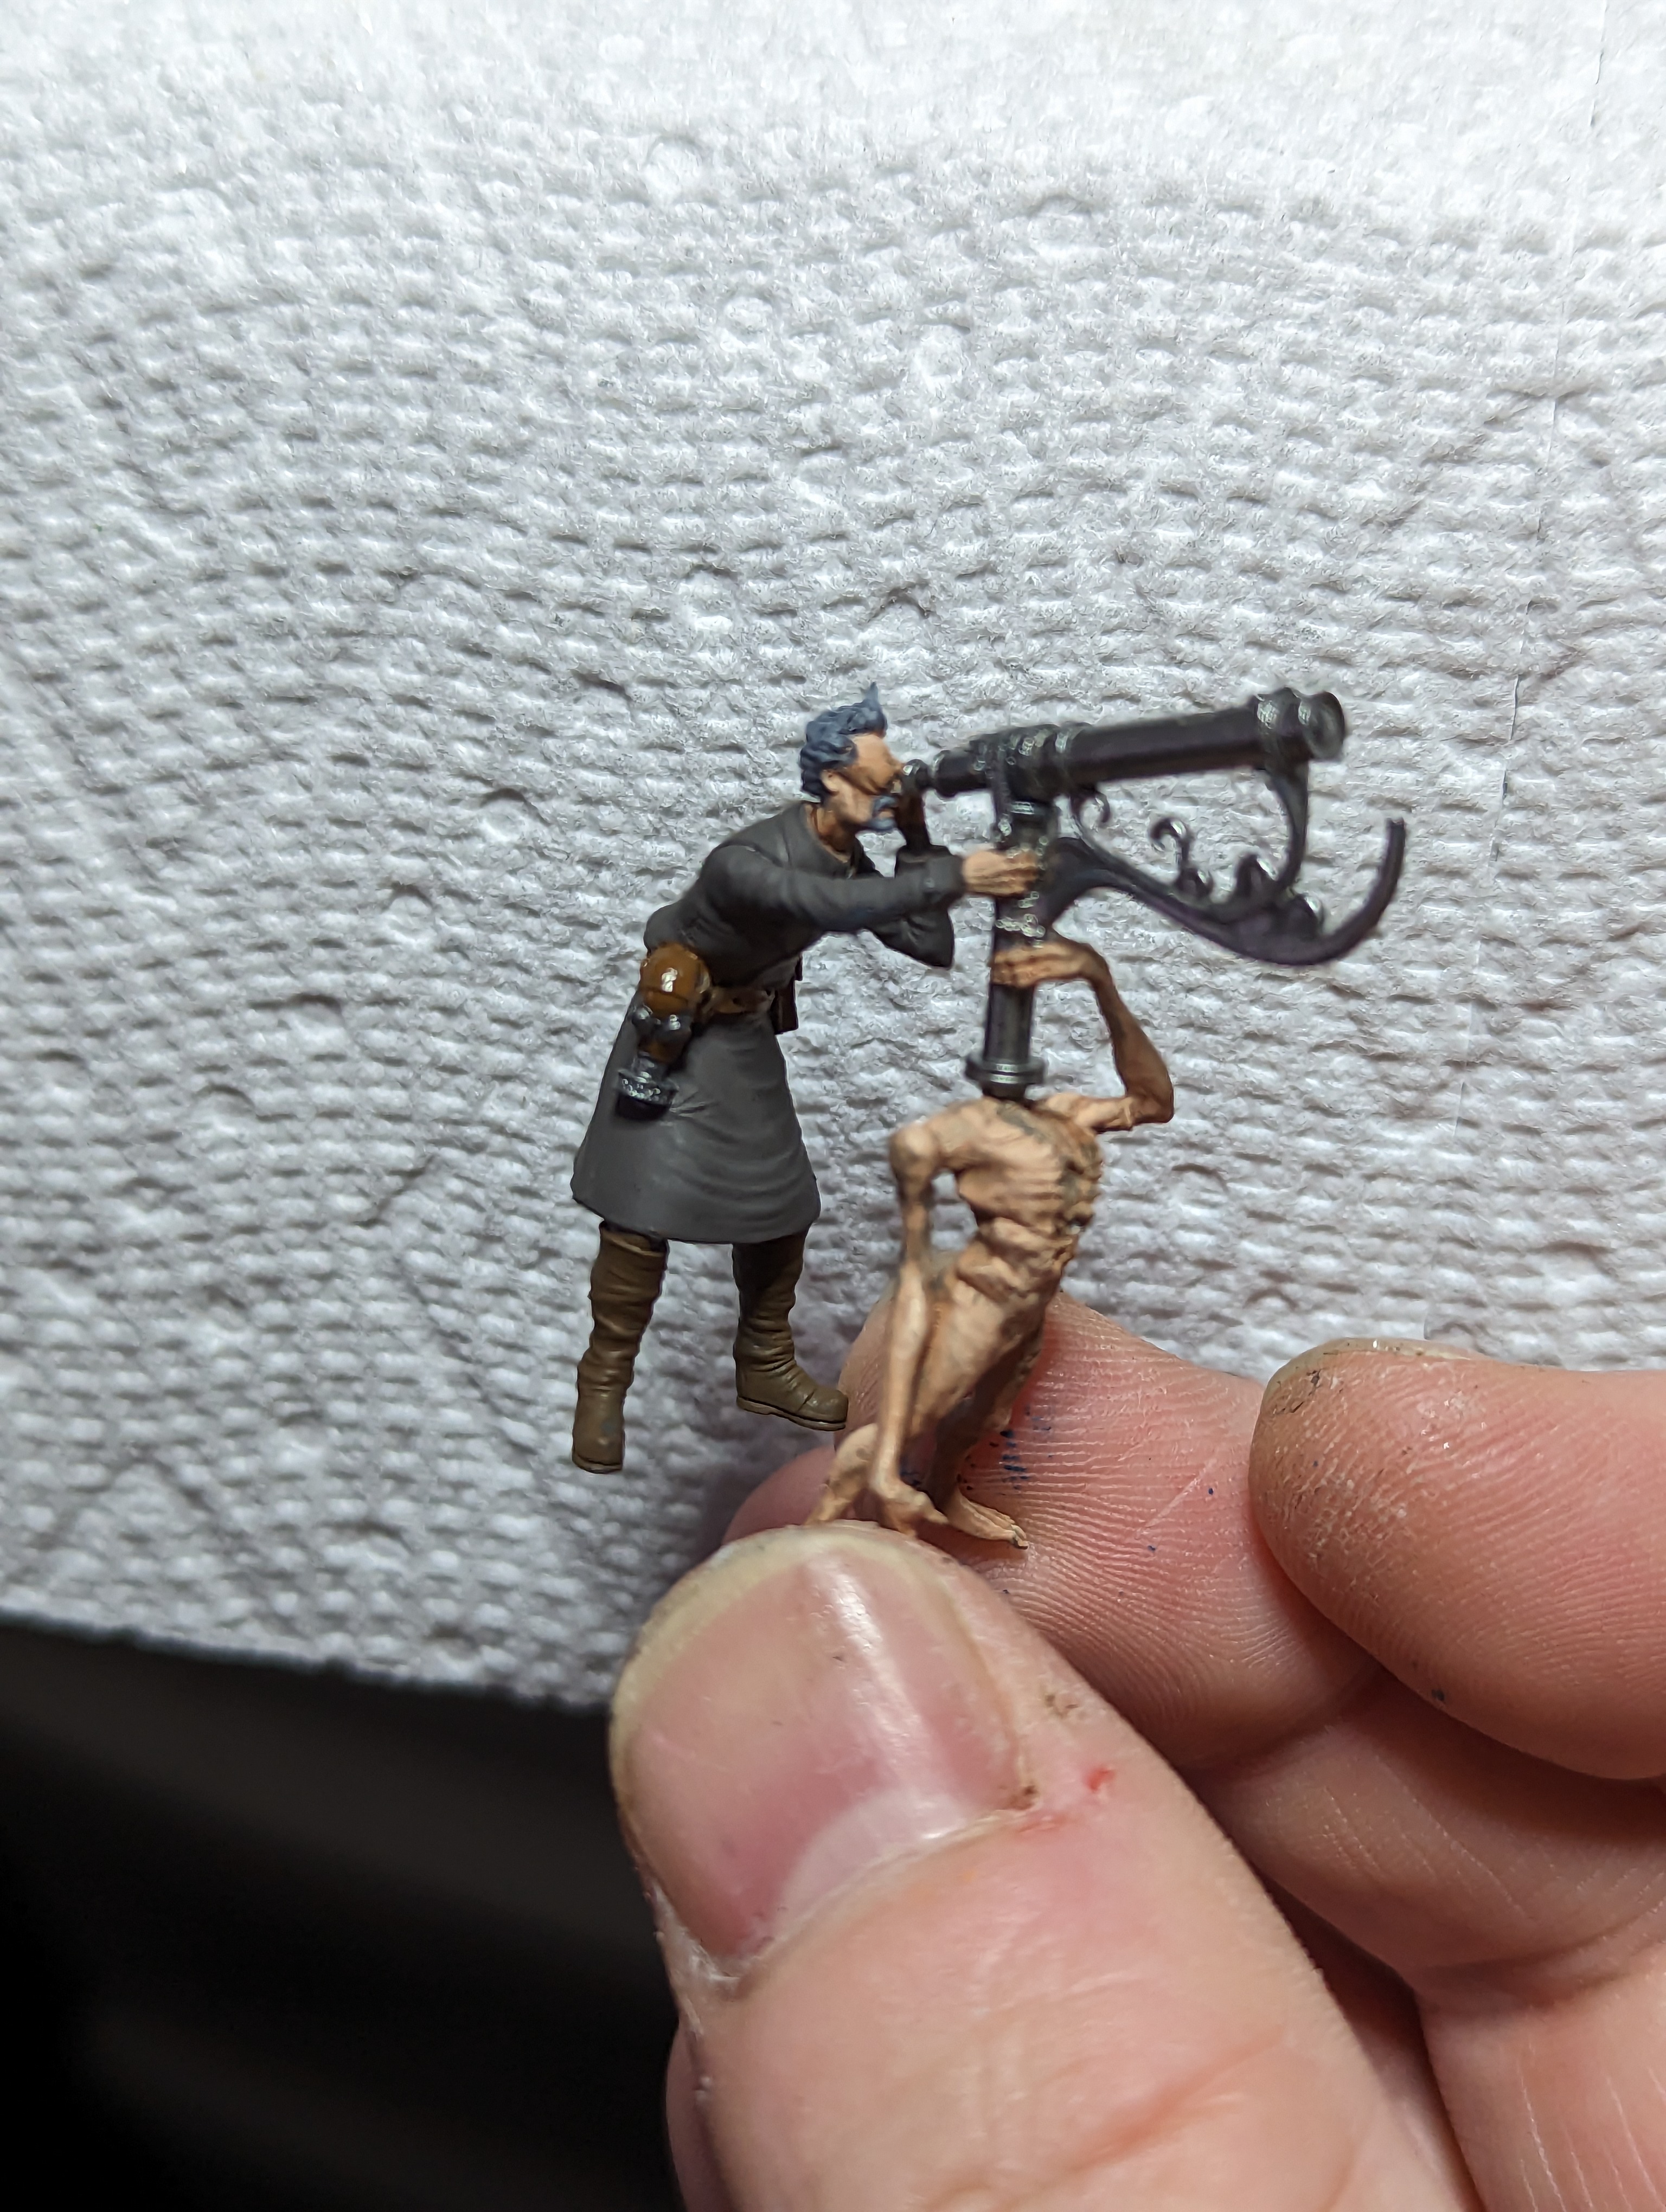
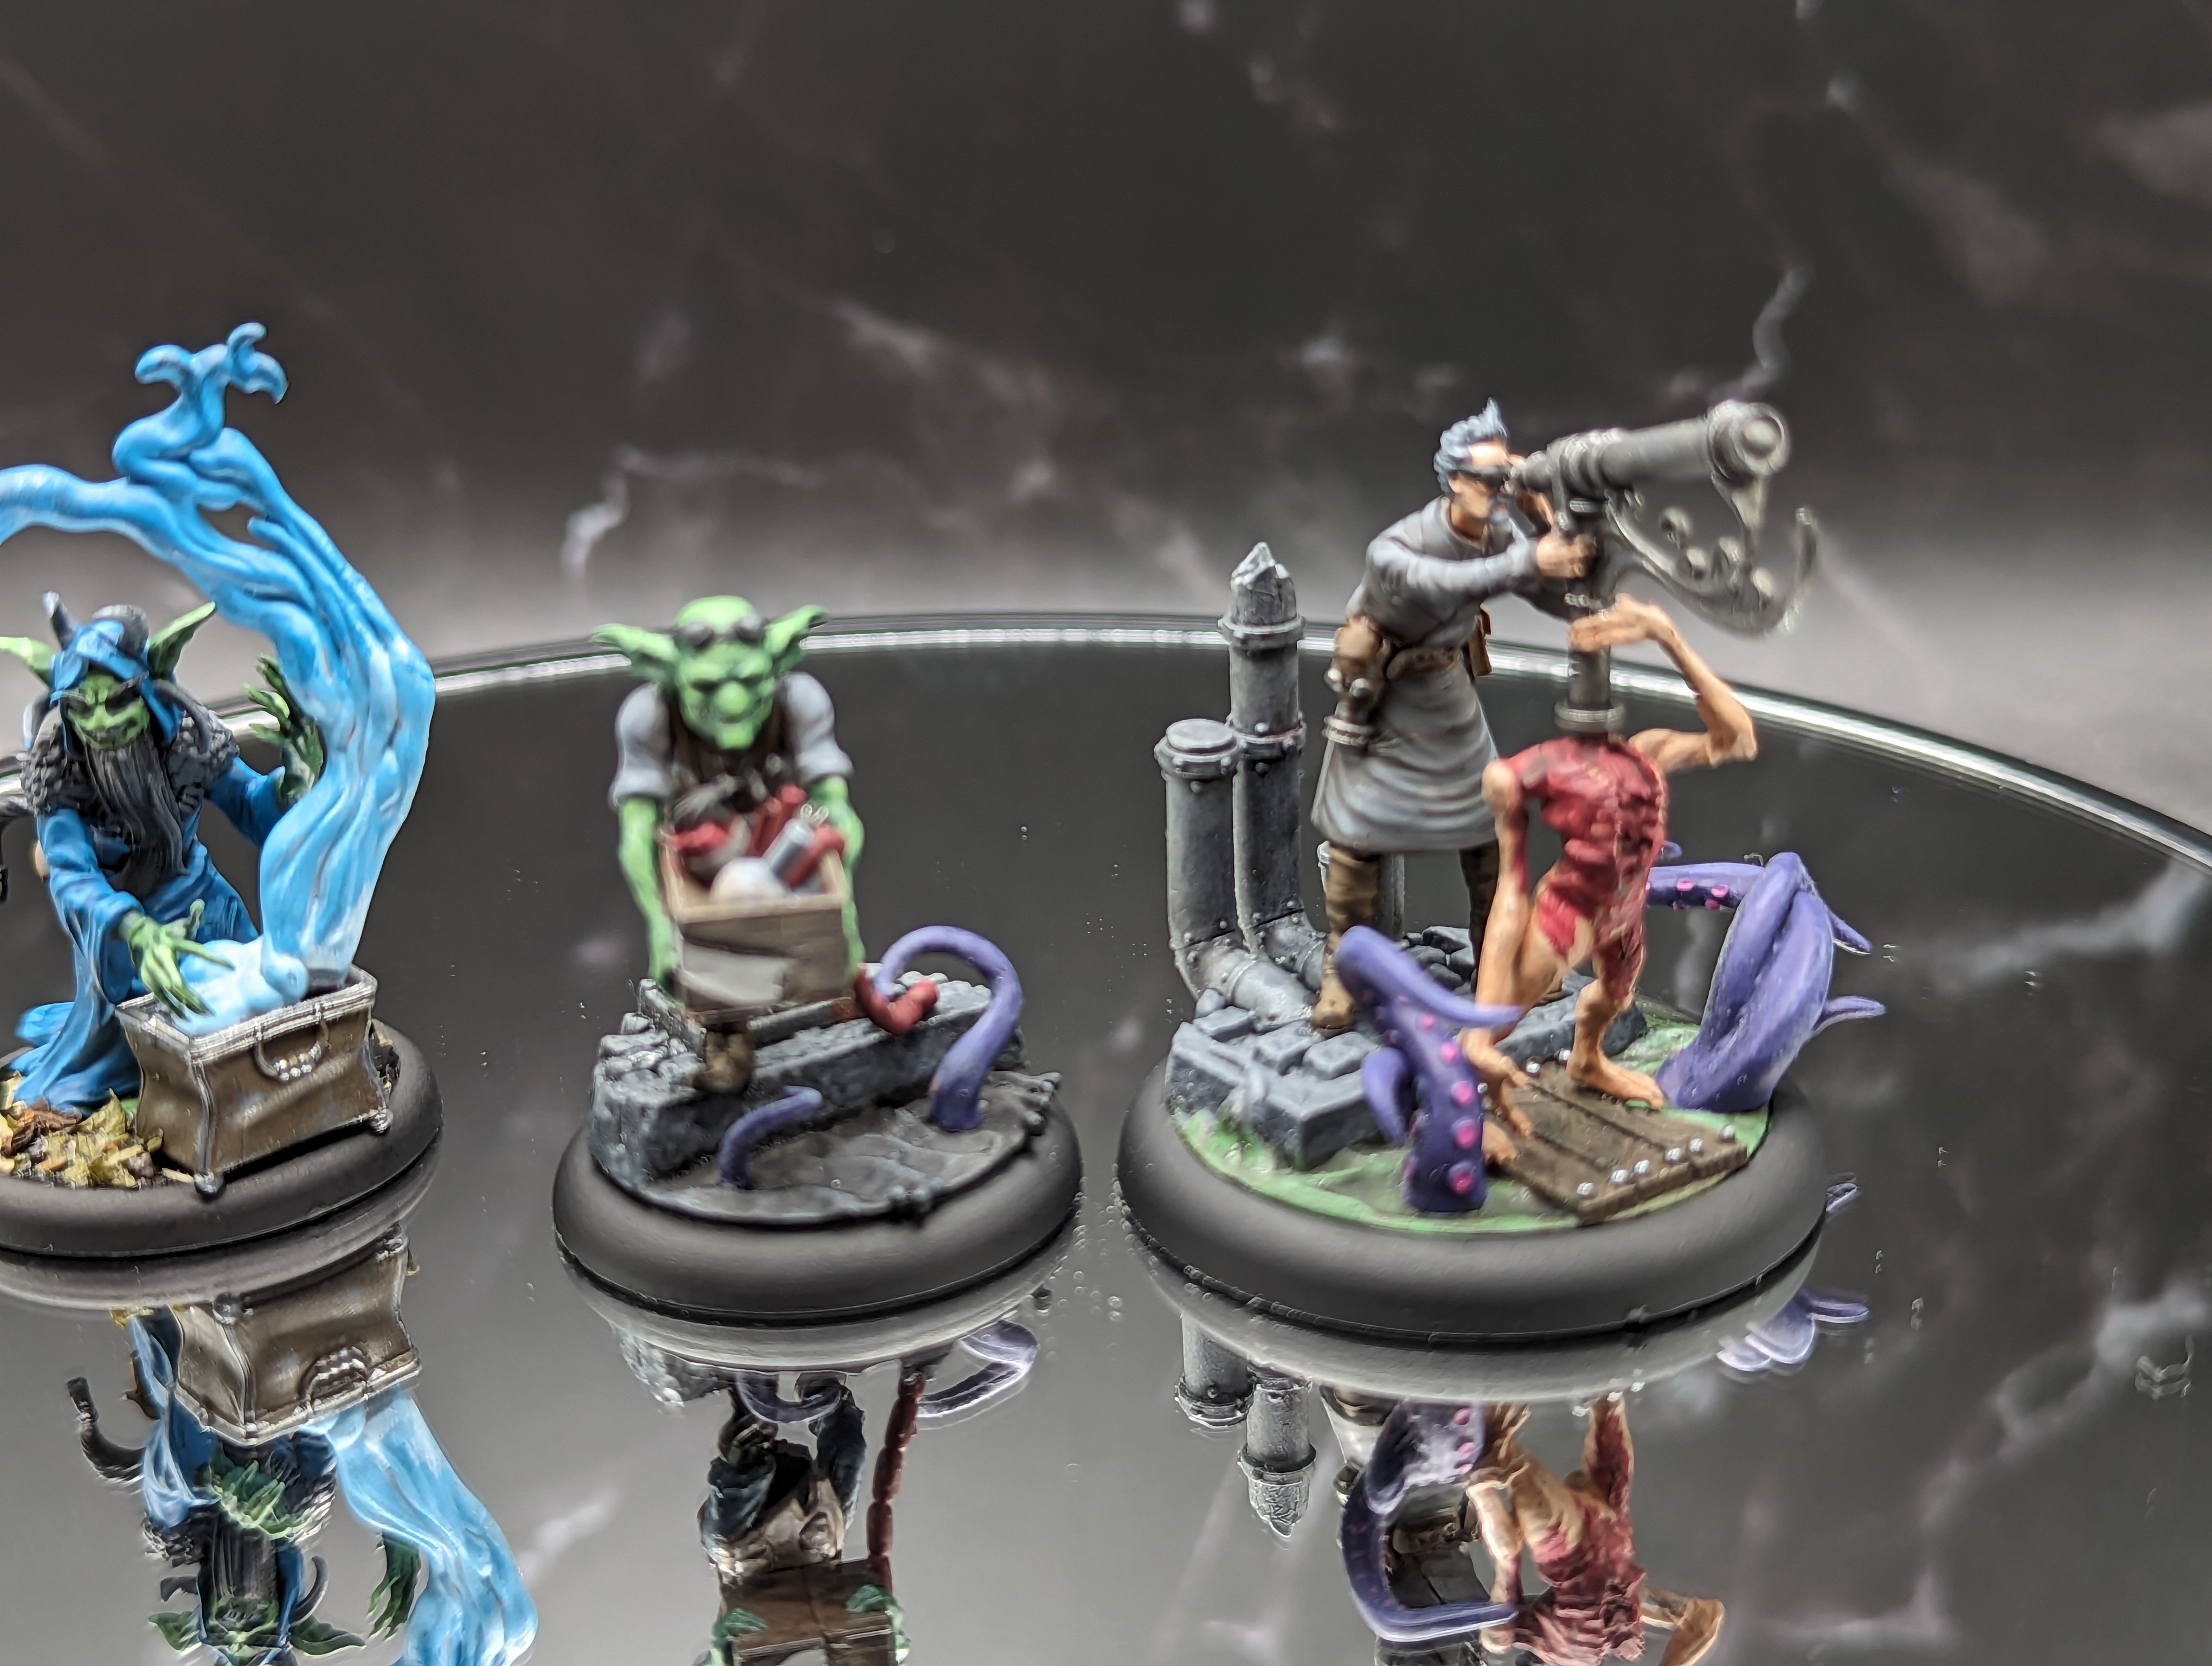
Von Schtook was a fun paint job. He has a lot of variety to him with the zombie and the telescope. I used a lot of washed to dirty up the undead and the metallics, and then went over Schtook and highlighted him manually.
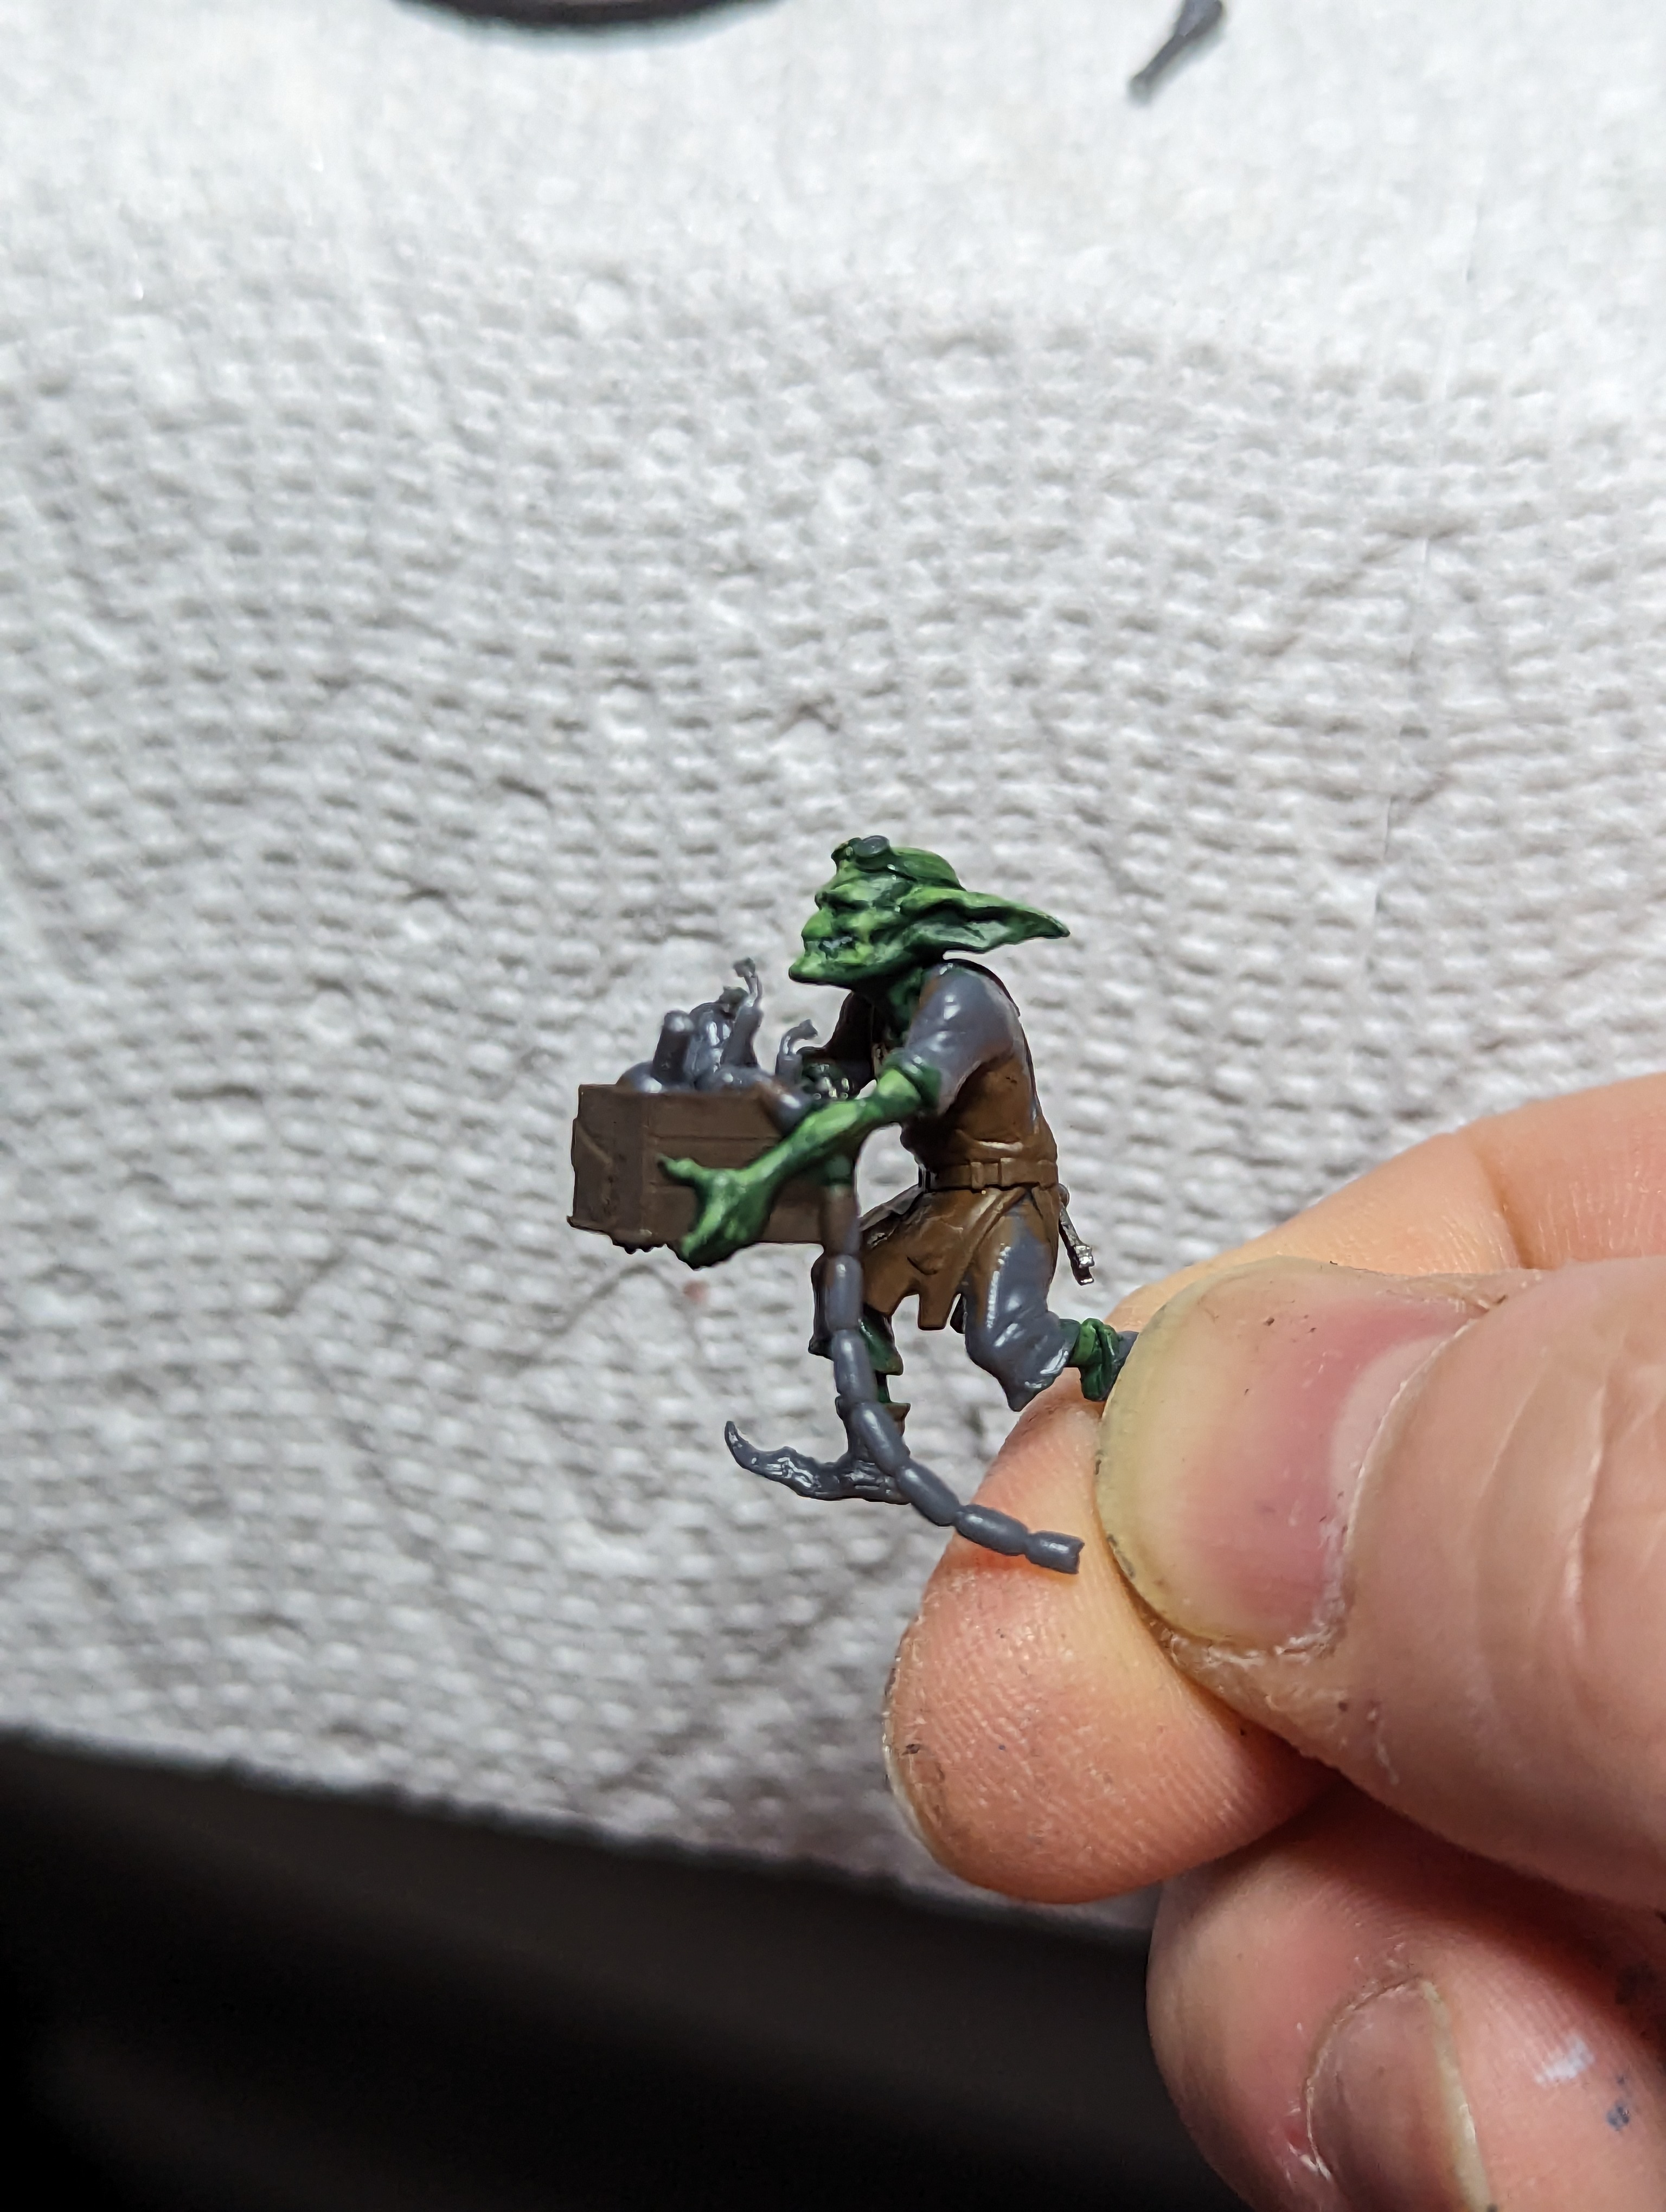
The backup assistant was pretty simple. He just got my standard Gremlin skin paintjob, and then a few colors and highlights on his clothes and box of junk.
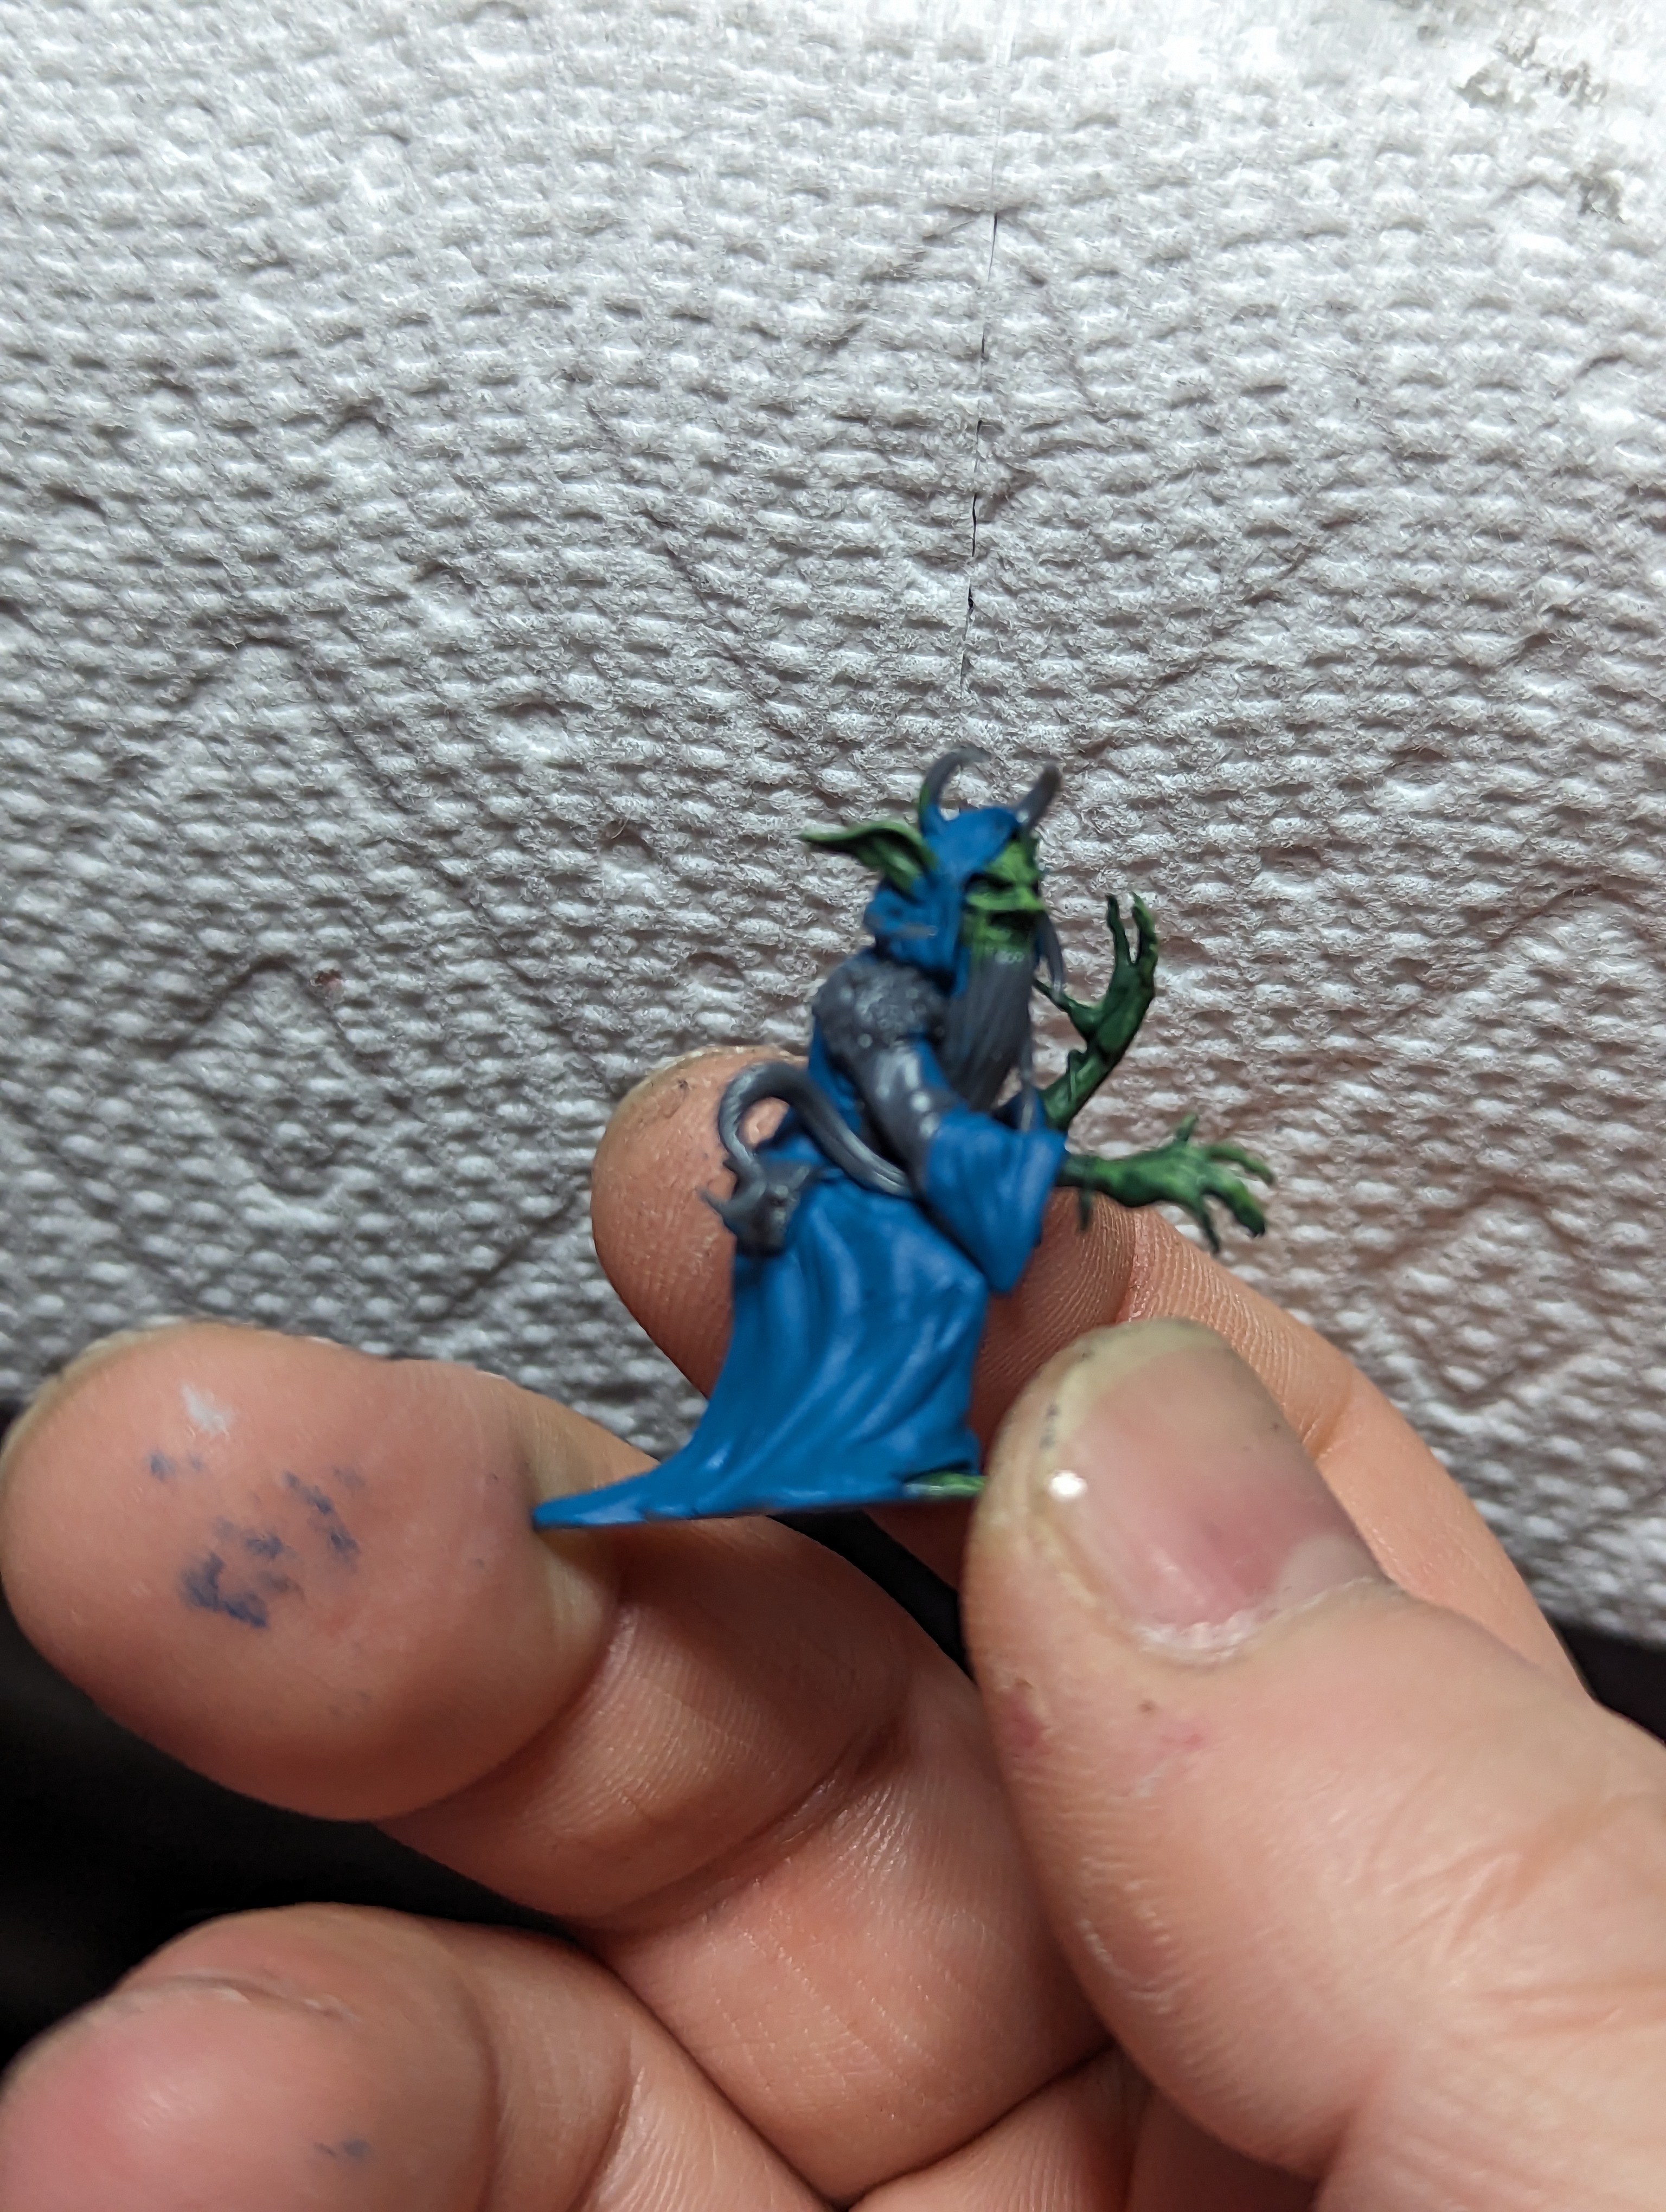
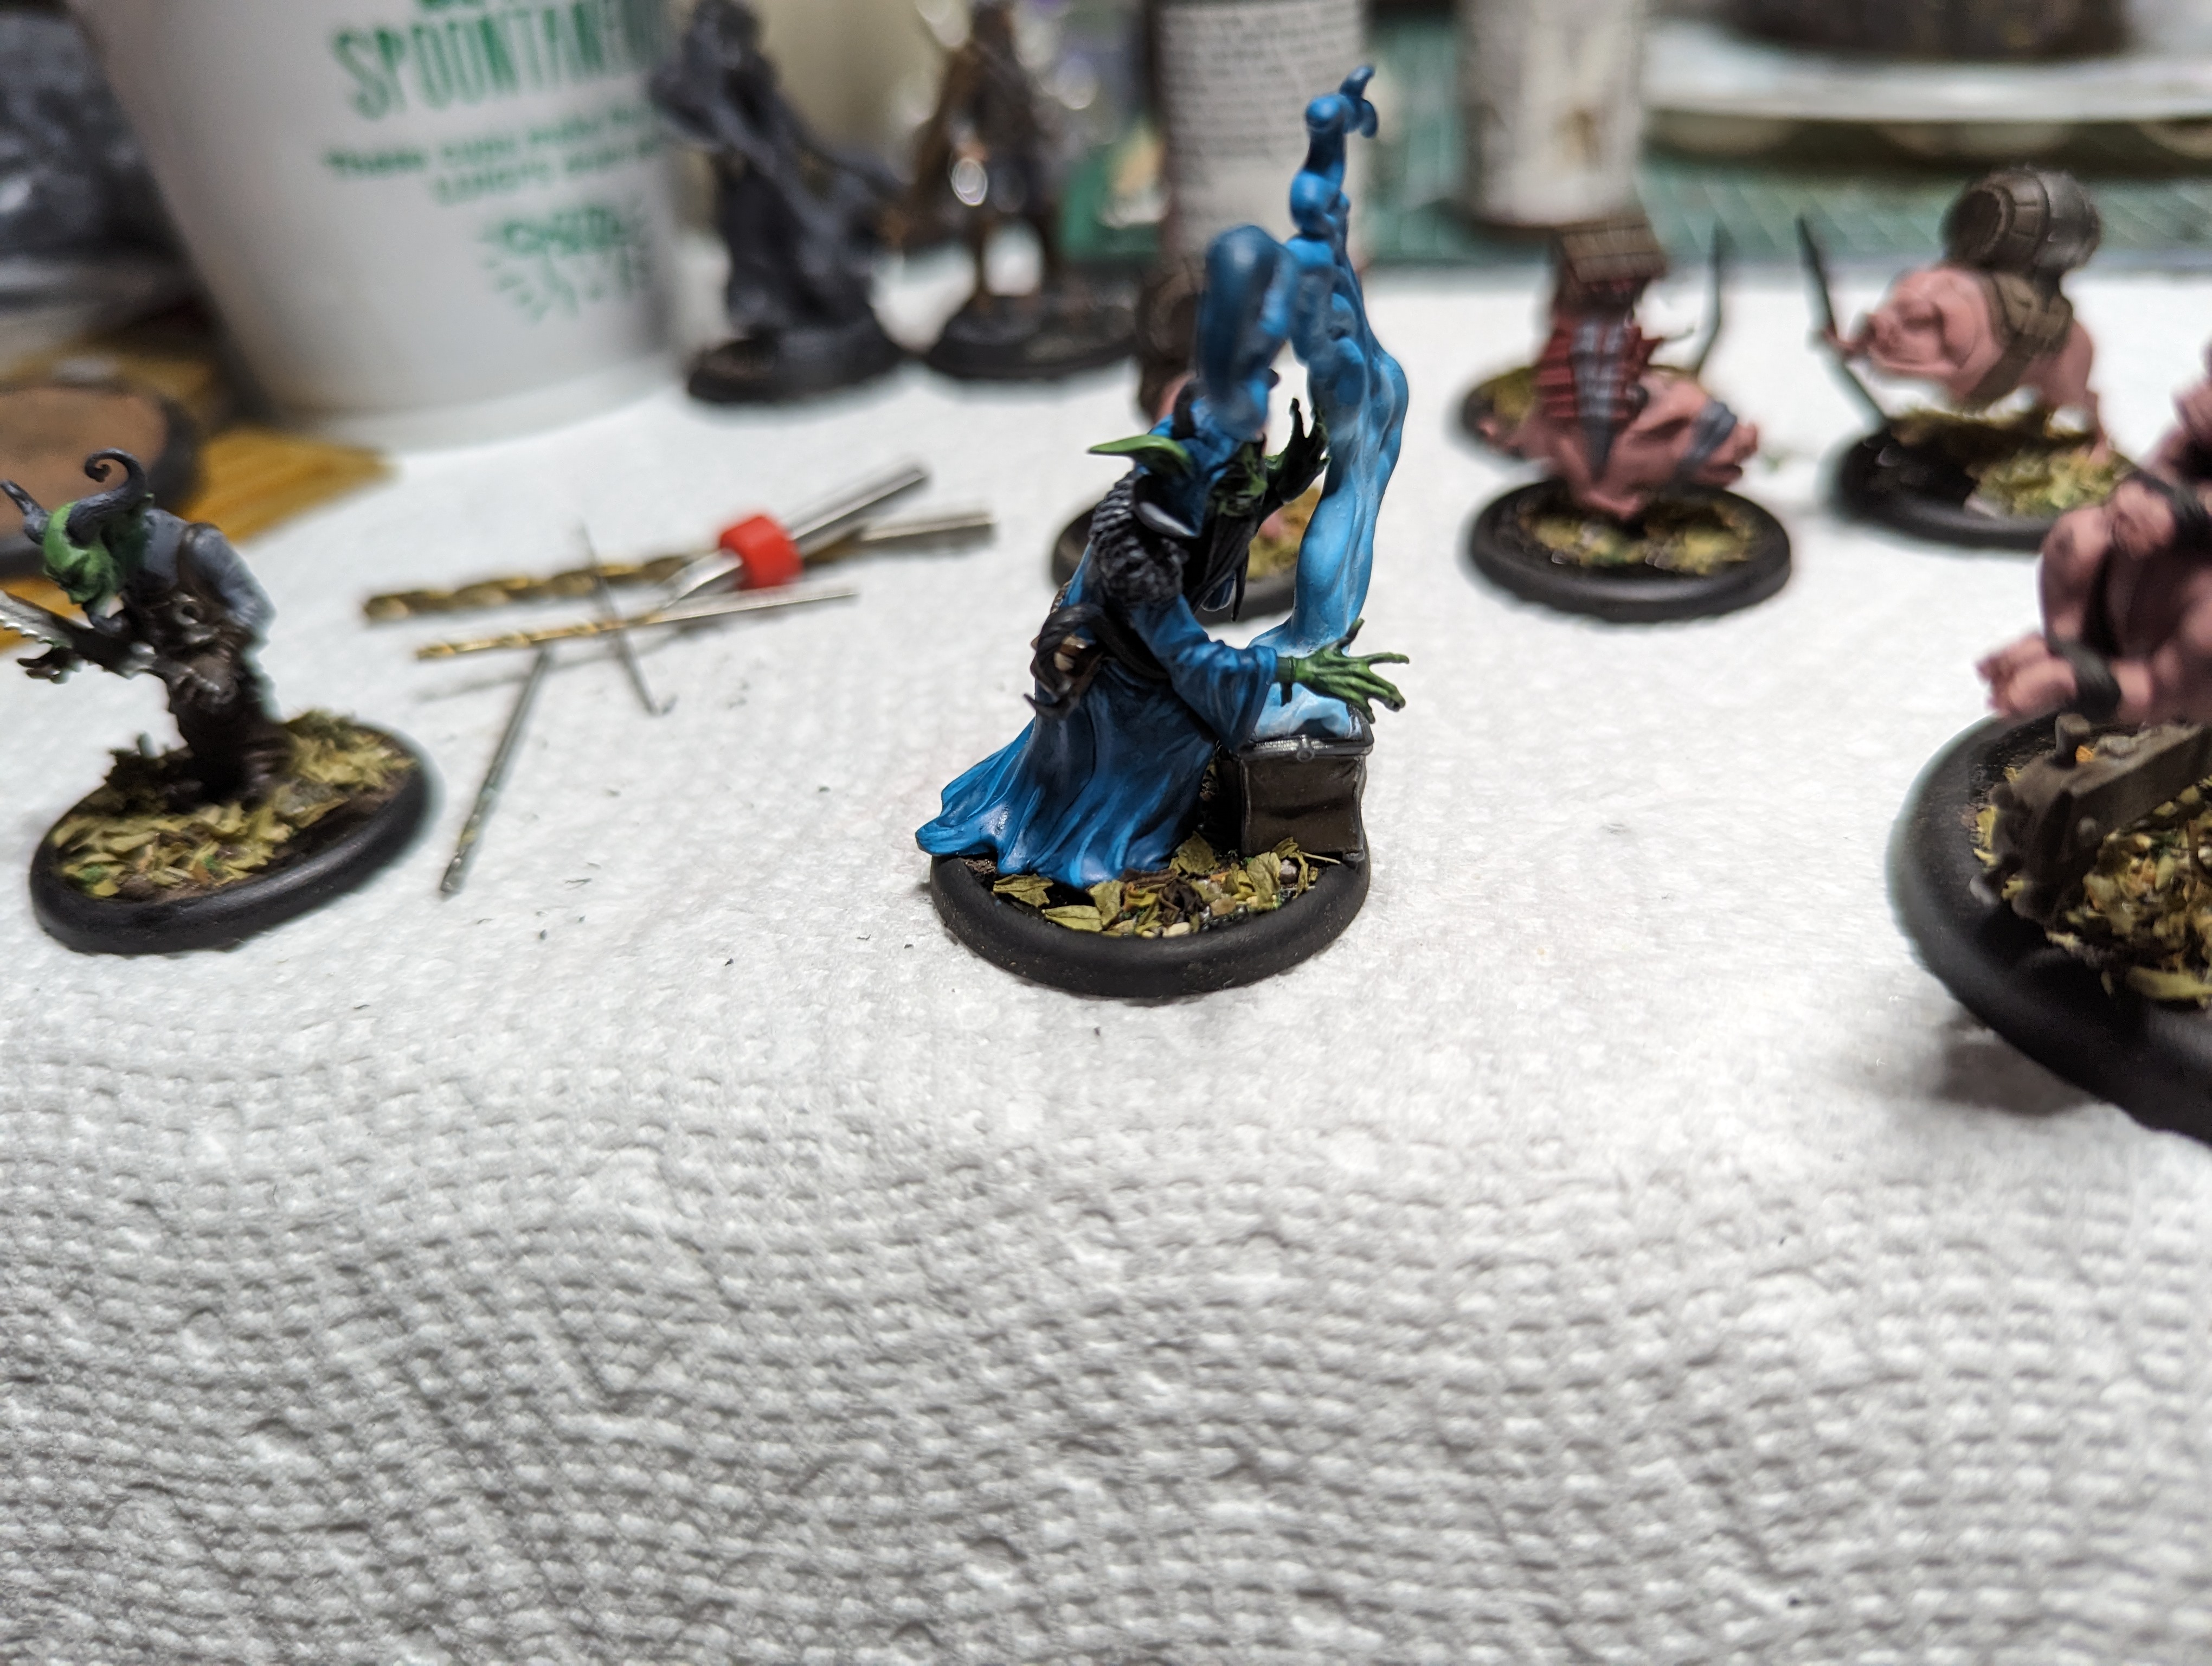
Wong was also really fun to paint. Hes got these flowing blue robes, a silly moustache and a bag of magic (demons). Wyrd went really hard into the magical effects in the last few years of models, and they all look really cool.
After painting him, I did the covering on the base and sealed it down.
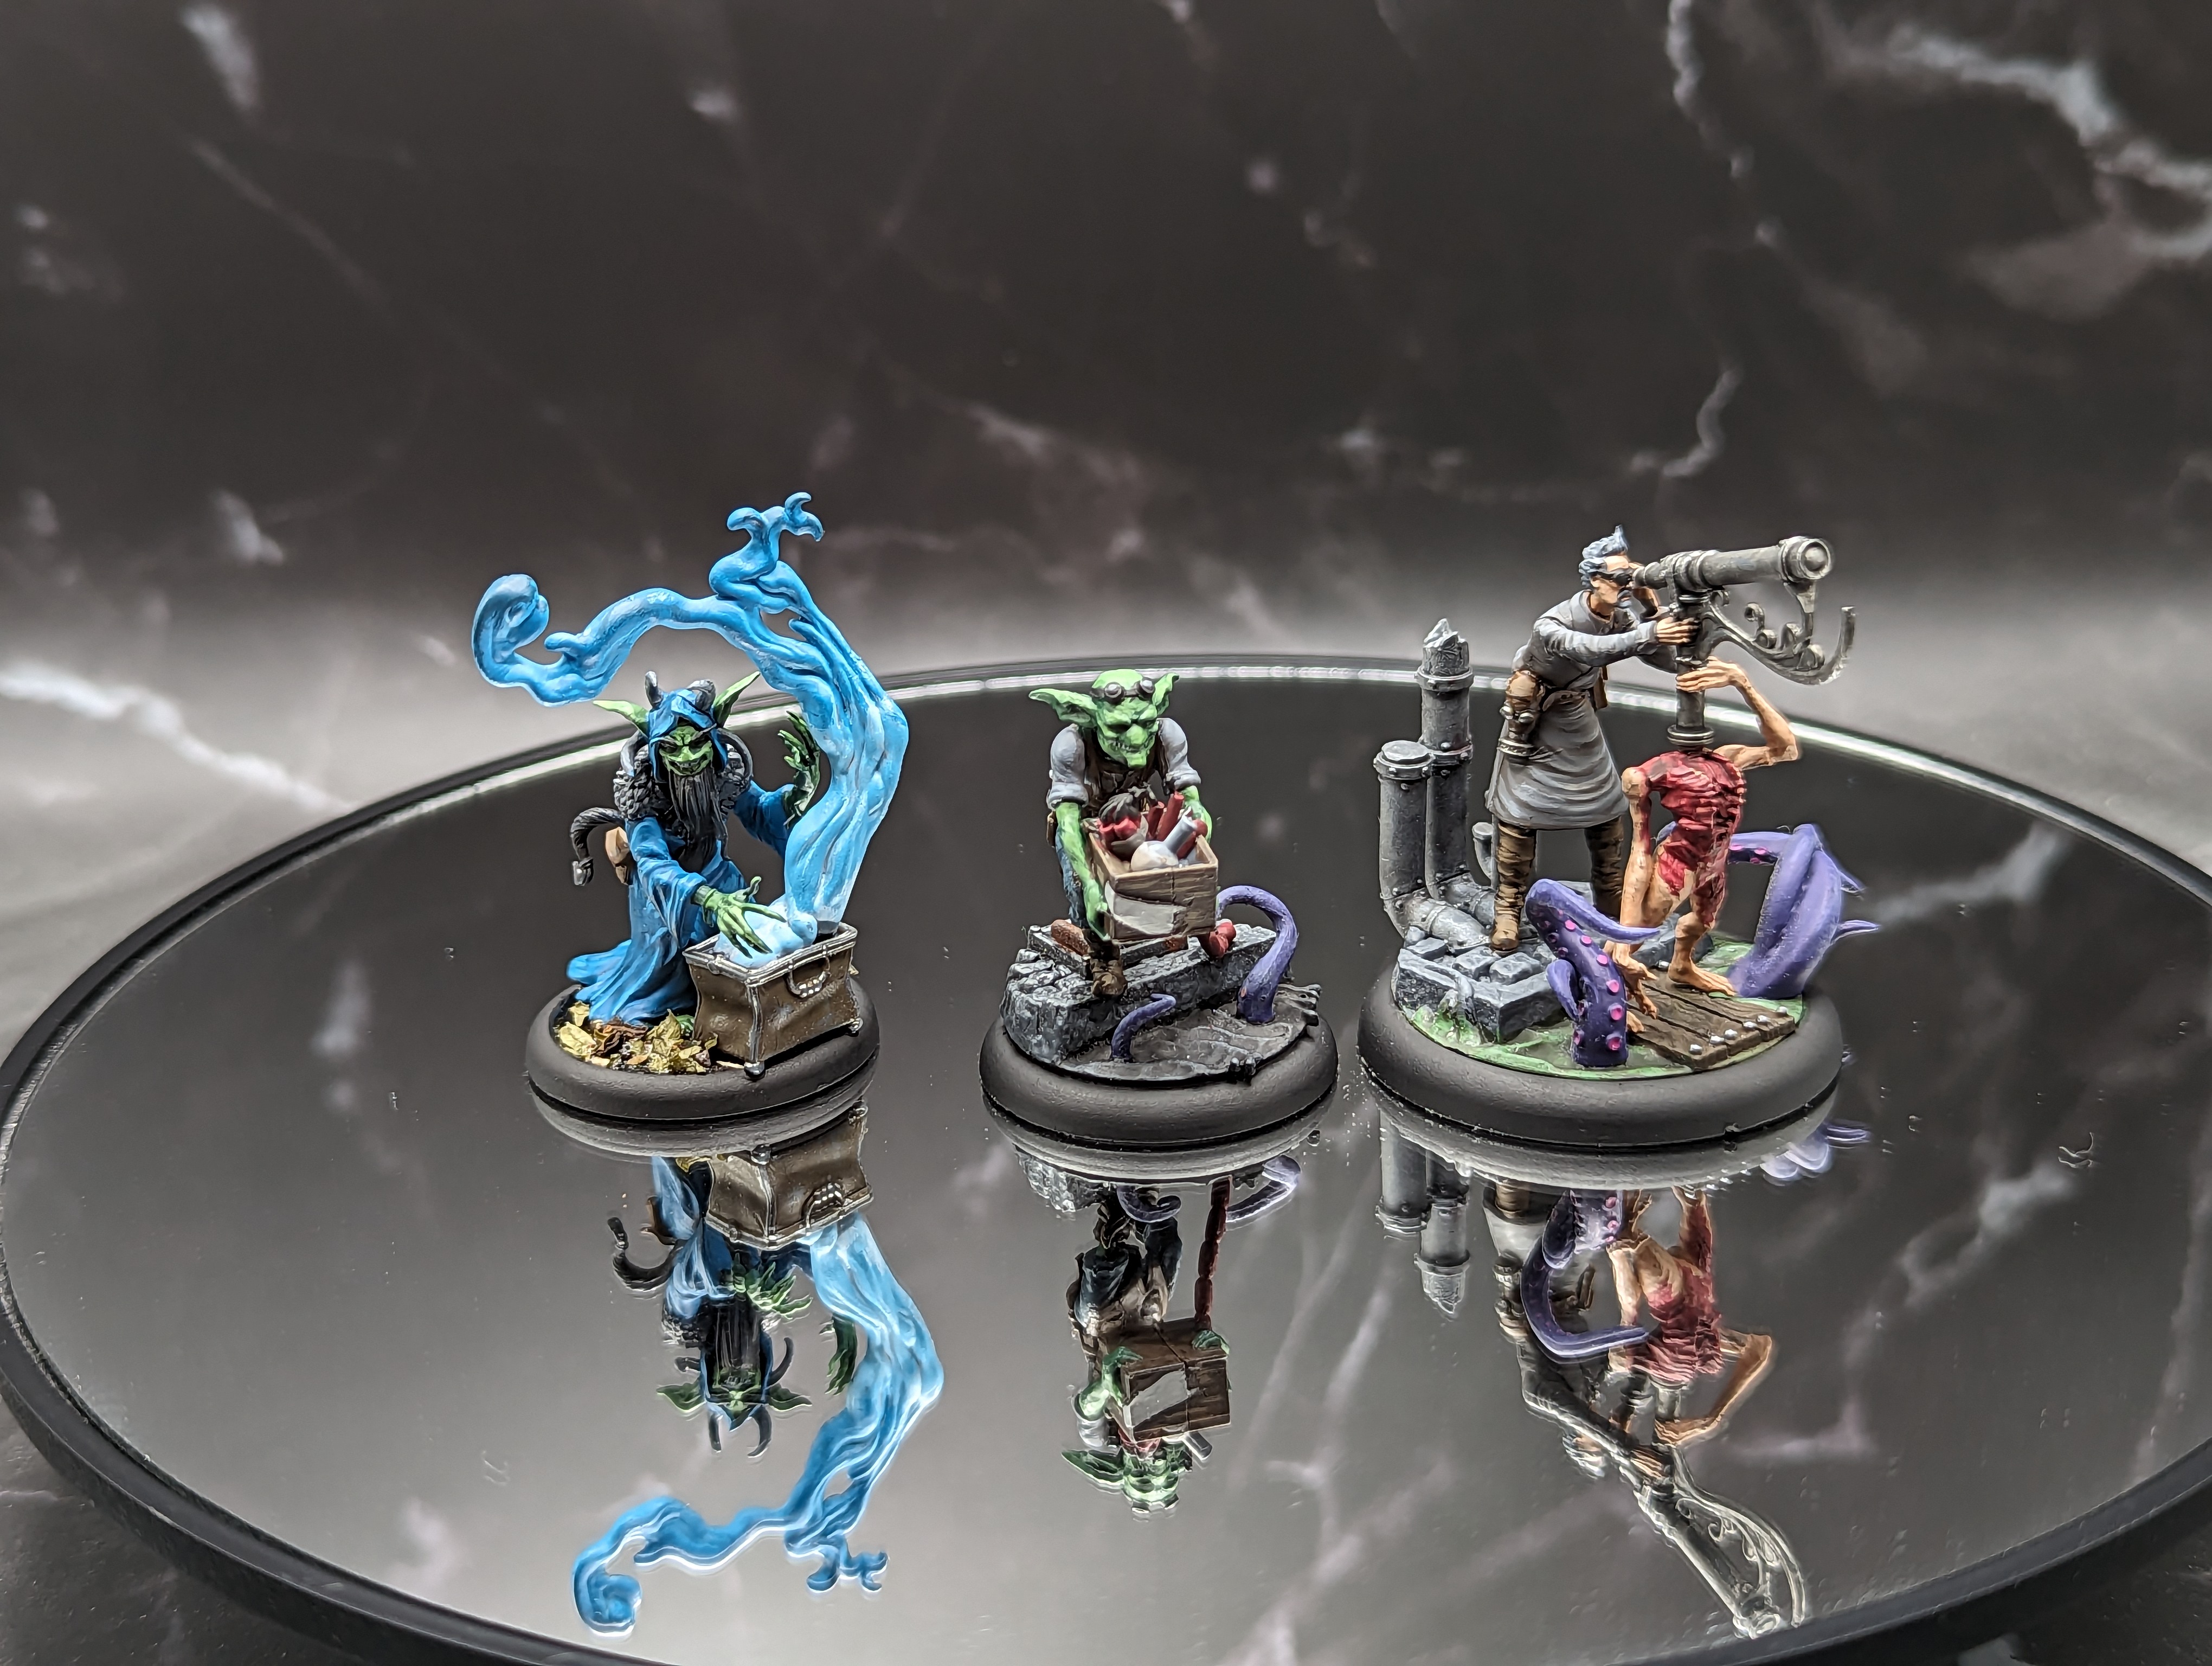
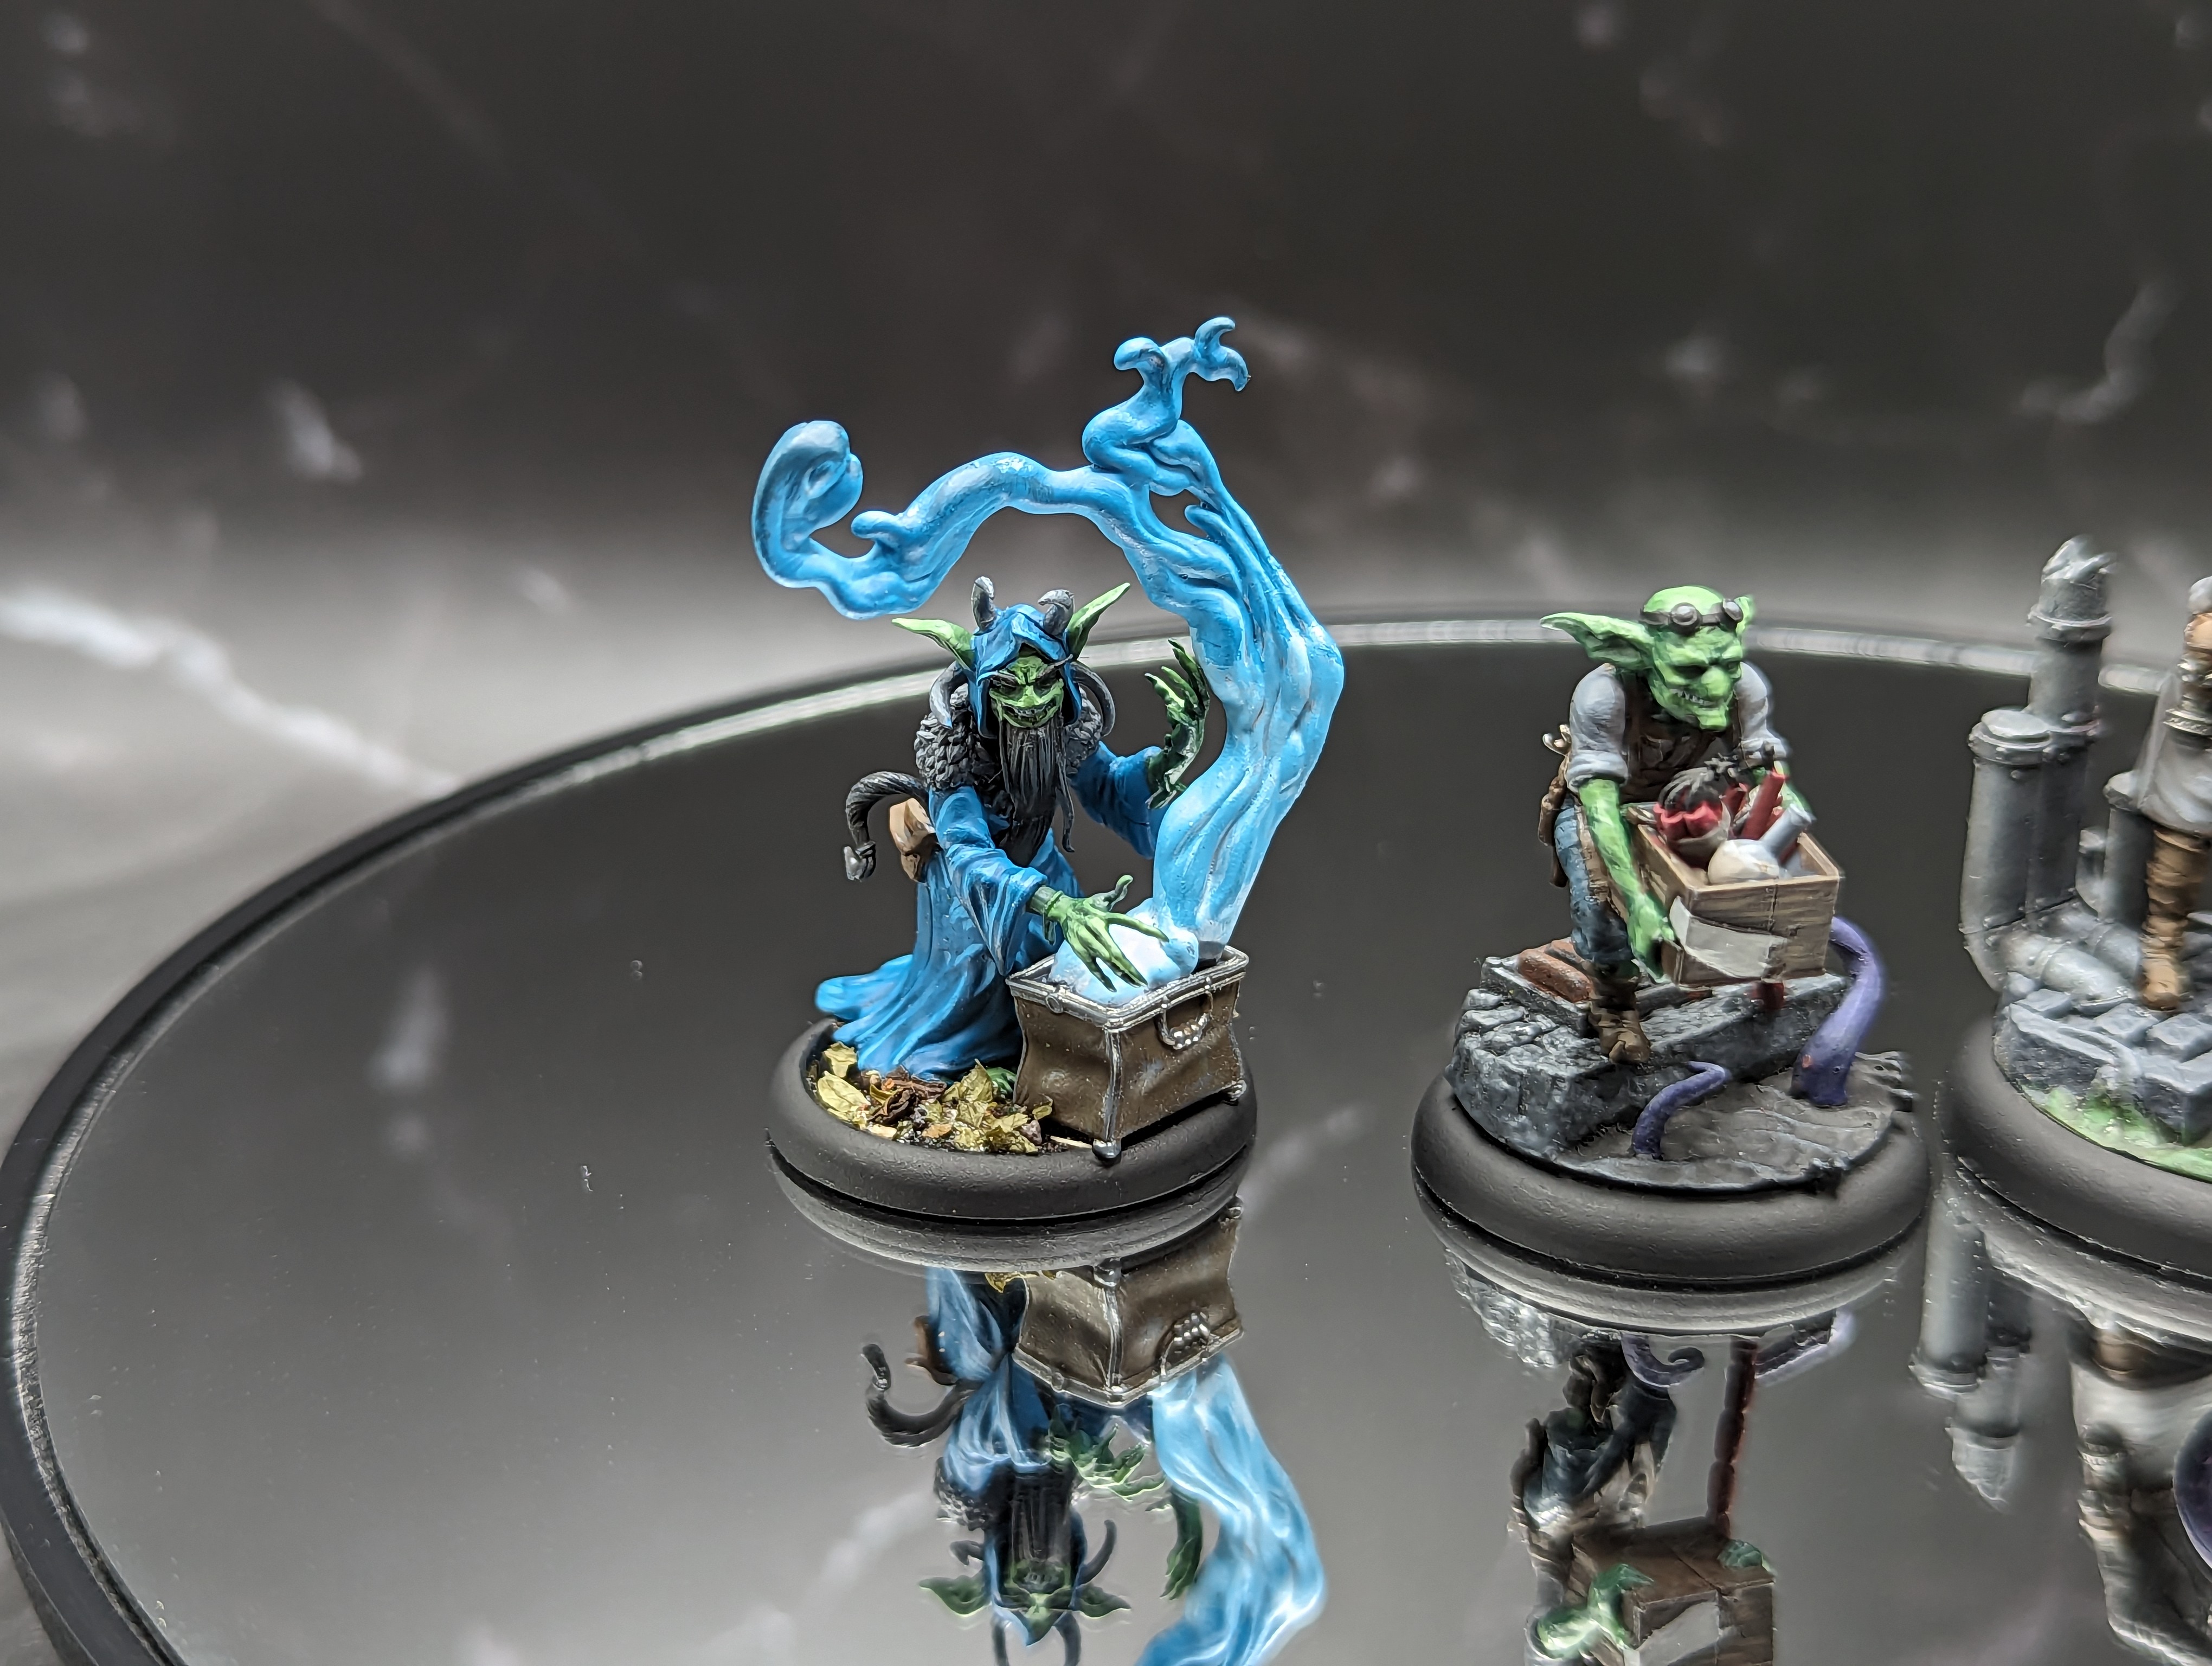
Another trio down. This was a fun one to work on. The bases weren’t as fun, but I had to run out of ideas for different basing schemes eventually, and resort to store bought stuff. I think those Wyrd bases are a little too cluttered for my taste, but I’m not gonna worry about it.
And now for some lore…
Im on a Boat
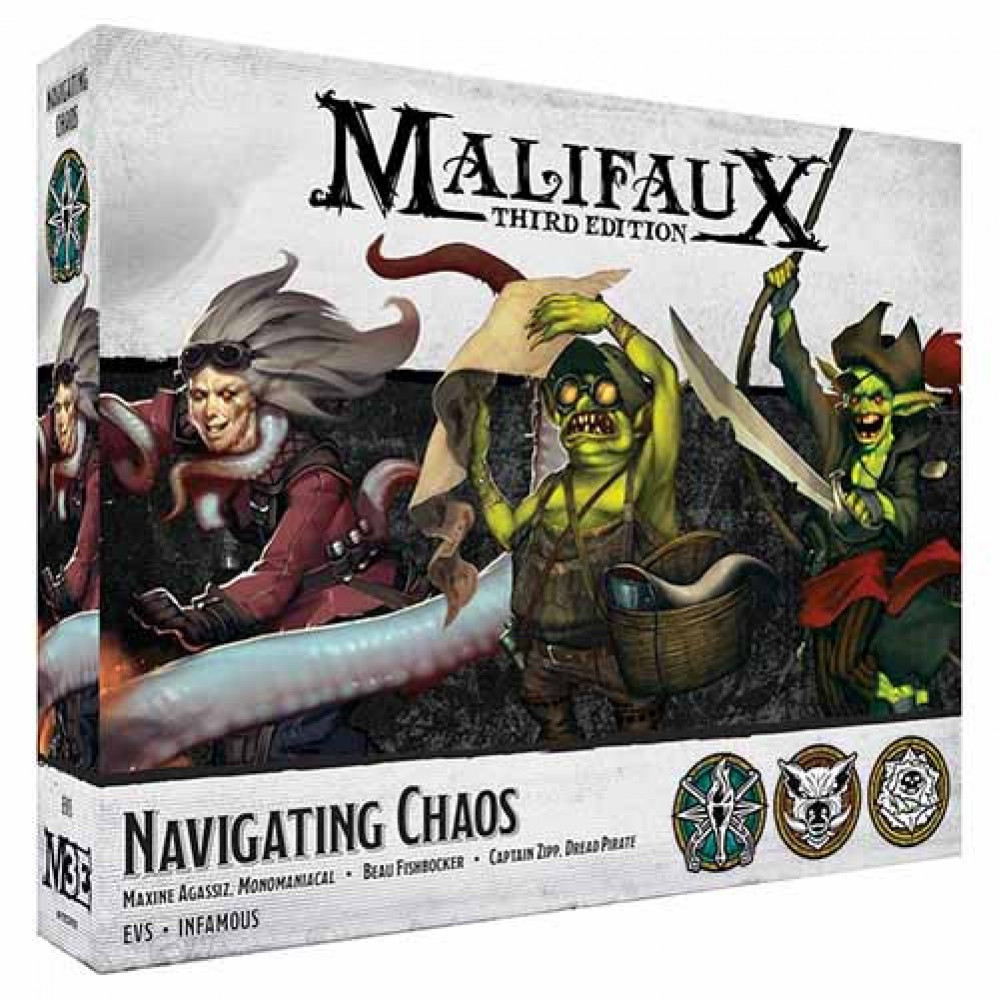
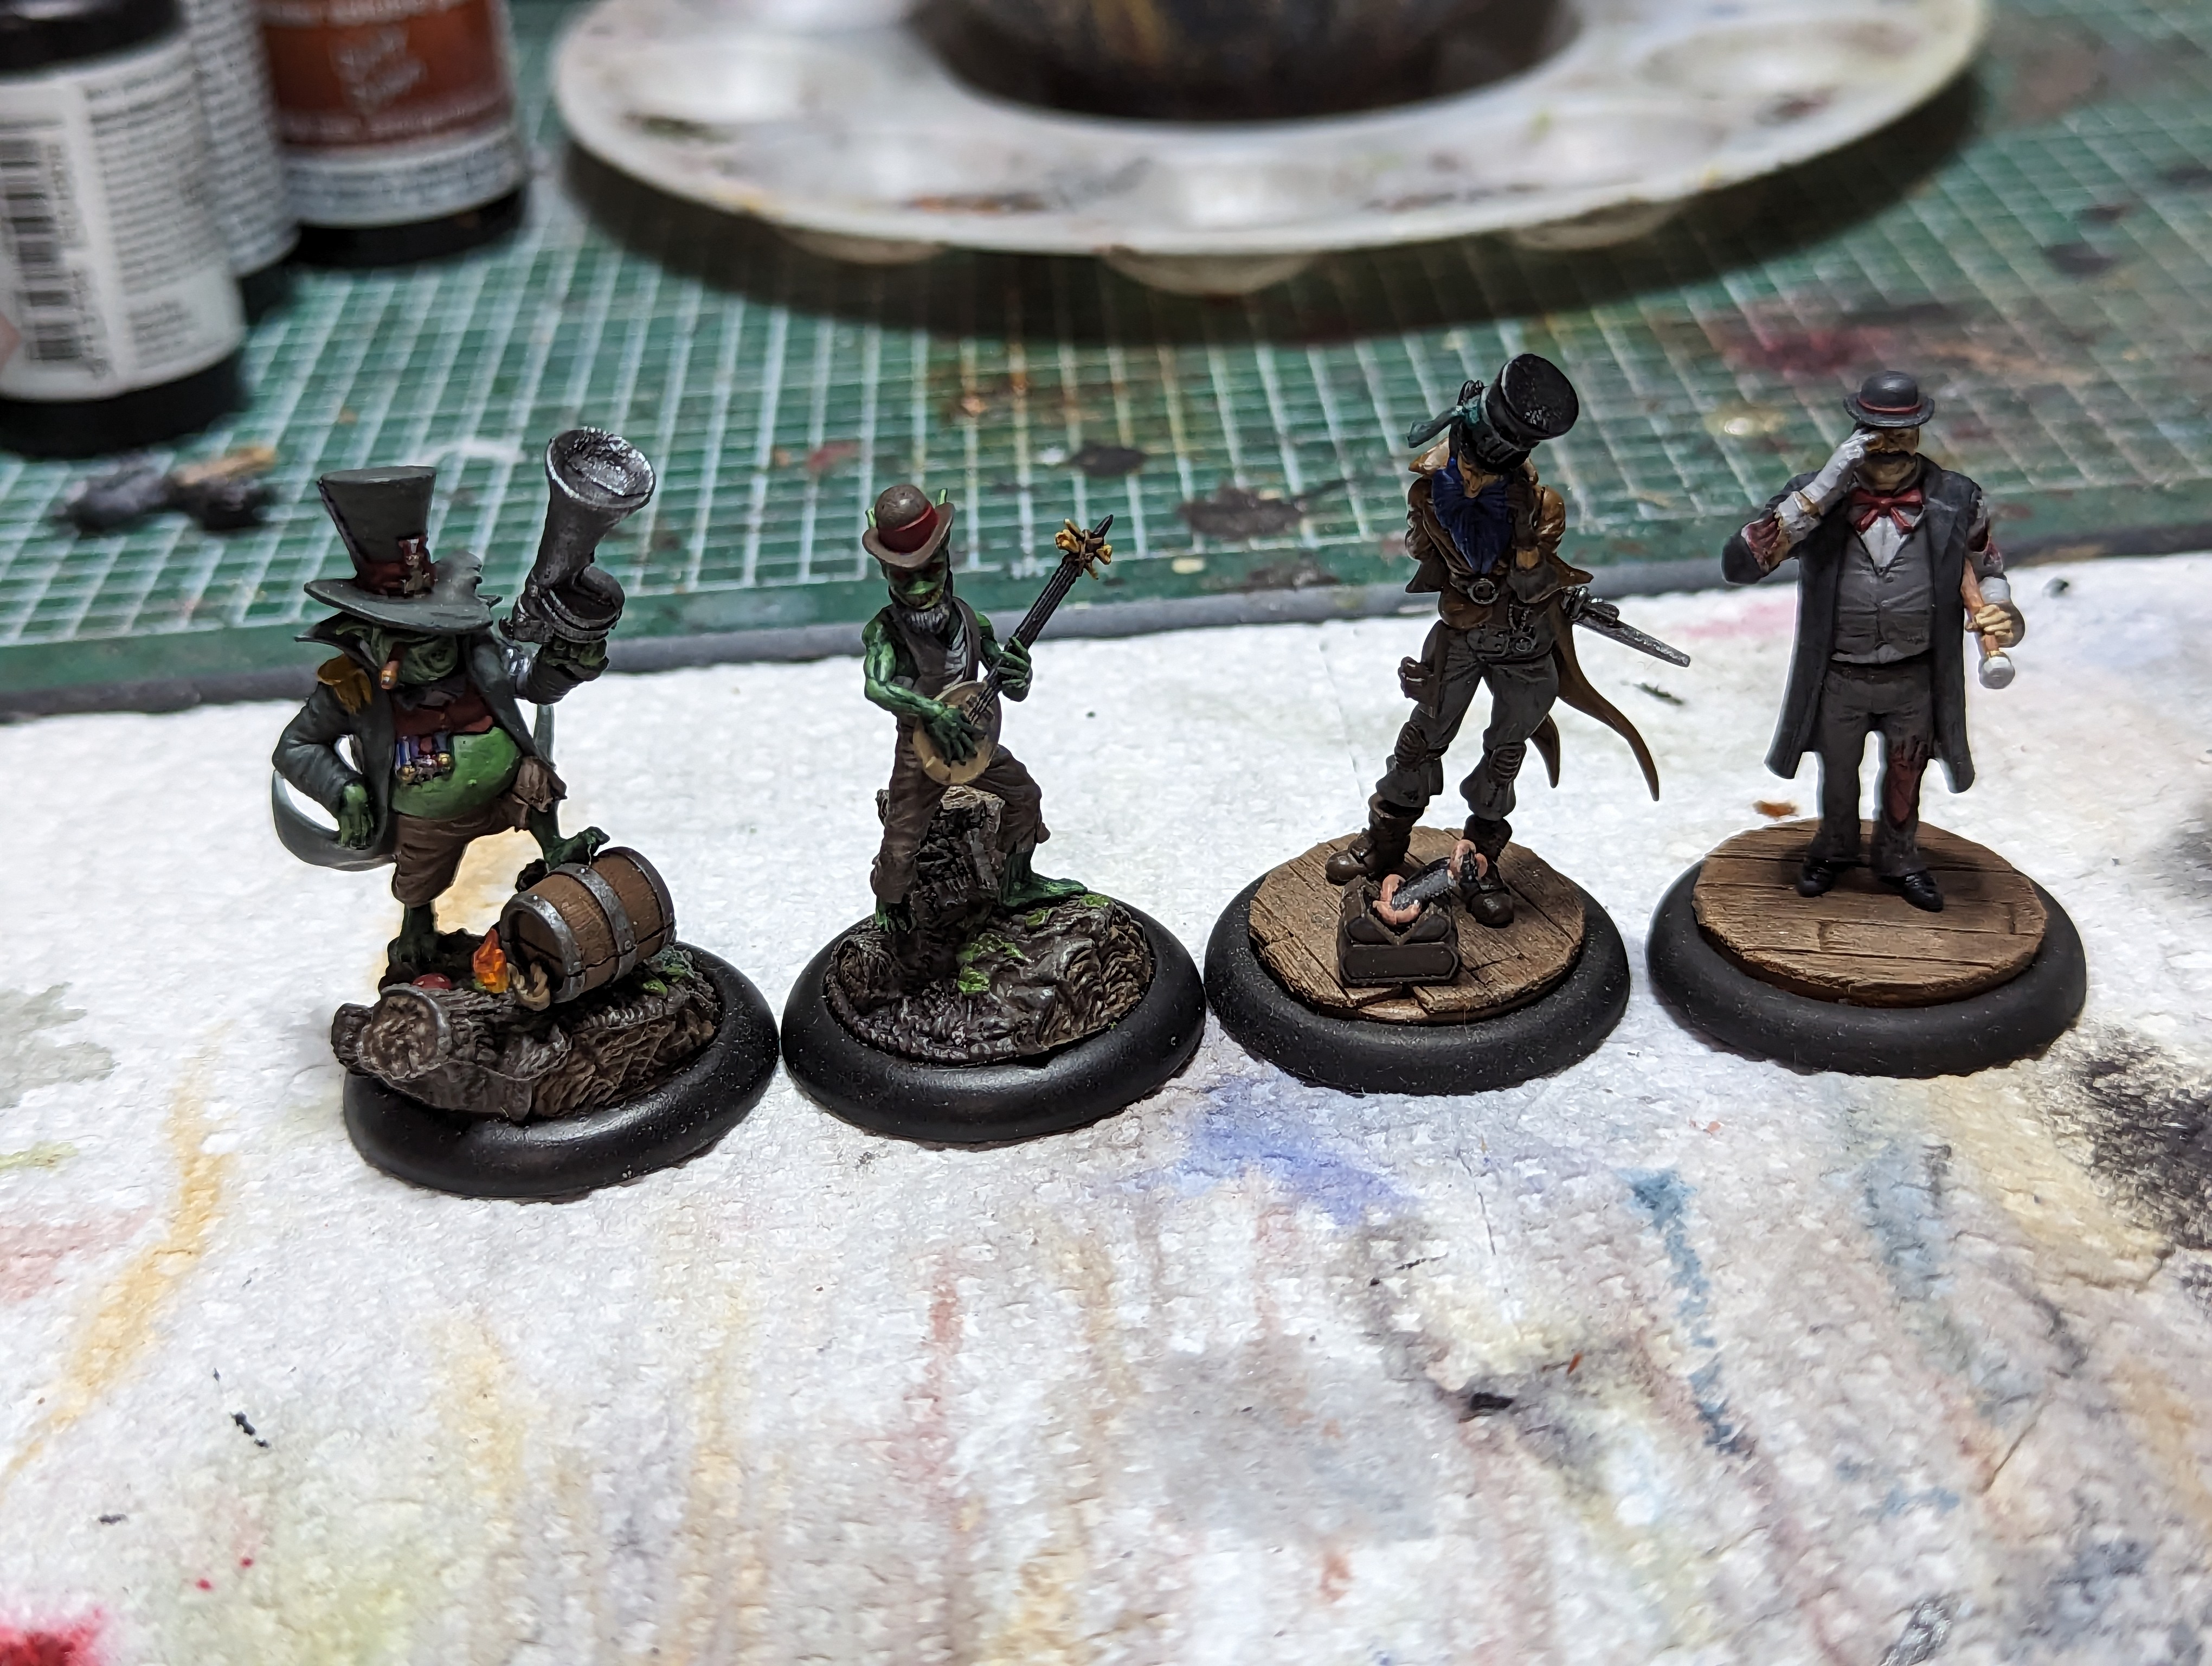
Next we are tackling Zipp and Maxine. I based both of them on ship decks: Airship for Zipp and boat ship for Maxine.
For Maxine, I have been using these premade bases. They are industrial style, with piping and valves and such, and I think they make for a good ship deck. The Zipp bases are custom made. I actually did a video about how to make these bases a long time ago. It was a fun project to do, and there are a lot of different directions you can go with a Malifaux airship because we dont have much in terms of offical art for them.
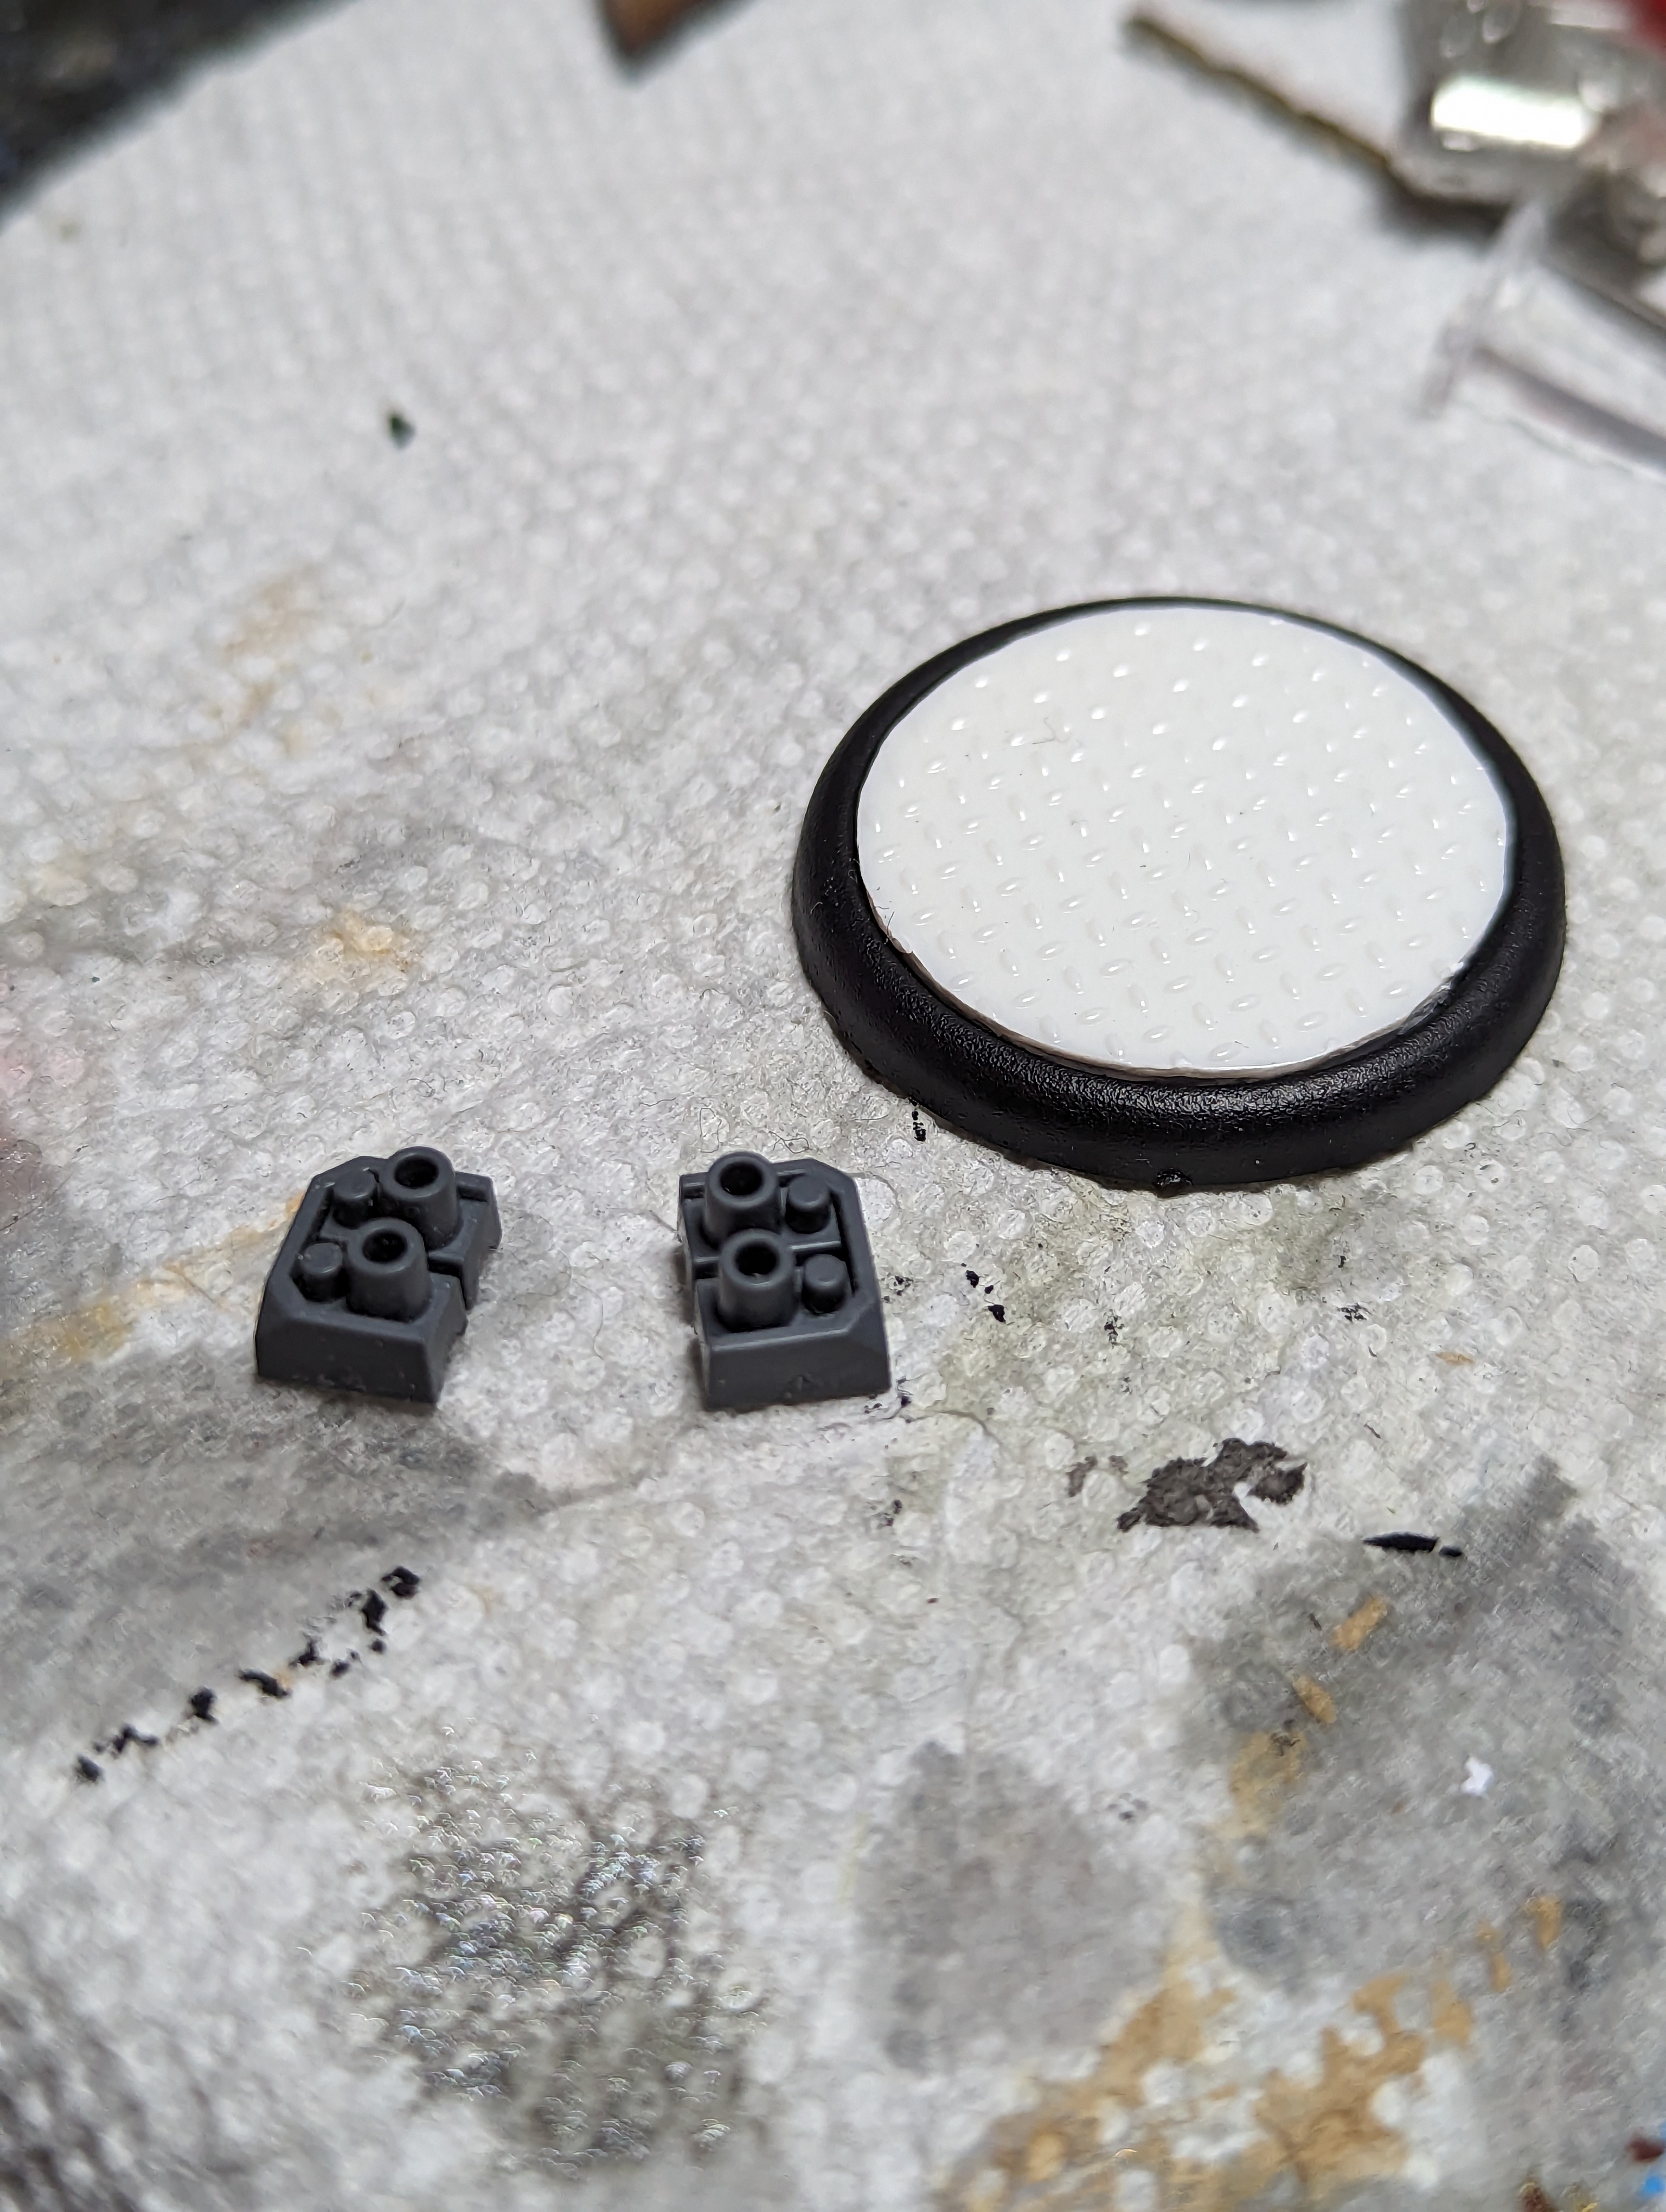
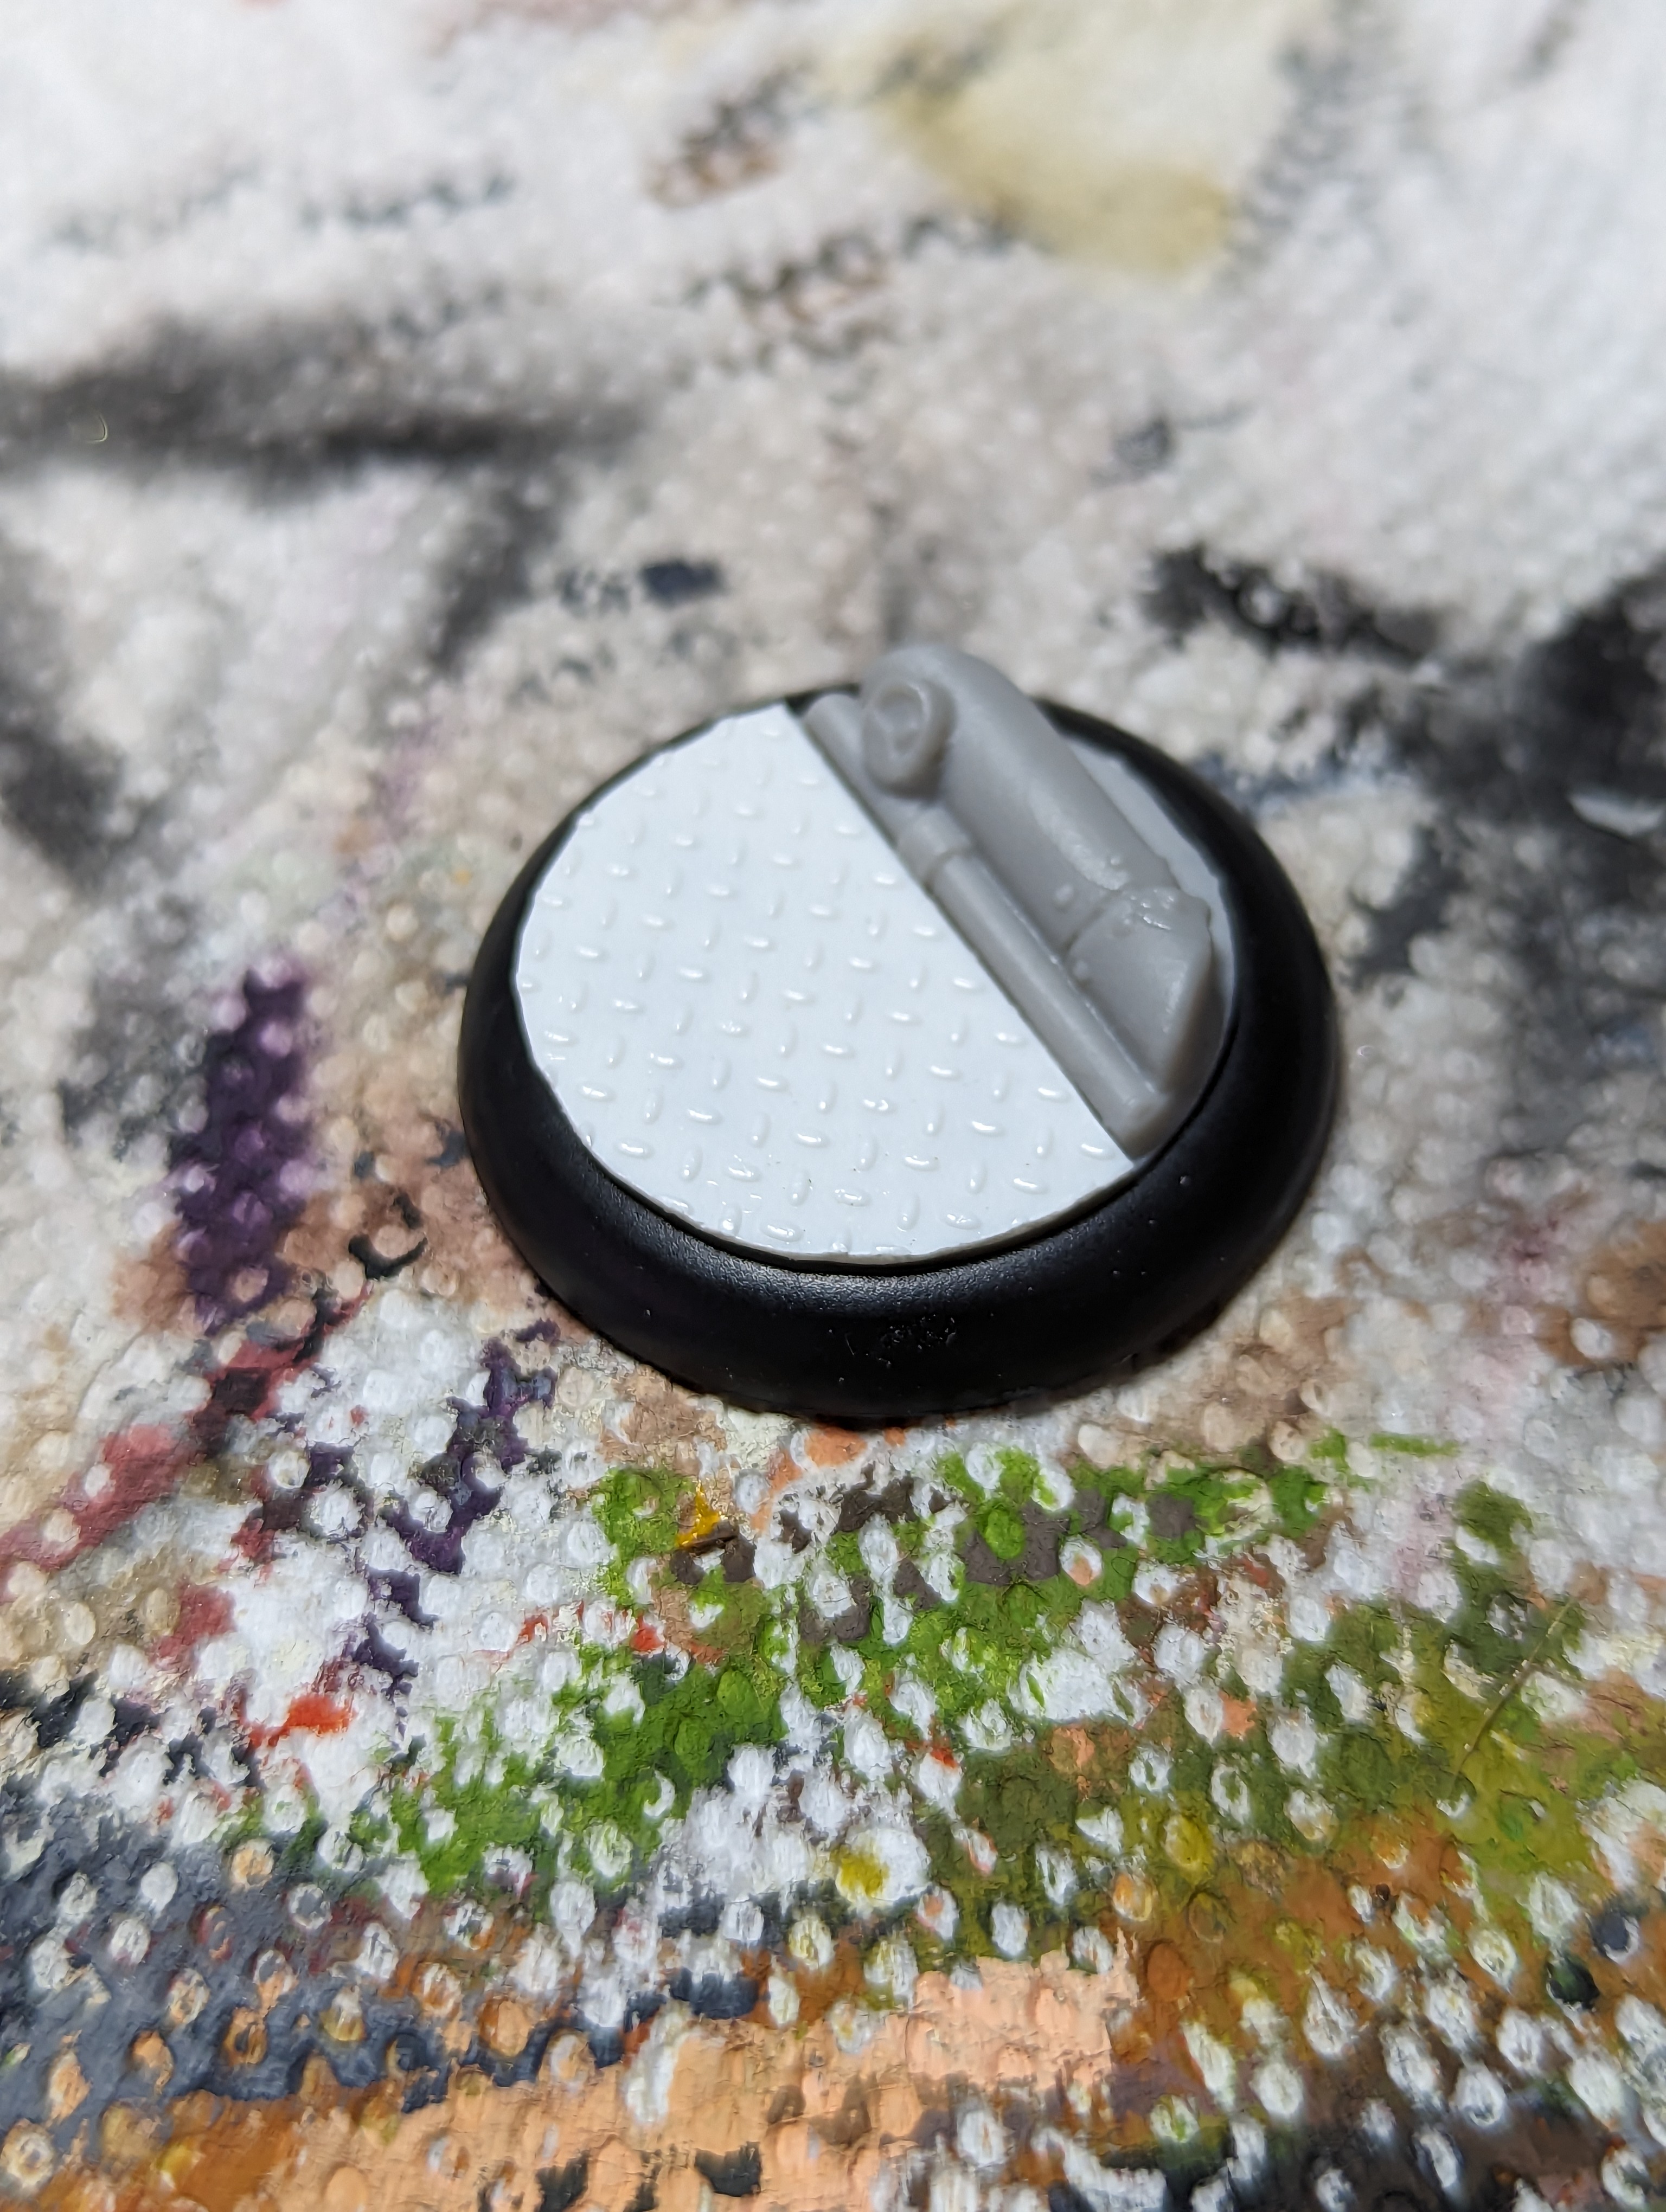
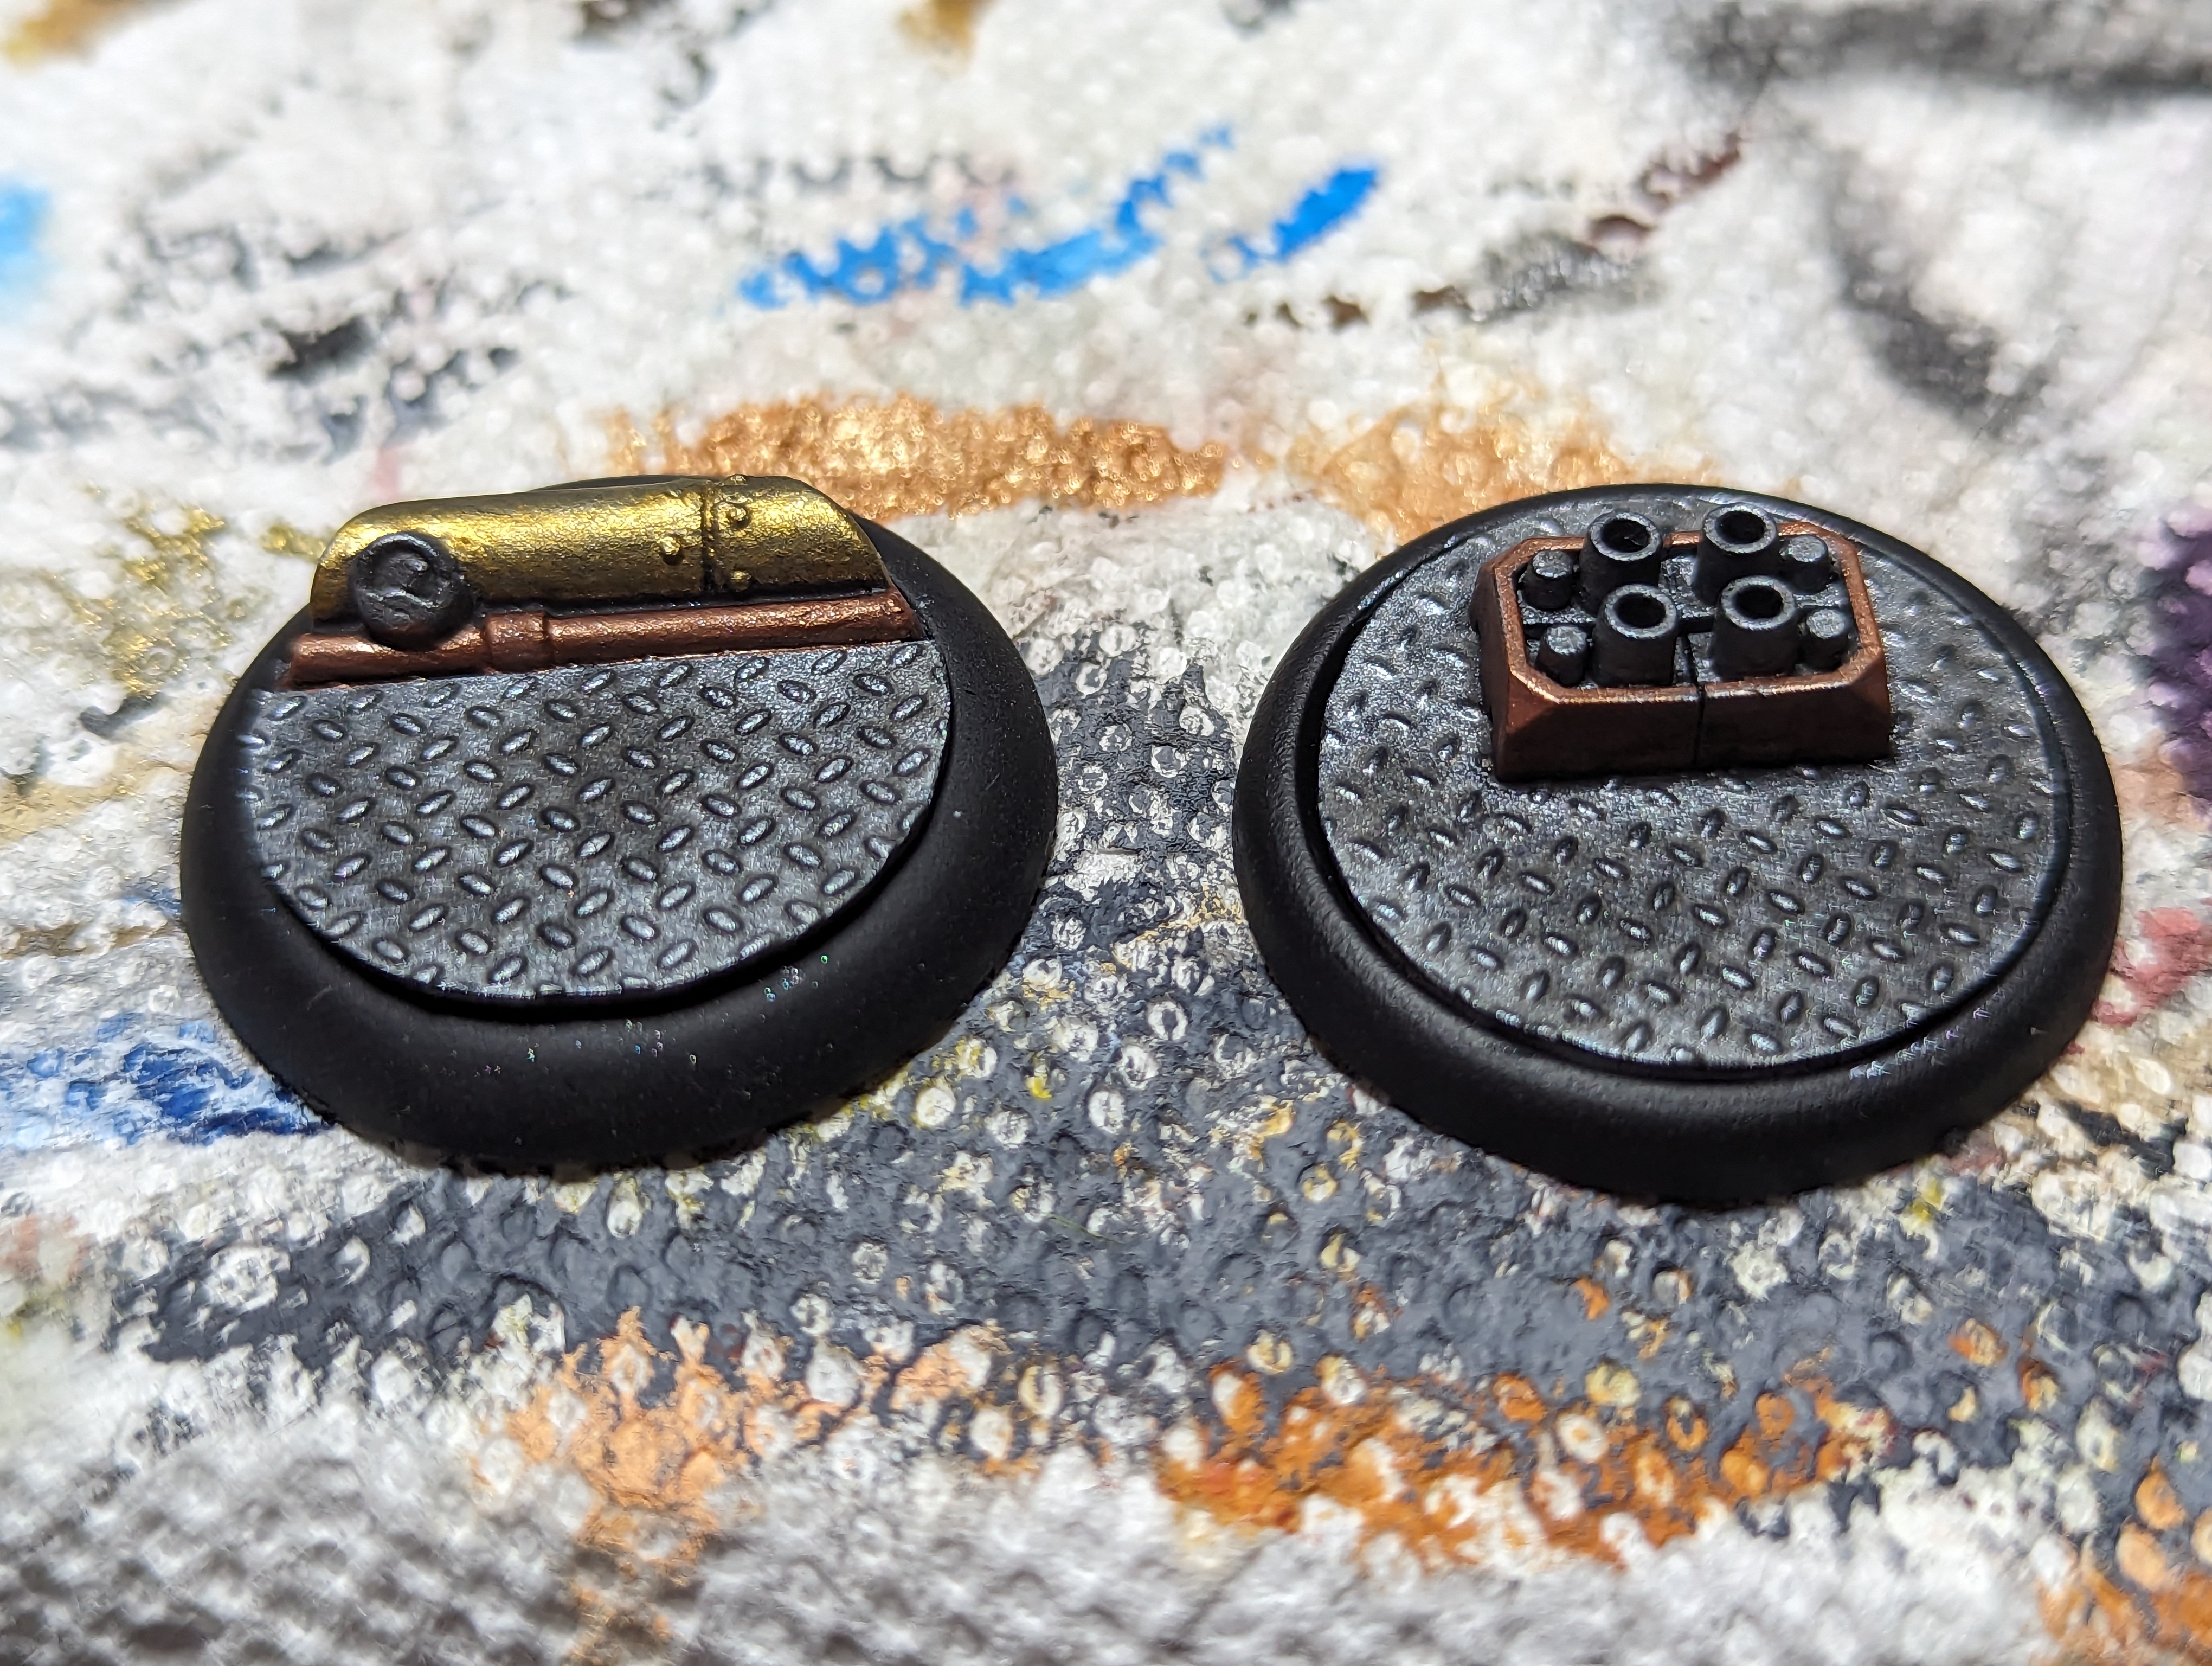
I already had a base painted up for Maxine. For the shared model, I decided to simply cut off some of the bits from another premade base, and then add some diamond plate to give it more of a look like the custom bases.
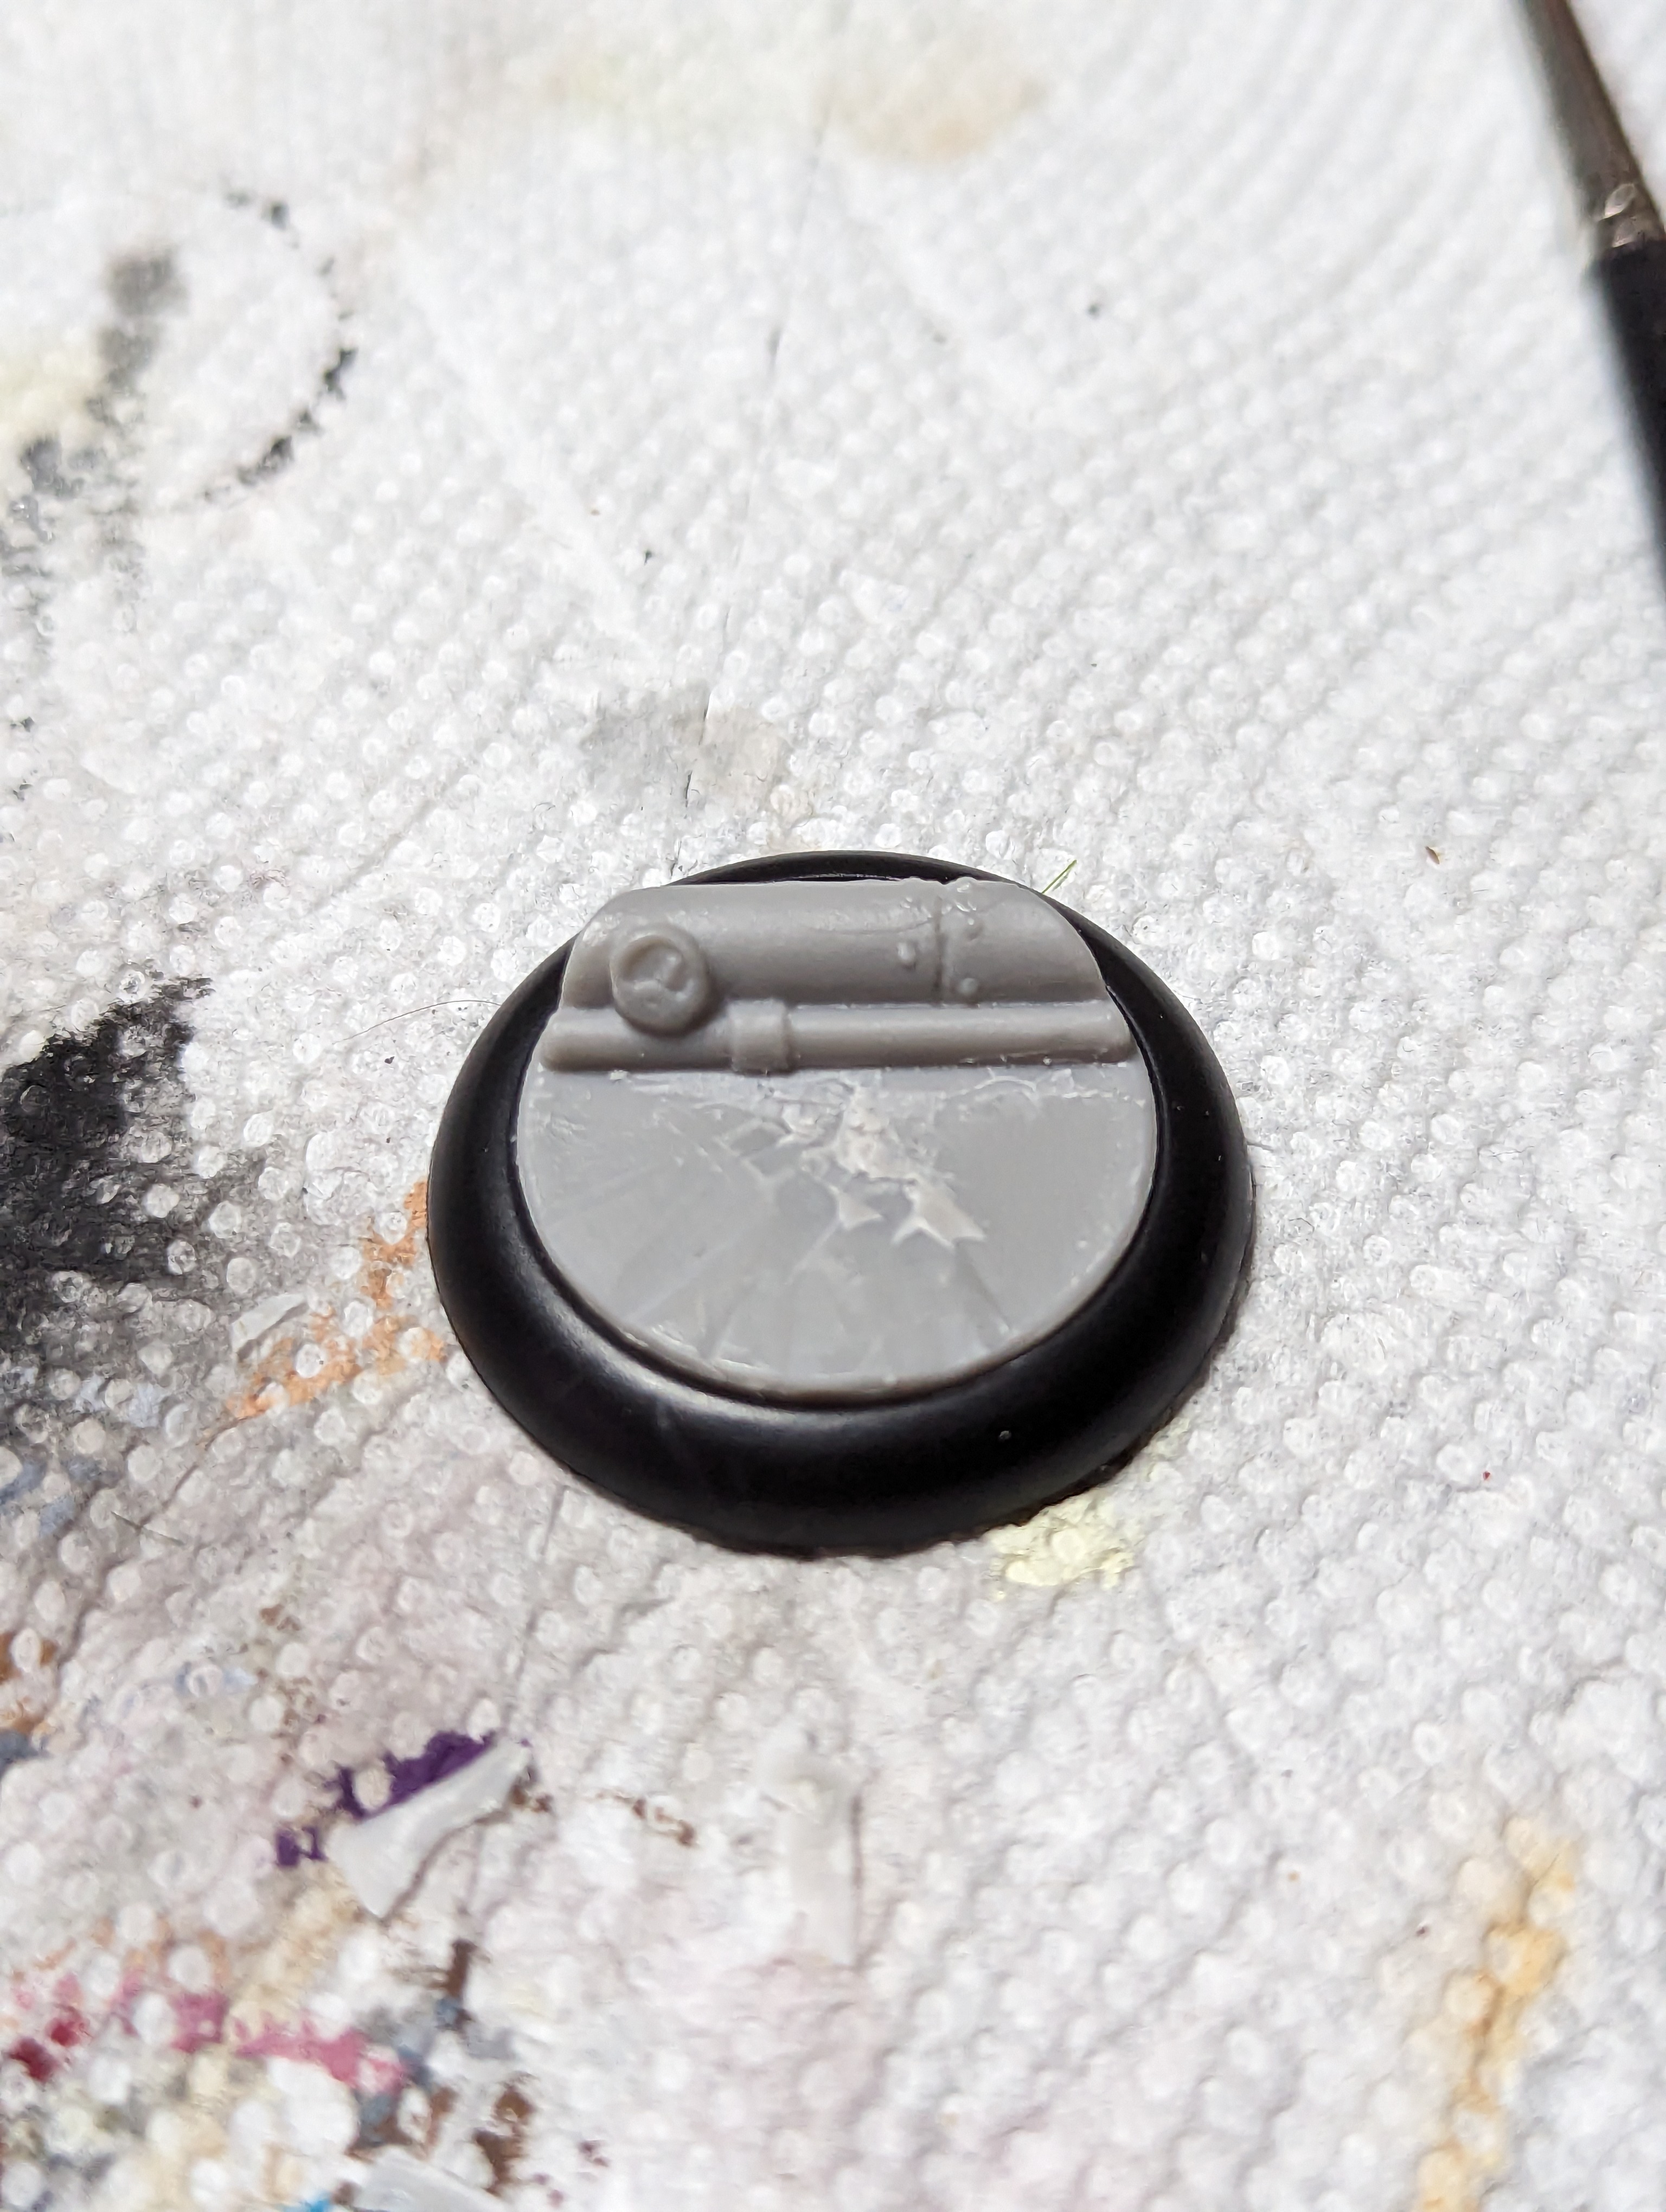
For Zipp, I also started with Diamond plate since its a common feature on the airship bases. I then took 2 bits from some space marines, and glued them next to eachother to look like a steampunk machine or an exhaust port.
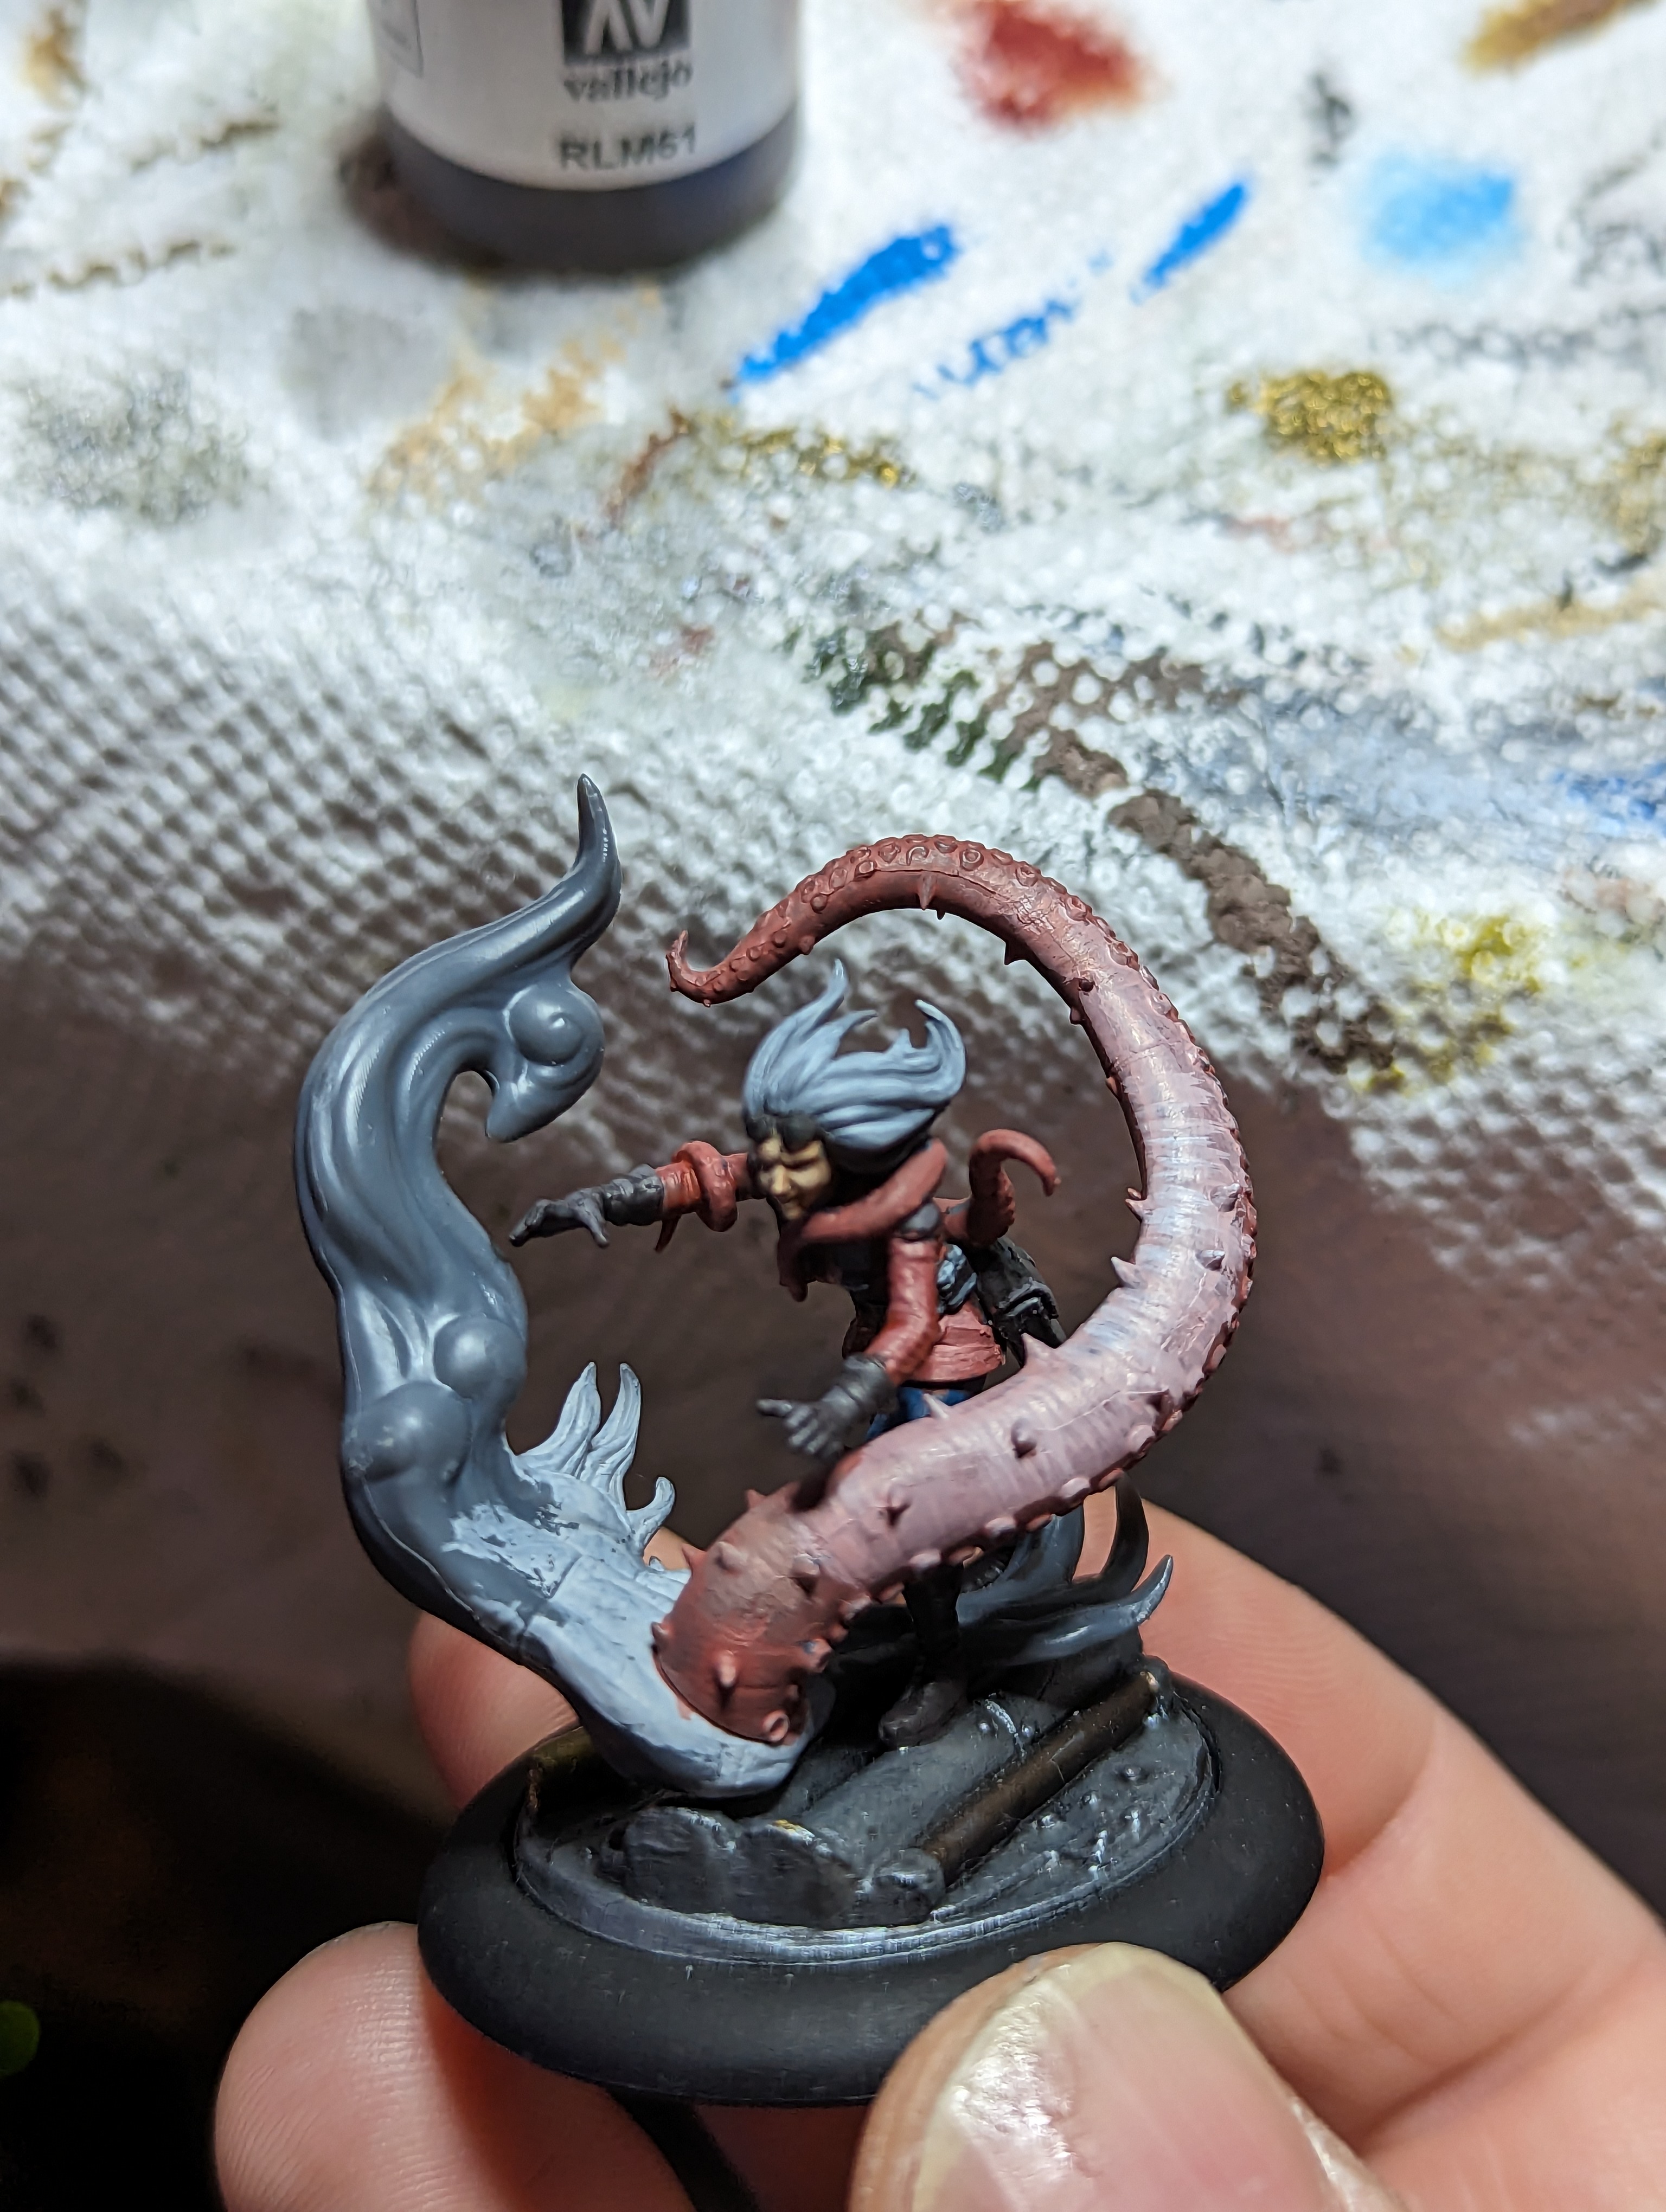
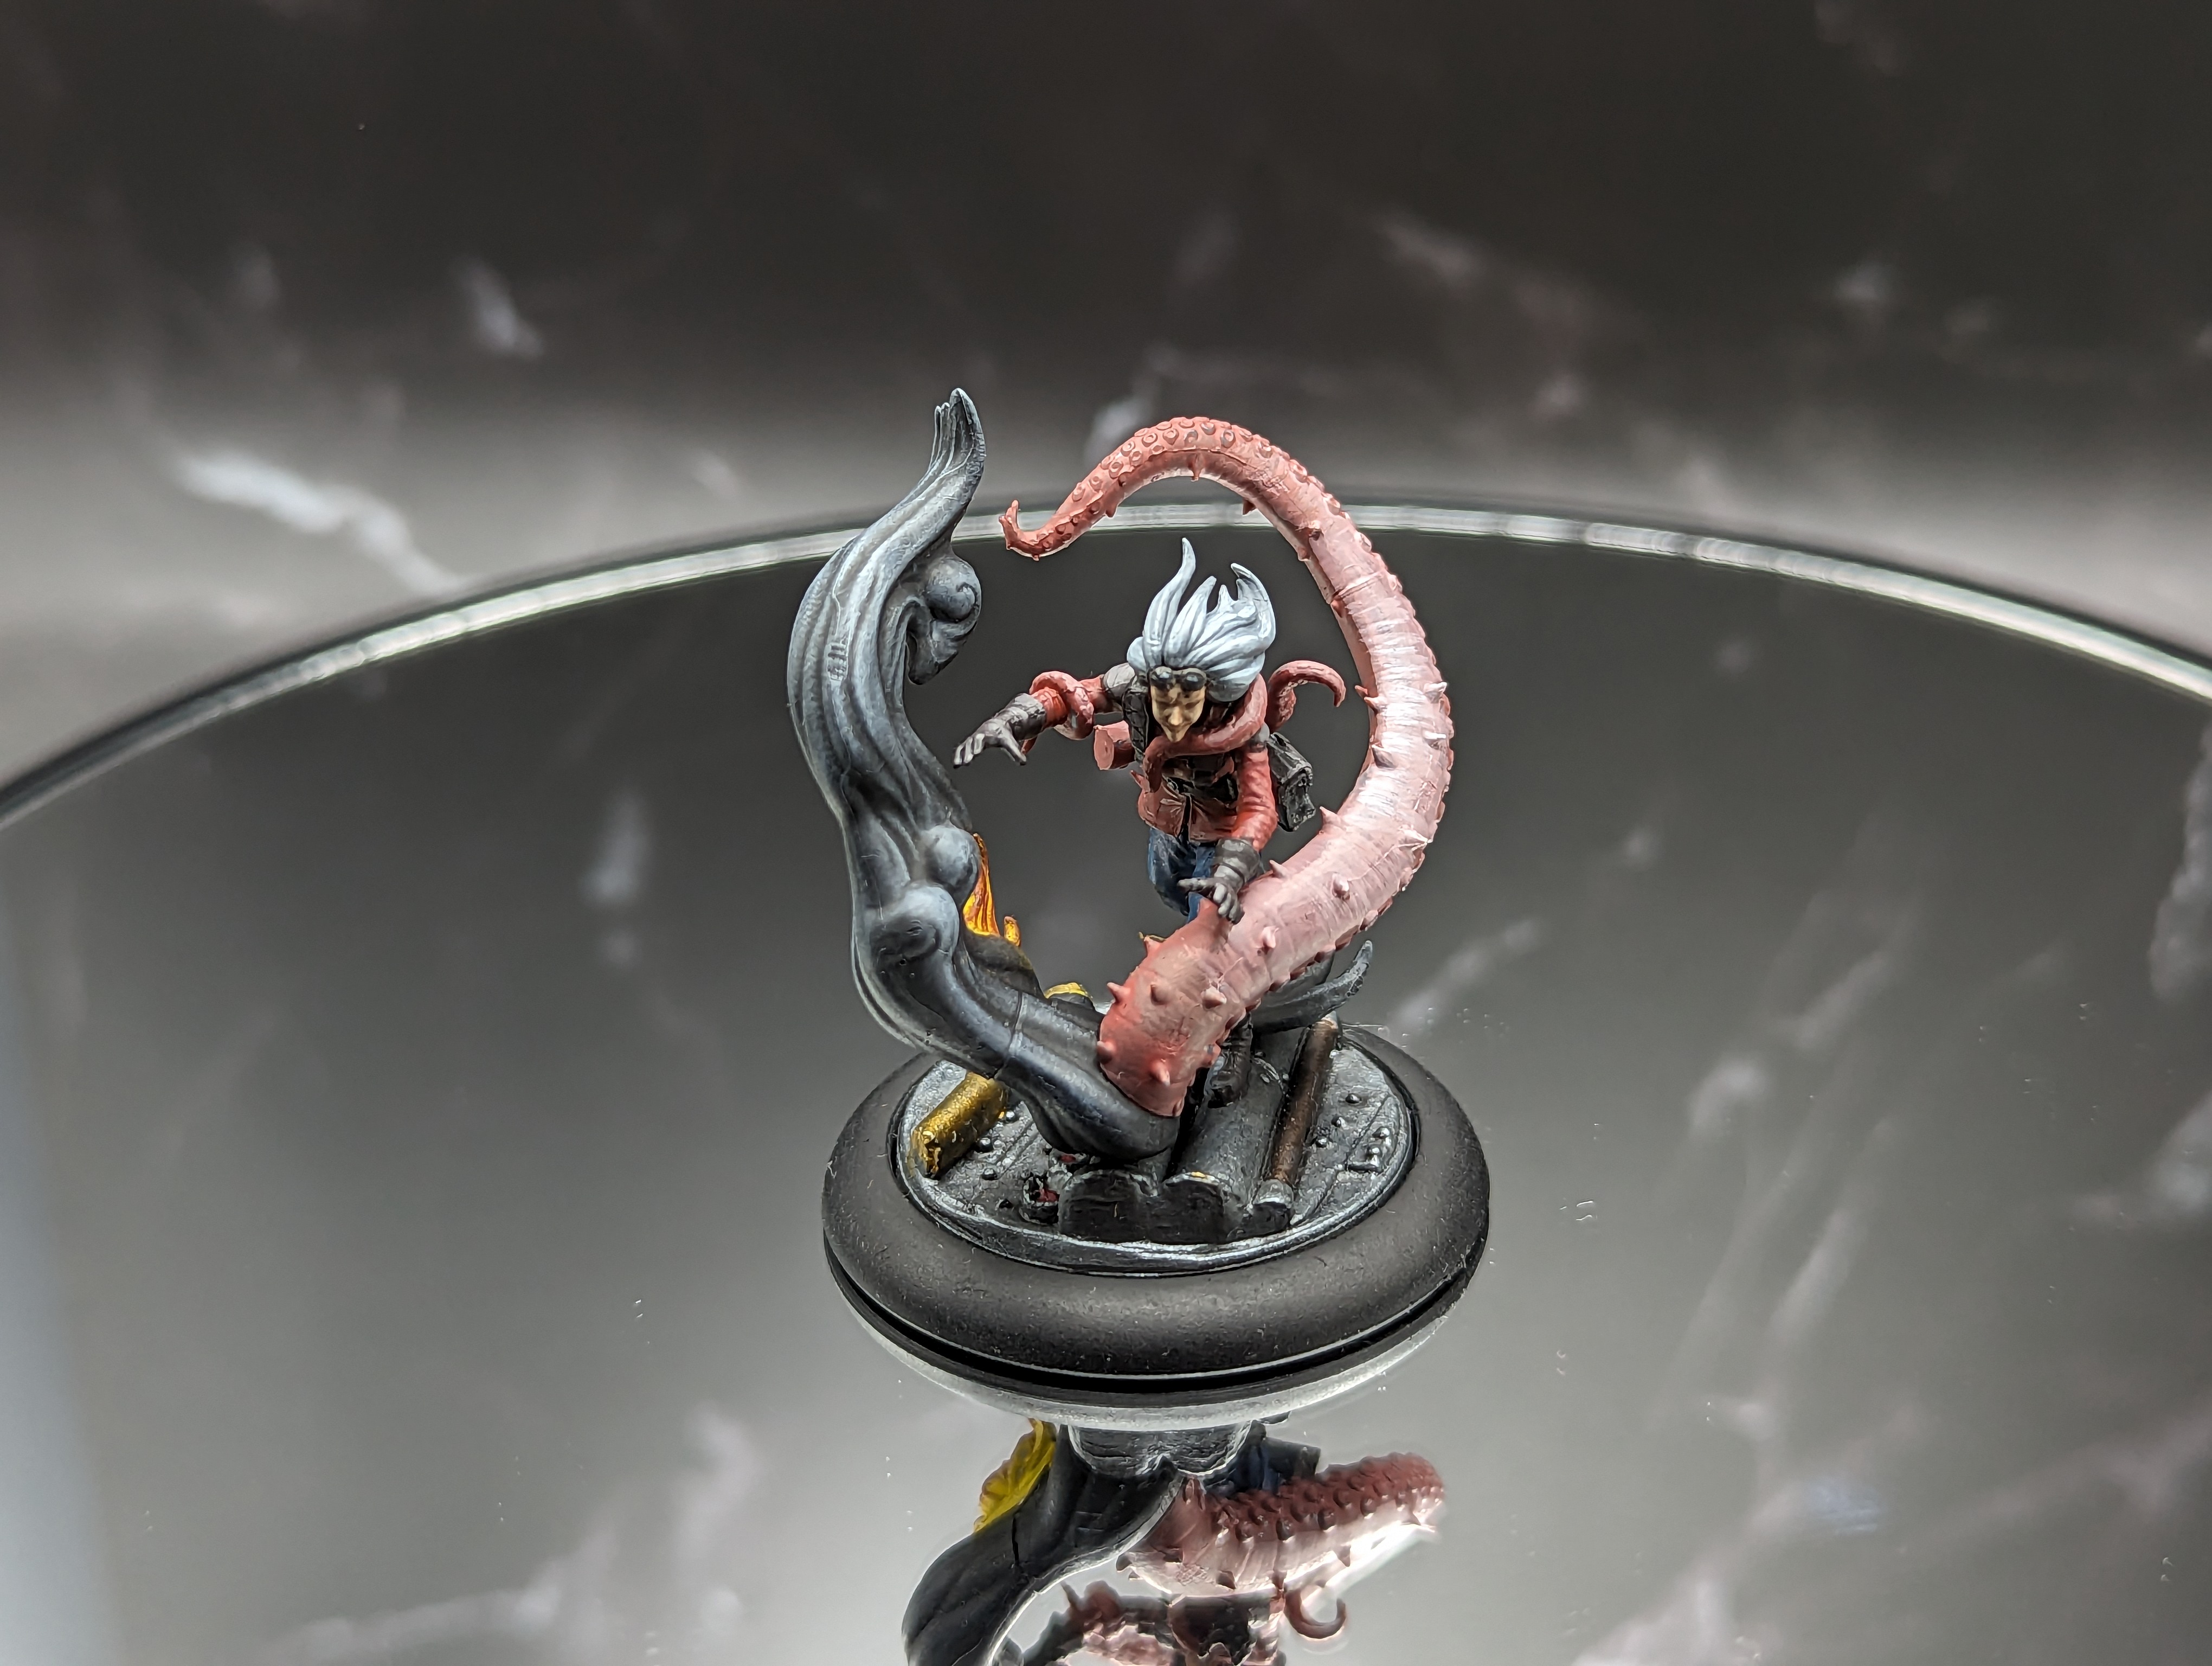
This is another one where I forgot to take WIP pictures. Maxine was the most interesting model to paint. She has a bunch of tentacles because of her being influenced by the burning man.
I tried to paint them in a pinkish skin color by blending the color along the main tentacle. I kind of feel like I should go back and add some different colors to the suckers and spikes, but there isn’t much to go on in the art.
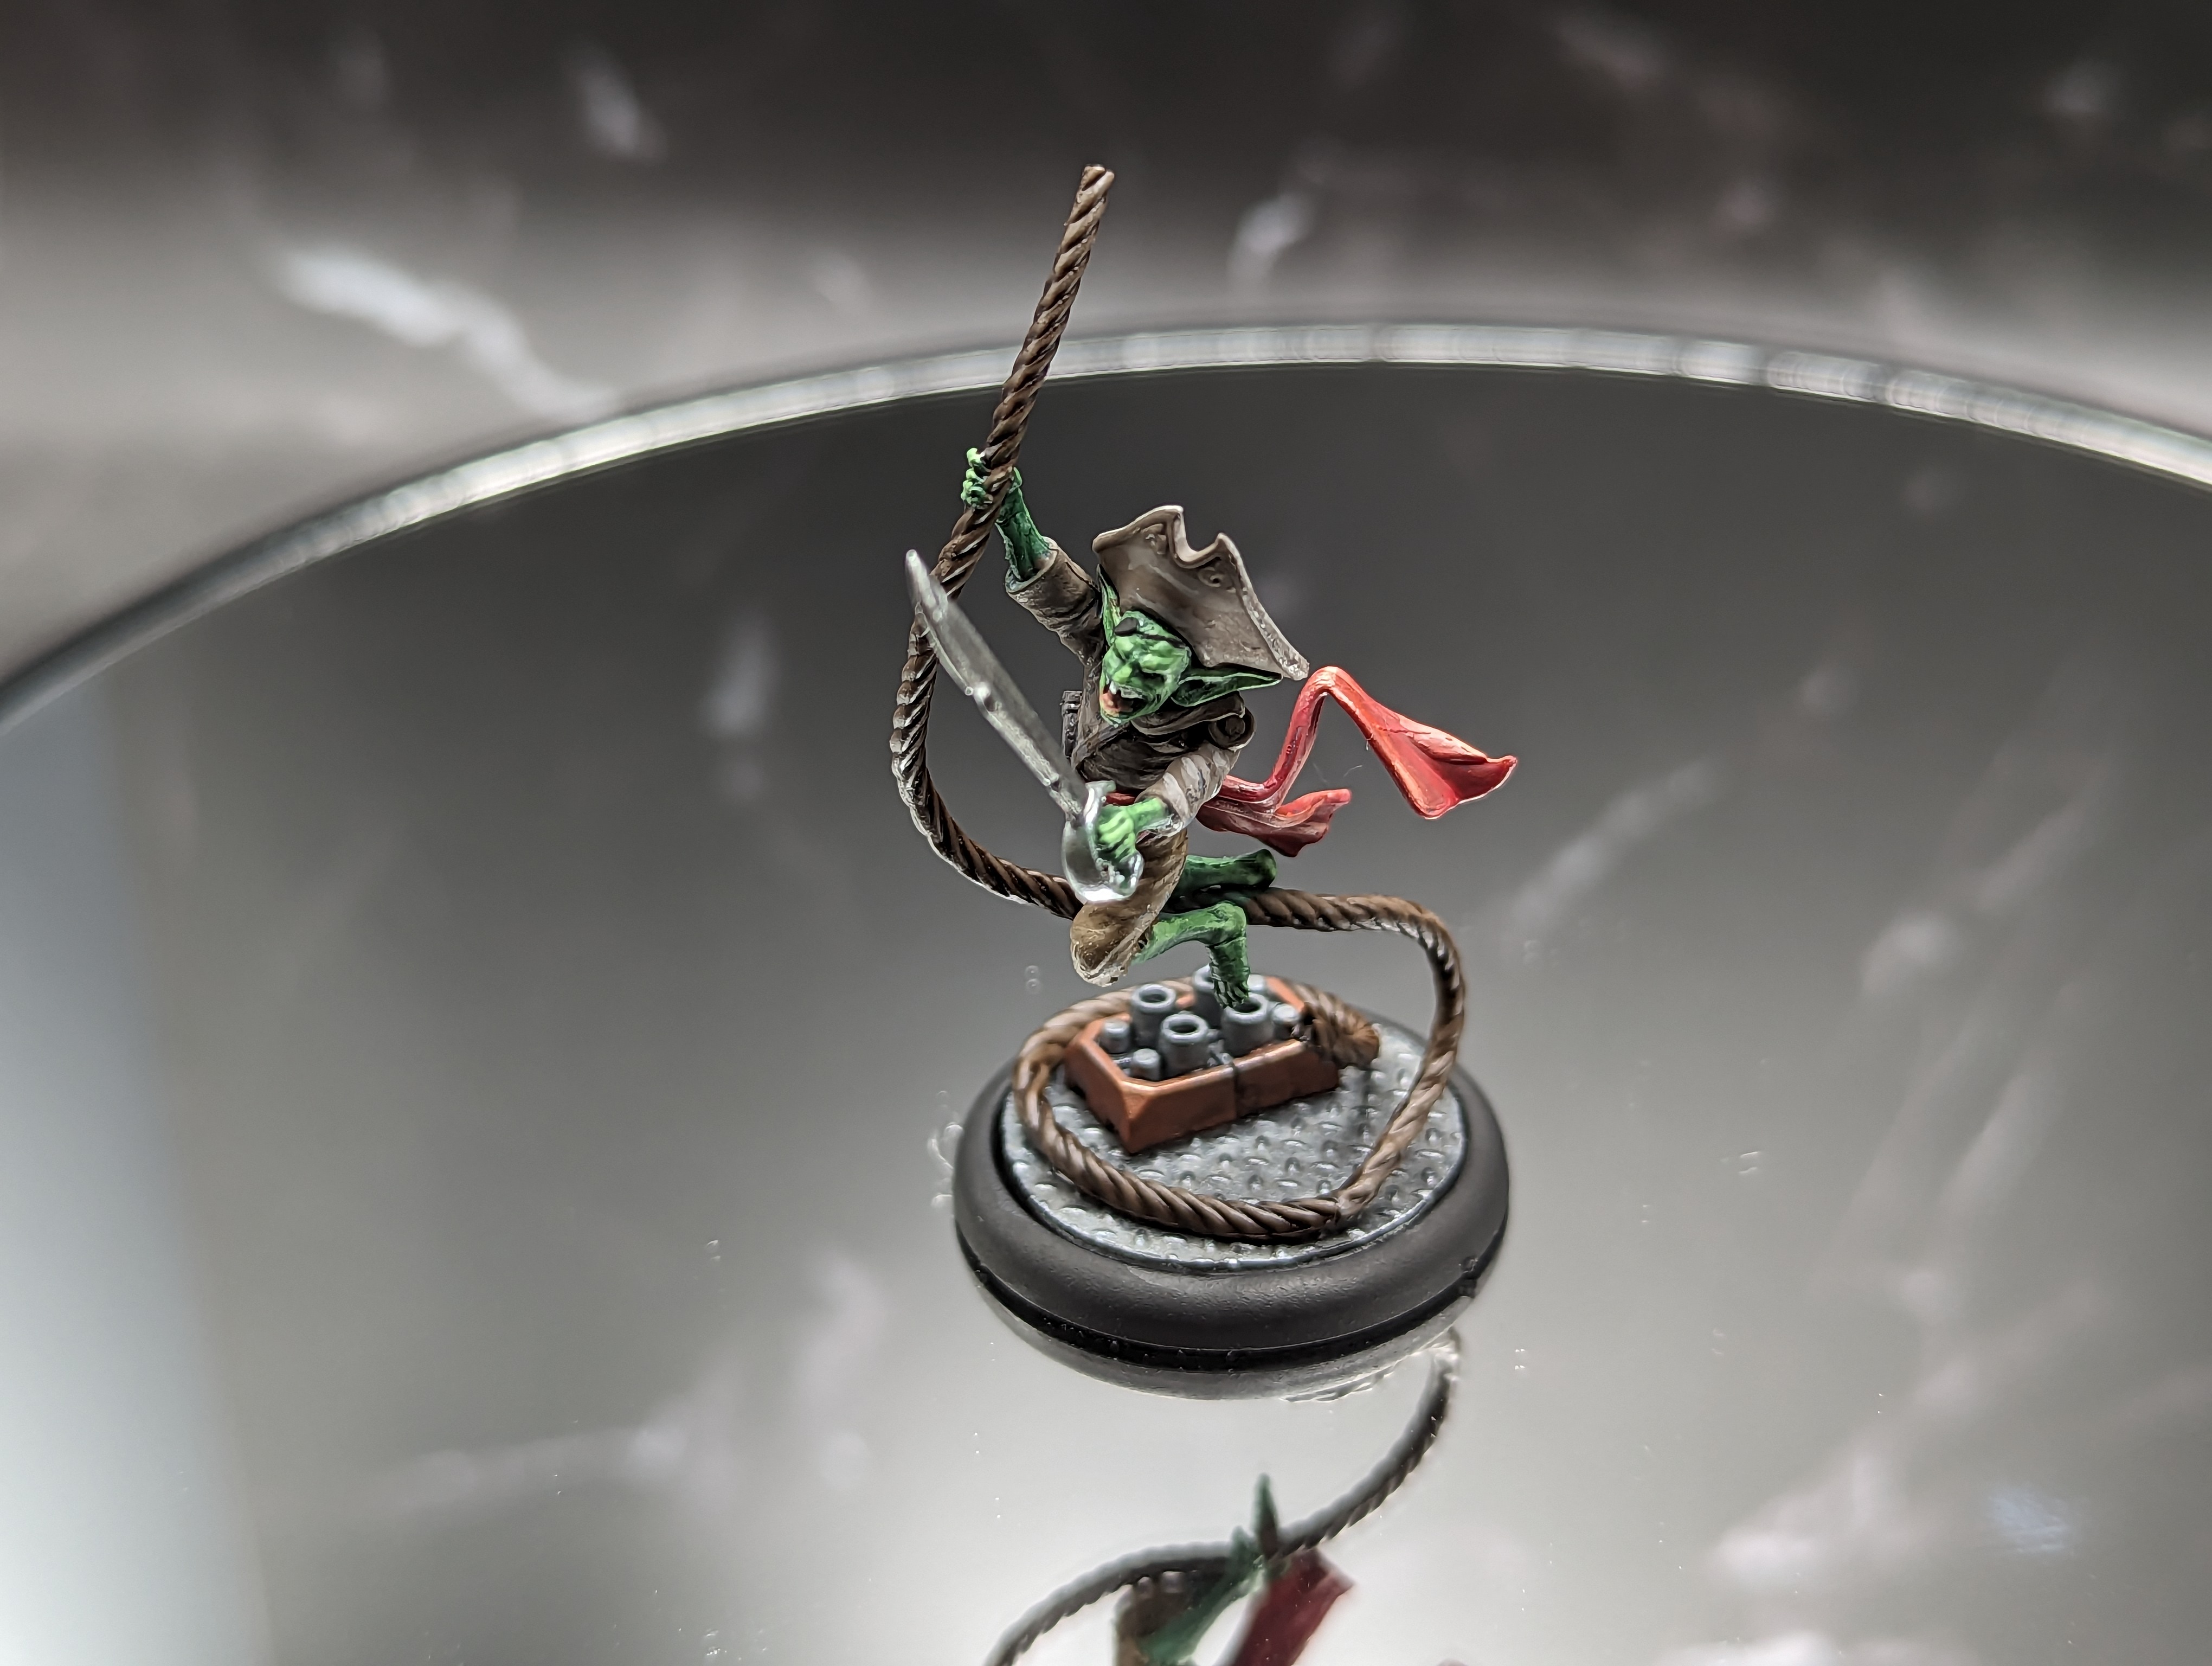
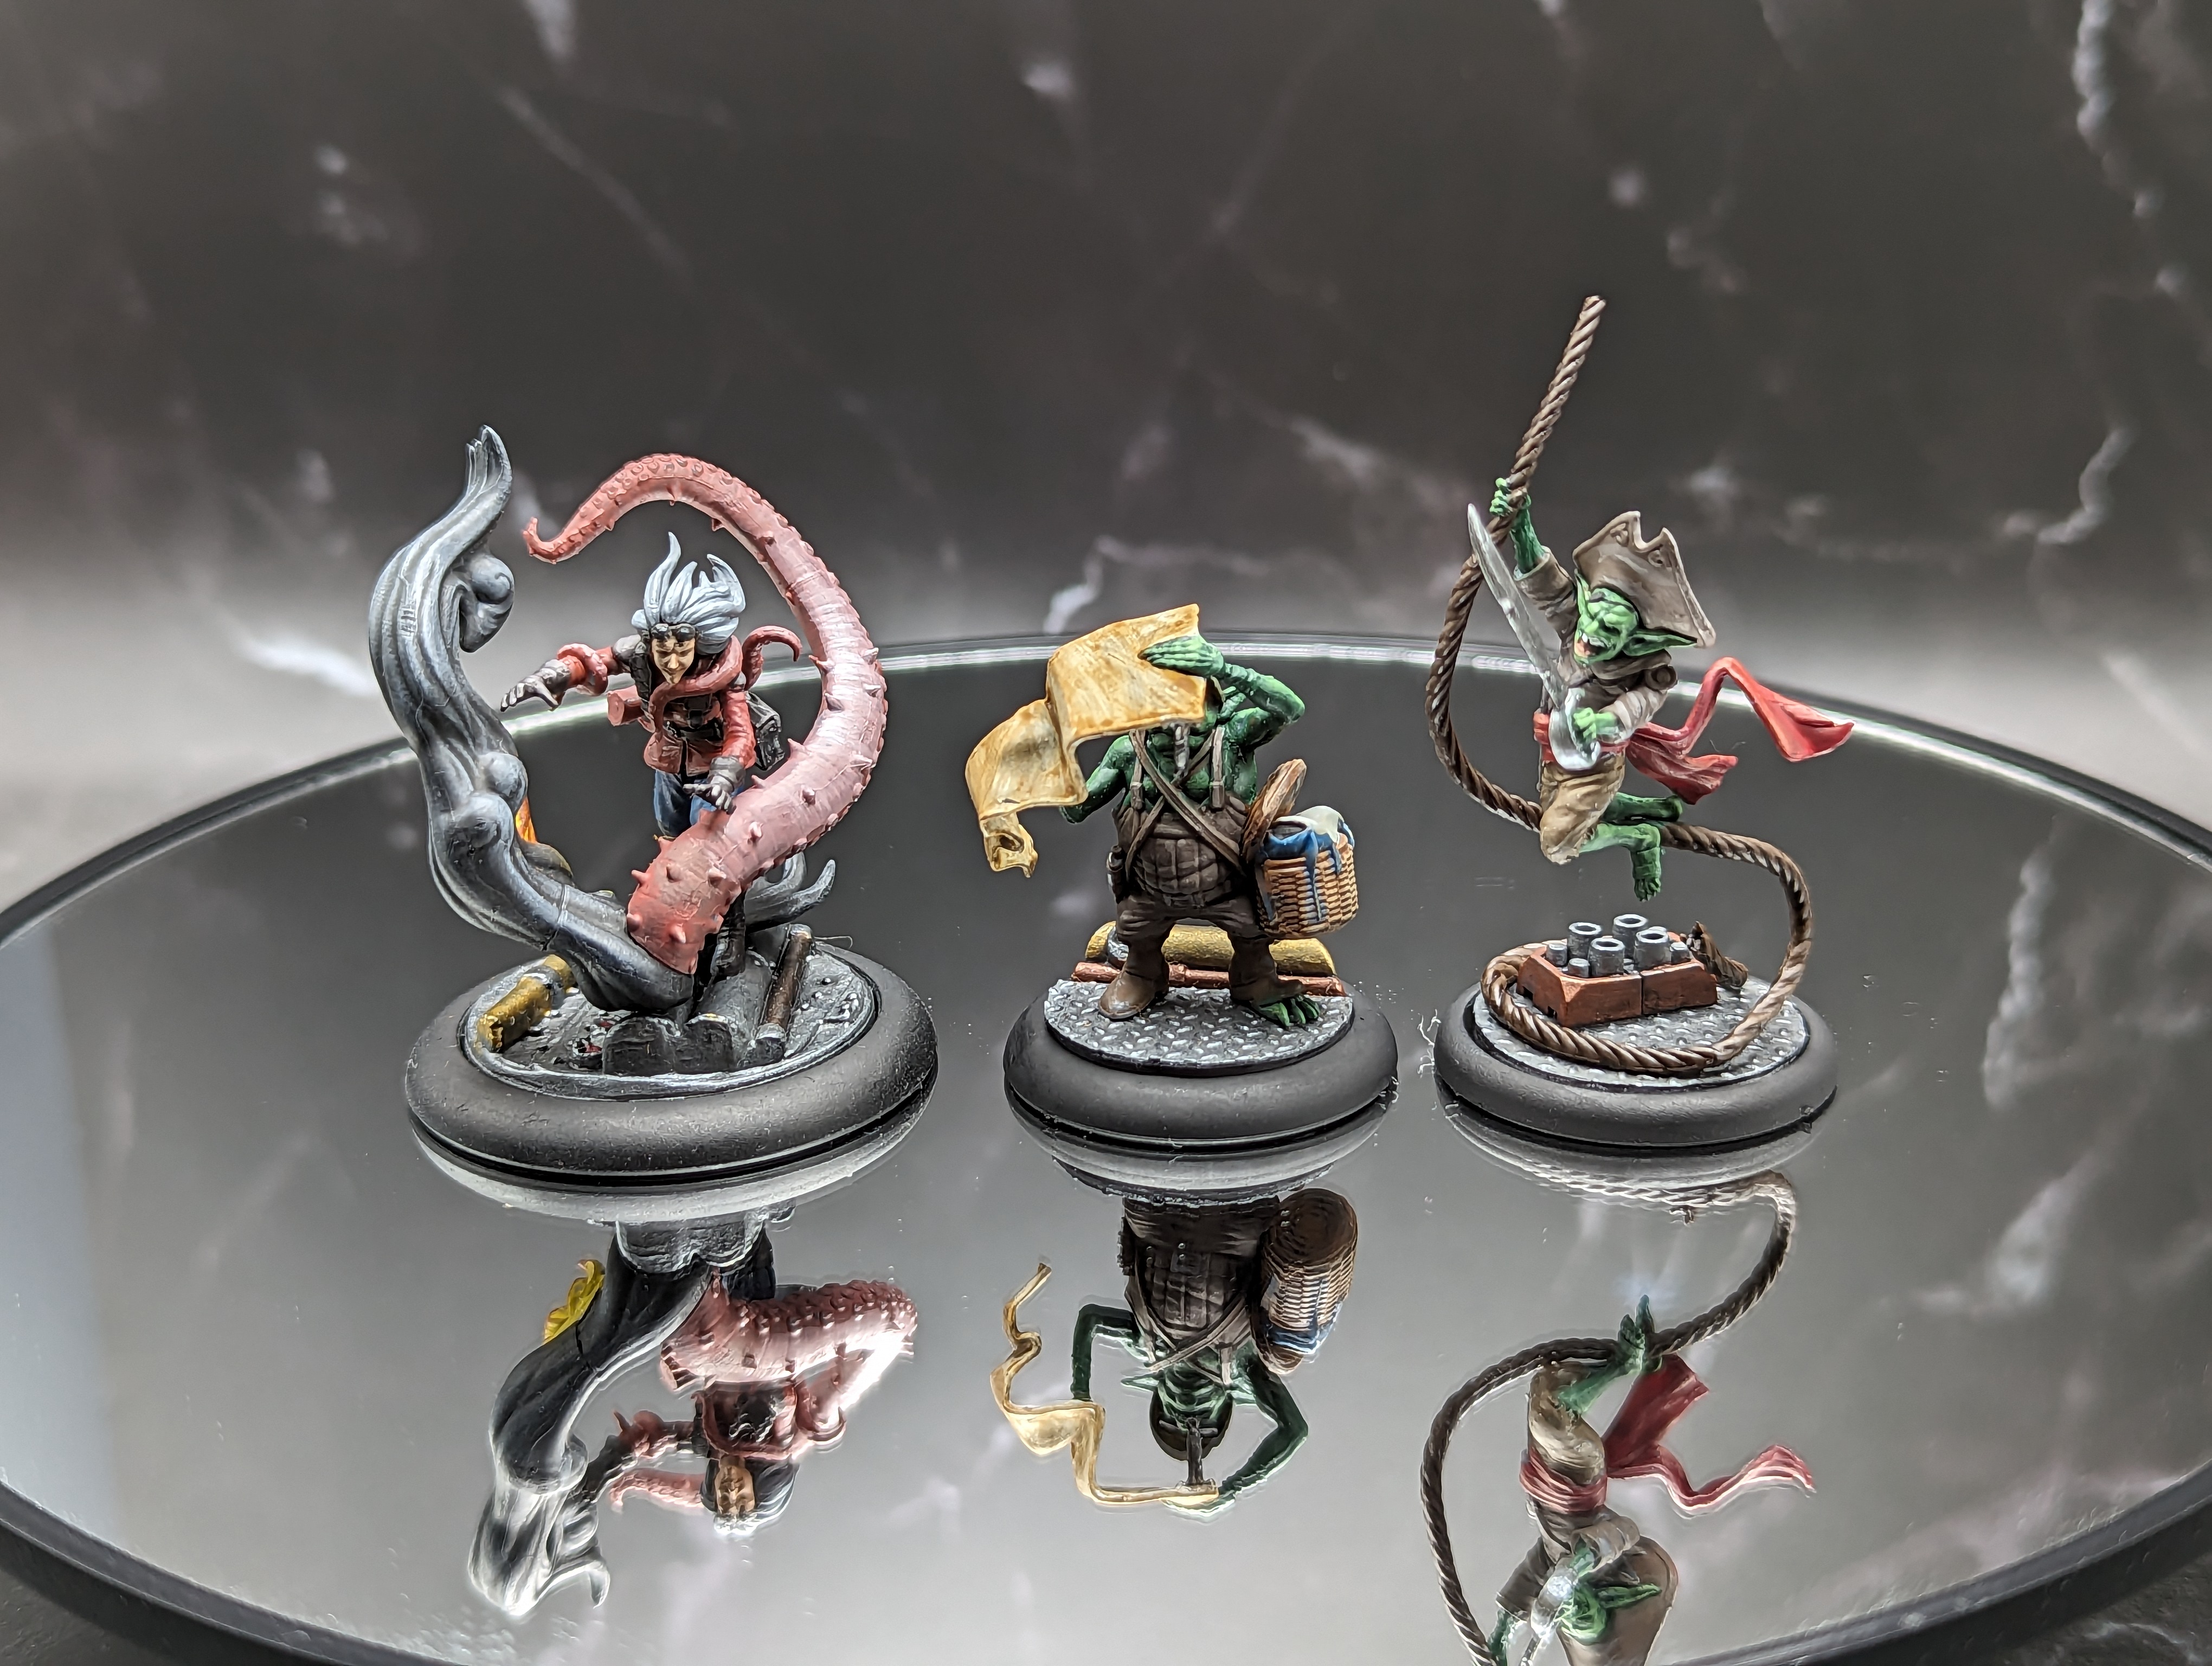
Zipp was a pretty simple paint job. He looks a lot like his old version, but pirated up. I like the sculpt for this model, I haven’t seen many models swinging on a rope like this.
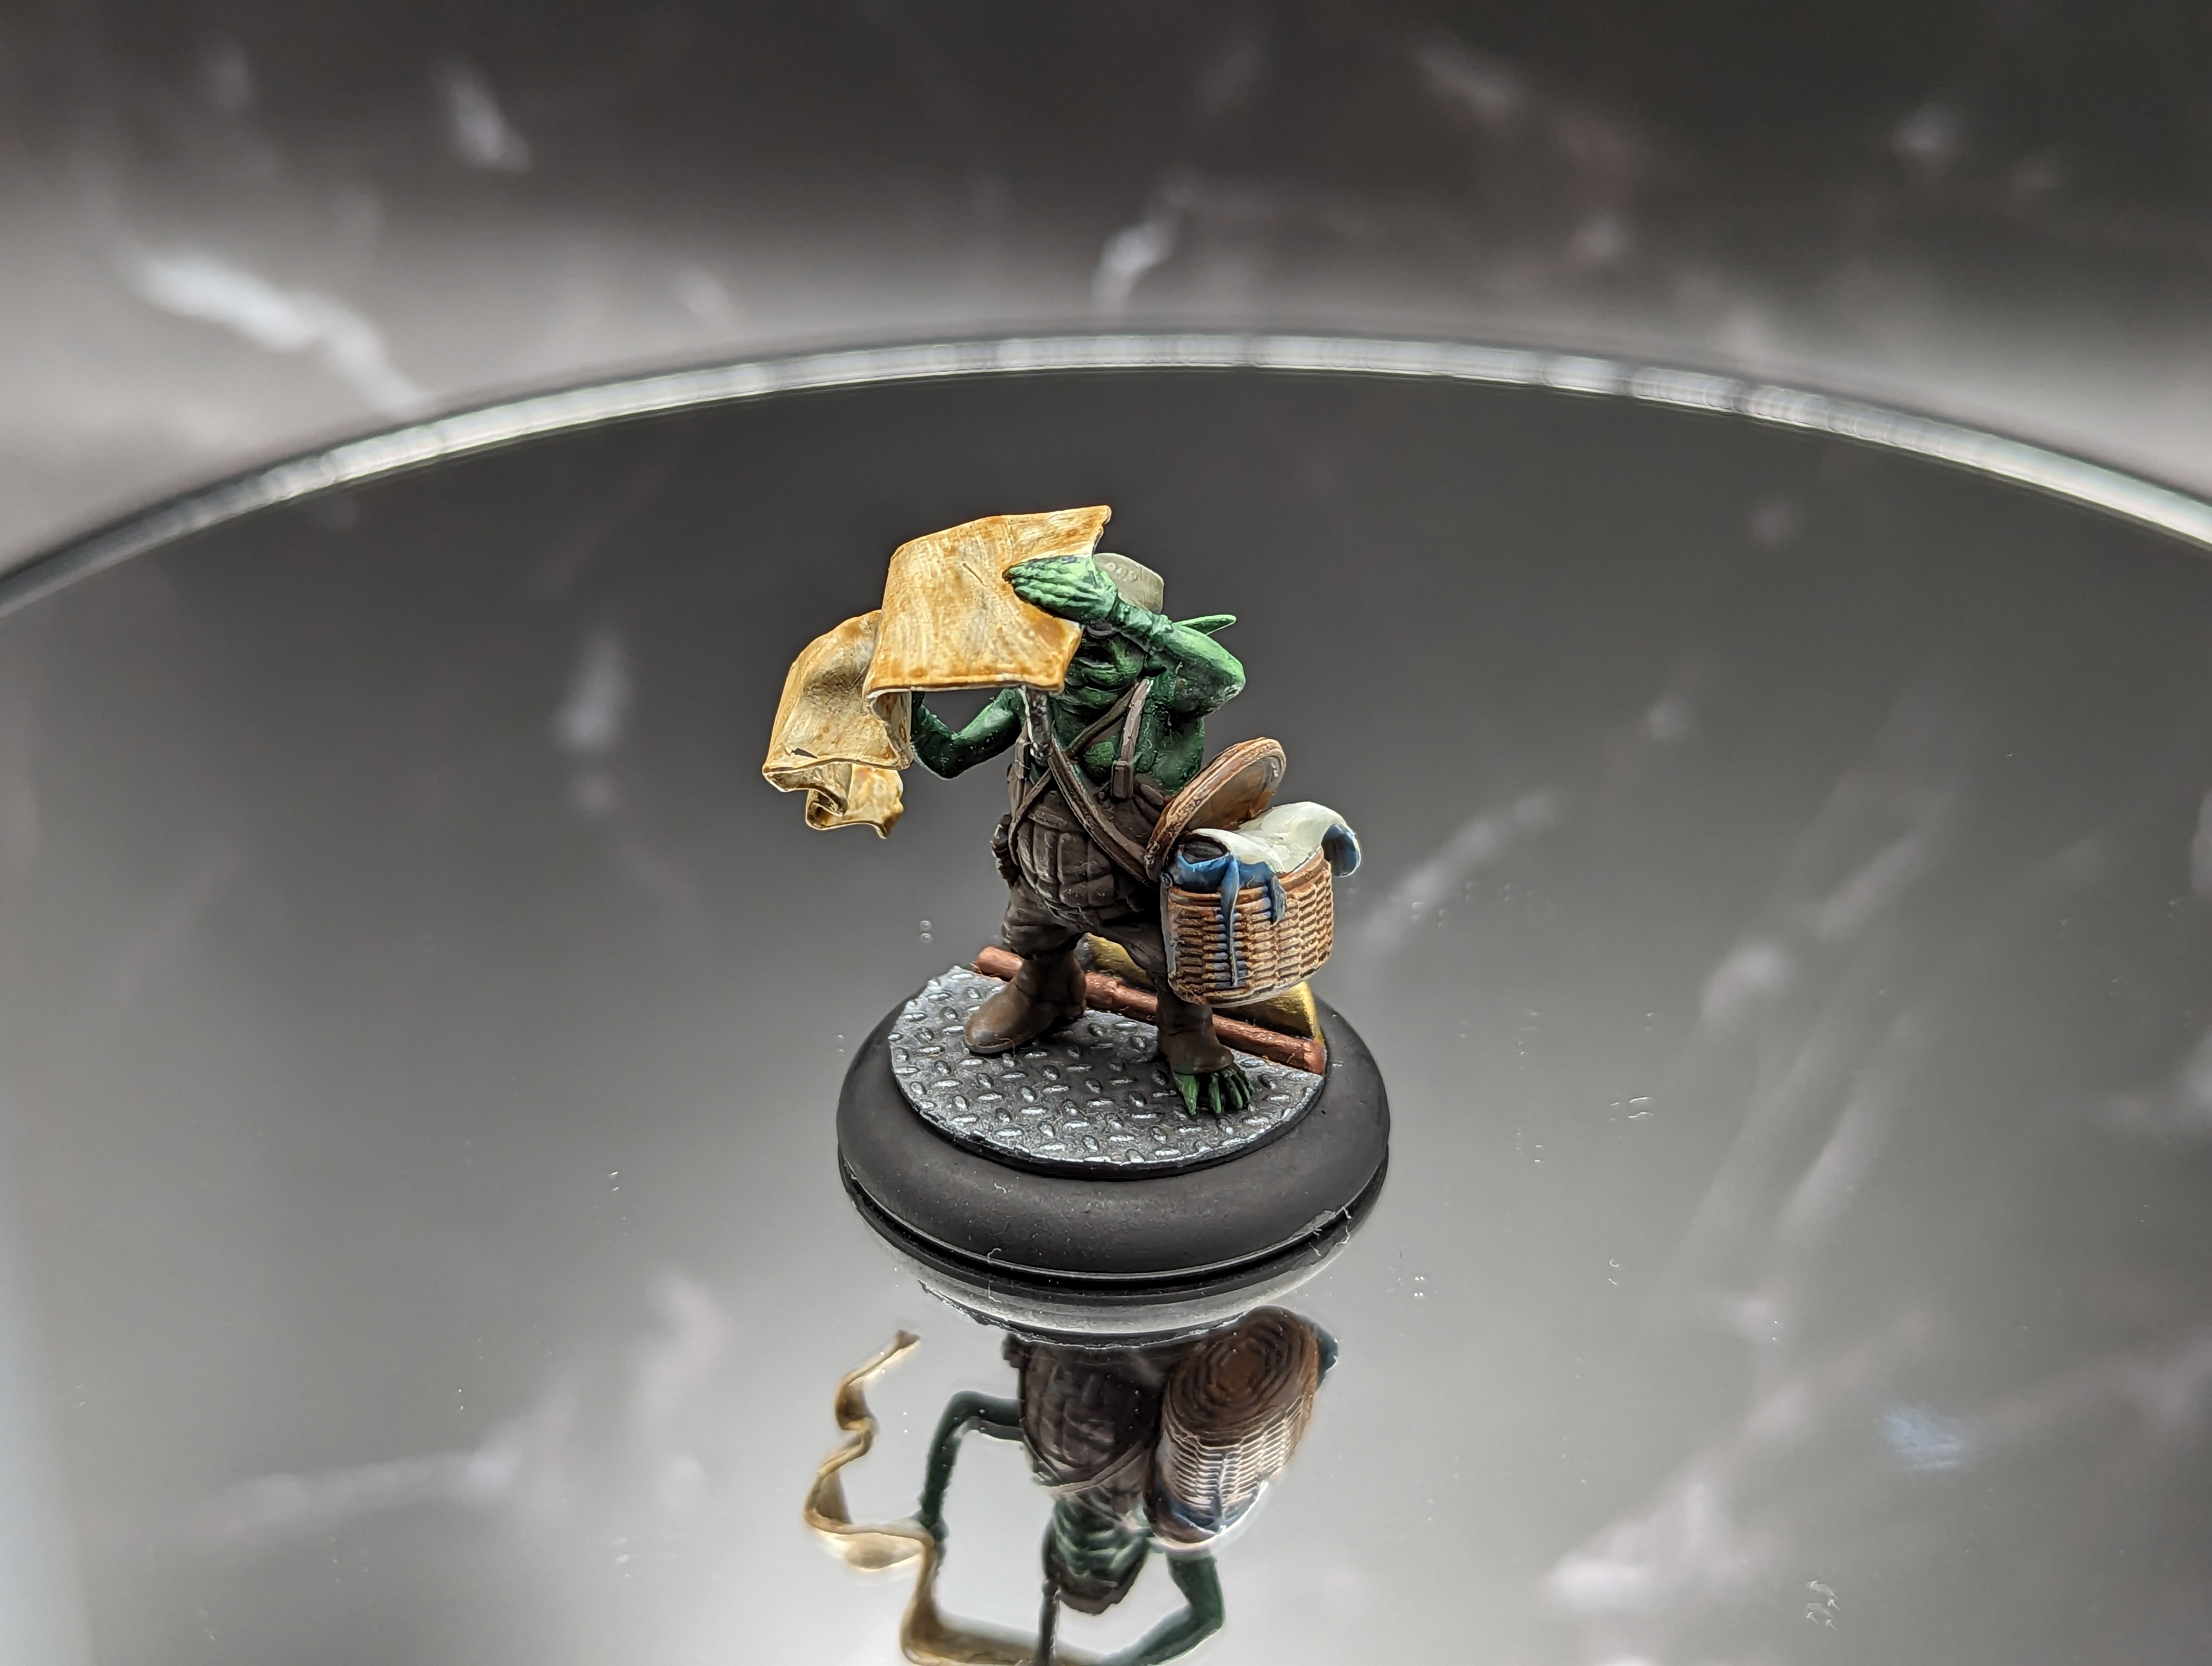
Beau is a cute little gremmie. He is a lot like other gremlins, but hes holding a fun map. I tend to always paint paper the same, base it in an off white, and then wash it with sepia. It adds a dirty look and almost gives the impression of writing, with almost no effort.
Long Time Coming
I helped Wyrd Announce this set of Miniatures in the summer of 2021. It was technically released in Q1 of 2023, but because my FLGS does not carry Wyrd stuff, and the websites I order from are… bad. I didn’t get my hands on them until almost 2 years after the announcement. Naturally, Marcus is the master that I play the most, so I’ve been proxying him (hence the weird base thing)
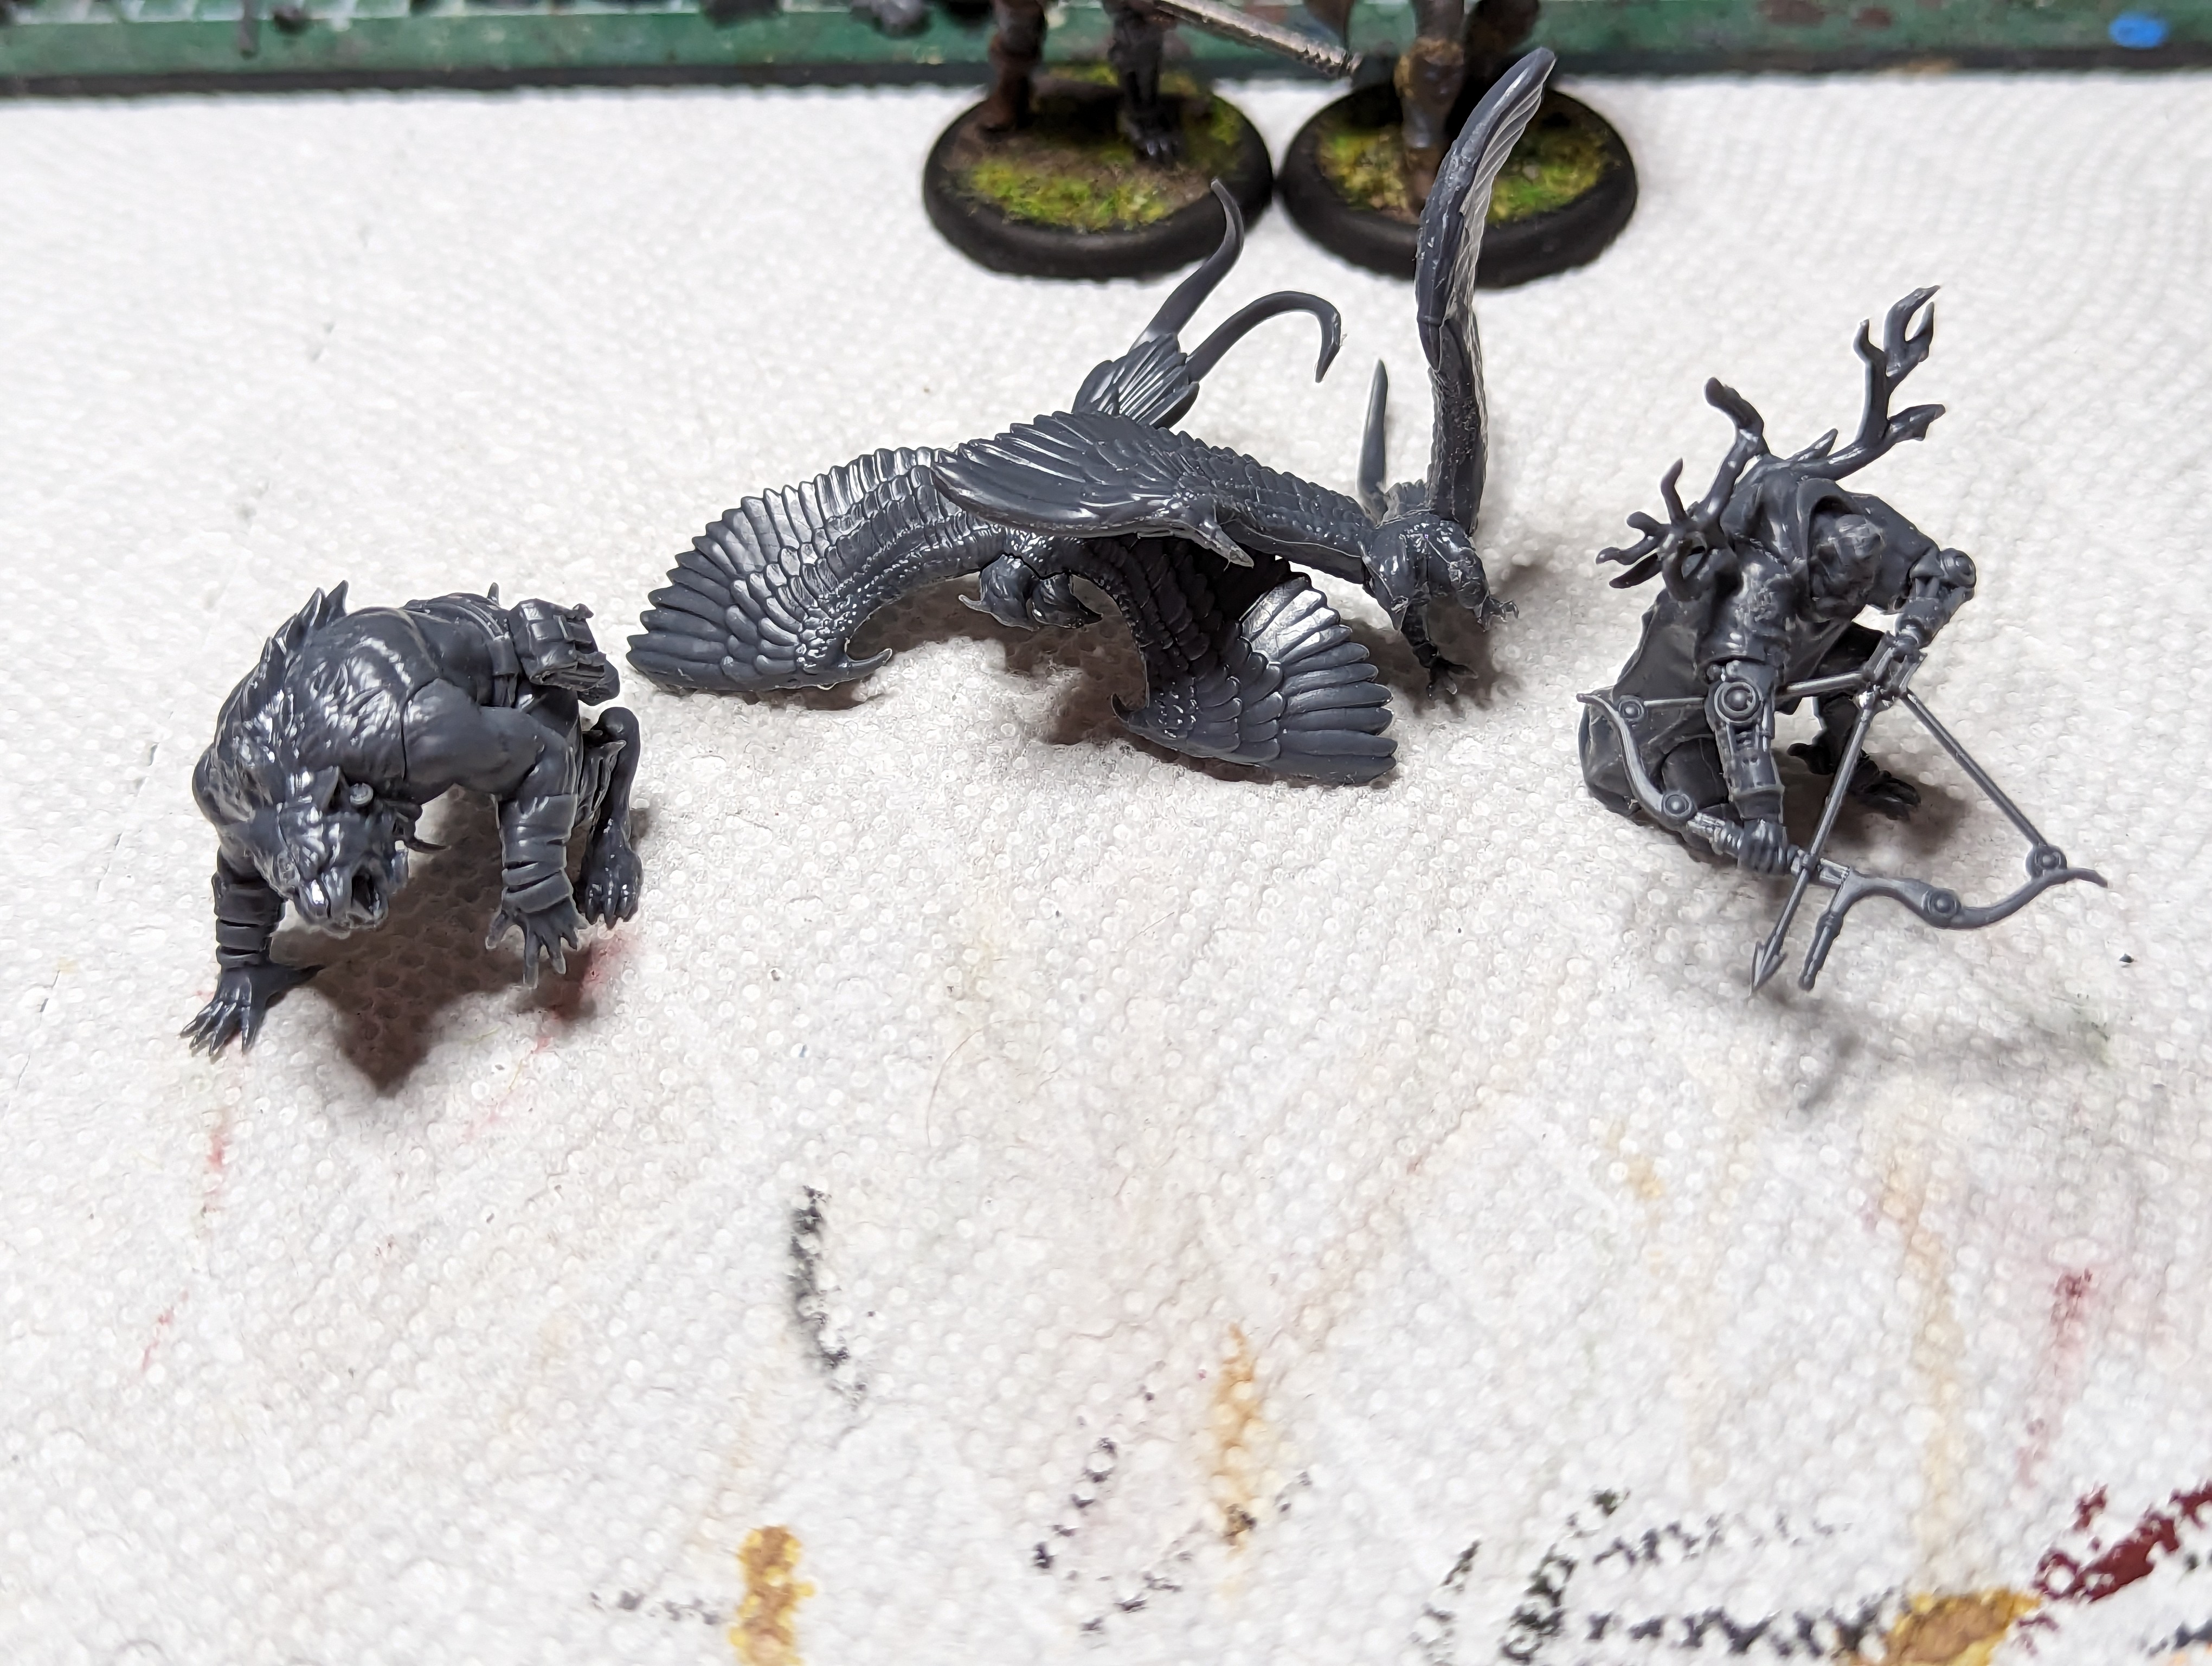
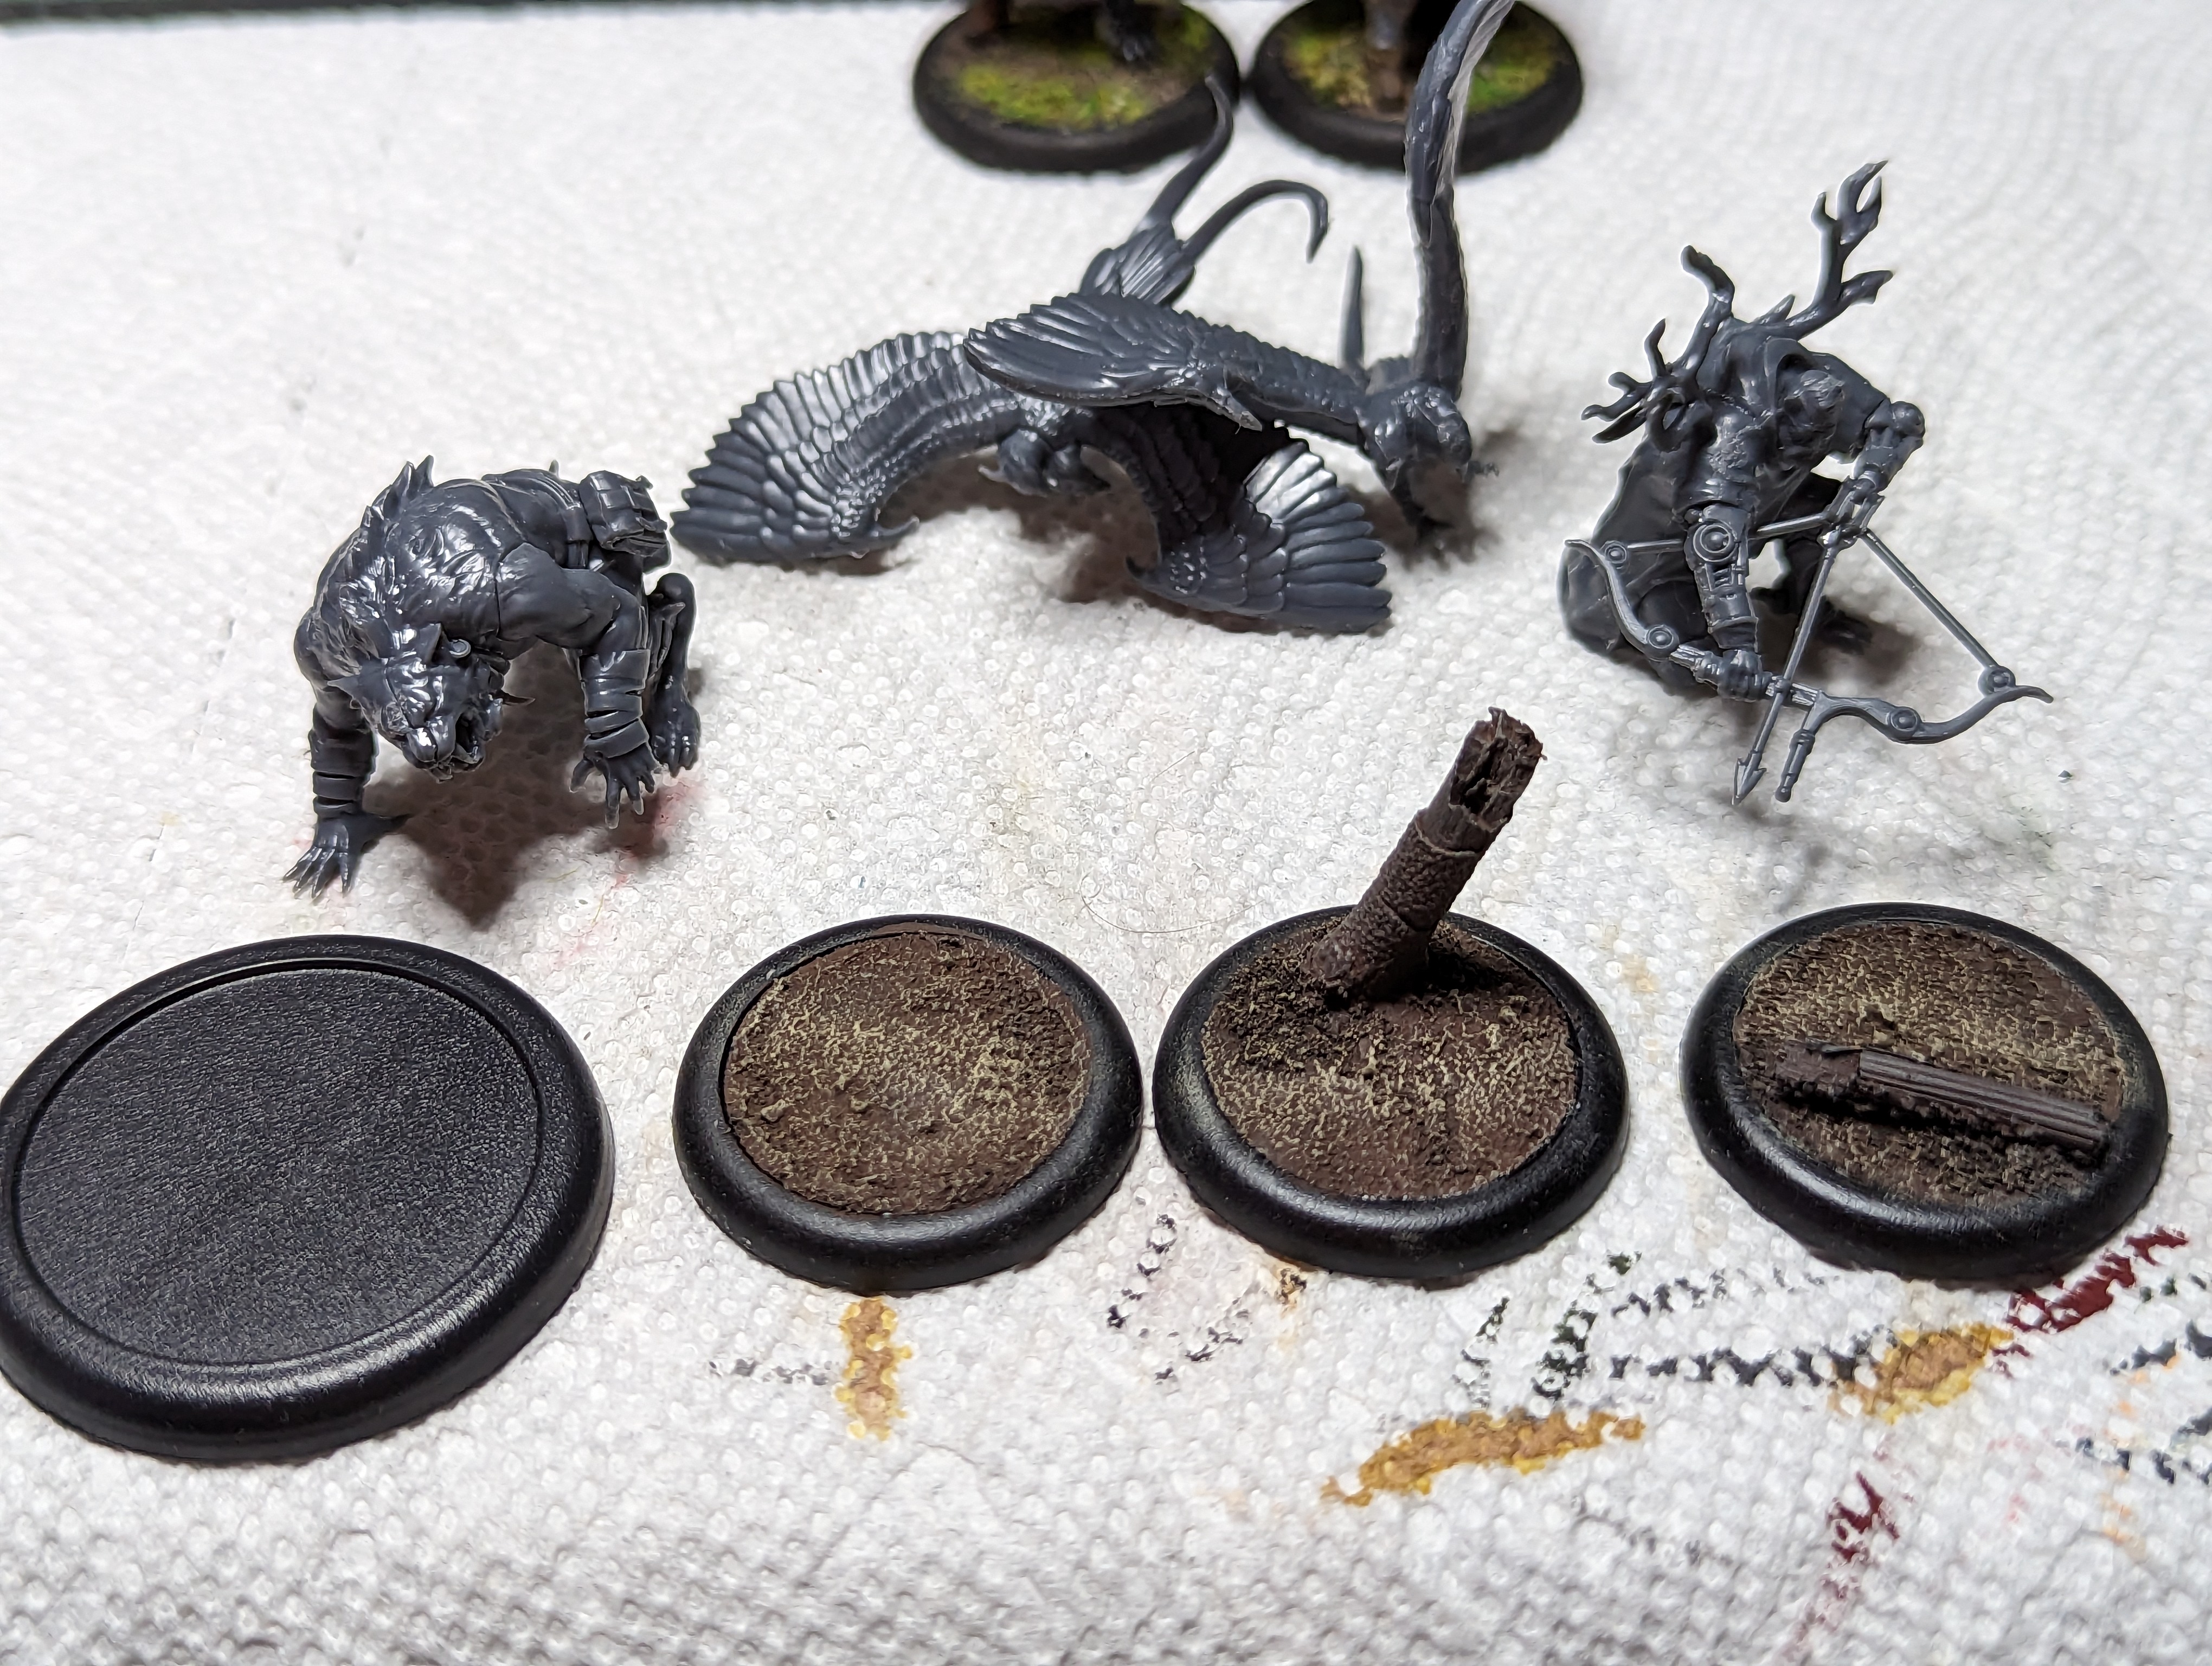
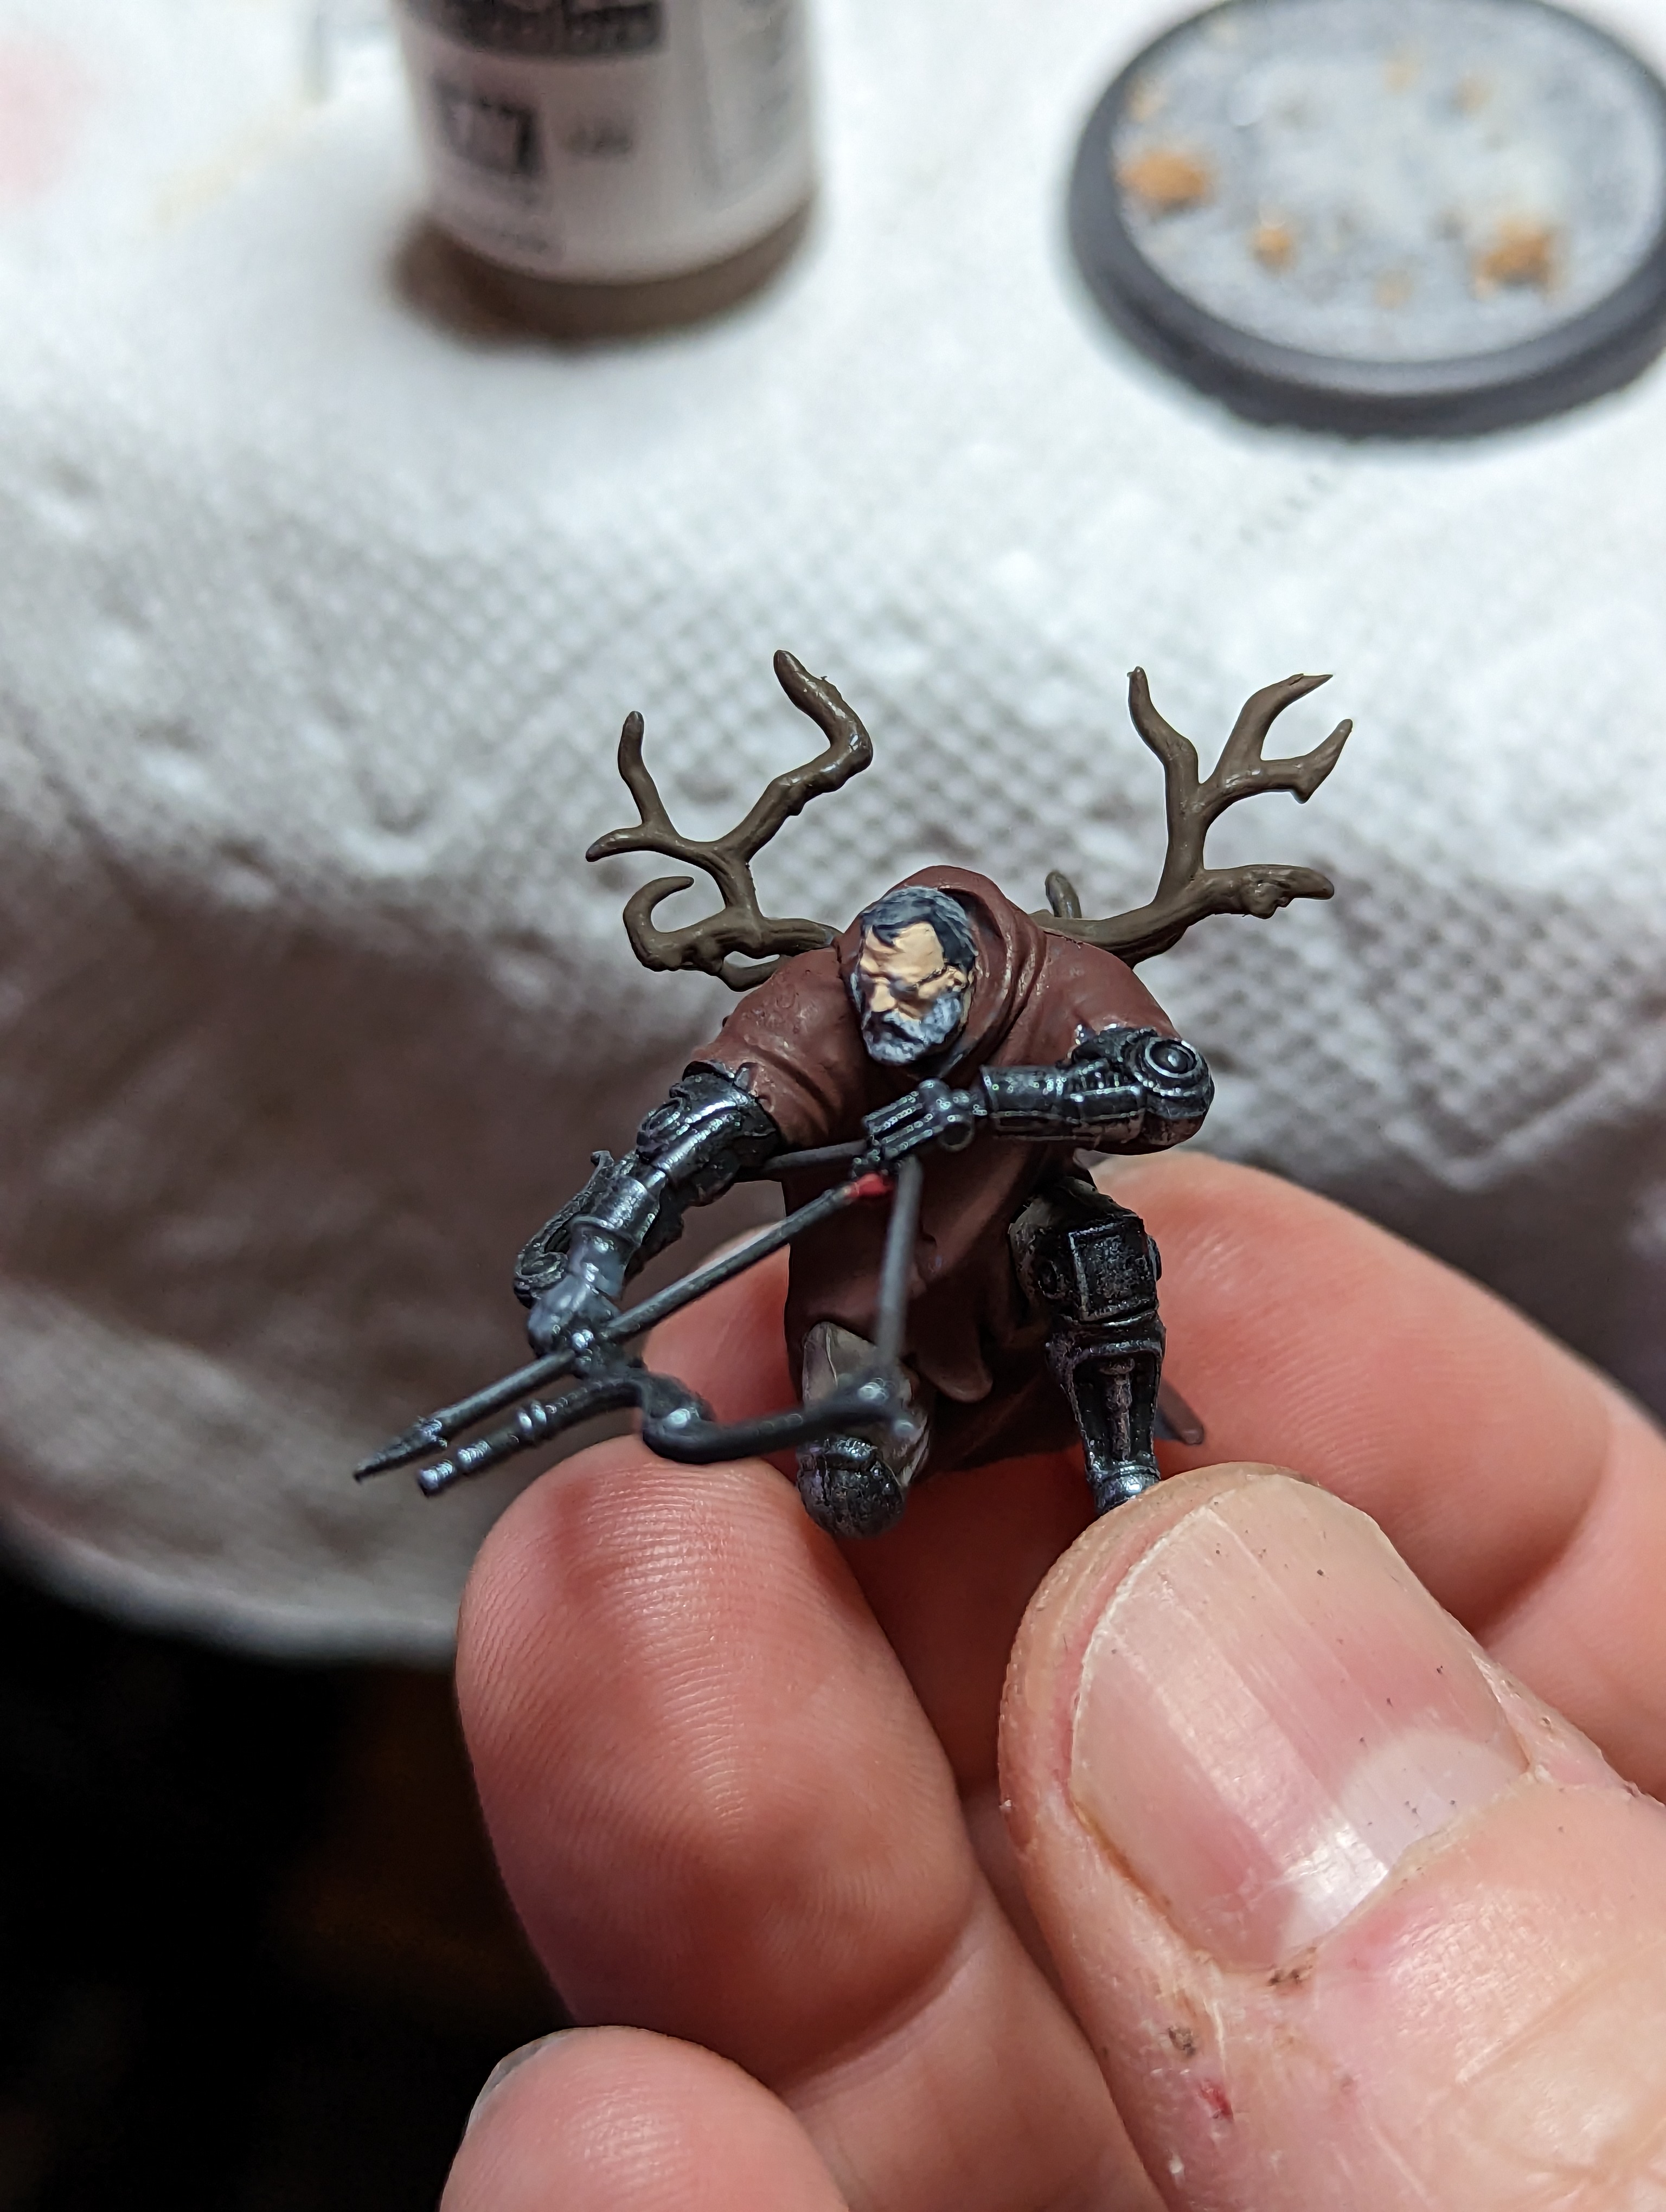
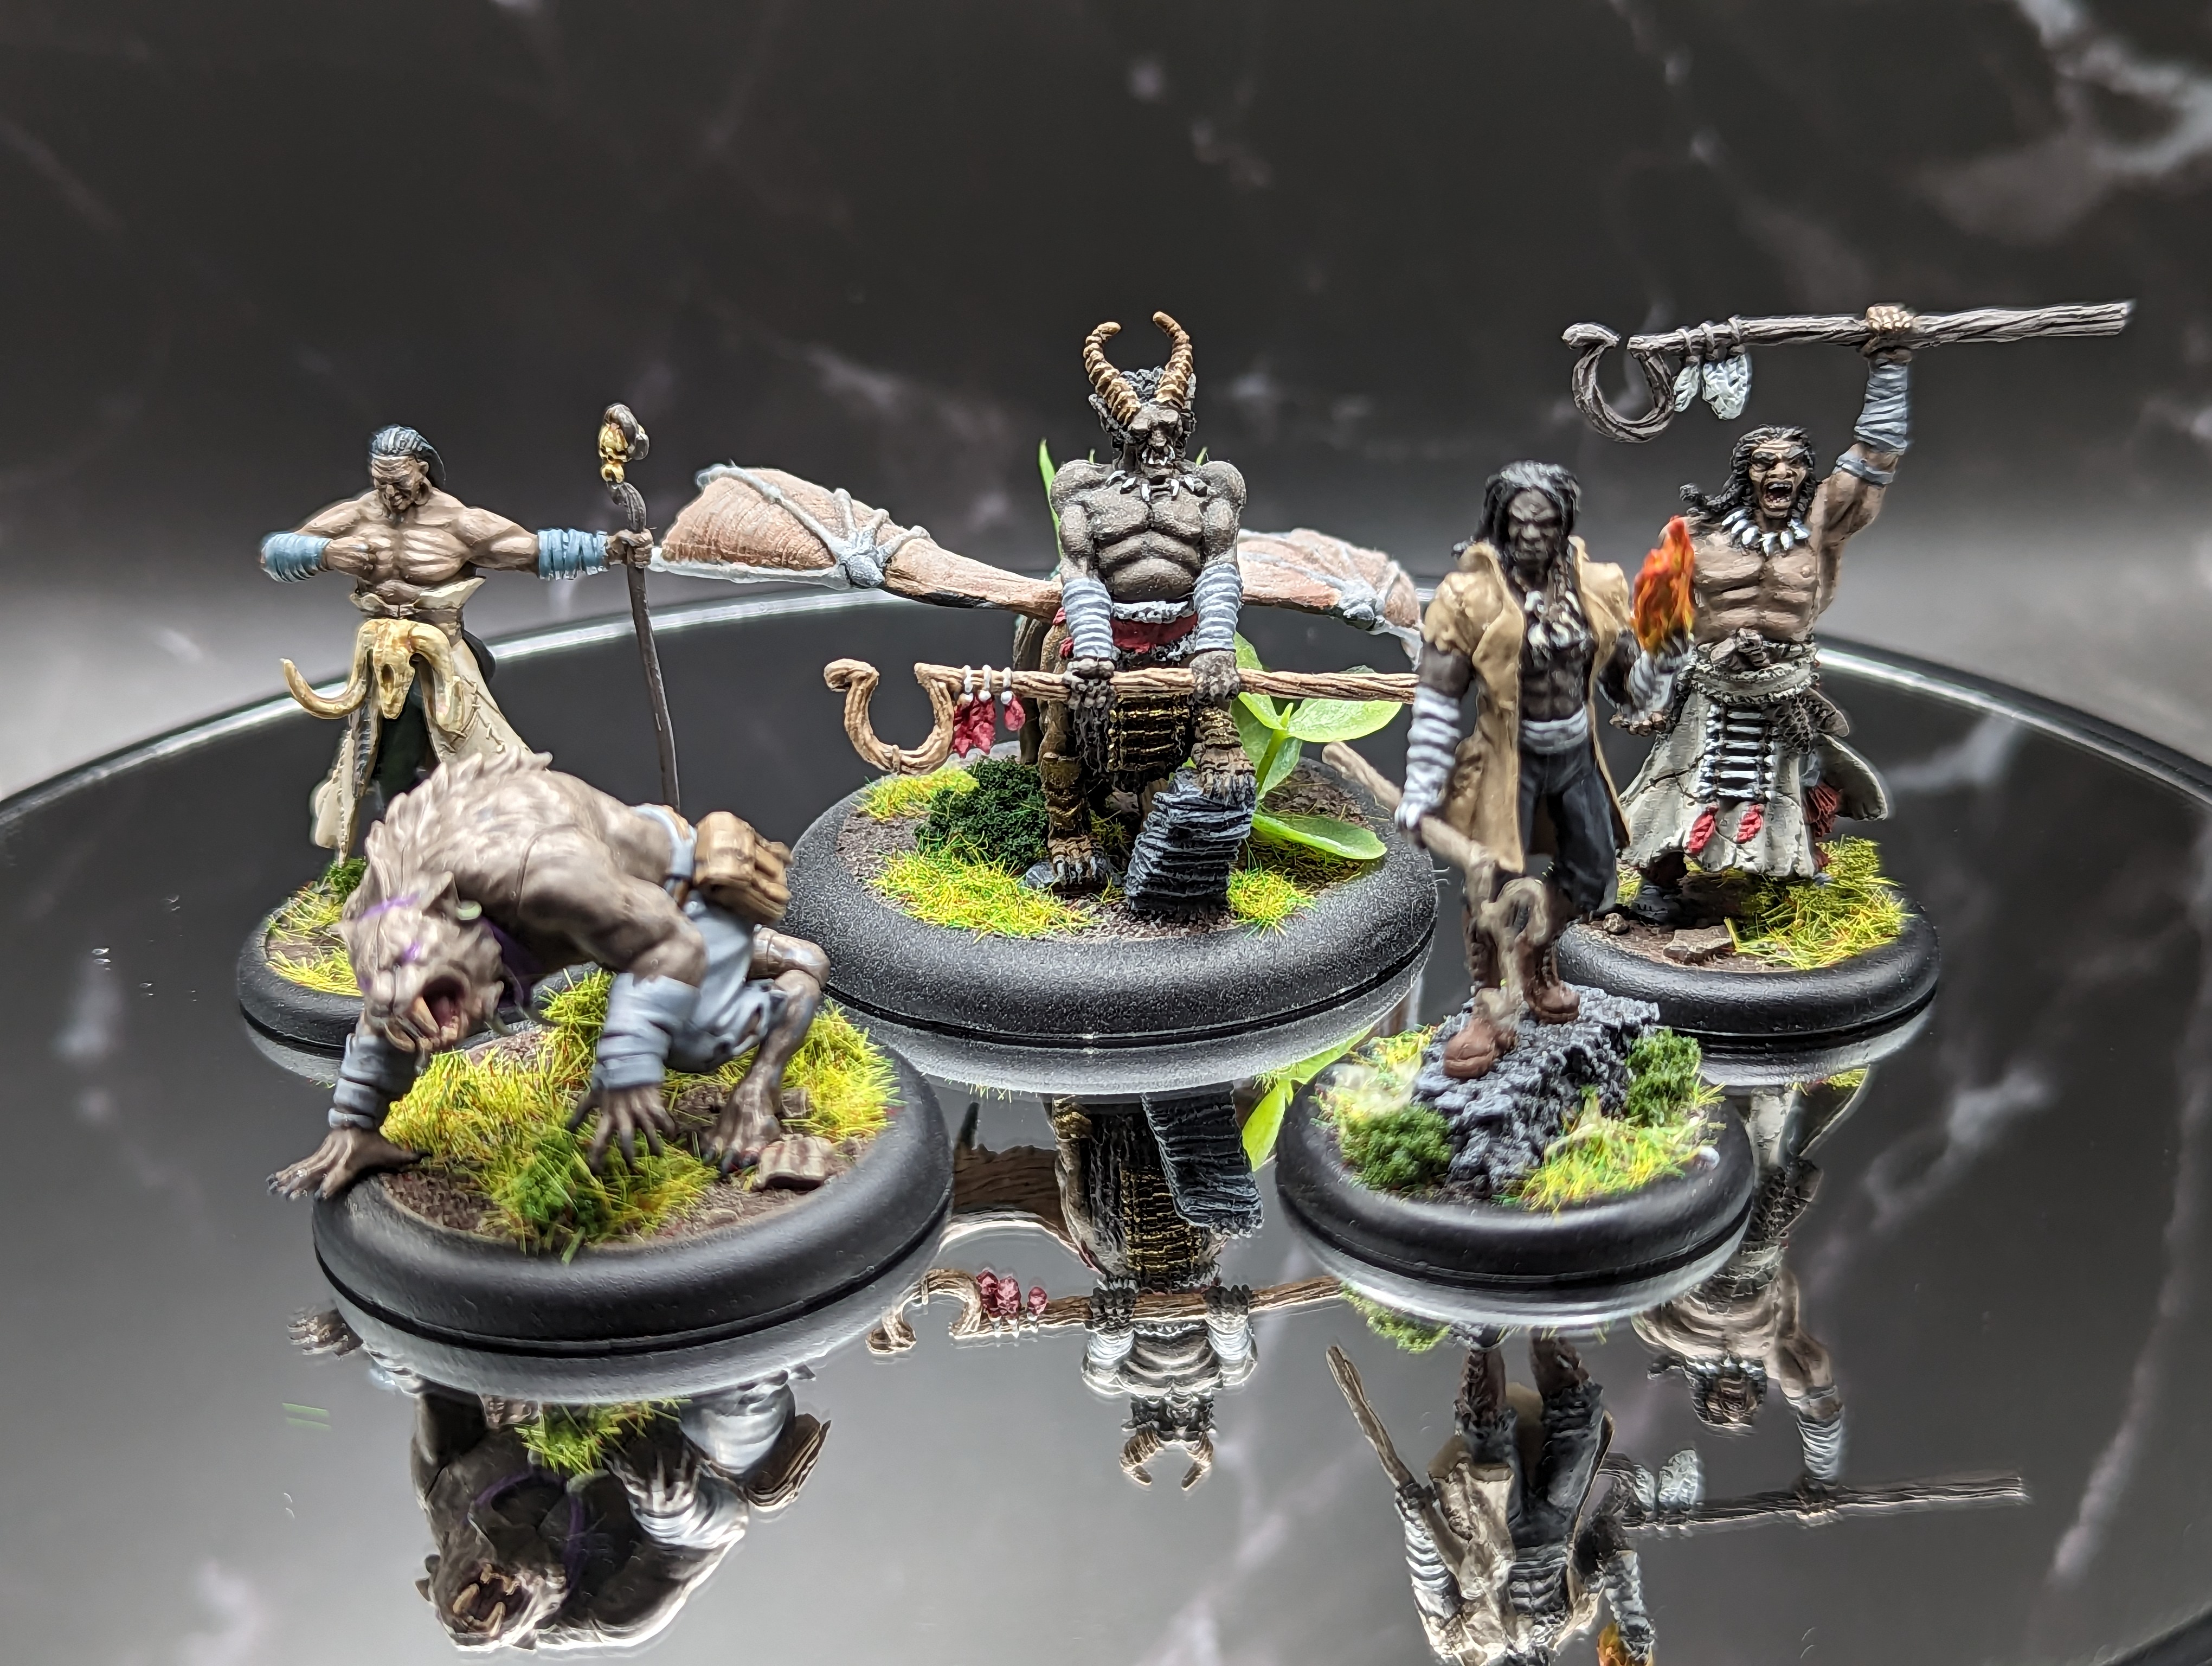
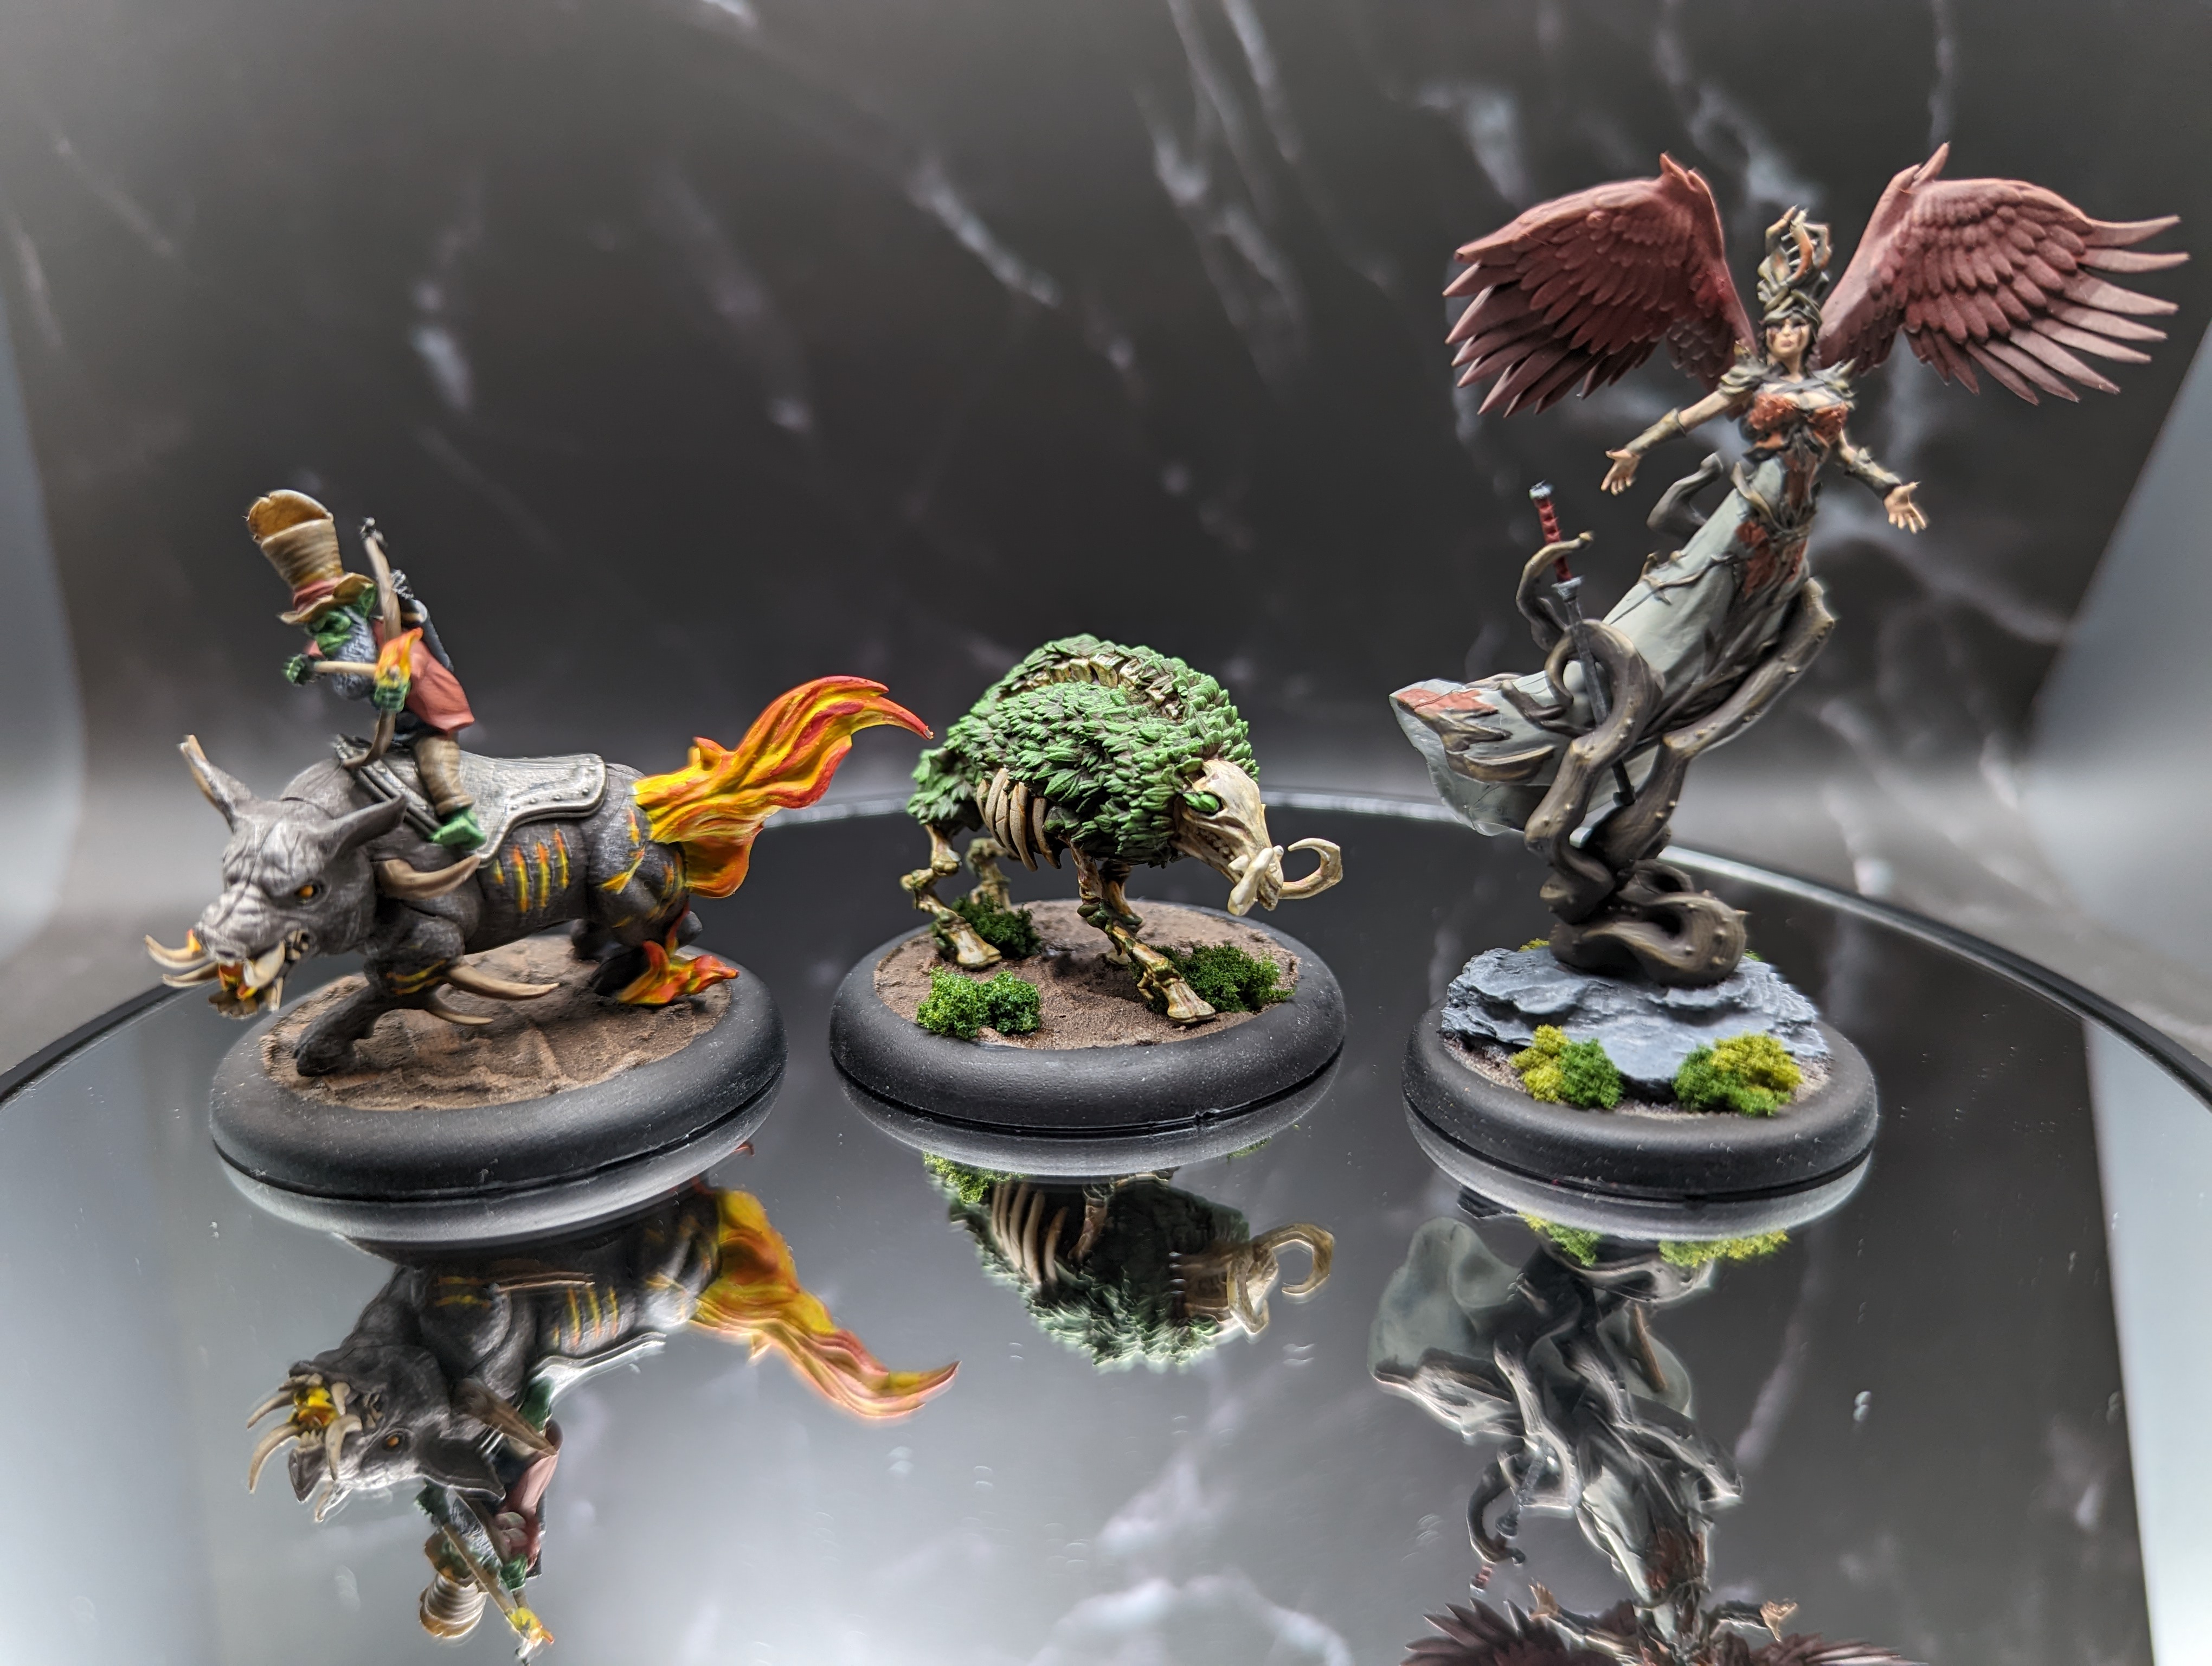
Anyways… Marcus, Lord cooper and the Empyrean Eagles.
The fun part is, both of these Masters have pretty similar base styles. Marcus and his crew are on jungle style bases. For cooper, I tried to make his bases feel like a path that has been carved out of the forest, because they are all hunters. Turns out, the bases are pretty small and you cant really see the trail much, but oh well. I already had the bases made for Cooper and the Eagles because I did his crew fairly recently, but I’m sure you can guess how I did them. Copy paste for Marcus’ base.
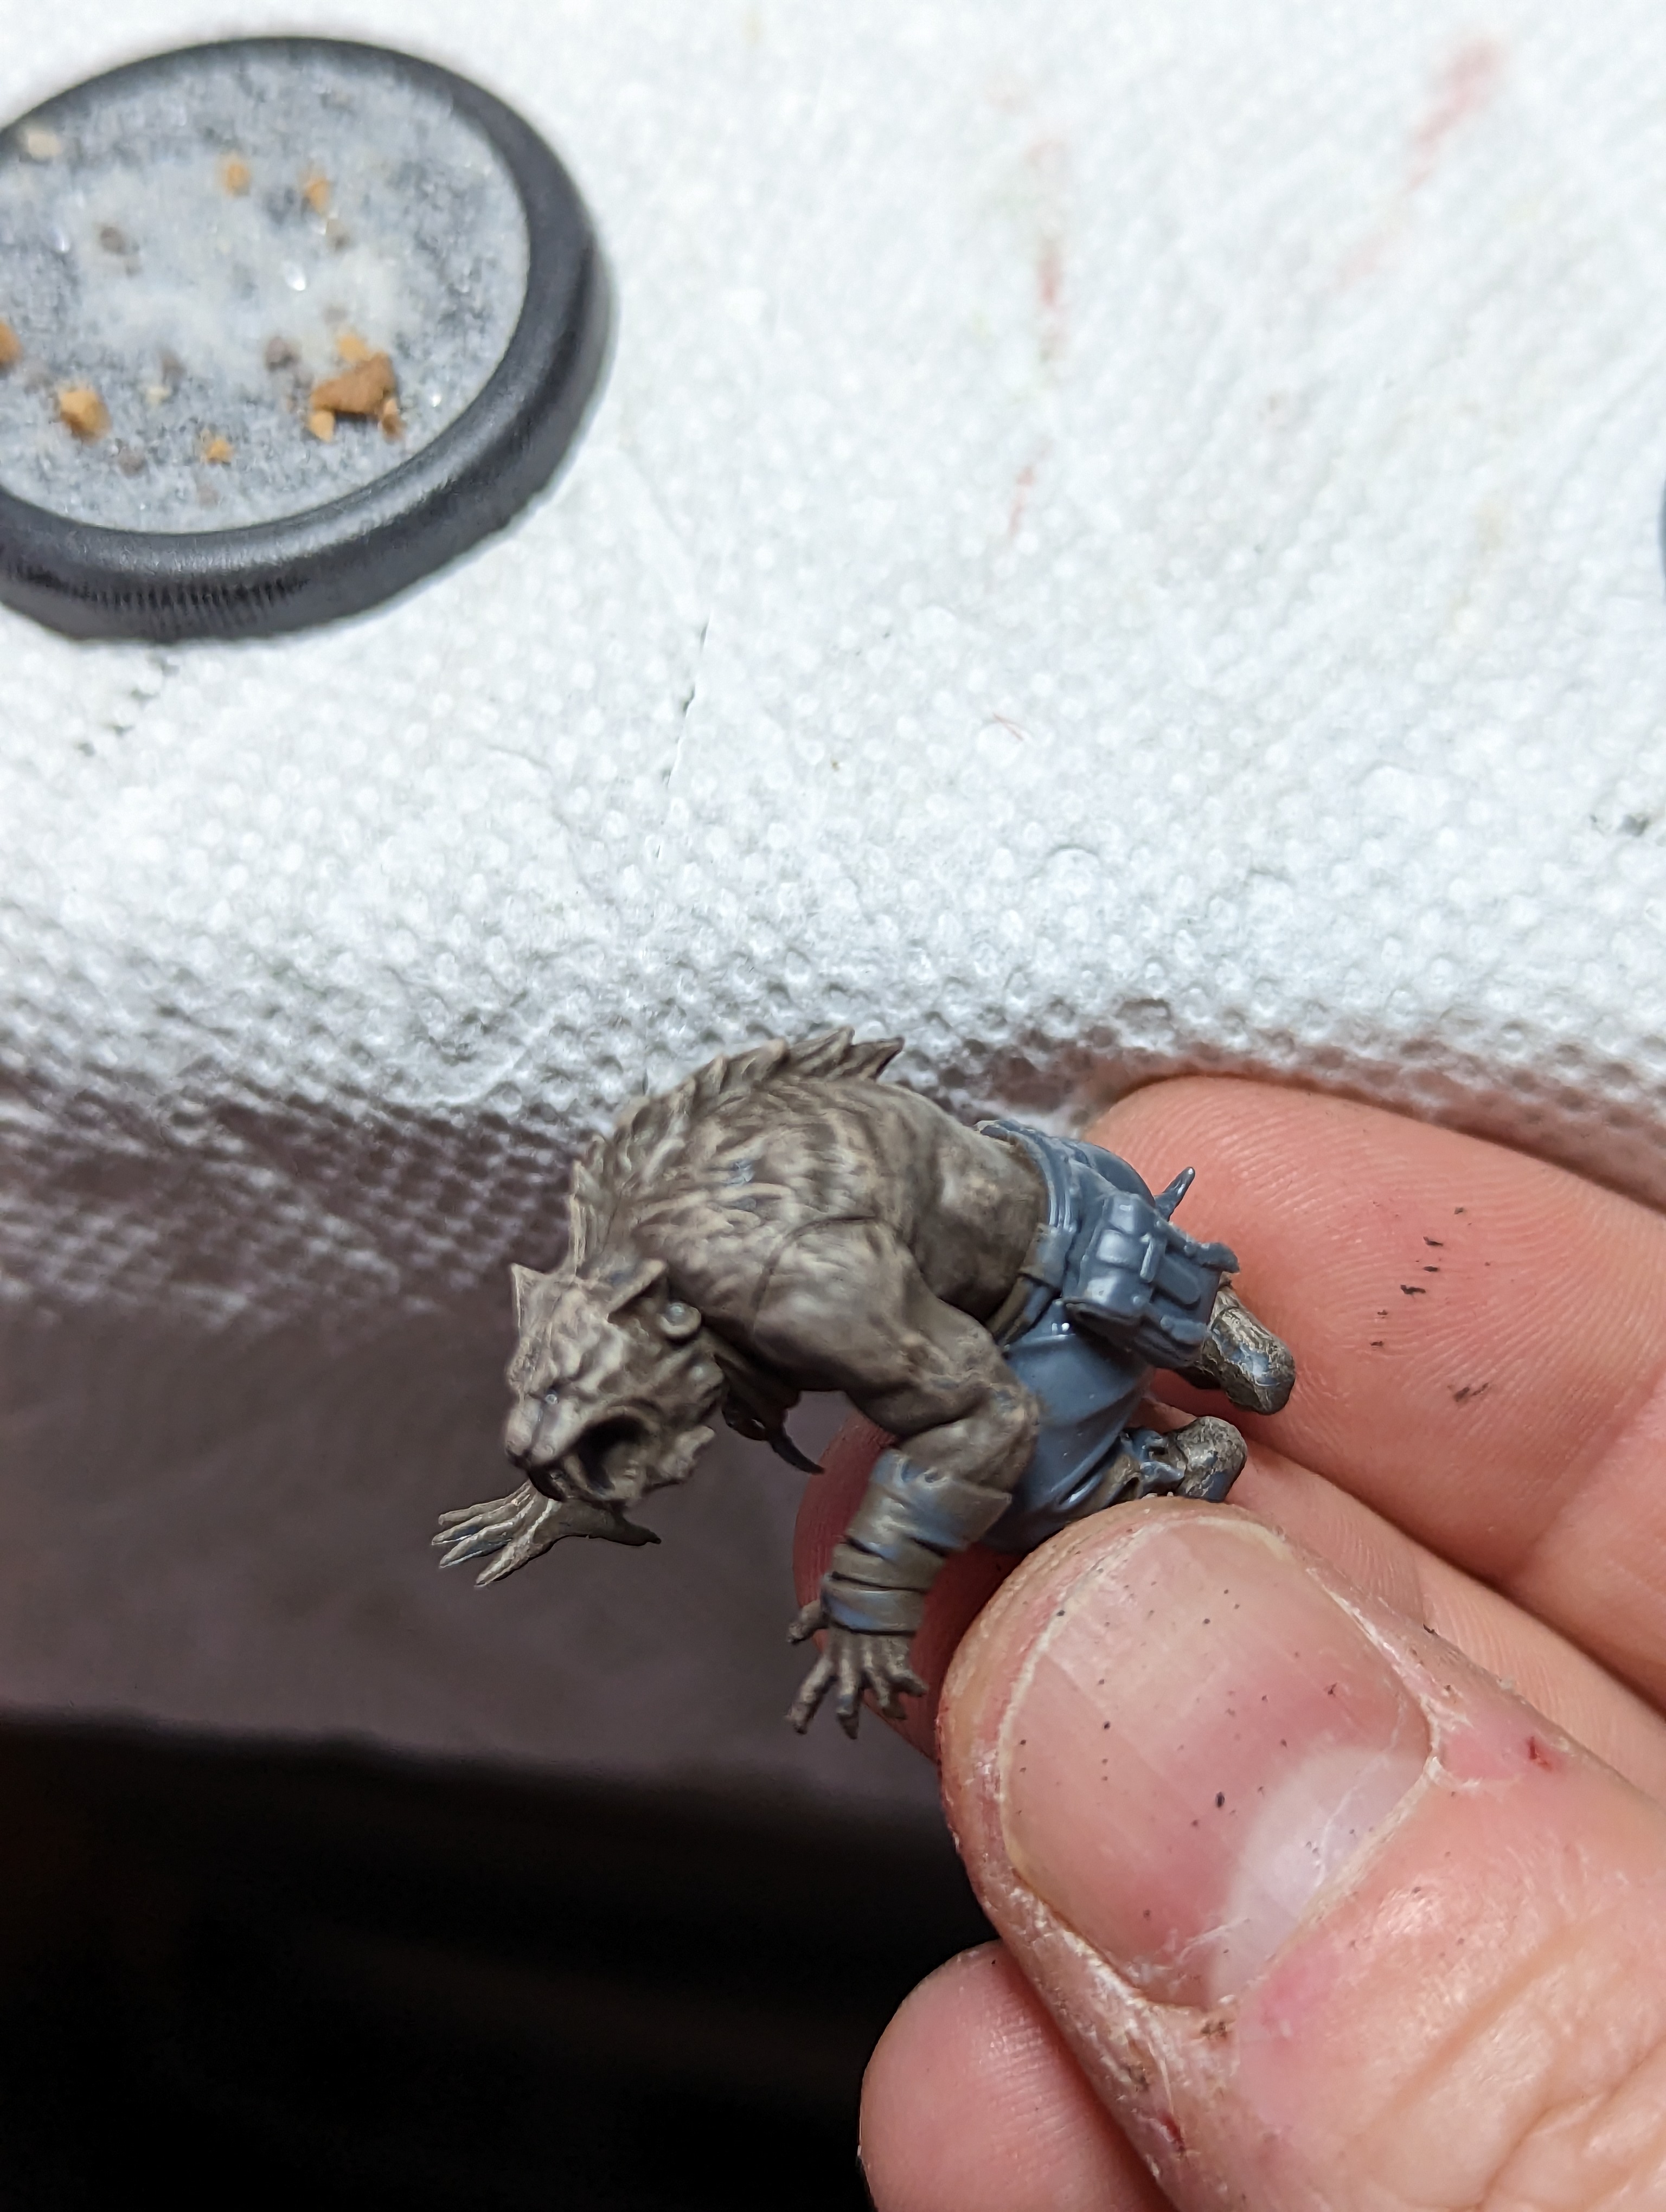


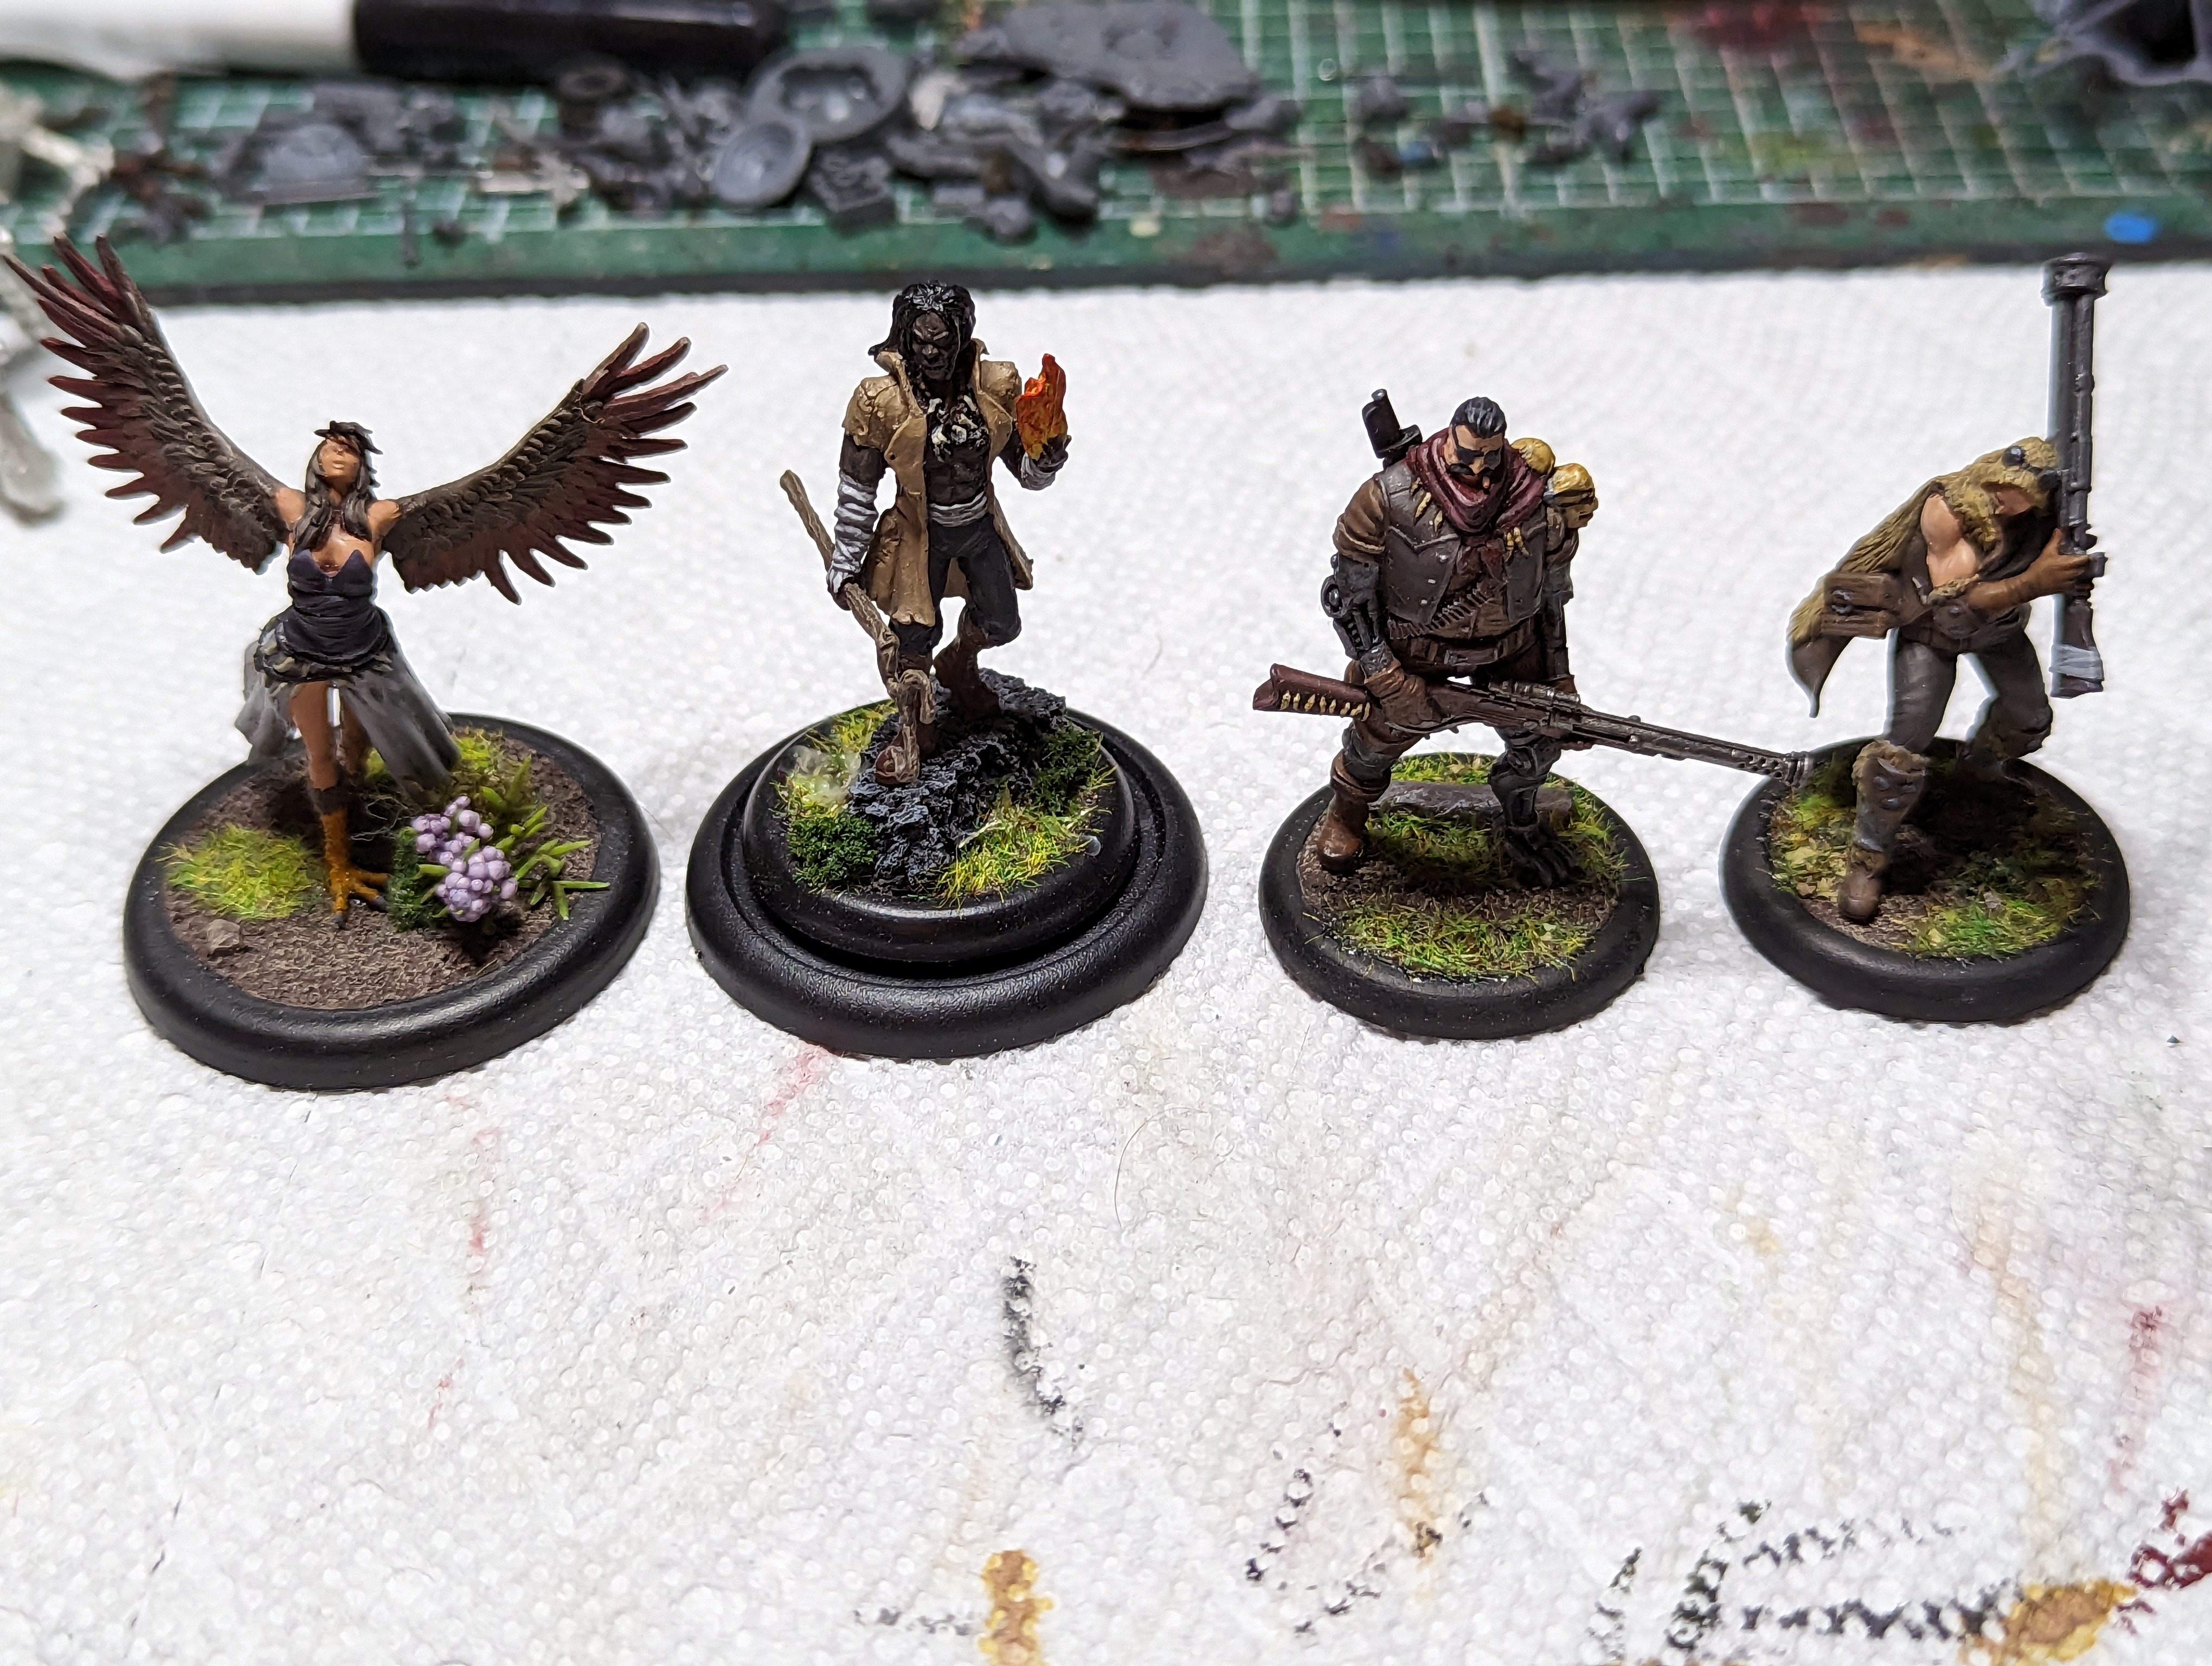
I started Marcus by doing an orangey brown for his fur, followed by a careful drybrush. Its a really cool looking model, but there isn’t actually very much to it. So after that I just painted up his clothing and added some highlights.
Cooper has a little more going on in terms of colors, he has a few metallic limbs and a fun new bow. His clothes have a few splashes of color, and he also has some branches on his back. Im not sure how effective that will be as camo, but who cares… hes a bad guy.
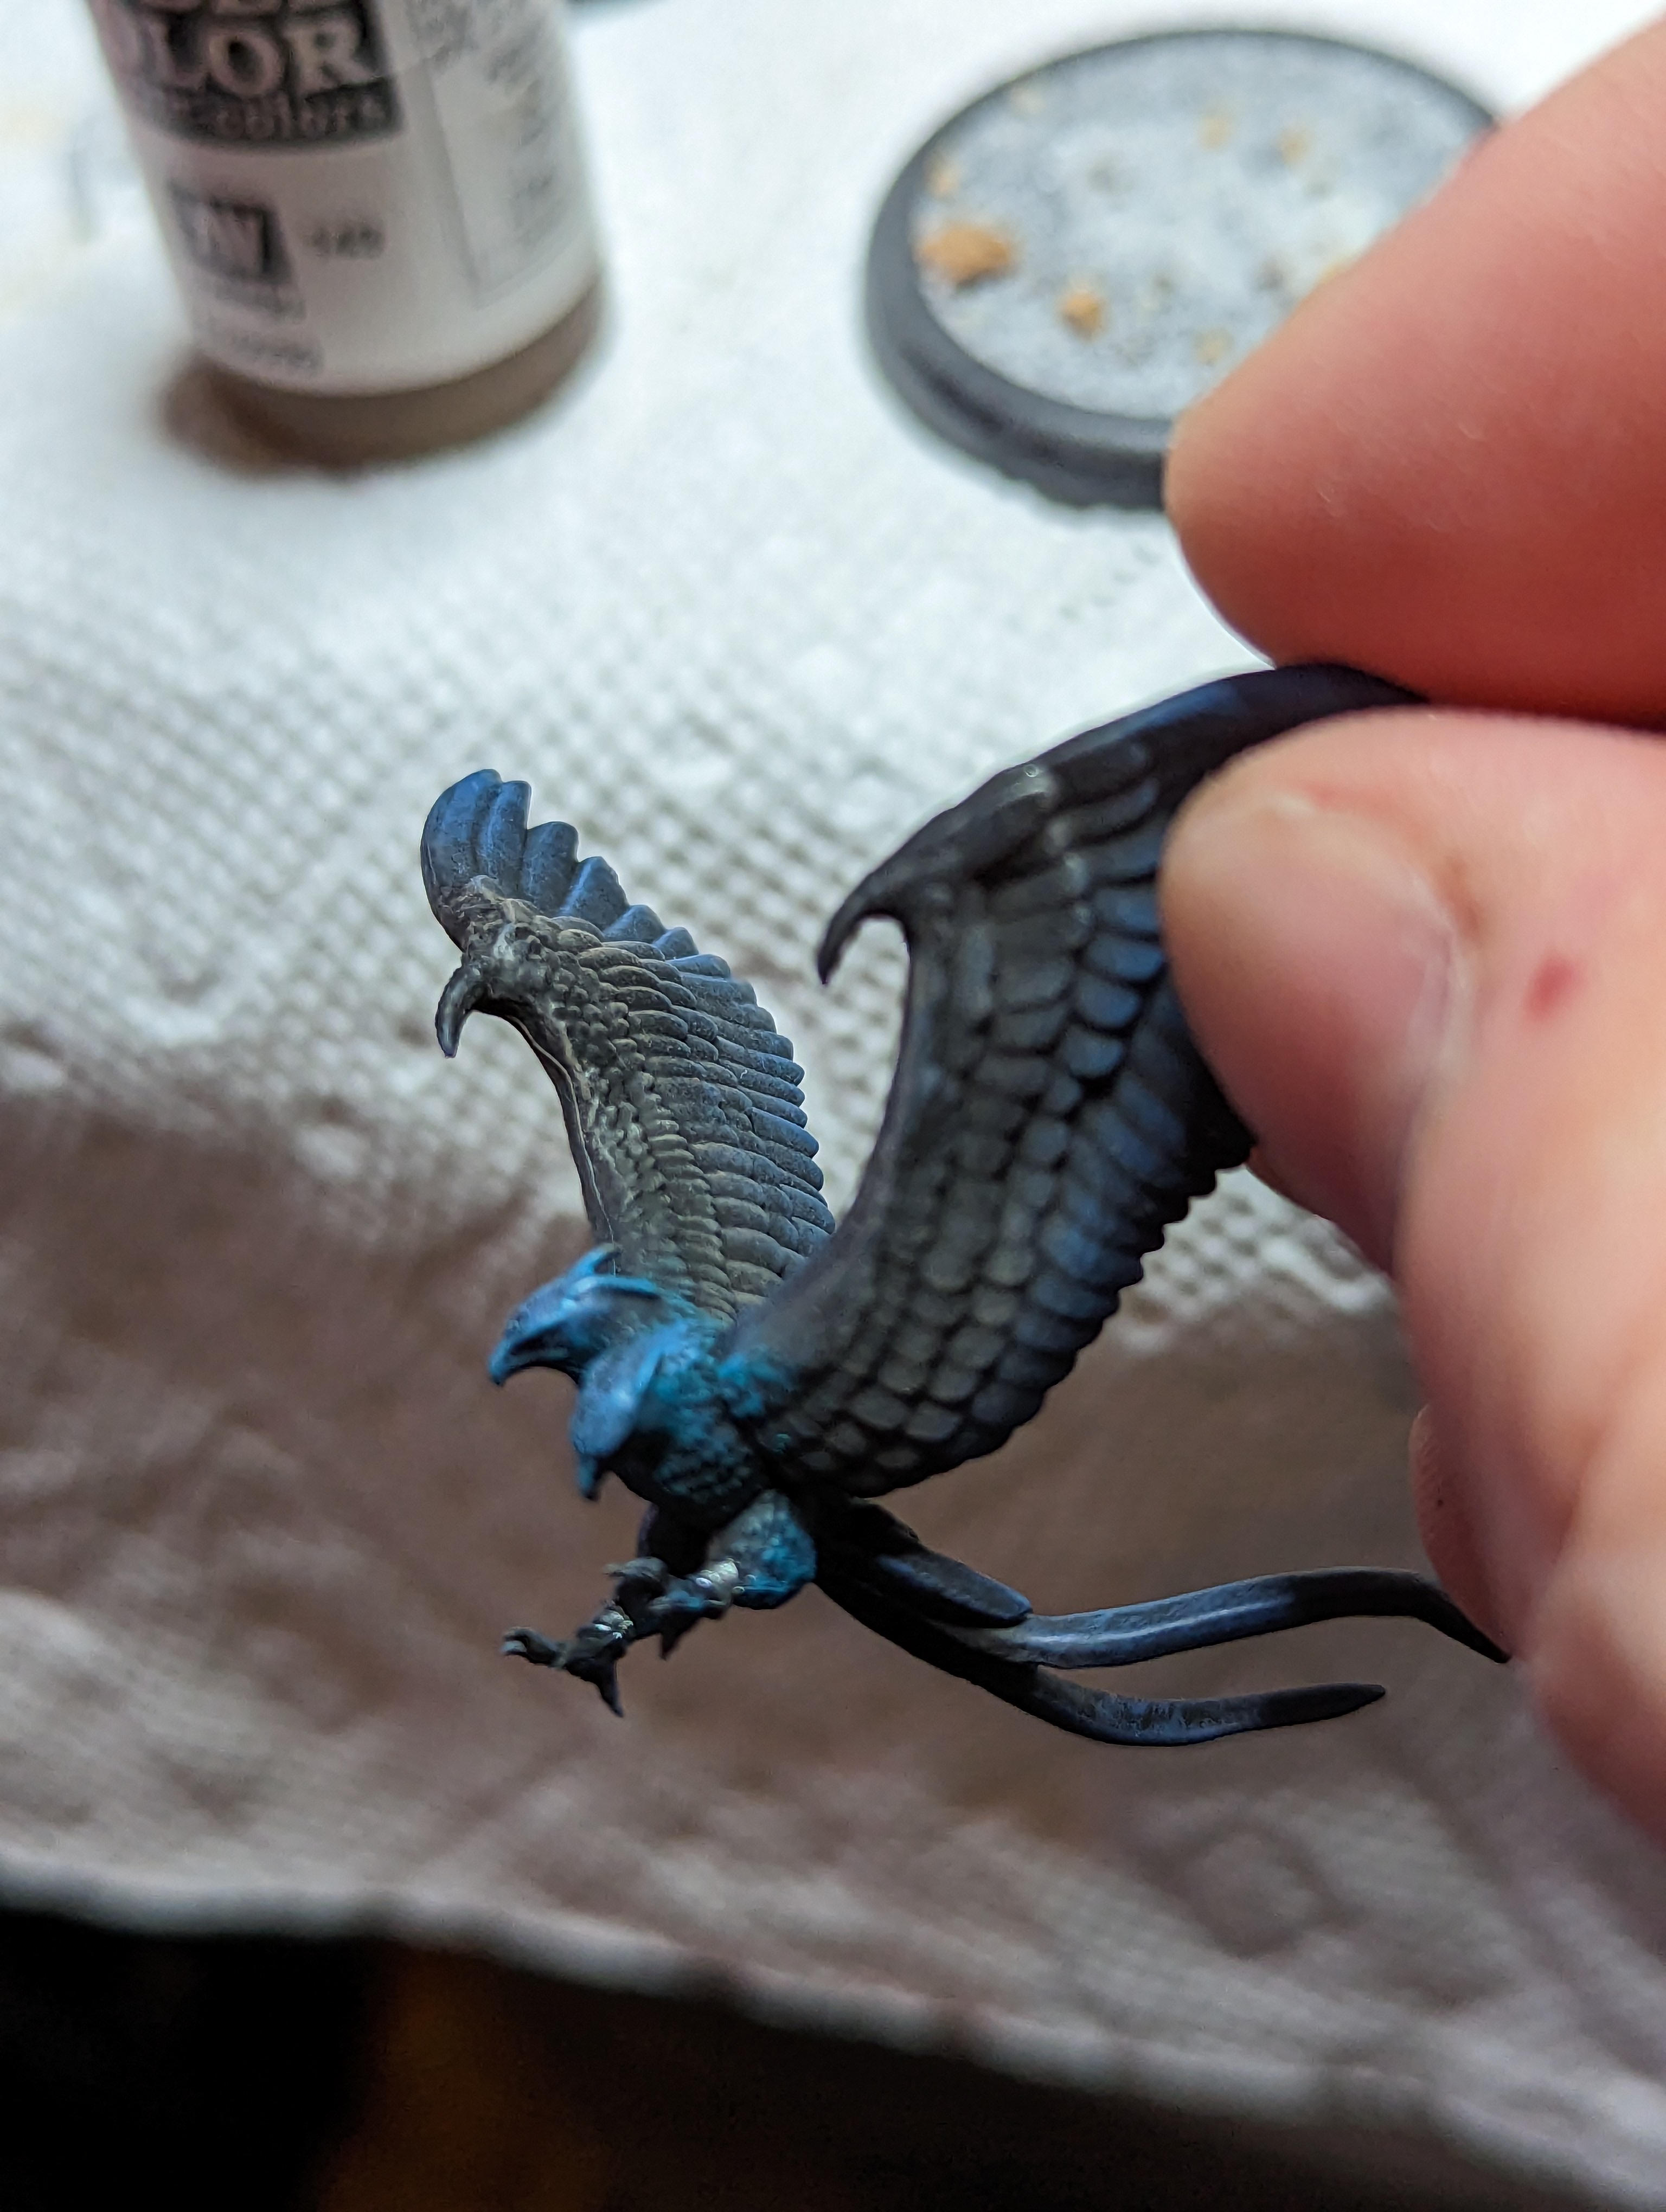
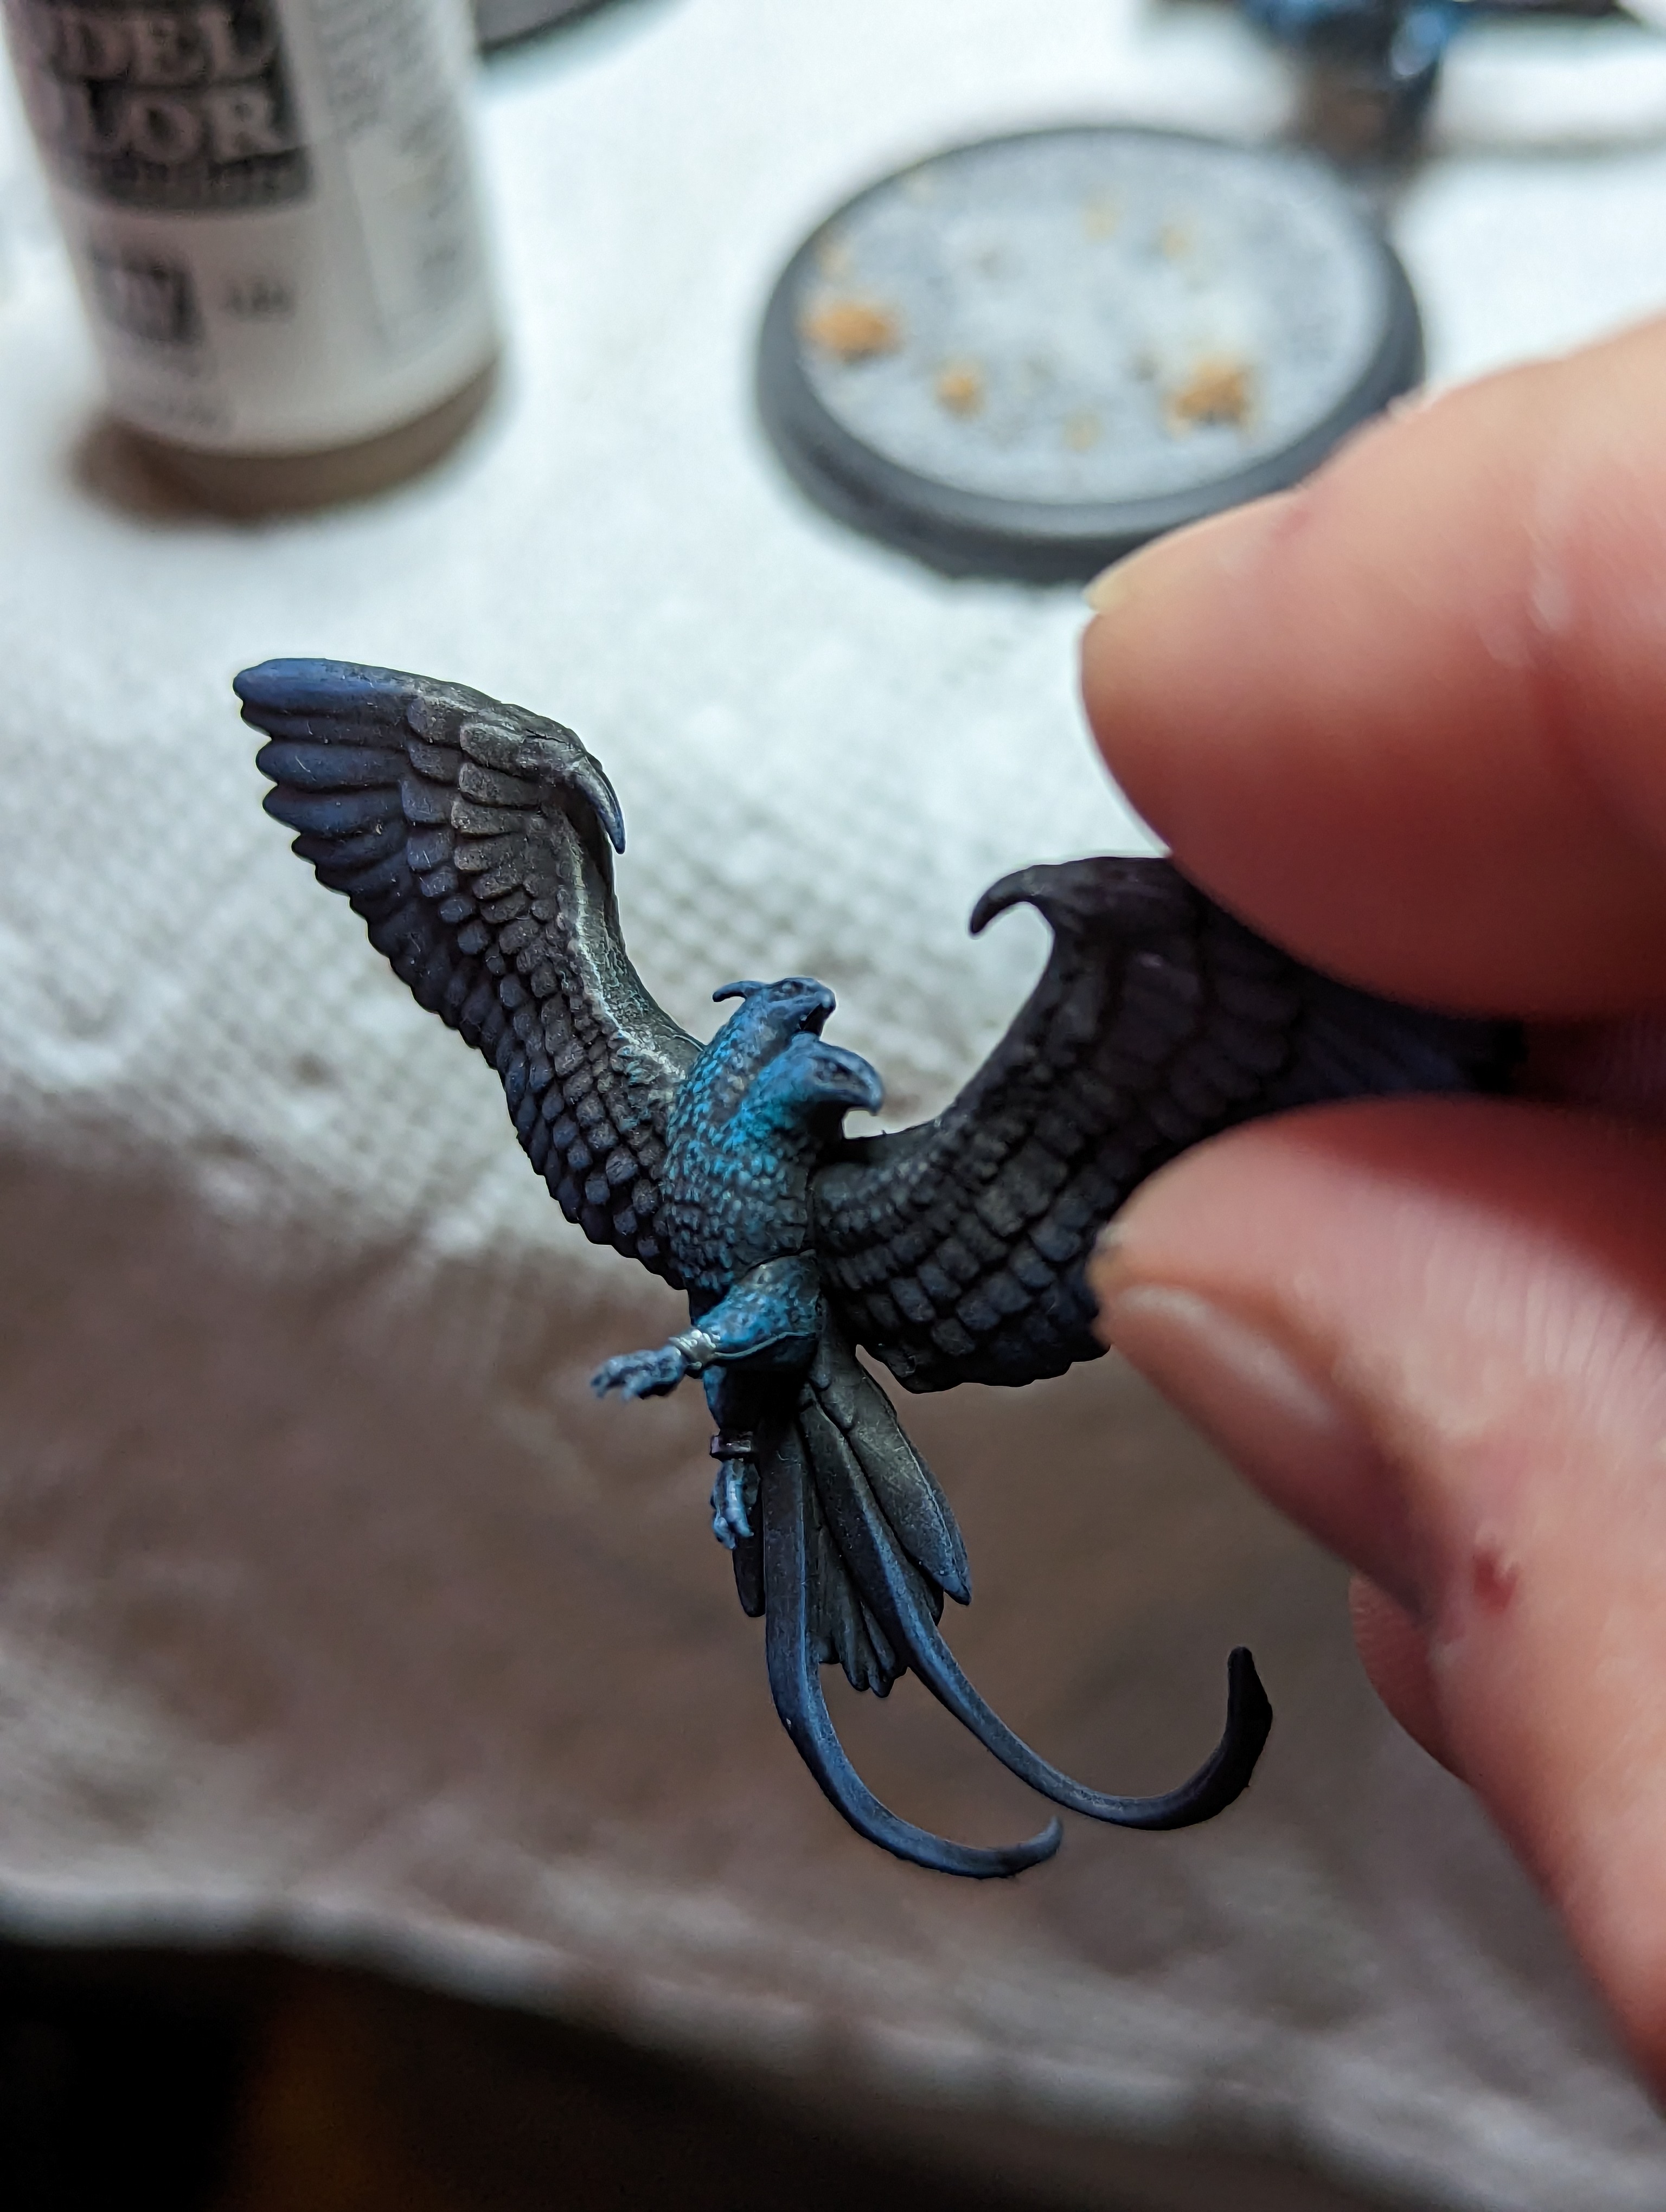
The eagles were a lot of fun to paint. They have these kind of brownish blueish feathers with a suble fade across the wings. I started by base coating them brown, and drybrushing several layers up to the aqua blue. They have a few little details on them, including a little anklet and some creepy eyes.

Marcus is my most played master, and I got a few games in with him right after finishing these guys up. I also snapped a few pics of my collection of Marcuses. I’m only missing one of his sculpts, I’m sure ill round out the collection soon.
Don’t forget to check out the lore videos, and stay tuned for more Faux!
The creepy and the kooky


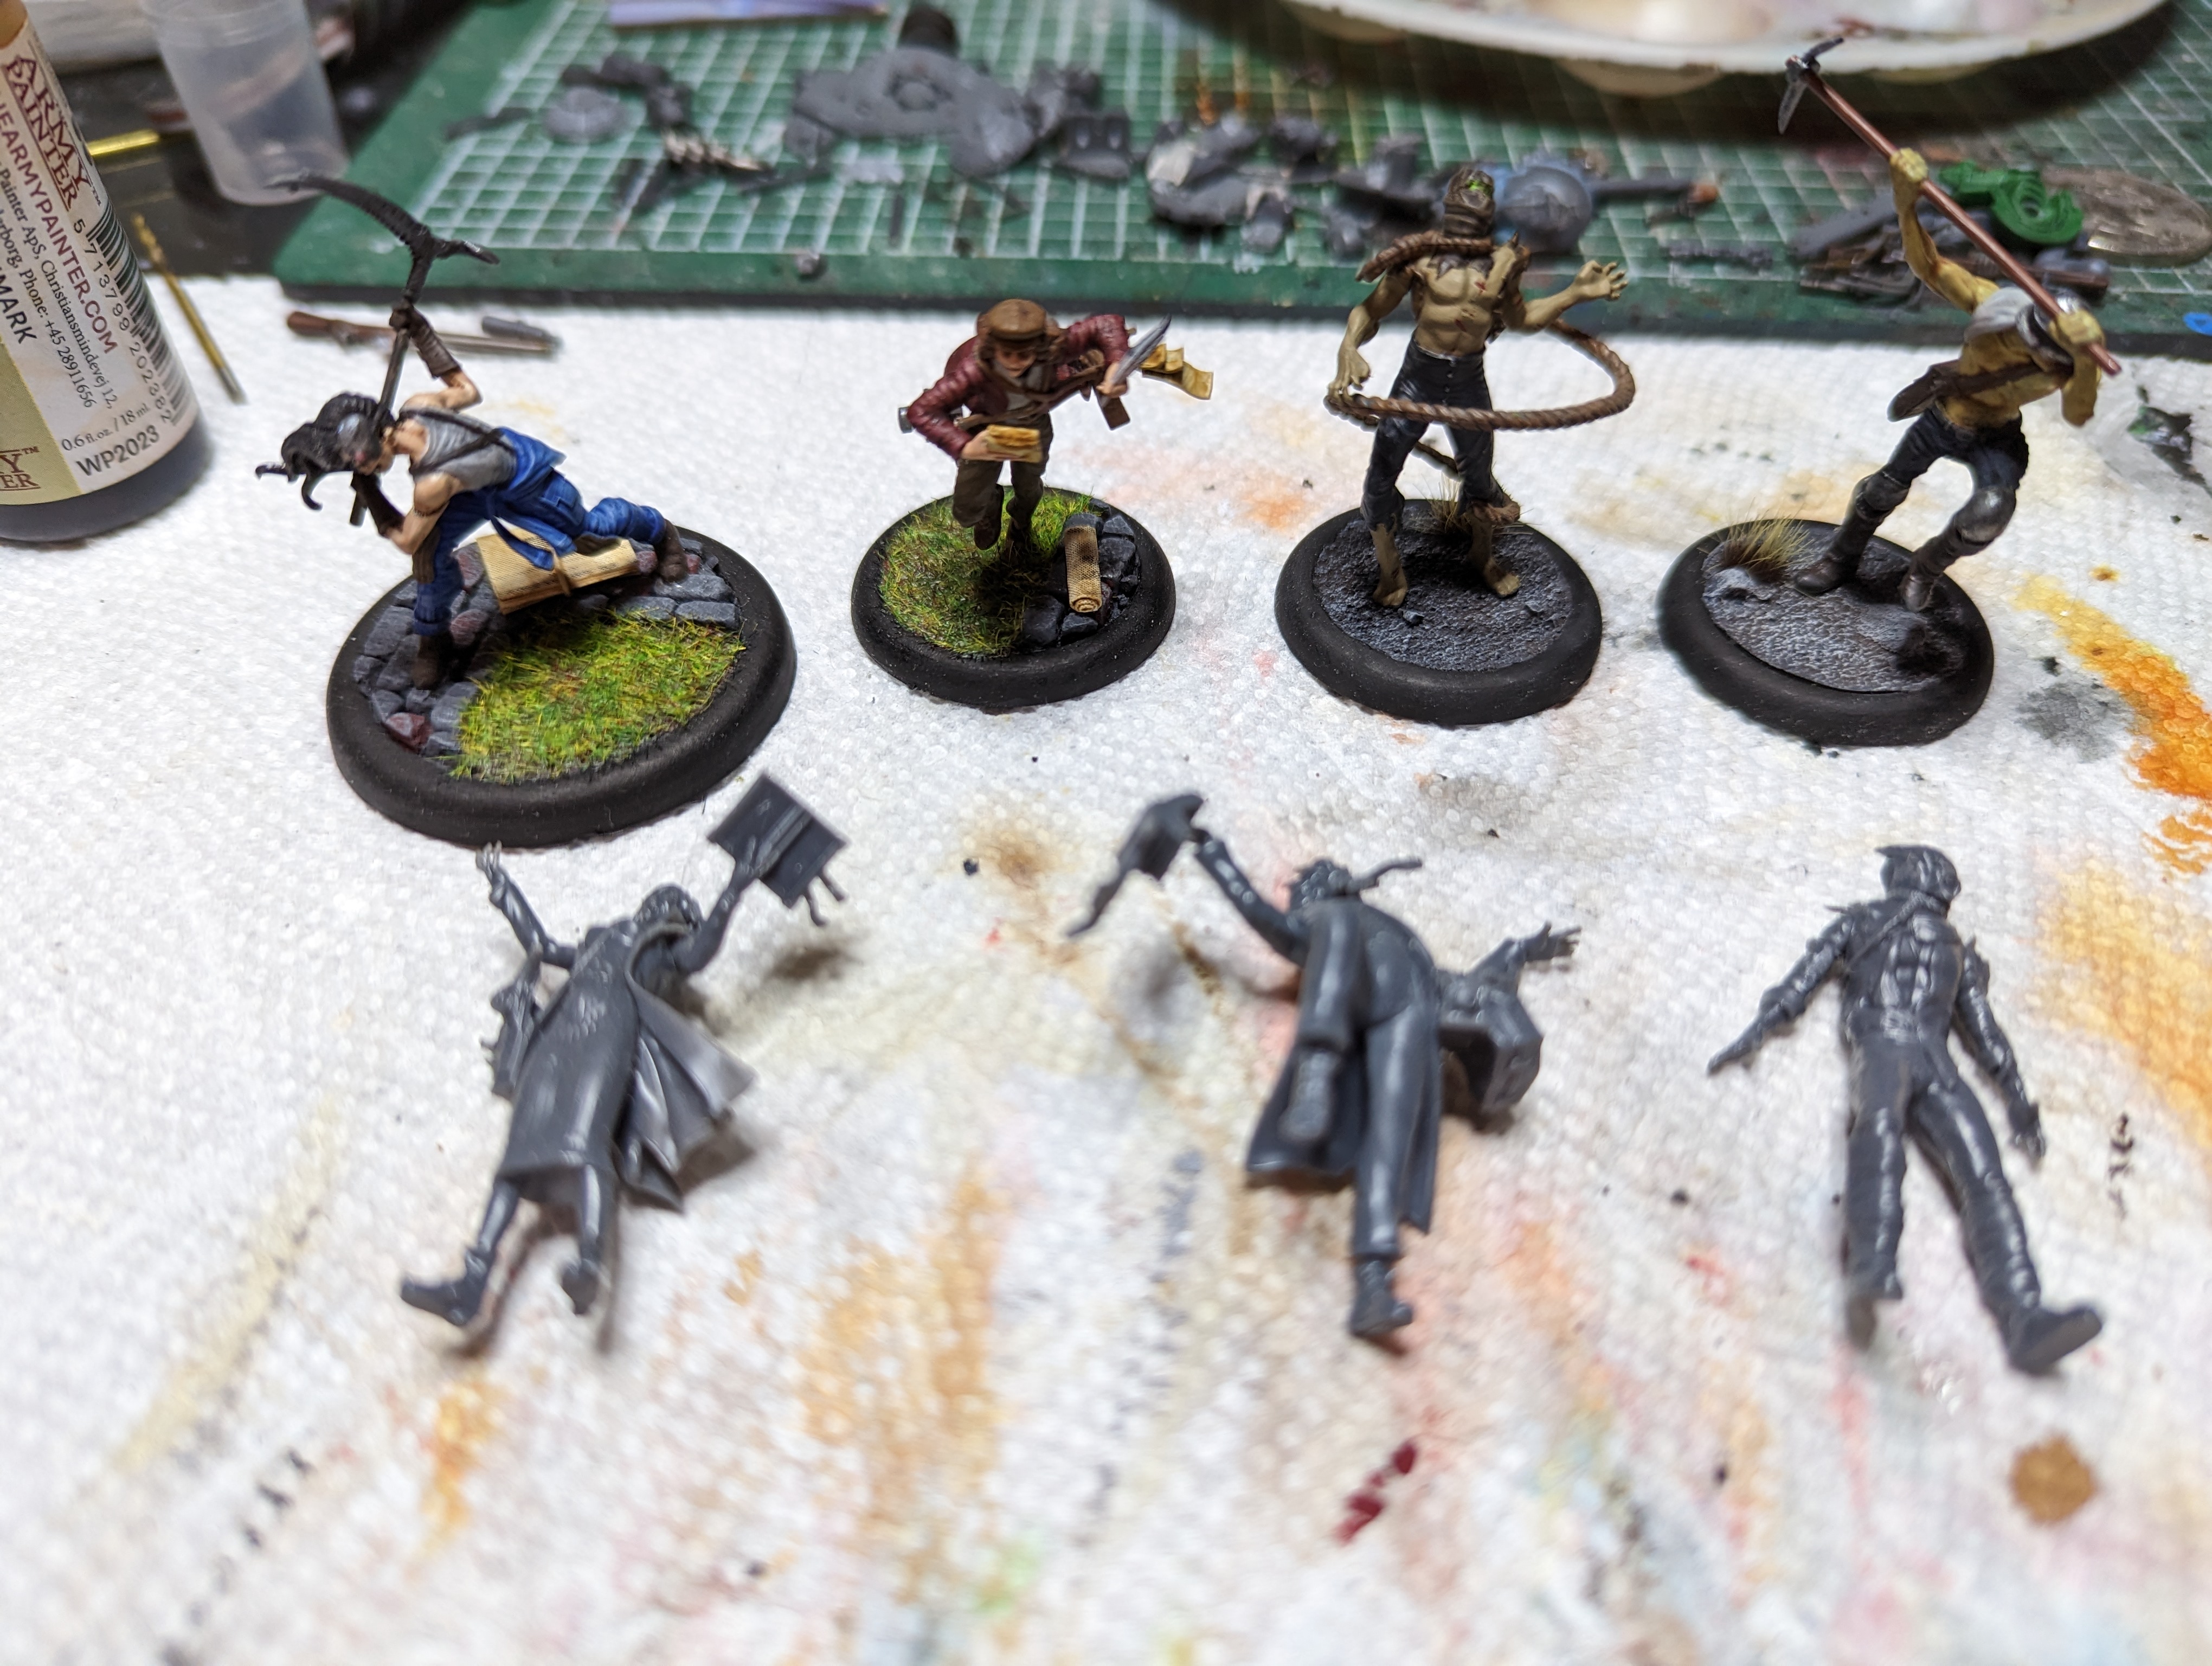
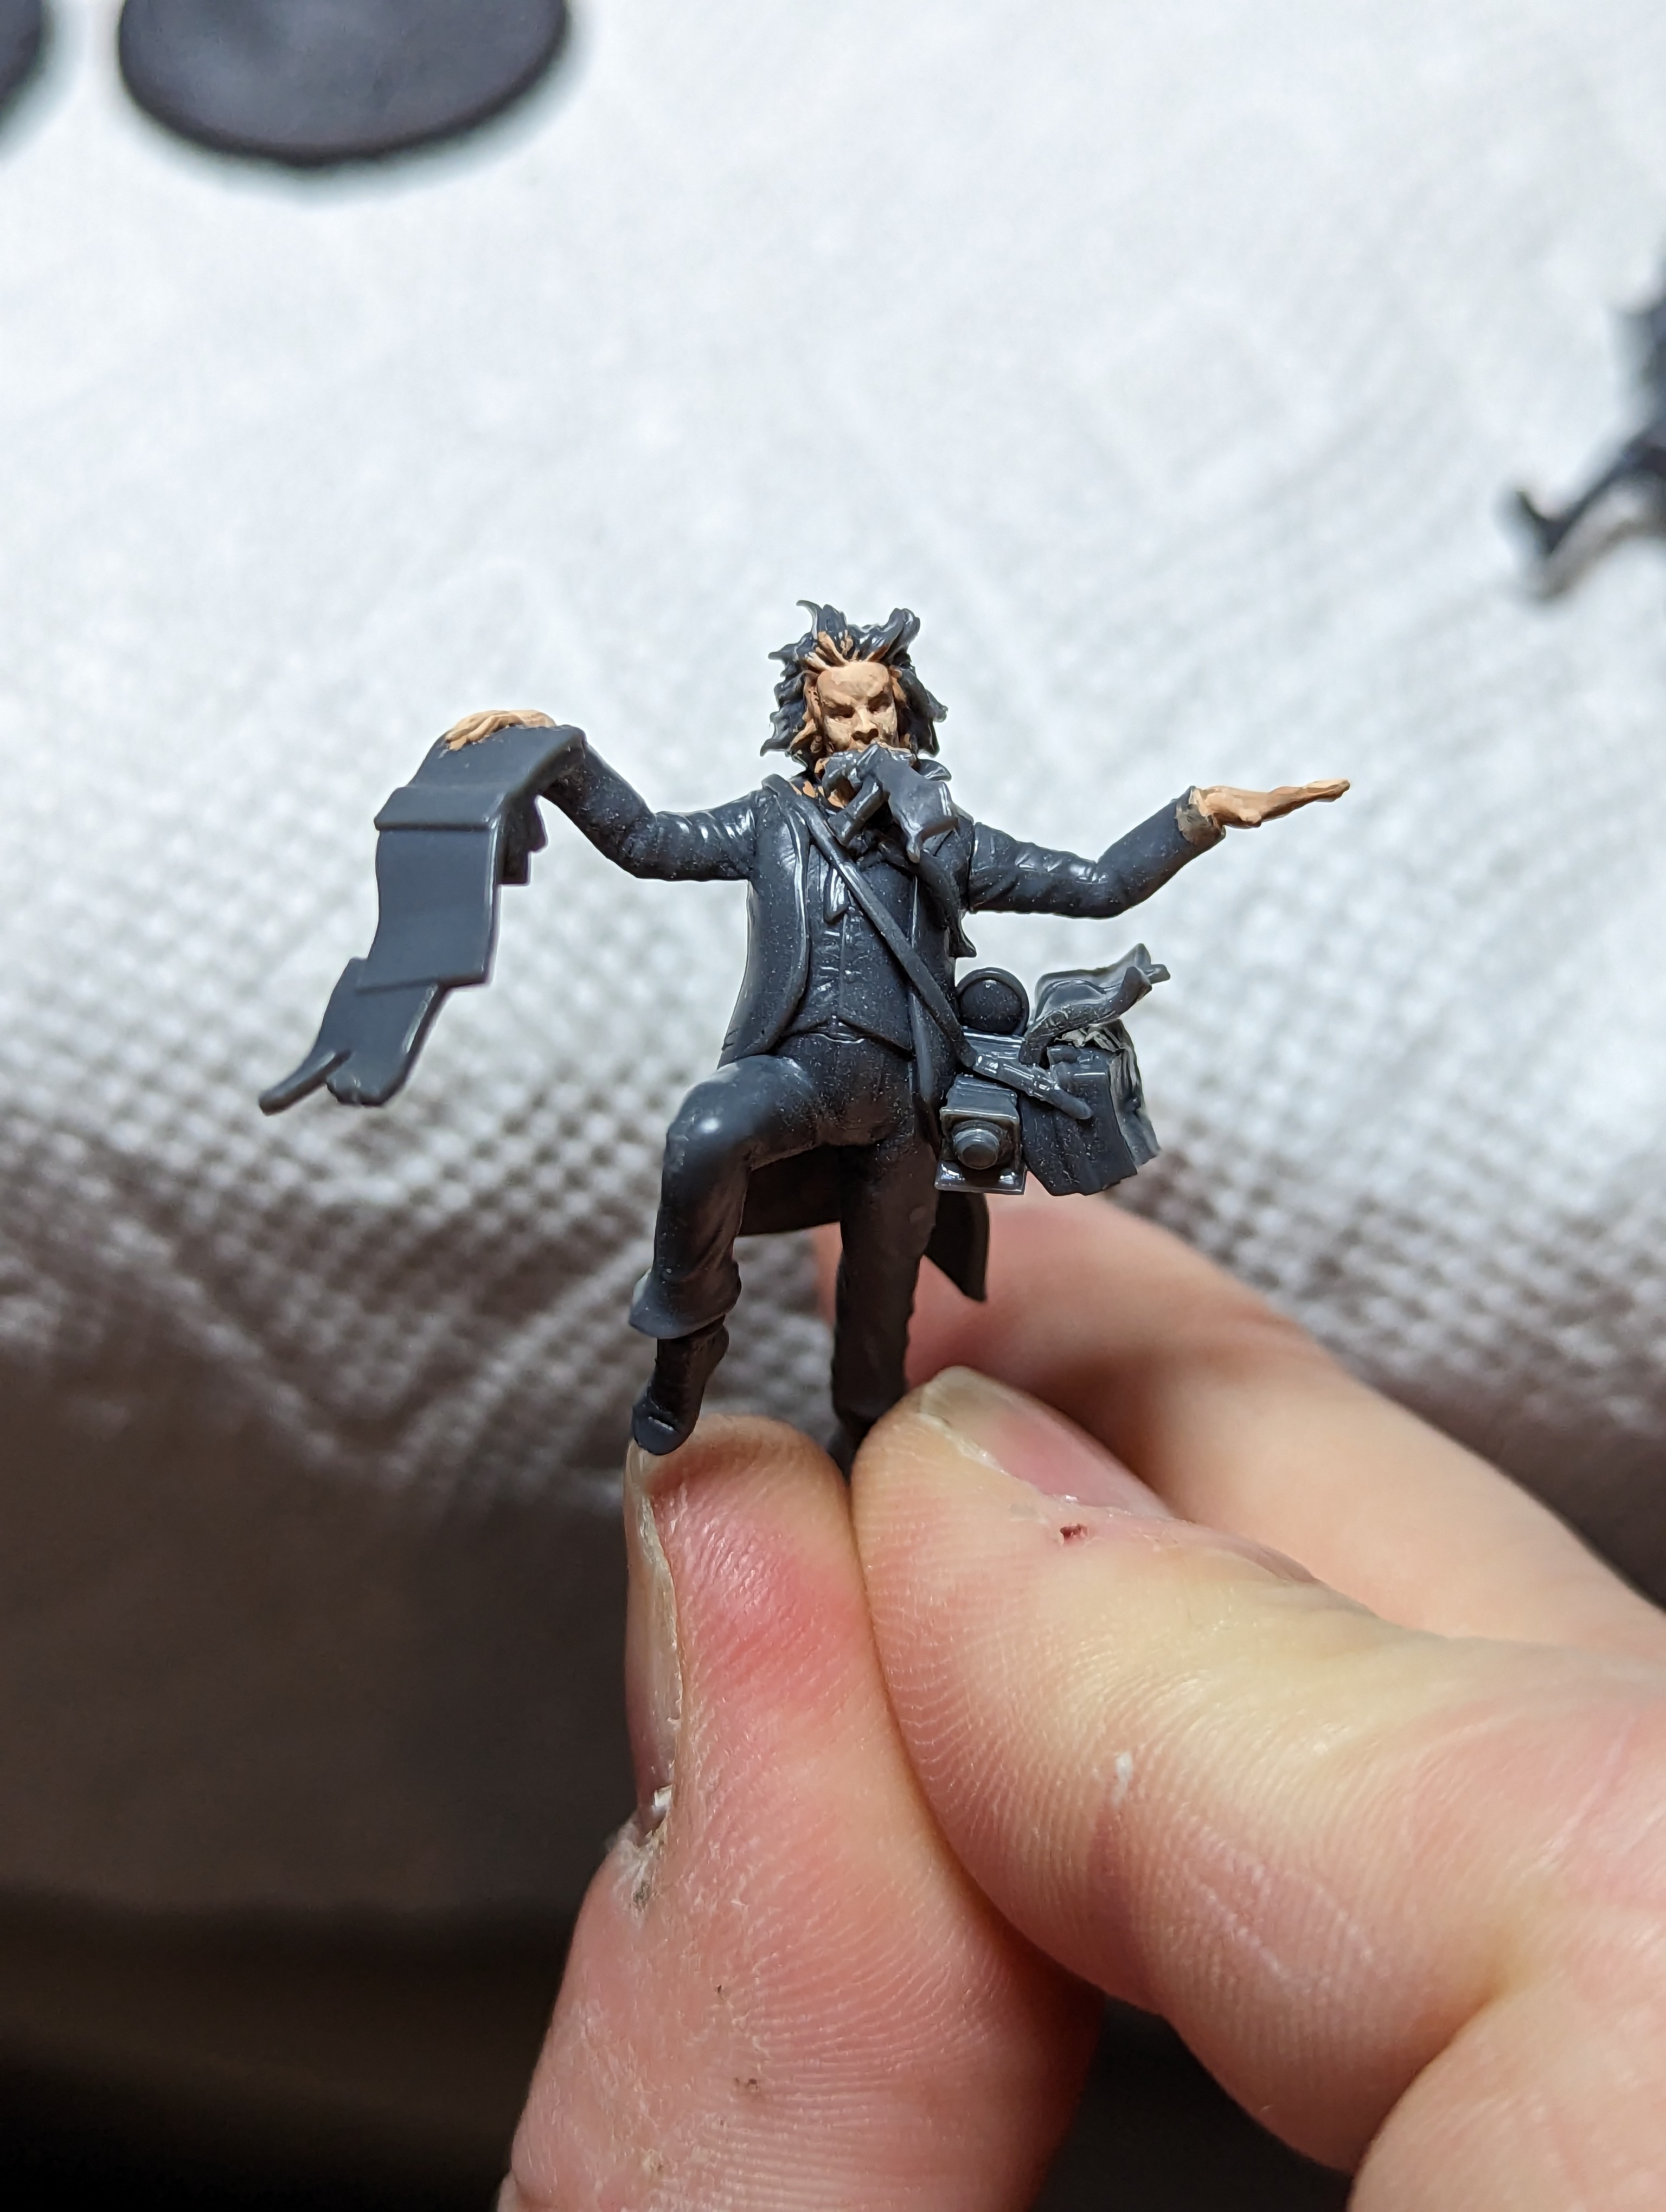
So next up I’m gonna tackle Nellie and Jack Daw. They are 2 of the crazier characters in Malifaux, but their models are relatively understated for this new line of titles.
For my existing crews, Jack Daw is on a gray wasteland type base with tufts. Nallie and co are on brick paths with green grass on the sides, and for some I have added newspapers since they are all about being journalists. This should actually be a pretty easy pair to combine the bases on.
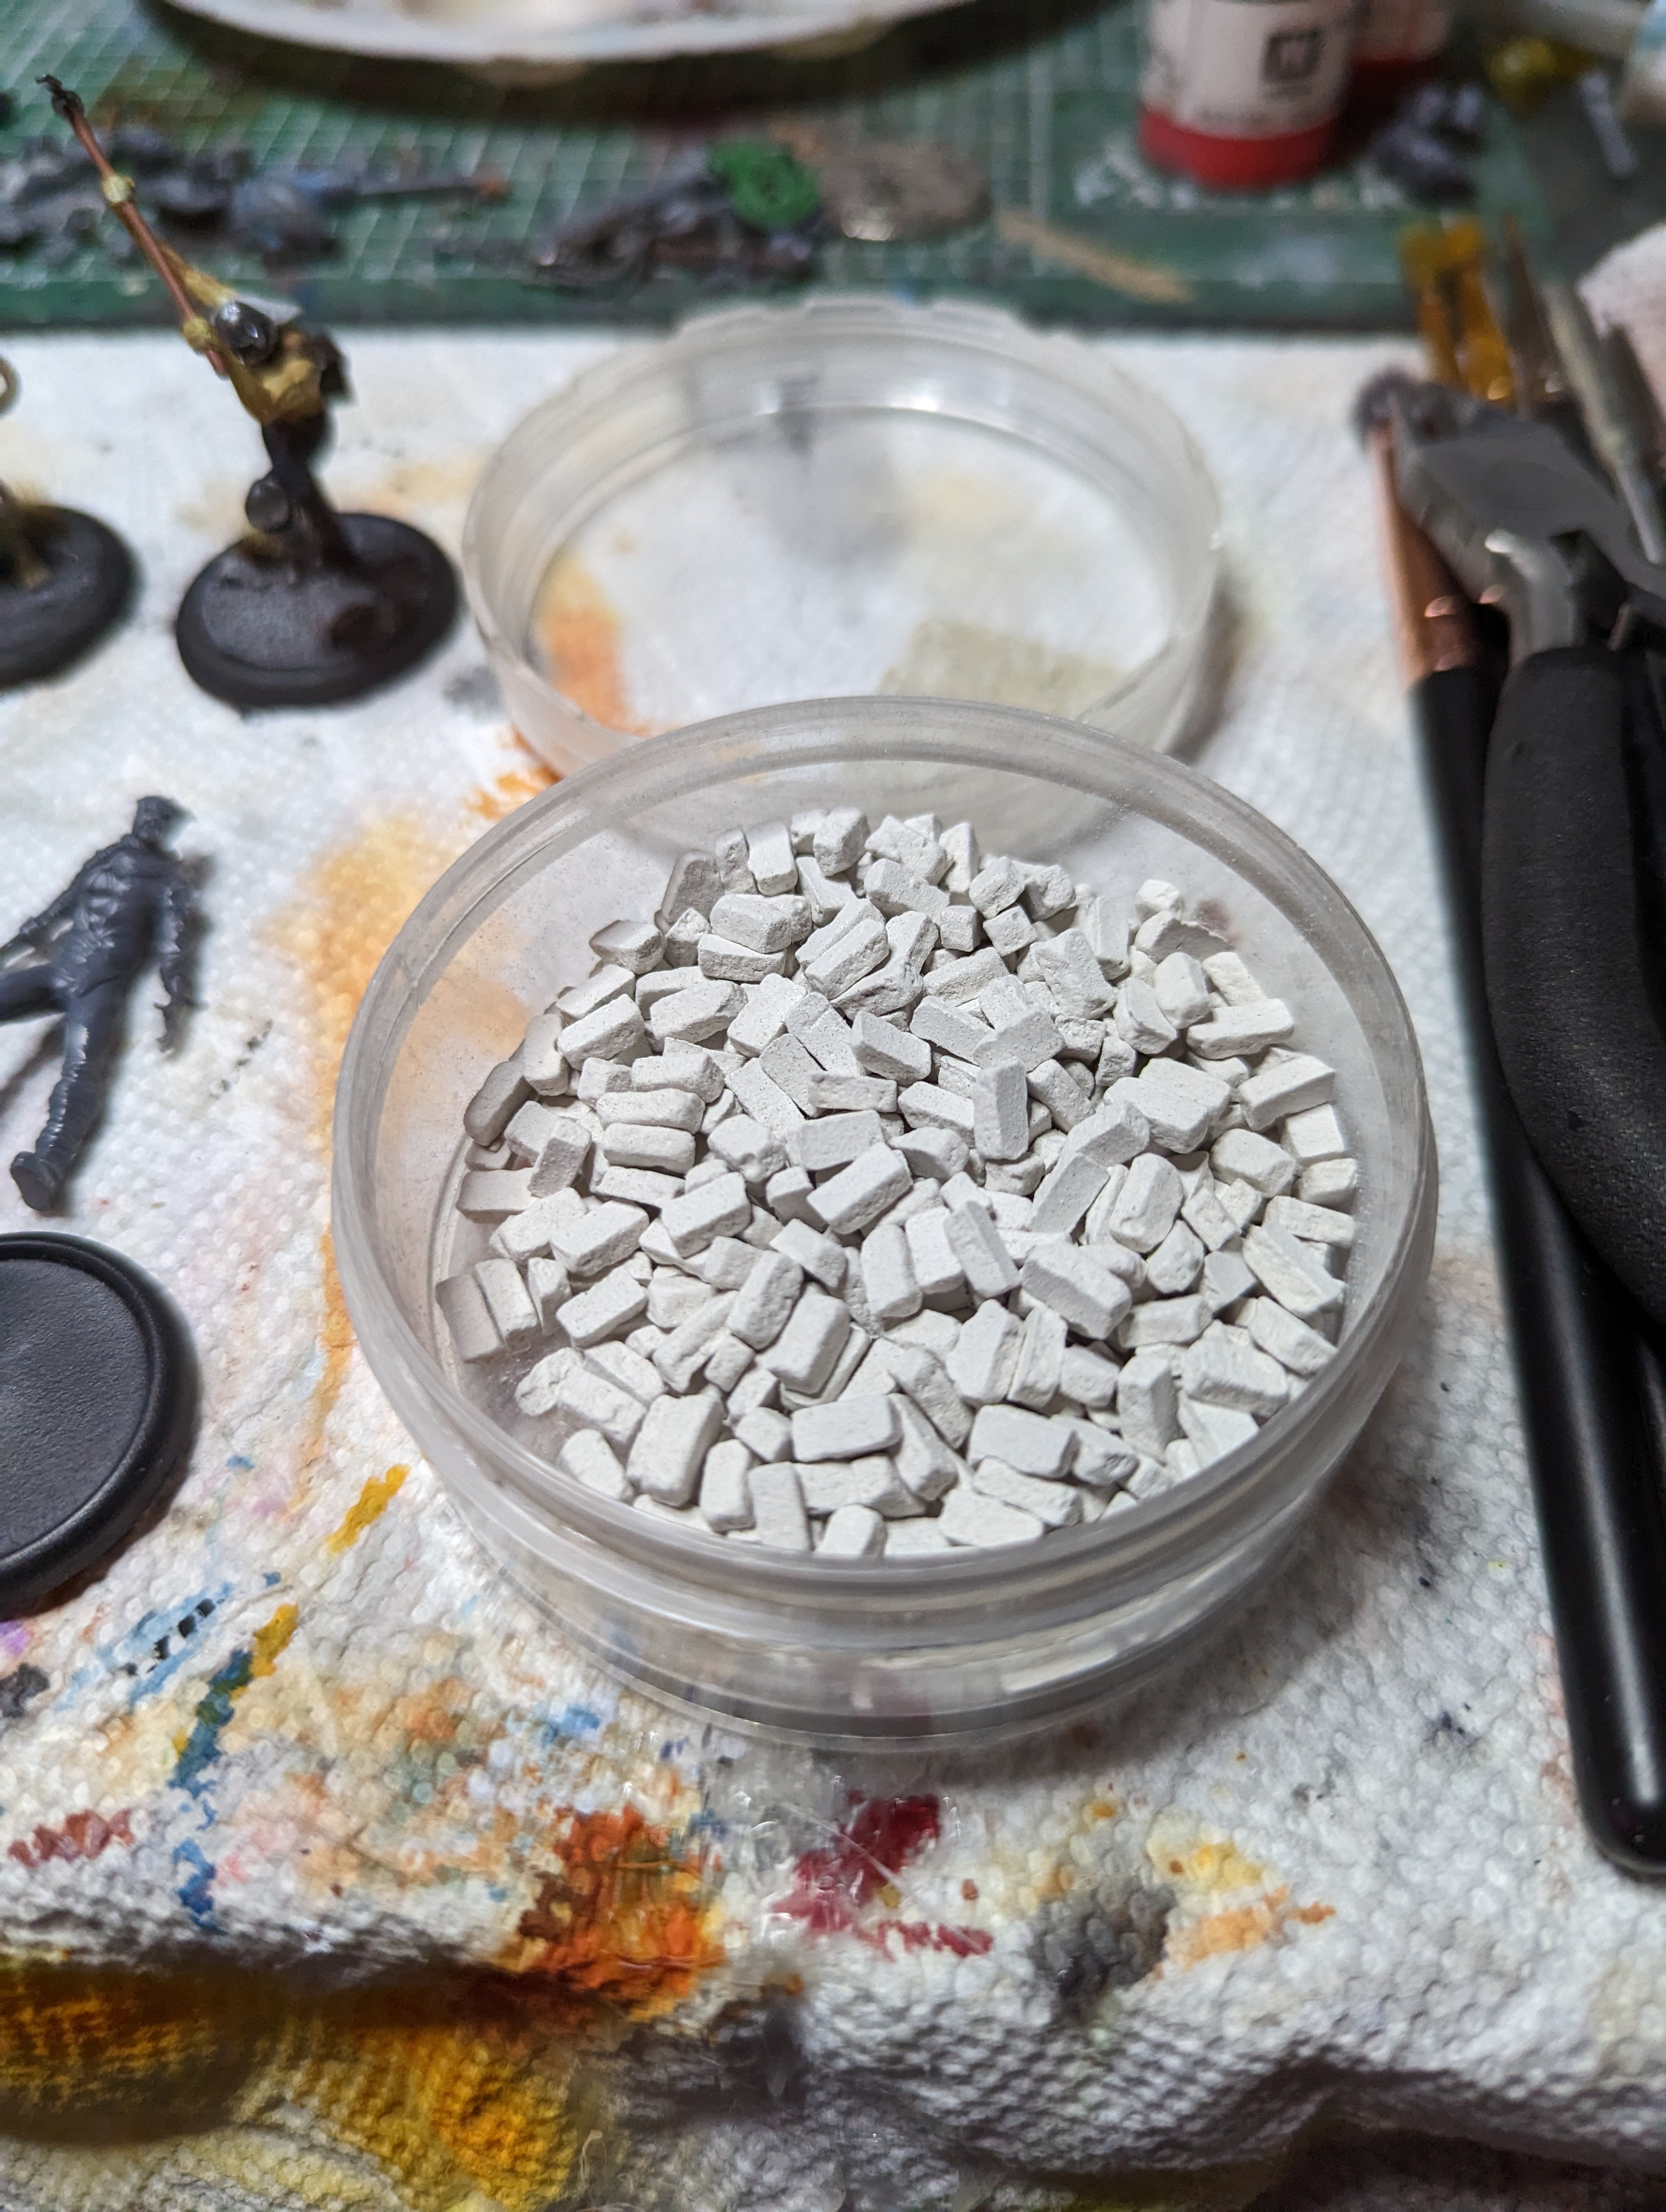

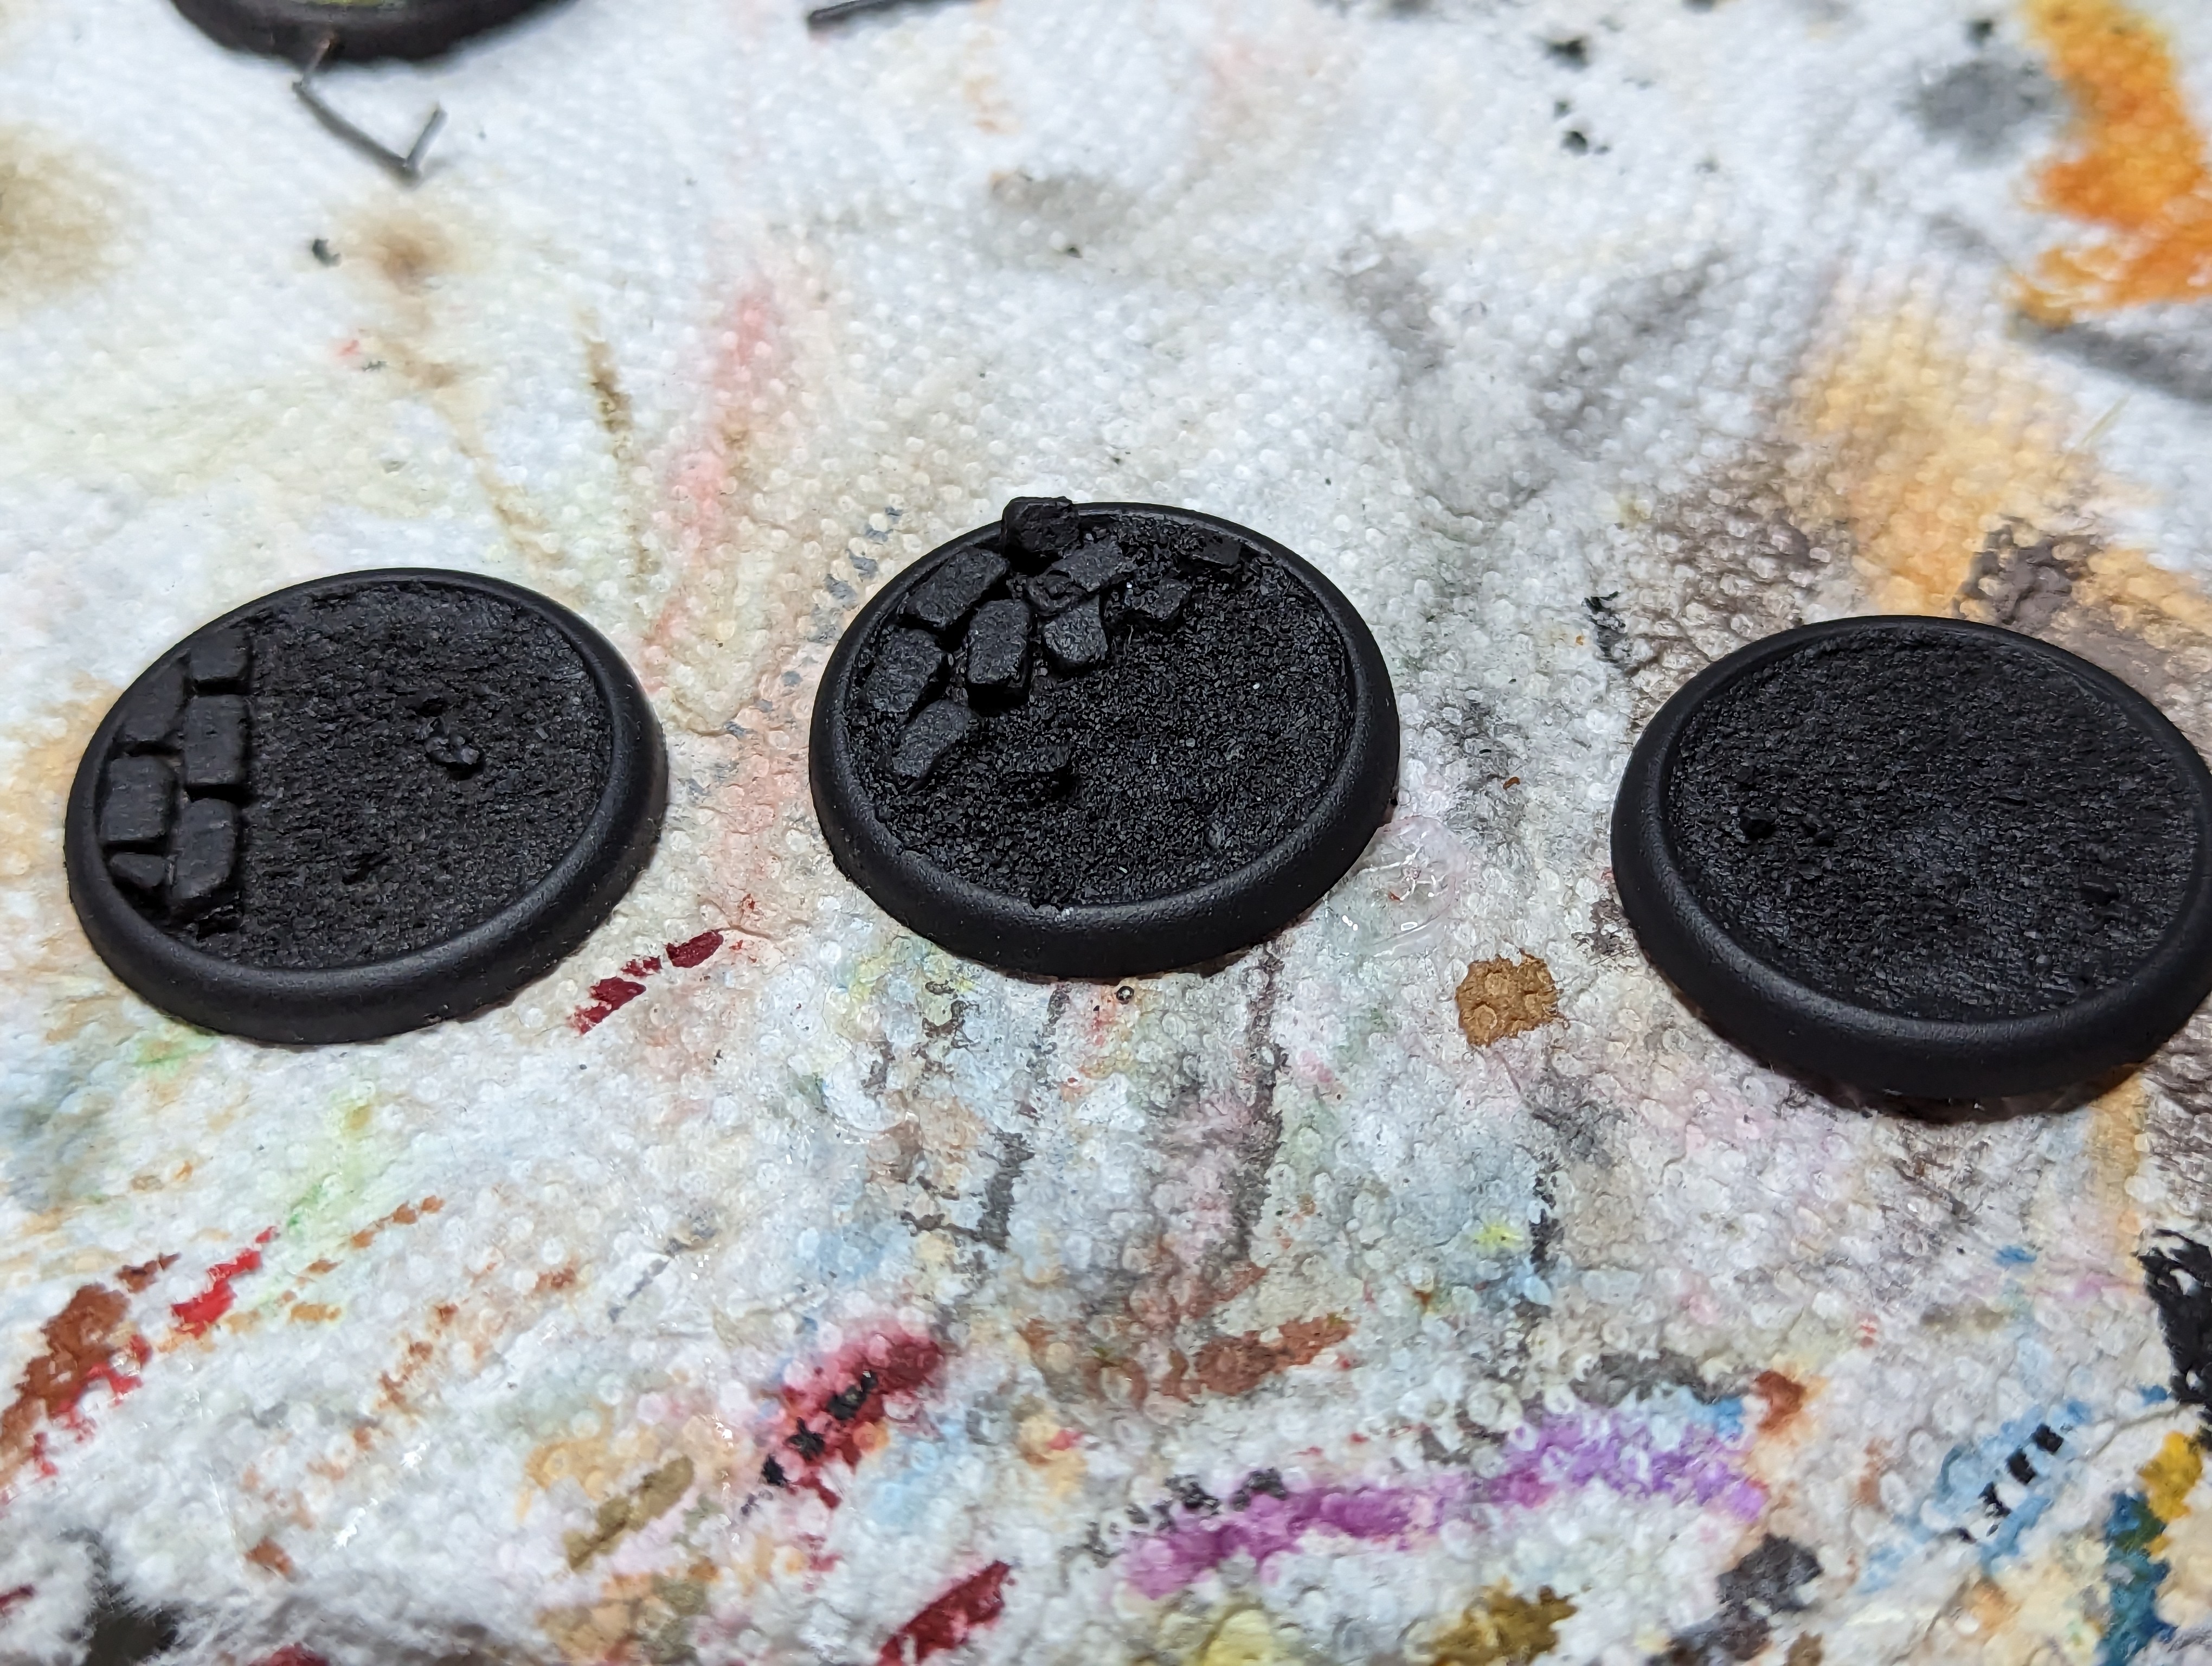

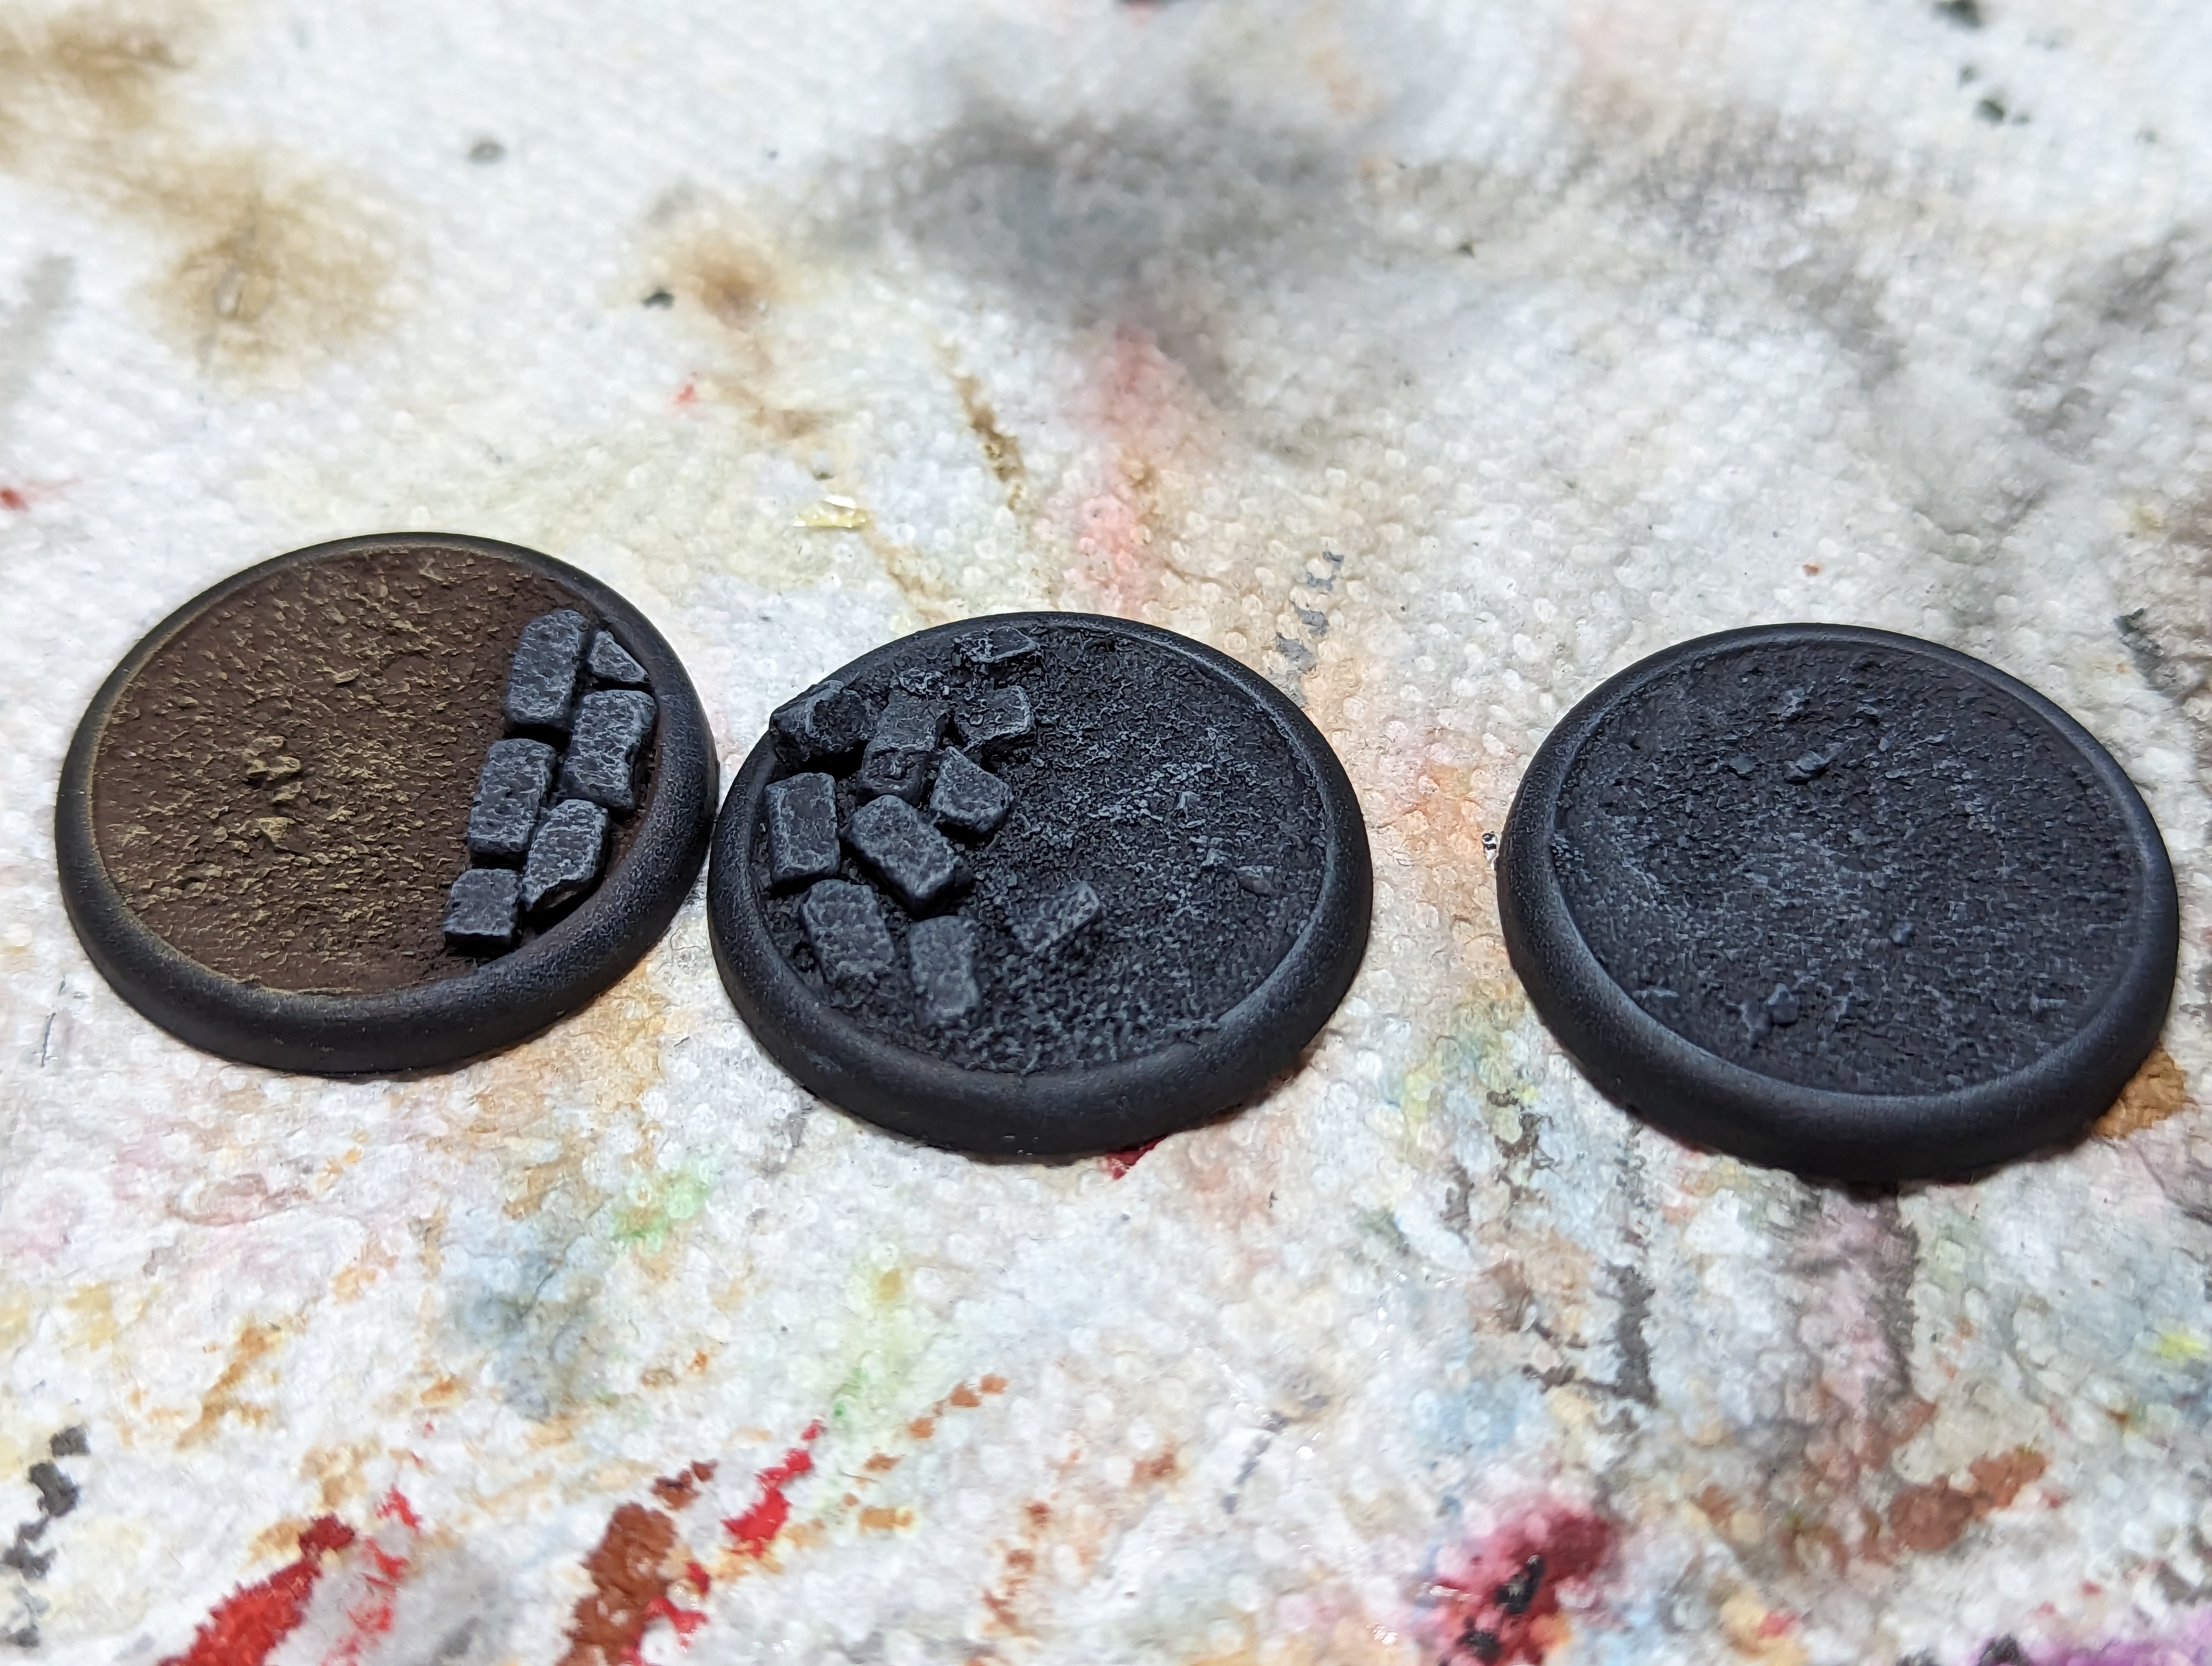
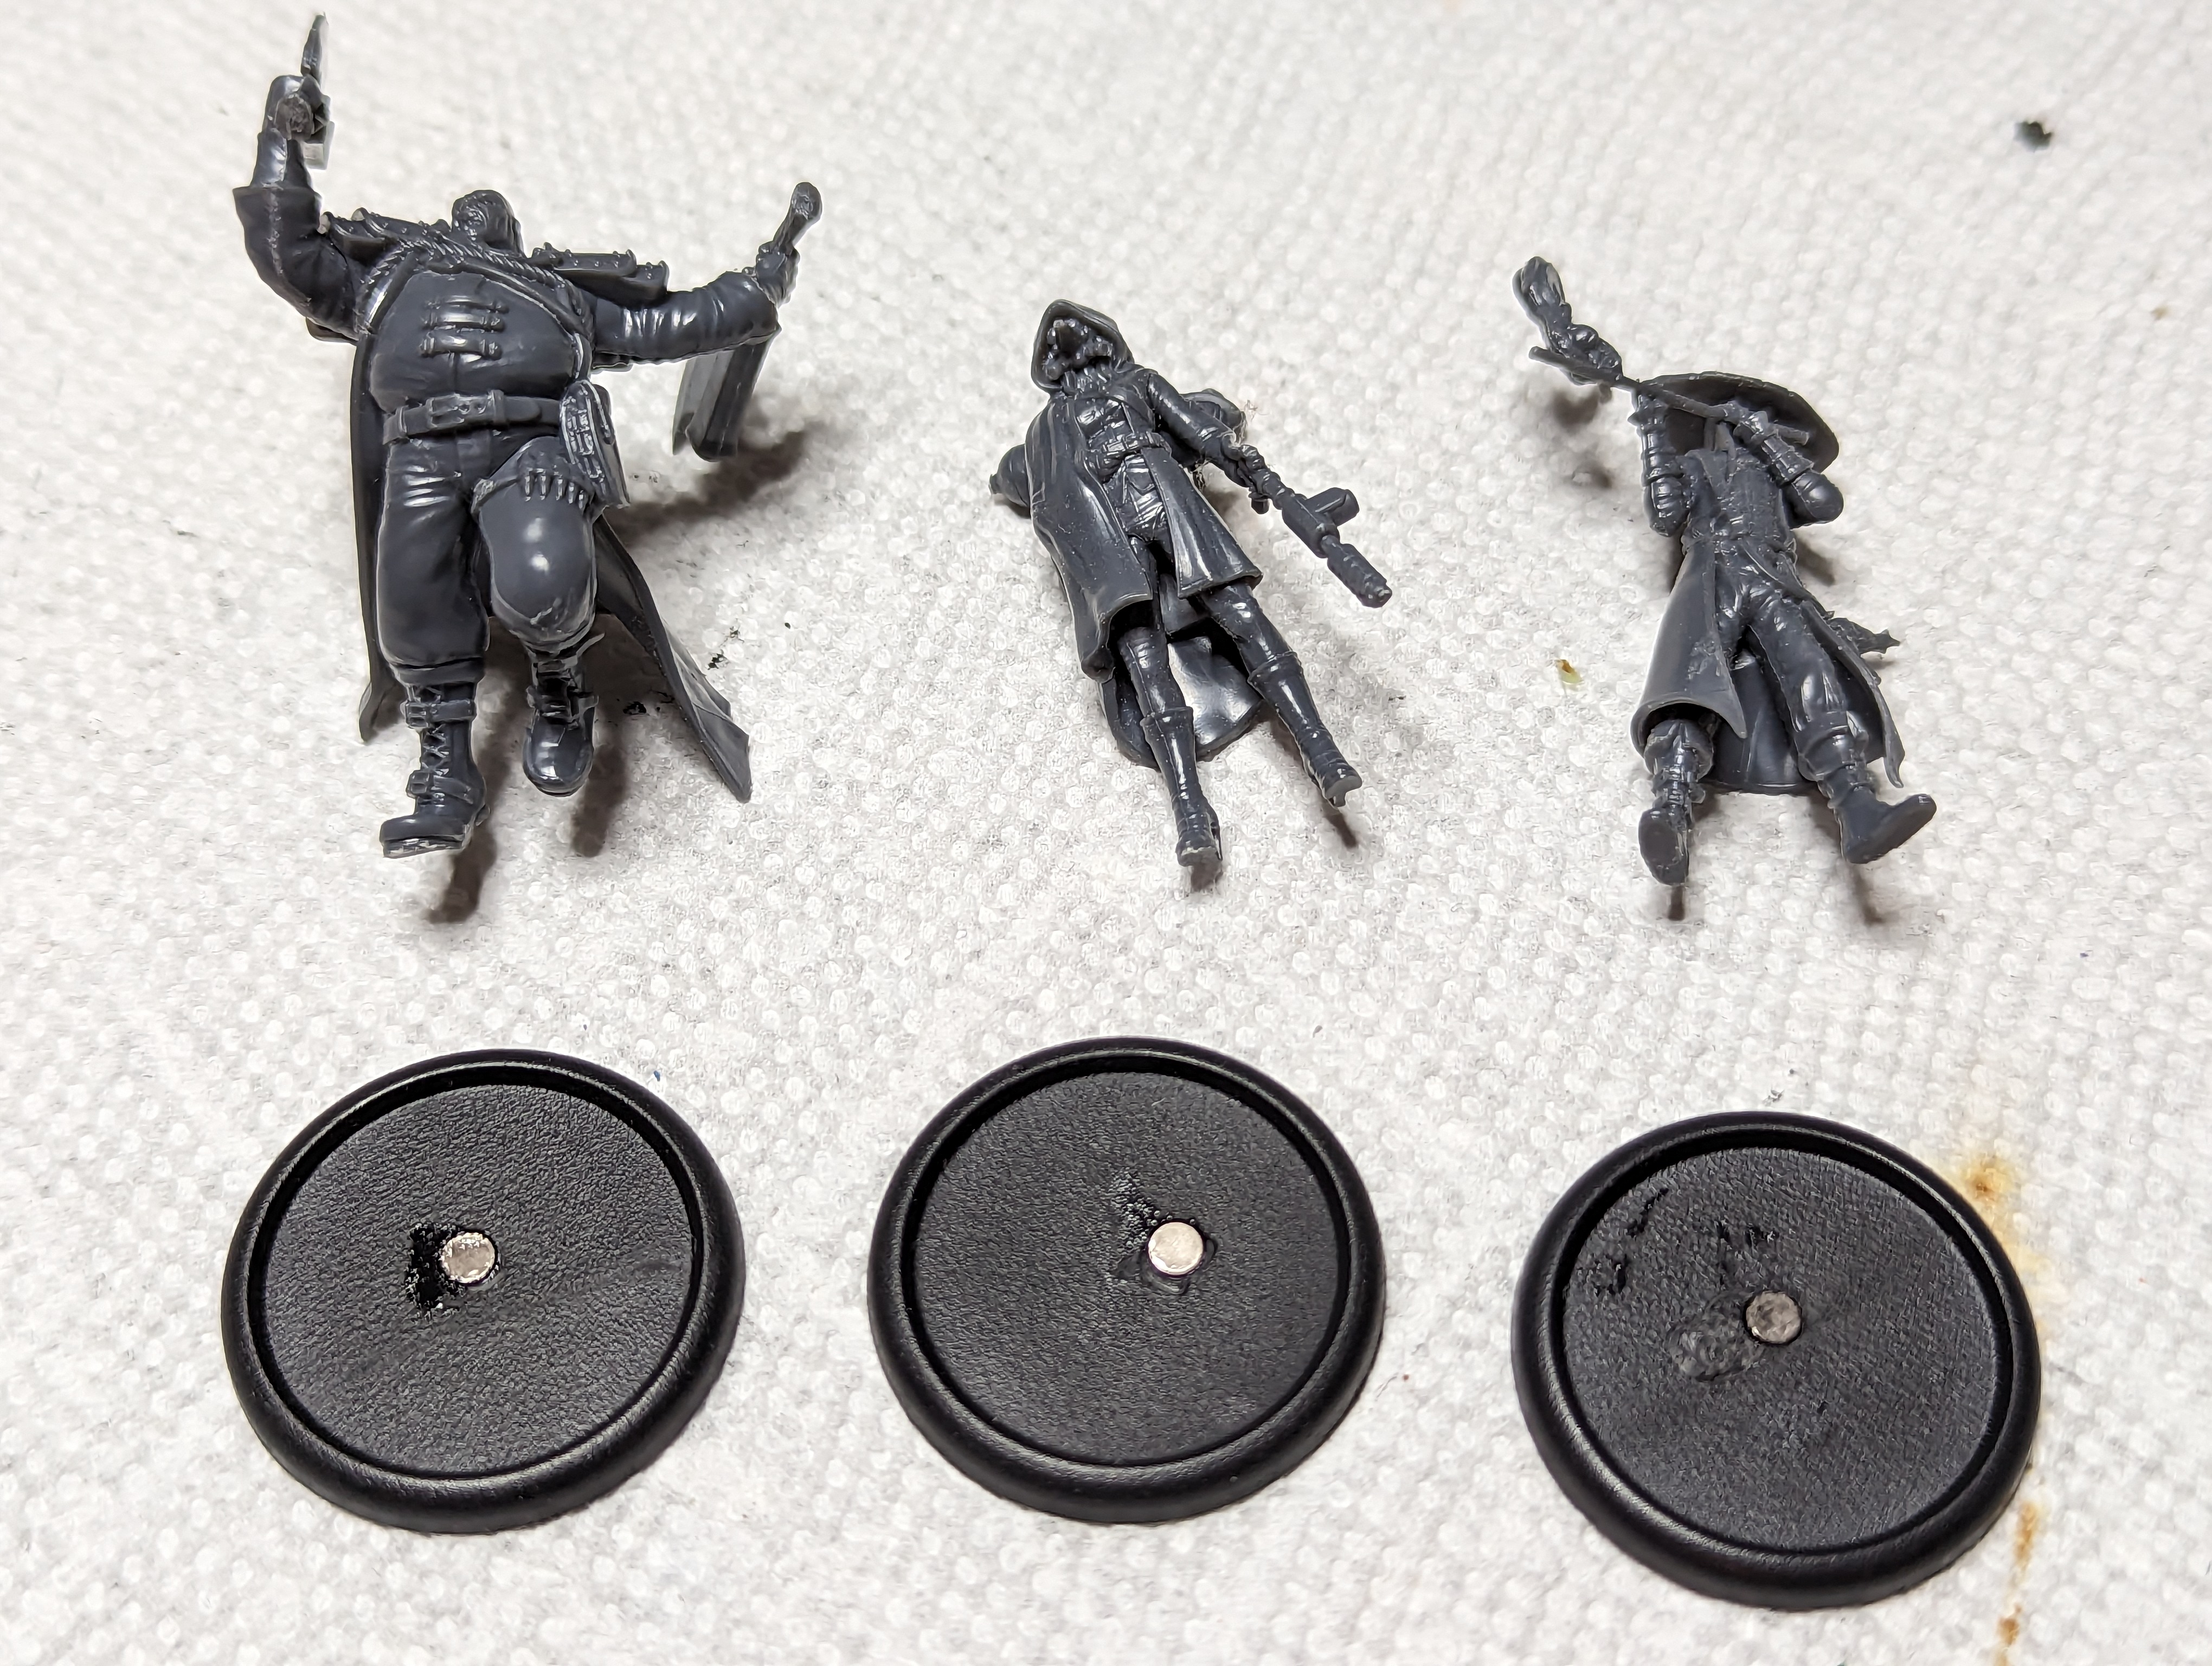
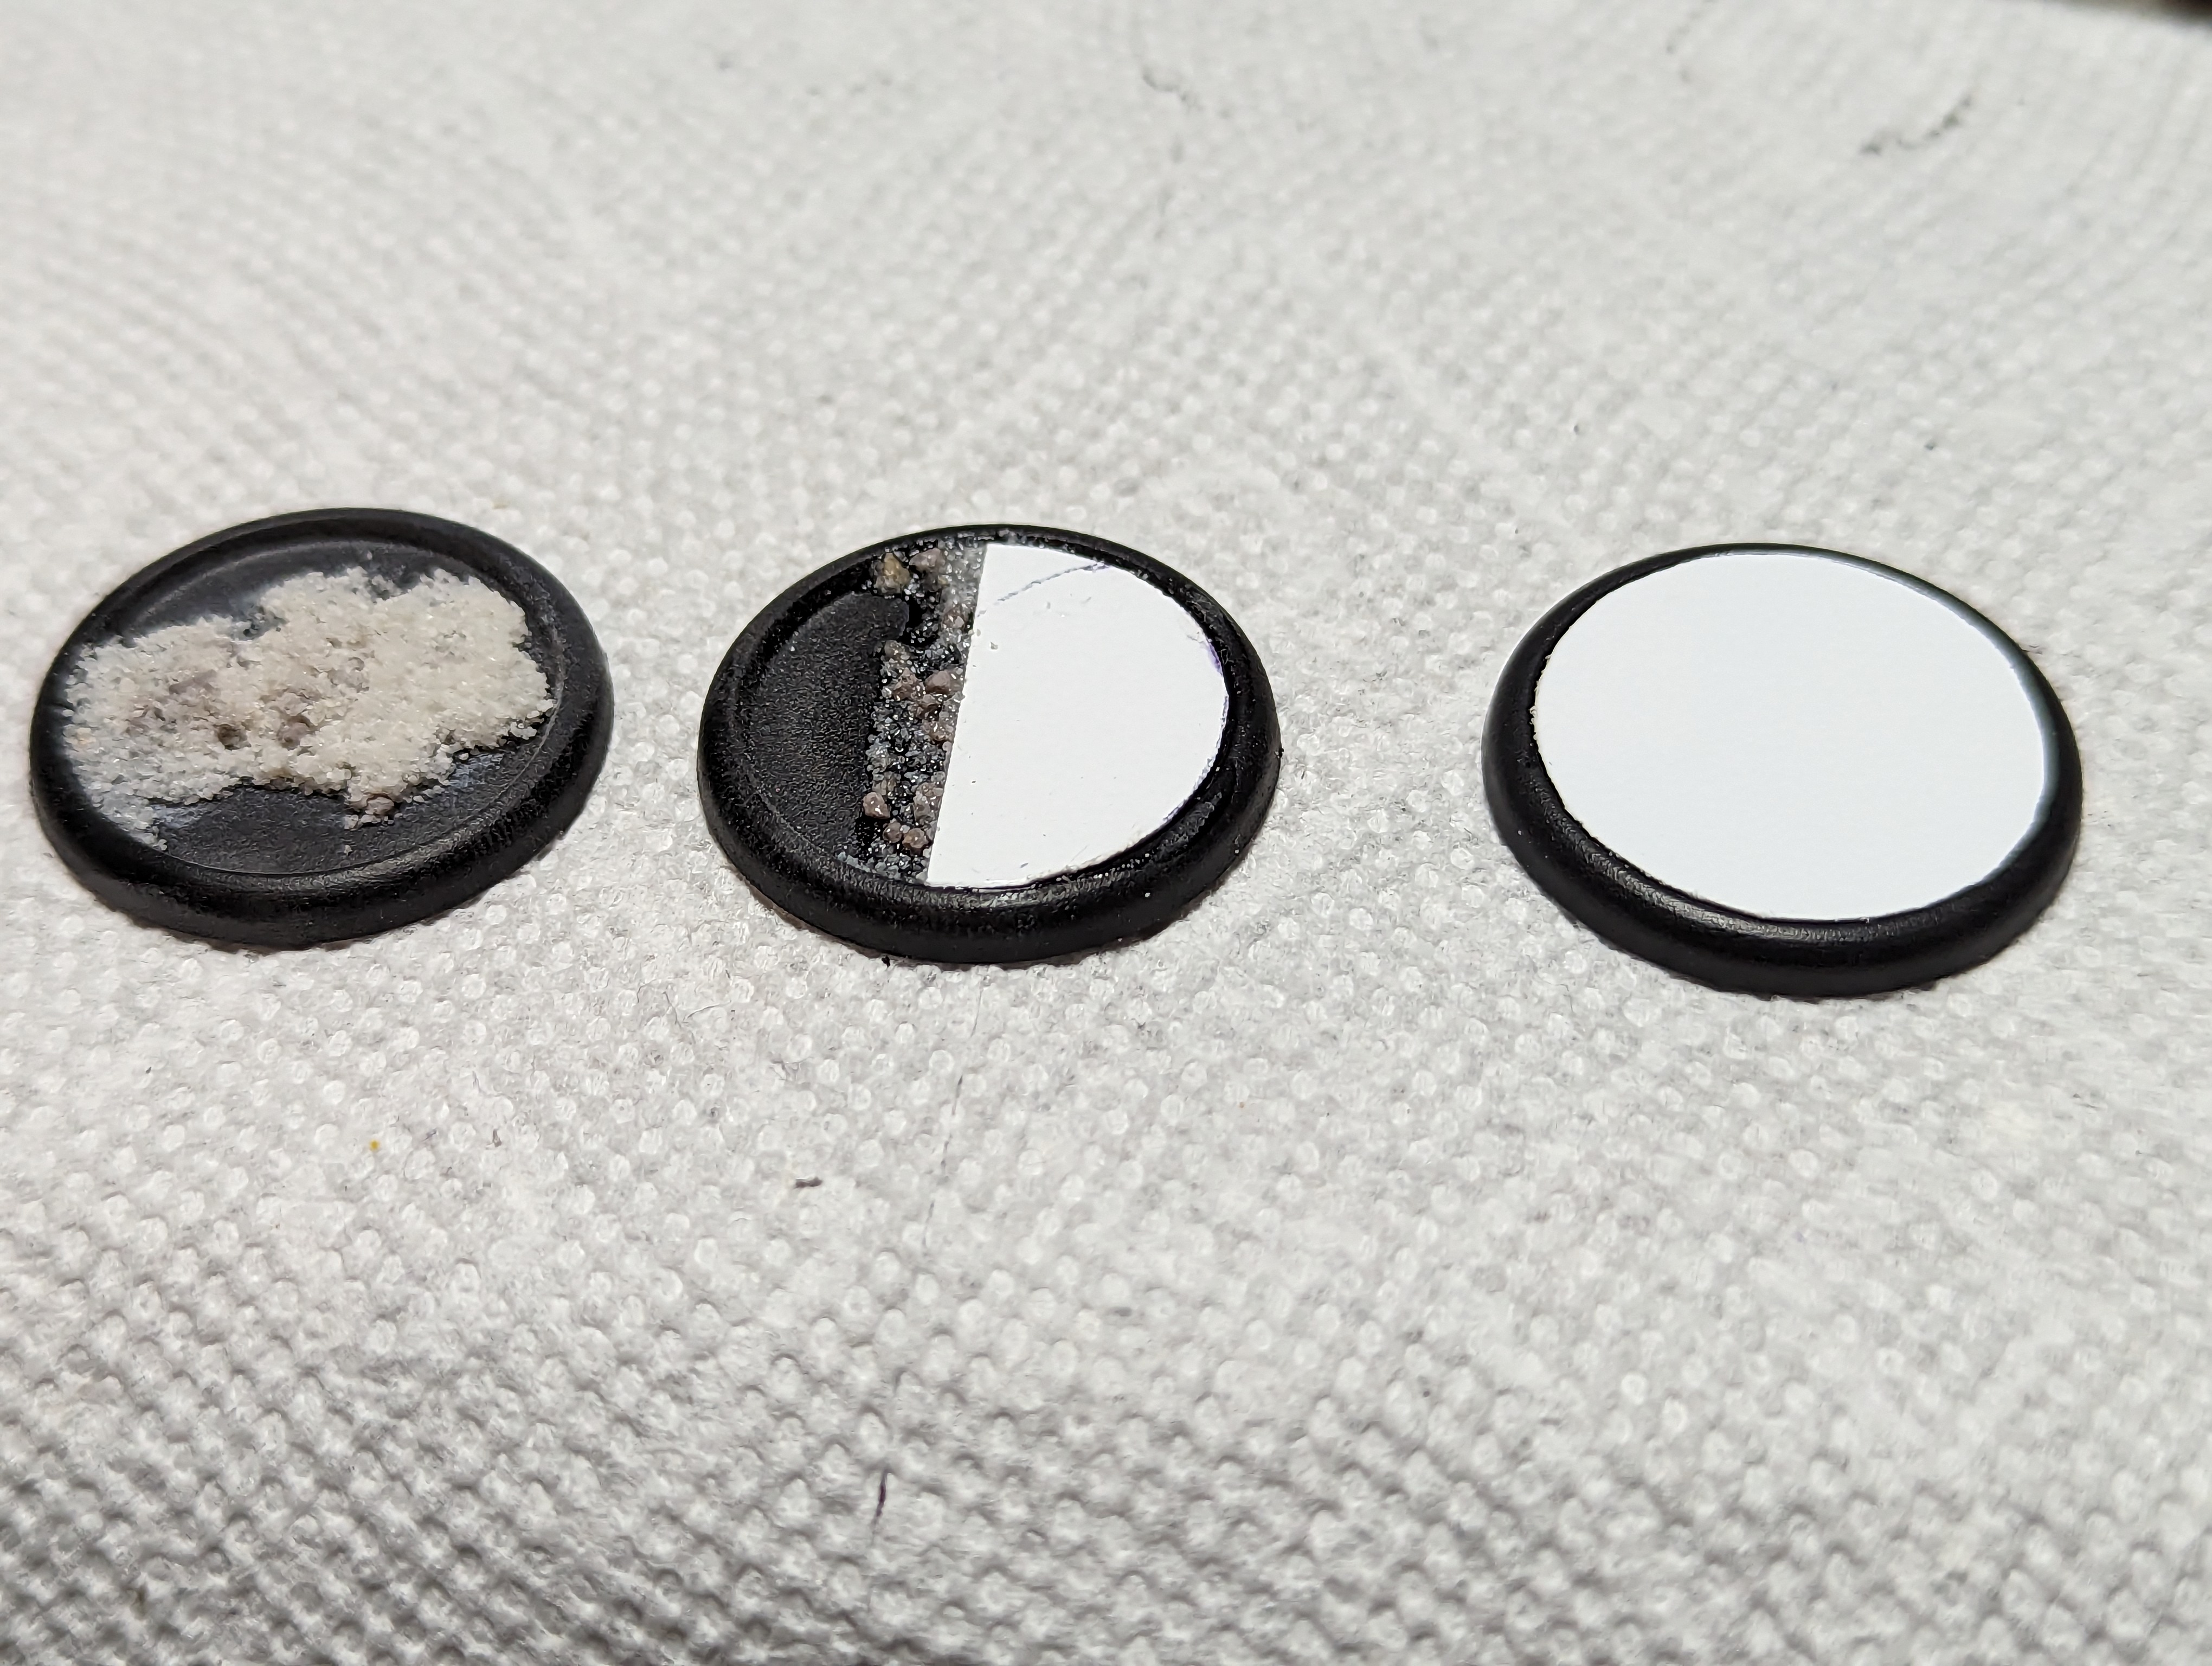
I have these little plaster bricks that I picked up a while back, and I started off by glueing them down on 2 of the bases in a pattern. I made it a bit more chaotic for the base for the shared model. I then did the rest of all 3 bases with sand and primed black.
The normal ground got painted brown, while the wasteland got painted a medium gray. The bricks got painted gray, and all of it got dry brushed- Khaki for the brown, light gray for the gray. Pretty simple really.
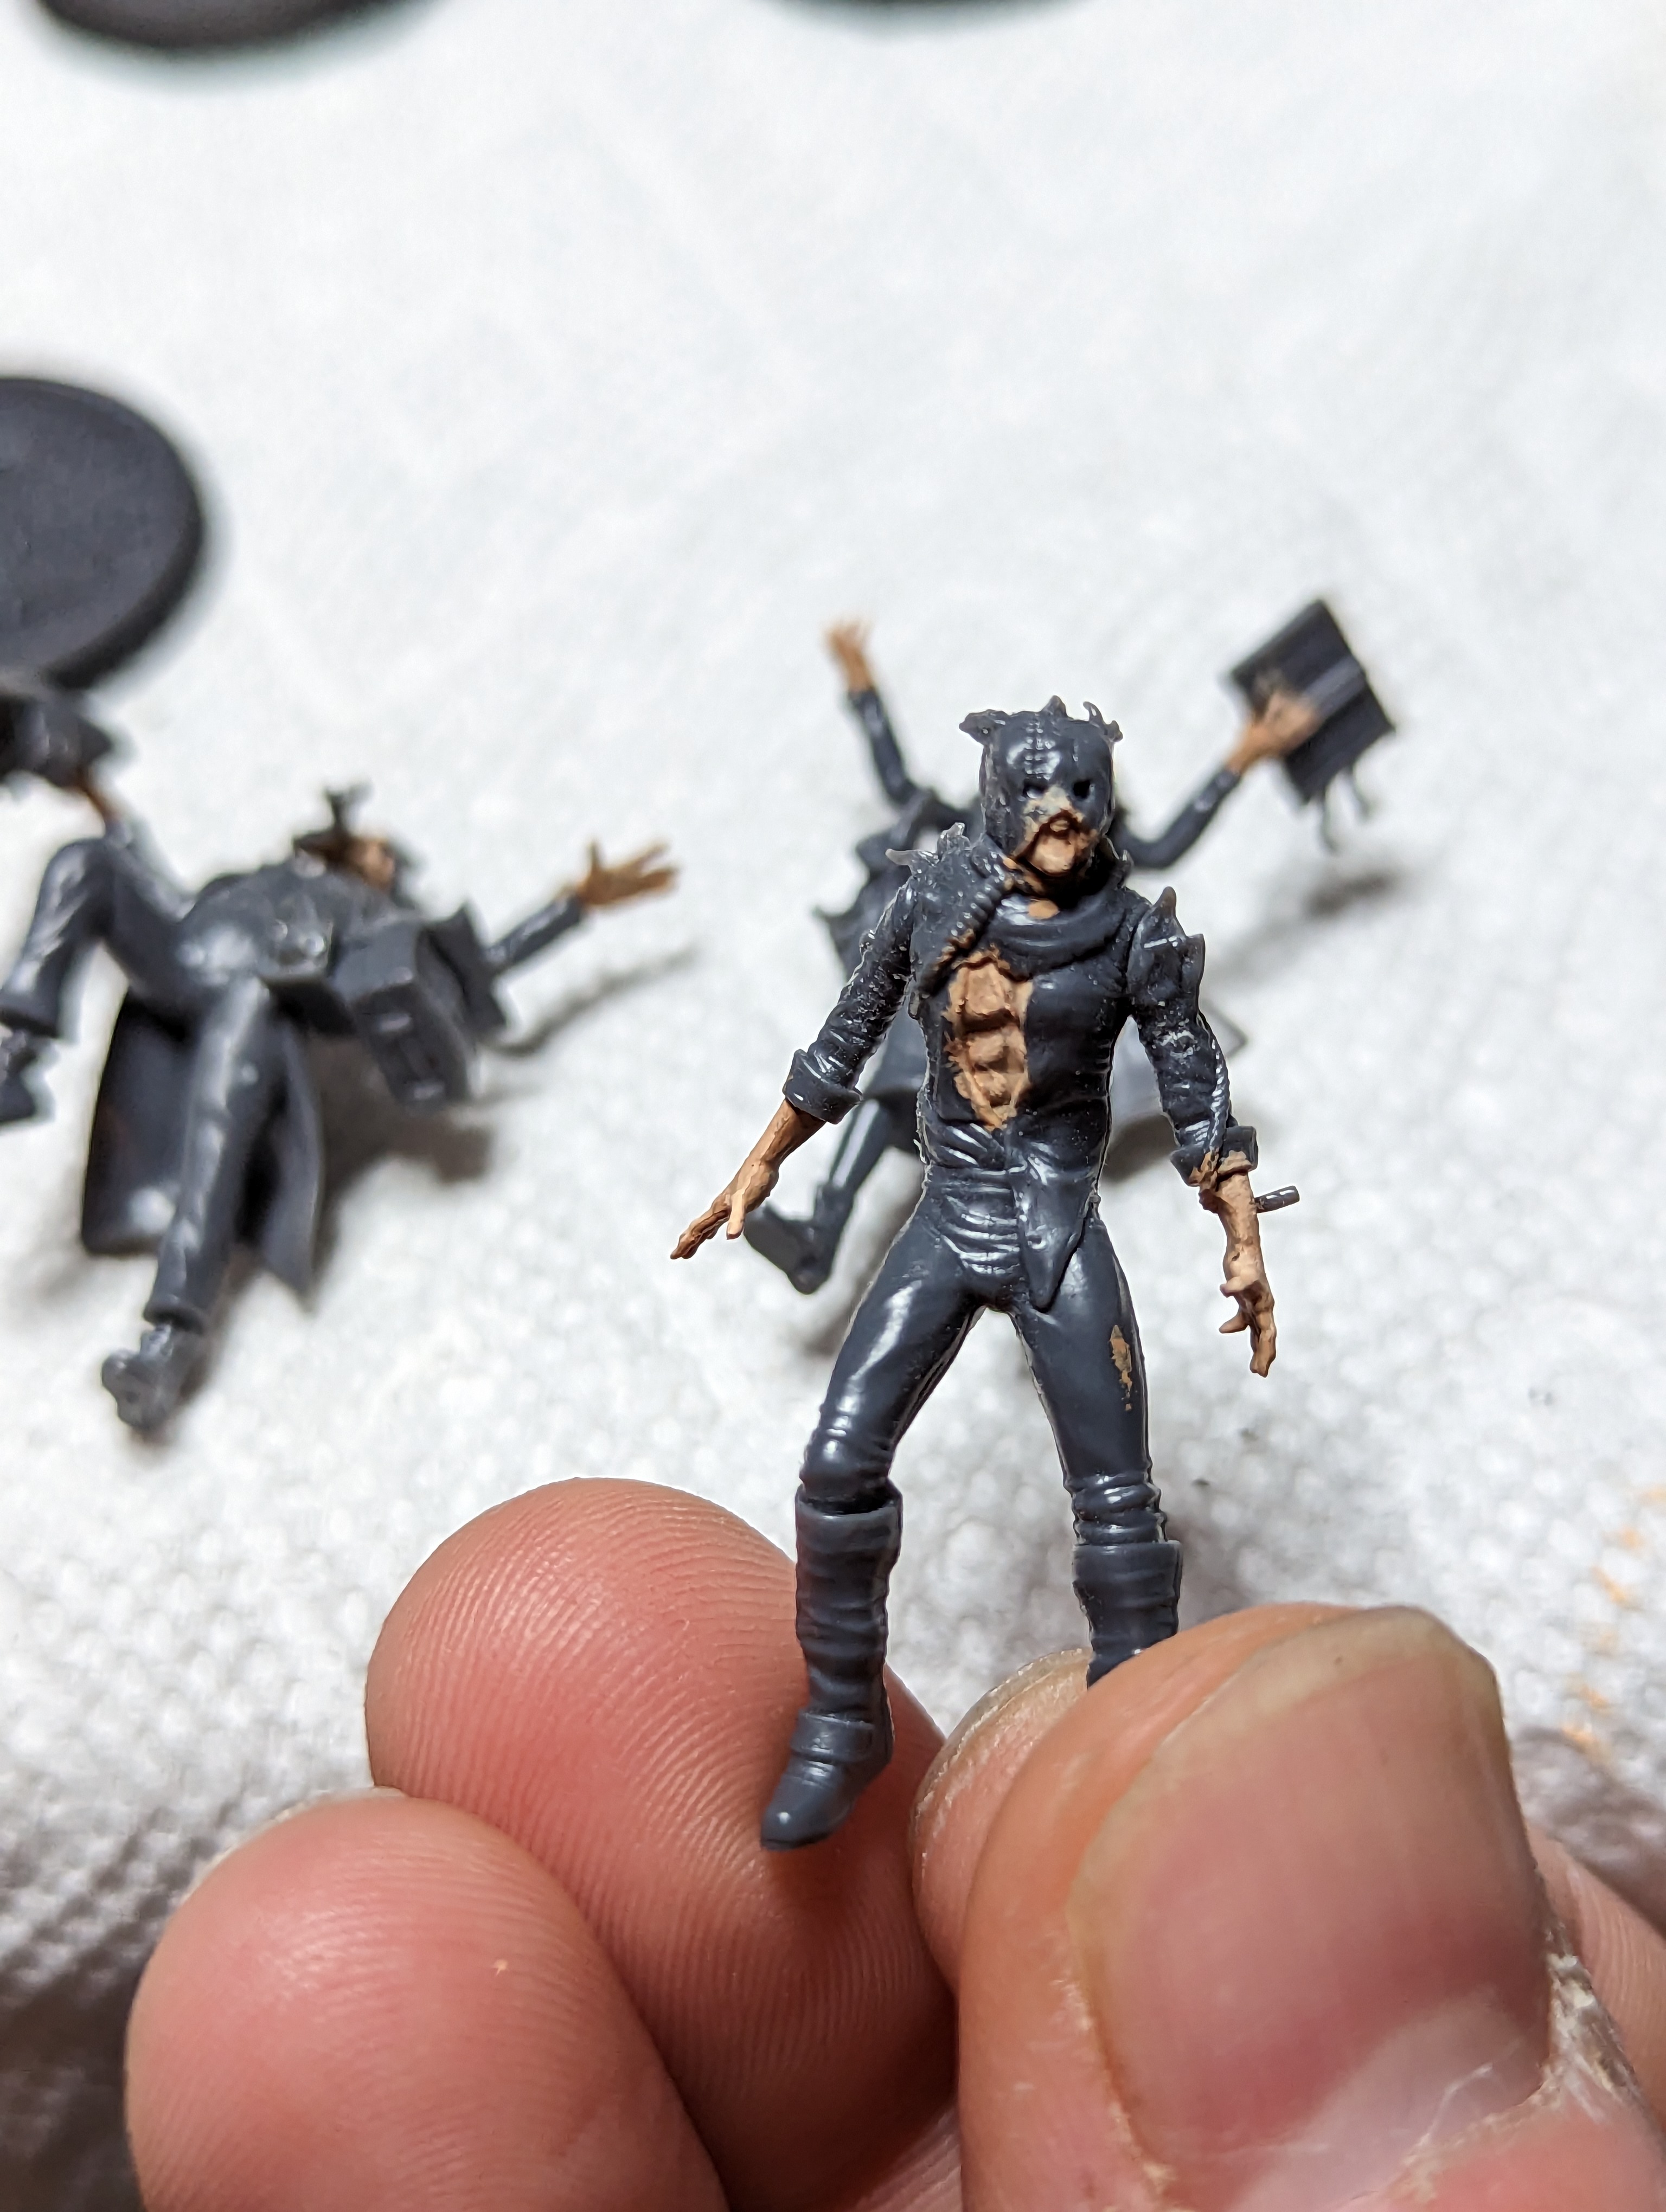
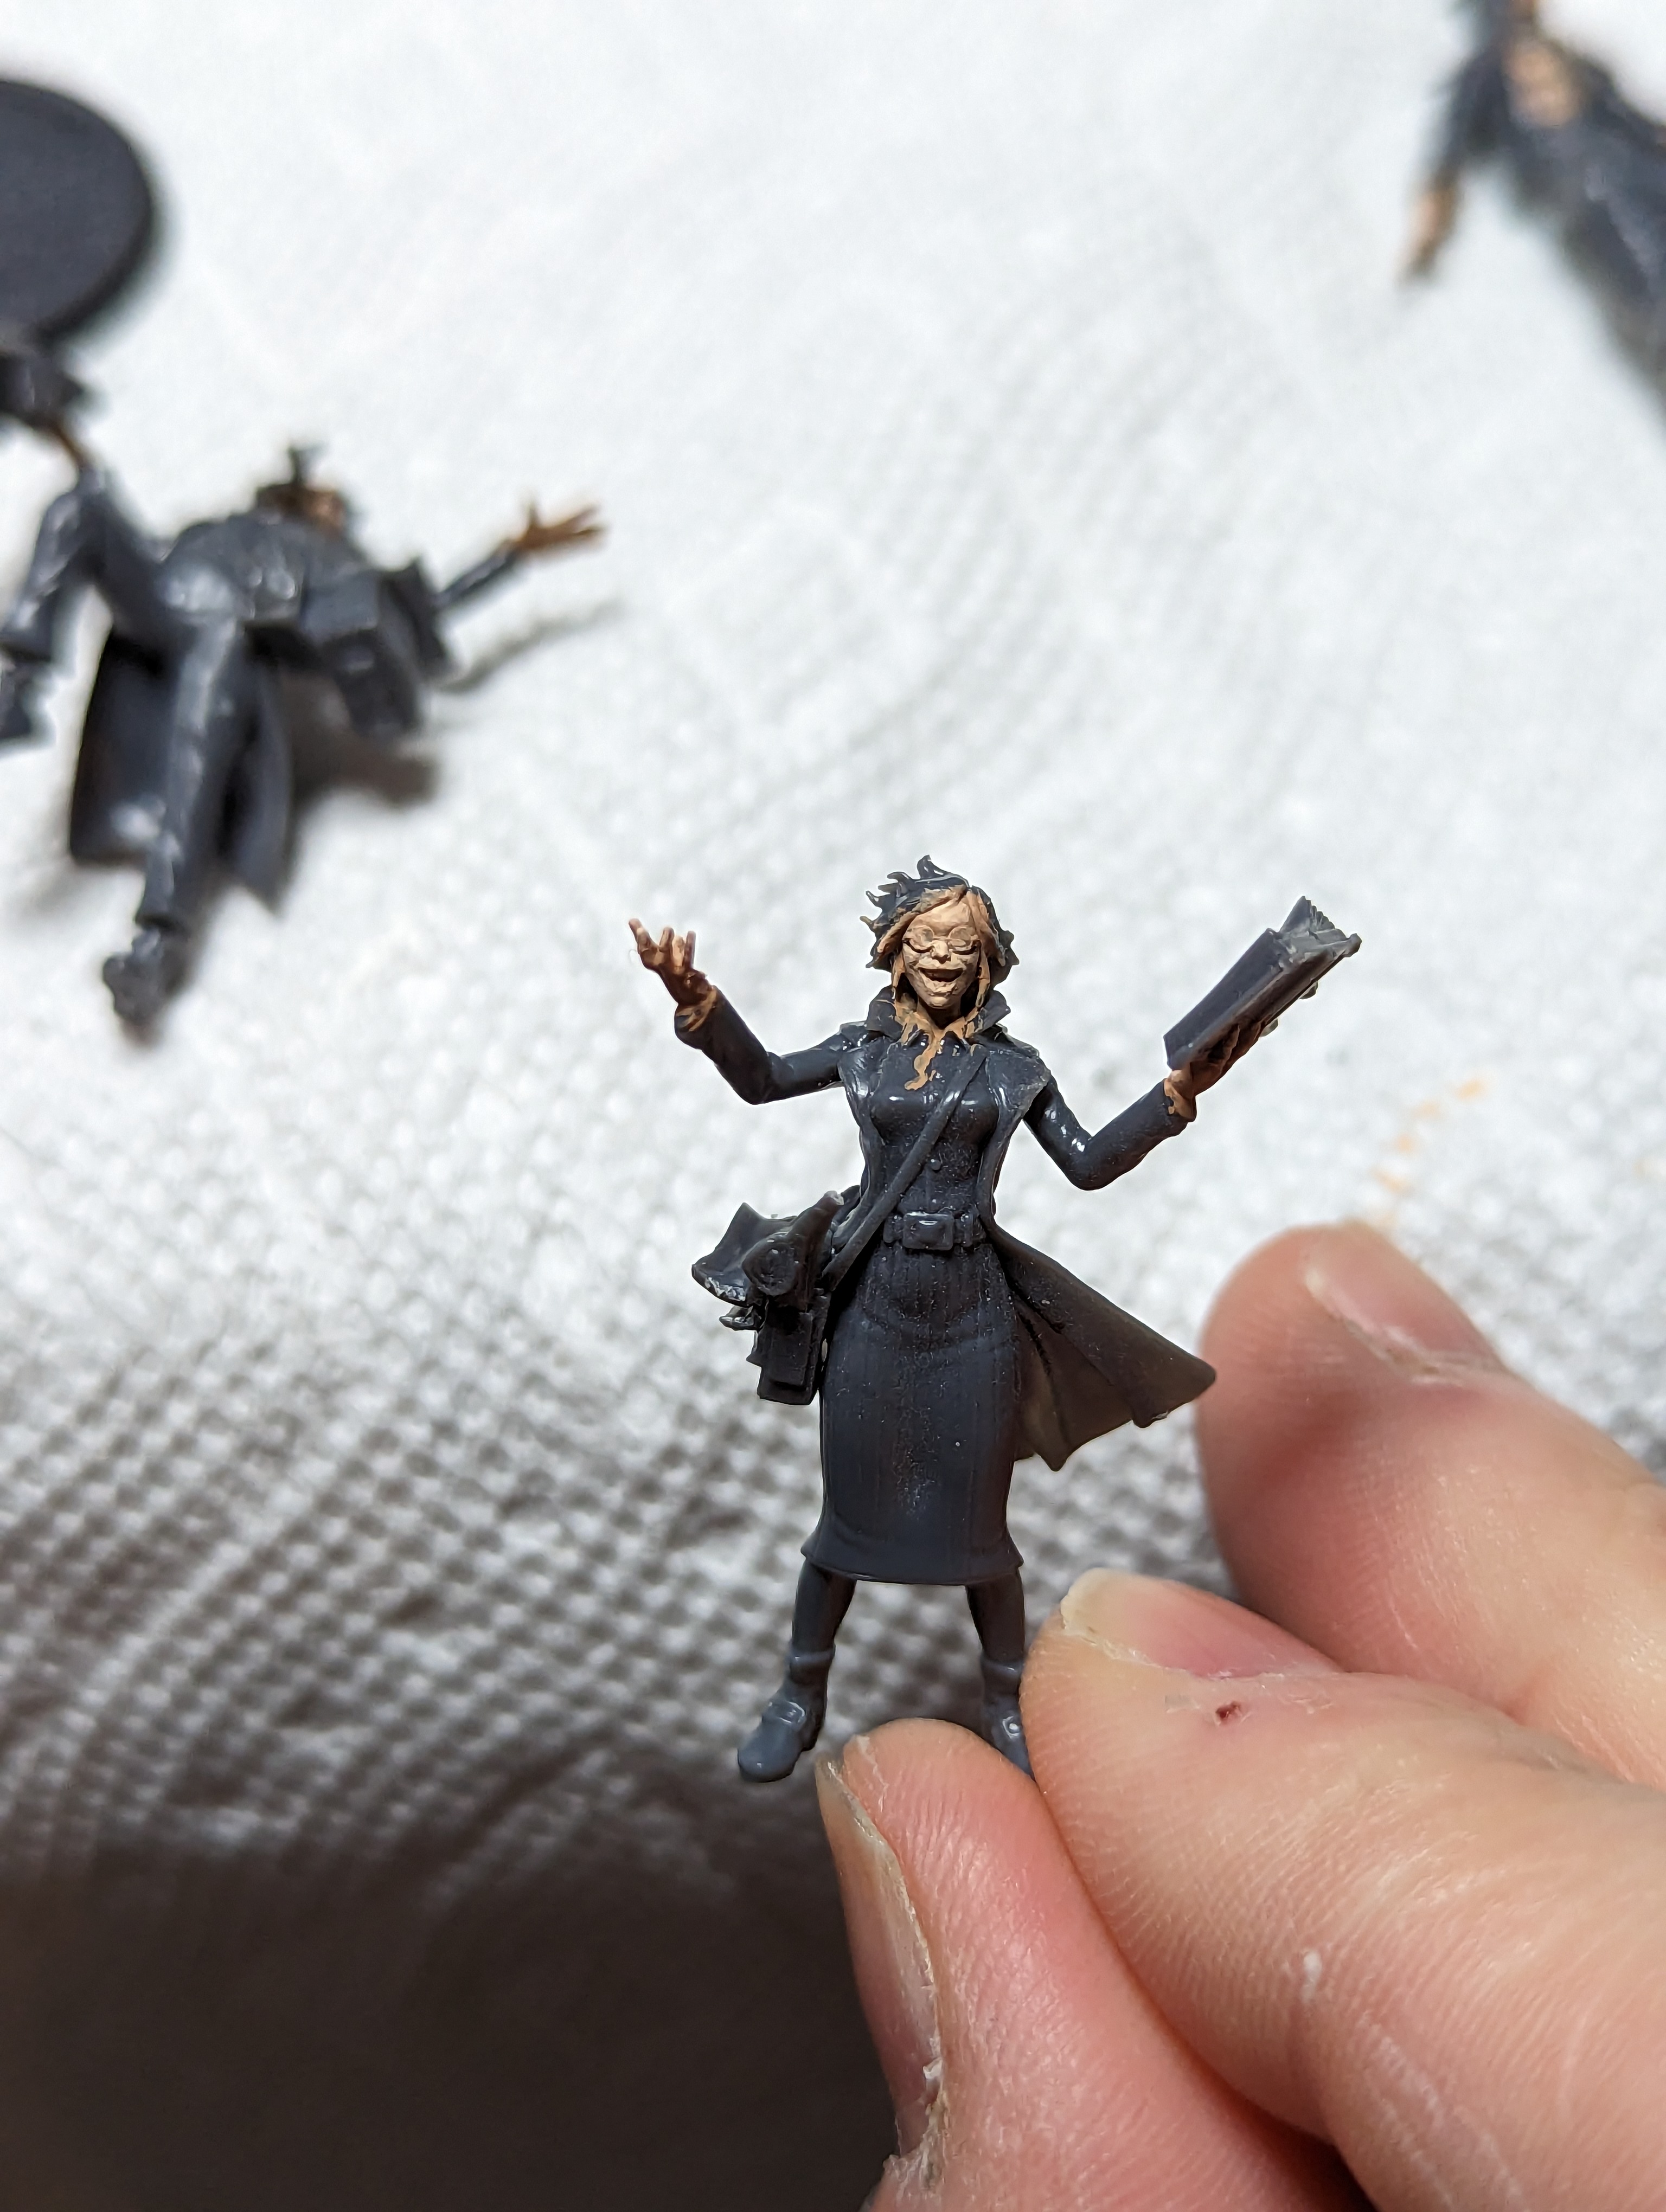
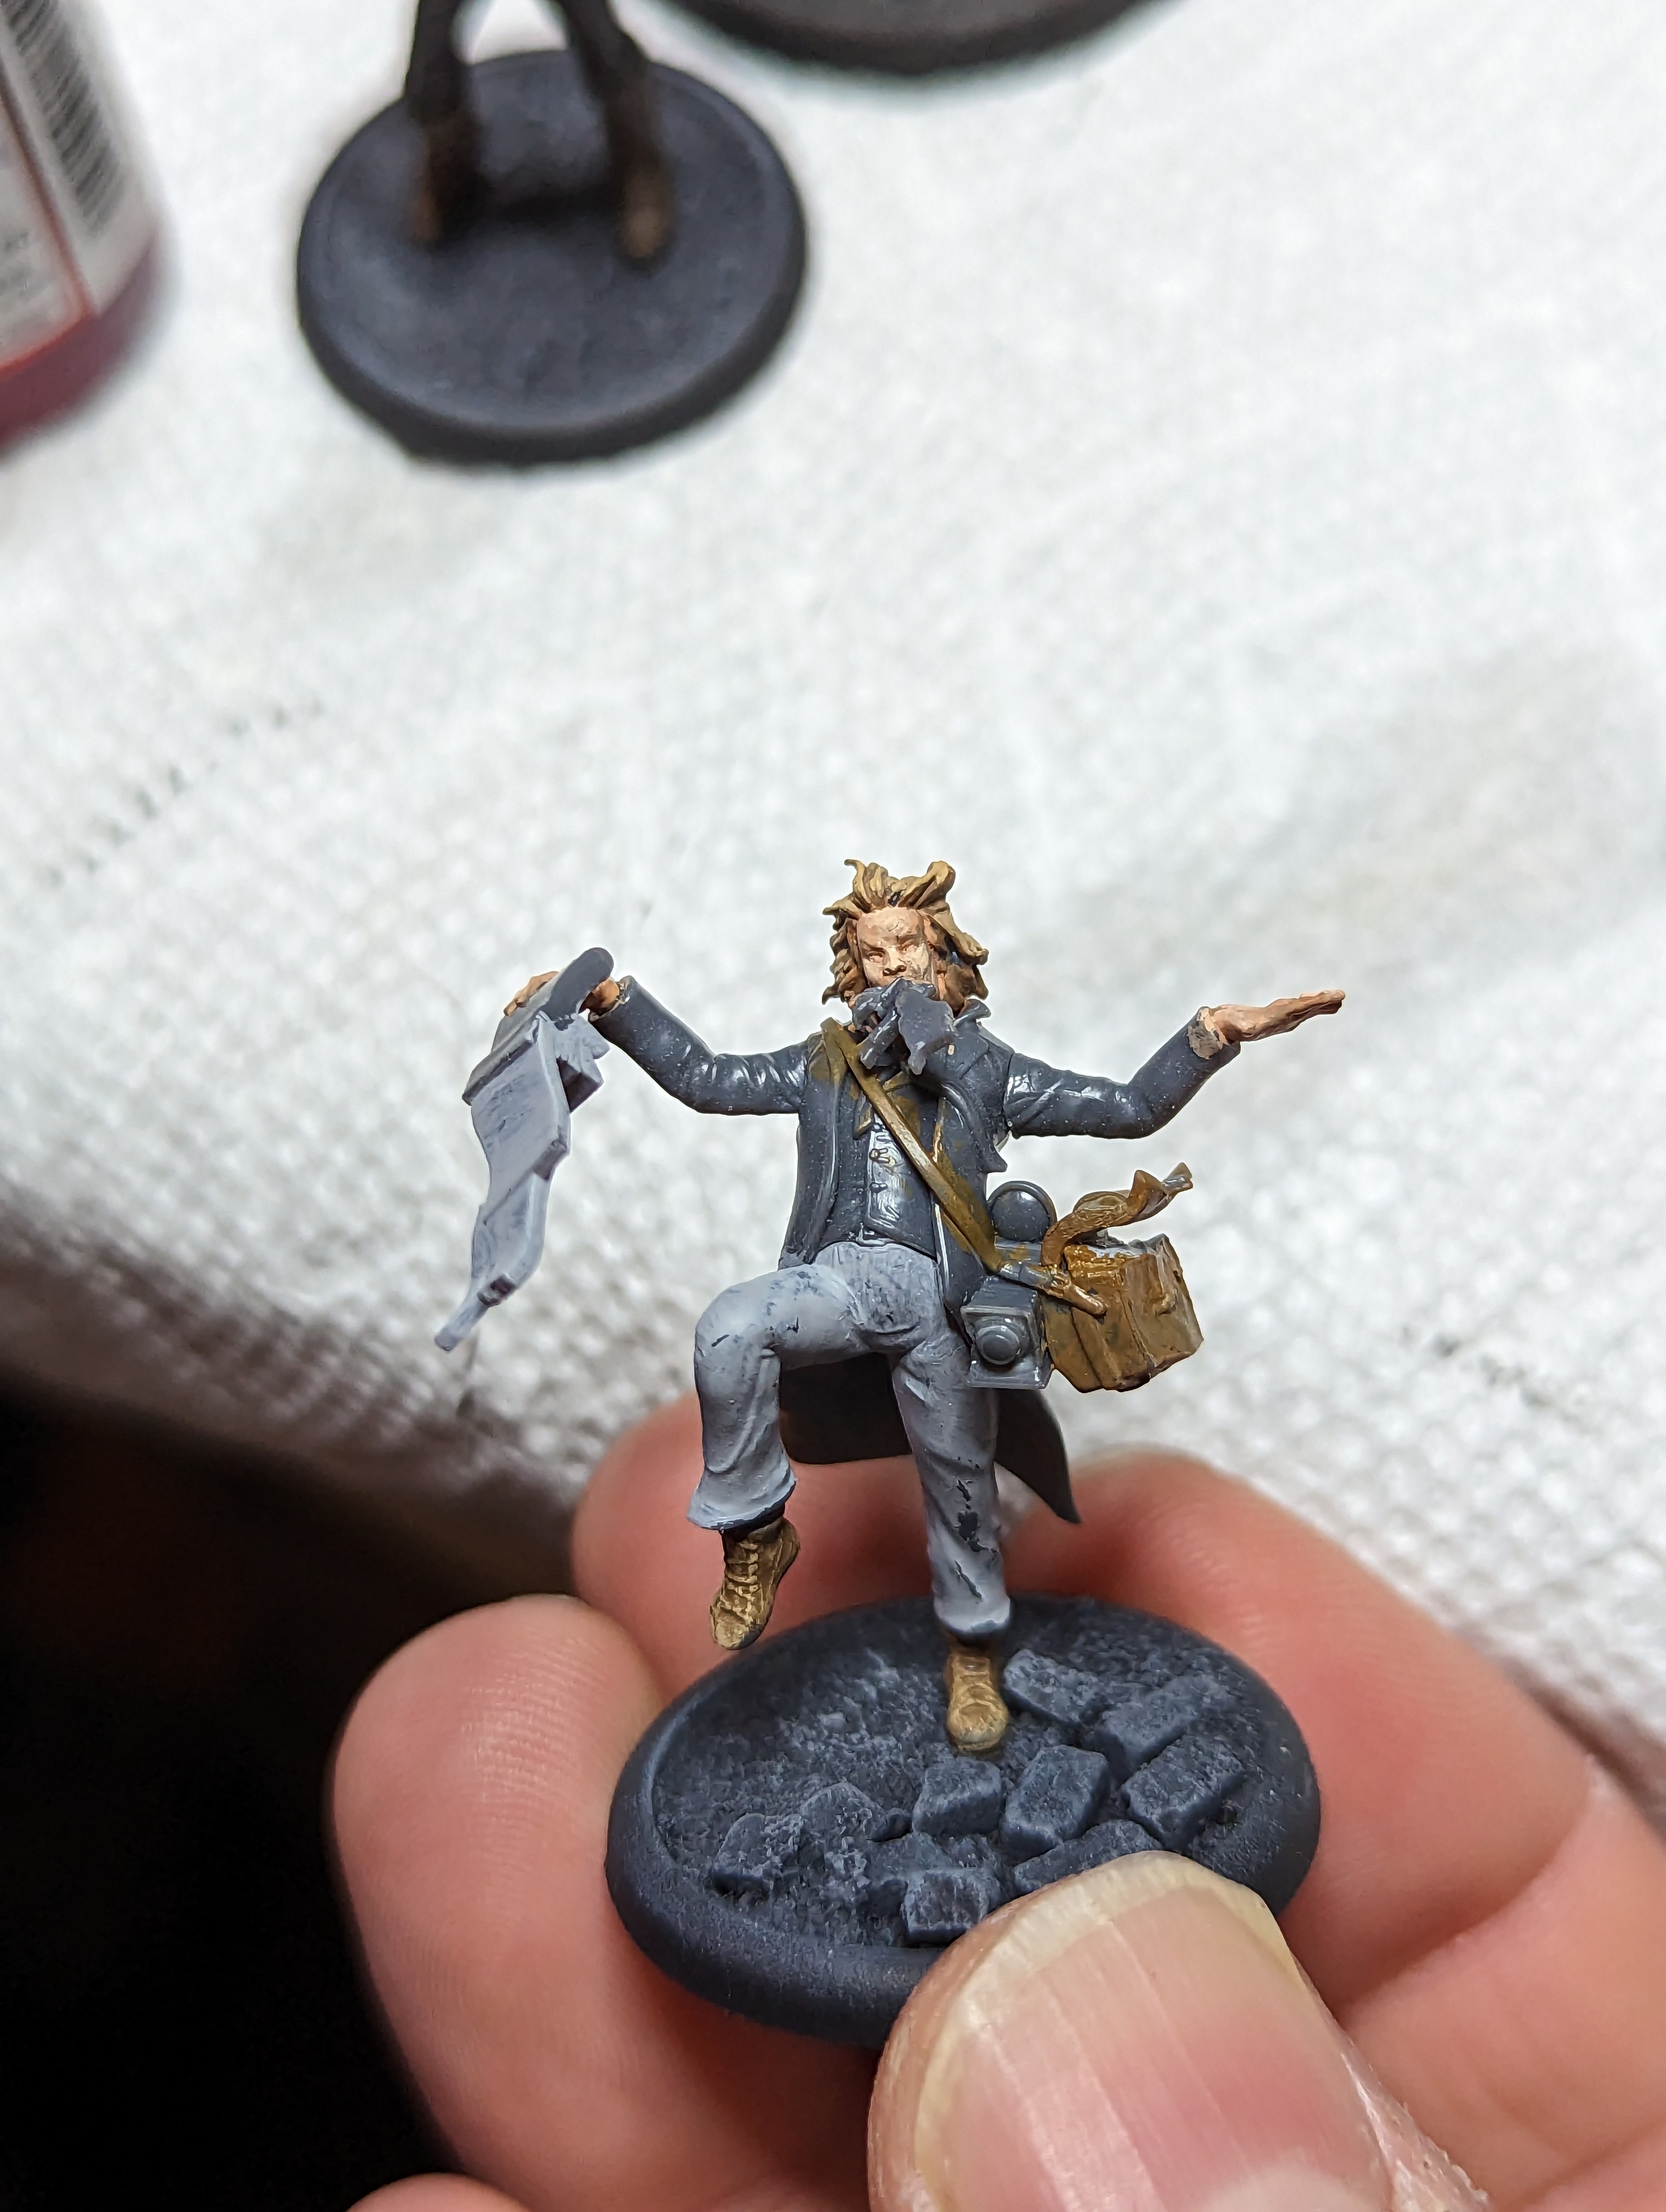
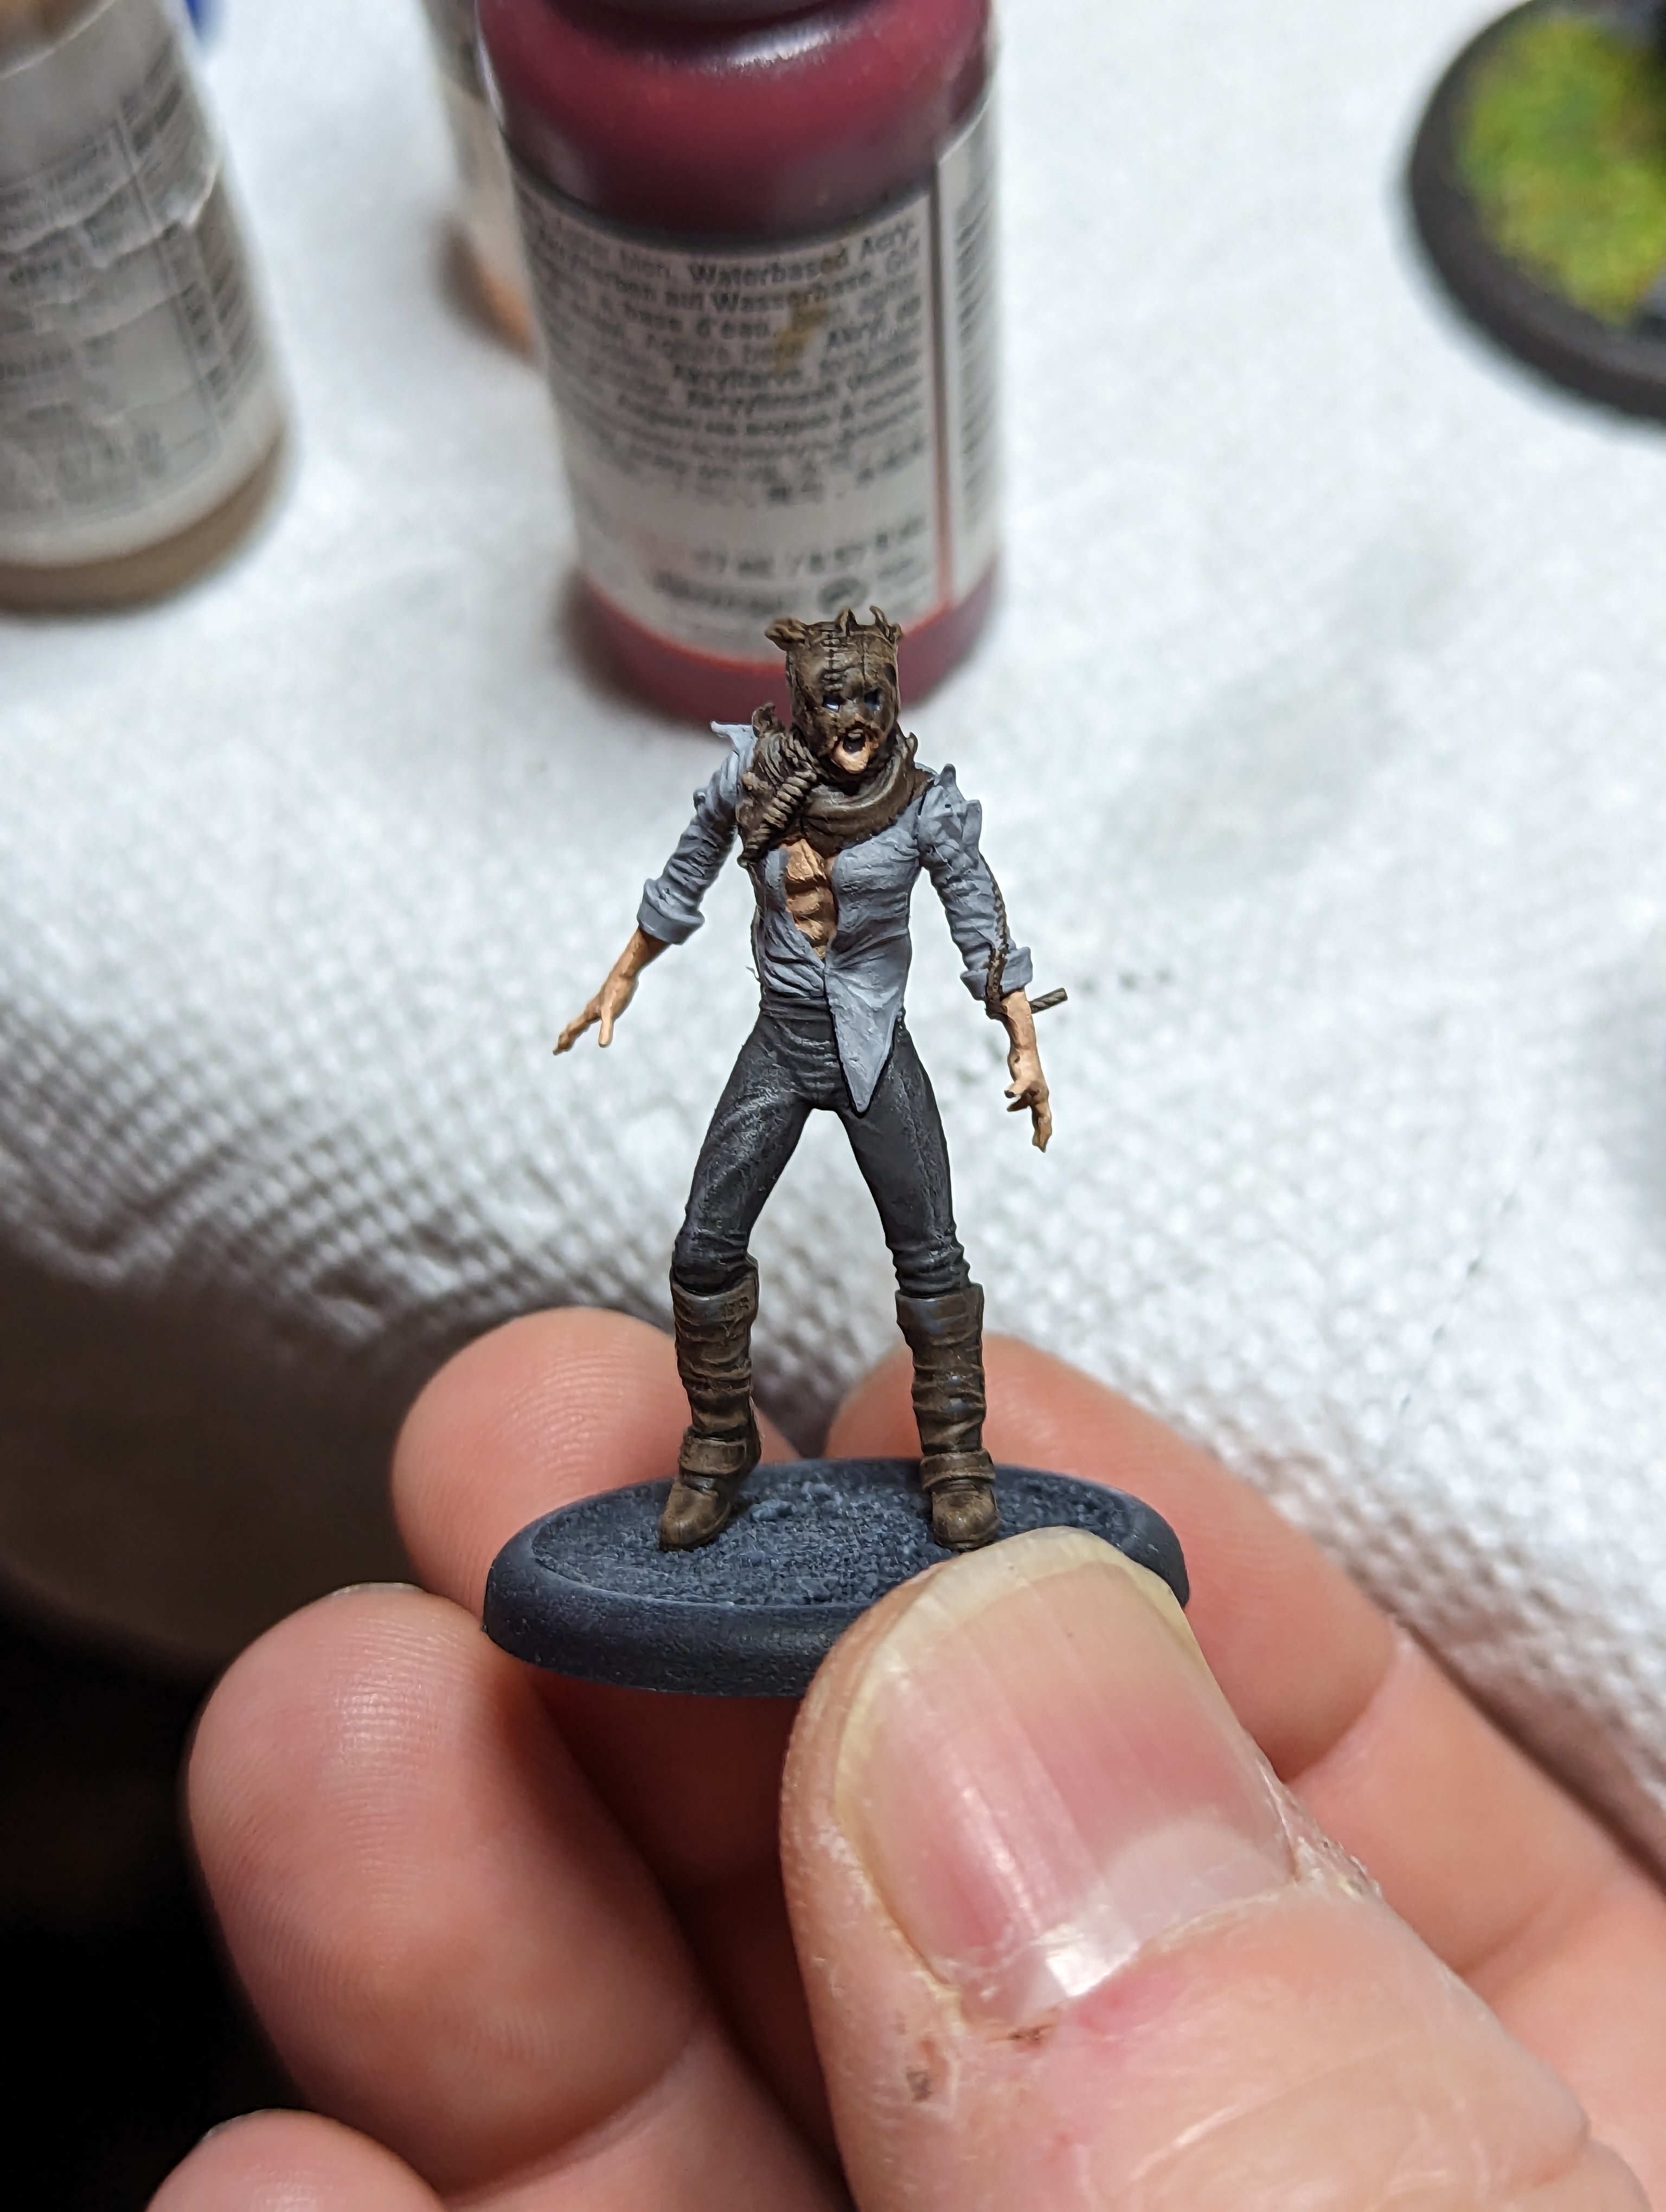
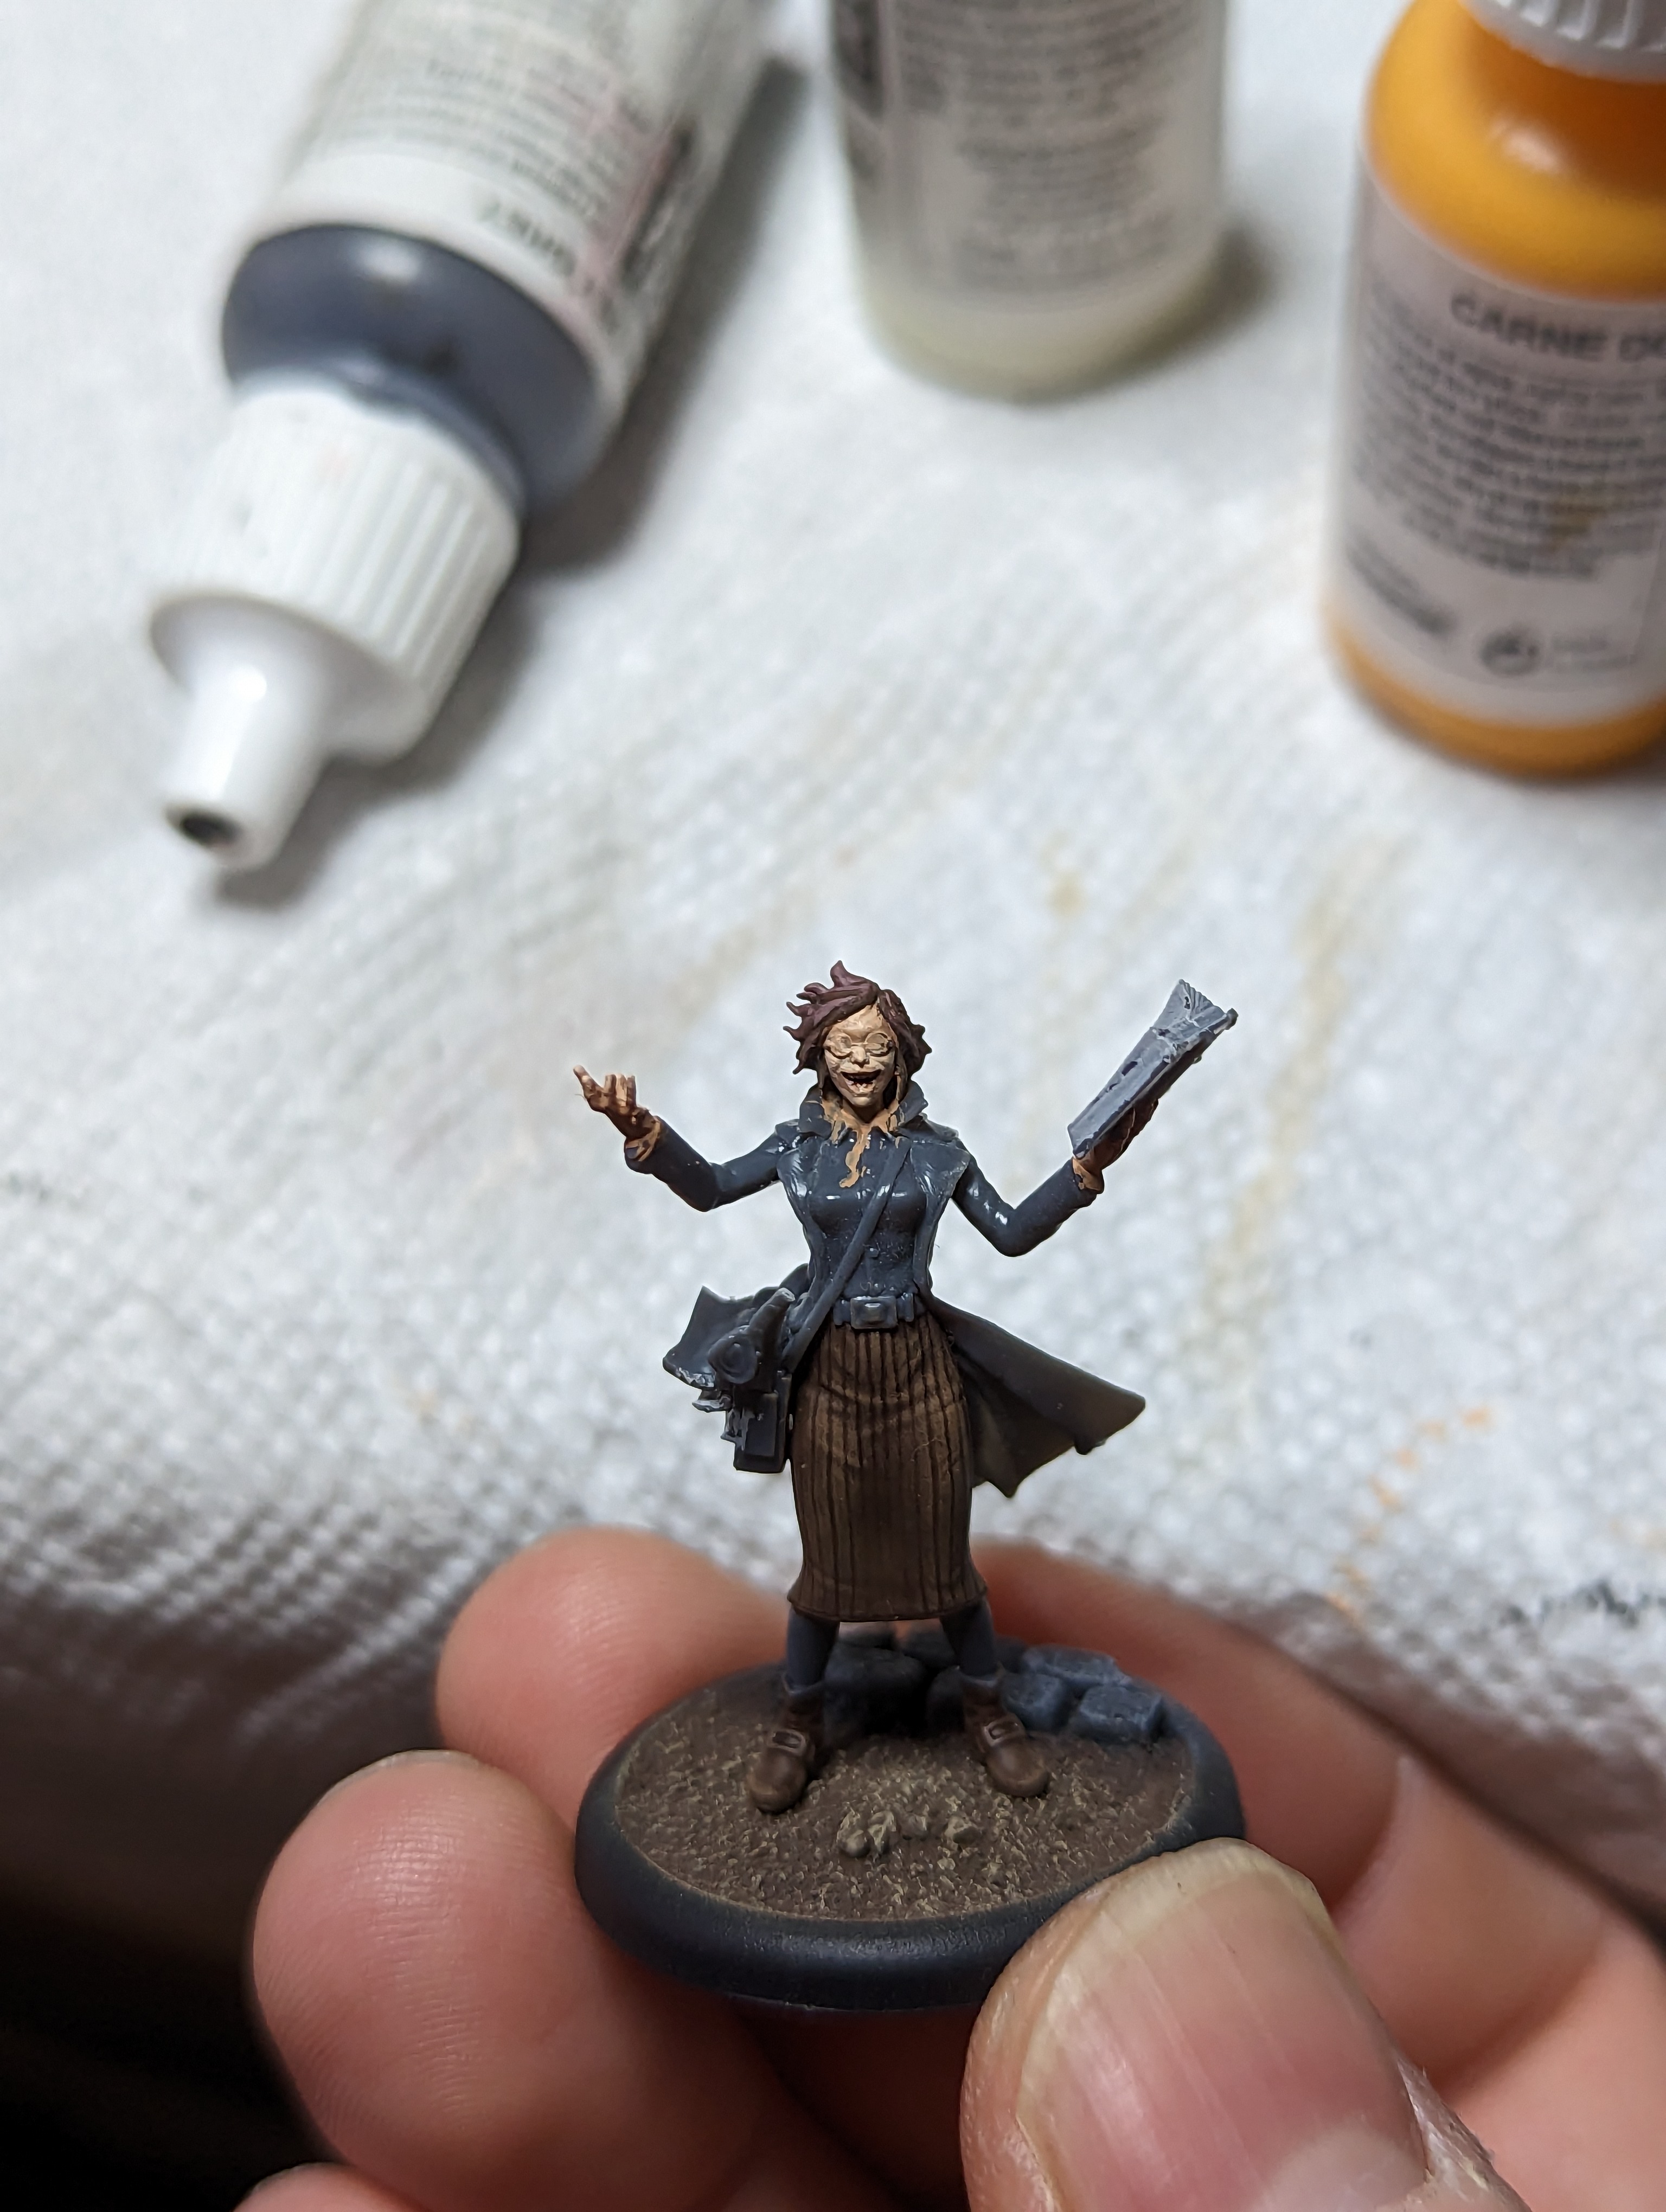
I started off by painting all of the models skin, since they are all a similar tone. After that I hit all of the leather and browns. Leather works pretty well with just a simple dry brush. Even Nellies skirt was pretty quick and easy, and the result was pretty good I think.

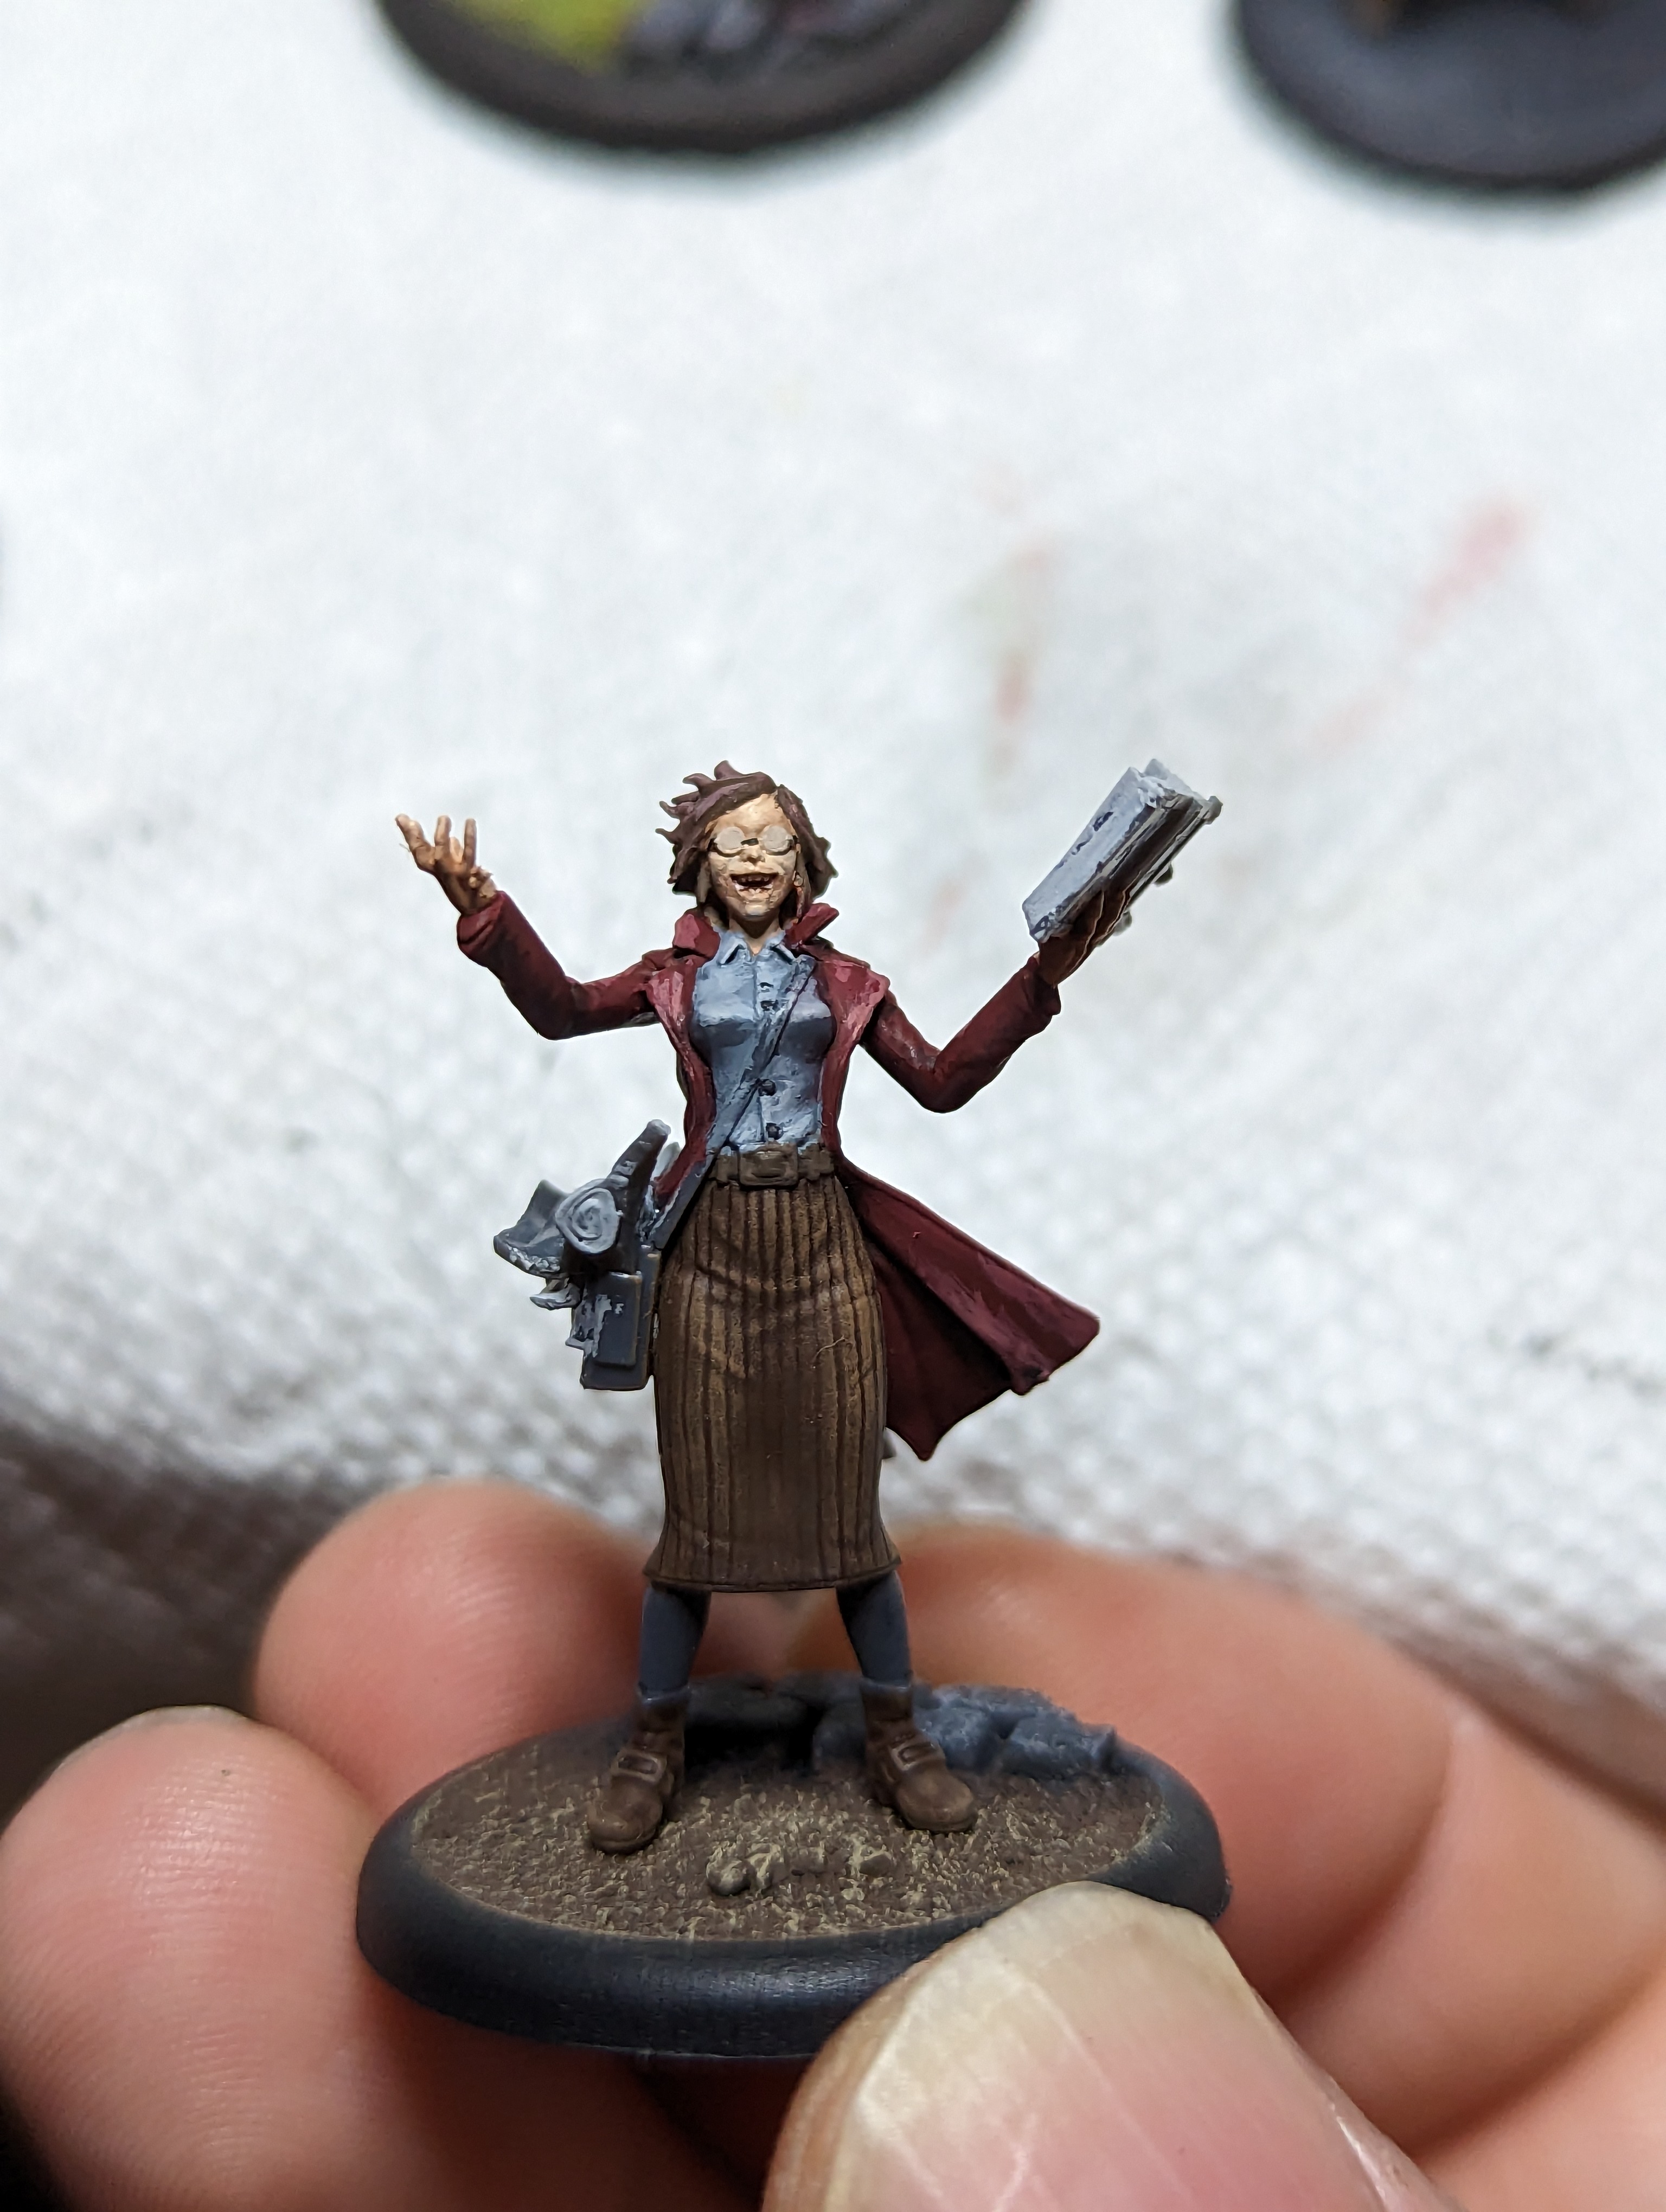

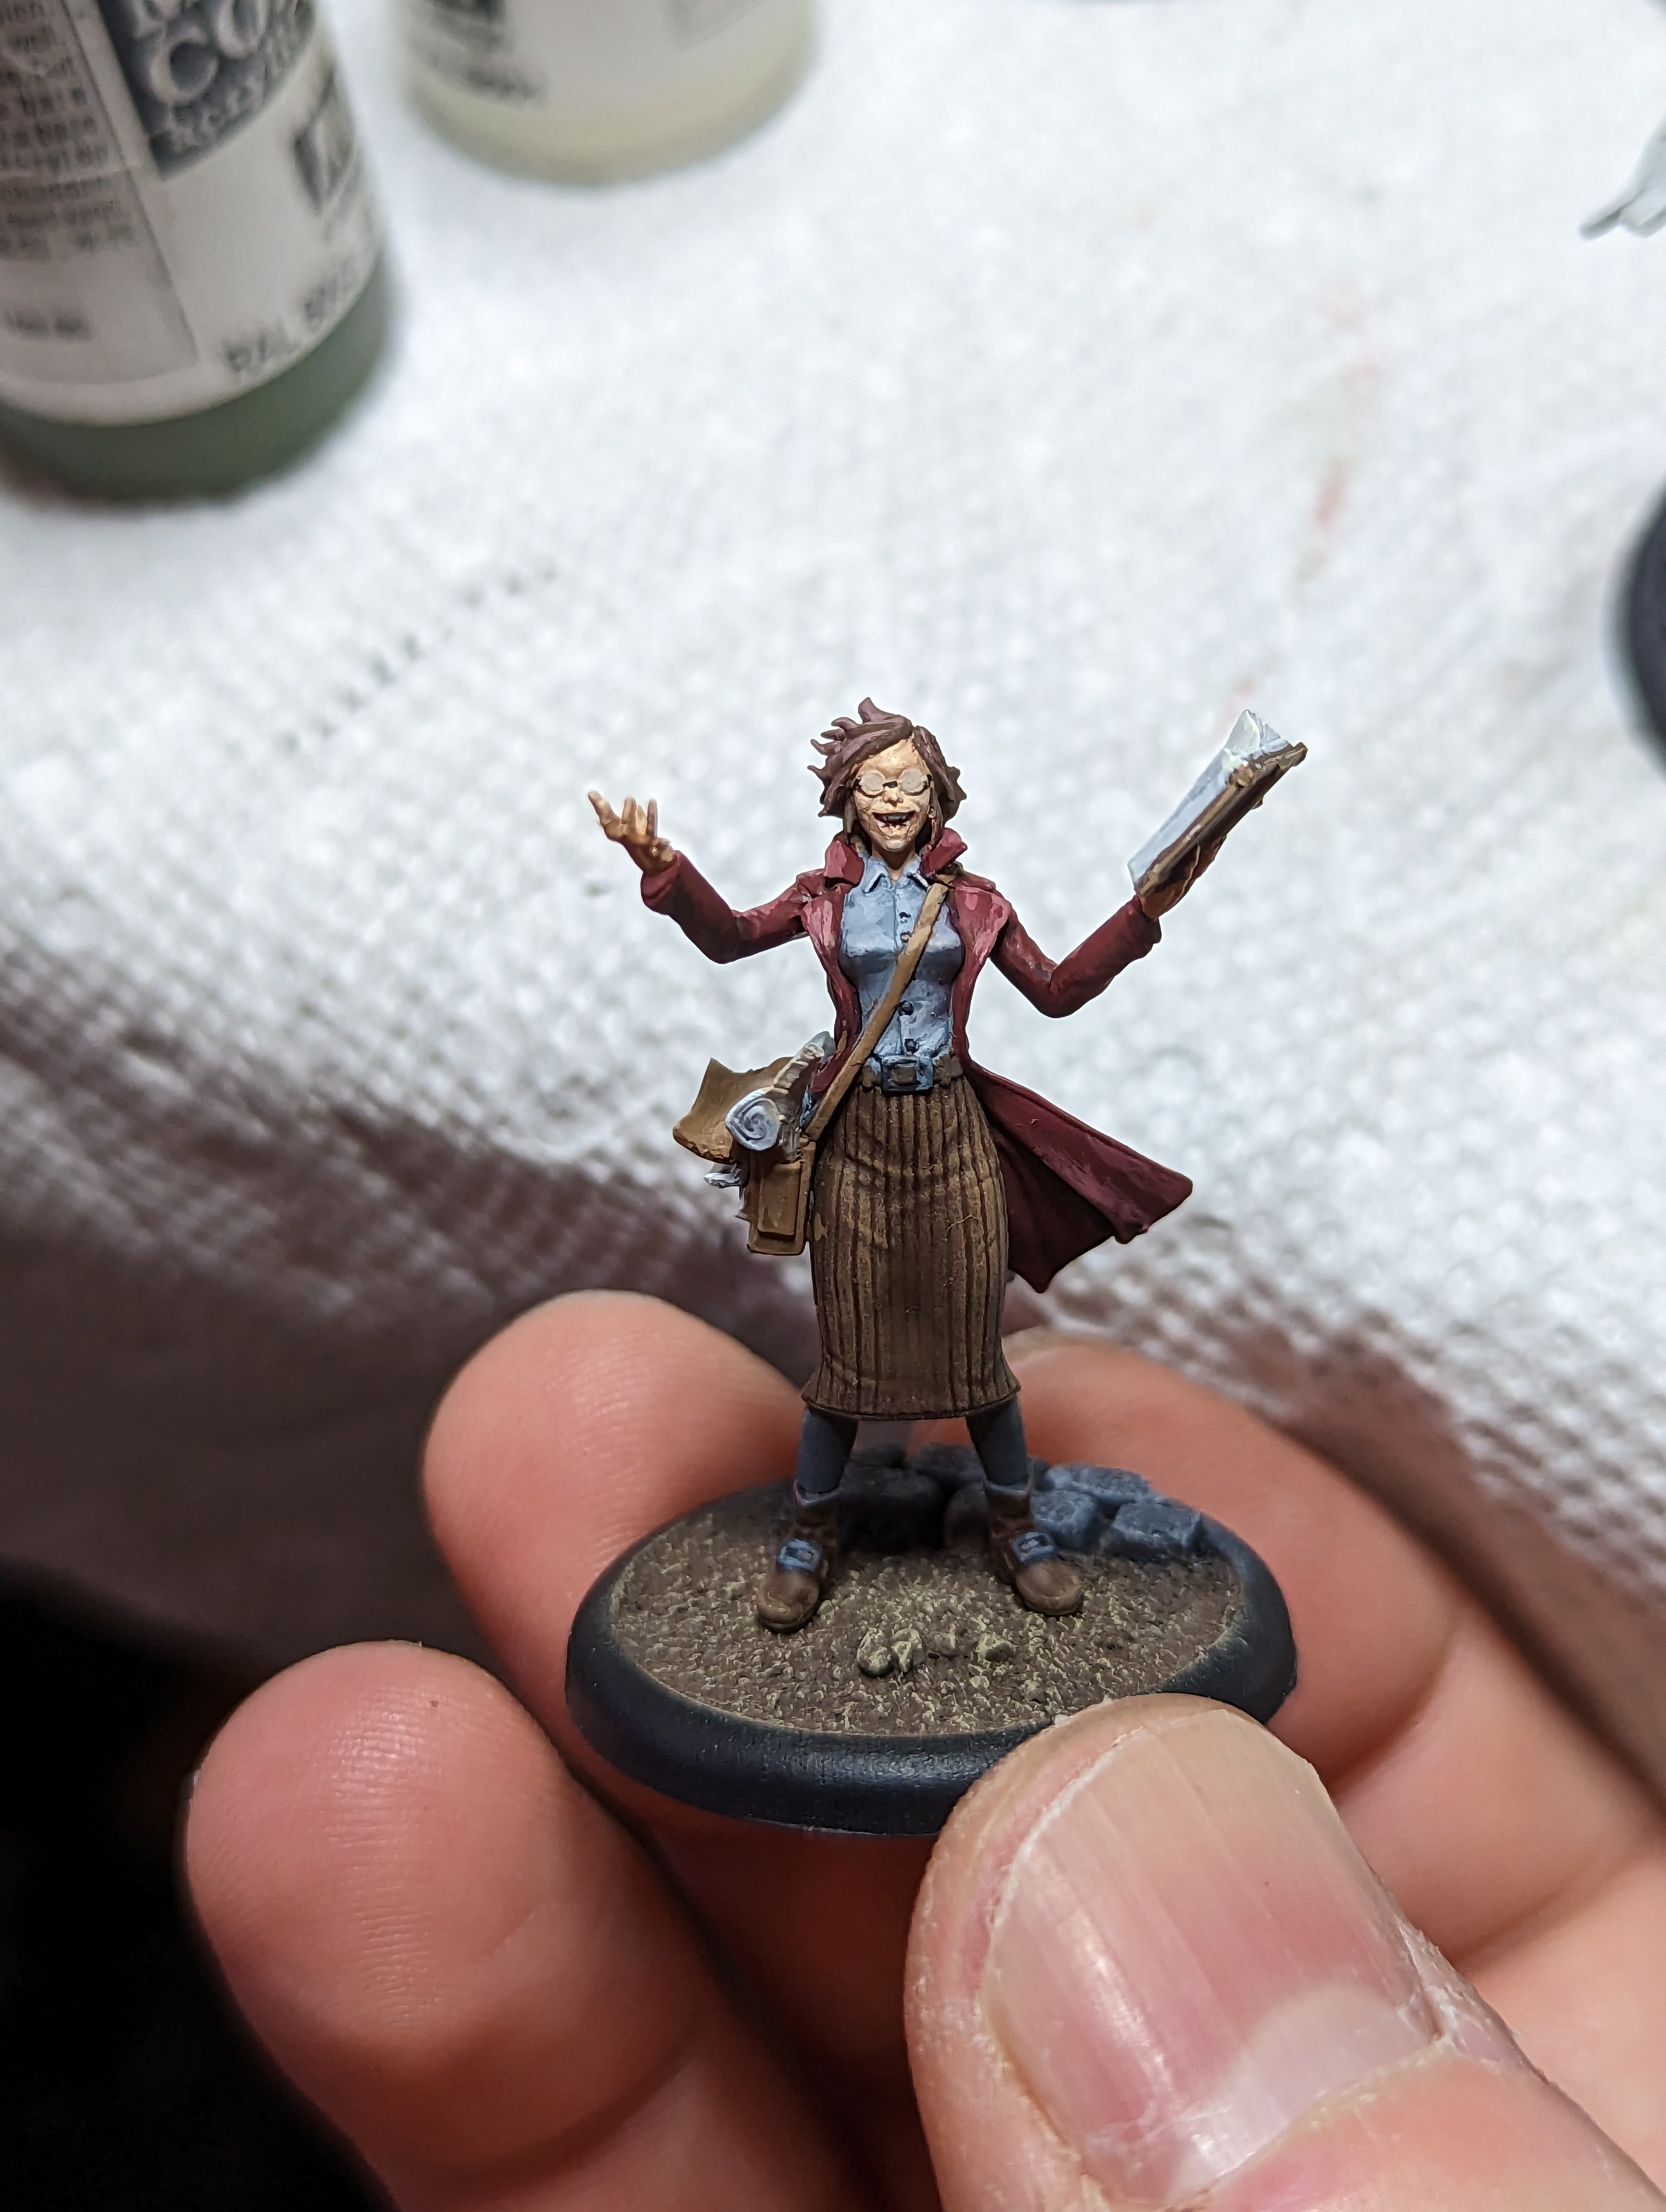
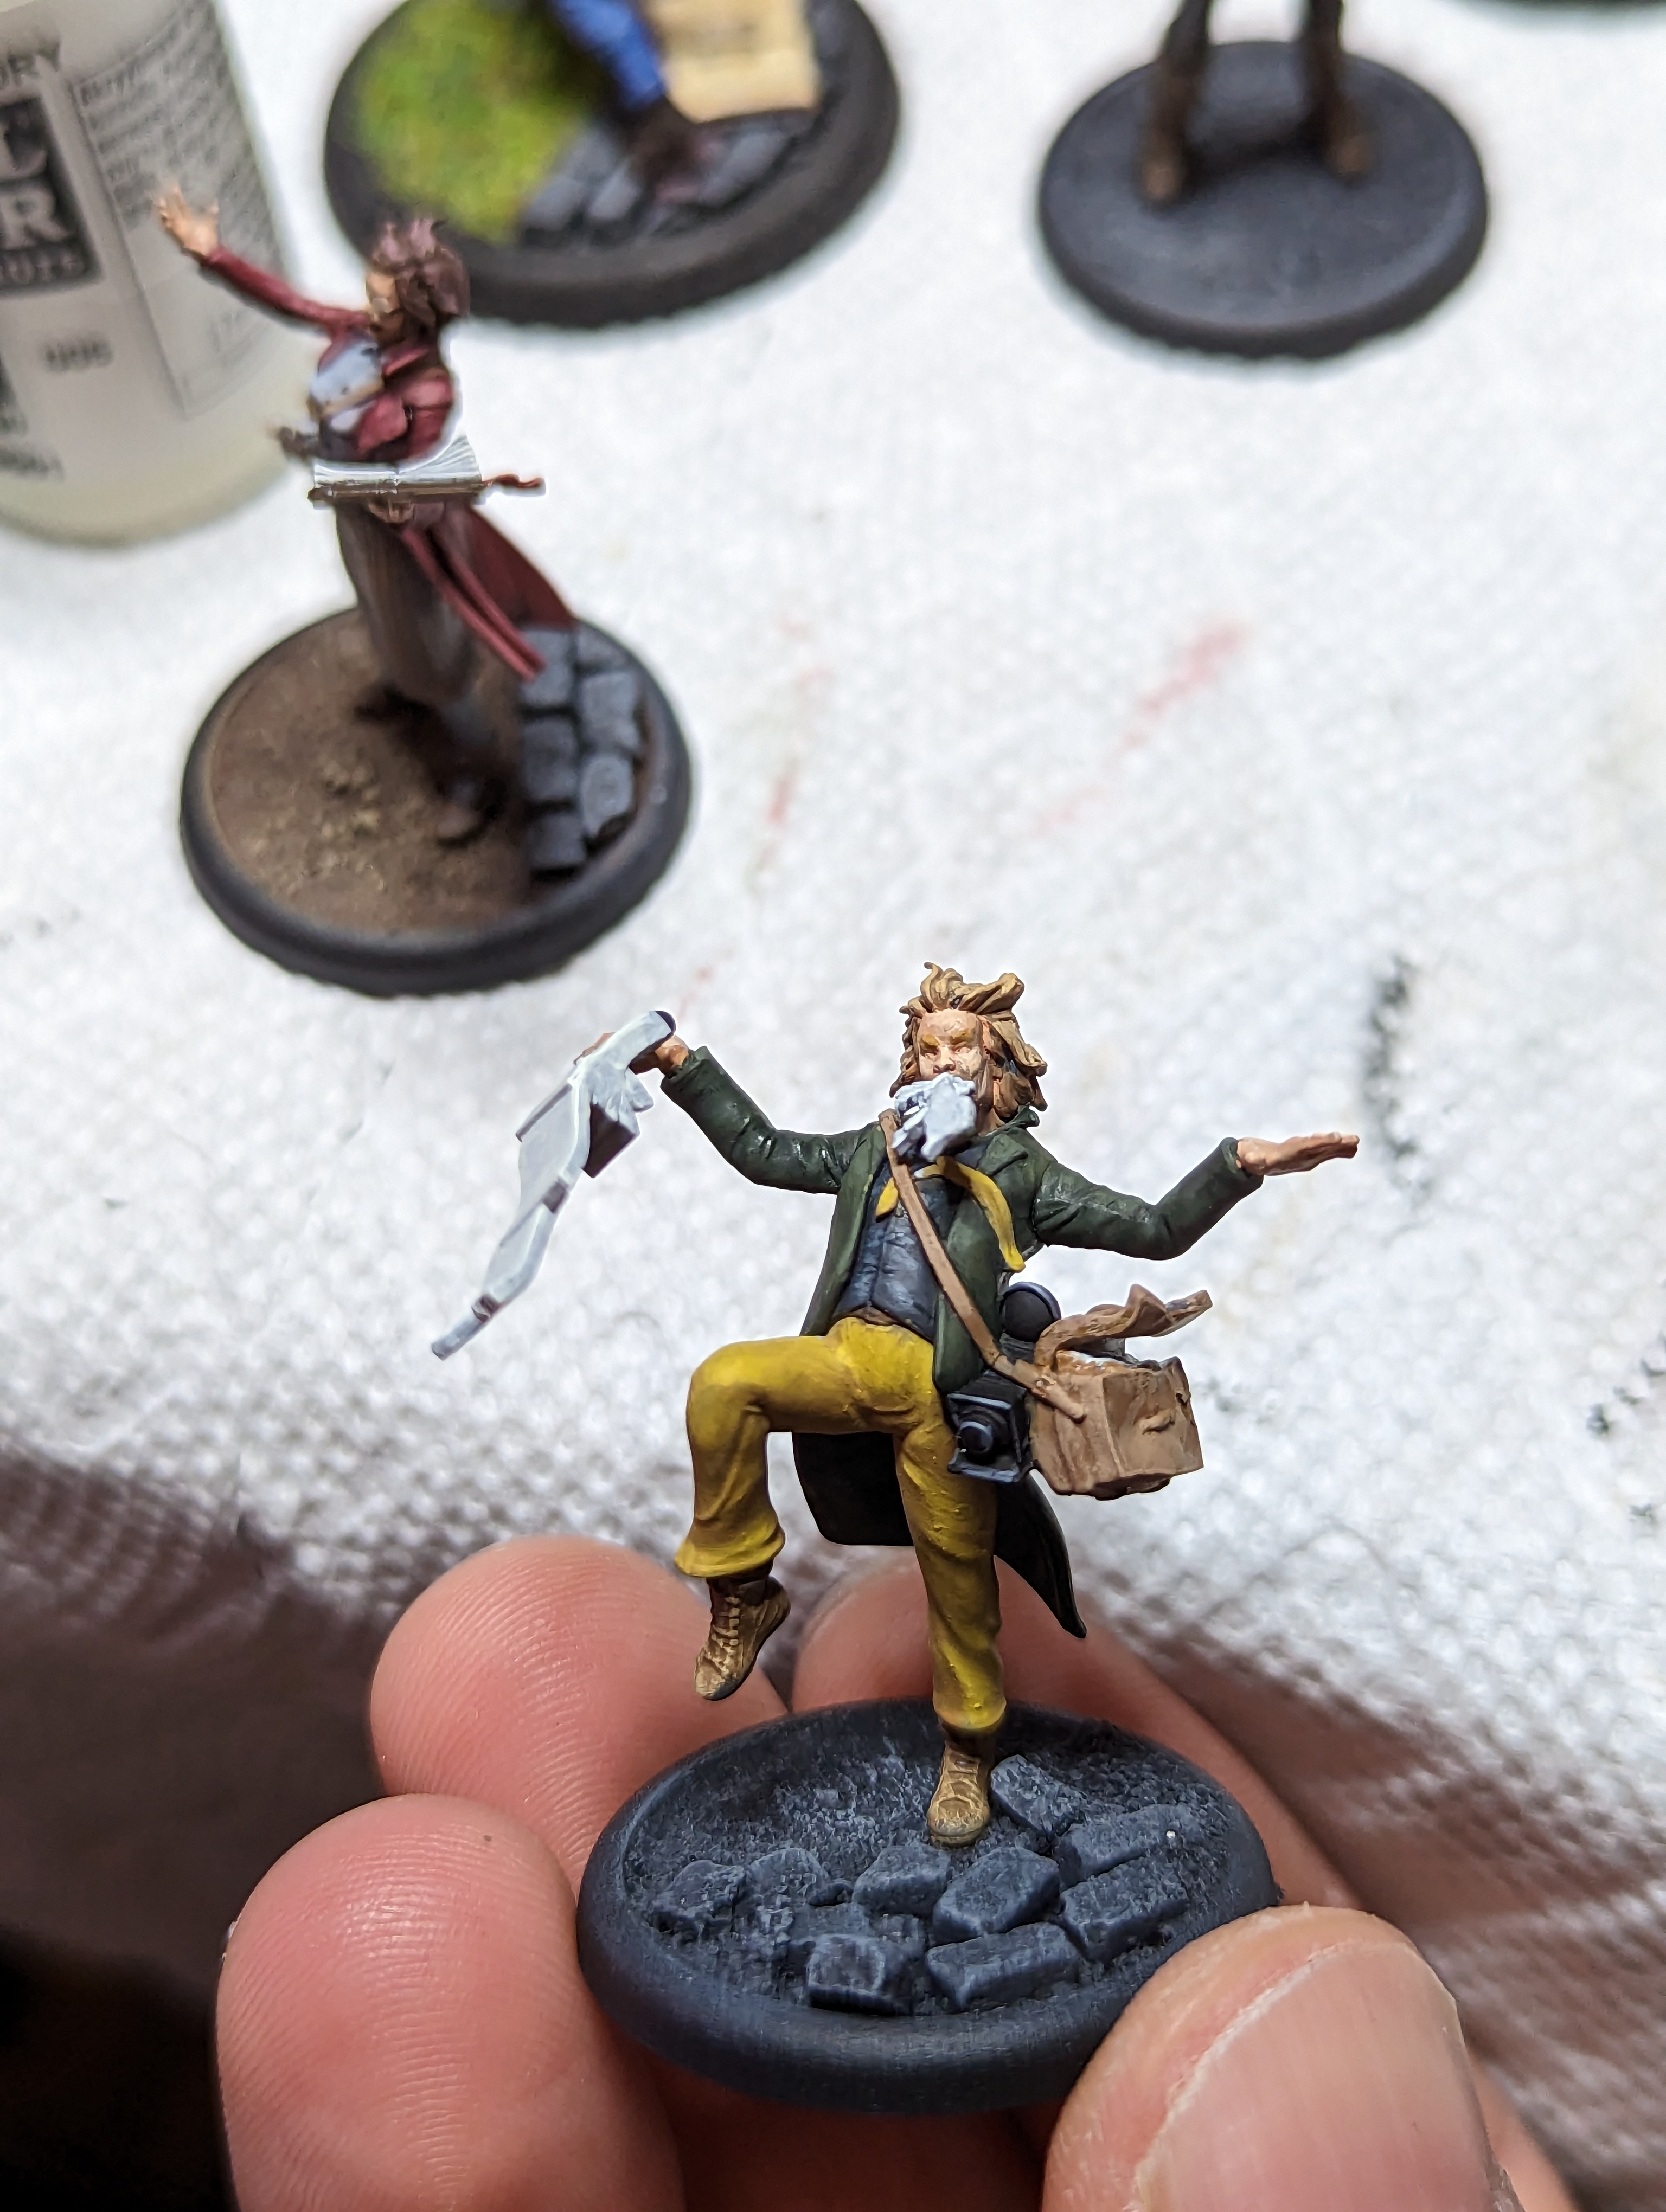
Jack Daw’s clothes are pretty simple, just dark gray and light gray. The other 2 have a little more going on, with colorful clothing and papers and cameras. I always find it difficult to paint classes. Nellies look bad up close, but from a distance I think they are passable.
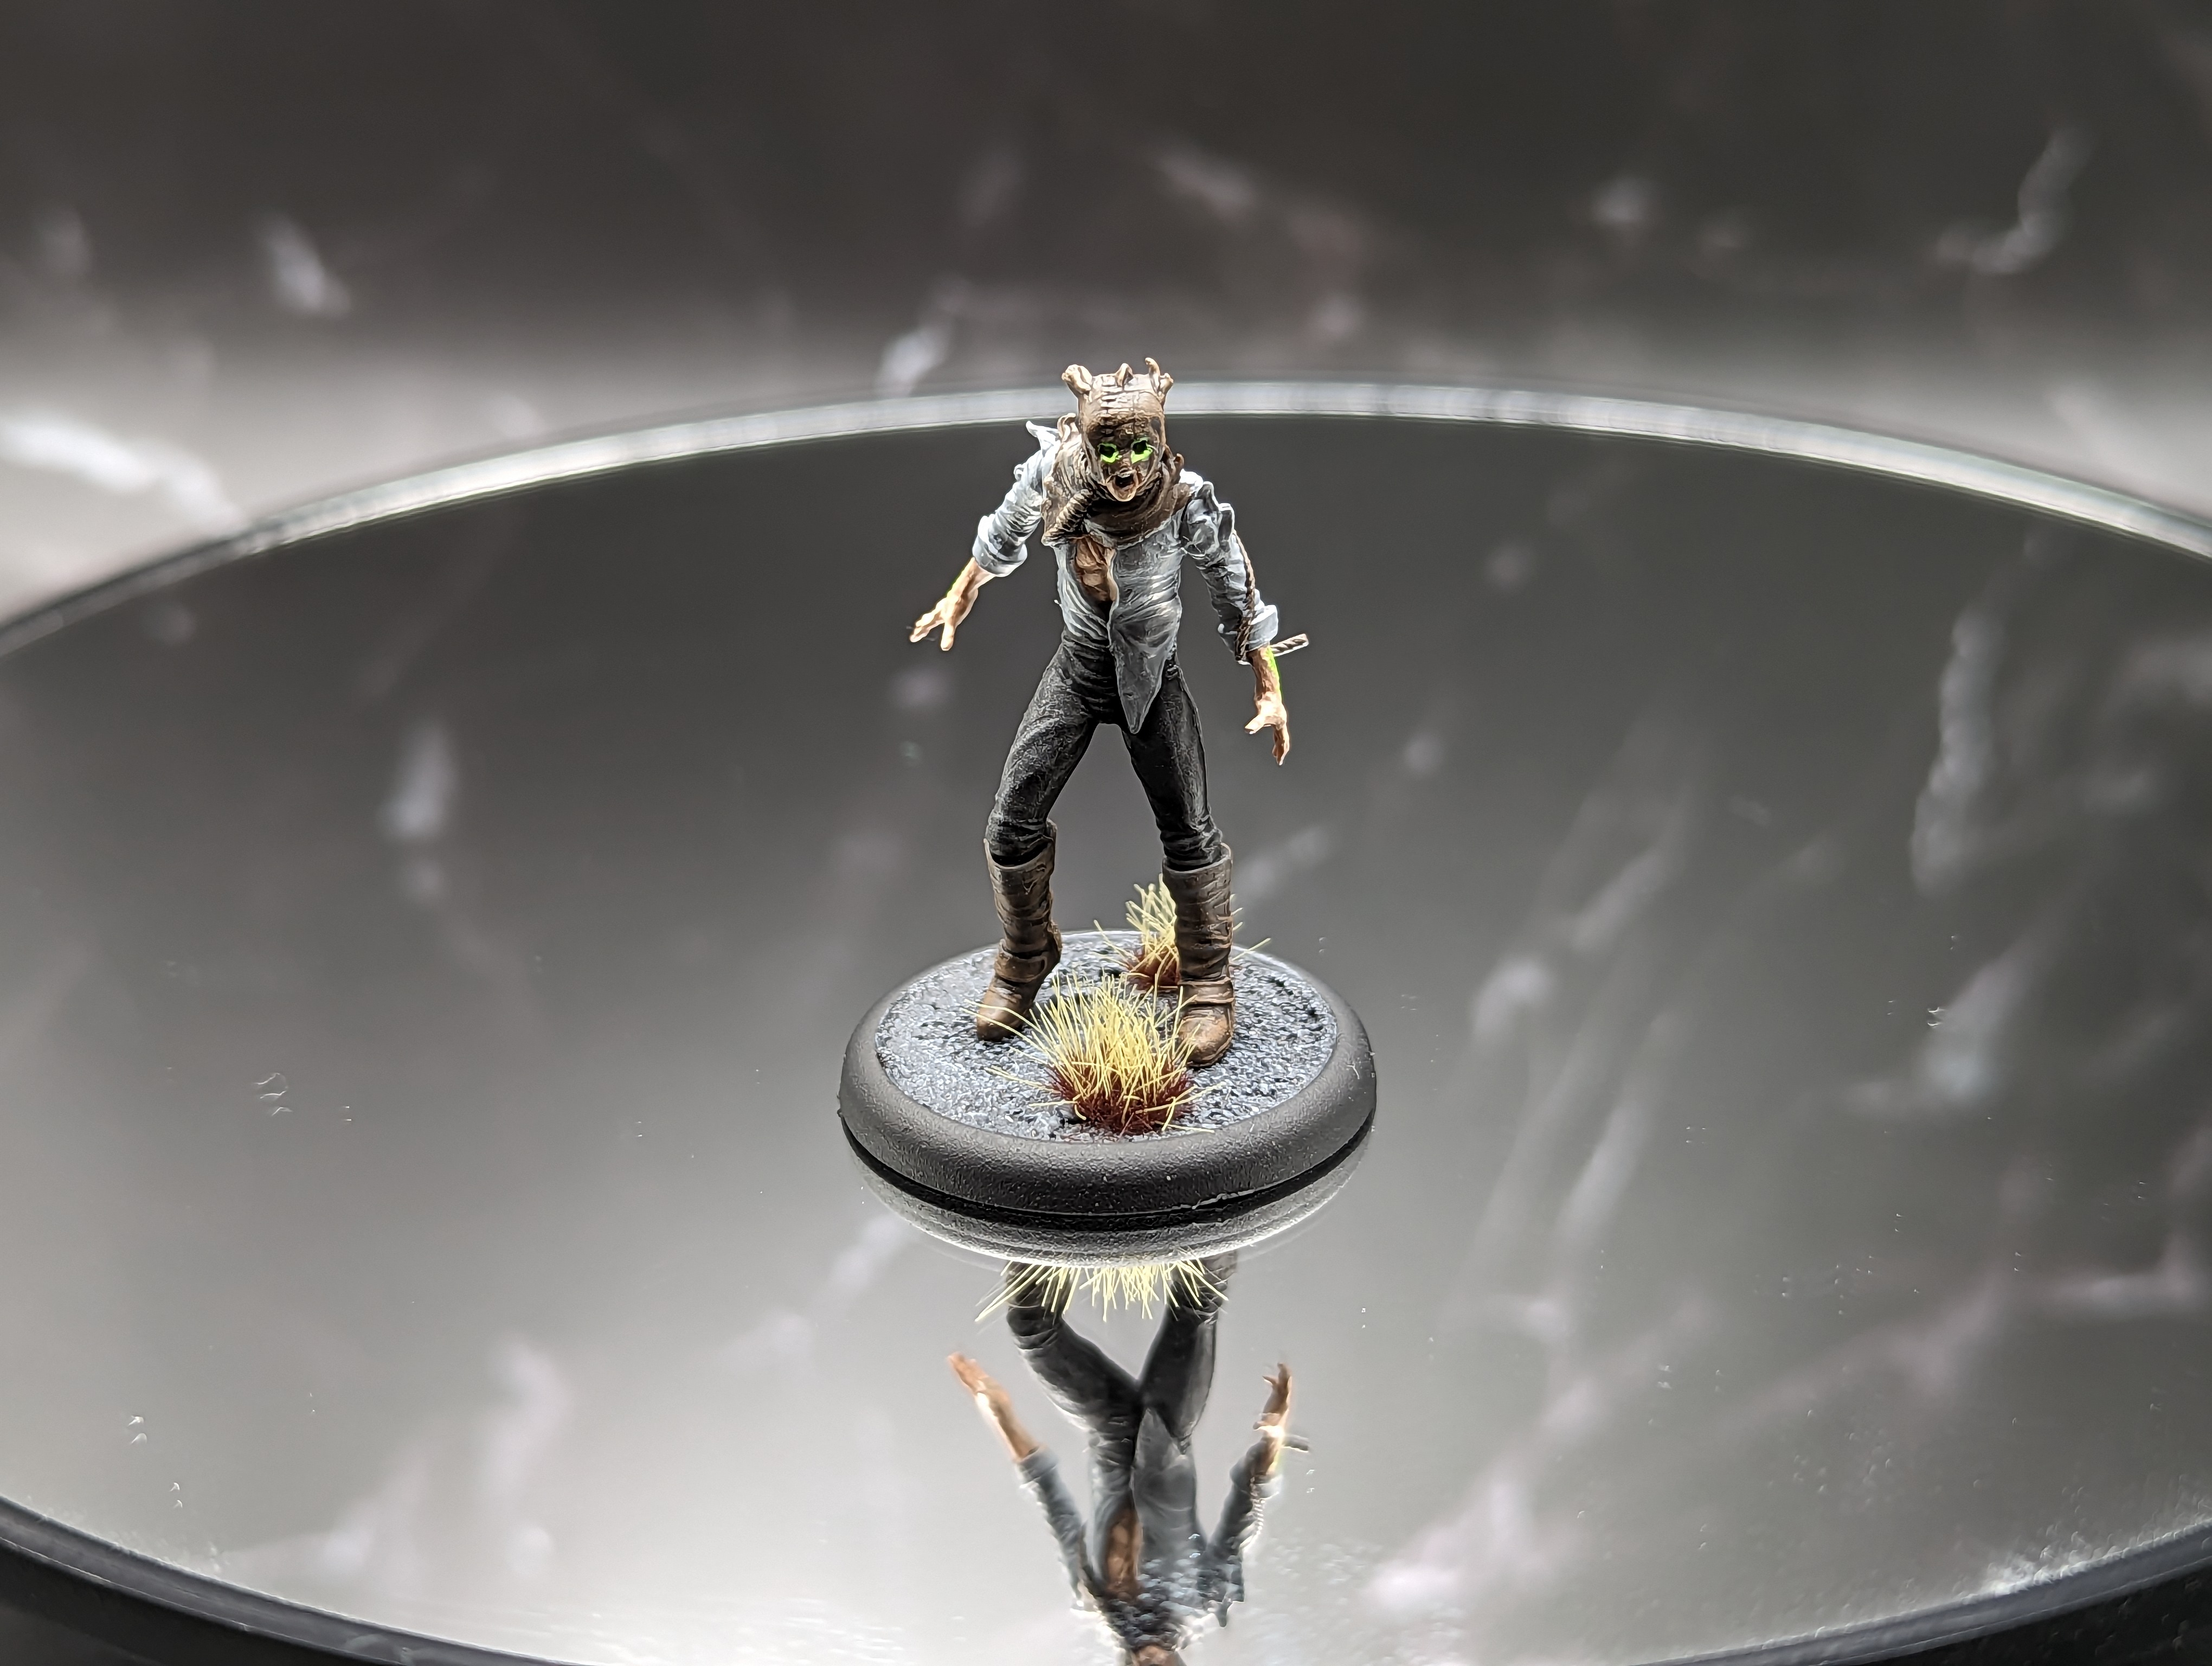
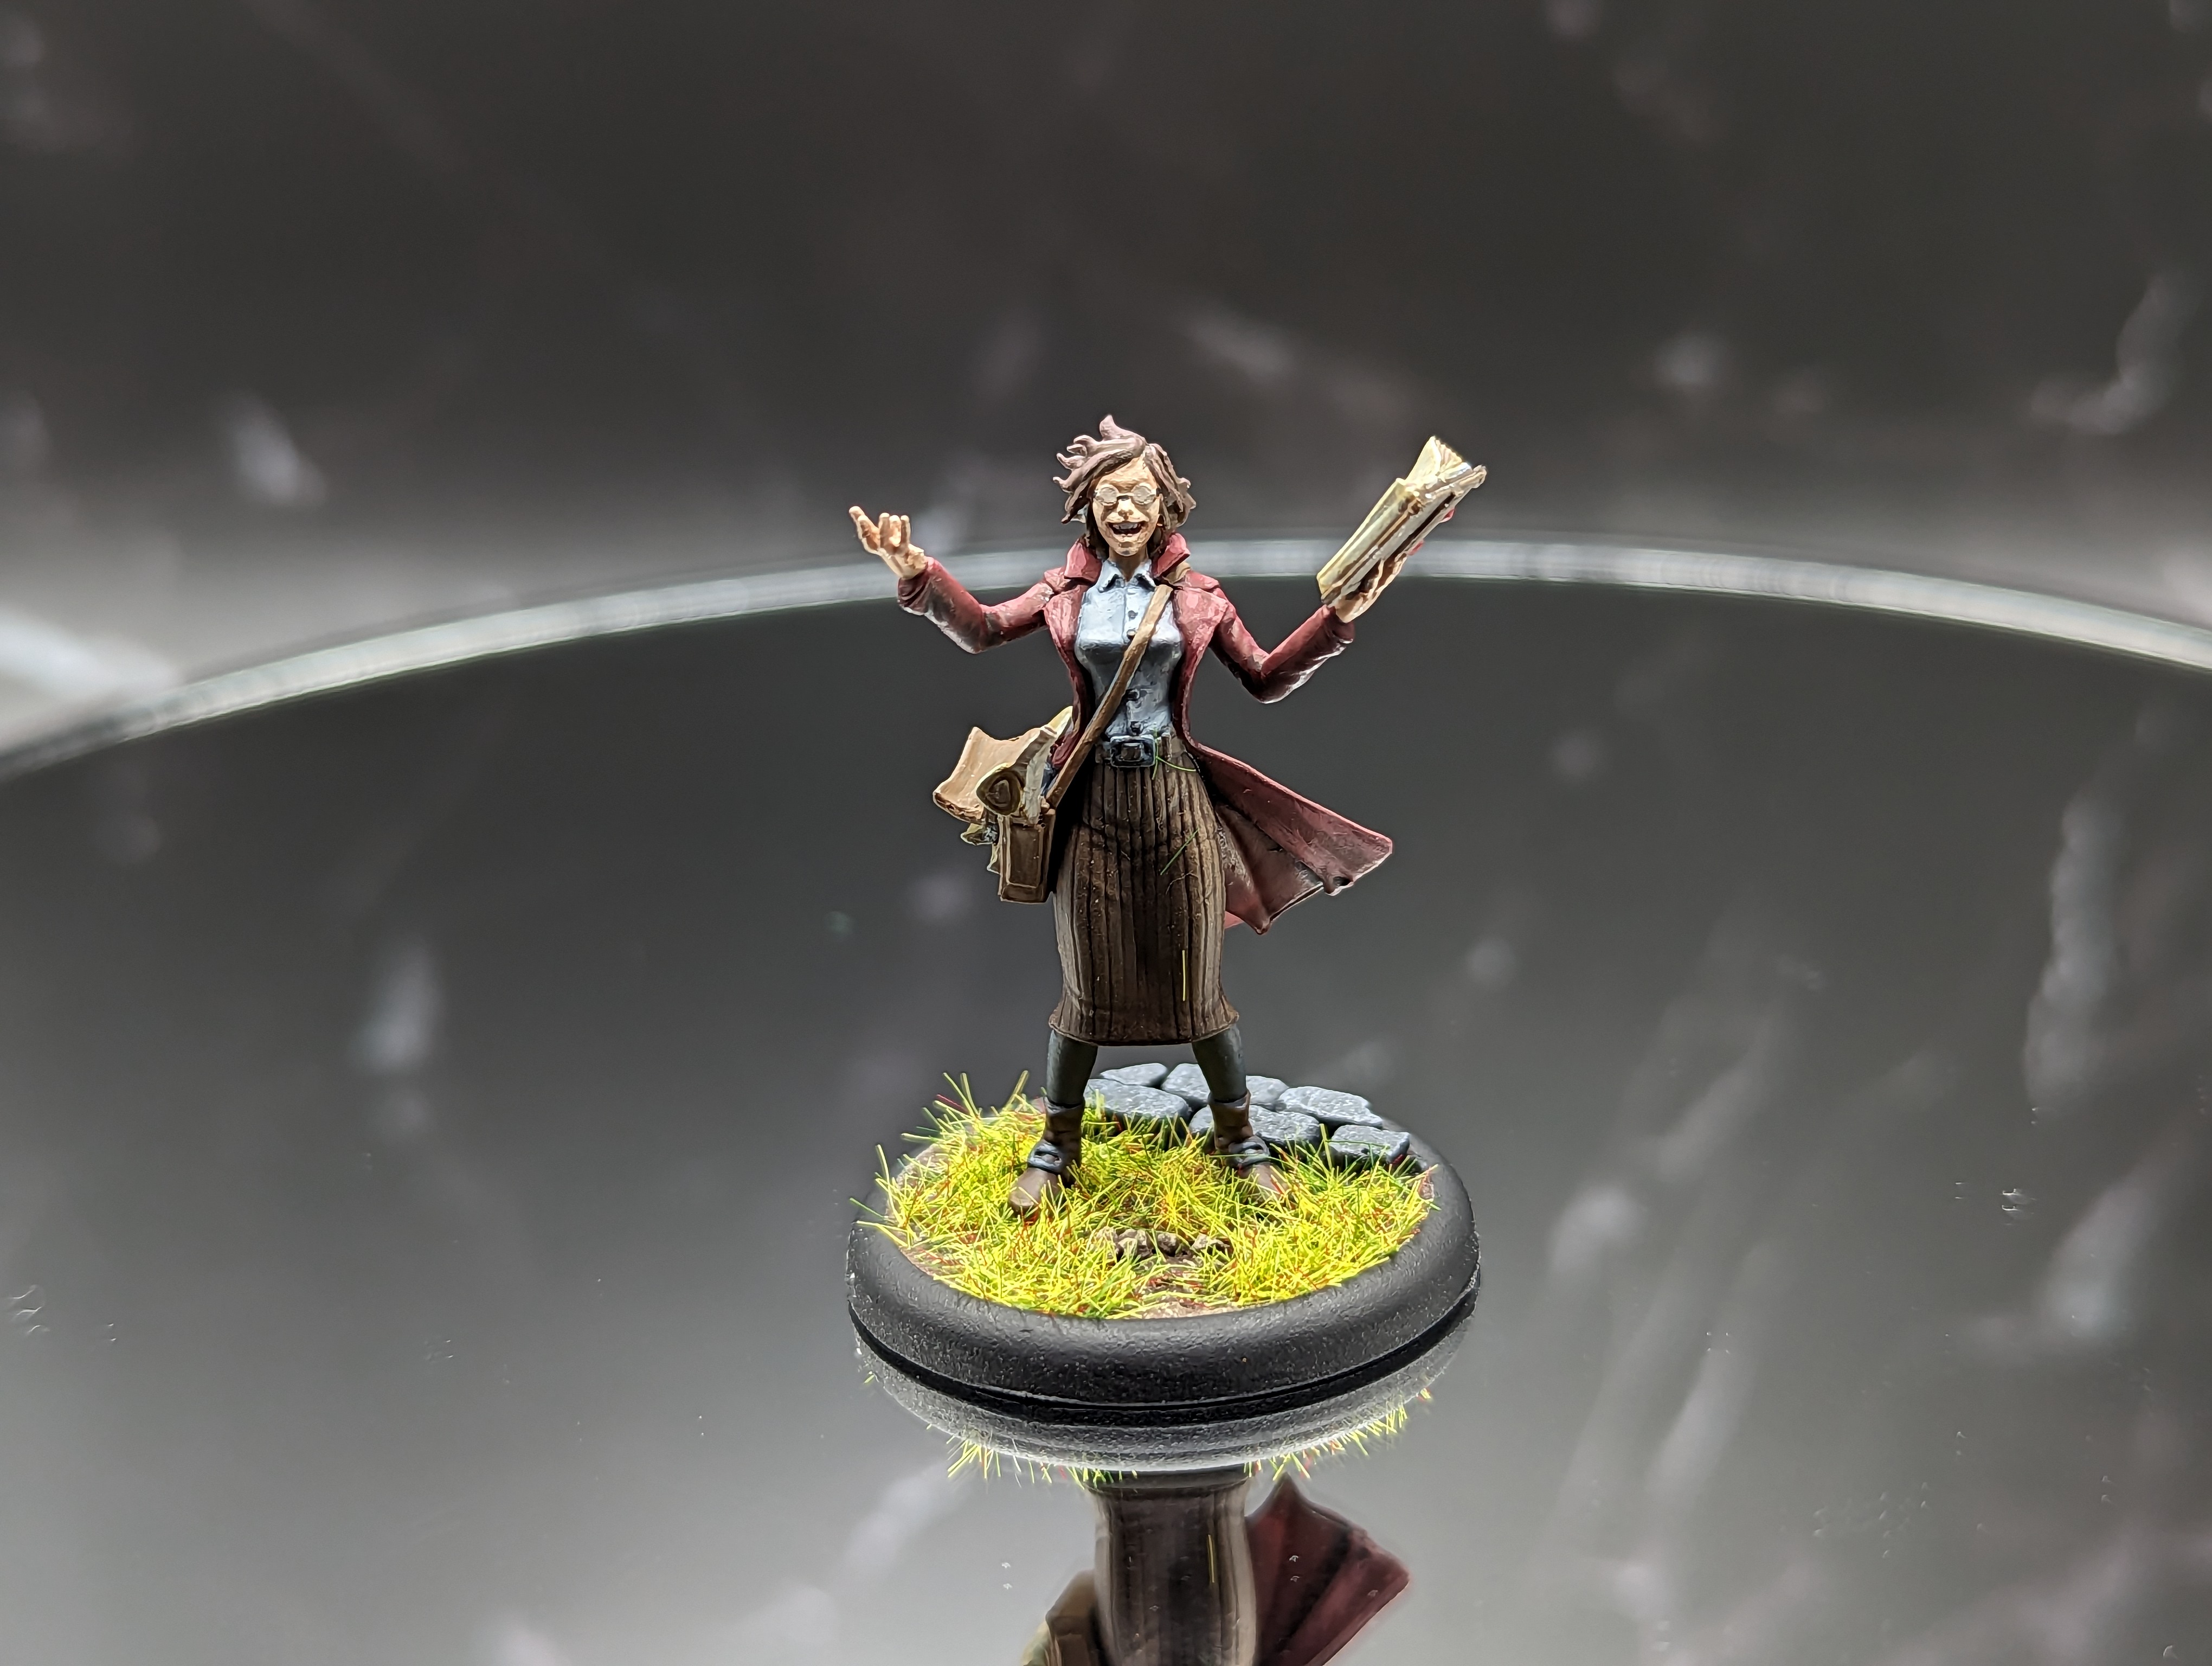
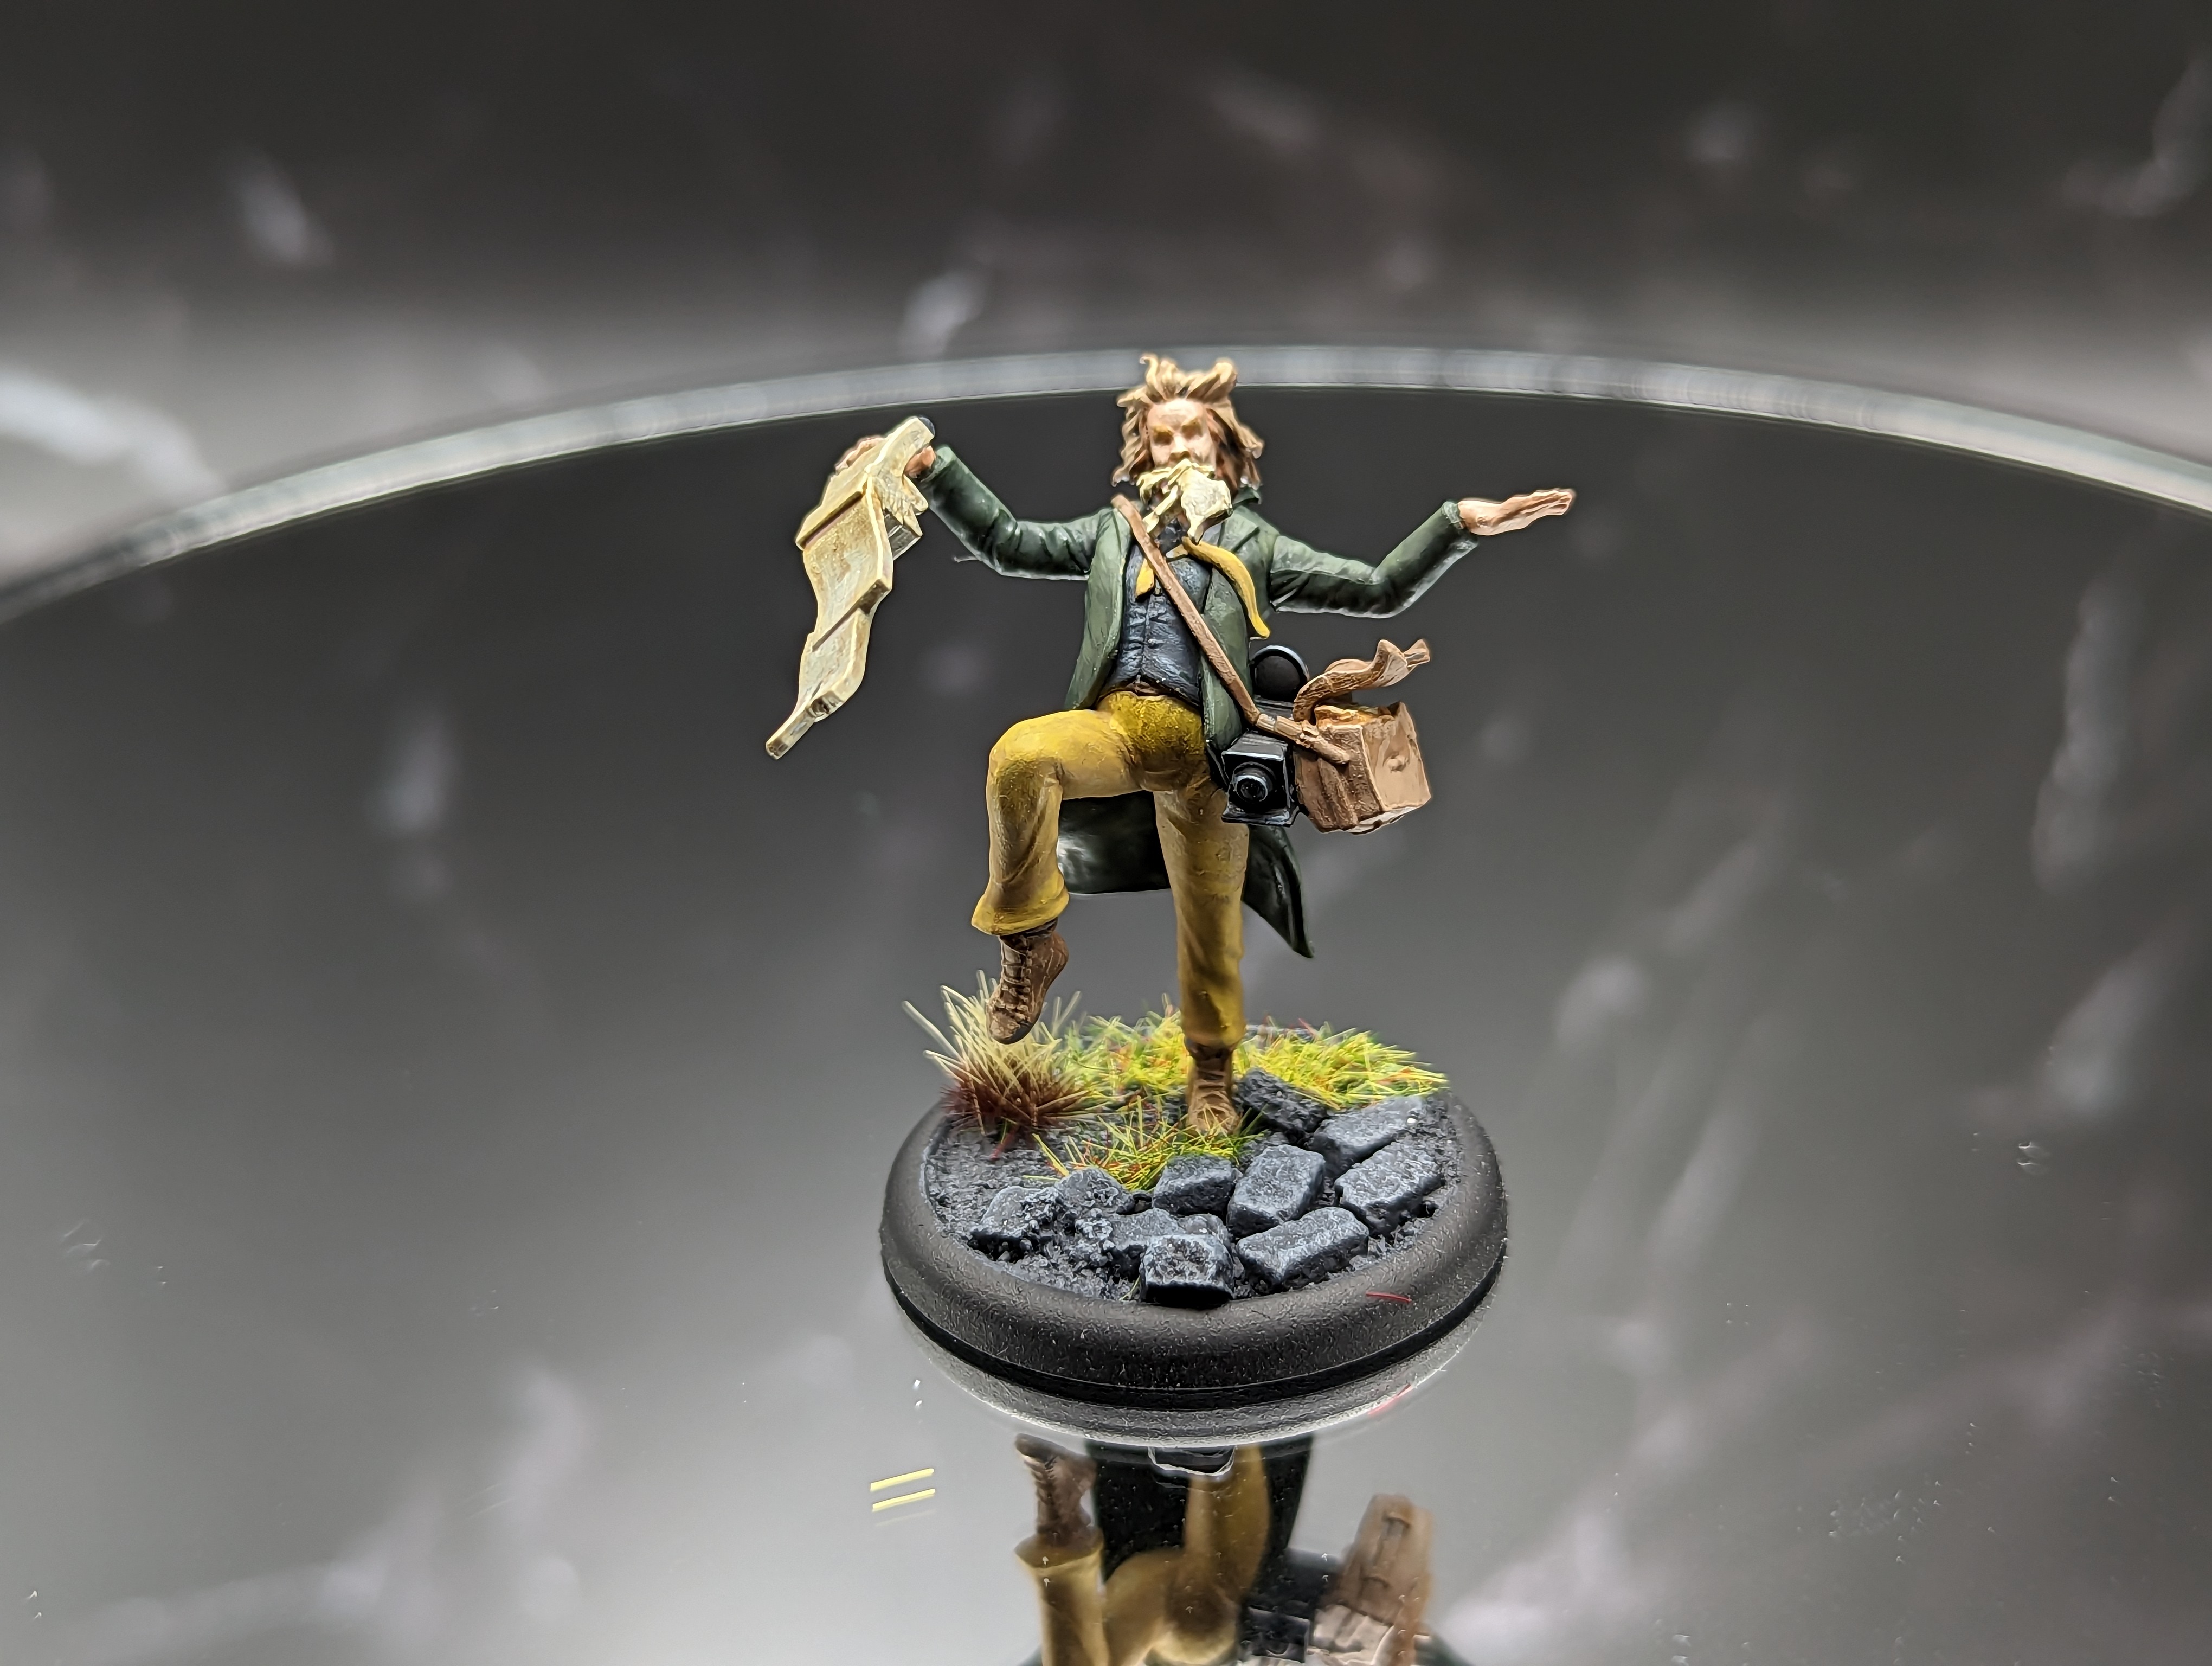
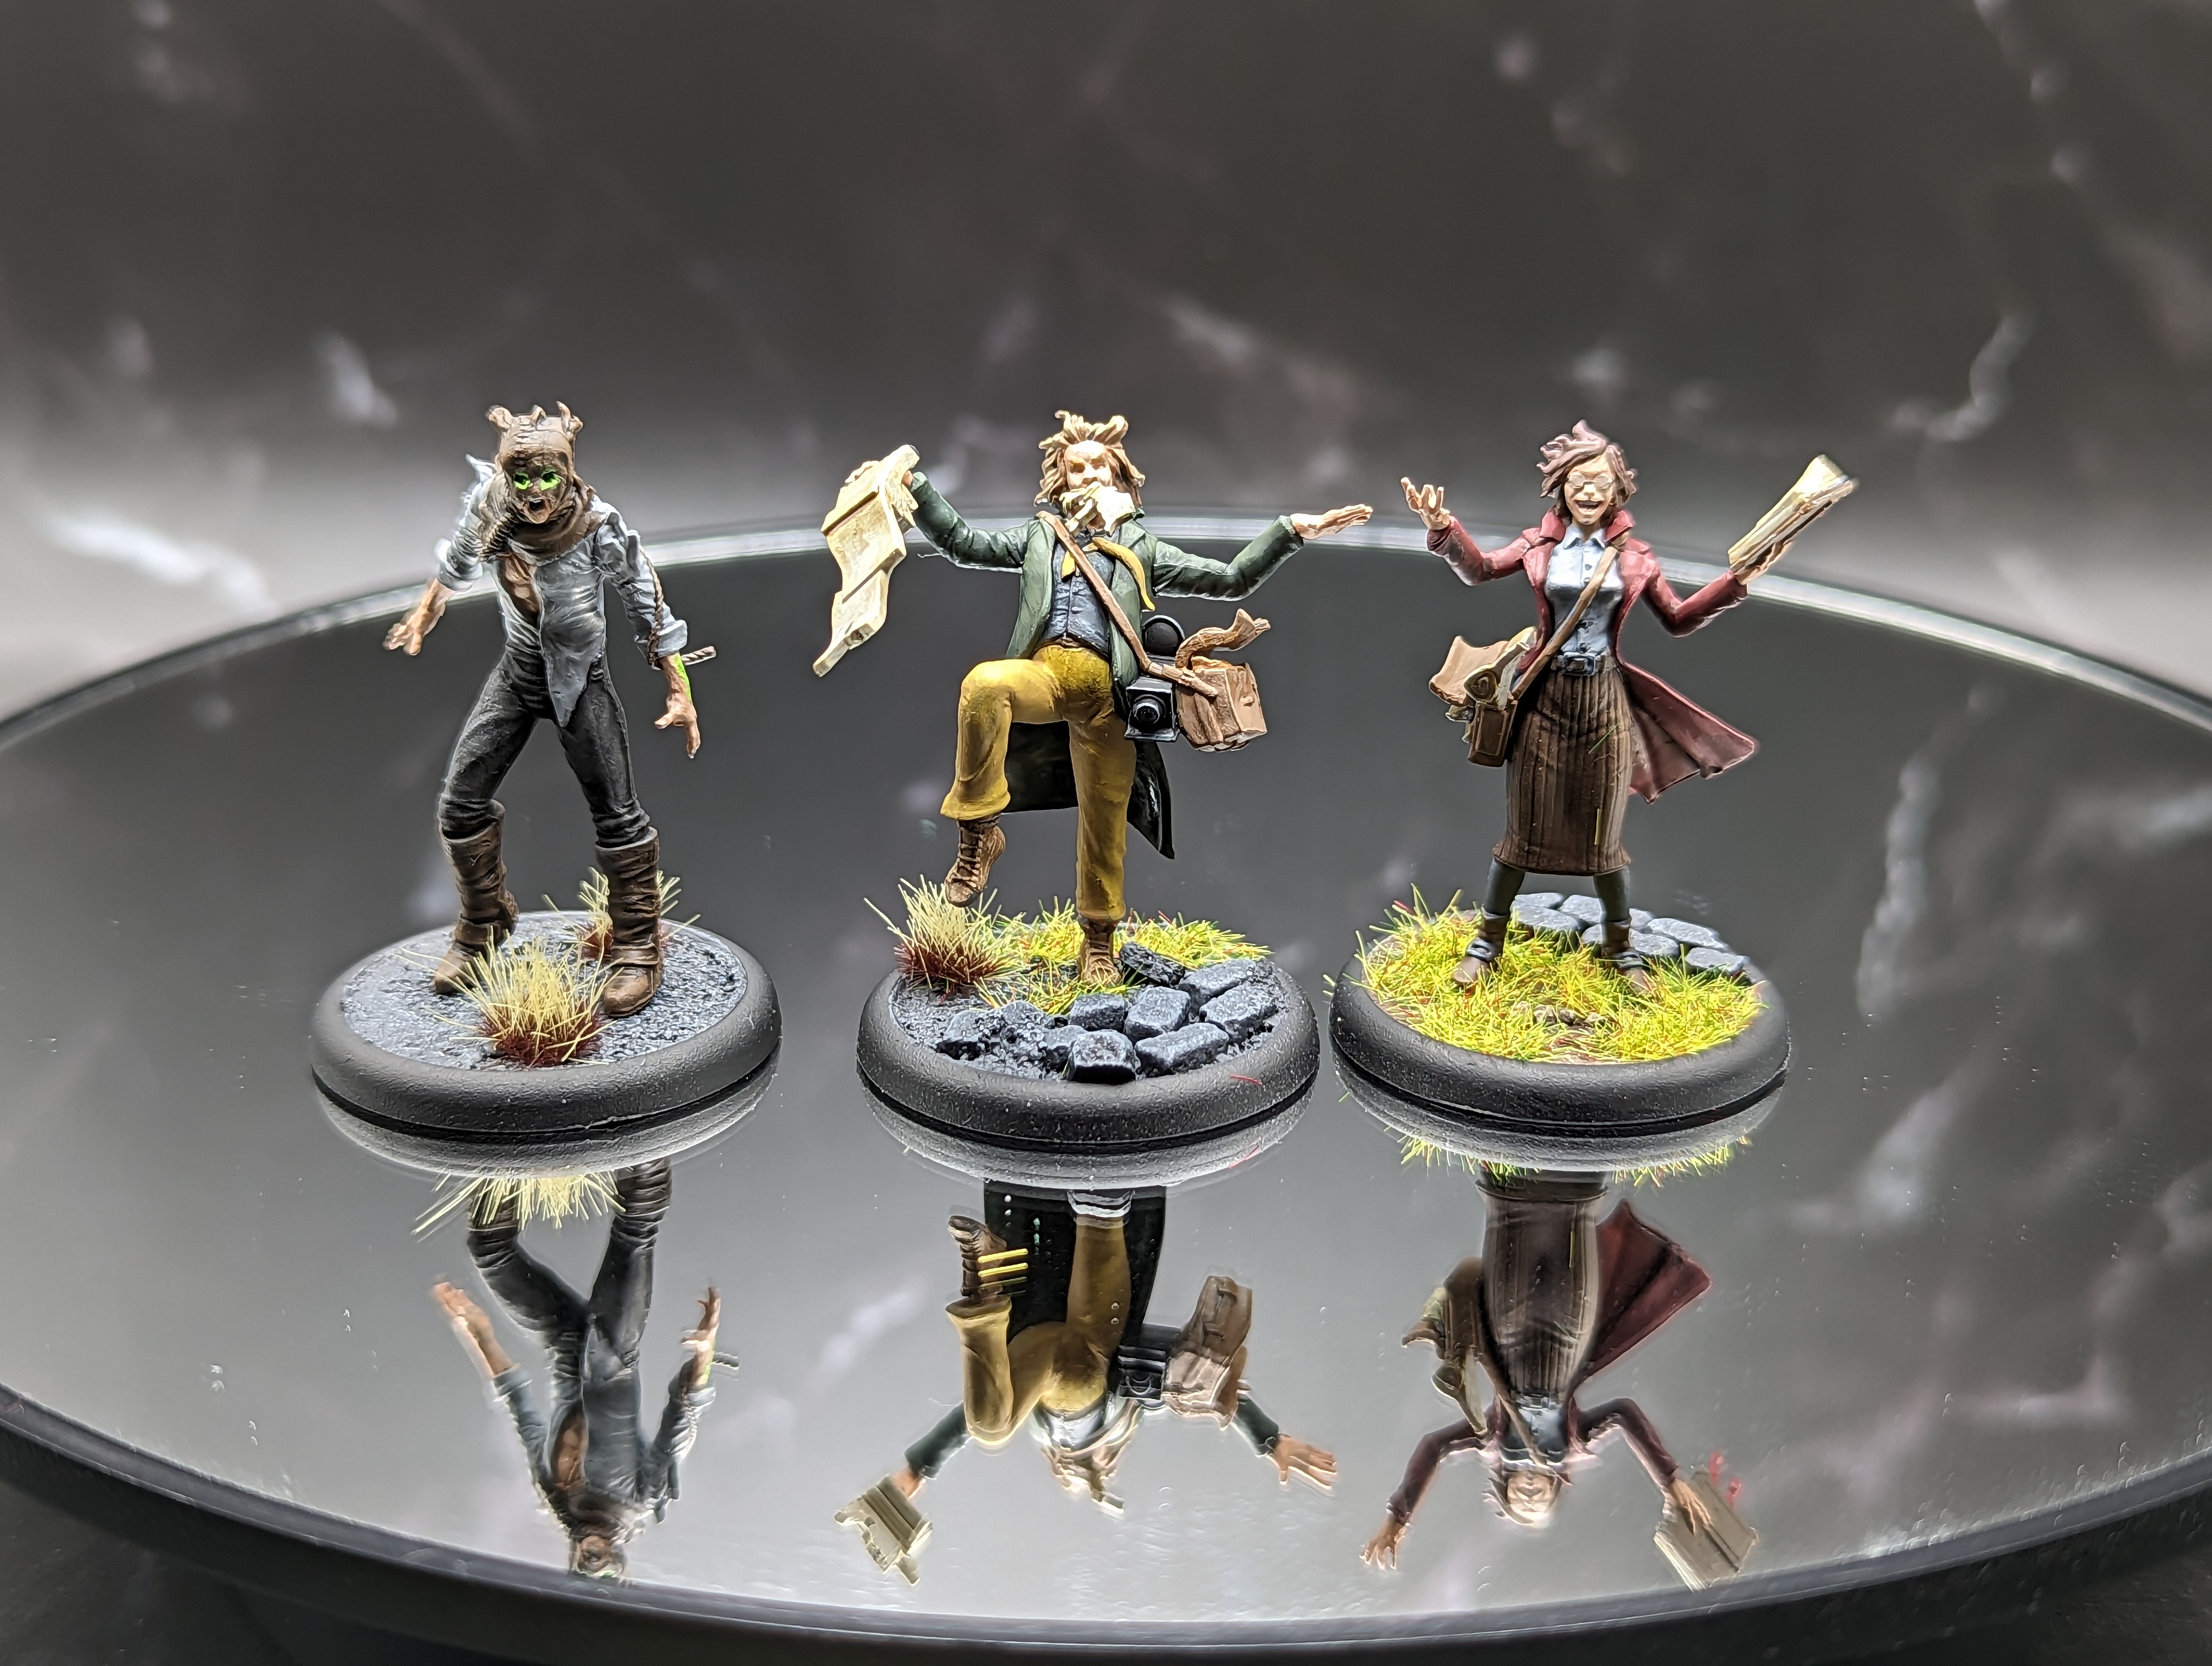
I added a little green glow to Jack, and some grass to the bases, and im calling them done. Quick and easy. 1 more box down.
If you’re curious about the characters, check out the videos I did!
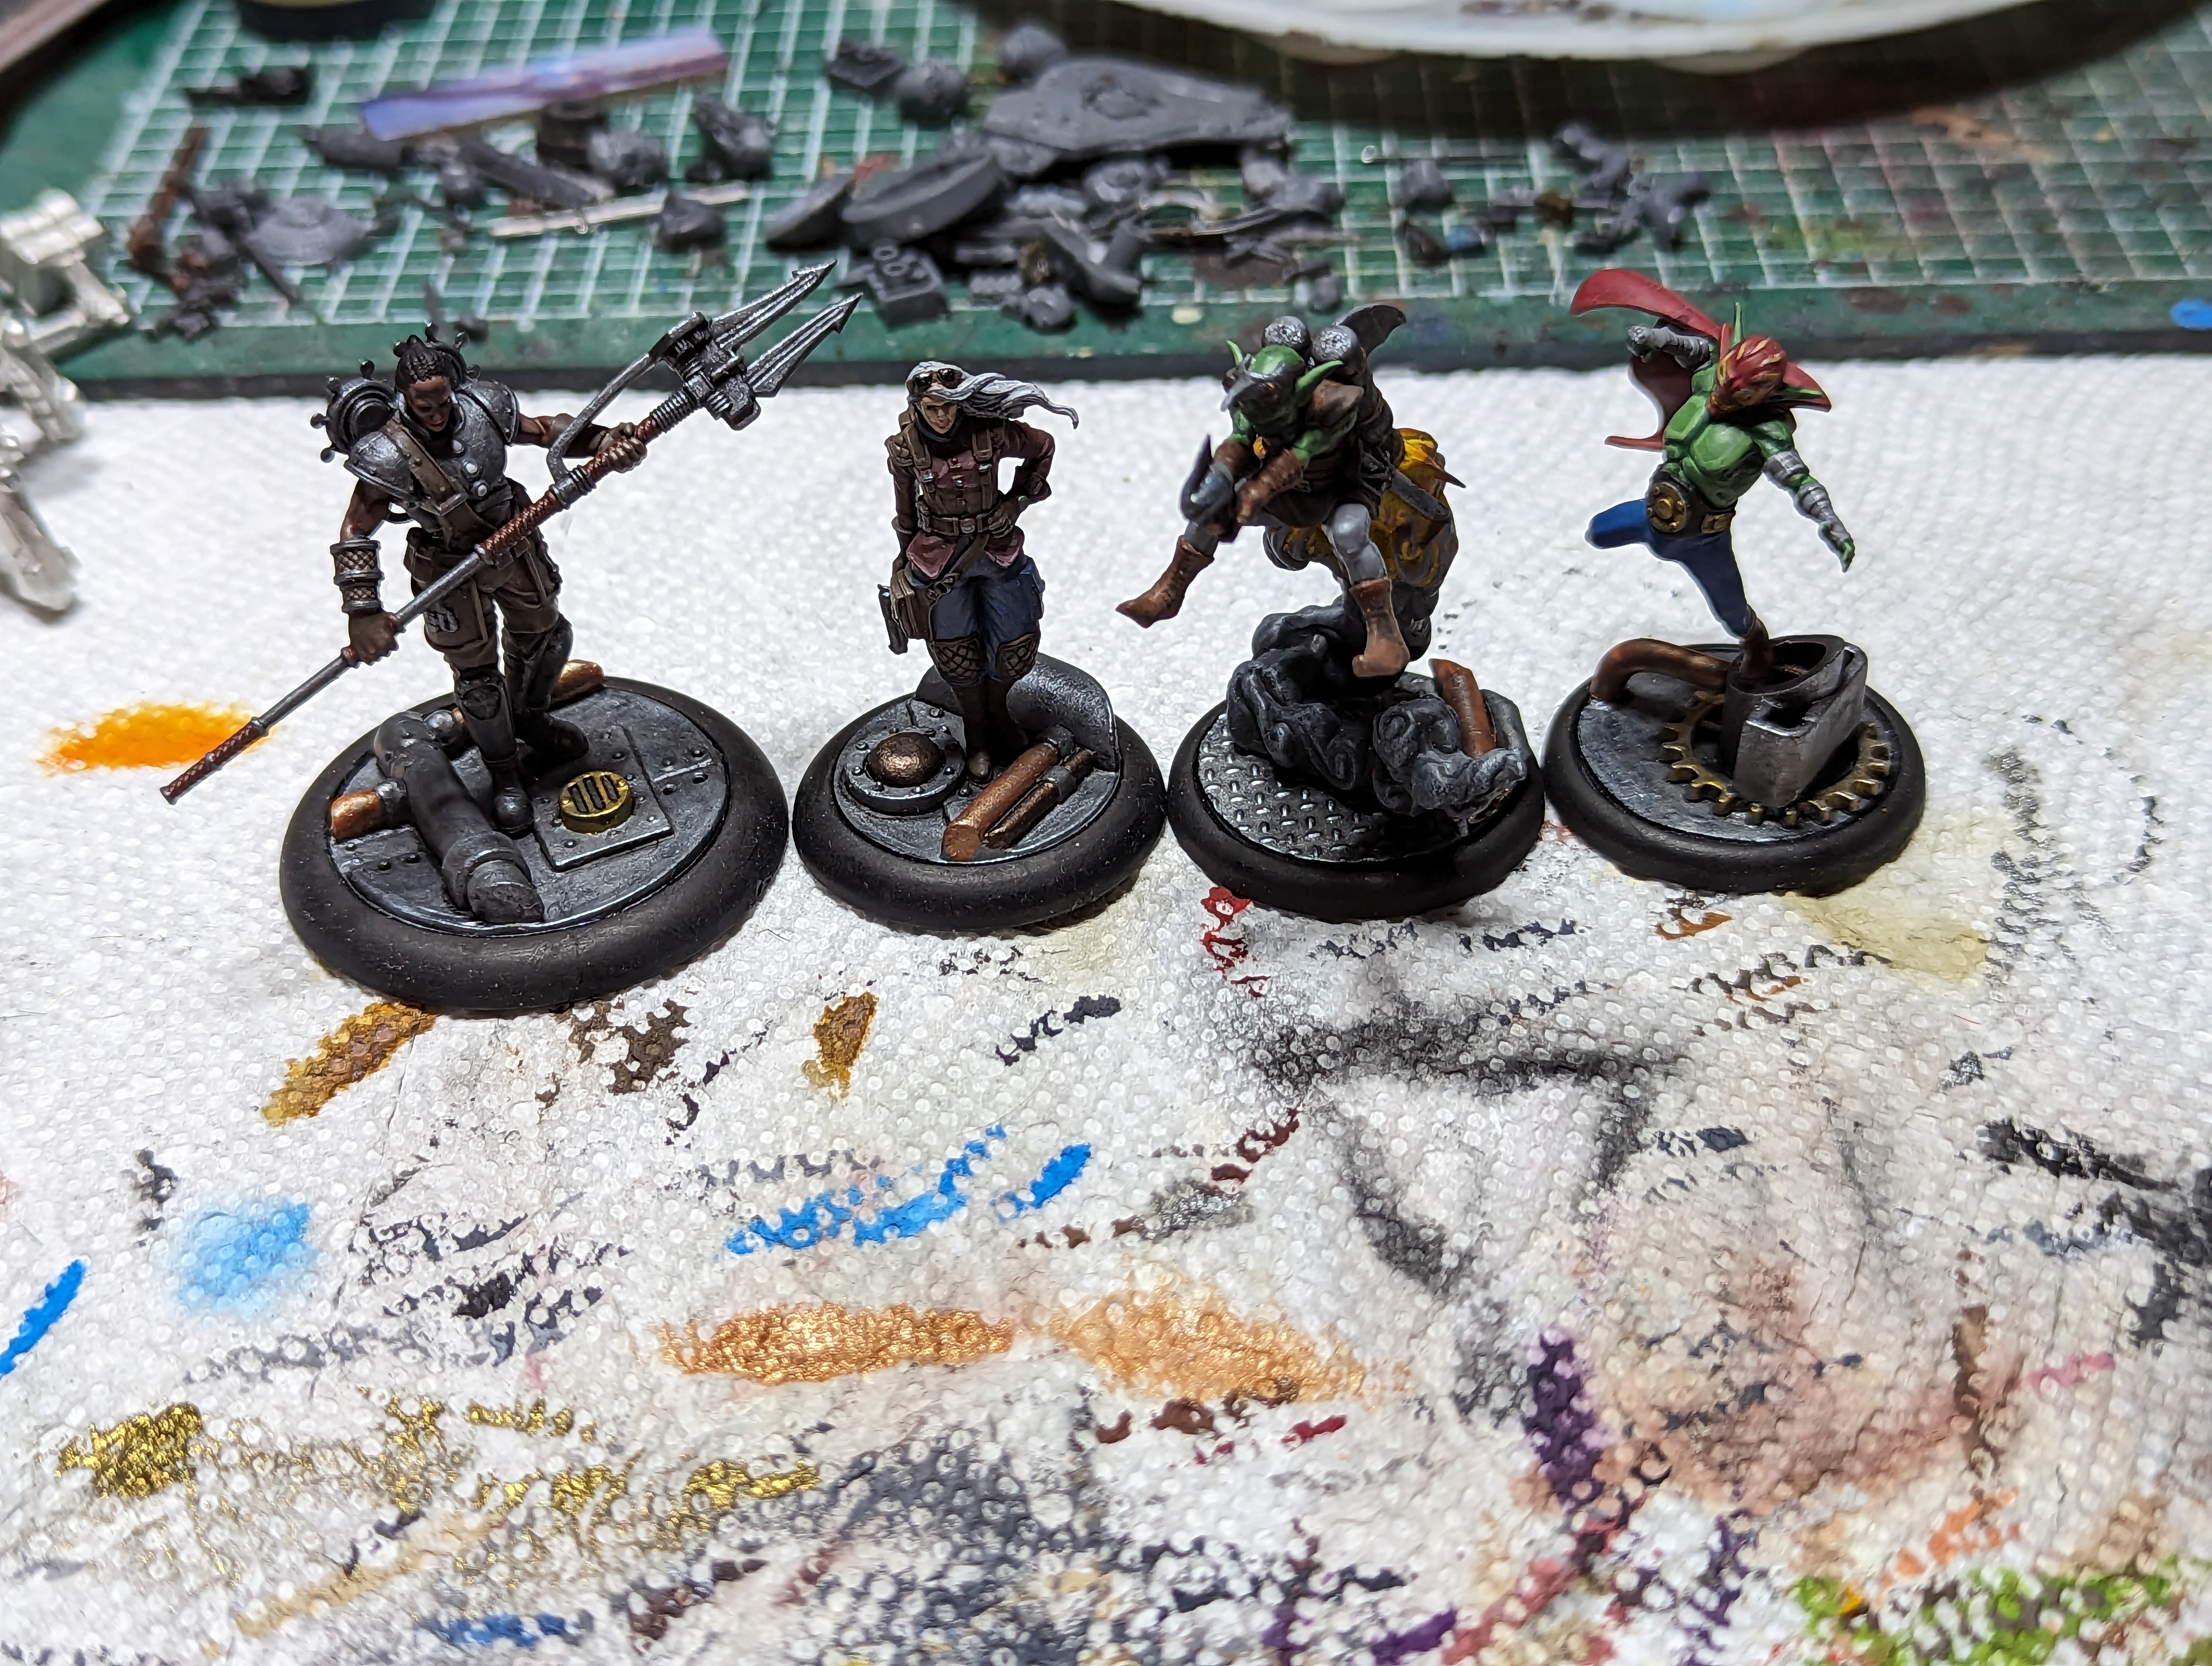
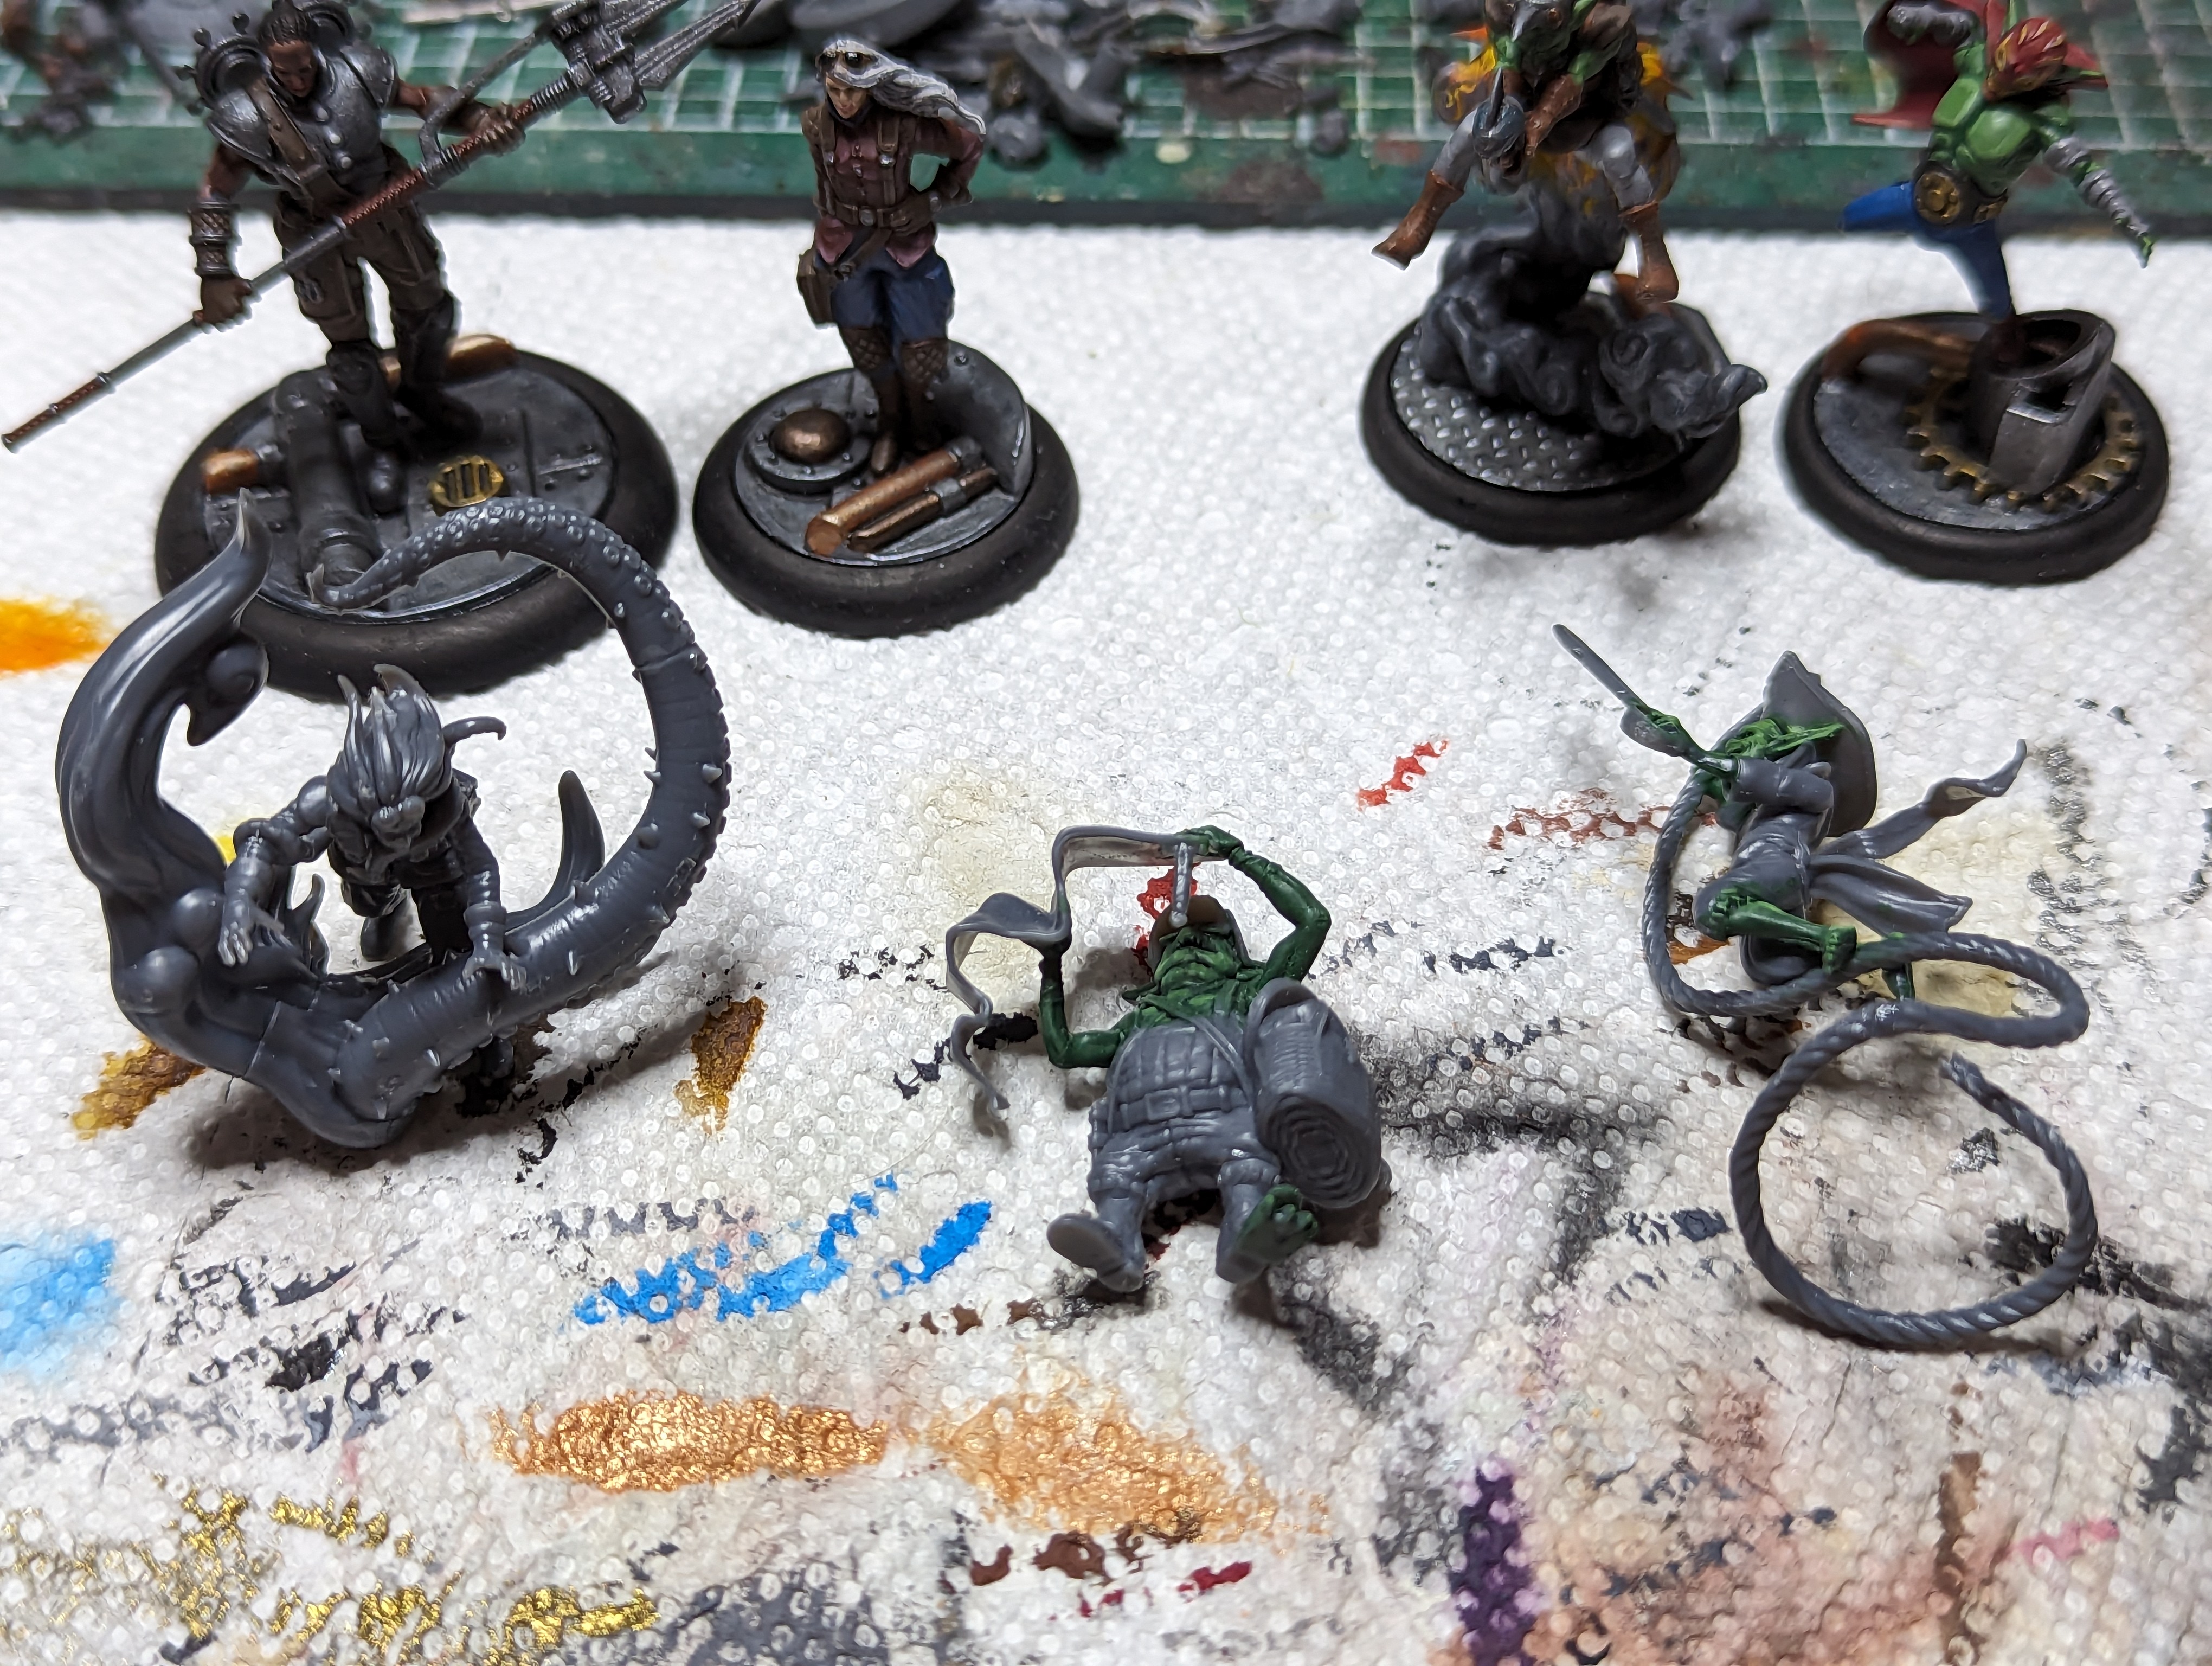
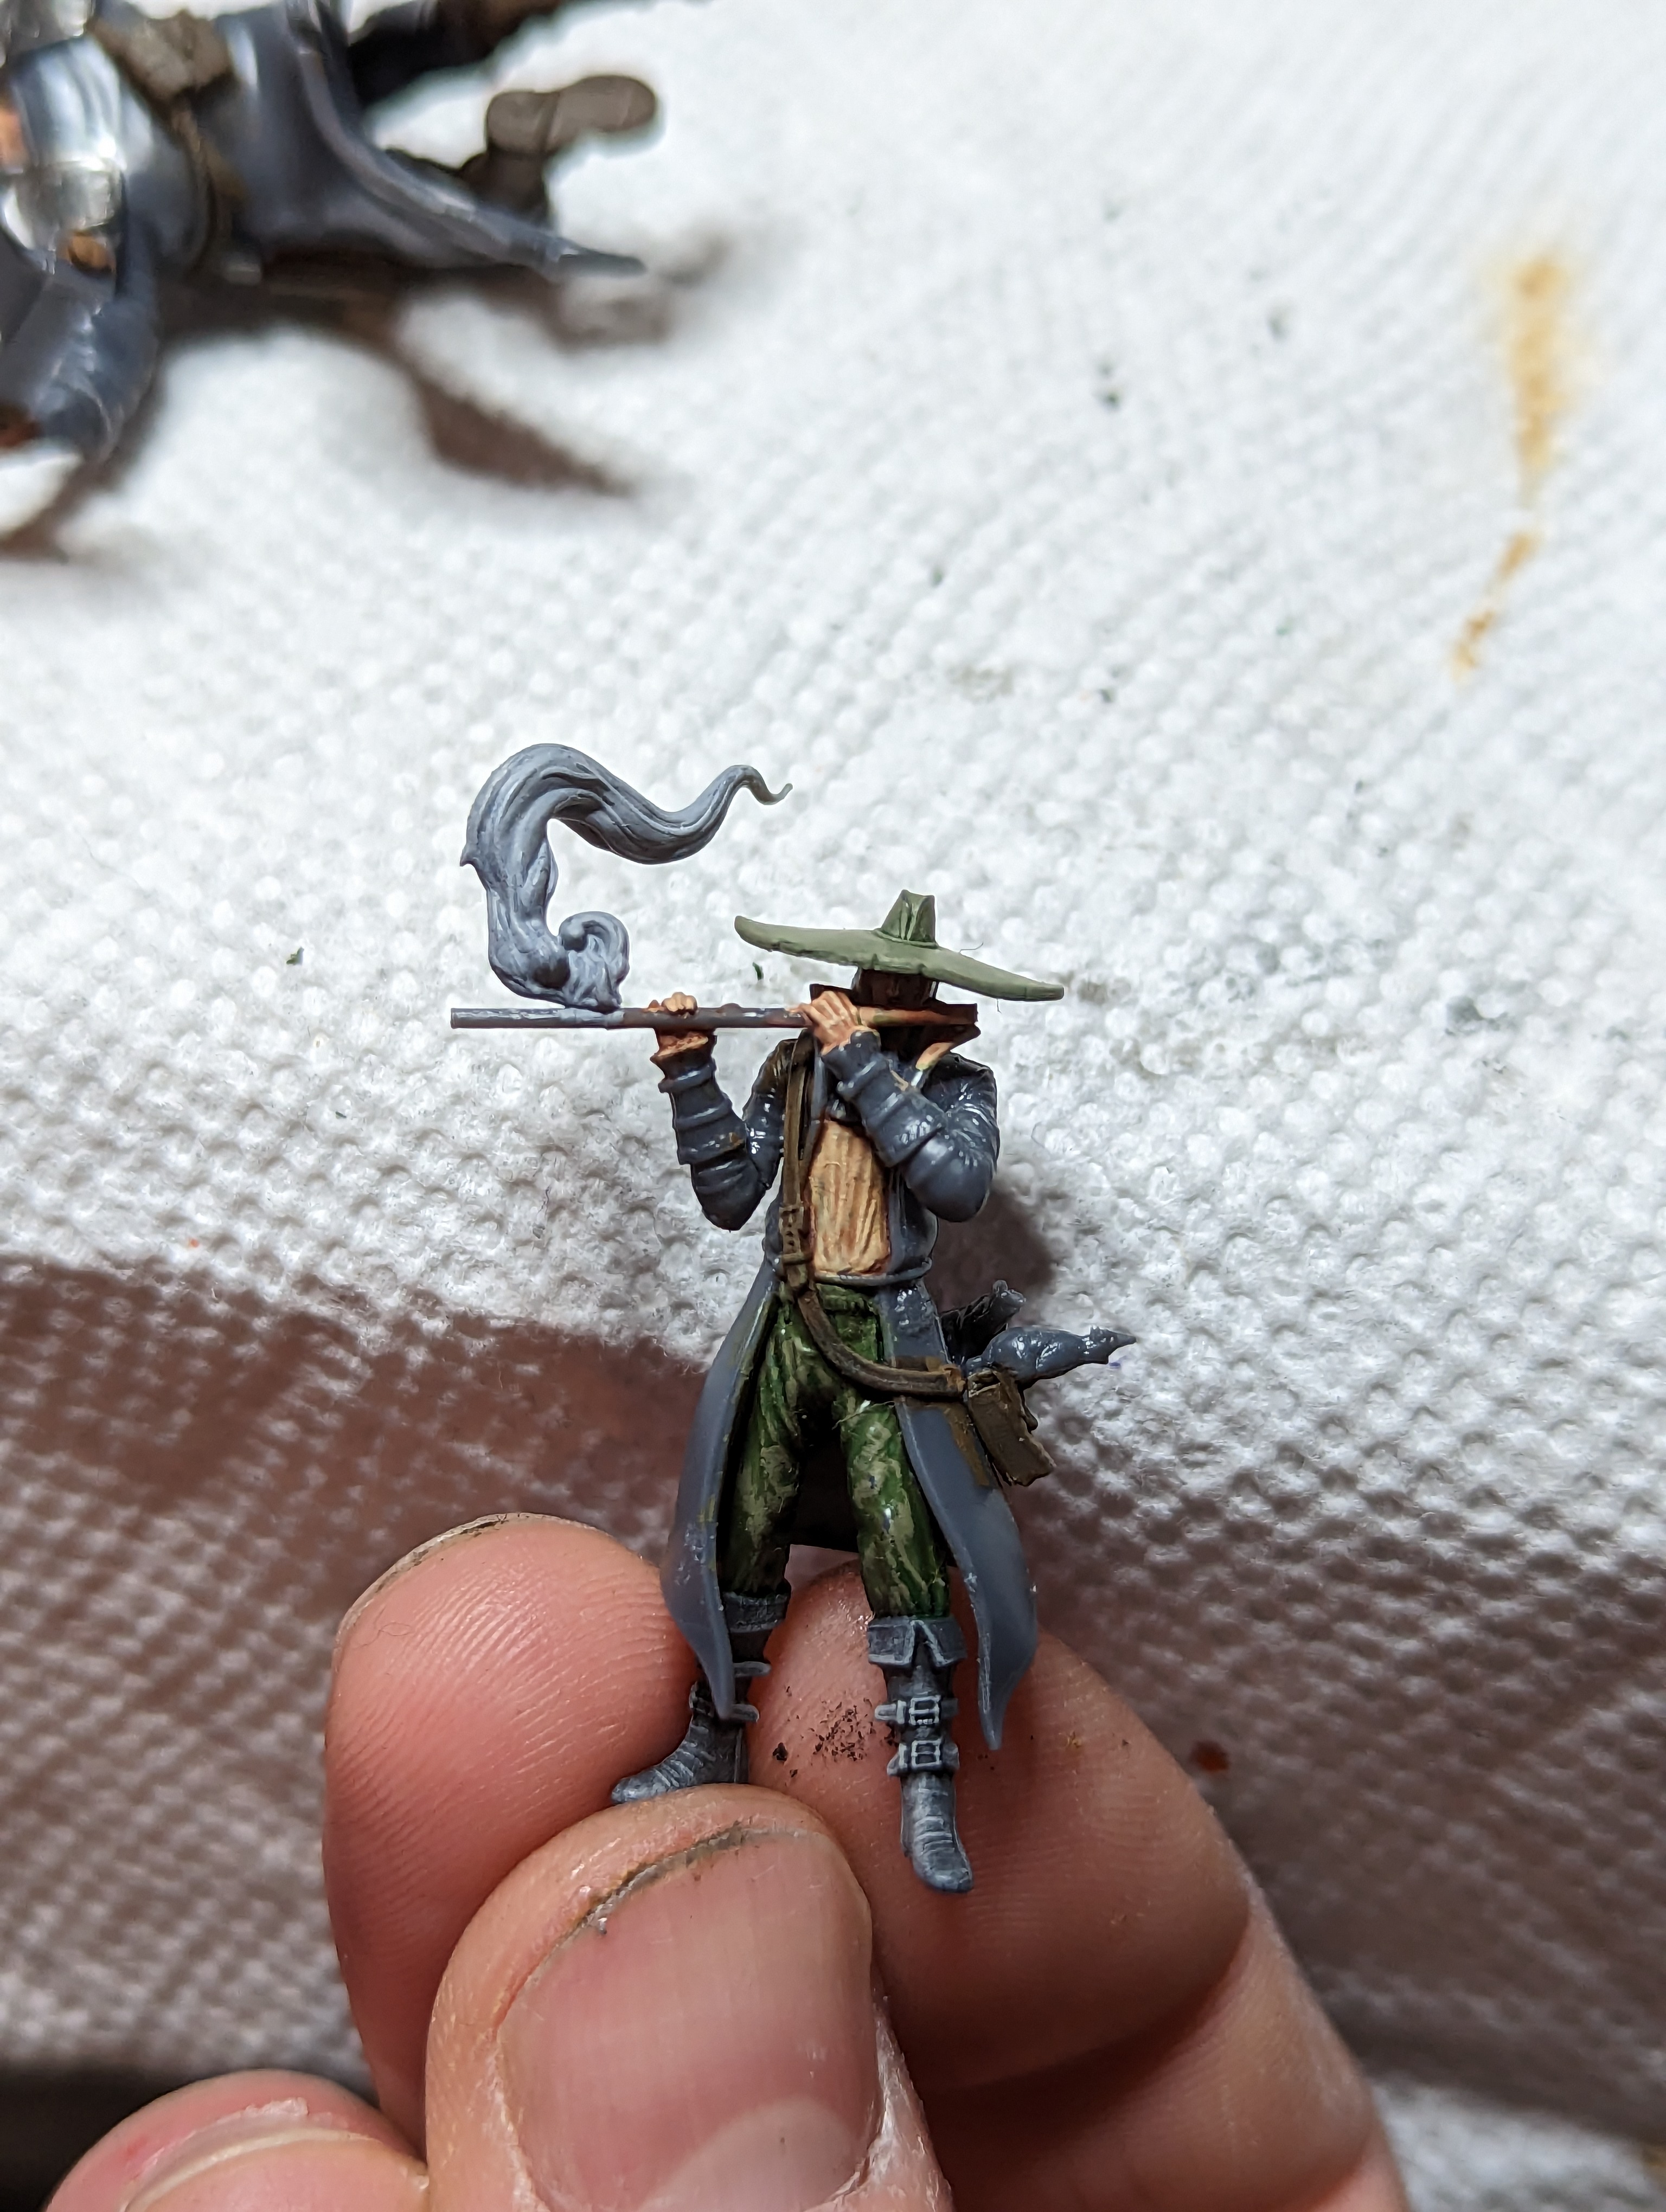
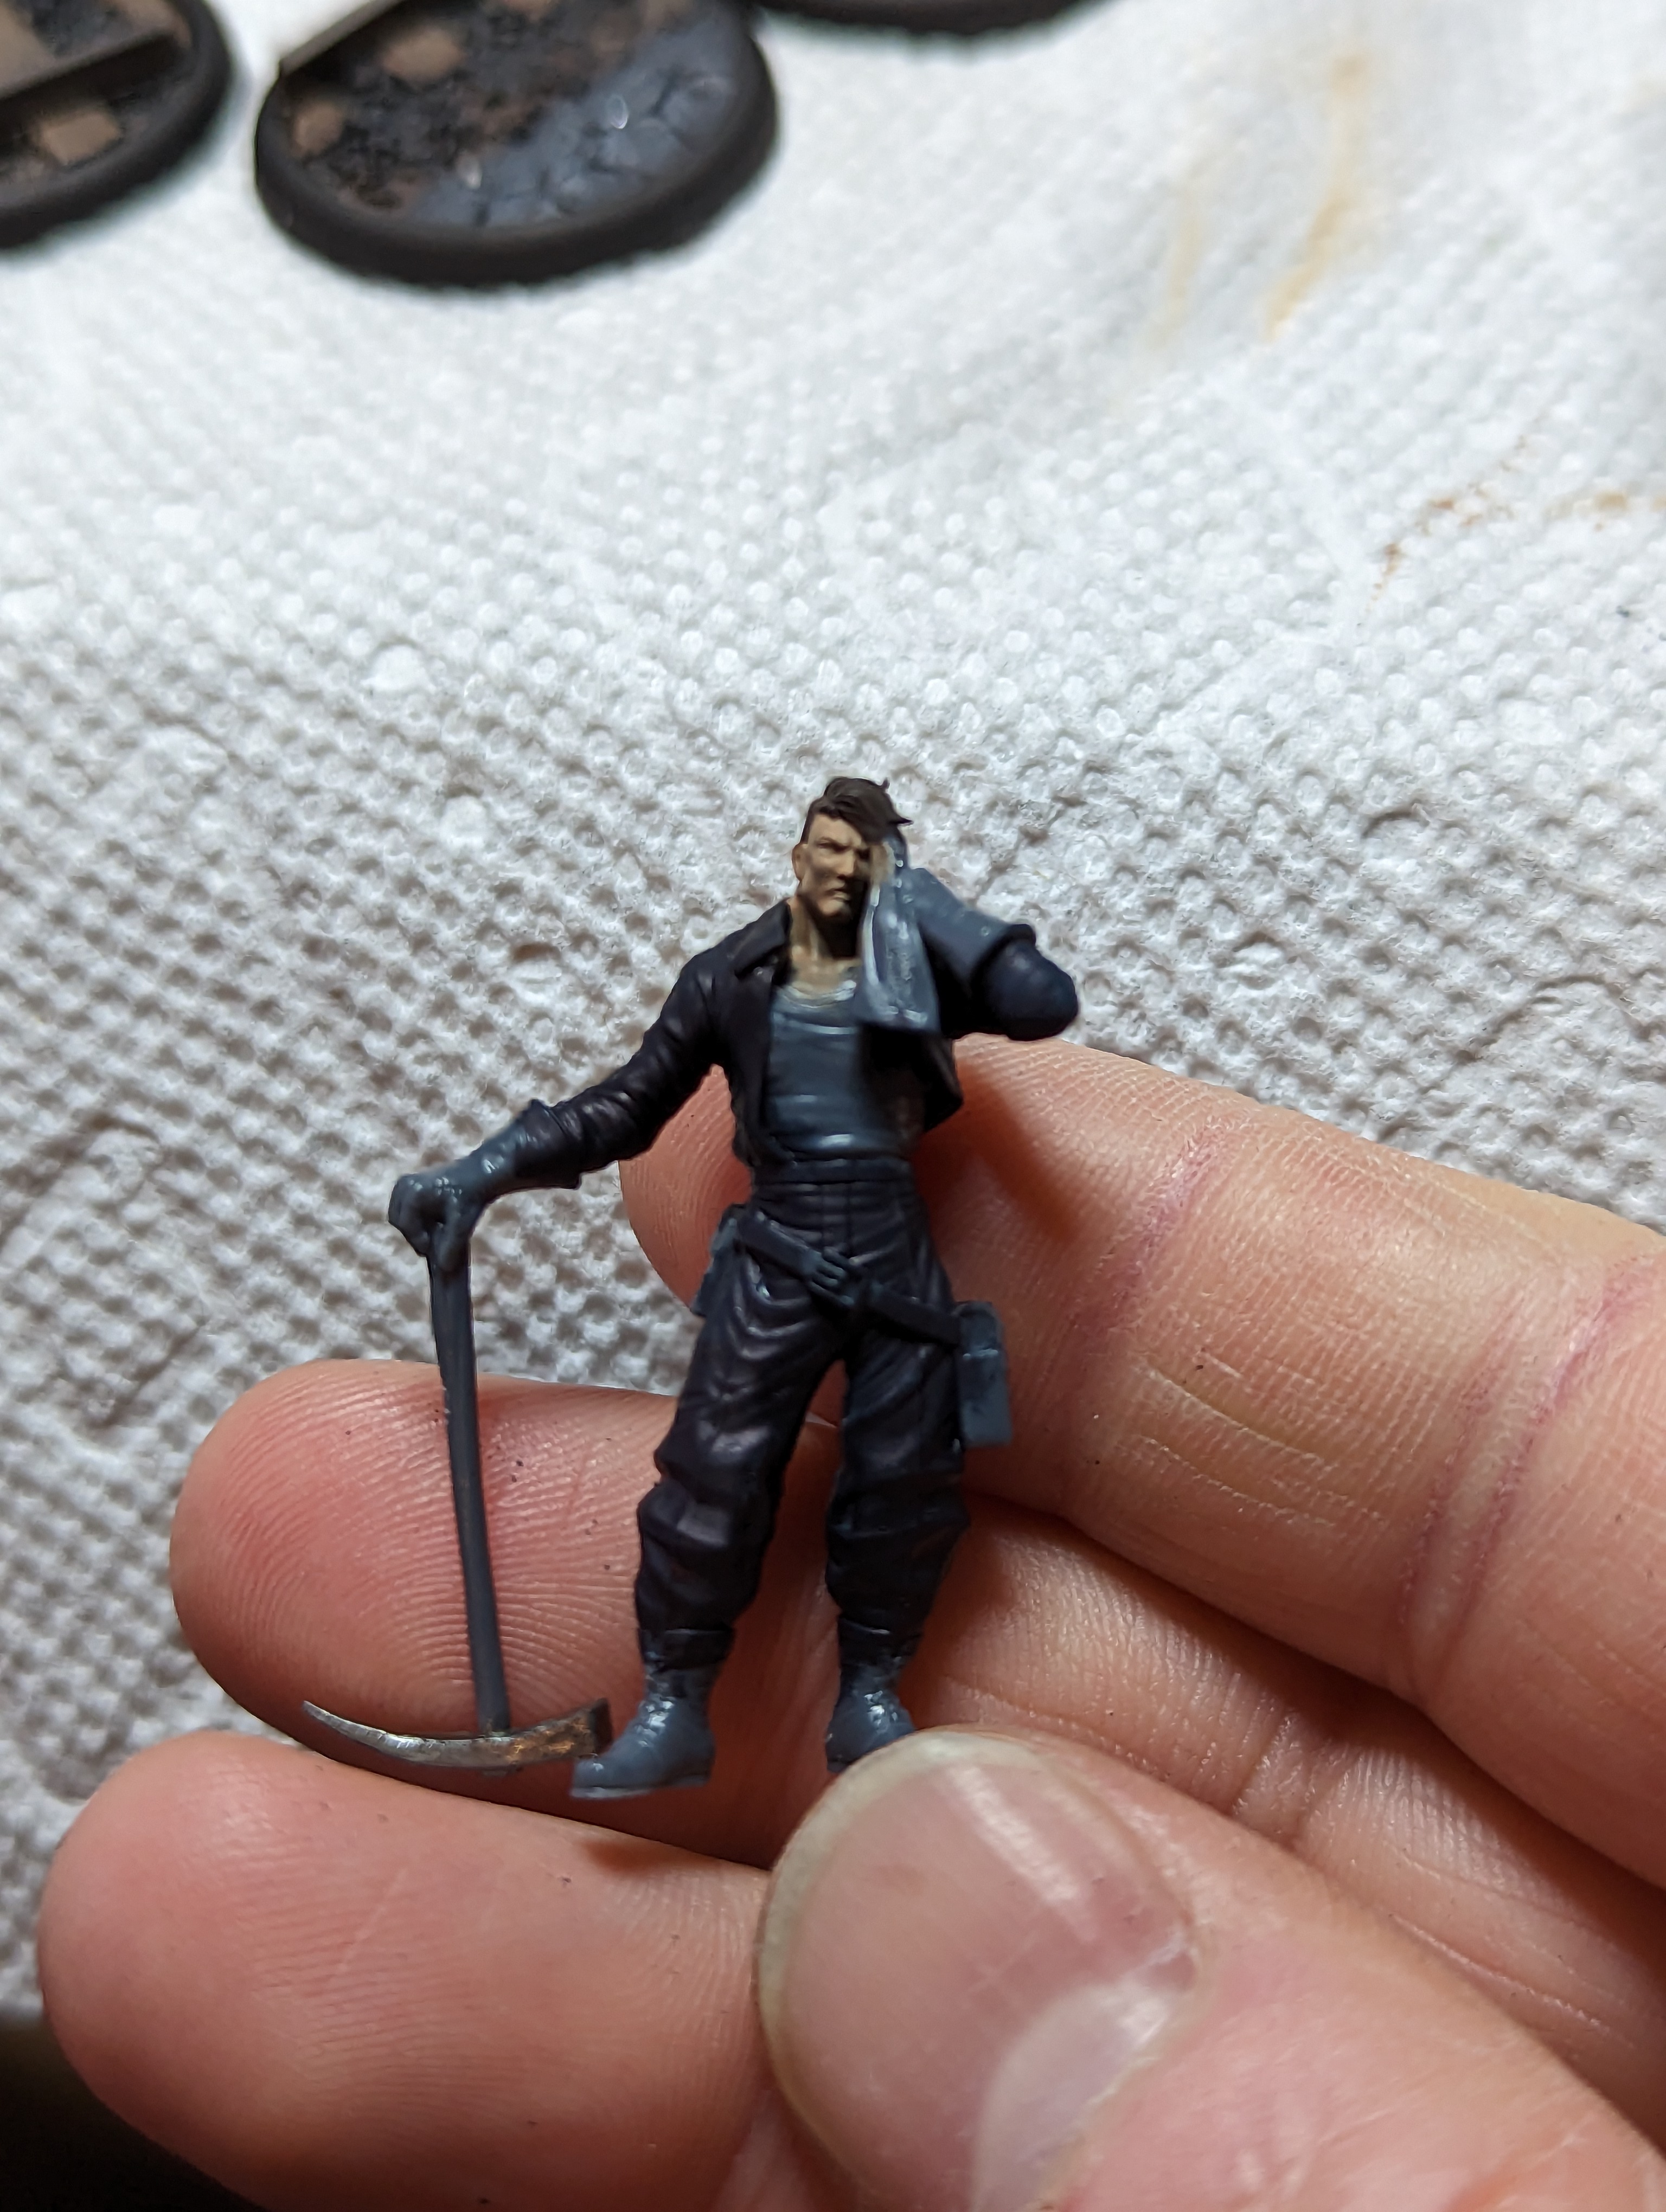
Plague

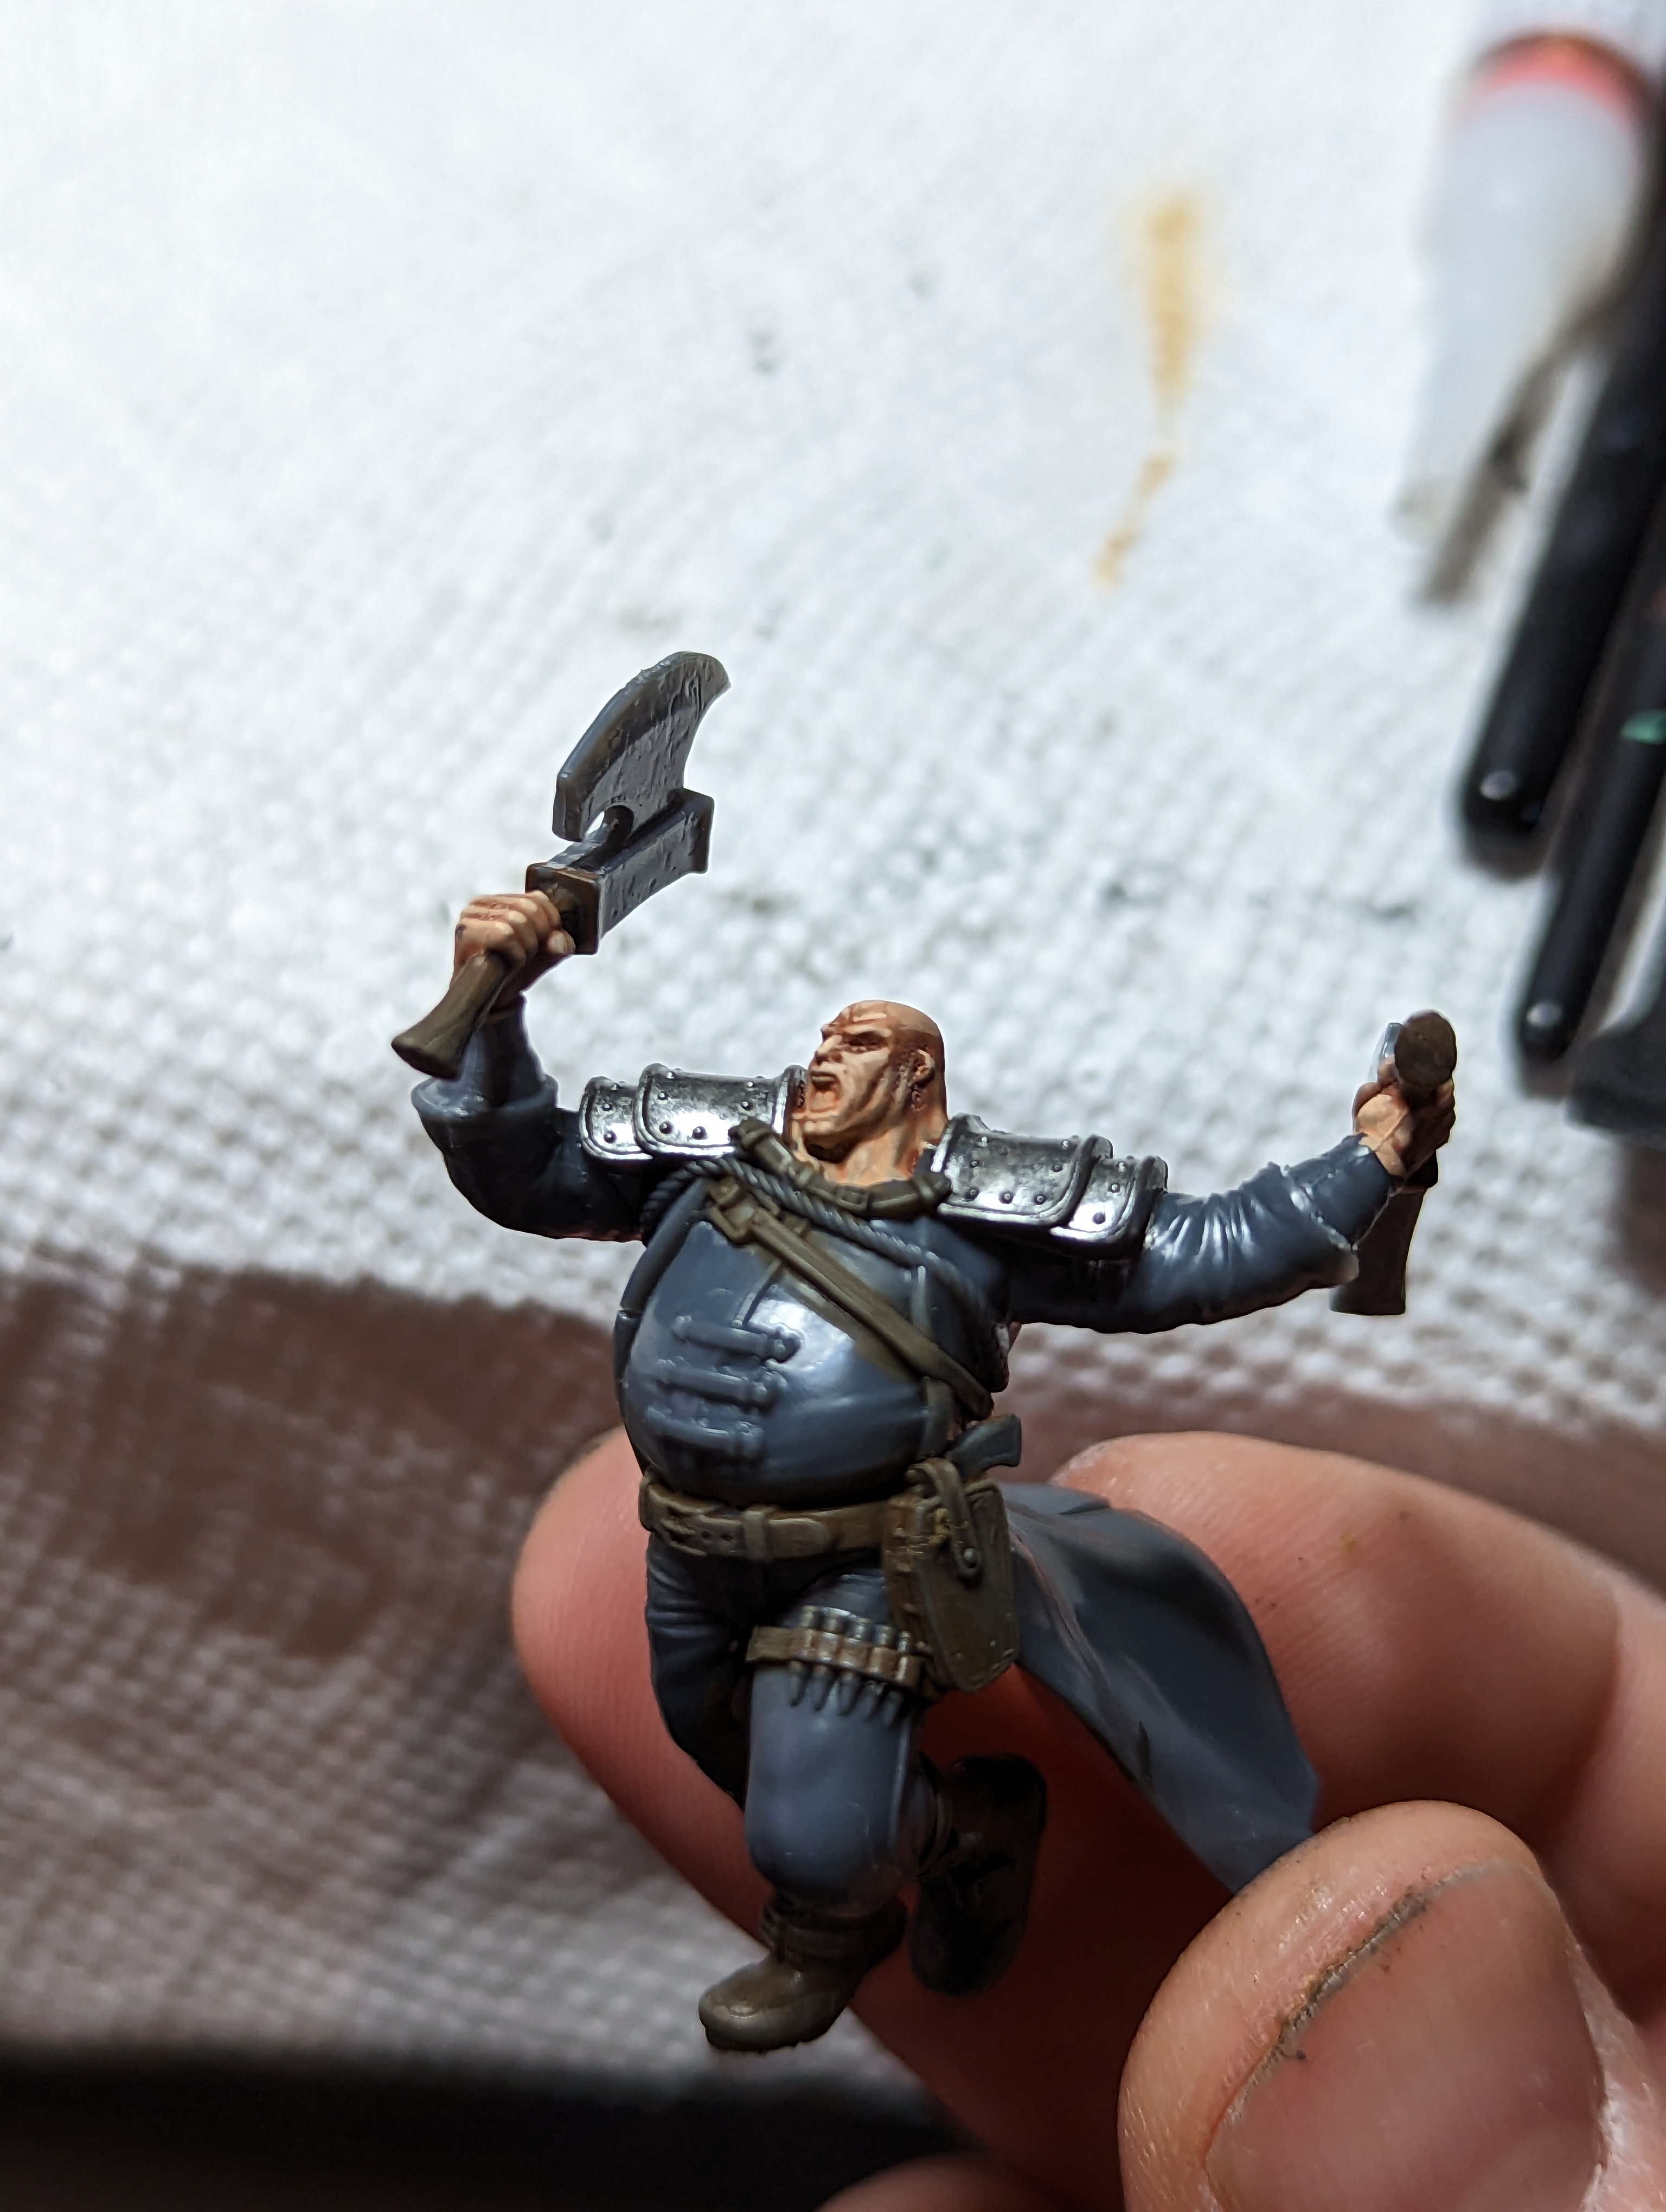
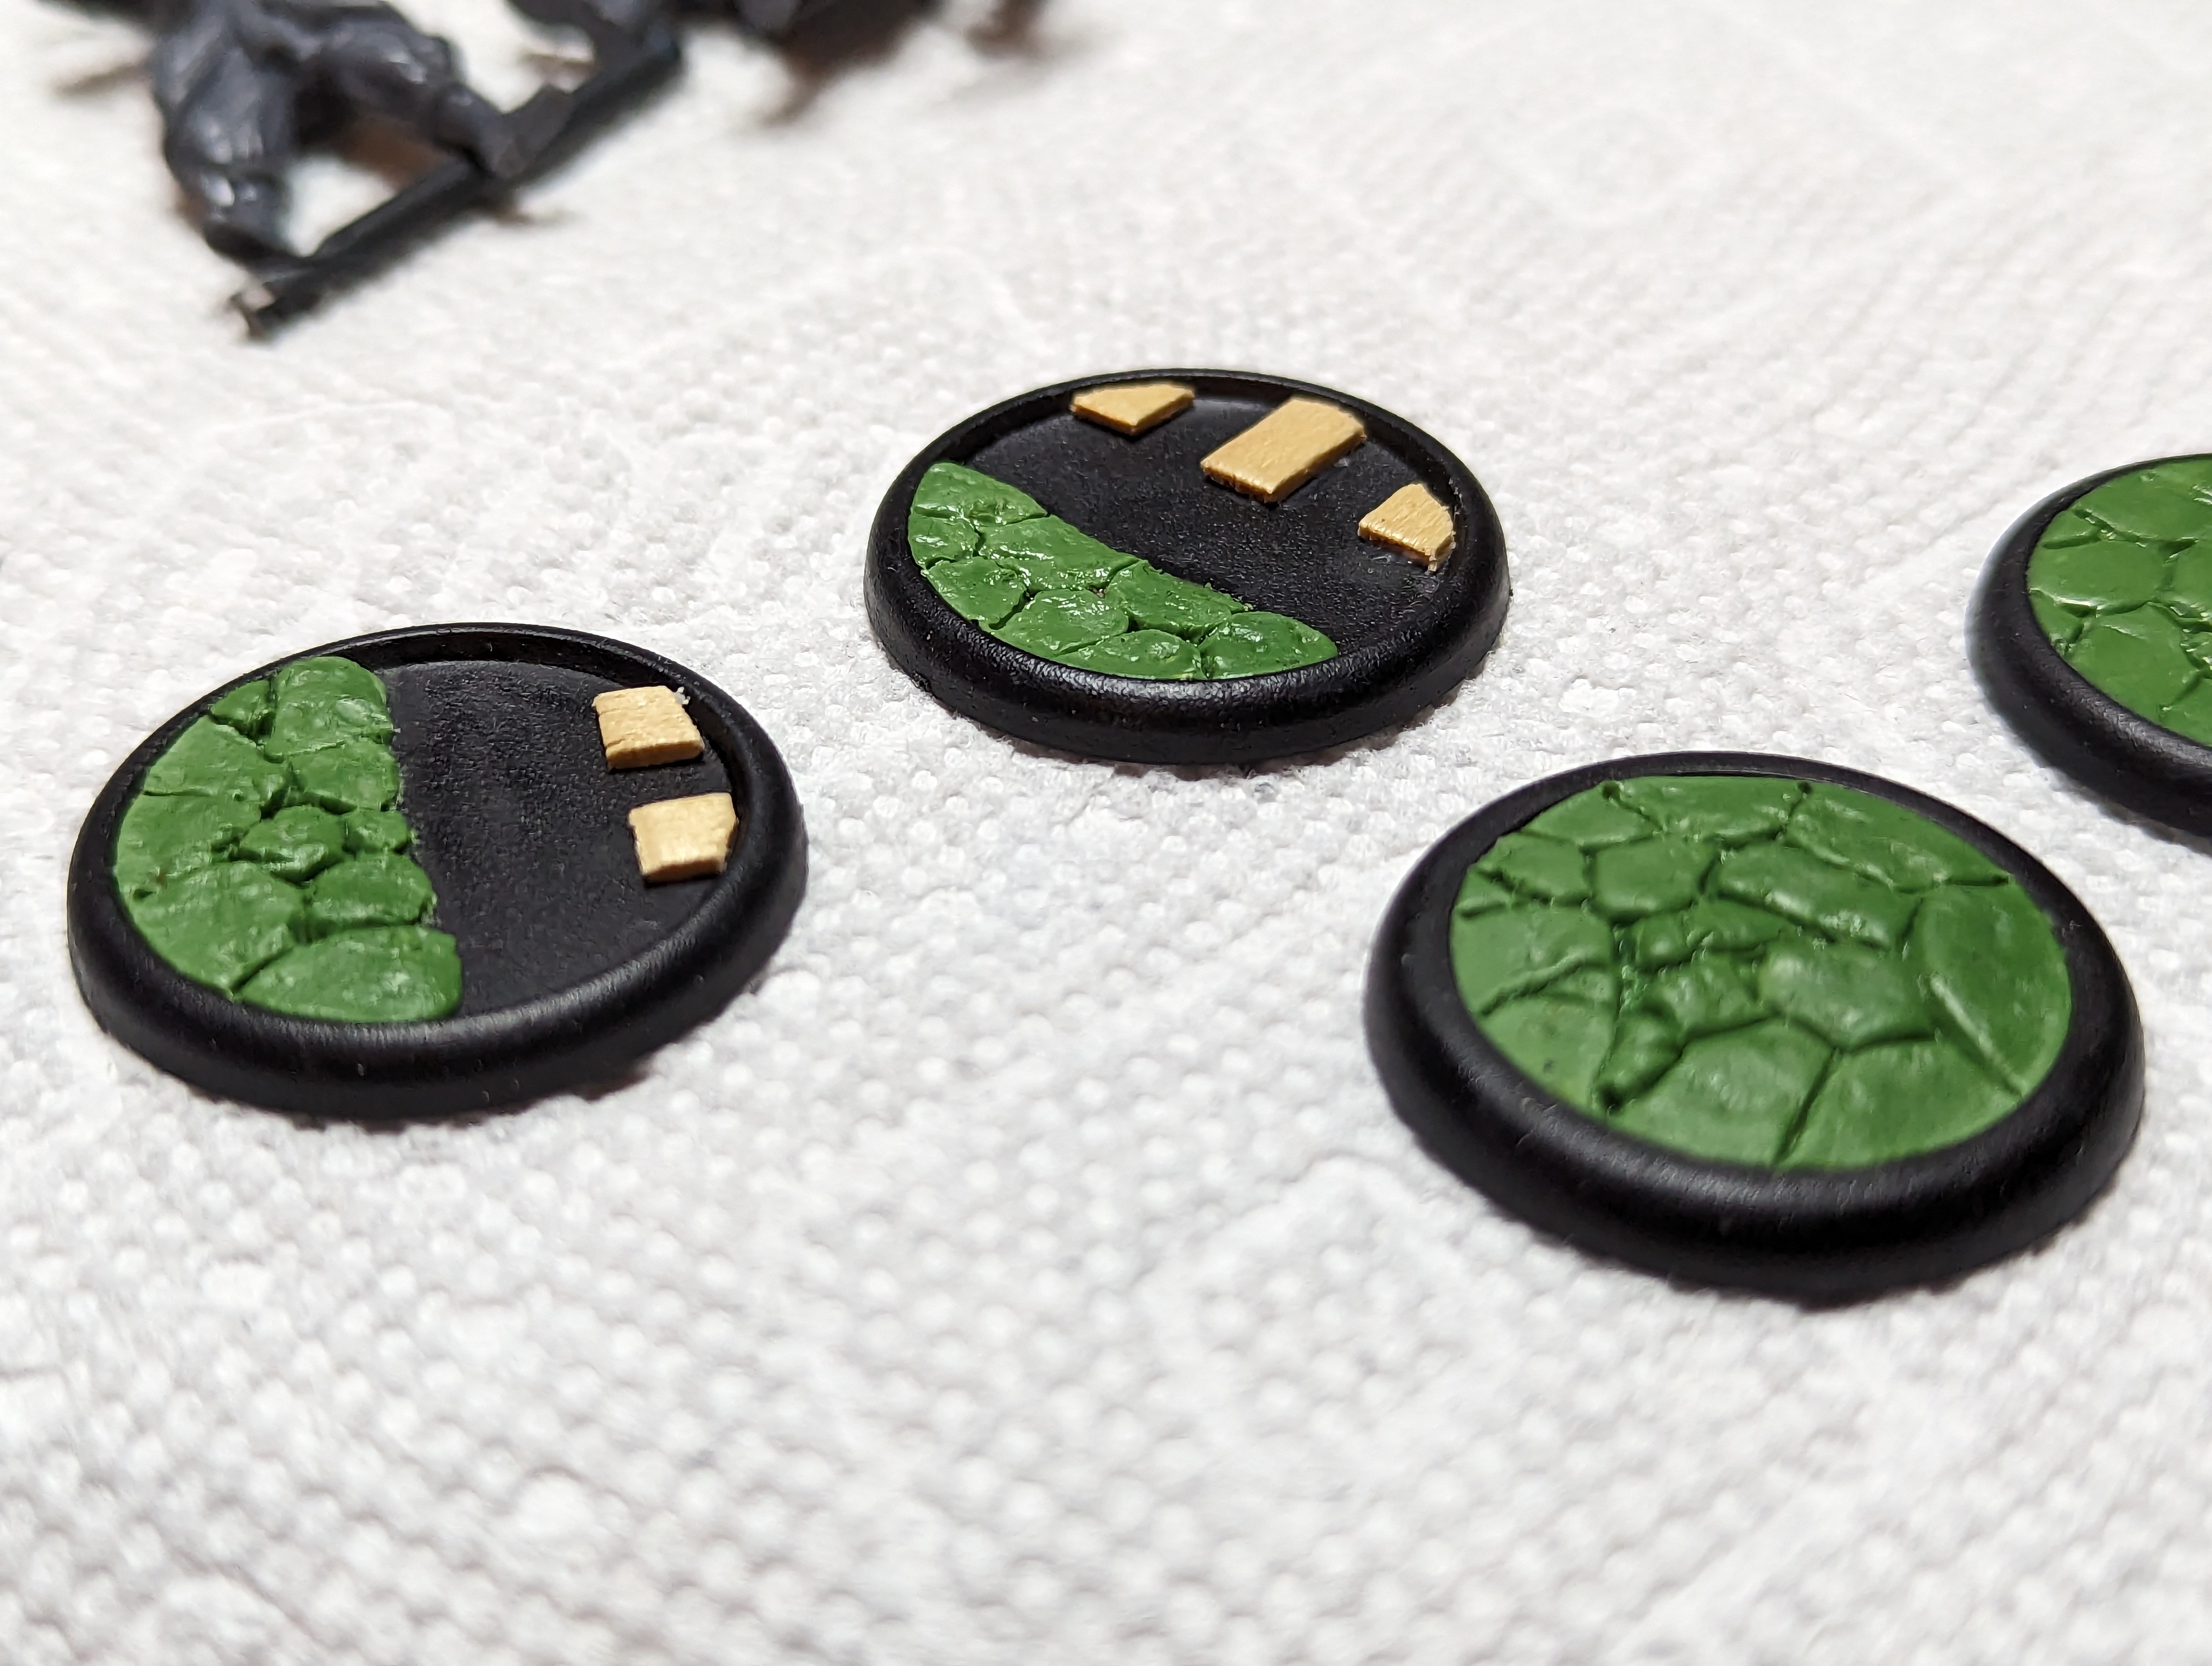
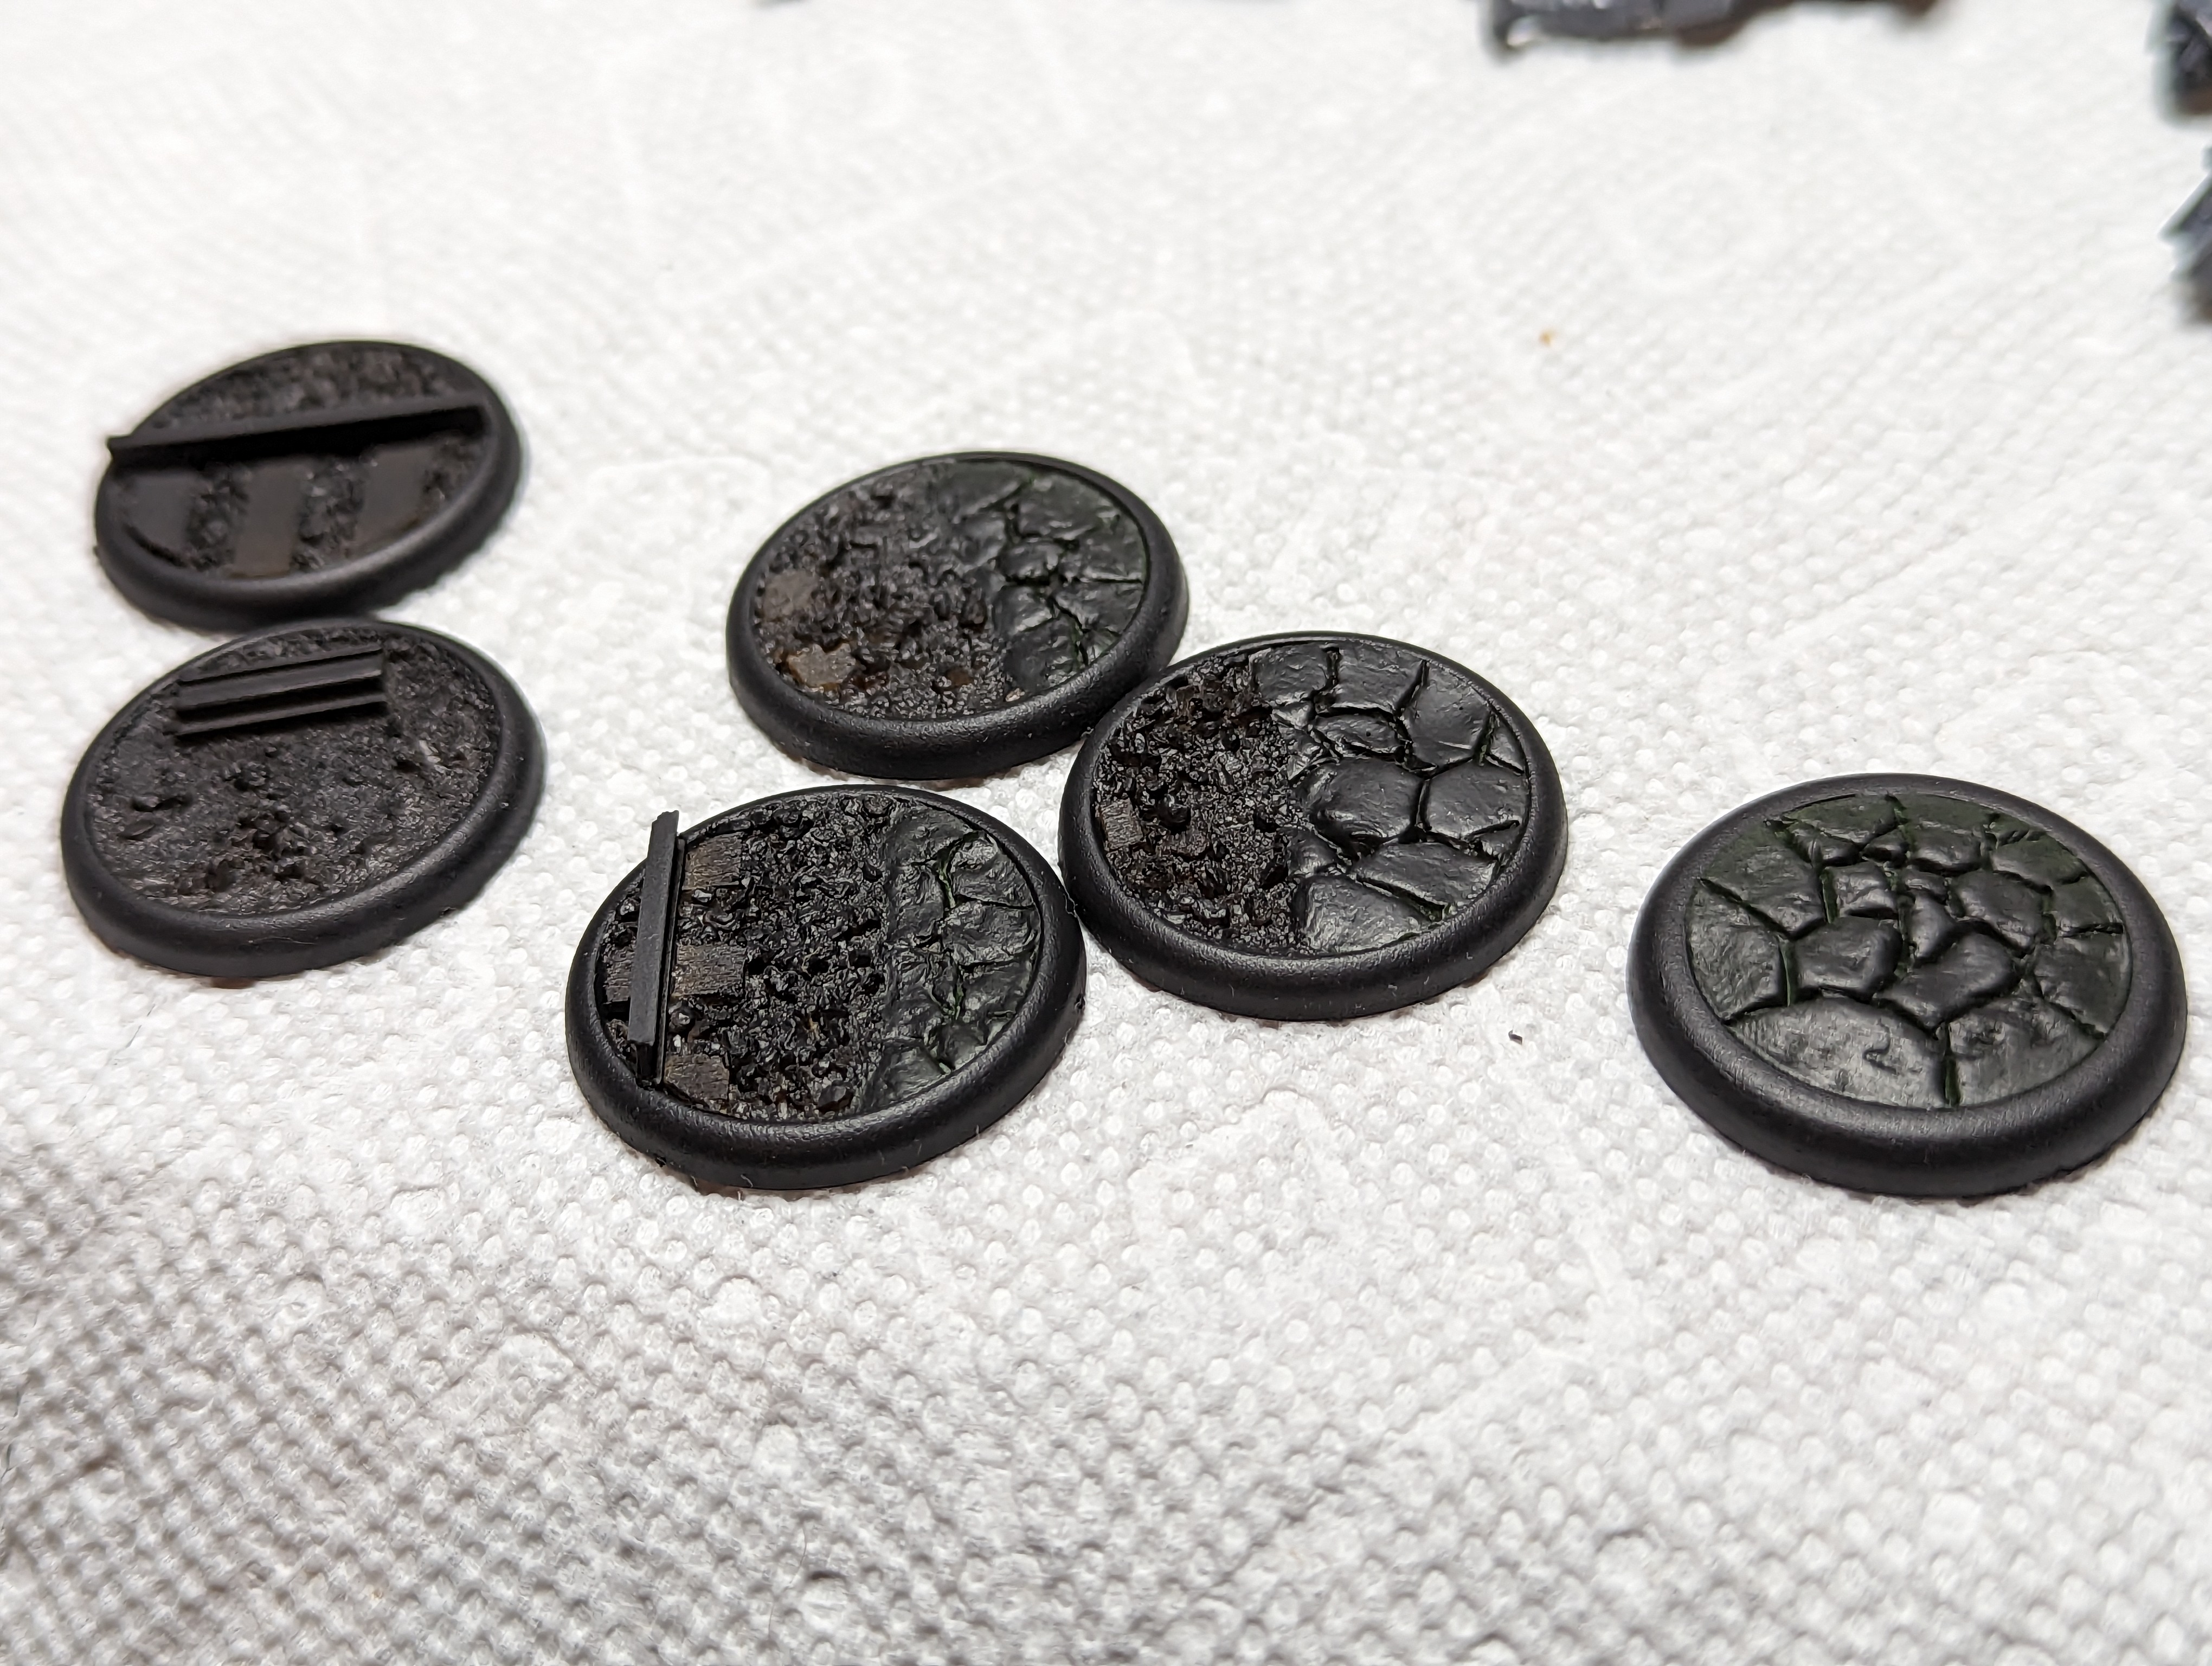
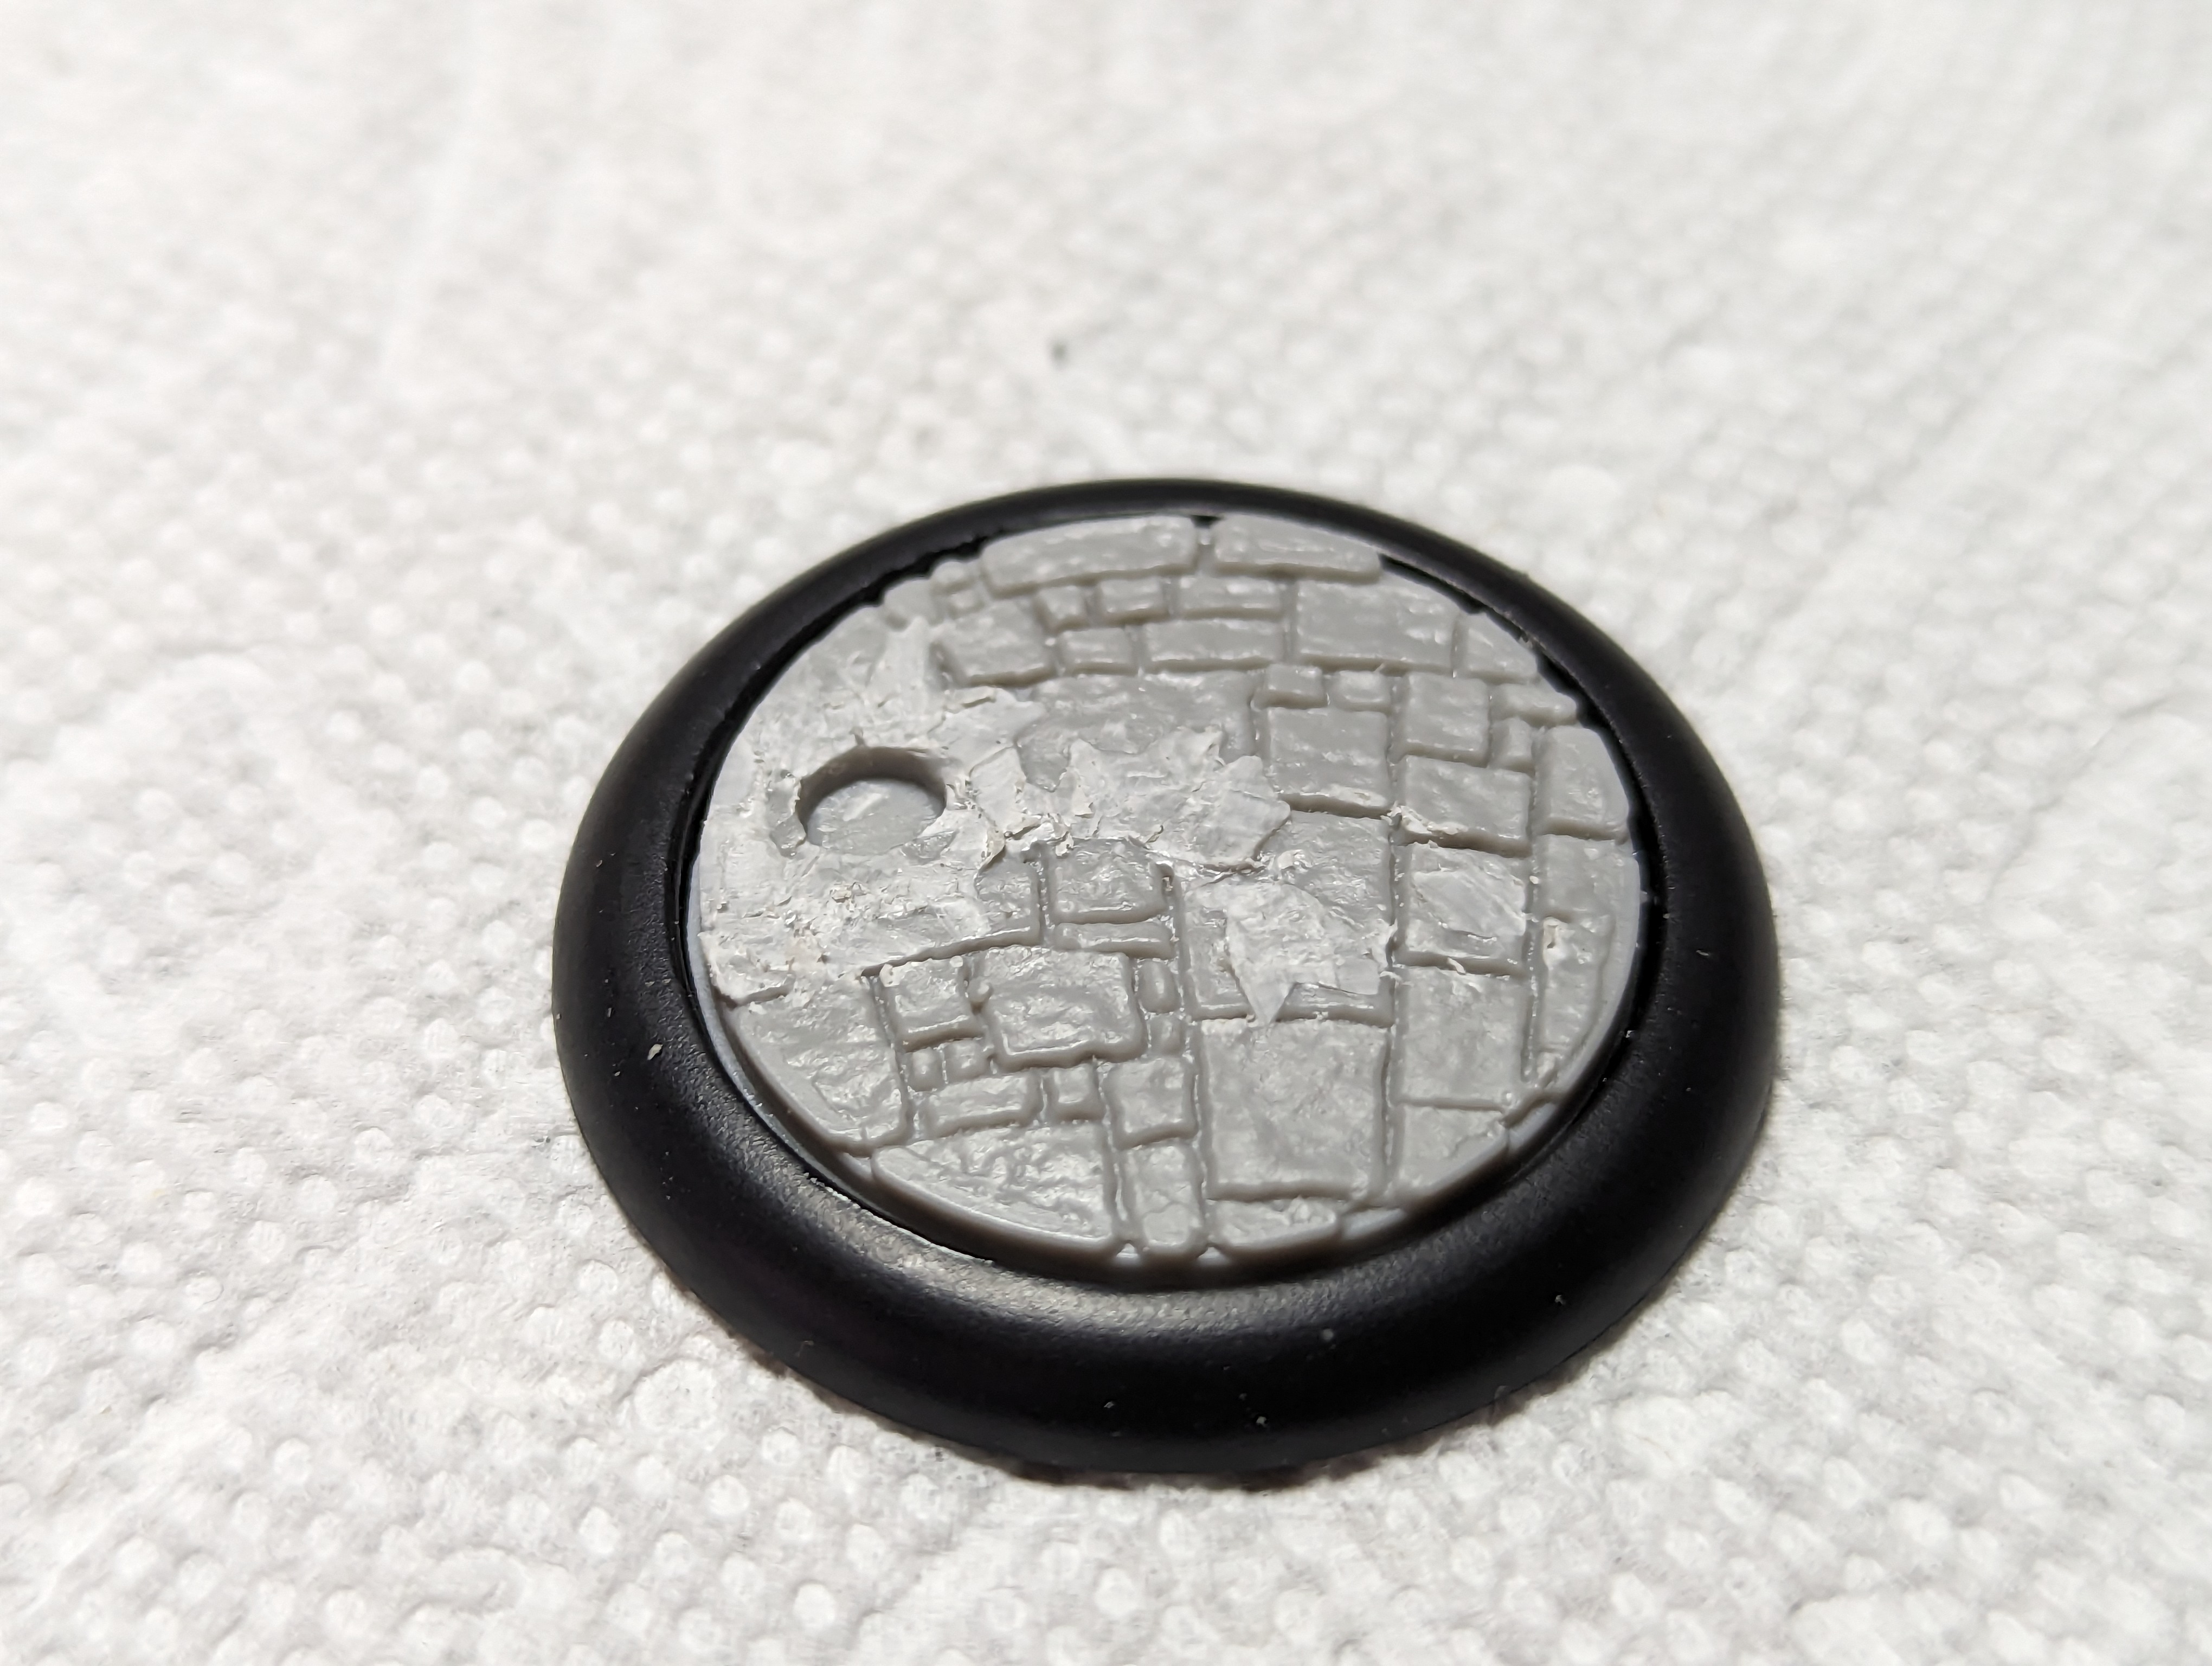
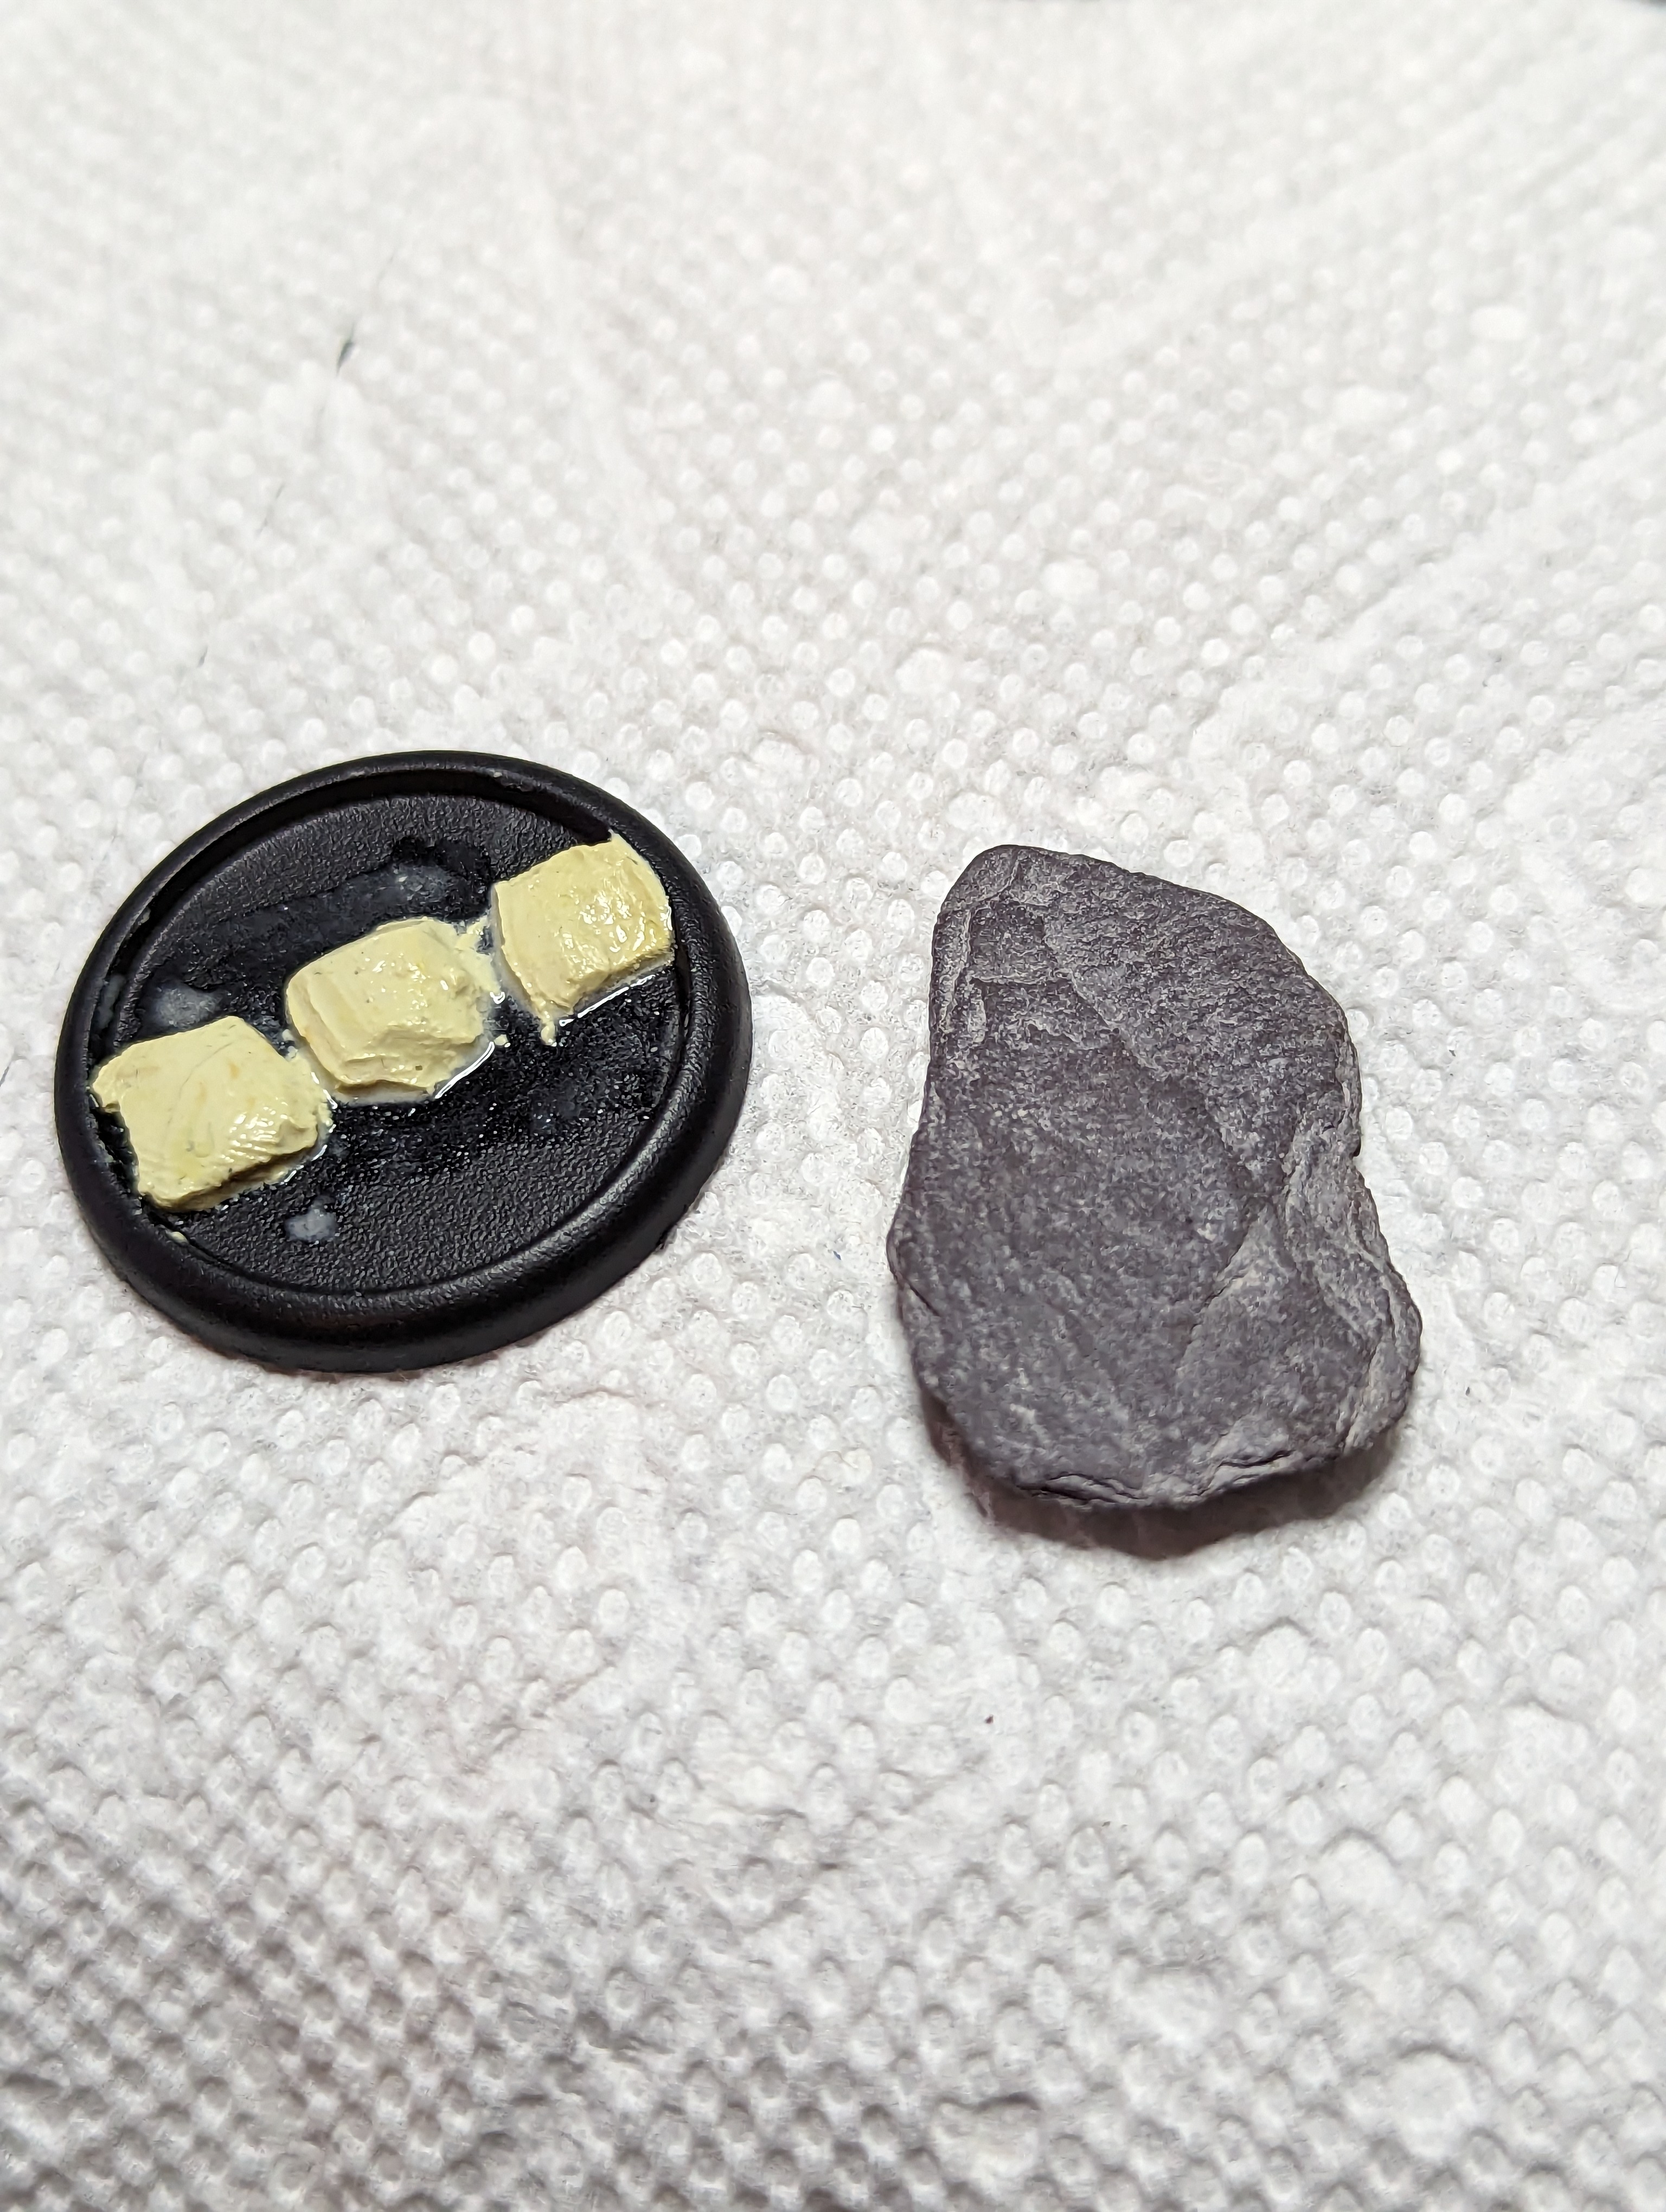
Next I thought I’d take a crack at Captain Dashel and Hamelin. Dashel is all about commanding the Guild Guard and patrolling the streets, so I have his crew based up on sidewalks, with rubble and bricks mixed in. Hamelin is a dirty sewer boy, so I have his crew done up on slimy putrid water bases, and some have piping and rubble mixed in. It shouldn’t be hard to make up a hybrid base for the 2 schemes.

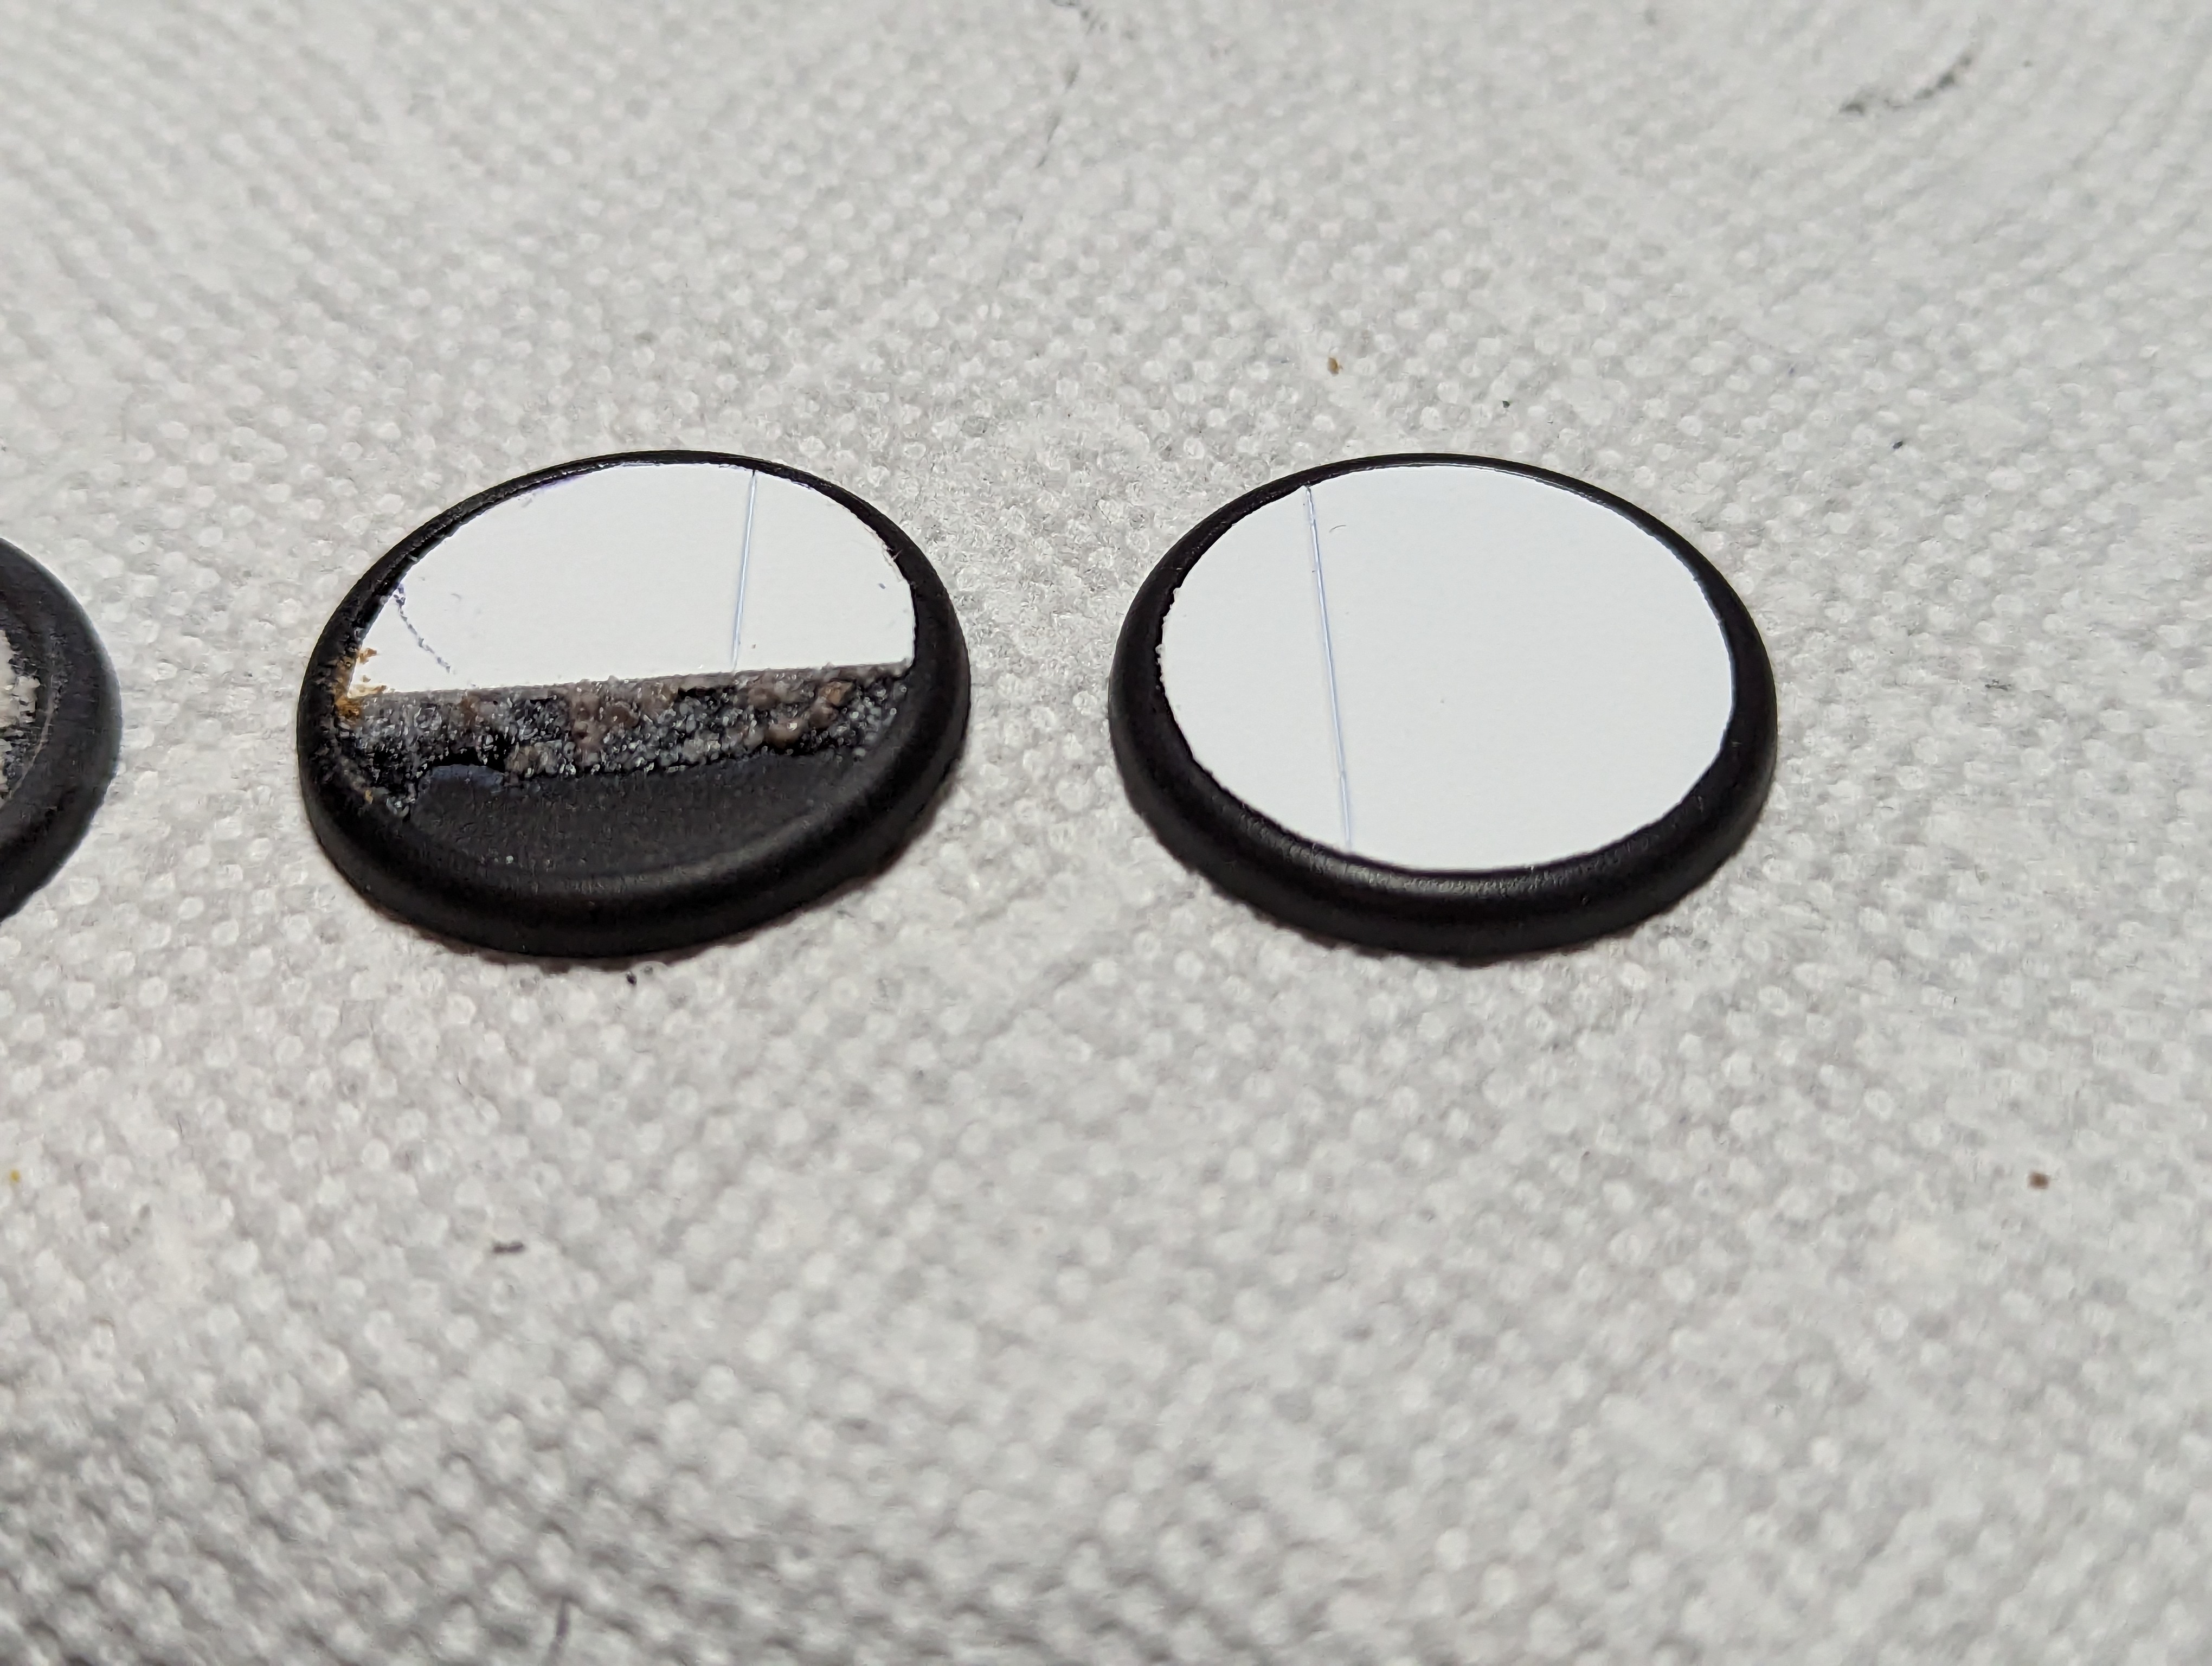
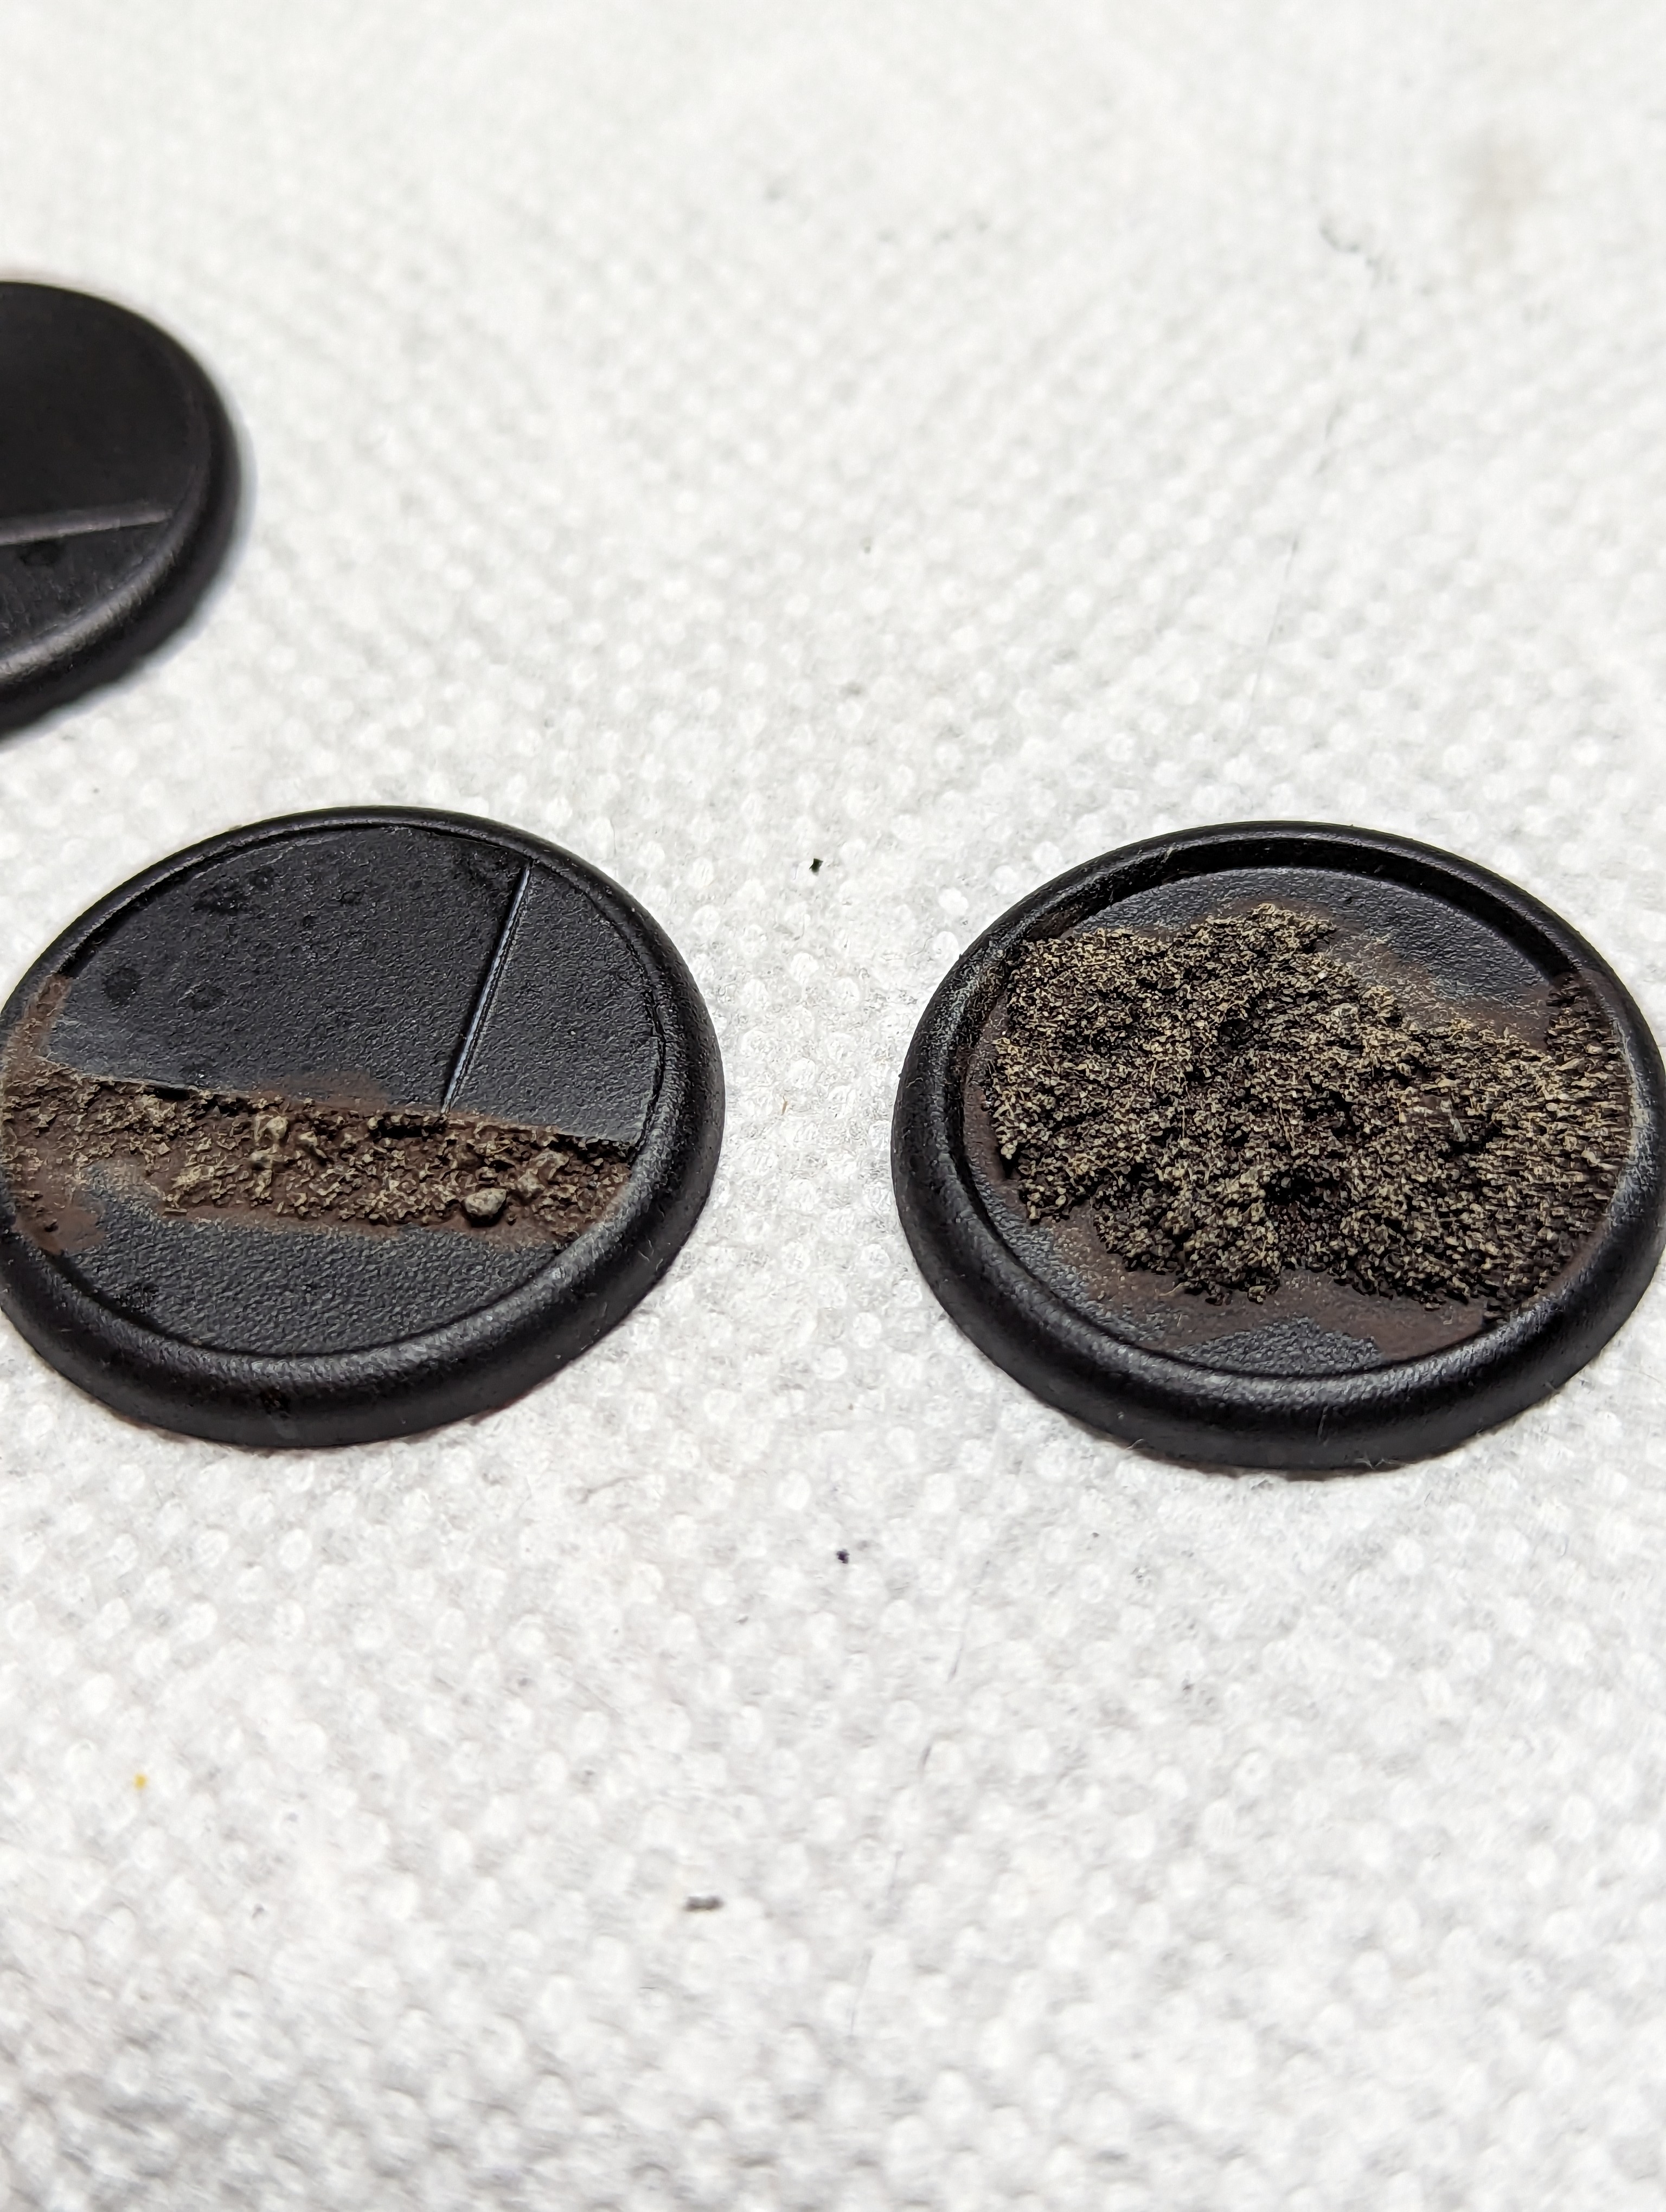
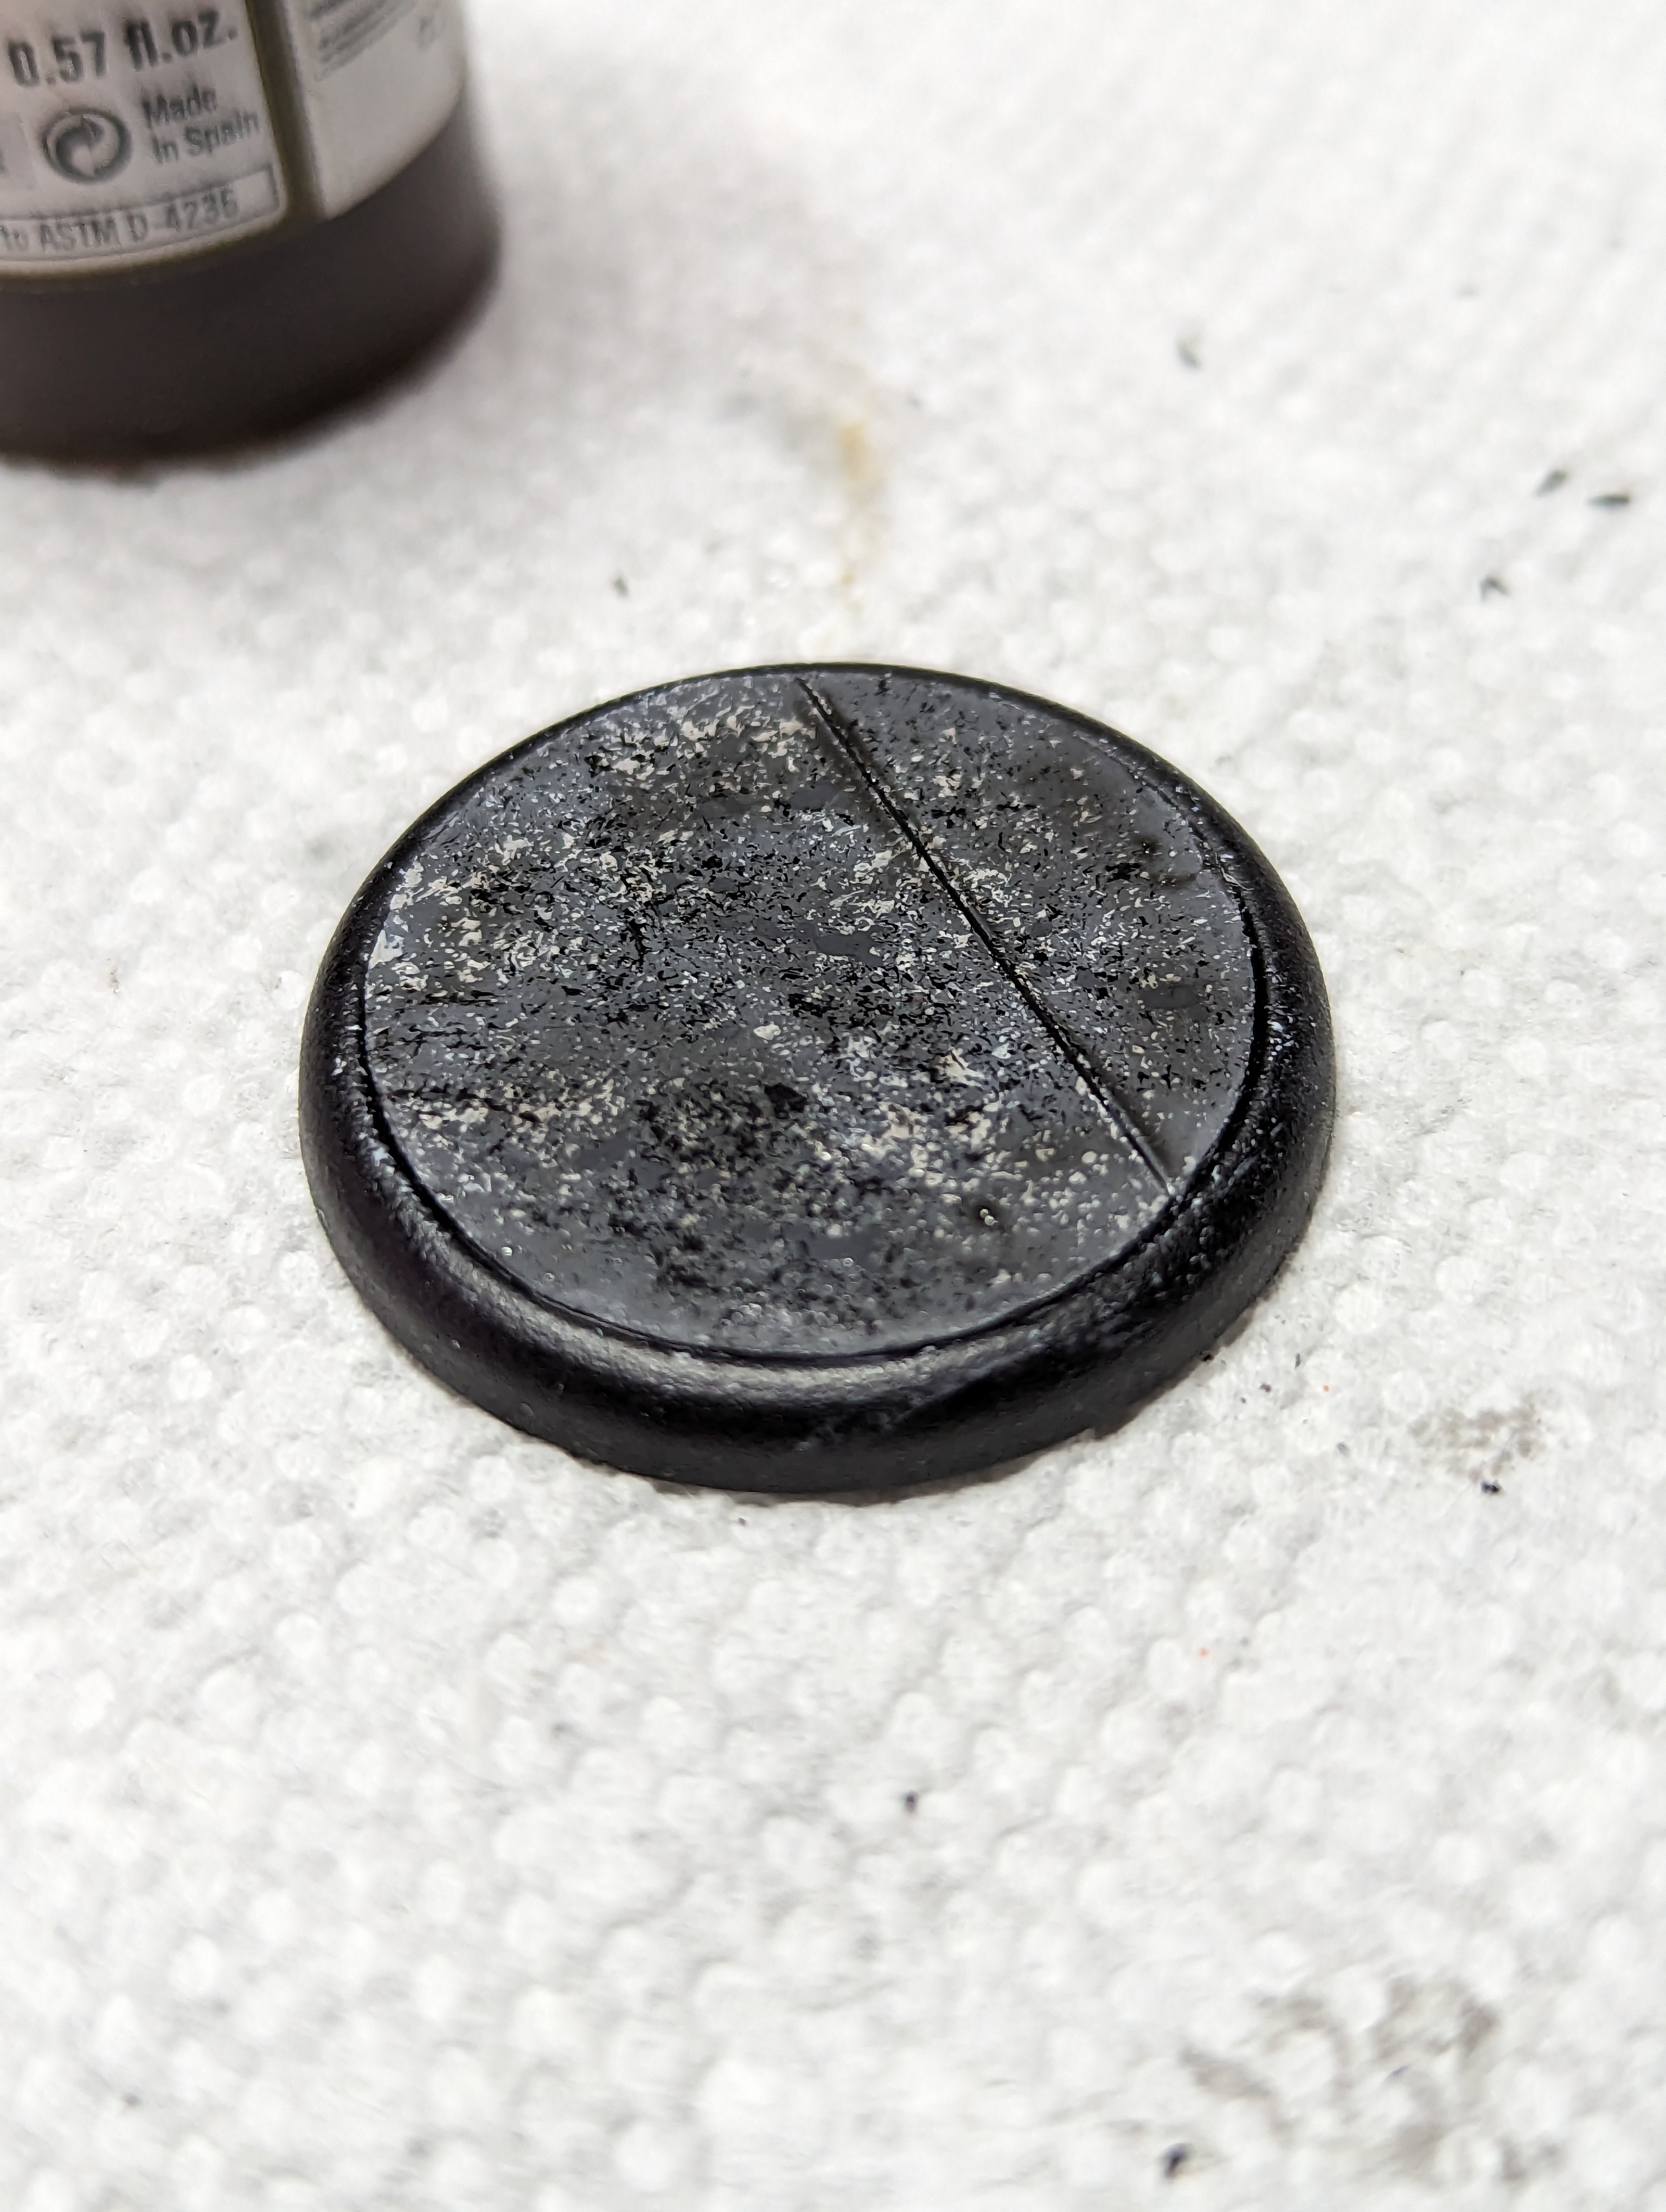
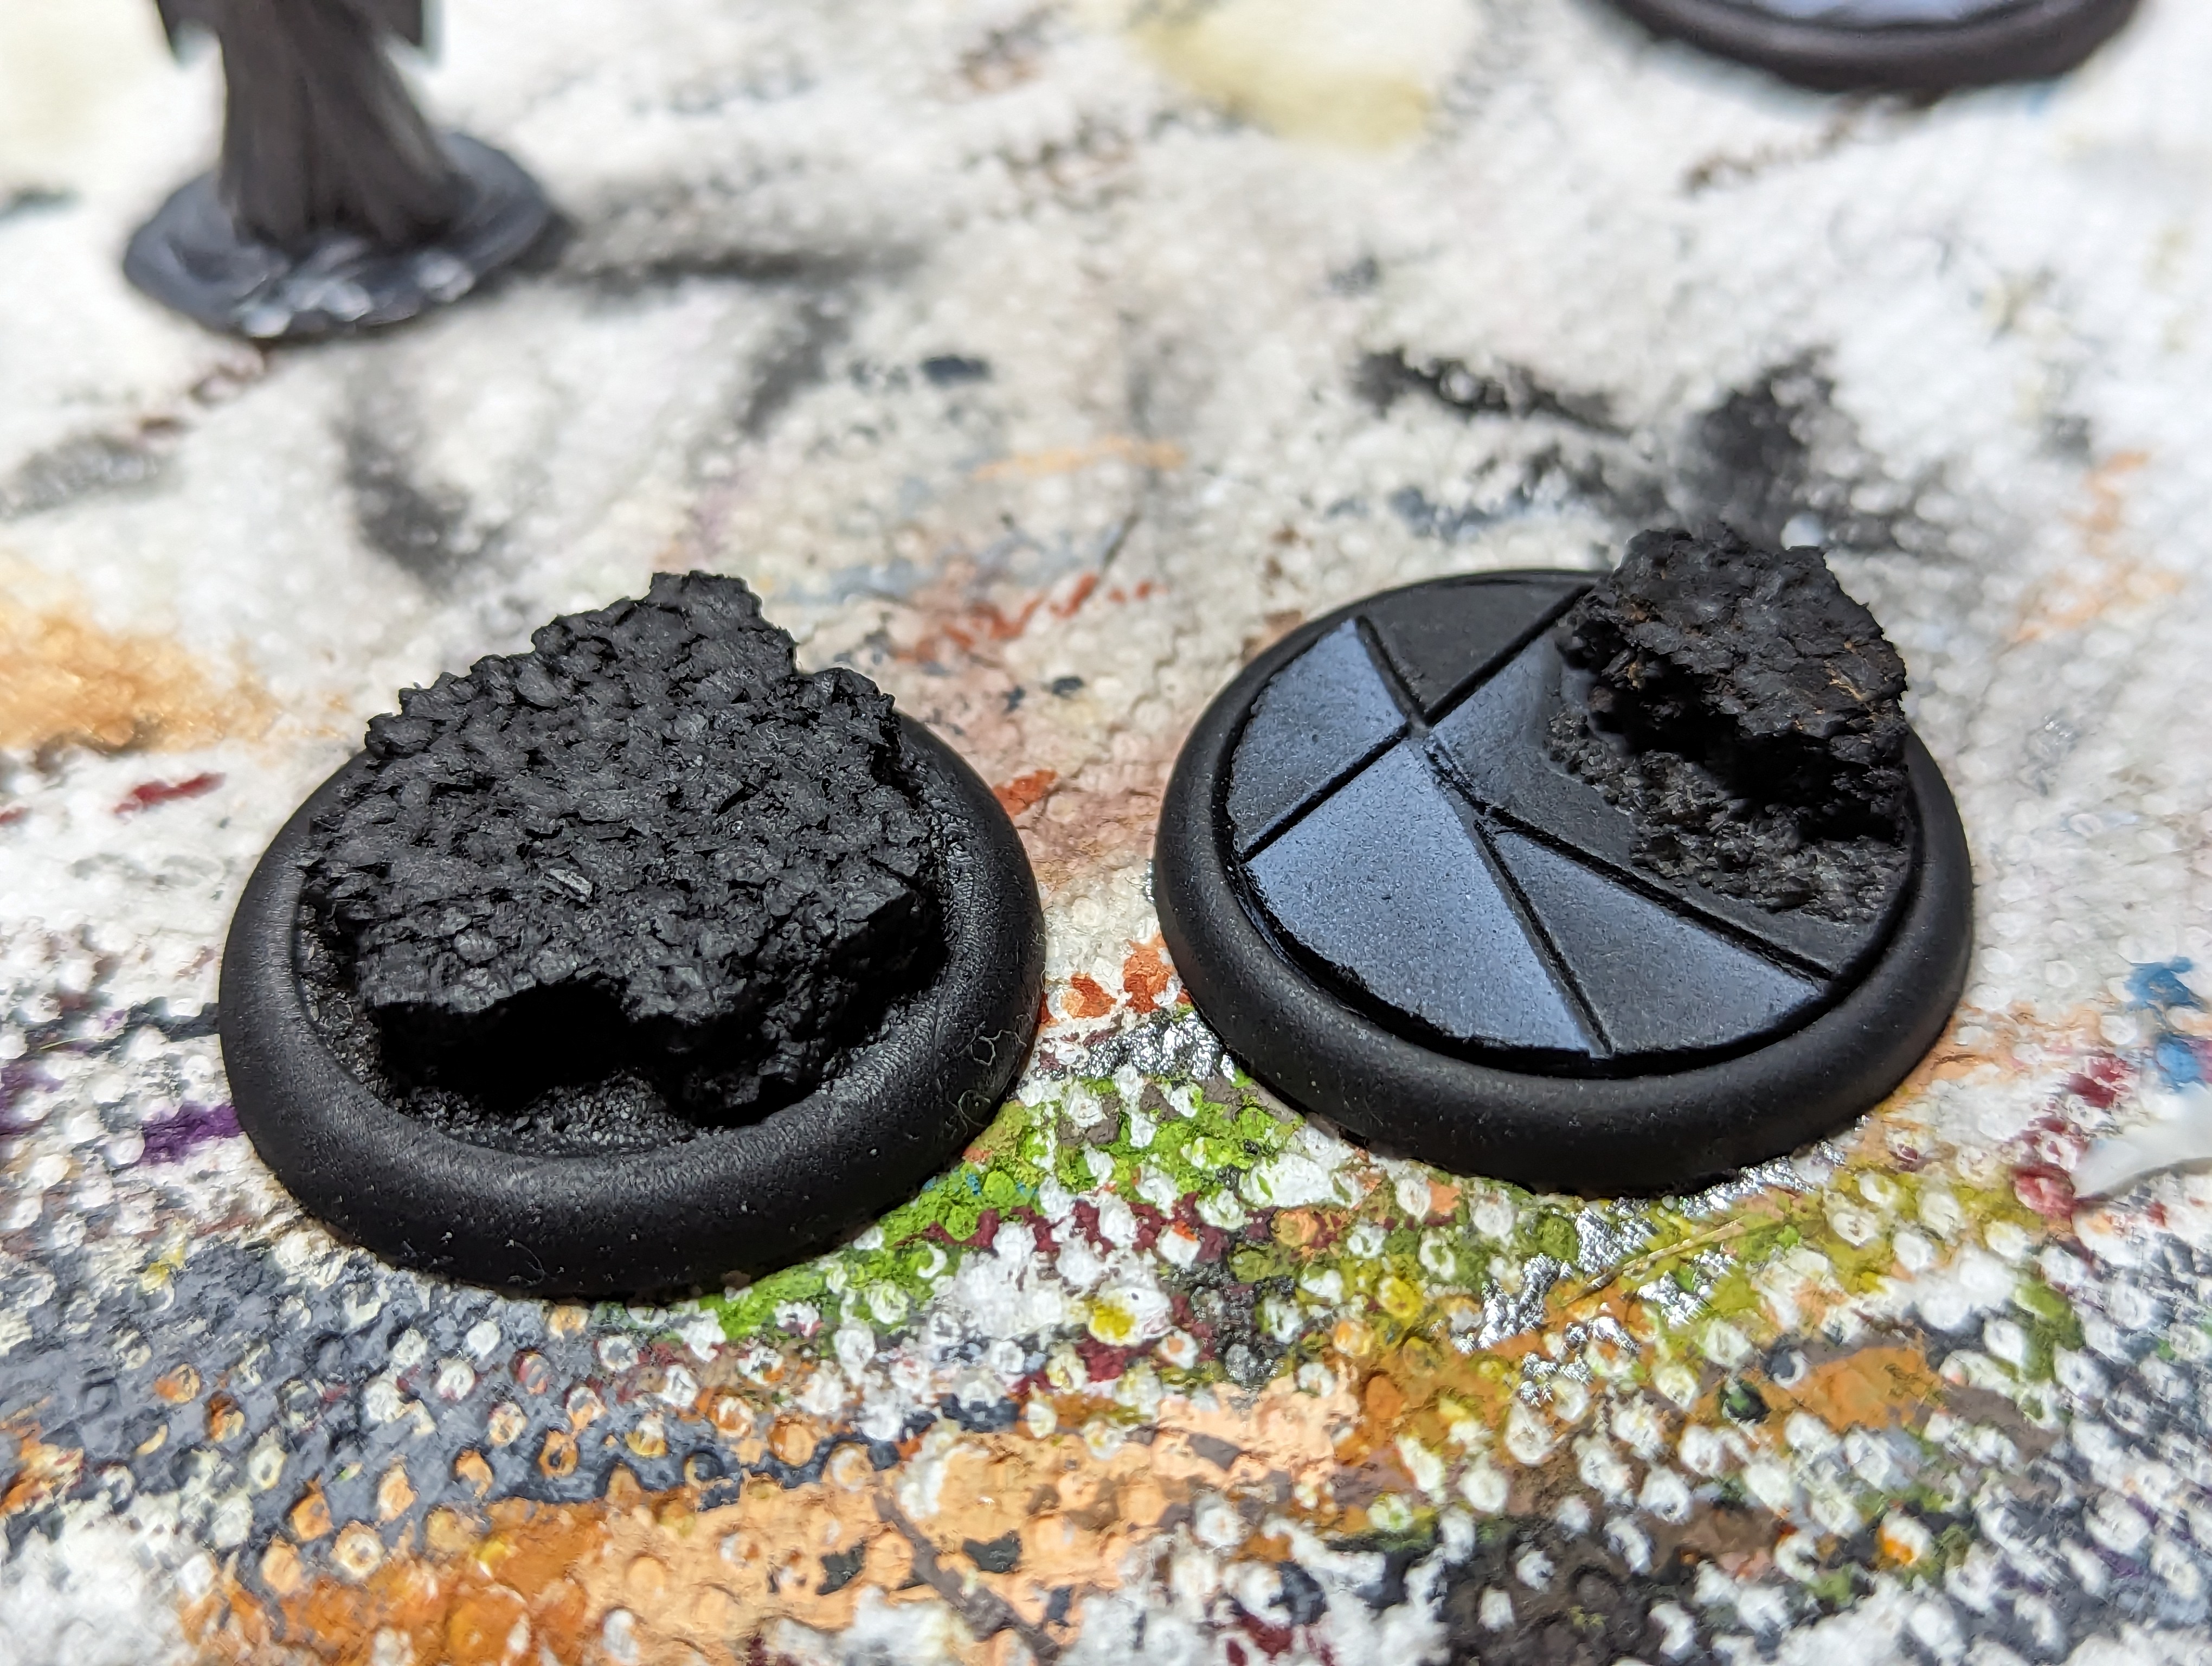
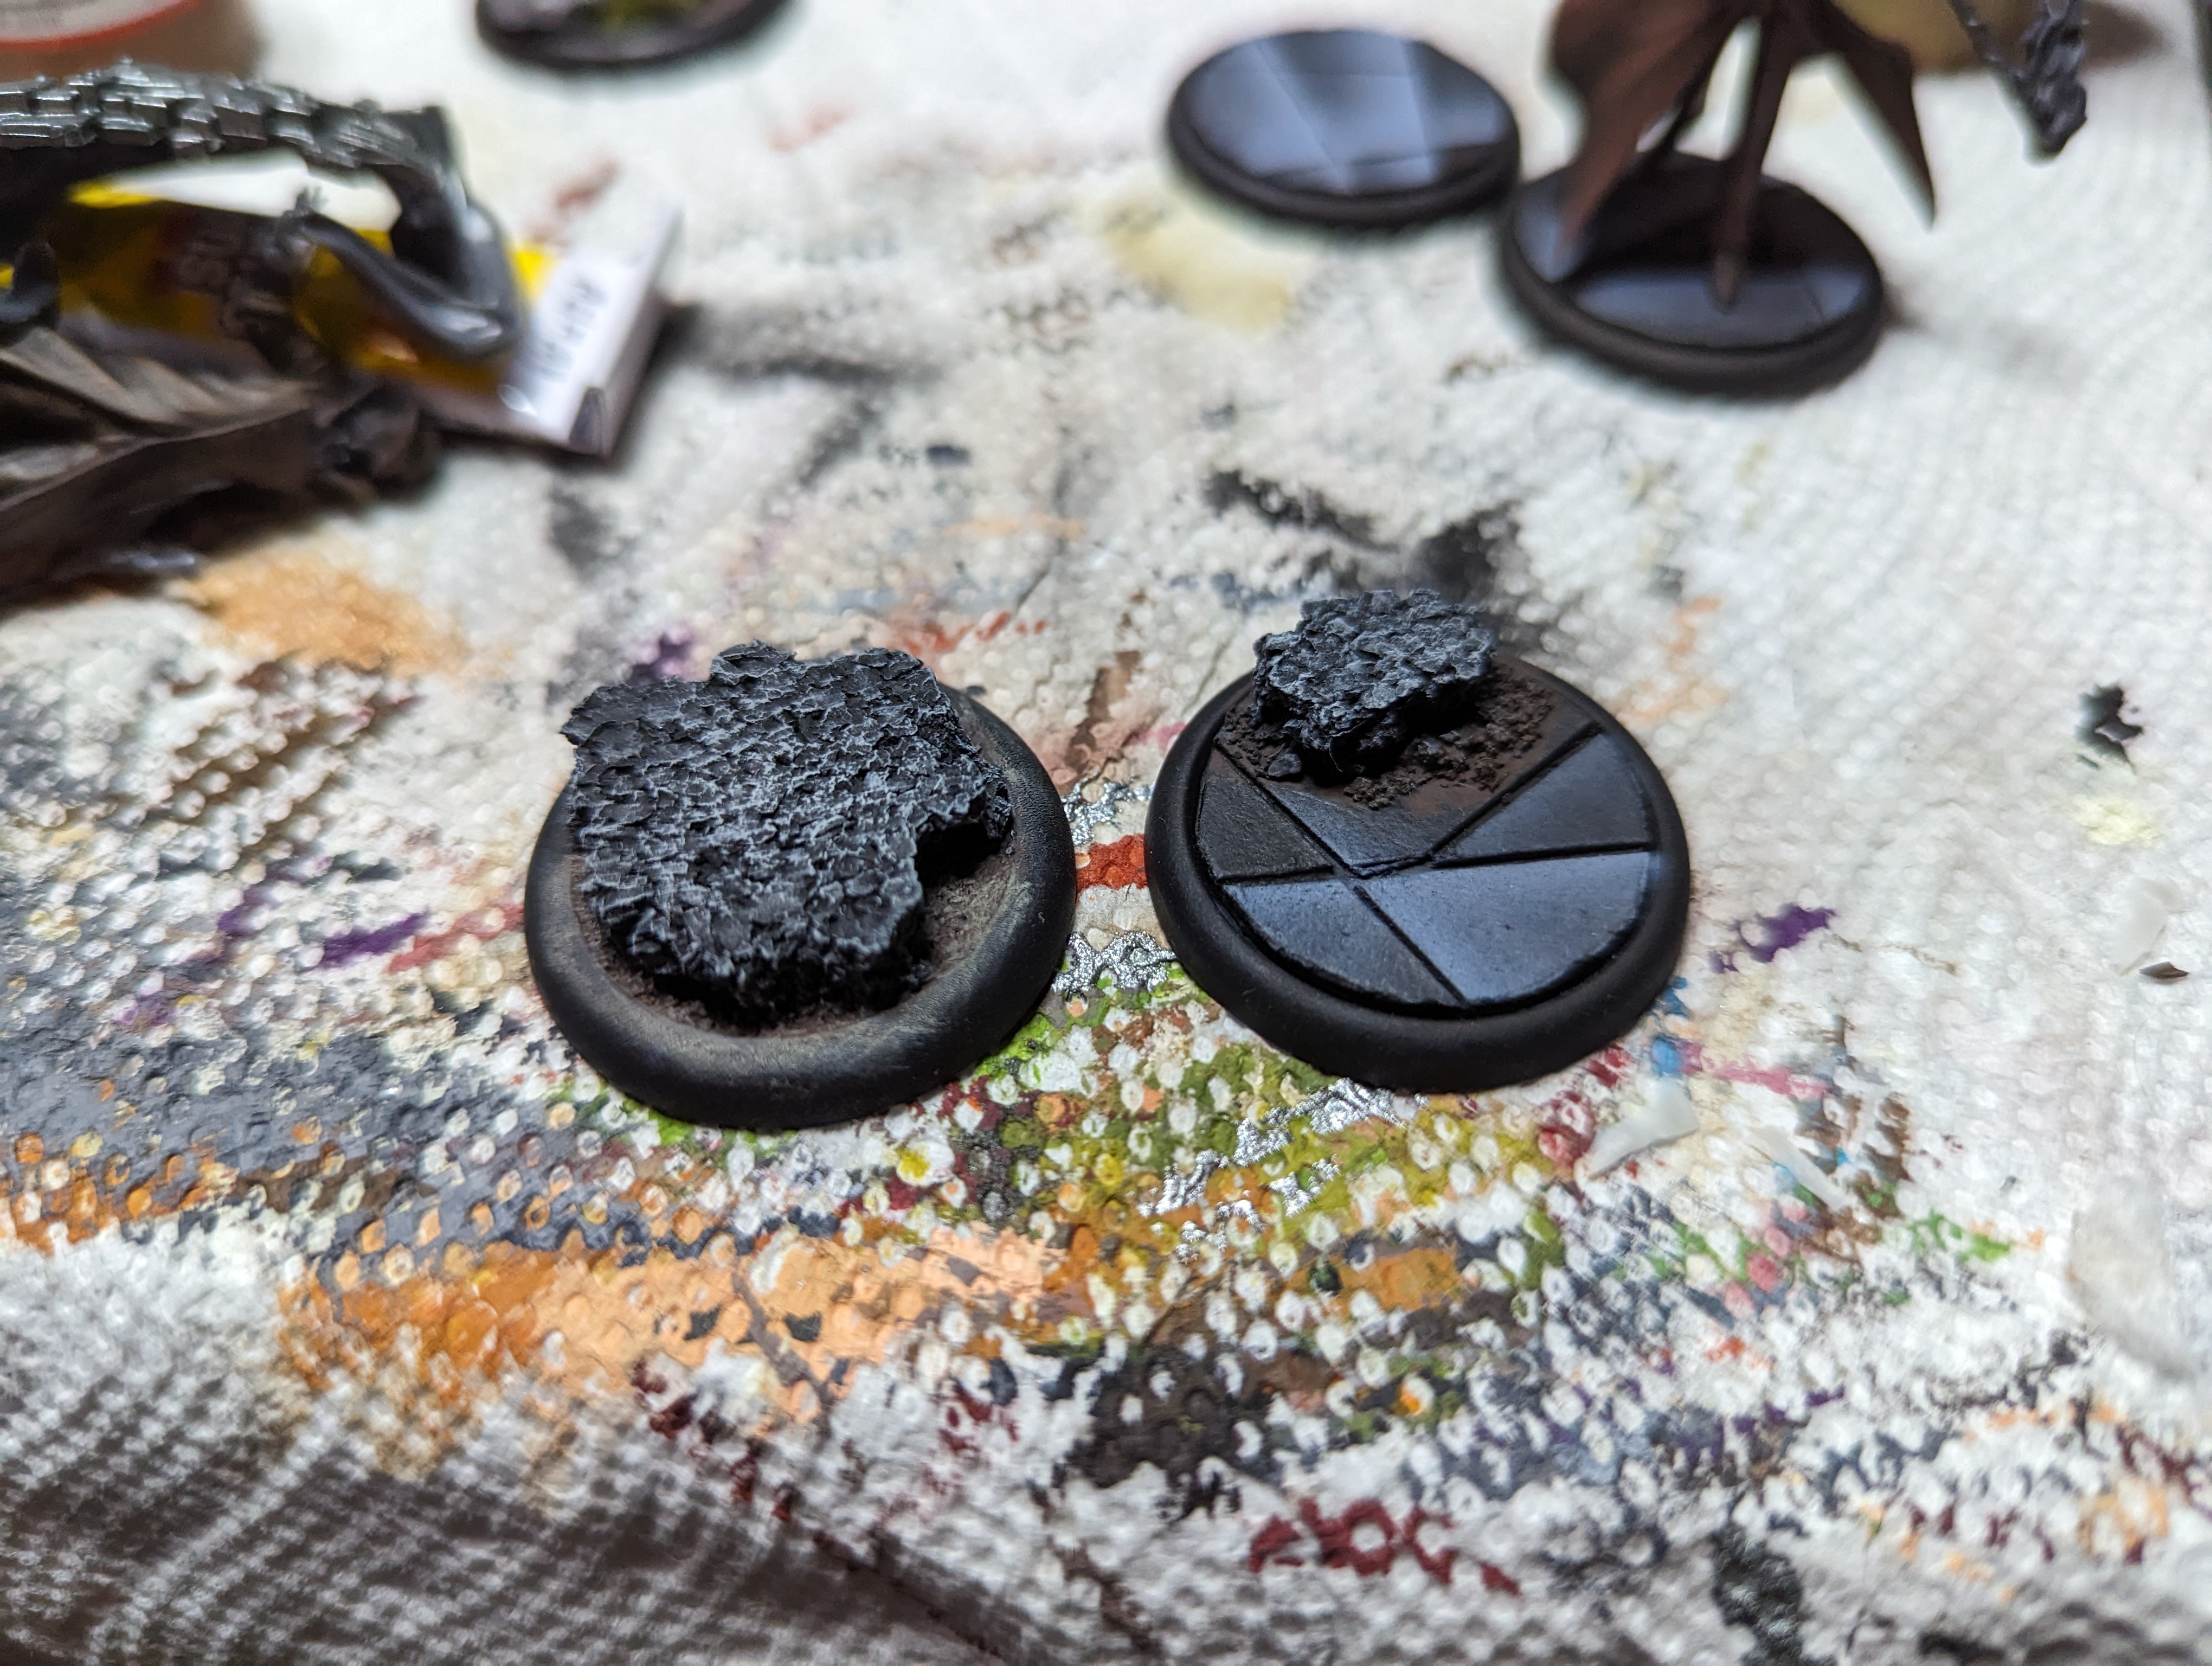
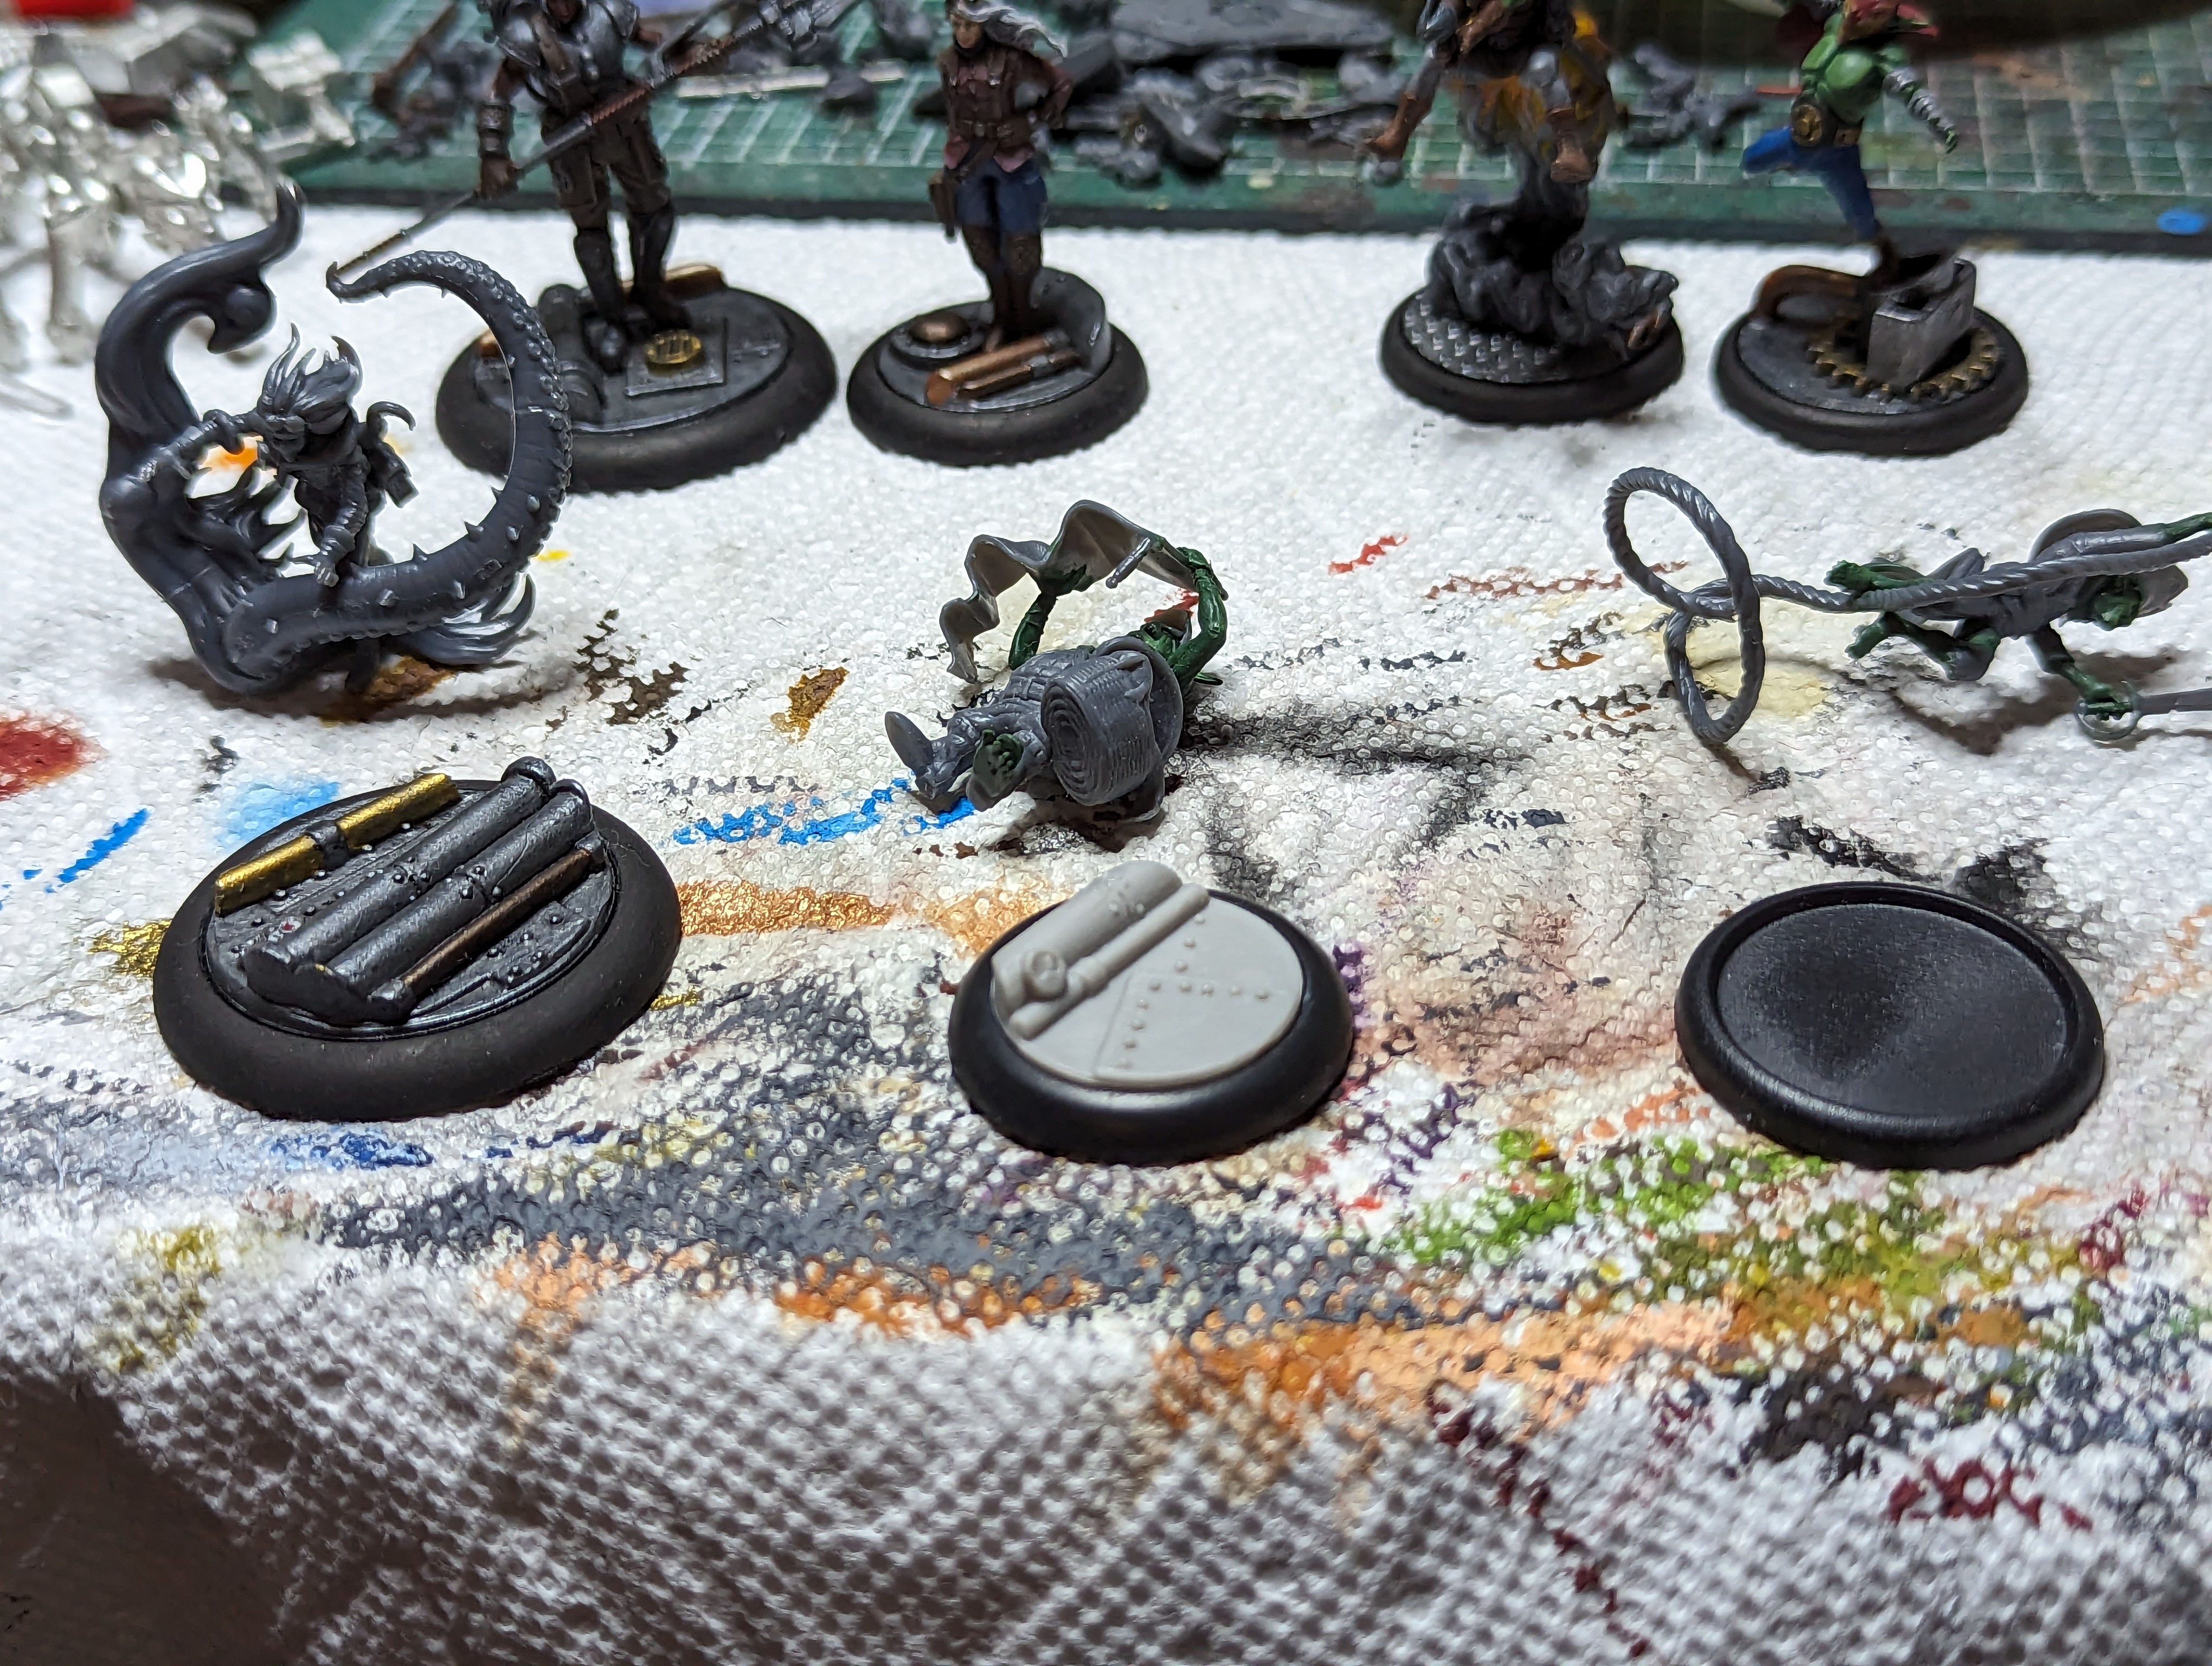
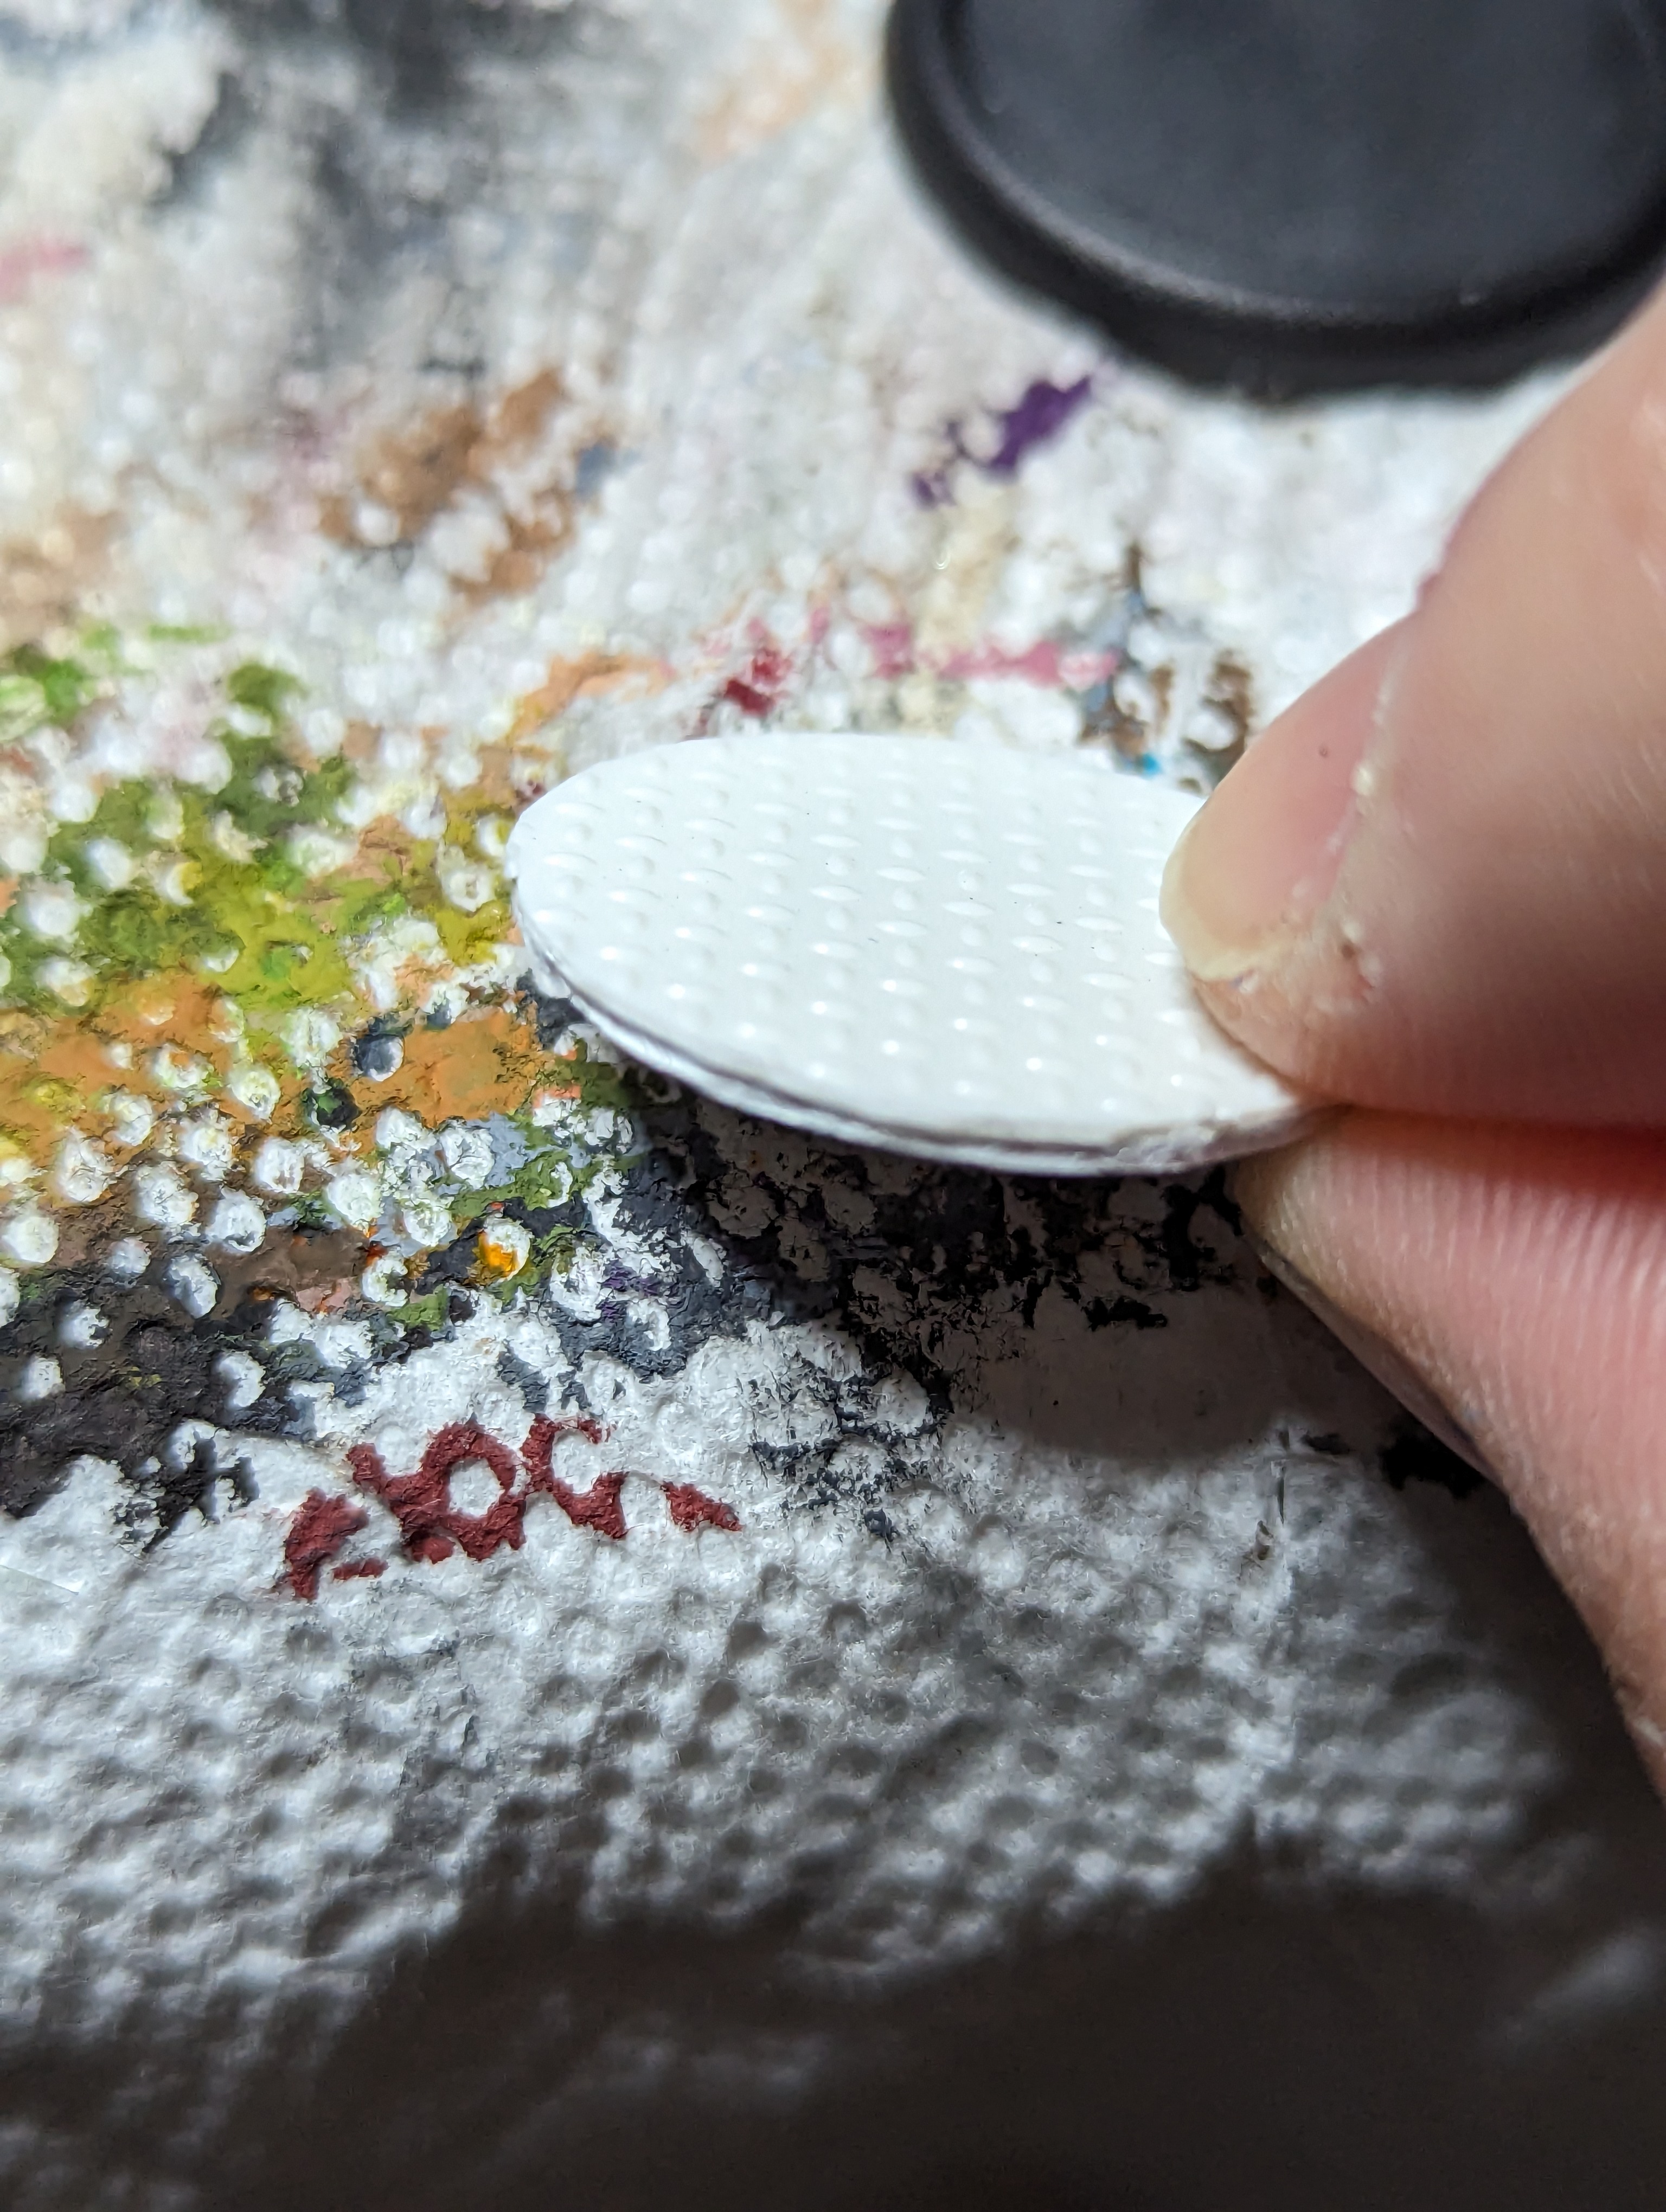
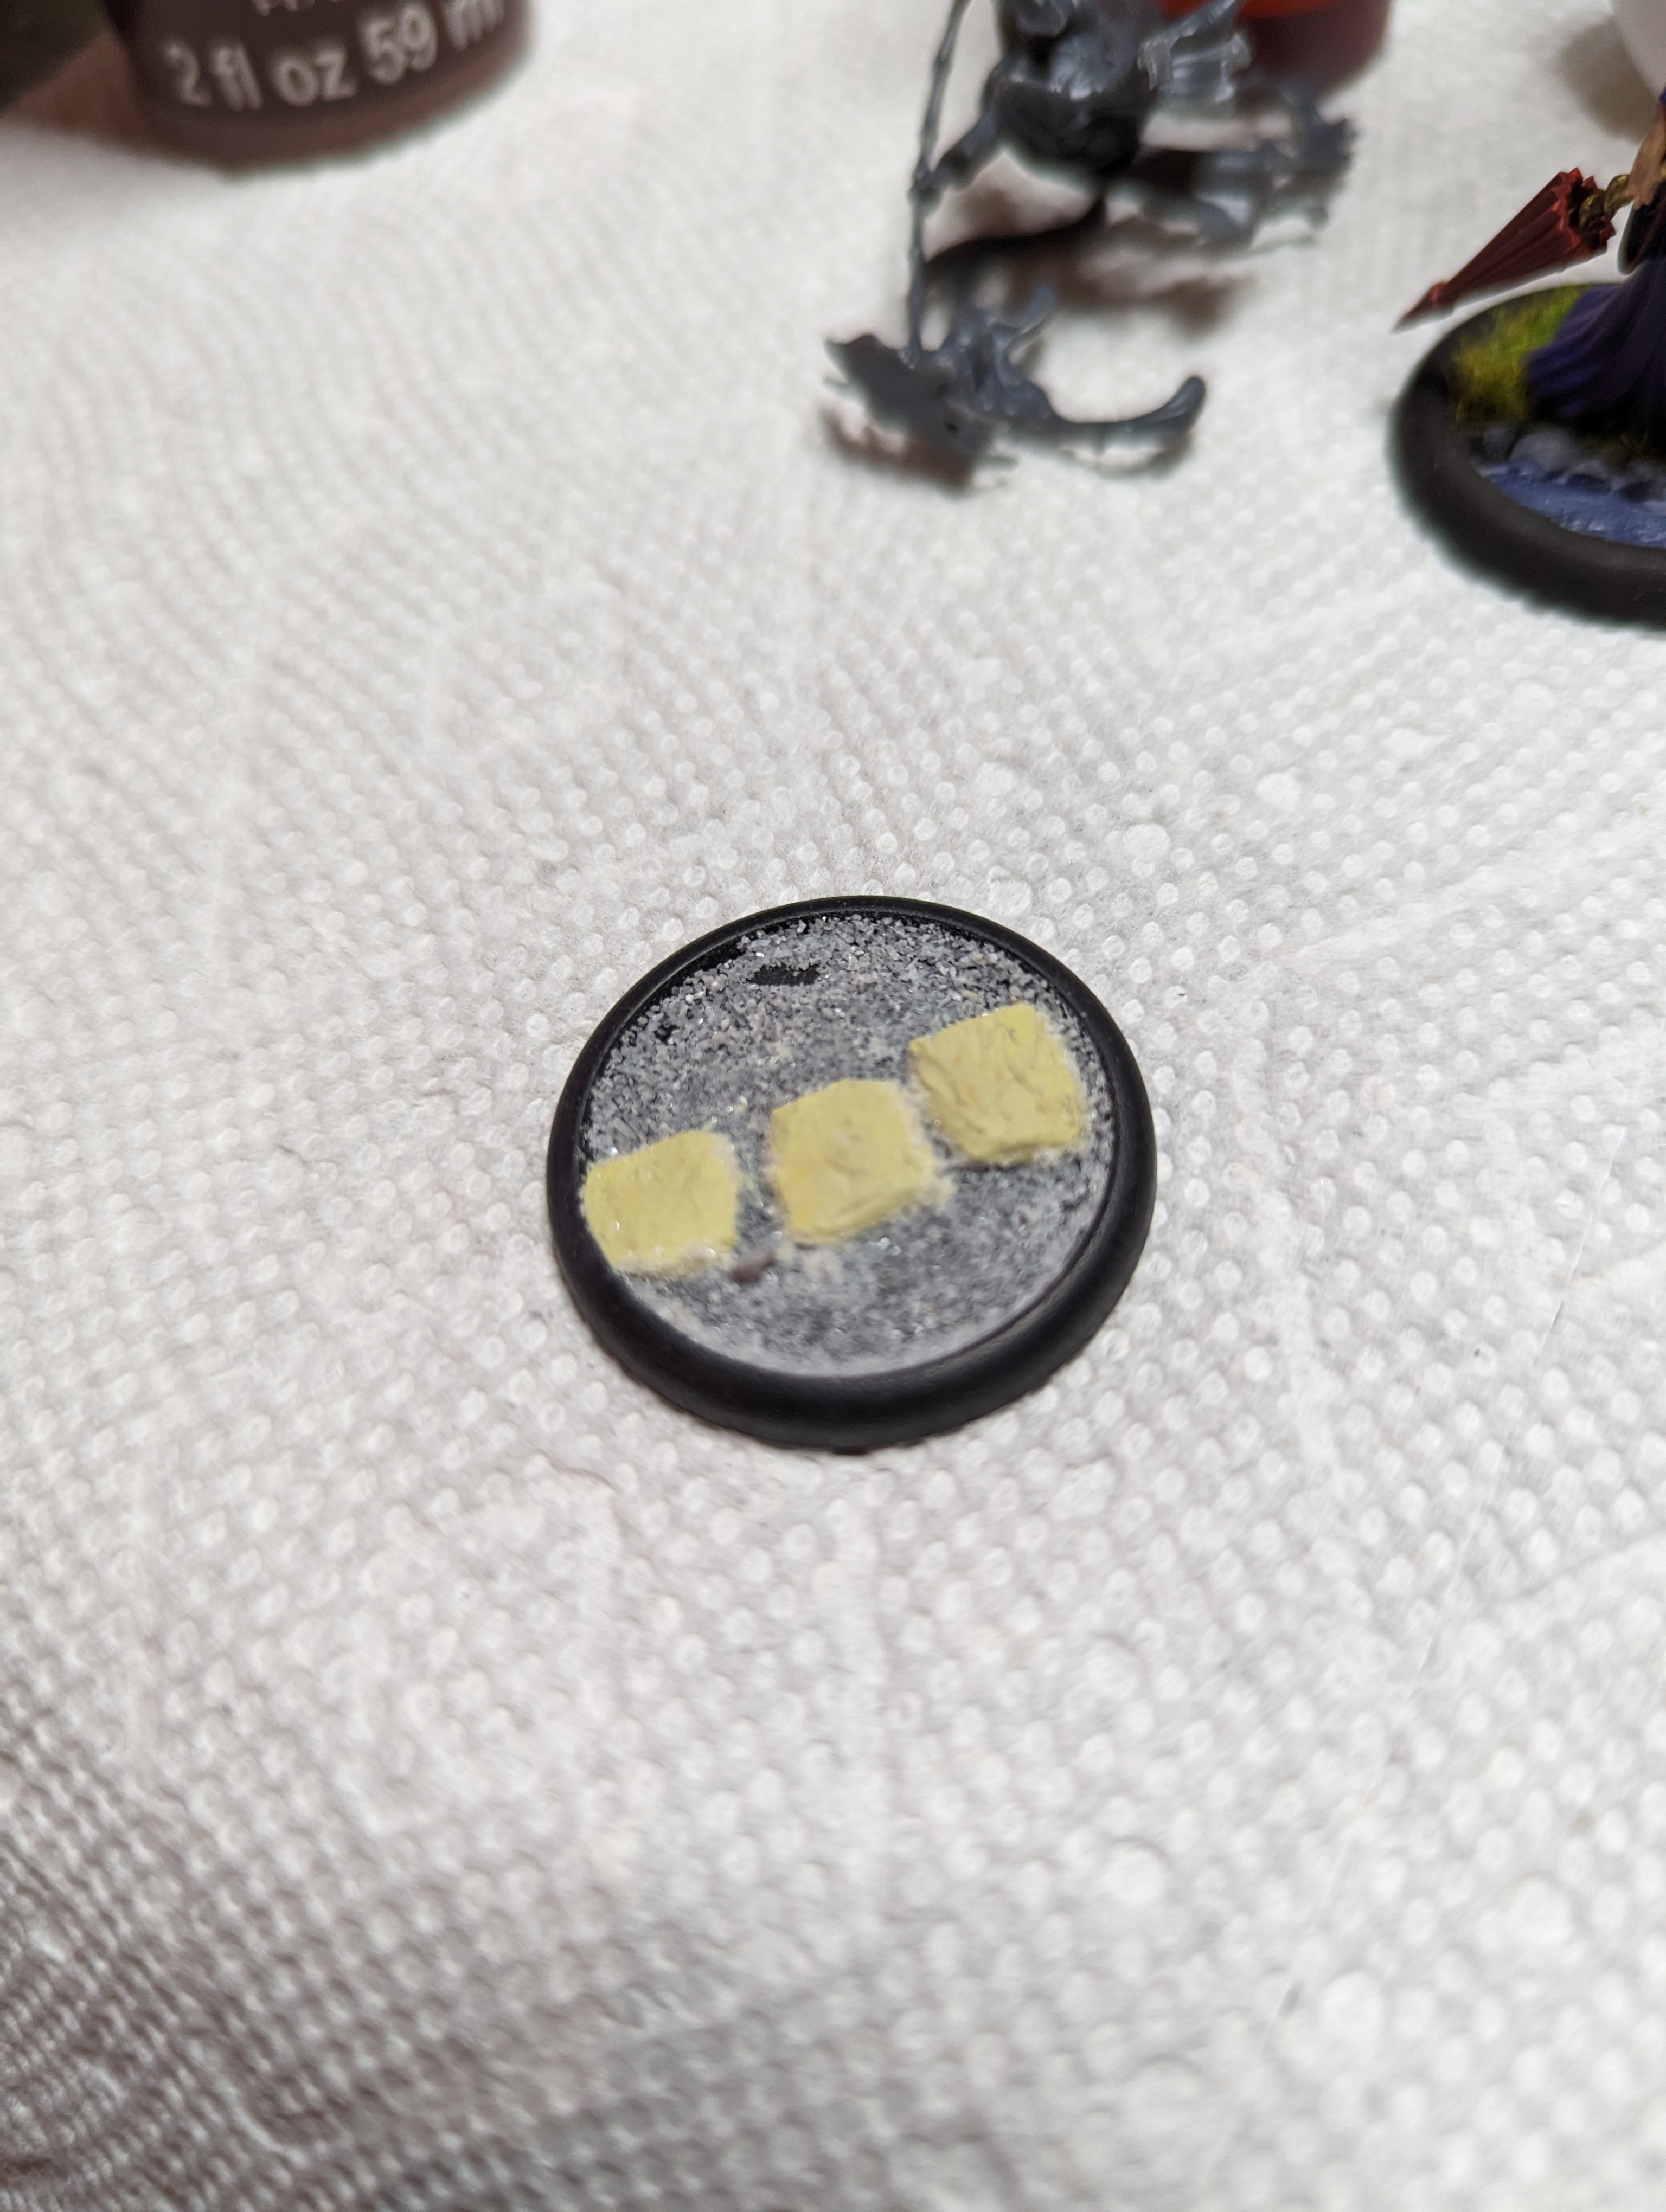
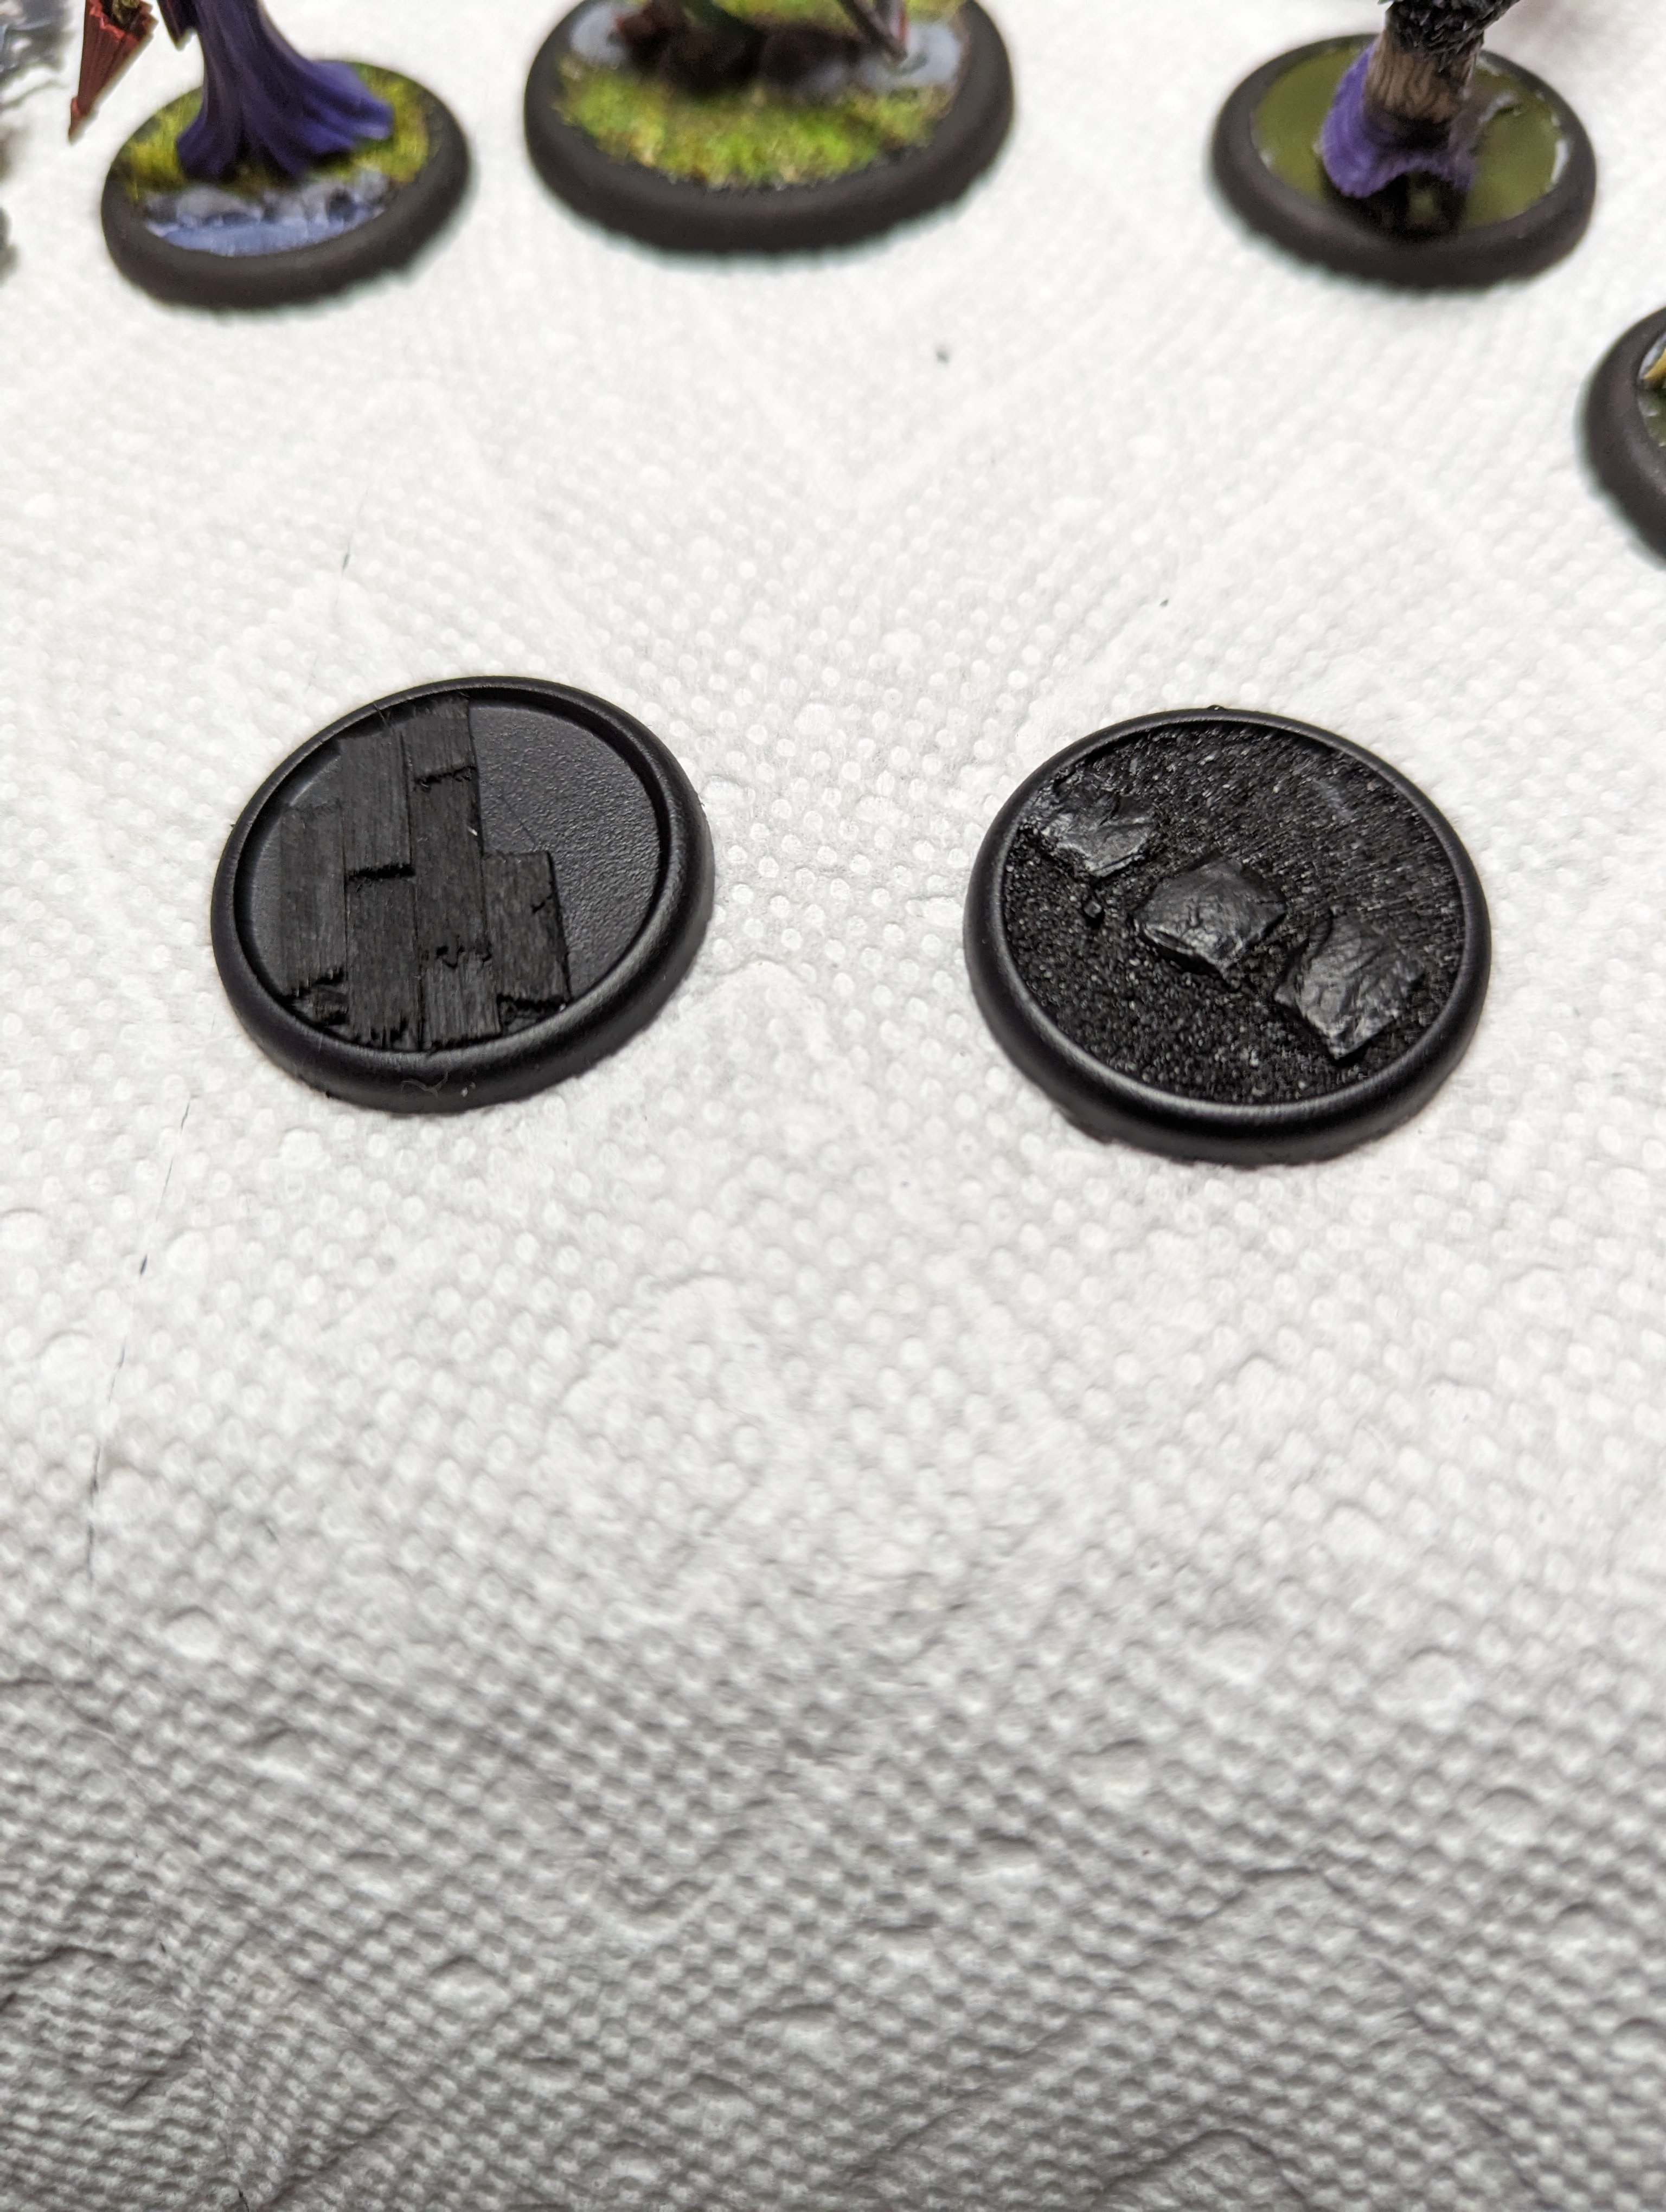
Malifaux bases have a lip, so I started by cutting out discs to stick inside and bring the base up flush. I glued in one, and added a groove to look like a separate part of the sidewalk. For the hybrid base, I only used a half disc so that it looks like where the sidewalk meets the dirt. I then added some sand to the edge, and a pile of sand to the sewer base. I put it down with superglue so that it would build up a bit thicker.
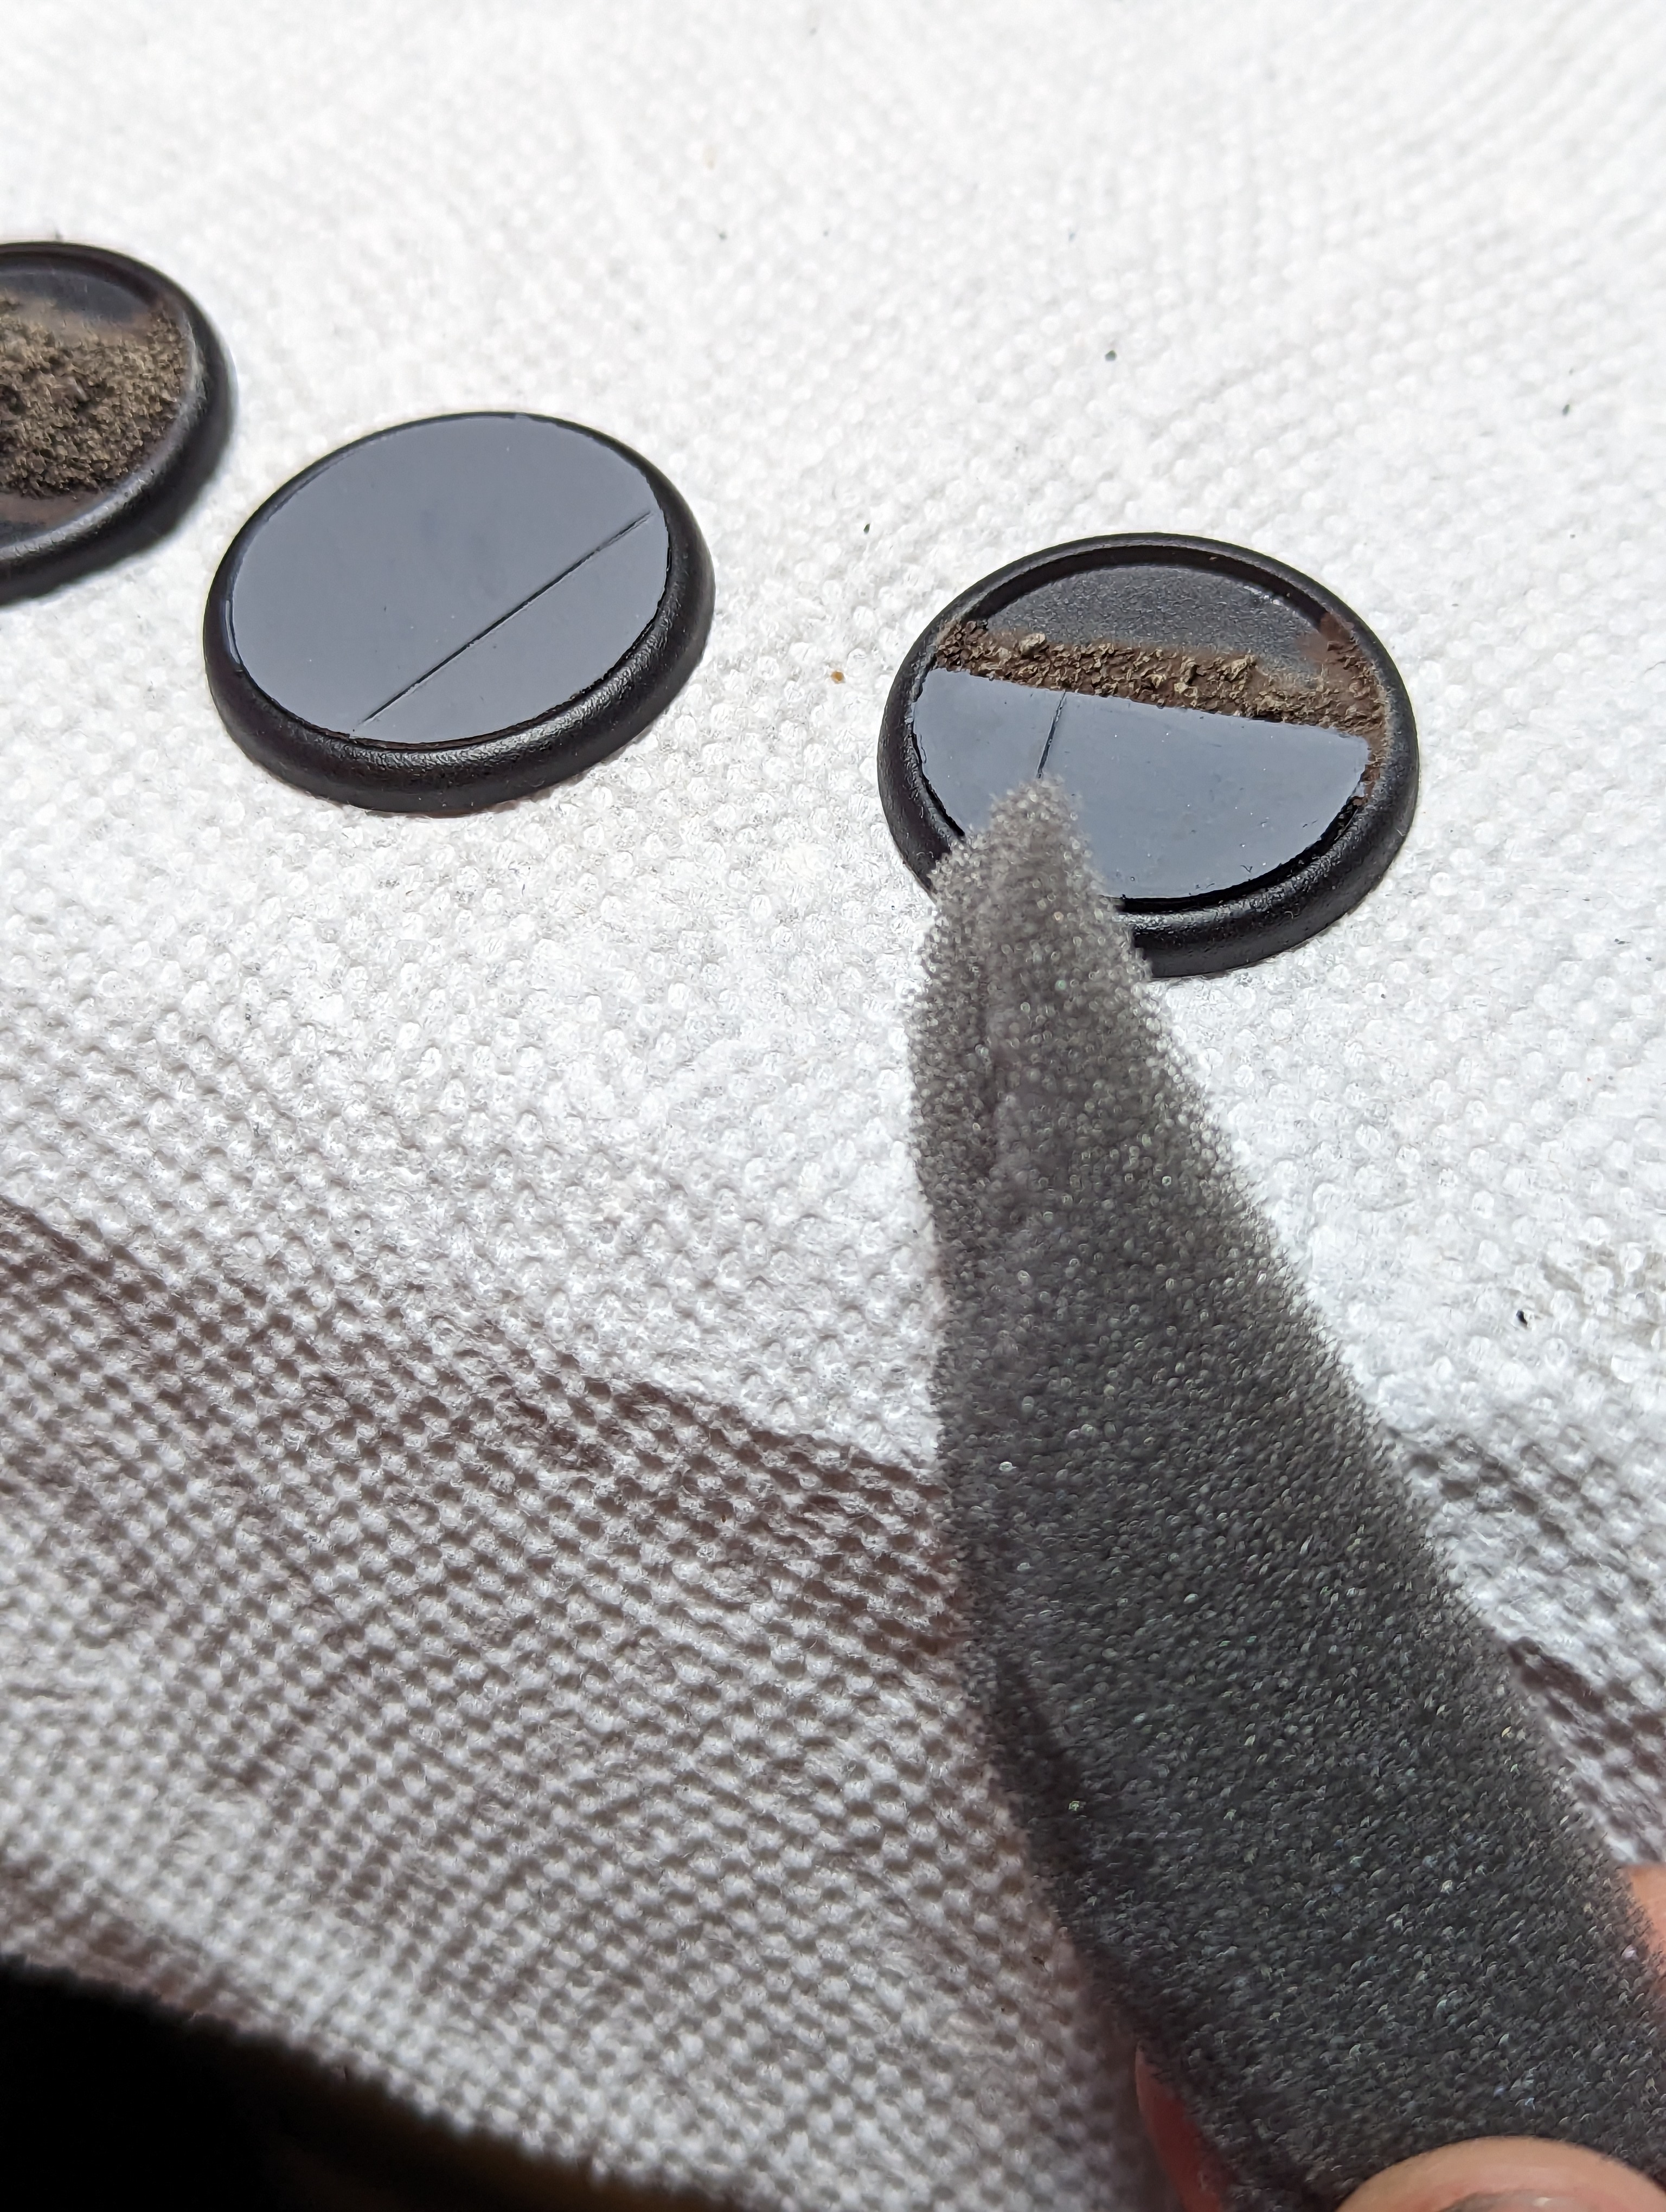
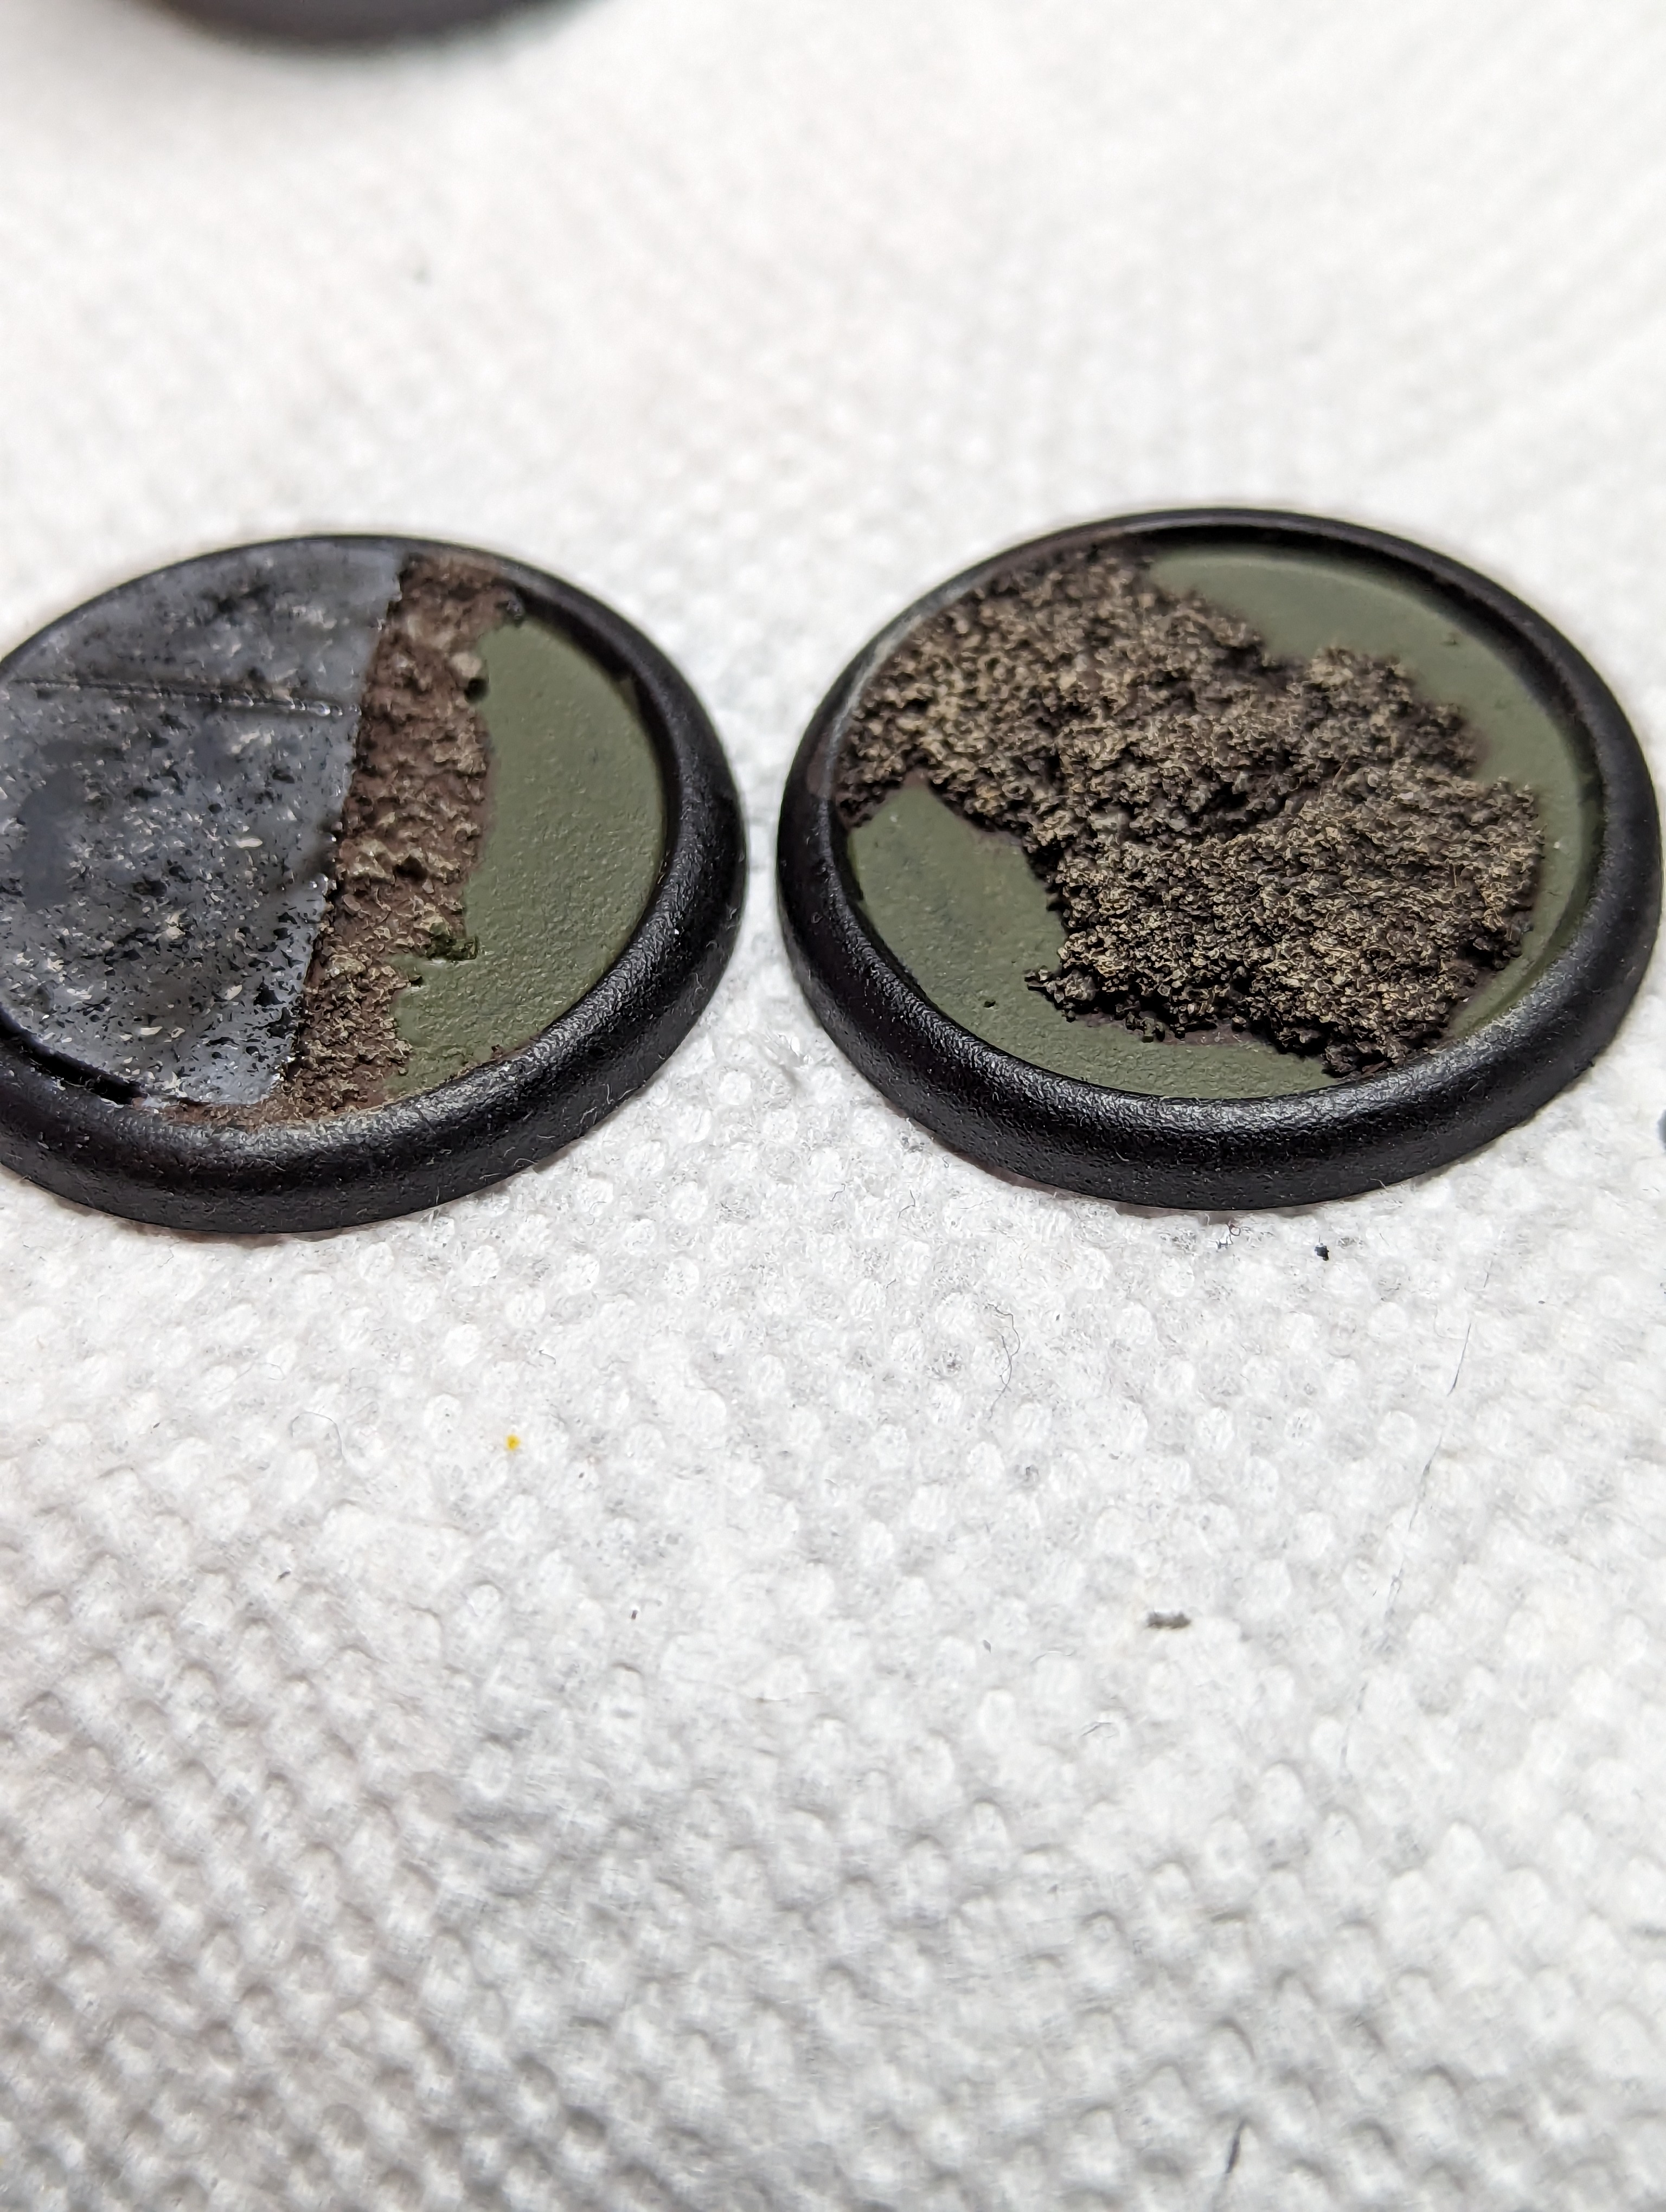
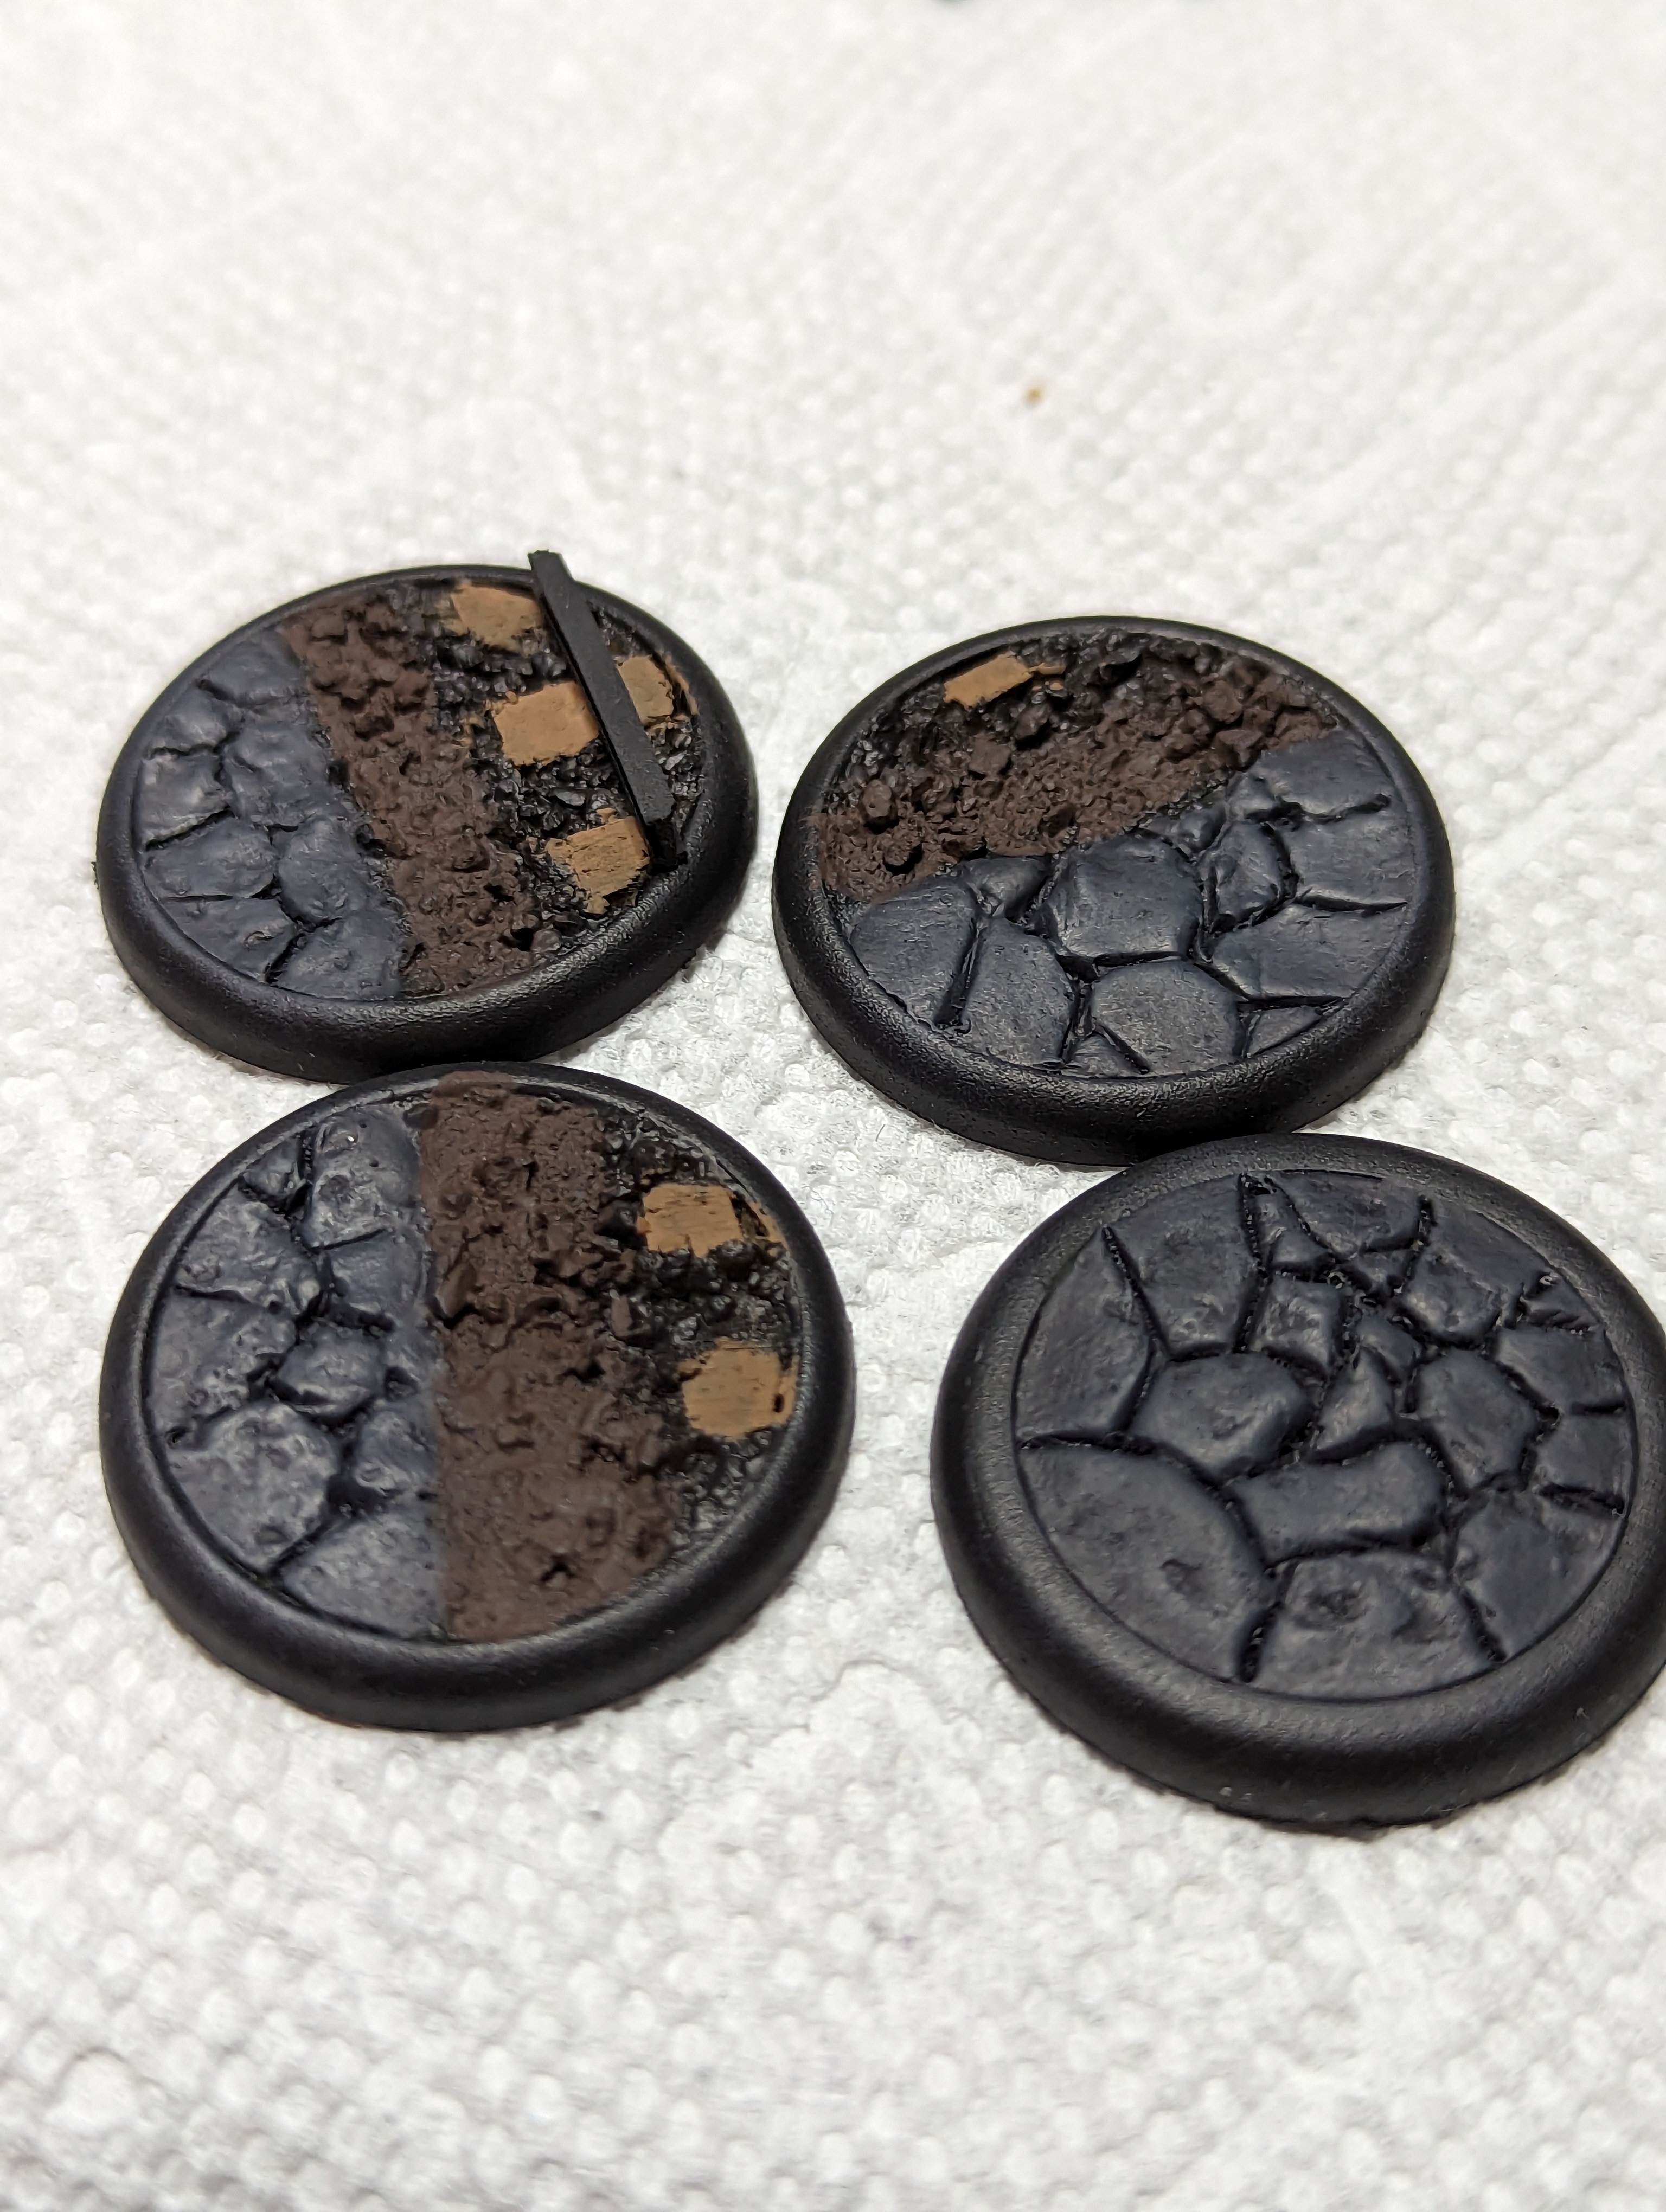
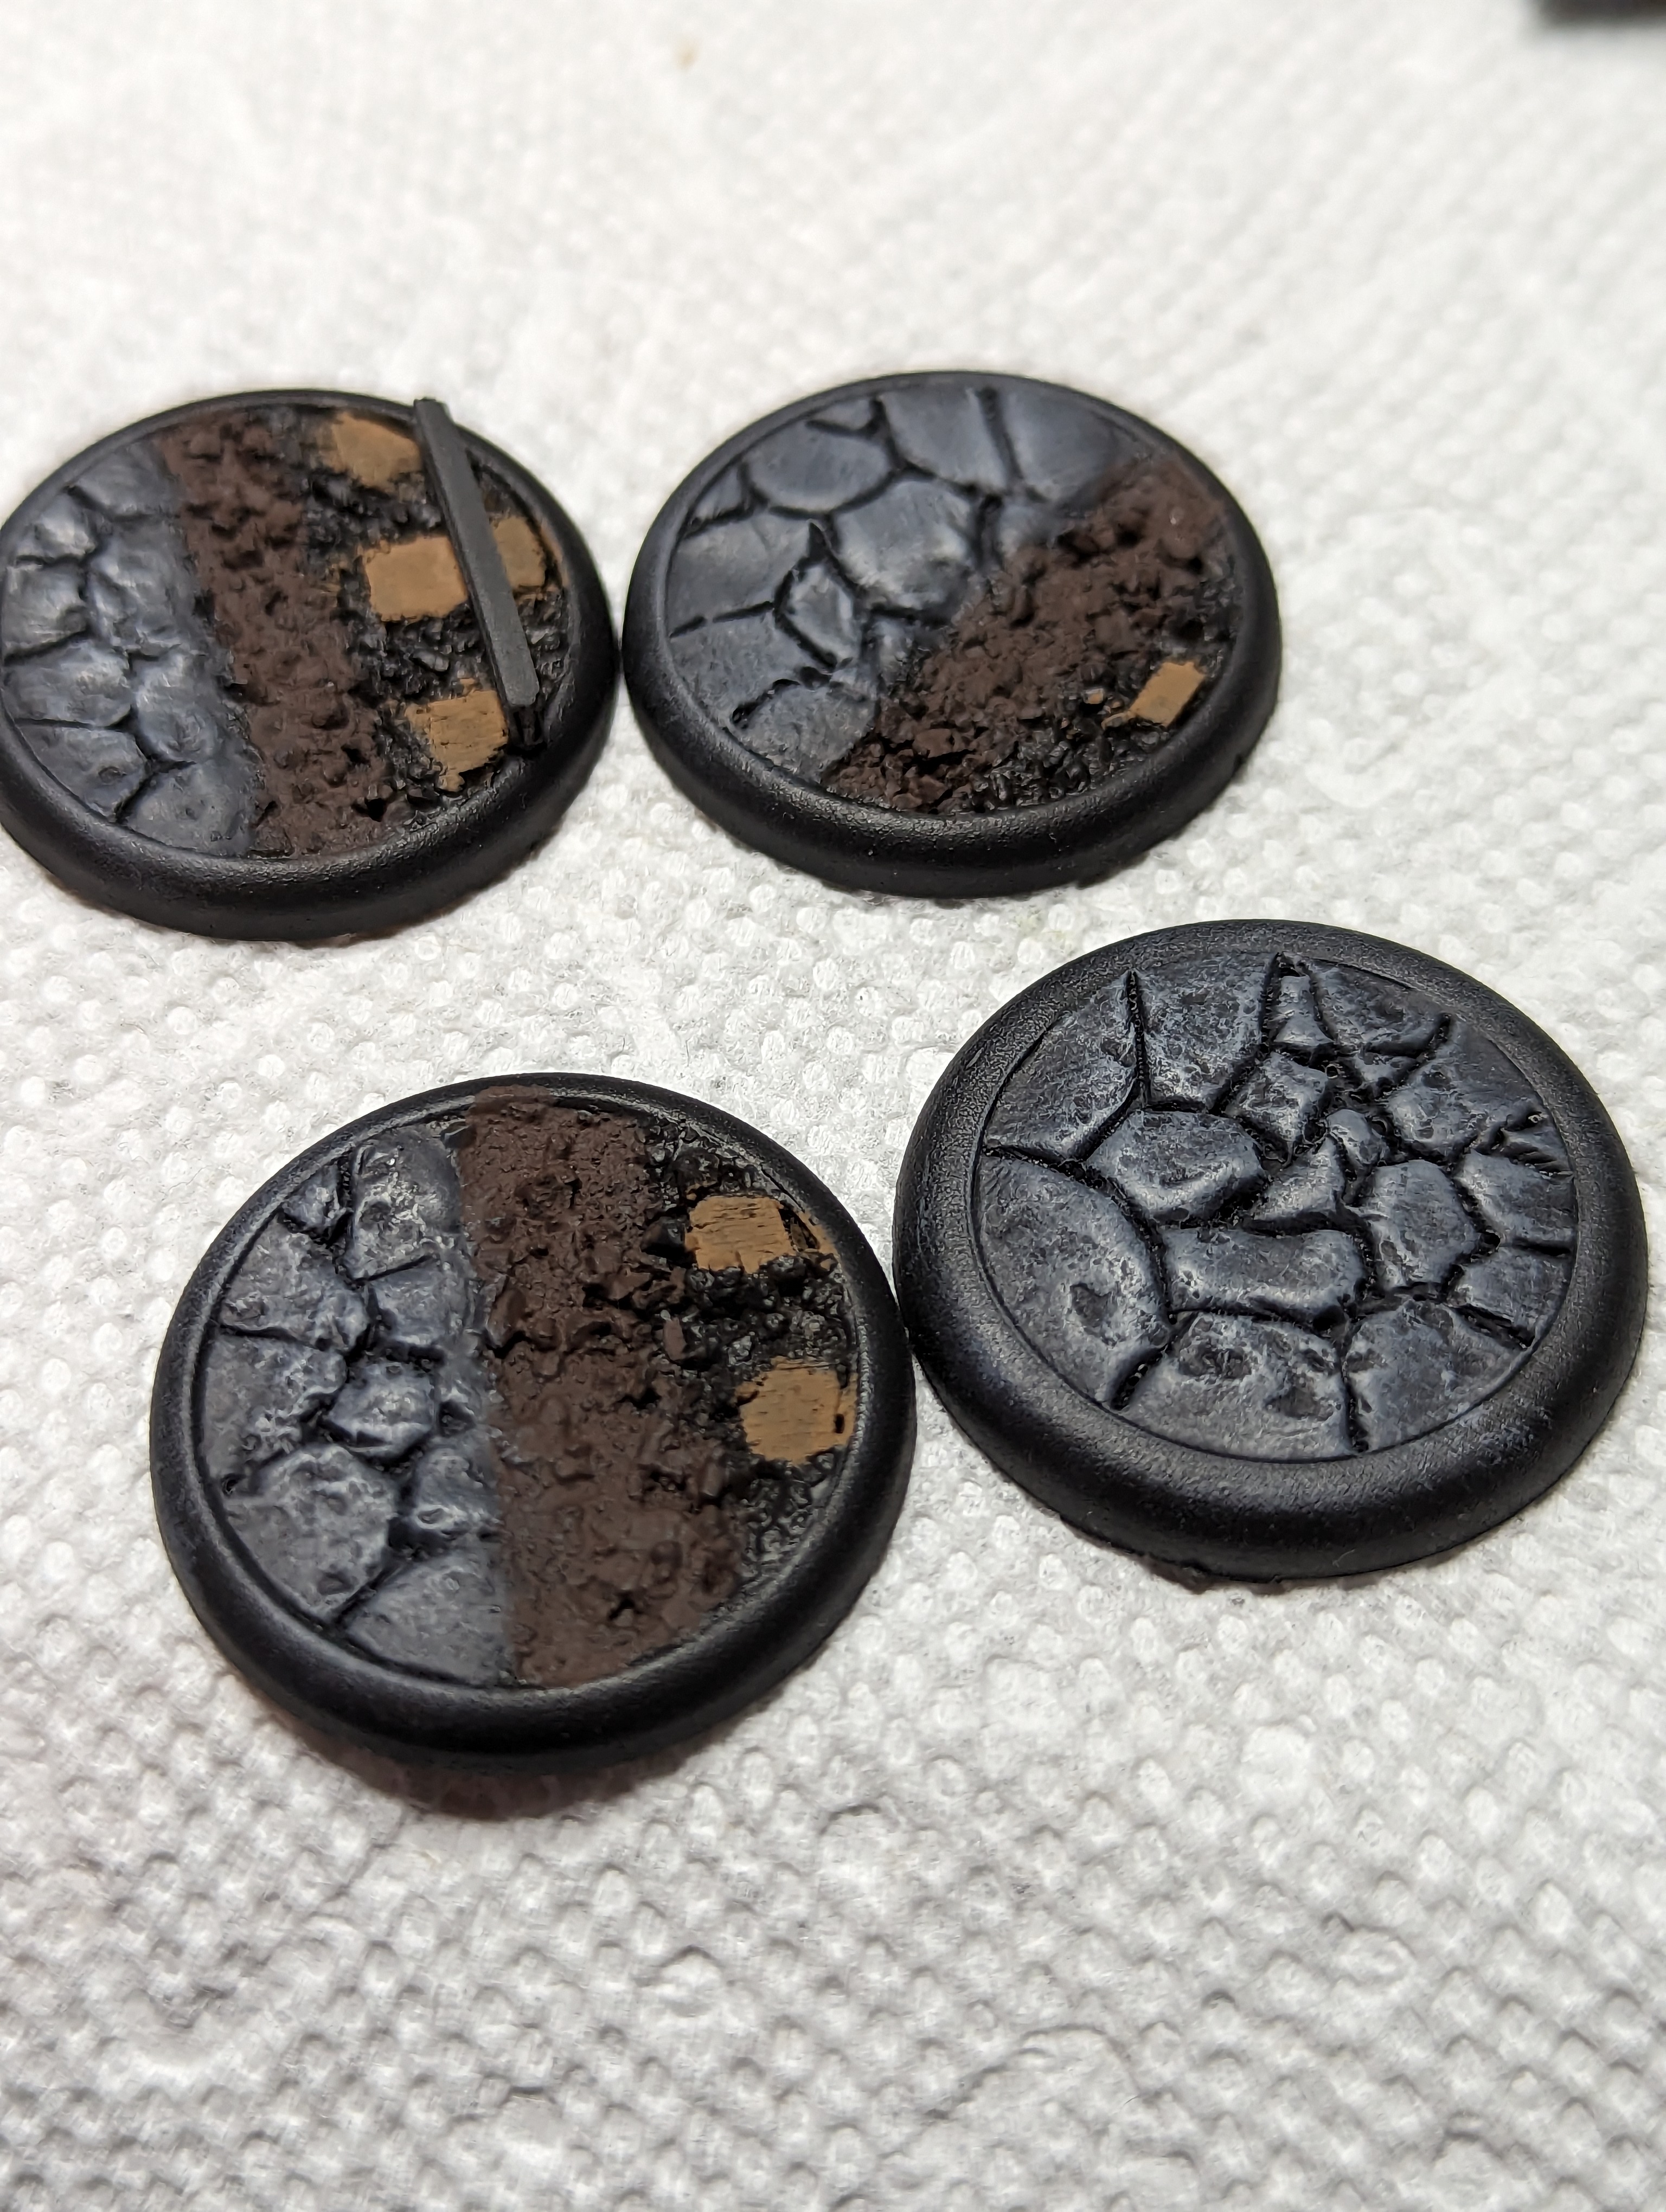
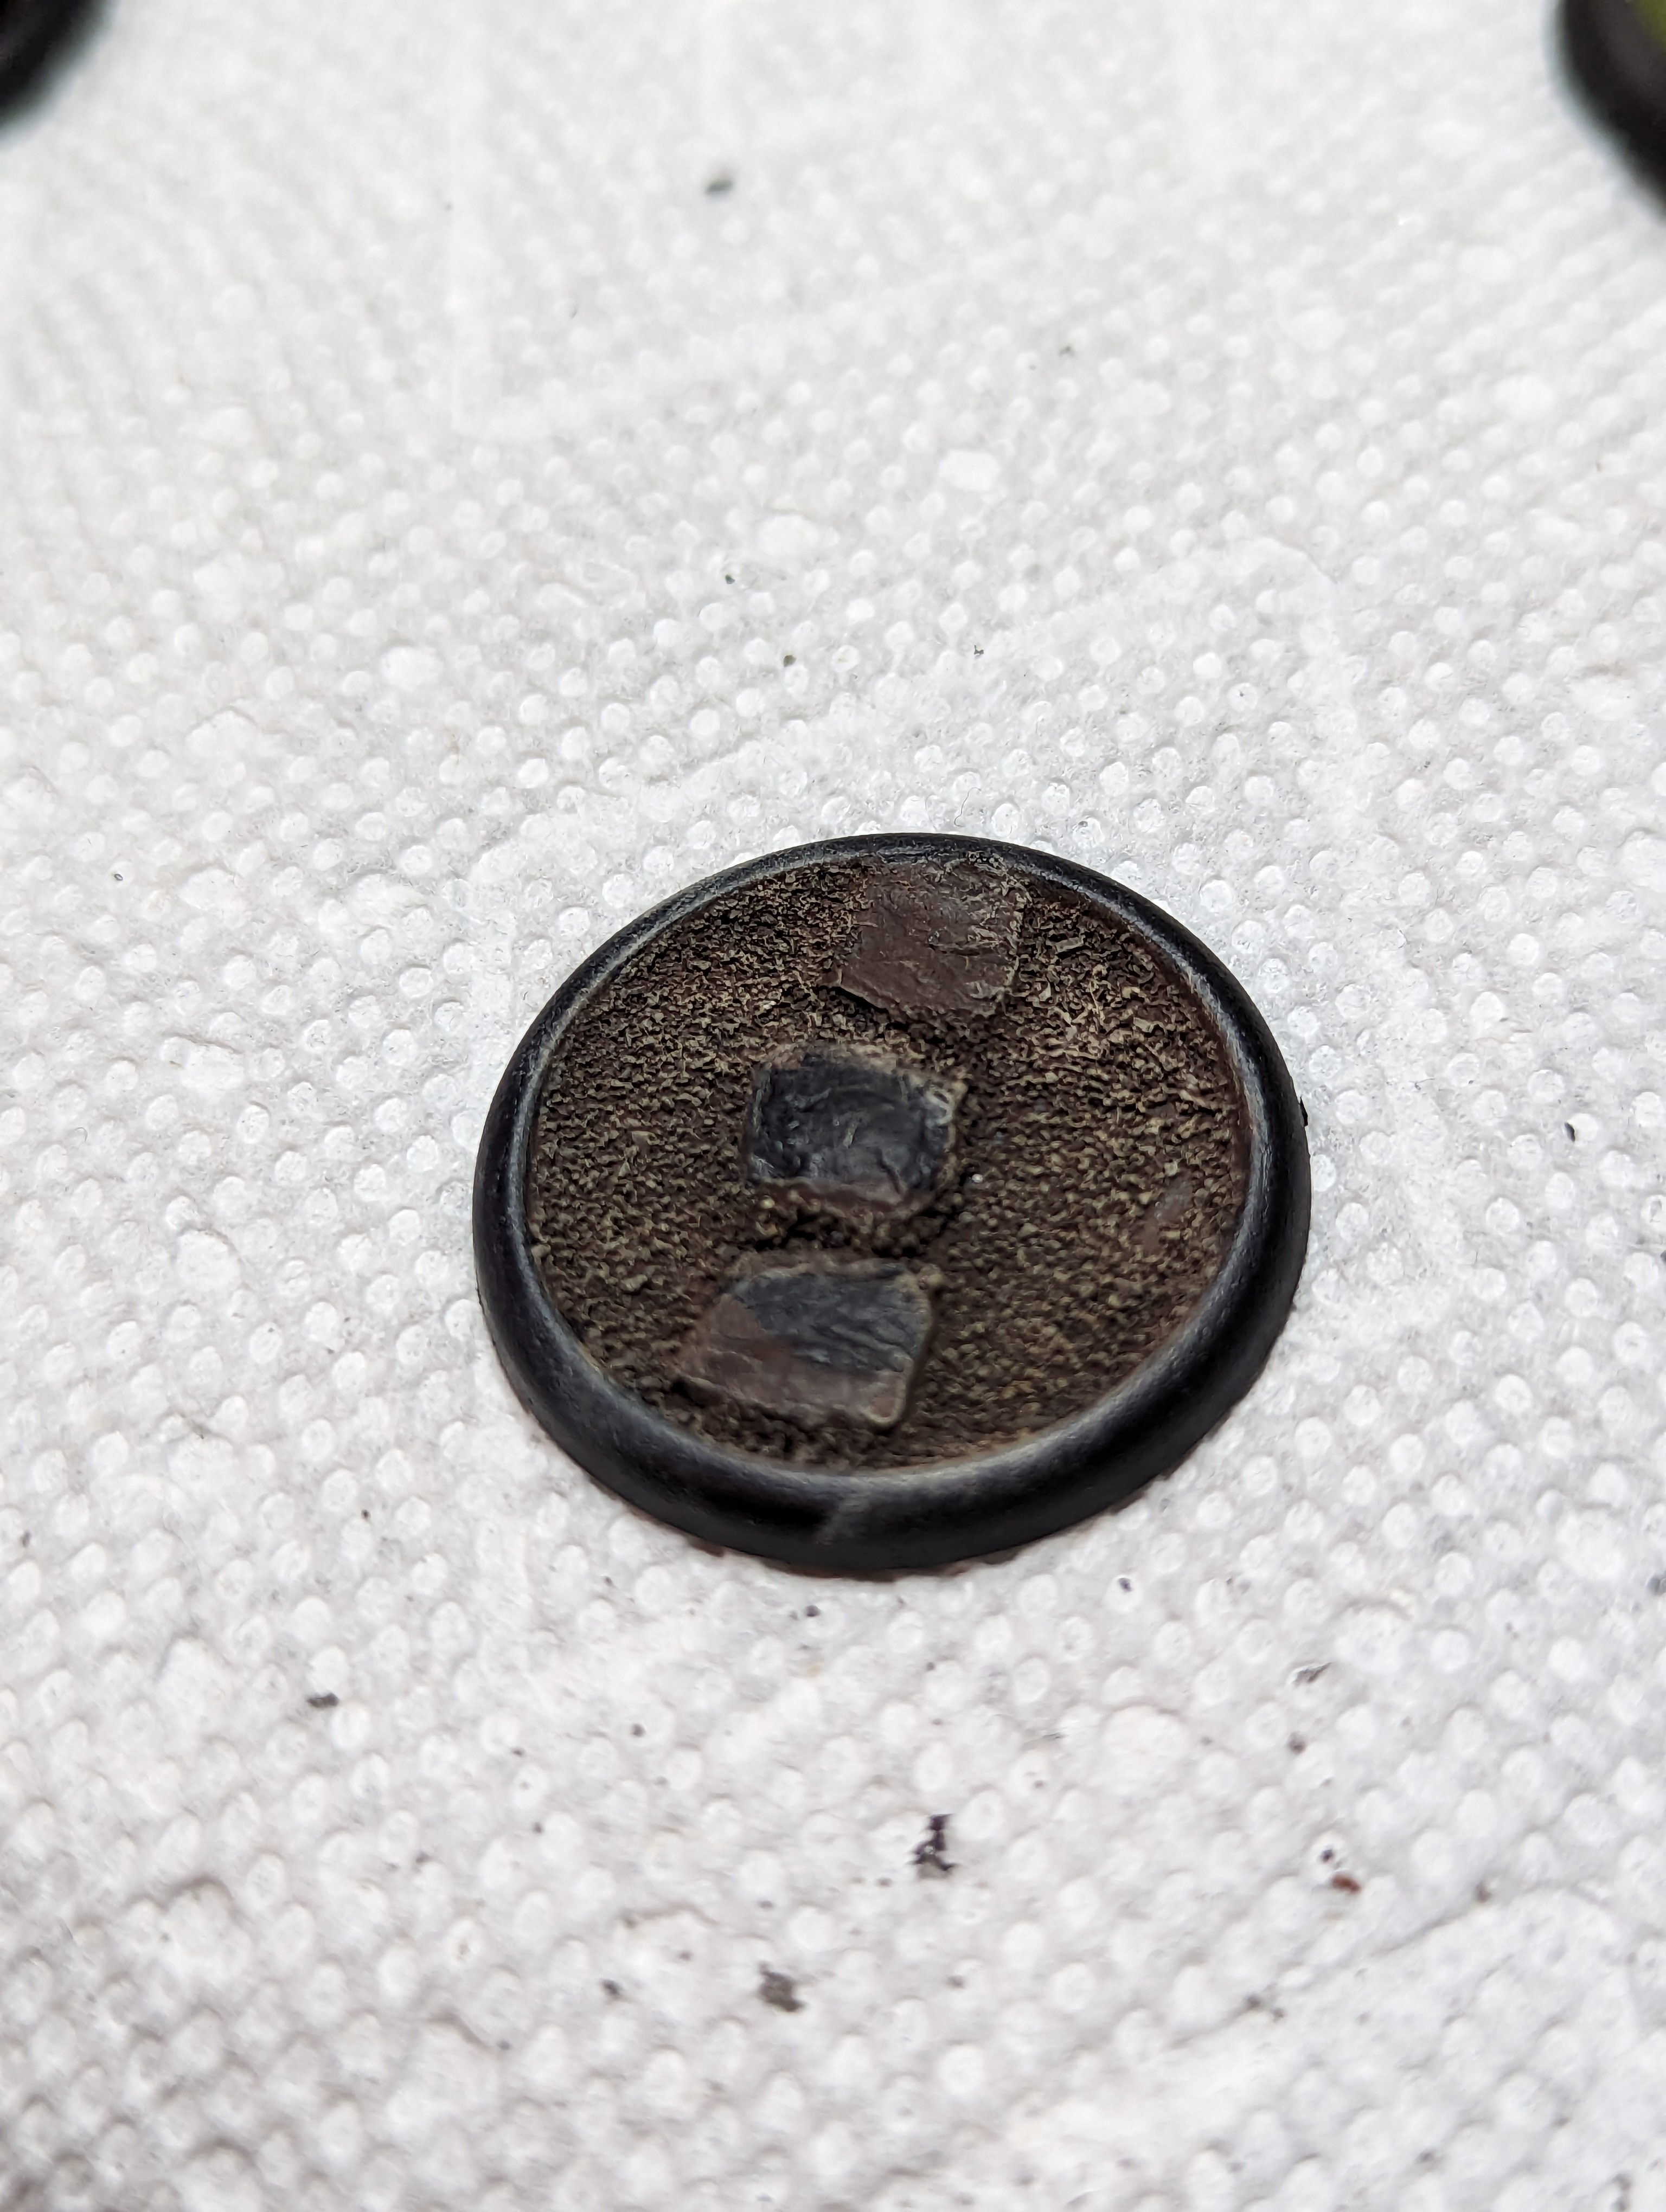
After a prime, I painted the dirt brown, and drybrushed tan. Then I painted the sidewalks with a dark gray, and used a bit of sponge to stipple on a darker gray and a lighter gray to give it a sidewalk look.
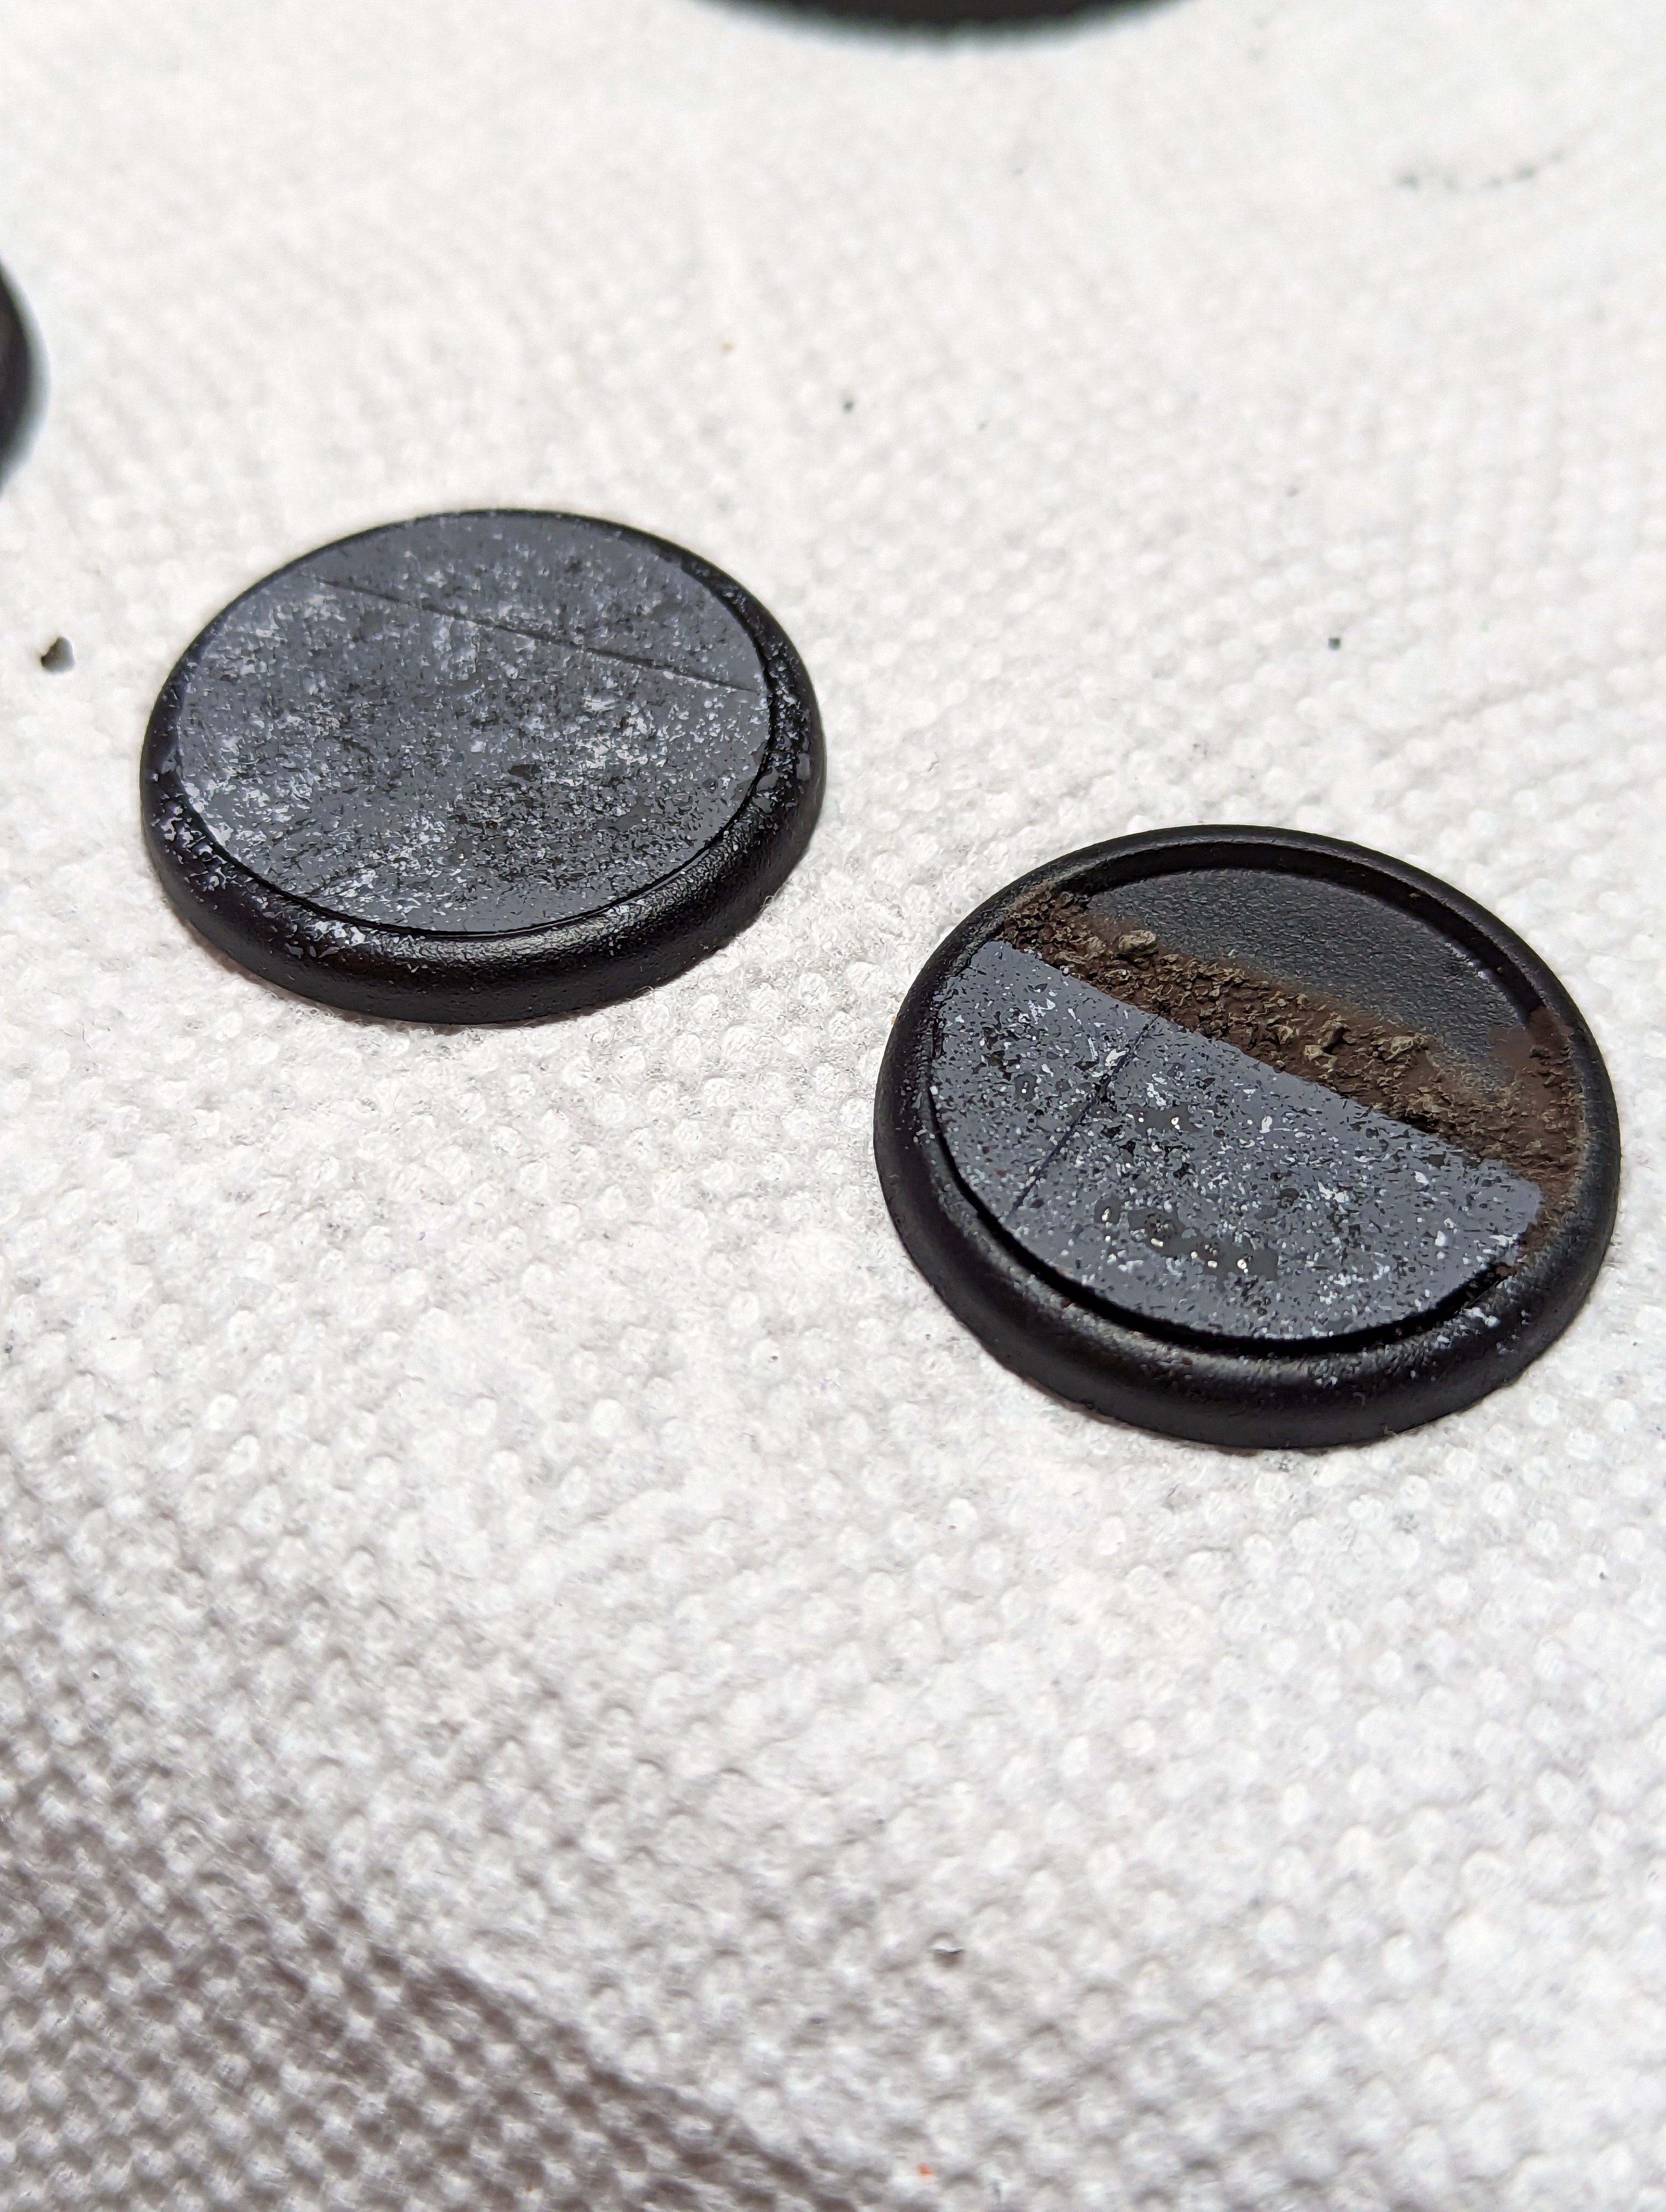
The last step was to paint the submerged area in a few shades of green, and then pour on some water effects. I wasn’t super happy with how it came out, I still find water effects to be a bit hard to make look good. Needs more experimenting.
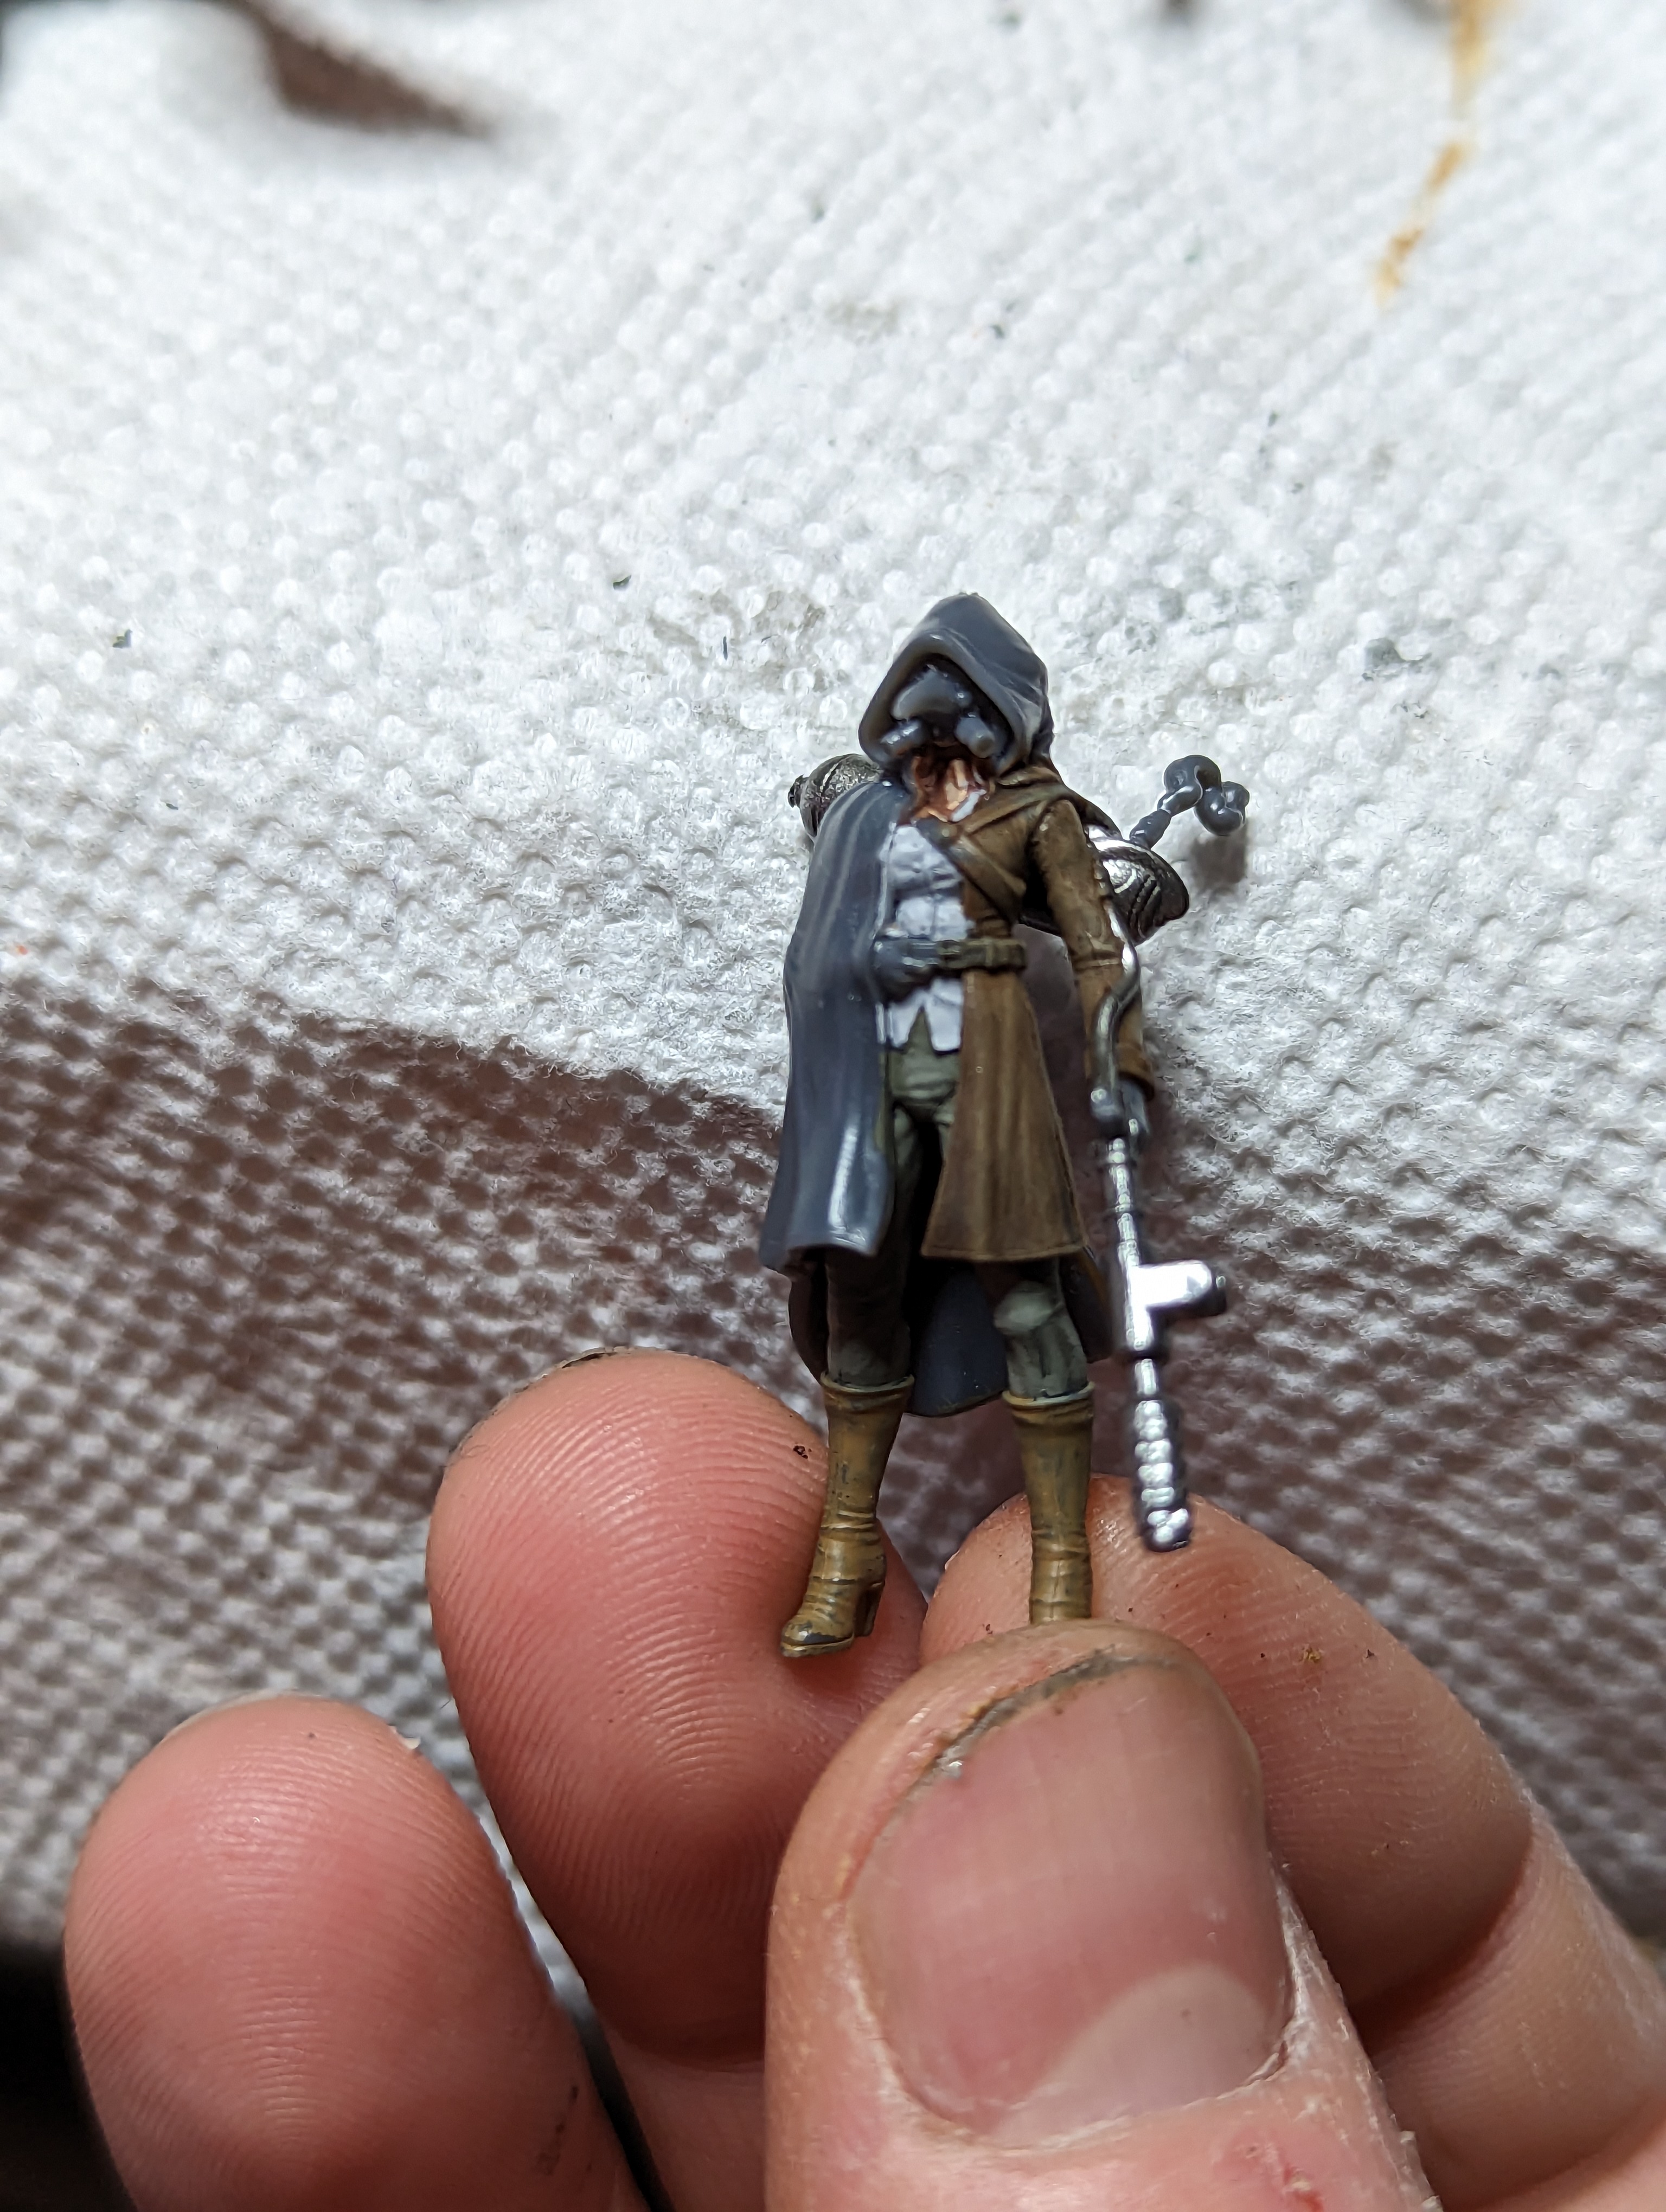
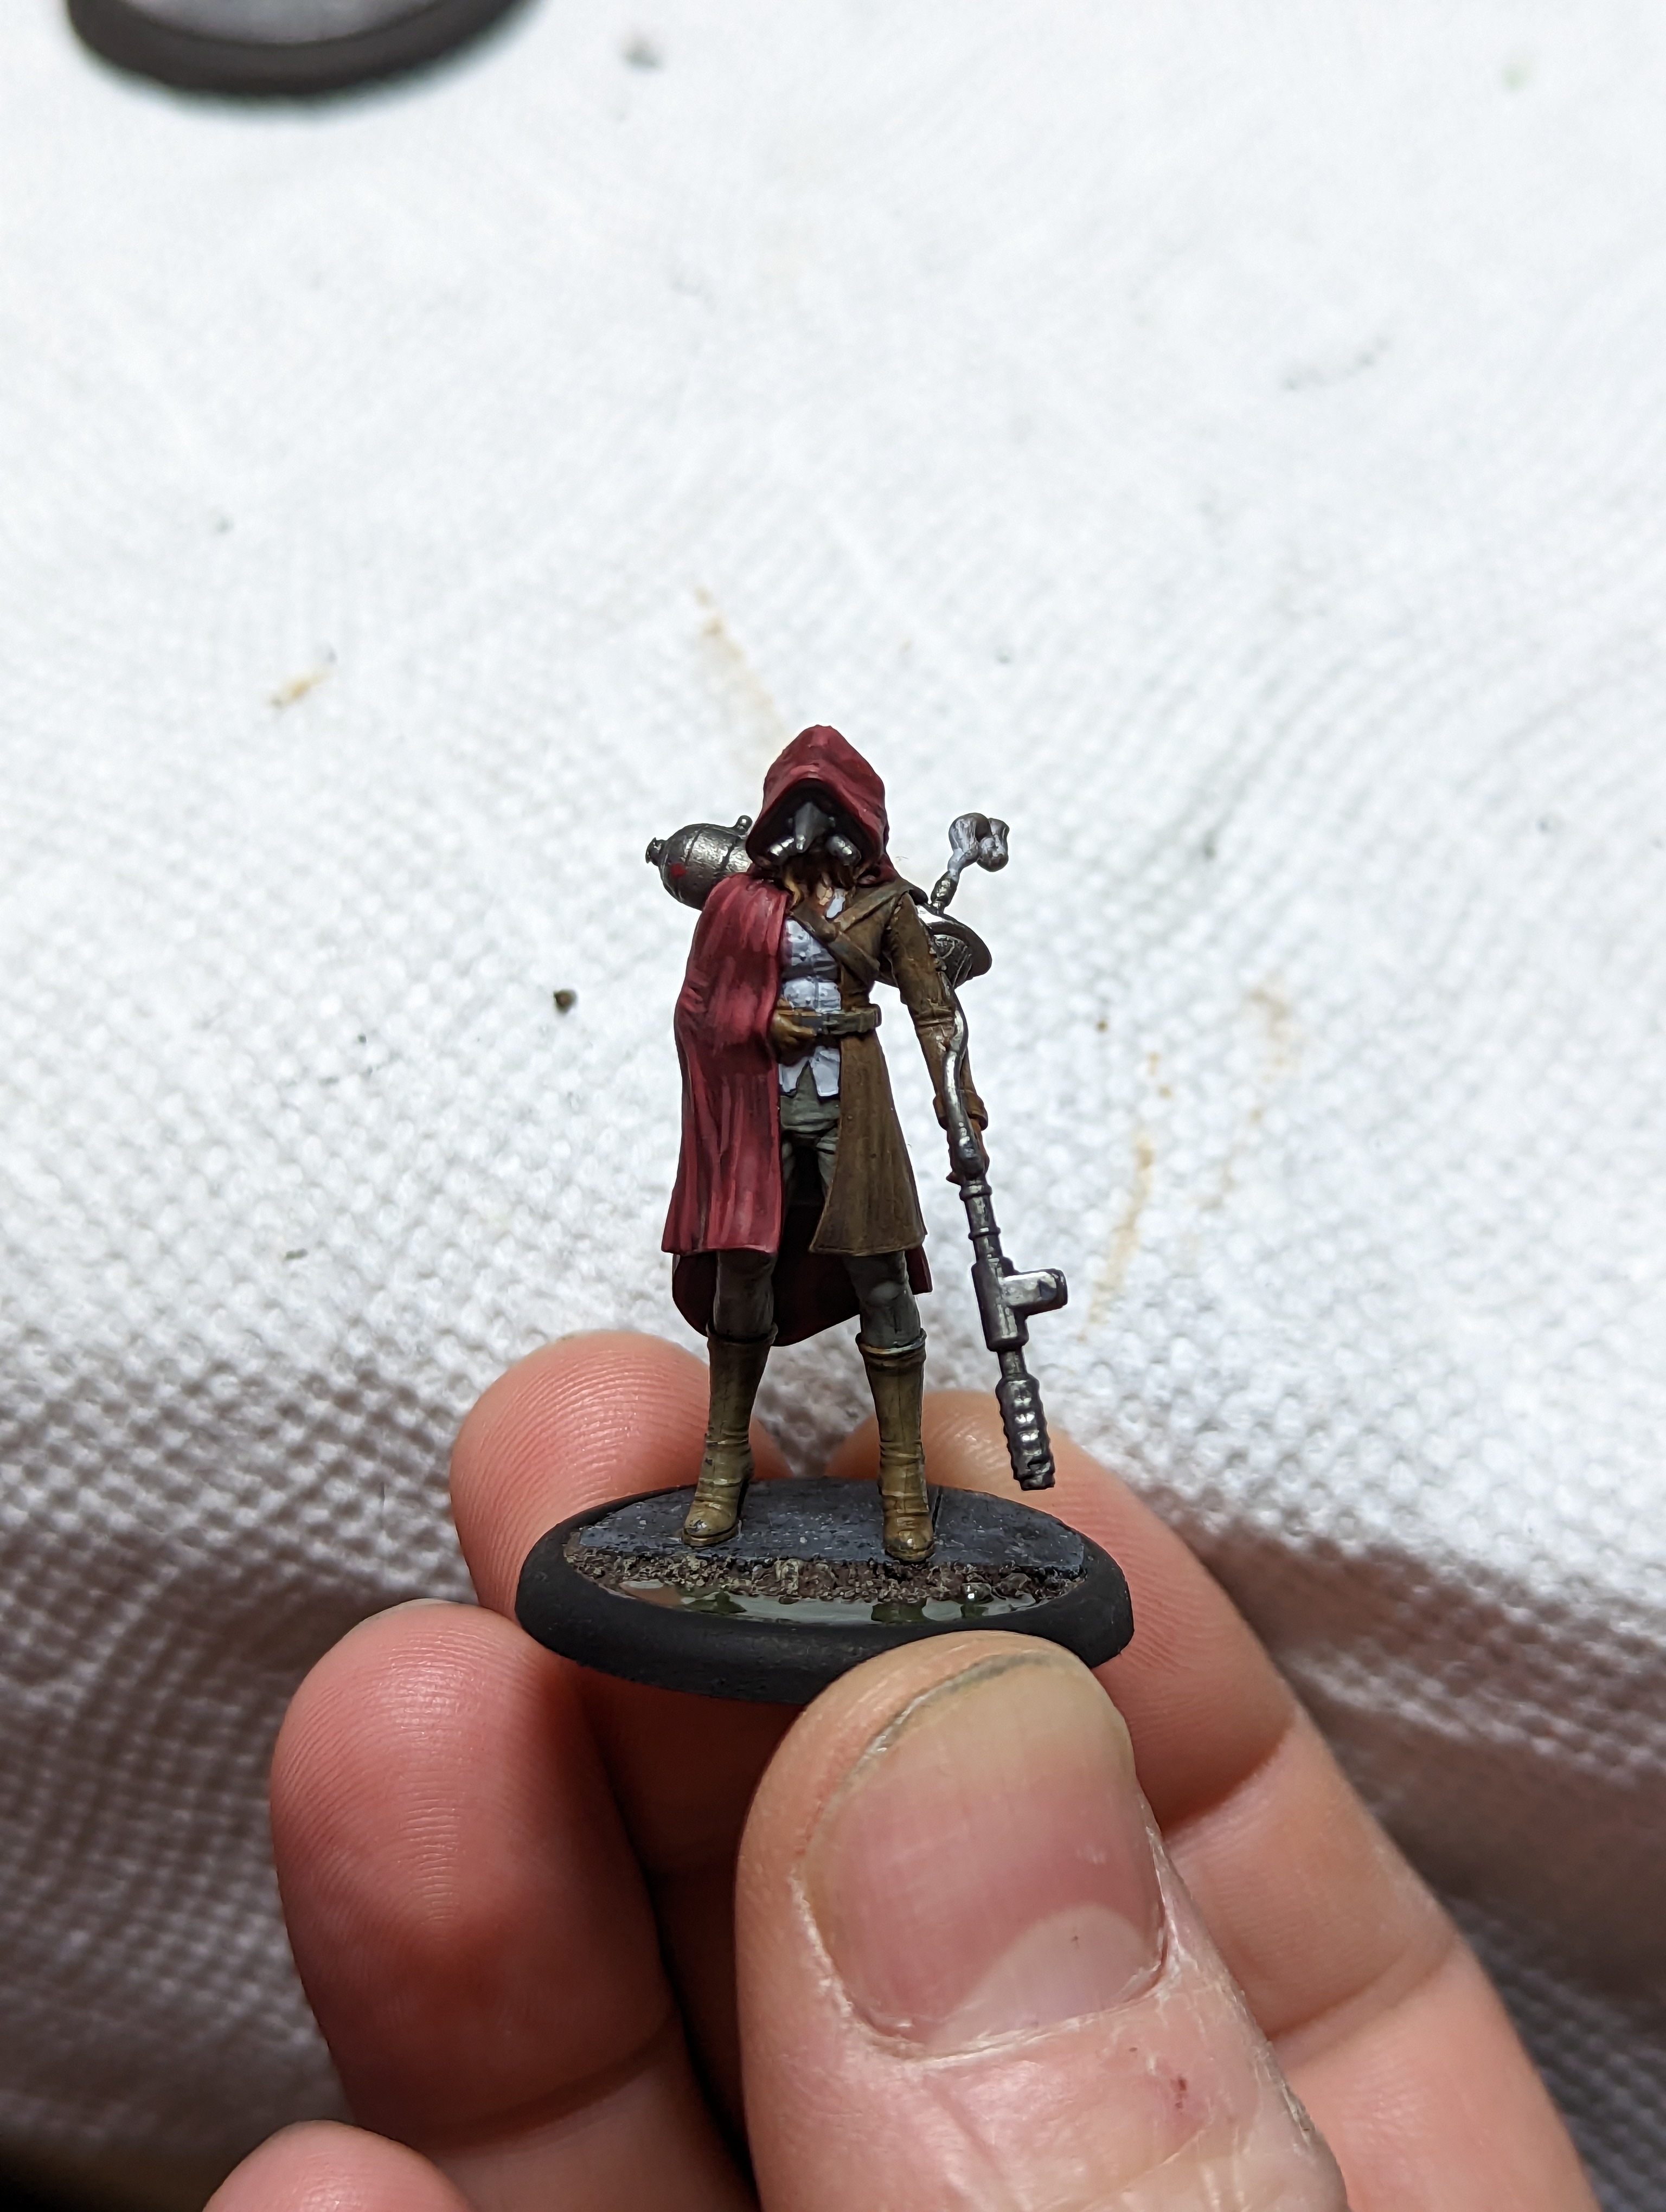
the disease containment unit is mostly a leather outfit with a red cloak. The leather was done with an orangey brown and a wash. I then finished all of the metal details and her hair, before doing the red cloak.
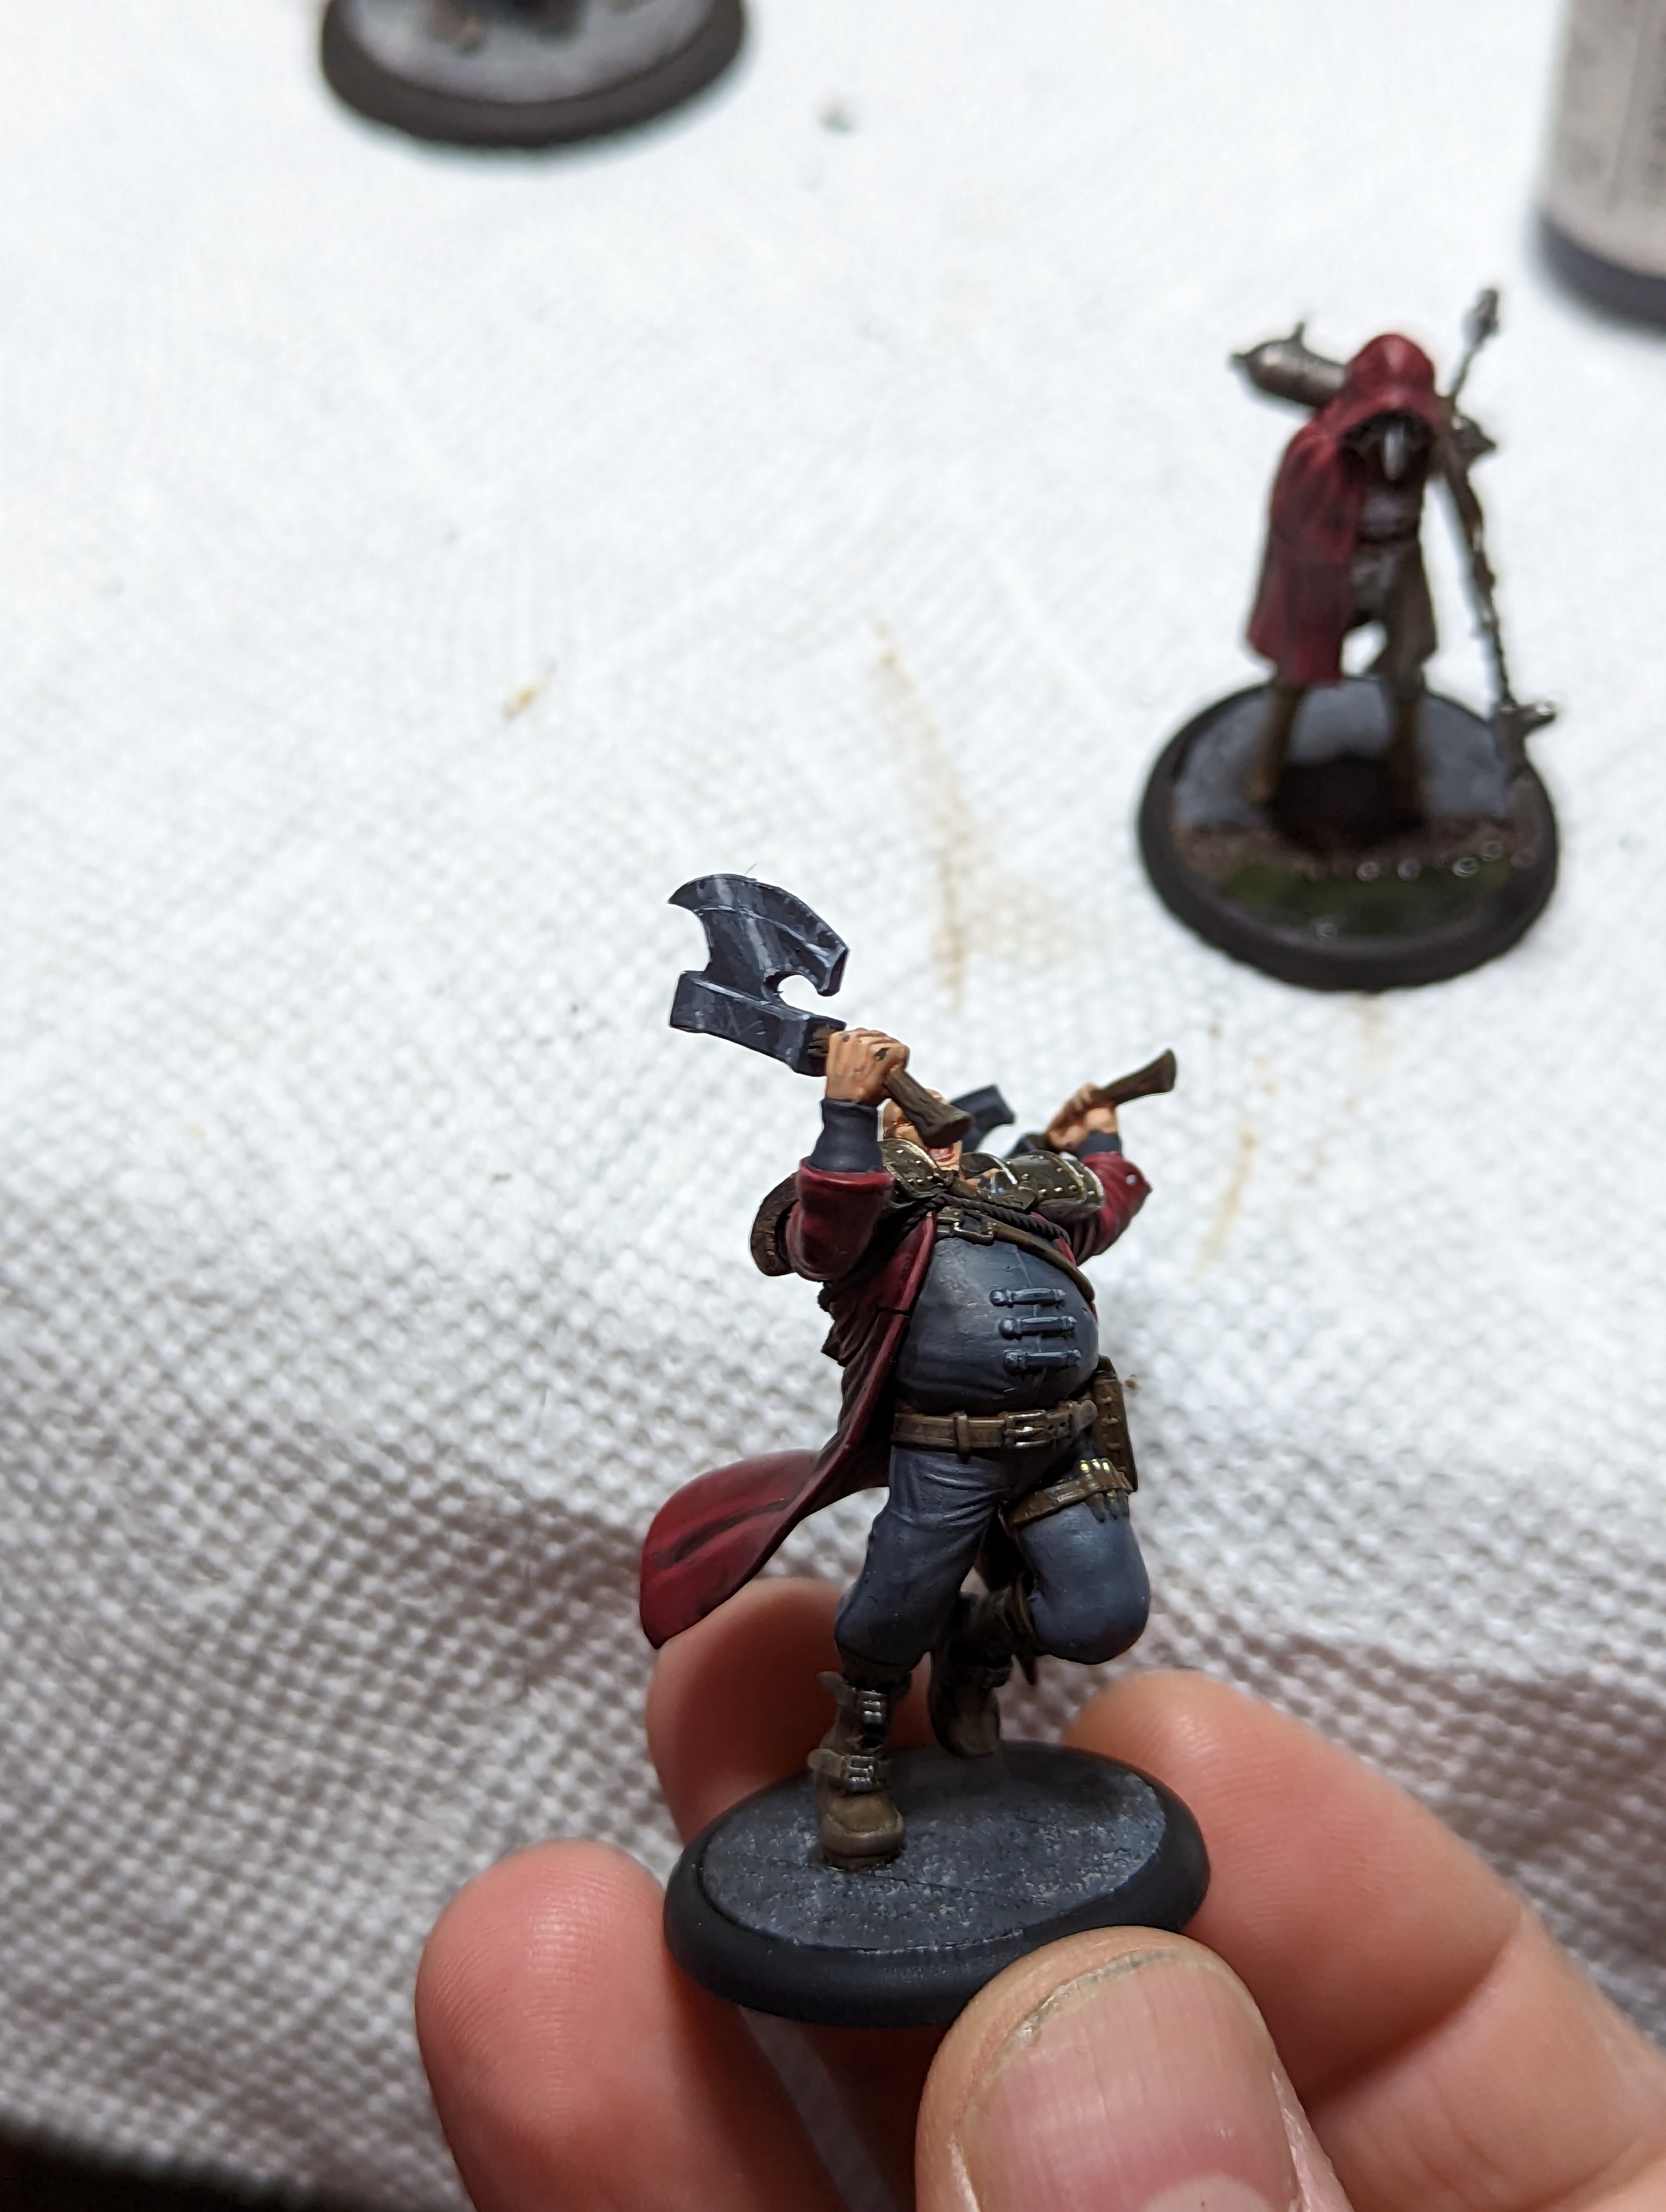
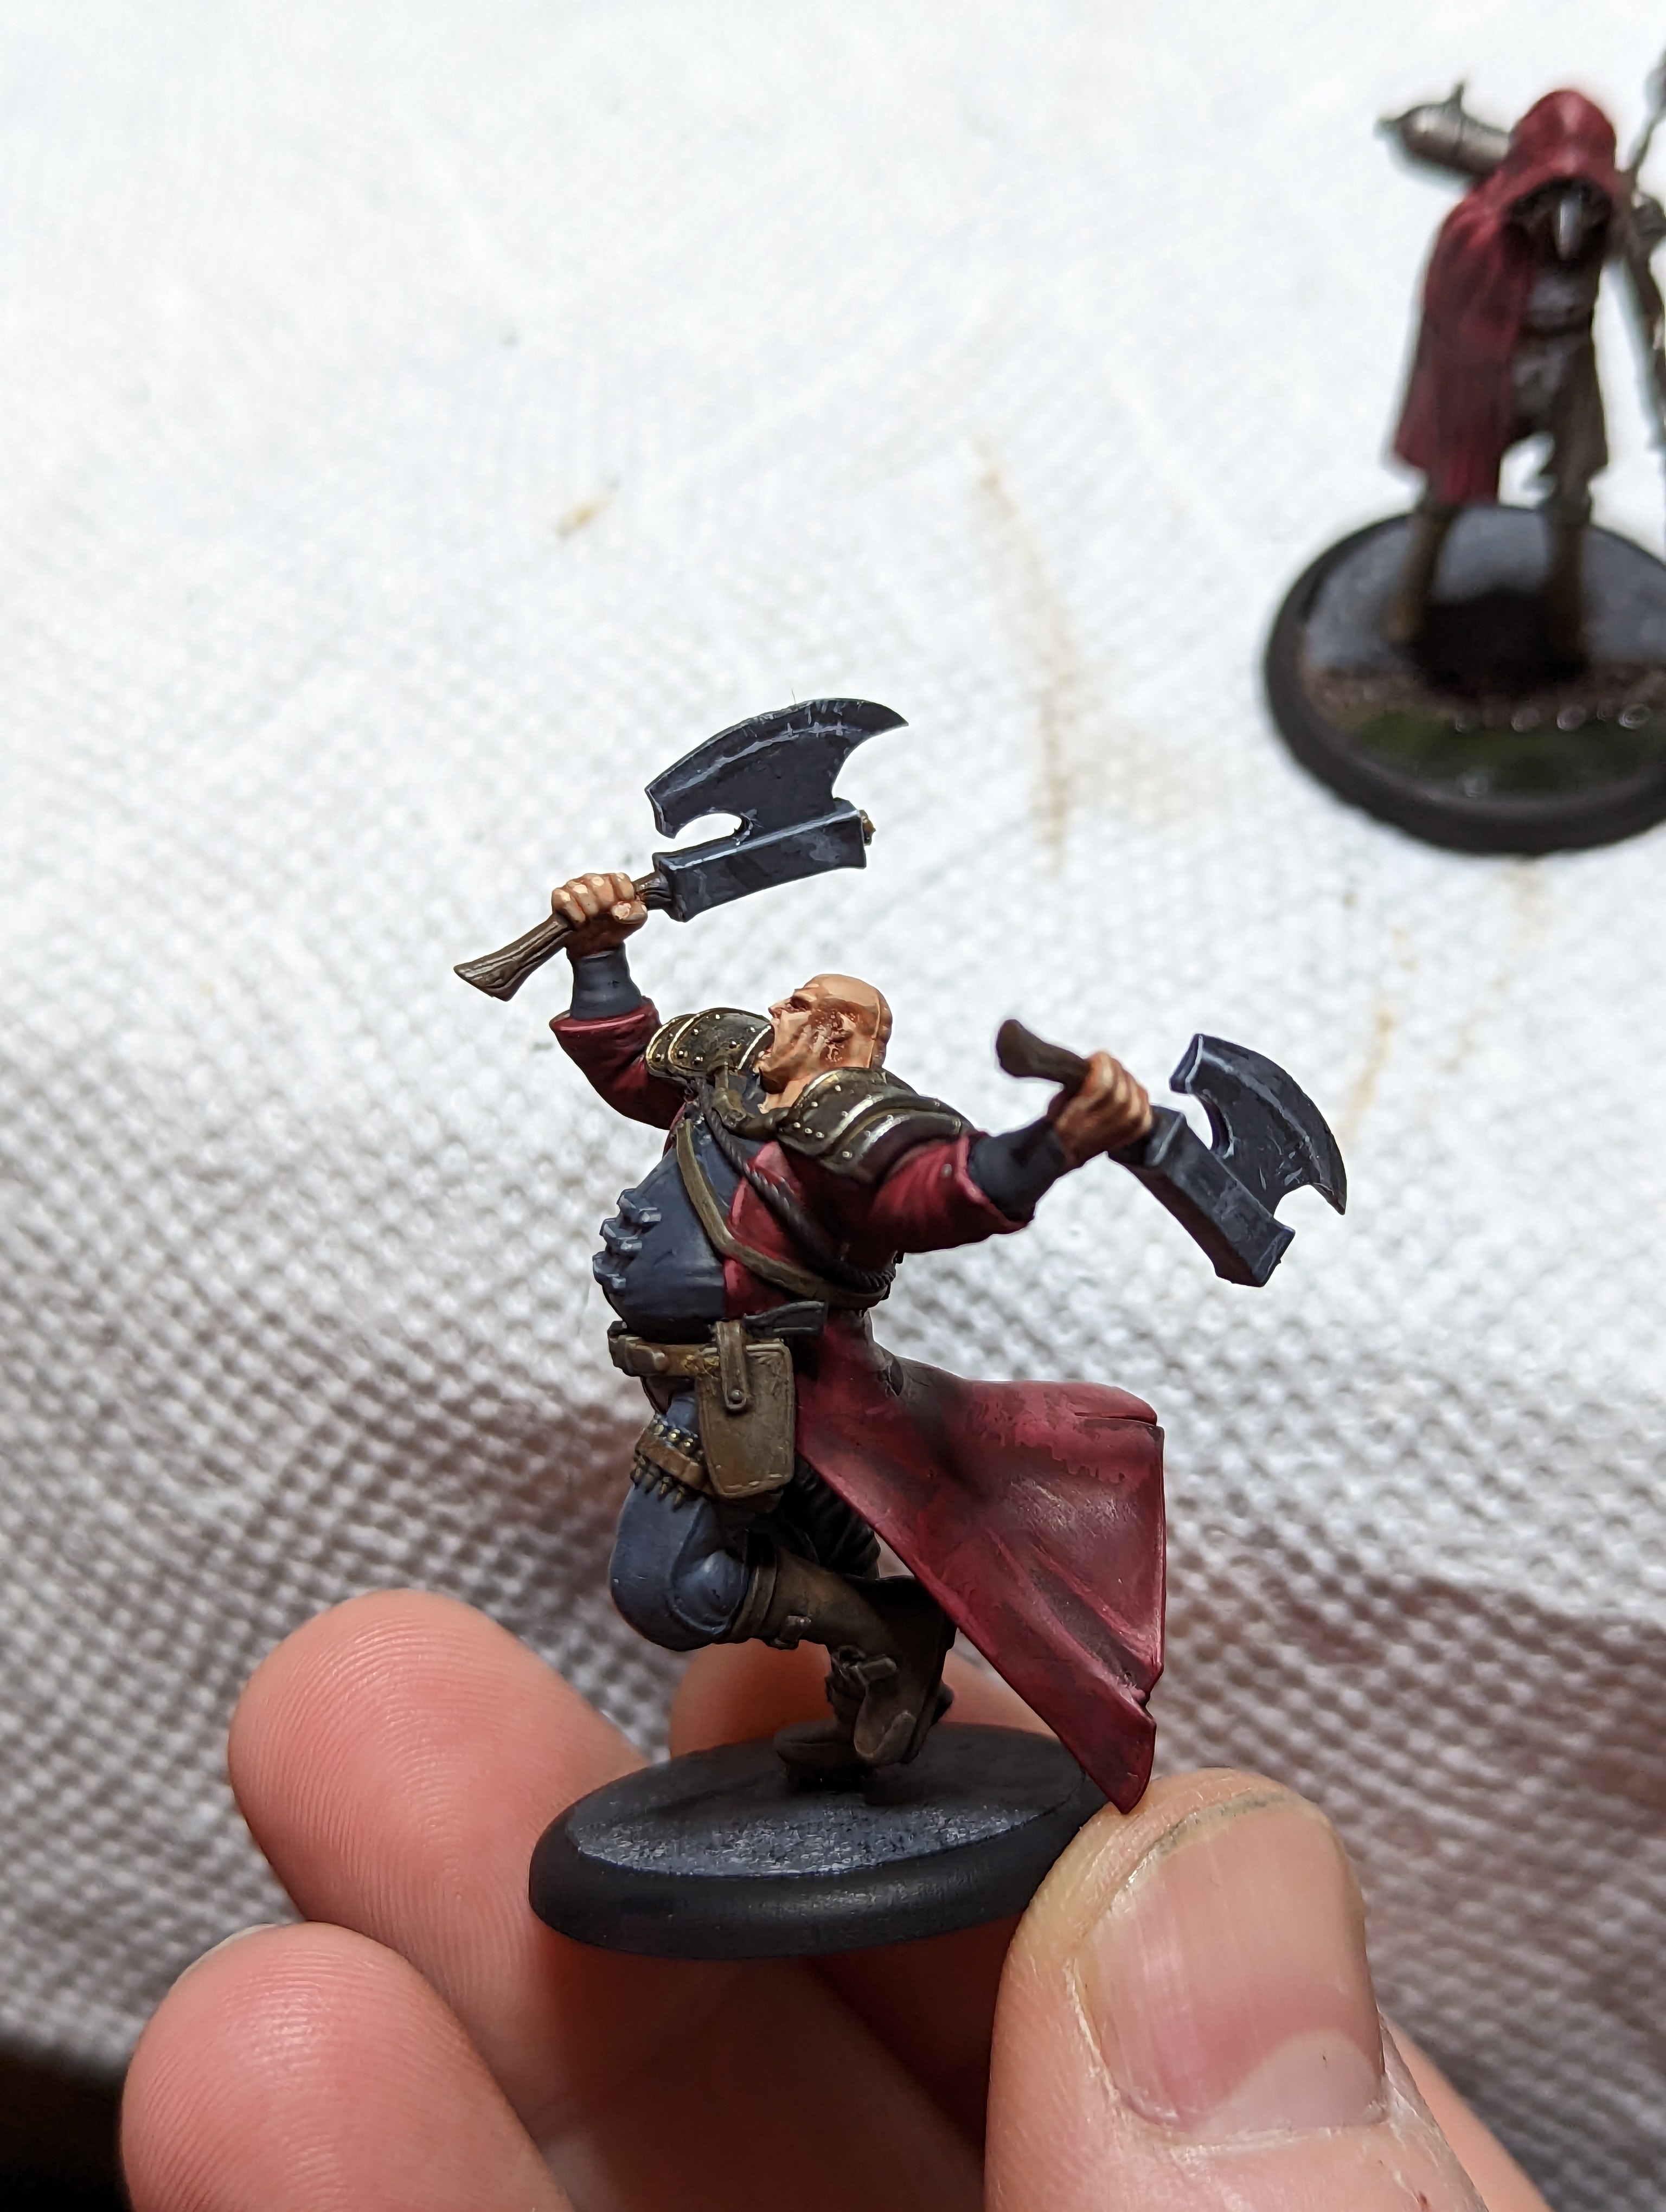
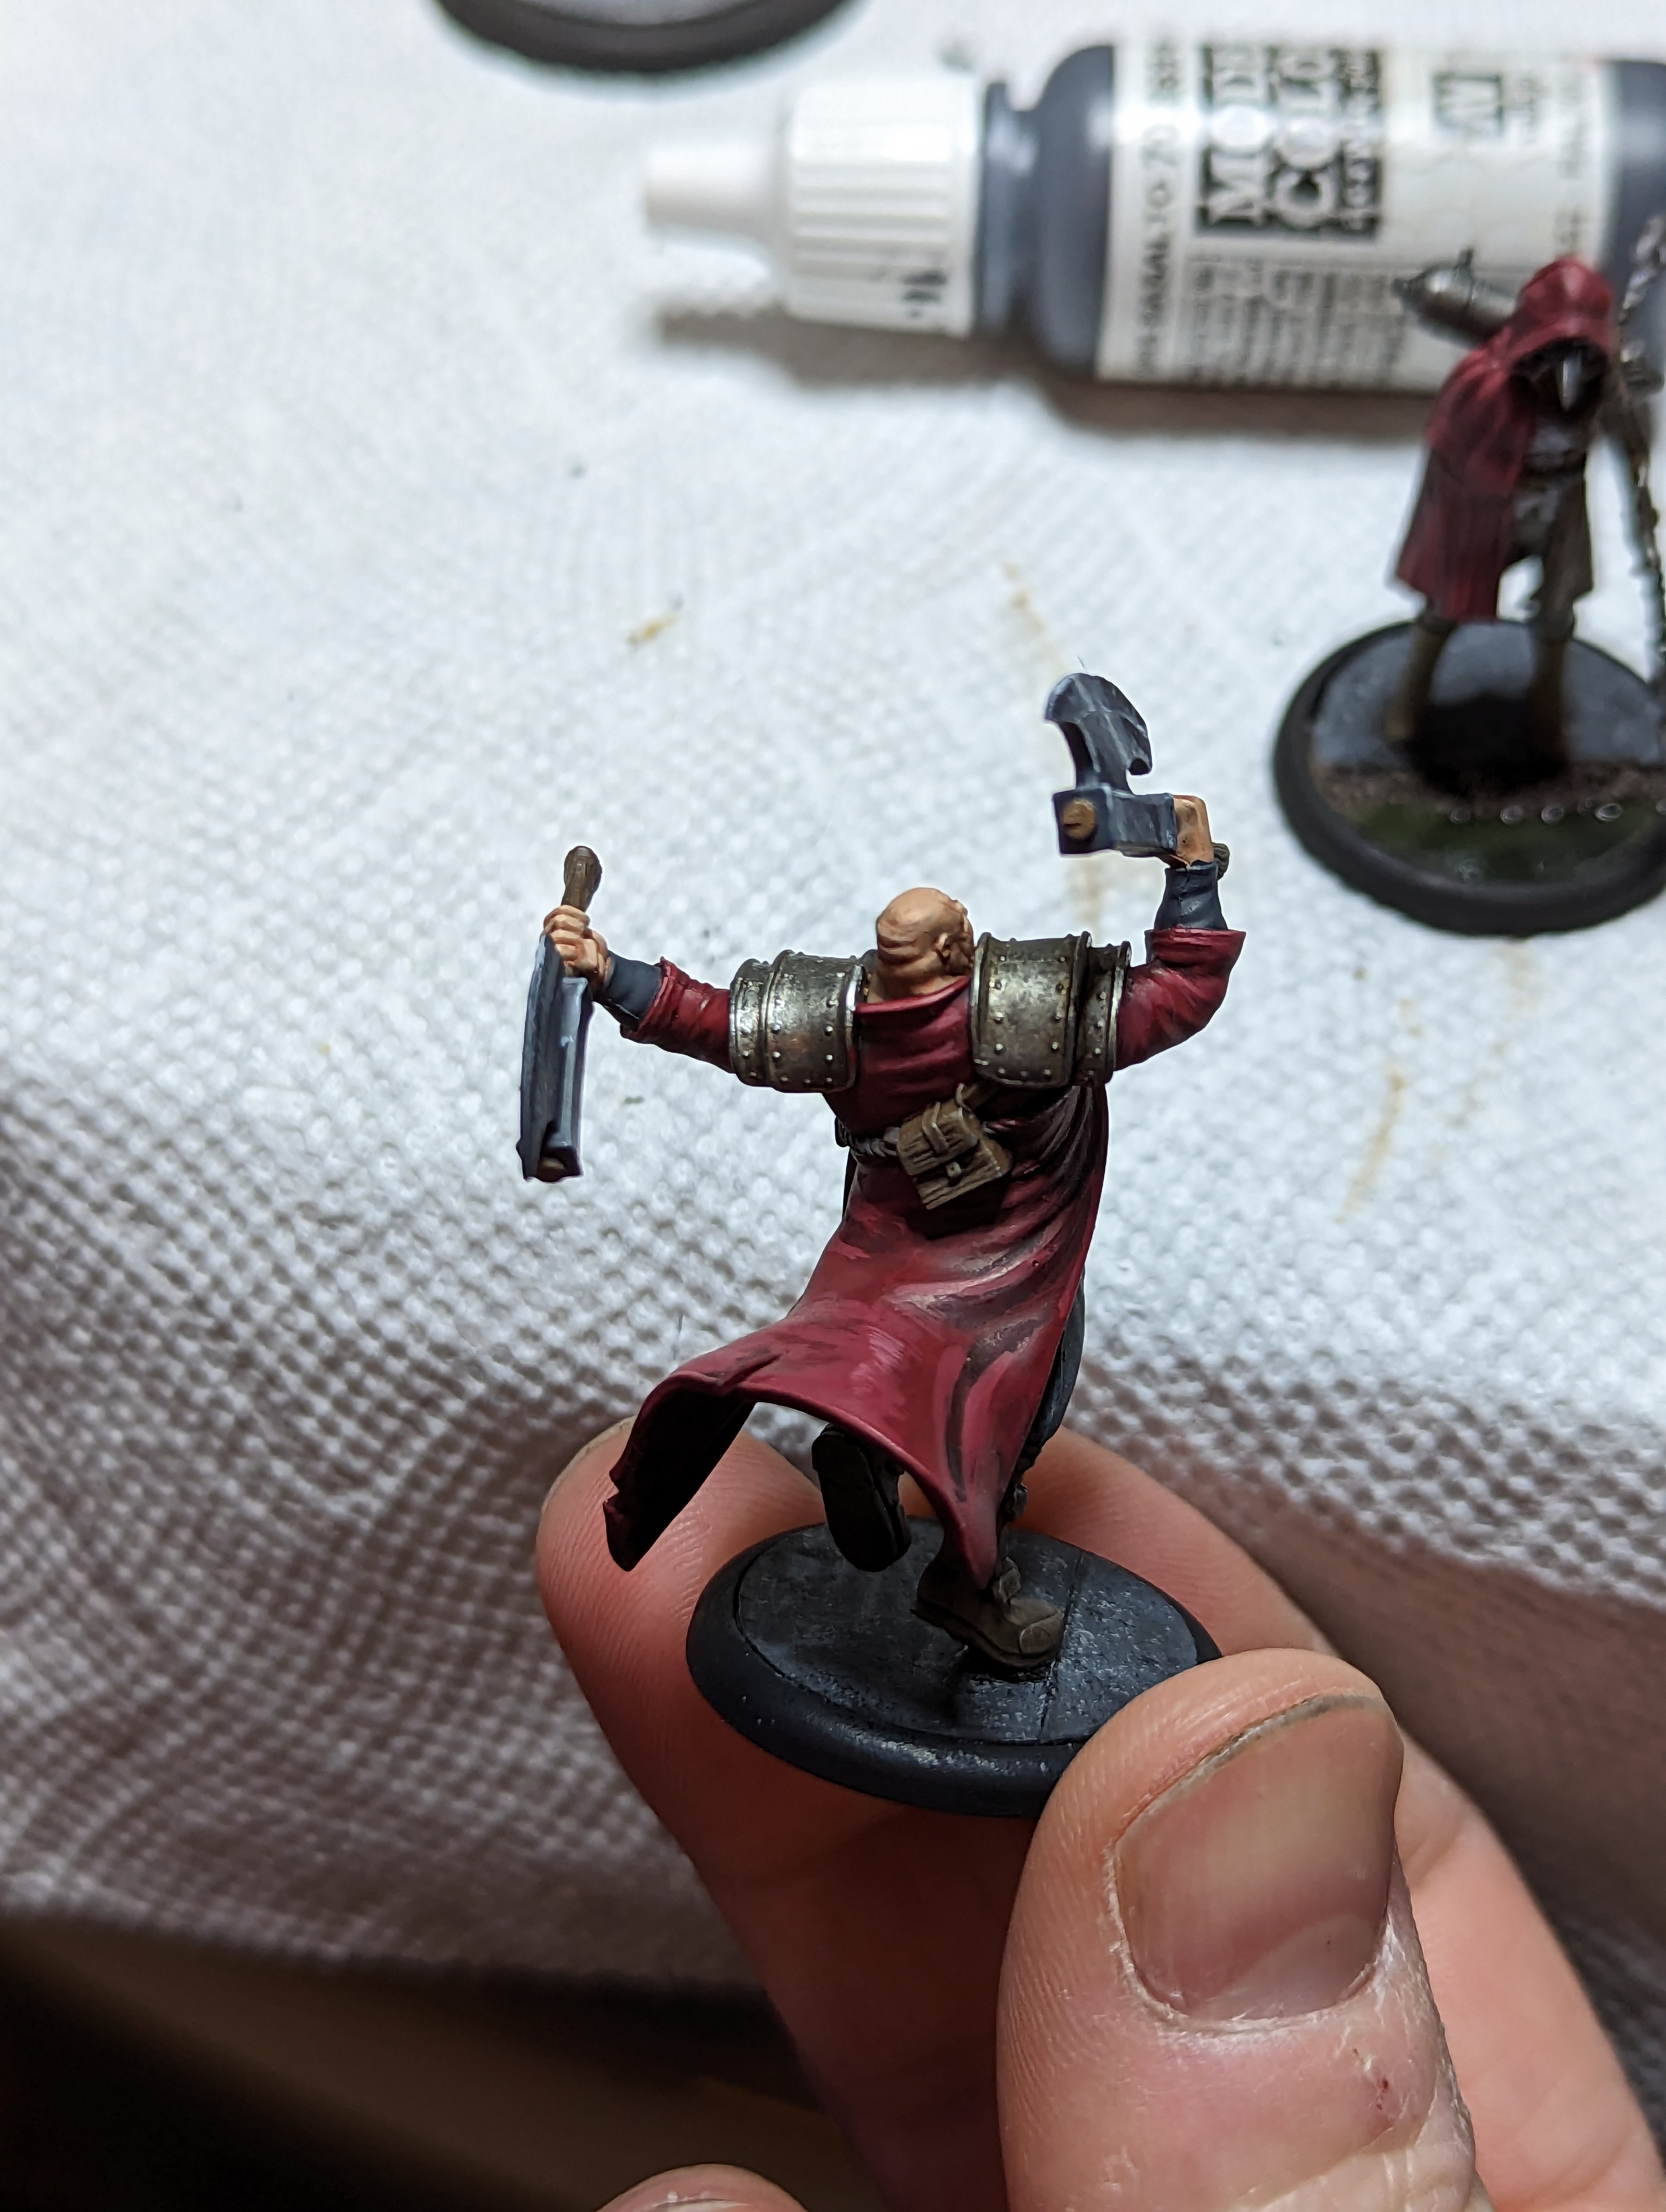
Dashel is also mostly red clothes, leather straps and some metal. I did the leather with brown and a wash, and then spent some time highlighting the cape manually. The axe heads were a bit tough. They look like a very dull metal in the art. I tried doing some NMM to give it a scratchy texture. I think it came out okay, but im still not super happy with my NMM. I can do it pretty decent on small surfaces, but these guys are big.
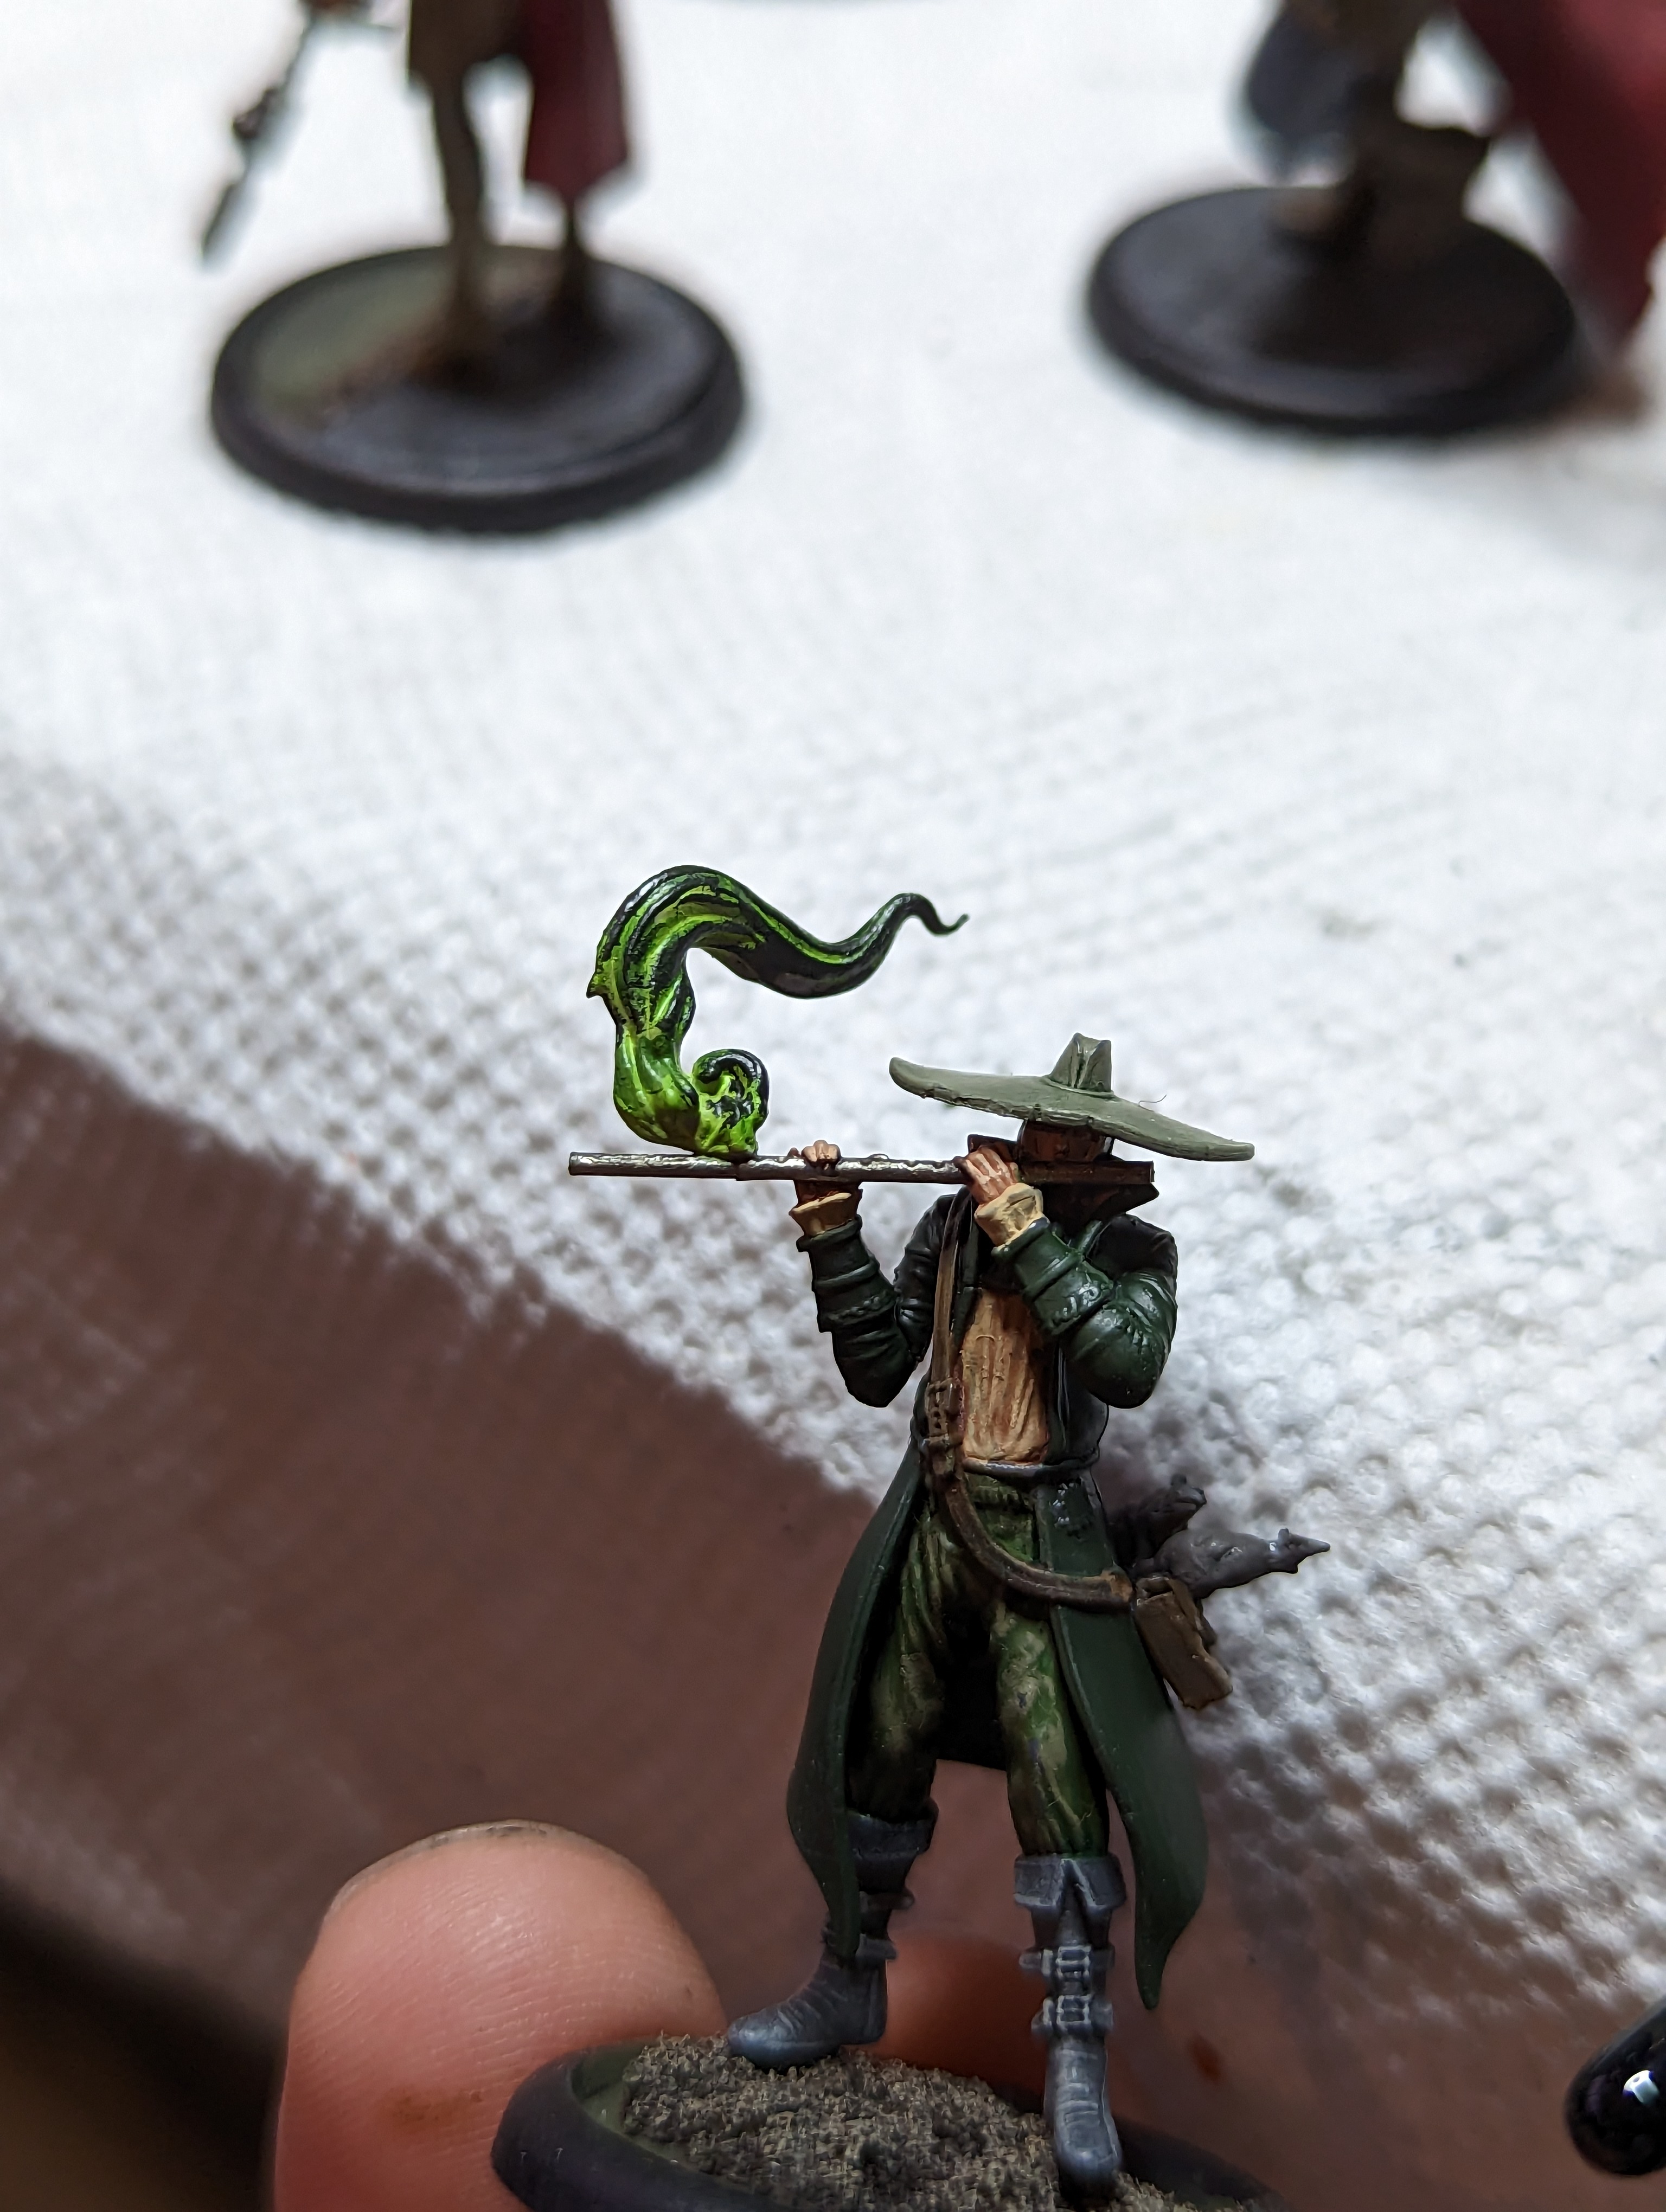
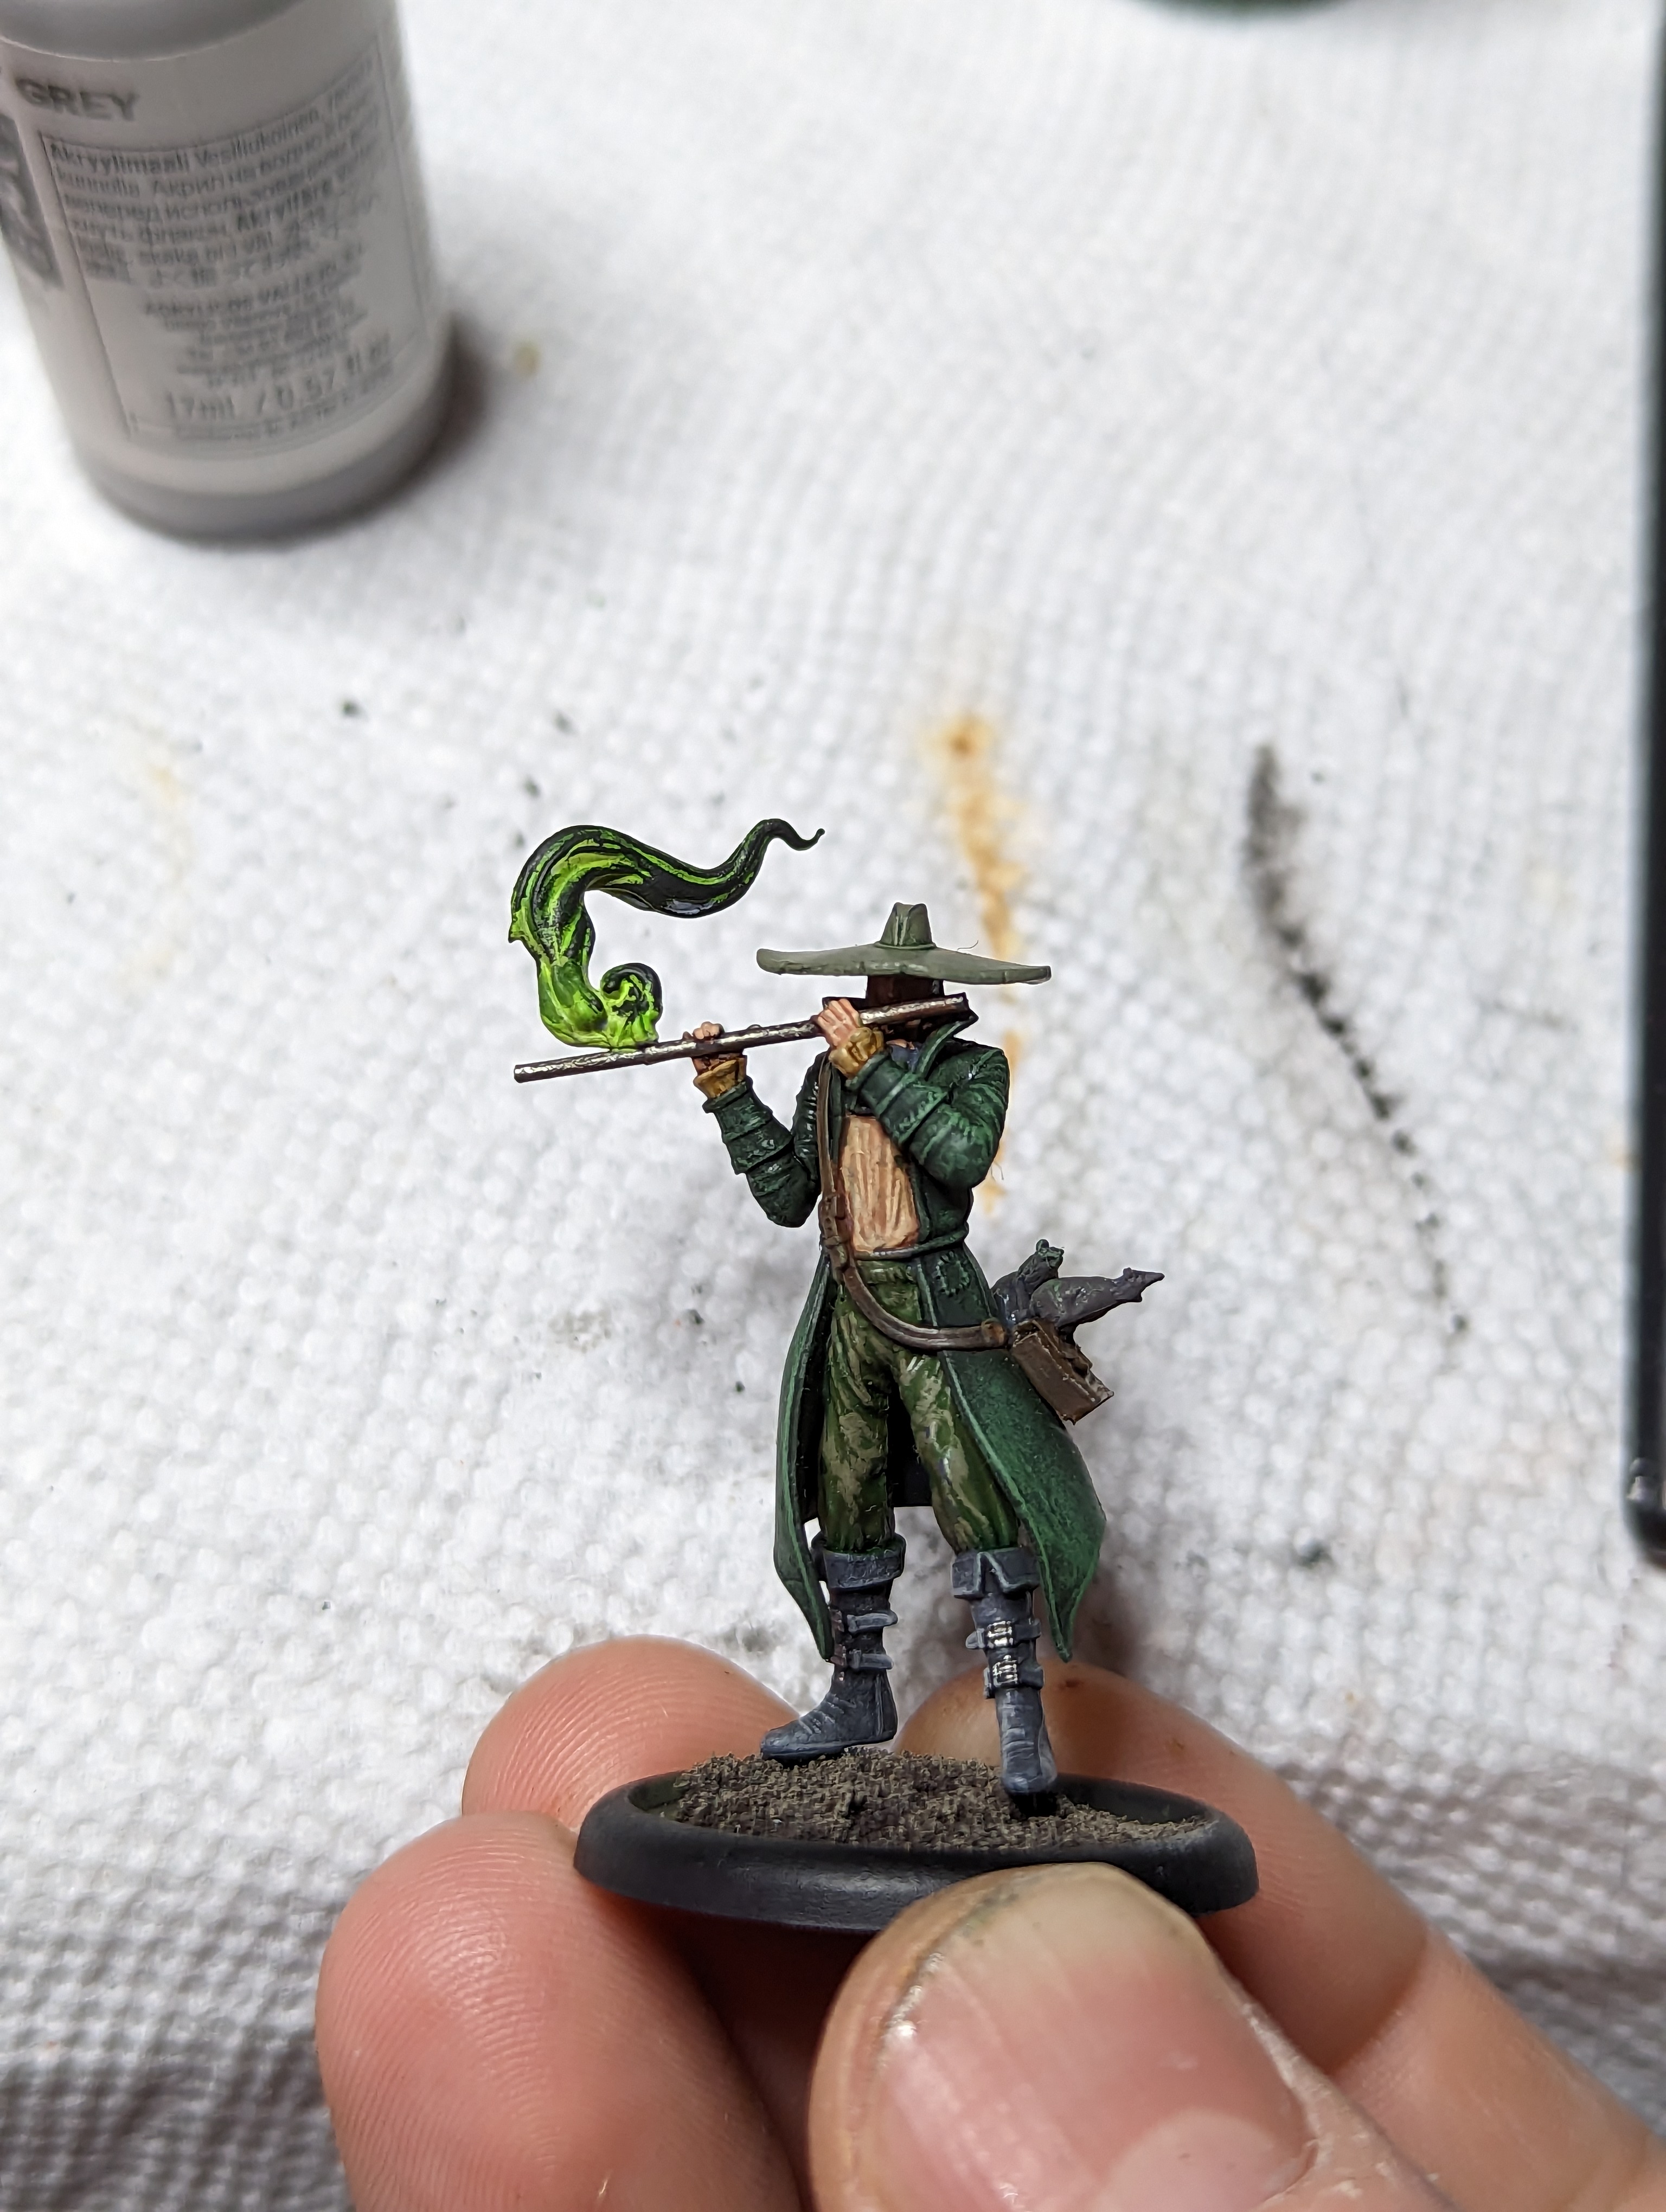
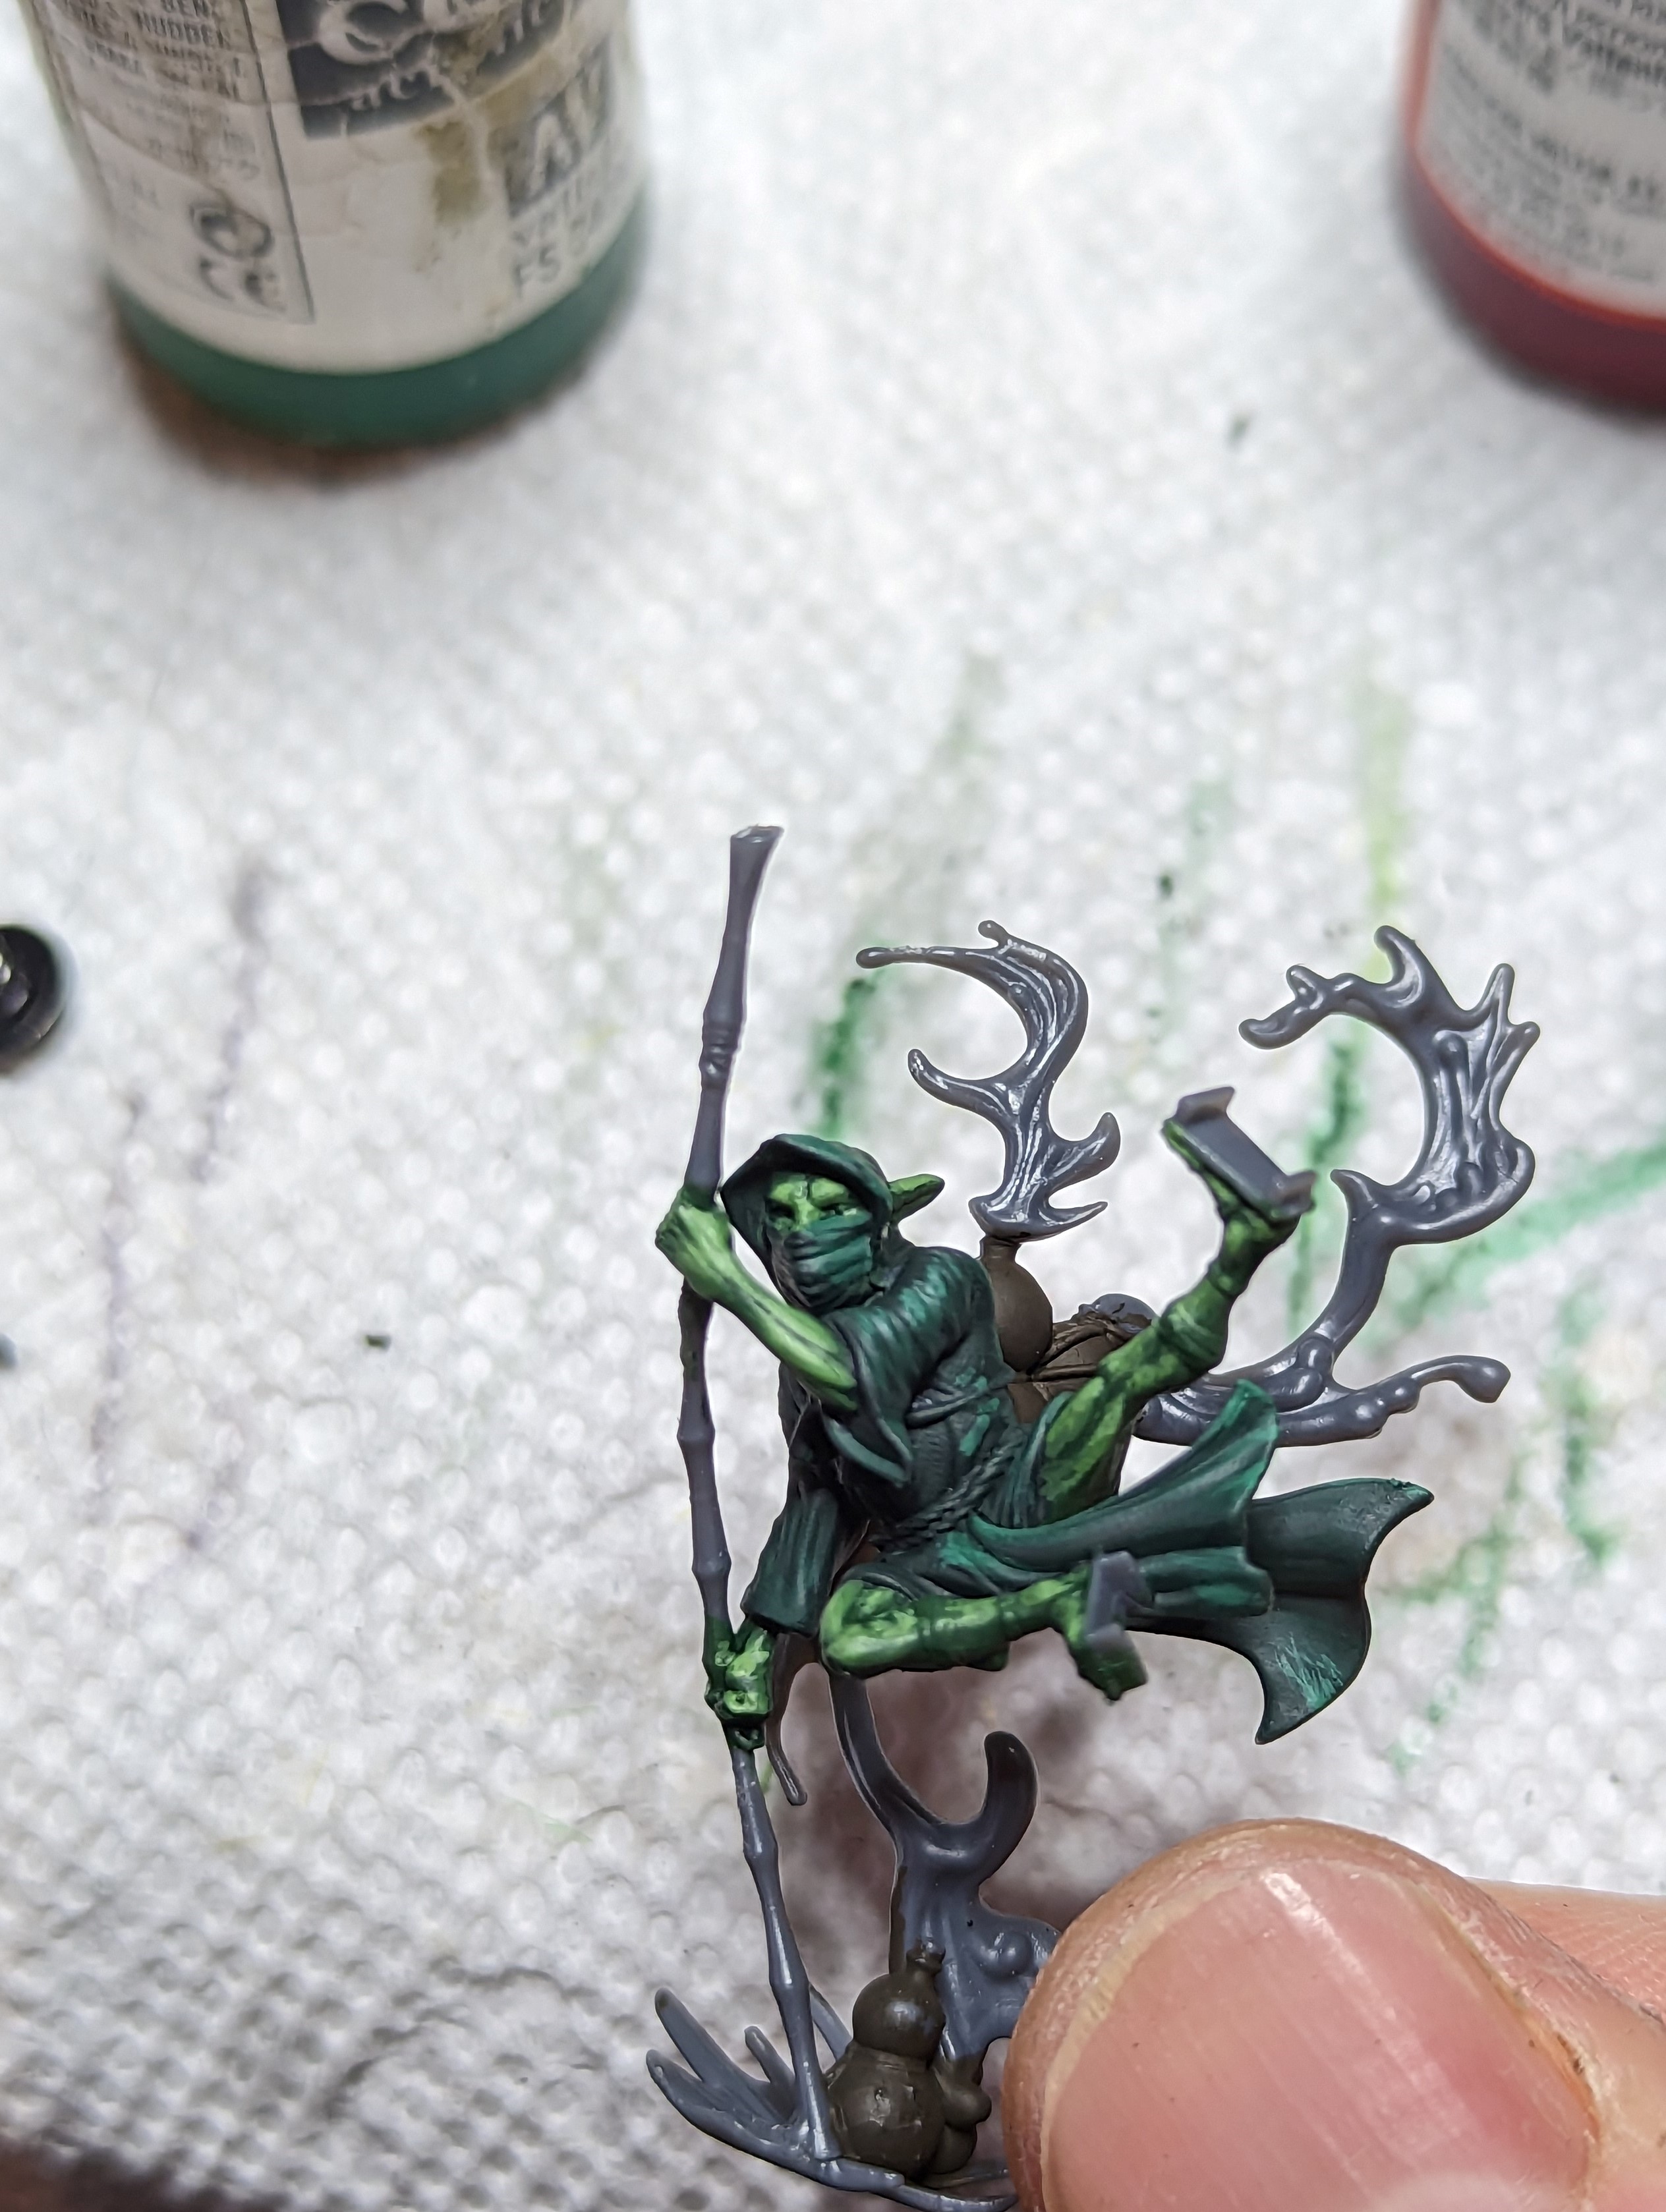
Hamelin was a fun one. He is all dirty looking green and khaki. The green bit coming out of the flute looks like someting between smoke and fire, so I painted it similar to how I paint fire.
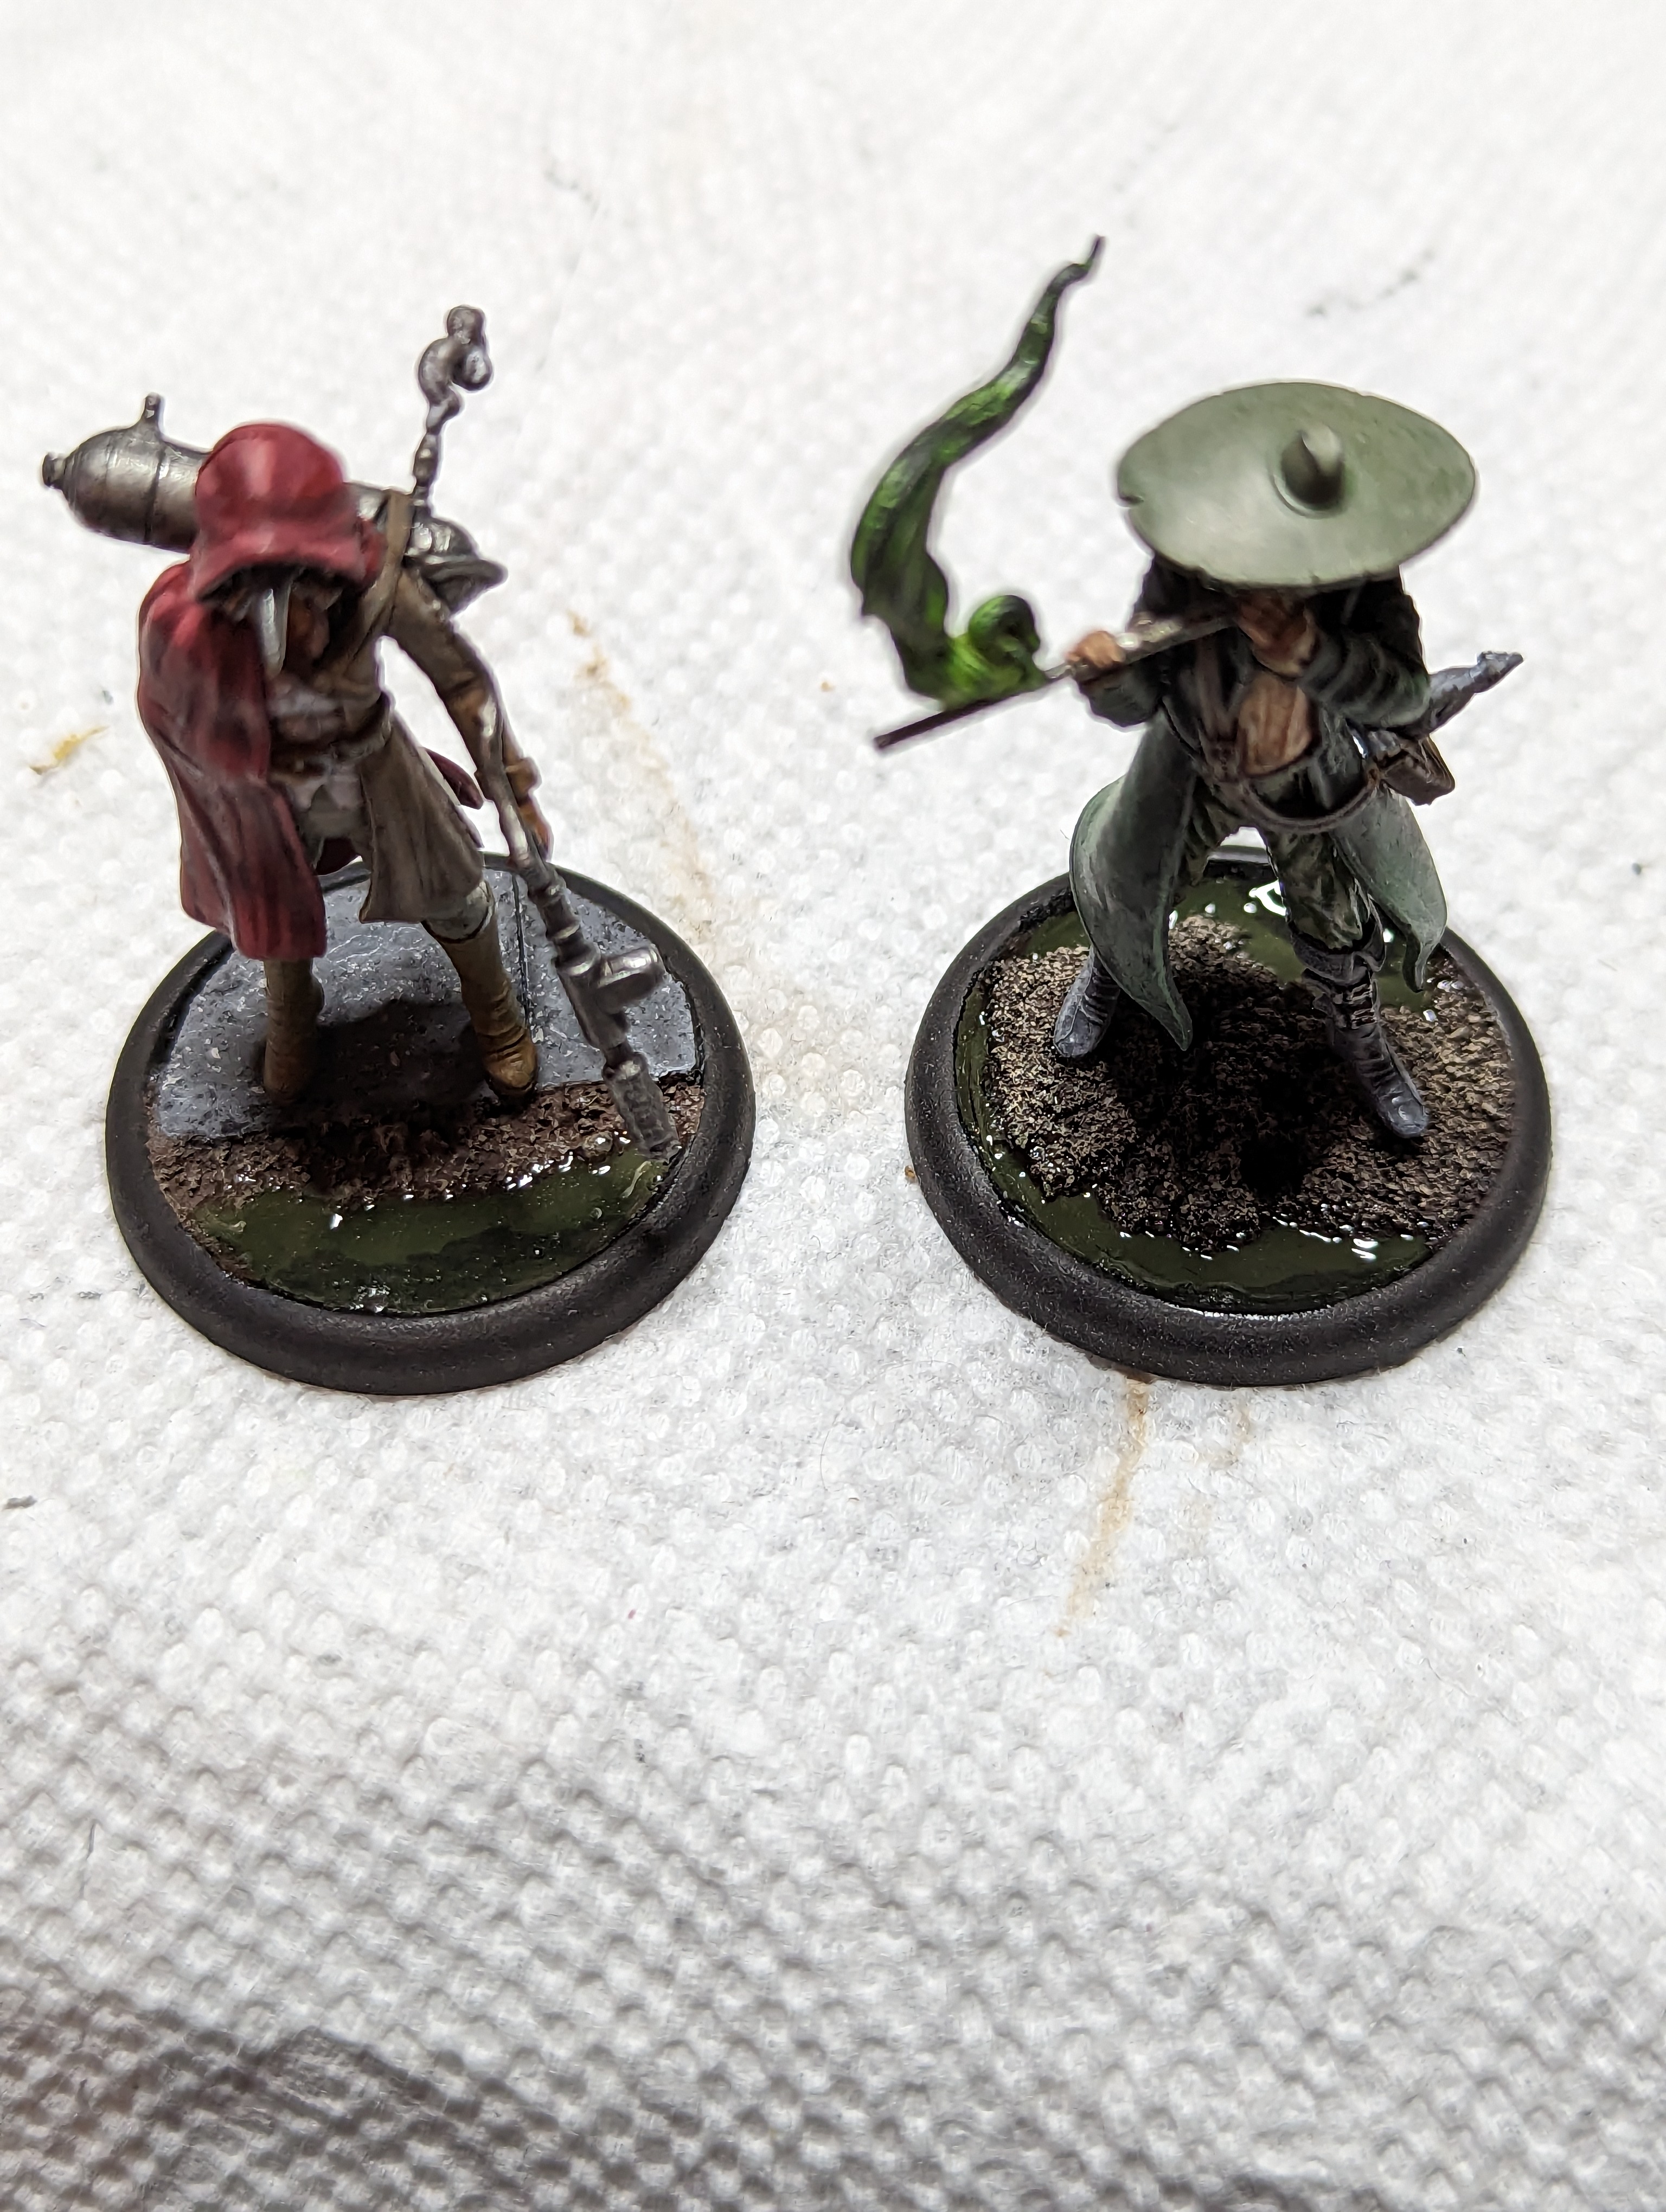
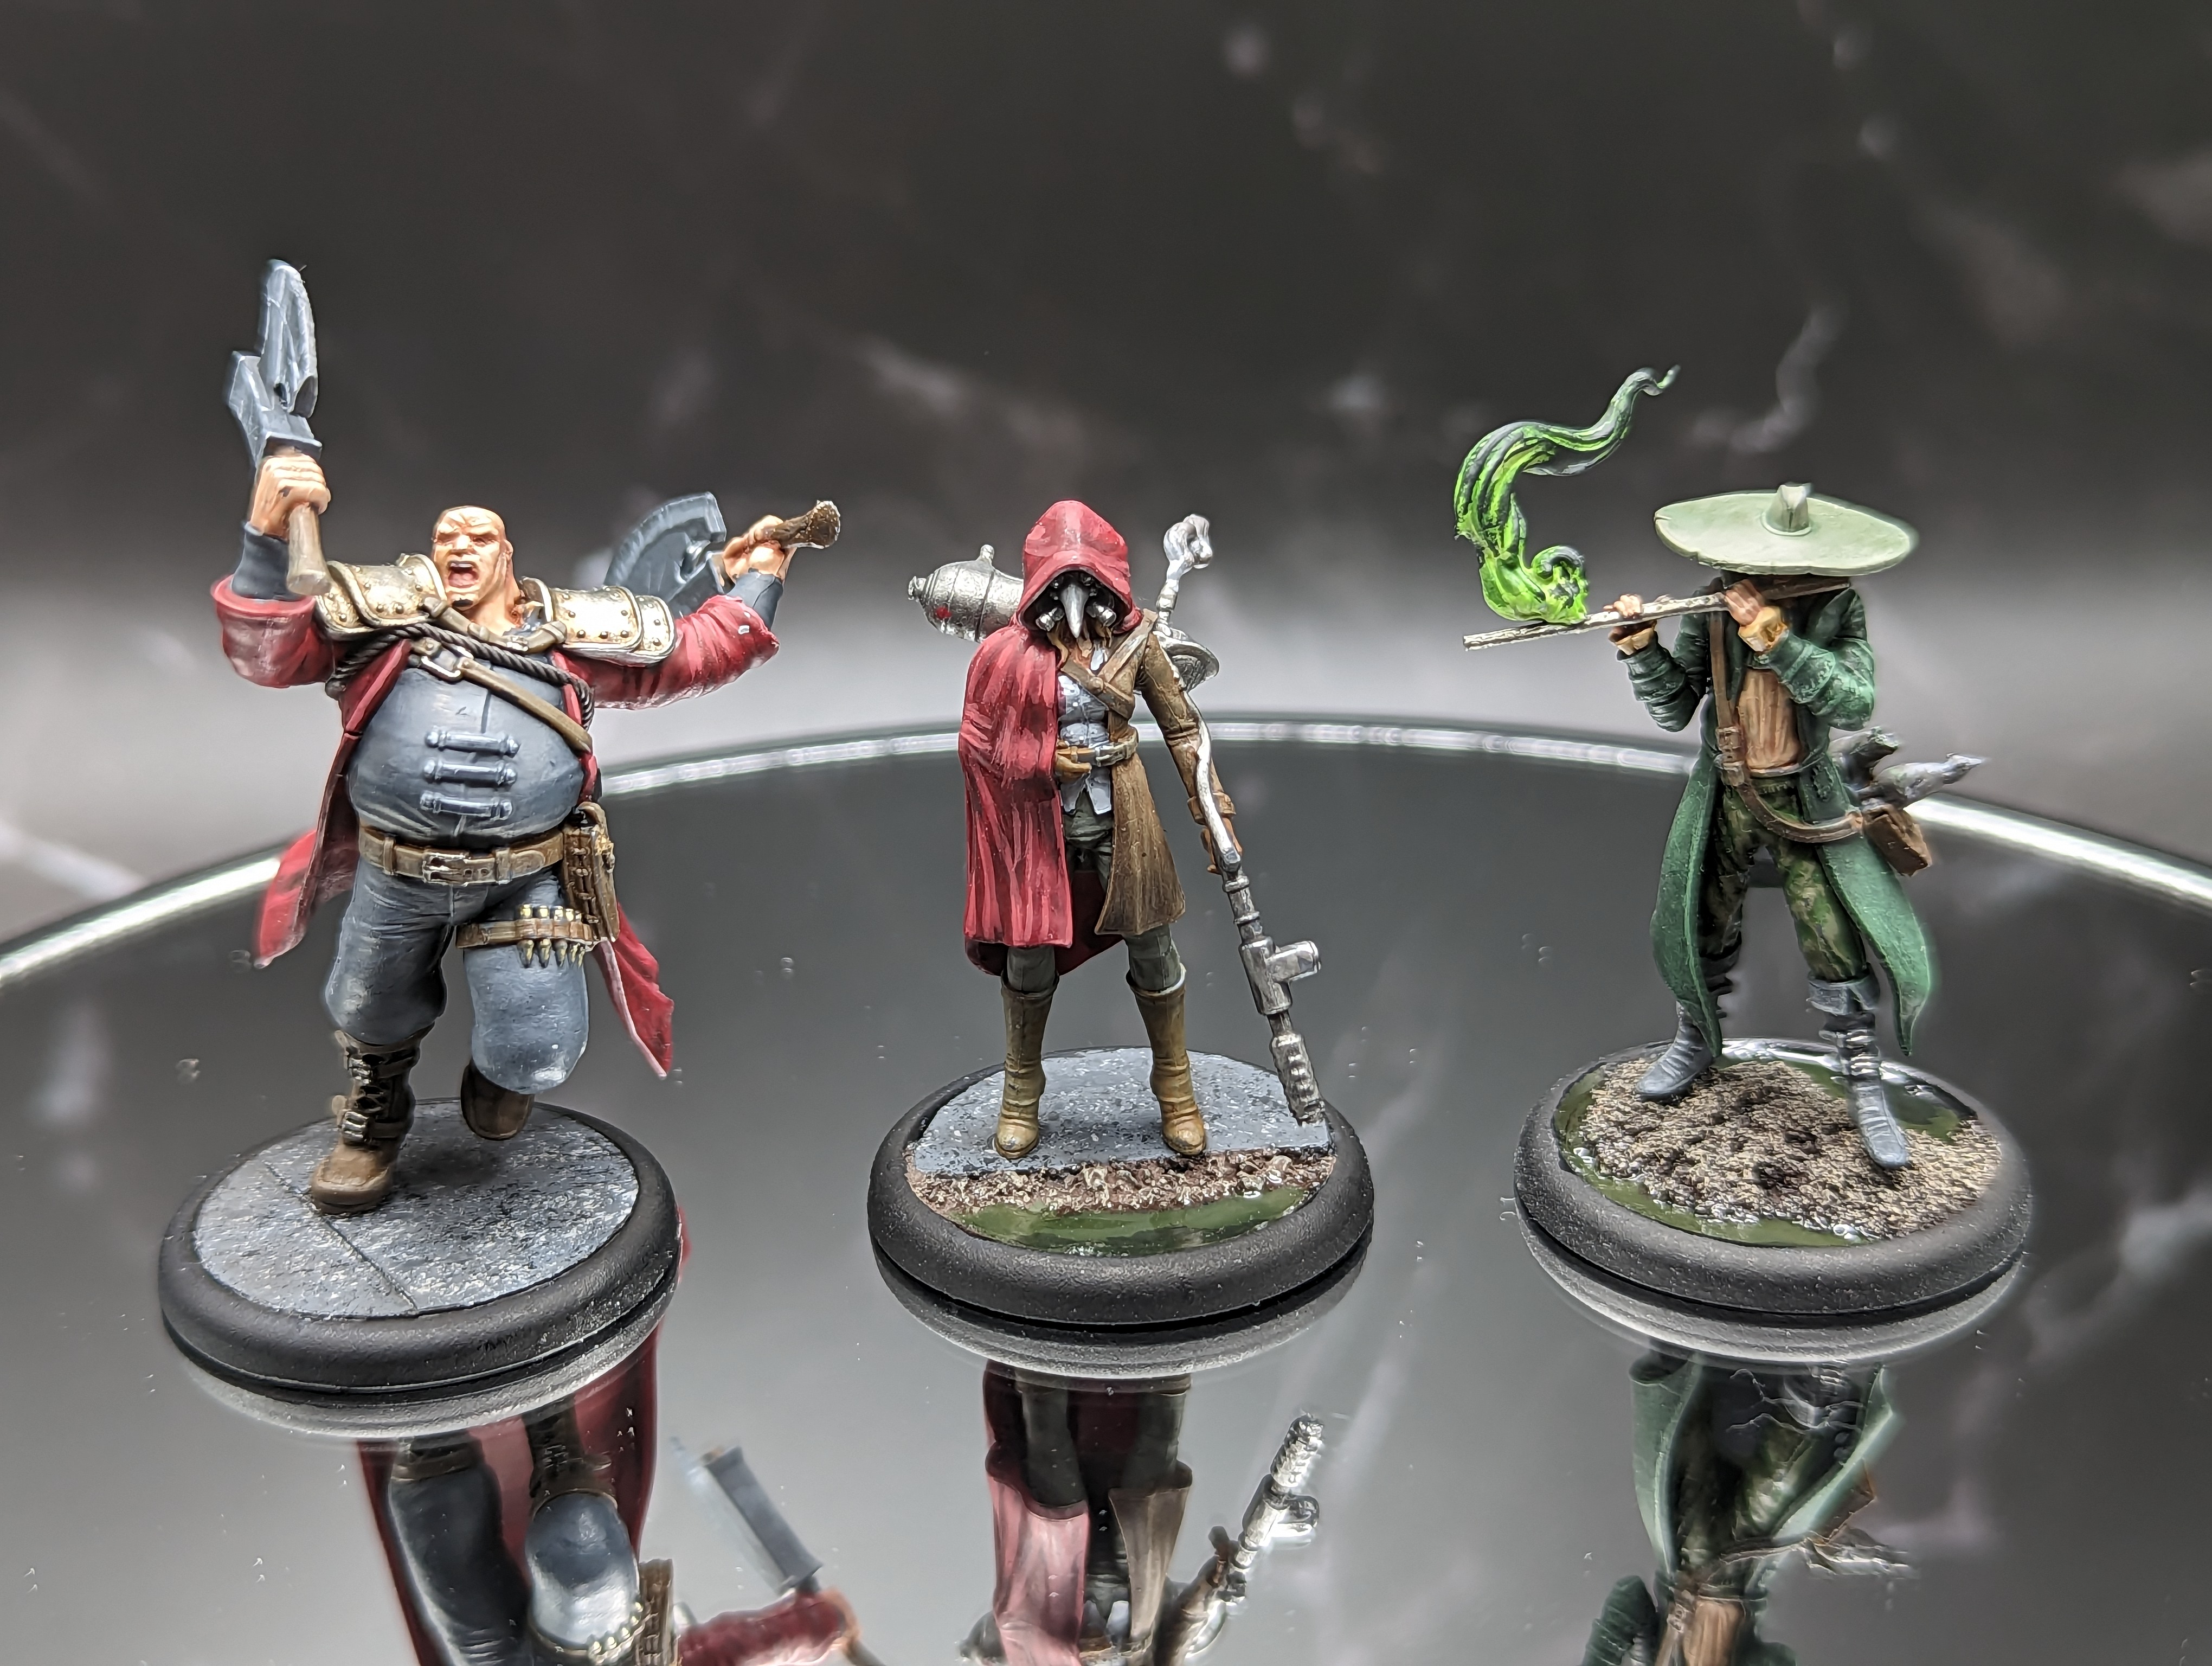
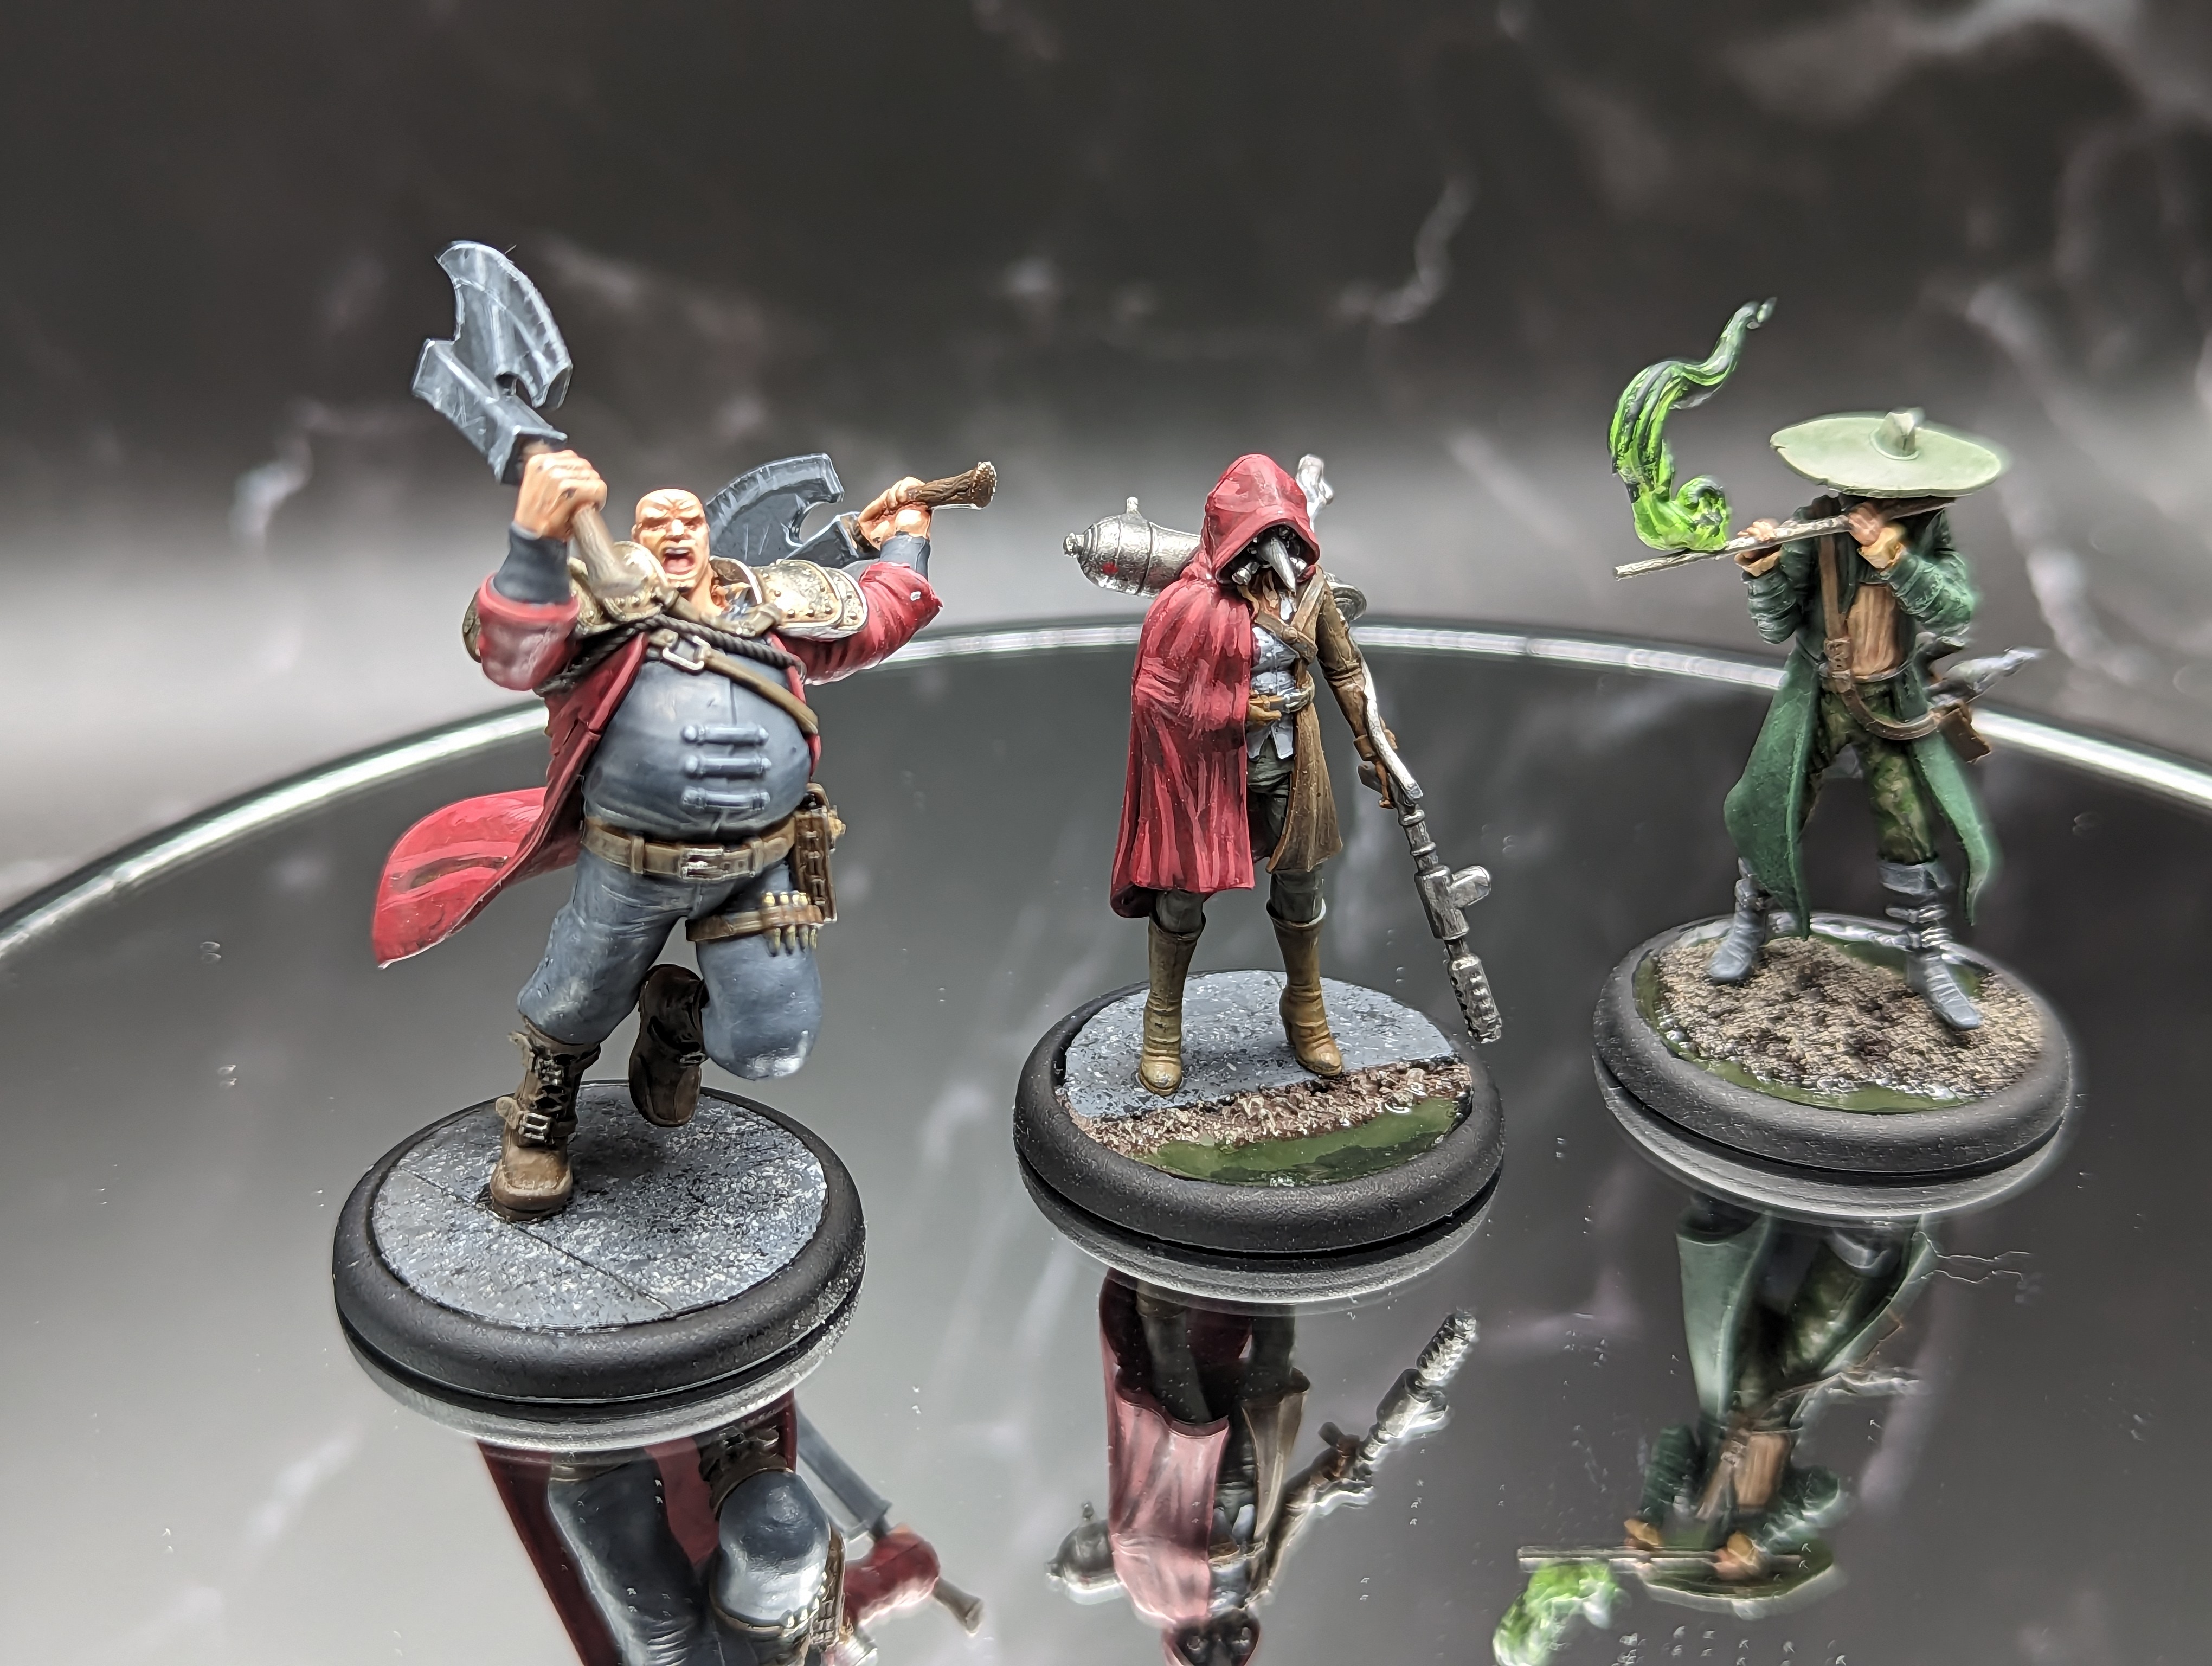
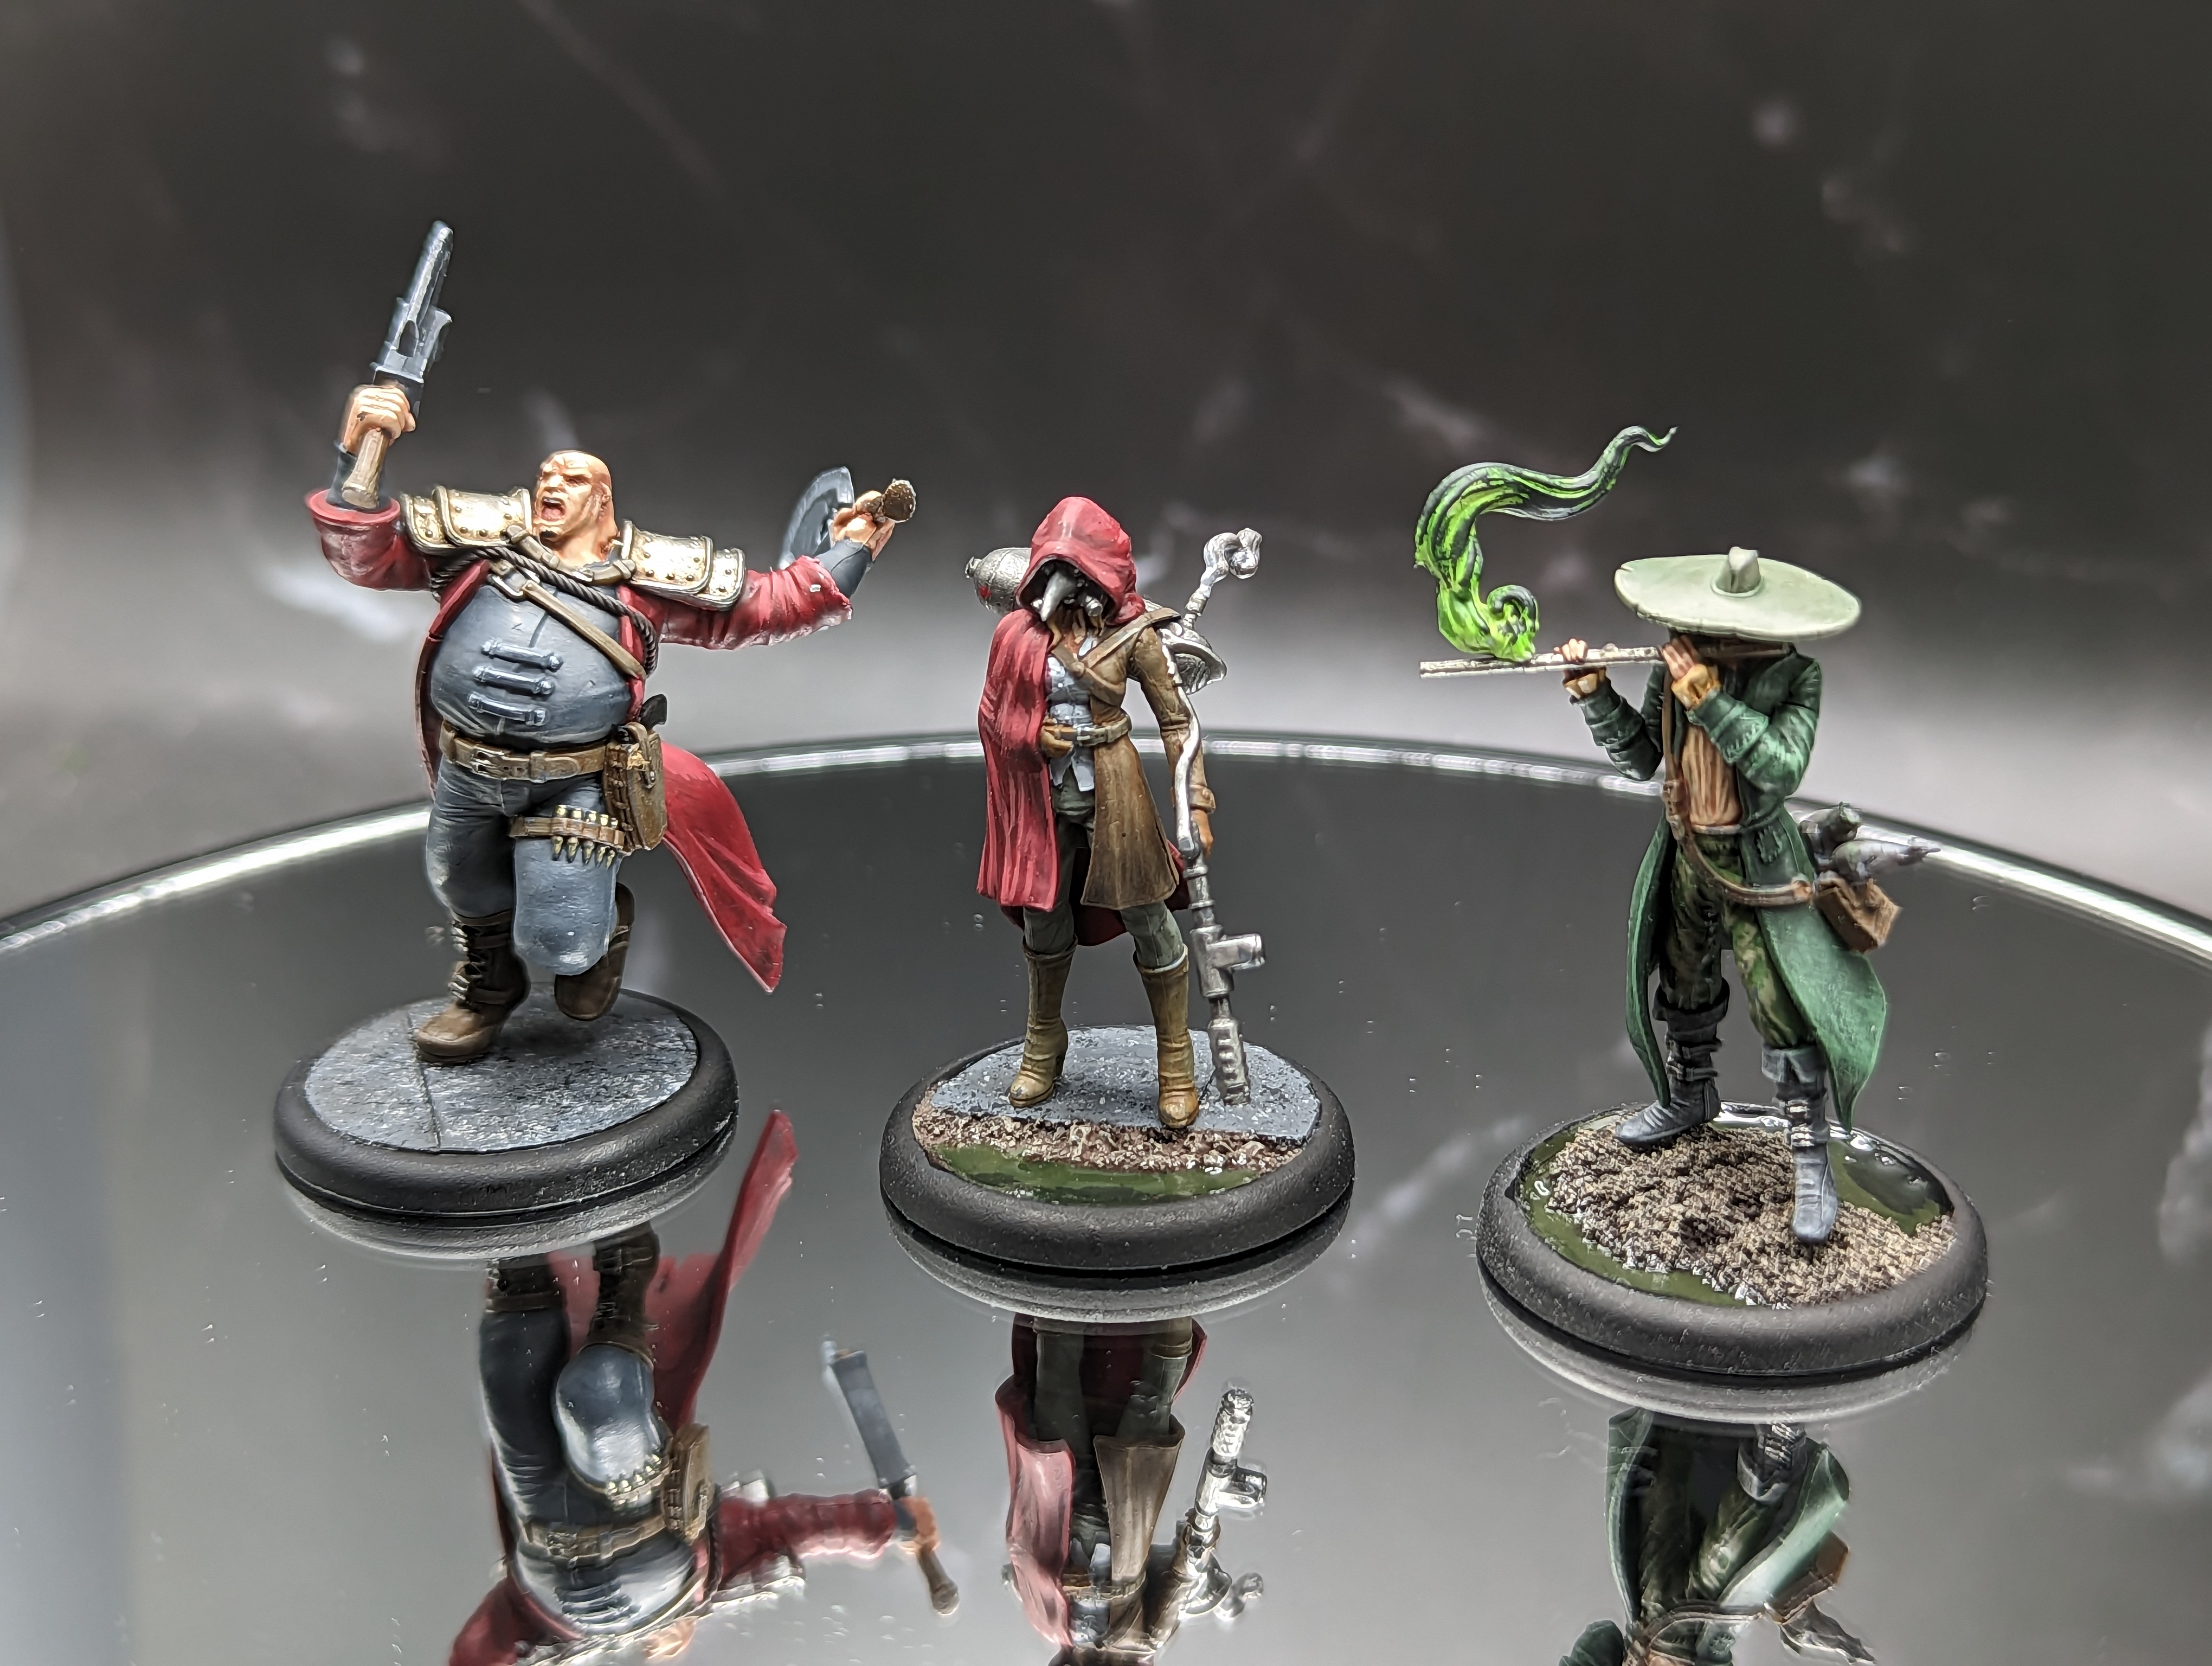
After putting them on their bases, I felt a bit better about the paint jobs. I think they fit in well with their crews, even though I painted them years ago. I have to say these new sculpts for Malifaux in the last few years have been excellent, really dynamic and high detail. They are a ton of fun to paint.
Oh and don’t forget the videos I did on both of these masters if you wanna learn all about their lore!
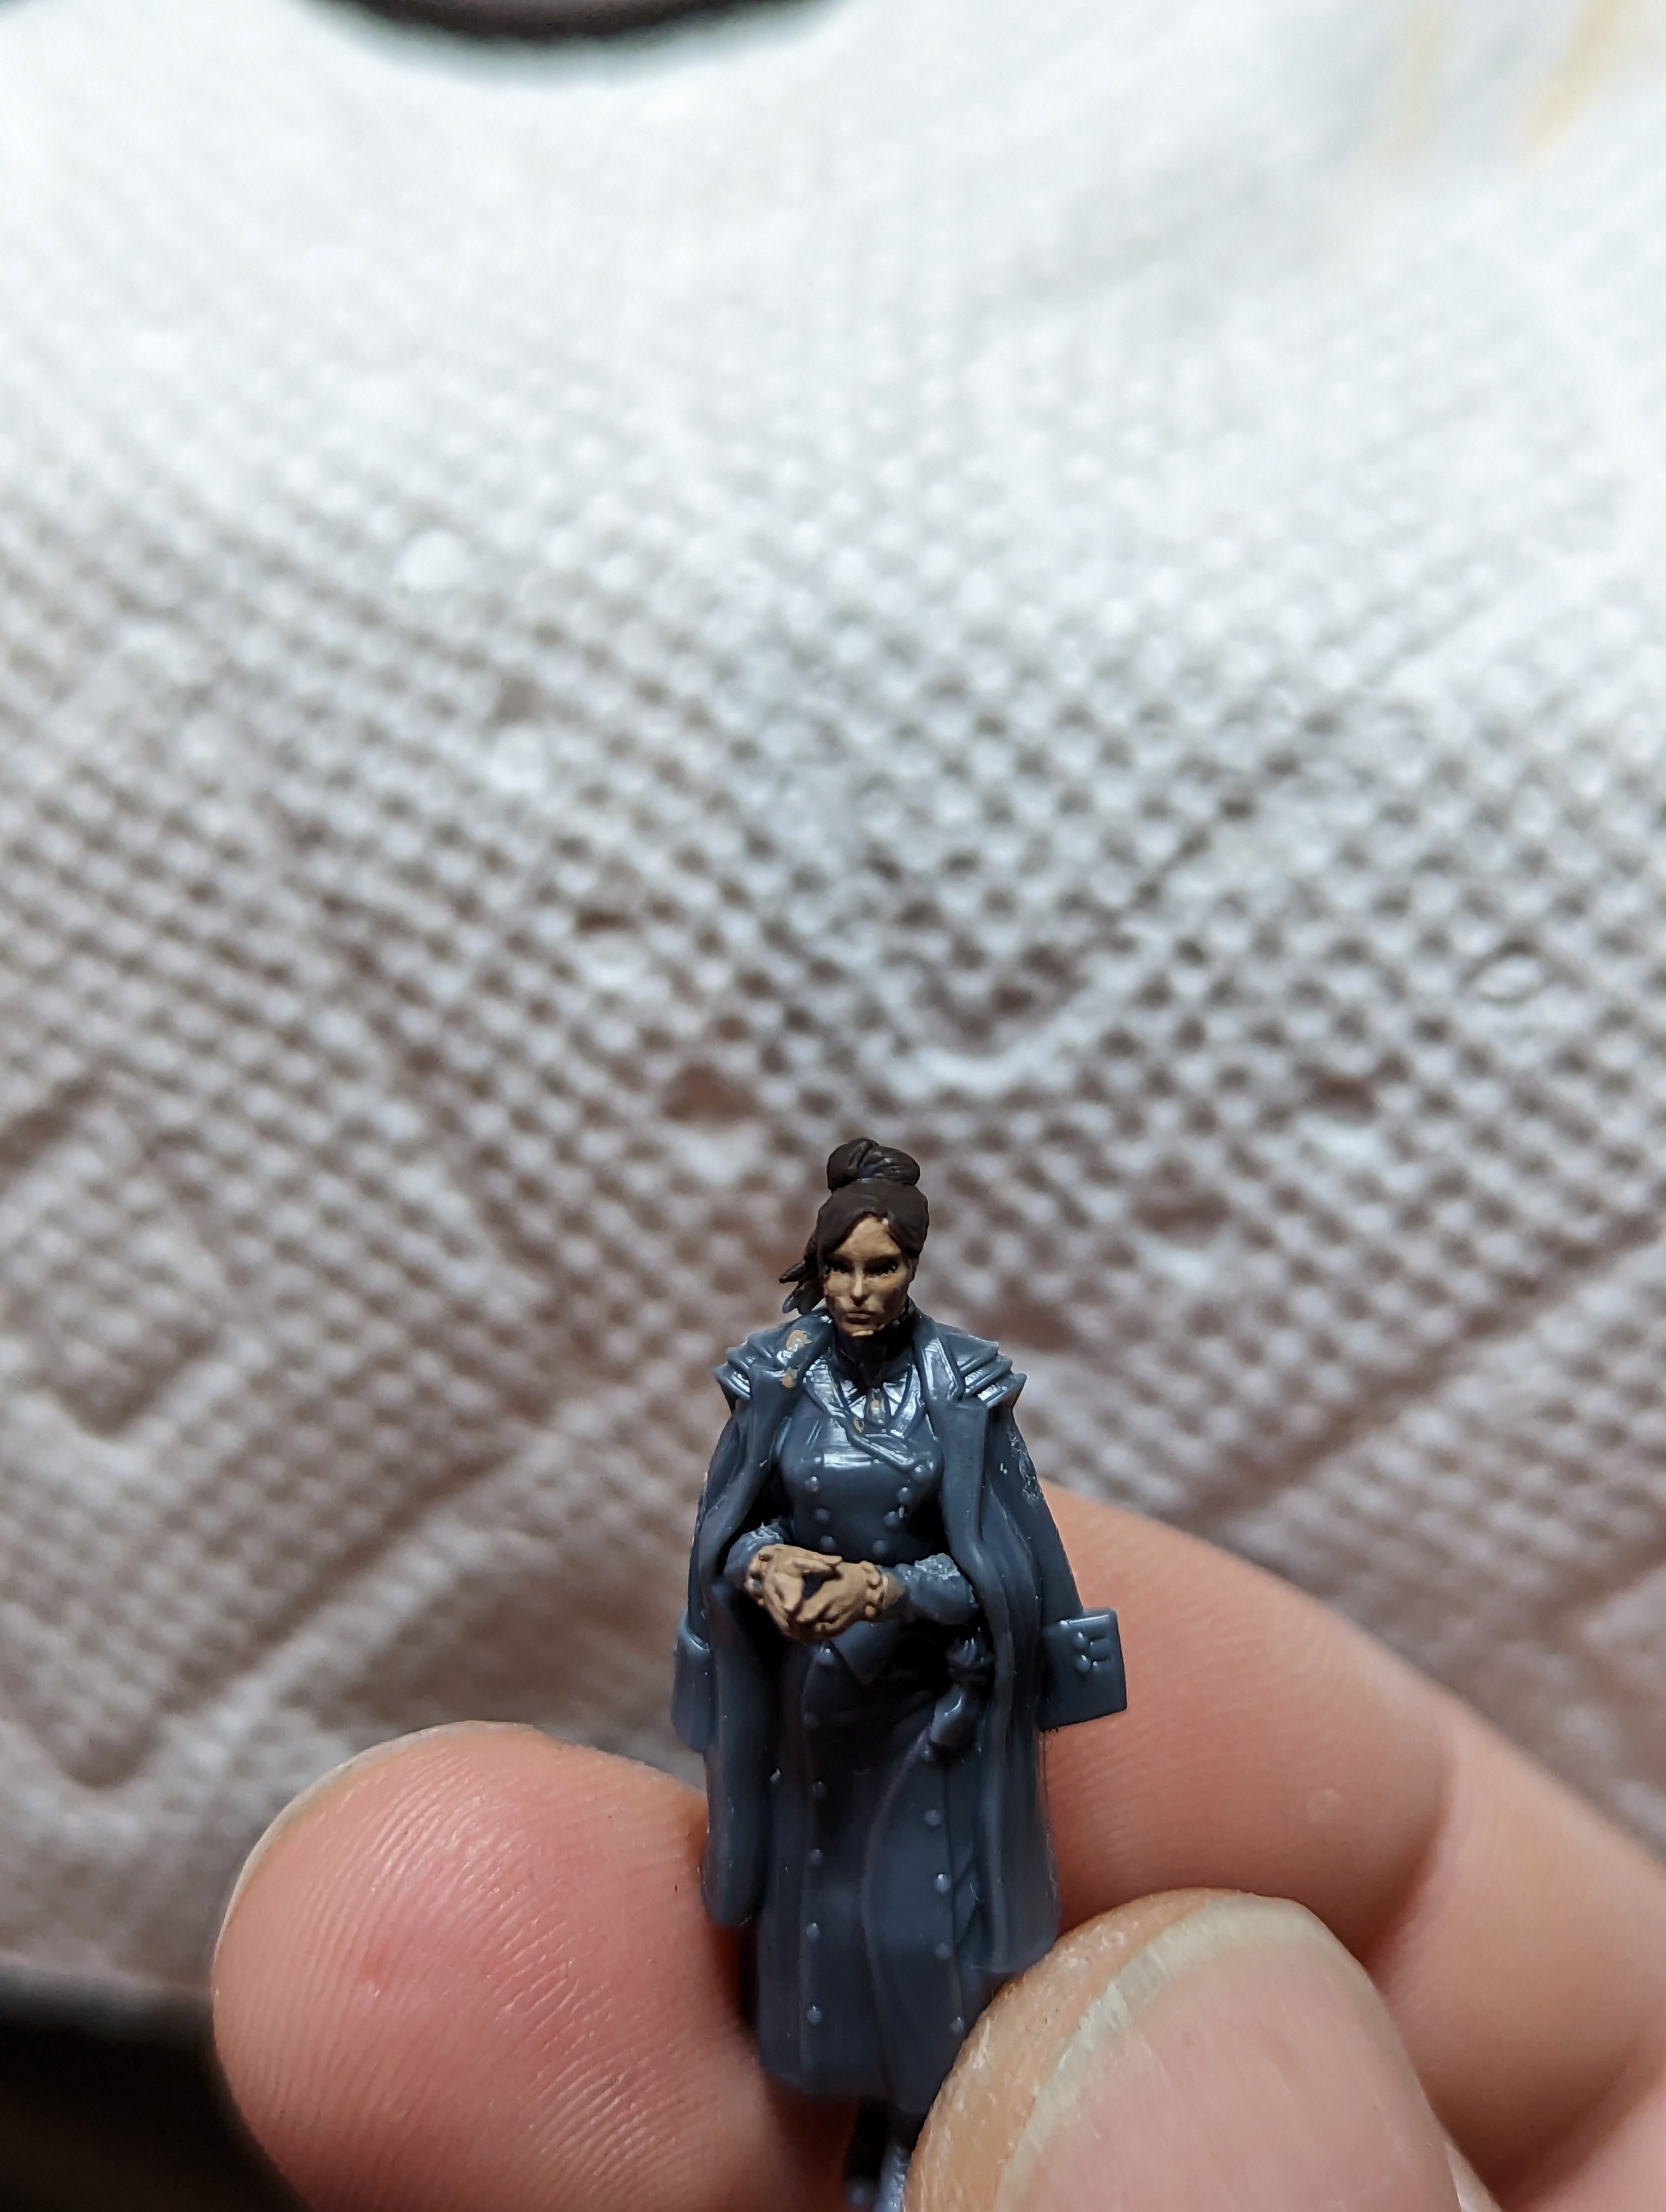
The Queen
Toni Ironsides is my favorite character in Malifaux. Queen T can do no wrong, and if you say anything bad about her, I will fight you.
All that said, he crew is on these kind of plain cobblestone bases, cuz I put her together a long time ago. Anya, the other master in her box, is so new that I haven’t based up her crew yet. Id like to put her on railroad bases since shes a rich rail magnate. The three drudges that they share will, as always, go on 2 tone bases.
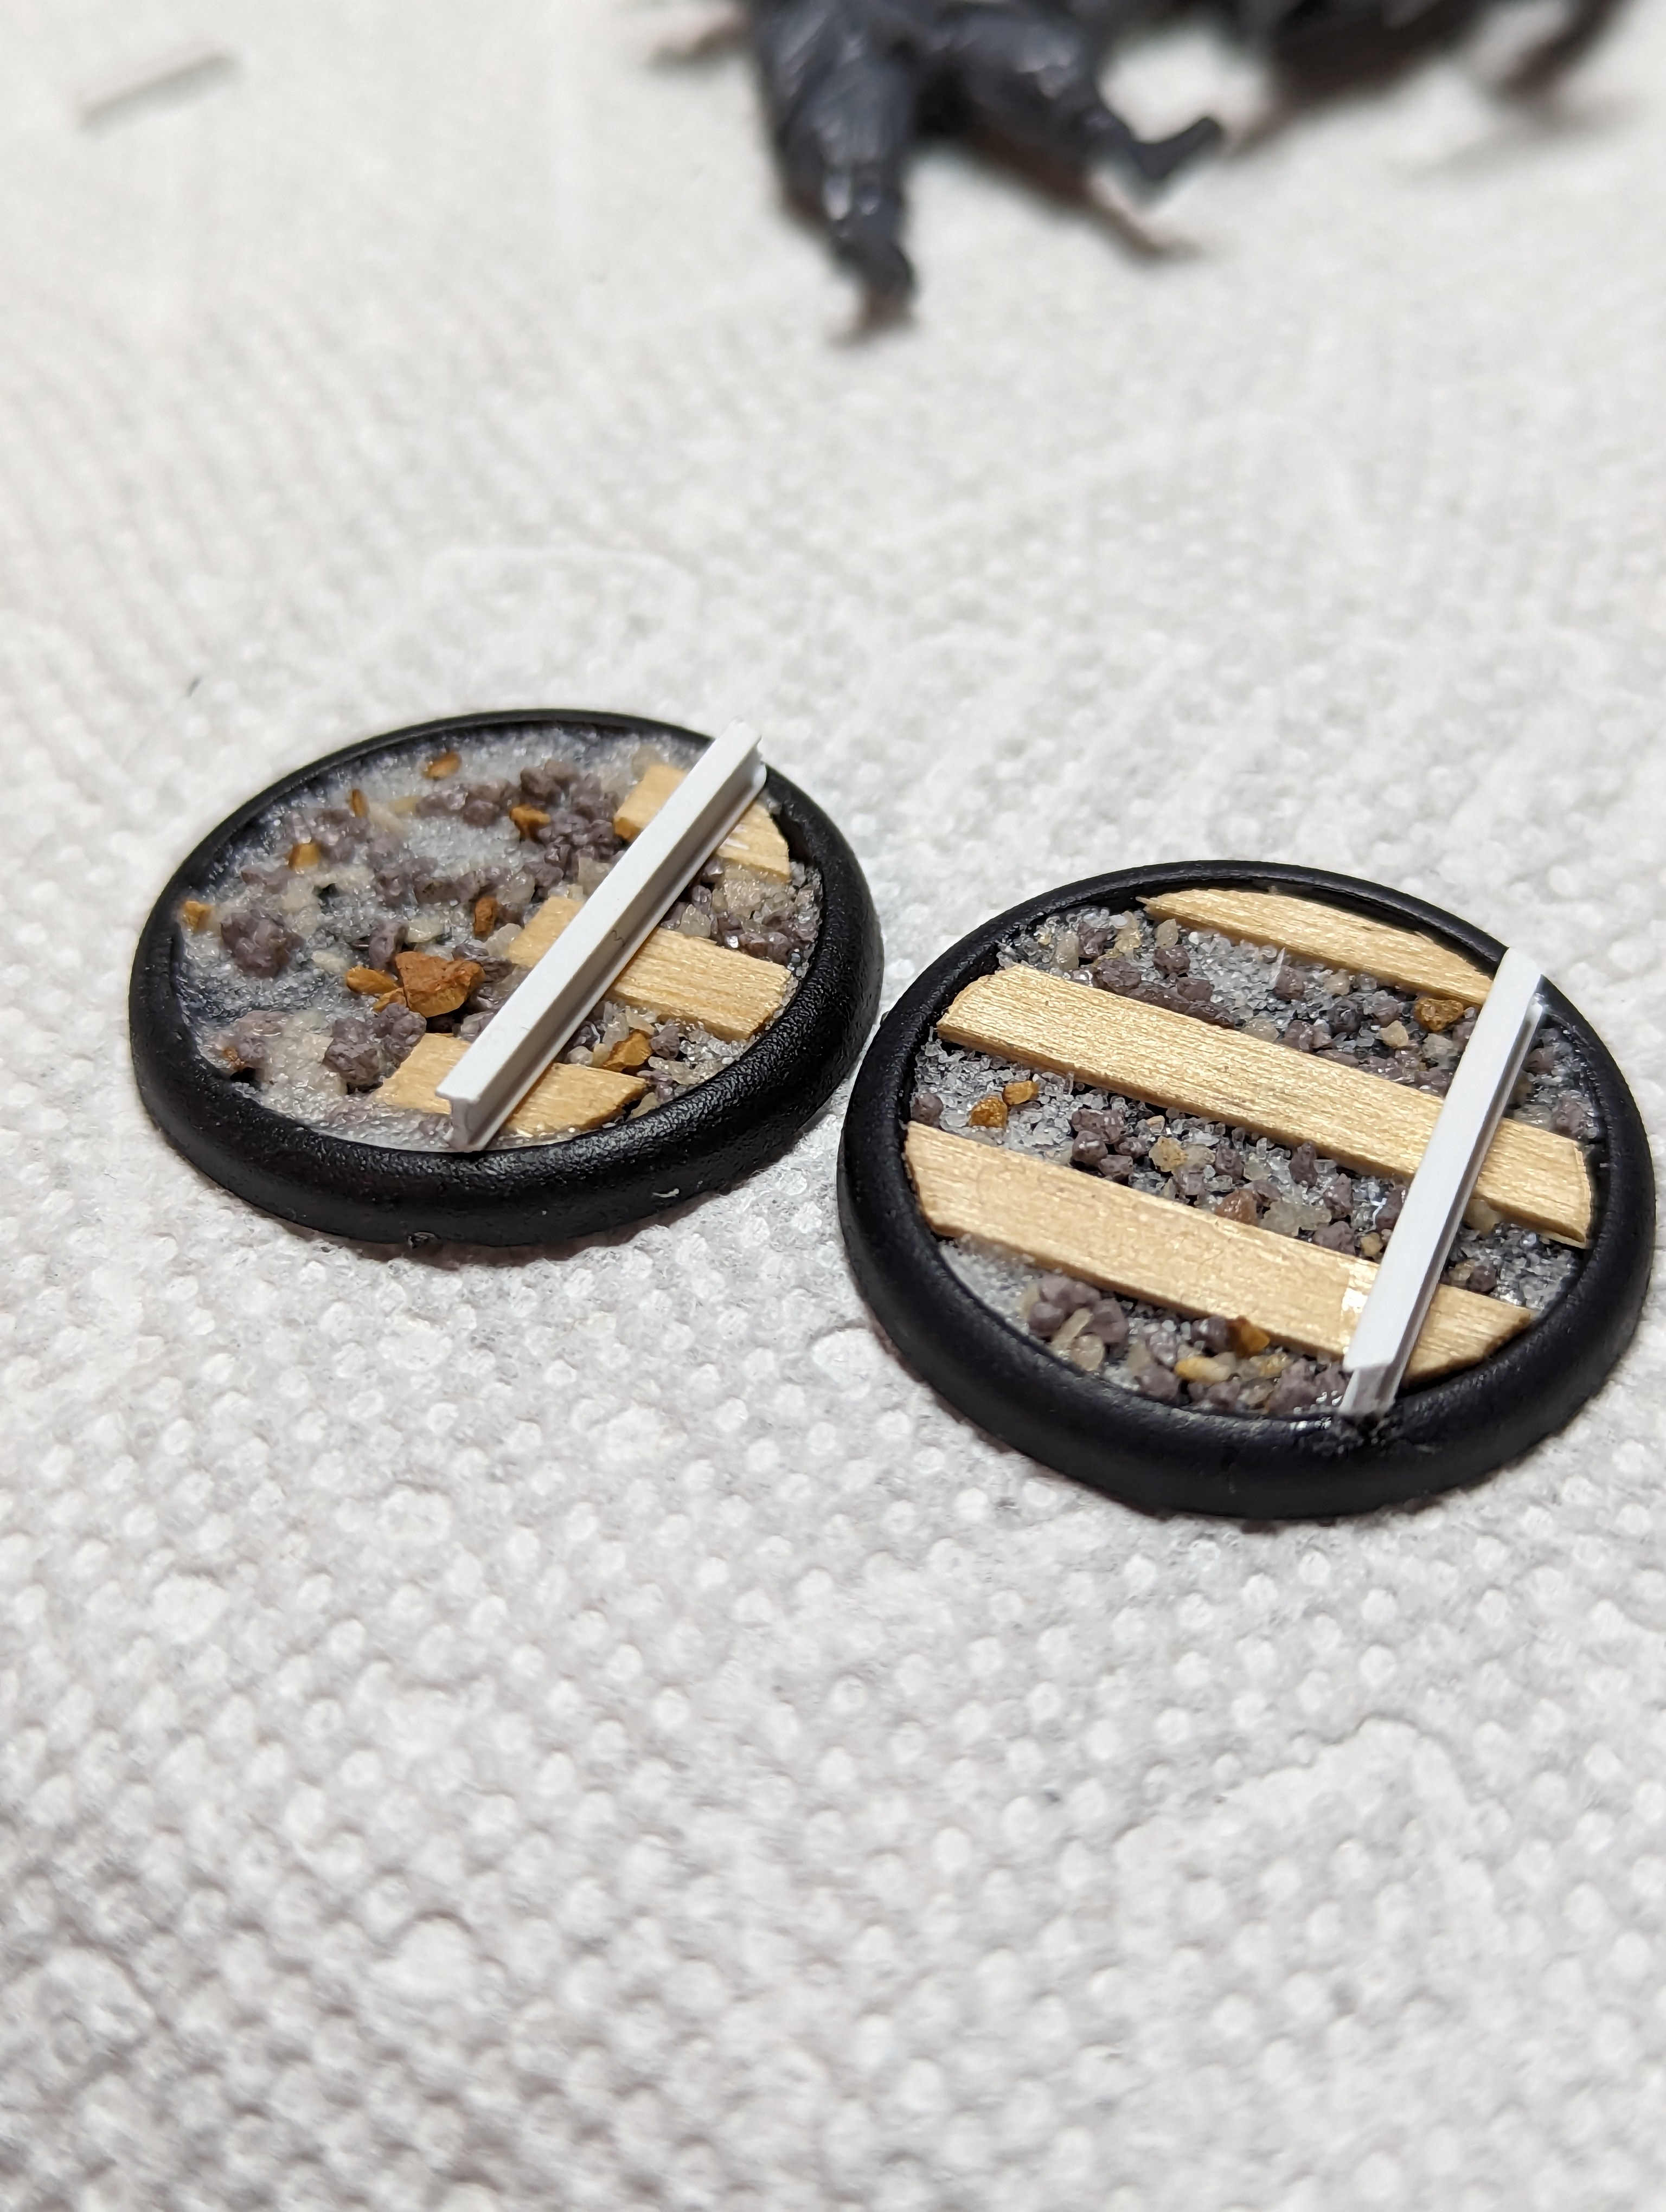
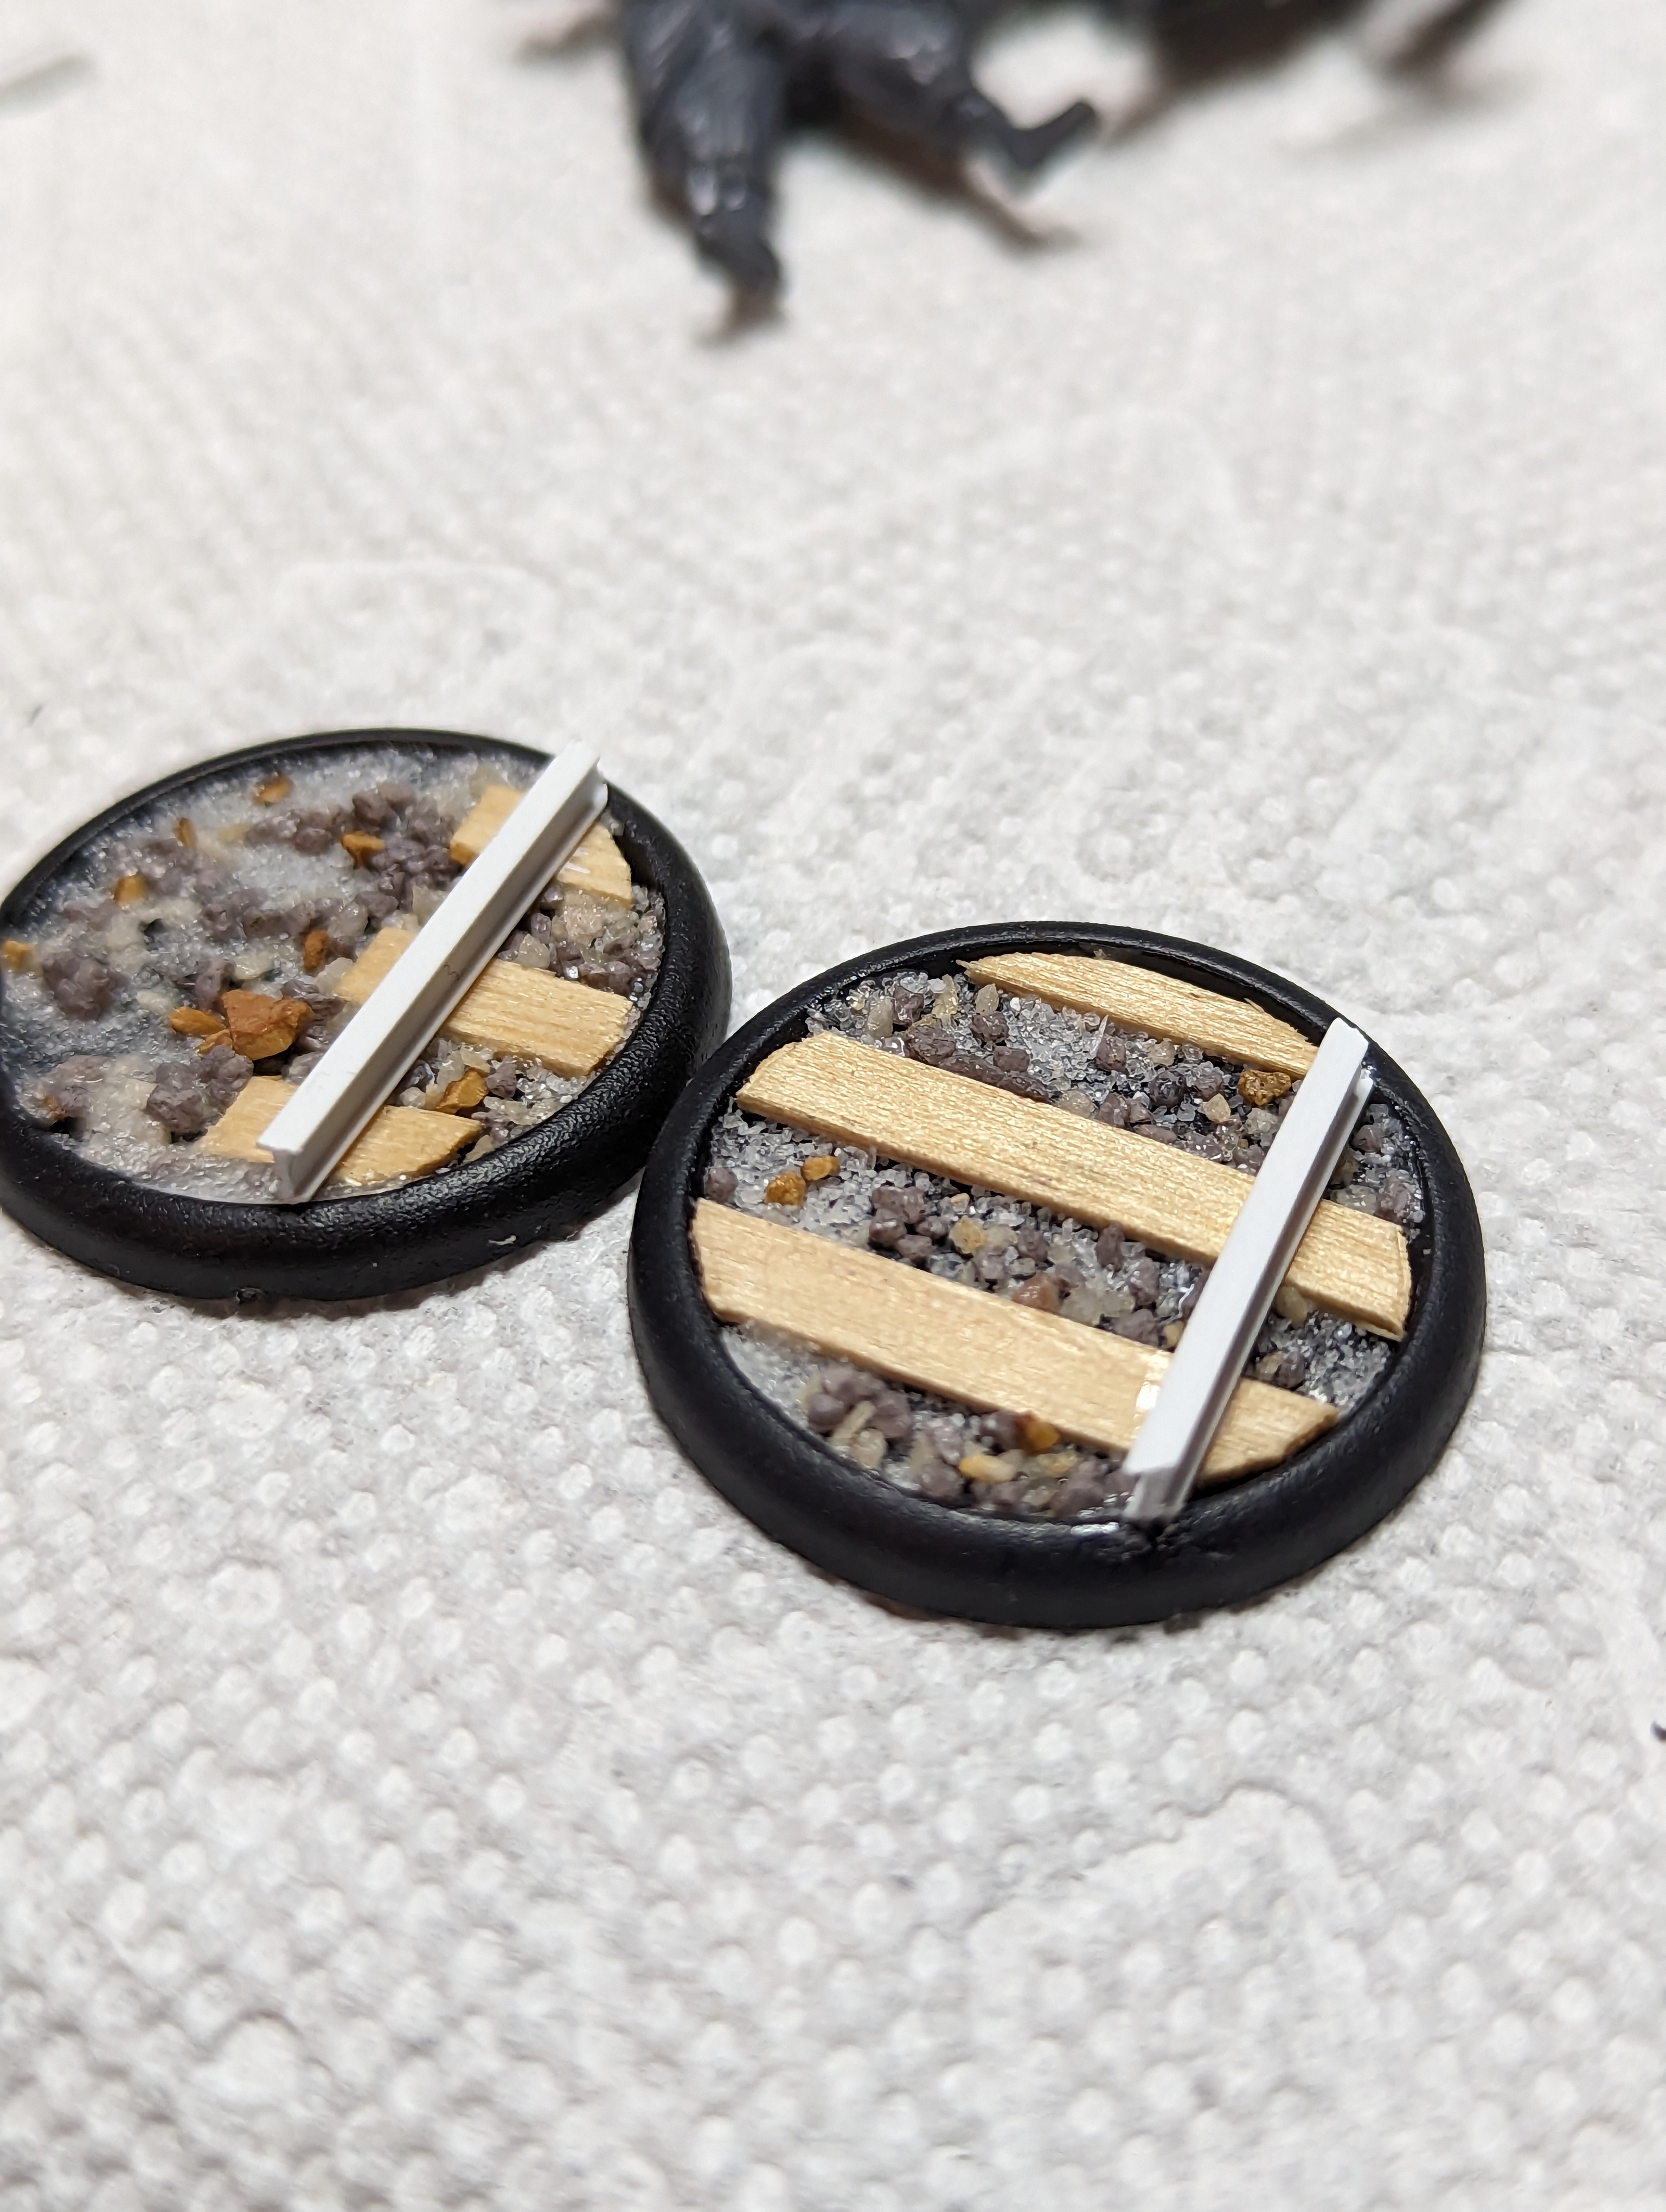
For the rail bases, I used some coffee stirrers and cut them into shape so they would fit in the lipped bases. I have these styrene I beams that Im going to use for the rails, since railroad rails are closer to capital I shaped than just a flat rail. I positioned some of them so that the model would be standing in the middle of the tracks, and some where the tracks are off center.
For the cobbles, I stuck some greenstuff on the bases, and then used a sculpting took to make some irregular shapes. I then rounded out the meeting points so that all of the “cobbles” dont seem too perfectly shaped, and ran a rock over the top to give a bit of texture.
For the hybrid bases I one did part cobblestones, and the other side I added railroad ties.
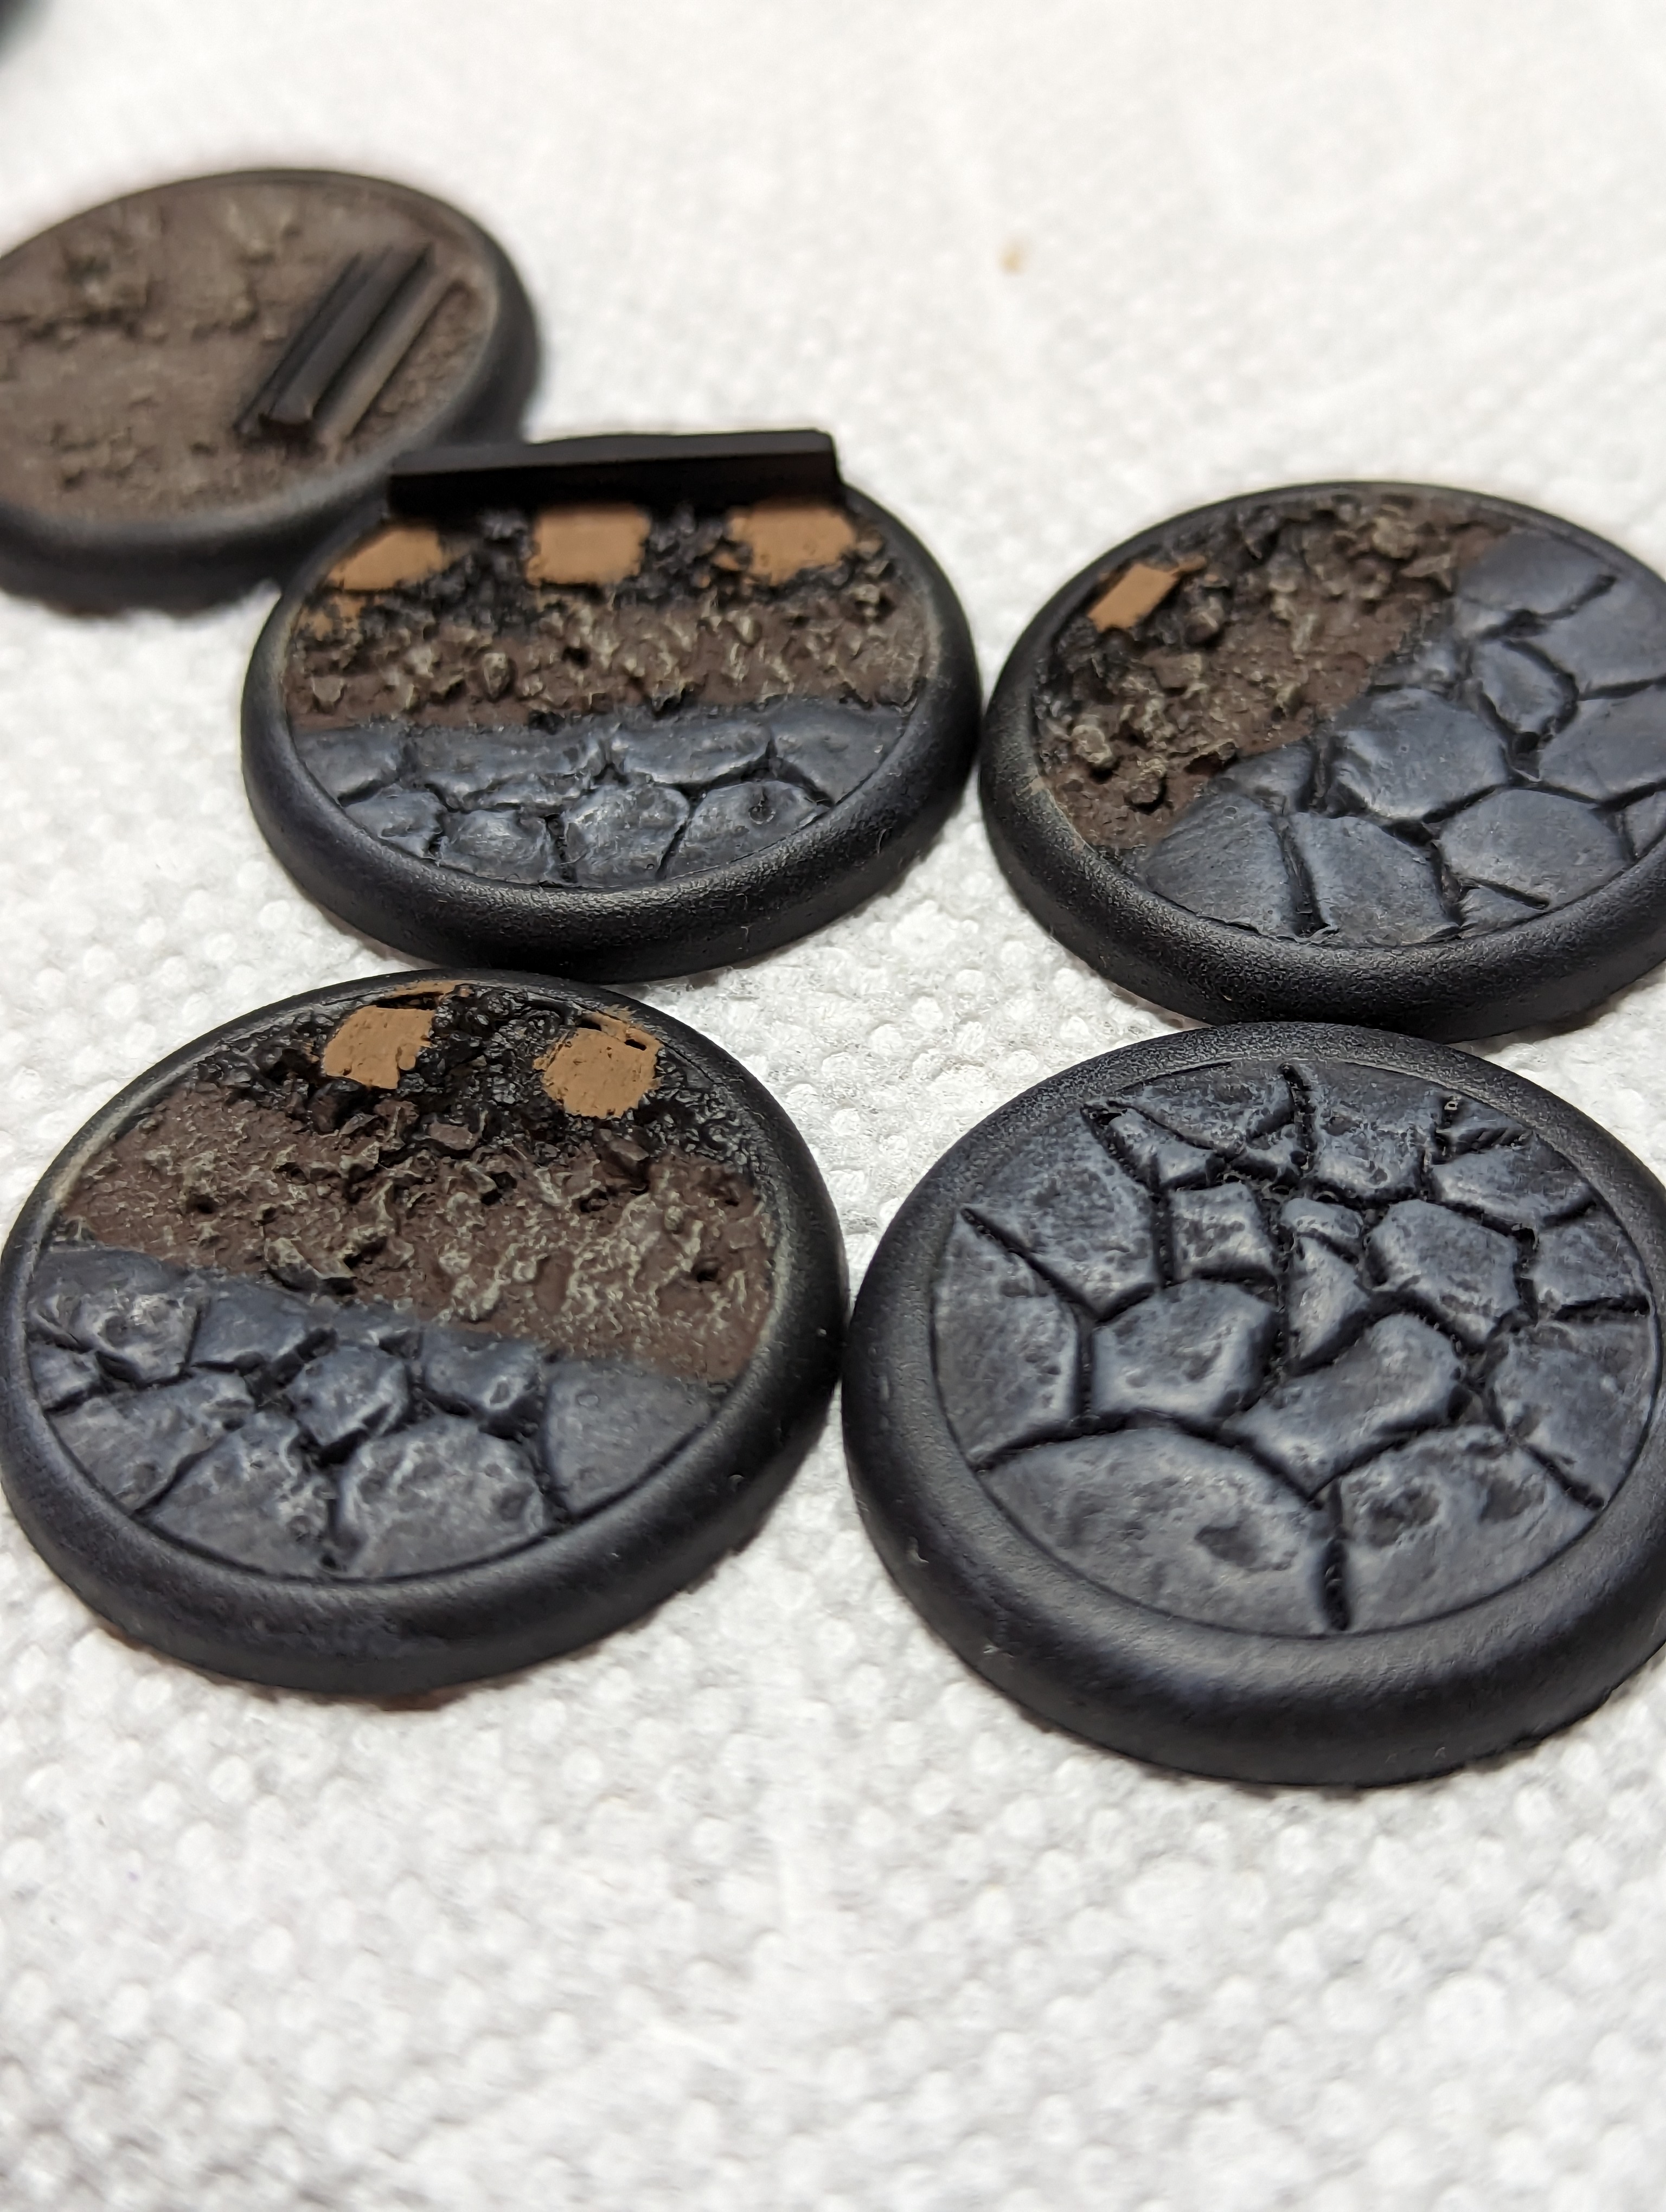
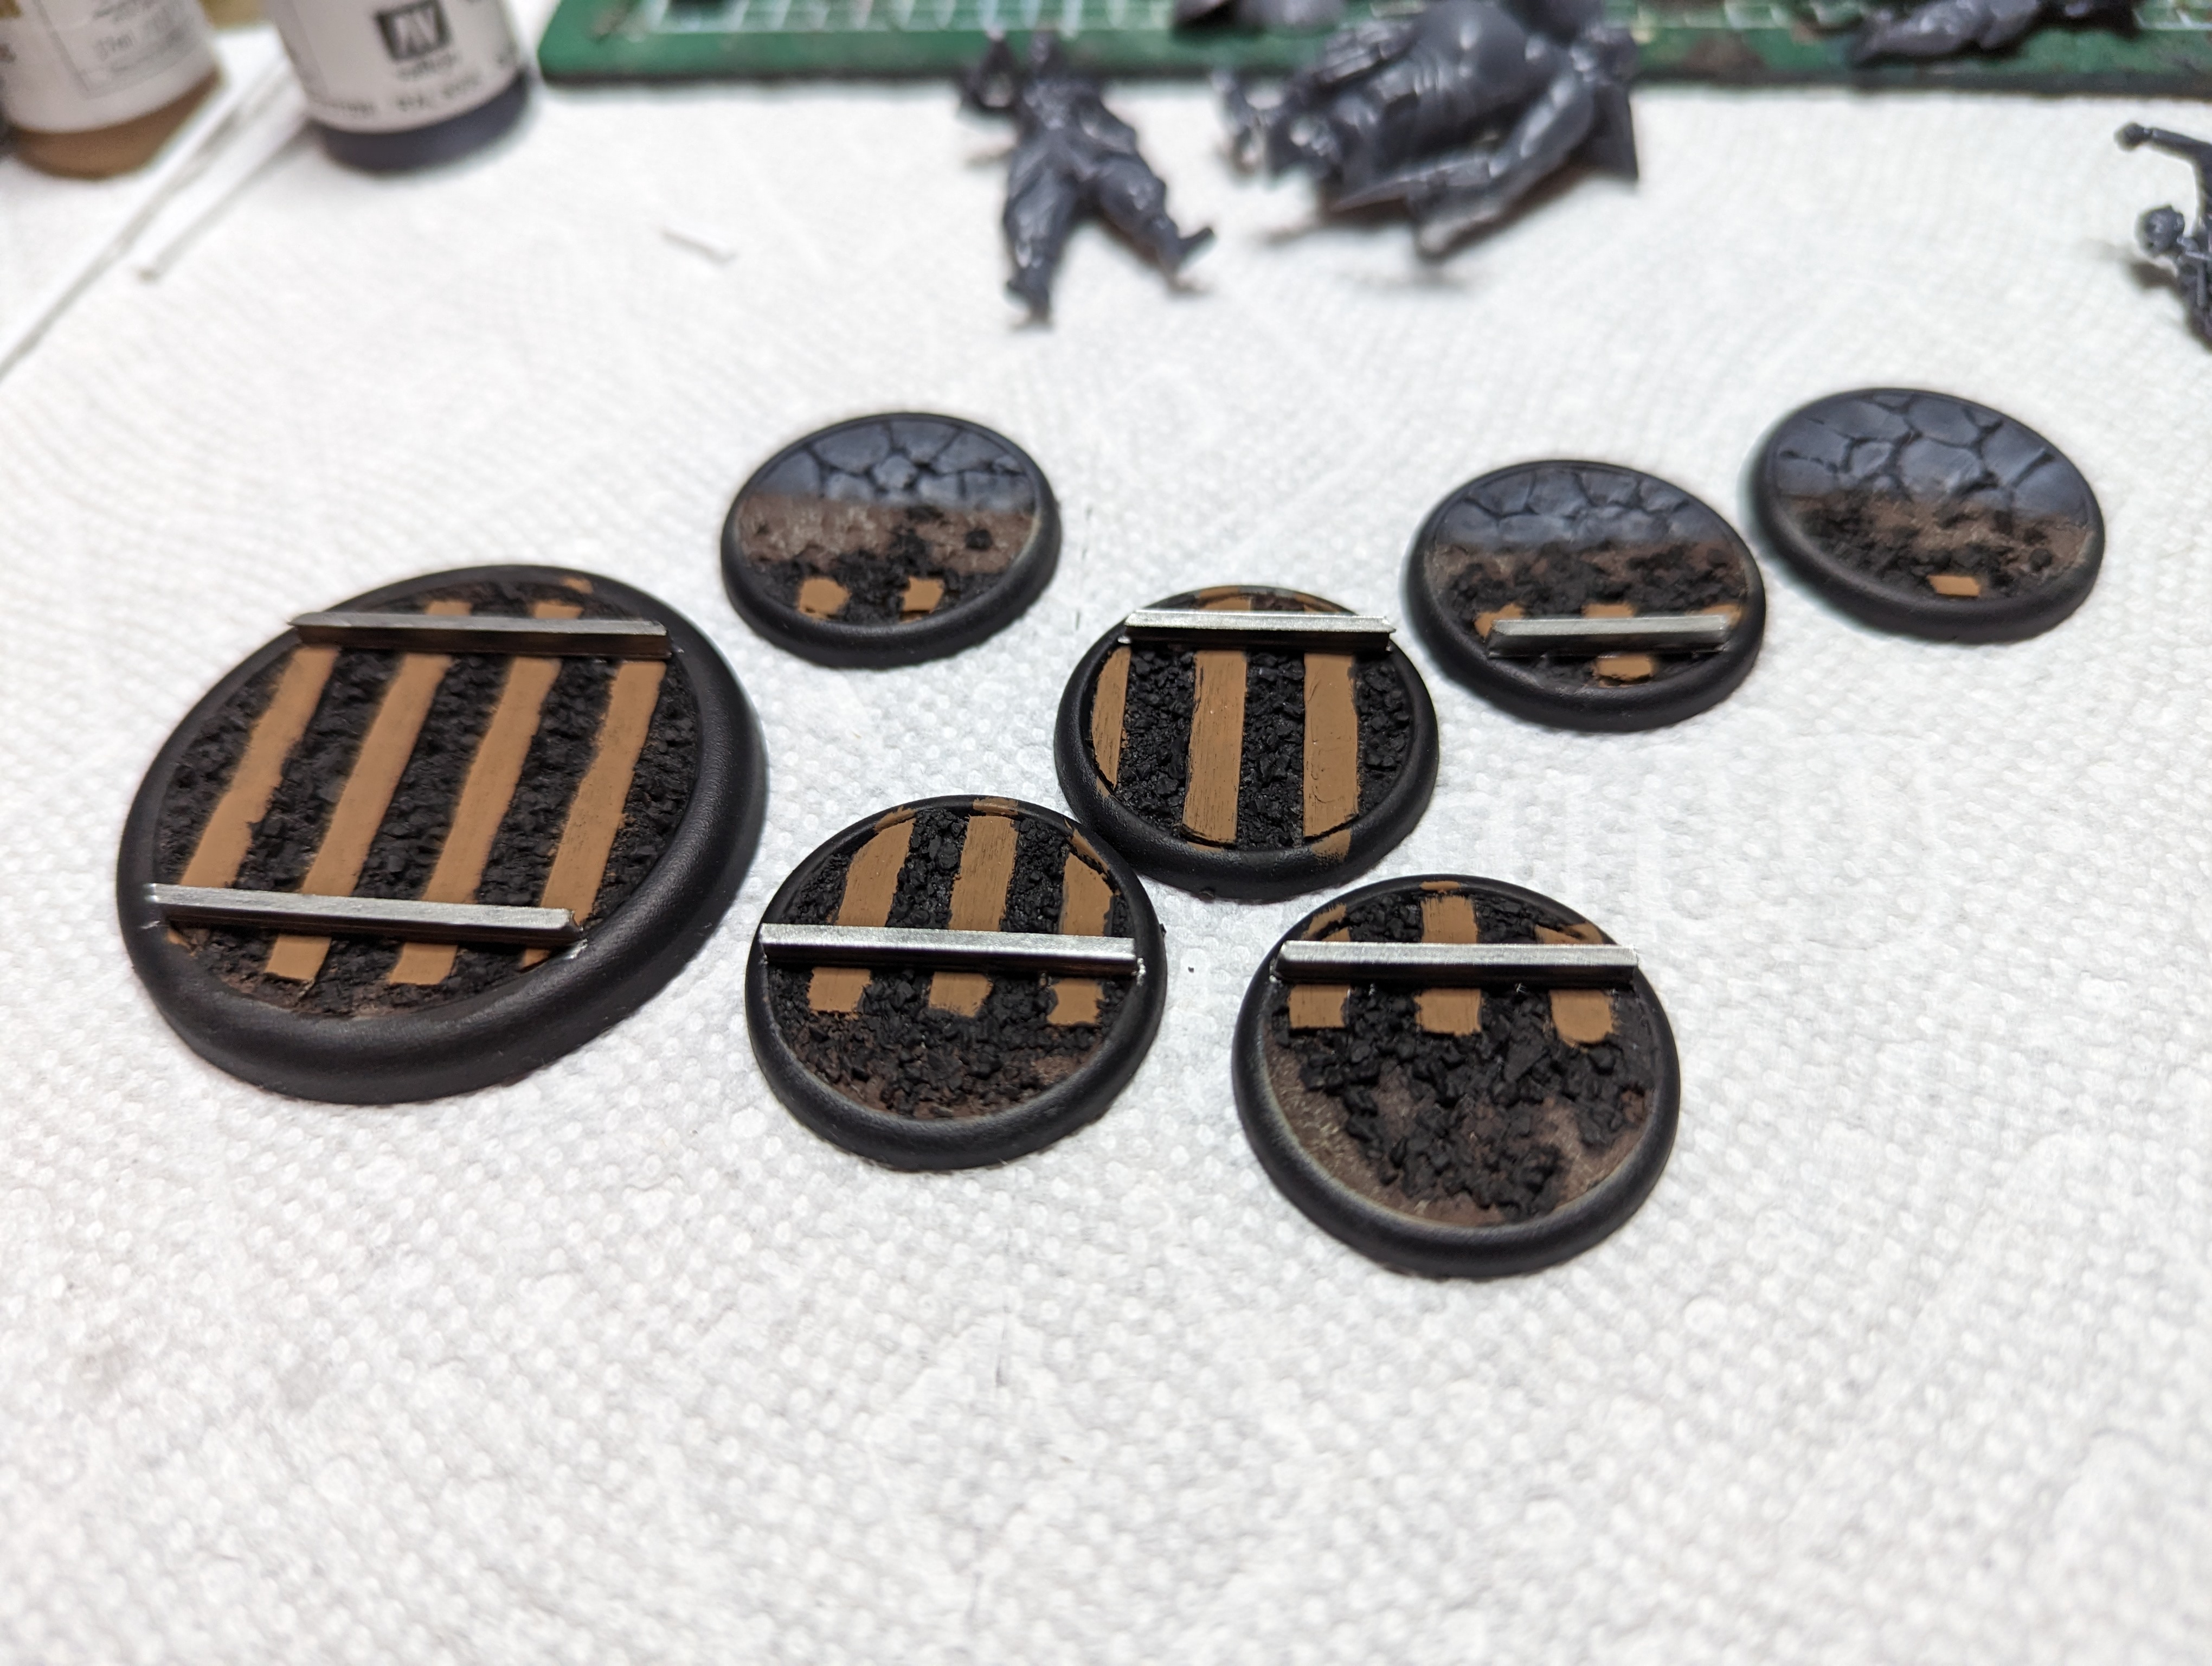
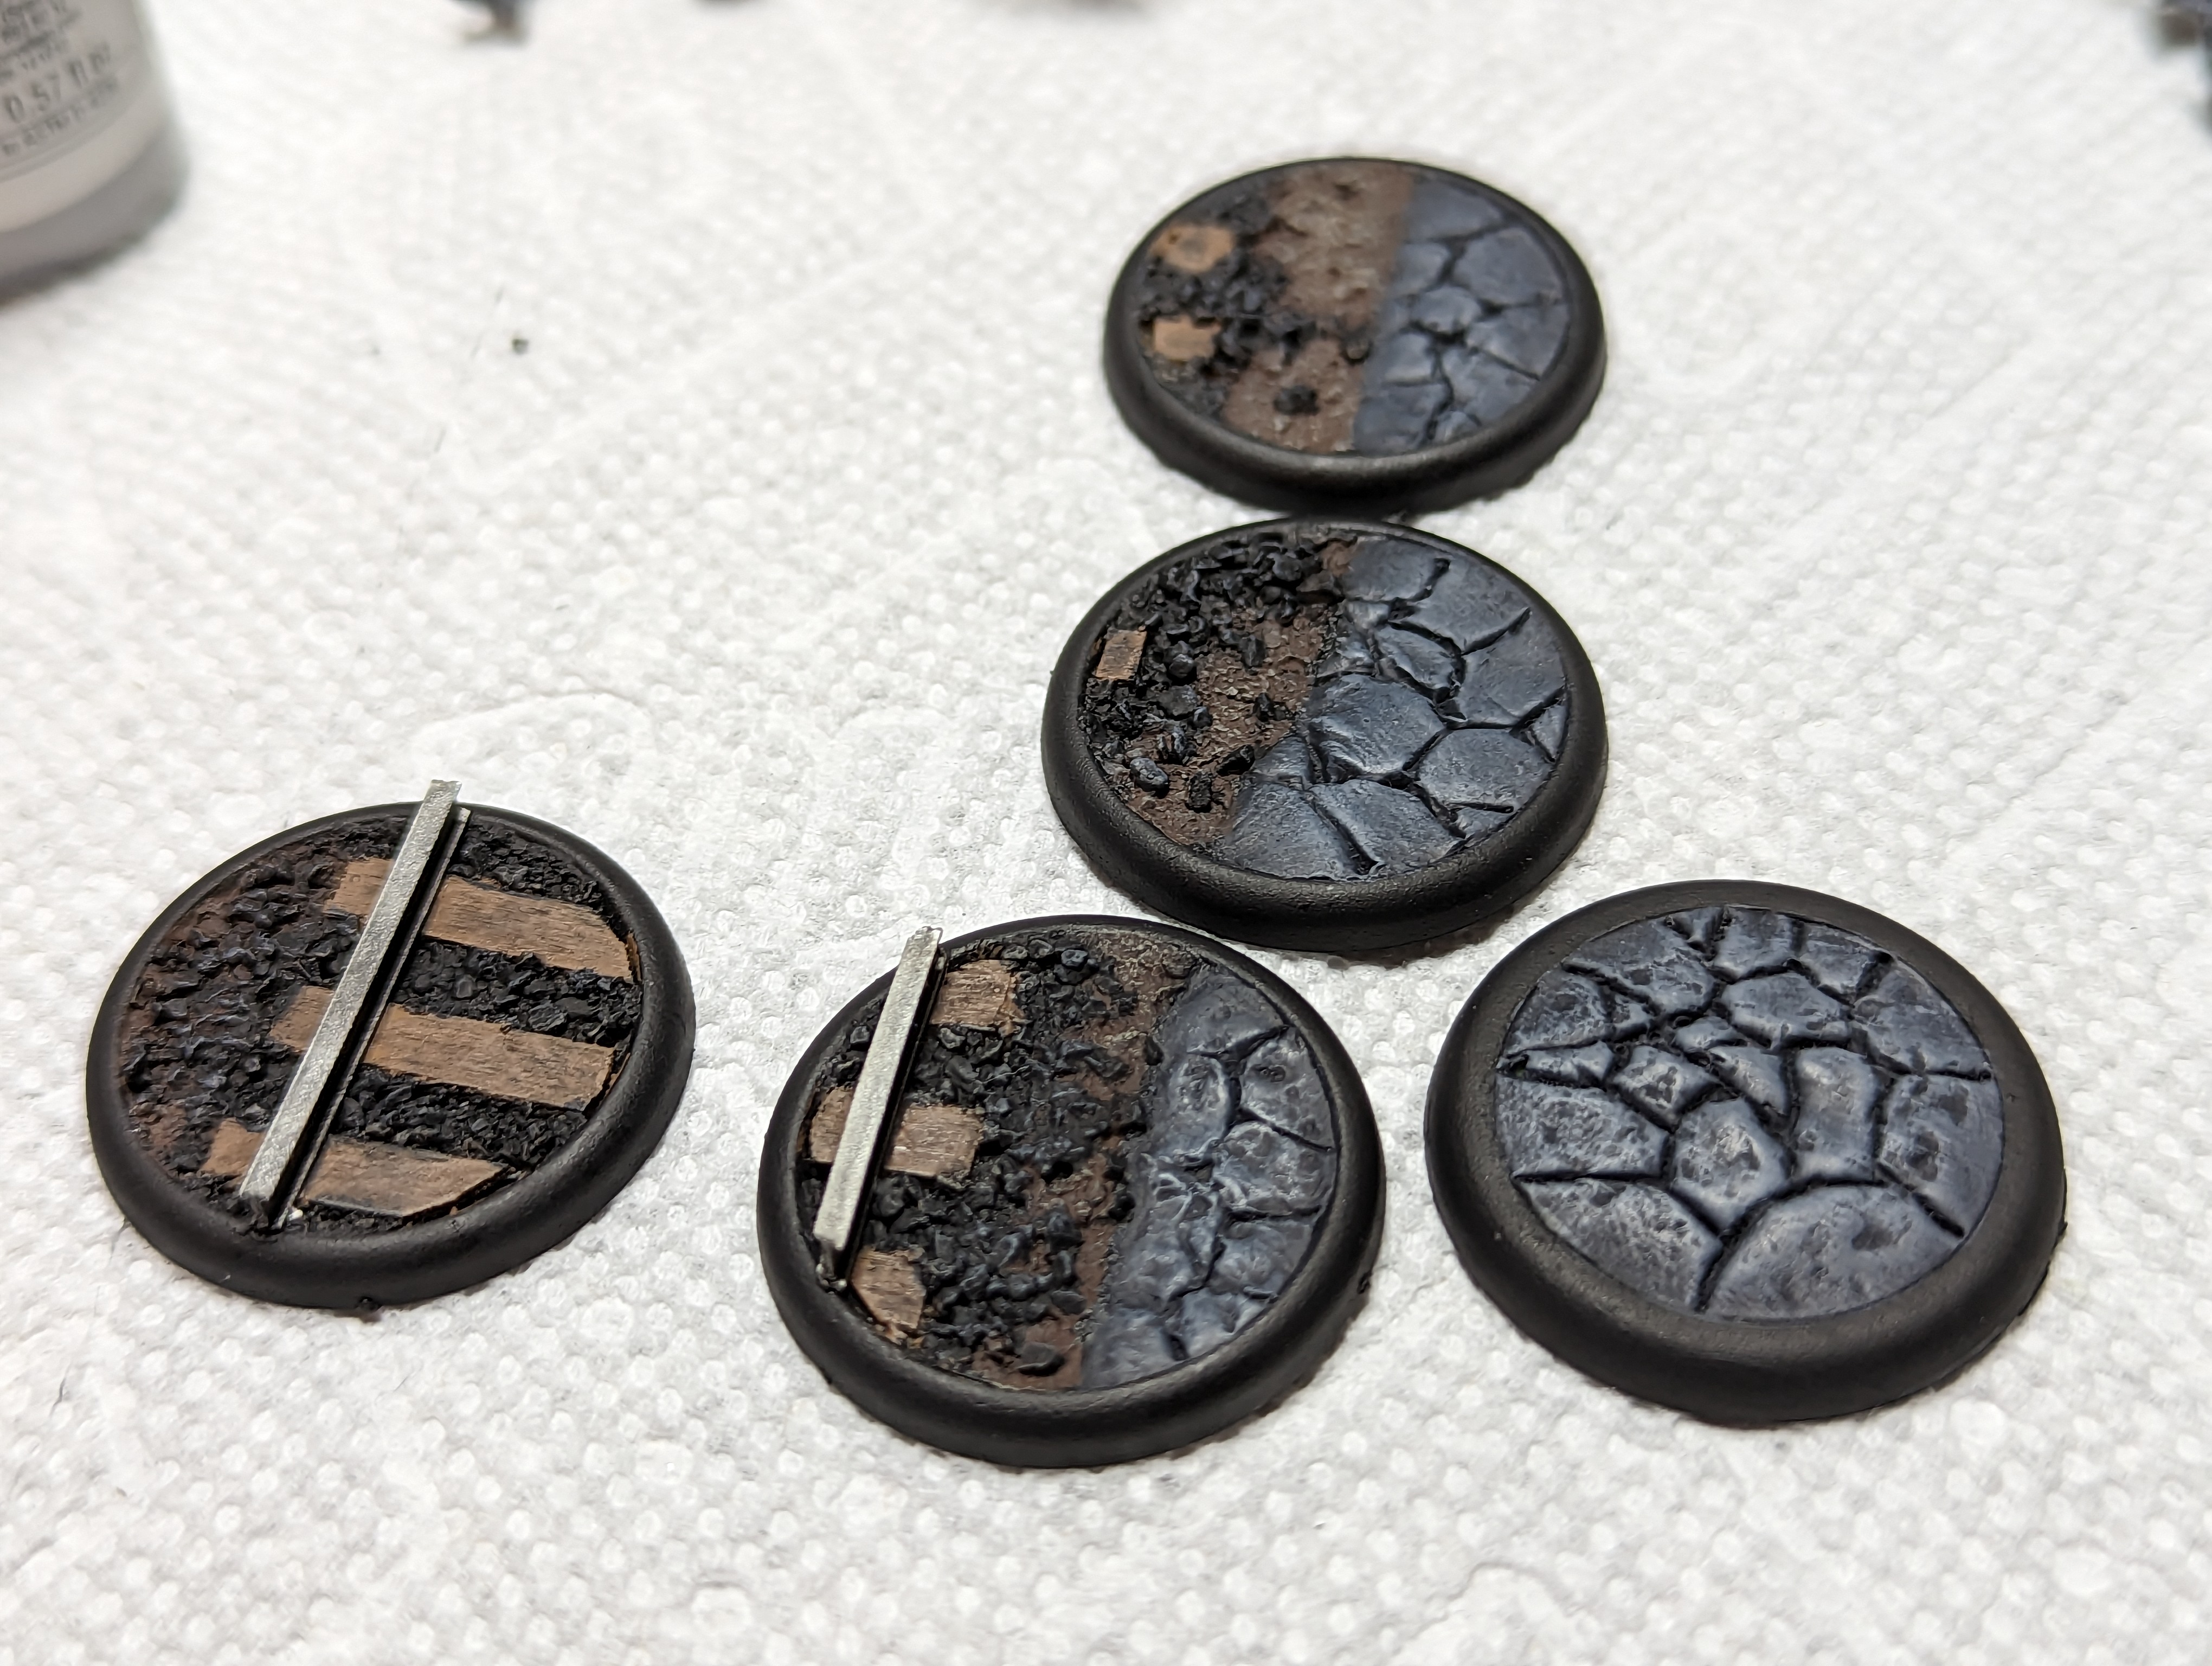
I primed everything black. For the cobbles, I based them in a dark gray, and then drybrushed up to a light gray. Its probably better to add more interesting colors to cobbles, but I need them to match the plain old ones, for now.
I did the rails in metallic, and the ties in a wood color, and hit them with a dark brown and a drybrush.
In my head, the rocks inside the rail tracks should be black. I did some research to figure out if this is a real thing, and I couldn’t find an explanation. I couldn’t even find many pictures where the rocks were black unless all of the rocks in the area were black. But thats how they look in my head, so thats how im gonna paint them. Sometimes, you have to paint to be representative, not realistic.
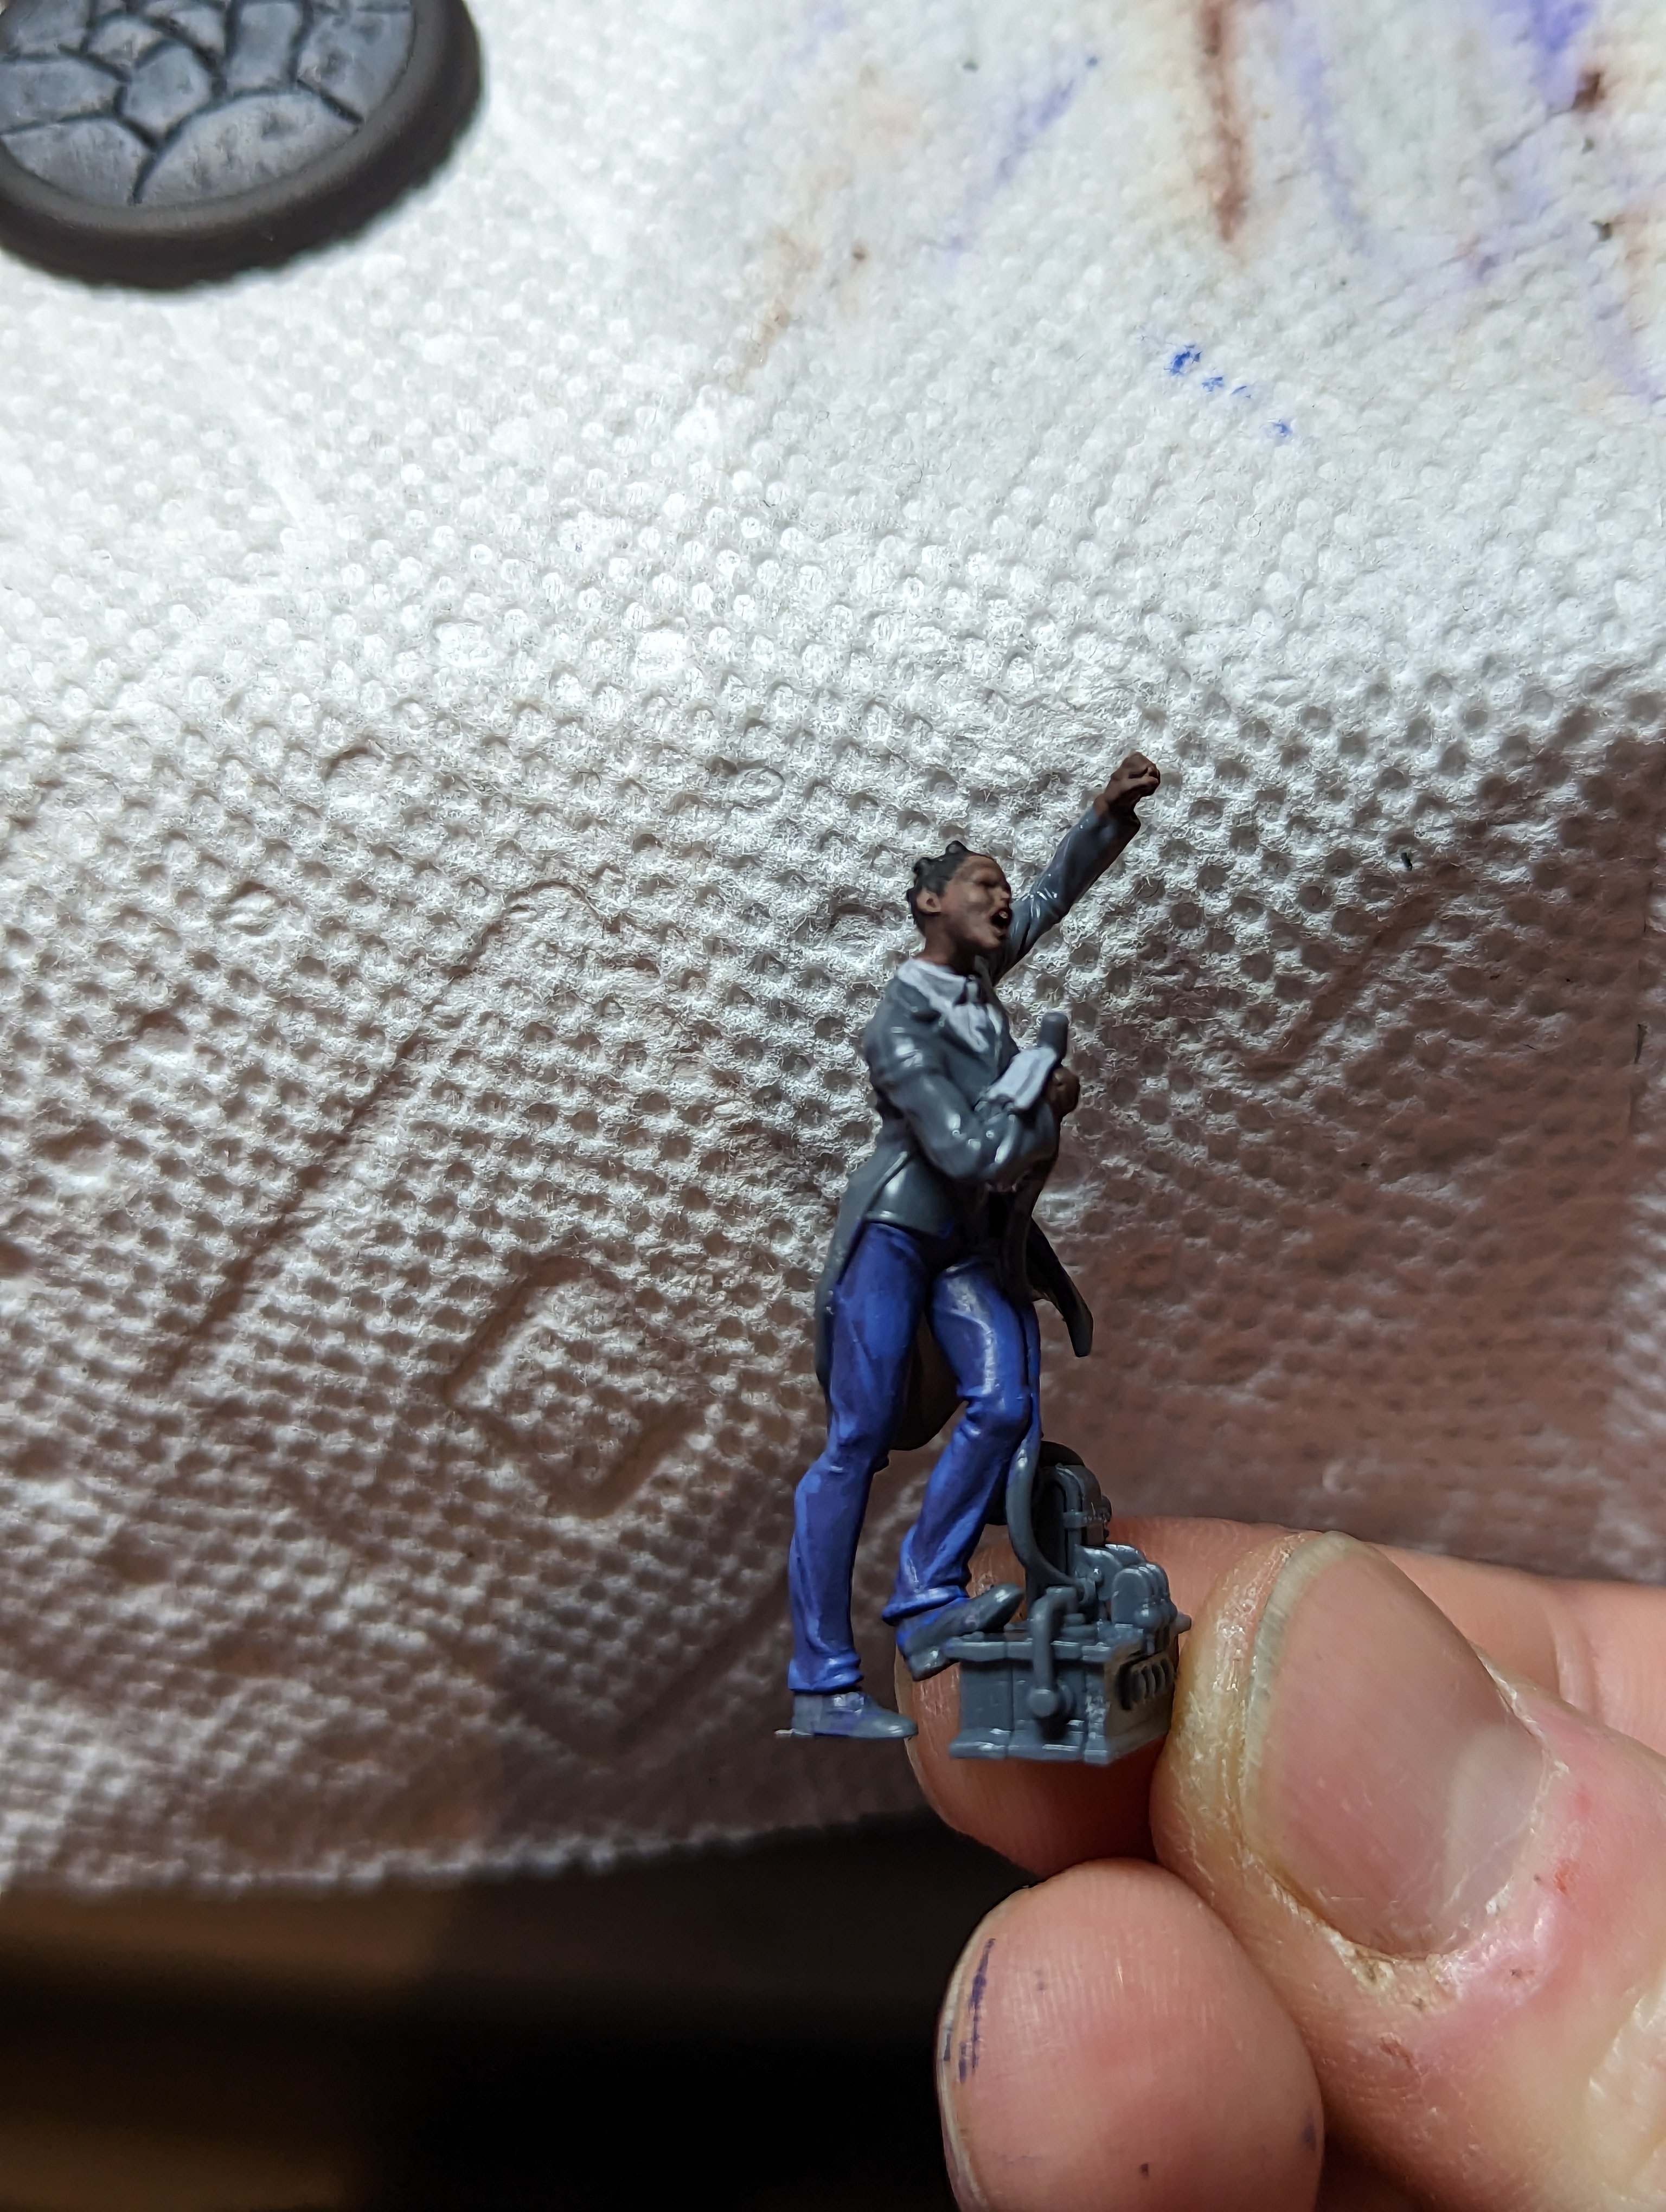

The paint scheme was pretty straightforward. The drudges have work clothes on, so I did some pretty heavy washes and light drybrushing to get a dark and worn look.
Im still bad at painting black skin in spite of the fact that ive gotten a lot of practice at this point. Its hard to capture the shininess of skin without making dark skin look pale. I try adding red into the mix to make it look more natural, but I still haven’t gotten it down.
Anya is looking all fancy and professional. Watch out, she will cut you.
I had to get these models done quick because I was getting ready for a tournament. Fun fact, I ended up only playing Toni’s original version, so I never touched any of these models.
Also fun fact, Anya has never really showed up in the Malifaux story, so I have not made a video on her yet. Hopefully one day soon. But Toni’s story is one of the best, so check it out.
You've got lore
I totally forgot to include the lore videos for the last 2 masters. I’m bad at youtube.
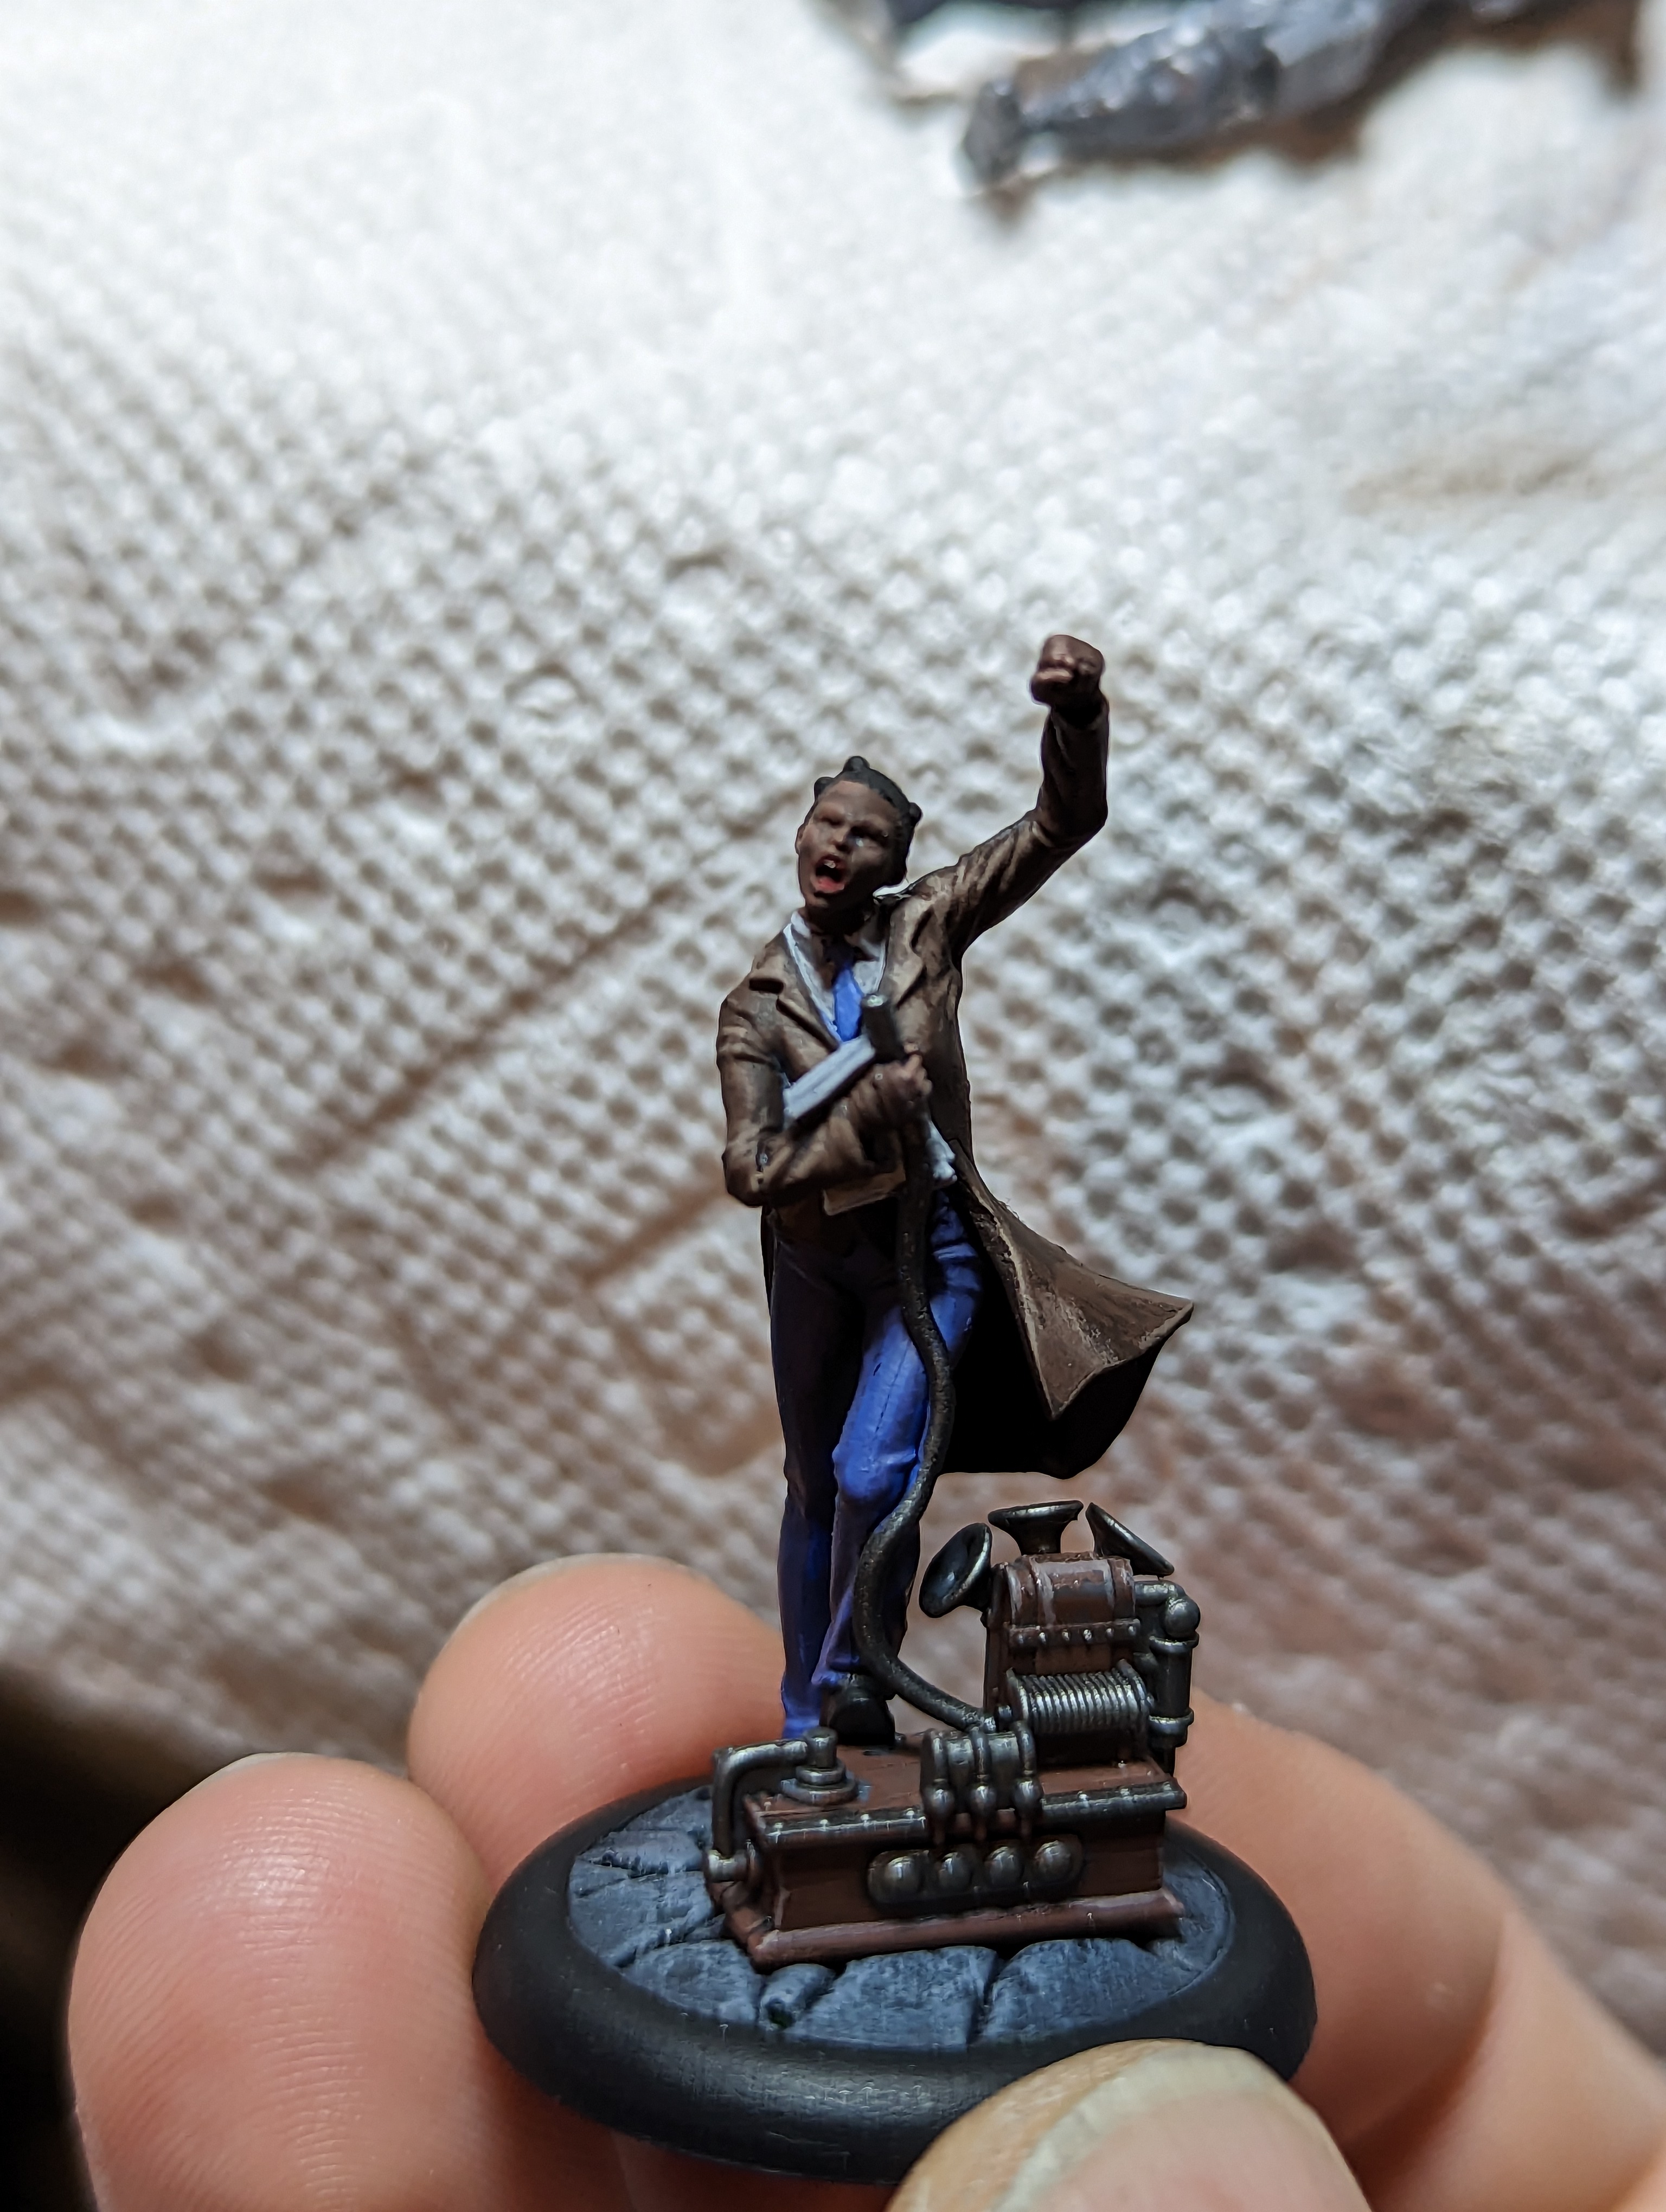
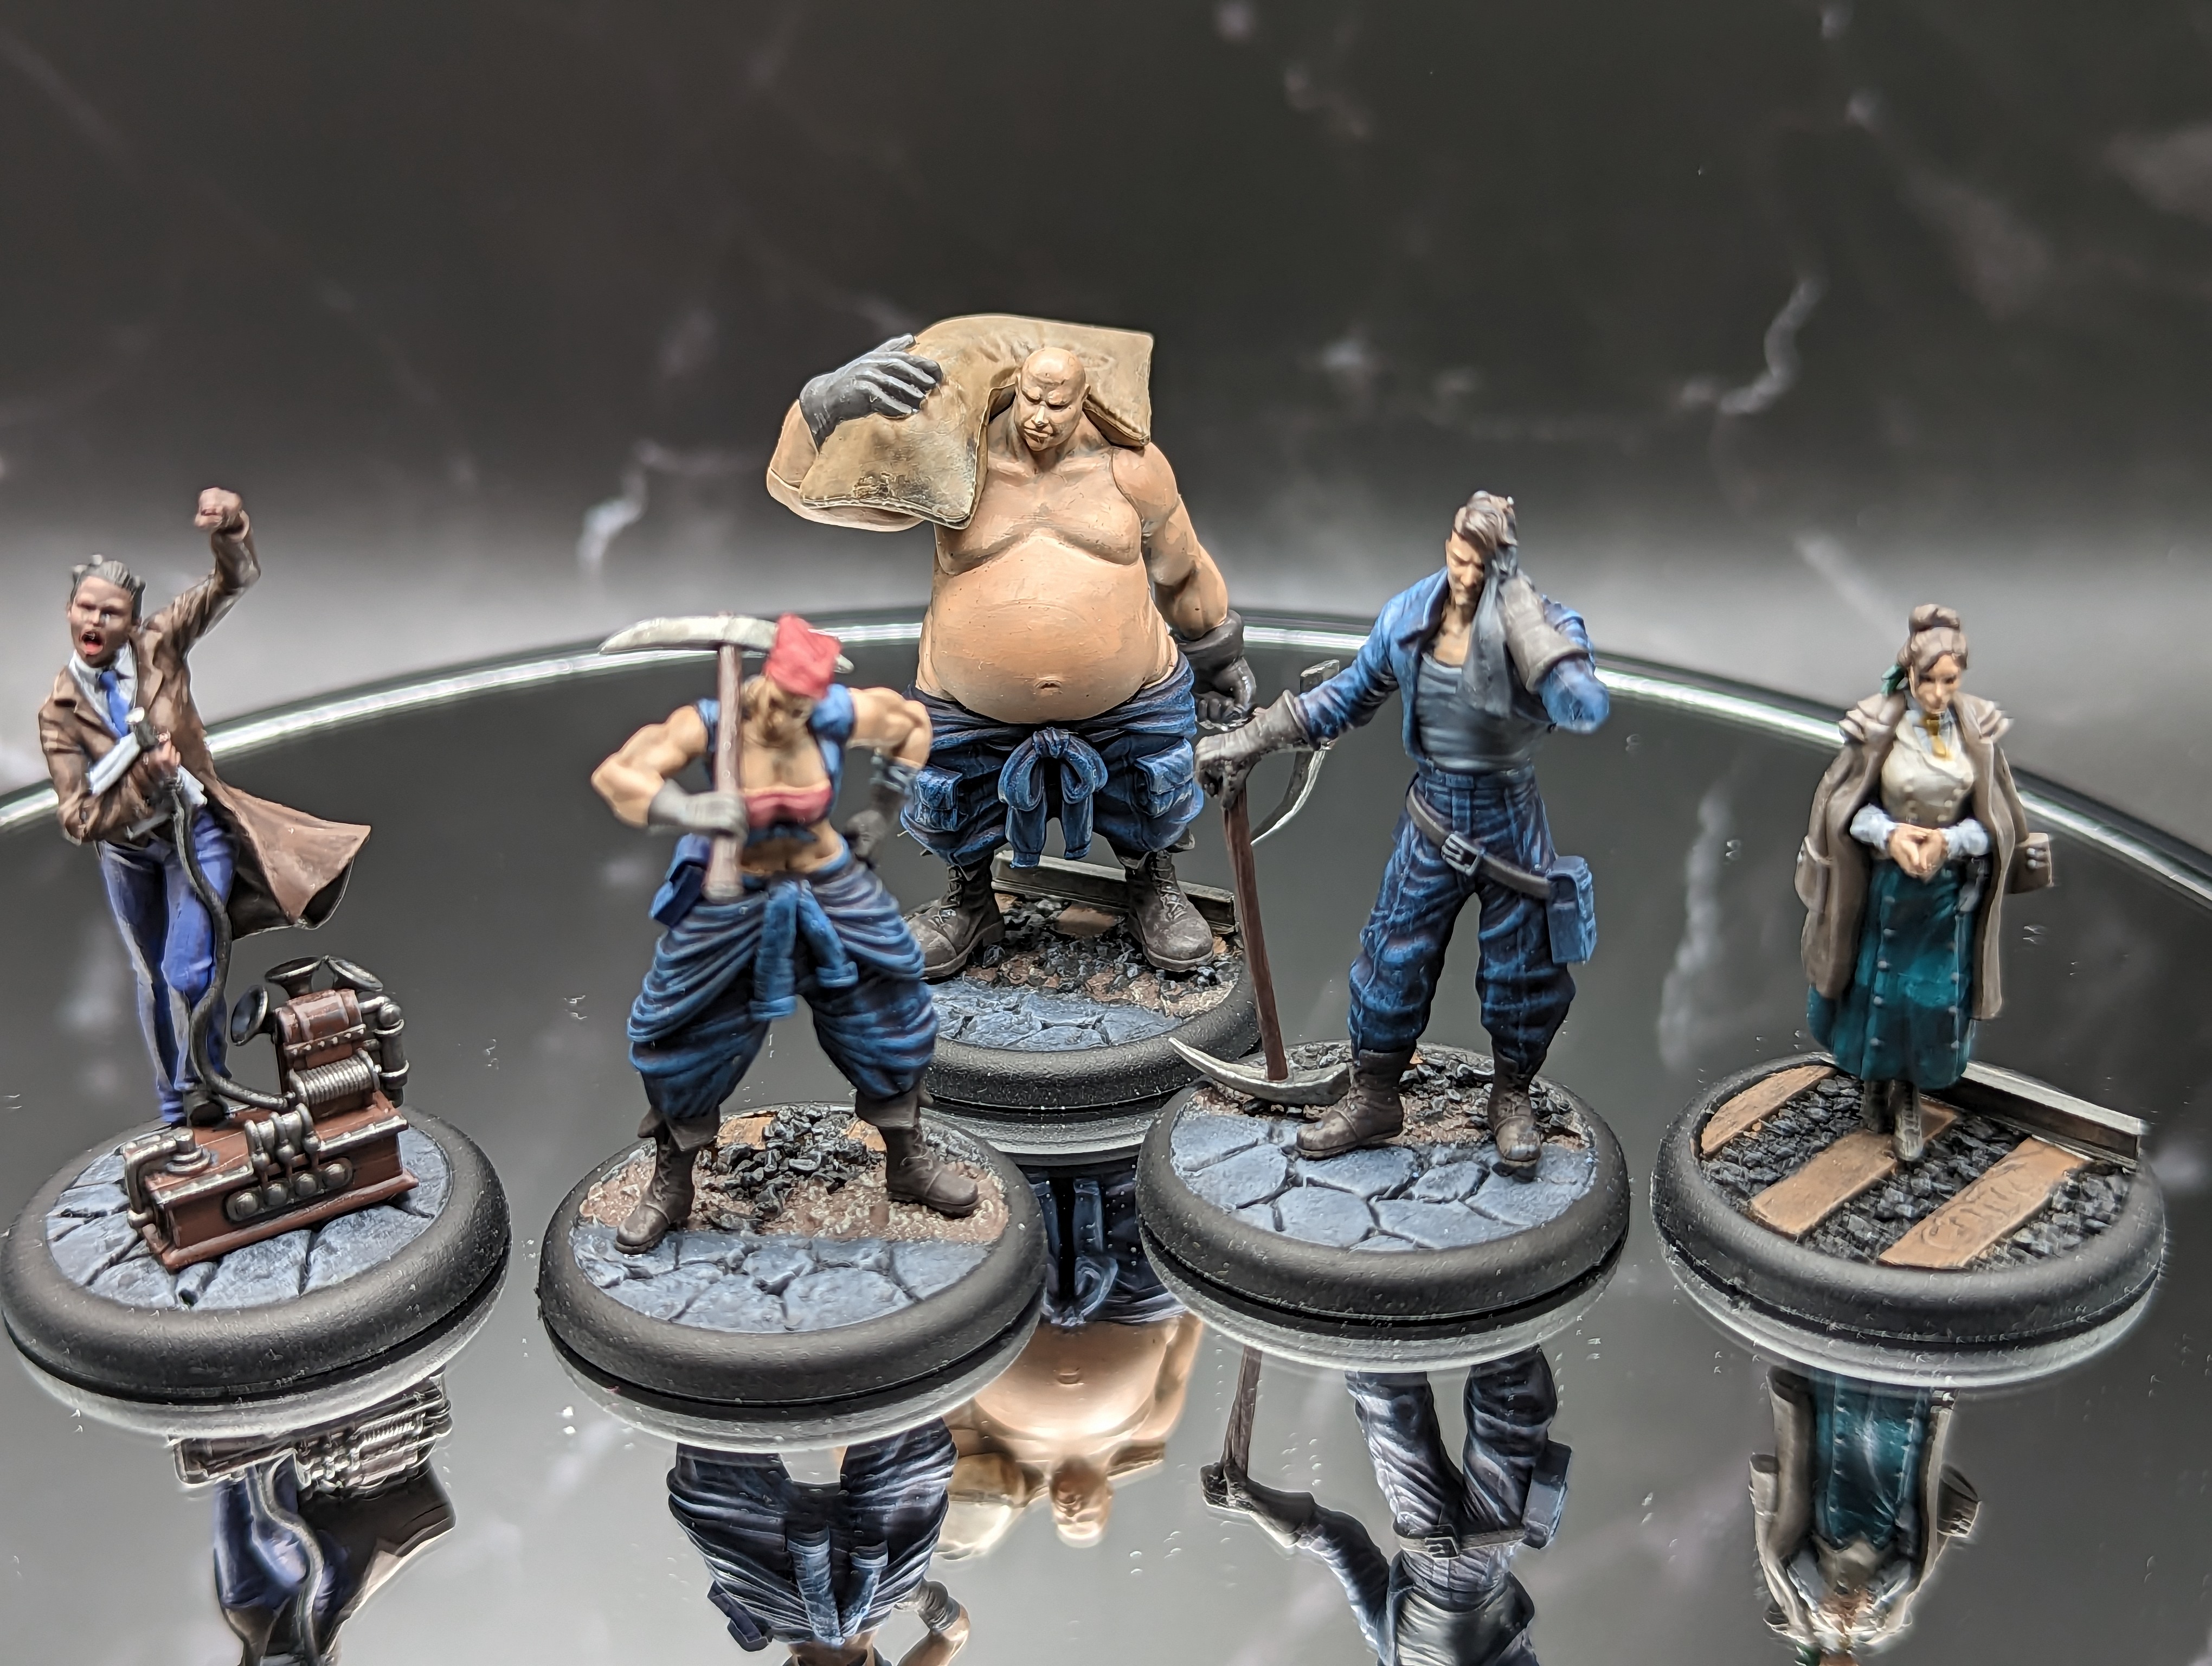
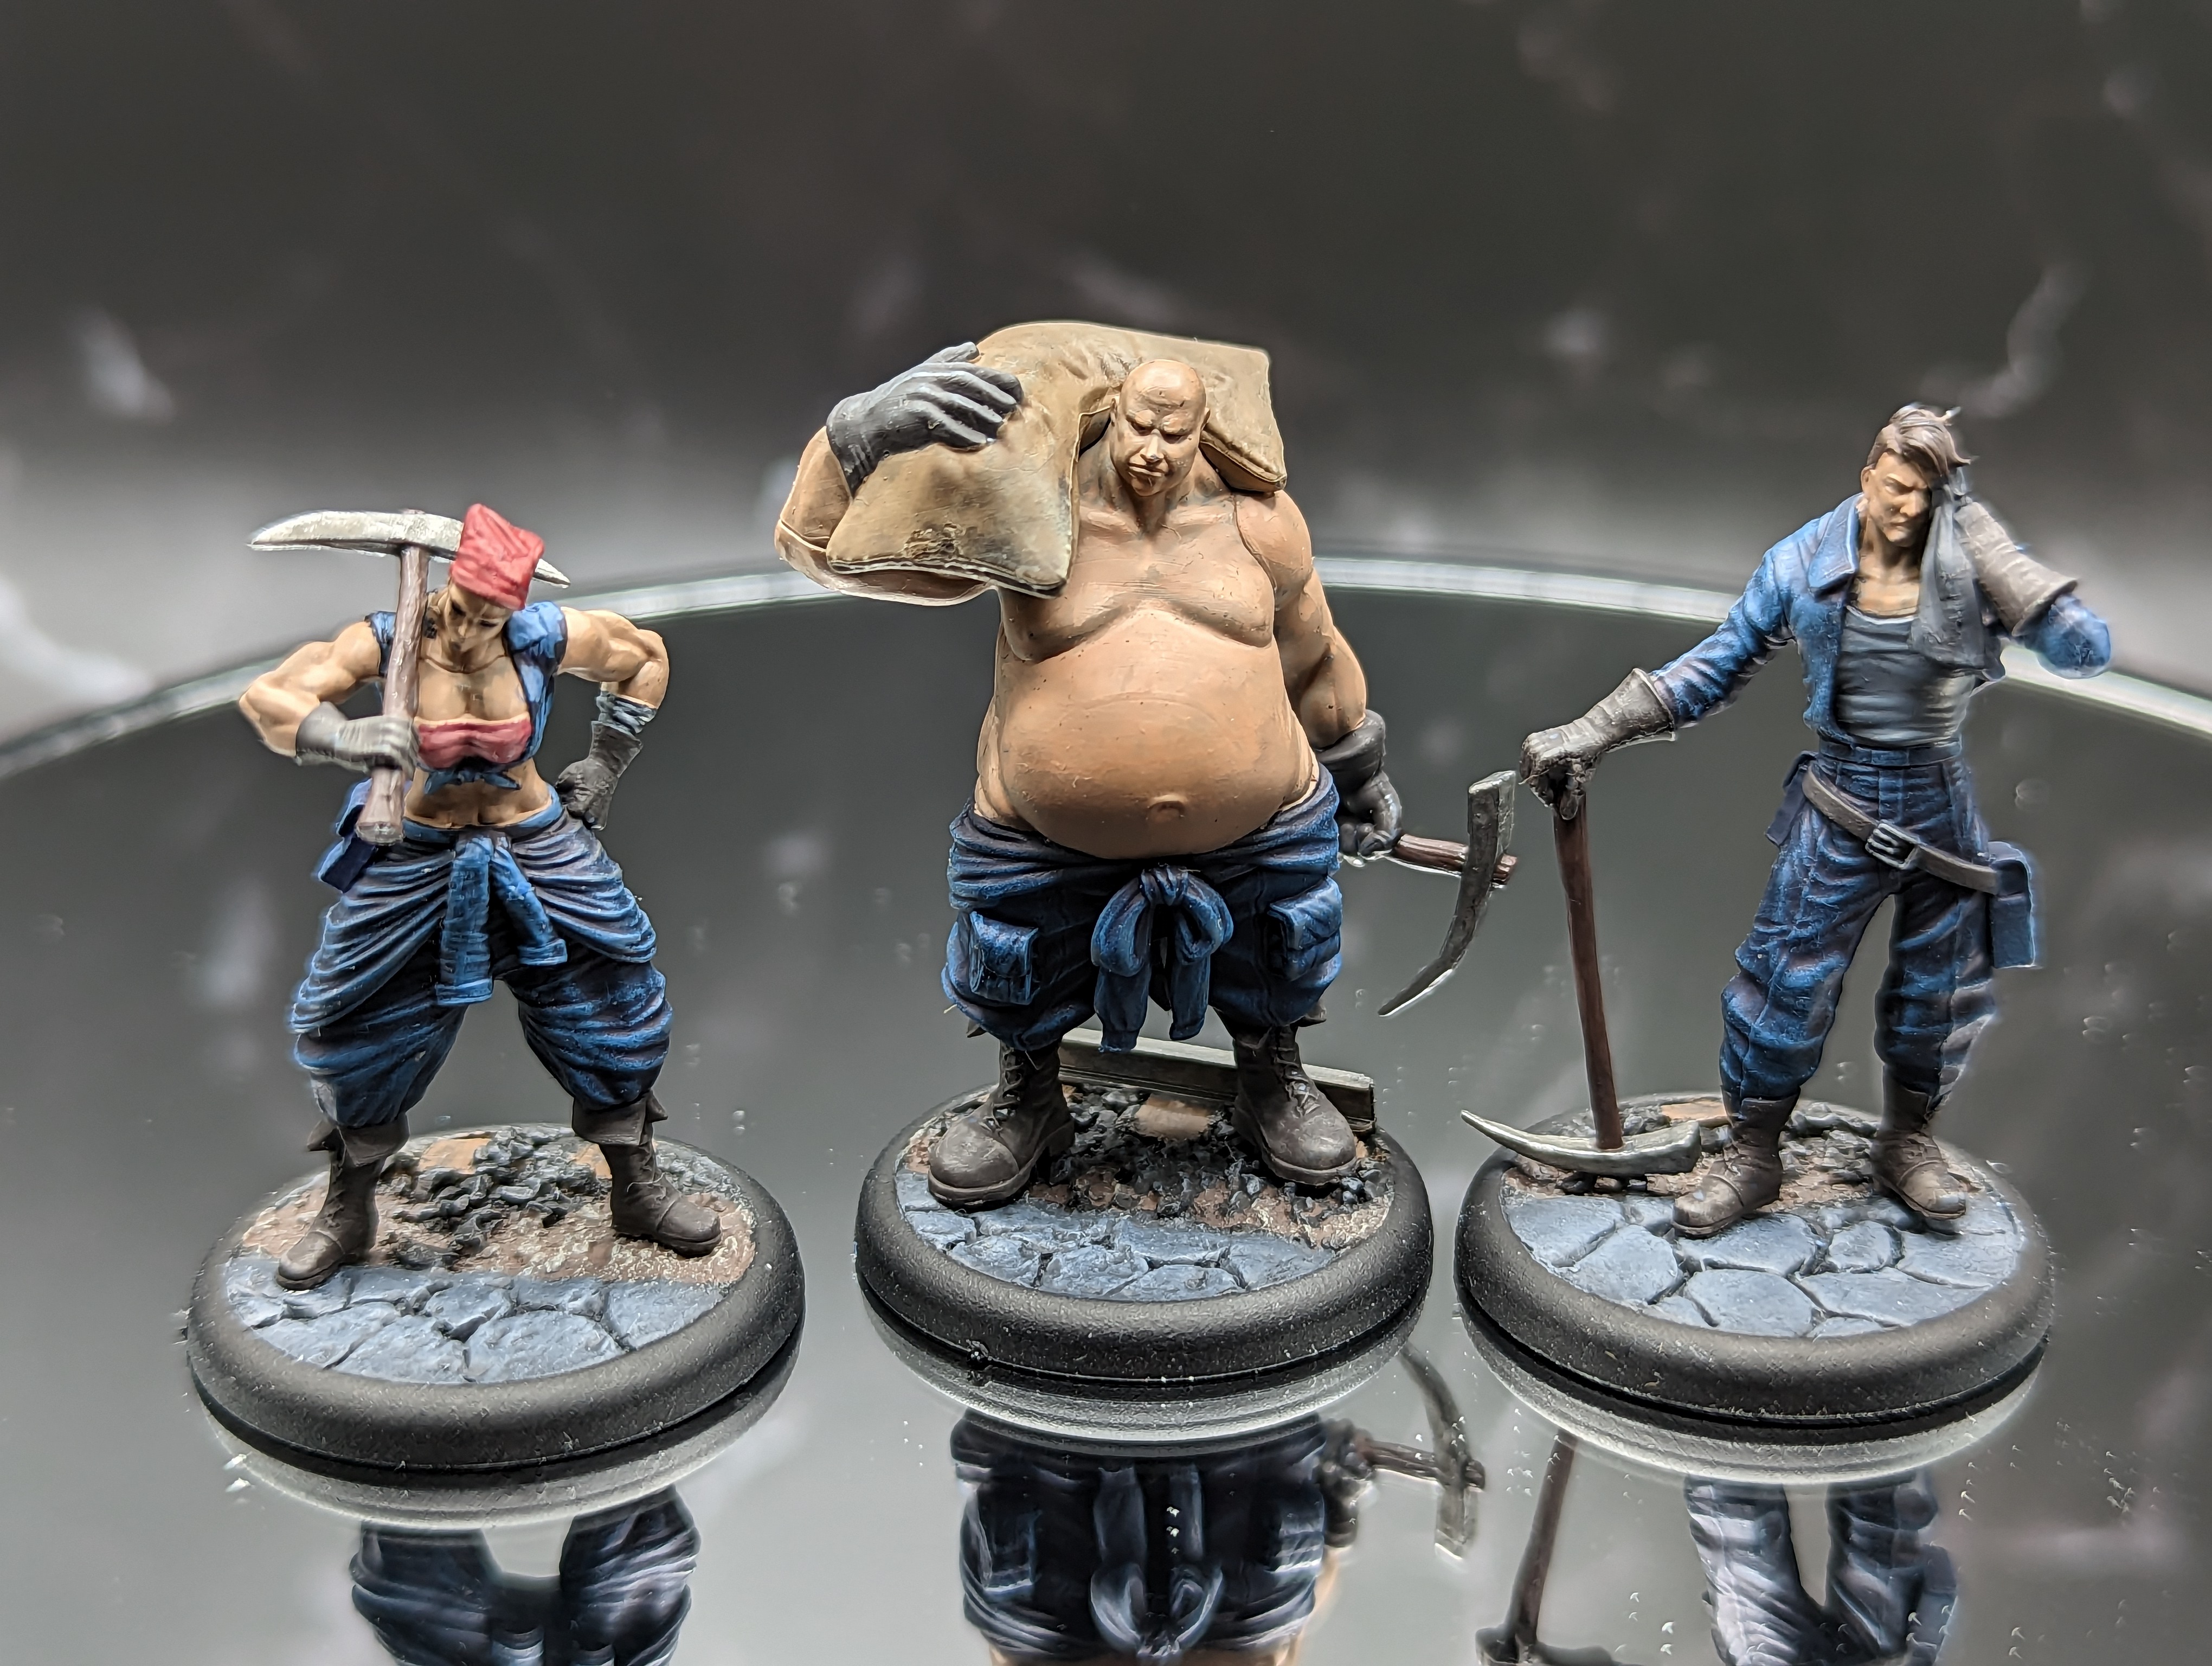
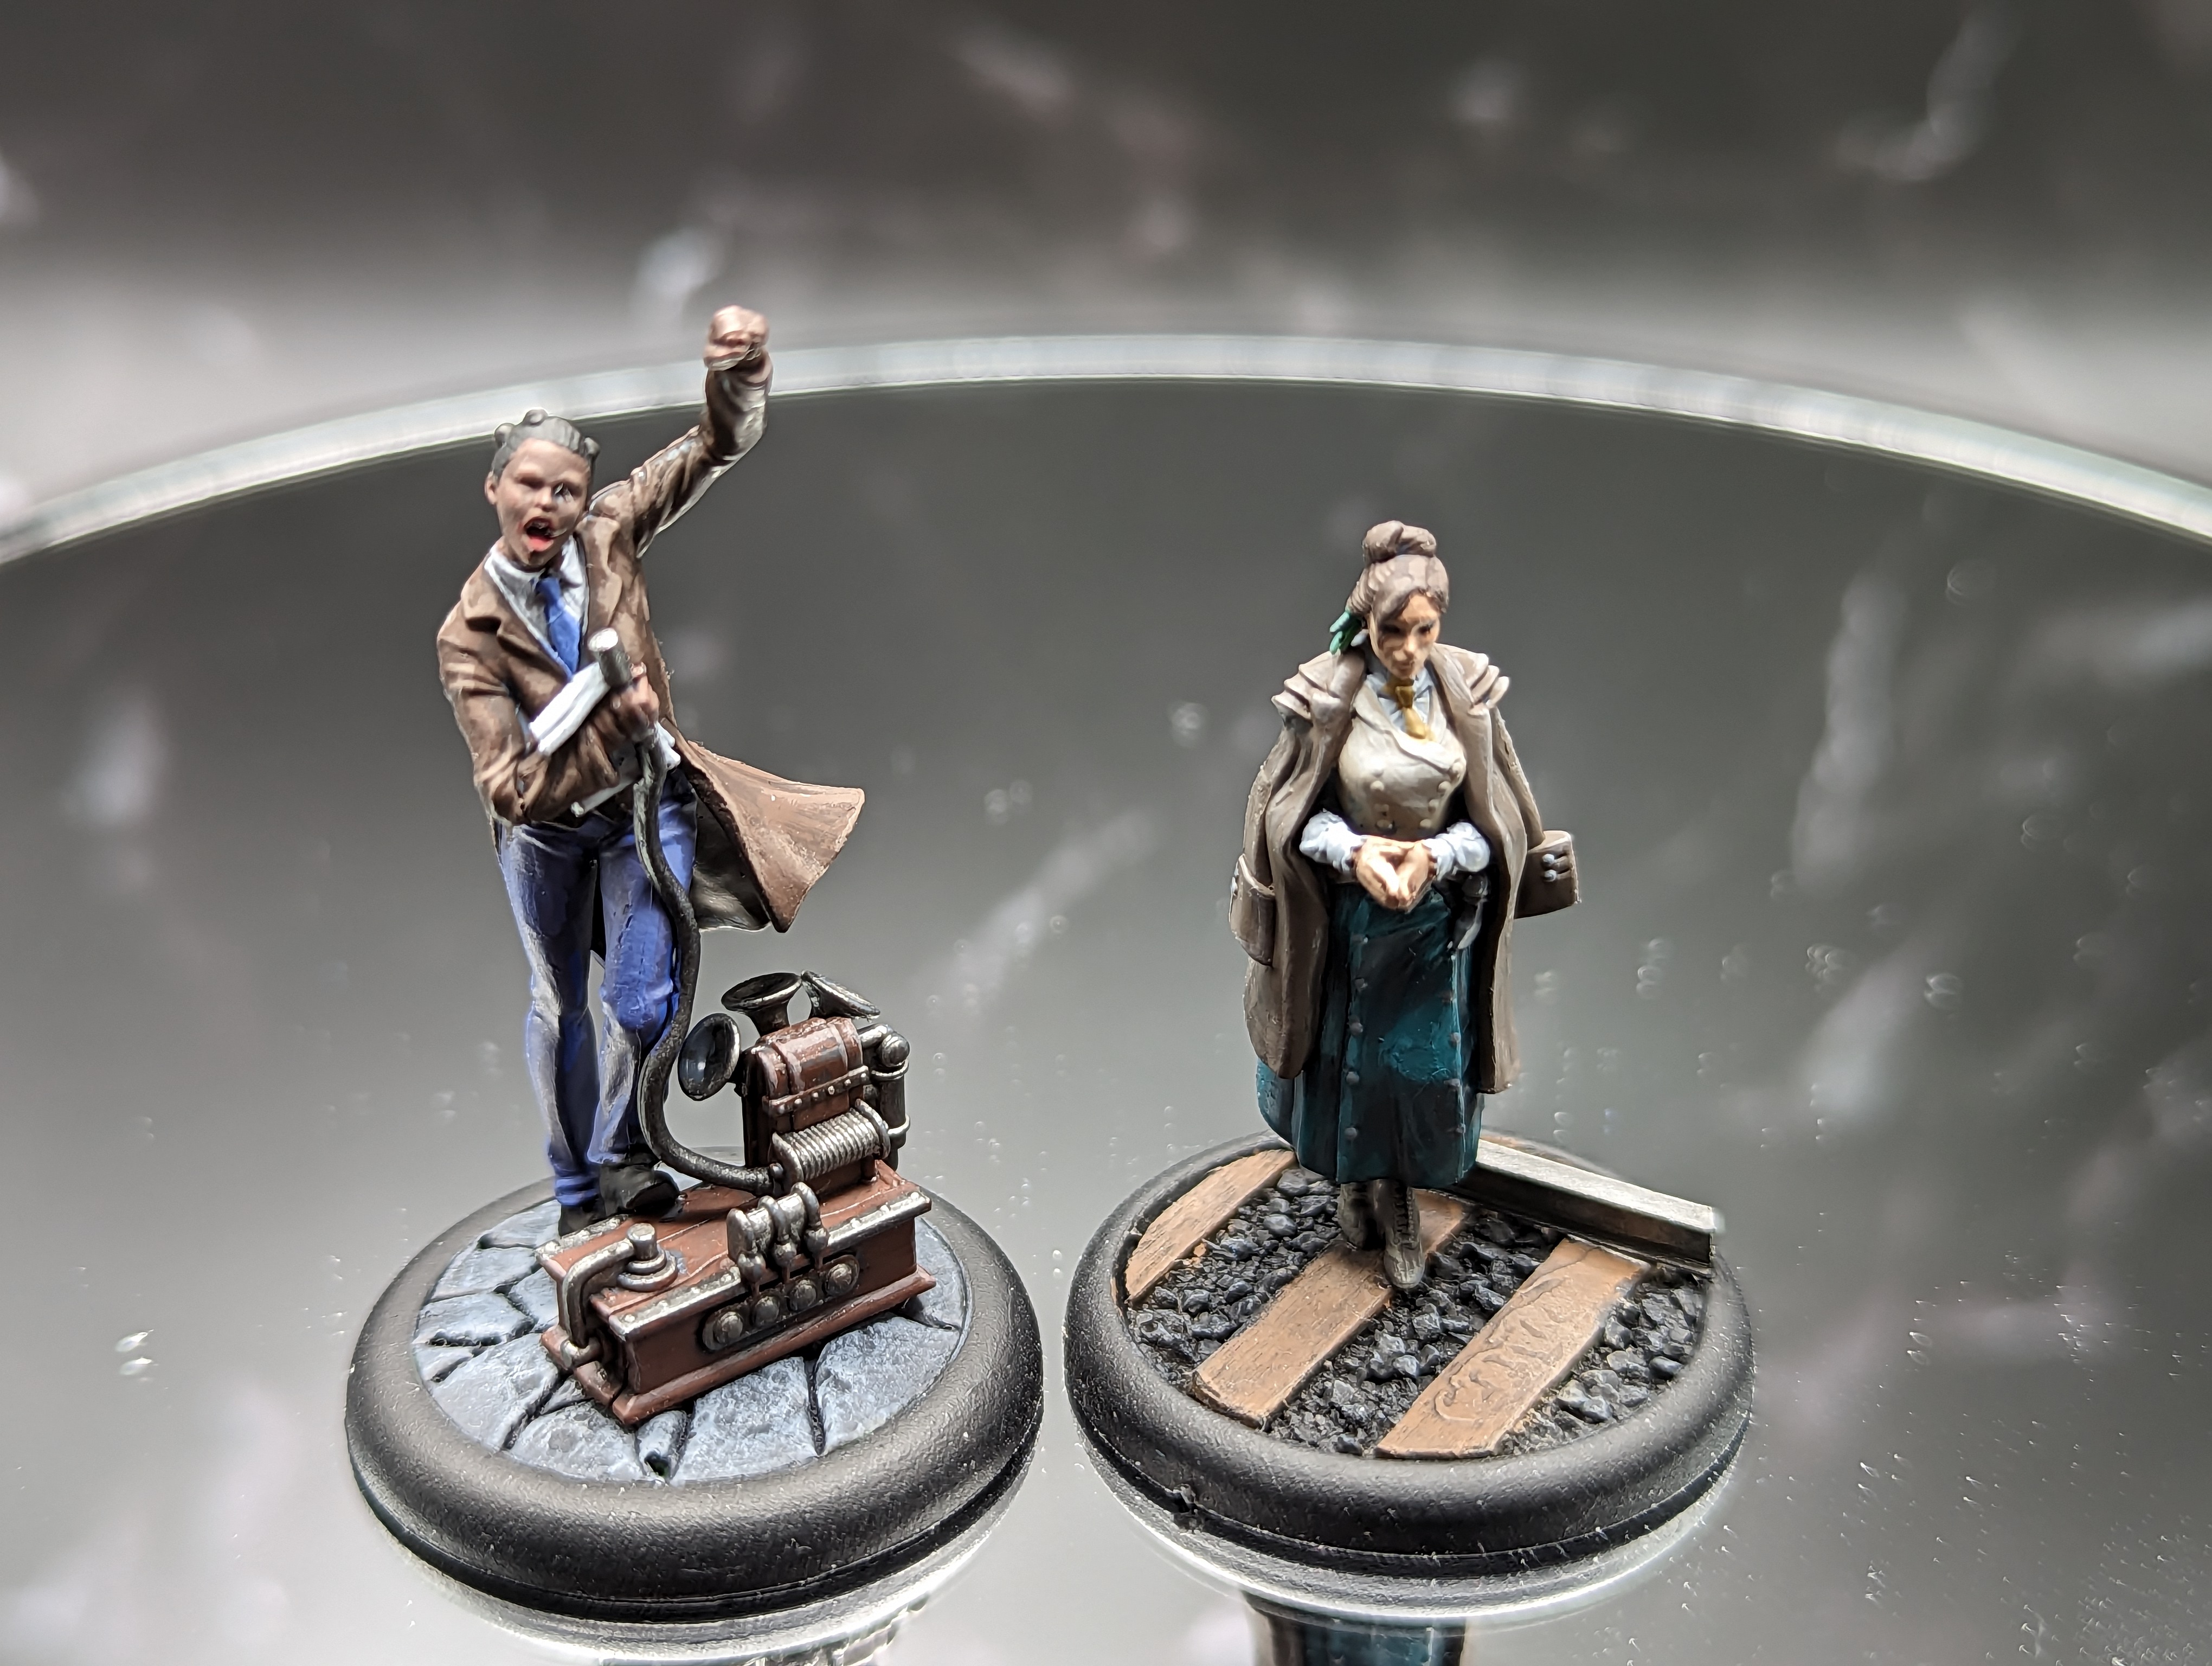
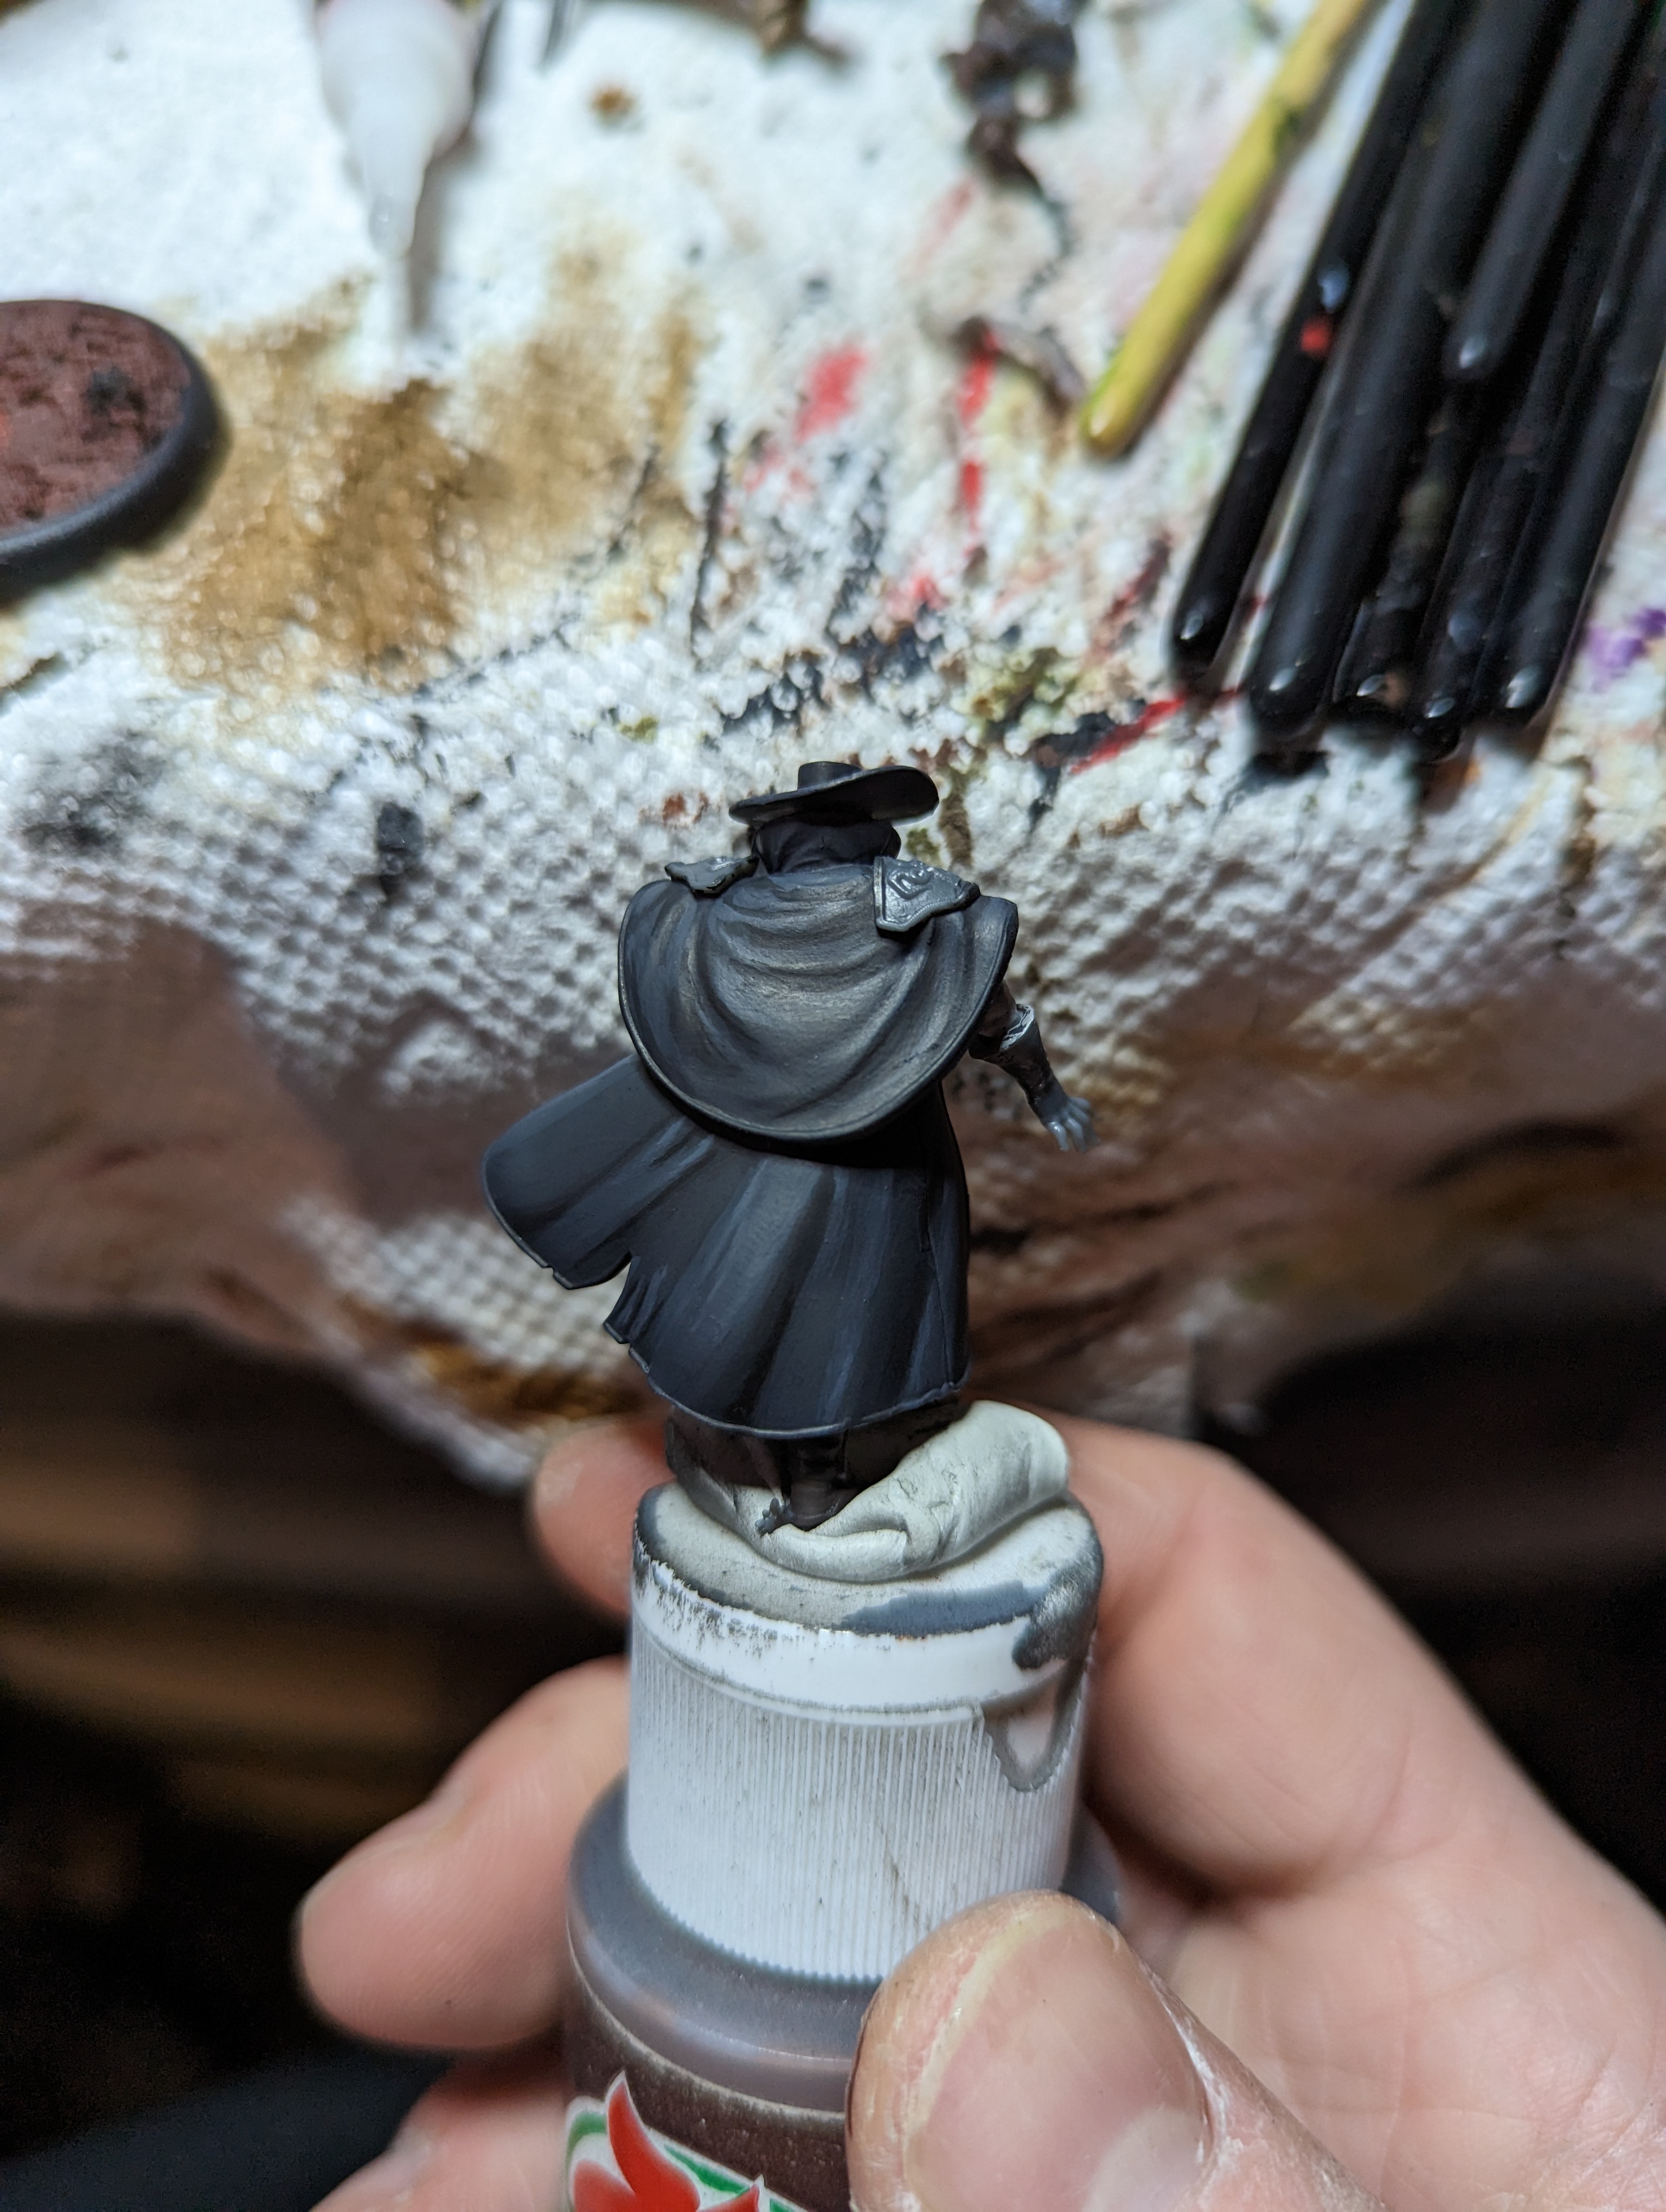
Cops and Robbers
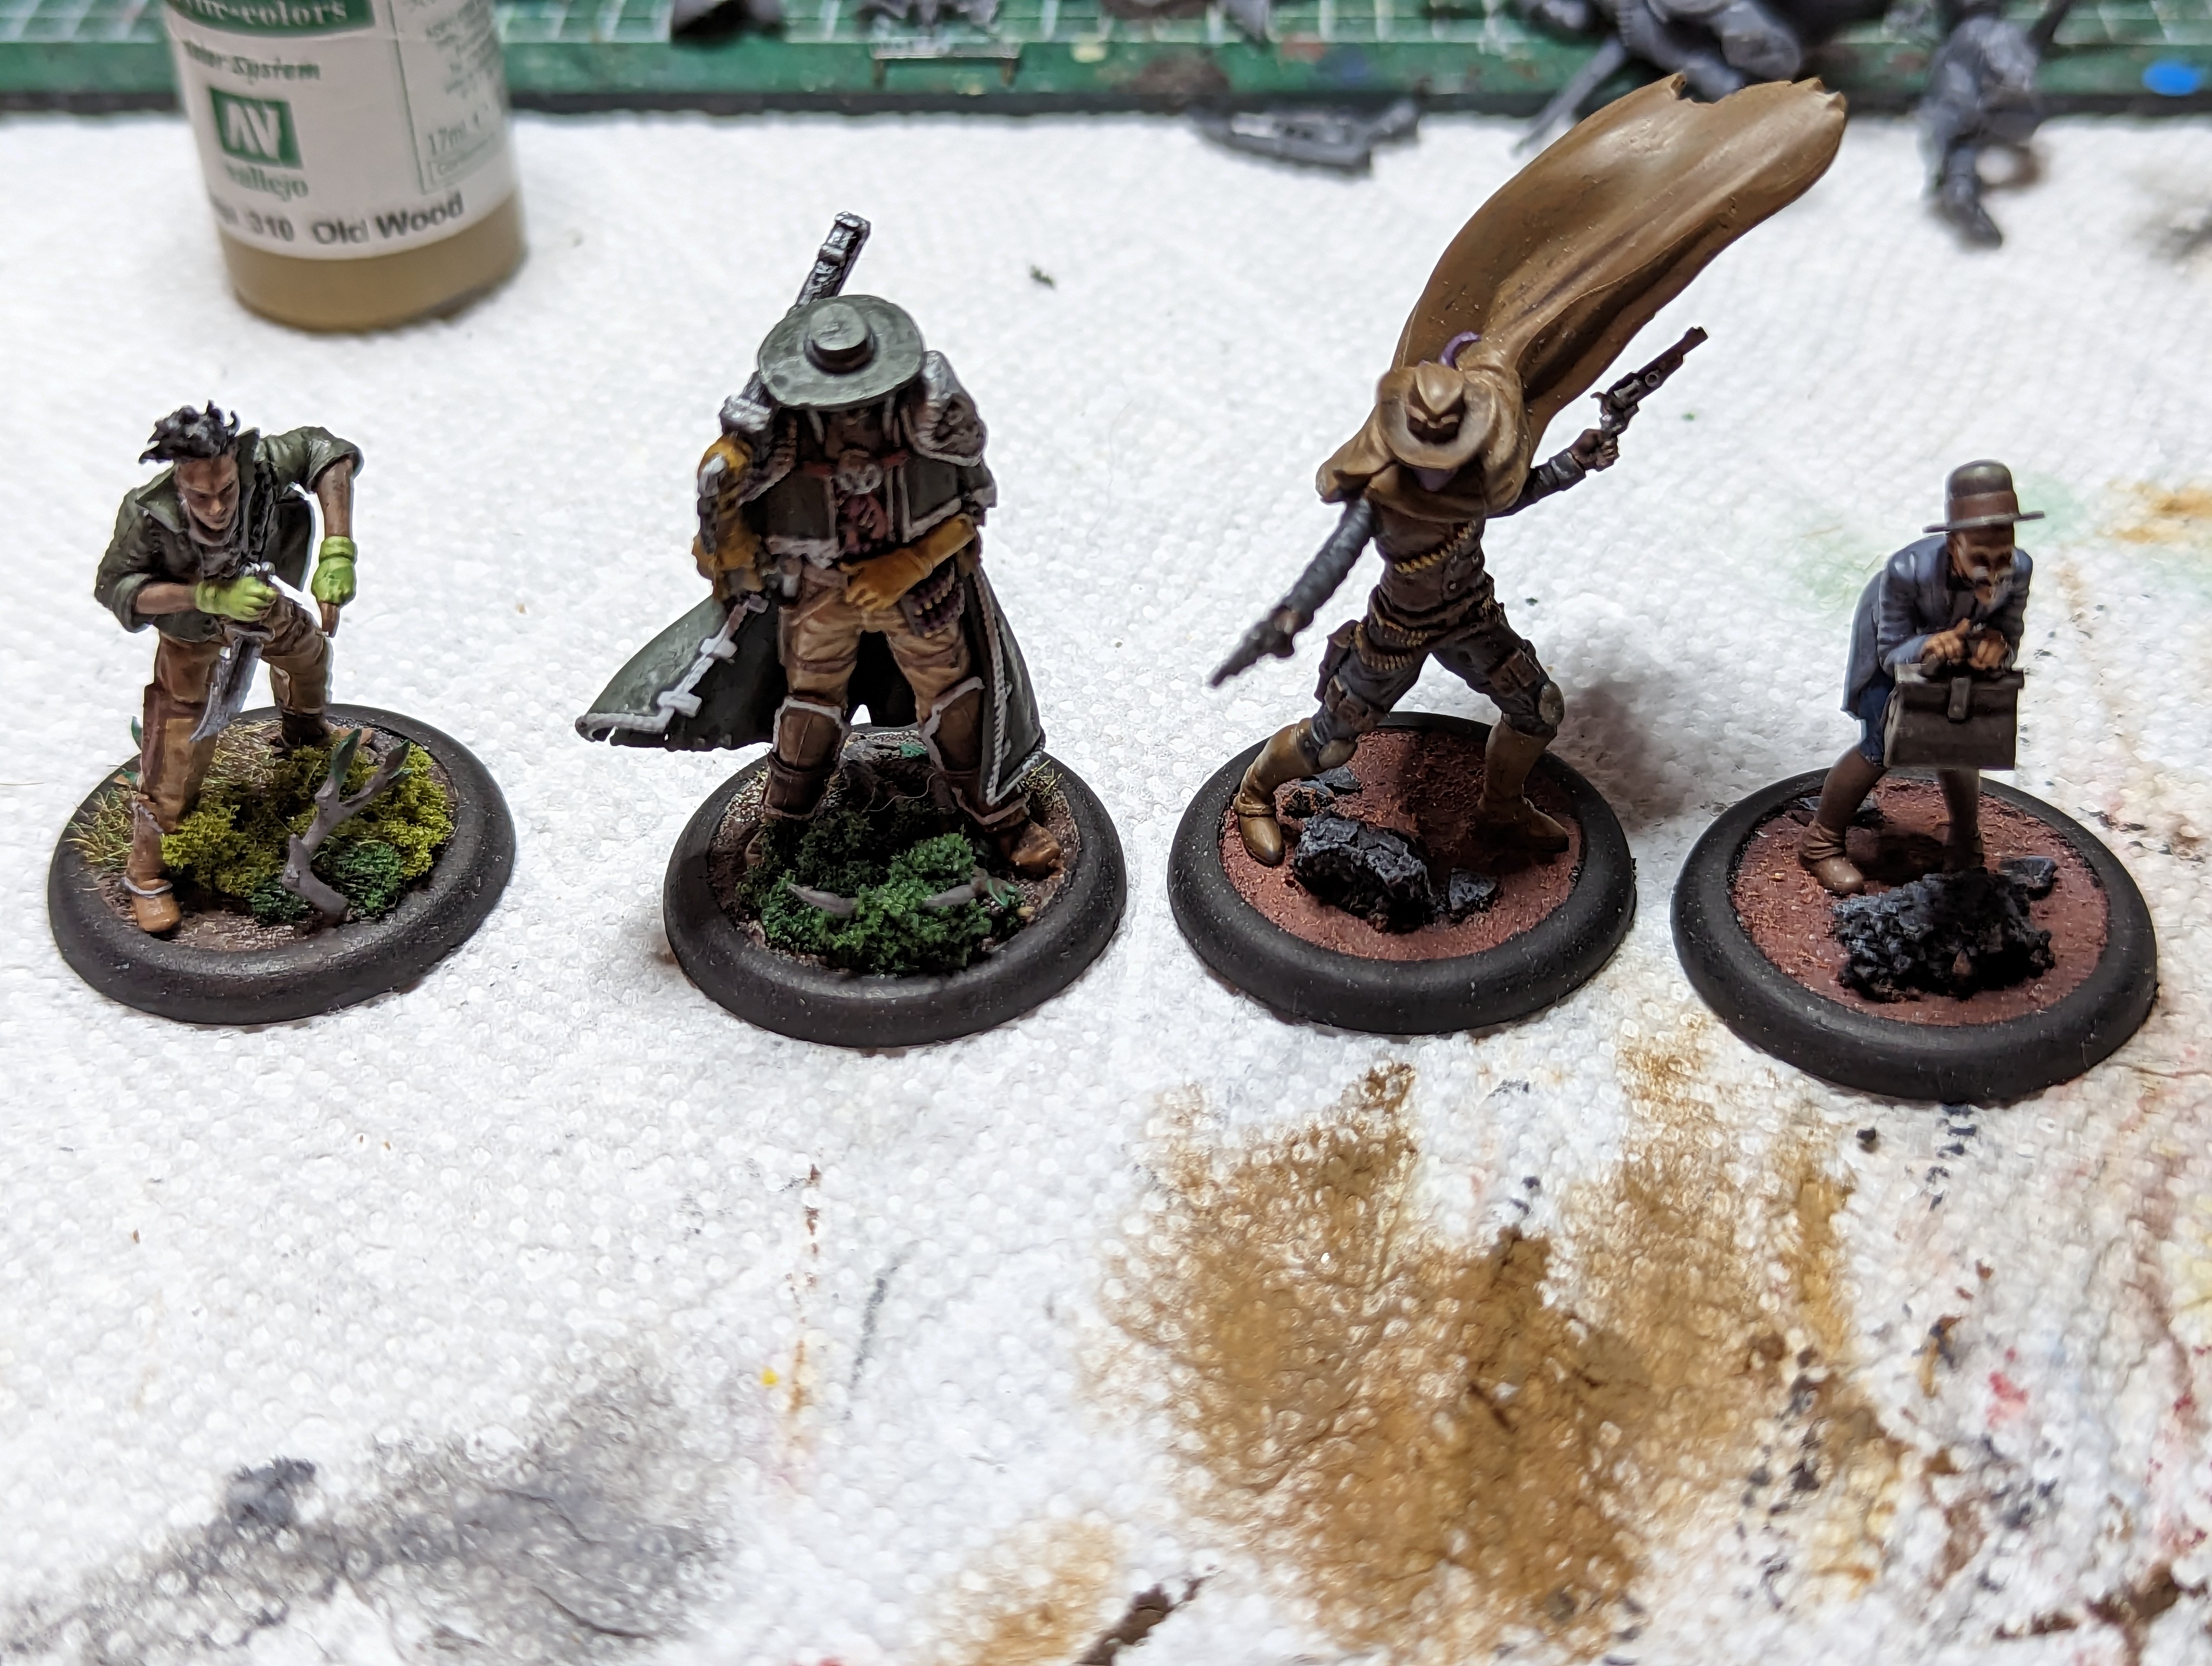
Next up we are tackling Basse and Parker, along with Parkers sister Pearl who has infiltrated Basses posse.
My Basse crew is done up with grassy and overgrown bases. The models int he crew focus on being able to move through difficult terrain, so it made some sense to base him this way.
Parker is on a reddish desert based with rocks. The big story Parker is featured in sees the crew moving through the badlands and the dirt is described as reddish, so I thought it would make an interesting basing scheme.
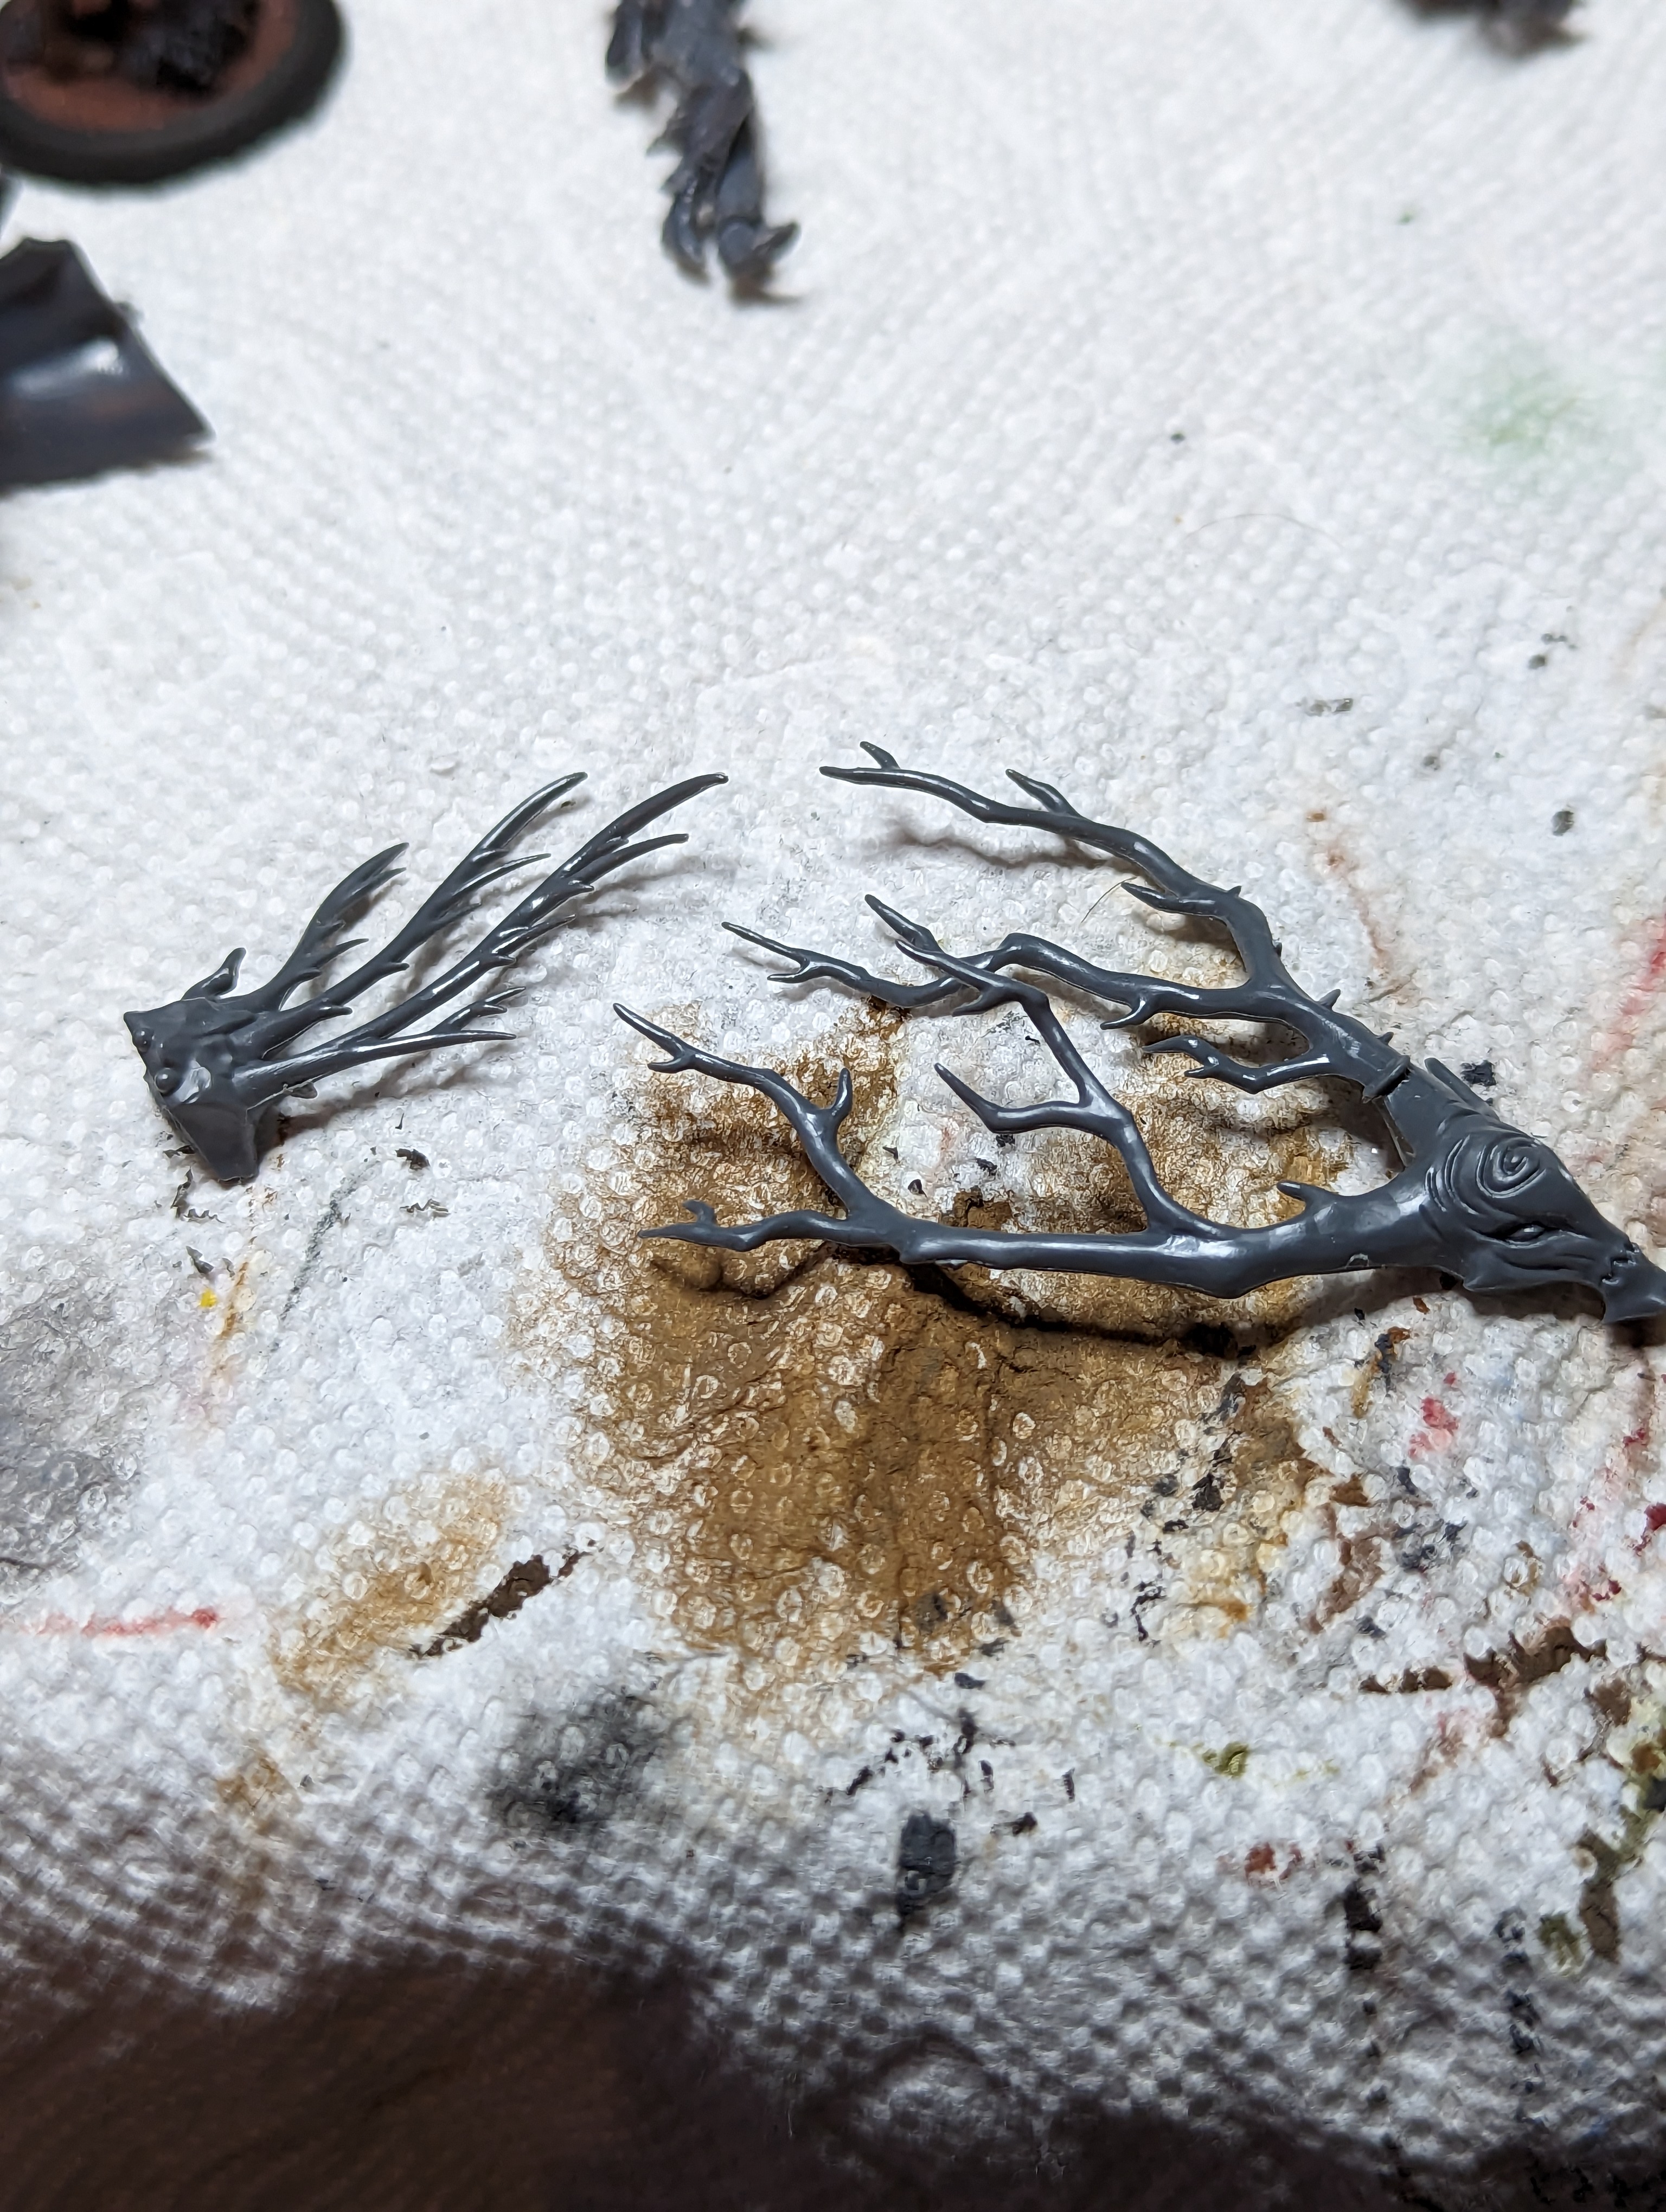
For the Basse base (lol) I used some of these extra bits from a sylvaneth army to make some little shrubs and bushes. I just cut little pieces off and glued them to the base, before applying dirt.
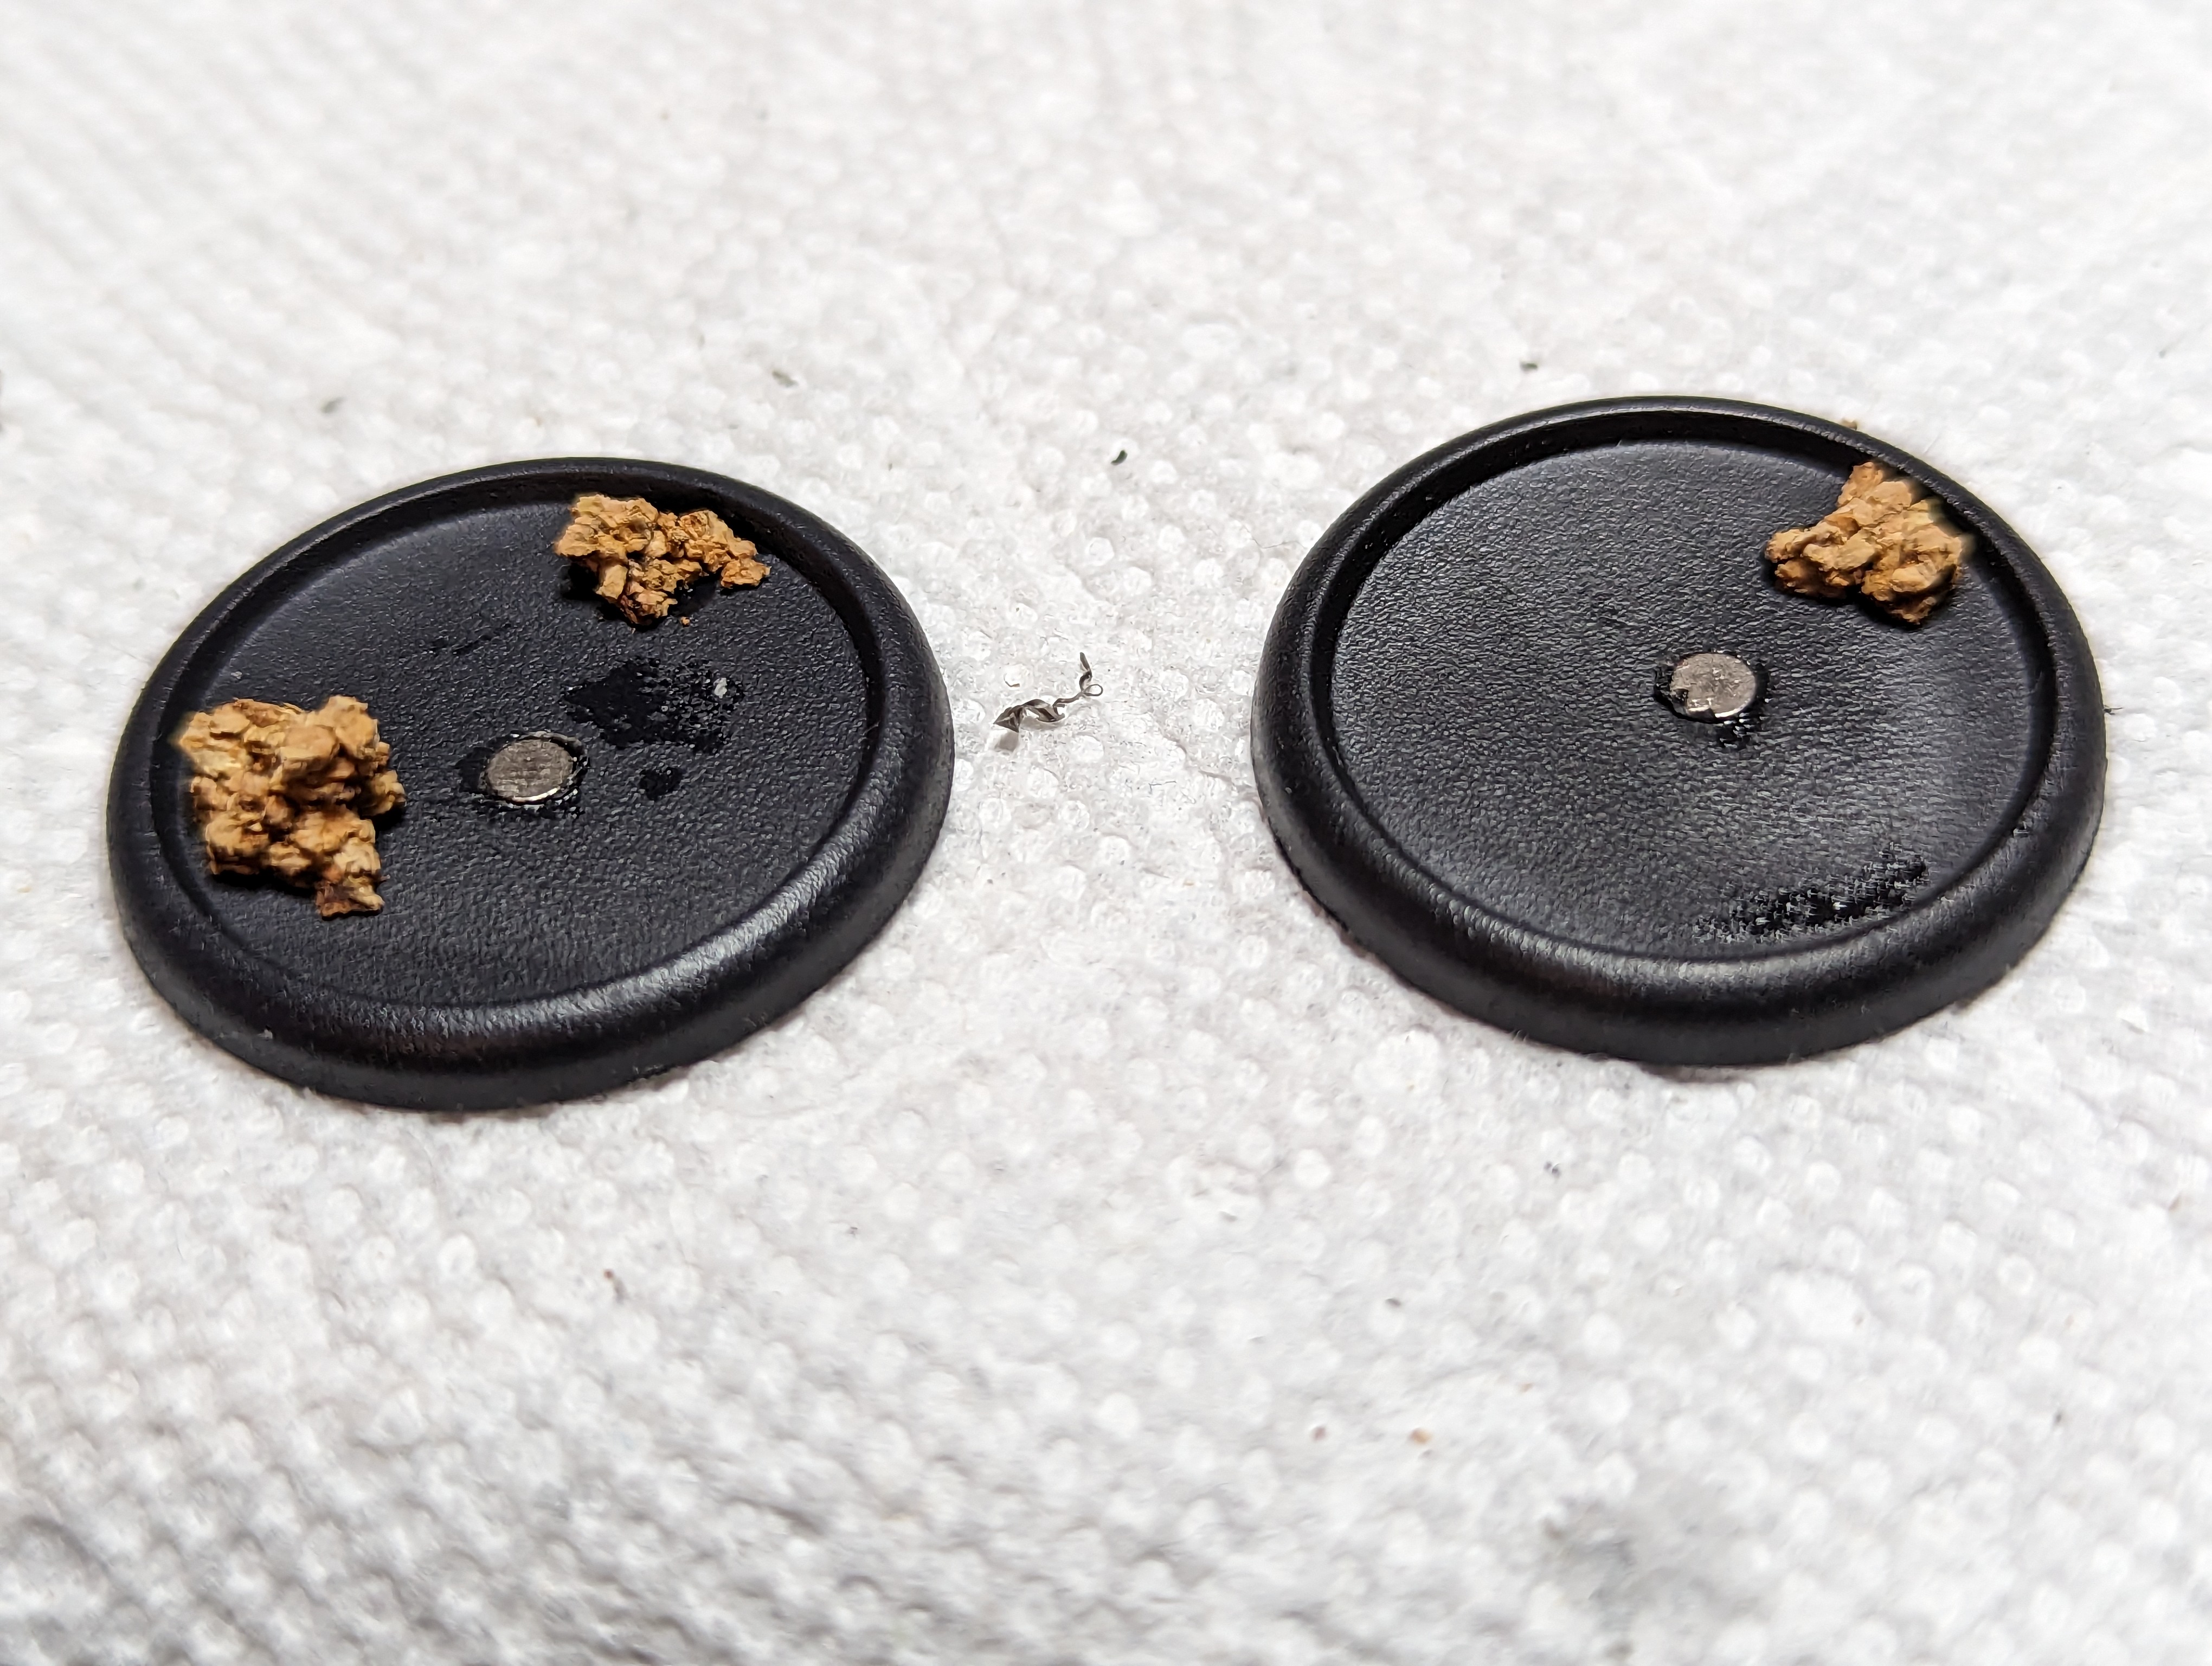
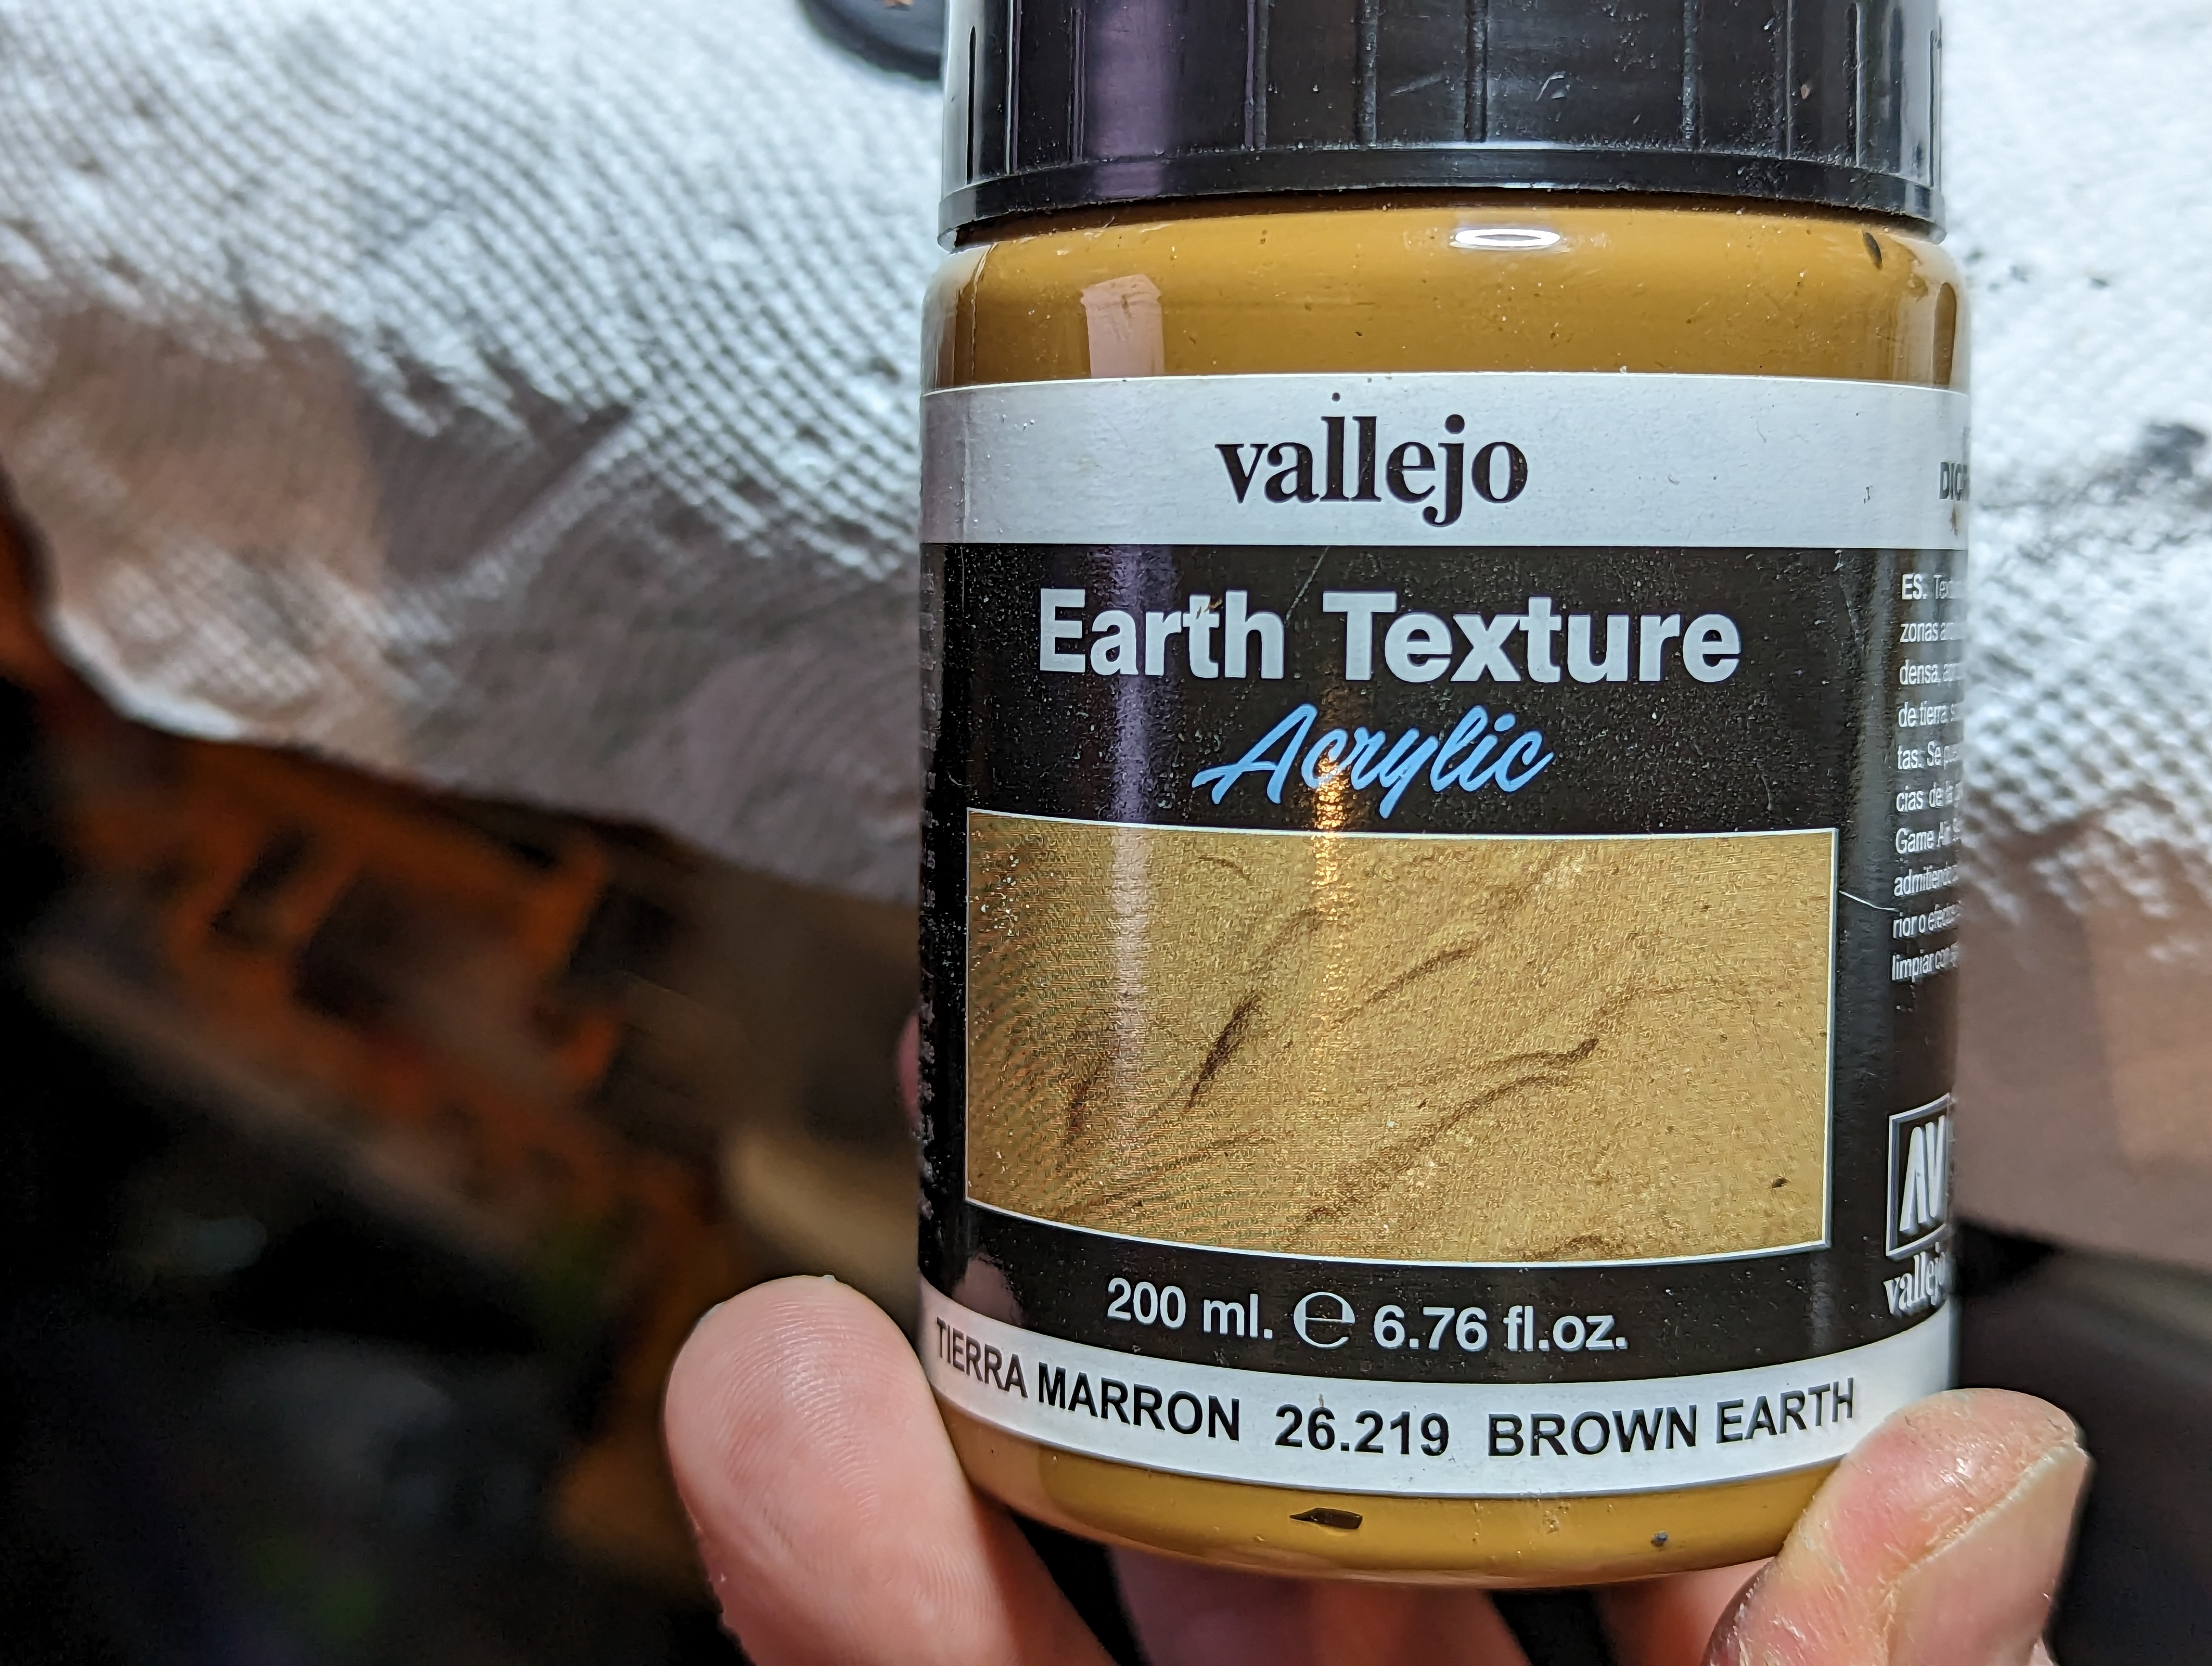
The red desert I made with some Vallejo texture paste. I base coated them with a dark red and then drybrushed a pale red over top. The rocks are made of cork, and I painted them up with a medium gray, drybrushed up to a light gray.
For the mixed keyword base for Pearl, I just did the texture paste, but at the end I will toss some bushes on top to make it a mixture of both schemes.
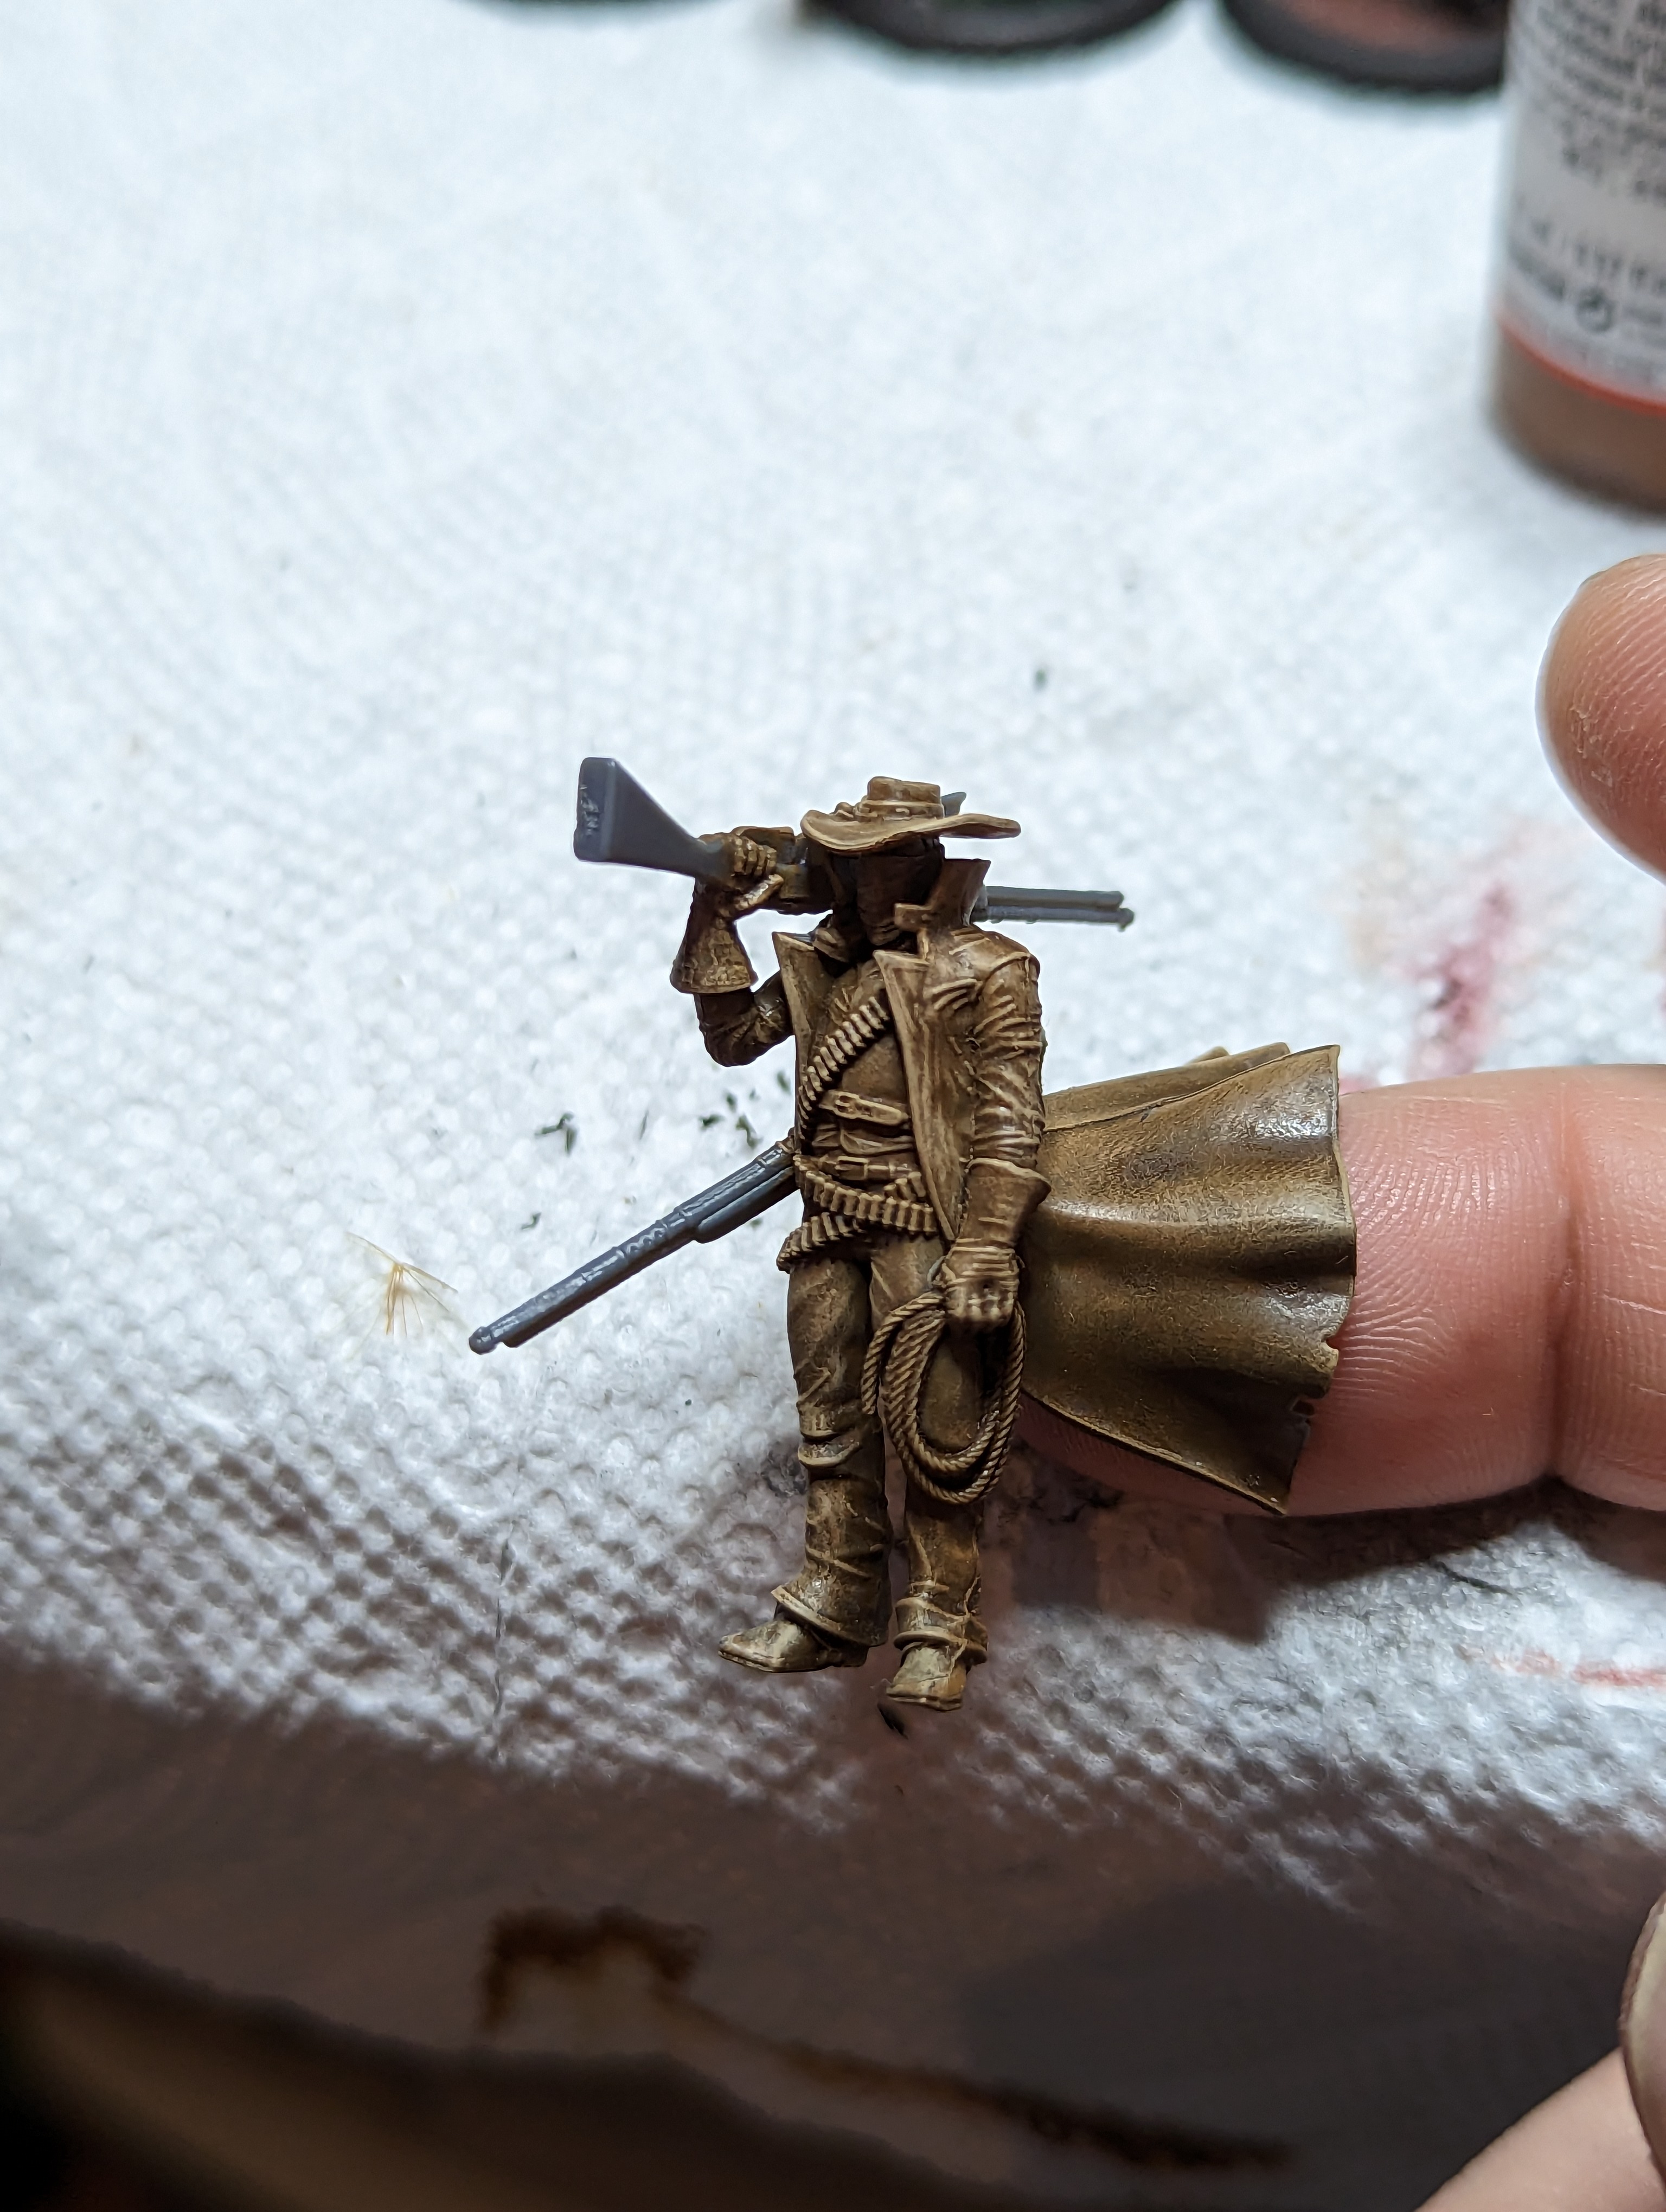
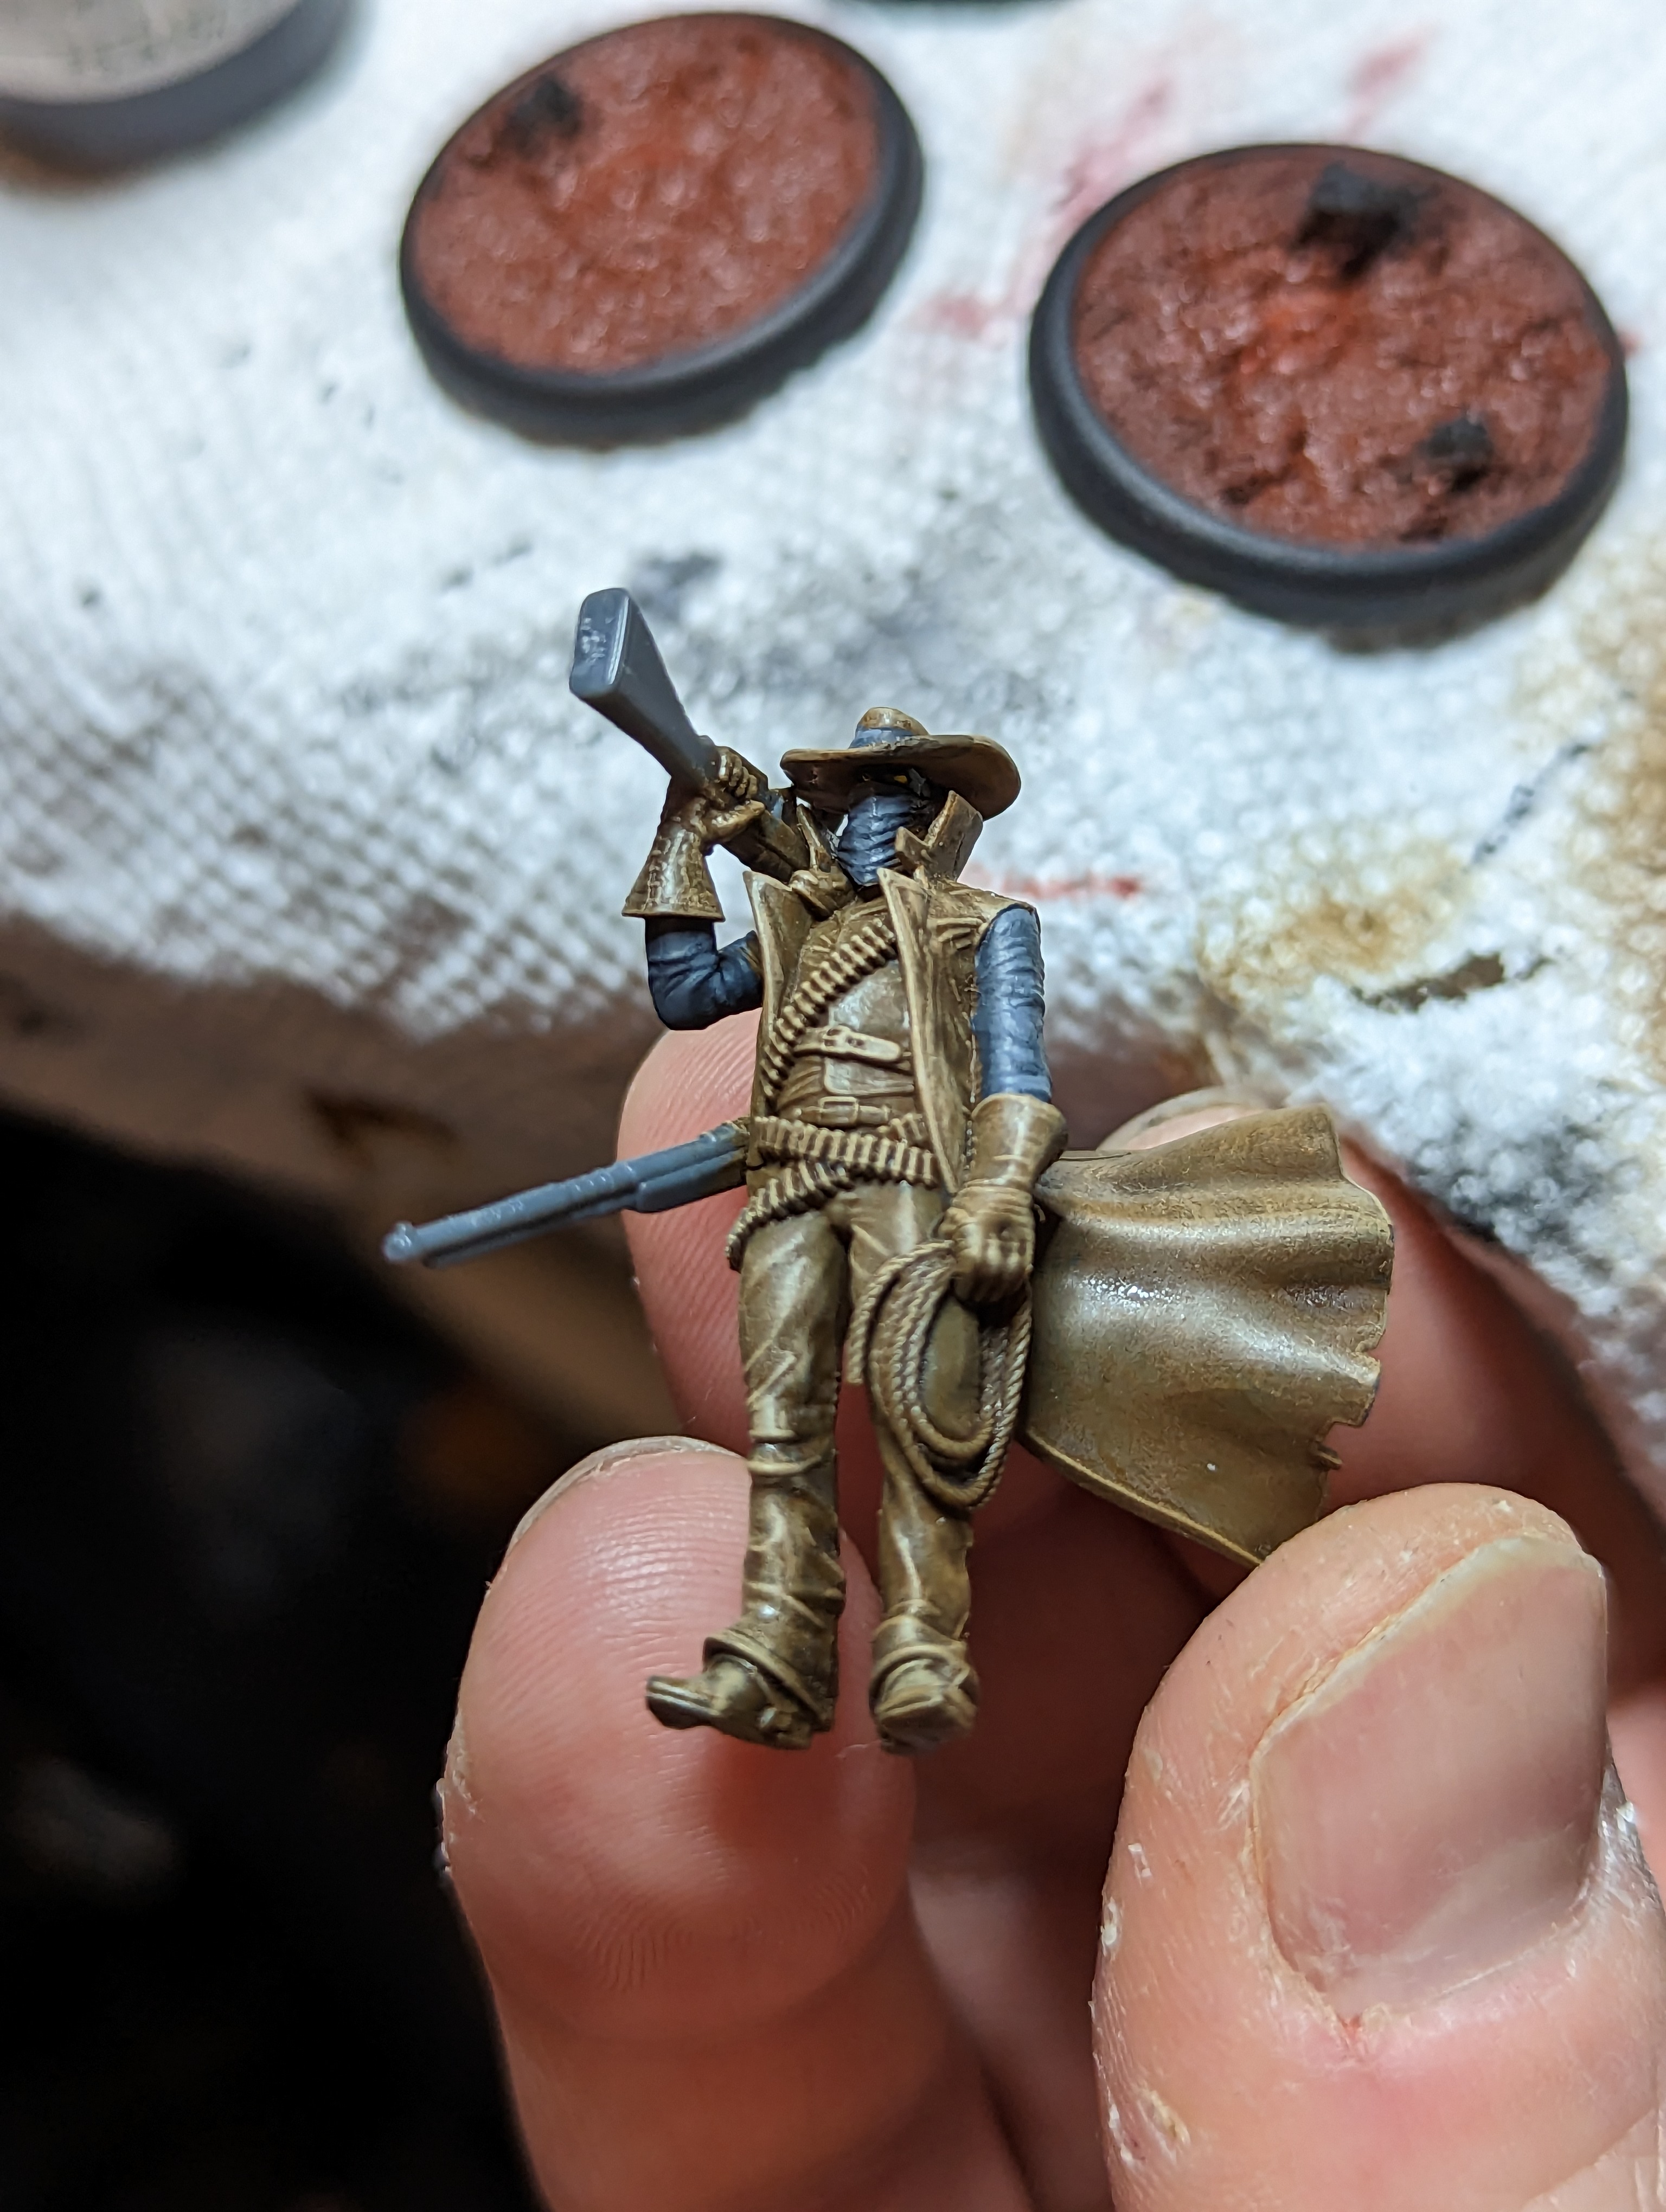
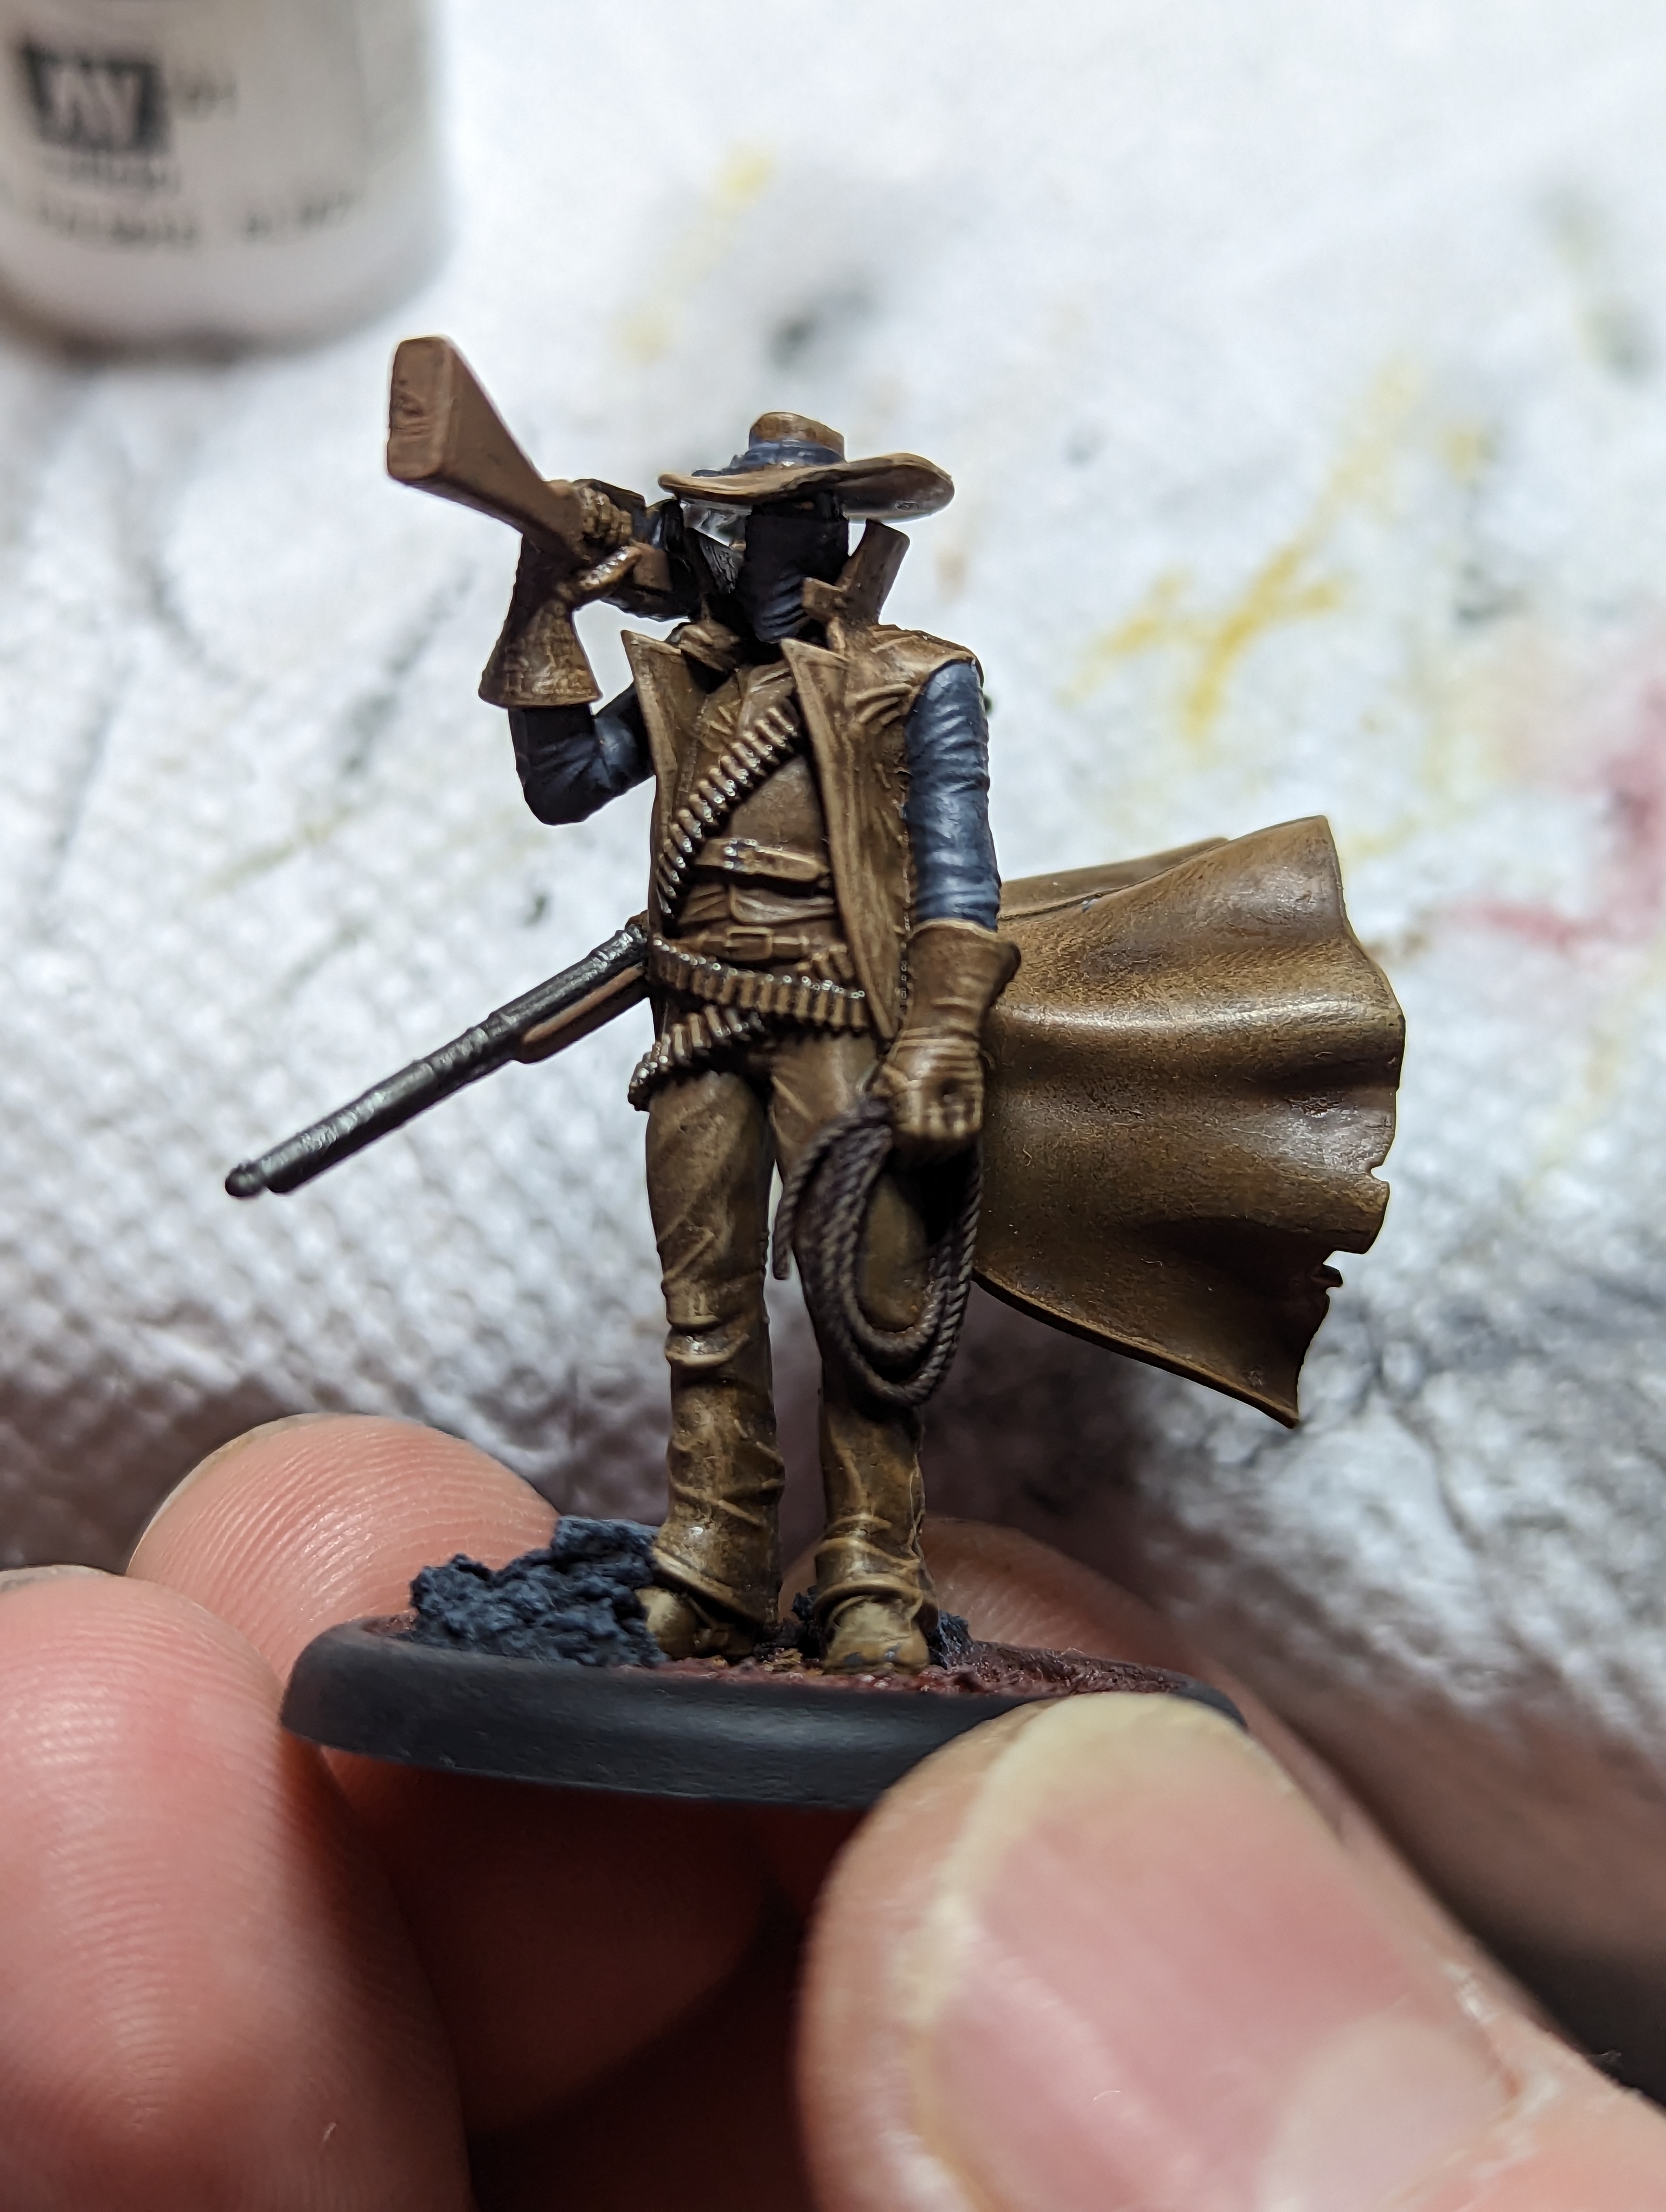
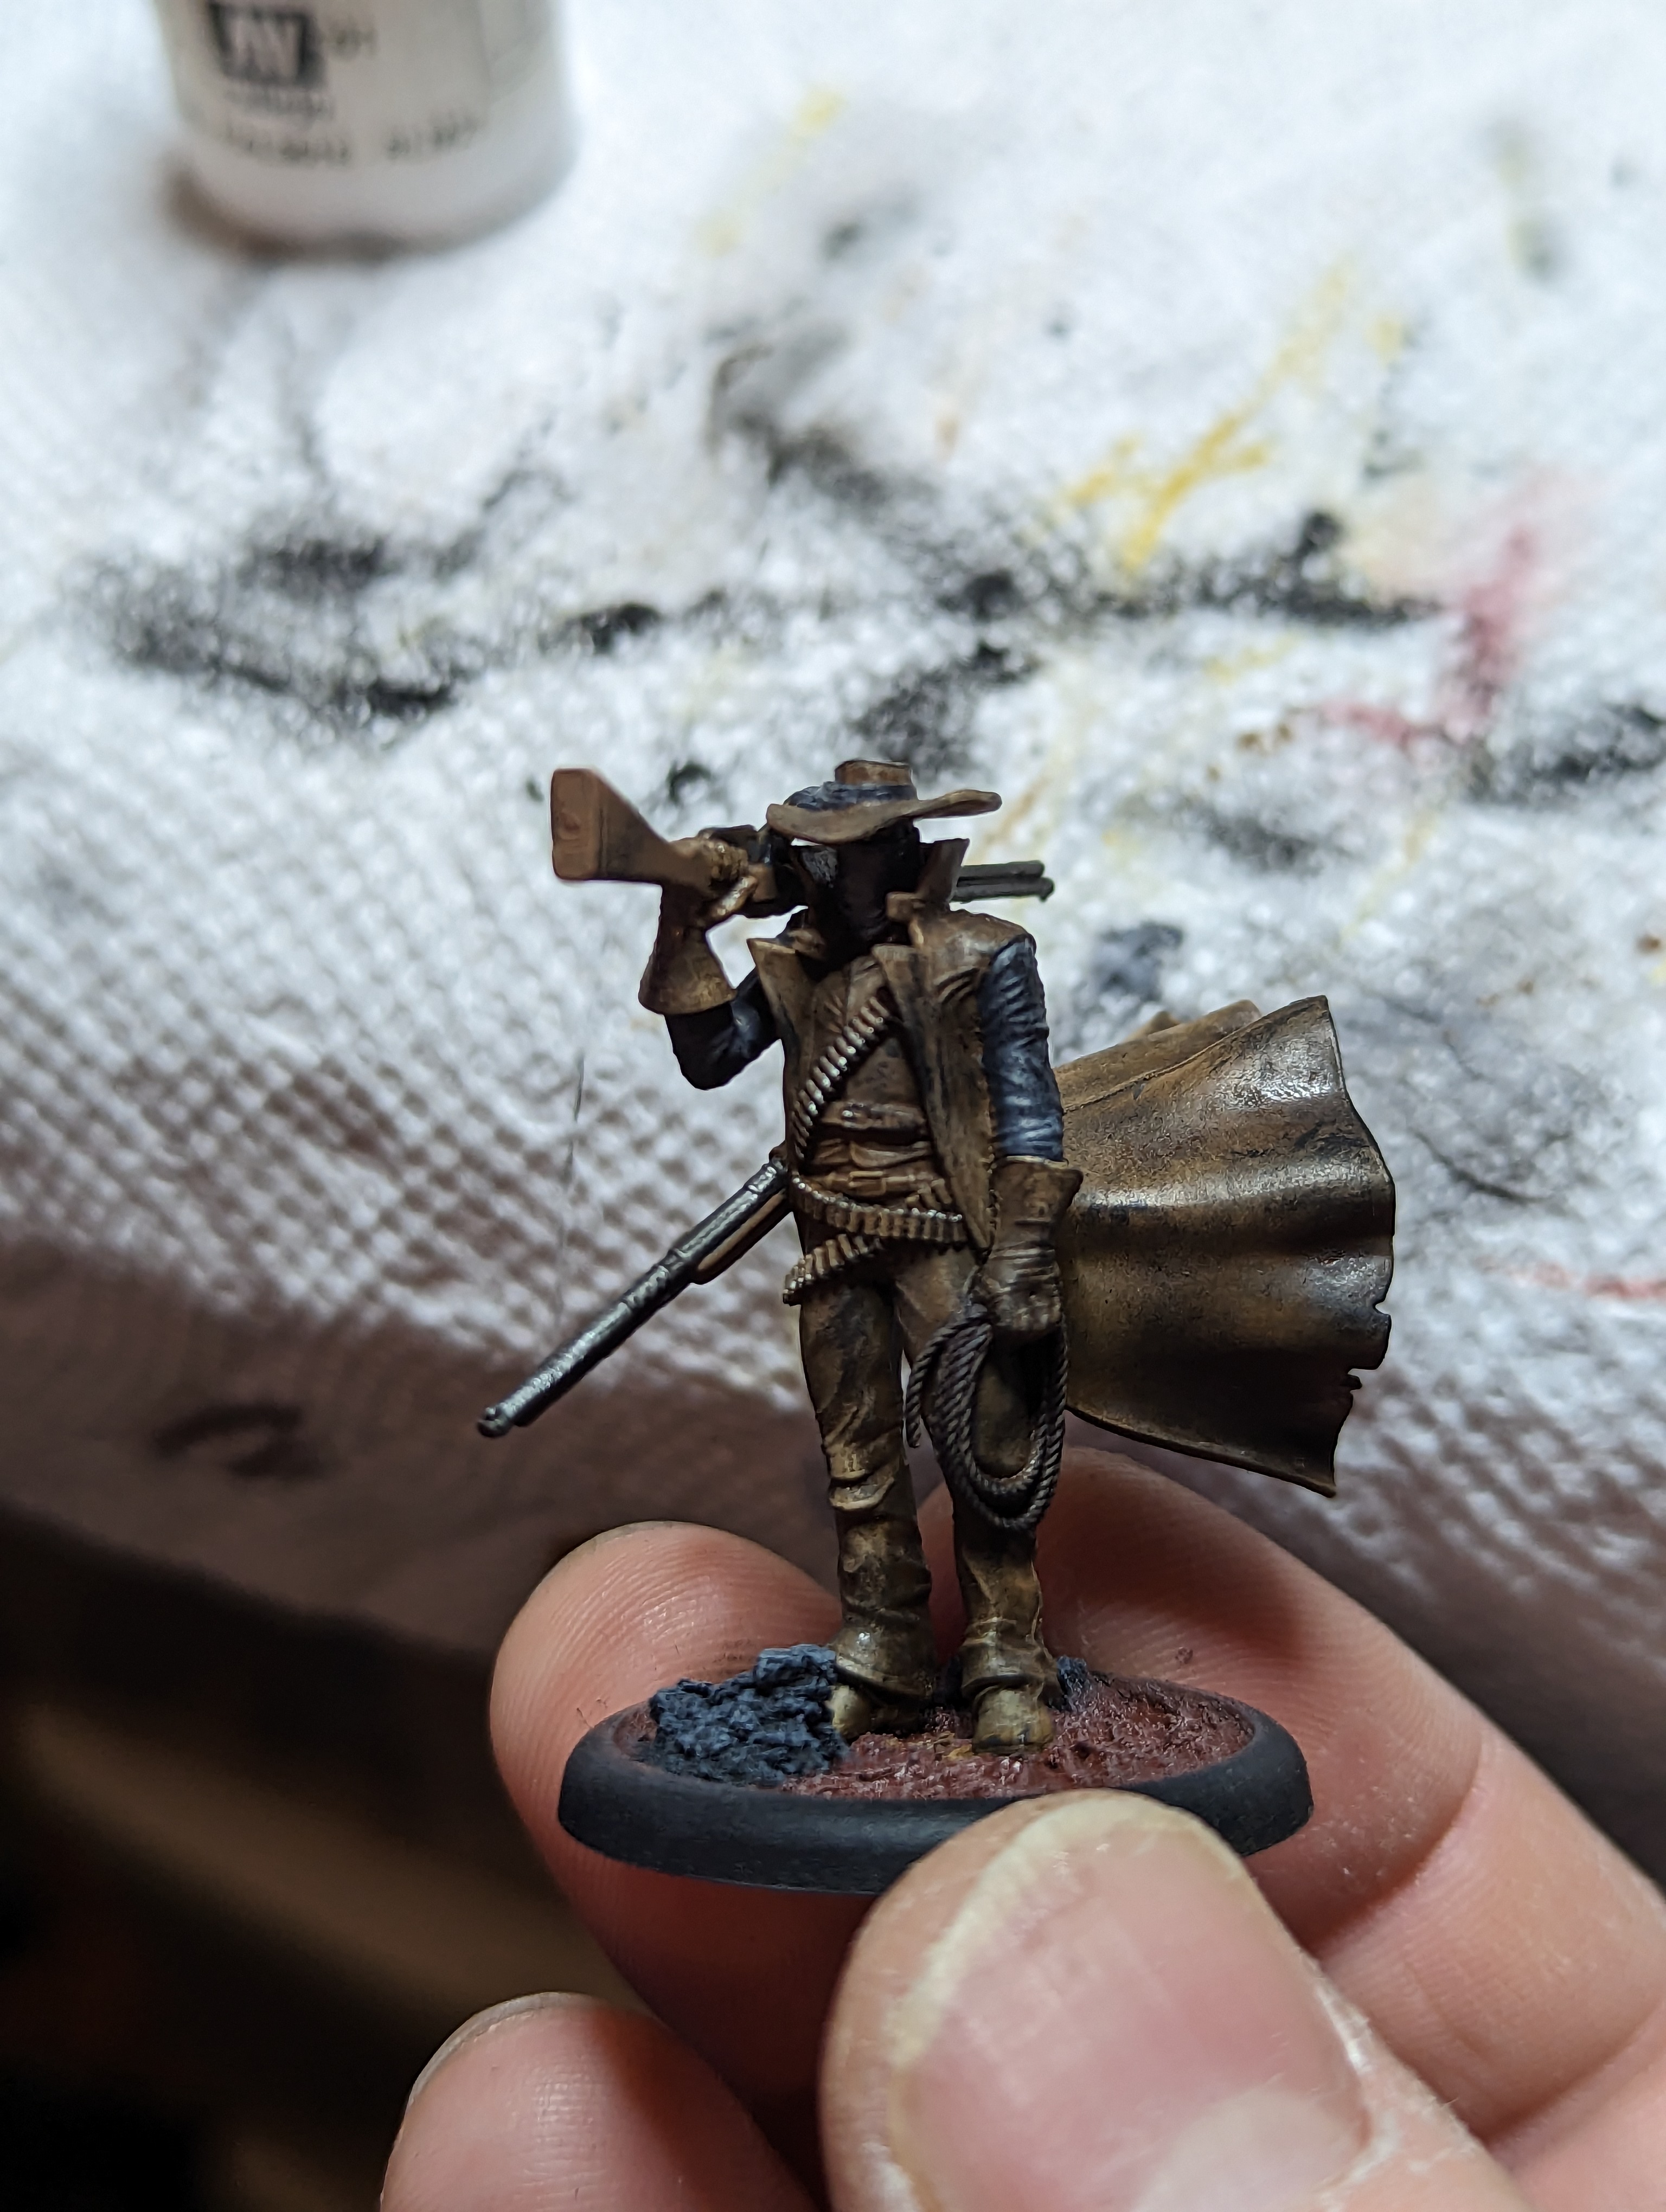
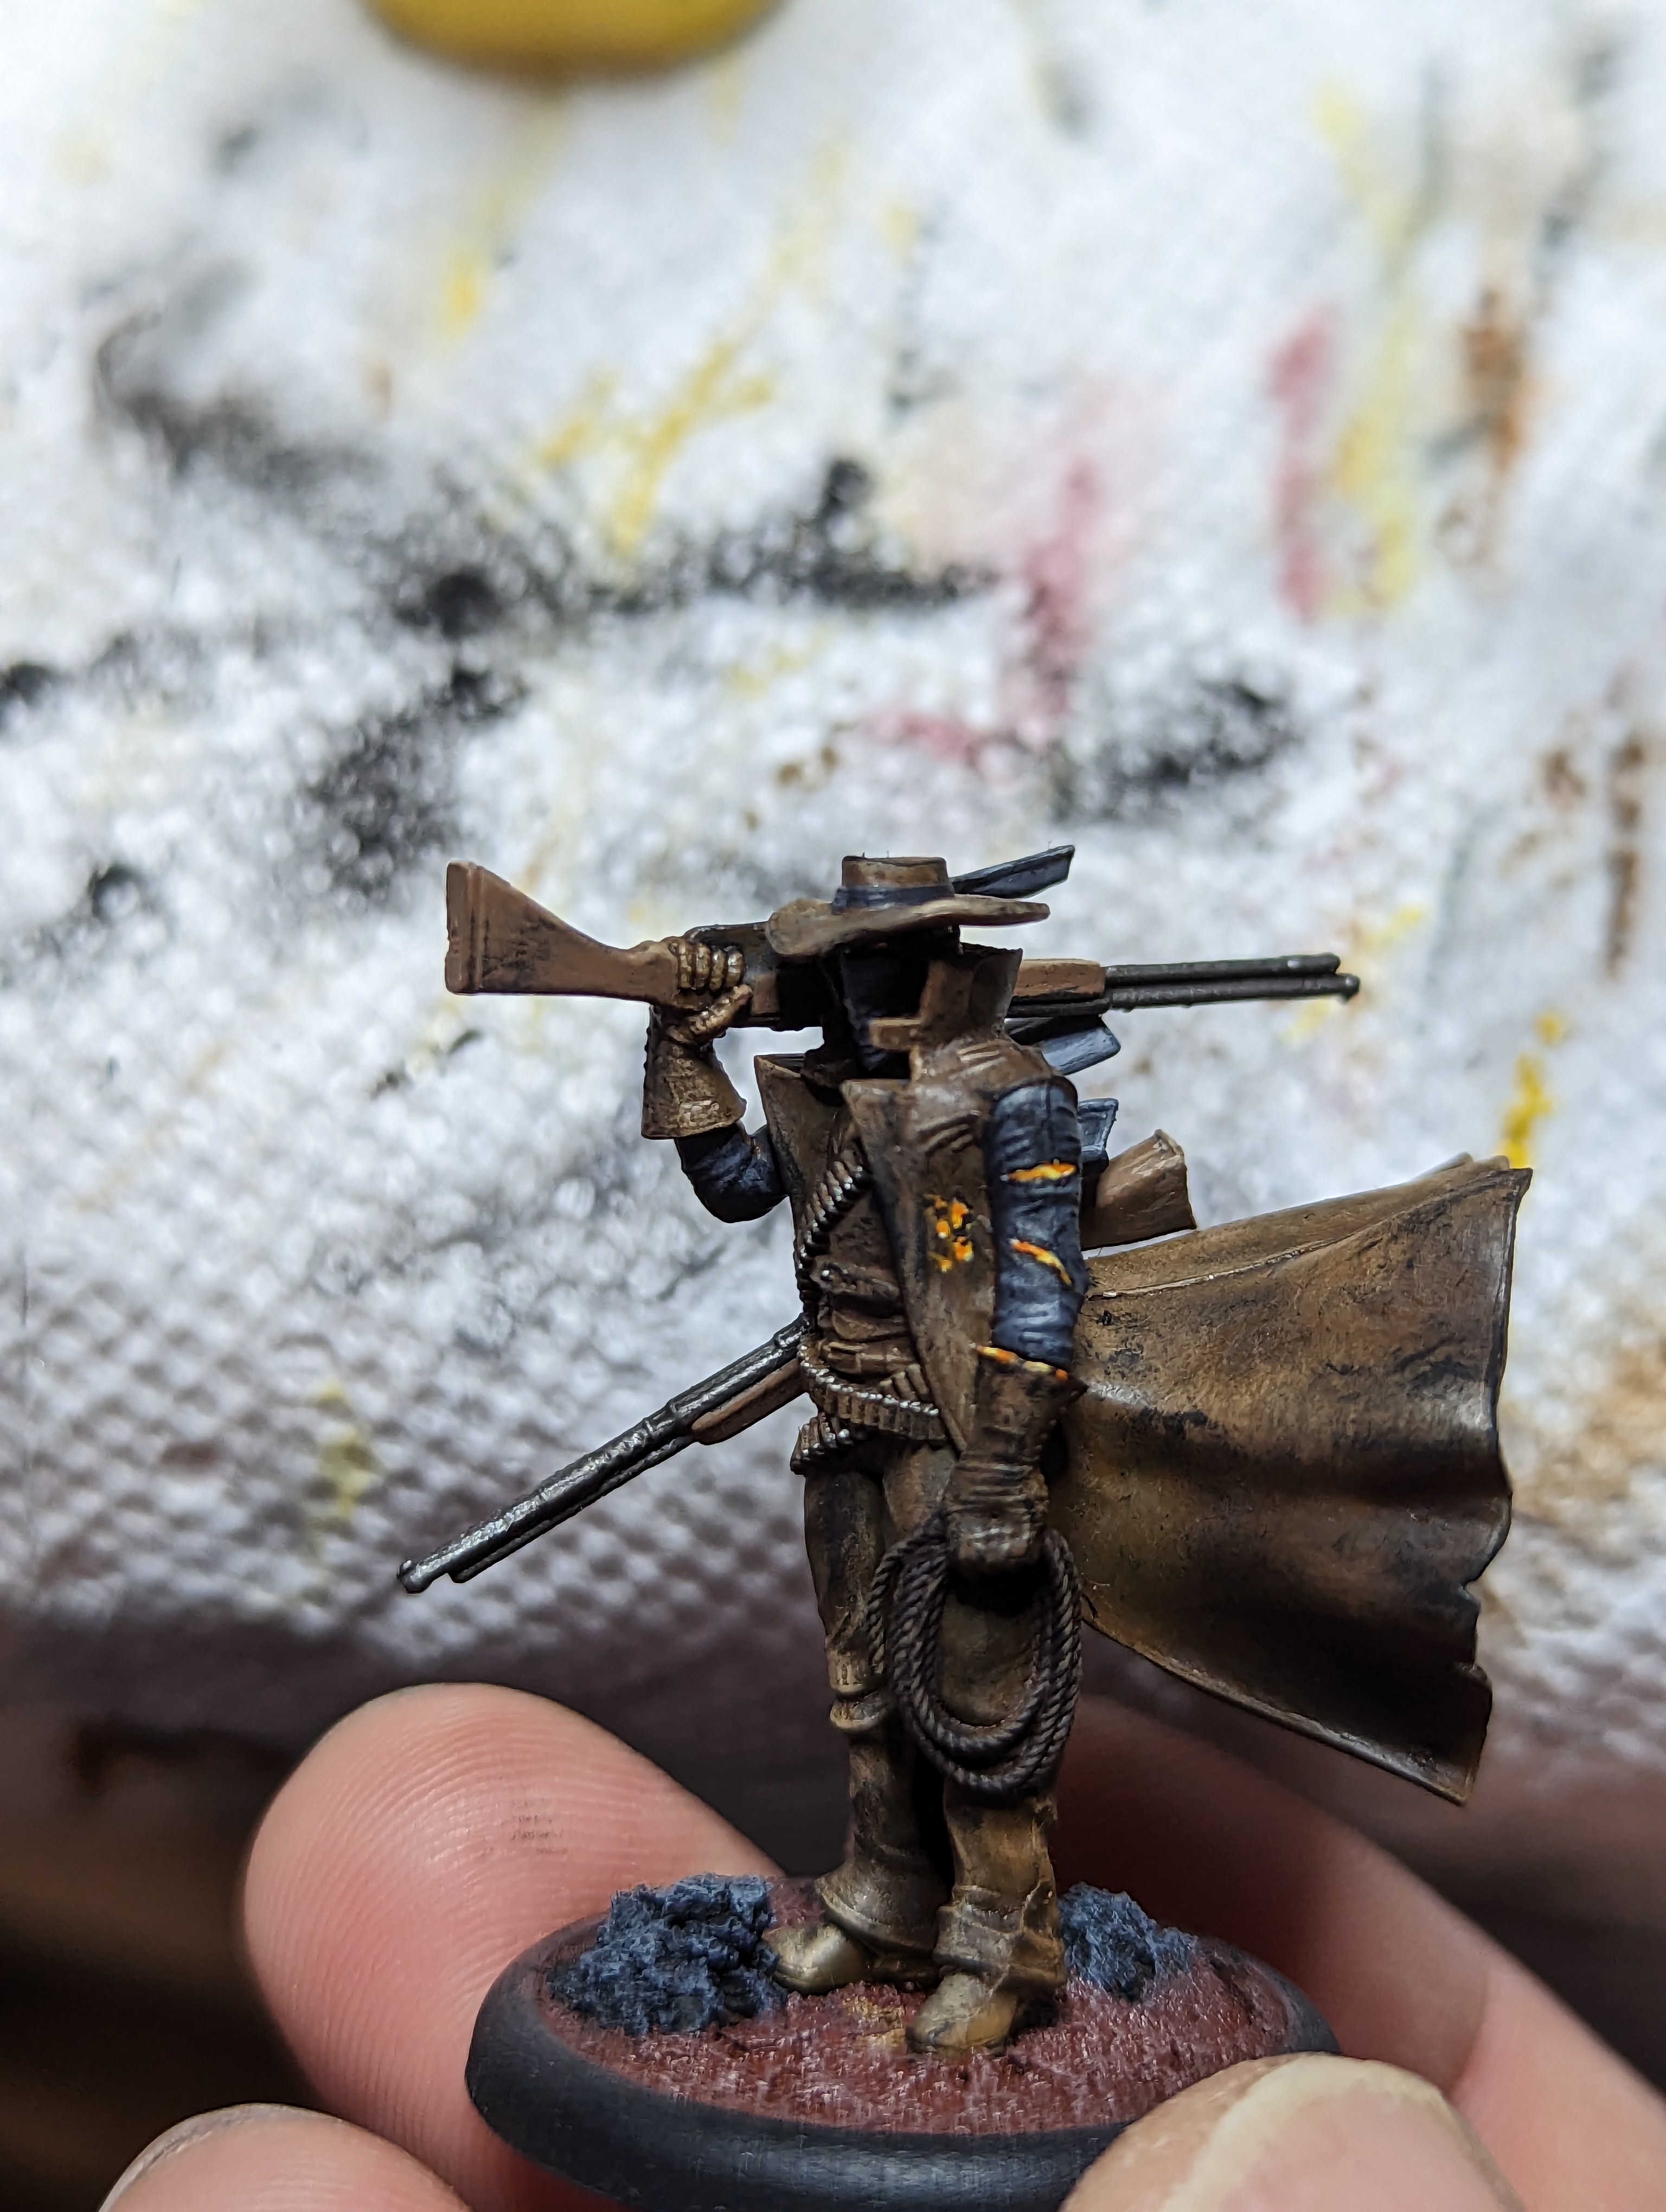
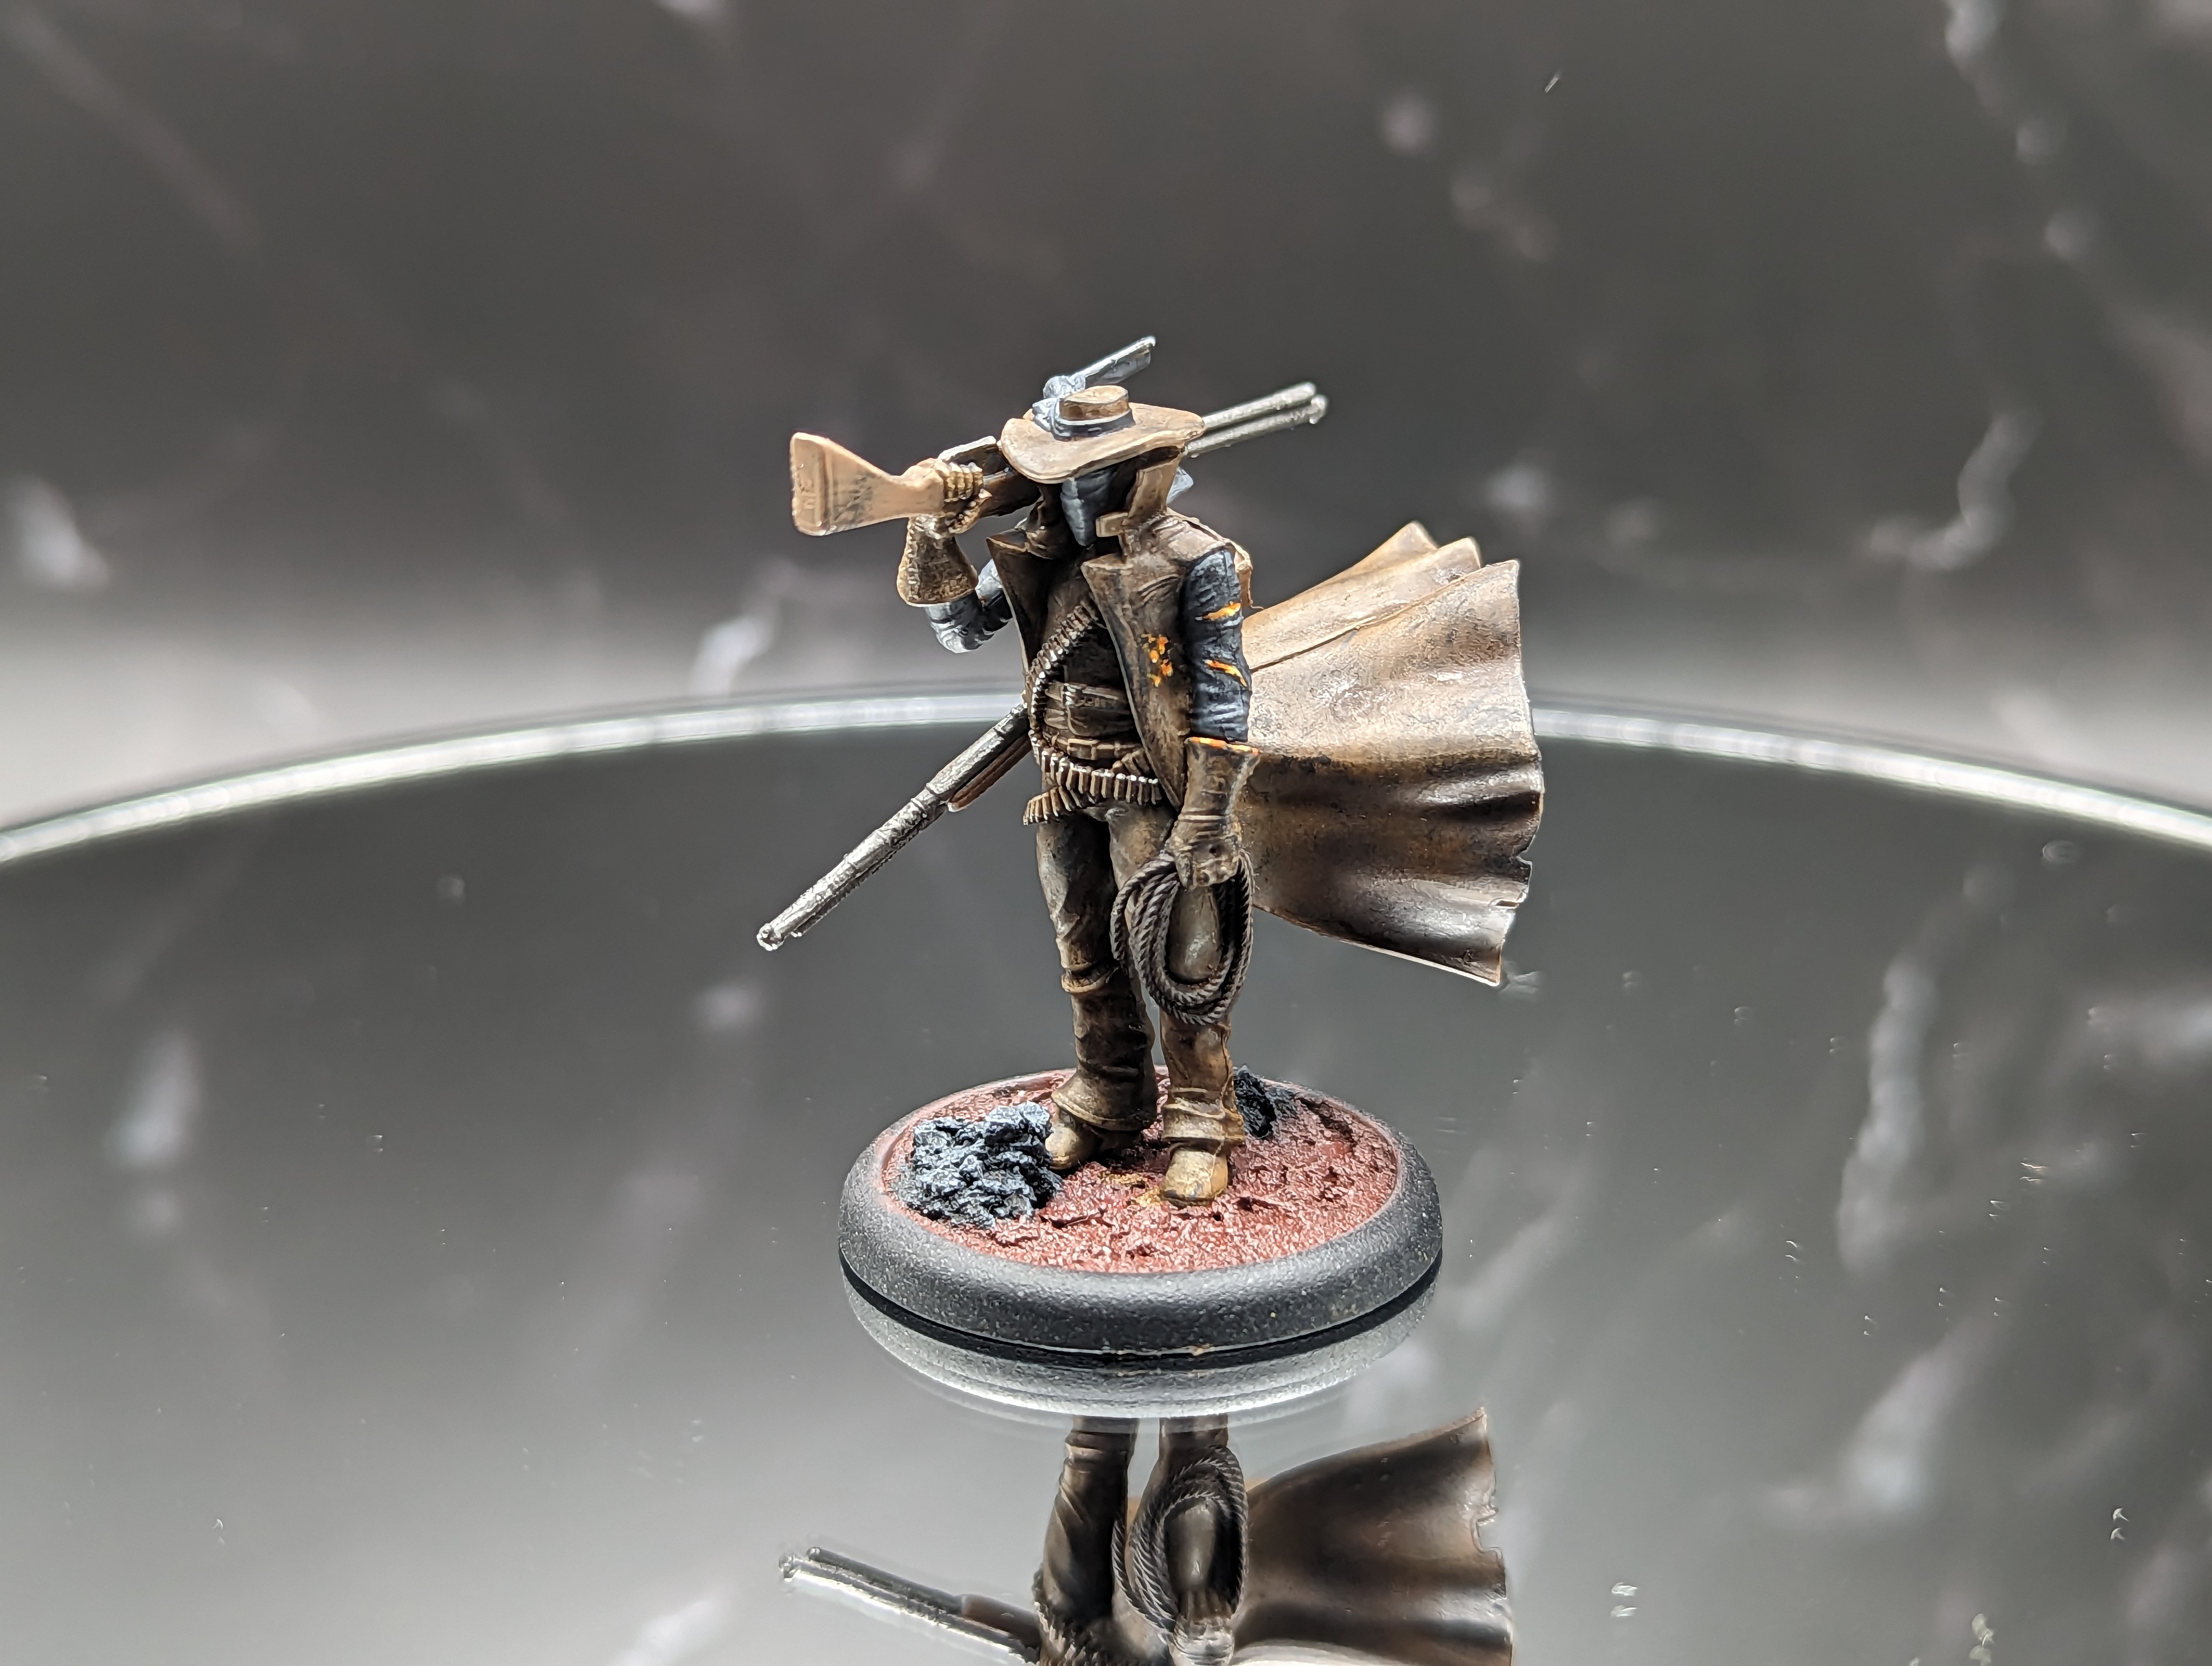
Parker is wearing a ton of leather, so I started off by basecoating him in an orangey brown. I then drybrushed it heavily to give it a worn look. I went in and added some color in the few places that arent leather, and painted his gun. The last step was to drybrush and stipple some dark gray and black on the ends of his clothes, since hes a firey boy.
Last I just added some fire effect into the cuts in his arm and chest. Undercoated it with a light gray, then added yellow and orange.


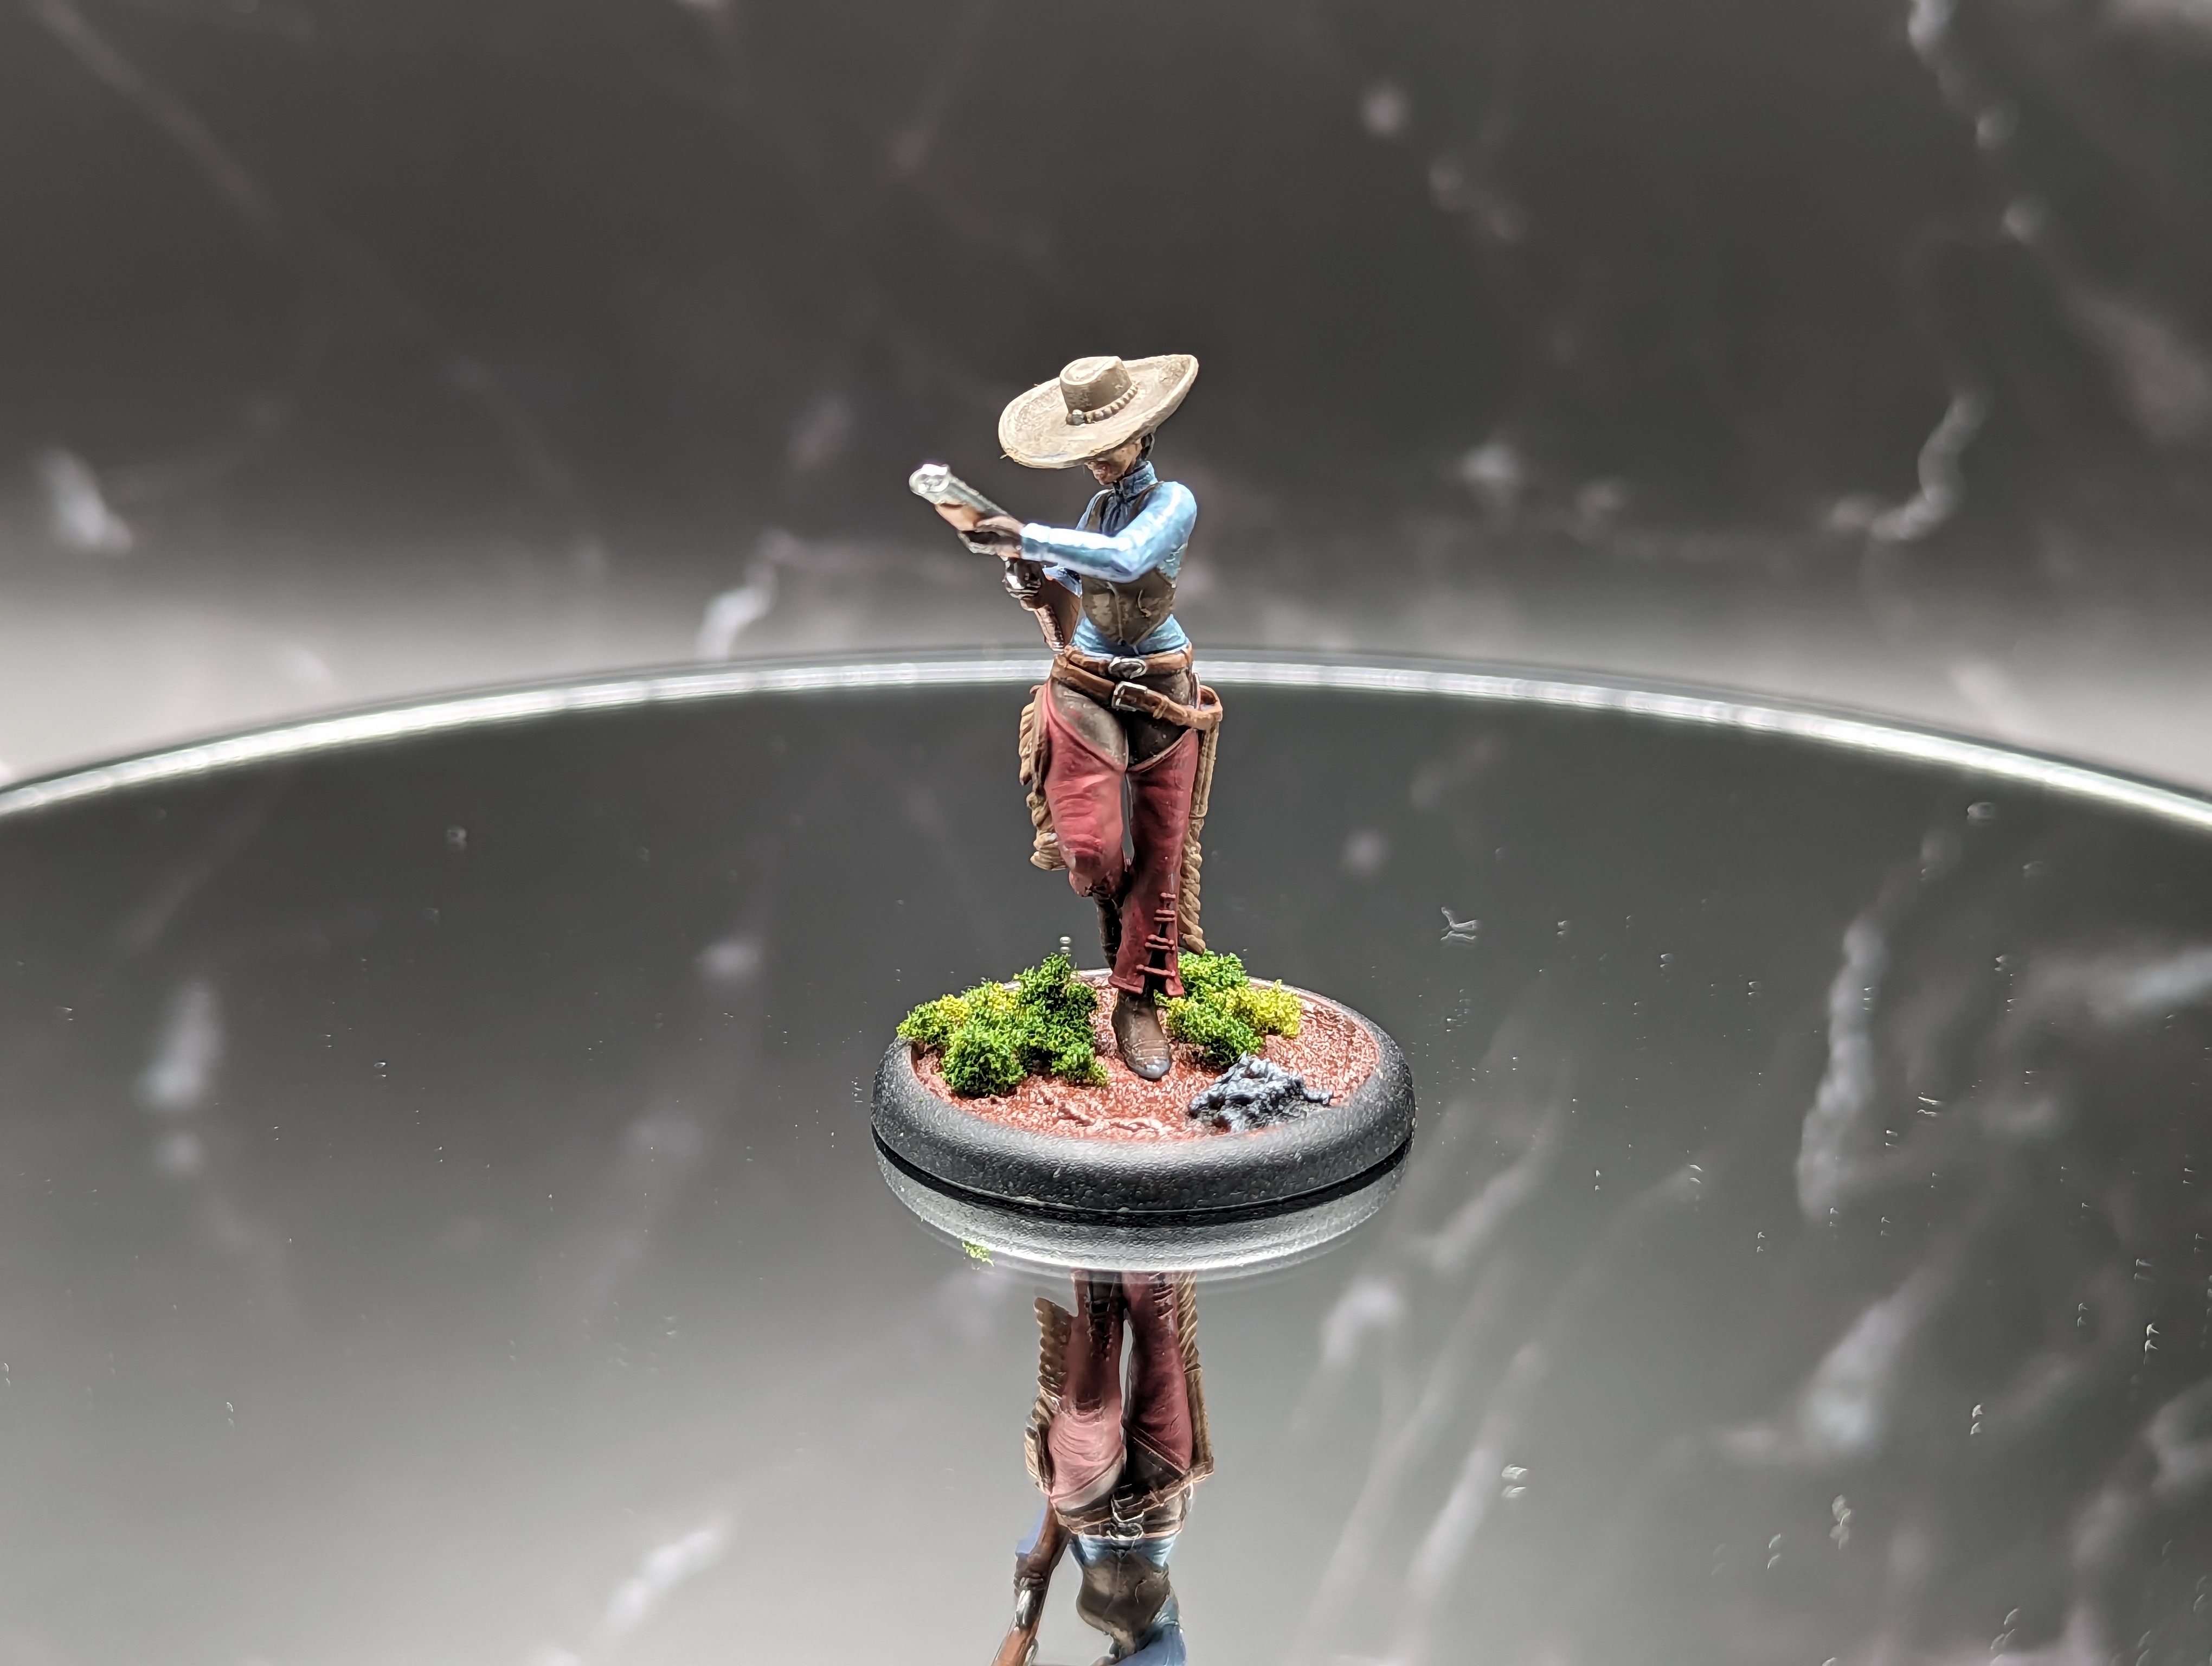
Pearl was a pretty simple paint job. I base coated everything as needed, and then drybrushed to give her clothing a worn effect, similar to Parker. Her chaps are red so I went in an manually highlighted them up to get them to stand out a big more.
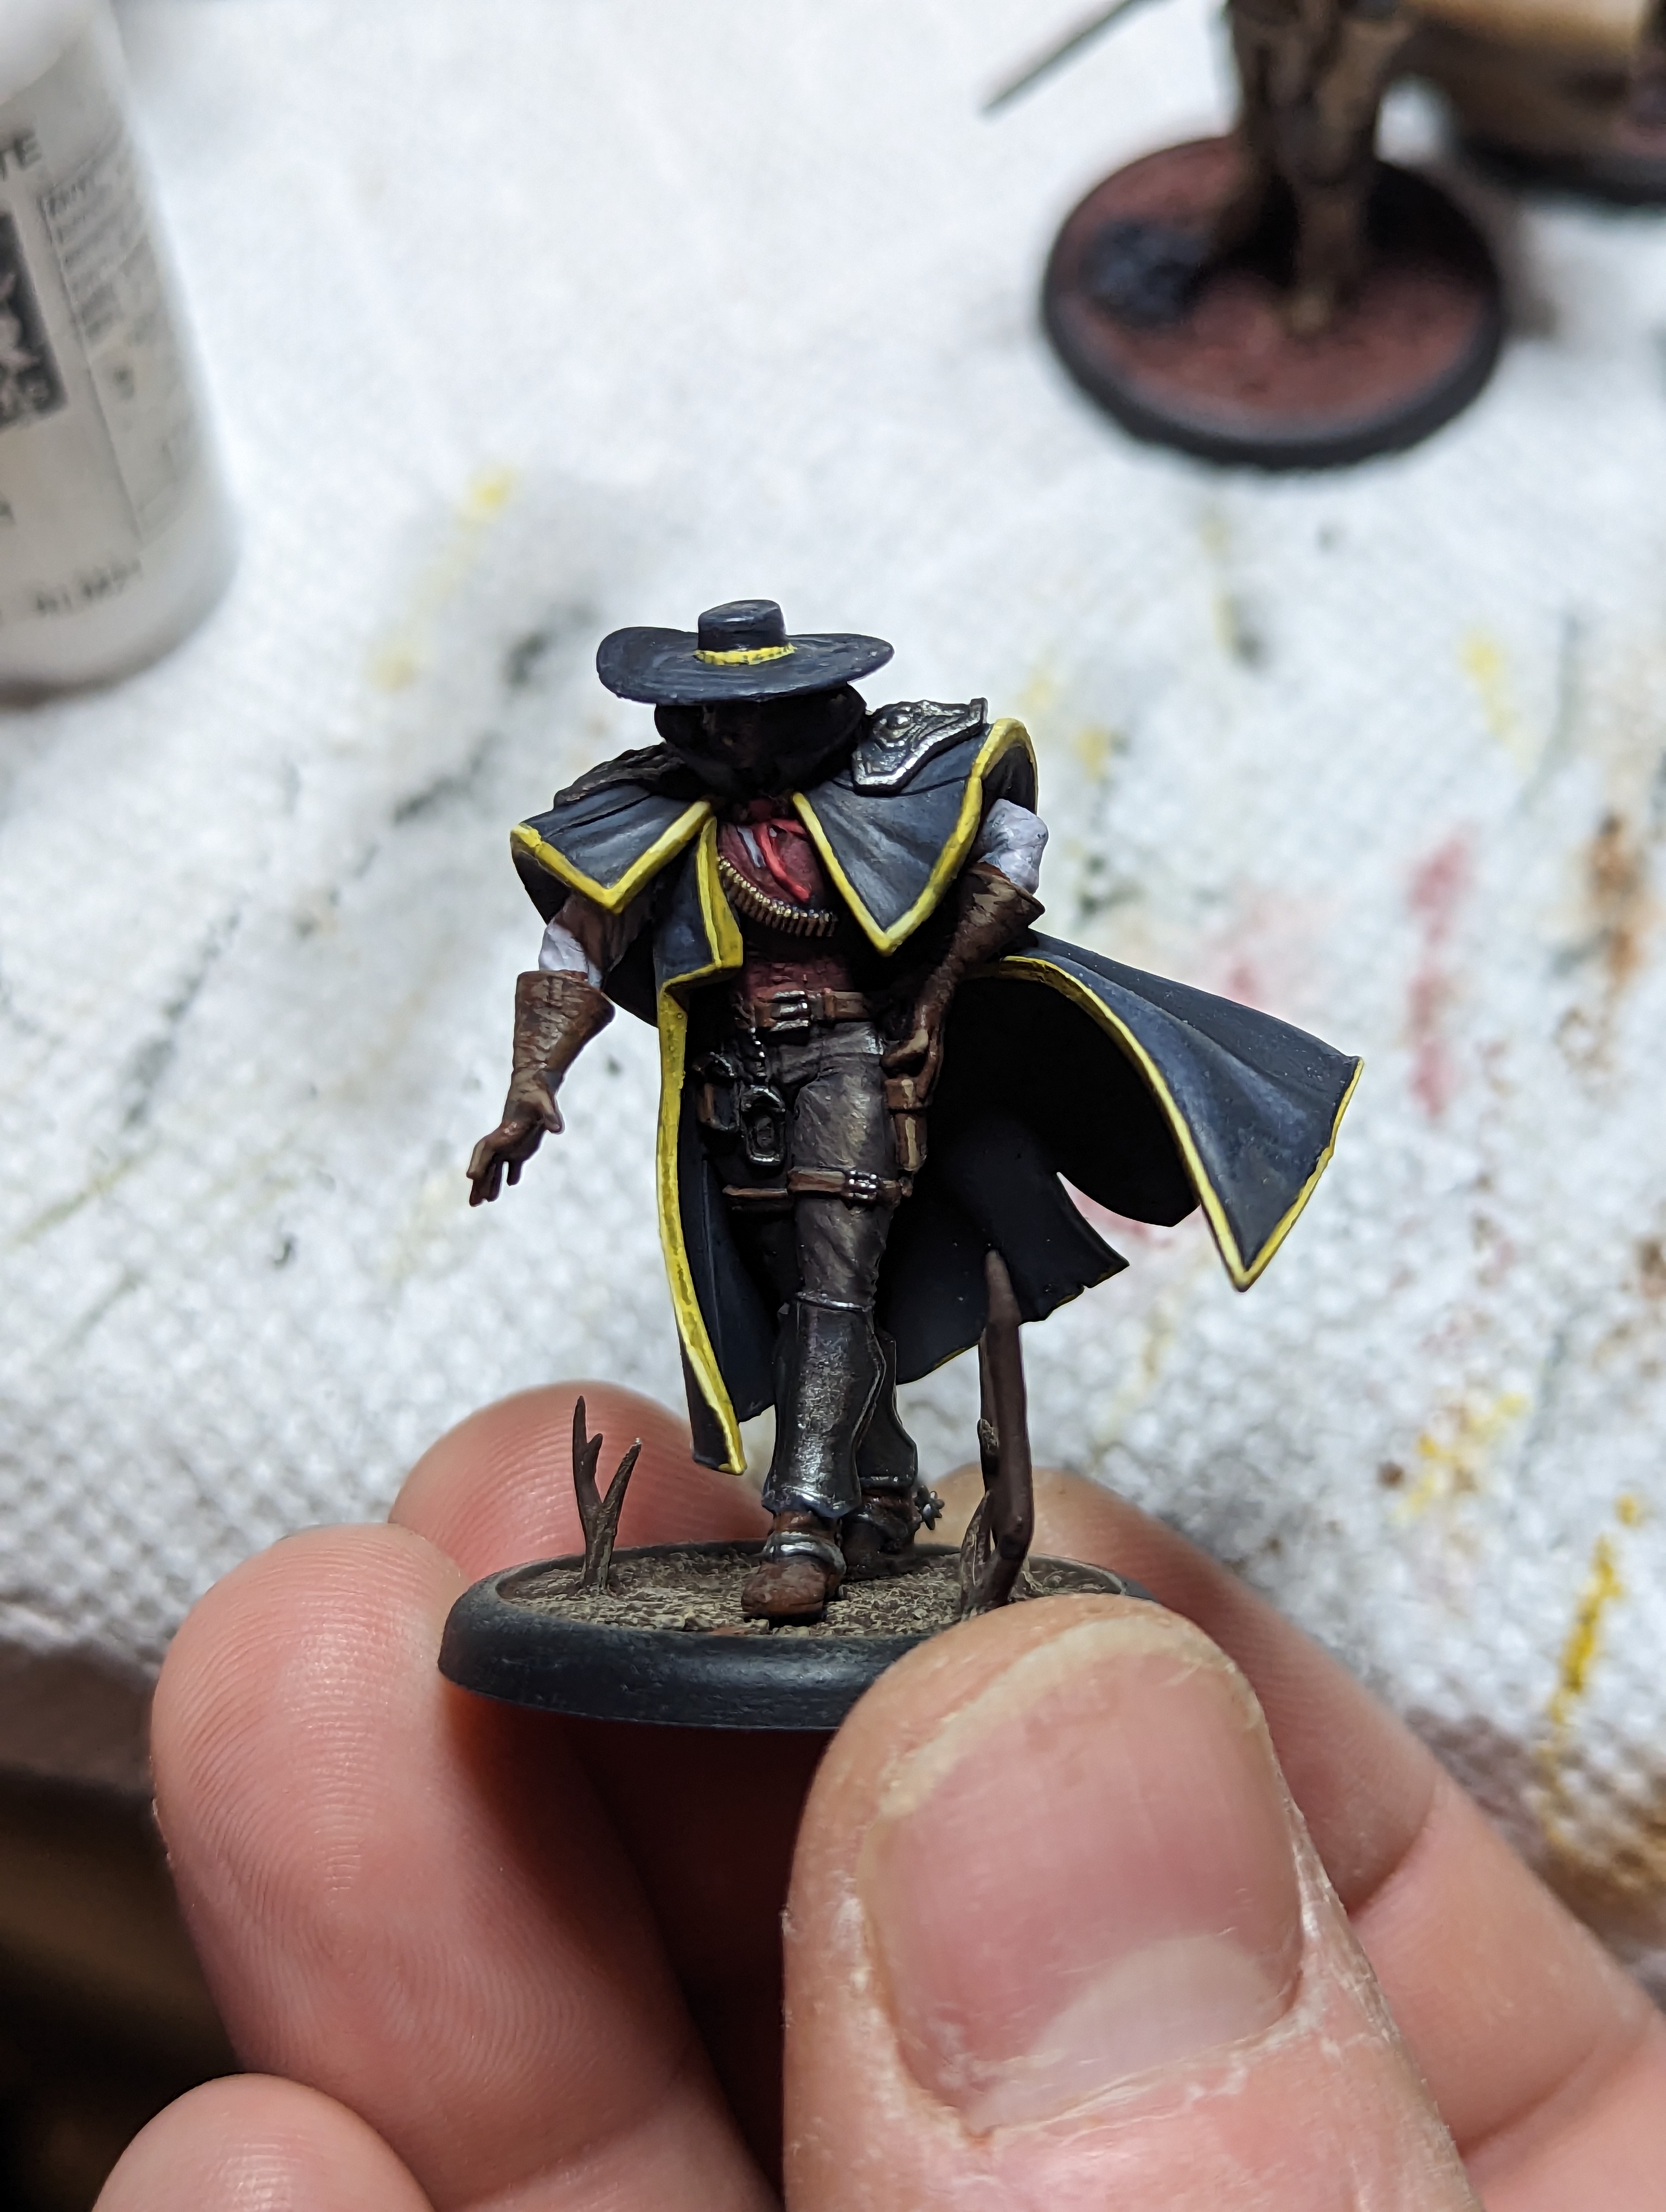
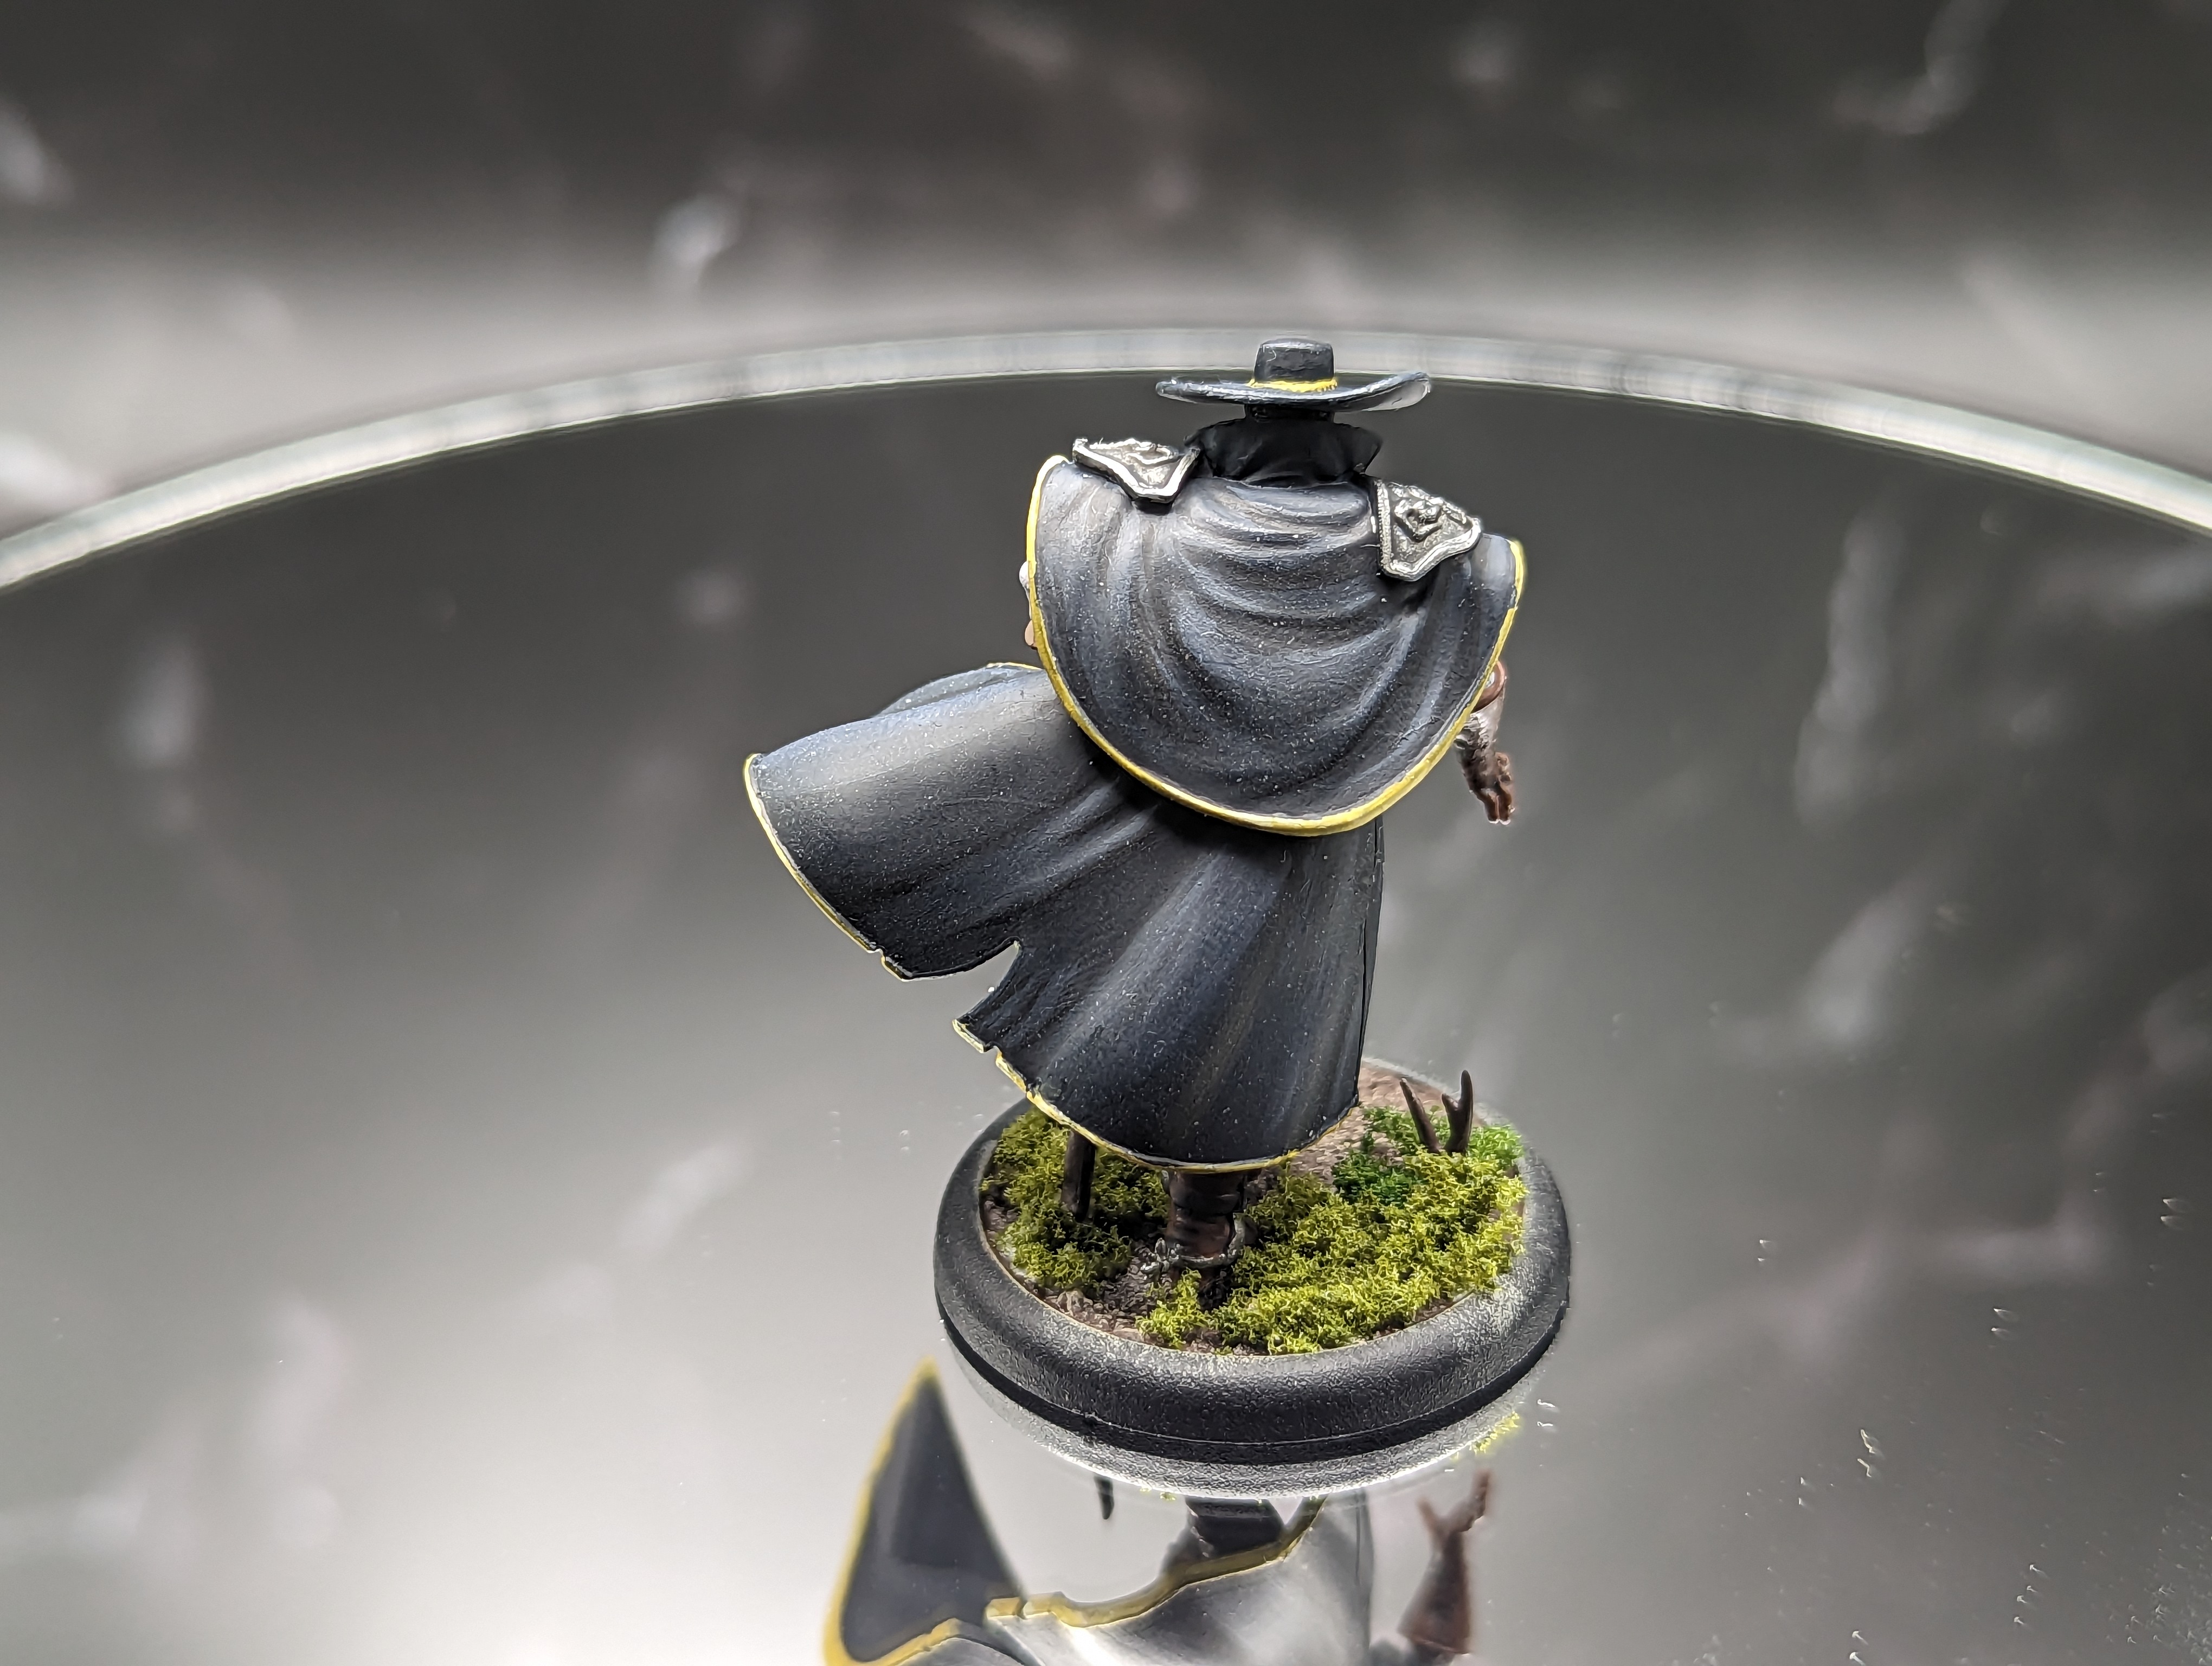
Ive always had a hard time painting capes, so when I got to Basse I spend a bit of extra time on it. I just did a ton of layers, adding in highlights where my painting light seemed to indicate. I then added a few shadows, being careful not to make them too big, which is something that often happens.
After I picked out all of the other colors, I went in and added the gold trim that goes around his clothing. I think this added a really nice touch to the model, and makes it stand out quite a bit.
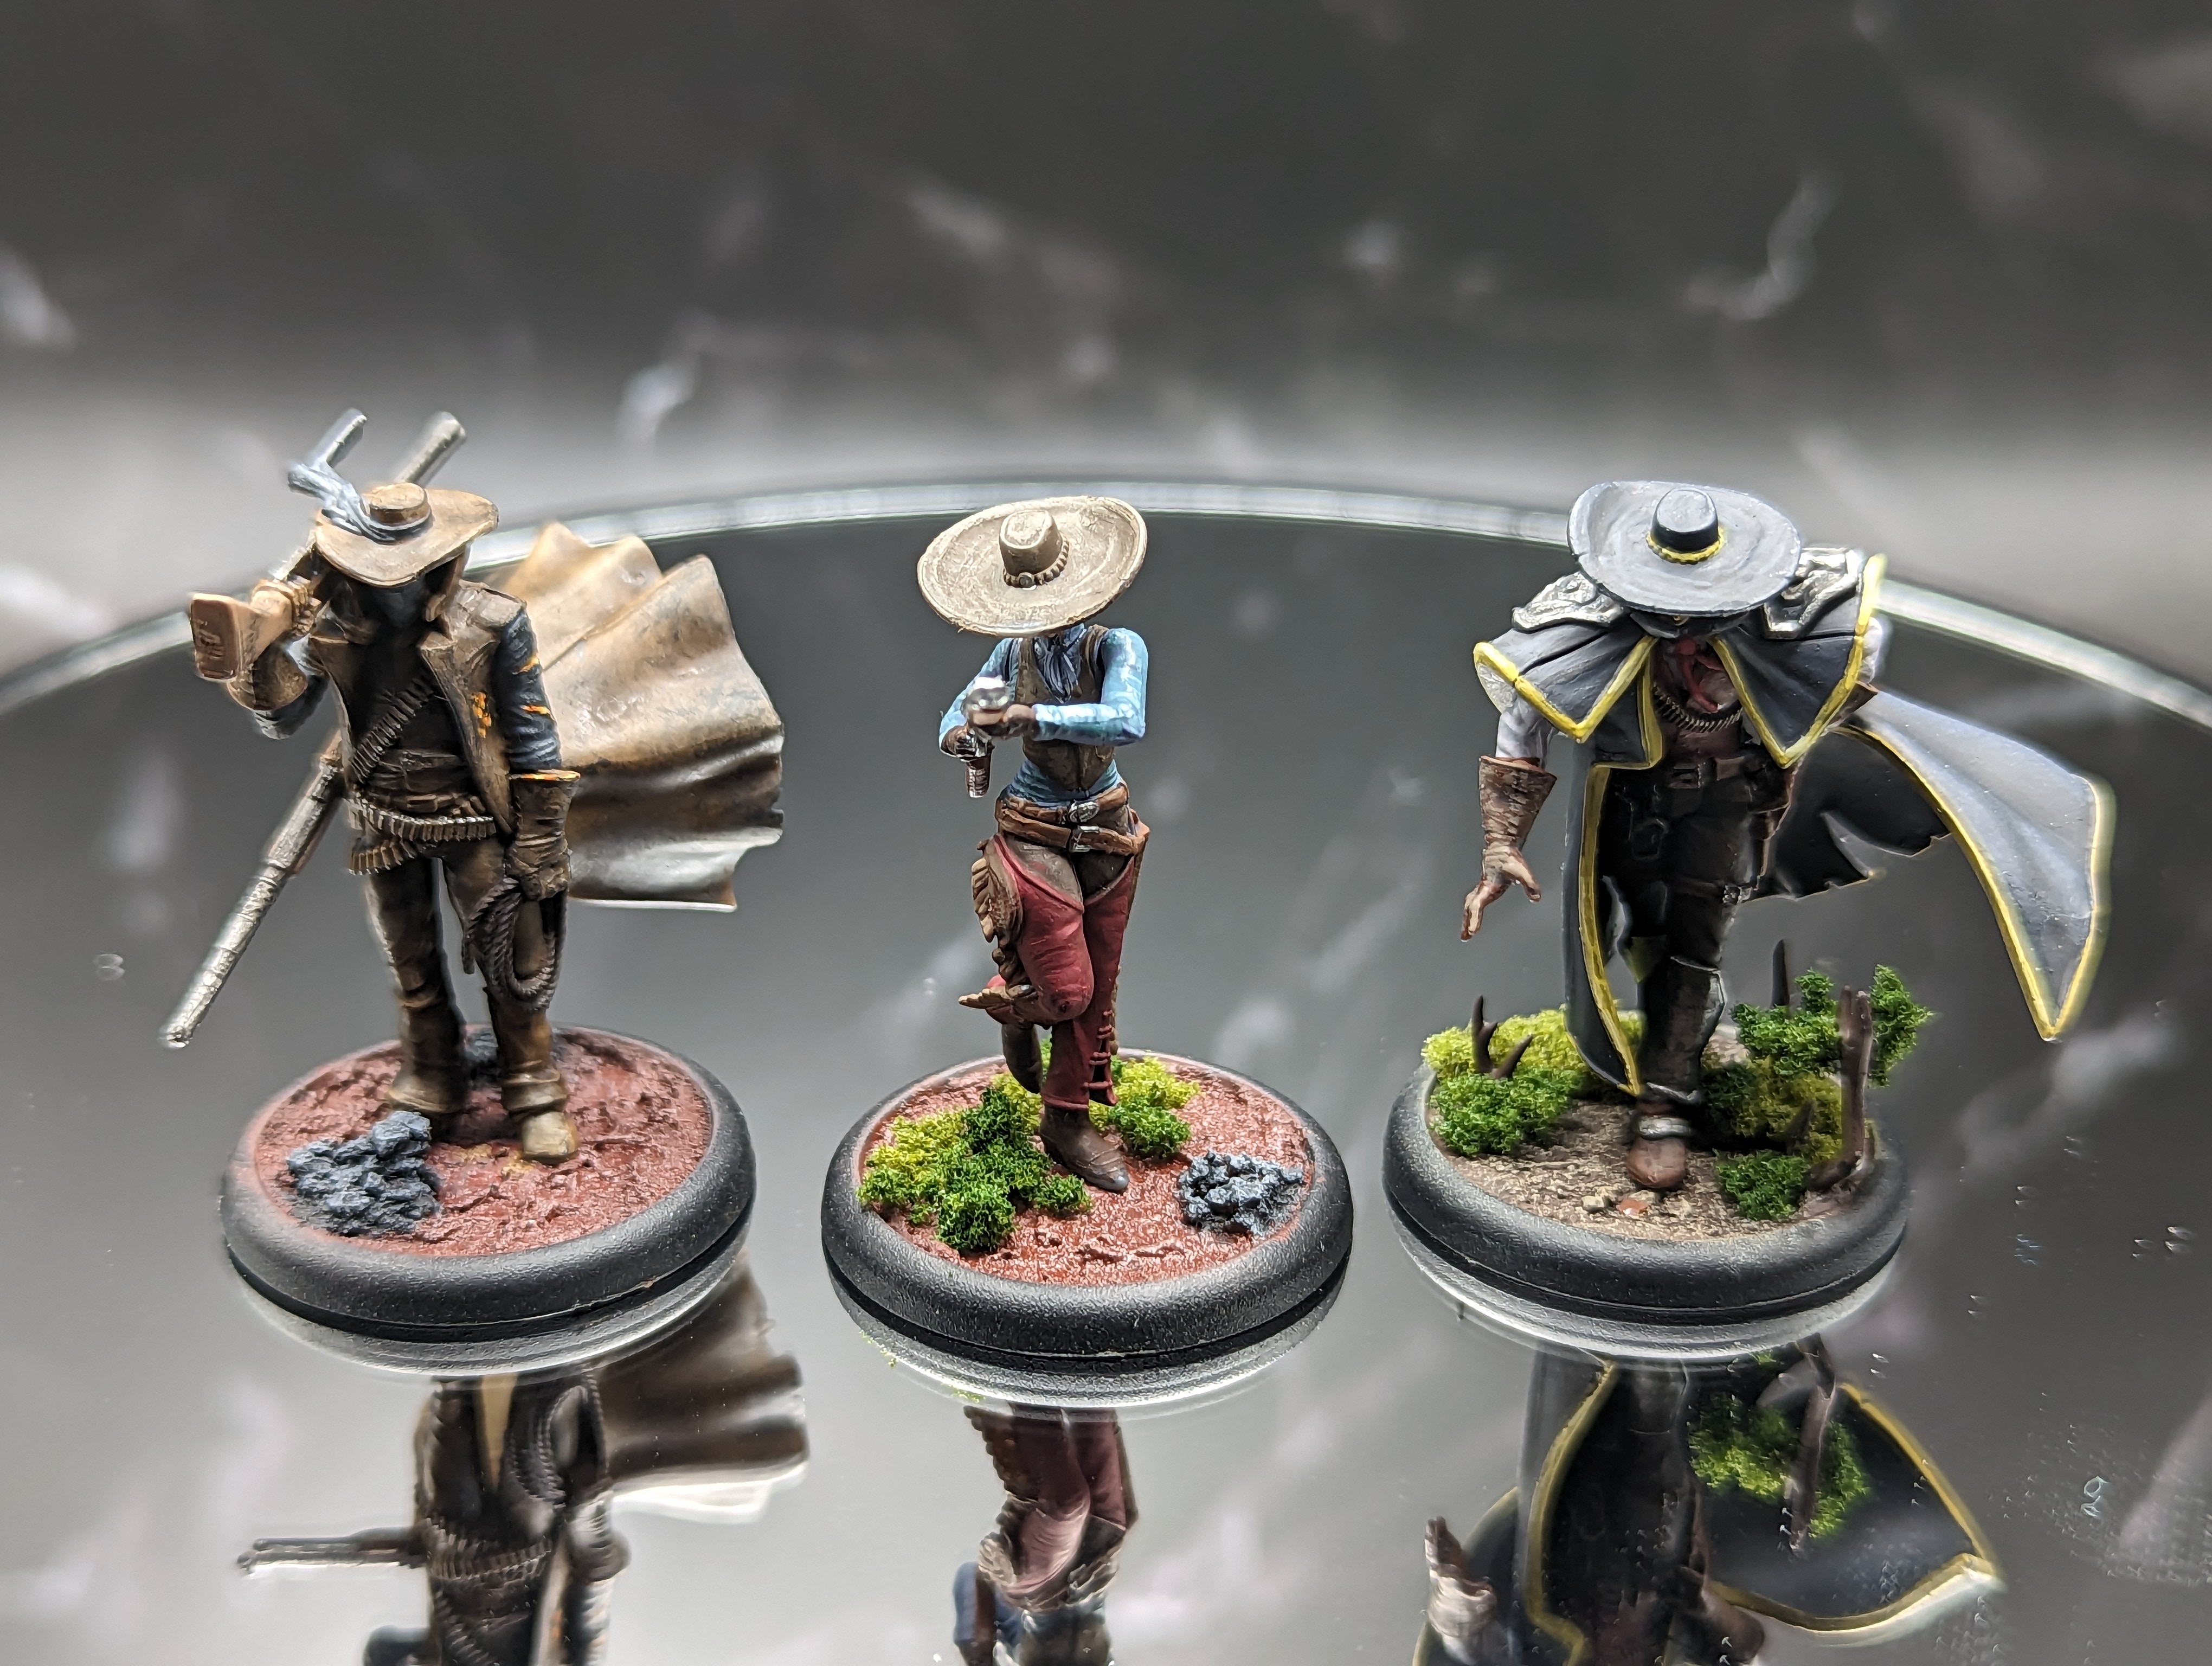
These were some of the most fun models ive painted in a while. Im not really sure why, they don’t look like they stand out very much. I think it was the combination of painting techniques, and some really well sculpted and characterful models. Im always impressed how Wyrd can manage to make normal-ish looking people look so unique and different, even though there are hundreds of models in their range.
Guns... lots of guns
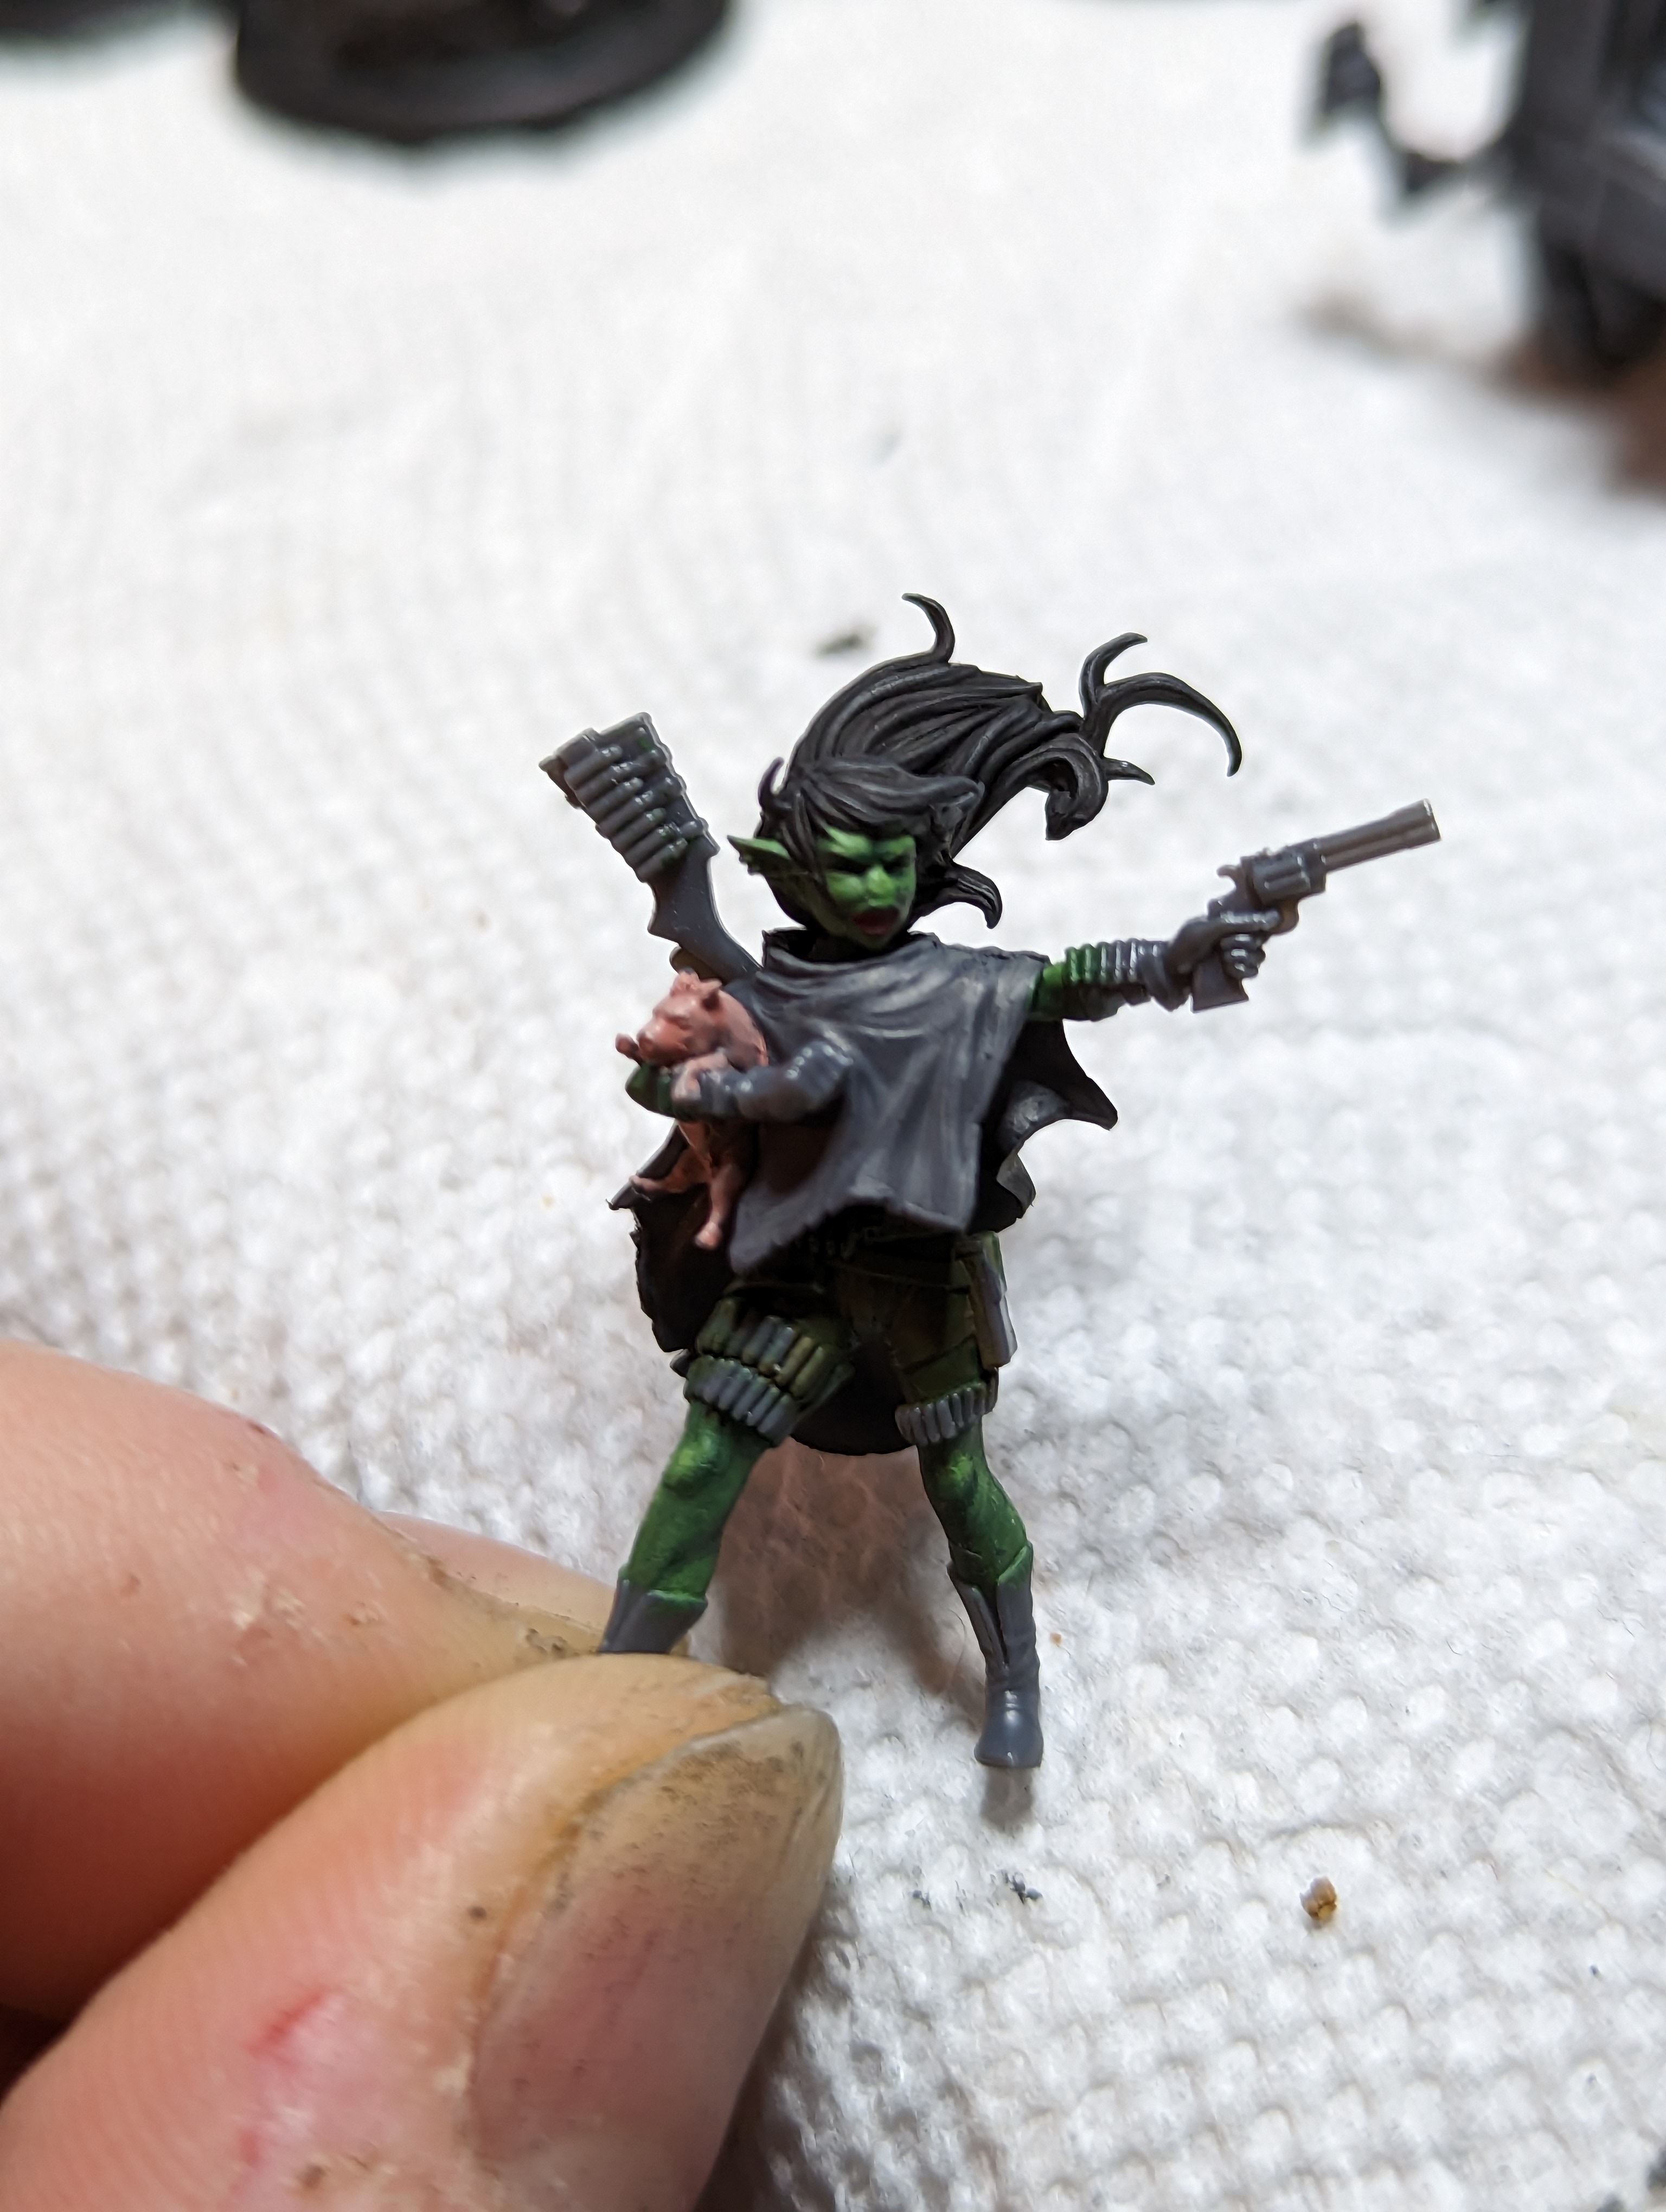
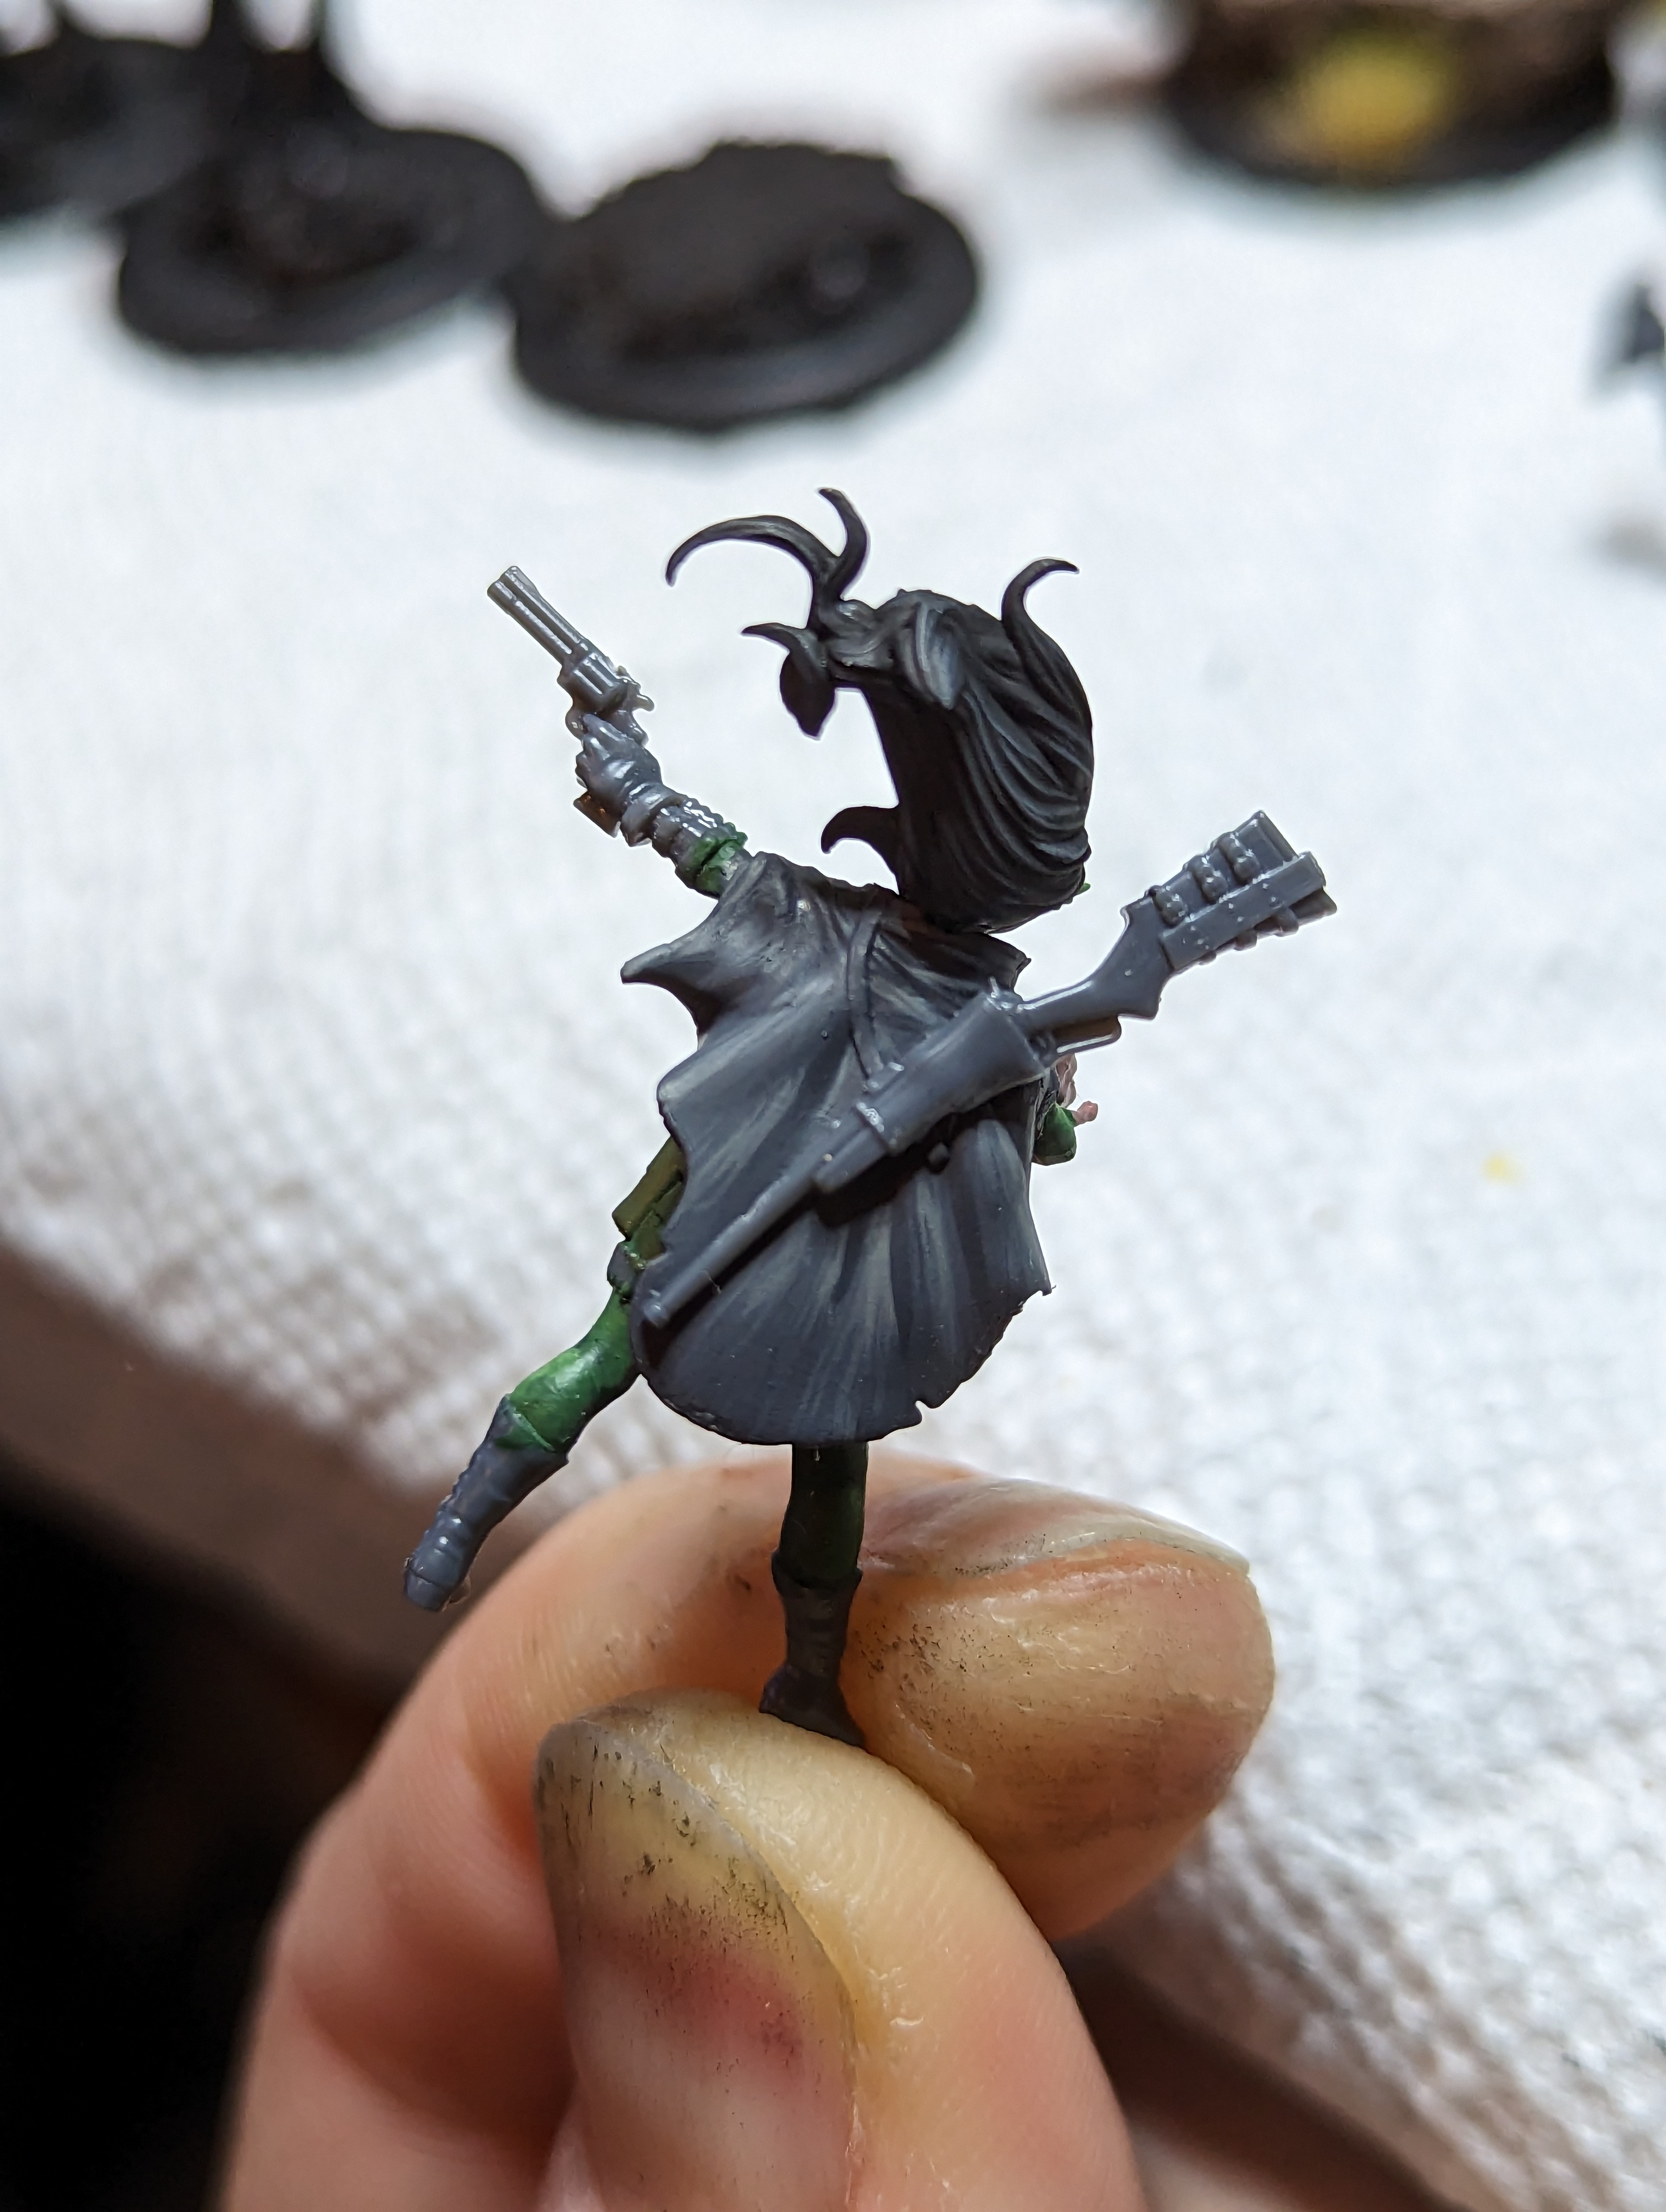
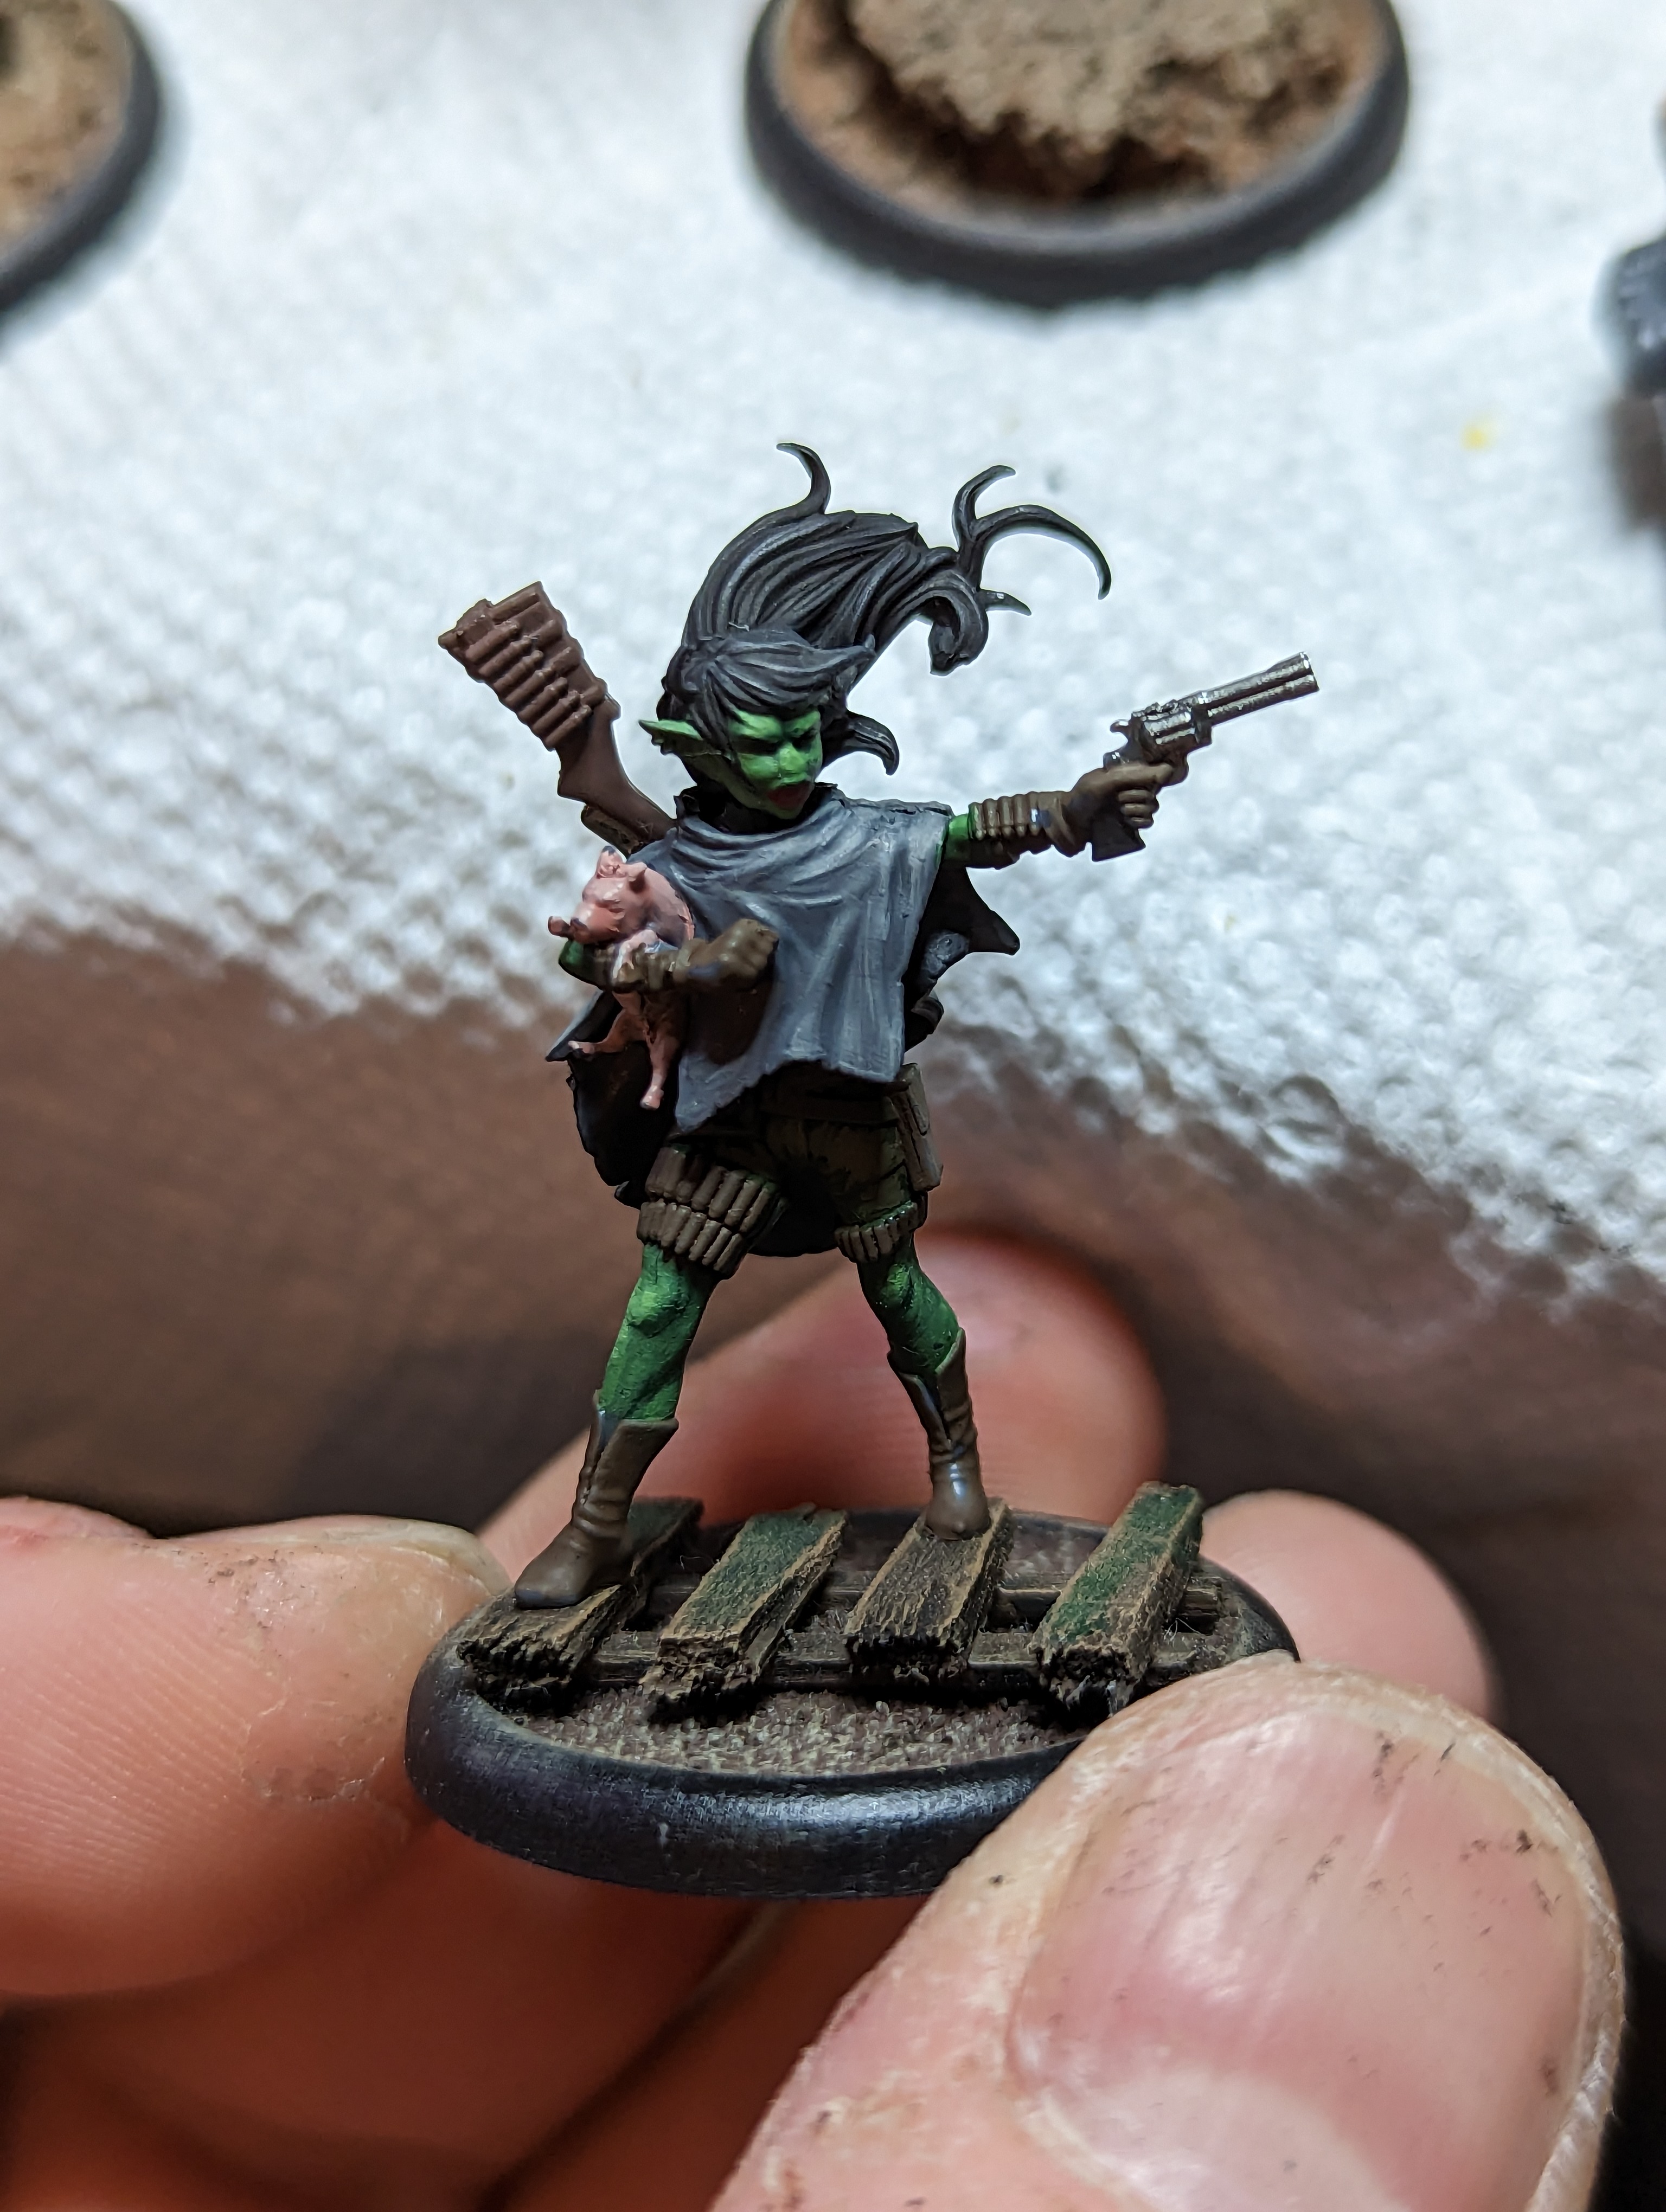
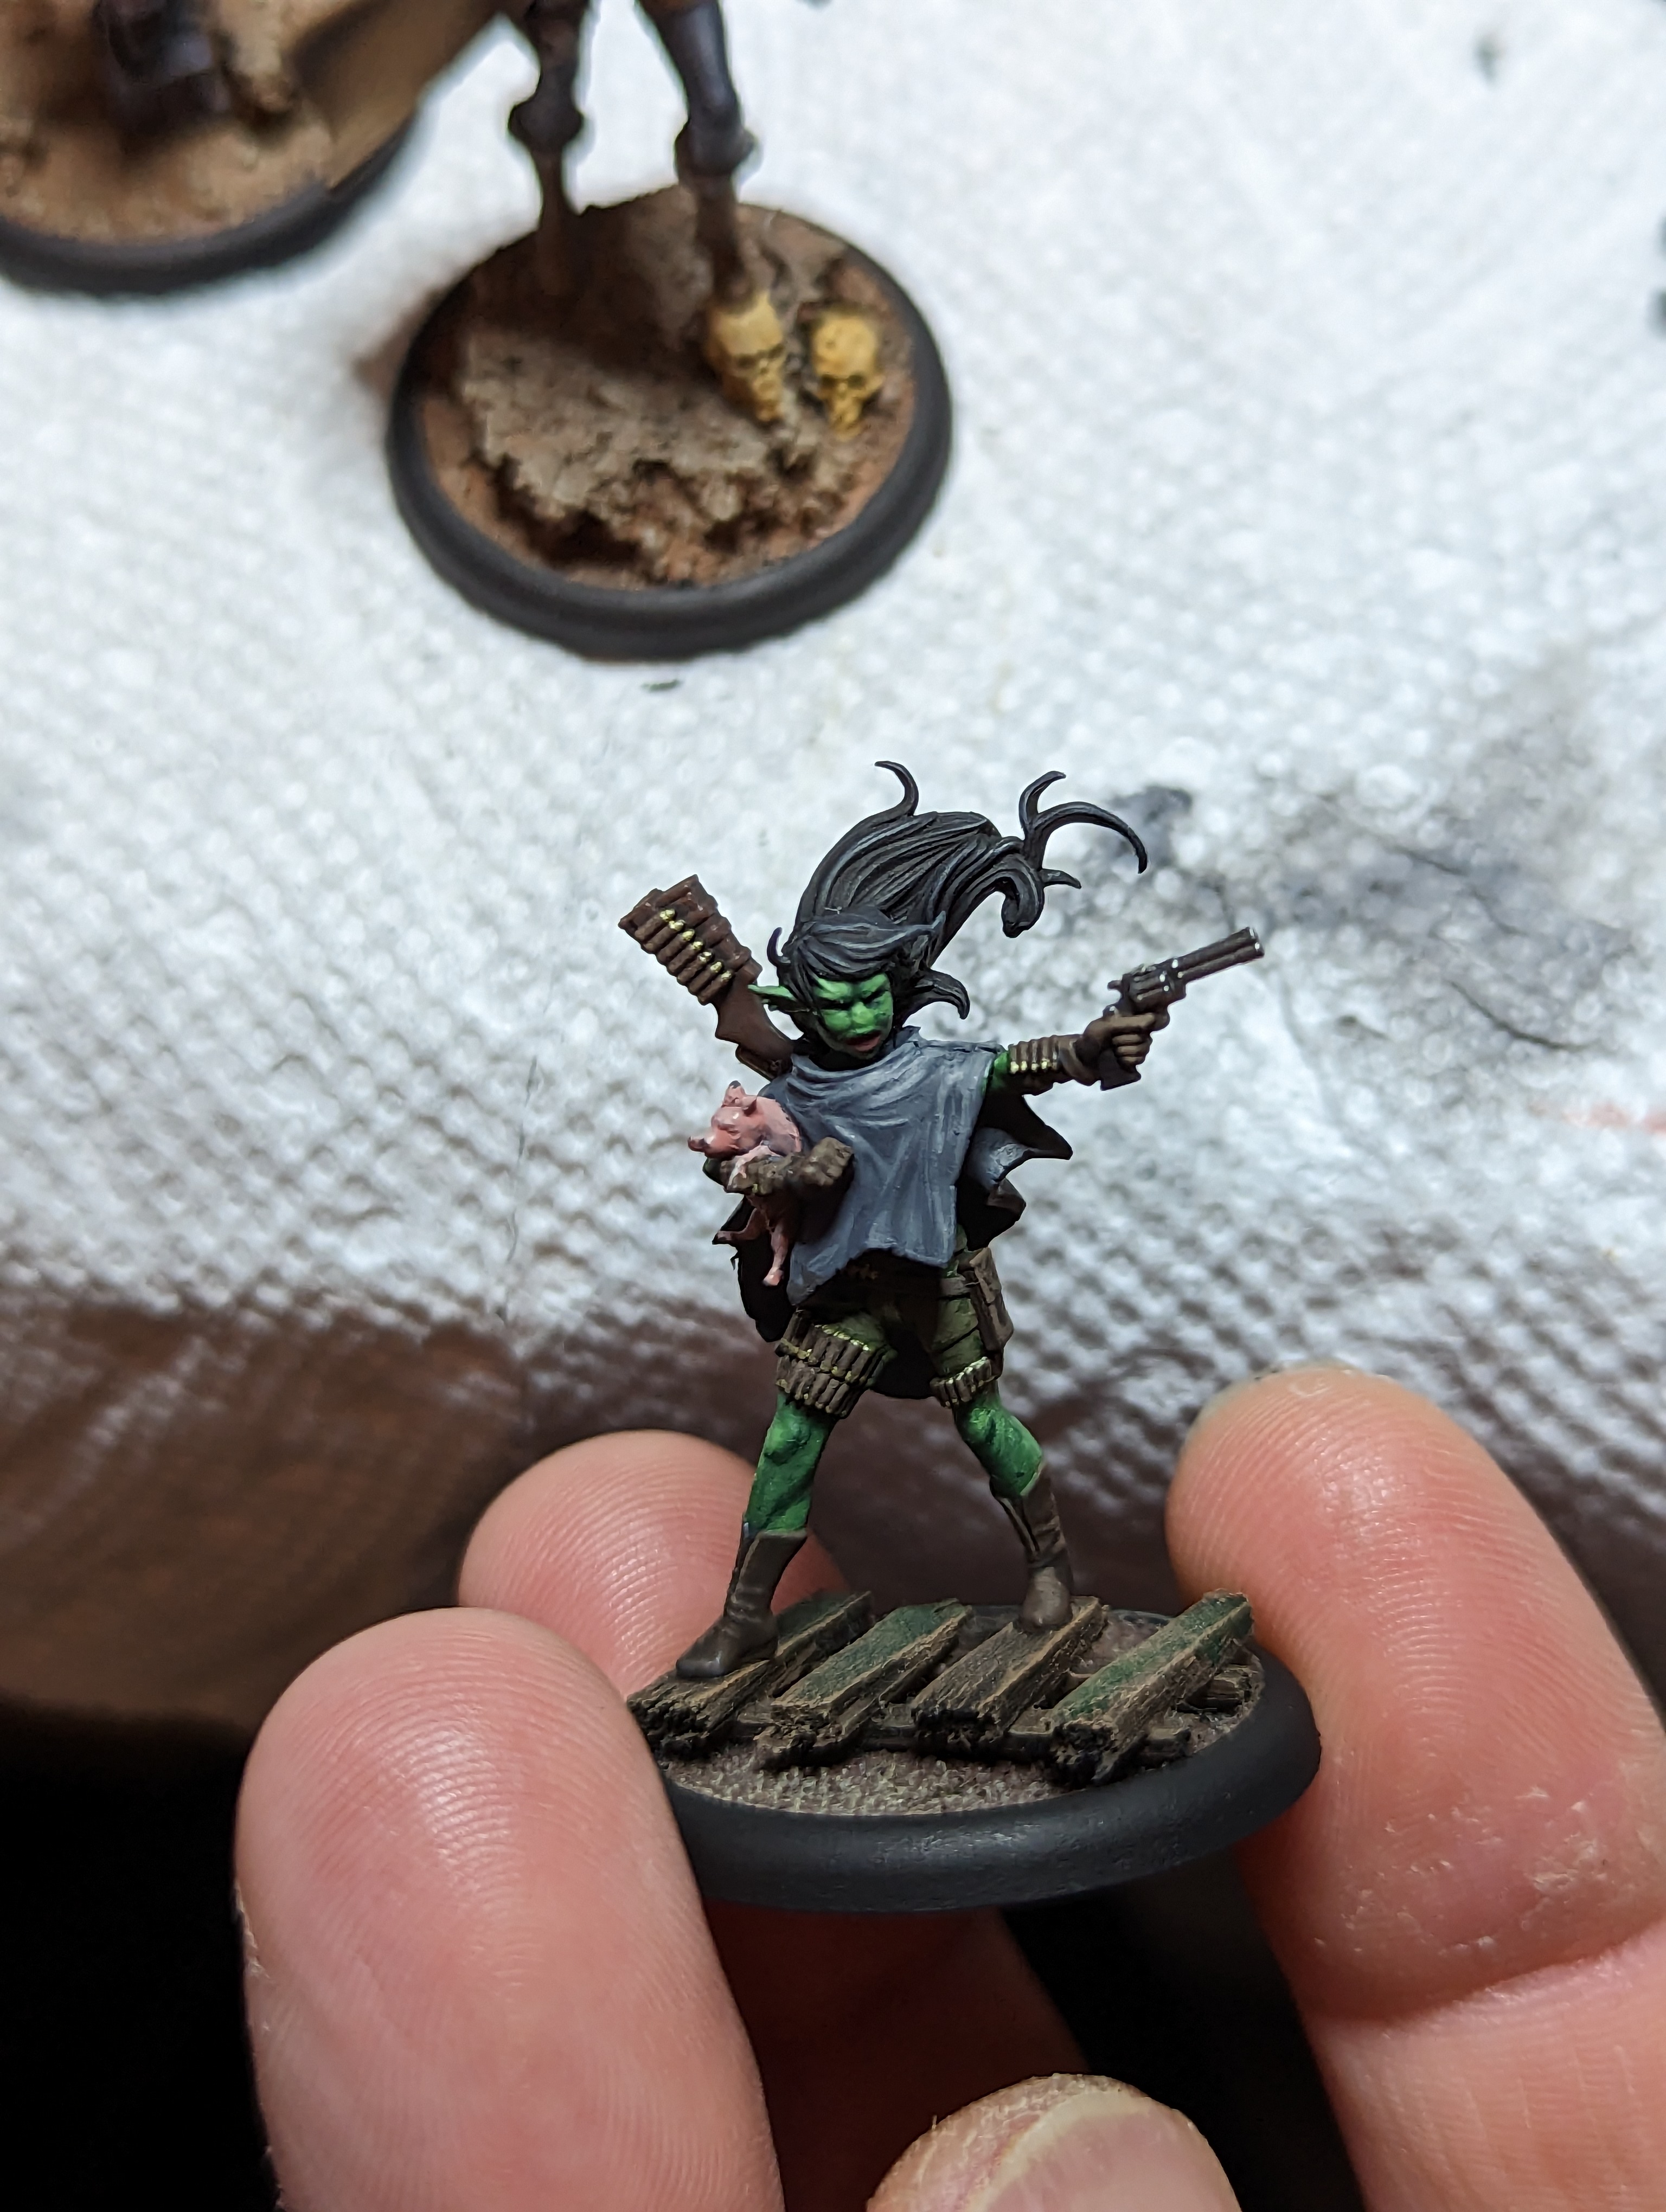

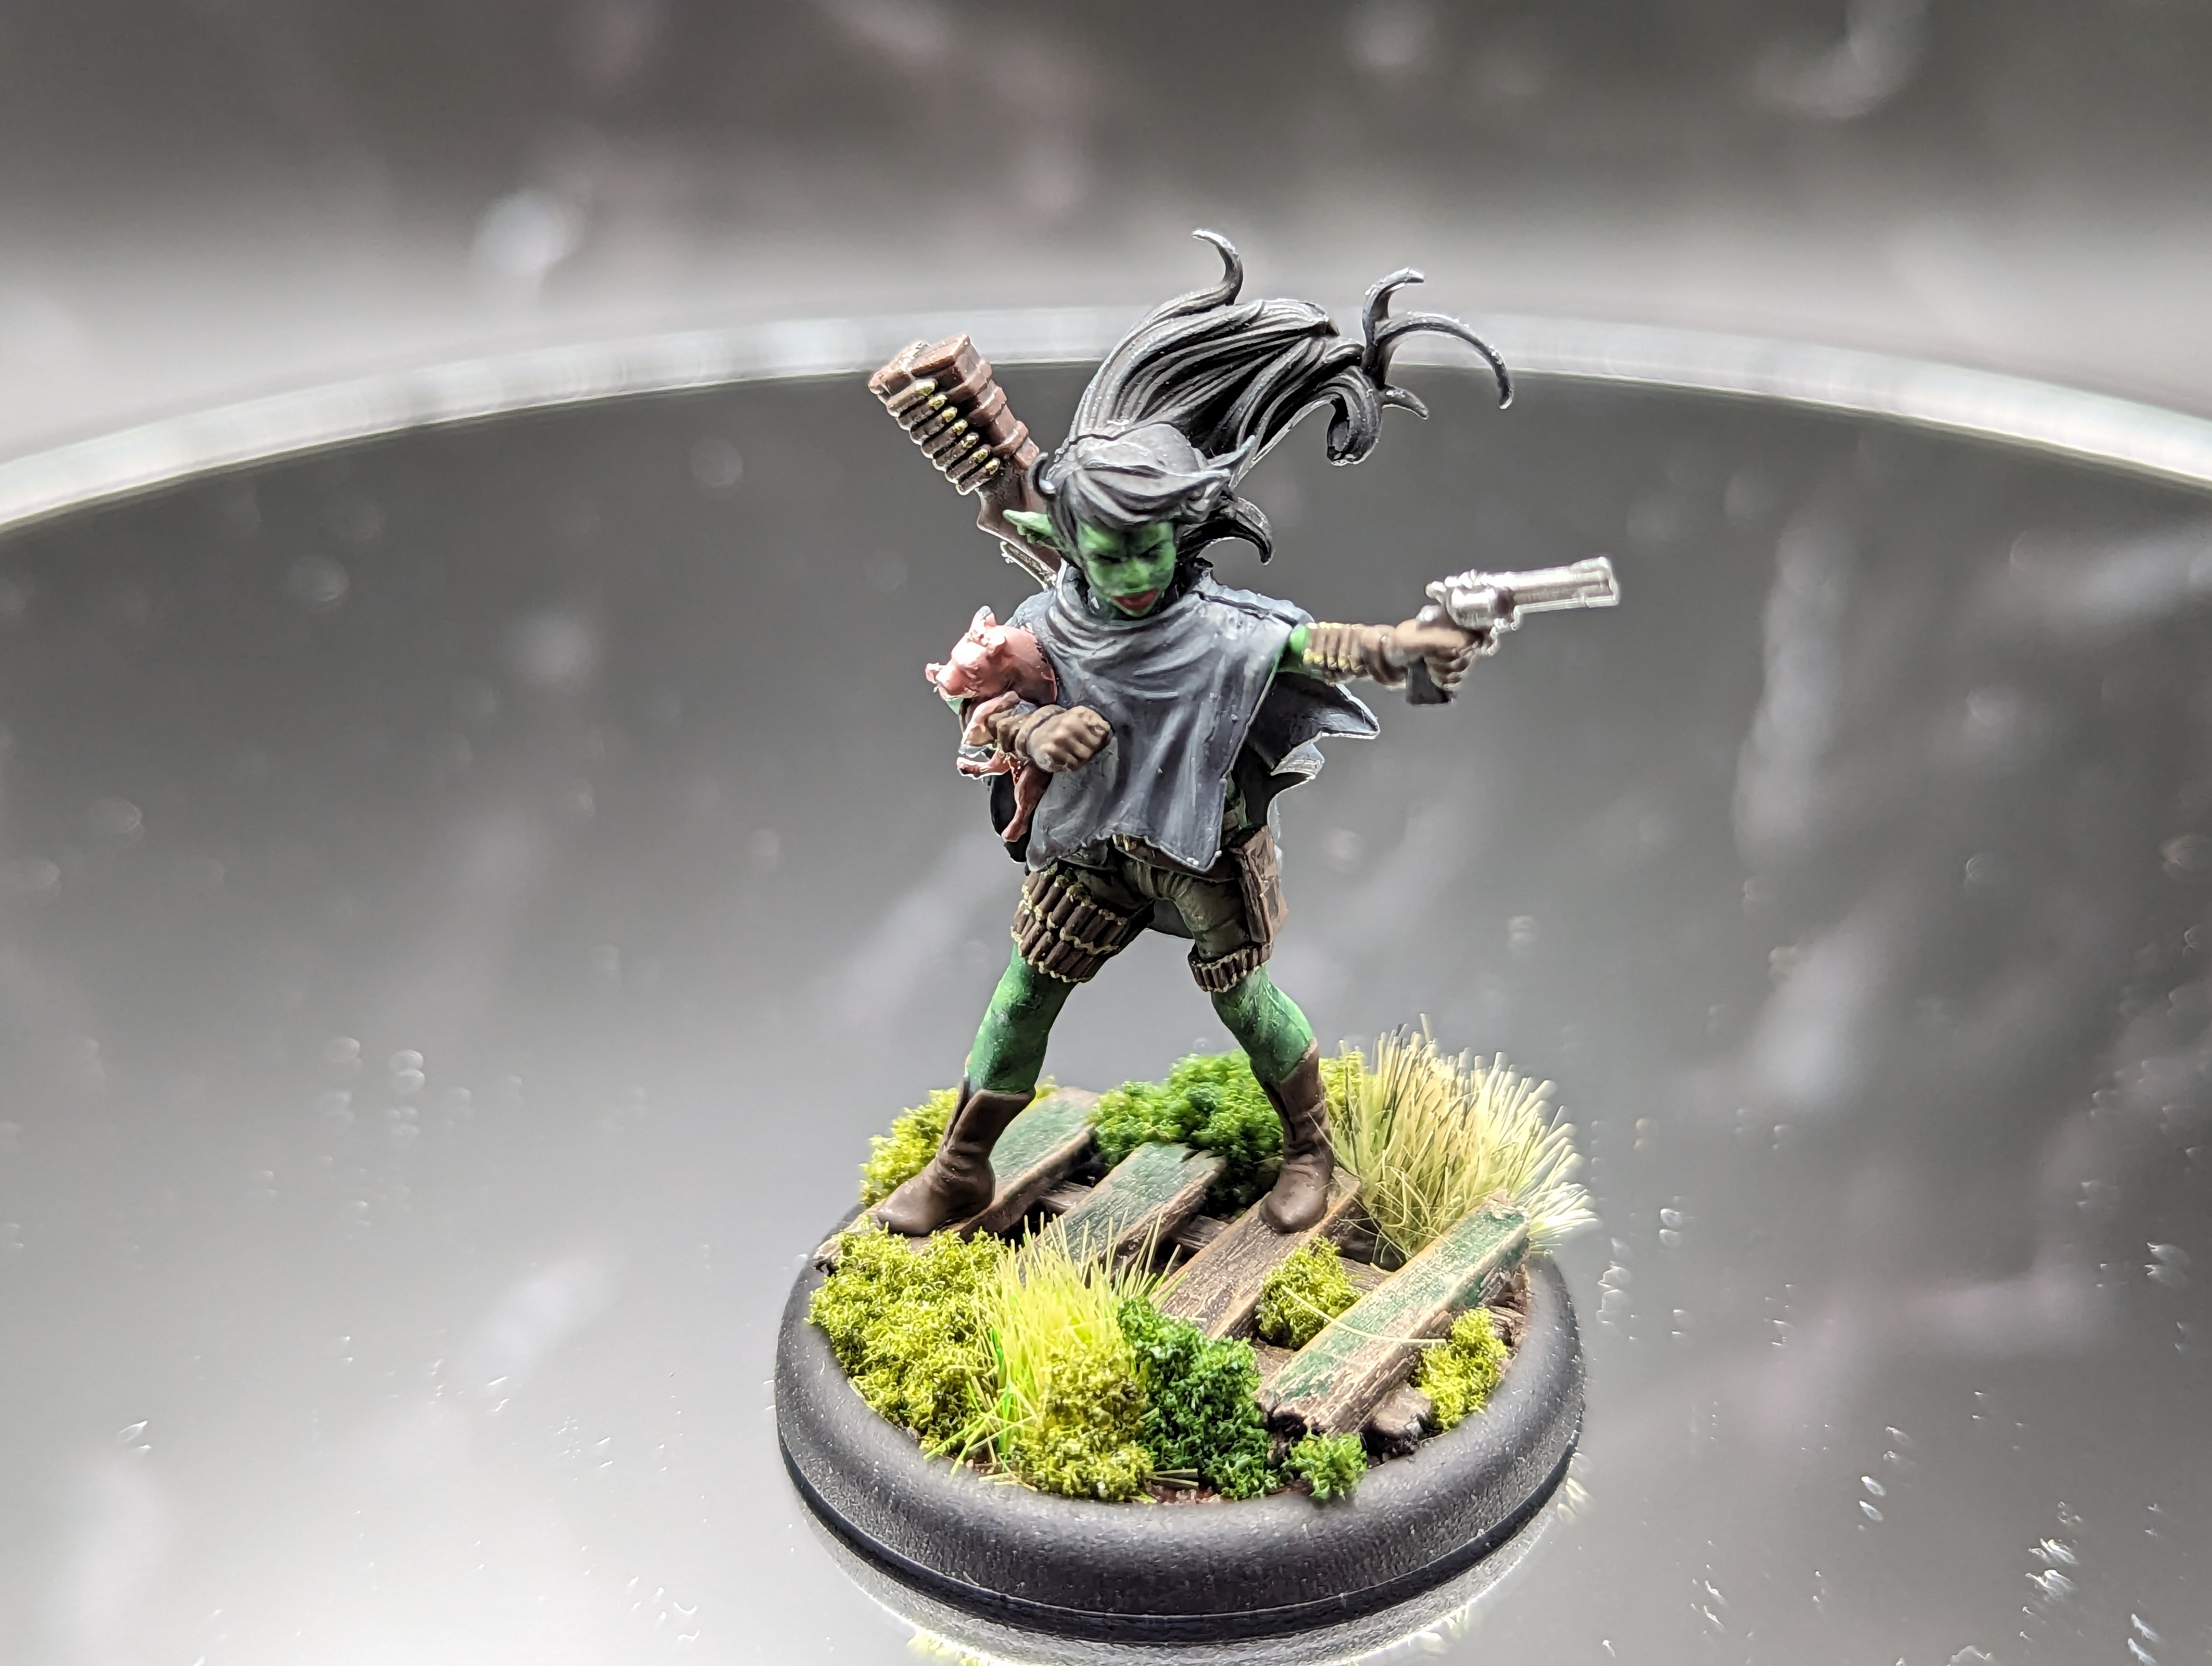
Ophelia was a fun model to paint. I started by doing her skin with my typical gremlin formula, its basically just GWs formula for Orks. Shes got a pin in her arms which I painted with a muted pink, and then it was just a matter of painting her clothes and all her belts.
The finishing touch was to paint the tips of all the bullets with a metallic paint. I think it adds a lot. Shes a lady who likes guns, and she needs plenty of ammo to fight off the red cage abominations.
The last step was to add a bunch of random vegetation to make it look like she’s in the swamp.
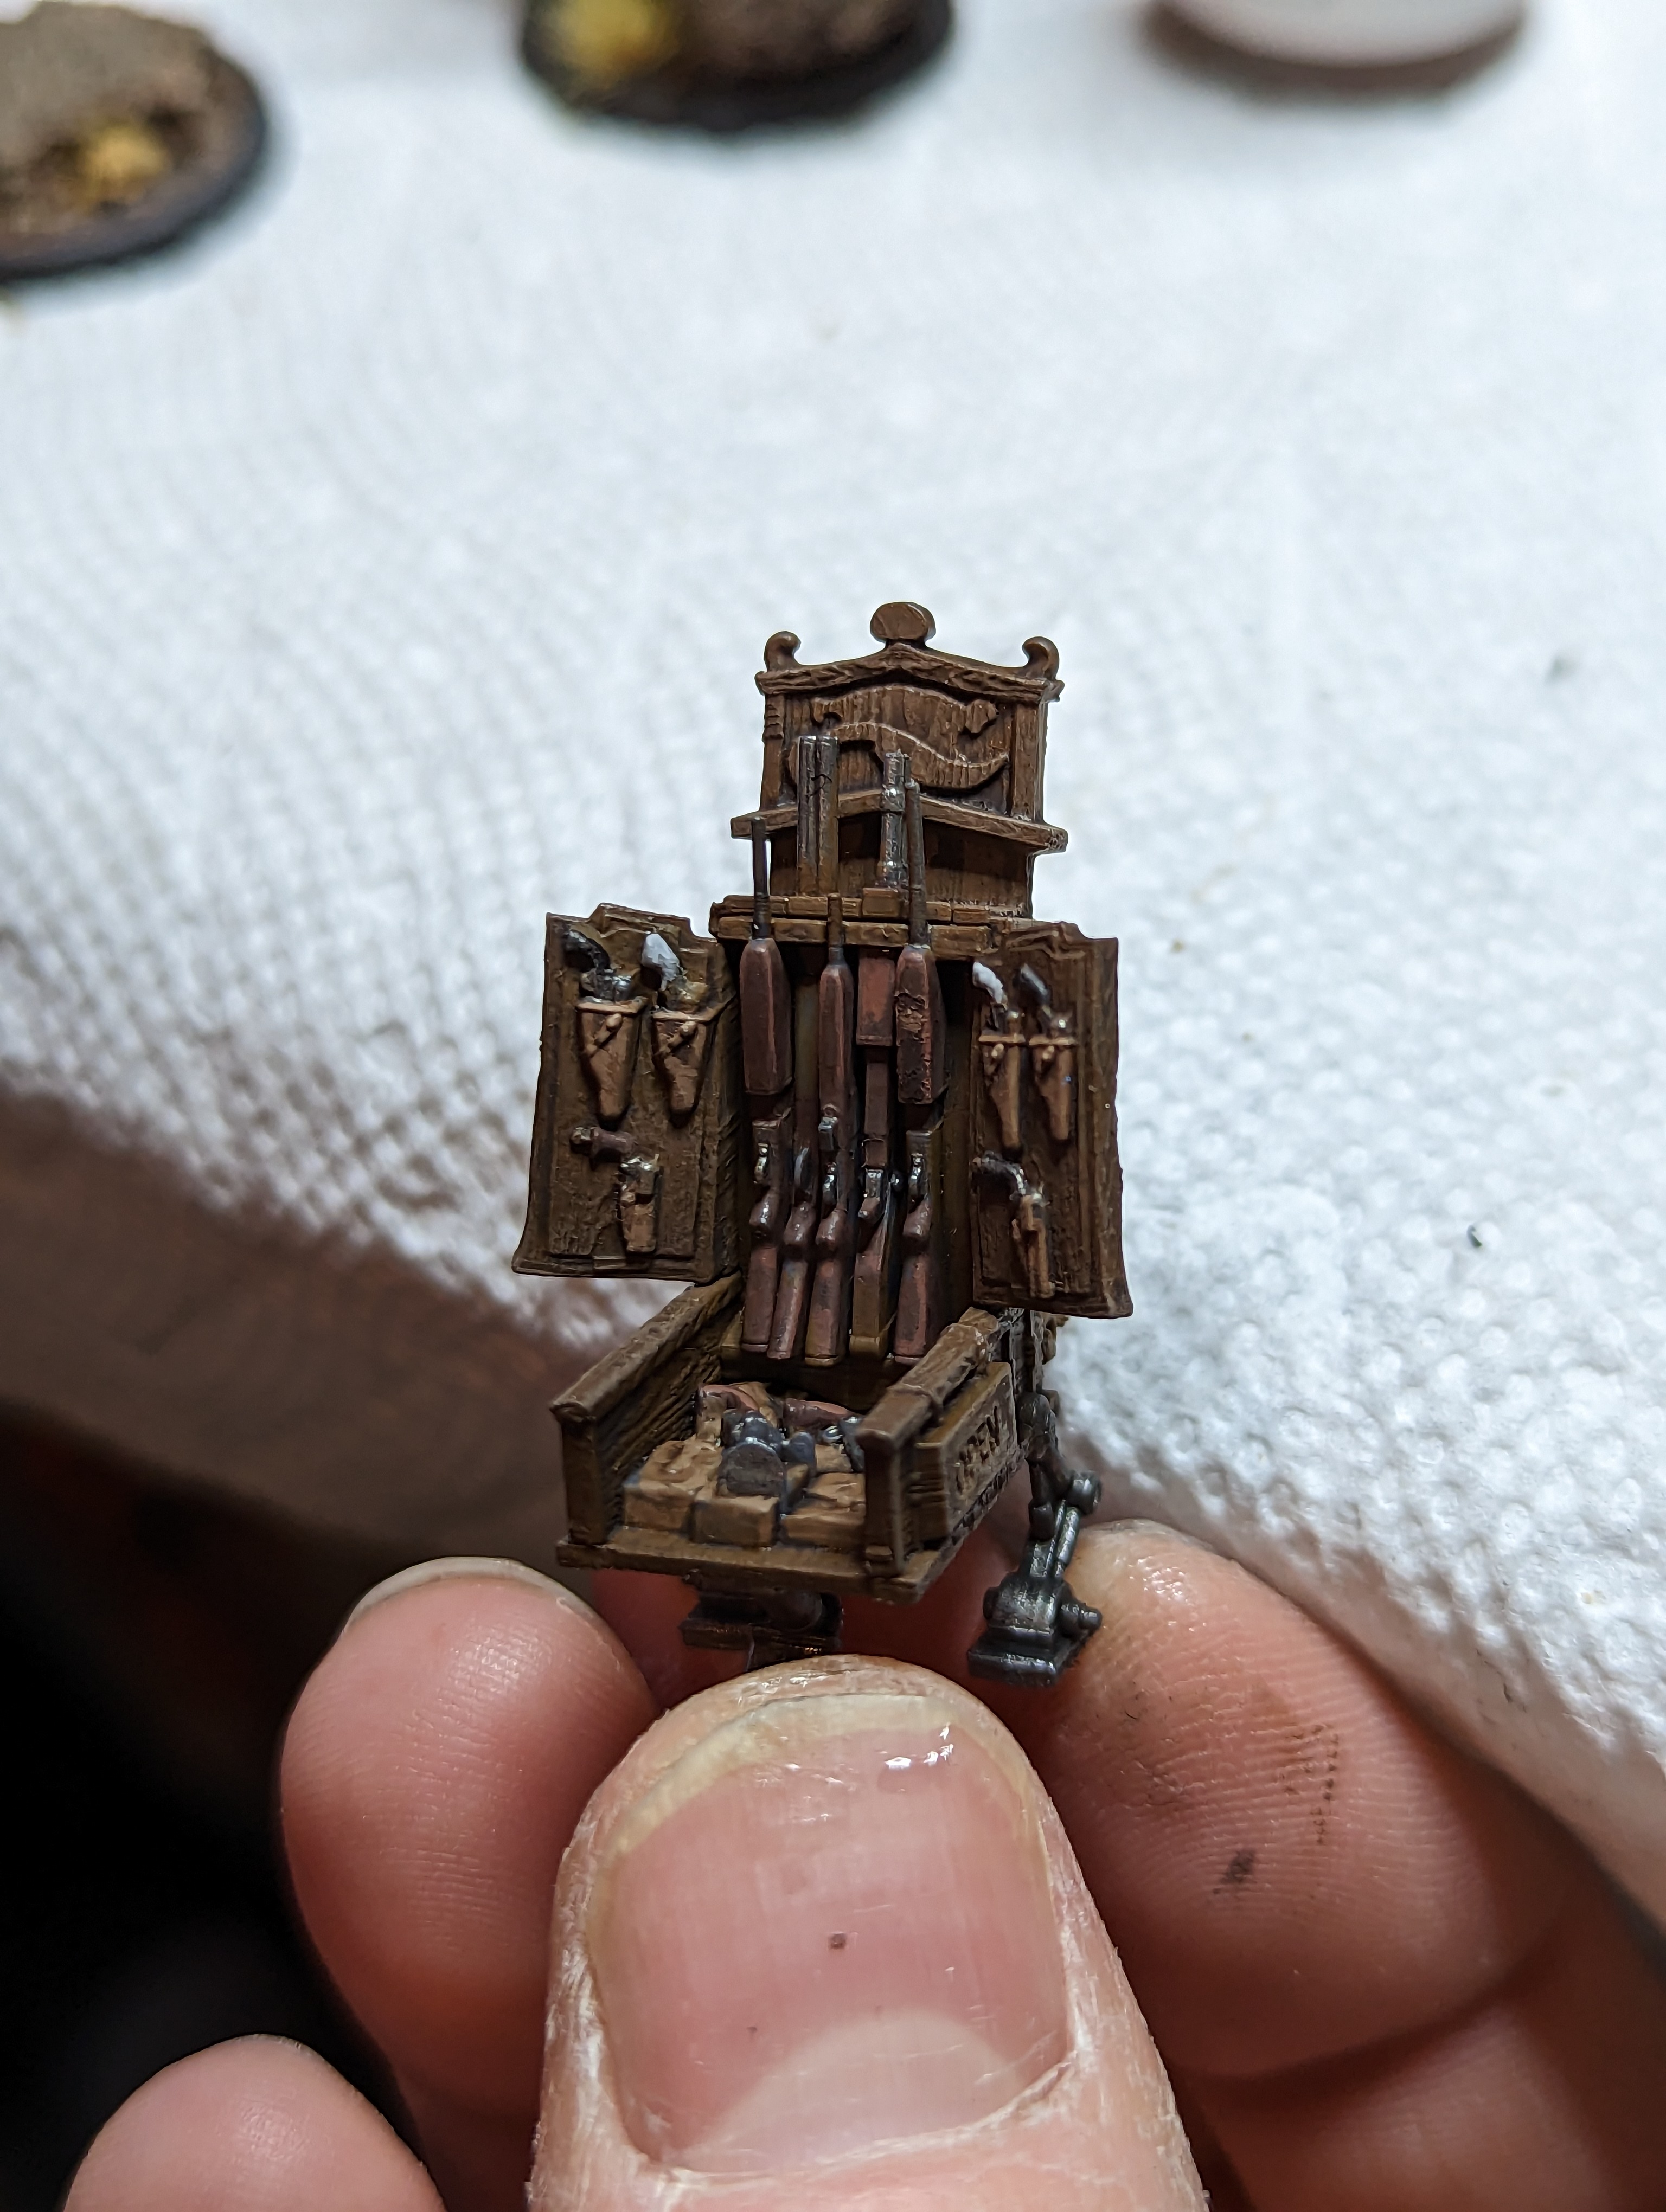

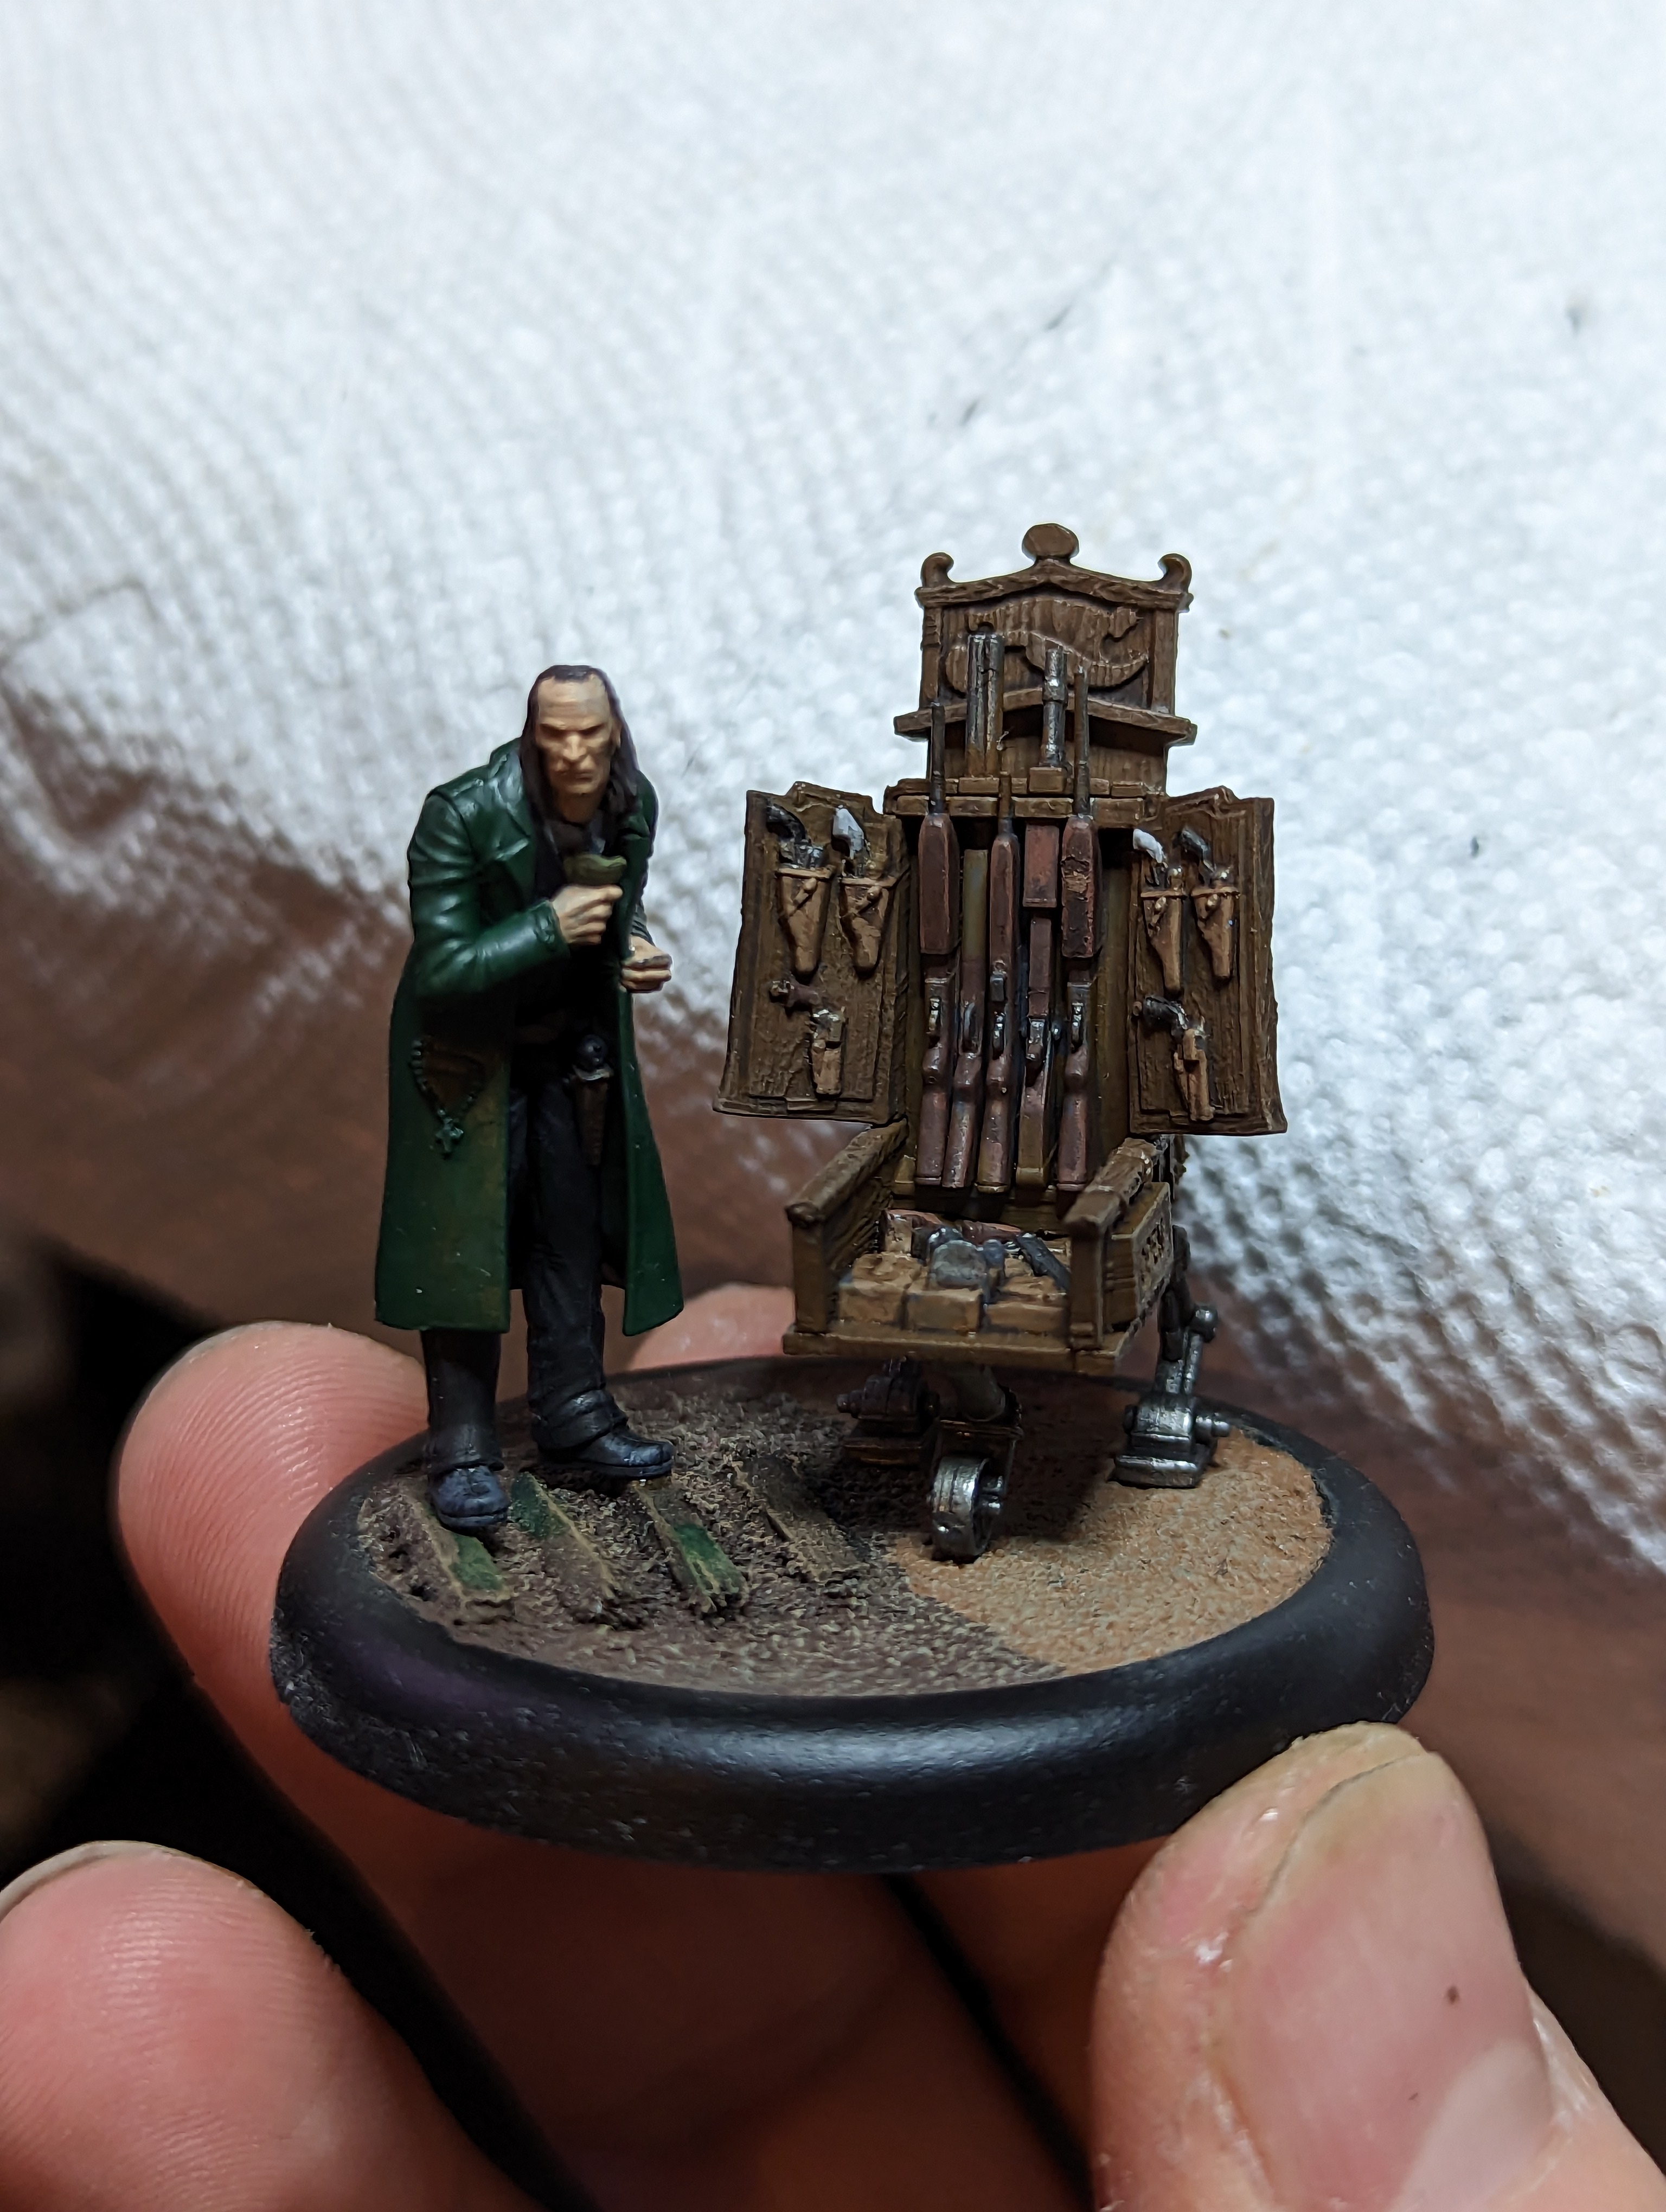
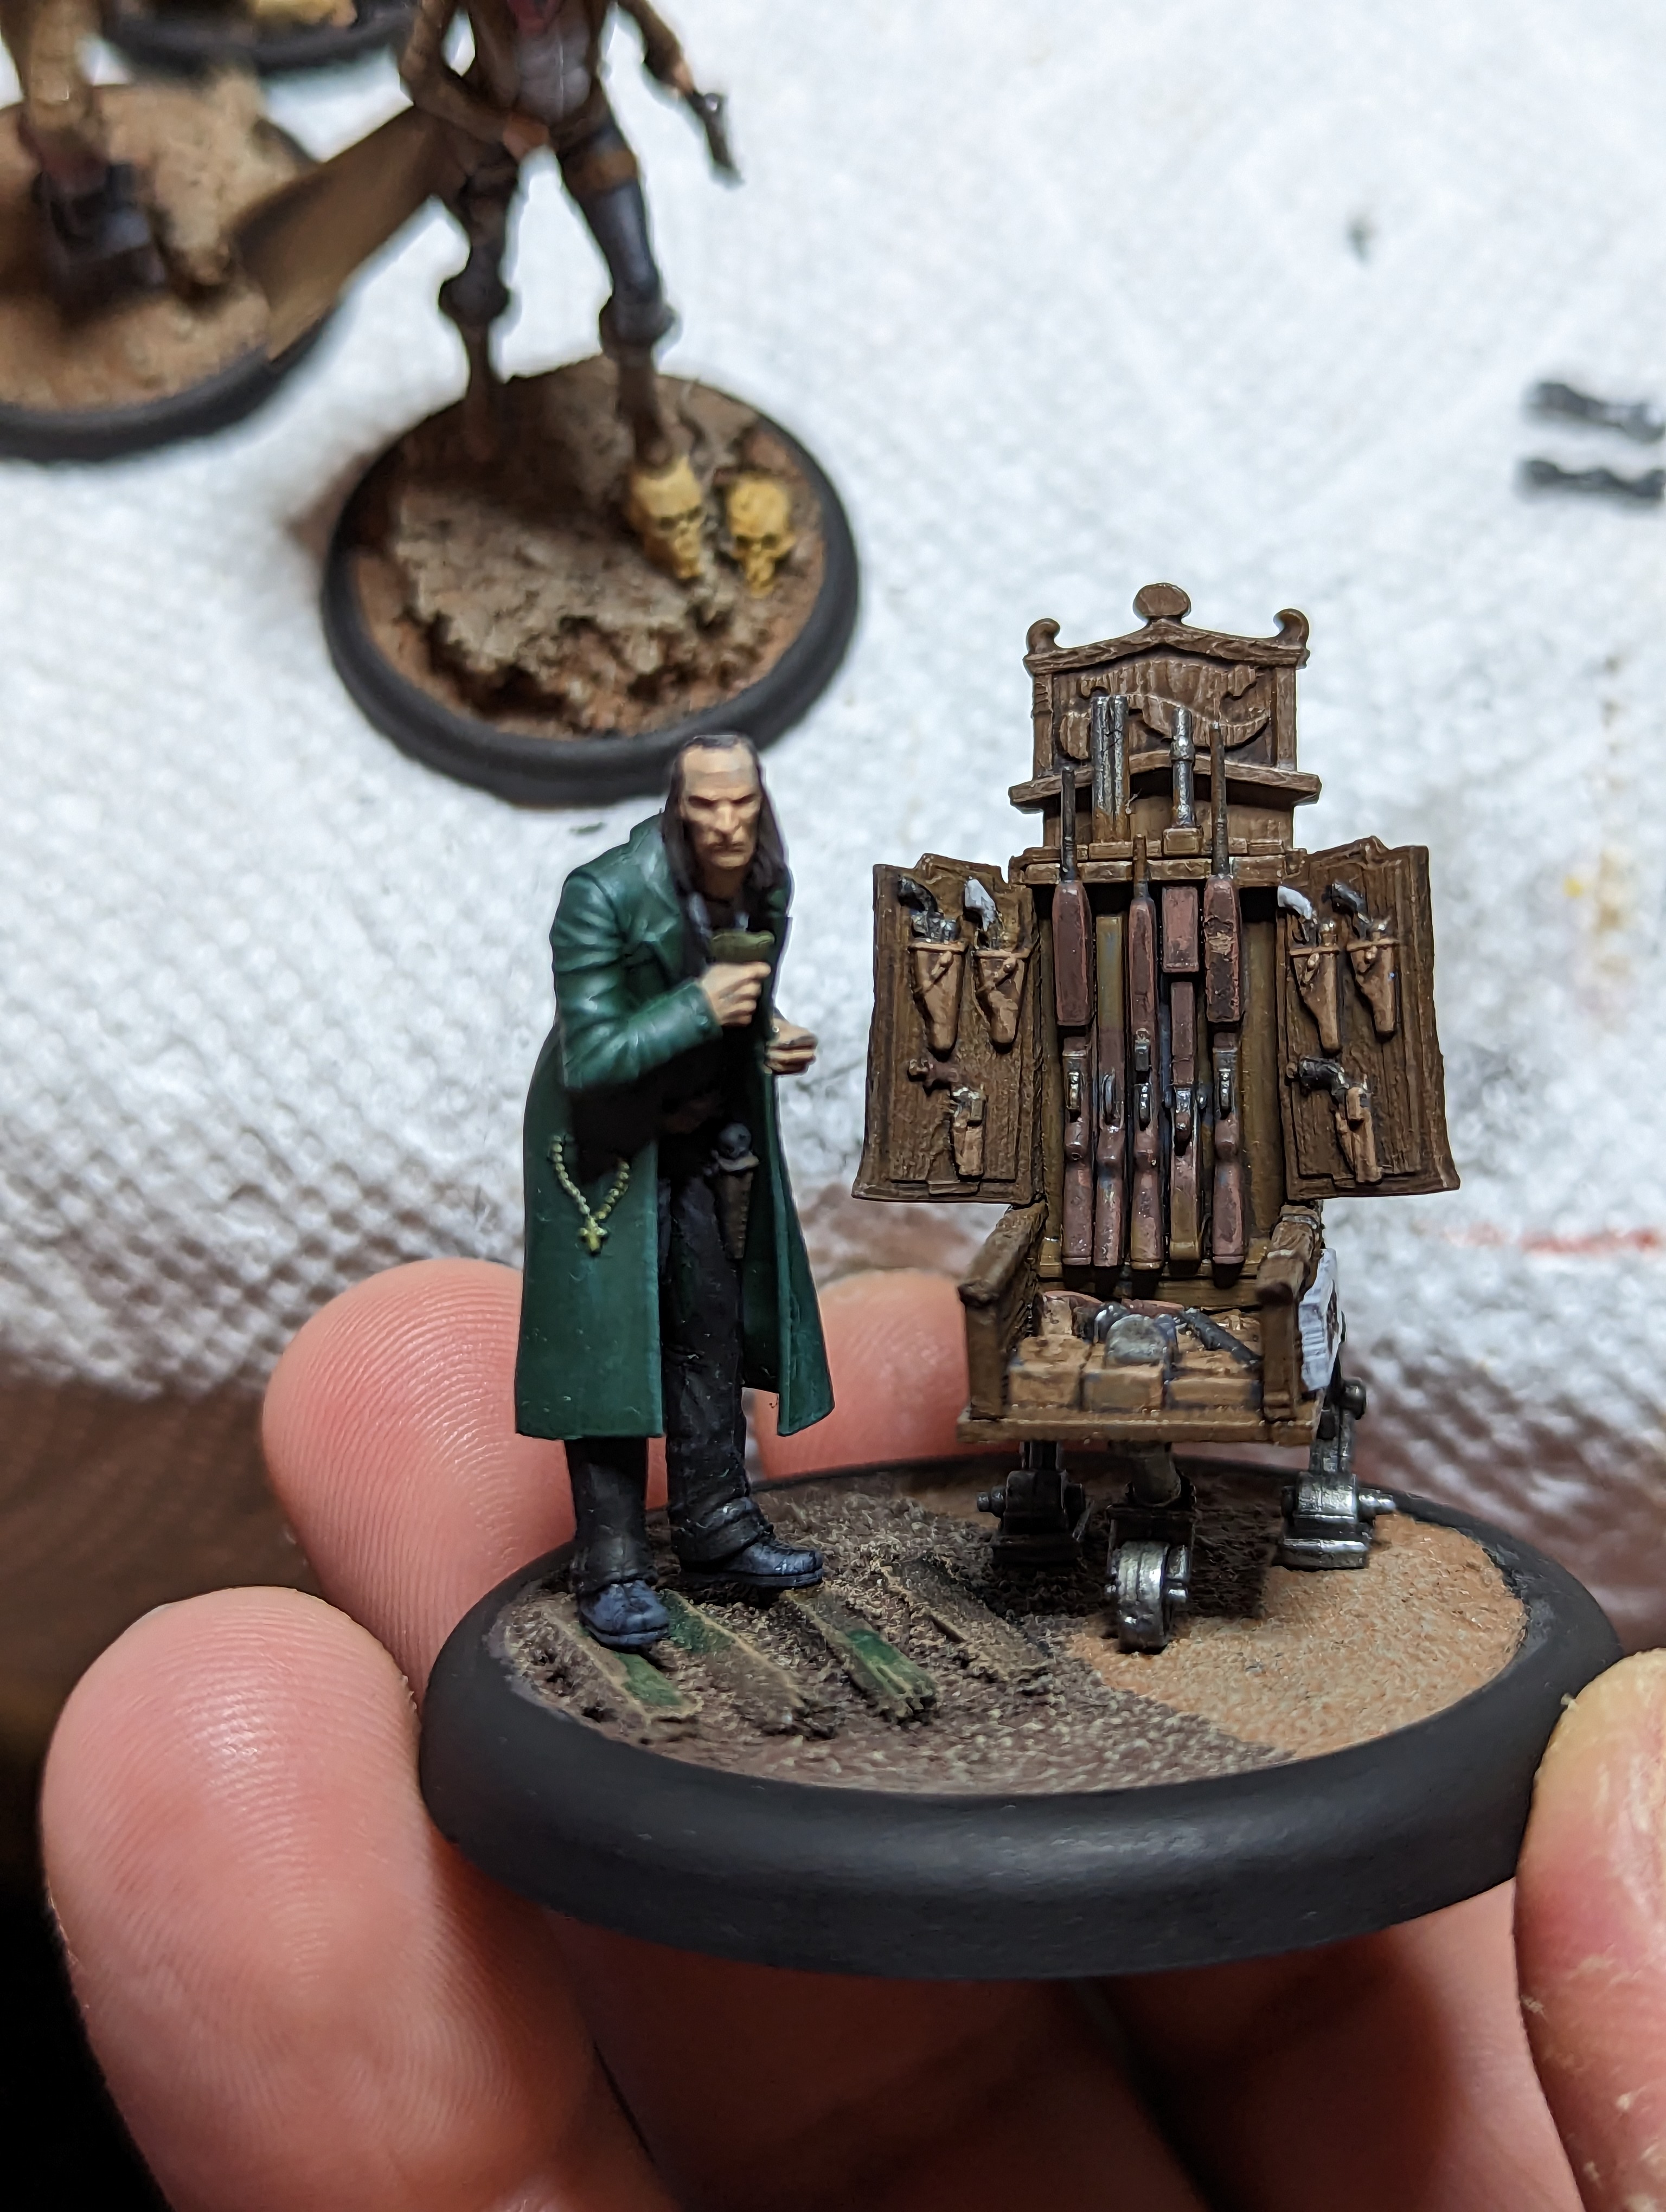
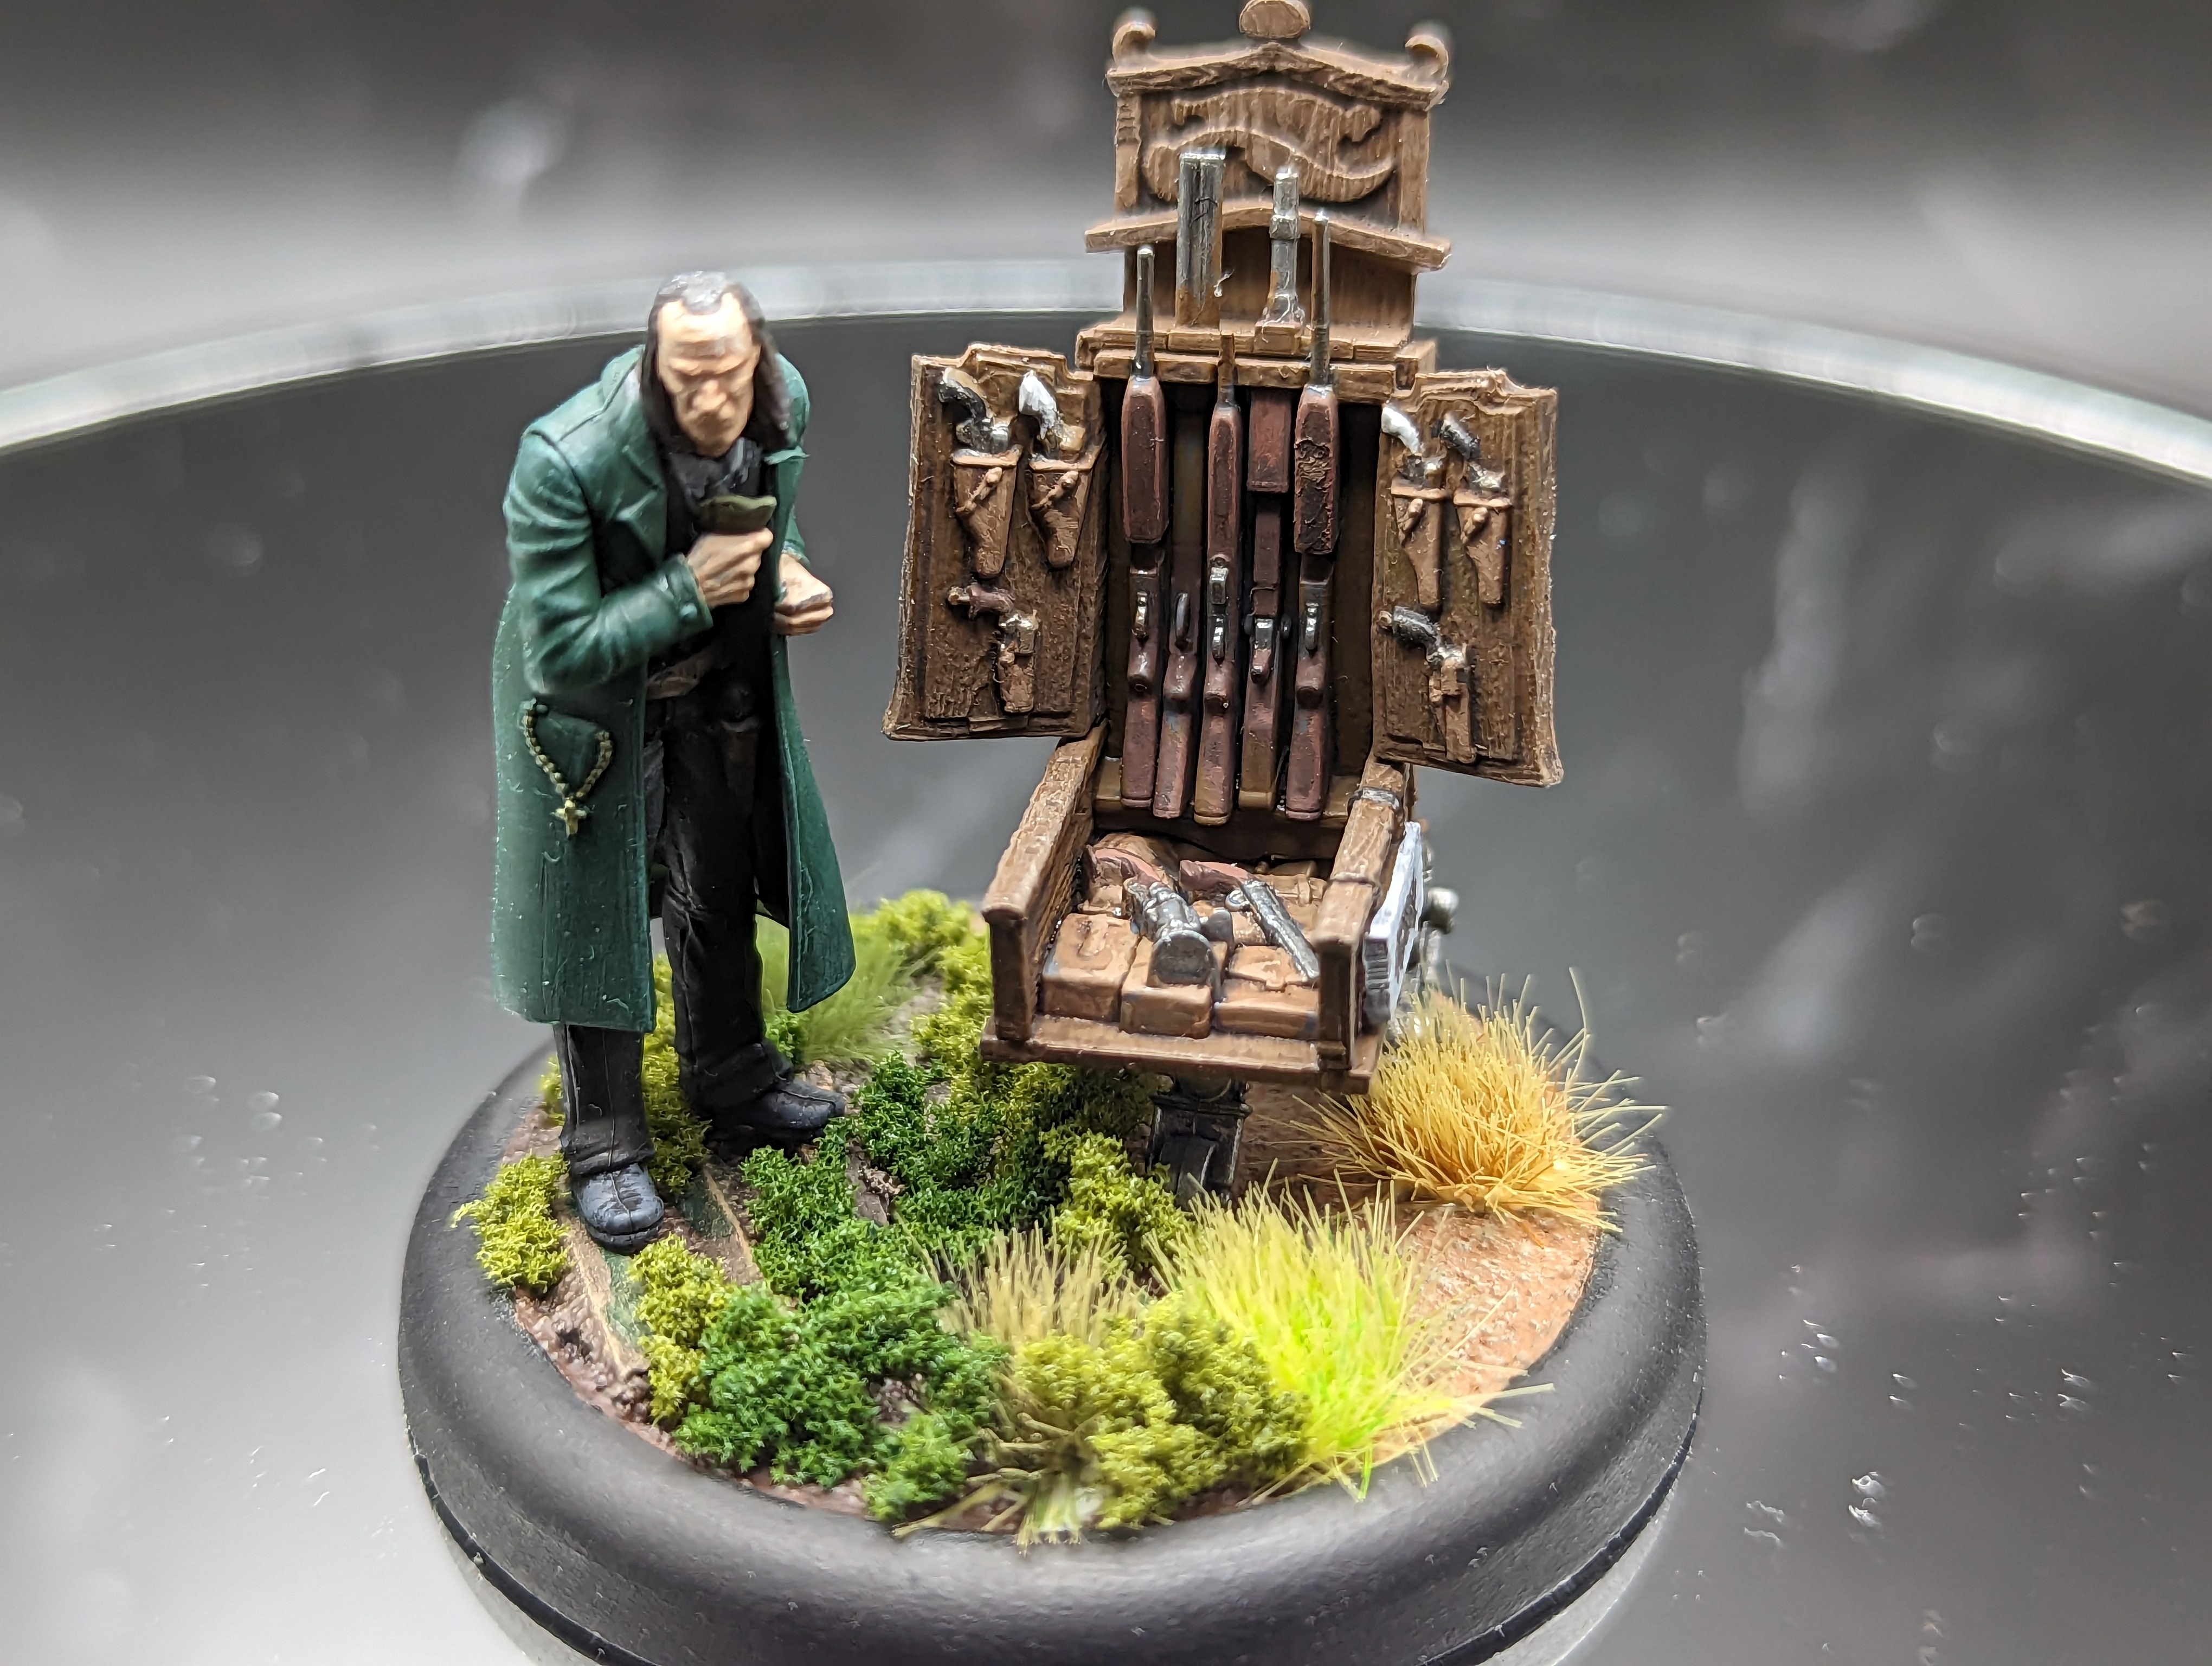
Sly six shots himself is kind of an understated model, so he got a pretty basic paintjob. Next to his is his case of goodies that he peddles, and I think it is the part of the model that will get the most attention.
I started by base coating the wooden parts, and then going over all of the gun barrels and handles. Then I hit the whole thing with a dark brown wash. I probably could have stopped there, but I decided to go back over it all with a bit of a highlight to make some parts stand out.
The I added foliage, the same swamp stuff to some side, and some dry deserty stuff to the other. Overall I was pretty happy with the transition between the two biomes.
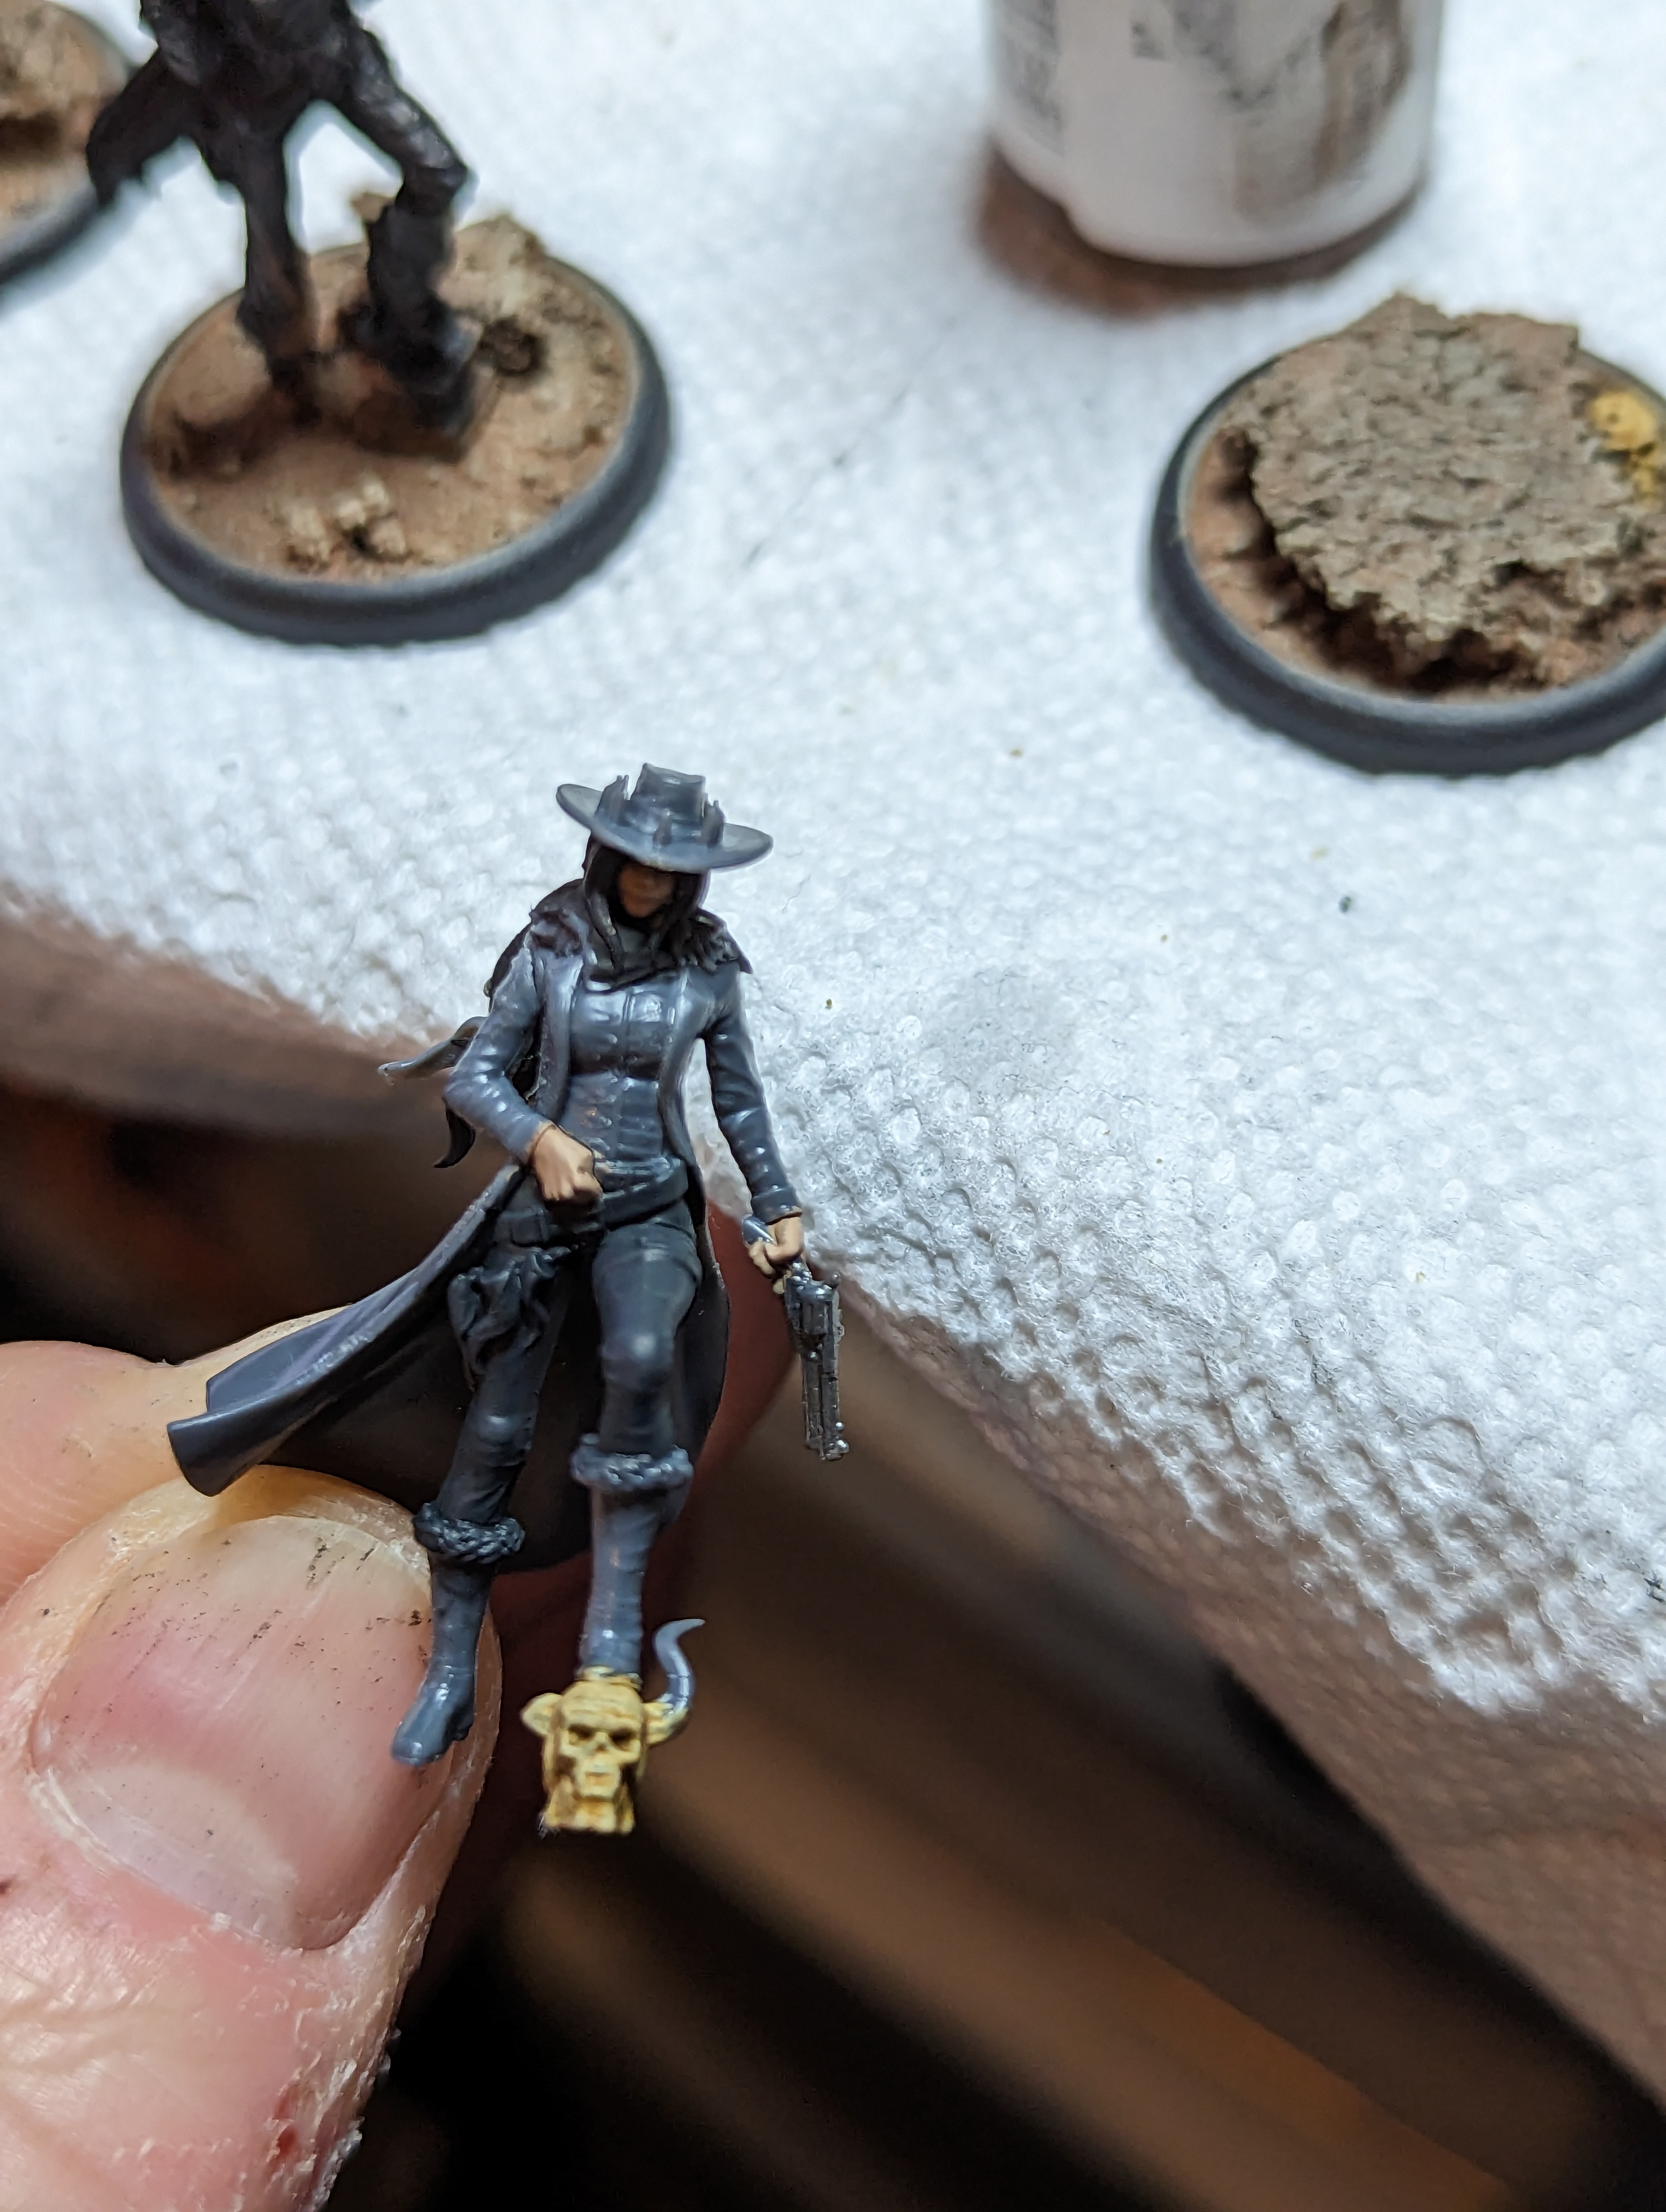
Perdita is one of my favorite characters in Malifaux. She’s basically Dominic Toretto if he was Latina and even cooler than he is. This new model is a bit understated compared to most that have come out with Malifaux Burns, but I think that is because it is showing her character growth. She started out as a teenager who was a bit more reckless, and who was kind of sexualized. Now she ought to be in her 30s, and I kind of like the new dignified look, as shes taking on her role as the Matriarch of her family.
It was a pretty simple paint job. One fun bit was the few areas of fur on her outfit. I did those by undercoating in a medium gray, and then doing a pretty heavy drybrush, probably closer to an overbrush, with a lighter gray with a bit of a tan color mixed in to give it a bit of warmth.
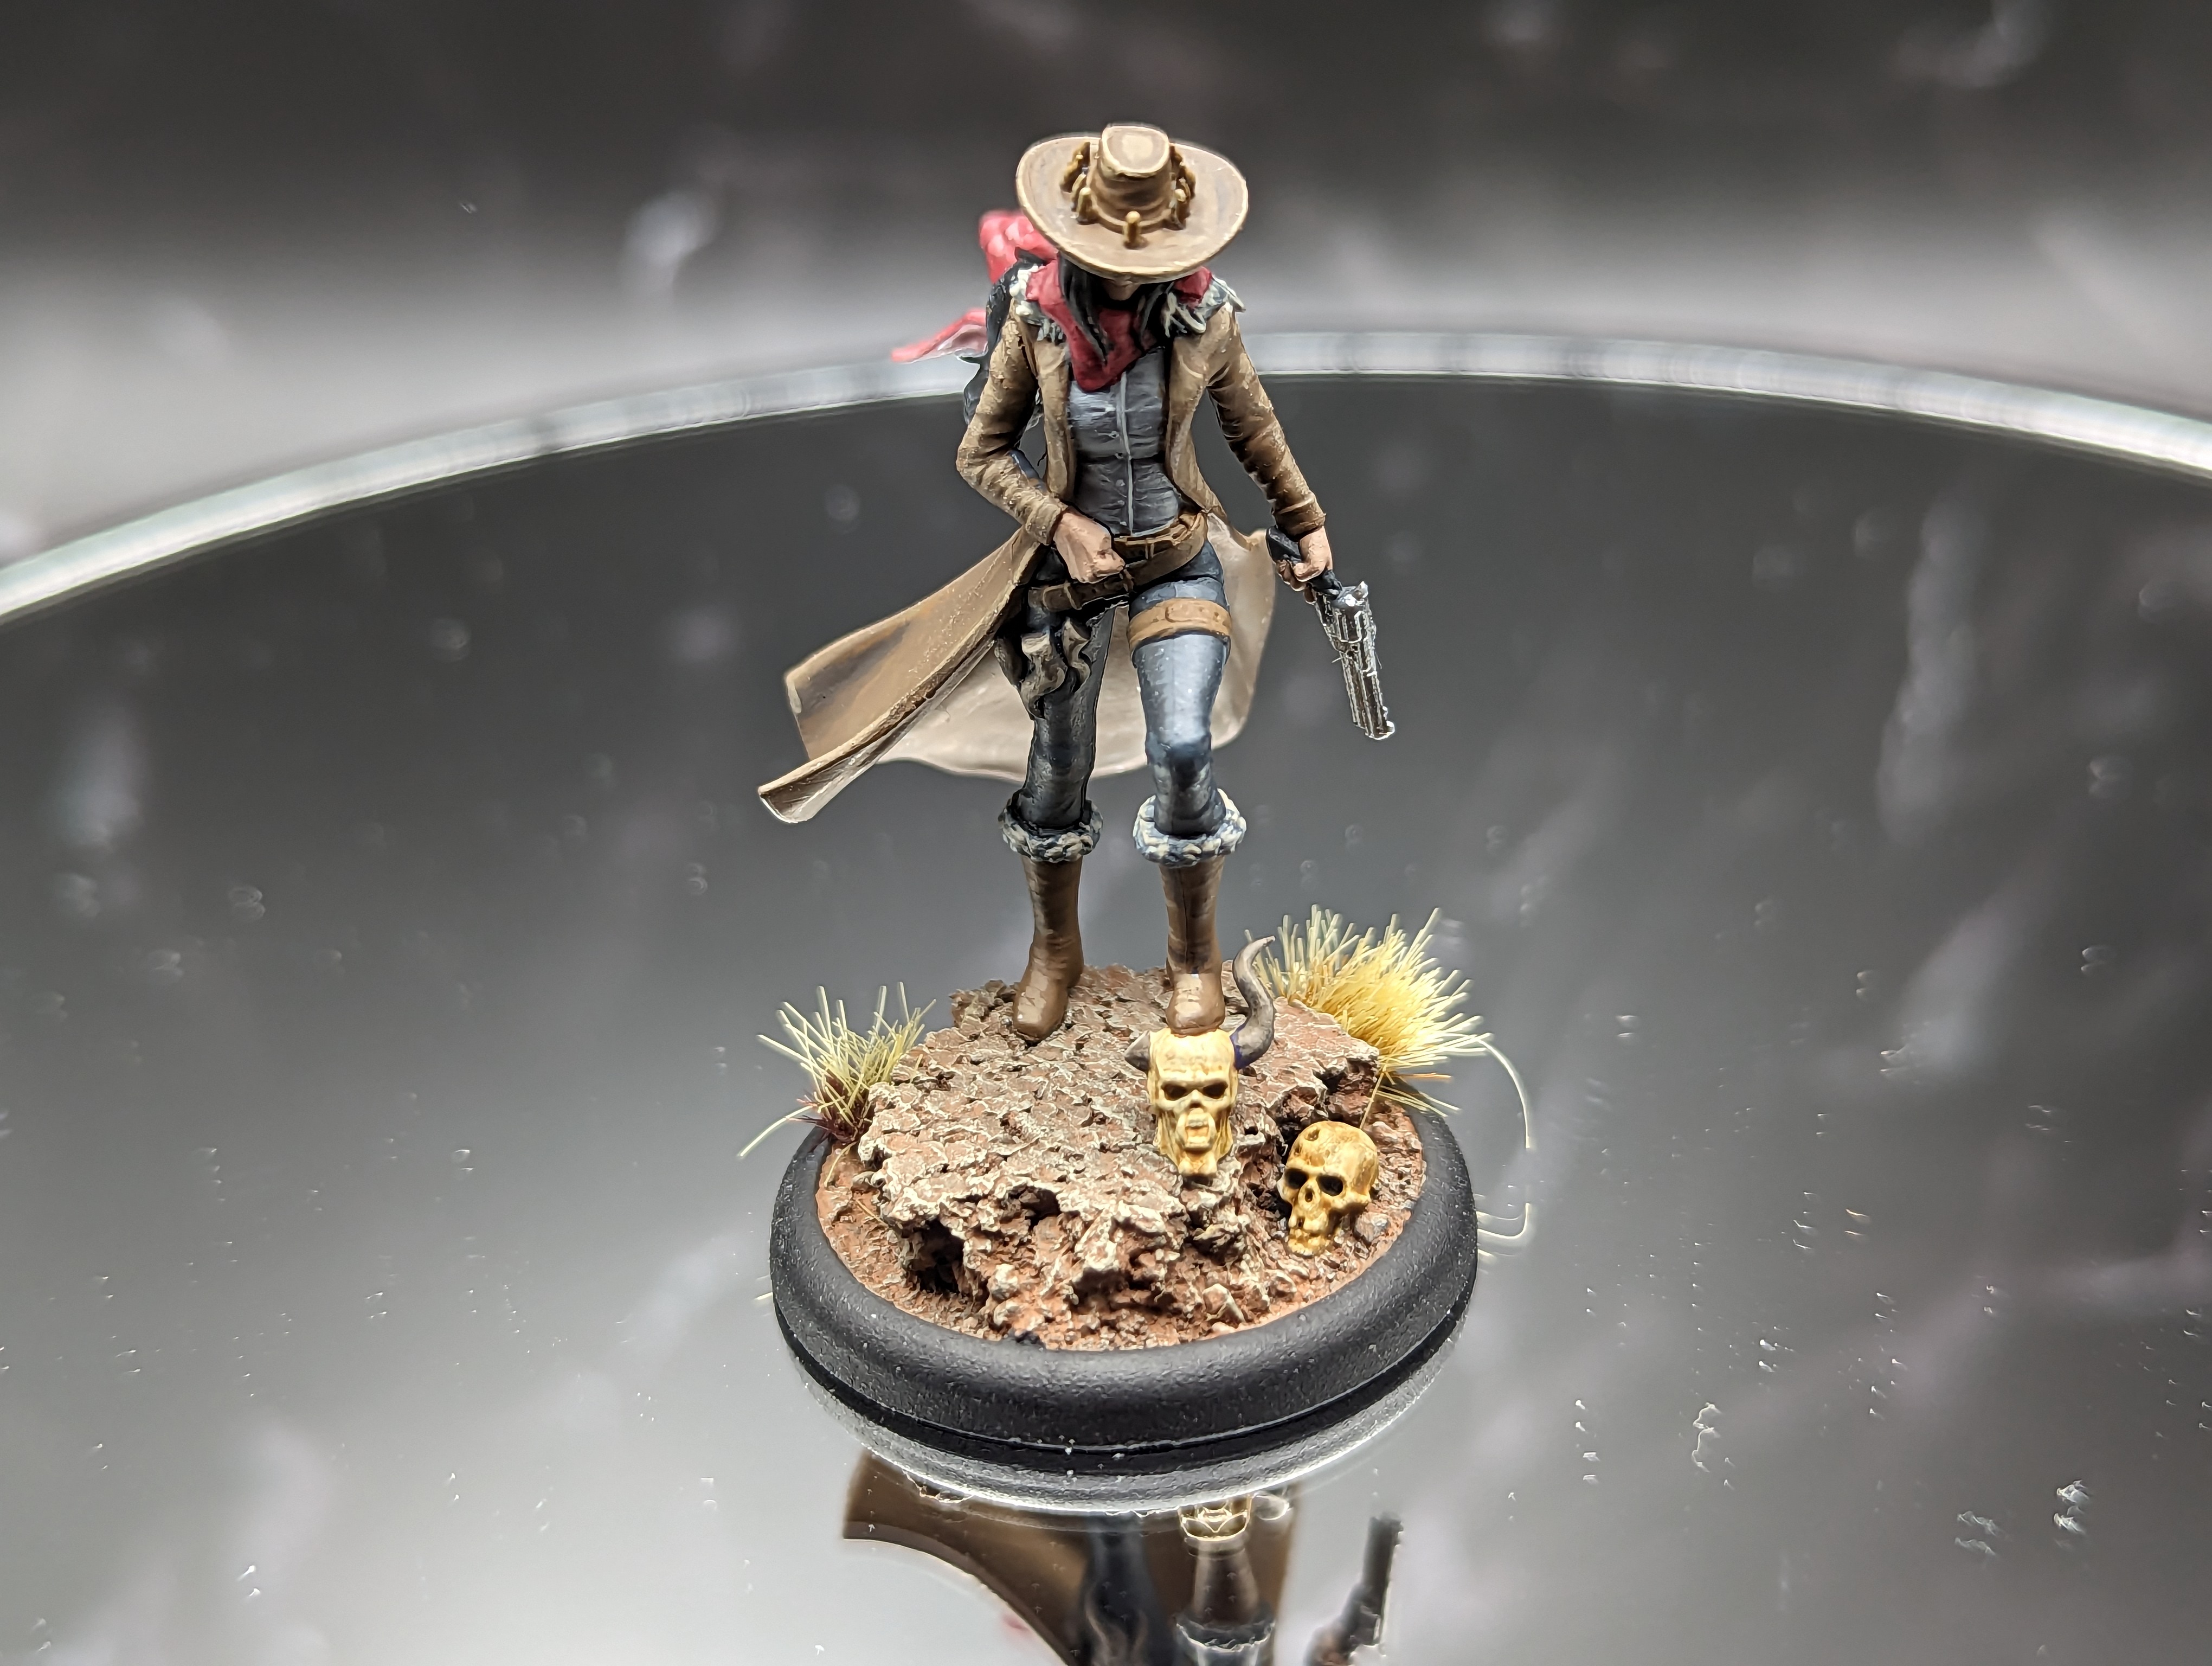
I added a few tufts to her base and shes all done.

And the gangs all here. This was a fun box to paint up. I have never been a huge fan of the Gremlins, but Ophelia has really grown on me. I might have to put her on the table some day soon.
As always, if you wanna learn more about either of these characters, check out the lore videos I did on them below, and stay tuned for the next box!
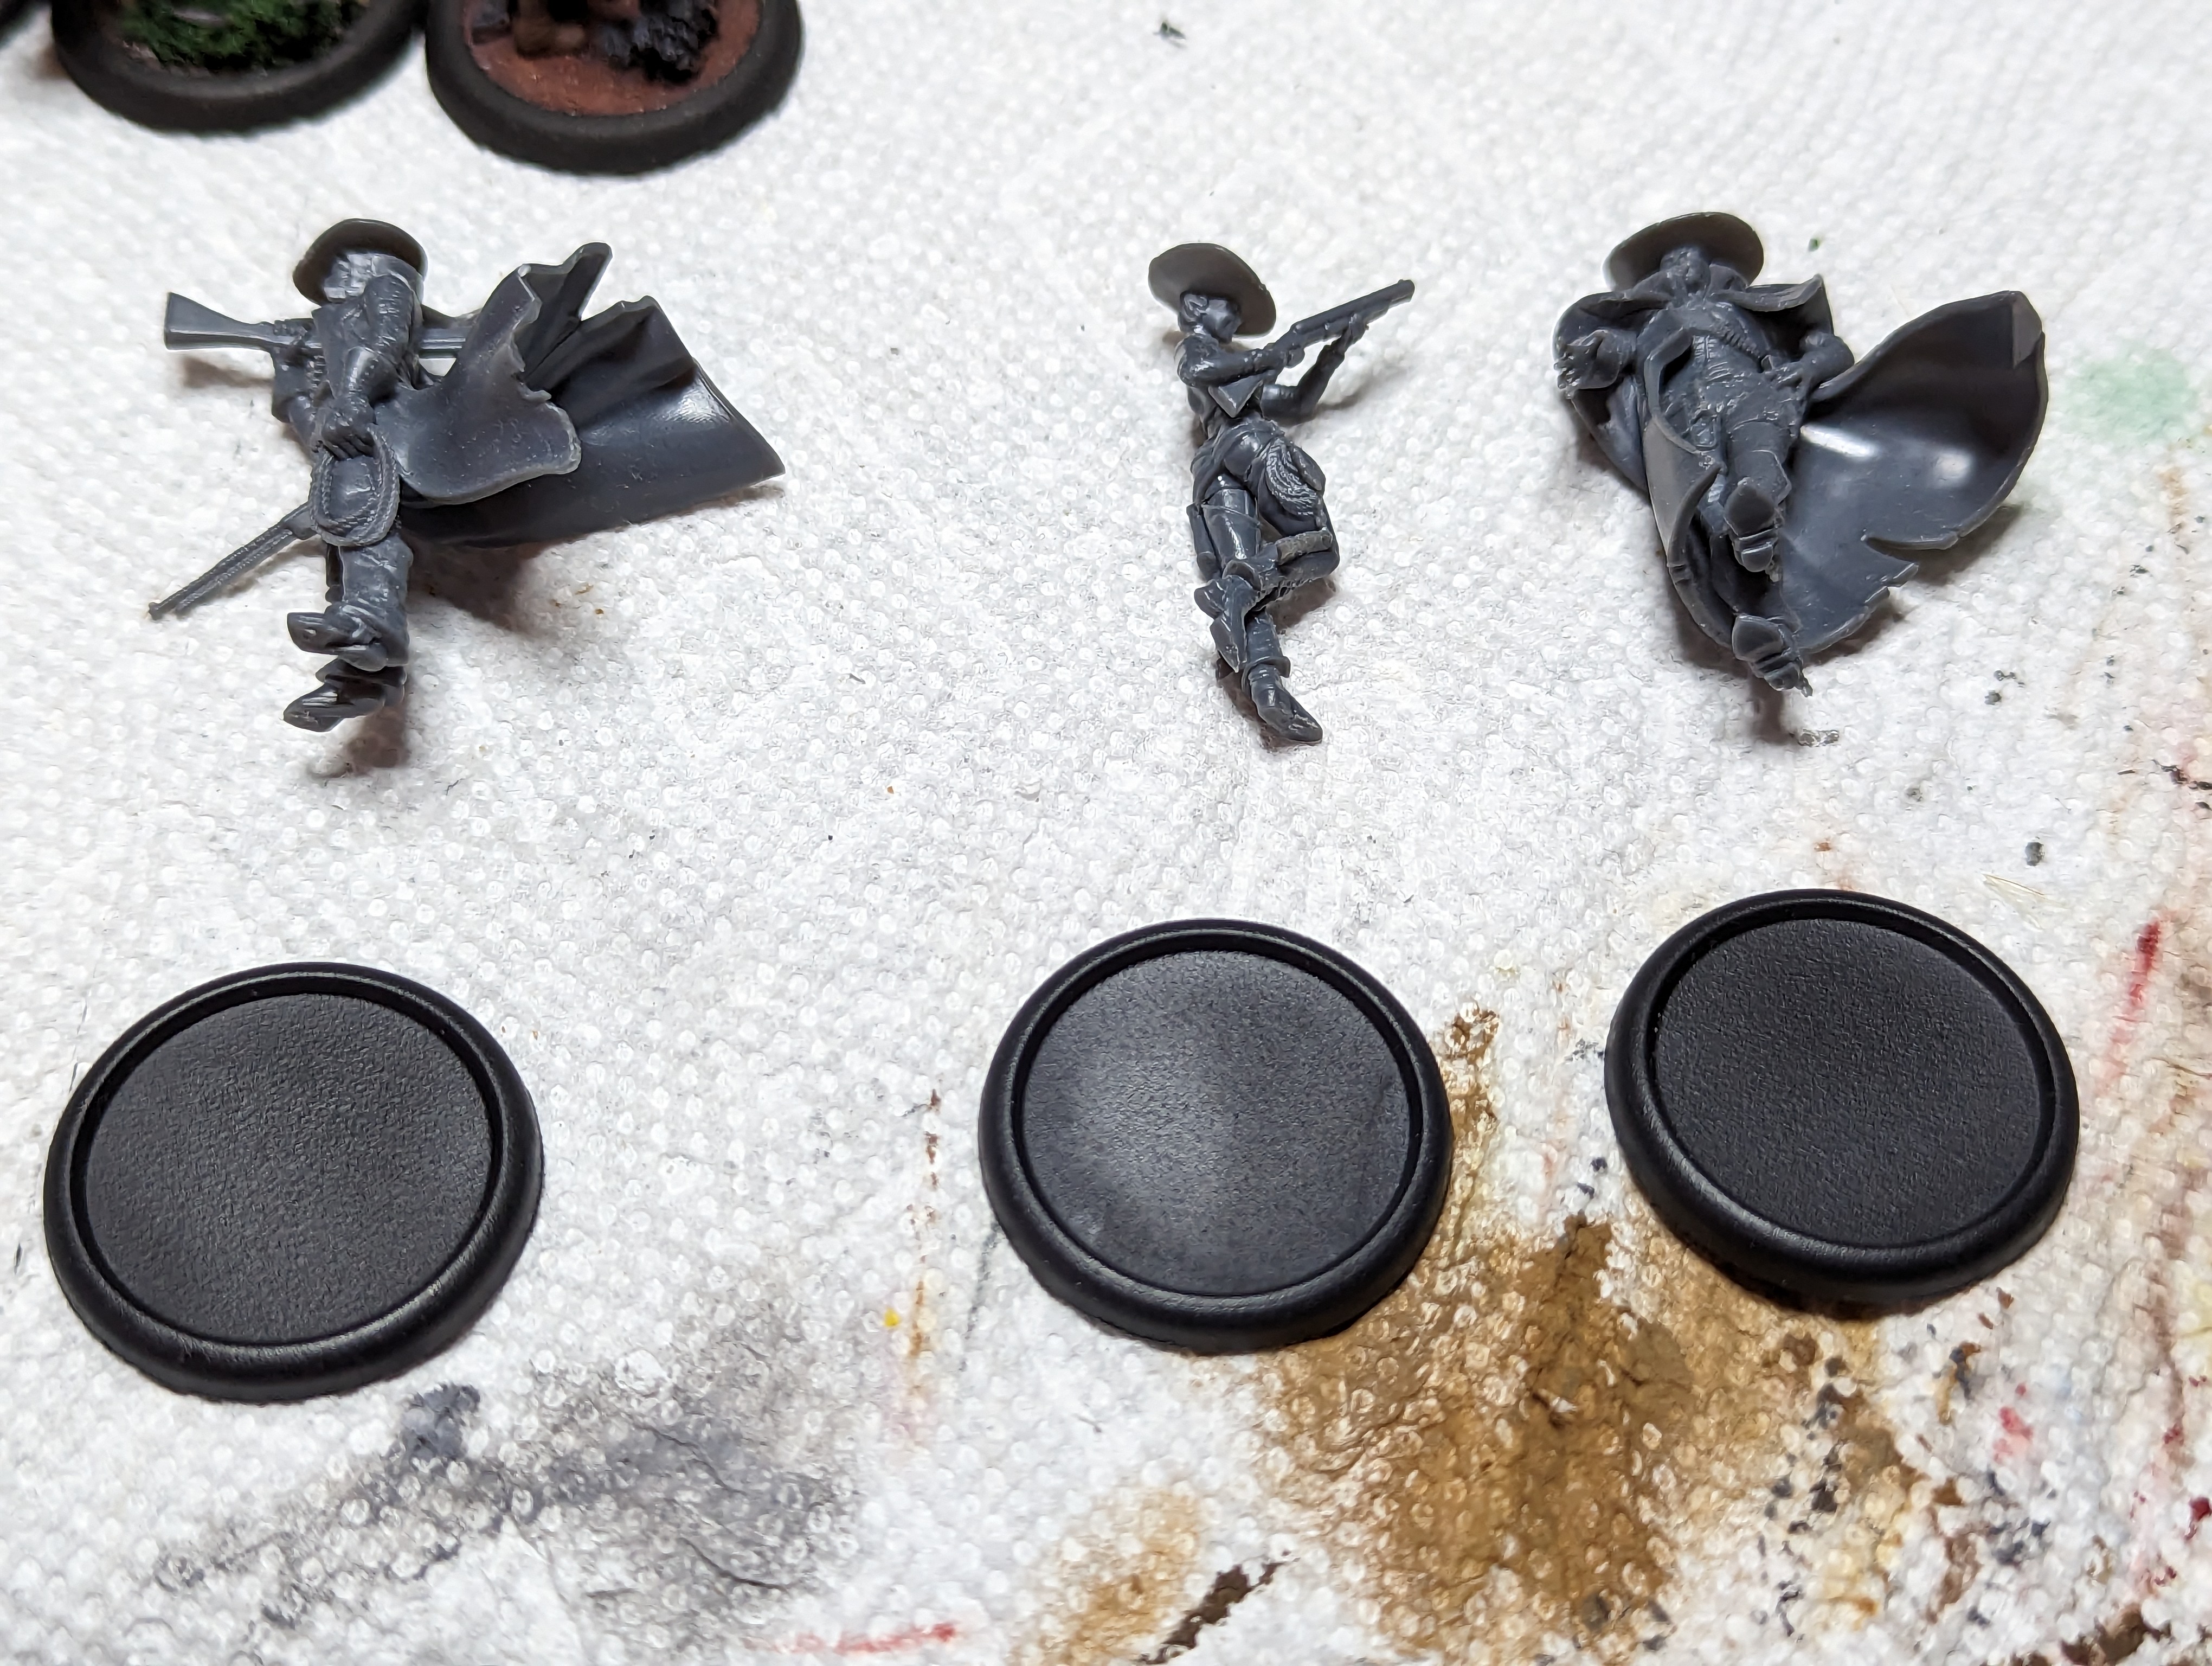
Gunslingers and Gremlin Fangirls

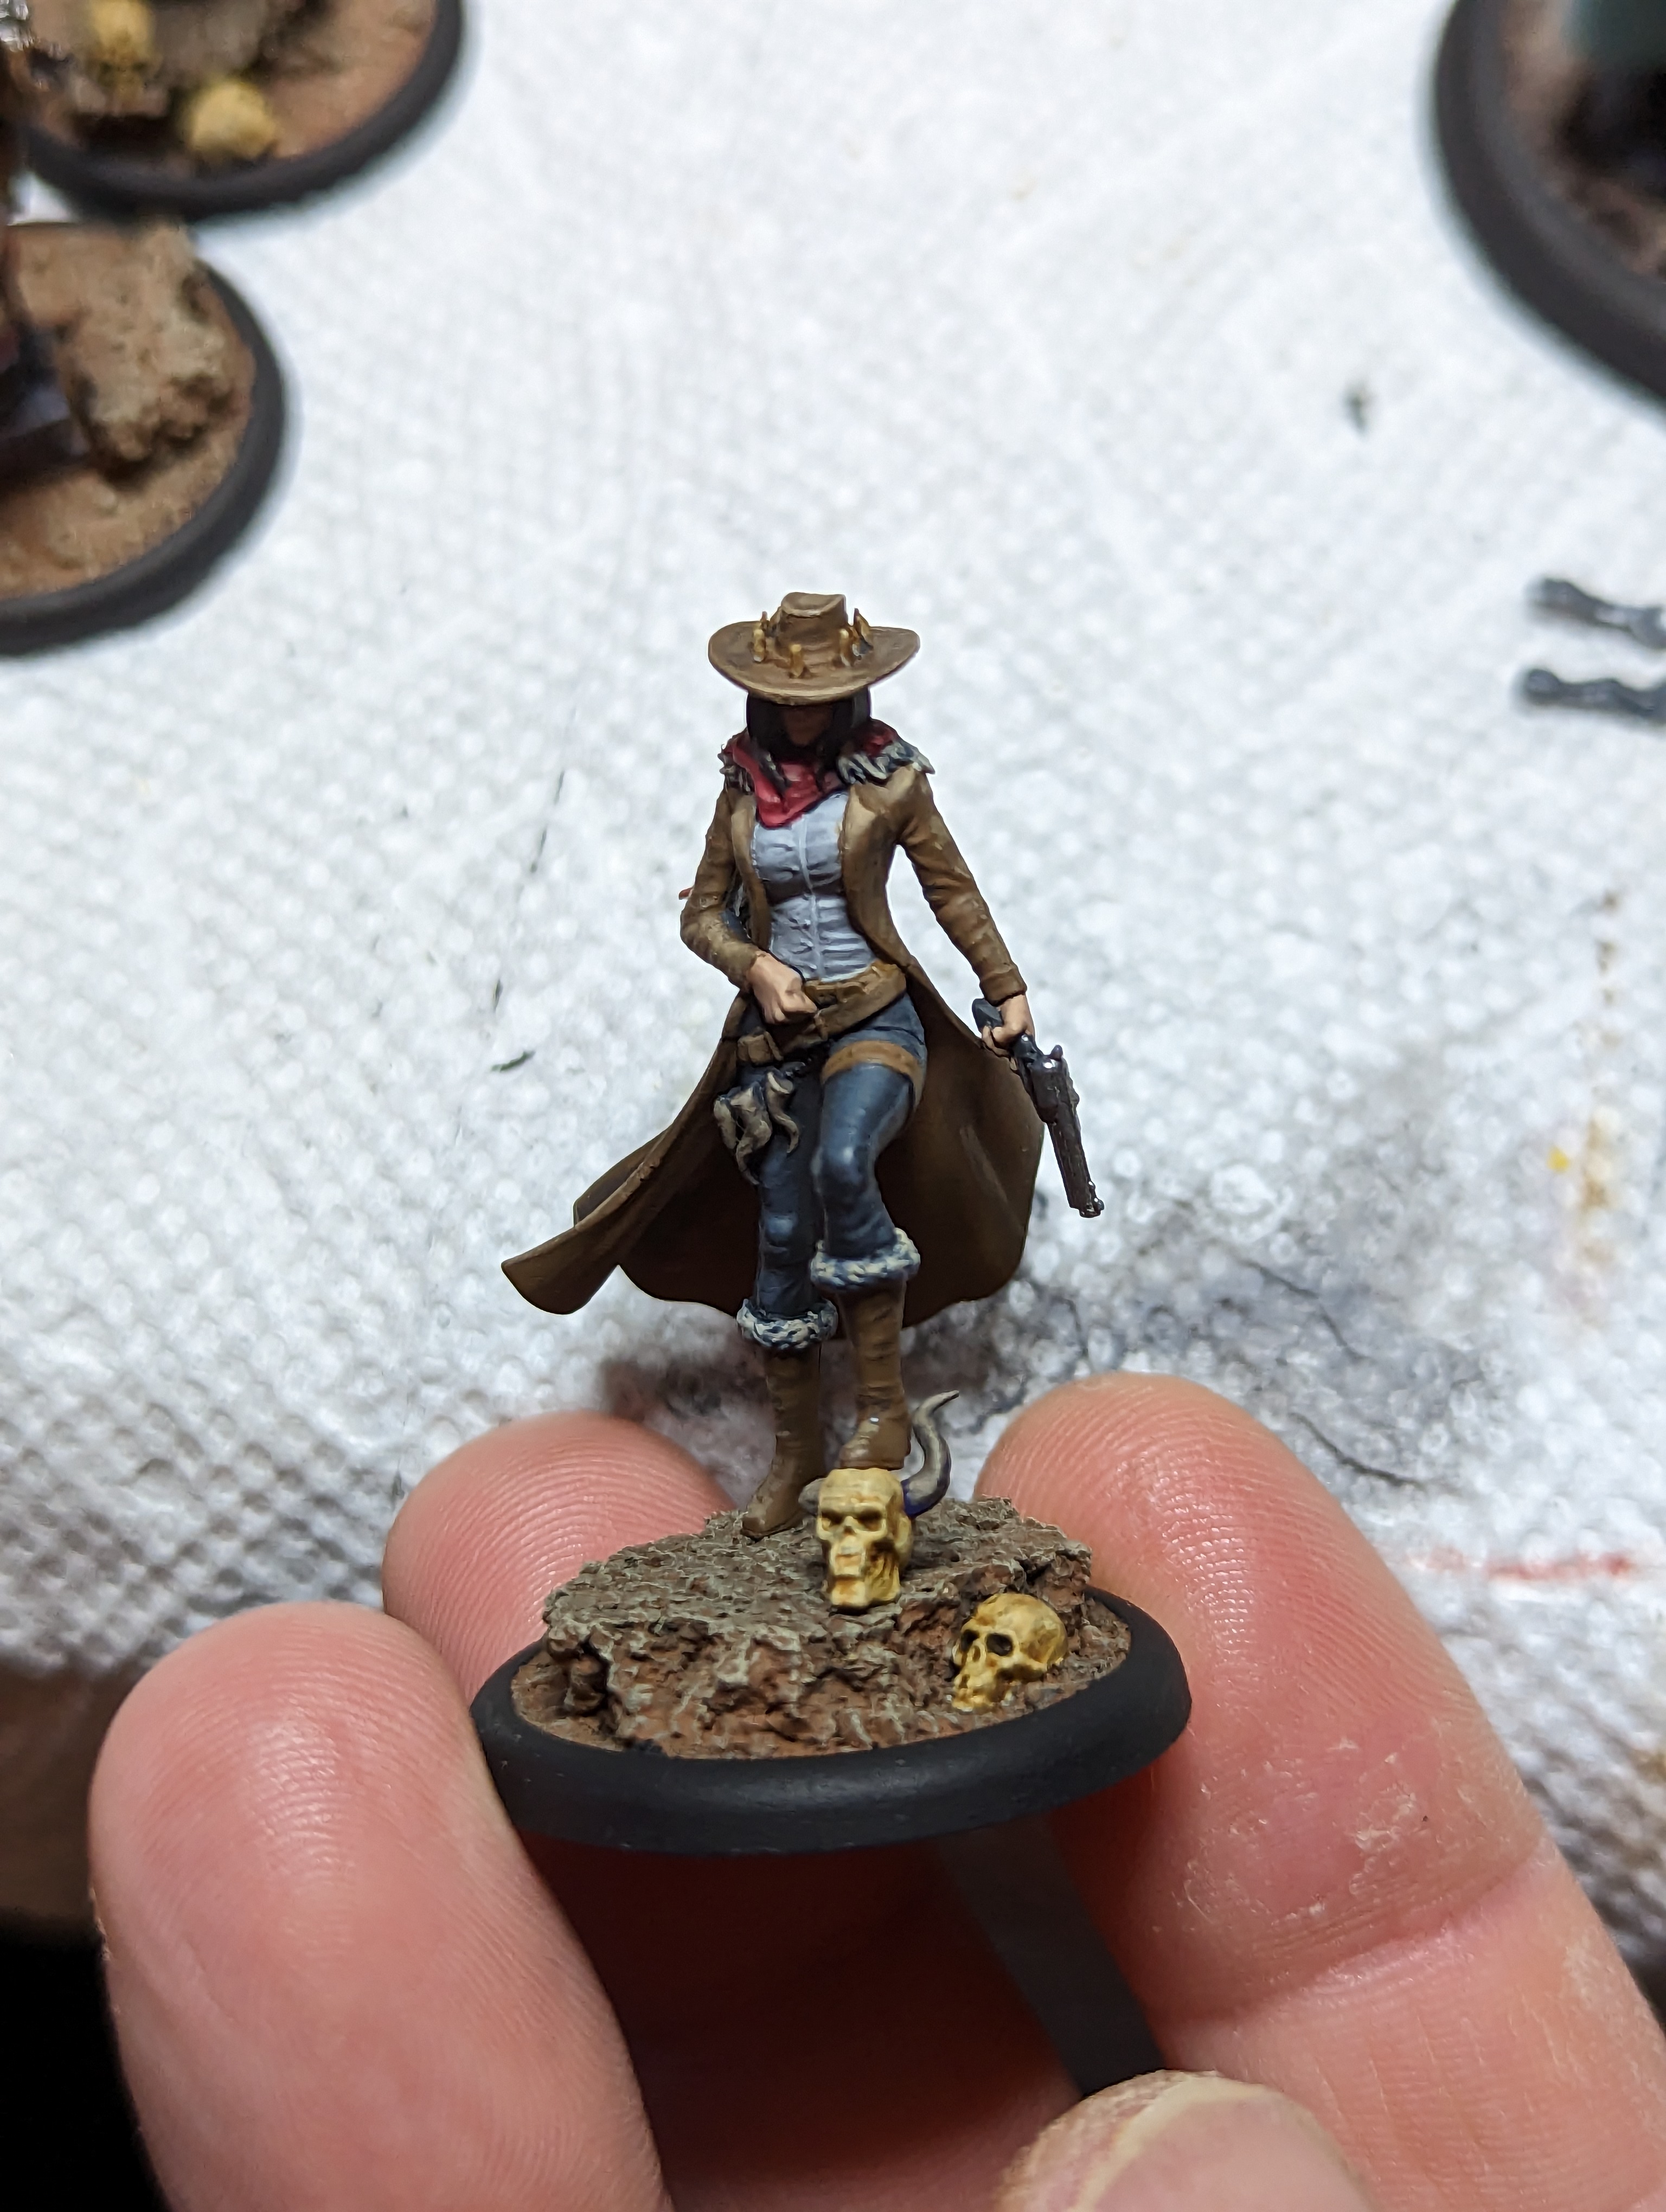
The next project is going to be Perdita and her gremlin stalker, Ophelia. They have a common friend called Sly Six Shots who sells them guns.
My Perdita crew is on wasteland bases with some skulls and dry looking plants scattered. They live in a compound south of Malifaux that in a kind of desert-y area called the badlands. My Ophelia crew is based on wooden planks and walkways that are all overgrown and covered in plants since they are from the bayou.
For the shared model, Im going to try to do a transition from badlands to bayou. Thats a thing that really exists in fiction, since they border eachother, but im not sure how itll look on the base.
Also, I already made bases for Ophelia and Sly since I based up her whole crew fairly recently.
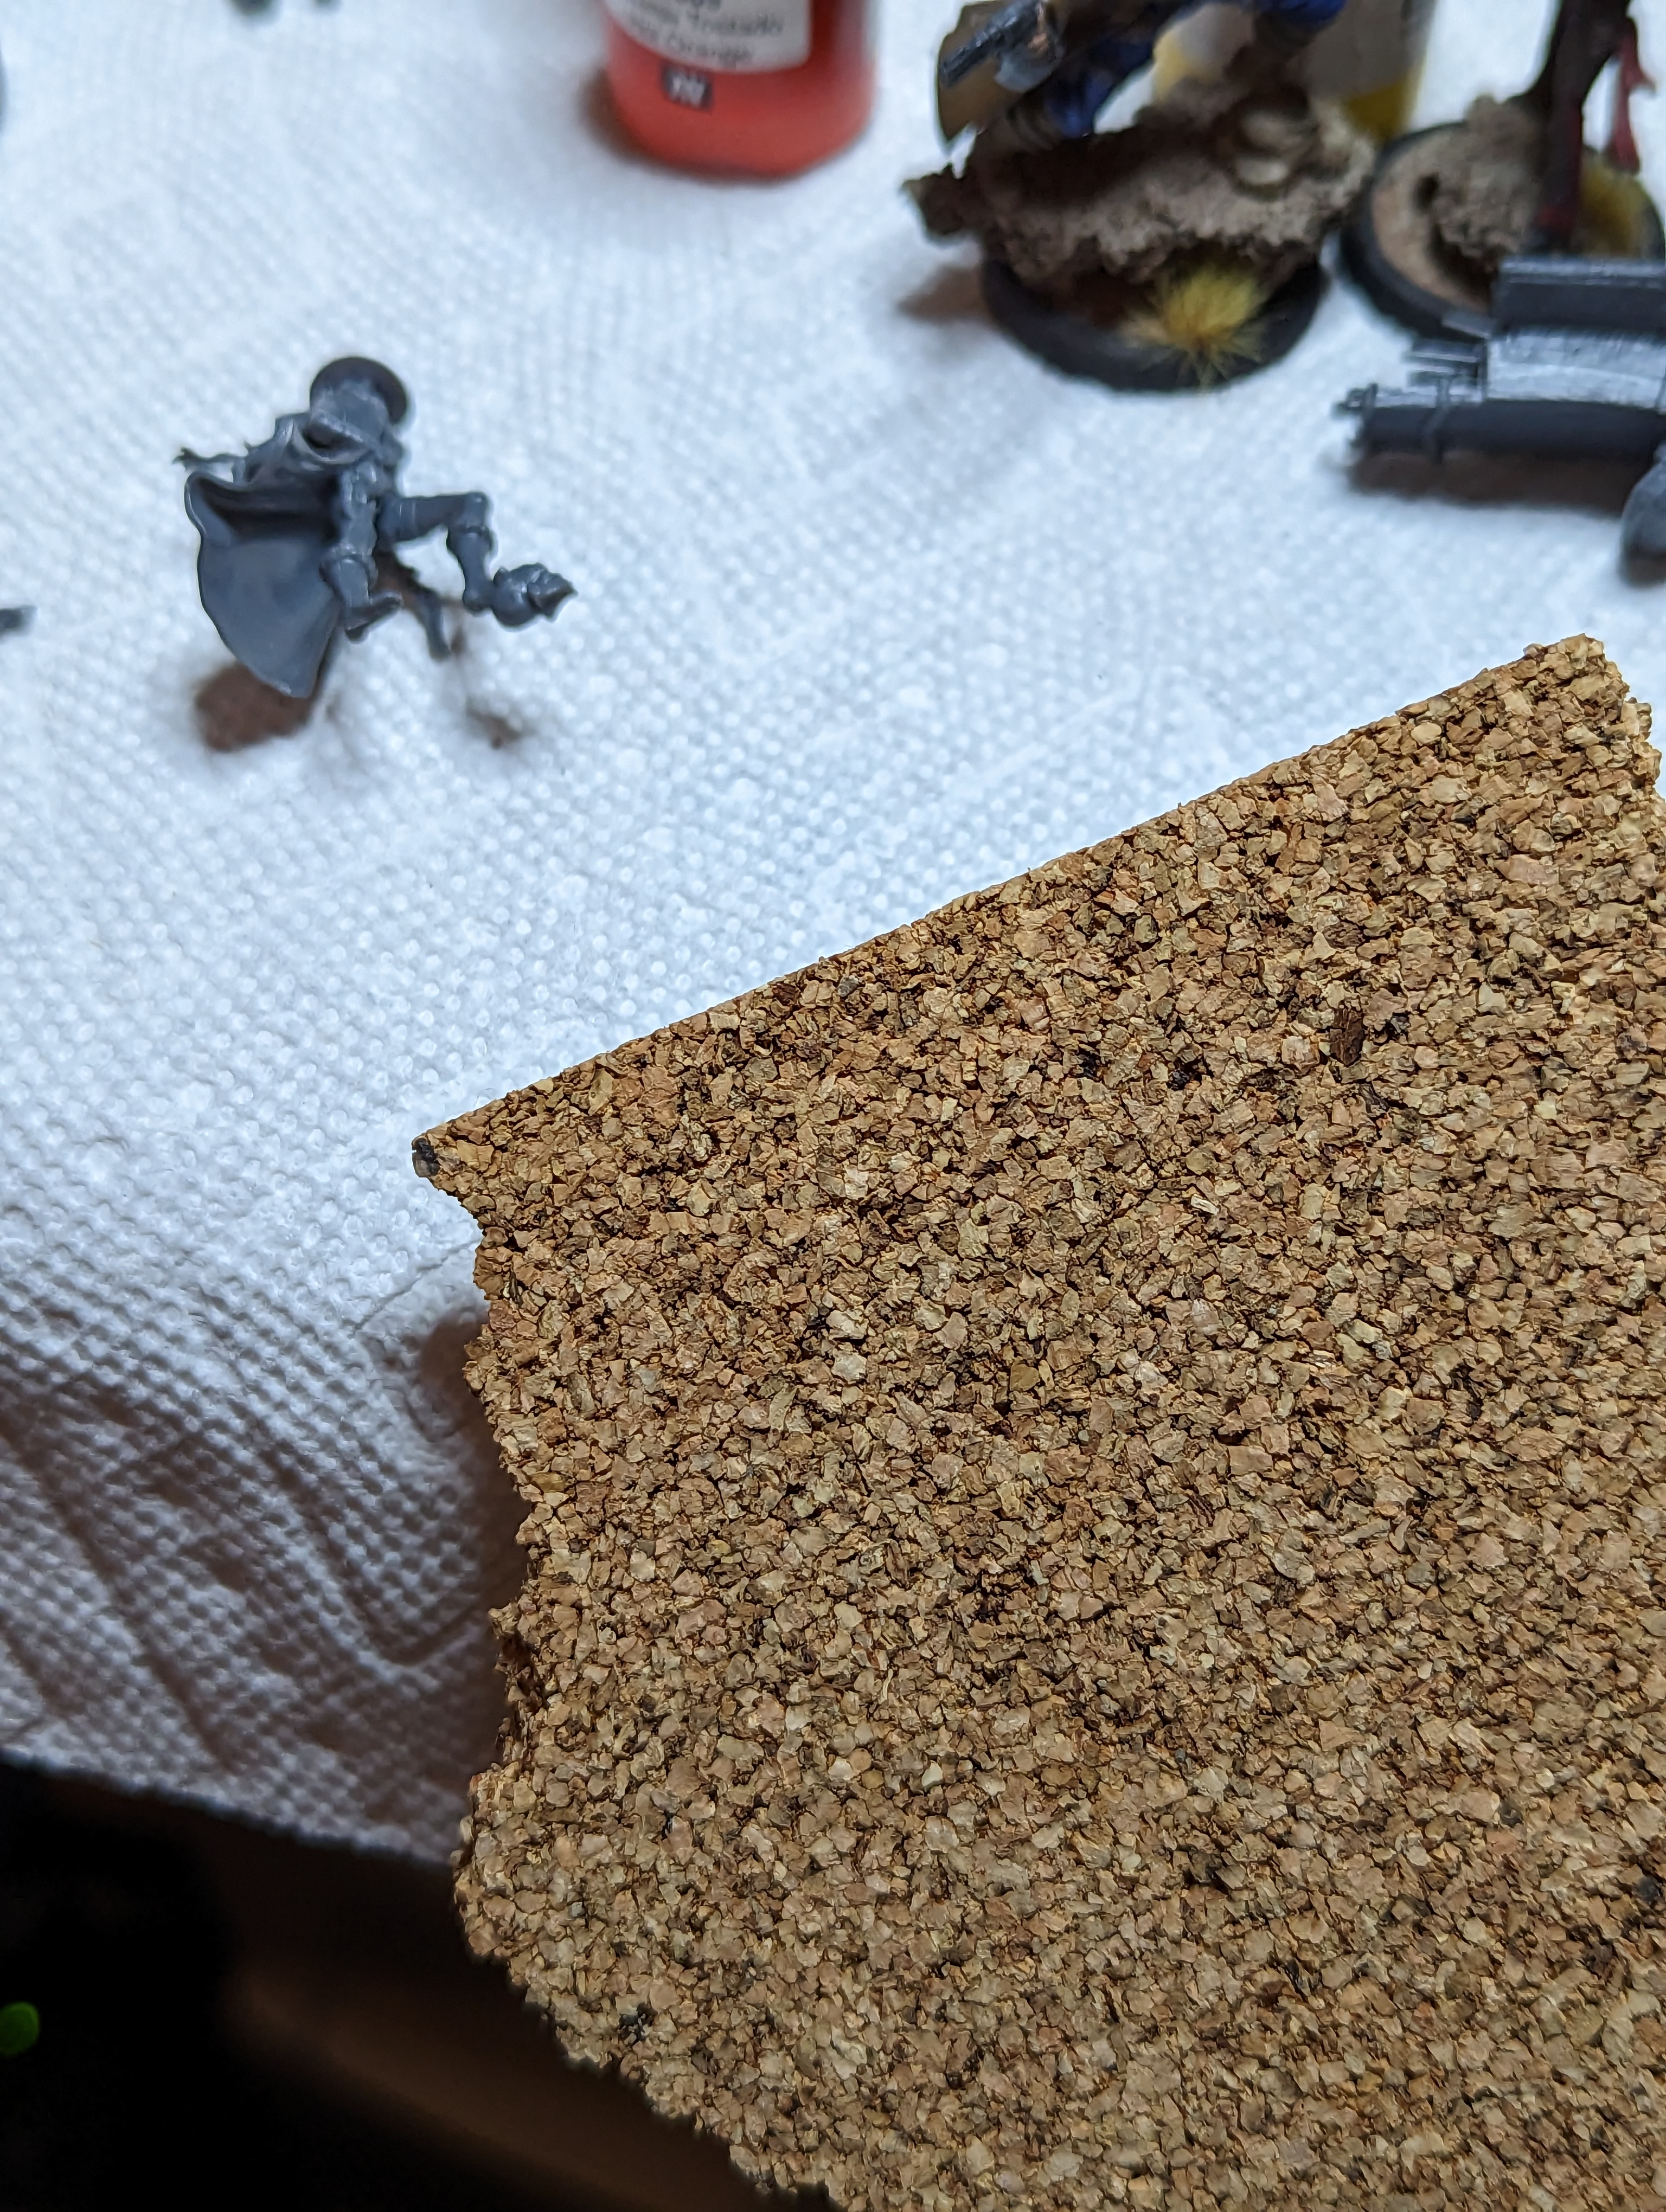
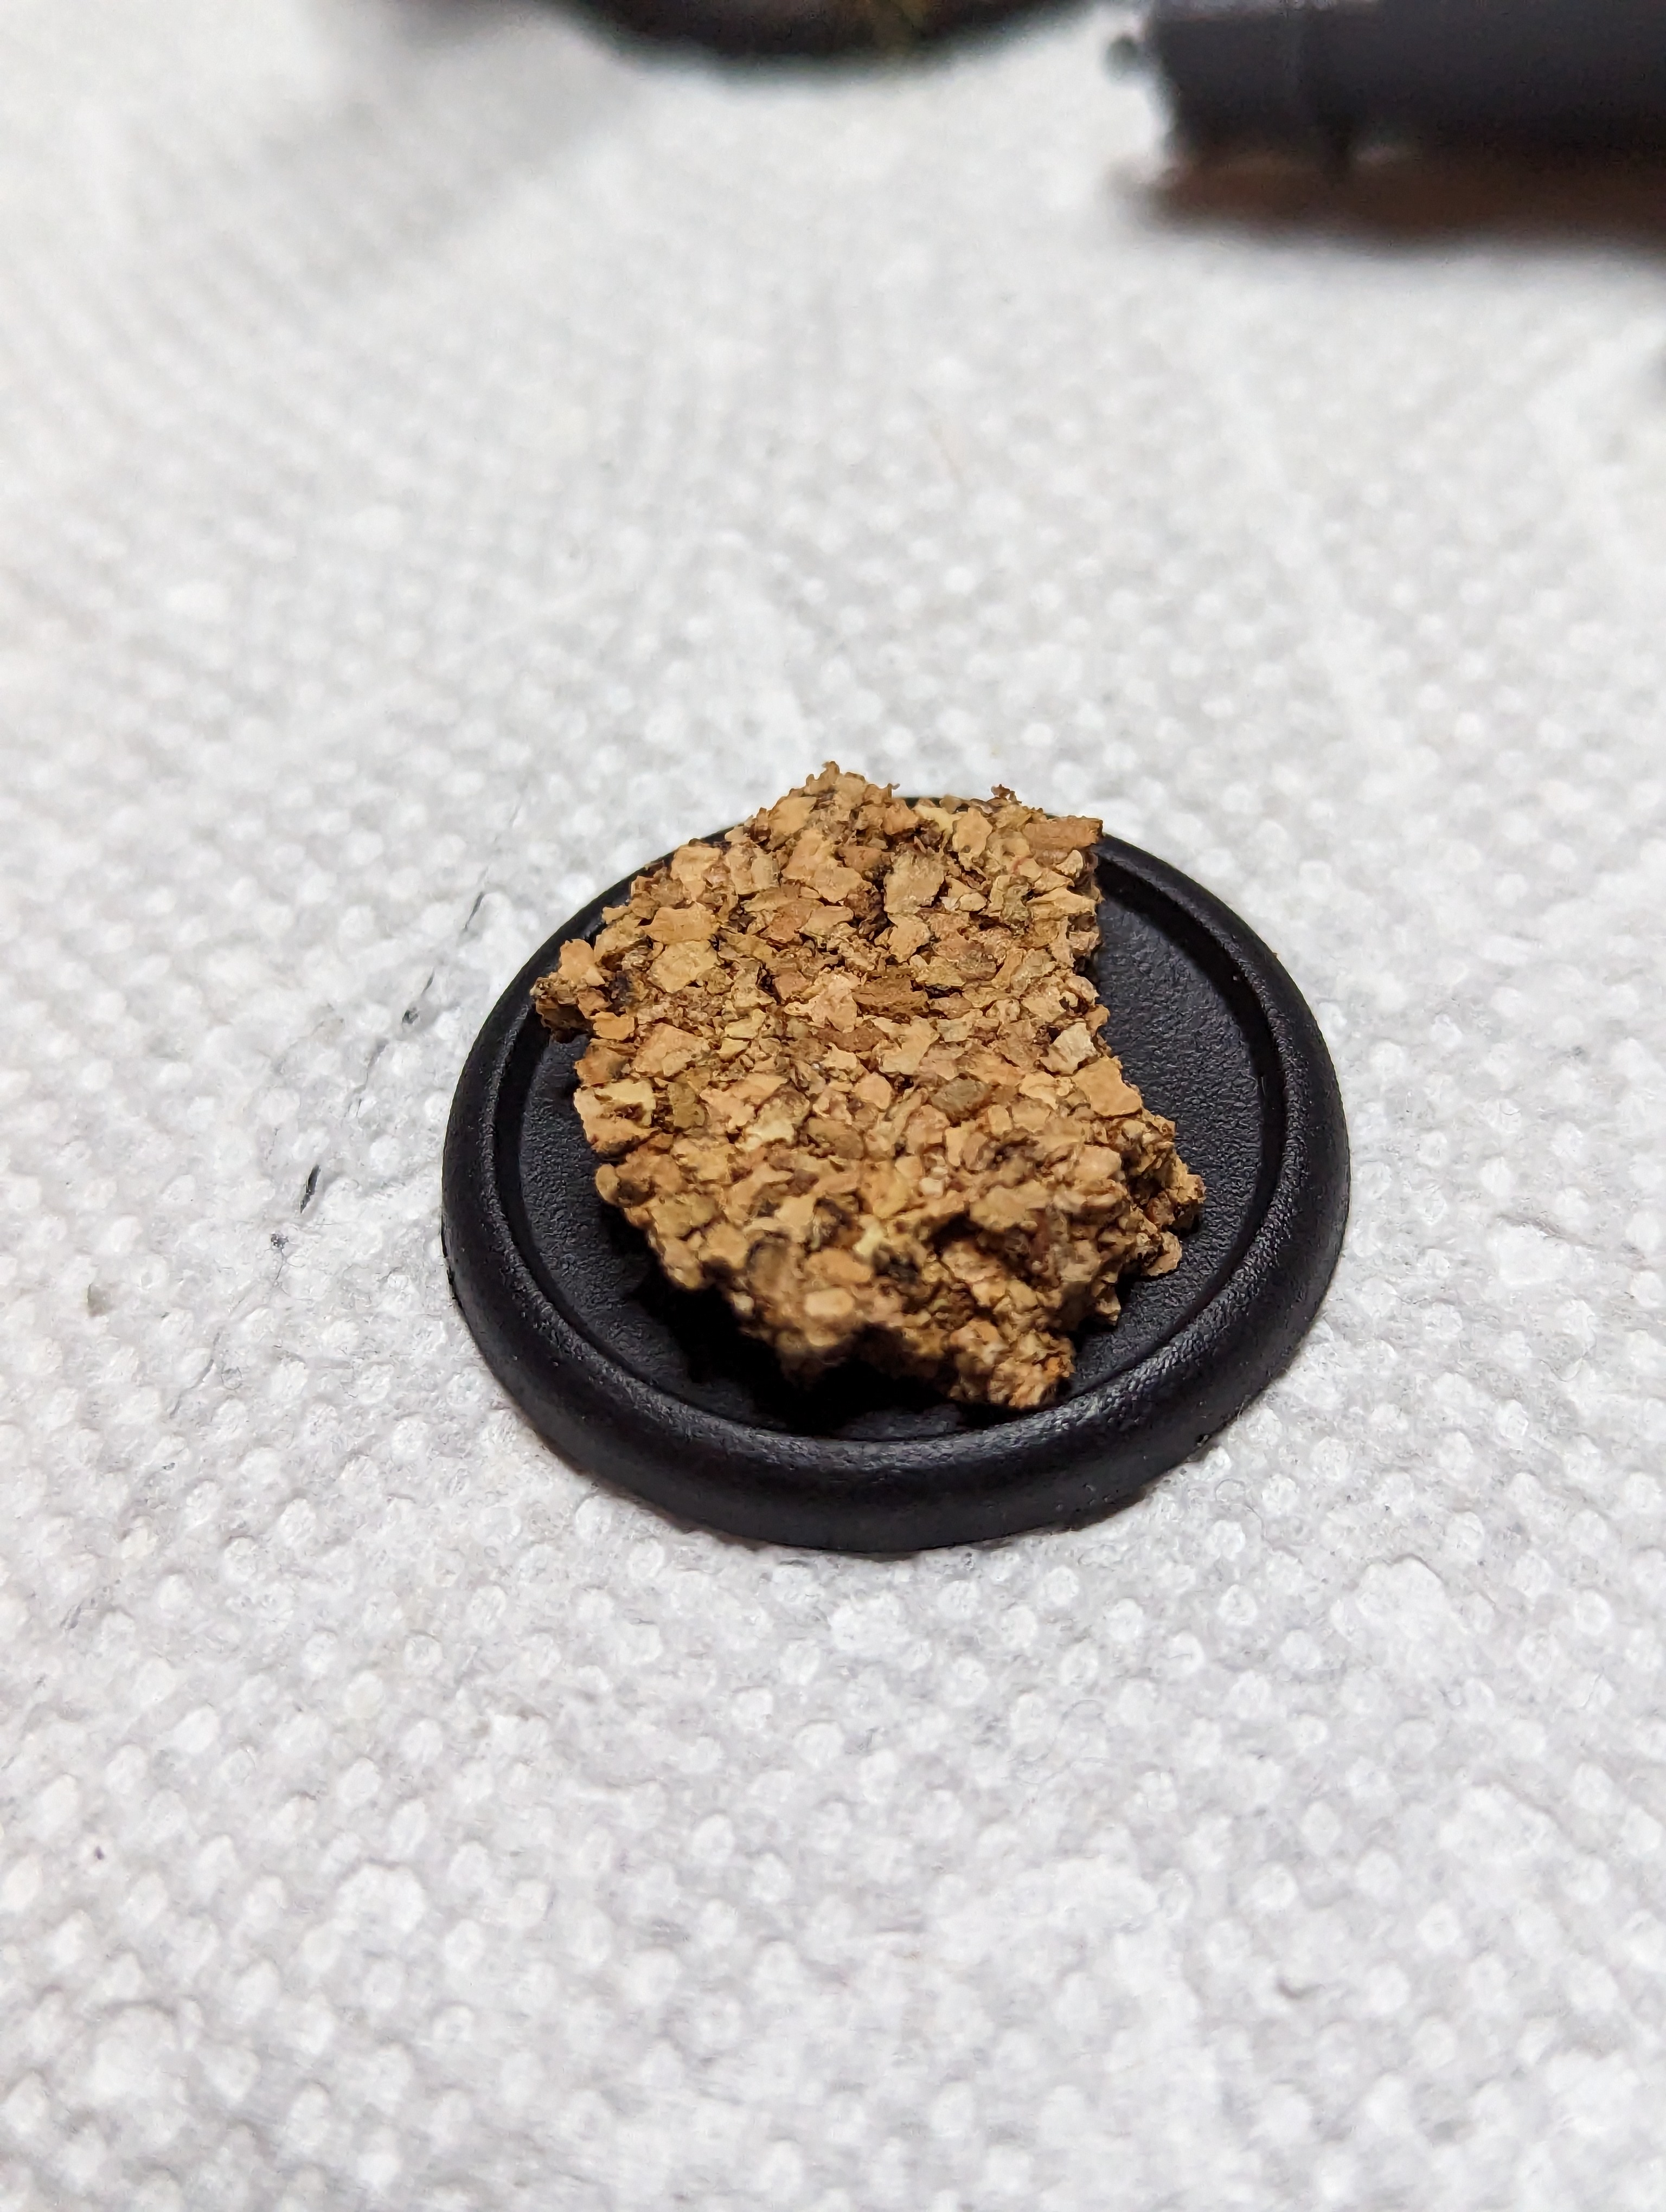

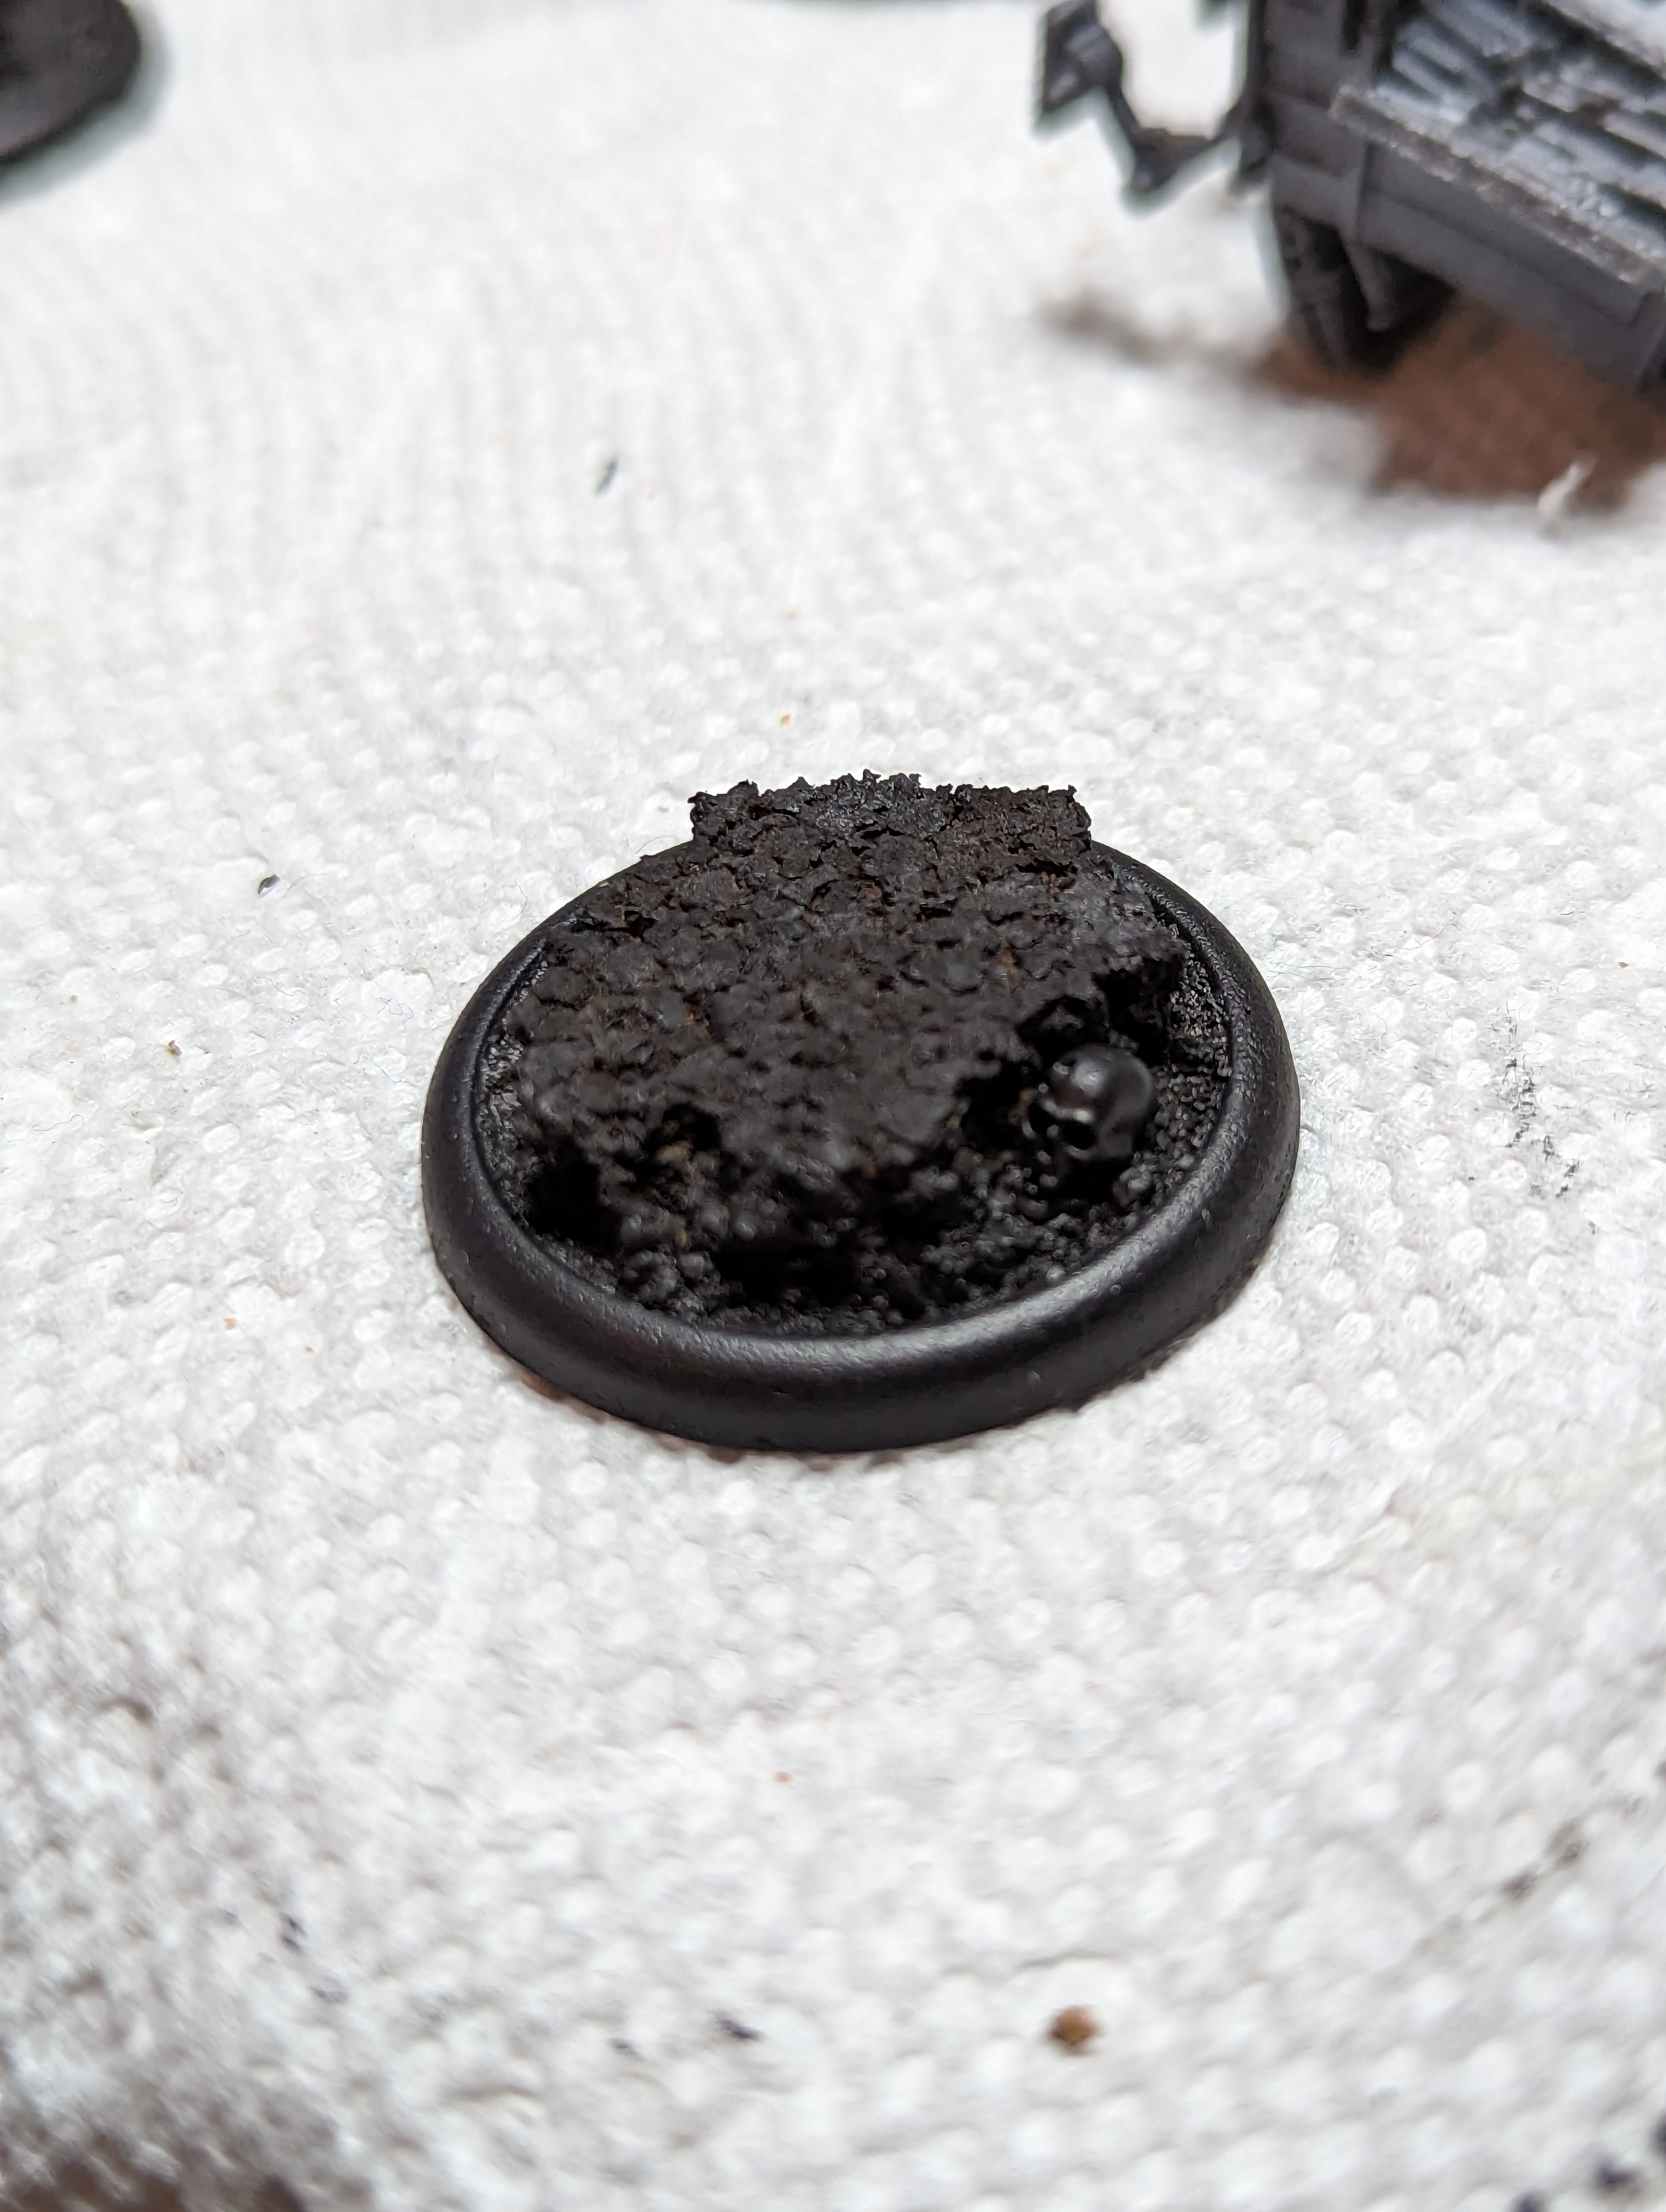
I use these cork sheets for so many bases, they are super useful. For ‘Dita, I ripped out an oddly shaped piece, and glued it down to the base. I put sand down around it, and then primed the whole thing after adding a little skull. I painted the sand and rocks with a coffee brown color, and then drybrushed it to the pale sandy color. The skull got his with an off white, and thne washed with a sepia wash. Its an easy way to give it a dirty but bleached look
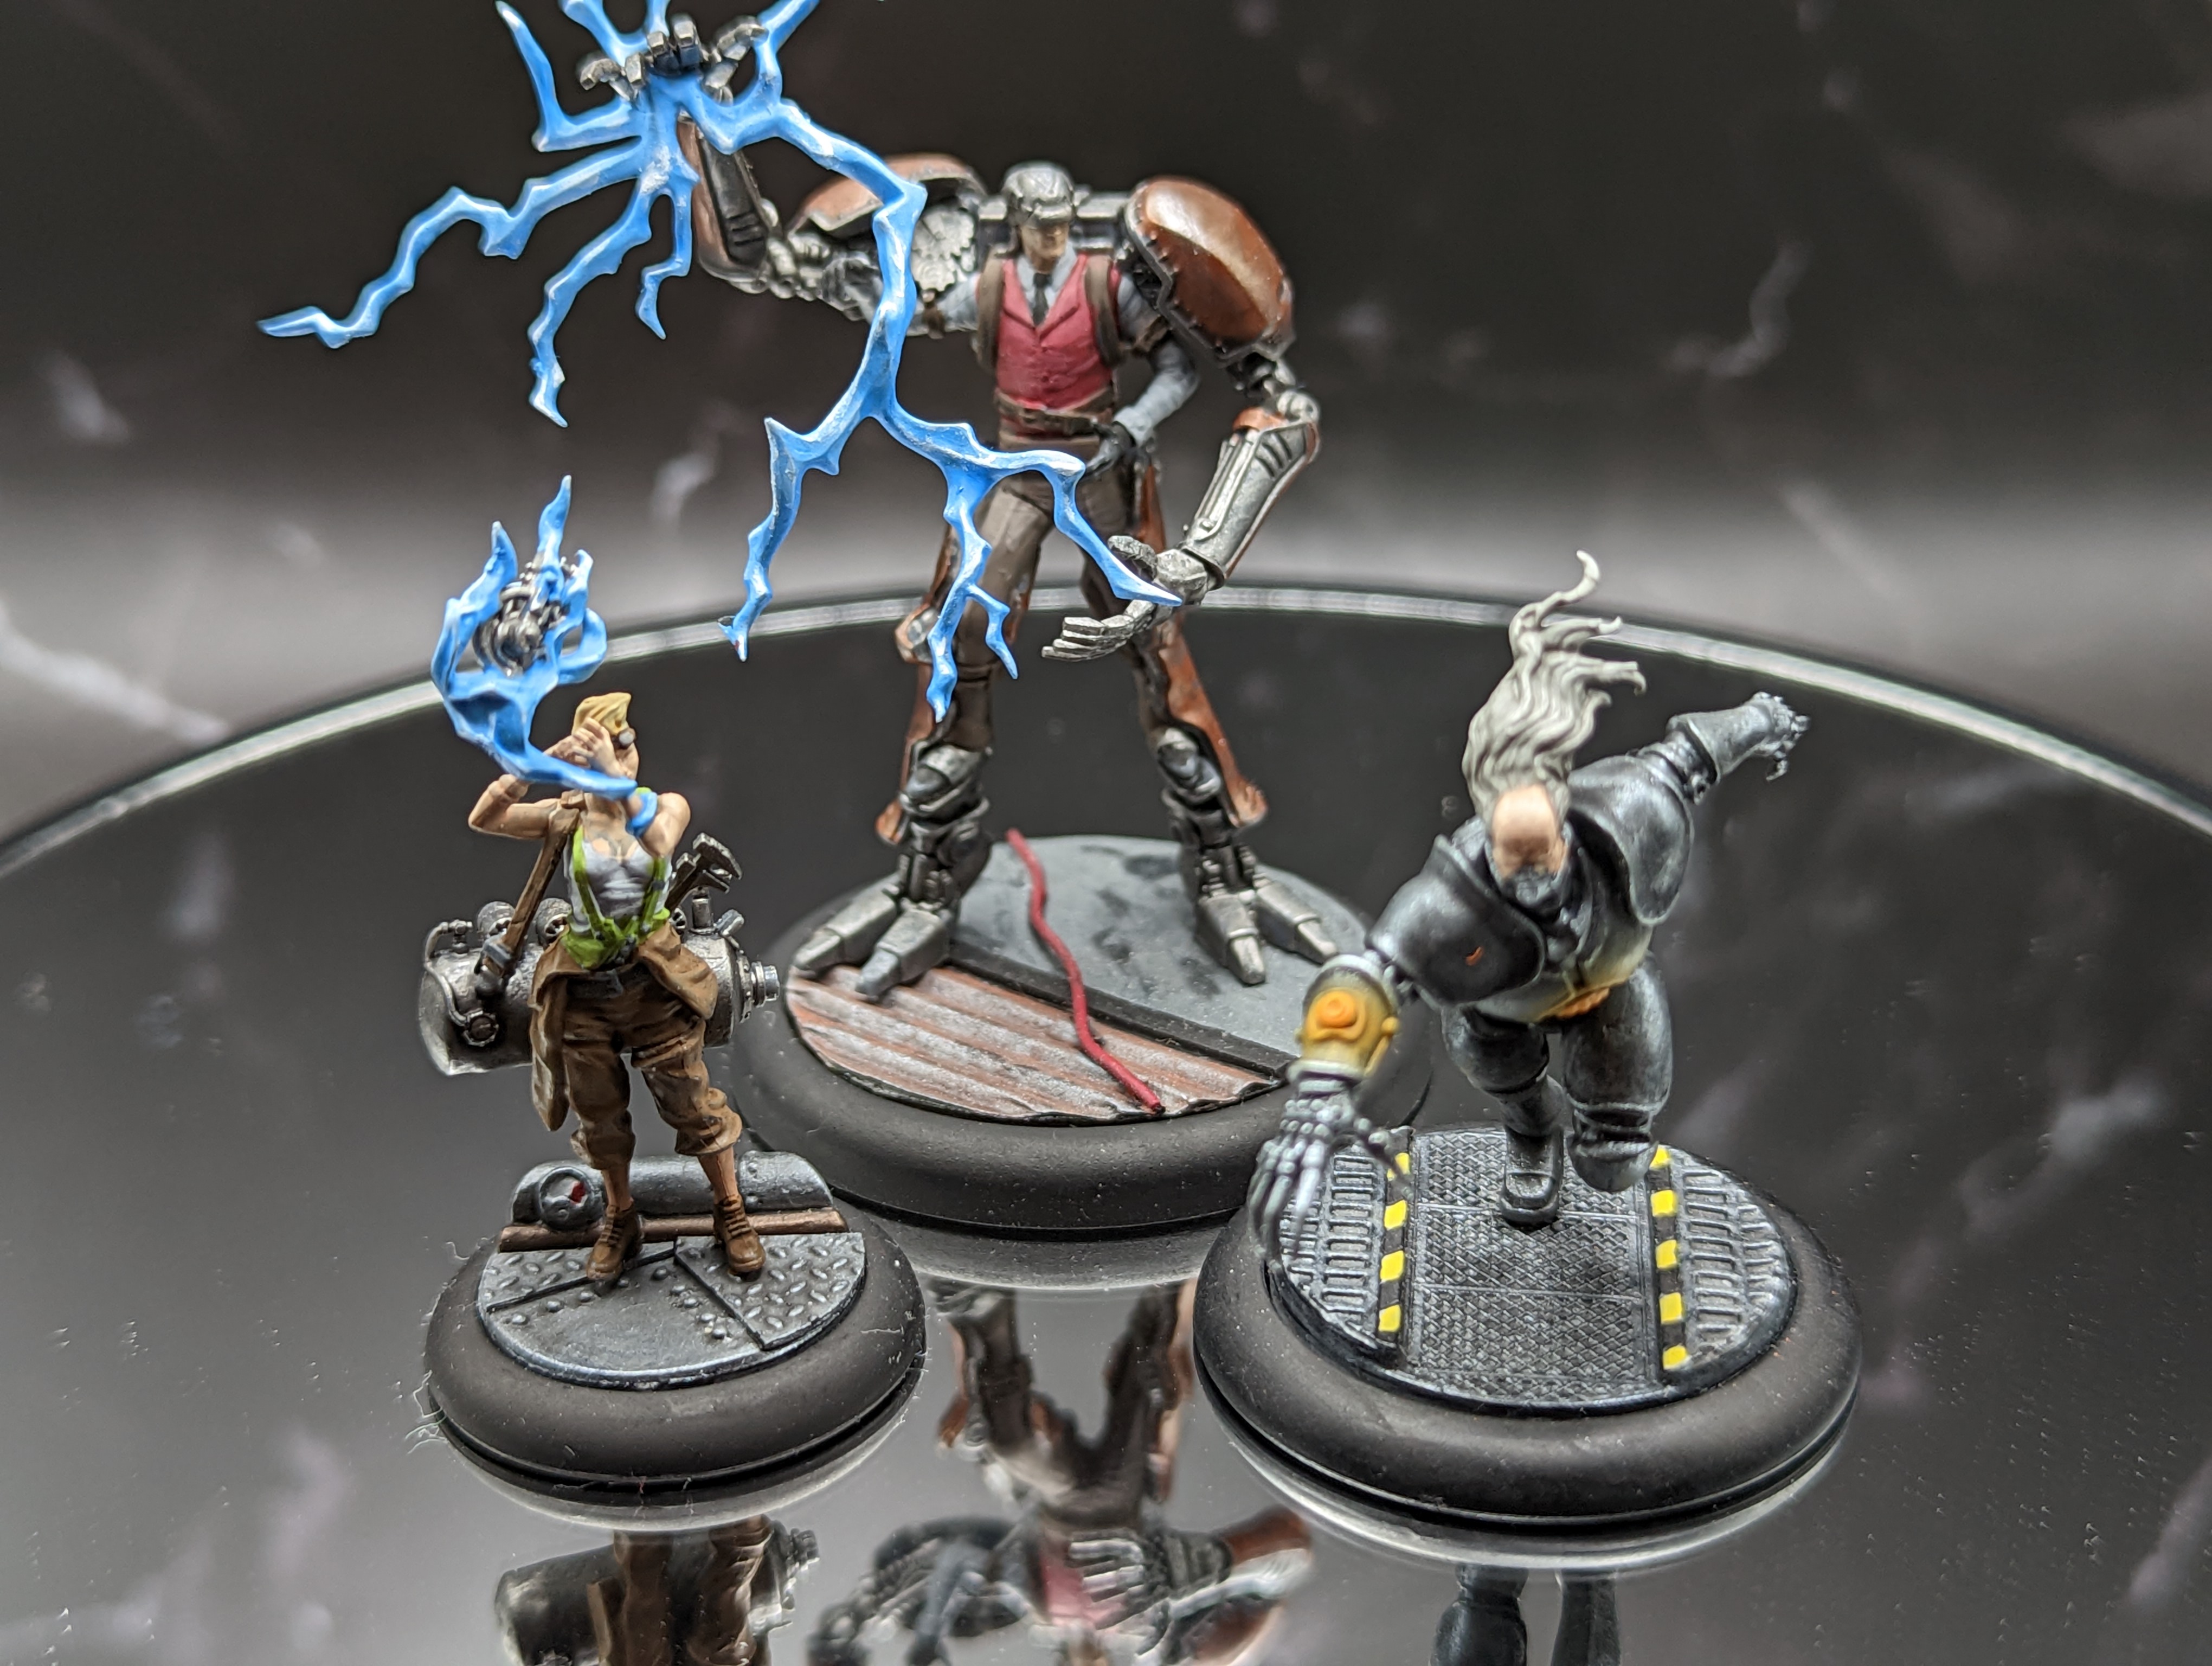
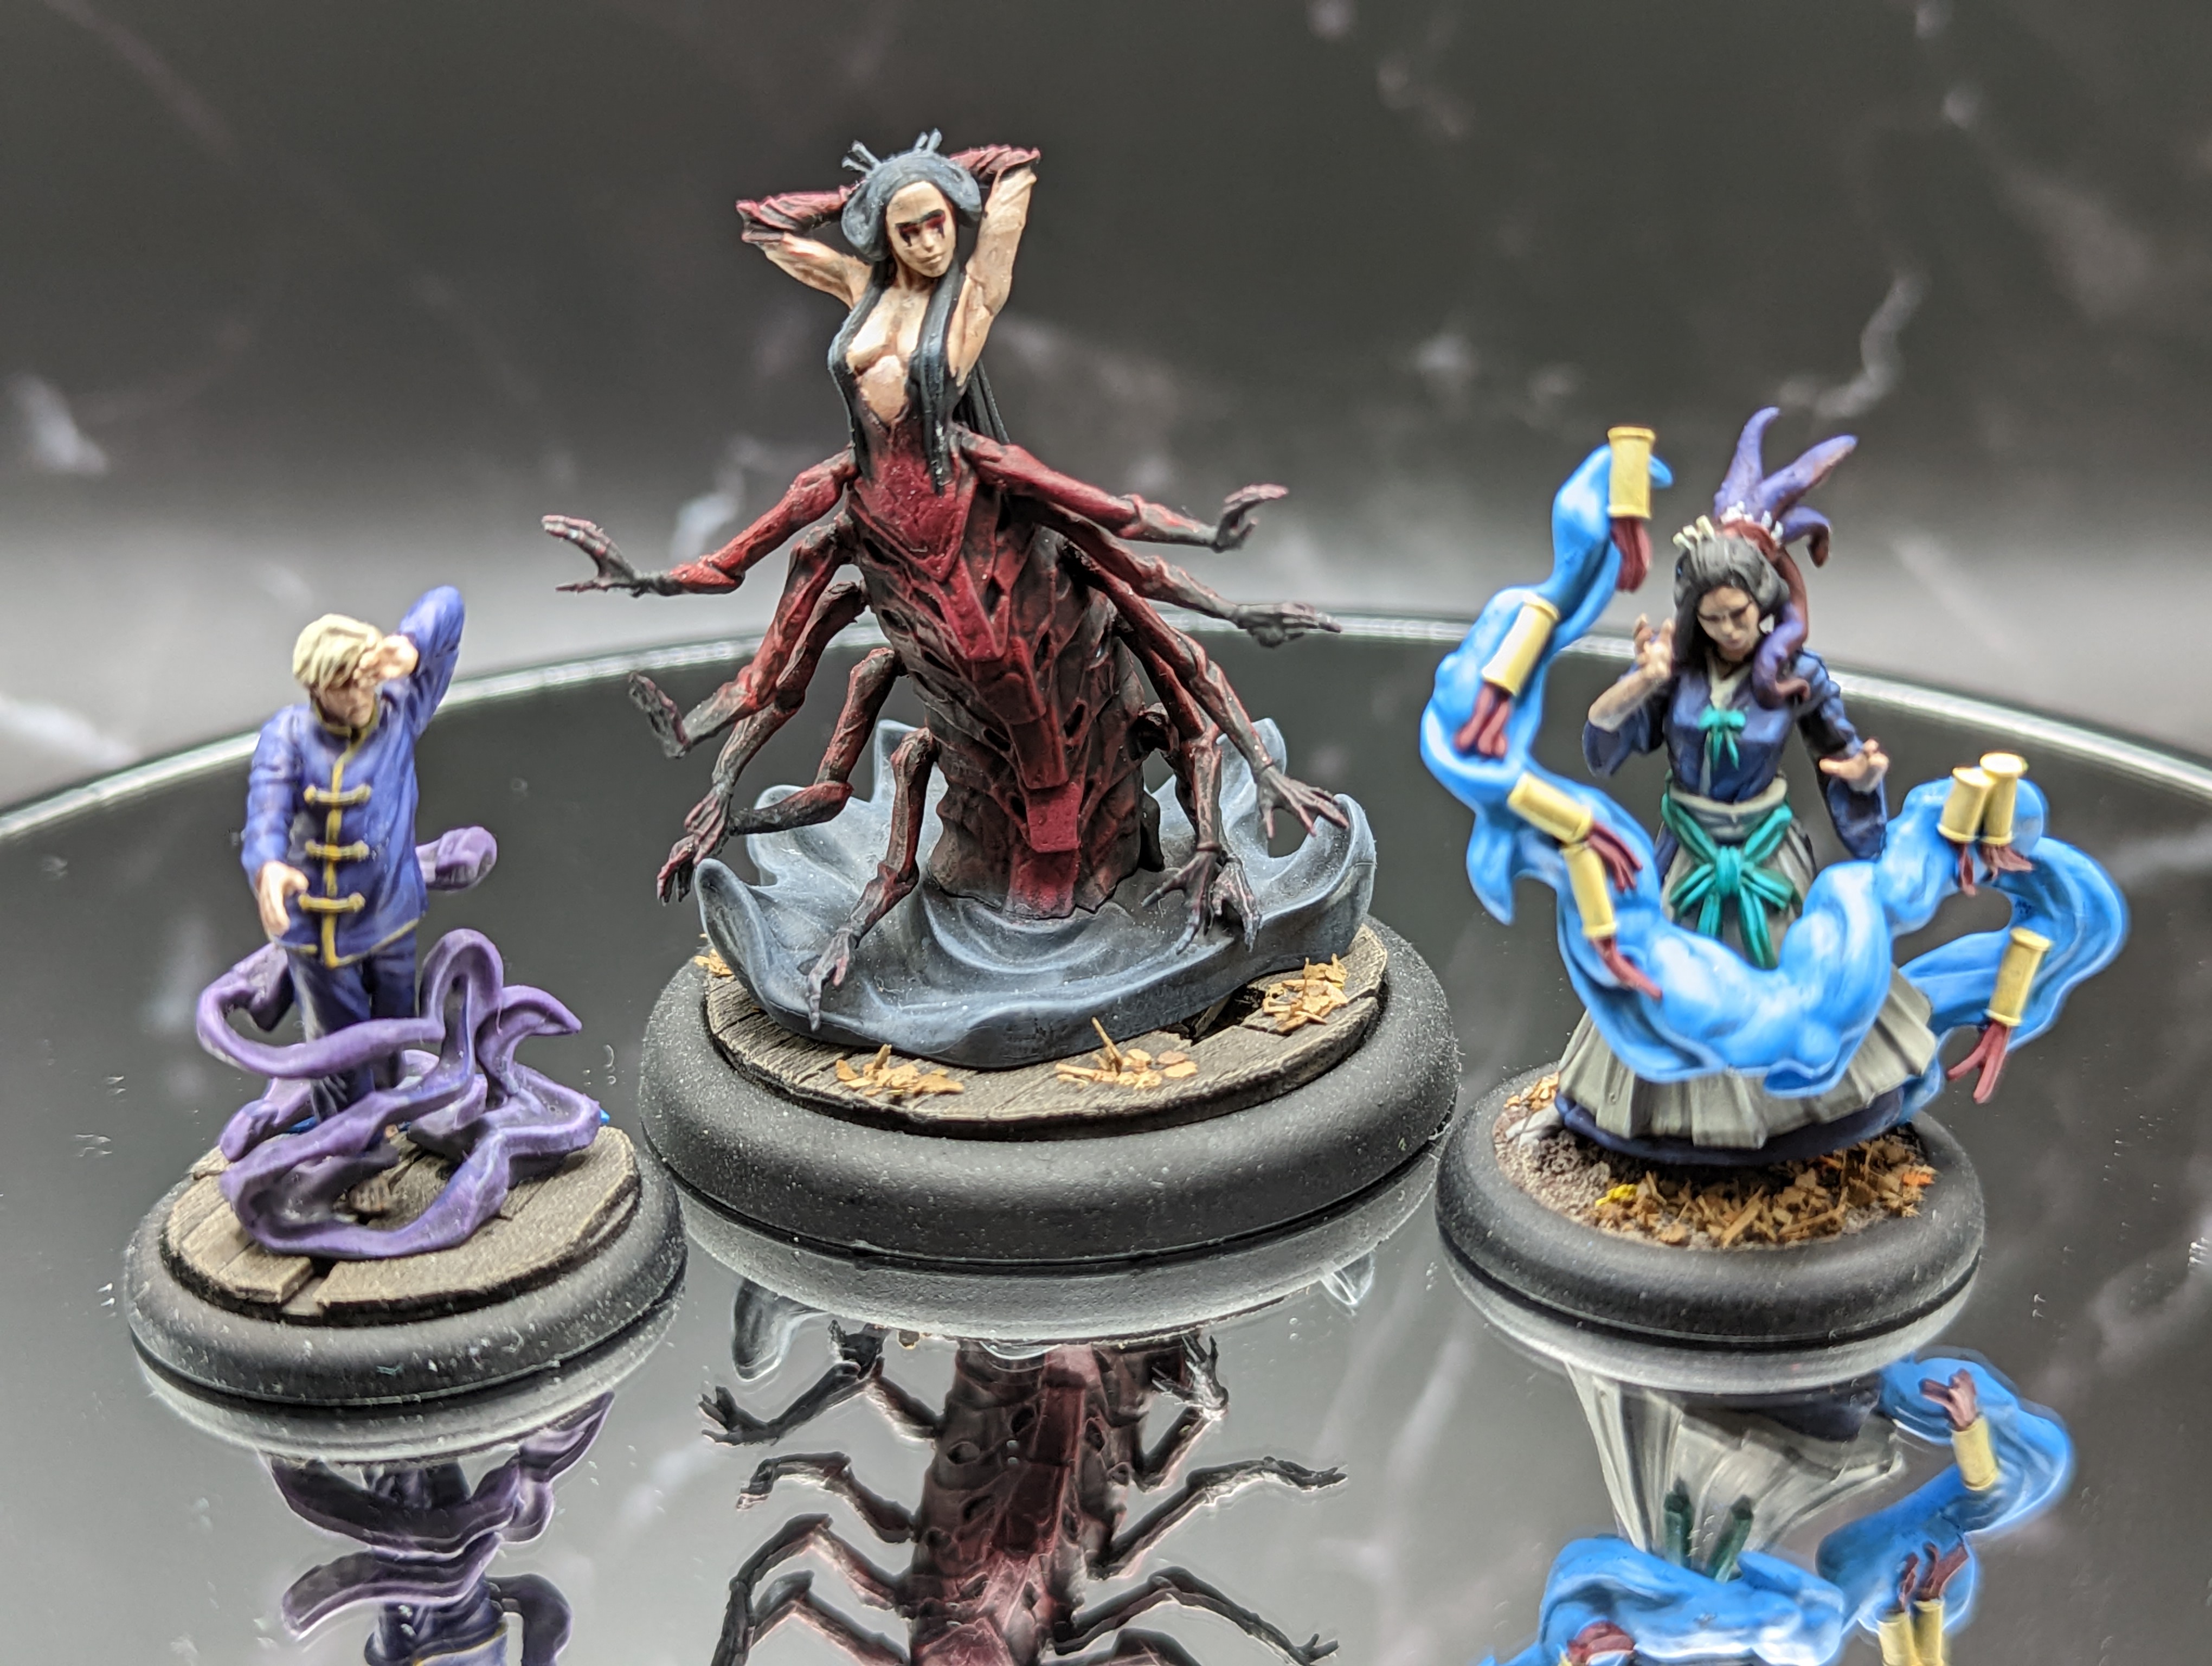
Finishing Shenlong and Sandeep
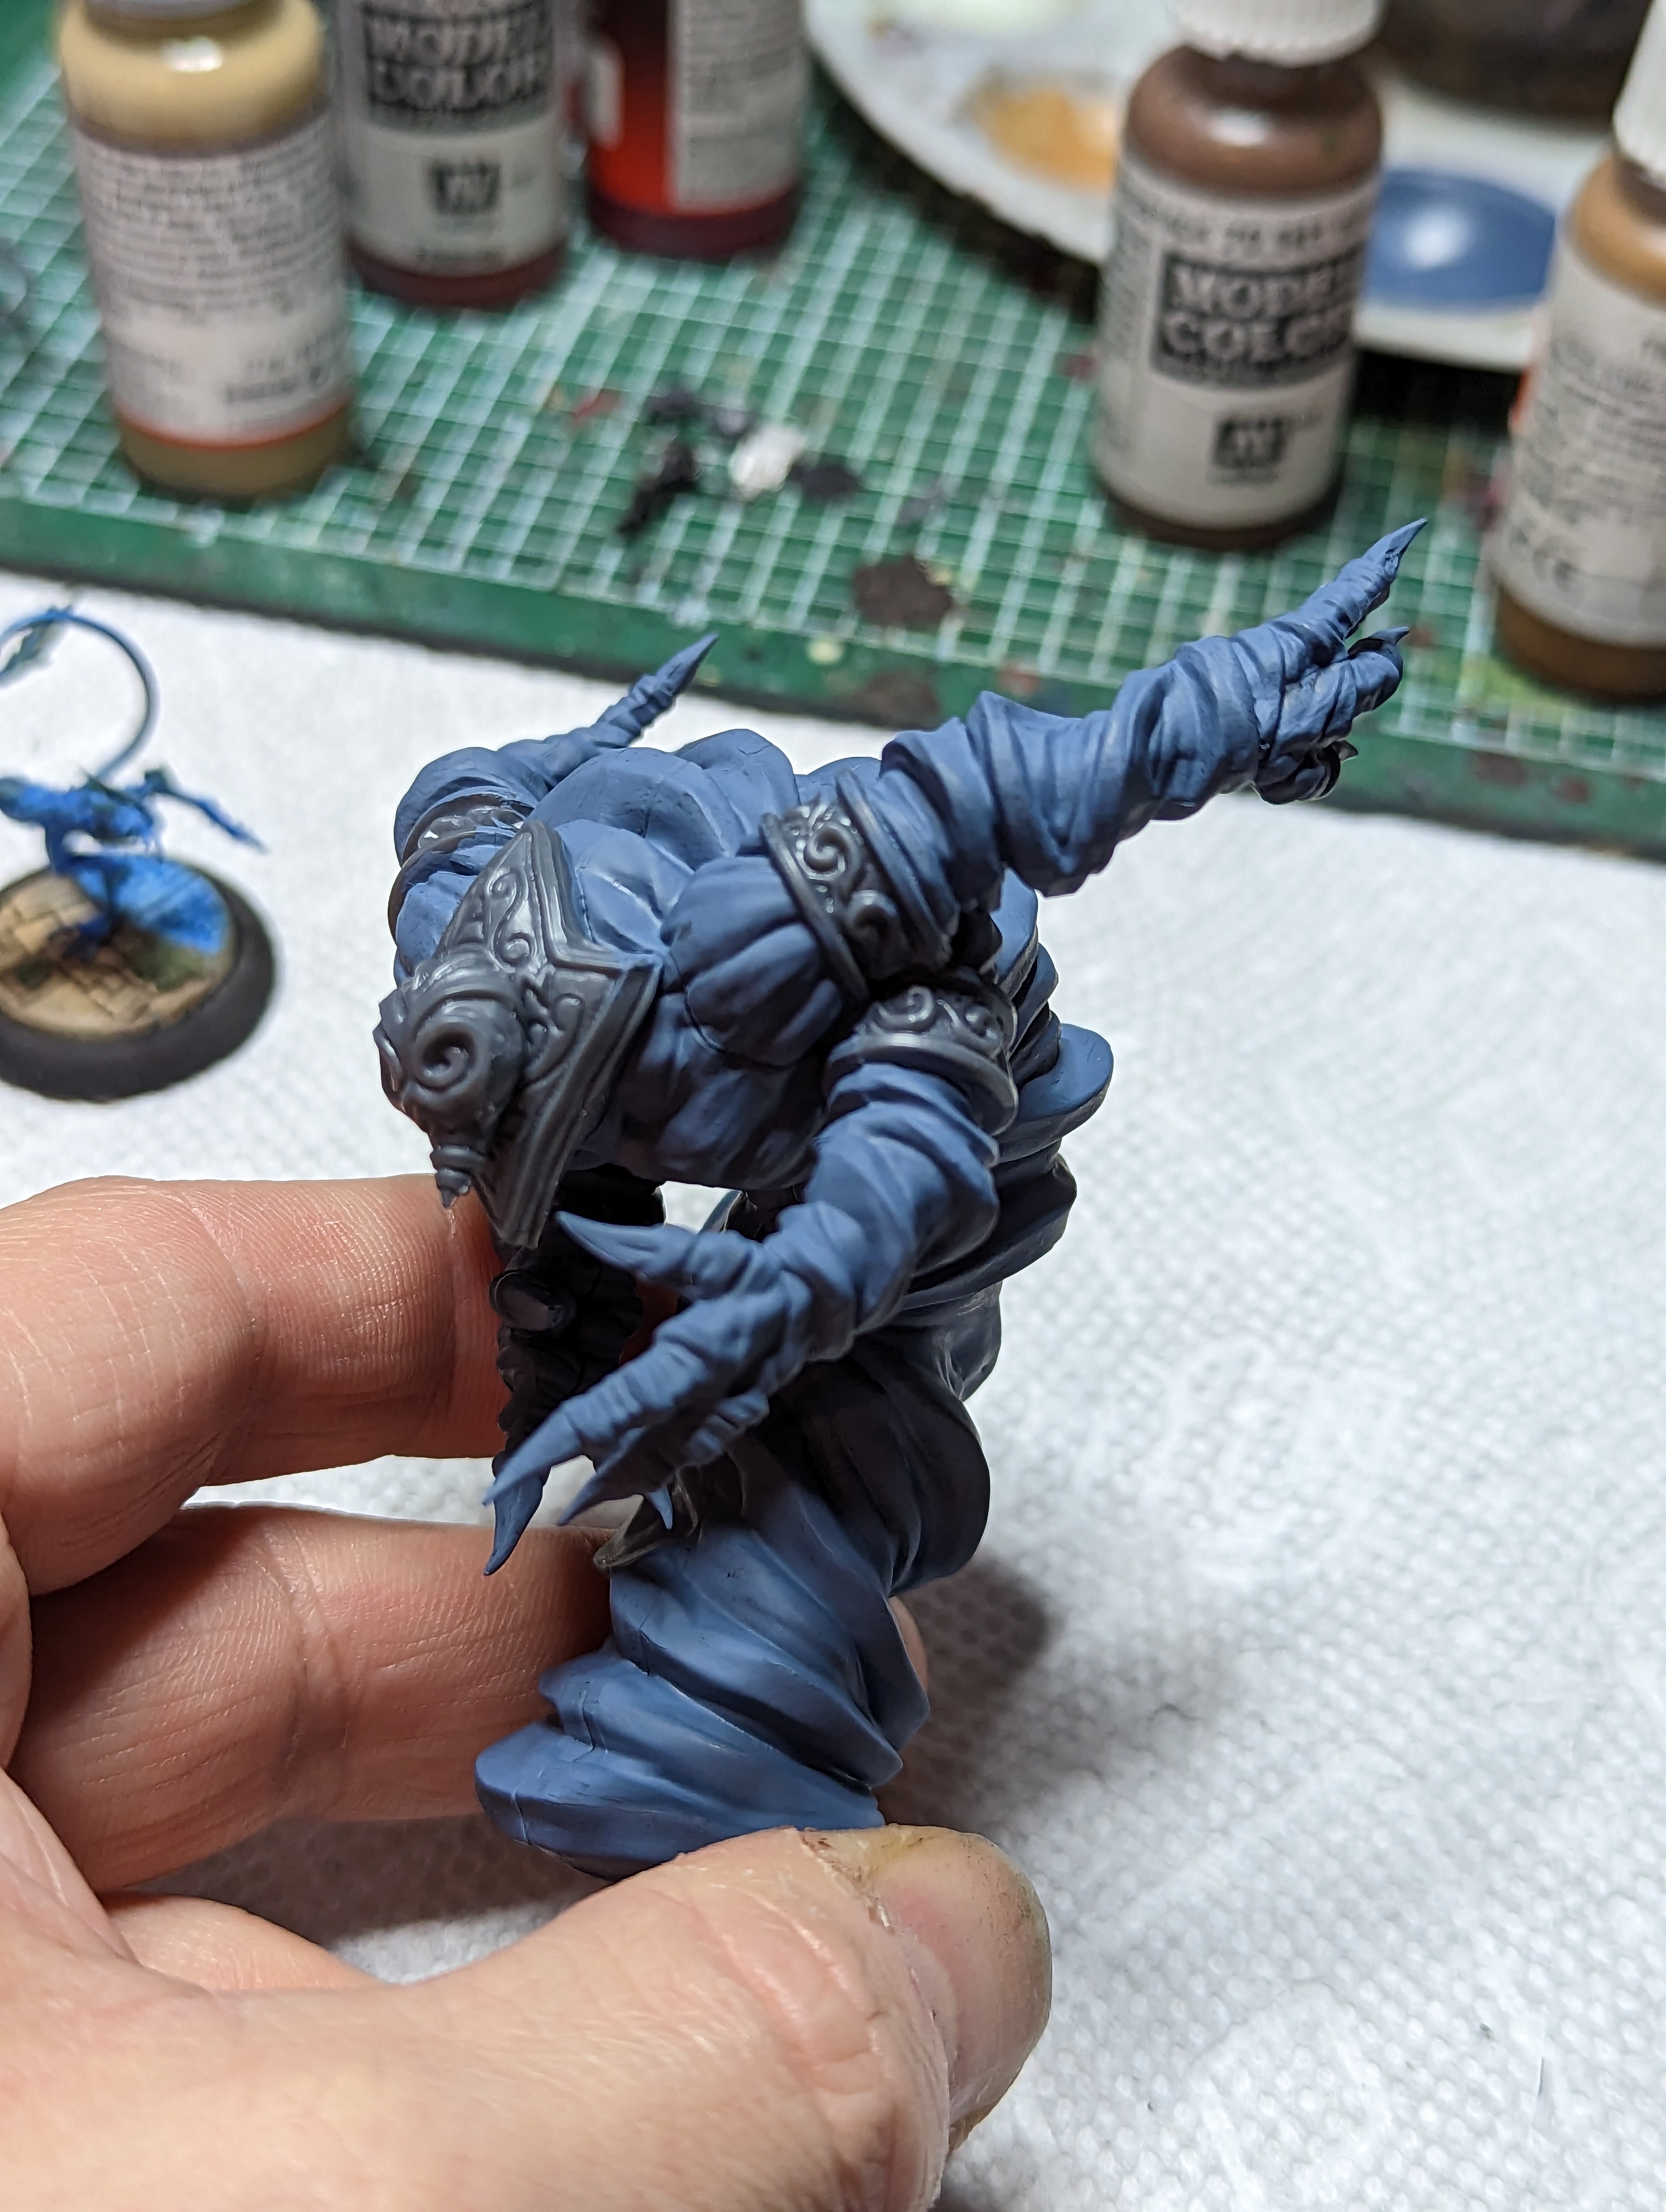
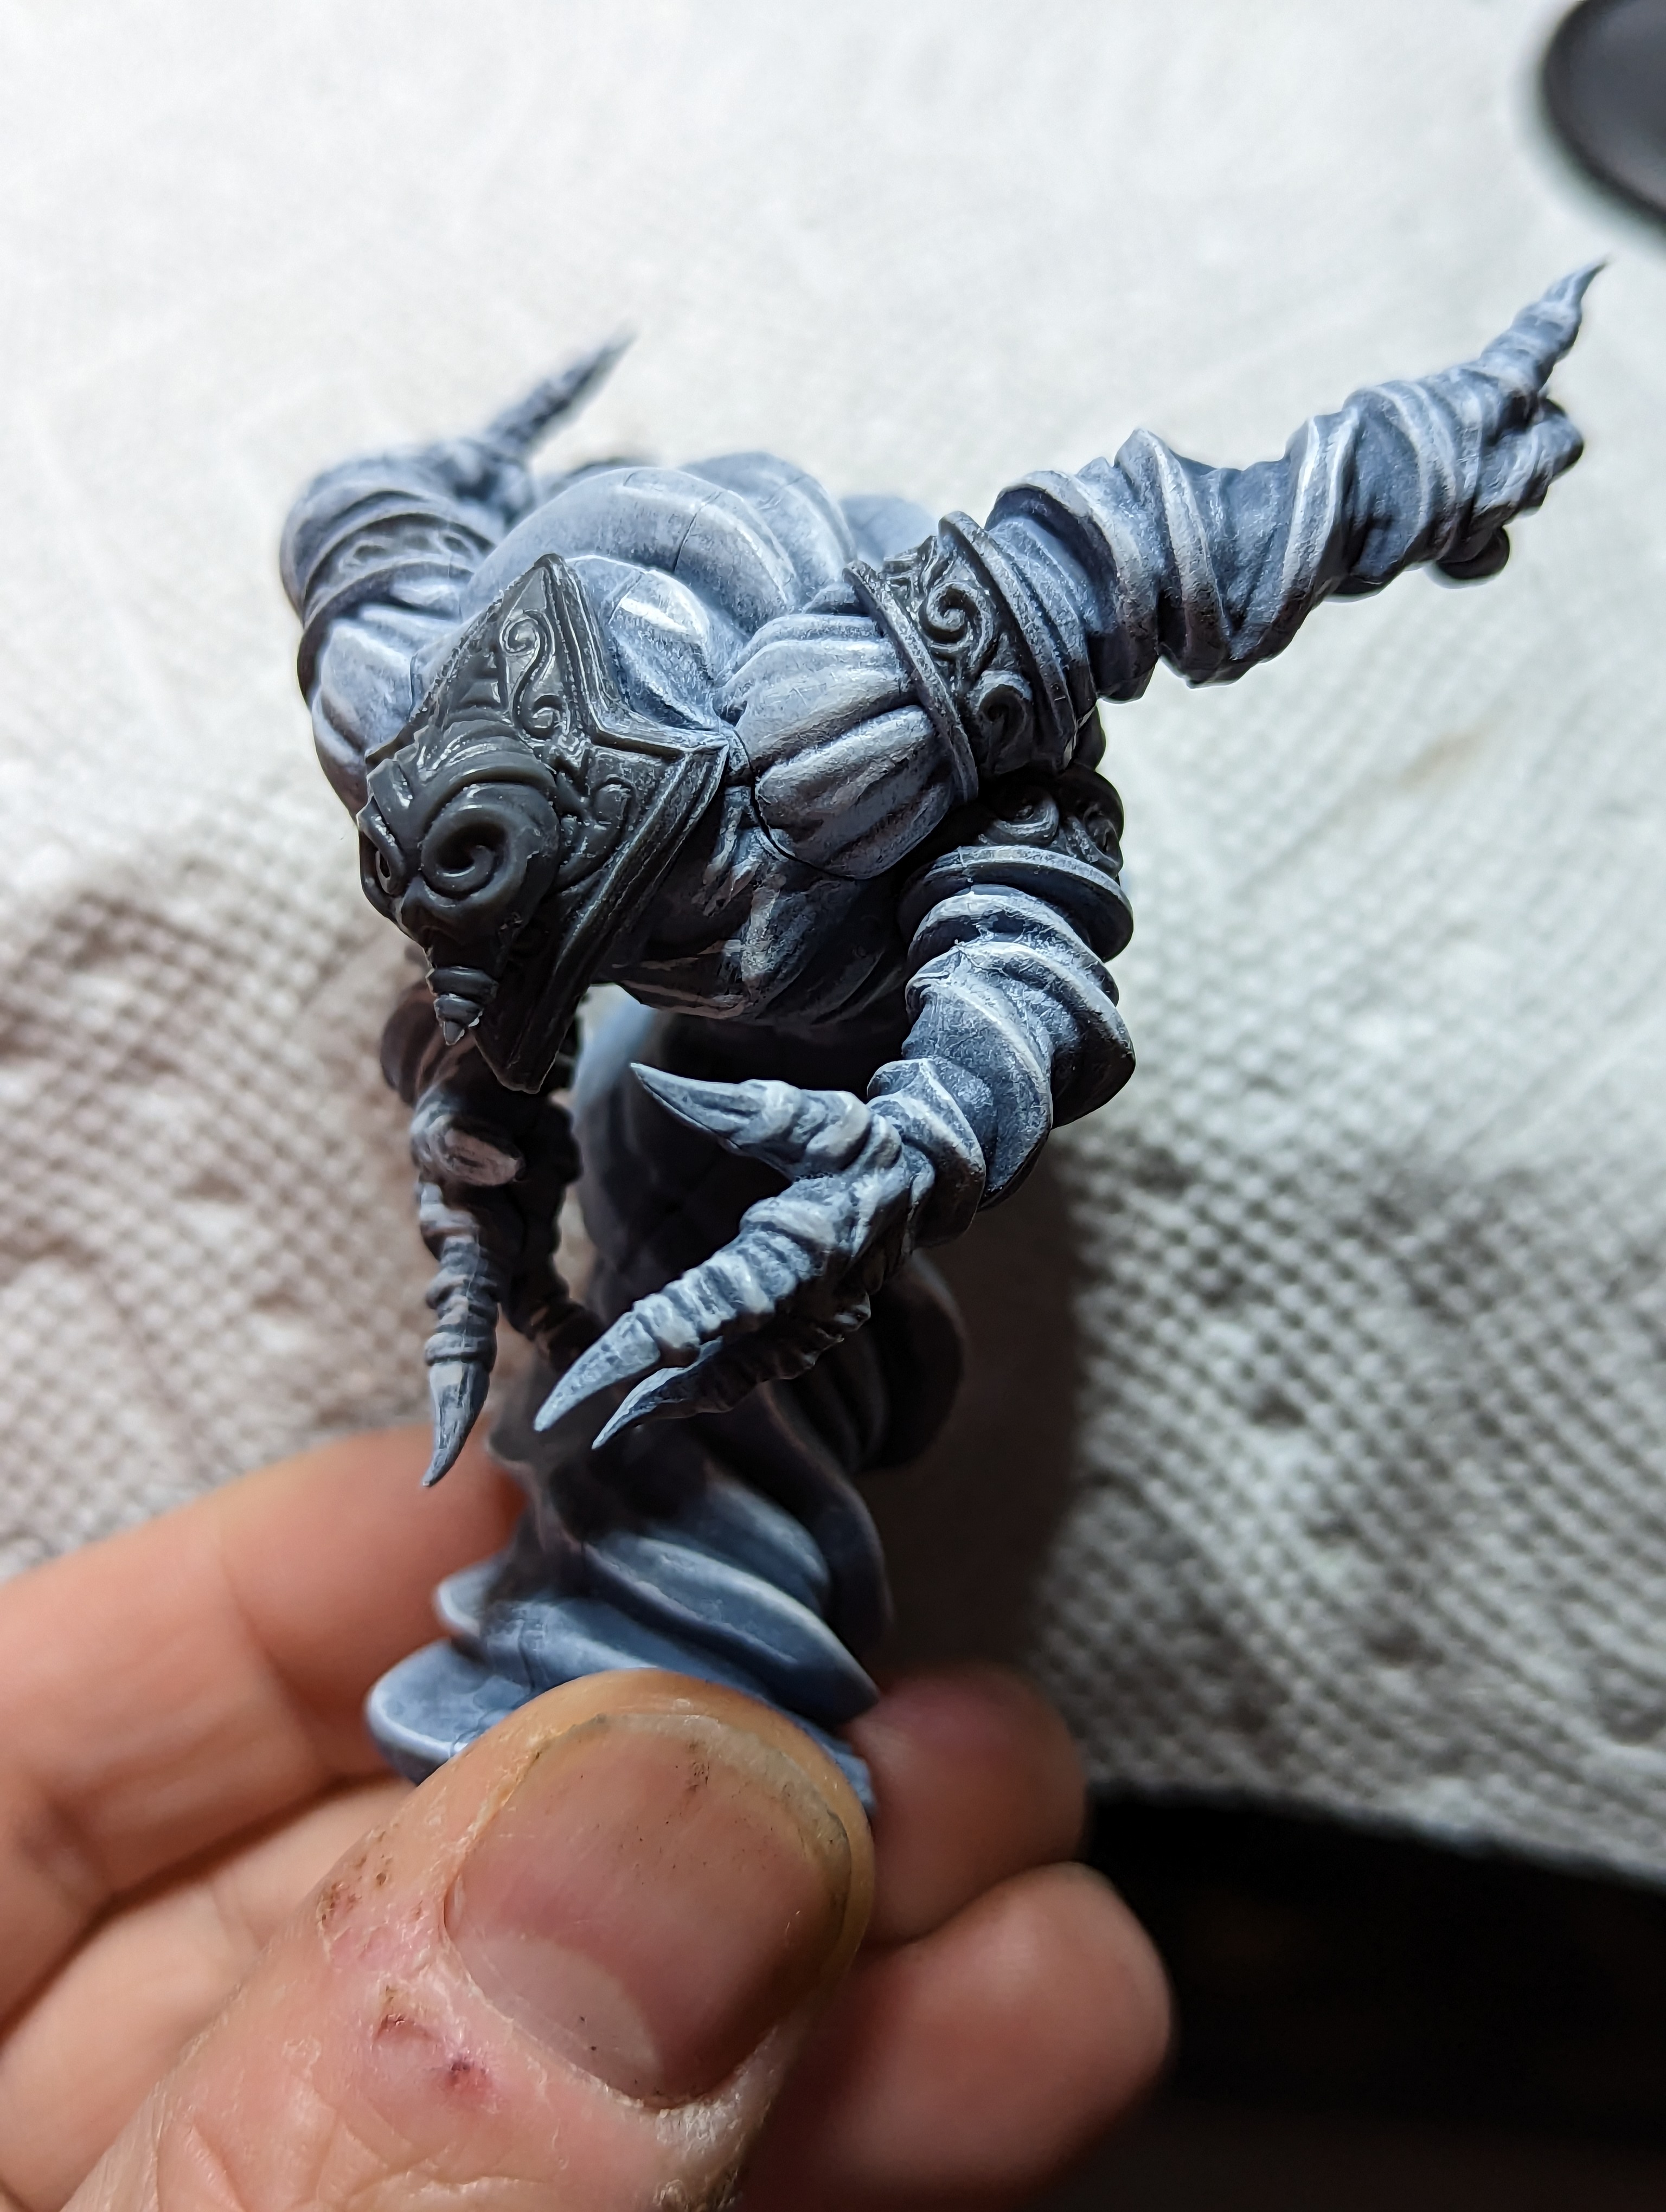

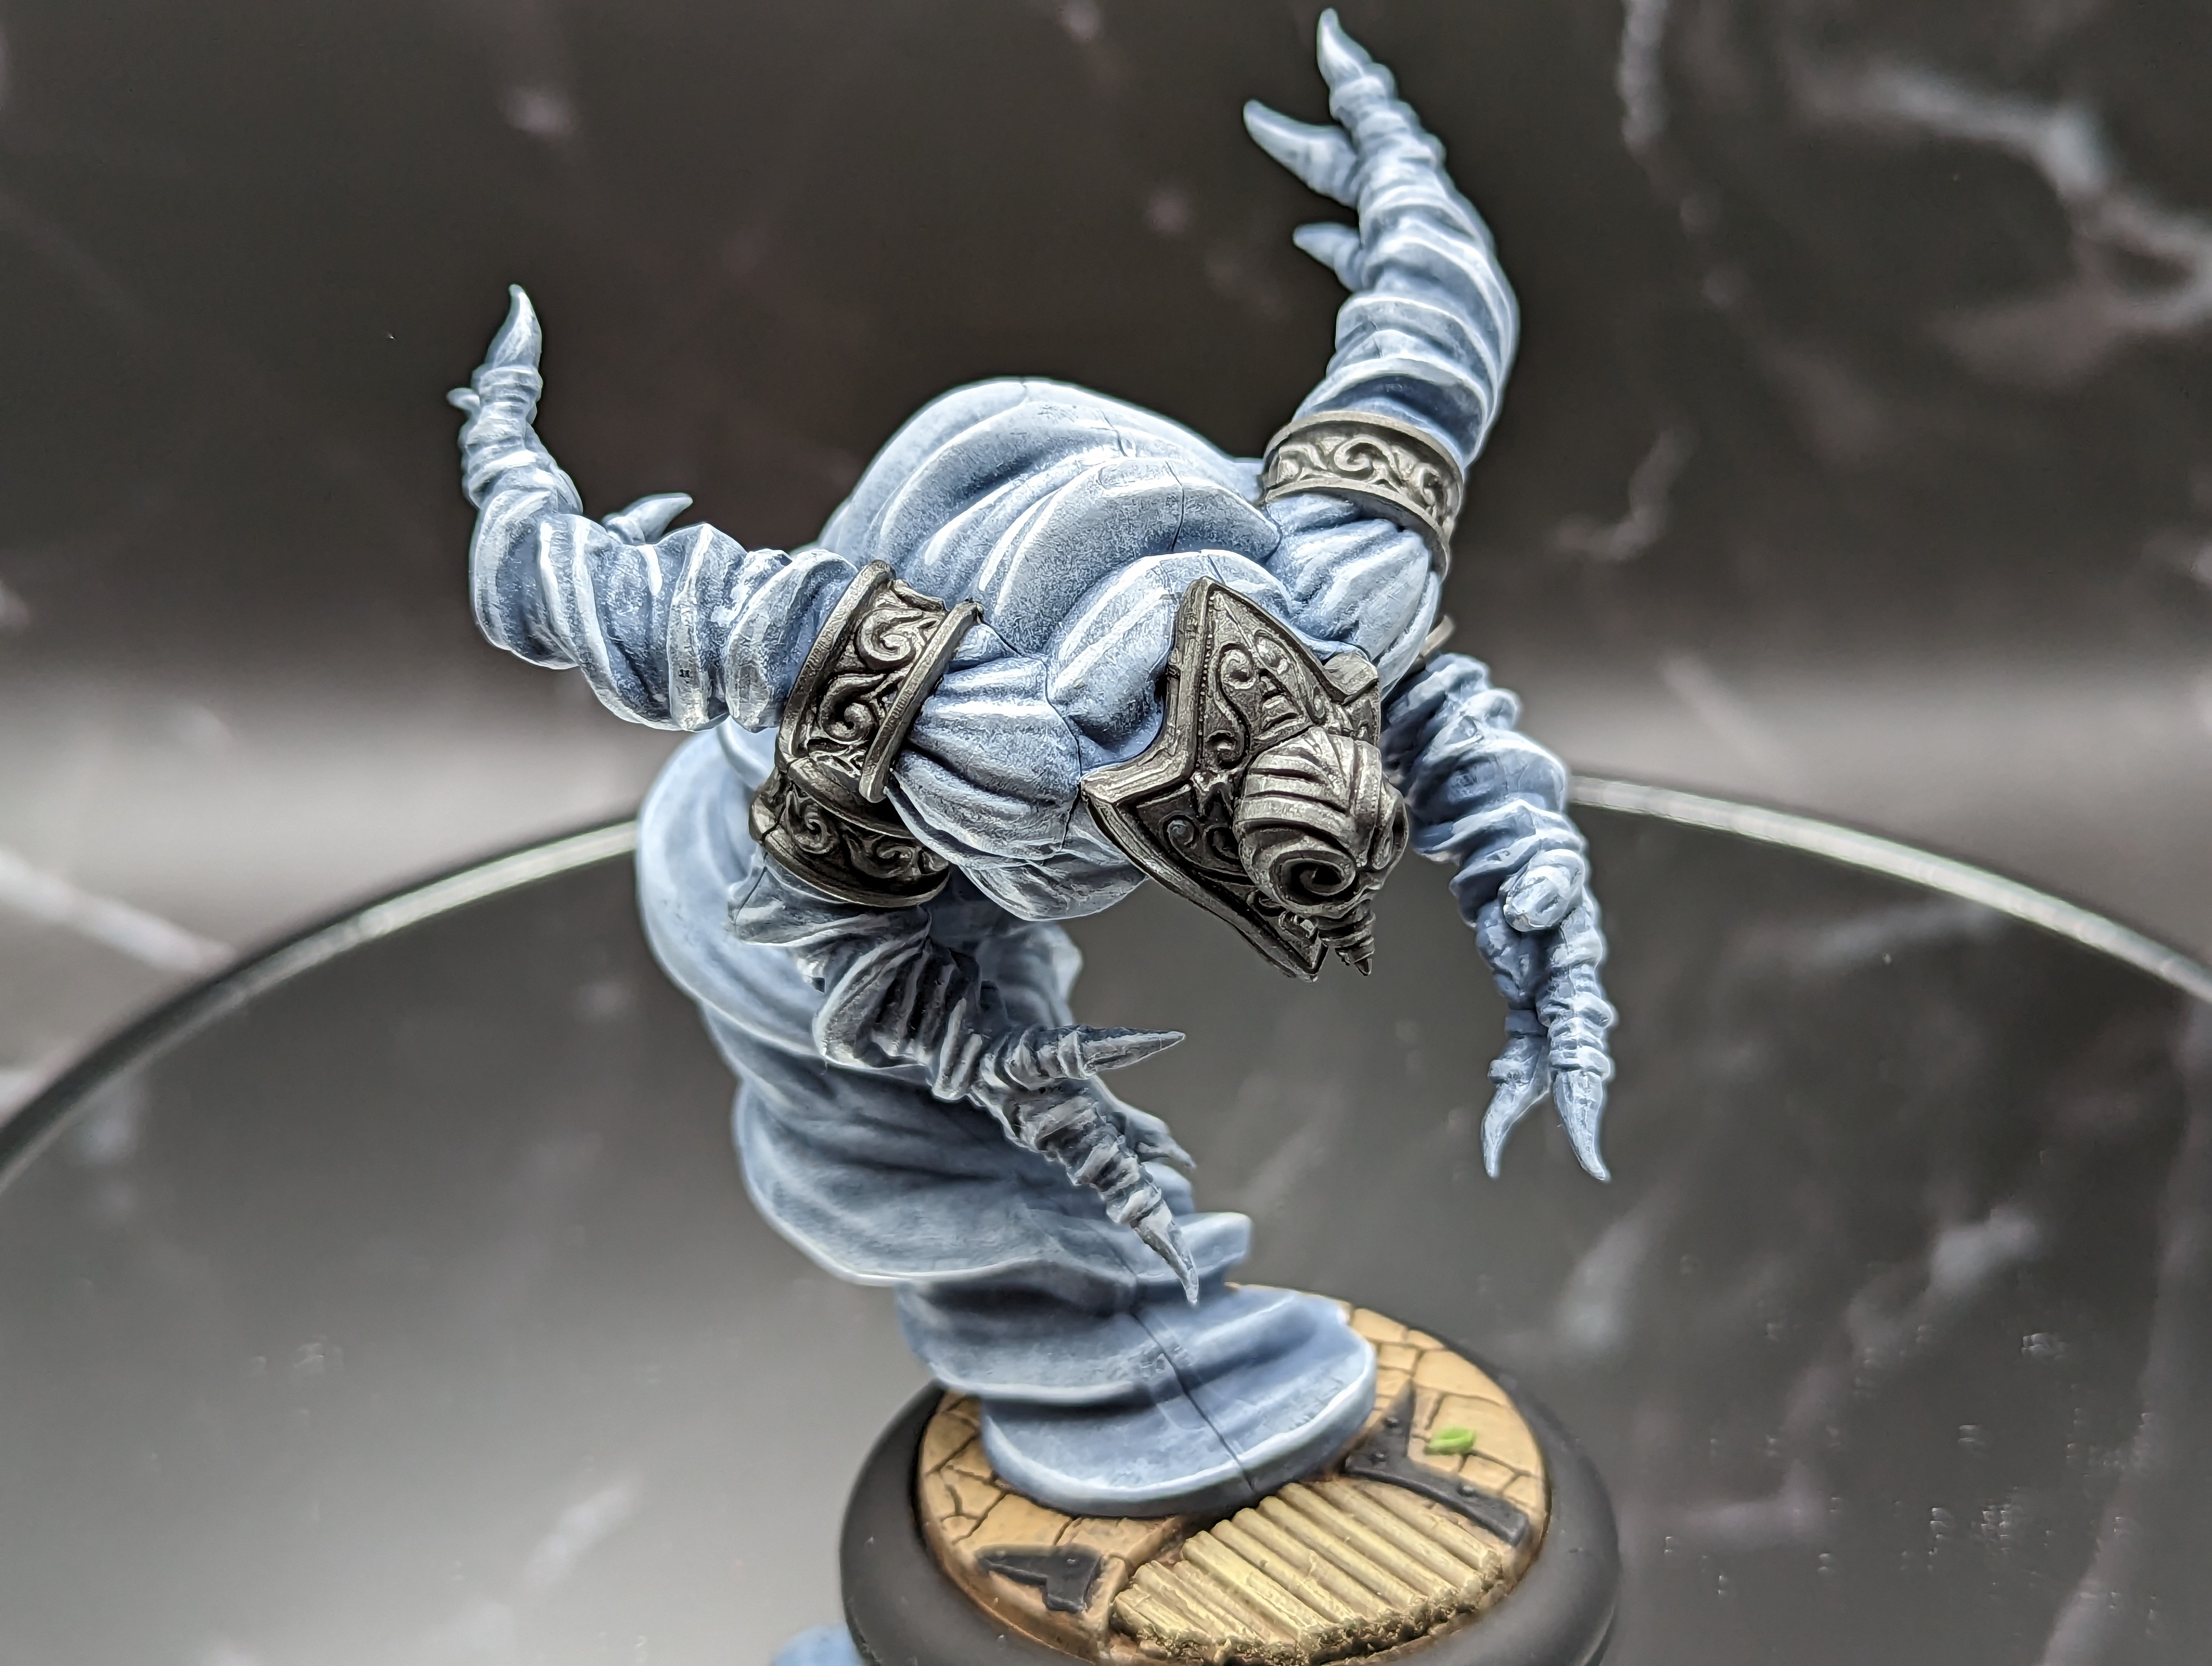
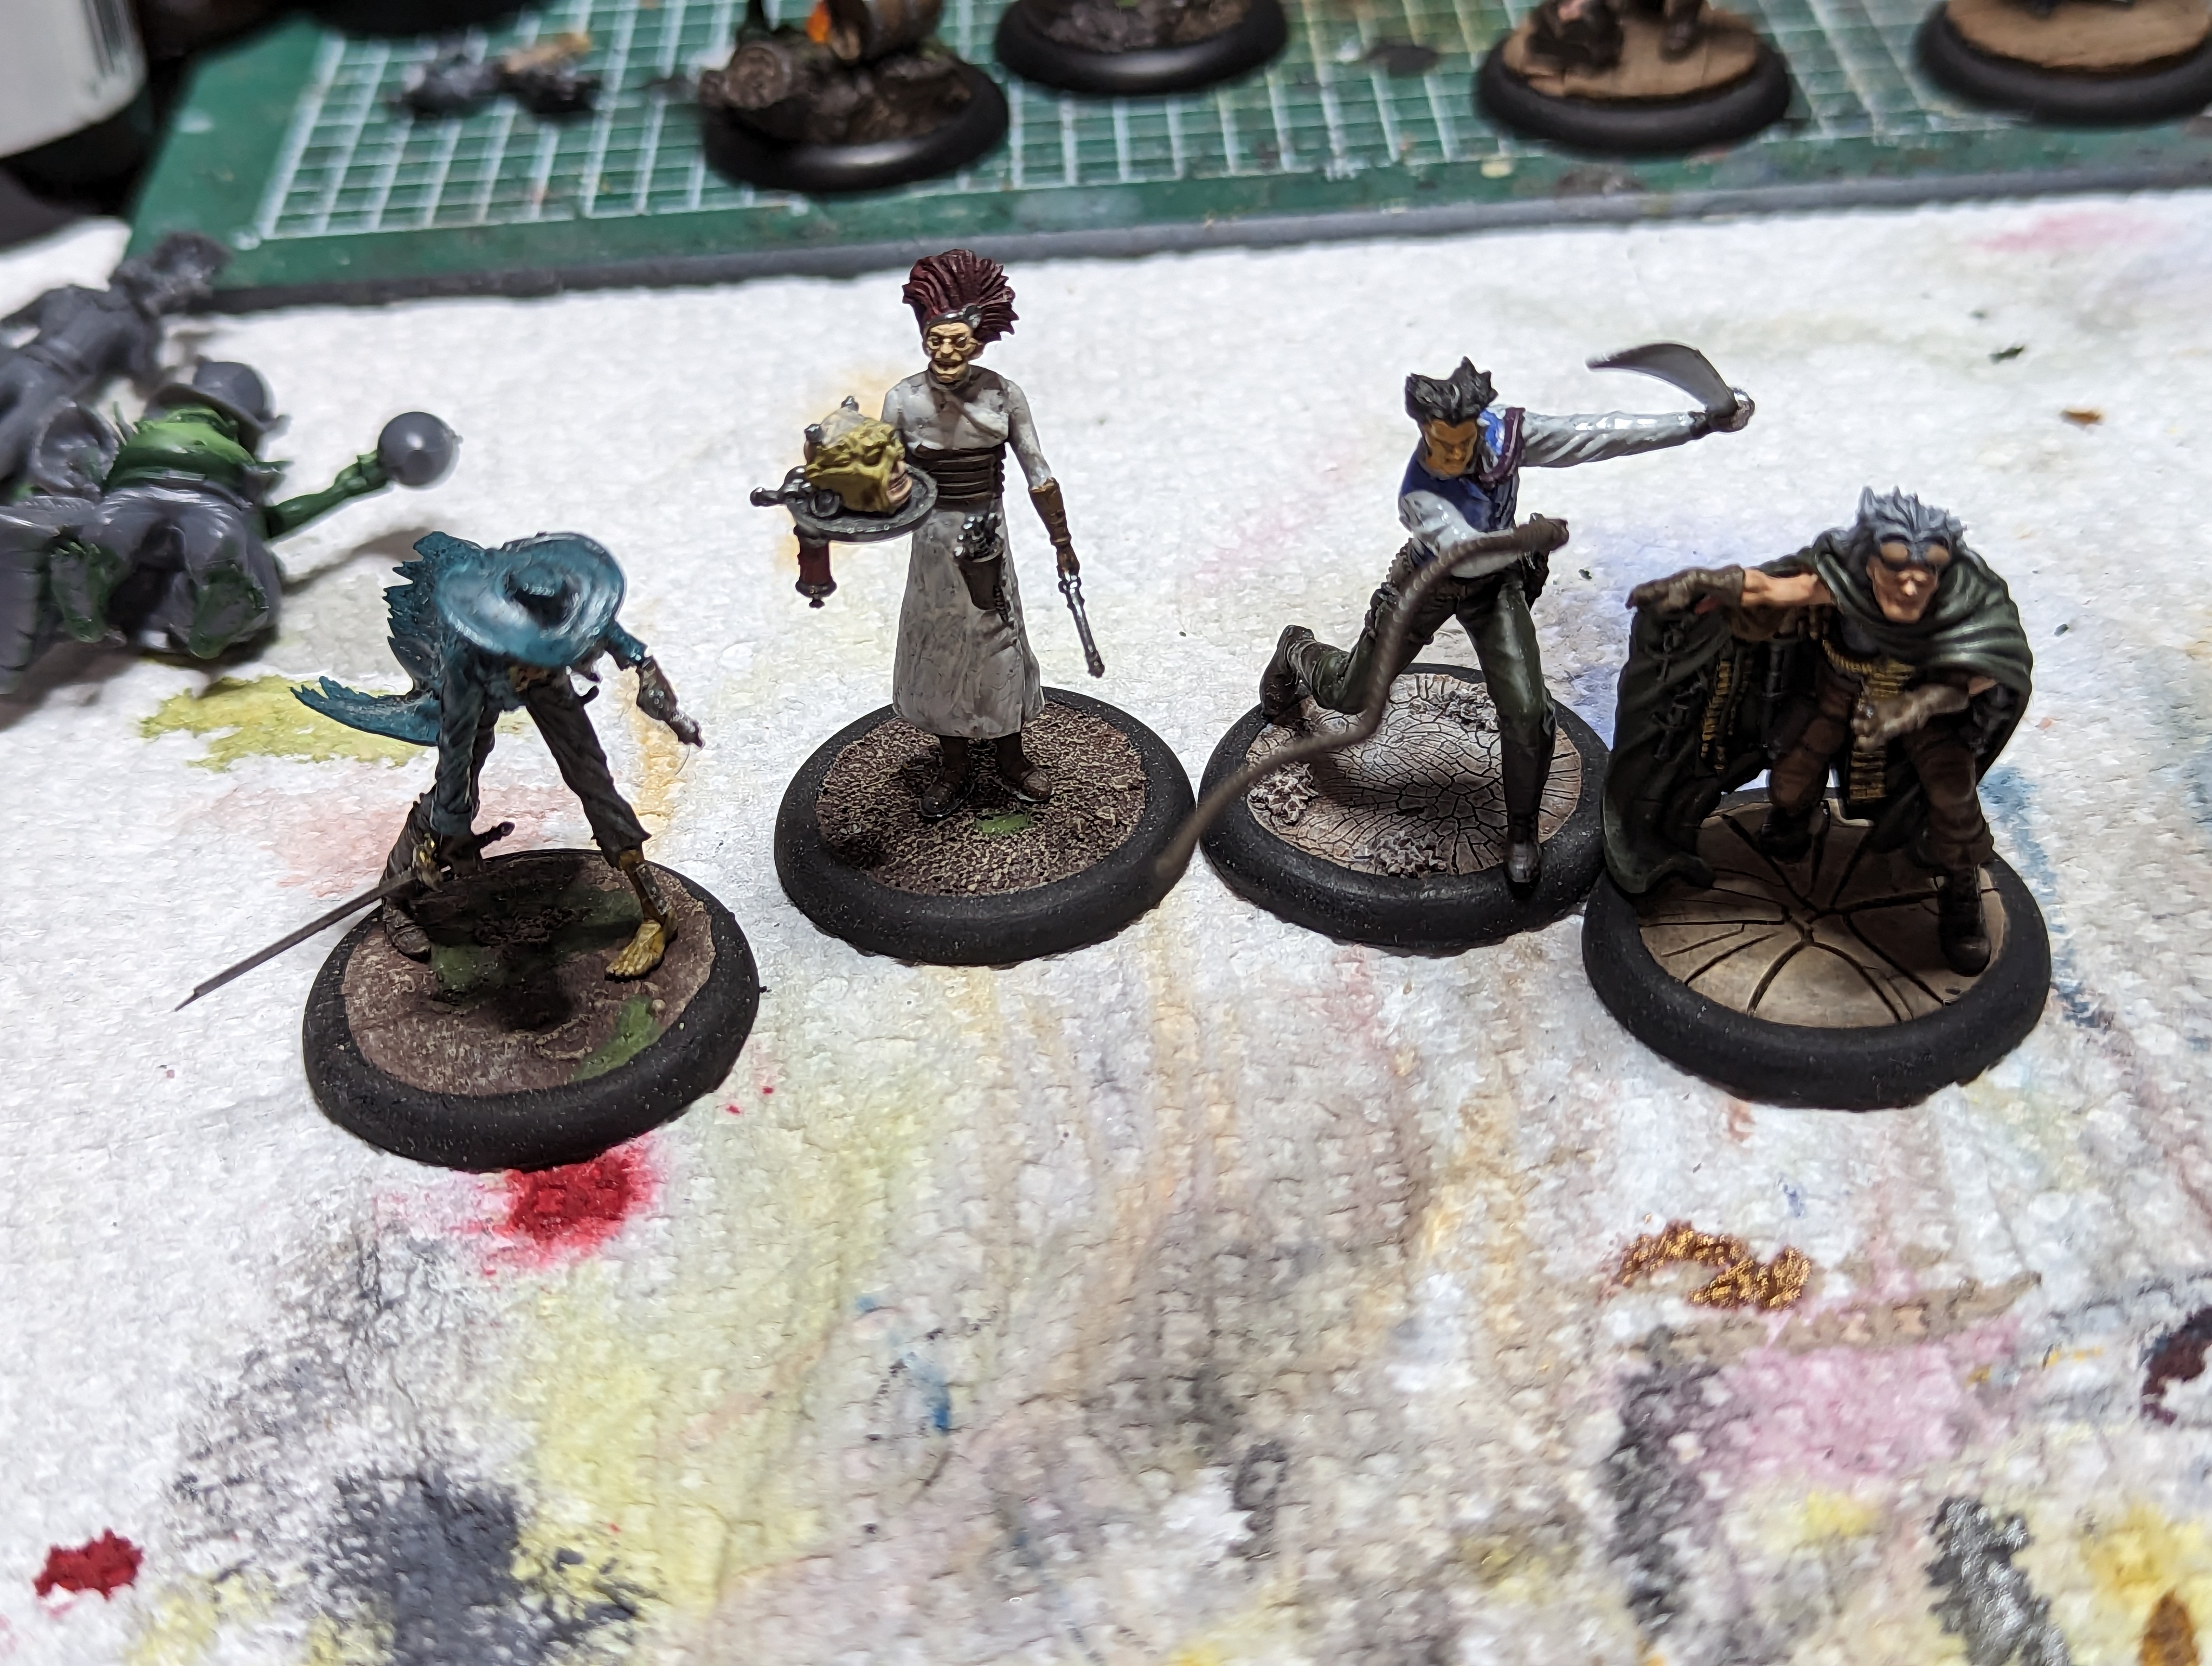
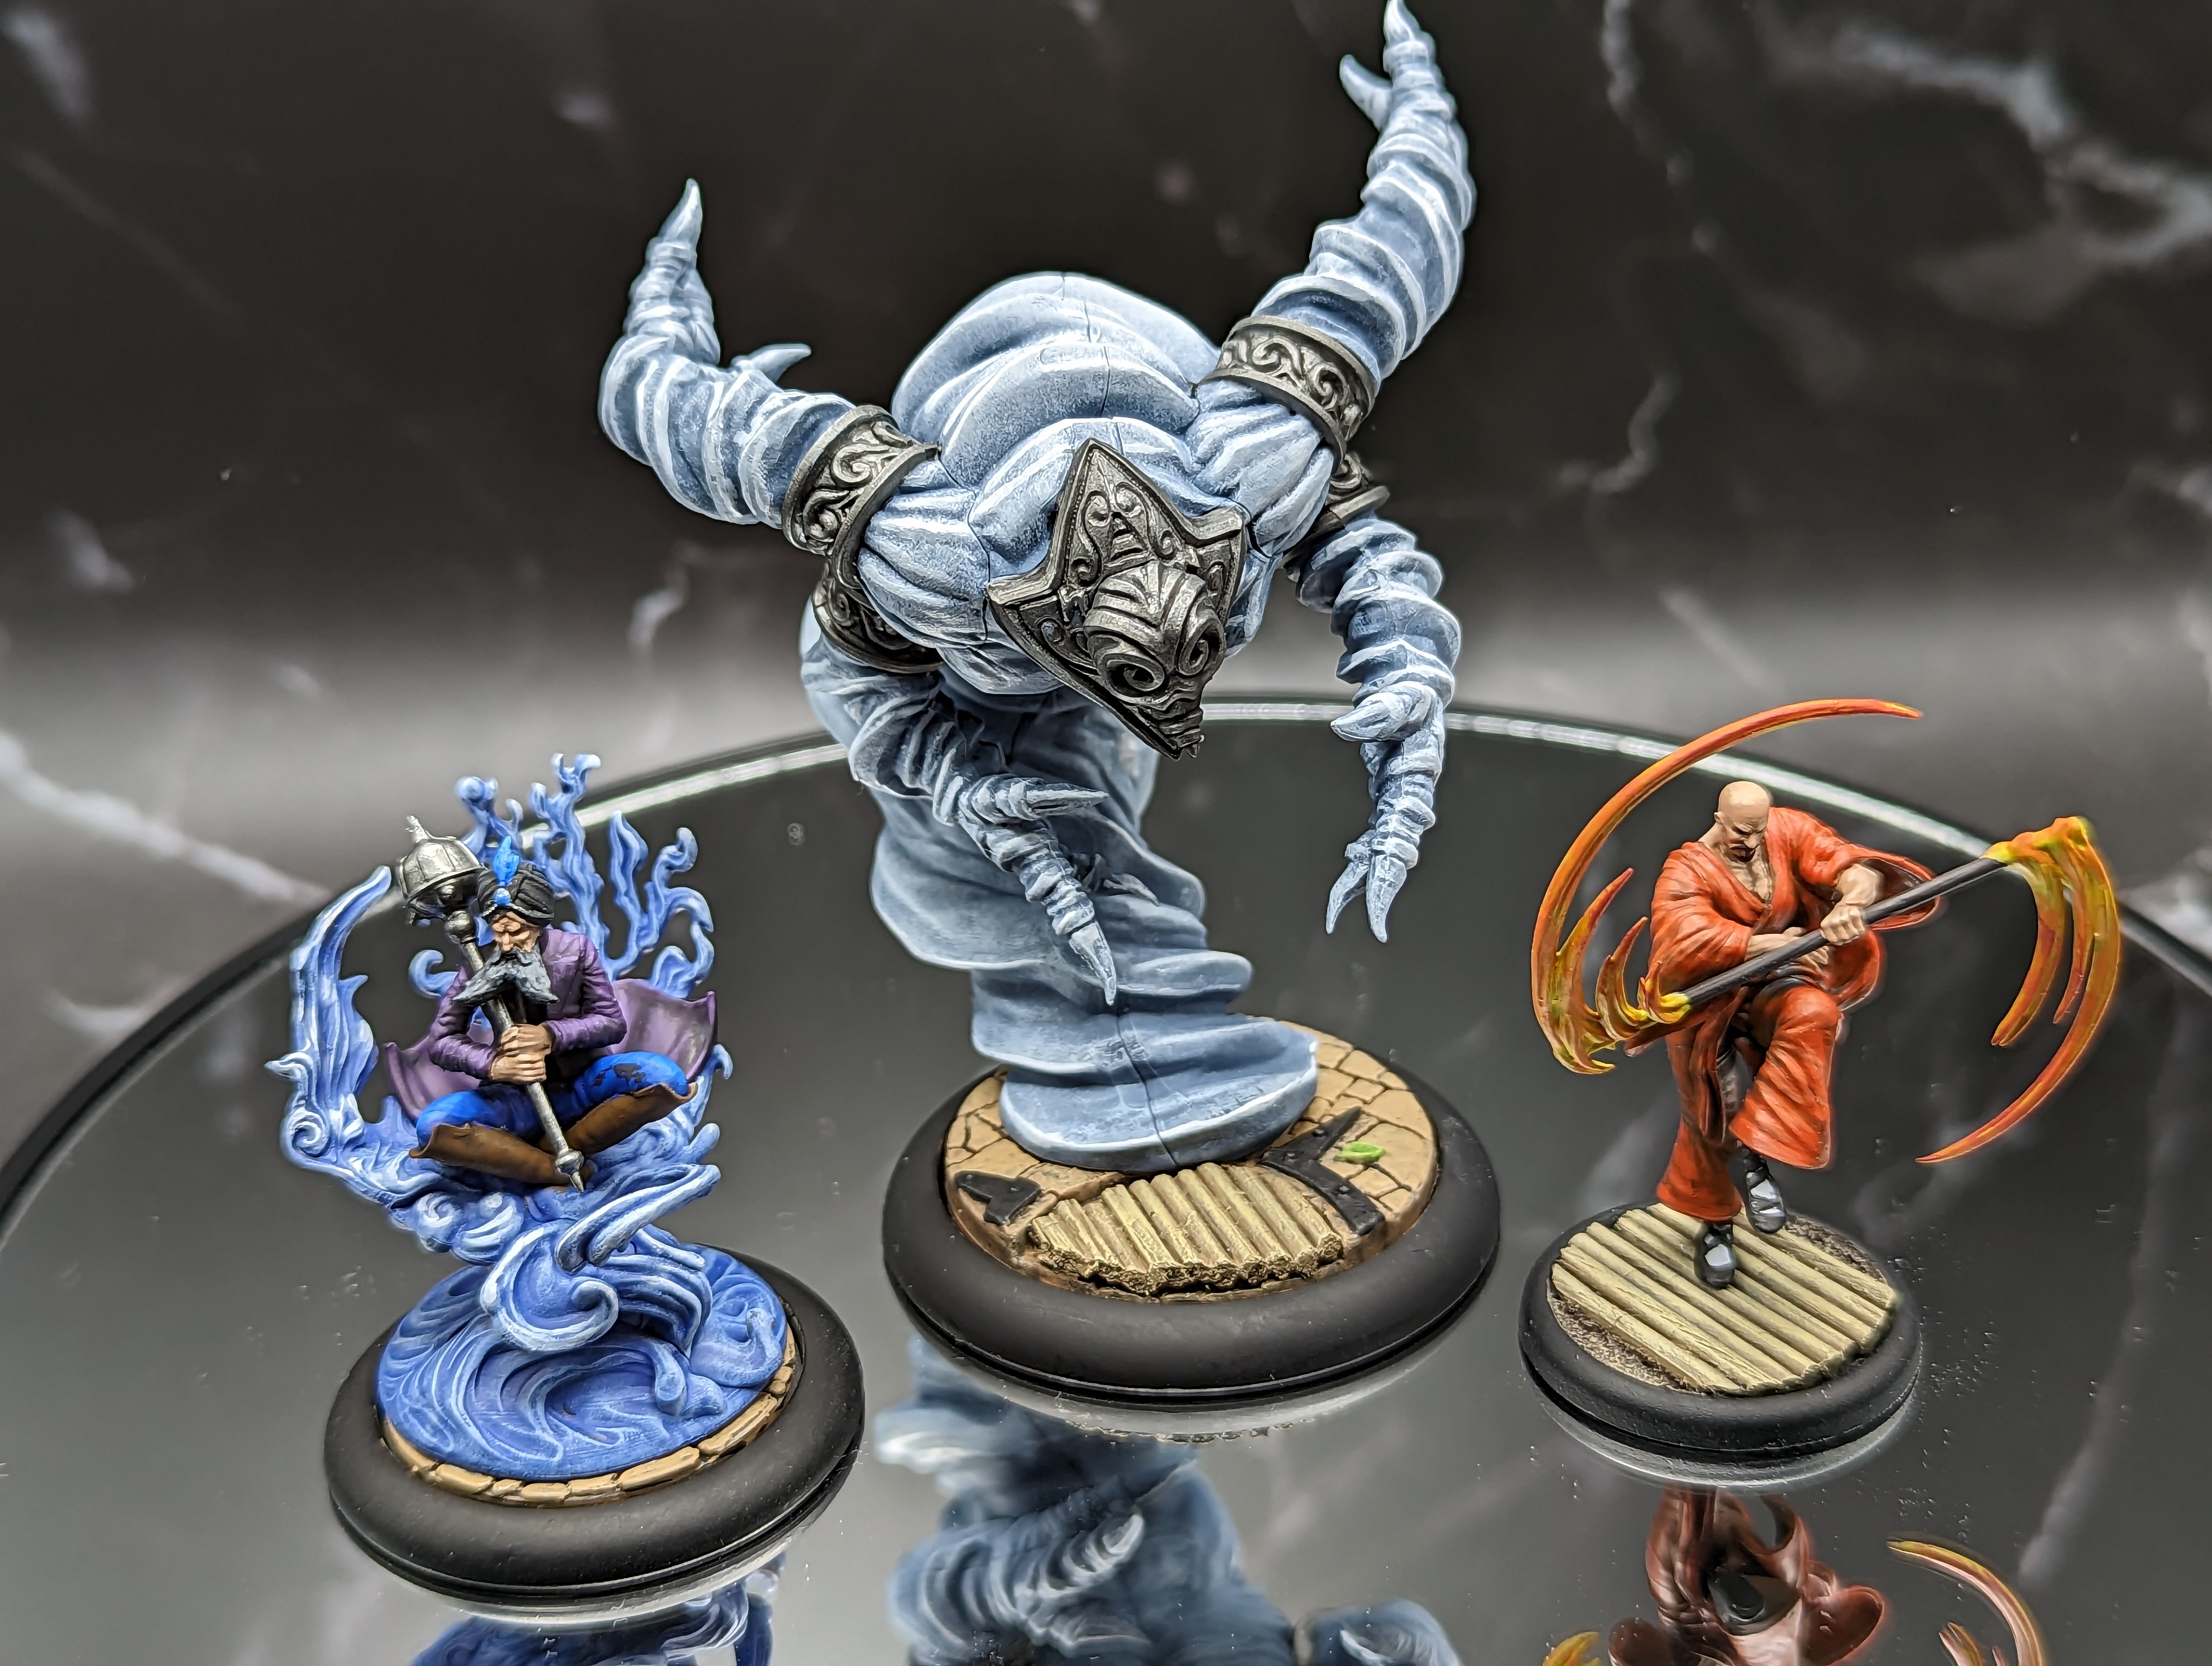
The wind golem is a big chunky model, and its got a lot of texture to it. I decided to base boat it with a greyish blue to make it look like wind. After that I did 2 layers of drybrushing, up to a pretty bright blue. That gave the model a bit of a dusty look, so I just went in and added some edge highlighting with white. I was pretty pleased with the result.
The rest of the model is a few sections of metal, so I based coated them with a darkish metallic, and then added some nuln oil. I was going to add some highlights, but the art show it all being pretty dull, and I wanted the body to be the part that stood out, so I stopped there.

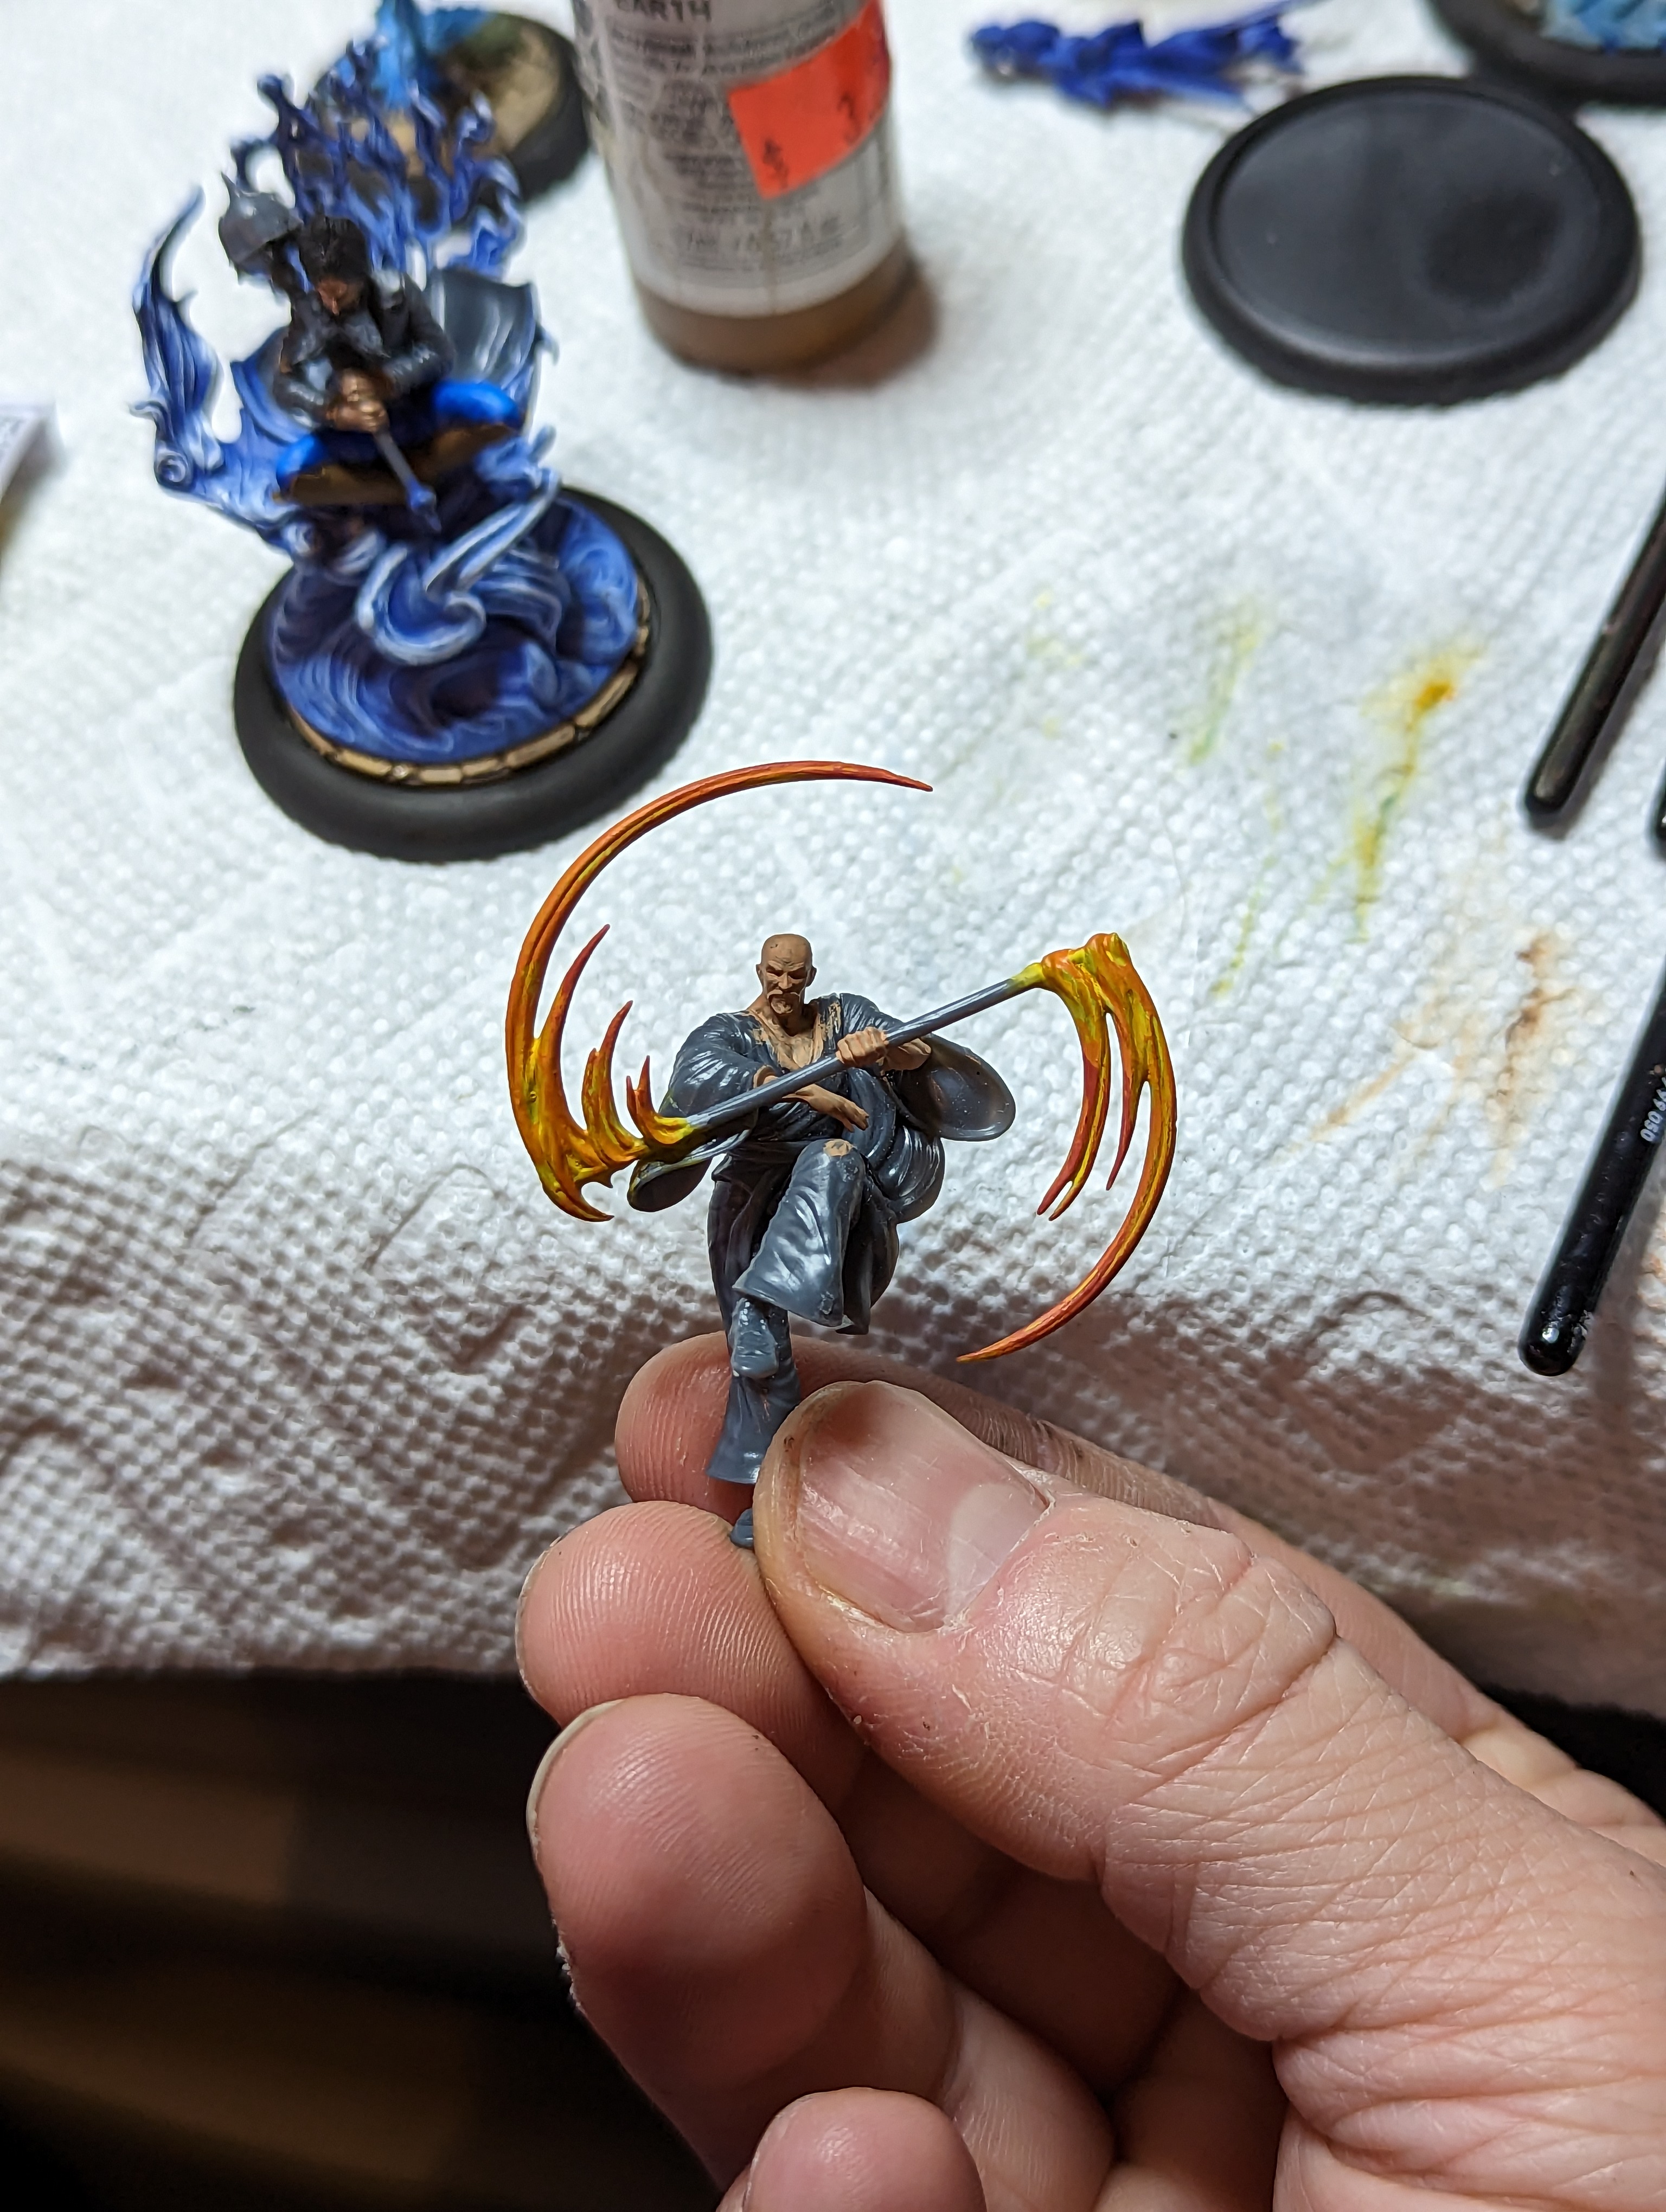
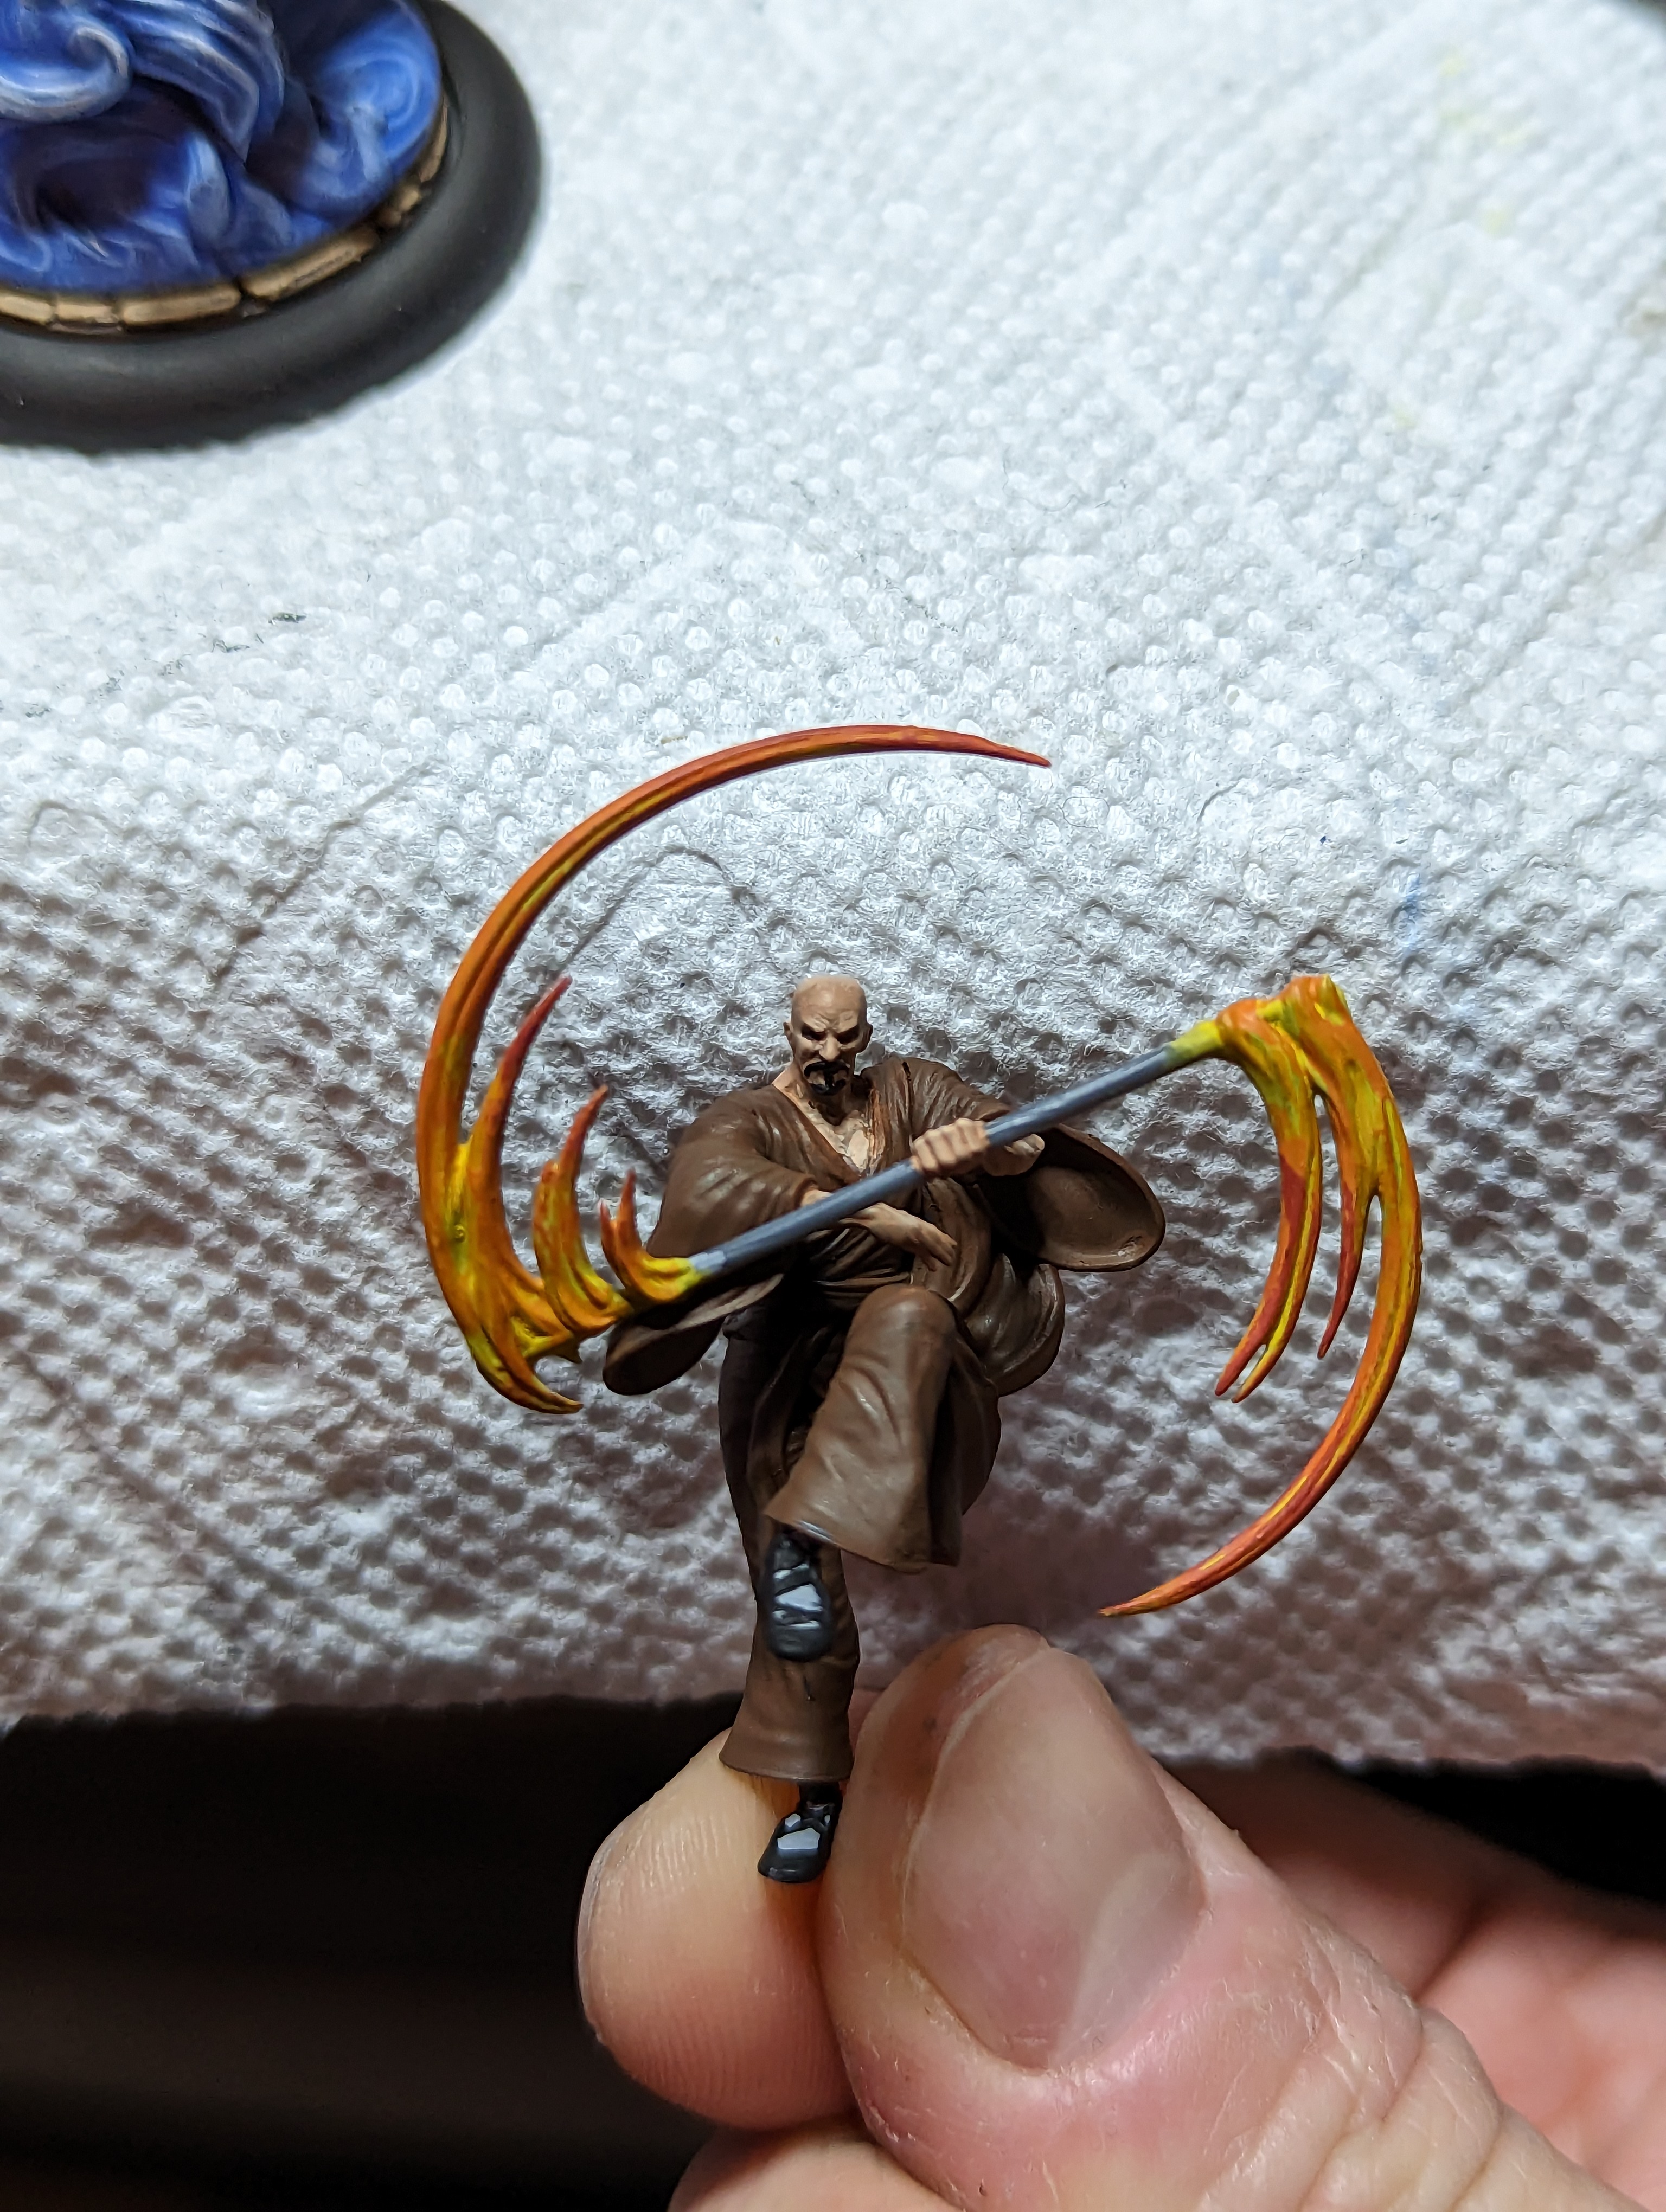
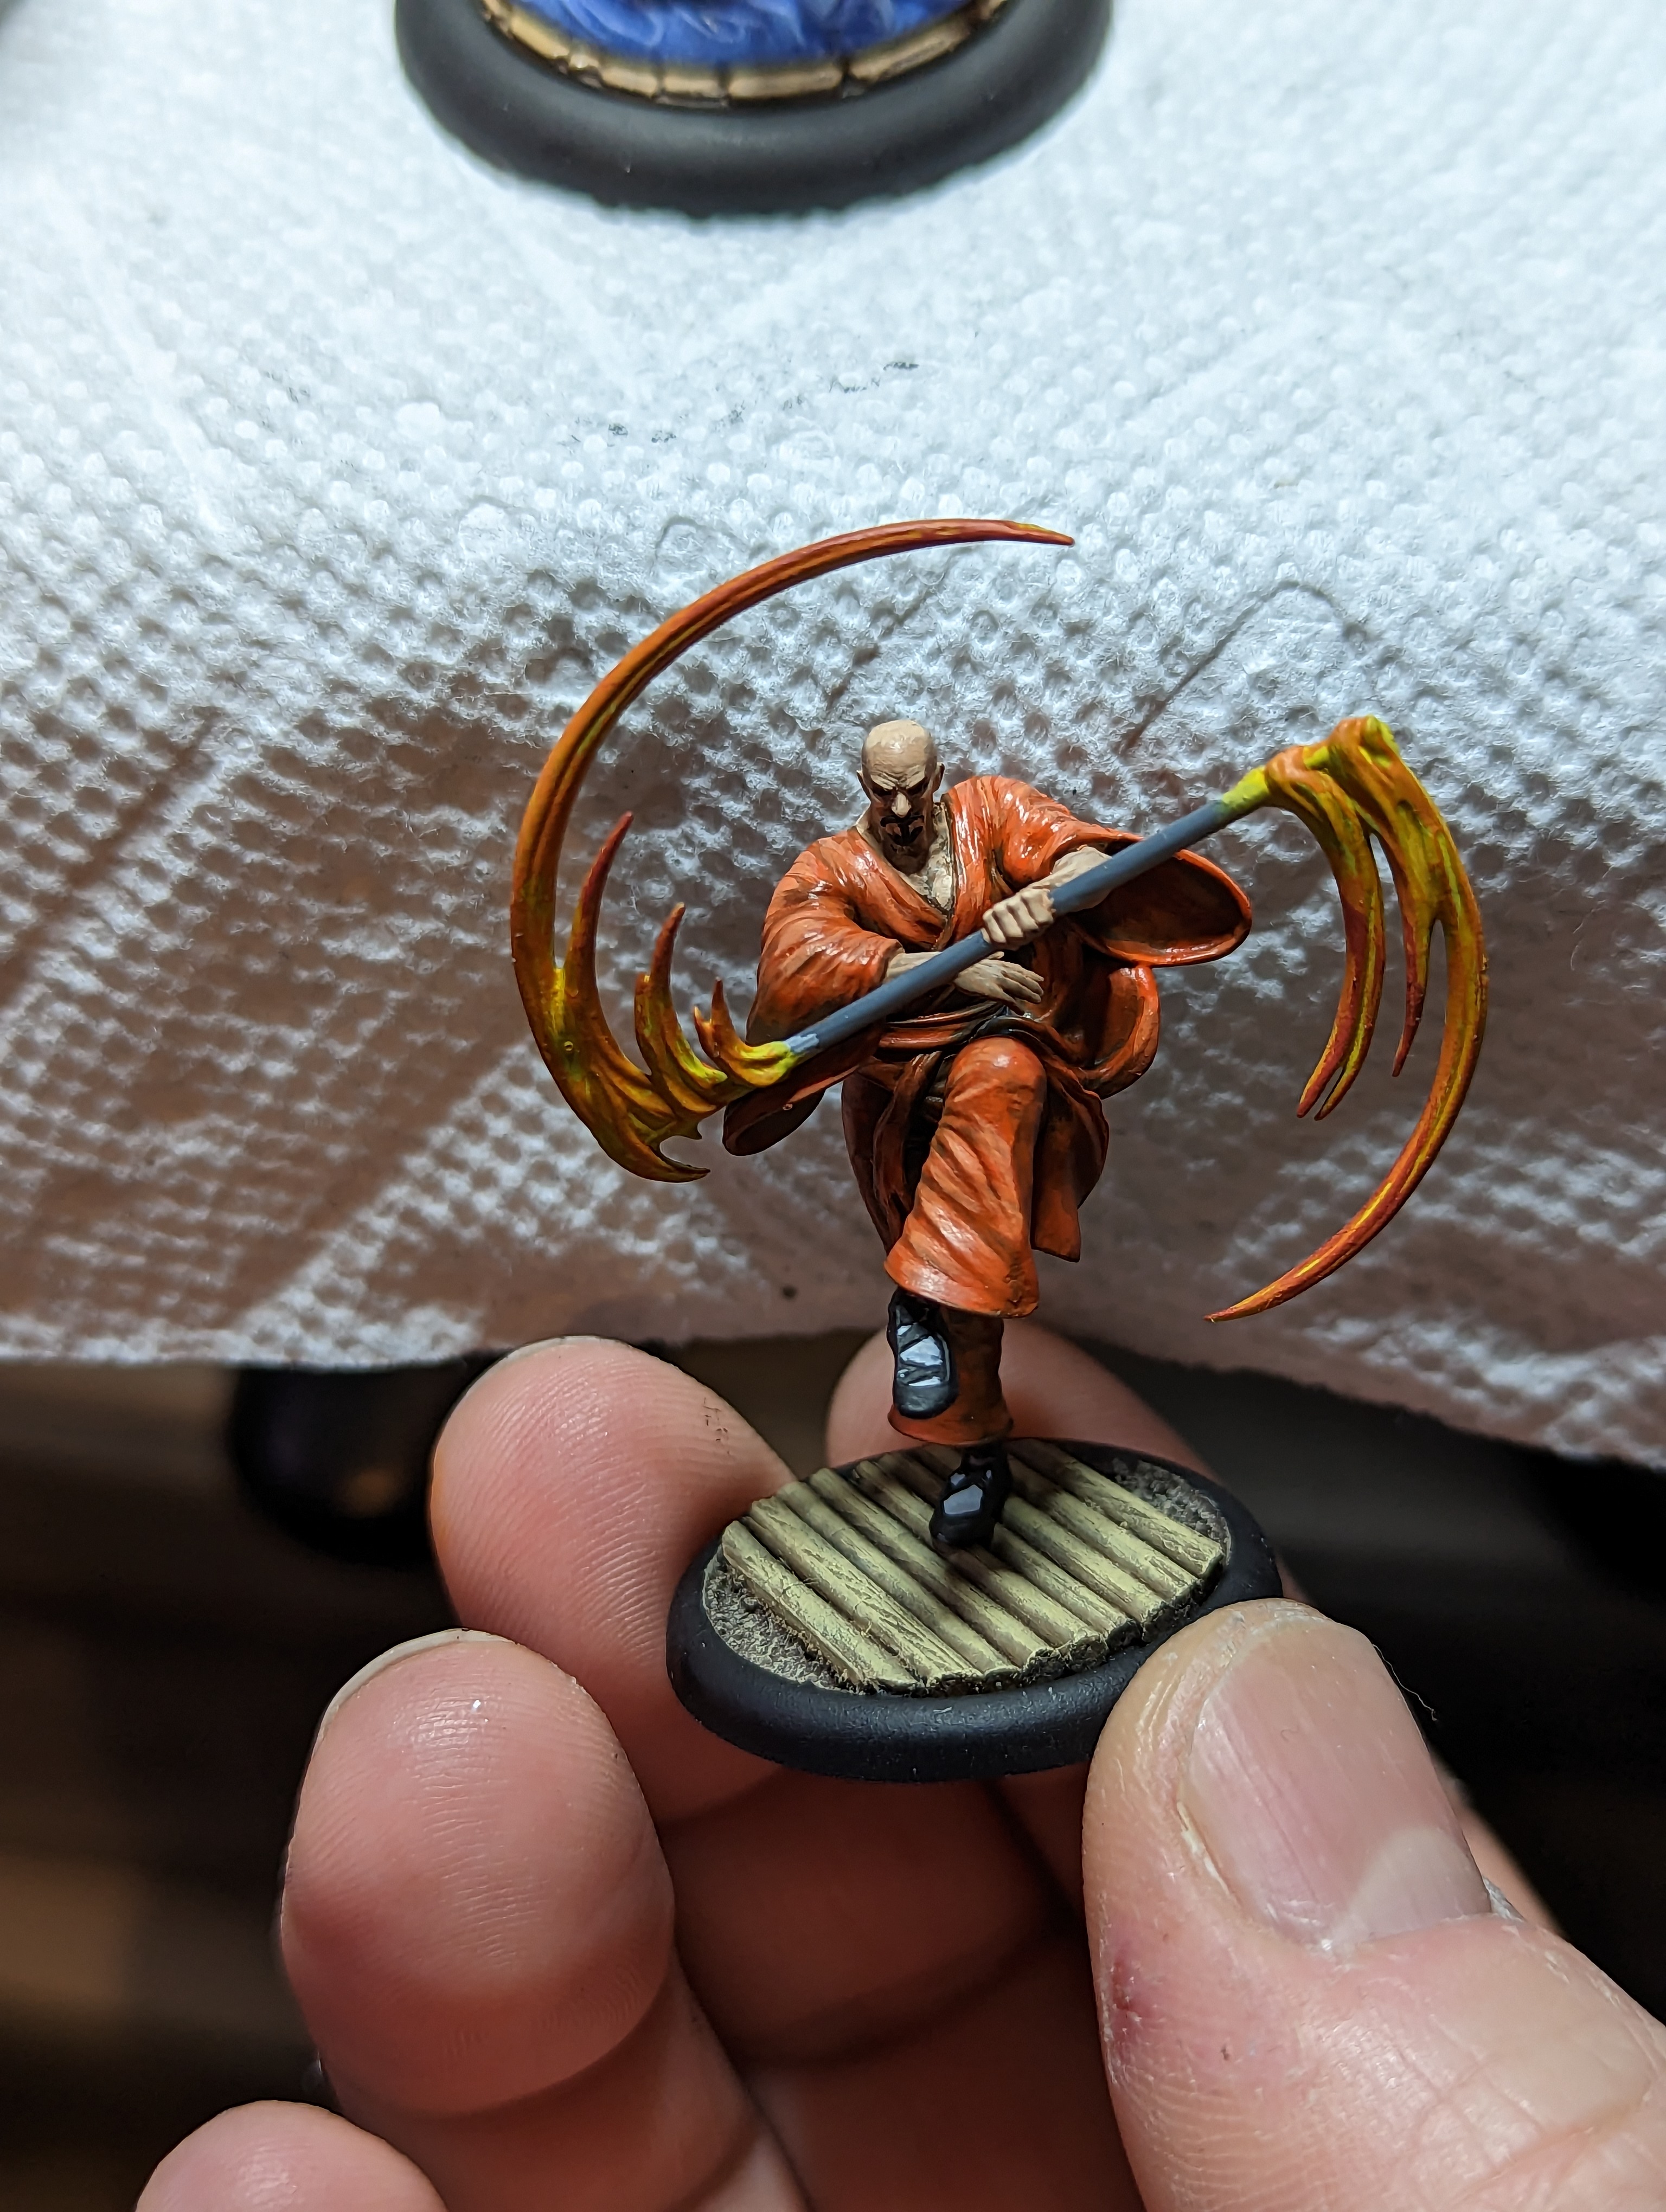


For Shenlong, I started by doing the flames. The art has them being very orange, so I started by base coating them a pale gray. Then I did 2 coats of yellow so that it had some good coverage. Then I added a few layers of orange highlights.
For the outfit, the art has most of them being orange, but some of them are more of a cream color. I couldn’t make sense of where the orange should stop and the cream should begin, so I decided to just make them all orange. I started with an orange-brown base coat, and then worked up to a brighter orange. The orange paint I have does not cover well, so this took kind of a long time, but I think it came out okay.
It was also tough to do his moustache cuz its super tiny. I had to touch up his face a few times after, but it came out okay I think.
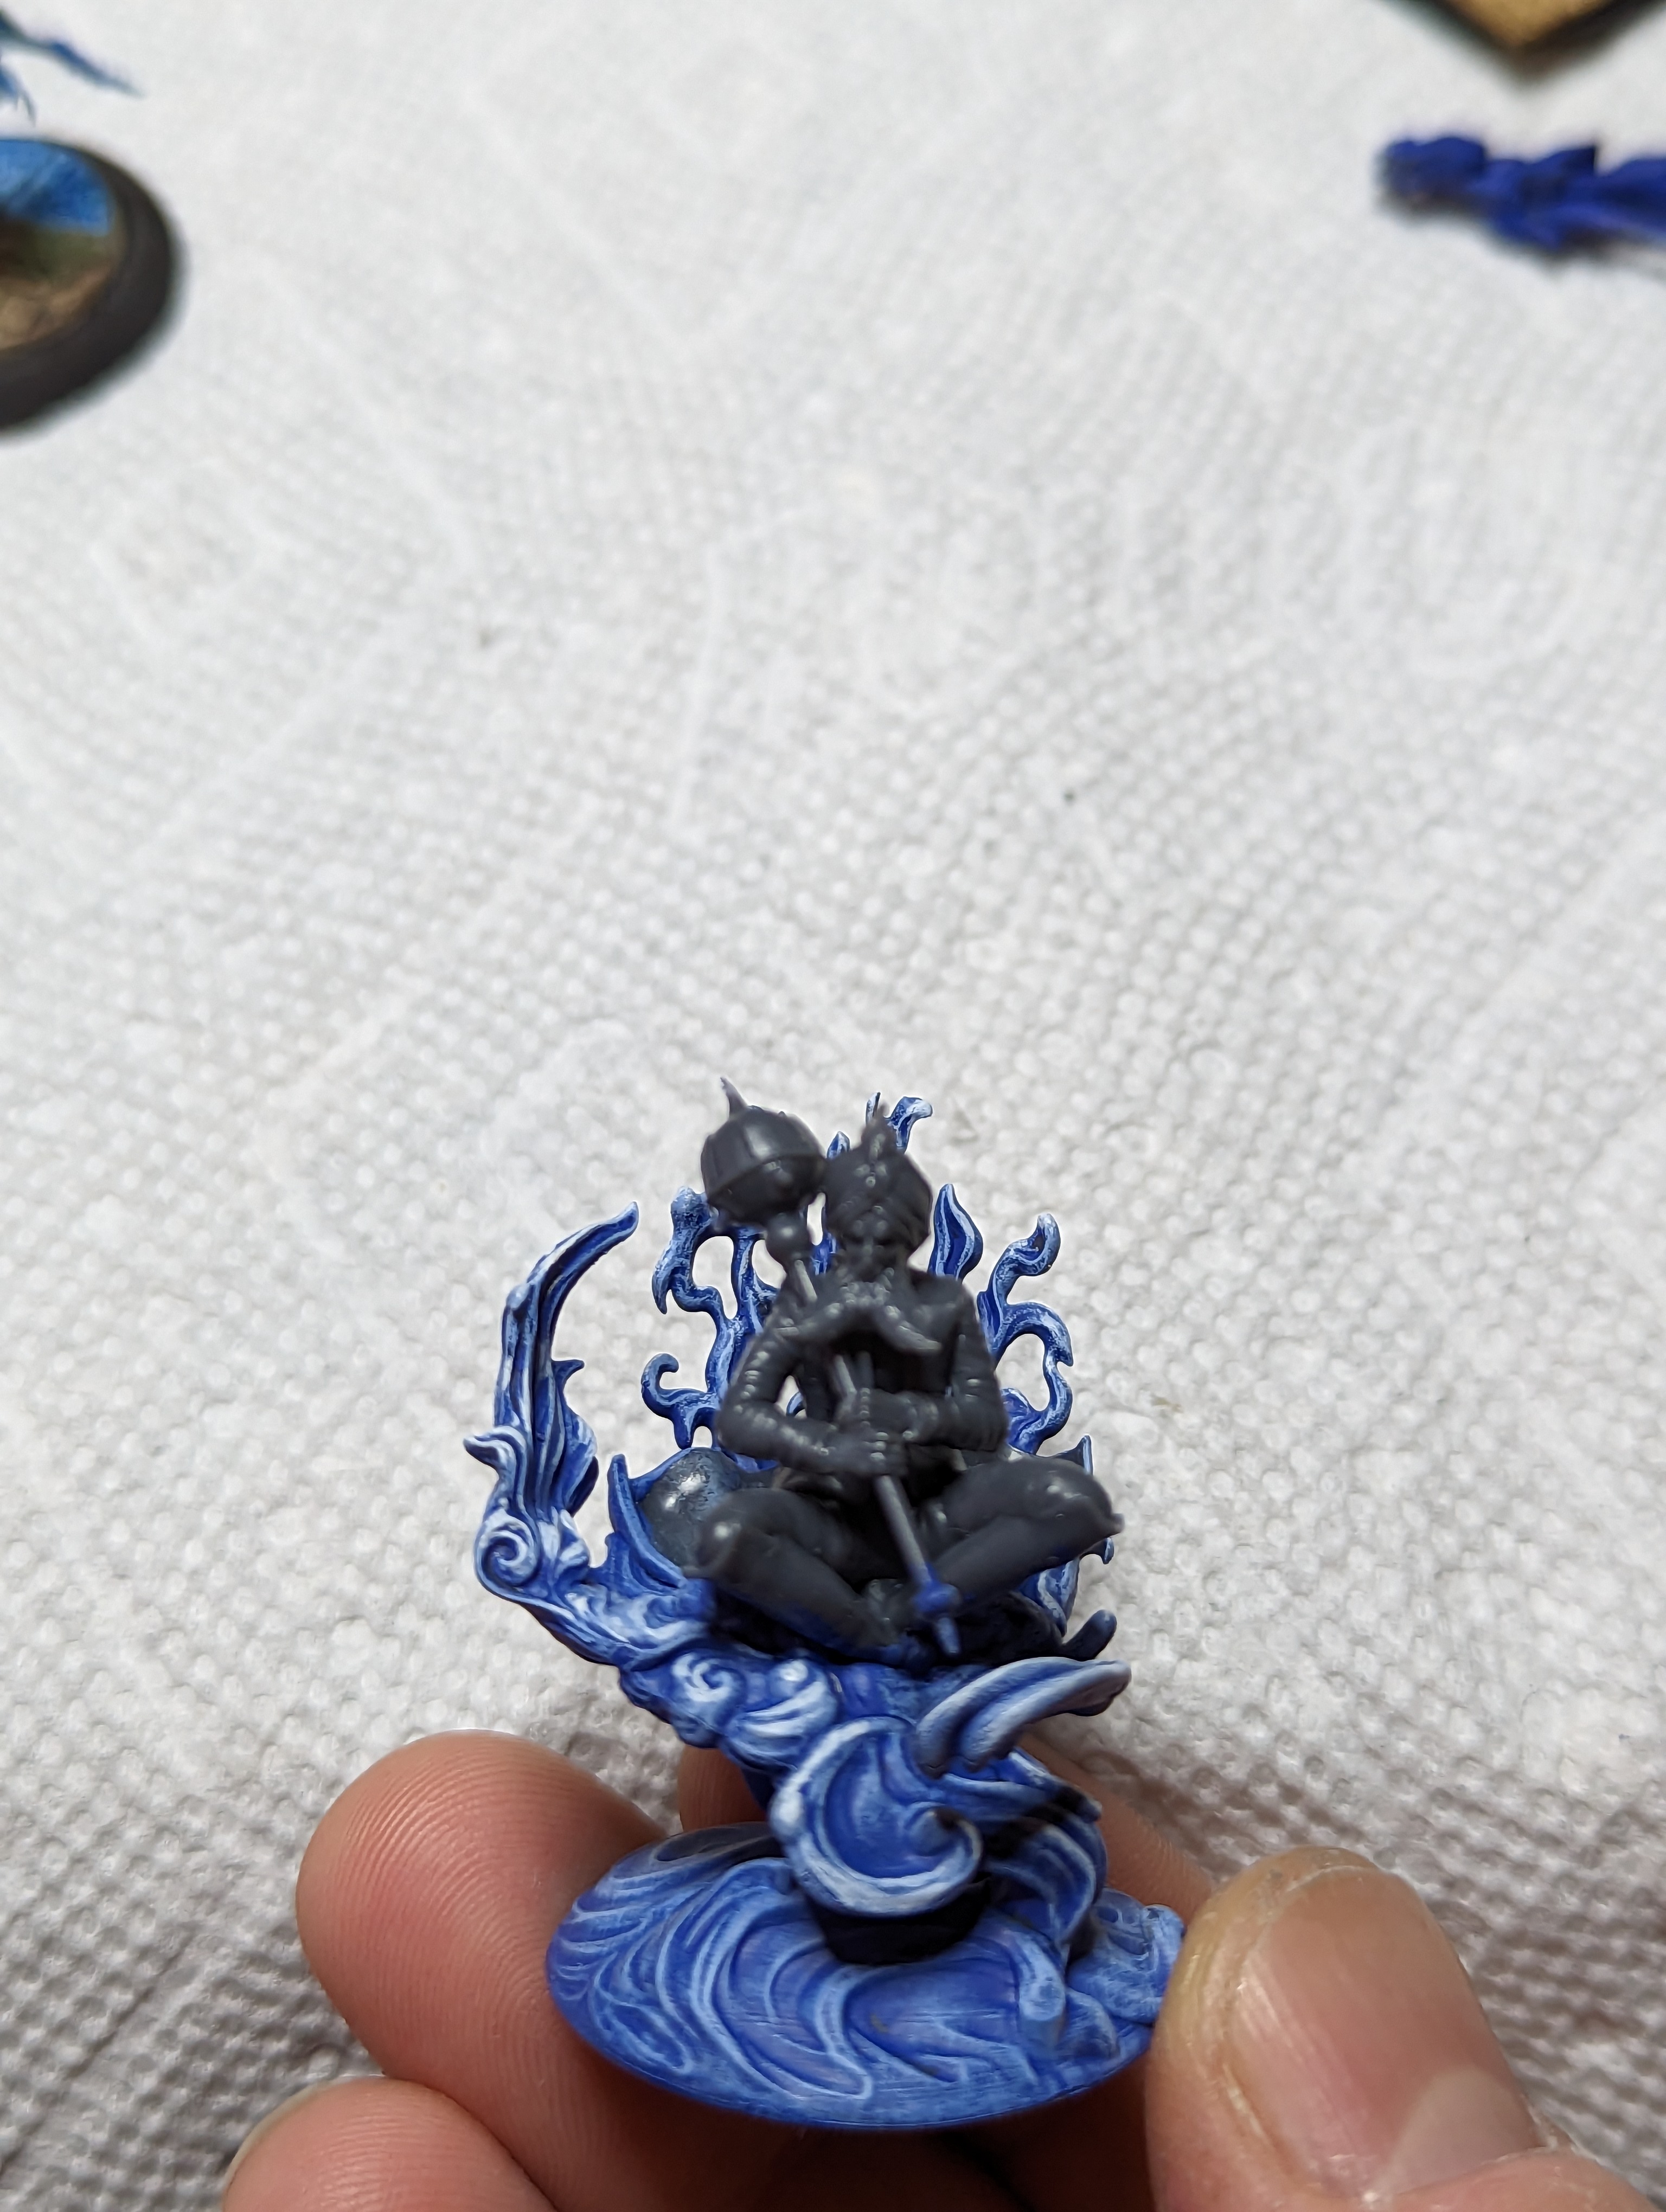

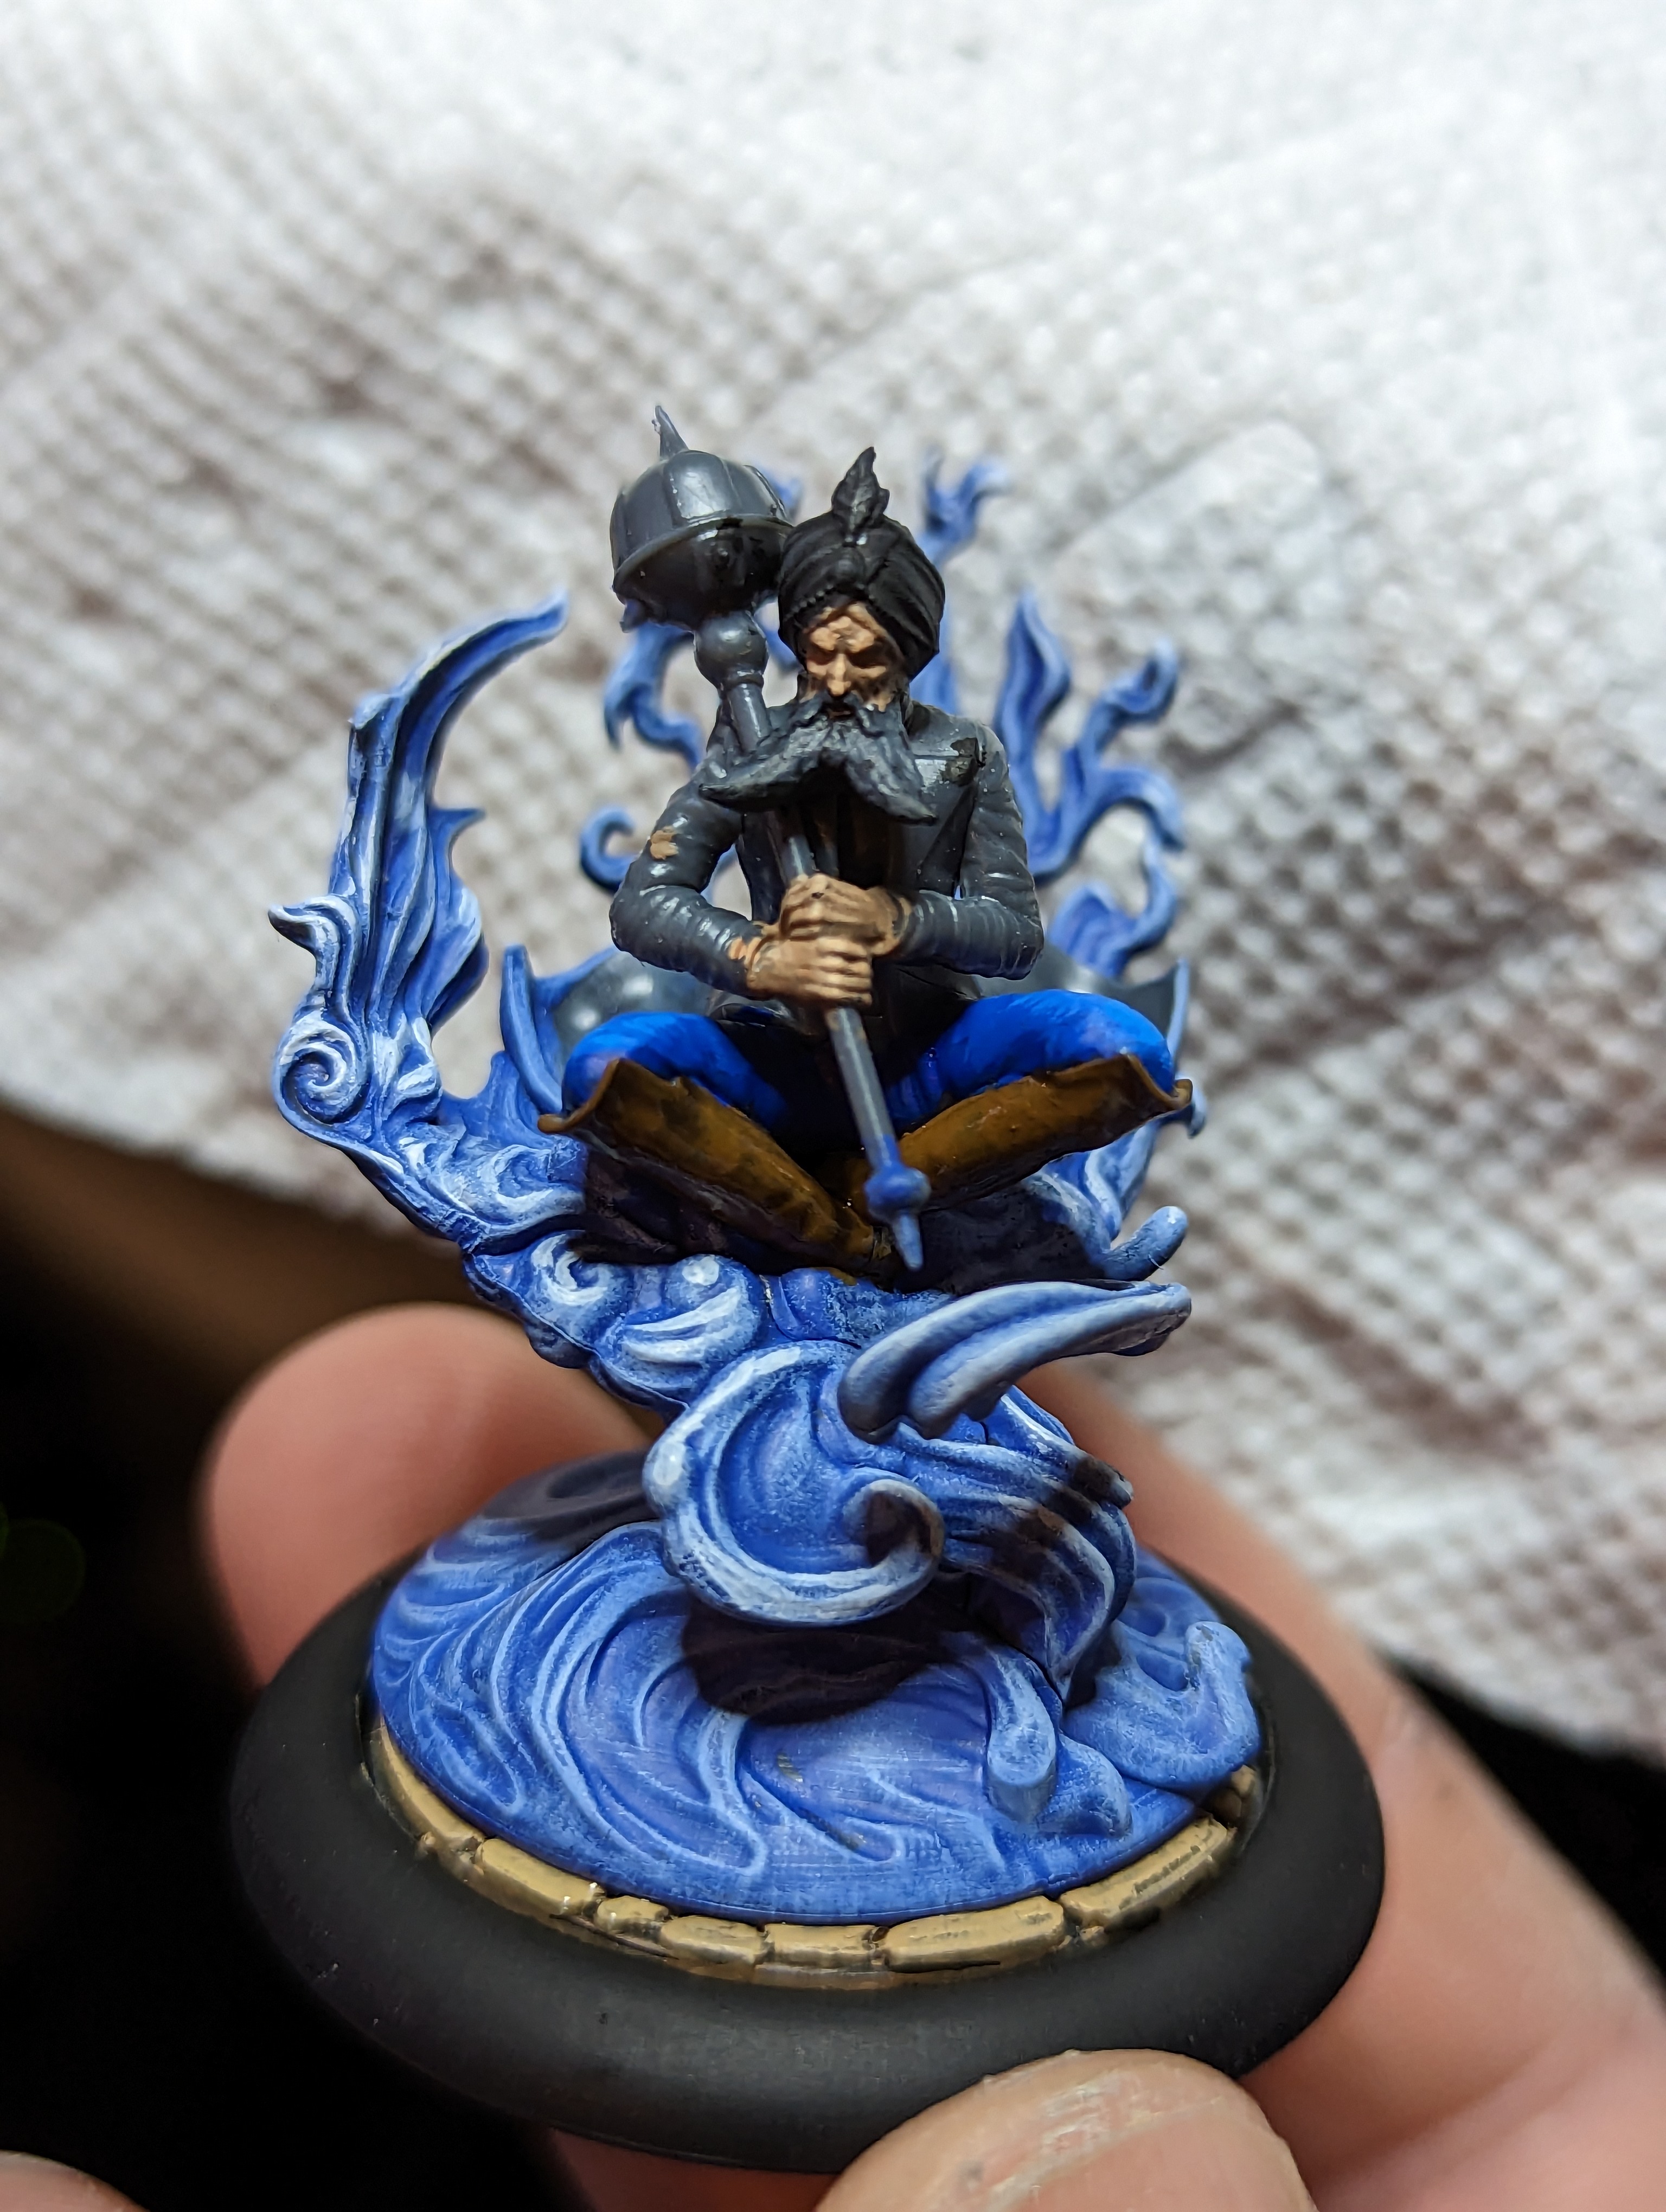
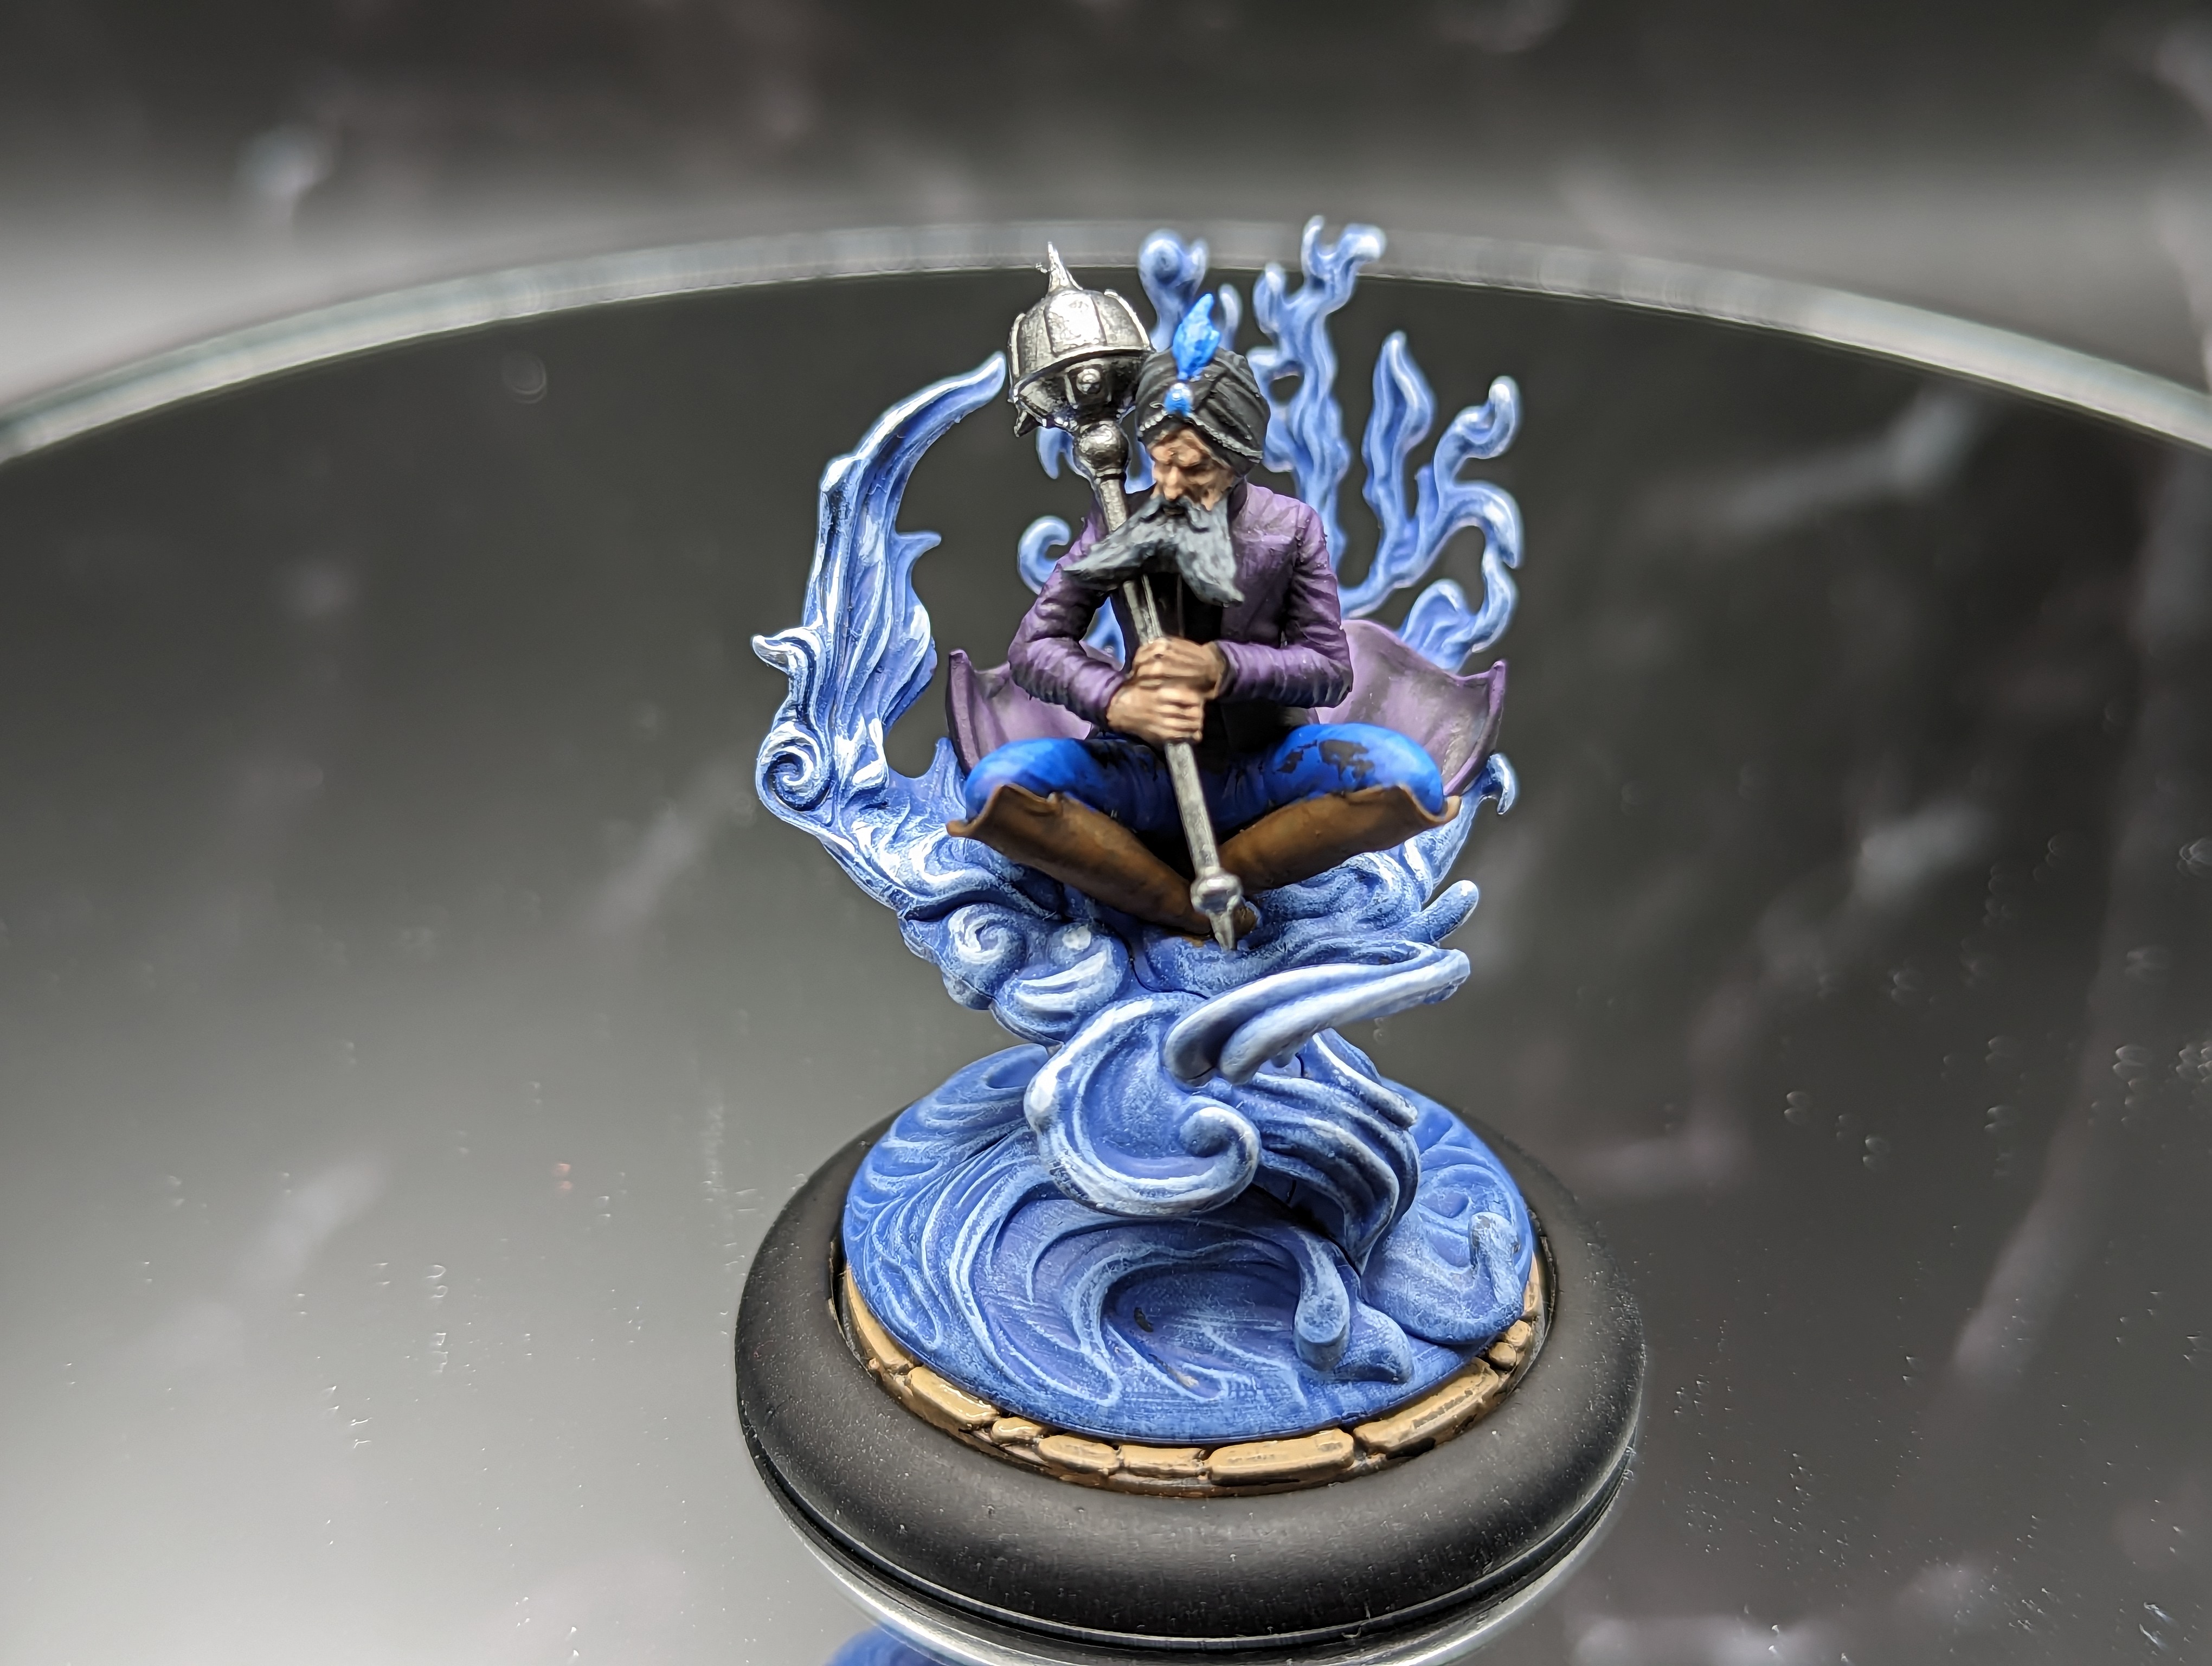
And finally we have Sandeep. He is the one that I am most likely to actually put on the table, so I spent a bit of extra time on him. I started with a medium blue base for all of the magical effect. I then drybrushed it up to almost white. I added some white highlights to it, but I was a little more deliberate about it than what I did on the Golem.
I have always had a hard time painting medium toned skin. It always either comes out looking too black or too white. I decided to try to push the shadows a bit darker on this one, and then bring them up to a brighter highlight, and I think it worked out pretty well.
In the art, his shirt is purple and has a white design across the whole thing. I’m for sure not doing freehand, so I decided to just highlight the shirt normally and try to give it a bit of a shiny look. Im still not great at doing textures, but I think I got it most of the way there.
I also have videos explaining the lore of all of these characters and I keep forgetting to add them! Here is the episode on Shenlong and Sandeep, and you can find all of the other masters in the same playlist on the channel.
Monks n Elementals

Next i’m going to tackle Shenlong, Sandeep, and their shared model the four winds golem. They look like really fun models to paint, so im excited.
For their bases, I did Sandeep and his crew on these premade temple bases from micro art studio. At some point I ran out of ideas for custom bases, and I thought these looked pretty cool.
For Shenlong I made up some bases with bamboo mats. And I hate them. I plan to redo the whole crews bases, but thats a project for another day, so I will crack on for now.
The golem will need a micro arts base, but im going to add on a little big of bamboo mat to make it match both crews.
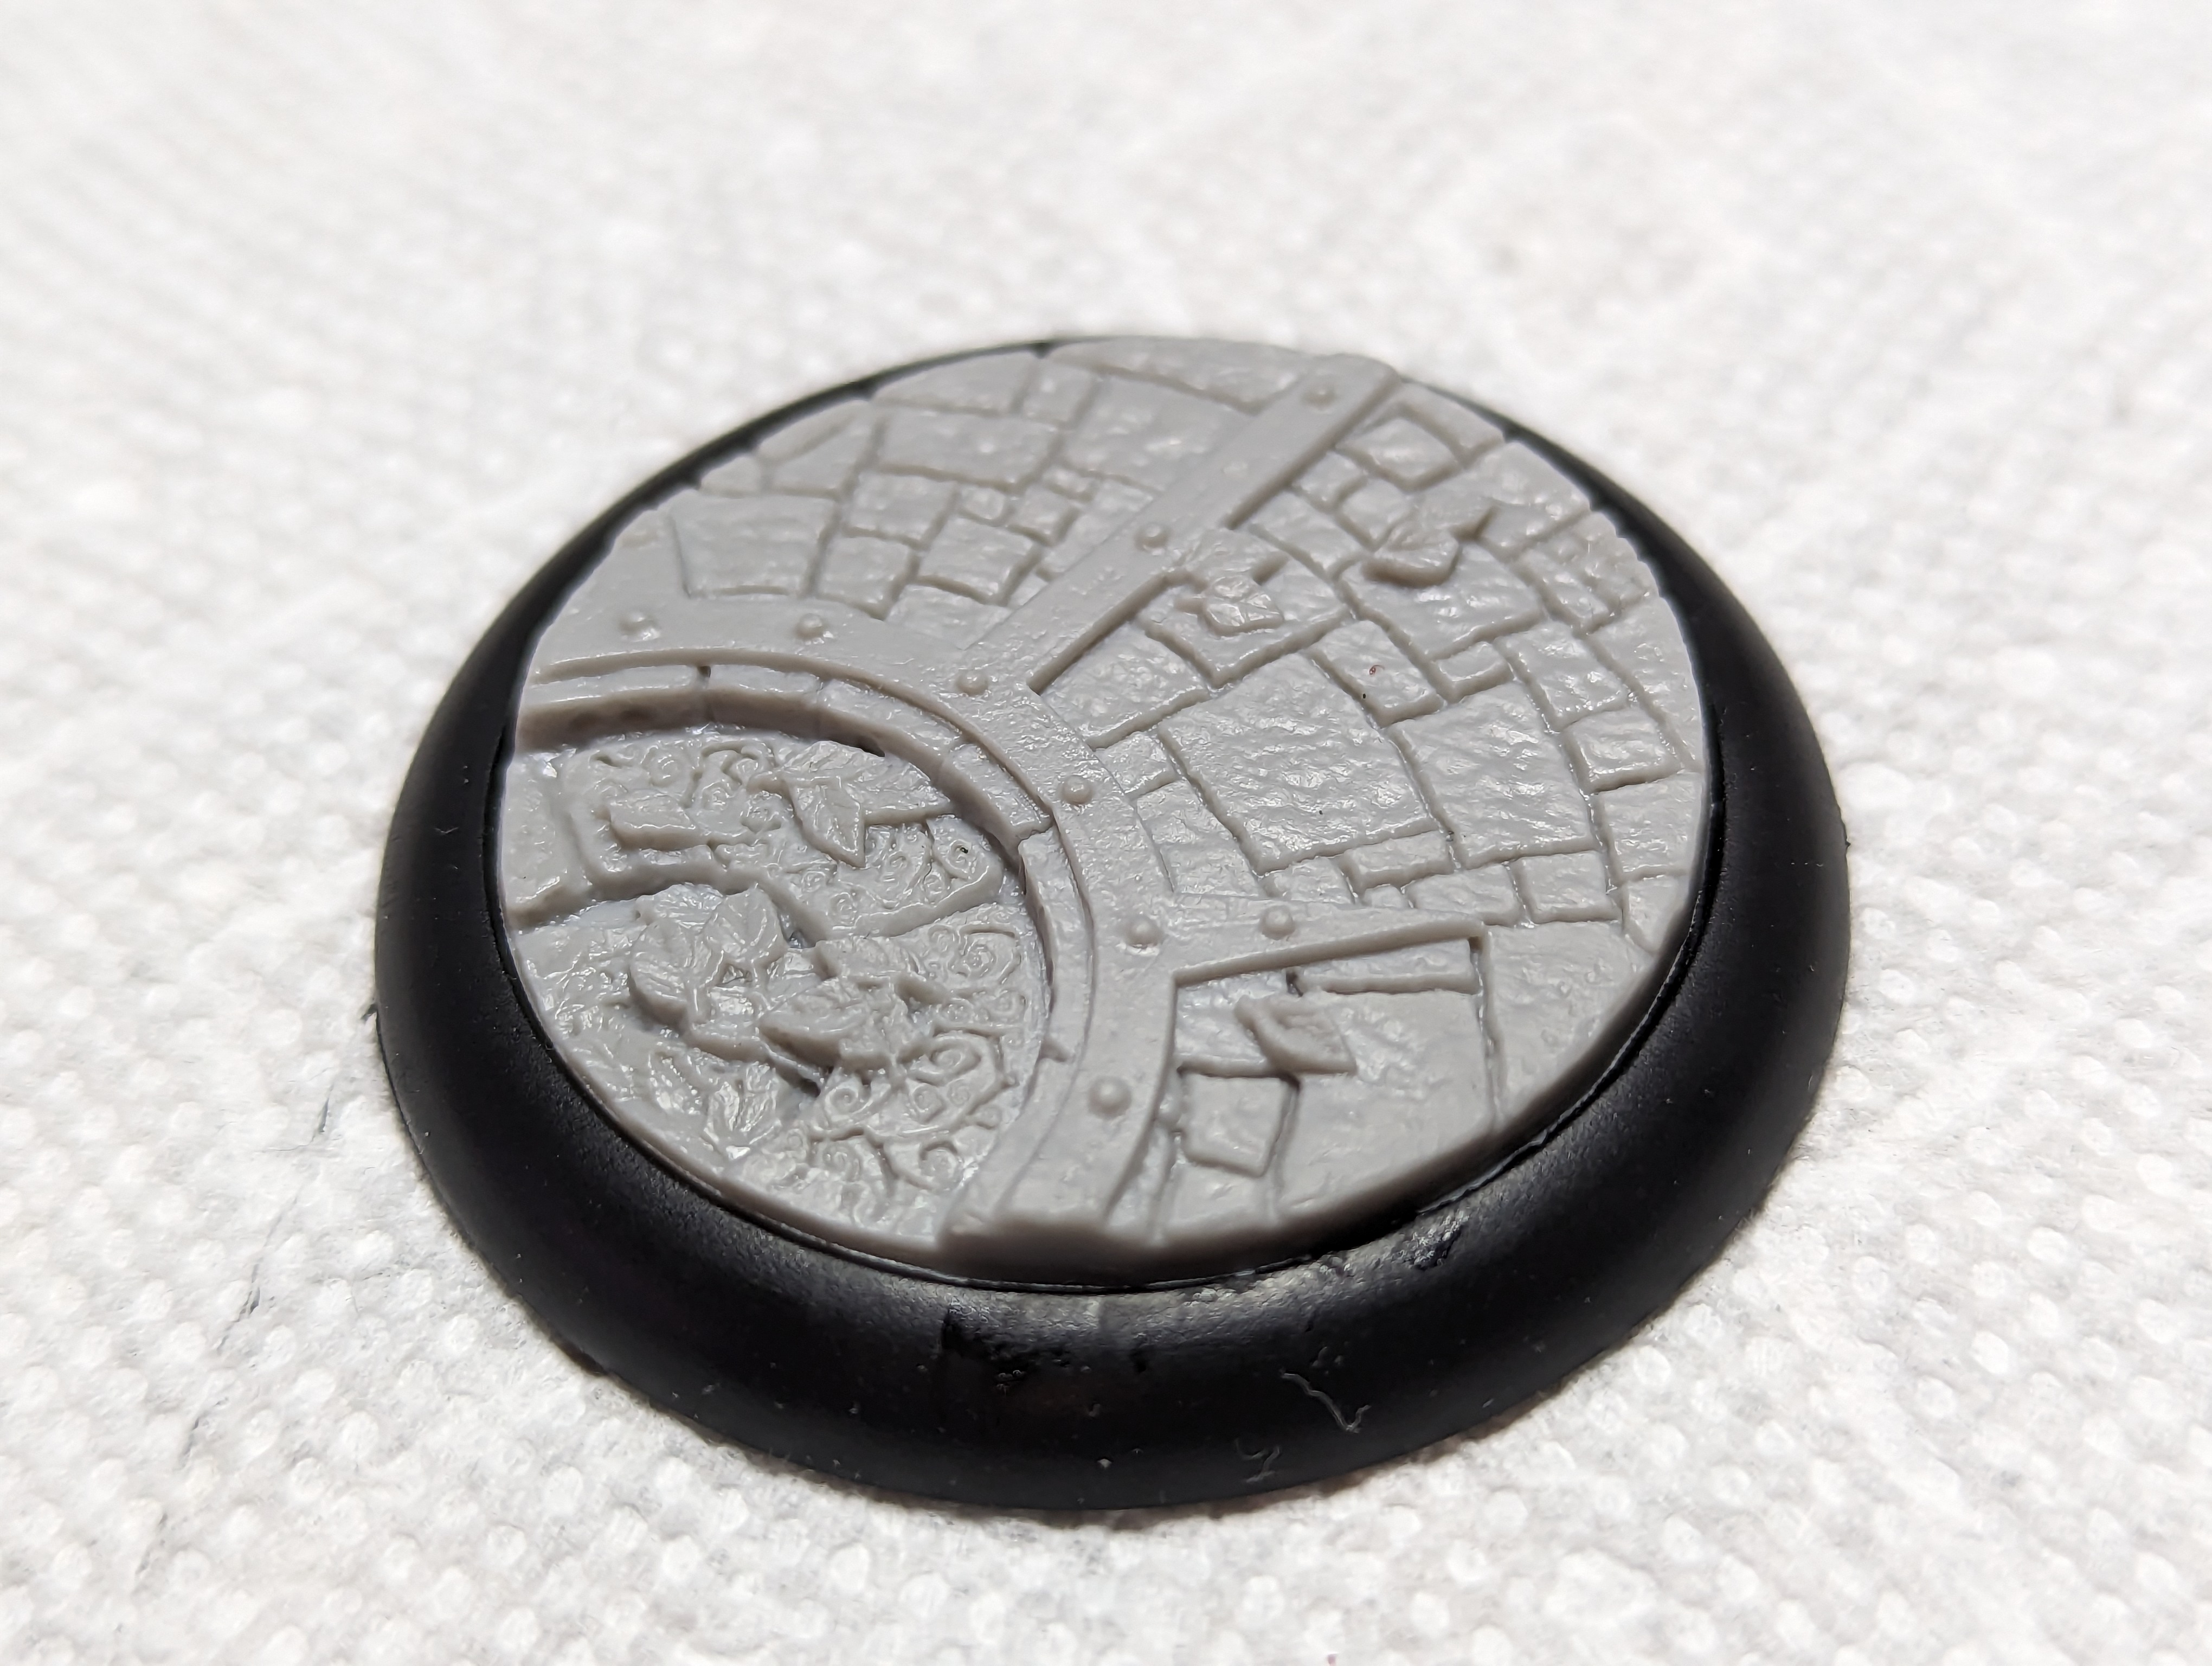
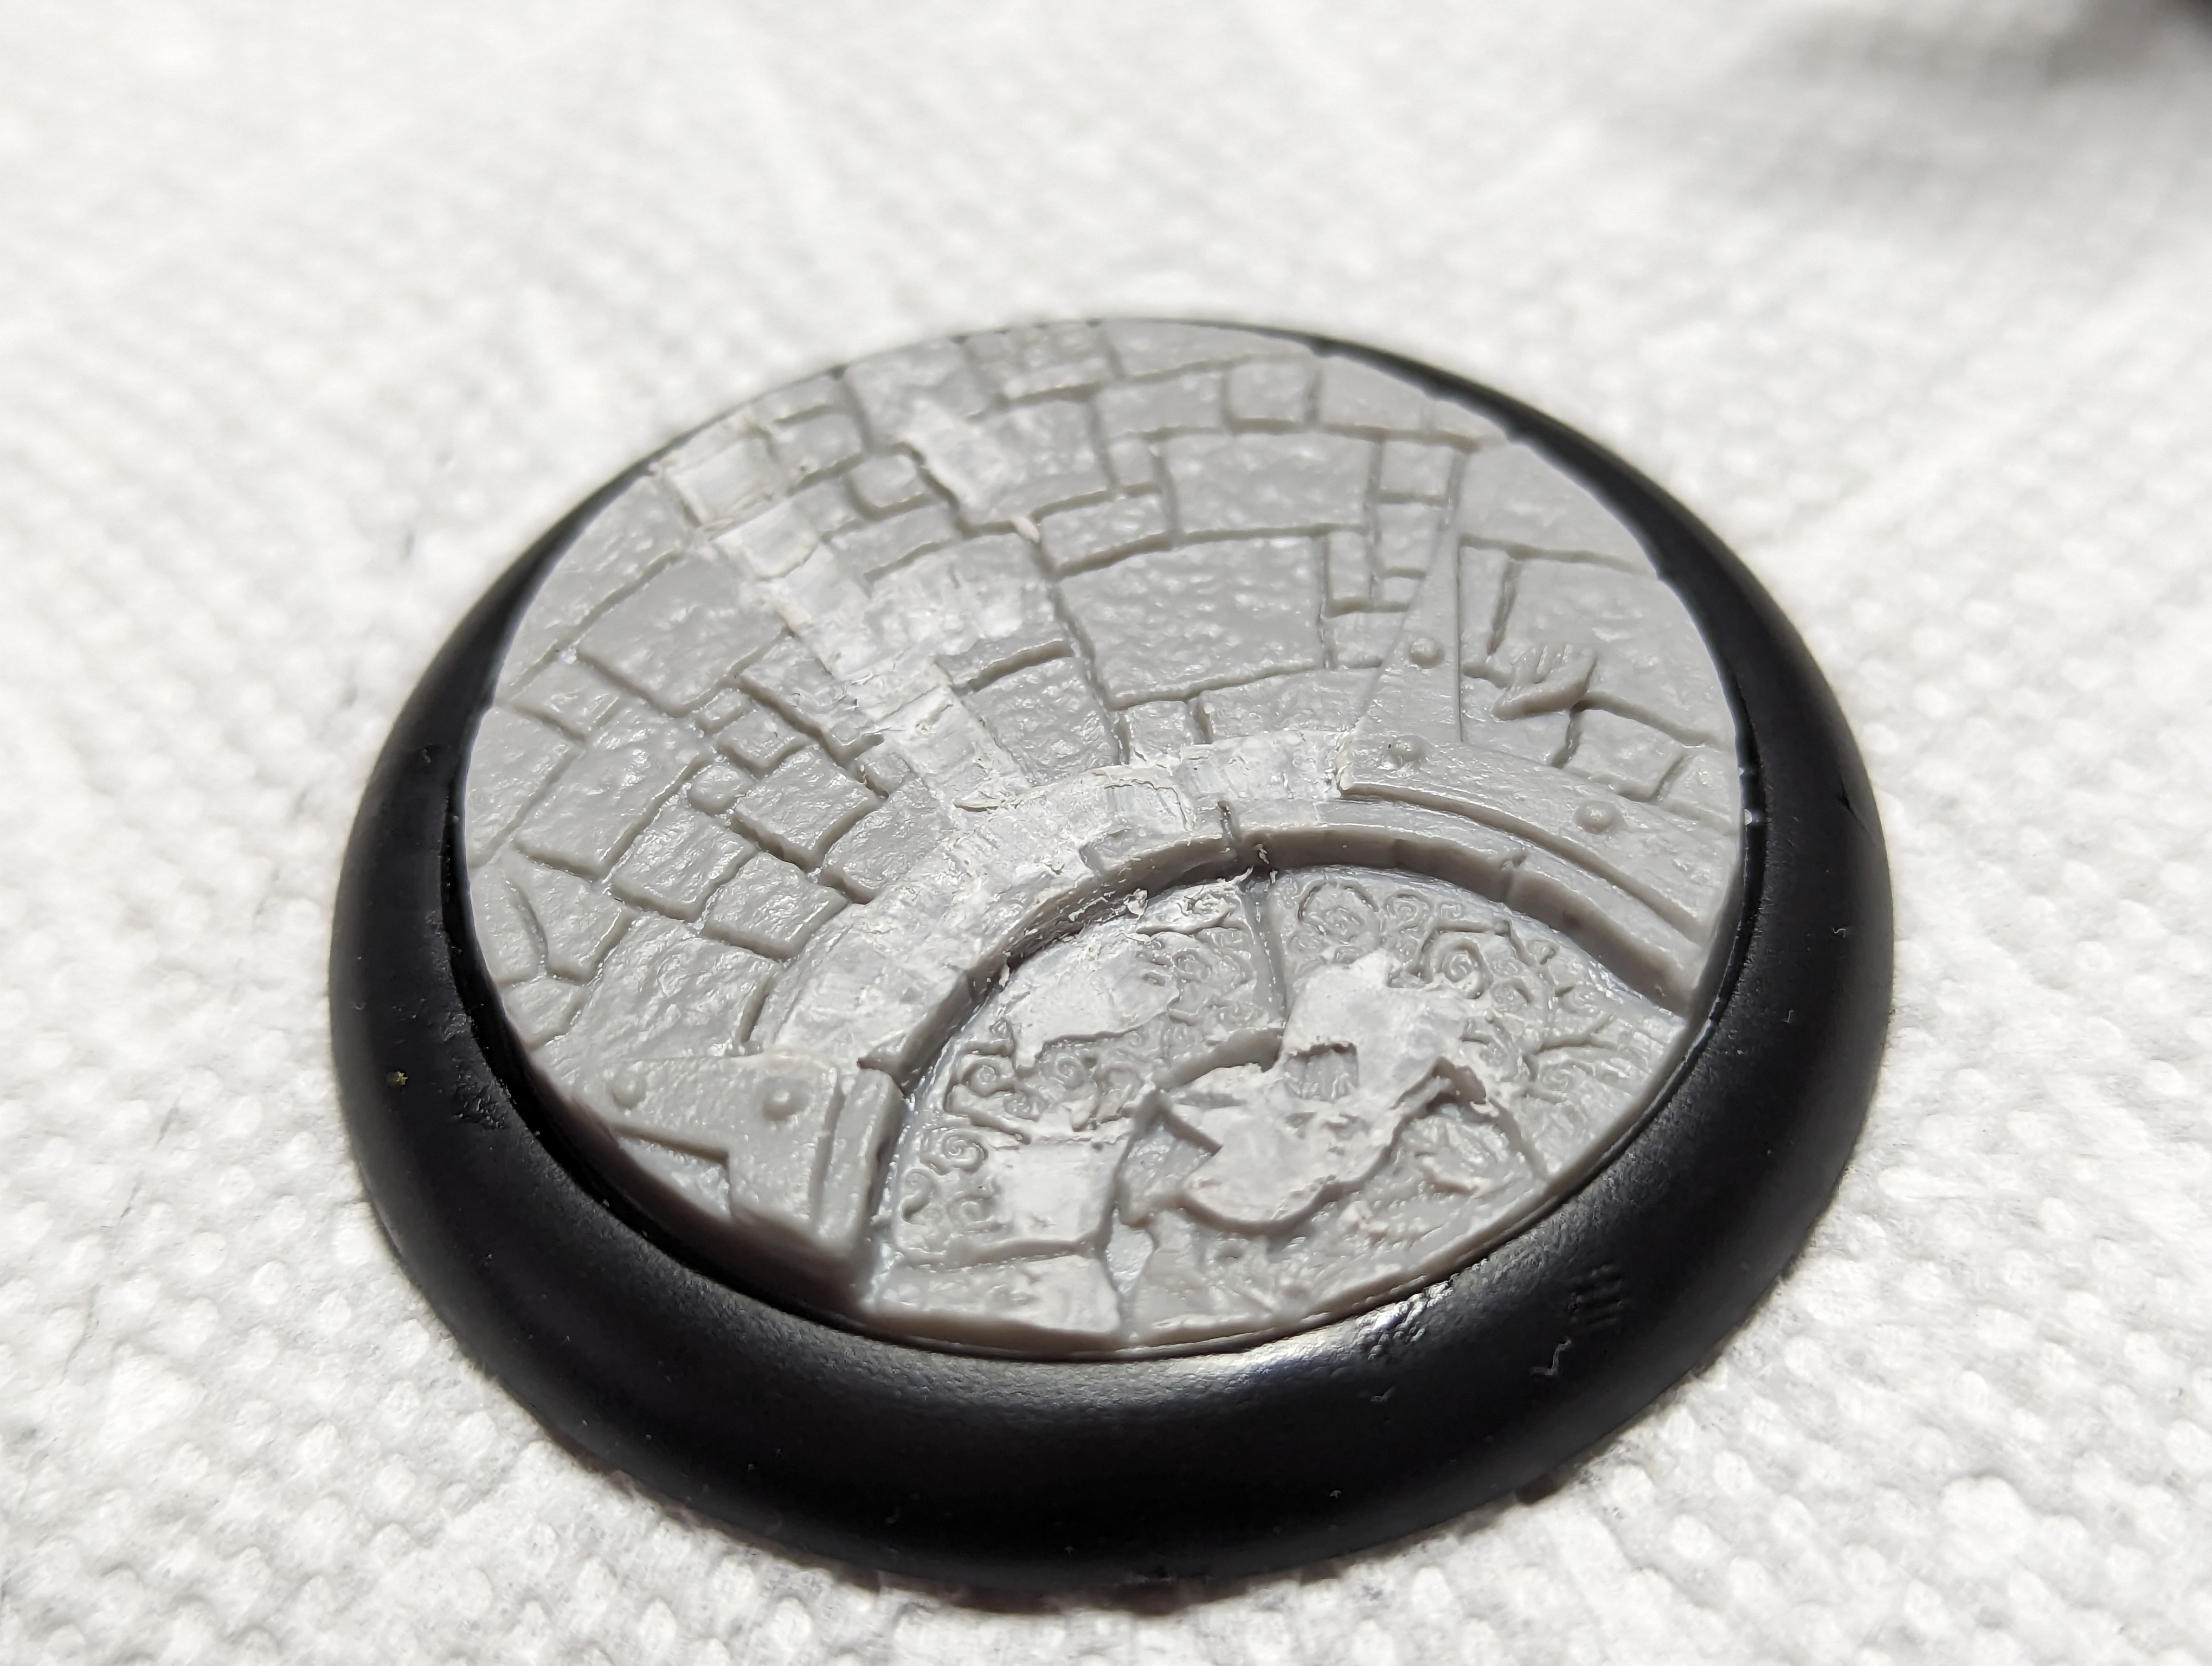
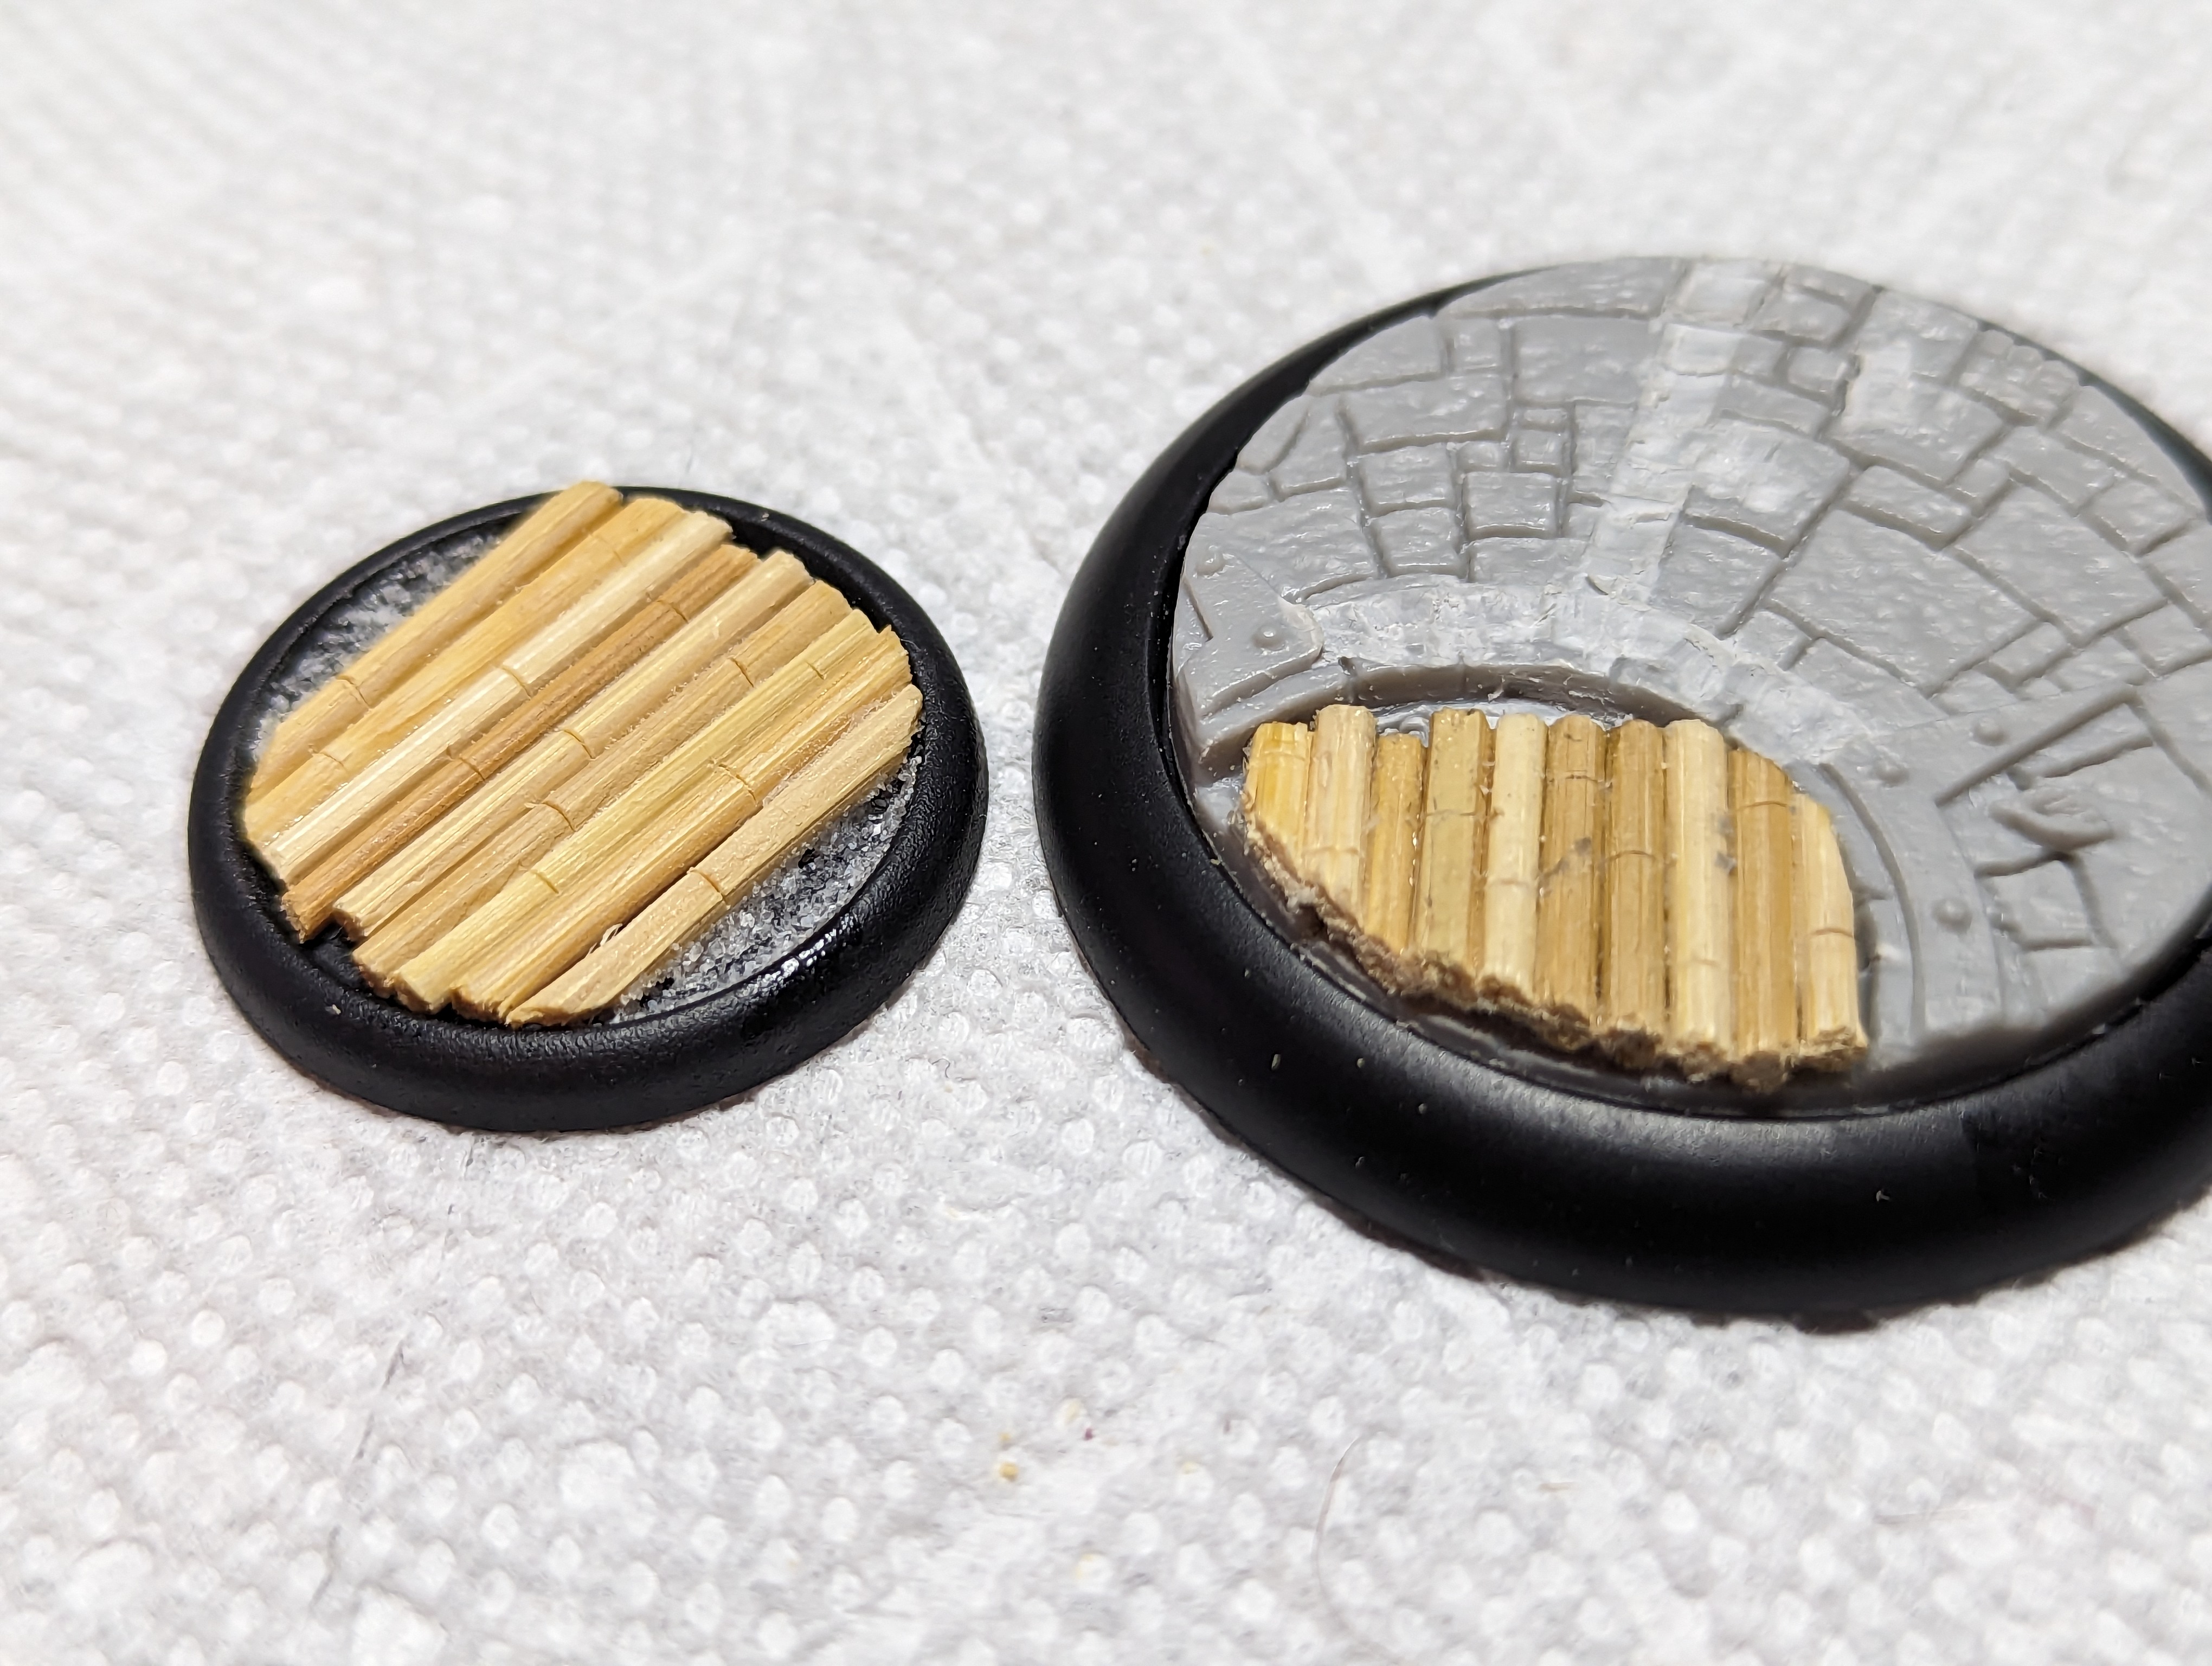
Sandeep has this special effect that is going to cover most of the base, but some will peek through, so I am still going to use one of the base inserts. I have to cut off some of the textures on the top in order to make him sit flat.
For the Golem, I will also have to shave off some of the bits in order for it to have a nice place to sit.
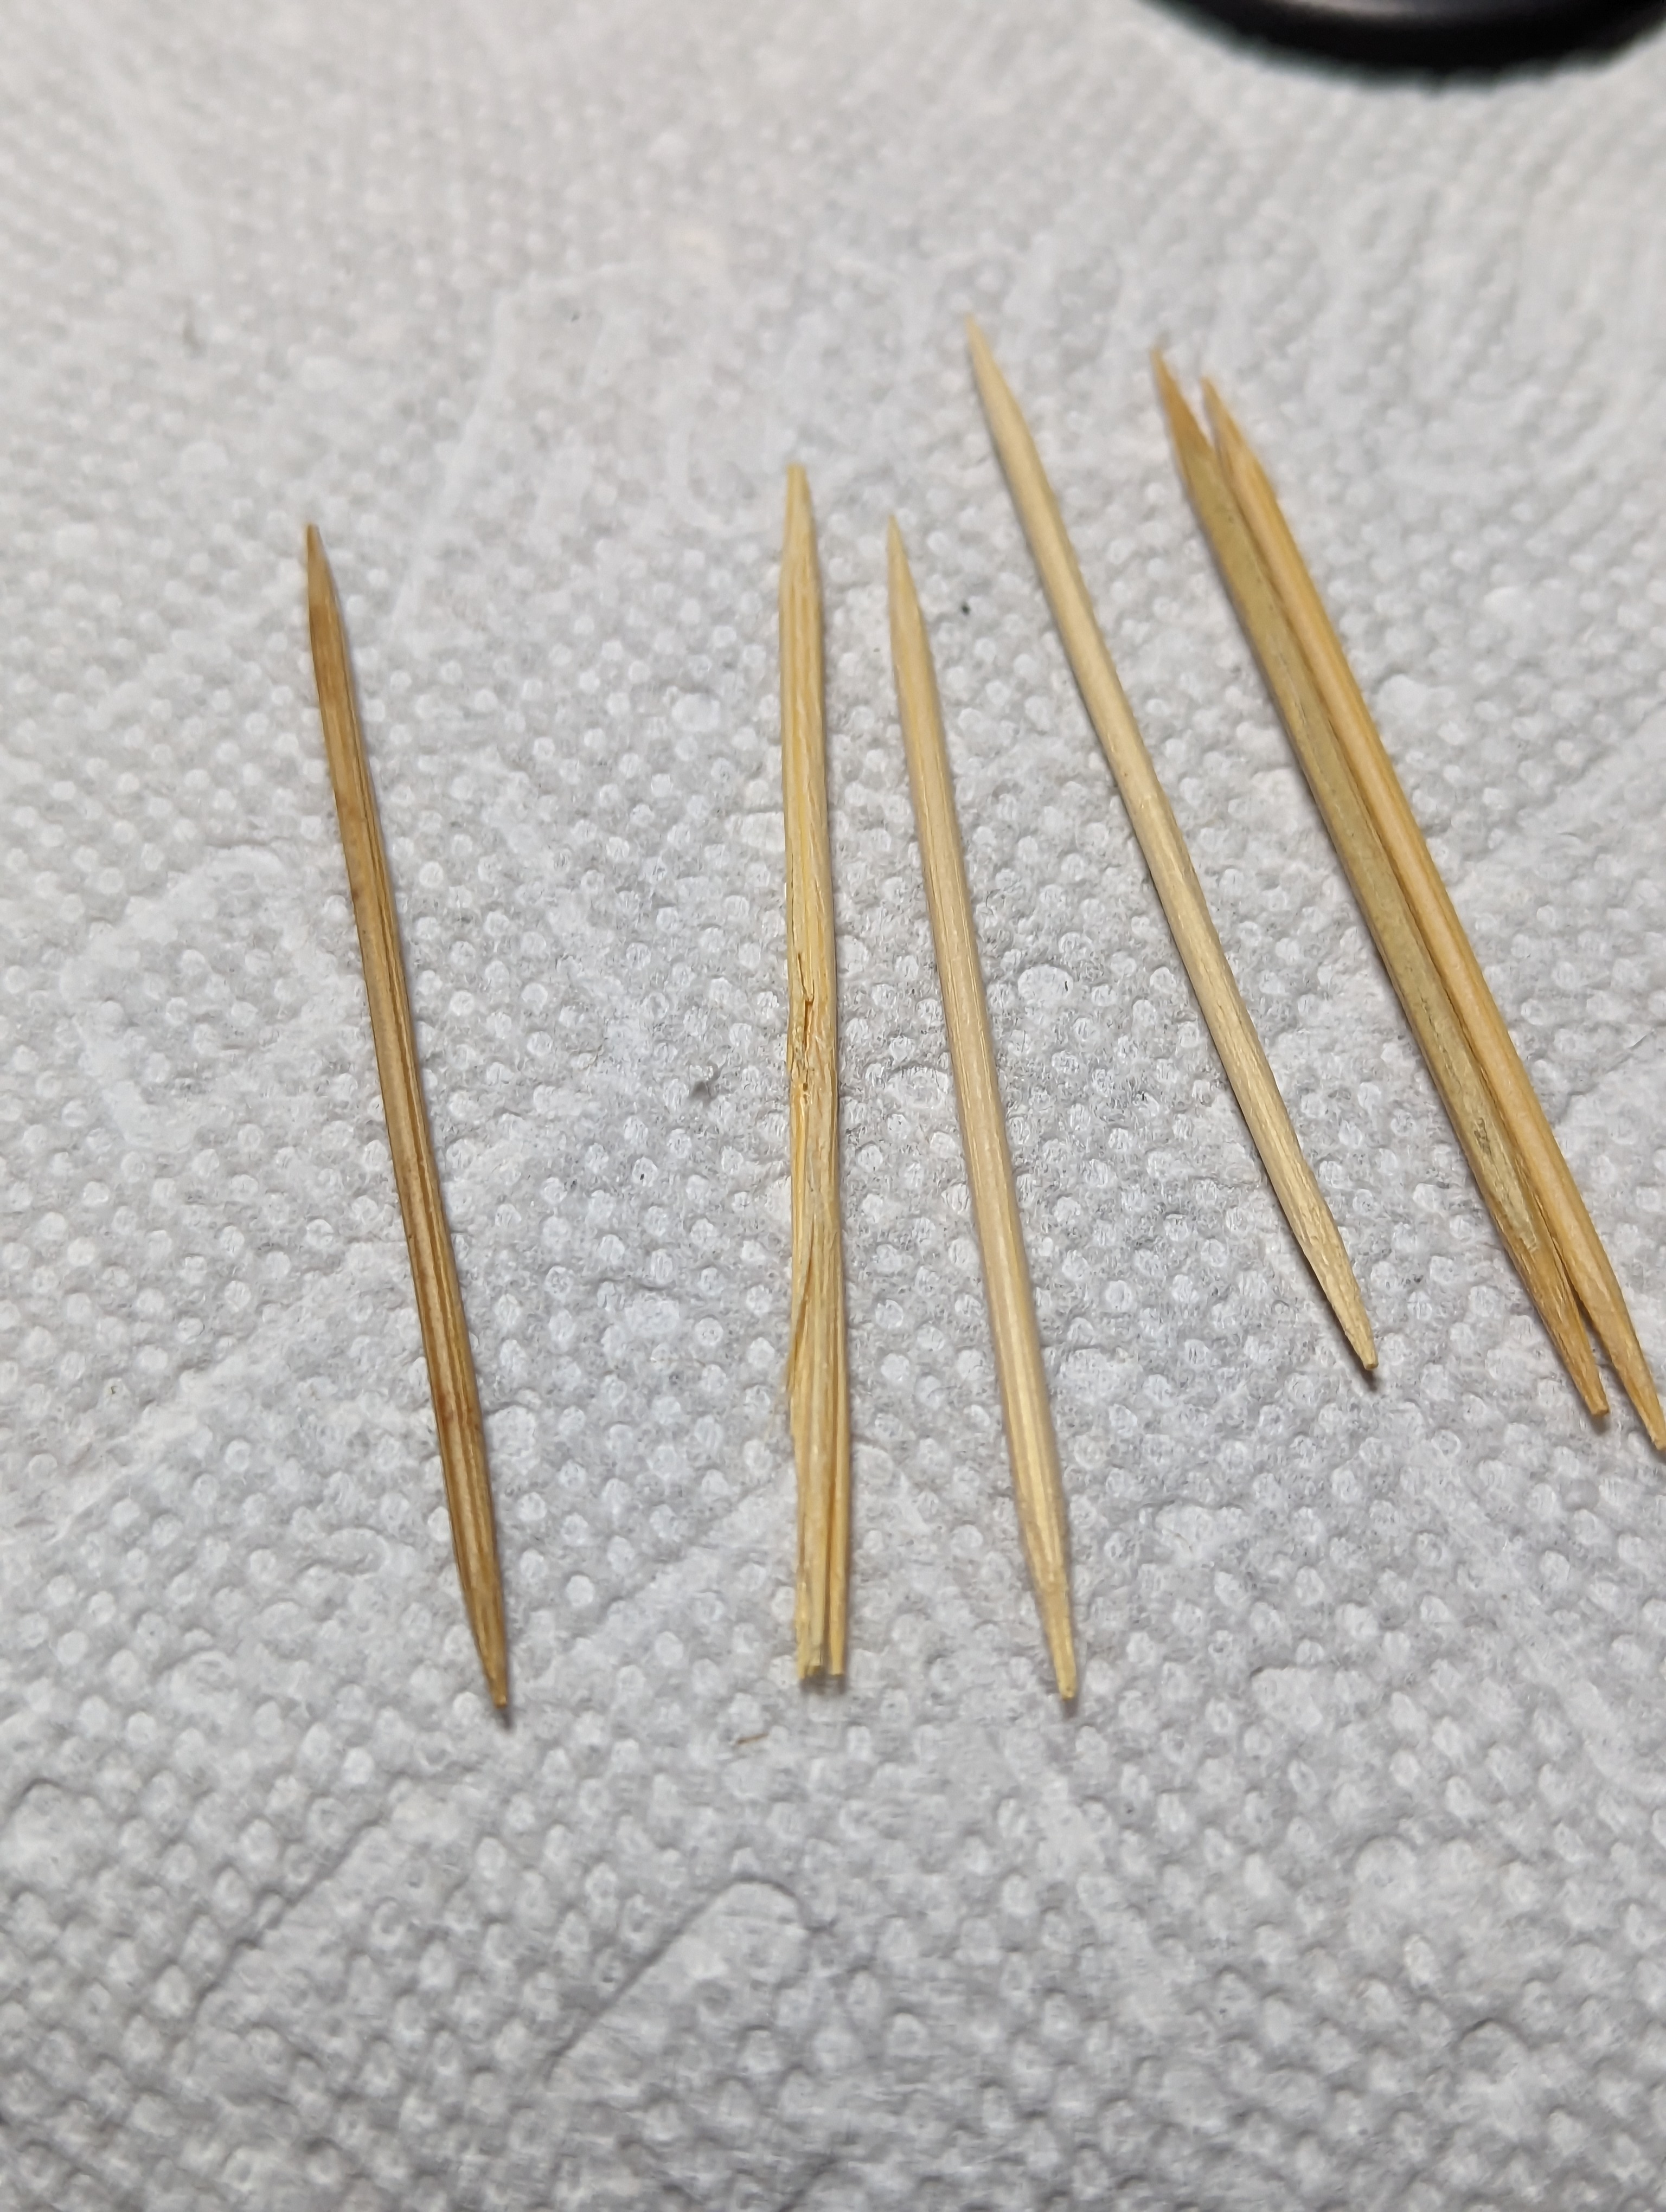

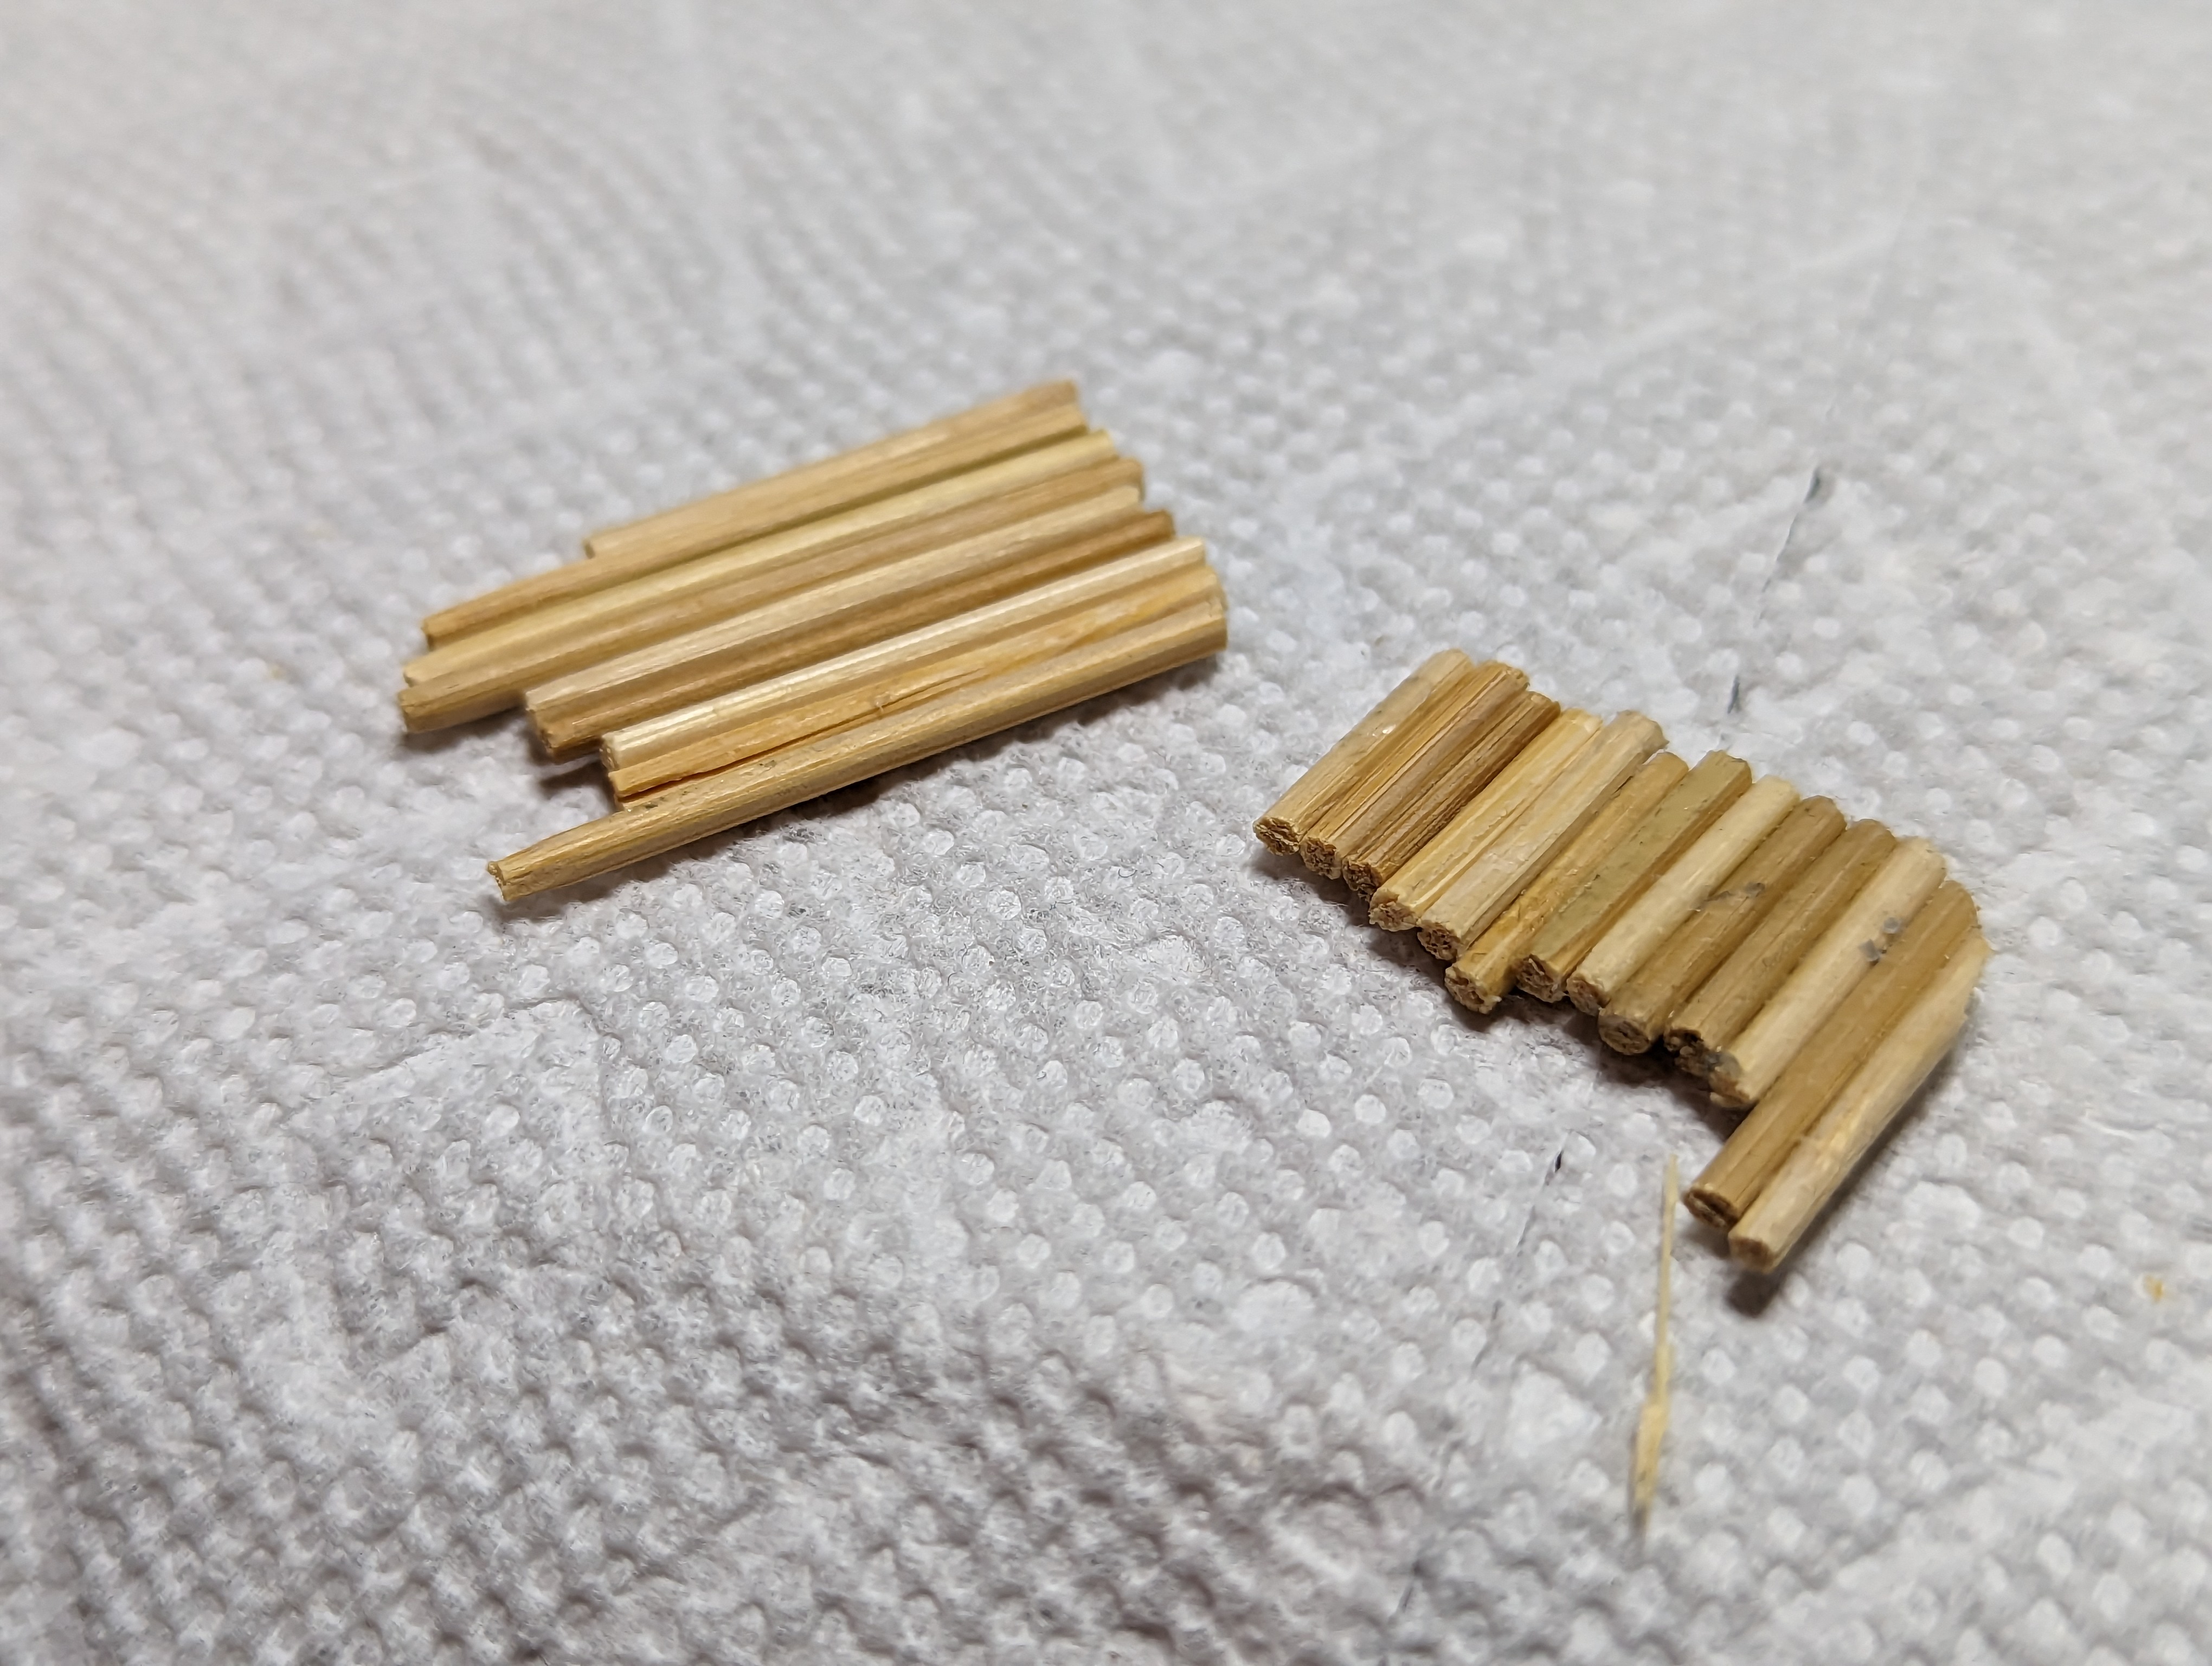
For the bamboo mats, I started by cutting the ends off of a few tooth picks, and then sizing them into smaller pieces. I then glued them together side by side. Its kind of a paint to work with them at this size, I think next time I will make them bigger before gluing and then trim them after.
Then I just trimmed them down, and for Shenlongs base, I glued it inside a normal 30mm base, and for the Golem, I tripped it down to fit inside this little recessed area.


I put some sand in around the mat for Shenlongs base, and I also went in with a knife and cut some little slashes across the bamboo to make it look more like real bamboo which has little sections to it. After that I primed them all black.
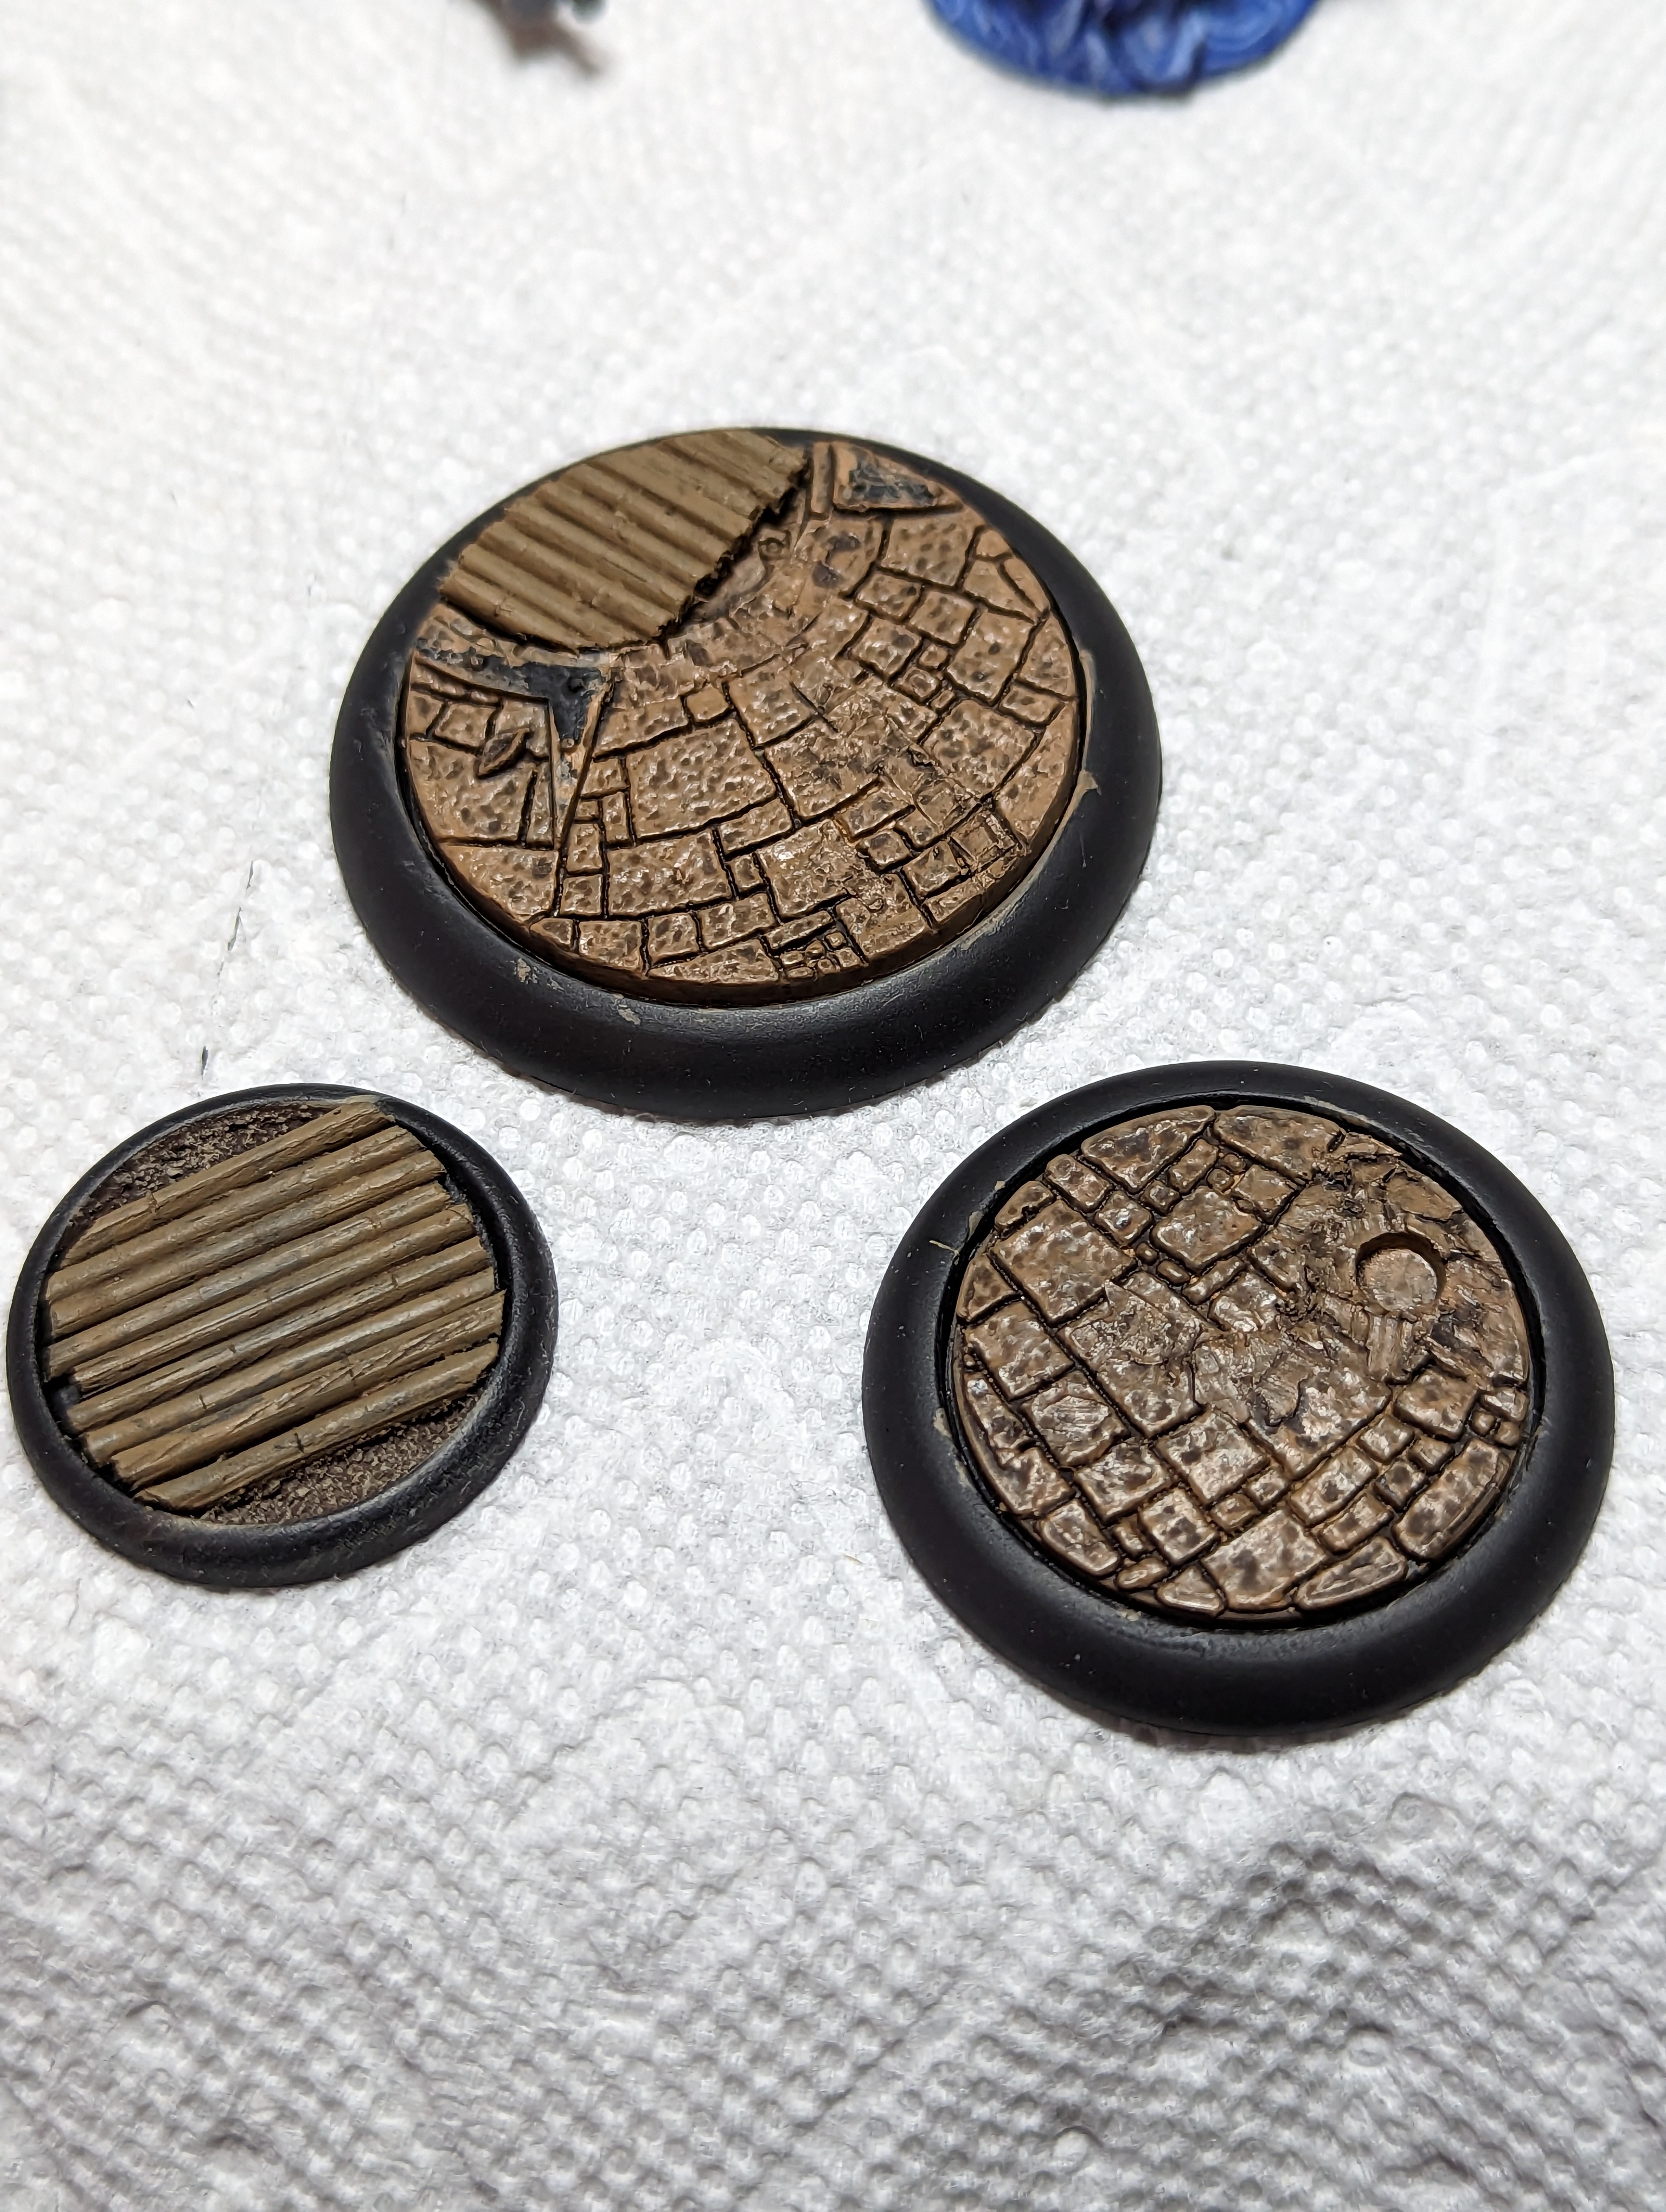
I gave the temple parts a base coat of a sandy brown to make them match the ones I already have. For the bamboo, I use a more neutral brown. It all got a quick dark brown wash, which looked good on the bamboo but it kind of left pool marks on the stones. I fixed it with a quick overbrush of the original color. I drubrushed both with a paler version of the original color, and they were all done.
Our next contenders

Next up im going to be tackling Youko Hamasaki, and Brewmaster, as well as their mutual friend Shojo.
For my Youko crew, I based them all up in a Zen Garden theme, with rock paths, raked sand, and a pond (sans Koi cuz the bases are too small. Some of the bases I did the for crew were a bit of a pain, so I think ill just make another rock path surrounded by grass like this Kabuki Warrior in the picture.
Brewmaster is a crew I put together a long time ago, and it shows in the quality. I did the crew on bases that look like busted up docks along some swamp water. They were kinda meh, but Im not gonna redo them all now, so ill still do these folks up to match for now.


For the swamp bases, I started by breaking up some pieces of a coffee stirrer. I made sure to break them and not cut them so I would have some jagged edges. Then I glued them onto the base toward one side, making sure there was enough room for the model to sit.
When I was happy with that, I primed the base, and then base coated the wood in a medium brown. I then hit it with a dark brown wash, and drybrushed it with a lighter brown to bring out the edges. I kept the color pretty dark to keep a rotten and swampy look.
Next I painted a gradient of greens into the swampy area, and I did the same for half of the Shojo base, since it was be half swamp water and half grass to match the other crews bases.
The last steap was to just pour some water effect into the swampy part, but I forgot to take a separate pic, so youll see it at the end.
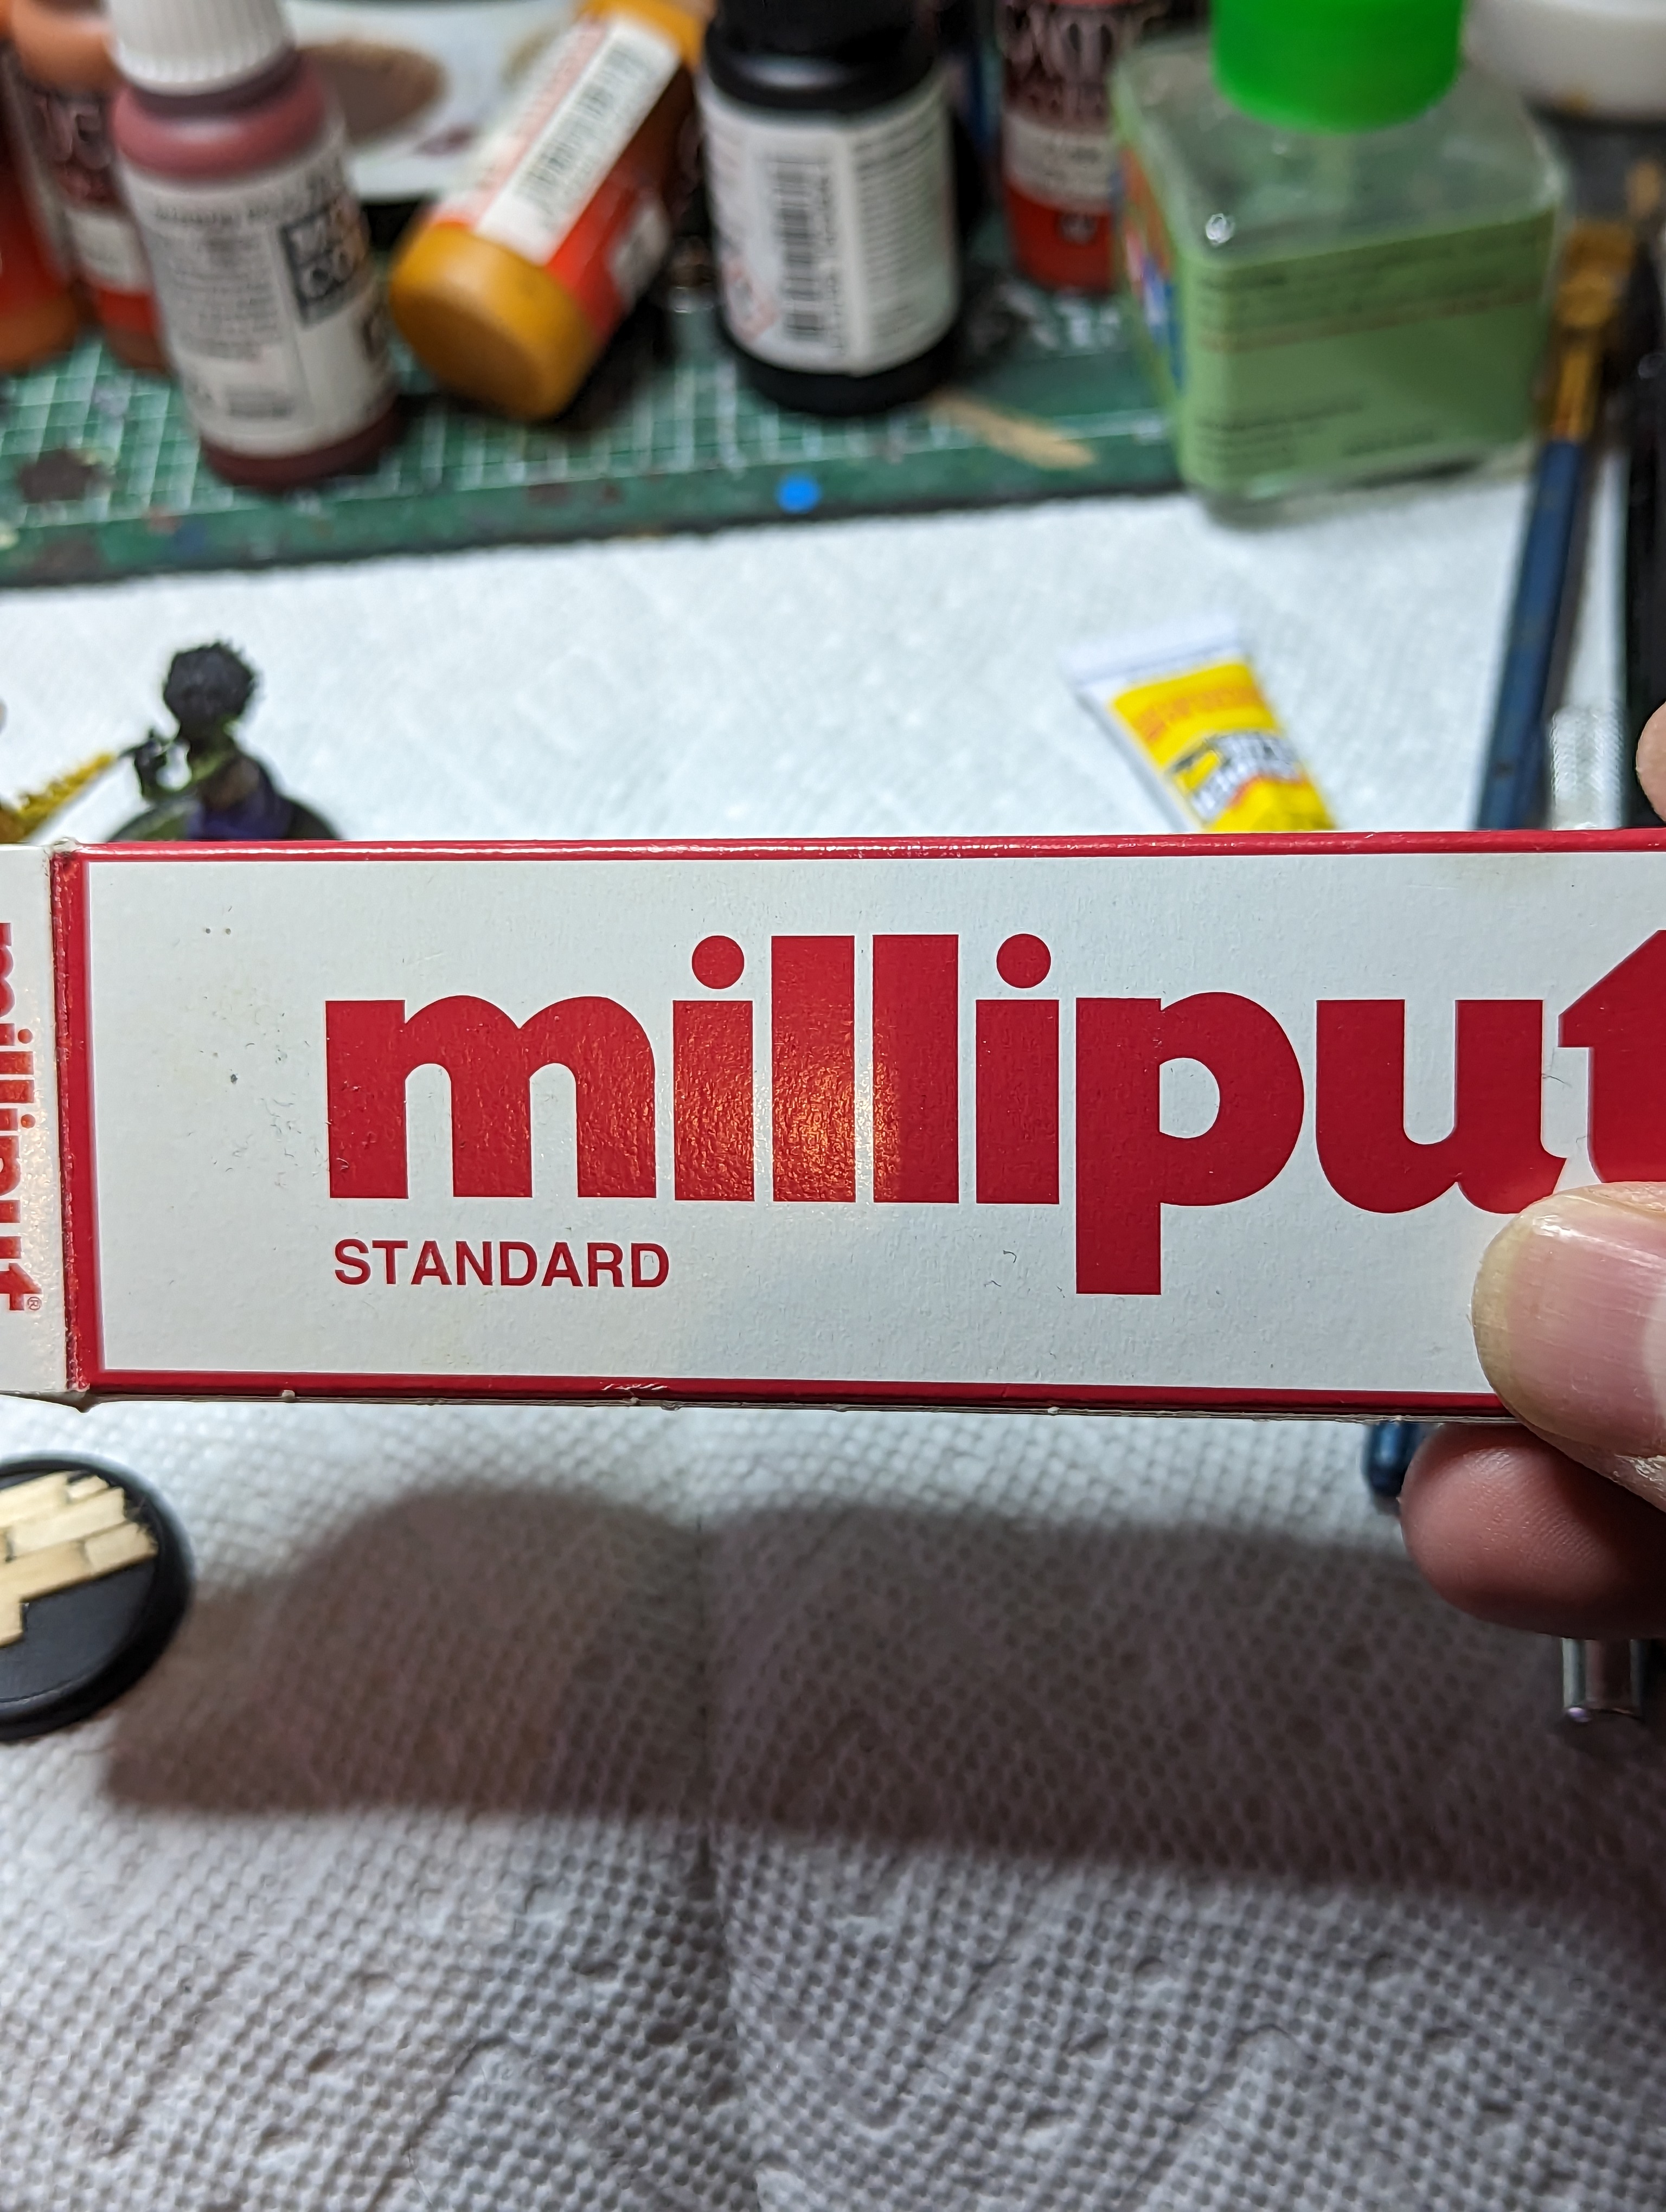
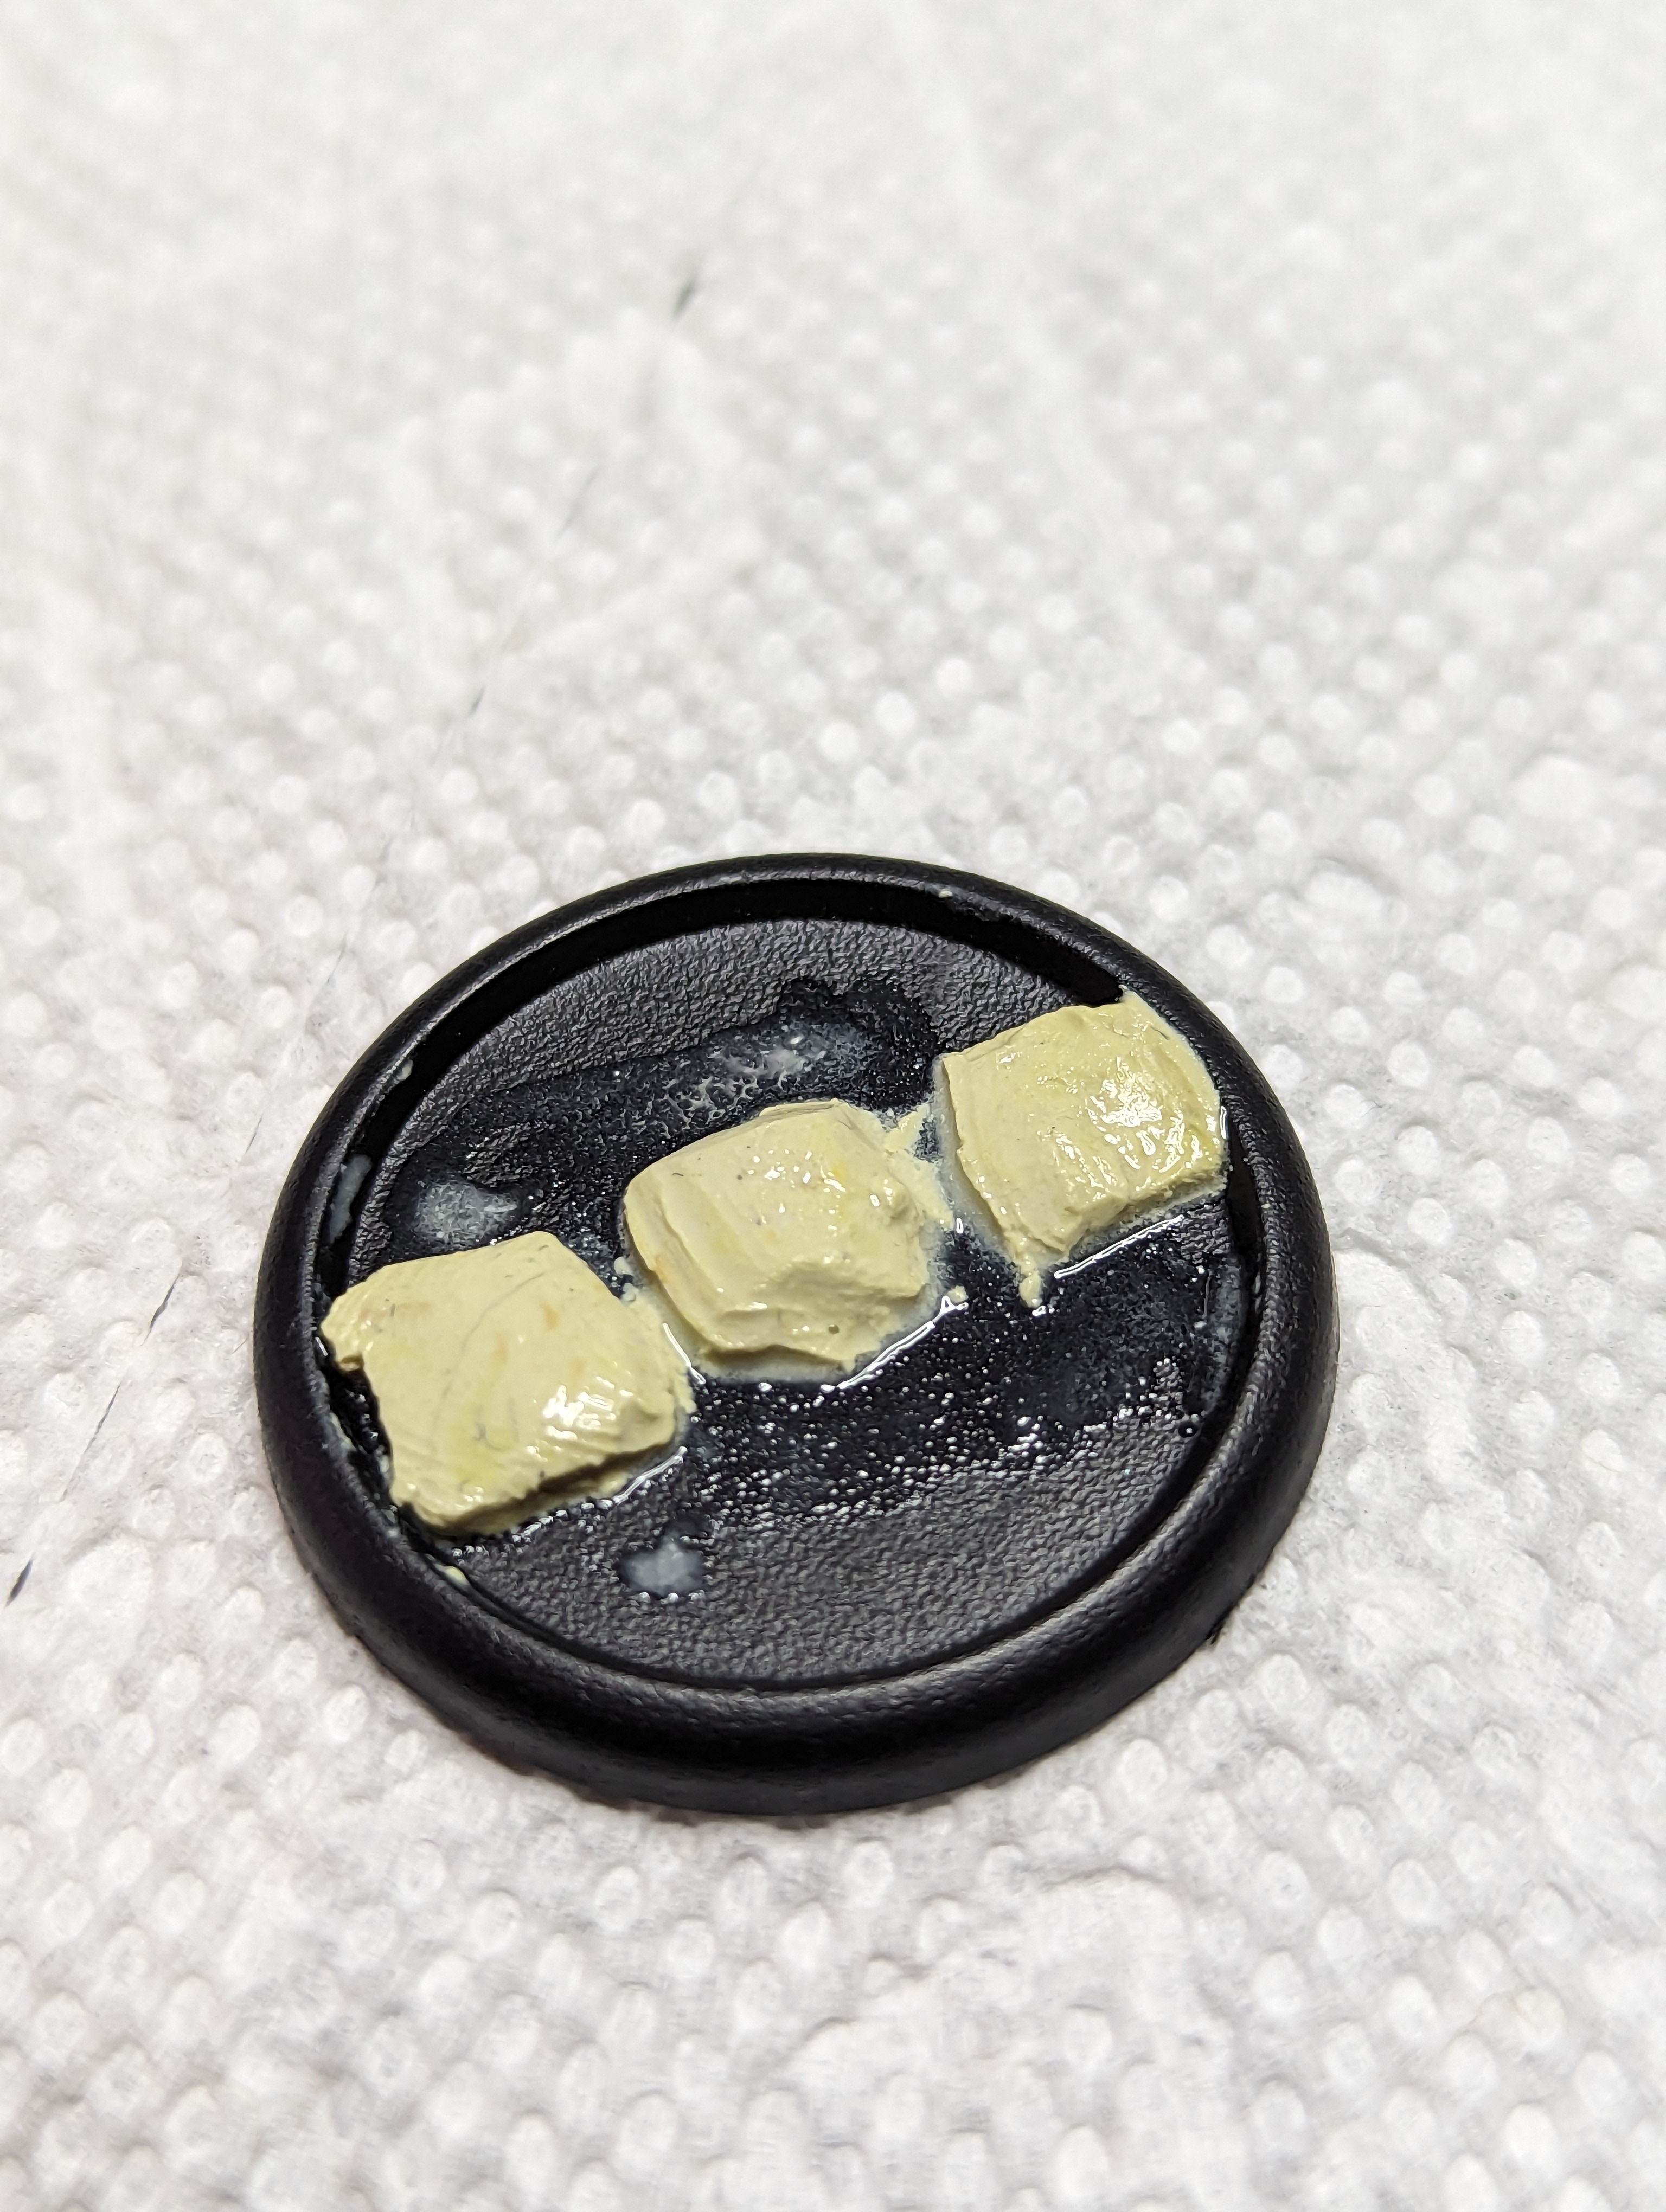
For the Zen base, I decided to finally break out the Milliput. Im sure Gerry will be pleased. I did some very basic sculpting to just push a few piles of the stuff into roughly rectangular shape. I then used a knife to cut it into more of a clear rectangle, and then softened the sides. I used a small rock to add some texture to the tops after the Milliput had dried just a bit.
I then slapped some sand down in the negative spaces. After sealing it and letting it dry, I primed it place.
The sand got my normal treatment for sand, I base coated it burnt umber, and then dry brushed it with Vallejo Game color Khaki. Its a good recipe because you don’t really have to do multiple passed of drybrushing.
For the stones, I base coated them with a medium-dark gray, and then drybrushed a few layers up to a lighter gray. Super simple.
Finally I added some green grass to the dirt, as well as half of the Shojo base so she would have a mix of both styles. I tried to use a static grass applicator for this, and hey. Pro tip. Those things are only for doing big terrain pieces. Don’t use them for bases, it will just make a huge mess.


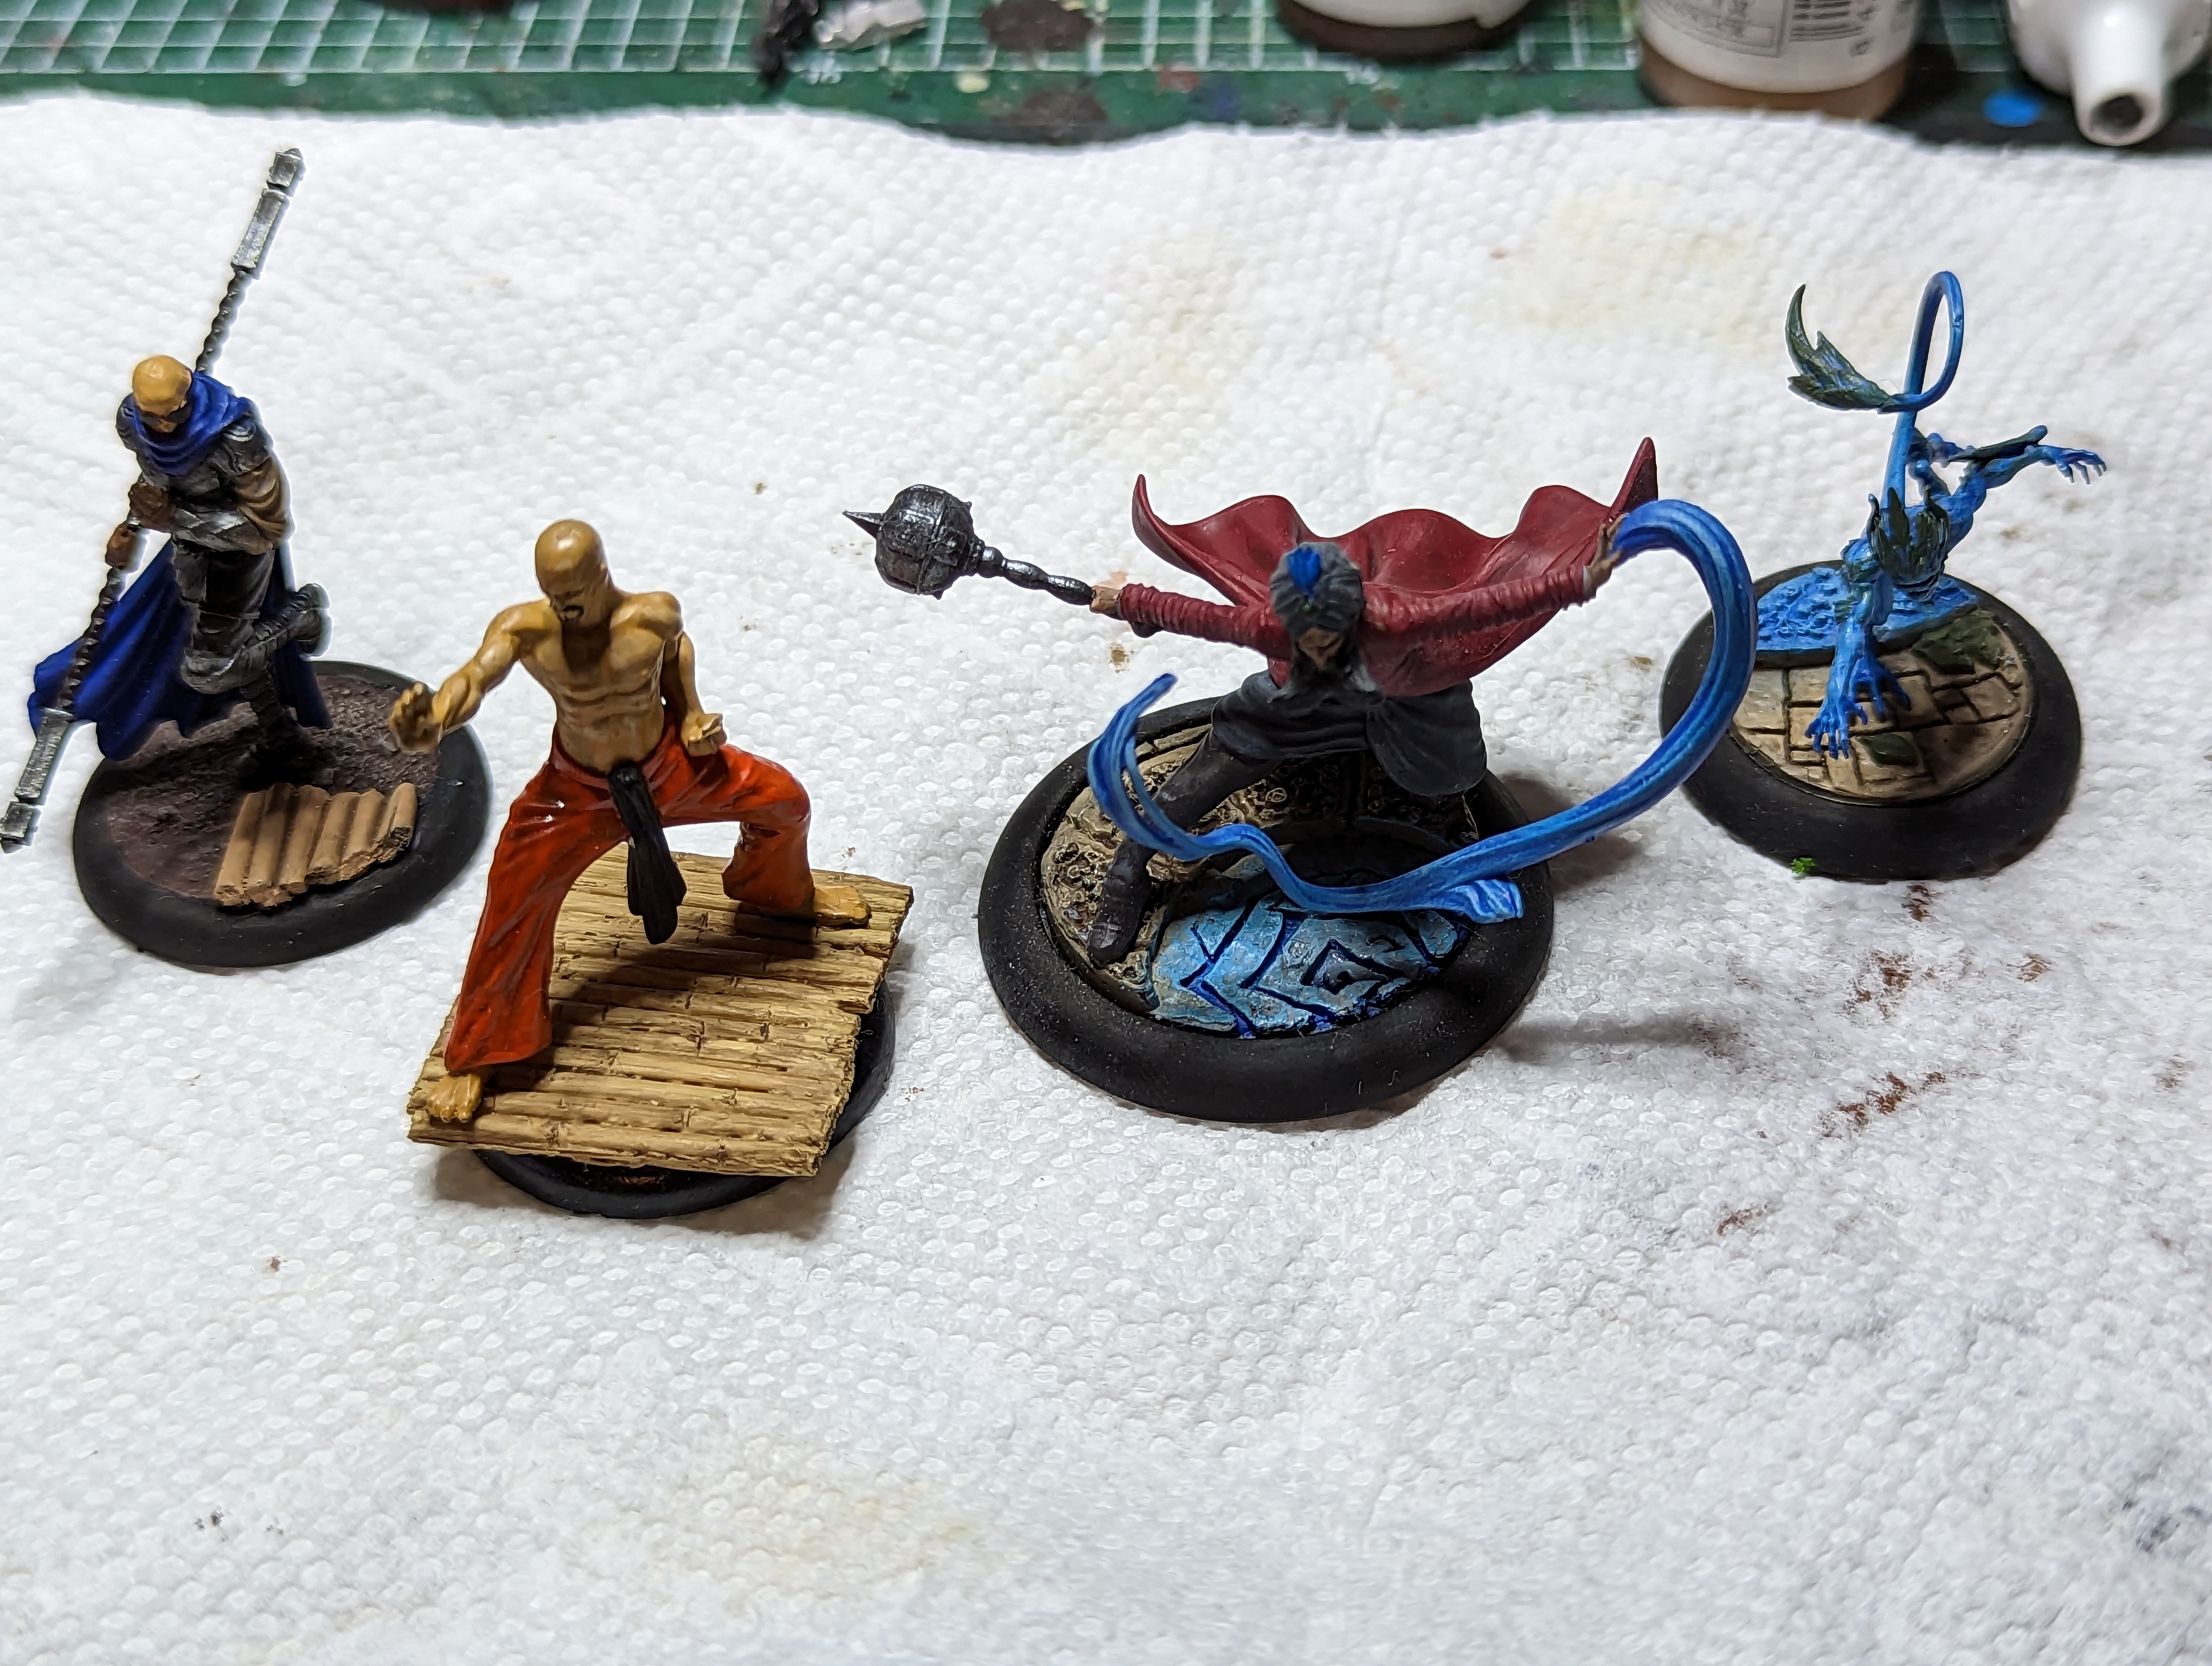
For some reason I have an extremely hard time remembering to take WIP pics when painting models. However, this time I did actually remember while painting Shojo.
Shojo is a water spirit, and in the art her body and clothes are all a dull gold color. I started by base coating her in a brownish yellow, and then highlighted up to a gold type of color. I probably should have made her brighter just to make her pop more, but hindsight is 20/20.
Next I base coated the water parts in dark blue, and drubrushed a medium blue, before highlighting up to a light blue to show the splashes of the water. On her sleeves, the “fabric” is turning into water, so I tried to blend those areas a bit, but transitioning from yellow to blue is pretty tough.
Past I did her hair in red, highlighting up to almost orange. According to her lore, her hair is usually black and sometimes red/orange, but I thought the black would get lost here.
Youko was a pretty simple paint job. Everything was a simple base coat and then highlight. I put a wash on her underclothes because the purple I used was too bright. The brown for her gloves and boots I also did with a wash and drybrush cuz they seemed like too much work to highlight manually.
Brewmaster was a fun paintjob. I actually use GWs recipe for Ork skin to do my Gremlins. It makes them a bit darker than the art, but I like it anyway. I couldnt decide how to do the spilled alcohol effect, so I just started with a yellowish brown base, and highlighted up to a pretty bright color. It ended up coming out pretty good in my opinion.
Thats the whole set, another box down. A ton more to go.
Ladies
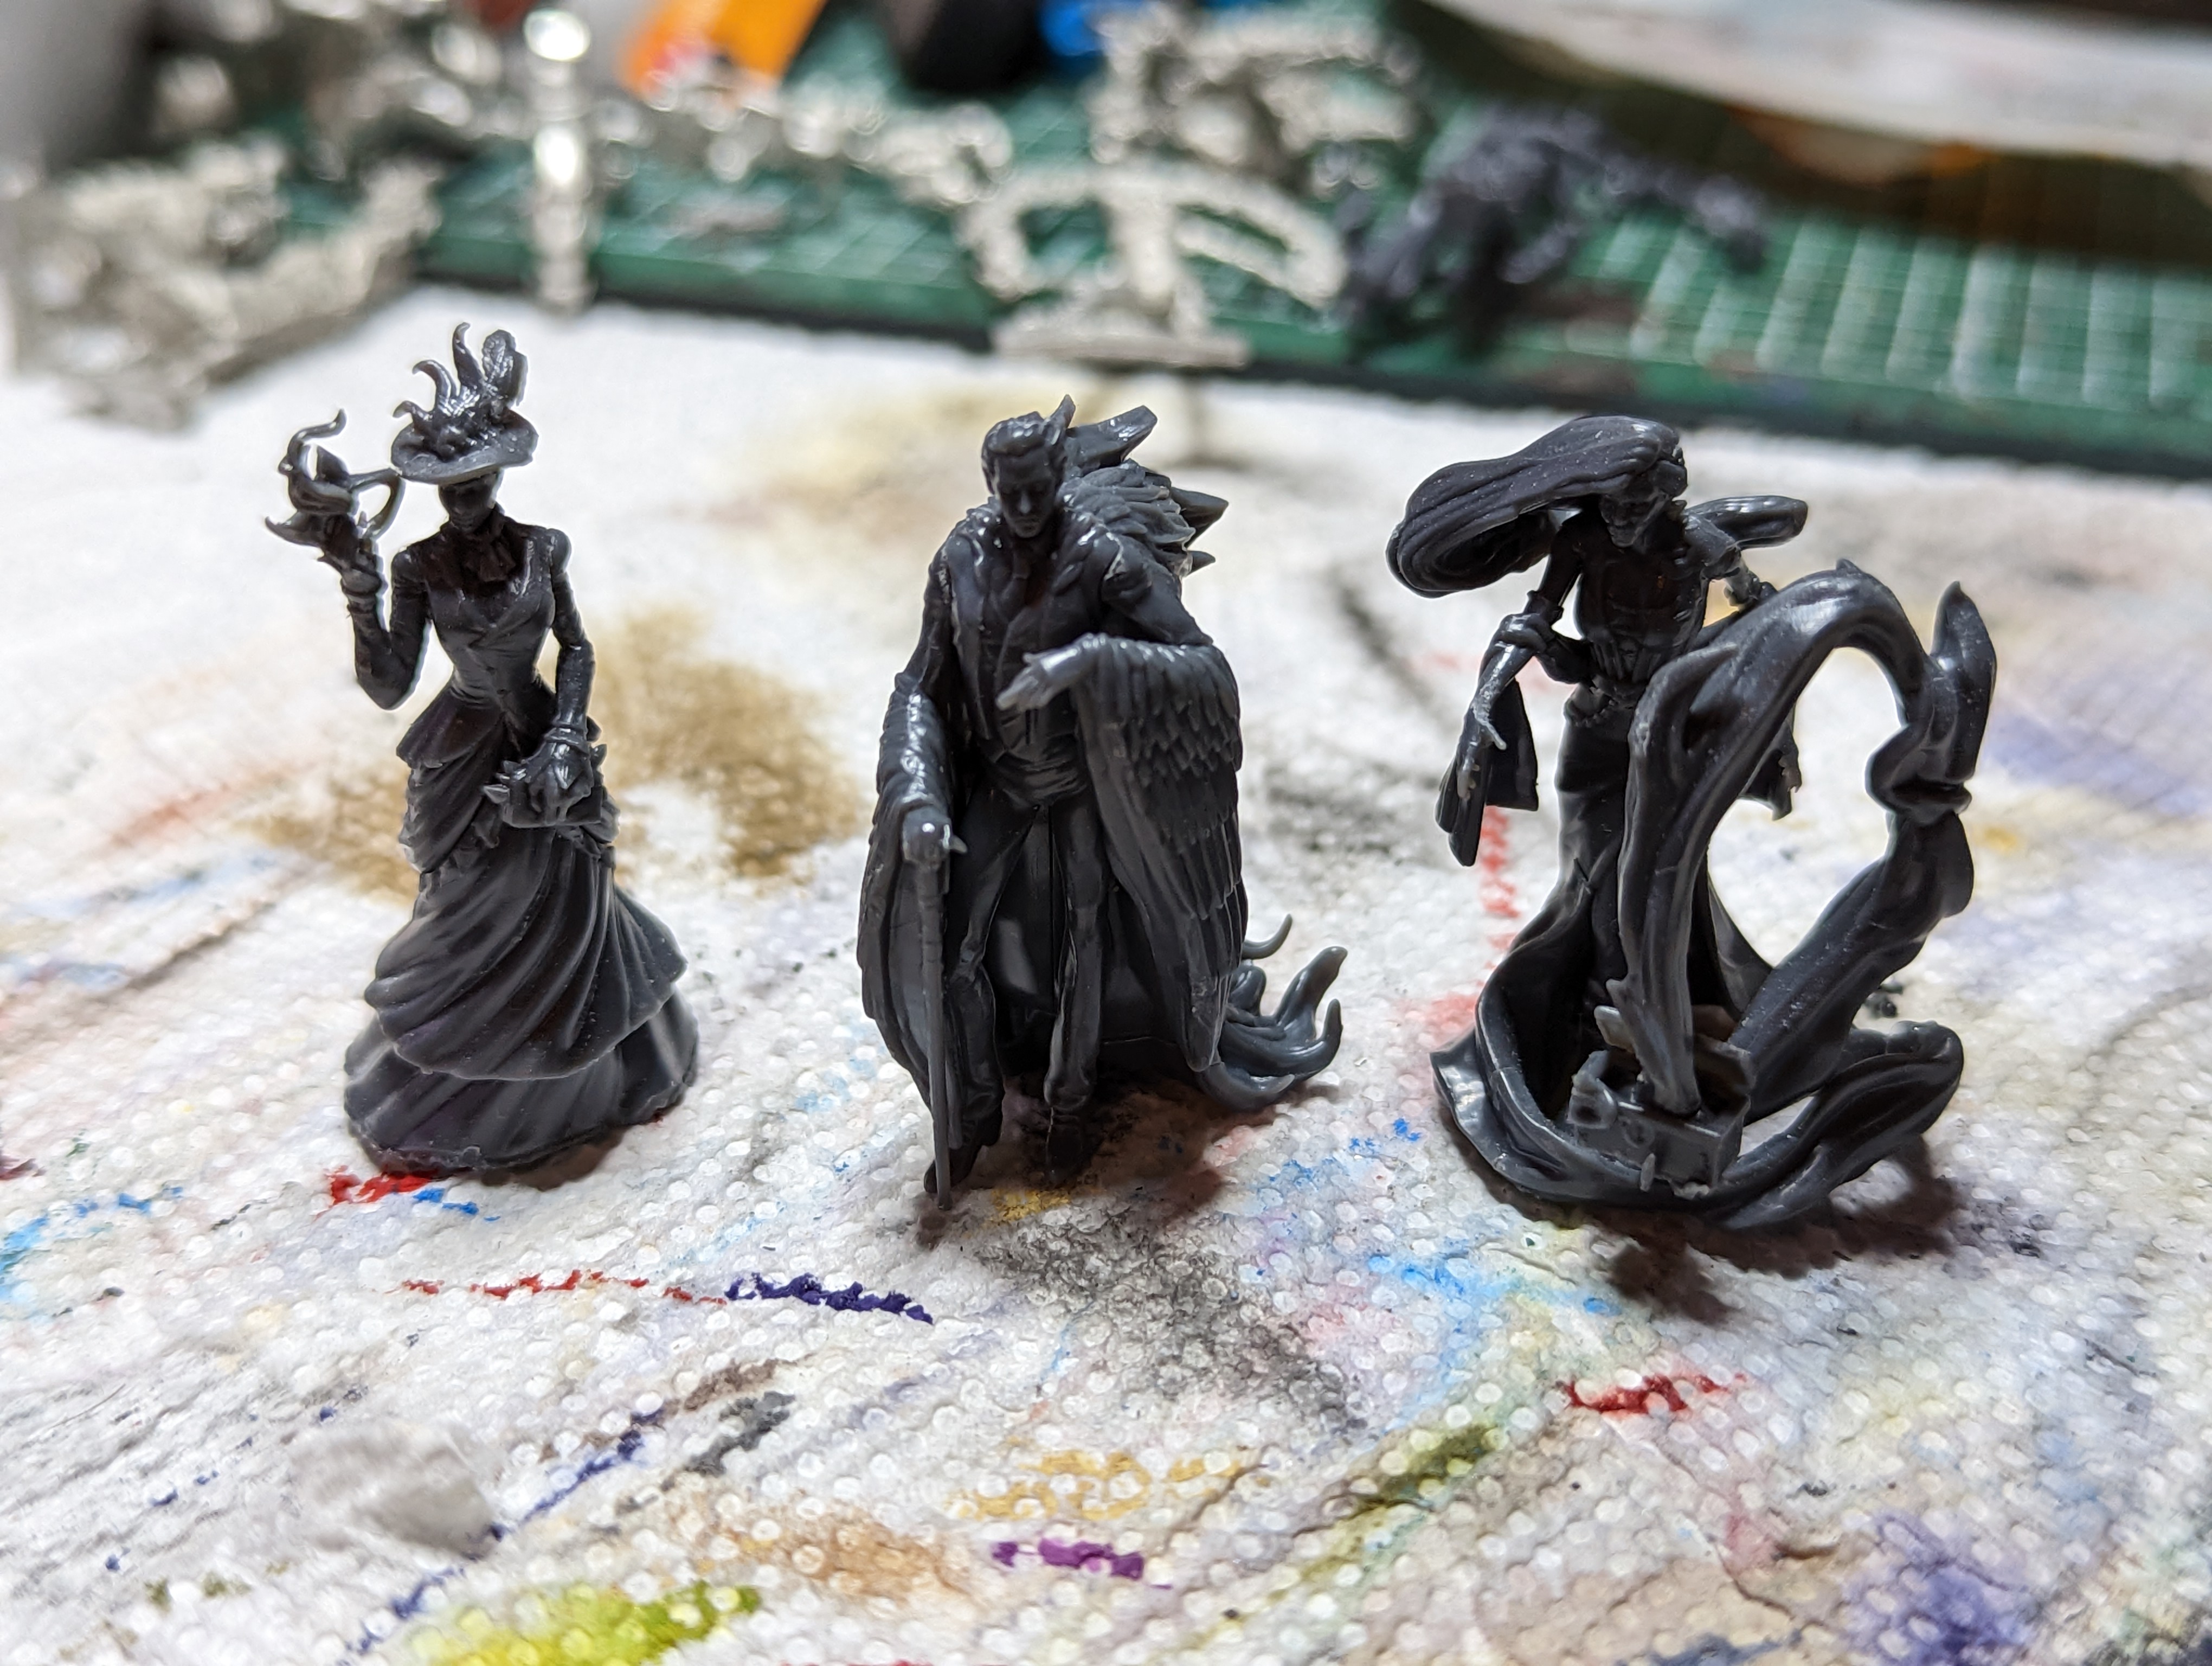
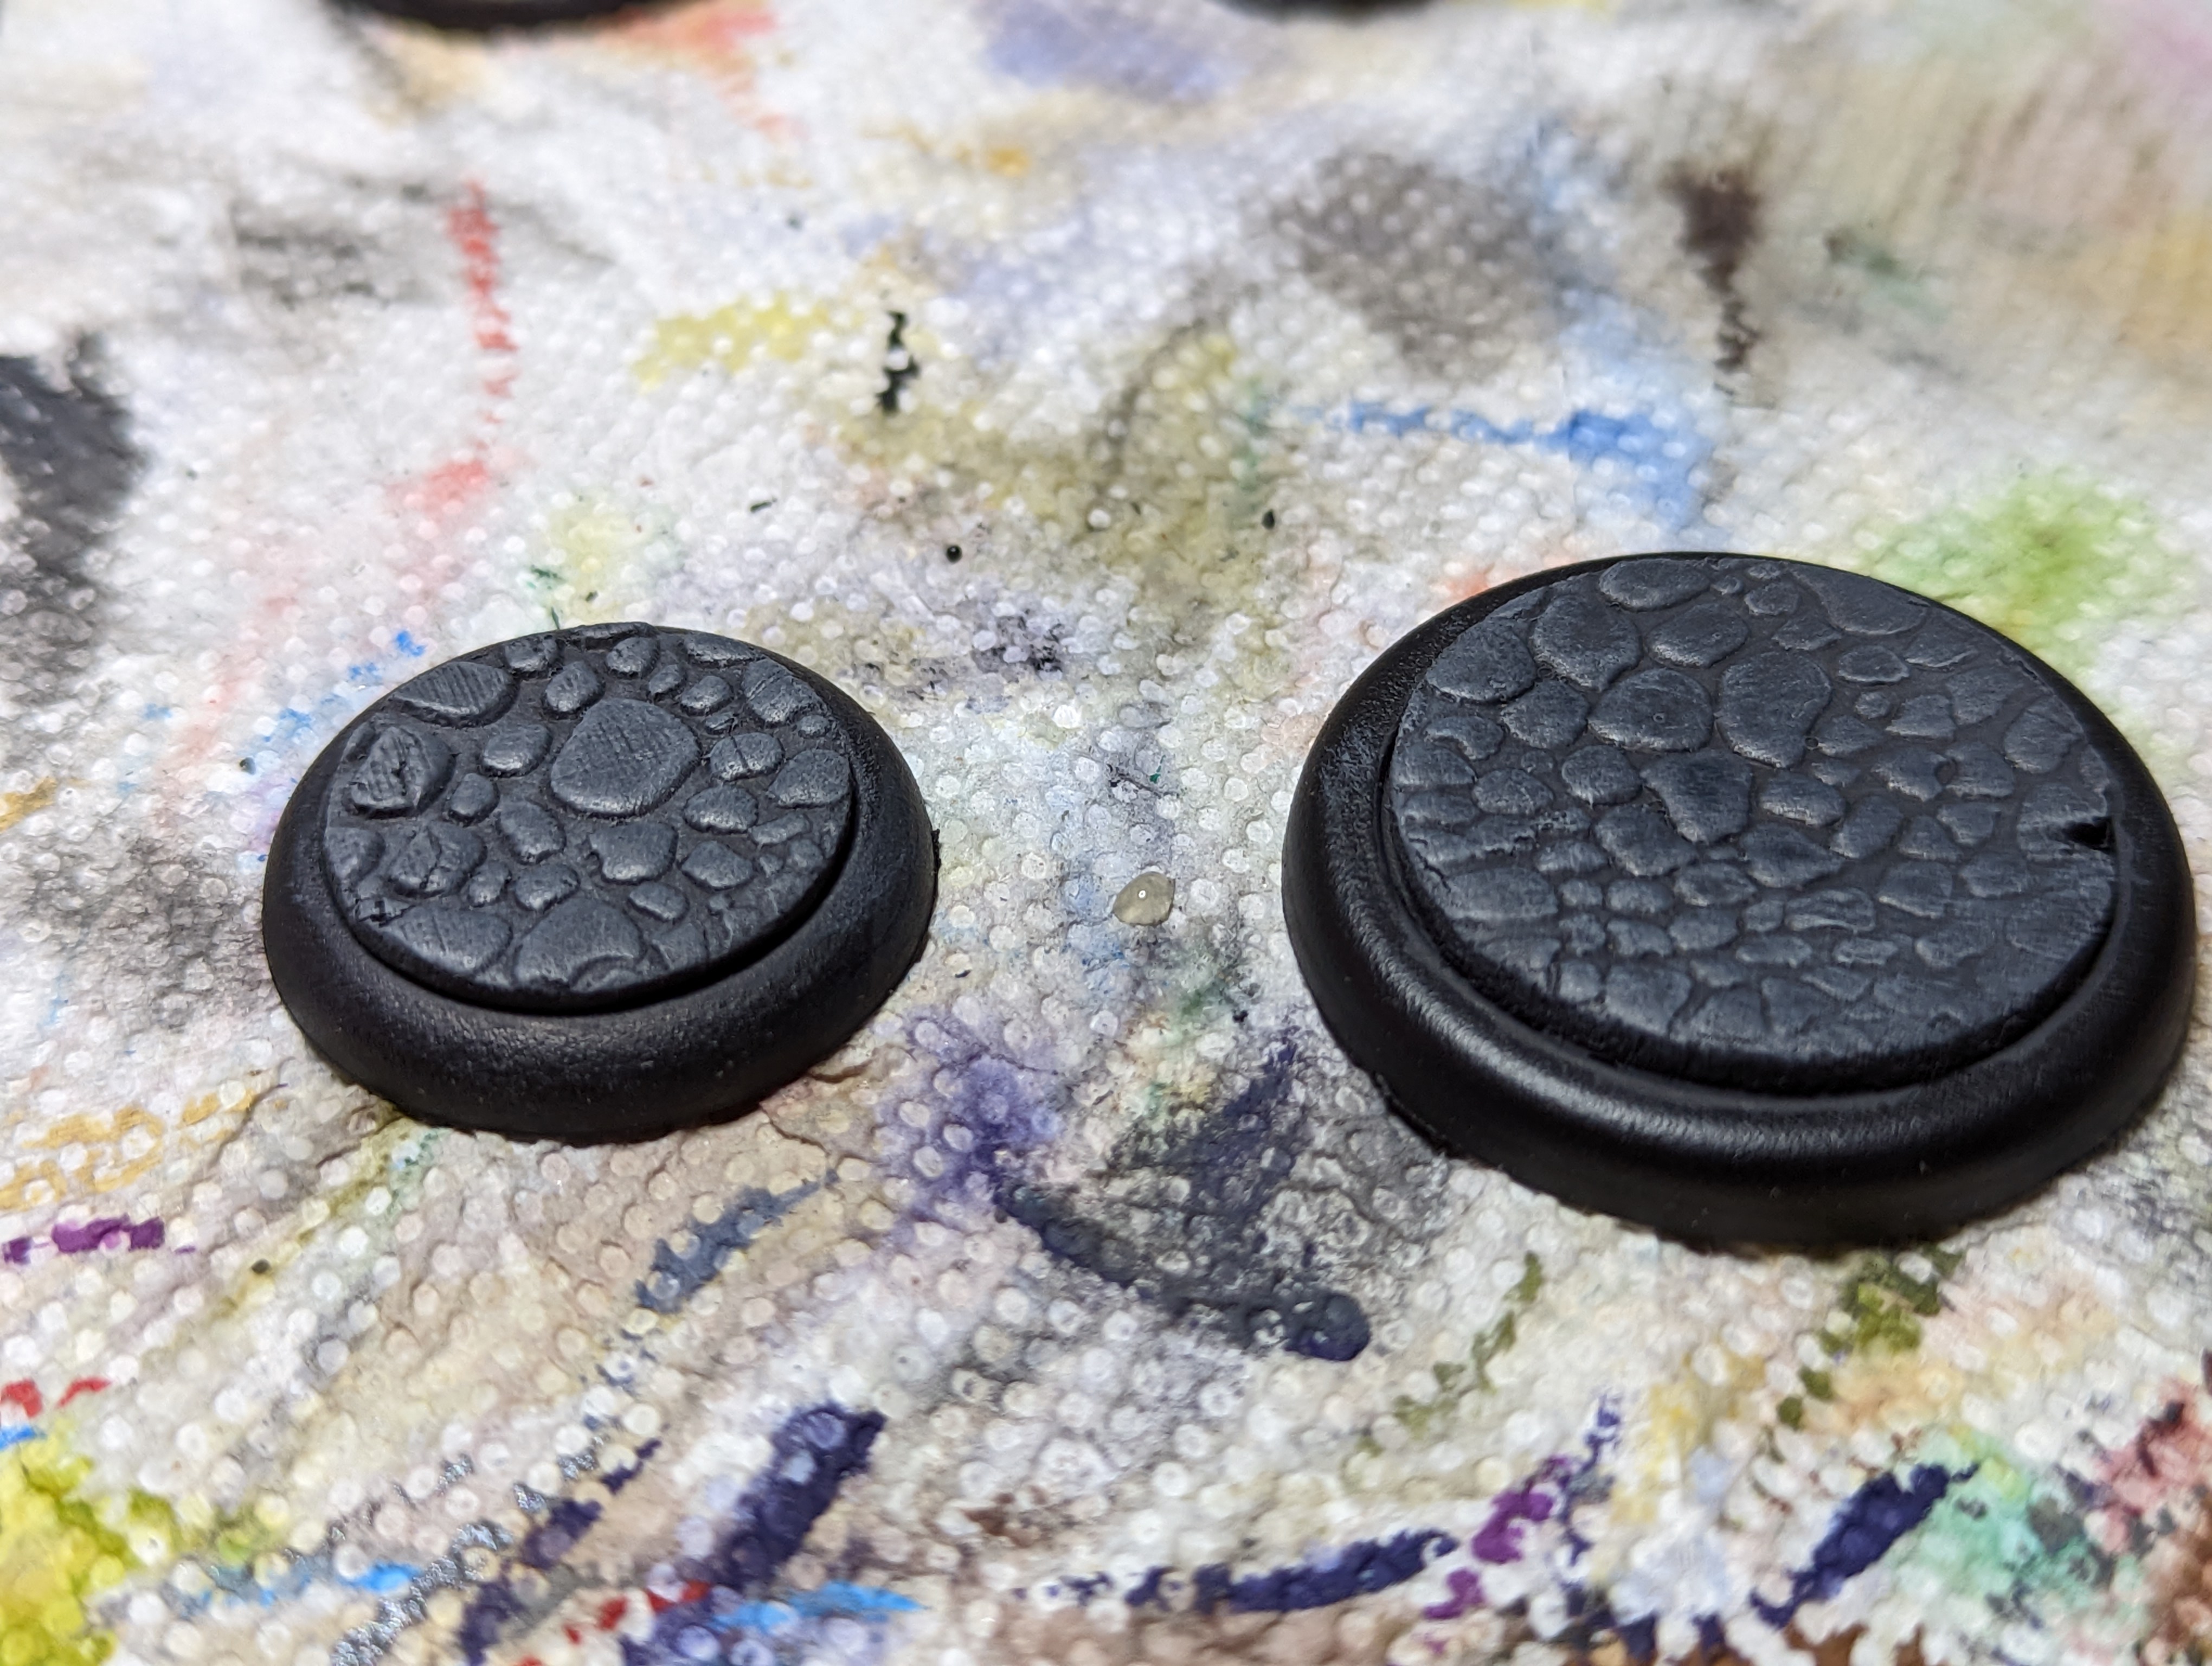
Next up I decided to tackle the Pandora and Colette box since I was working on a video on Colette’s backstory. My Pandora crew has a cobblestone base with some tentacles coming up out of them, and I added a green glow underneath the models to represent the fact that they are not what they appear to be. Colette is a stage performer, so I did wood floors with a fancy carpet over the top. I will need to replicate these bases for the new models, and find a way to combine them for Dorian Crowe who belongs to both crews.
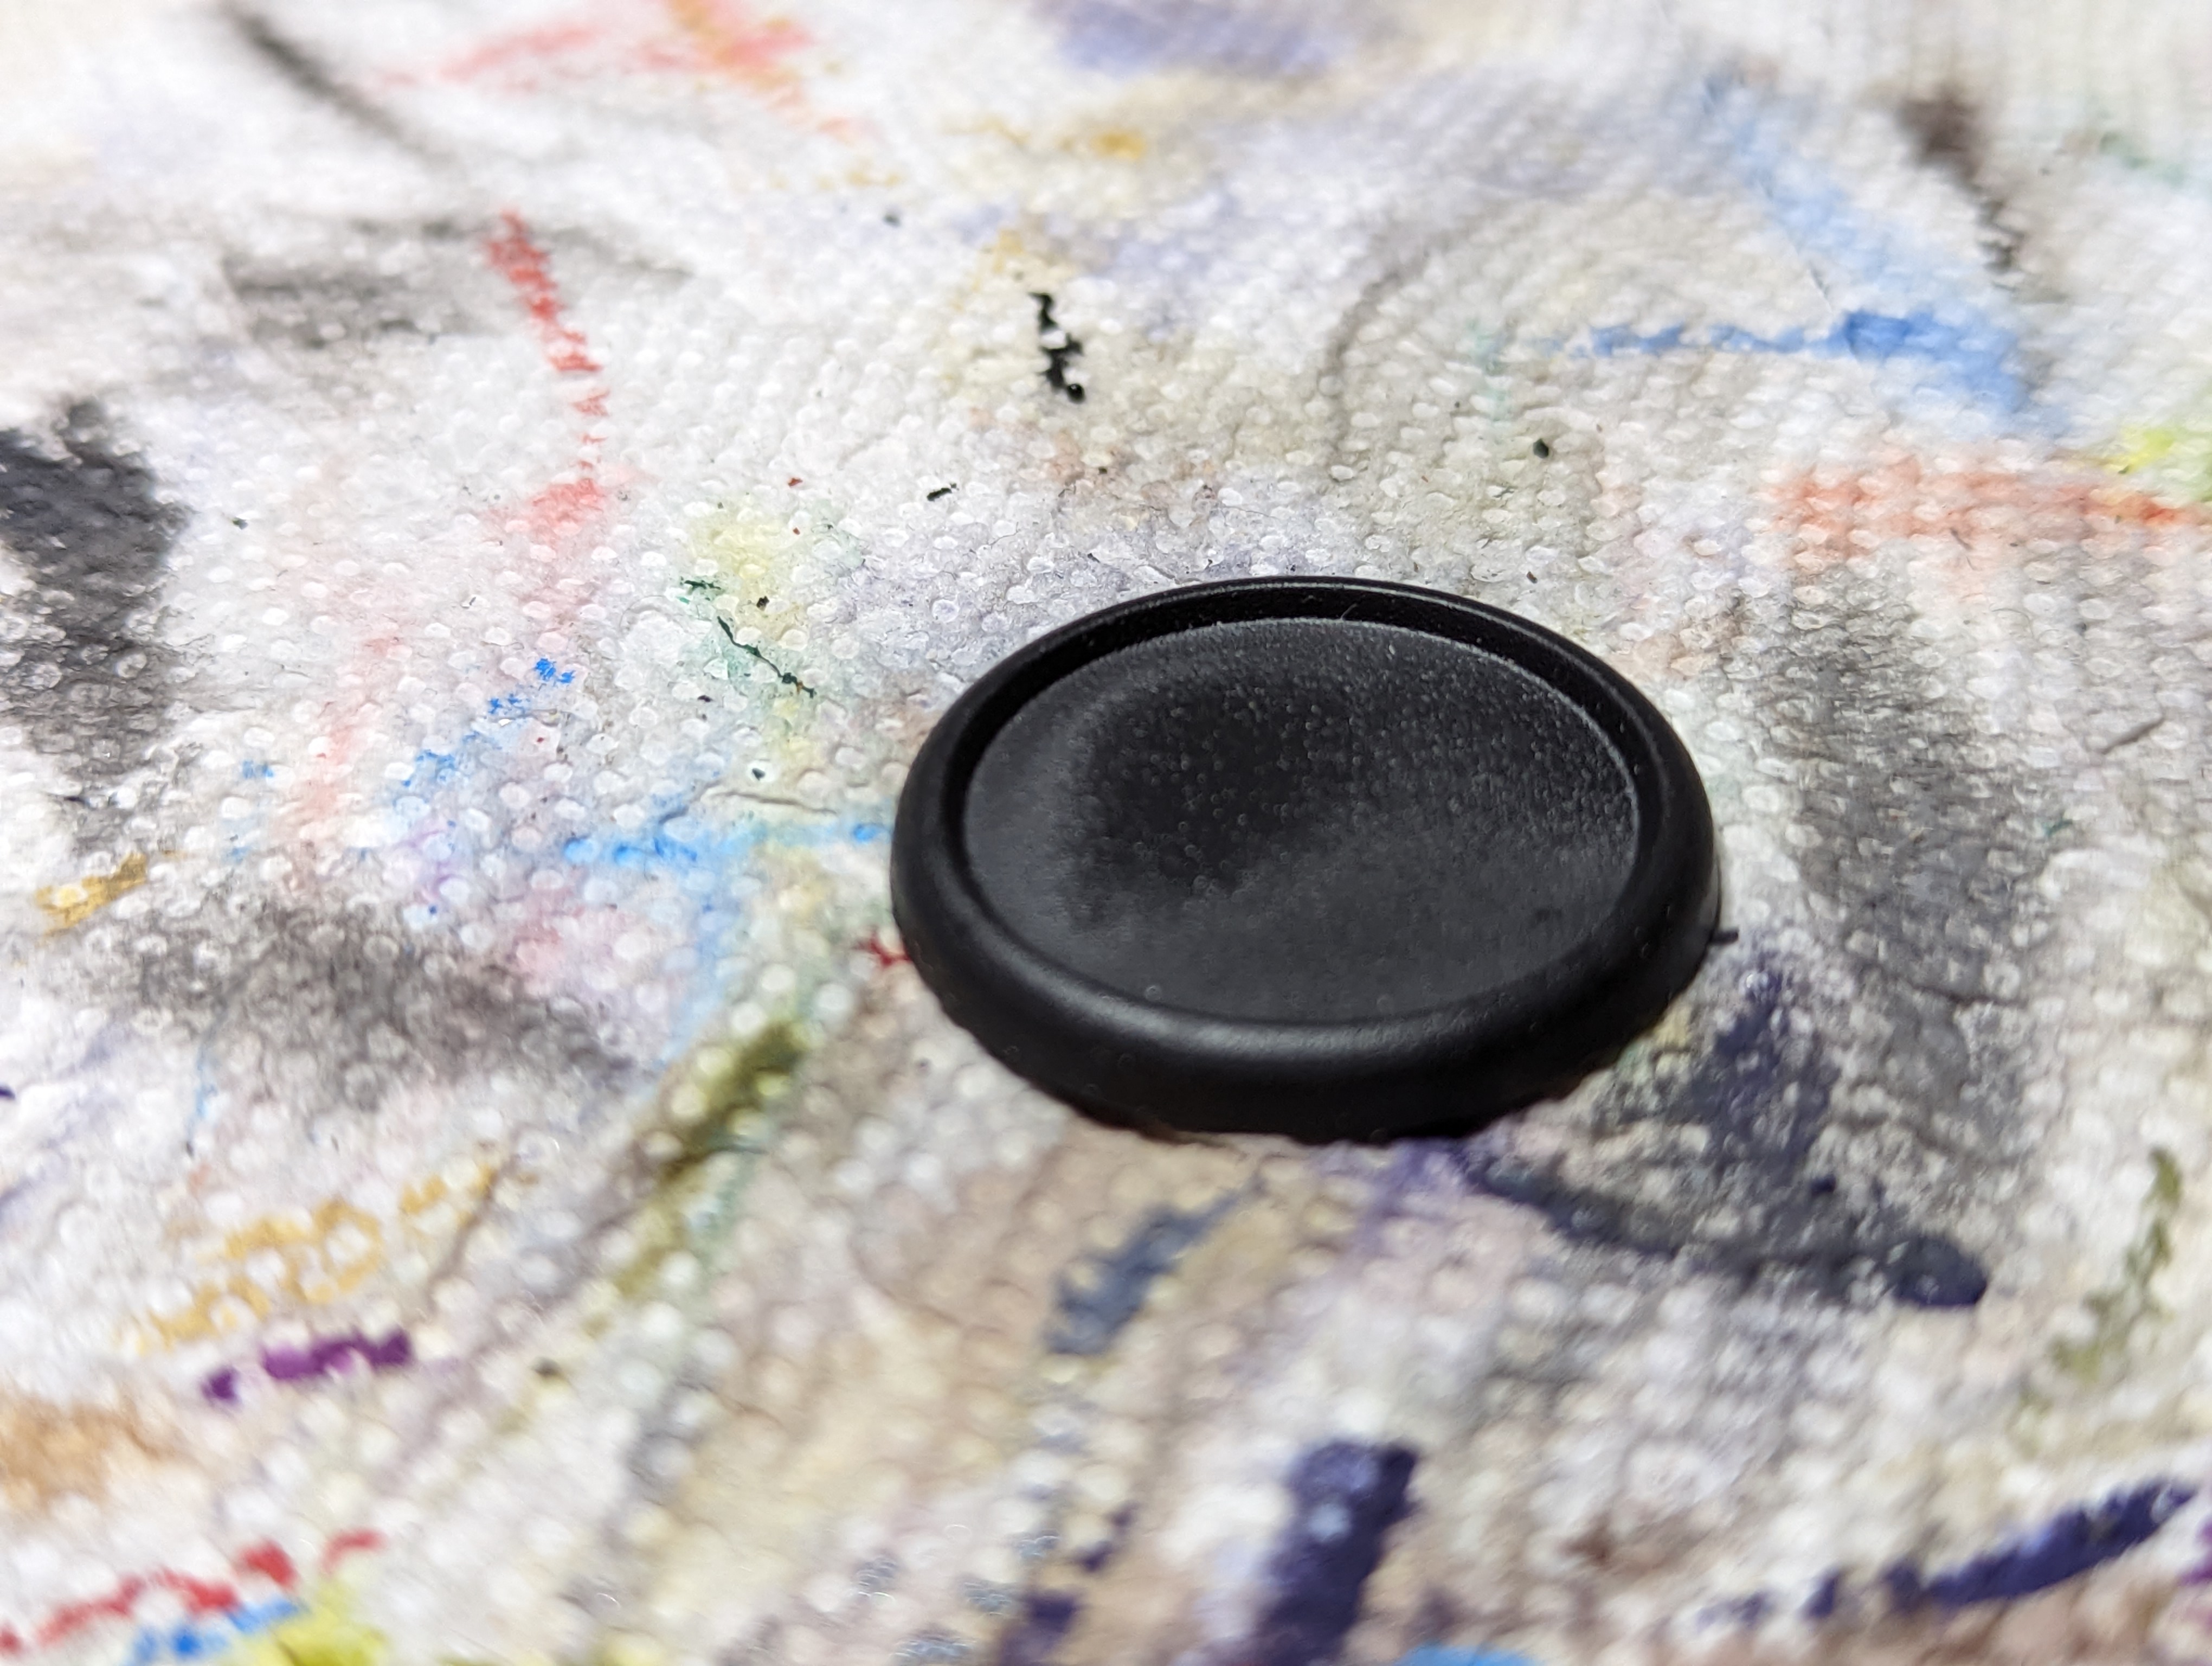
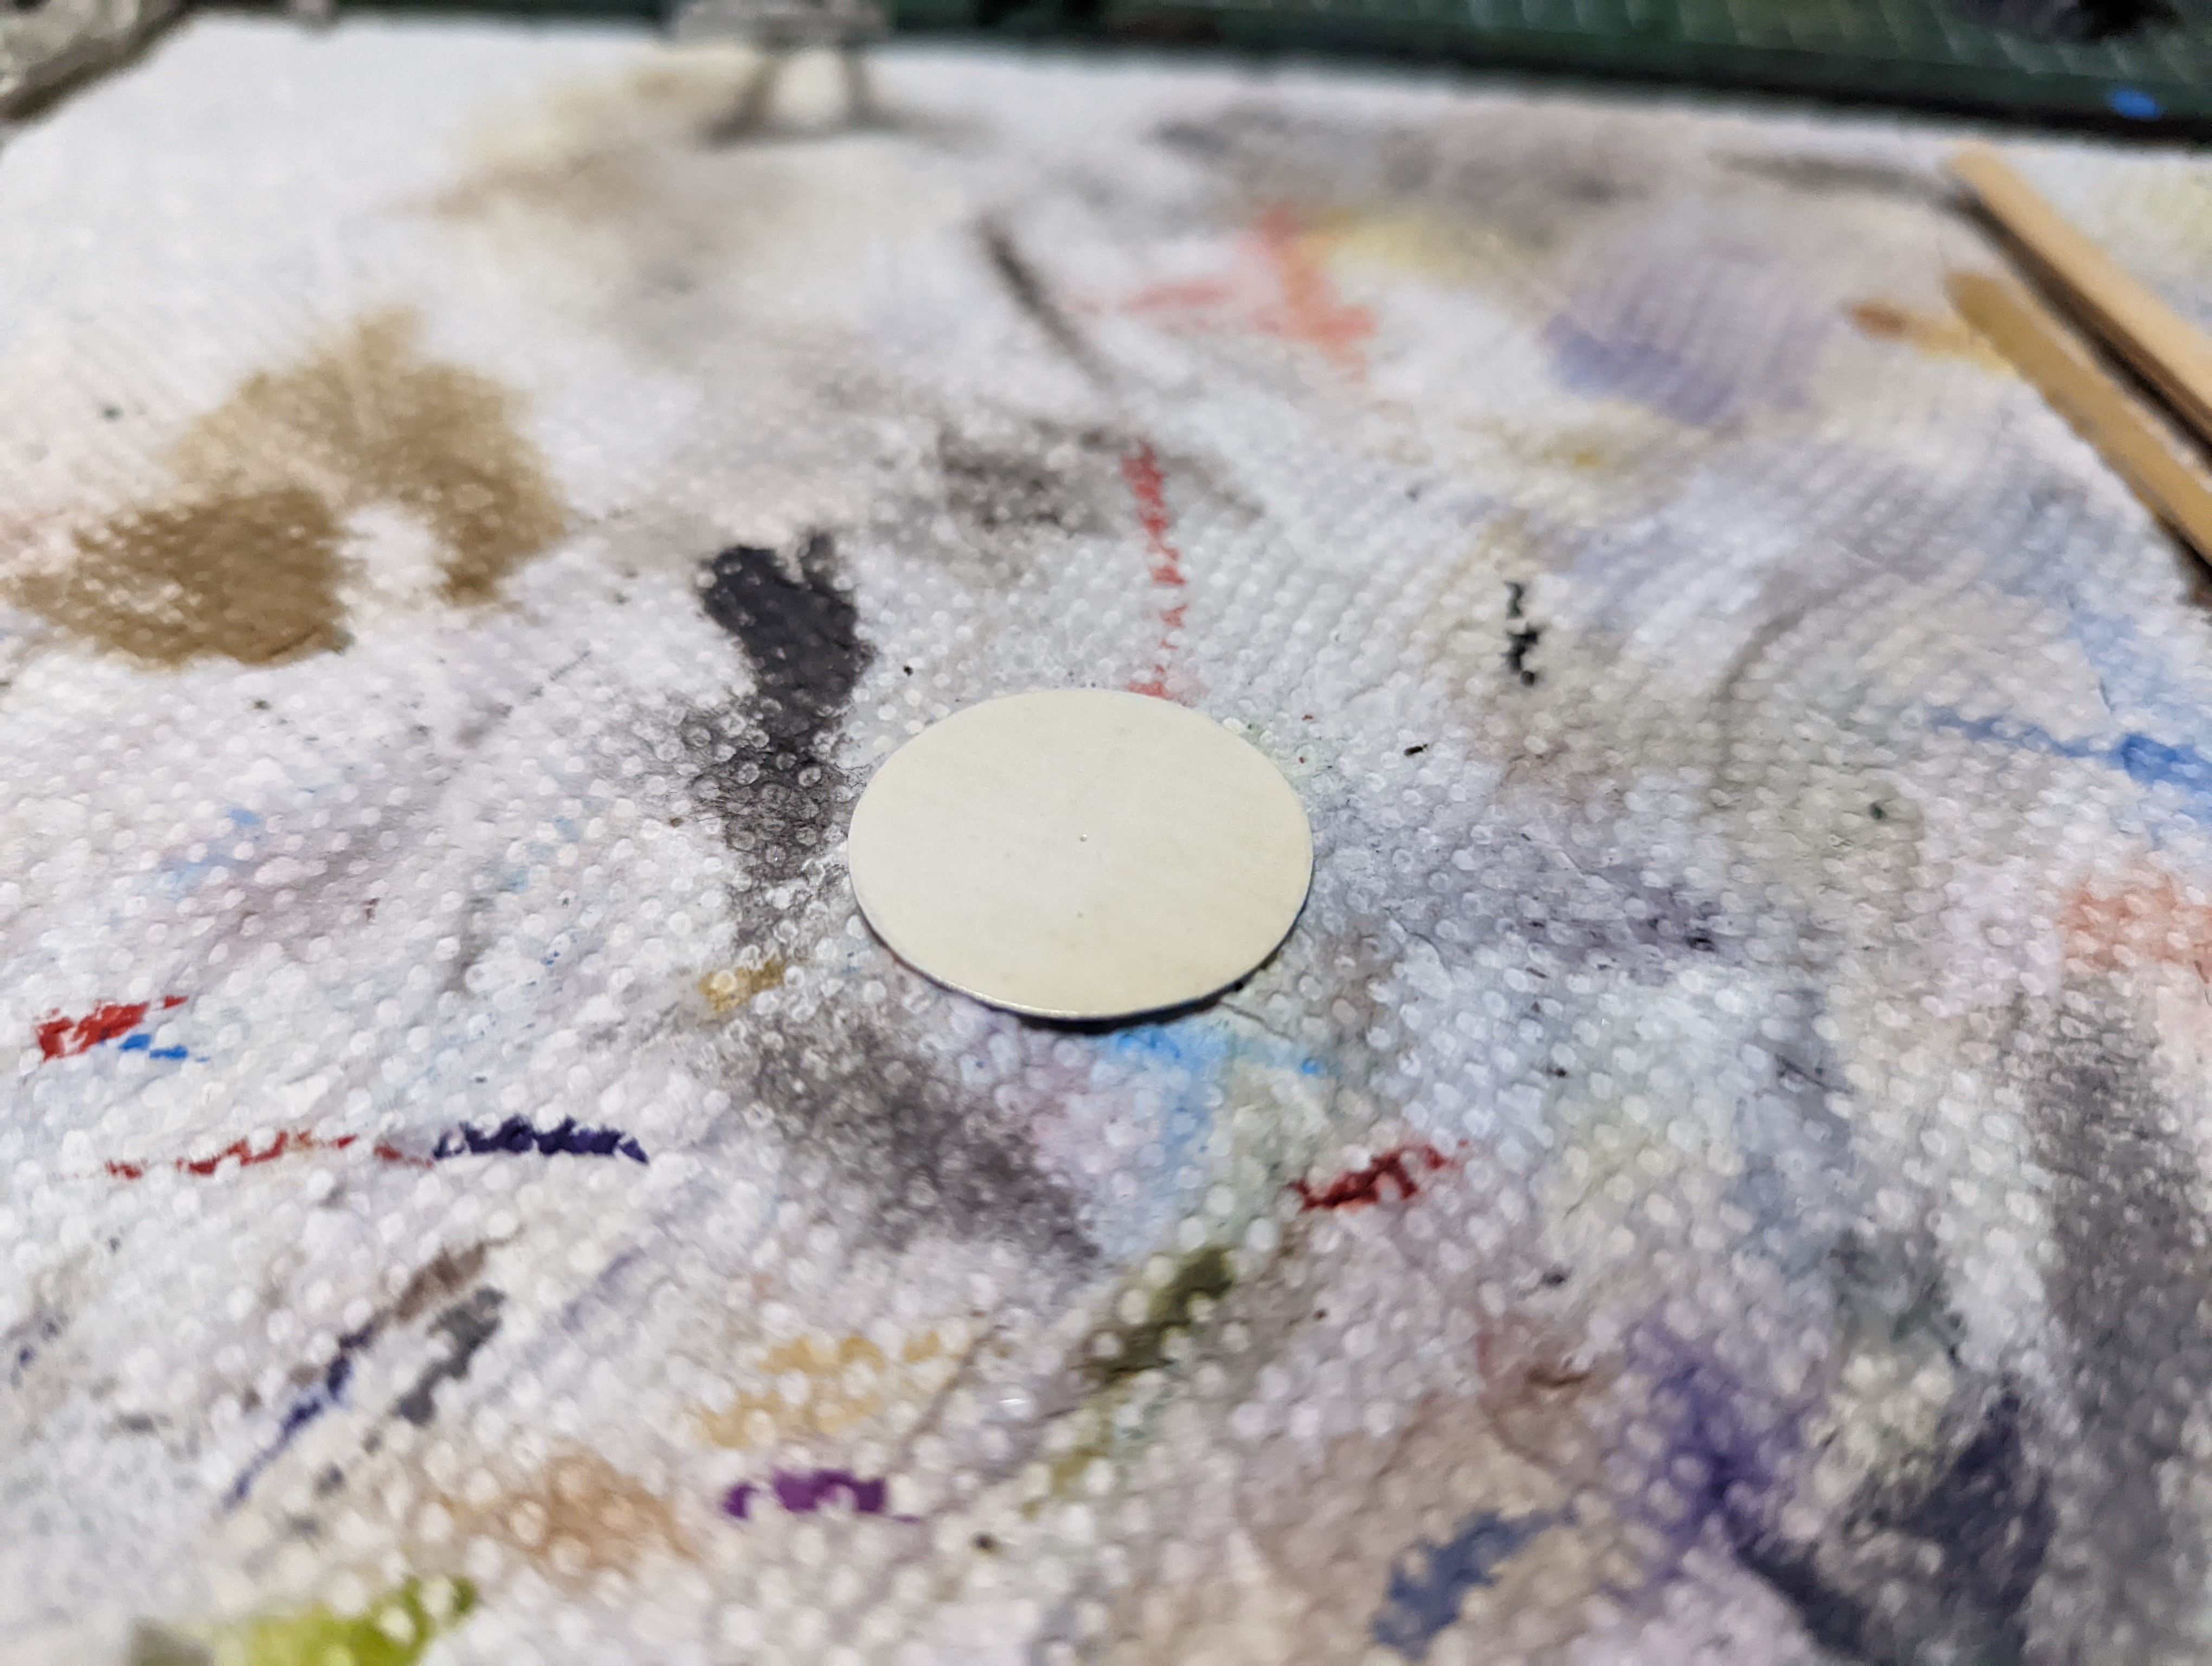

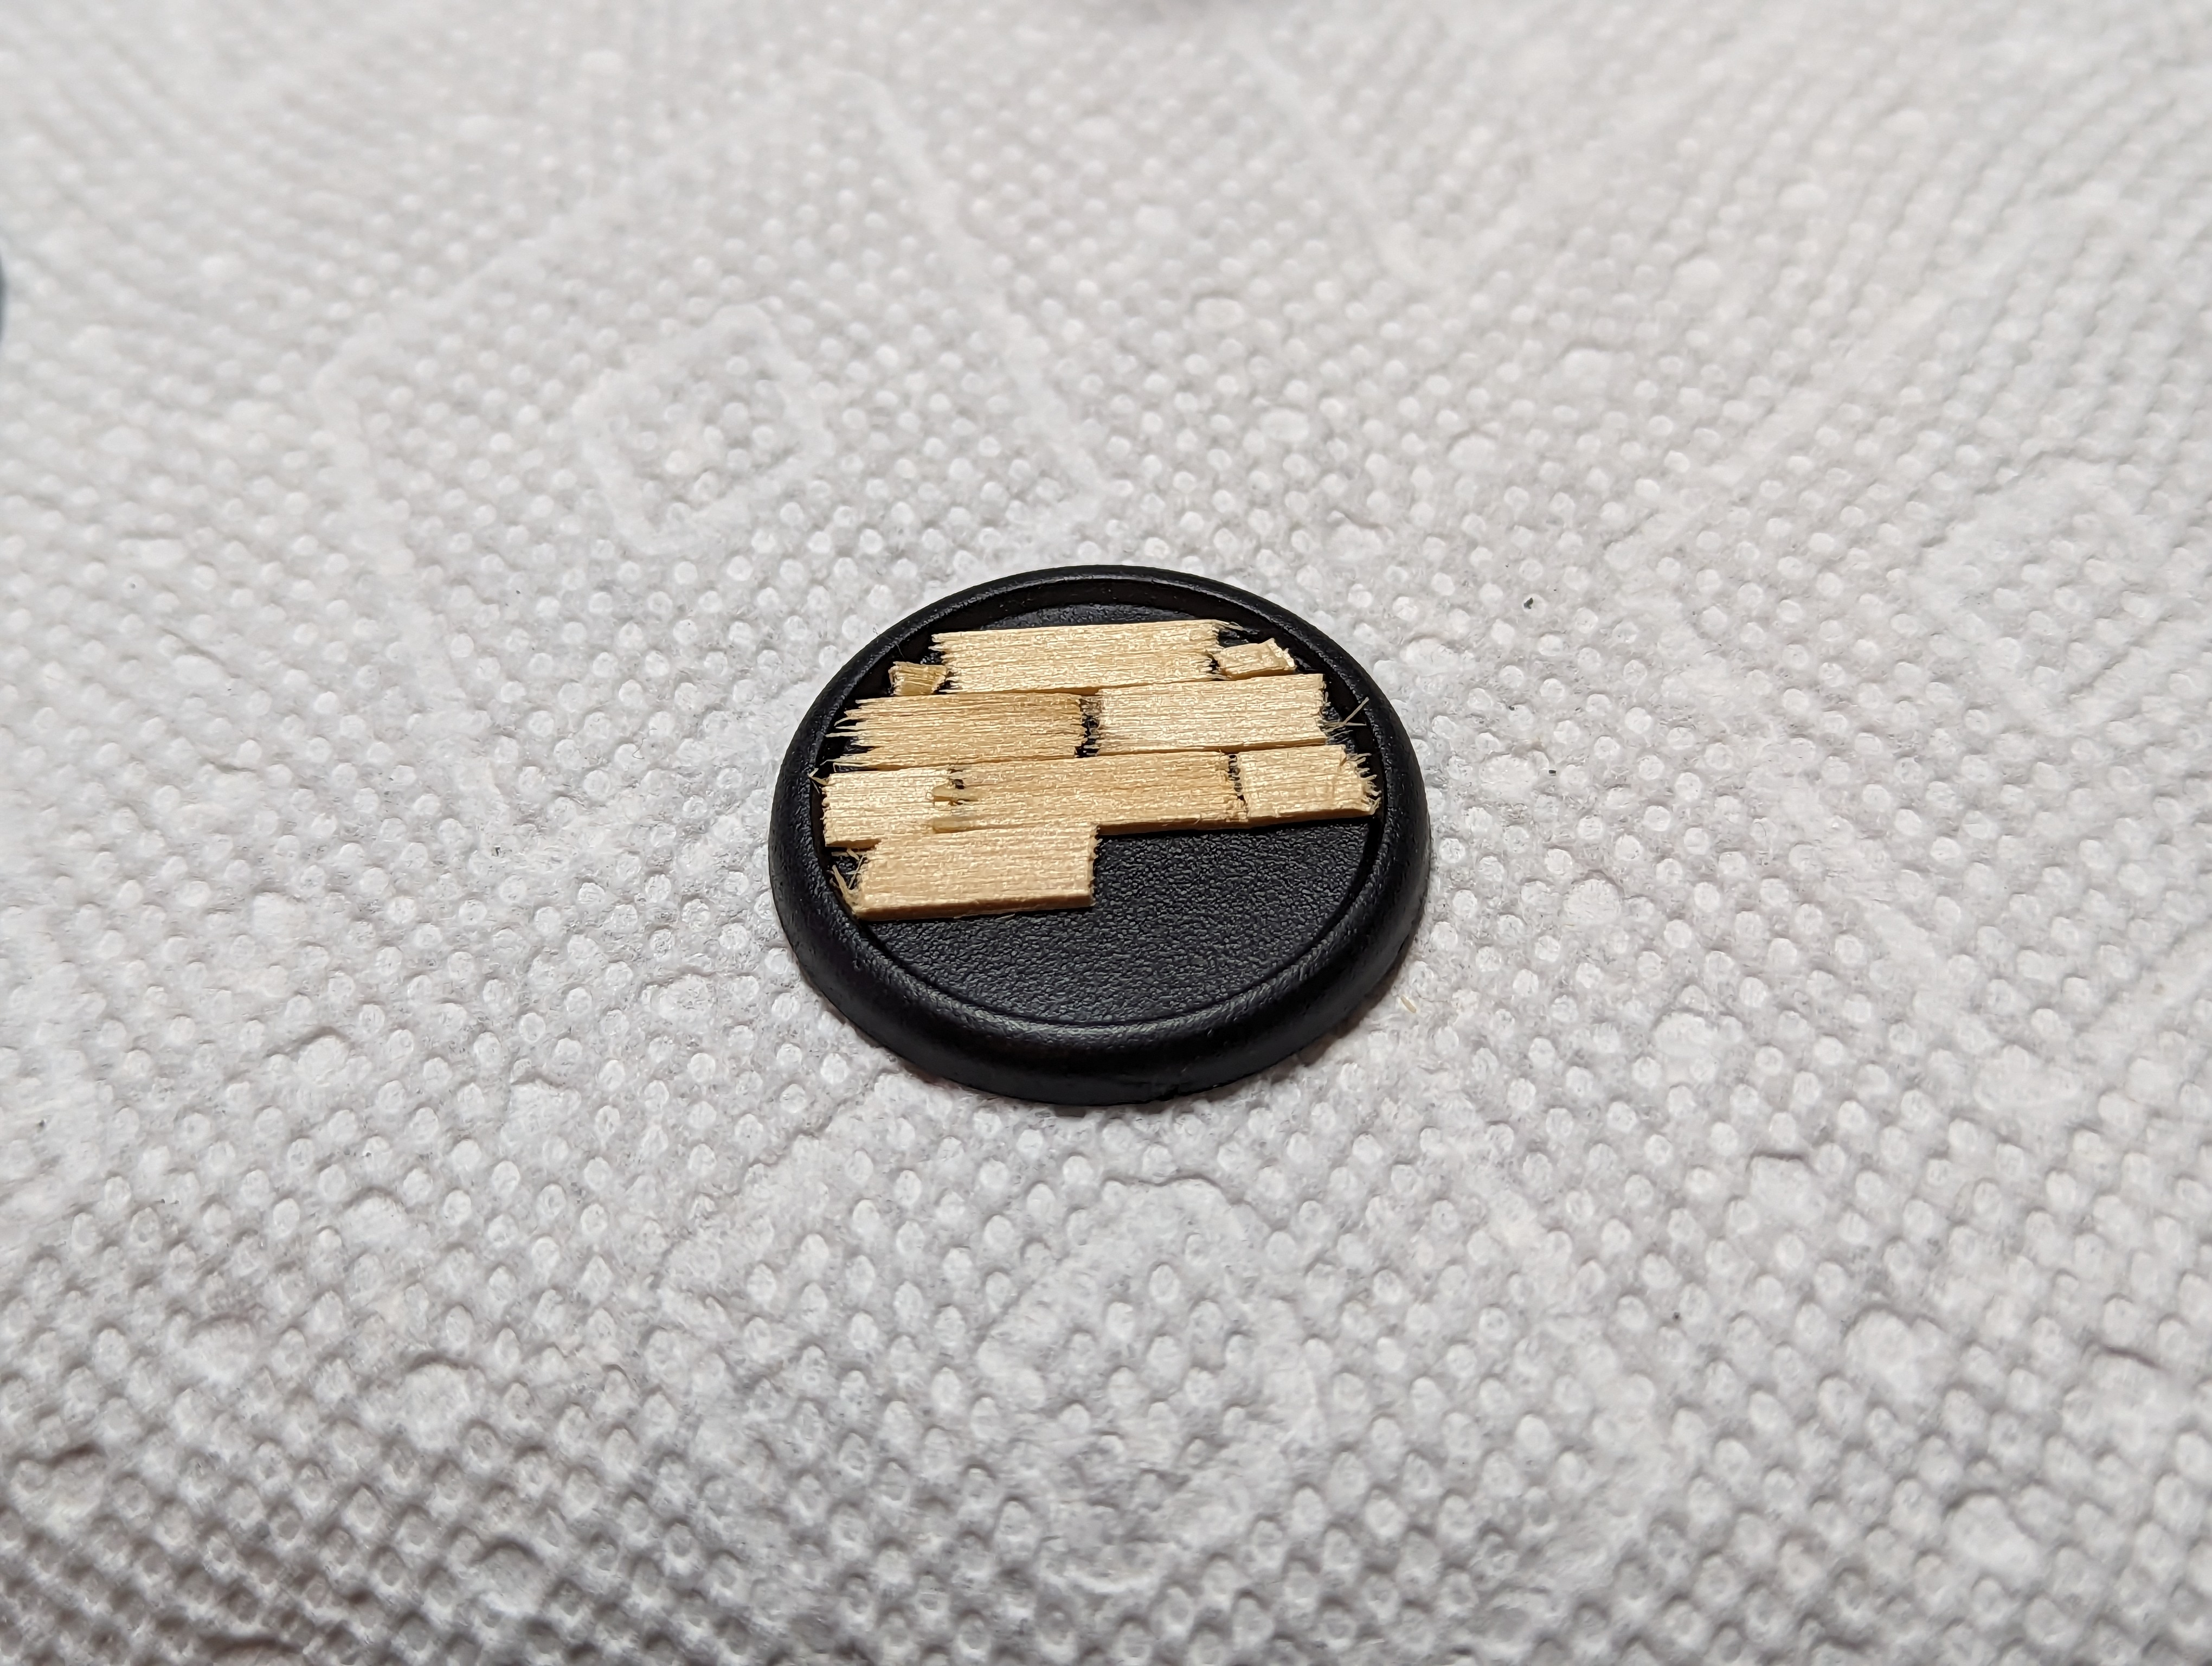
To make the wood floors, the first problem I have to tackle is the fact that Malifaux bases have a lip. For some basing techniques, this makes the process much easier, but for some it is kind of a nightmare.
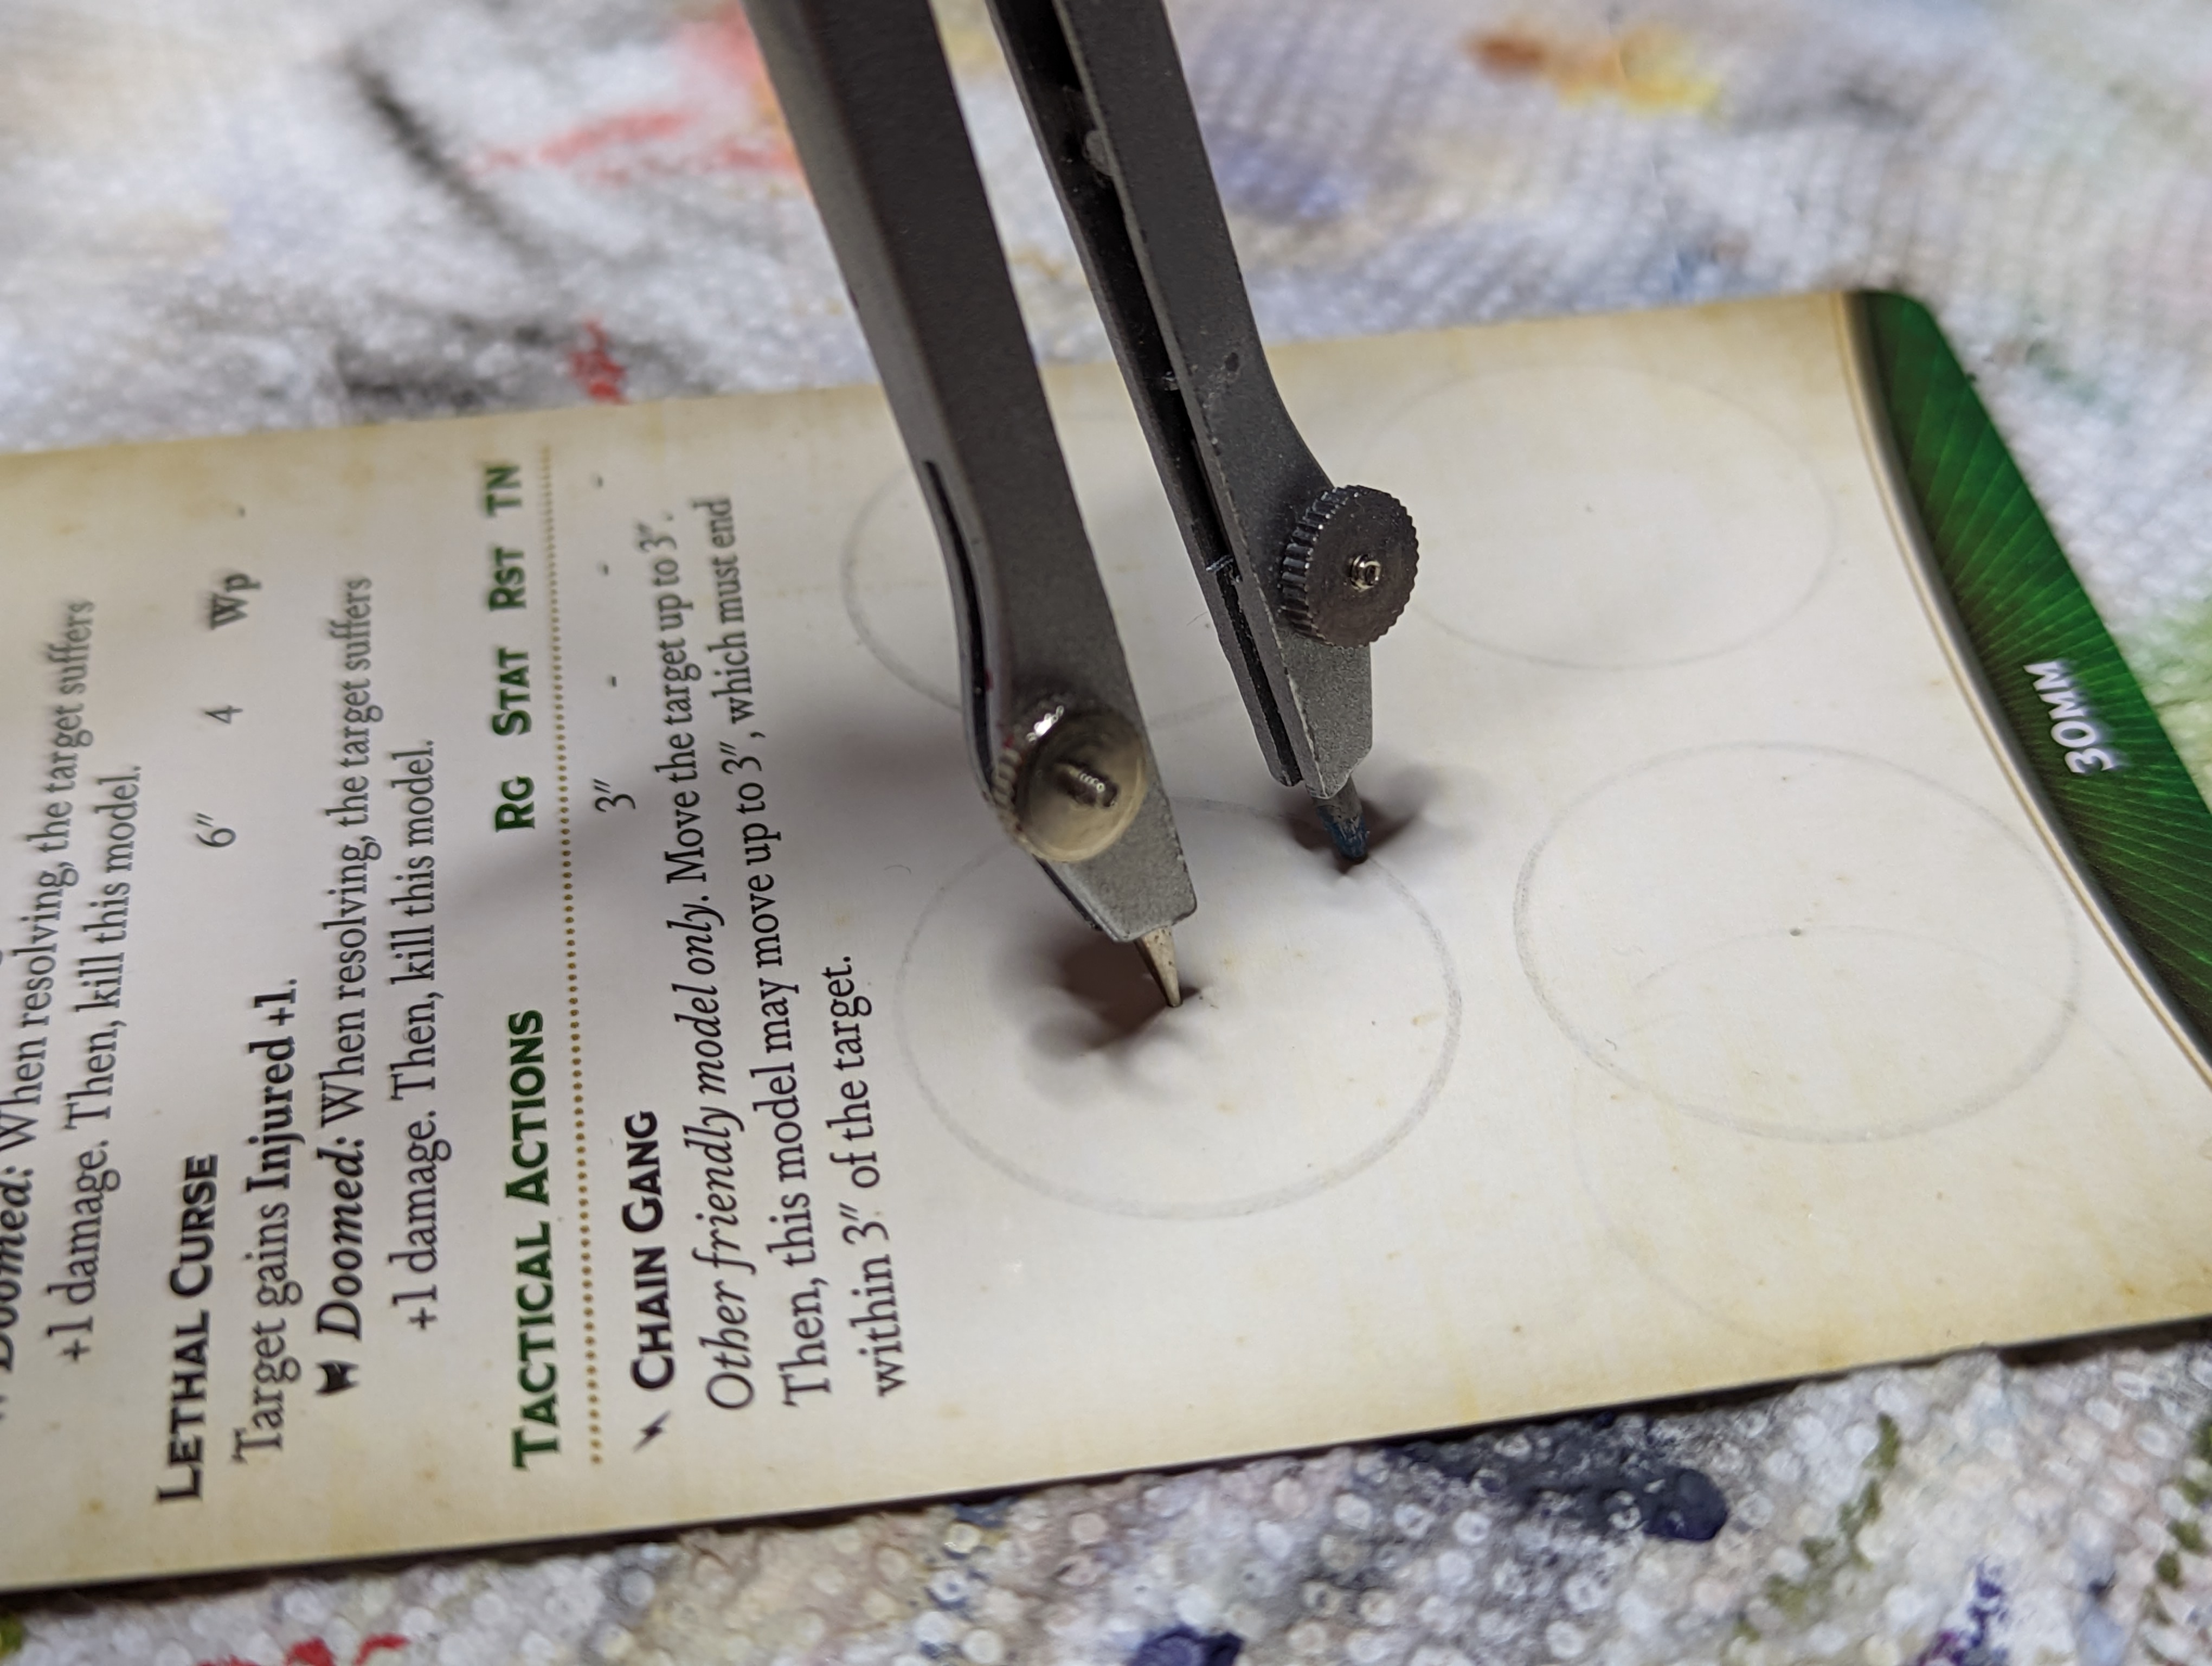
Depending on what im making, I will sometimes use a bit of polystyrene or card to fill the lip and bring the base flush with the edge. Here, I am actually just using I piece of an old unit card to serve as a guide for the proper size I need the base to be.
I used a compass to cut out the right size circle, and then used stirrer sticks, cut in an offset pattern, to make a floor pattern.
I later realizes that I made my Colette bases so long ago that I actually didnt use this method, I actually scored lines into some material to make the wood pattern. But it kinda looked terrible so im going to stick to the new way.
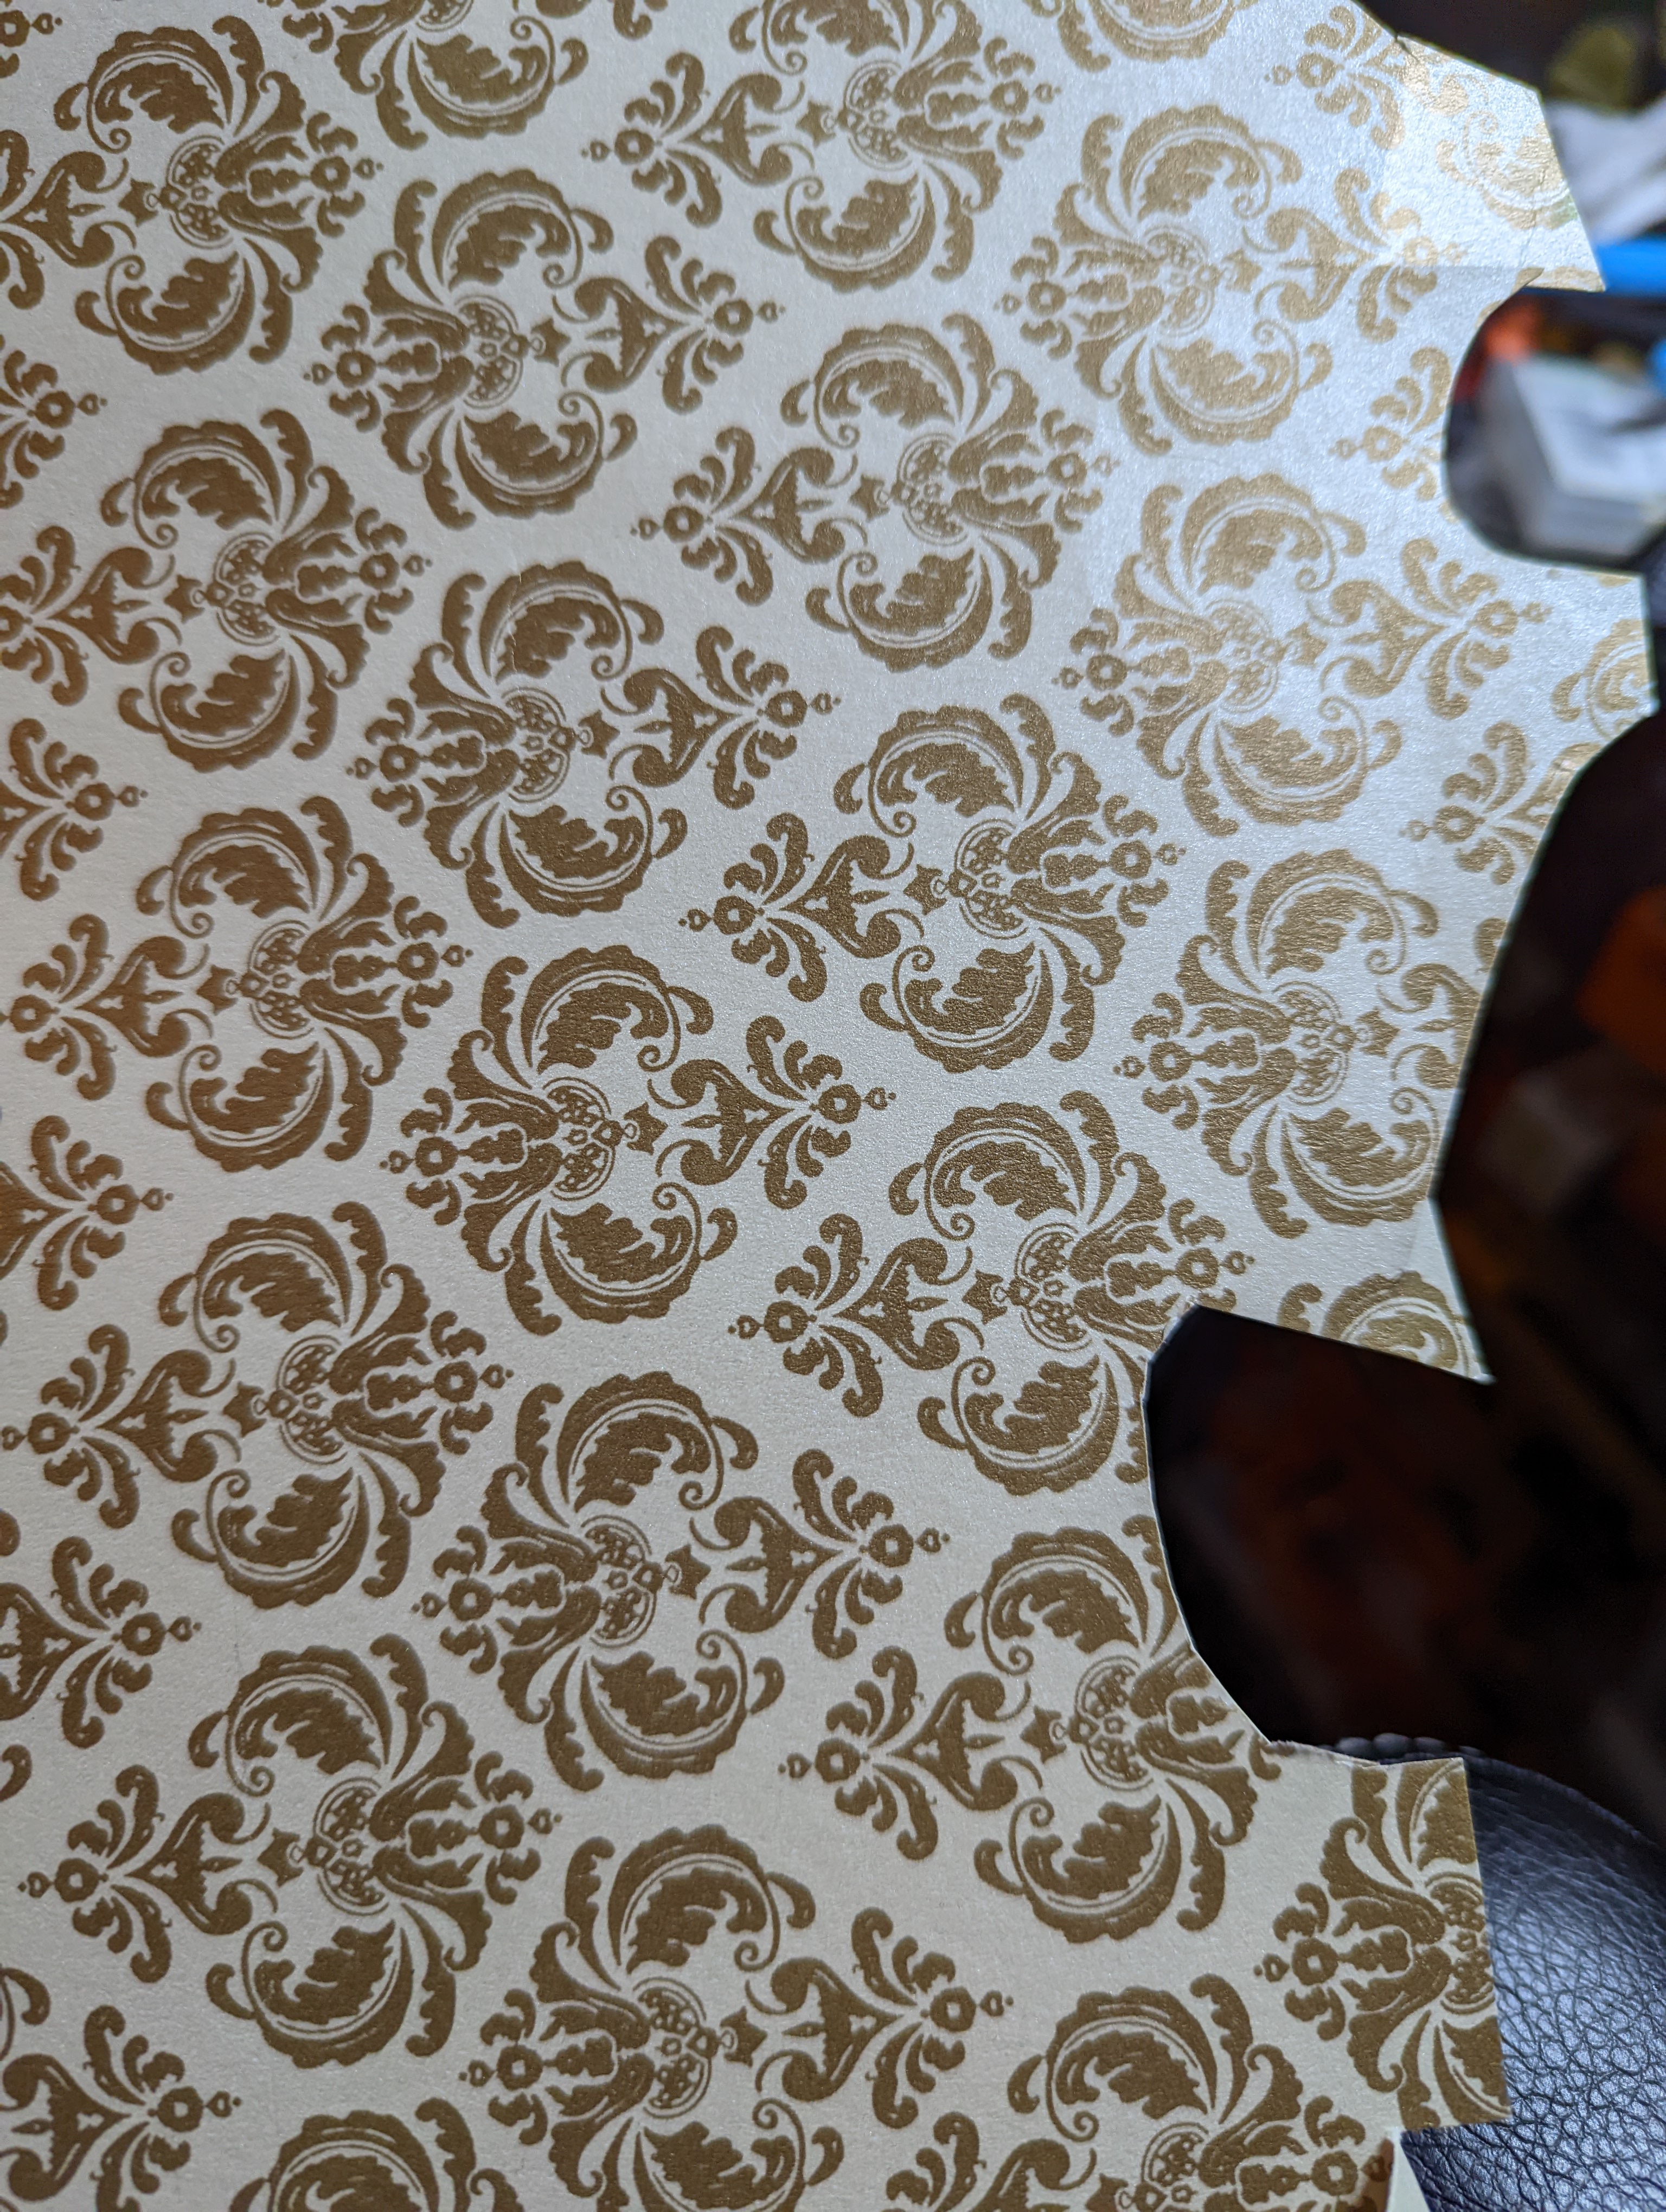
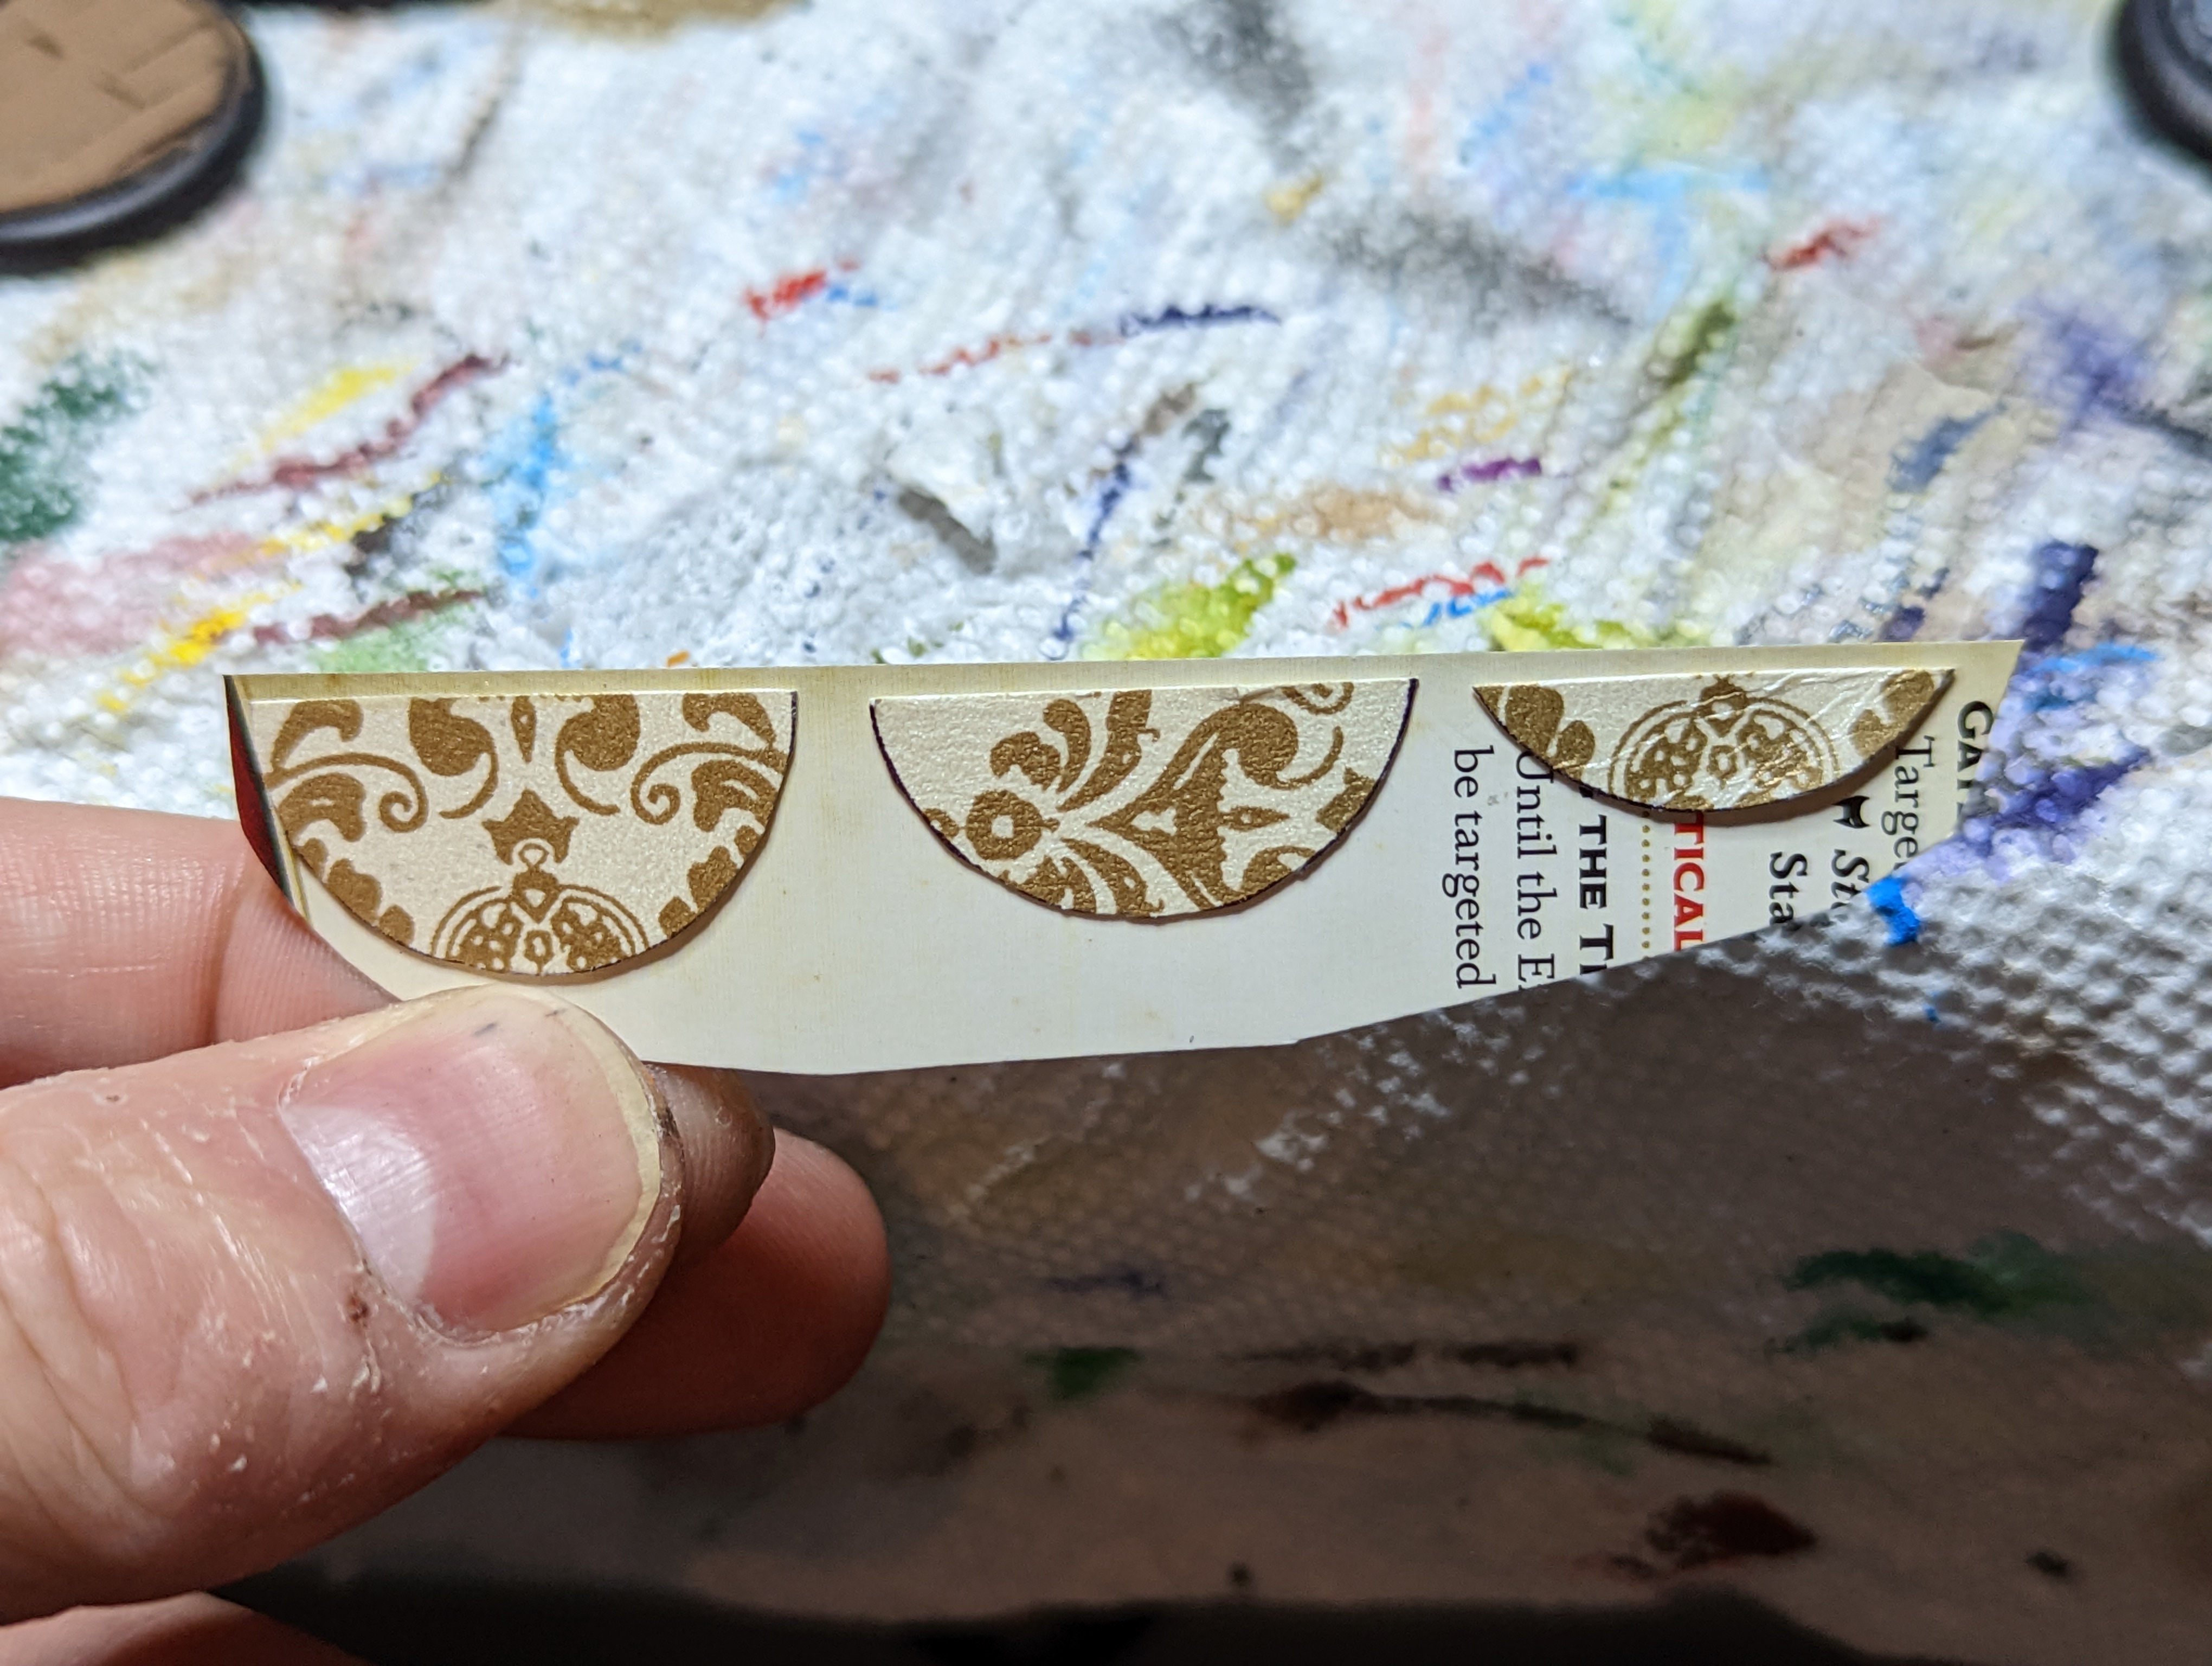
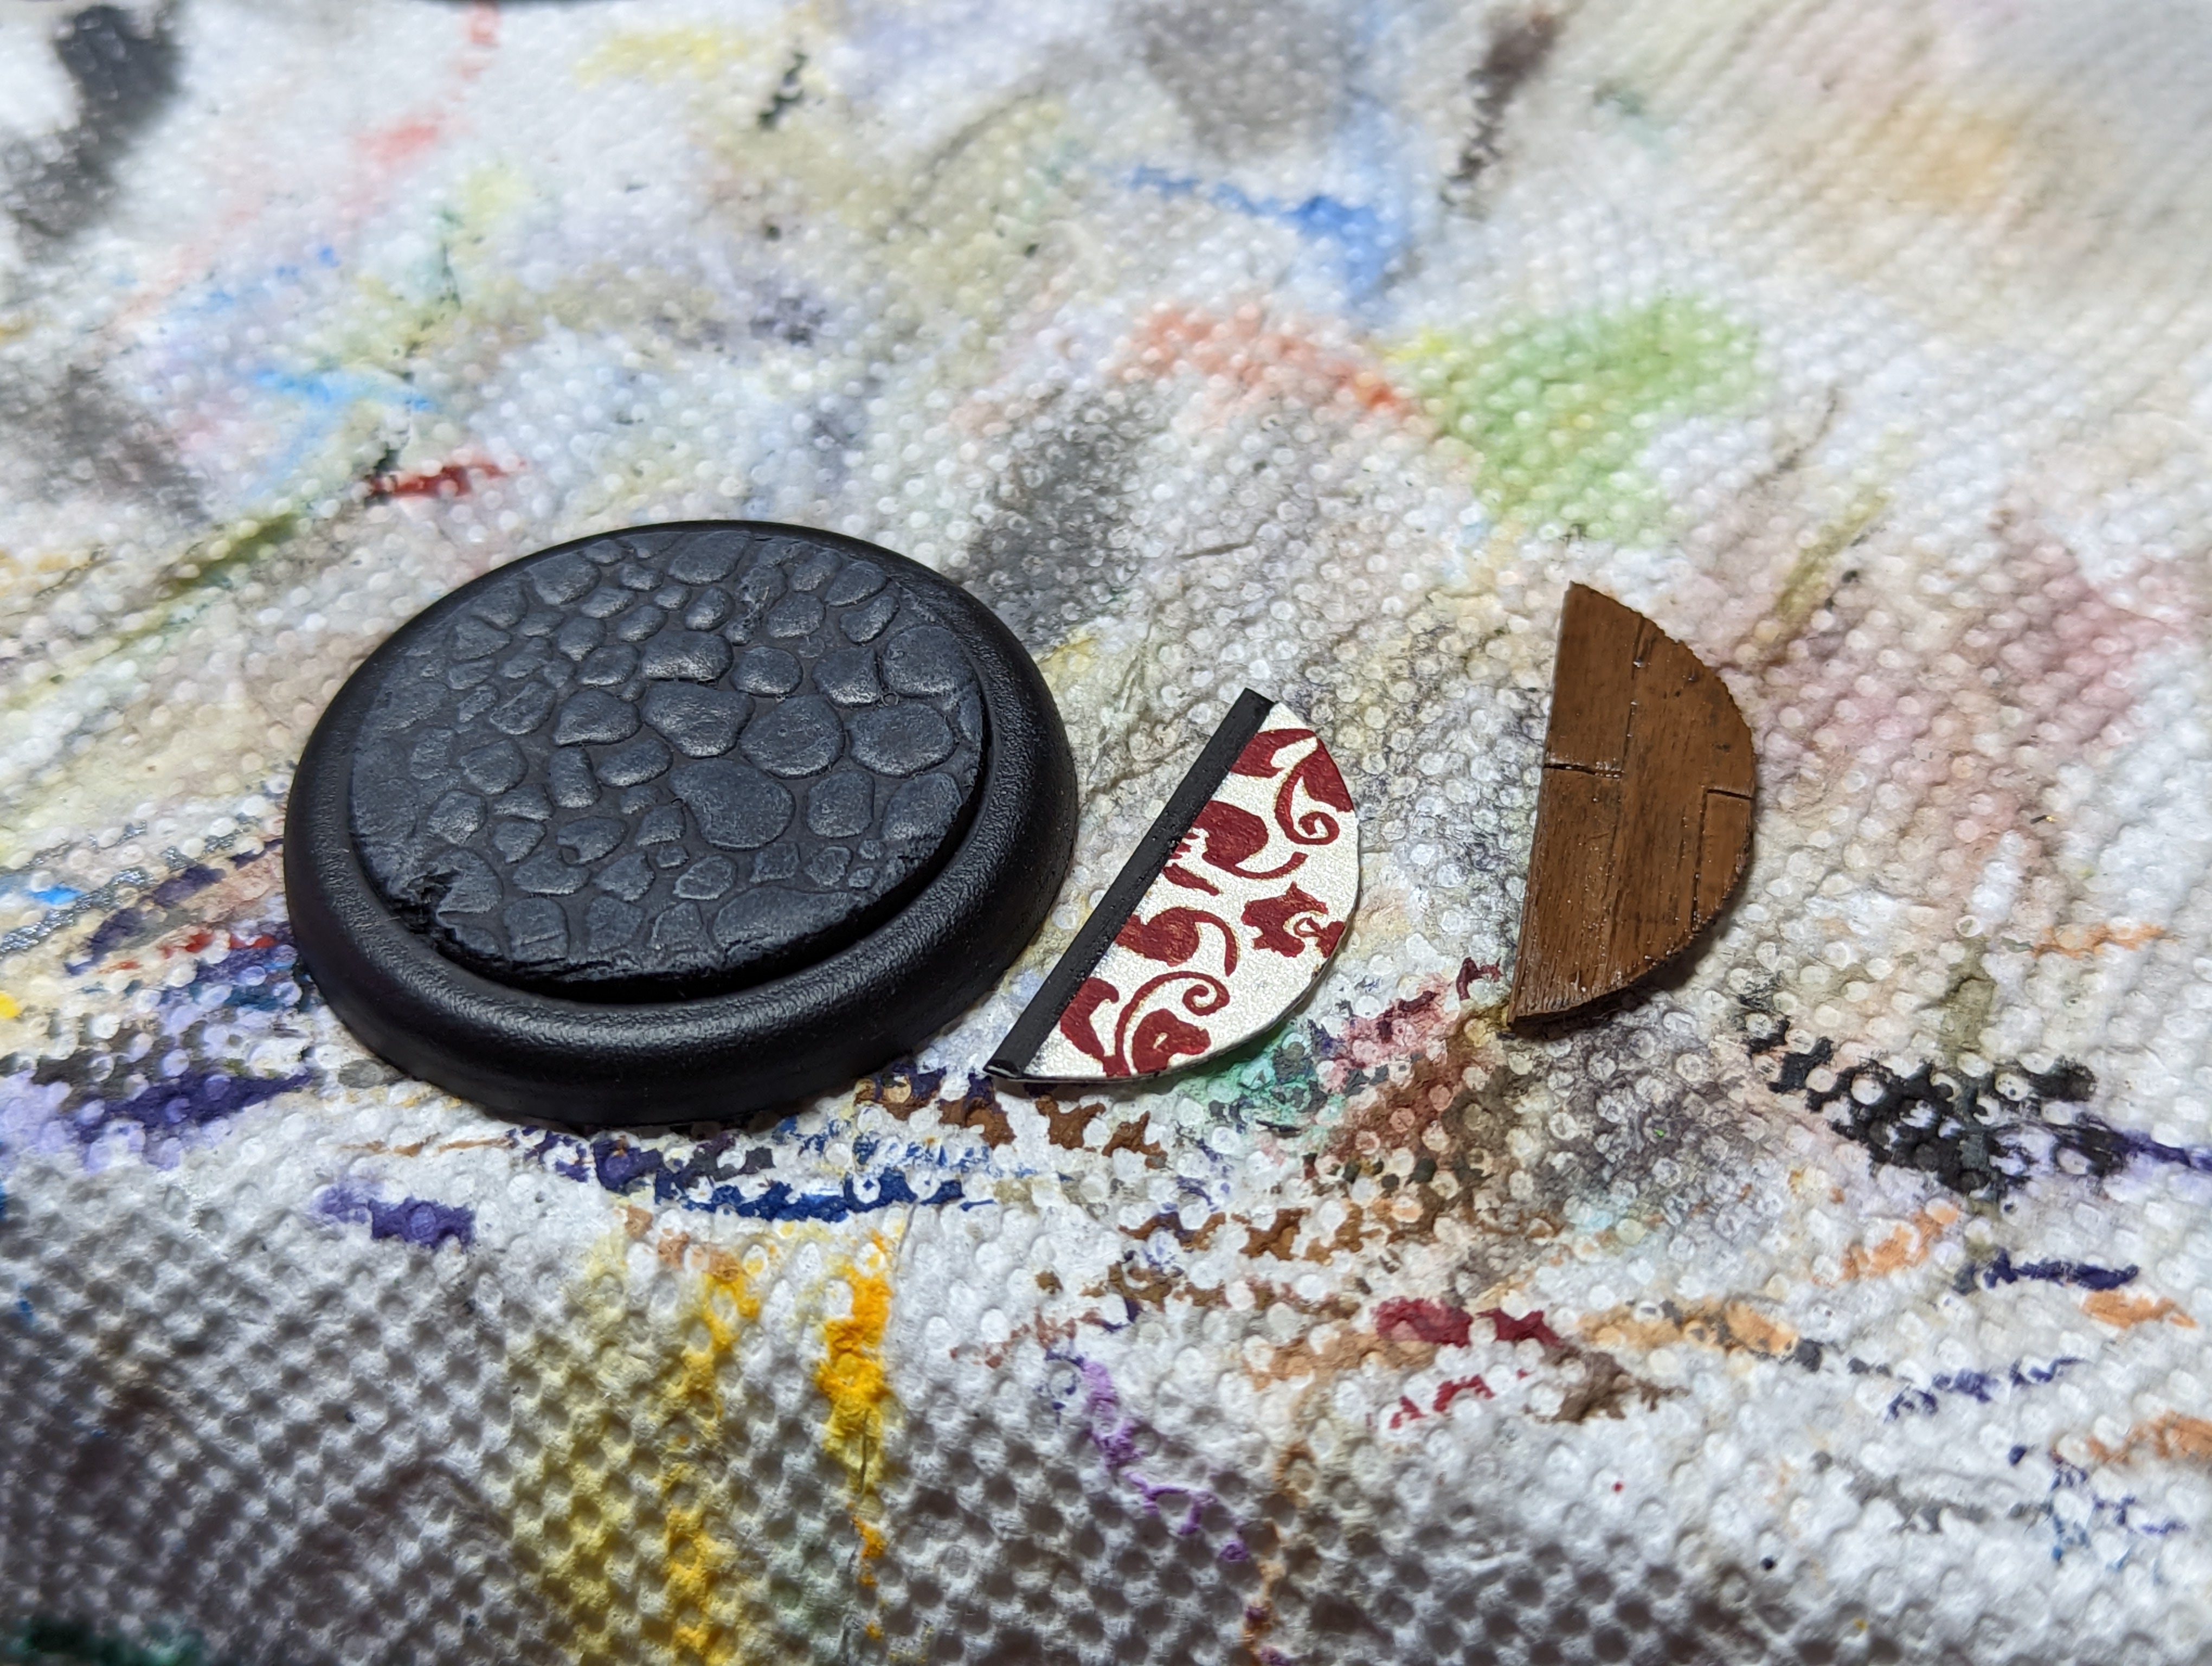
When I had decided to try to make carpet, I considered a bunch of different techniques. The Star Theater is one of the more popular and fancy establishments in Malifaux, so I wanted the carpet to be fittingly gaudy looking. I found some decorative paper in a craft store, but it had gold design which I though was too gaudy. So I just painted over it.
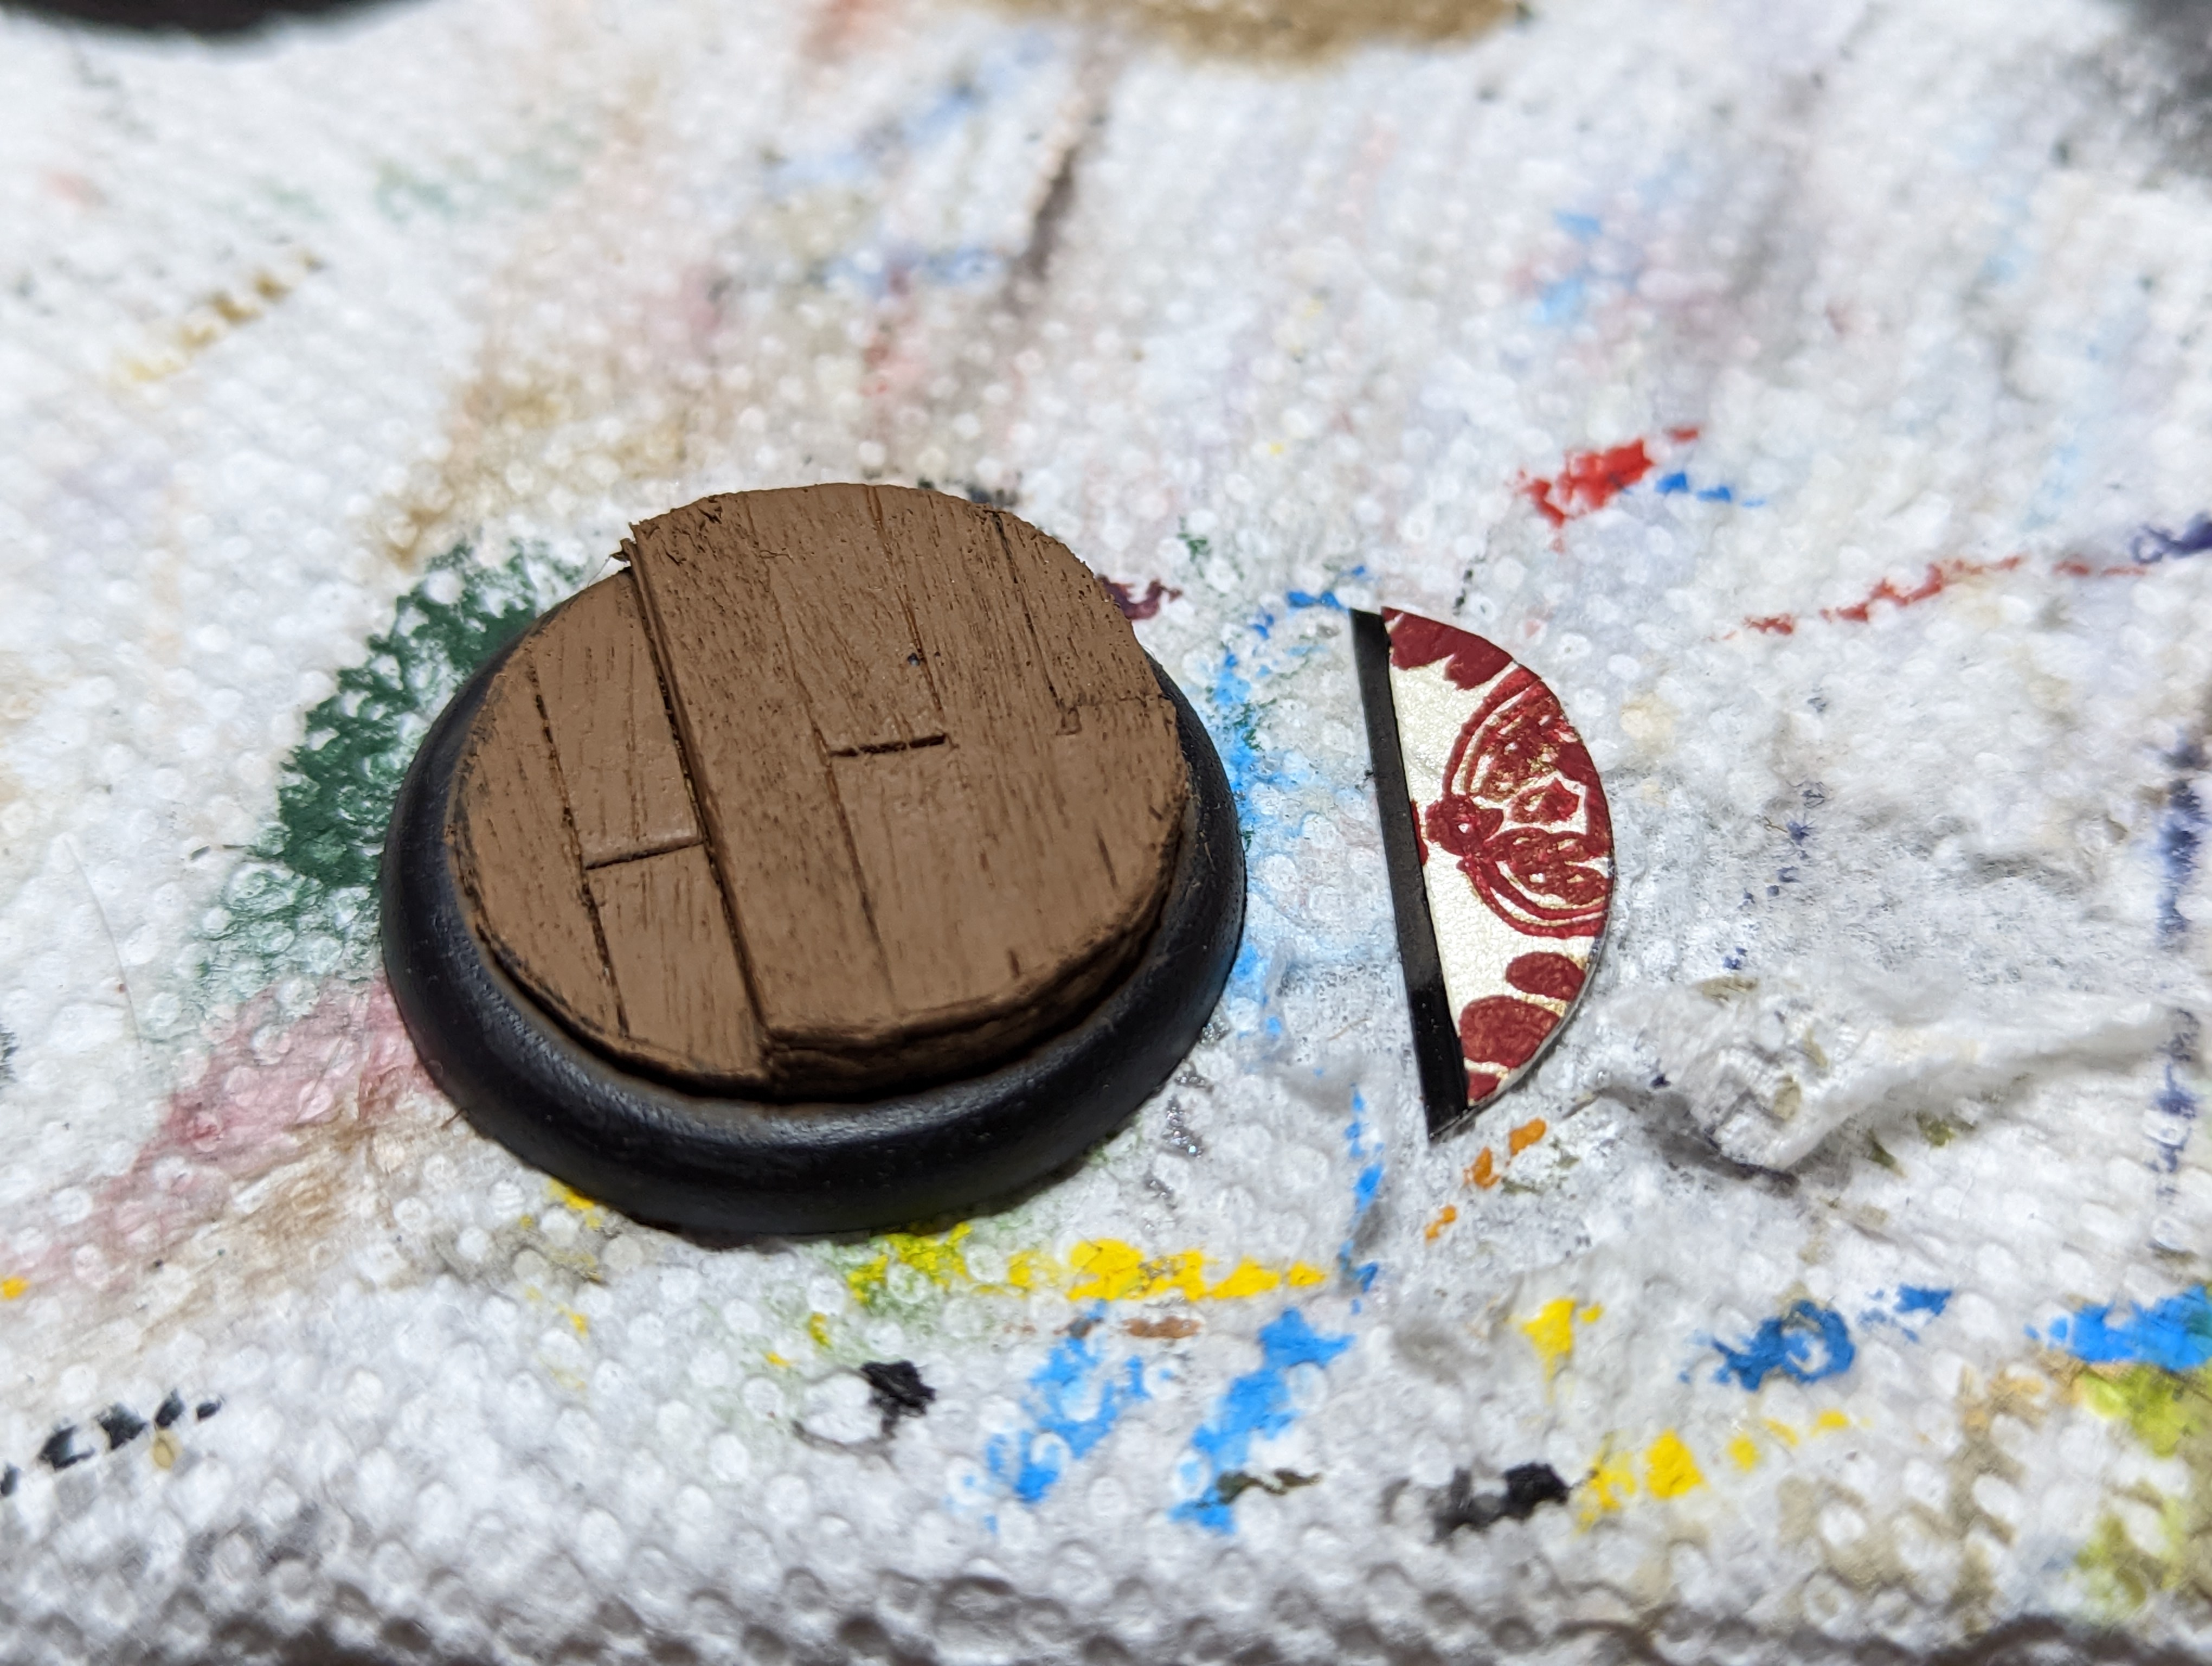
I cut the paper into semi circles, and then glued them to pieces of card with a little overhand to act as edging for the carpet. I them painted over the gold with some red paint, and painted the trim black. Then I just slapped it on the bases and it was good to go.

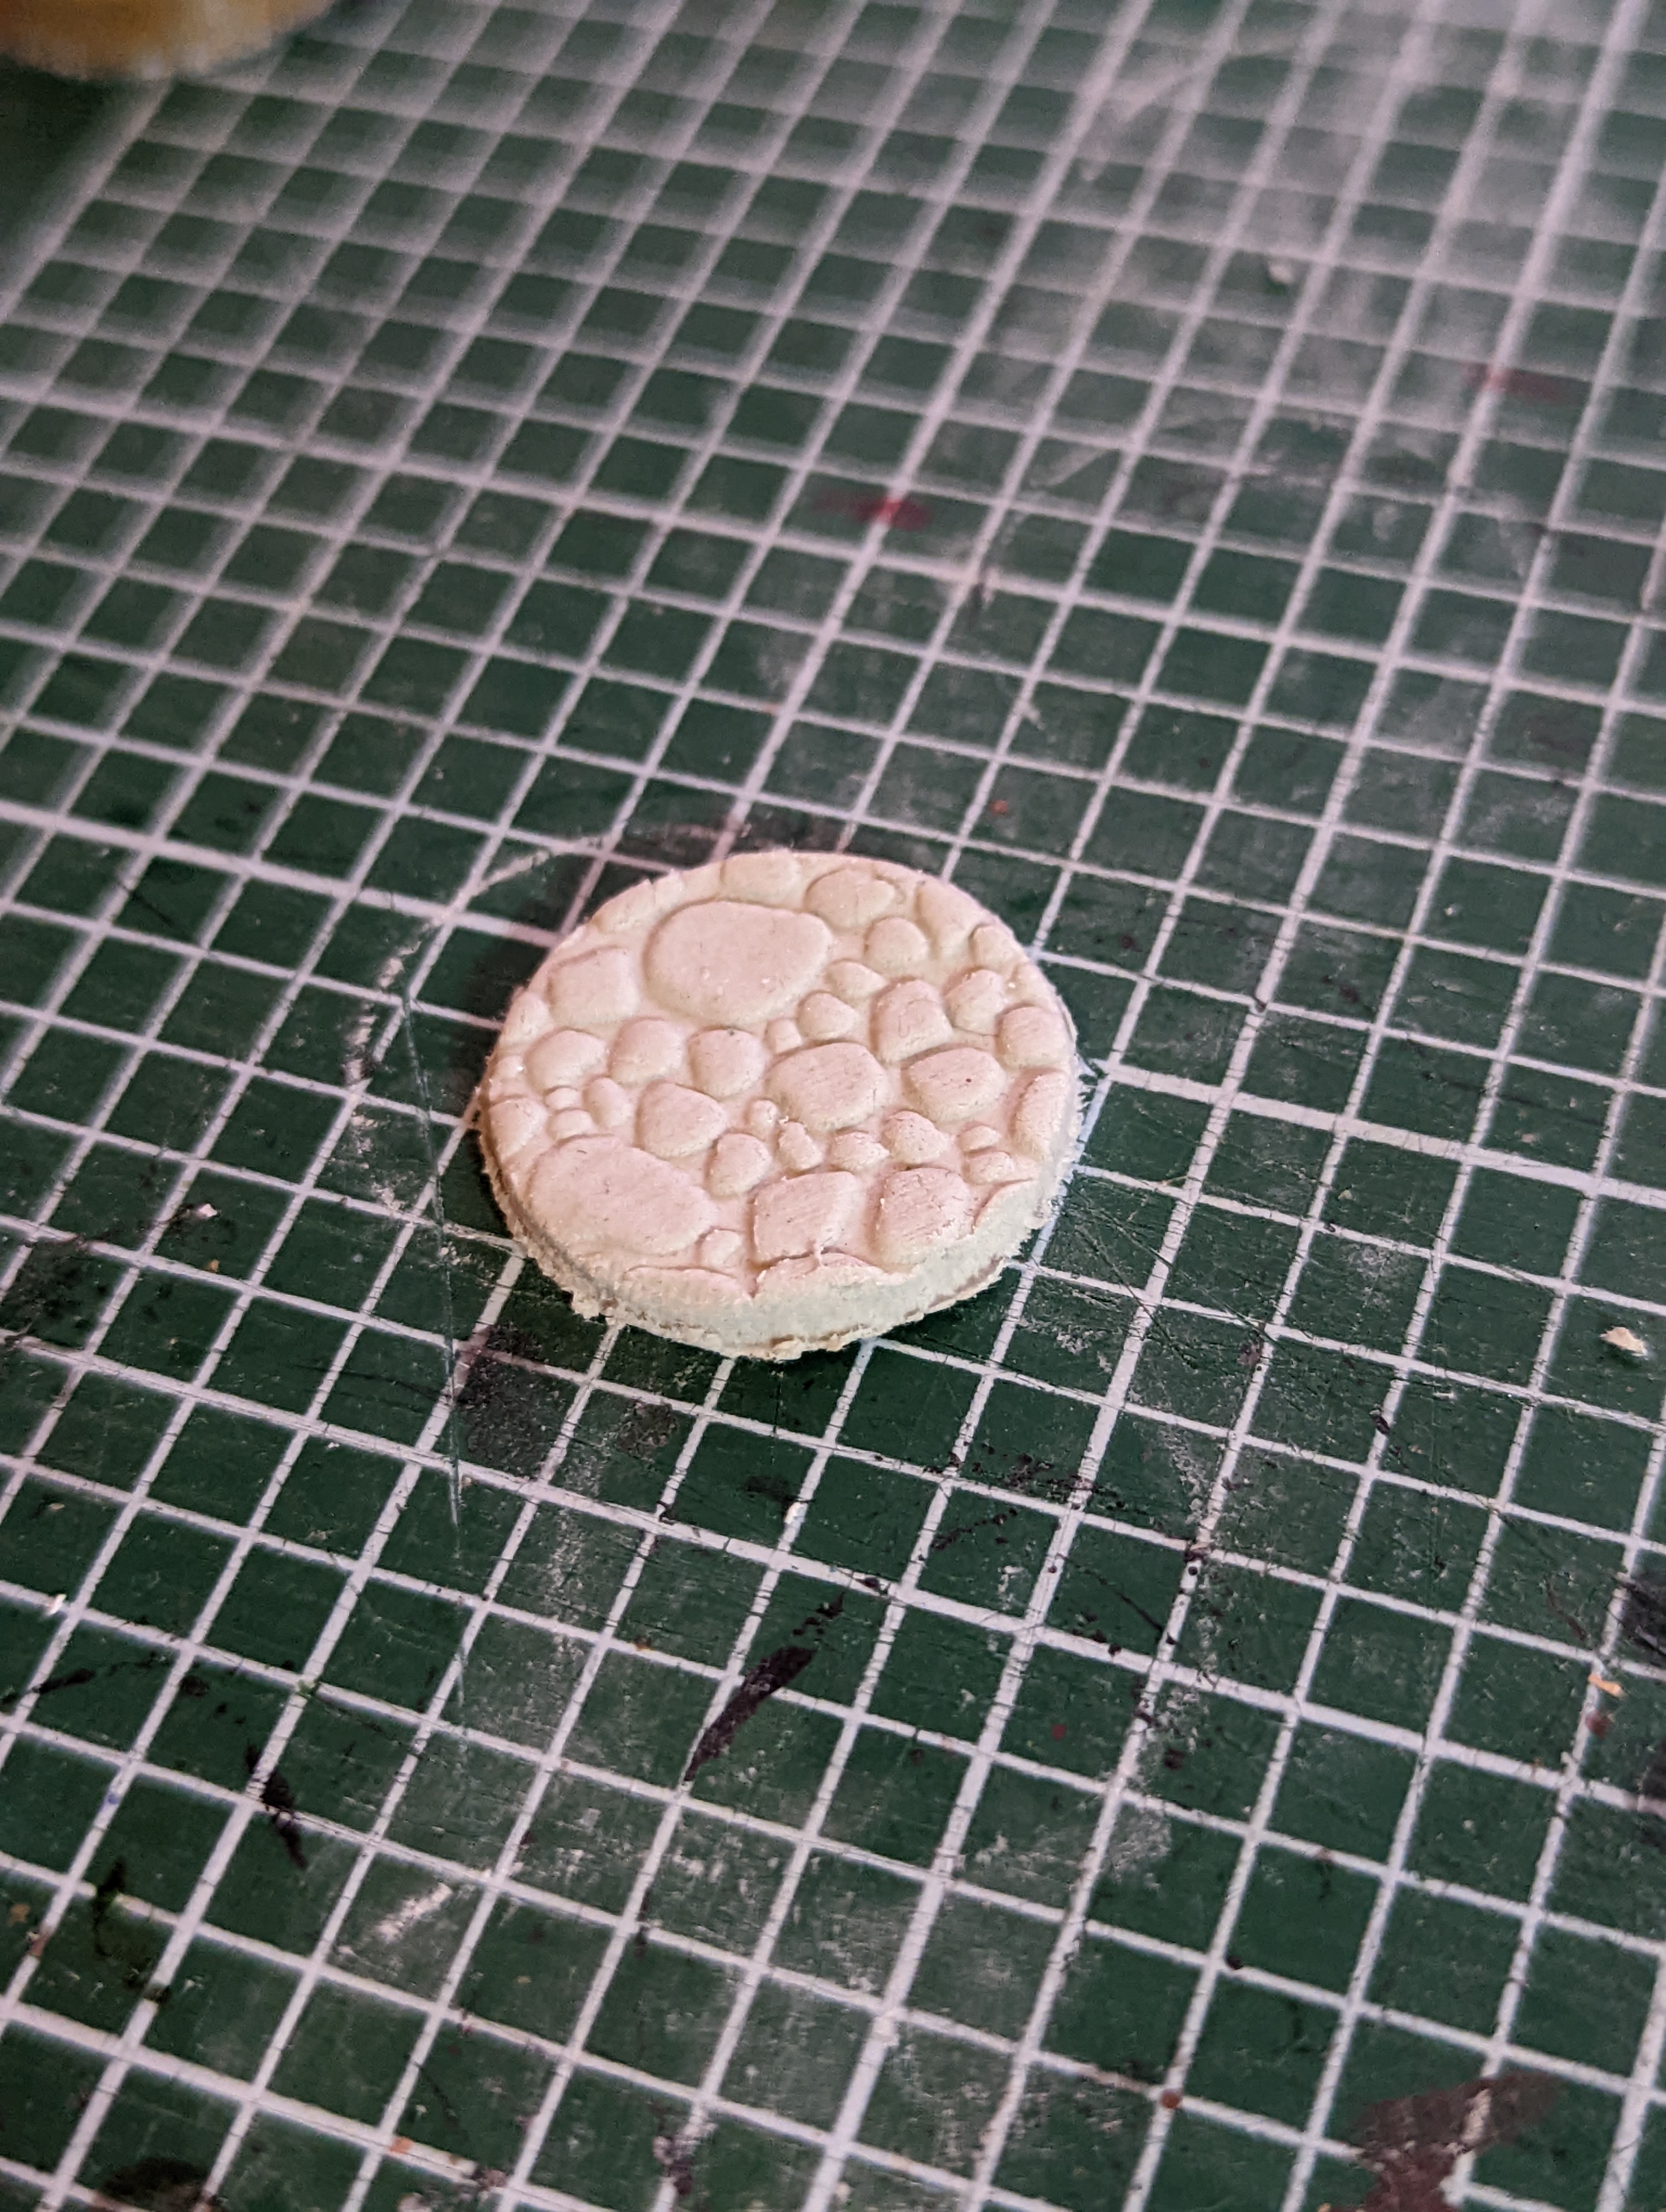

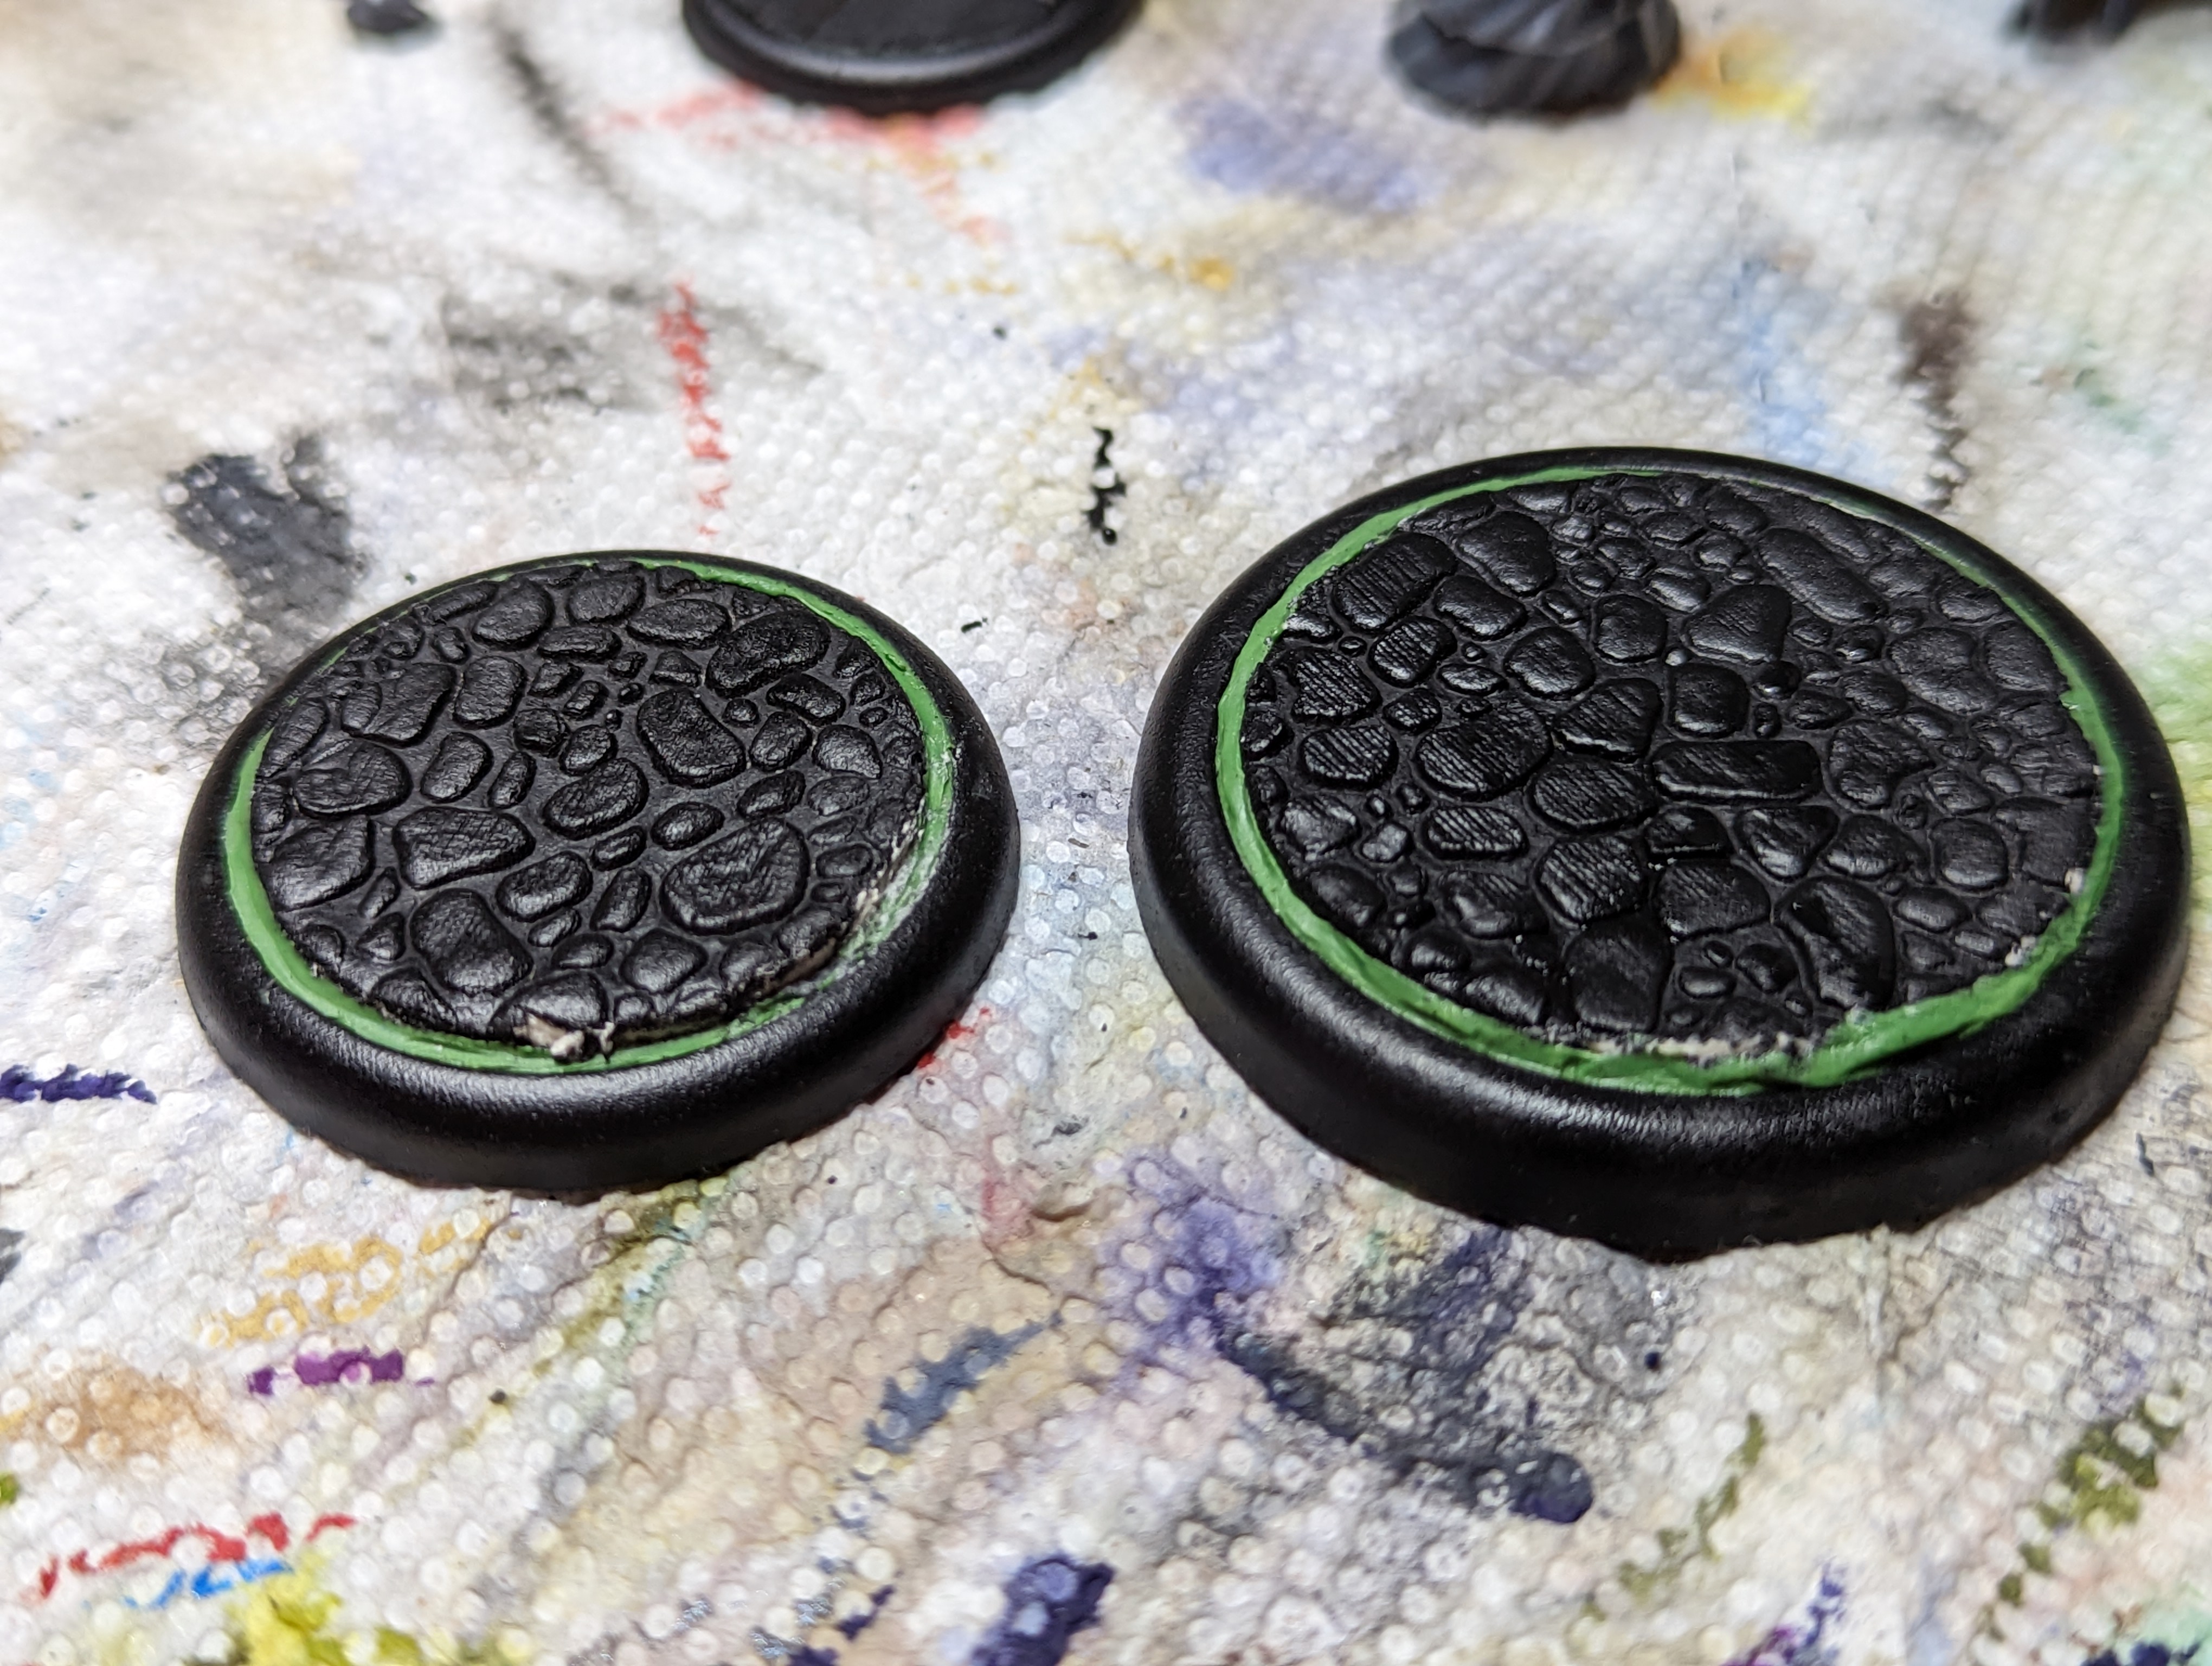
For the Pandora bases, I used a green stuff world roller to make the pattern out of air drying clay. I 3d printed a little cookie cutter to cut the clay into the correct size, but I must have used the wrong ones cuz they ended up a little small. I put in some green stuff around the edges to fill the gaps. I know Gerry will be sad, but Milliput is hard to come by in the US so I treat it like the precious substance that it is.
I then primed based with a medium to dark gray, and drybrushed with a blueish gray.
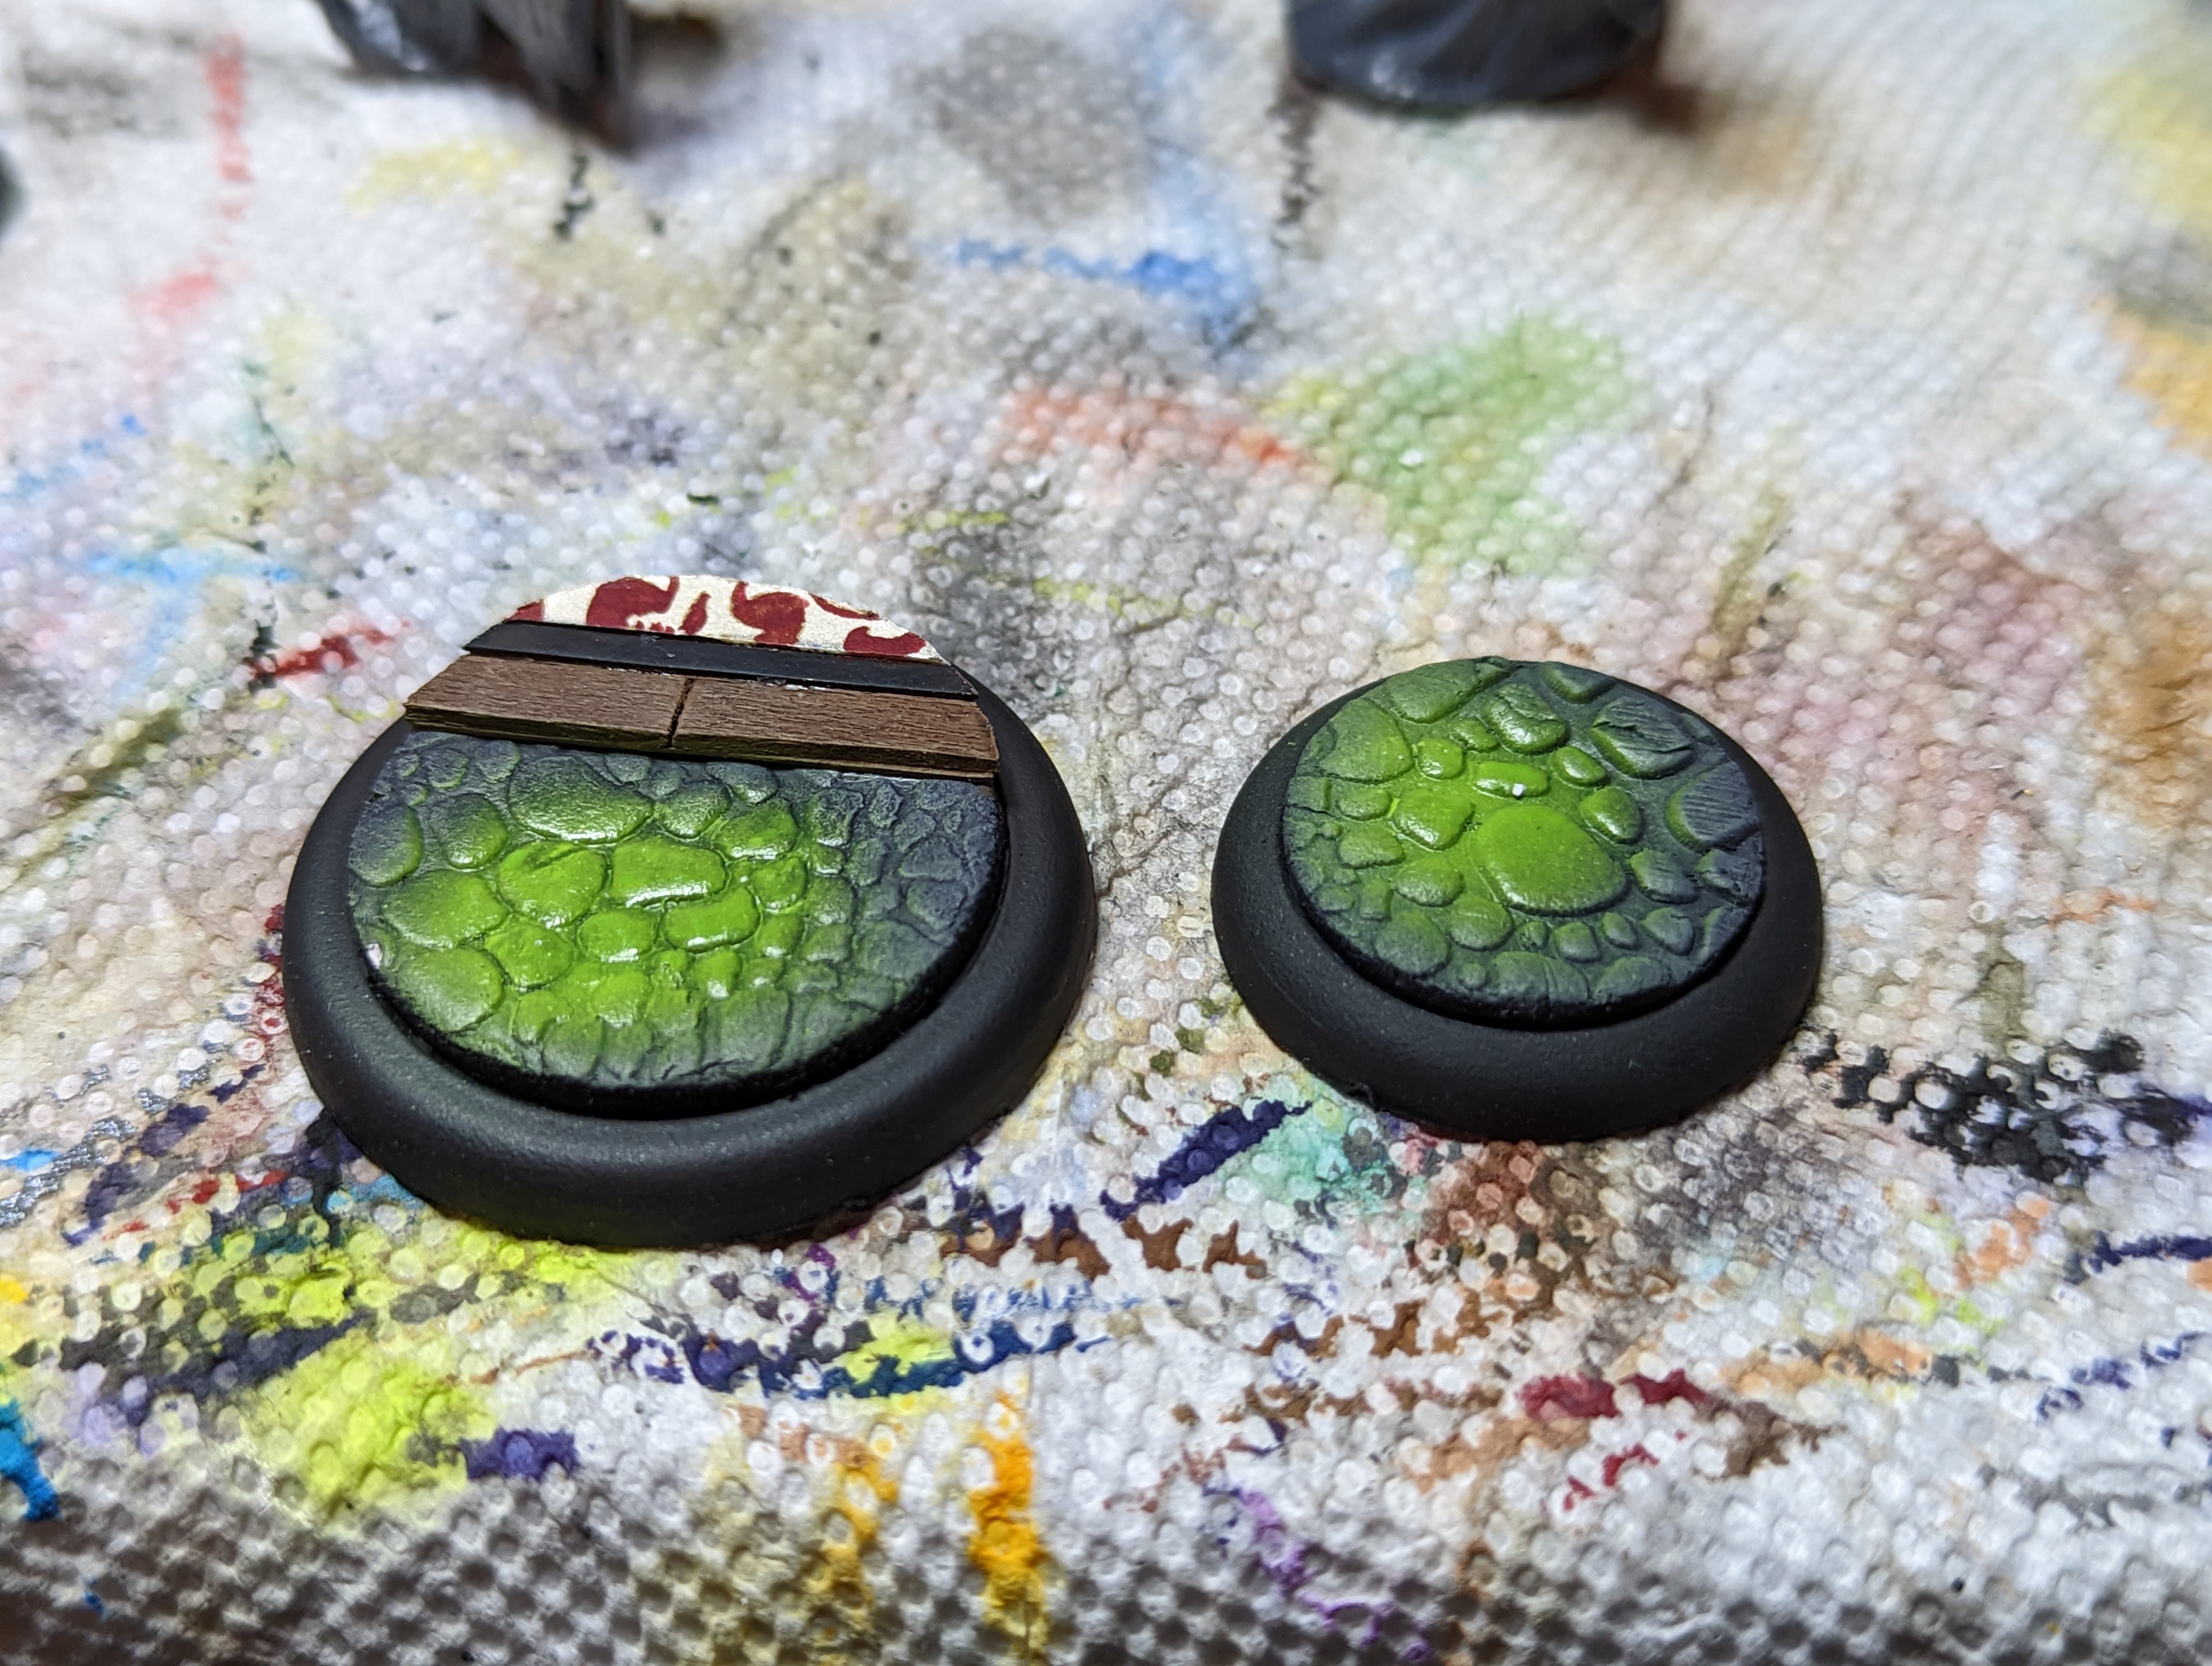
For the hybrid base, I just did the same processes as above, but on a bigger base. I decided to make it look like a sidewalk with a step that leads into the theater. Once I had that all assembled, I used the airbrush to make some green glowy patched, and I had all of the bases done.
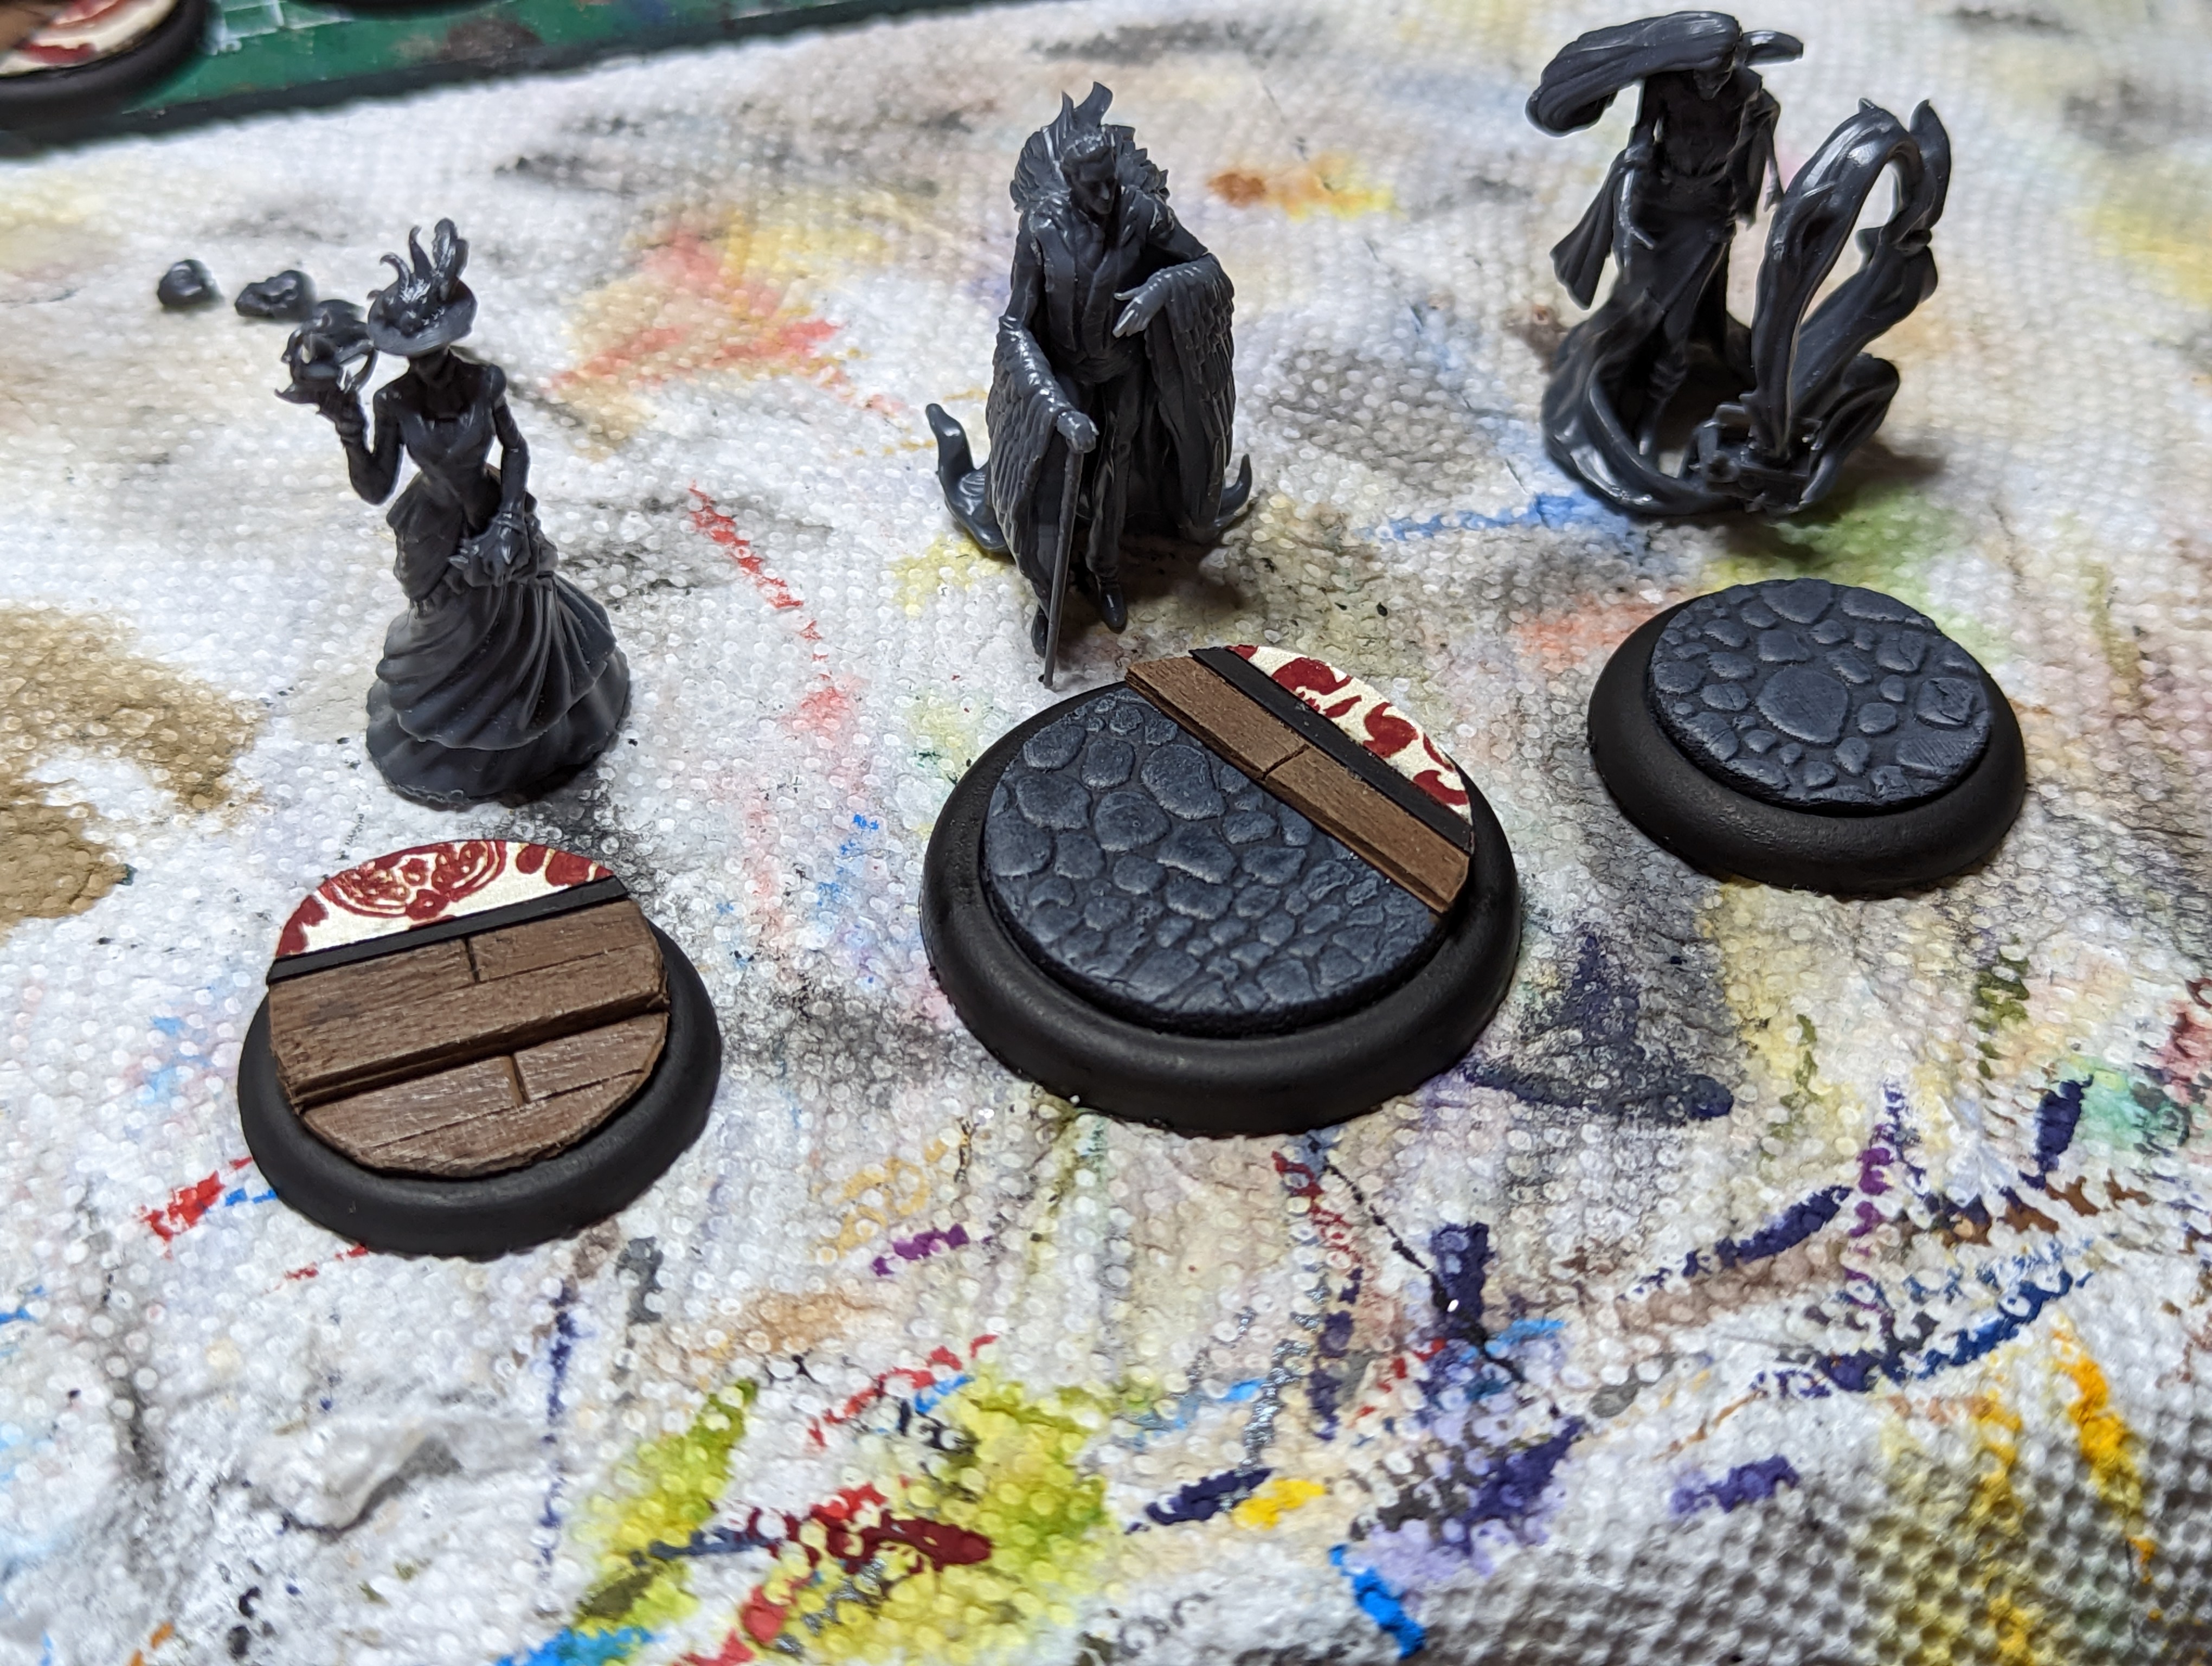
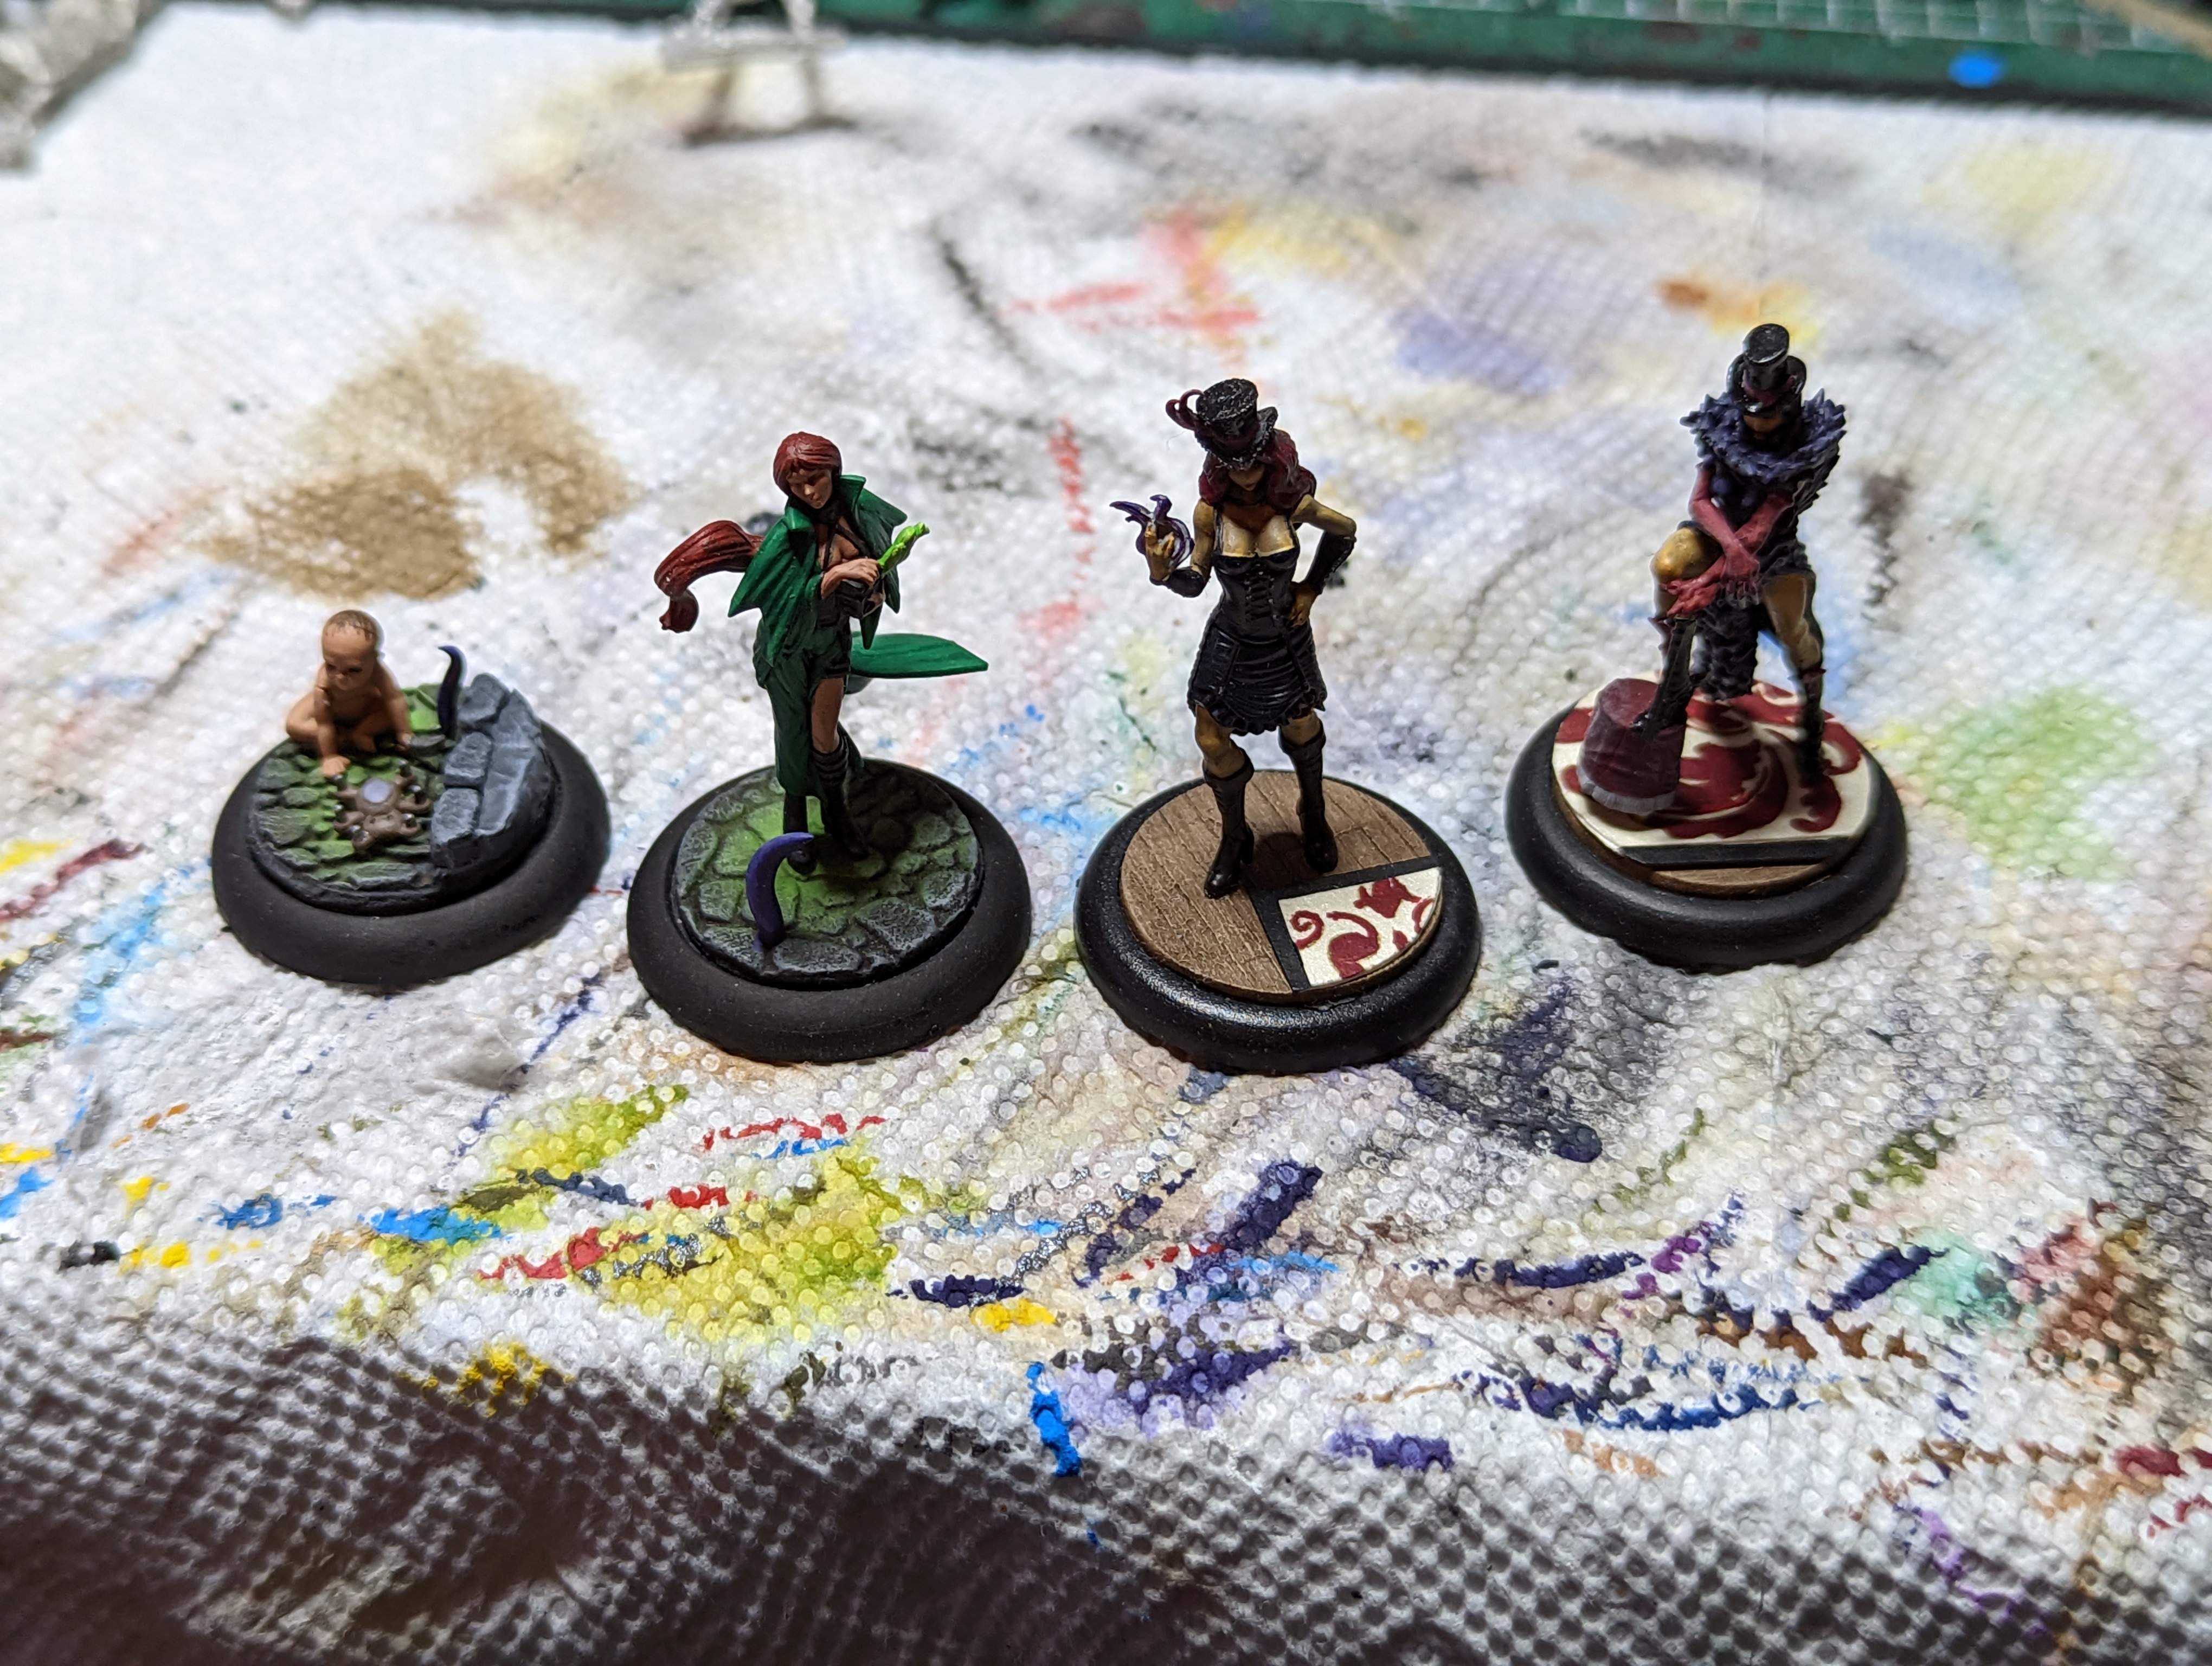
I forgot to take WIP pics of the painting process, but it was a pretty simple paint job. I mostly used dry brushing to highlight, except on Colette who I used layering cuz I wanted to have a bit more control over the shadows and highlights on her dress.
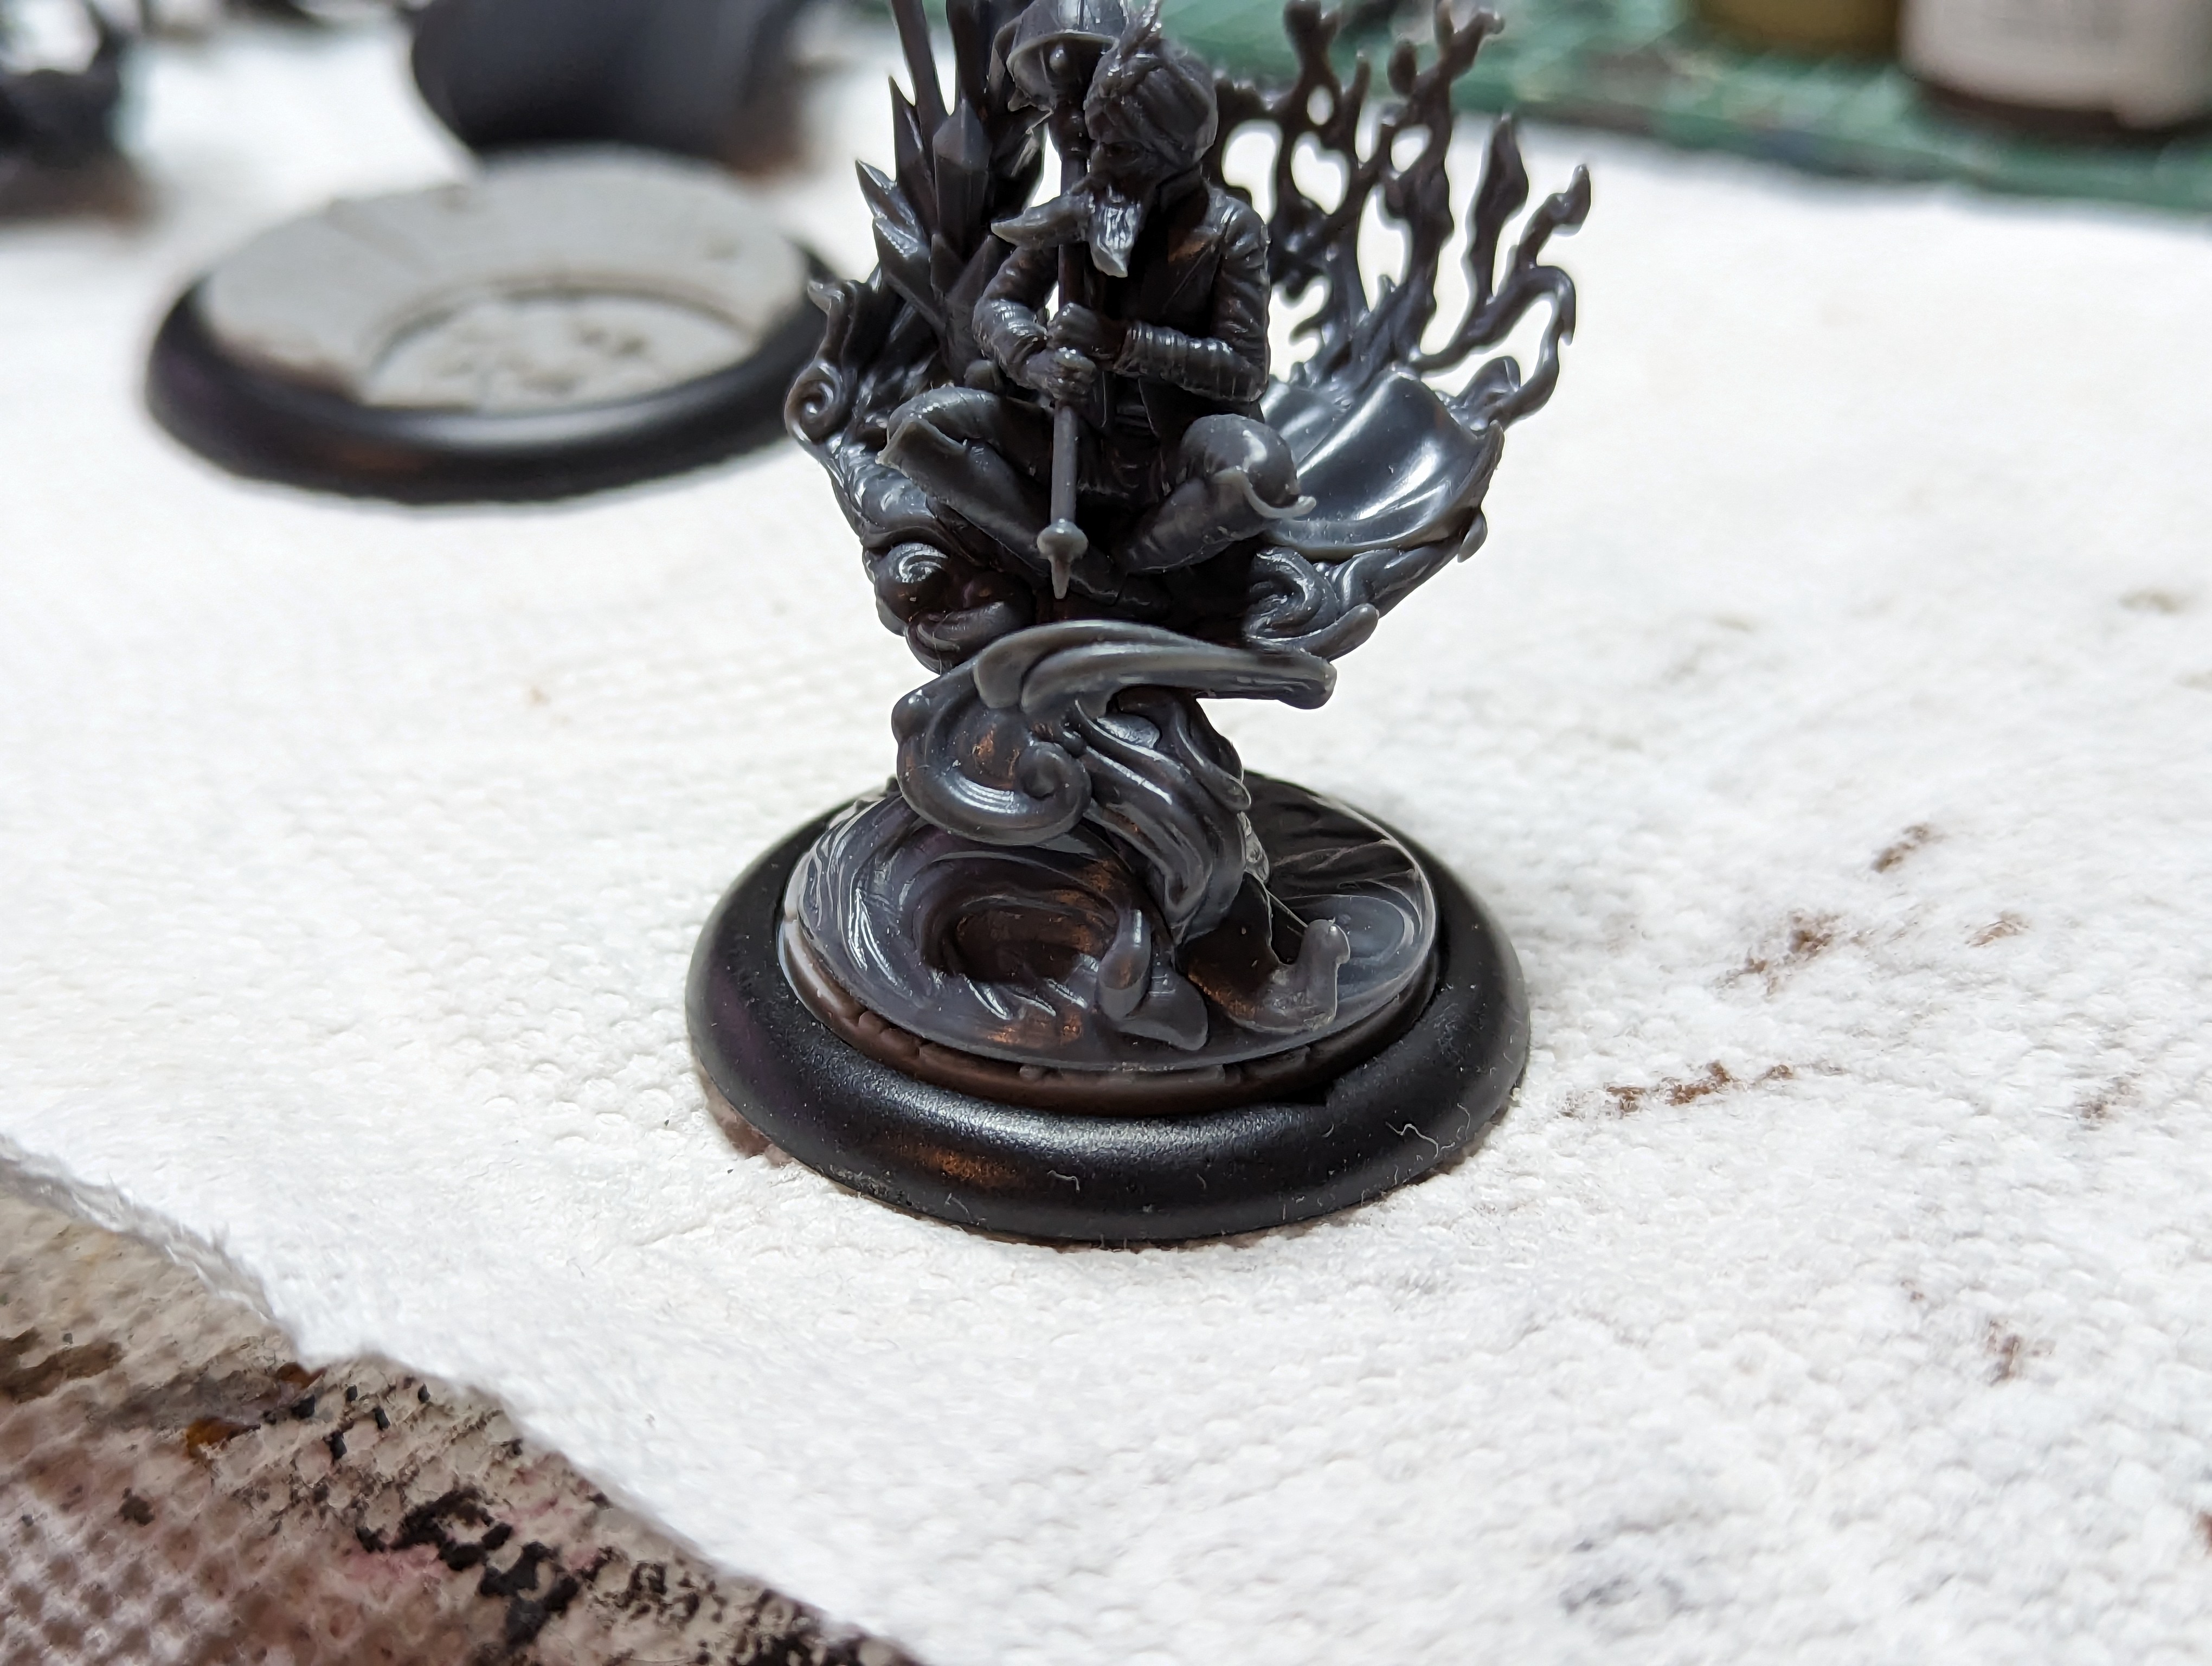
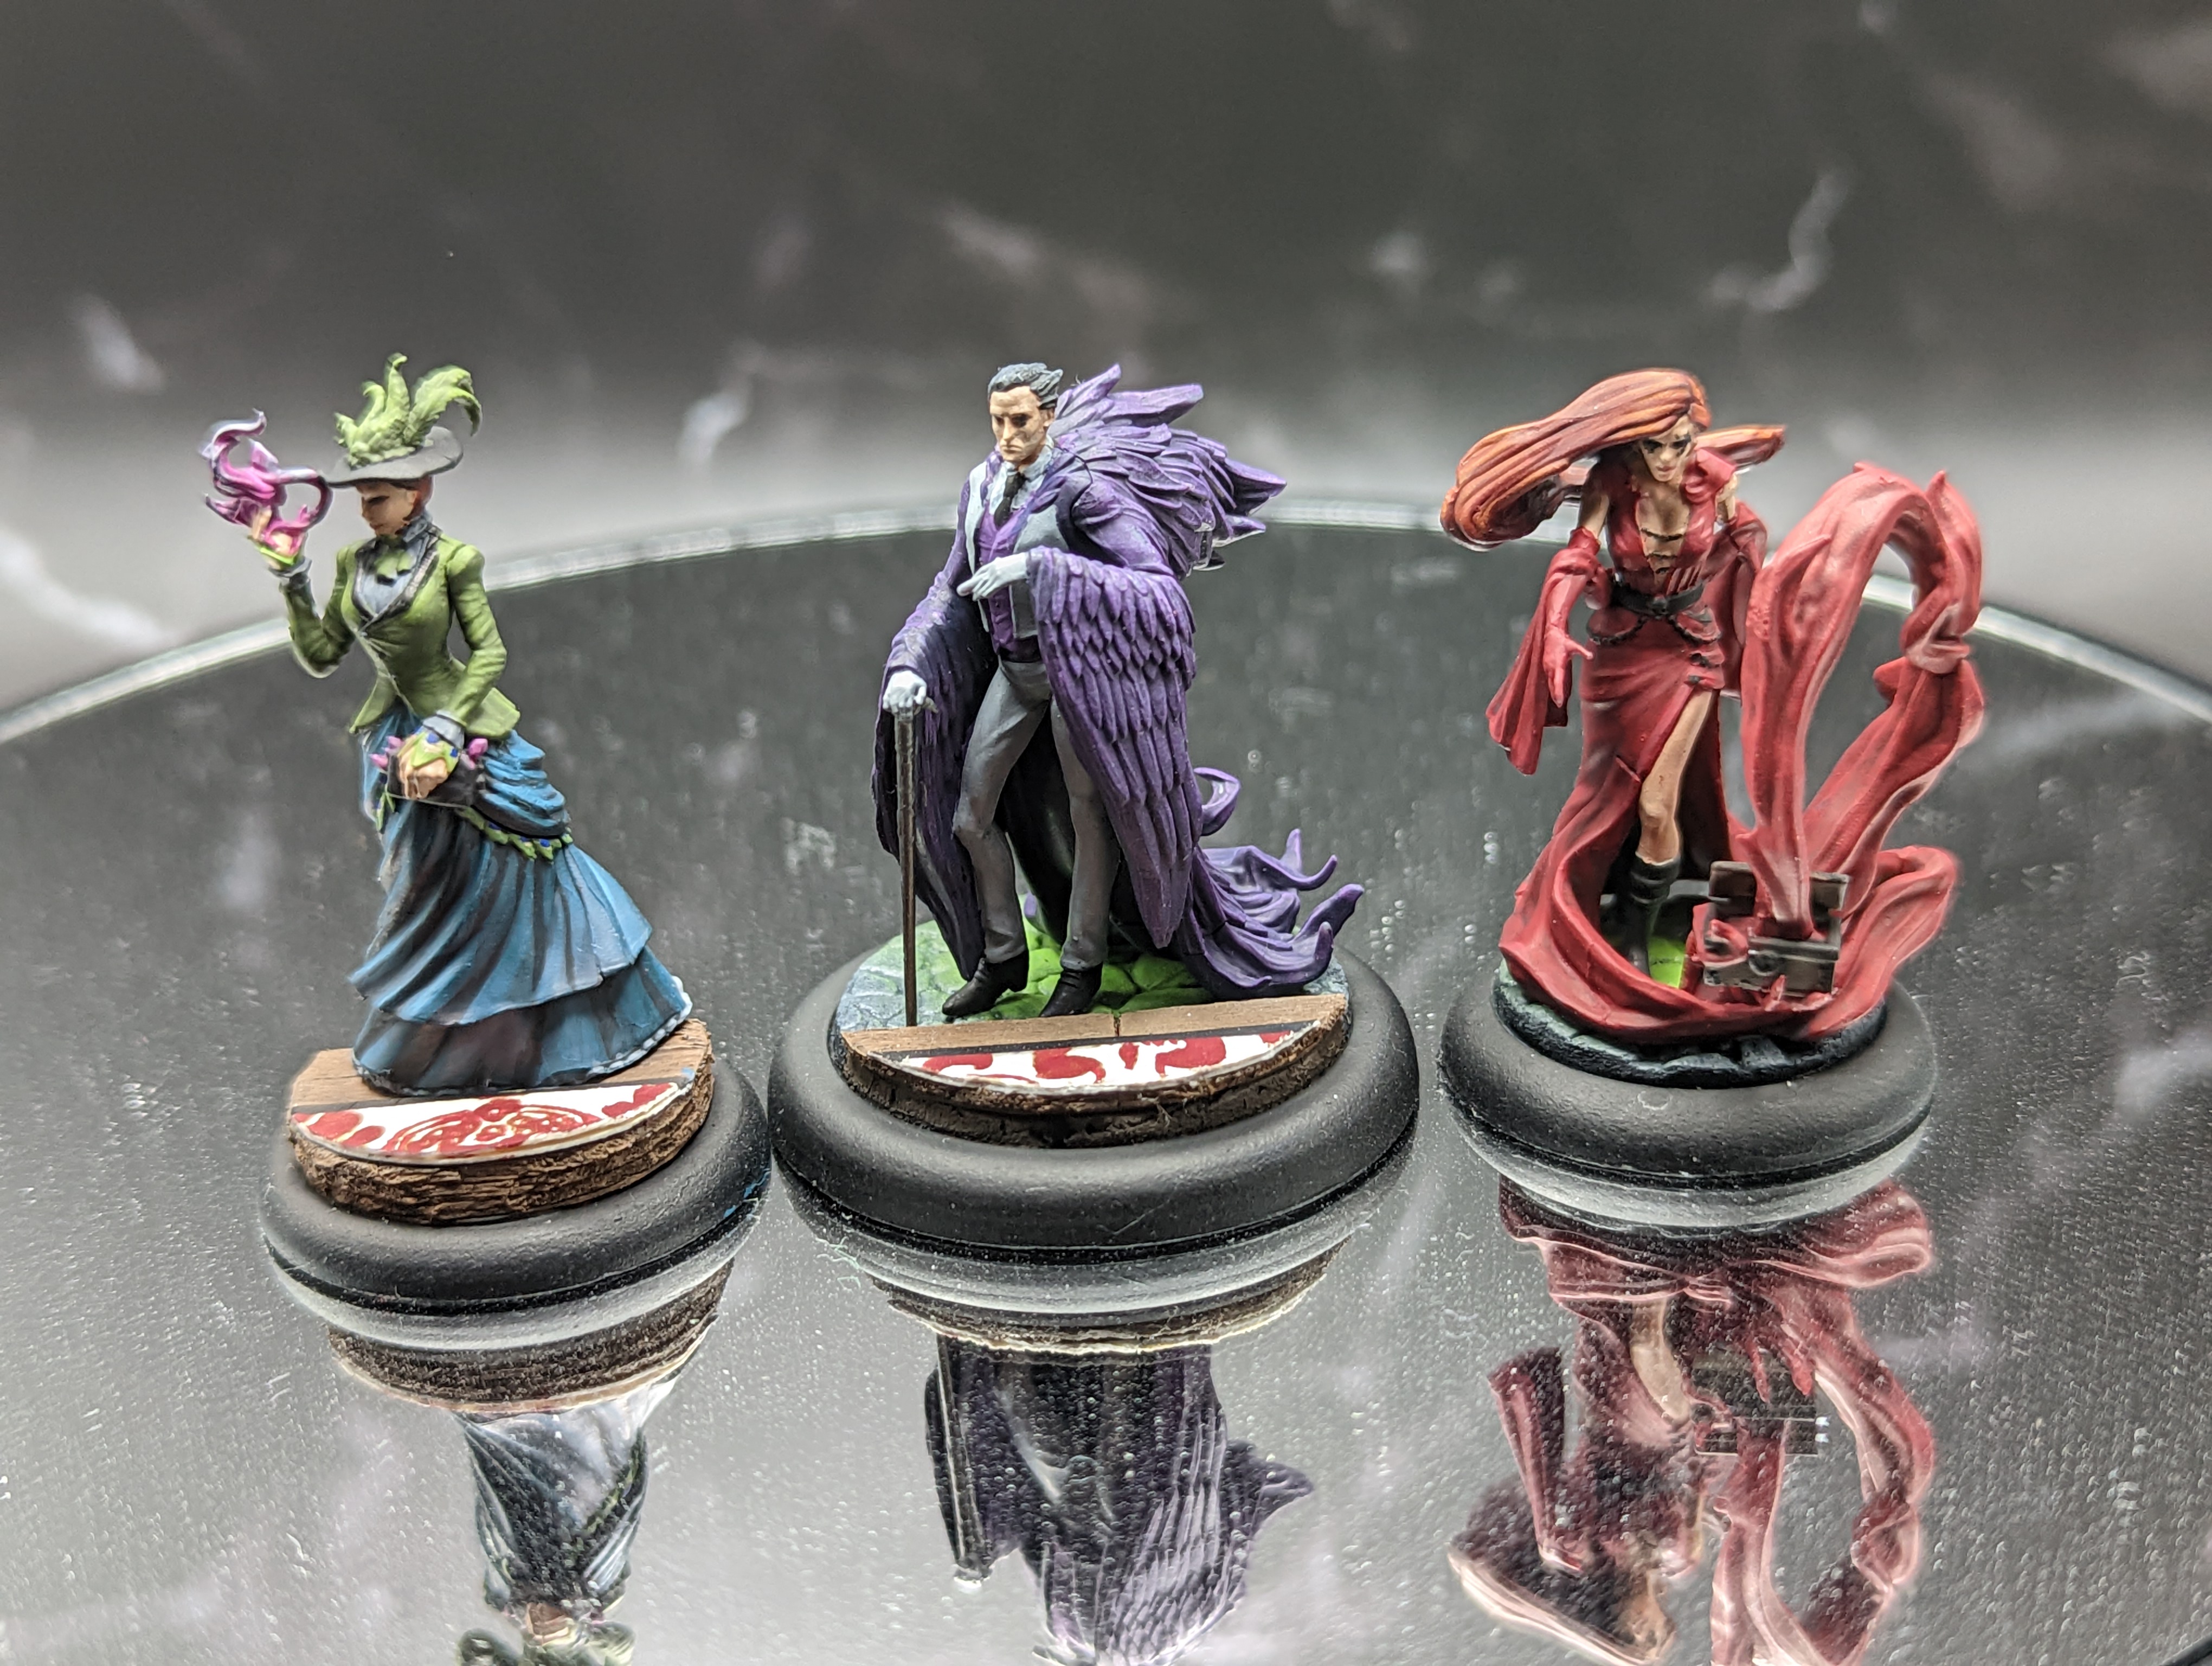
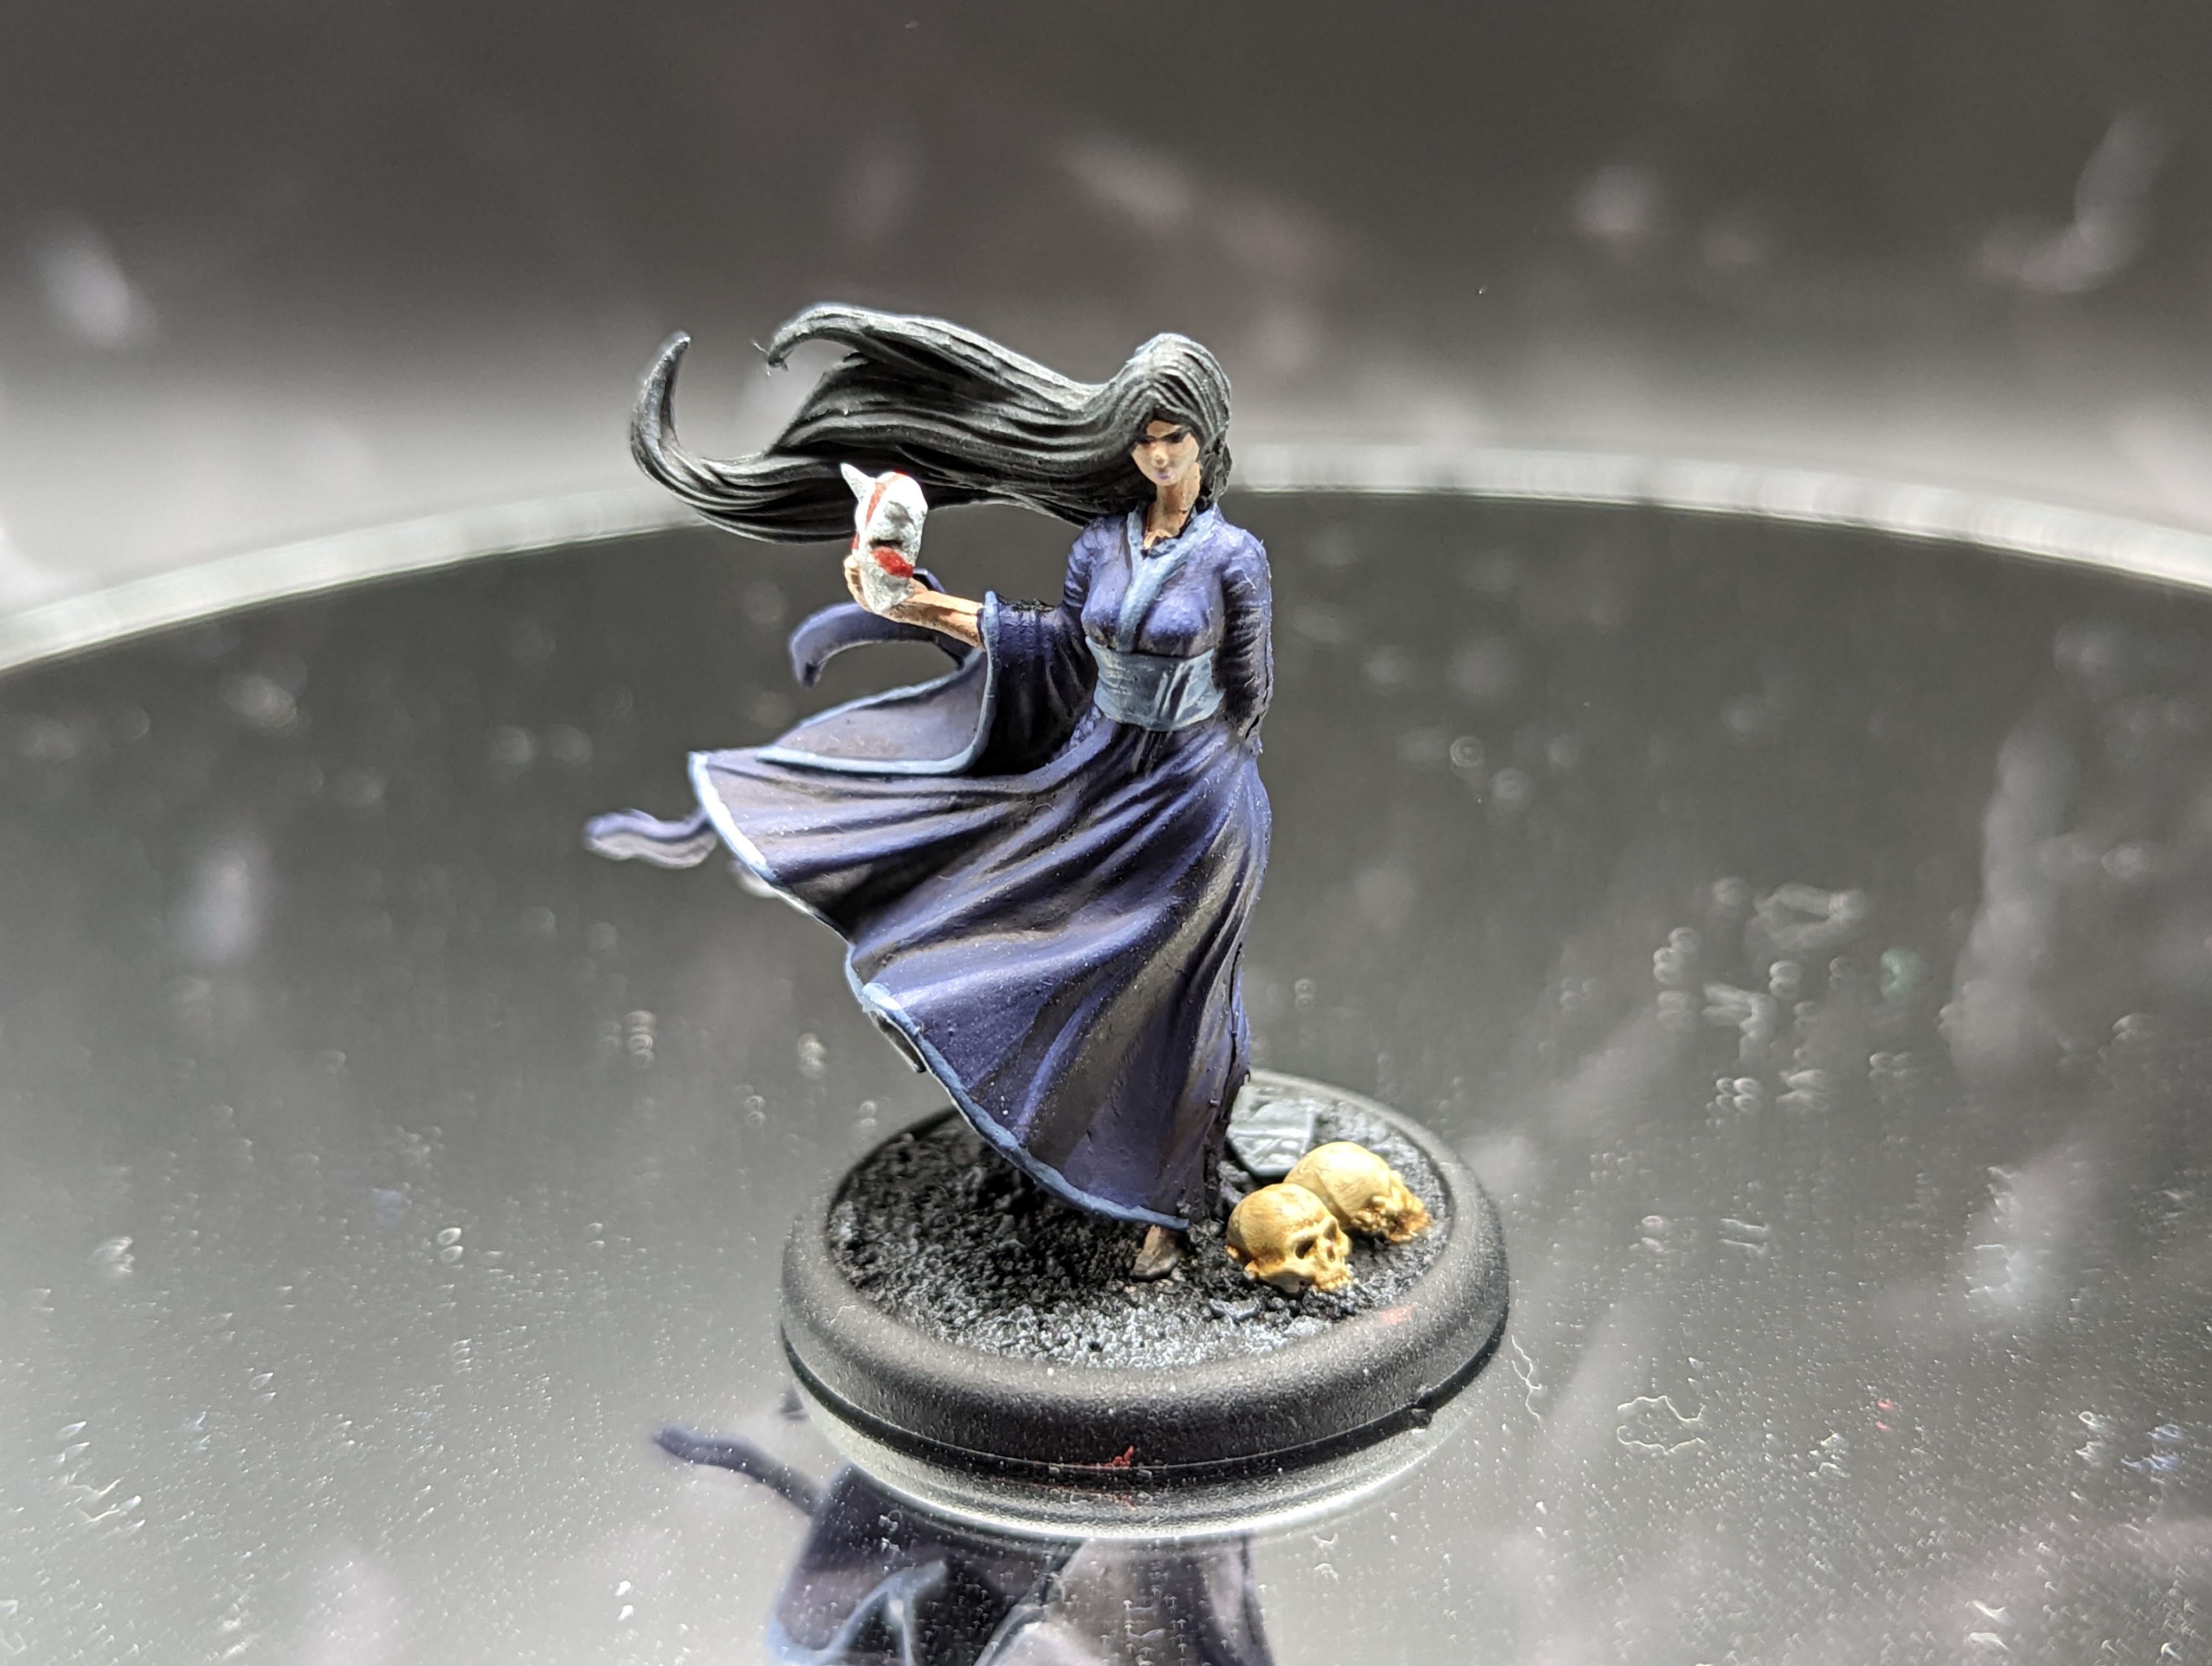
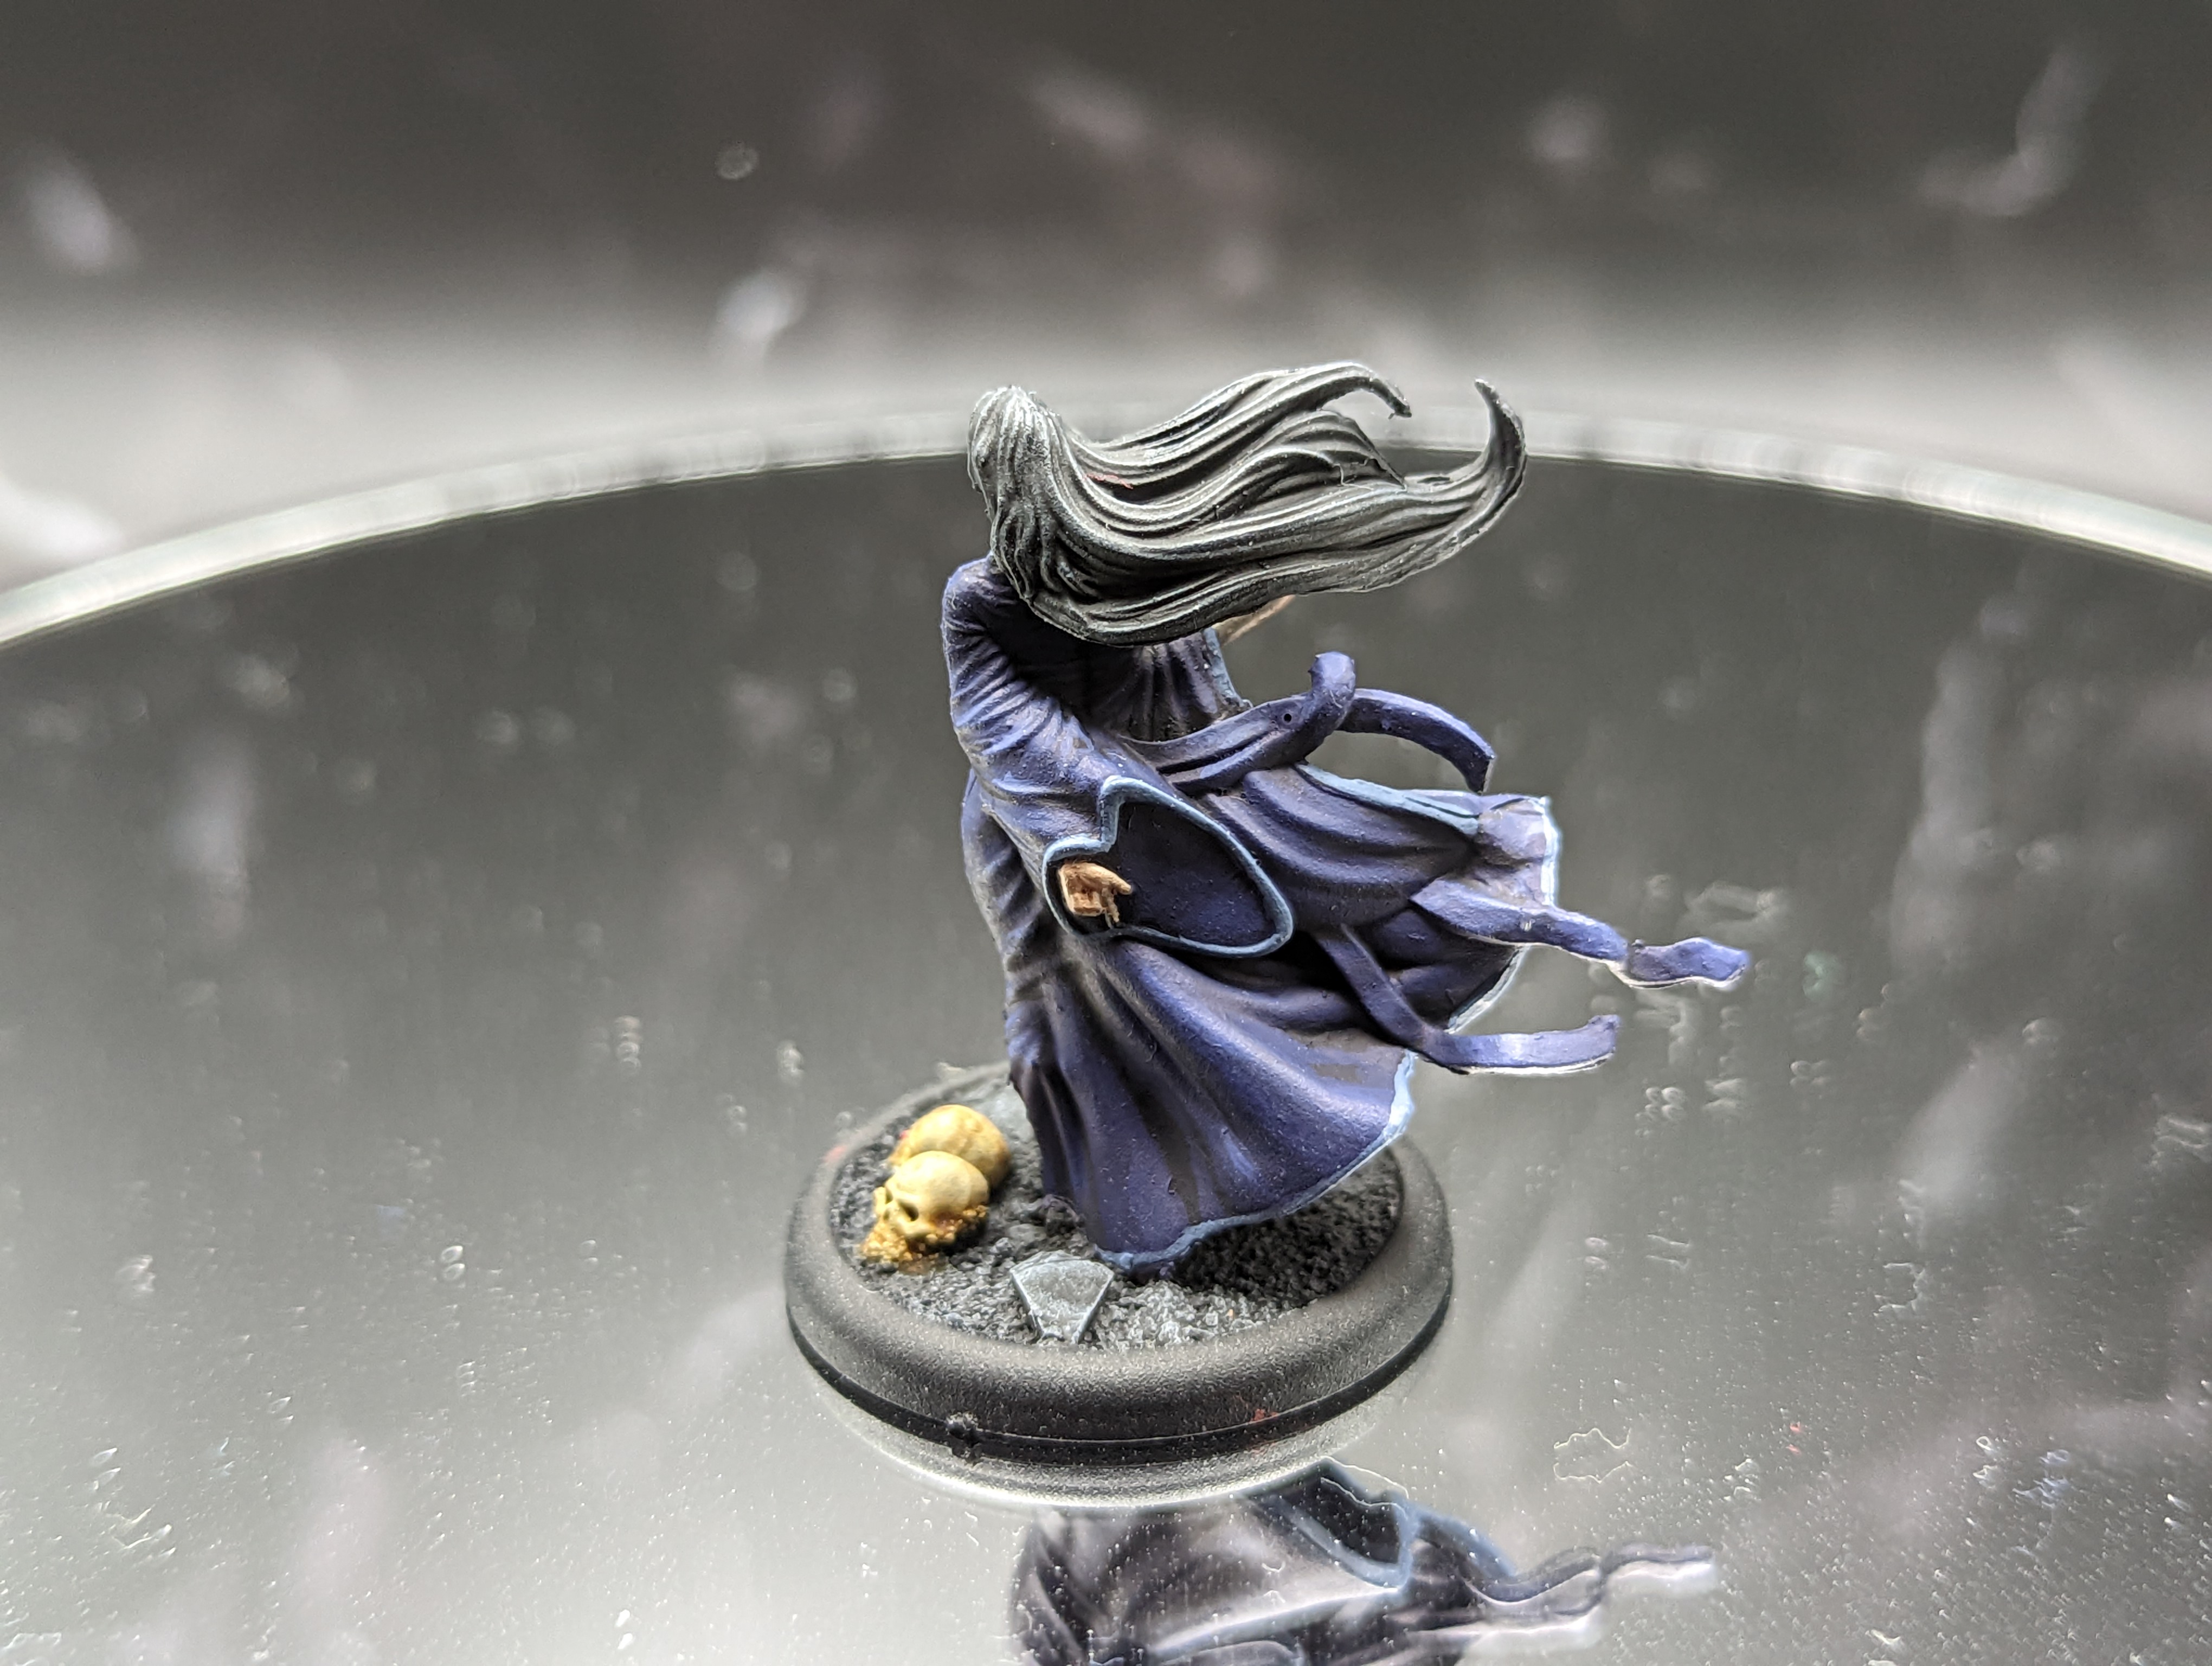
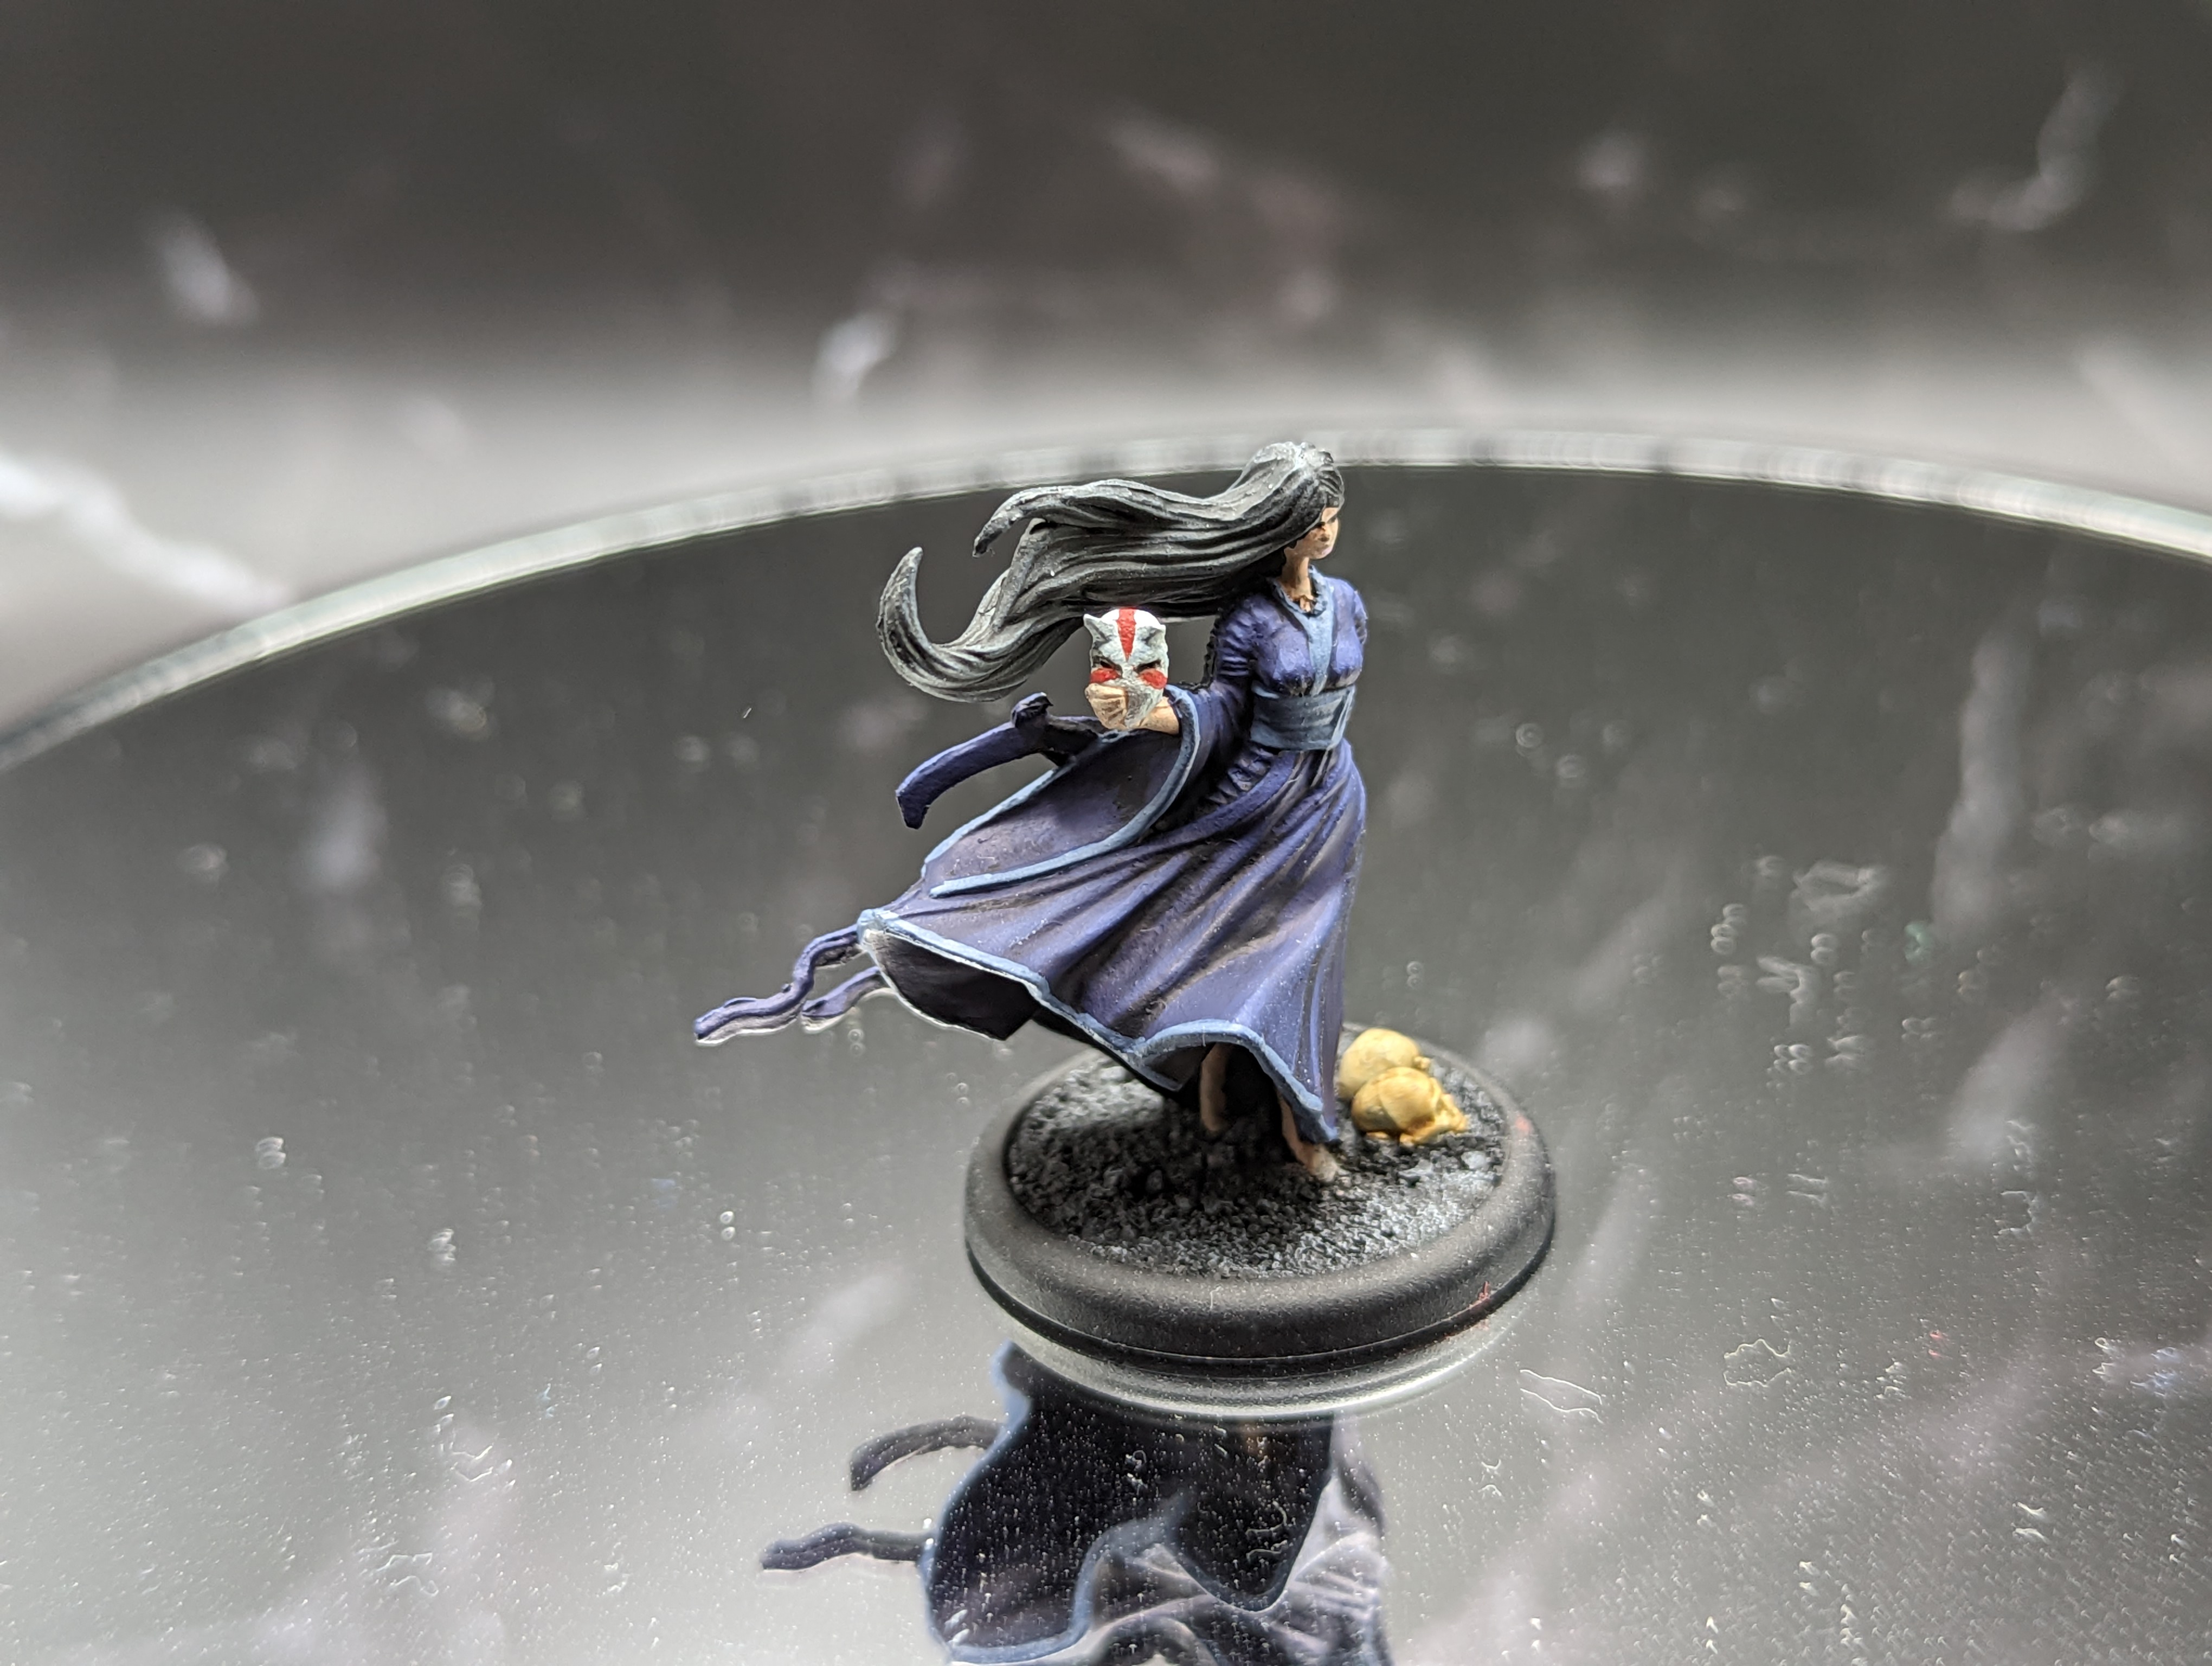
Kirai and the graveyard
Kirai is one of the 2 masters in the game who does not follow the normal pattern of coming in a box of 3 with a dual keyword model. So I decided to tackle her first since it would be a bit less work. I have her crew based up in a desaturated graveyard theme, cuz shes all about spoopy ghosts and such. I did these bases a long time ago, so they aren’t spectacular, but I dont have them.
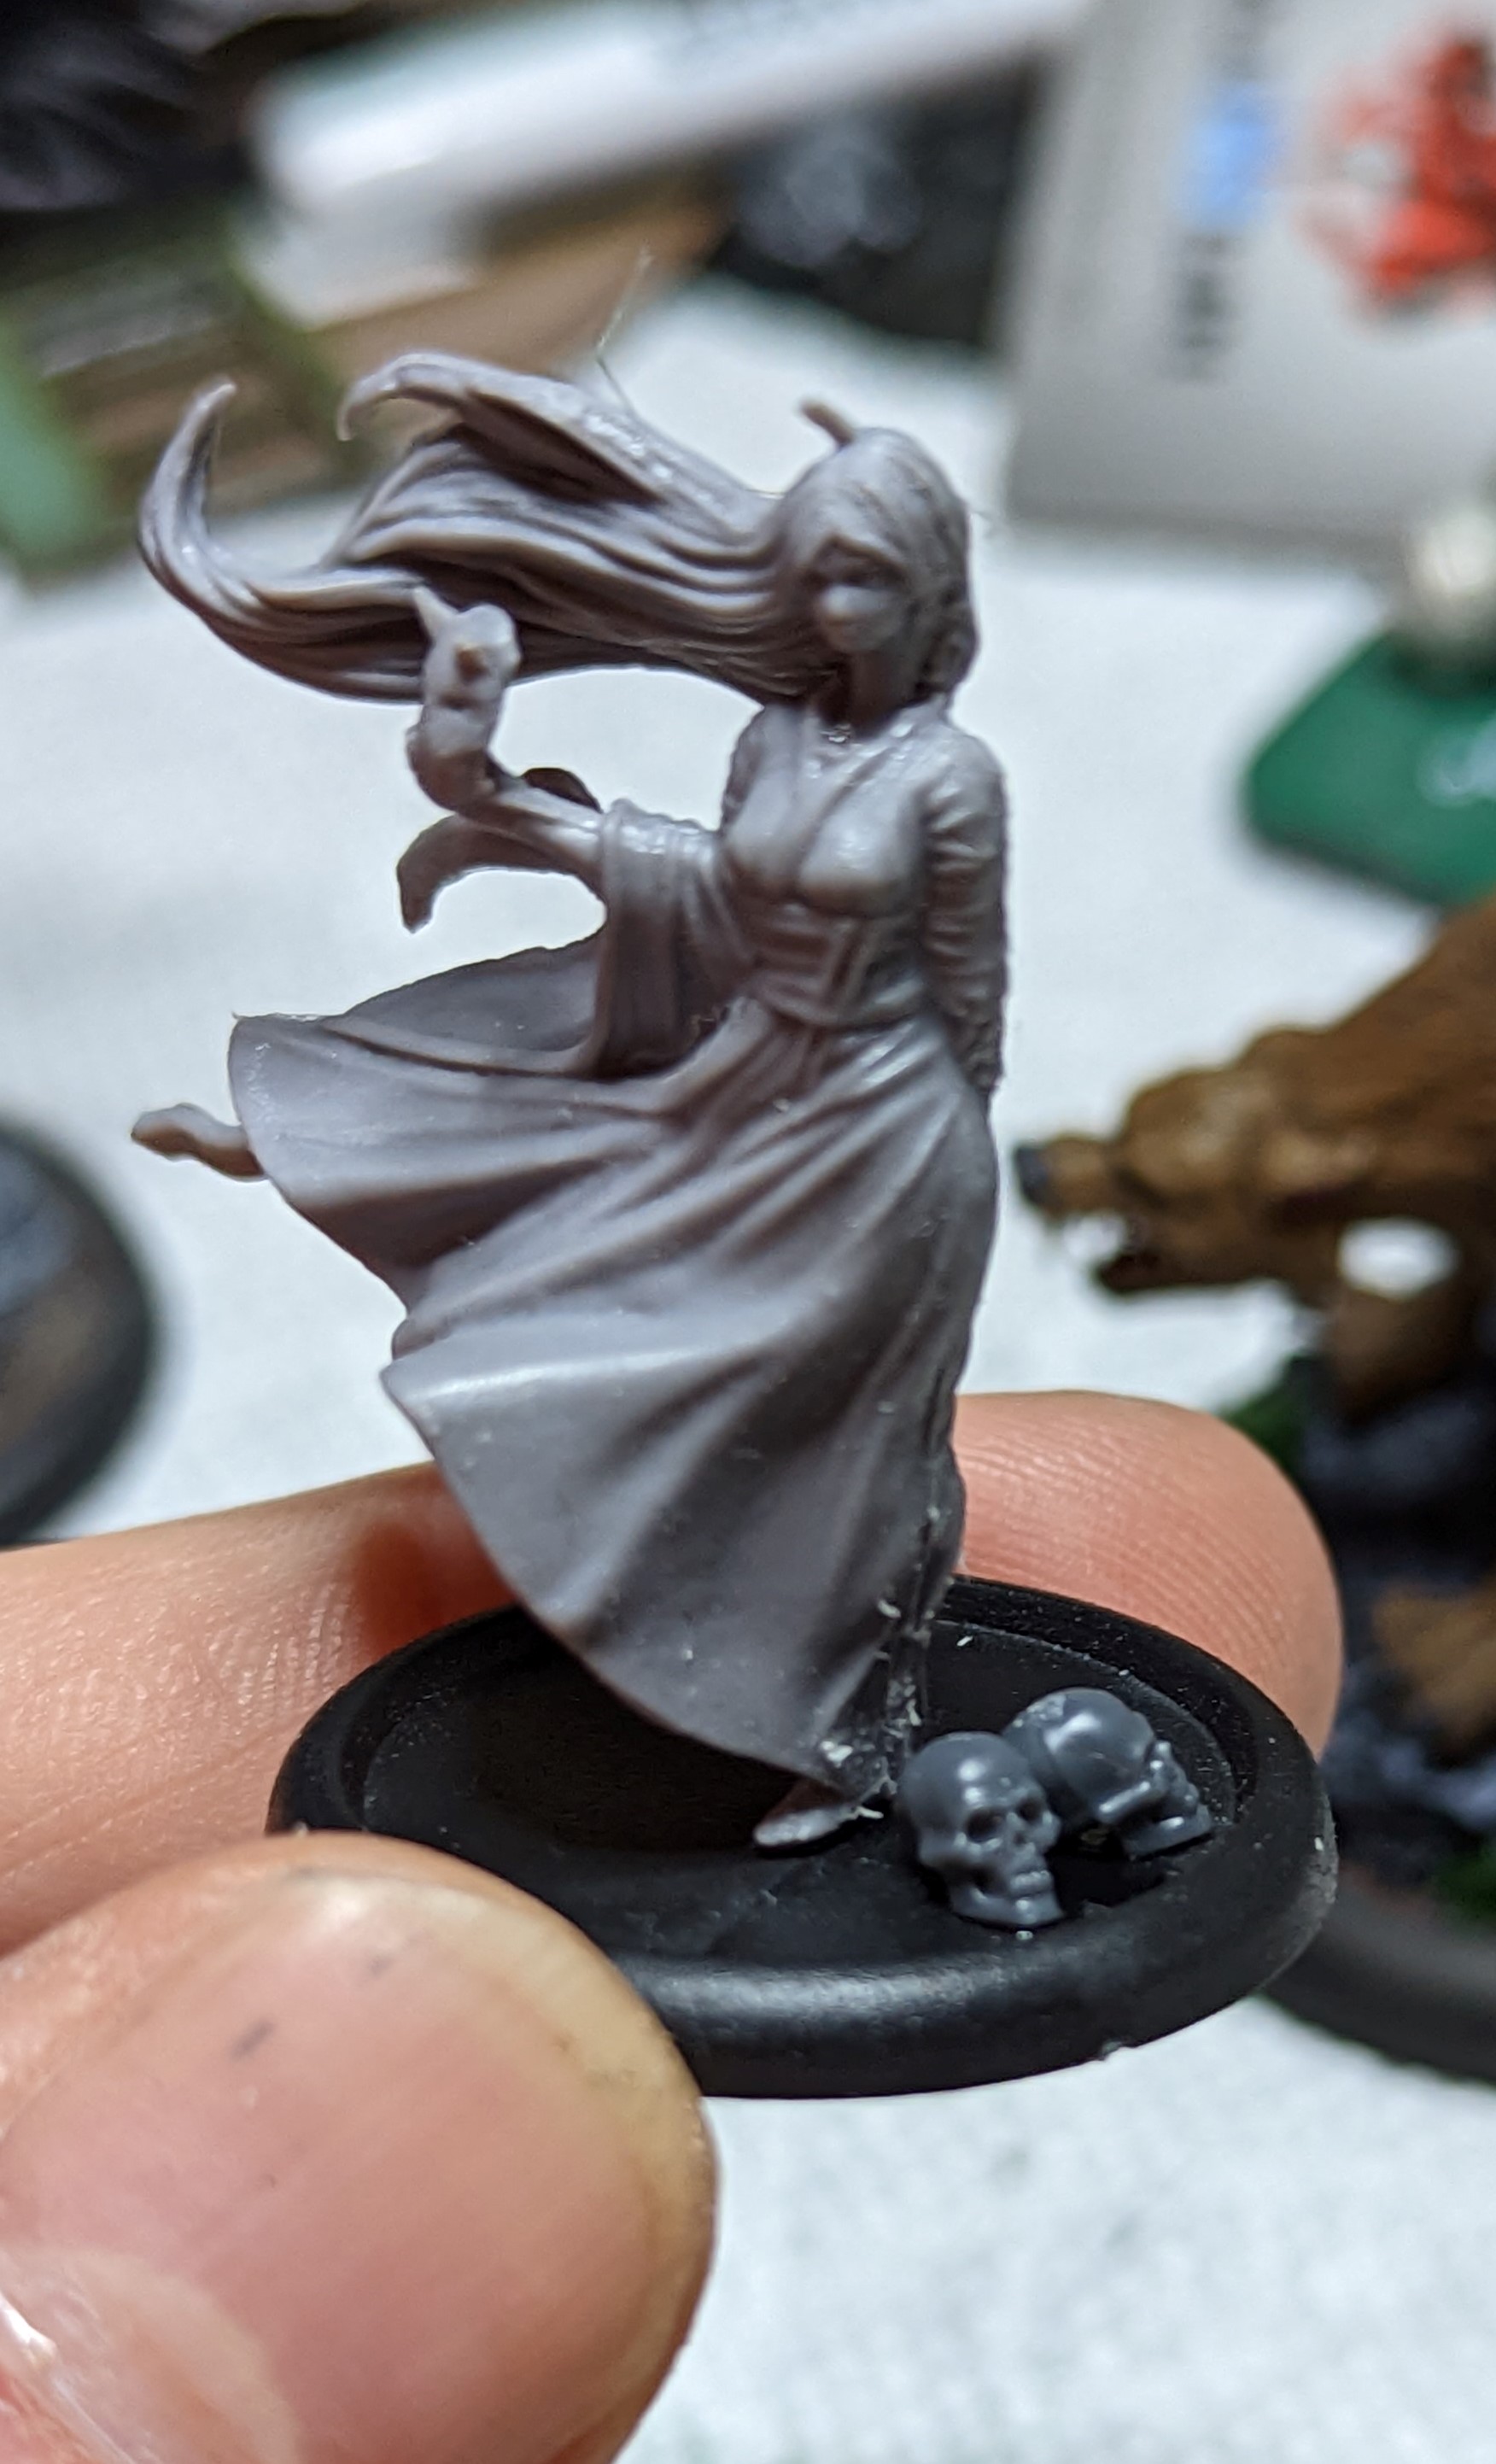
So I started by sticking her down to the base and adding some skulls next to her. Not enough room for a headstone on the small base, so I decided to go pretty simple here. I think when im done im going to add some dead looking tufts to this crews bases to give it a bit more interest.

Next I added some sand and primed the whole bit. The paint scheme for the ground is just a medium grey drybrush over black. I think it gives it a dark and dead look and I kind of like it. For the skulls, I base them in an off white, and then use a sepia wash. I think it gives them a rotten and aged look, and its more interesting to look at than bleached bone.
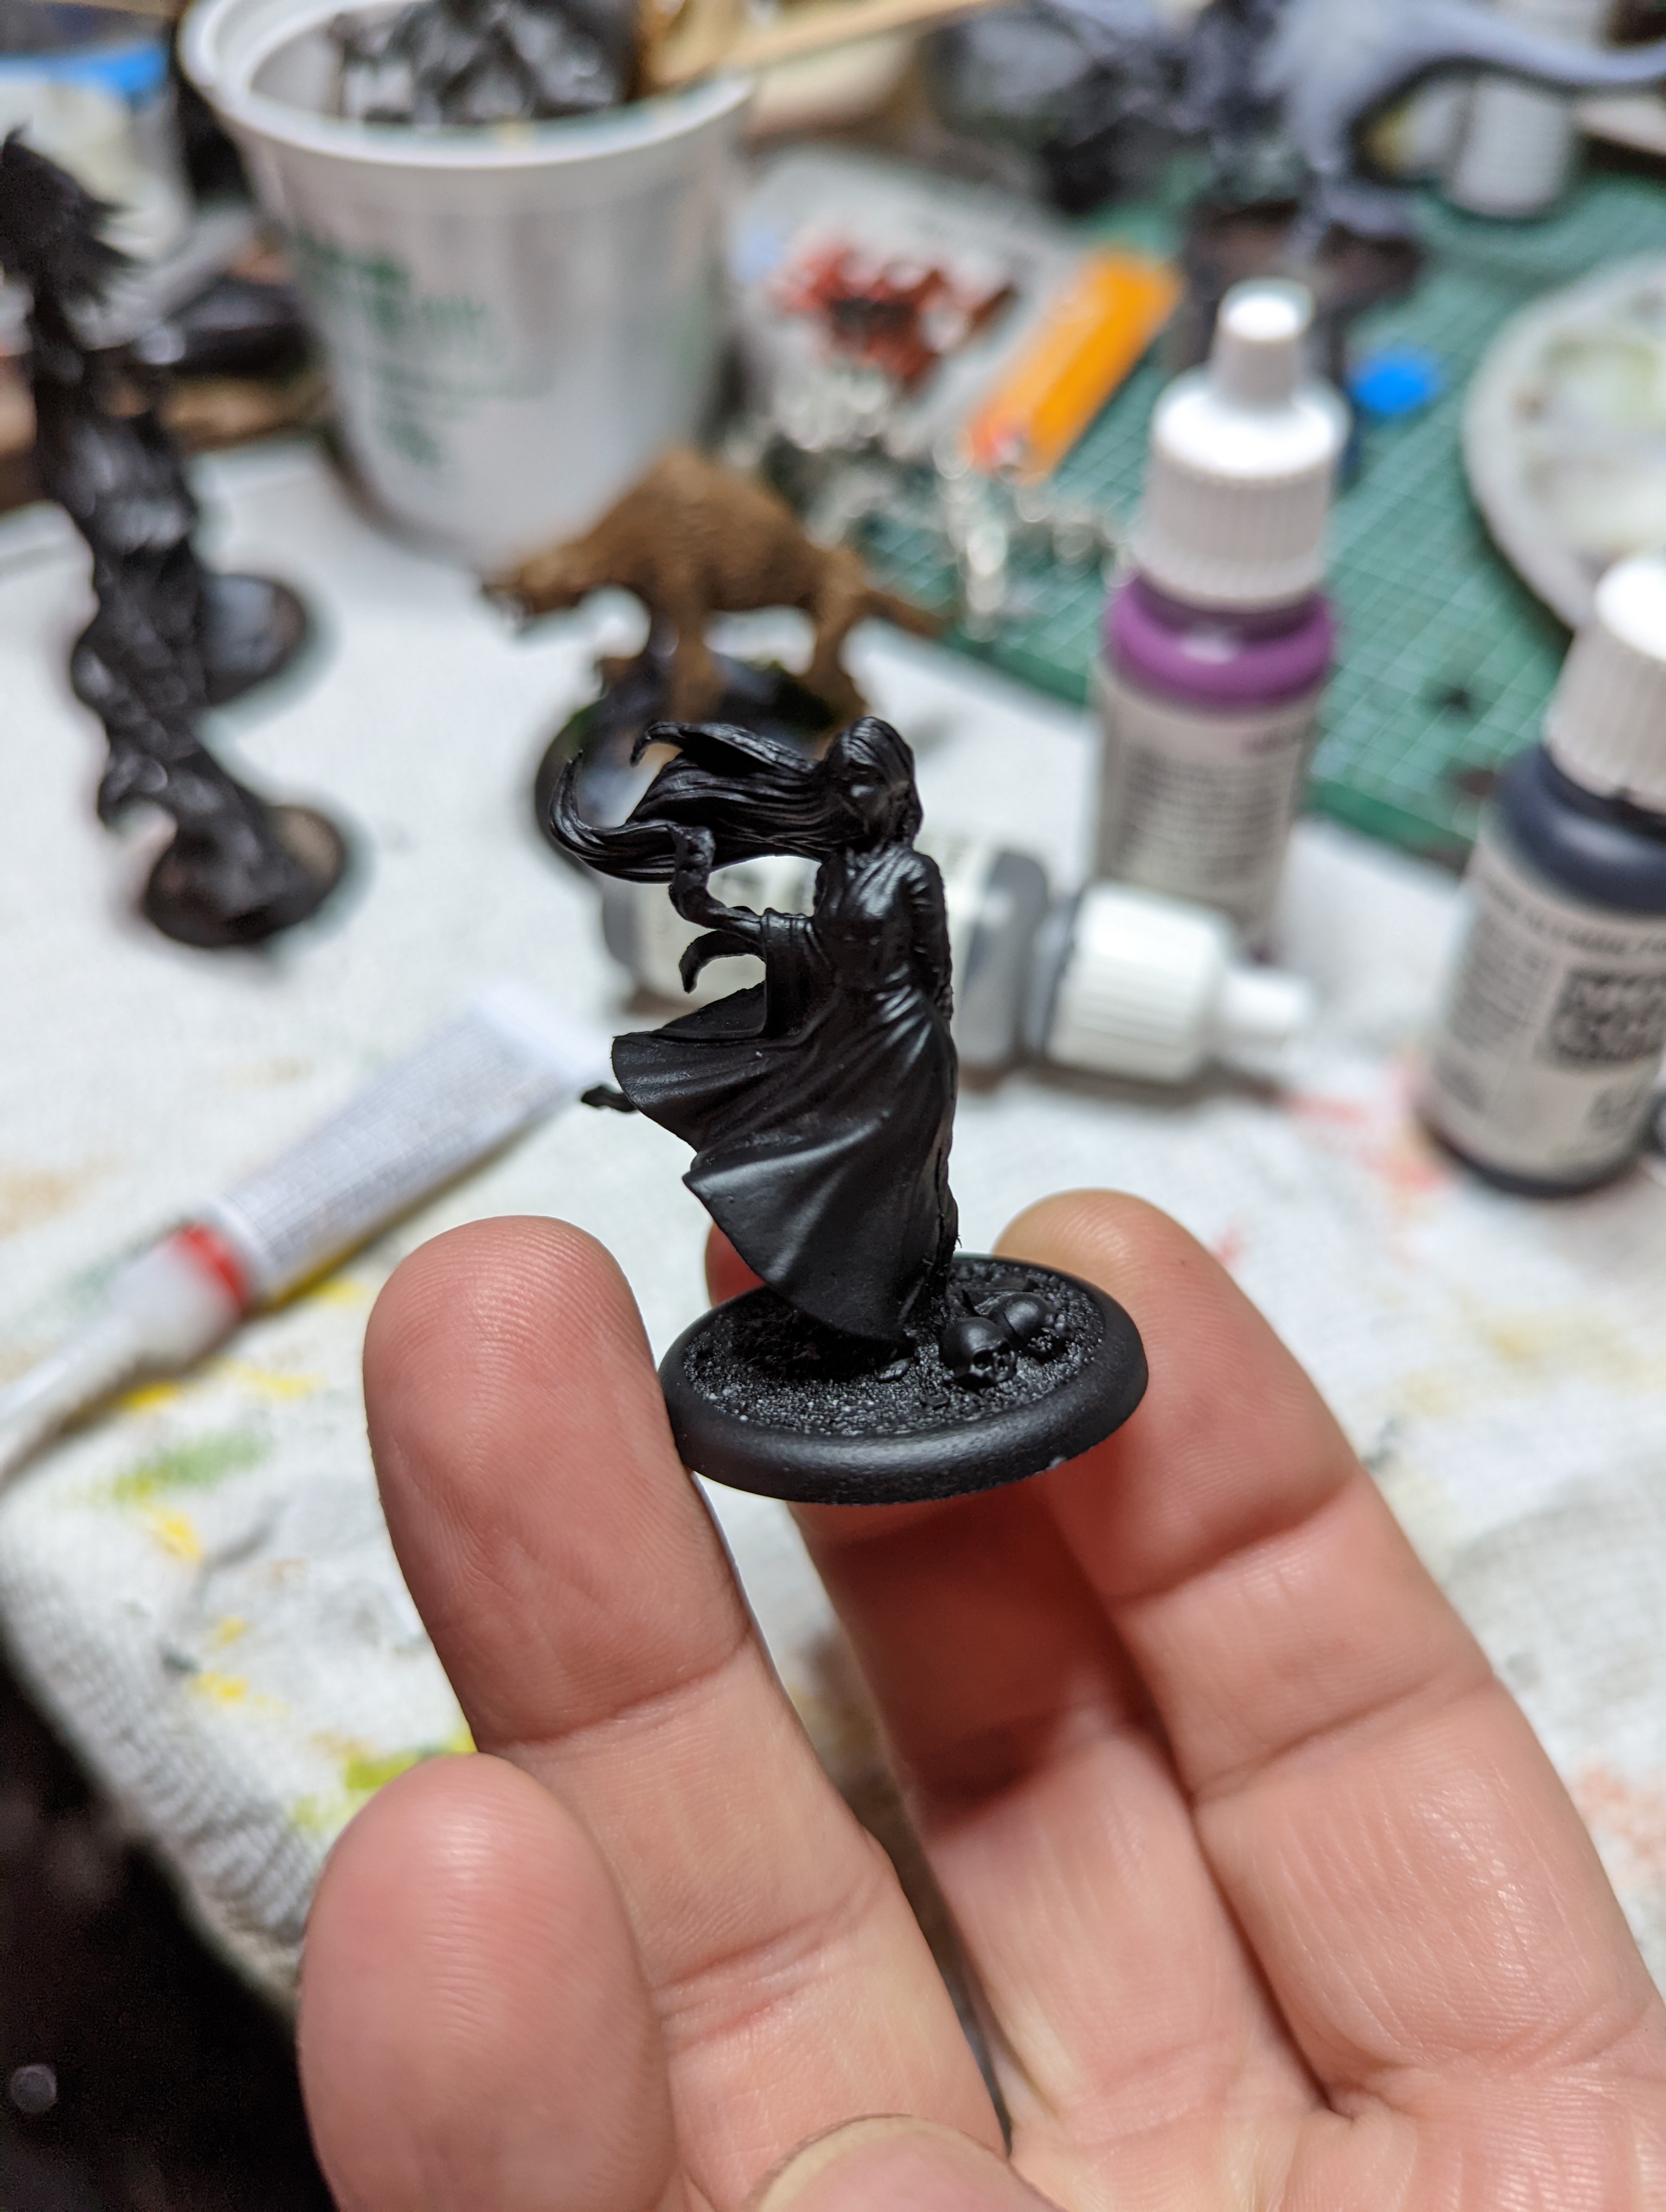
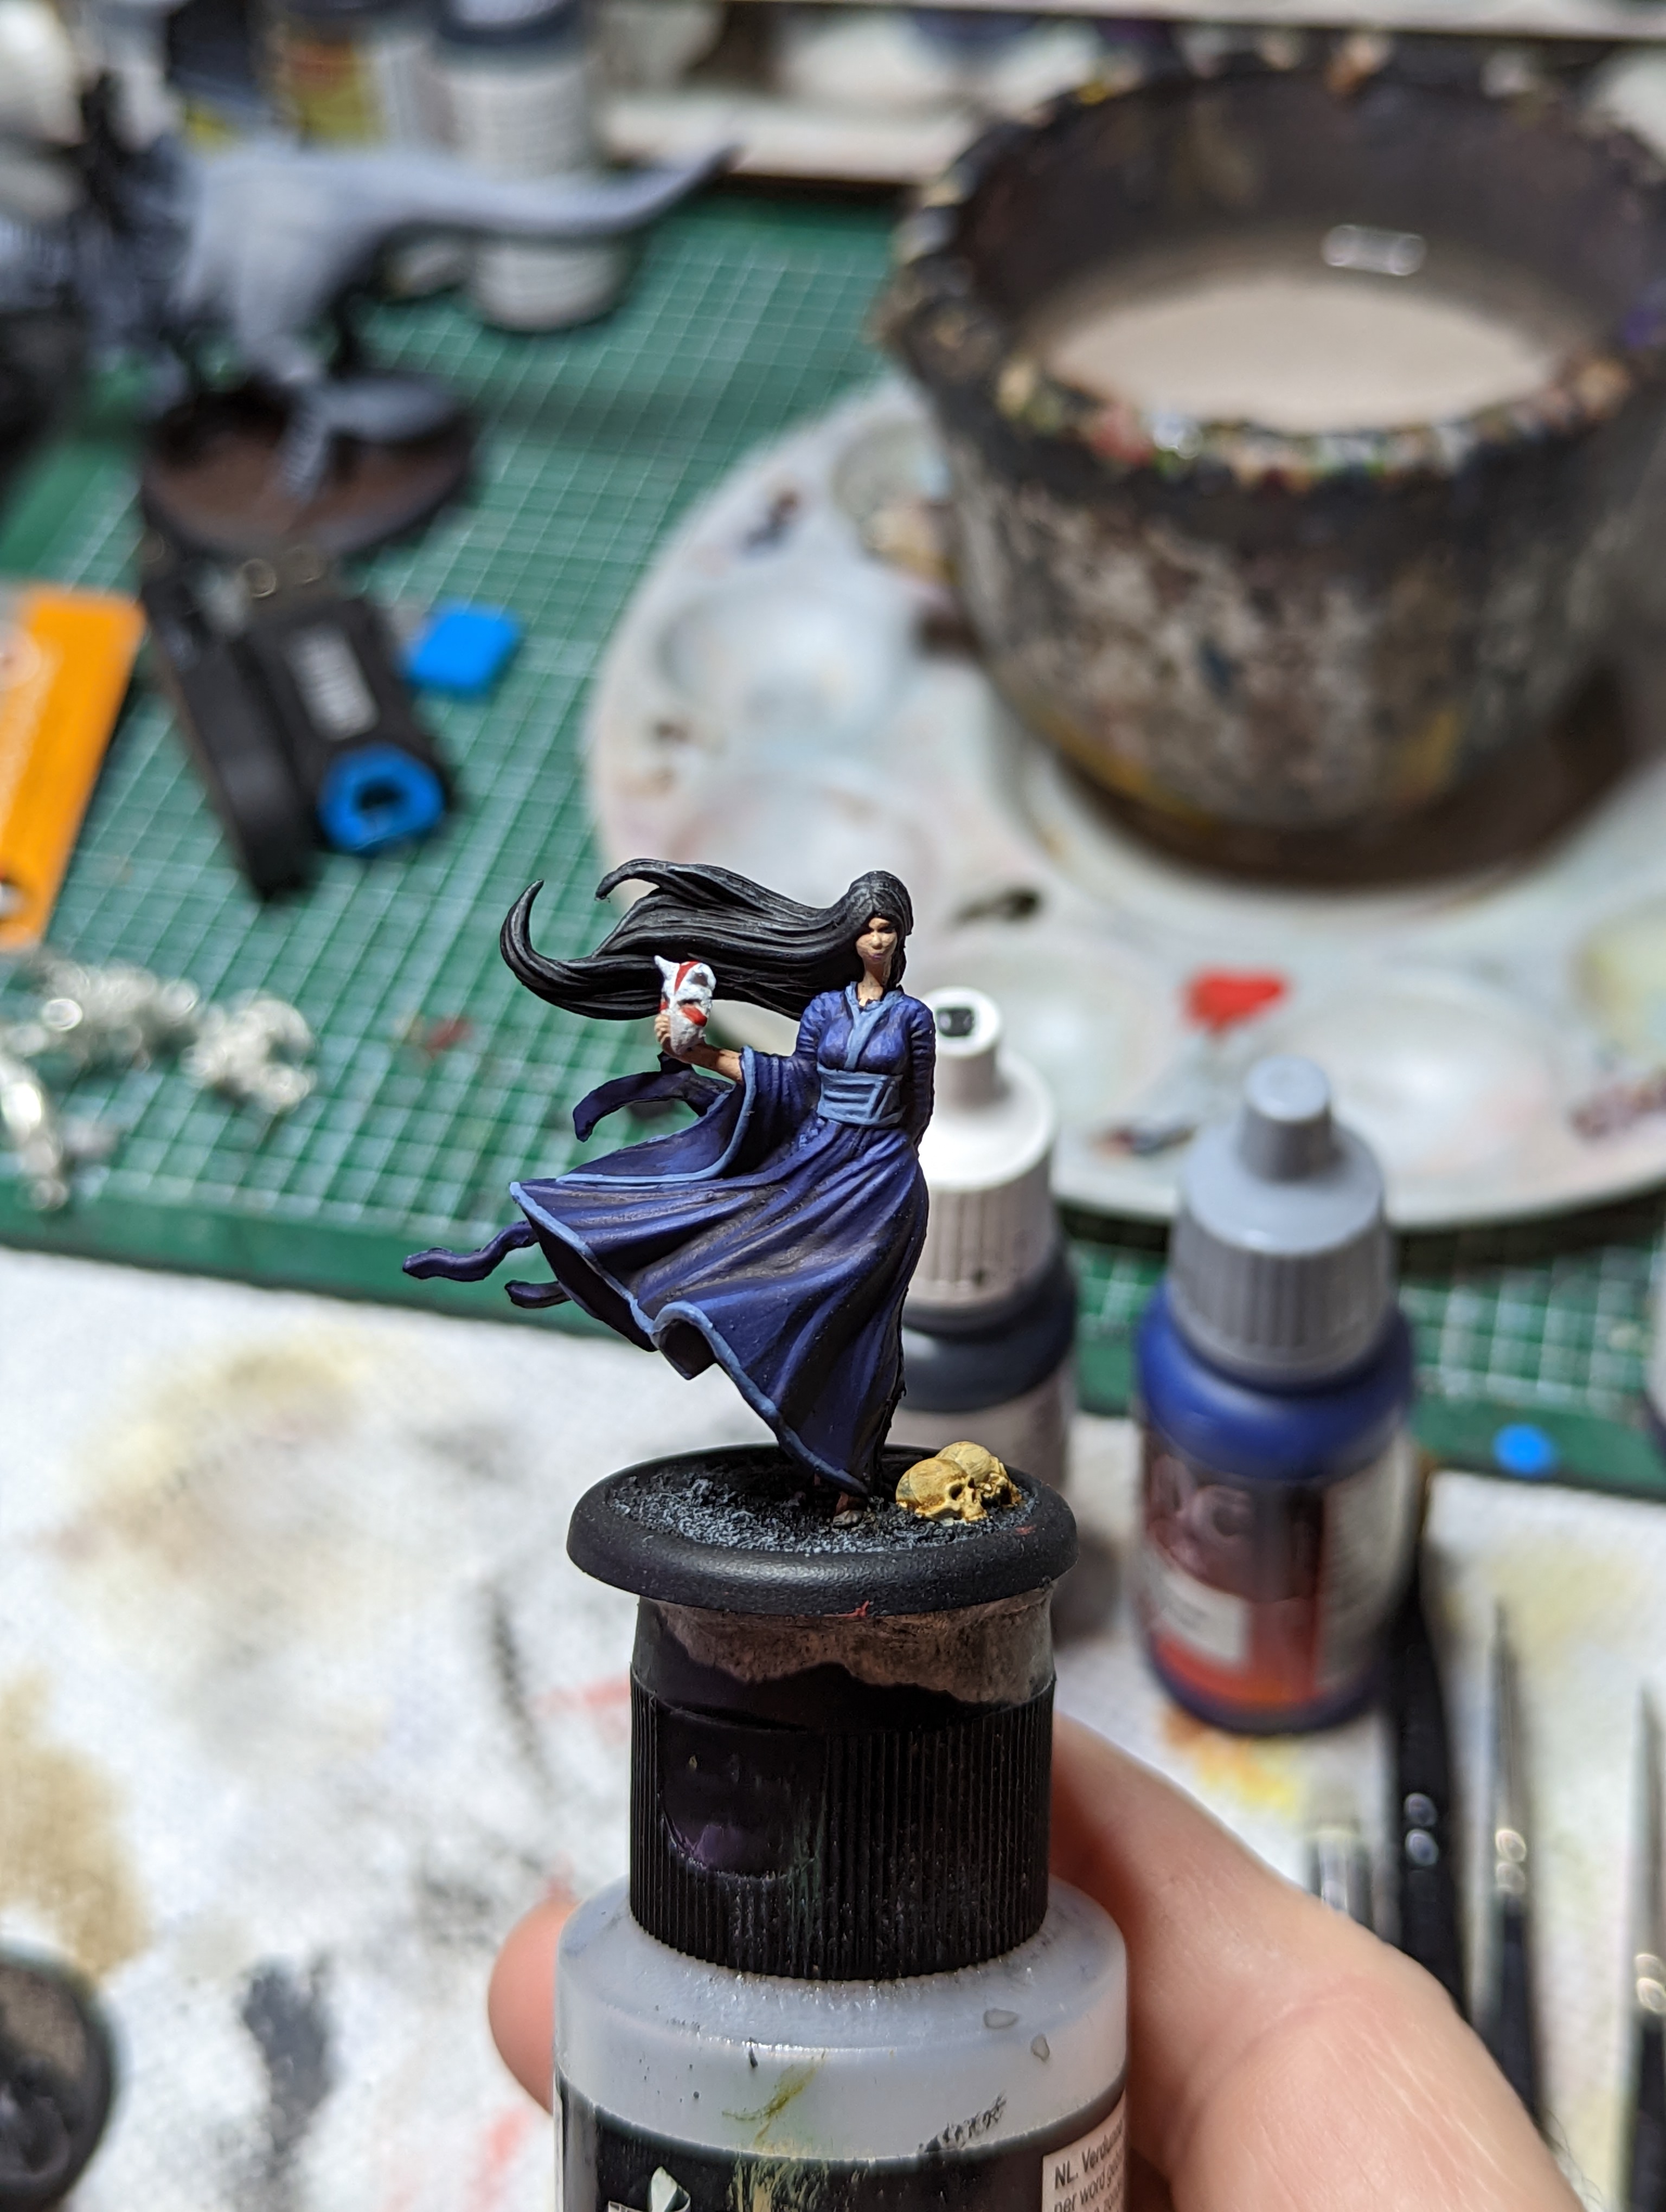
For Kirai herself, it was a pretty straightforward paint job. The most interesting part was her flowing clothes. I started with a very dark purple and just focused on bringing back the saturation for the highlights. It came out with a pretty dark and shadowy effect that I was pleased with. I was hesitant to add the stripe on the bottom of her robes, but they looked too plain without it. From a 3foot view, I think it looks pretty good.
As a side note, I also 3d printed a little base insert that she can sit in, because this model is meant to also be used in The Other Side, Wyrd’s massed battles game, but she uses a bigger base in that.
Where we stand

These are the few boxes that I have already completed. As you can see, each of the new releases came with the alternate versions of 2 different masters from different factions, and another model which has the keyword of both masters. I finished these up already either because they are masters I play a lot, or because I built the bases for the crew after the new book came out and I knew what would be coming, so I had their bases ready.
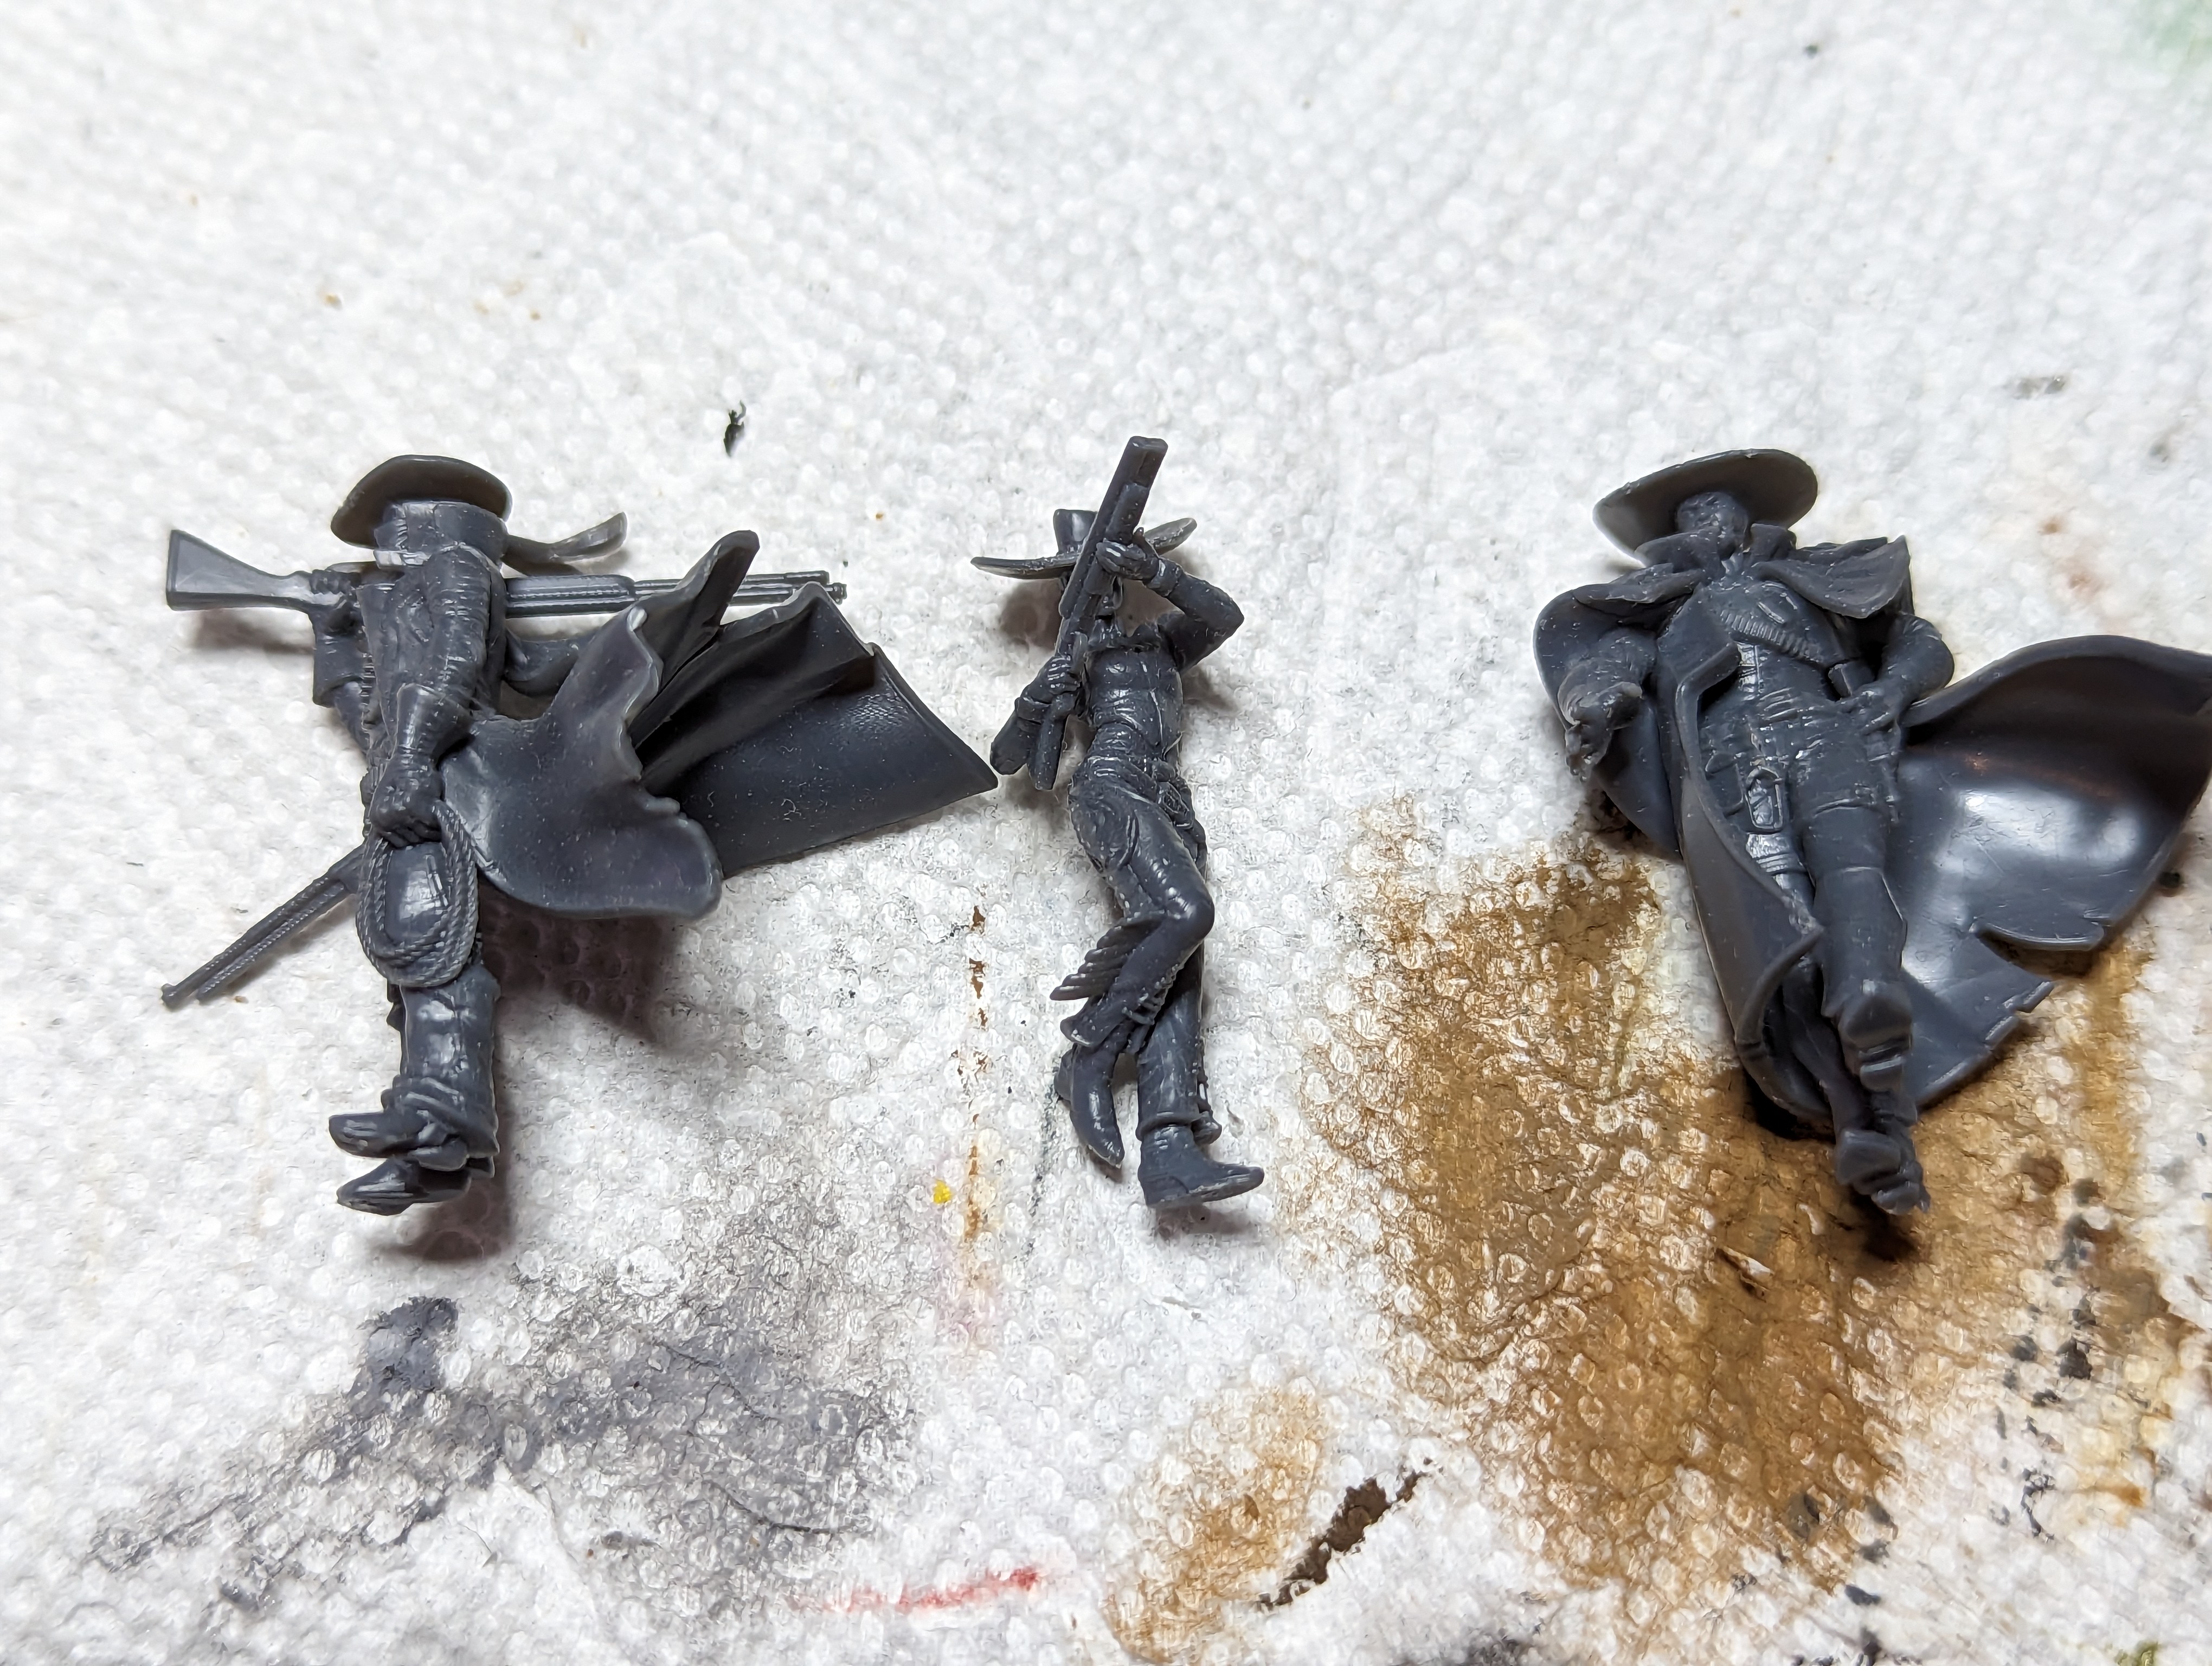
The problem at hand
With all of these new releases coming for Malifaux, I’ve ended up with a sizeable backlog that I need to get caught up on. I had every crew in Malifaux, but now each and every one of them has gotten new models in the last few months. I couldn’t not buy the new stuff, right? It would be silly to have 98% of the collection and leave the rest missing, right?
So the first issue I have is that I base all of my crews in a specific theme. Some of them are based on happenstance, they are just one whatever kind of base most of the crew was one when I decided to use this system. But most of them are on very thematic bases. Now I need to go back and remake bases for all of the dozens of different themes, and try to get the new ones to match as close as possible. That would probably be easy if I documented the material I used, and the colors of paint I put down. But sadly, I only pretend to be a smart man. So lets see what we can do about it anyway.
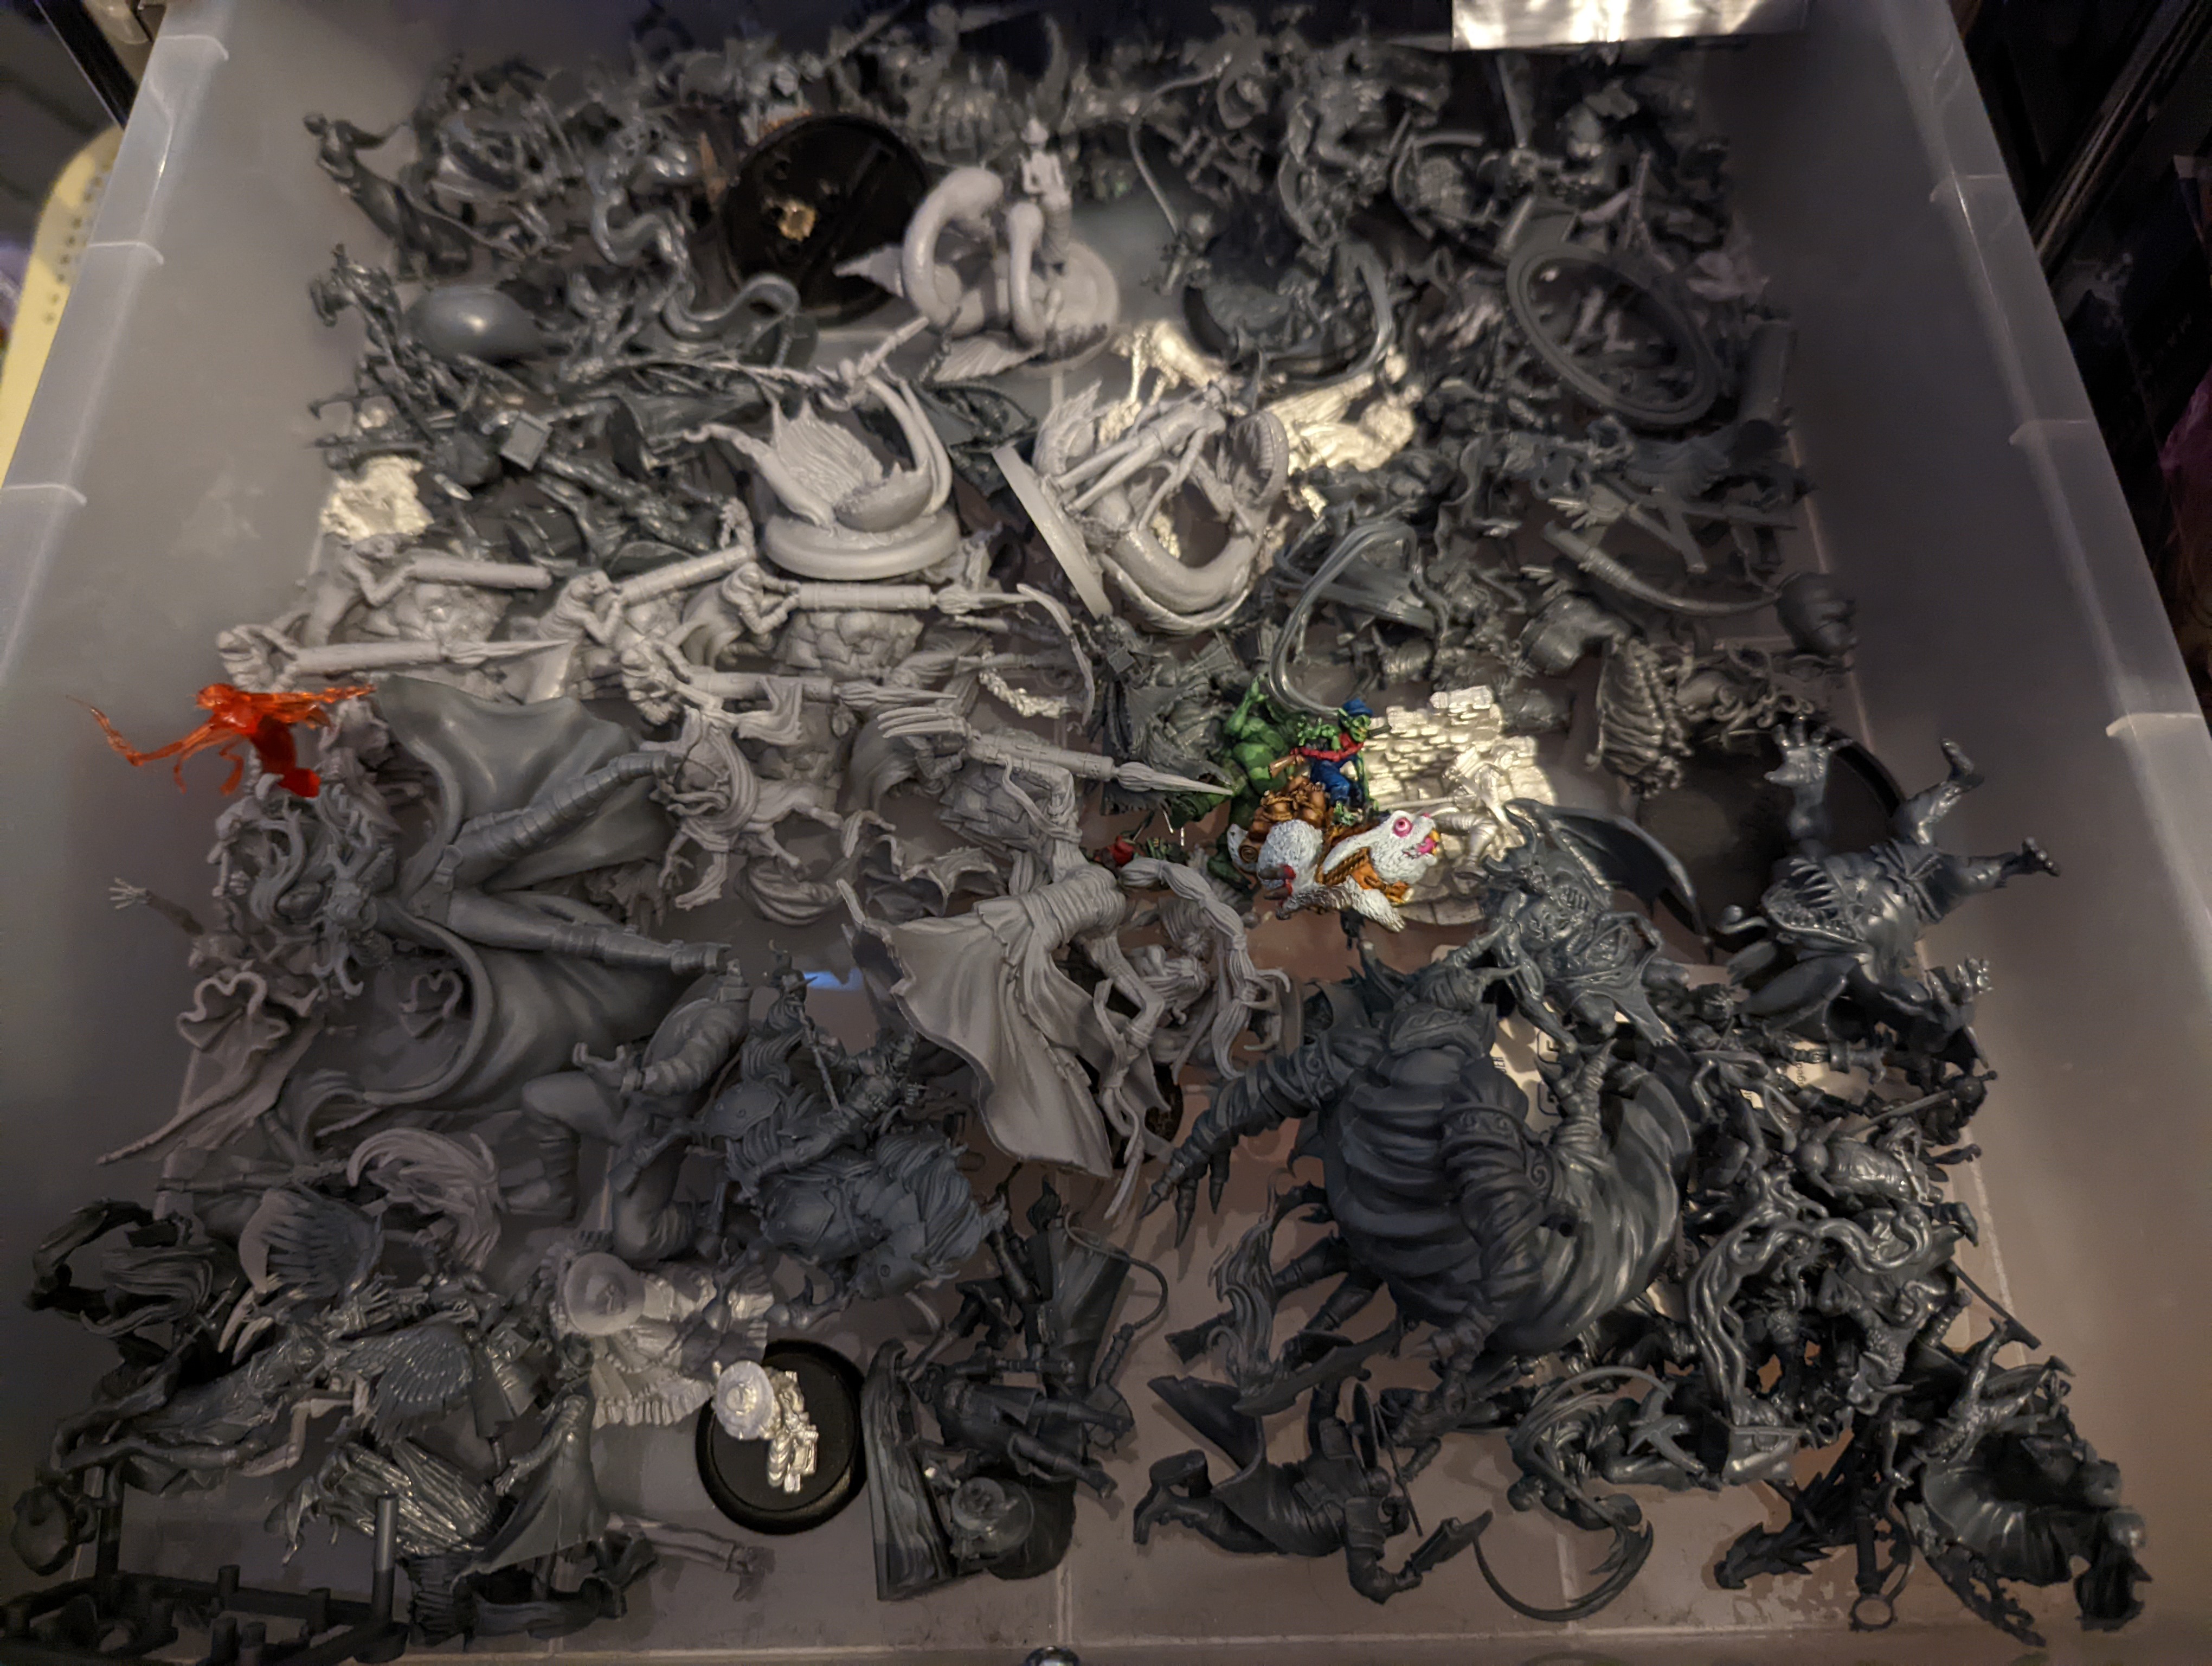 To give you a sense, this is my Malifaux pile of shame, plus a few boxes that I have not had a chance to assemble yet.


