


Rooting Around – Turnip28 Spring Clean Challenge


Recommendations: 337
About the Project
Kitbashing together a few models for Turnip28.
Related Game: Turnip28
Related Genre: Fantasy
Related Contest: Spring Clean Hobby Challenge 2023
This Project is Completed
It Begins...
Churned mud and swampland stretches out into the gloom. Thick fog hangs heavy in the air. Rolling barrows loom out of the murk. A strange root writhes underfoot. A thousand years after the defeat of Napoleon at the Battle of Austerlitz, the world has fallen into decay. Endless war has led to technology stagnating, and beautiful countrysides have been ground to a thick ruin under the boots of a million dead men.
Now, nothing grows. A bizarre and horrible root covers the land; strangling the life from the trees, poisoning the water, and filling the sky with an acrid mist. Humanity barely endures by harvesting this disgusting tuber. It twists their bodies and minds, infesting their thoughts with divine visions of lost vegetables. Bizarre religious orders have formed. They stockpile abandoned weapons unearthed by the twisting roots.
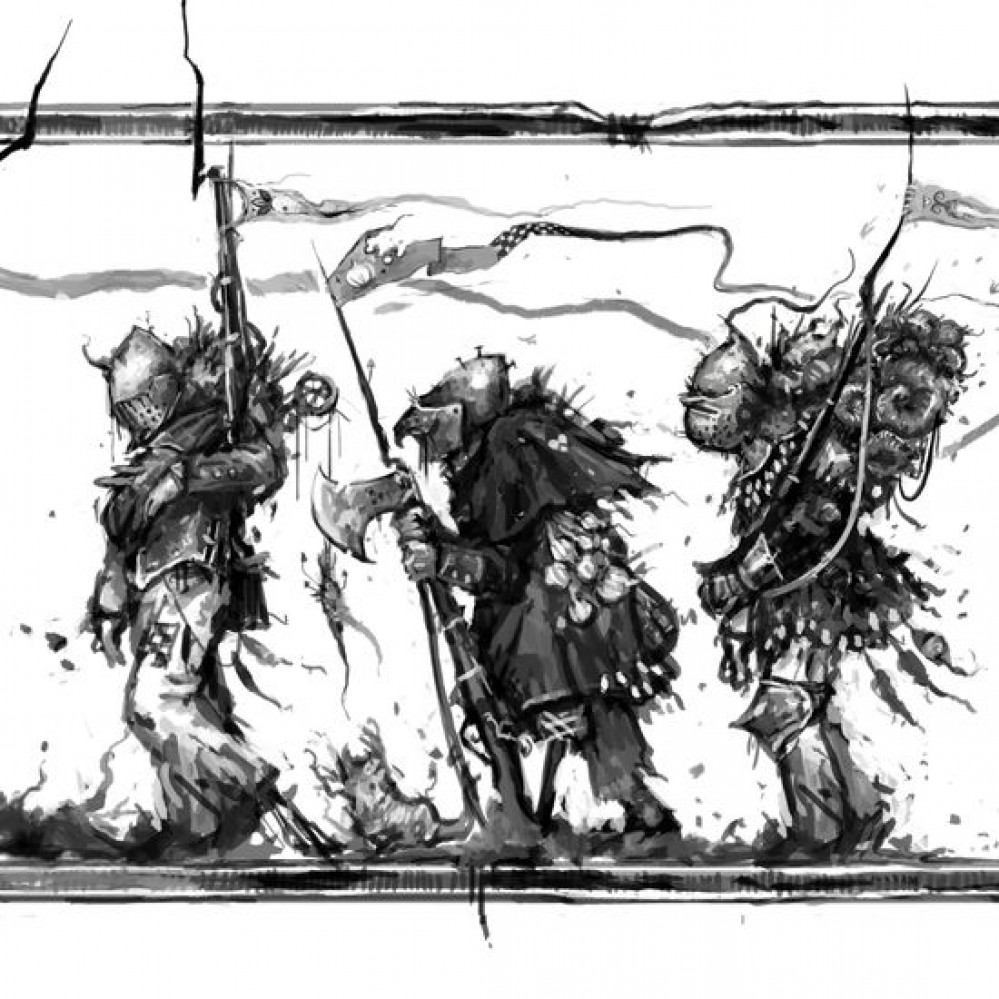
Marching in column under fluttering banners, brandishing mud-clogged muskets and rusted bayonets, they are cruel parodies of long-forgotten armies on the march.
Gather your troops. Fix bayonets. Devote yourself to the roots.
Turnip28 is a weird postapocalyptic wargame that combines Napoleonics with root vegetables, created and developed by Max FitzGerald (with free rules available at his Patreon – https://www.patreon.com/Turnip28). It is a setting that encourages and embraces players to kitbash together odd, root-tangled soldiers.
Kitbashing is not something I’ve done a lot of in the past. I had a lot of fun building some Napoleonic French zombies for the Silver Bayonet, and wanted to try something else, with the setting of Turnip28 grabbing my attention the most. So I picked up a few things around Autumn last year with the intention of getting going, but I stalled due to other ongoing projects.
Enter the 2023 Spring Clean Challenge – a perfect time to revisit the idea.
The Main Ingredients
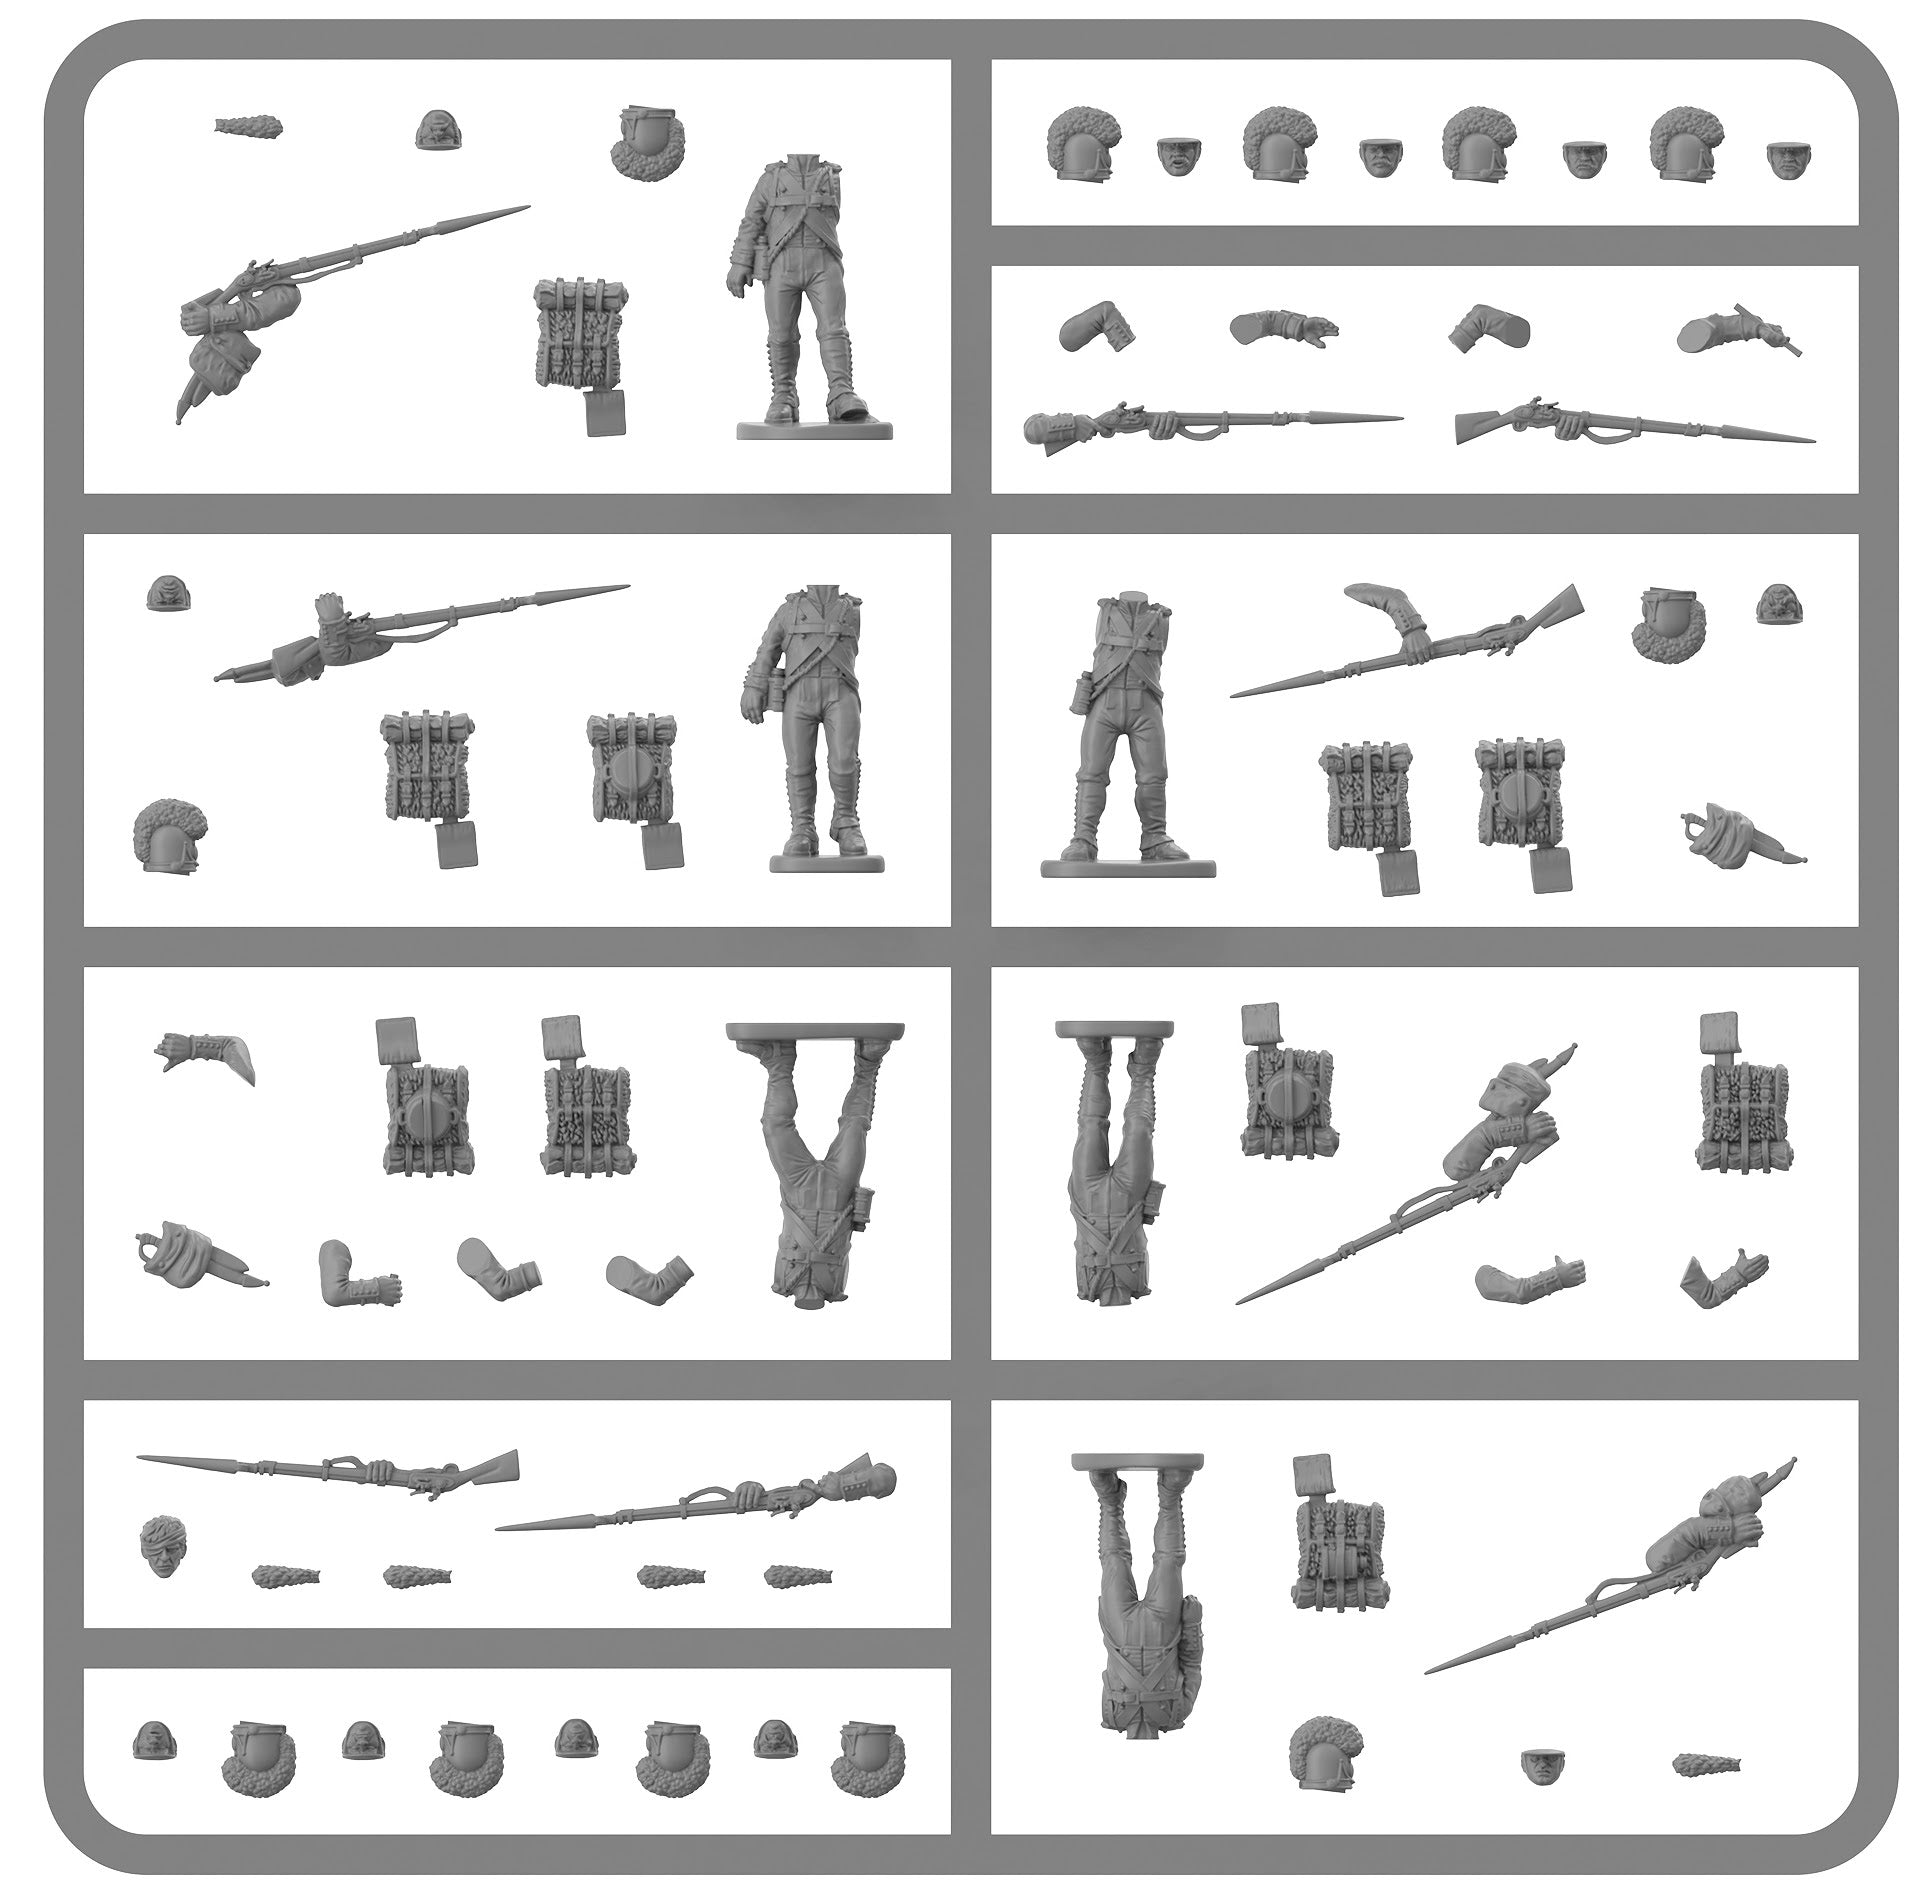
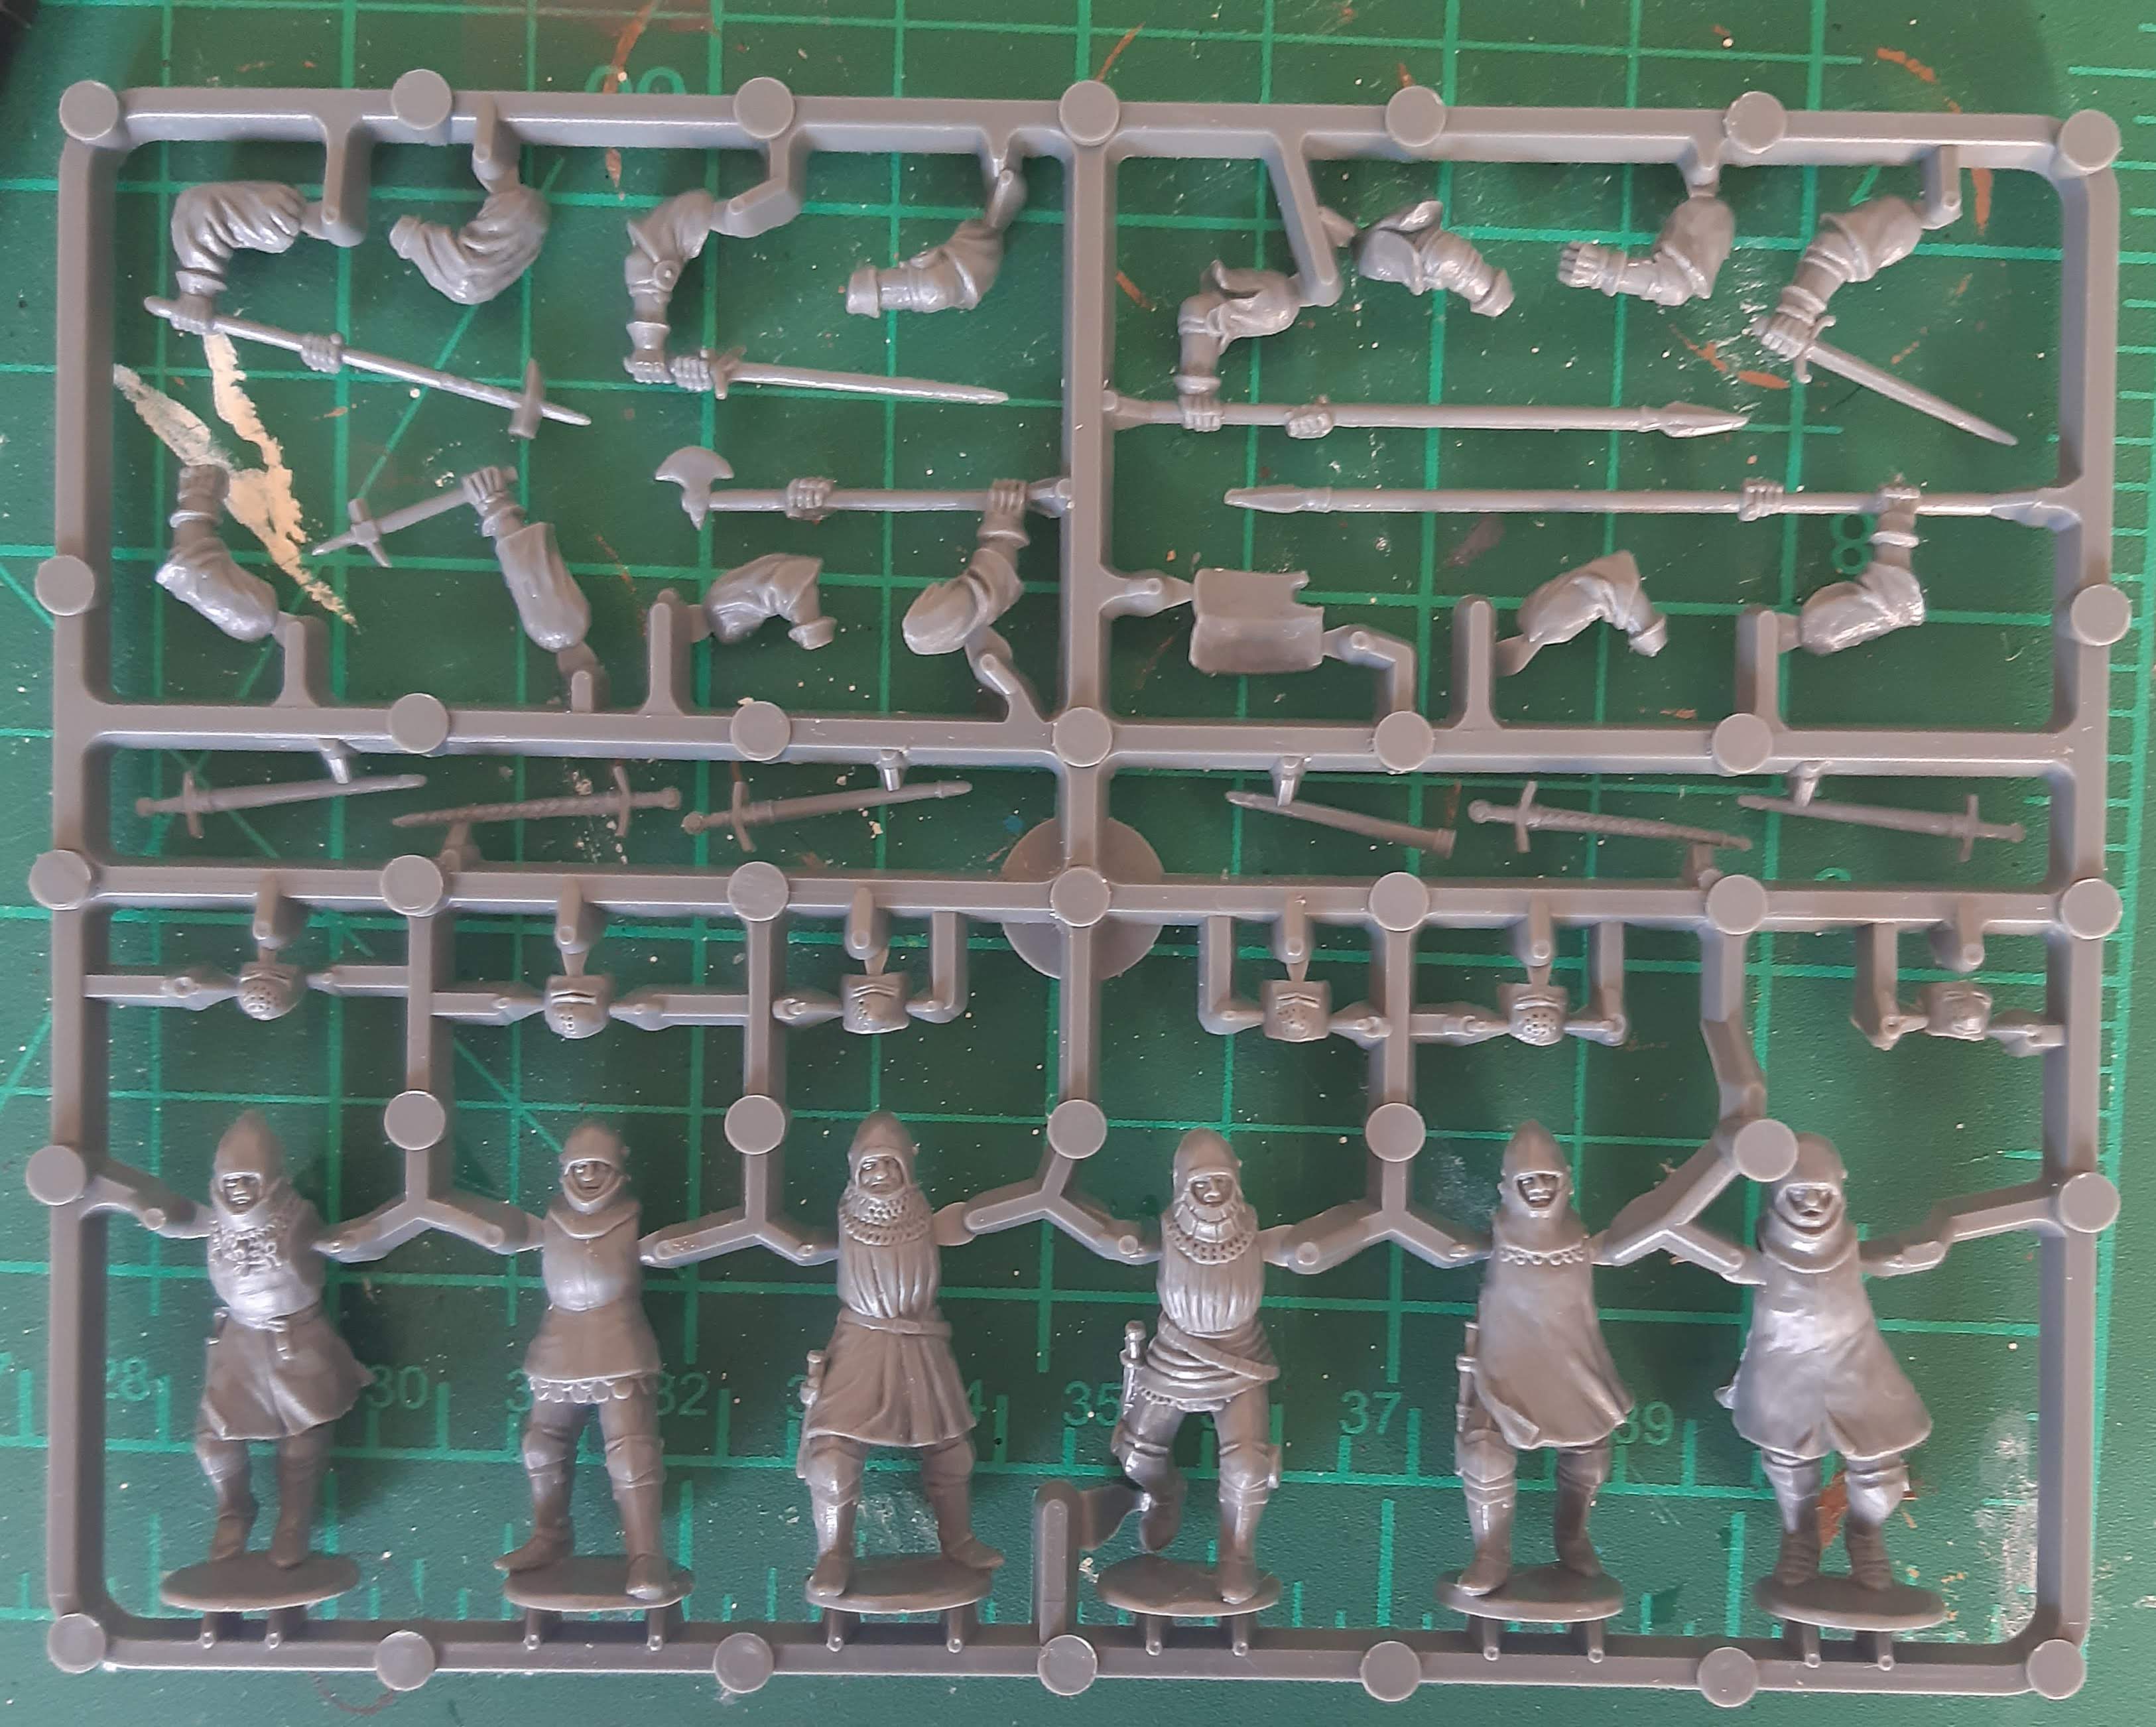
I’m aiming to bash together about 20 or so figures. There’s two main components – some plastic Napoleonic infantry, and some 3D printed torsos and heads designed by saint_decent. The basic idea is to slice off the Napoleonic infantry legs, stick on the torsos and heads and then add the arms and muskets, plus backpacks and whatever else suits.
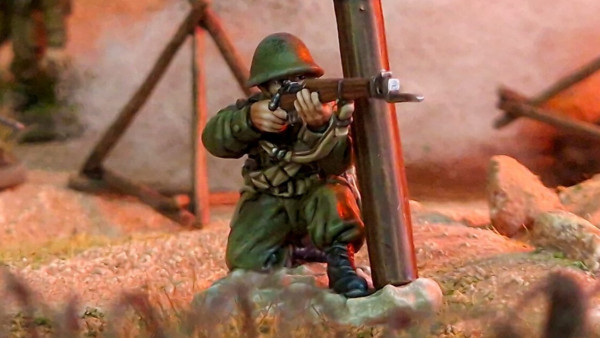
For the Napoleonic infantry, I went for Victix’s Bavarians, one of their newer releases. These have both marching and firing poses on the basic infantry sprue, plus a mounted officer who should be an interesting prospect to put together. I also have a few spare arms and weapons from some Perry’s French Line Infantry left over from my Silver Bayonet zombies.
Images of the main ingredients below.

Putting Together the Chaff
Before starting to put any models together, I had a quick skim of the Turnip28 rules to see the types and sizes of units. There are three different sorts of infantry – Fodder, Chaff and Brutes, being your general foot sloggers, skirmishers and heavy melee troops respectively.
I decided to start with a unit of Chaff, which are only four figures in size. Grabbing a pair of clippers, hobby knife and some superglue, I got going.
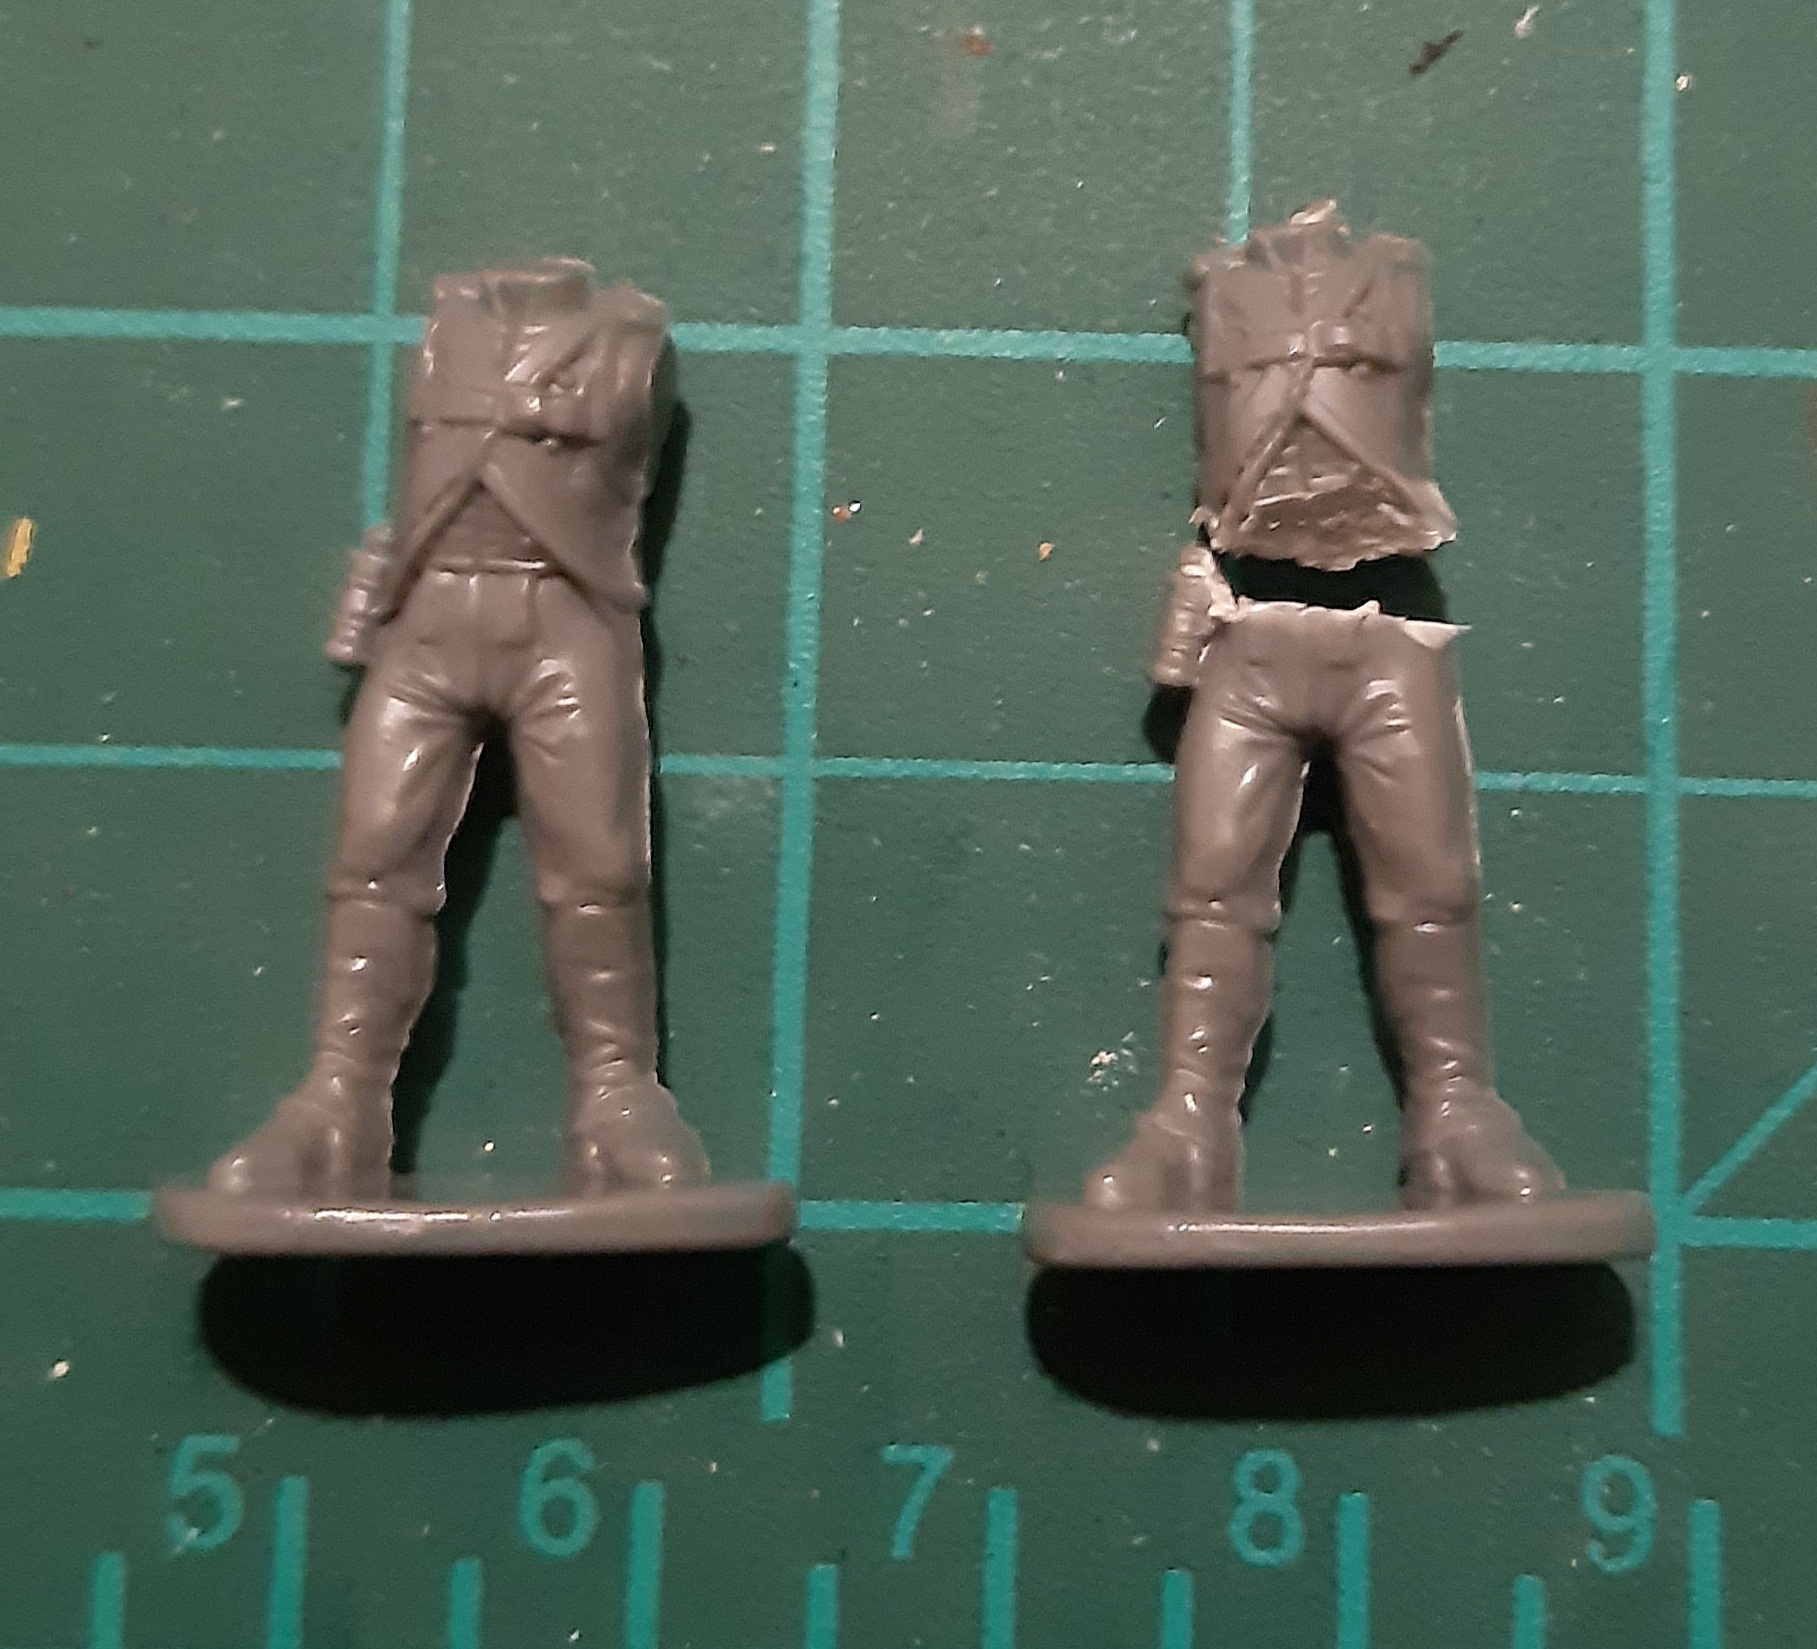 First step was snipping the legs from the torsos of the Bavarians. I made a quick check to see how the 3D printed torsos matched up, just in case they aligned in an unexpected way, but fortunately there were no surprises.
 Next it was a simple case of gluing the torso on, and picking some appropriate arms. As these were going to be Chaff, I picked out some of the arms for firing and loading figures. Backpacks were added, and I thought plumes would be a nice addition to mark them out as elites.
As far as kitbashing goes, this is pretty standard stuff. The 3D torsos were a bit more rotund than the Bavarians, so trying to get arms to match nicely around the body was difficult. Lots of gaps are present, which would normally be avoided by careful dry fitting and trimming of parts to get better joins. However, one of the joys of Turnip28 is the dirty, rooty grim dark theme – gaps in the joins are opportunities to work in roots and tufts and general grub. Basically, lazy kitbashing is absolutely fine, possibly a boon.
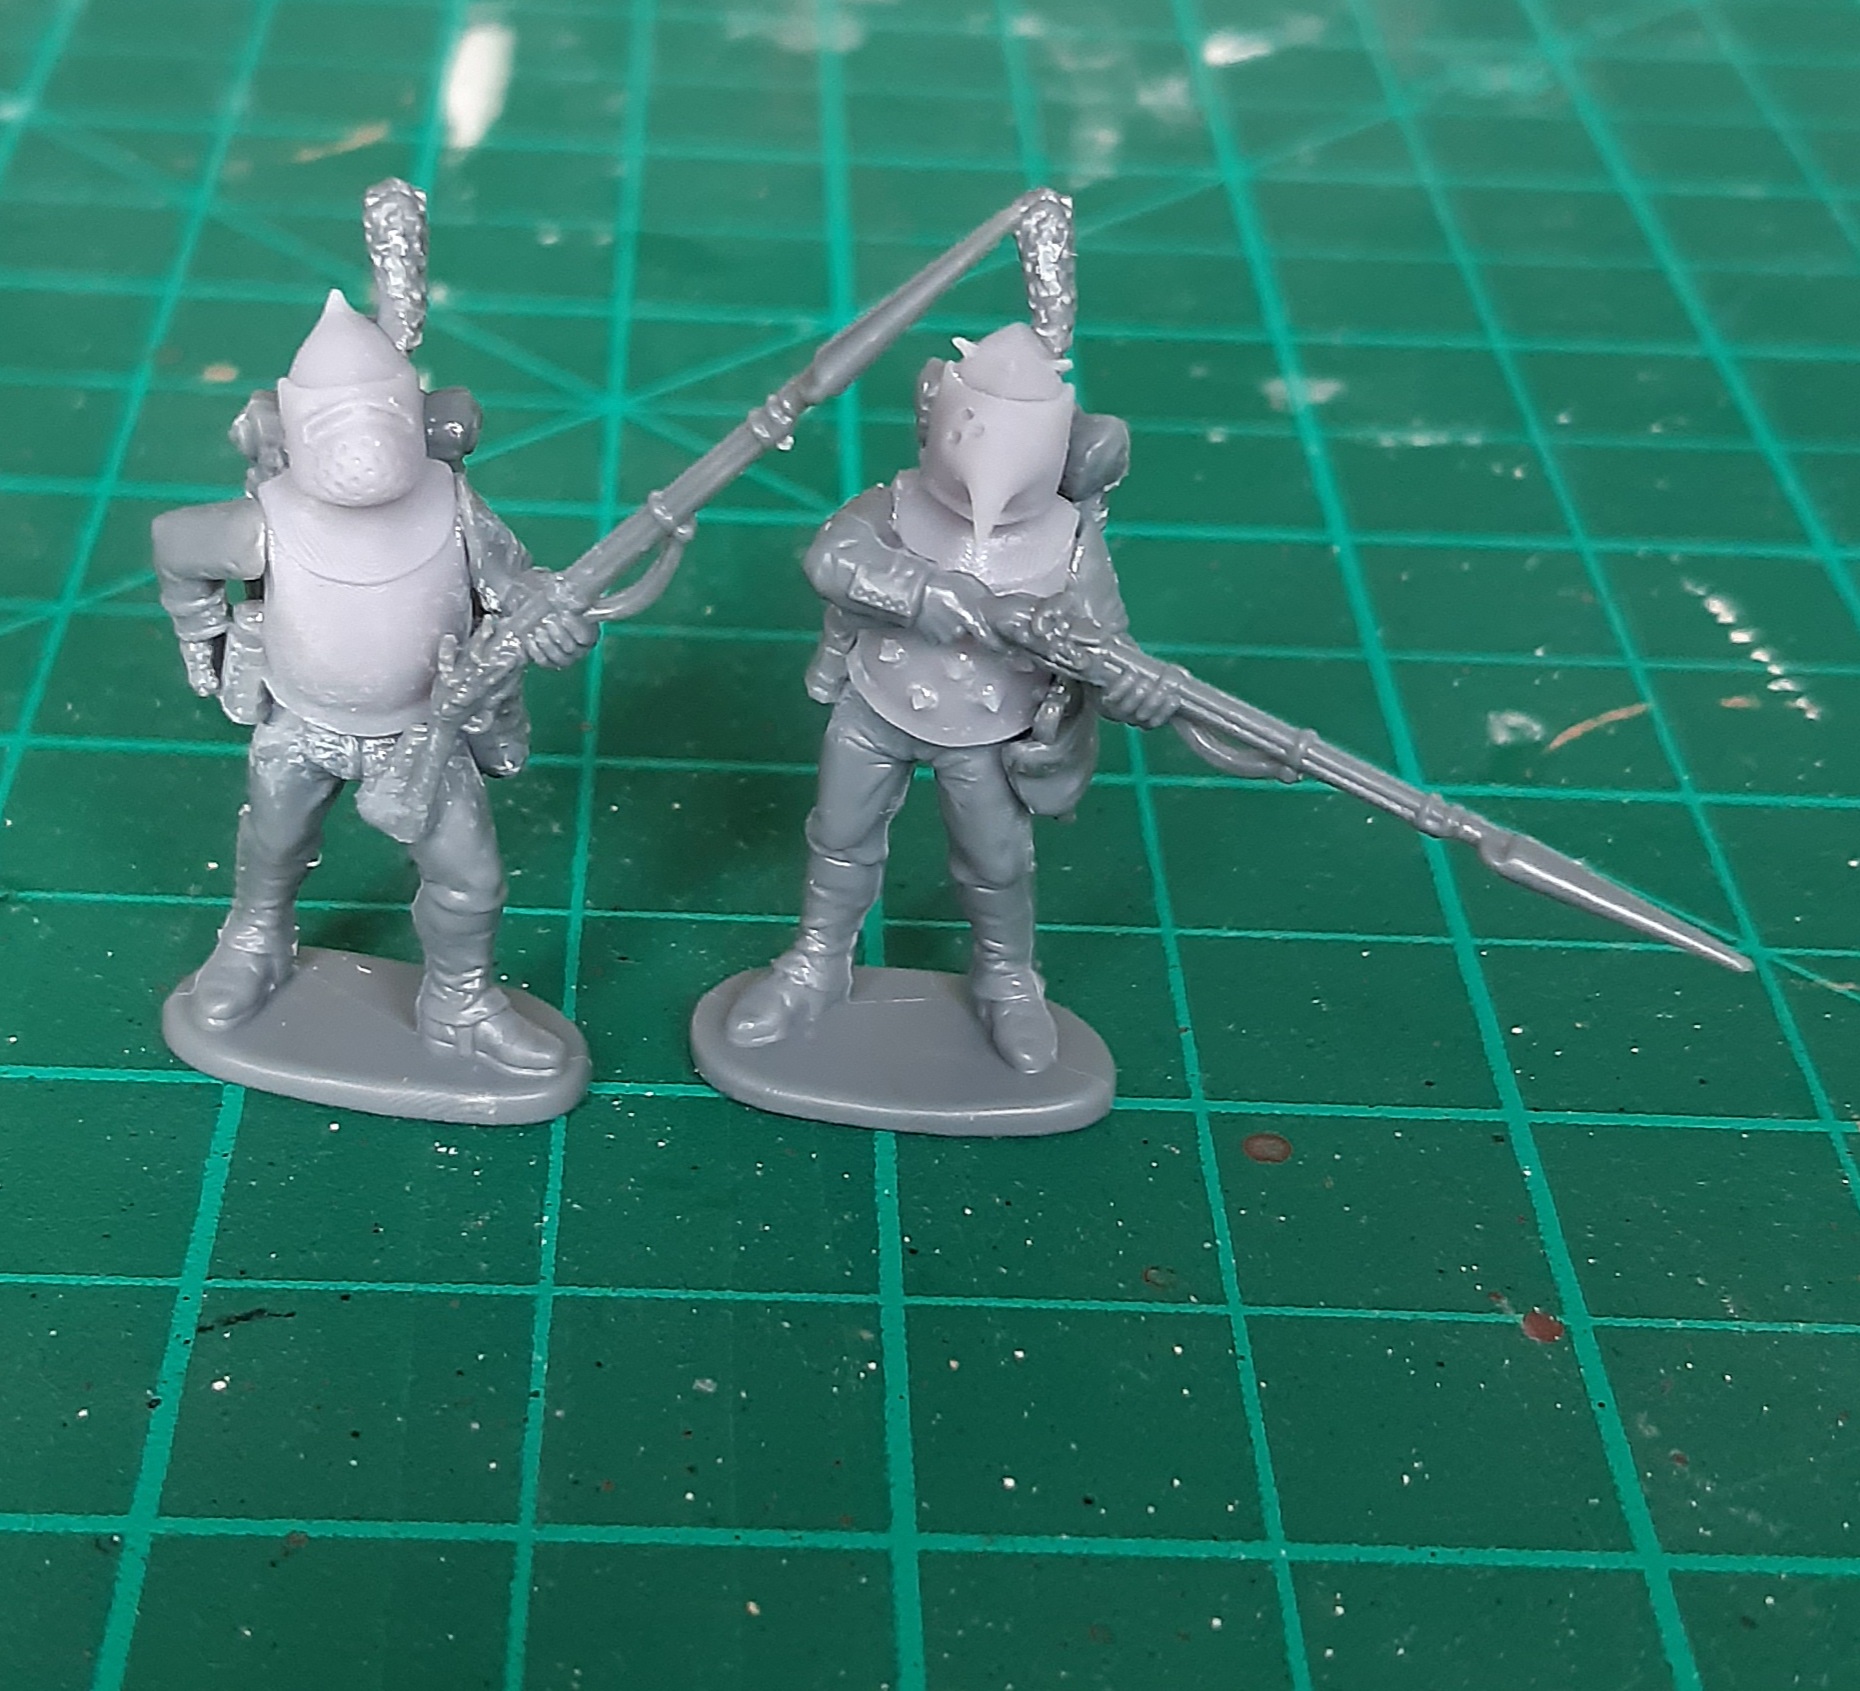
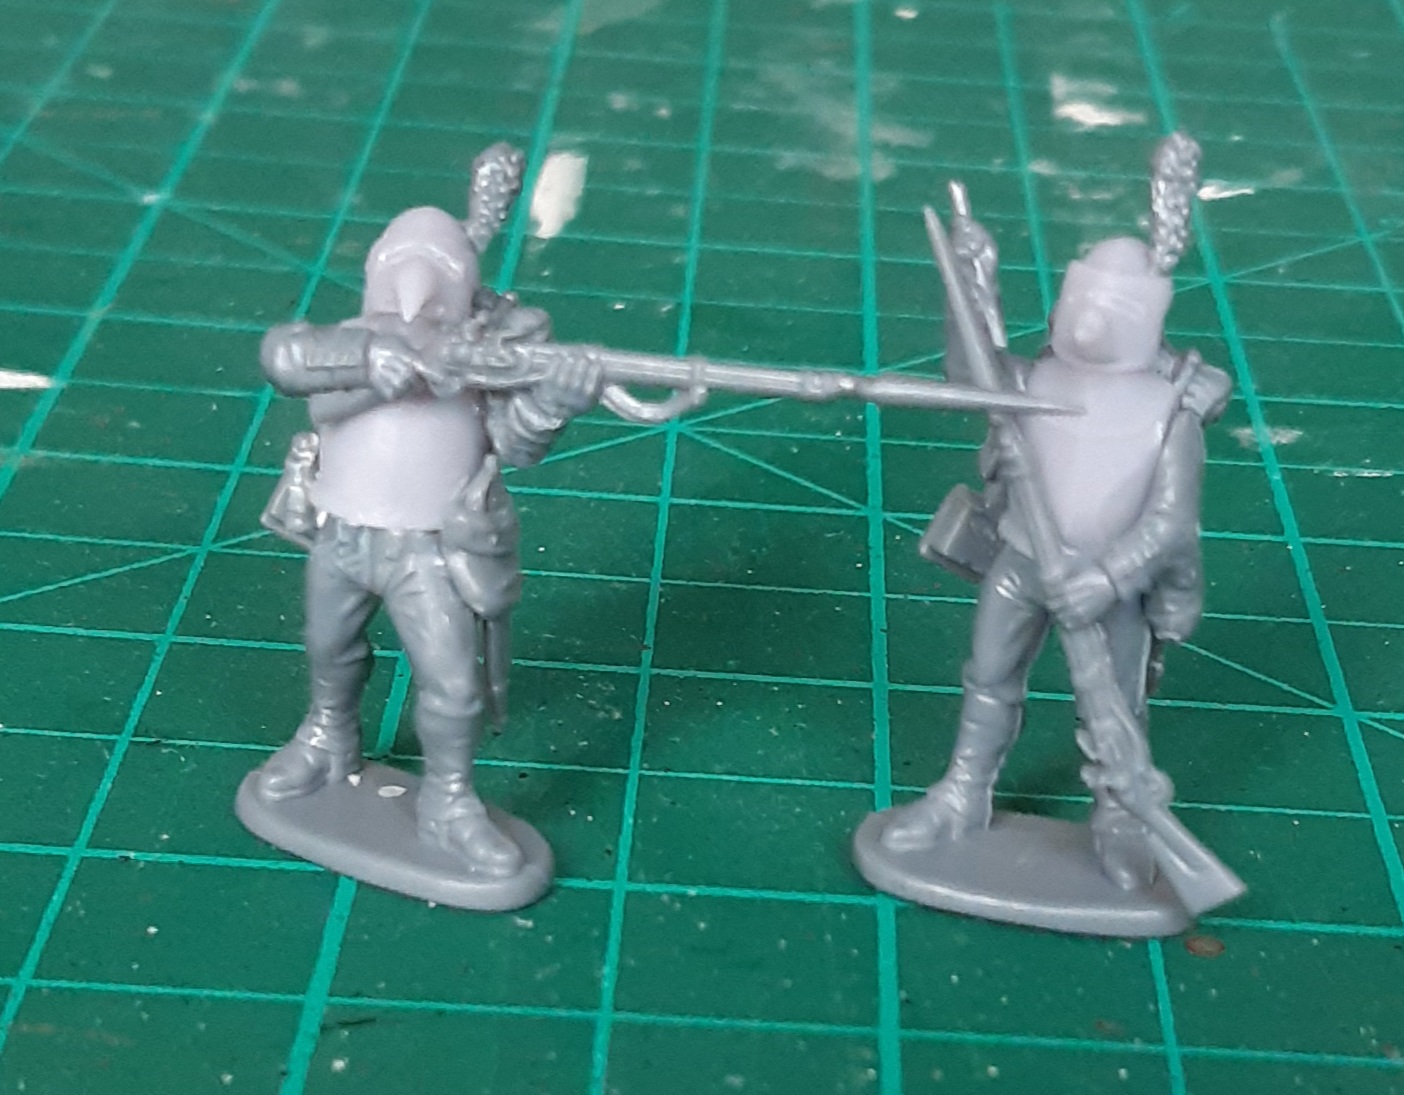

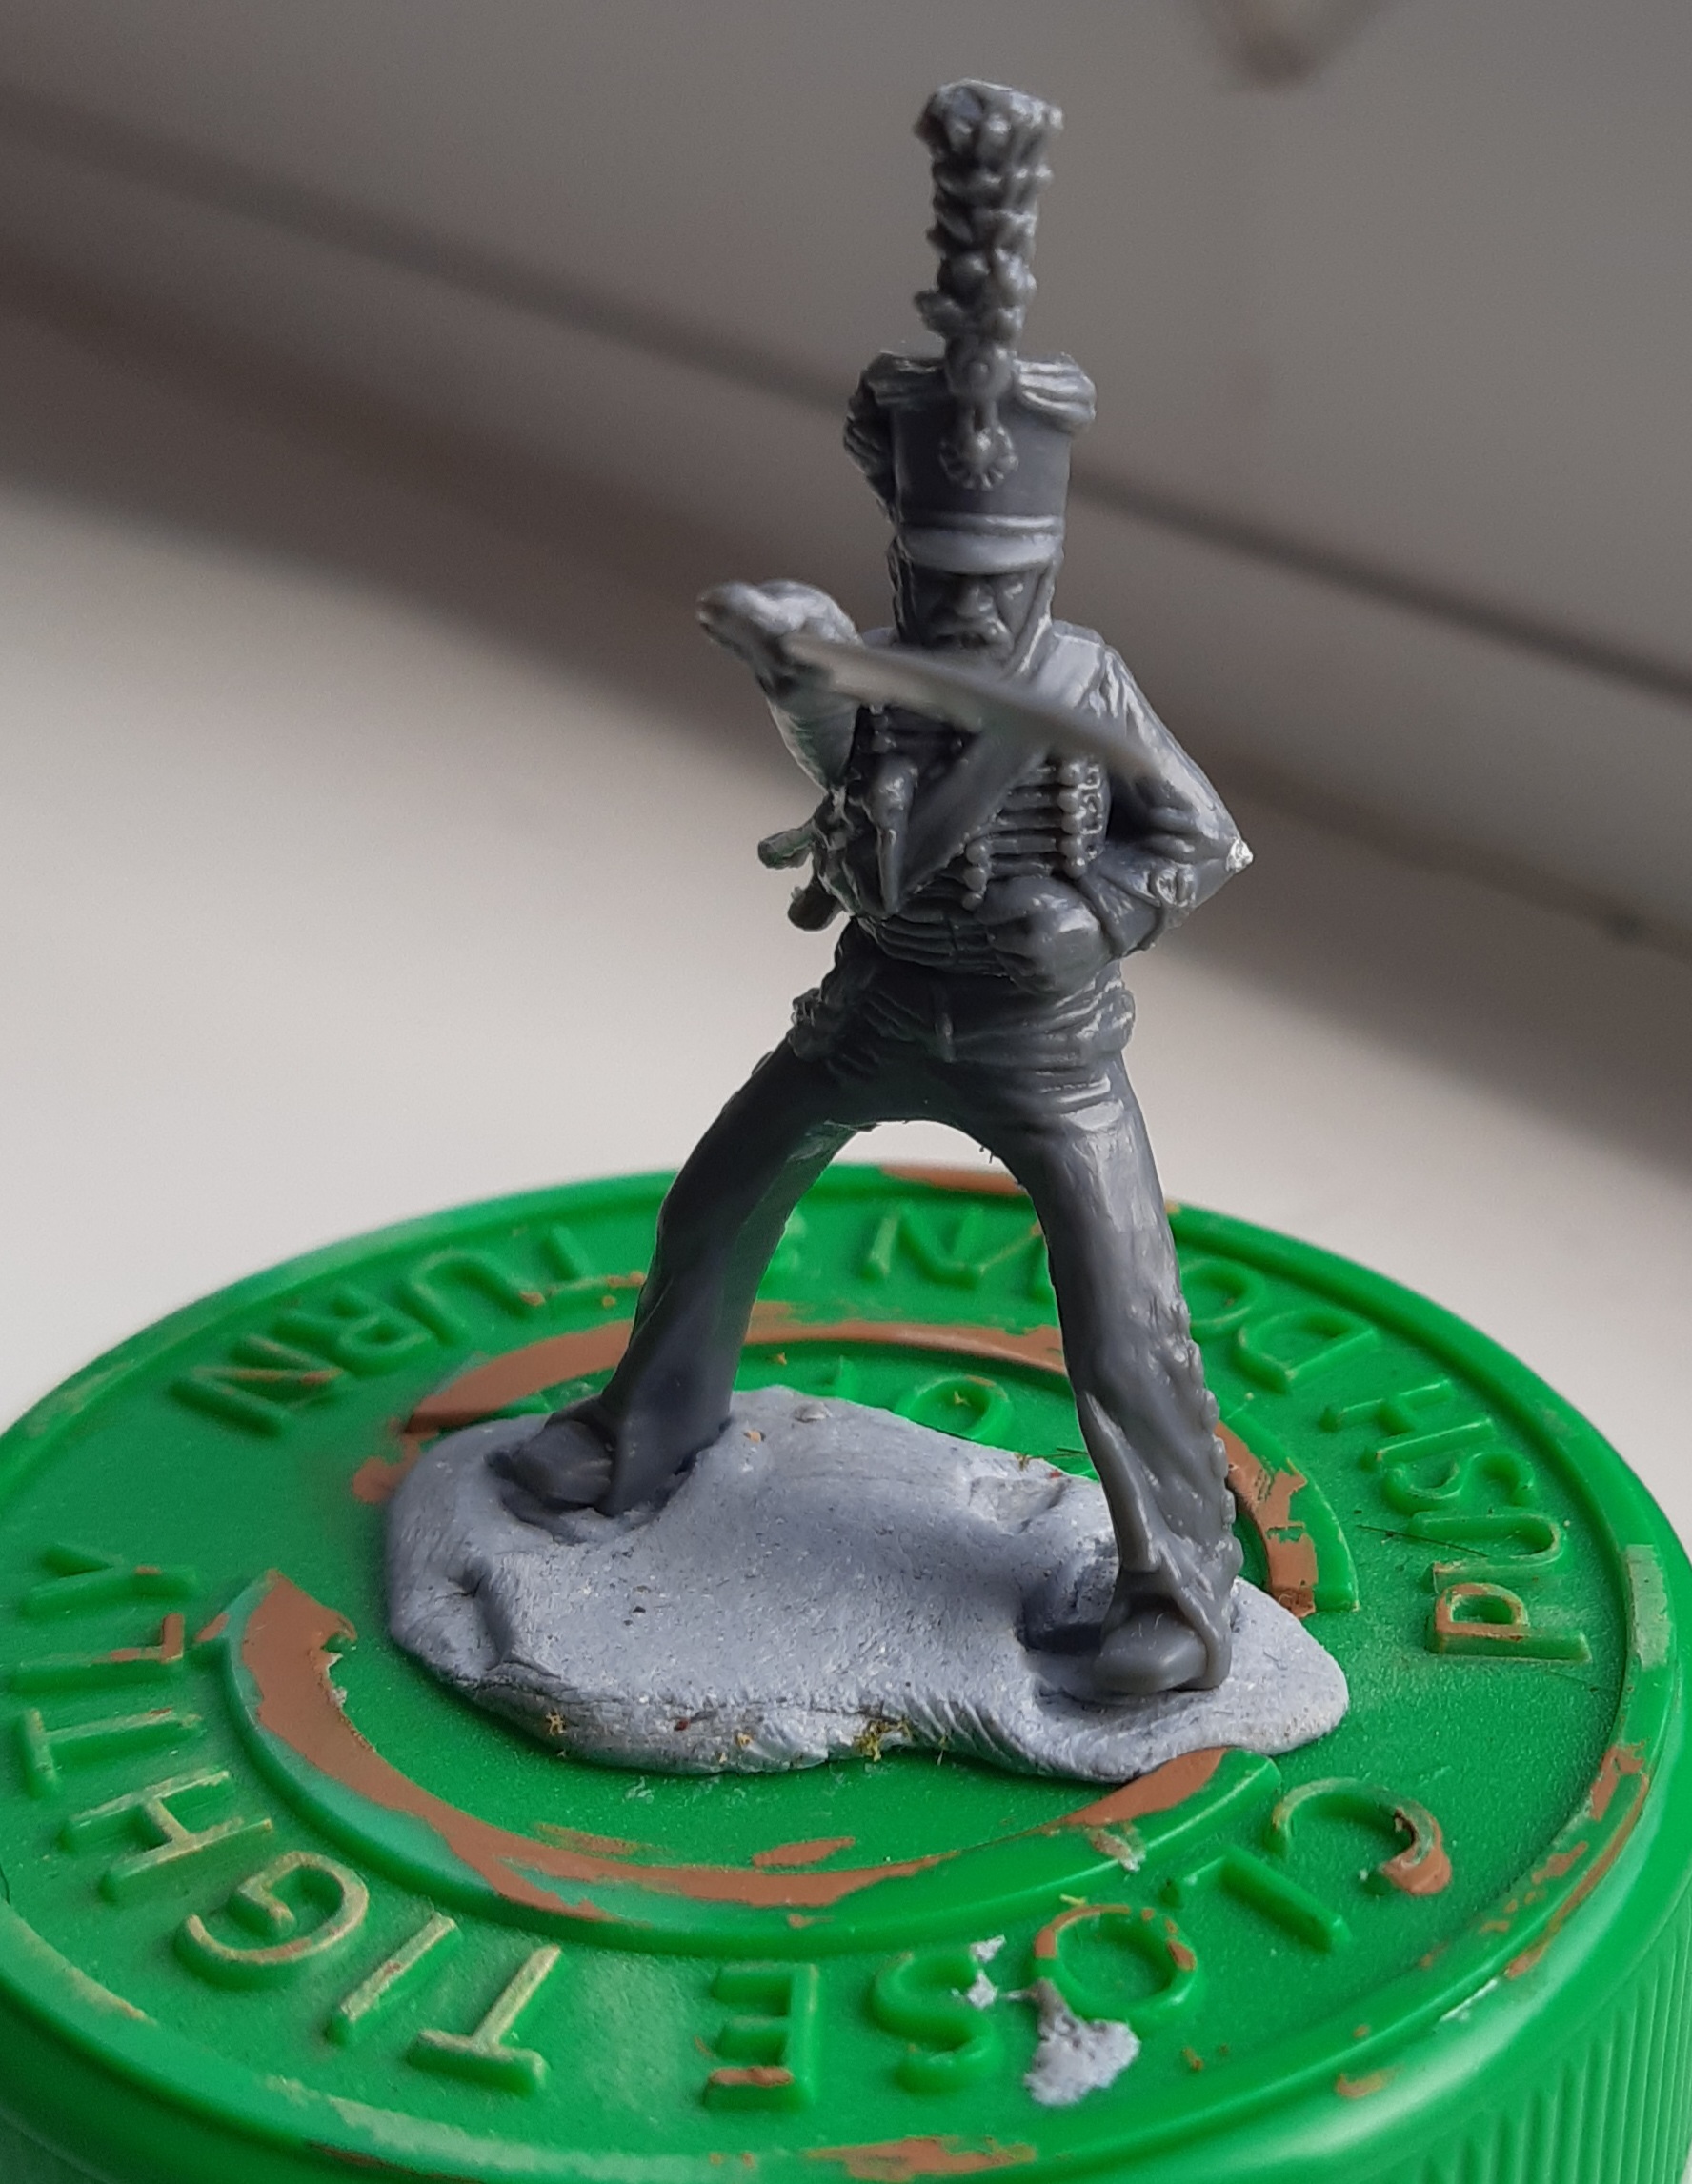
Although Chaff reckon themselves to be quite the dangerous marksmen, they are in fact terrible shots. I quite liked making one of them look pretty awkward in firing as a nod to this.
Putting Together the Fodder
In Turnip28, Fodder are the mass group of the lowest troops. They come in units of 12, and I wanted to have a lump of these in traditional Napoleonic marching poses as they trudge onwards.
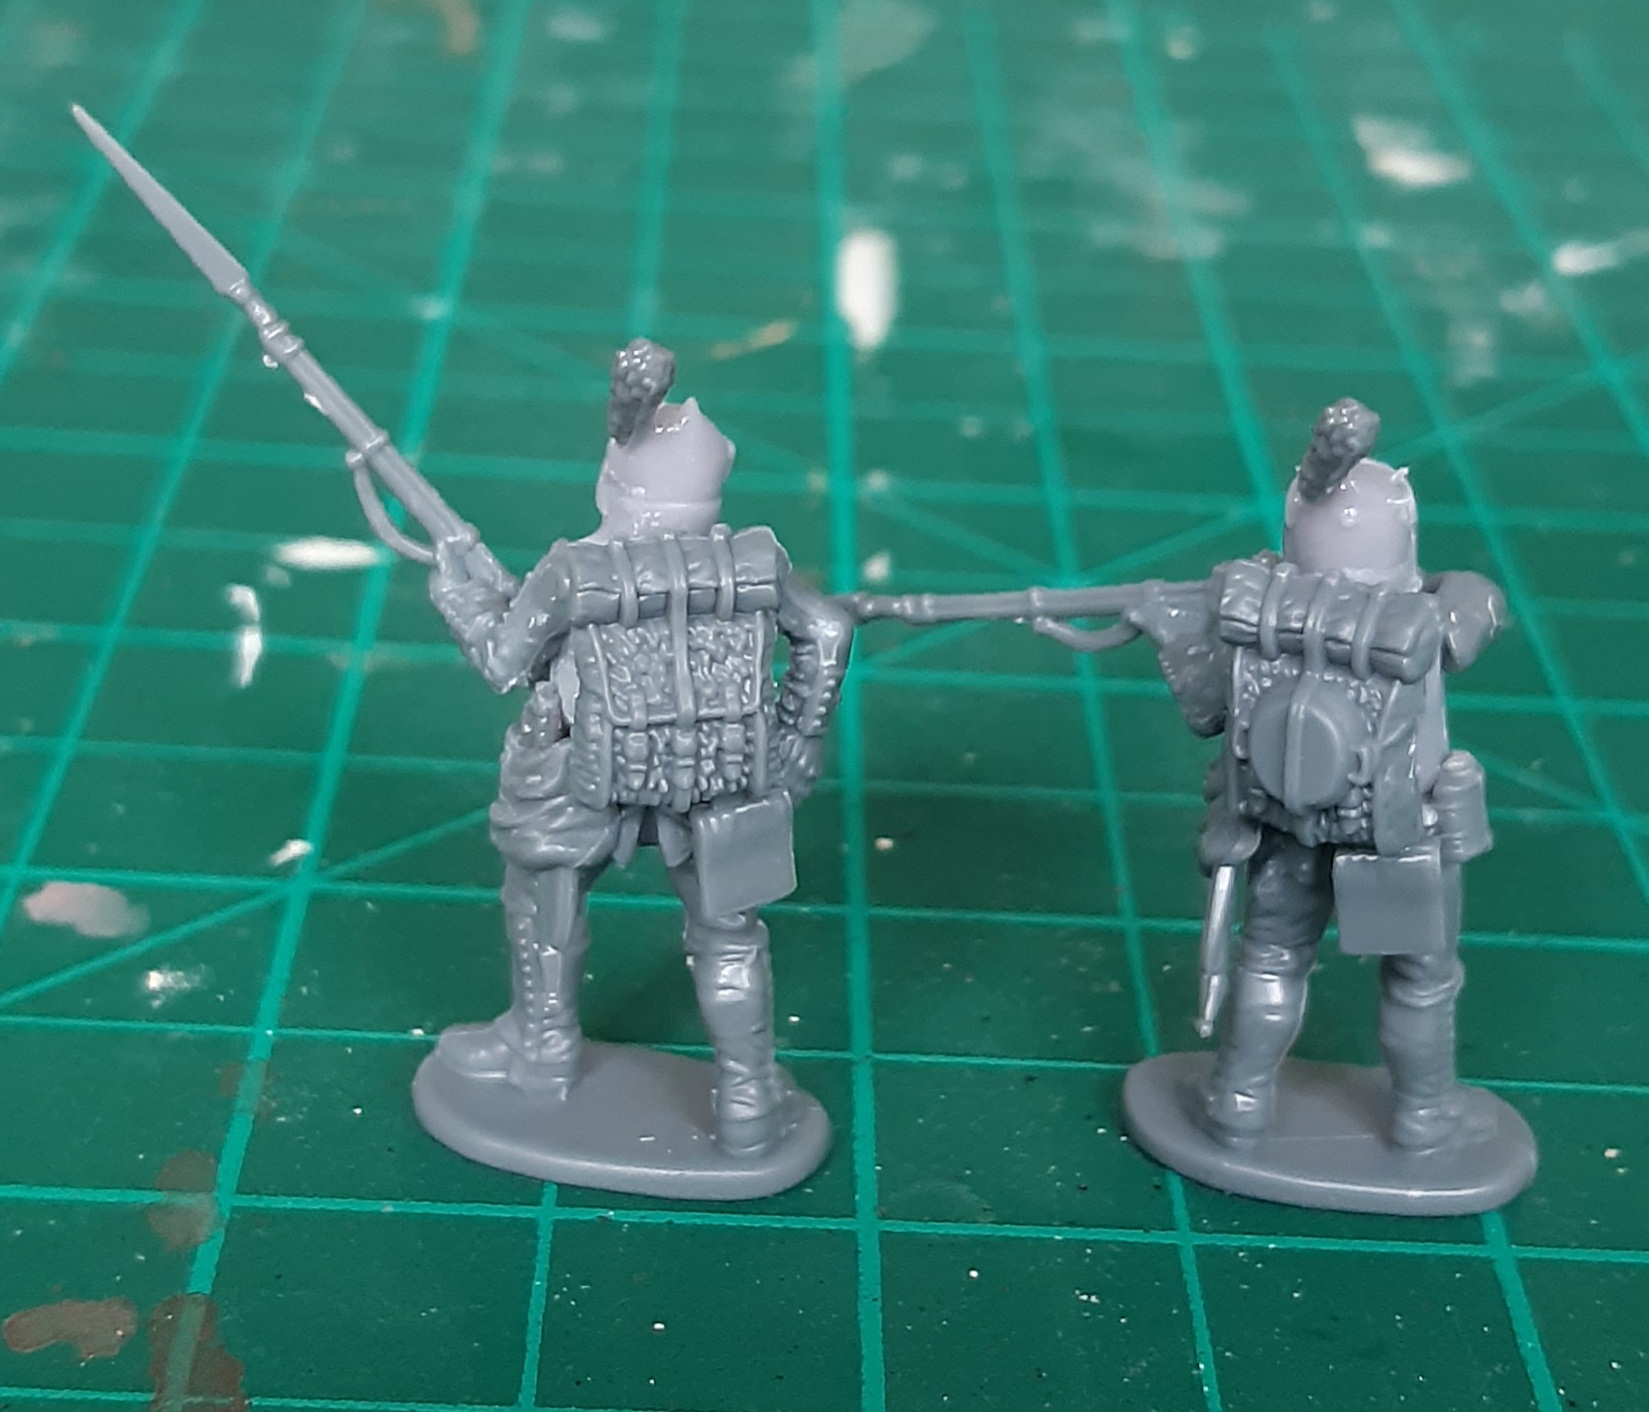
The process was basically no different to the Chaff – slice legs from the torso, replace with a nice 3D torso, add arms and backpack. Two main differences were I sliced the legs at a bit of an angle to give the Fodder a more hunched and slumped over look. Secondly, I found carving a little concave nook into the back of the blanket/coat roll helped fit the backpack onto the more rounded shape of the torso.
The wise among you may have spotted a potential problem with some of the Bavarian bodies. Half the infantry on each sprue have their right arms already attached, with no additional straight arms present. This potentially meant having to carefully remove the arms before slicing off the legs, nothing too difficult, but a bit of a pain. Fortunately, I had some spare arms left from a Perry’s 1814 French Line Infantry kit, so I had options beyond removing all the arms from the bodies.
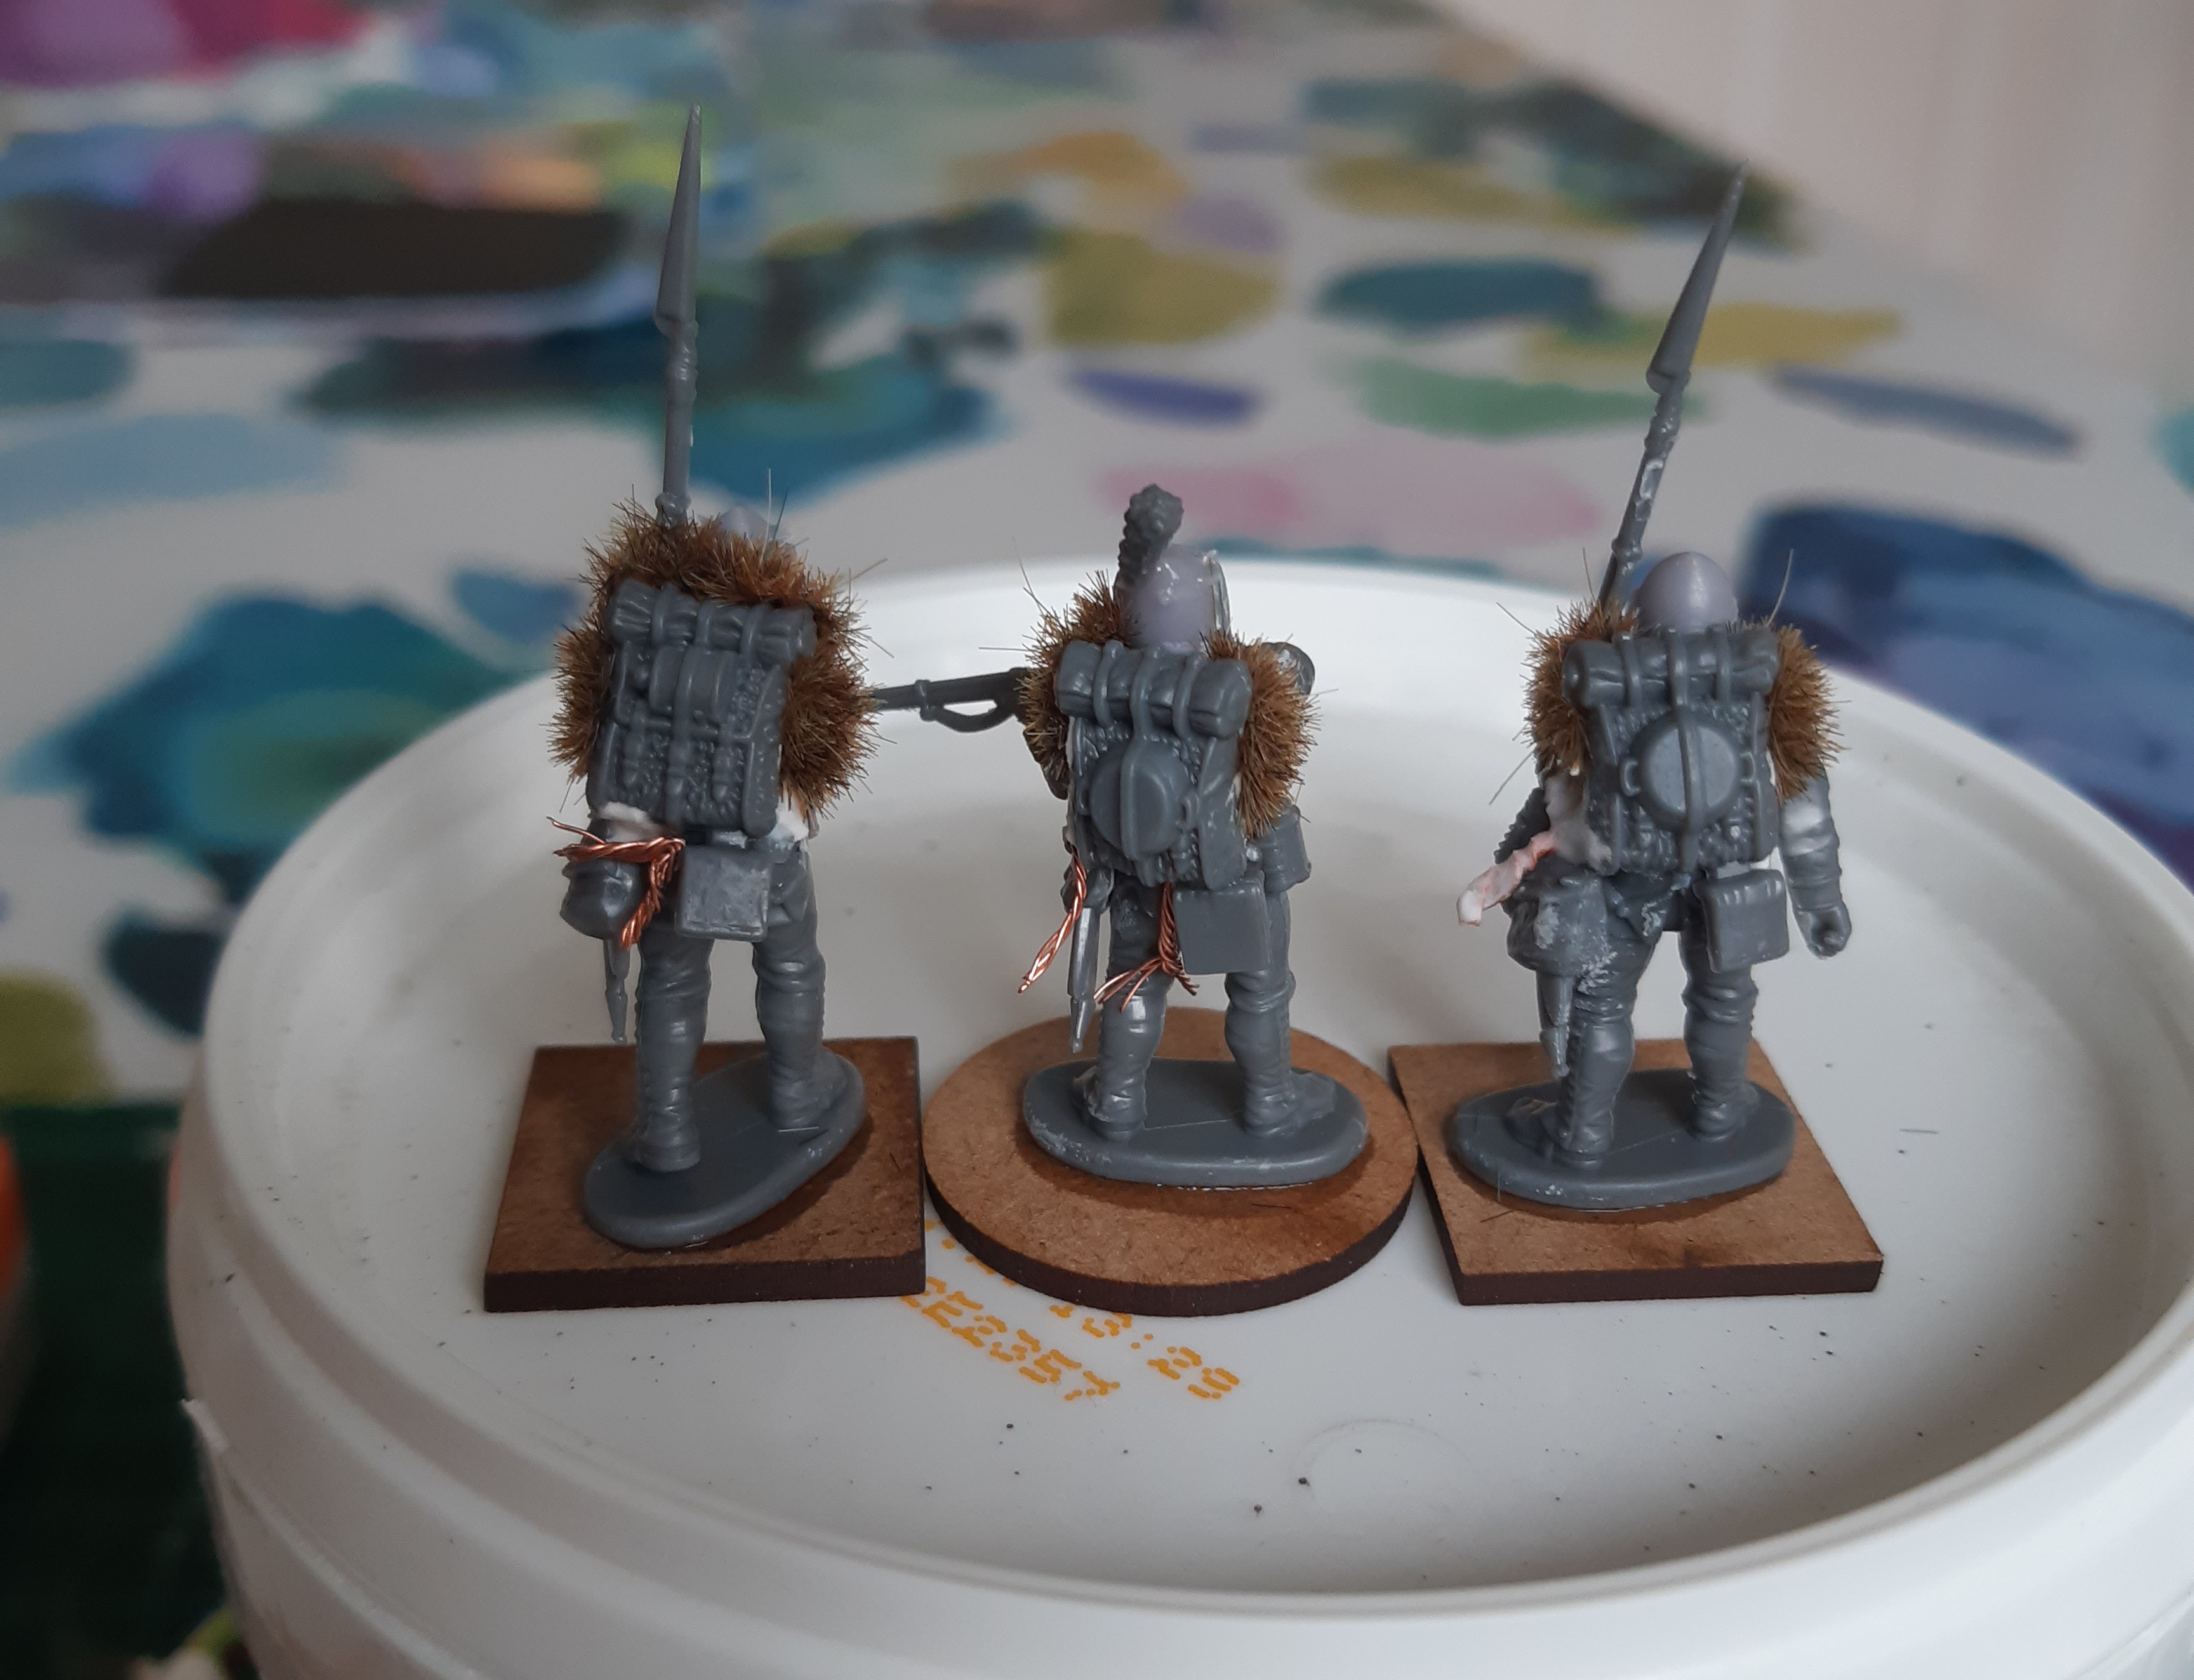
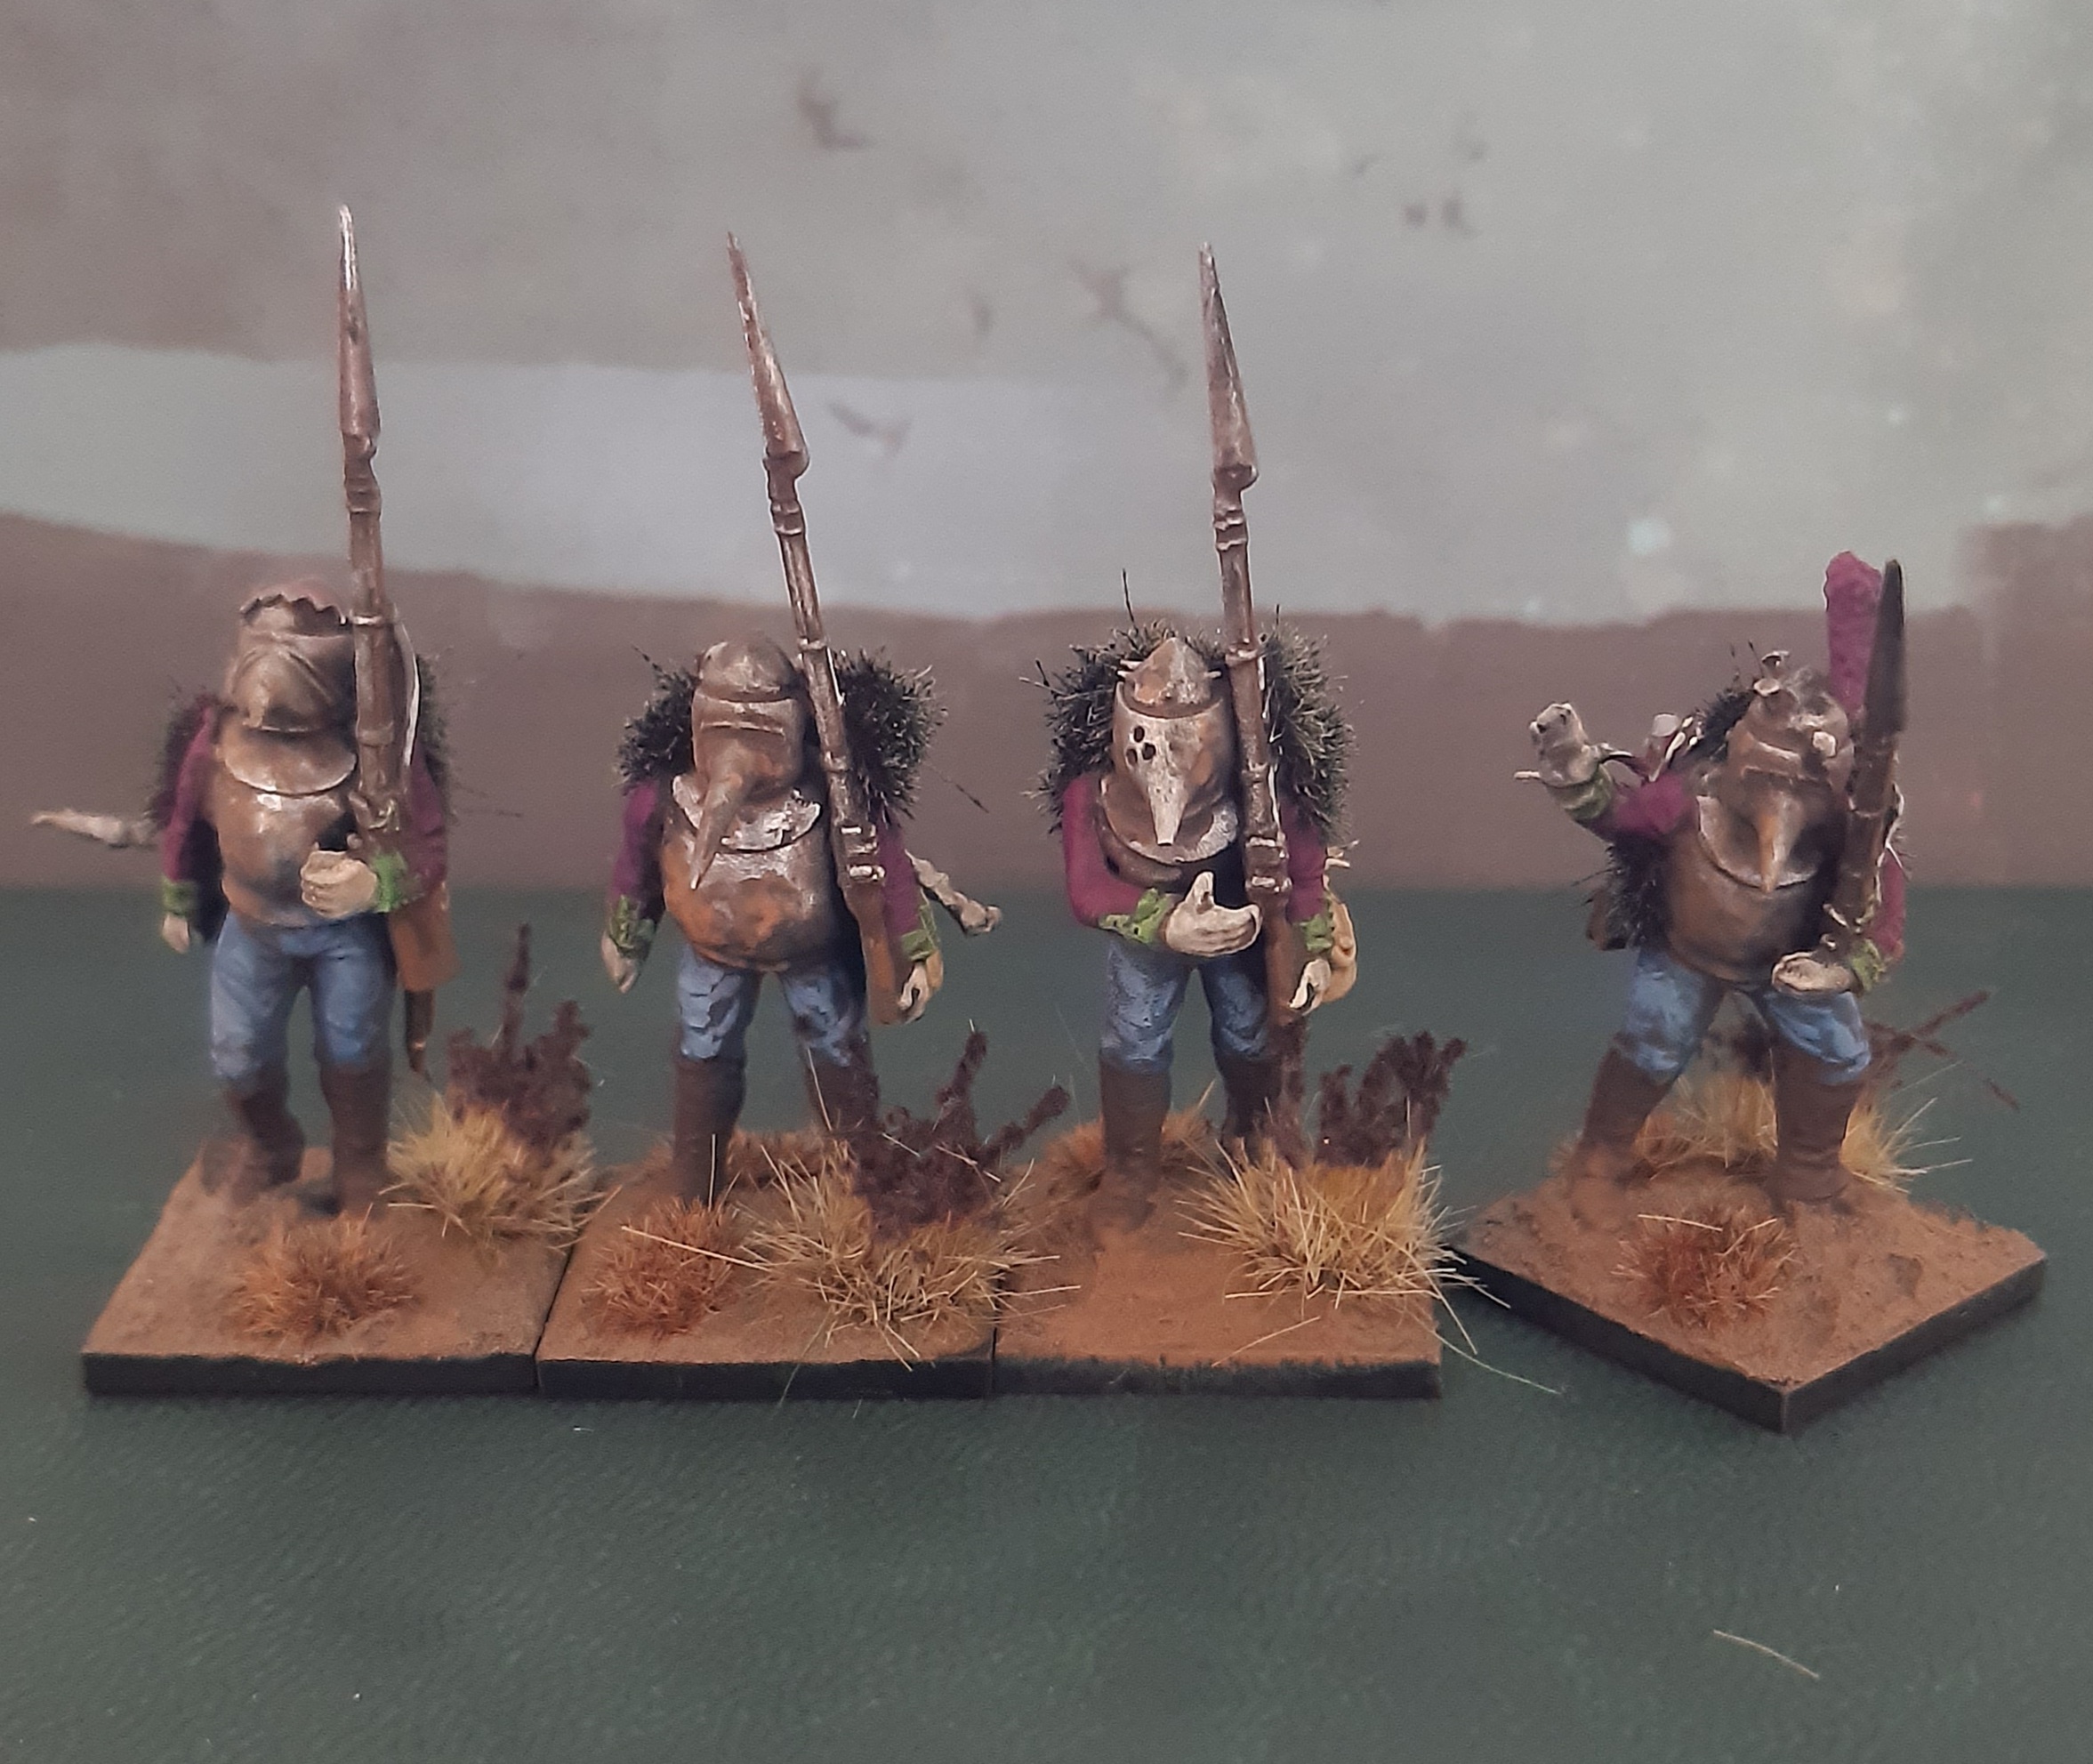
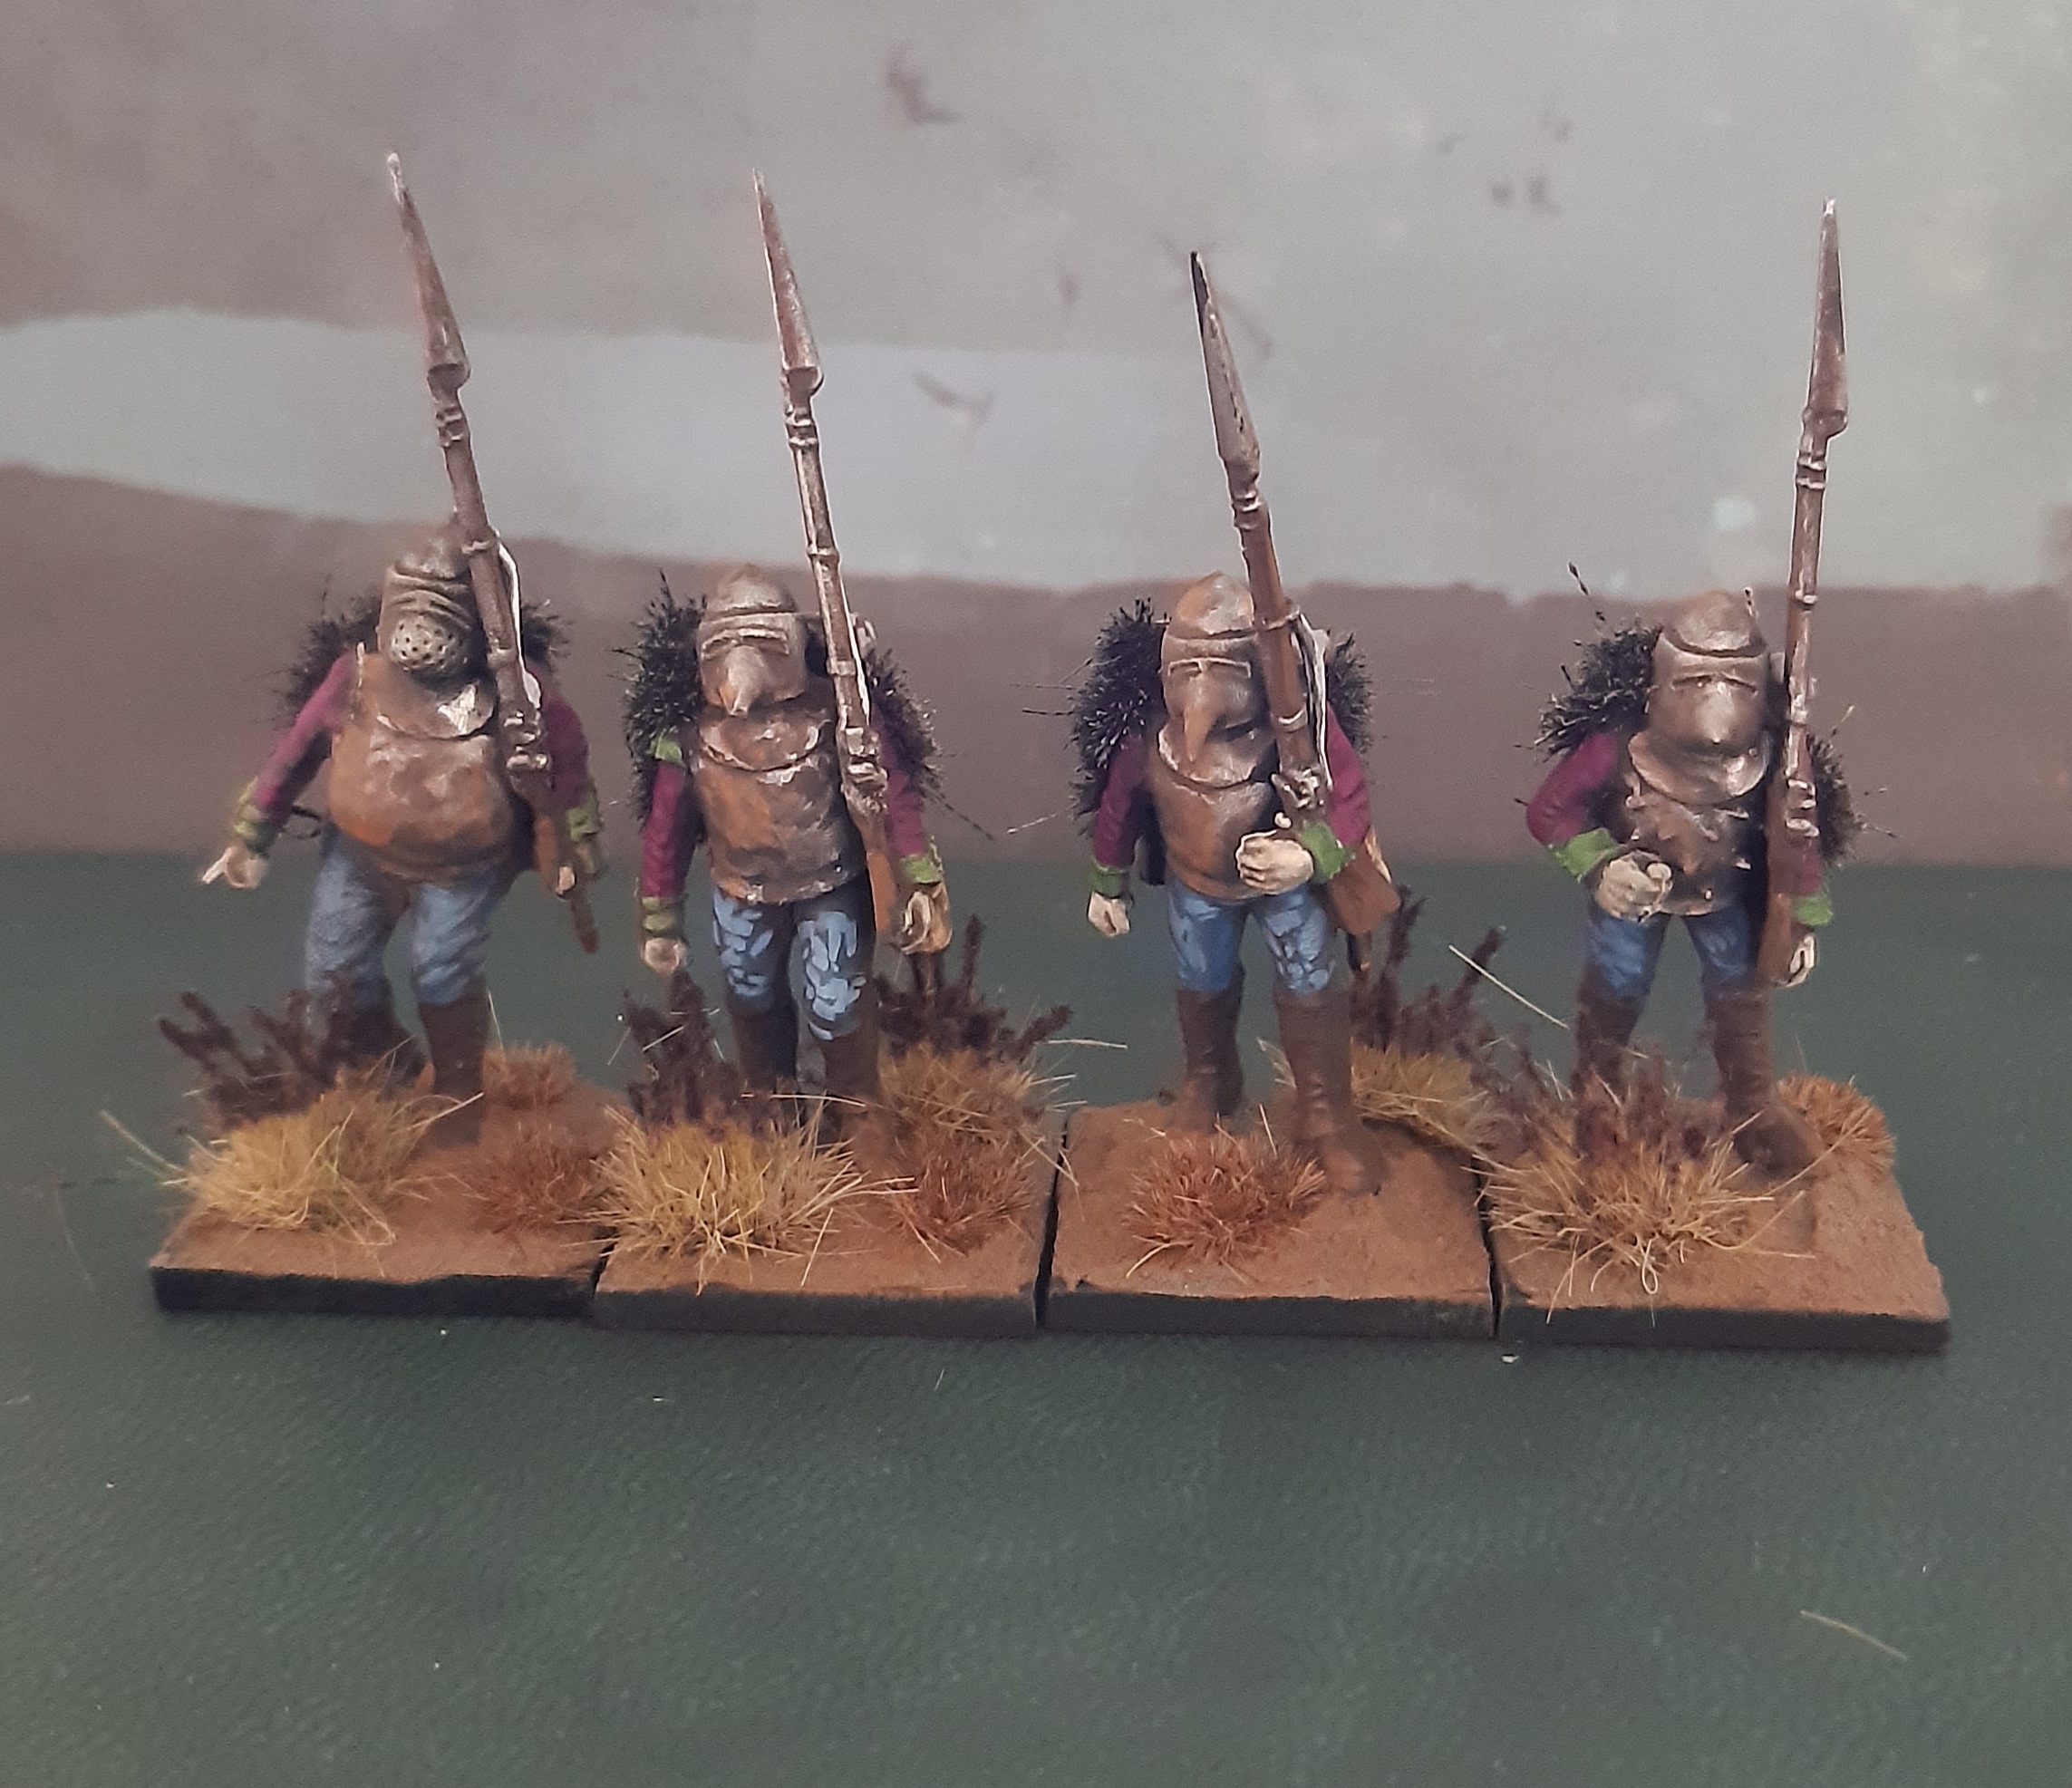
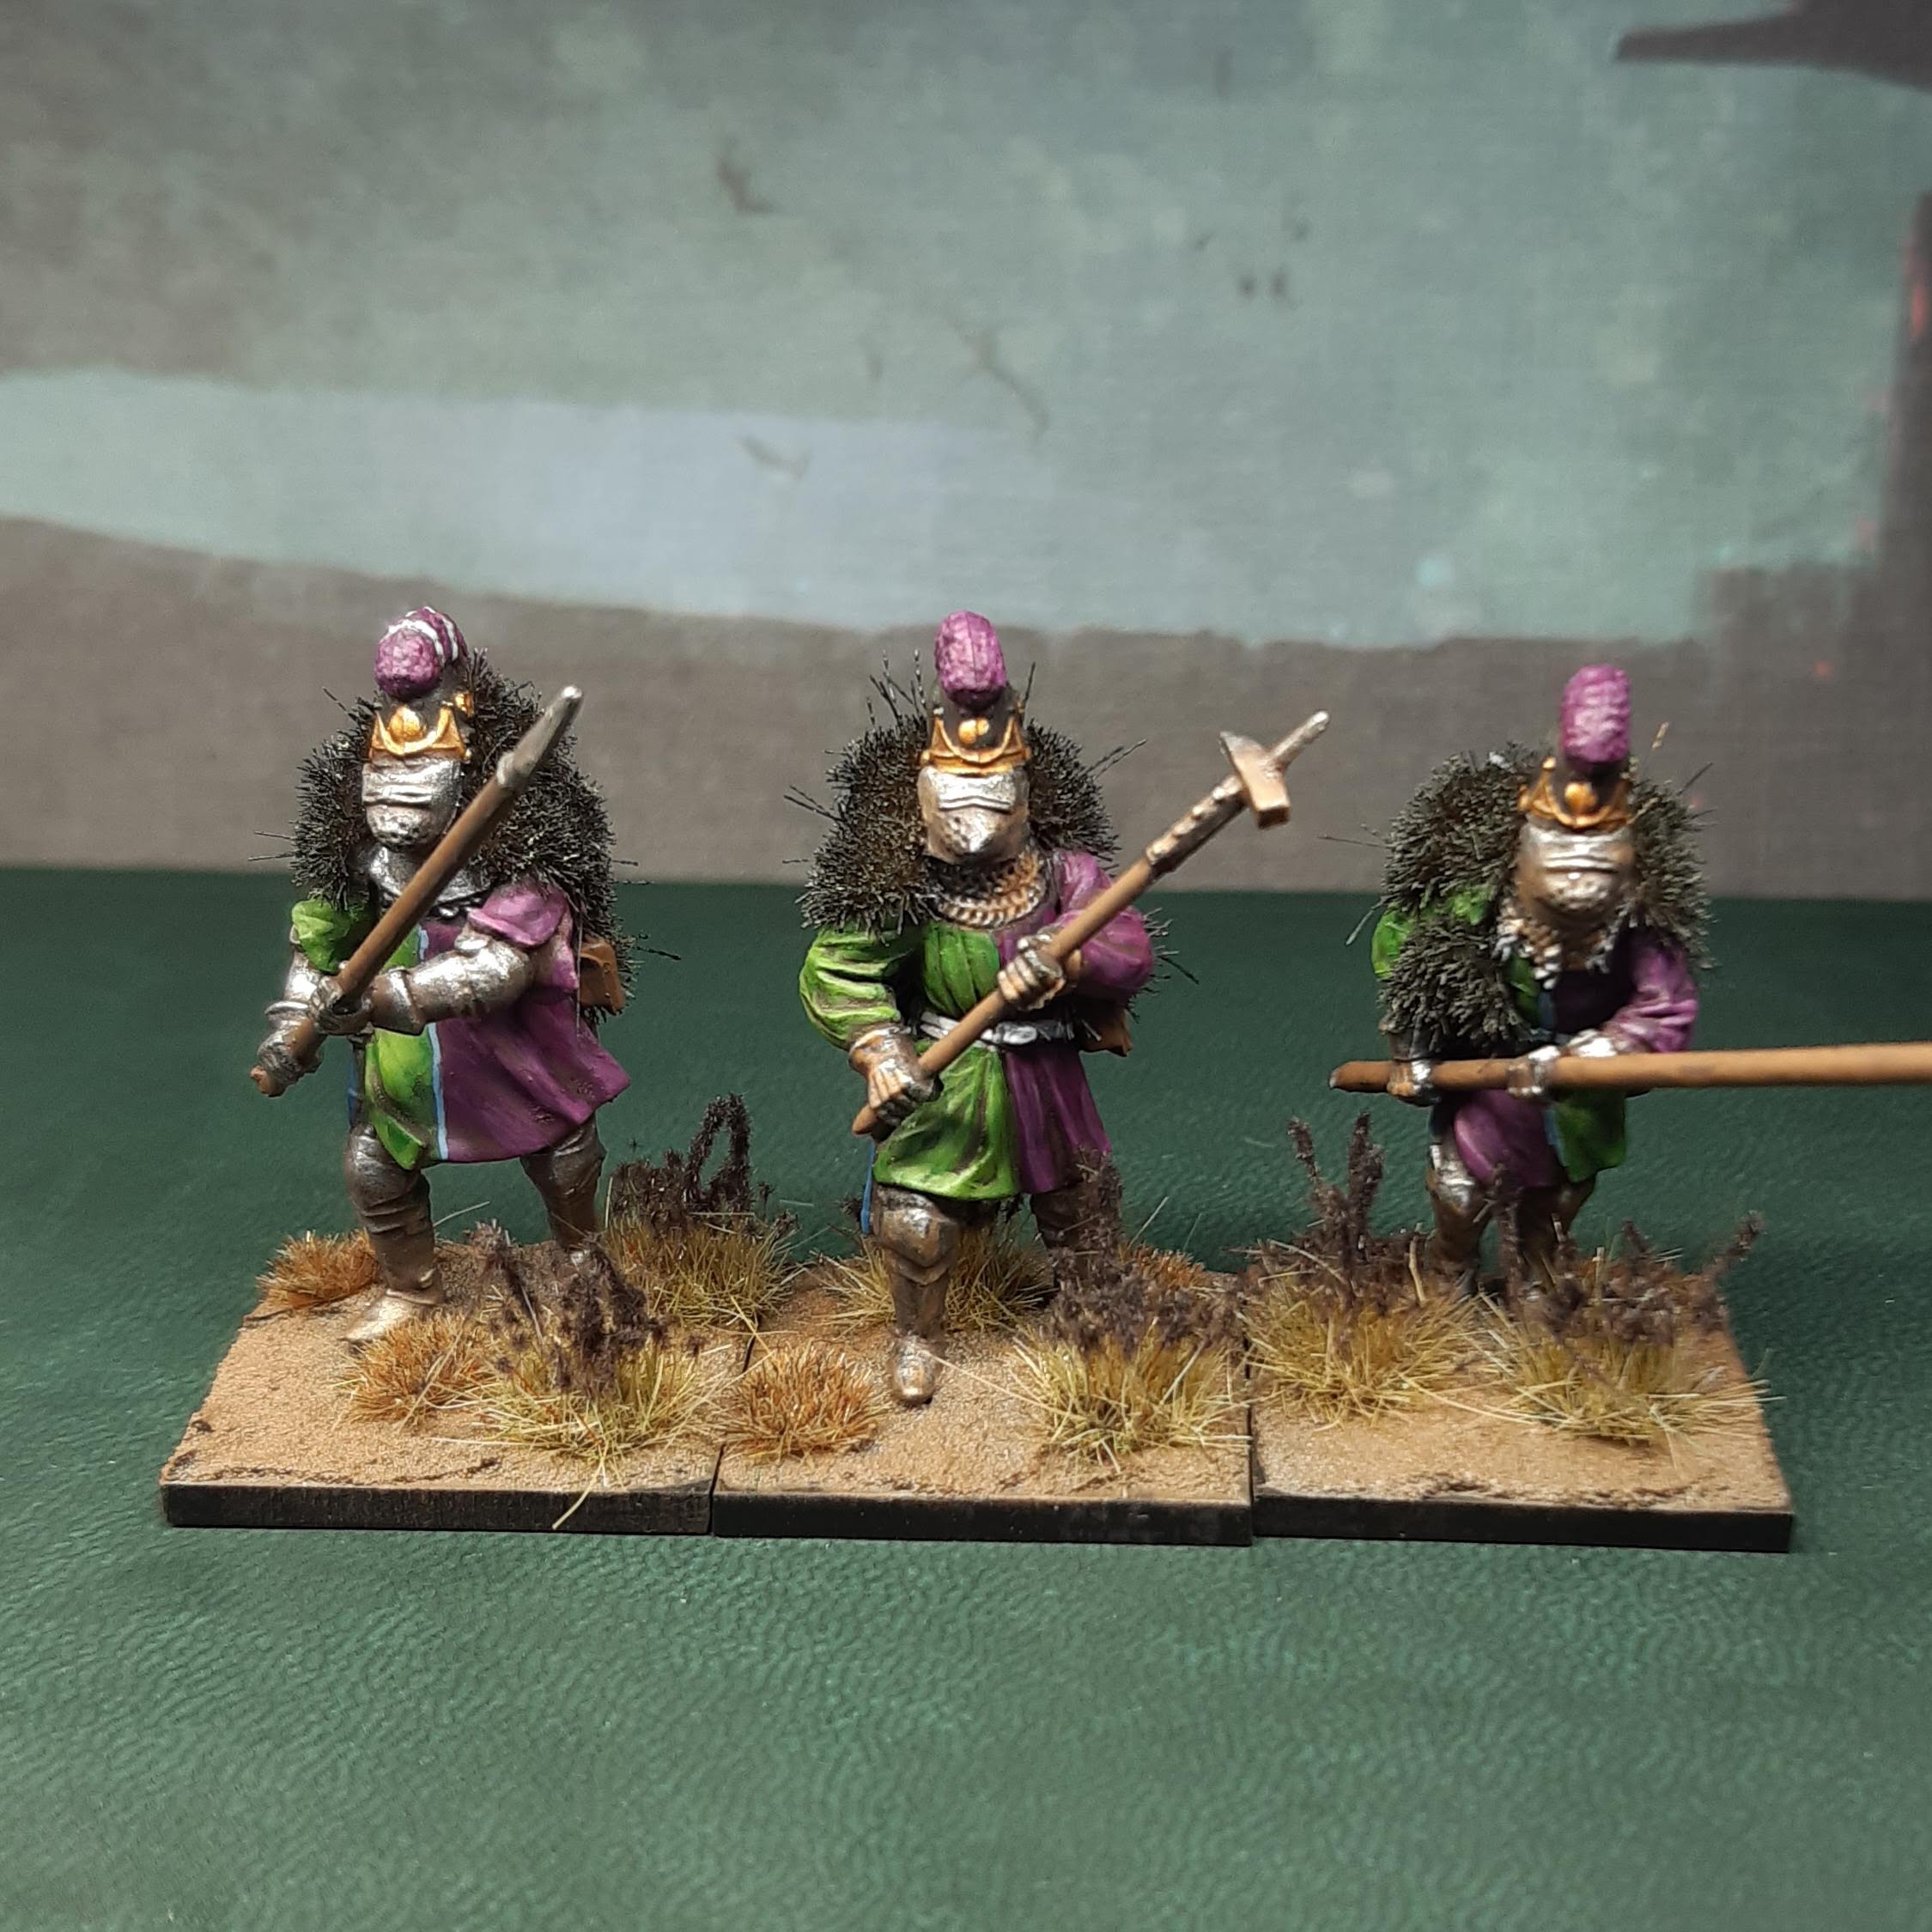
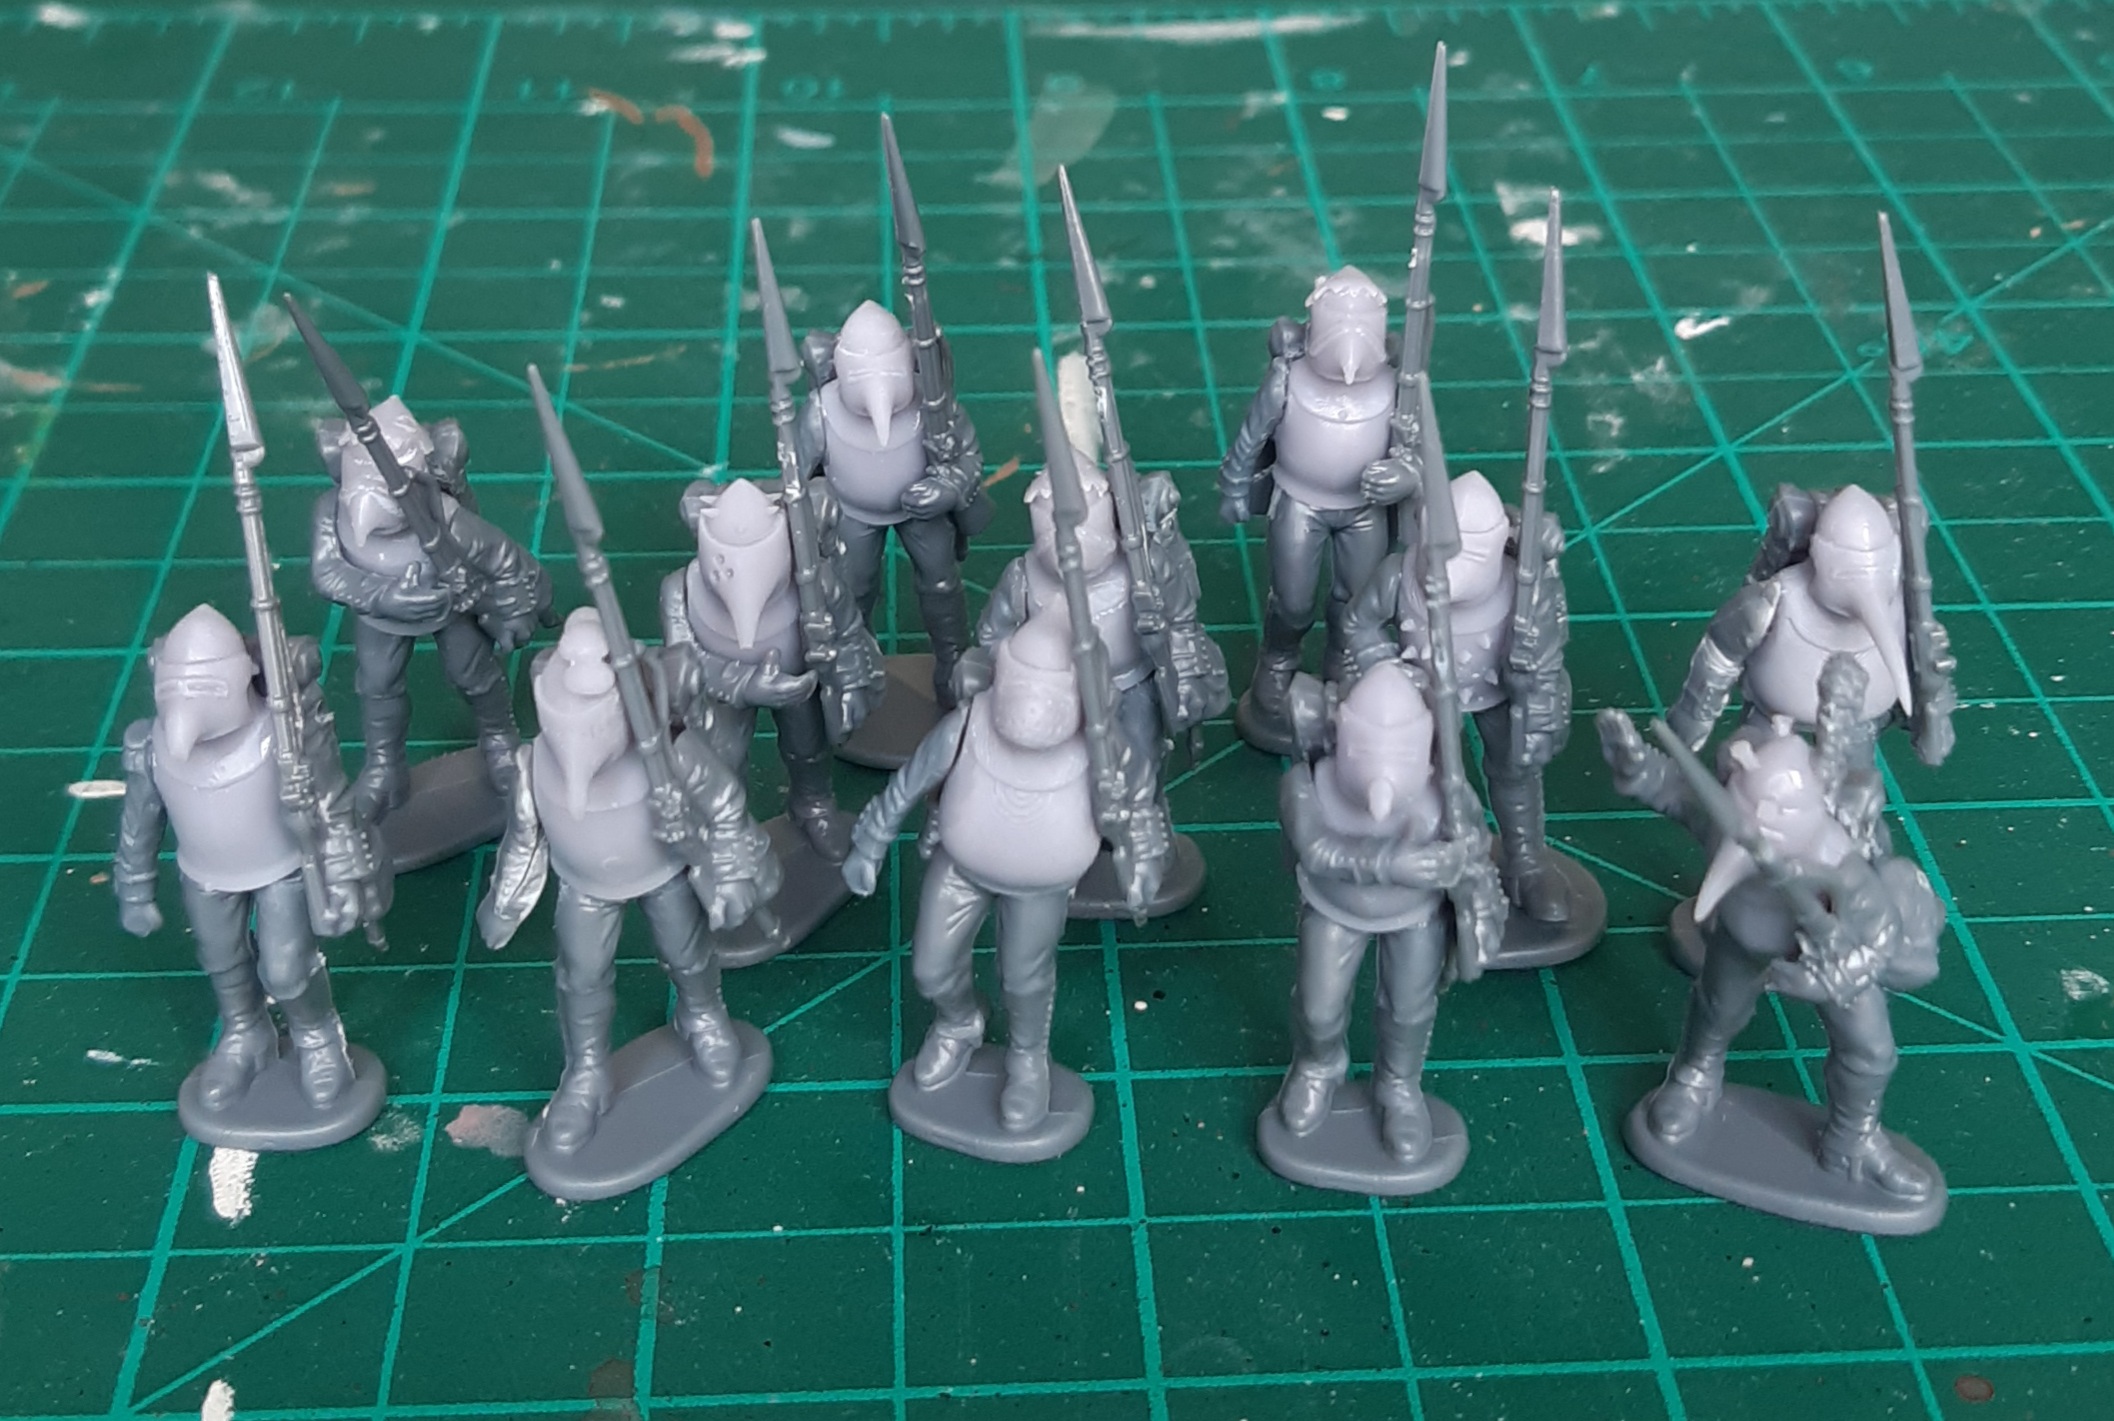 Here's all twelve Fodder. As with the Chaff, plenty of gaps to be sorted out with roots and dirt.
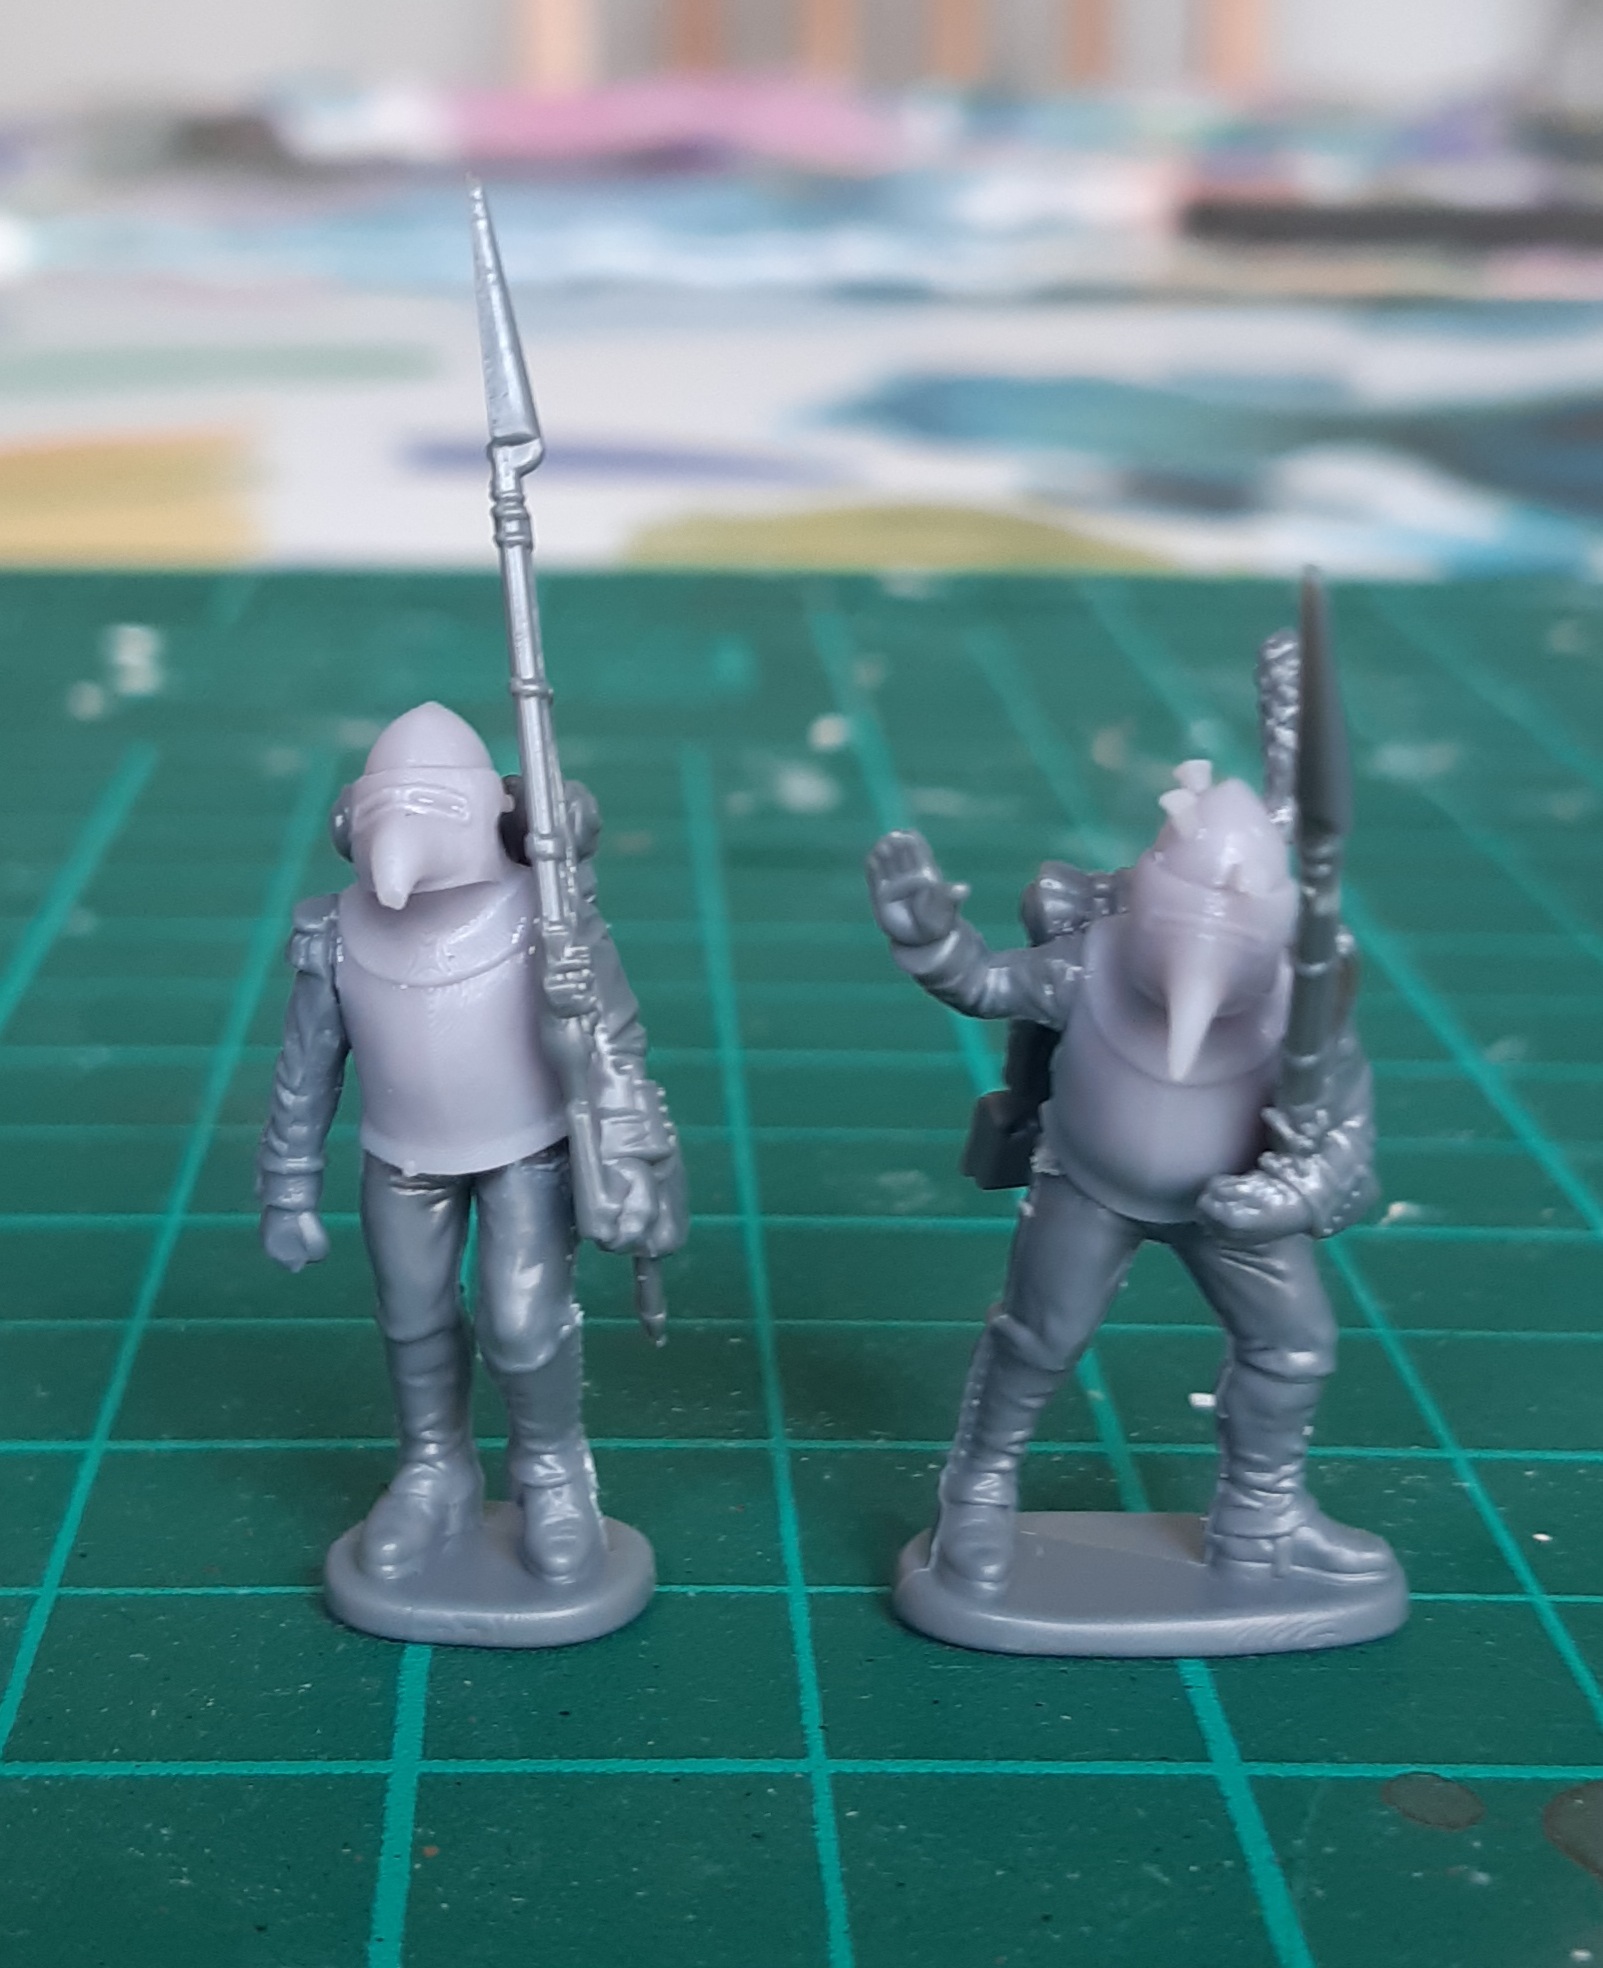 A couple of close ups of a few Fodder. I gave one a plume and a signalling hand, representing a NCO.
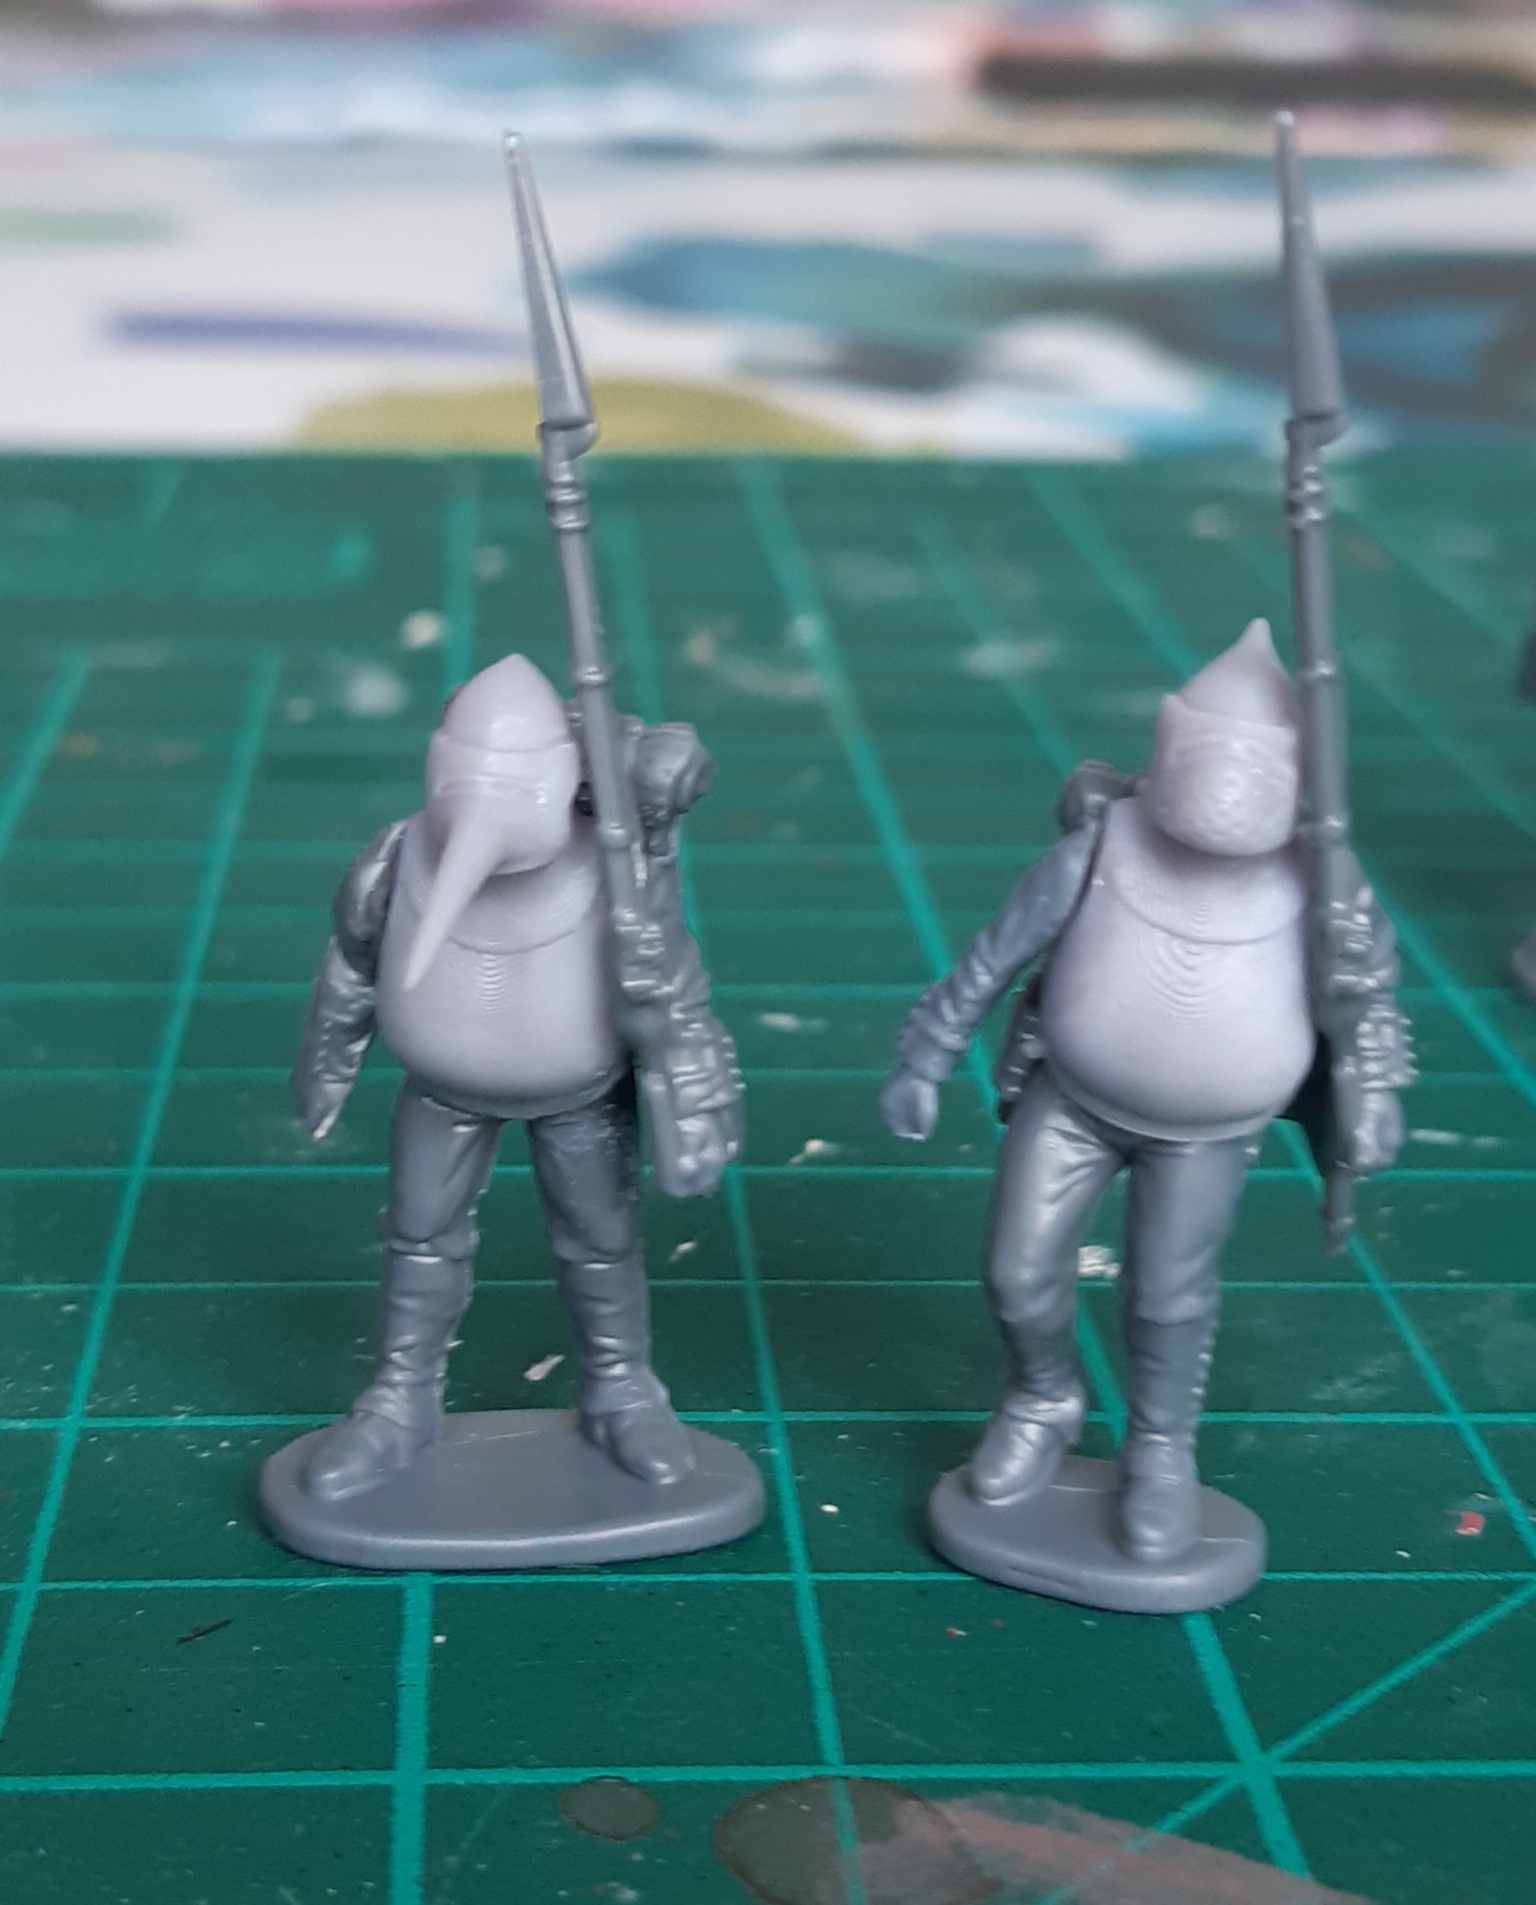 I quite liked the swagger I got on the chap with the larger gut.
Finishing Touches
With the figures put together, the next step was to fill in some gaps and add various bits of vegetable material indicative of the root infused theme.
Materials used included tile grout, some scrap wiring, a few small patches of tufts and superglue.
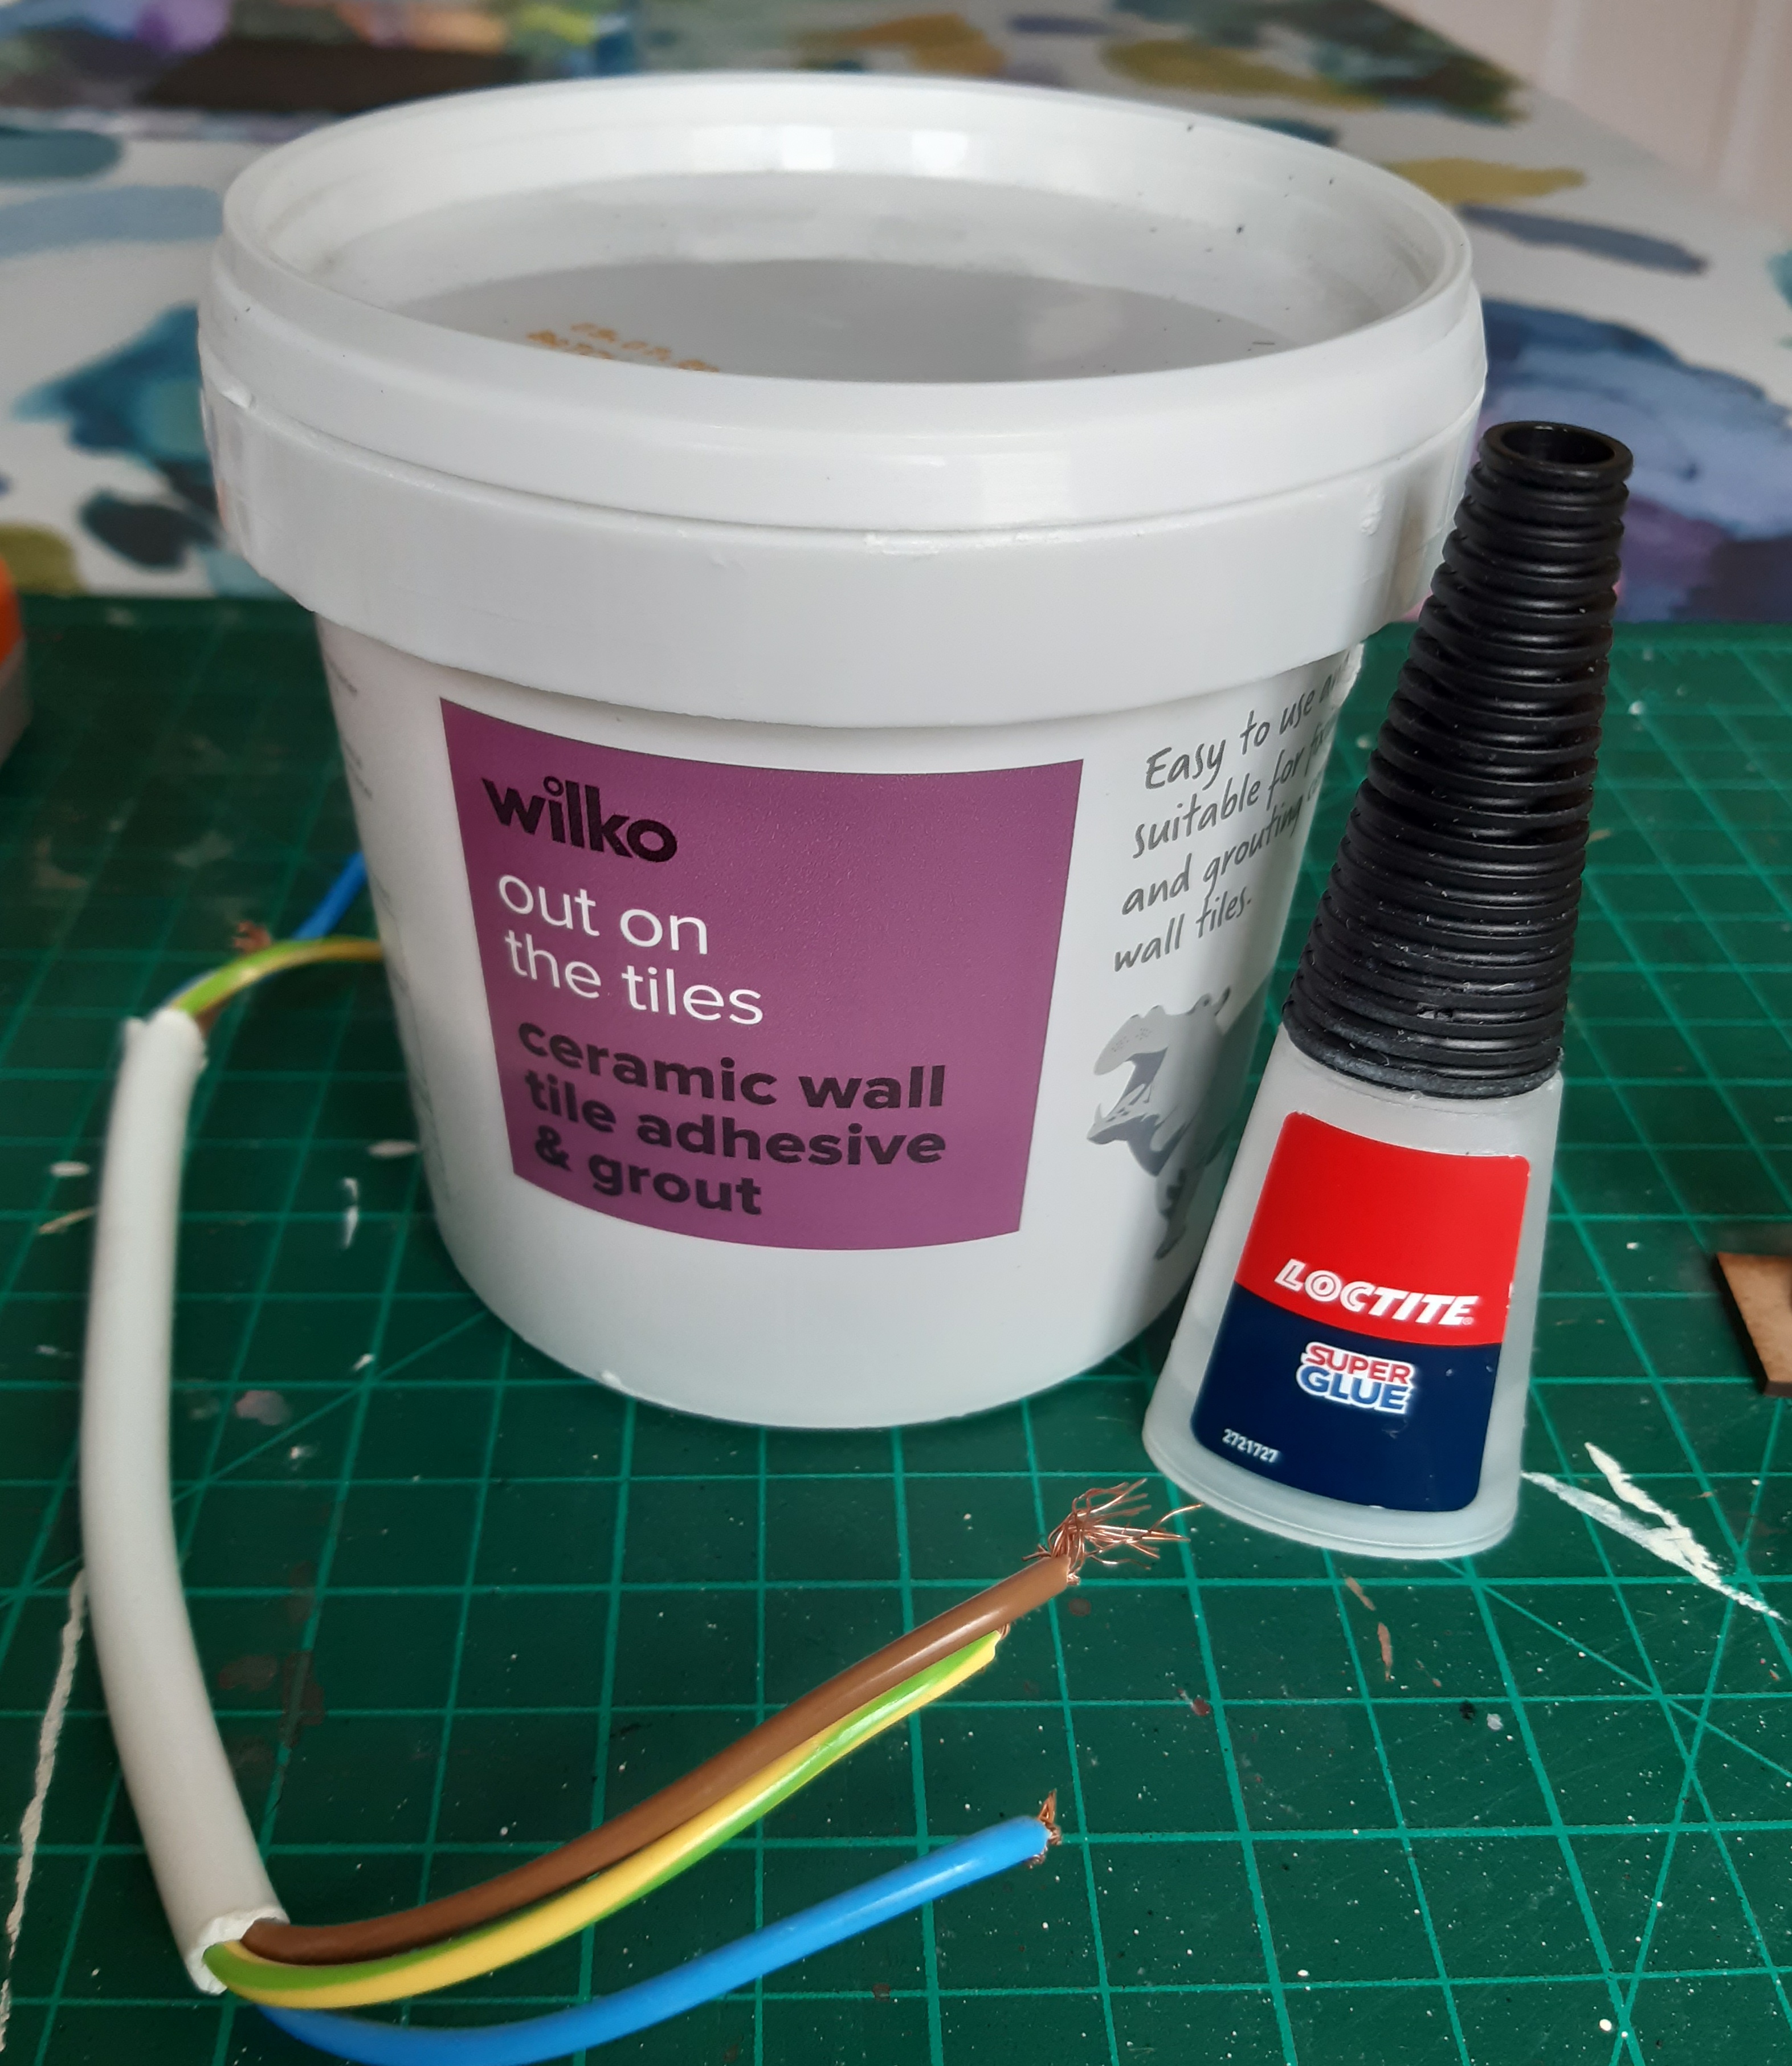
The grout was used to gap fill. For this style of kitbash, the rough finish and any overspill just adds more earthy texture.
I used a bunch of small tufts from Tajima1 (a small company based down in Cornwall that do some really nice tufts and patches of mixed flowers and grasses – highly recommended), placed around the sides and top of each figure’s backpack.
For roots, I ended up using stands of wire twisted together into interesting shapes that were superglued in place, mainly towards the bottom of the packs. I experimented with coating some of the wire twists with grout, and with hindsight, I’d probably have done that with all the roots.

I was tempted to try using some natural organic materials for the roots, but was nervous about ensuring that it was preserved properly. I’d be interested if anyone has advice on how to keep locally gathered organic modelling materials like twigs and lichen from breaking down.
Painting next…
Painting up the Chaff (Part 1)
The end goal was to have some grimy, dirty figures, but I also wanted some of the colourful flare from Napoleonic uniforms still present.
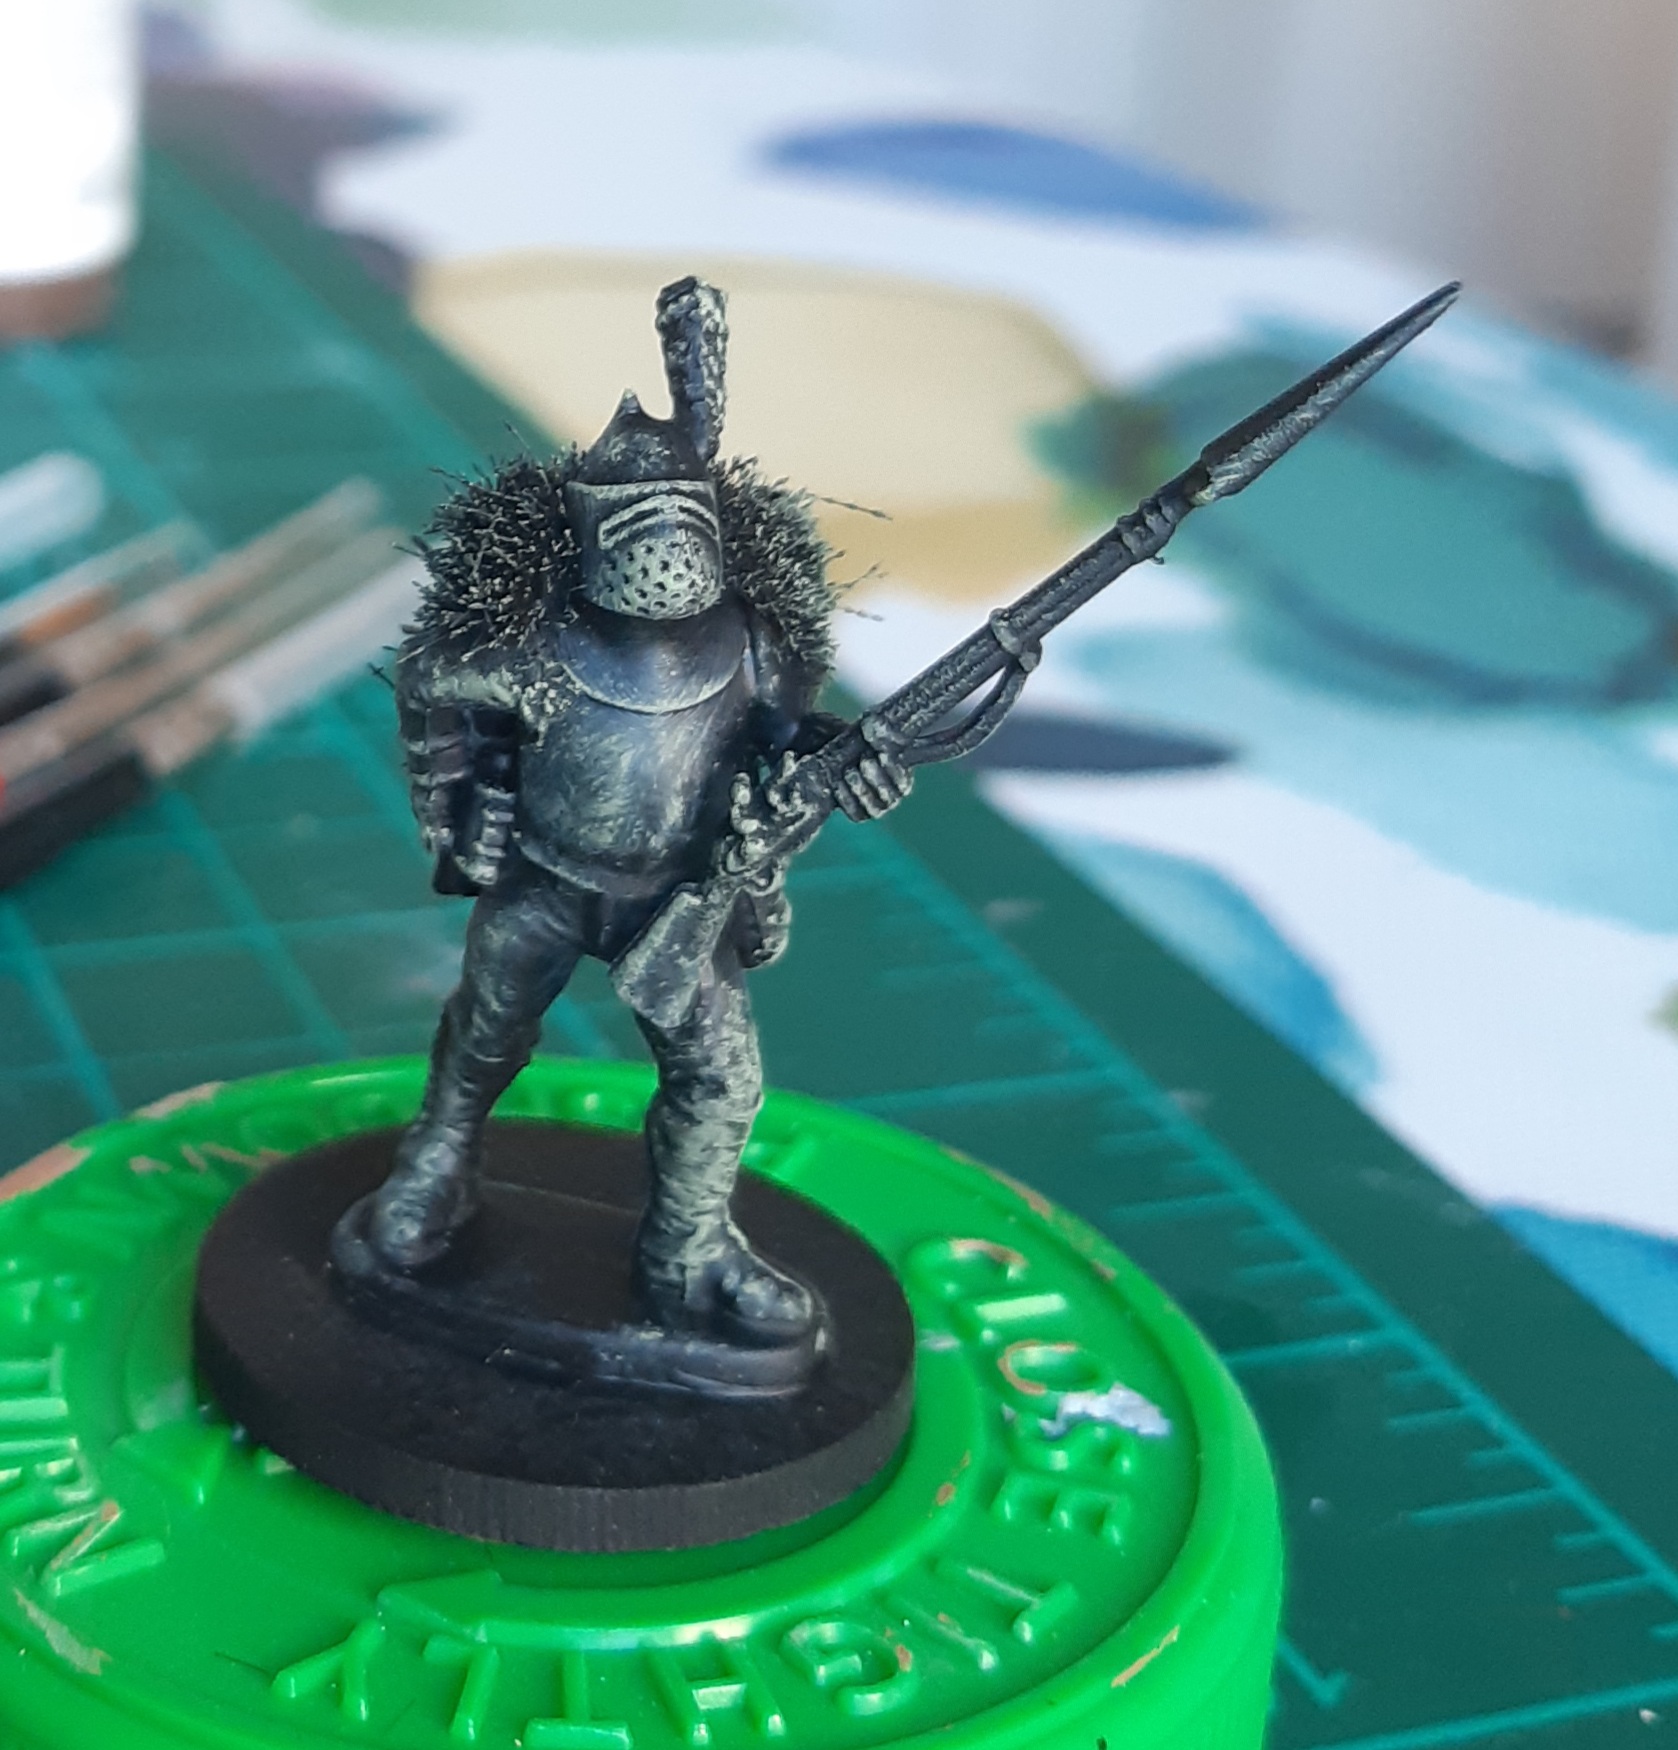
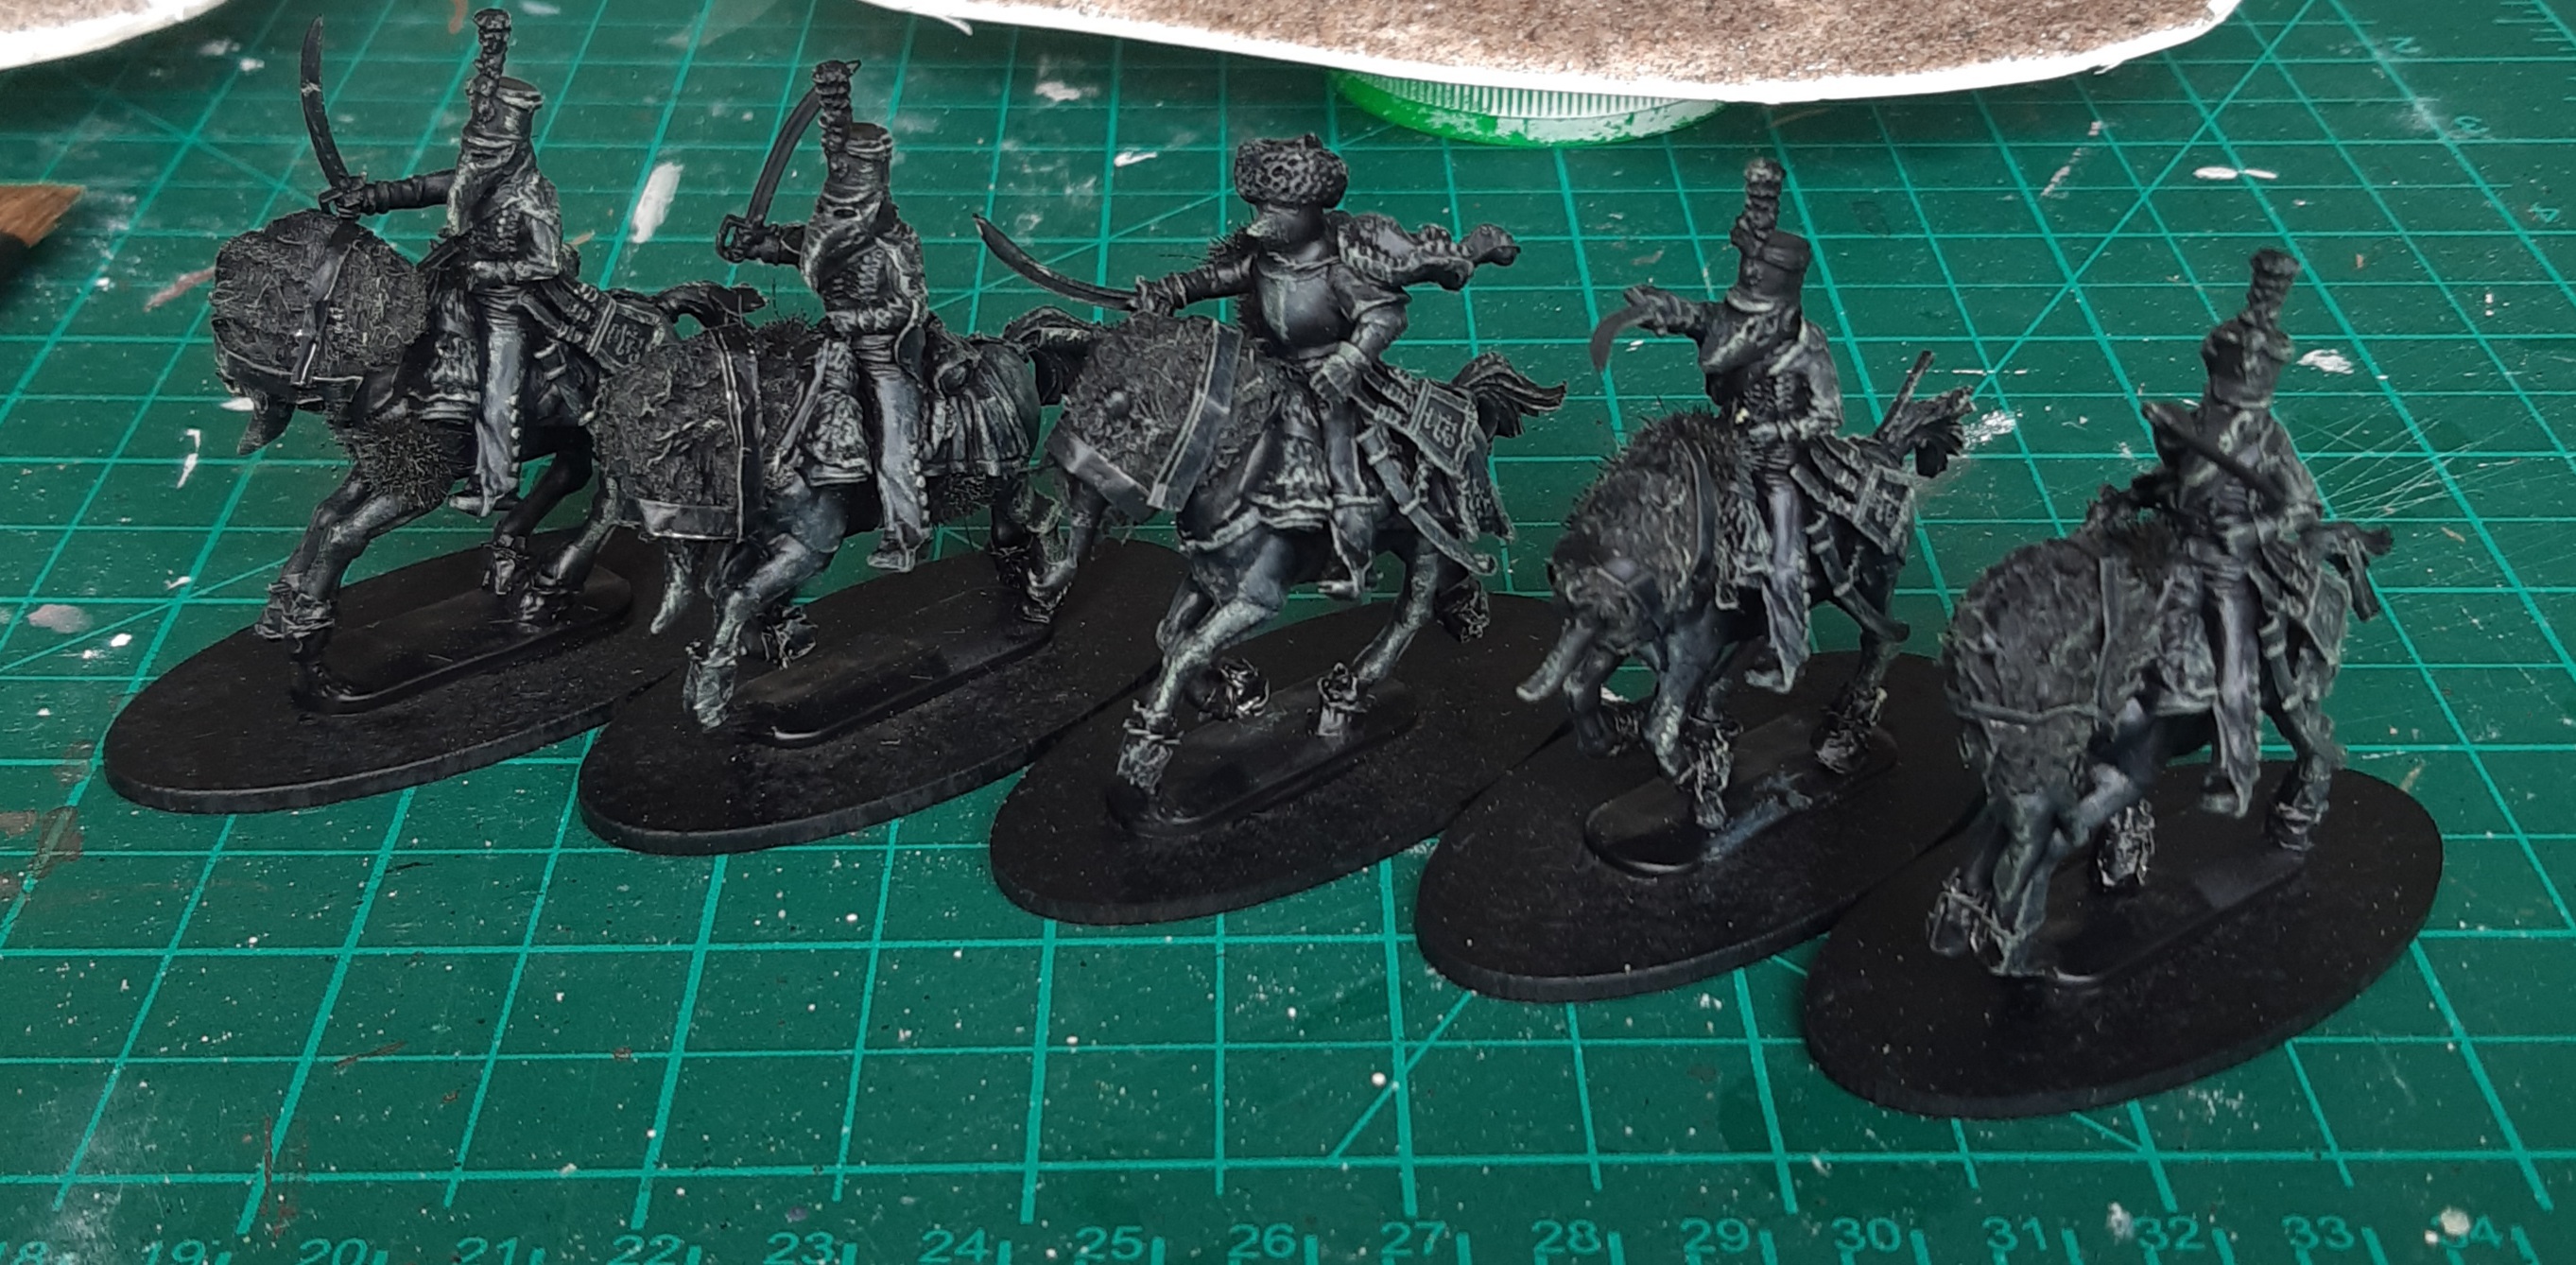
First step was to prime in black, followed by a very quick and light drybrush with Citadel Nurgling Green. The drybrush was mainly to make details more easily visible after the black prime, with the added benefit of the green highlighting the tufts.
A quick base coat next, just a single thin coat to let the black prime tone things down. Colours used were as follows (VJGC = Vallejo Game Colour; VJMC = Vallejo Model Colour)
- Metal – VJGC Gunmetal
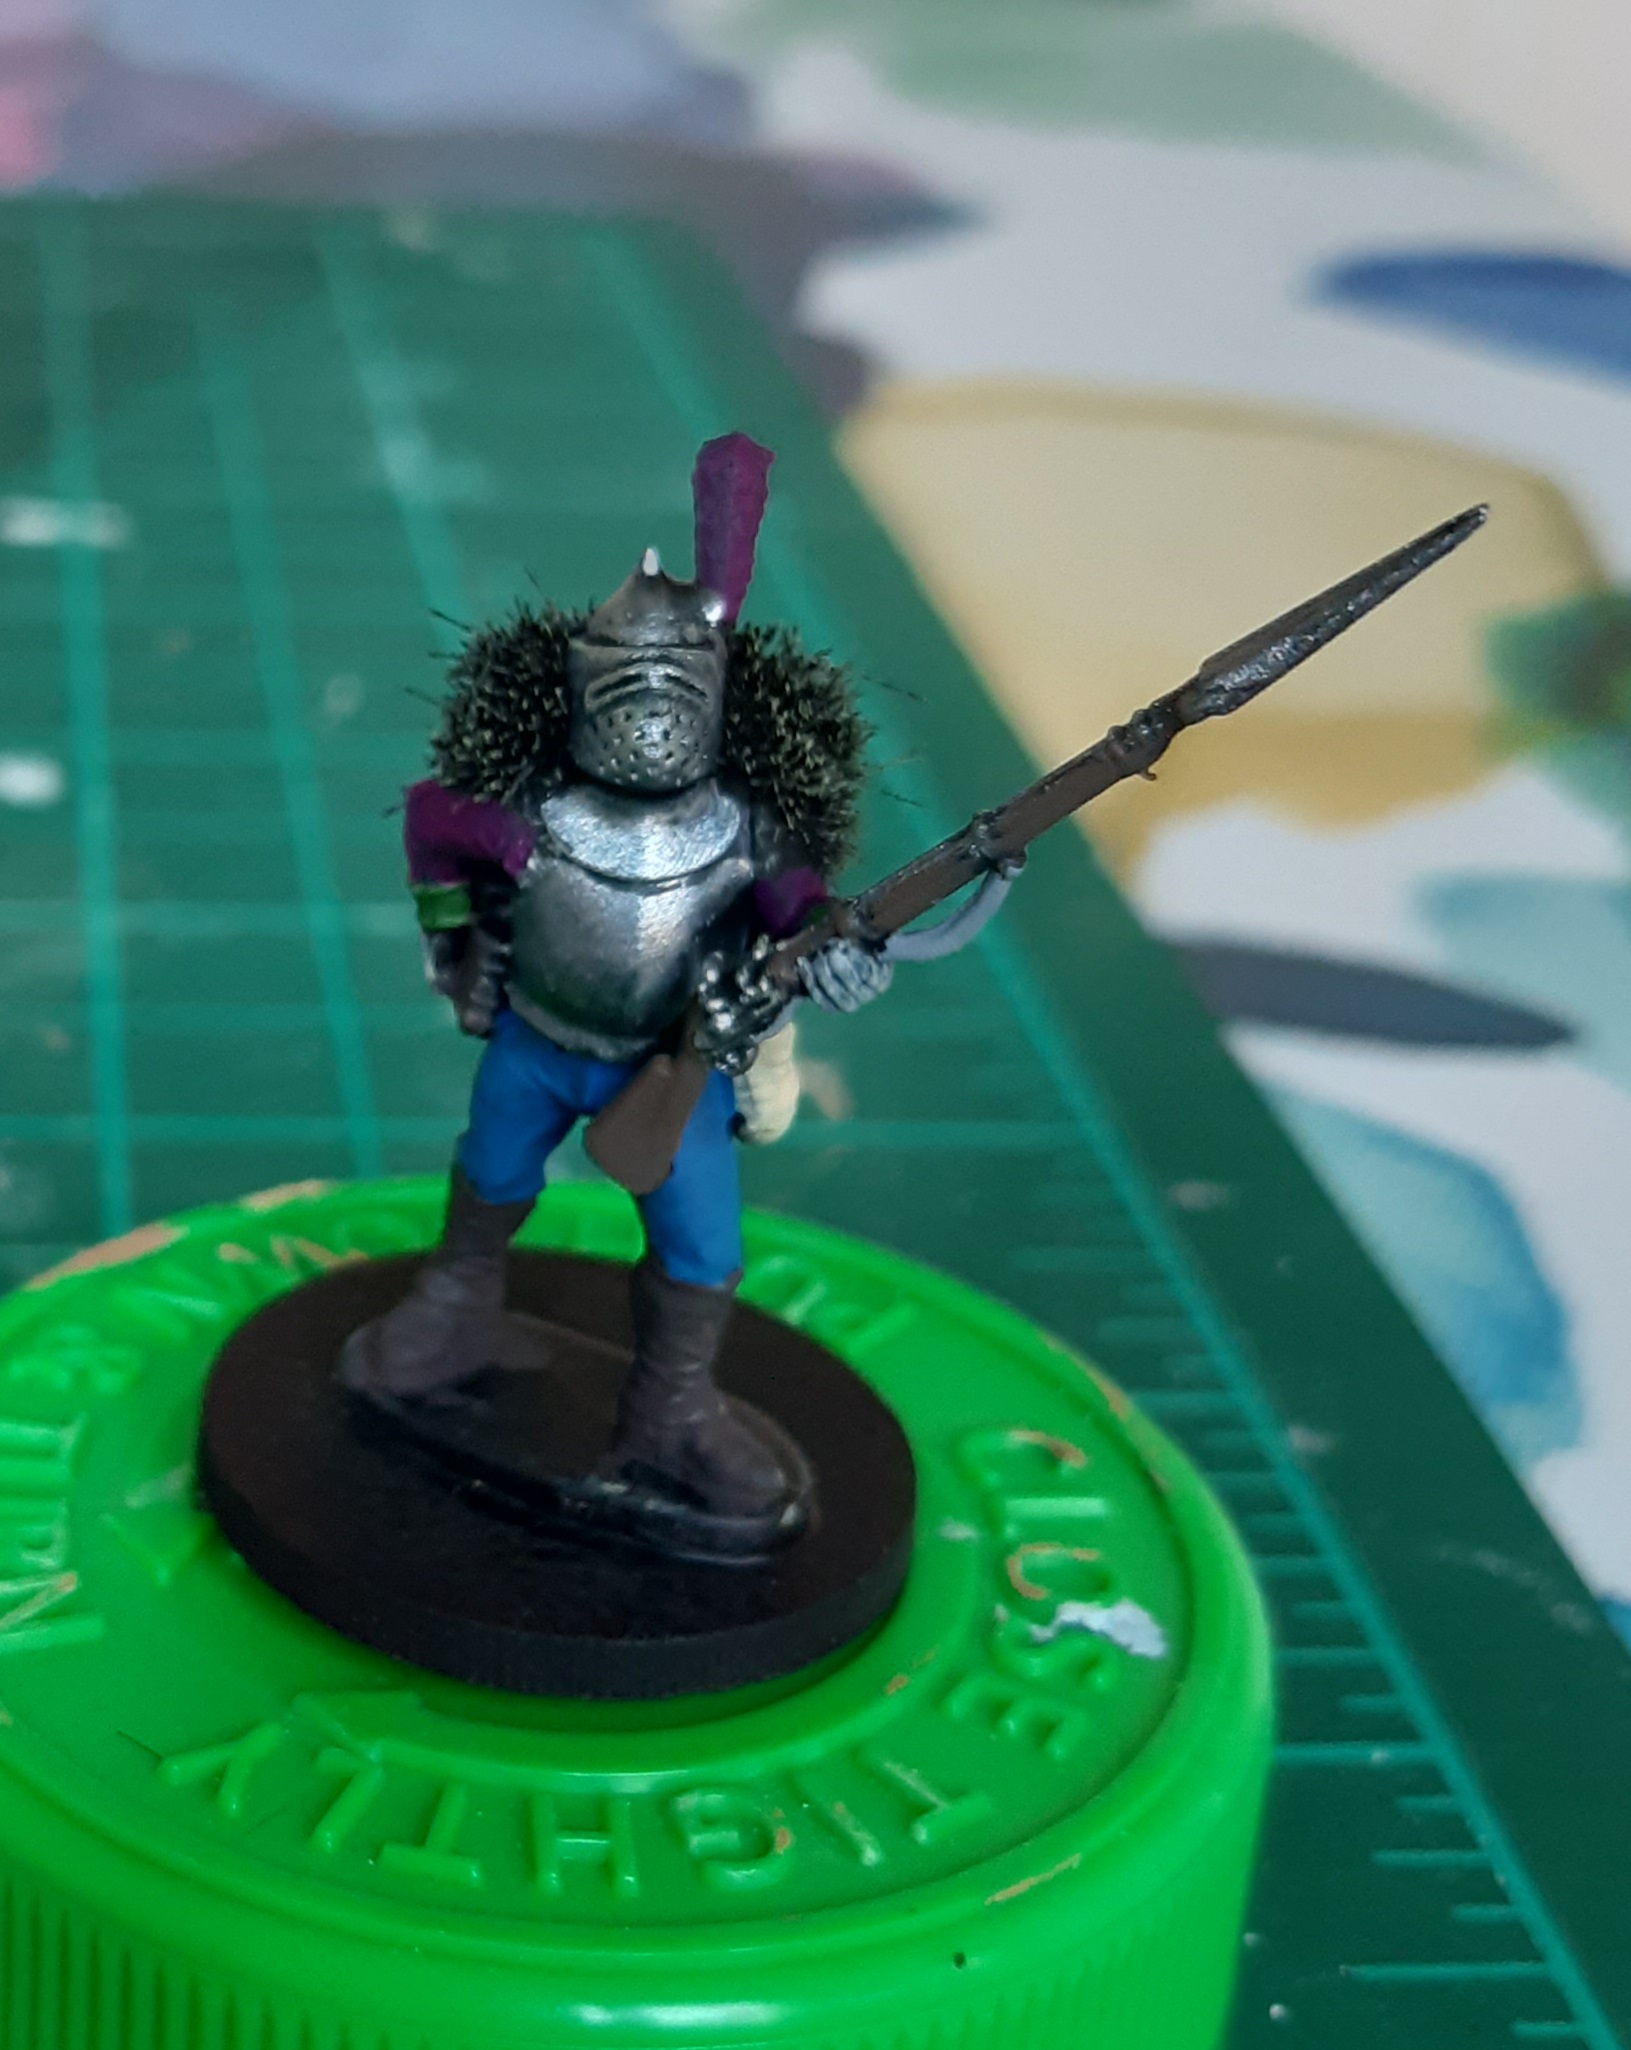
- Jacket/ plumes- VJMC Violet Red
- Trousers – VJMC Prussian Blue
- Musket/ Backpack/ Ammo pouch – VJMC Burnt Umber
- Boots – VJMC German Camo Black Brown
- Bread Bag – VJMC Buff
- Greatcoat / Straps – VJMC Medium Sea Grey
- Cuffs/ Turnbacks – VJMC Flat Green
- Flesh/Roots- Citadel Deepkin Flesh
(Considering the theme, having the roots and flesh the same colour felt appropriate!).
Painting up the Chaff (Part 2)
Next step is to tone back the base coat colours and to add the dirt and grime – quickly achieved with a heavy wash of Vallejo Umber Wash.


Could call it done at this stage, but some selected highlights help lift the figure. For most areas, it is a case of going back in with the base colour and picking out raised parts, but I did use a few lighter colours in places, whilst ignoring some things entirely:
- Musket/ Backpack/ Ammo pouch – VJMC Flat Earth
- Jacket/ Plumes – VJMC Violet Red
- Cuffs/ Turnbacks – VJMC Olive Green
- Trousers – VJMC Prussian Blue mixed 1:1 with VJMC Pastel Blue
- Greatcoat – VJMC Medium Sea Grey
- Straps – VJMC Off-White
To add some more grime to the armour, I stippled some patches of VJMC German Camo Black Brown over selected areas, followed by some VJMC Orange Brown over the top, giving a fast rust effect with little effort.

For basing, I used Vallejo Dark Earth texture paint, drybrushed with VJMC Flat Earth. I added bullrushes and small brown tufts from Tajima1 to finish them off, with the colour of the rushes intended to echo the jackets. I left the base rims black.
All in all, a pretty quick and dirty paint job, but I am quite happy with the end results.


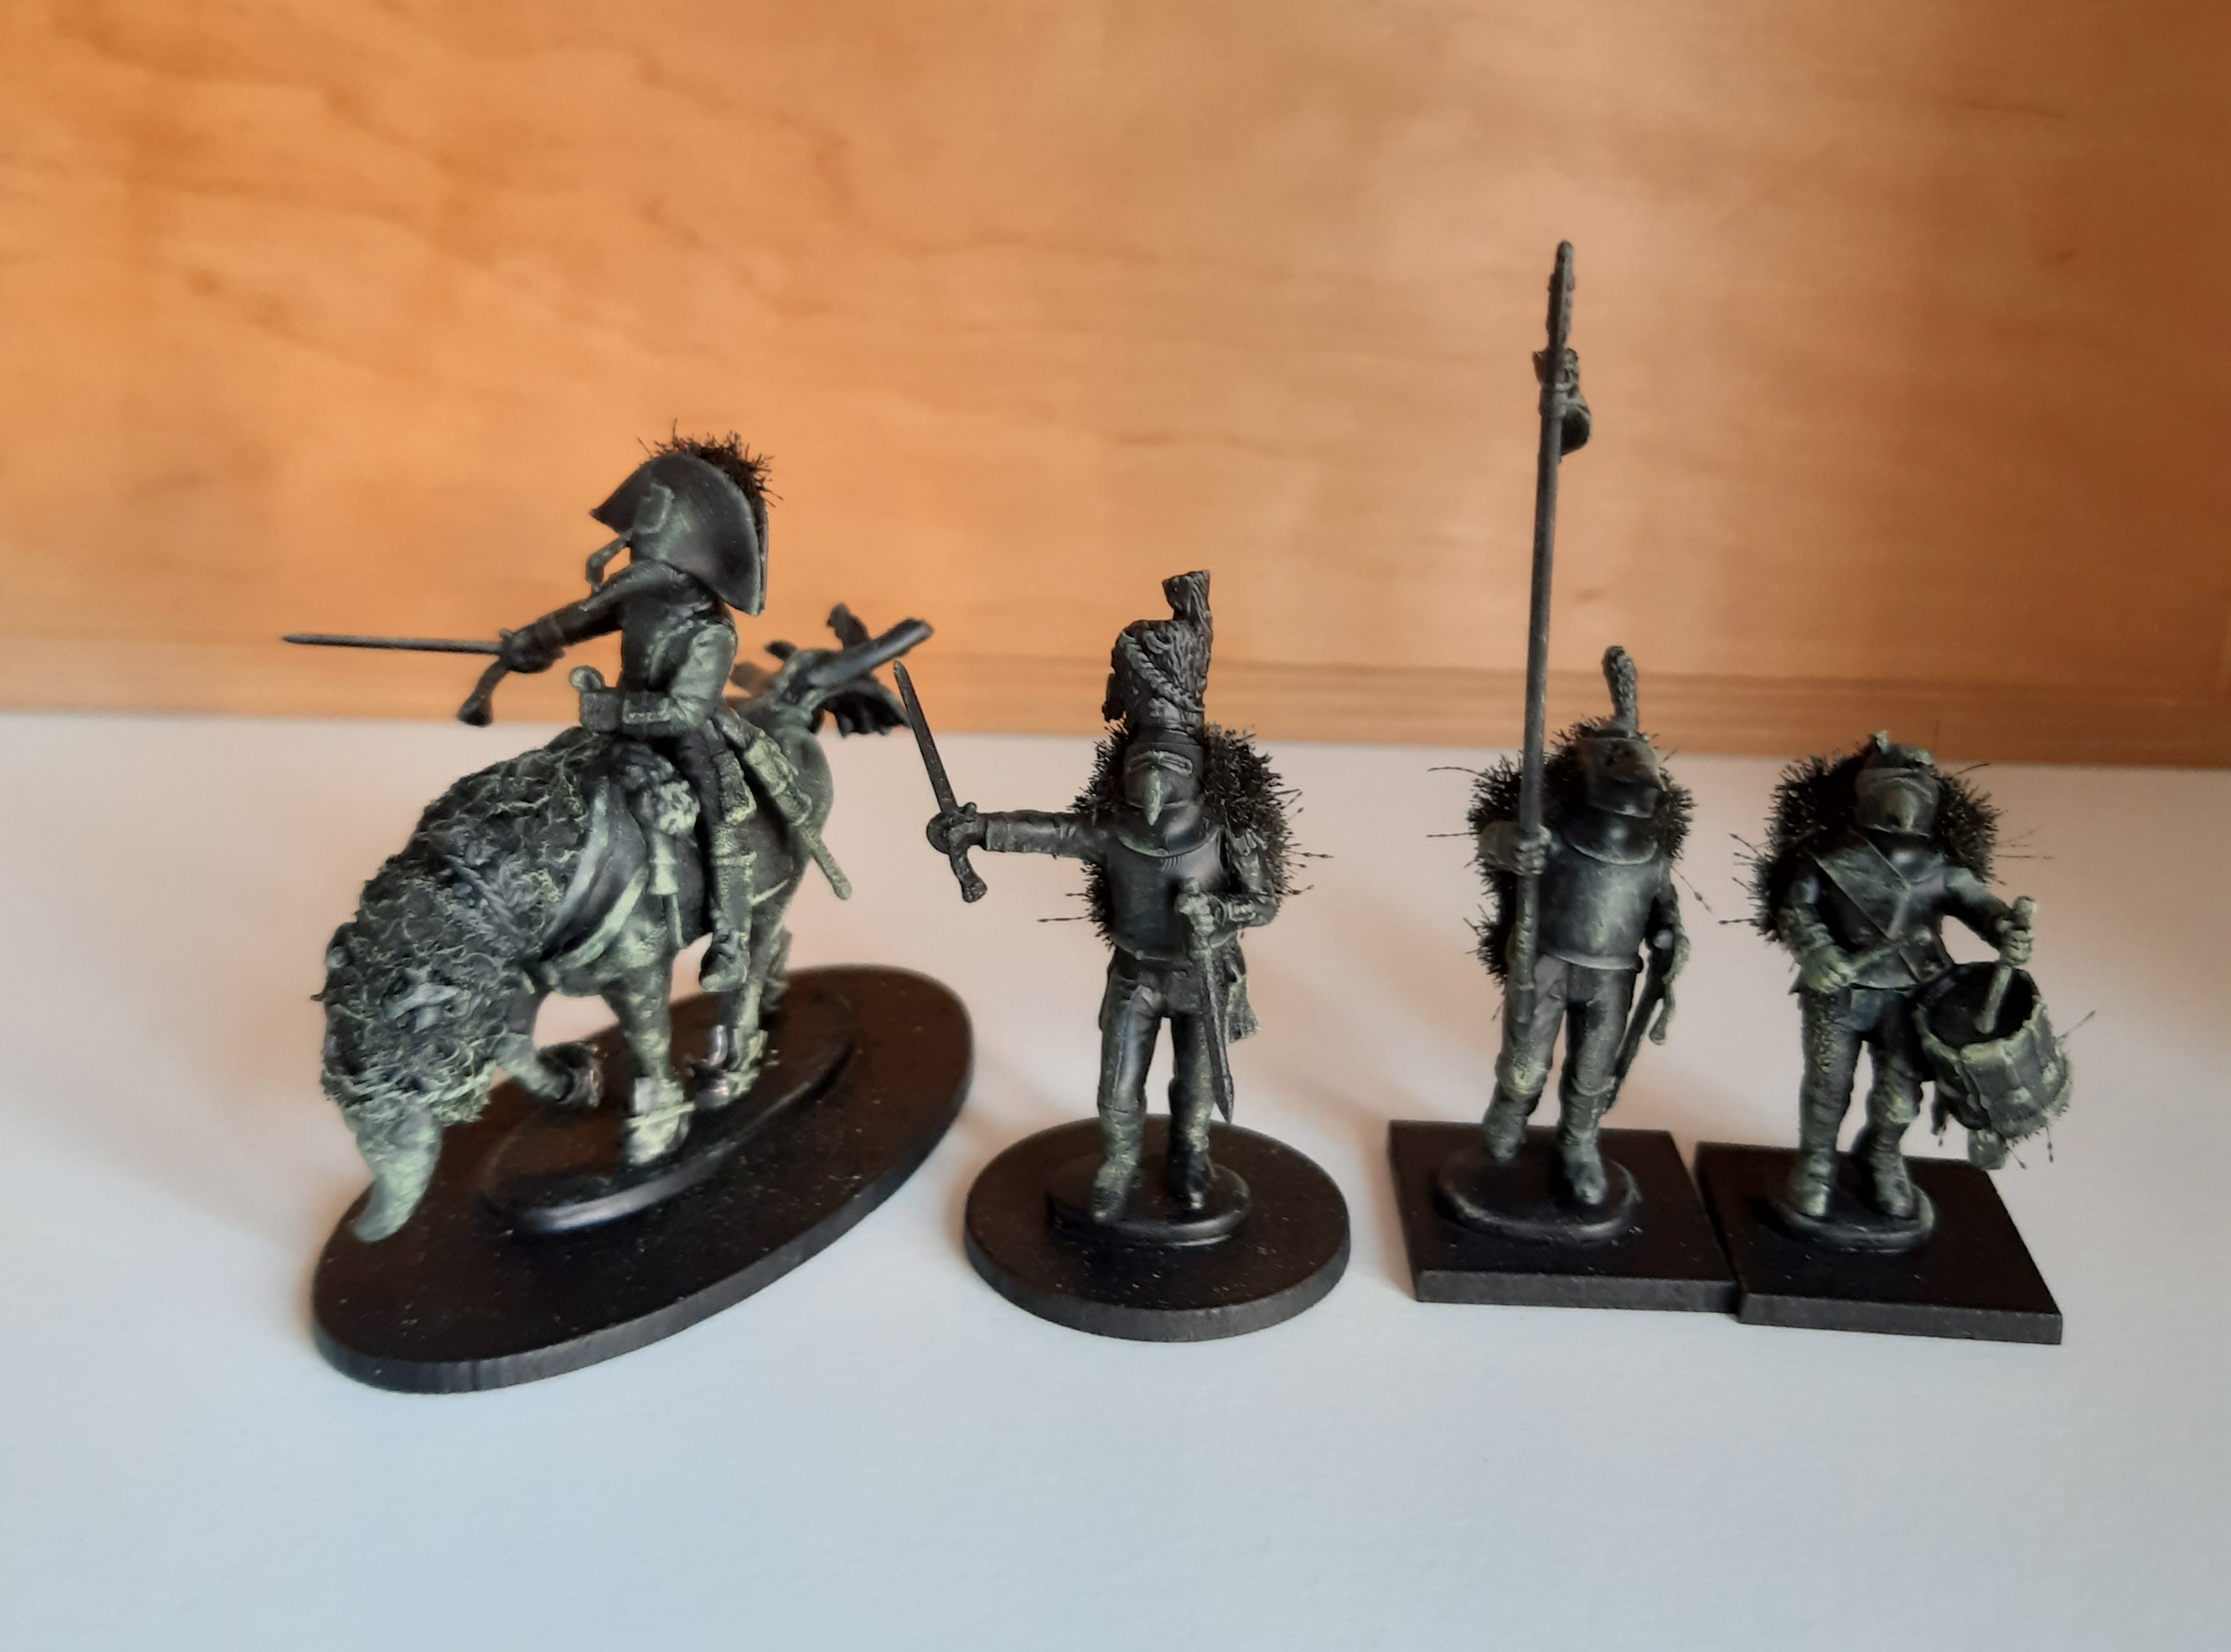
Snobs and Command Frippery
In Turnip28, the leaders of your rabble of soldiers are known ss Snobs, with the Regiment being commanded by a Toff, and ancillary leadership coming from Toadys.
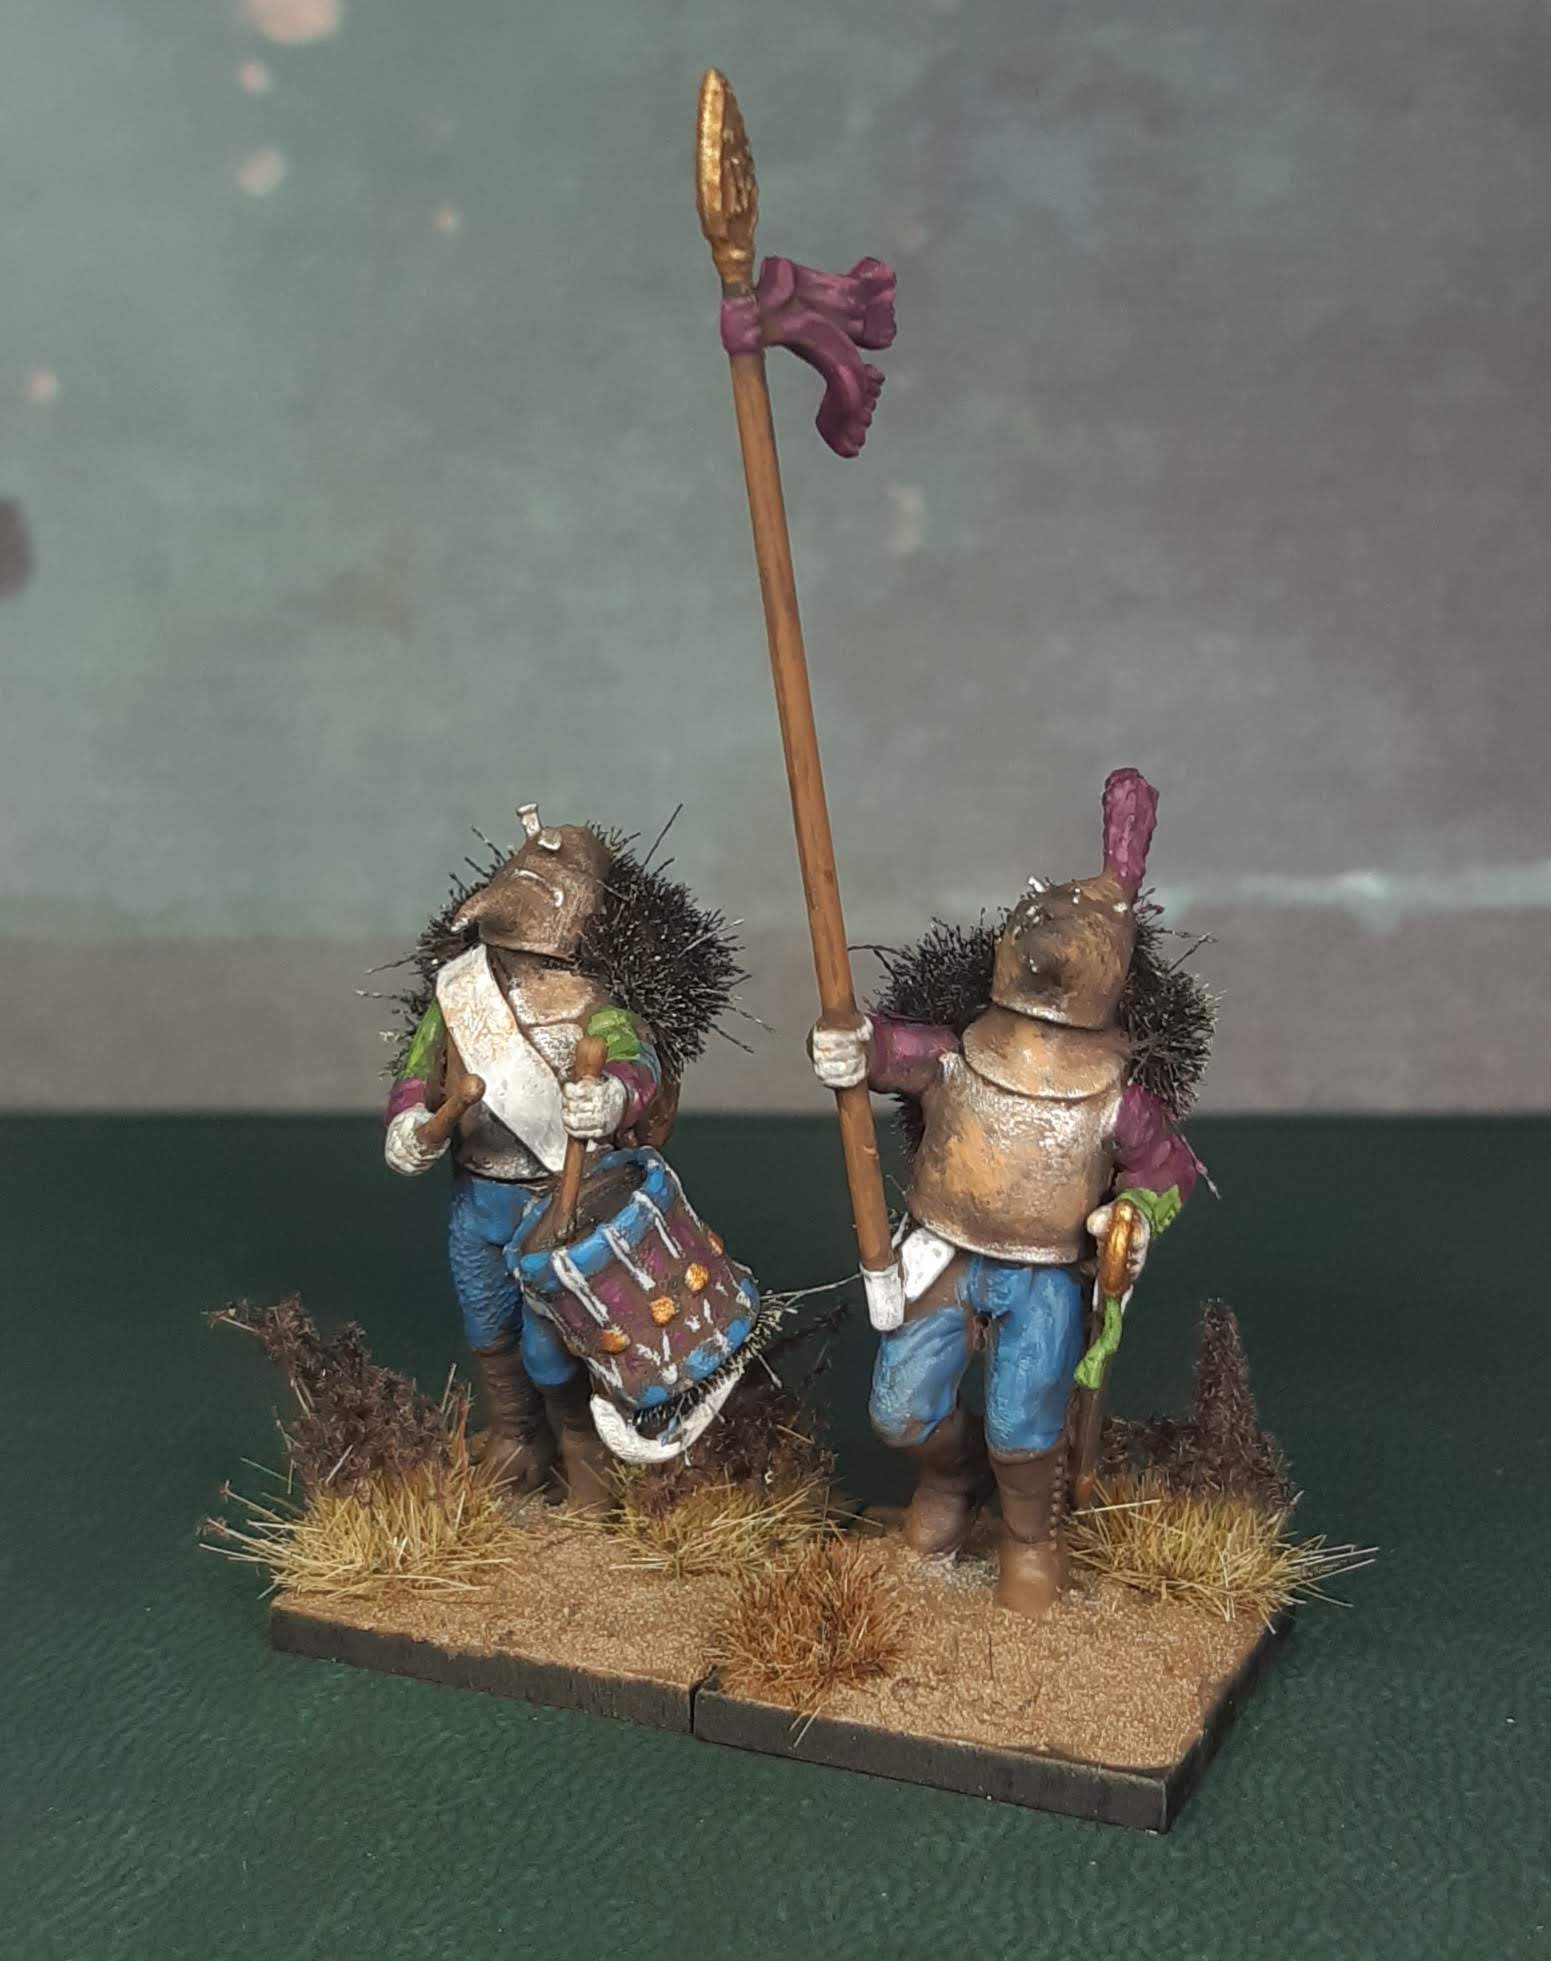
I set about the Victrix Bavarian Command sprue to build a couple of Snobs, plus a drummer and standard bearer to give my Regiment a bit more Napoleonic elan.
 These two chaps were simple builds as previously described, with legs liberated from bodies and supplied with alternative torsos.
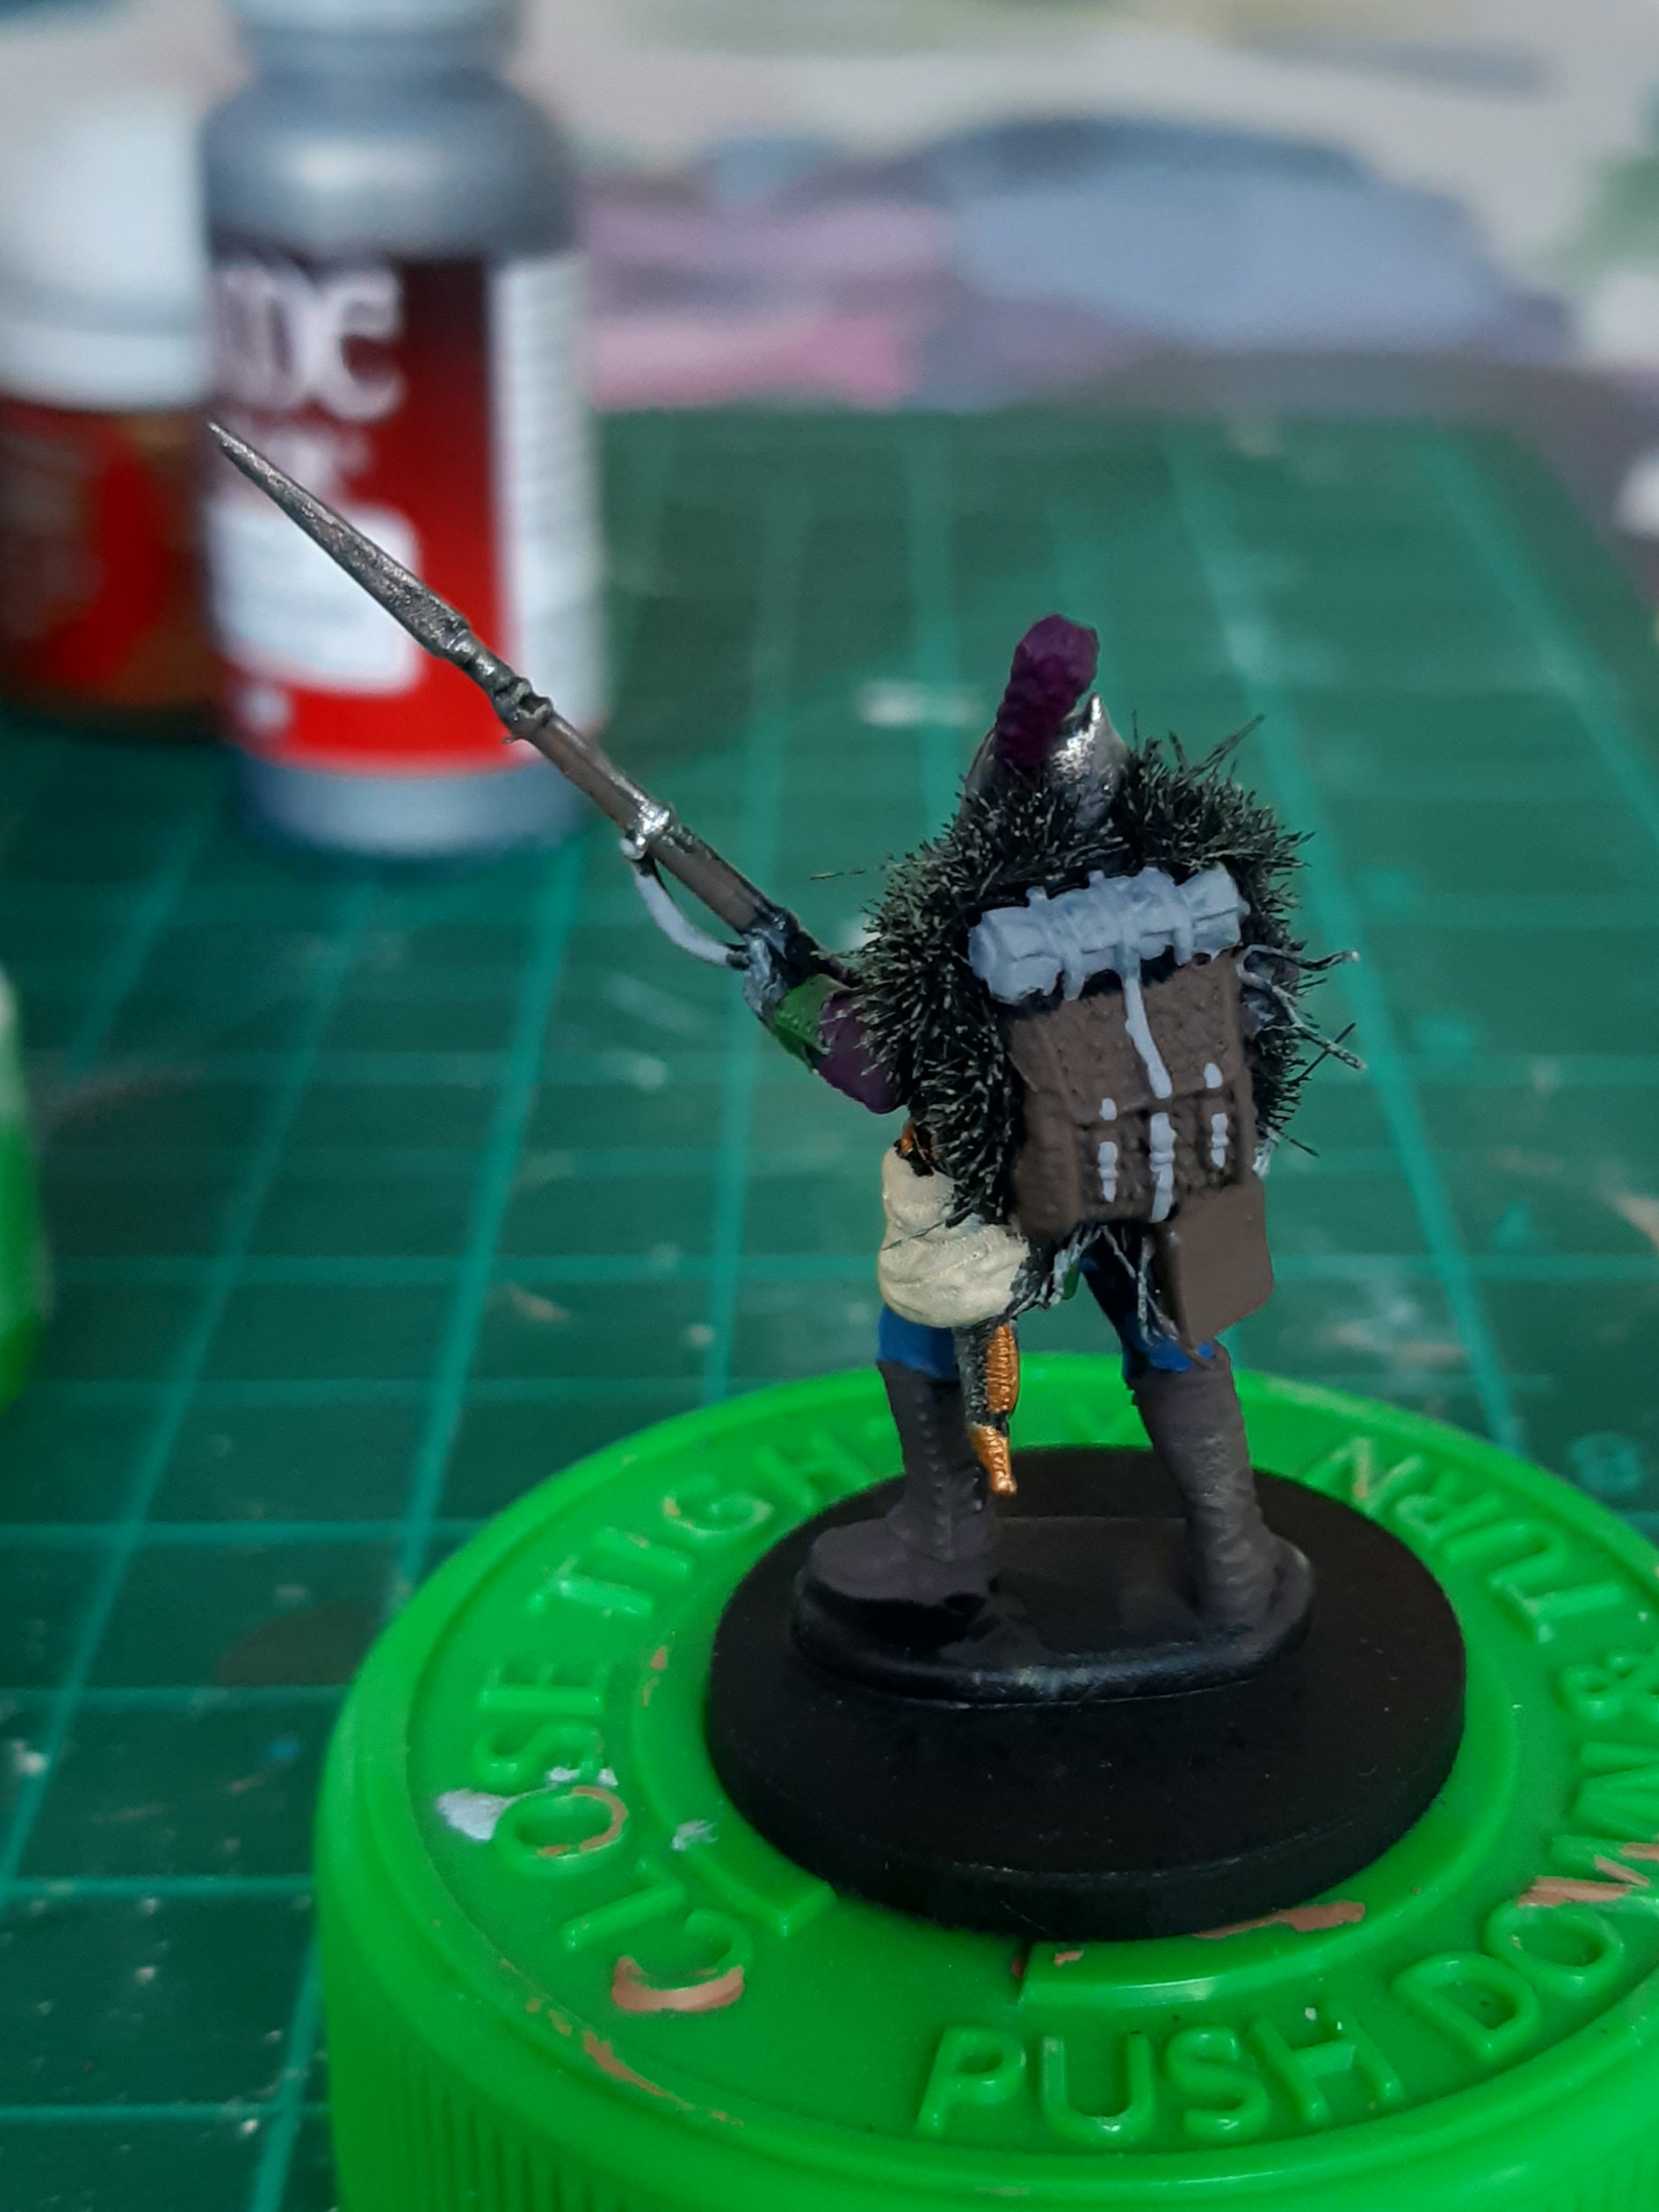
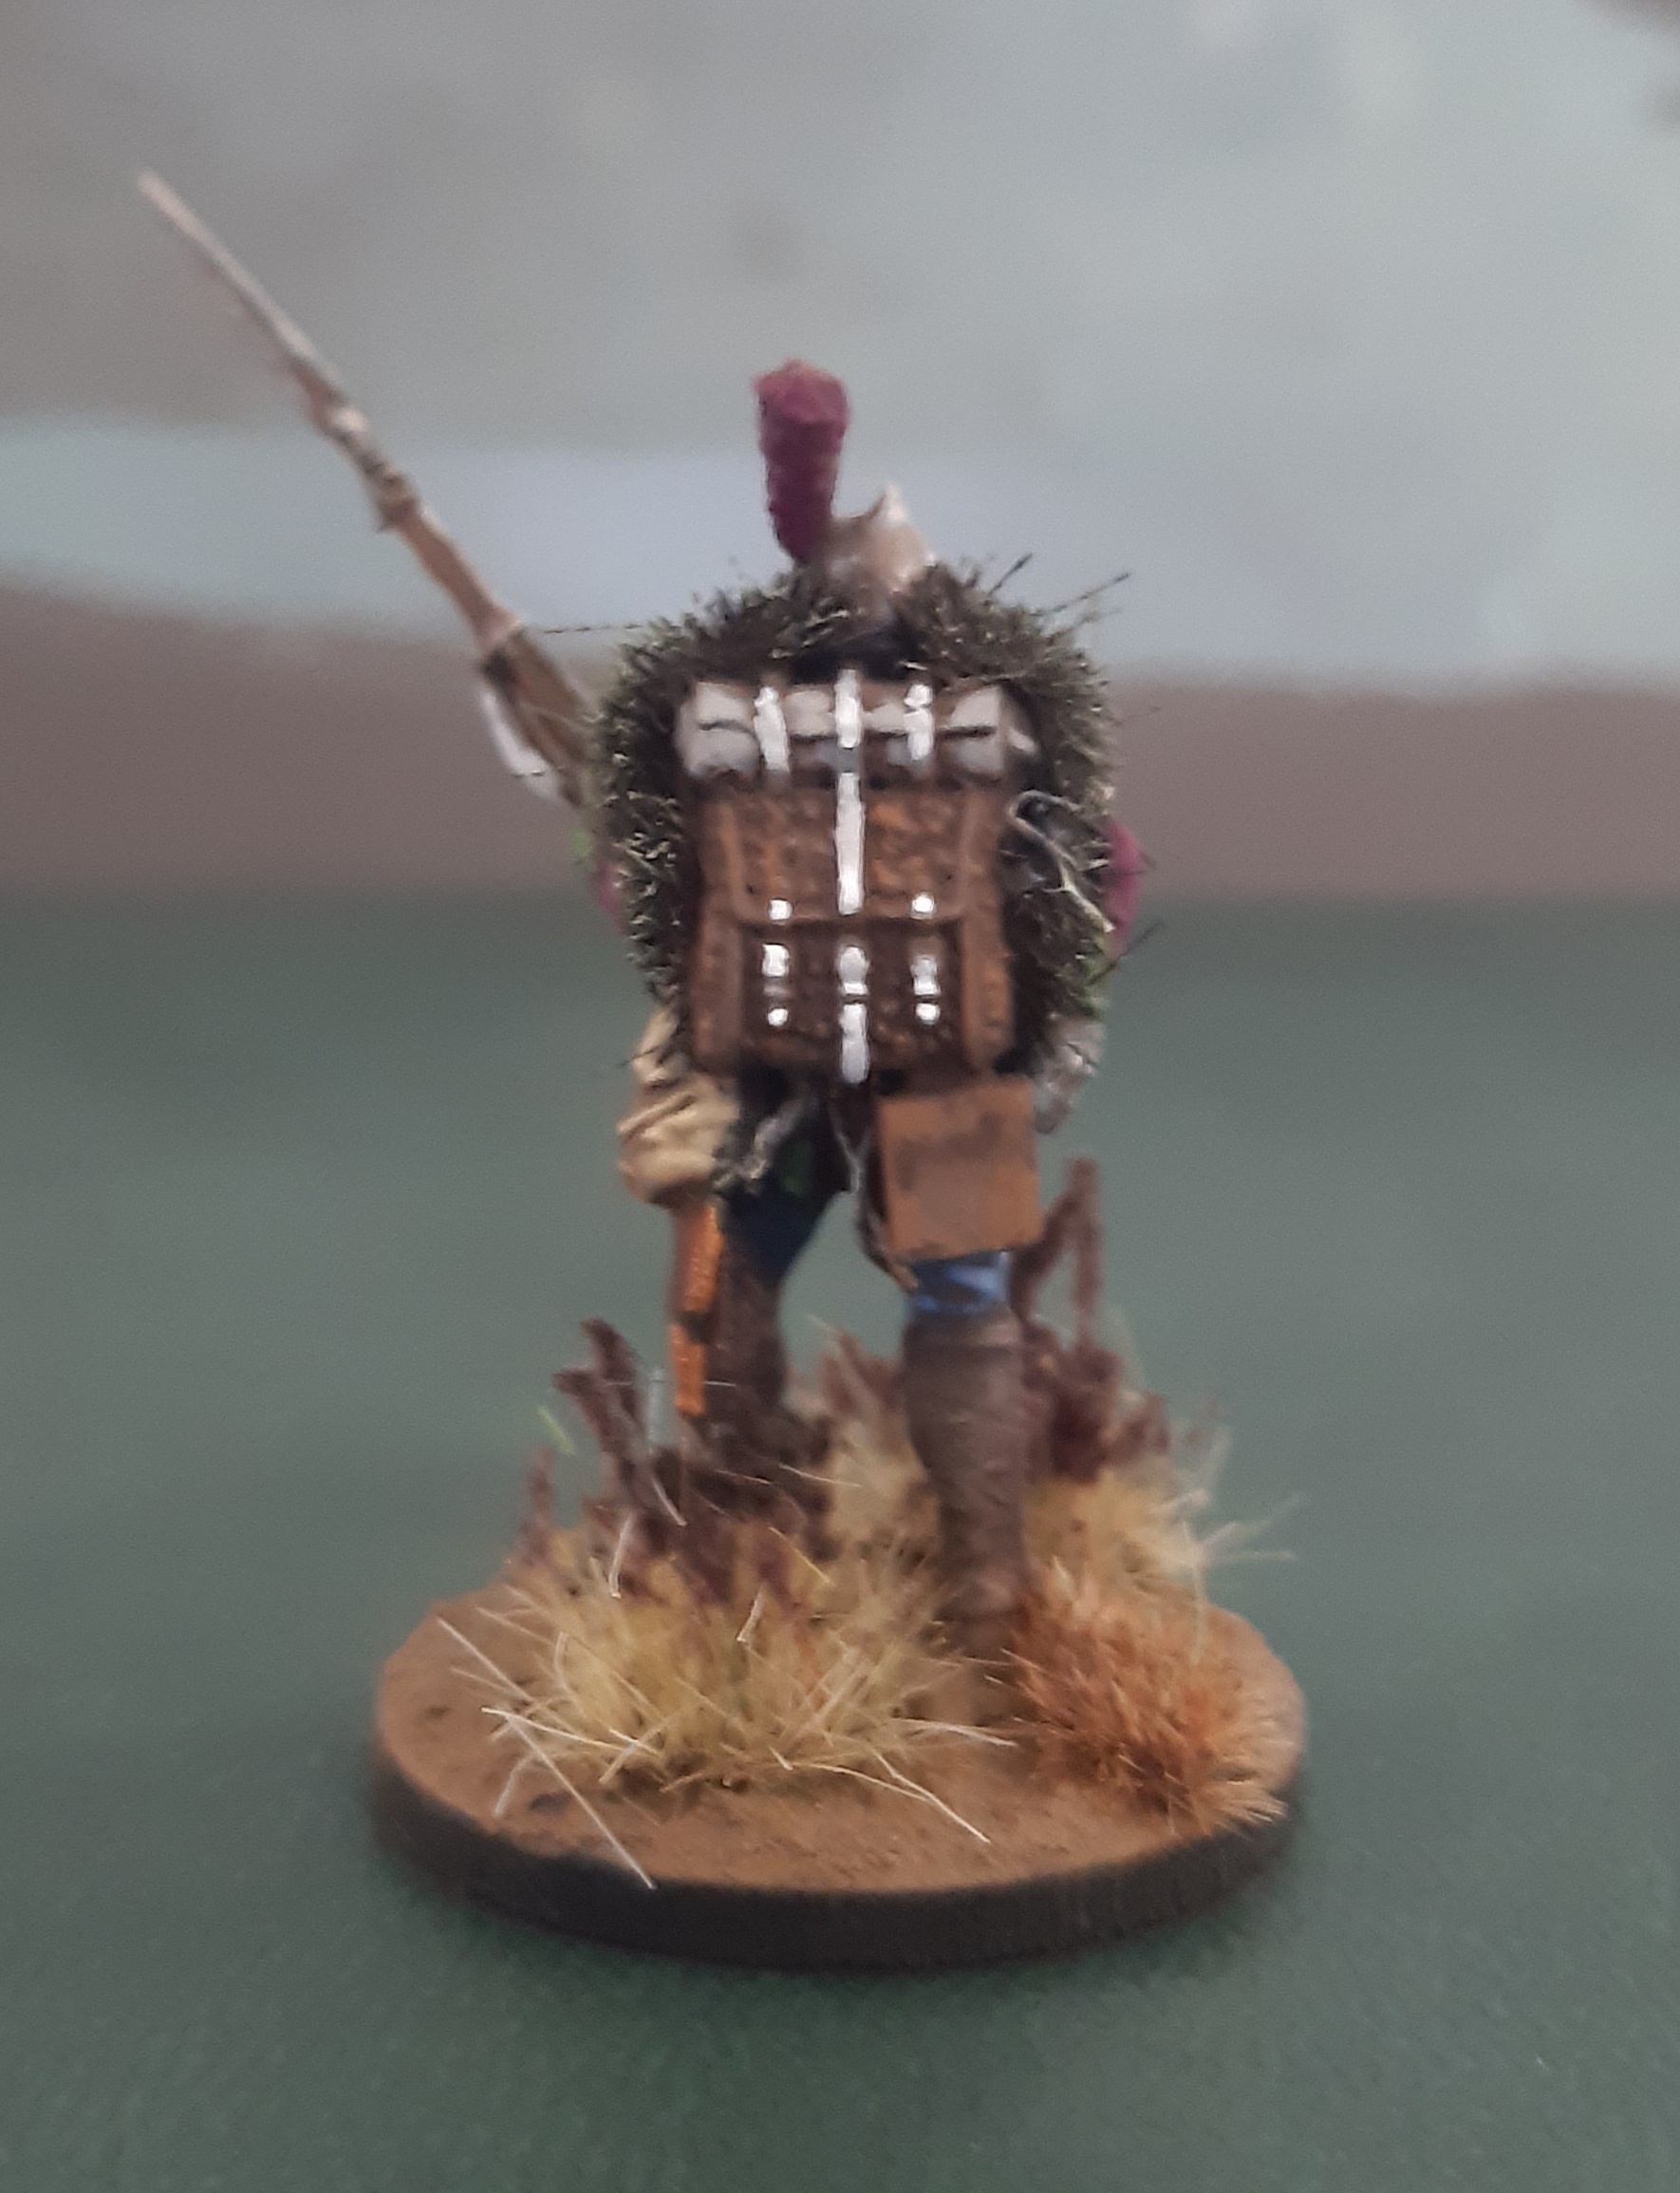
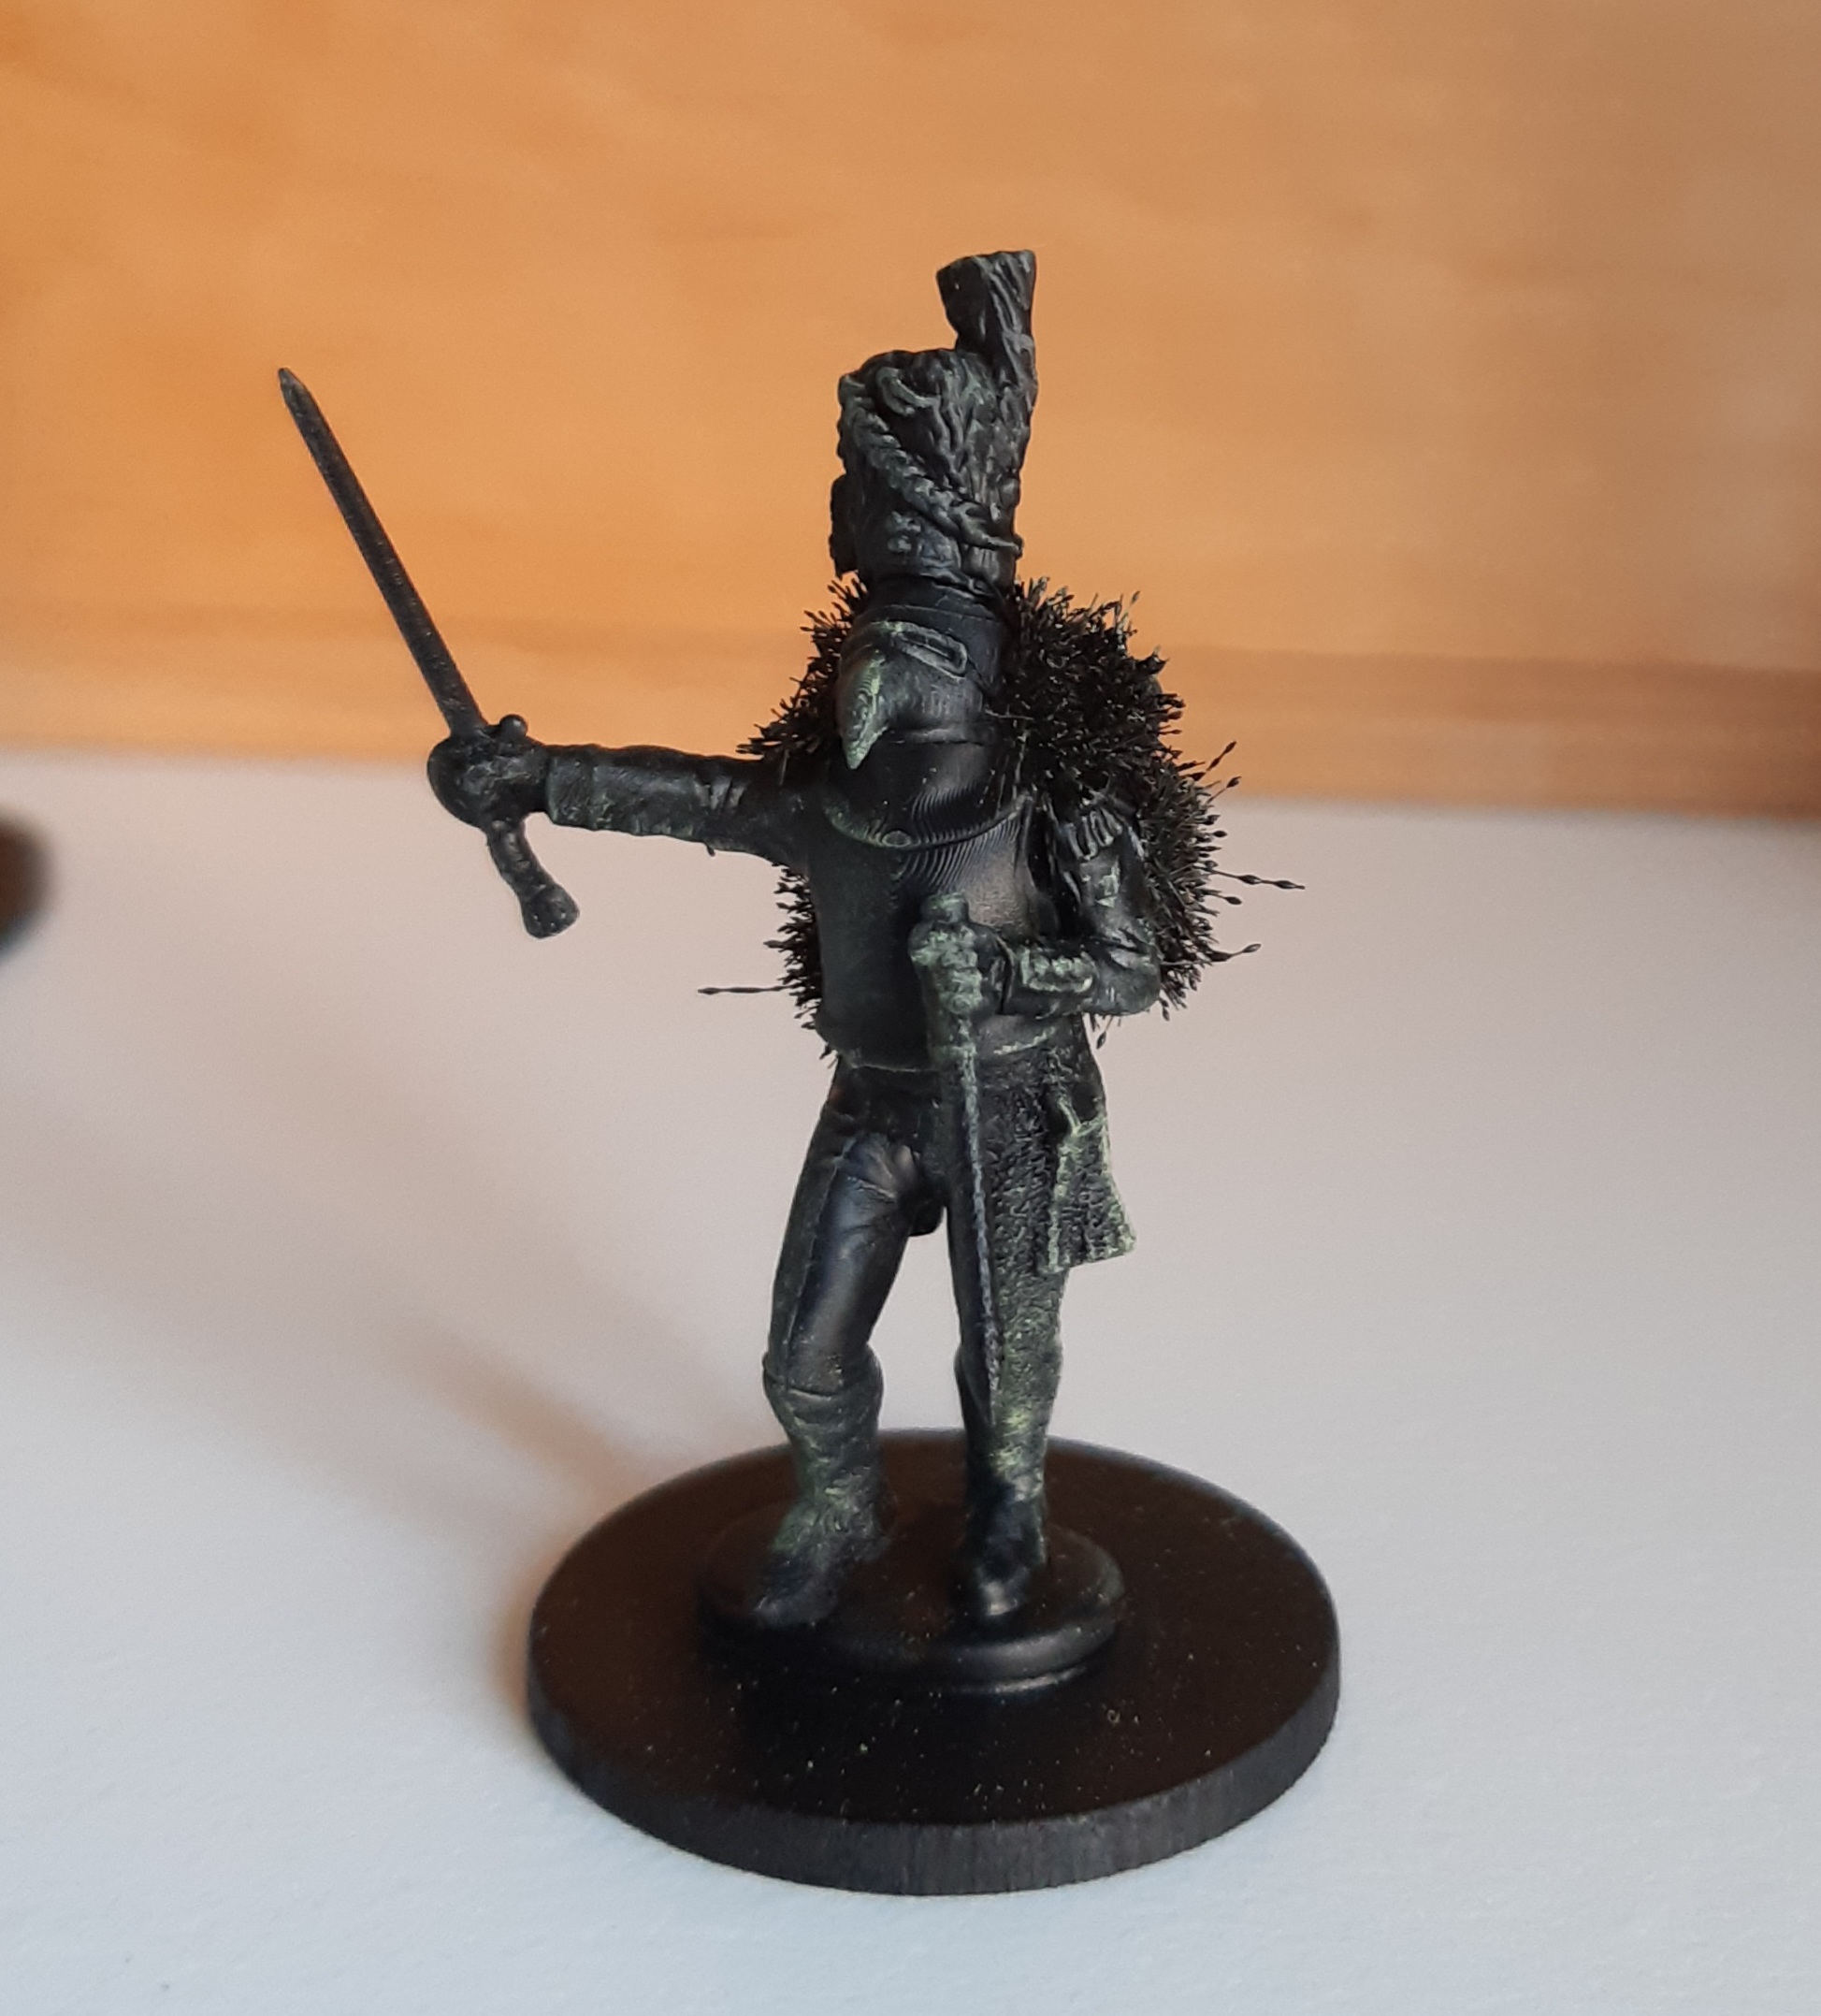 This is my first Toady, again a torso swap, but with an added Bearskin from some French Line Infantry. Simple case of trimming away the face, drilling a hole into the hat, and carving out a recess so it fits snugly. I'll probably add a shield to this one as well.
 Finally, my Toff. Bit more of an interesting build here, so worth elaborating some more.
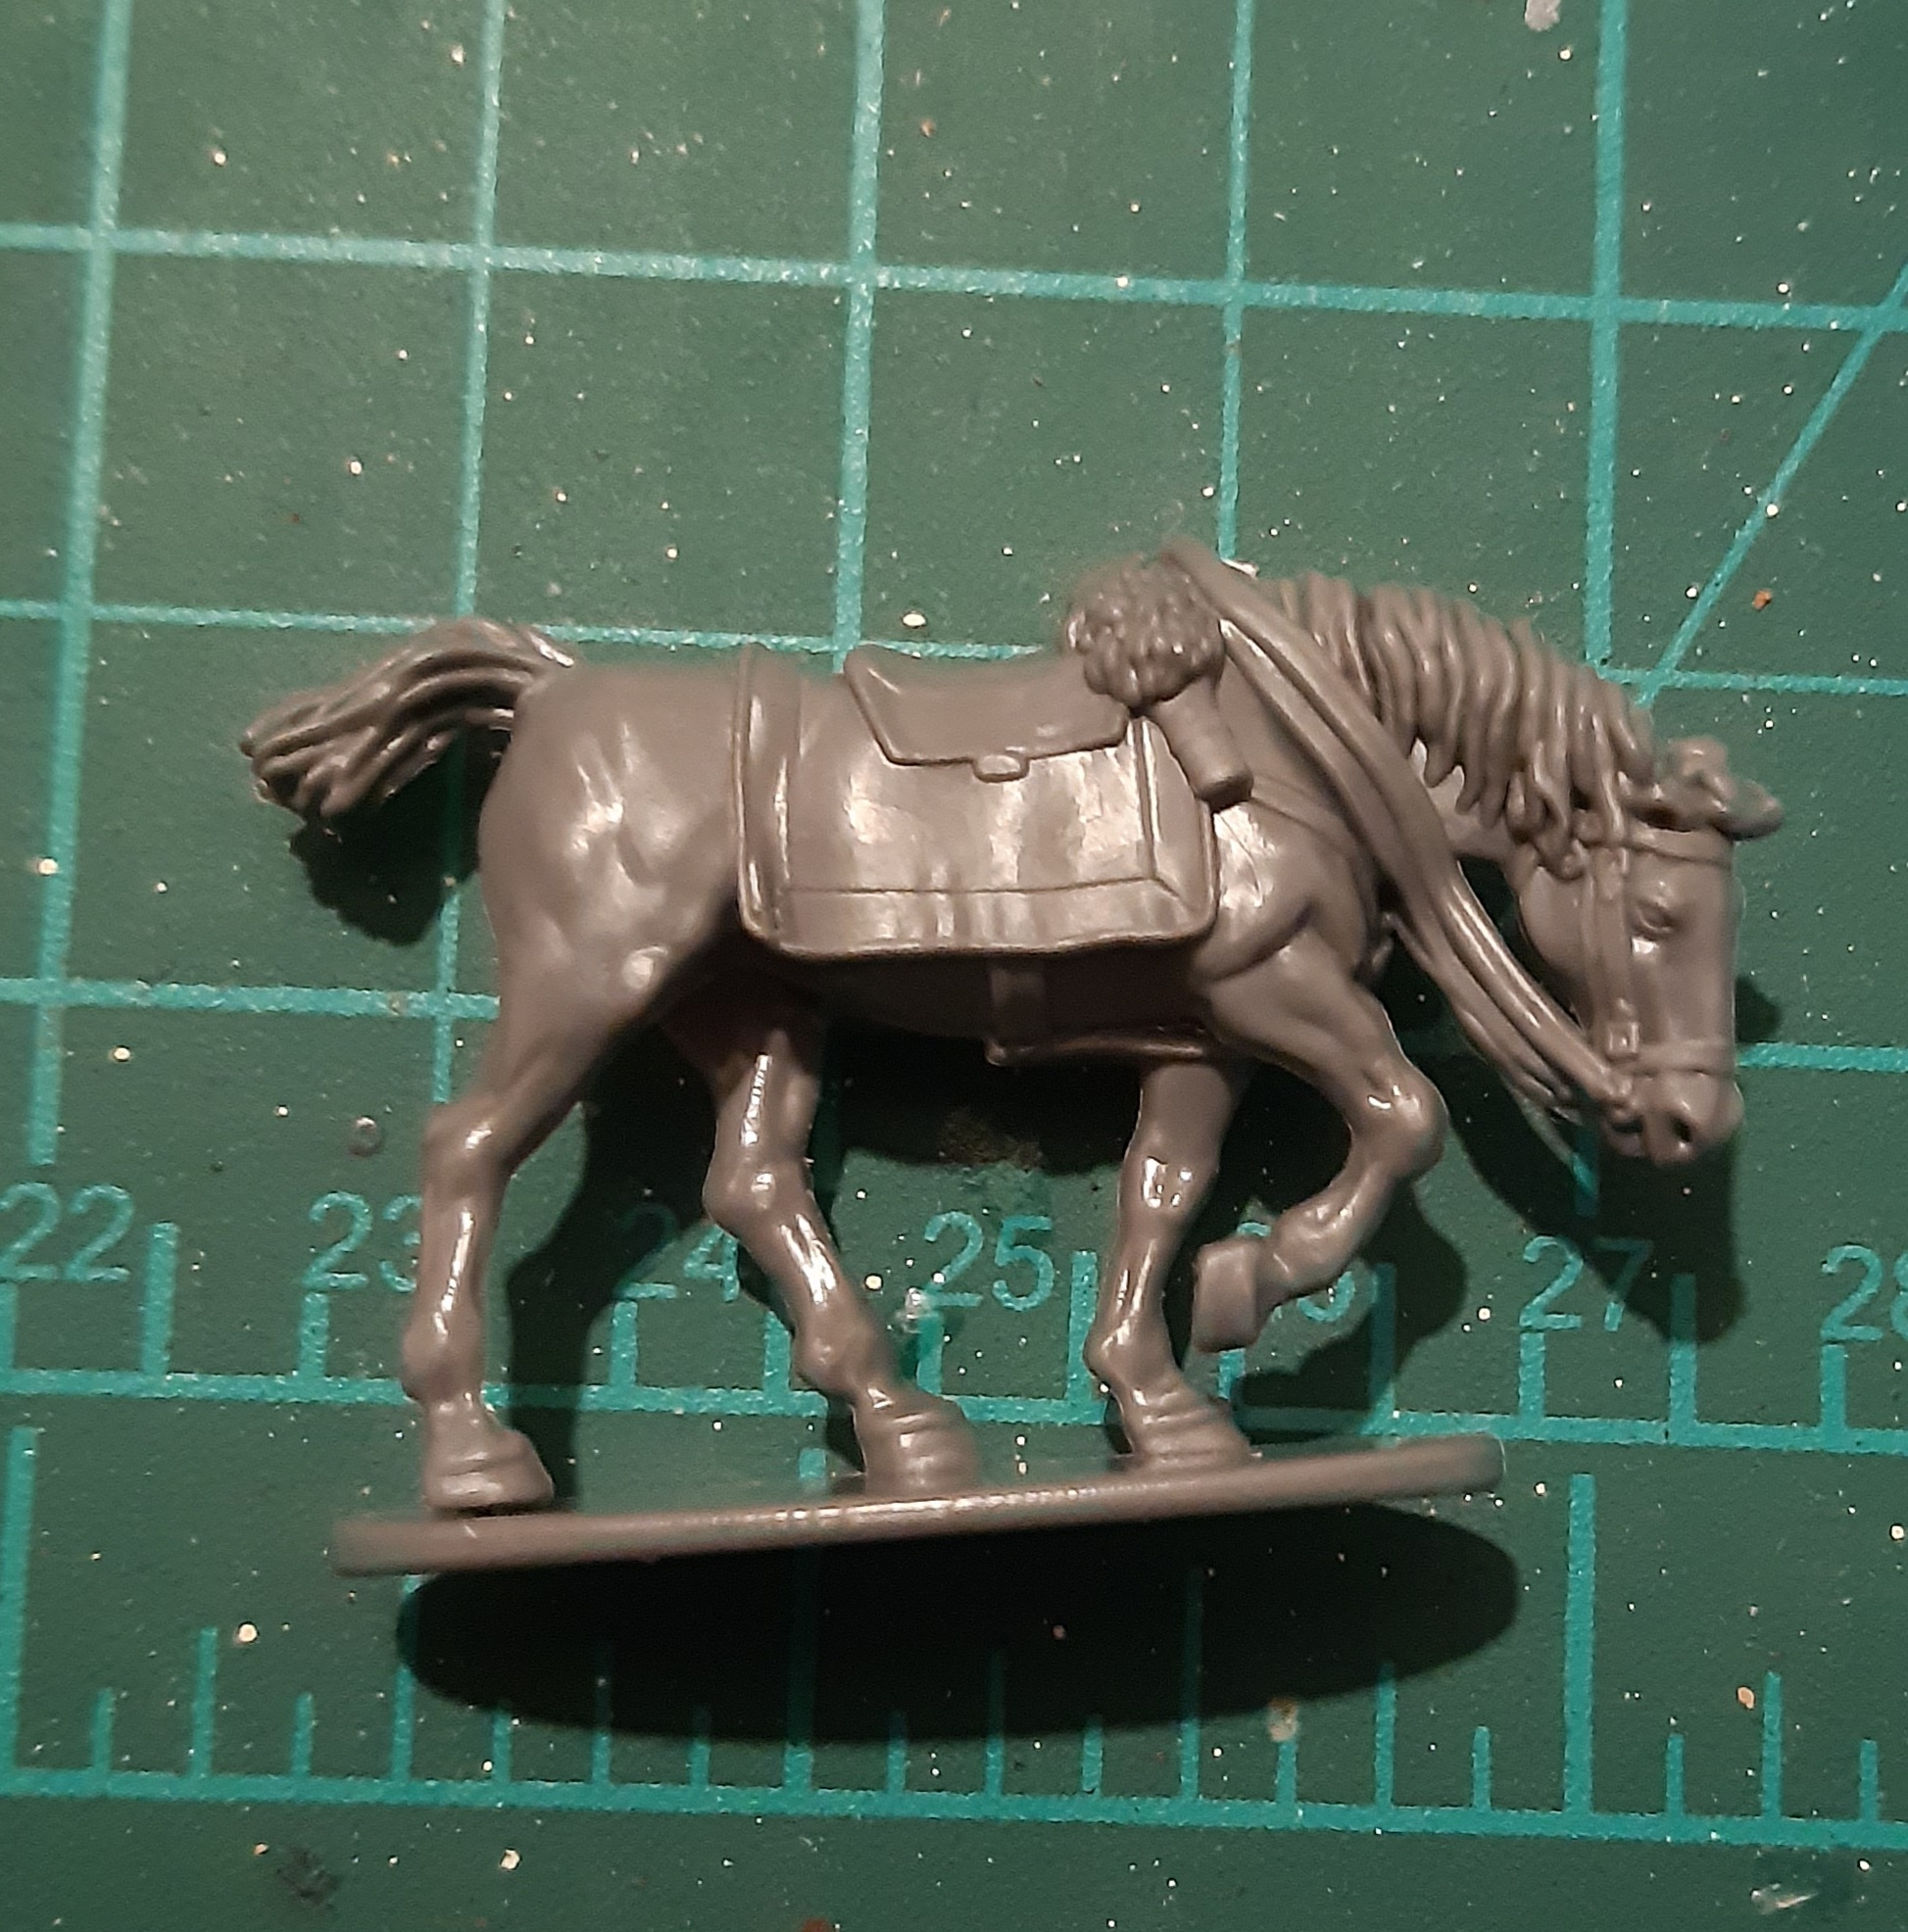
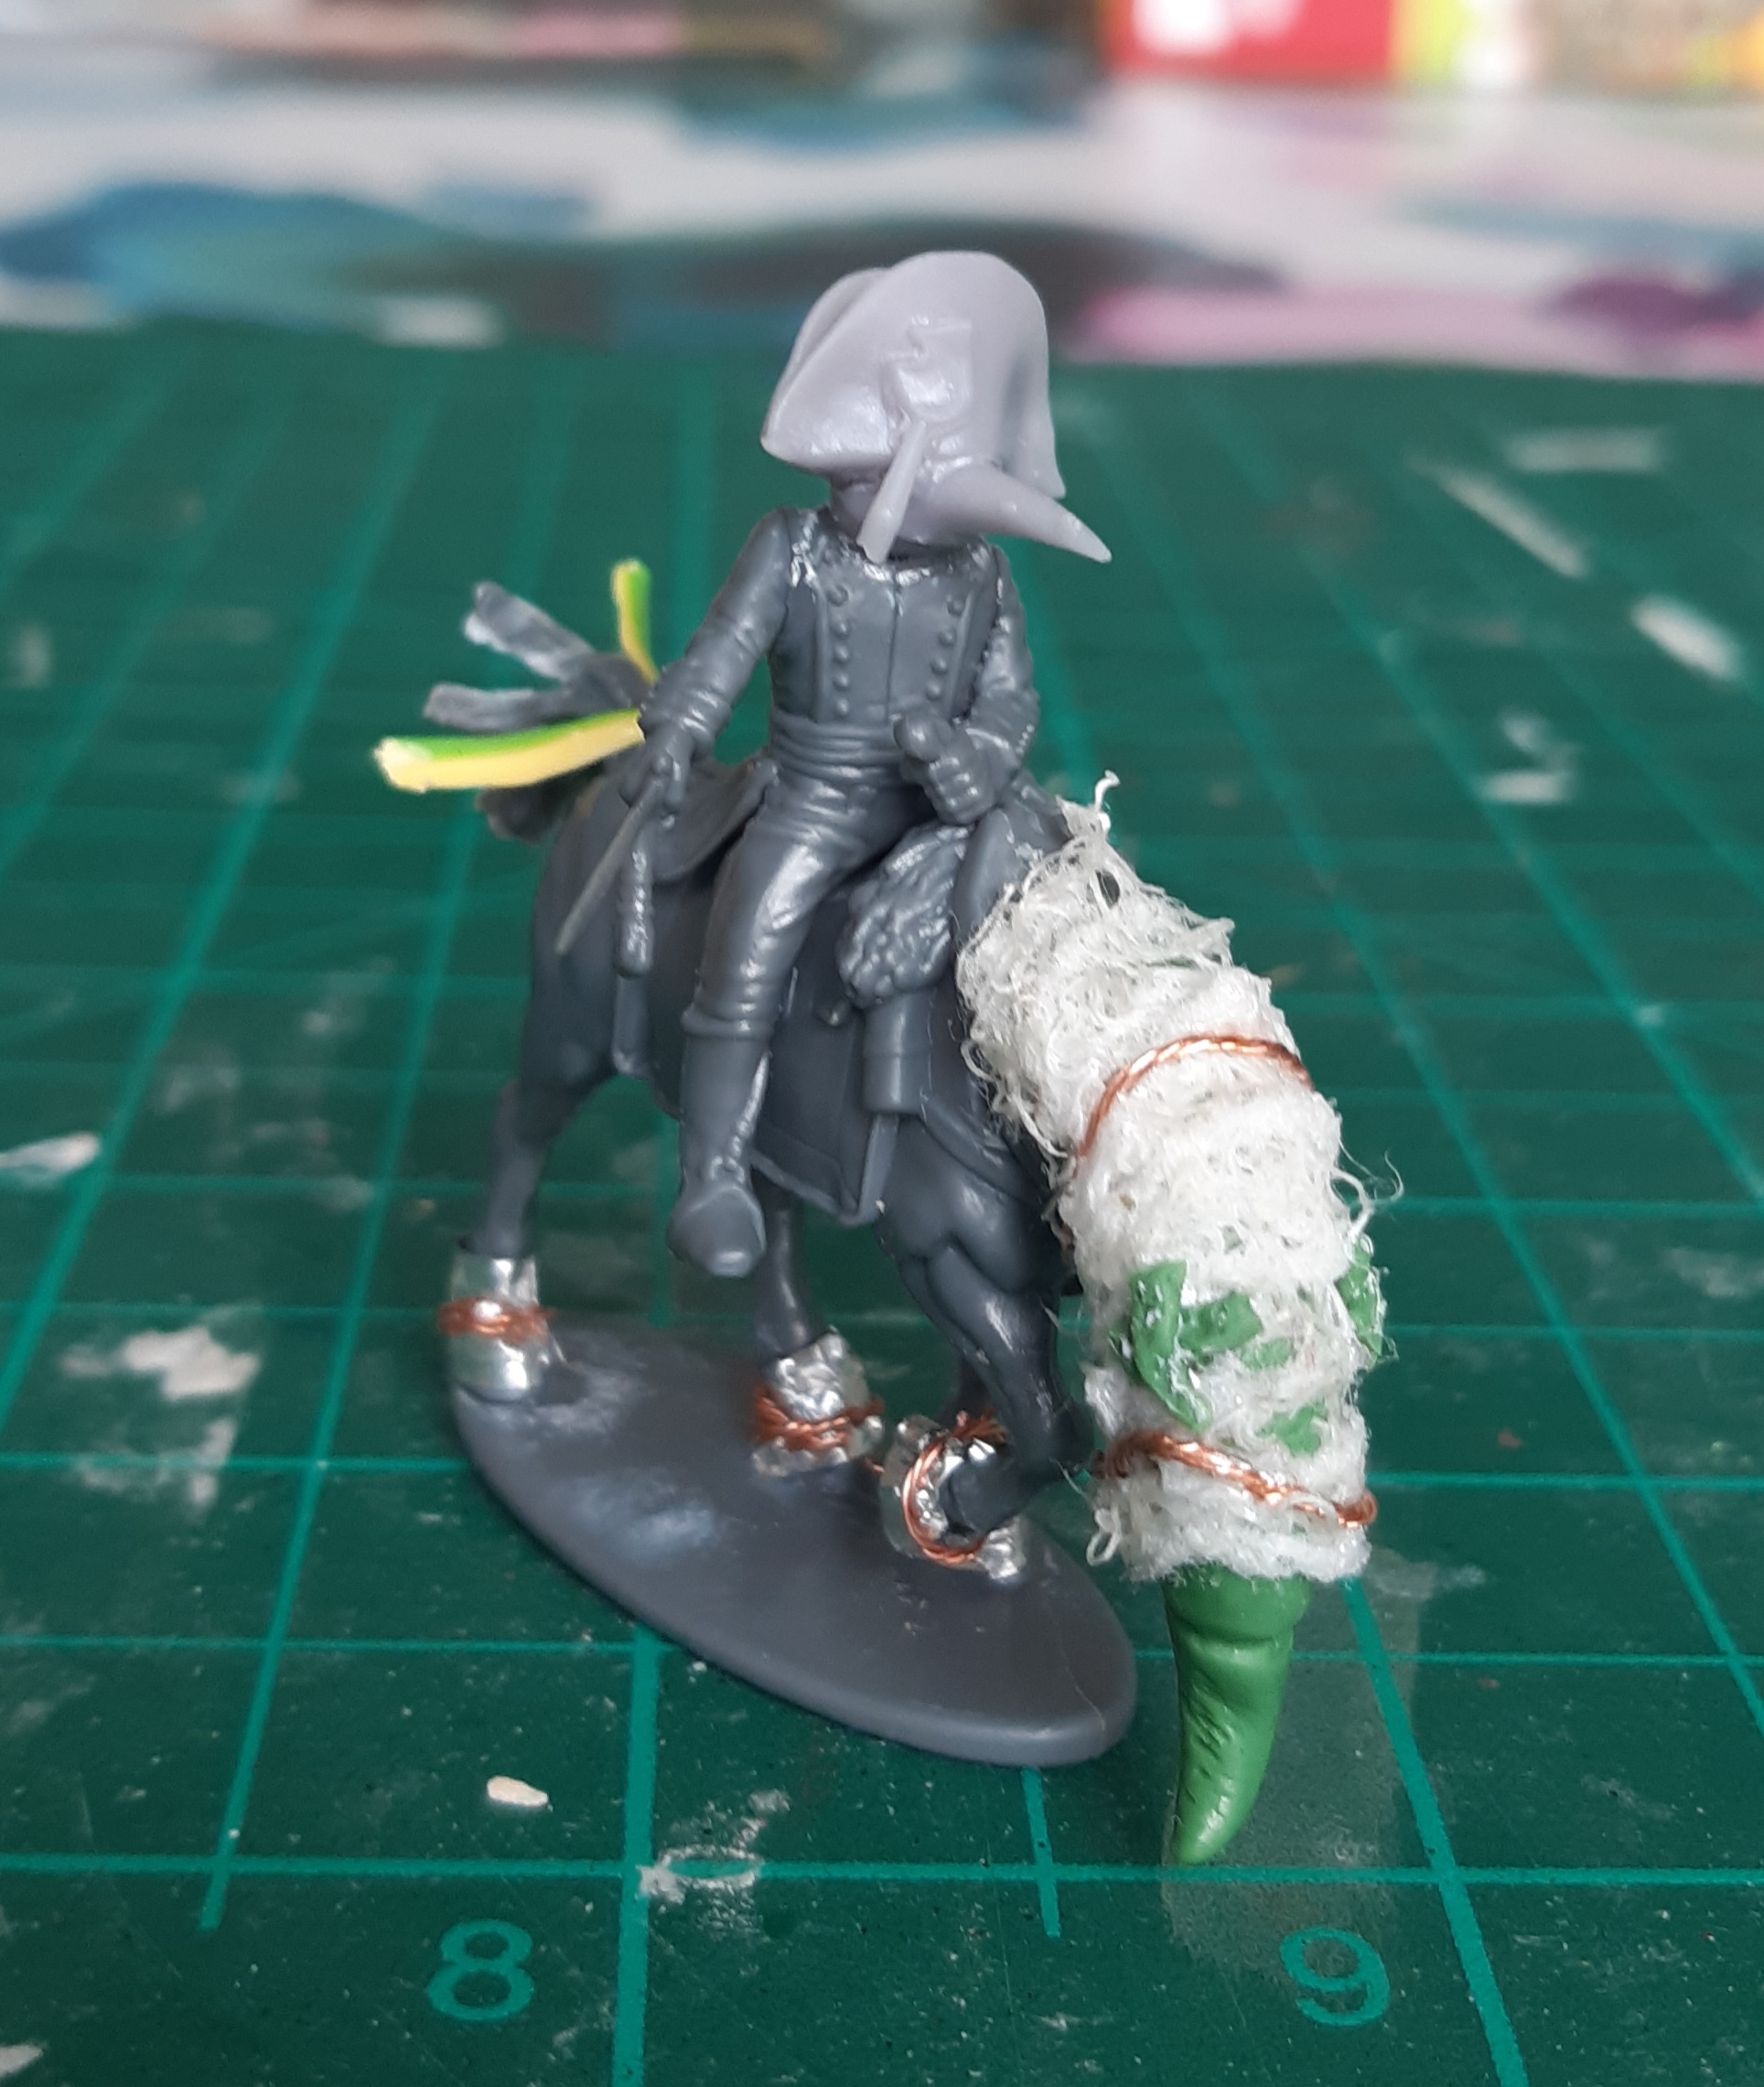
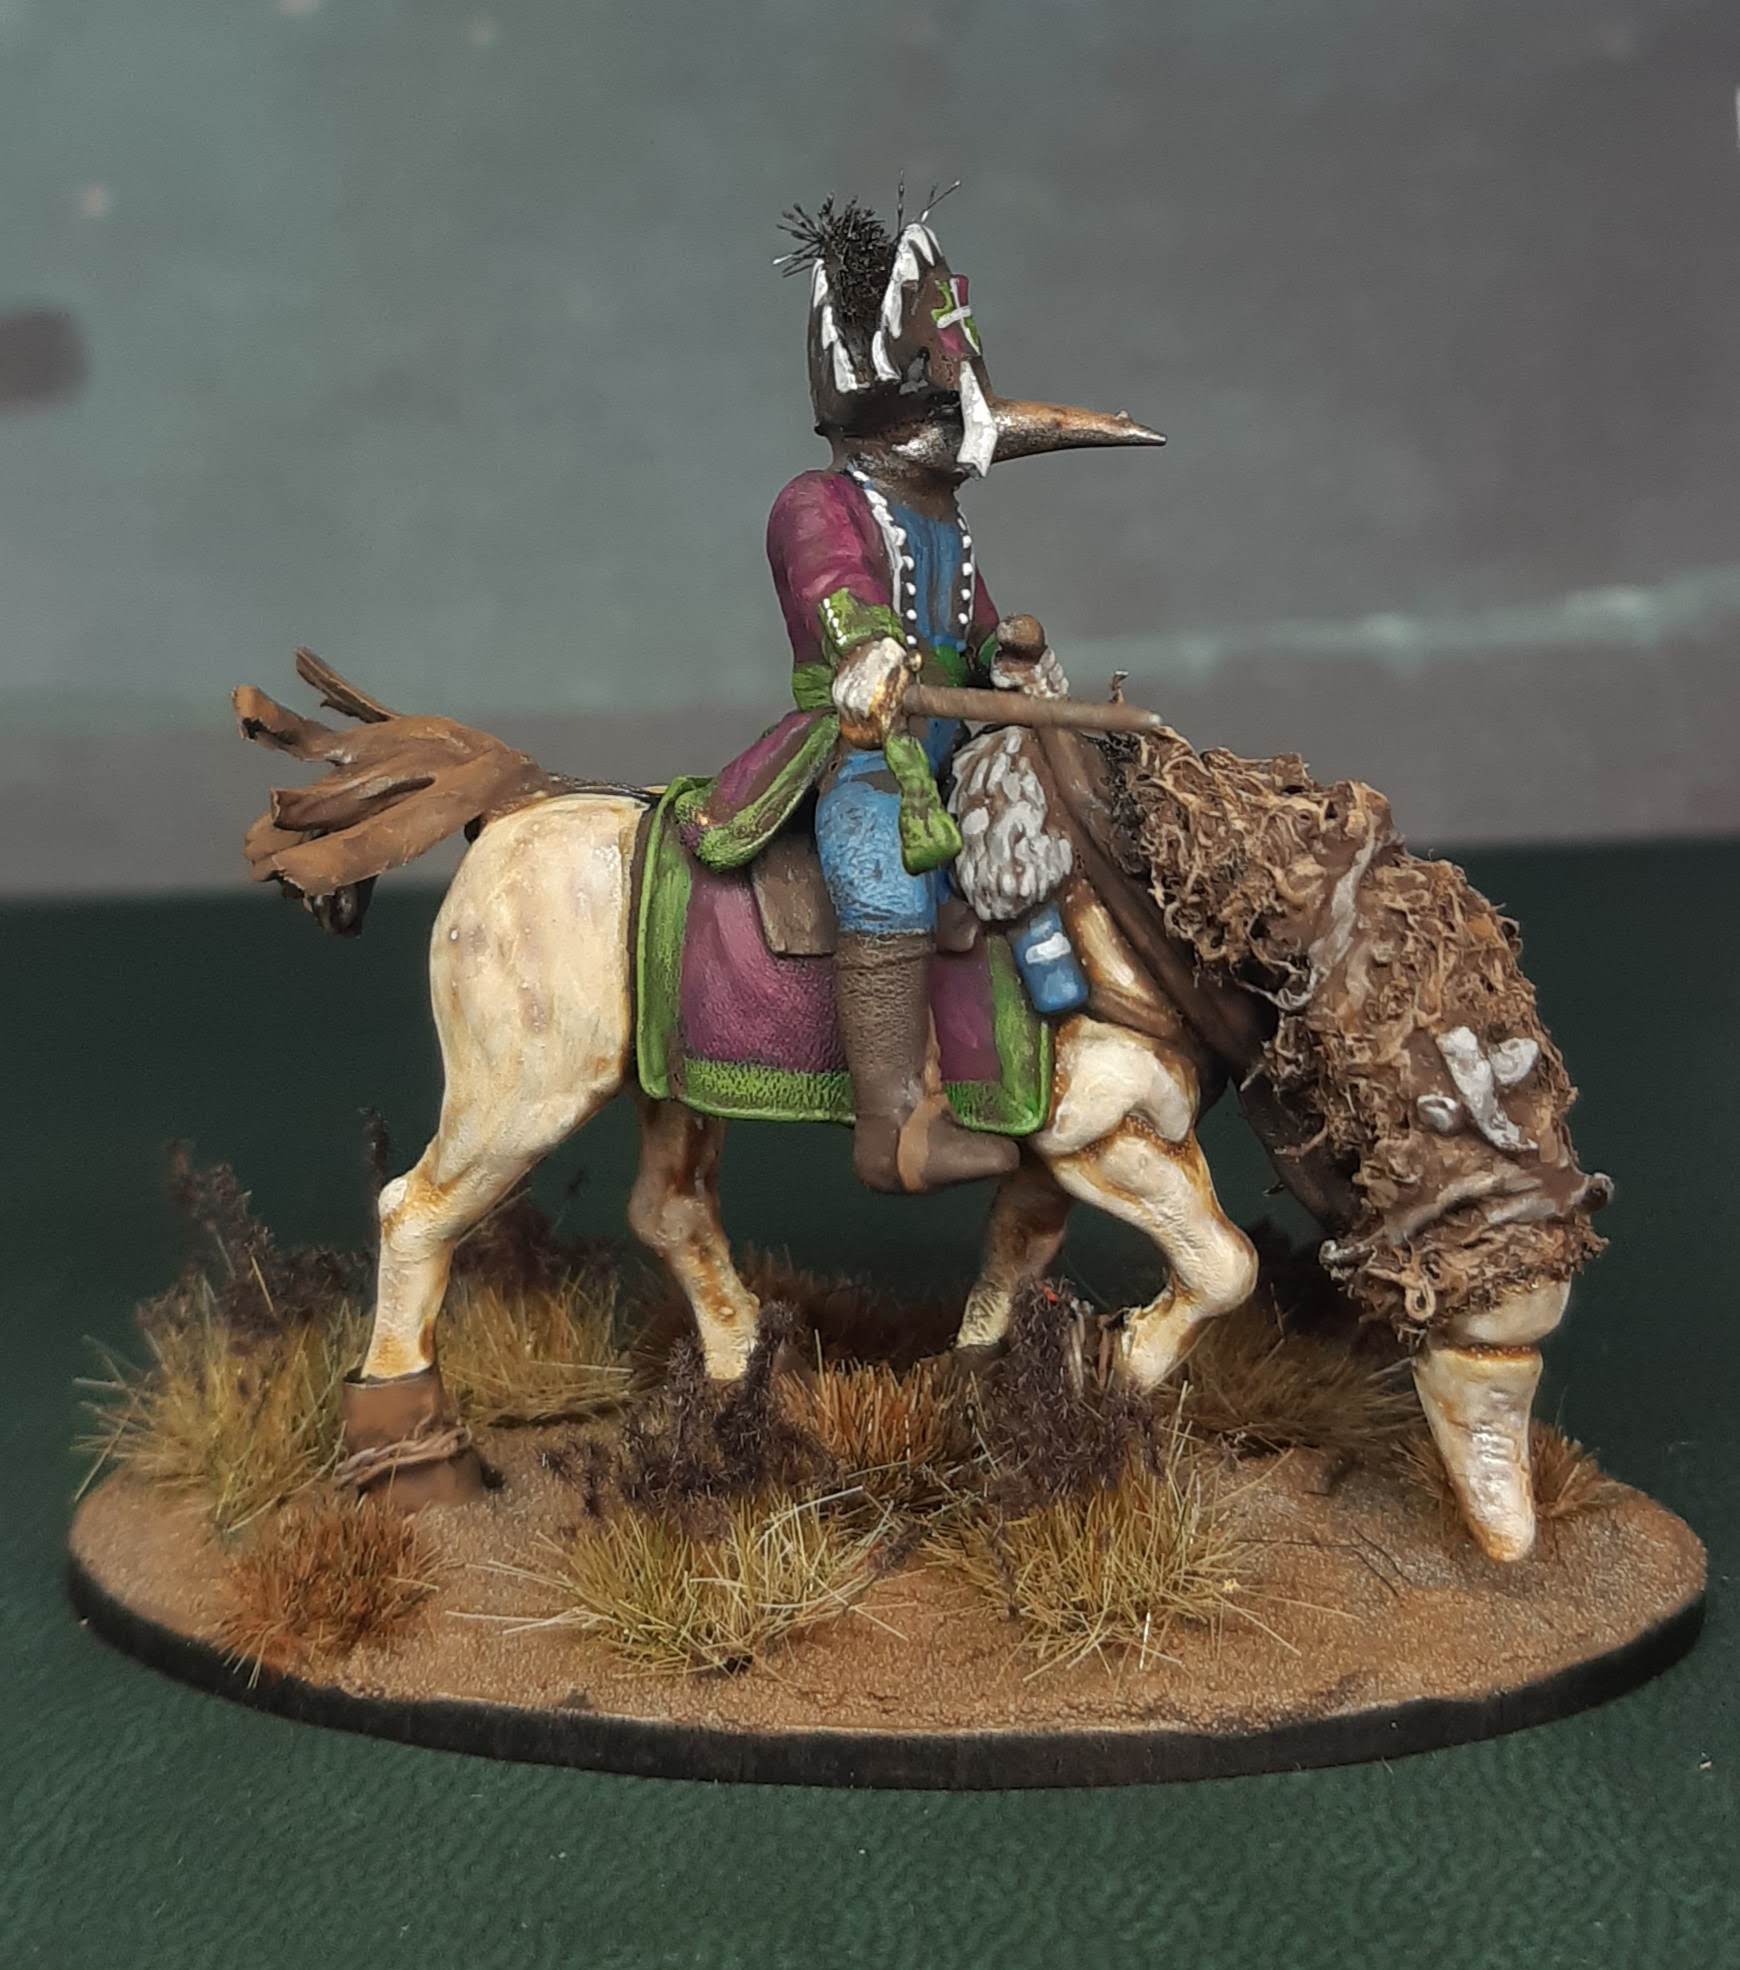
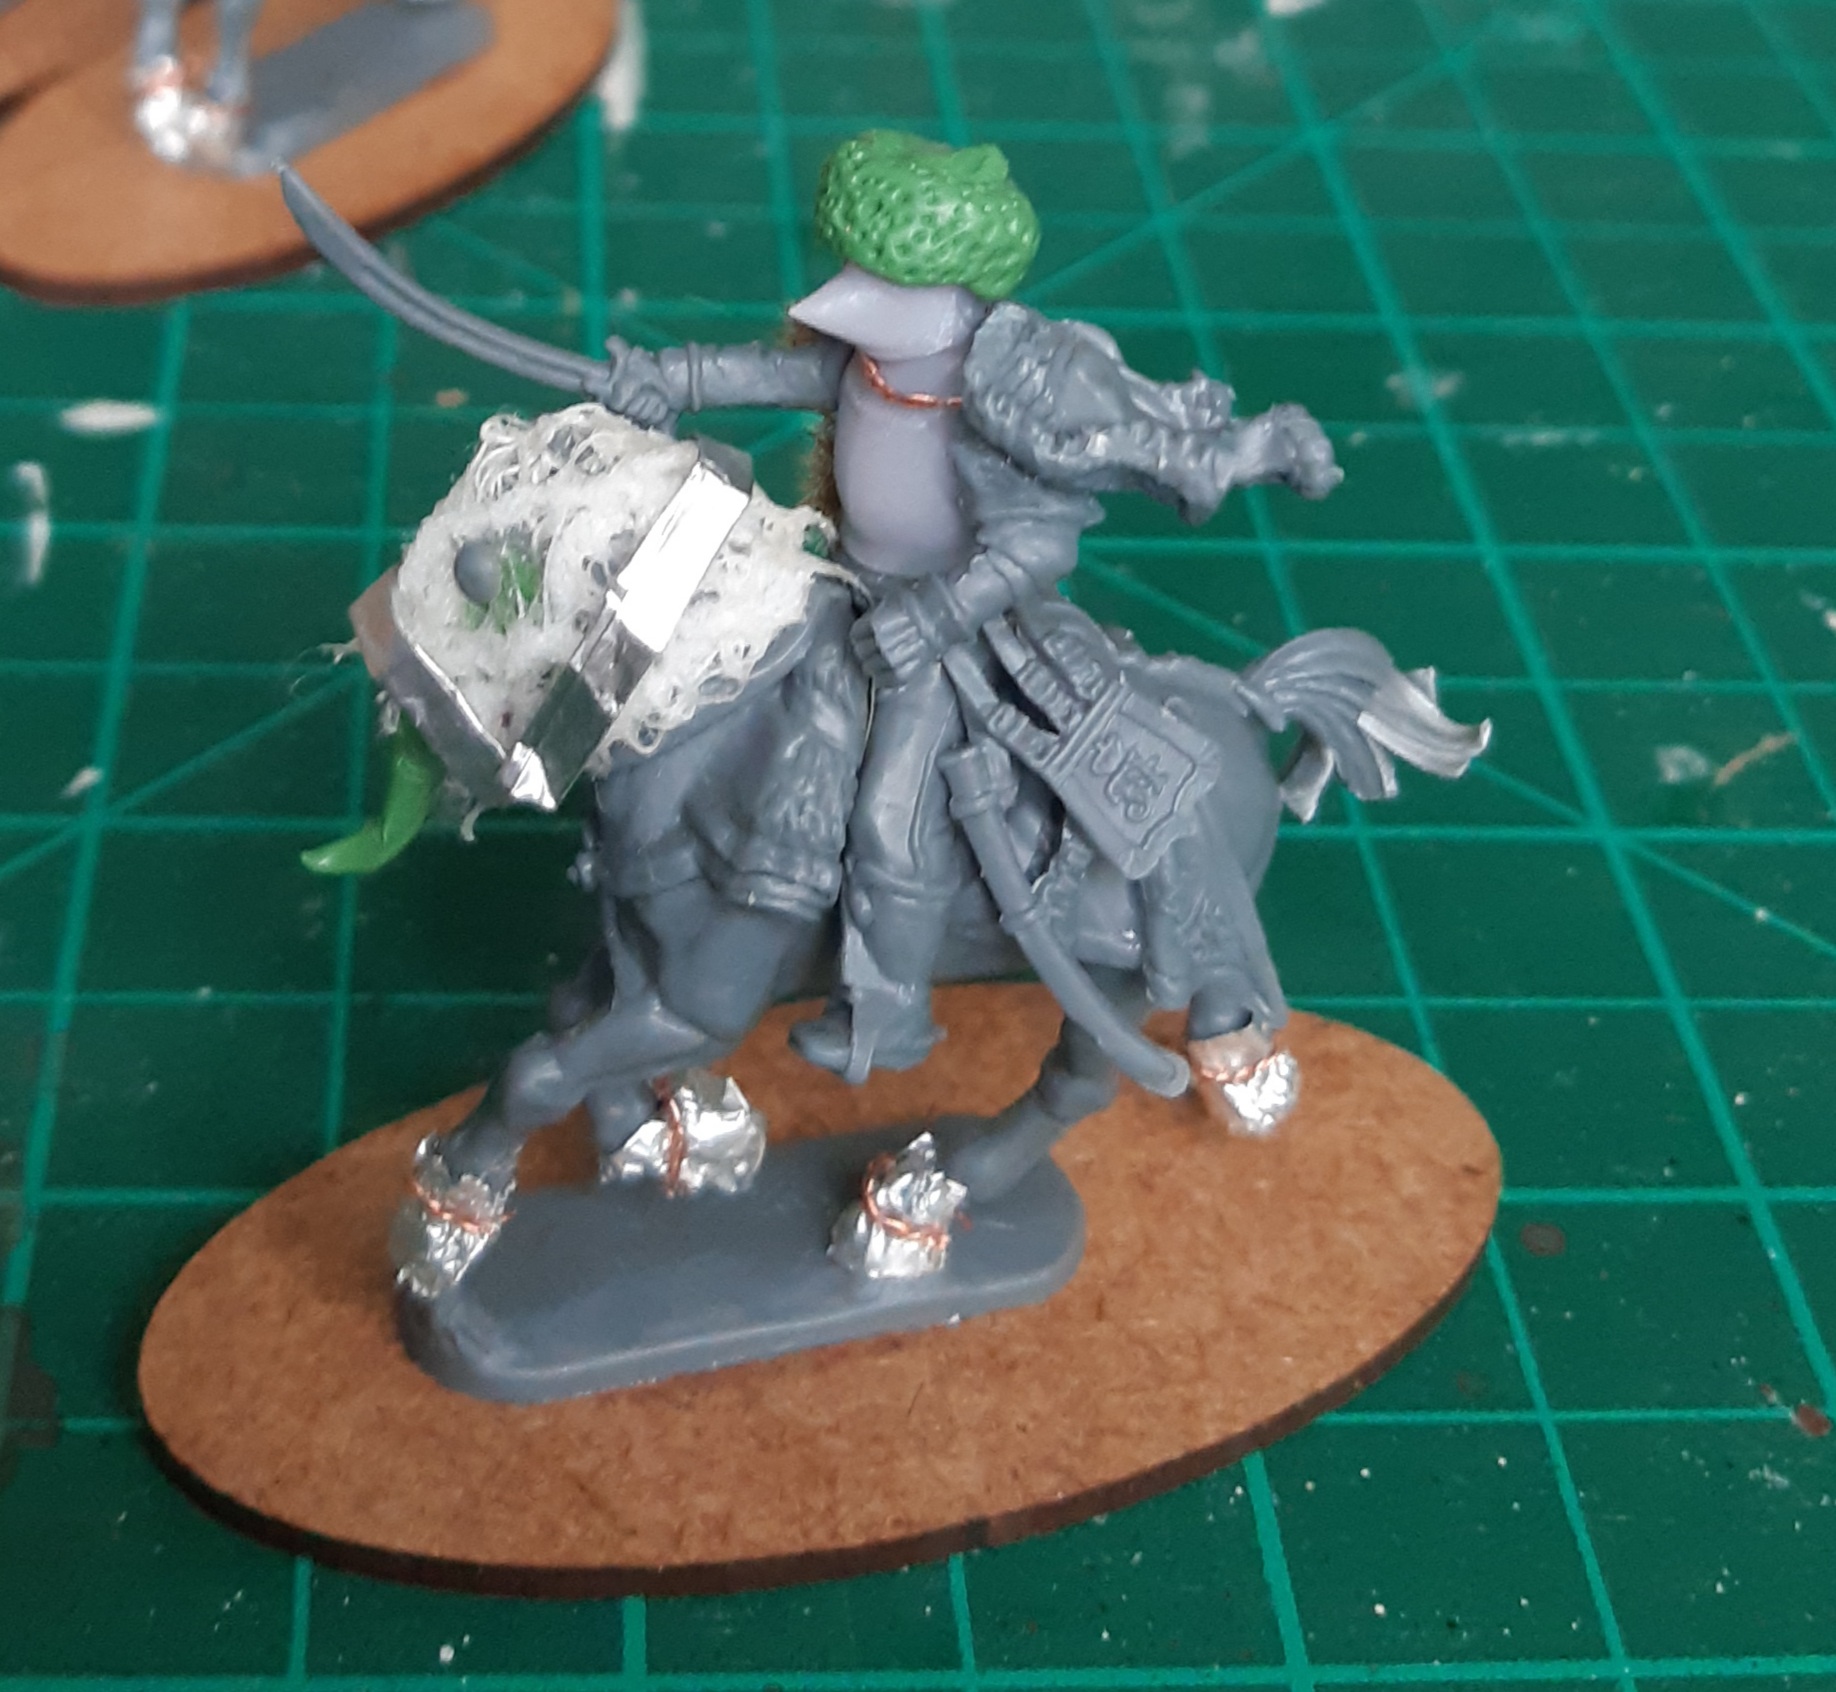
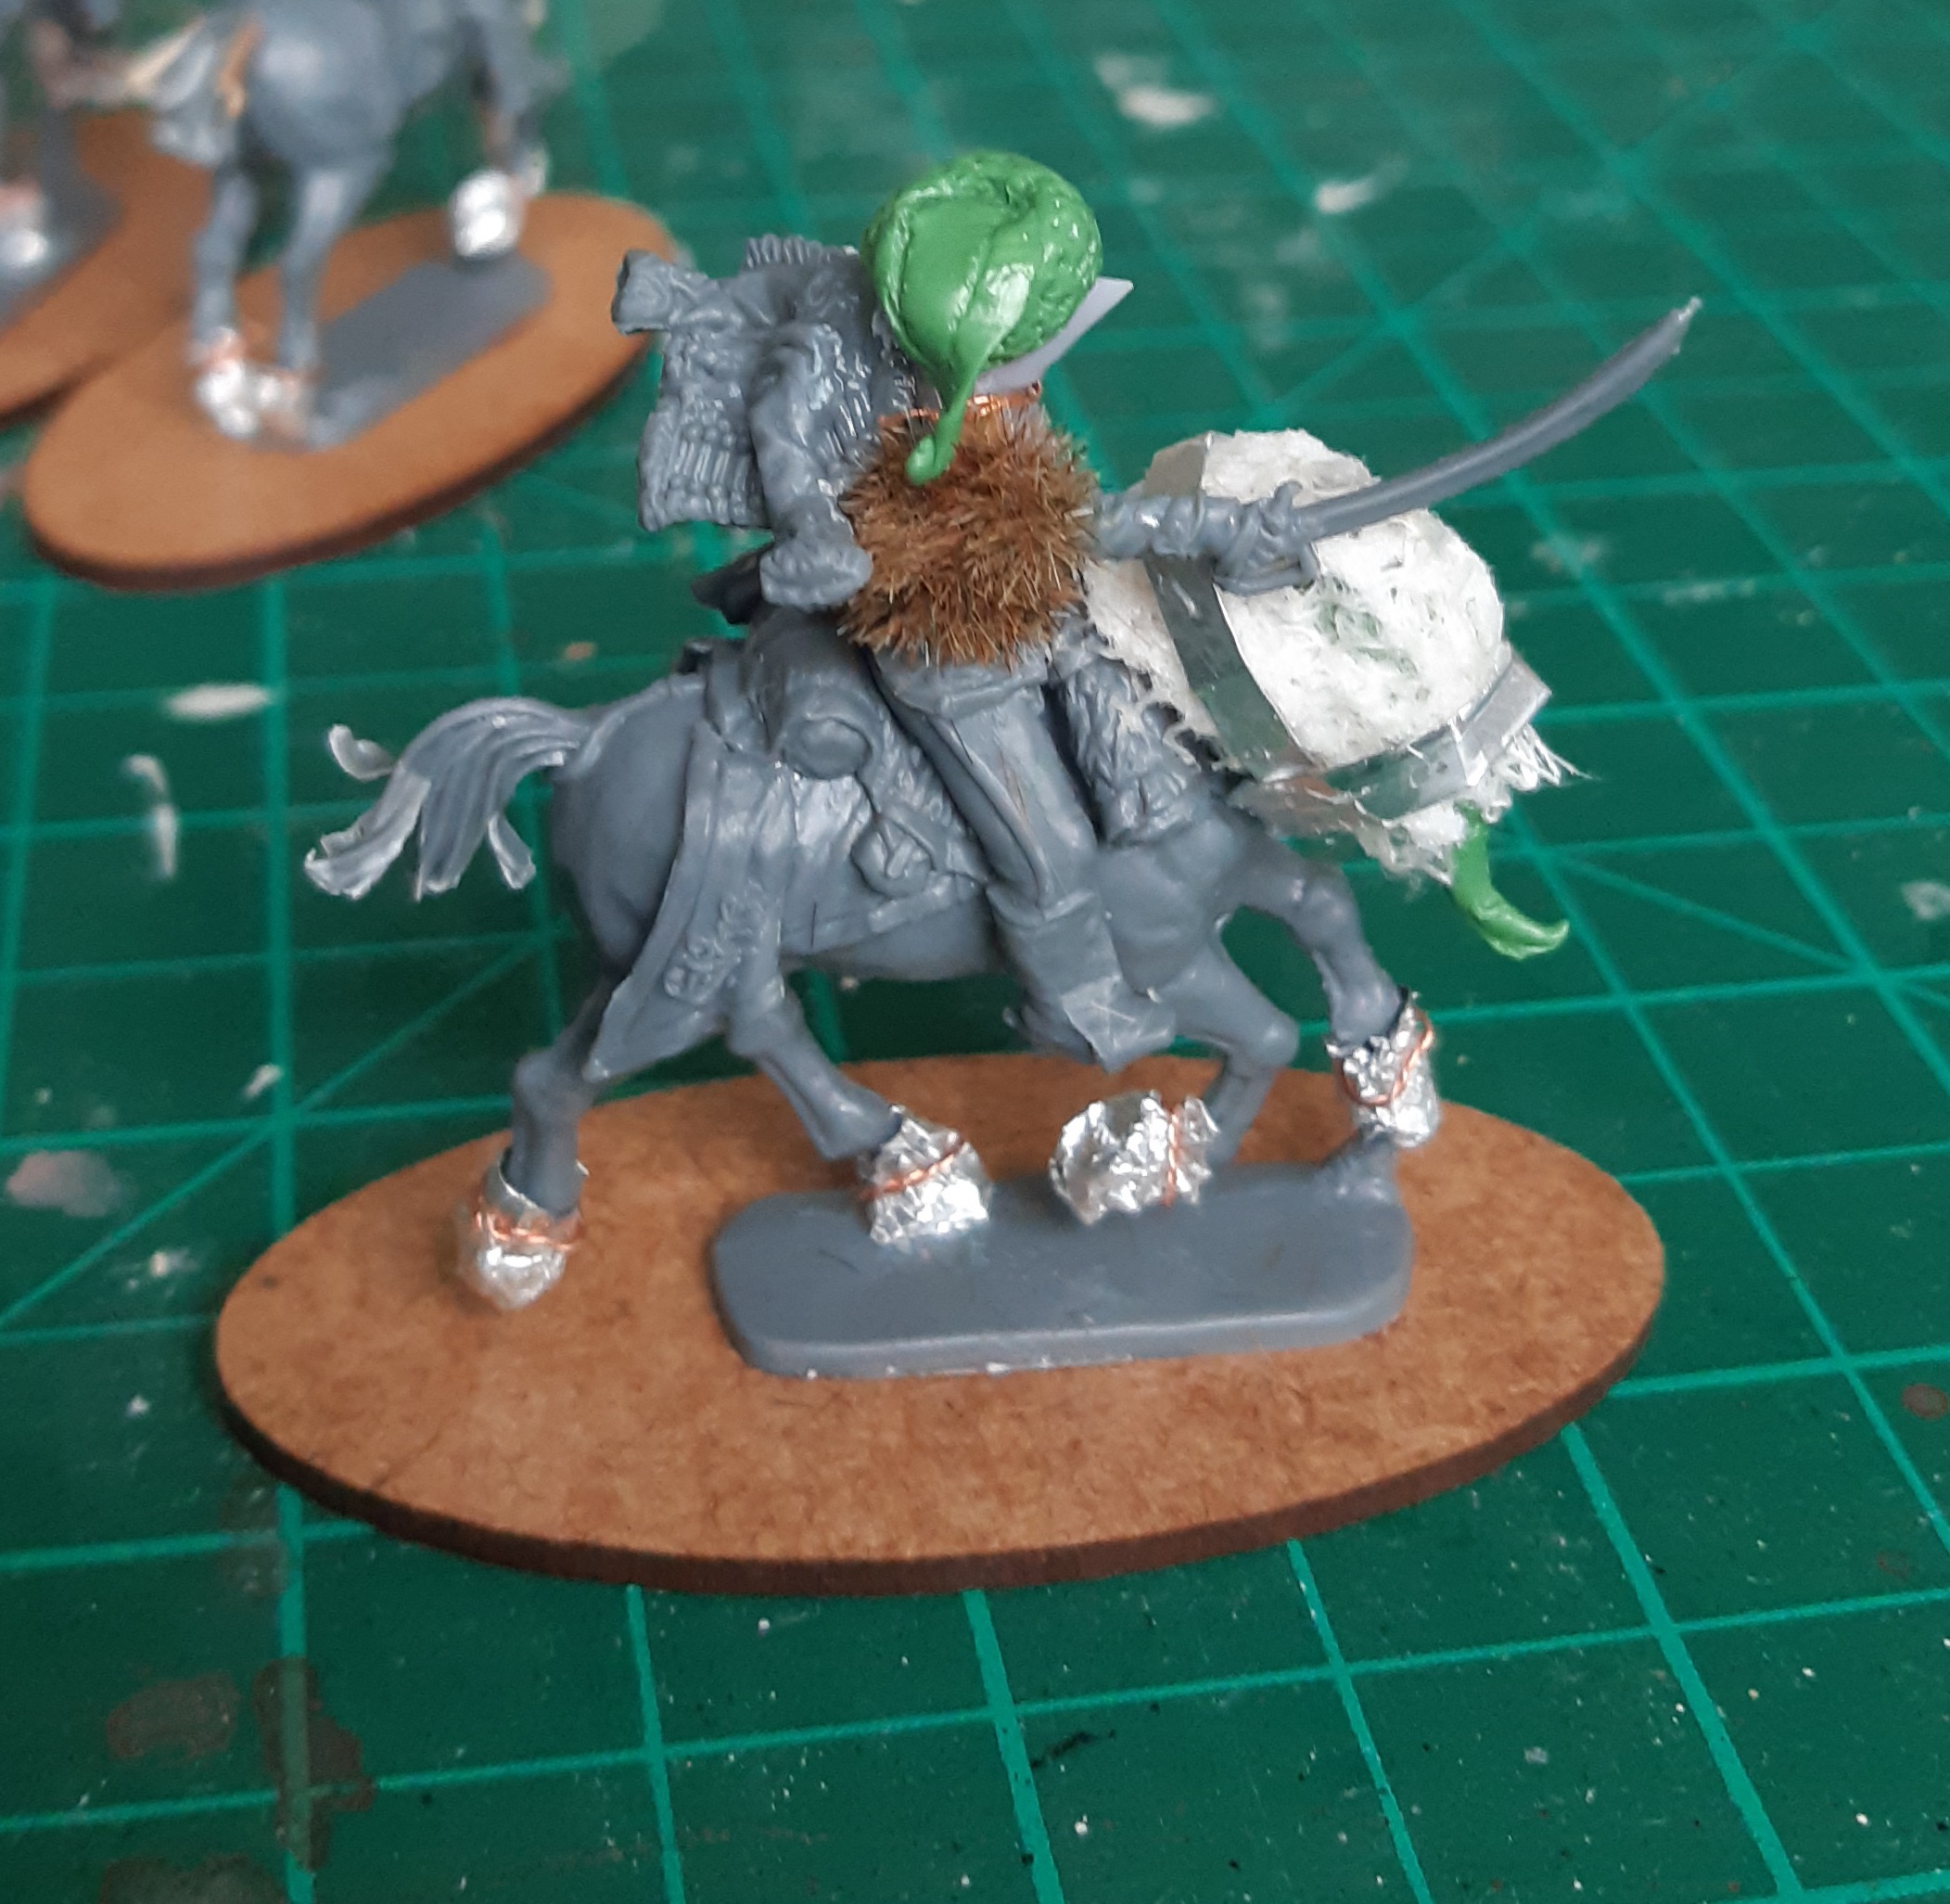
The Toff himself was pretty simple – just trimming off the Bavarian officer’s collar and creating a nice recess to fit the 3D printed head.
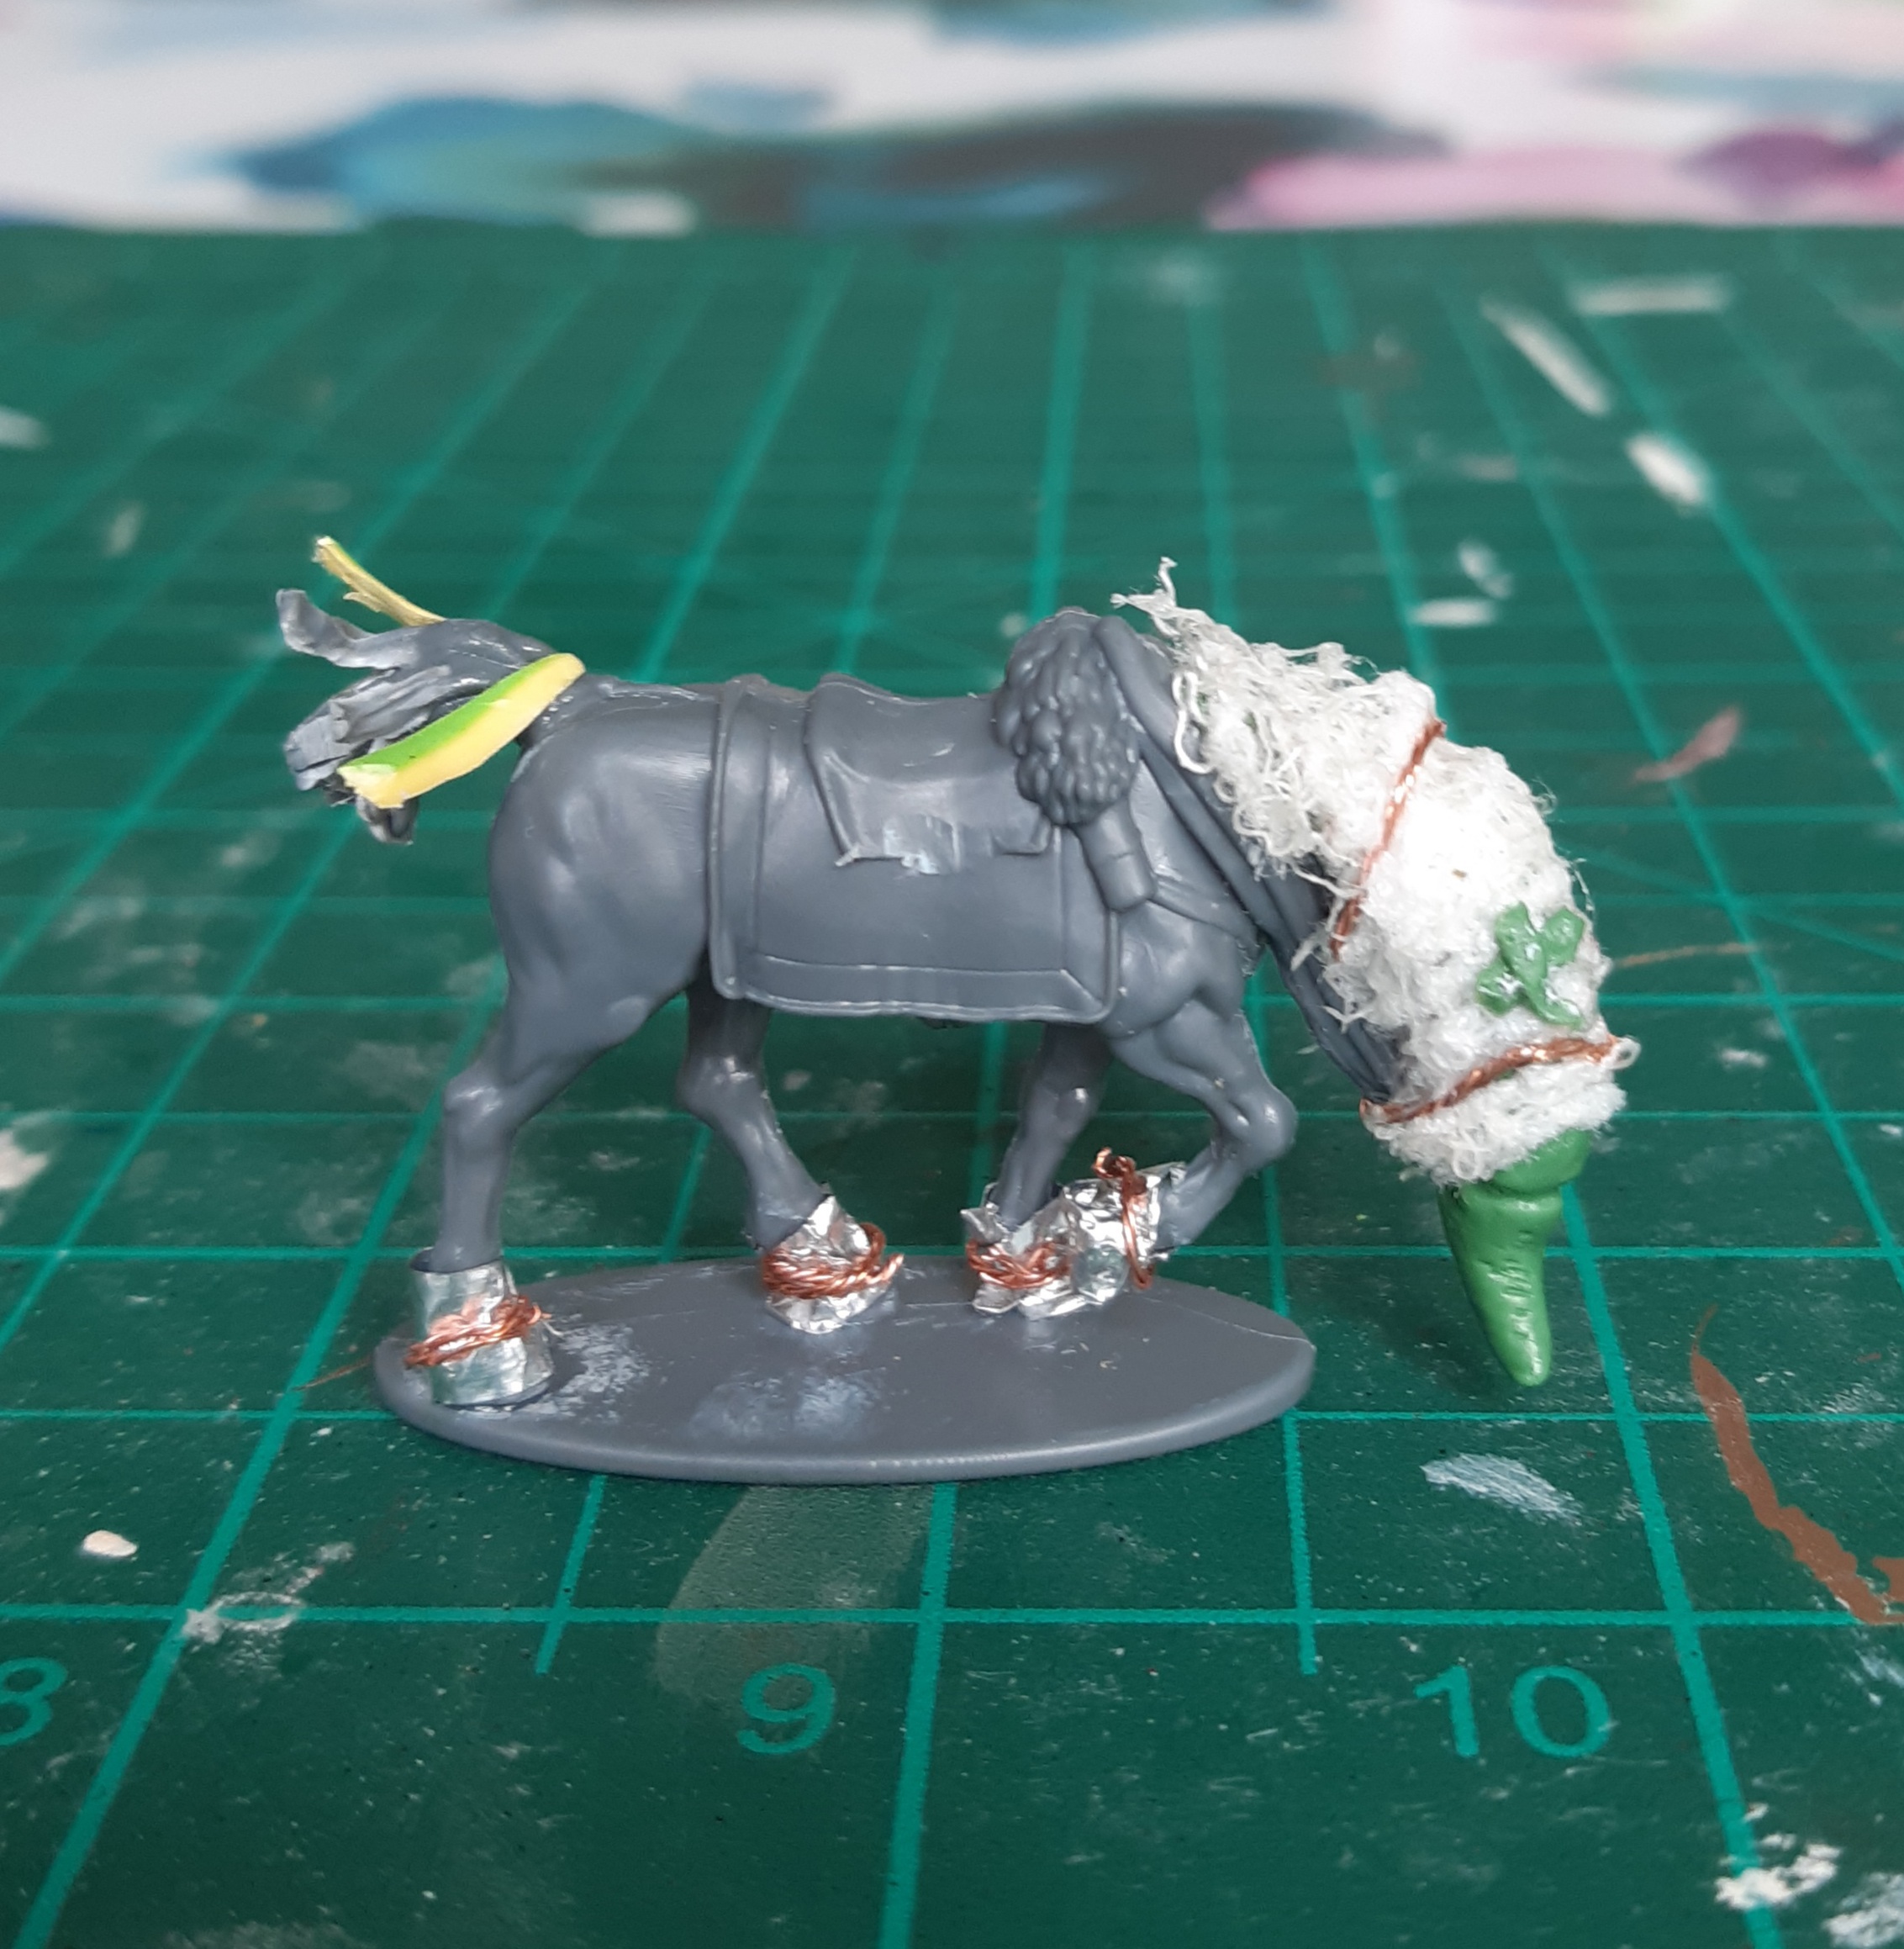
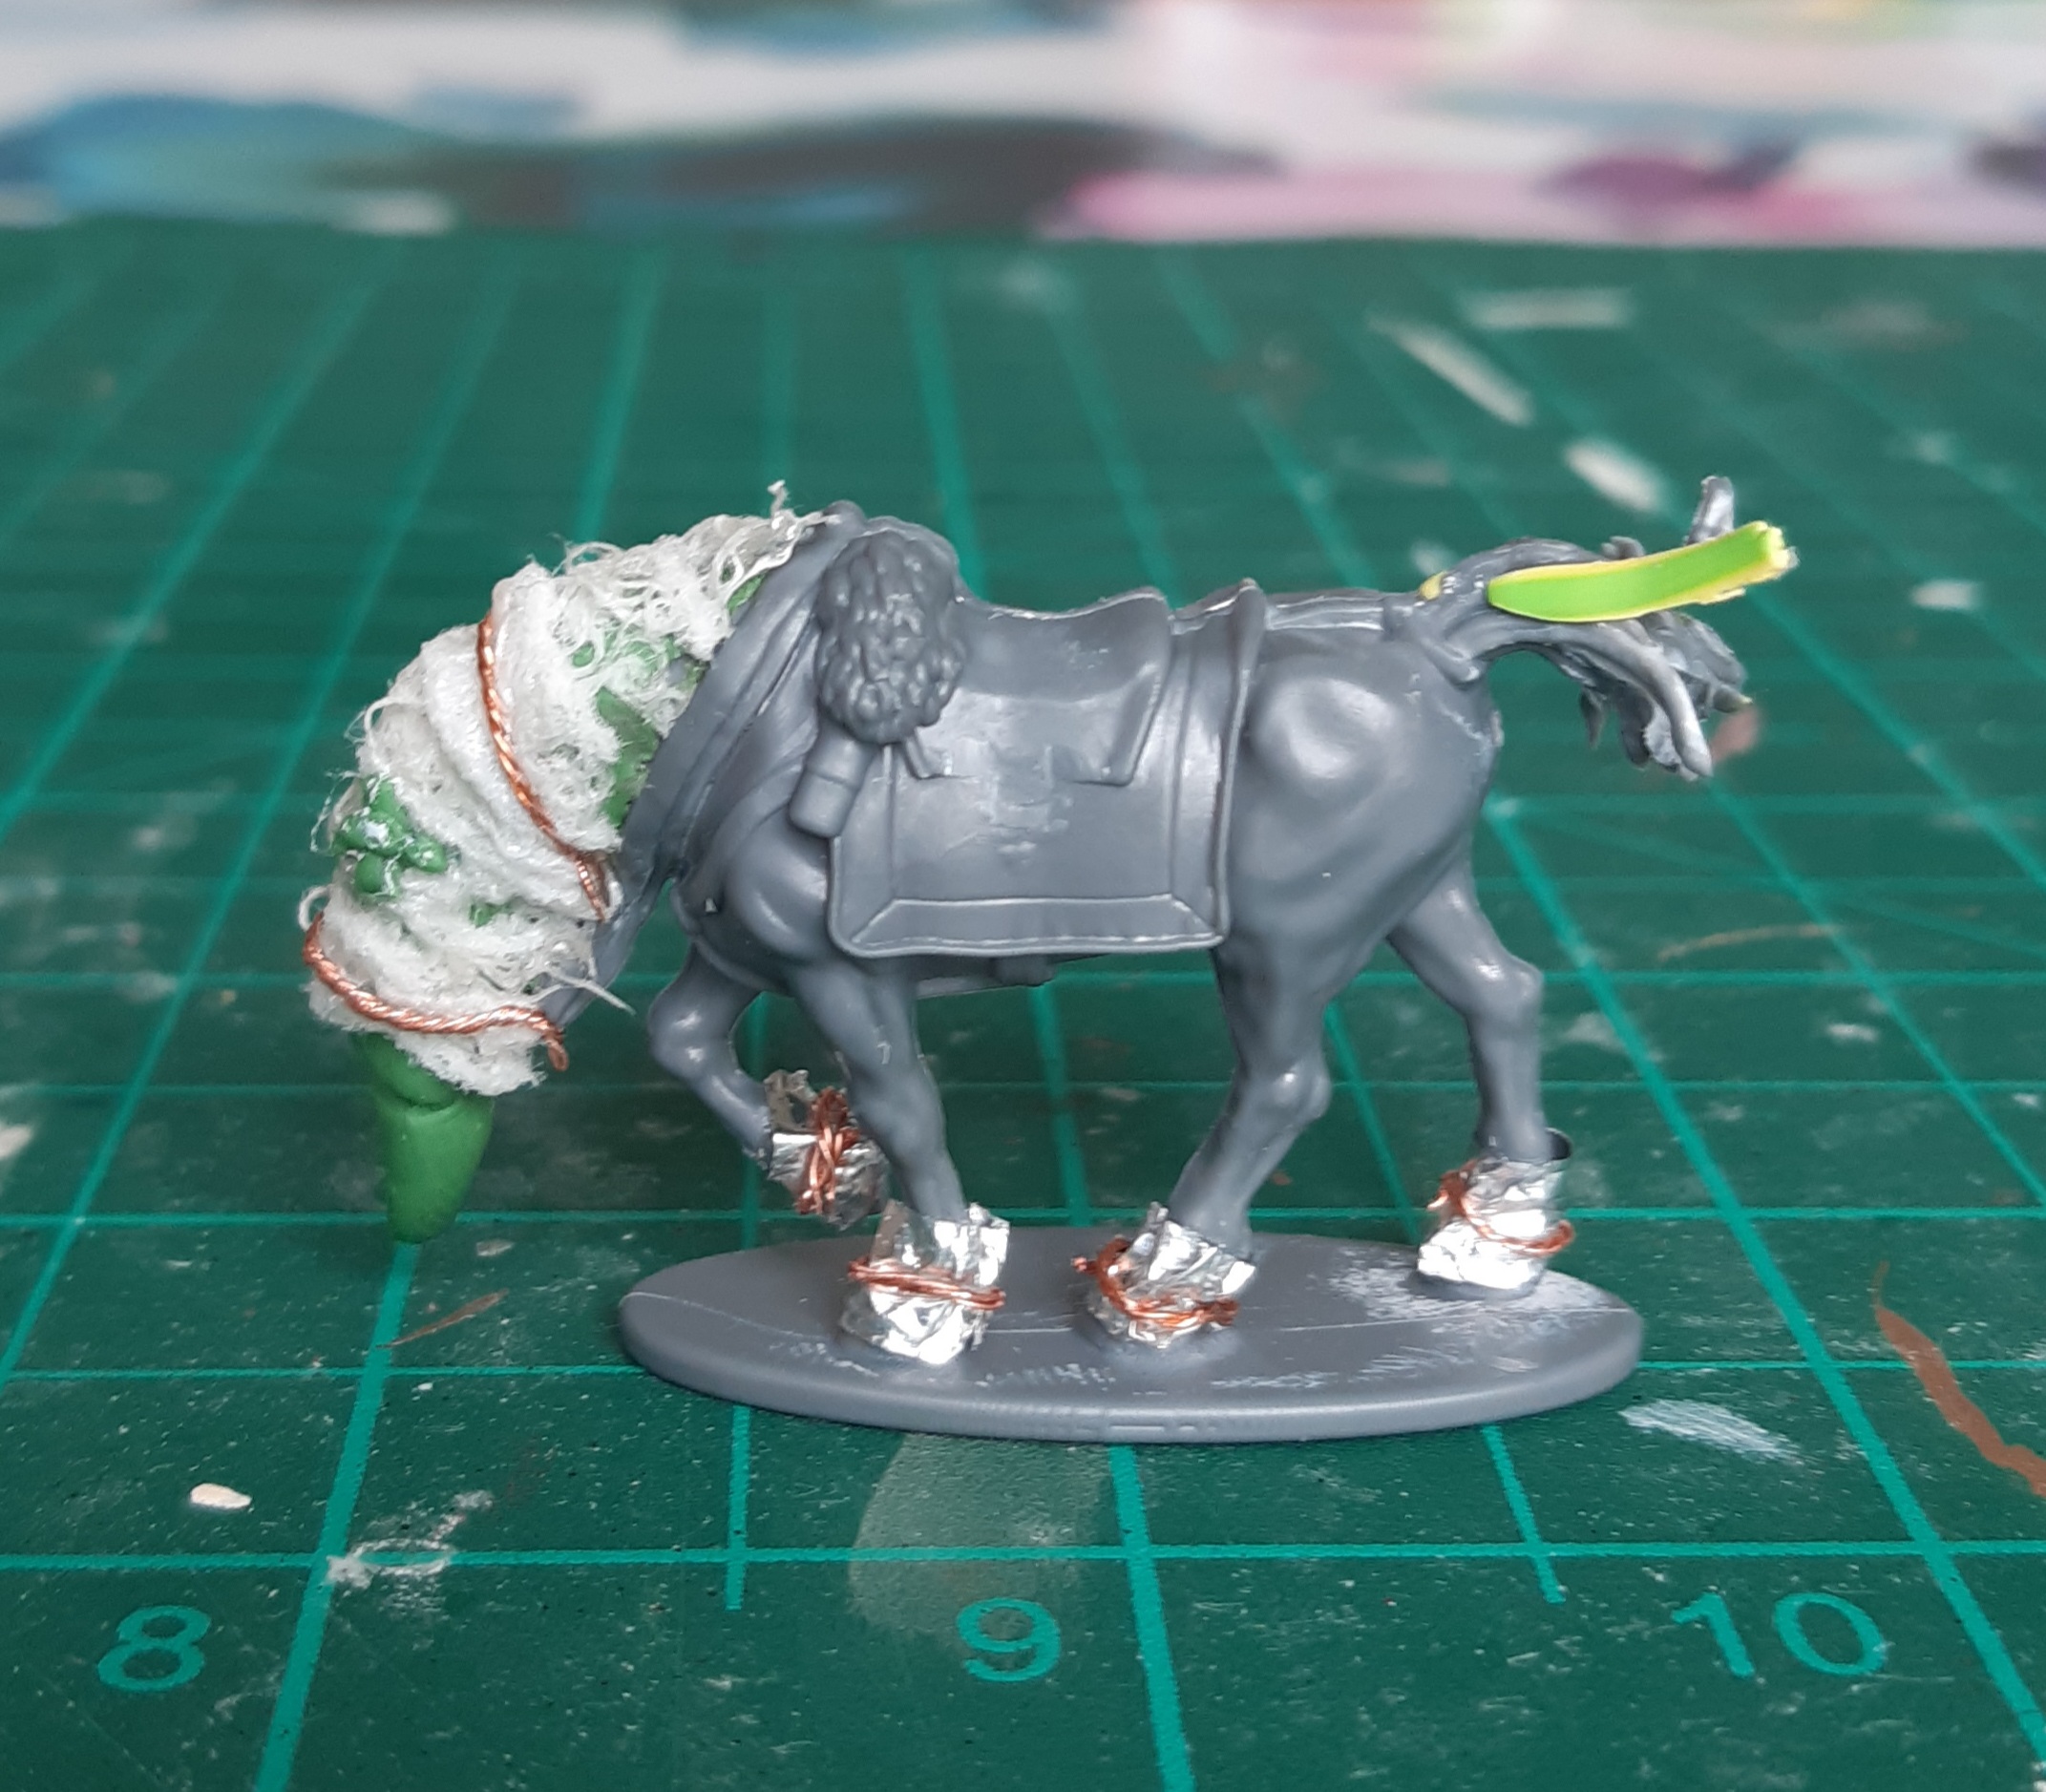
The ‘horse’ was an experiment in using different materials to see if they resulted in some interesting textures for painting.
Firstly, I sliced away the mane and ears, before making a green stuff snout/root thing. I wrapped the neck/head in some bandage, and coated it with some thinned down pva to try and create a coarse-sack like cloth texture. I used some tin foil for the hoof wraps, with wire twists used to approximate ropes to secure those wraps and as a bridle.
Finally the tail/stalk was simply done by carefully slicing into the tail, with some offcuts of electrical wire cover added as well (using what was lying around after making the ropes).
Before and after images below.
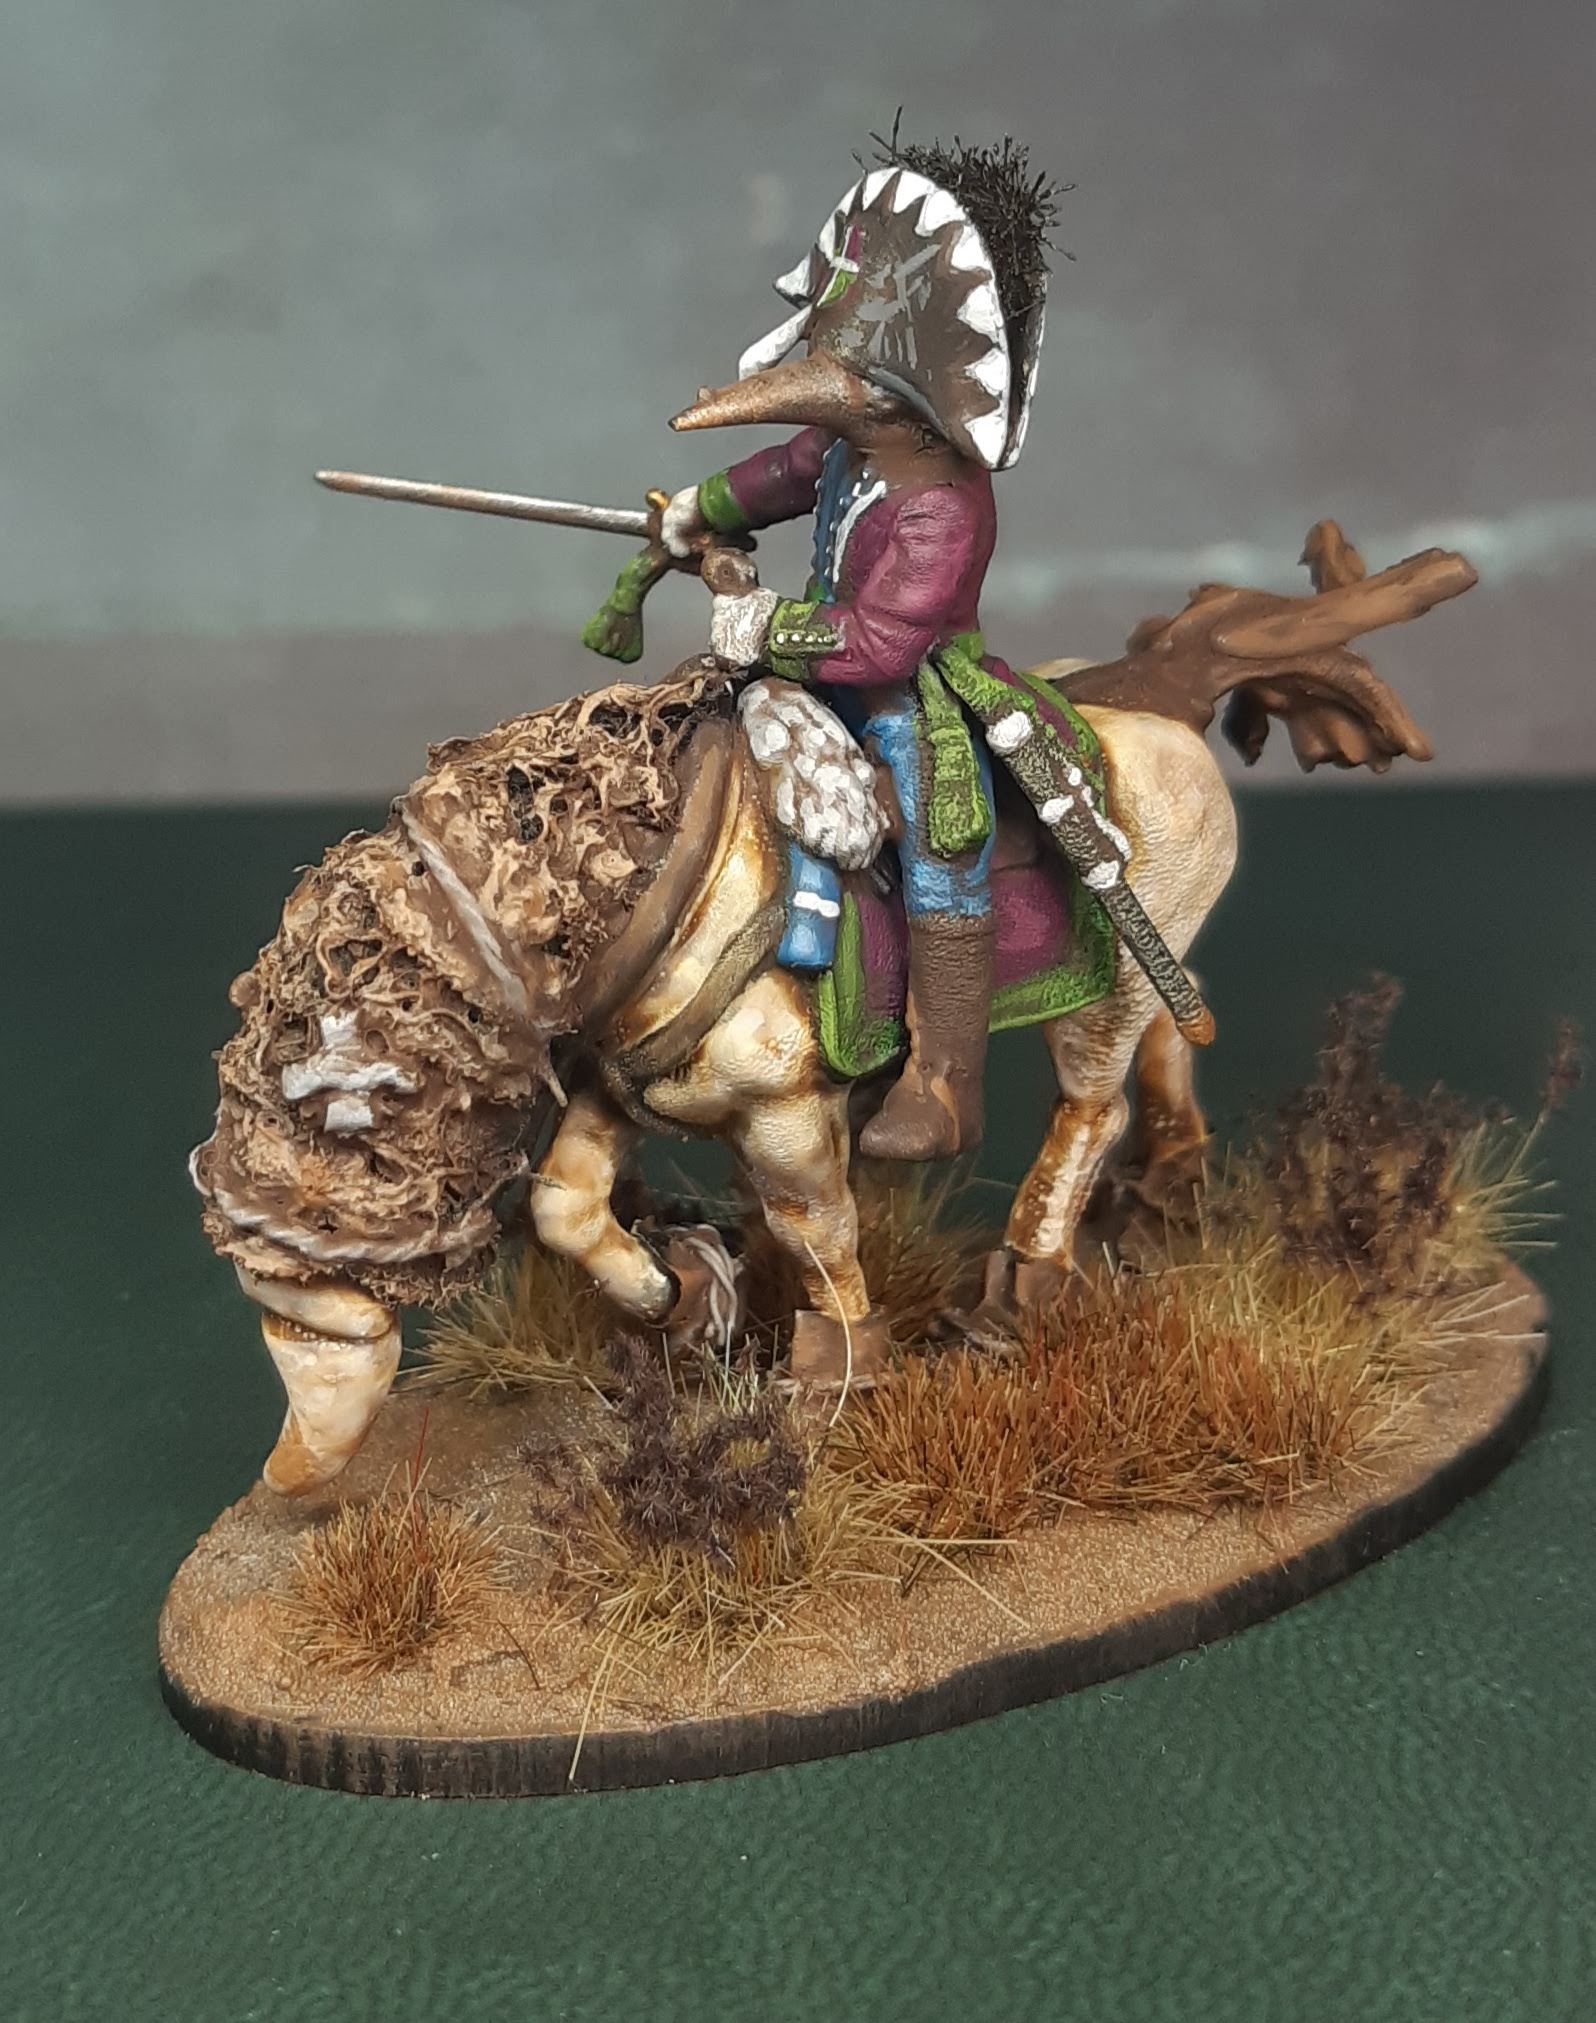
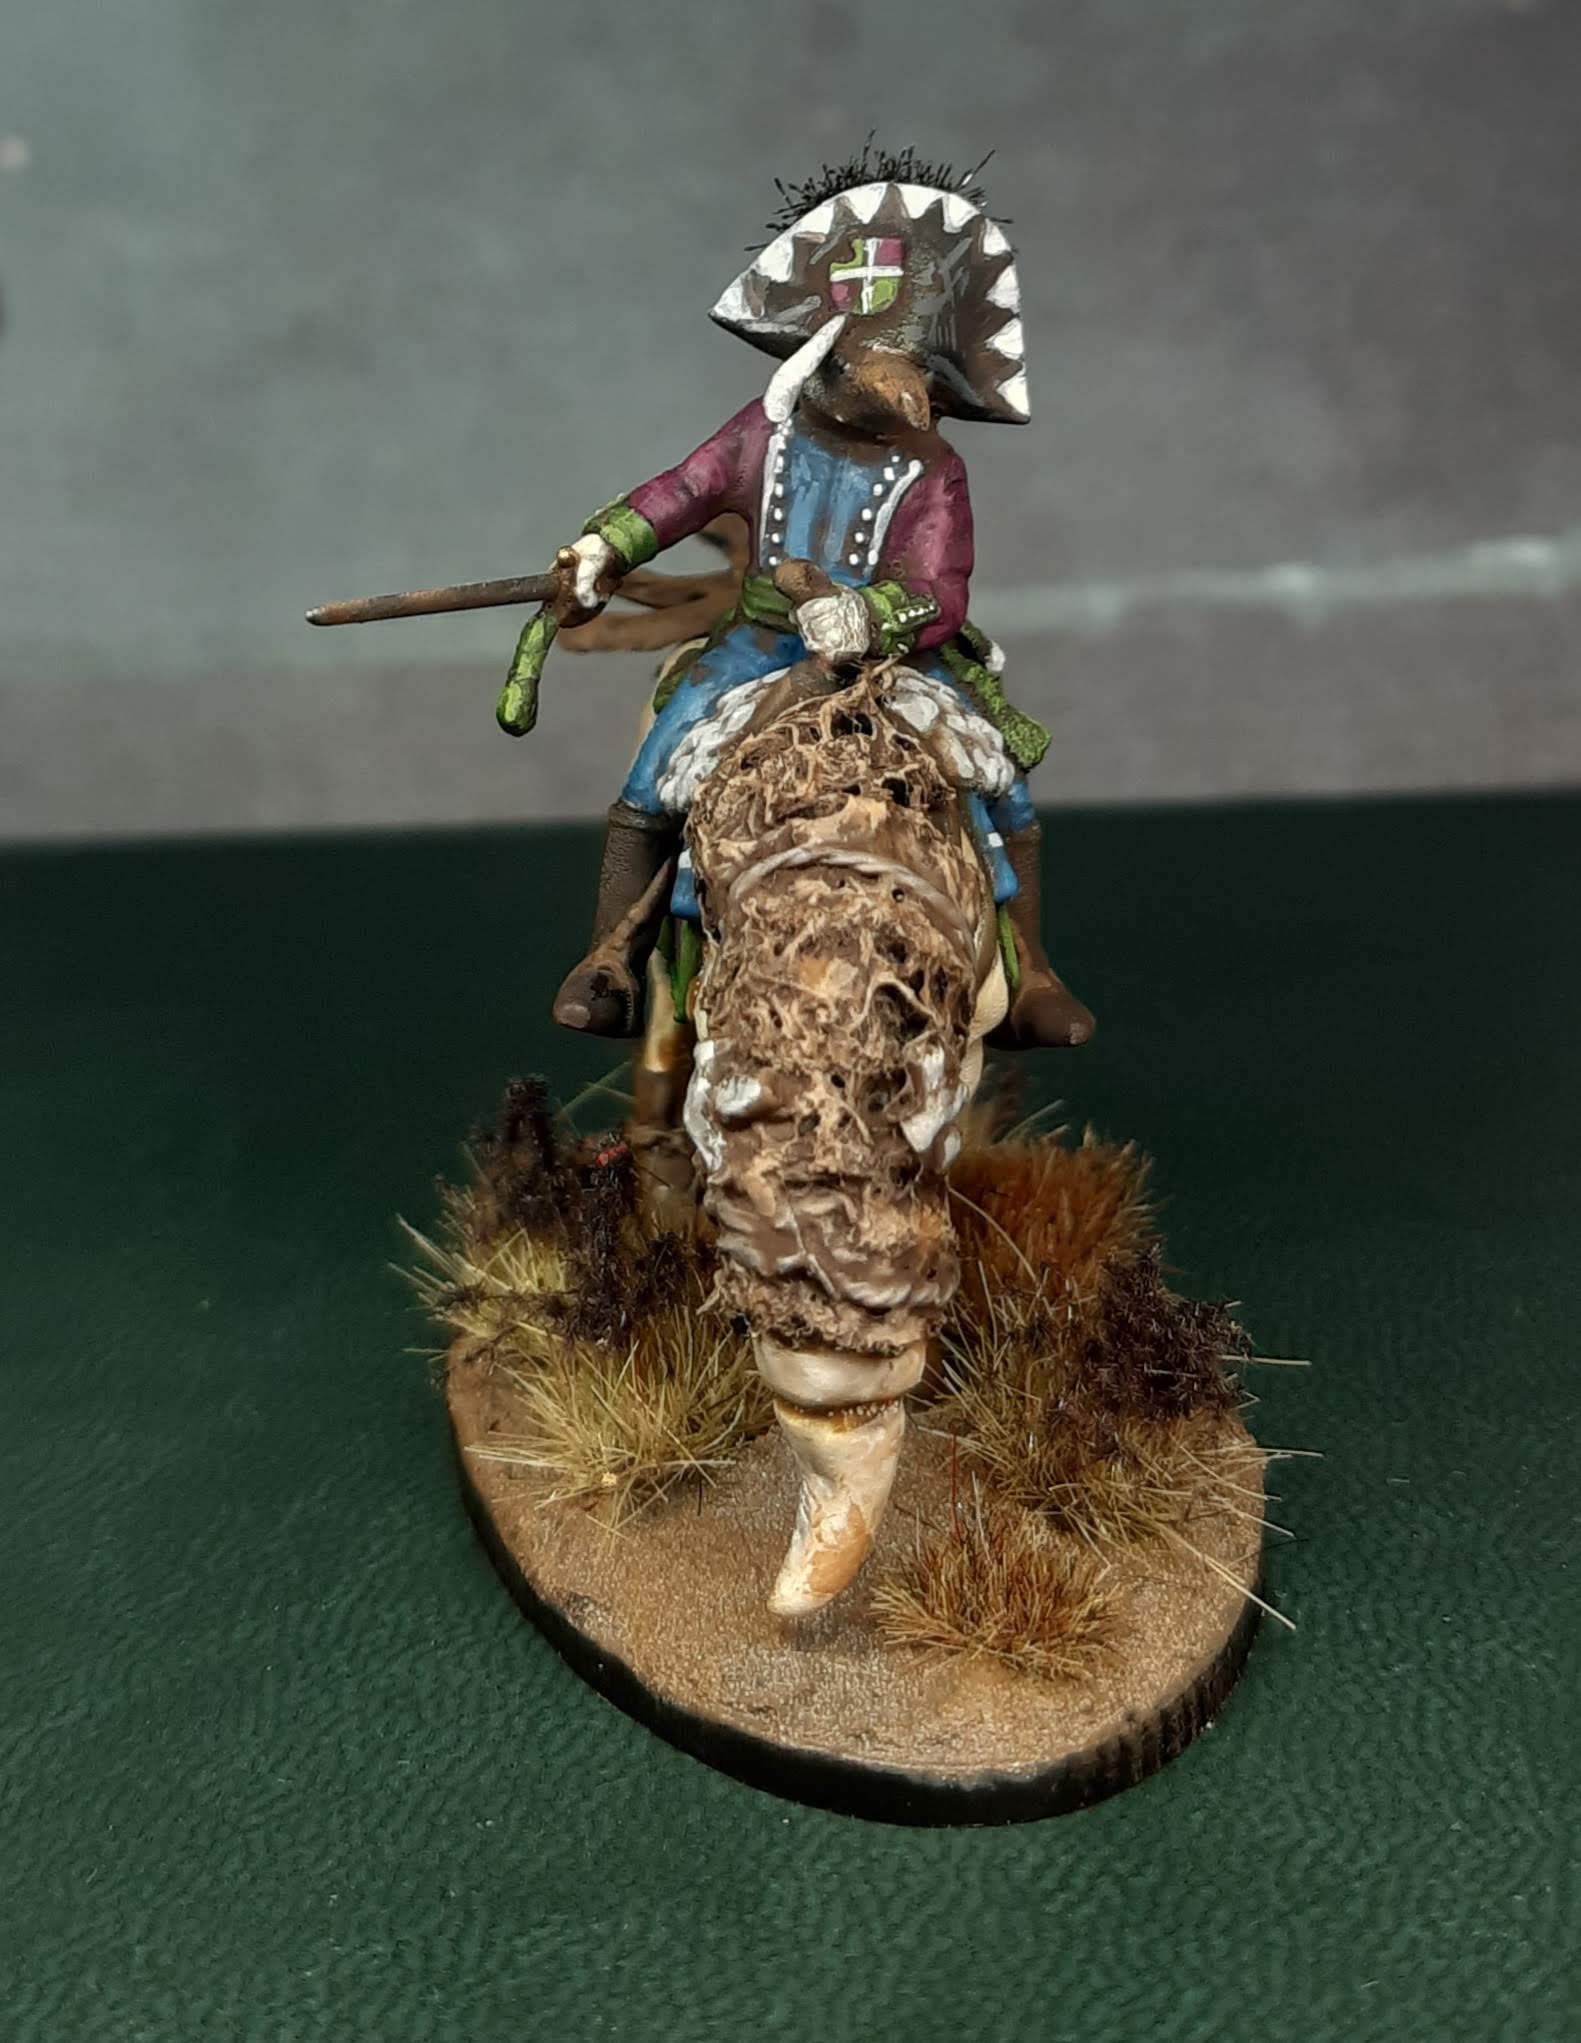
Painted Snobs

Had a bit of fun getting the Snobs all painted up this weekend. The colour schemes for both essentially followed that outlined in an earlier post for the basic troops. The main differences were adding some selected extra highlights for the brighter colours. The blues had a final highlight of Vallejo Model Colour pastel blue, the red/violet areas had a mix of Vallejo Model Colour Red Violet and Citadel Emperor’s Children, whilst the final green highlights were a mix between Vallejo Model Colour Olive Green and Buff.
The steed was painted with Deepkin Flesh, but washed using Vallejo Sepia wash rather than the Umber wash used for everything else. Some thinned down Deepkin Flesh was then used as a highlight. The sack covering the head/neck was painted as per the Fodder backpacks, but with a second highlight of Vallejo Flat Earth mixed with some Buff.
The Toff on foot had an old citadel shield that I had kicking around added.


The banner and drummer have also been finished, following exactly the same painting scheme outlined for the Fodder and Chaff.
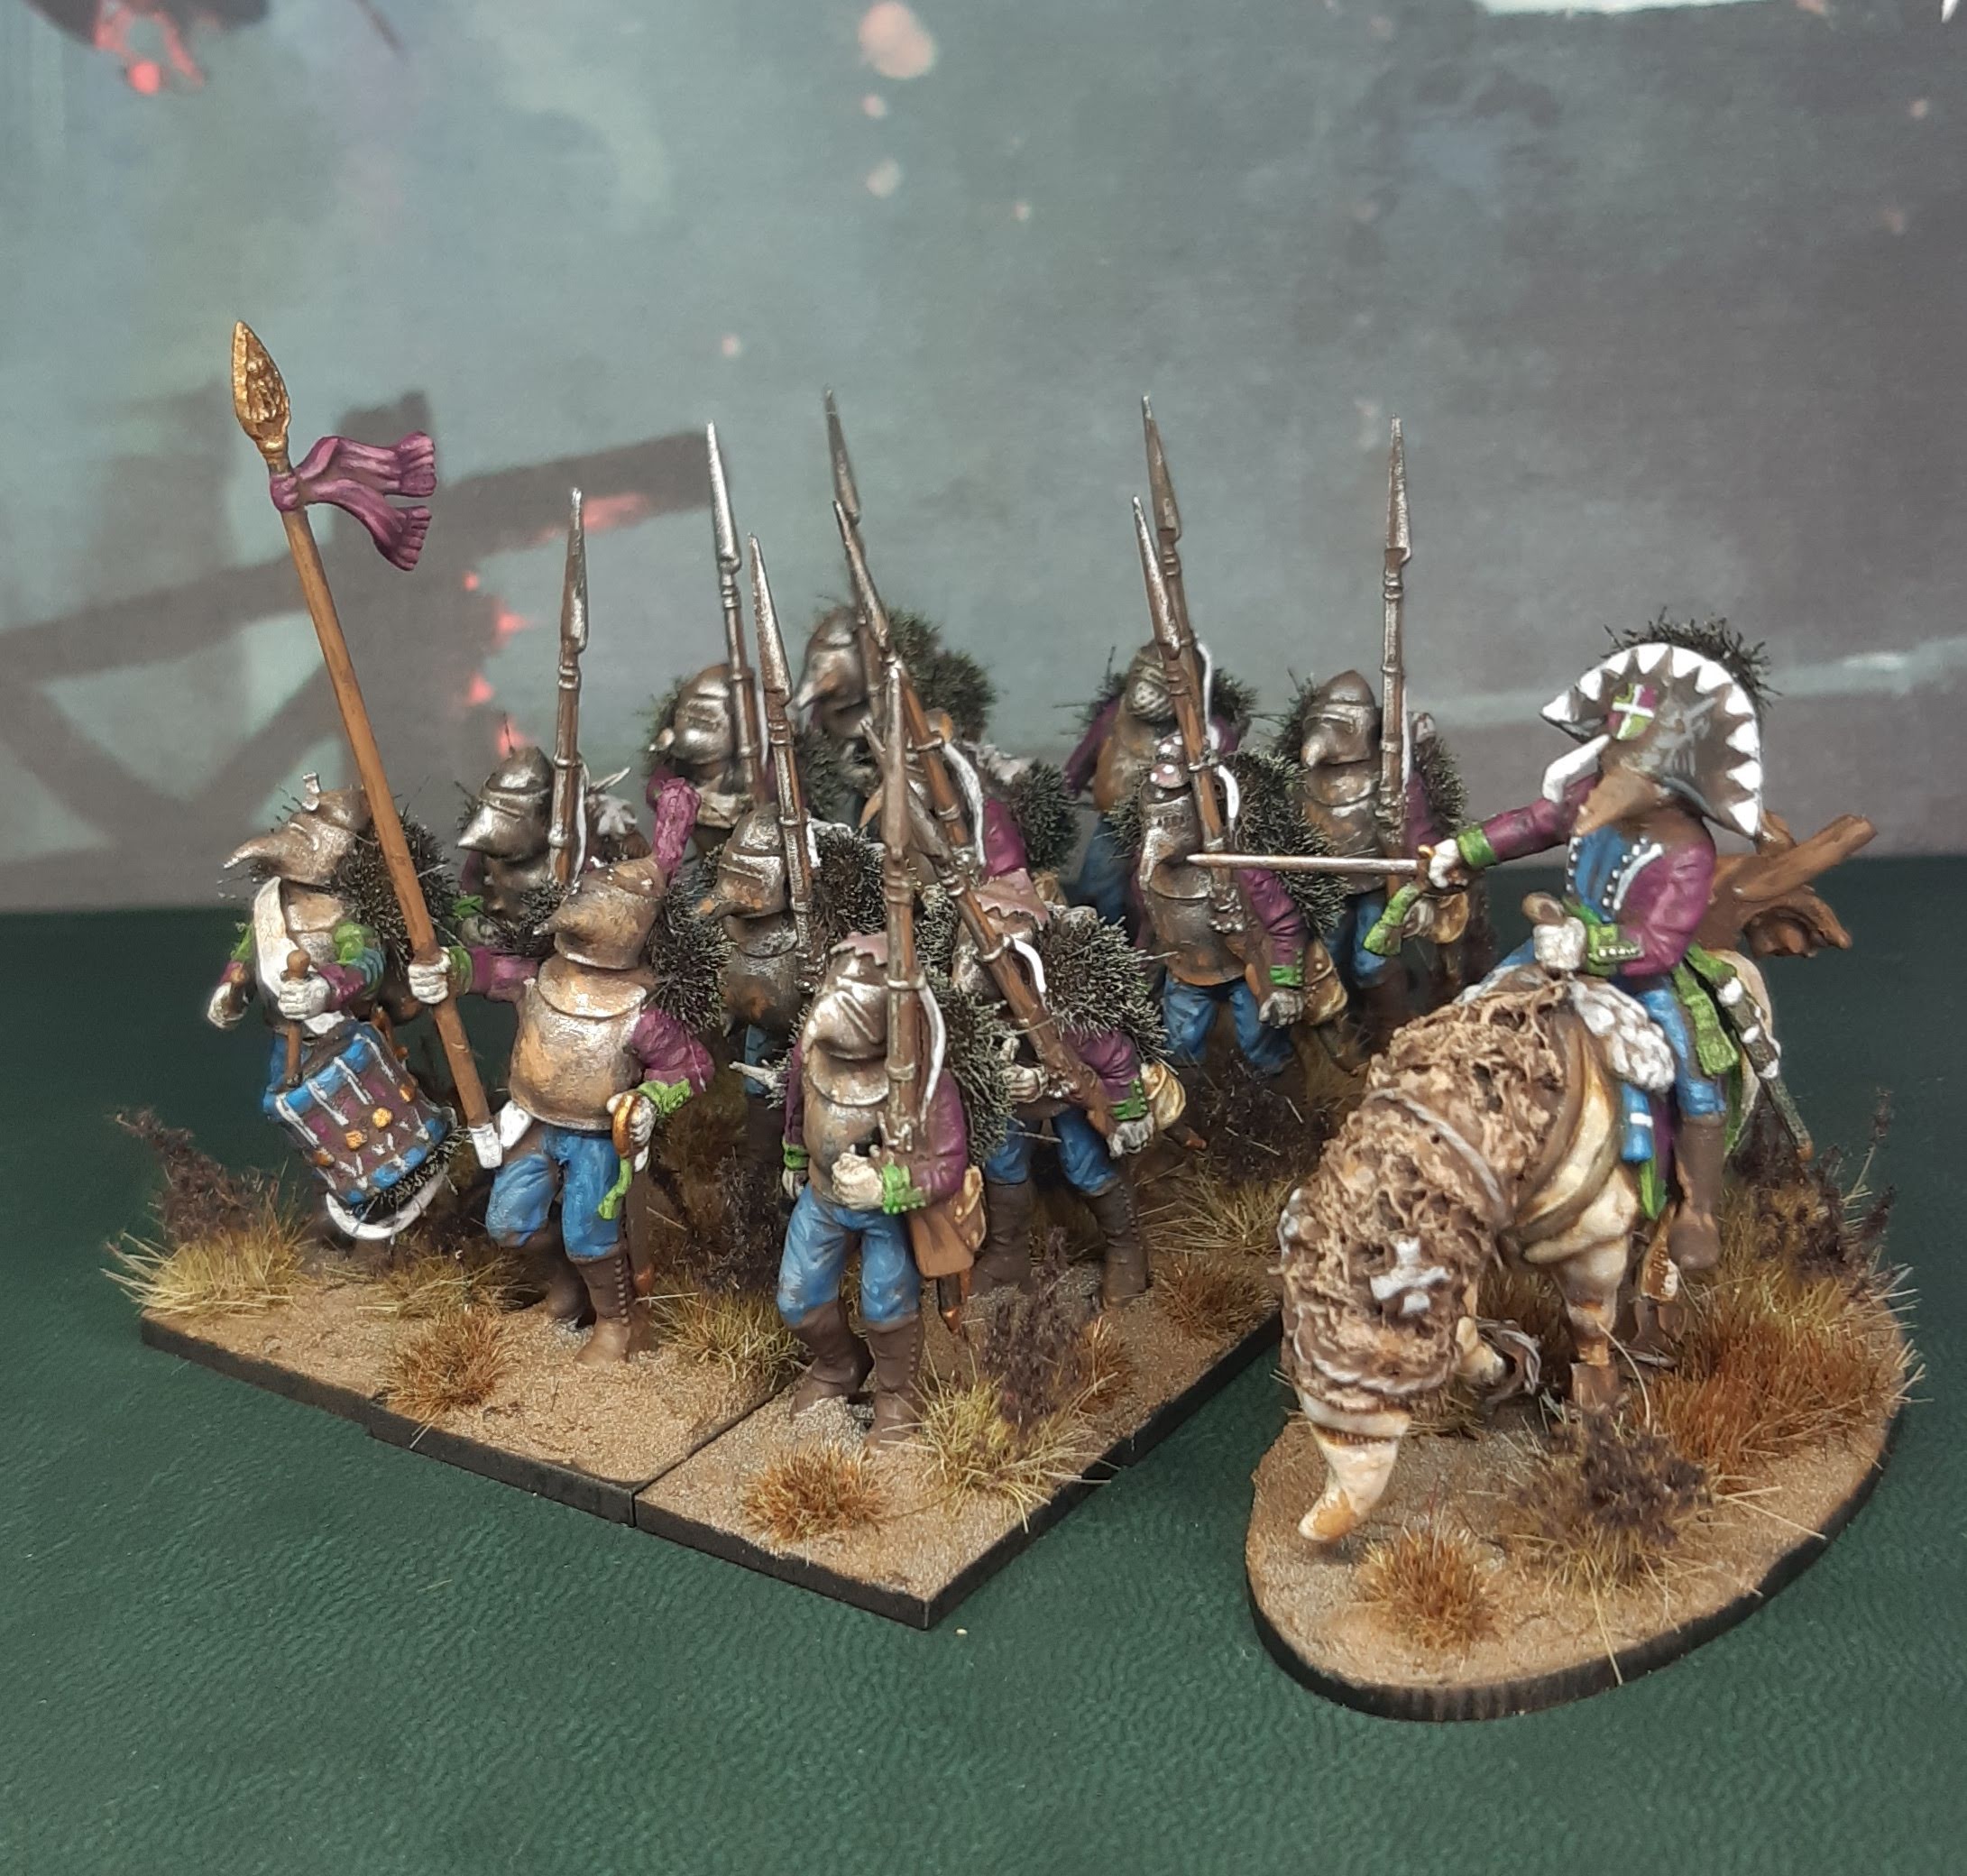 That's a better looking Regiment with someone to drum the pace and lead the way. However, it's still missing something - there's a standard bearer, but where's the flag?!
Raising the Flag
My Regiment needs a flag to march under. There won’t be anything off-the-shelf to buy for such a personal force, so time to make something appropriate.
First thing was a find some inspiration for the design. I quickly decided to use the lozenge shaped 1804 Napoleonic French as a basis. The colours are pretty much well established from painting the models – violet/red and green, with some blue trimming. I picked a random number for the Regiment, and have named them the 17th Beetroot (had to be considering the colour of the jackets).
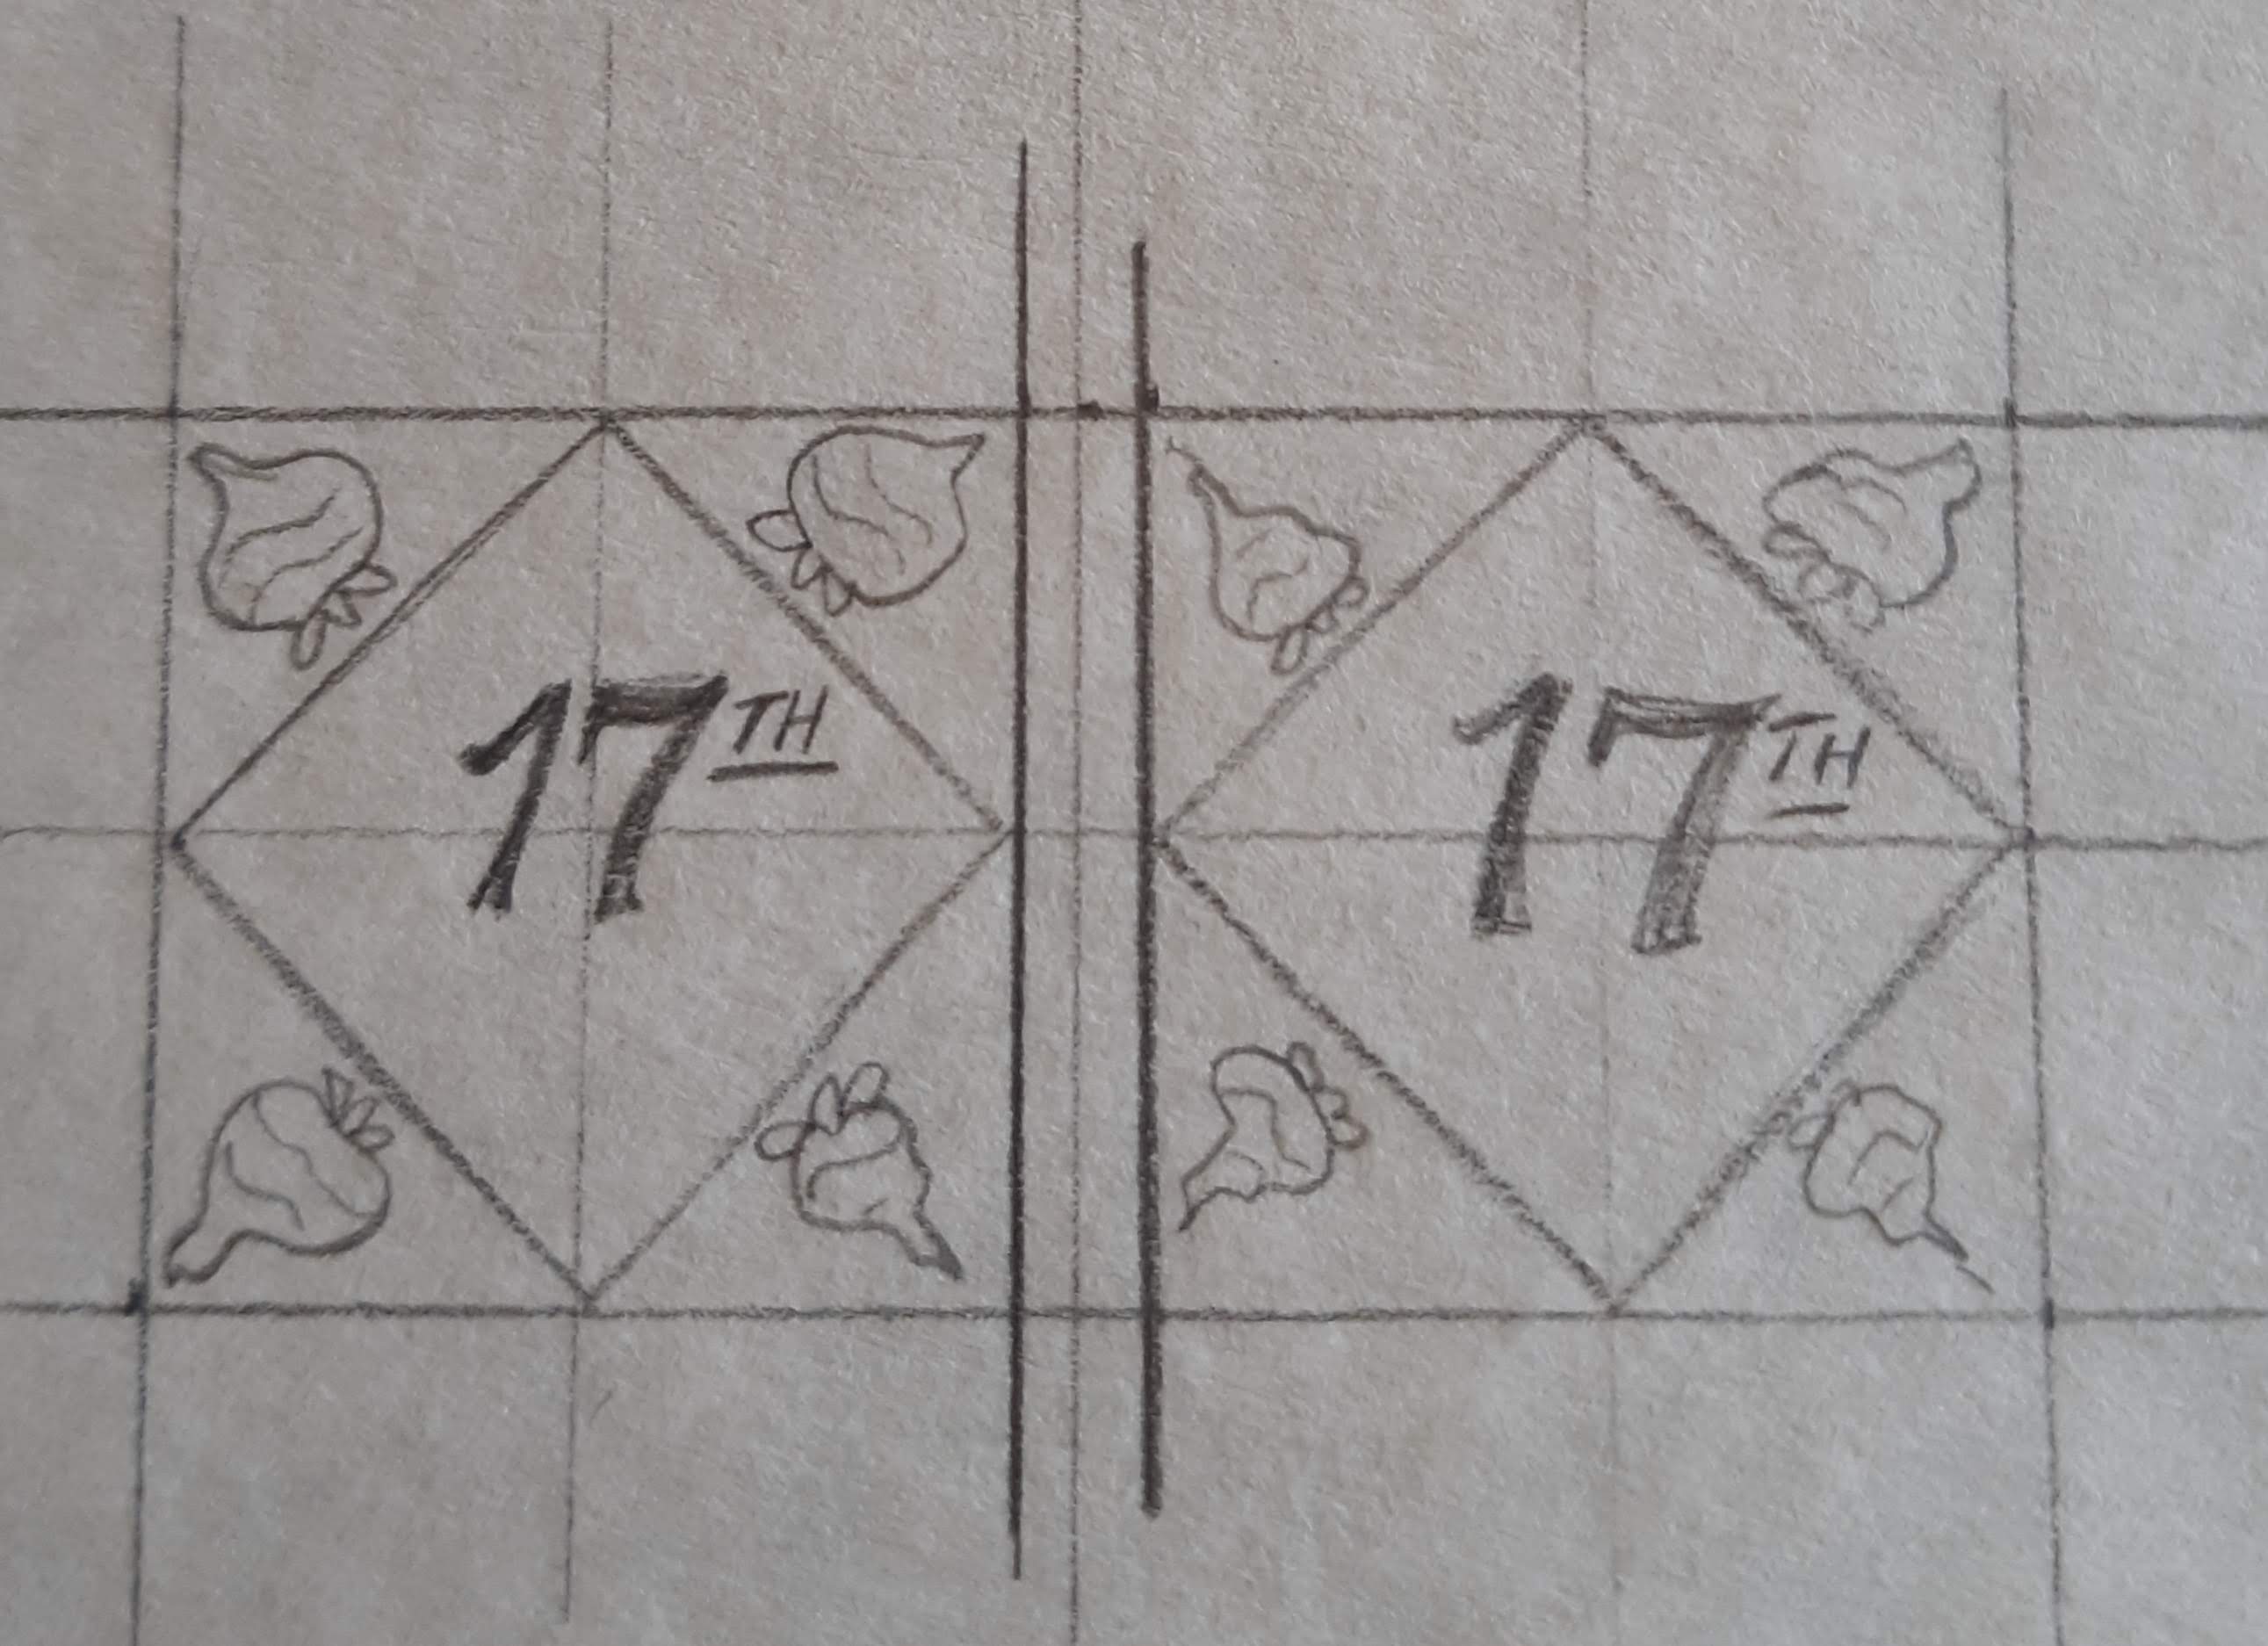 First step is sketching out the design in pencil on some relatively thick paper. I use some writing paper designed to be a bit coarse, as I think this gives the final thing a bit of additional texture. Rough sketches of the design only - it will all get a bit neater when painted.
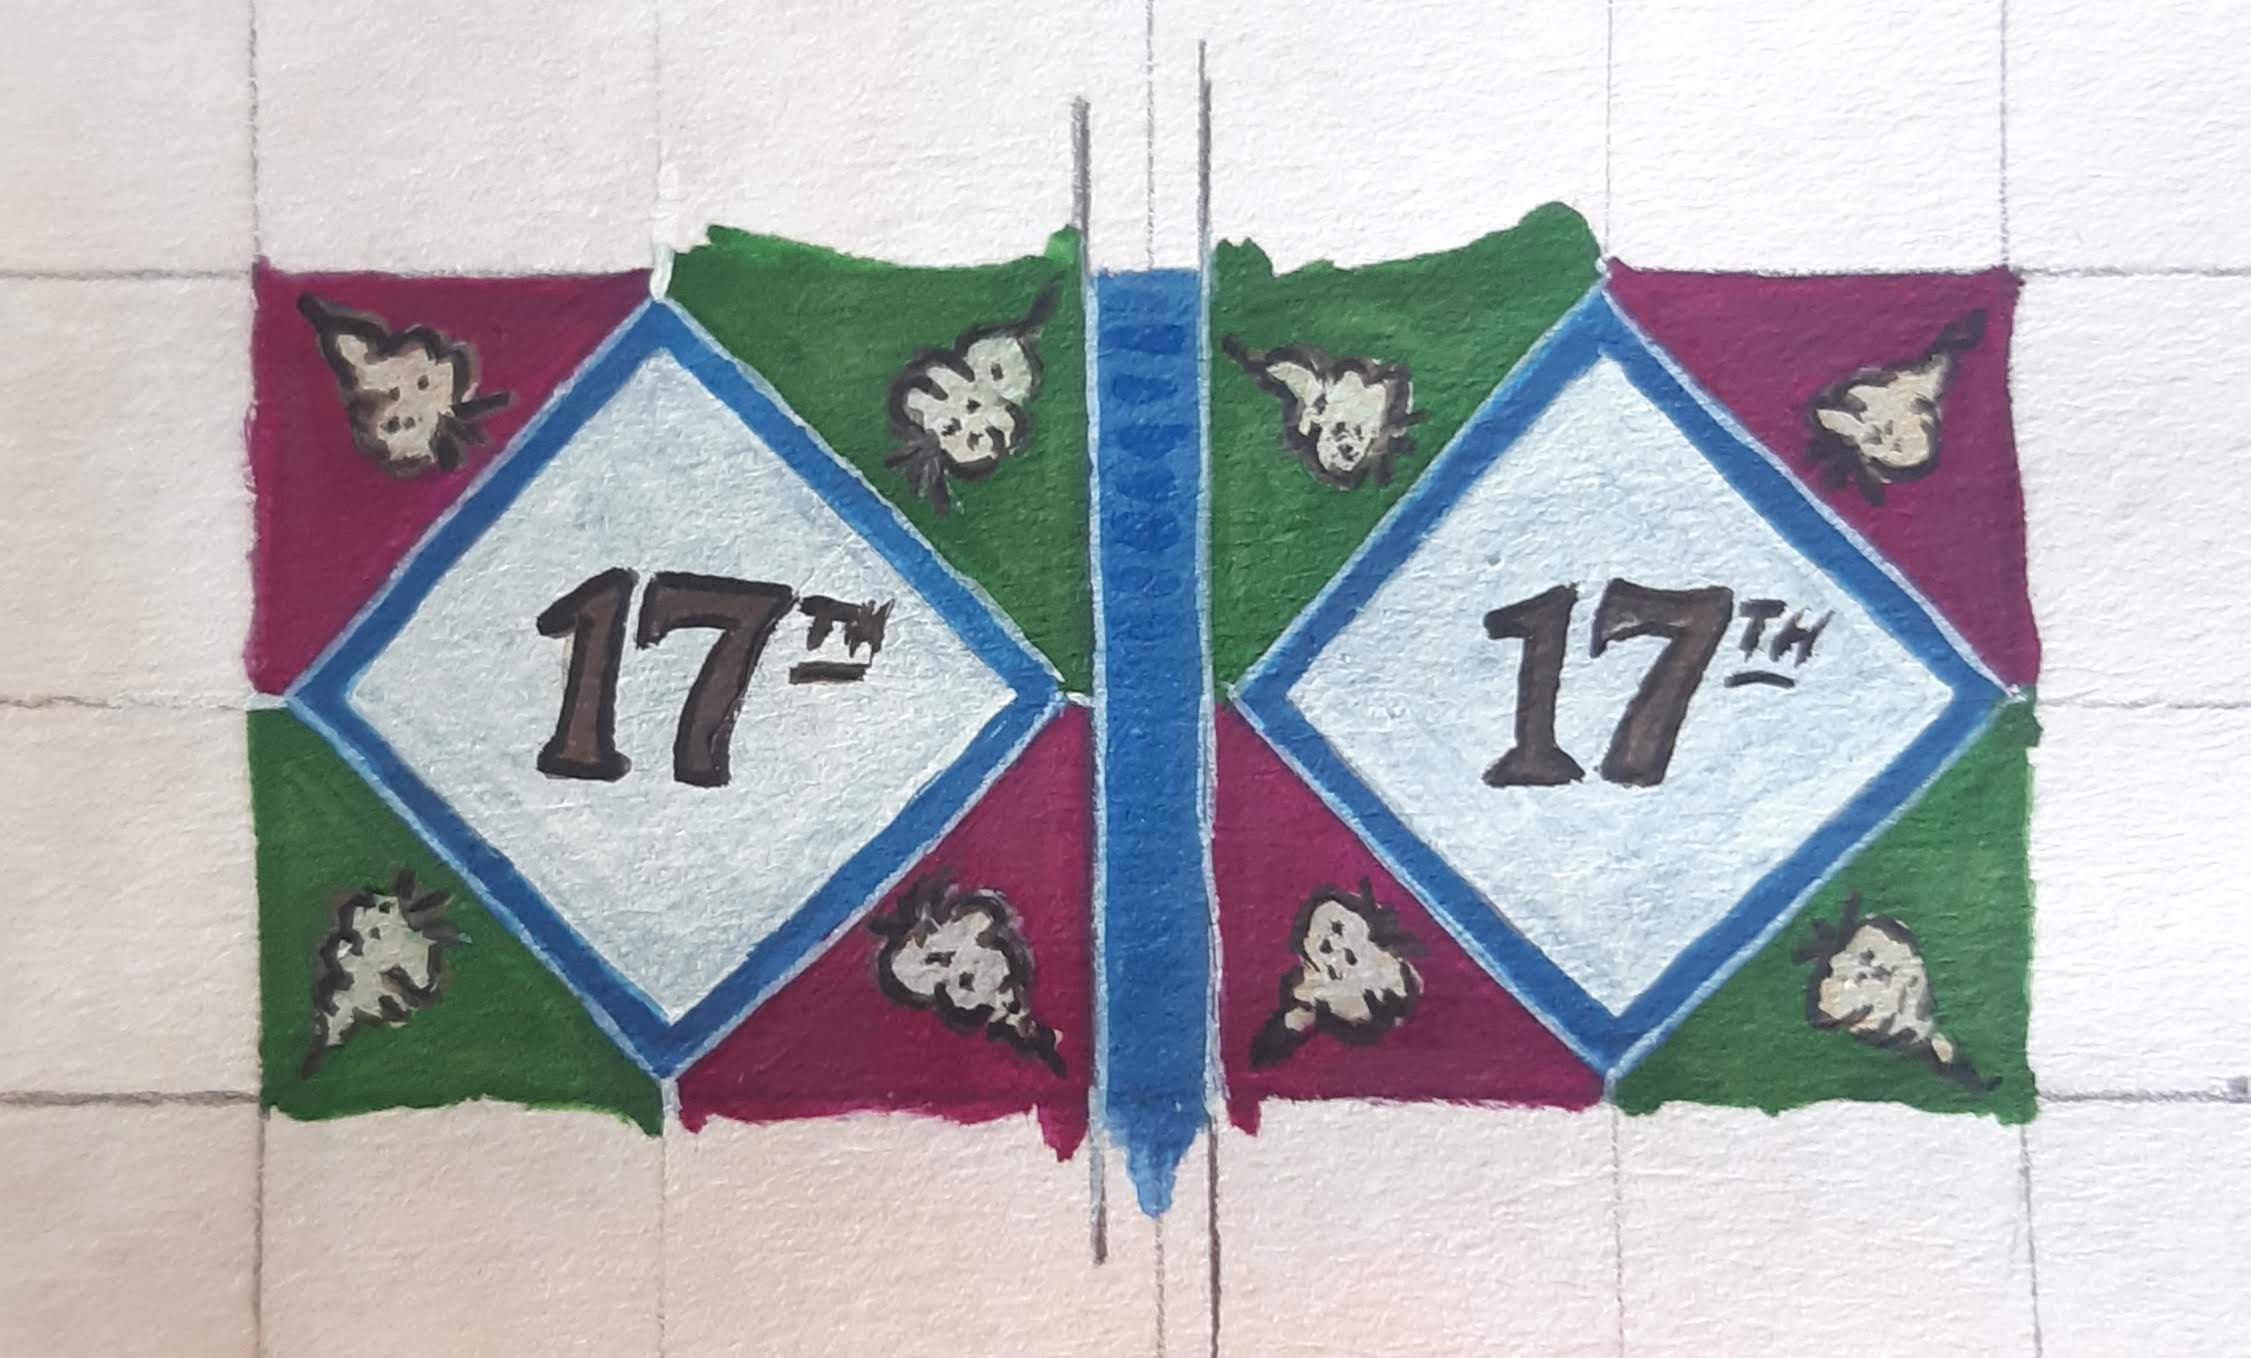 Colourised flag. This used all the same colours as detailed for painting the figures. The white centre was first painted in Vallejo Medium Sea Grey to give a solid foundation, before painting over with Vallejo Ivory. It gives it a bit more of a grubby white. Colours are still a bit bright though.
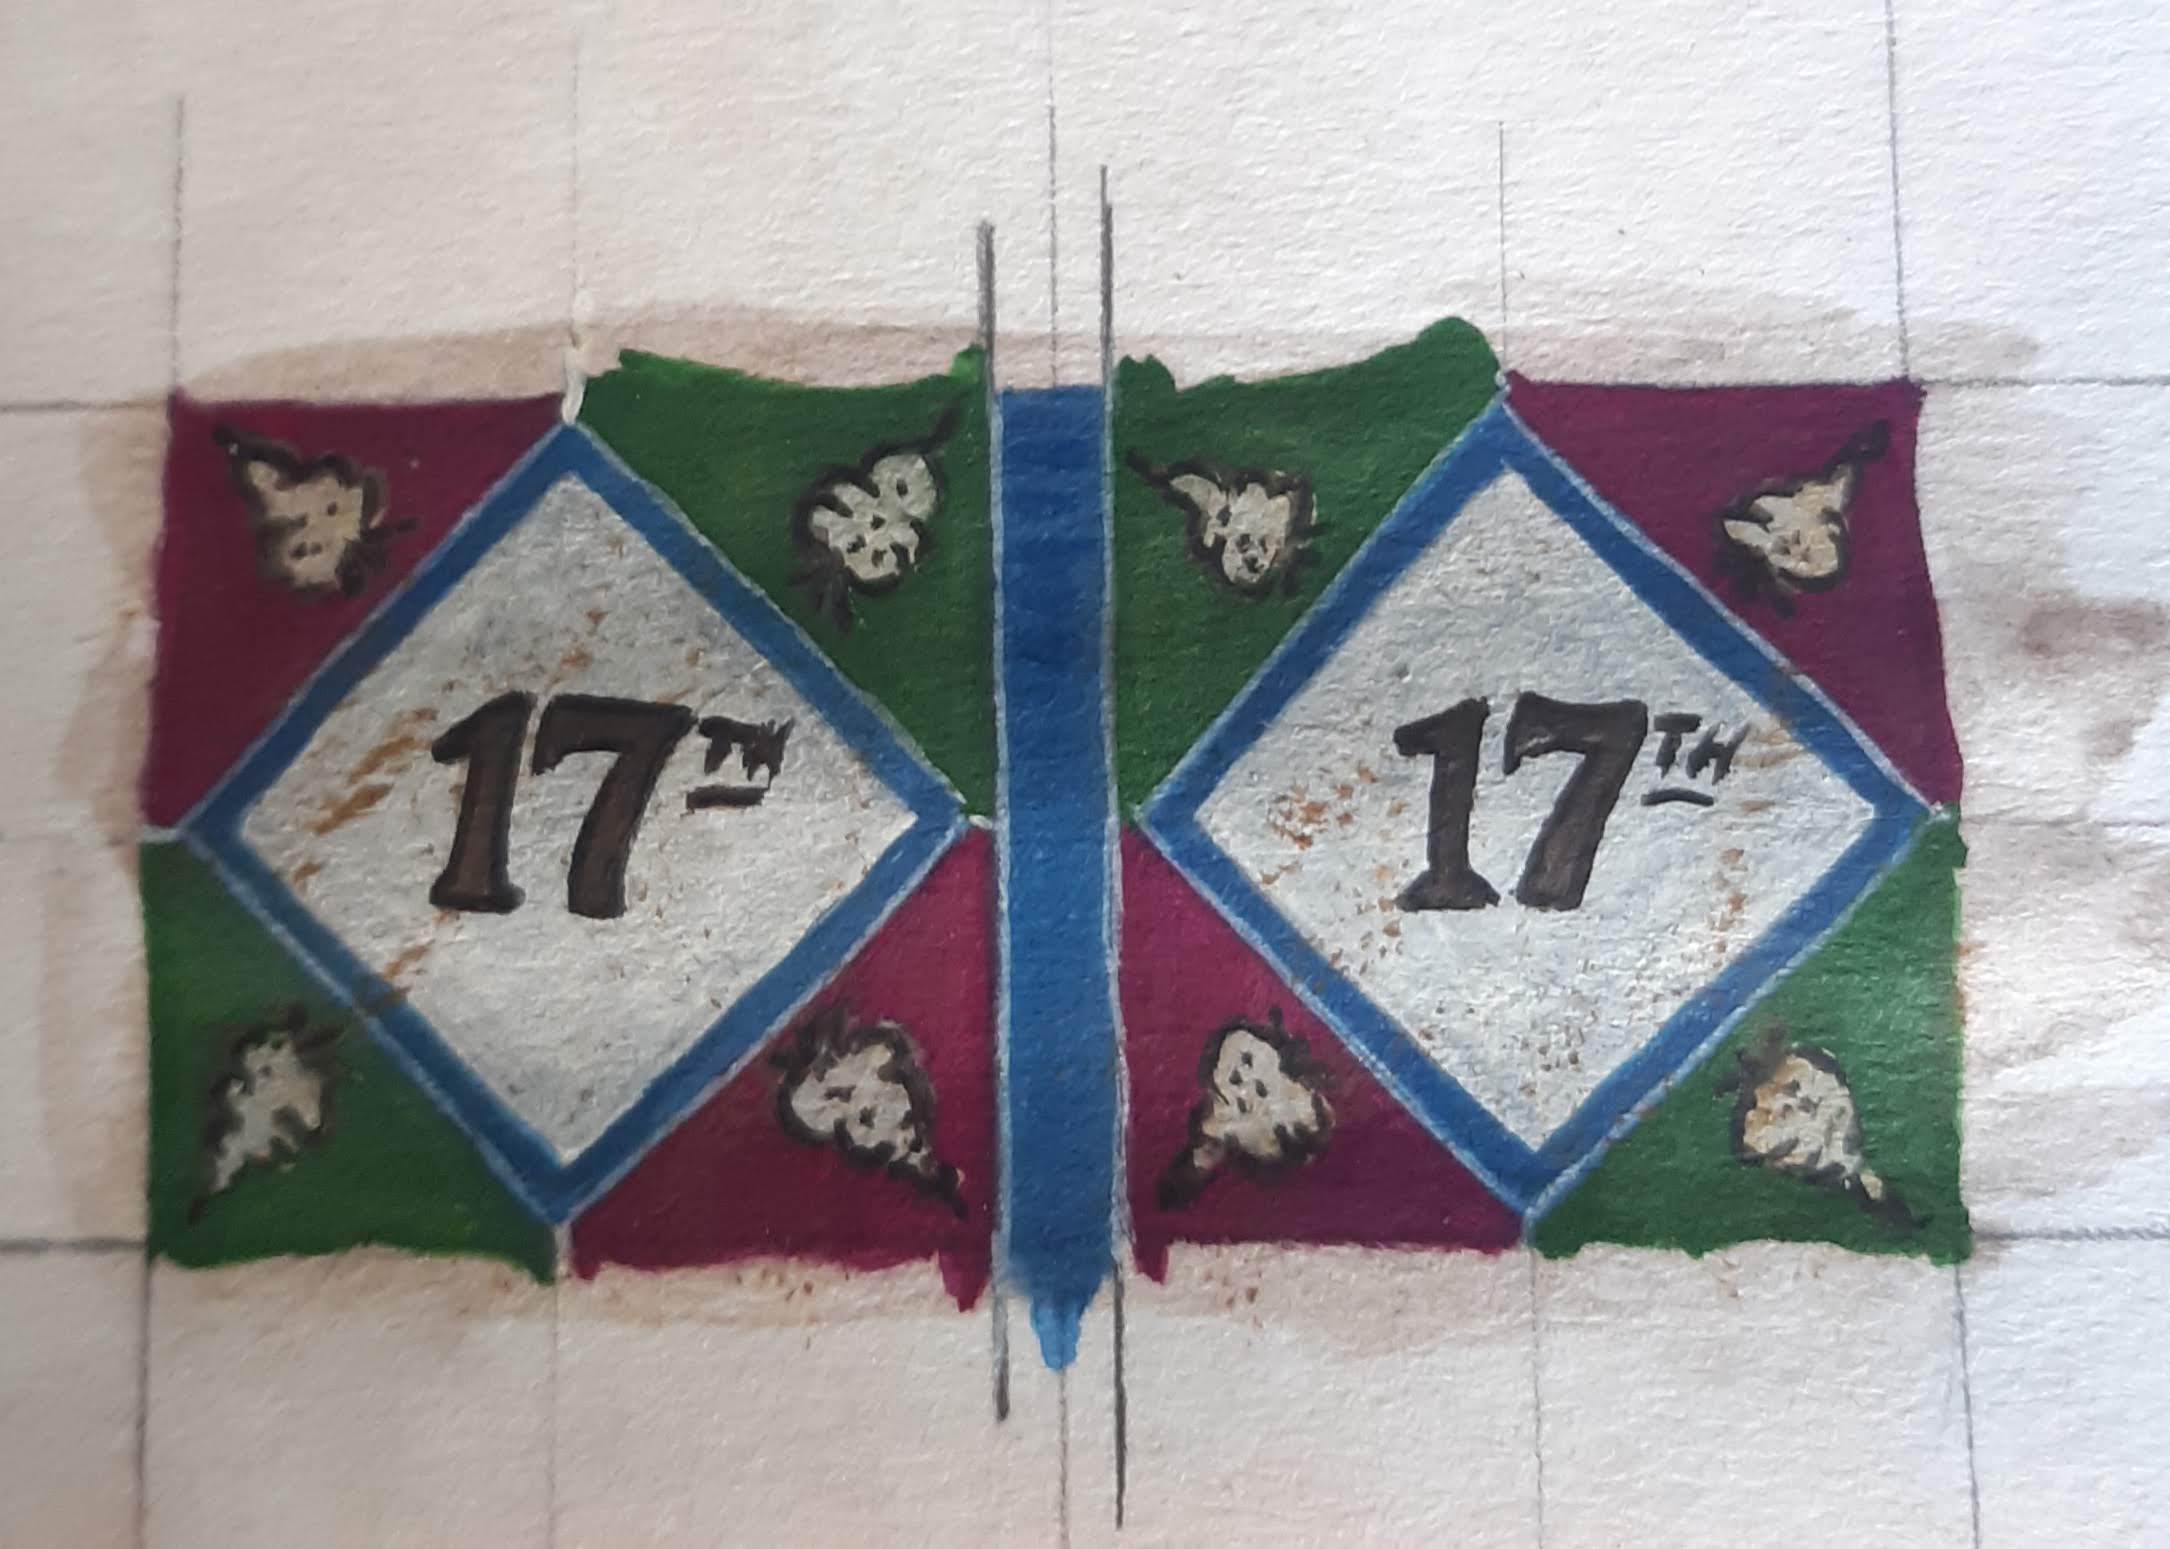 A thinned Umber wash is applied over the top to tone down the colours, and a bit of Vallejo Flat Earth stippled on as mud splashes.
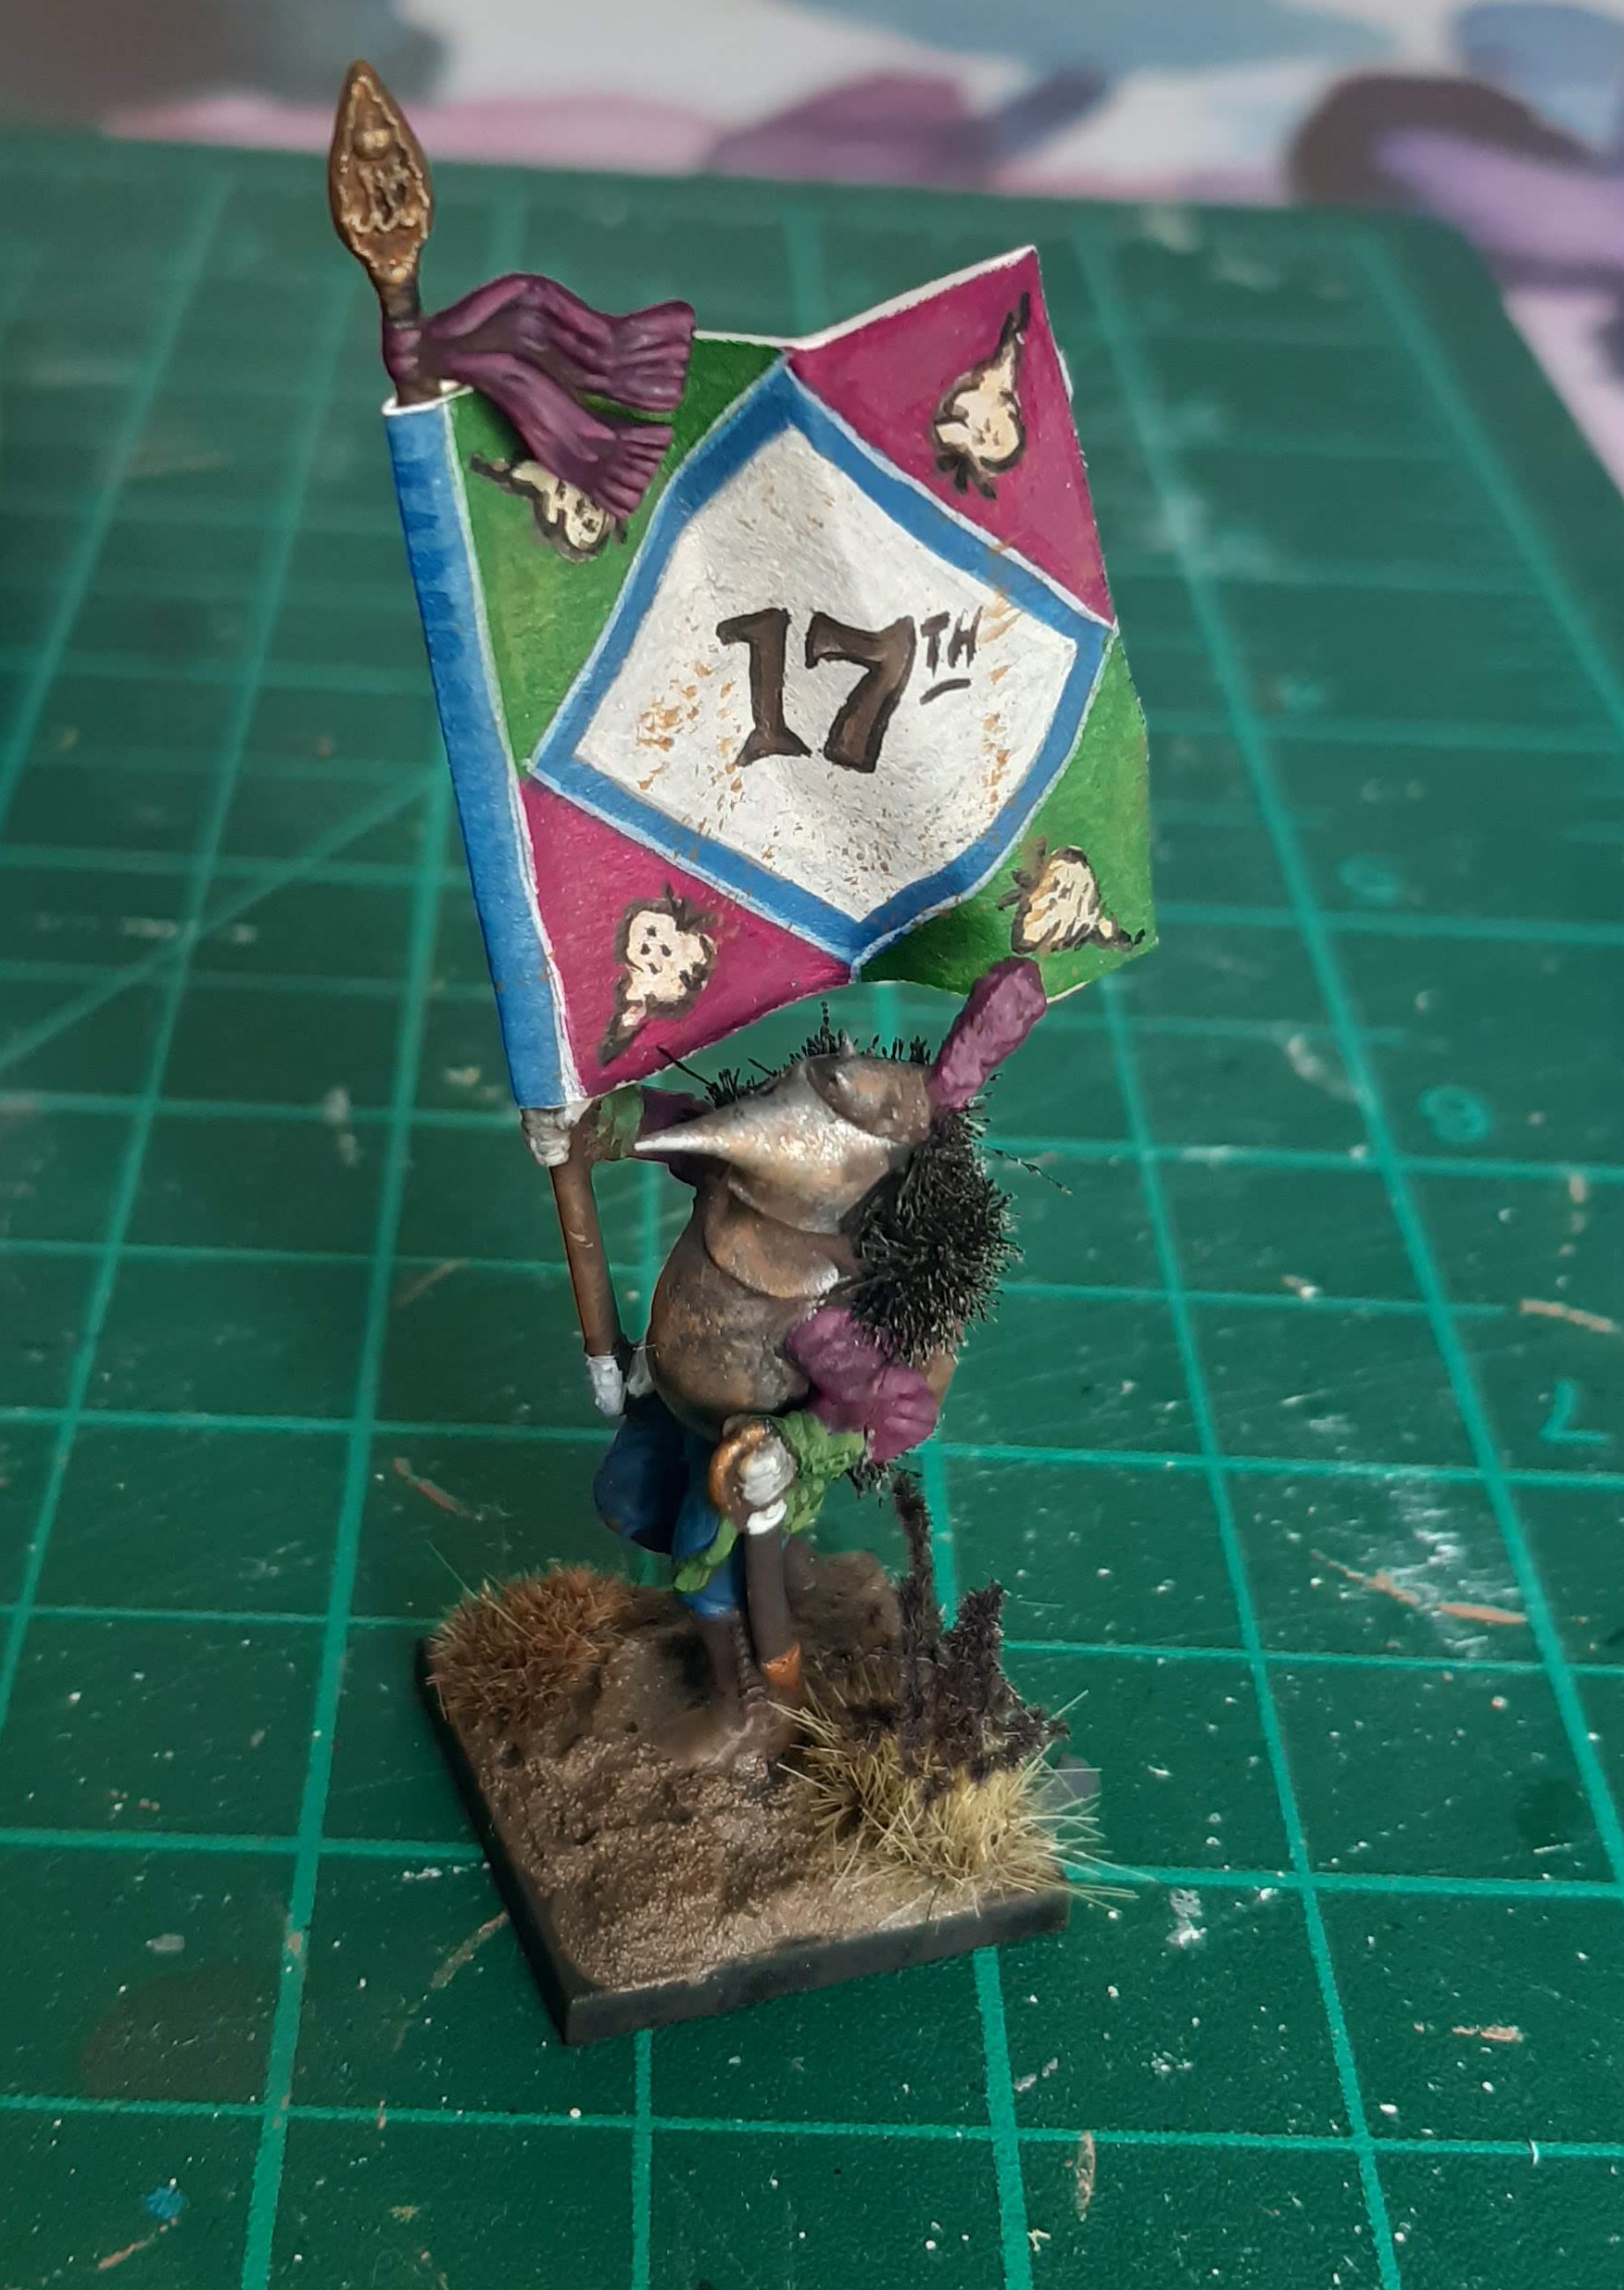 The flag was then carefully cut away using a sharp knife, before being glued together with pva. The paper is relatively thick and can be scrunched up a bit to produce the folds, which hold quite well without the additional of any foil between the two flag halves.
 Final step is to paint the edges of the flag to remove the white. This is a simple step that is often missed, which surprises me as I find it can make quite a difference to the end look.
Next Steps - Brutes and Whelps
At this point, I’ve finished what I initially wanted to achieve for this project. However, it has been a lot of fun, and getting a Golden Button has given me a bit of encouragement to expand my ambitions a bit more.
A standard Turnip28 Regiment is comprised of three Snobs ( a Toff and two Toadys), and four units of Followers. The Toff is accompanied by two units of Followers, with the two Toadys each bringing along their own unit of Followers. It would make sense to try and get a full force completed.
At the moment, the 17th Beetroot are comprised of a Toff, Major-General Bolthardy, and his followers ( a unit of Fodder and a unit of Chaff). I have one Toady finished, but he lacks any Followers, and I’m missing the second Toady plus his retinue.
Since my completed Toady looks to be a bit keen for the melee, it seems appropriate to make a unit of Brutes as his Followers. Since I quite enjoyed messing around with the horse for Bolthardy, I think the final models will be cavalry, a unit of Whelps (light cavalry) and a suitable leader.
One consideration is that I’m almost out of the 3D printed Turnip torsos. I don’t have enough to create any consistent looking unit, so I’ll have to experiment with other ways to get the right feel to the models.
I’m going to start with the Brutes. These are a 6 figure strong unit, and I want them to be brandishing close combat weapons and looking to be heavily armoured. There’s a pretty easy solution for where to begin – Perry Agincourt Foot Knights.
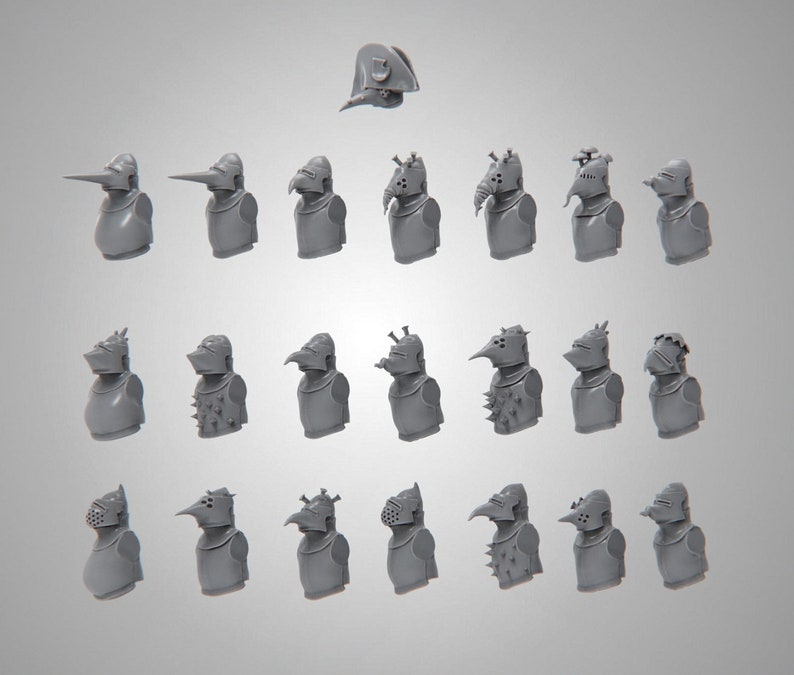
These are specifically the French foot knights, as I like the long surcoats that most are wearing, which are absent from their English counterparts. These foot knights have long been one of kits used for Turnip28 kitbashes. They come with full face visors for their helms, which instantly creates the ‘visors-down’ Turnip28 look without messing around with any sculpting. I’ll raid the left-over parts of my Bavarians to see about adding a few Napoleonic elements such as backpacks, maybe some plumes or other uniform frills, but I think these will largely be used as they come.
For the Whelps I have some sprues of Austrian Hussars to use as a starting point. Not sure quite what I’m going to do with them yet, maybe something with cloaks? I’ll see what sort of inspiration strikes when I get there.
Making the Brutes
After a little stock take of remaining Bavarian parts, I stuck with really simple modifications for my six Brutes.
Firstly I wanted to add the crest from the German fusilier helms to the Brutes. I toyed with trying to snip it away, before quickly releasing it would be far easier to cut off the top of the knights’ helms, and add the Bavarian helm on top instead.
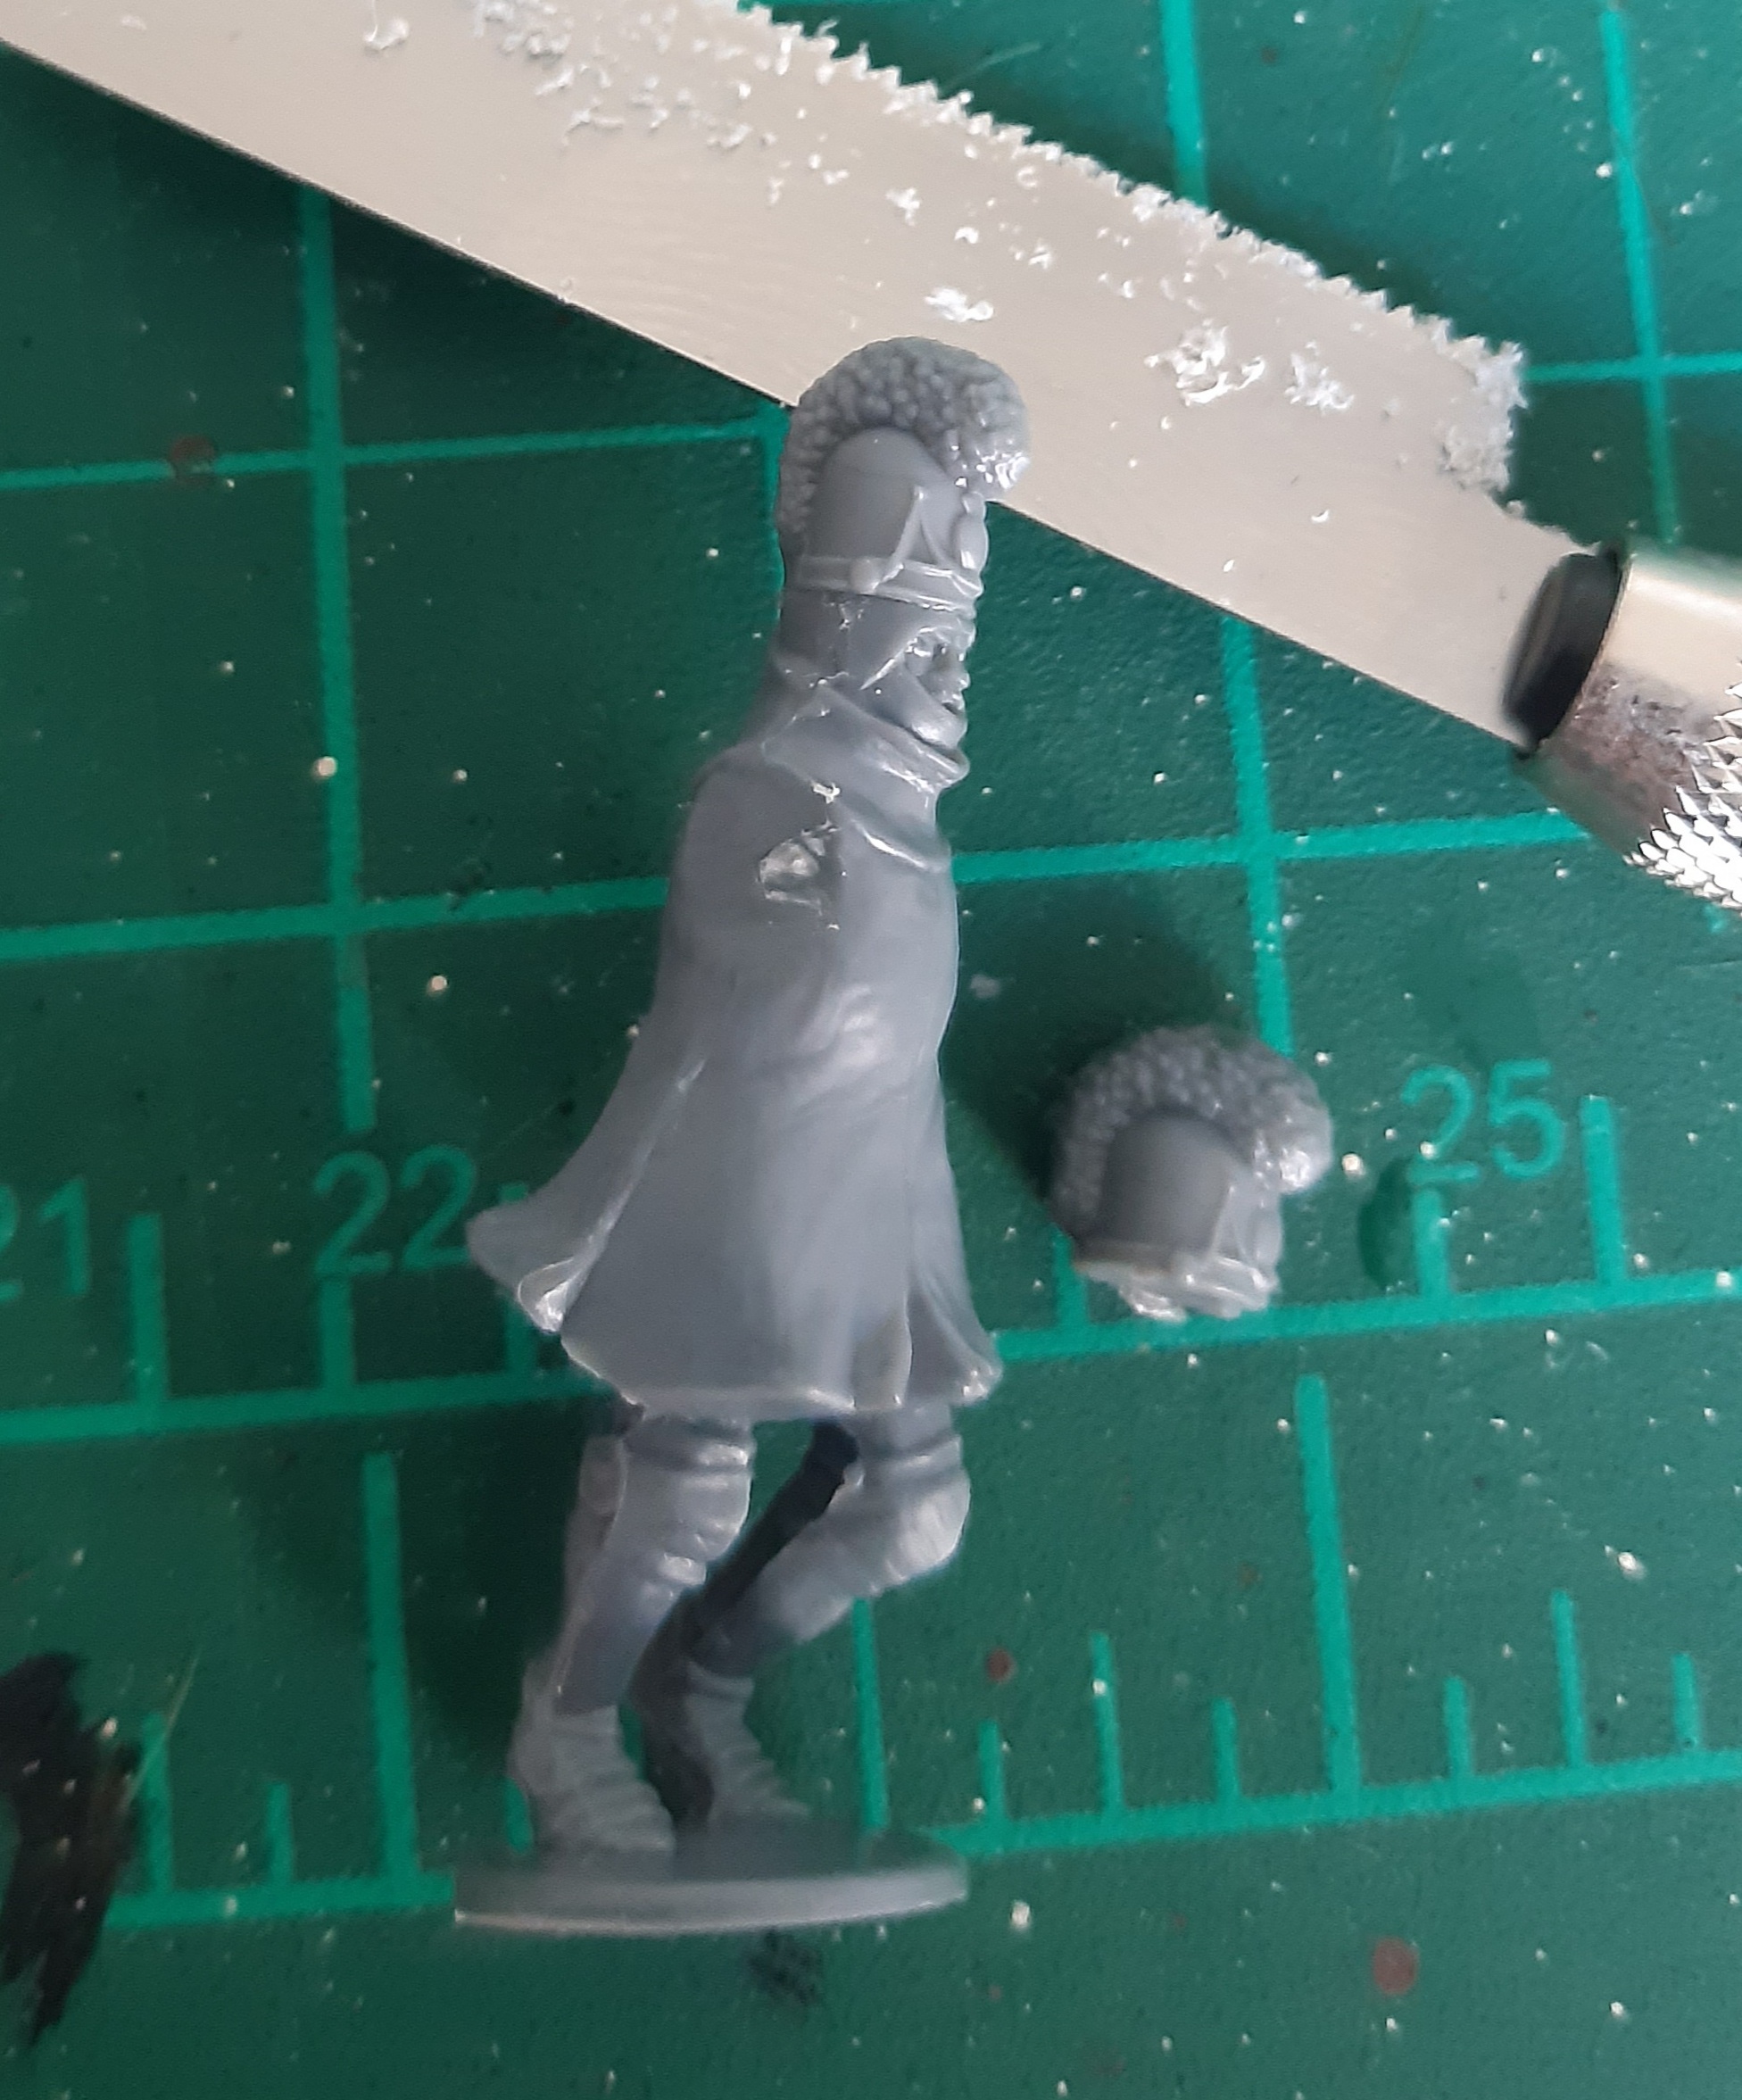 Saw used to get a straight cut, with only a little cleaning of the bottom of the Bavarian hat to remove the assembly tab.
Next, adding on the arms as per the design of the Knights, and getting those visors firmly closed. I used all the double handed weapons for these dangerous lads, leaving one poor chap with only a simple warhammer. He clearly needed another weapon for his empty hand, so I used one of sheathed swords from the sprue. I cut away the blade, trimming the point to remove any suggestion of scabbard ends, glued it to his hand, and sliced off the pommel and added that as well. Nice quick weapon swap.
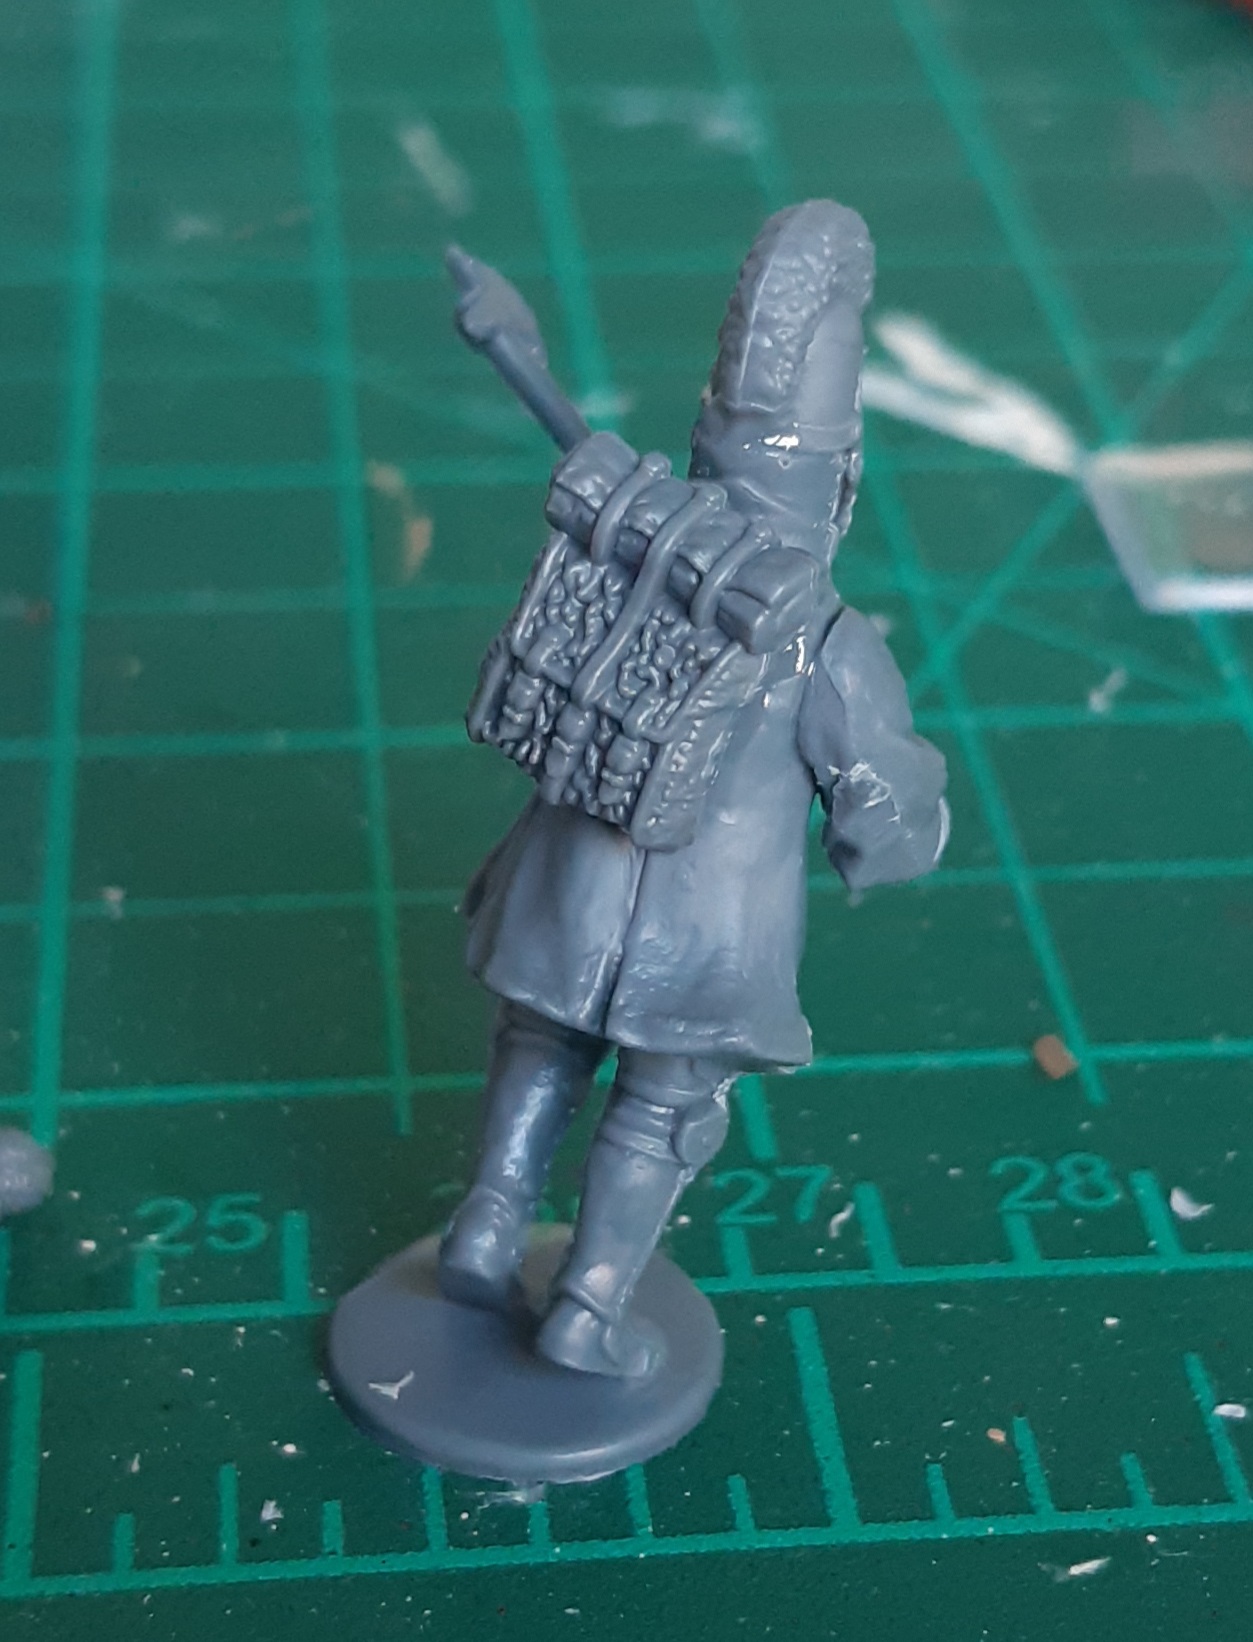 Bavarian backpacks then added. They had their cartridge pouches removed, which were reused as belt pouches.
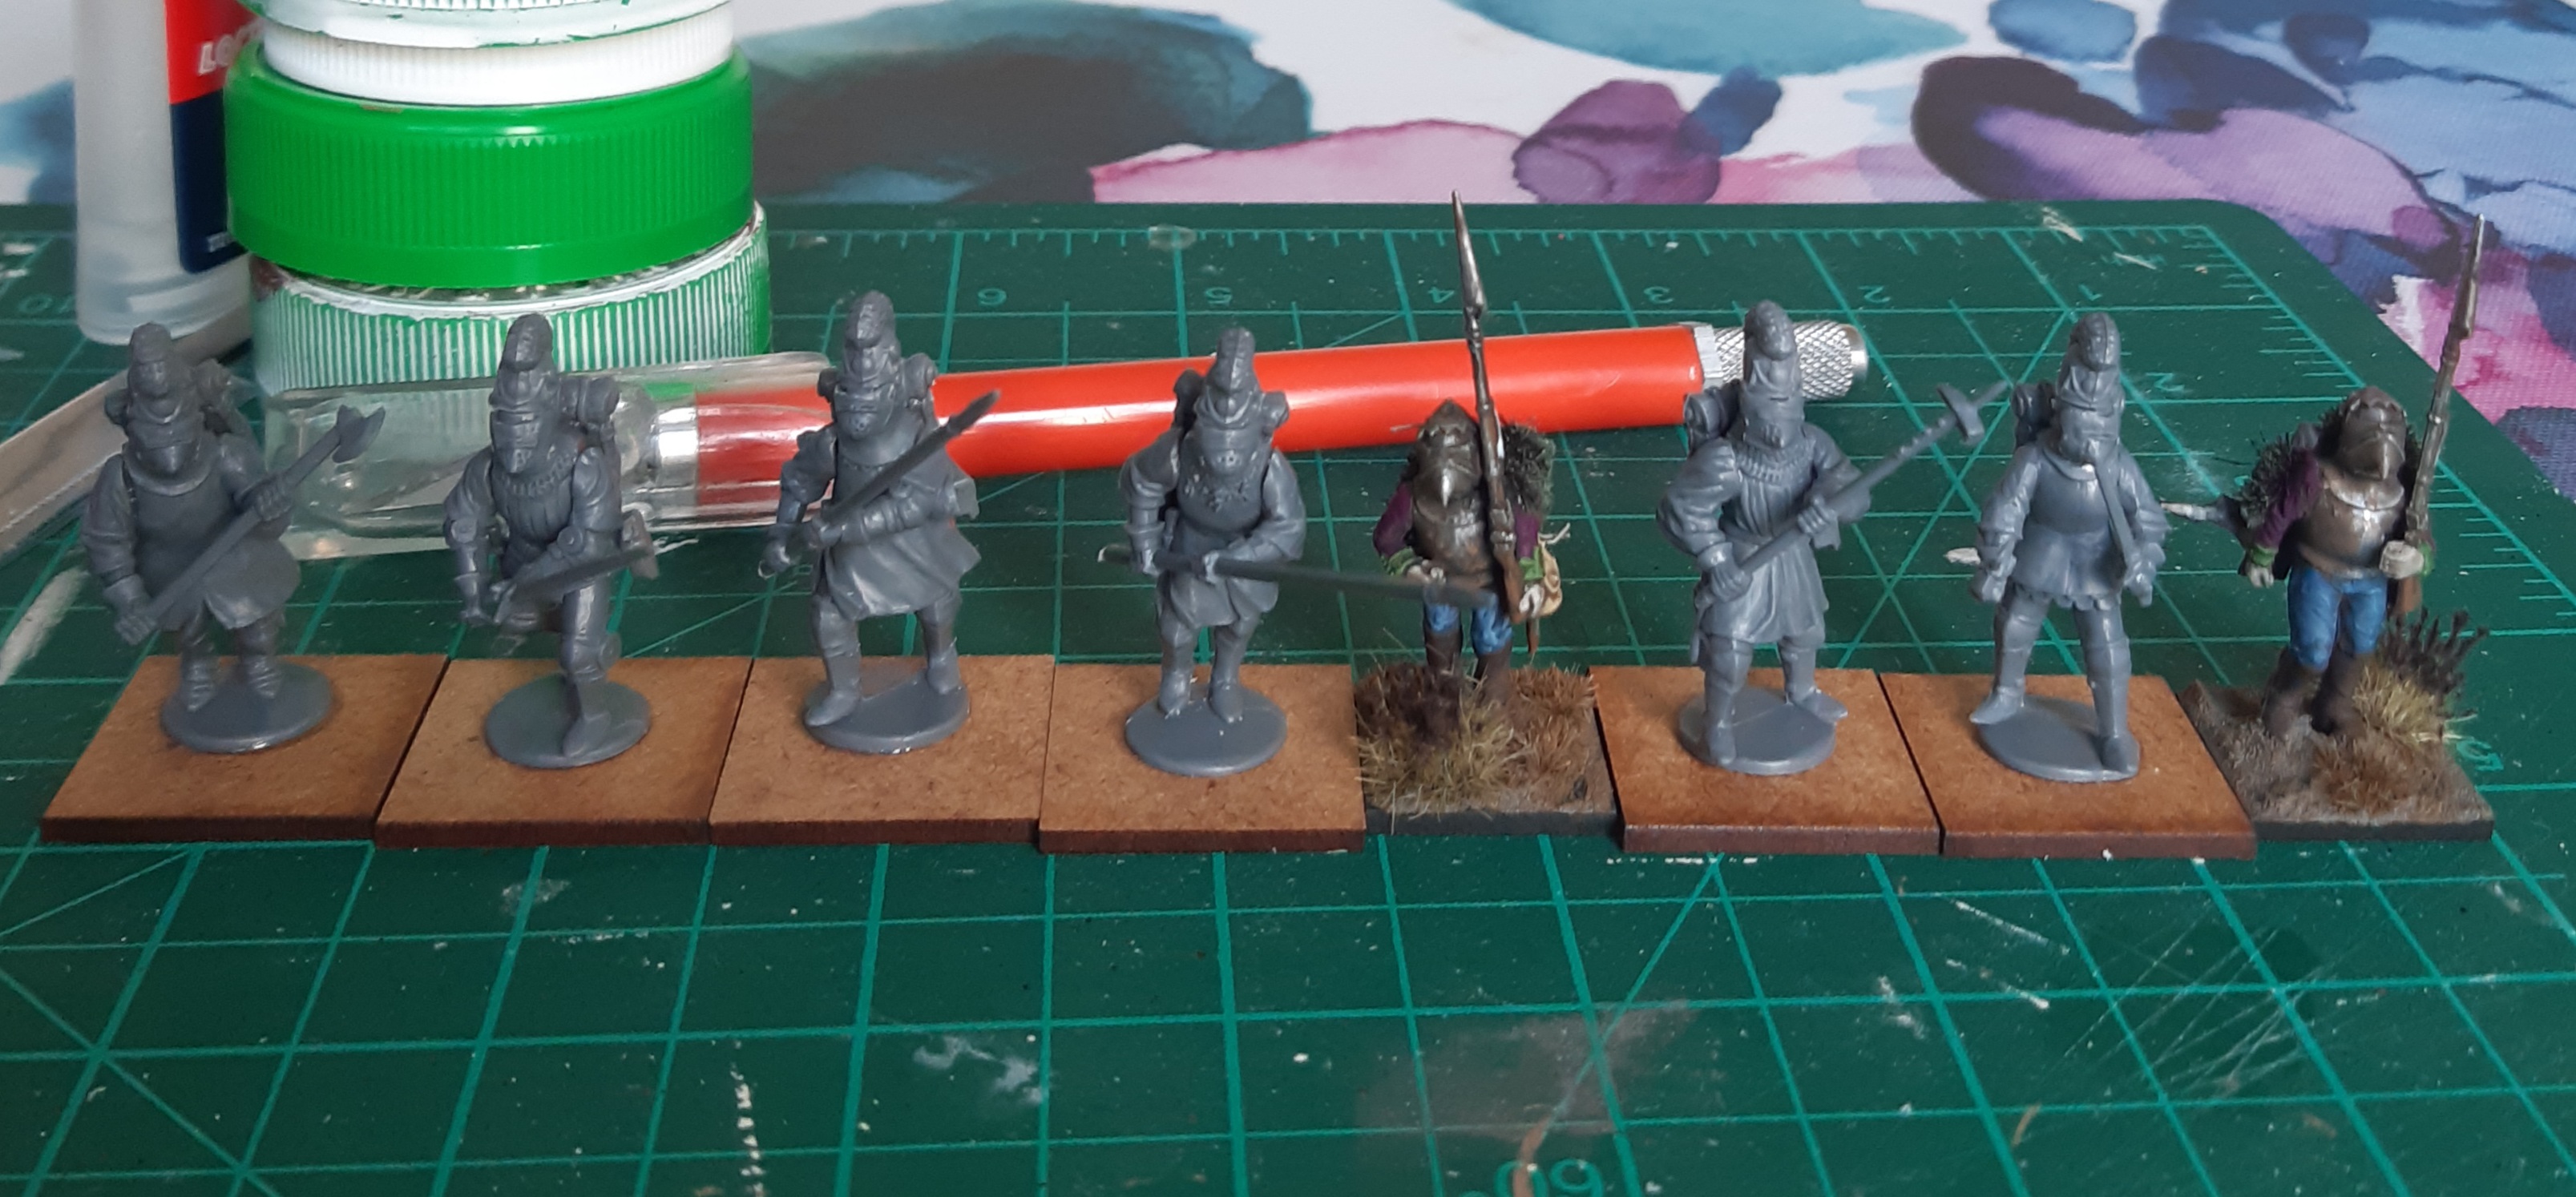 Brutes lined up against the Fodder.
I was pretty happy with these simple kitbashes. They’ve got a nice bit of height thanks to the Bavarian helm extensions, and the more dynamic poses with the melee weapons make them seem more dangerous than the passive marching poses of the Fodder.
I could have spent a bit more time bulking them out with greenstuff, but adding the tufts and roots will take a step in that direction.
 Ready for paint.
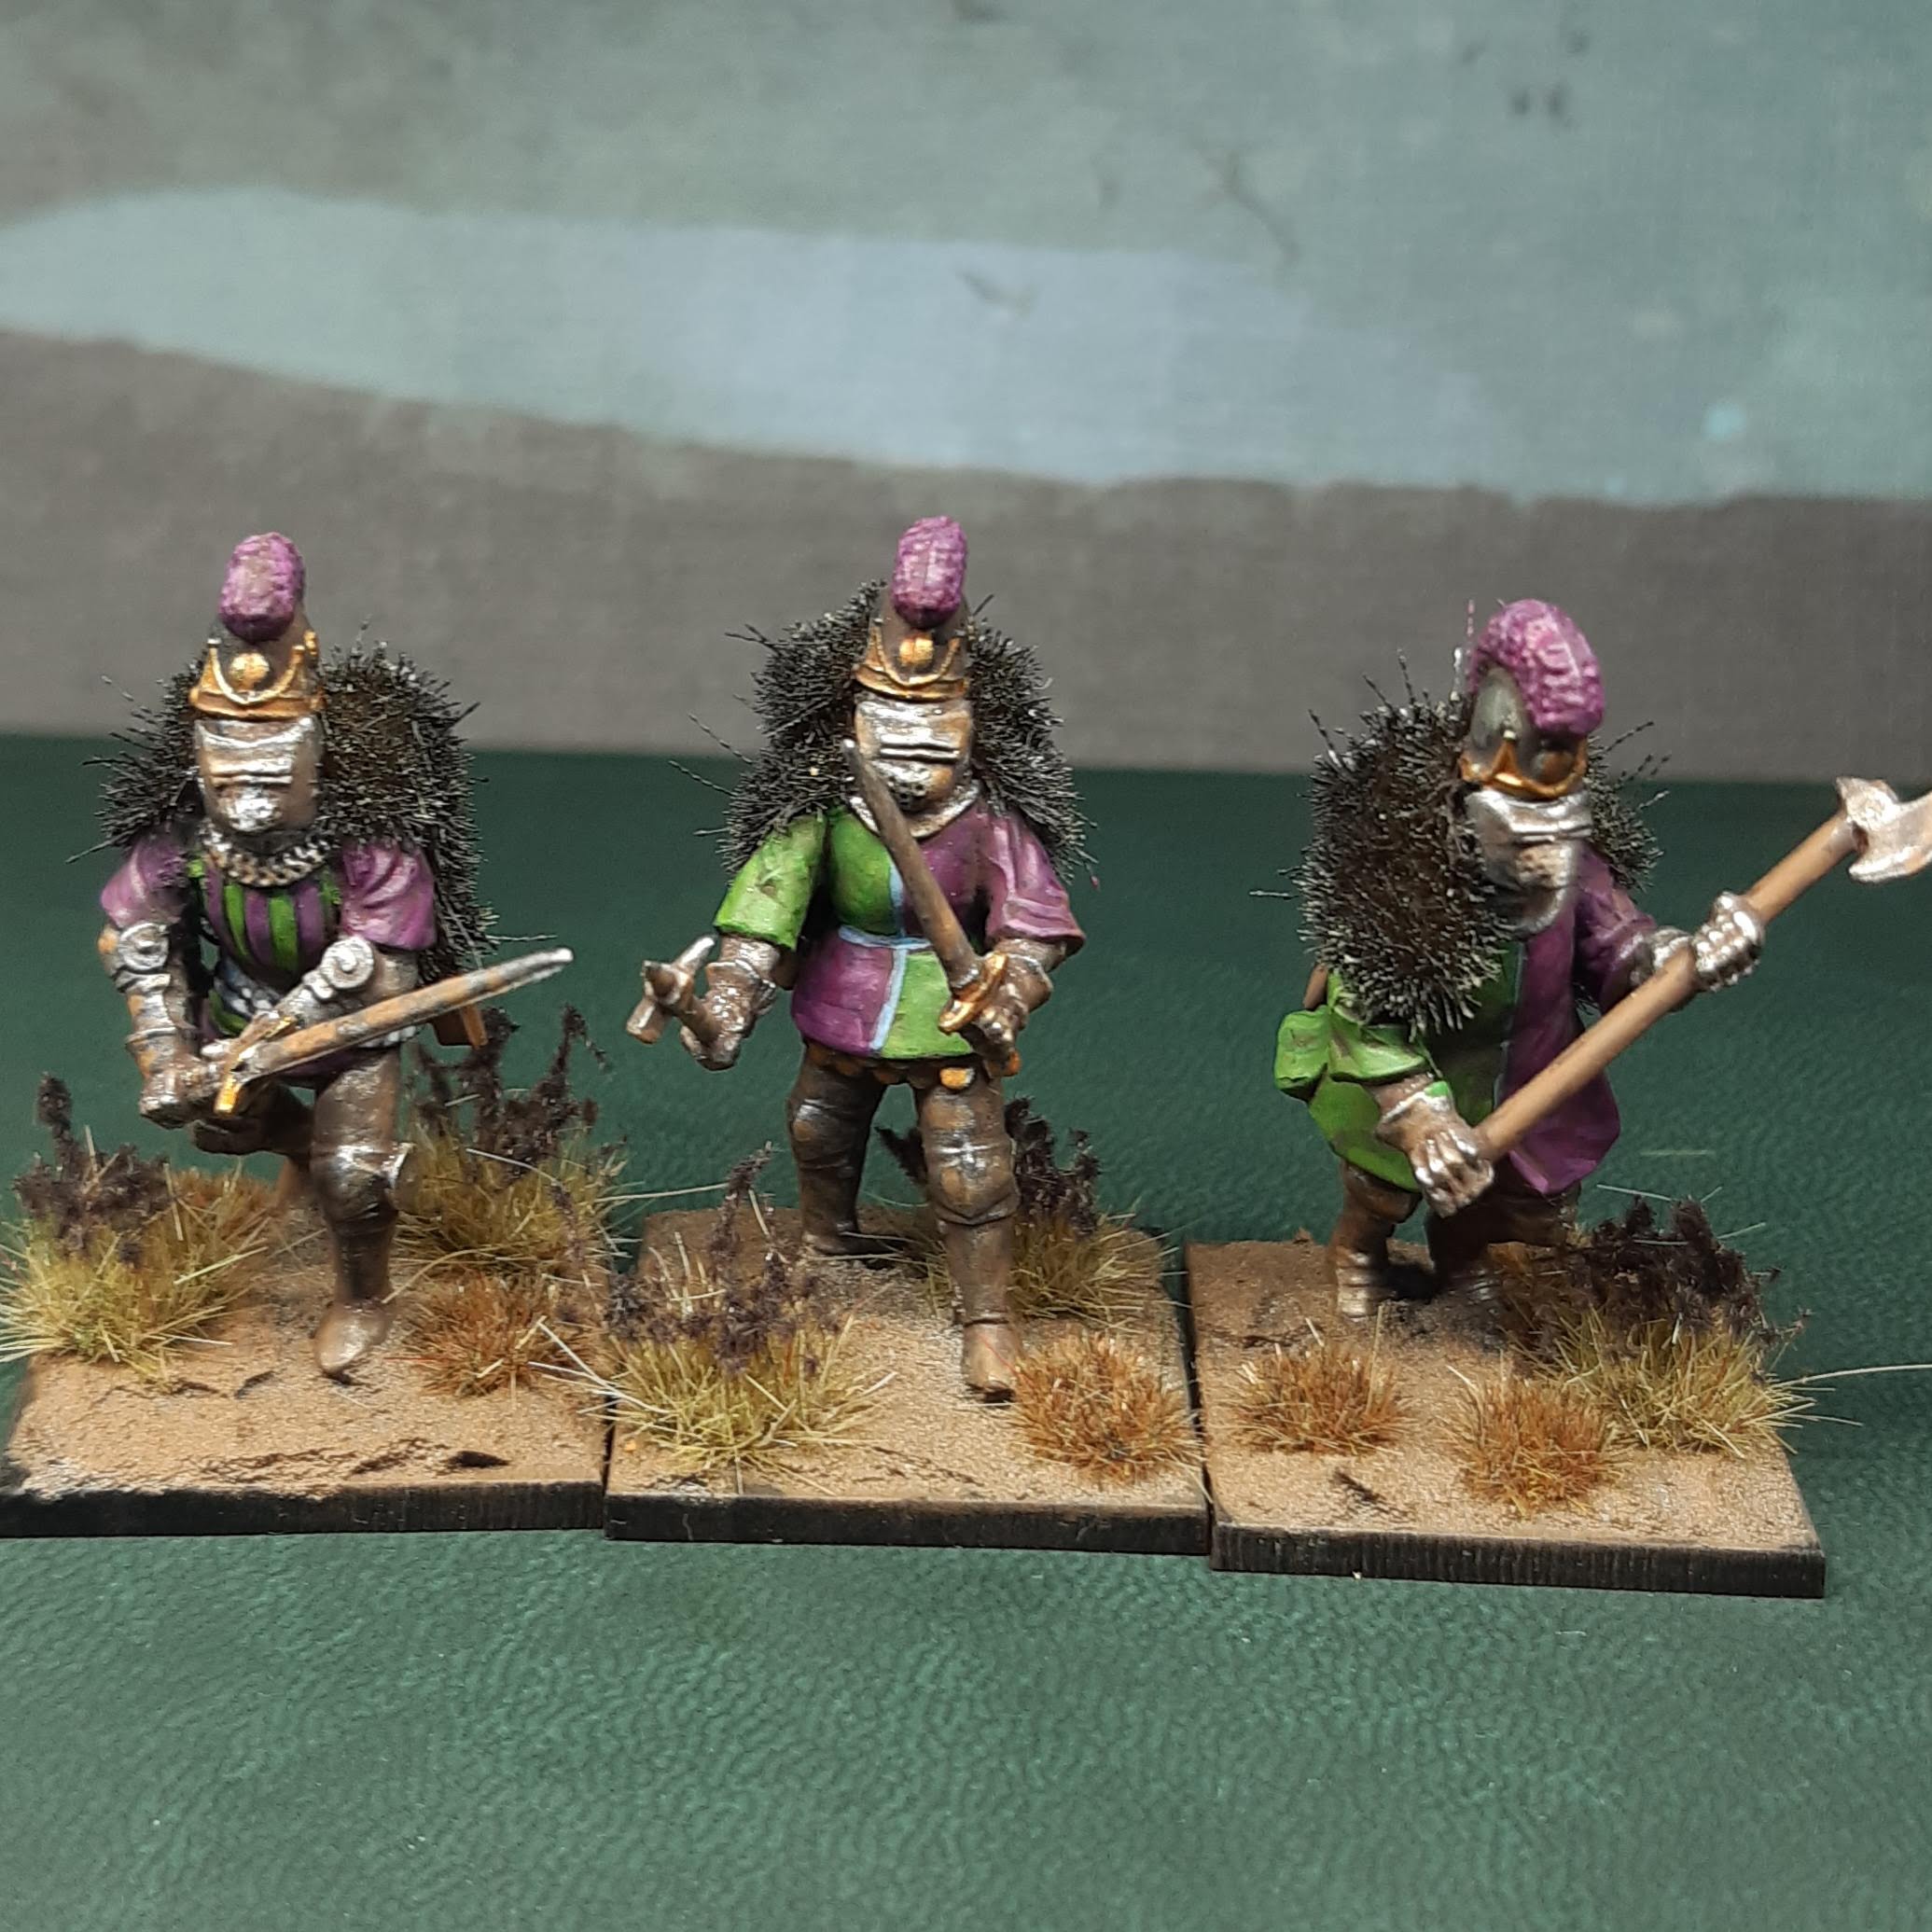
Painted Brutes

By this stage, the colour scheme for these models has been well established. Beyond deciding to either halve or quarter the surcoats in red/violet and green, there was very little I had to consider. All paints and processes were as described for the Chaff and Fodder.
Making the Whelps
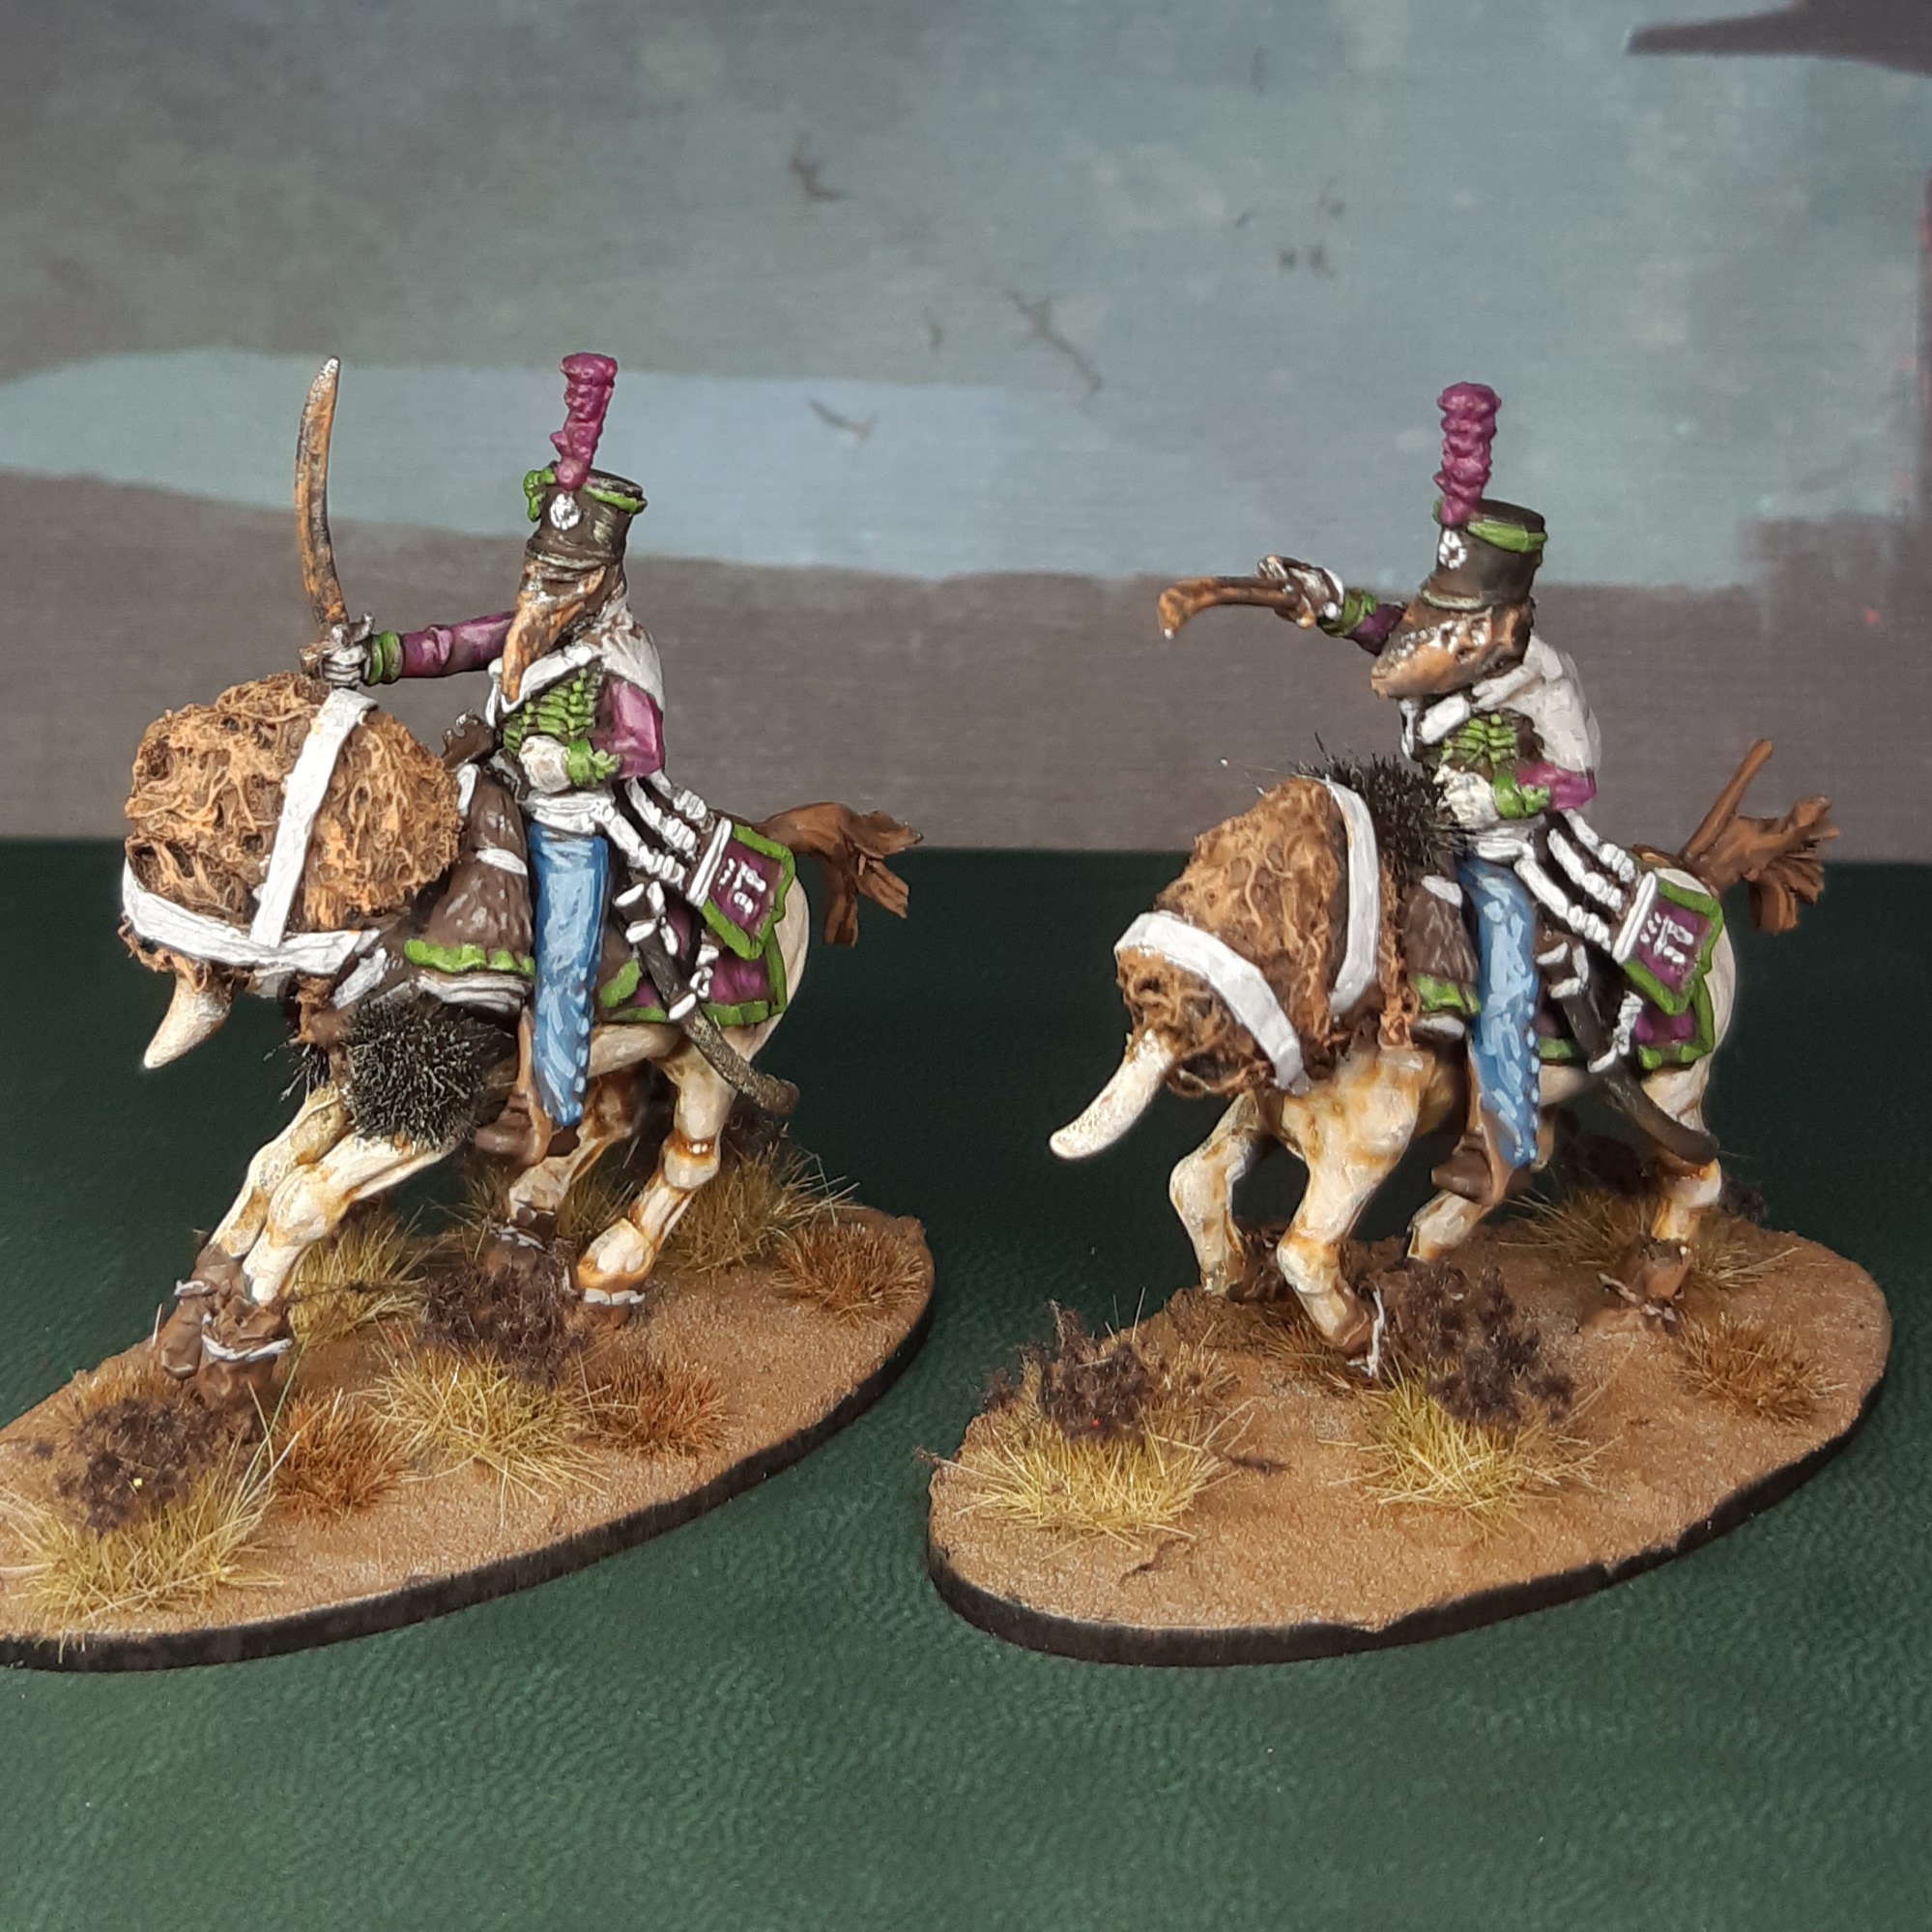
One last unit to do, plus their leader. I quite enjoyed making the root steed (horse radish?) for my Toff, so decided I wanted this last lot to also be cavalry, and with an appropriate mounted Toady to lead them. I went for a unit Whelps, which are the Turnip28 equivalent of light cavalry, and come in a unit of 4 models.
I had used up all bar two of the 3D printed torsos at this stage, not enough for a full unit, so I’d have to look at other ways of creating the Turnip28 look for this lot. I grabbed a pair of Perry Austrian Hussar sprues as a starting point.
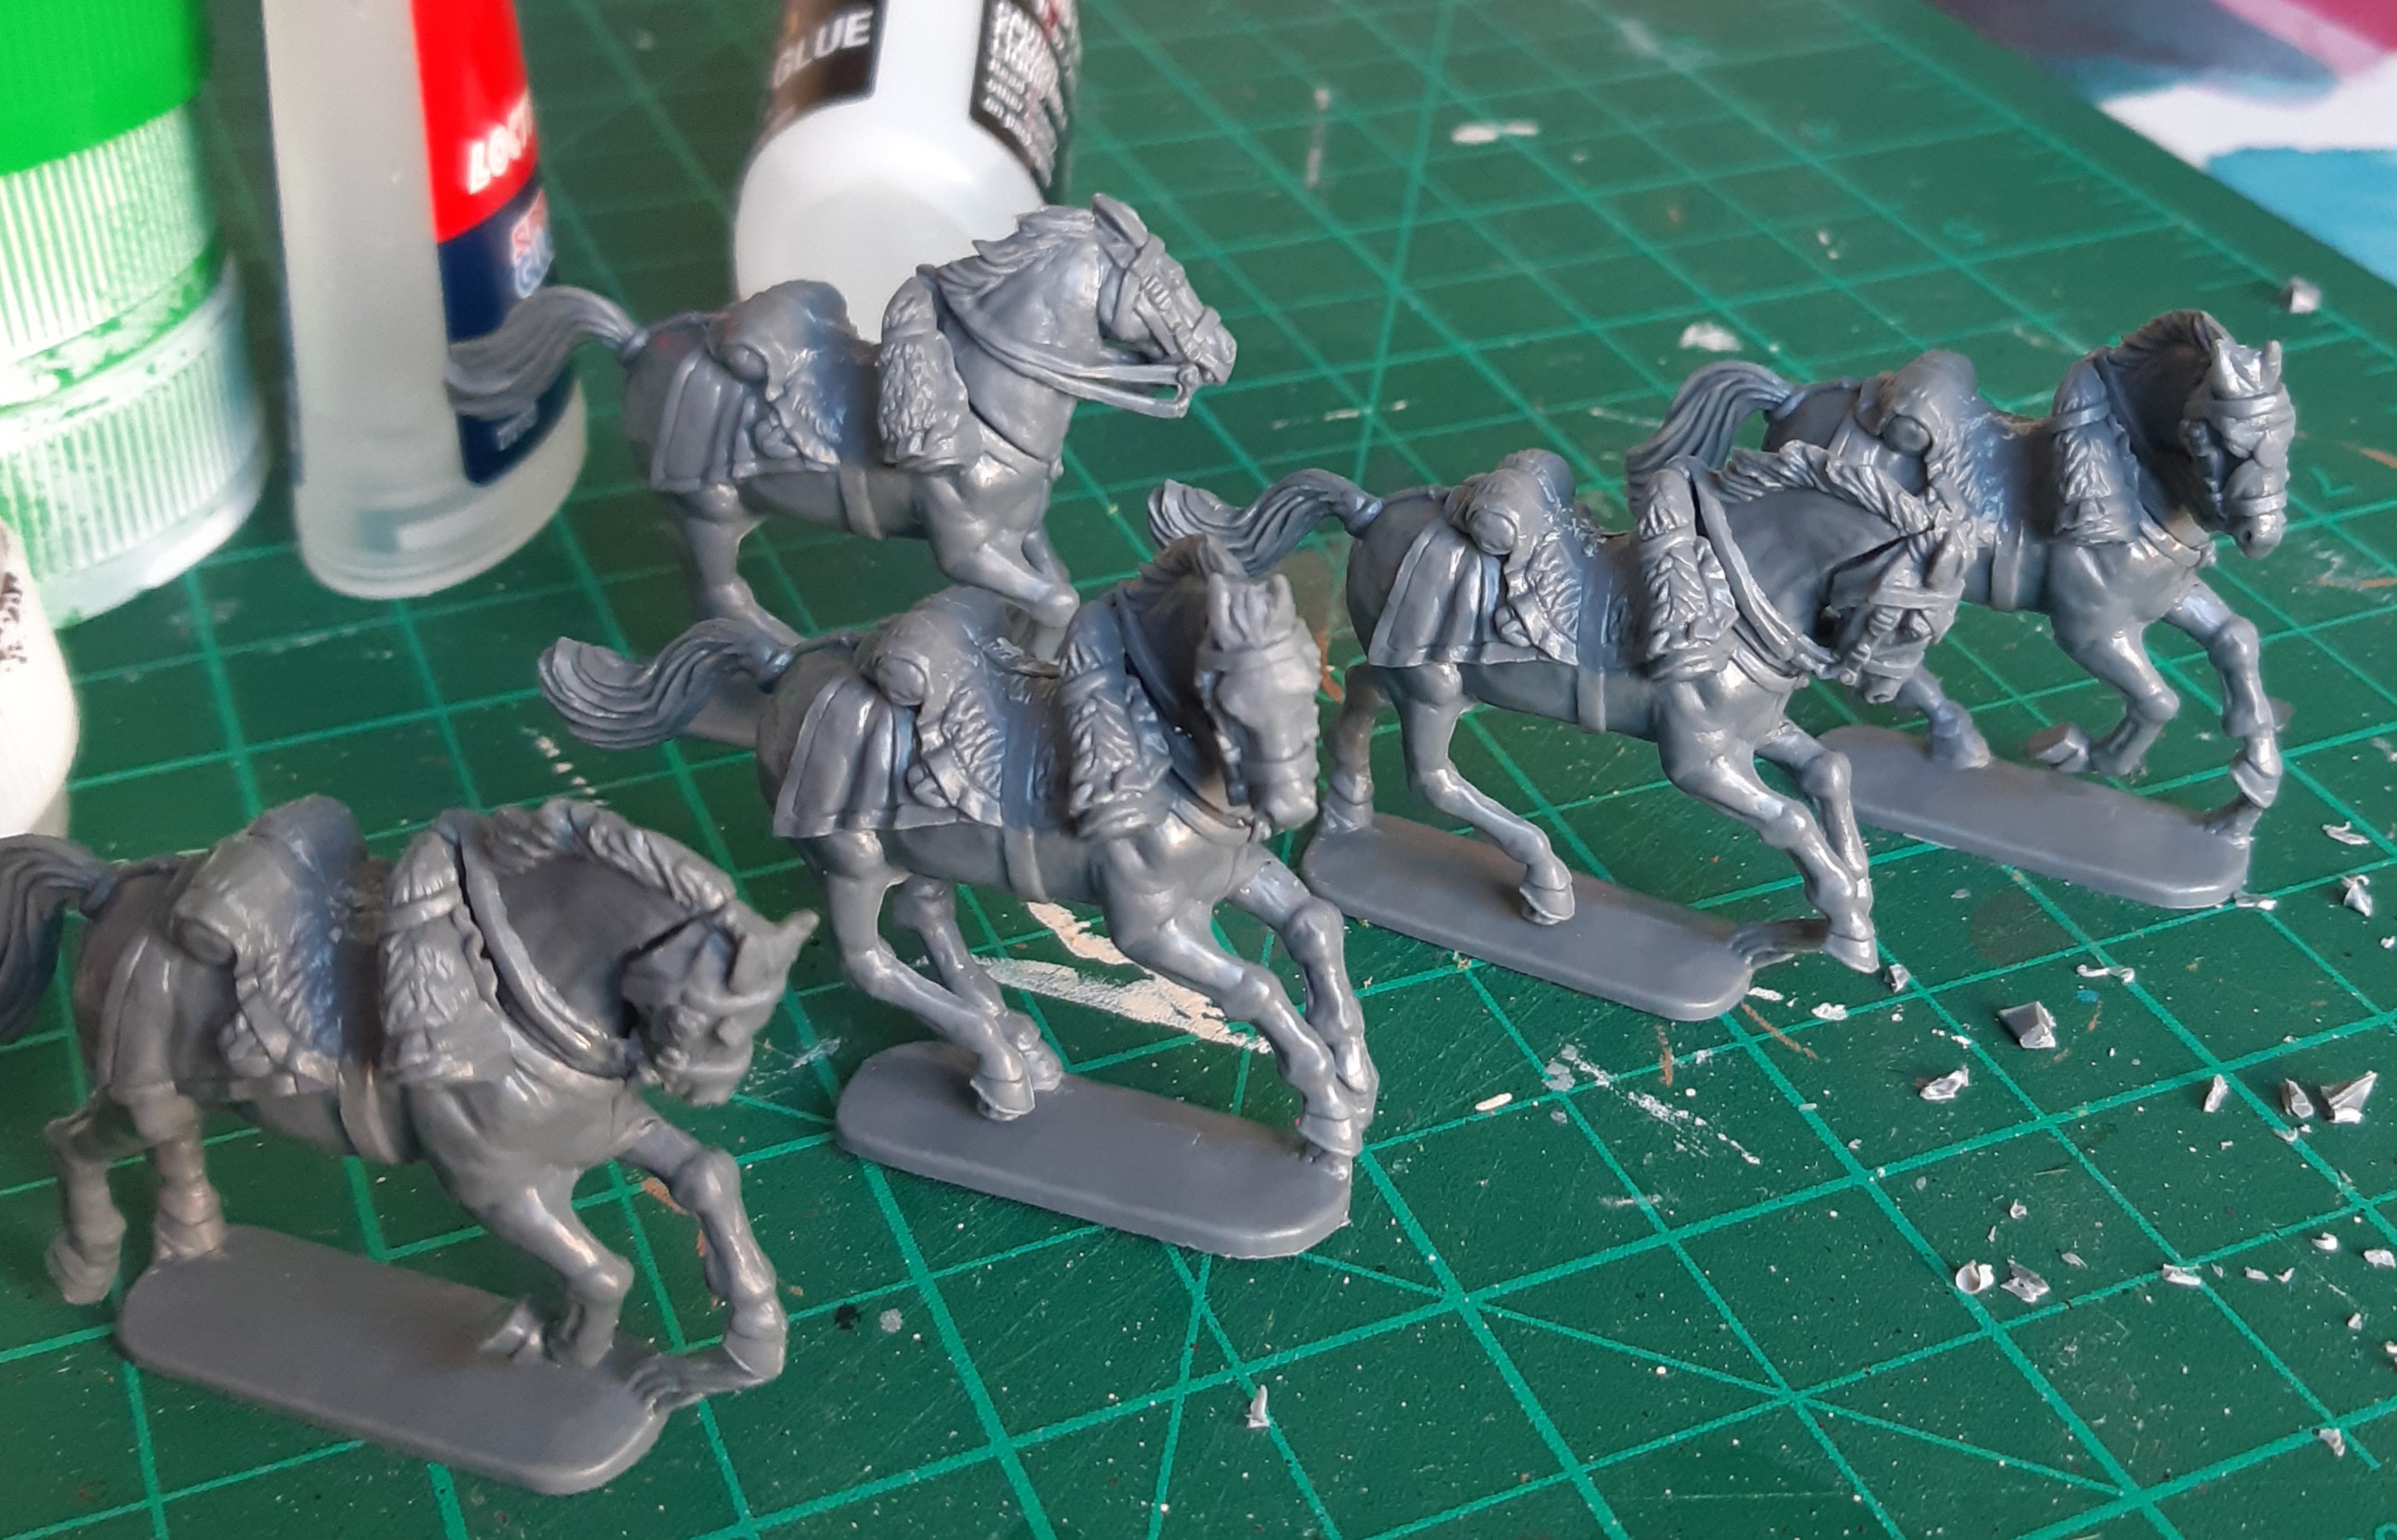 5 horses assembled and ready for converting
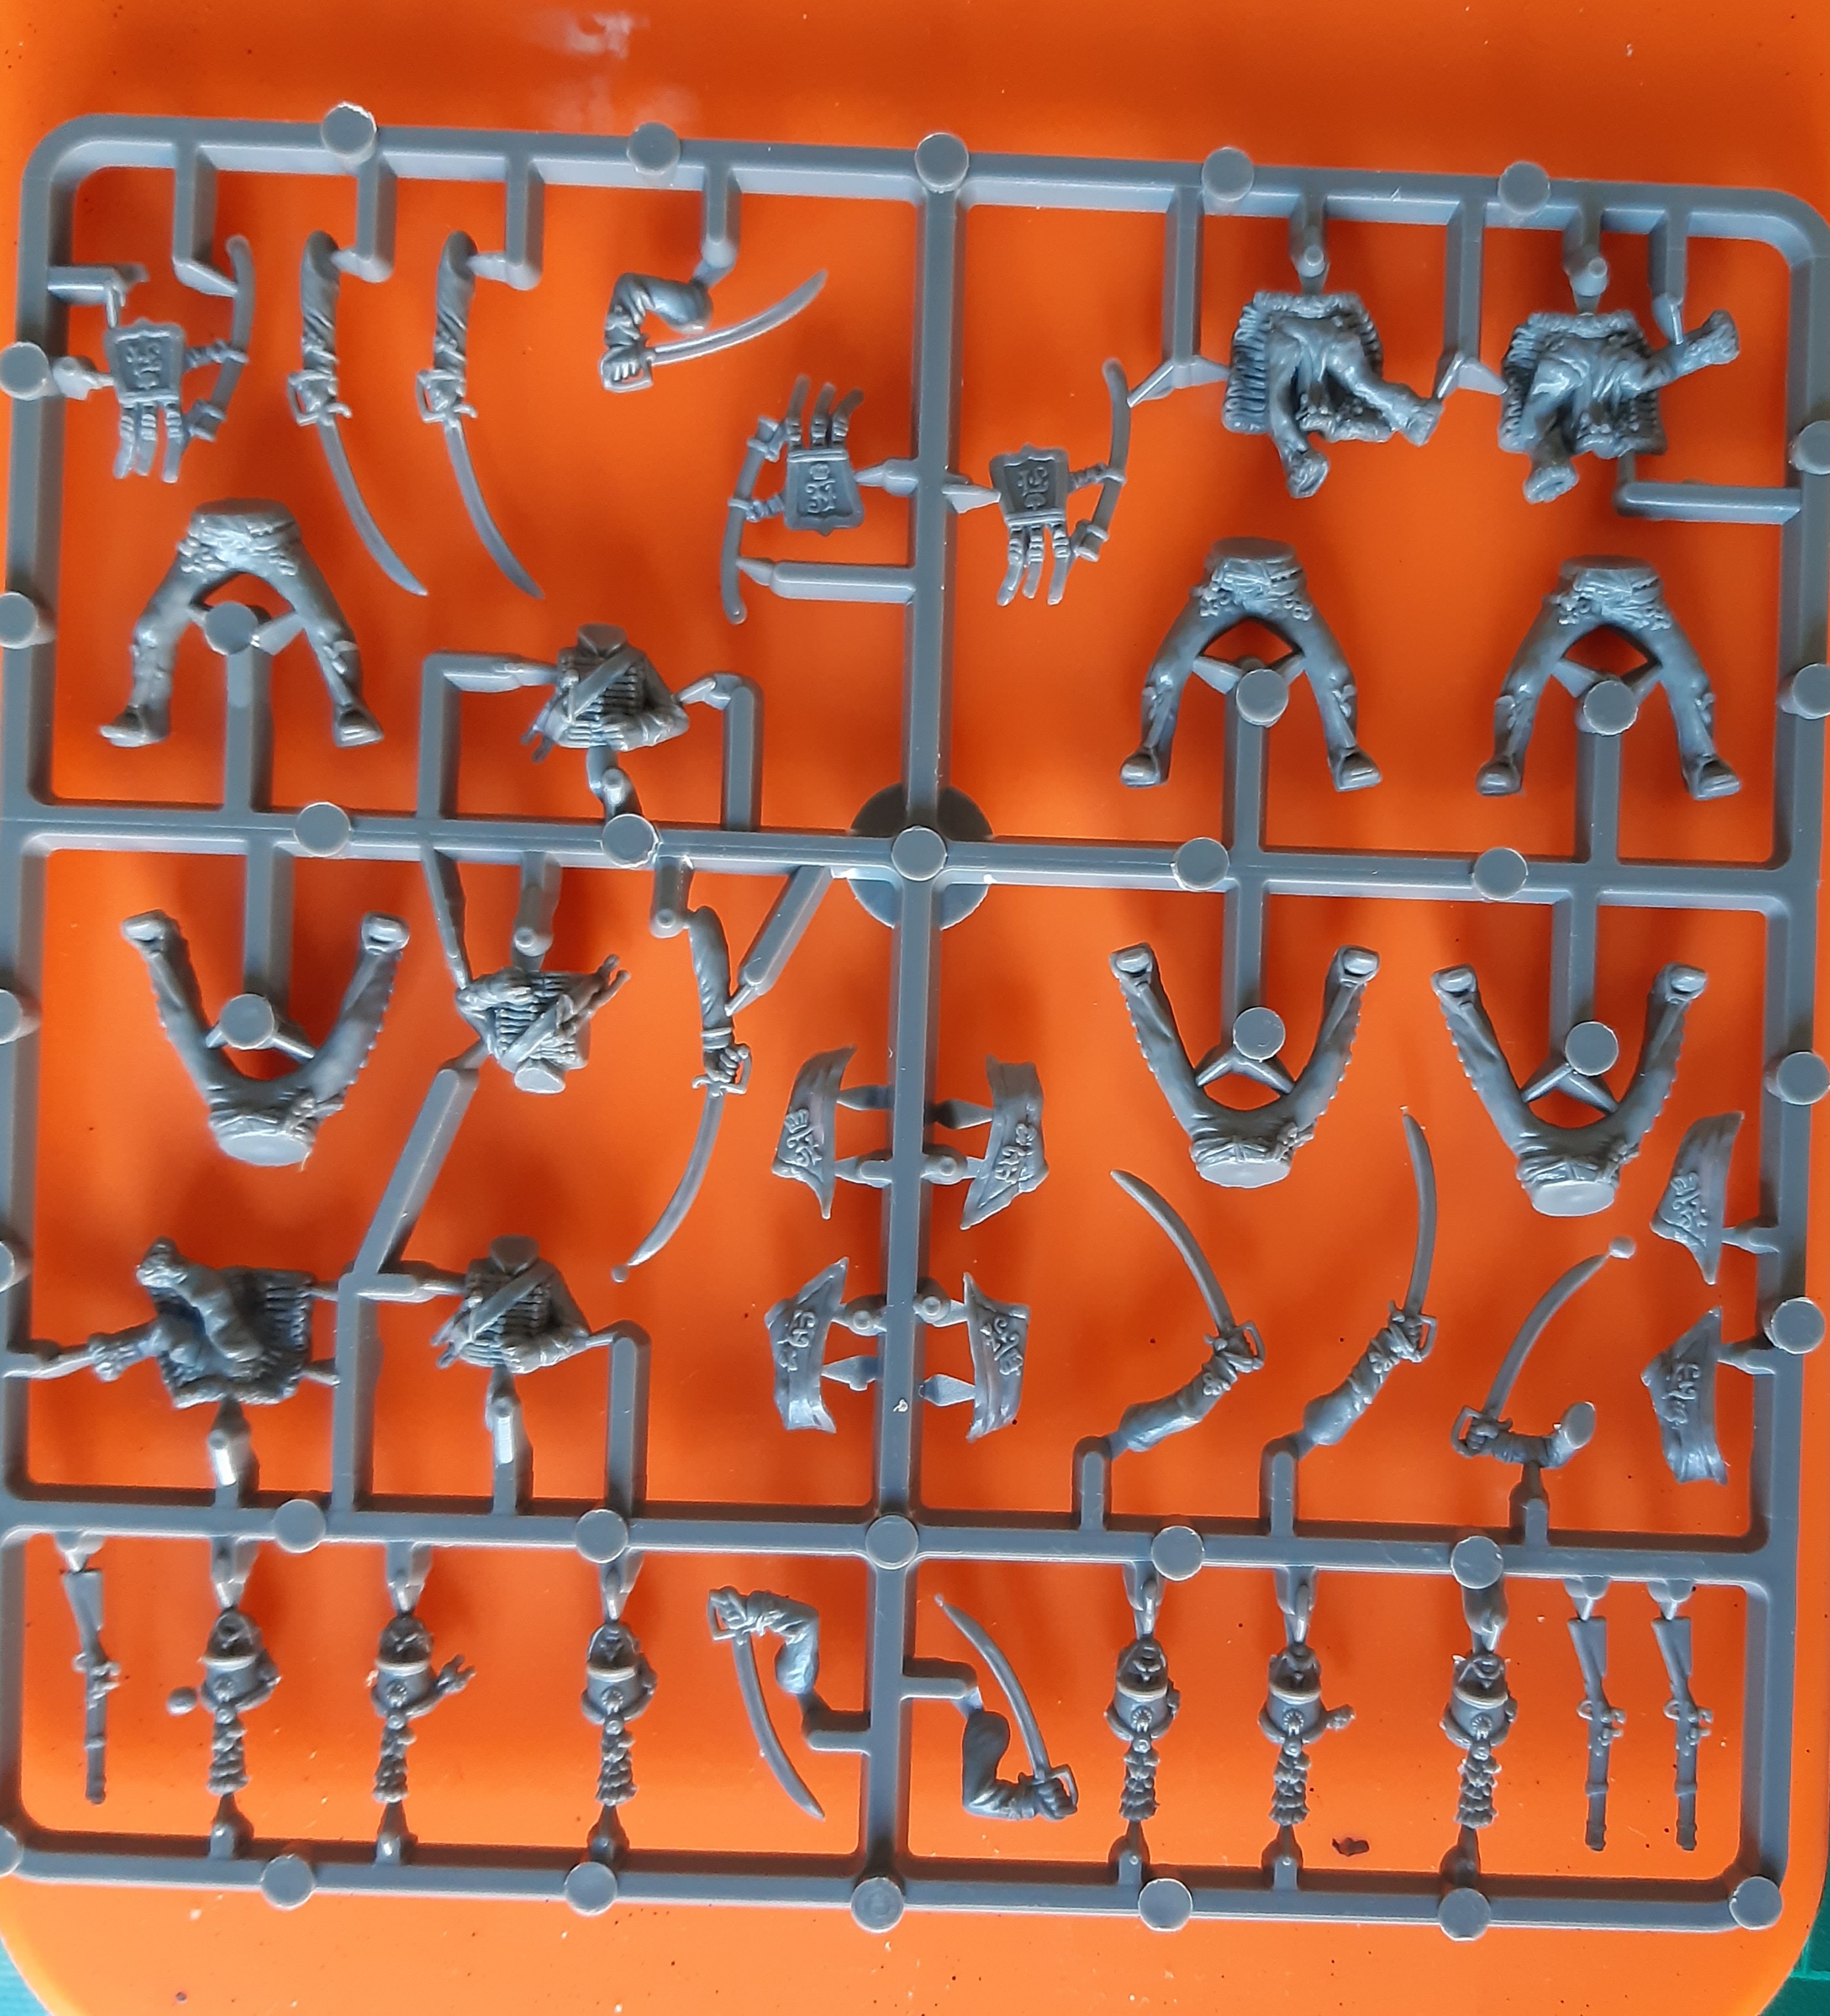 This is the Austrian Hussar trooper sprue used
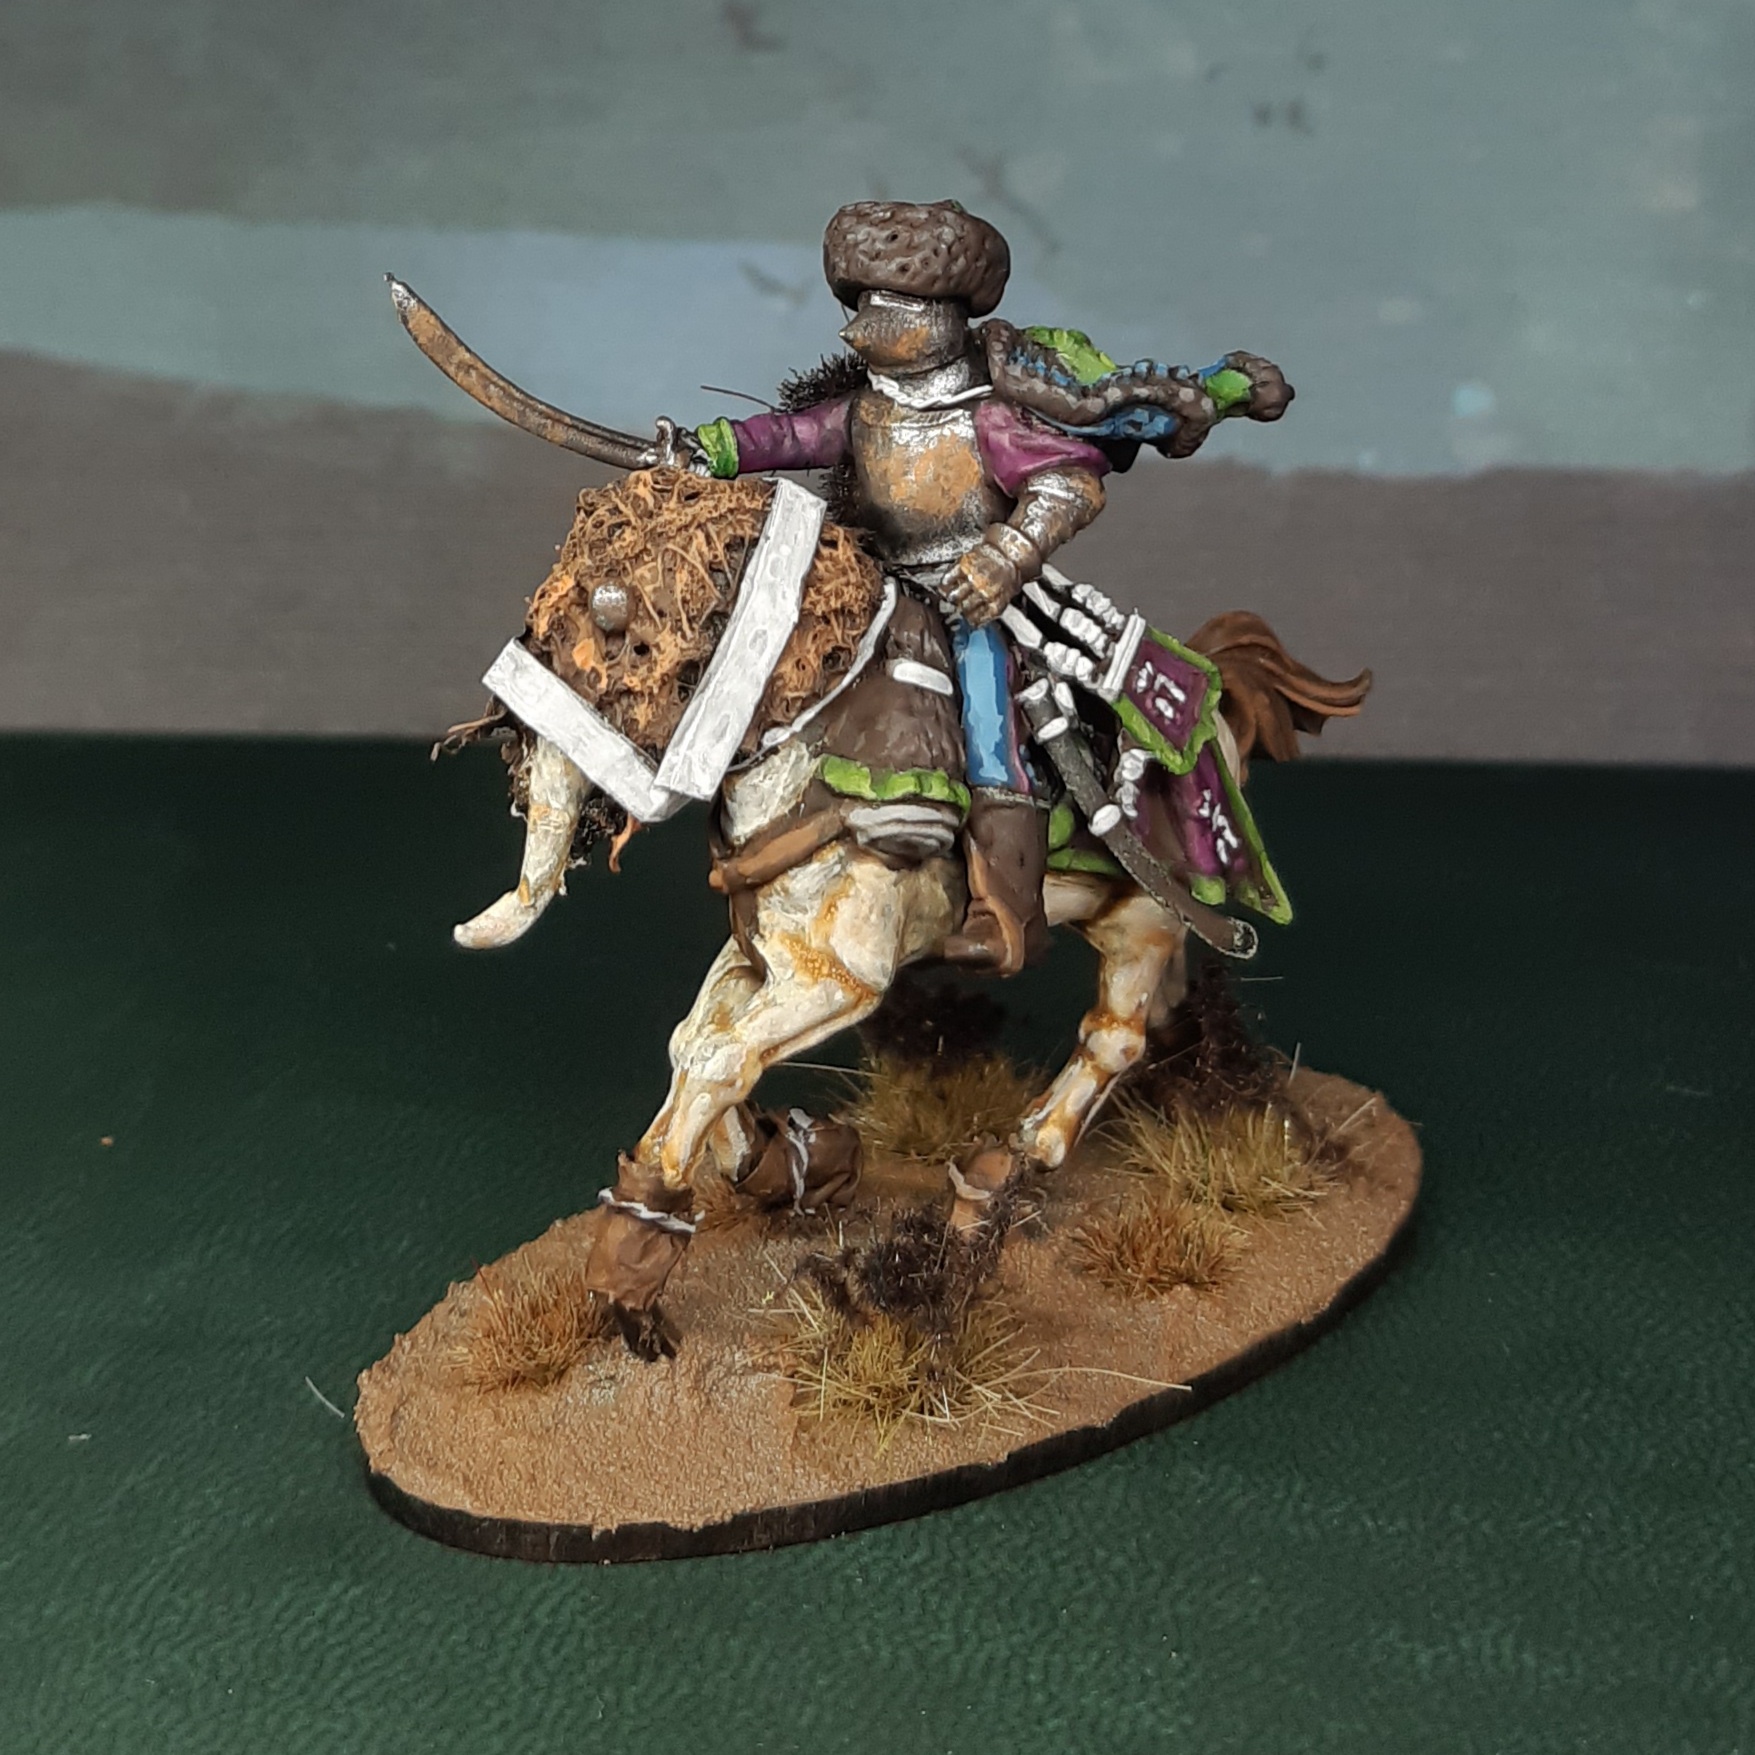
I started with the horses, as I intended to simply copy what I had done for the Toff’s steed. The horse heads were trimmed to streamline their profile (essentially removing manes, ears, some of the bridles etc.), before adding a green stuff root tendril/snout. A bit of bandage was then wrapped around the neck/head, and glued in place with watered down pva. Foil straps and hoof covers were then added, with wire ‘ropes’ wrapped around the latter. Finally, the tails were snipped short, and peeled with a knife to approximate a stalk.
Next I built the Toady. I wanted him to be a bit more ostentatious than the regular troopers, so used the fancier legs, and one of my final two torsos. Whilst a right sabre wielding arm was easy to identify from the sprue, one potential issue with the hussar sprues is the left arms are moulded onto the bodies. I therefore had a quick search through the remains of the other sprues used in this project for something appropriate, deciding on the last left arm from the Agincourt foot knights. A pelisse was added as well.
Whilst I quite liked this, the model was still missing something – an appropriately splendid hat. Out came the green stuff, and I attempted to make a colpack.

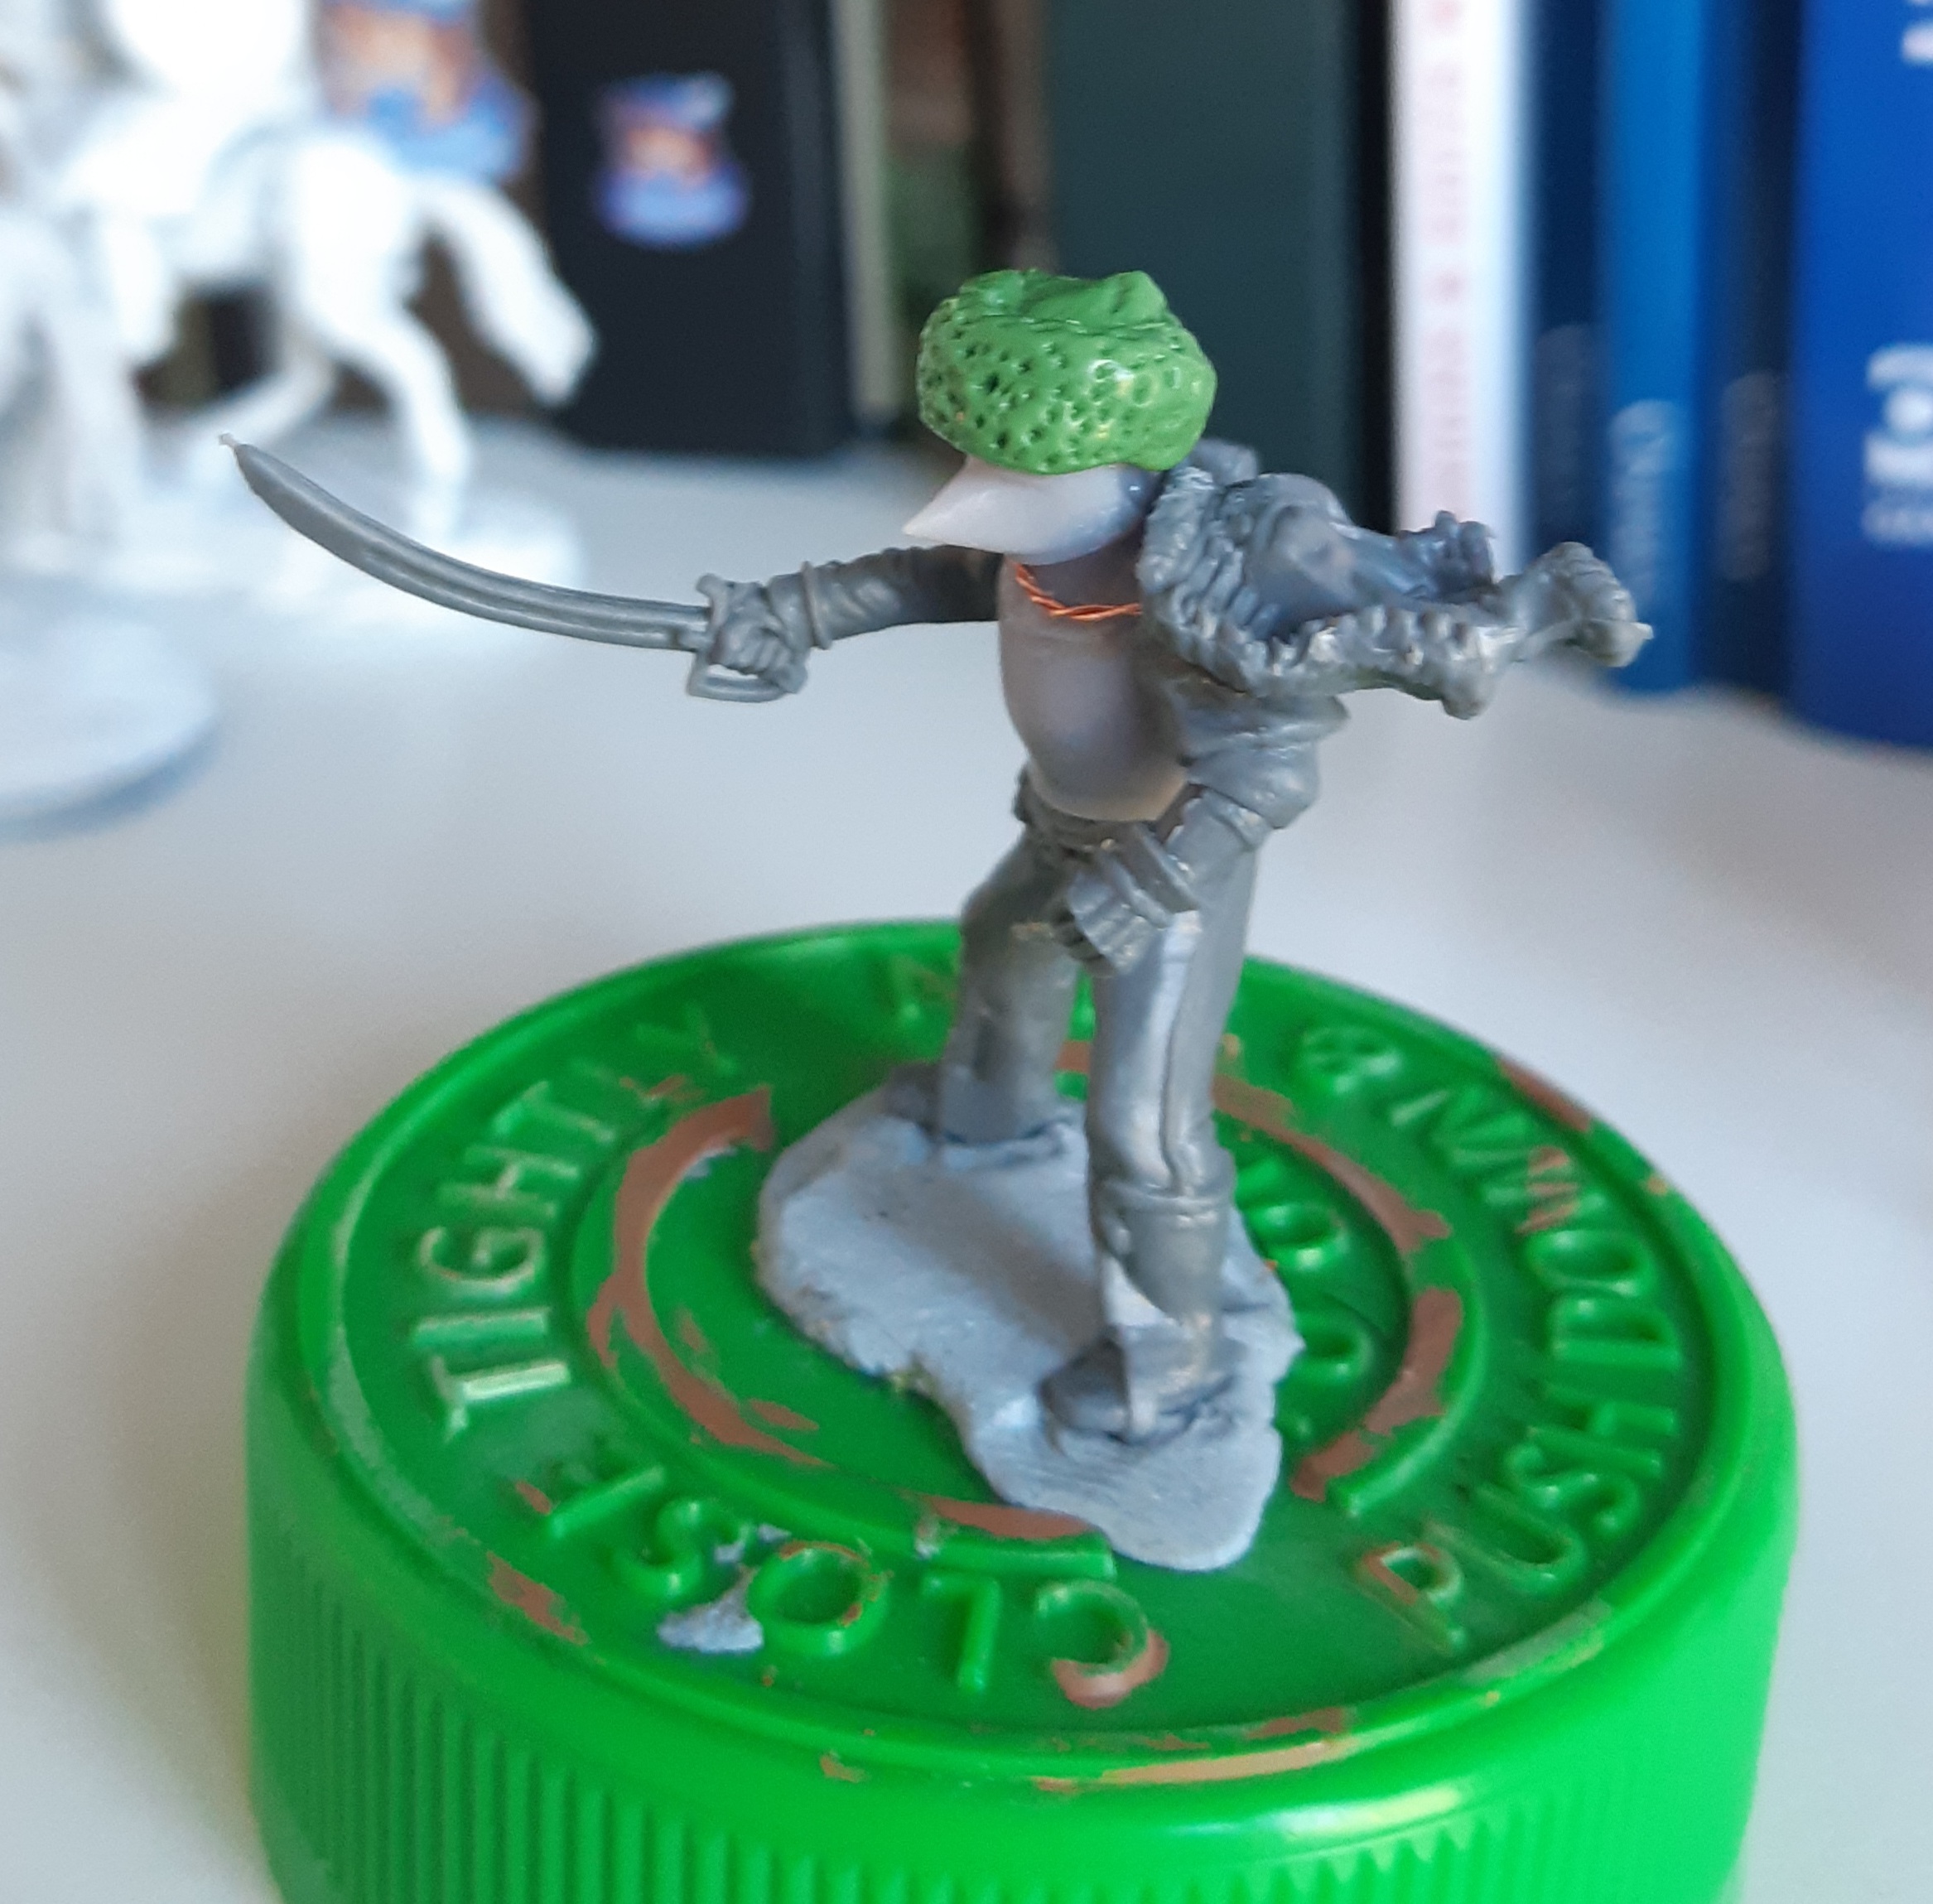

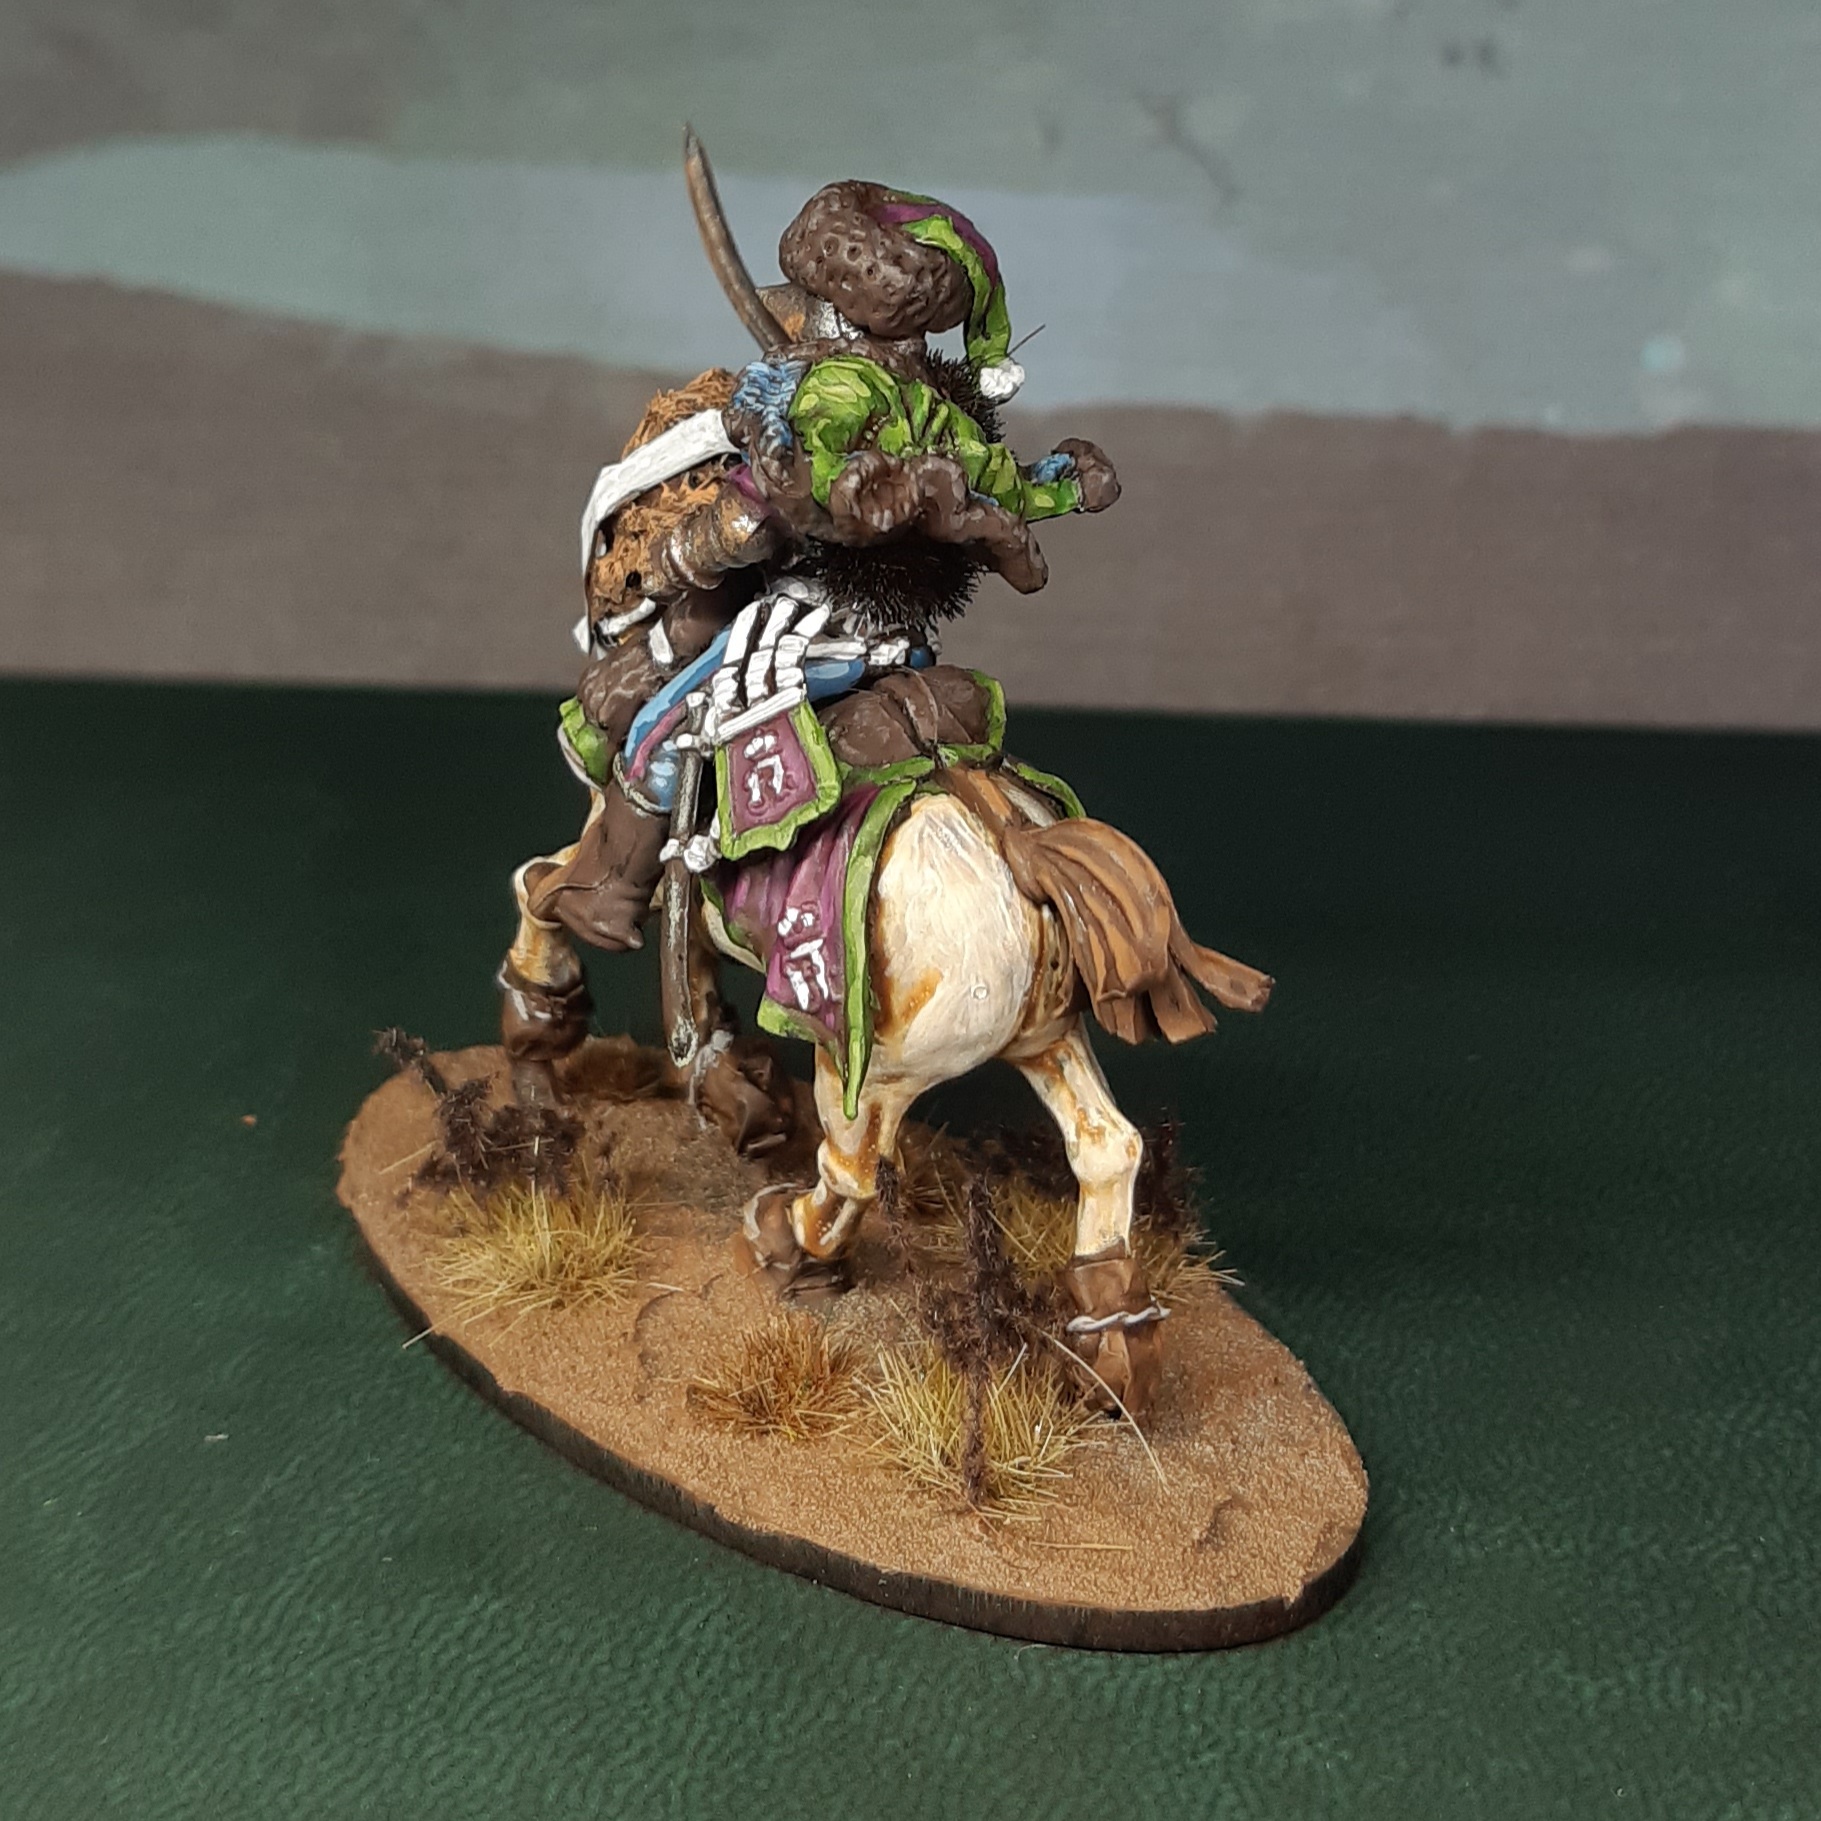
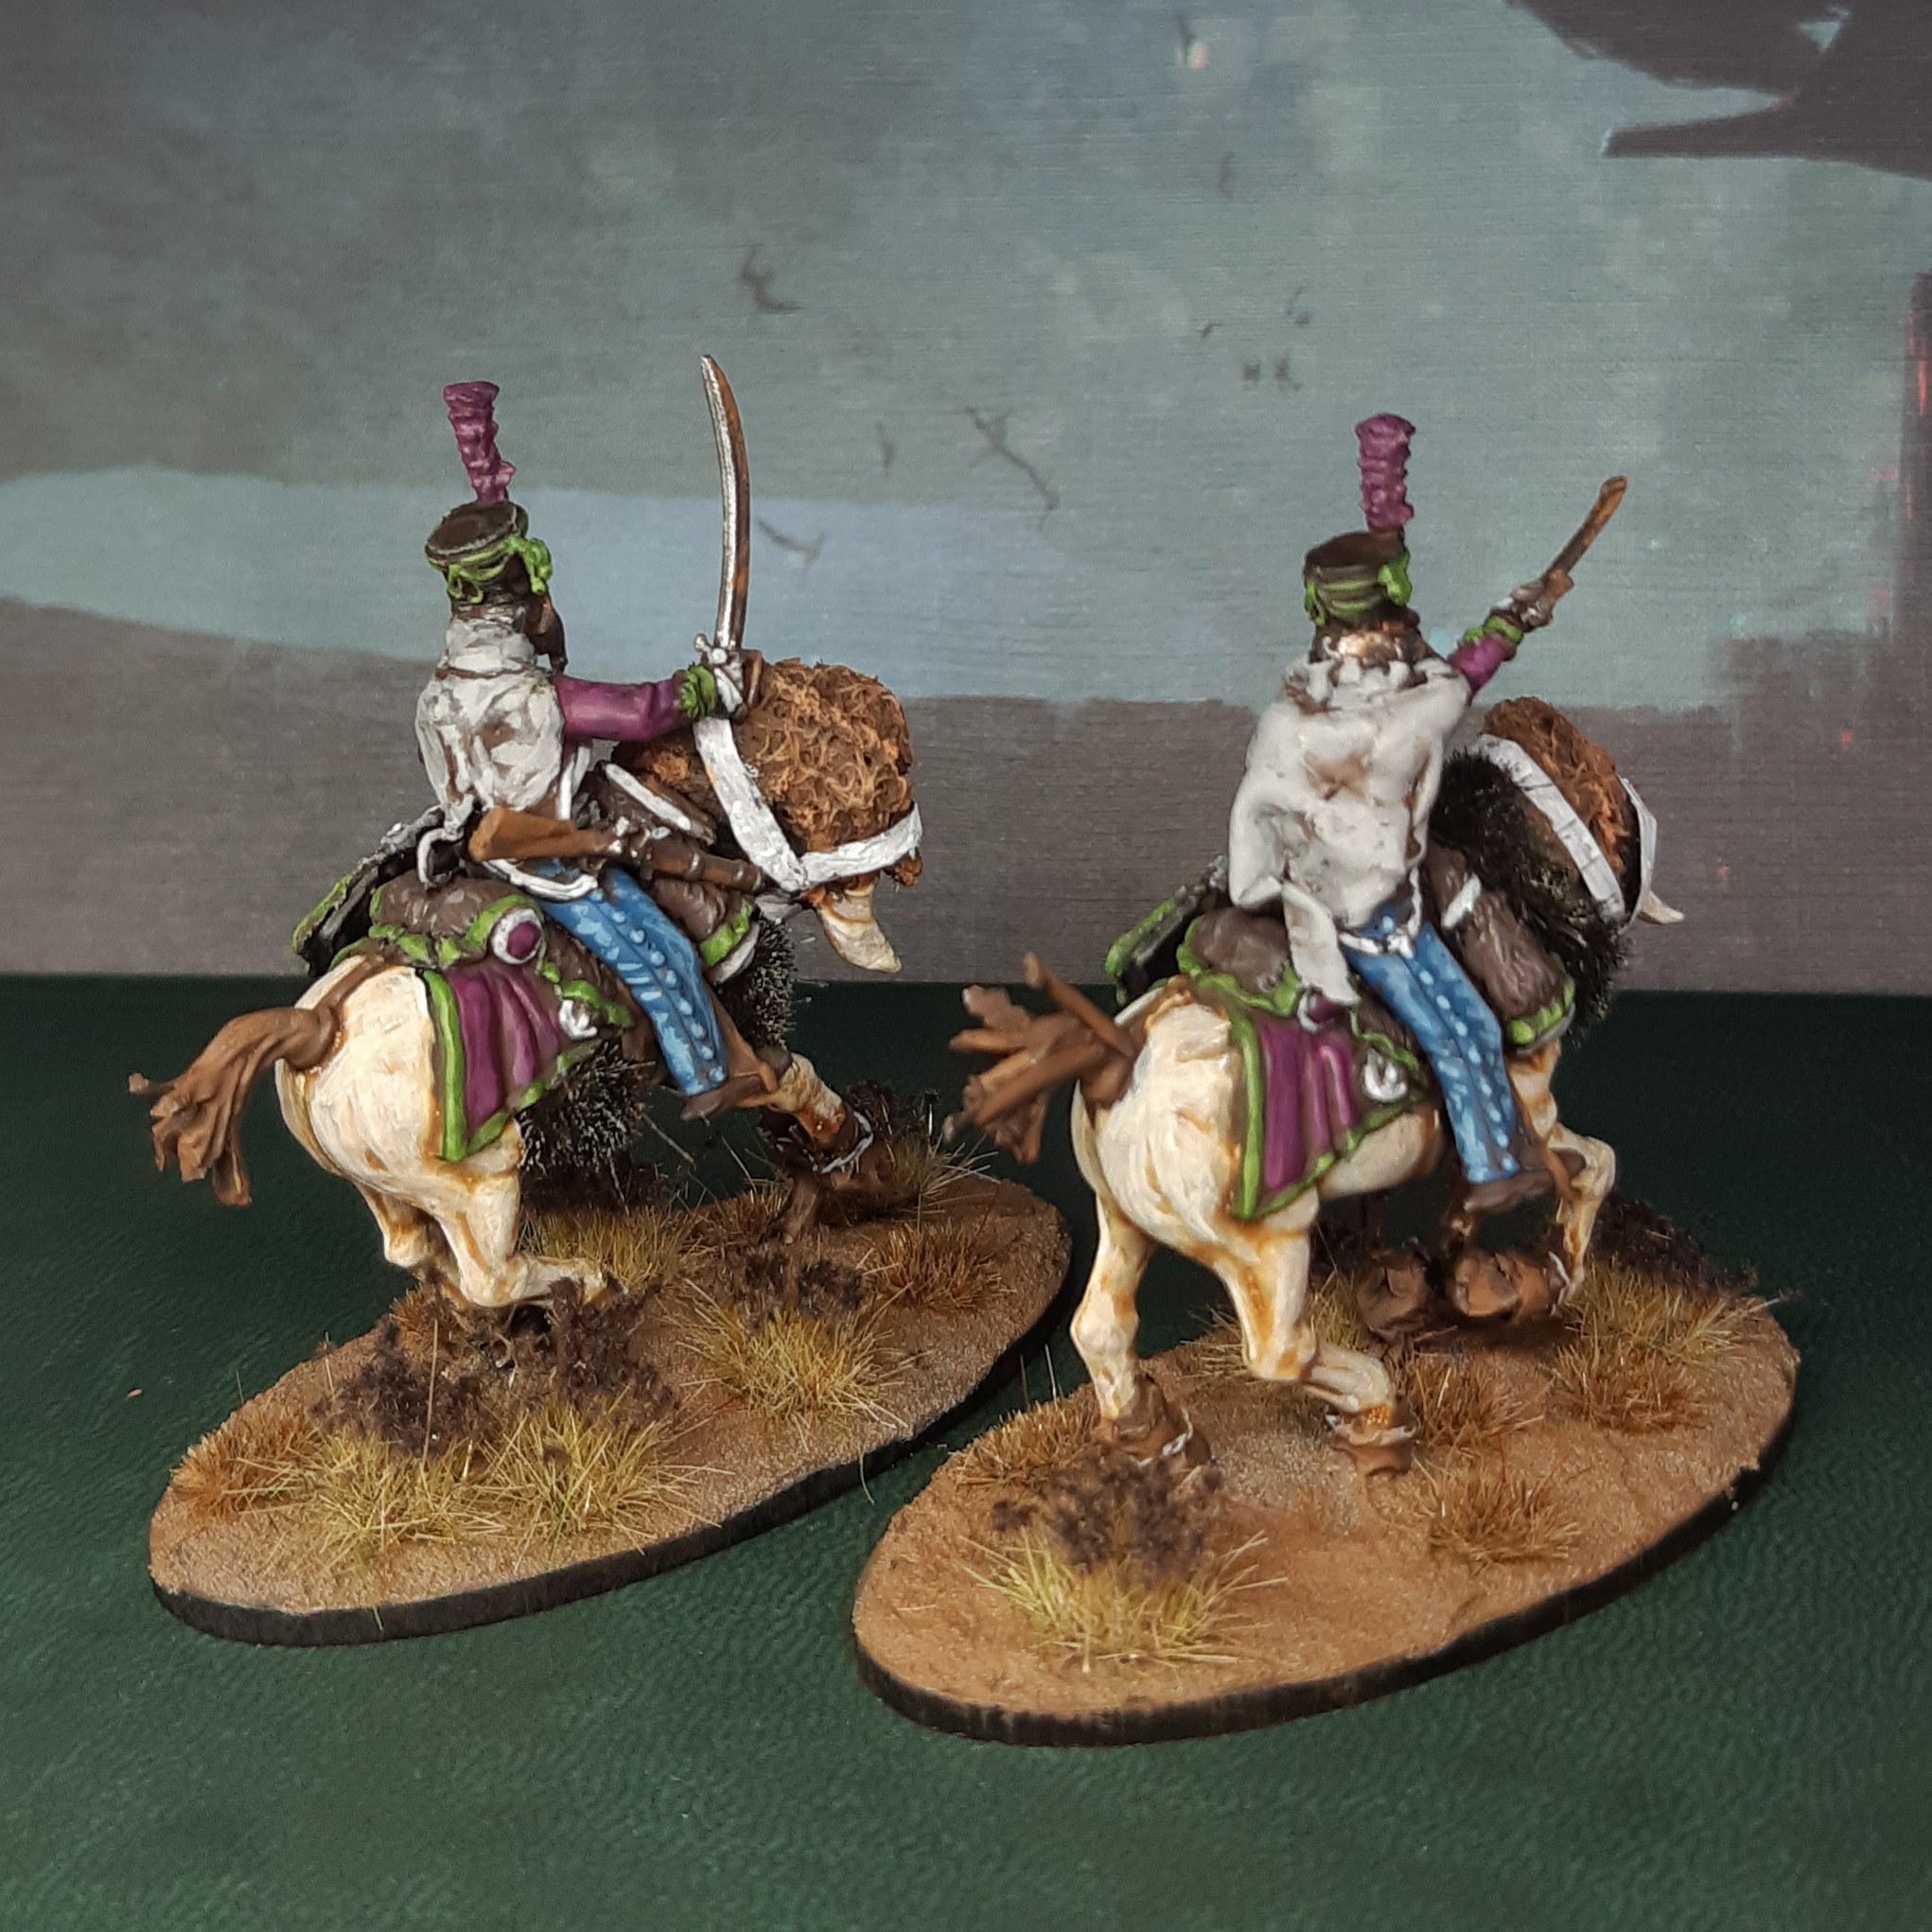
Onto the Whelp riders then. I didn’t have any additional bits left to modify this chaps, so it would be down to sculpting with green stuff. This is something I’m not very practiced in, but I gave it a go anyway.
First I built the hussar troopers to understand what I was going to be working with. First, it was obvious they would need a Turnip28 style visor. I realised I should have had off adding the sabre arms, as they made this more awkward than was necessary, but I got them all done. Next, I decided I’ll try and give them some ragged cloaks. I vaguely remember some video I saw when they took a thin piece of green stuff, attached at the figures shoulders, and then pulled and tore at the bottom to create a worn, damaged cloak. I gave that a go, and was pretty happy with the end results. I decided that was probably enough for the riders, and got them on their steeds, adding some additional bits of frippery from the sprues like carbines, before adding some tufts here and there.
 This was the basic hussar trooper before any sculpting.

 Ready for painting
Painting the Whelps
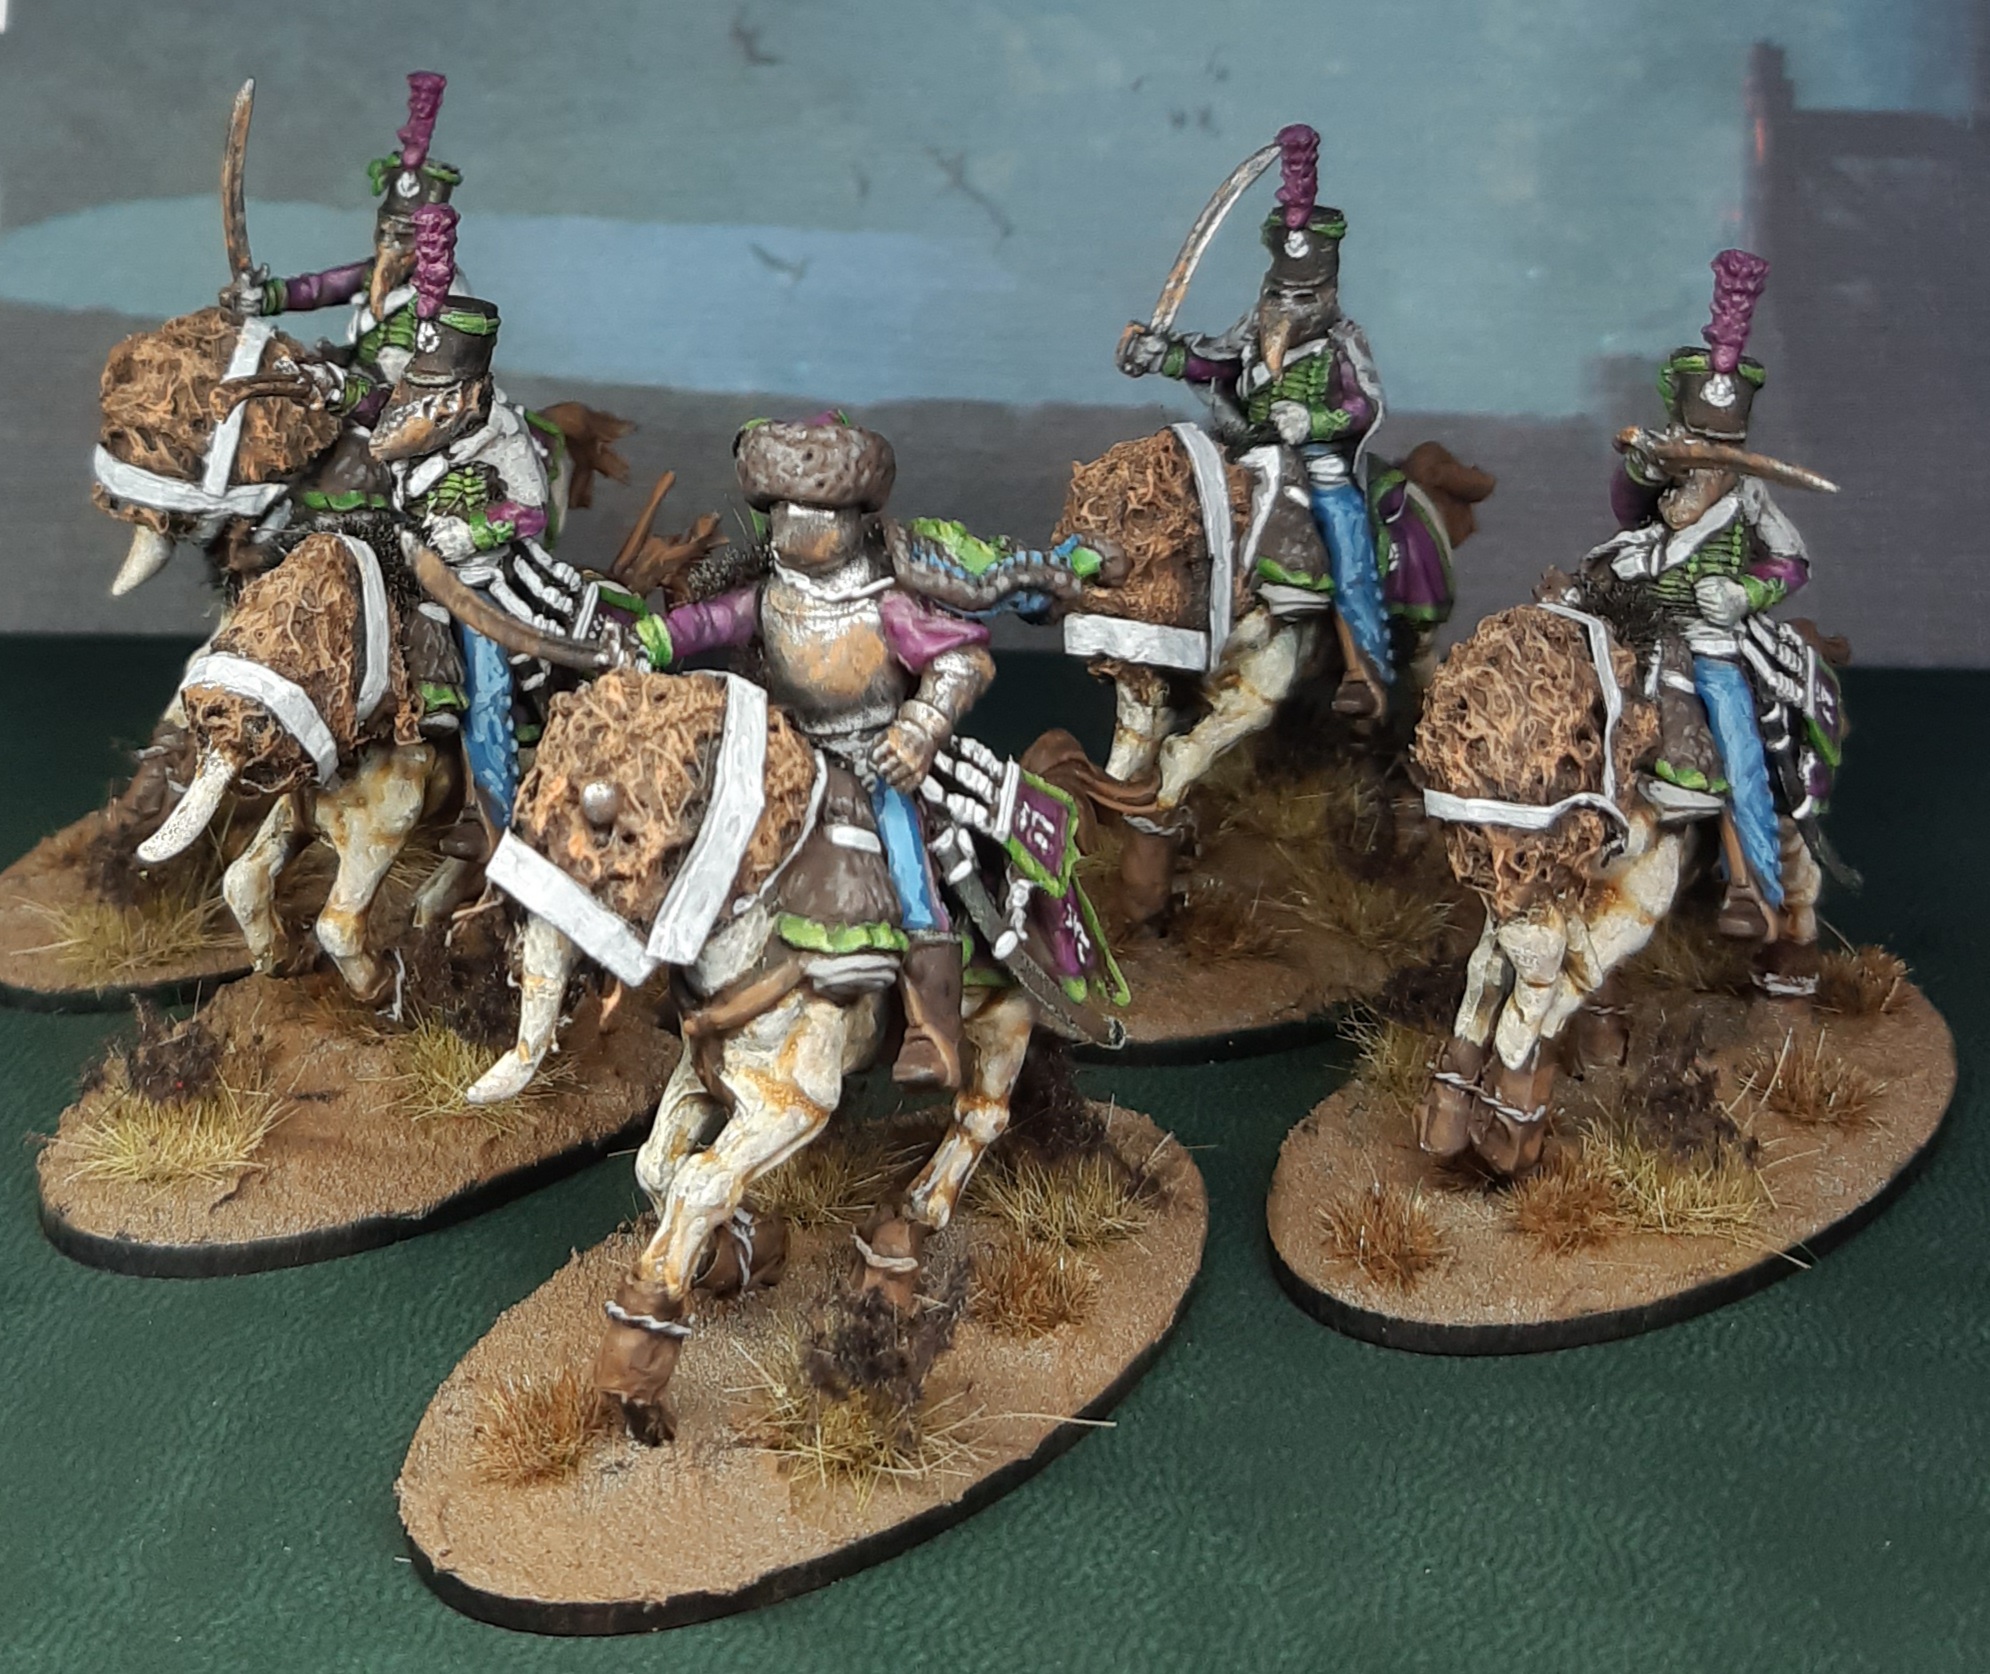
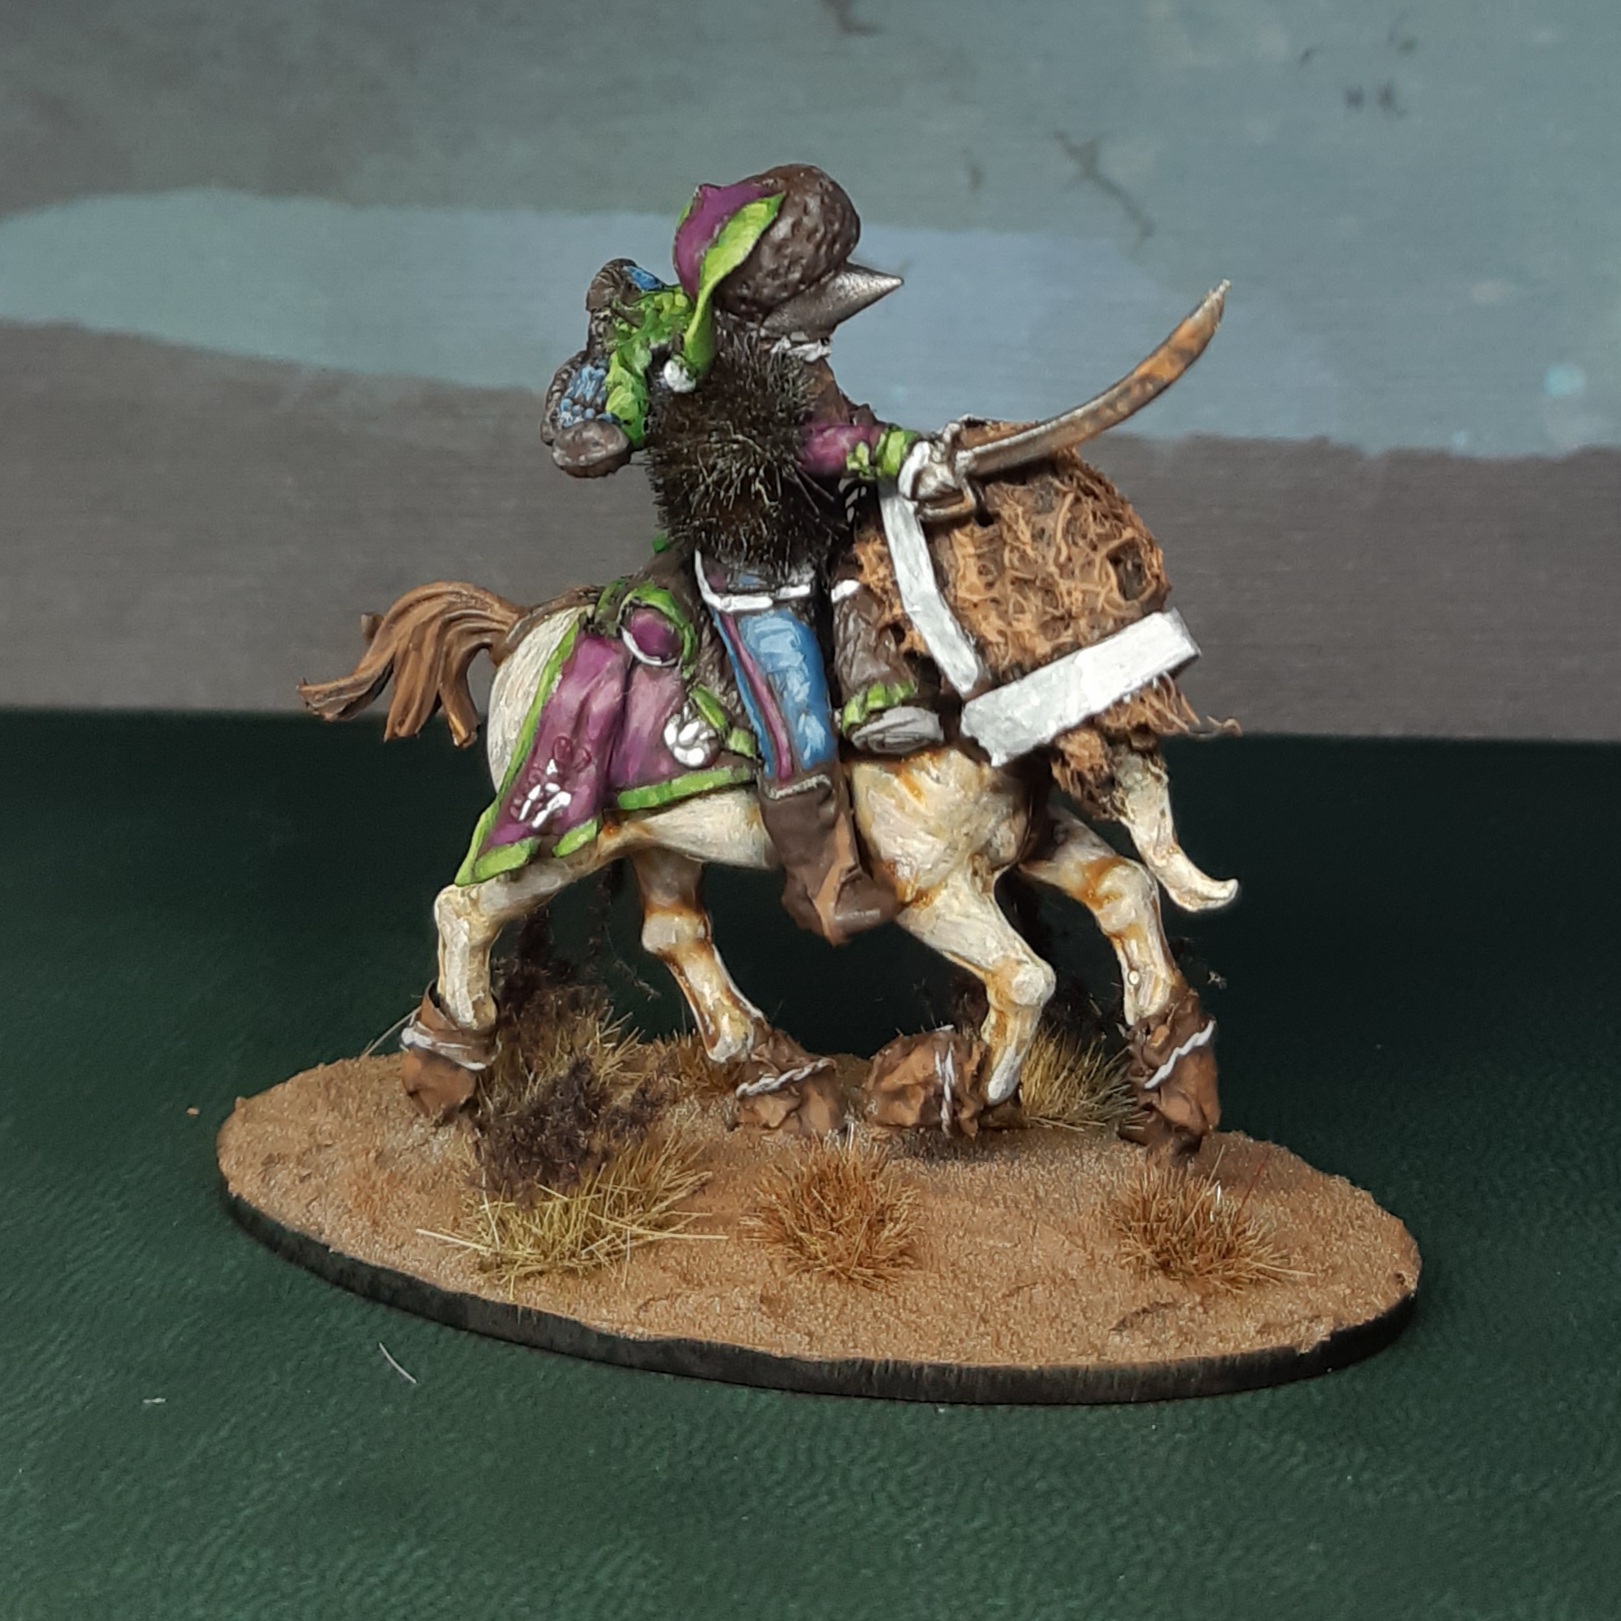
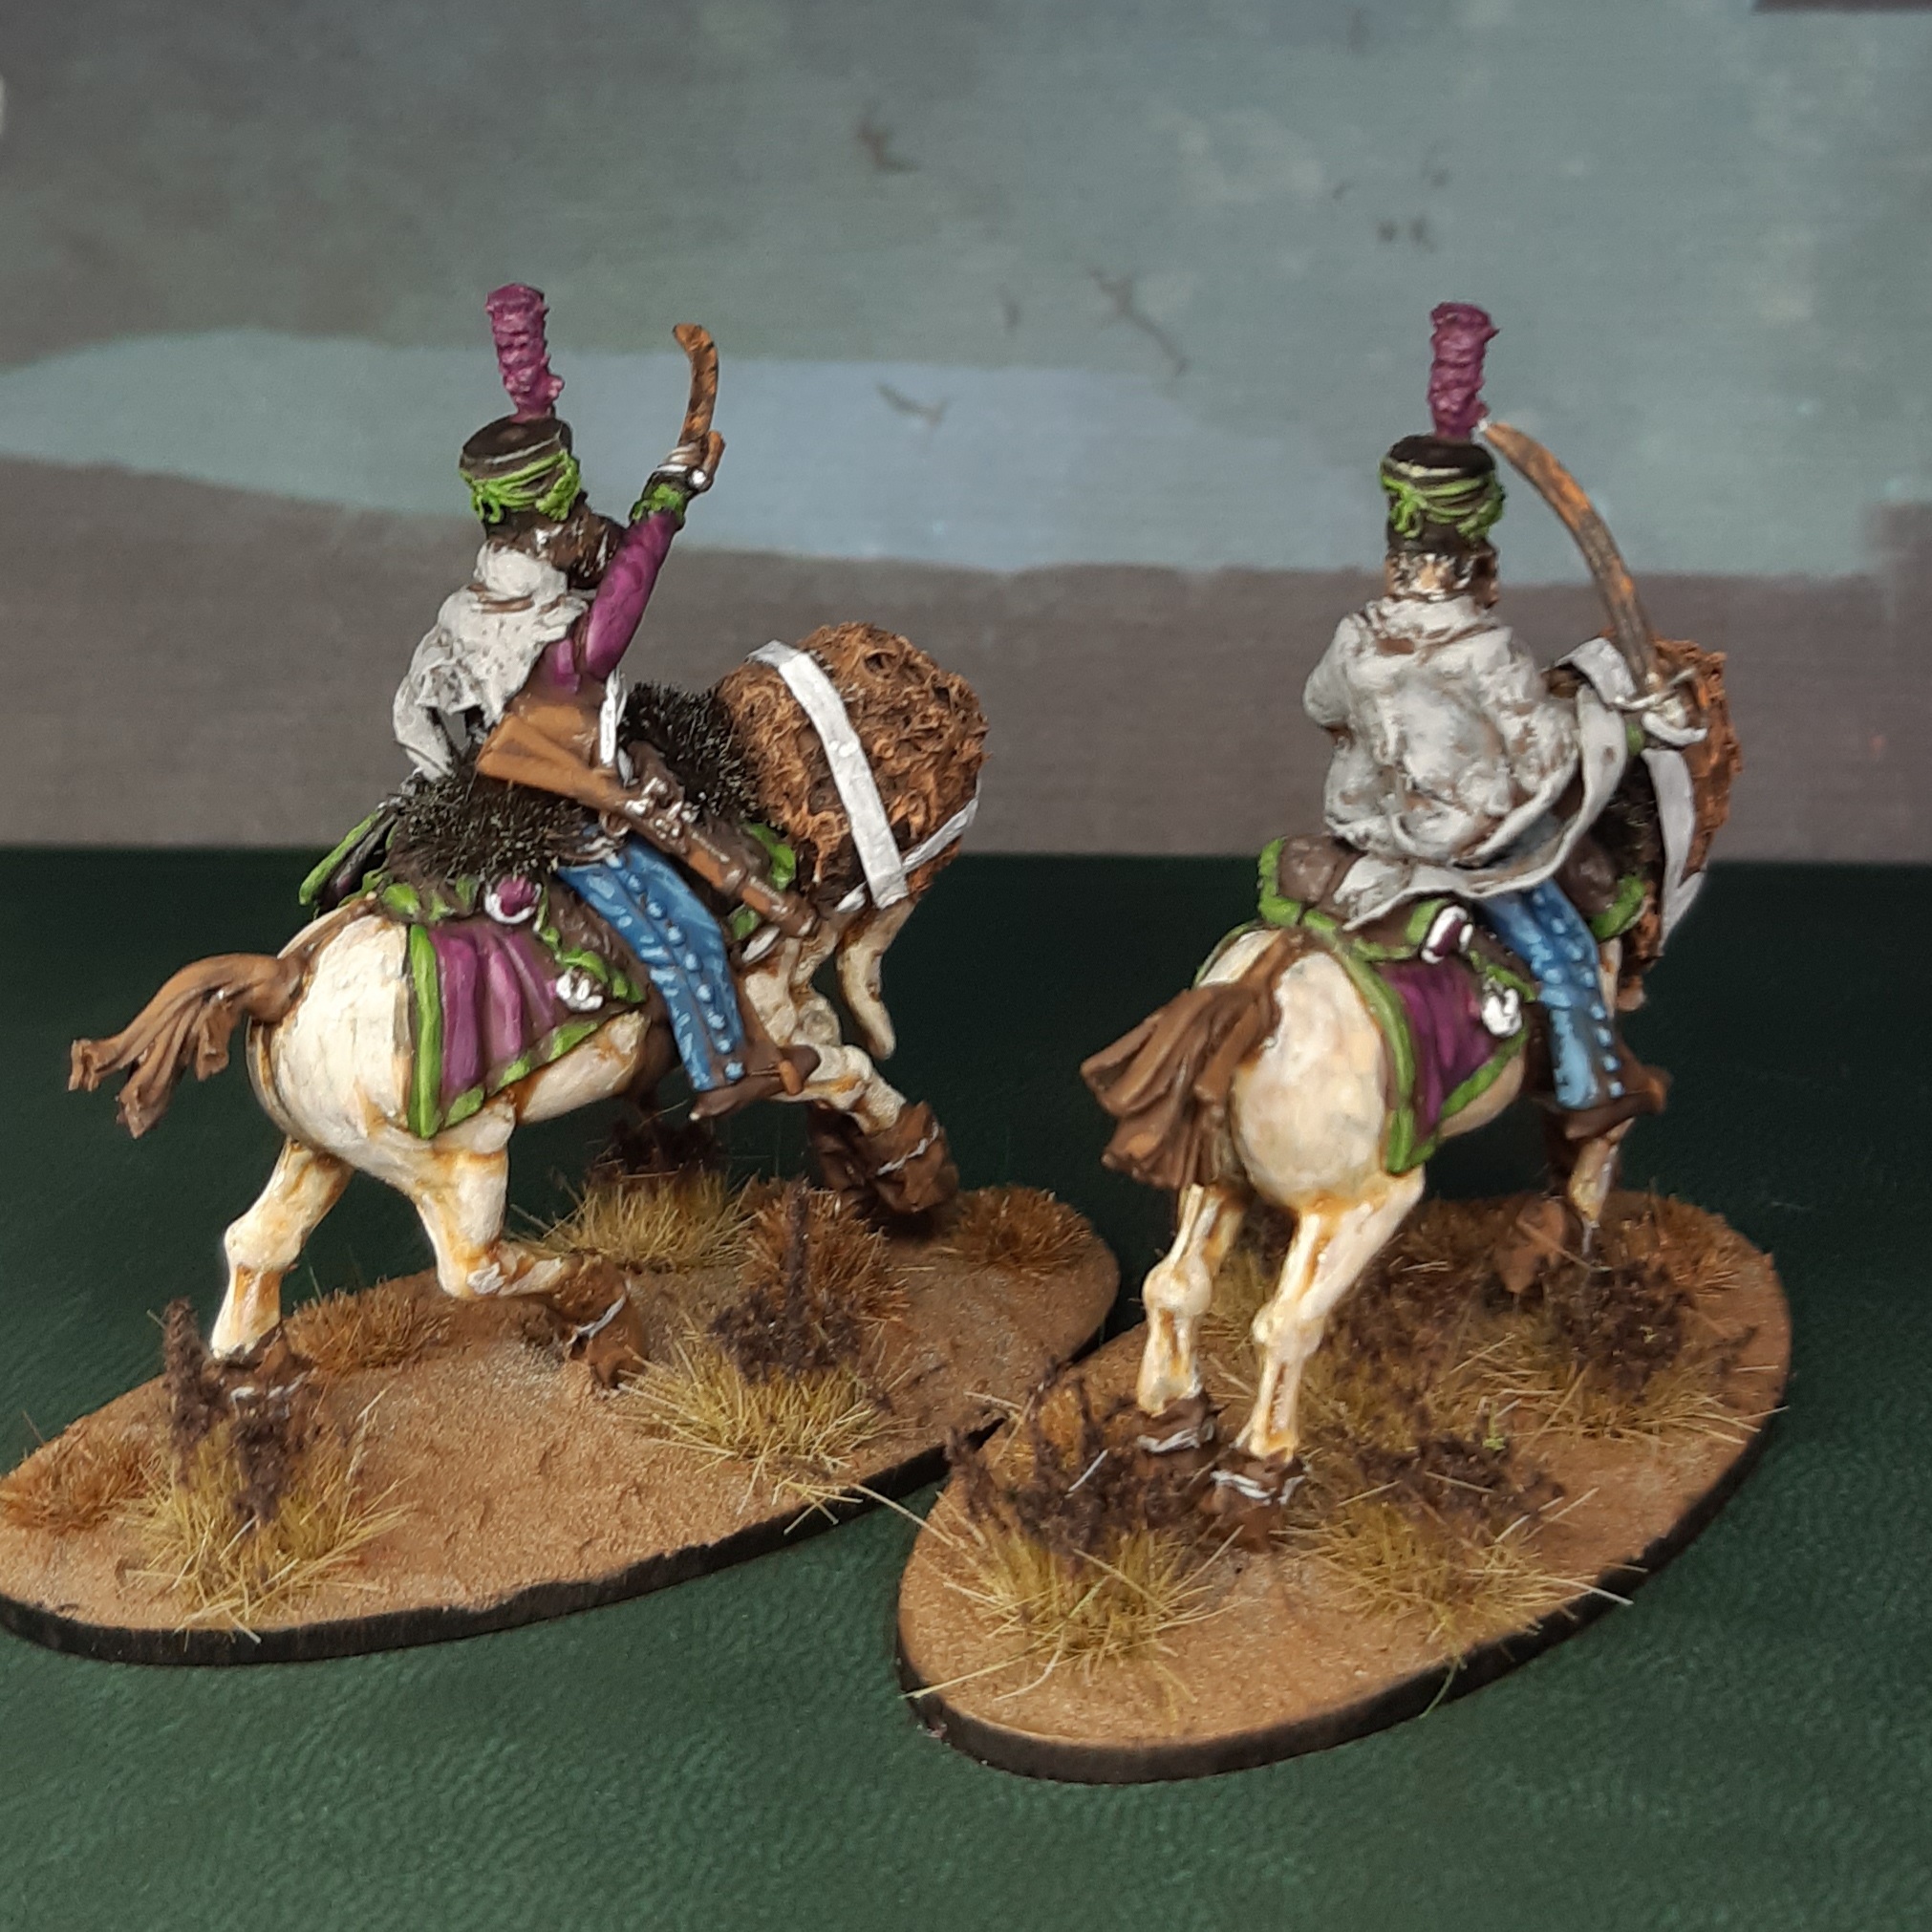
There’s not much to say here really, as painting these was a simple case of applying the established colour scheme again. I debated with doing something a bit different, as Napoleonic cavalry quite often had a different uniform colours to the infantry, but decided to just keep it simple.
Quite pleased with how these turned out.

The Beetroot 17th Sallies Forth
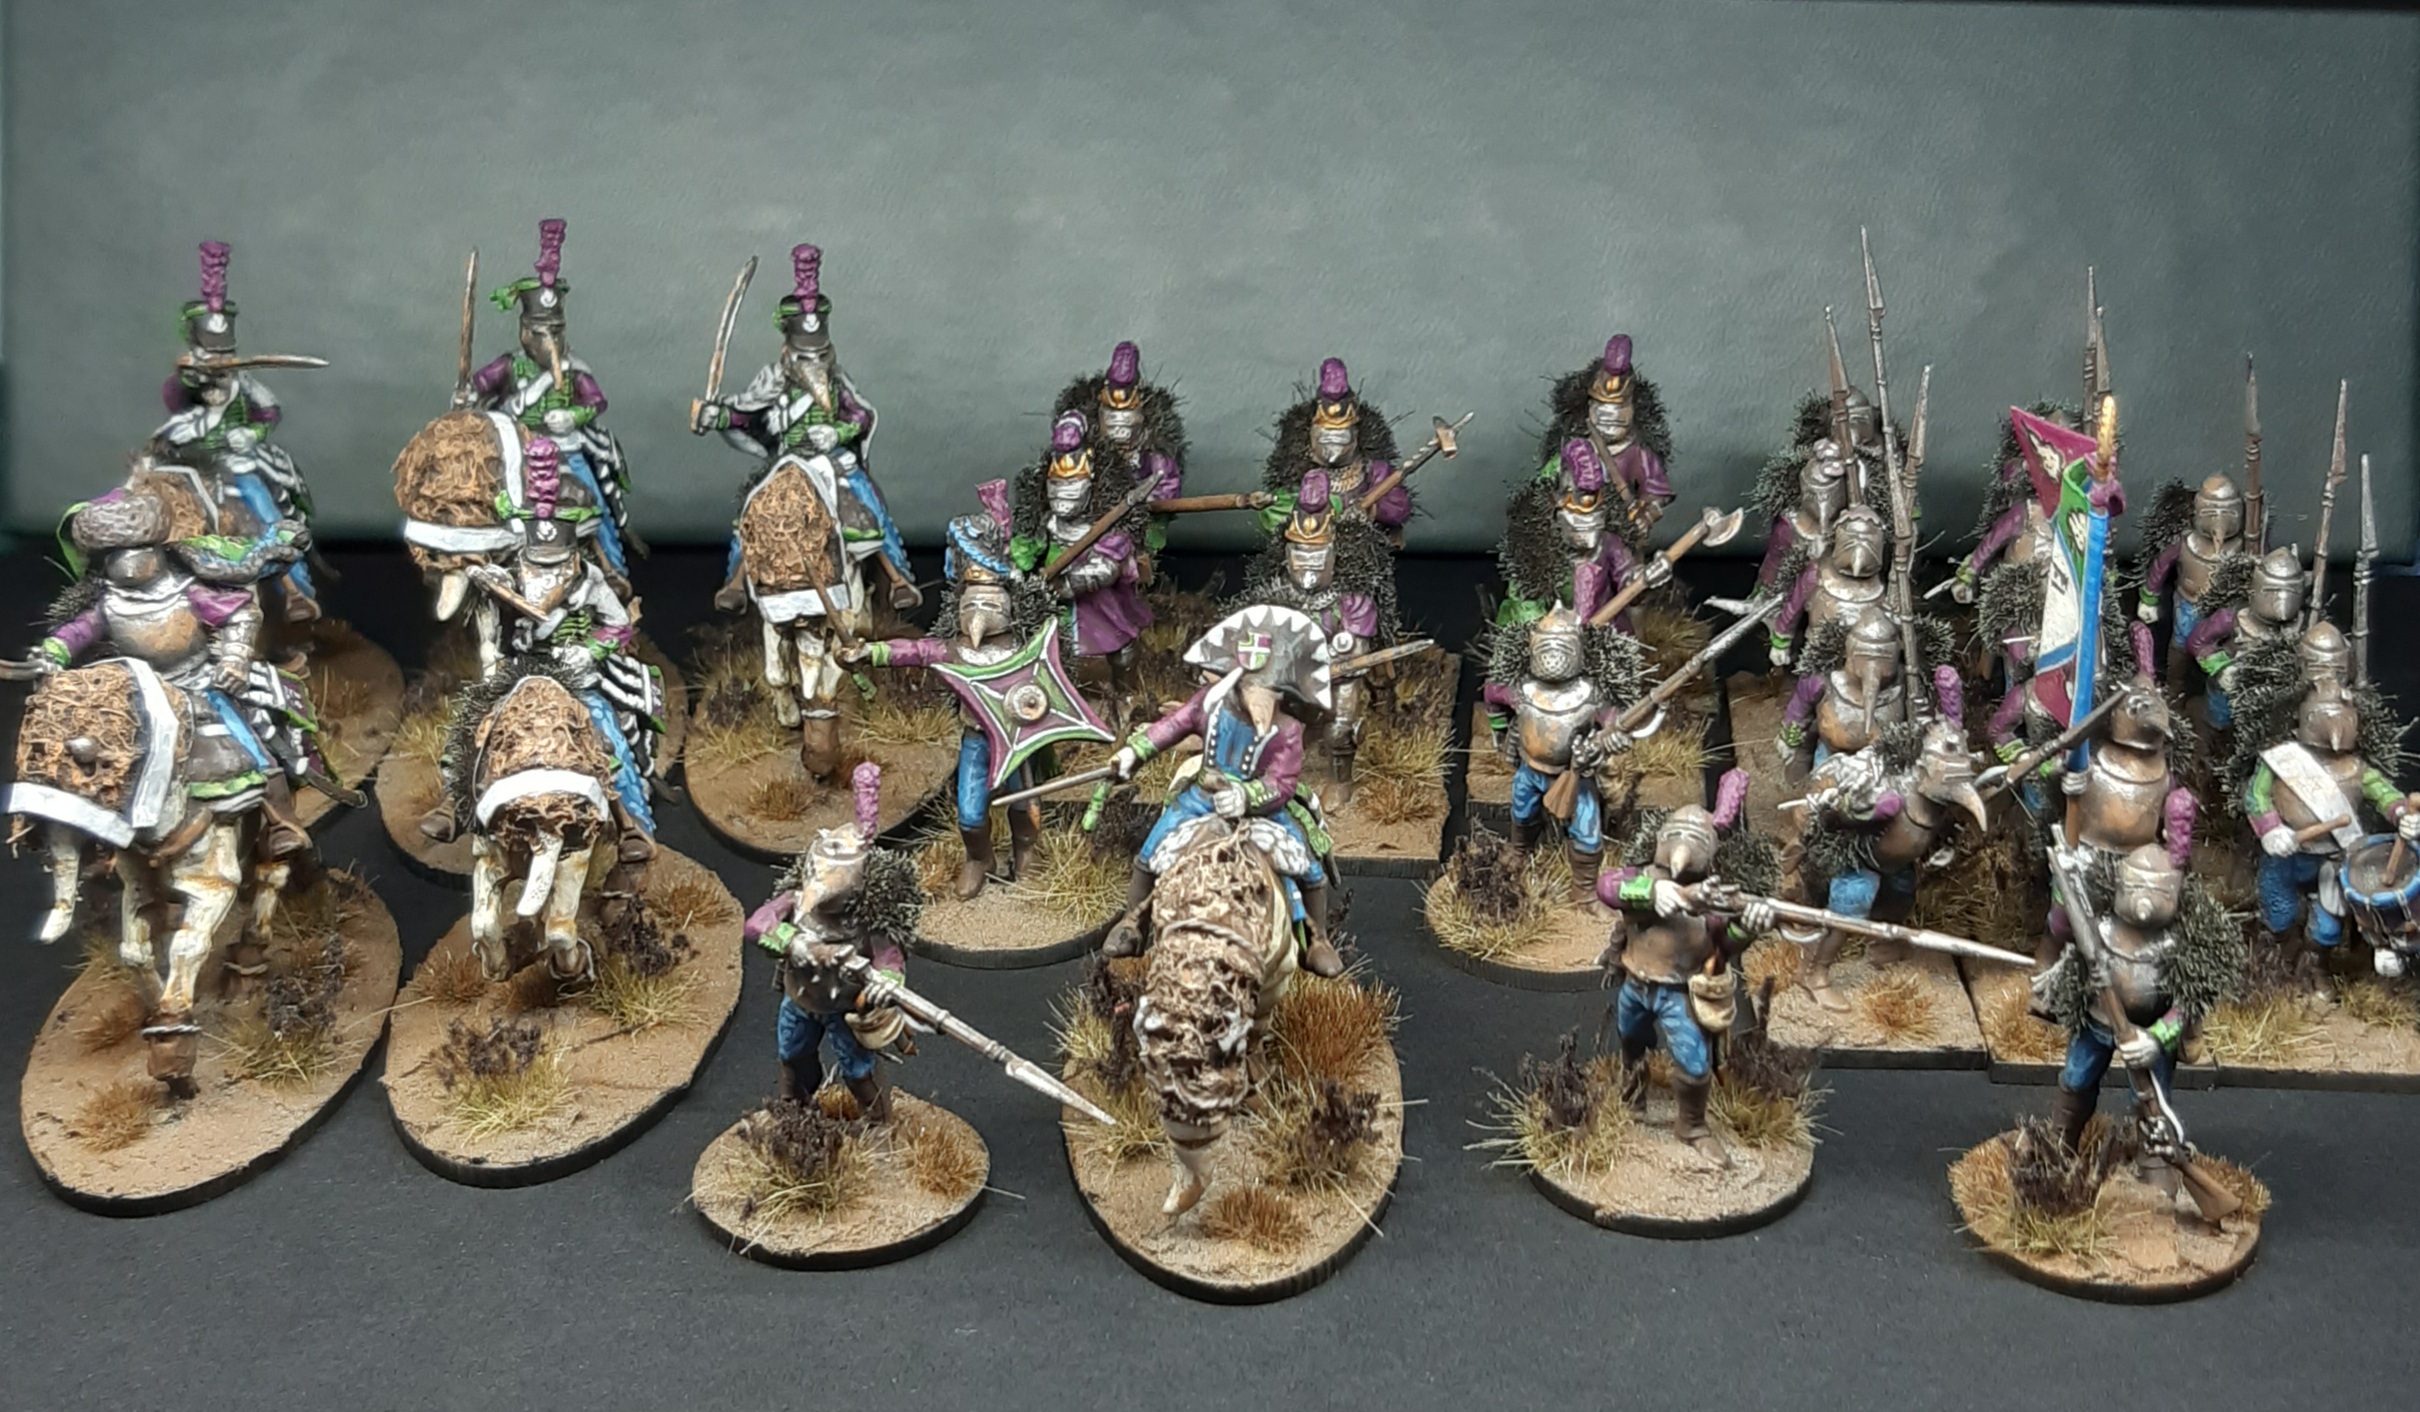
And that’s my Spring Clean Challenge for 2023 done. A nice little project, only 31 models, but a full force for a standard game of Turnip28. It has been good opportunity to practice more hobby skills beyond just painting, with a little kitbashing, sculpting and experimenting with different materials. I changed up my painting style a bit too, being a little more looser and skipping over details, looking more at the overall effect.
A few lessons learned, probably the most important being to pay more attention to the sprues selected. For the Hussars and infantry, having an arm moulded to the body was potentially awkward. Easy to remove, but then requiring a replacement arm. Luckily, I had some suitable additional arms from other kits I could use, but I could have avoided it or at least plan ahead if I thought about what I was doing a bit more ahead of time.
Thanks to anyone who has followed along, and I hope you’ve found this project interesting.
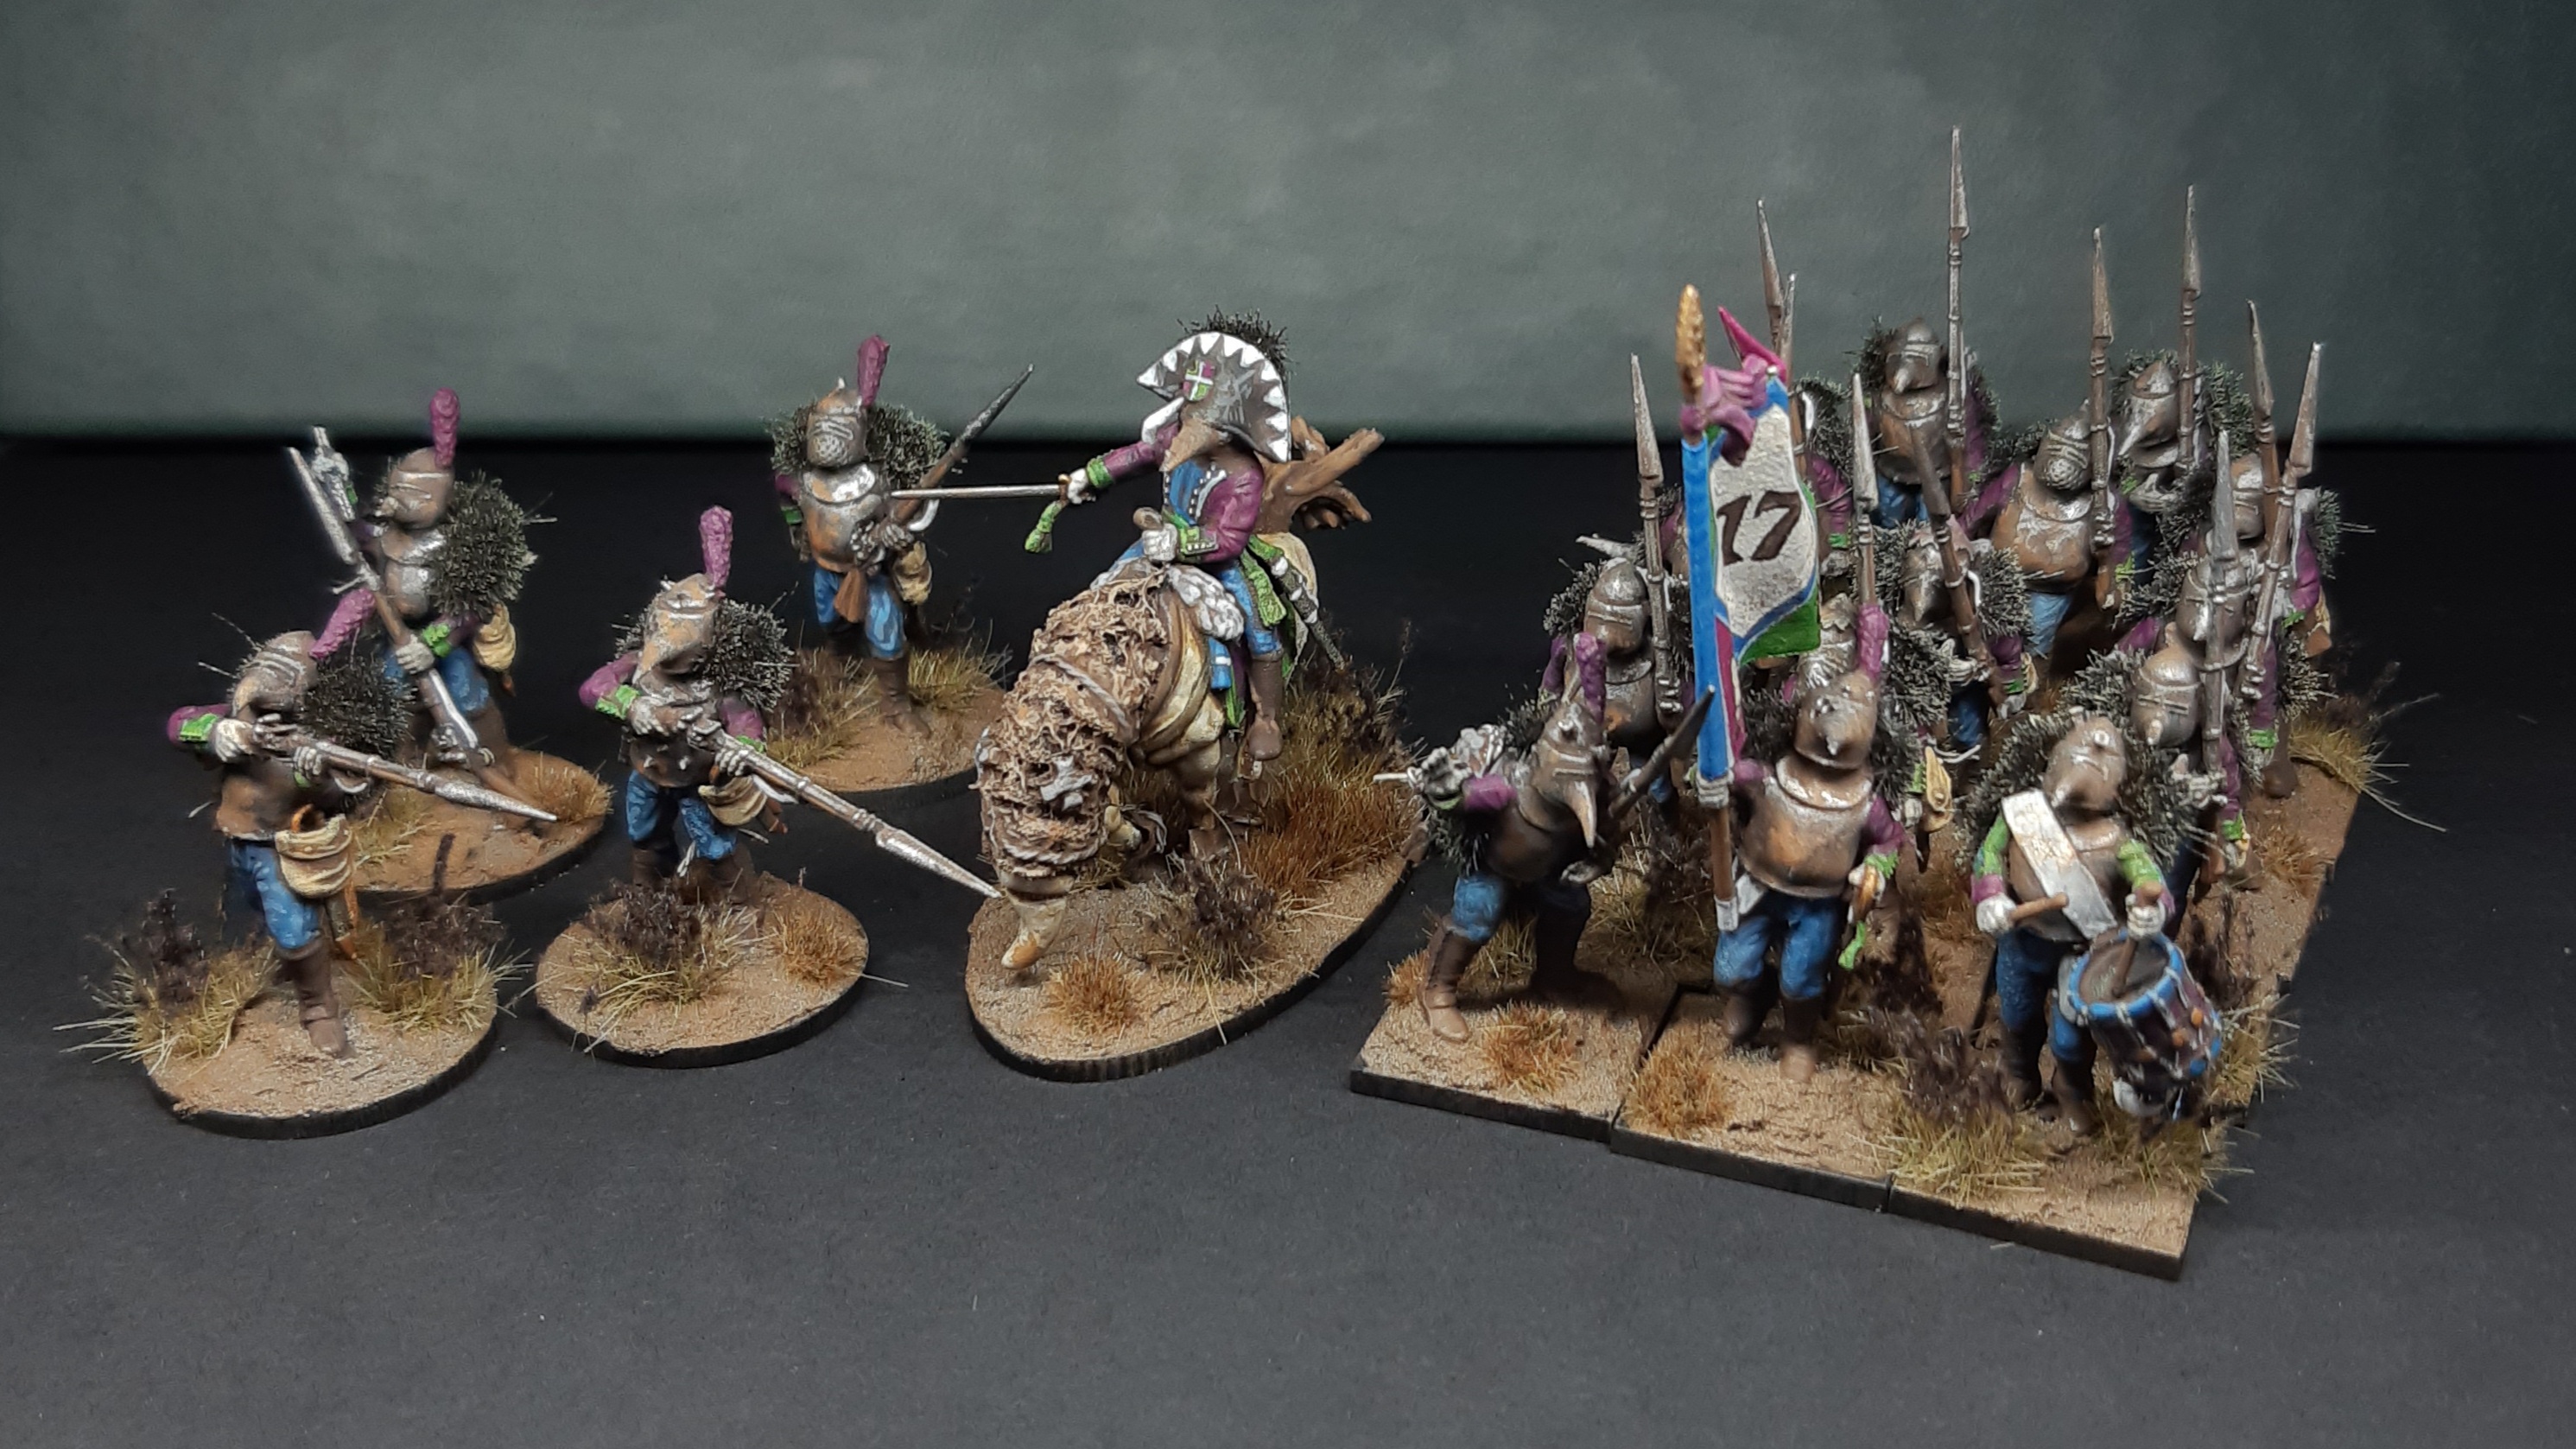 Major-General Bolthardy is the glorious leader of the Beetroot 17th. He leads the solid infantry core of the Regiment, formed by a unit of Fodder with Chaff to screen and skirmish ahead of their advance.
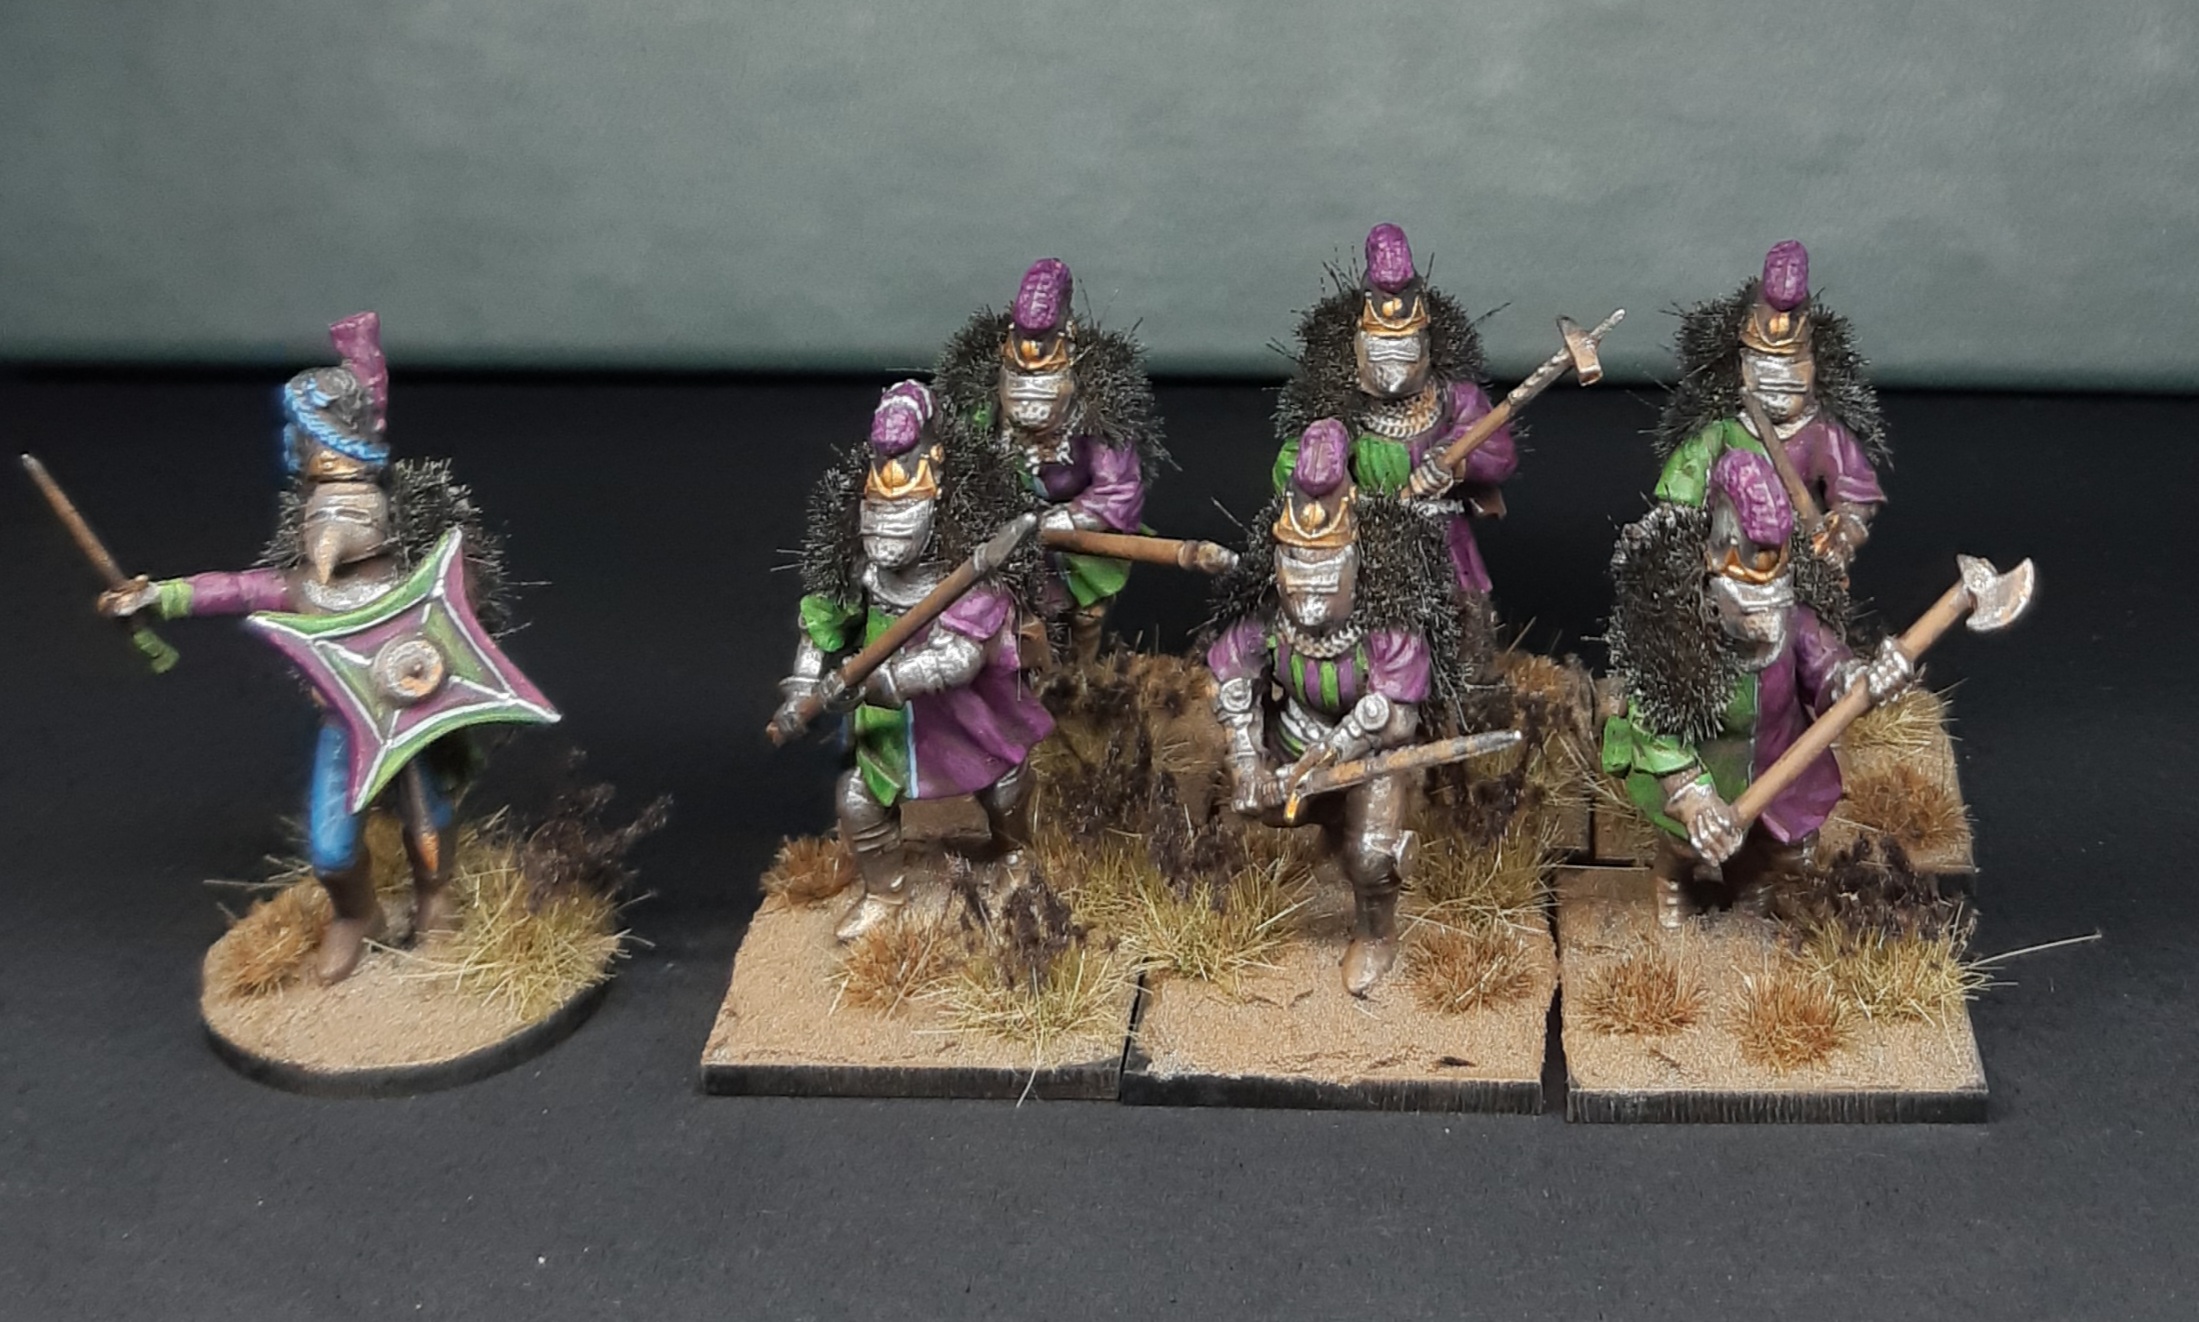 The elite of the Regiment are the Brutes that follow the dashing Captain Rutherford. Too stupid not to charge anything in sight, his reckless bravery makes for a good story, often with a morale about comeuppance from overconfidence.
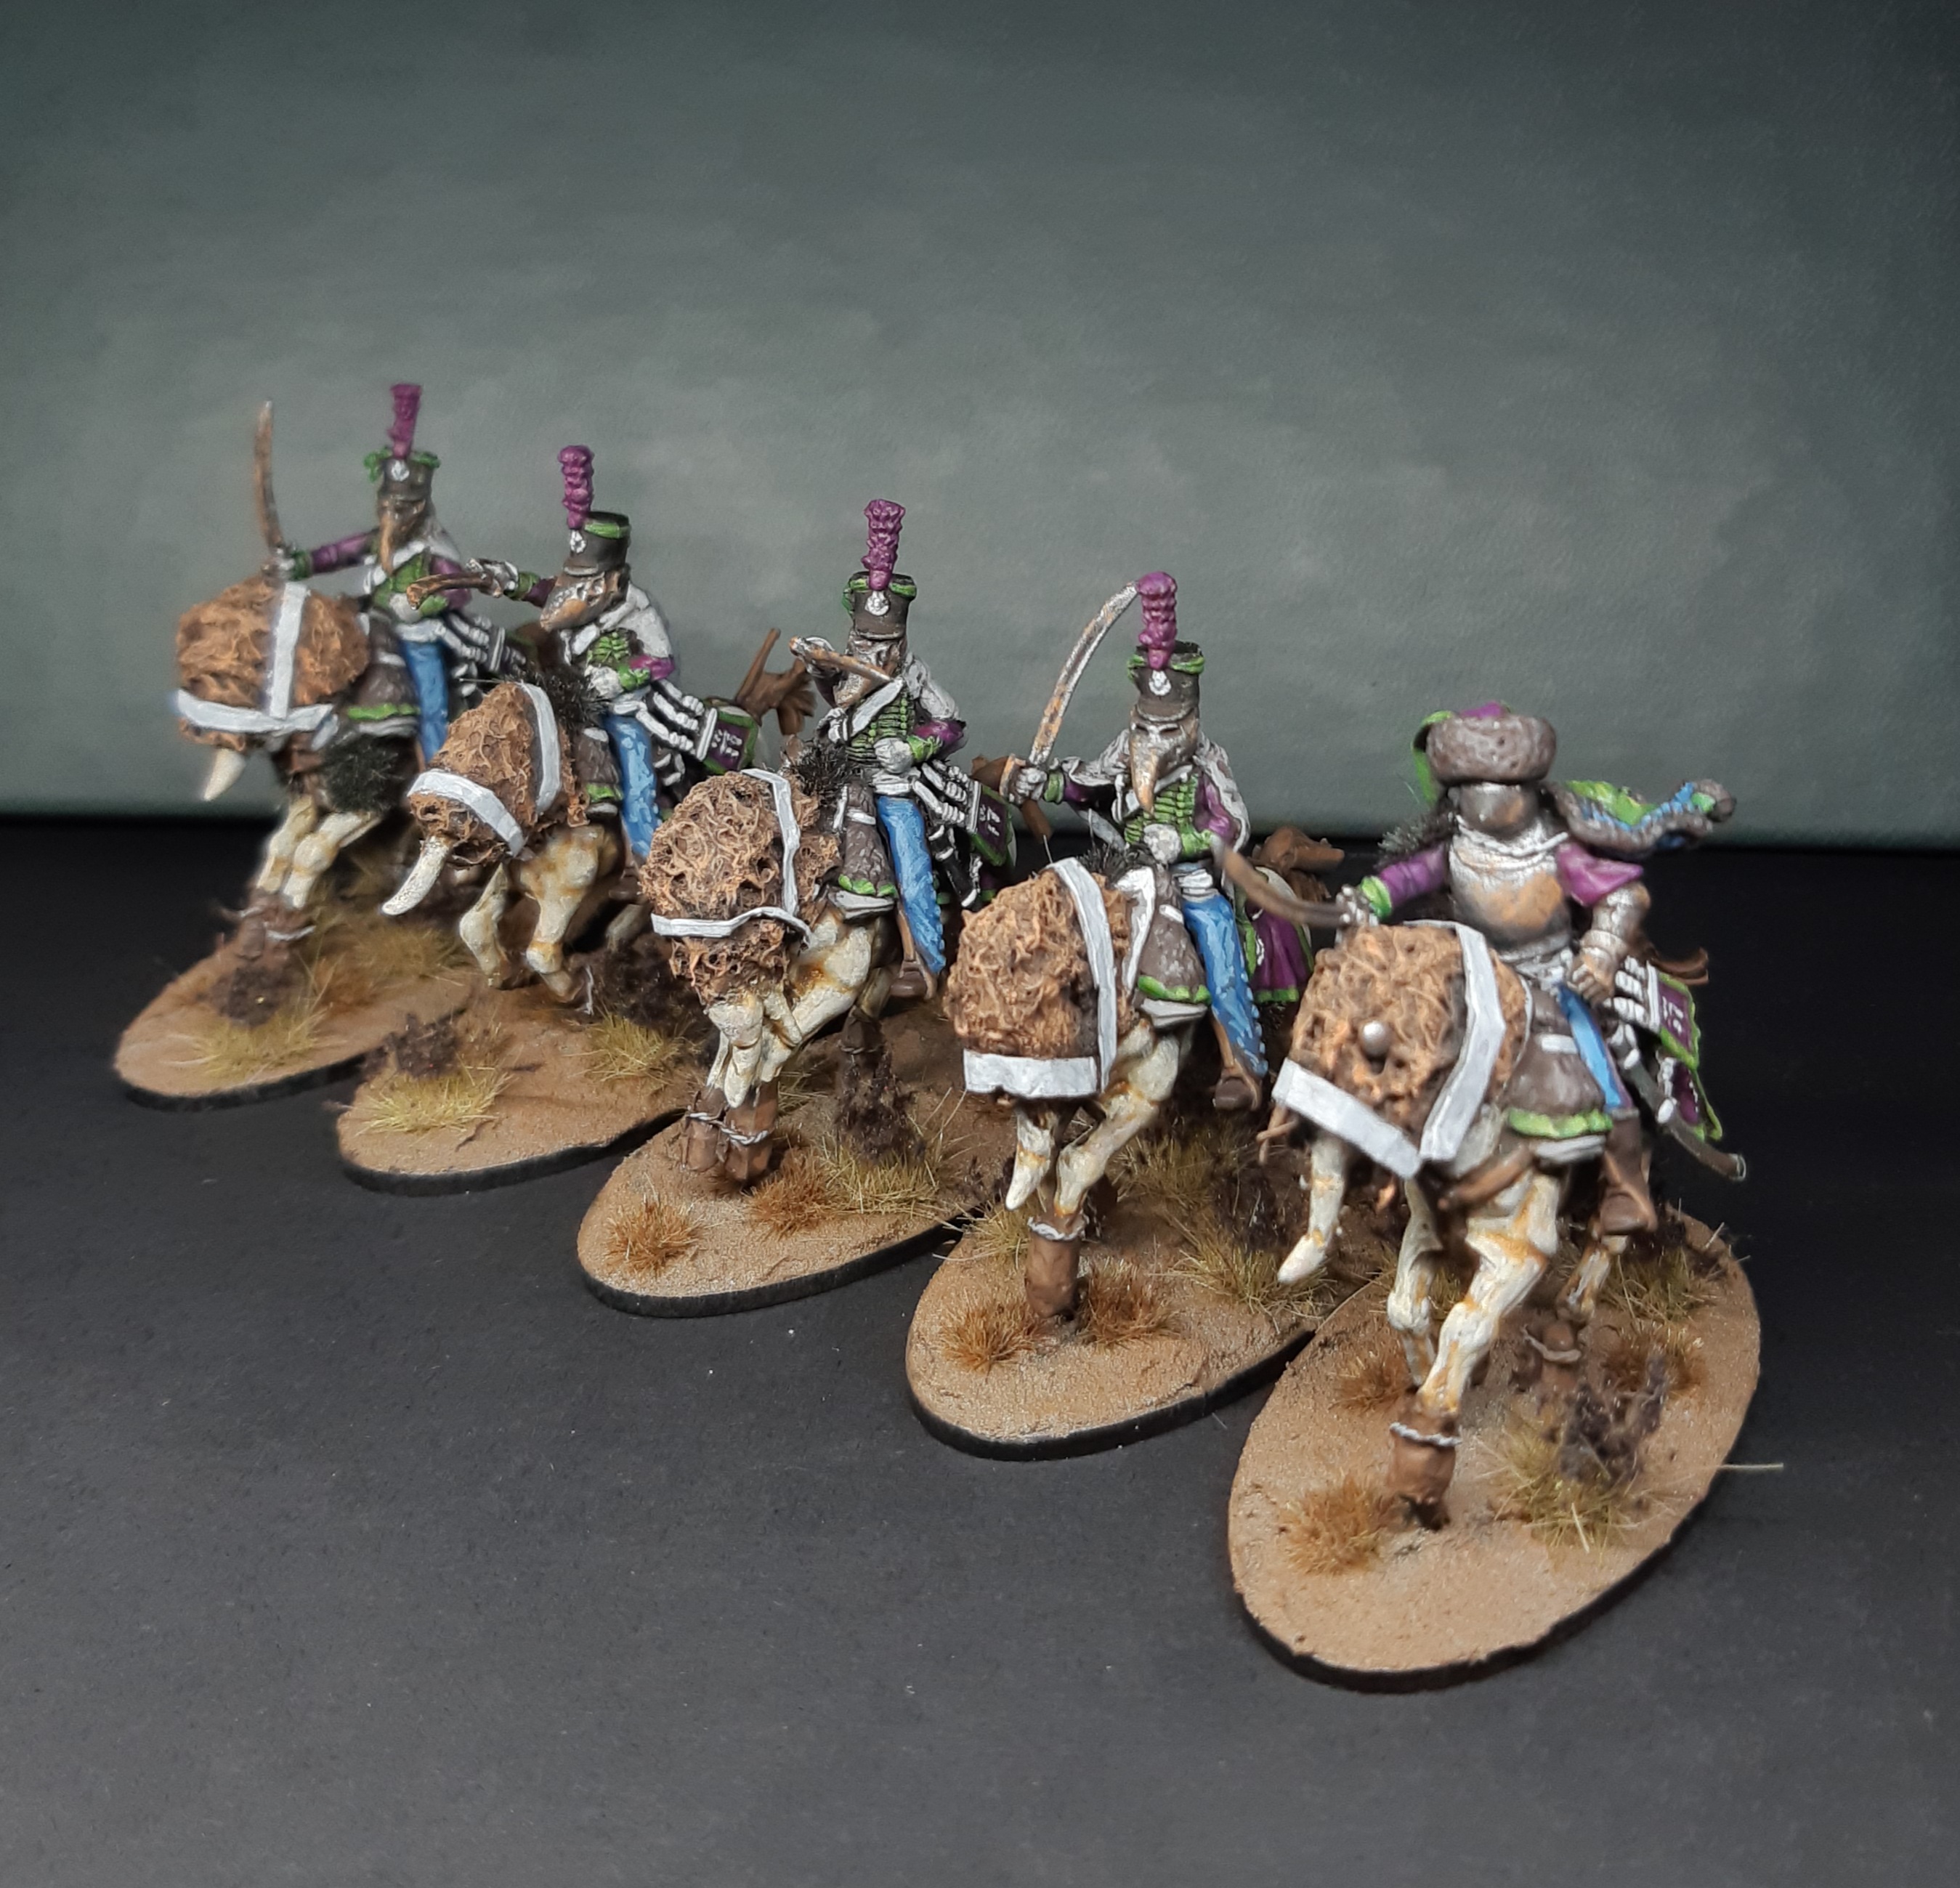 Captain Ignacy has a reputation of being an extremely effective scout, ranging ahead with his Whelps to locate enemy formations. His rapid retreat away from anything vaguely hostile is a good warning as to location of potential threats in the field. Where there is danger to be found, Ignacy will be absent, making him an excellent gauge of the ebb and flow of any given battlefield.