


Marvel Crisis Protocol by Lawnor


Recommendations: 166
About the Project
I've got a bunch of naked MCP stuff, and it's time to get it table ready. My friends are getting in to it so I need a squad ready to go ASAP.
Related Game: Marvel Crisis Protocol Miniatures Game
Related Company: Atomic Mass Games
Related Genre: Pulp
Related Contest: Spring Clean Hobby Challenge 2023
This Project is Completed
Introduction and Planning
Introduction
I’ve been interested in trying MCP since it first landed, but with no one to play I’ve avoided buying in to it. Recently my friends have started playing so I’ve finally picked some up, thanks to eBay, and a £50 OTT voucher from last years Spring Cleaning Challenge. It’s time to start work on it all so why not gather all my plans and progress and eventual paint recipes all together in one place, and maybe win another voucher if I’m very lucky?
My Best Tutorial 2022 project:
https://www.beastsofwar.com/project/1381664/
OTT challenge winners announcement weekender:
https://www.beastsofwar.com/featured/light-up-tabletop-terrain-challenge-winners-ottweekender/
My bit of the video:
https://www.youtube.com/watch?v=6zDRBzU3F3E
Targets
So what are my goals? I want to get a playable team painted and built. I believe the expectation is you turn up at a table with 10 models, but only pick 6 to play with, based on the points limit of the scenario (Please correct me if I’m wrong). So I need to get 6 models minimum done, but ideally 10 before I can get distracted. I also have a big distraction on the horizon. Diablo 4 is due 6/6/23 and I expect it to swallow me whole, at least until I’ve completed the core campaign. Any time sensitive hobby I want to get done, should be done before that happens. So here is my goal:
Tier 1: Get at least 6 characters from the core box done before 6/6/23
Tier 2: Get all characters from the core box done by 6/6/23
Tier 3: Start work on the terrain and explore other options for this
I’ll be aiming for “best bang for your buck” level of painting. Squeezing out the best quality I can, without sinking too much time or effort in. I’ve still got a backlog of other stuff to catch up on, and more kickstarters due later this year. I can always take more time over later models, once I’ve got a playable force.
My Stuff
Currently owned:
- Core Set (eBay bargain)
- Hulk (Thanks to OTT Voucher)
- Black Panther and Killmonger (Thanks to OTT Voucher)
- Shuri and Okoye (They seem to be moving towards 4 model affiliation packs, so seemed wise to buy this now before it goes out of production)
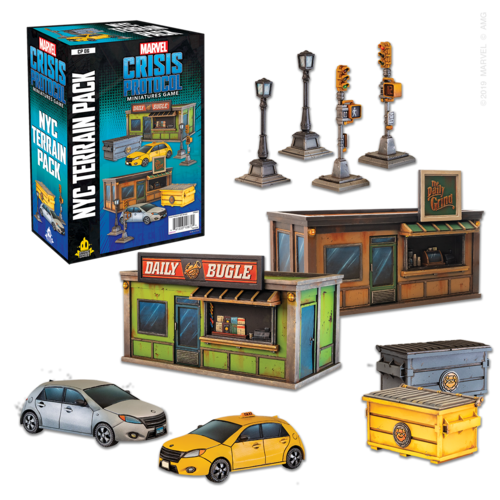
- NYC Terrain Pack (It was less than half price where I bought Shuri from, and pushed me up to qualifying for free delivery. A cracking bargain!)
If my maths is correct, that’s 34 models to get painted. I don’t plan on painting widgets.
Planning and Inspiration
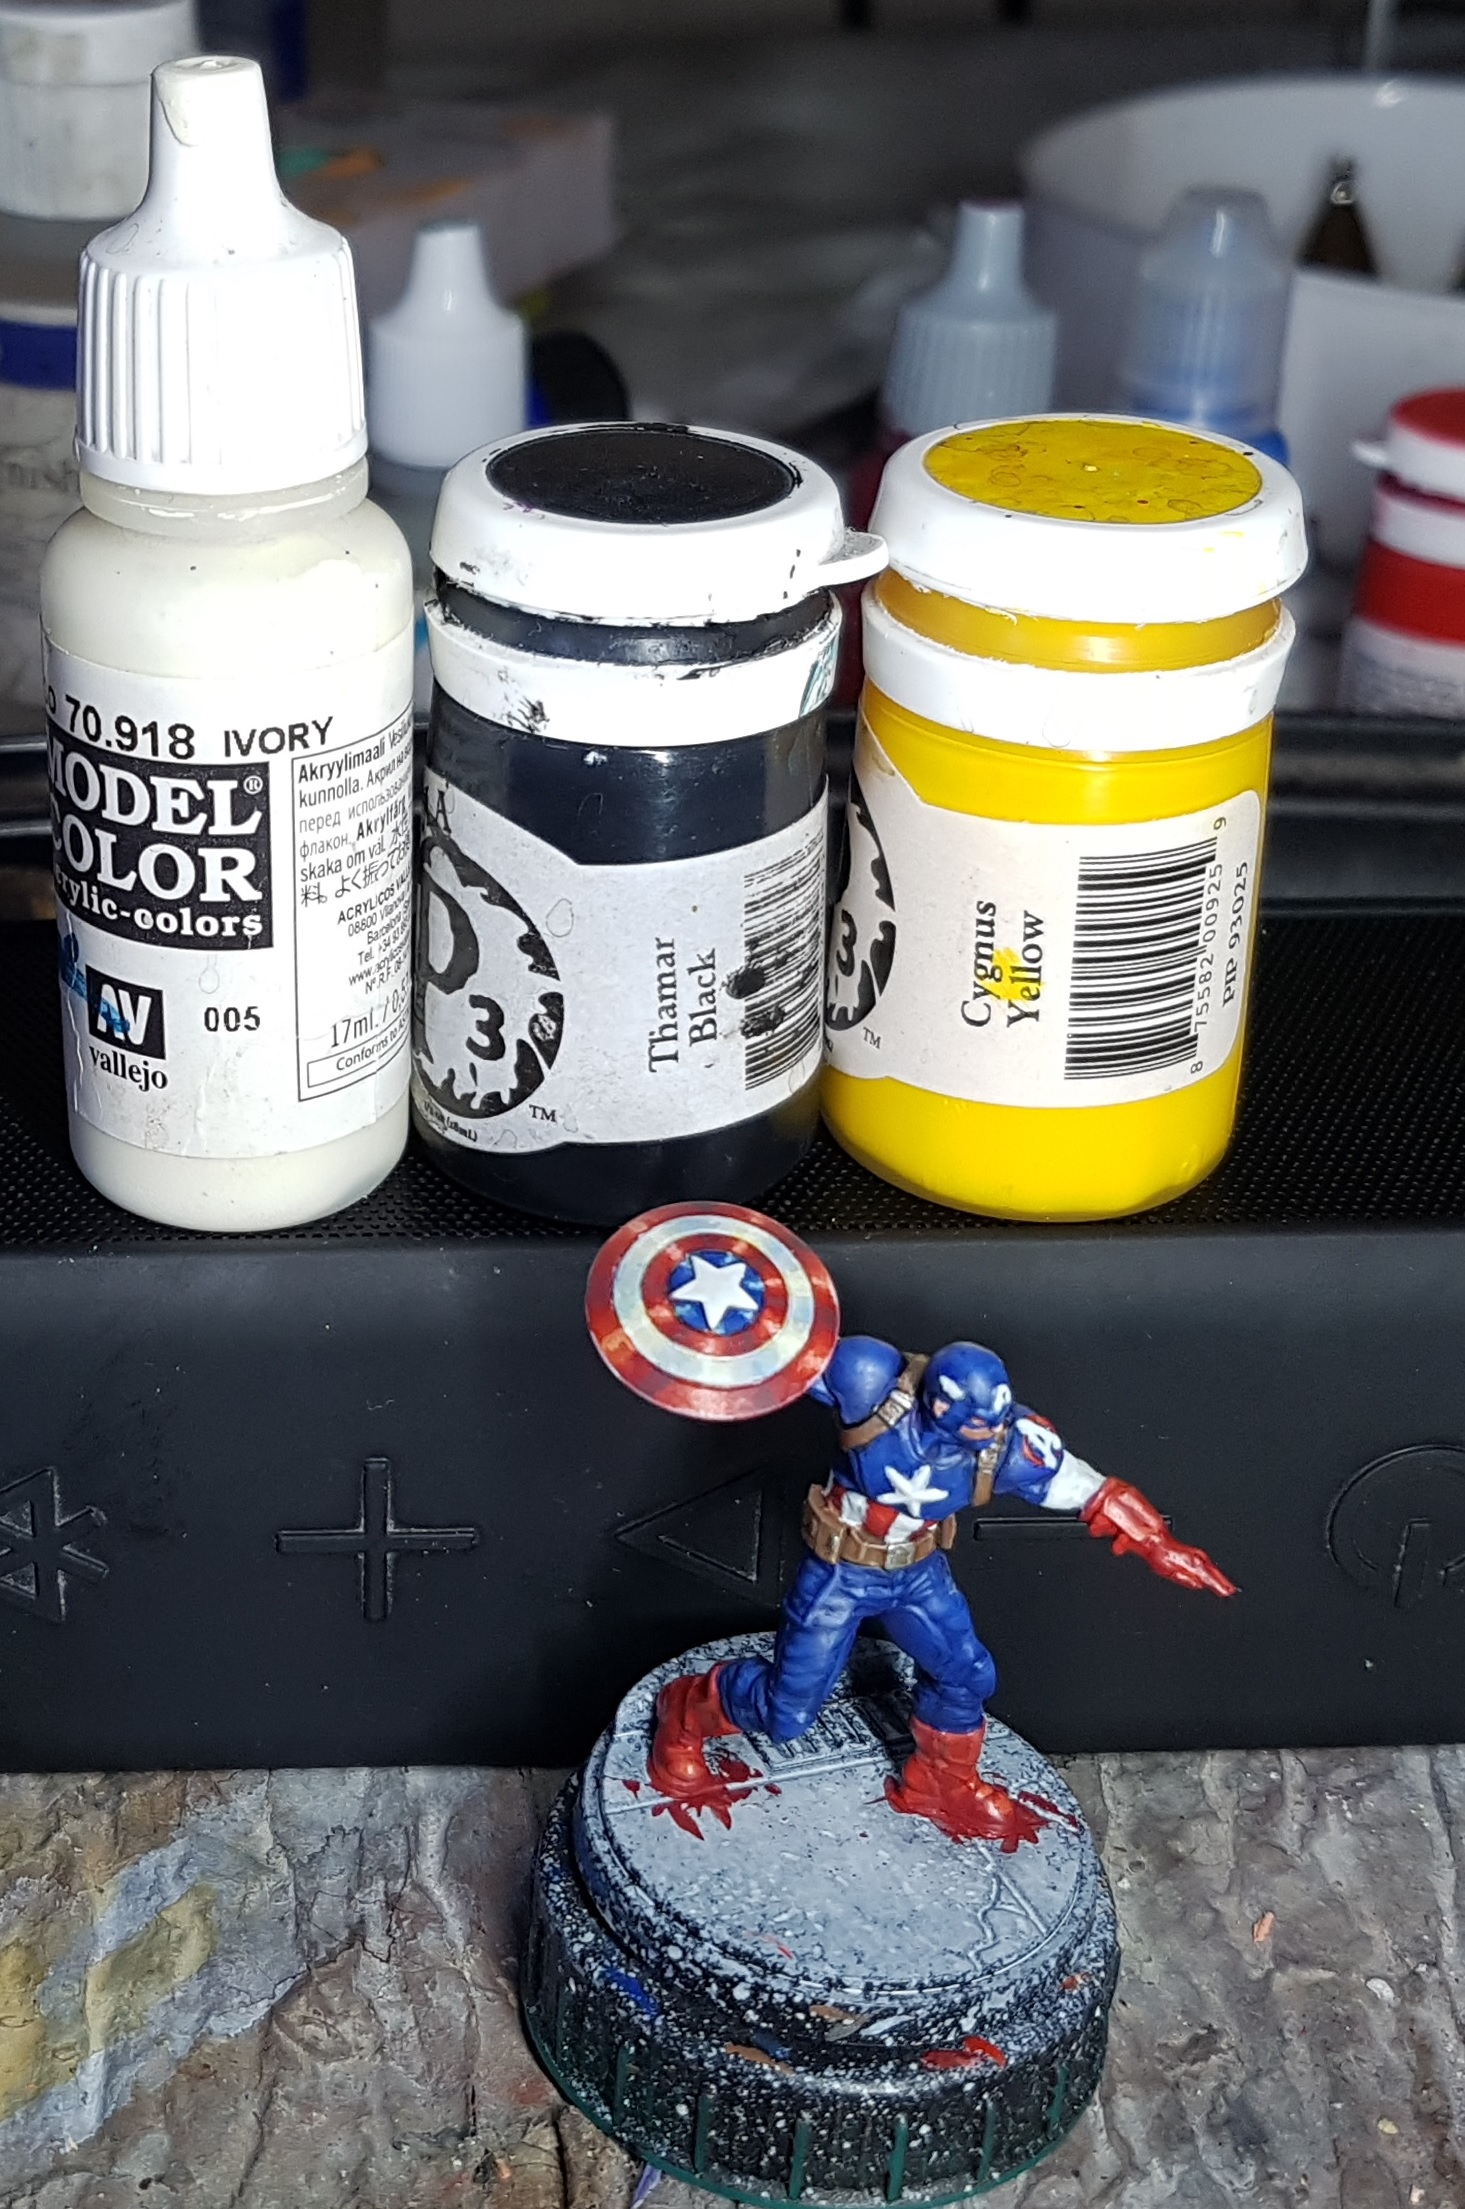
I’ll be looking at the videos of a few Youtubers, but probably not following their guides to the letter in most cases. Exceptions will likely be things like Captain America’s shield. I’ve no idea how to paint that so it looks shiny, without it looking wet.
Youtube channels with helpful MCP guides I’ll be looking at:
If you can think of more reference material please let me know. There are a few OTT projects I can look in to, too. I’d be particularly interested in guides covering those buildings. Does anyone have opinions on if any of the terrain is better painted before or after assembly? Tyres might be better done separately. The lights etc are probably fine to just build. Dunno if those buildings are better to have some bits done as sub assemblies.
Given I’ll be starting with the core box characters, lets assemble a gallery if images in one place so I can see at a glance what’s what, and hopefully save time by painting different but similar models at the same time as each other.
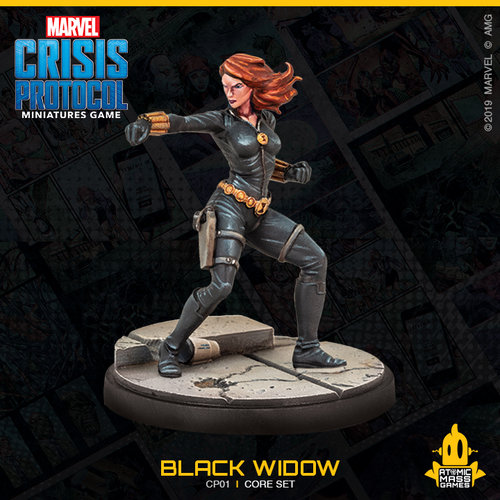
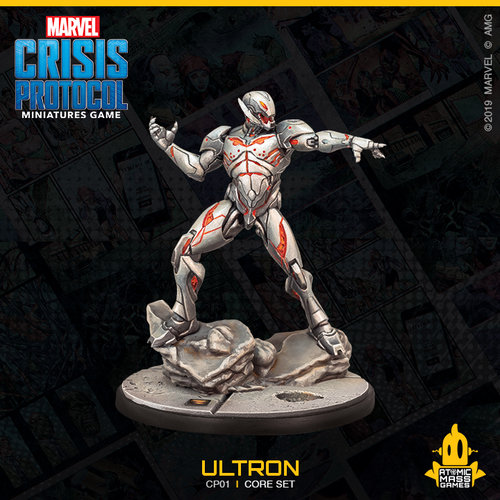
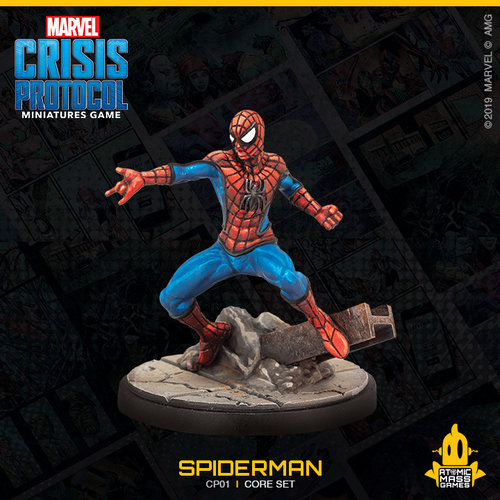
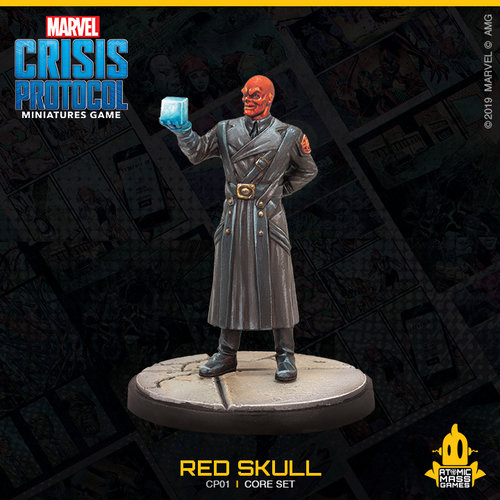
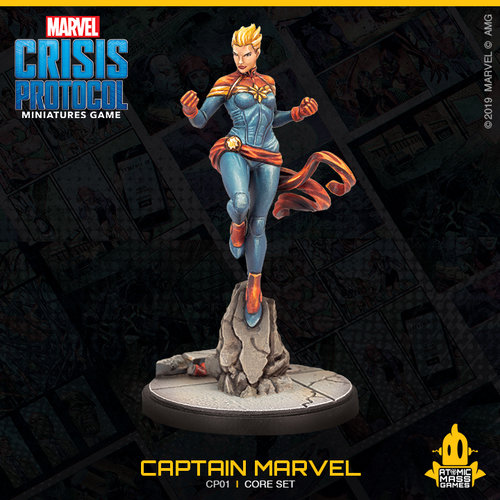
At a glance we can see a few things:
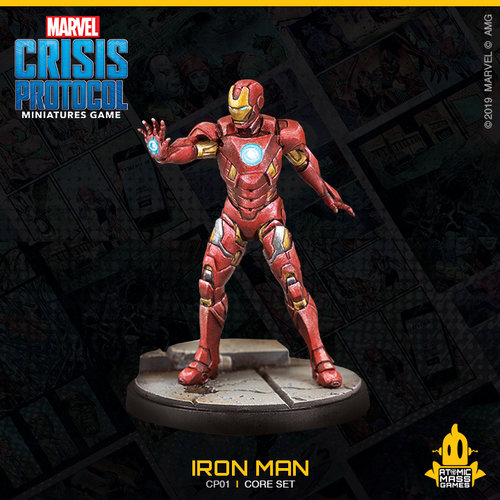
- There are 3 models that are 90% red and blue so can be painted together
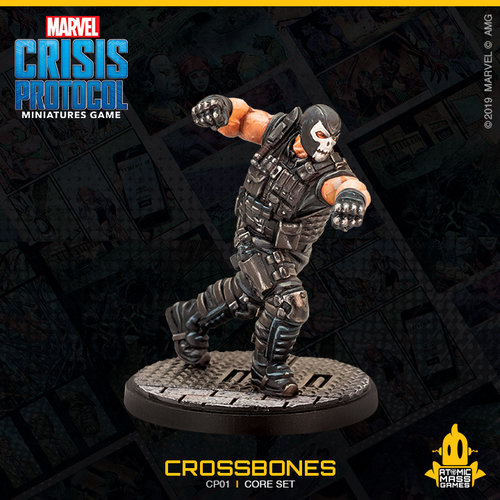
- There are 3 models that are mostly black so can be painted together
- These galleries are capped at 9 images in size, which is annoying when I only meant to post pics of 10 characters
- I clearly have time on my hands right now and nothing more productive to do with it
I’m feeling a lot better about my deadline now I’ve done this. You can paint 3 similar models in about the same time you can paint 1, if you’re not going overboard.
If anyone has some appropriately scaled printer ready newspapers, leaflets etc they could send me to help decorate those bases, I’d be grateful. They come with disposable cups for this, but I’m not sure I want them everywhere. I don’t want to paint 3mm tall Starbucks cups with logos, and if everyone has a red solo cup then are they all alcoholics? I don’t know if anyone has modded the minis so they’re all drinking, perhaps calling it Marvel Crisis Partytime?
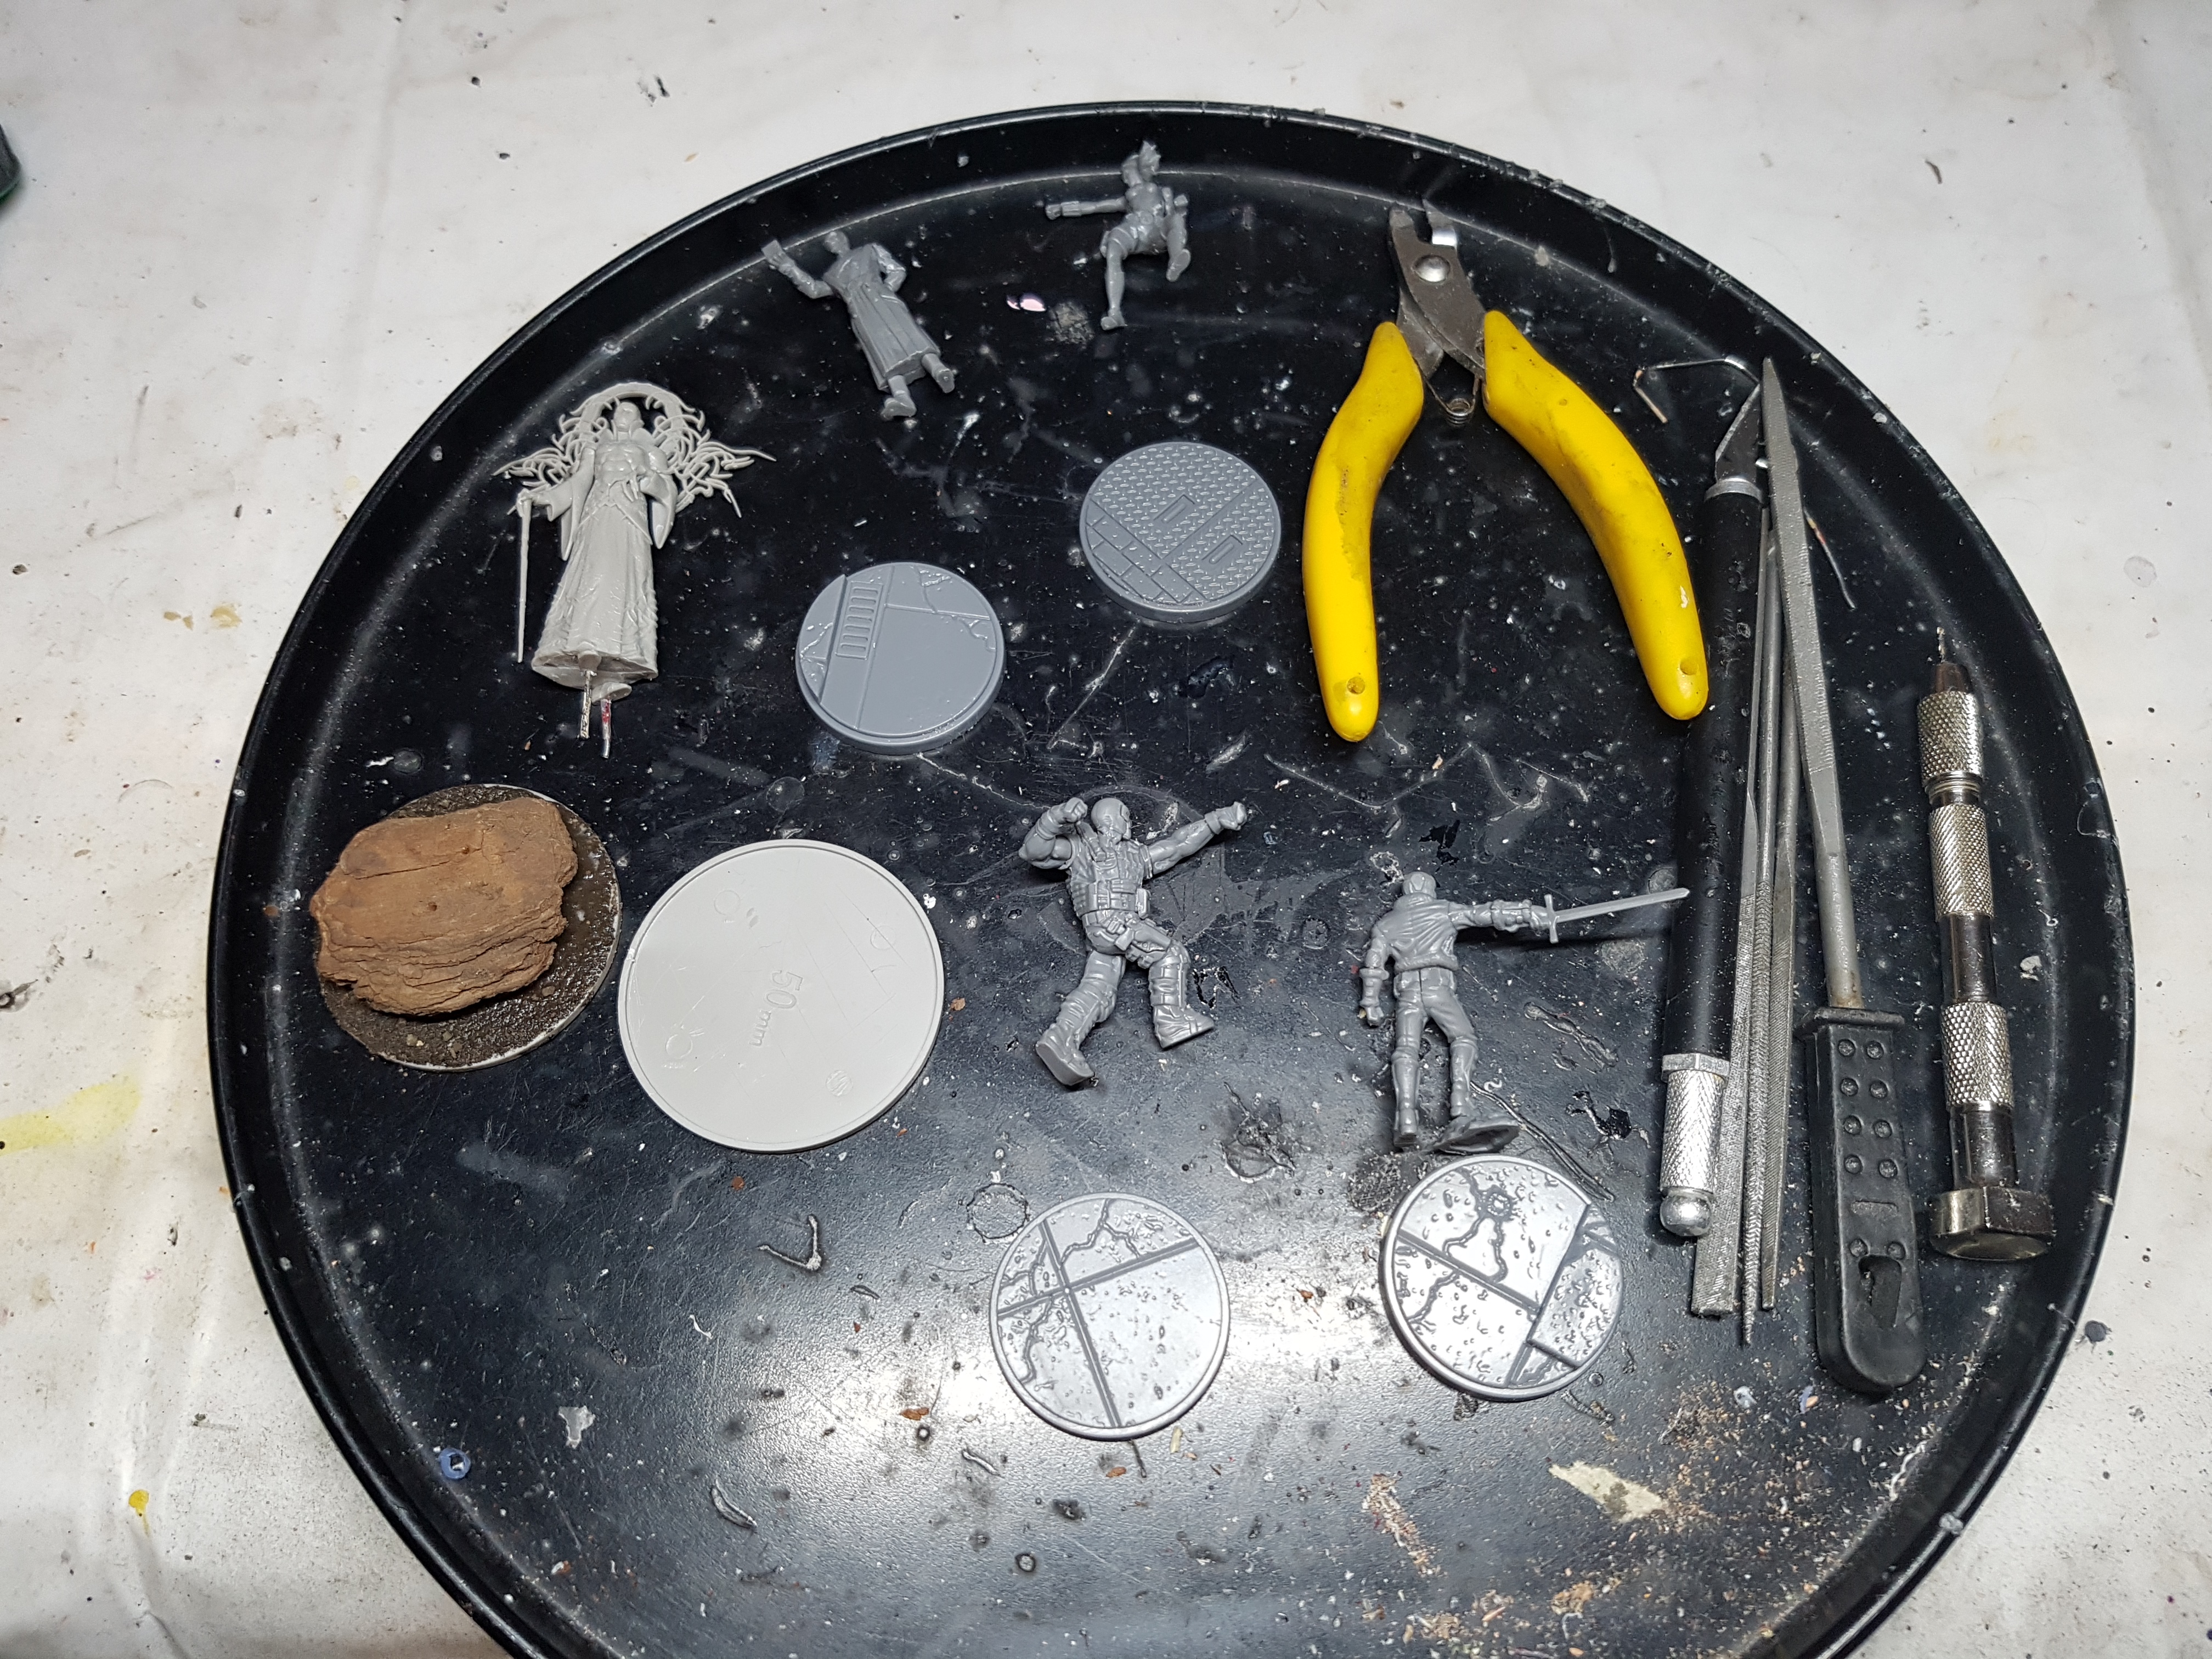
Evenings 1 &2: Preparation
Everything was washed in warm soapy water and left to air dry the moment it entered the house a month or so ago. There’s no reason not to do this with any model. No matter the material or production method, so you may as well always do it. If you run in to issues and you didn’t, you’ll regret it. I’ve had problems in the past.
My core box was second hand so Doc Ock, Spiderman, Ultron, Iron Man, and Captain America were preassembled, and Captain Marvel was mostly built too. I finished of building the set, but did not glue anyone to their bases. I prefer to paint people separately. It allows better access to the model, and you can be messy with the base without risk to the character. I did put pins the models feet and drill matching holes in their bases. These pins will also be used to hold them on to milk bottle tops for painting. They’re a lot cheaper than hobby holders. This all took about one evening after work one day. I’m only working on the characters for now.
I also prepped the Tyrant for Kingdom Death while I was working on this.
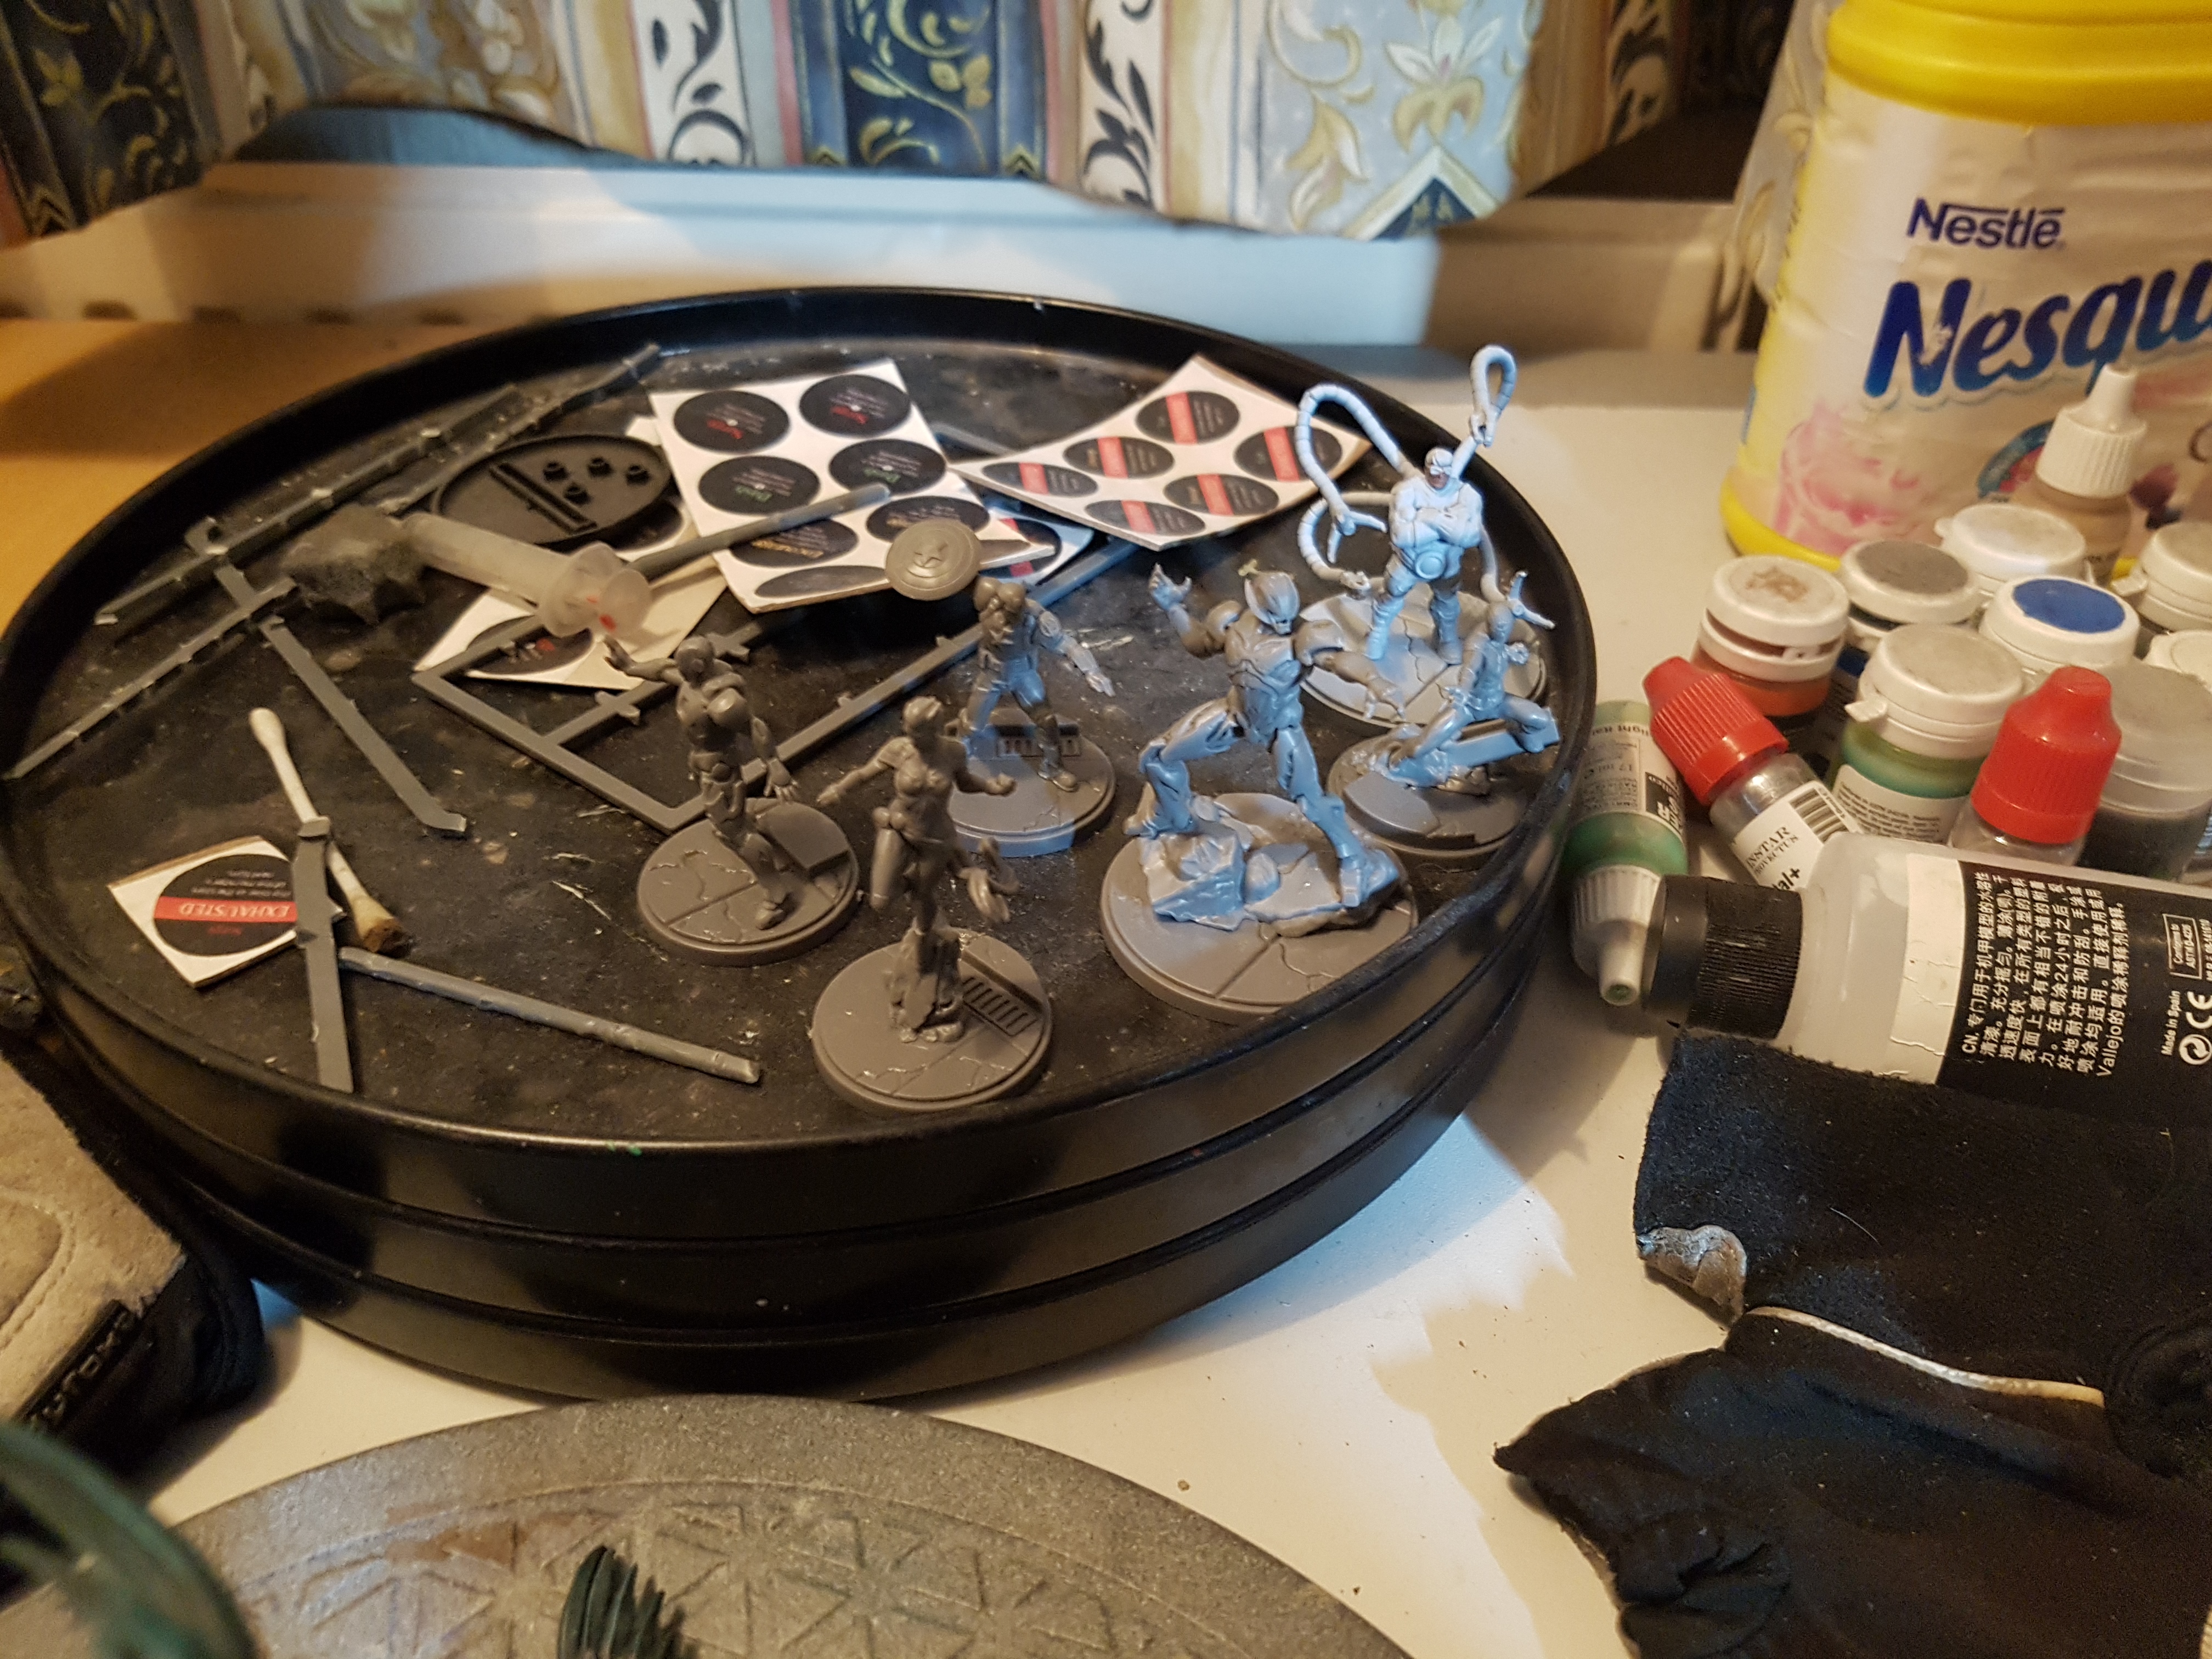
Everyone got pinned or blu taked on to bottle tops and was then primed black with Stynylrez black primer and a little airbrush thinner (3-4 primer : 1 thinner. I put 10 drops of thinner in the cup and then fill it most of the way with primer, then mix). The models going metallic or black were then put on one side and I then tried to zenithally prime the rest with Vallejo Grey Primer 72.601. My airbrush was playing silly buggers though and was just spitting, and when it sprayed, it was all going at a funny angle. I sorta coated everything though and it’s good enough for my purposes here. That’s another evenings work all done.
My airbrush then spent a long while in an ultrasonic cleaner, and a few hours in a fresh batch of cleaning solution (Water, with a little dish soap and a large squeeze of Airbrush Cleaner). My airbrush has been having issues lately. I was afraid this was then end for it. I’ve had it for 8 years and it’s done a lot of heavy lifting. Had it work out? I’ll find out tomorrow.

Evening 3: Post-Primer Airbrush Ground Work
It’s Friday evening and it’s time to test my airbrush and it works better than it has in a while! Brilliant! I have plans for it. First up, the metallics on Ultron and Iron man. I have a copy of Reapers Hammer and Anvil paint set which I don’t use often. I’ve found they airbrush well, but I haven’t had good coverage through a regular brush so I don’t use them often. I thought this would be a good time to use them.
Dark: Reaper 09205 Blackened Steel
Midtone: Reaper 09053 Hones Steel
Light: Reaper 09054 polished Silver
Pinwash GW Nuln Oil
I began with a single all over coat of the dark colour, allowing it to be thin and transparent from the underside. I then went in for another coat or two from the sides and above only. I want it to look more black from the undersides.
I then mixed in a little of the midtone and did a lateral and zenithal spray, leaving some of the previous layers showing. Then came a more targeted layer of just the midtone, then the midtone with some light, then just the light. The next day, once it was all dry, I pin washed with some GW Nuln Oil to provide deep shading.
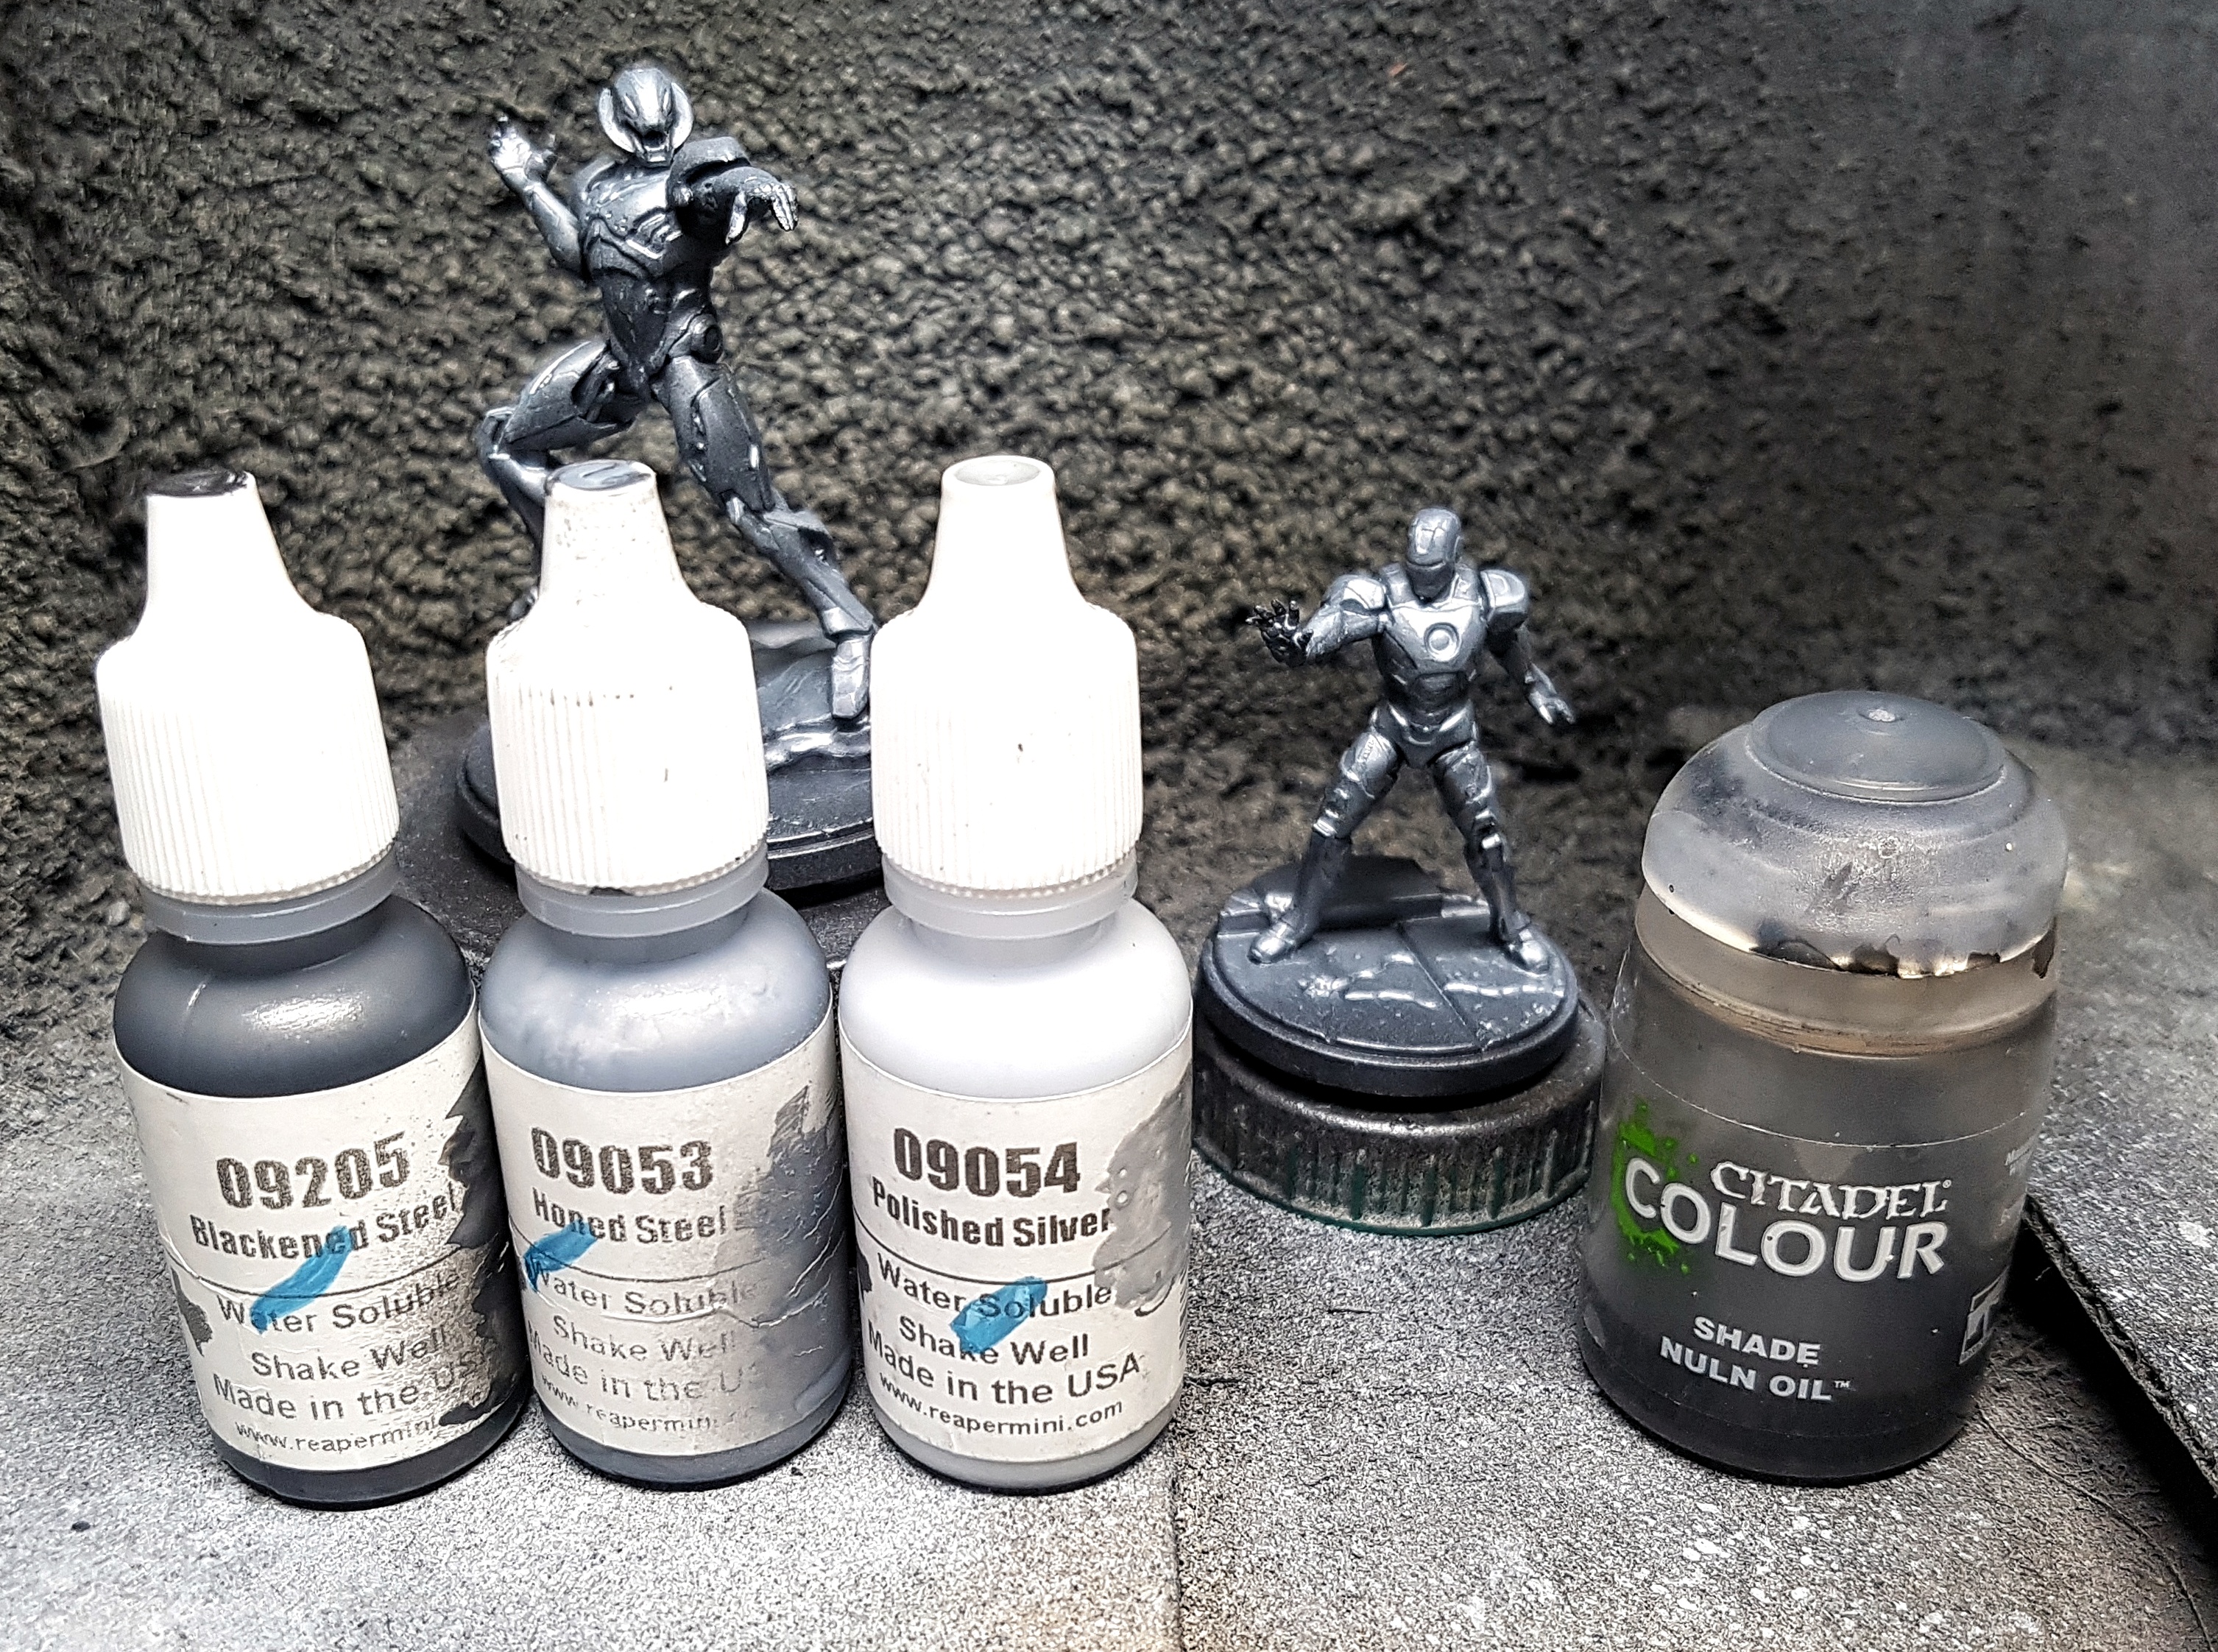 This pic was meant as a reminder to me only. I didn't think about sharing these pic until later so they don't focus so much on the minis just yet. They will later on.
The blacks were the other airbrush mission. I’ve a triad of paints for this from an old Asset Drop box:
Dark: Revell Tar Black 36106
Midtone: Revell Gunship Grey 36174
Light: Light Grey 36176
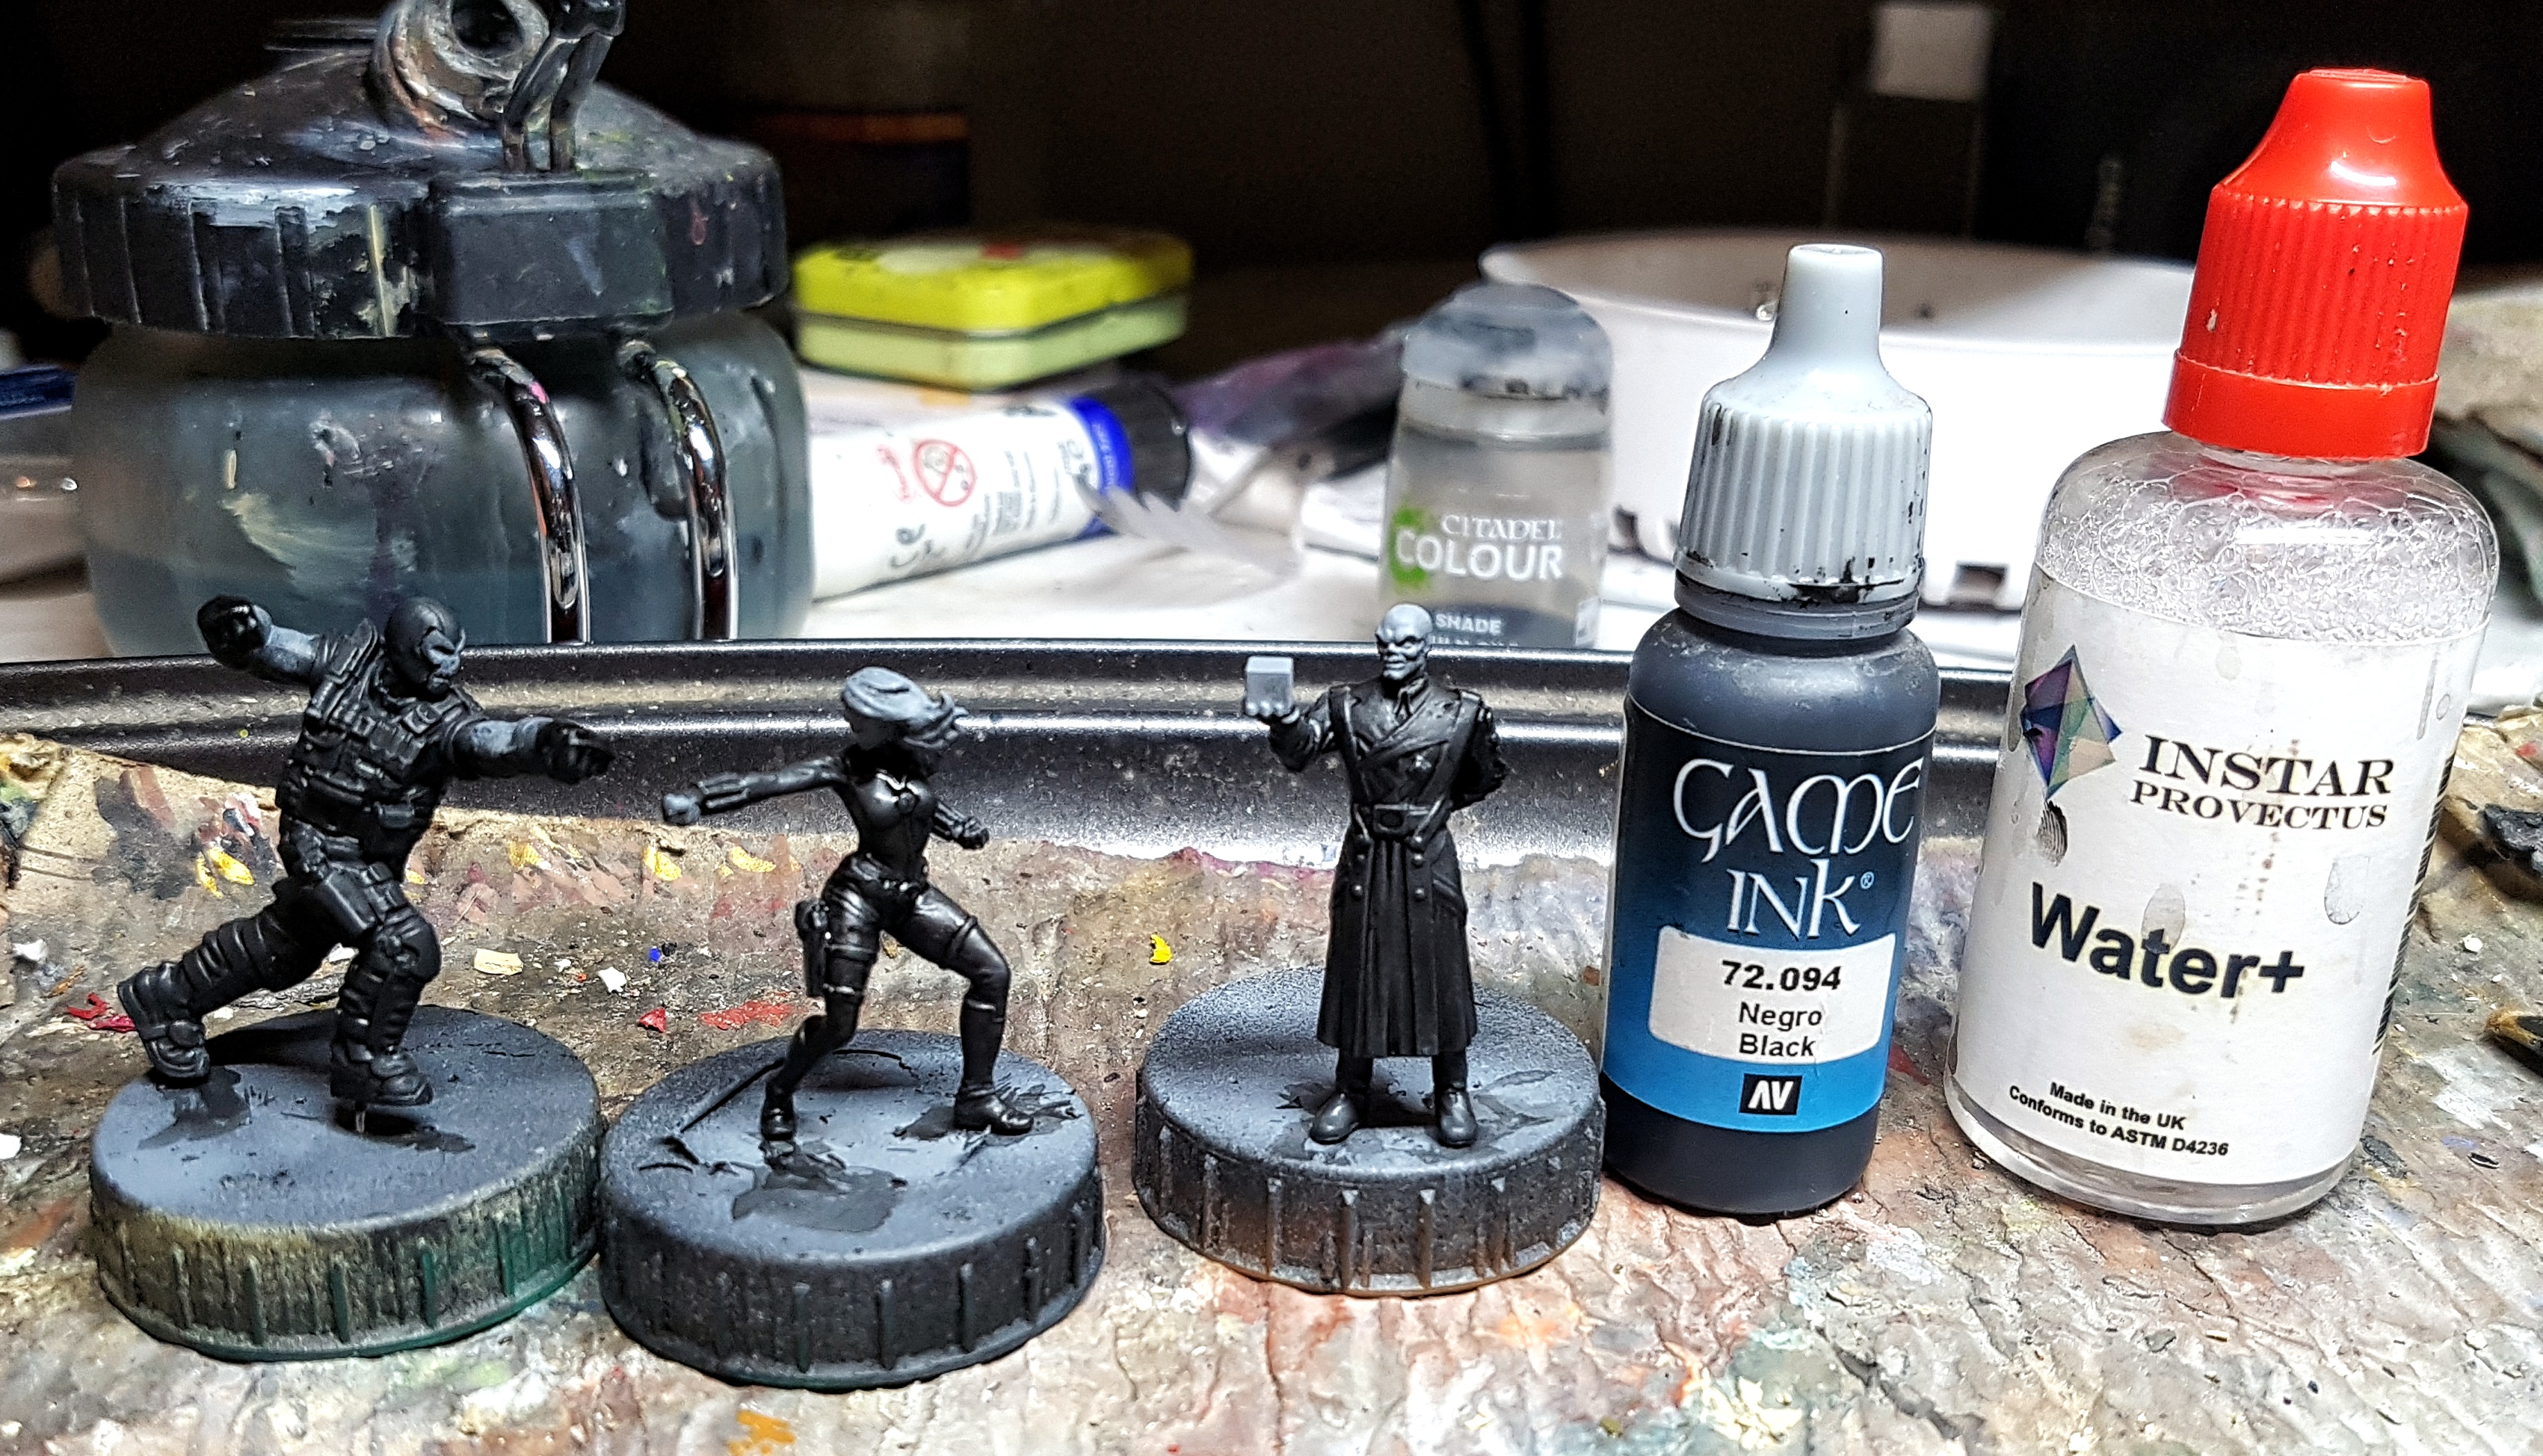
Wash: Vallejo 72.094 Black Ink mixed with Instar Water+
I repeated the same method as with the metallics above. I didn’t worry about pushing the blacks too white as they’ll get knocked back down after, although I never airbrushed pure Light grey.
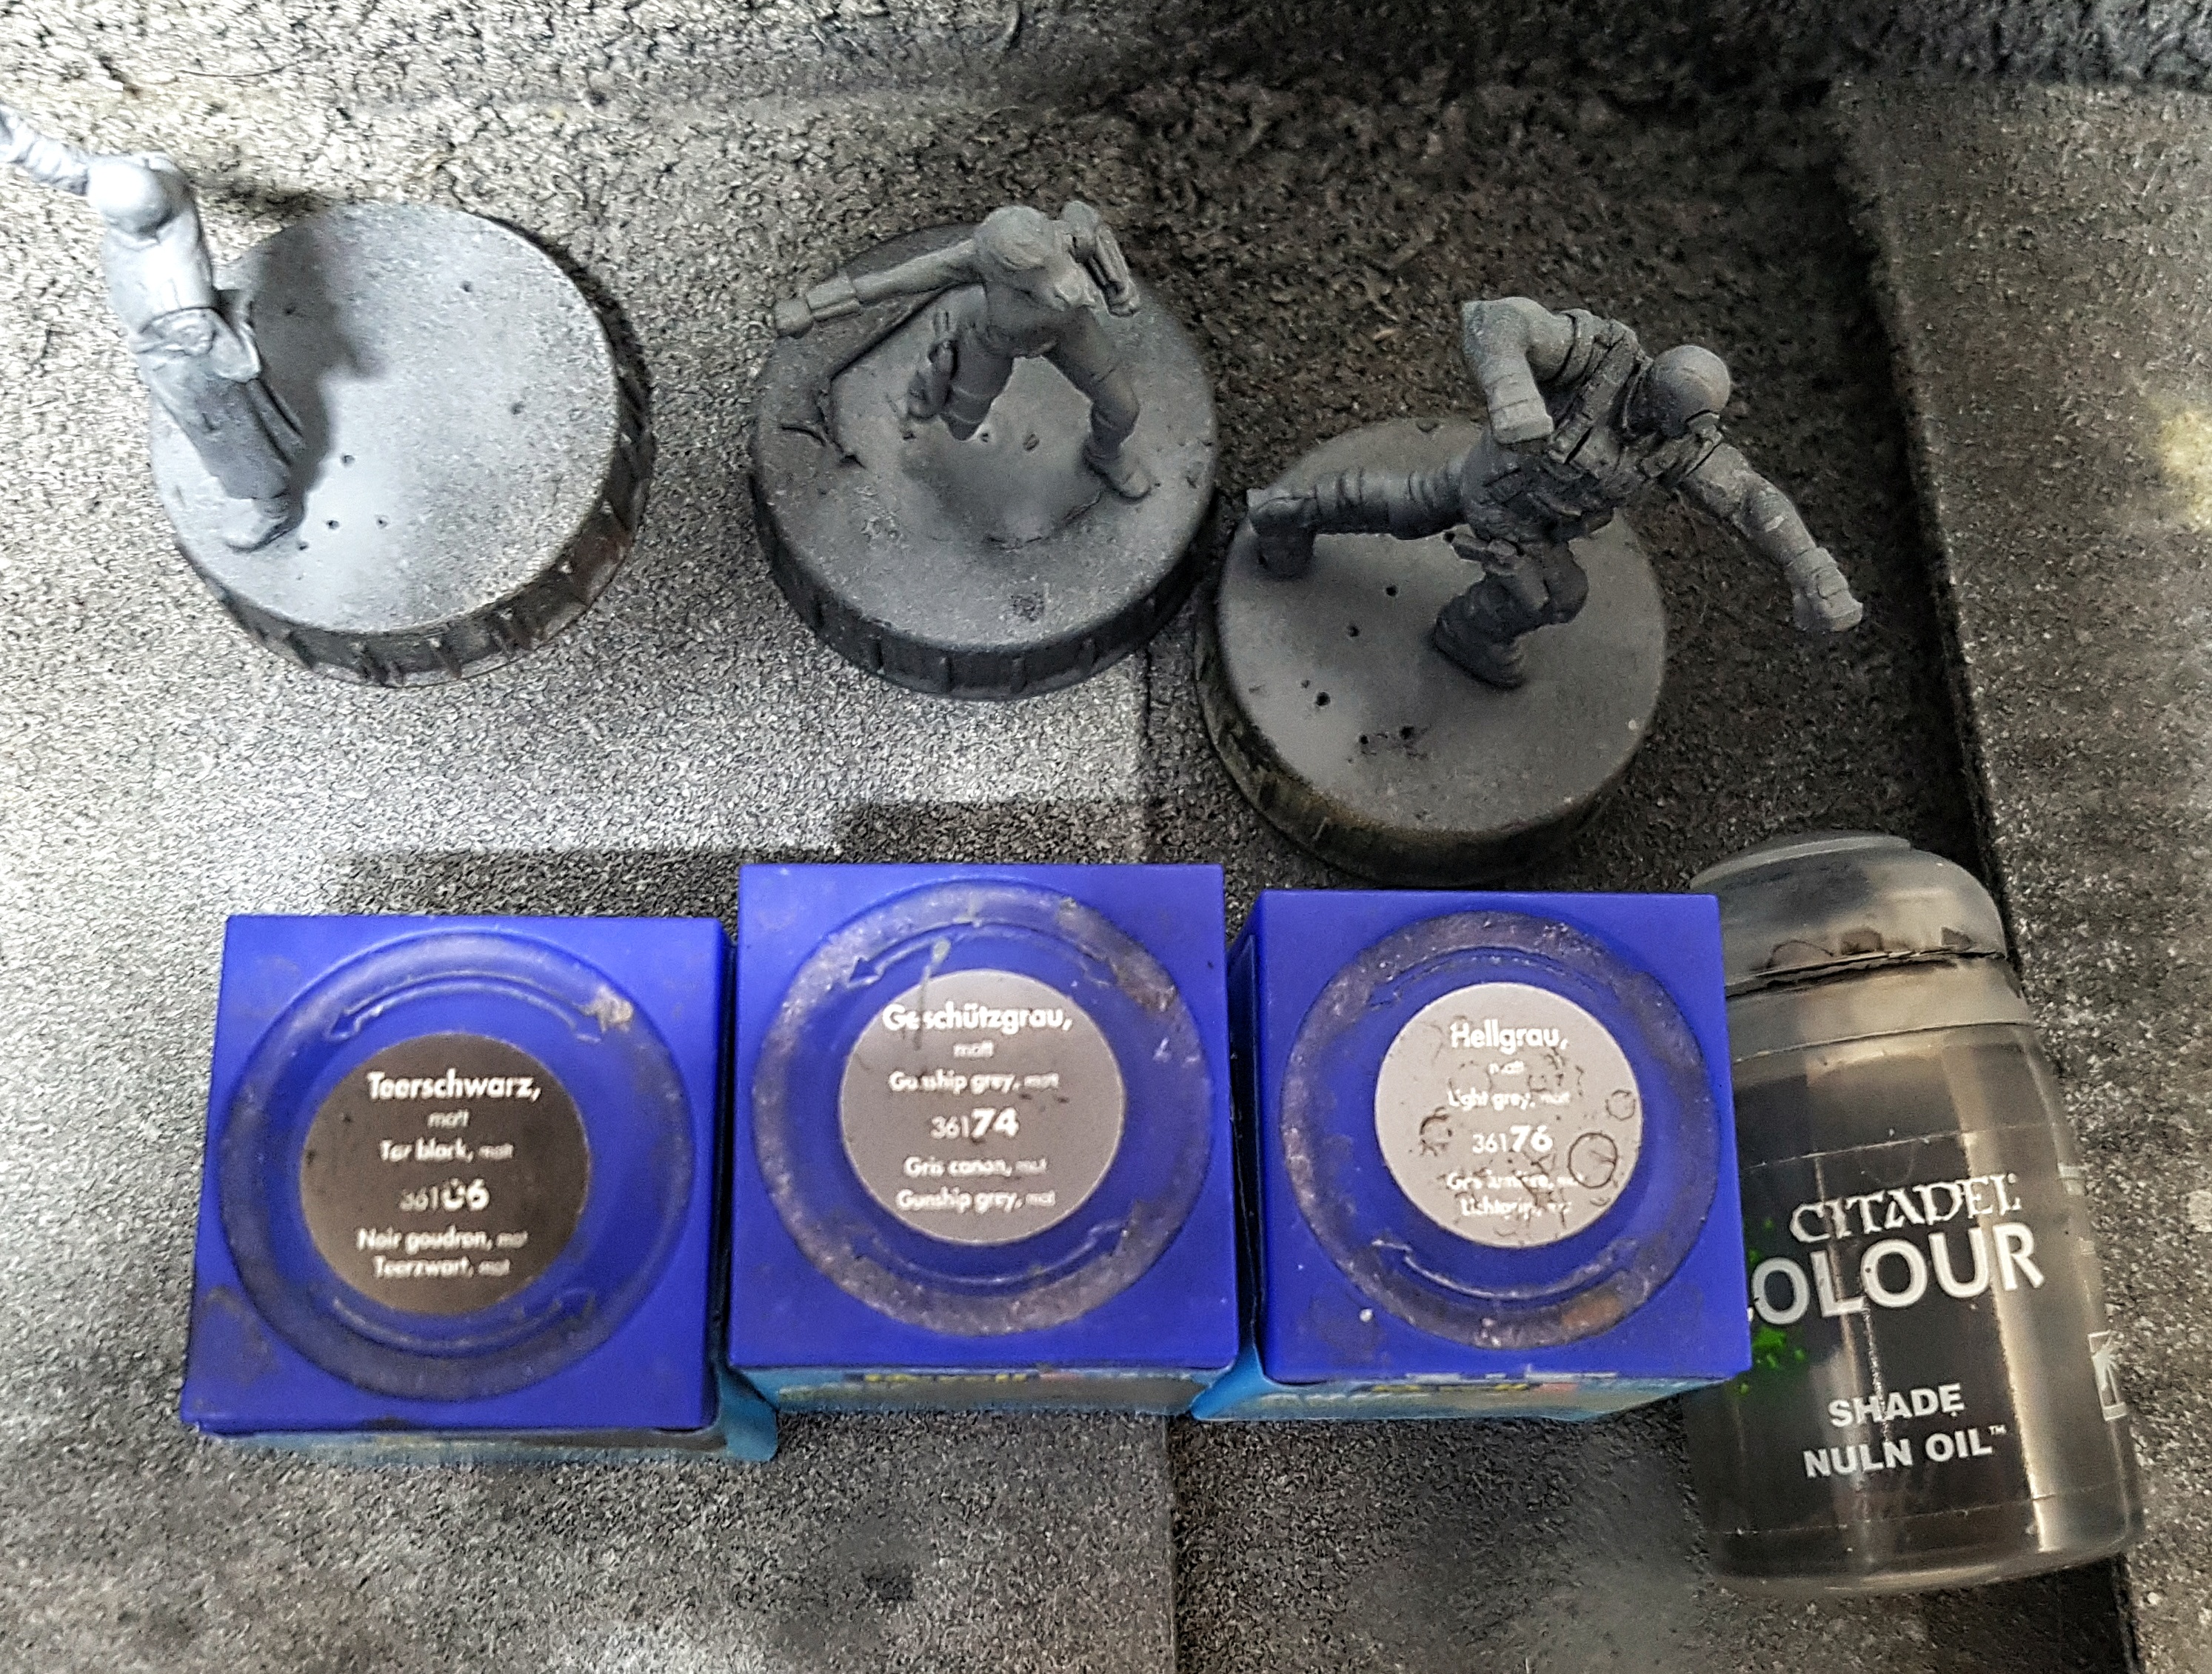 I didn't use that Nuln oil, after all.
 Once they’d been left overnight to dry (I’ve had issues with airbrushed paints reactivating in the past so I’m a little paranoid / overly cautious) I went for the wash. I’ve been told that adding water to a wash leads to tide marks, so I thinned down some black ink with Instar’s Water+ instead, maybe to 50/50, but probably favouring the ink more. Everything got a coat and was left to dry. I decided they needed a second. Your mileage may vary.
I’m now 3 evenings and an extra hour-ish and I’ve gone from sprues to having a lot of work done, ready for hairy brushing. It’d likely be 4 evenings if I’d had to build everyone.
Evening 4: Ultron and Iron Man
It’s Saturday now. My mission for the weekend is to try and play through the final 6 missions of Gloomhaven Jaws of the Lion, and enough MCP painted to have something to type about here. I got 2 games in on Saturday, and 2 more on Sunday, keeping the evenings free for painting. I get to finish JotL this weekend and then start playing Aeon Trespass: Odyssey.
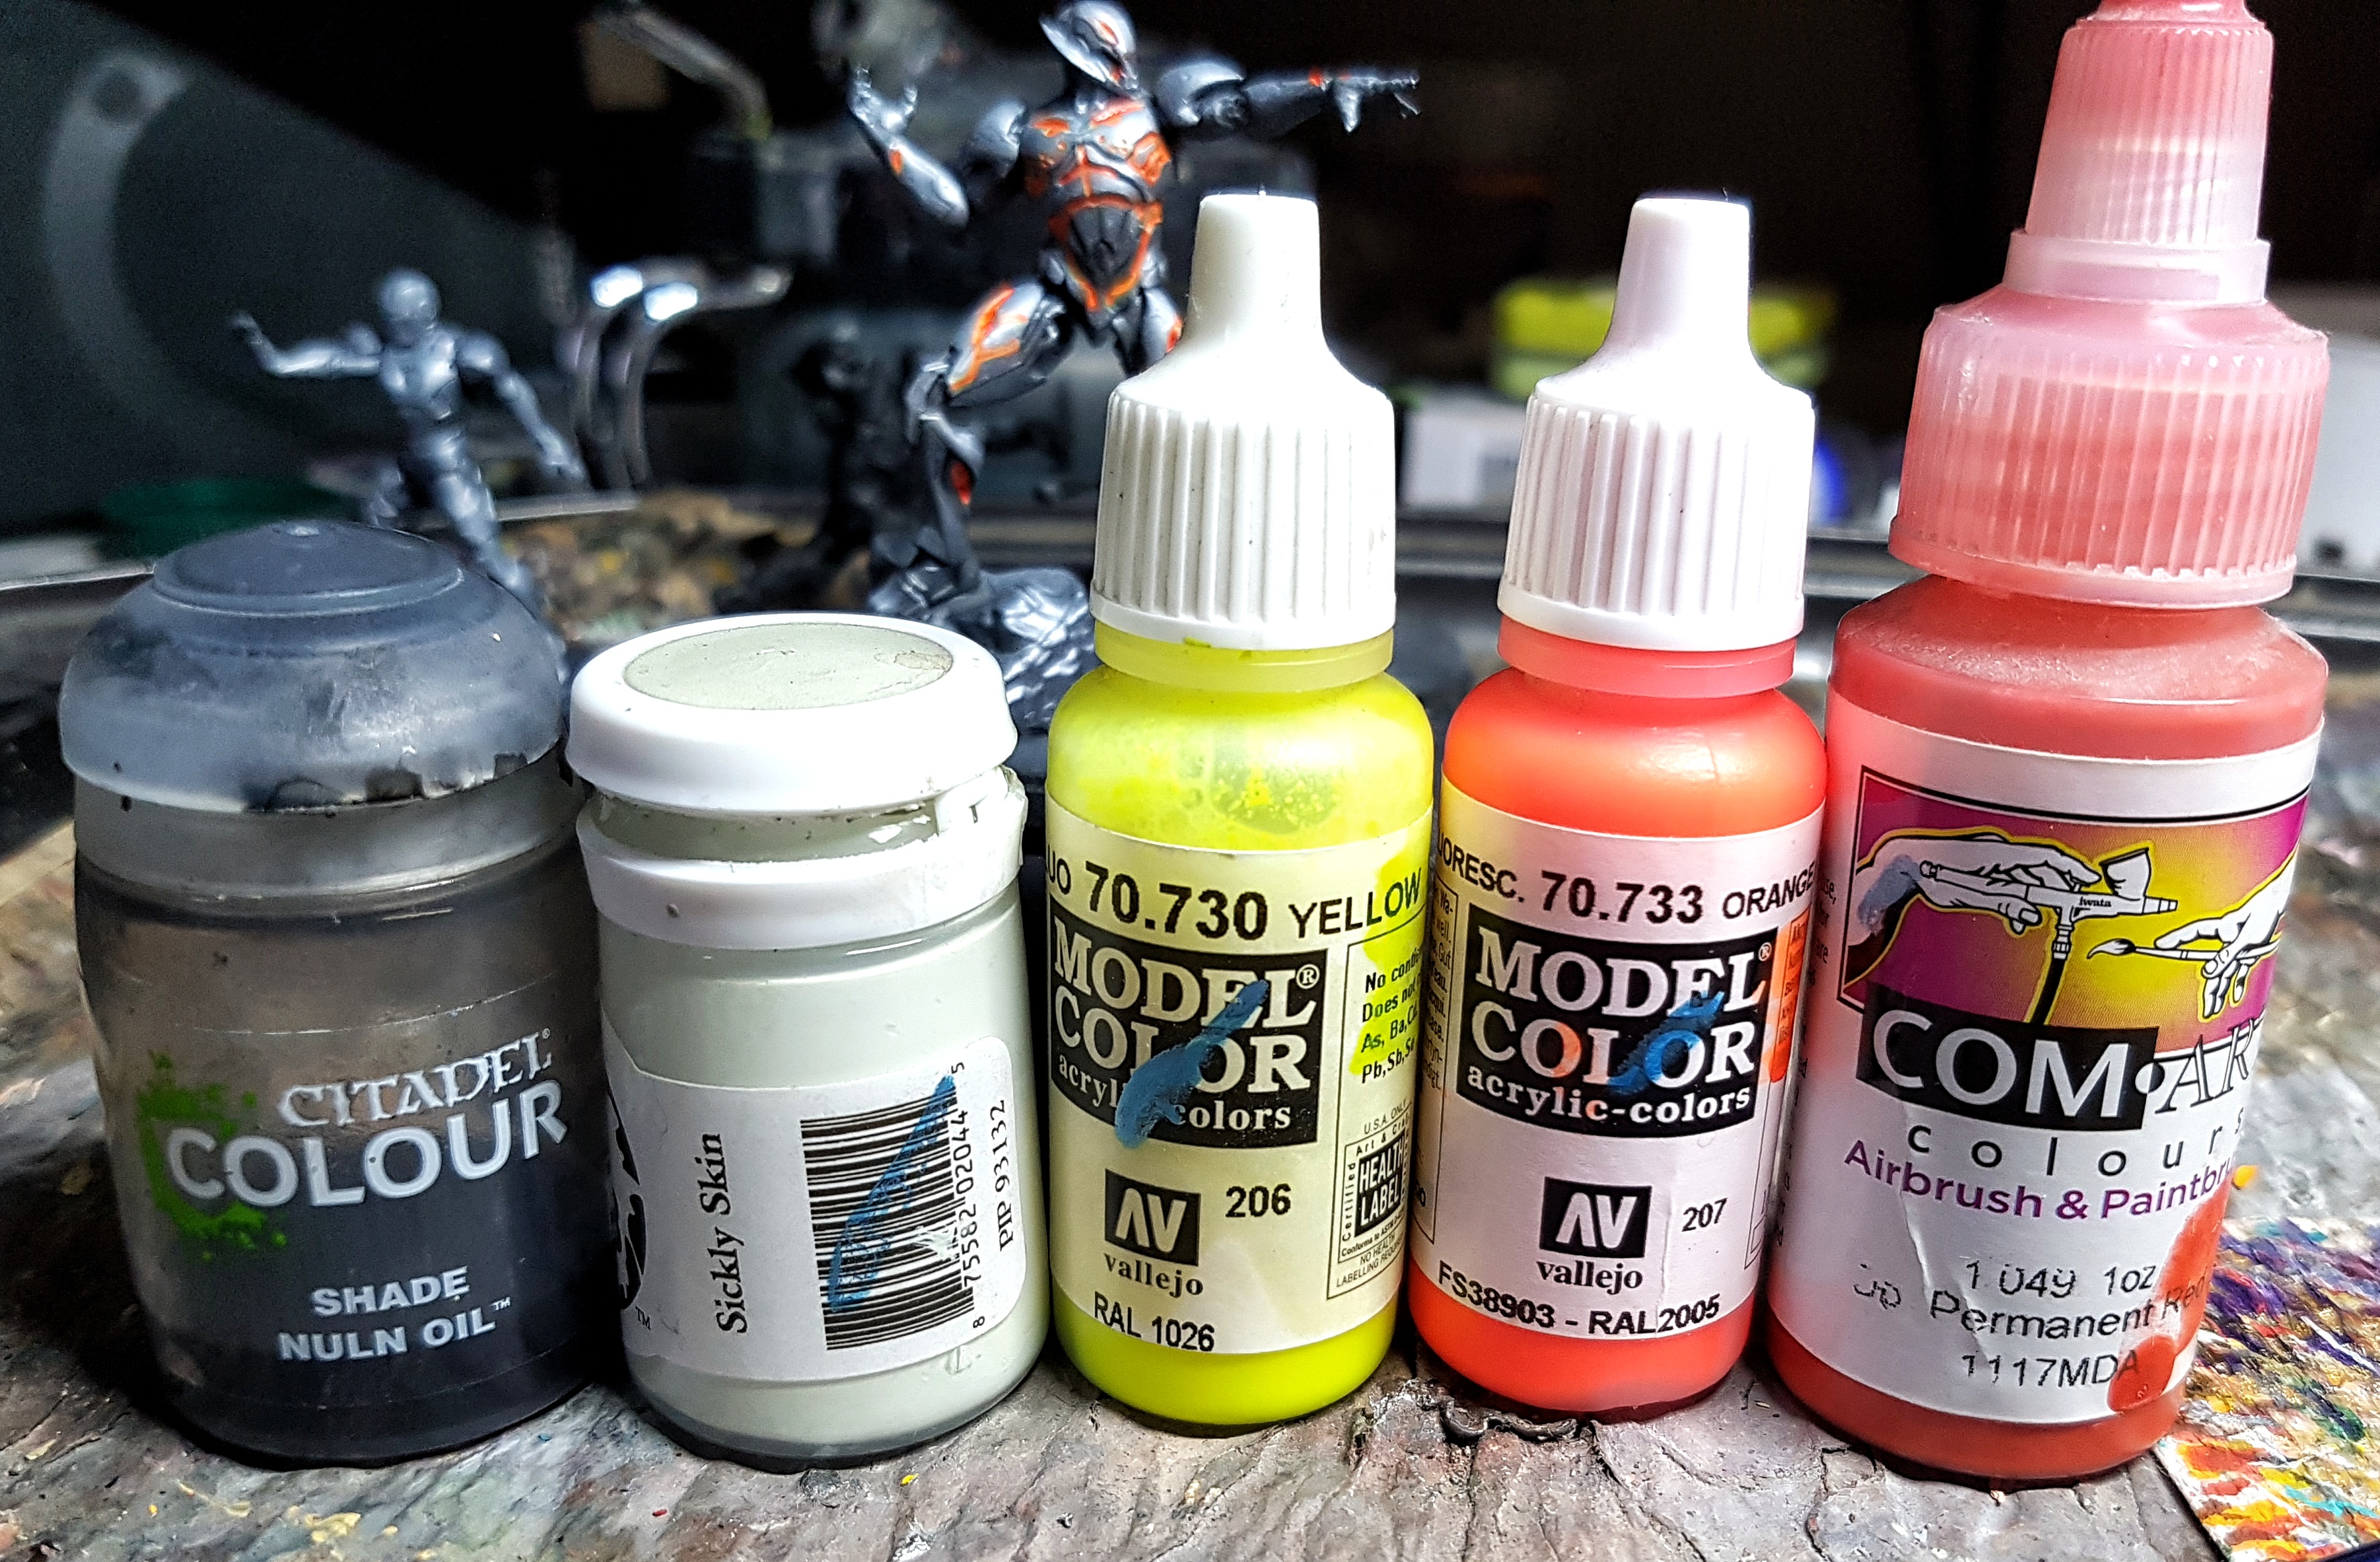
I started my evening off by applying the washes I’d discussed in my last post, and left them to dry while I ate dinner. Looking at my work Ultron is 95% done so it makes sense to finish him off. It’s glowing lights time.
Undercoat Wash: P3 Sickly Skin (Any white or off white will do)
Base: VMC 70.730 Yellow Fluo
Main Colour: VMC 70.733 Orange Fluo
Tint/Shade: Com-Art 1.049 Opaque Permanent Red
I’ve been unable to pick up a fluo red. Every time I look for some the shop had ran out. I guess it’s a popular colour?
All paints were thinned enough to let them flow in to the crevices and recesses. First I undercoated with an off white because this will reinforce any vibrant colour I put over it. I’d watched a youtube video on painting Ultron and the guy mentioned he’d painted the lights fluro yellow first, presumably so provide some tonal variation, so I thought I may as well and see what happens. Two coats of Fluo Yellow were followed by two coats of Fluo Orange. I didn’t have any Fluo Red so I grabbed the pot of Com Art stuff. I don’t use it often because it’s so very thin. It doesn’t feel like paint, or ink, or a wash. It’s somewhere in the middle. I really need to experiment airbrushing it lightly over a preshade one day. Anyway, it’s thin enough that I could use it straight out of the bottle to provide some dots of strong red to the orange. It was applied before the orange had fully dried to allow natural transitions.
I was working from the studio painted pics for this and I couldn’t help but notice that they painted light that I couldn’t find on my model. Maybe they weren’t there on theirs either, but it does lead me to think the painted pieces they’re showing off are different to the ones they’ve sold us plebs. That’s just cheating. Some rear shots (robo-booty!) would have been nice too.
 Again, I was only taking pics to remember what colours I'd used. I start taking better pics soon.
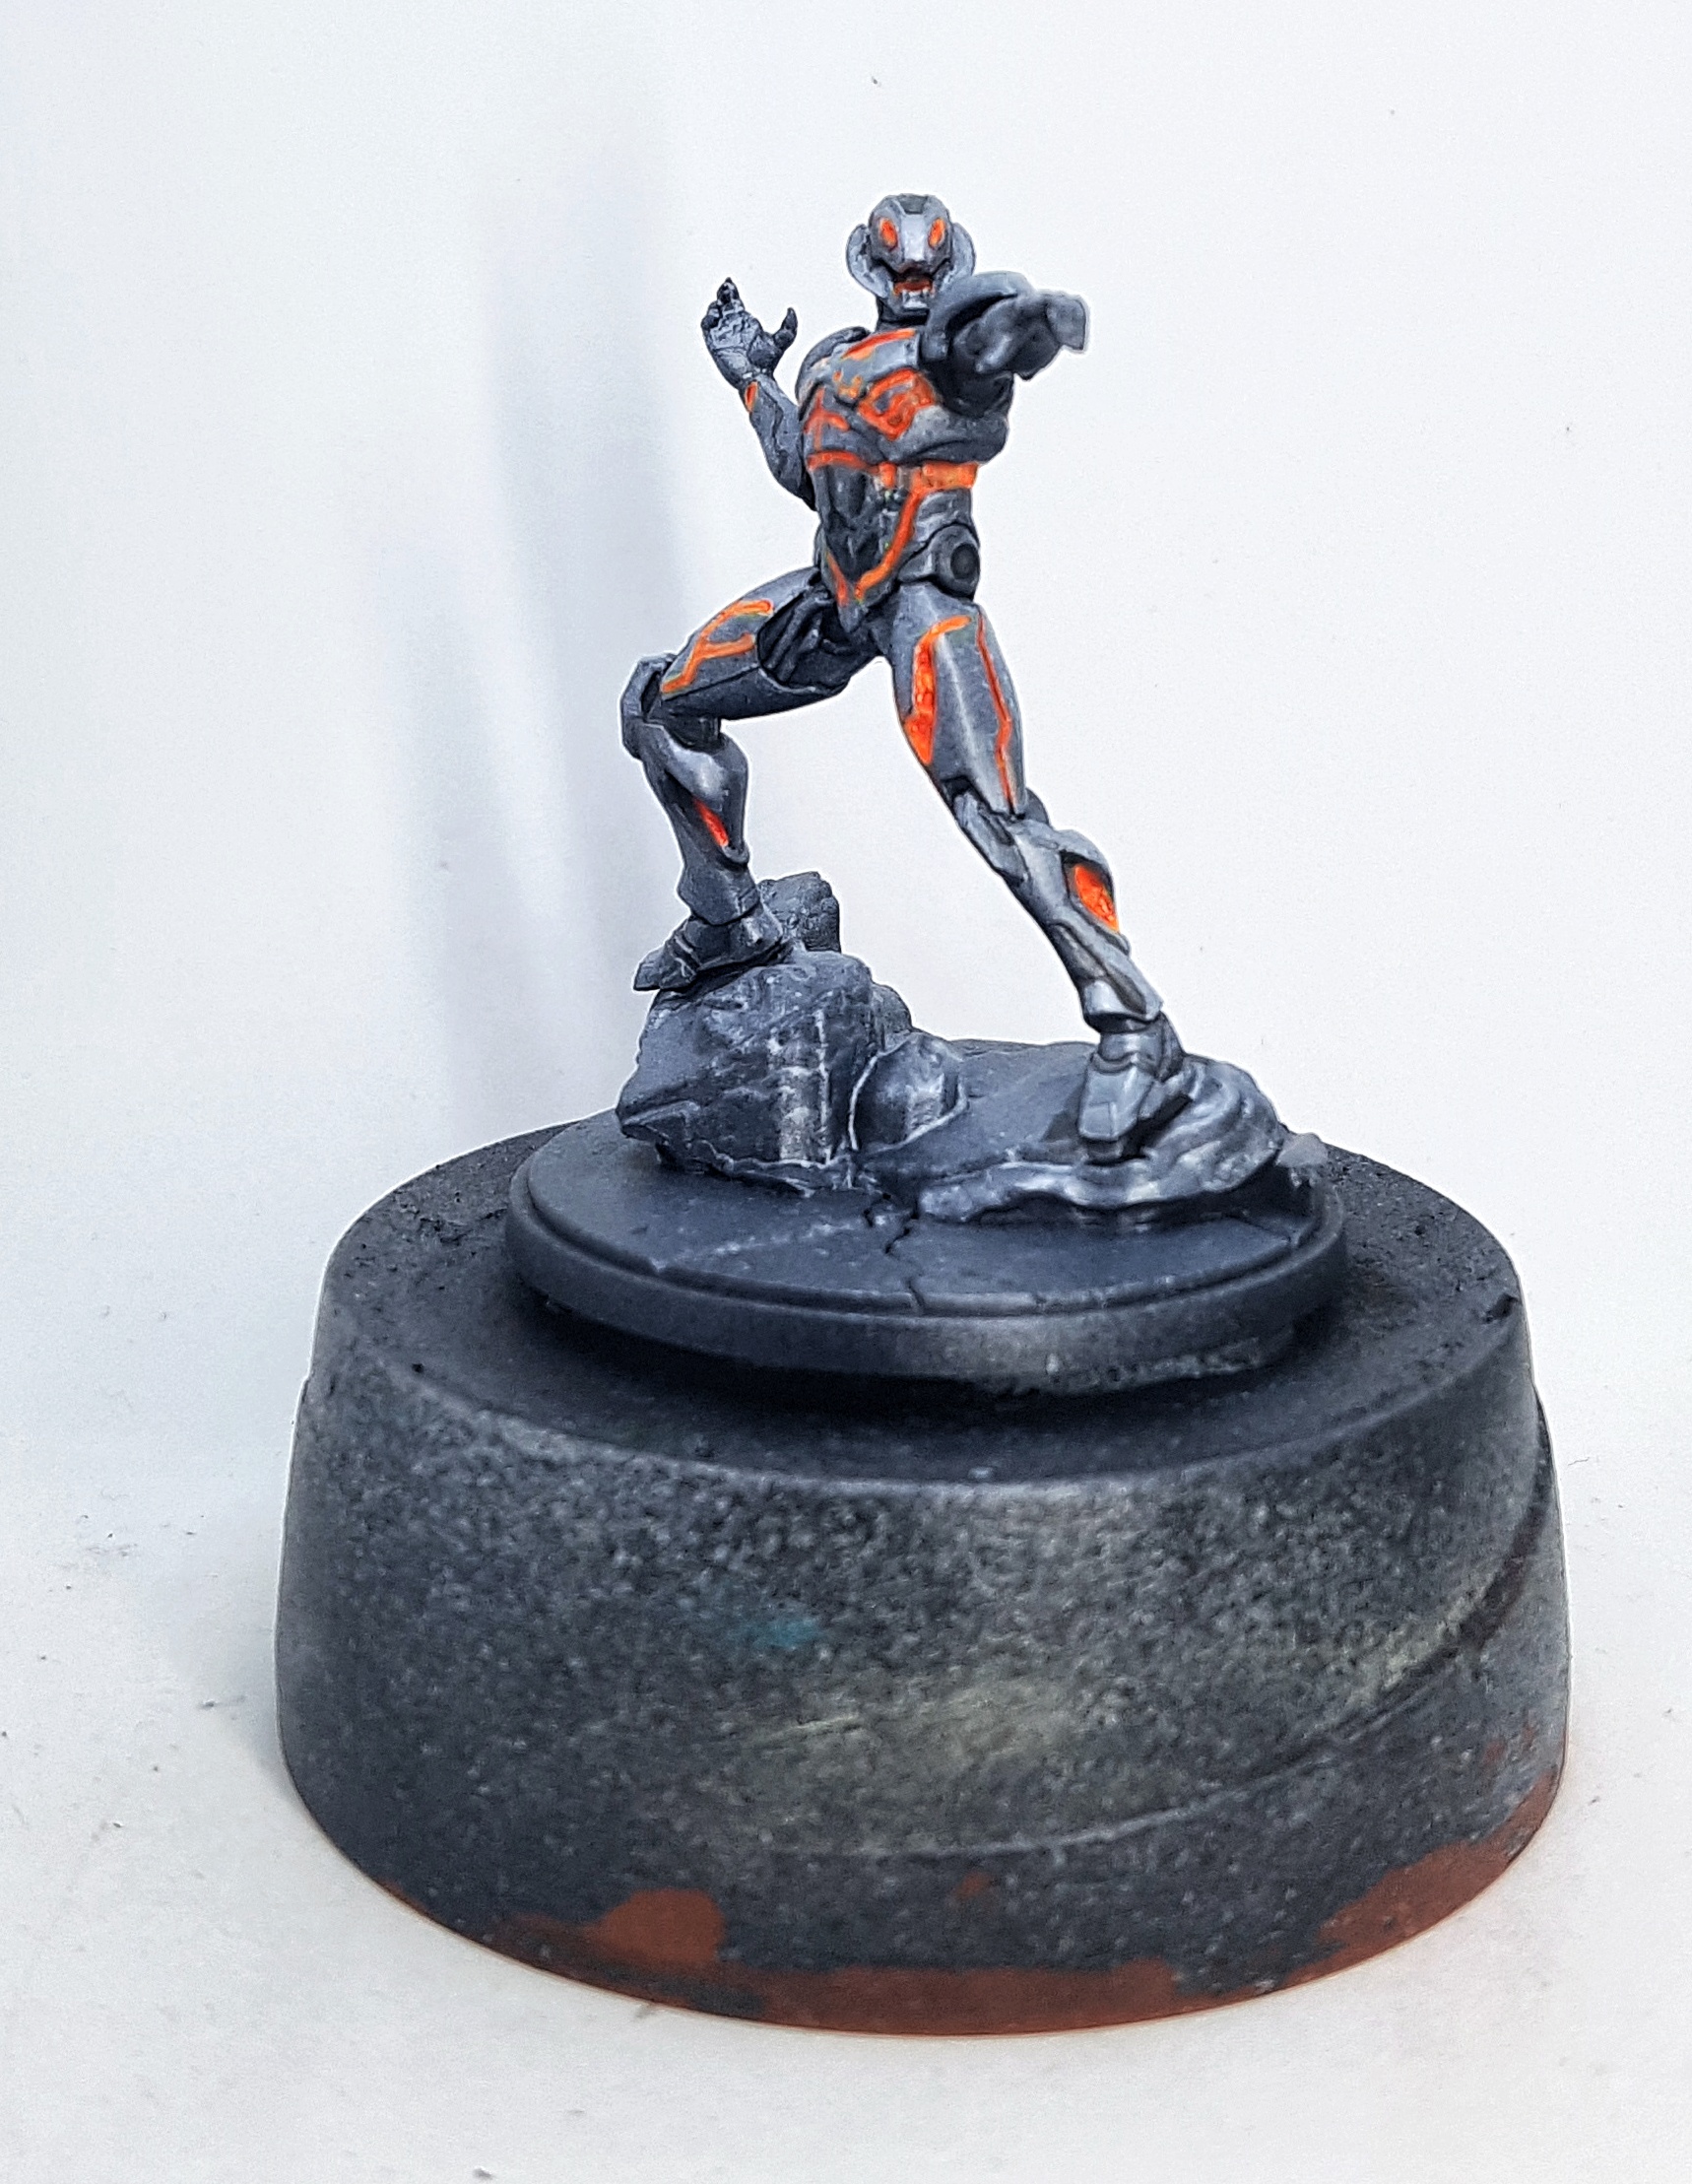 Here's a better pic of Ultron
That’s Ultron finished. Well, except for the base. let’s not worry about that for now. I can do all the bases together later, or do a batch if I want time to think about how I’ll be painting something before I commit. Anyway, I know how I want to paint Iron Man and I’m curious to see if it works or looks ugly. He’s yellow and red, but they’re shiny polished colours. Not exactly metallic, but also not flat colours. I’ve two pearlescent paints that happen to be red and yellow, again from an old AssetDrop box. Let’s see what happens.
Yellow: Mission models MMP-159 Iridescent Lemon Yellow
Red: Mission Models MMP-148 Pearl Red
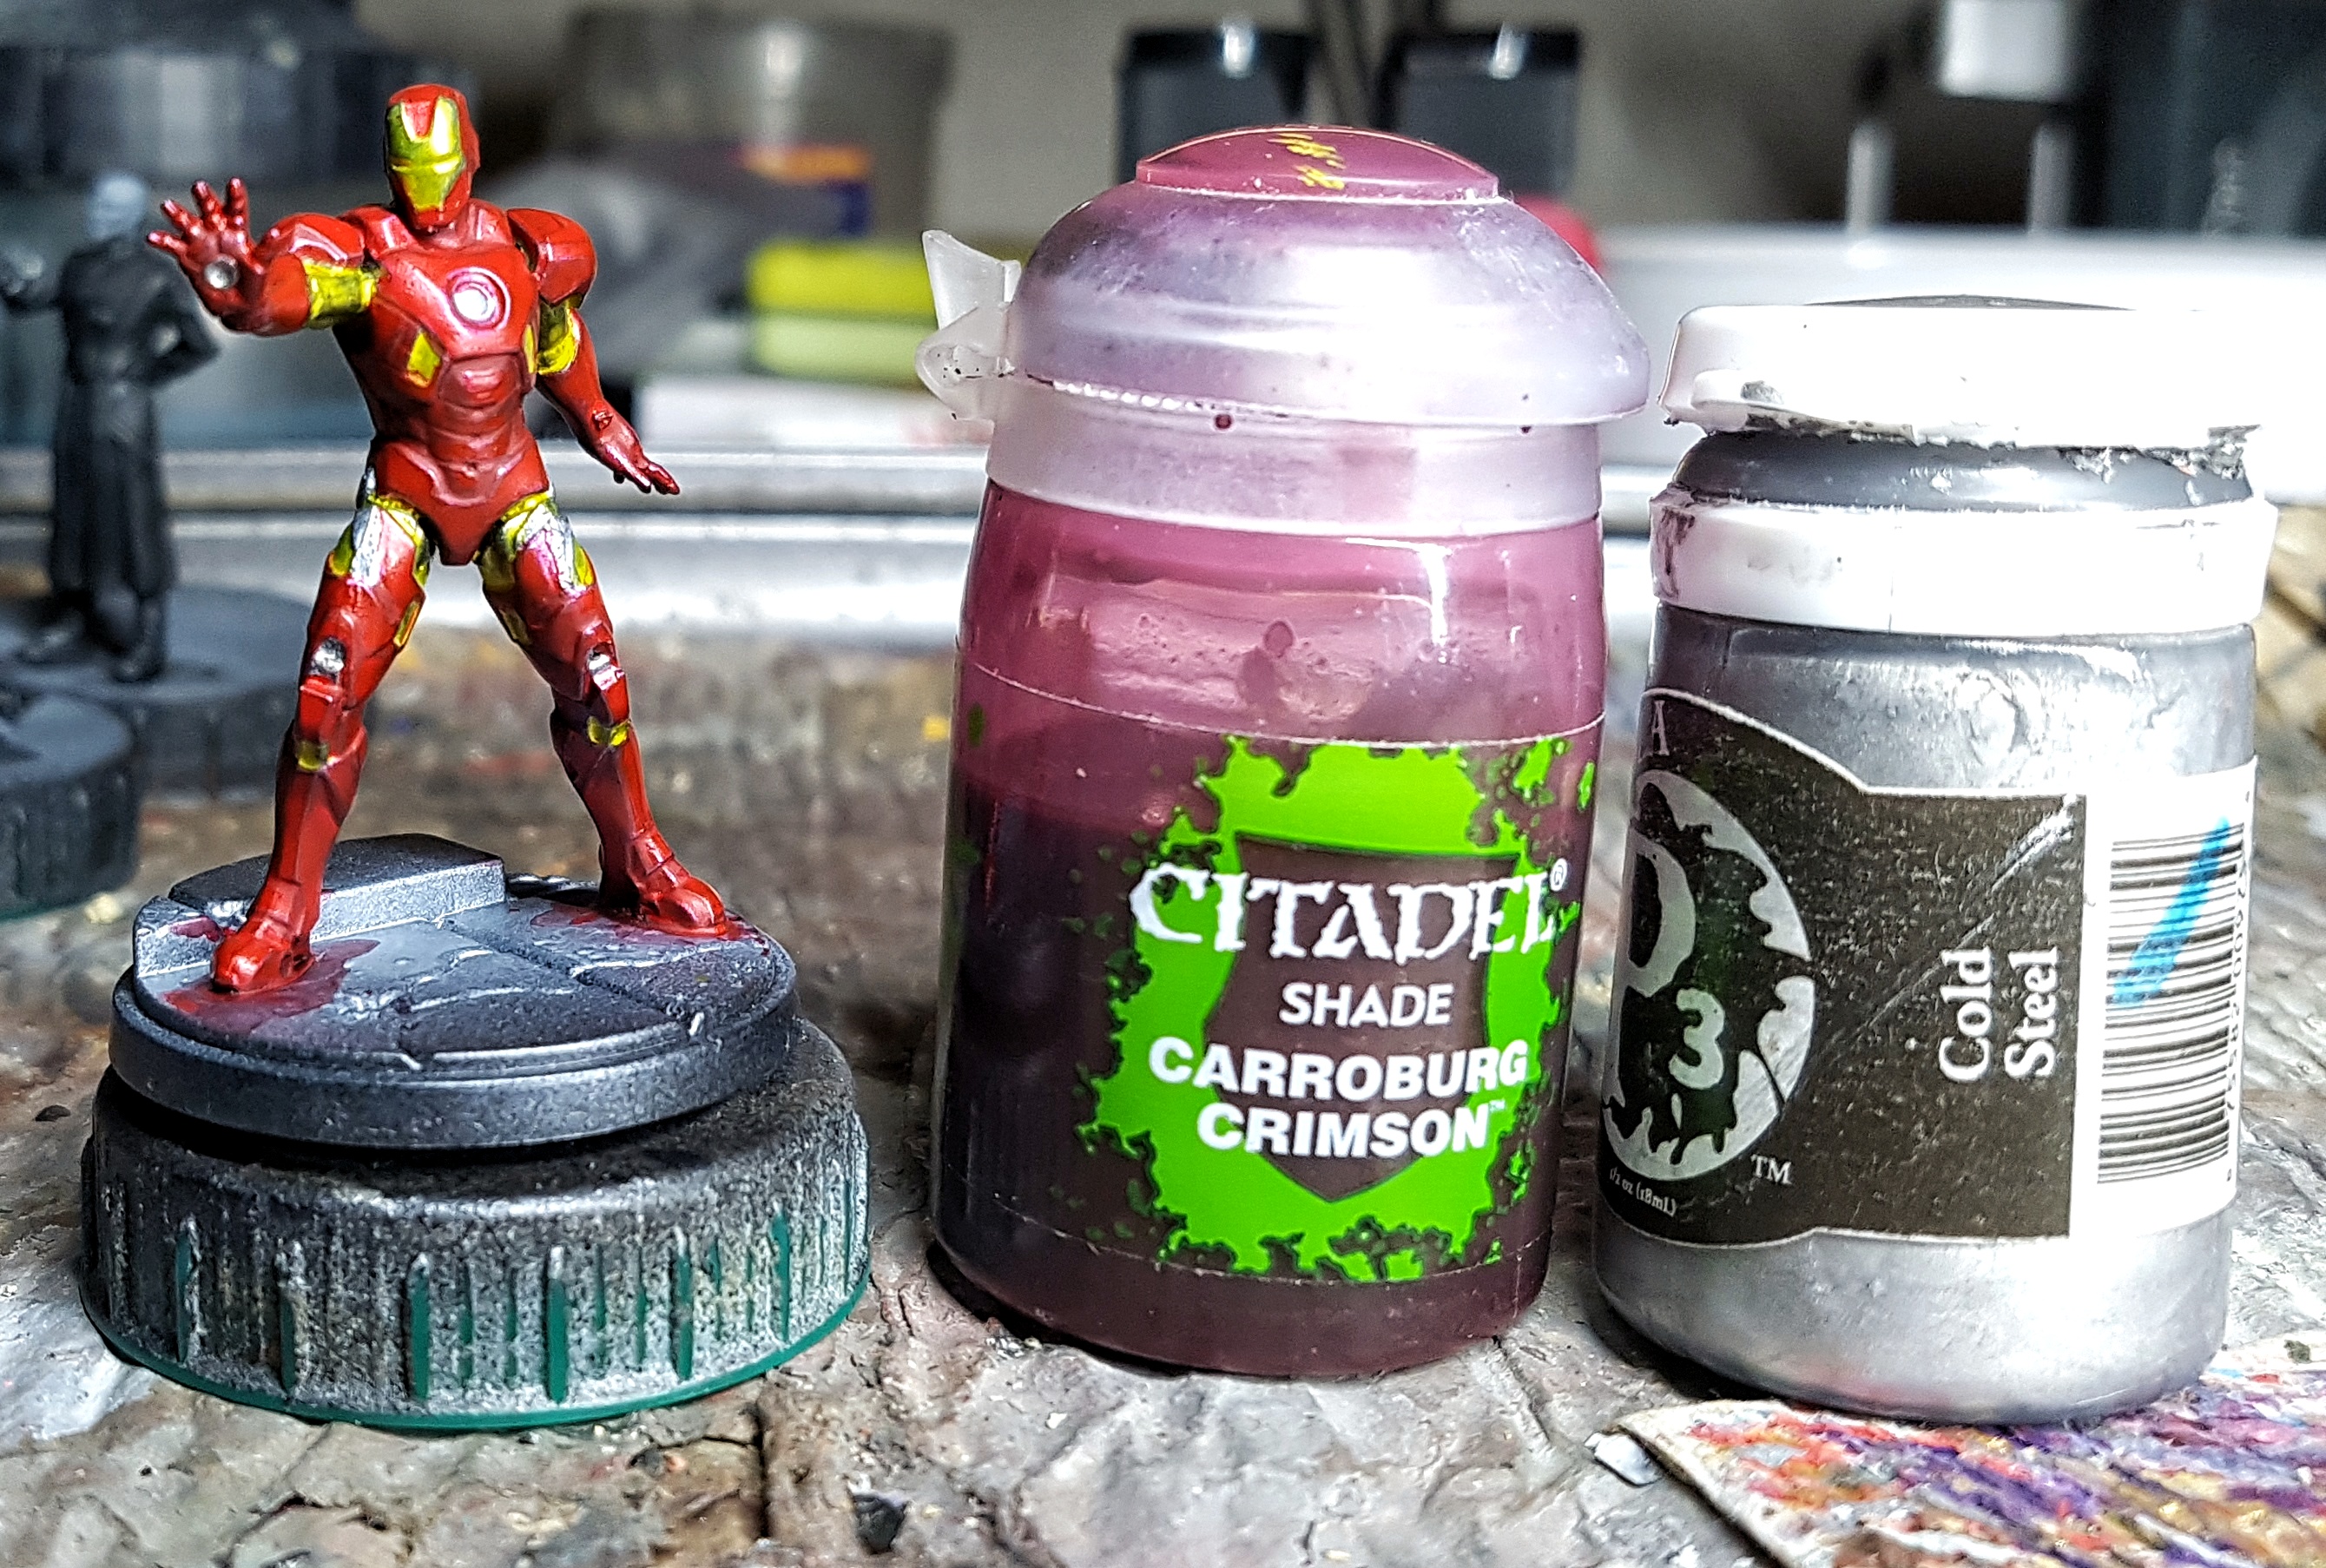
Red Pinwash: GW Carroburg Crimson
Steel Highlight: P3 Cold Steel (I also reclaimed the repulsors on his hands with this)
This was all brushed on. The Mission models paints took quite a few layers, and still doesn’t have 100% coverage on the hard edges. I’m happy to call that shading and natural wear and realism. Any more layers and I’ll start losing detail. I’ve airbrushed them before, but I wanted to control the coverage and thickness so the steel undercoat would hopefully influence their vibrancy and provide natural shading. I’m not sure that’s worked out but he looks ok in person, and will hopefully look better once his base is finished and providing him with a frame.
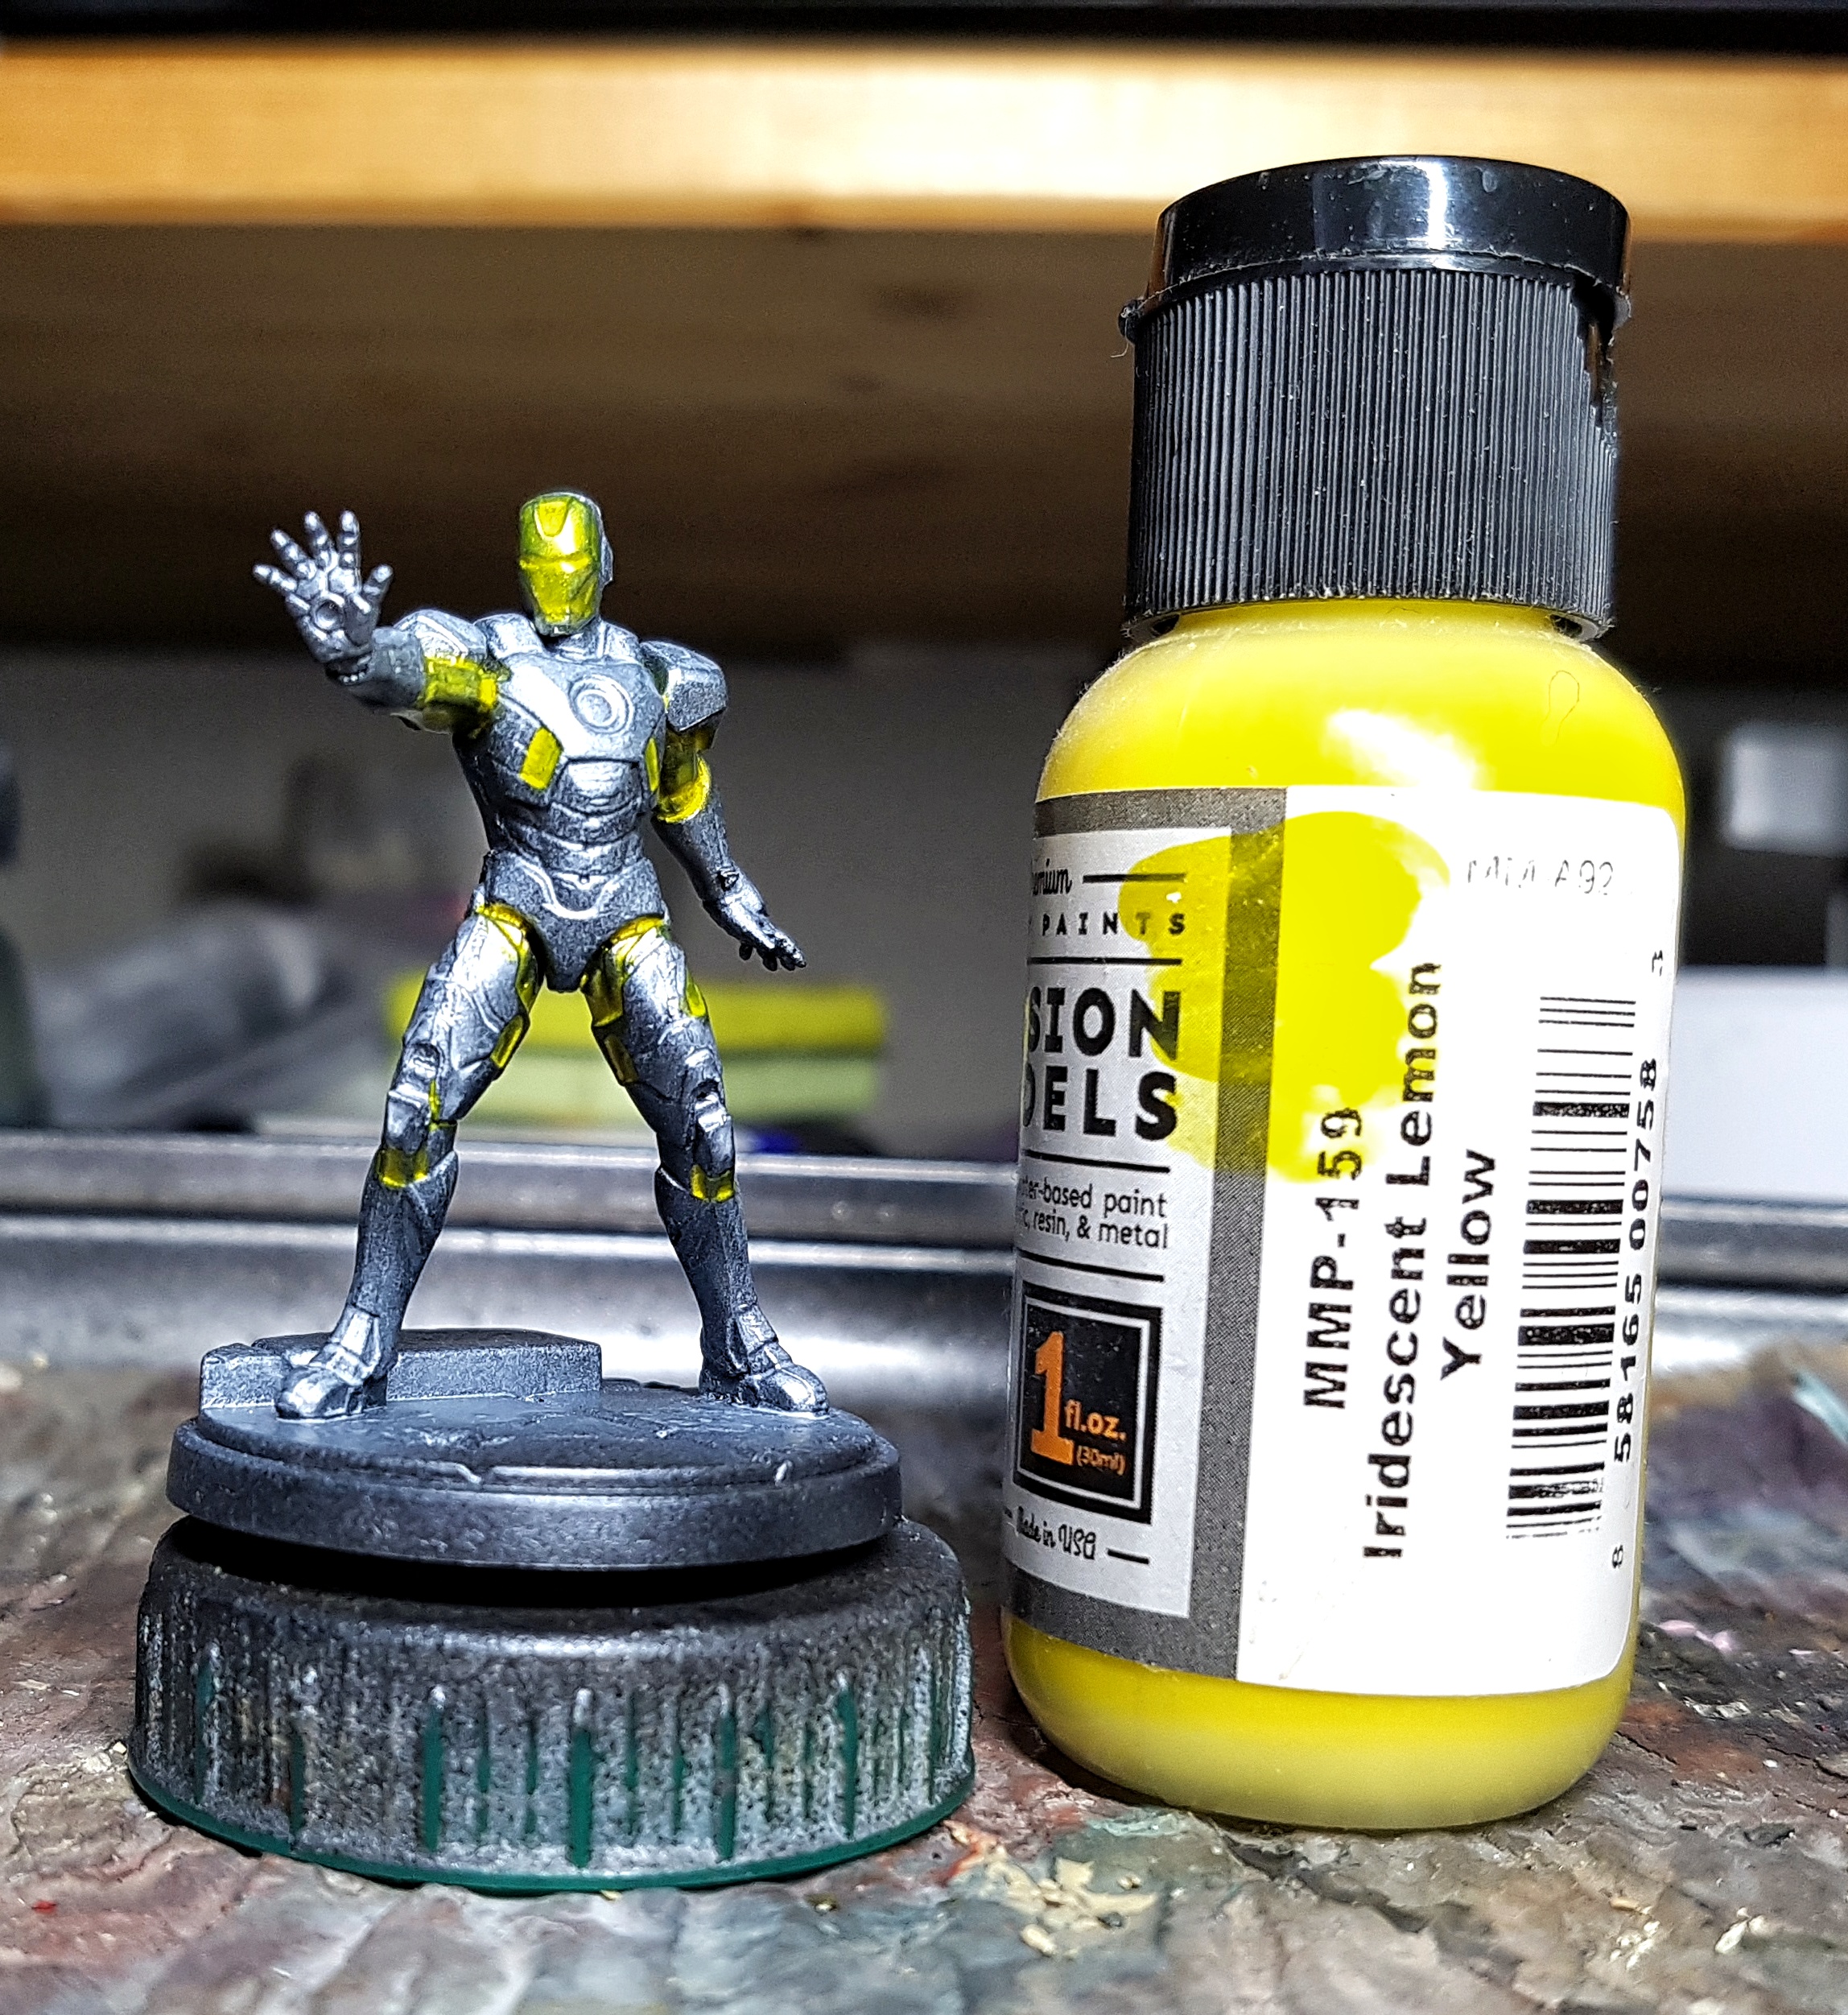 See? I said I'd start taking better pics for you.
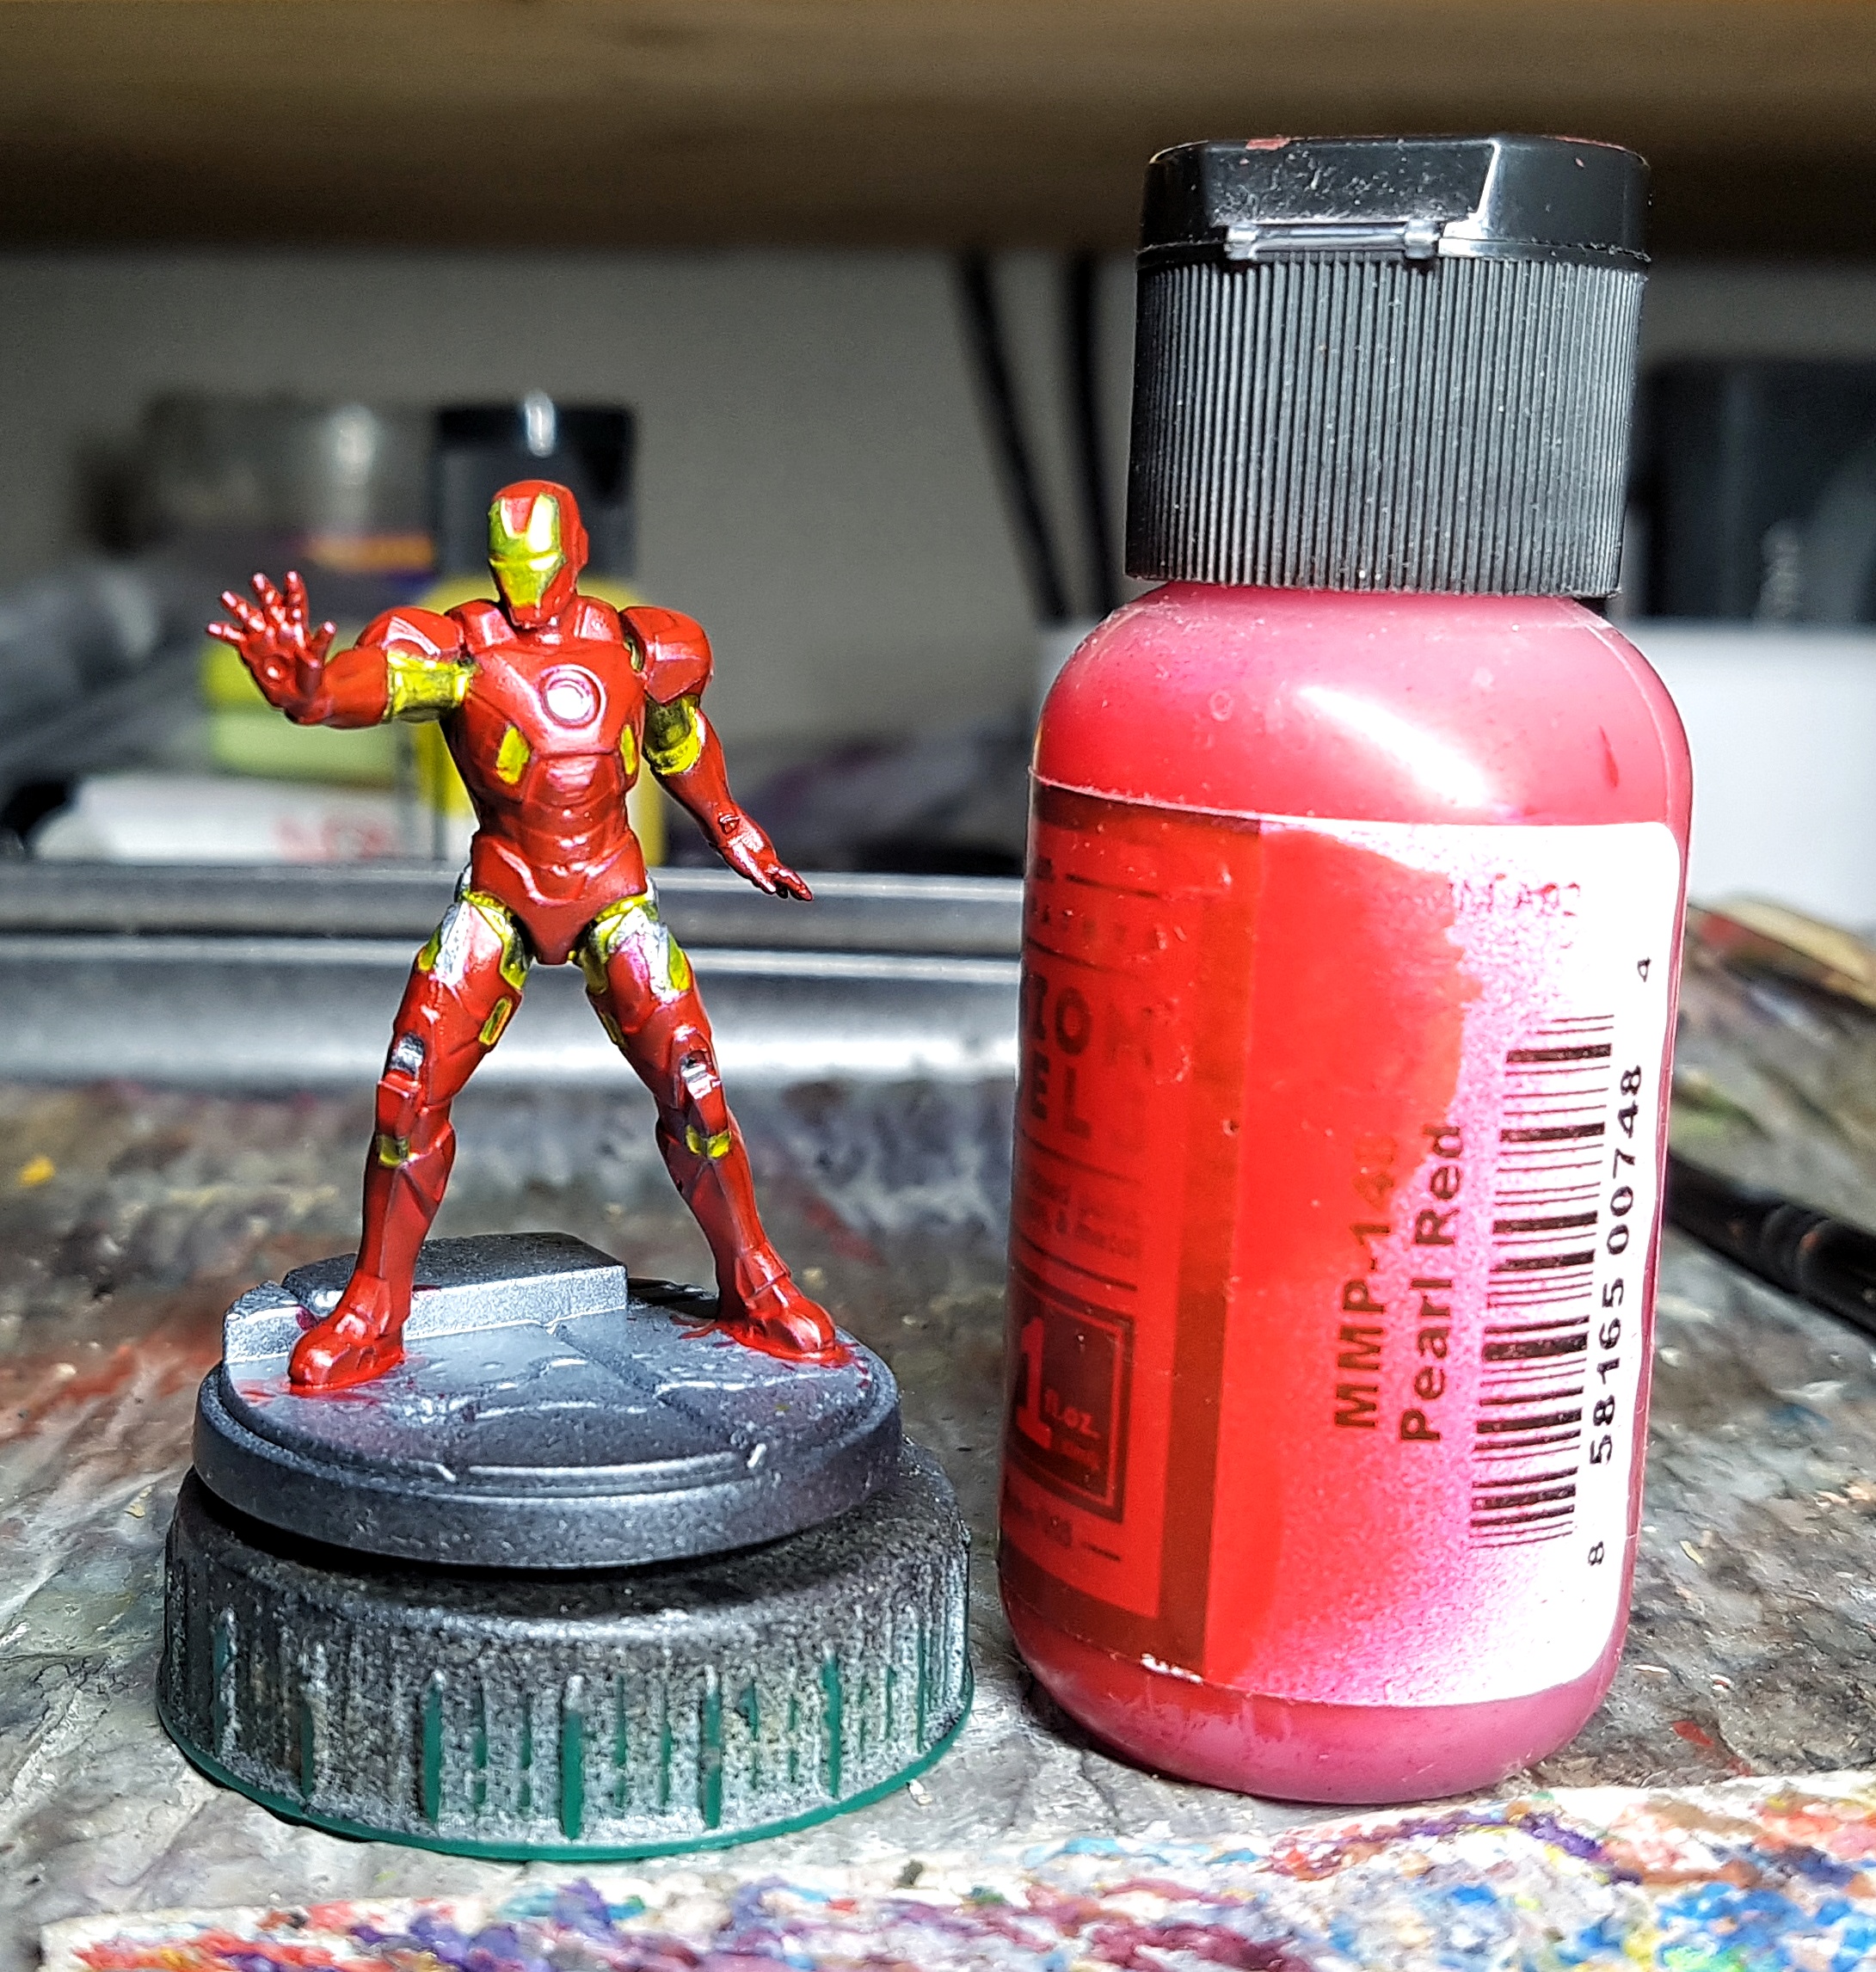
Evening 5: Iron Man and Red Skull
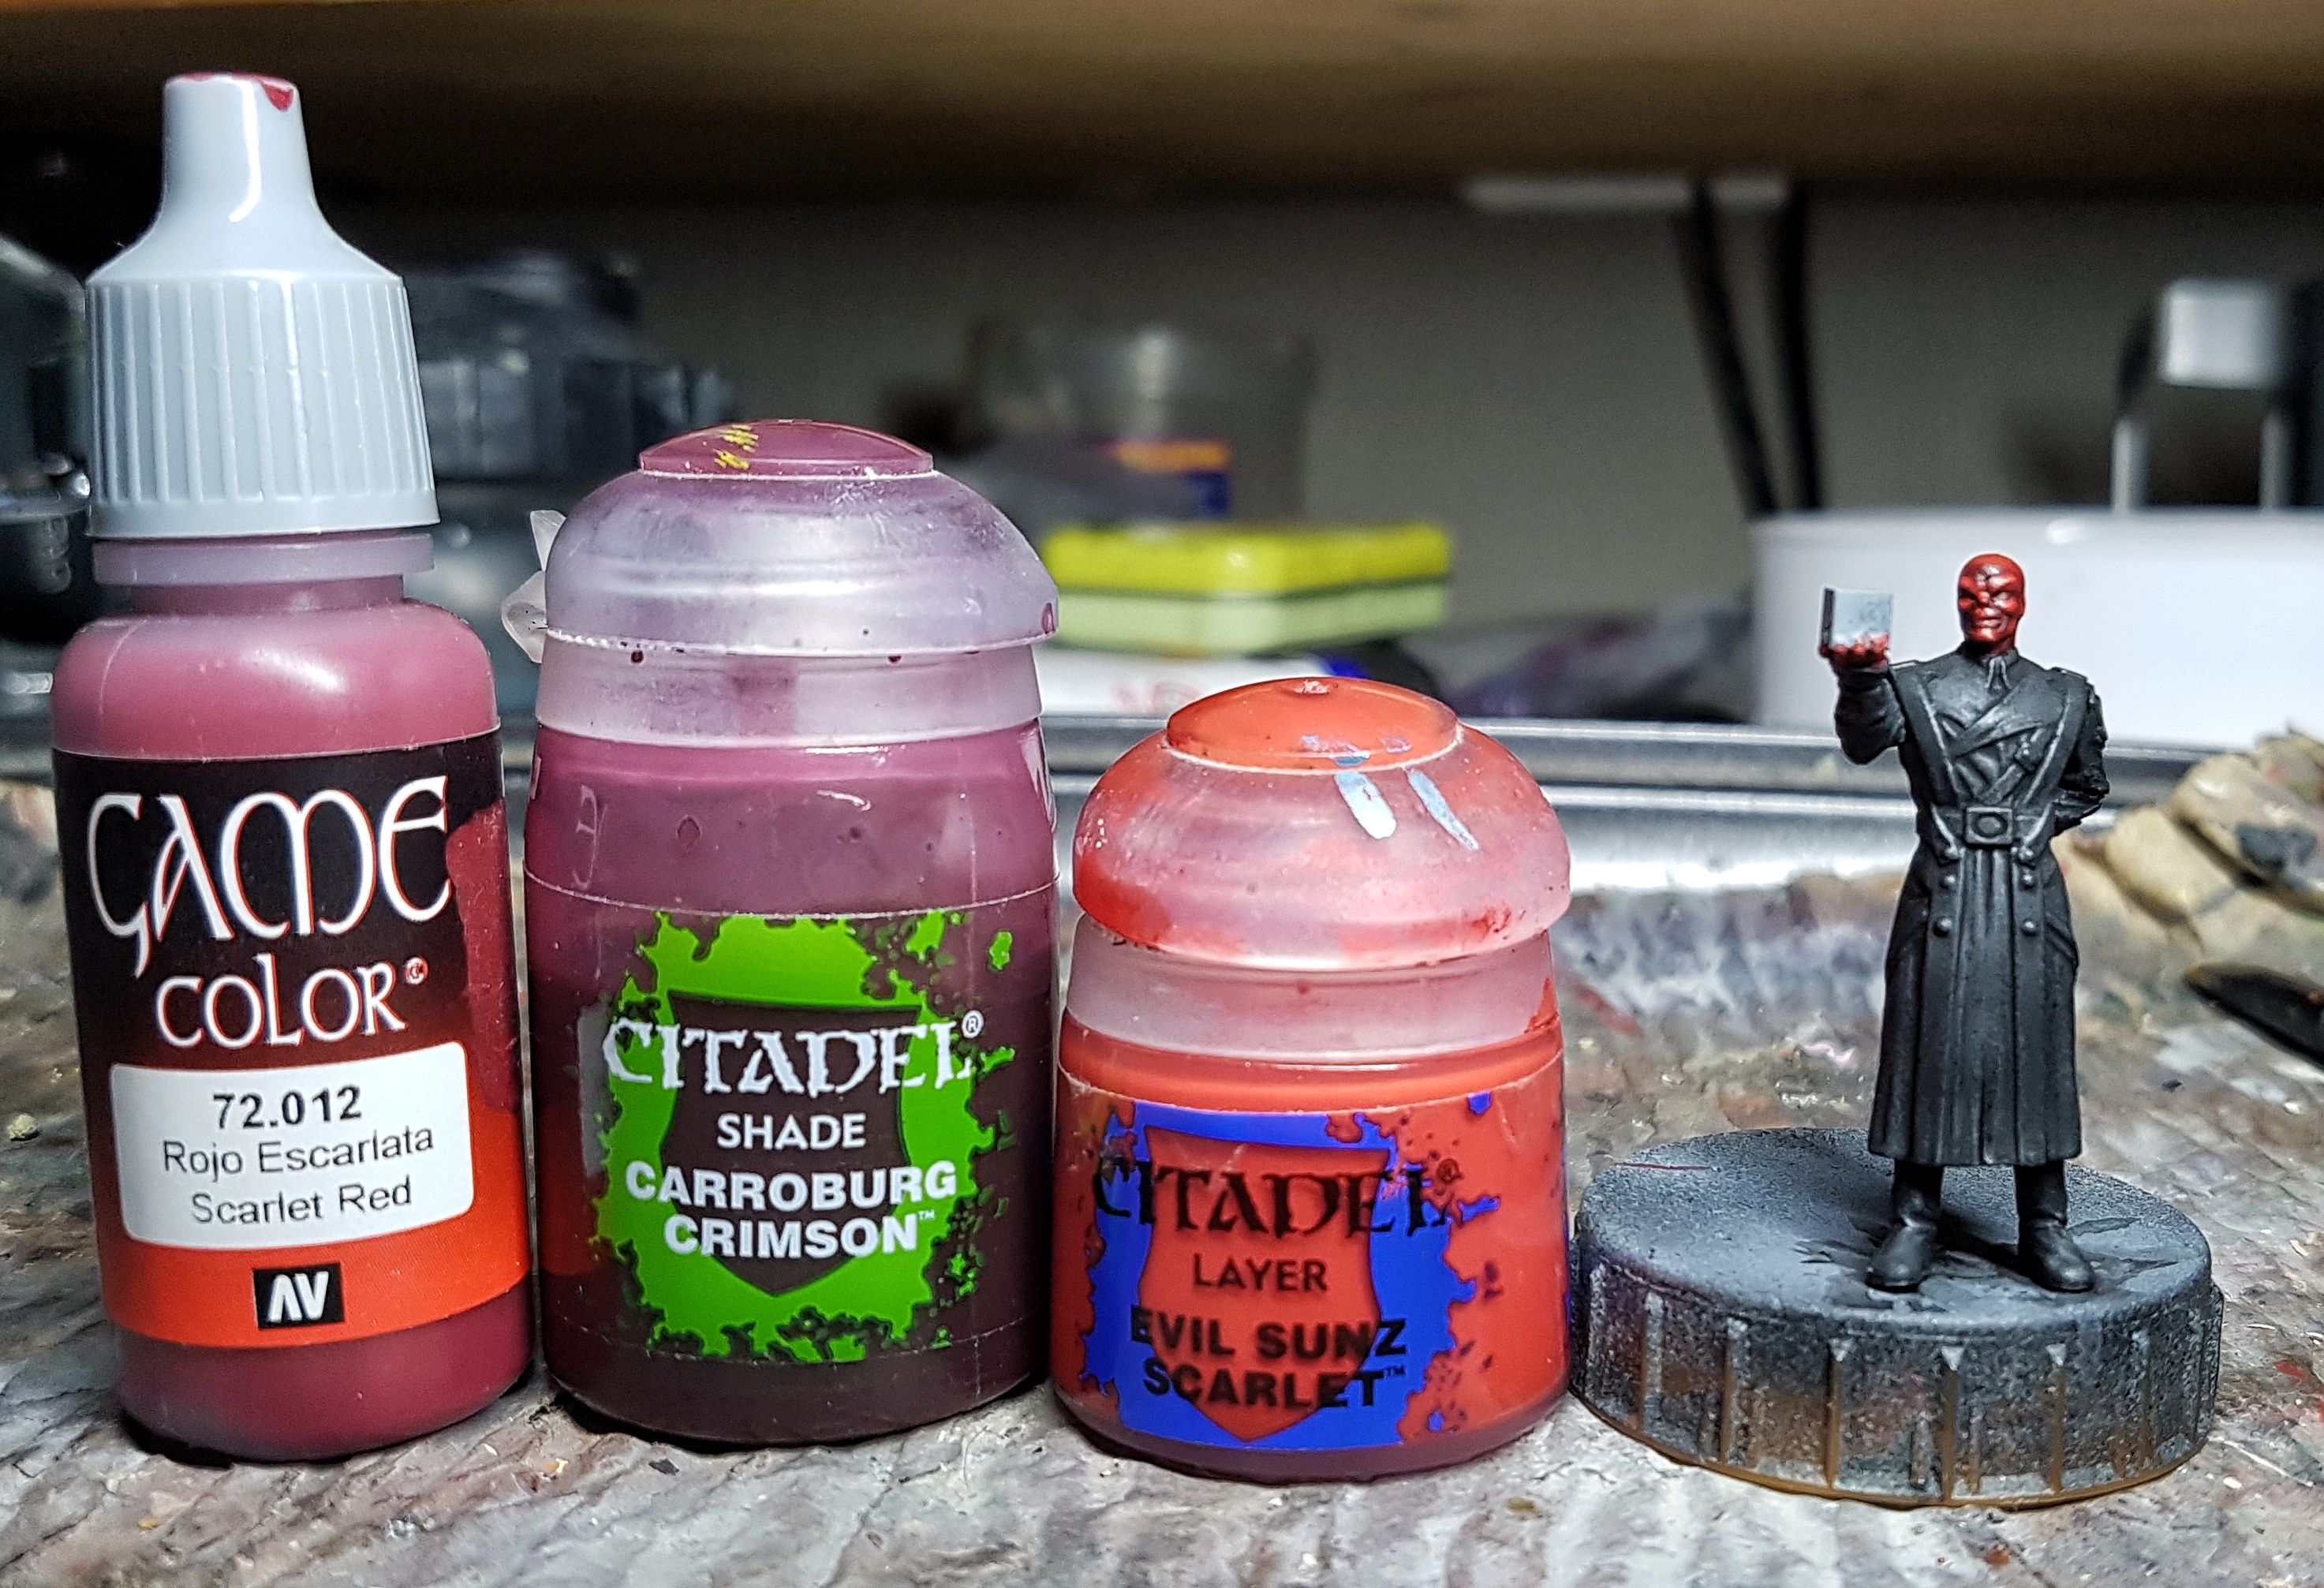
The final stage on Iron Man is the blue glow. Red Skull also has some blue glow on his Cosmic Cube so lets do him at the same time. This means ditching Iron Man for now, and painting red flesh.
Base: VMC 72.012 Scarlet Red
Shade: GW Carroburg Crimson
Reclaim base
Highlight: Base mixed with GW Evil Sunz Scarlet
Highlight: Evil Sunz Scarlet
This is my Khorne Bloodletters Flesh recipe, although there I might push it a little higher and there’s a lot more dependence on drybrushing. I’d usually be painting it on 30+ models instead of one. I’ll do all the eyes on everyone together later on, I think.
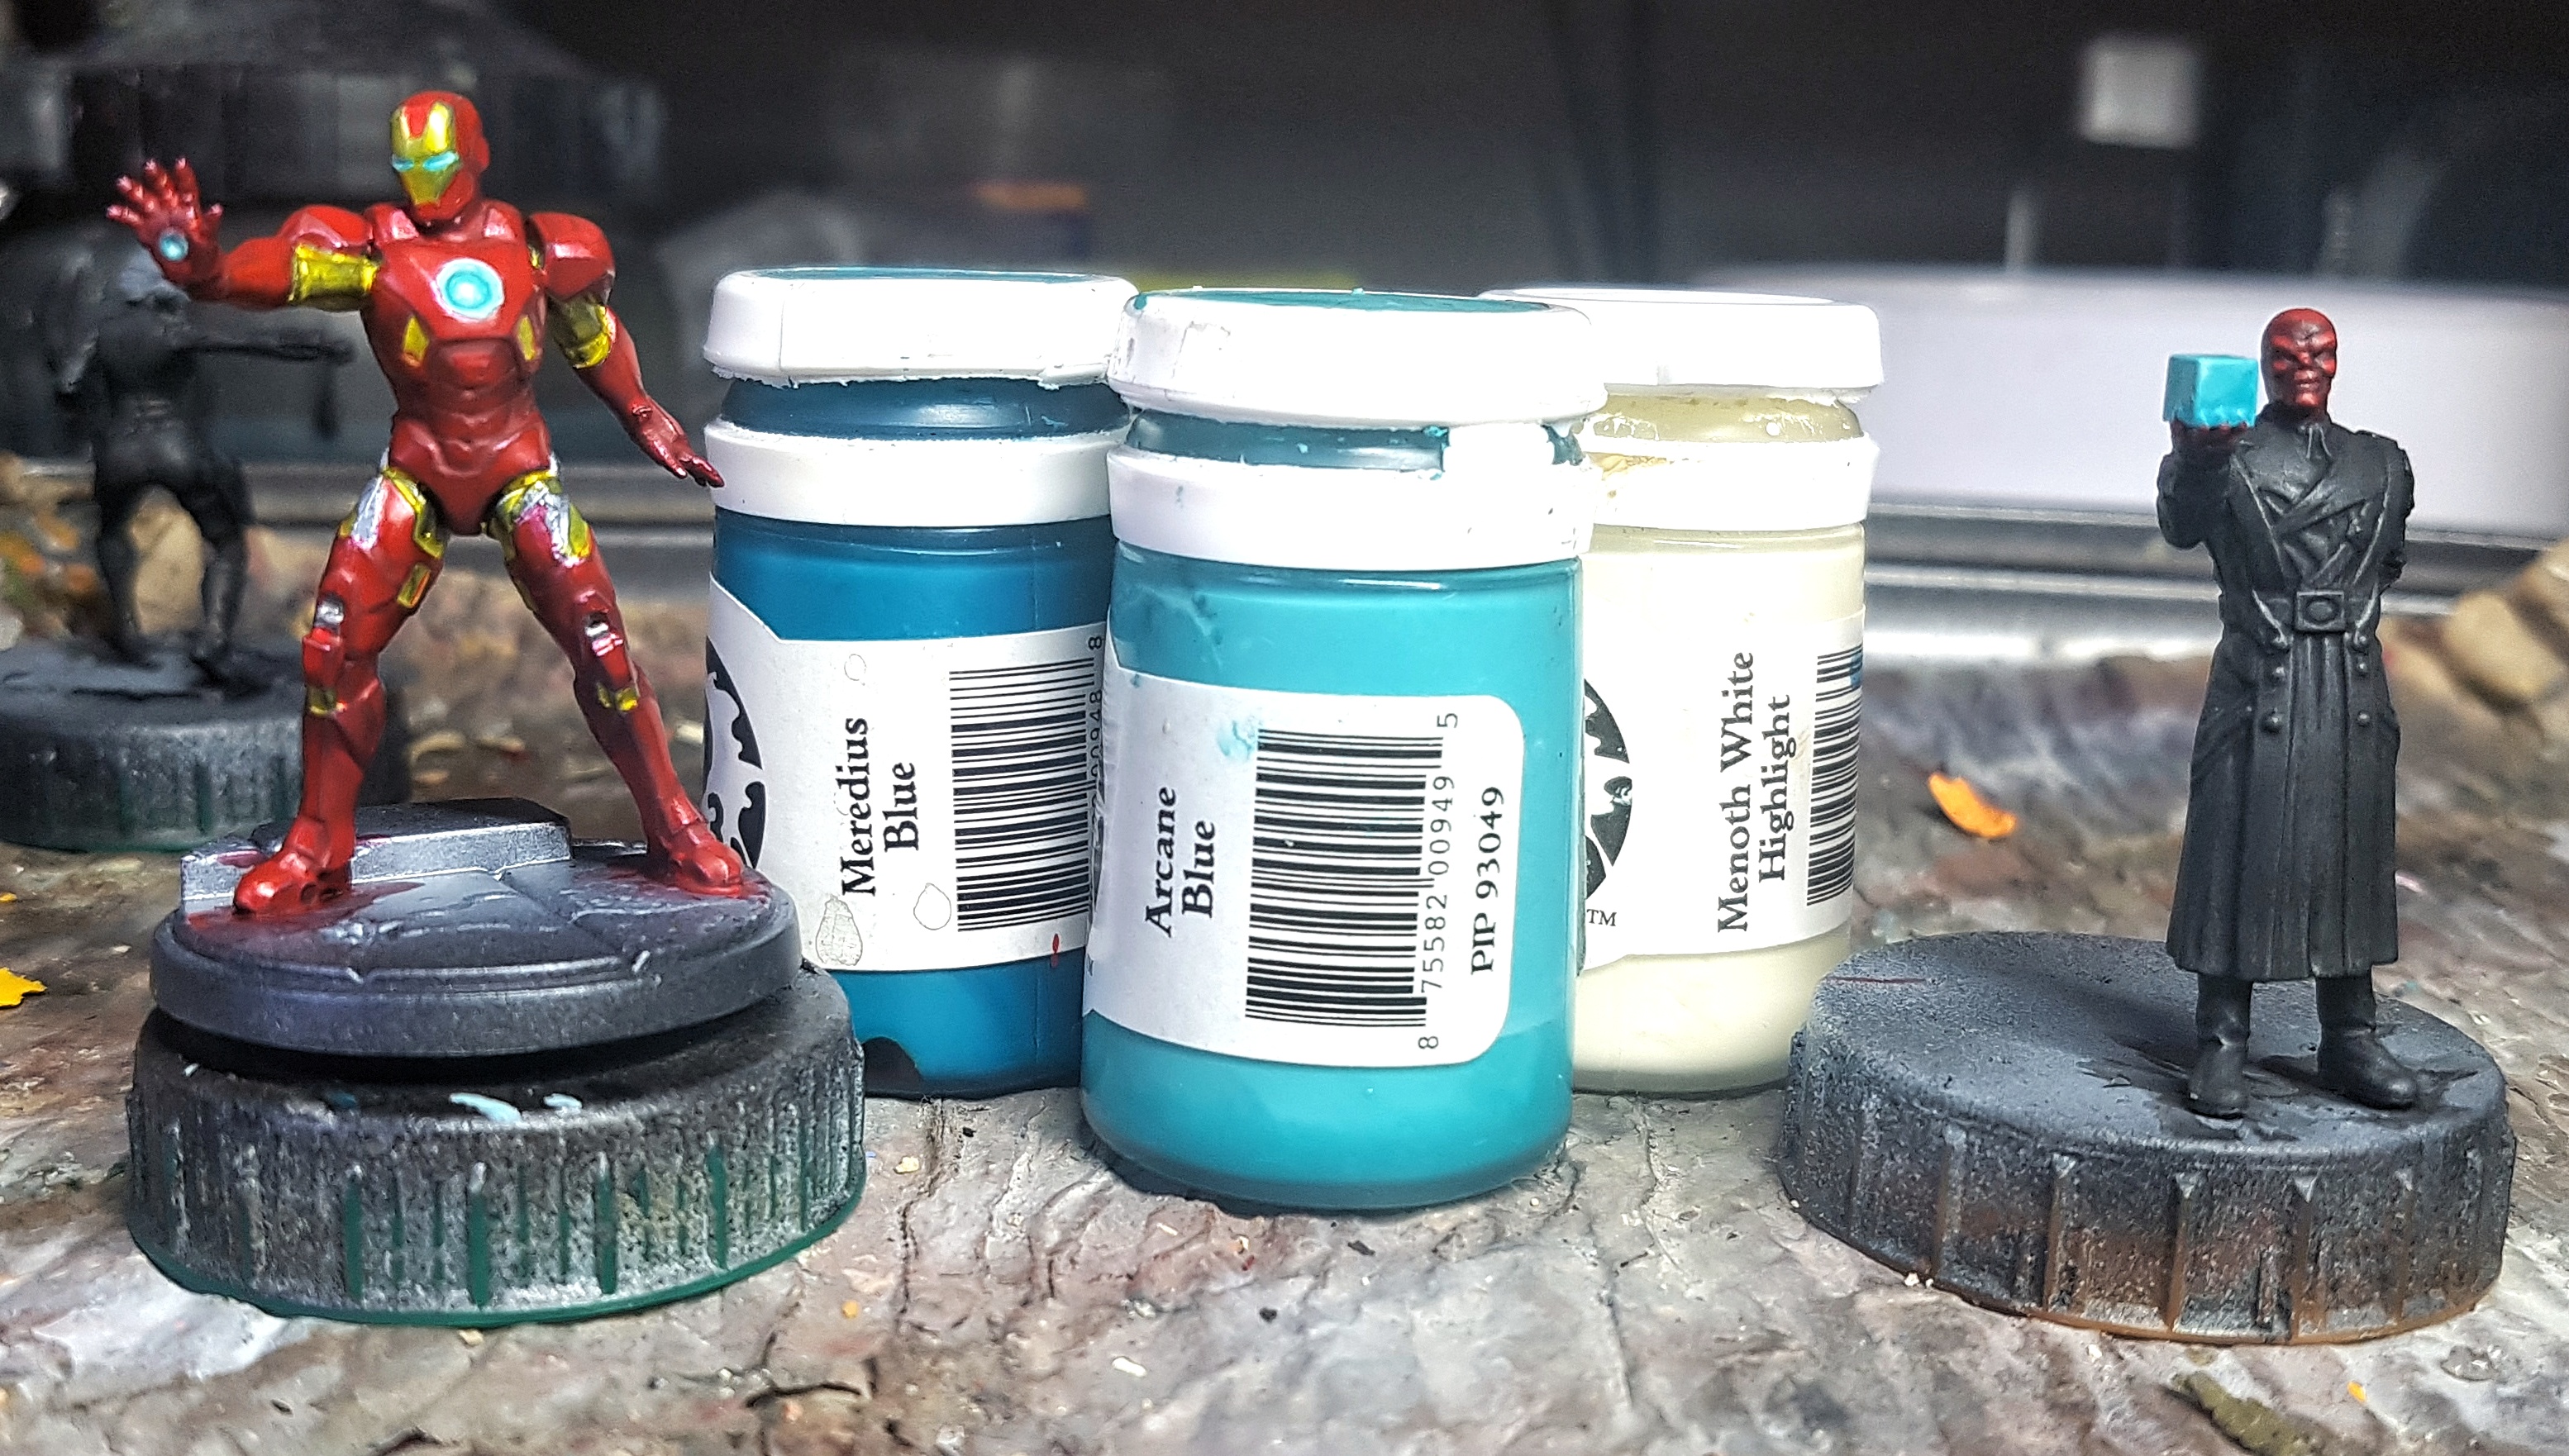
It’s now Sunday evening and time for the blue glow
I started with undercoating the areas with an off white. Any vibrant colour wants this or it’ll never get it’s full brightness.
Undercoat: P3 Menoth White Highlight (Get this even and complete, not too patchy)
Base: P3 Arcane Blue. Can afford to be a little patchy, but not ugly. Tonal variation can come across as variable moving light
Shade: P3 Meredius Blue
Highlight 1: Arcane Blue mixed with Menoth White Highlight
Highlight 2 & edge highlight: as 1, but let the MWH dominate the mix
Corner Highlight: Pure MWH
Once the base colour was down I mixed up a little of the different shades and highlights and kept them to hand. A ring of the shade was applied to iron mans chest light, and a dot to the nose end of each eye. Following the studio piece, I decided the front facing corner of the cube would be the lightest part. I then applied an L of the shade in the opposite corner of each facing. Once that had dried I applied a second coat over the top and some of the base colour next to it and ran them in to each other. Once that was dry I did the same thing, but with Highlight 1 and the base colour. A little Highlight 1 and then 2 was also applied to the outside of Iron Man’s eyes. Edge and then corner highlights were then applied to the cube.
I could have added just a touch of P3 Coal Black or VMC Periscopes to the shade colour to get an extra darker tone.
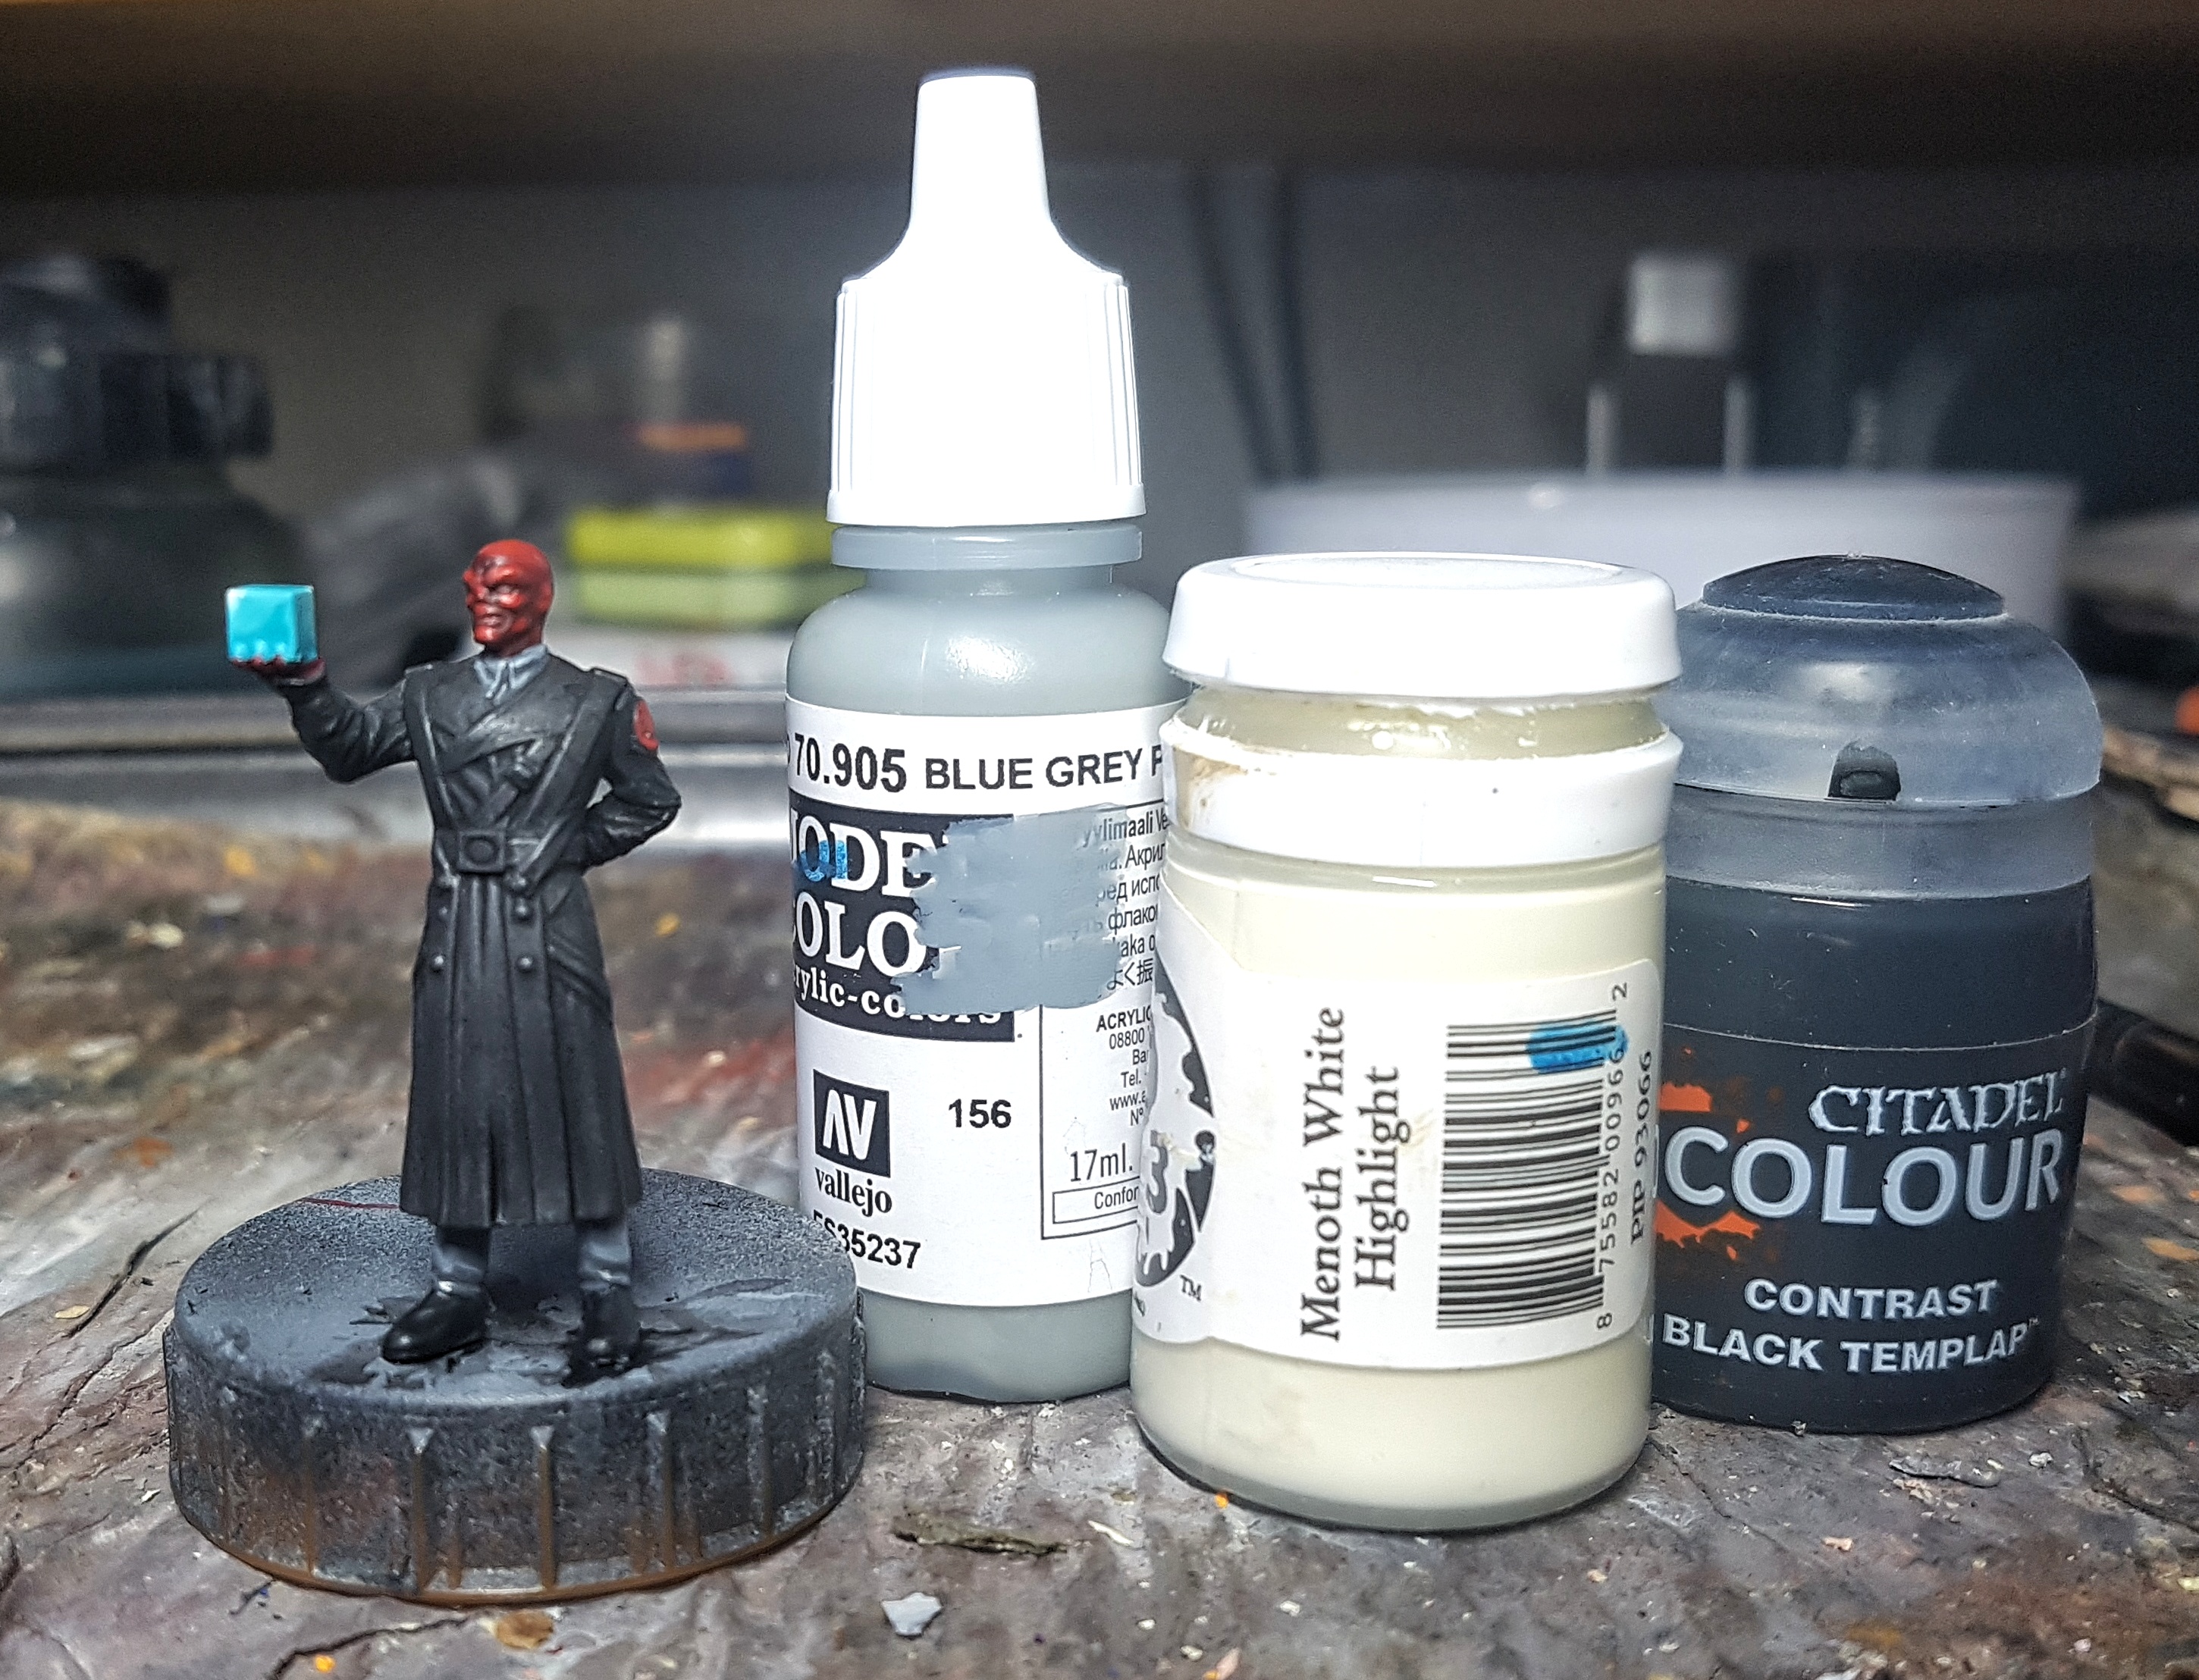
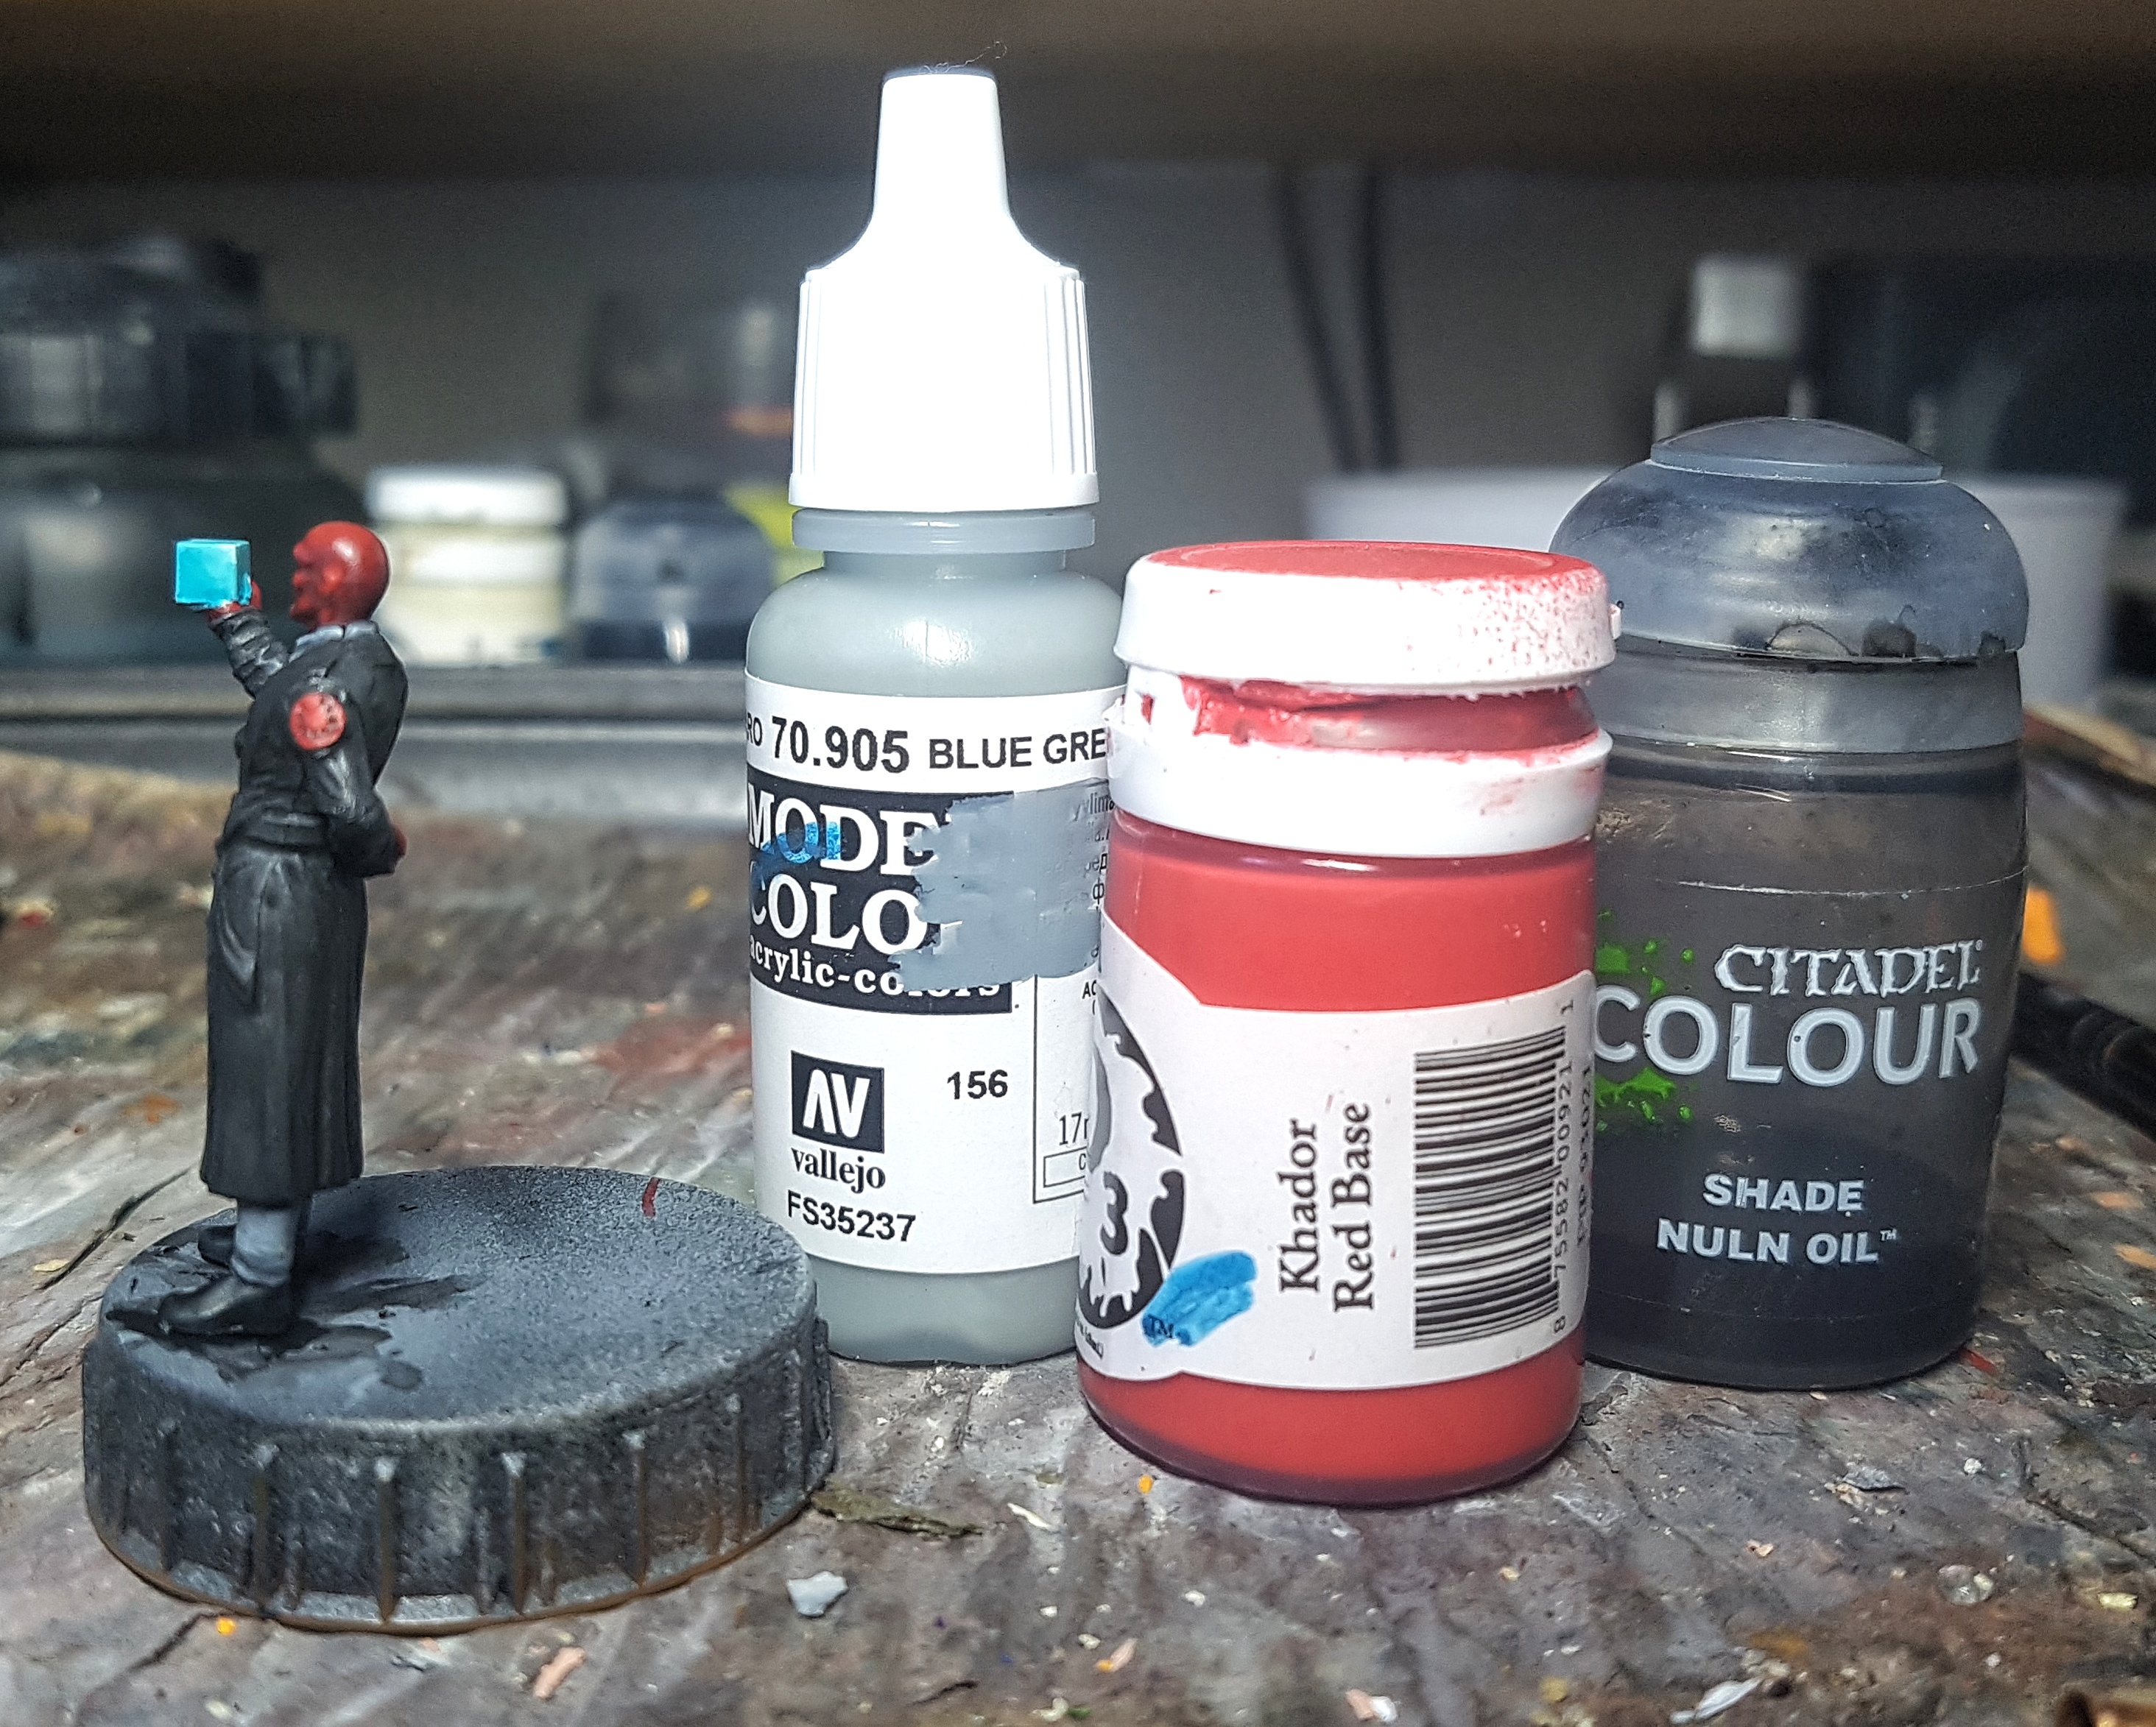
Iron Man is now done, and Red Skull looks most of the way there. Let’s focus on him next. Looking at the studio pic, he is wearing all black, but it’s different blacks. I’ve the Vallejo German Field Grey set within arms reach. Let’s look at what that says. It feels appropriate here.
Paints Used
VMC 70.868 Dark Seagreen
VMC 70.905 Blue Grey
P3 Thamar Black (Any black will do)
The trousers and shirt were based with Dark Seagreen. Blue Grey was then used to highlight them. Some half and half tones may have been used too. While it was out I also base coated the shoes. I’ll come back to them in a minute. A little black was added to the Dark Seagreen and this was used to shade shirt and trousers.
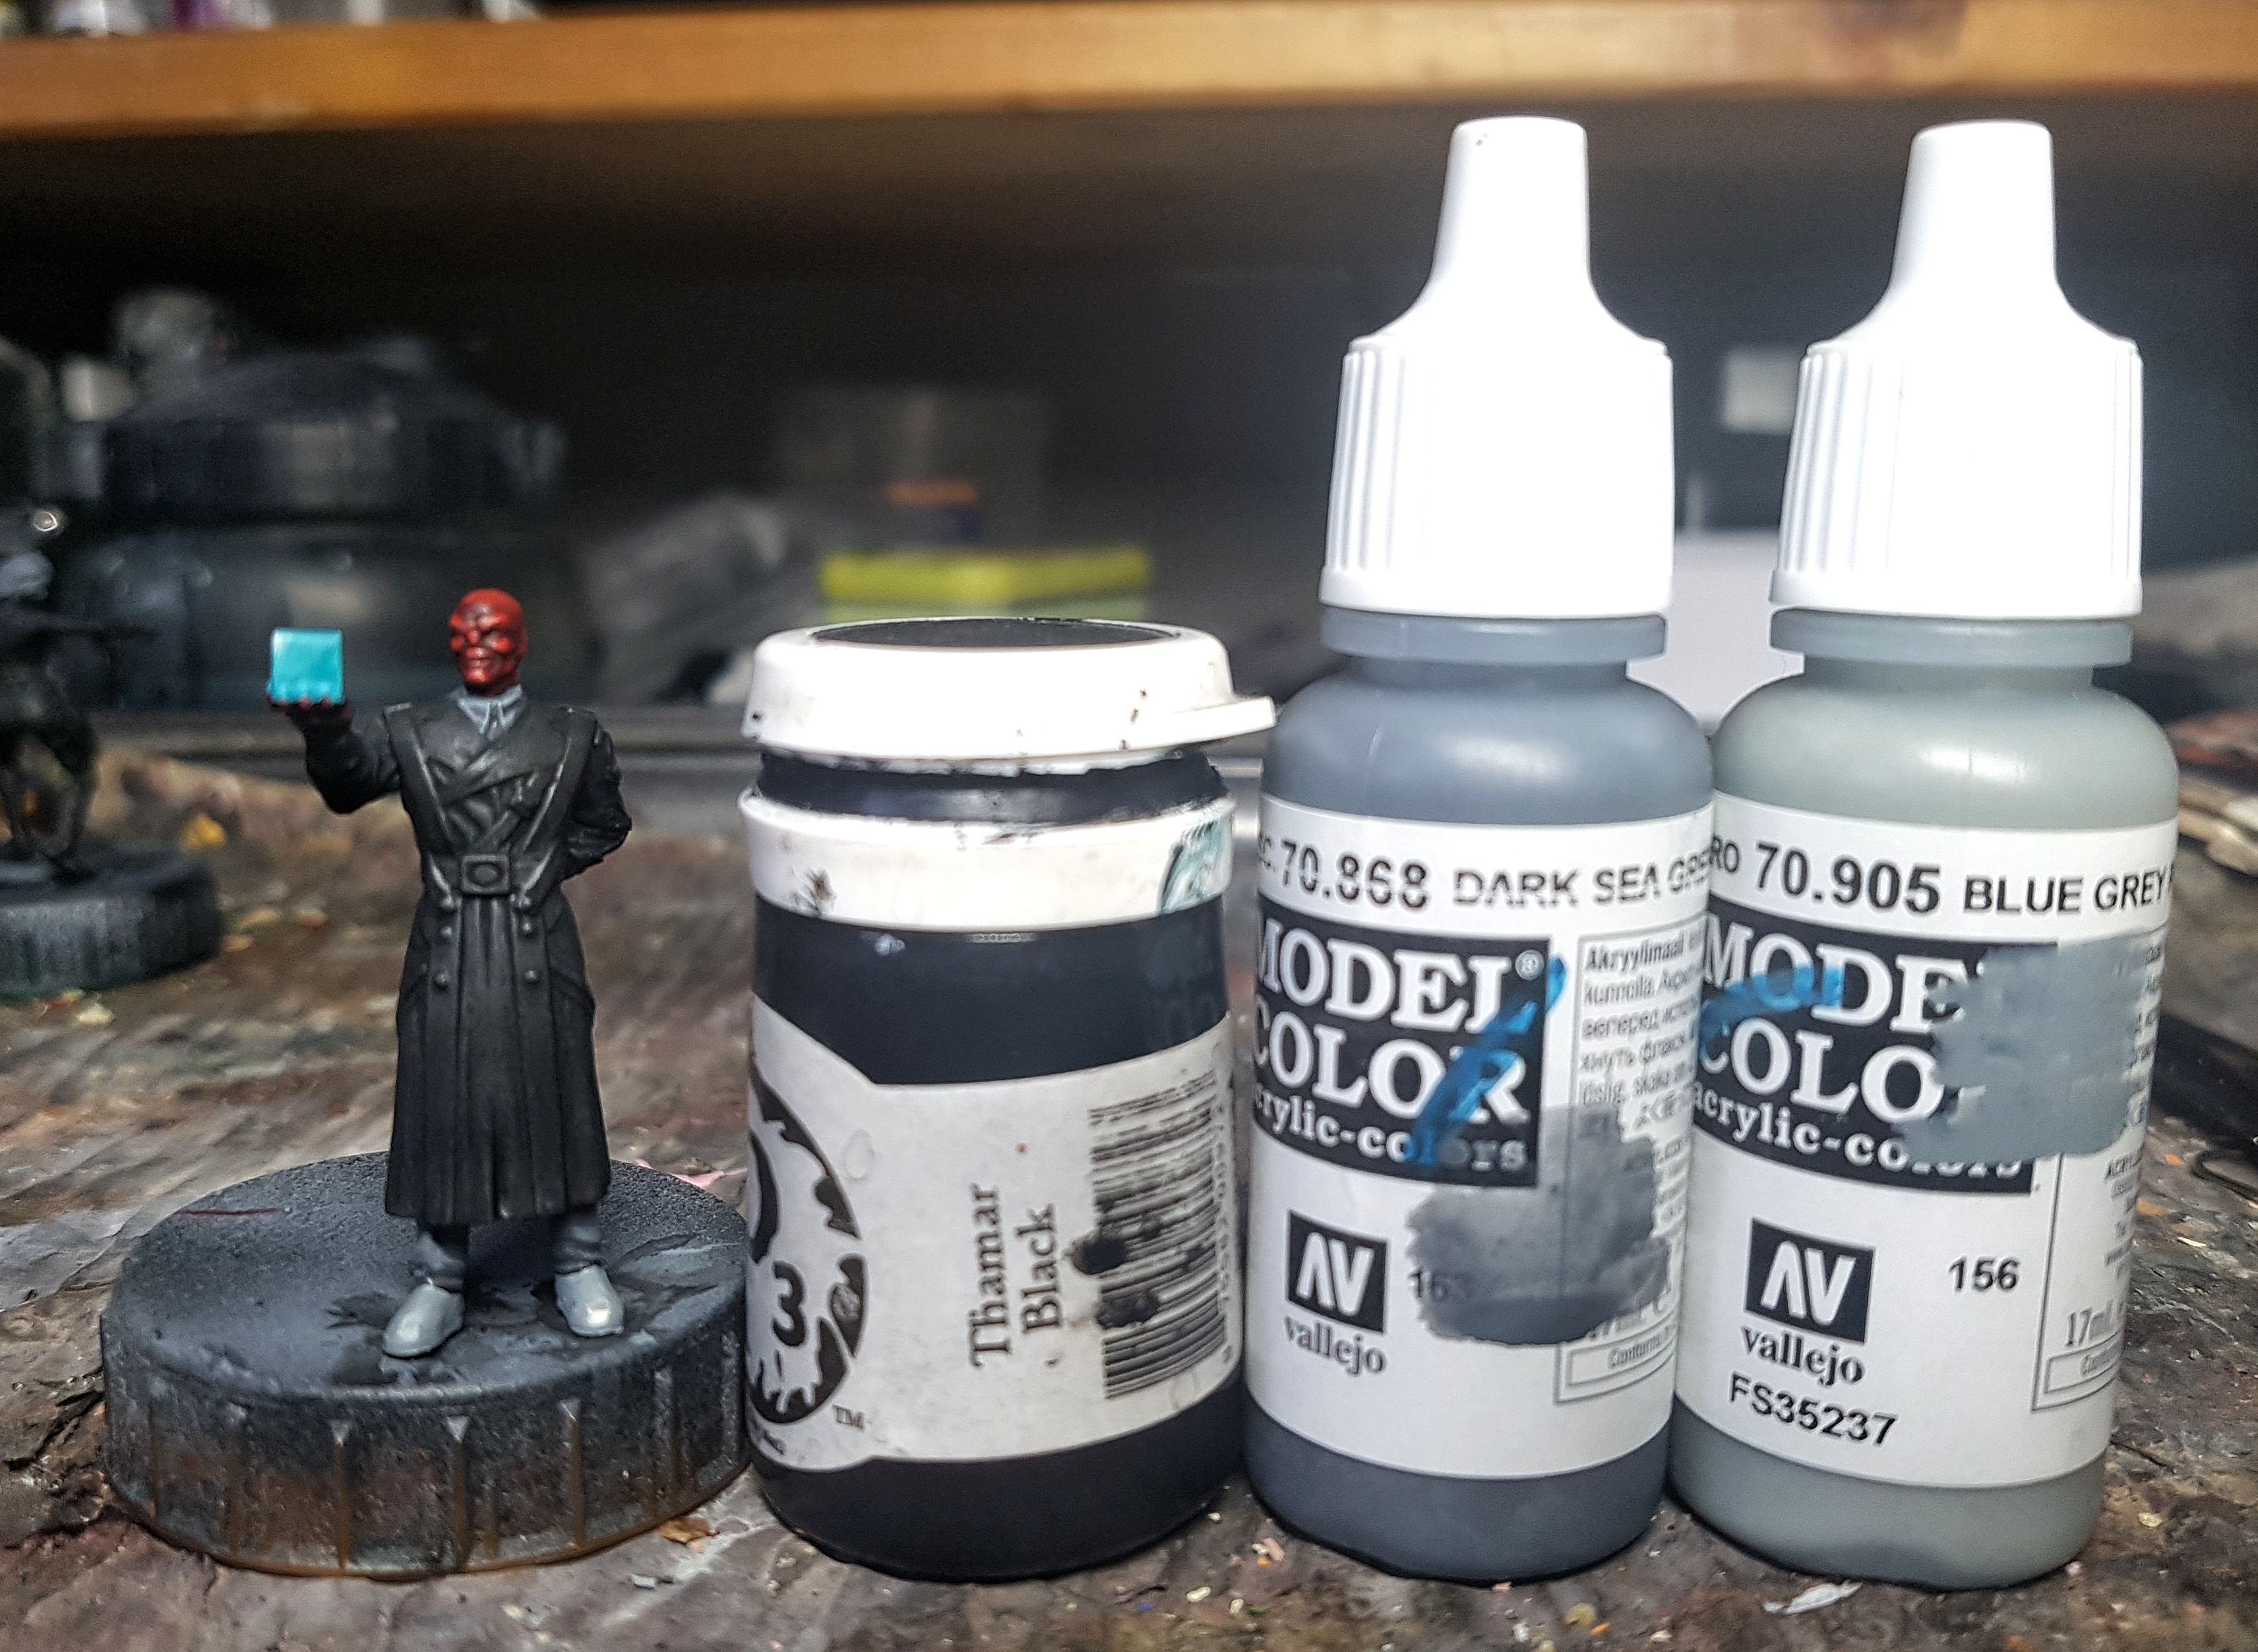
The shoes were then given a sloppy highlight of a blob of P3 Menoth White Highlight where the shine on the toes would be. This gives me a lazy man’s zenithal preshade. They were then coated with GW Contrast Black Templar.
He’s got some Hydra emblems on each shoulder. I don’t know if it’s just me, but they seem to be lacking most of their detail. I went lazy on them because of this.
I gave them an undercoat of VMC Blue grey because it’s already on my palette and much closer to white than what’s already there. I then carefully put on a couple of coats of P3 Khador Red base, aiming for a different brighter shade of red than his skin. I did my best to but some GW Nuln Oil in what recessed of the emblem made it through the printing process (unless my airbrushed primer and base coats are to blame?)
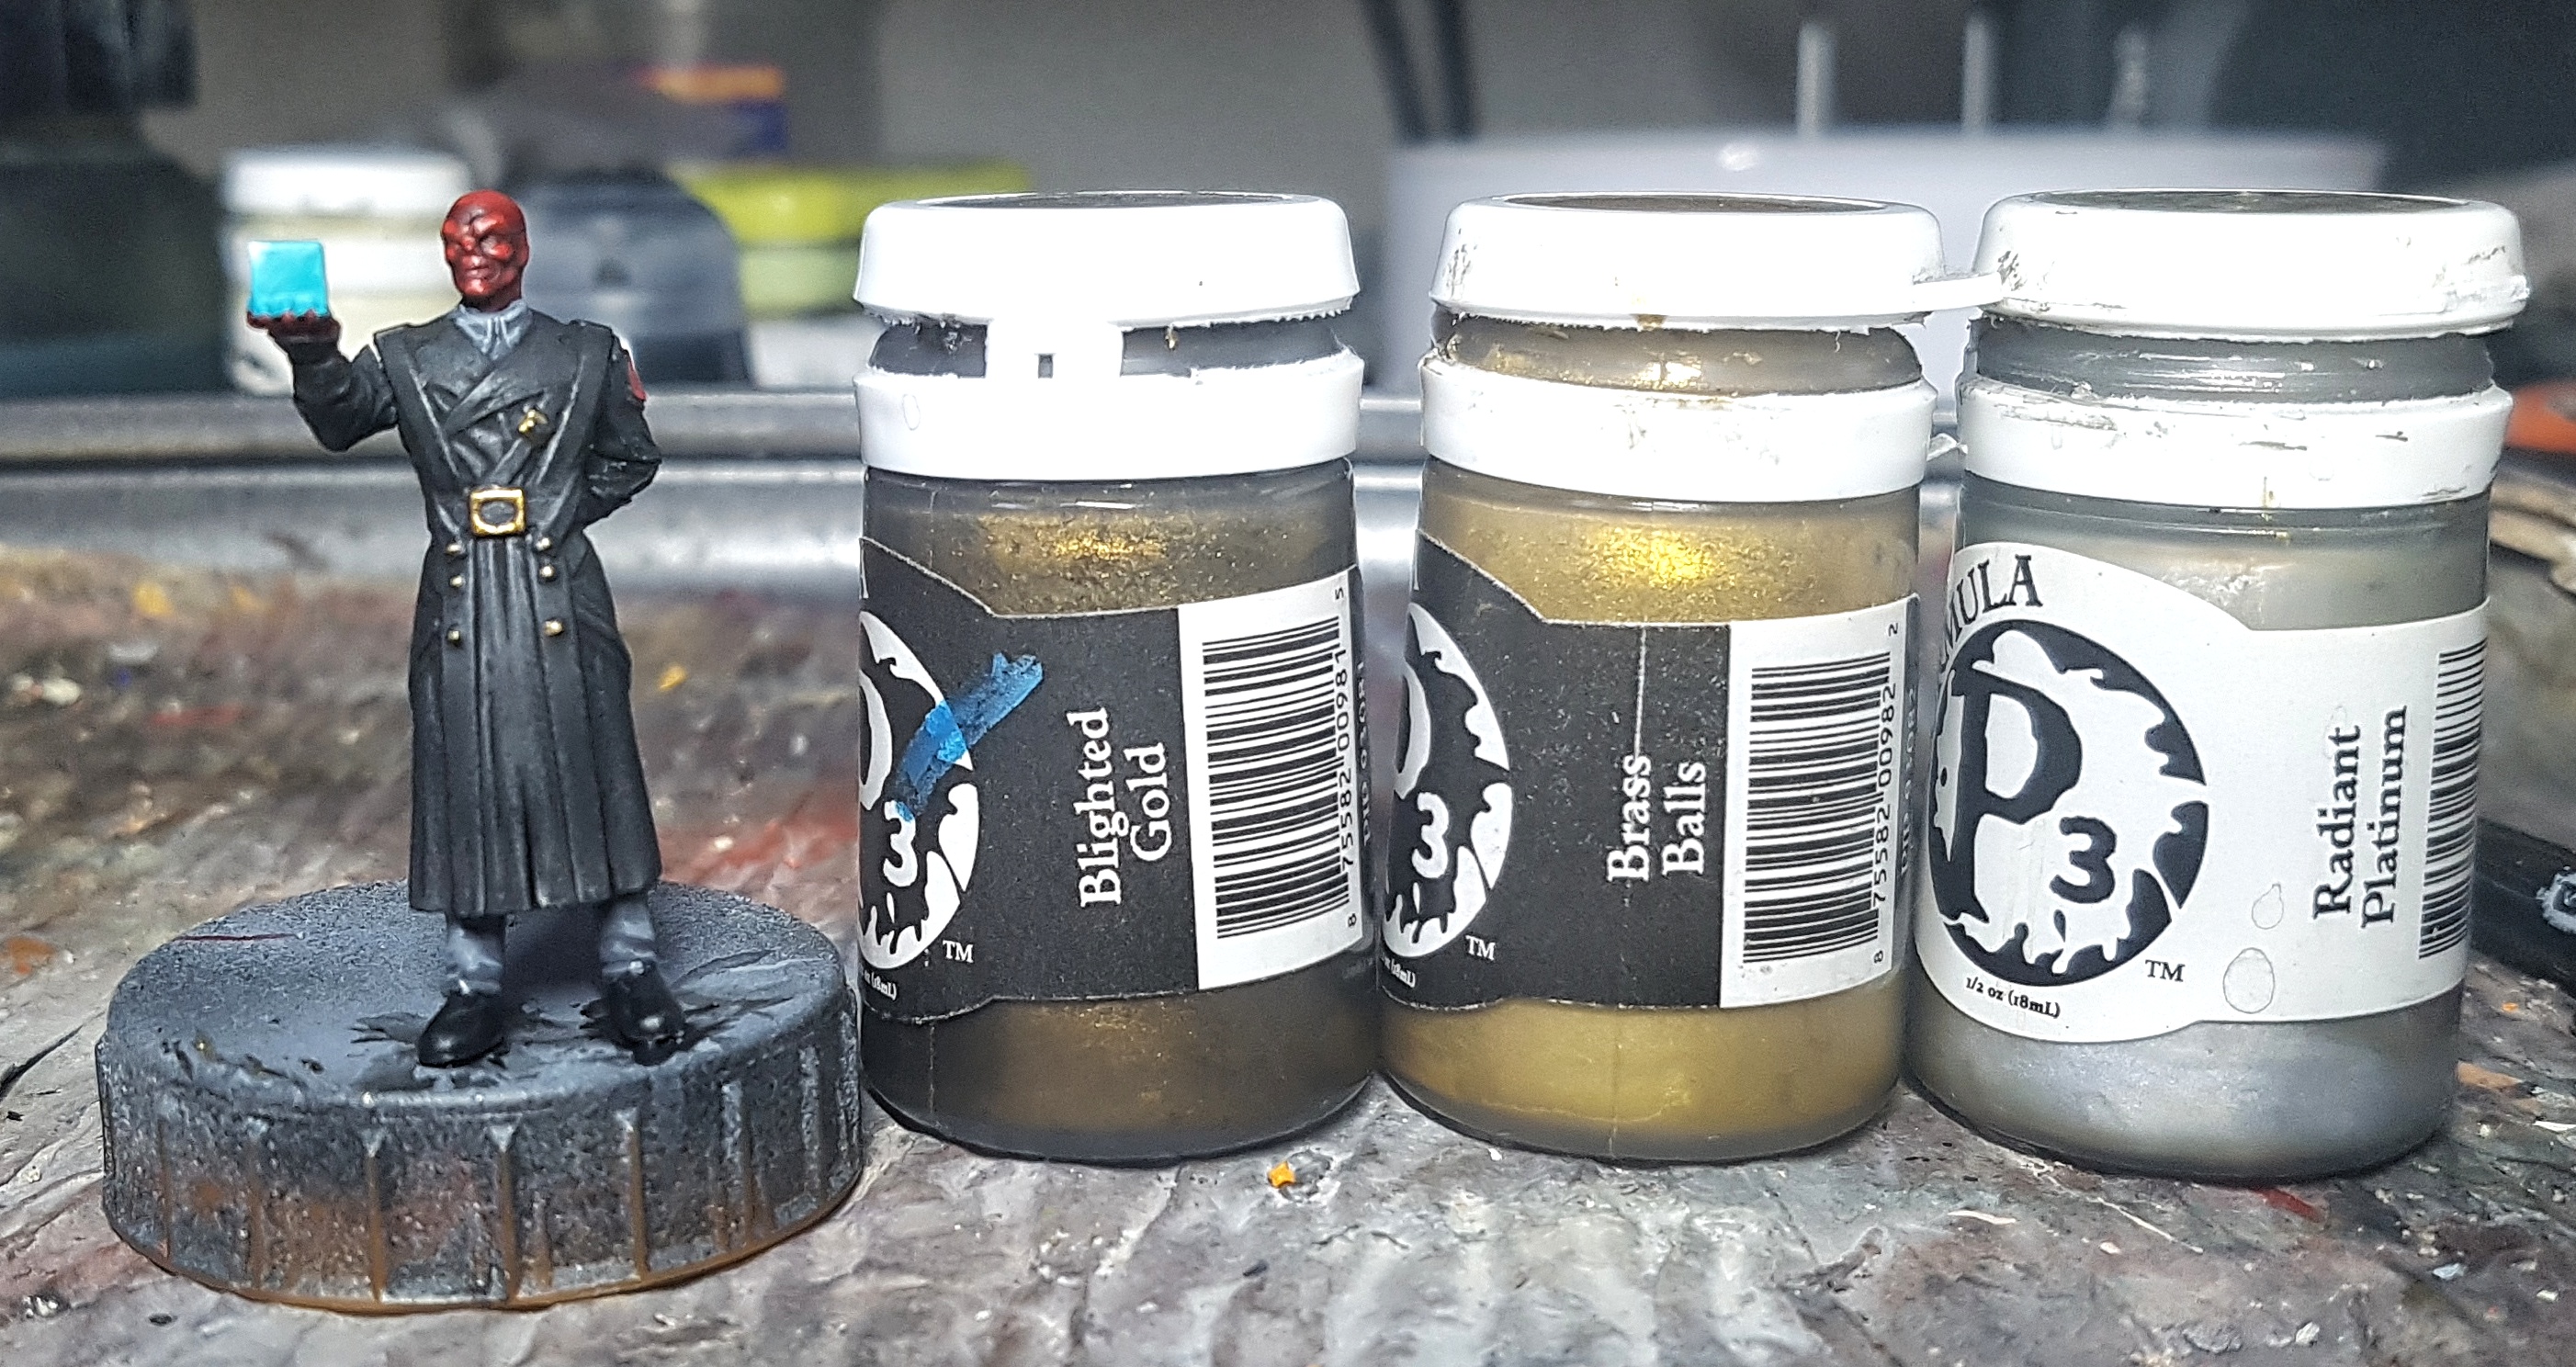
This just leaves the gold buckle and buttons.
Base: P3 Blighted Gold
Highlight 1: P3 Brass Balls
Highlight 2: P3 Brass Balls mixed with p3 Radiant Platinum
Reclaim the darker areas with some of the base
I wasn’t sure what to do next so I thought I may as well paint the Caucasian flesh on everyone who needs it. Before Sunday evening was over I’d based and shaded it. I’ll cover this in my next entry, once it’s finished. Plus, I’m at my post limit for this entry.
I’m 5 evenings in since I was holding untouched sprue and I have 3 models ready for basing and varnish, and strong progress made on a bunch of other models. I’m amazed at how quickly and easily this is all flying together. I should have this done much sooner than I expected. I’ve also done some work on that Kingdom Death mini from earlier in the same timeframe, when i had my airbrush out last.
I’ve got some thoughts on alternate terrain I can use or make, including mats. I’ll make a post on the subject later, once I’ve finished my research and have some pics to show off. I have, or expect to soon have everything I need for two thematic tables, and at least the basis of a third: A roadside diner, a Martian outpost, and a (possibly medieval) graveyard. With comics your heroes can fight anywhere, and anywhen so it’s all valid.
Evening 6: Crossbones, Black Widow, Captains America and Marvel
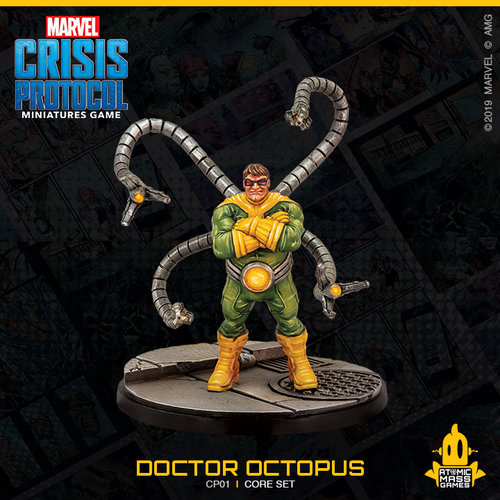
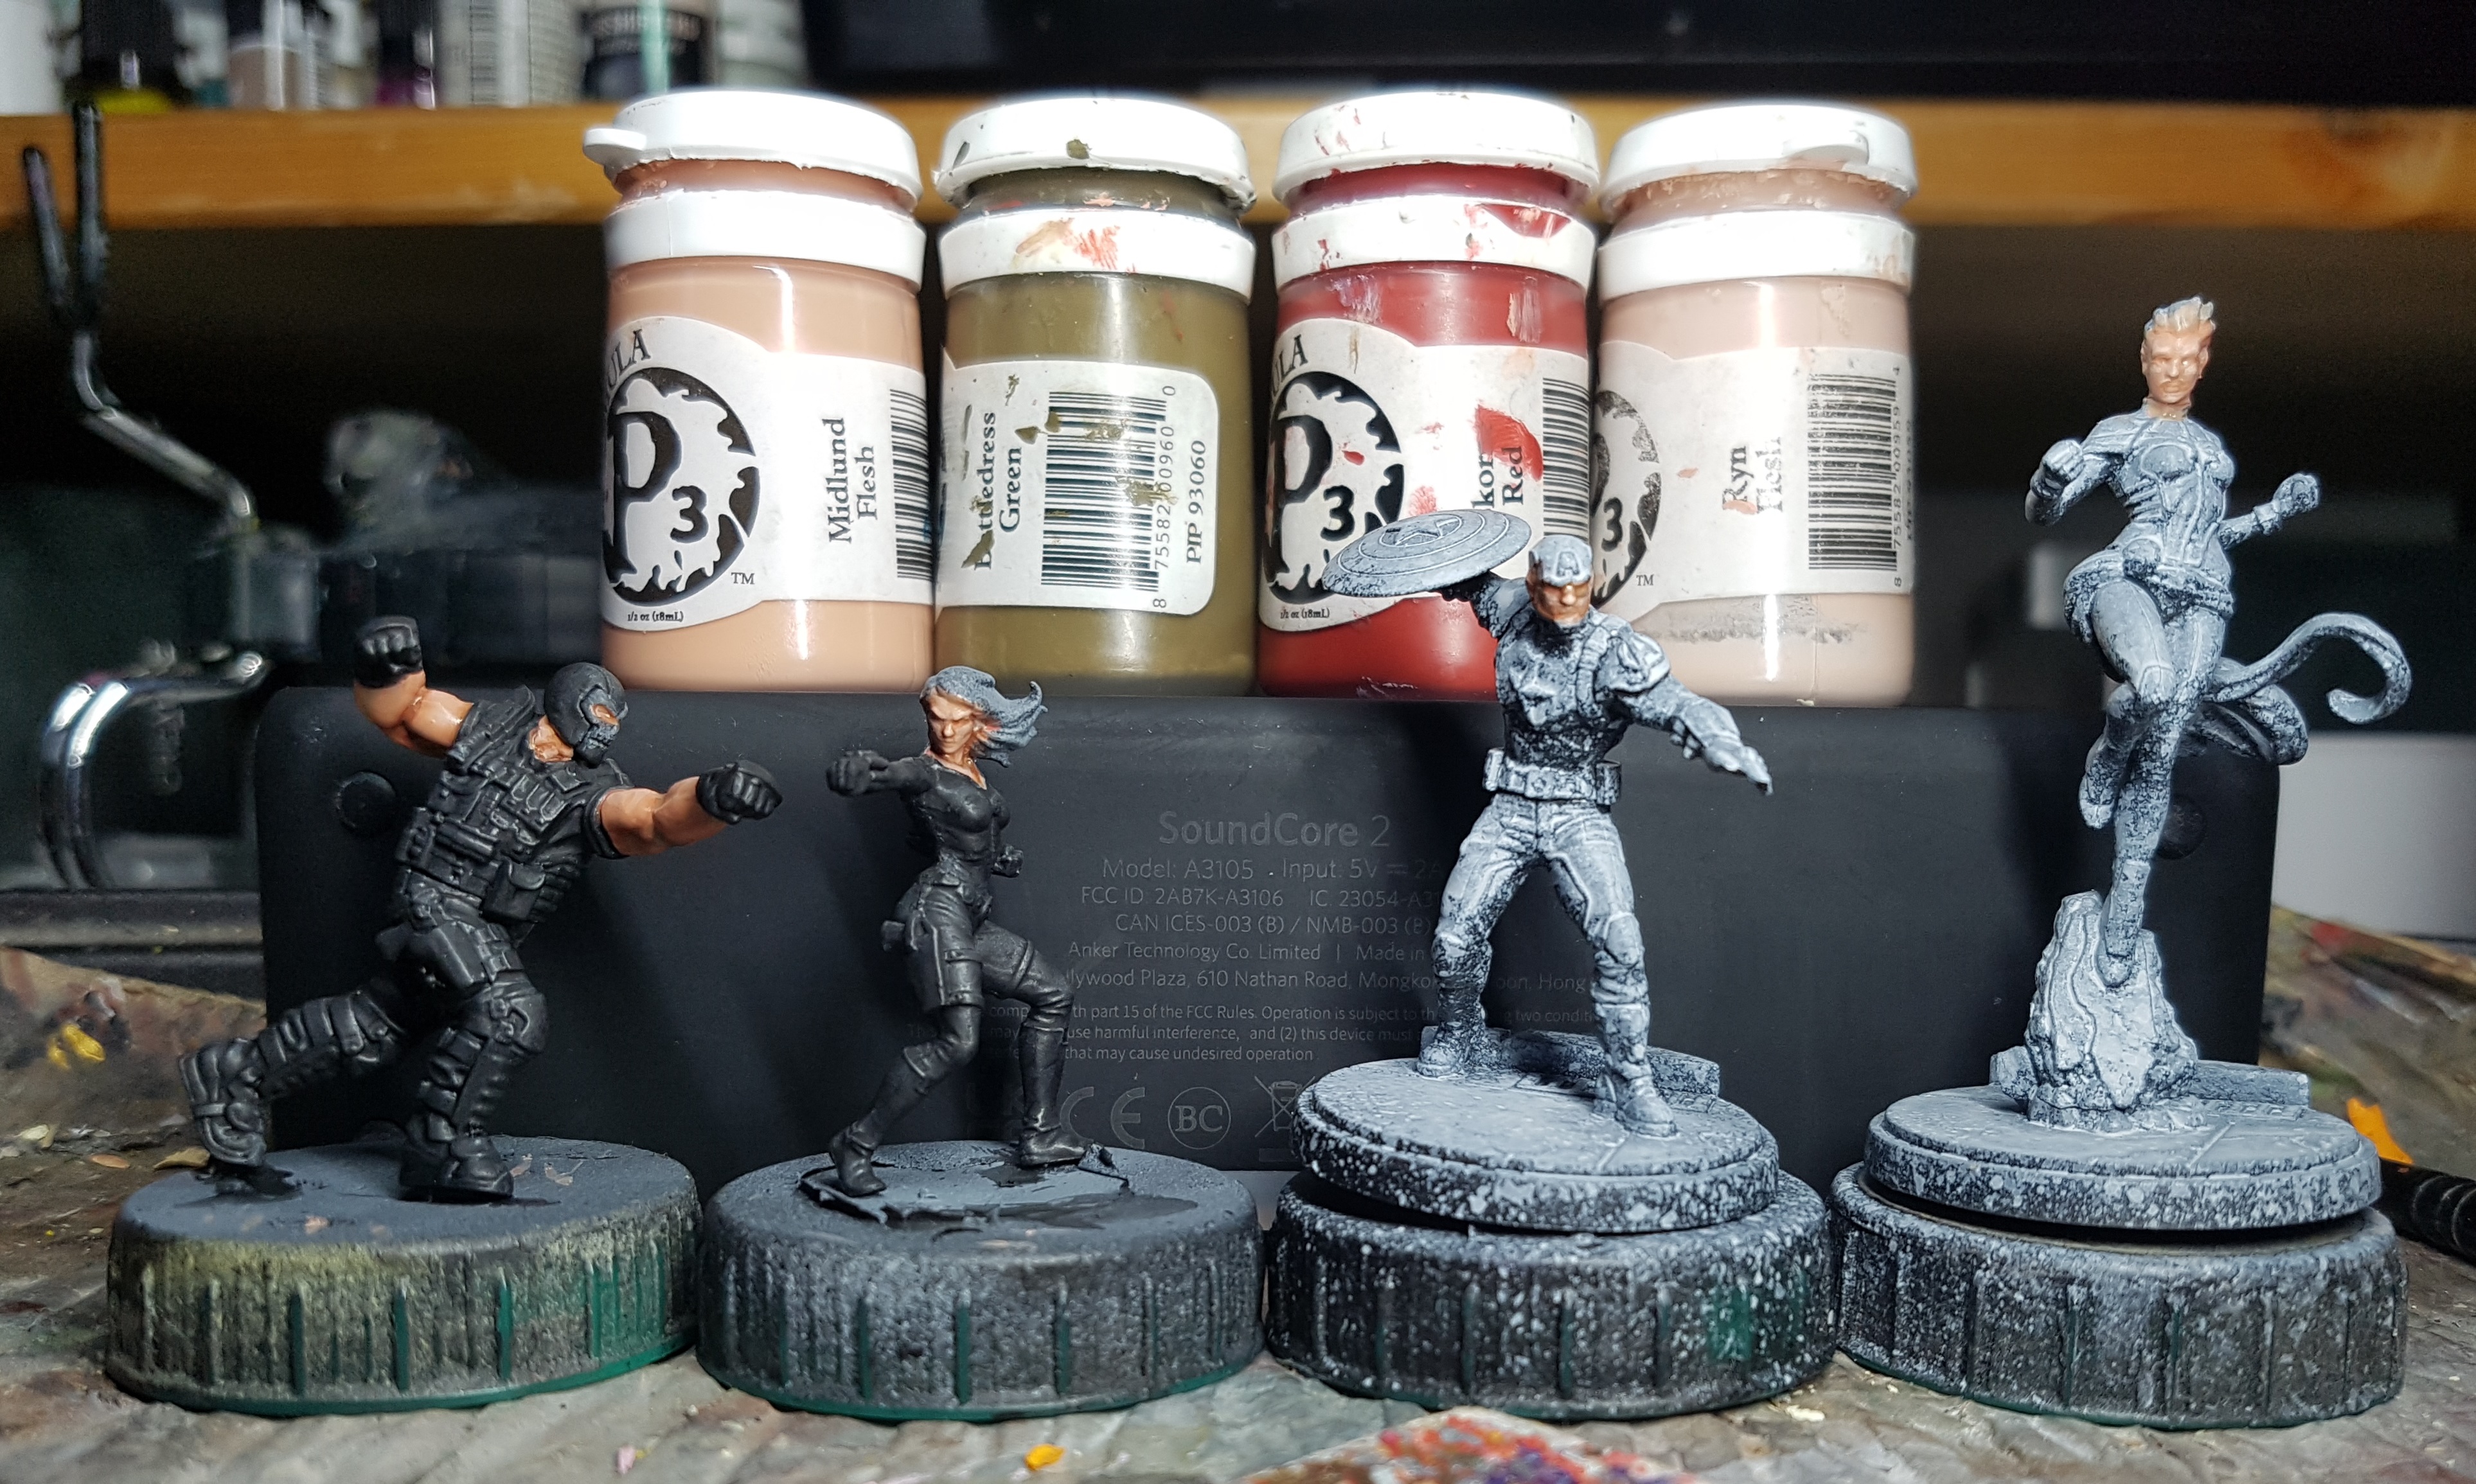
Time to get all the Caucasian flesh done. Doc Ock came with his face painted so I left that alone. I should probably have painted it though. I went for the Cygnar flesh scheme from Forces of Warmachine – Cygnar, by Privateer Press.
Base: P3 Midlund Flesh
Wash: Midlund Flesh mixed with P3 Skorne Red
Wash: Midlund Flesh mixed with Battledress Green
Wash: Skorne Red mixed with Battledress Green, aiming for the deeper areas only
Highlight: Midlund Flesh
Highlight: Midlund Flesh mixed with P3 Ryn Flesh
Highlight: Ryn Flesh on the peaks / glint areas only
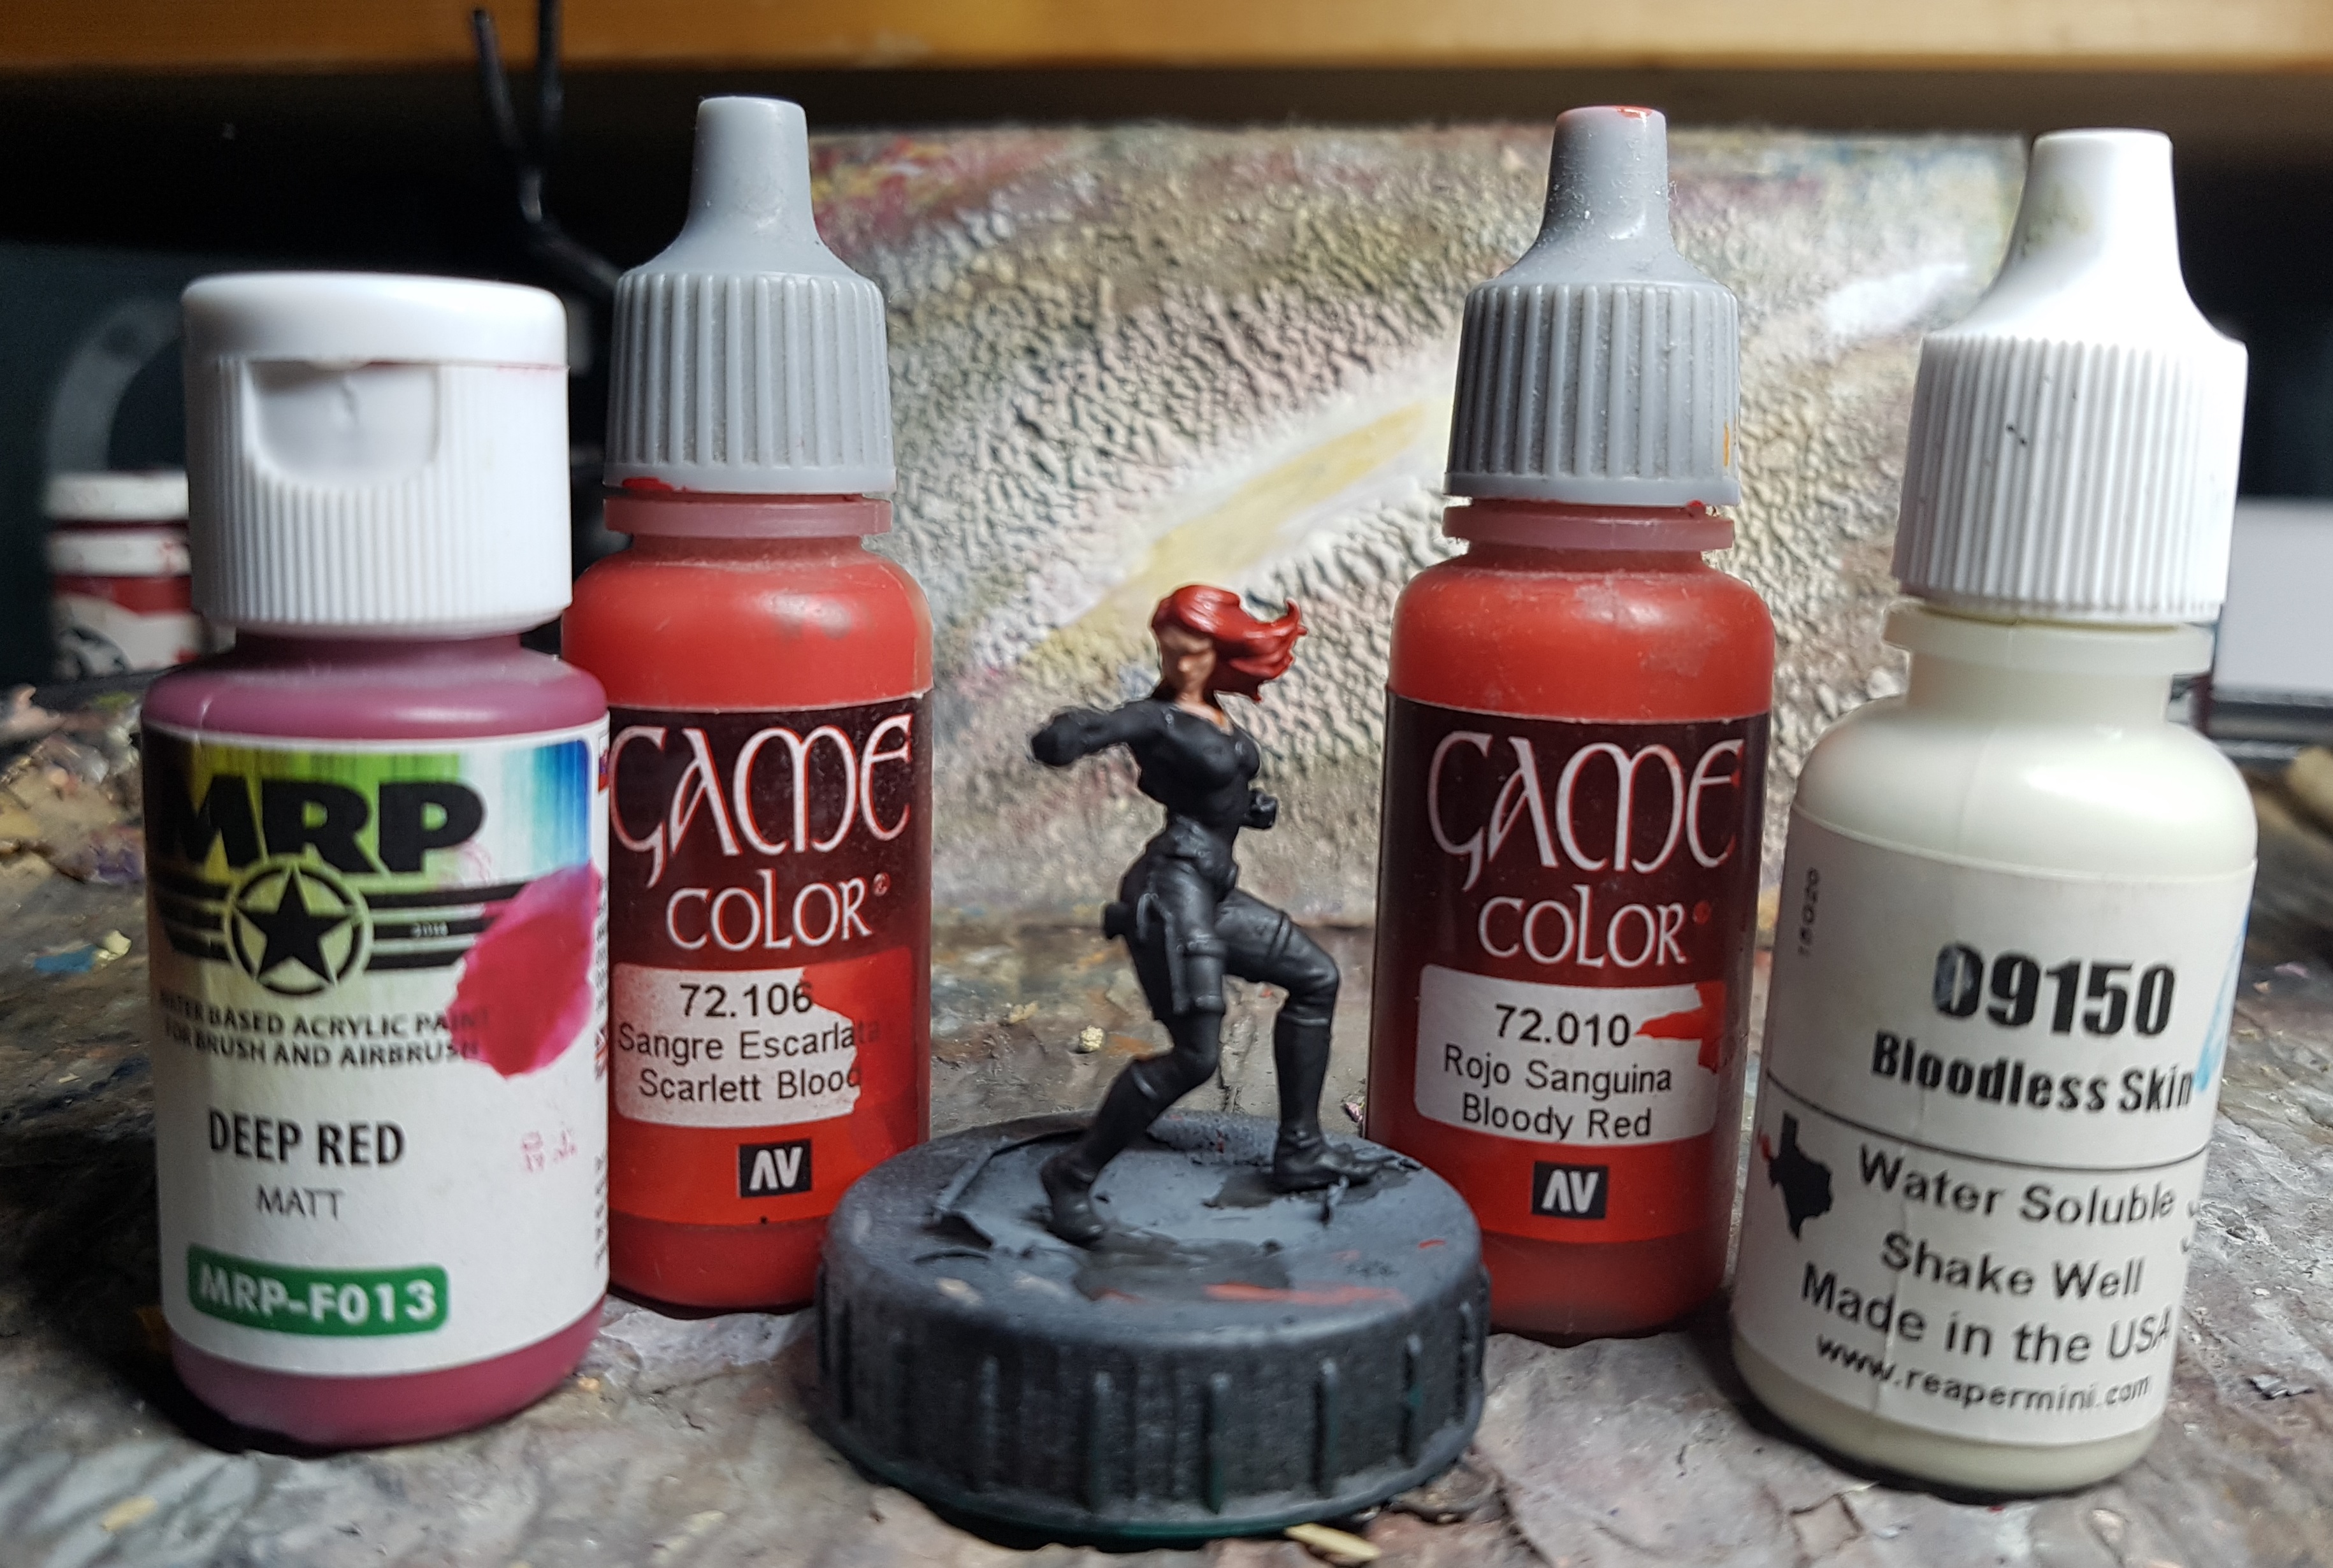
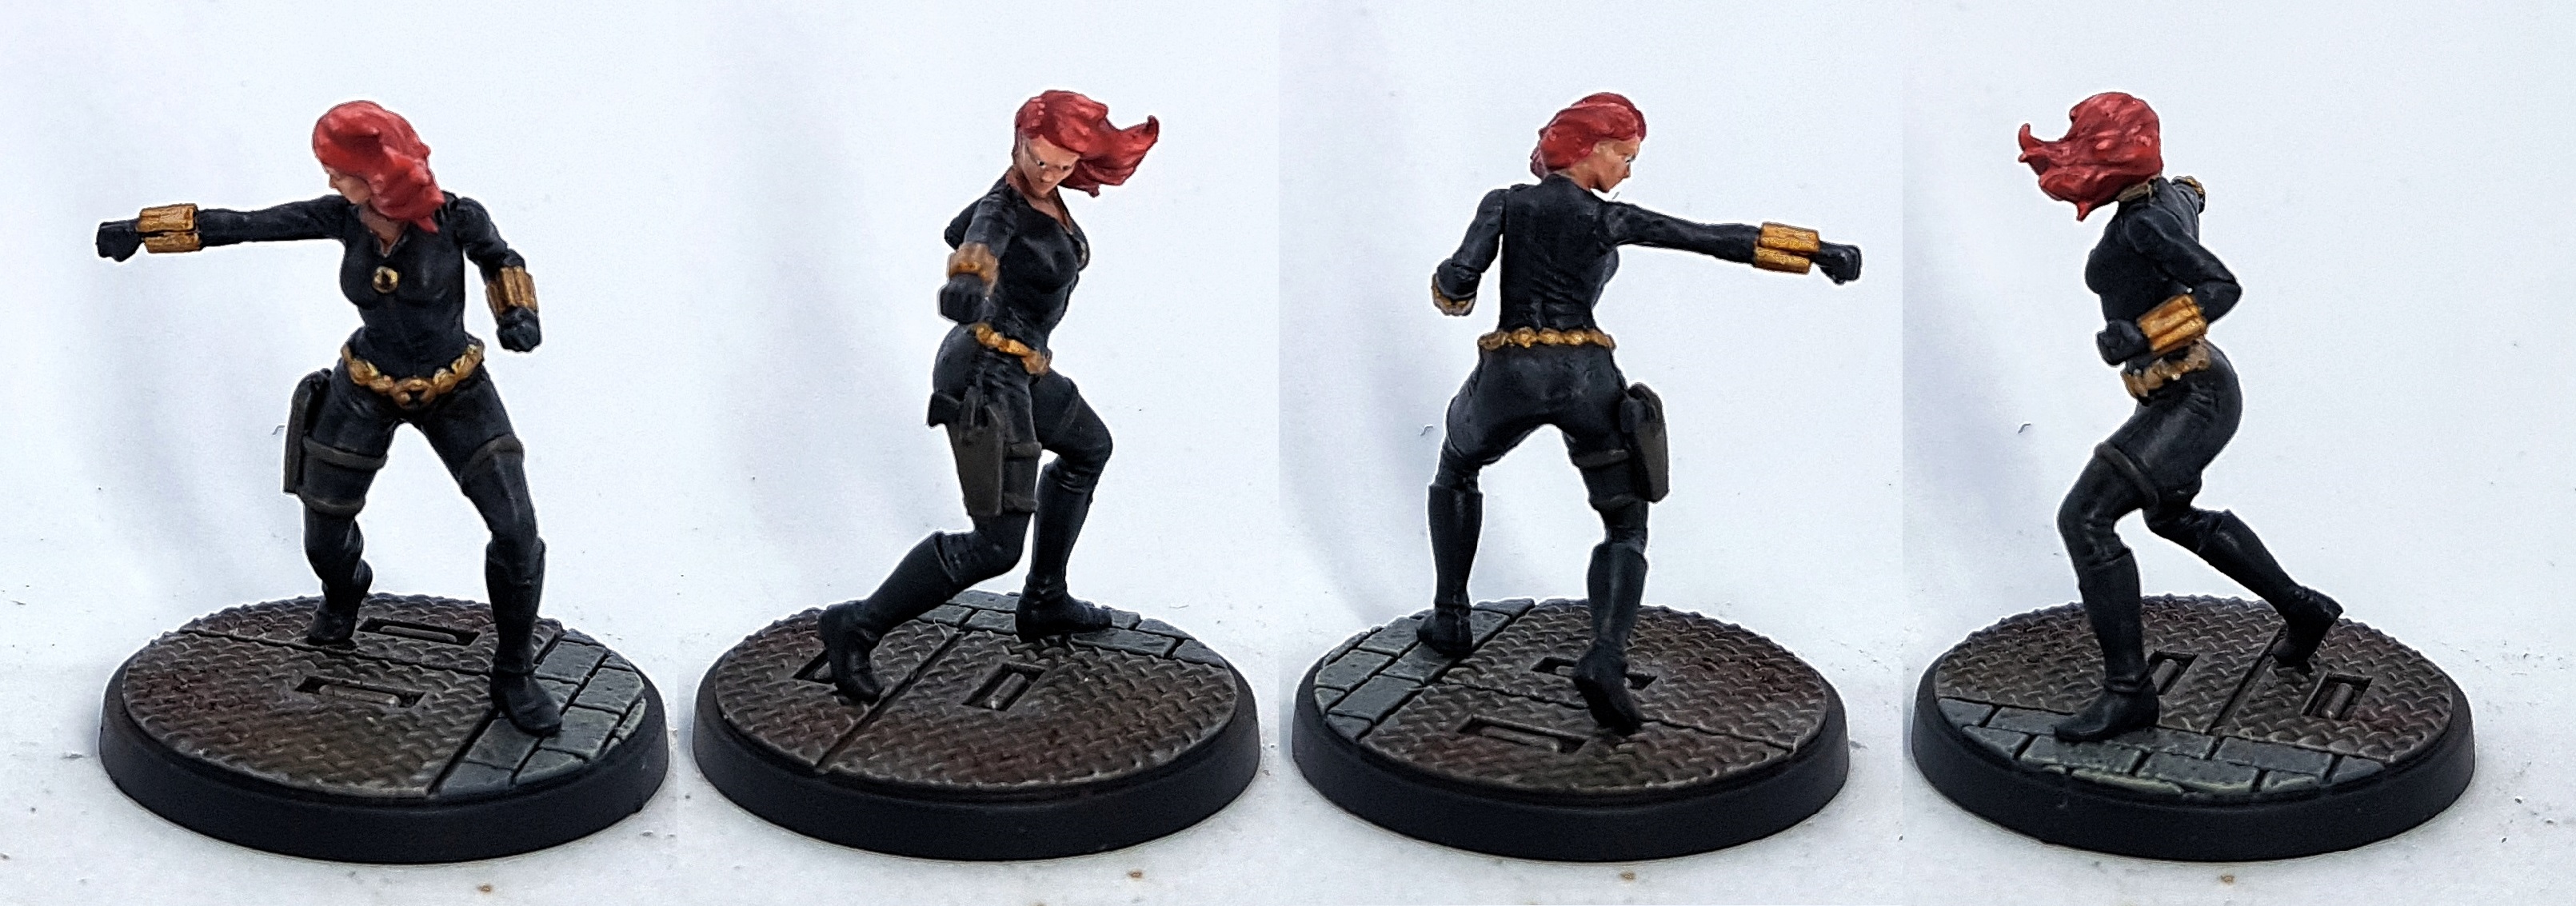
It was too early in the evening to quit, but bedtime was on the horizon so I went for a quick task: Black Widows hair. on the box art its a reddish brown. I wasn’t overly keen on this. I have a good recipe for a very orange ginger hair, but it didn’t feel right. I googled for comic pics of her and she has vibrant scarlet red hair. Lets do that. She needs some colour to her.
Base: Mr Paint MRP-F013 Deep Red
Layer Highlight: VGC 72.106 Scarlett Blood
Layer Highlight: VGC 72.010 Bloody Red
Layer Highlight: Bloody Red mixed with a little Reaper 09150 Bloodless Skin
Layer Highlight: Add a little more Bloodless Skin
Layer Highlight: Add a little more Bloodless Skin until it’s almost pure white and use for glints.
That’s 6 evenings work invested on this project. She’s nearly finished so next time I sit down I’ll finish off her holster and her belt and that’ll be one less in my painting queue.
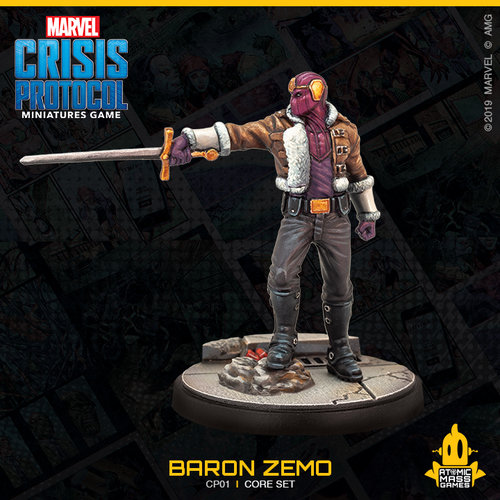
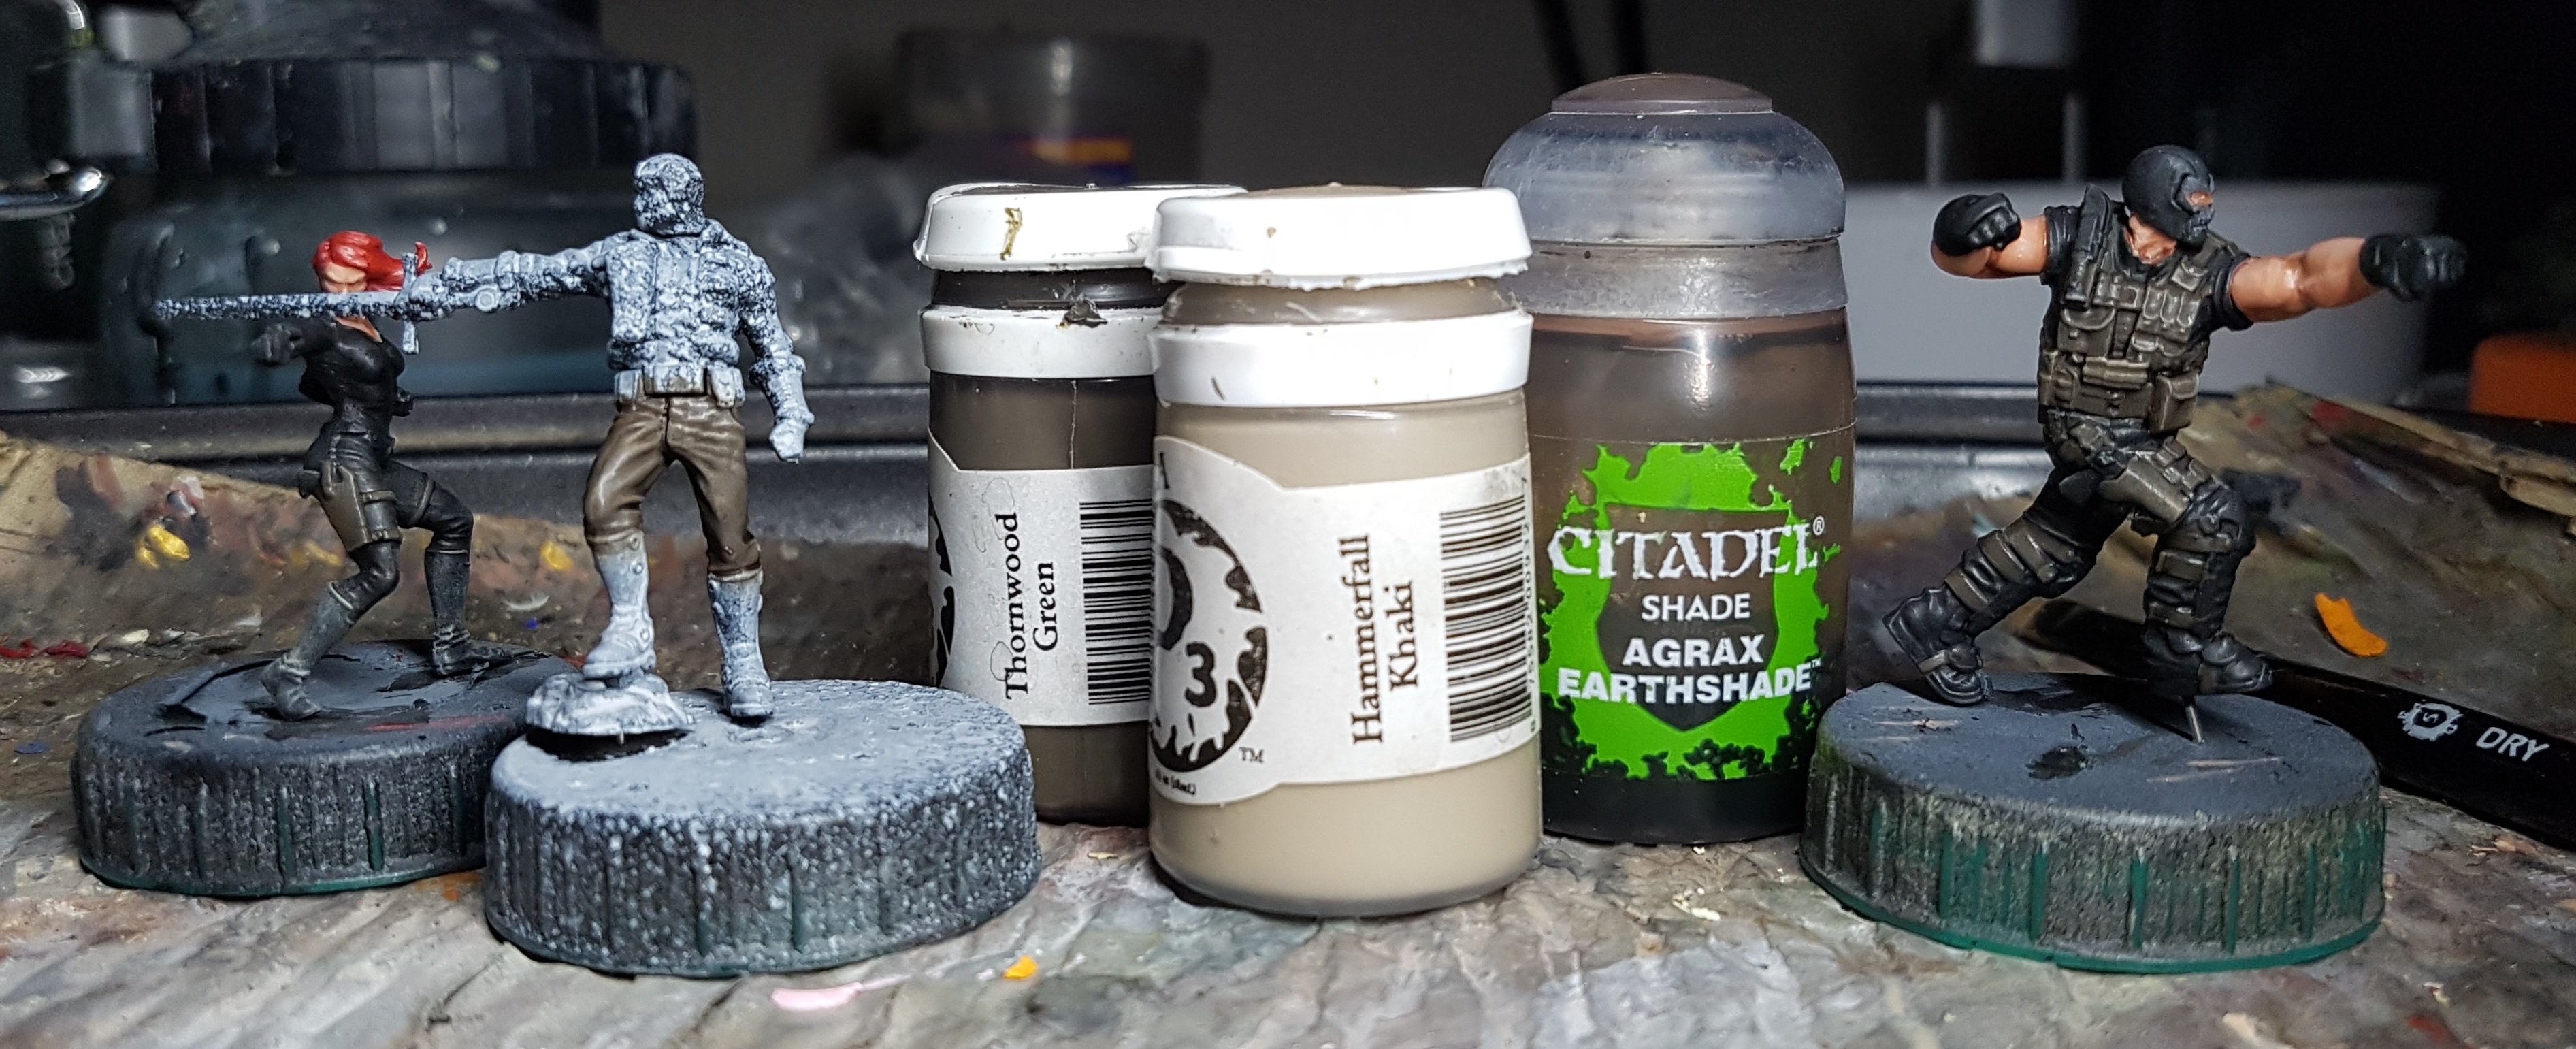
Evening 7: Black Widow, Baron Zemo, & Crossbones
Zemo’s trouser colour will work for Black Widow’s holster, and Crossbones’ vest so lets do all that at the same time.
Base: P3 Thornwood Green
Drybrush and edge highlight: P3 Hammerfall Khaki
Wash: GW Agrax Earthshade
Revisit the highlight to taste
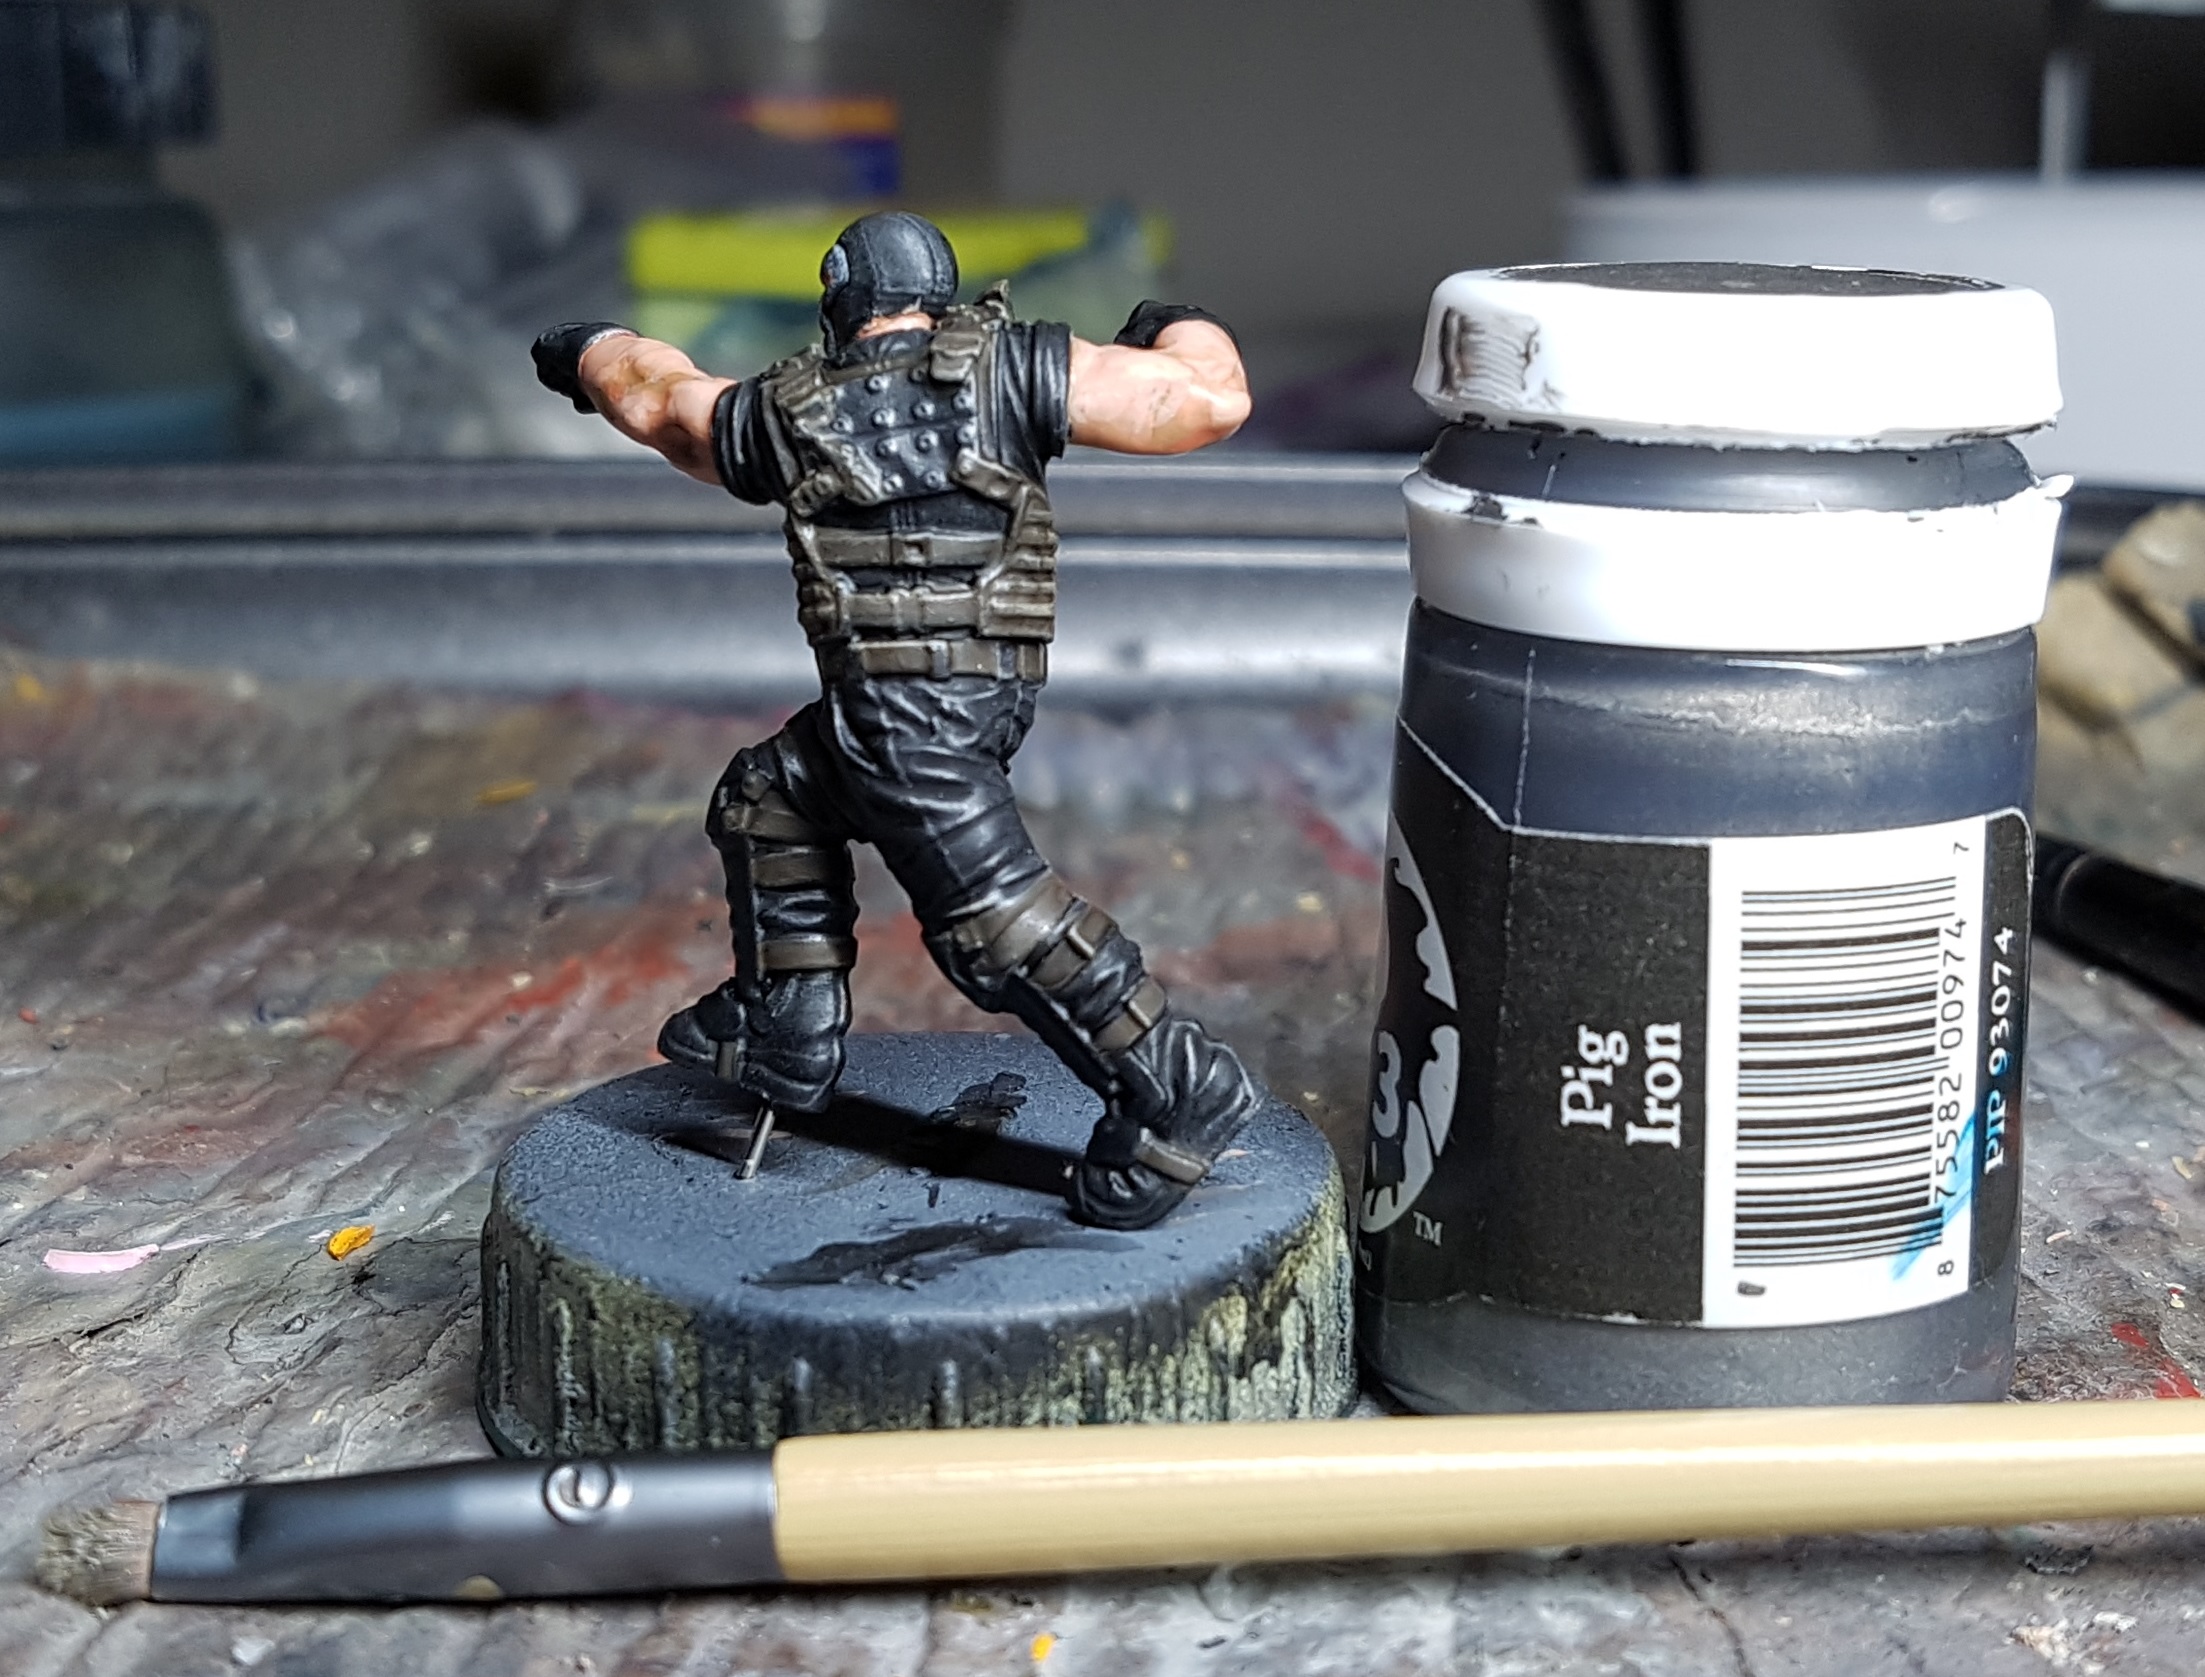
I was going to paint the black leather on Zemo and Crossbones, so I thought why not do that for Widow’s boots too, and at least give all that black a second shade of black? I heavily drybrushed her boots with P3 Menoth White Base and then used GW Contrast Black Templar over them, and the black leather areas of the other two.

The evening is almost over, and Crossbones is almost finished too. I’ll leave his mask until I’m doing the white on Captain America, and I’ll do his steel when I paint Zemo’s sword, but that leaves his knee pads (Bronze?) and that armour plate on his back. I gave it a drybrush with P3 Pig Iron, leaving a lot of the black showing through to give the idea that it was metal painted black, and the paint has worn. It’s better than another area of black on him.
That’s the 7th evening over. Time for bed.
Evening 8: Crossbones and Zemo
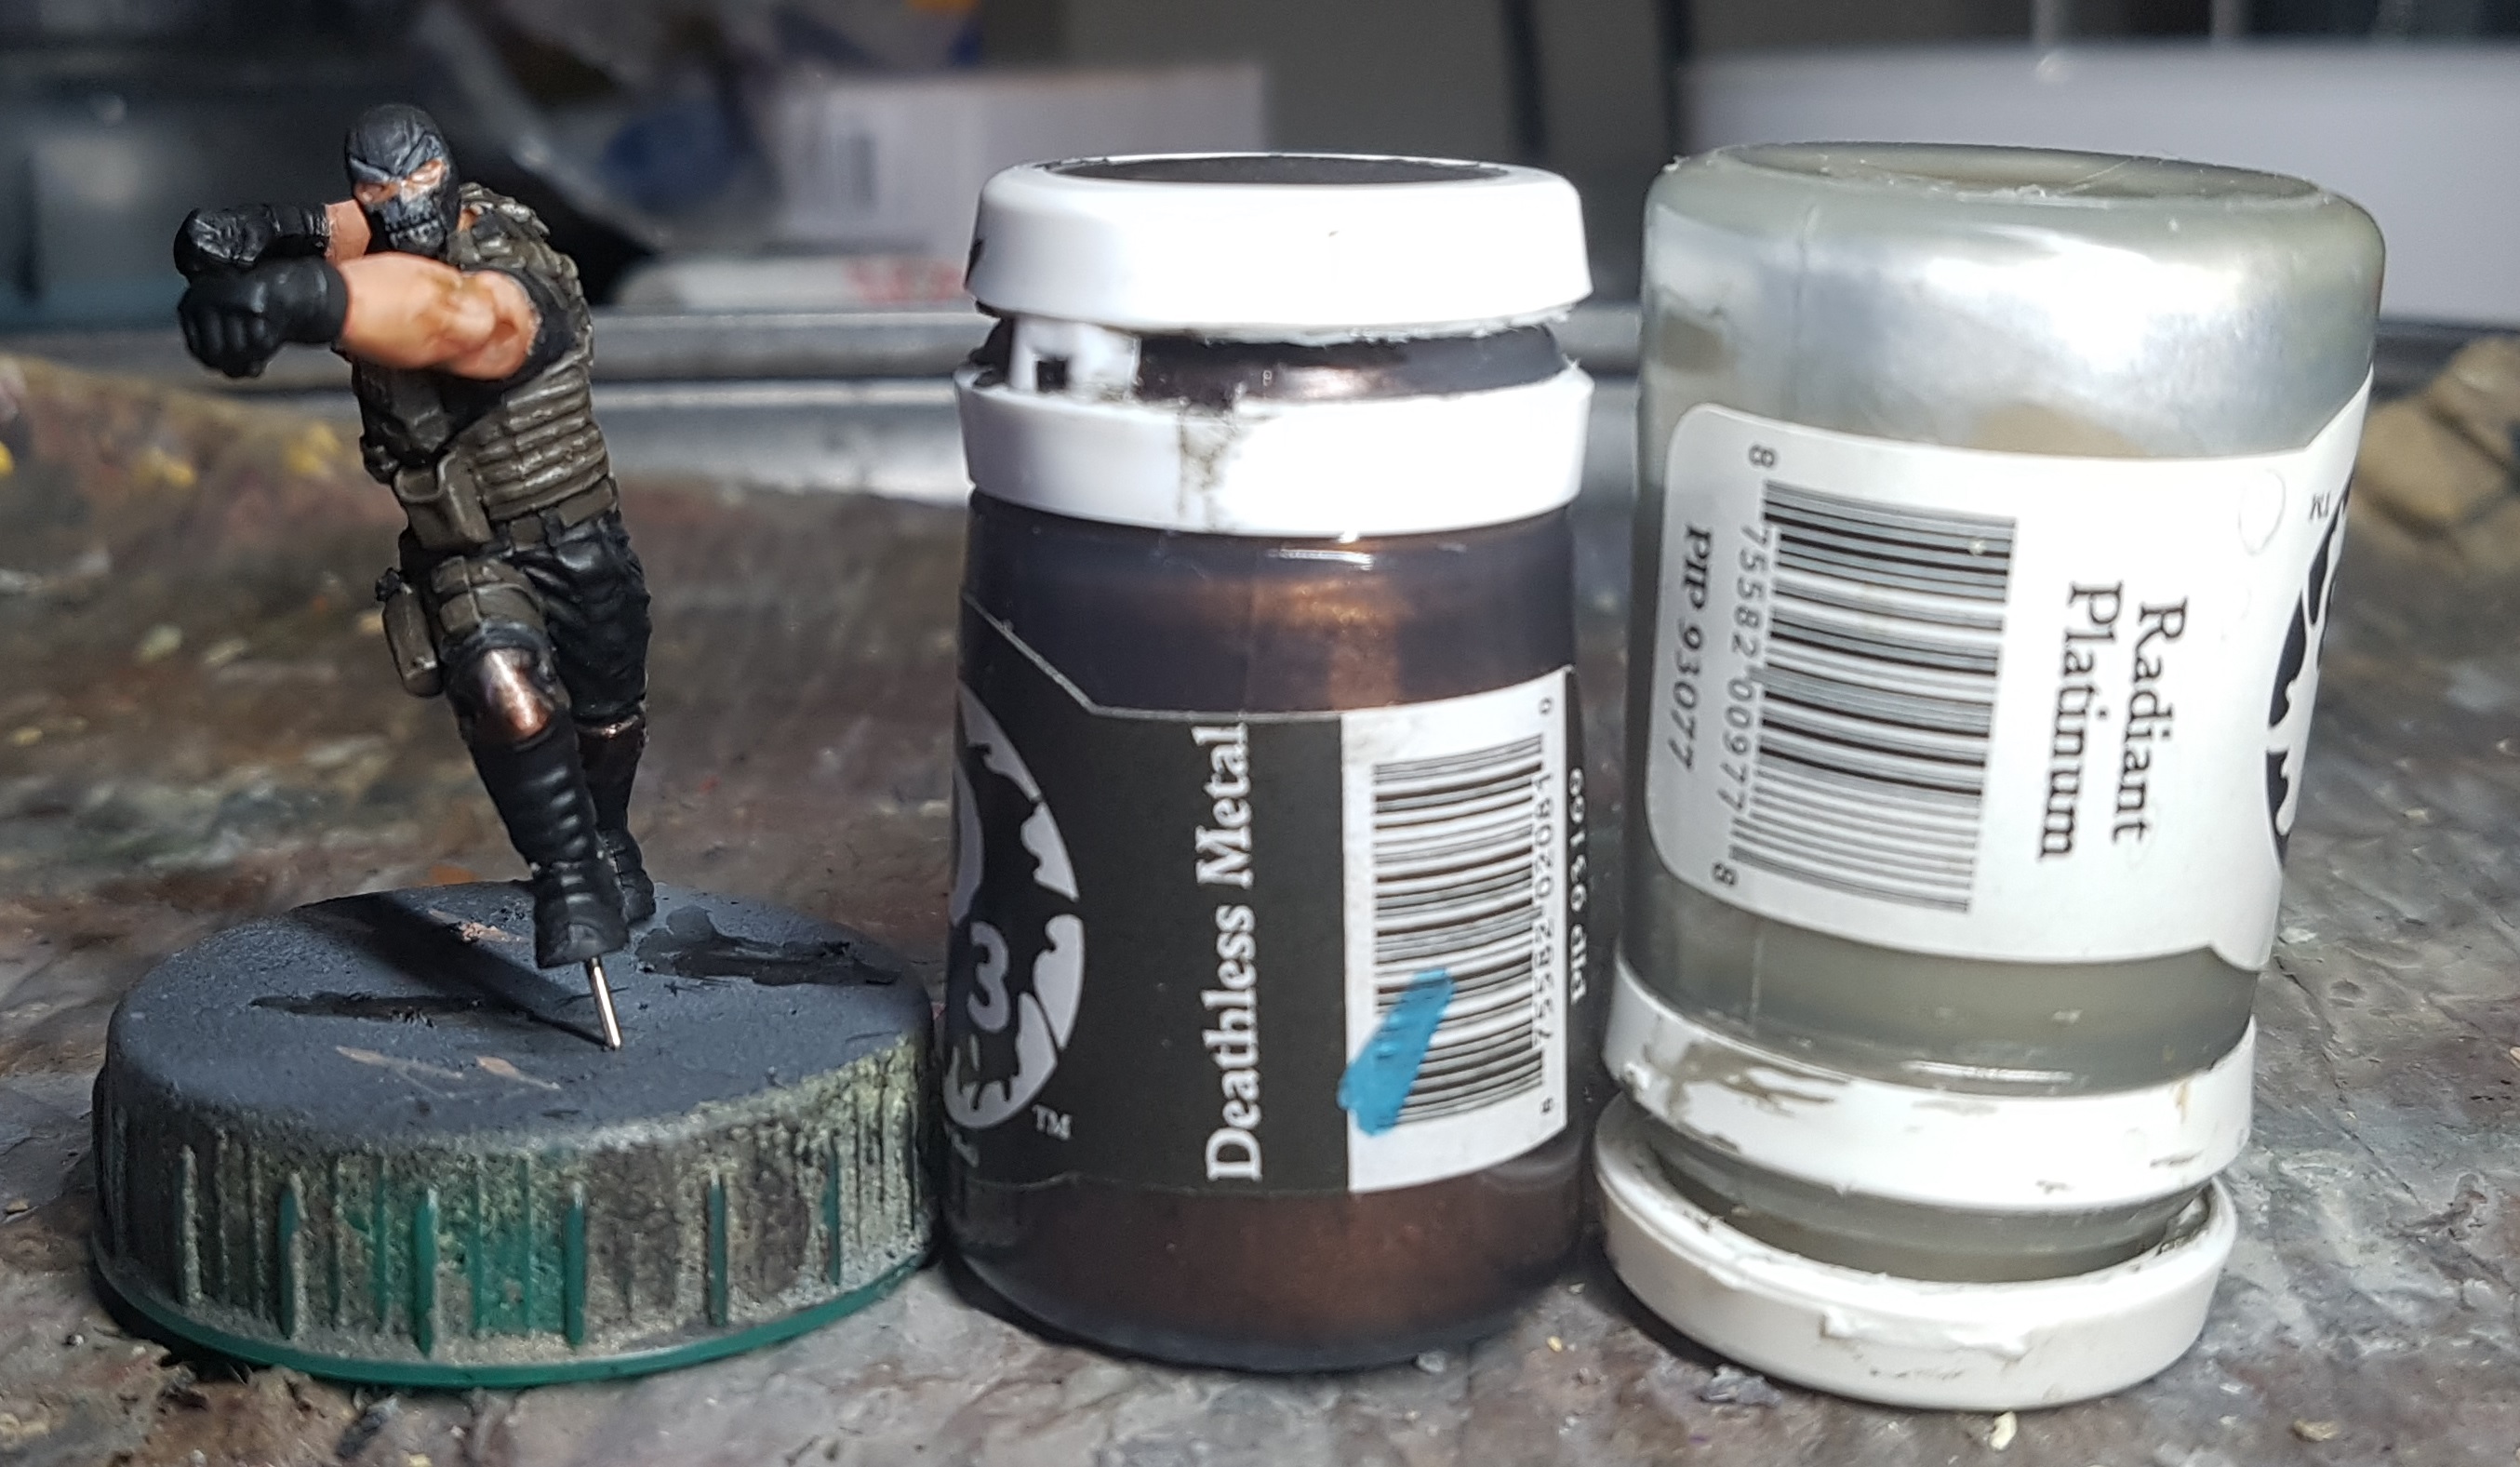
It’s the first day of the 4 day Easter weekend. I’ve spent most of the day playing Gloomhaven and doing chores (Adulting sucks!), but I’ve got a long evening just for me to paint. Once I do Crossbones’ knee pads and steel he can go back in the queue, so let’s do his knees quickly and then get Zemo up to the point where I’m doing his steel.
Base: P3 Deathless Metal (My pot has always separated out whenever I try and use it and a good solid shake has never fixed this. It’s a good colour so I’ve made a point of giving it regular shakes, some stirring, and regularly inverting it over the last few weeks. It seems to have done the job as I actually got paint out, and not just tinted medium.)
Highlight: Deathless Metal with a little P3 Radiant Platinum. Allow the Deathless to dominate the mix
Highlight 2: add more Platinum
Highlight 3: Add more Platinum
There may have been more layers. Highlight to taste, perhaps with pure Platinum as a glint colour
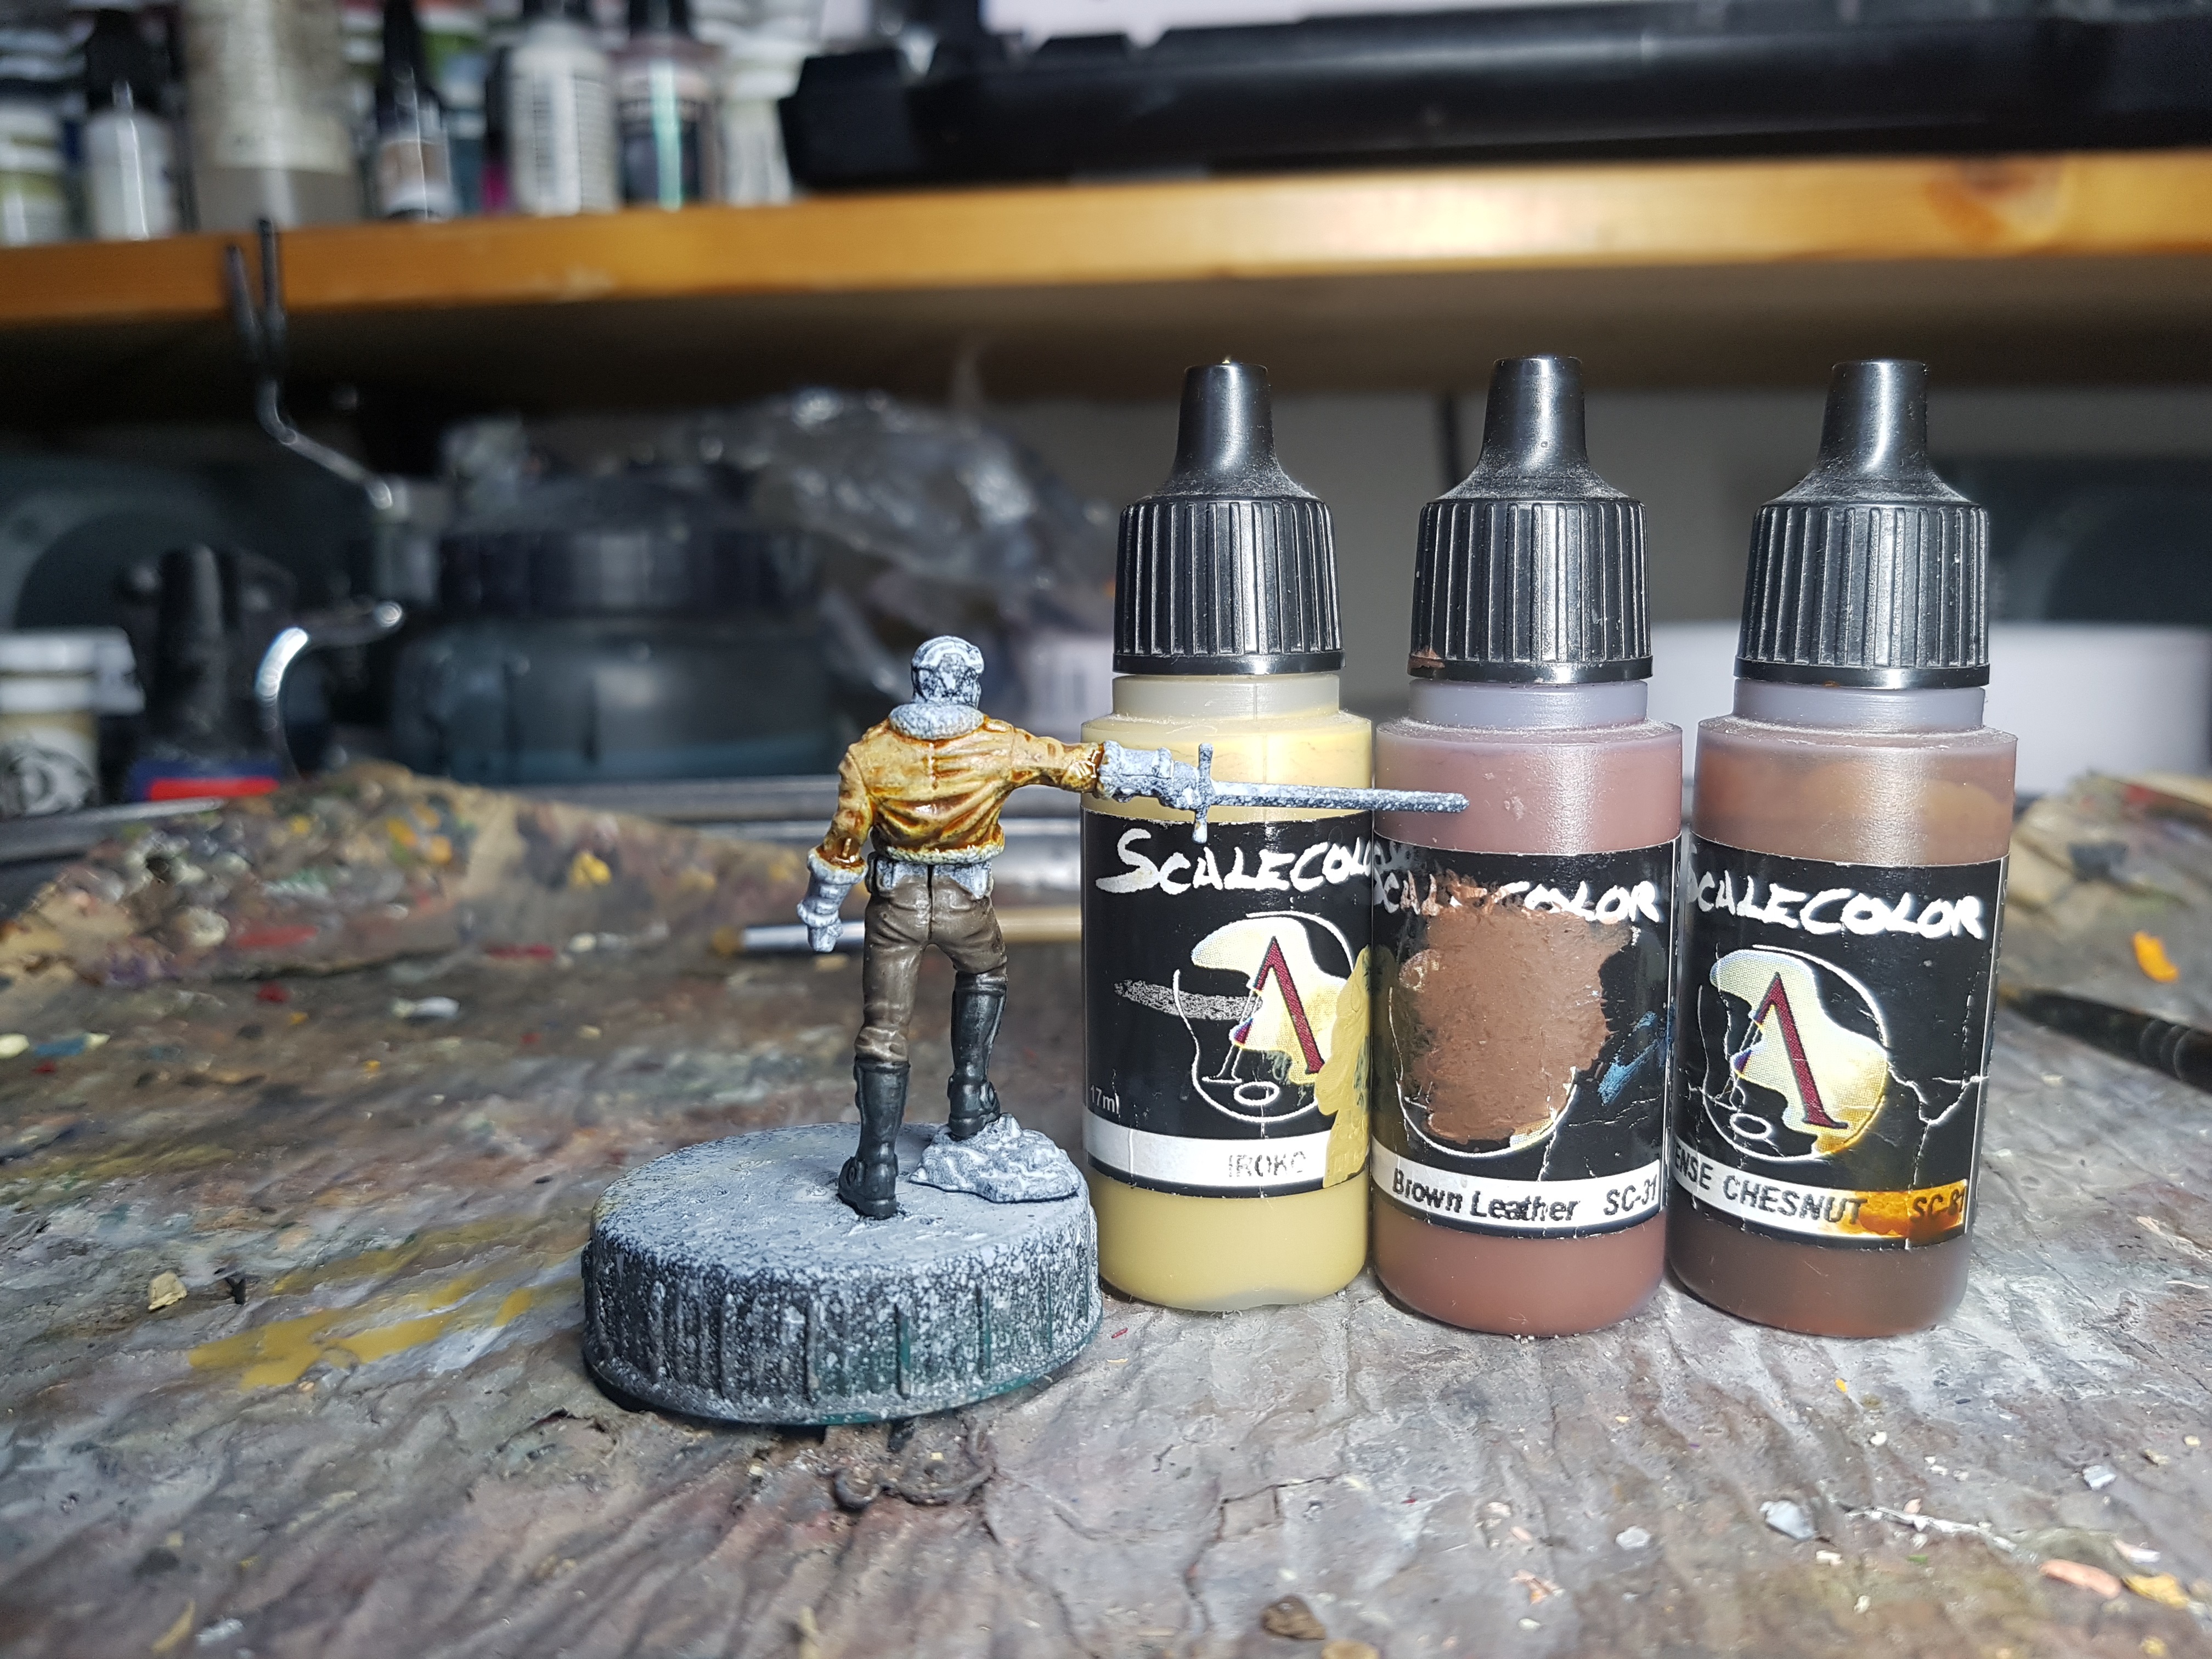
Over to Zemo. His jacket is a potentially messy job so lets get that done while I can muck up the surrounding areas.
Undercoat: Zenithal prime!
Drybrush: Scale75 Iroko
Stipple: Iroko
Stipple: a very little Scale75 Brown Leather
Wash: Scale75 Inktense Chestnut mixed 2:3 with Instar’s Water+, or just water
Add a second layer of the wash to the deeper and darker areas only
Drybrush: Iroko to the more worn areas
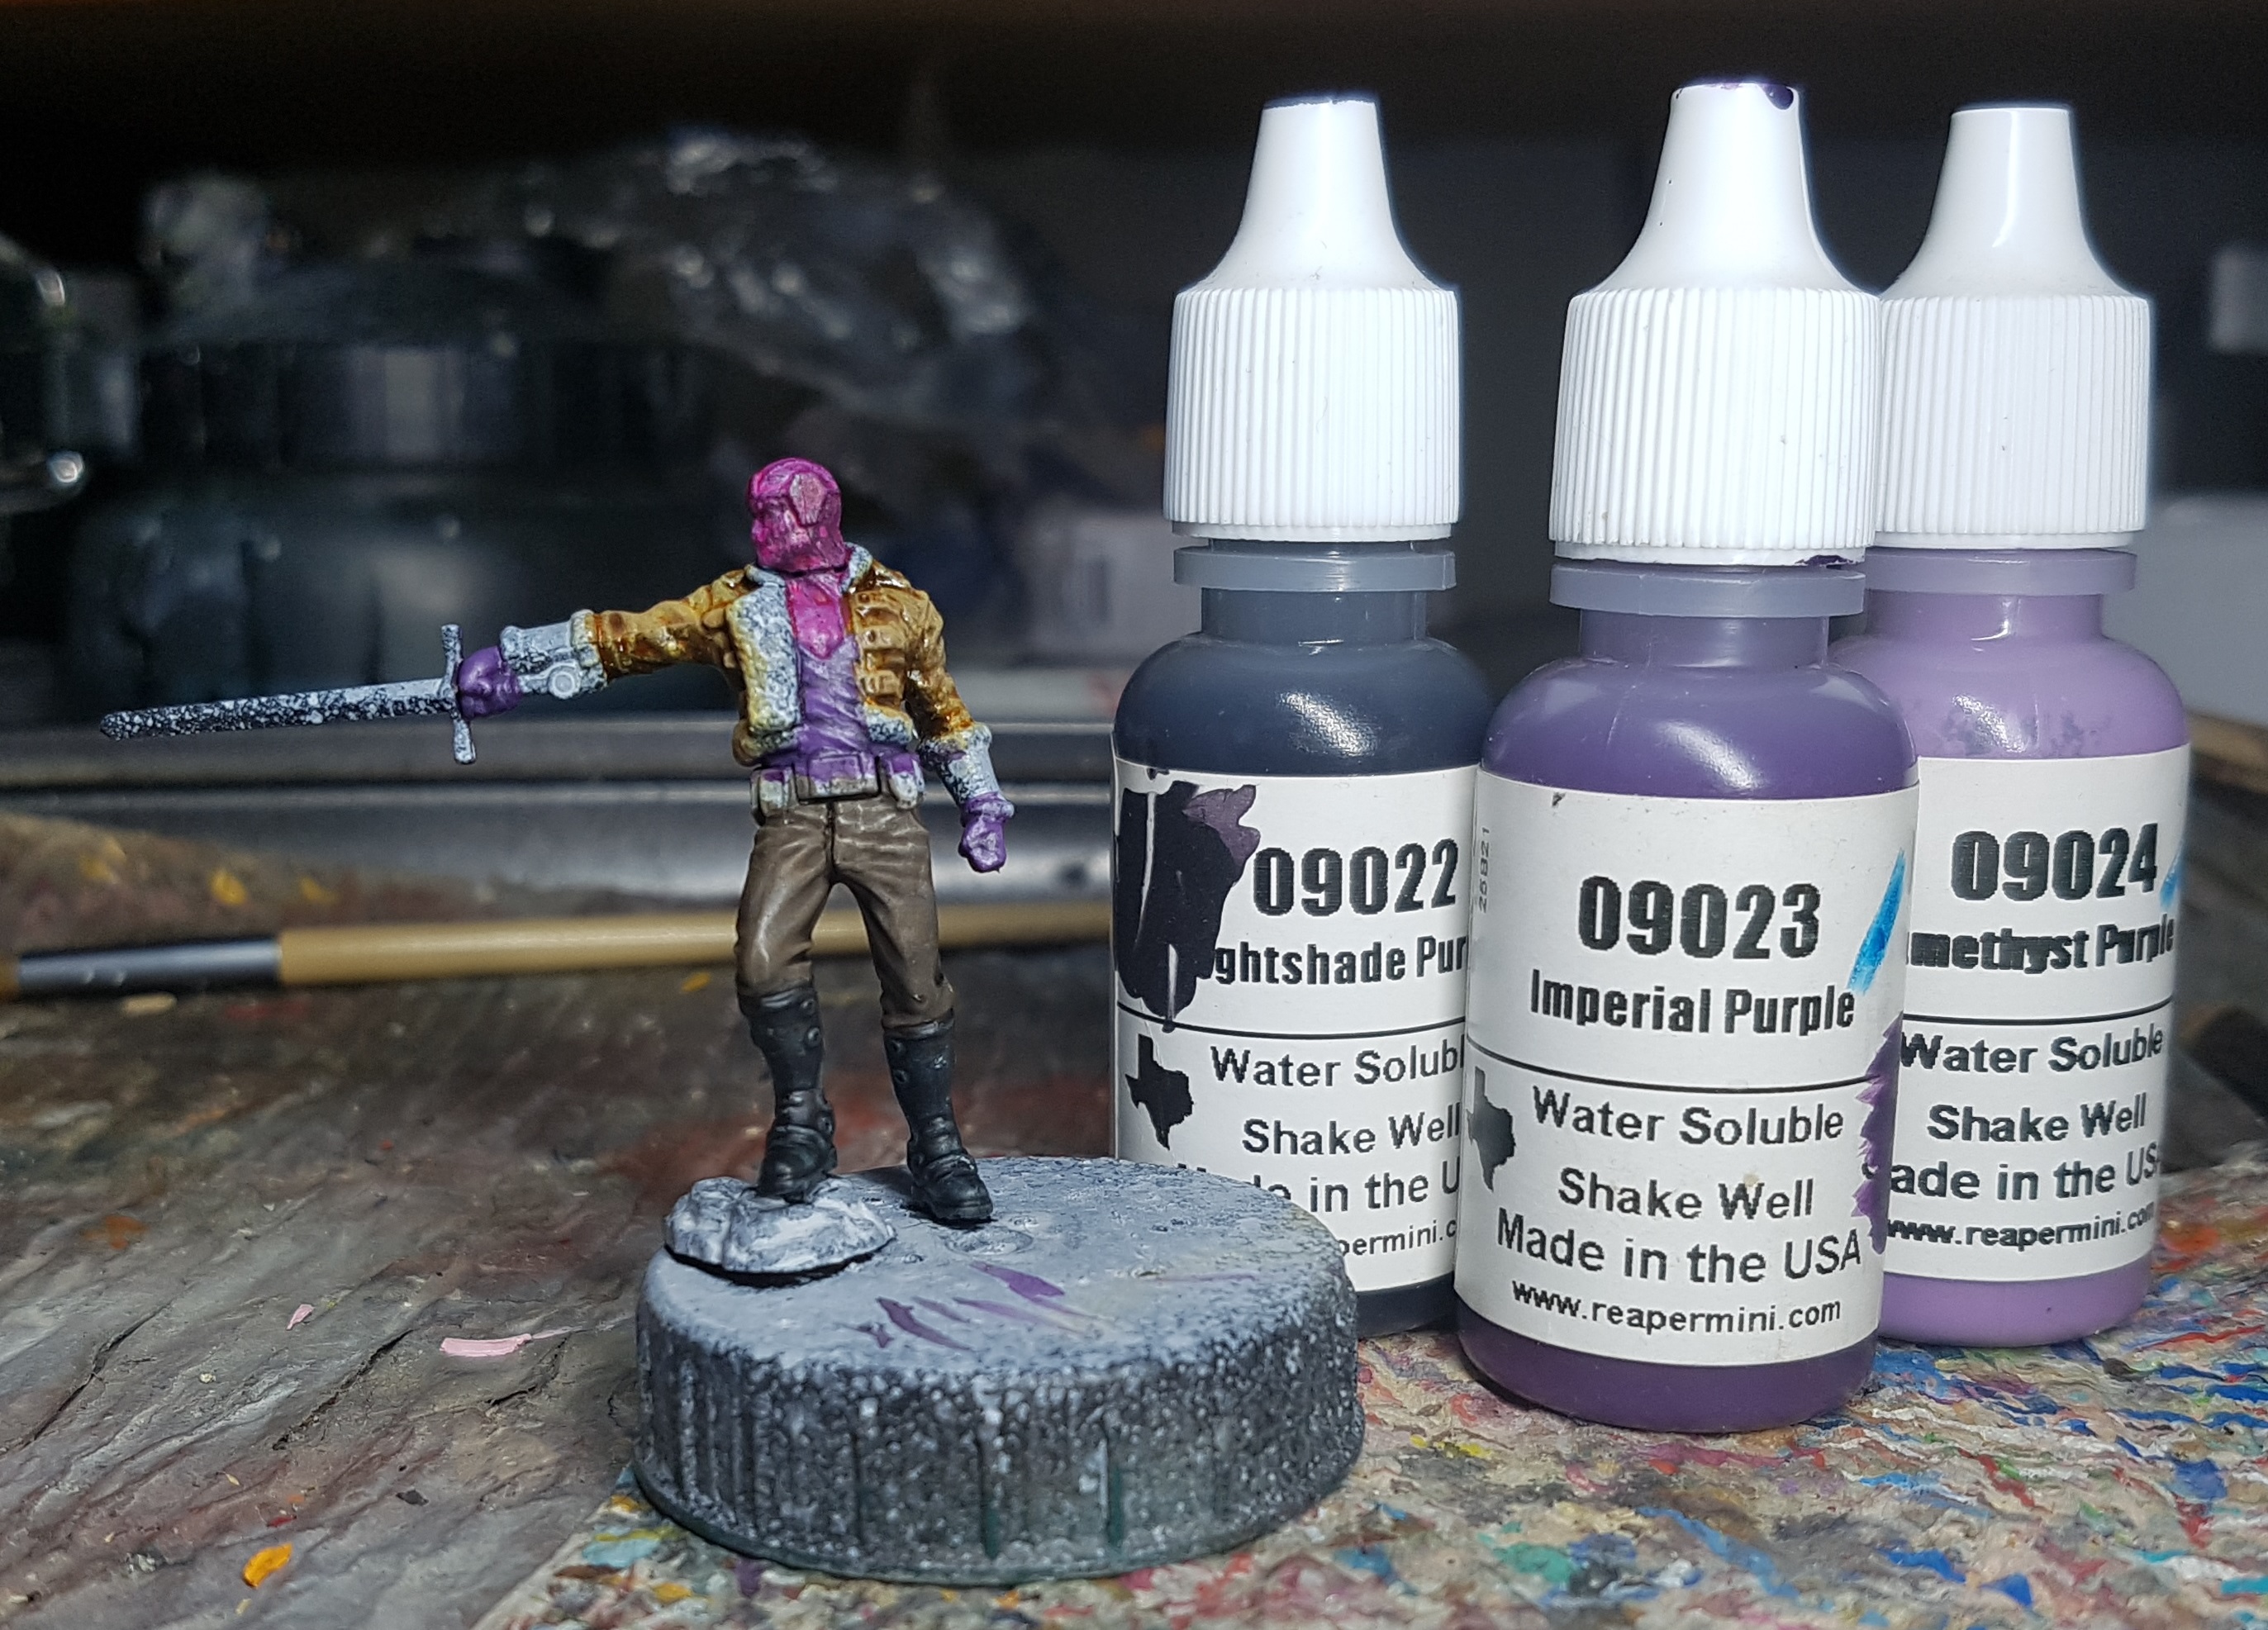
Let’s do Zemo’s inner layers before I start on that wool lining. I don’t want to have to fix that white if I get purple on it. First, his vest and gloves.
Base: Reaper 09023 Imperial Purple
Shade: Add some Reaper 09022 Nightshade Purple to the previous purple and shade down. use differing amounts to provide different tones. I don’t think I ever went pure Nightshade.
Highlight: Add some Reaper 09024 Amethyst Purple to Imperial Purple, and then add more for further highlights
Final highlights with pure Amethyst purple
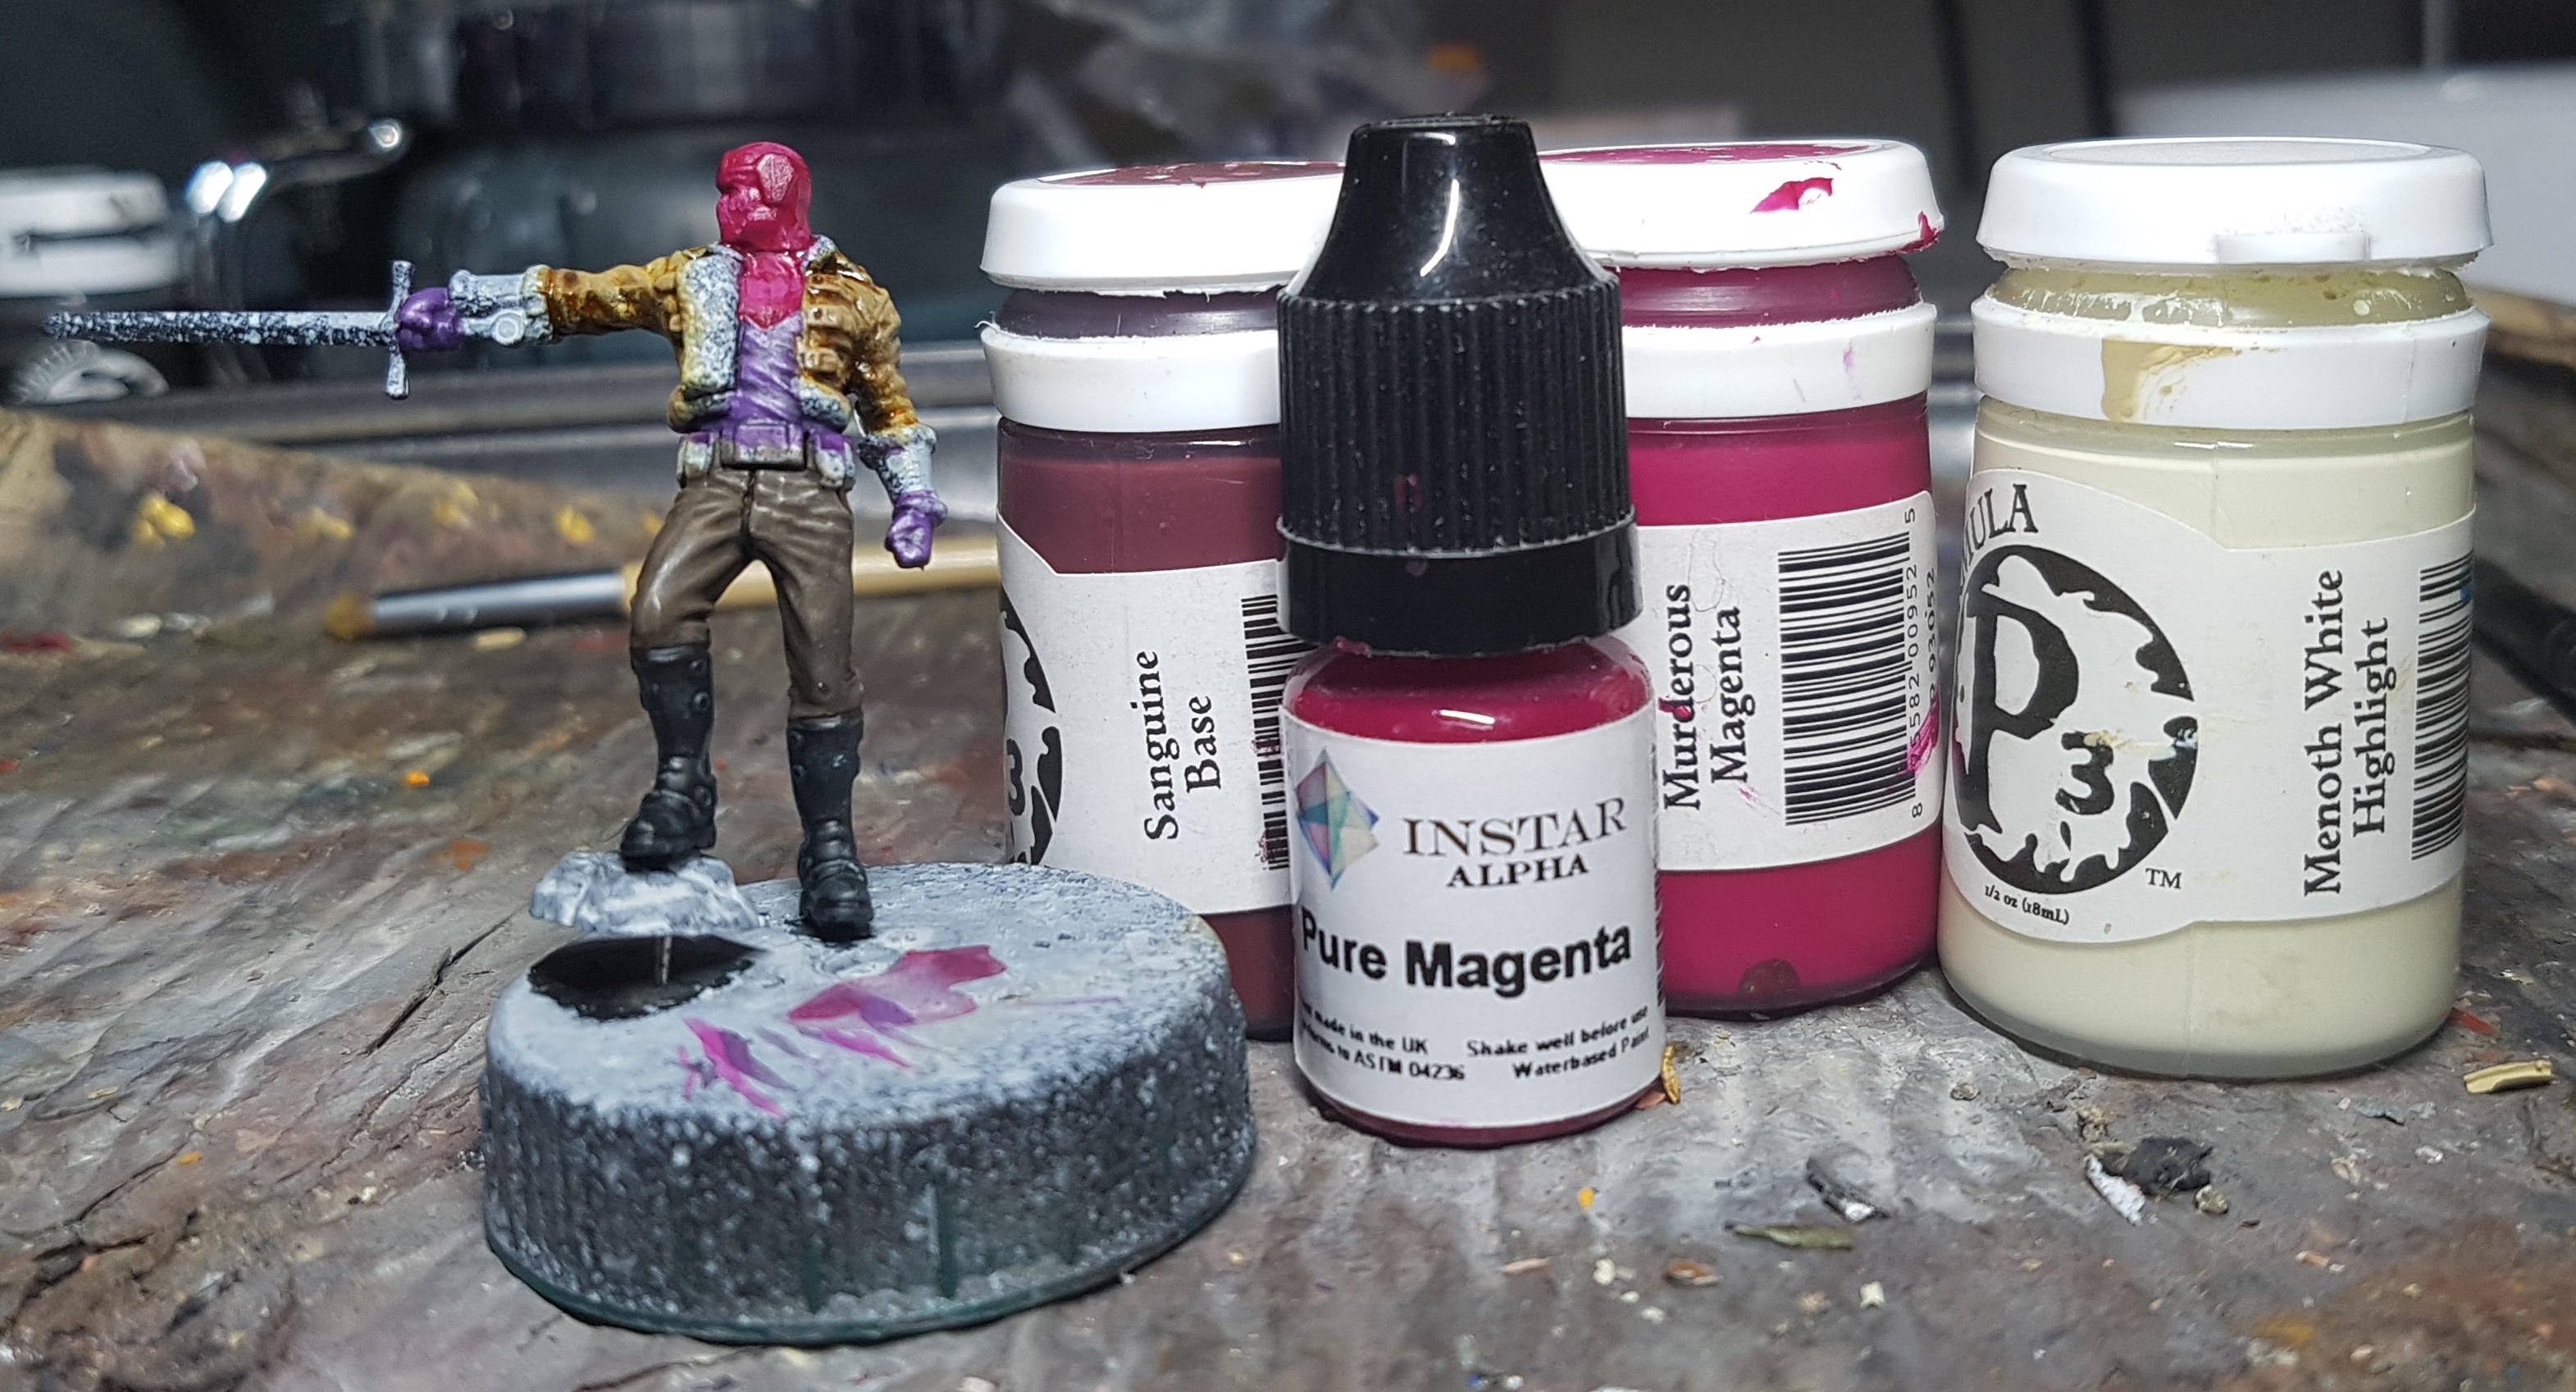
 I forgot to take the pic before starting on his balaclava
On to his mask. I wasn’t sure what I was going to do so there were points I was just throwing paints together to see what it gave me. Here’s what I think I did.
Base: P3 Murderous Magenta
Wash: P3 Sanguine Base mixed with Instar Alpha Pure Magenta
Highlight: Murderous Magenta mixed with a little P3 Menoth White Highlight
Highlight: Add a little more Menoth White Highlight, being careful not to go too white
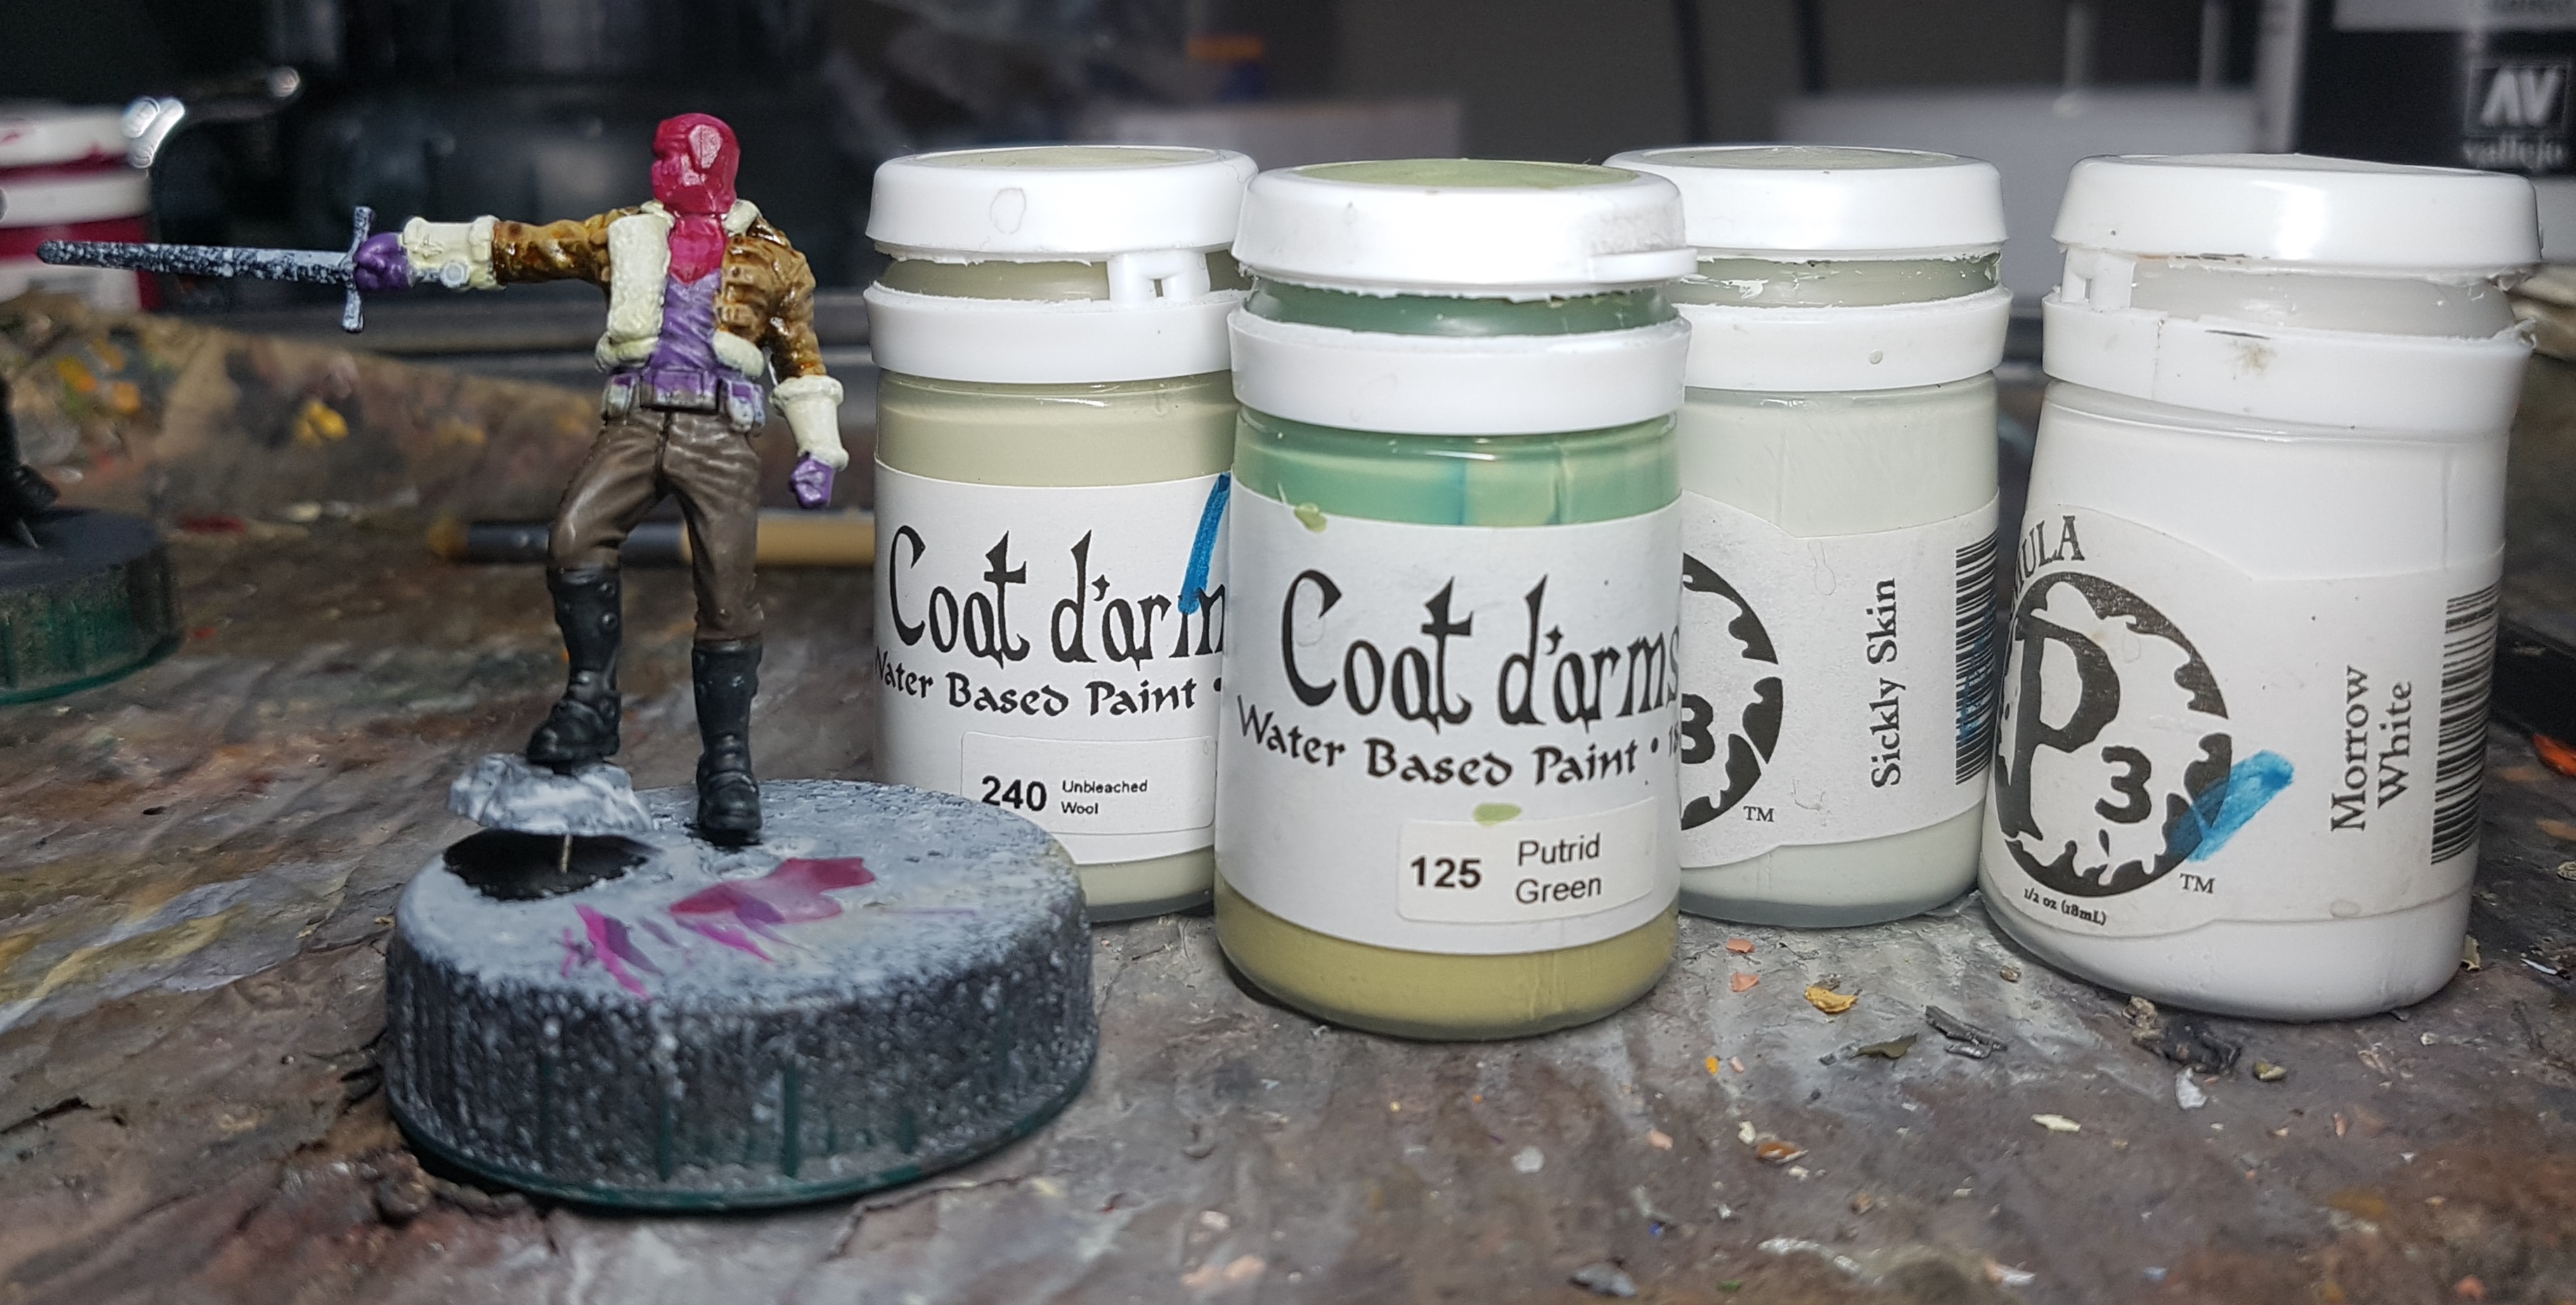
Let’s get that wool done, and preferably without mucking up the purple or the leather I’ve just finished! The wool and the bracers were painted as follows:
Base: Coat d’arms 240 Unbleached Wool (It seemed like an obvious choice)
Wash: Coat d’arms 125 Putrid Green (it came with the Unbleached Wool for this very purpose)
Drybrush: P3 Sickley Skin
Drybrush: P3 Morrow White very carefully. This should not dominate the colour. Never go full pure white or black!
At this point I had just been including the bracers to give them a white-ish undercoat, and because they were in the line of fire anyway. I figured they were almost as I wanted them, I just needed to tint them to make the different to the wool. I tried a glaze or two of P3 Hammerfall Khaki and was happy enough with the results.
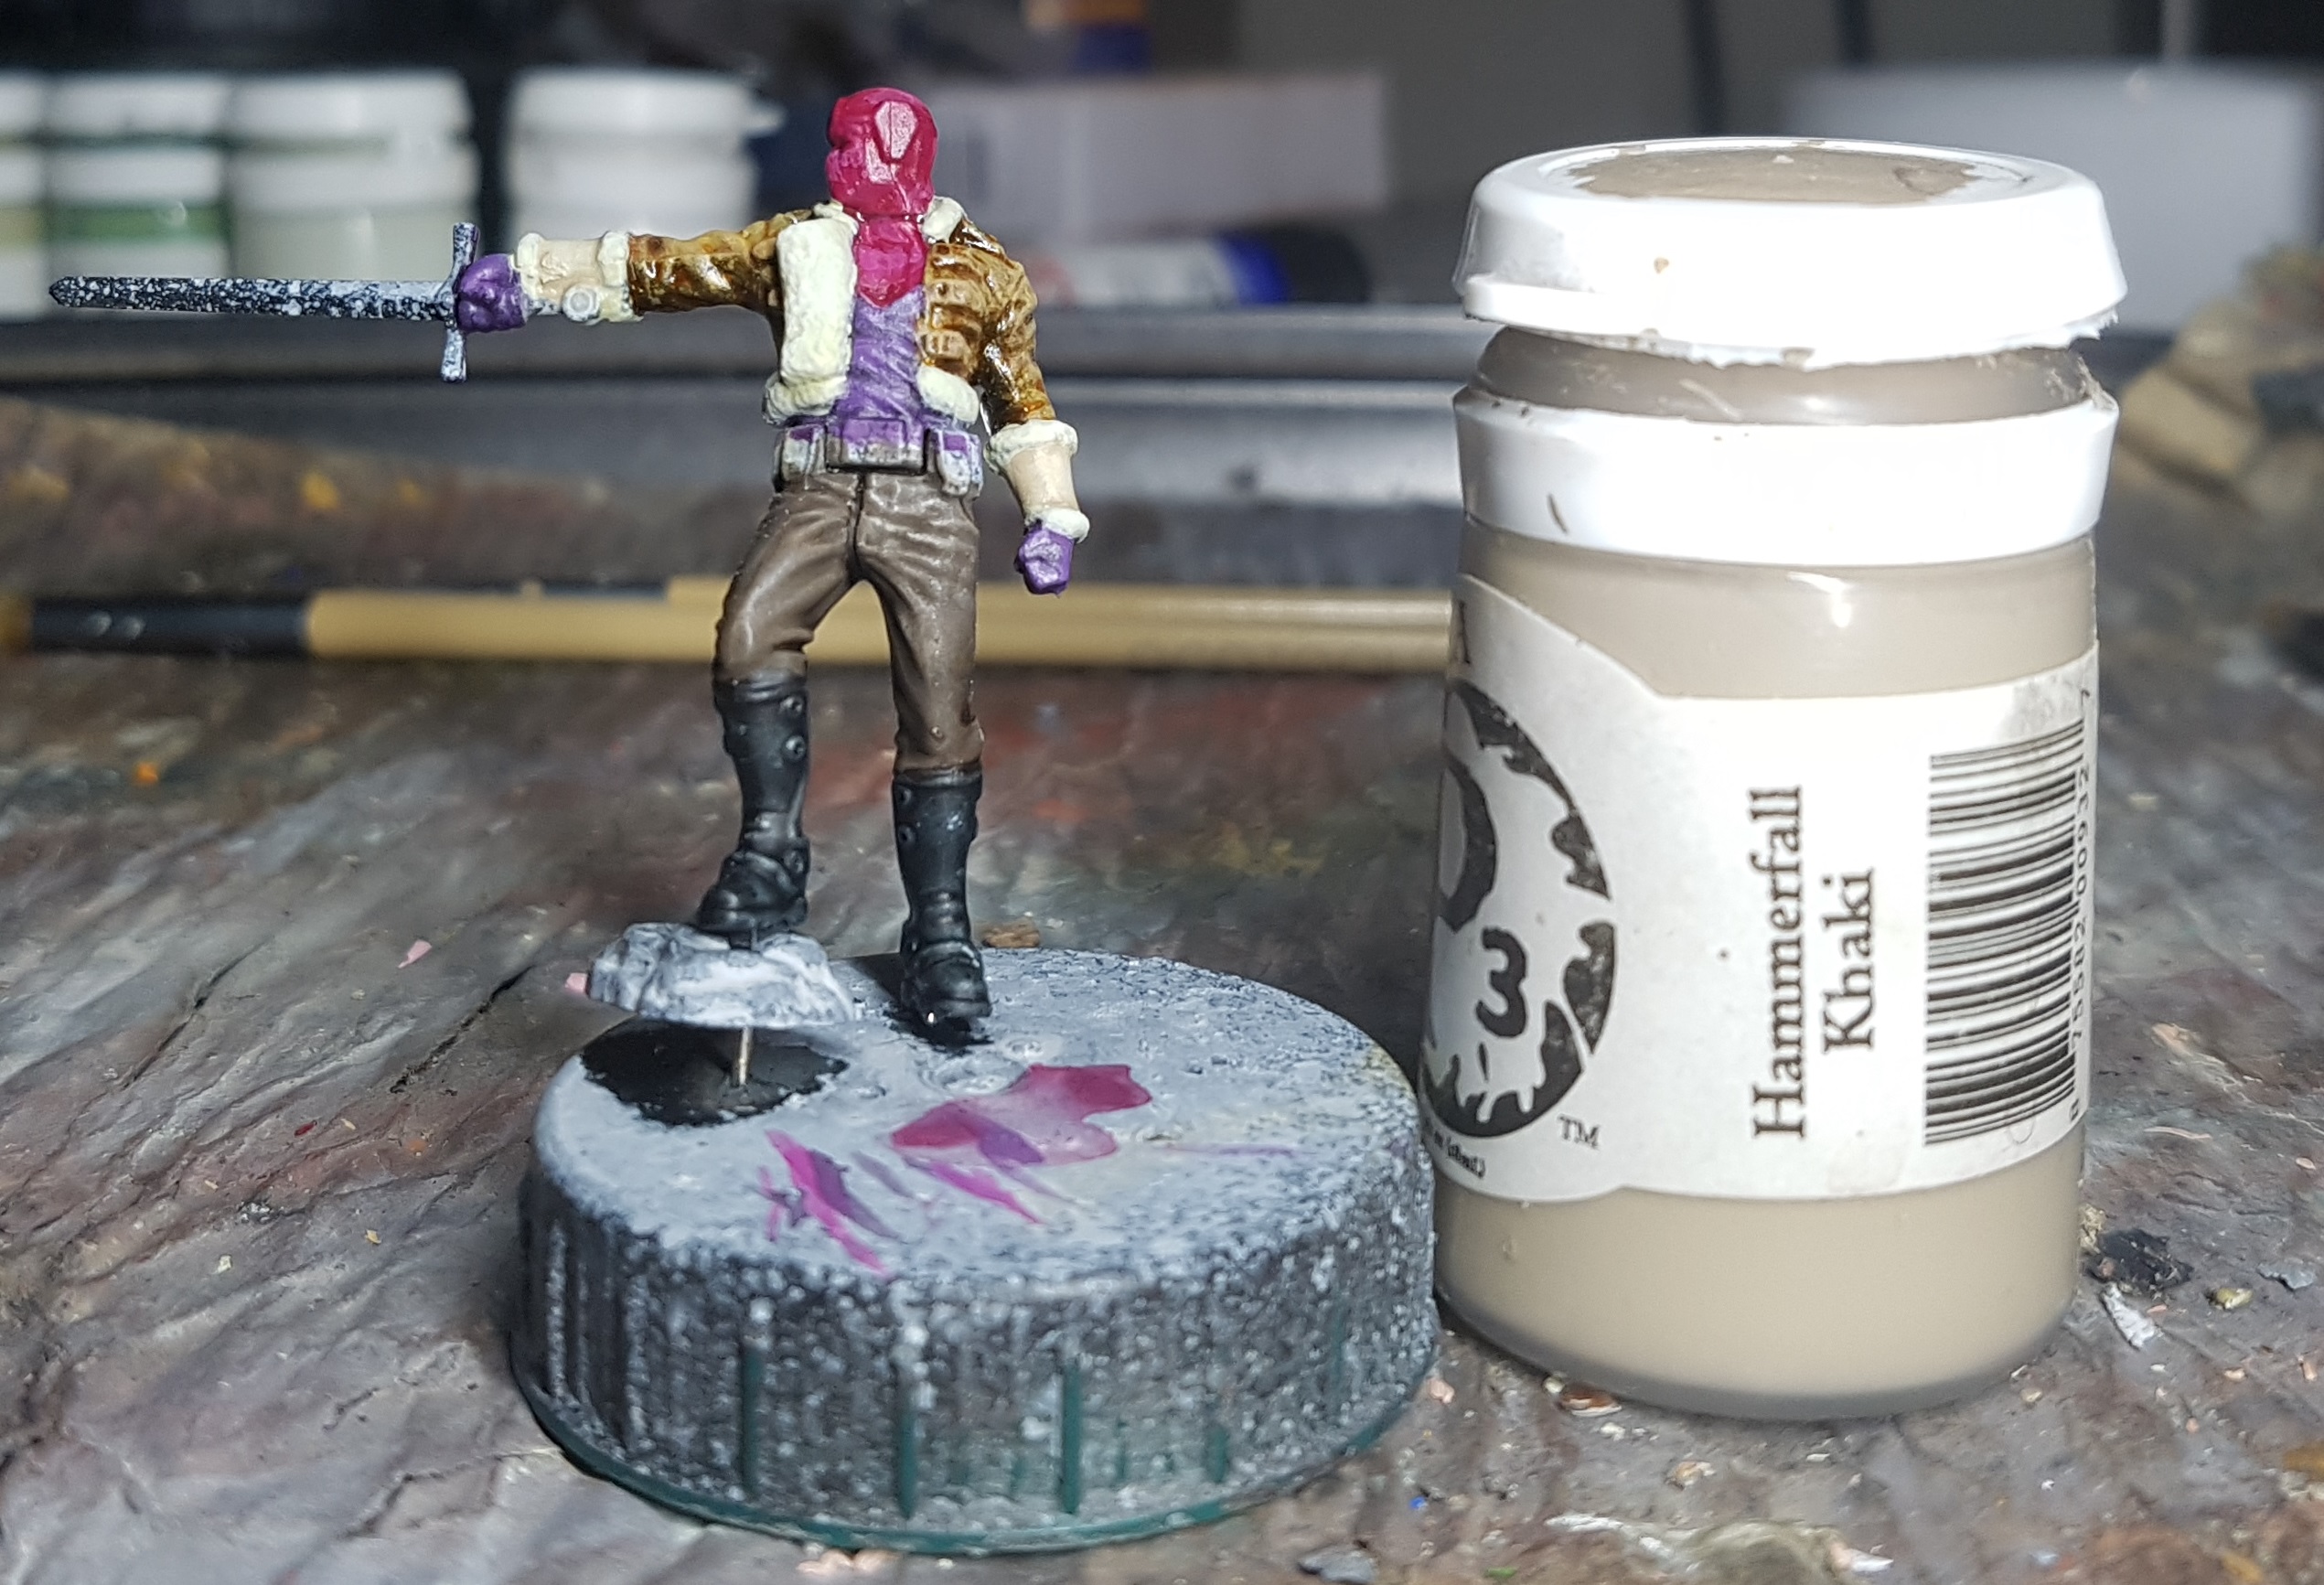
I’m getting there with Zemo. Time for the black cloth. I can undercoat his sword while I’m doing this. The metallics will thank me later. It’s getting late in the evening and if I do this just before bed then the black wash can dry naturally. Also, if I stop now there’ll be time for a movie in bed. I’ve somehow never seen Galaxy Quest and I’ve got that queued up for a watch tonight. (It was a good film, but could have done with a longer runtime allowing for 1-2 more events to happen to explore the concept and not make it feel like only an hour of their lives too. I’d happily watch this explored a a limited series too. I think there’s a good few hours of solid content could be got from this idea)
Anyway, back to the painting chat:
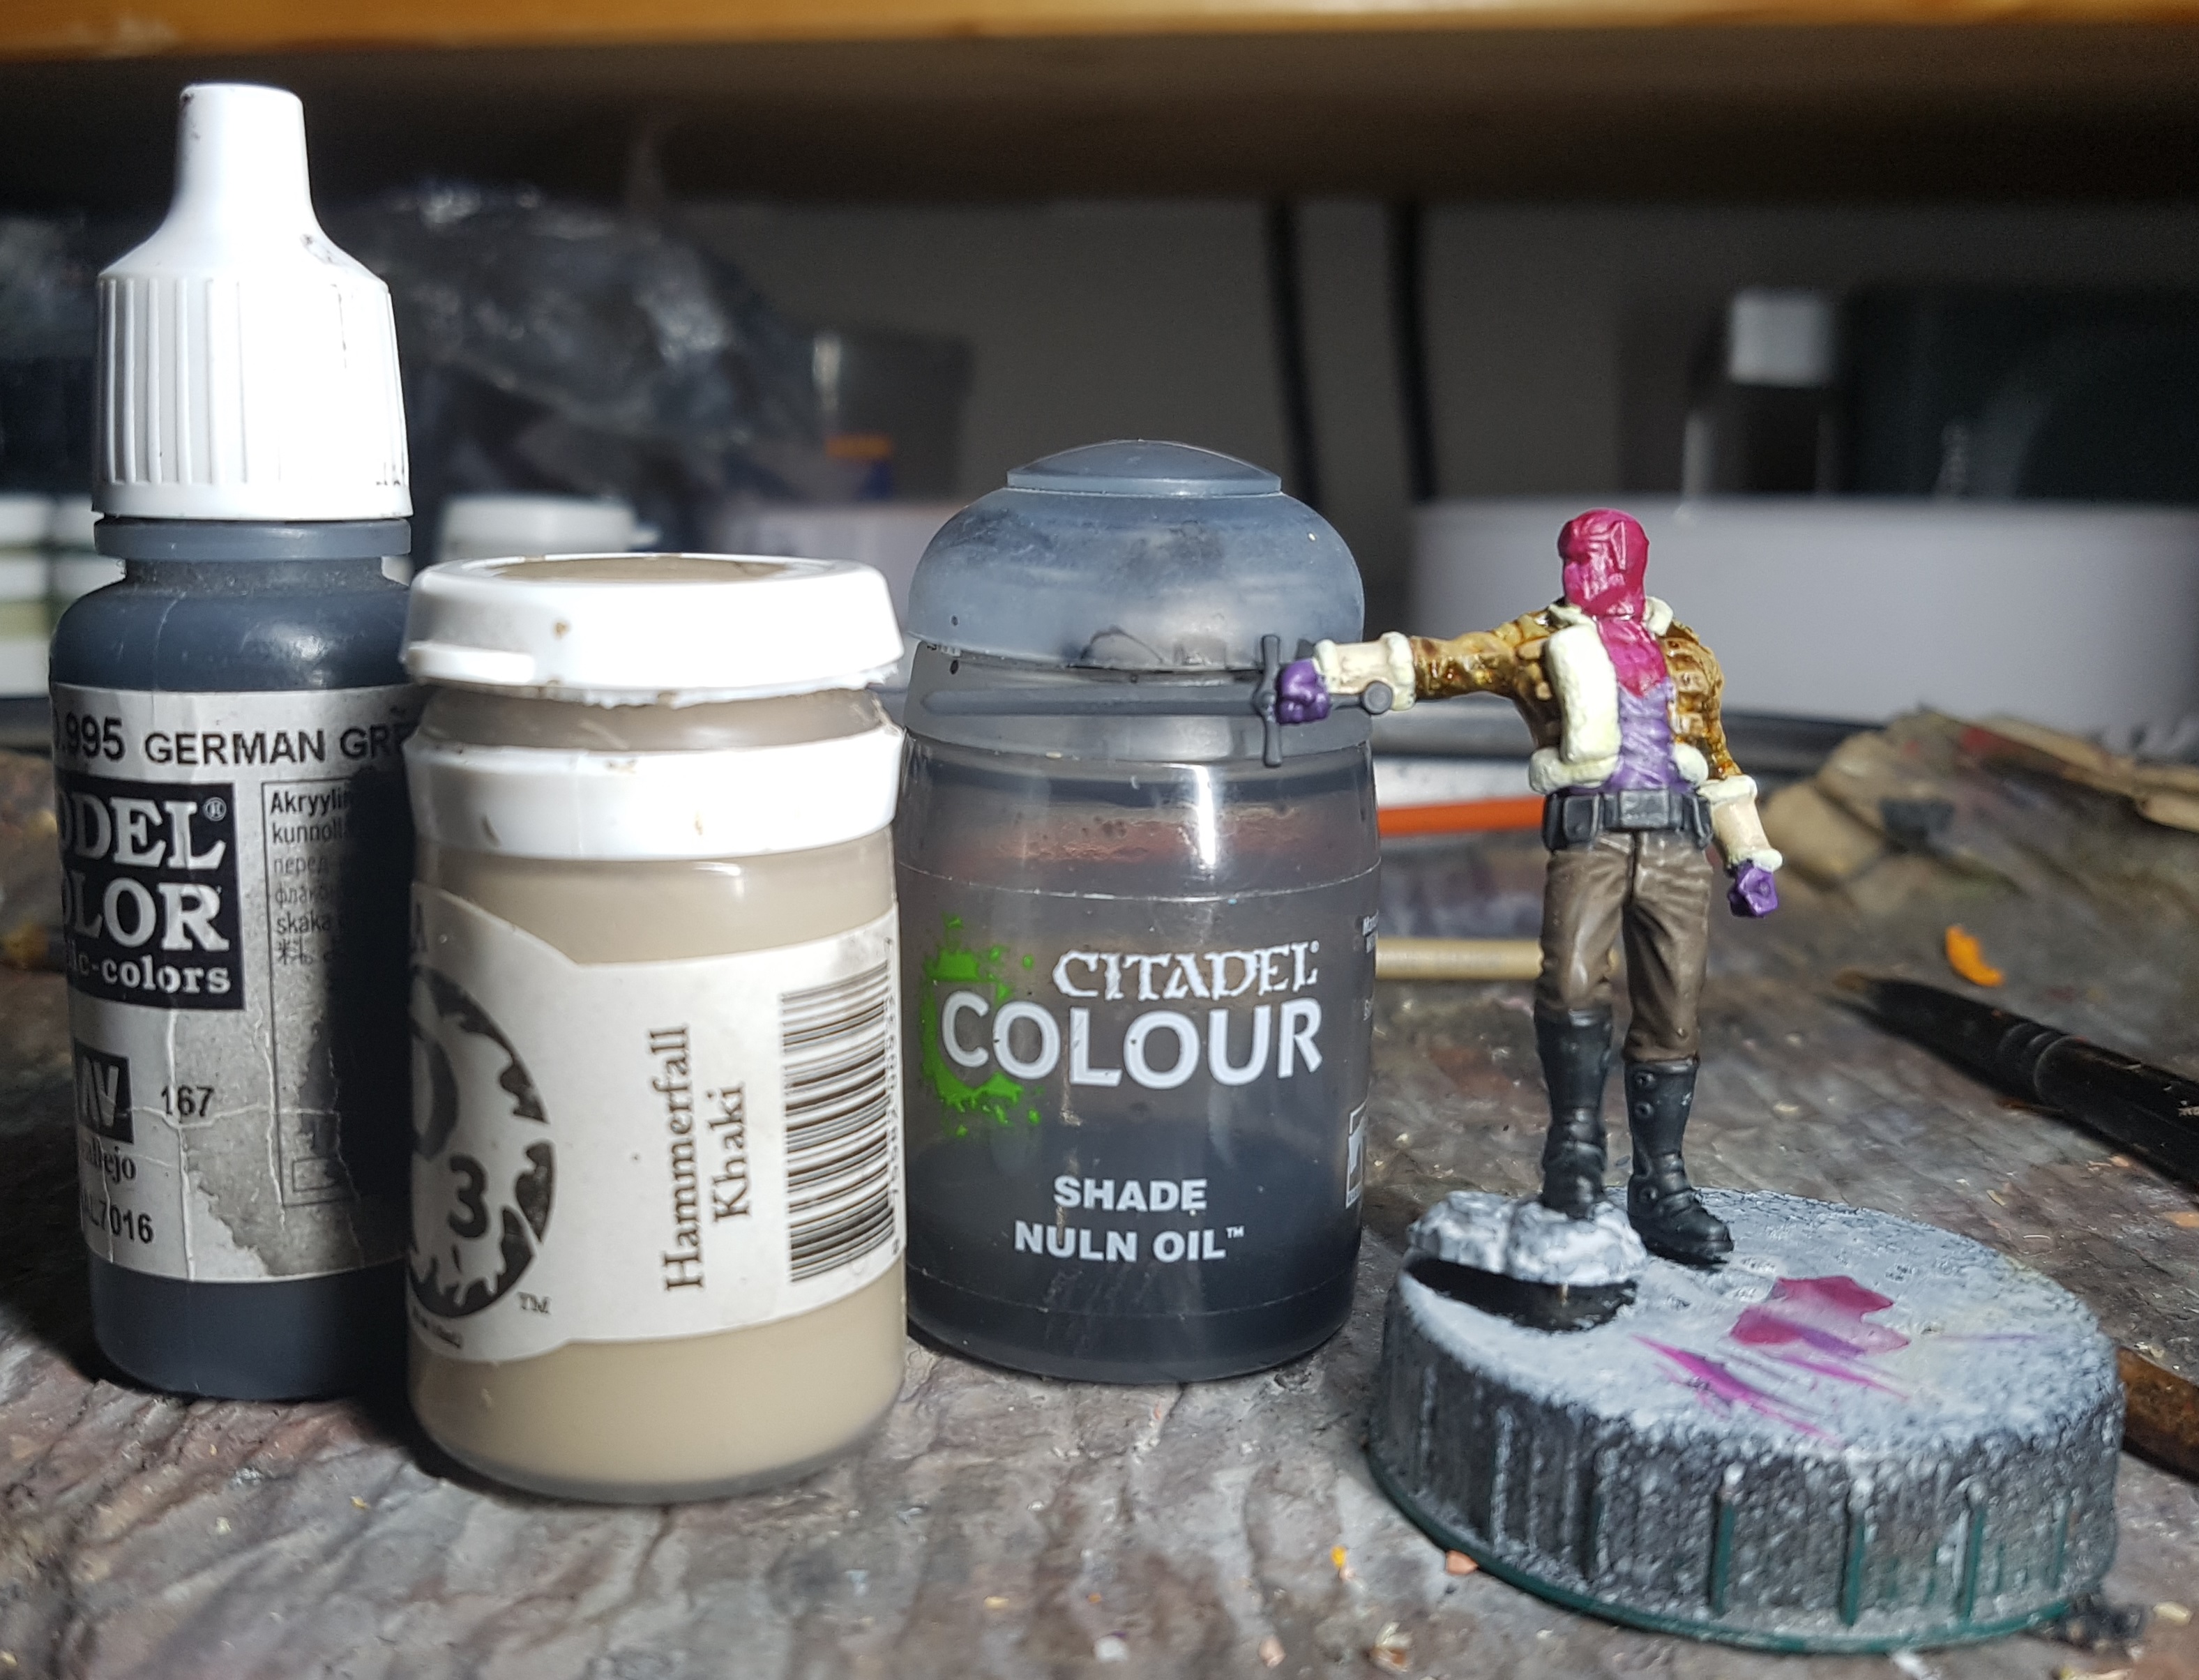
Base: VGC 70.995 German Grey
Drybrush and edge highlight: P3 Hammerfall Khaki
Wash: GW Nuln Oil
Go to bed with a movie
That’s 8 evenings work so far.
Evening 9: Zemo, Black Widow, Crossbones and Doc Ock
Easter Saturday. Another day of Getting Stuff Done, and my final game of Gloomhaven: Jaws of the Lion, but an evening free to paint. Zemo is finally ready for the gold, so lets get Black Widow back on the painting tray.
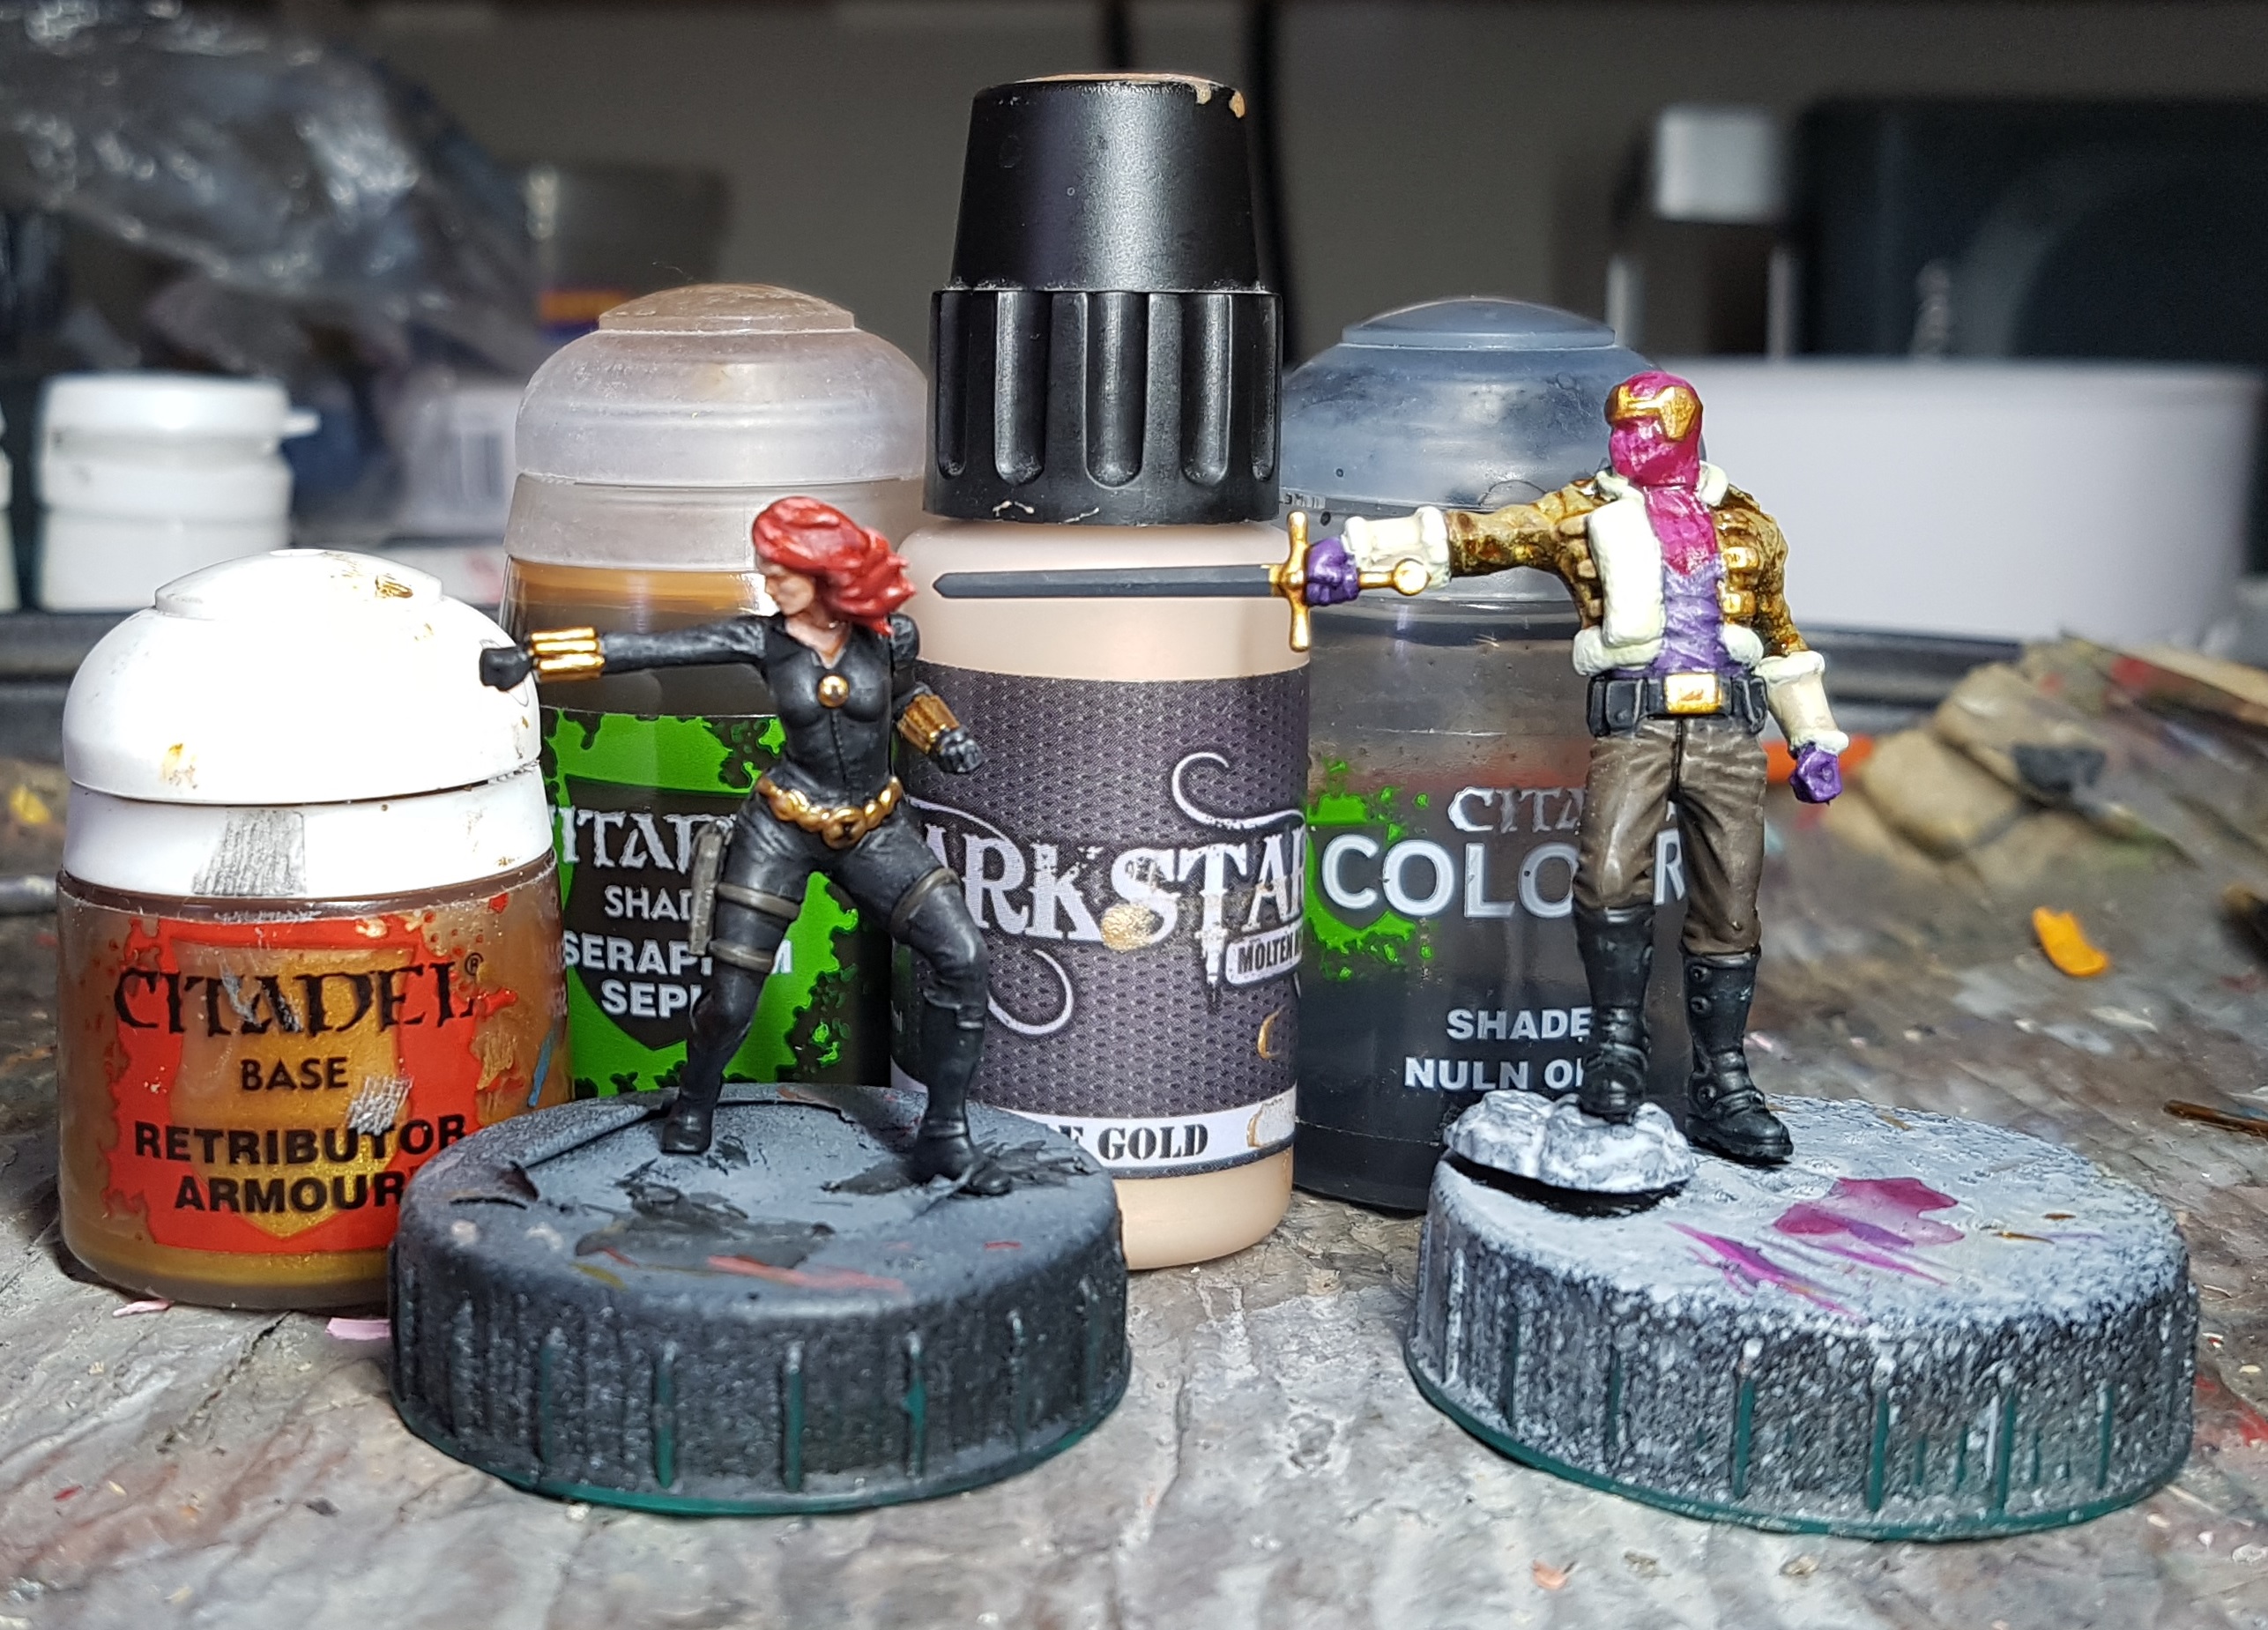
Base: GW Retributor Gold (Thanks to that magazine a few years back)
Wash: GW Seraphim Sepia (This combo makes for a nice warm gold)
Reclaim with base where needed
Highlight: Base mixed with Darkstar Pale Gold
Highlight: Pale Gold
Once dry, the emblems on Black Widow’s belt and pendant were inlayed with a drop of GW Nuln Oil. This was repeated once it was dry until it was a solid black.
Black Widow can now go sit in the Done pile, until I’m ready for eyes or basing.
Time for that sword, and all the buckles and steel trim on Zemo and Crossbones. This was another instance where it became apparent that the models in the box are not the same as the ones on the box or on the website. My Crossbones has a single metal strip across the knuckles of each hand. On the box and on the website he has two rows of individual metal studs on each hand. They are giving us slightly different models to the ones they’re telling us they’re selling. It’s not a huge difference and nothing I’ve had an issue with so far, but I dislike the dishonesty and it makes me wonder what else they’ve done or will do that I’ve not noticed yet.
Anyway, Steel:
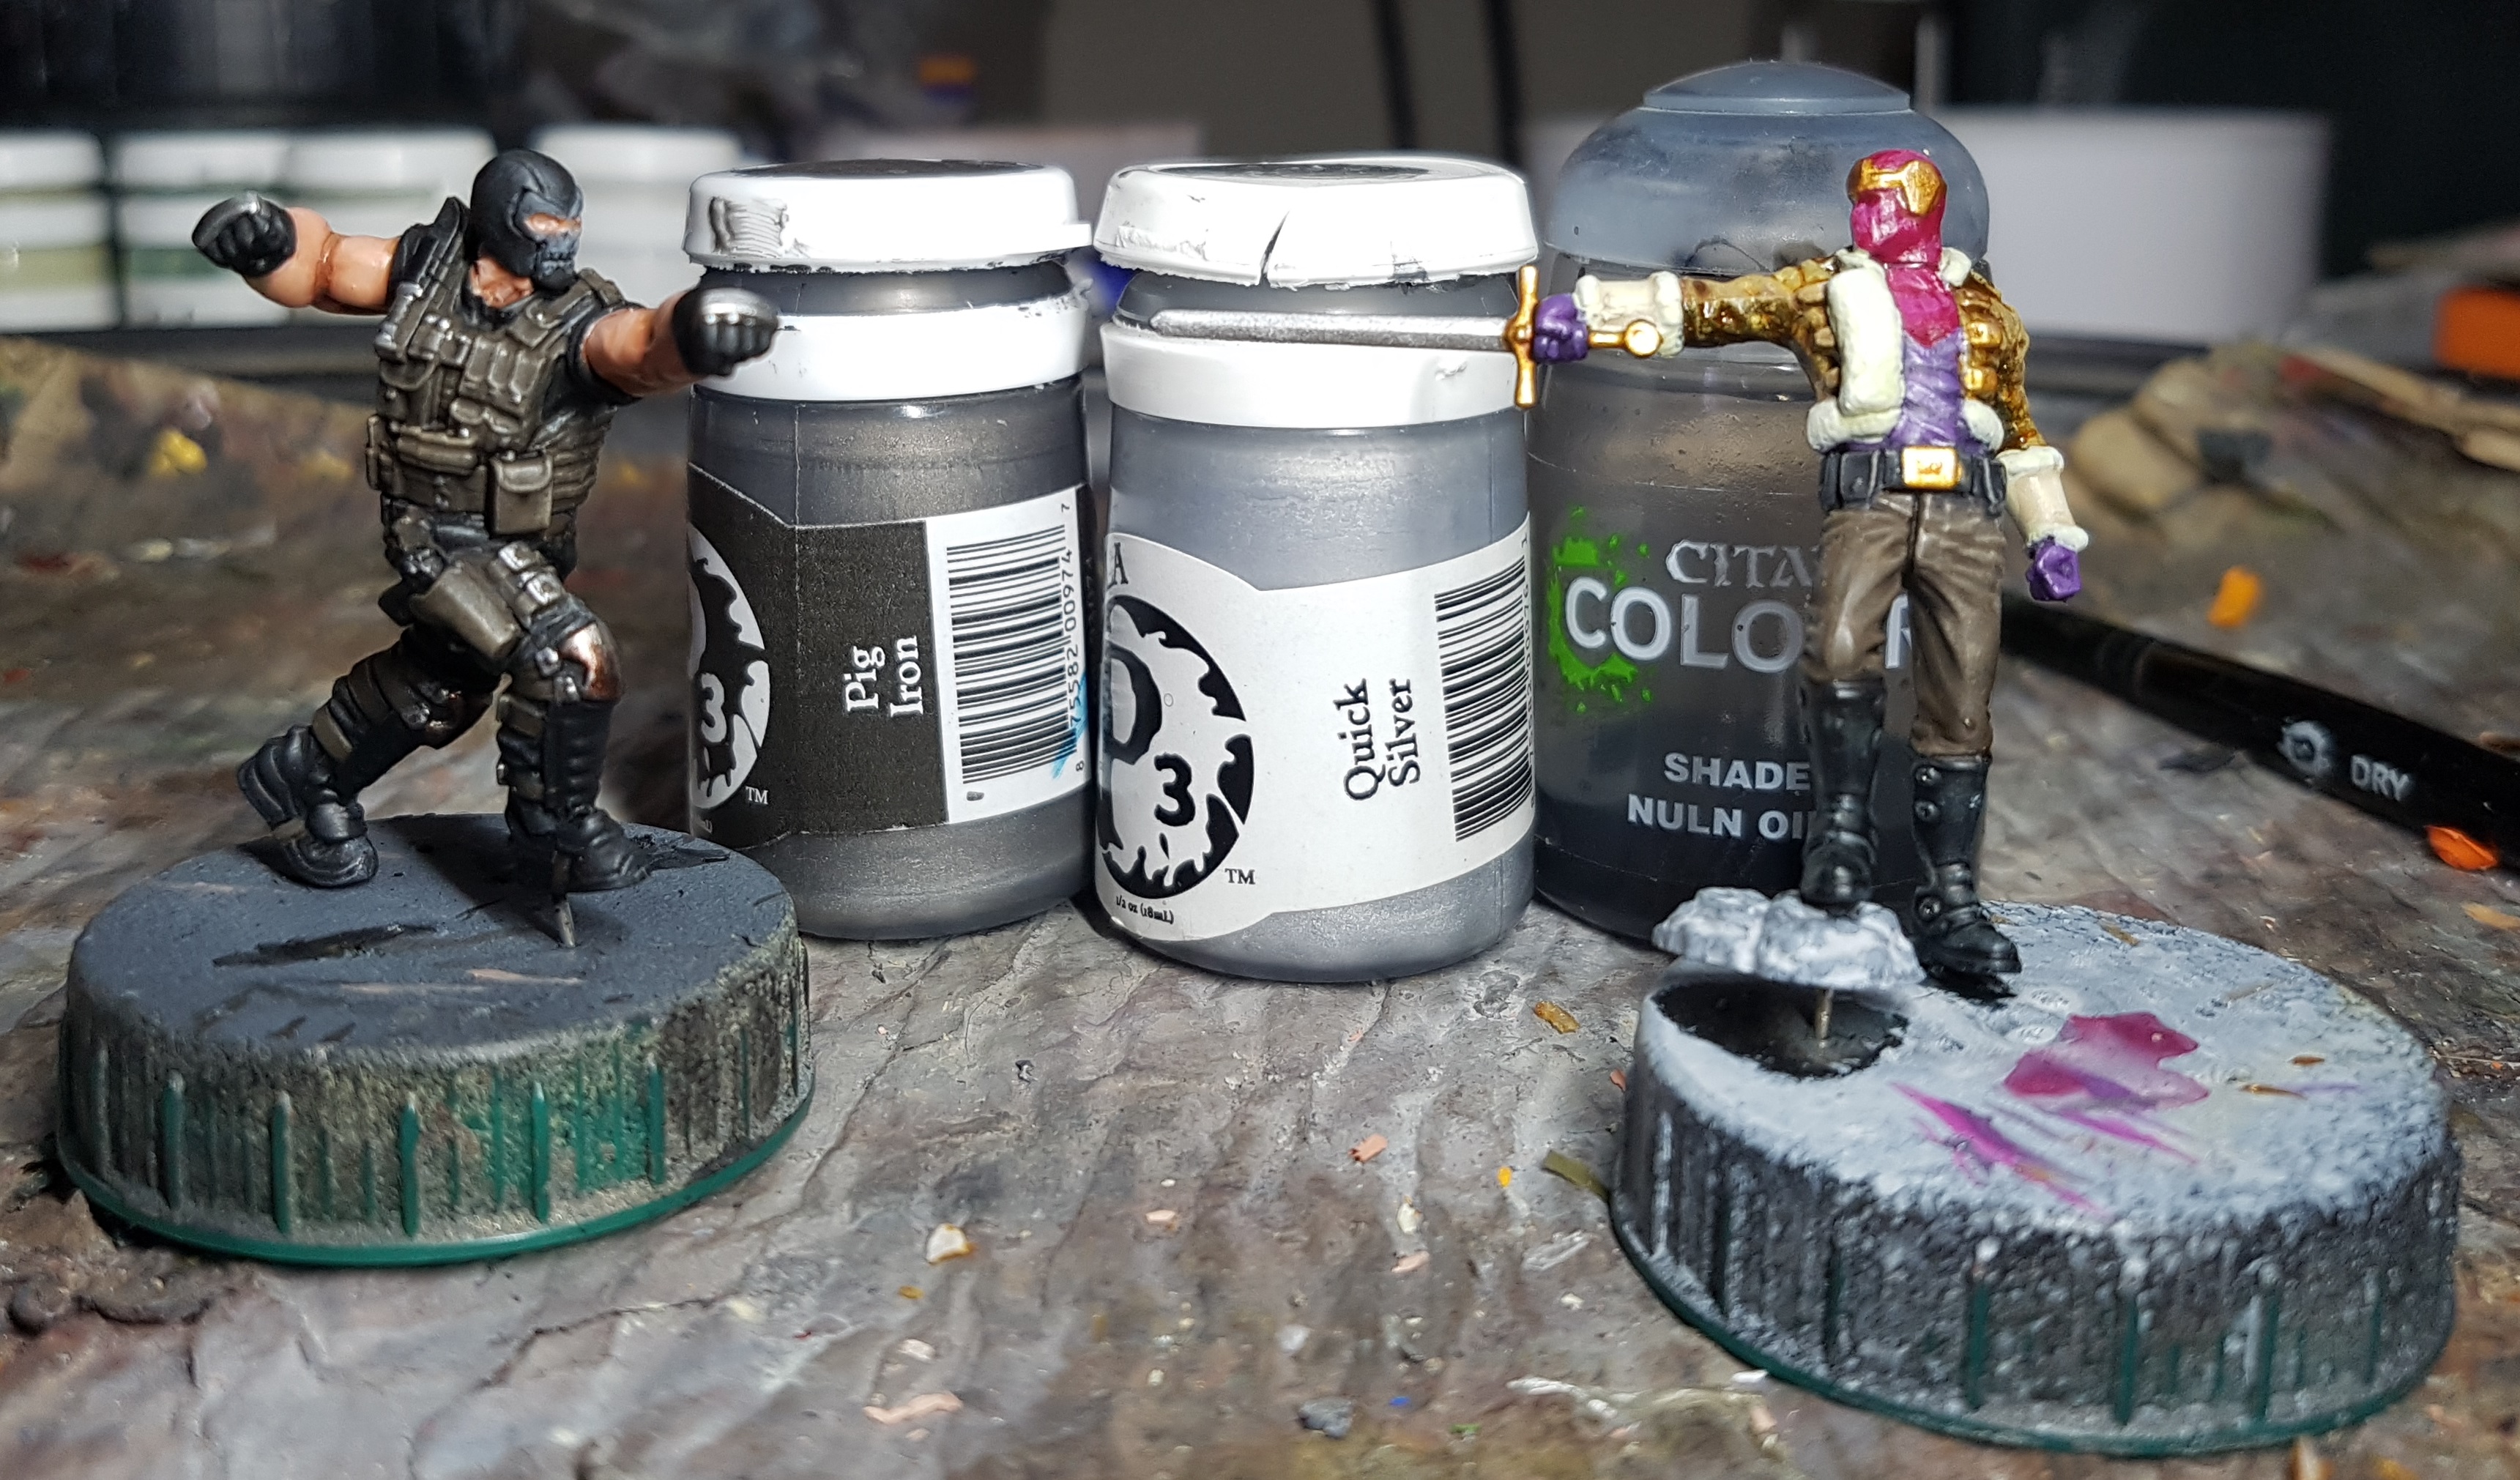
Base: P3 Pig Iron
Highlight: Pig Iron mixed with P3 Quick Silver
Highlight 2: Quick Silver
Apply targeted GW Nuln Oil where needed for depth or to tidy up any overpainting from the last few steps
Reapply any highlighting as needed.
I almost forgot the hilt of Crossbones’ knife! I should have done this before the steel, but oh well.
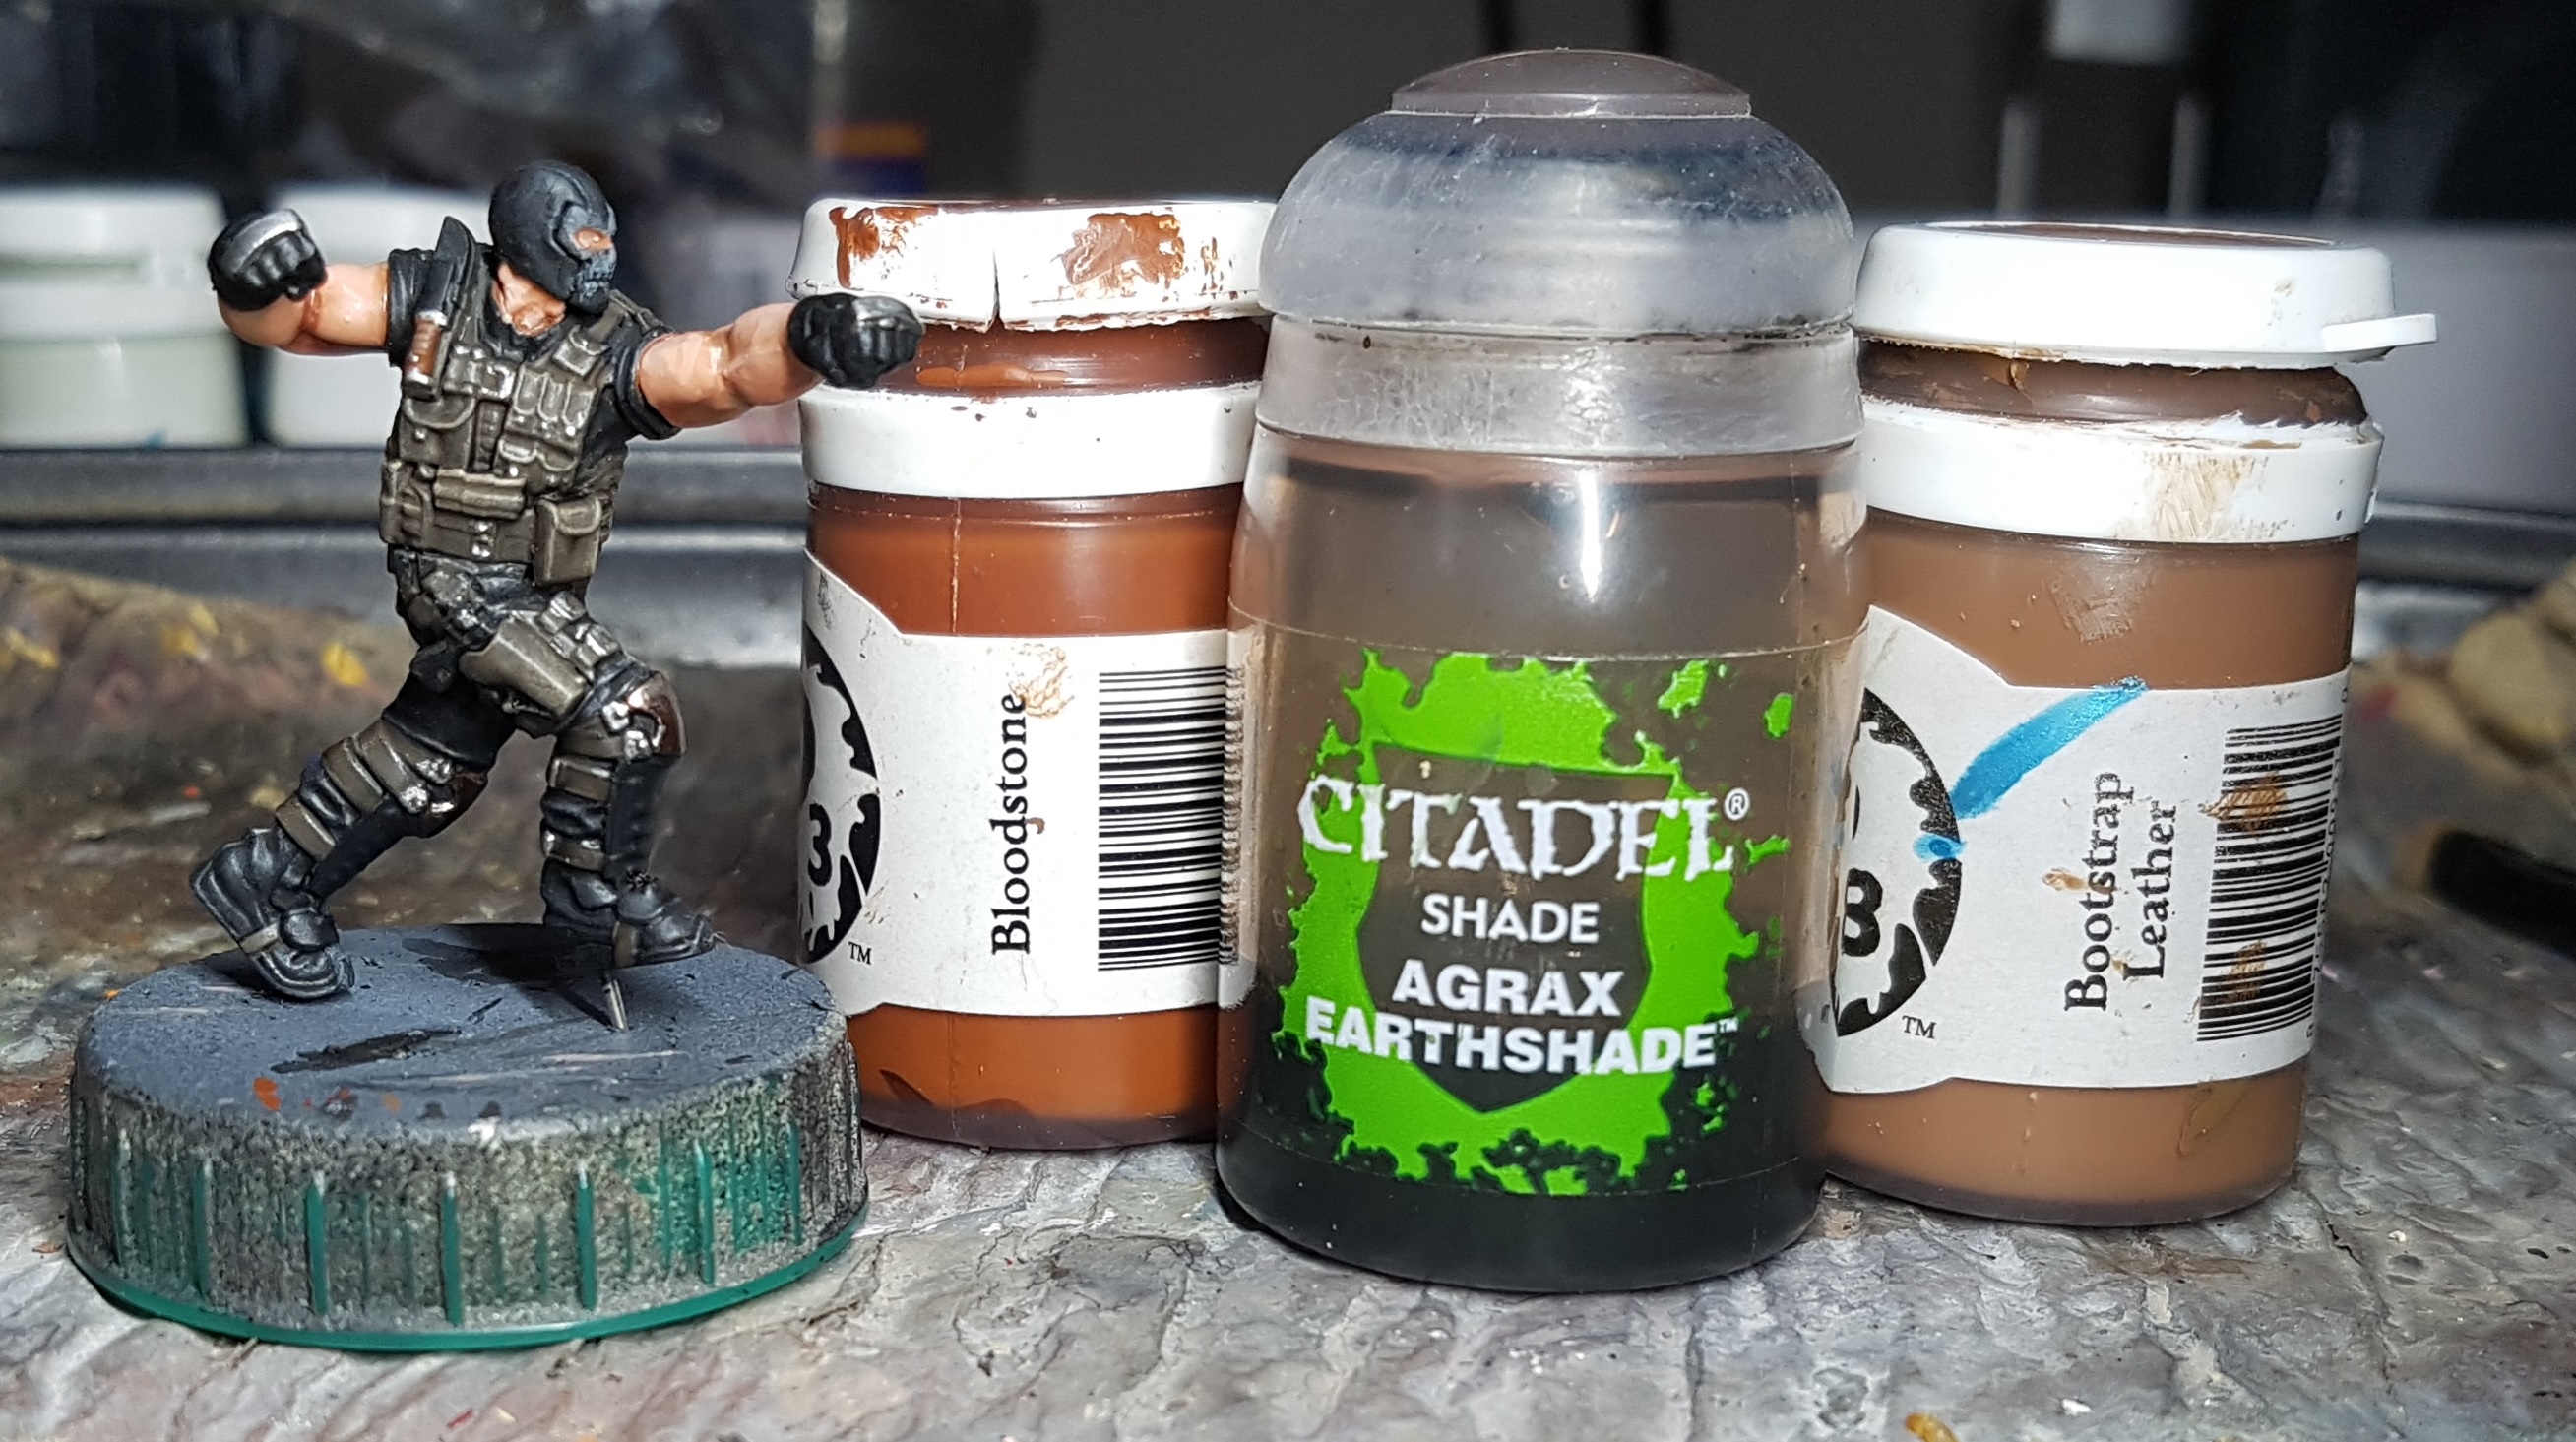
Base: P3 Bloodstone
Targeted Wash: GW Agrax Earthshade
Highlight with a few lines of P3 Bootstrap
Repair any steel that needs it
Crossbones can return to the paint queue now, until I’m ready to do the white on Captain America
I should probably start work on Captain America now so I can finish Crossbones, but I’ll be honest with you: Spider-man intimidates me. All that webbing on him? That padded armour effect requiring each square to have its own highlights and shade? Eeek! That can wait! Plus, there’s Captain Americas shield. I’m not looking forward to that!
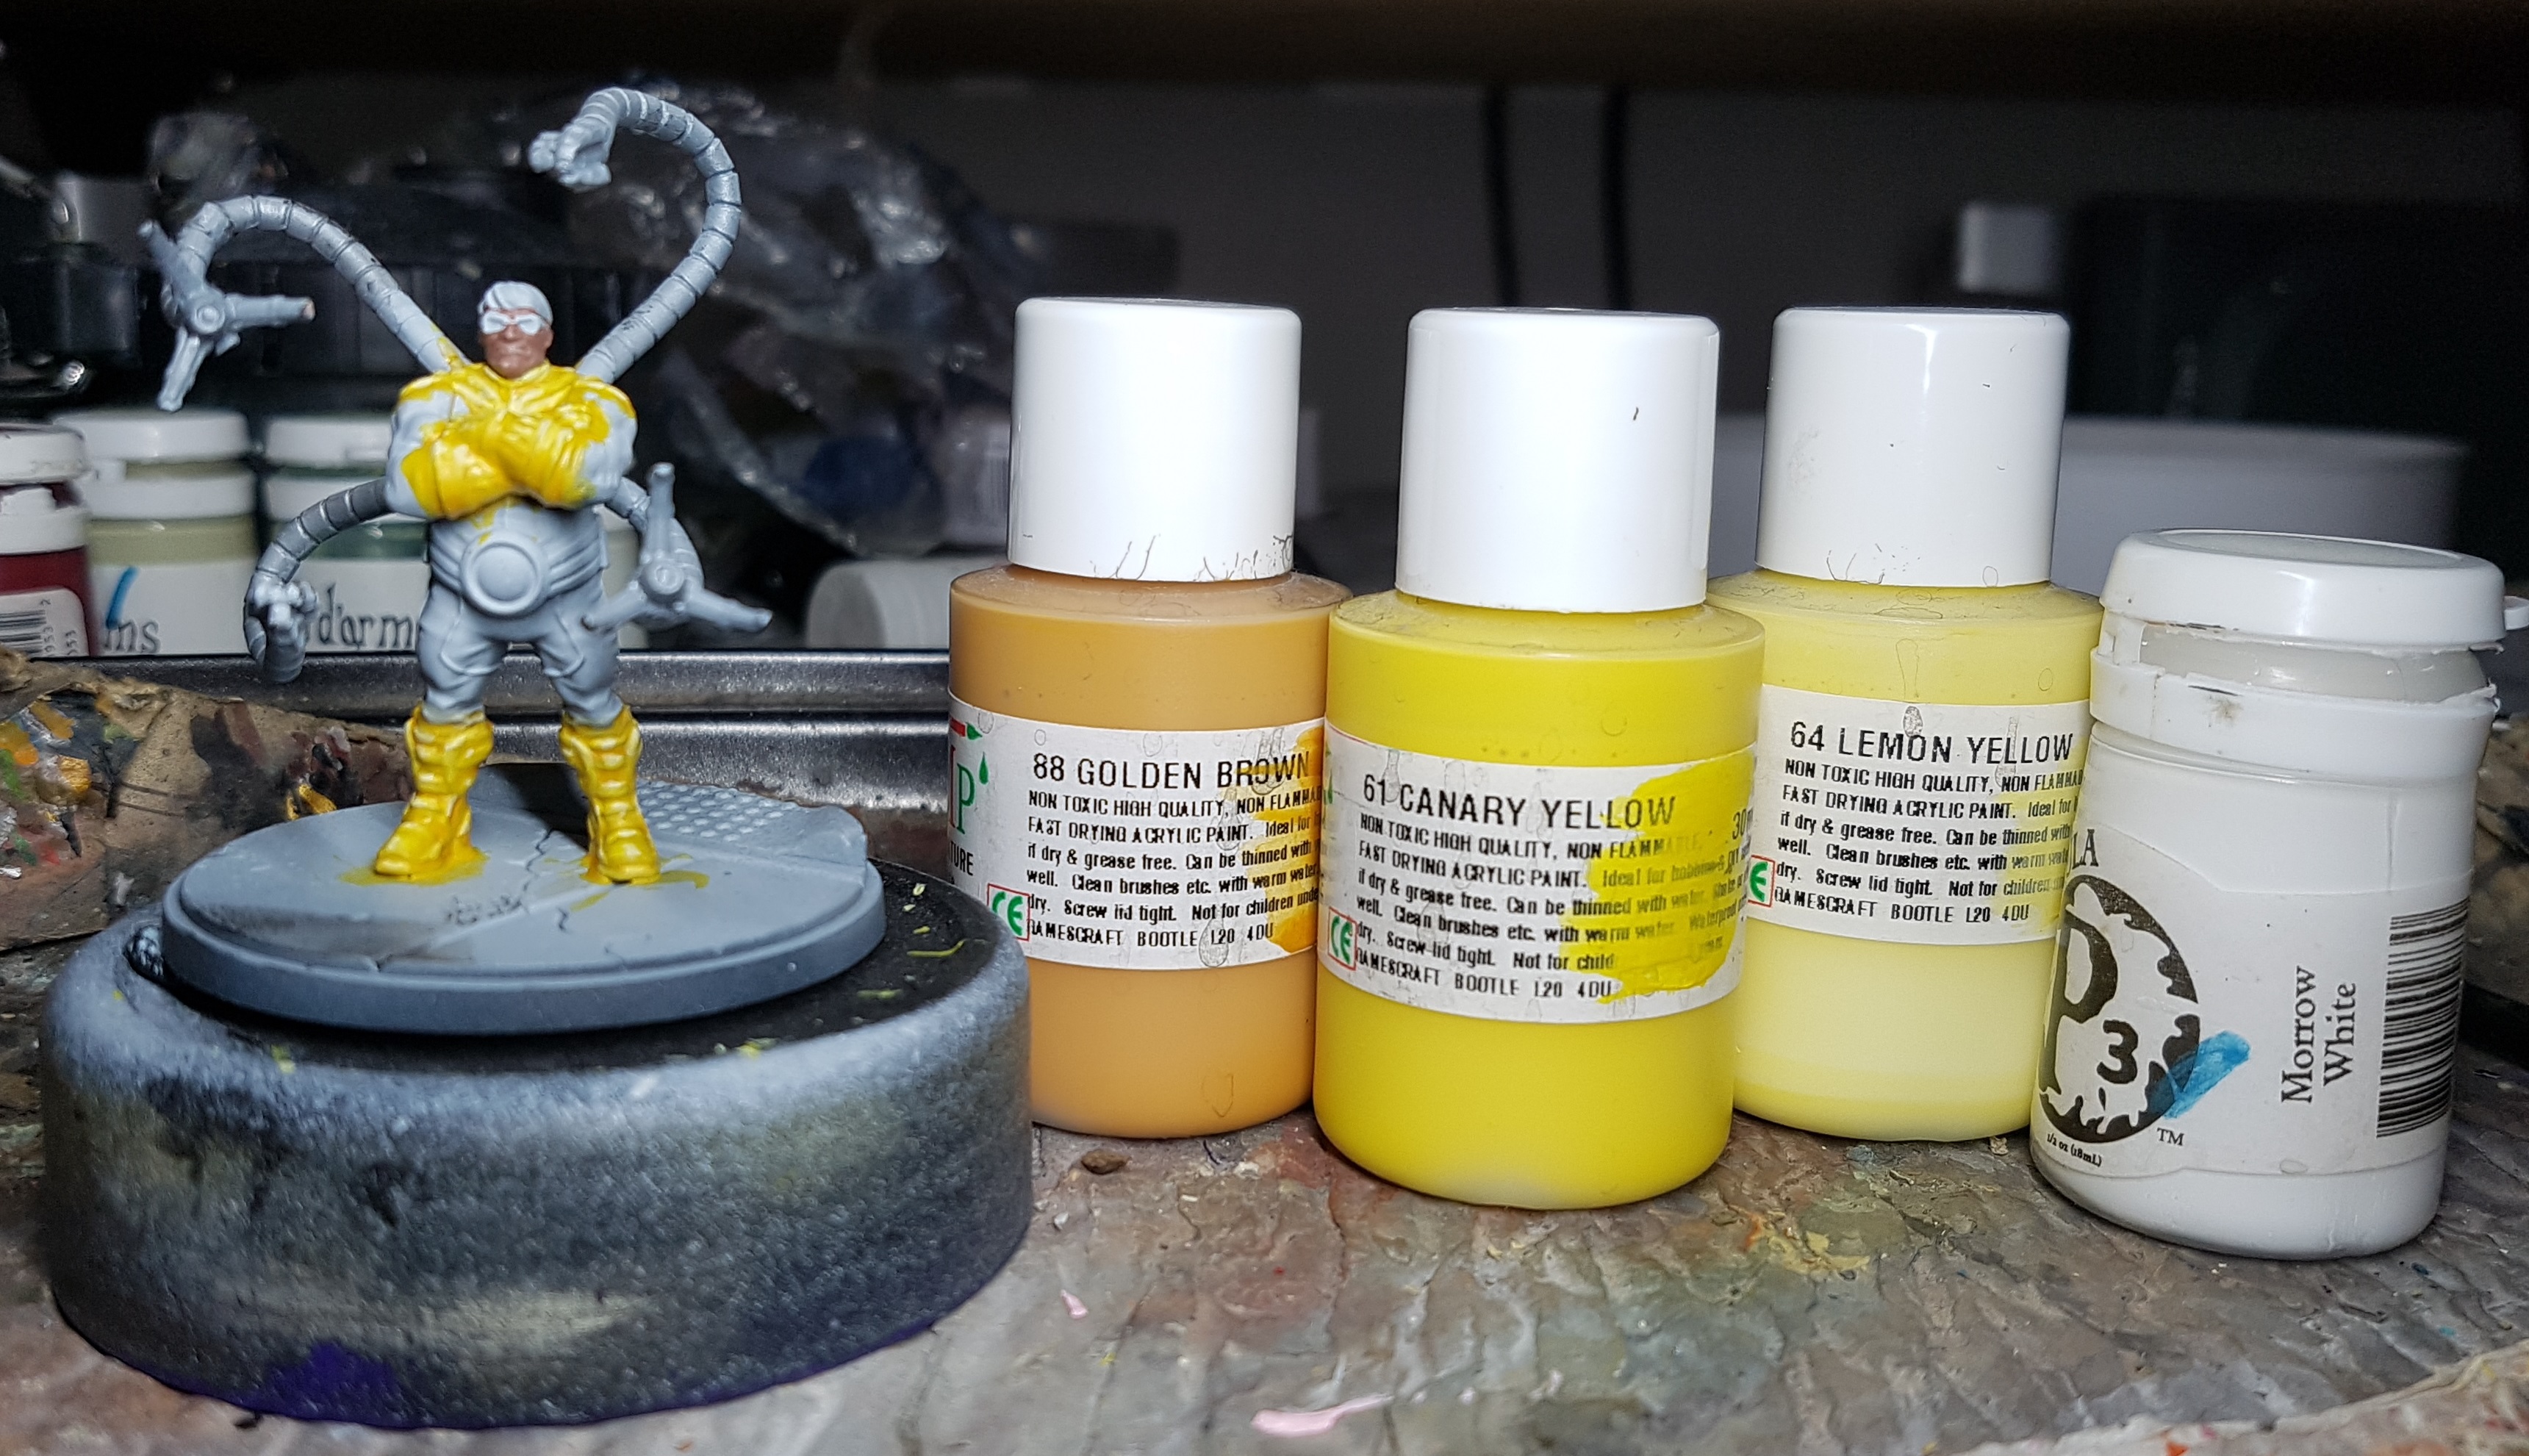
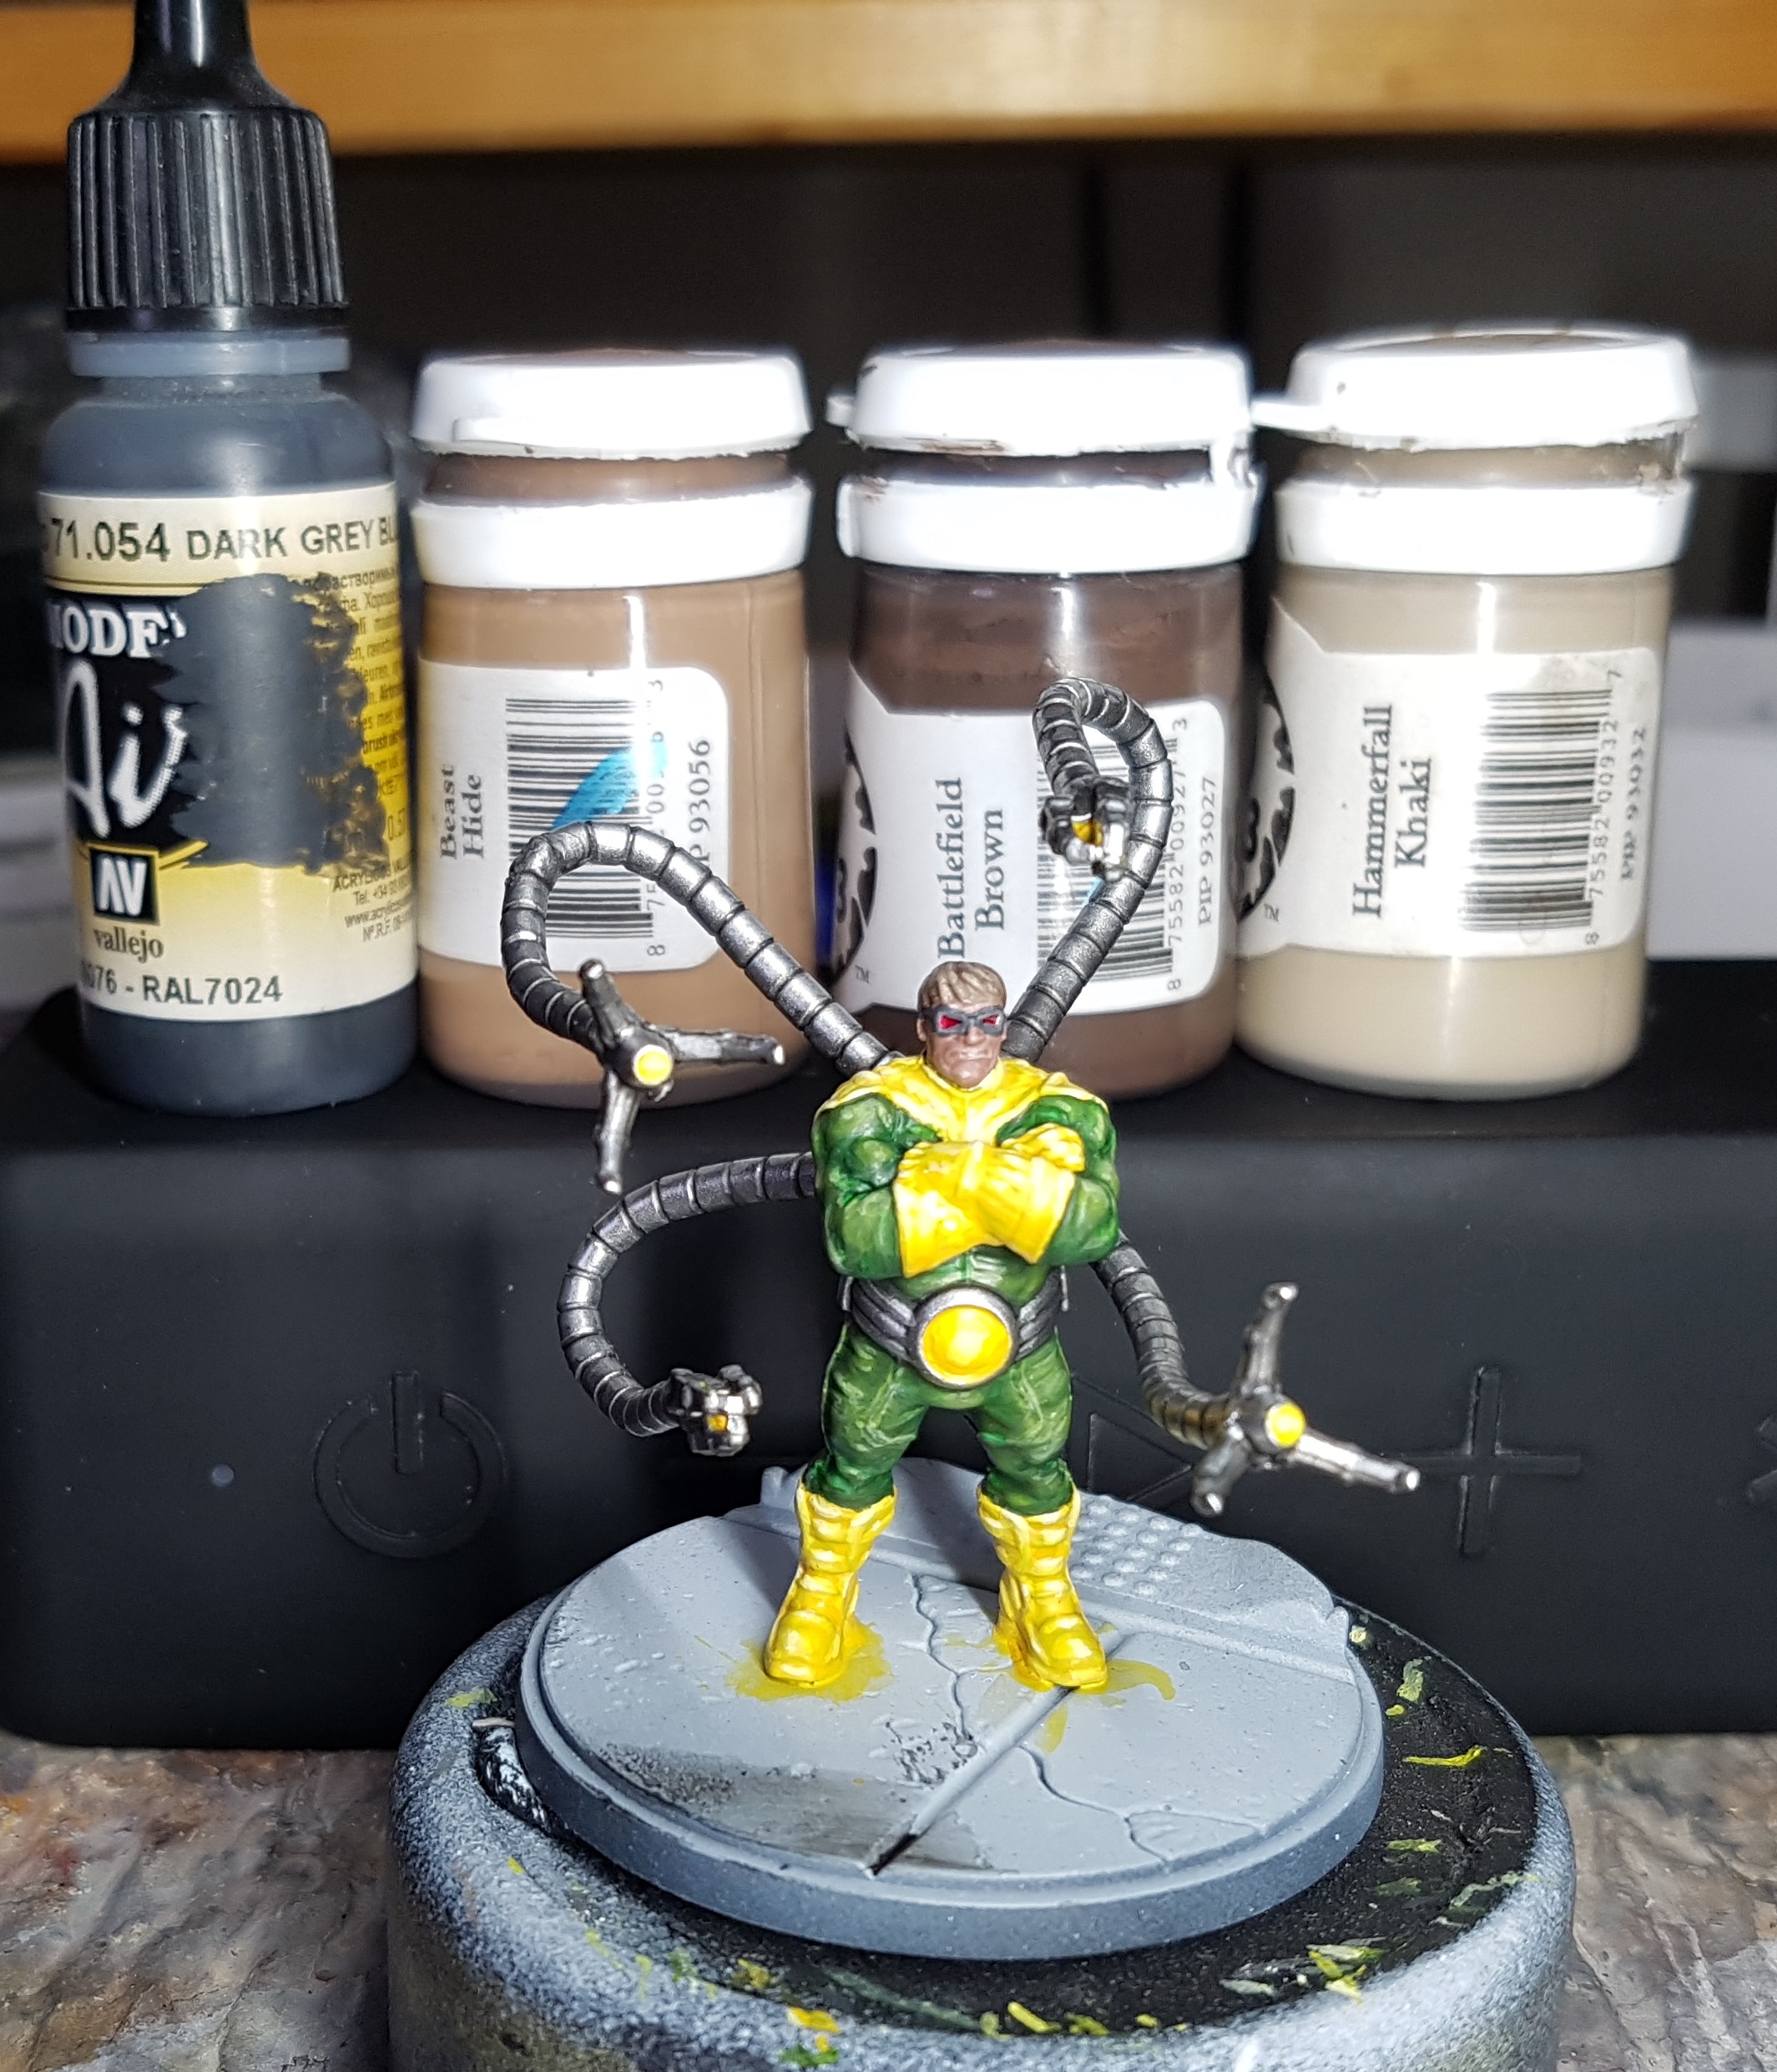
So one last distraction before Team Red and Blue: Doctor Octopus. Let’s do the yellow first as we all know yellow has poor coverage. I should probably have airbrushed on the yellow base colour and repainted the flesh, but I didn’t so time to live with the consequences.
Base: 50/50 mix of Gamecraft Miniature Paint Golden Brown and Gamecraft Miniature Paint Canary Yellow. This took more coats than I would have liked, and the detail may have suffered a bit. Airbrushing would likely have covered better with less.
Layer Shade: Thinned Golden Brown
Layer Highlight: Canary Yellow
Layer Highlight 2: Canary yellow mixed 1:1 with Gamecraft Miniature Paint Lemon Yellow
Layer Highlight 3: Canary yellow mixed 1:2 with Lemon Yellow
Layer Highlight 4: Lemon Yellow
Layer Highlight 5: Lemon Yellow with just a touch of P3 Morrow White
Layer Highlight 6: Add more white
Layer Highlight 7: Add more white
Layer Highlight 8: Add glint highlights with just pure white CAREFULLY!
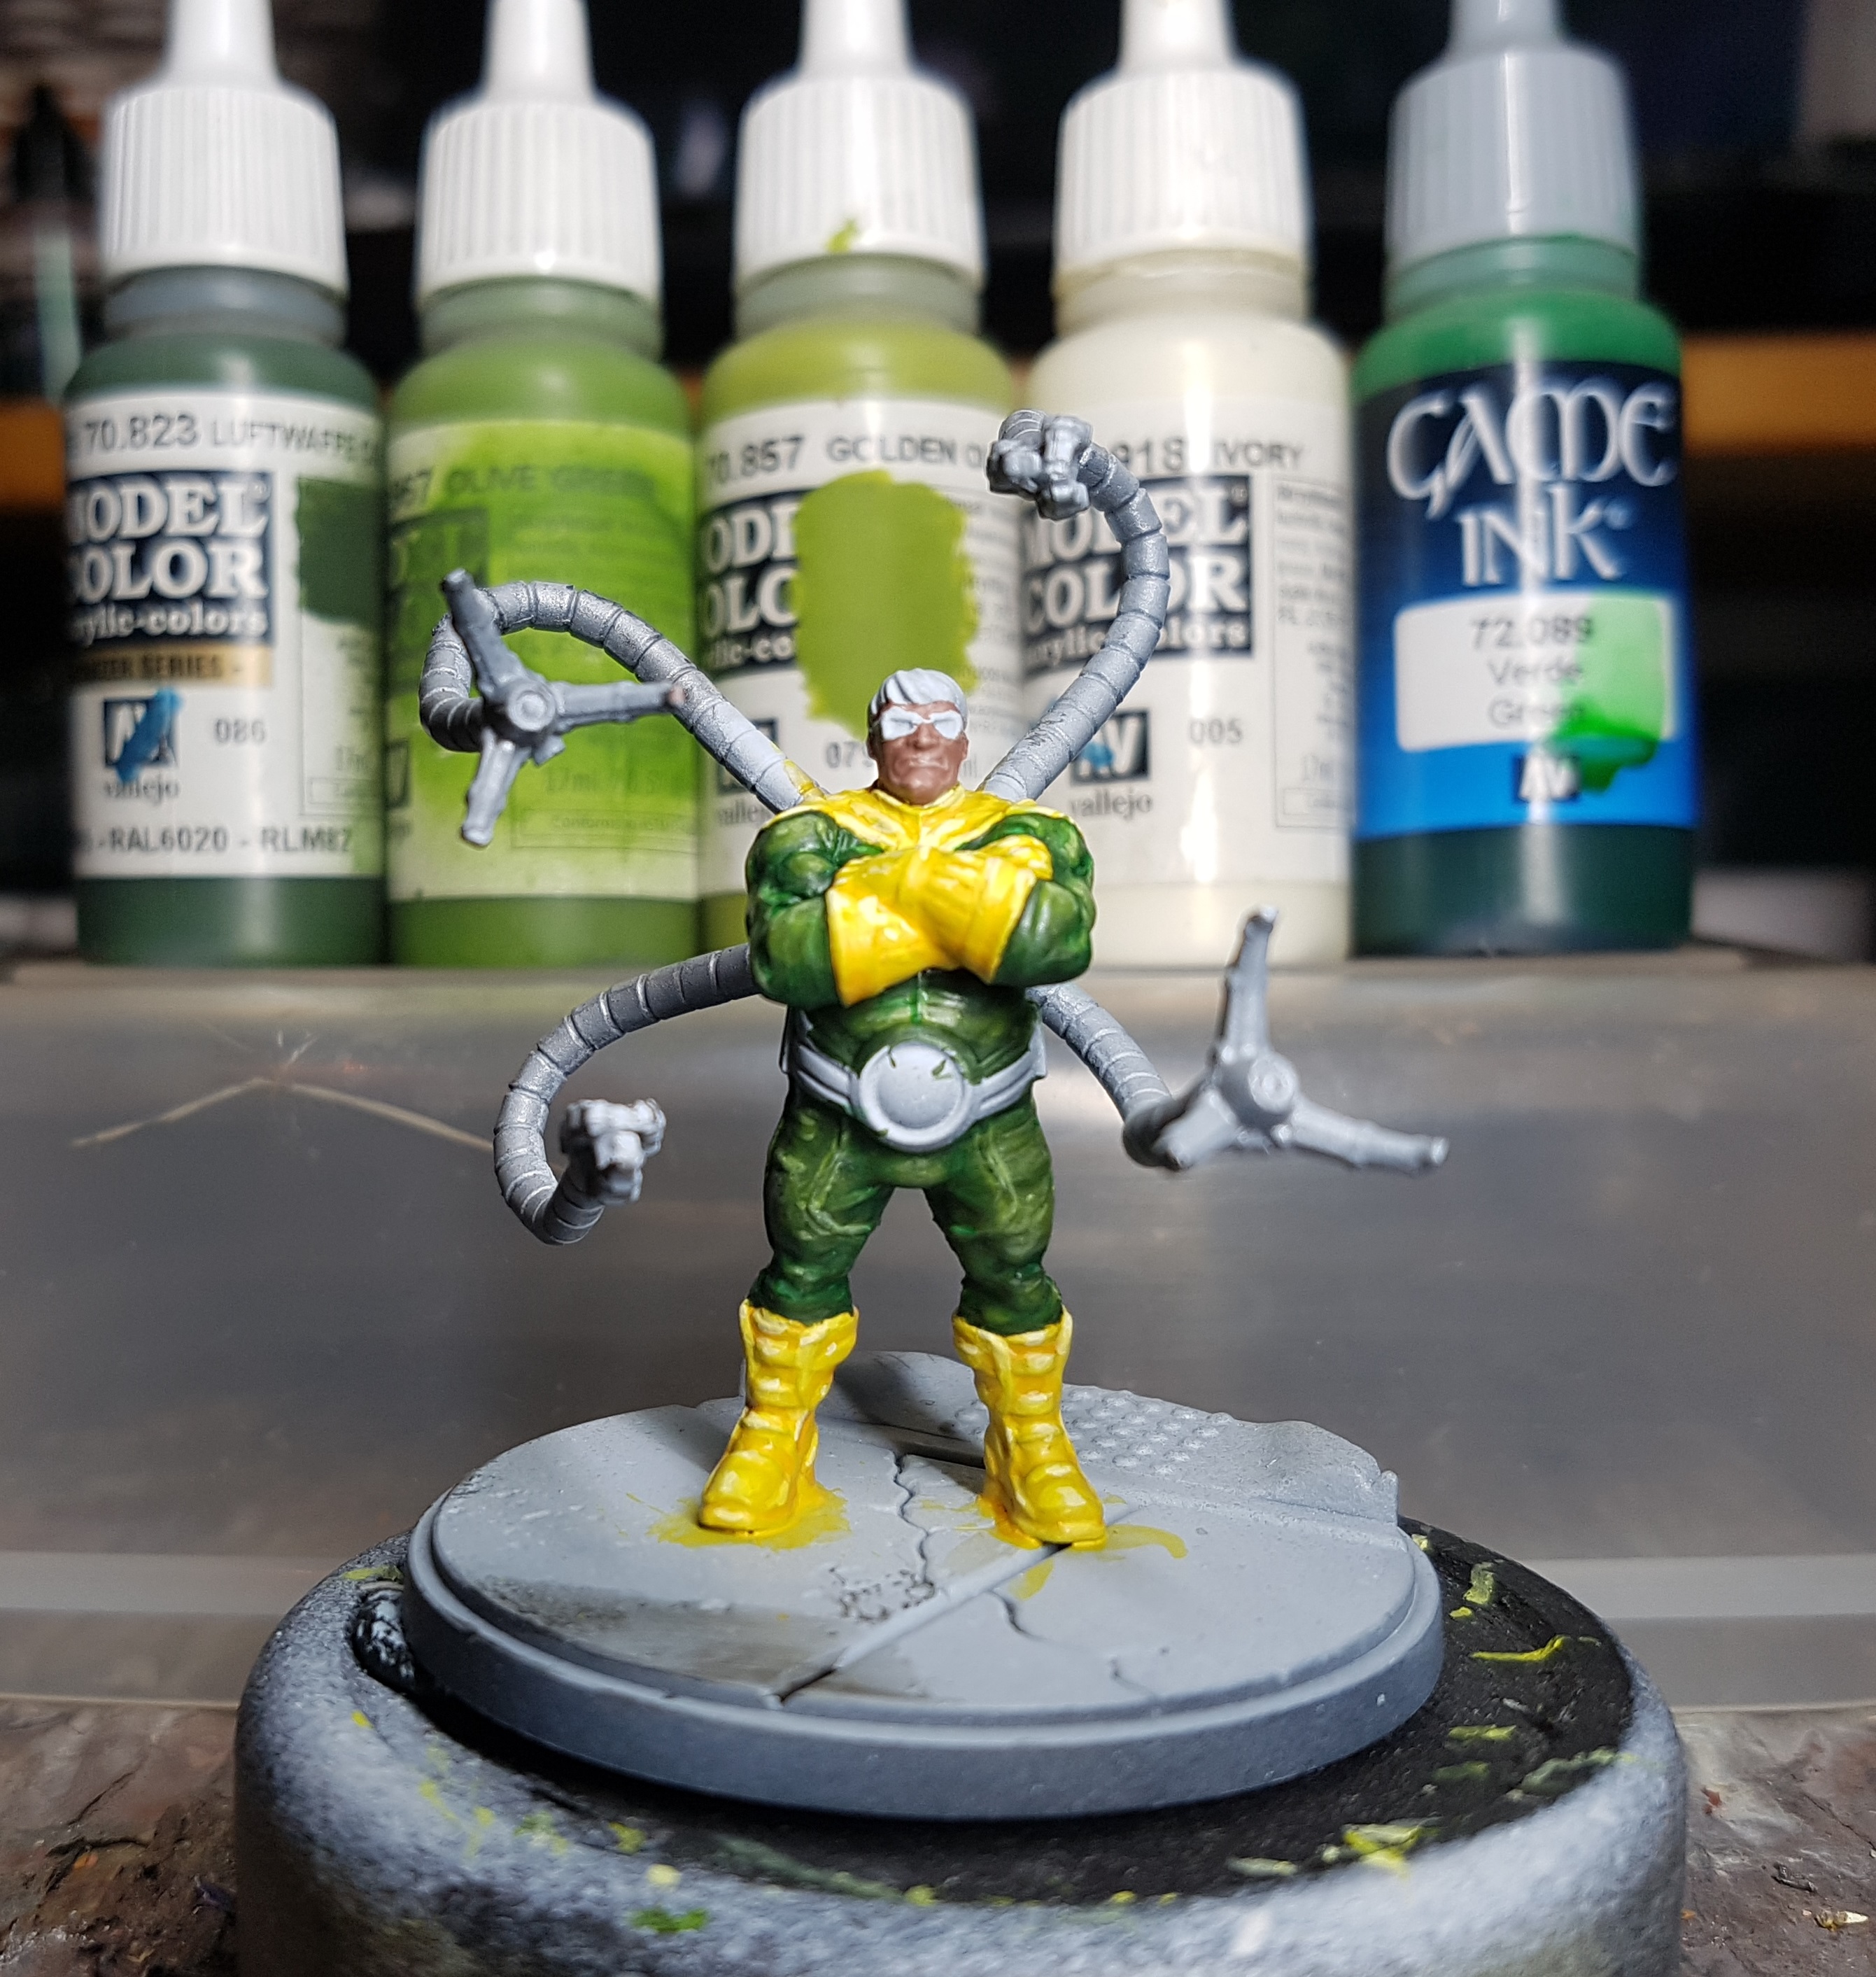
With the yellow done, it’s time for the green. I wasn’t sure how to go so I flicked through both the Angel Giraldez books looking for inspiration and fell on a recipe I’ve used before but thought looked darker than the studio’s green (PanOceania green), but thought it’d work well and I’d go with it anyway.
Base: VMC 70.823 Luftwaffe Cam. Green (Its’ the base, but it’s also the shade colour. I’m starting from the darkest colour here)
Layer 1: Above mixed with VMC 70.967 Olive Green
Layer 2: Olive Green
Layer 3: Olive Green mixed with VMC 07.857 Golden Olive
Layer 4: Golden Olive
Layer 5: Golden Olive mixed with VMC 70.918 Ivory carefully
Glaze: VGC 72.089 Green Ink thinned down to a glaze, and applied to the shaded areas to give more tonal variation. It’s a brighter colour than the shade, but that’s what Angel said to do and it seems to have worked out.
It’s about an hour later in the evening than I usually plan on packing up. I’ve truly gotten caught up in the layering there. It’s too late for a movie in bed tonight so I caught up on some TV instead. That’s 9 evenings worth of work done.
Full Day 1 (After 9 evenings): Dock Ock, Spiderman, and Captains Marvel and America
One of my plans for the 4 day weekend was to finish Jaws of the Lion, and then start Aeon Trespass: Odyssey. However, I seem to be having an allergic reaction to something in my gaming room. It’s happened the past 2 days, and it happened all last weekend. last weekend I was dog sitting so I was blaming it on the dog. I’ve never had an animal allergy before, but I’ve never spent more than a few hours with a long haired dog before that. The dog is long gone, but my itchy eyes and runny nose keep coming back. I didn’t have this issue when I was gaming in this room before Christmas. Well, the weather is really good so I’ve had all the windows open all weekend. Let’s hope that clears whatever this issue is. I’ve decided I don’t want a third day of my face attacking me, so I’m skipping ATO and spending the whole day painting instead. Let’s get Doctor Handsy finished.
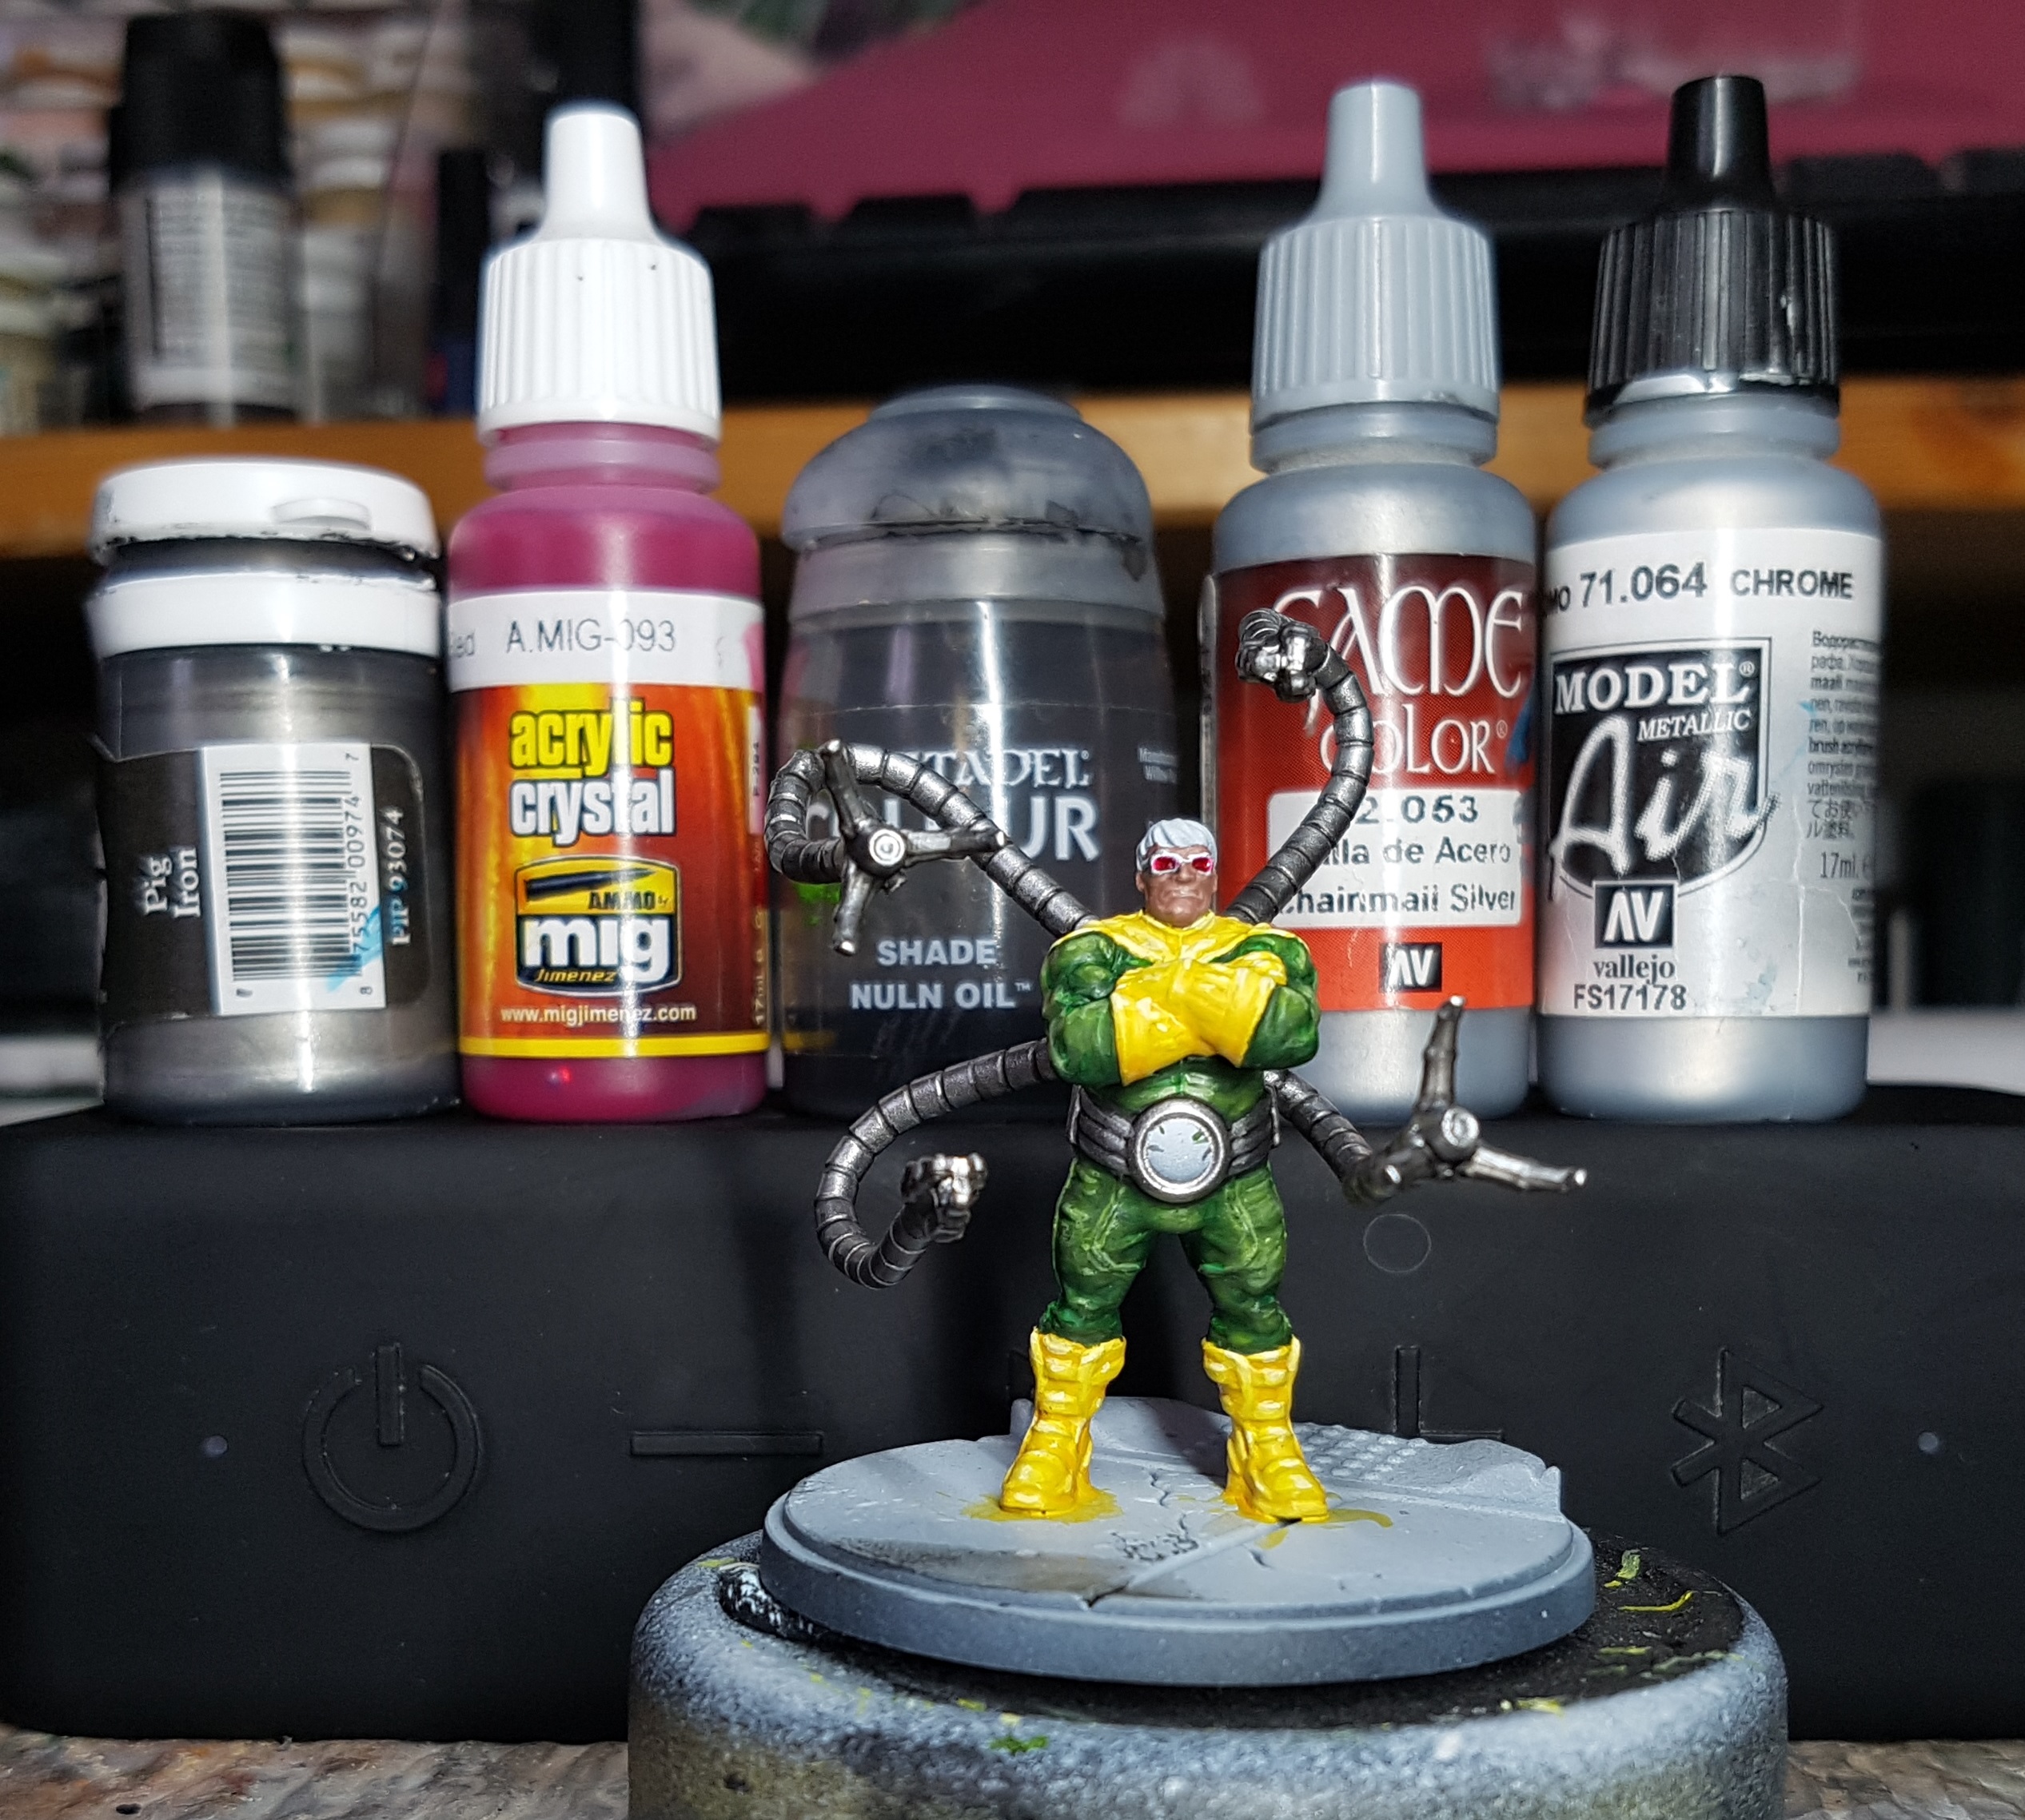
Tentacle Steel & Lenses
Base: P3 Pig Iron. Undercoat the lenses of his glasses too
Pin Wash GW Nuln Oil only in the gaps between the segments
Paint the lenses on his glasses with a drop of A.MIG-0093 Crystal Red. I used 2 coats, but 1 was probably enough.
Layer Highlight 1: Pig Iron mixed with VGC 720063 Chainmail Silver
Layer Highlight 2: Chainmail Silver
Layer Highlight 3: Chainmail Silver mixed with VMA 71.064 Chrome
Layer Highlight 4: Pick out a few careful glints with pure Chrome
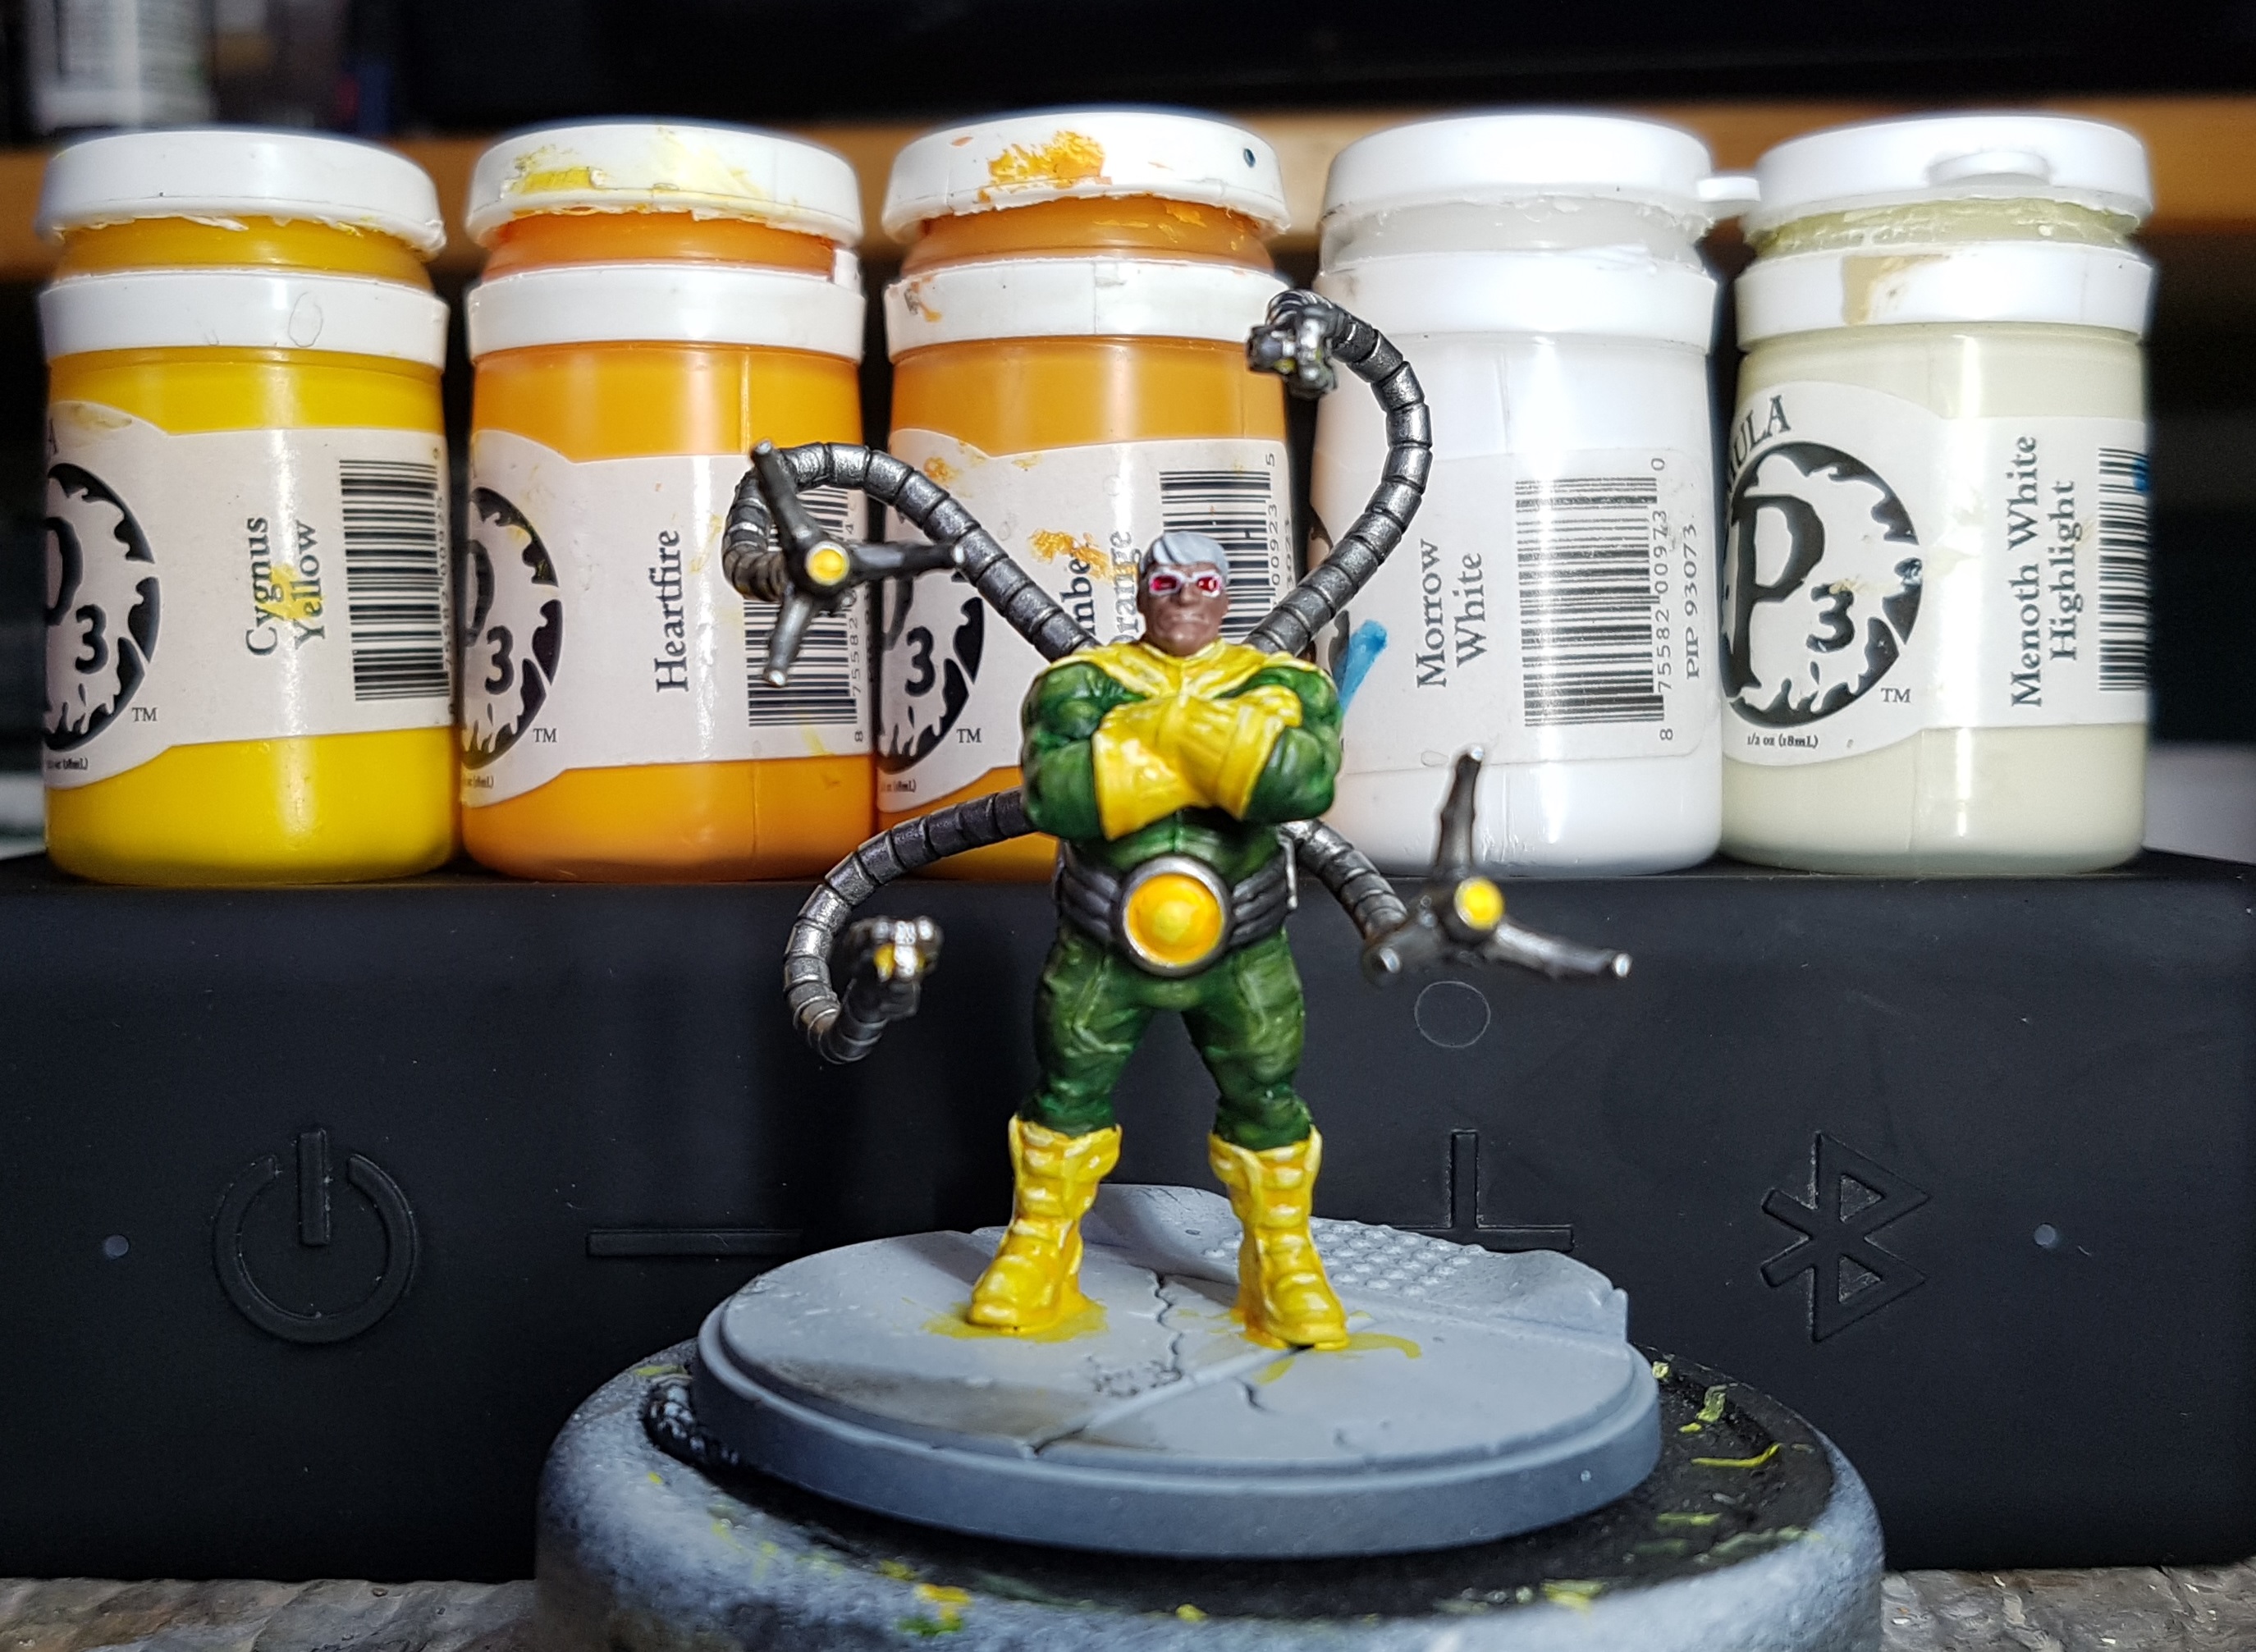
The next big colour is the glow. This was a trial and error paint job. I had a good idea as I’ve done similar things before but there was definite experimentation here
Undercoat: White or you’ll never get the vibrancy you need
Base: P3 Cygnus Yellow
Wash: P3 Heartfire over all of it
Wash: P3 Ember Orange only in the outer ring of each light
Undercoat a small circle of white in the middle again (Or a dot on the smaller lights)
Reclaim with Cygnus Yellow over that white on to the slightly darker areas.
Try a little wet blending between the different shaded until you’re happy or afraid you’re just going to ruin it.
Final Highlight: Cygnus Yellow mixed with a little P3 Morrow White at the brightest point of each light
Getting there. Just tidy up tasks and he can go sit on the Done shelf.
Glasses Frames: VMA 71.054 Dark Grey Blue
Hair
Base: P3 Beast Hide mixed with P3 Battlefield Brown
Wash: Battlefield Brown
Layer 1: base mix
Layer 2: Beast Hide
Layer 3: Beast Hide mixed with P3 Hammerfall Khaki
Glints: Hammerfall Khaki
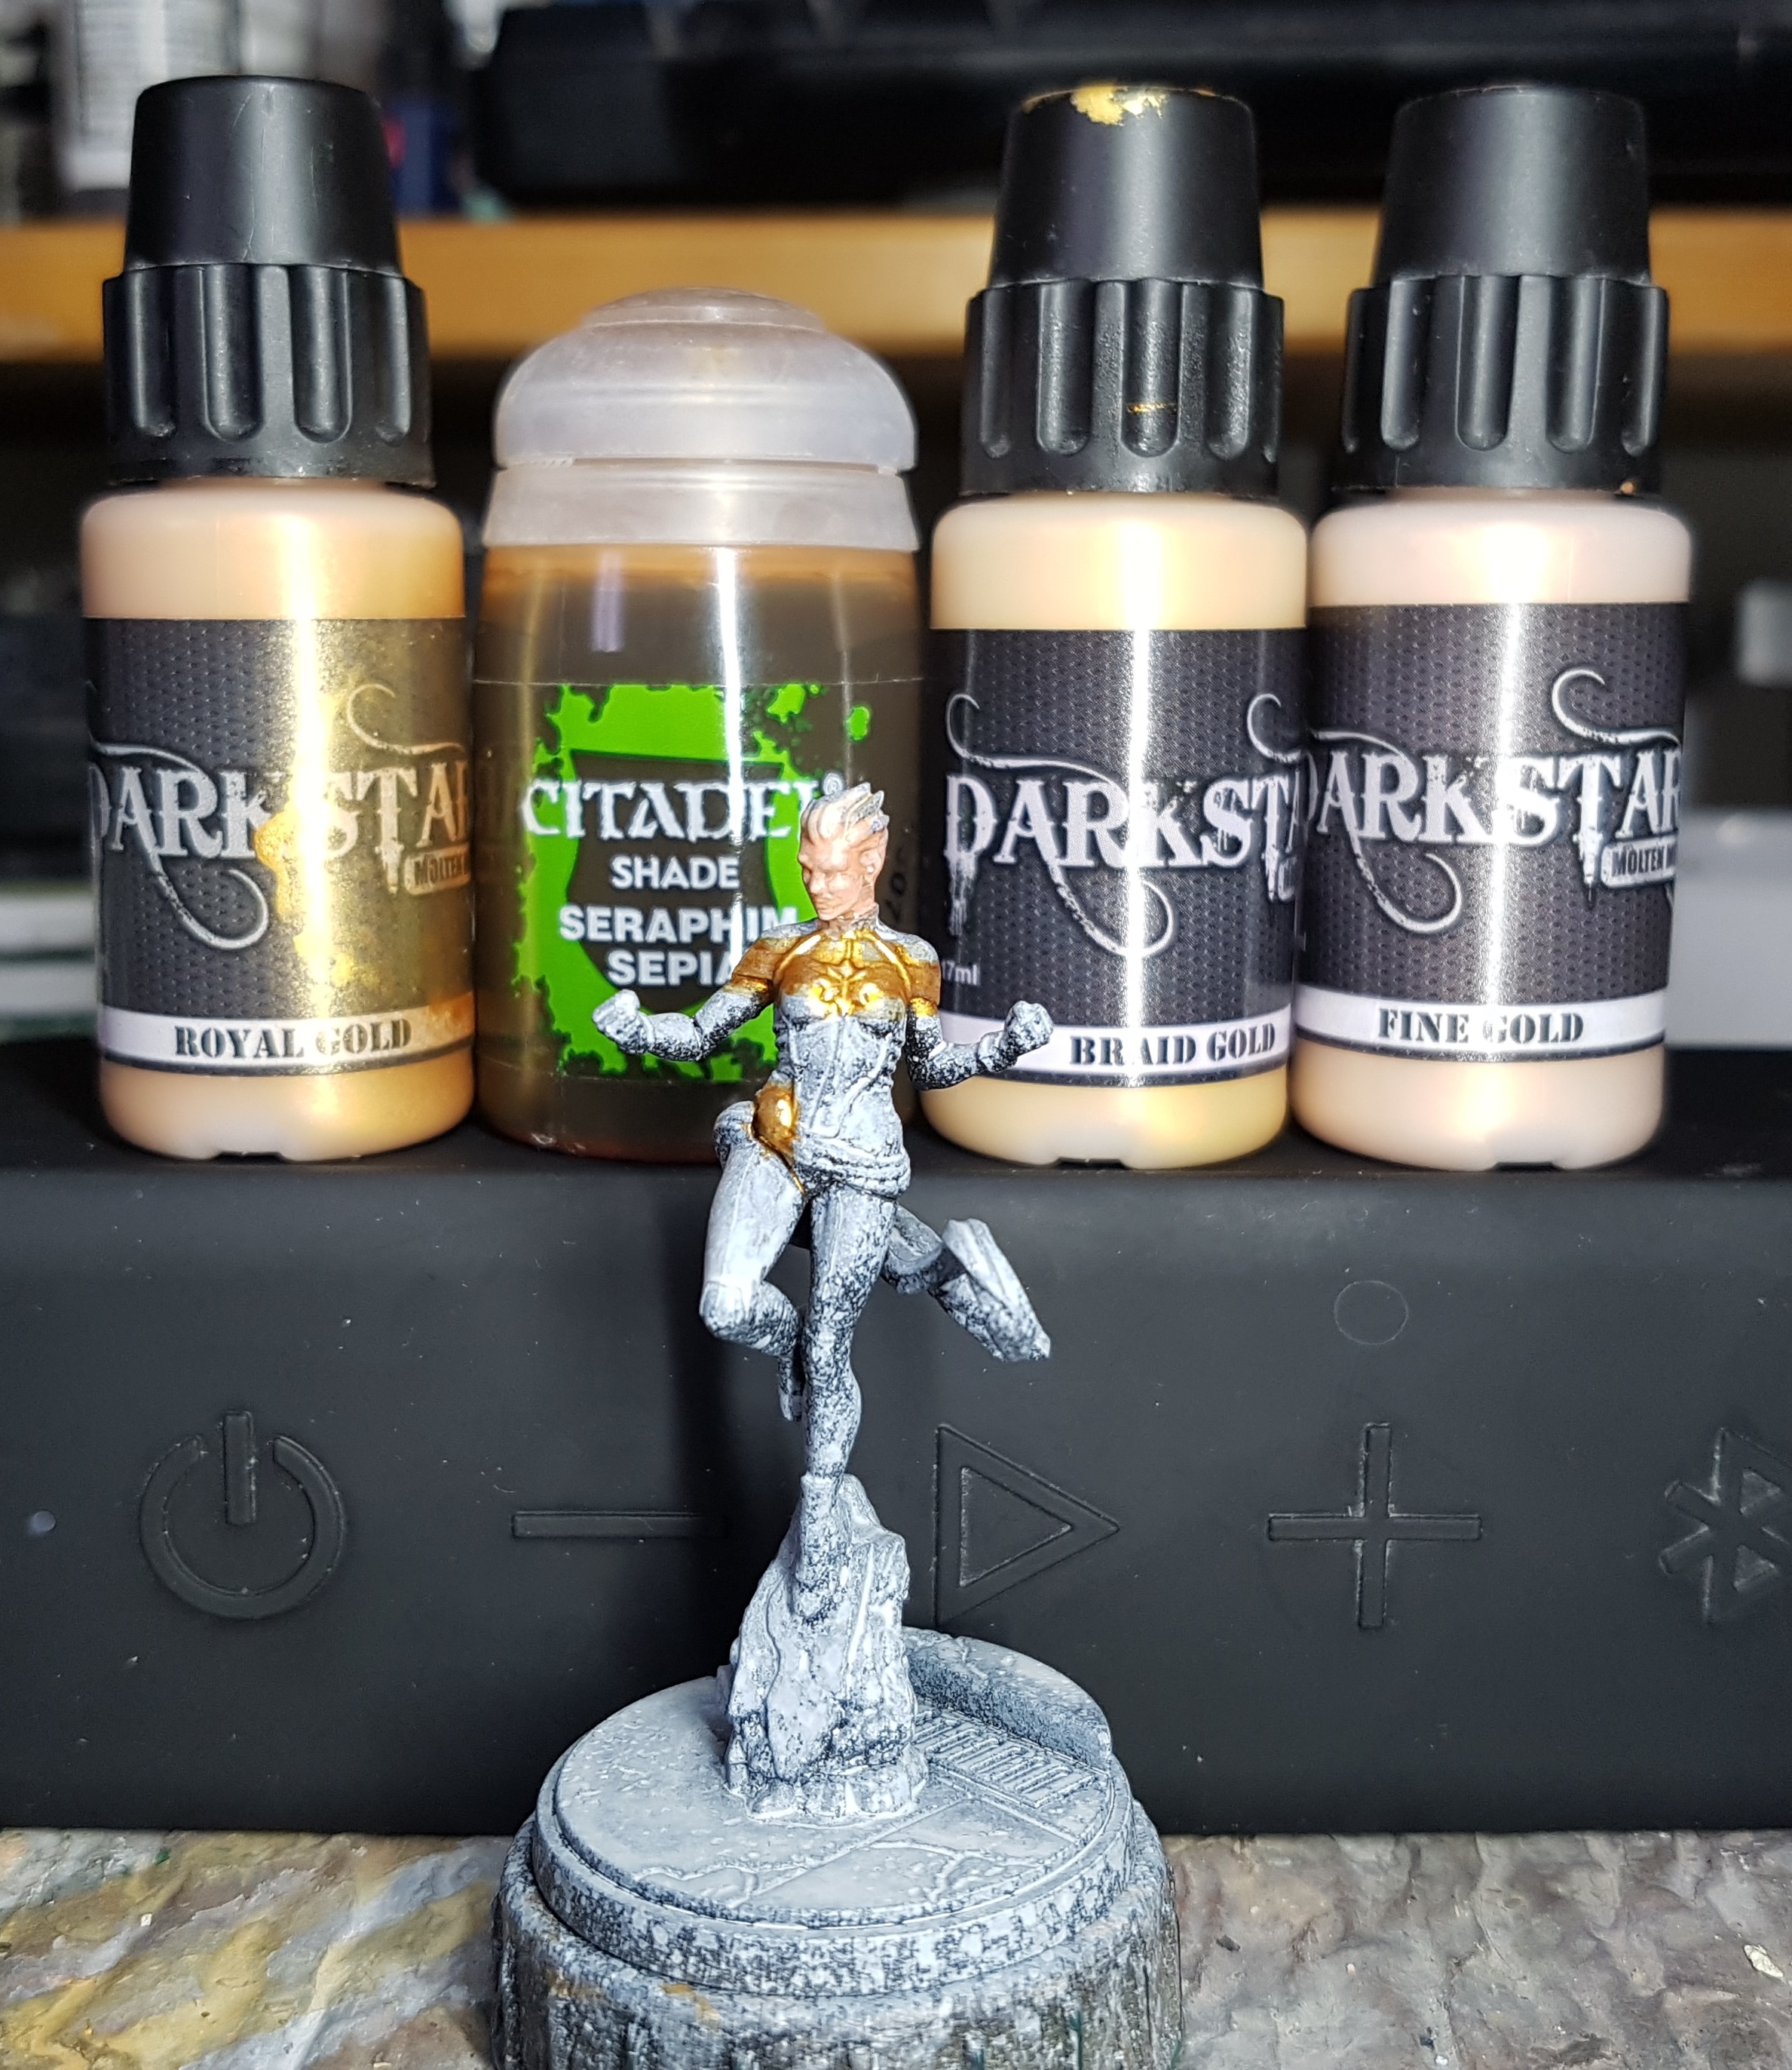
There’s no avoiding it any longer. It’s time to start on the red and blue guys. Looking at them, I decided that it’ll be easier to paint the gold on Captain Marvel first.
Base: Darkstar Royal Gold (I should perhaps have undercoated brown first)
Targeted Wash: GW Seraphim Sepia
Layer 1: Royal Gold
Layer 2: Darkstar Braid Gold
Layer 3: Darkstar Fine Gold
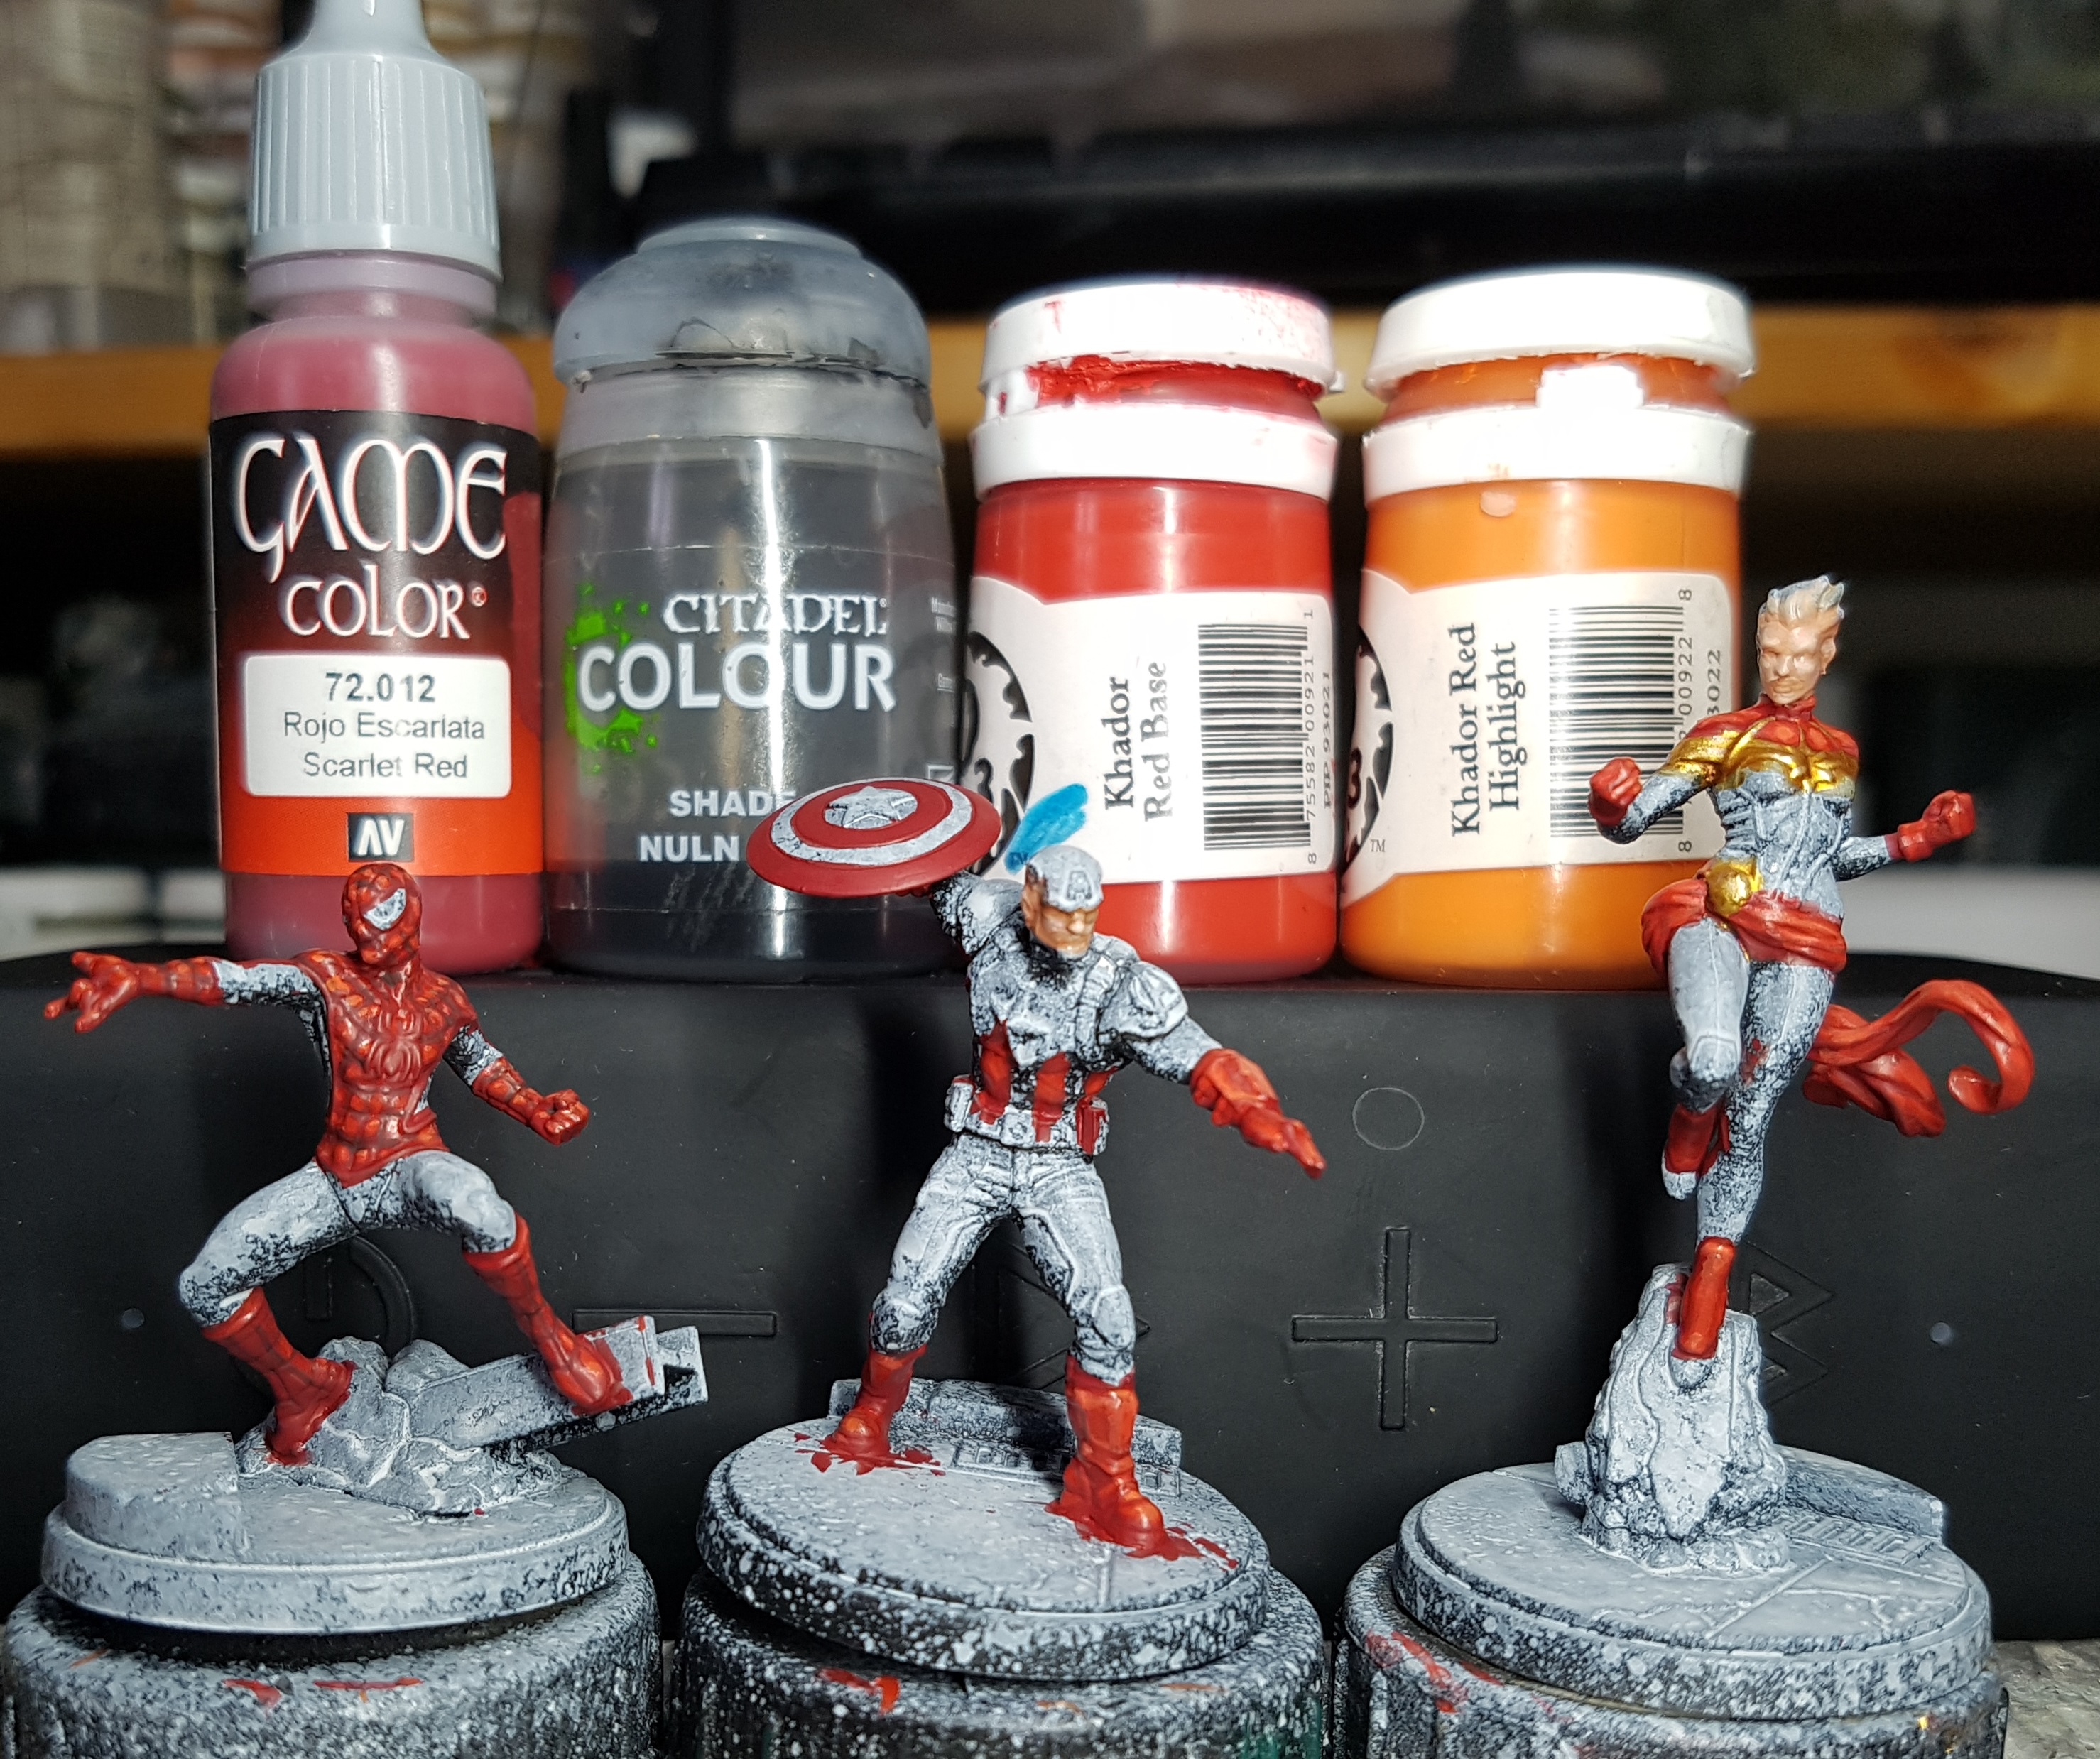
The red seemed like the next best colour. Red can be a bit thin so let’s put it down before I do anything else that might make it harder to get an even coverage. If I’d been thinking ahead I’d have undercoated Captain America’s bellow with a light grey before starting work so i can get a good coverage of white there later. It turns out I didn’t need to though as what i ended up doing went down well enough.
Base: VGC 72.012 Scarlet Red
Pin Wash: GW Nuln Oil between the segments on Spiderman’s quilted top. I should have taken the time to gloss varnish him first, and then matt varnish him after. It should have kept the wash more contained to the crevasses. I had the end in sight and just wanted to avoid slow down so I didn’t do this.
Layer Highlight 1: P3 Khador Red Base
Layer Highlight 2: Khador Red base mixed with P3 Khador Red Highlight
Layer Highlight 3: Above but with more Highlight
Layer Highlight 4: minimal highlights of just Khador Red Highlight
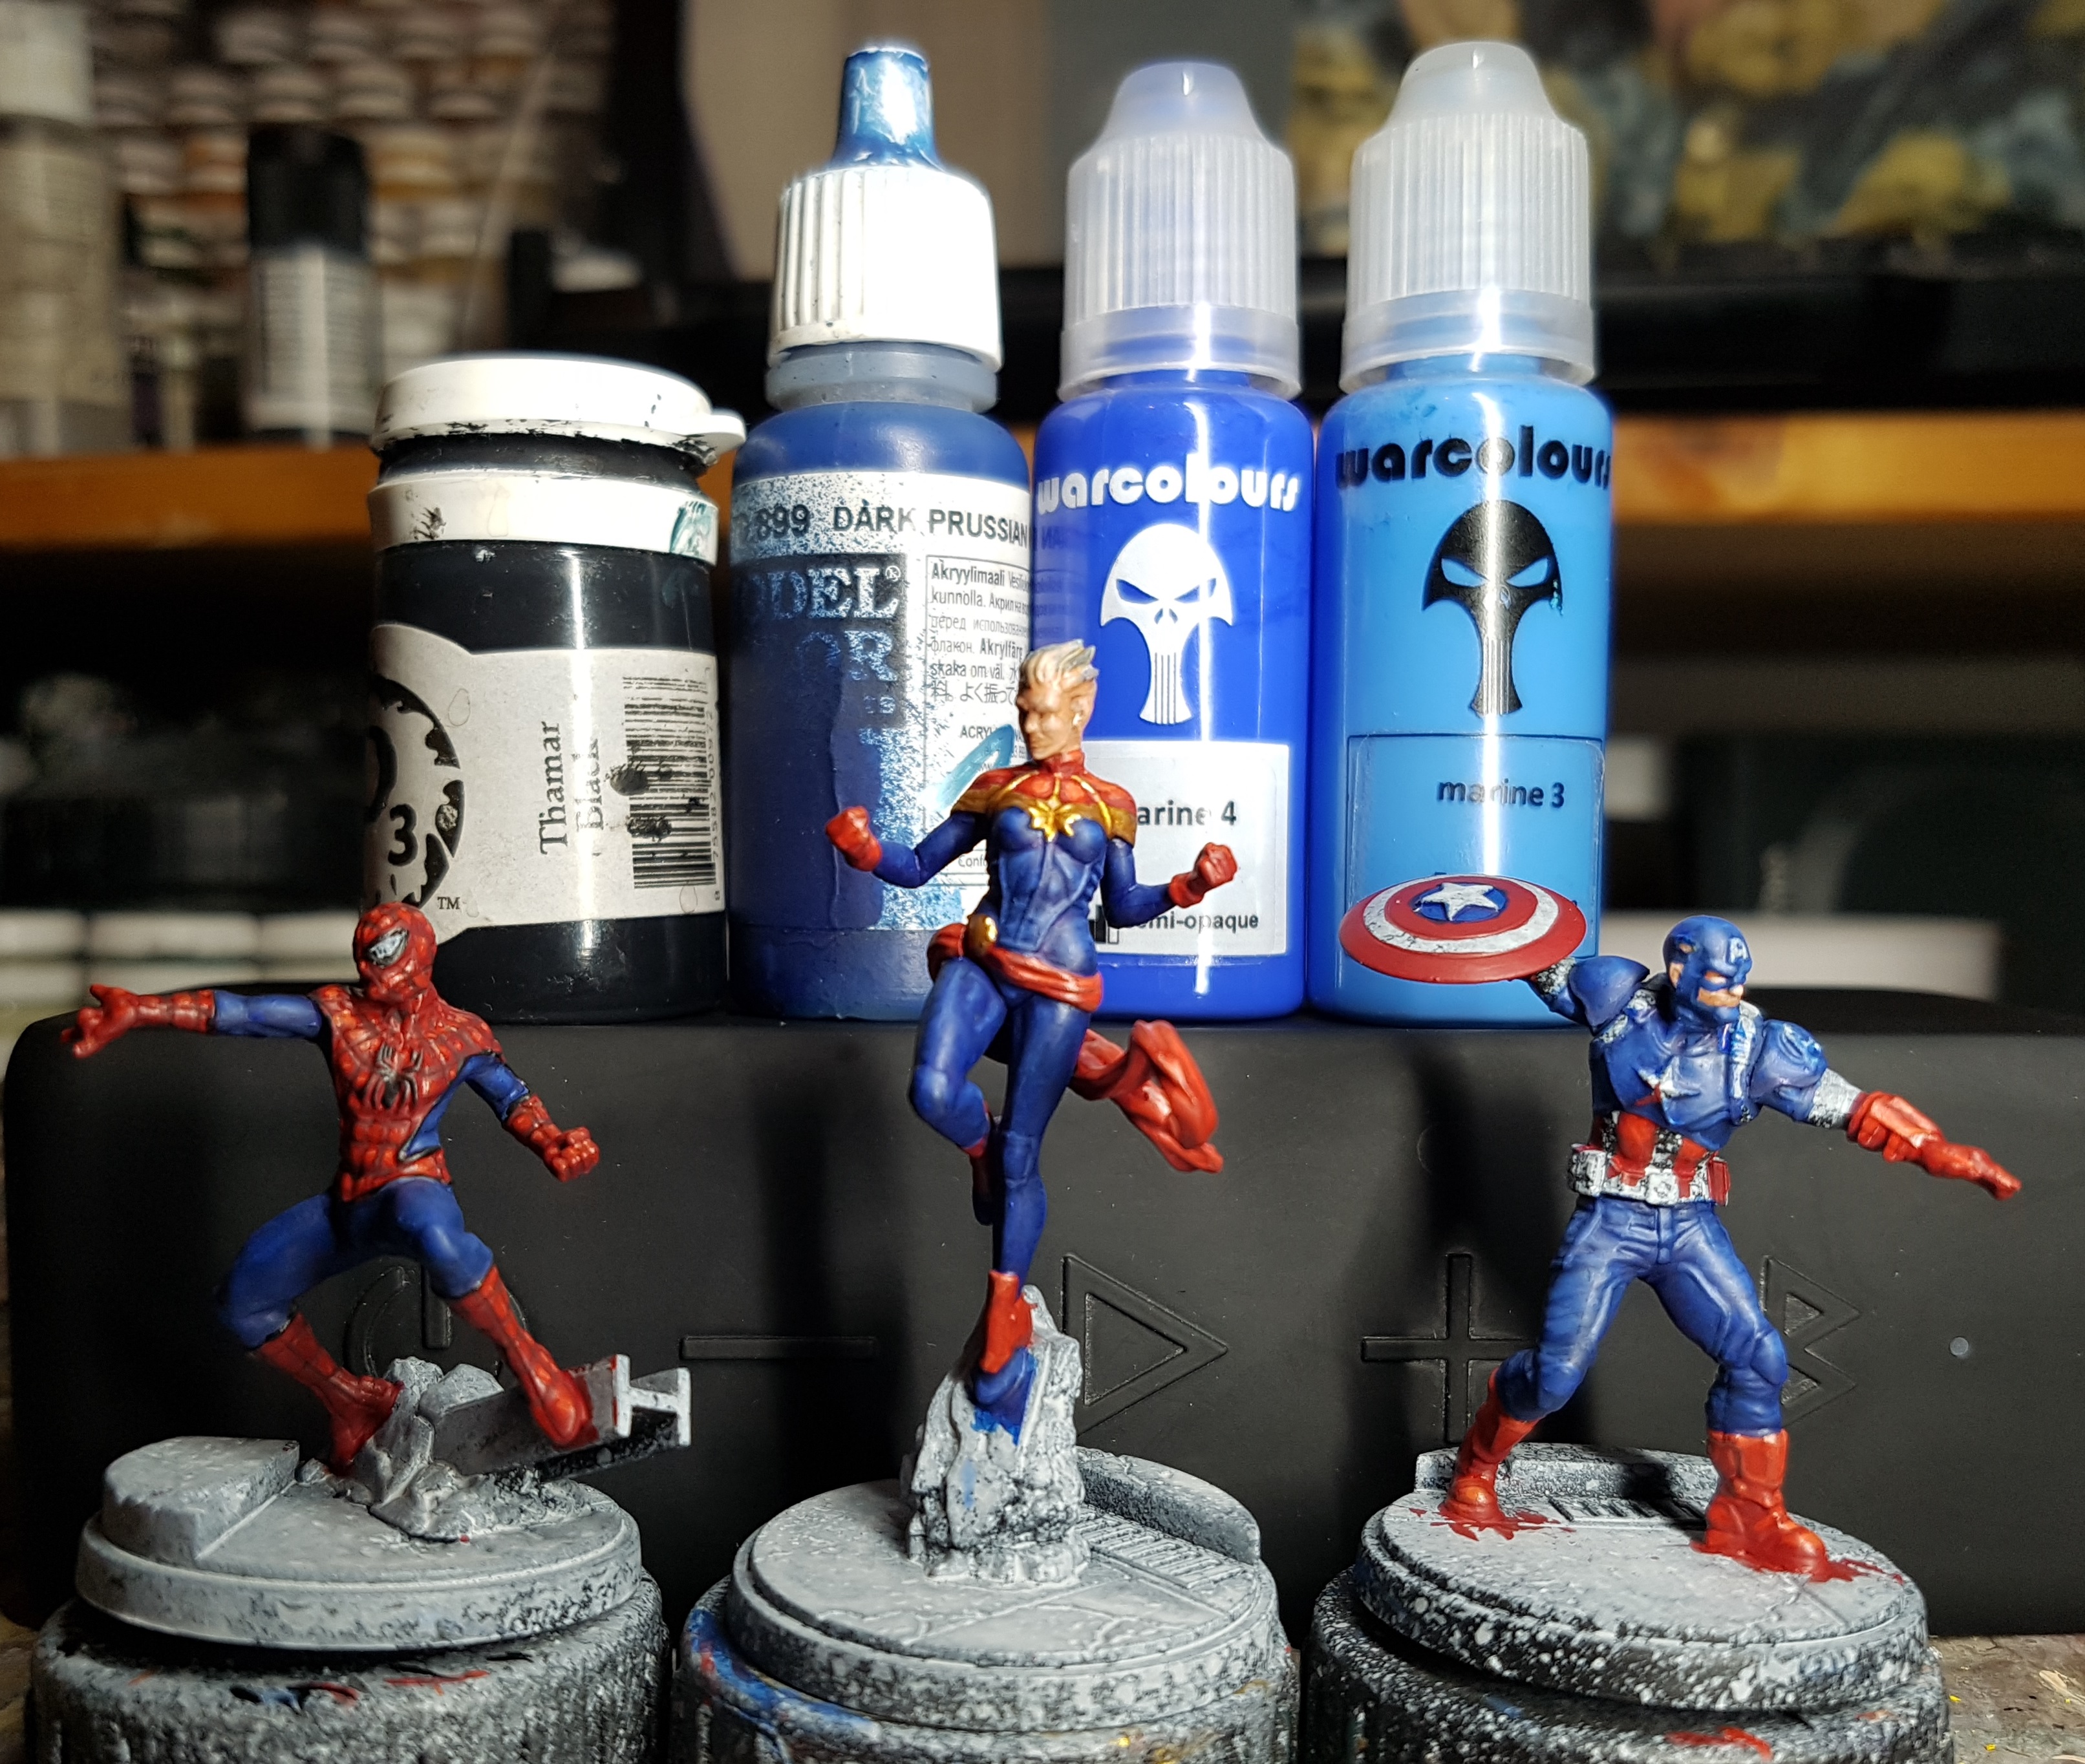
That just leaves the blue as the one last big task. I had an idea where to start, but wasn’t sure if it’d pan out. I think it did ok, but perhaps I could have pushed the highlights more on Spiderman?
Pick out the trim on Spiderman with P3 Thamar Black
Base: VMC 70.899 Dark Prussian Blue (I love this colour. It’s a deep warm blue)
Layer 1: Dark Prussian Blue mixed with Warcolours Marine 4 (I’ve based with this colour before. It Almost glows)
Layer 2: Marine 4
Layer 3: Marine 4 mixed with Warcolours Marine 3
Layer 4: Careful selected application of Marine 3
At this point I have only applied base colours to that shield. That’s a whole job to itself for later. I have a plan.
It’s too late now to start another colour, but it’s early enough for a movie. I’m 9 evenings and 1 whole day in. I went to bed and watched Nope for the first time. I can’t cope with horror movies. They show me things I can’t unsee. I can still see Karen Gillen taking a bite out of a light bulb and I only saw the trailer for Oculus a few years ago (2013. Was that 10 years ago and I’m still squirming???). No thanks. I also have issues with the whole alone in the dark thing afterwards. I’m a wuss. Every now and then I try some, and I like some, but I’ll usually only try them at home when i can stop them at any time, and have the time for a comedy afterwards.
I’ve heard good and interesting things about the Jordan Peele movies so I’ve been slowly working through the three of them recently. If you’re like me, then you should know these movies are safe. They’re horror toned, but everything bad happens off screen, or out of focus or in the distance. He’s also not trying to give you nightmares. He’s a story he wants to tell and he seems to make them viewable by everyone and not just those who love nasty horror movies.
I’ve watched all three now and they’re really good. They’re about a concept, and have an element of a mystery for the viewer to solve to them. Don’t do any research. Don’t watch any trailers. Enjoy them blind and you’ll have a better time. I knew some of the twists and still had a good time, but I’d have enjoyed it more if I was trying to figure it out with the characters. “Get Out” is like a reverse murder mystery. The murder hasn’t happened yet, but you know it’s going to. But how and why and by who? “Us” is more of a traditional (but still safe) horror movie, at least to begin with, but it’s more high concept with an interesting situation. Just don’t think too hard about the backstory because it doesn’t work. “Nope” was great. It’s got elements of SciFi and Western to it, while being set in the modern day. There’s something in the sky above their horse ranch that serves Hollywood, and it’s all about them figuring it out and the choices everyone makes. It’s currently 3 days later and it’s still demanding space in my head.
Anyway, this isn’t a movie review site and I’ve still got Monday to type up. Tangent over.
Full Day 2 (After 9 evenings): Spiderman, Captains America and Marvel, and Crosbones
It’s day 4 of the 4 day Easter weekend. I should probably go learn to play Aeon Trespass but I’m so close to finishing this round of the project. I’m also still not quite over whatever I’m reacting to whatever has been upsetting my face. I might also have an unplanned houseguest turning up at some random point in the day and I don’t want to be caught solo board gaming. It feels a little odd. I’m making excuses, so I give in and spend the day painting.
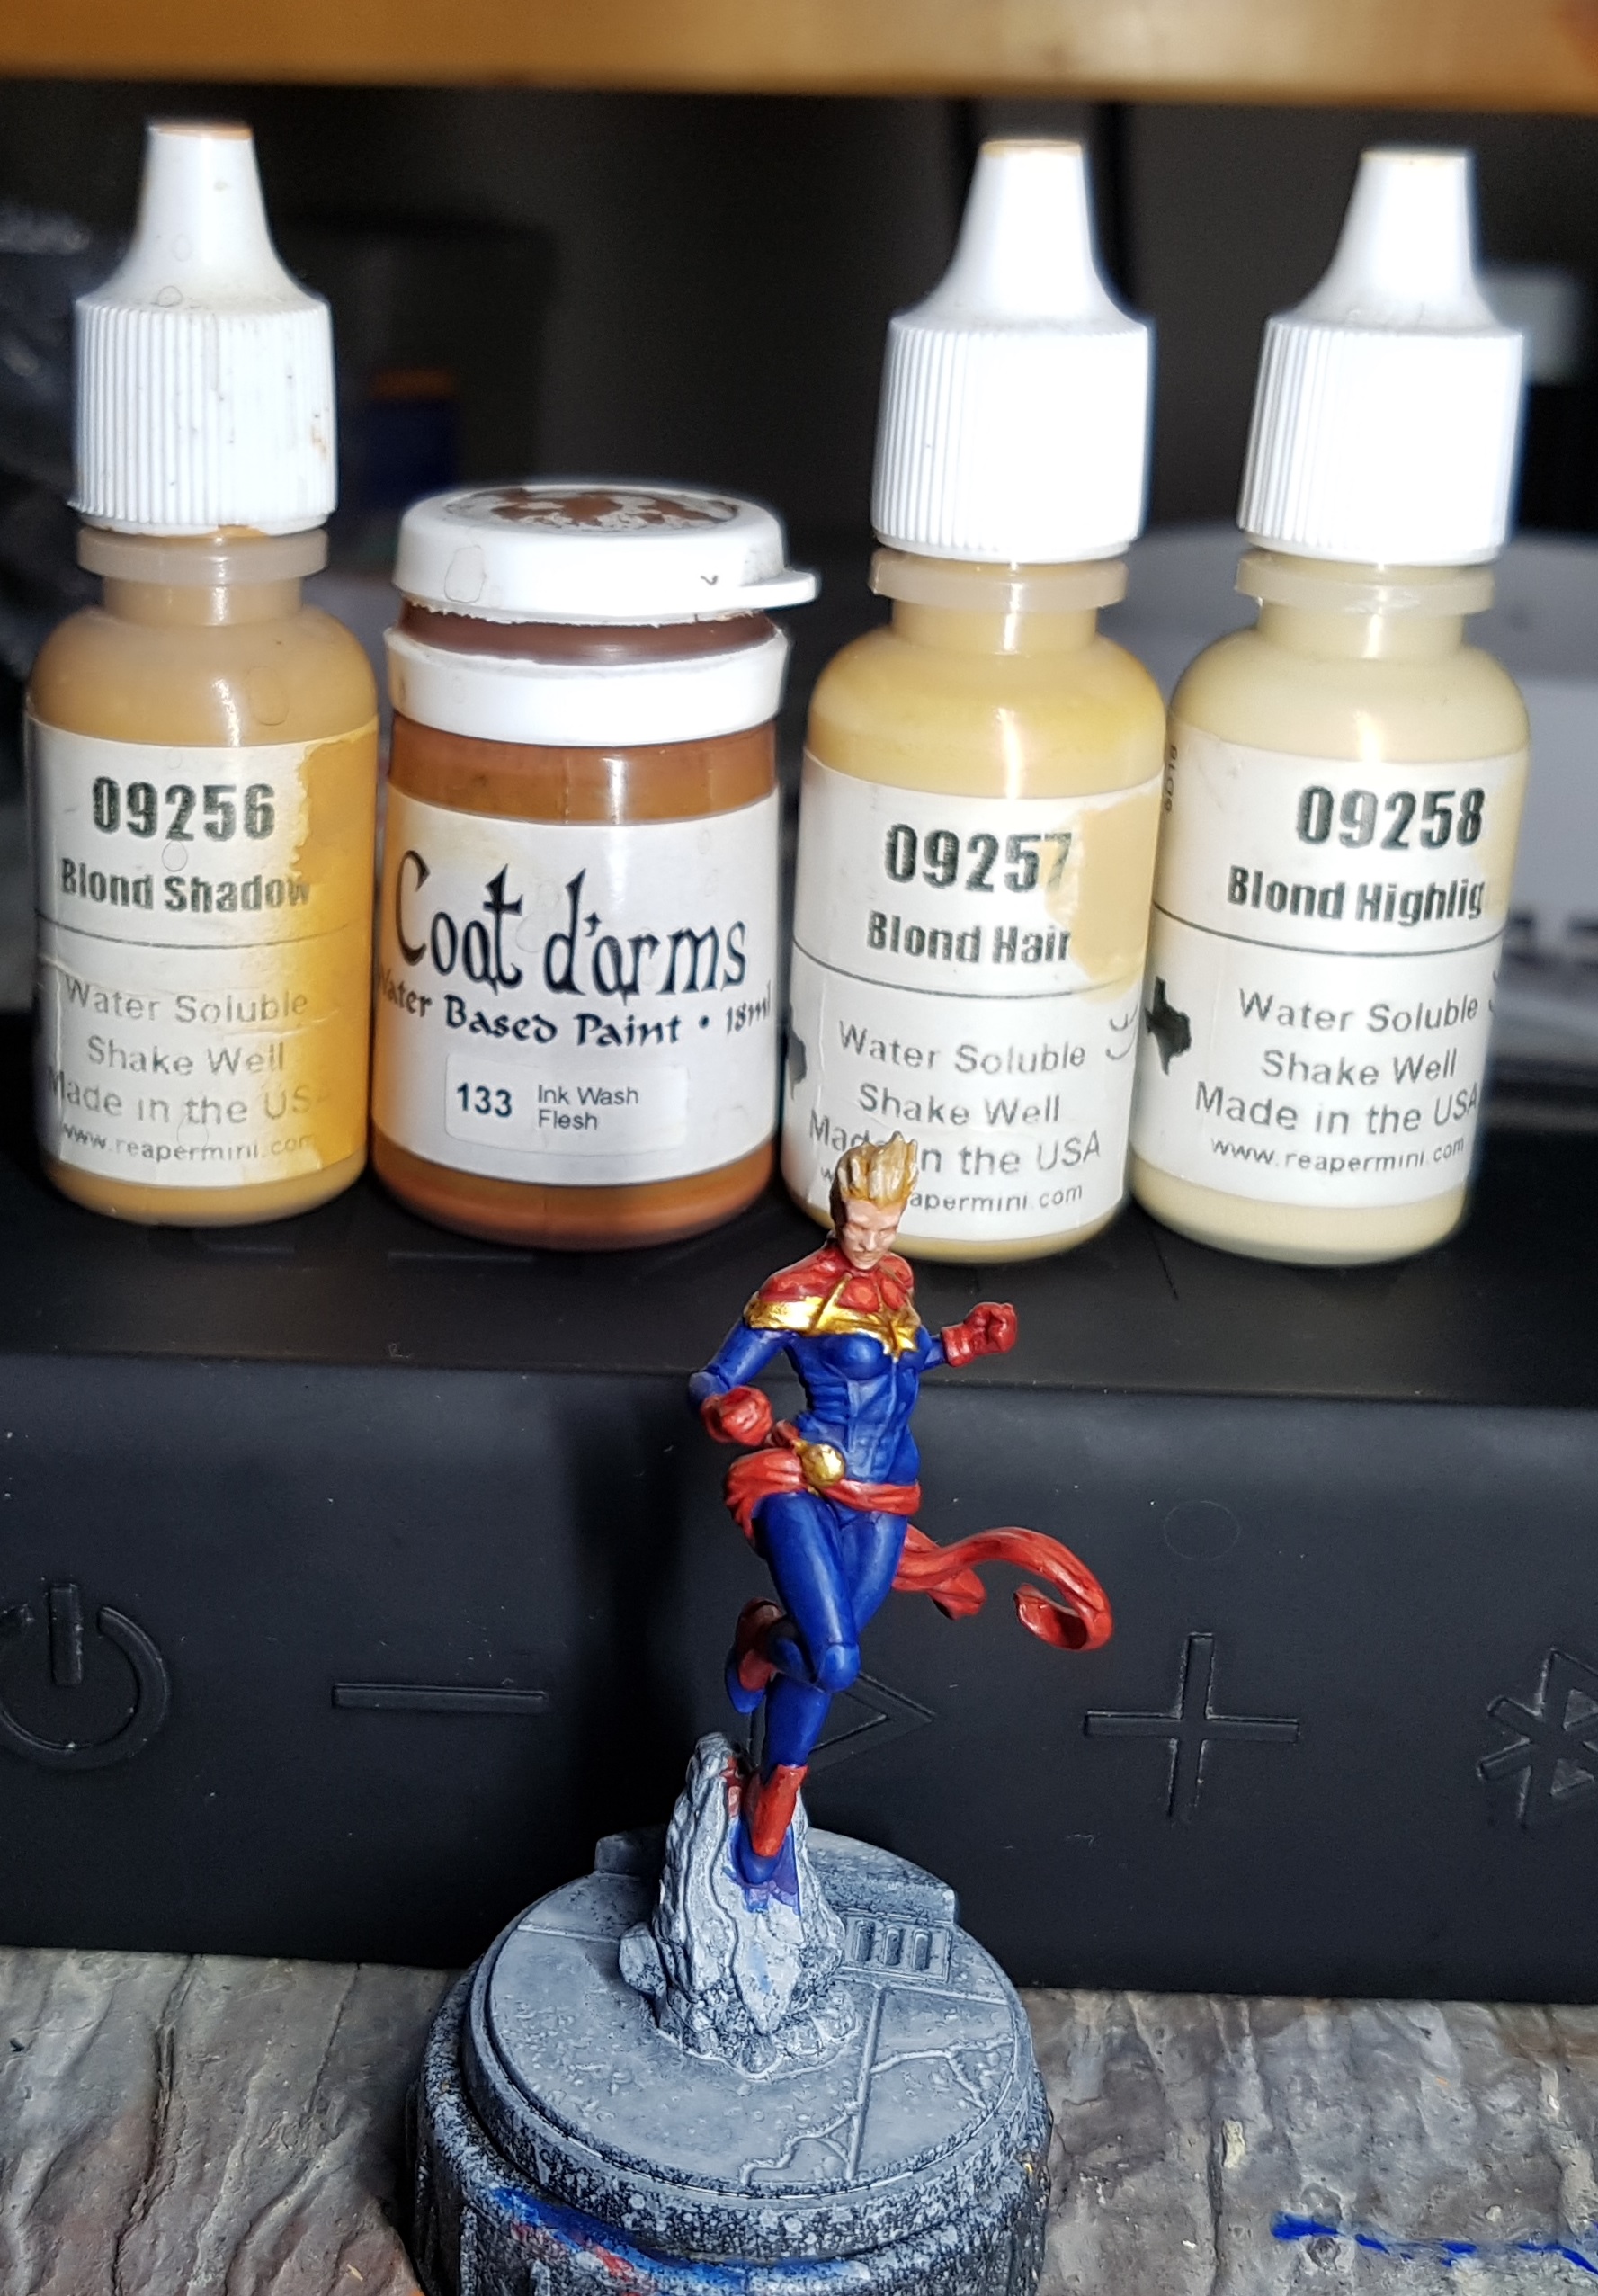
Lets thin the herd. Captain marvel just has hair to go so let’s do that. Should be quick and simple and a good way to start the days work.
Base: Reaper 09256 Blond Shadow
Wash: Coat d’arms 133 Flesh Ink Wash
Layer Highlight 1: Blond Shadow
Layer Highlight 2: Reaper 09257 Blond Hair
Layer Highlight 3: Reaper 09258 Blond Highlight
And she’s off to the Done pile
I’m putting off that white as long as I can. White can be a pain. Let’s do Captain America’s leathers
Base: P3 Bootstrap Leather
Drybrush and layer: P3 Hammerfall Khaki
Wash: GW Agrax Earthshade
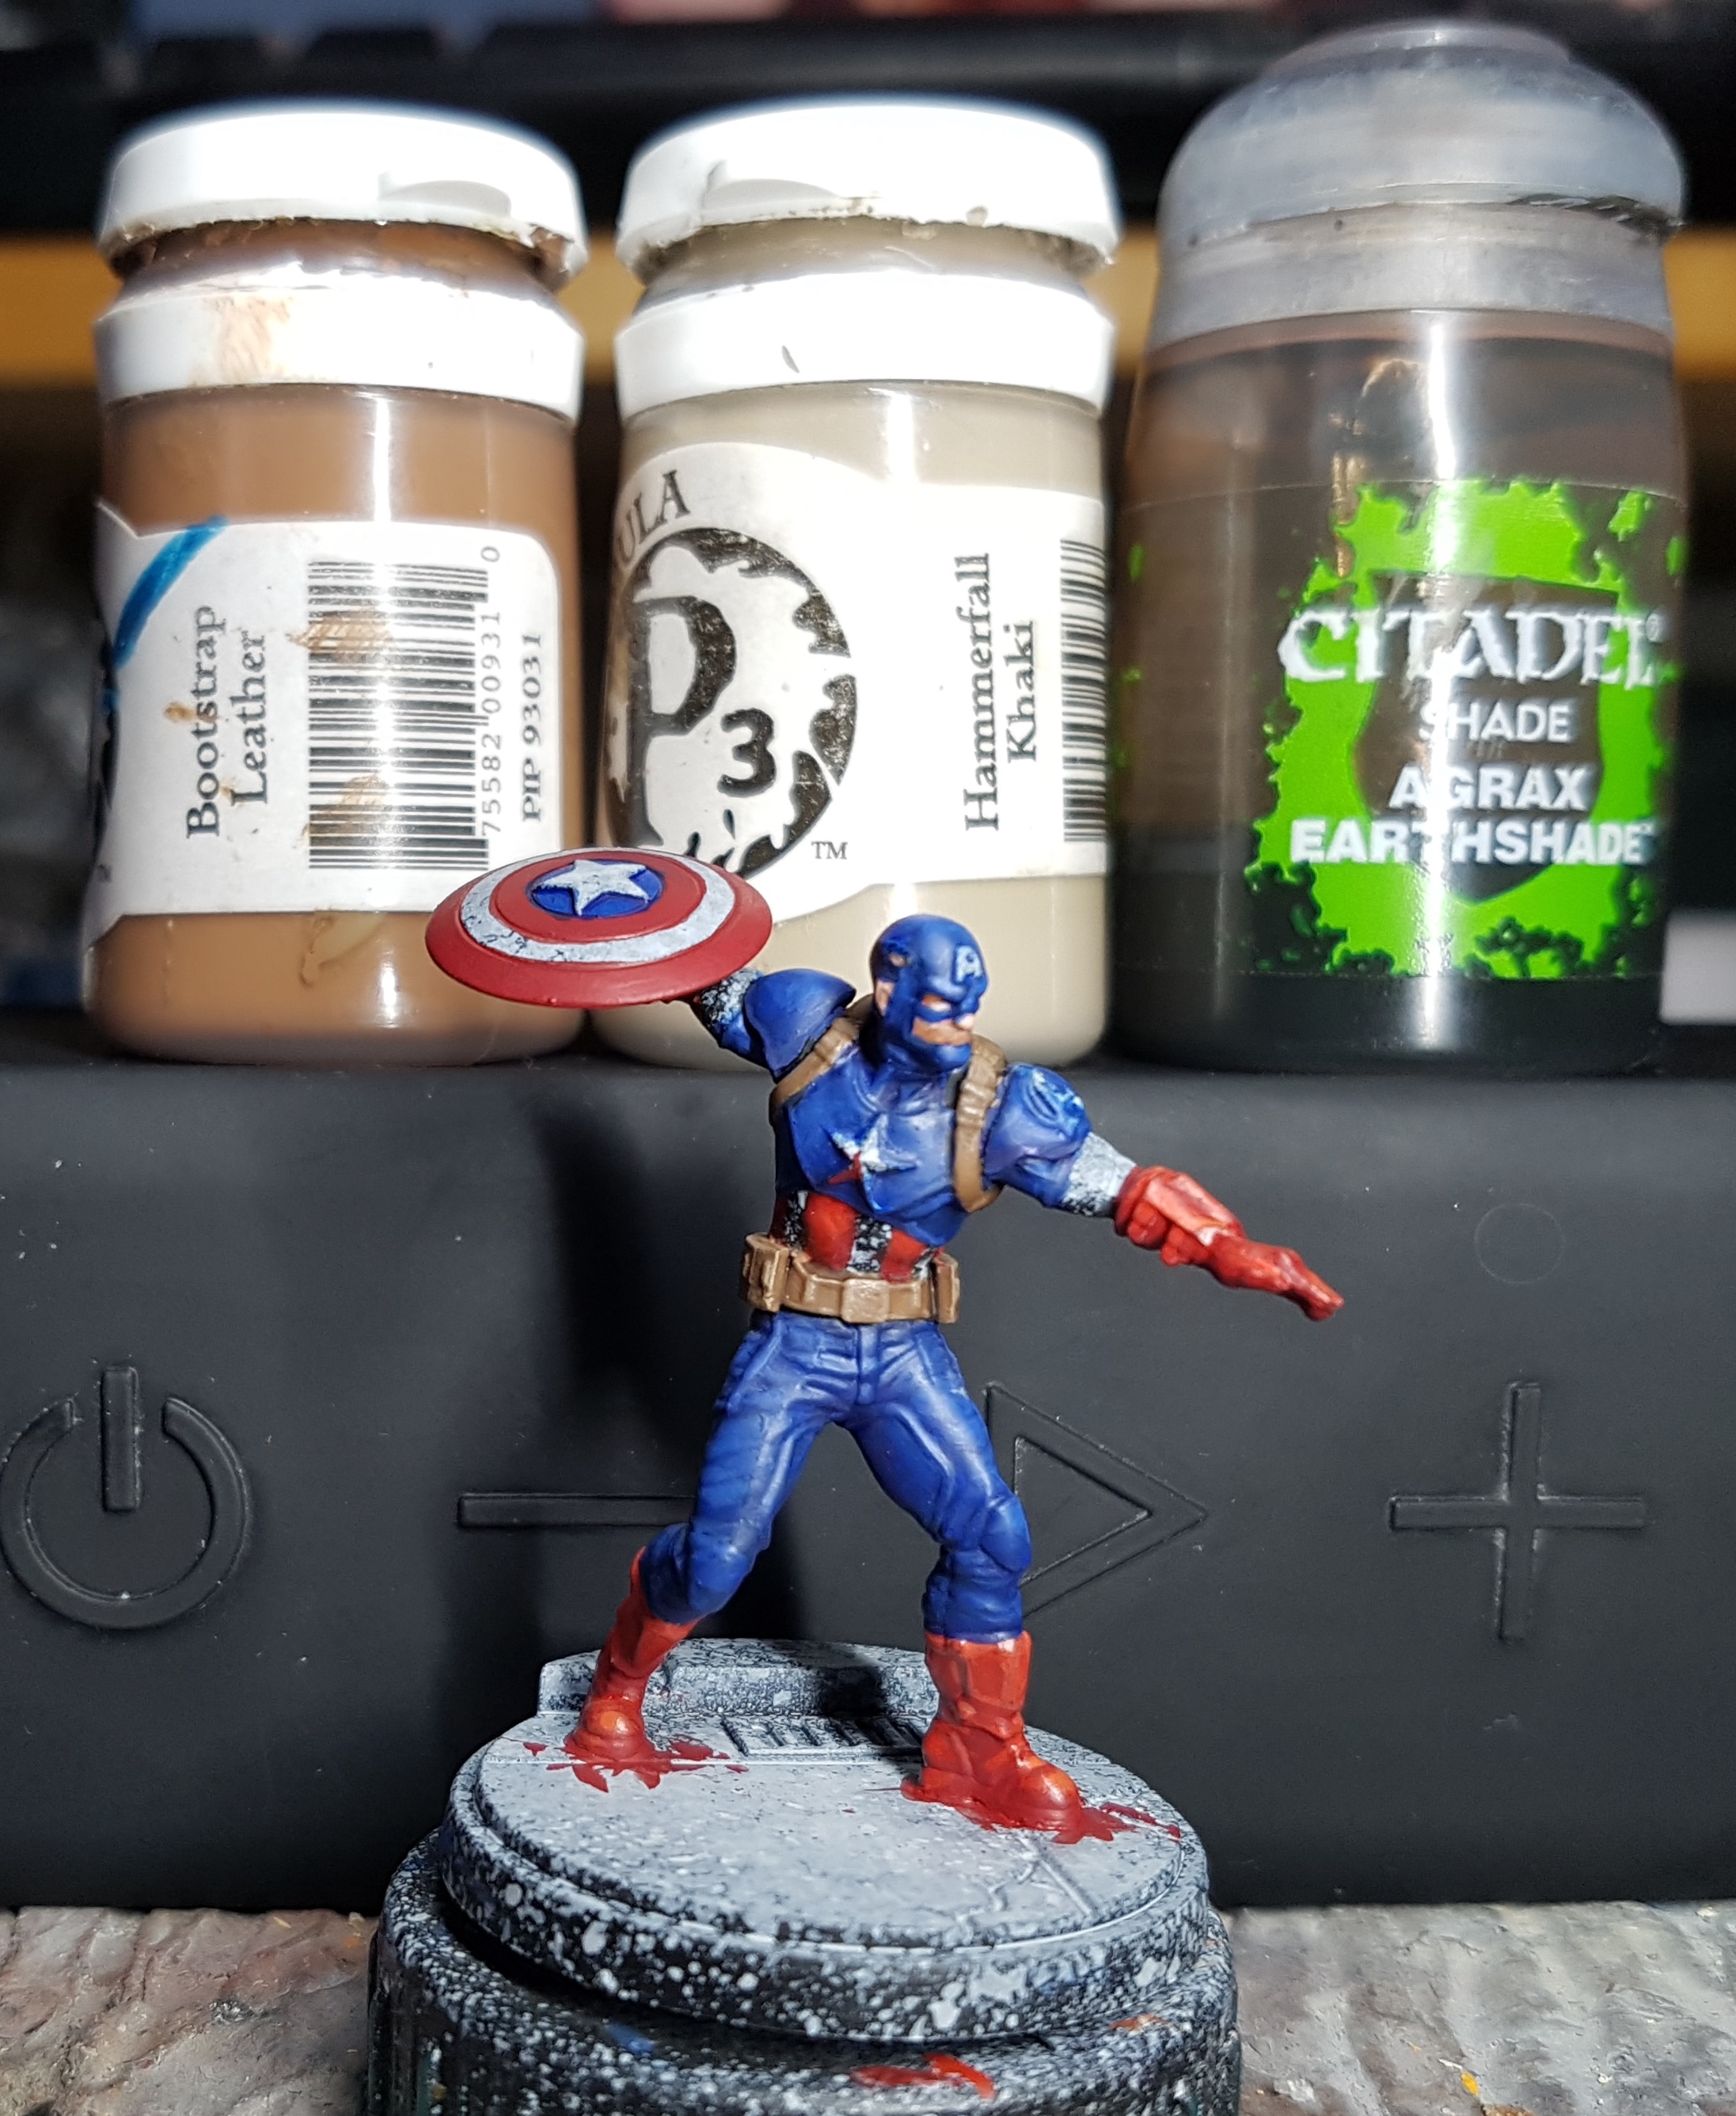
Still avoiding the white, let’s do the steel
Base: P3 Pig iron
Wash Captain Americas buckle with GW Seraphim Sepia
Wash the rest with GW Nuln Oil where safe
That girder gets one thick coat of GW Typhus Corrosion
Drybrush the girder with a little GW Ryza Rust to taste
Layer highlight buckles etc with P3 Cold Steel
Drybrush the edges of the girder (Anywhere that might get enough wear to work off the rust) with Cold Steel
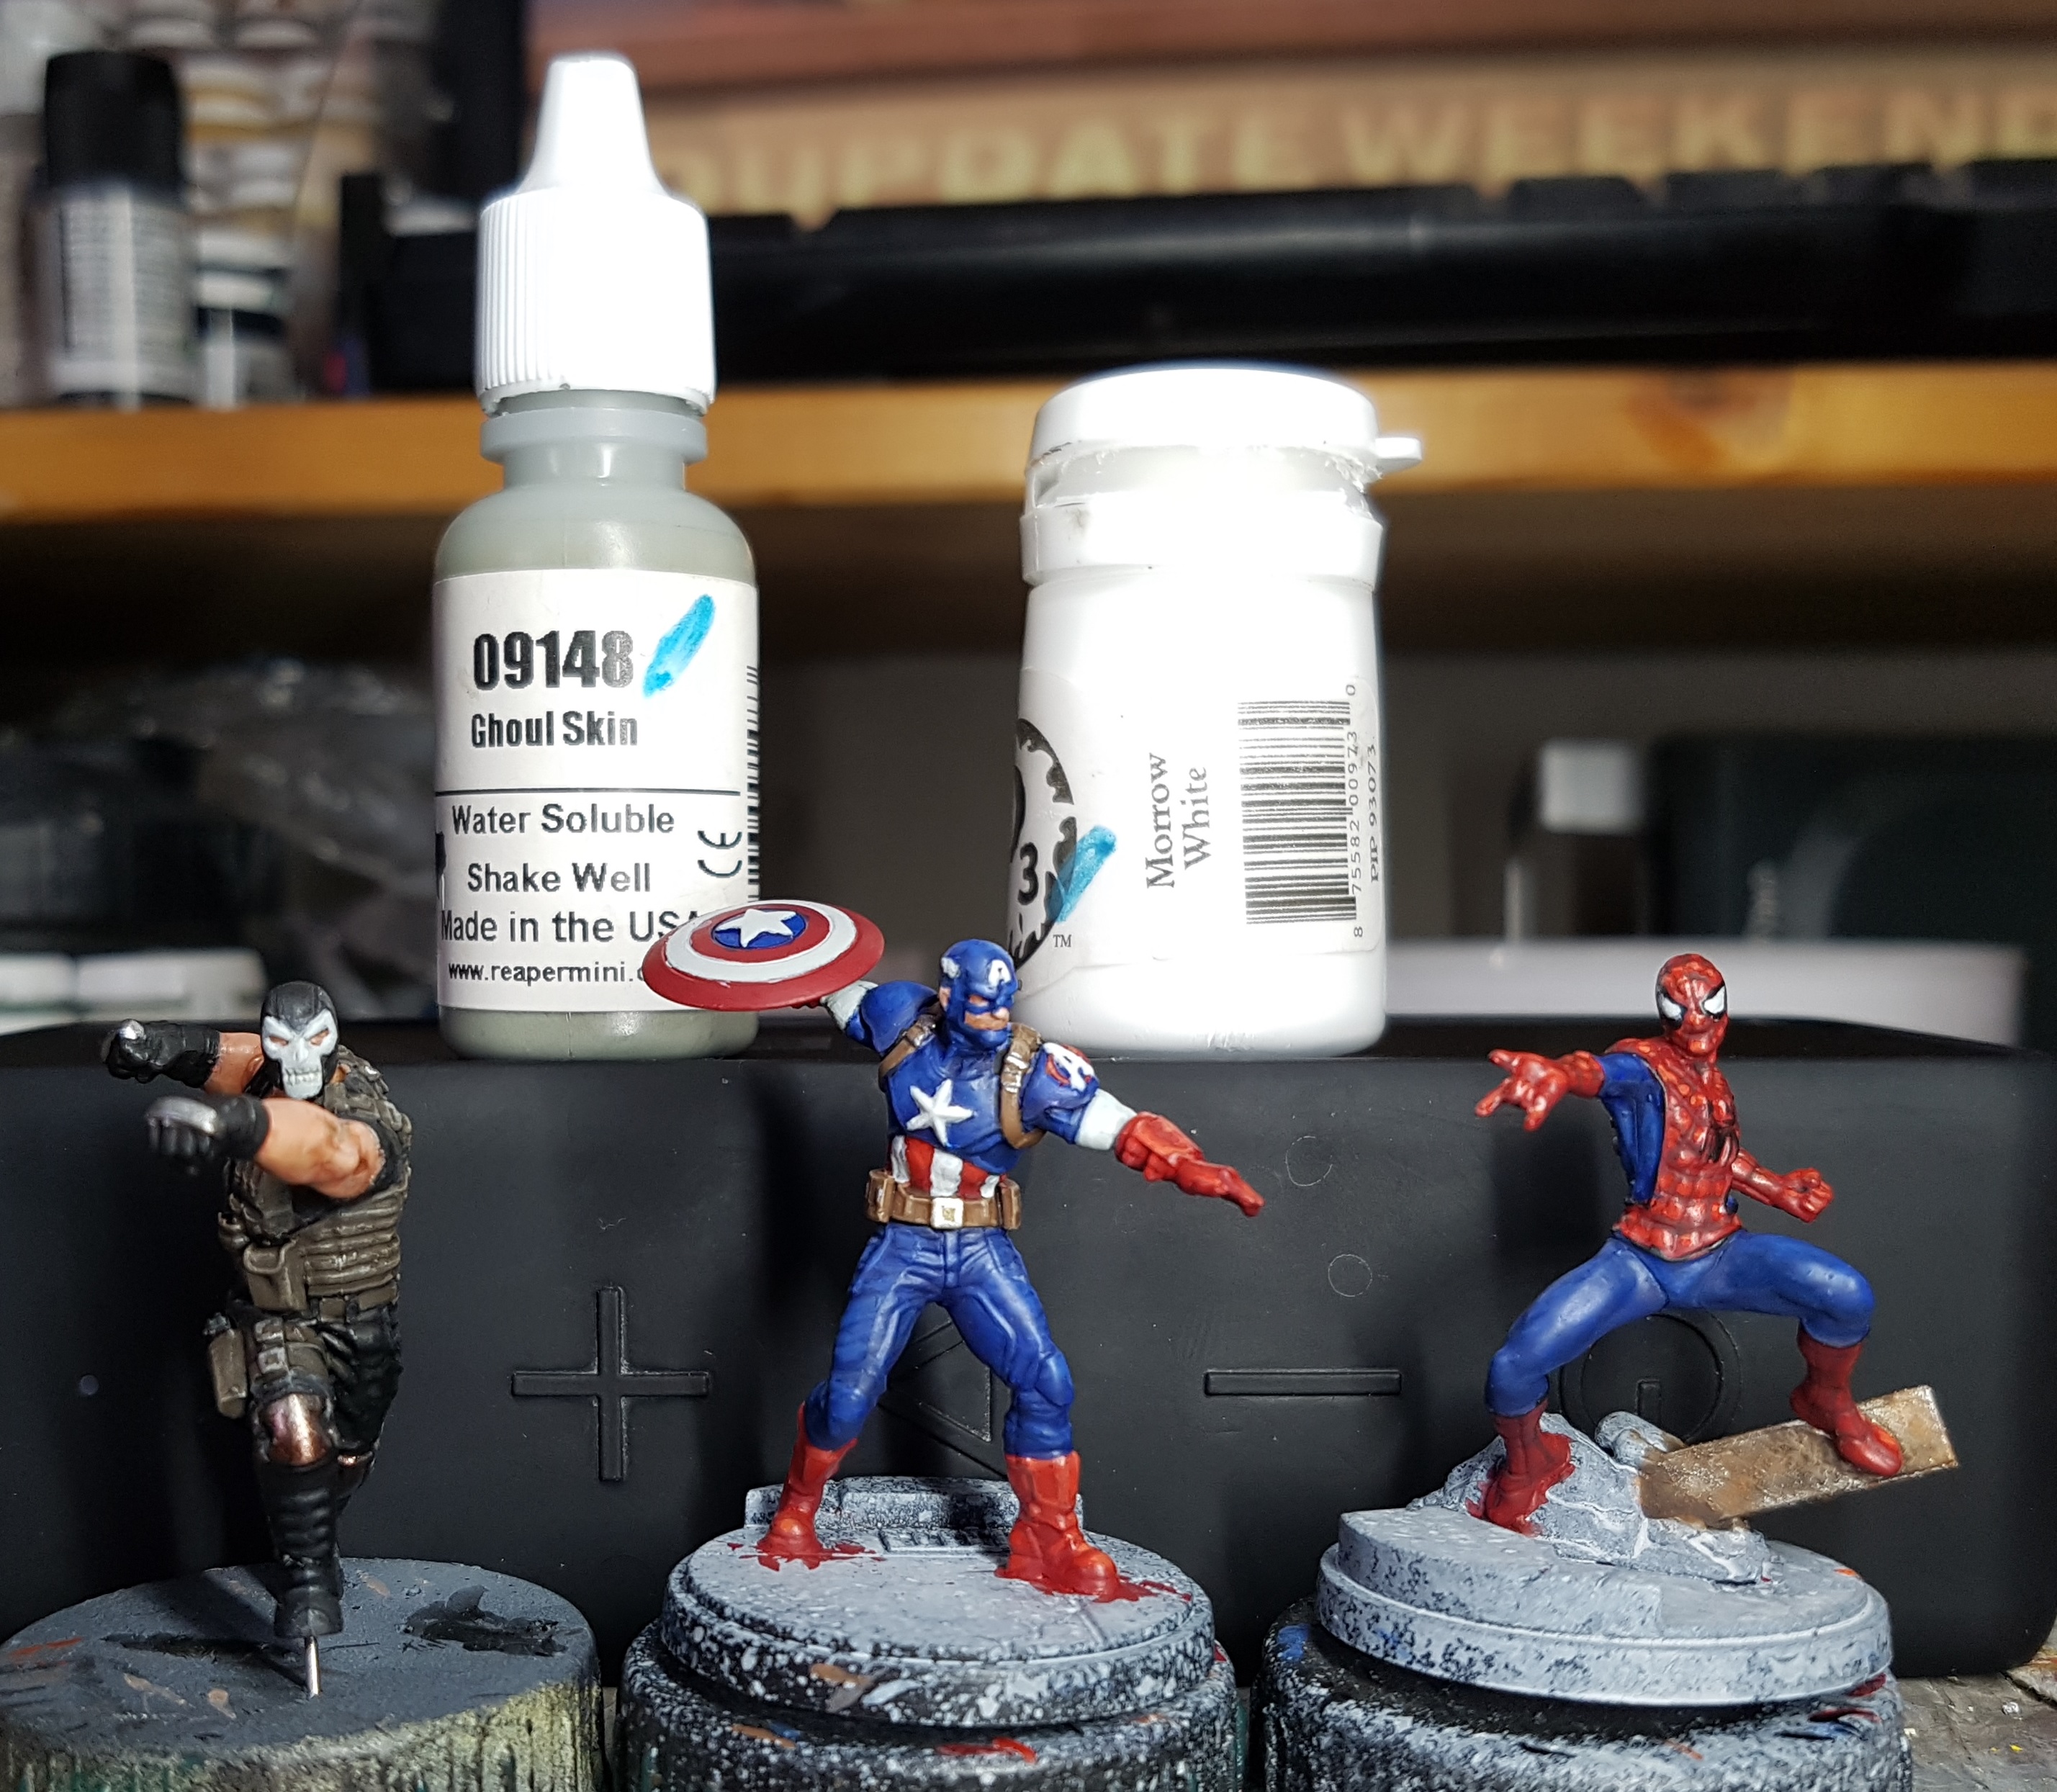
I guess I can’t put off the white any longer. Let’s figure this out.
Base: 50/50 mix of P3 Morrow White and Reaper 09148 Ghoul Skin to get a light grey
Pin Wash: Ghoul Skin just to the mouth of Crossbones’ mask
Layer 1: add more white to the above
Layer 2: add more white to the above
Never go pure white, unless you want some real high glints
Hmm. That was quite simple and worked well enough for how little white there is. It even had good coverage over that black primer. I’m not going to complain!
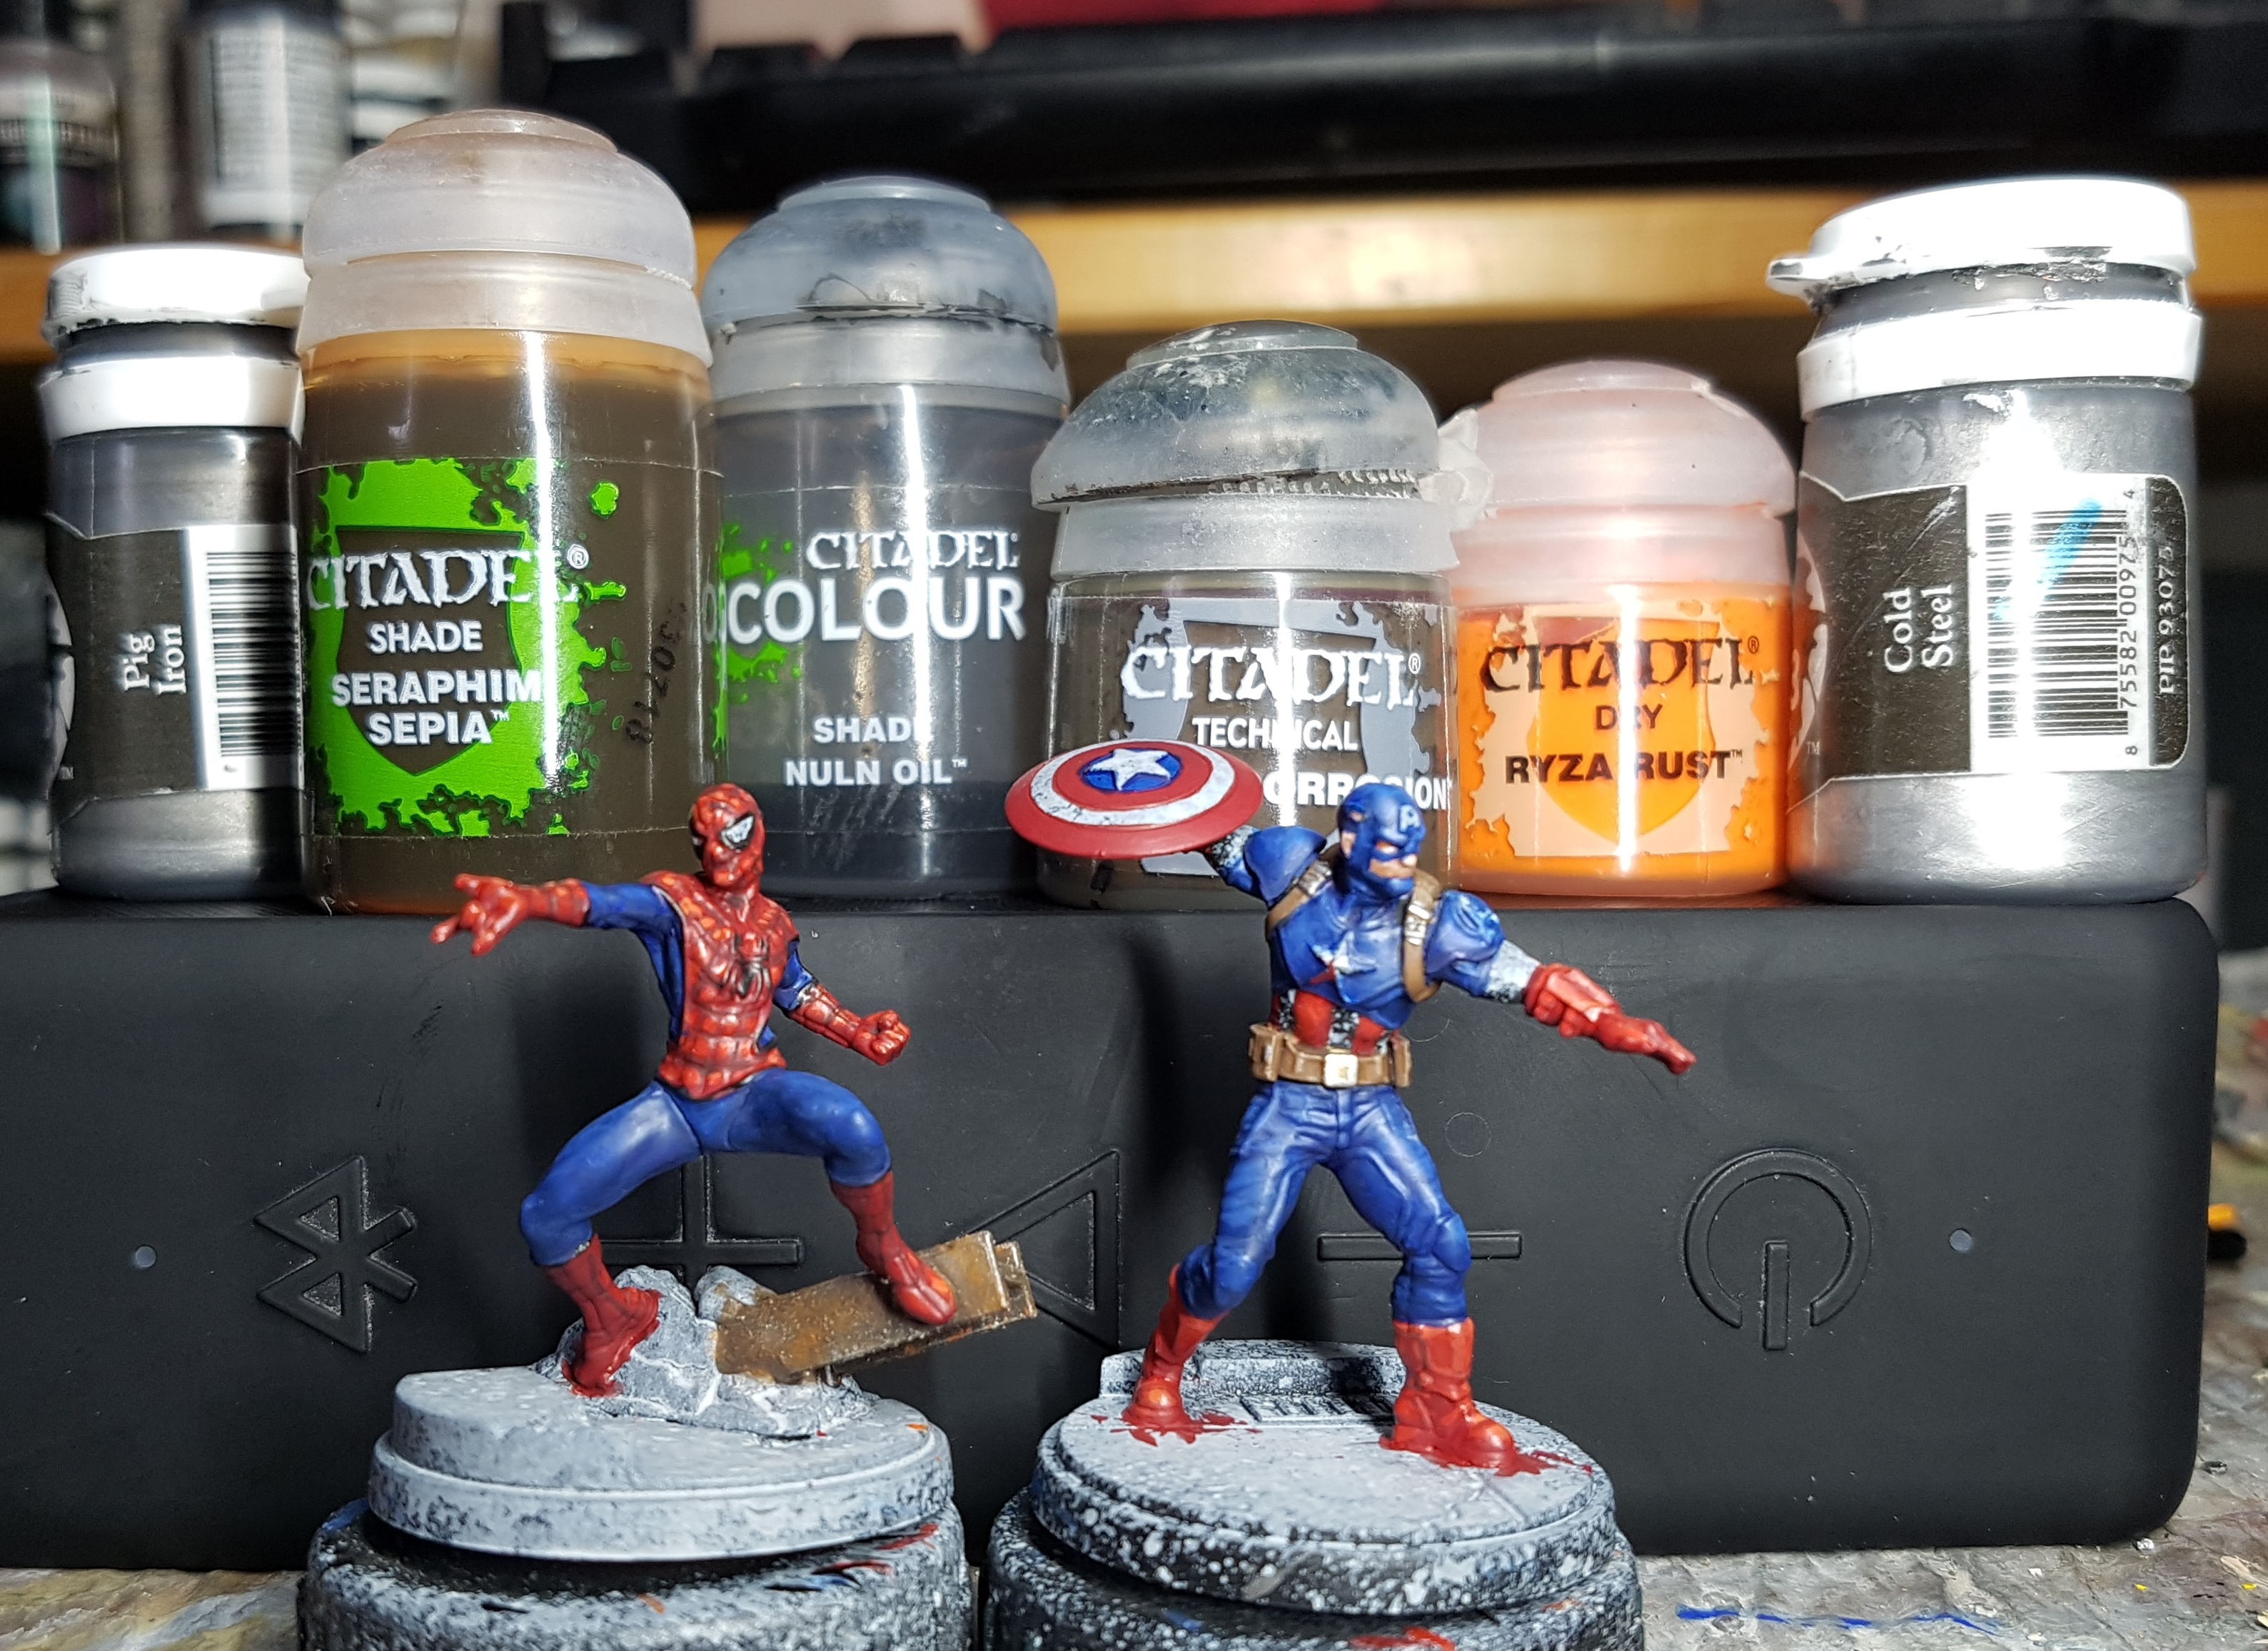
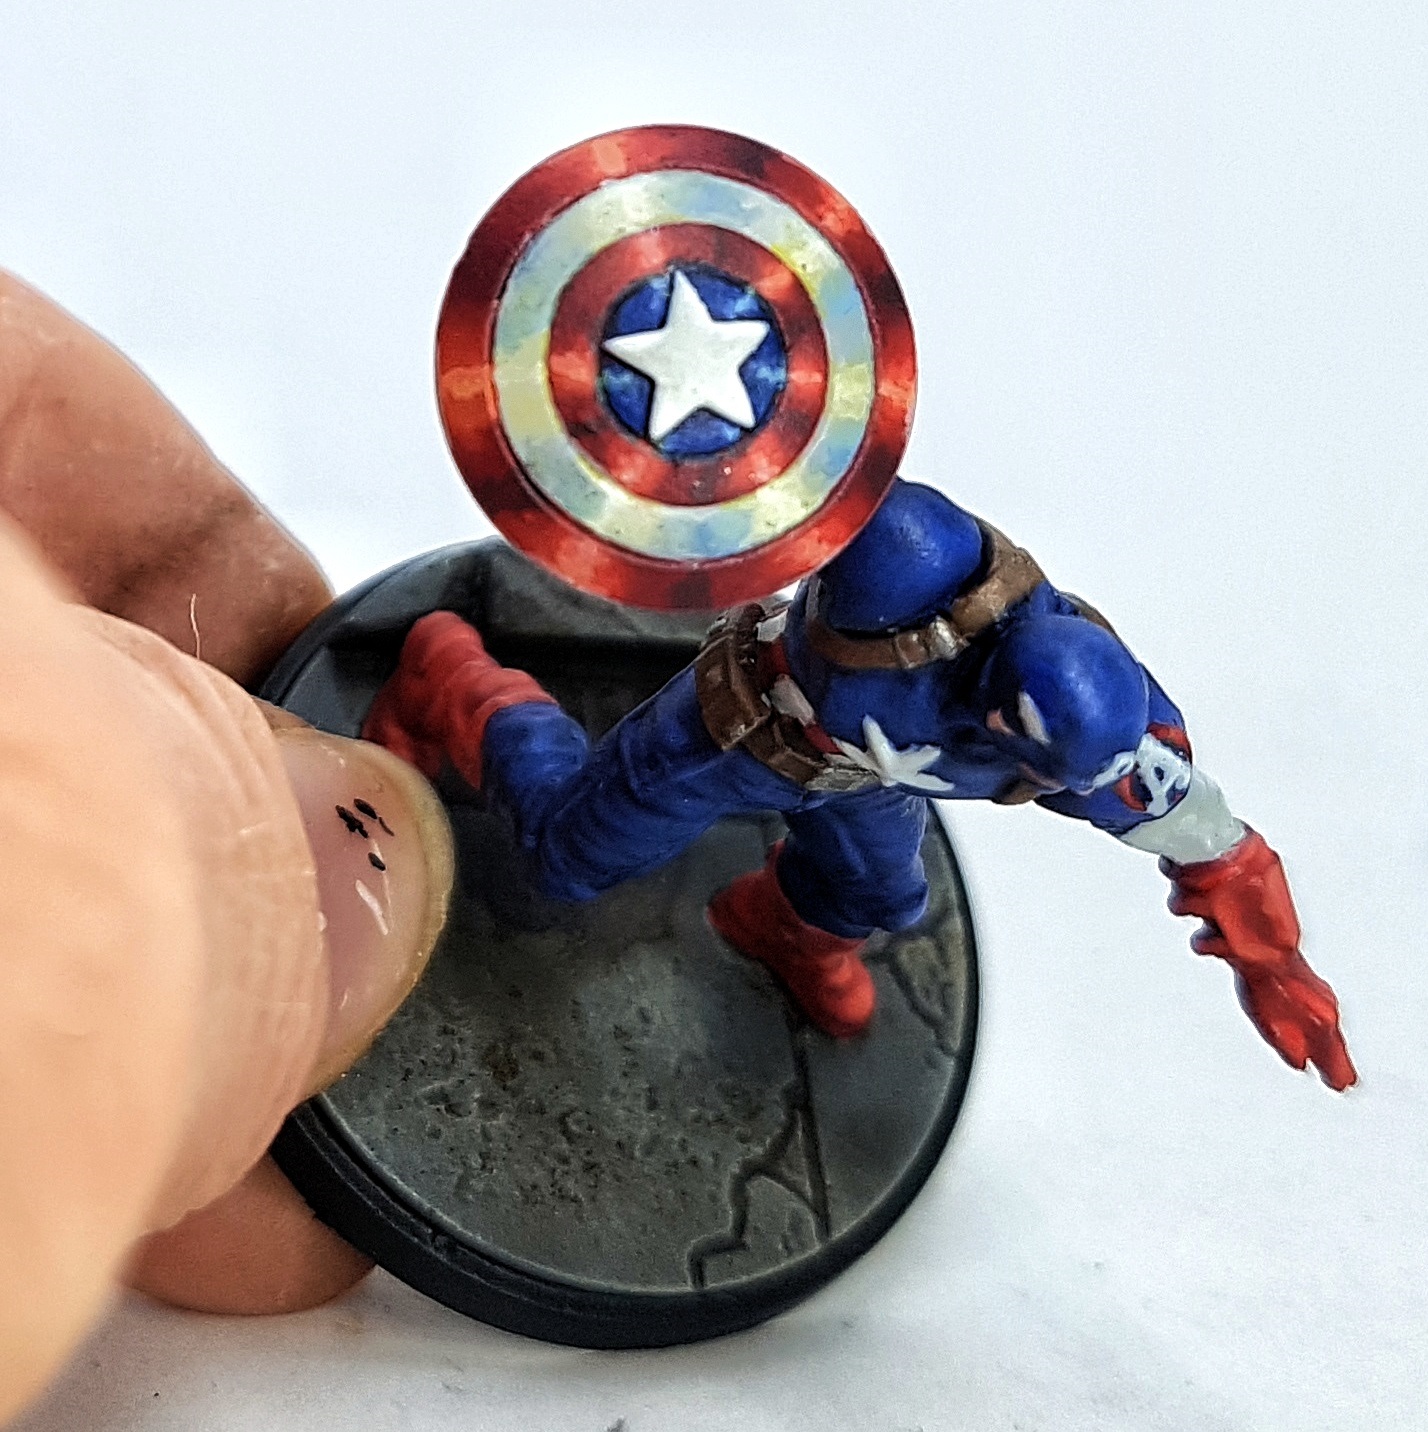
Well, there’s no avoiding it. Everything is done except the shield. I could have just painted it the same as the rest of him and it would have been fine. A little flat, but fine. I could have finished it with a gloss of satin varnish, but I feared it’d just look wet. However when I was doing my research I stumbled in to this video by Sorastra and I knew I had to at lest try it.
I got multiple tabs open. One showing his finished shield I could look at, and another with the video playing on, usually frozen at the start of his next step so I could see what he’d do ne with the current step. I didn’t use the paints he used, but continued to use the equivalent ones that I’d already used painting the rest of Captain America. I did use 3 extra paints:
P3 Cygnus Yellow instead of GW Yriel Yellow
VMC 70.918 Ivory
P3 Thamar Black
I didn’t understand the Why of some of what he did, and I could never have come up with this by myself. However, following his instructions, I didn’t find it hard to do this. I got my wet palette out for the first time in a long time and made sure all my paints were super thin, and I got better results than I feared for less effort than I expected. For extra thrills, know that I did all of this with a cheapo synthetic brush that I’ve been using for a few weeks and only cost me 8.5p, instead of the £10 ish I used to spend on Kolinski Sables. It should be trash, but it works well.
There’s just enough time left in the day for basing and varnishing. I’ll see you in the next post.
Full Day 2 (After 9 evenings): Basing
I forgot to take step by step pics here. Sorry. I got caught up in it all. I’ll just have to explain and hope it makes sense.
Drains and metal hatches:
Base: P3 Pig Iron
Wash the drains with GW Agrax Earthshade
Wash the hatches Italeri Wash Oiled Earth 4953AP. This doesn’t stain anywhere near as much as I hoped
Wash the hatches again with Oiled Earth, but add small patches of GW Agrax Earthshade and GW Athonian Camoshade to it while it’s still wet.
Tram Tracks
Base: P3 Pig Iron
Wash: GW Nuln Oil
Pavement Bumps
Undercoat the bumpy section white
Base the bumpy sections P3 Sulphuric Yellow (I googled “NYC bumpy yellow blind crossing pavement” or some such). Paint too much and reclaim back down to a square in the next step
Pavement
Base the stone: VMC 70.836 London Grey
Base the curbs / raised paving with London grey mixed with enough AK 11219 Sepia Ink to give it a browner feel (It took way more than I expected. This is much darker than GW Seraphim Sepia)
Everything
Wash all the paving, tram tracks, and the drains with Jan’s Magimix (6-8 Parts GW Nuln Oil, 6-8 Parts GW Agrax Earthshade, 5-6 Parts Lahmium Medium, 2 parts Athonian Camoshade. Thanks, Januinevision)
Drybrush some London Grey over the yellow bumps to provide realistic looking wear. There’s no way that paint would last on the corners of the bumps.
Drybrush all the stone with P3 Menoth White Base and a nice puffy makeup brush
Wet the drains, and a path out of them like it’s backed up. Apply some GW Typhus Corrosion to this and let it naturally soak out in to the water. Put it in thick, but let it move itself. You want texture, but you want it to look like naturally backed up sewage.
Paint the edges of the bases black.
I then remembered I hadn’t painted anyone’s eyes yet!
Base: P3 Menoth White Highlight
Pupil: P3 Thamar Black (Zemo doesn’t get a pupil)
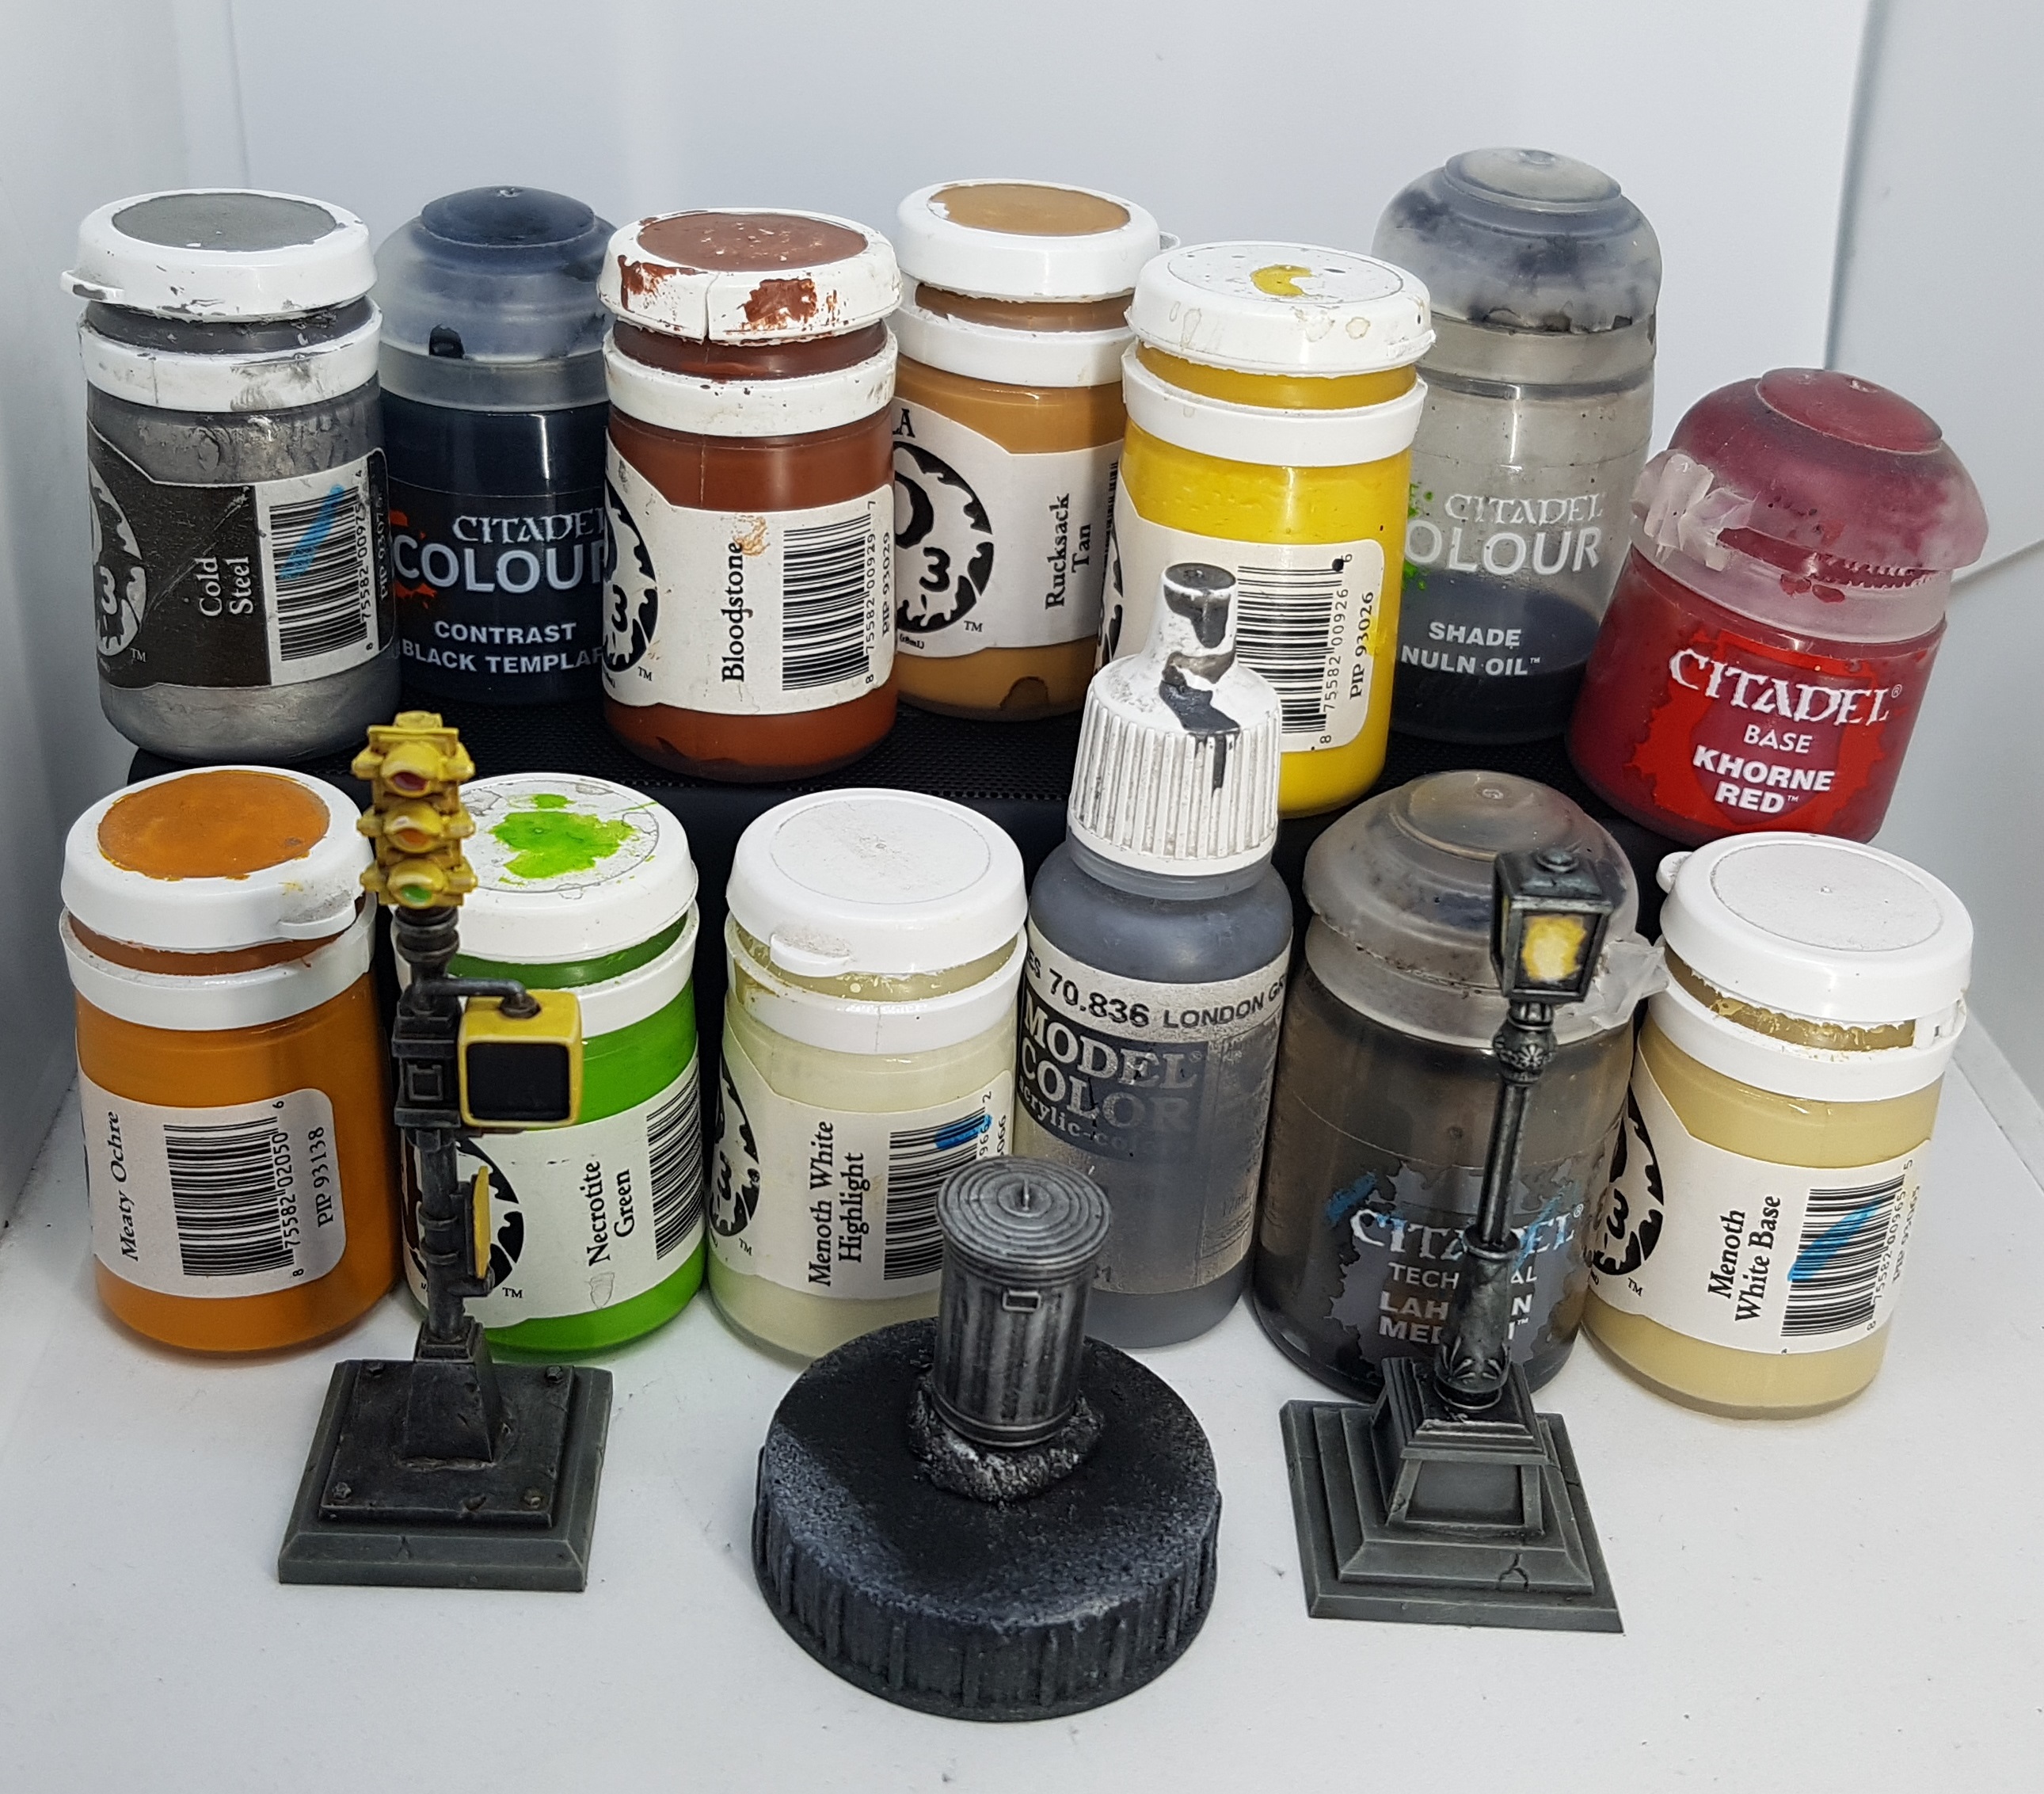
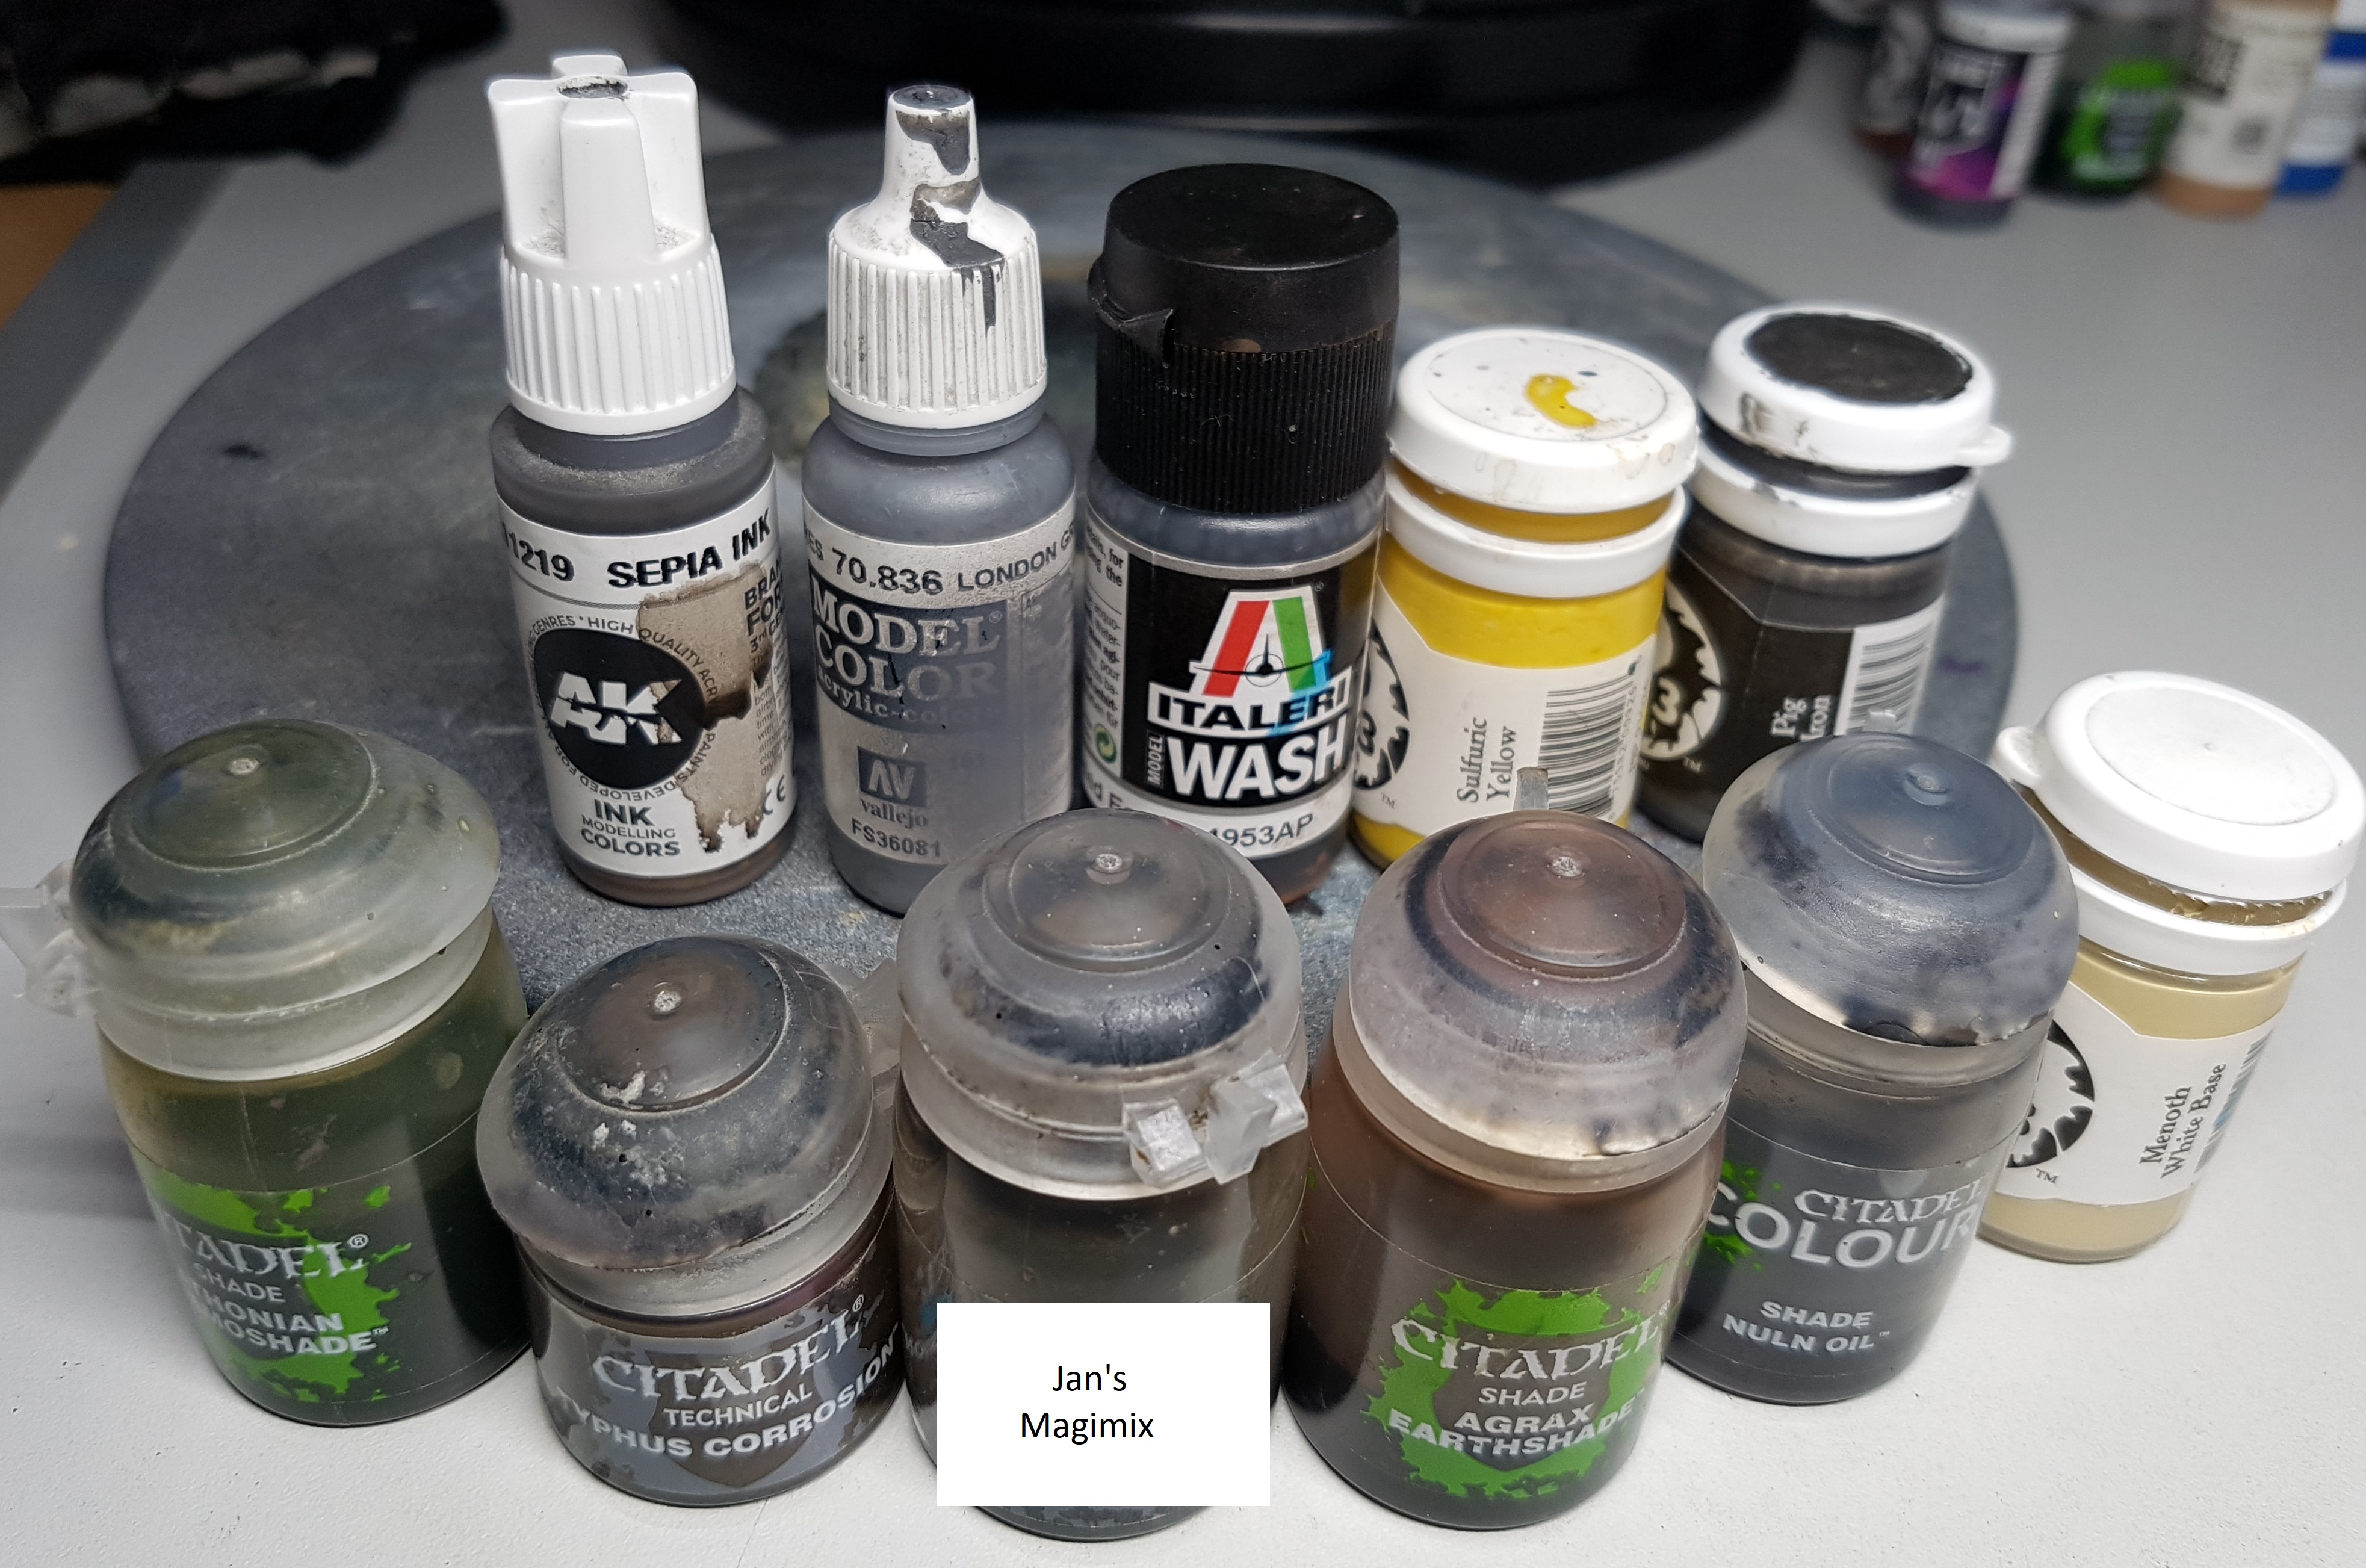 All the paints used on the bases
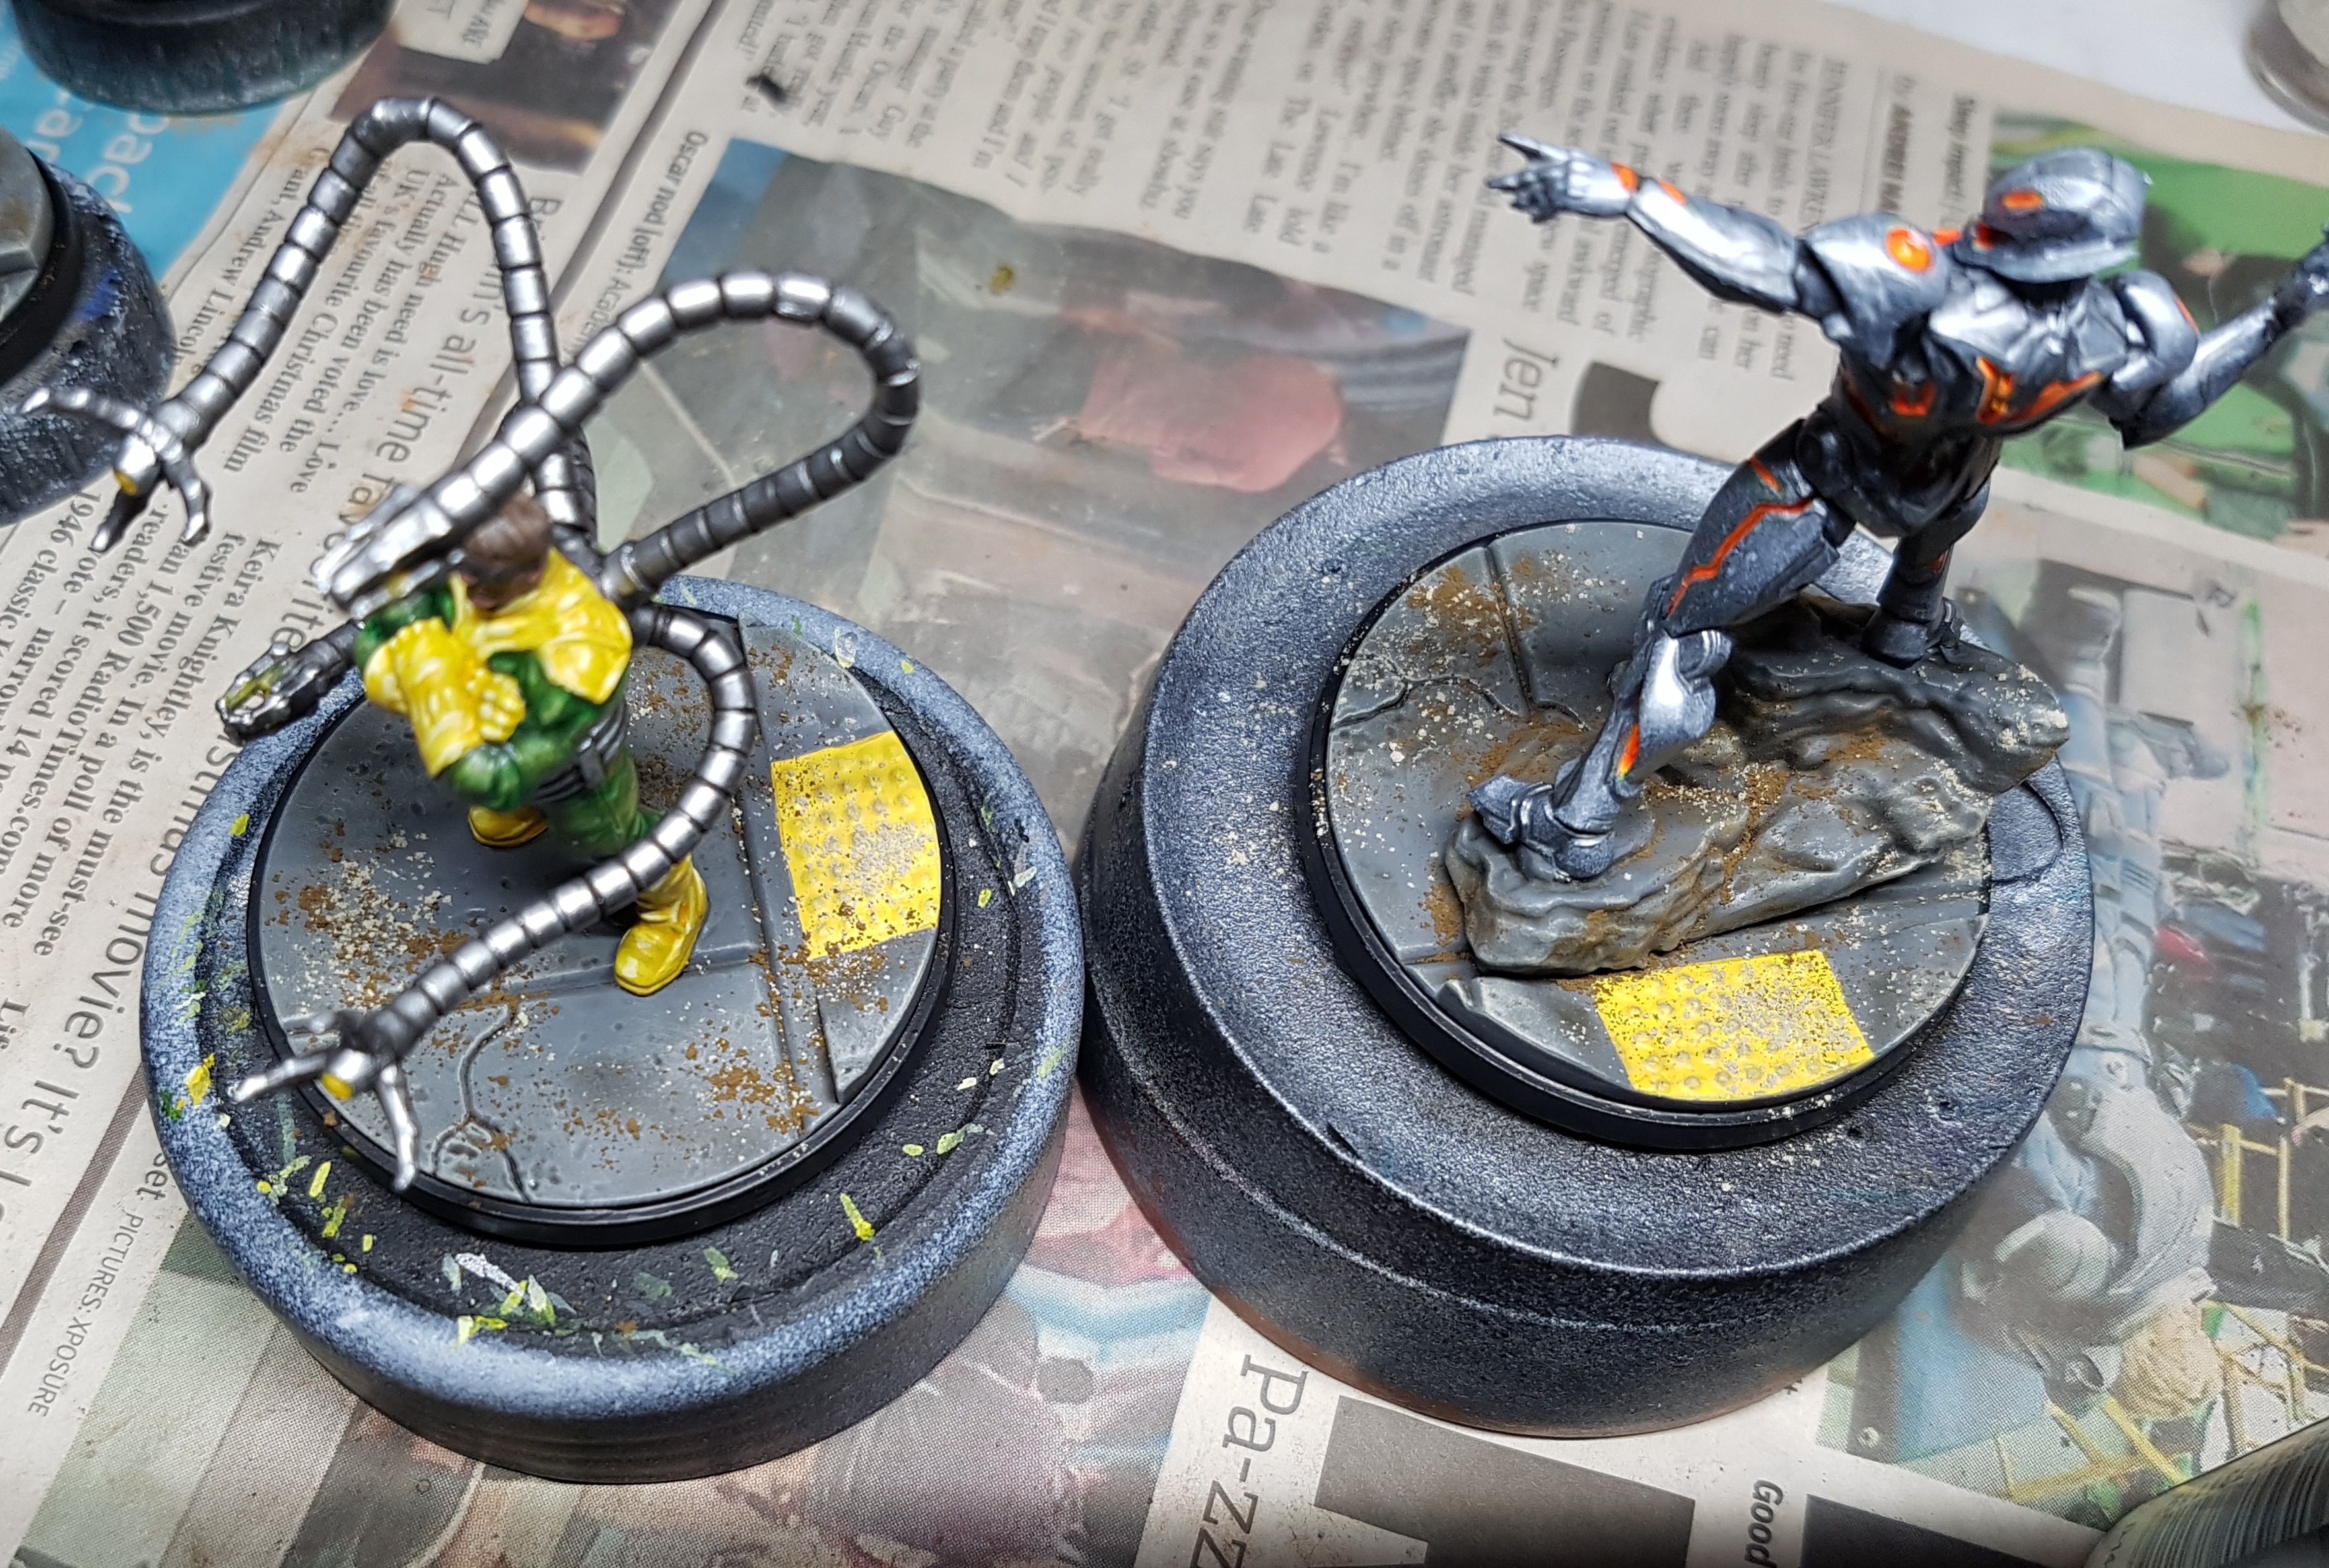
With everyone ready for varnishing, it’s time for a technique I got from experimenting after that Gerry Can on painting stone and Fogou beehive shaped buildings. Prep your airbrush in advance and wear a dust mask before opening any pots until after the first coat of varnish is dry. This could get messy if you’re not careful. It’s pigment time!
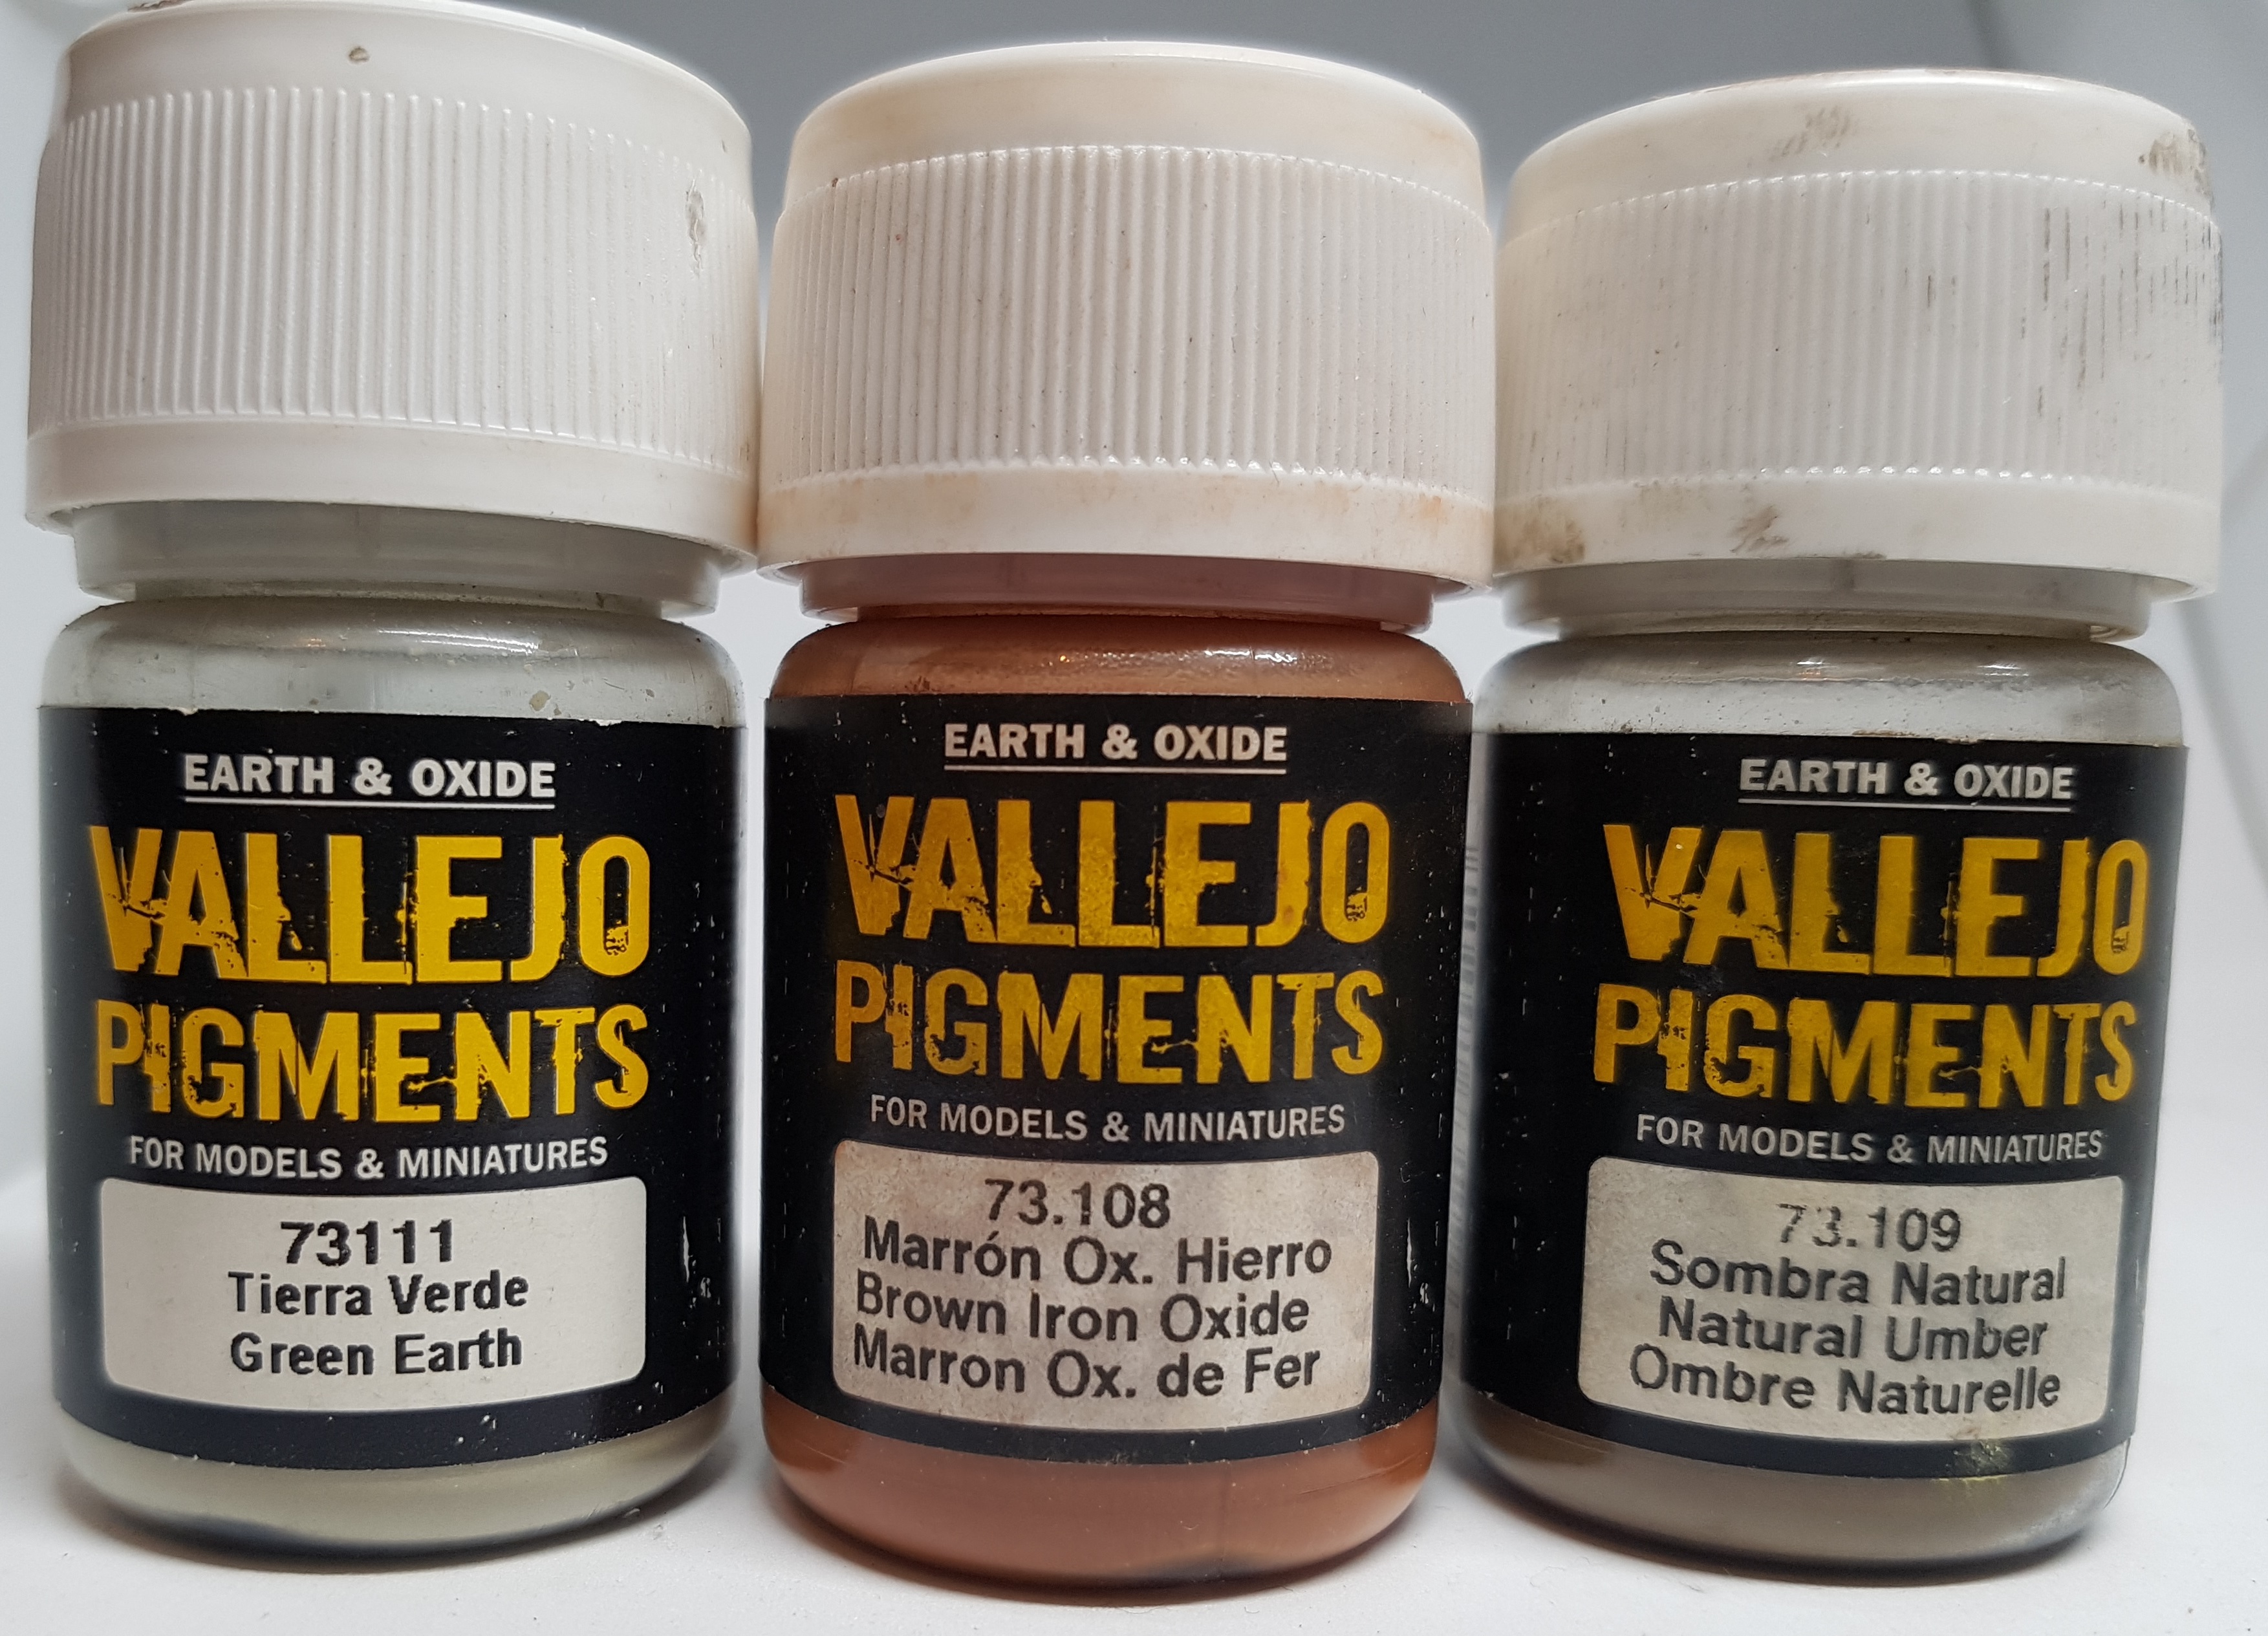
Put down some newspaper to catch any excess and clear a path to your bin ready to dispose of everything instantly. Grab a drybrush and open a pot of Vallejo 73.108 Brown iron Oxide. Dip the drybrush in and pick up some paint. Don’t overdo it. You don’t want a lot. Hold it over any metal hatch type bases and just tap the drybrush with your finger so some powder falls off. Move a little and do this again.
put away the Oxide and repeat this with Vallejo 73.109 Natural Umber and Vallejo 73.111 Green Earth over the stone areas. You can occasionally rub the drybrush into a surface, especially the rough damaged sections. Using the drybrush wedge some in the crevices of the rocks where dirt could have gathered naturally. Use your own judgement. Put the lids back on the pots and get rid of any loose pigment not on a base.
Most of this pigment is just loose and sitting there so keep your dust mask on and minimise any movement of air. Put your varnish in your airbrush and lower the pressure as far as you can. Test it pointing away from your models until you’re happy. Now spray it on to the bases from as far away as you can. You want the varnish to get there, but as little wind to arrive. Let it dry and then varnish as normal. I like one coat of Gloss, and then enough matt to take the shine away. I didn’t completely remove the shine from Iron Man and Ultron, just a little.
Some of your pigment will blow away. That’s fine. Just contain it. Don’t ruin your table or carpet. Most of it should diffuse and dissolve a little, making it look like natural dirt. Some of mine stayed a little more granular. NYC has become a battle zone with chunks of building being thrown around. I think dirt being about the place is more than fair.
Two whole days and nine evenings to go from sprue to varnished is pretty good work, I think. I’ve another model to finish, and then I’ll be back to work on the terrain pieces.
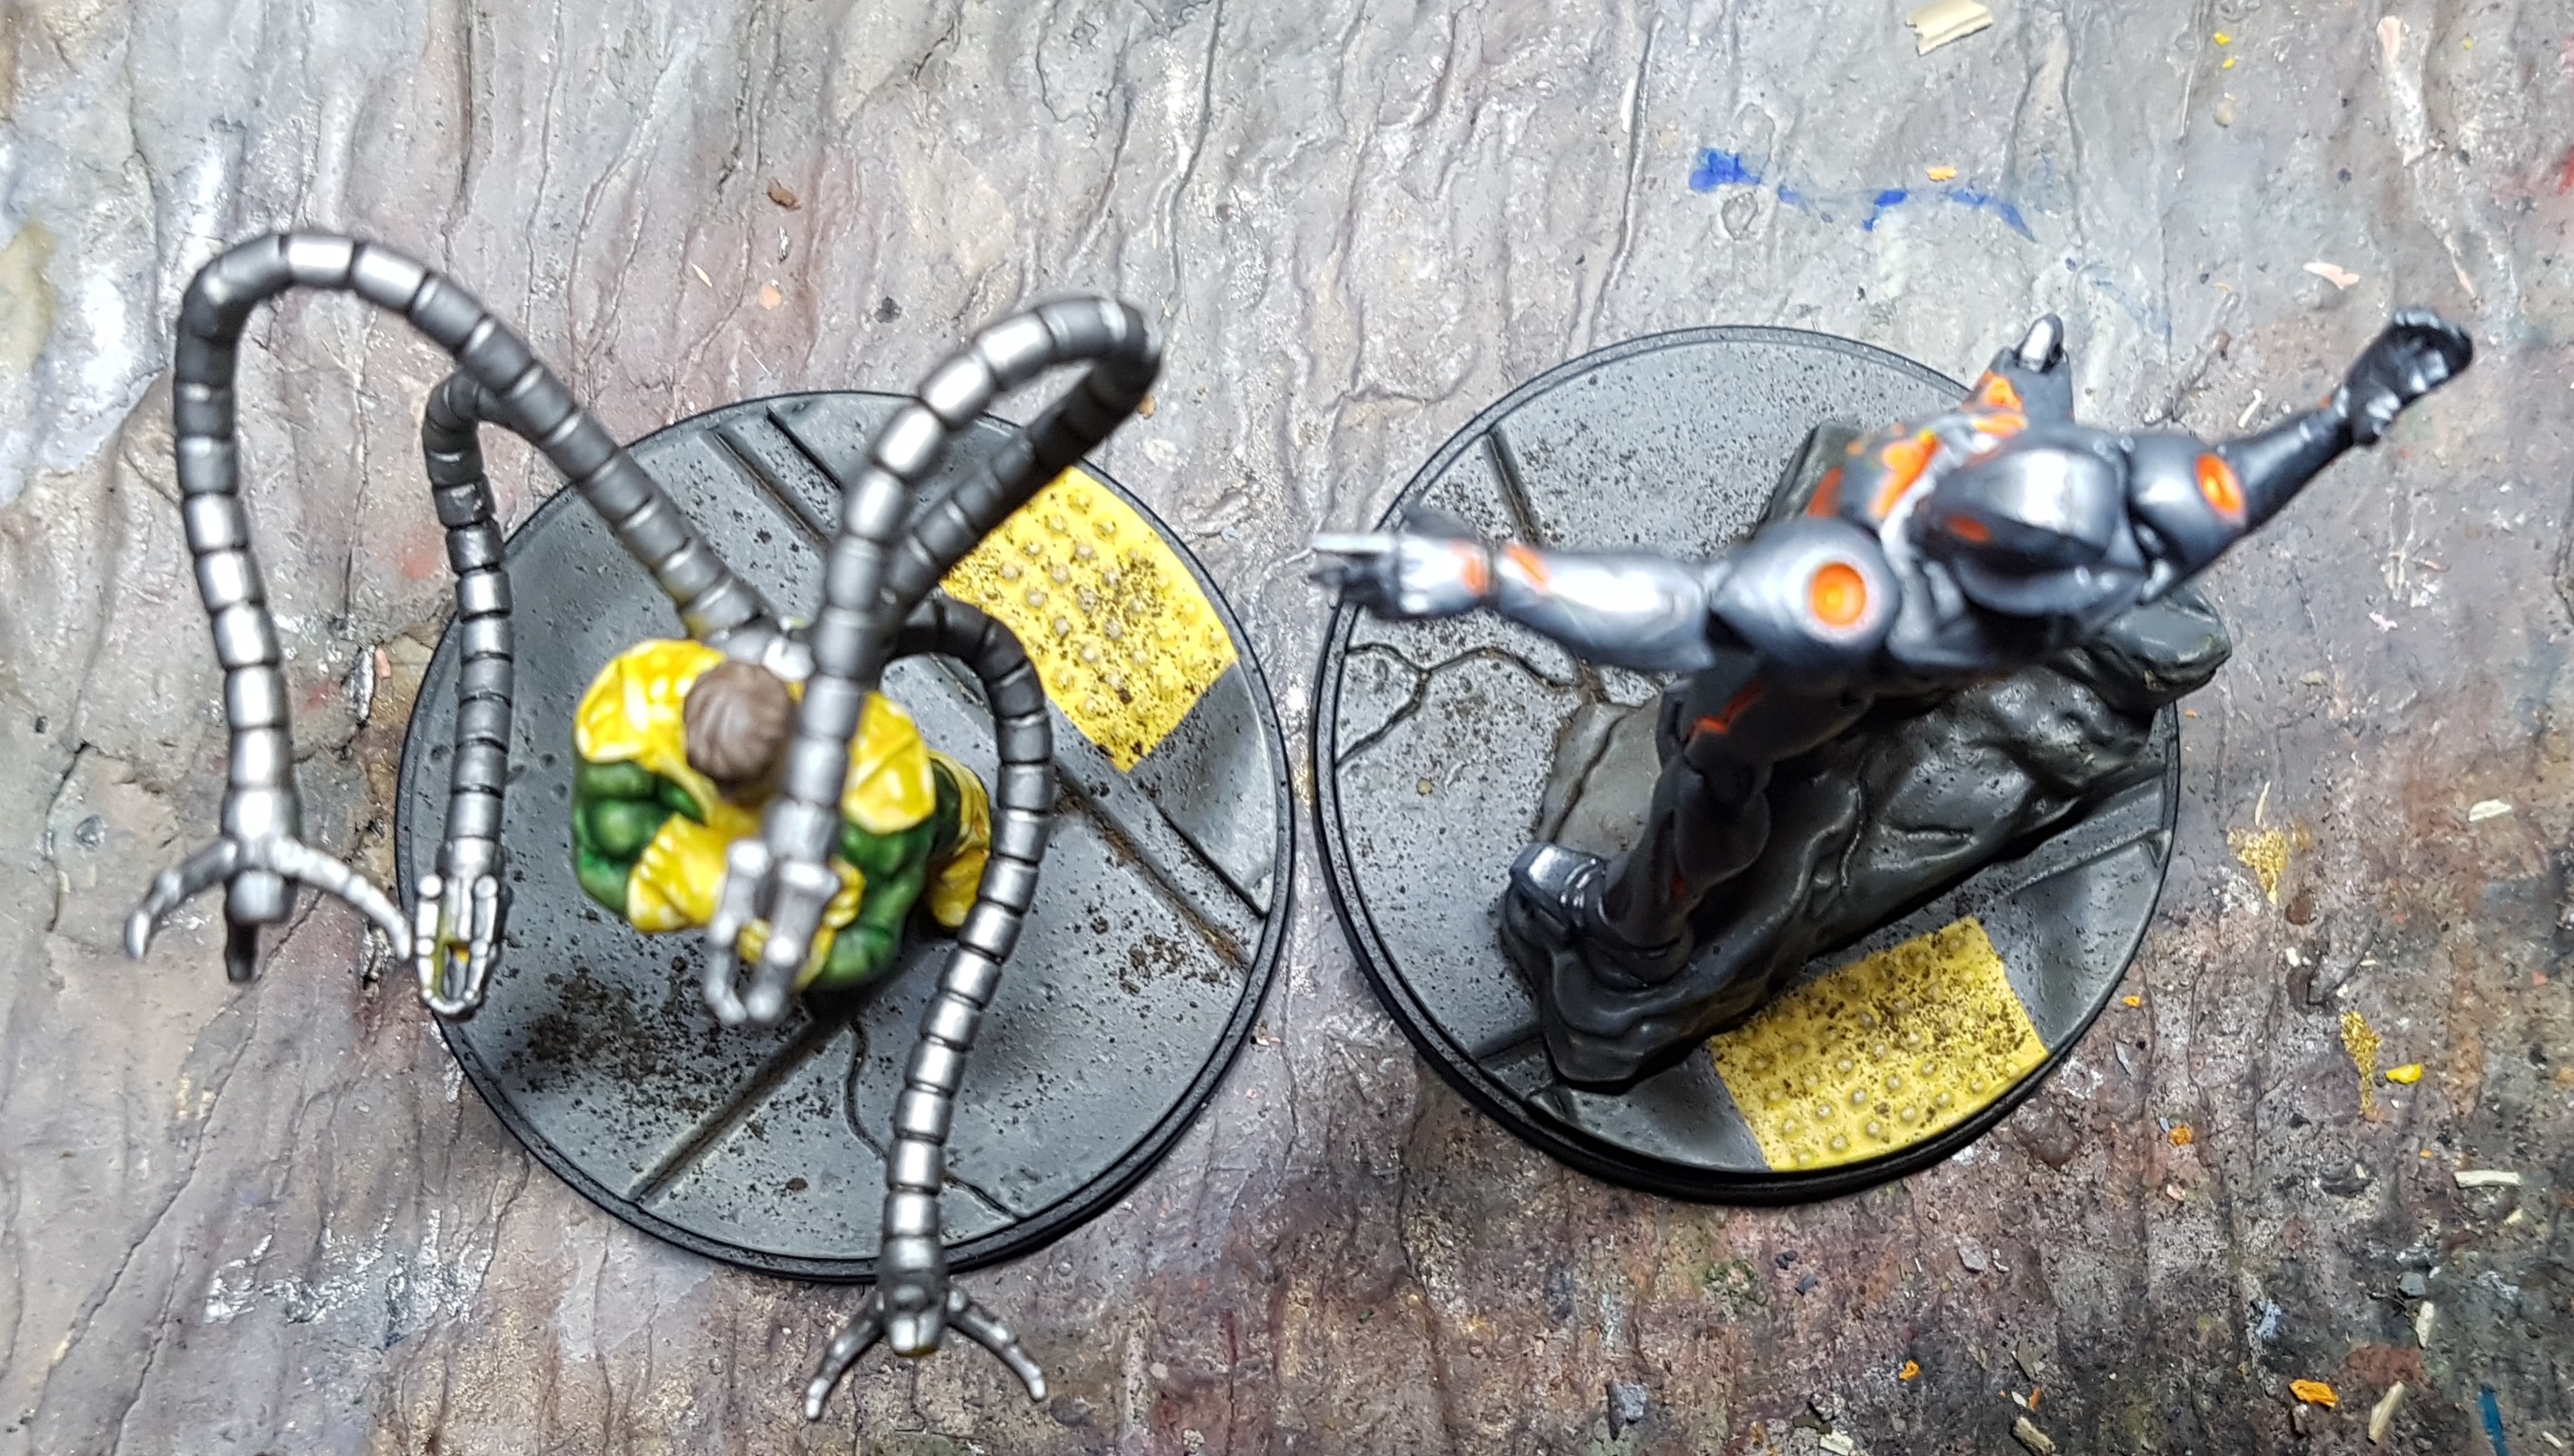 Here's those same bases varnished. Unfortunately this doesn't seem to show off the diffusion effect. I'll be sure to take more pics next time I do this and hopefully catch some good examples of how the varnish interacts with the pigments. All that dirt there is sealed in though, and isn't going to move. Looks like I could possibly do with another coat of matt. That's not so apparent in person.
Finished Core Set Characters Gallery
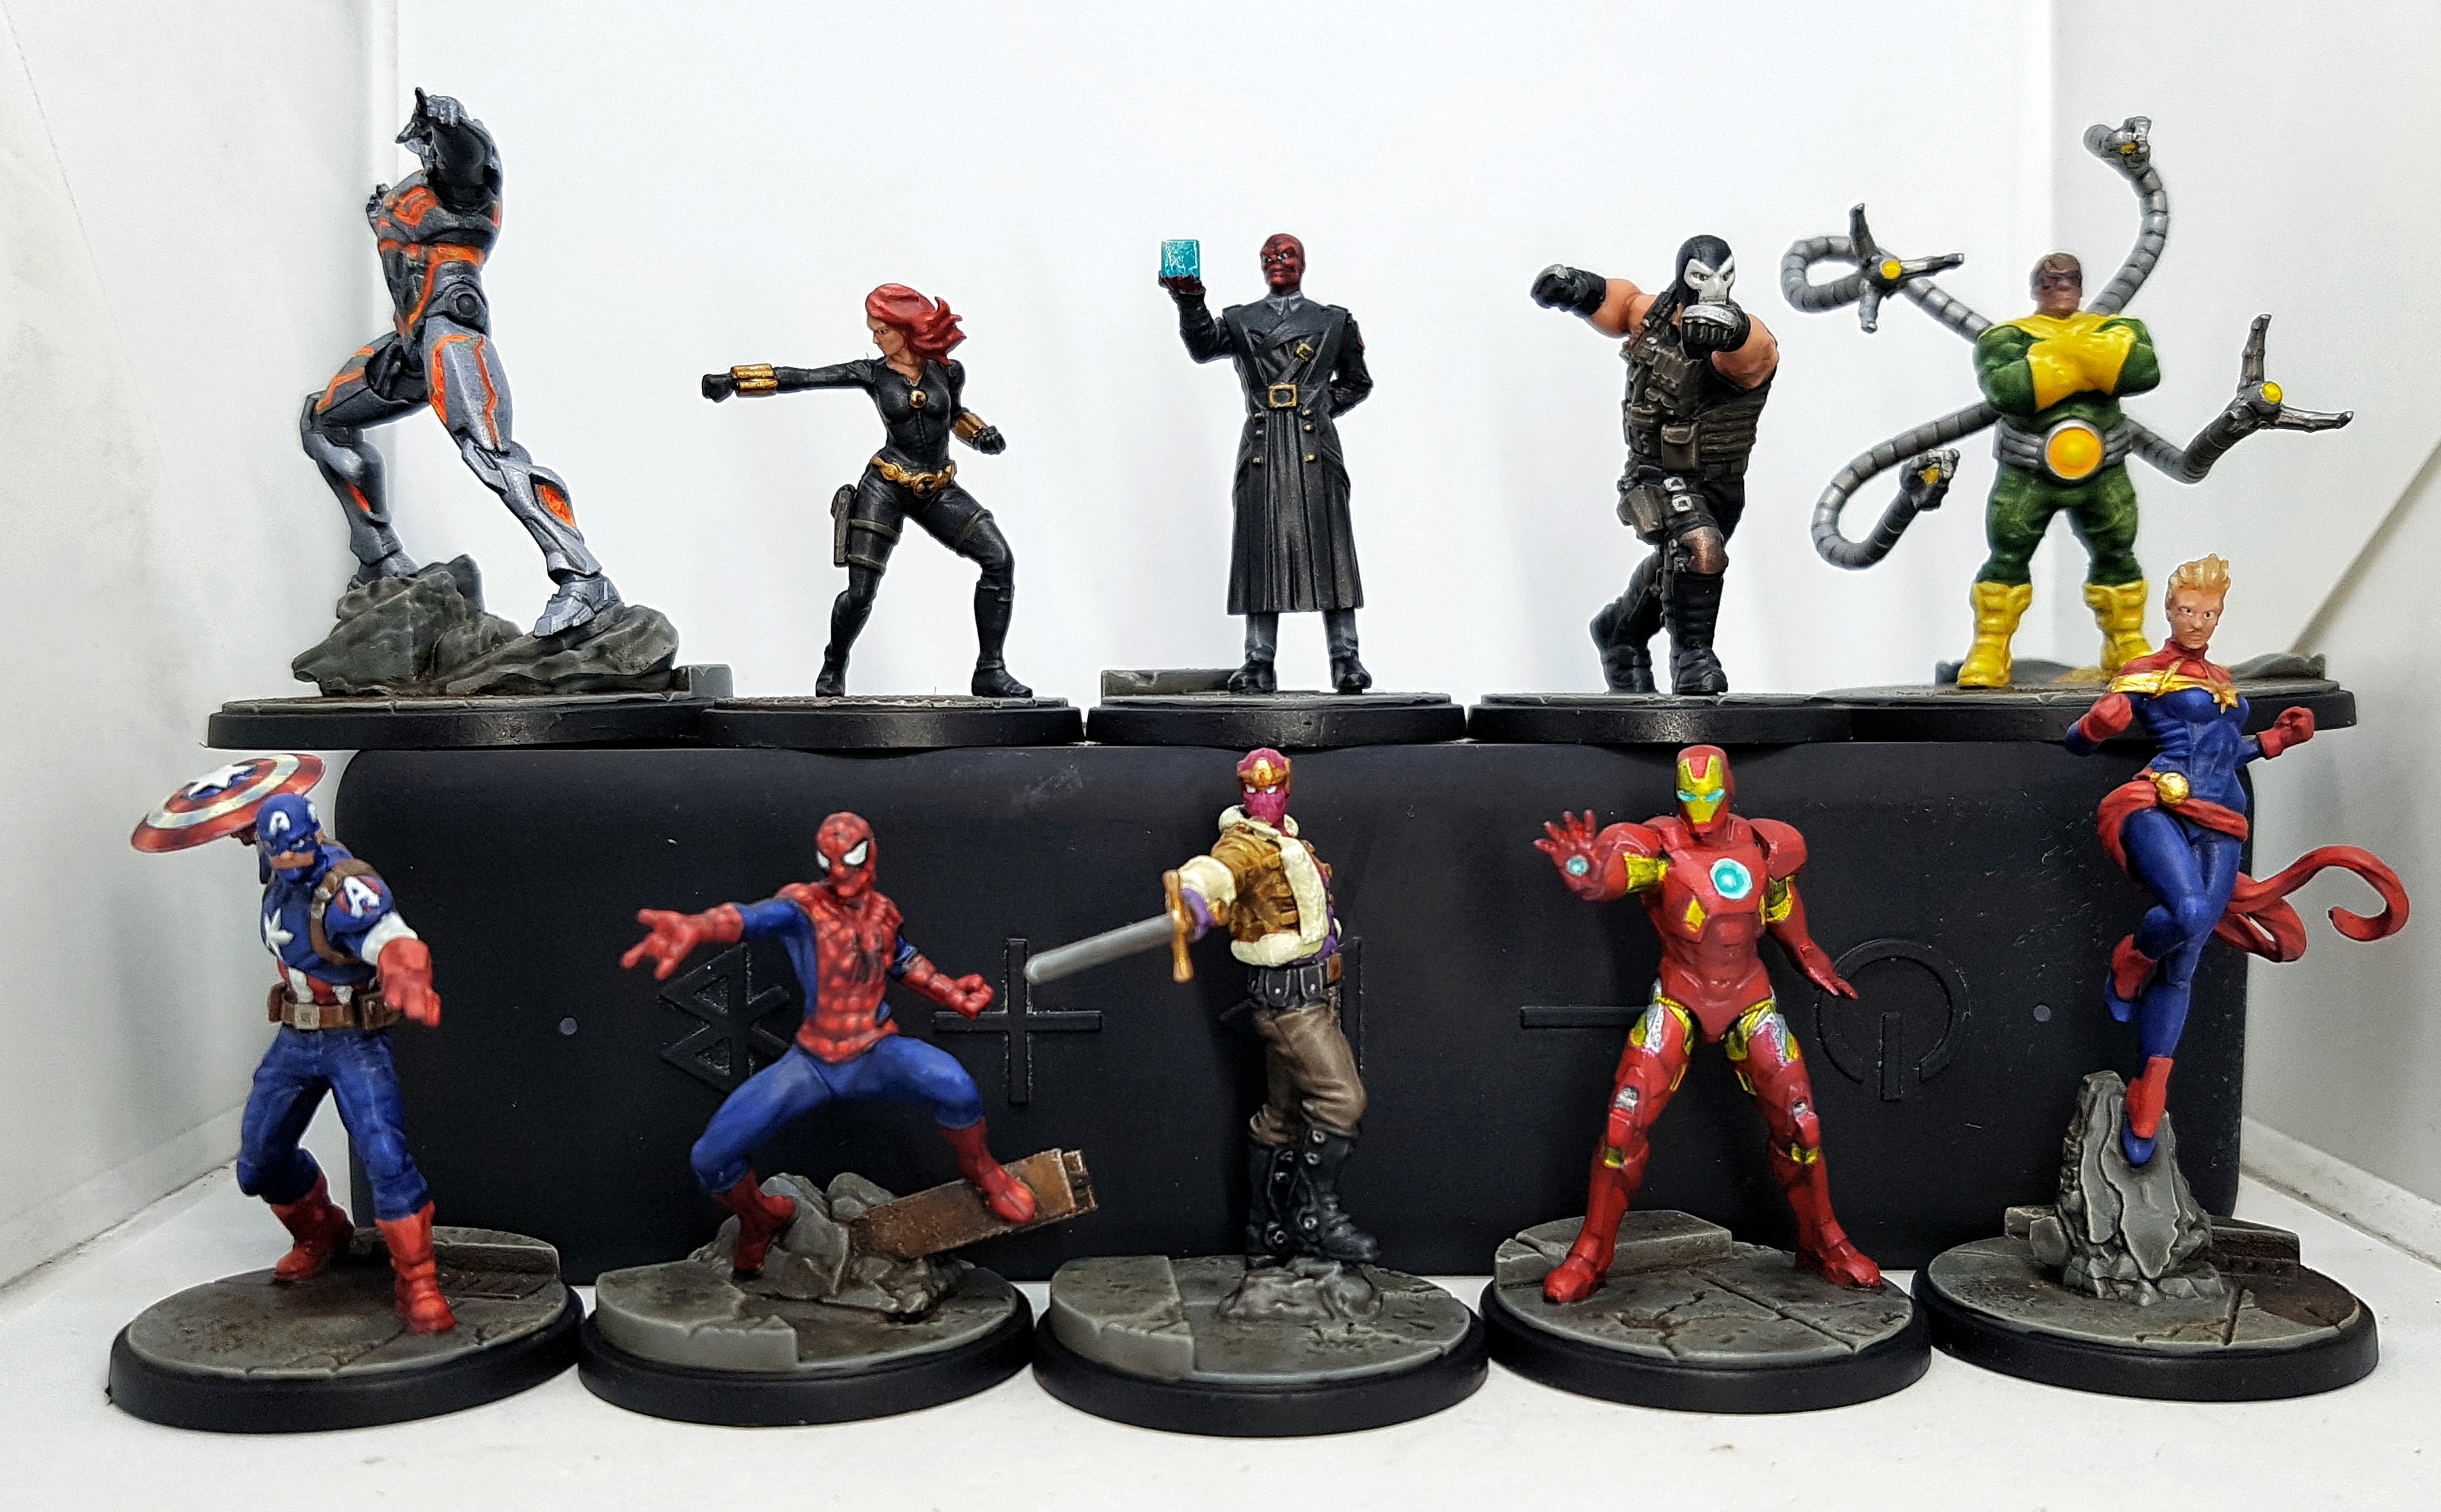
 Black Widow
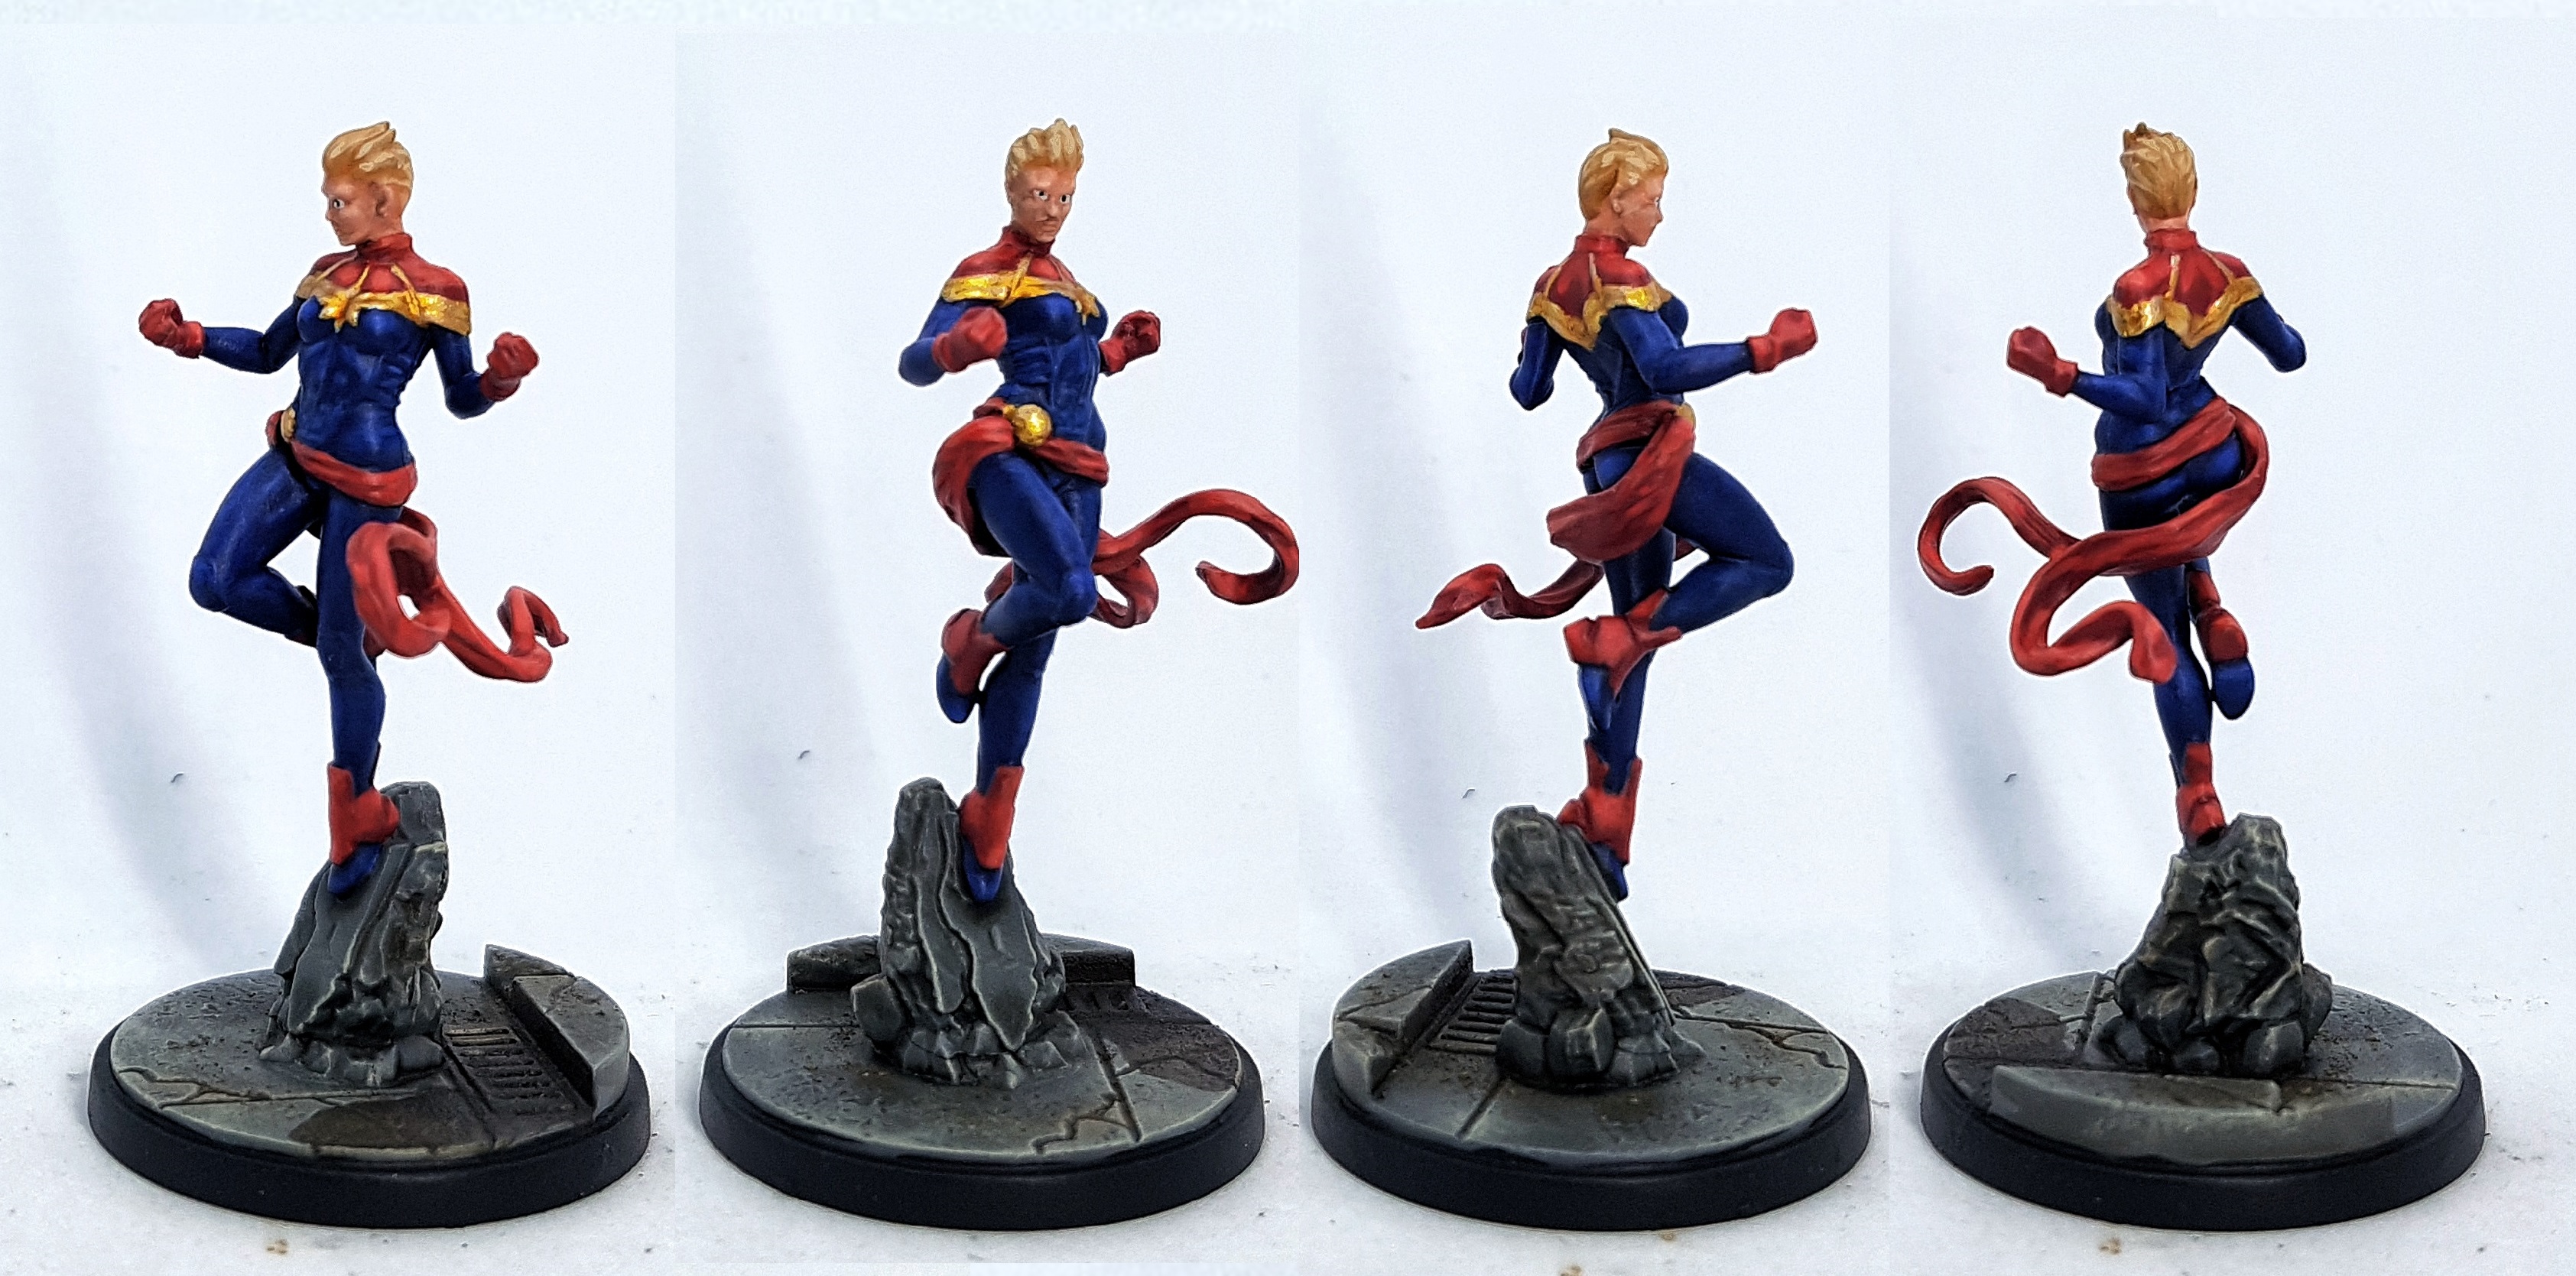 Captain Marvel
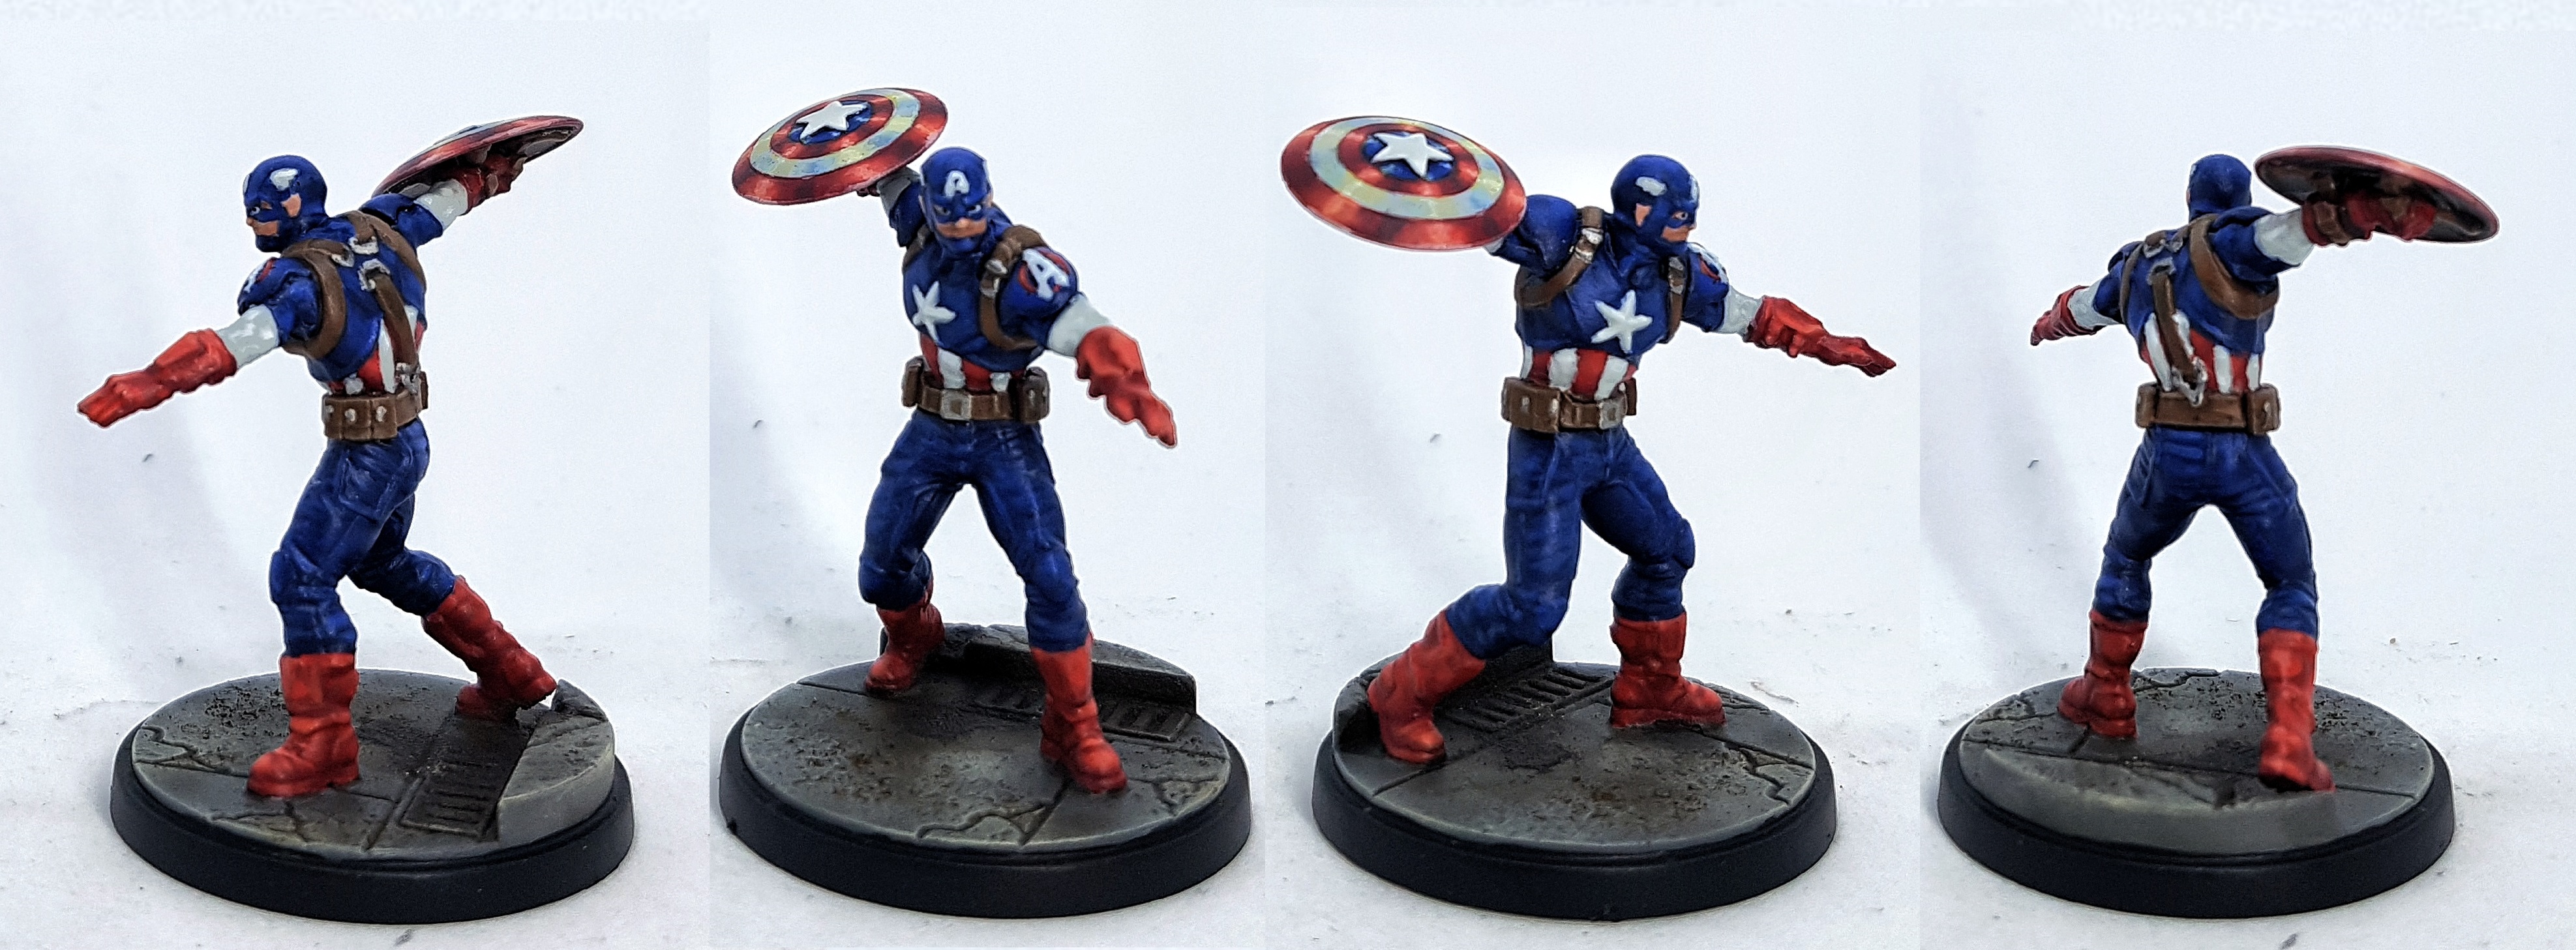 Captain America
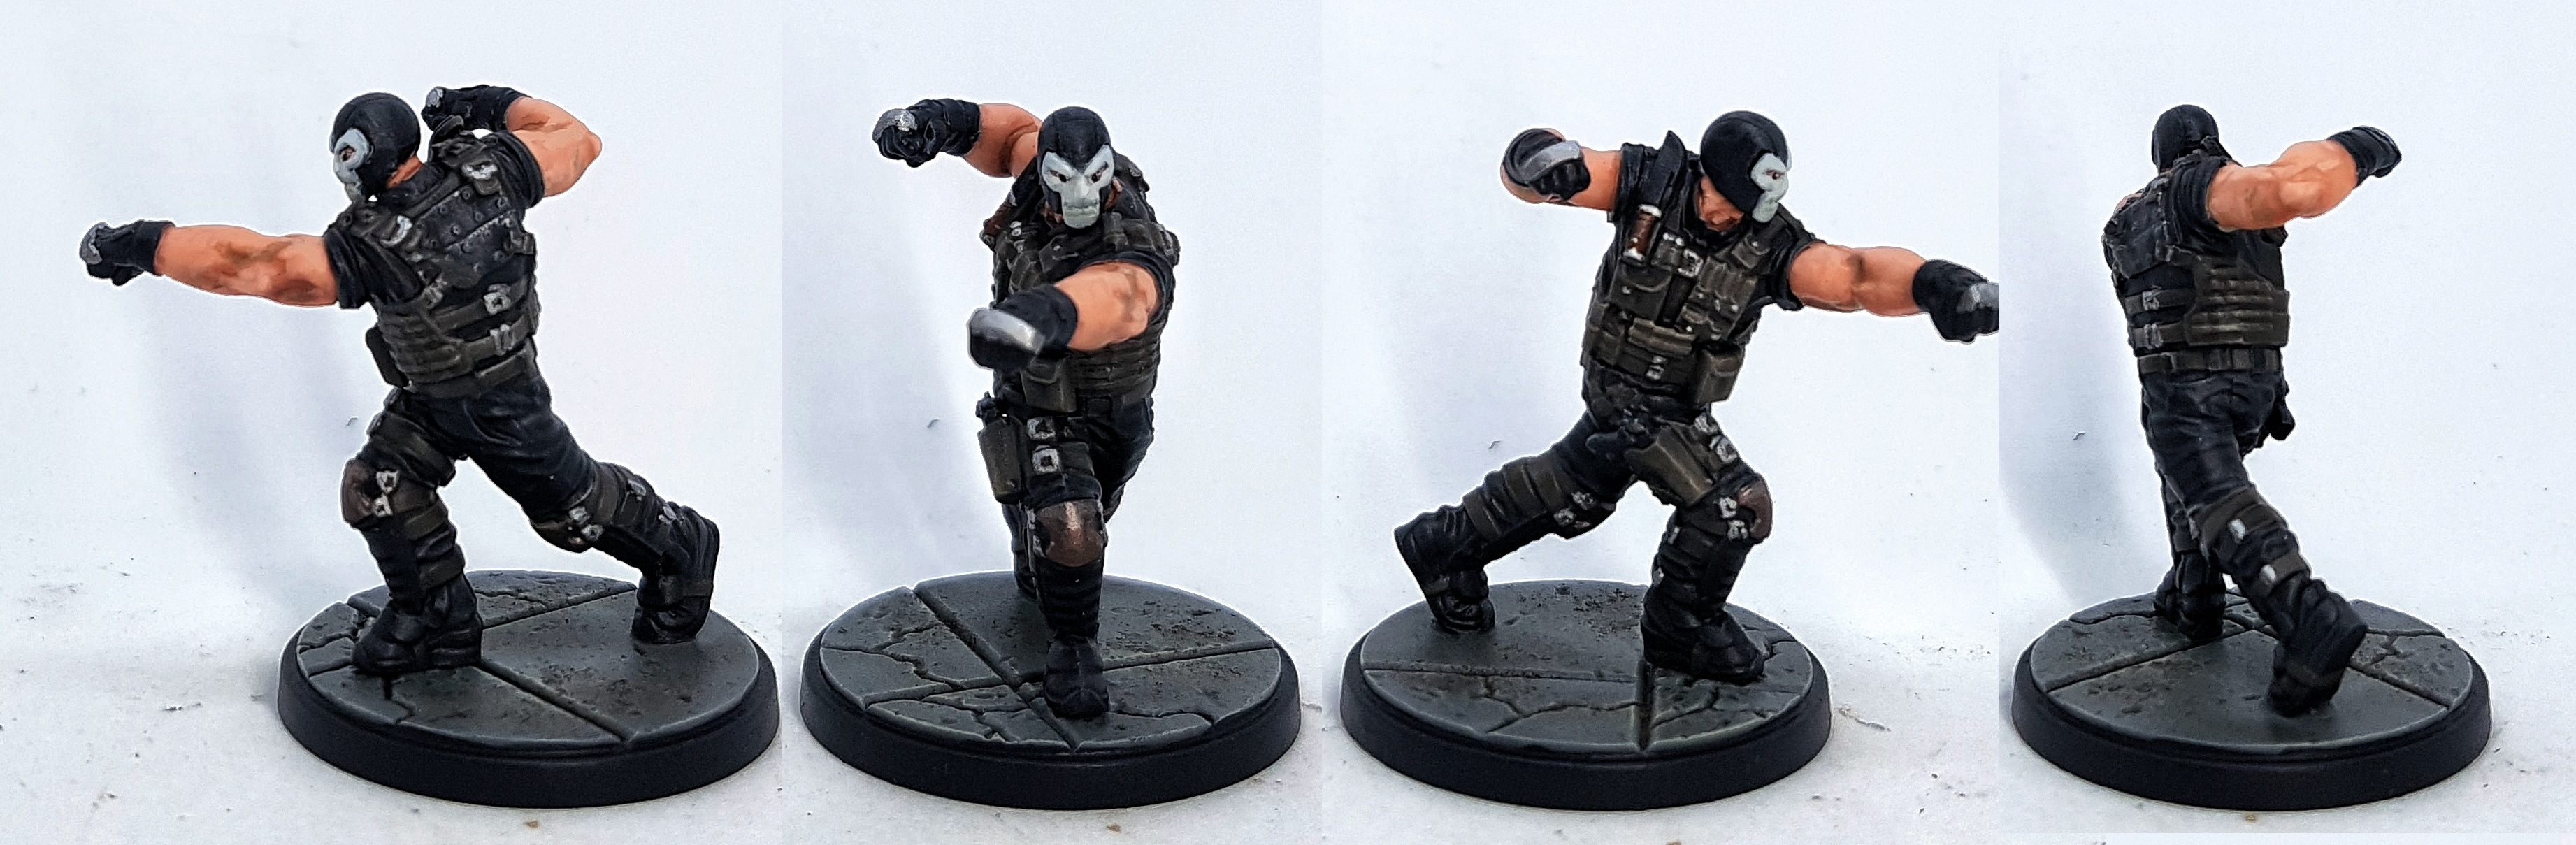 Crossbones
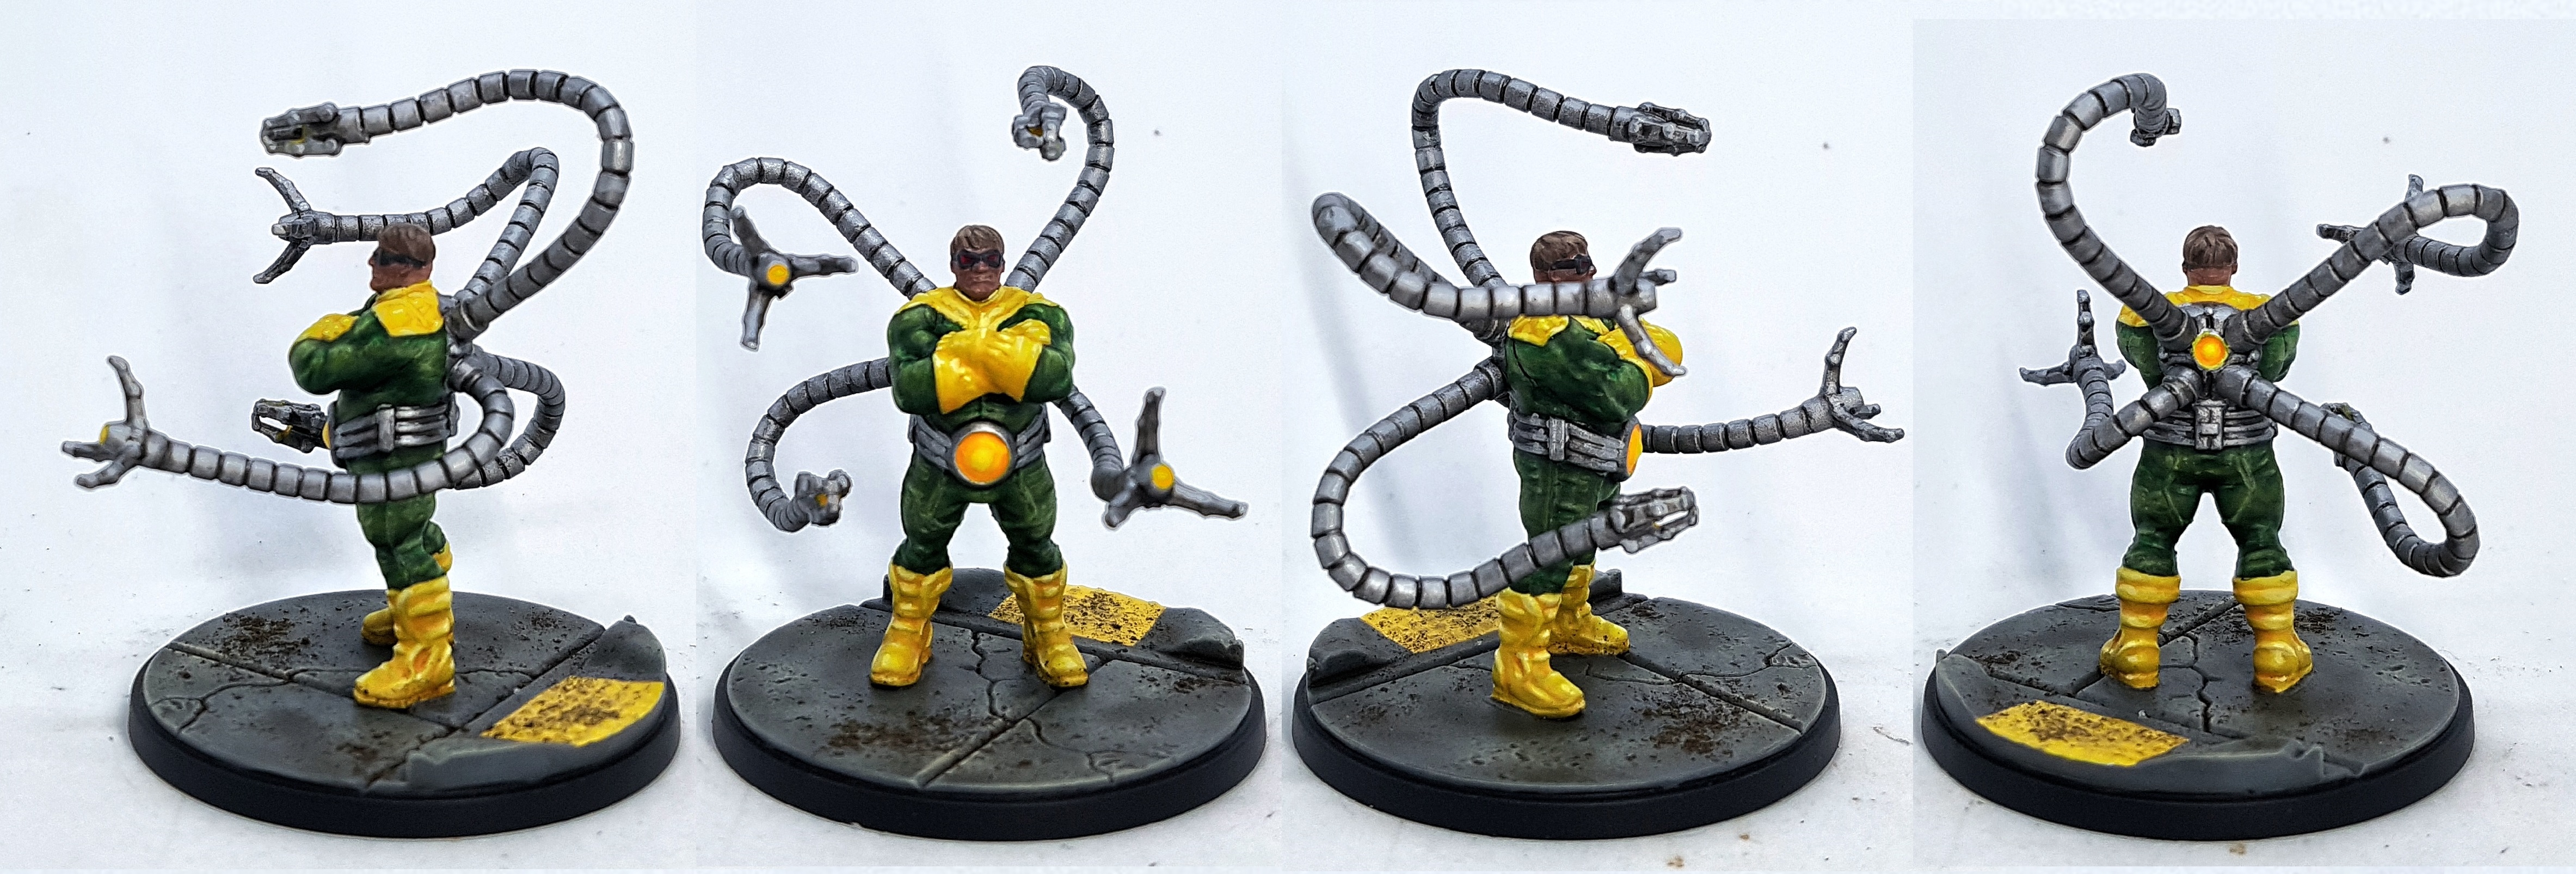 Doctor Octopus
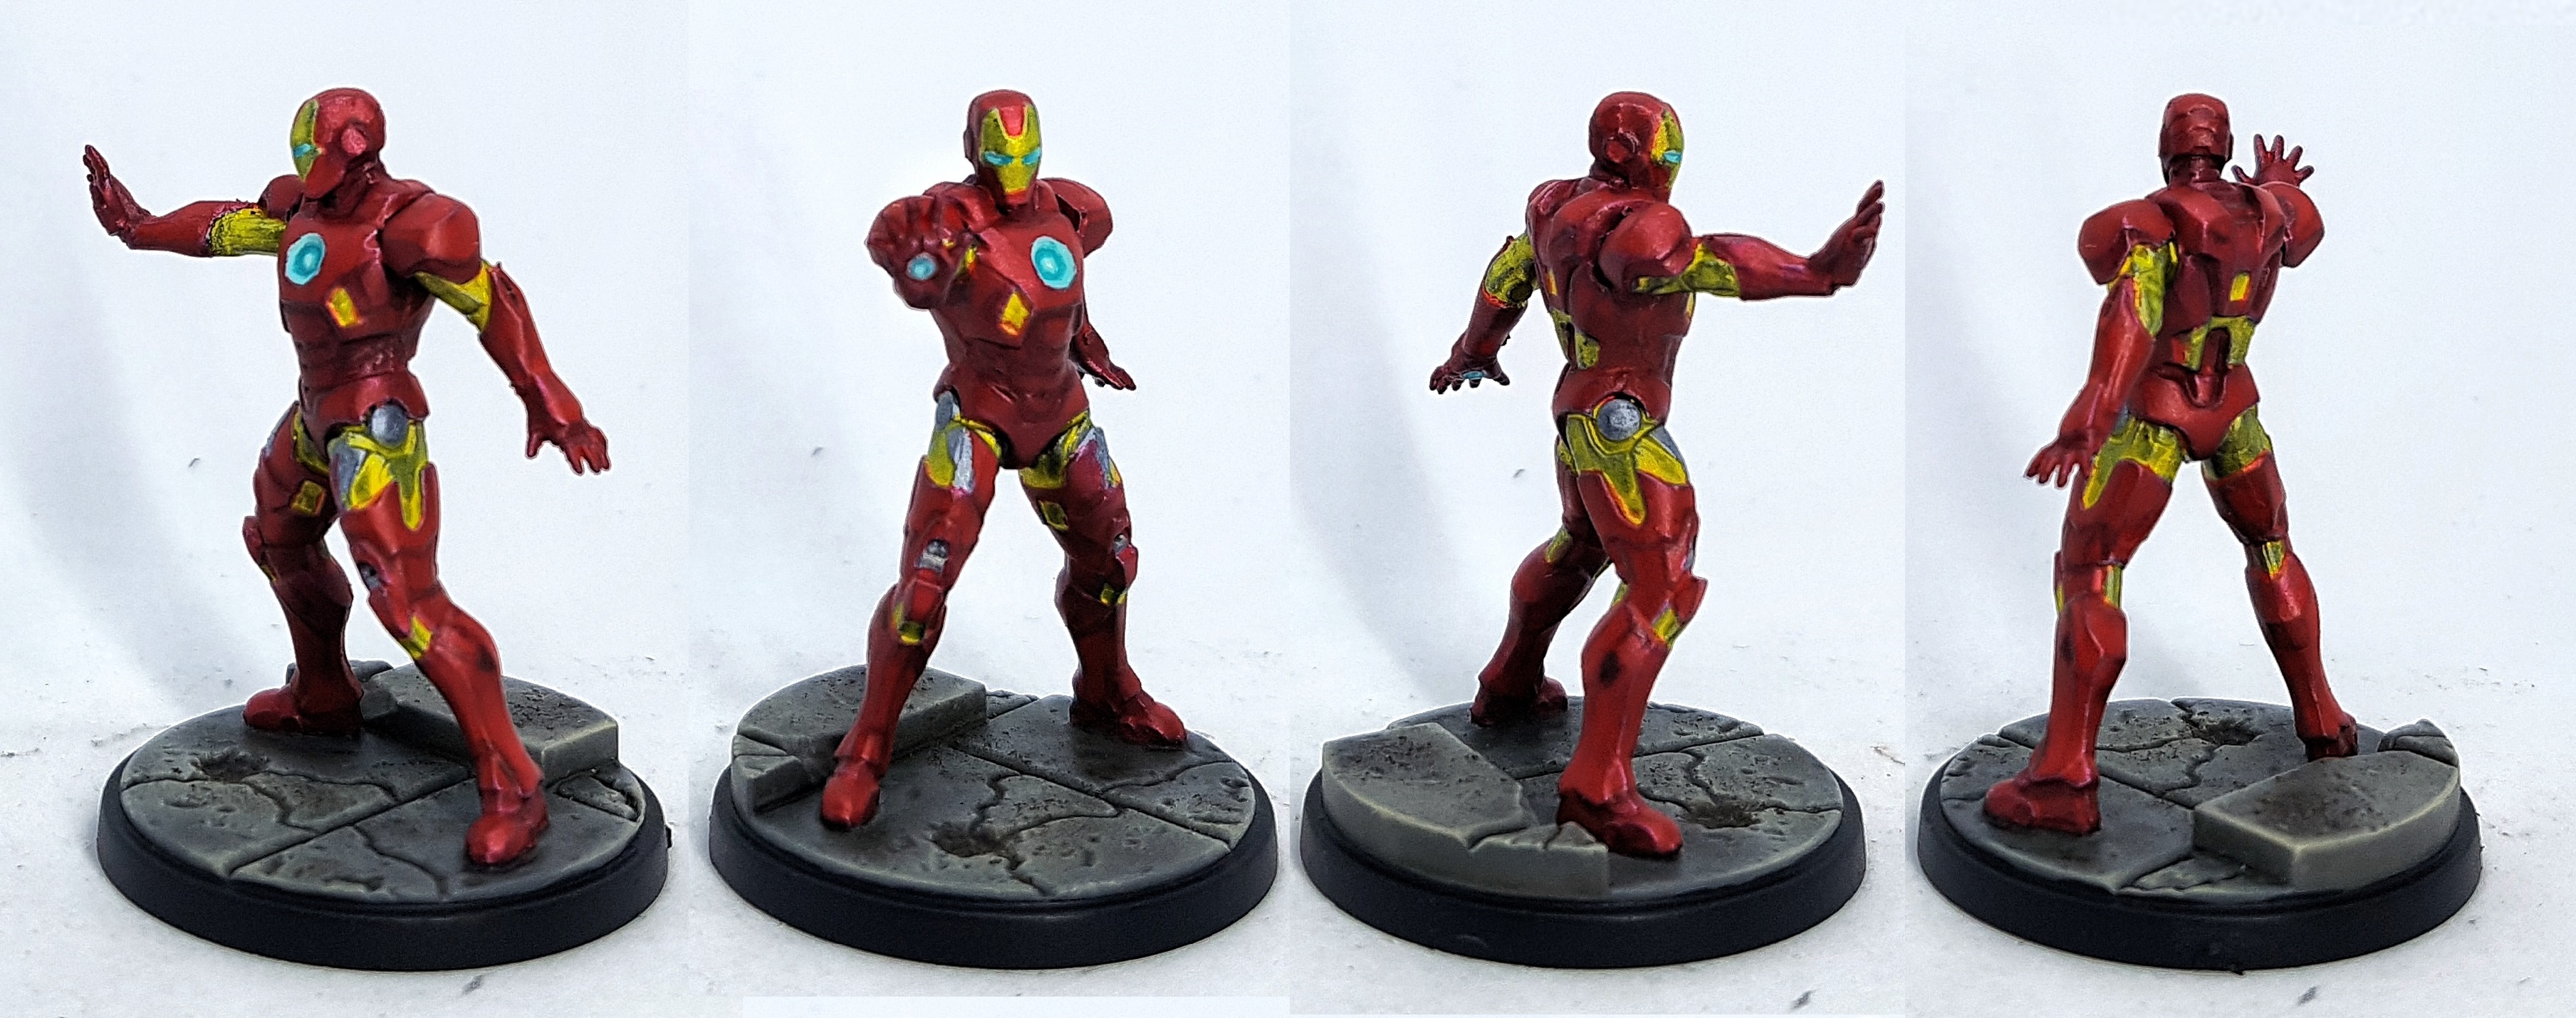 Iron Man
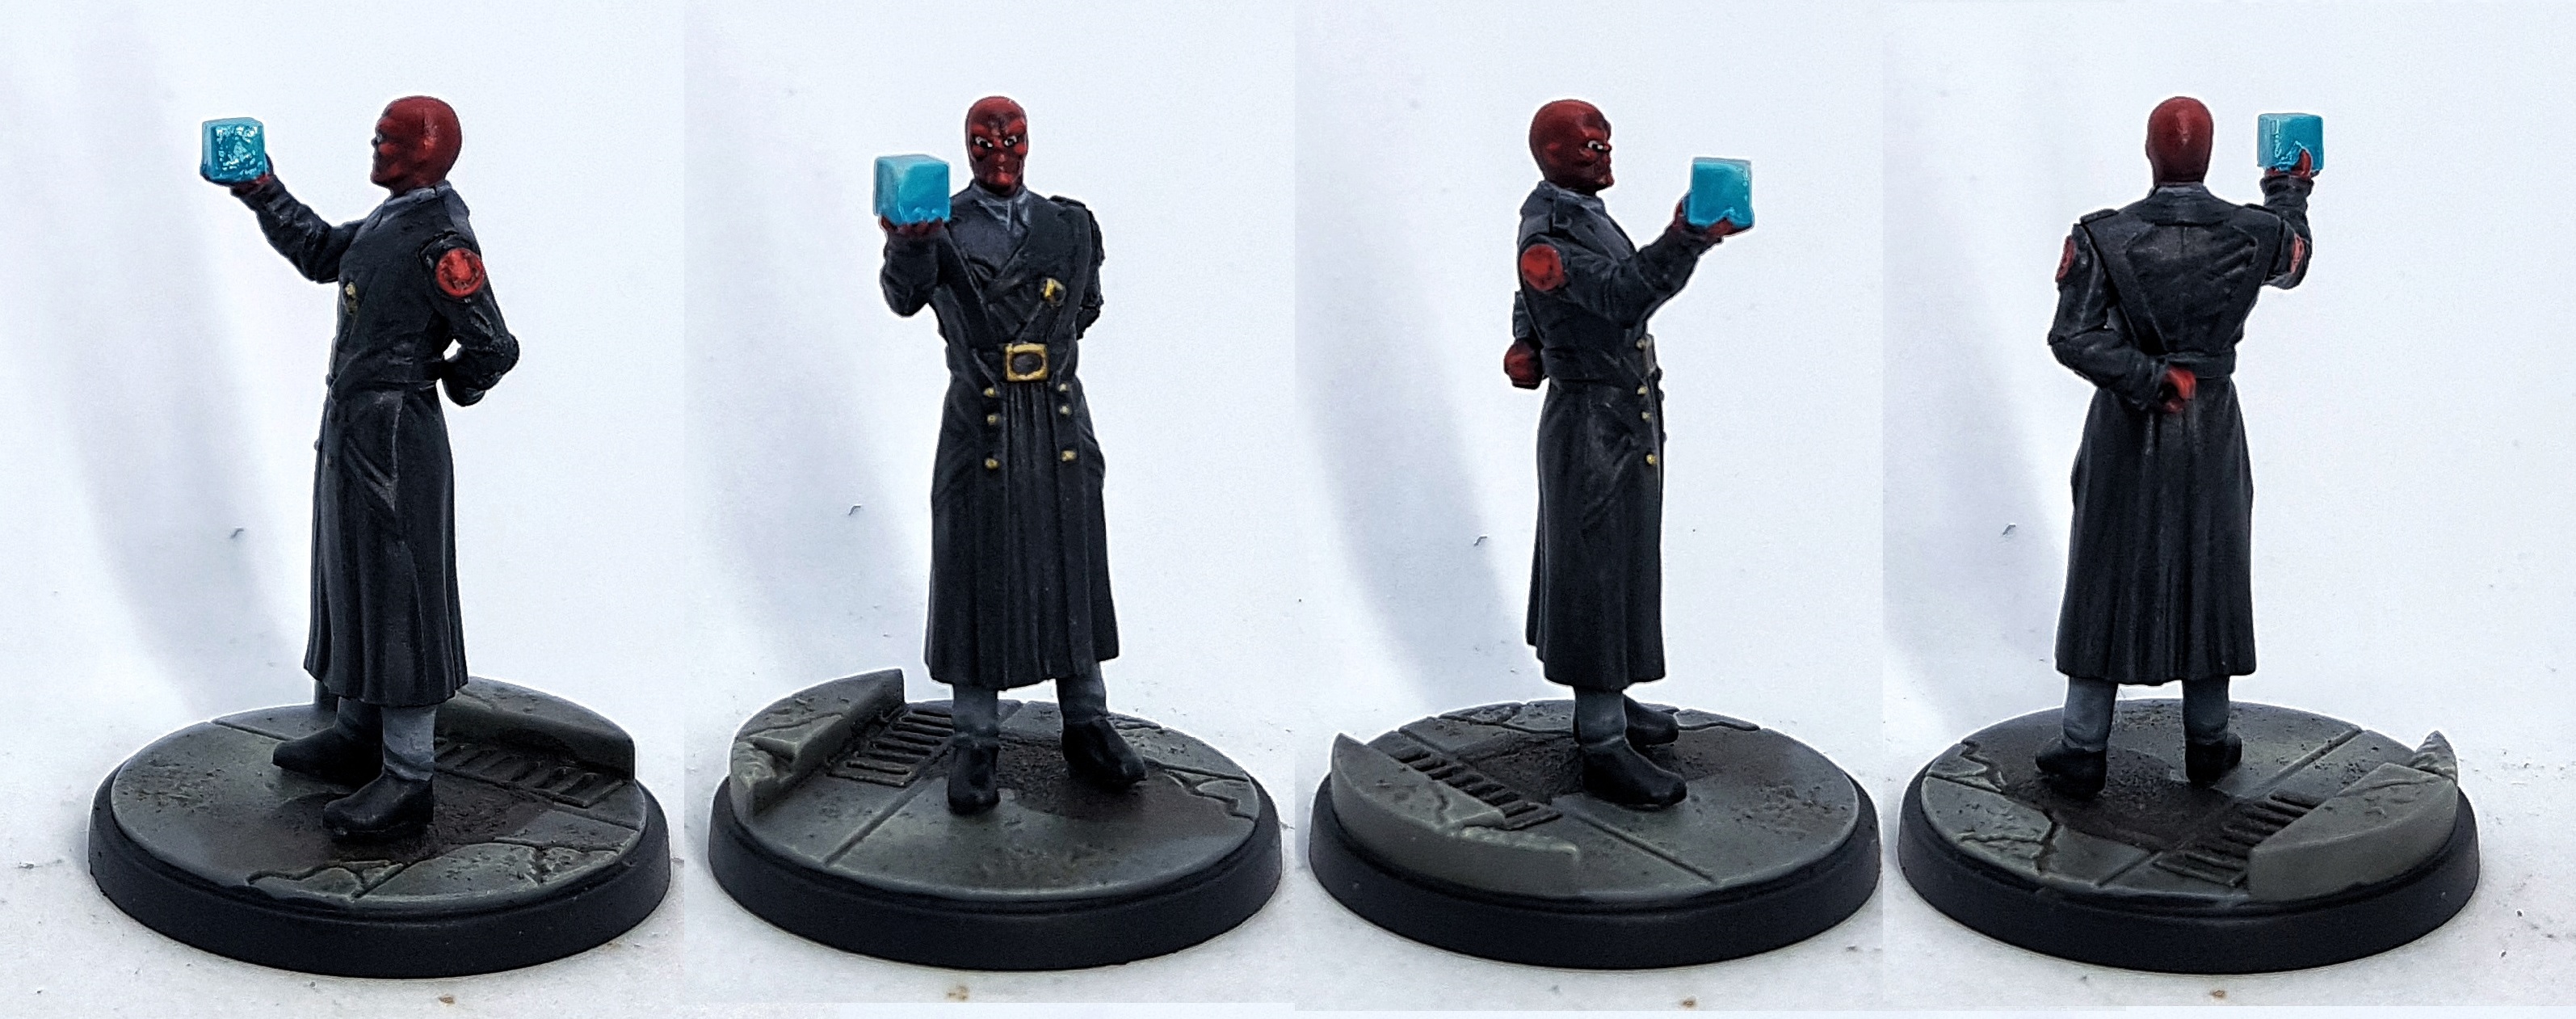 Red Skull
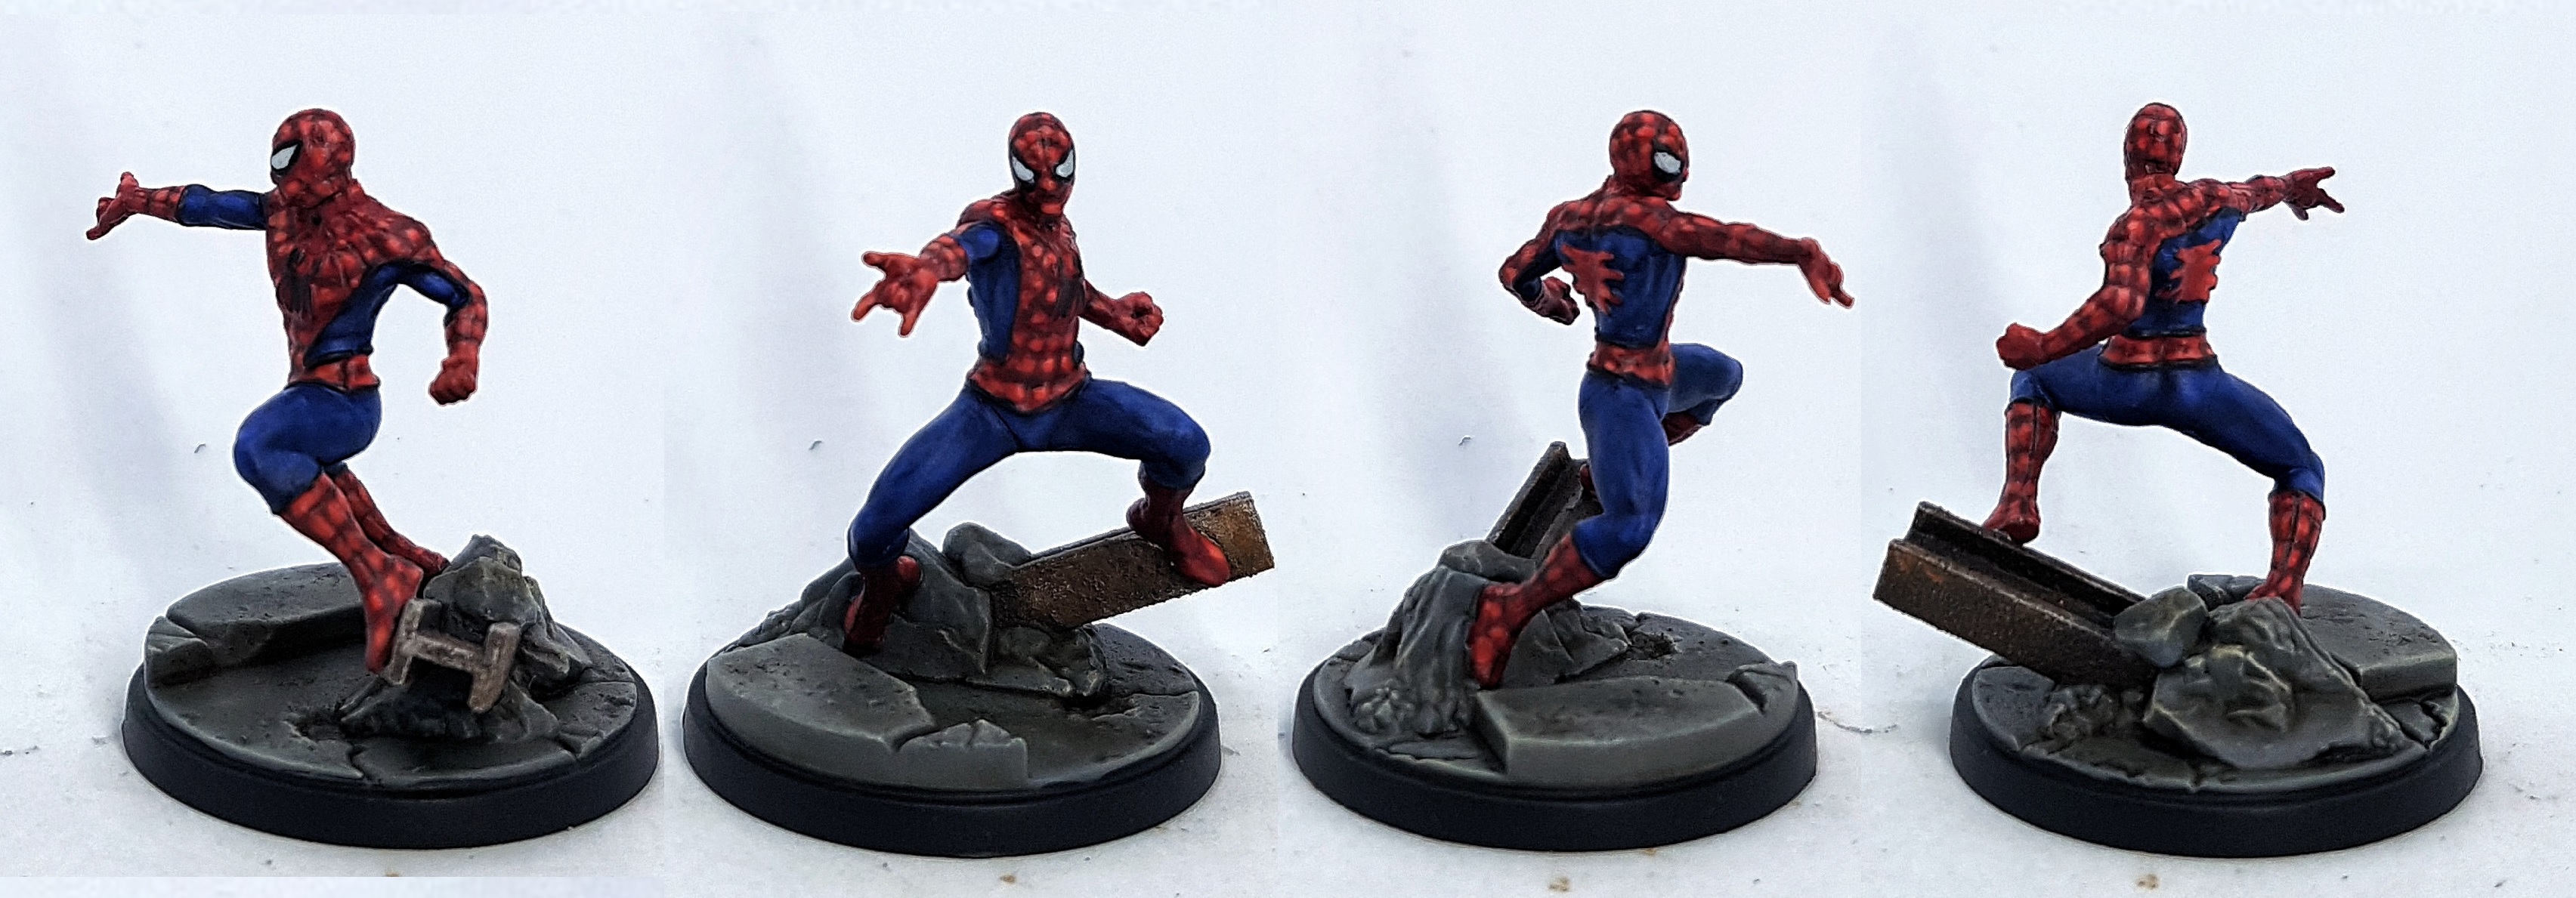 Spider-man
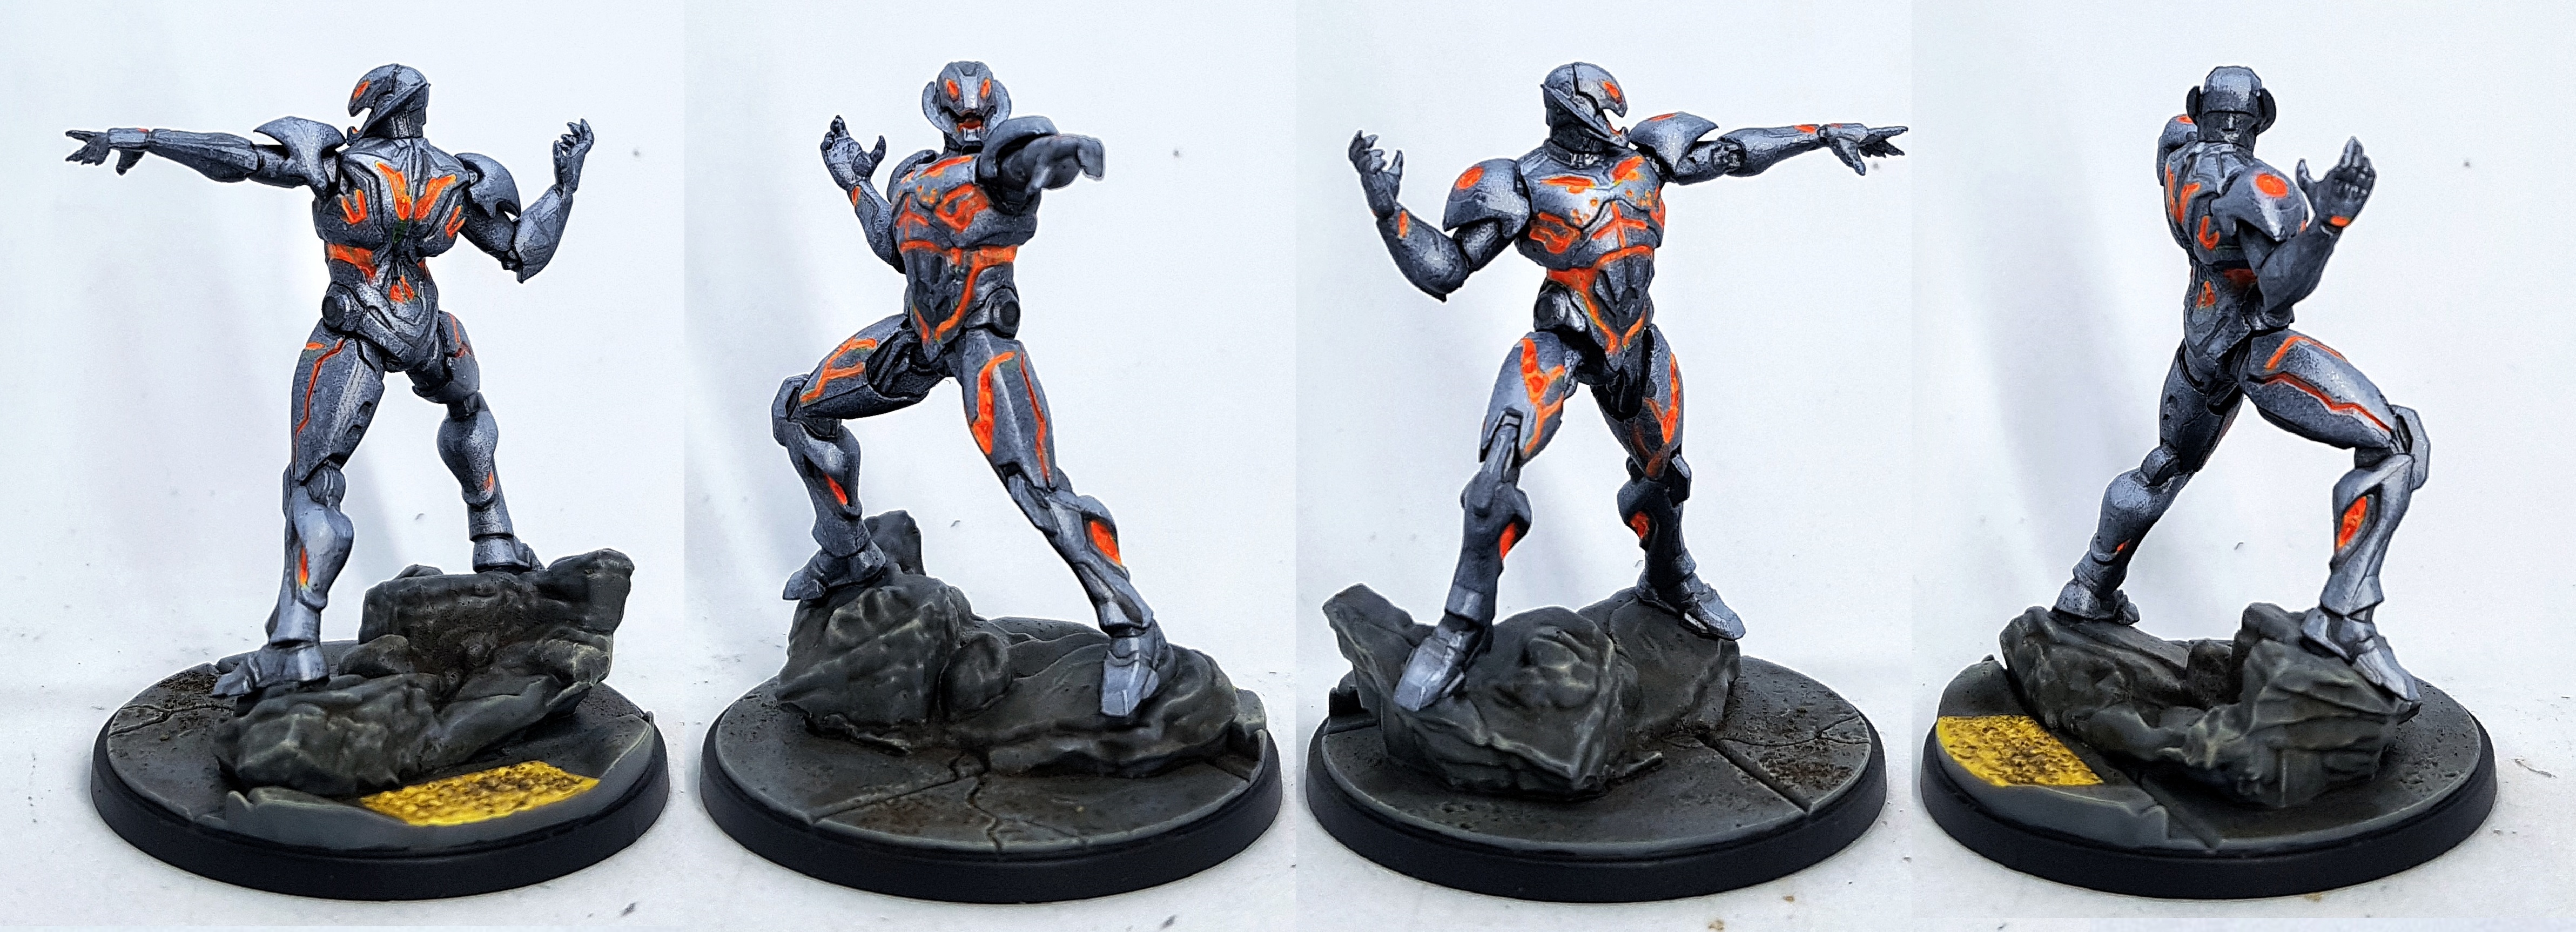 Ultron
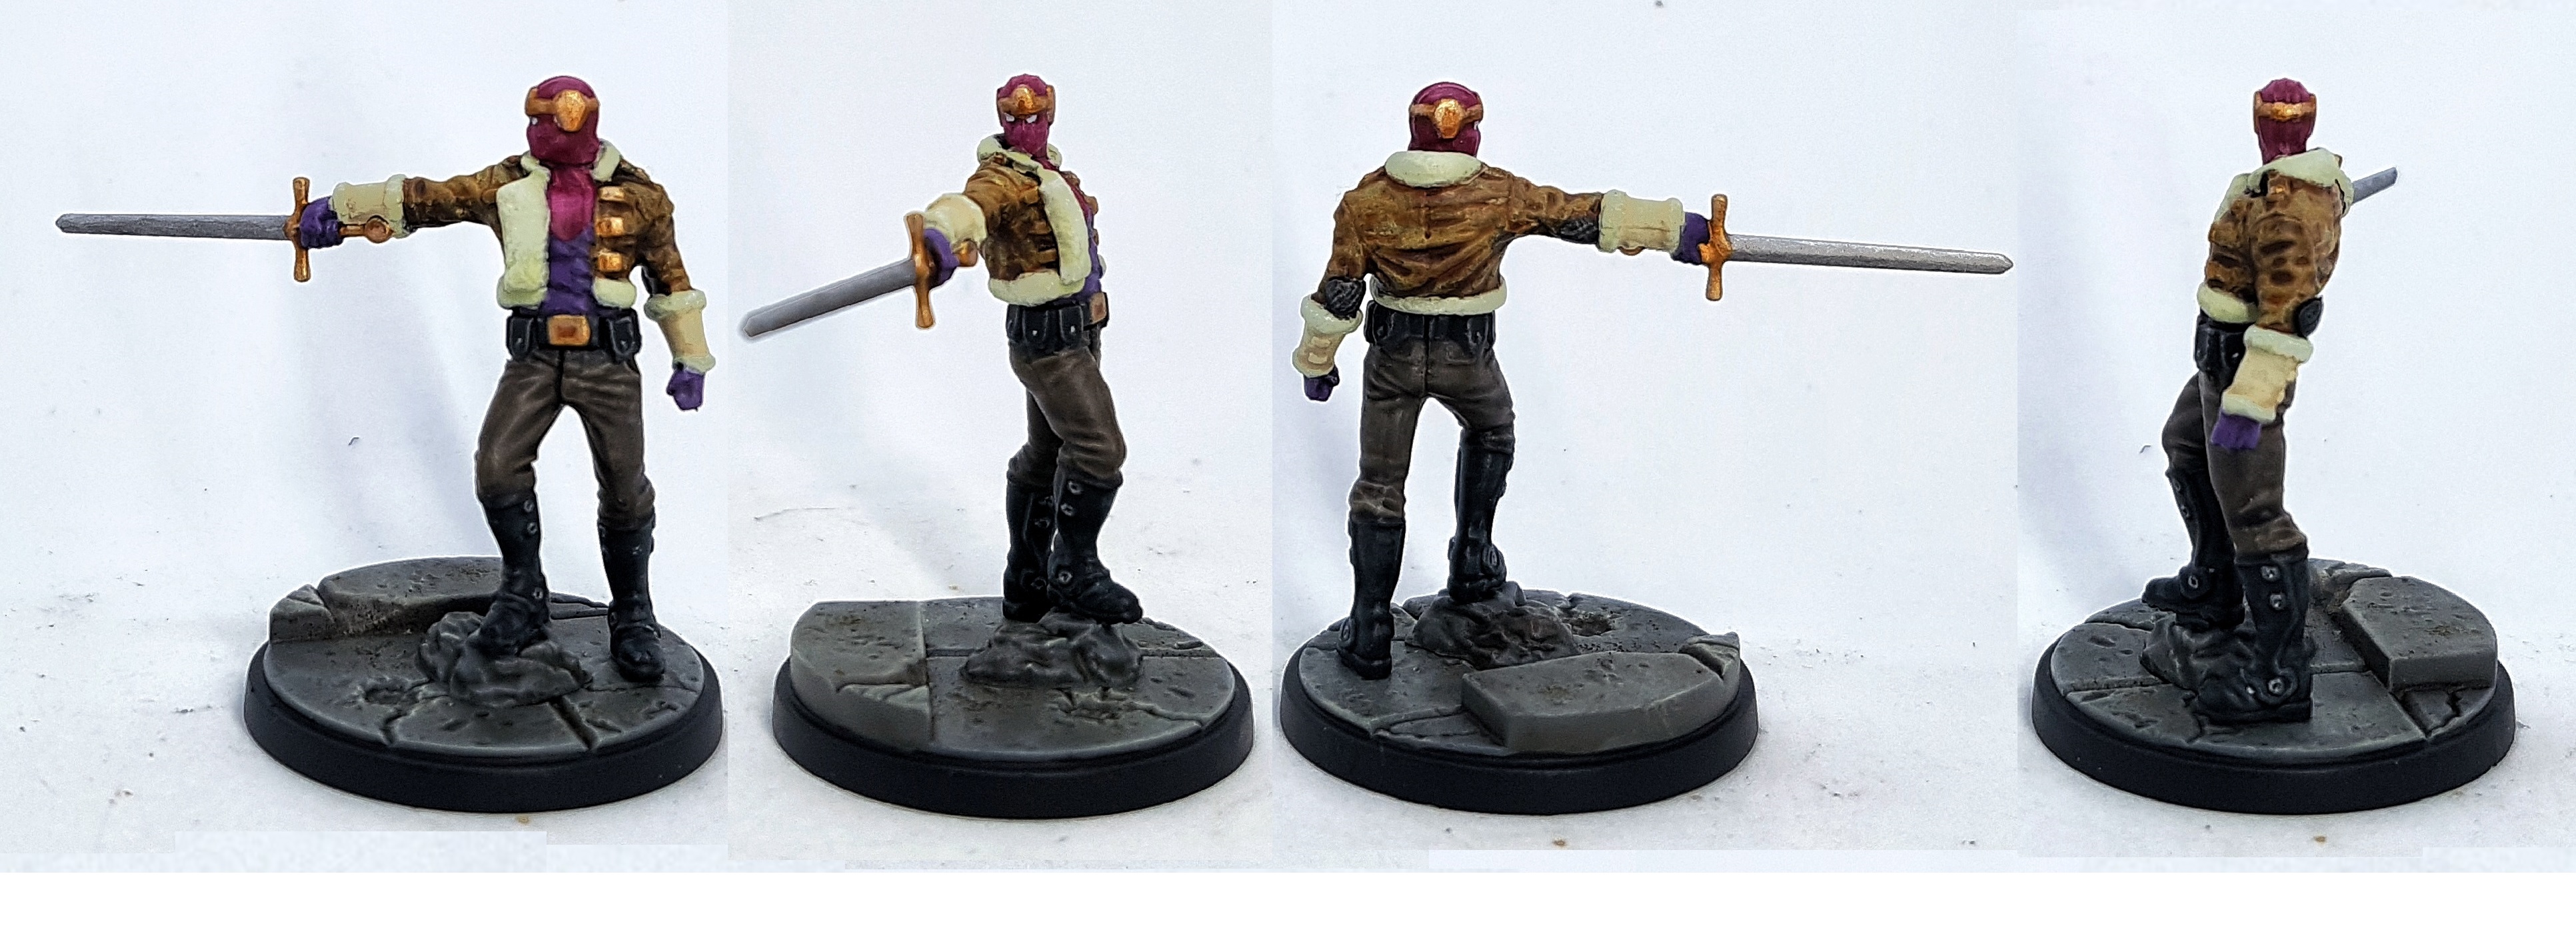 Baron Zemo
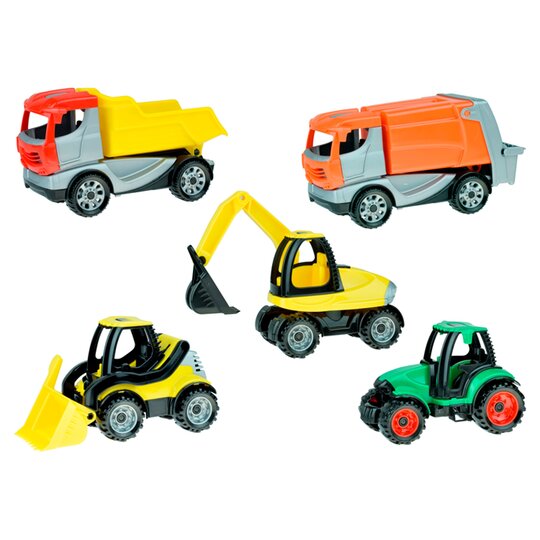
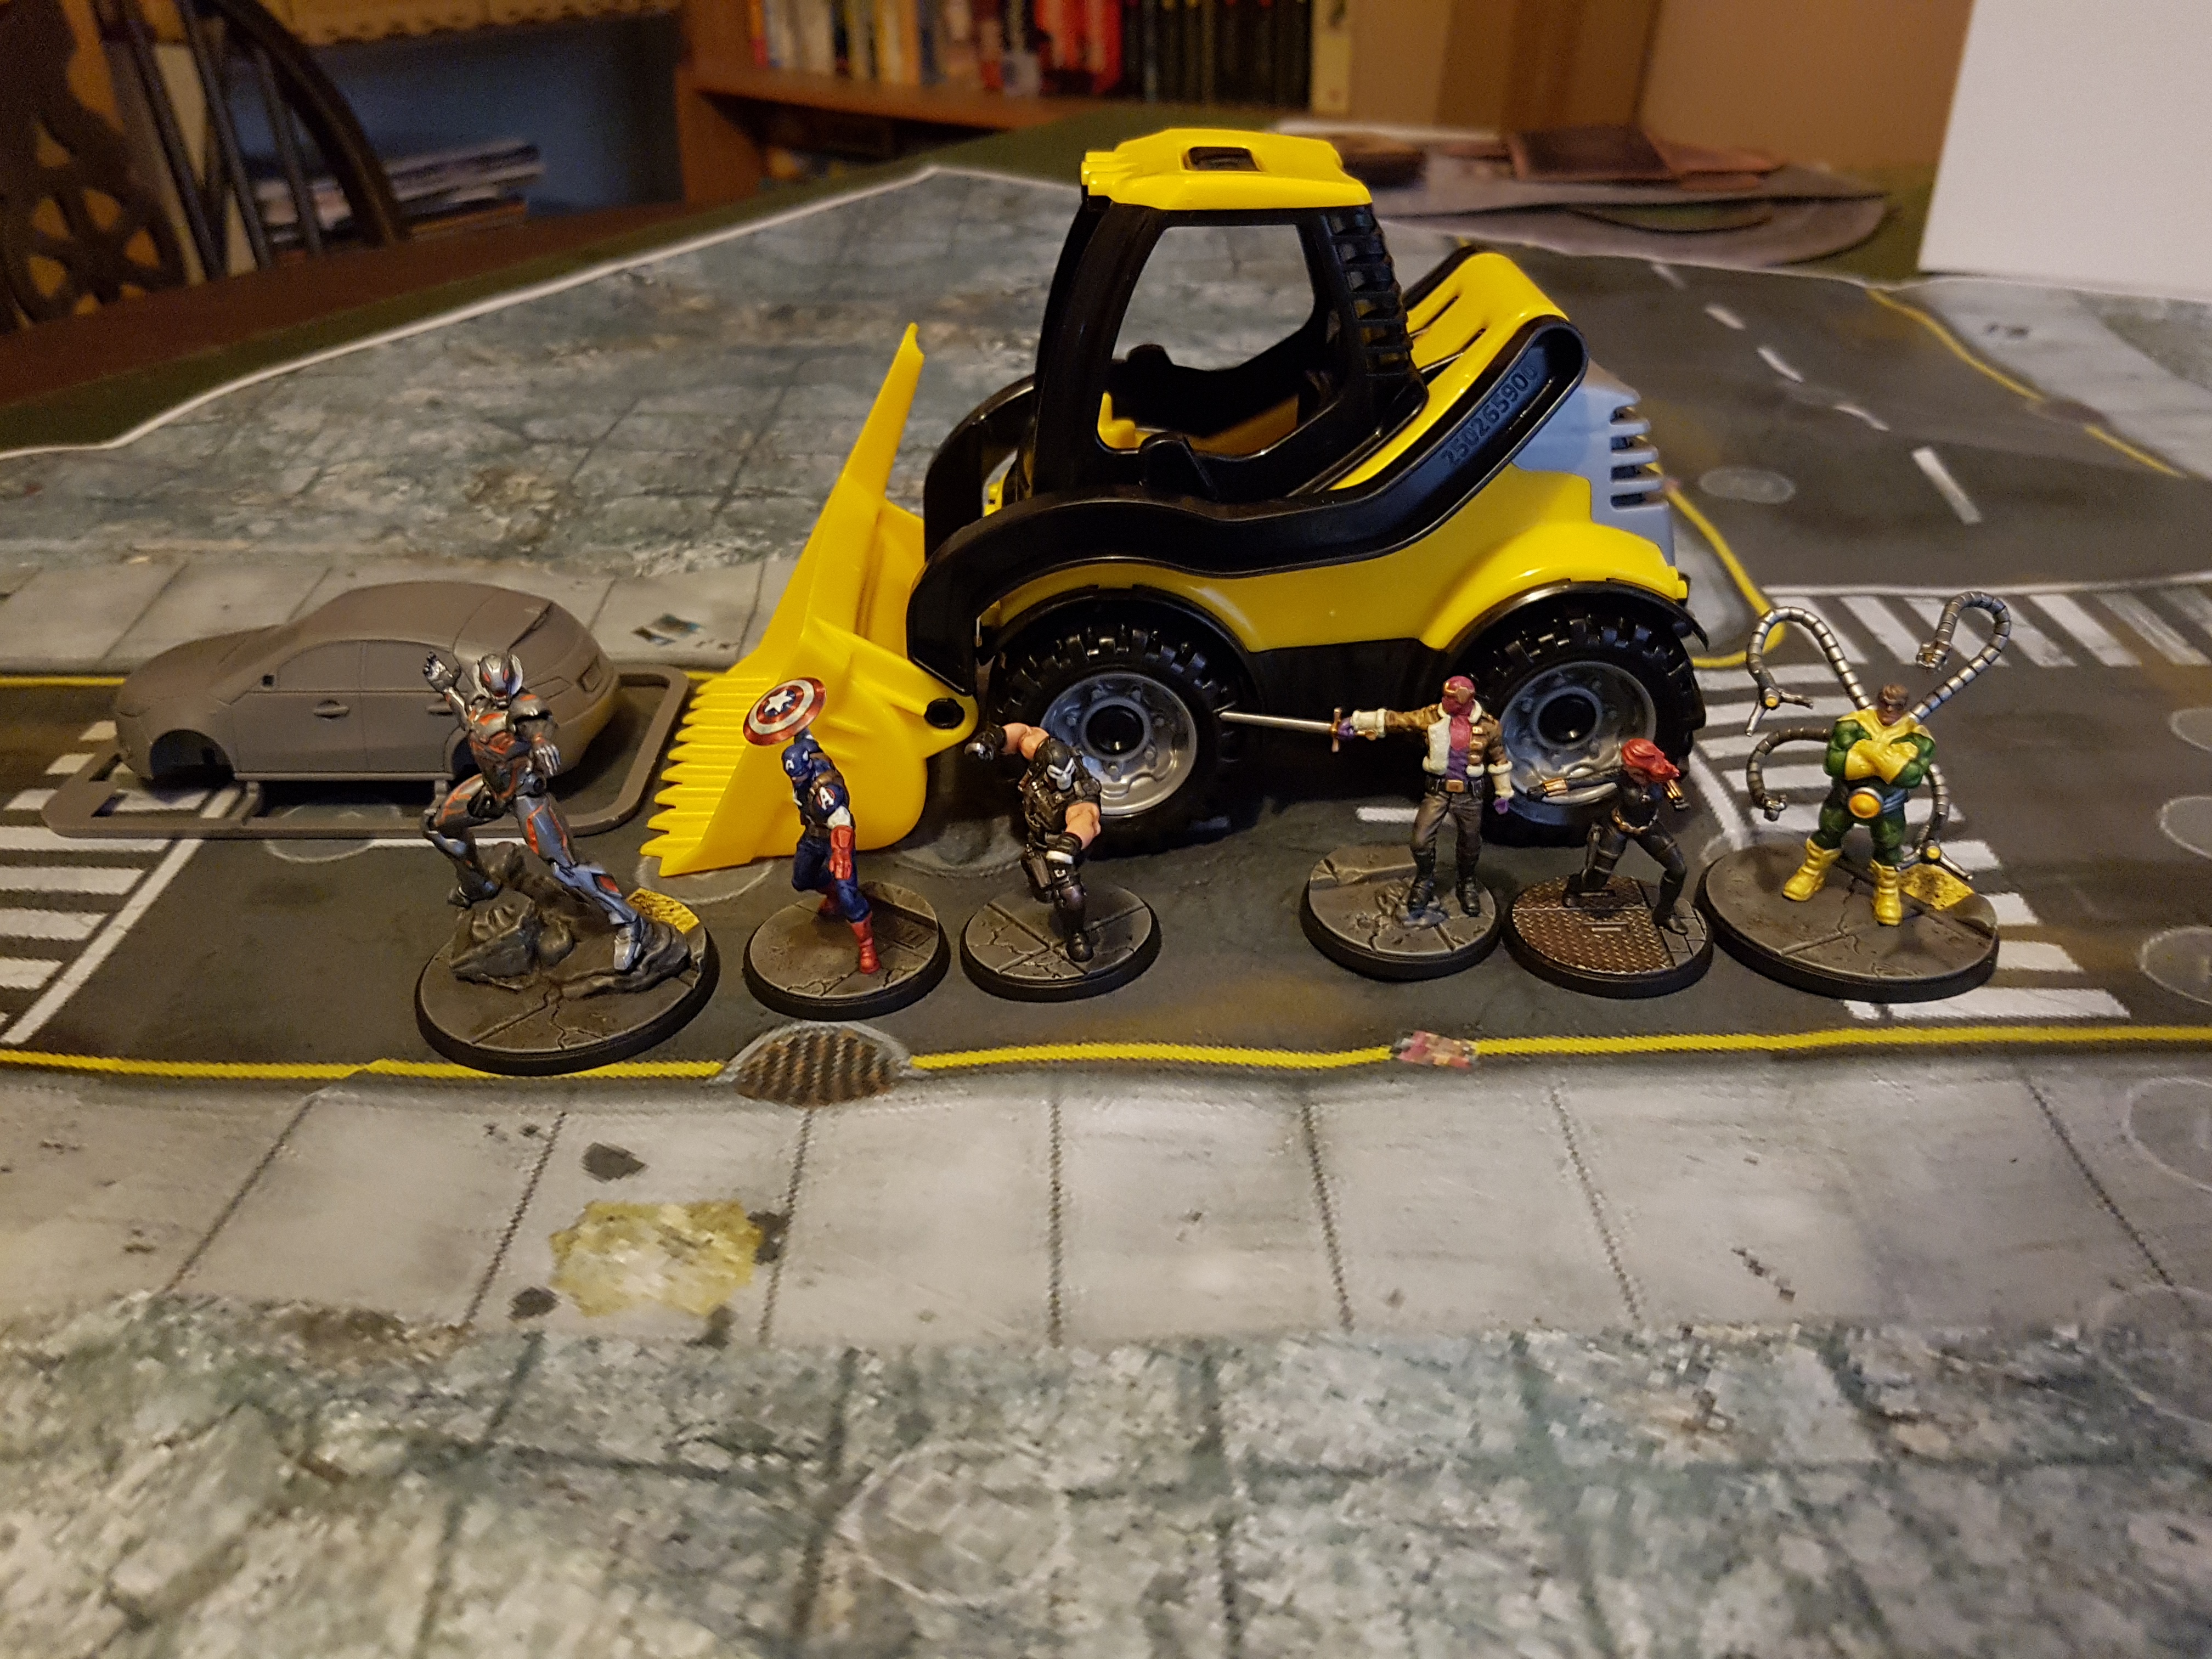
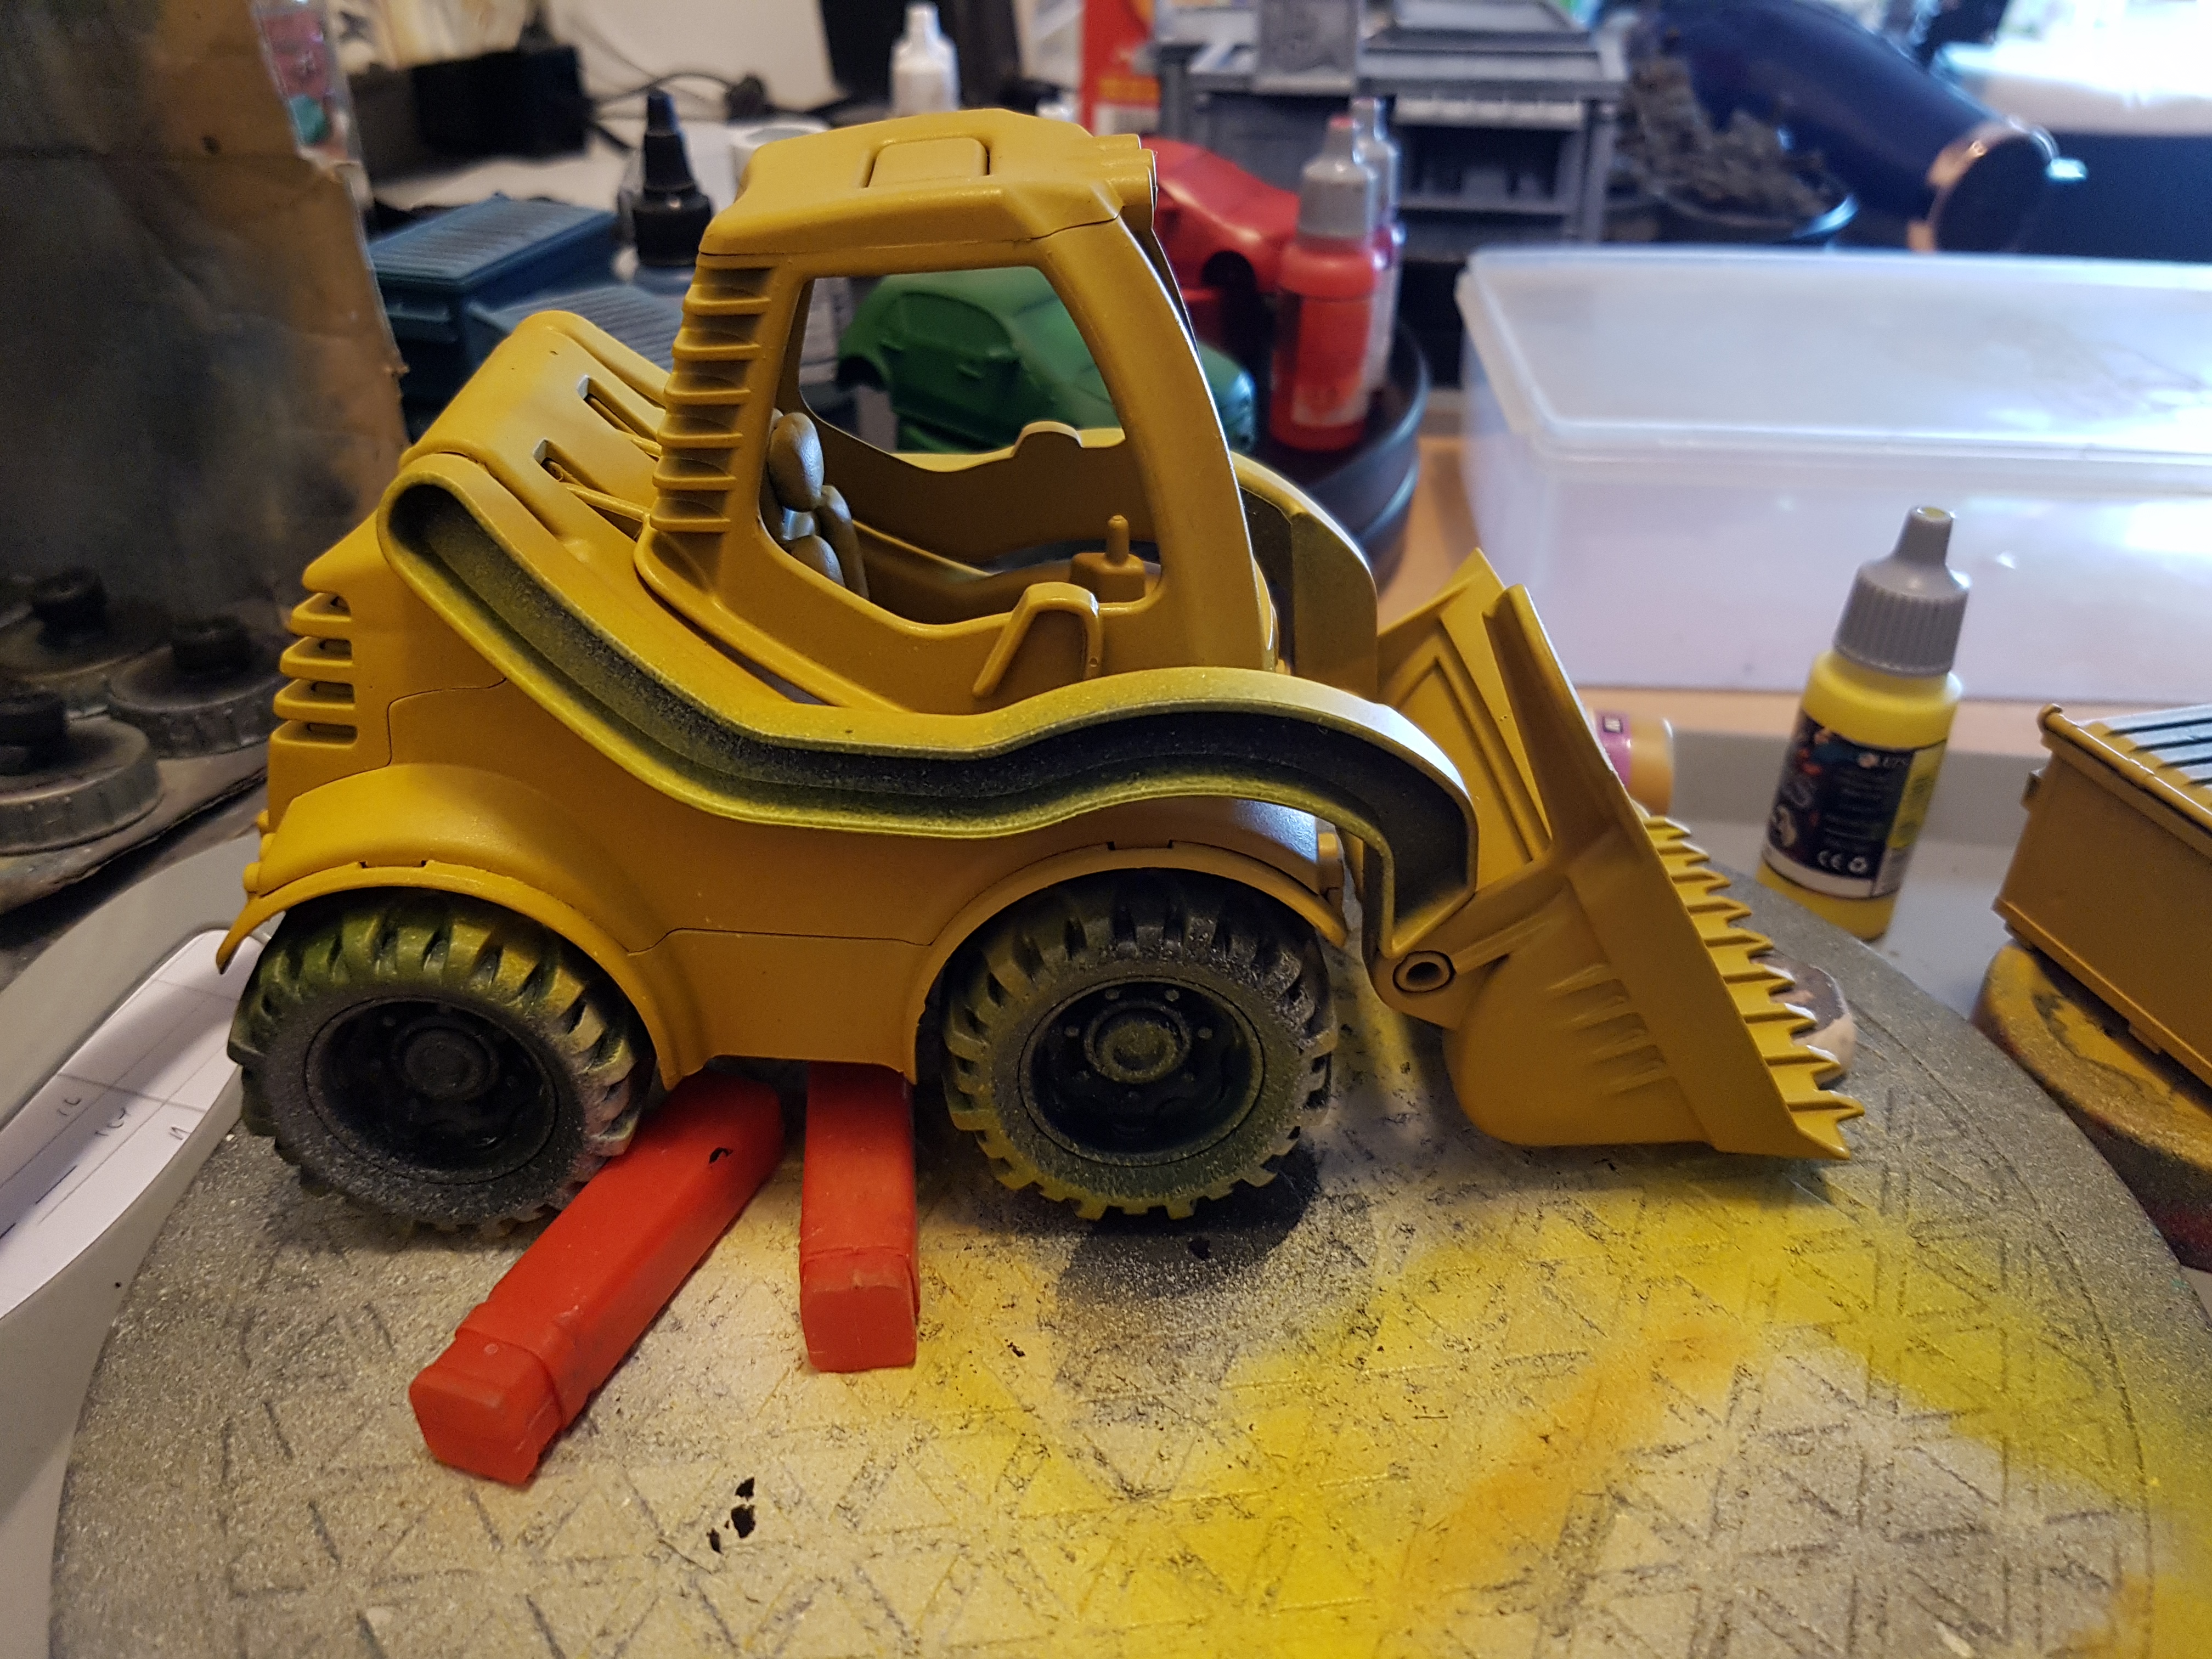
Toy Loader from Tescos by Lena Truckies
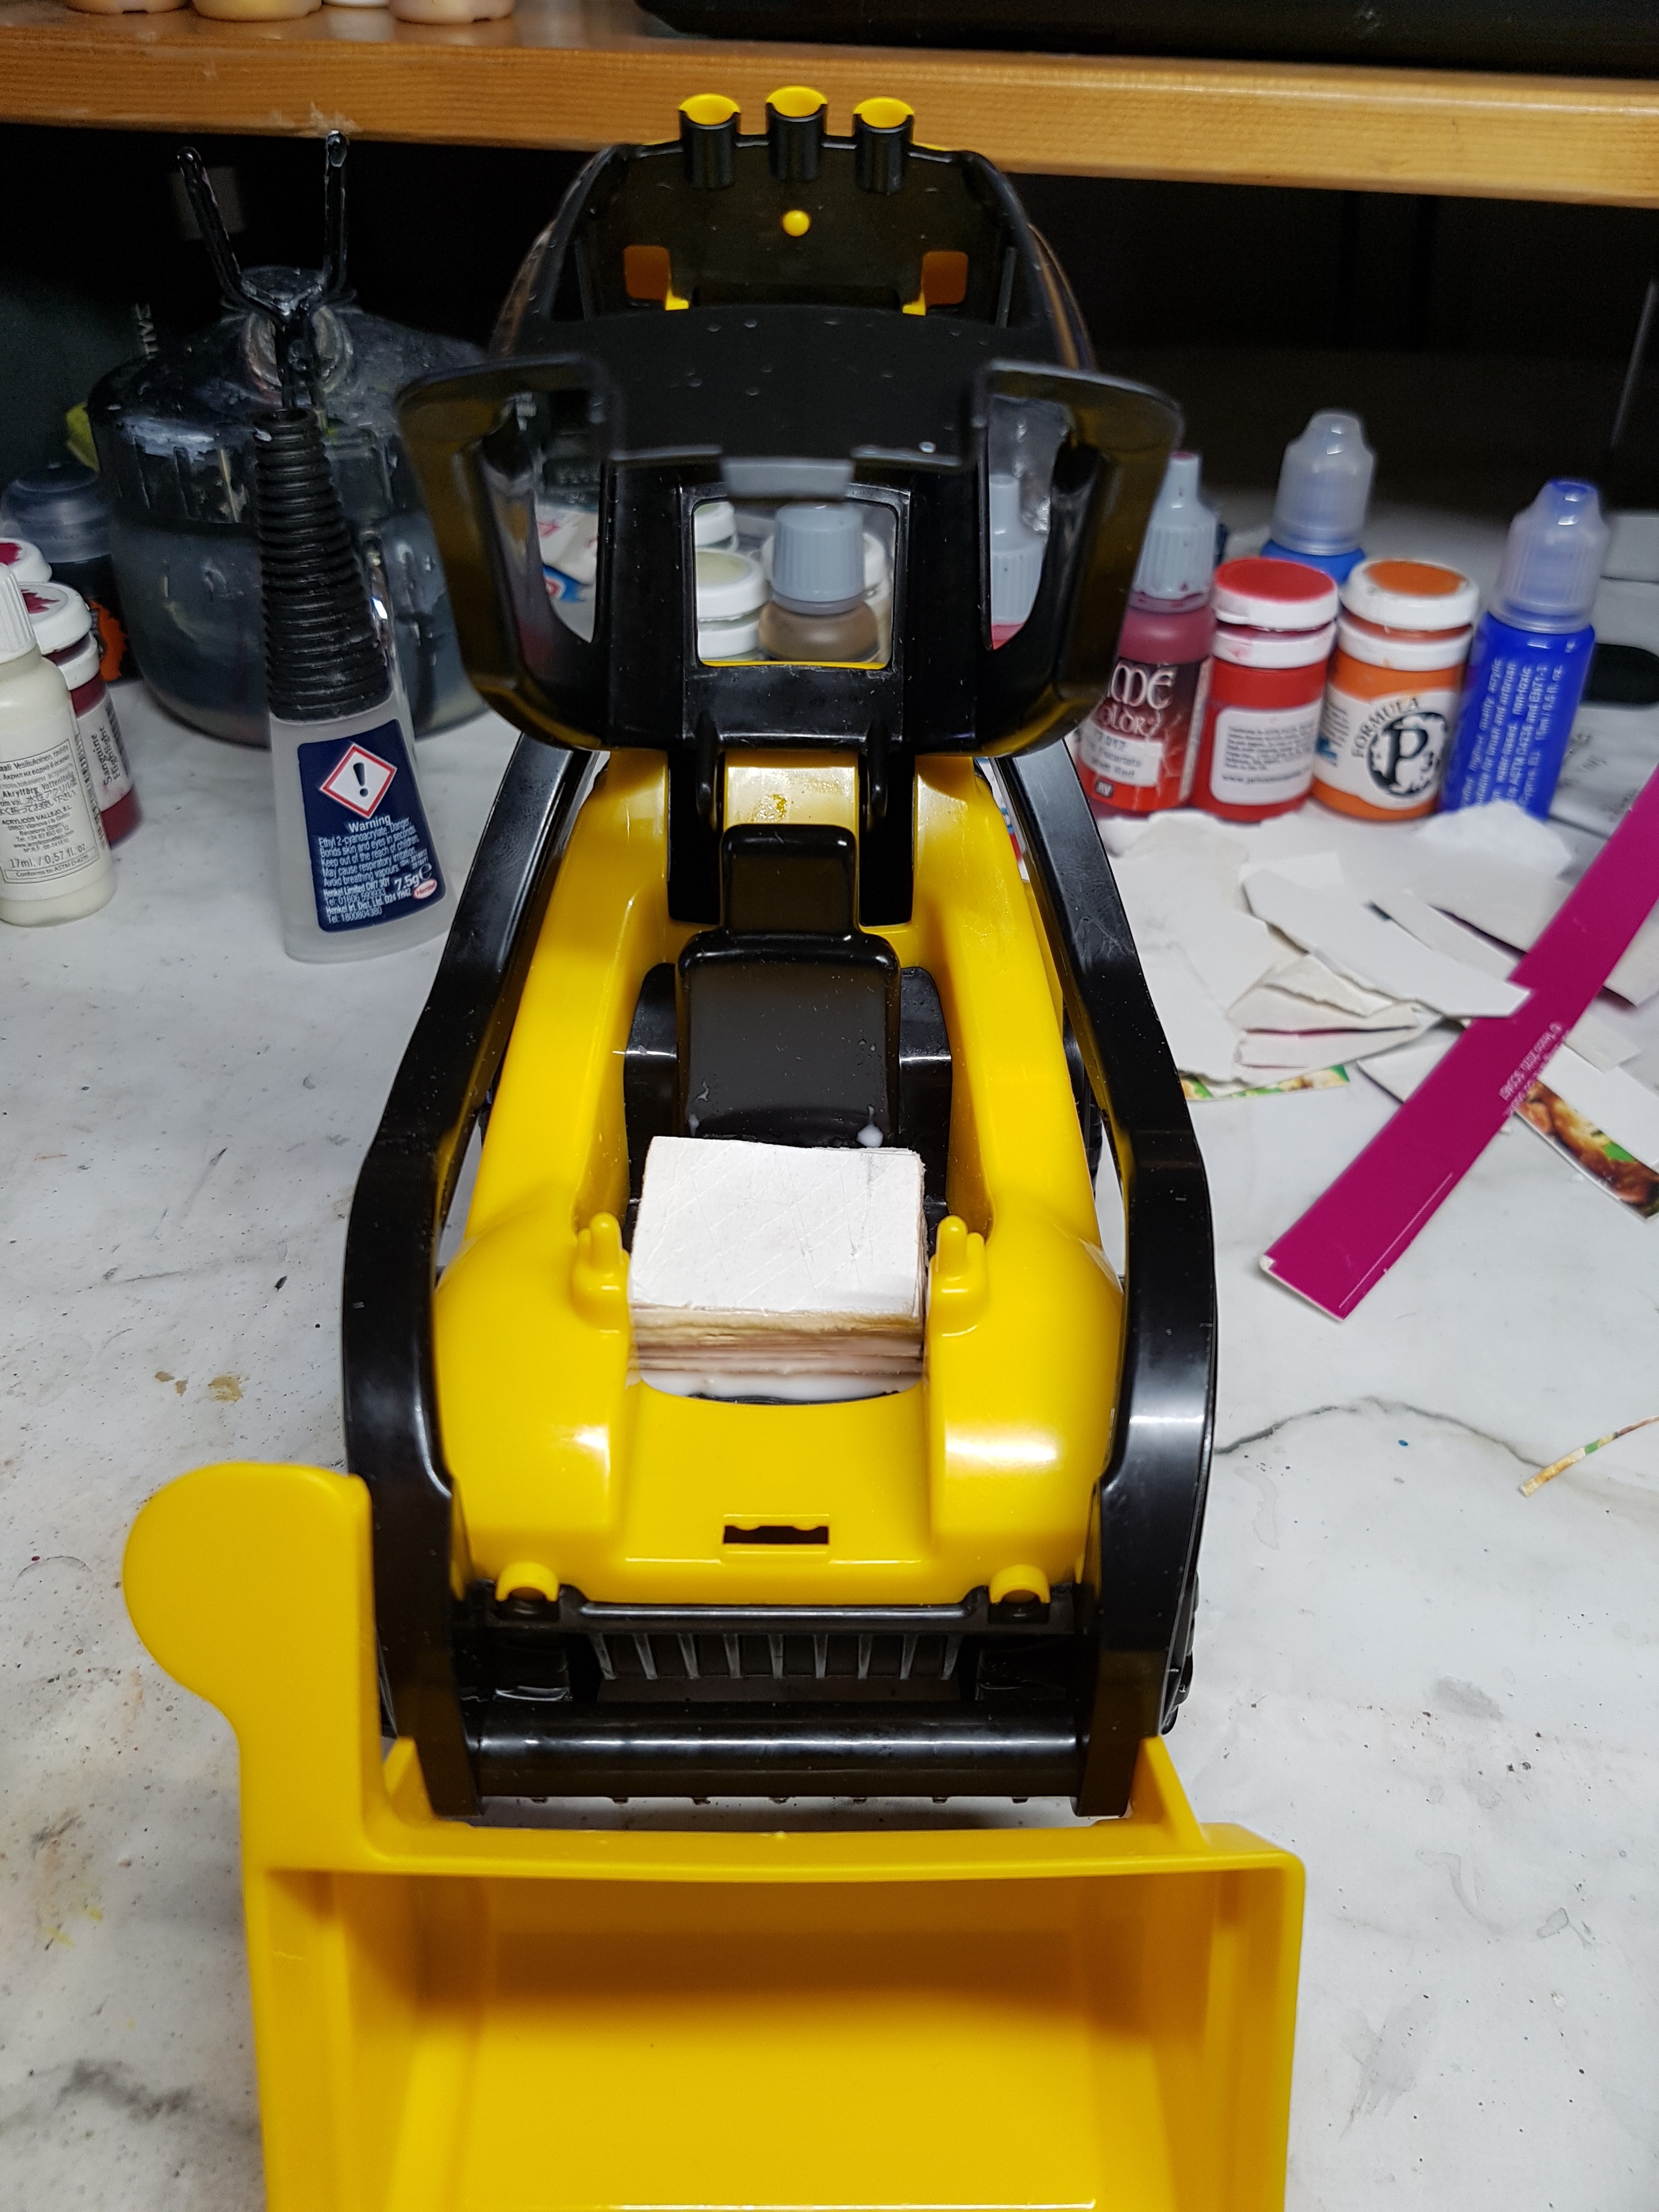
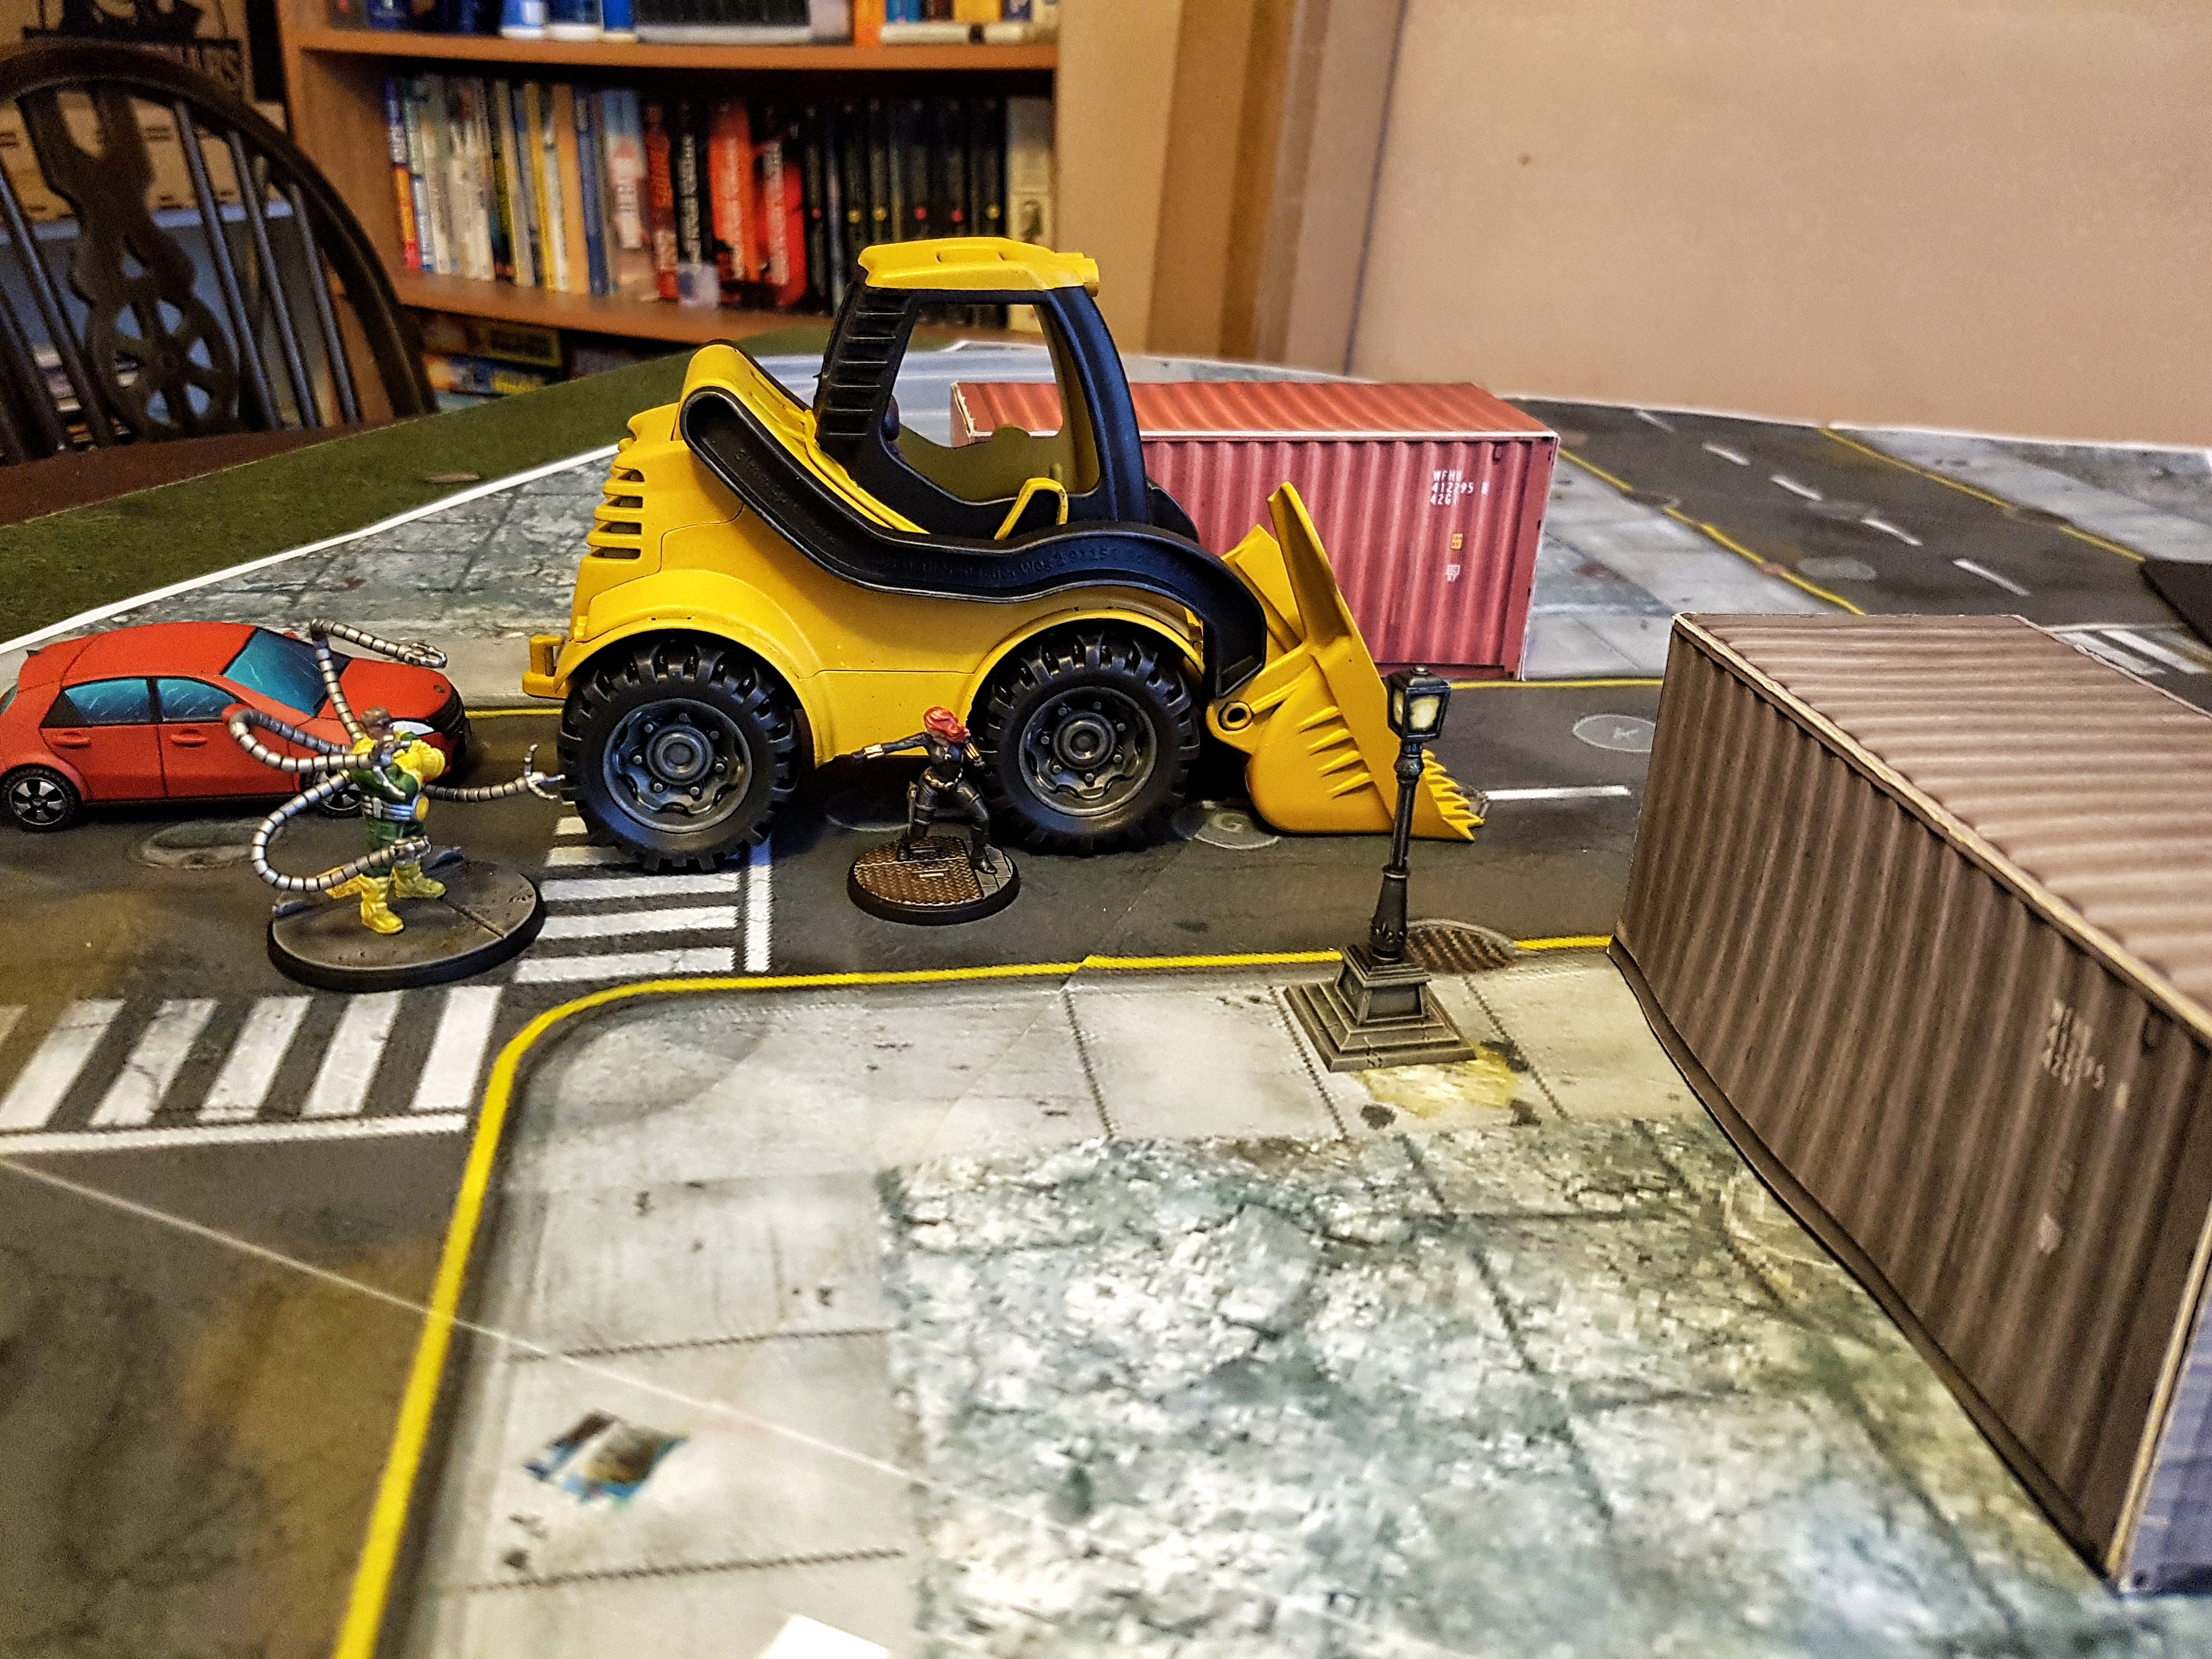
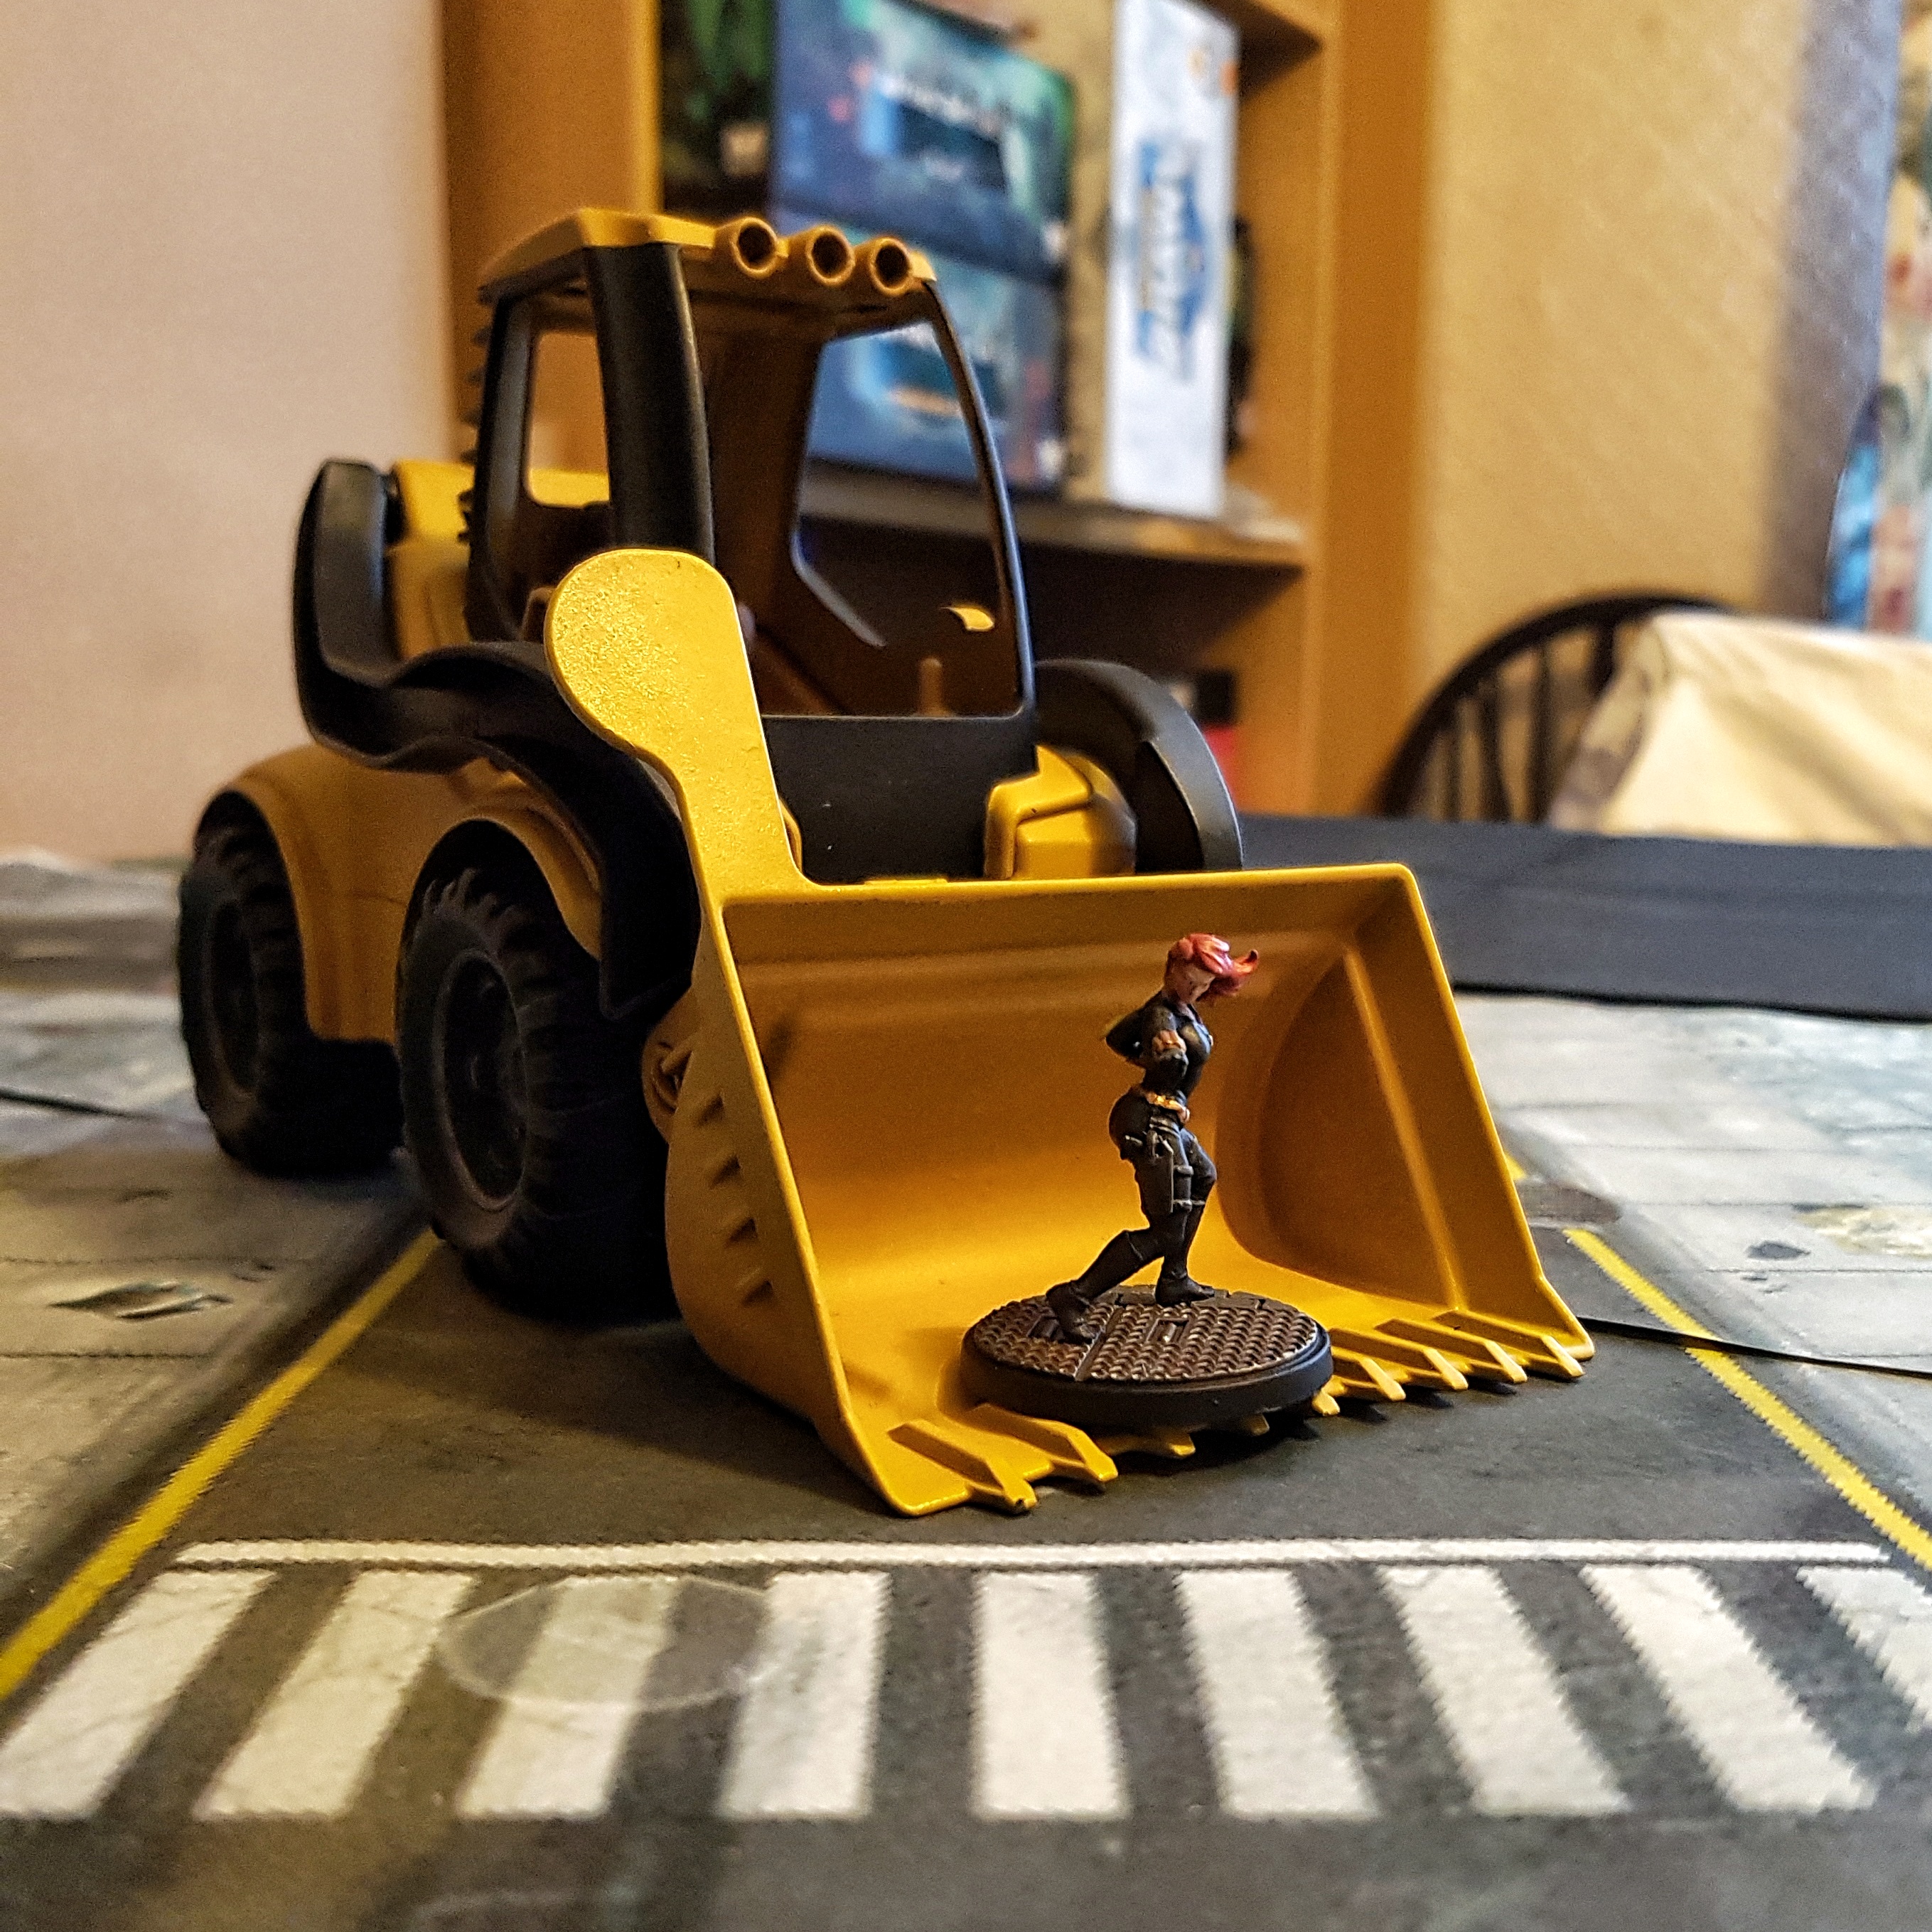
I was in Tescos last night and I always stop by their small crafts and toys section, but they never have anything of interest to me. This week I saw this Loader by Lena Truckies. It’s cheap fragile rubbish that’ll last being played with by a toddler for about five minutes. I don’t want it to be handled. I want it to sit still on the table and perhaps get thrown by The Hulk. It should be more than durable enough for that. I wasn’t sure on the scale, but for £4.75 I thought it was worth a punt. I took some pics in situ. it seems a bit large, what do you think?

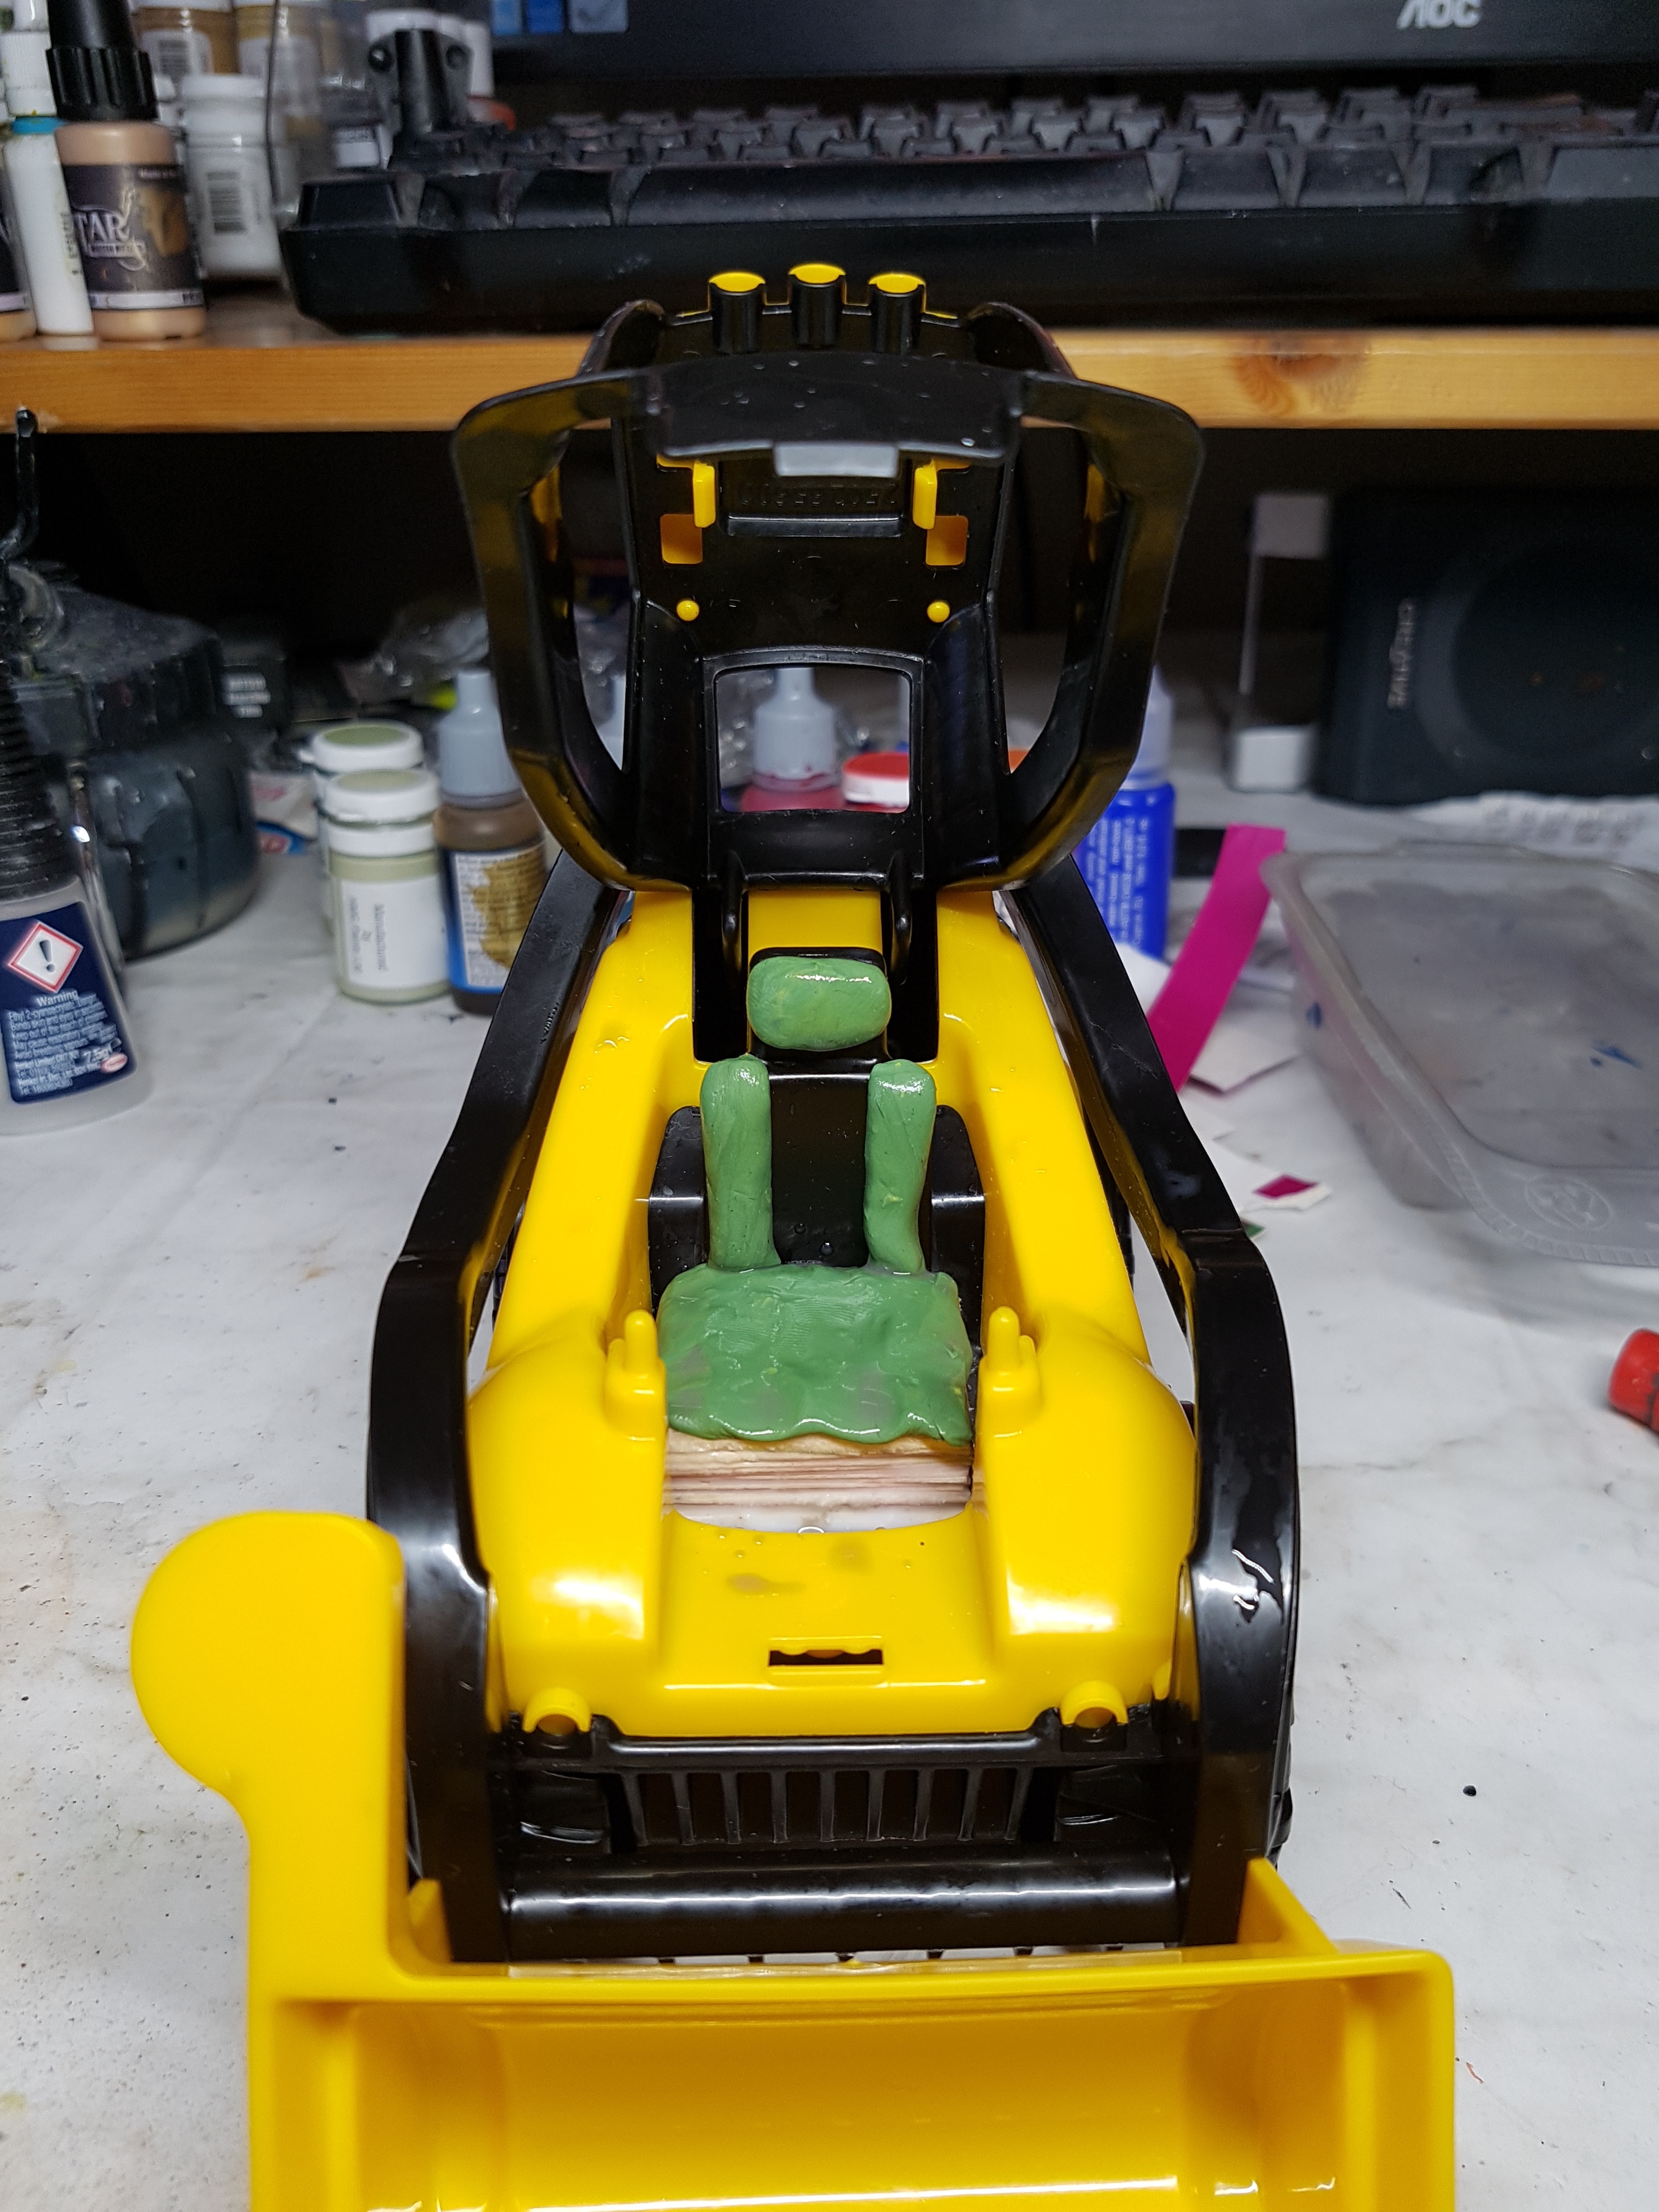
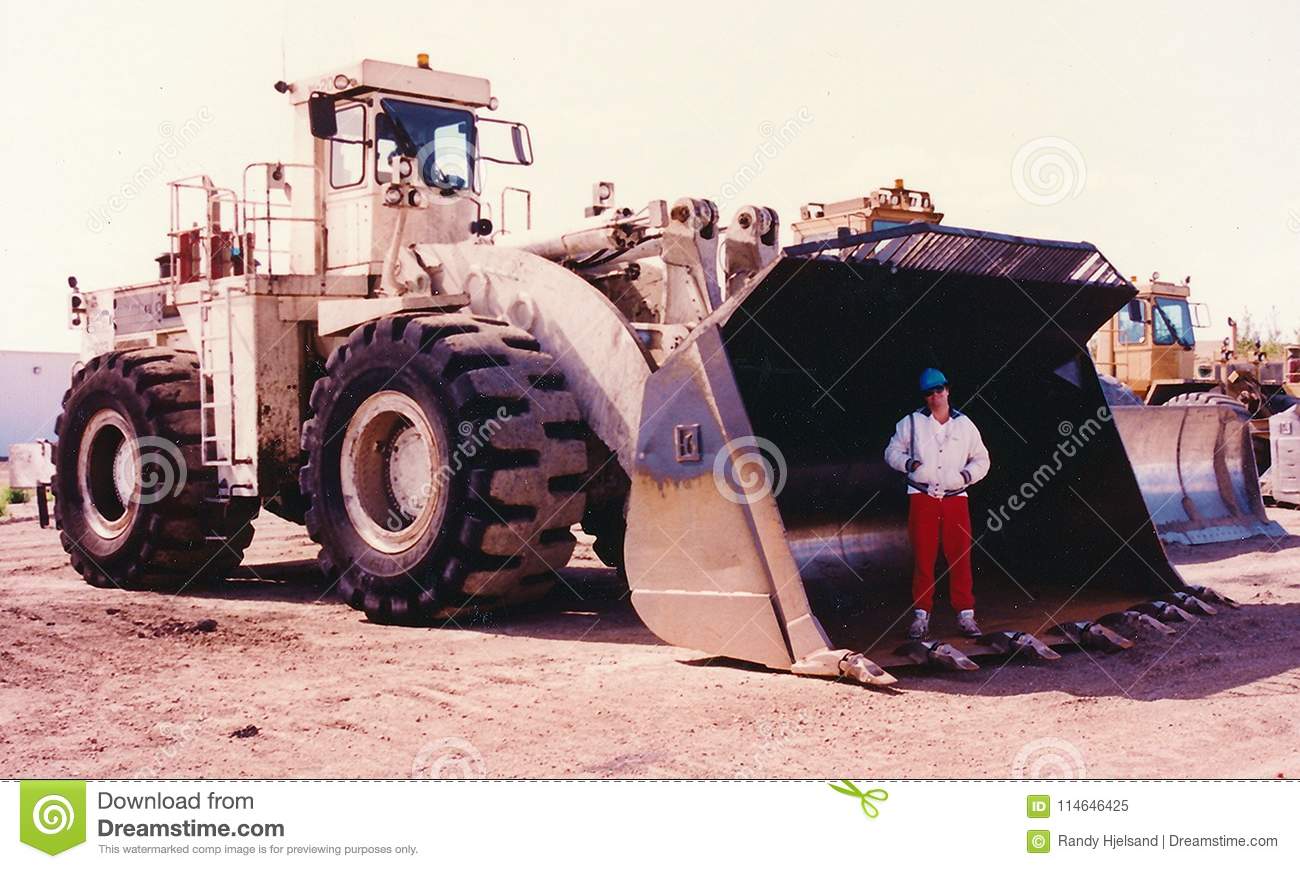
The thing about this type of vehicle is that they come in a variety of sizes (See below), so the only thing that really scales this vehicle is the contents of the cab, particularly the chair. There’s a slot in the chair for a little man to click in to so I’ll need to cover that anyway. I figure if I raise the seat part of the chair it’ll make it look like it’s for a seat for a smaller person, and change the apparent scale of the whole thing. I’ll have to repaint it anyway to make it look less like cheap plastic and that should also help set the scale and tie it in to the figures.
It’s not held together by screws, but plastic pegs. I could drill them out and then re-glue it back together when I’m done, but I fear I’ll just break it. With an airbrush it shouldn’t be too hard to repaint it as it is anyway. Prime white/light grey. All over spray a yellow shade. Zenithal/lateral spray a brighter yellow. Maybe add a little off white to the yellow and do a pure zenithal spray. Then just brush on some near black wherever I fell, and drybrush those edges with a dark grey and call it done. The cab opens up so I could even paint the chair a leathery tone to make it more apparent. Given it’s just terrain I can do a quick and lazy job.
I think if this was John, he’d just “prime” it with matt varnish and then weather it, as we’ve seen before. perhaps I should hunt down his R2D2 video and AT-AT videos (Were those the things he did?)

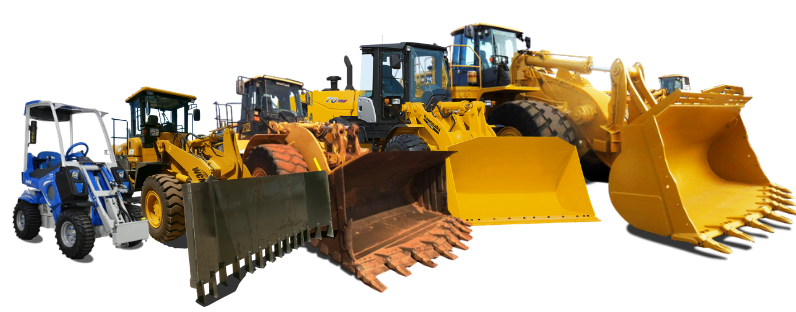
There’s five vehicles in this range. My Tescos also had the tractor in stock last night. I was tempted to grab them both, but decided it was smarter to only gamble £5 instead of £10 when I can always try again later. I suspected the tractor was more obviously out of scale though. If this works I’ll be keeping an eye out for the digger, and curious about how the two trucks look in person.
Has anyone worked with these? Any opinions on them, or on dismantling and reassembling after painting? Would you glue the wheels in place, or leave them free spinning? Would you risk your terrain rolling away?
It’s taken me forever to find the links due to the wonders of the OTT search functionality, but here’s the links to Johns videos on weathering Star Wars toys without doing a full repaint:
I’m not sure if there was more videos of this sort of thing. I can’t find anything on this site.
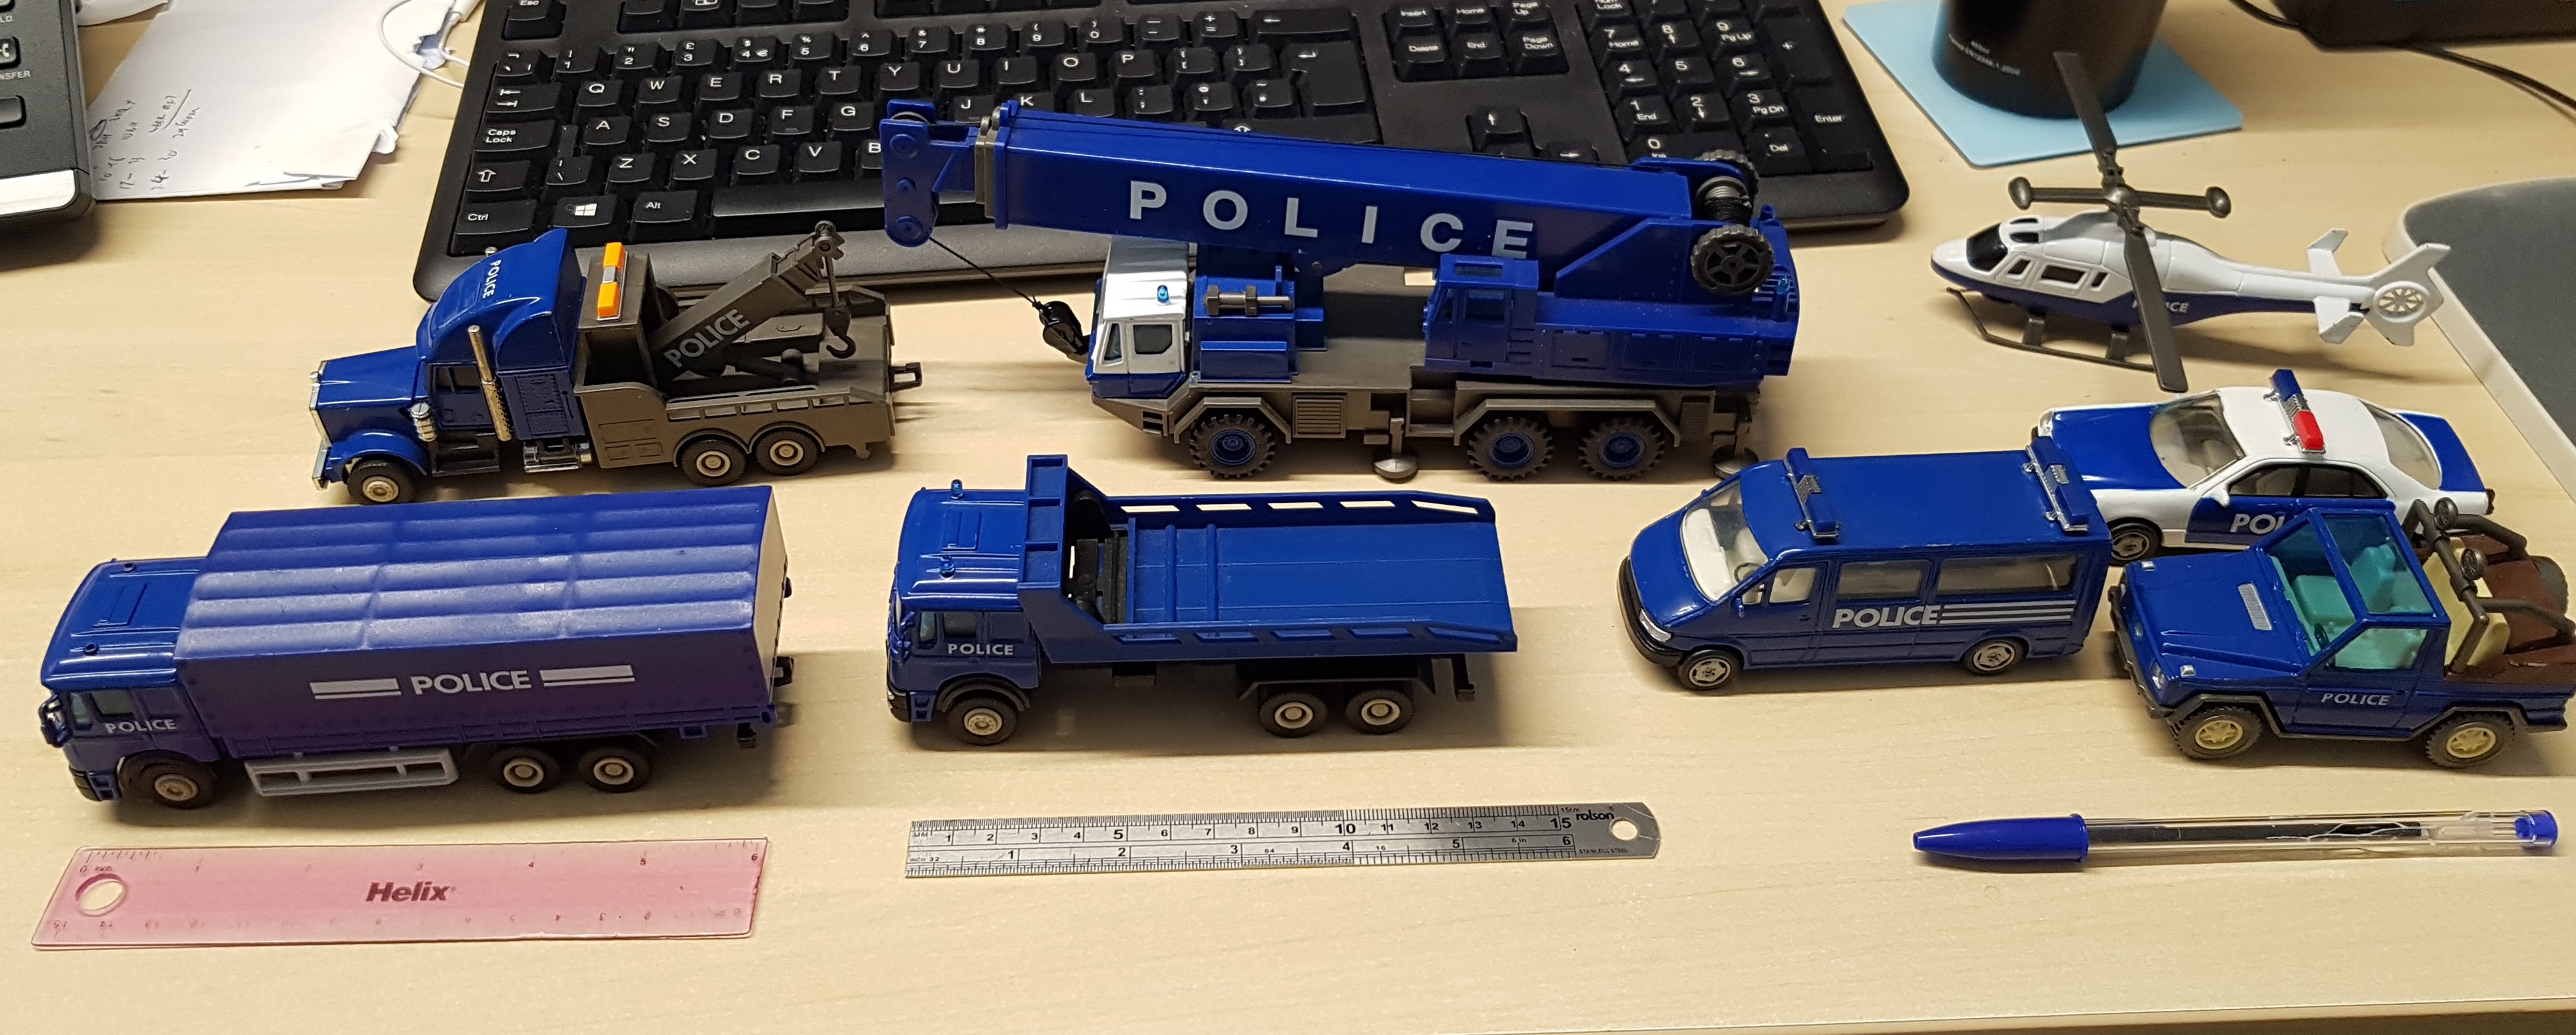
Ebay Police Bundle
I went scouring the toys on eBay a week or so ago. It’s really hard to work out what scale anything is, and toy cars are usually matchbox scale. The other issue is that postage will be the bulk of the price on die cast toy cars. So I had an idea. Don’t search “Car” or “Truck”, search “job lot” or “assorted” or “box” in the toys category. You’ll find boxes of stuff, instead of individual items, making the postage more economical. Things are less likely to be helpfully labelled, meaning you’ll have less competition bidding against you. You might find some great bargains of stuff buried in a large box that you can see one or two pieces on top of a pile you know you want.
Anyway, I found one auction of items that looked mostly around the right scale, but was hard to say for certain. I took a gamble on this pack of police vehicles for £11 after postage was included and I won. The postman just delivered them 15 minutes ago. They’re definitely more at the dainty end of things than the Lena Loader below, but I think they’ll turn out to mostly be in scale with standard issue human sizes, like Black Widow. I’ll find out tonight. 8 vehicles for £11 is cracking value. If it turns out they’re all no good I happen to know a couple of kids who’ll be grateful for this lot.
Meanwhile, here’s a pic with some 15 cm/ 6″ rulers, and a biro and keyboard for scale. The helicopter is probably too dainty, unless it’s a single seater perhaps. but the rest are probably about right. What do you think?
I’ll update this entry tonight or tomorrow with pics of the cars with game pieces near them.
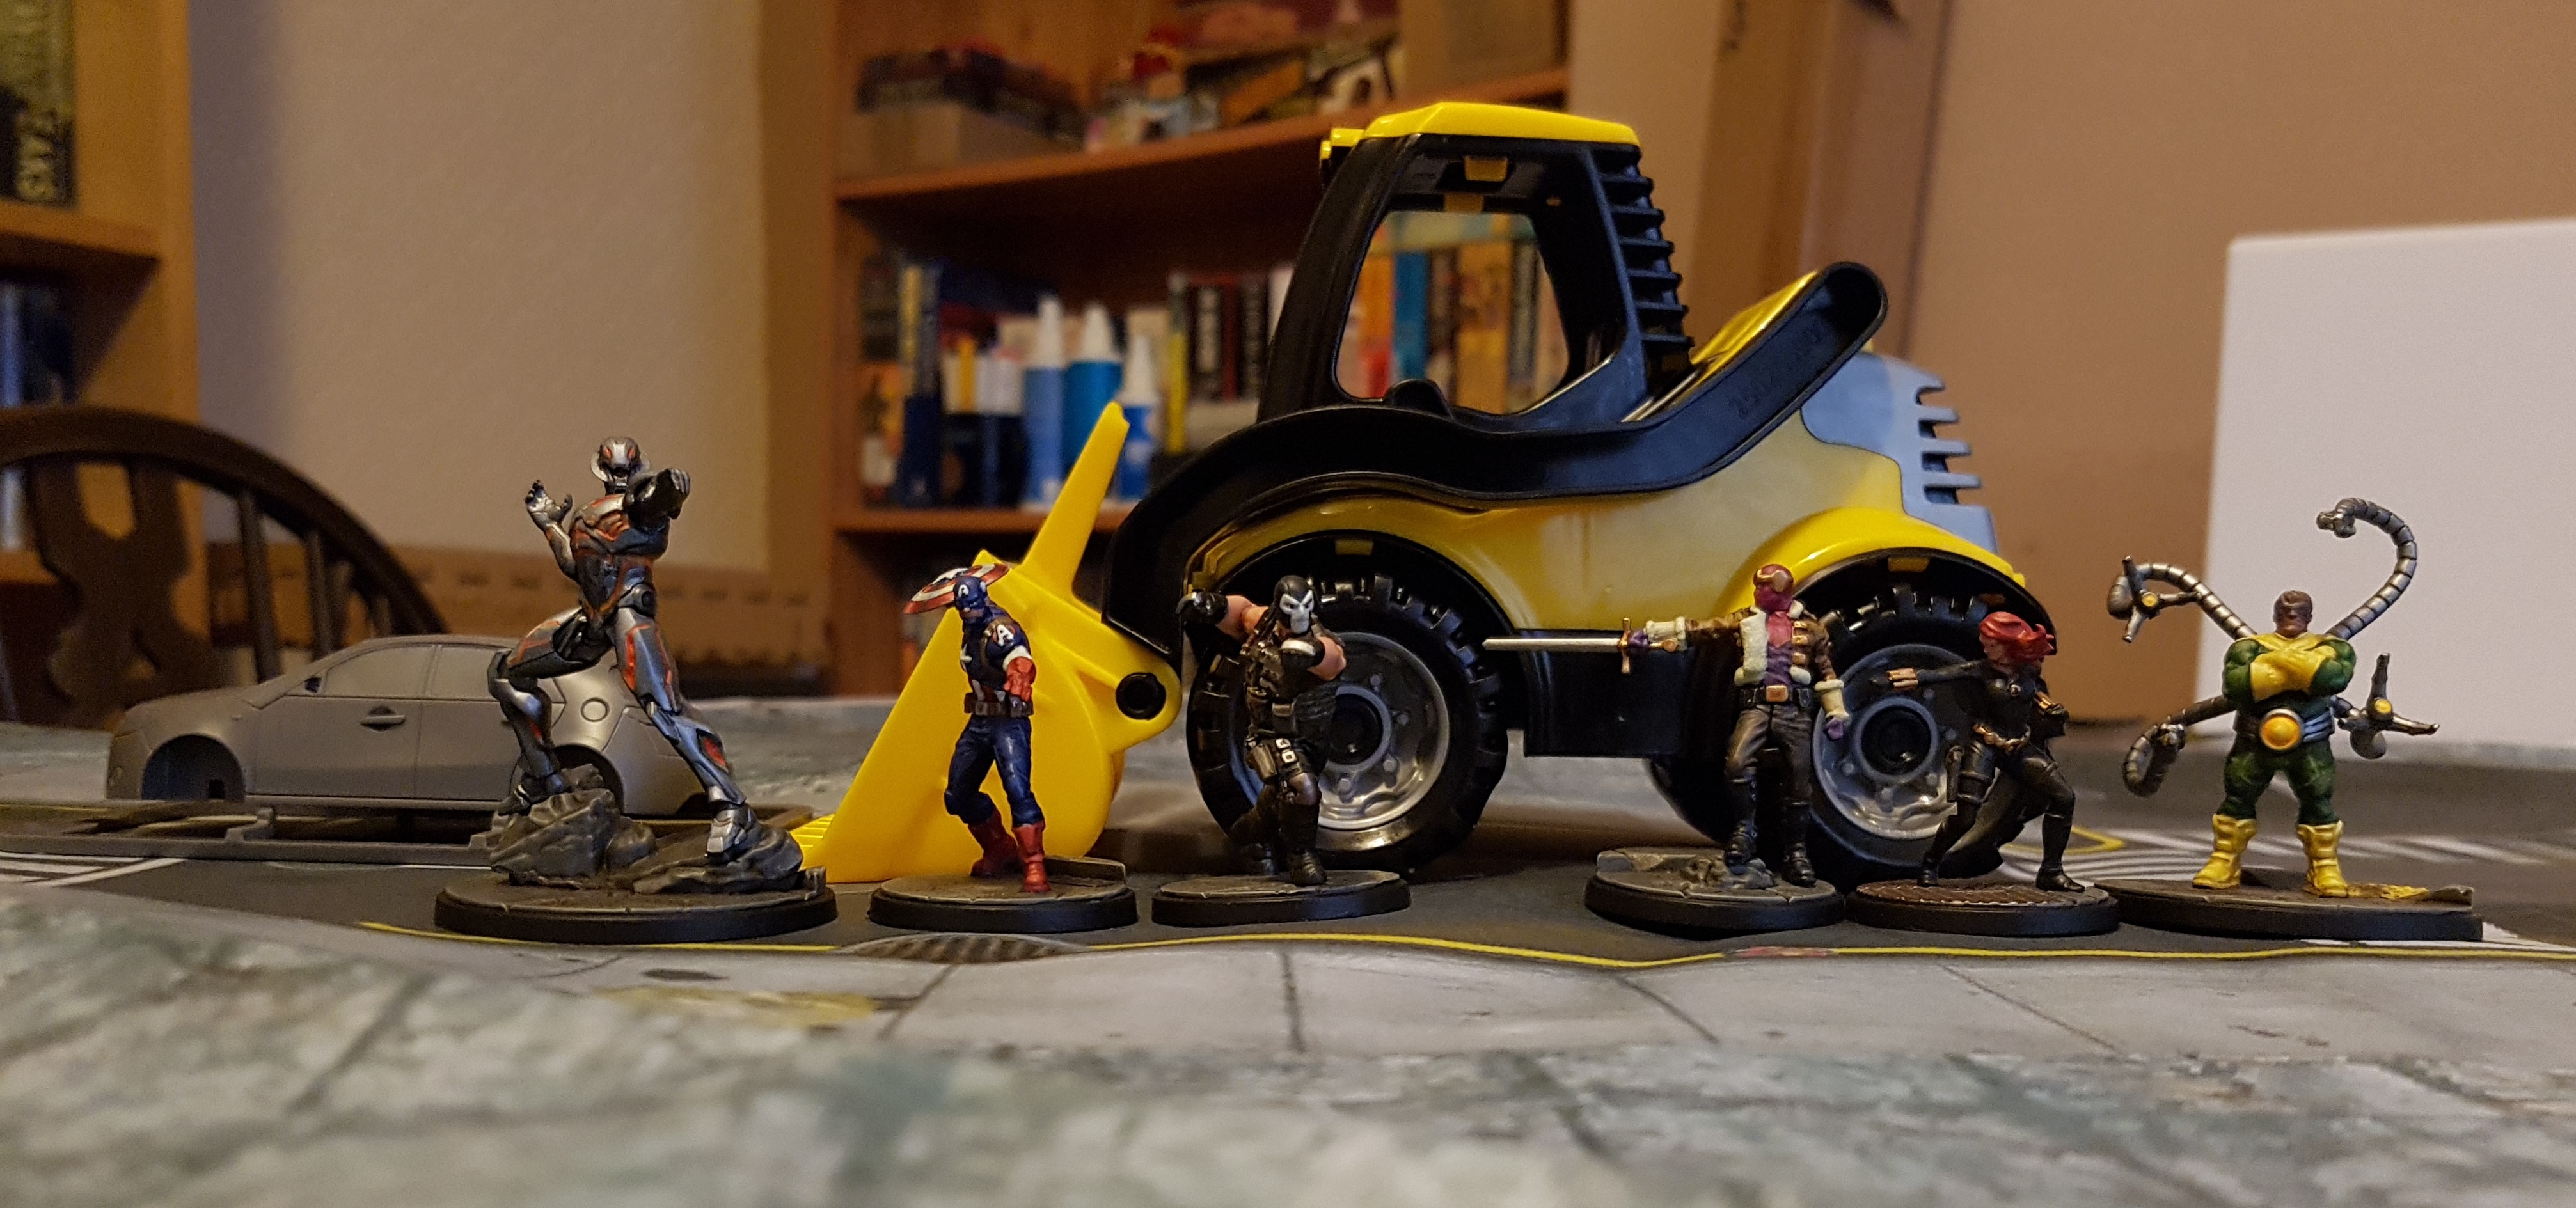
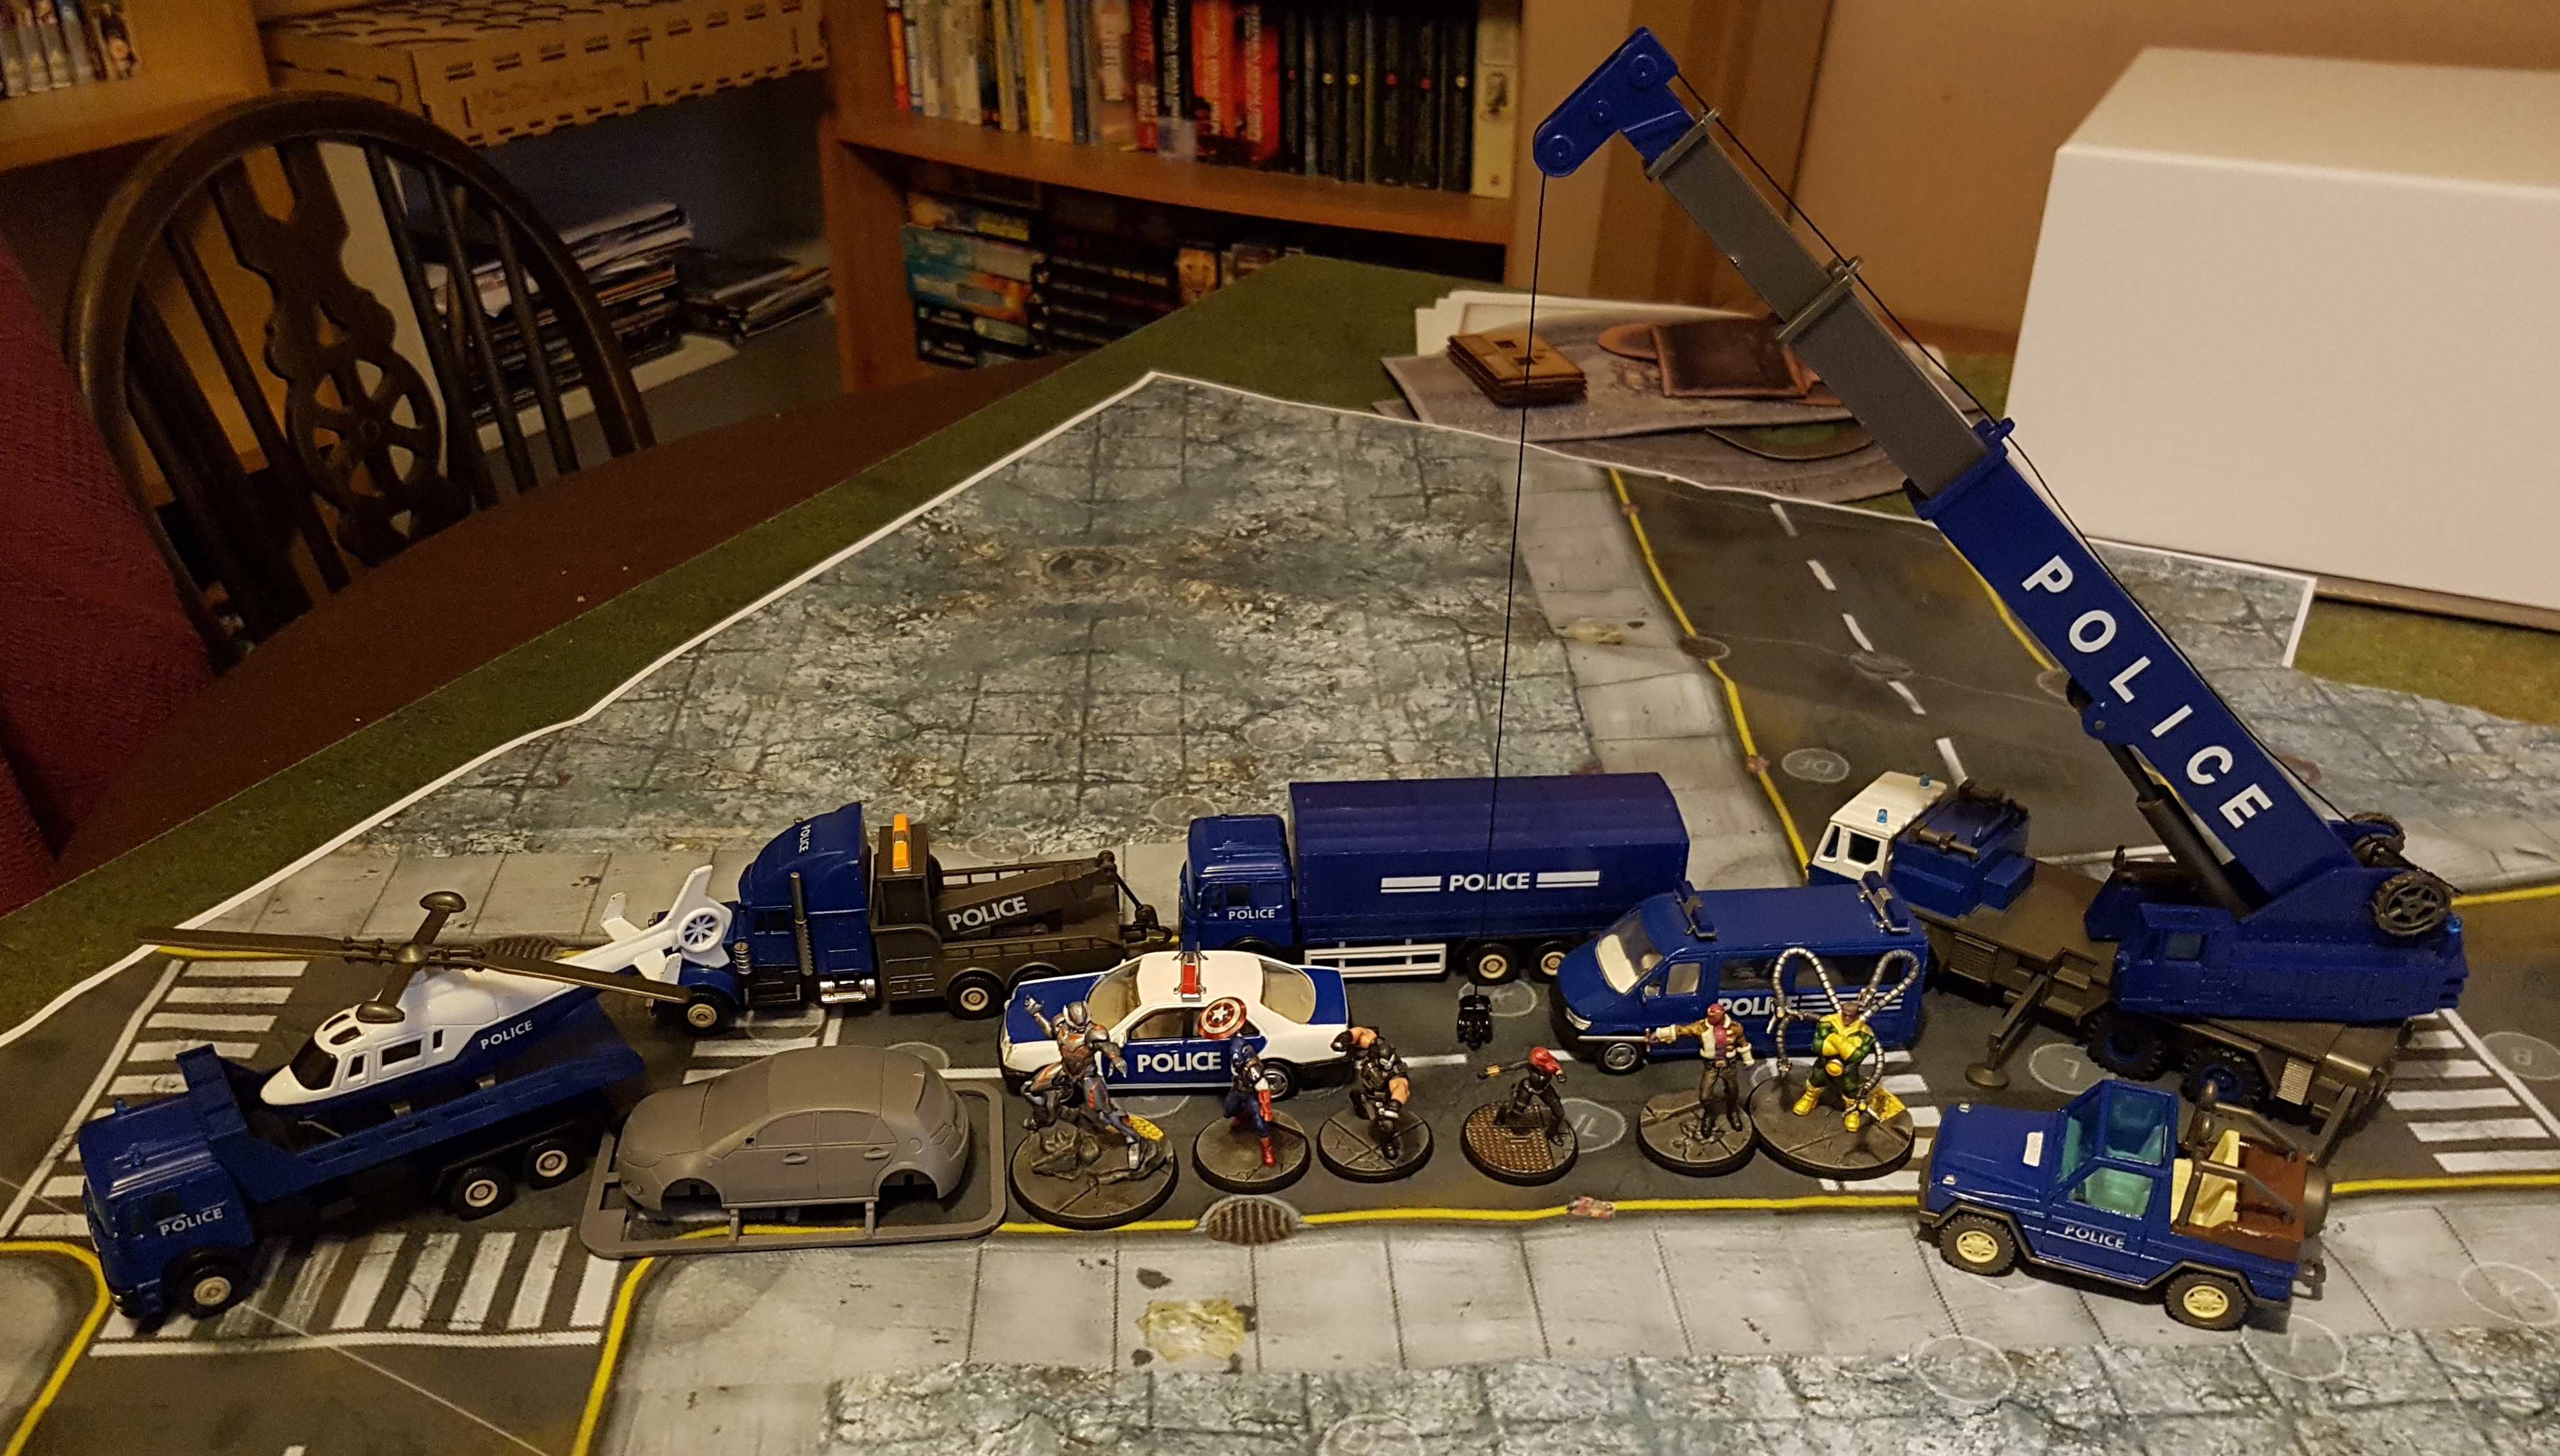
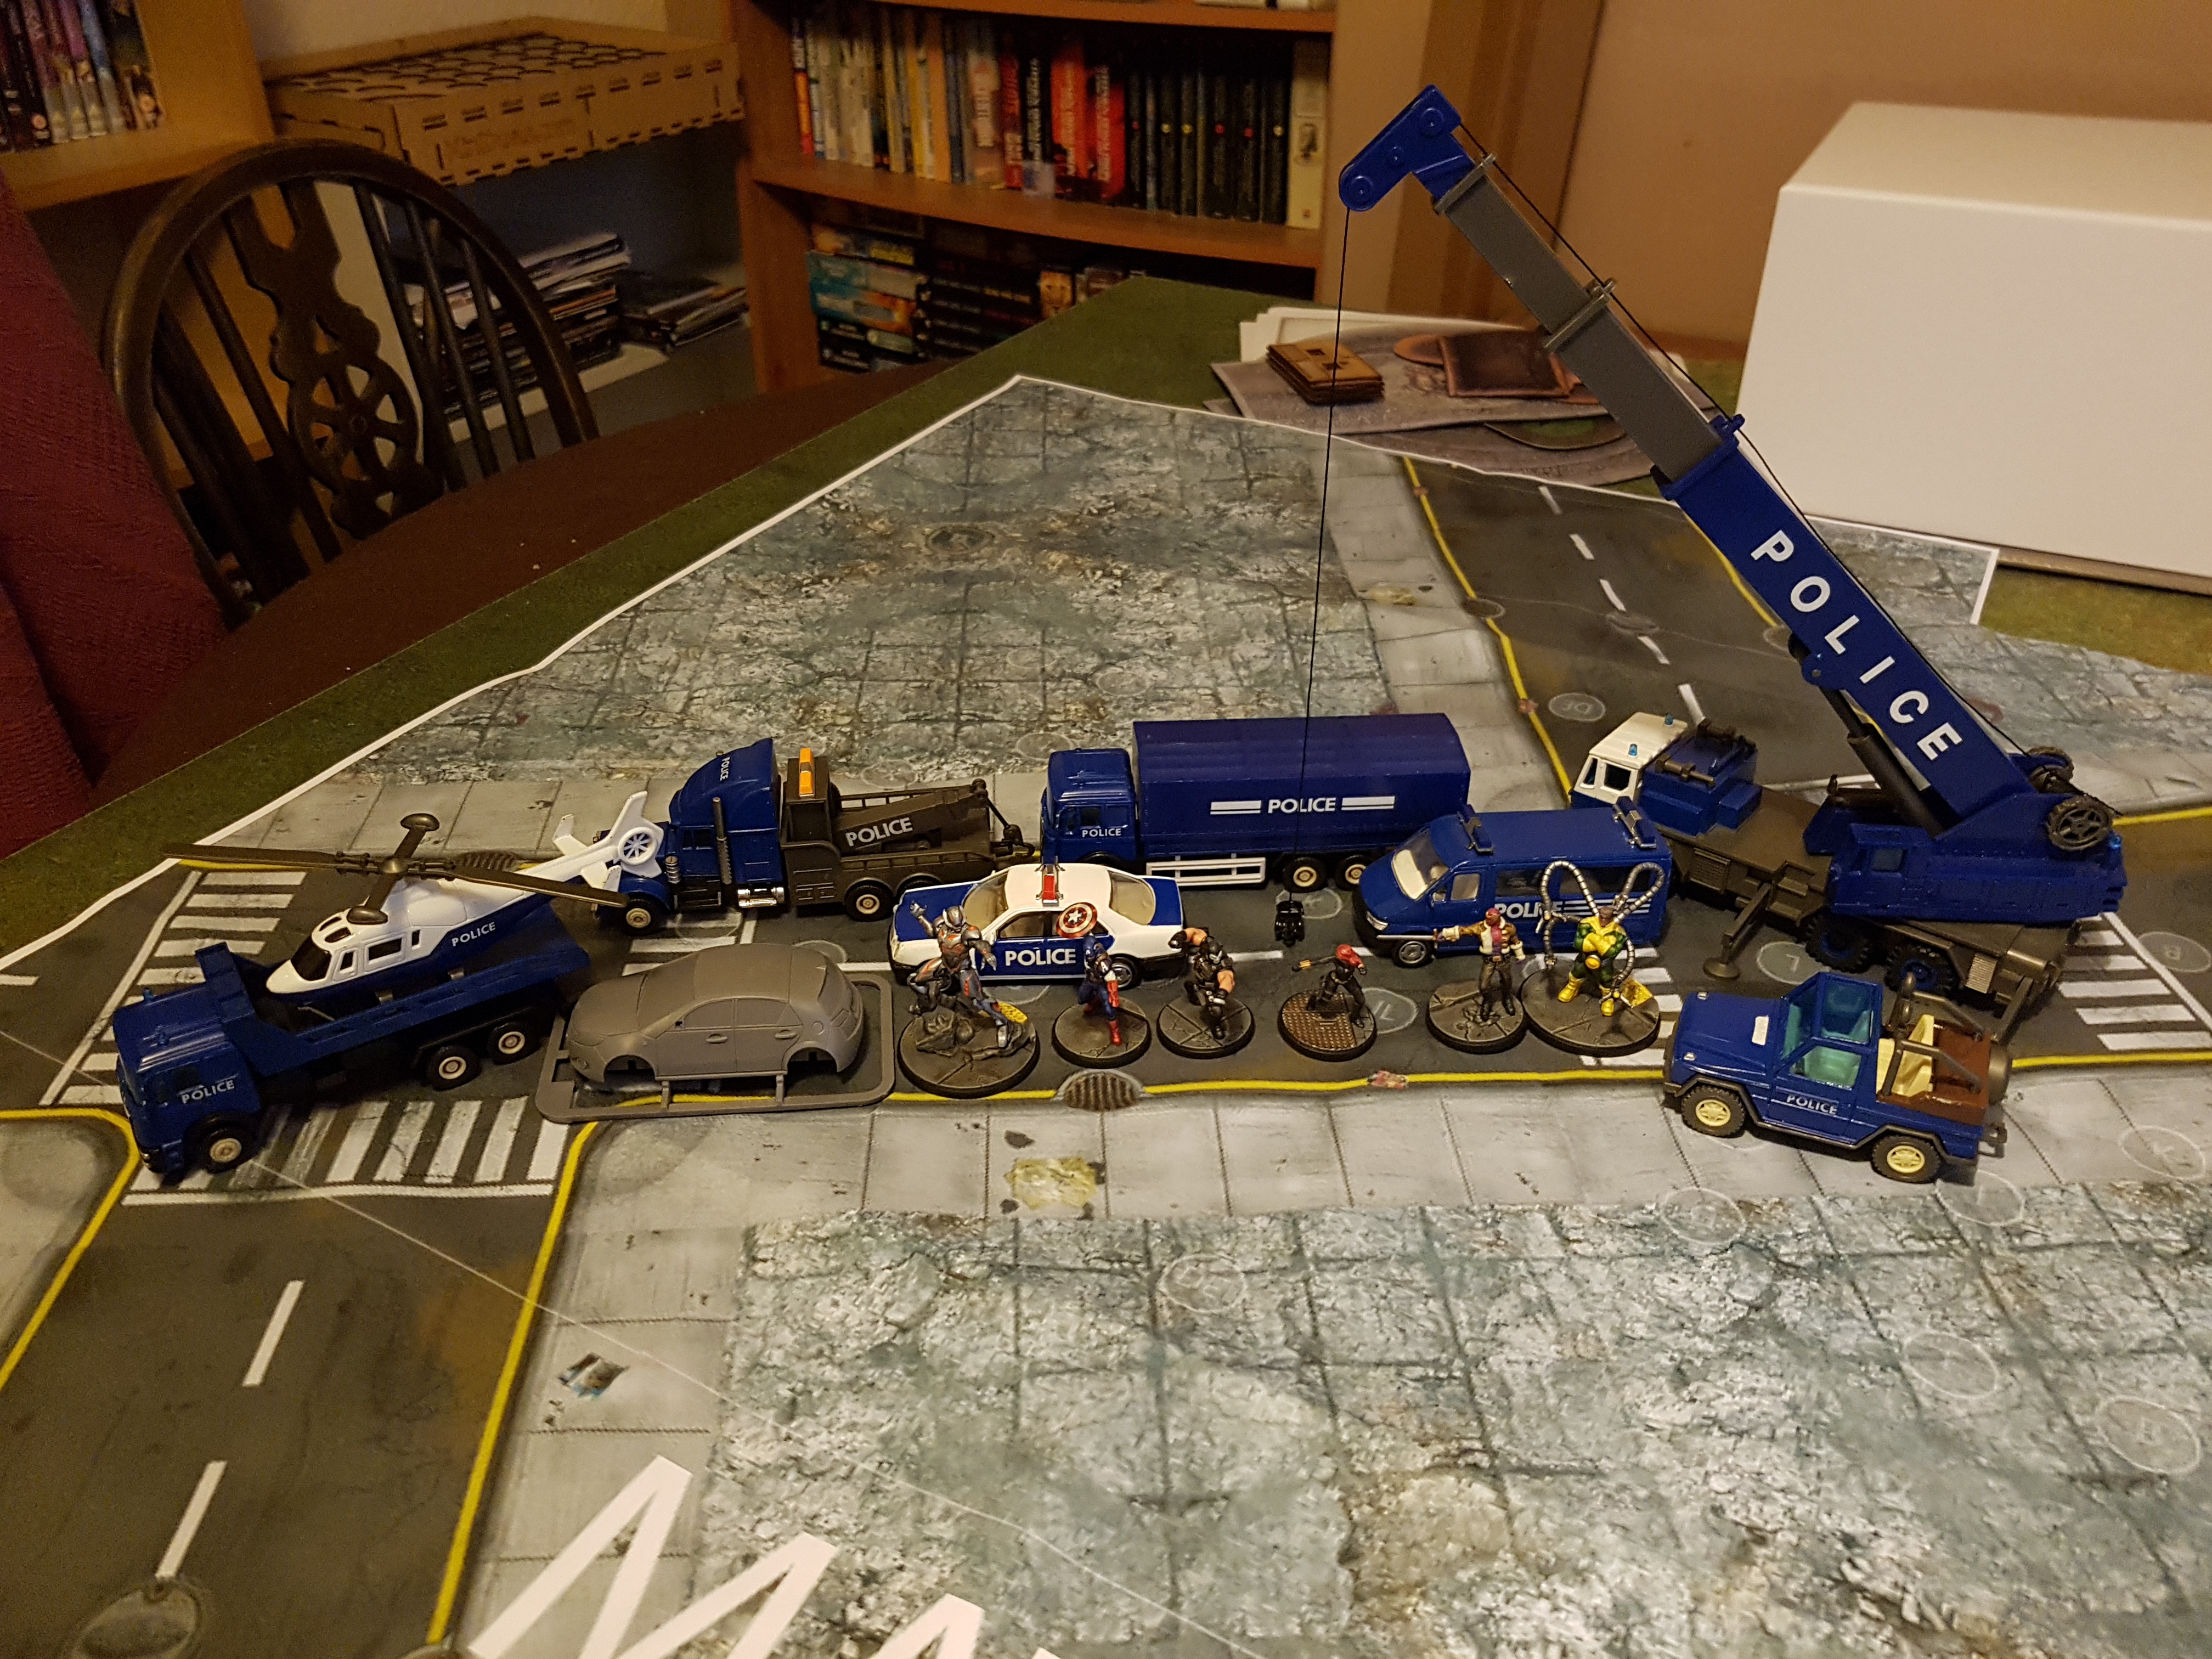
 Everything appears to be fully articulated too. The cars are size 2, and the trucks should be size 3. I imagine that crane can be elongated and have it's supports out and call it a size 4 piece.
I’ve had time to get the cop cars on a table near the core set car and my painted characters. These vehicles do look a little dainty, but I think they’re close enough and cool enough that no one will care. That helicopter is definitely too small though. Opinions welcome.
Papercraft Terrain
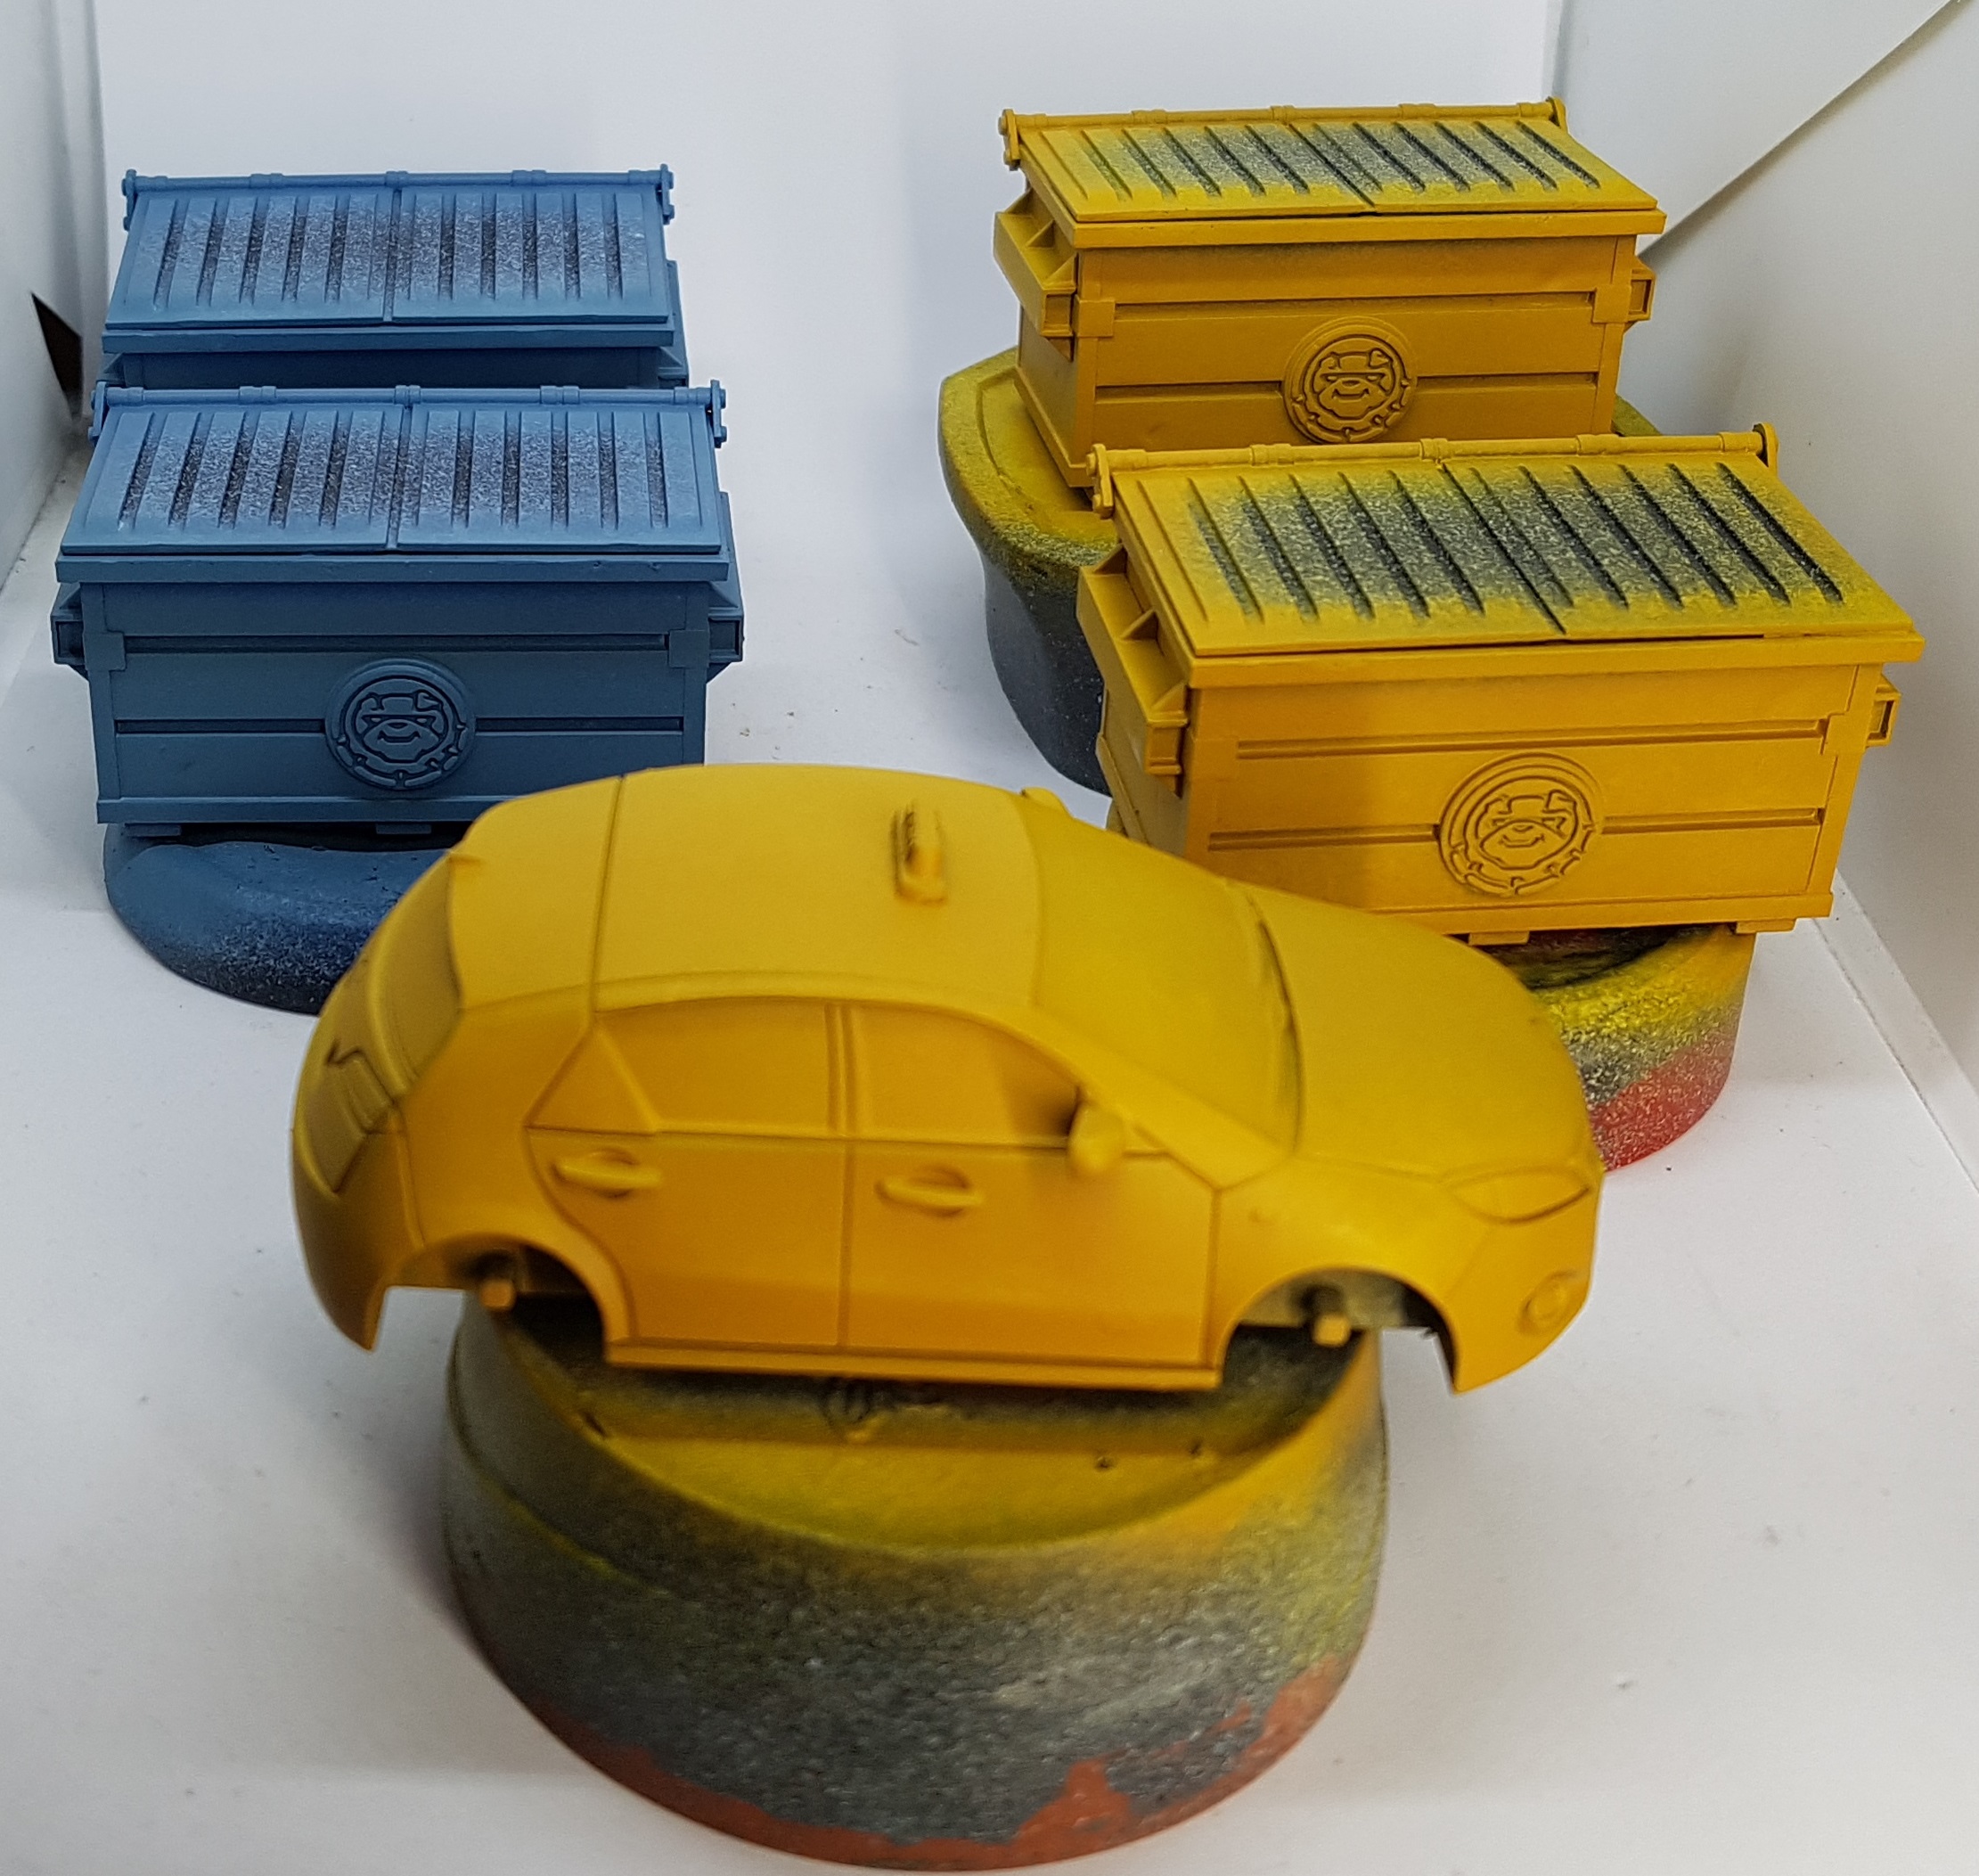
Terrain is expensive, and it takes up time to build and paint it that we’d often rather invest in painting toy soldiers or actually playing games. As such I’ve dabbled in papercraft terrain before, and I think MCP is the perfect game to use it. Here’s a few pieces I had to hand.
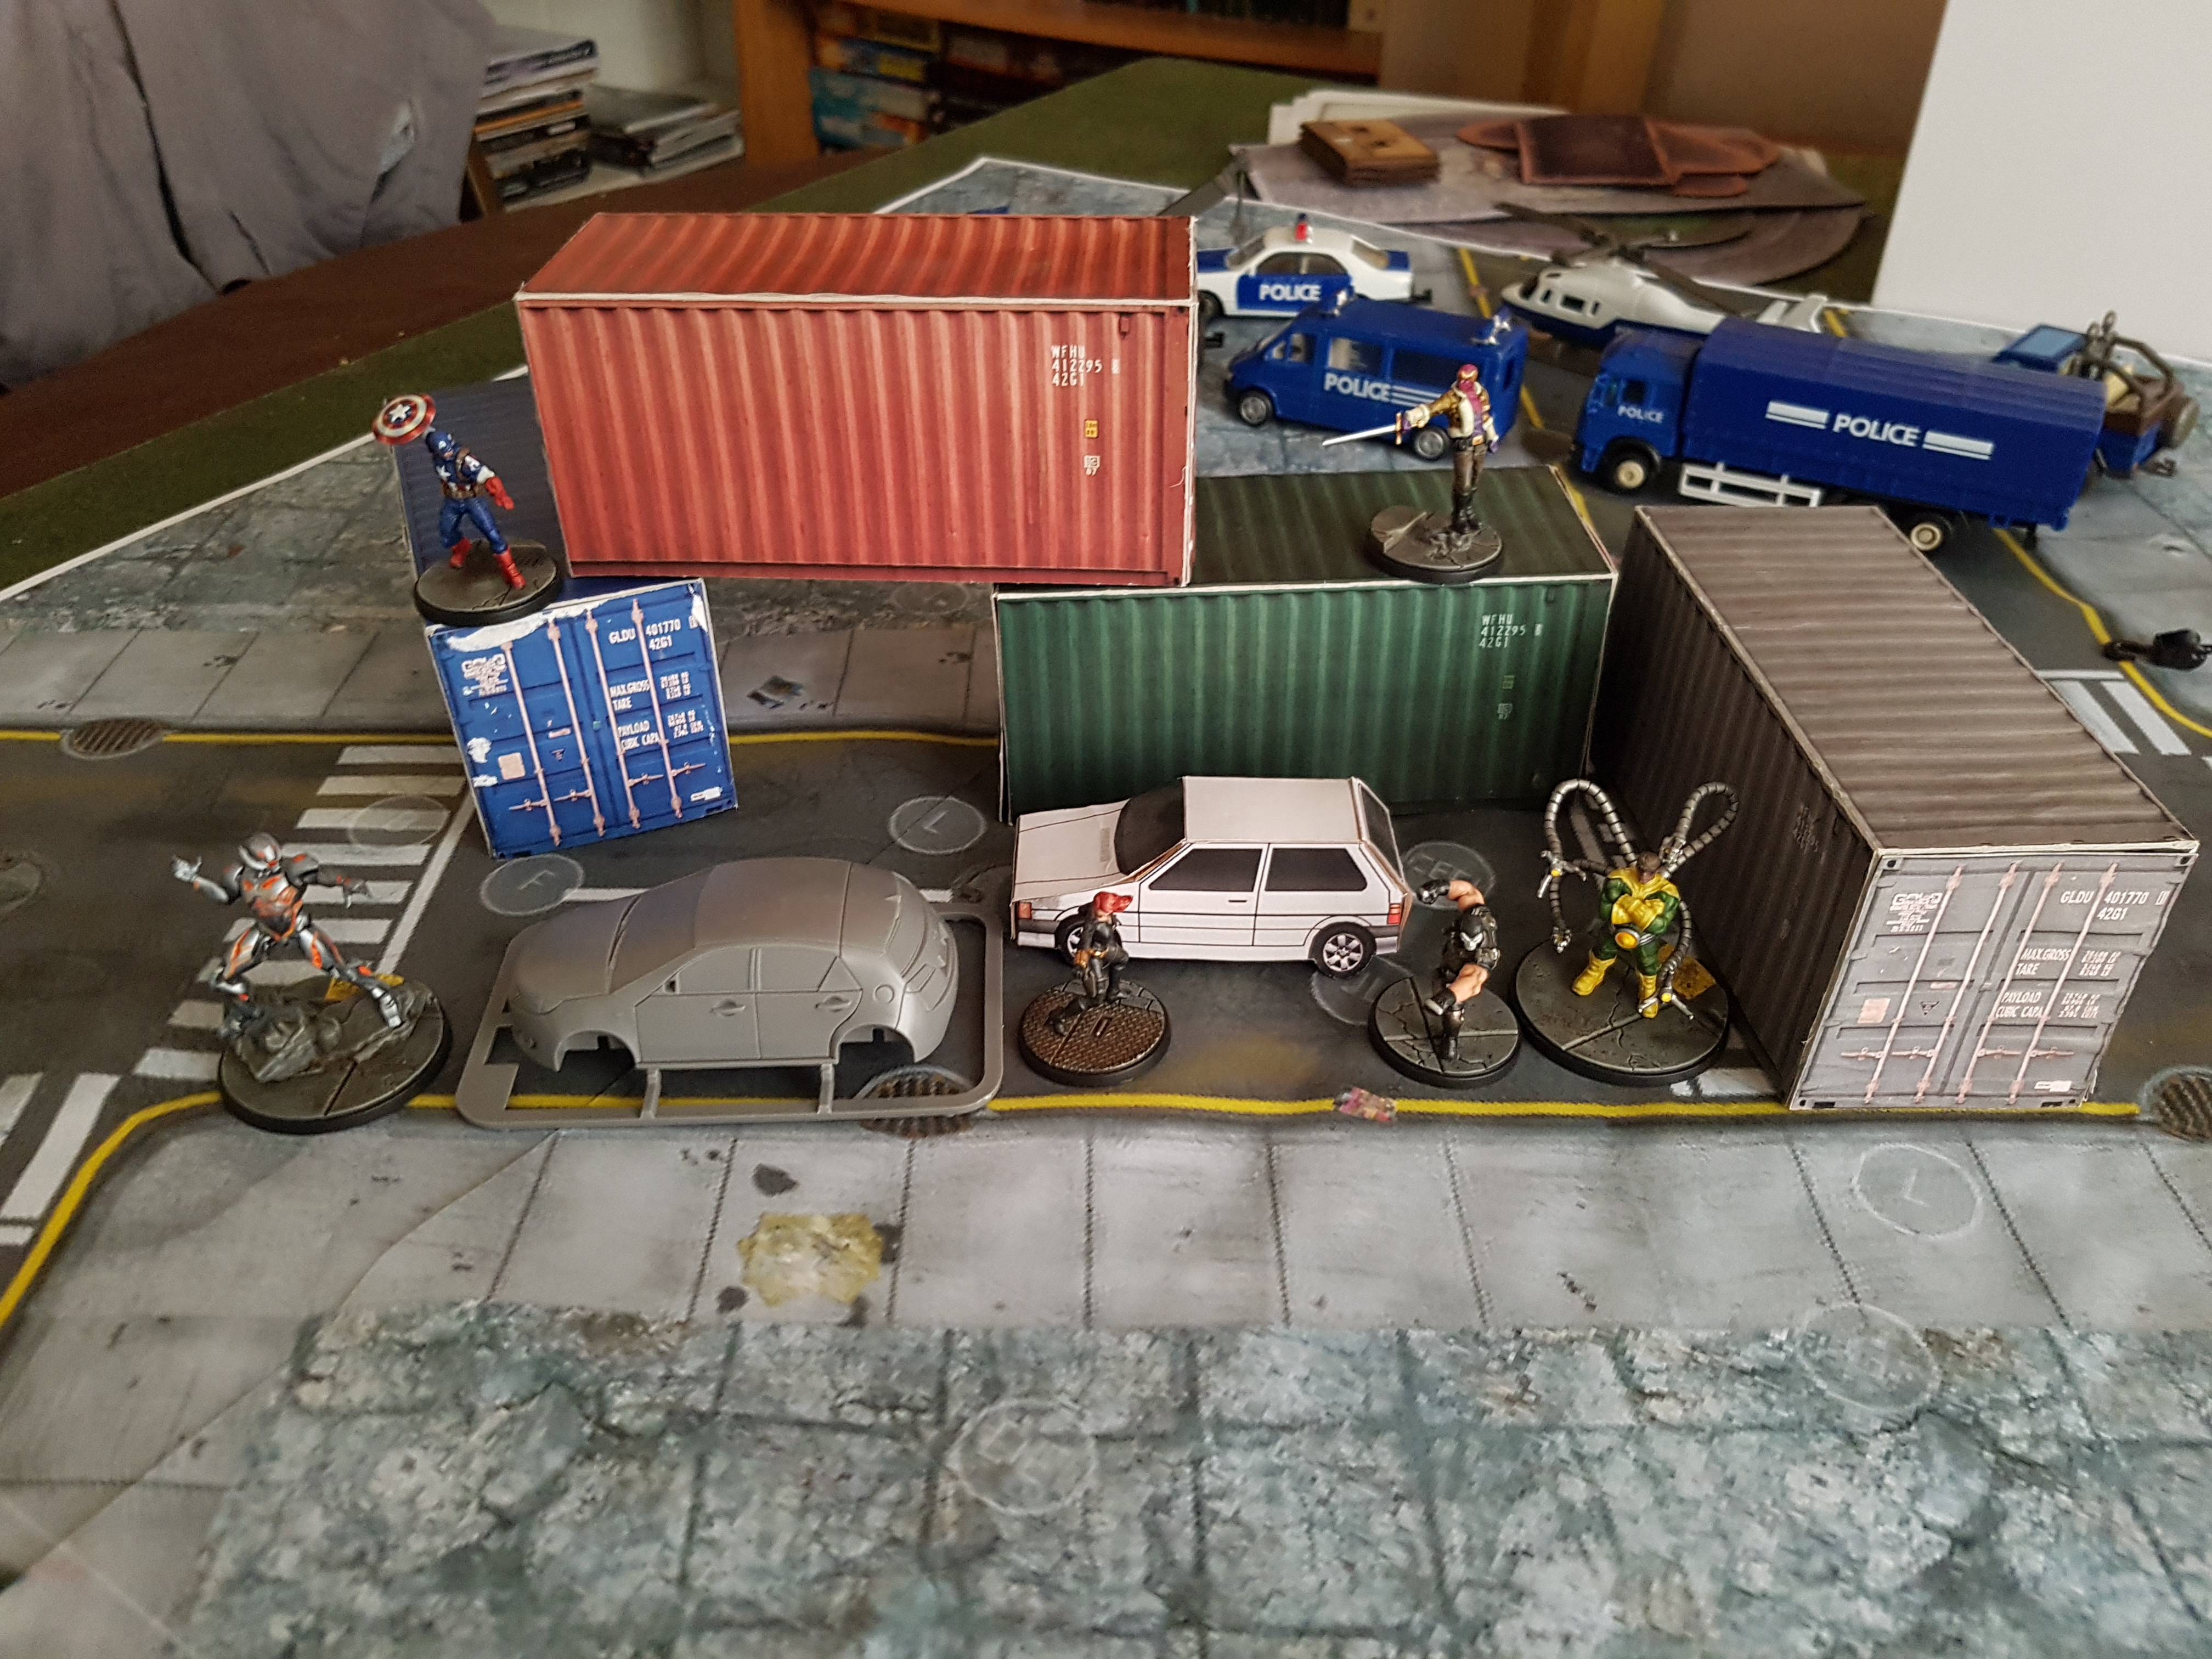 A papercraft container and car with some models and plastic terrain for scale
If you google “papercraft [insert item here]” you’ll find plans for most things in varying degrees of complexity. I’ve found lots of files to experiment with. The main issue is scale, but you can tweak that before printing to some extent, depending on what your printer can handle. You never really know for sure what you’re getting until it’s printed out.
If you have image files and you want to control the exact size of what prints out Gerry mentioned a great program during a Gerry Can on flags a while back: Ifranview. It lets you tell the printer the exact dimensions you want a file to come out. It doesn’t work with PDFs, but screen caps and the Snipping Tool can help with that.
They’re very simple to make. Just print the files using a convenient printer, often located as a place of work. Glue the paper to the inside of a pizza or cereal box using a pritt stick, or a glue you trust not to dampen and warp the paper, or affect it’s finish. Let it dry plenty before cutting it out. Allow larger tabs than the file suggests. You can always trim off later, but you can’t grow them. Score along the outside of the fold. Score along the inside too if you can, but be careful not to score too deeply. You don’t want it coming off. Fold and dry fit the whole thing, before gluing it together with superglue. Pritt stick isn’t really strong enough and PVA takes too long to dry.
Once it’s assembled and dried, these card backed printed shapes are fairly sturdy. The ones in this image are many years old and happily take being thrown in a box or having plastic models climb all over them.
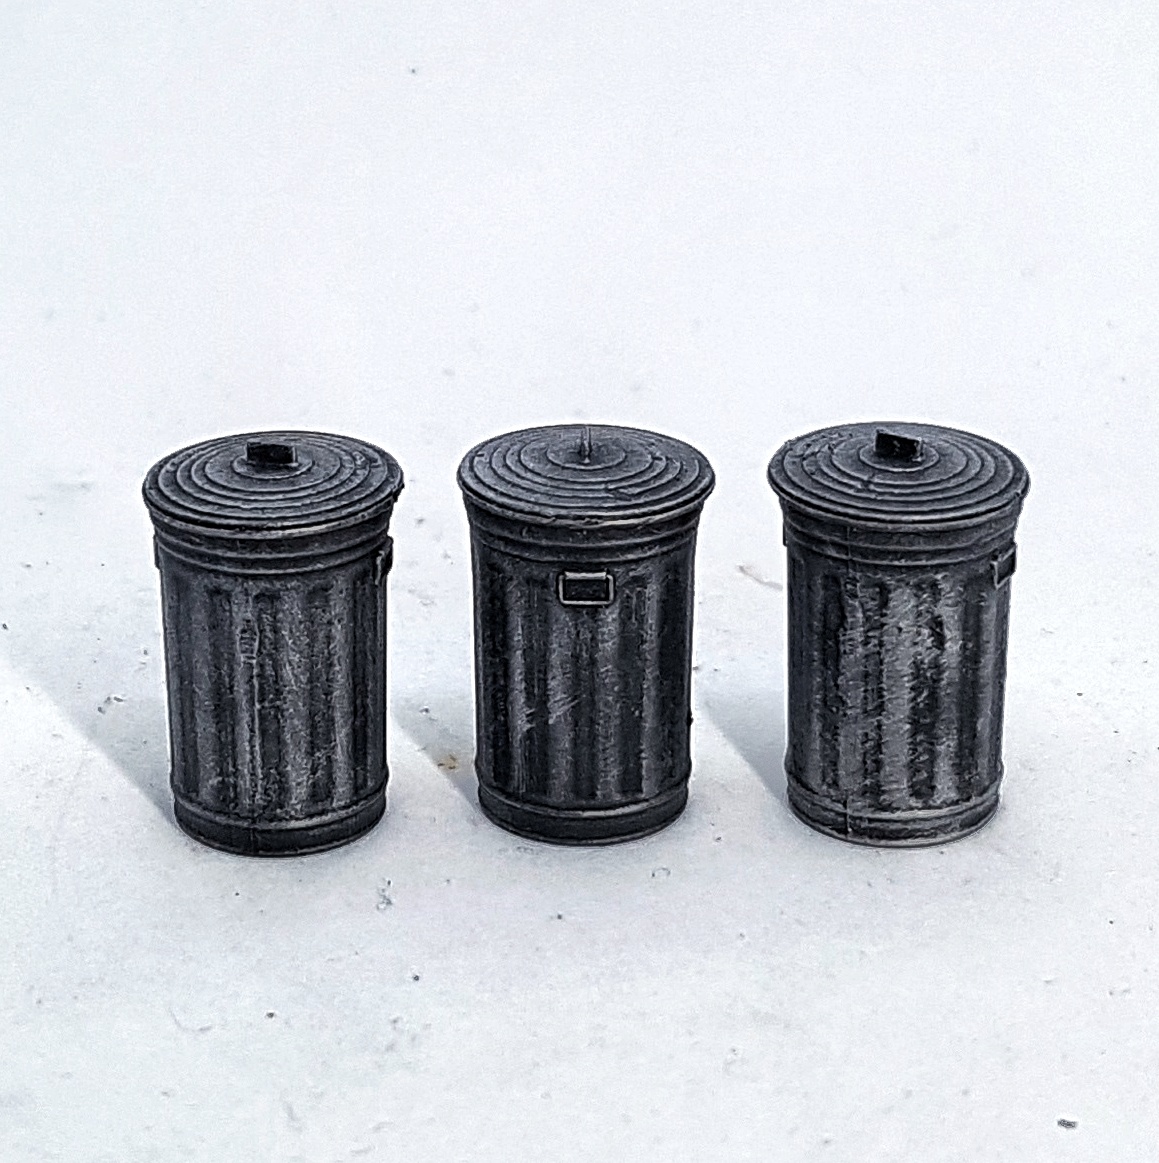
With access to a printer, a few pizzas in your belly, and an hour or twos work you can fill most of a table with papercraft terrain for minimal cost or effort. Google and see what else you can find. Share links for good stuff below please. I’m on the lookout for a good wheelie bin or an appropriate street bin. They’d make good size 1 terrain, and they’re basically boxes in shape so they’ll be easy to build, and sturdy too.
Oh, and see that mat in that image, and with the police cars below? That’s printed on paper. I have access to an A1 CAD printer at work and Ifranview let me print in 3 foot strips. I found an image of an MCP mat online and was able to print it in two strips. It’s not exactly high res, but it’s good enough for a test of concept, and it’ll be fine once it’s covered in terrain. Maybe you know someone who has access to something similar? If you have a quality image for me to print I’d be grateful for a copy. Thanks.
My image was just grabbed from the Muse on Minis web store. I’ll see about doing something less pirate-y for my next mat. Does anyone know if AI art generators can be persuaded to make something suitable and at a high enough resolution? Surely a challenge for Warren Meets Mat Meets AI Art.
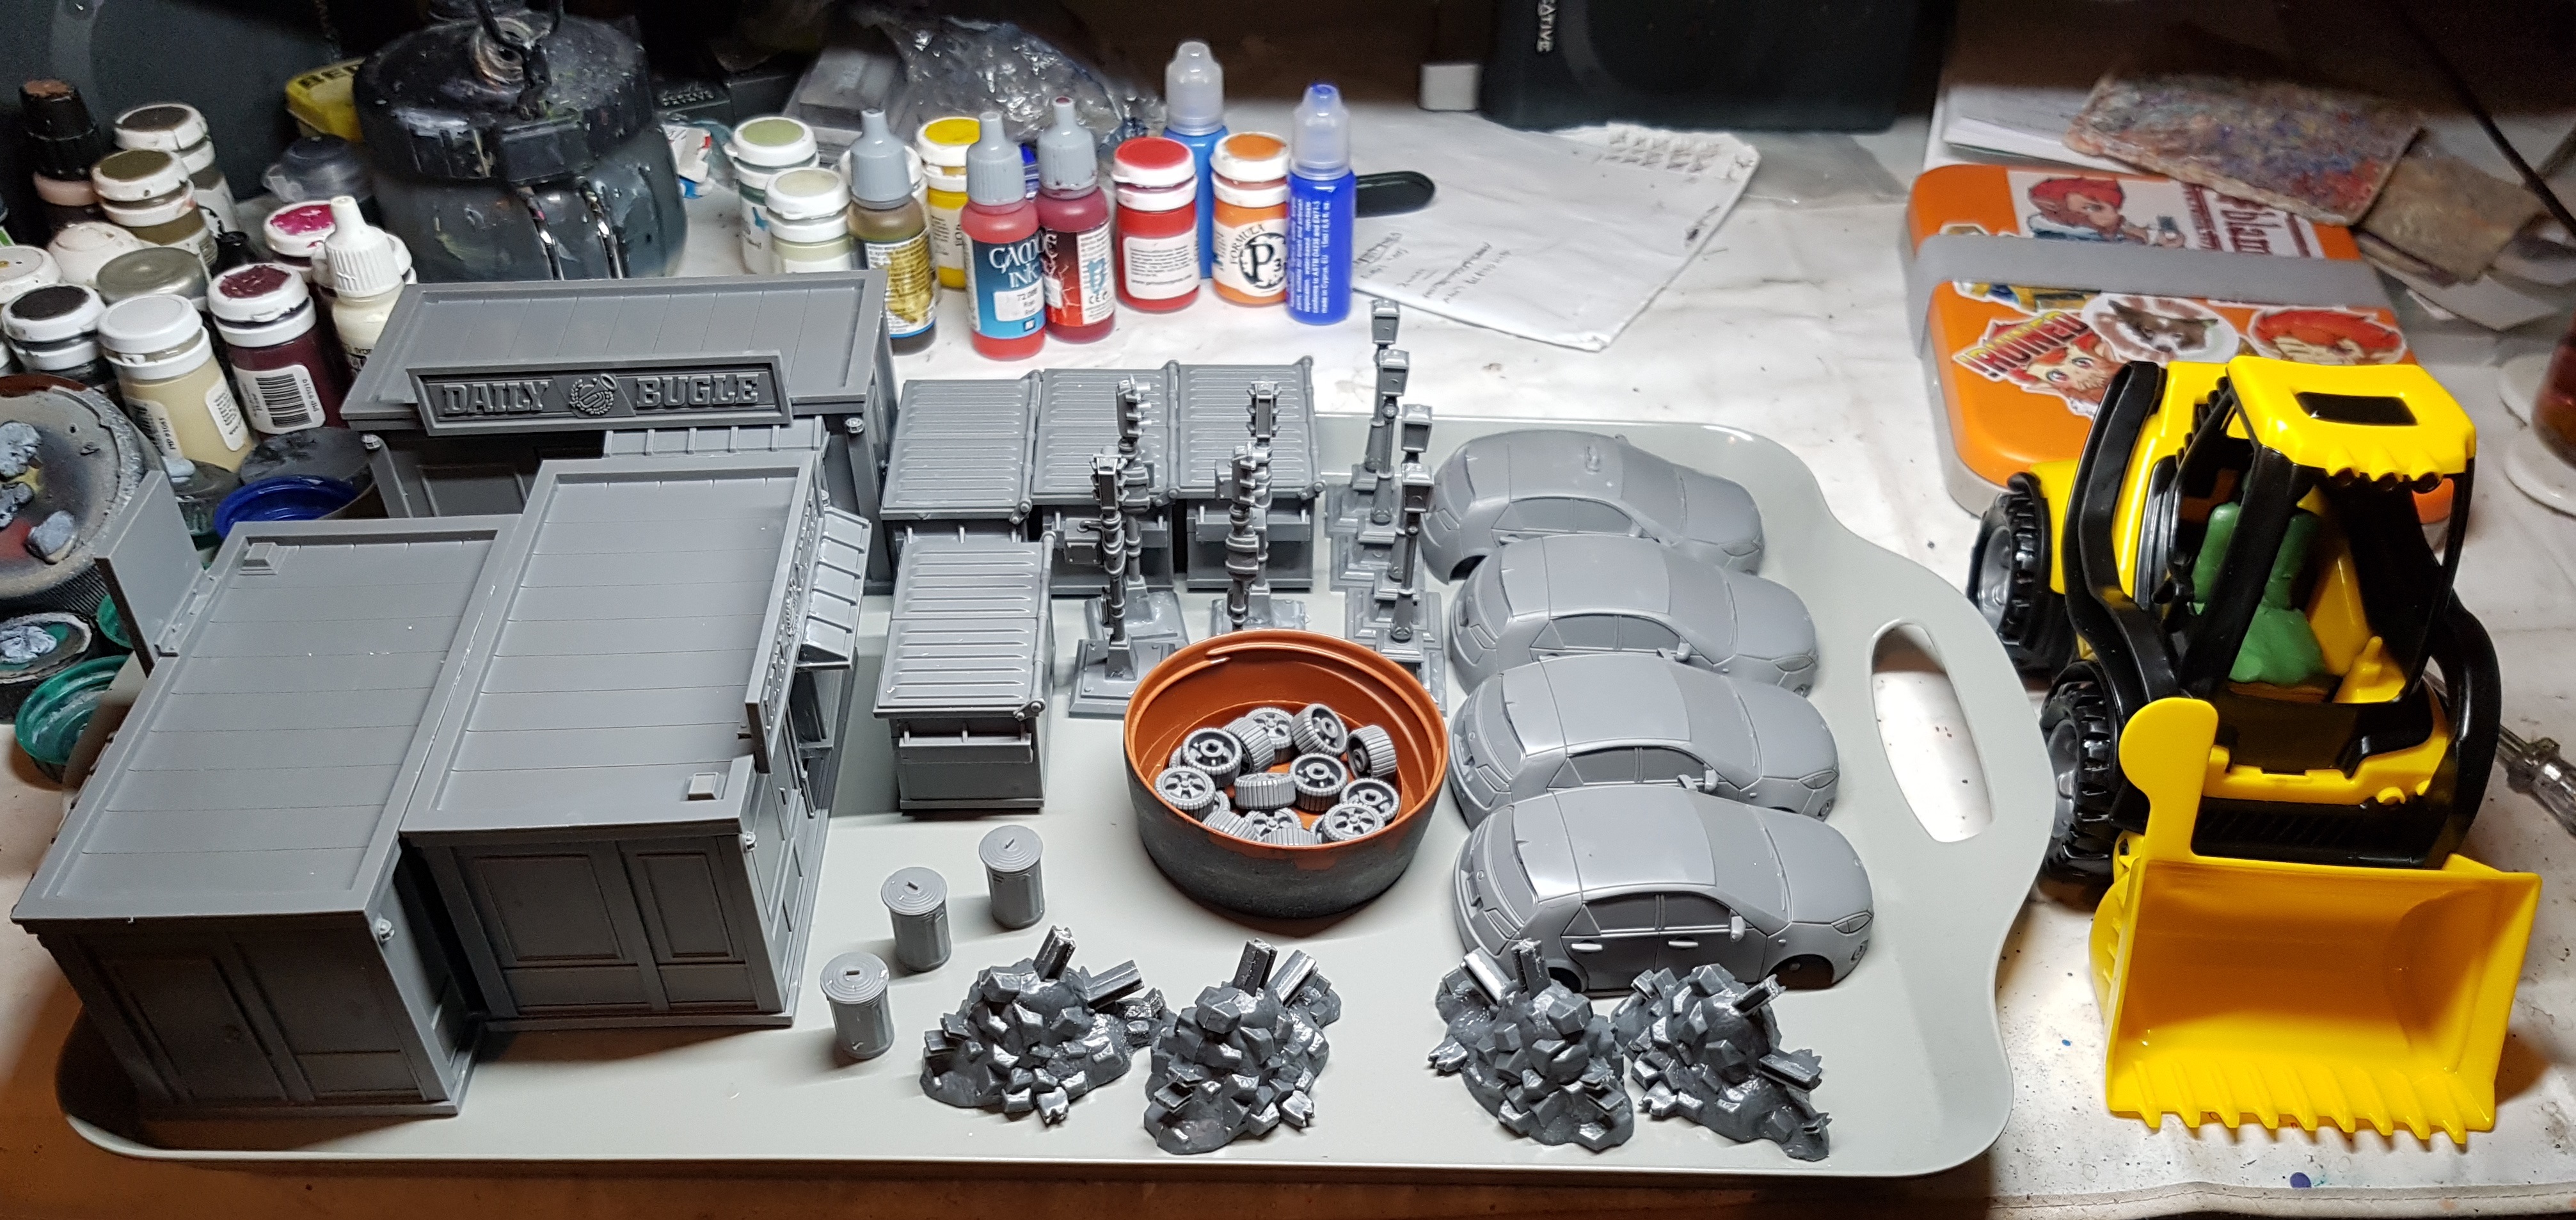
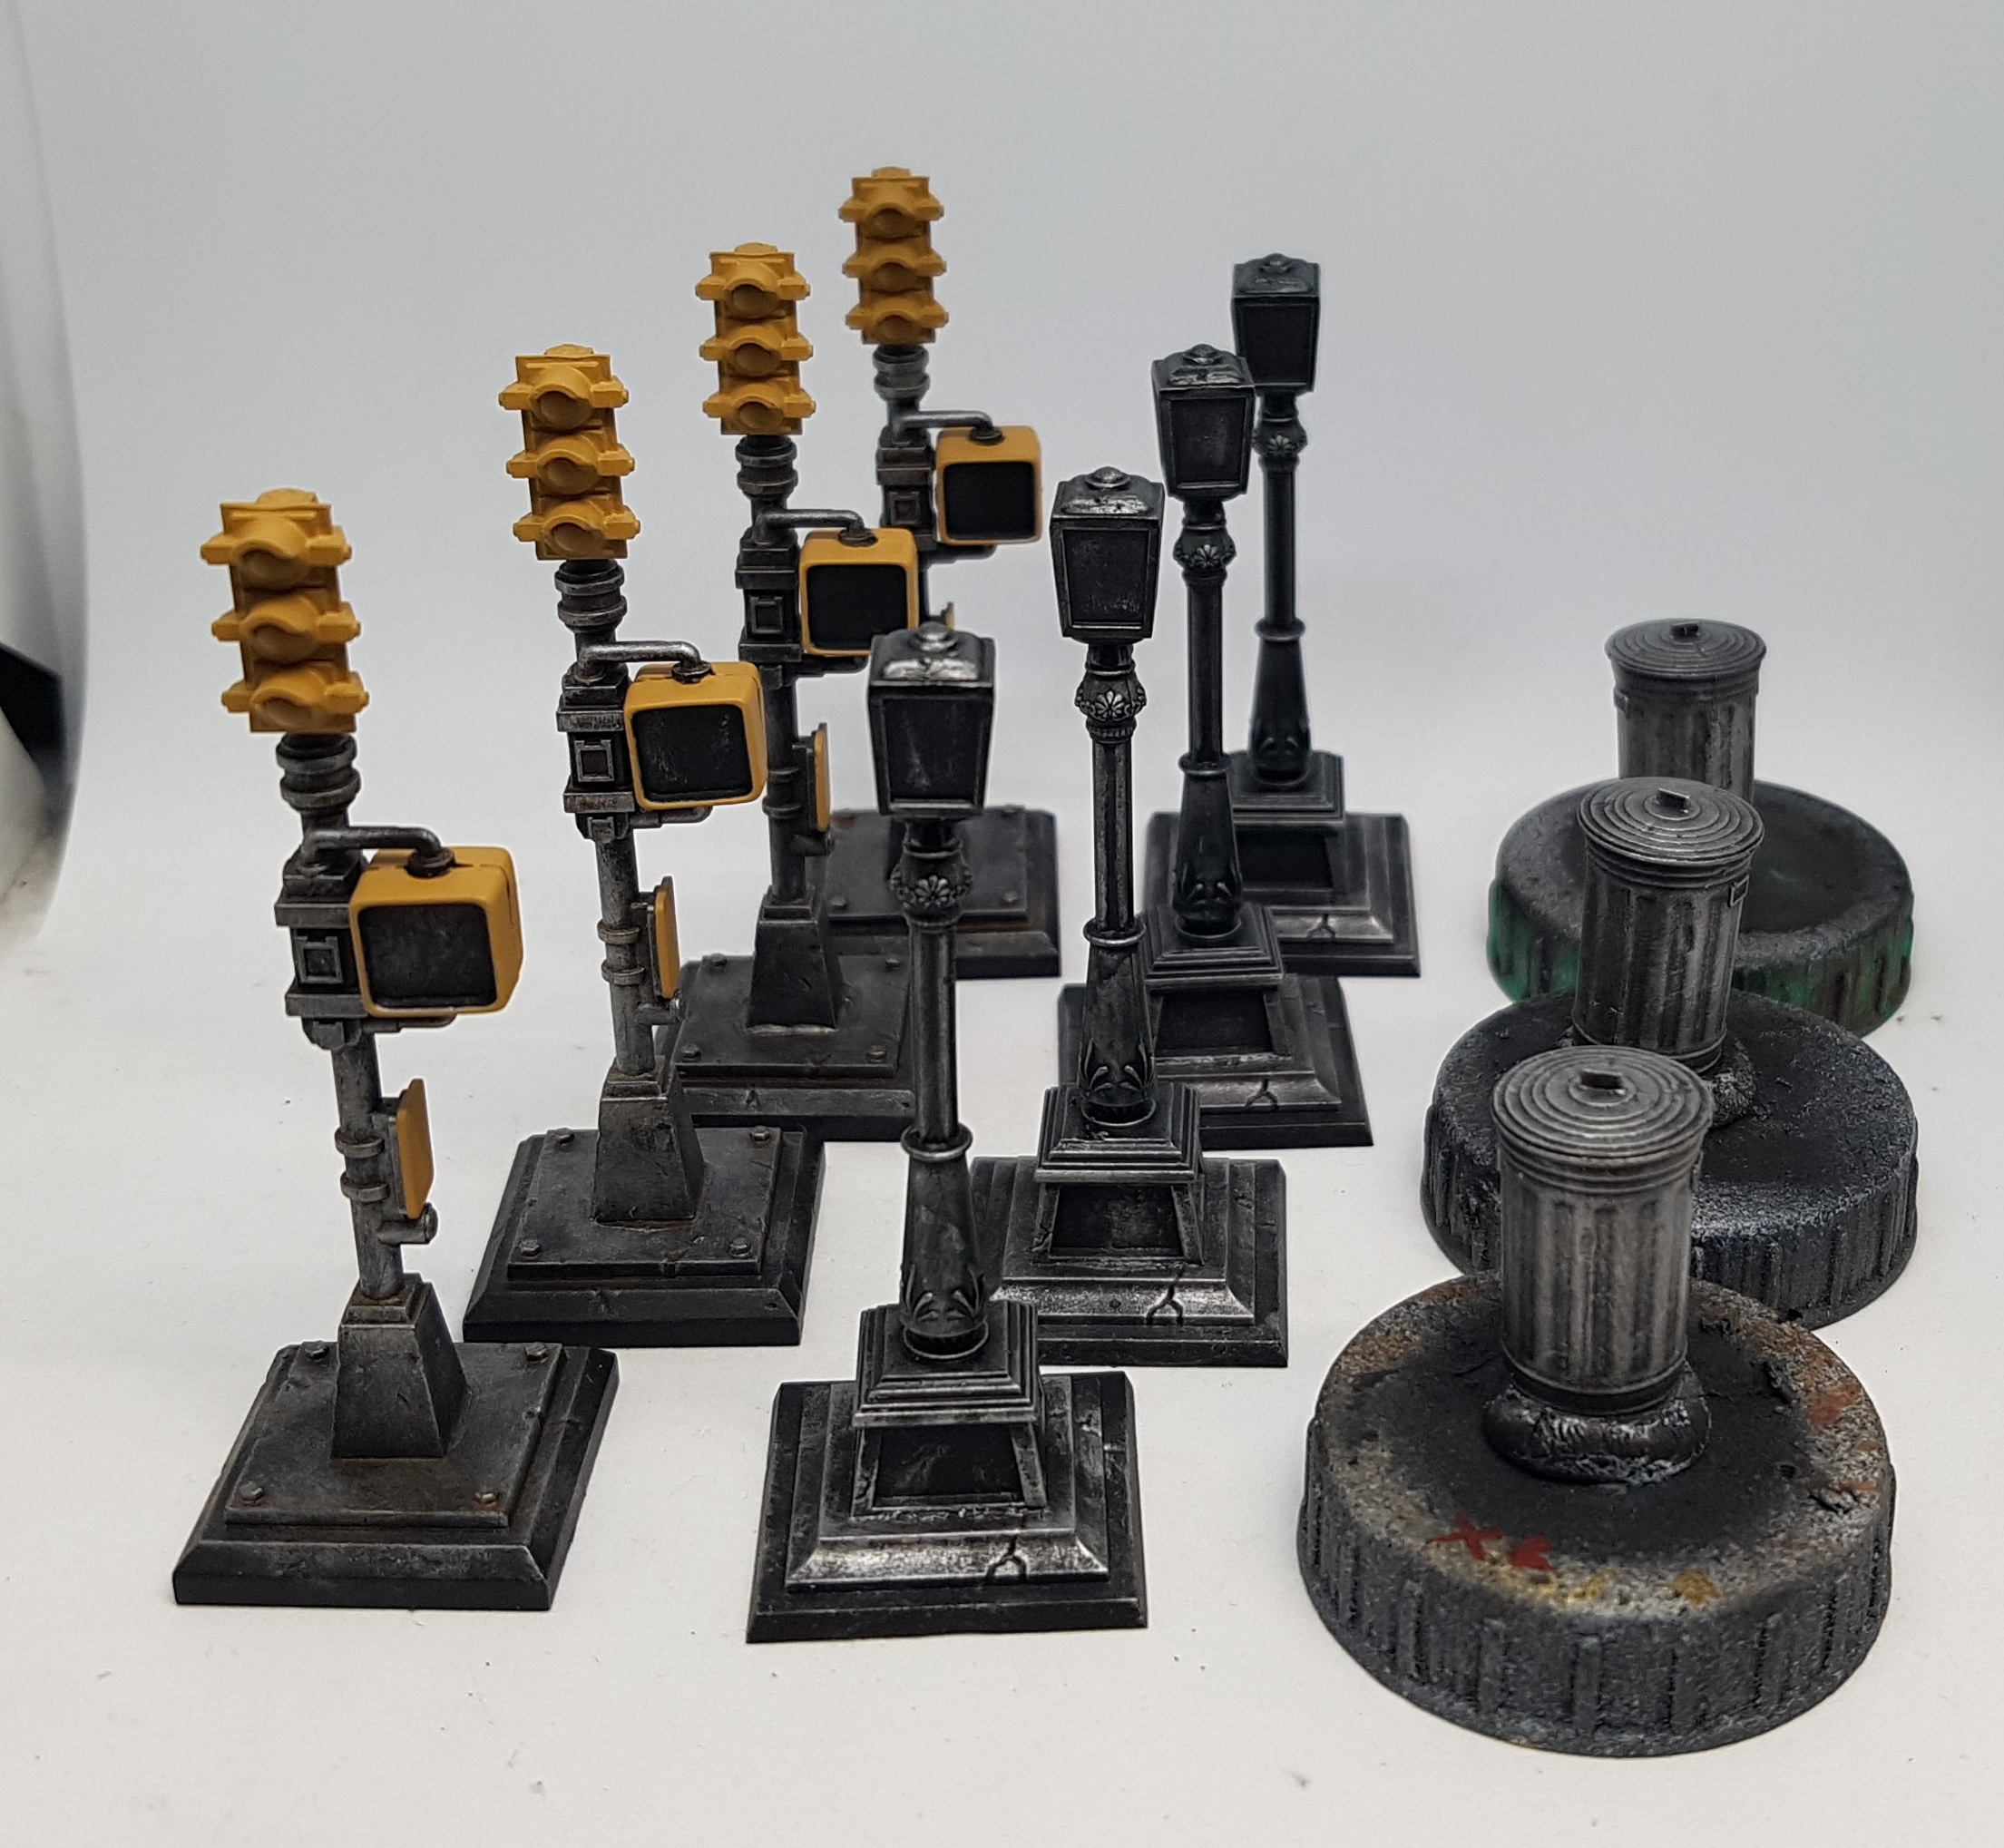
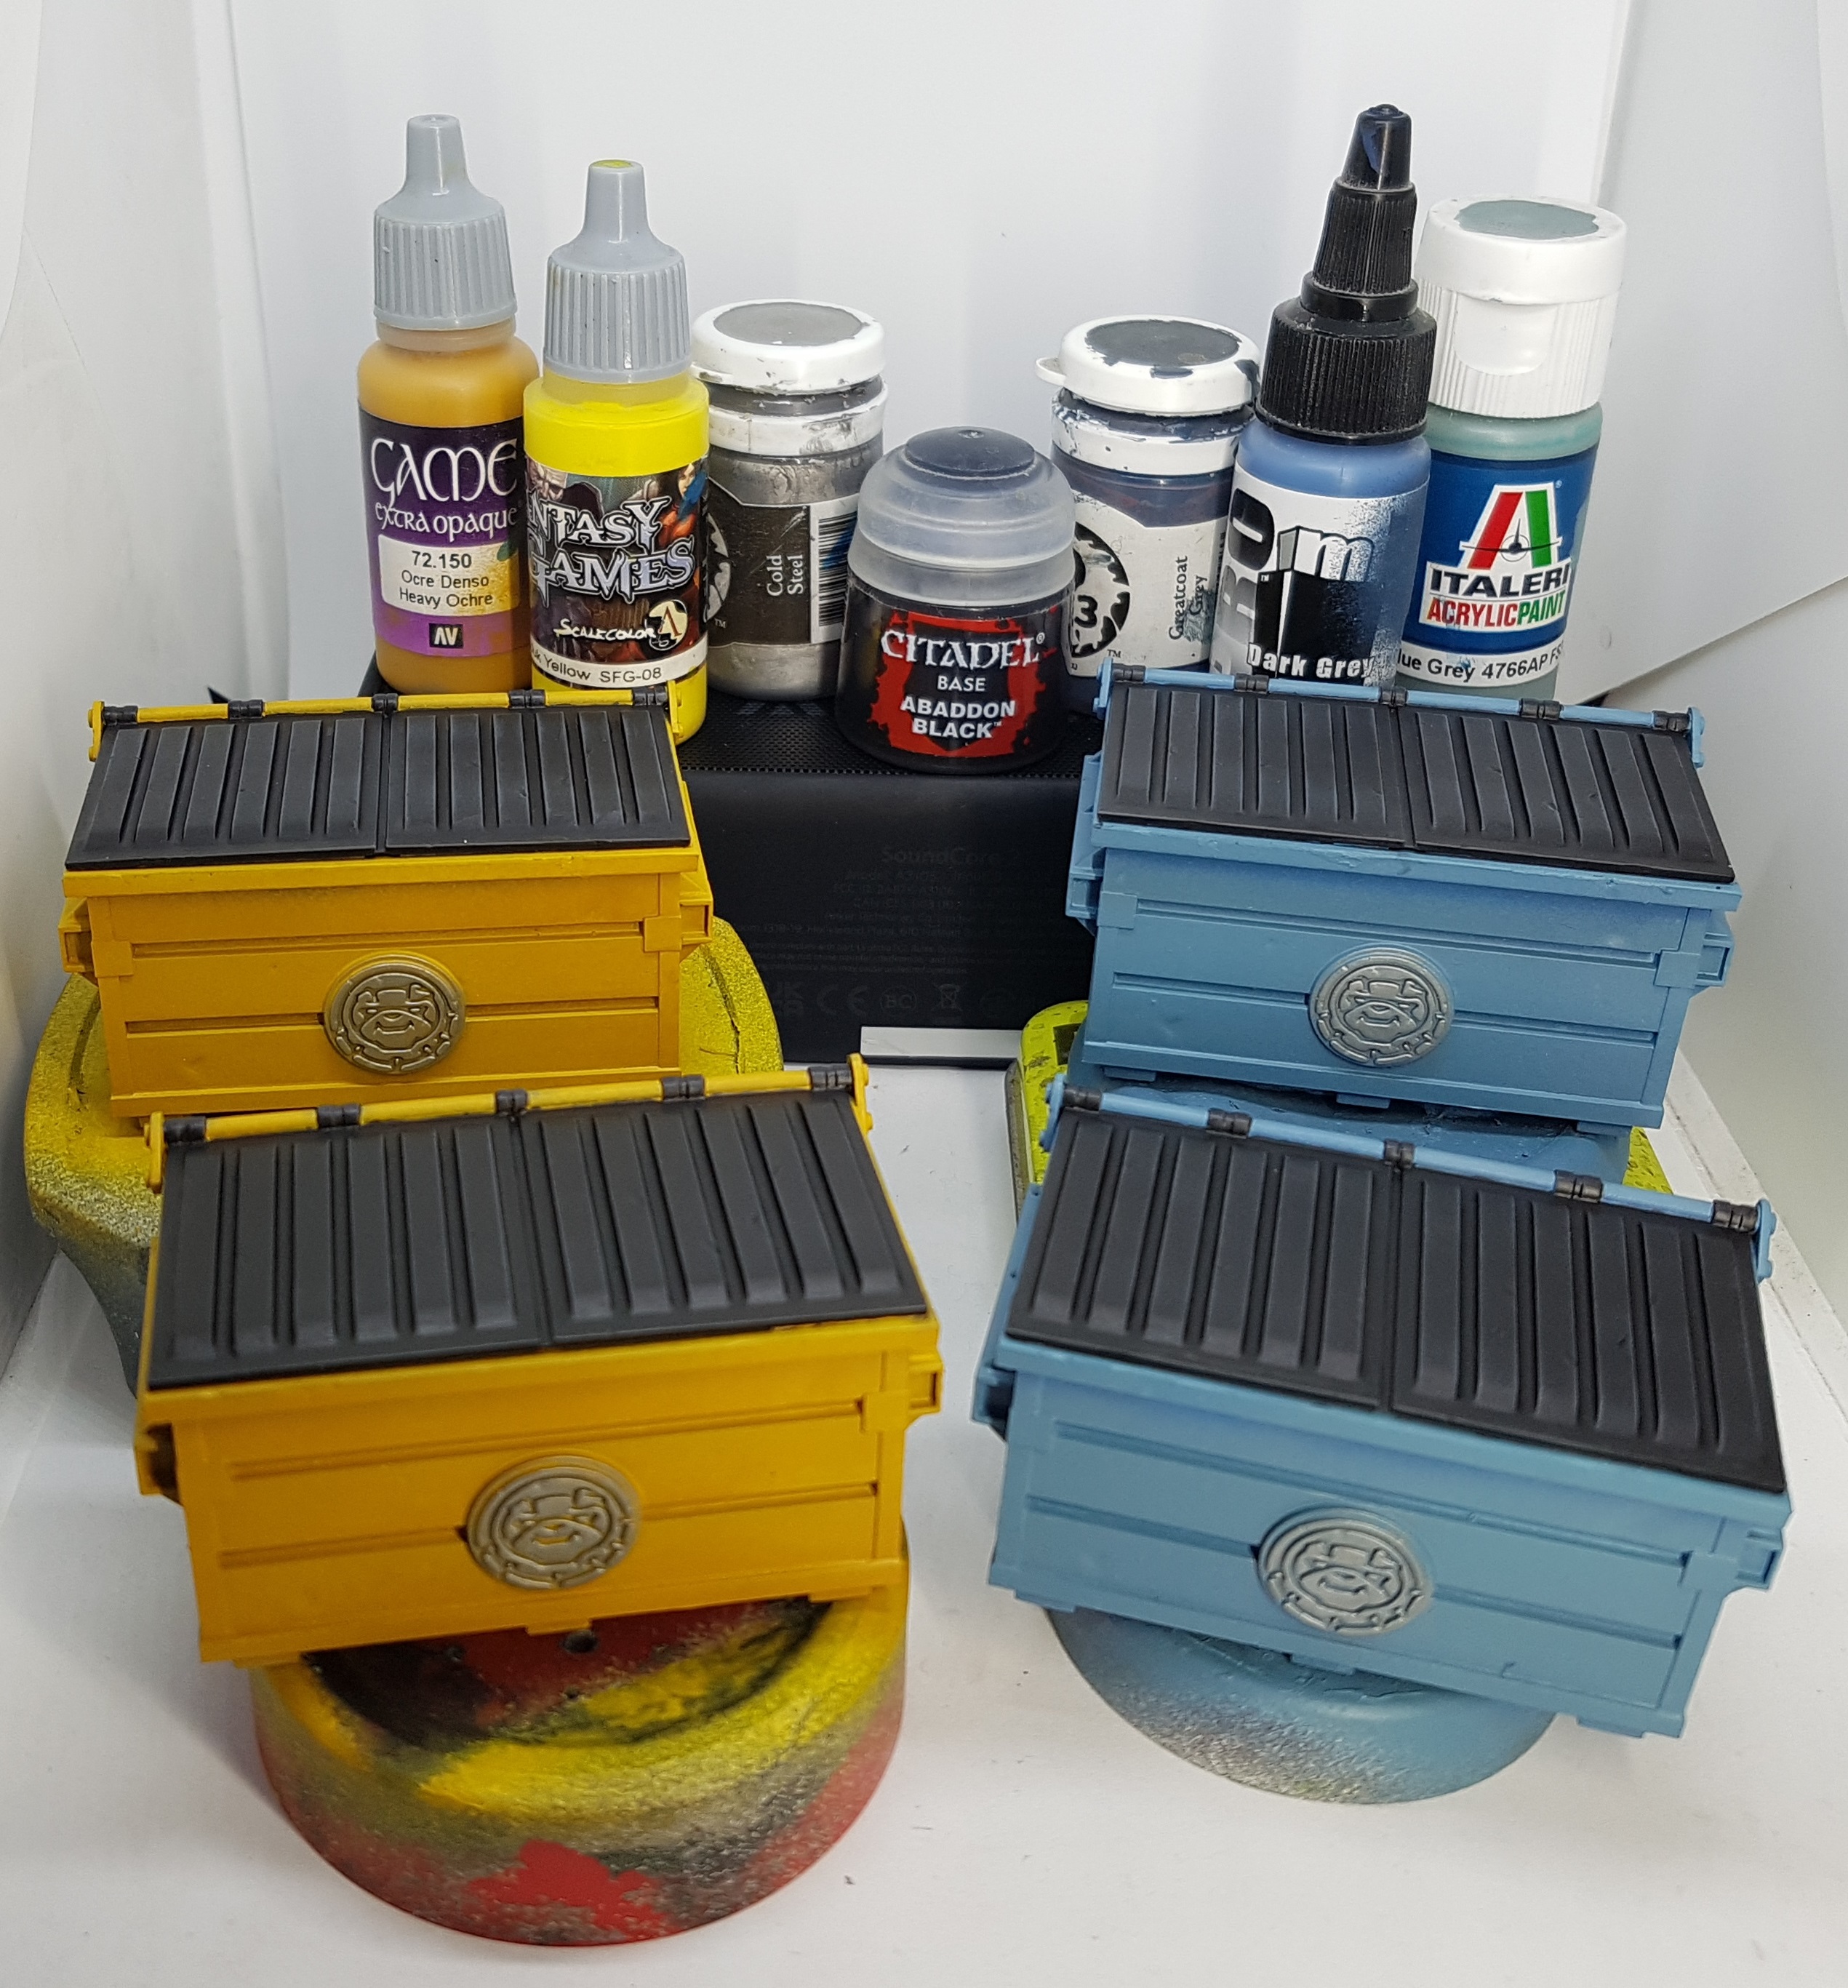
NYC Terrain Set and Extras
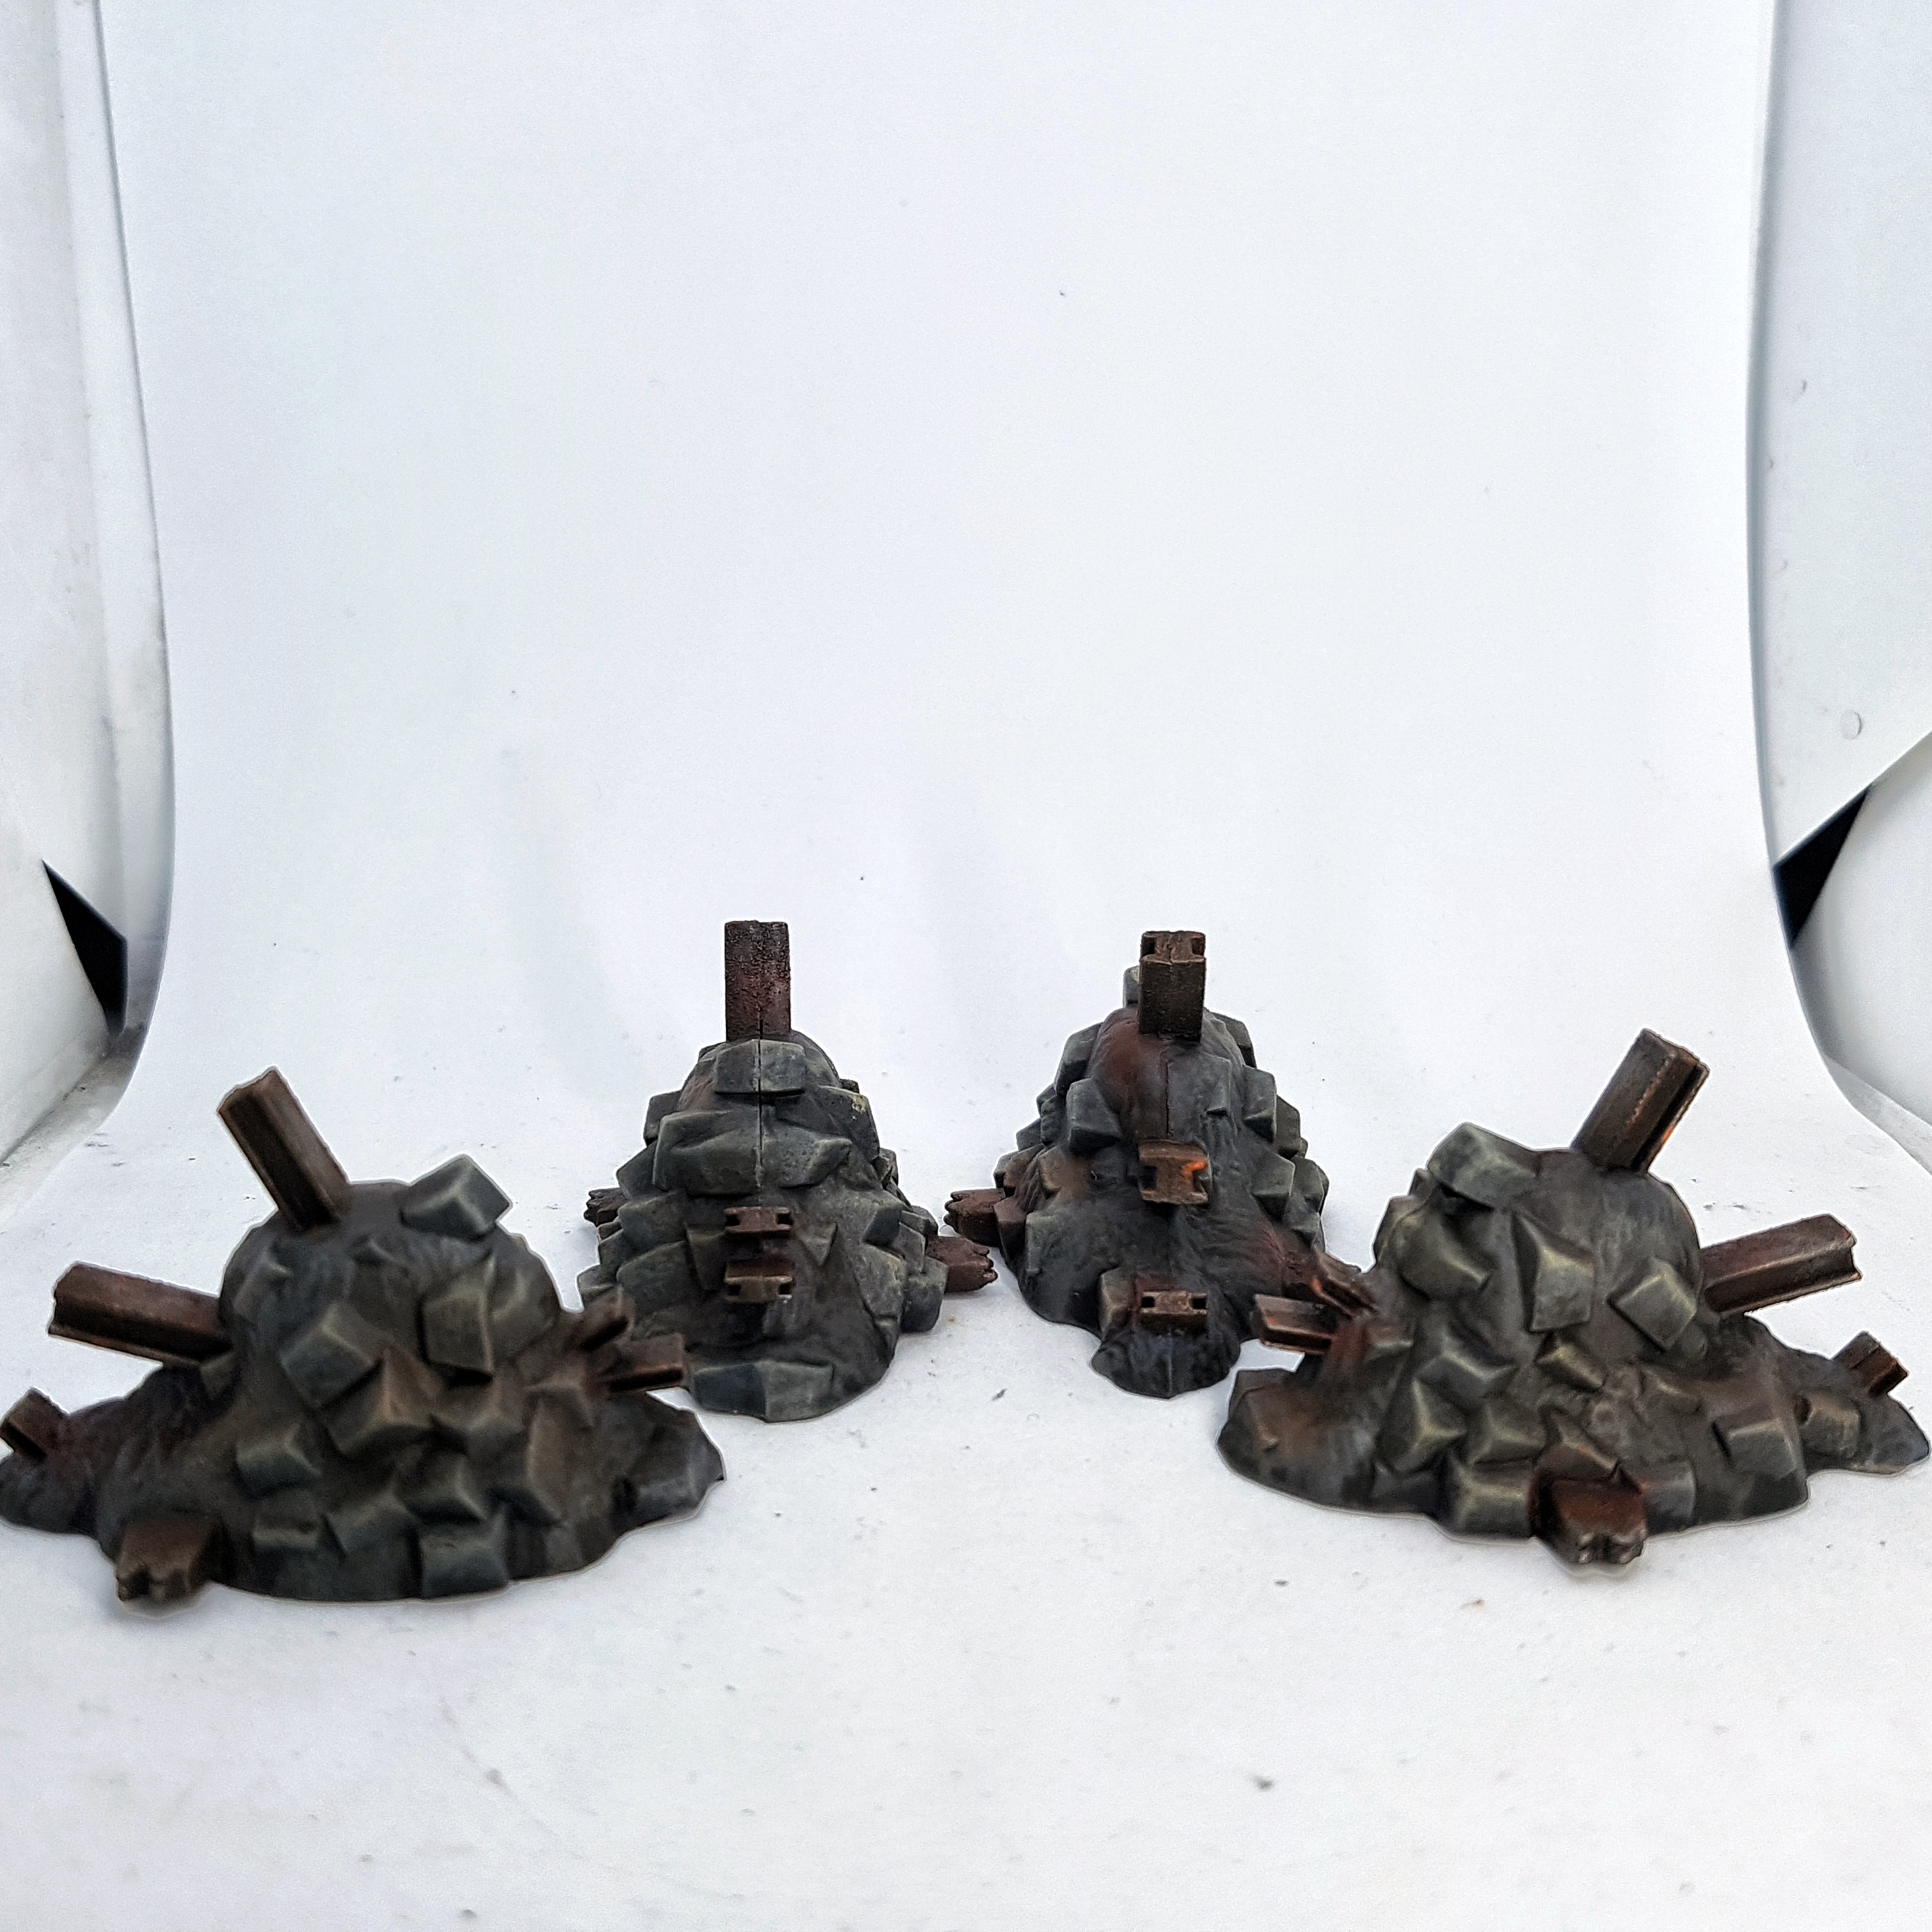
I’ve just had a week of work and one of my missions was to plough through as much of the terrain as I could. I have the core box set terrain, the NYC terrain set, 4 piles of rubble I found in my Deadzone spare pieces box, and a toy Loader I found in Tescos recently. The scale on it is wrong, but they do come pretty big and the only thing tying it to a scale is the chair. I’ve tried to make the chair smaller by raising it up and modding it with green stuff. I don’t think I went far enough though.
I followed Ghool’s video guides for the official terrain, making a change here or there’s as I felt appropriate. I had no idea how to handle the car windows otherwise.
Cars Video
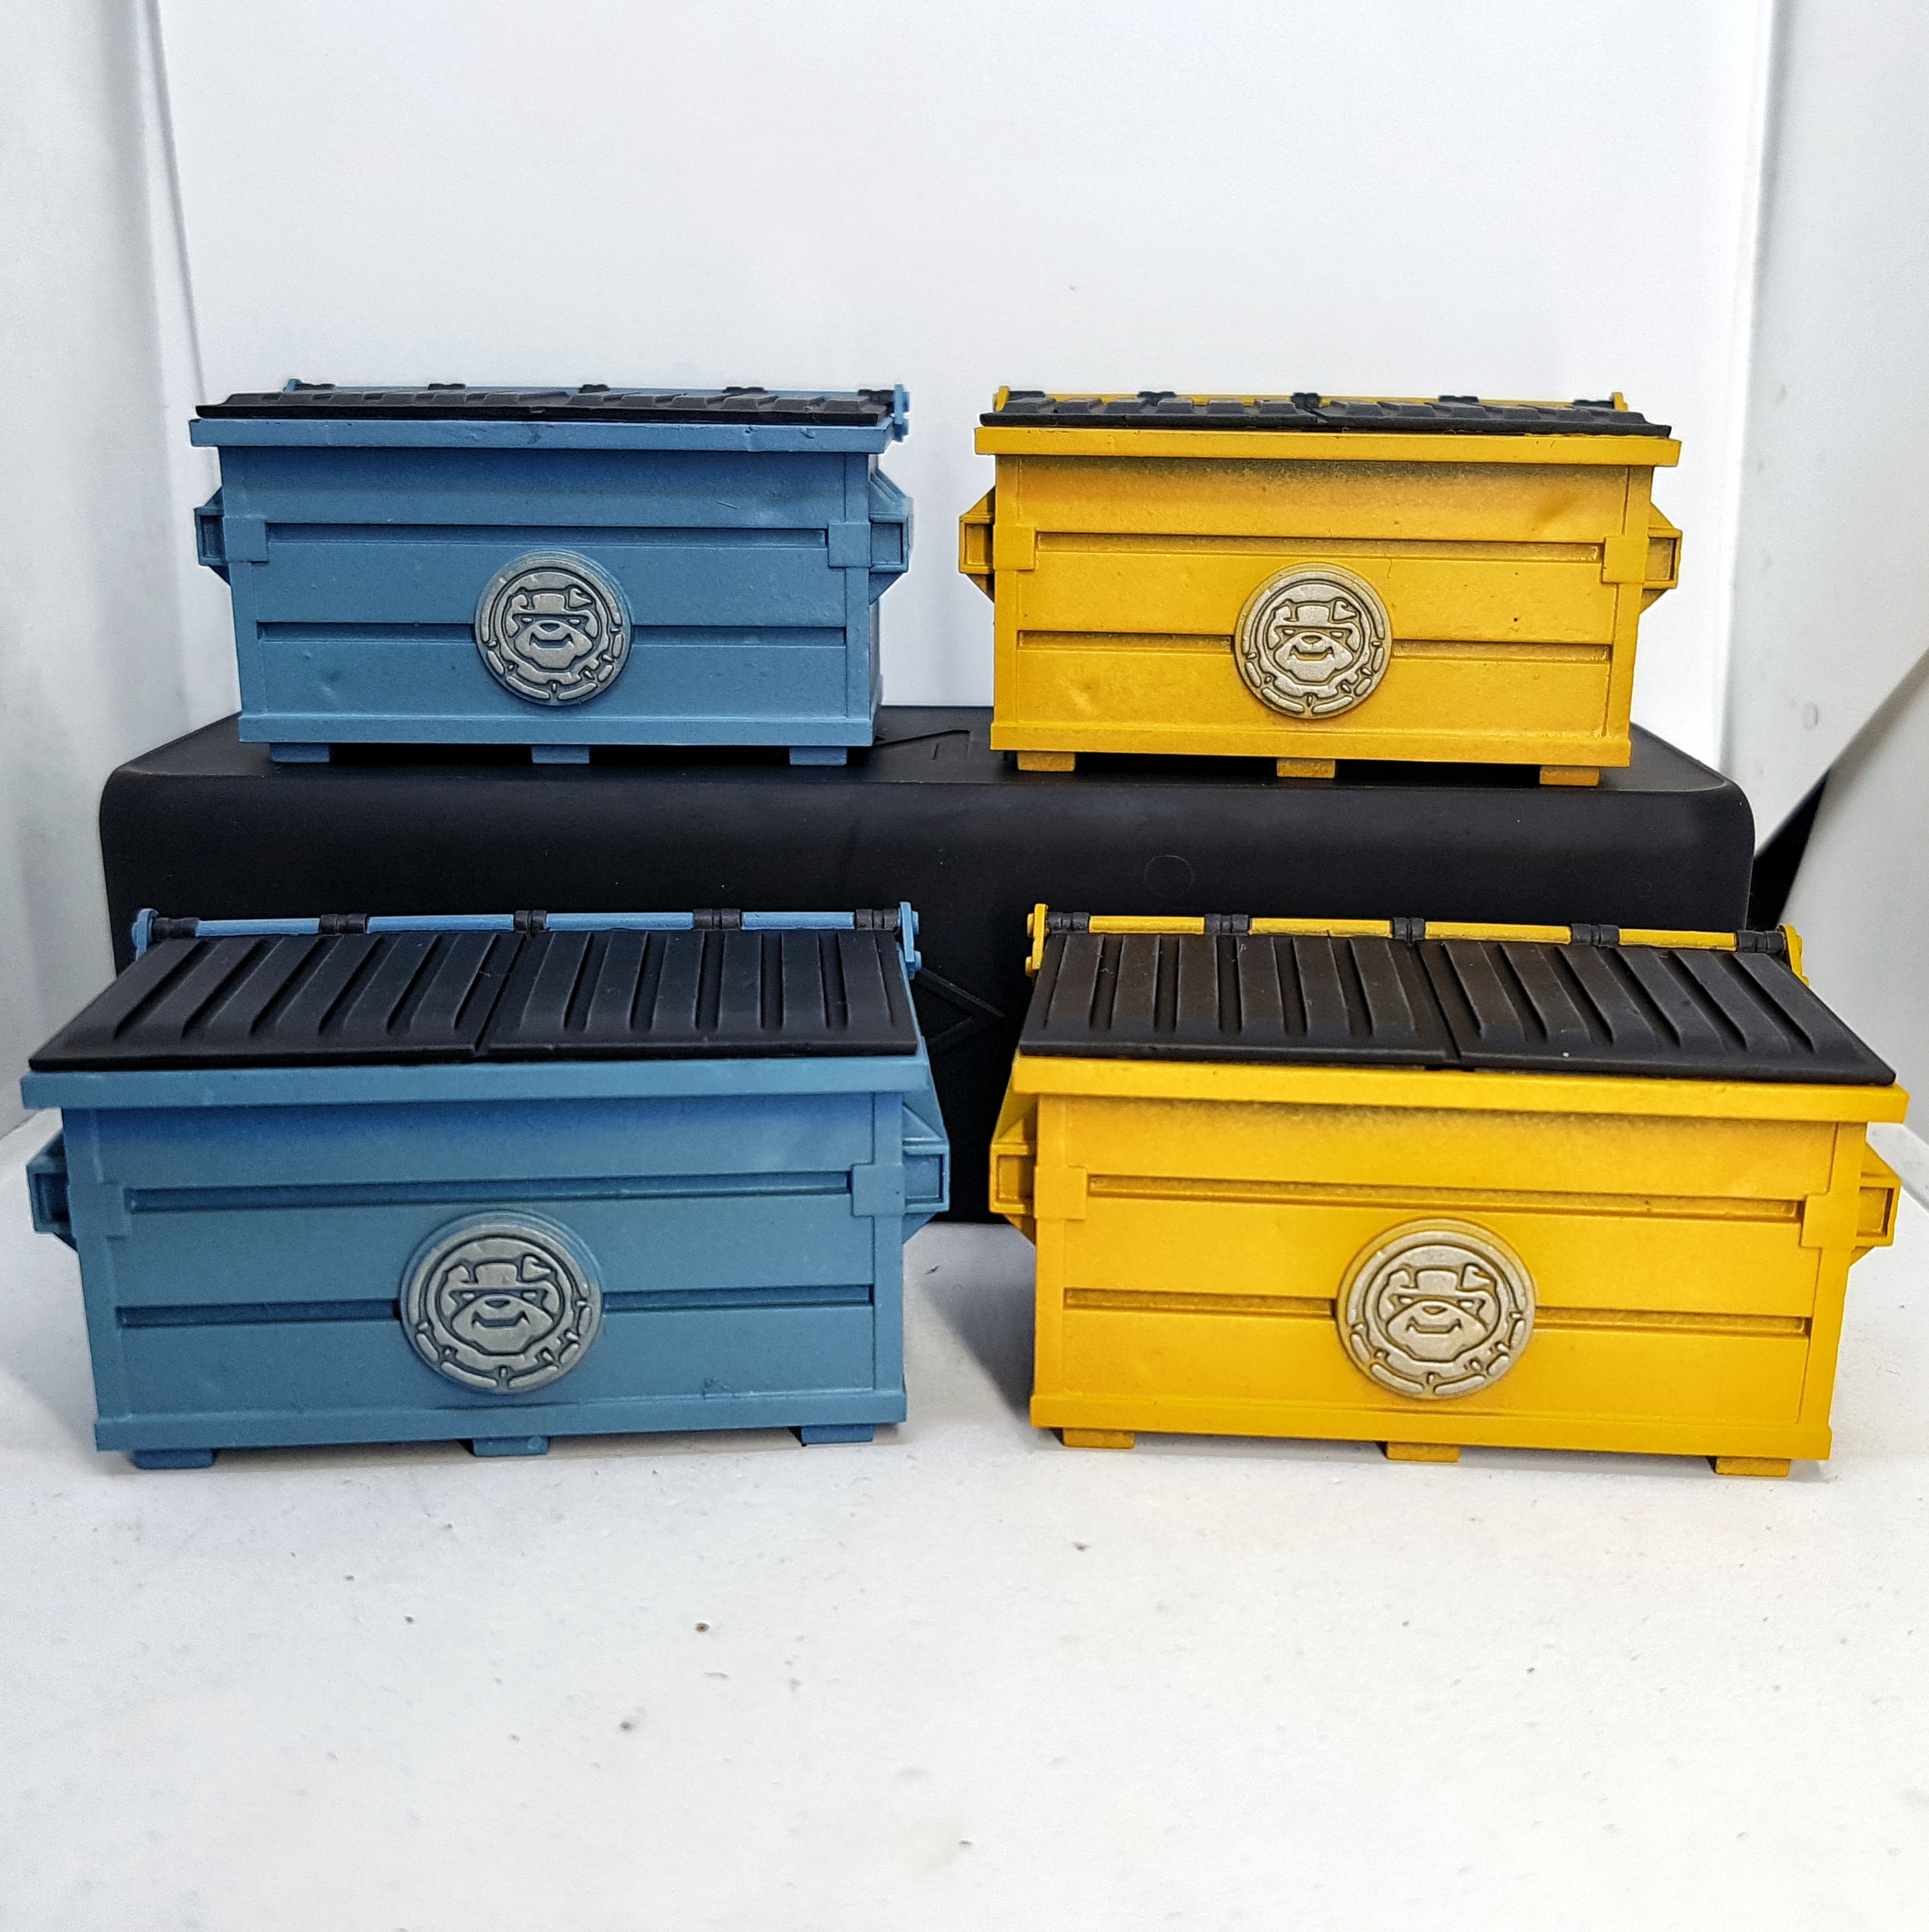
Dumpsters and Lights Video
Everything was primed in one sitting and left overnight to dry.
EDIT: 12/05/2023
It appears that Ghools channel and videos are down. I have no idea if they’re coming back up and if these links will ever work again. I have made notes in a later post on how I think I did those windows.

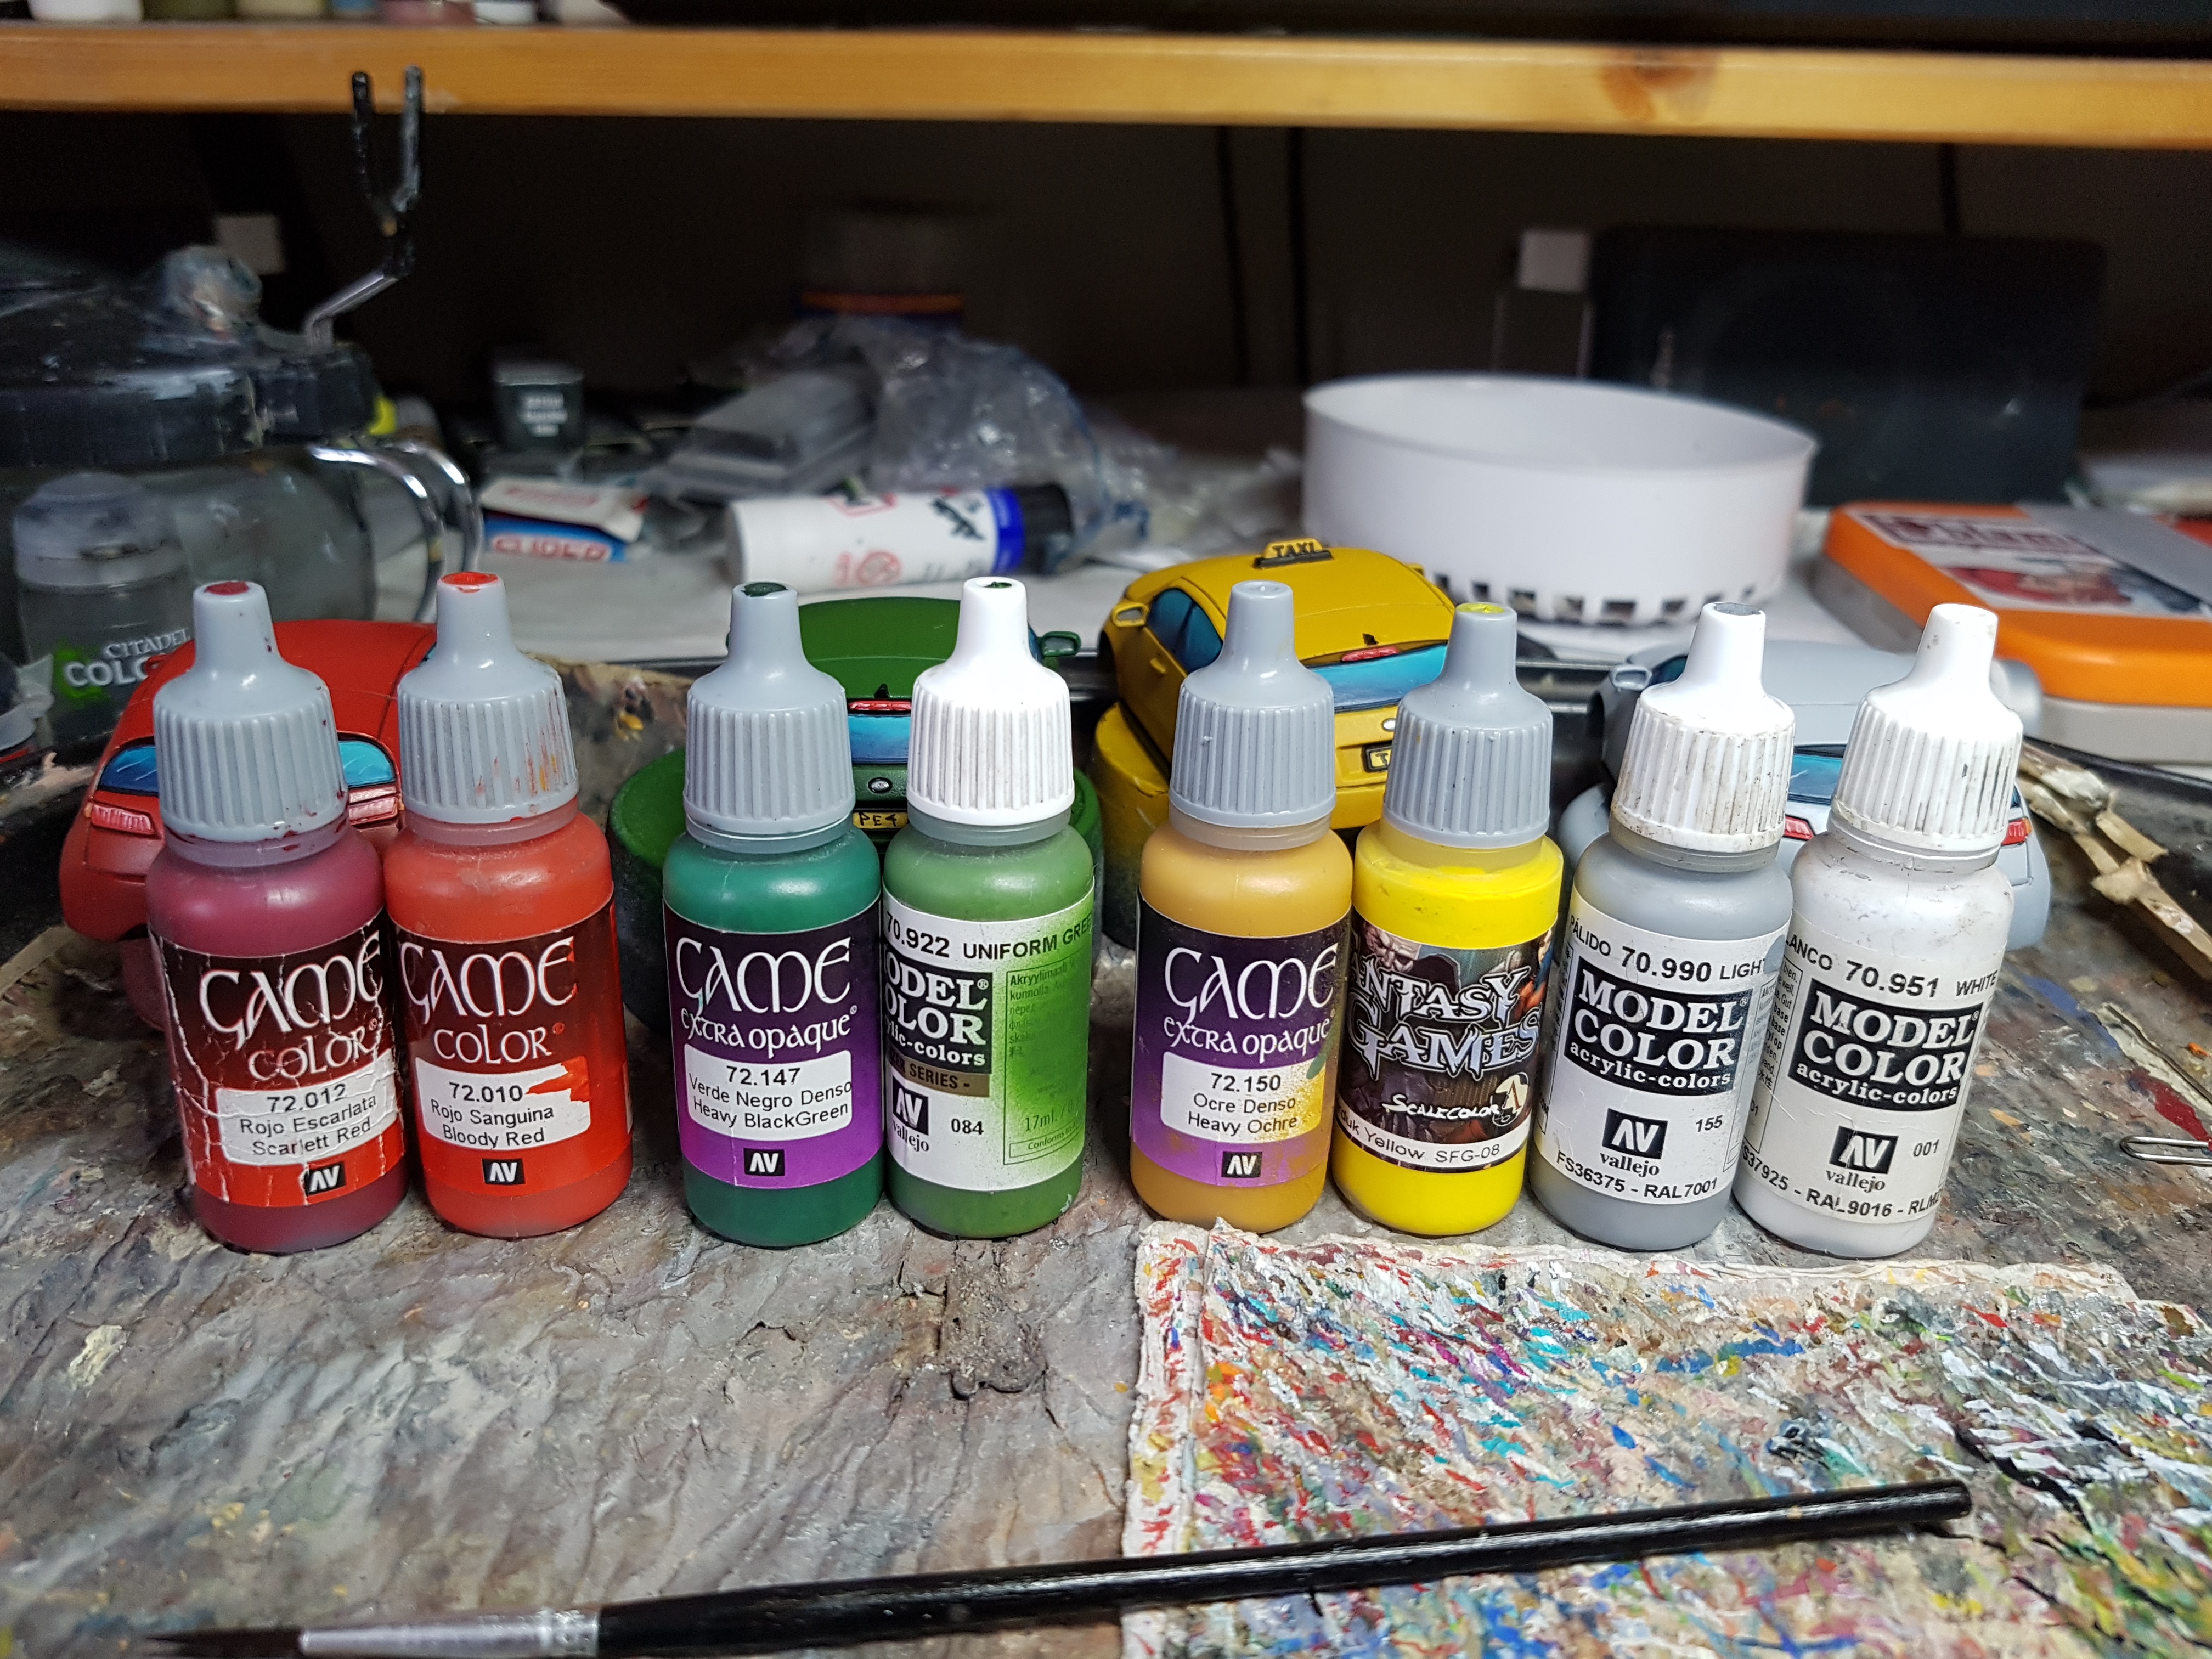
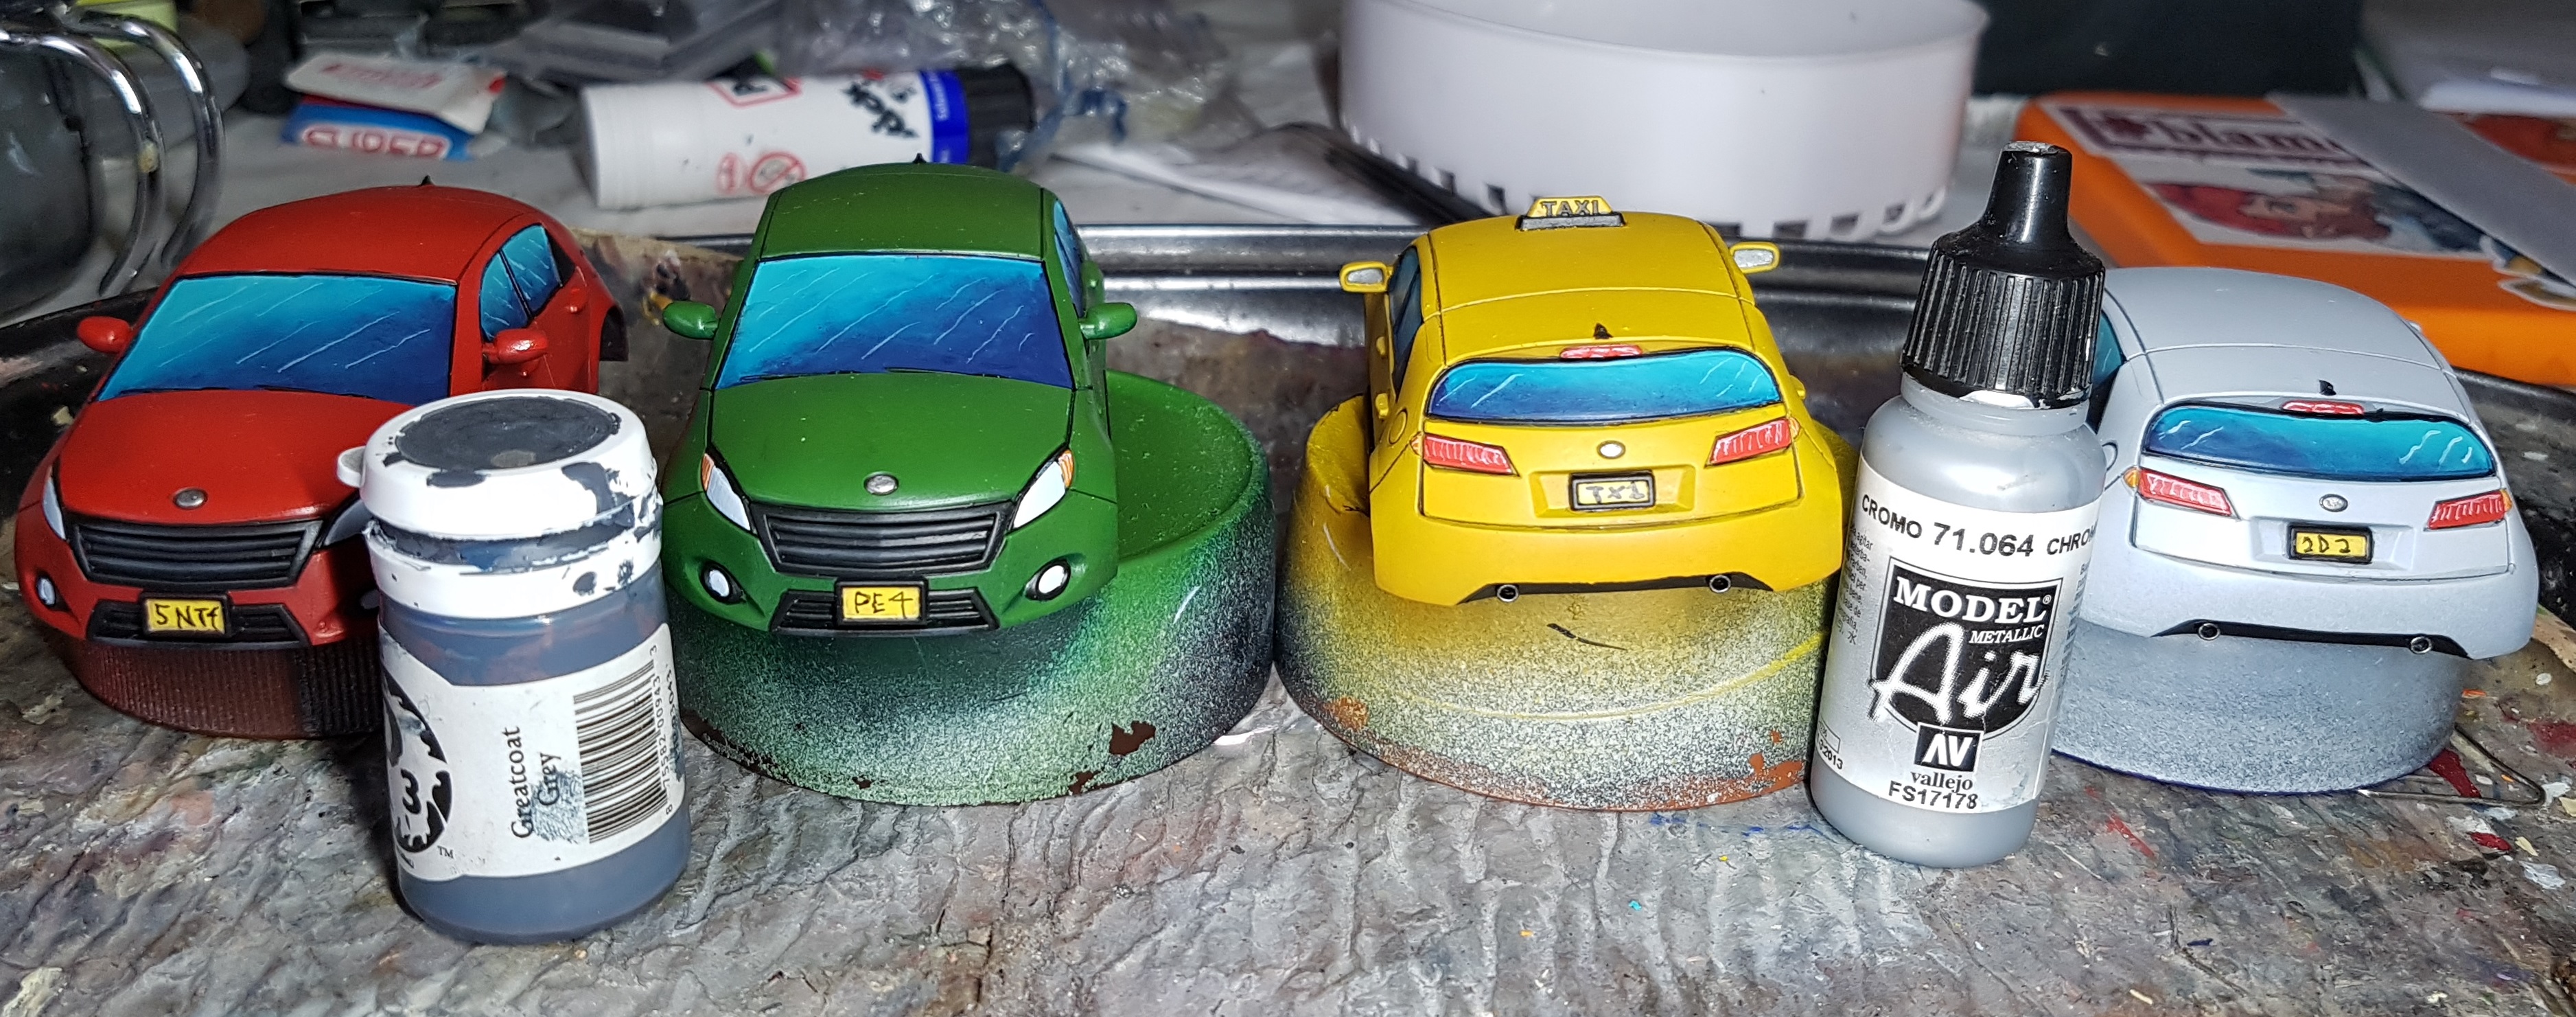
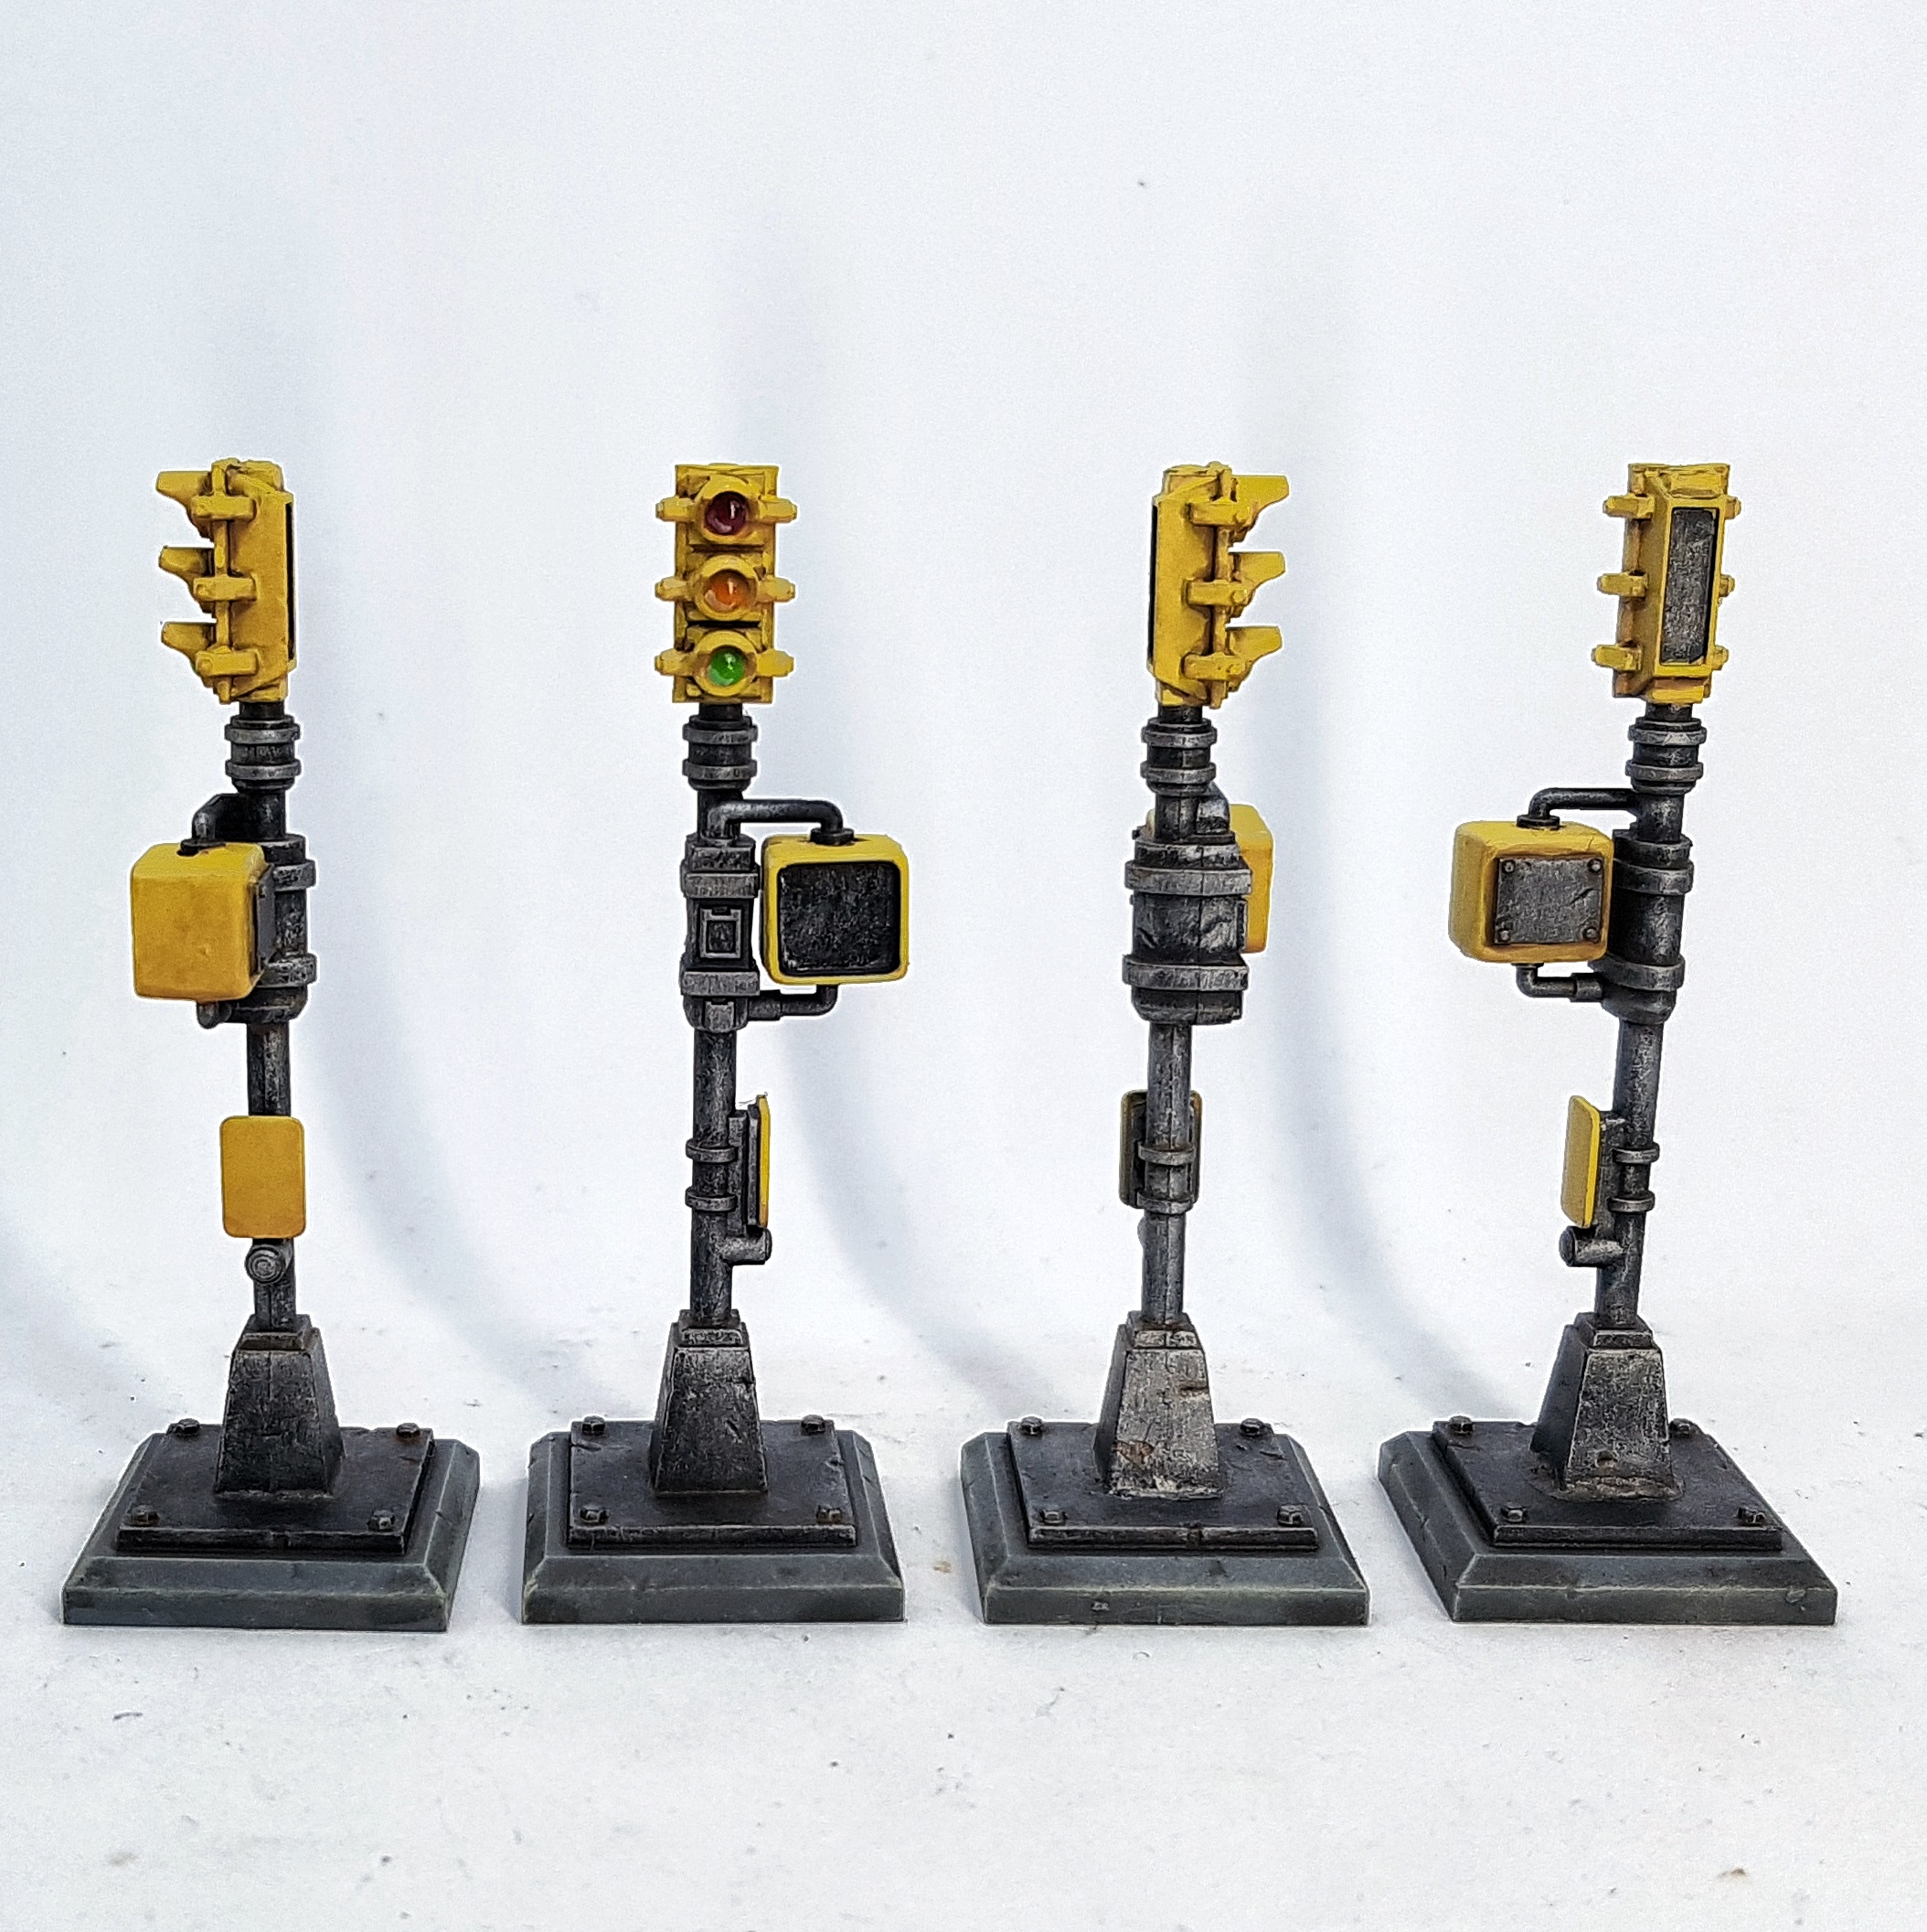
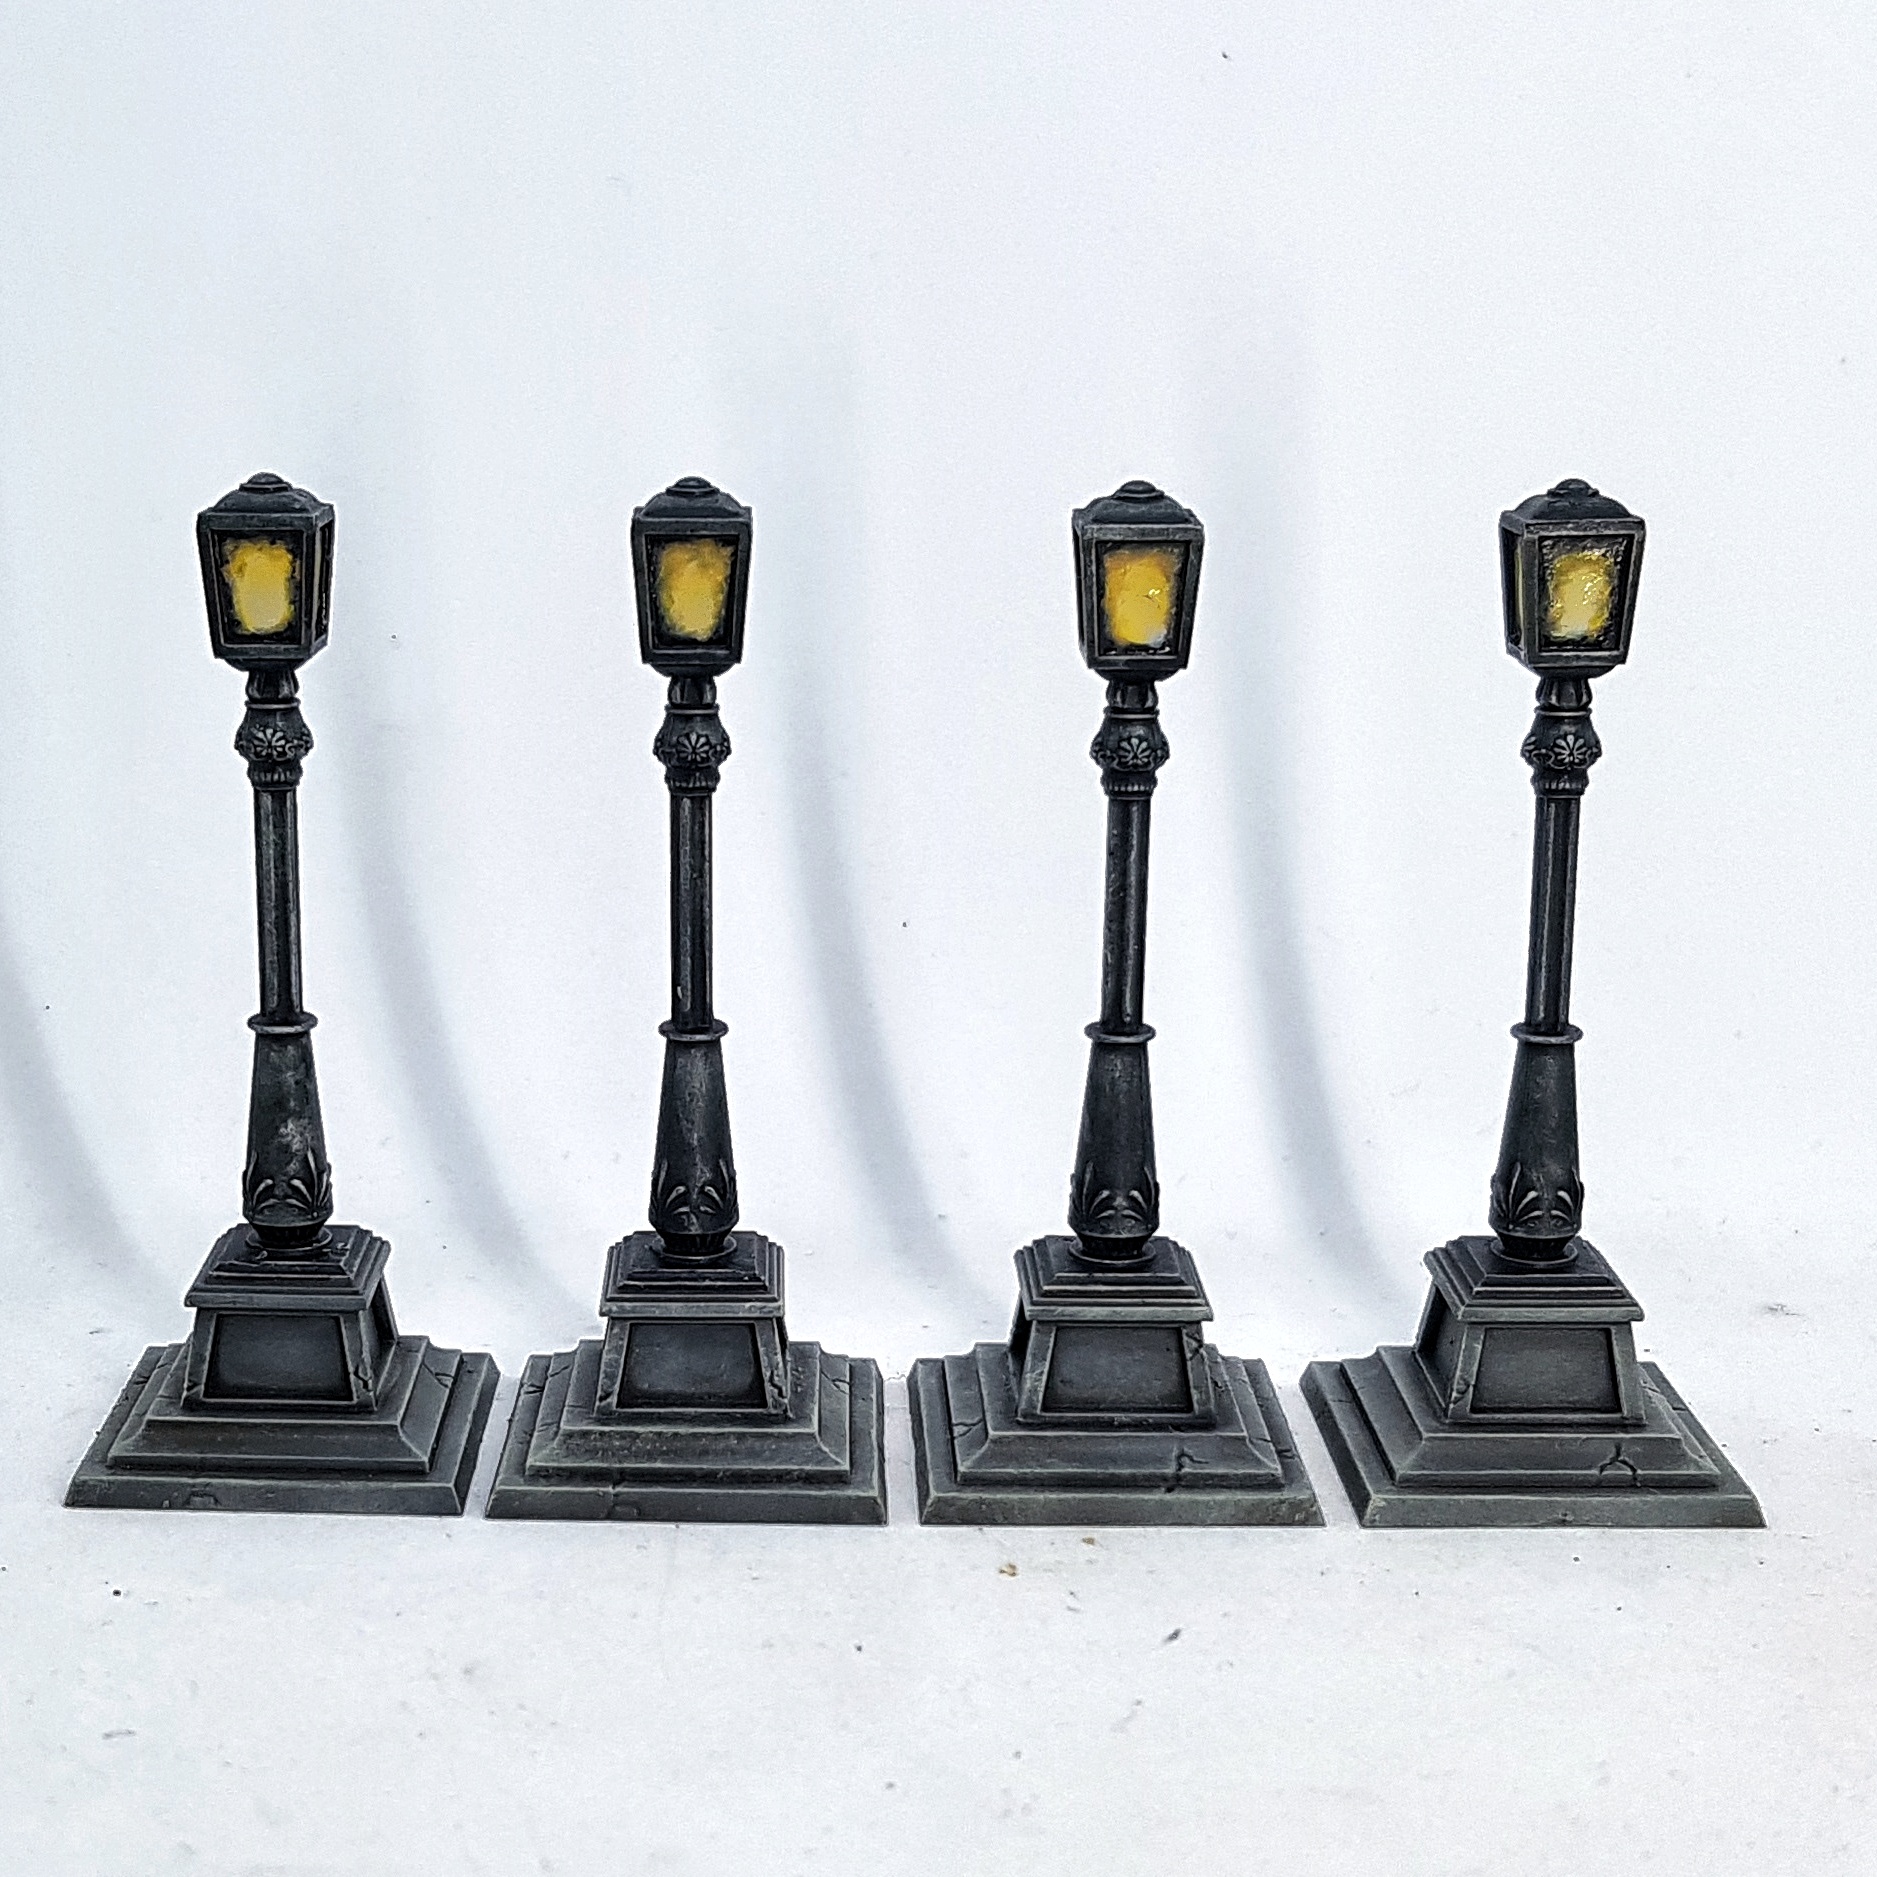
The next day I base coated everything, except for the three buildings. I’ll deal with them when everything else is done. I then went on to paint the bins, traffic lights and street lamps, as they didn’t need any airbrush work. They were painted following the videos pretty much exactly. I used the same paving scheme as I used for my bases. It’s good to tie everything together. I didn’t get them finished this day though.
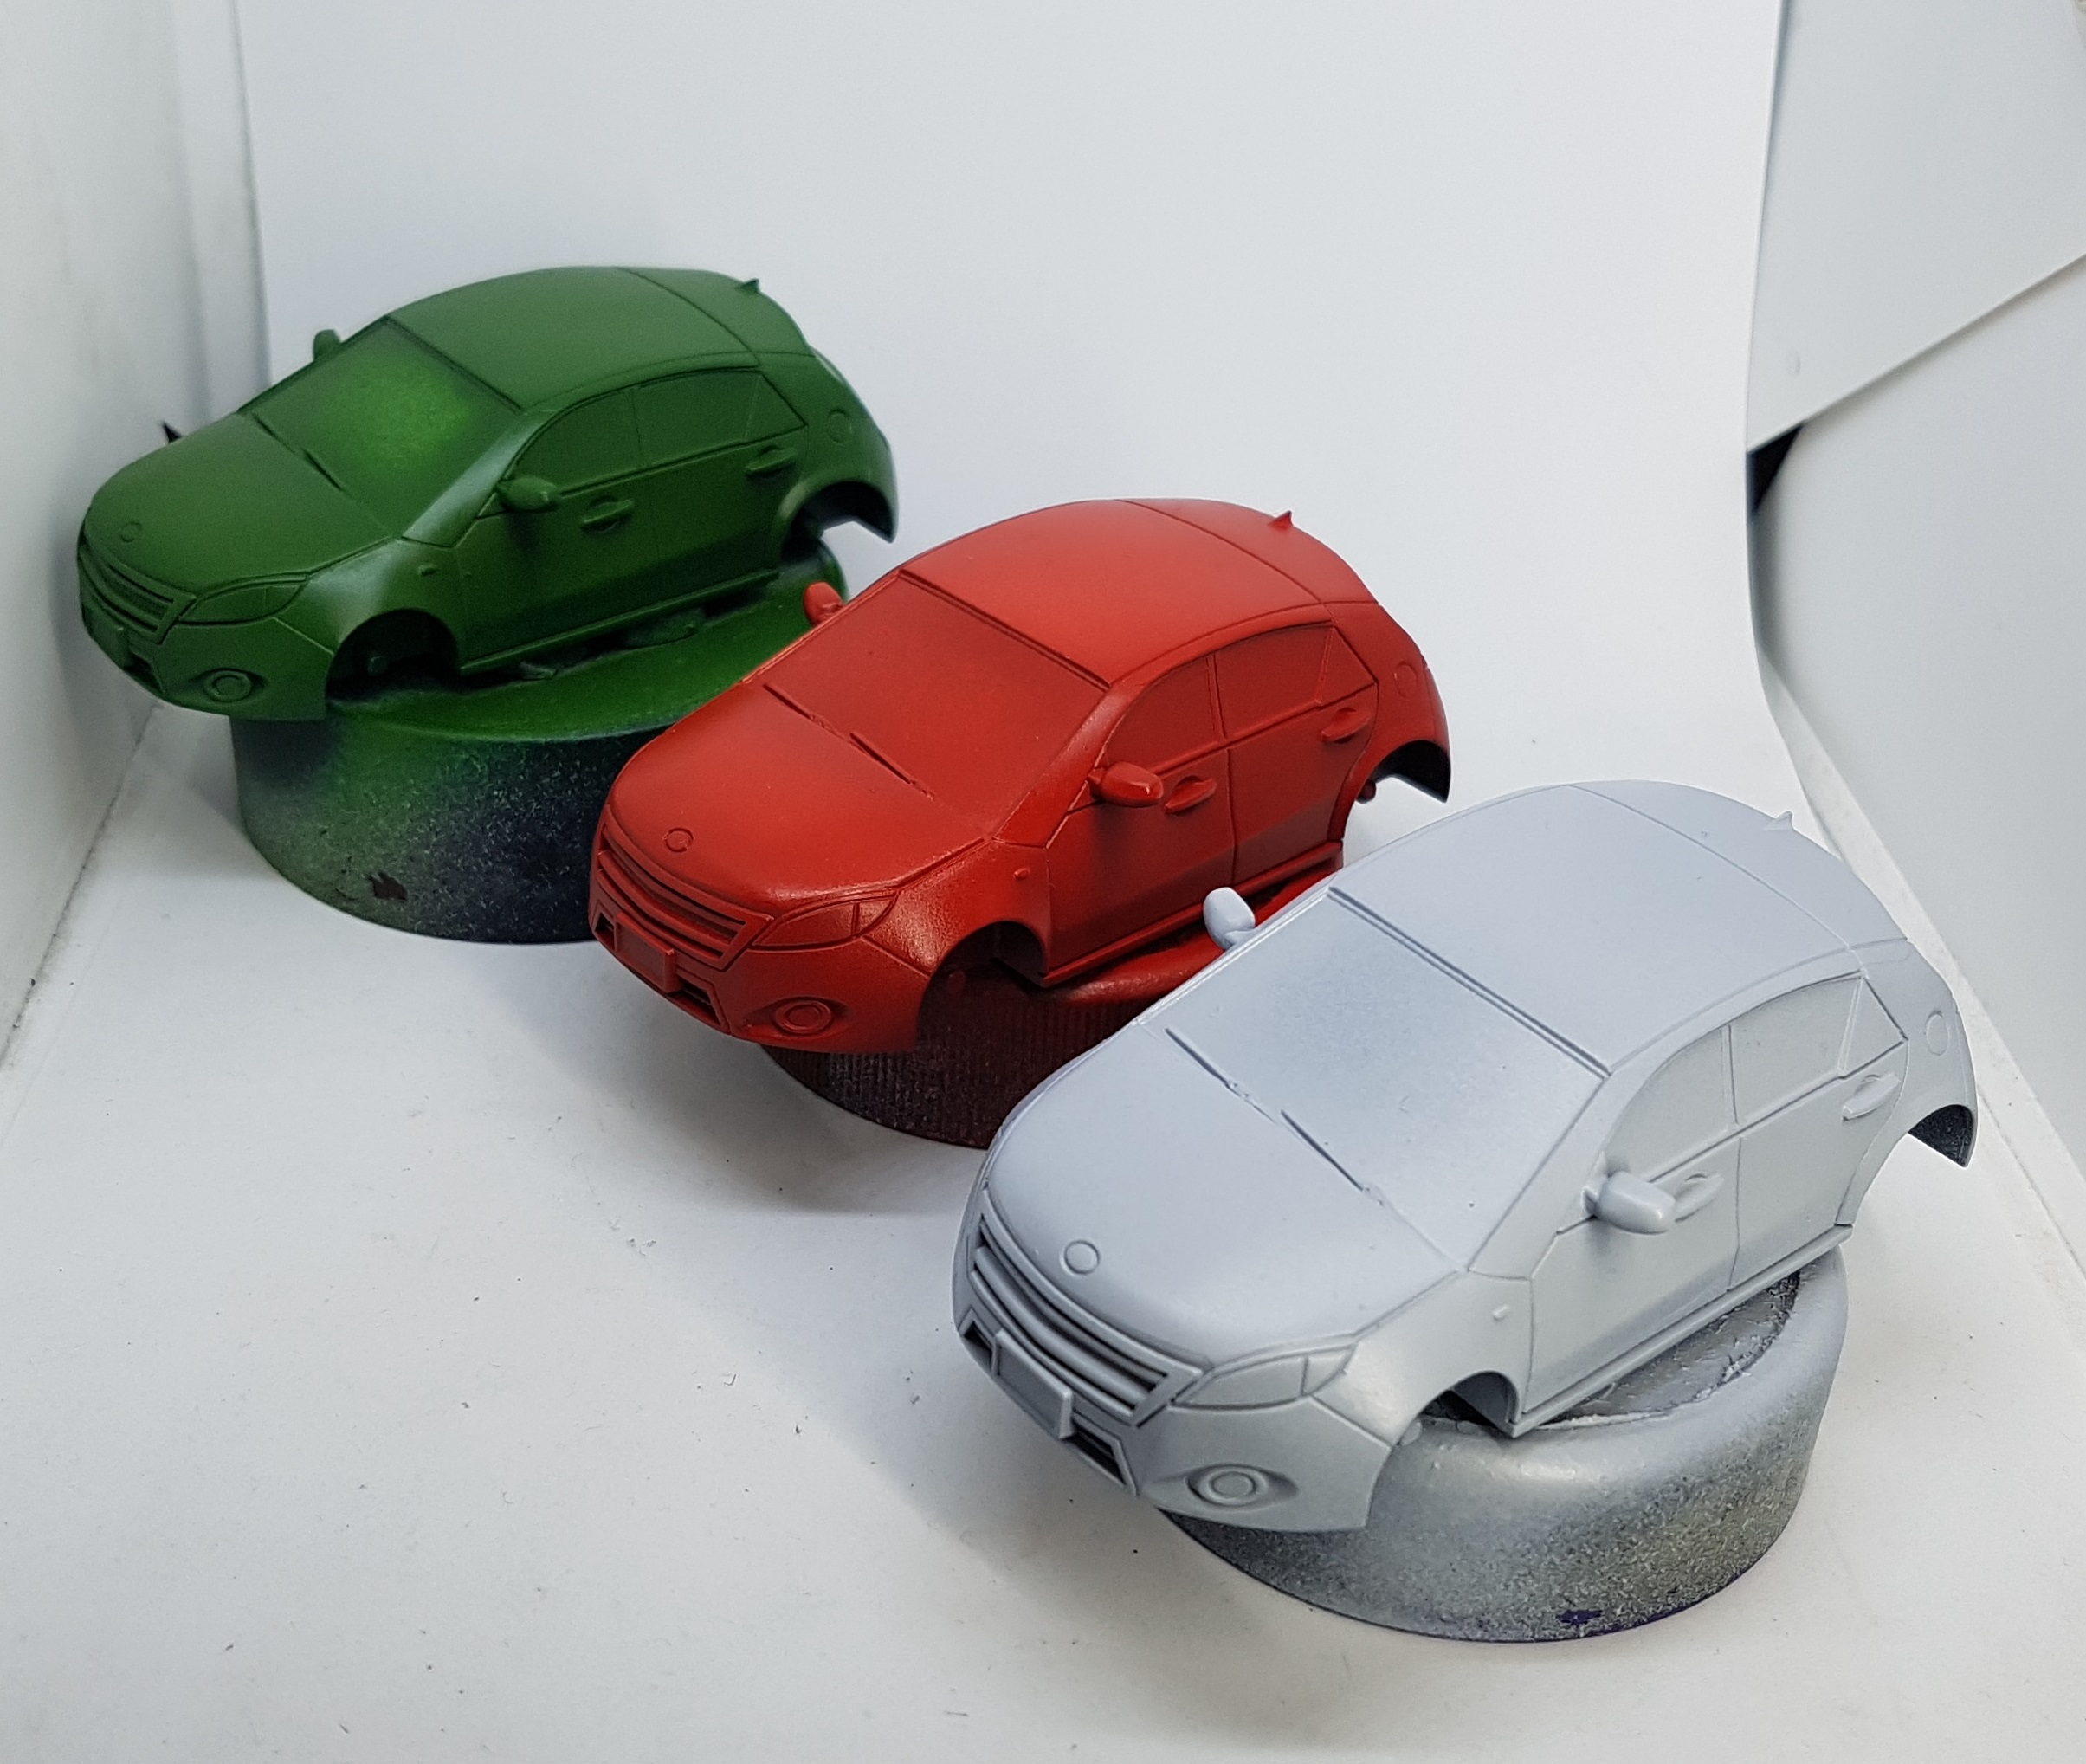
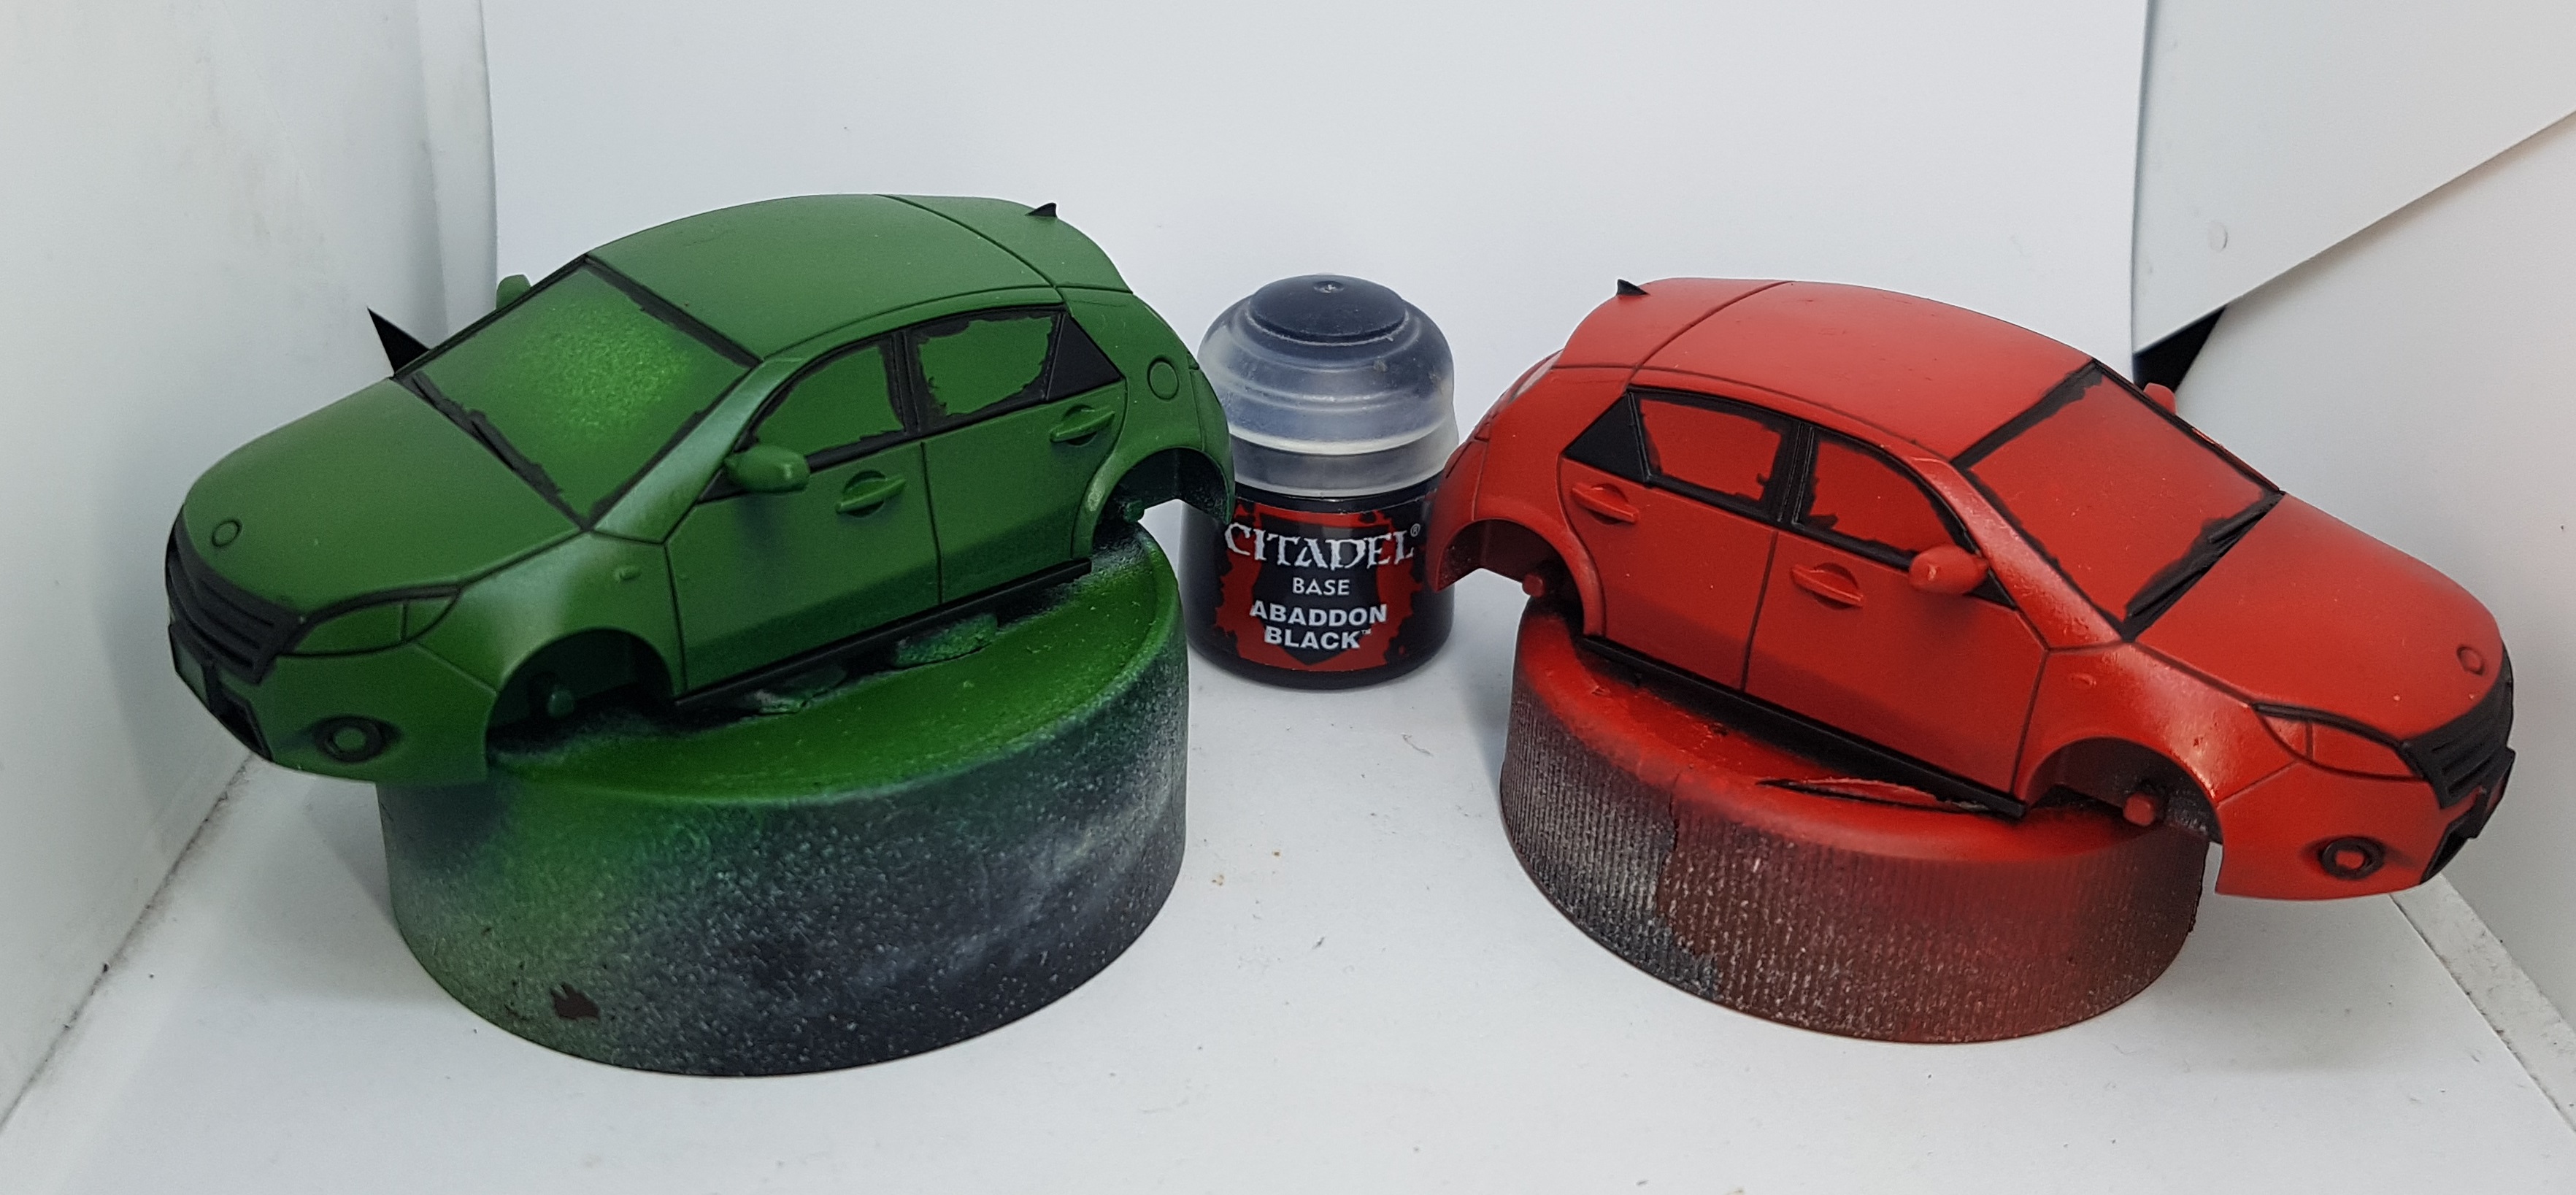
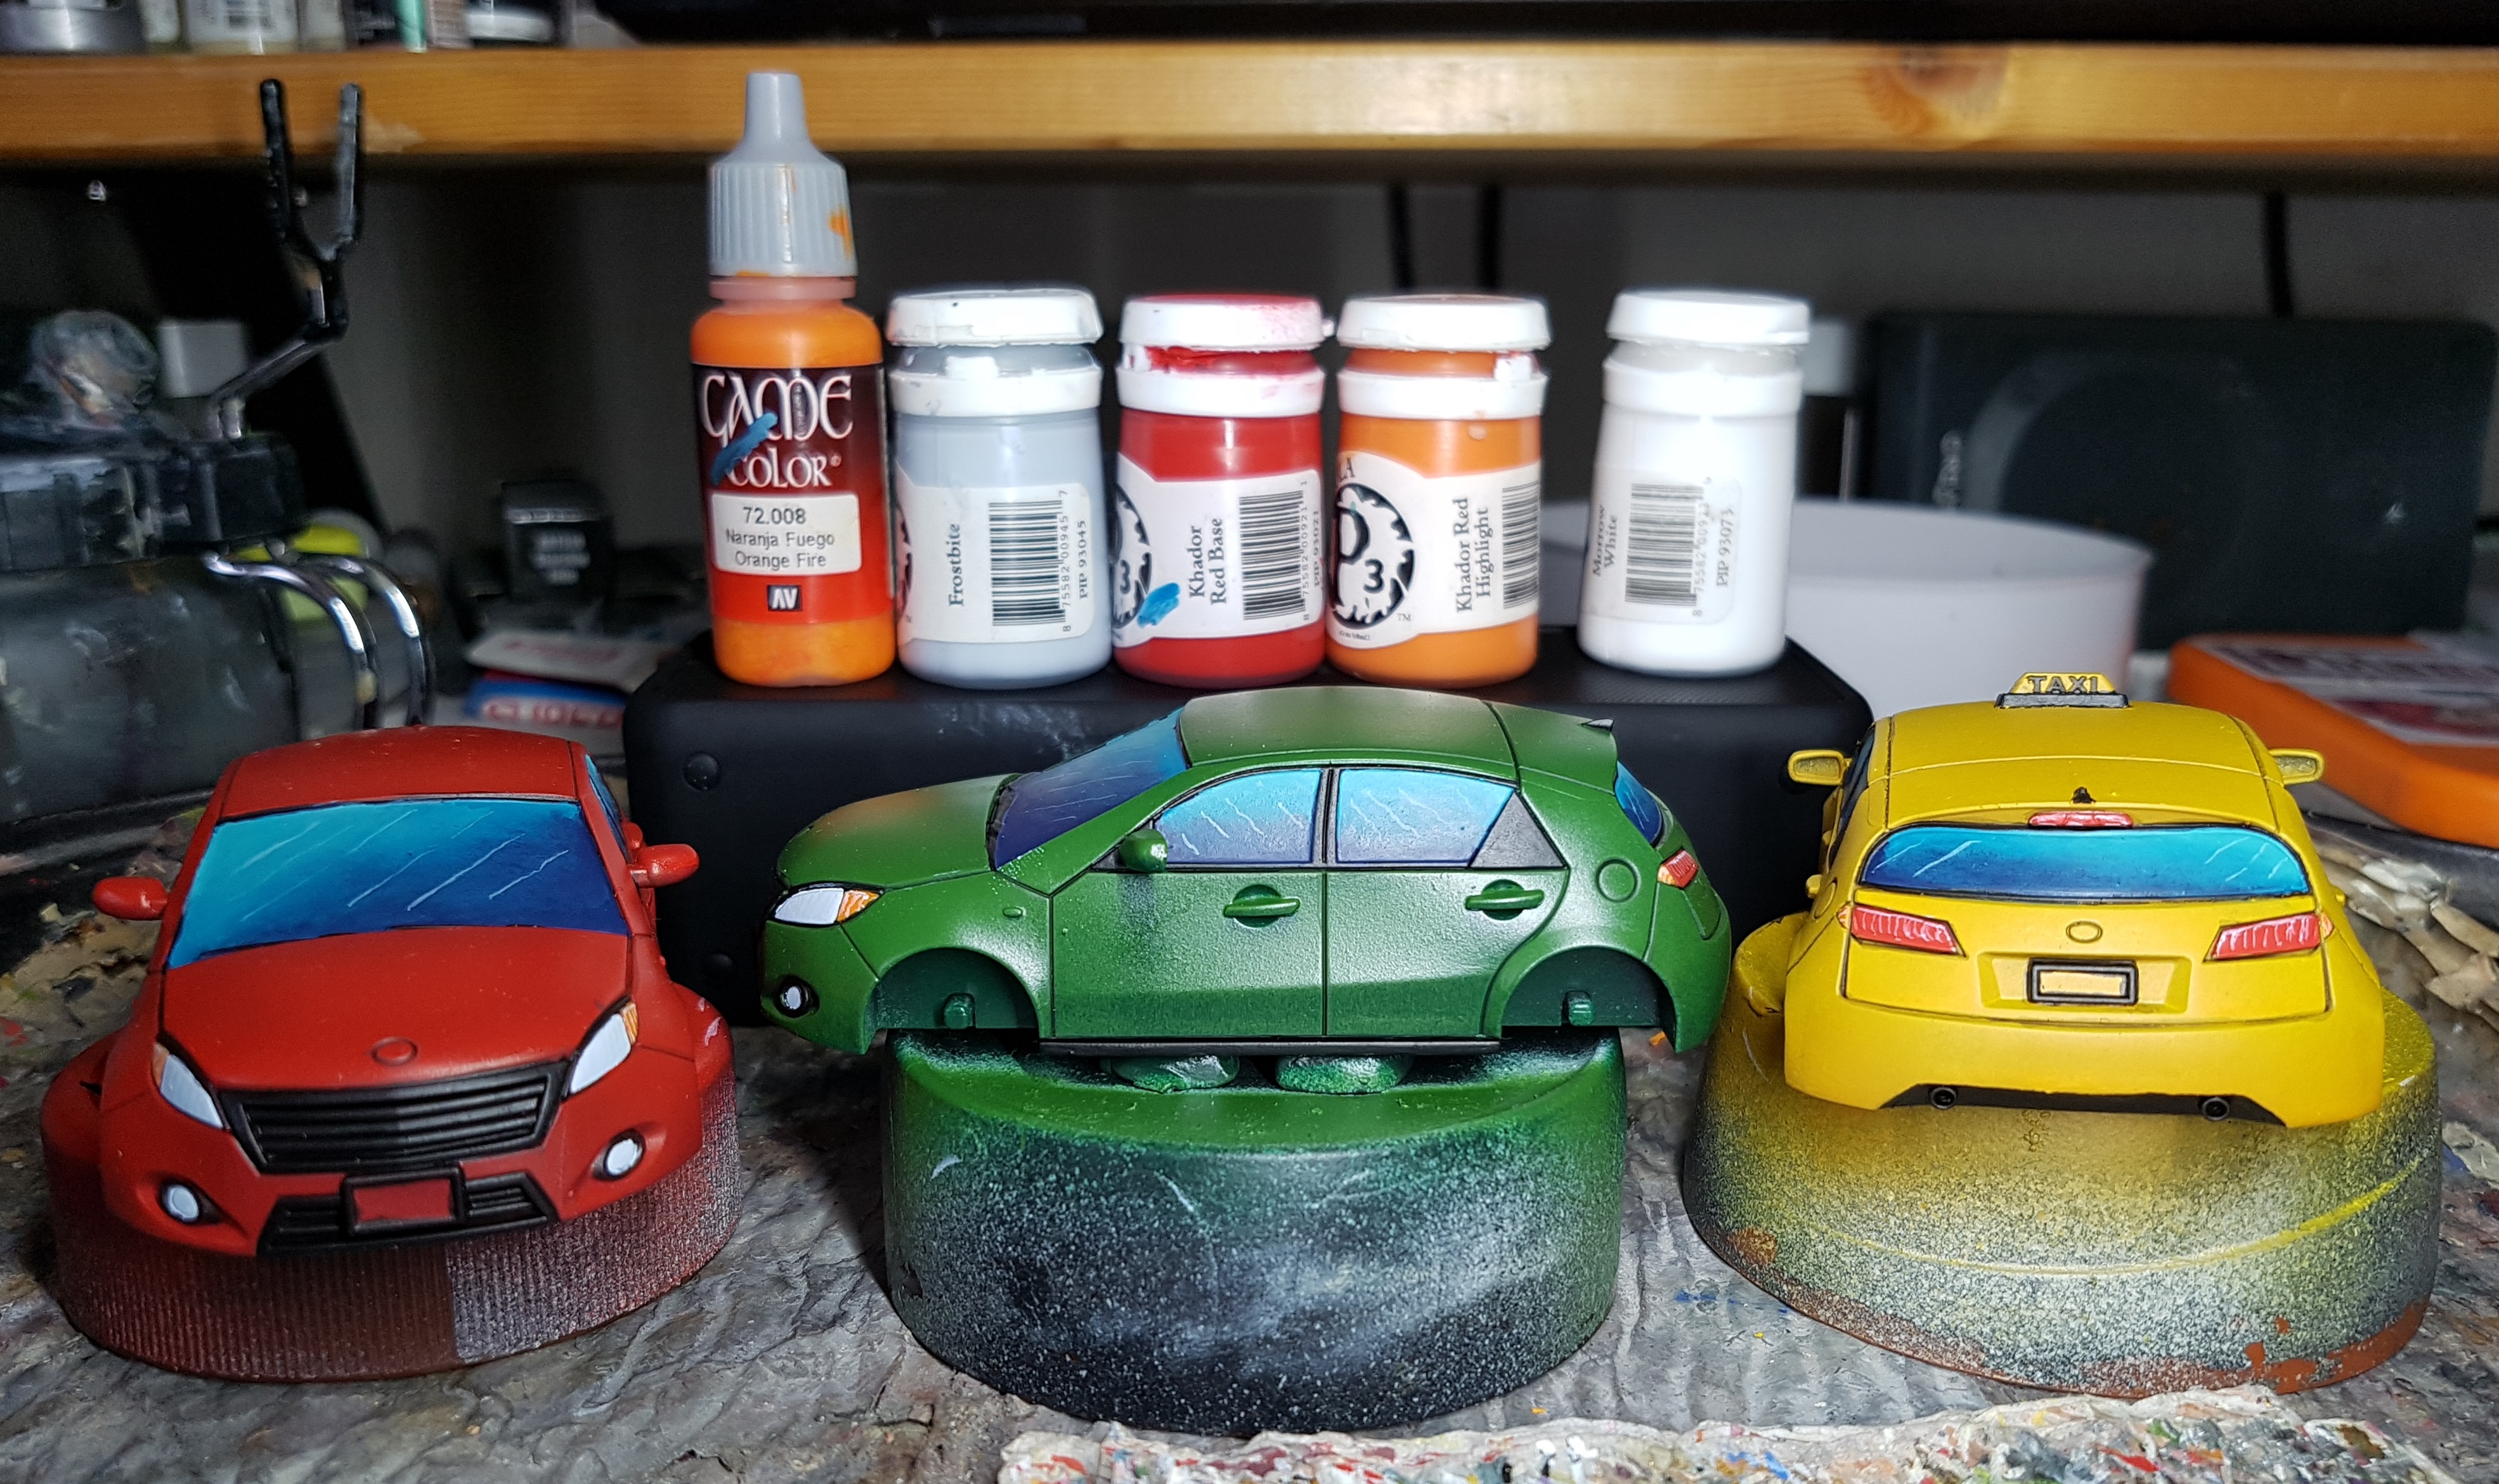
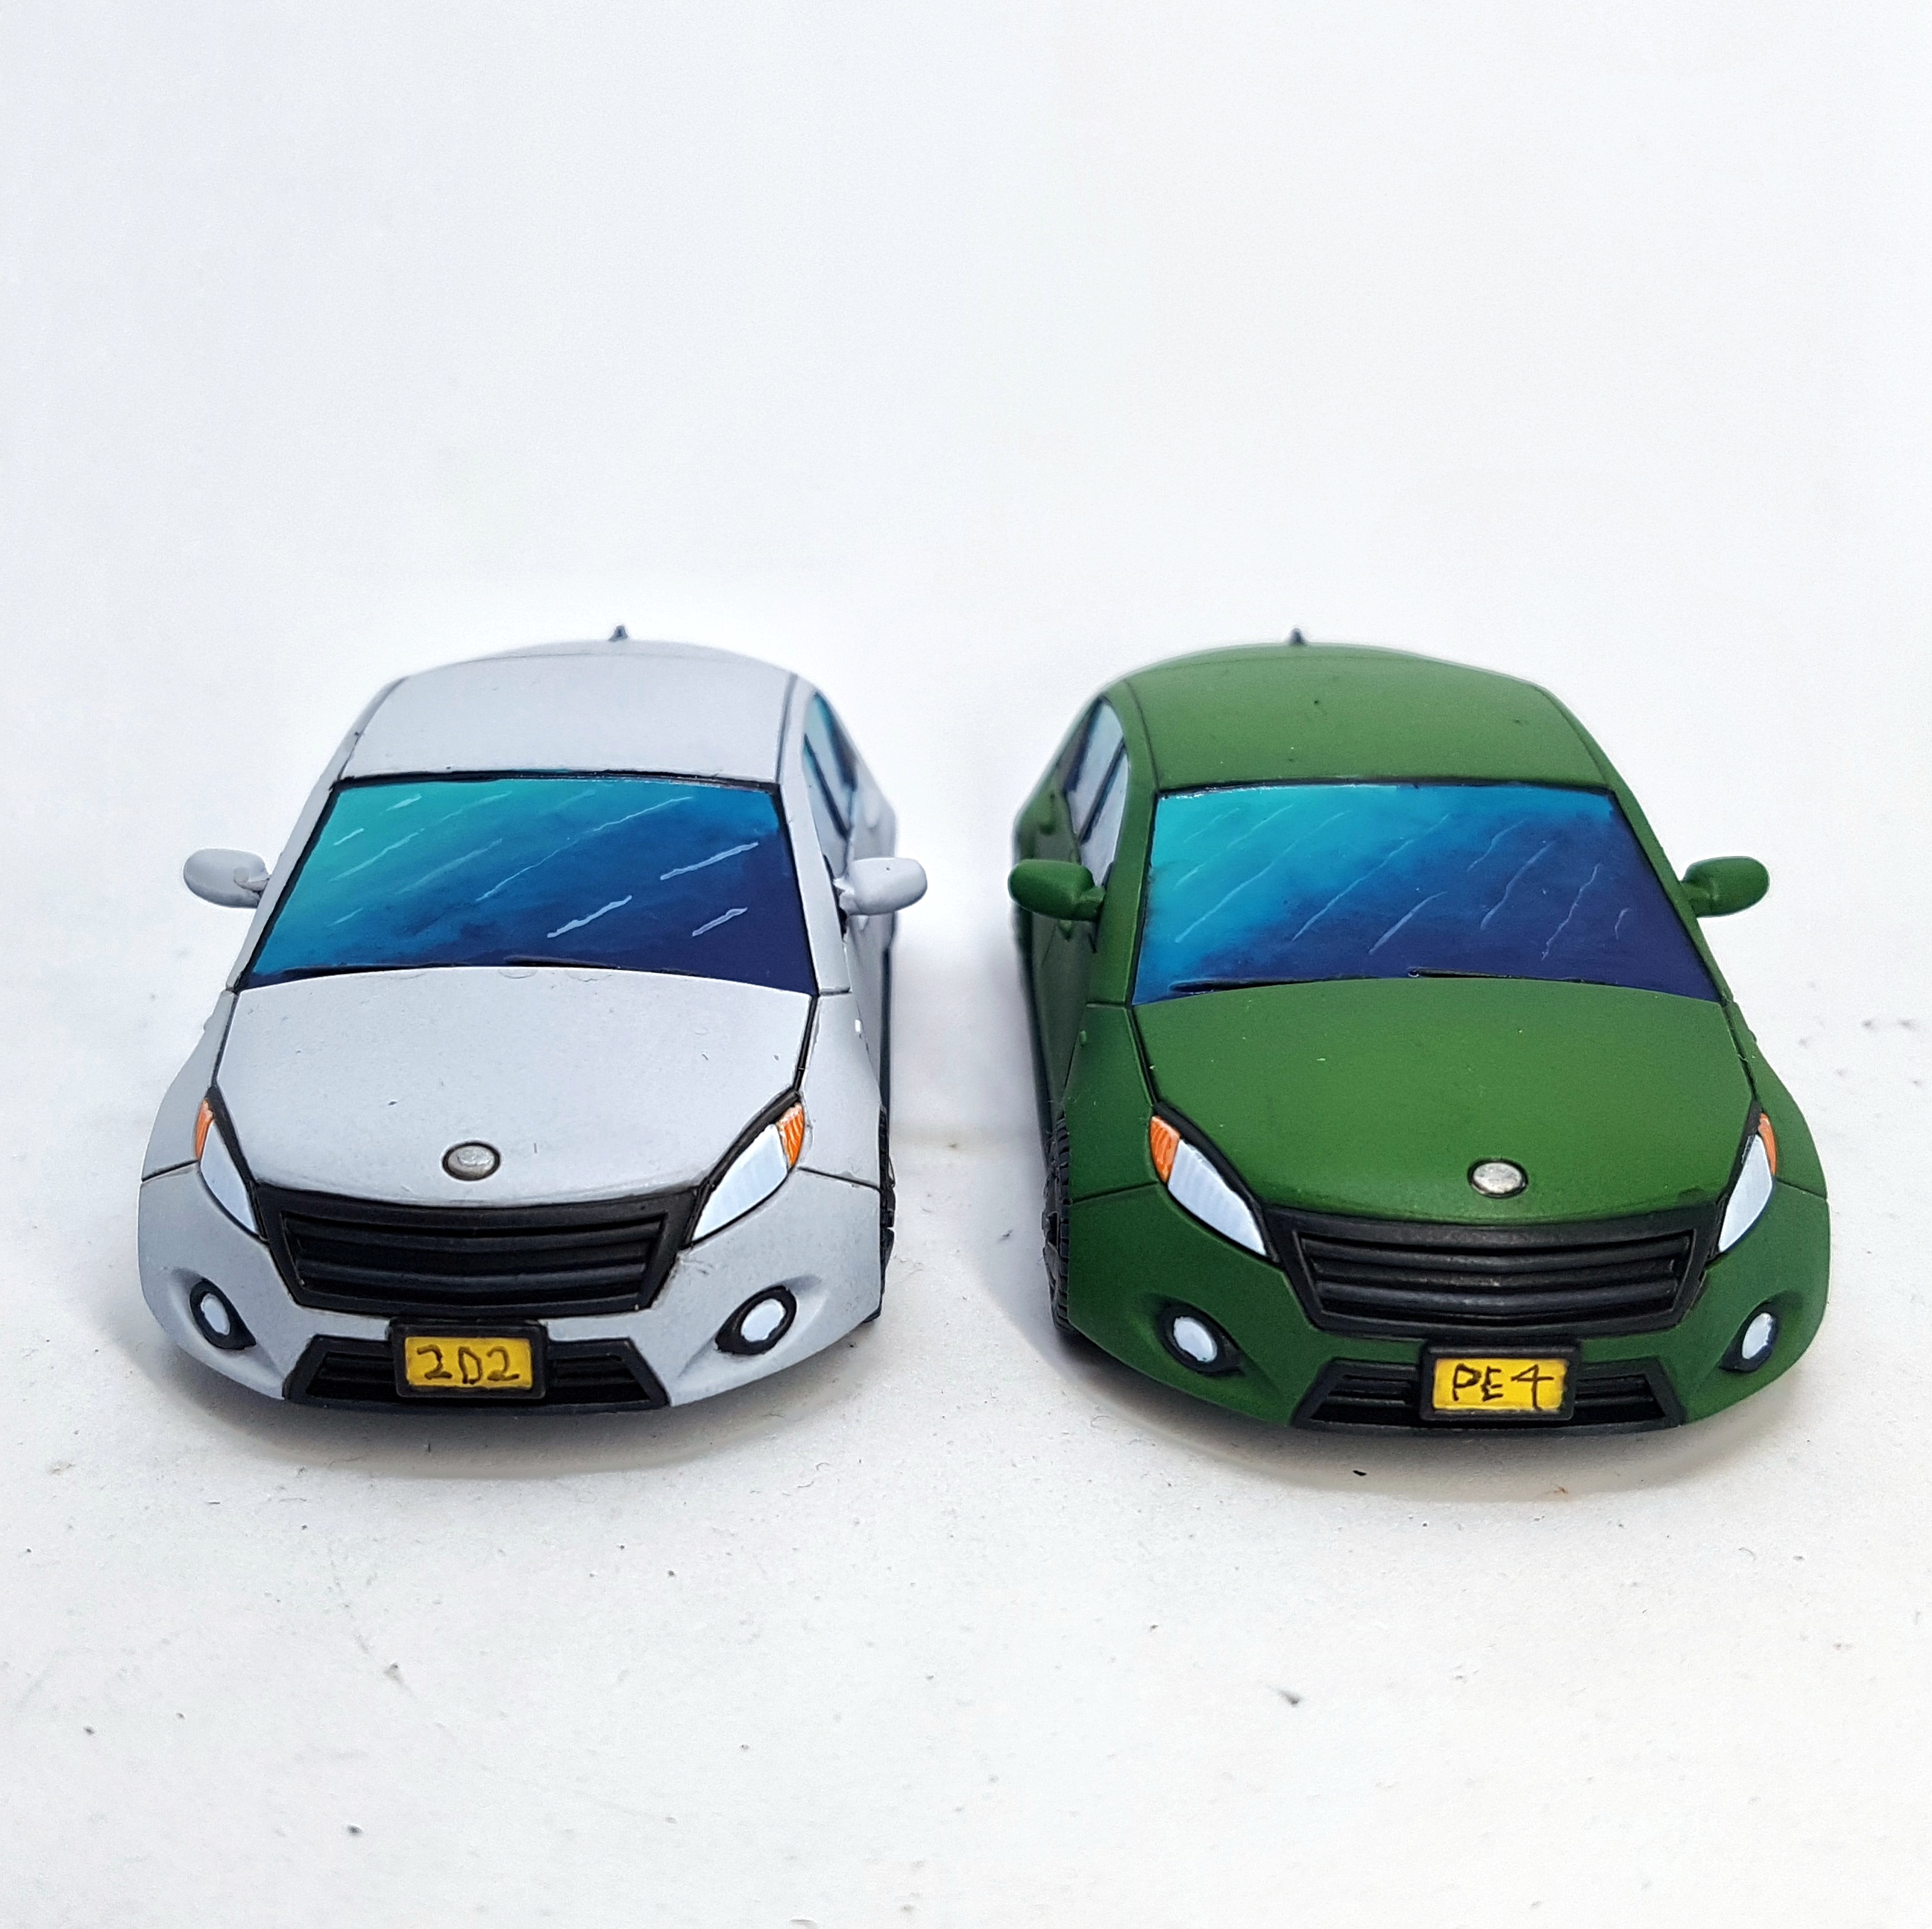
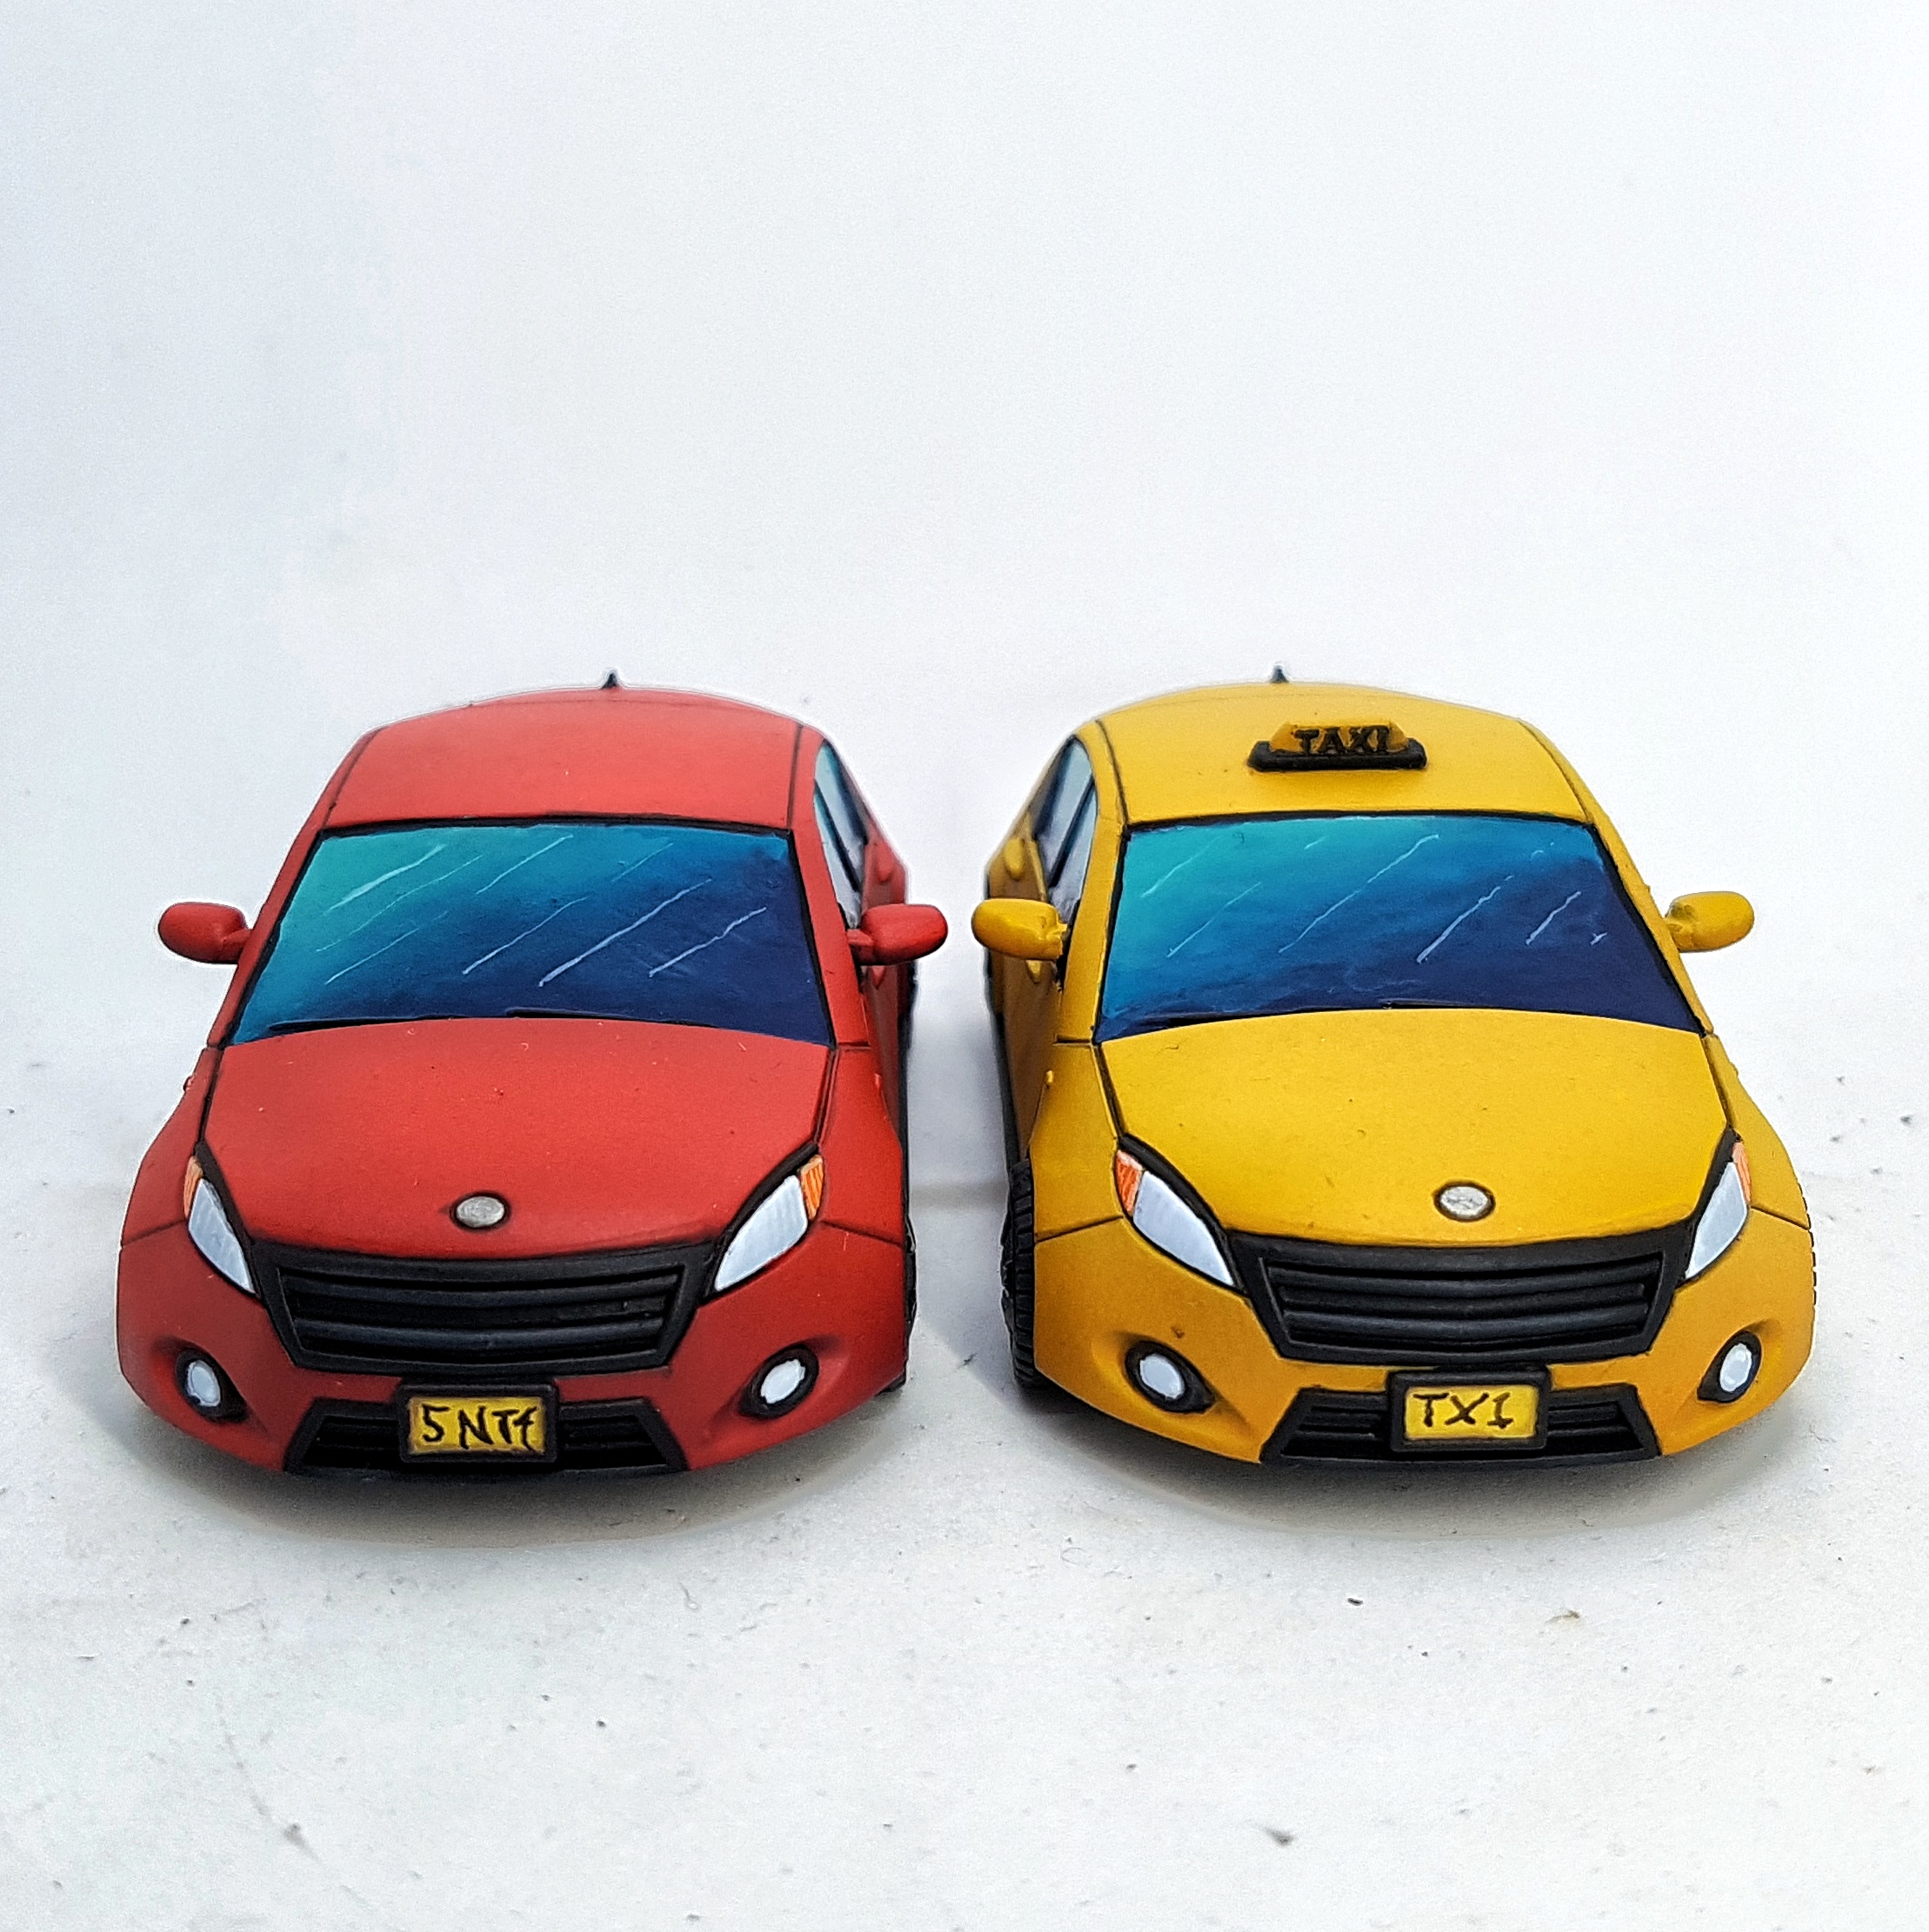
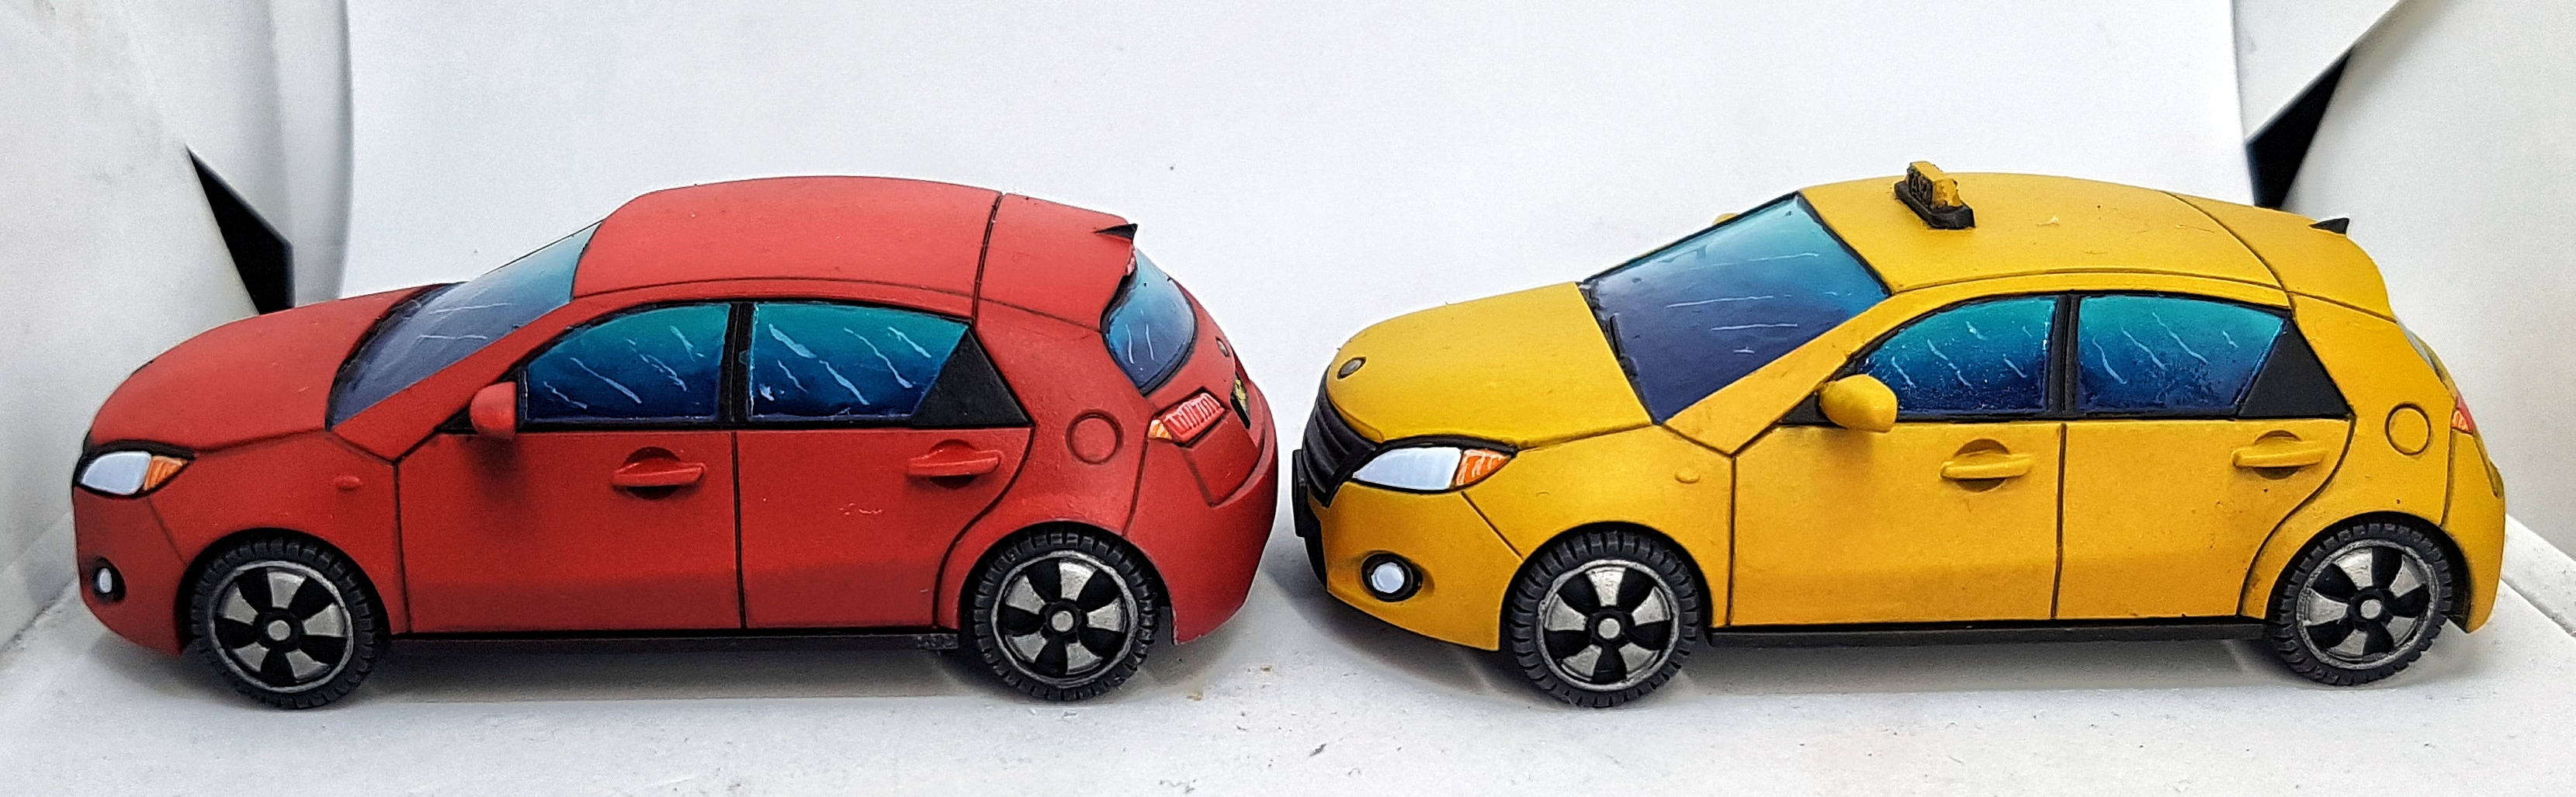
Red Car
Undercoat VGC 72.012 Scarlett Red
Zenithal Highlight VGC 72.010 Bloody Red
Green Car
Undercoat VGC 72.147 Heavy Black Green
Zenithal Highlight VMC 70.922 Uniform Green
Yellow Stuff
Undercoat VGC 72.150 Heavy Ochre
Zenithal Highlight Scalecolour SFG-08 Marduk Yellow
White Car
Undercoat VMC 70.990 Light Grey mixed with enough VMC 70.951 White to make it a “dark white” more than the grey it was before
Zenithal Highlight with more of the above with a lot more white added. Never go pure white, but get close.
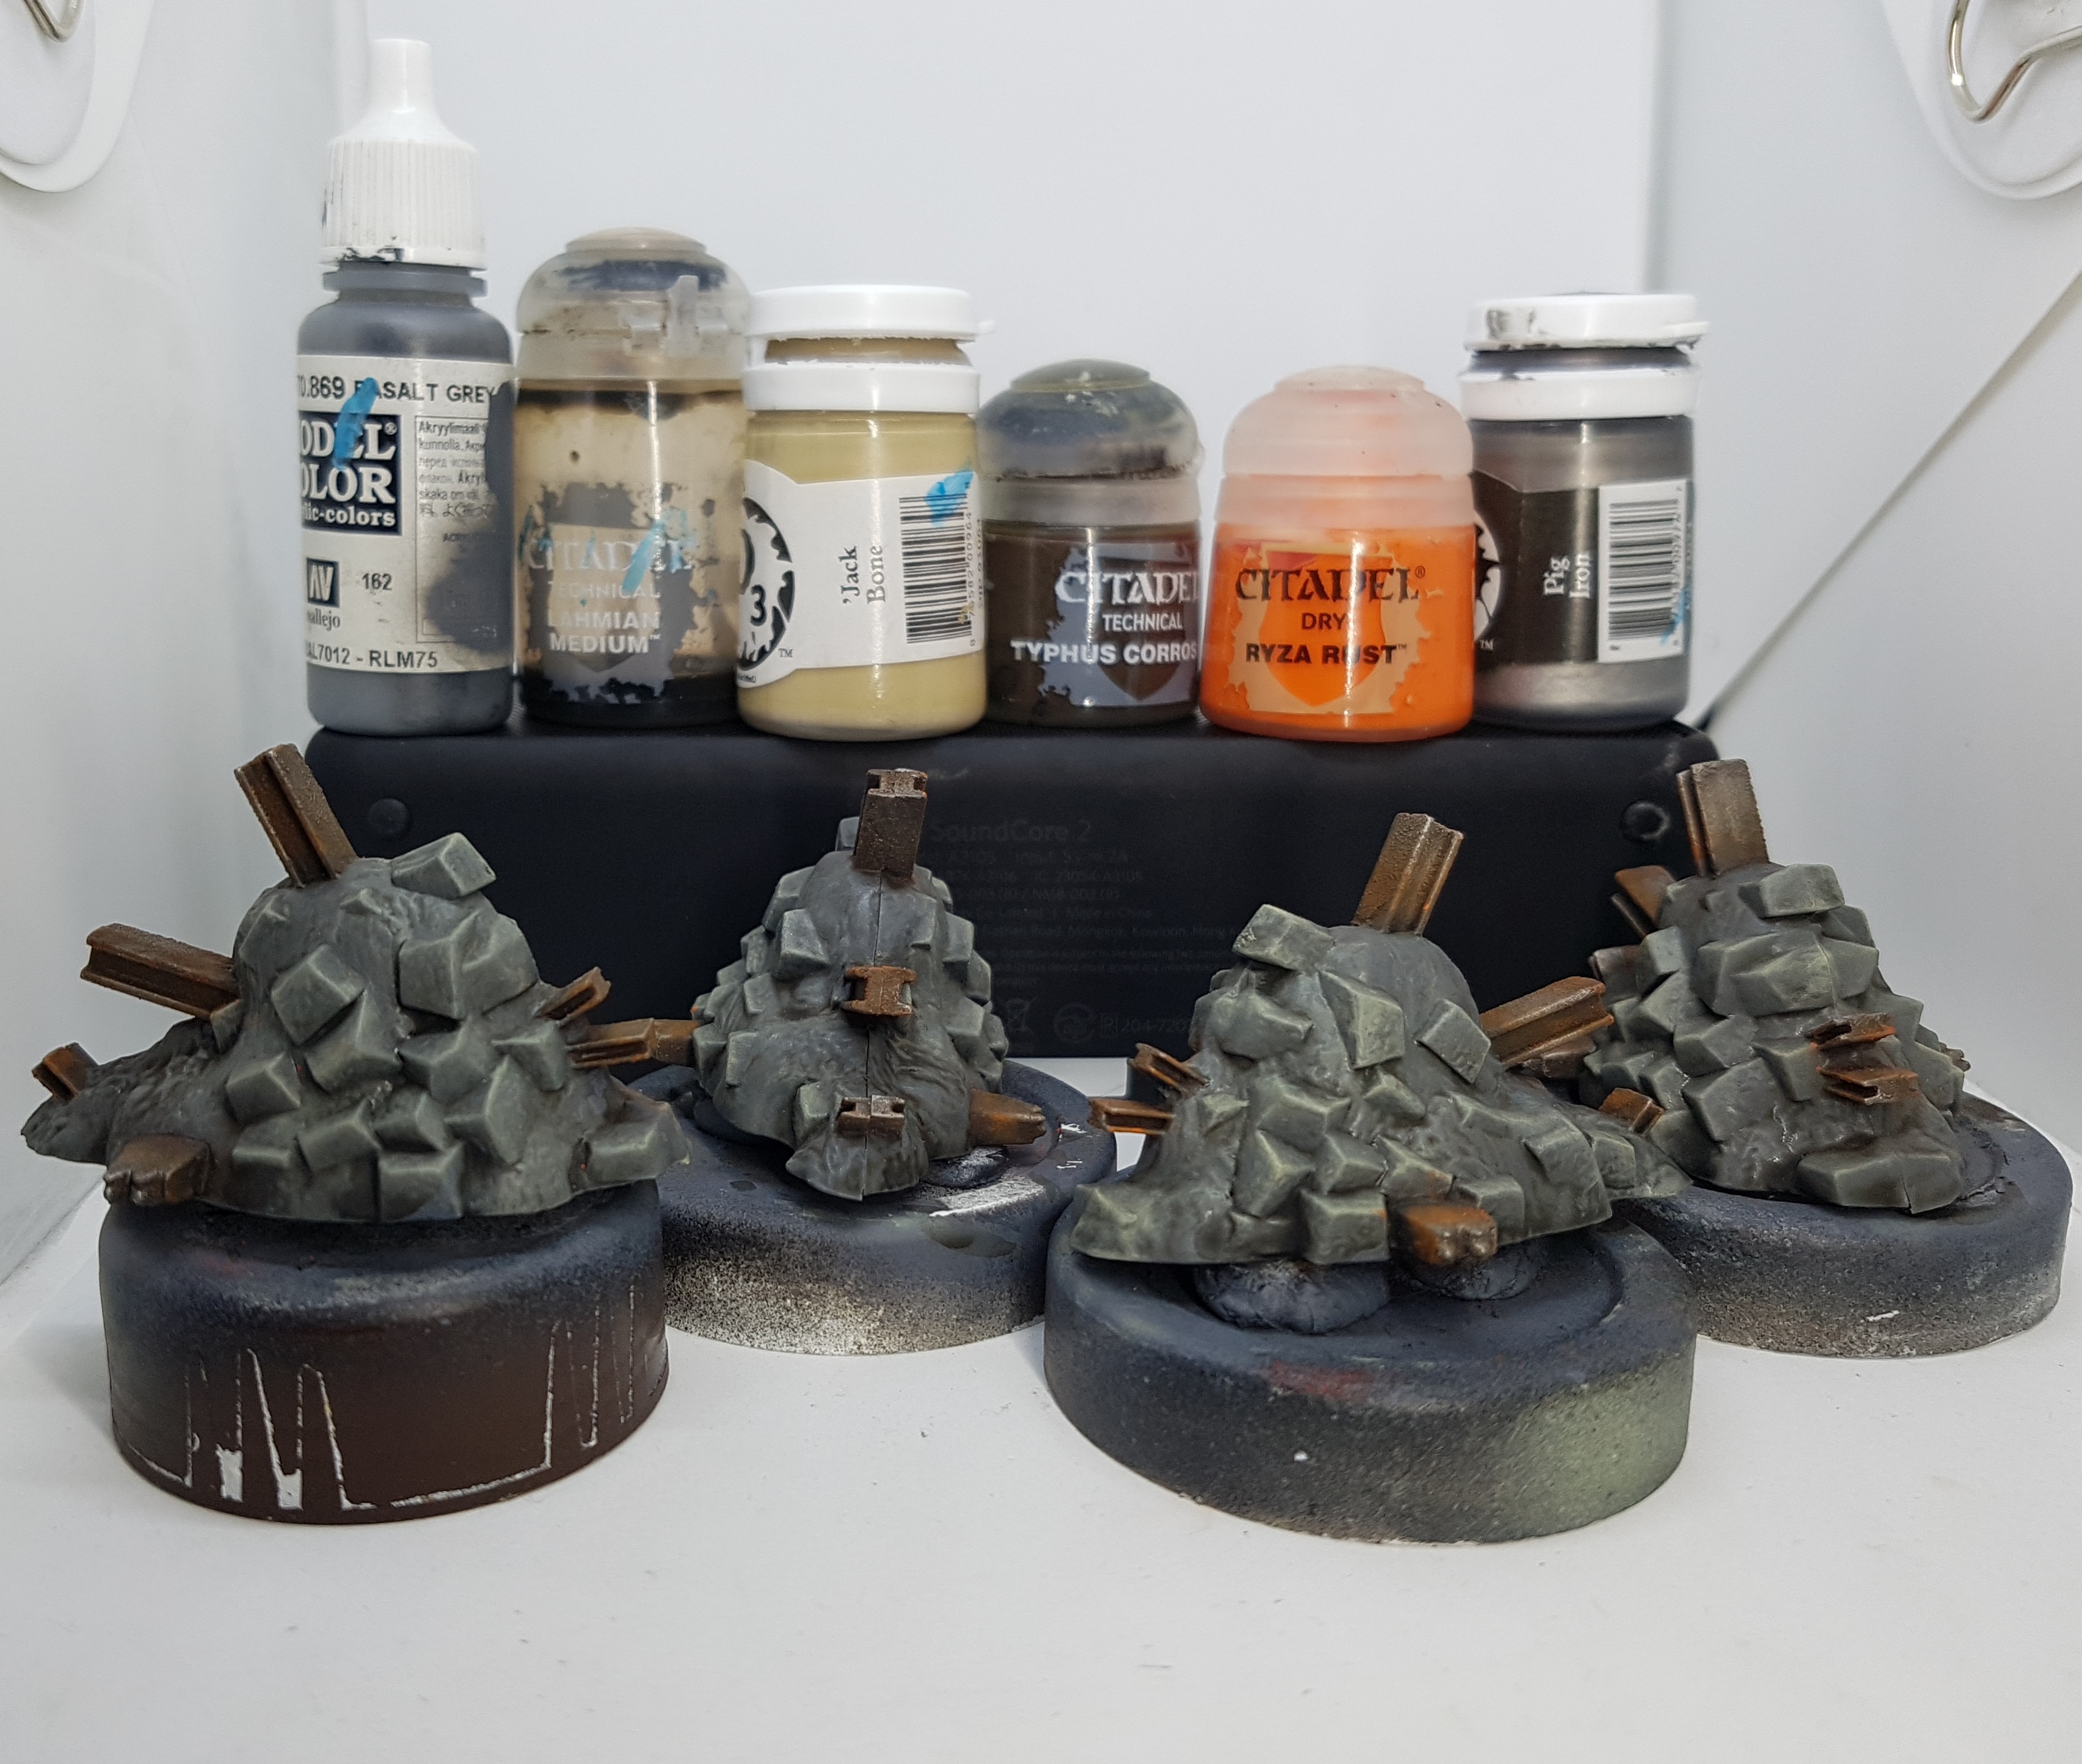
Rubble
Base with VMC 70.869 basalt Grey
EDIT 12/05/23: The next few recipes were written down from memory and one photo of a pile of paints a few weeks after the fact and could be wrong. This is in response to Ghools videos vanishing.
Steel
Undercoat Black
Drybrush P3 Pig Iron
Wash: GW Nuln Oil
Thin down some GW Contrast Black Templar and use this to give the lamps a black metal
Drybrush Highlight with Cold Steel where appropriate.
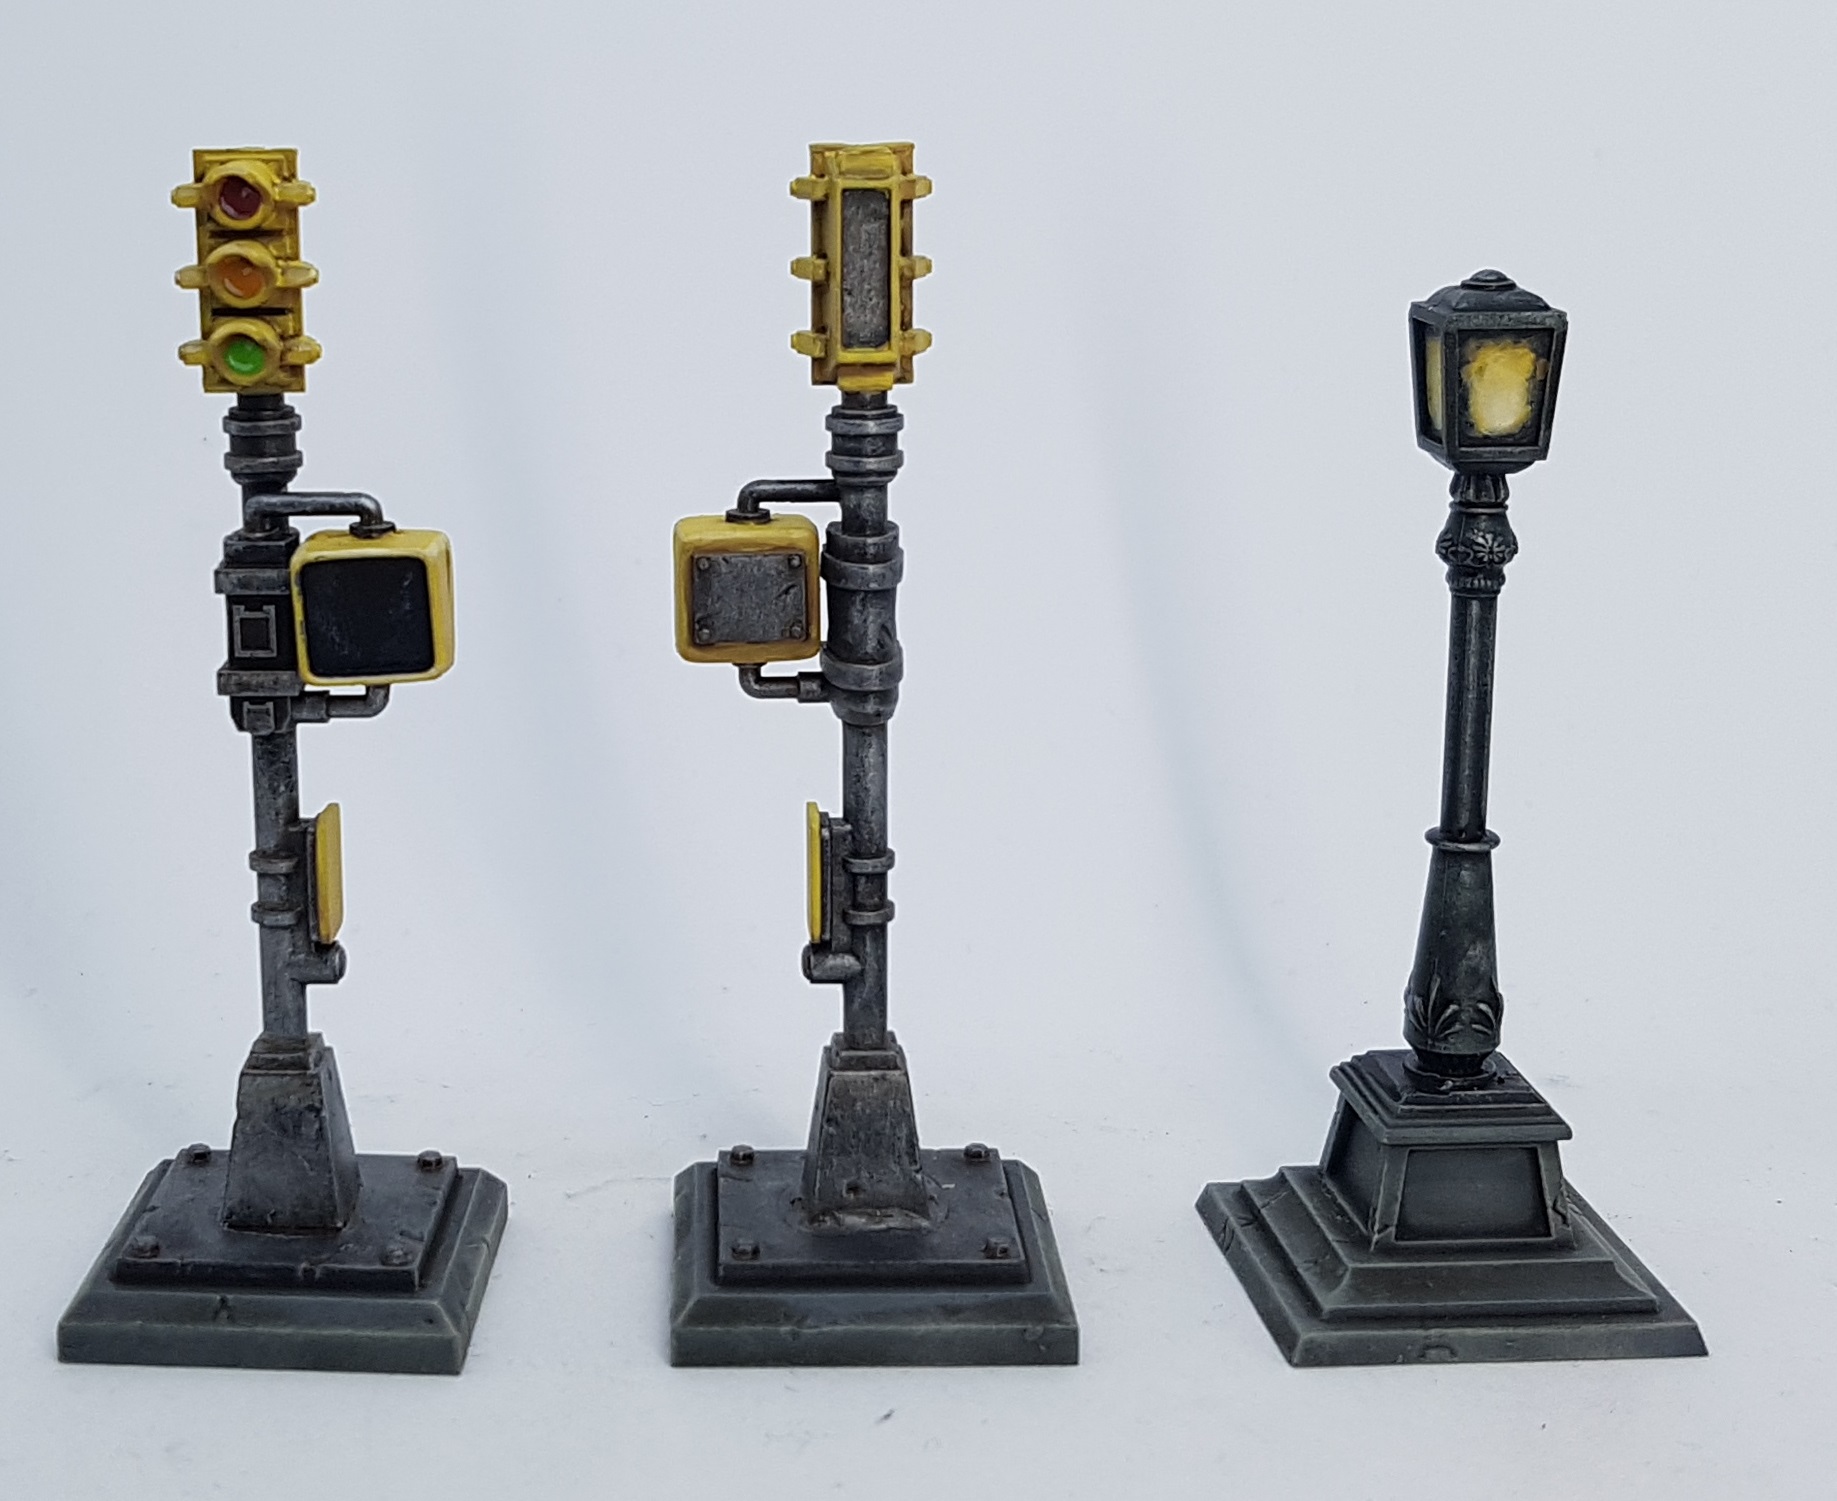
Yellow Crossing Light Plates
Shade P3 Rucksack Tan (I think?)
Pin wash P3 Bloodstone
Paint most non-shade surfaces with P3 Sulfuric Yellow
Highlight Sulfuric Yellow mixed with P3 Menoth White Base
Edge Highlight: Menoth White base
red Light: GW Khorne Red
Amber Light: P3 Meaty ochre
Green Light: P3 Necrotite Green
Glint Highlight: P3 Menoth White Highlight
The next day I finished off the lights. Highlighting that yellow took a while. I wasn’t crazy enough to paint the screens or the sign on the crossing lights. They look good enough without it, and terrain shouldn’t steal the show from the minis. I want this lot done fast, and done good enough to play, not slow and good enough to be a centrepiece. They should fade in to the background.
I then moved on to the dumpsters. The main body was done so I just painted the lids black and drybrushed with P3 Greatcoat Grey. I’d primed the car tyres separate to their cars so I drybrushed them while I was at it. You would think painting black over yellow would be quick and take only a coat or two. You would be wrong. That yellow is stubborn! The dumpster logos got drybrushed/overbrushed with P3 Cold Steel, as per the videos. I chose not to grime anything up. I want this done fast. I can always come back later and grime stuff up when I have time to spare if I want to.
I then pin washed the thin recesses on the cars with GW Nuln Oil, and picked out some details with black paint.
EDIT 12/05/23: Lantern Light (From memory a few weeks later)
Starting from a black undercoat
Splodge on P3 Rucksack Tan
Splodge on either P3 Sulfuric yellow
Splodge on some P3 Menoth White base, perhaps mixed with Sulfuric yellow?
Maybe Splodge on Some Menoth White Base. maybe push in to Menoth White Highlight. Maybe with was MW Highlight all along?
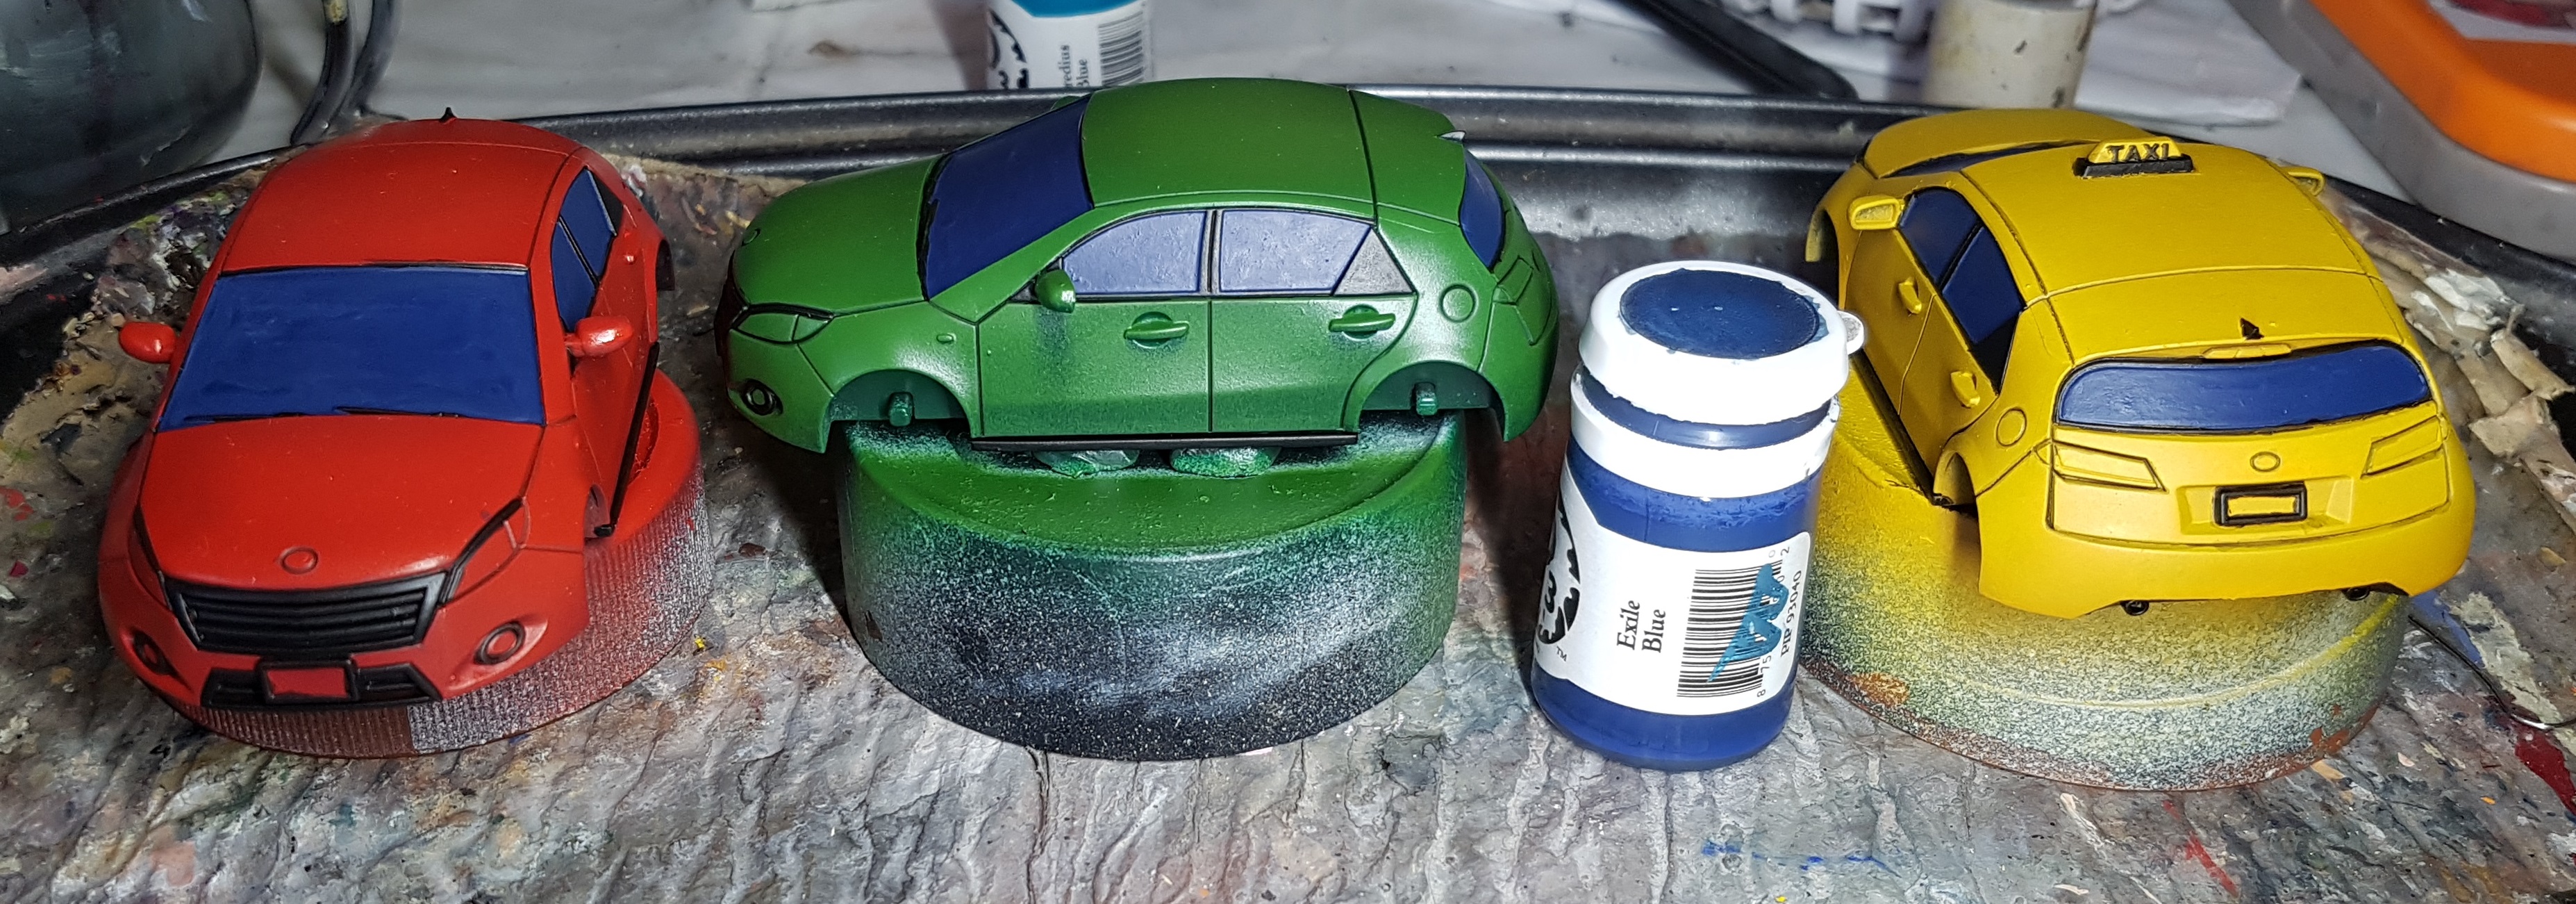
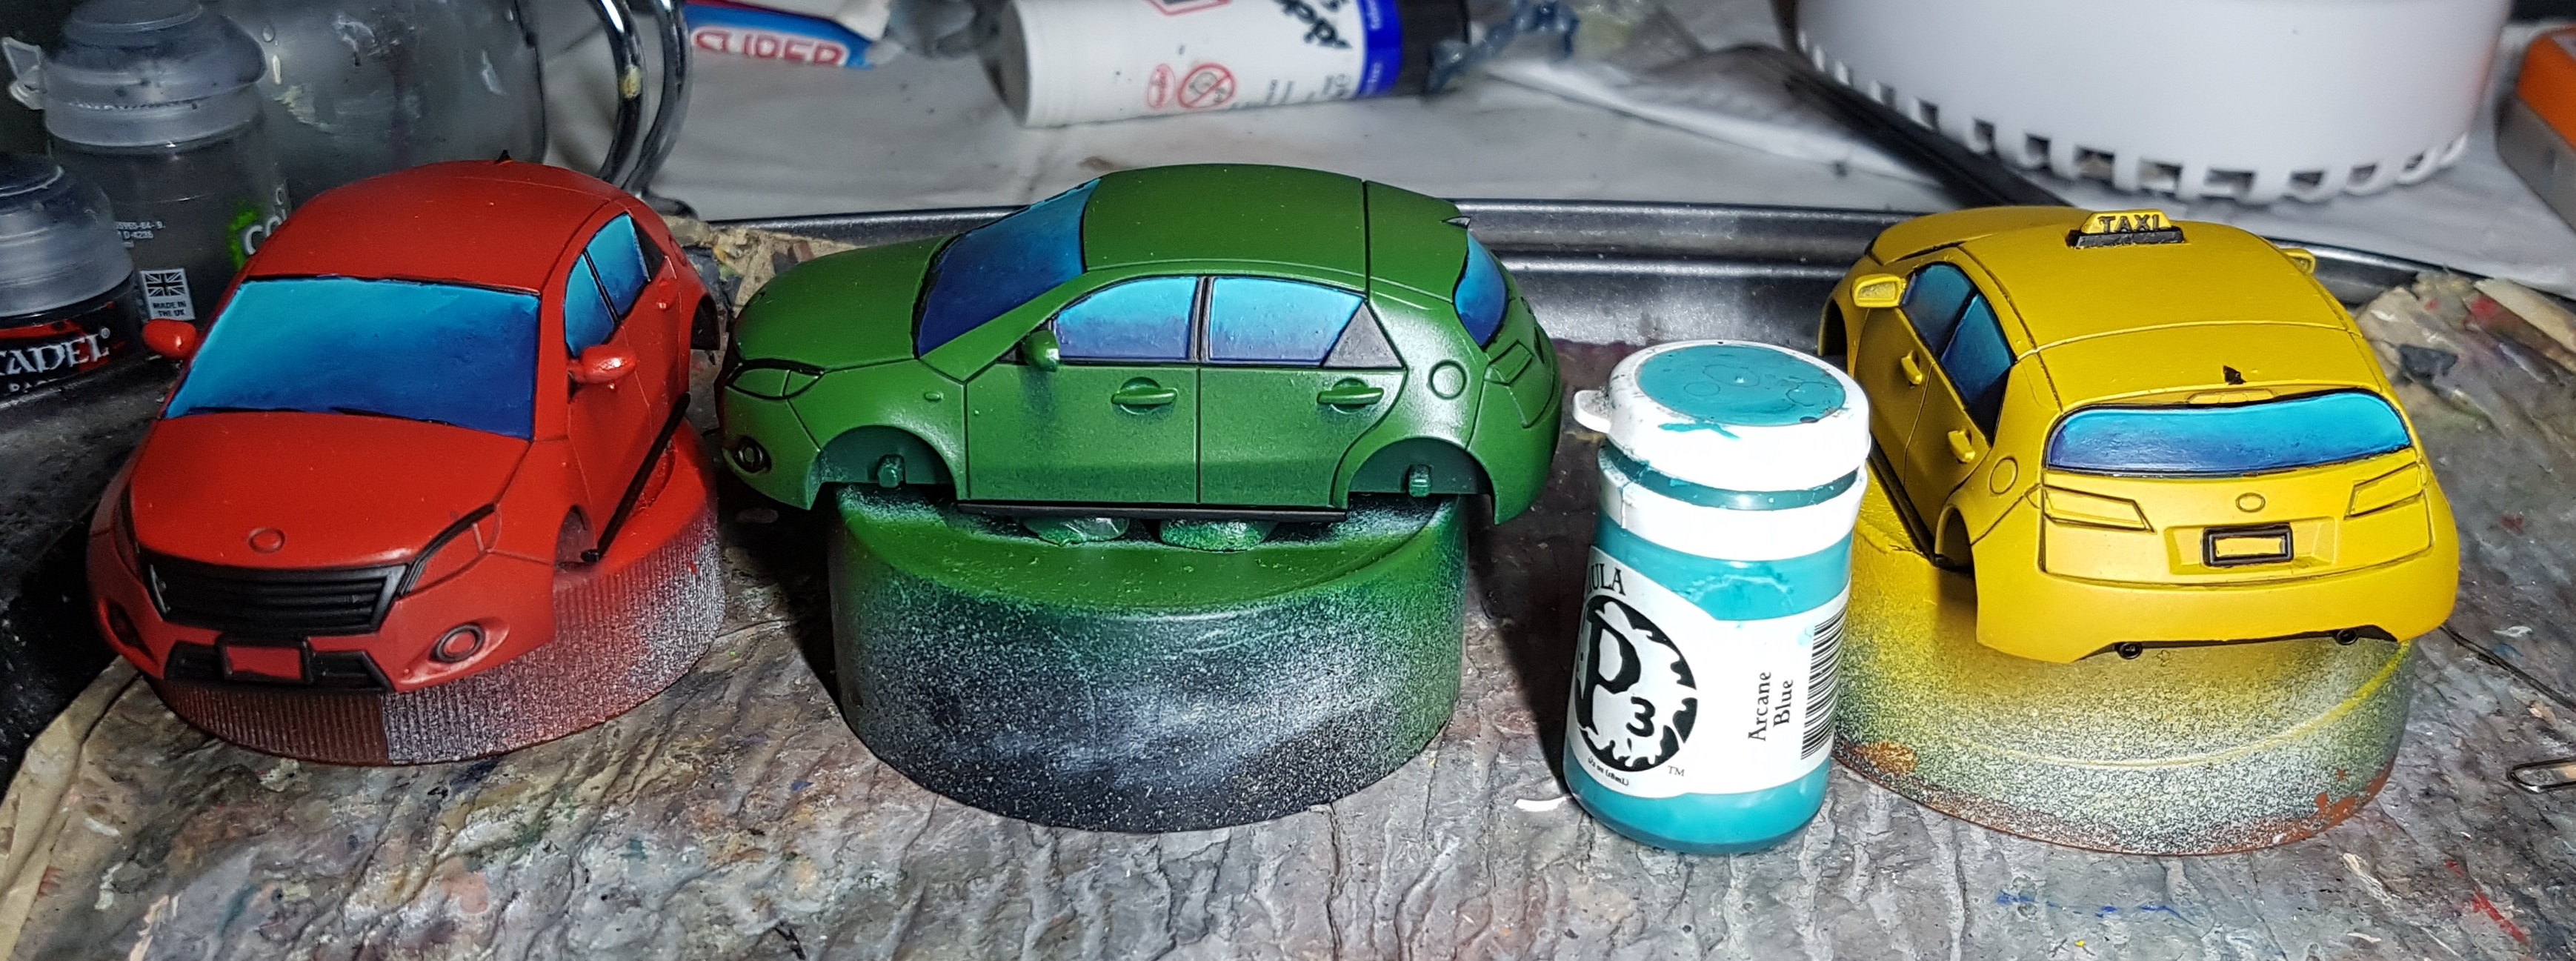
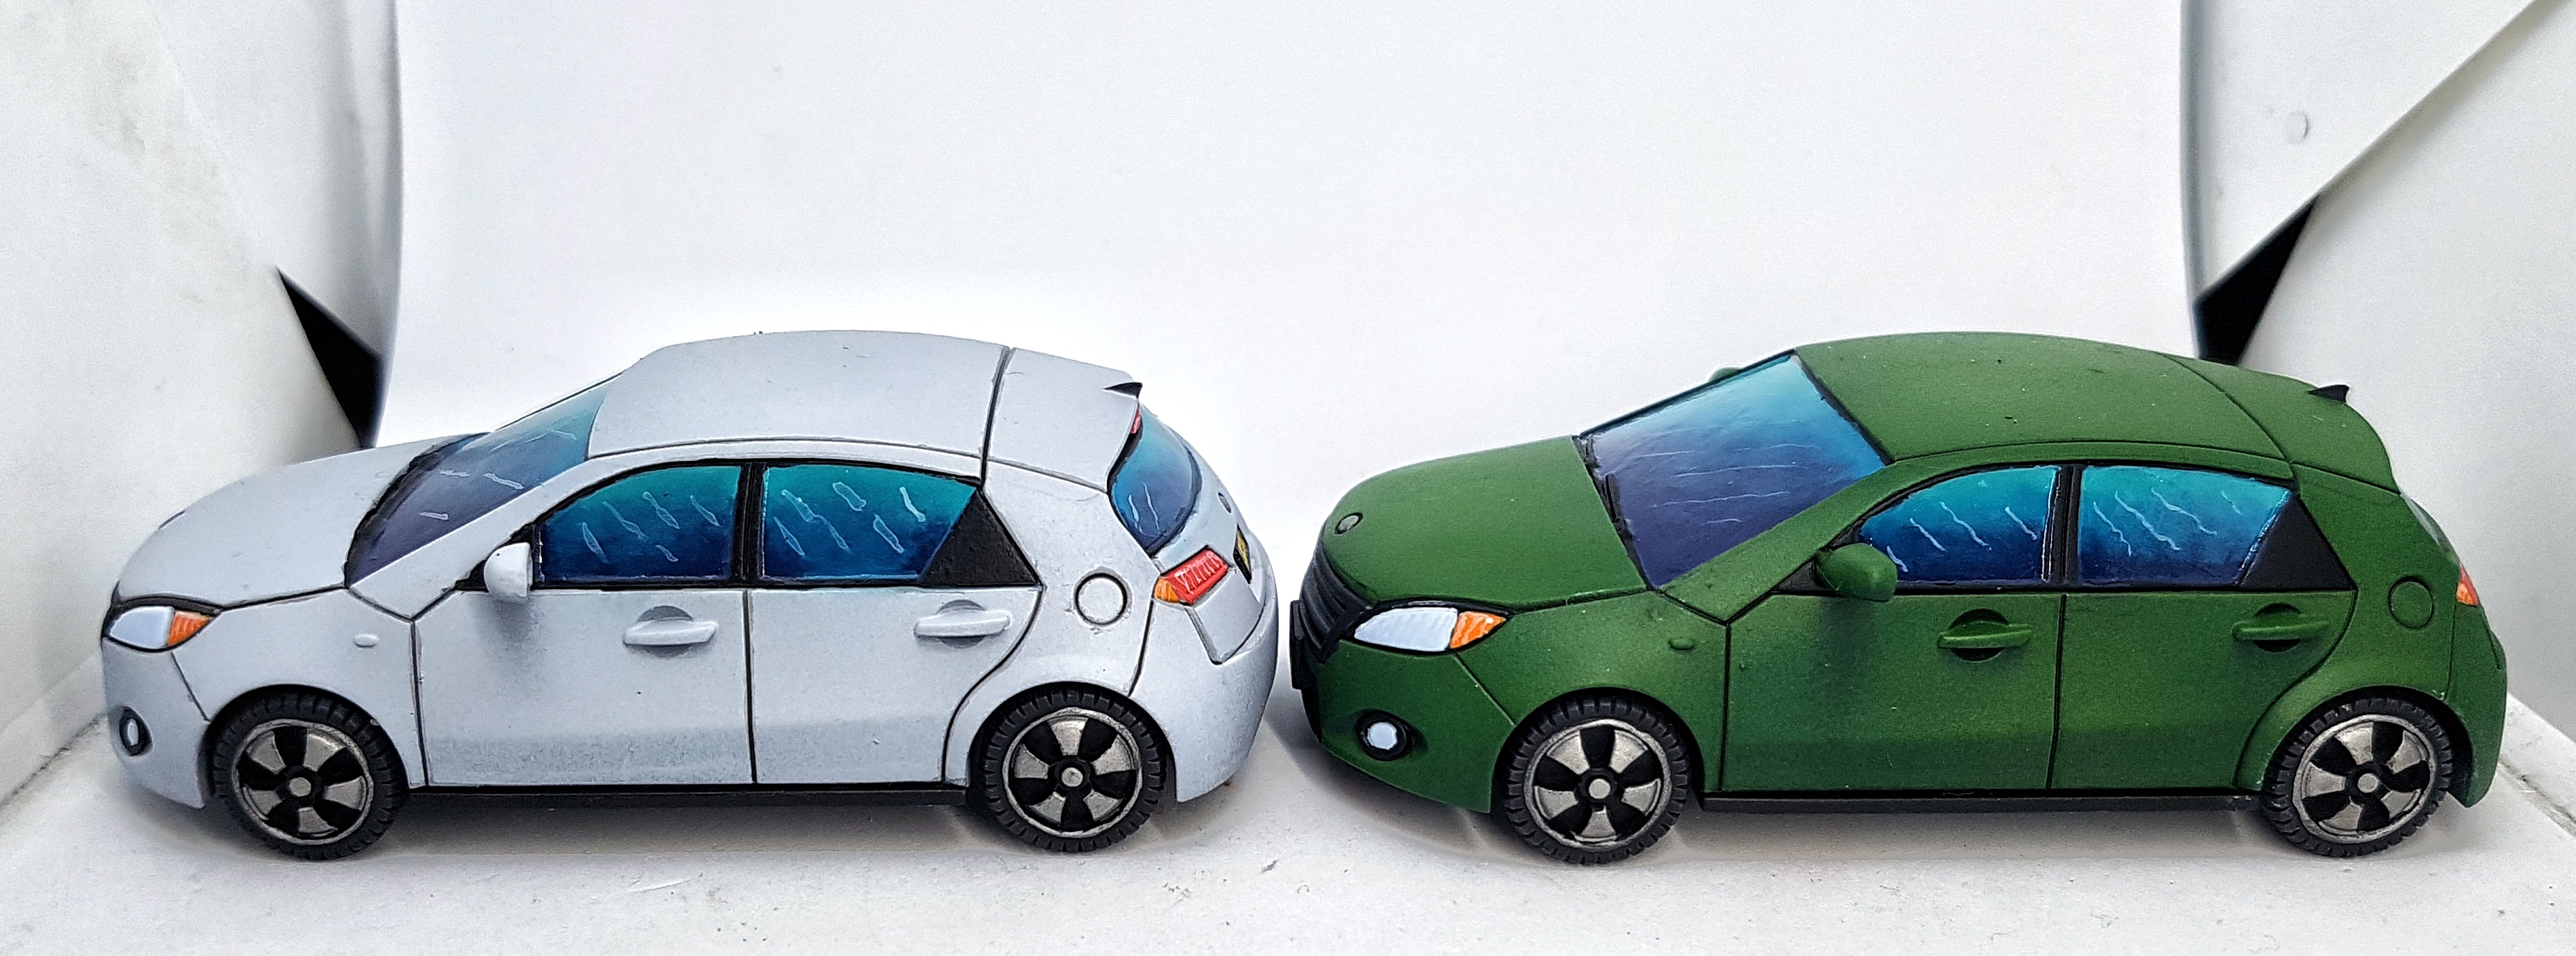
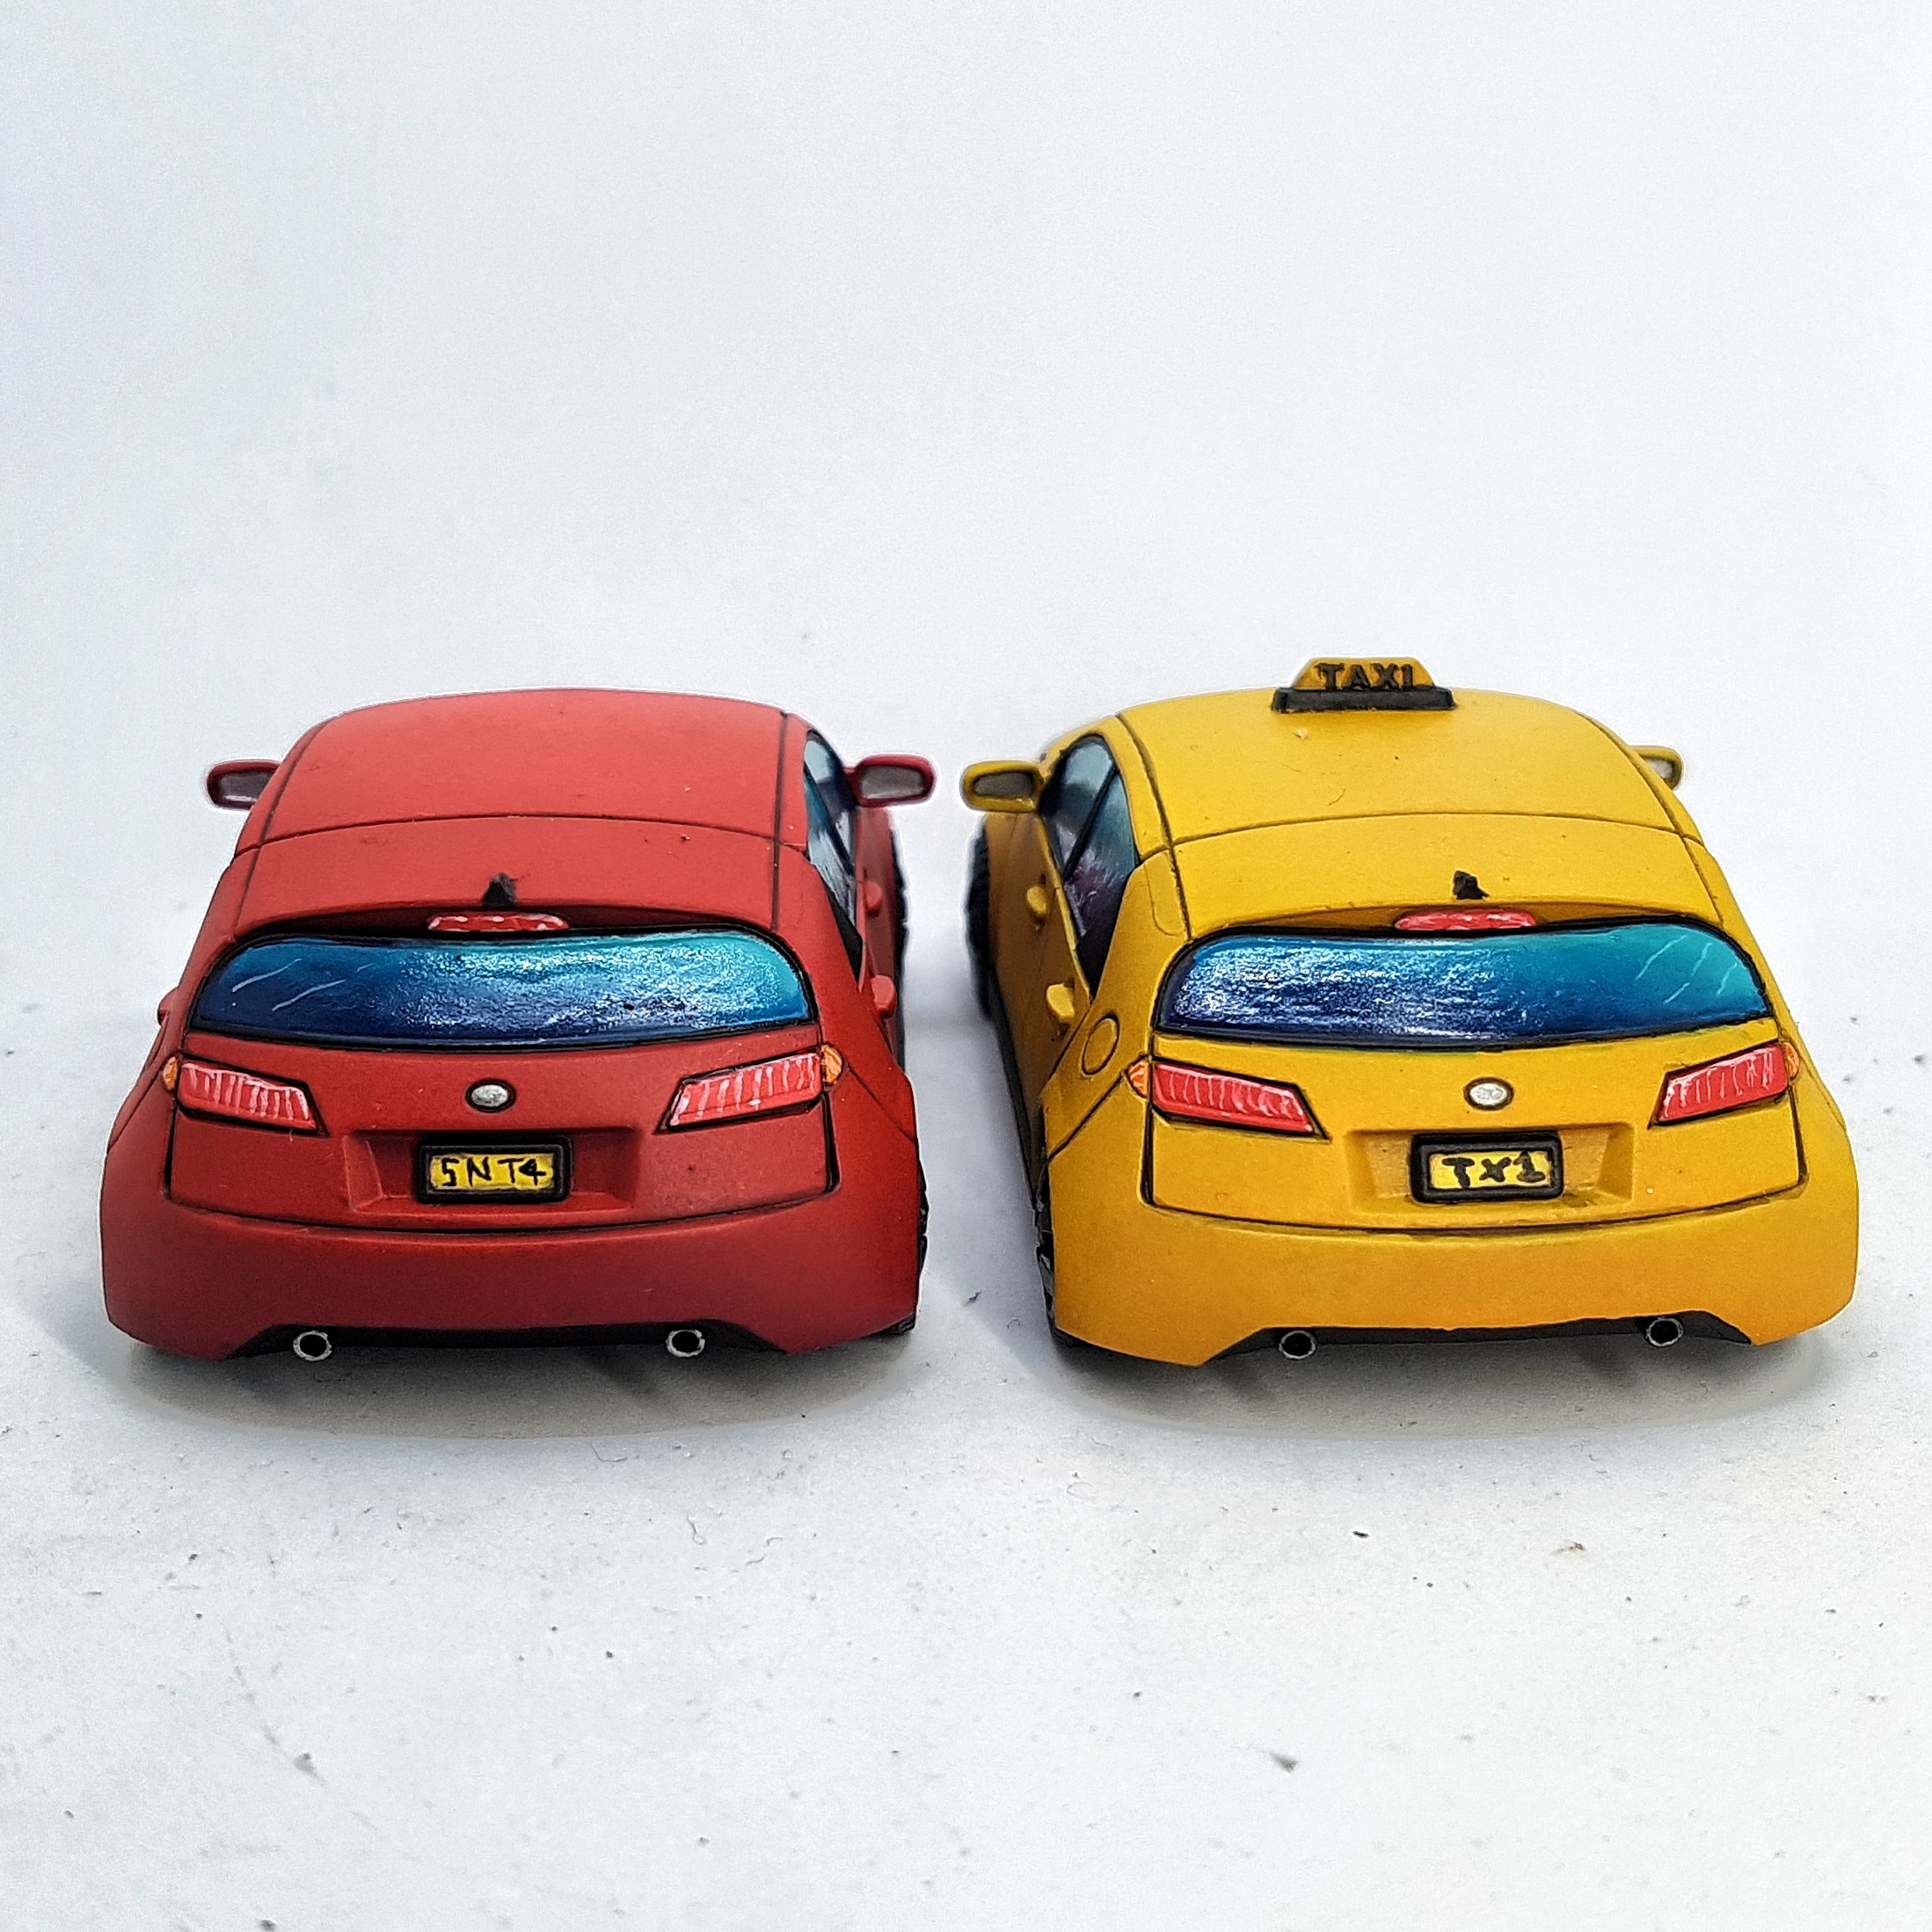
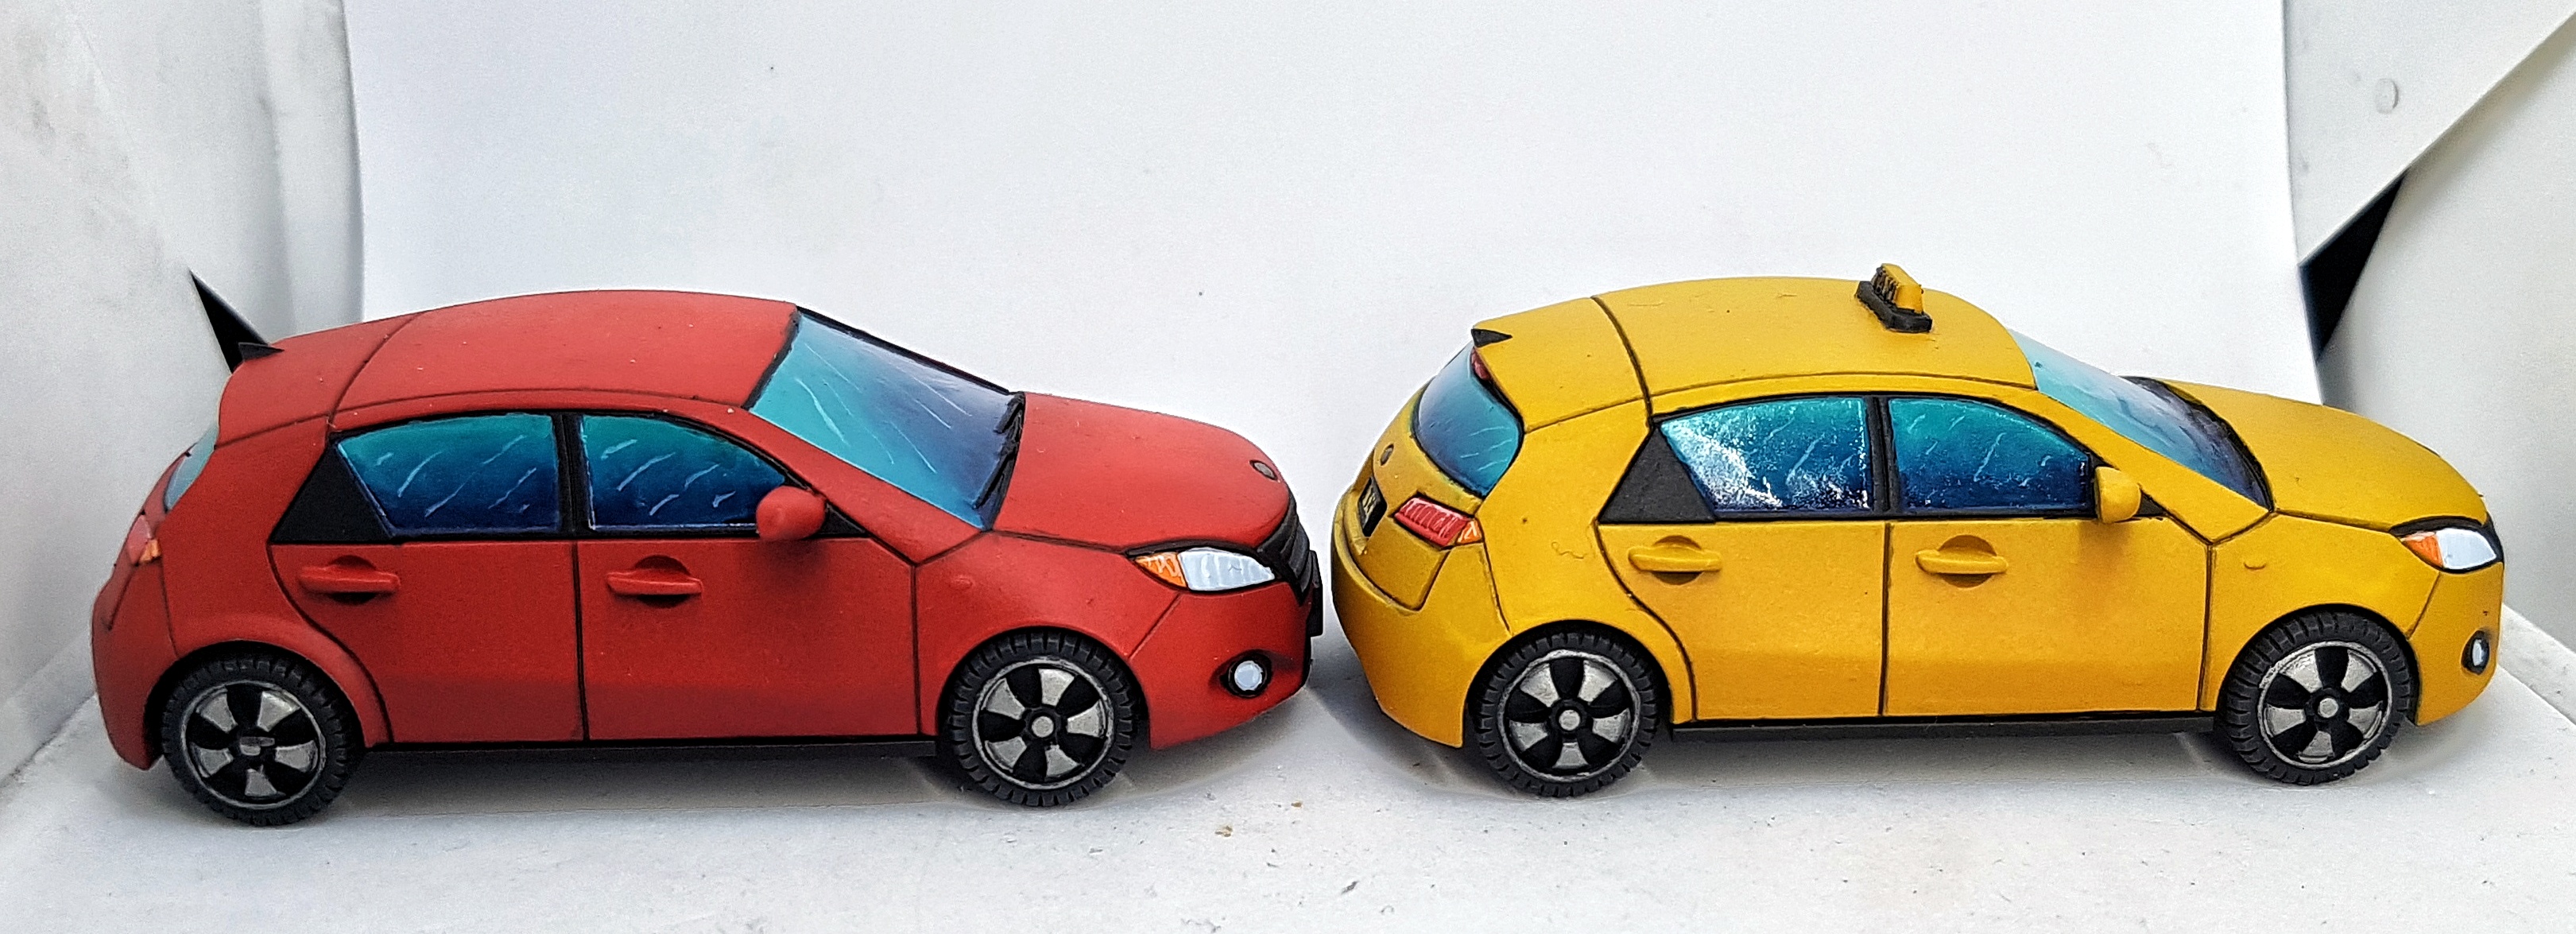
Next, the cars had their windows blocked out with P3 Exile Blue. The next two stages involved a lot of back and forth so there wasn’t any pause for photos to be taken. I followed the video, blending P3 Meridious Blue and P3 Arcane Blue across the model. I’ve never really done anything like this so I was learning and experimenting as I went. I definitely started to understand and improve buy the time I was done, and could probably do a better job now, but I’m happy with what I did. the end results speak for themselves.
I painted the lights before painting the white lines on the window so I could do them all at the same time.
Orange Side Lights: VGC 72.008 Orange Fire
White headlights: P3 Frostbite (I tried adding white at first, but it was always too white. Even solid Frostbite looked like just white, until some white is painted over it
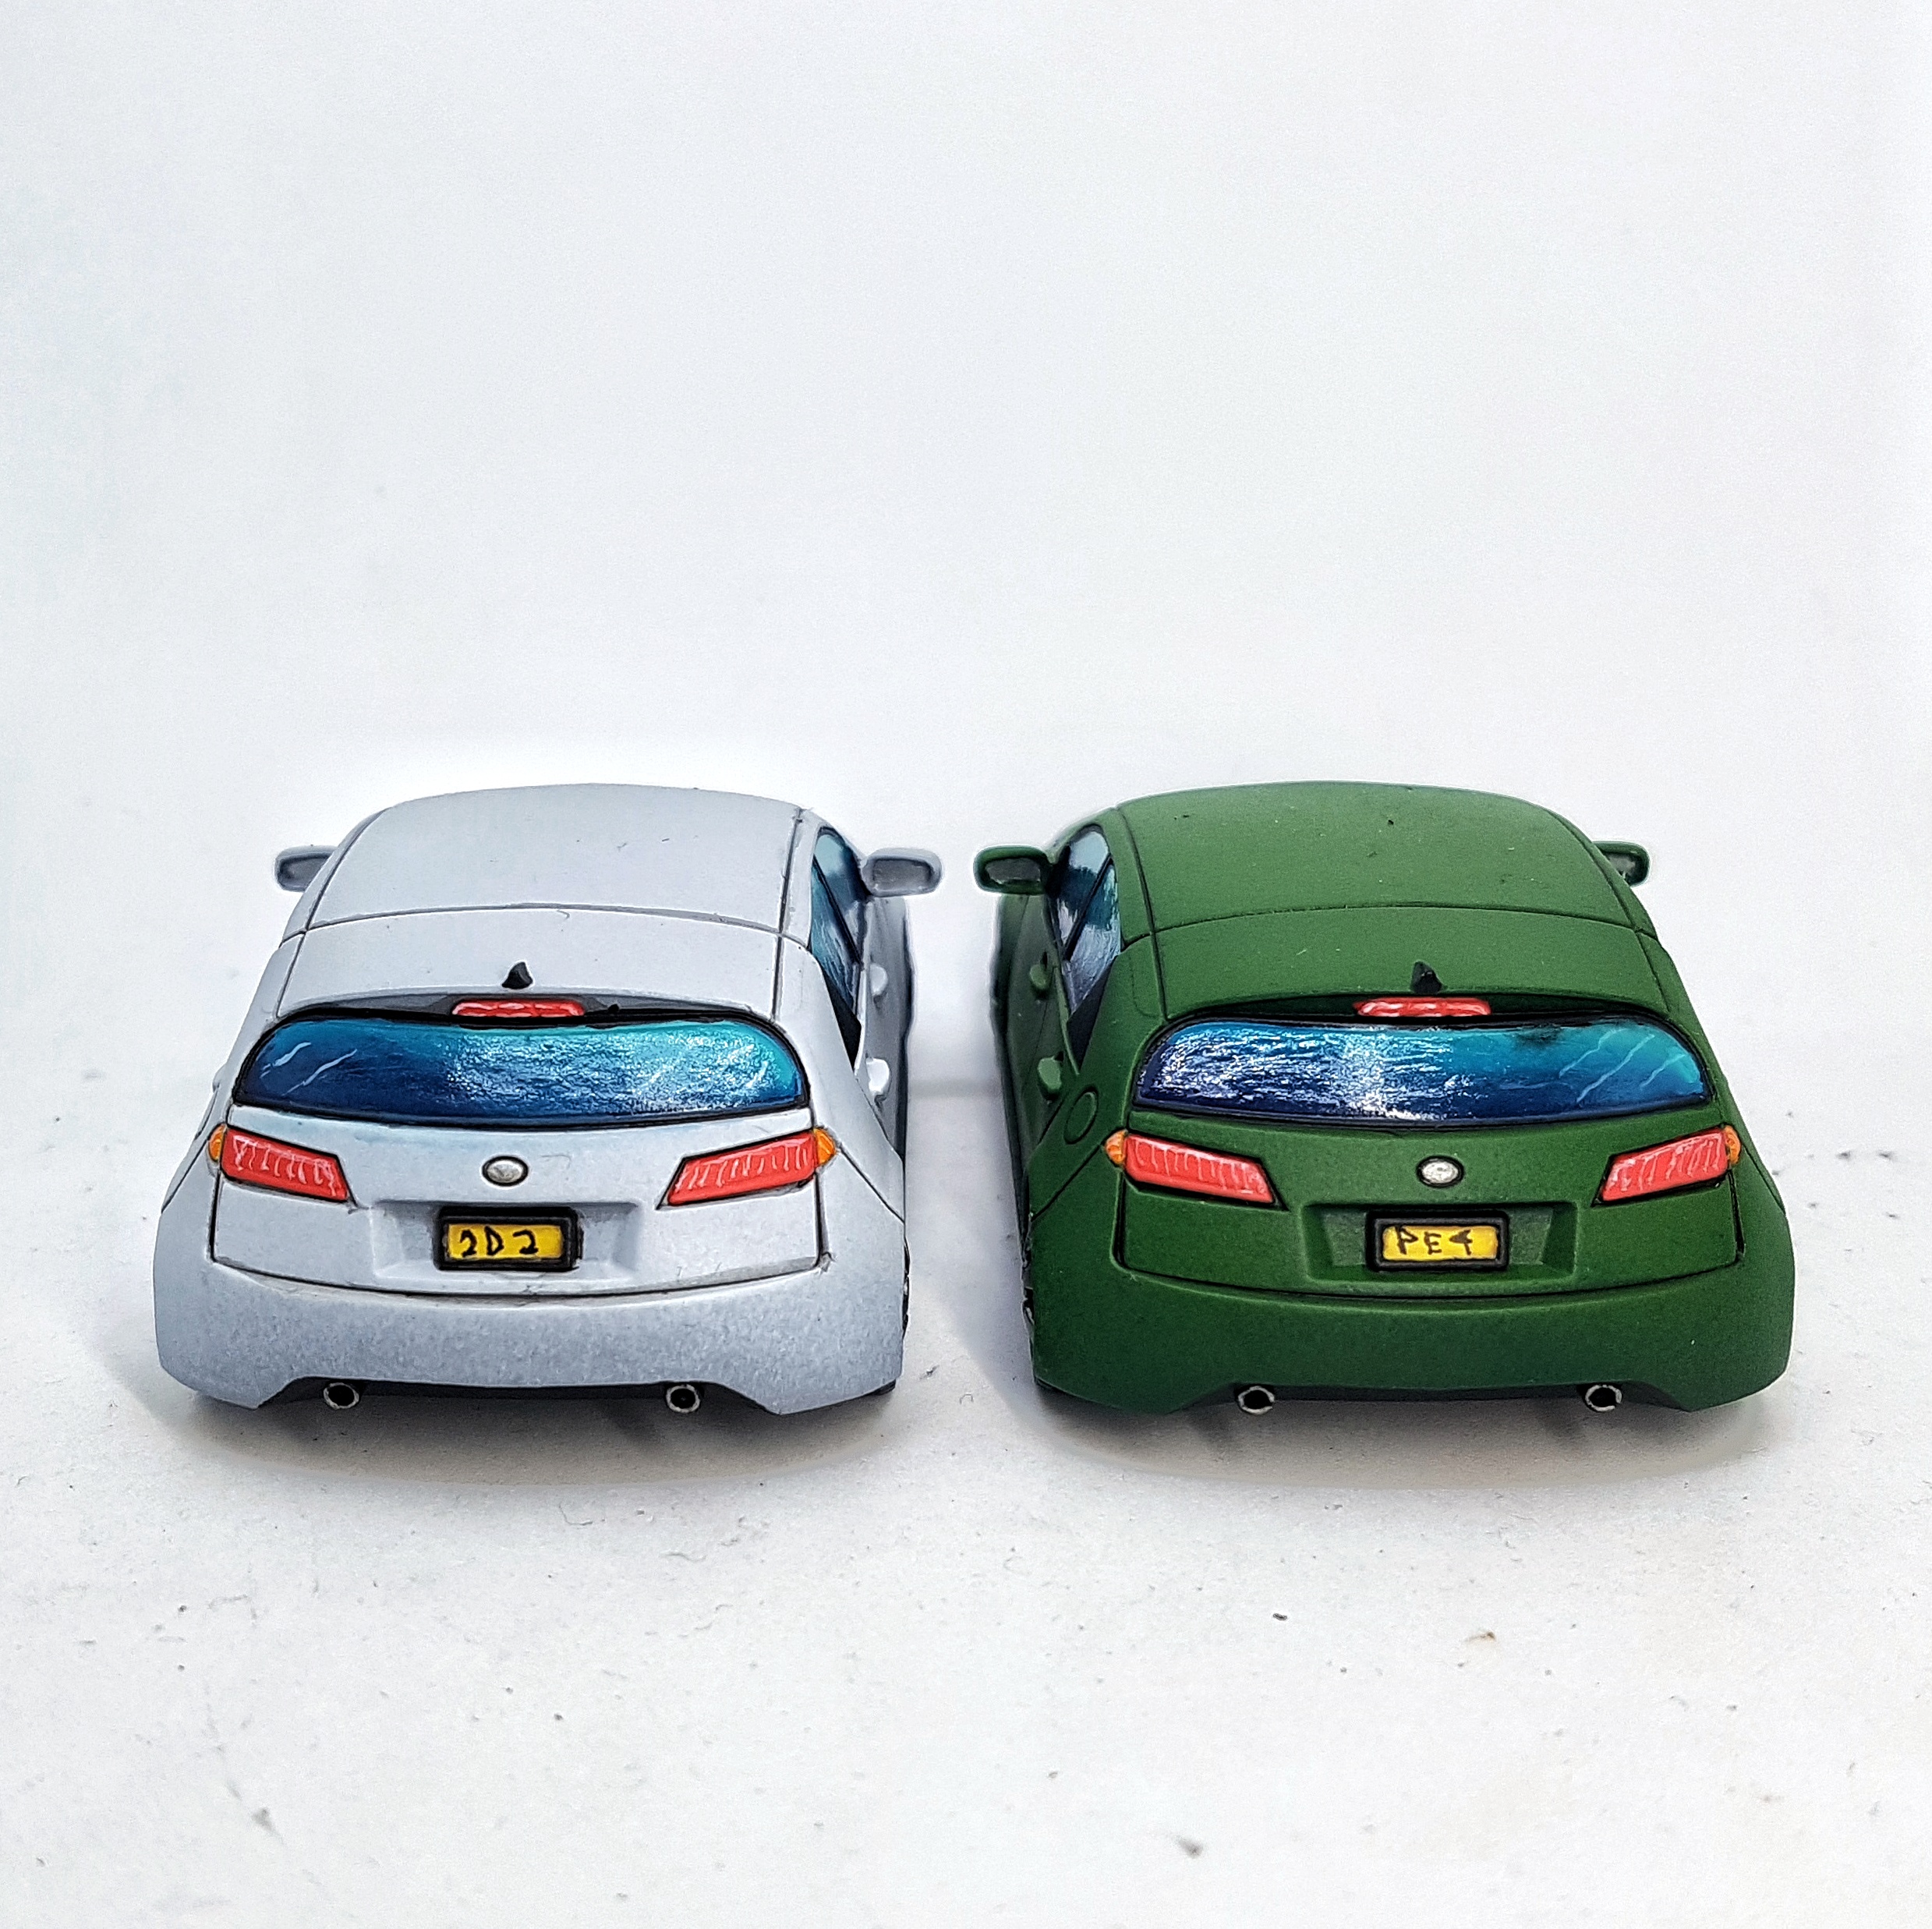
Red break lights: P3 Khador Red base with a little P3 Khador Red Highlight. We definitely want it to look different and lighter than the red car’s paint job.
Once that was all done I went in with some white and painted the lines over it all.
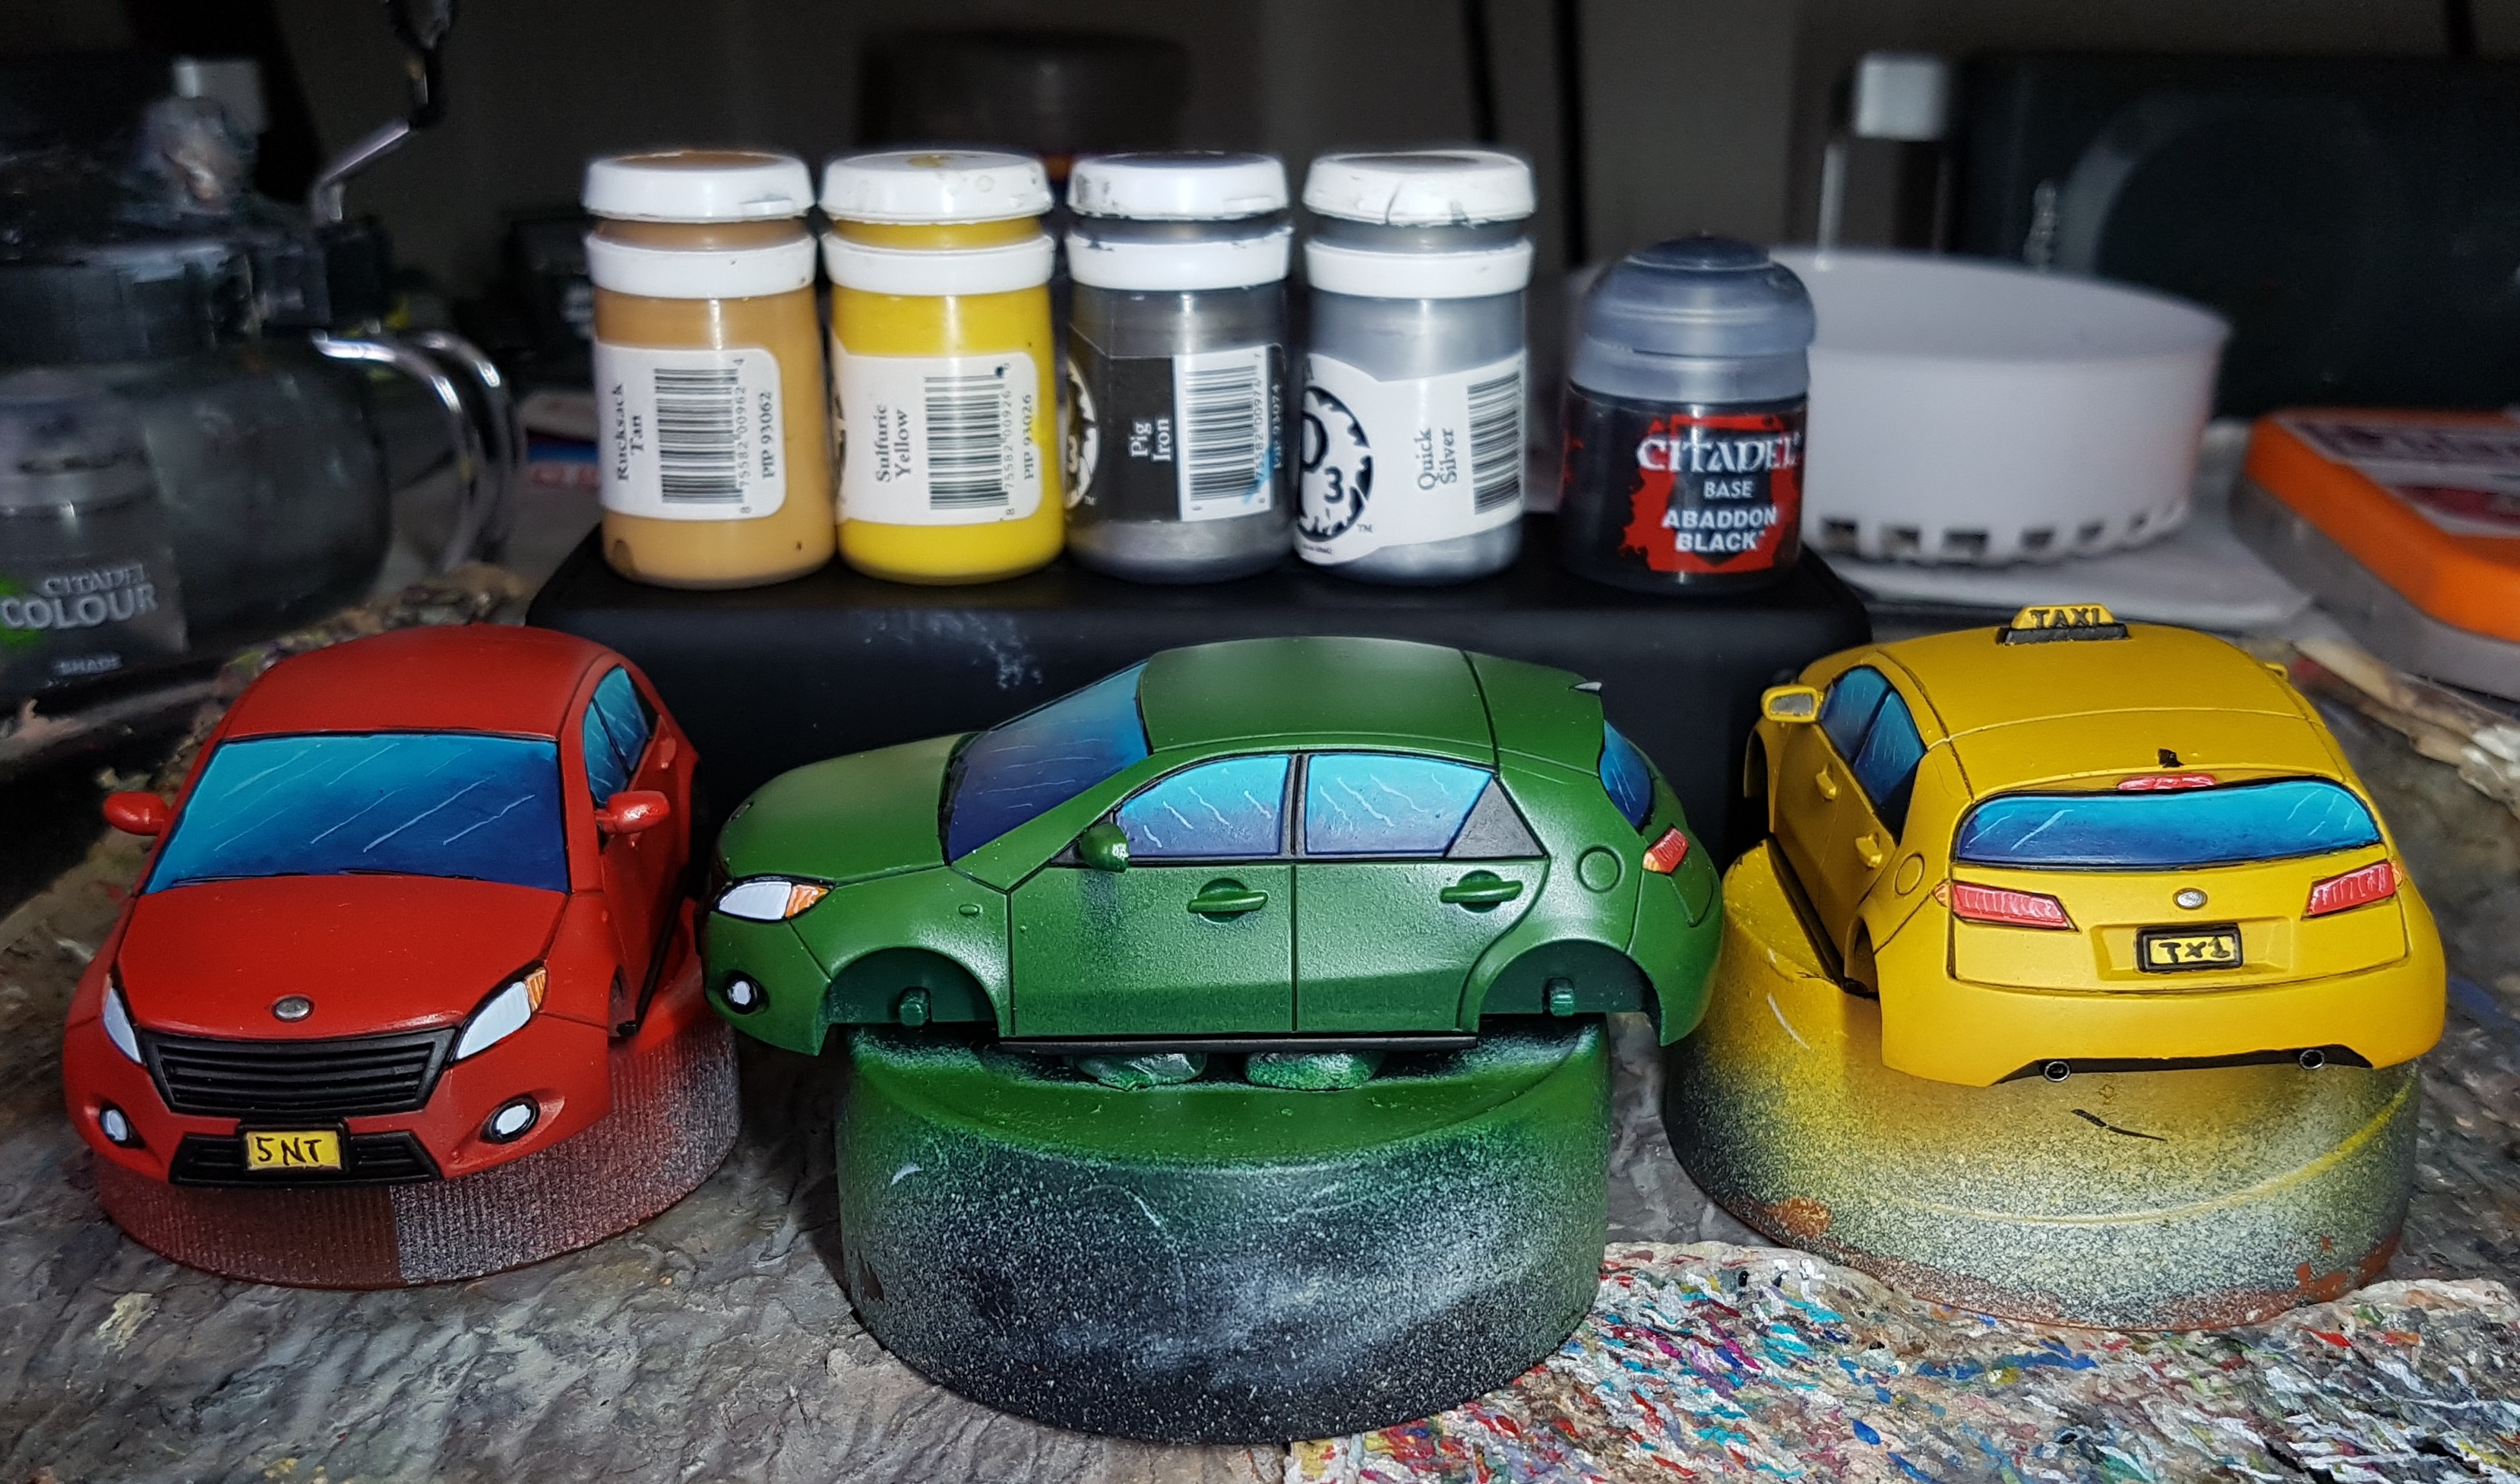
The number plates were painted the same as the crossing lights. undercoated with P3 Rucksack Tan, and based/highlighted with P3 Sulfuric Yellow. i then hamfistedly painted on some letter with Black. Please bear in mind I can’t really write any better with a pen and paper. I should have been a doctor.
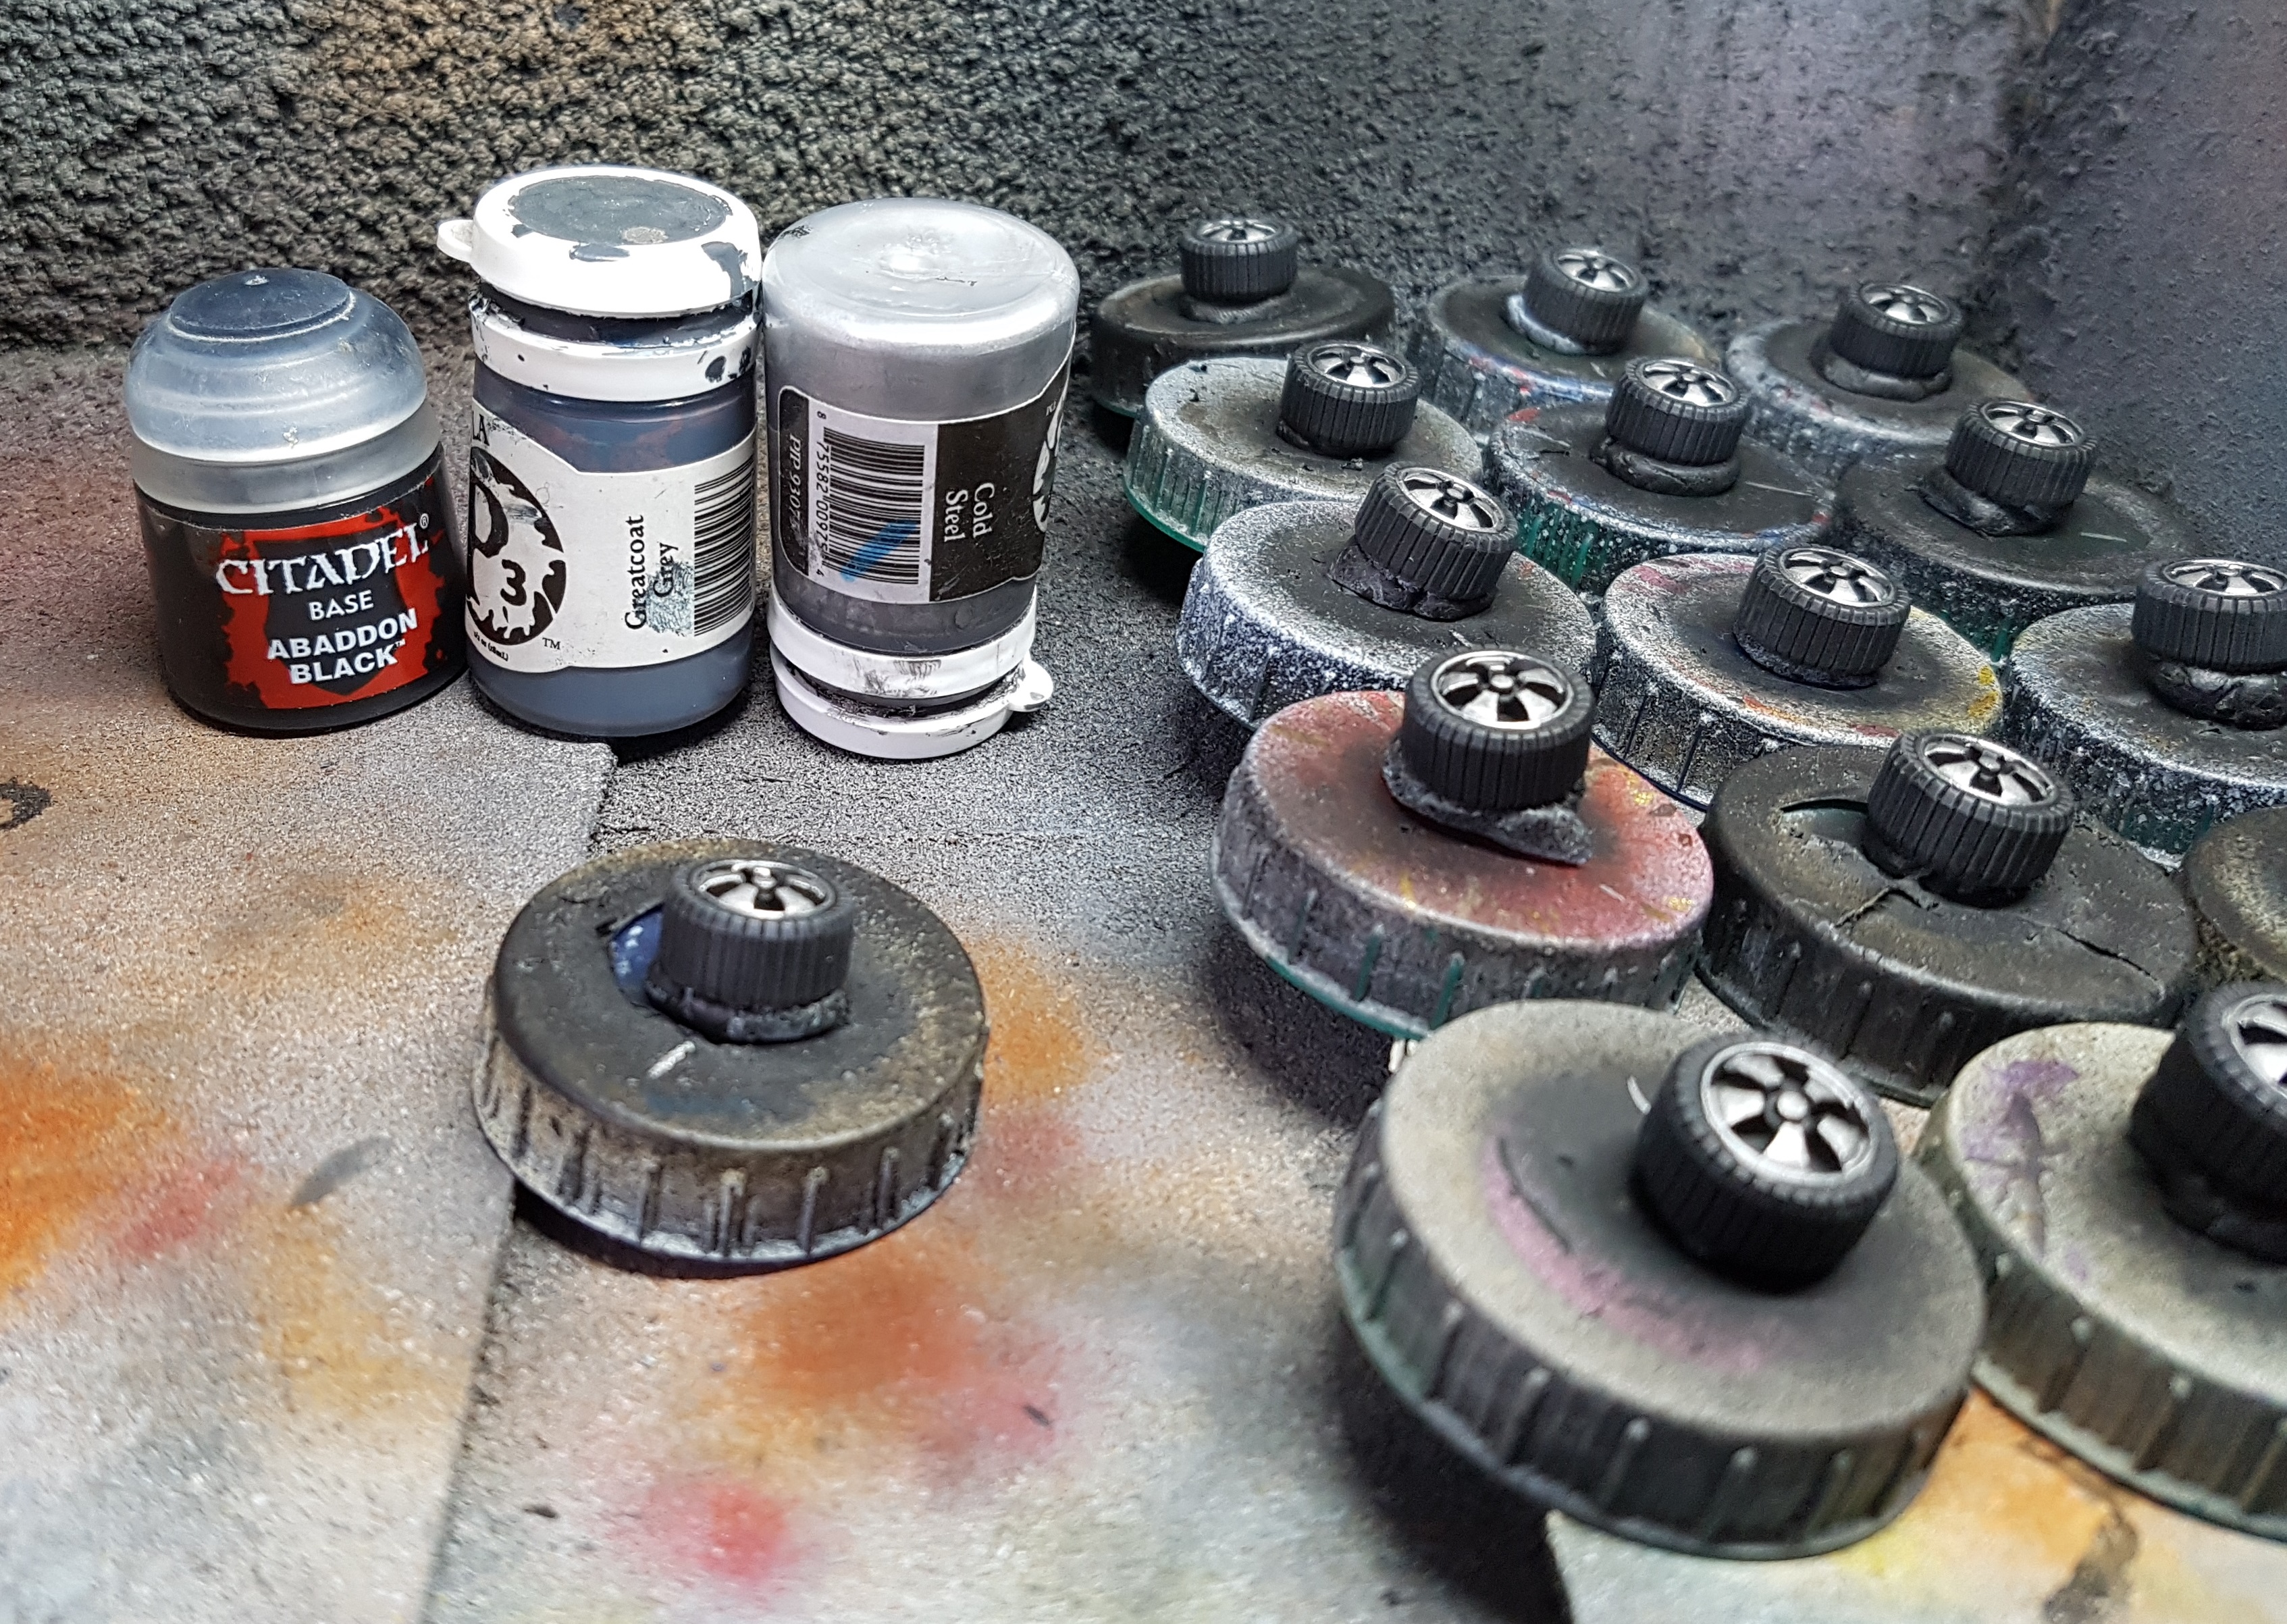
I picked out the badges and exhausts with p3 Pig Iron and while that was wet I added a blob of P3 Quick Silver to run in to it as a highlight. Some P3 Cold Steel was used to paint the hub caps. The black car radiator grilles were gently drybrushed with P3 Greatcoat Grey, and the wing mirrors were painted with the shiniest metal paint I know of: VGA 71.064 Chrome. The wheels were glues on and the cars were done and ready for varnishing.
Once the base coat had dried over night, the rubble was washed with Jan’s Magimix (6-8 Parts GW Nuln Oil, 6-8 Parts GW Agrax Earthshade, 5-6 Parts Lahmium Medium, 2 parts Athonian Camoshade. Thanks, Januinevision),and then drybrushed with P3 Jack Bone. The girders were base coated with GW Typhus Corrosion, and drybrushed with GW Ryza Rust and P3 pig iron wherever I felt like it. They were then put on one side until 5 minutes before varnishing began.
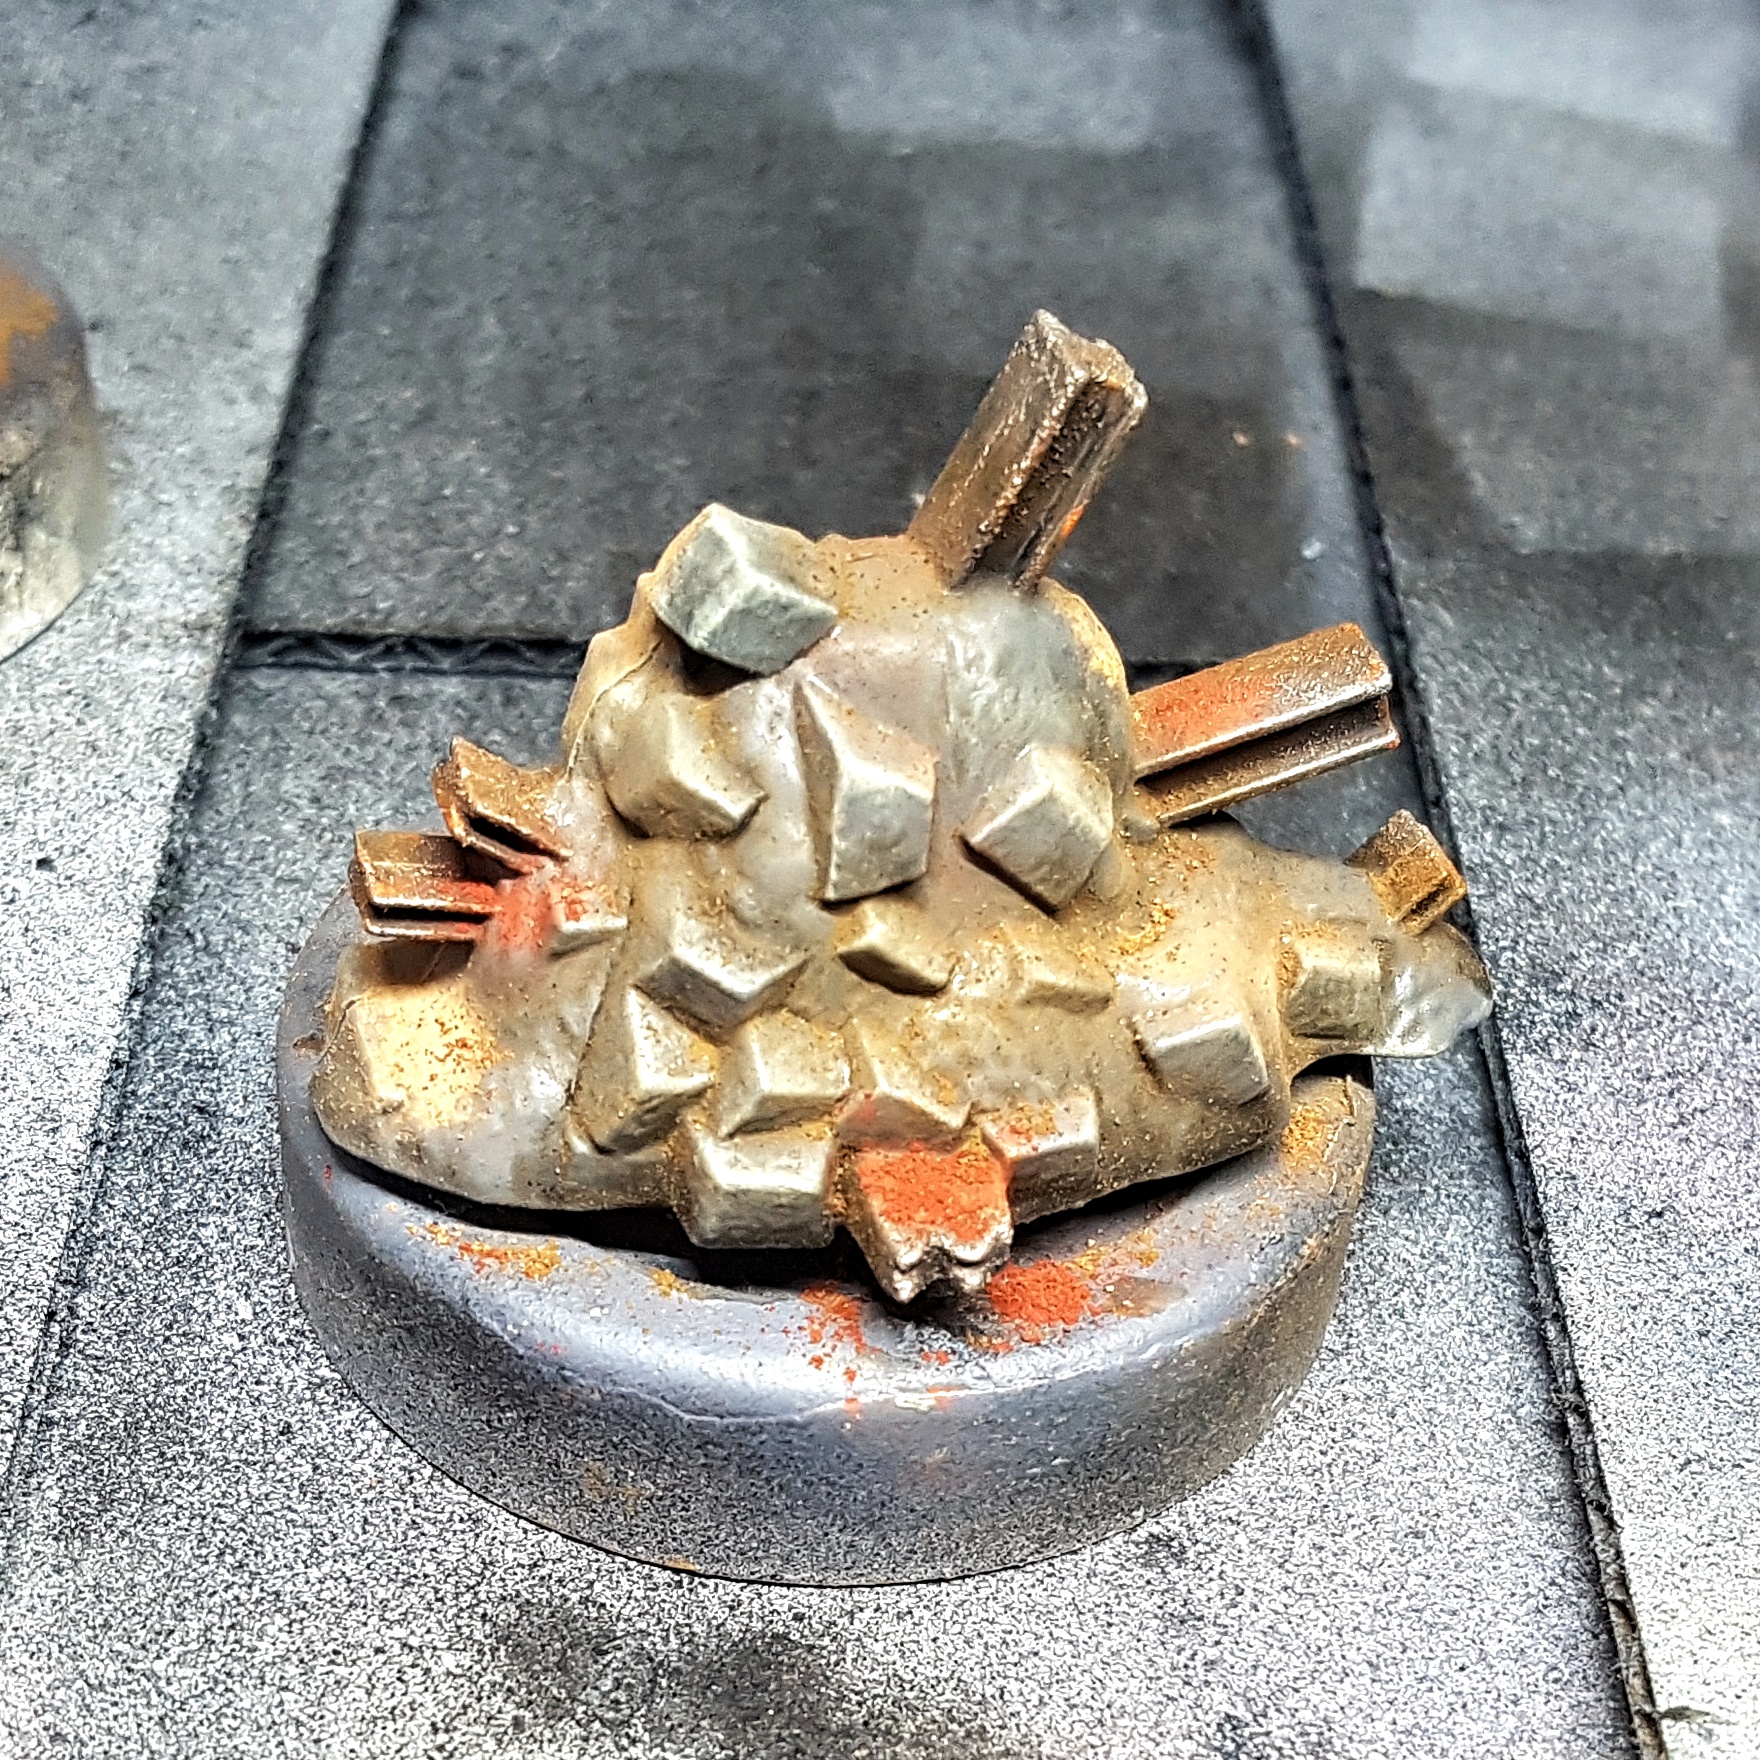
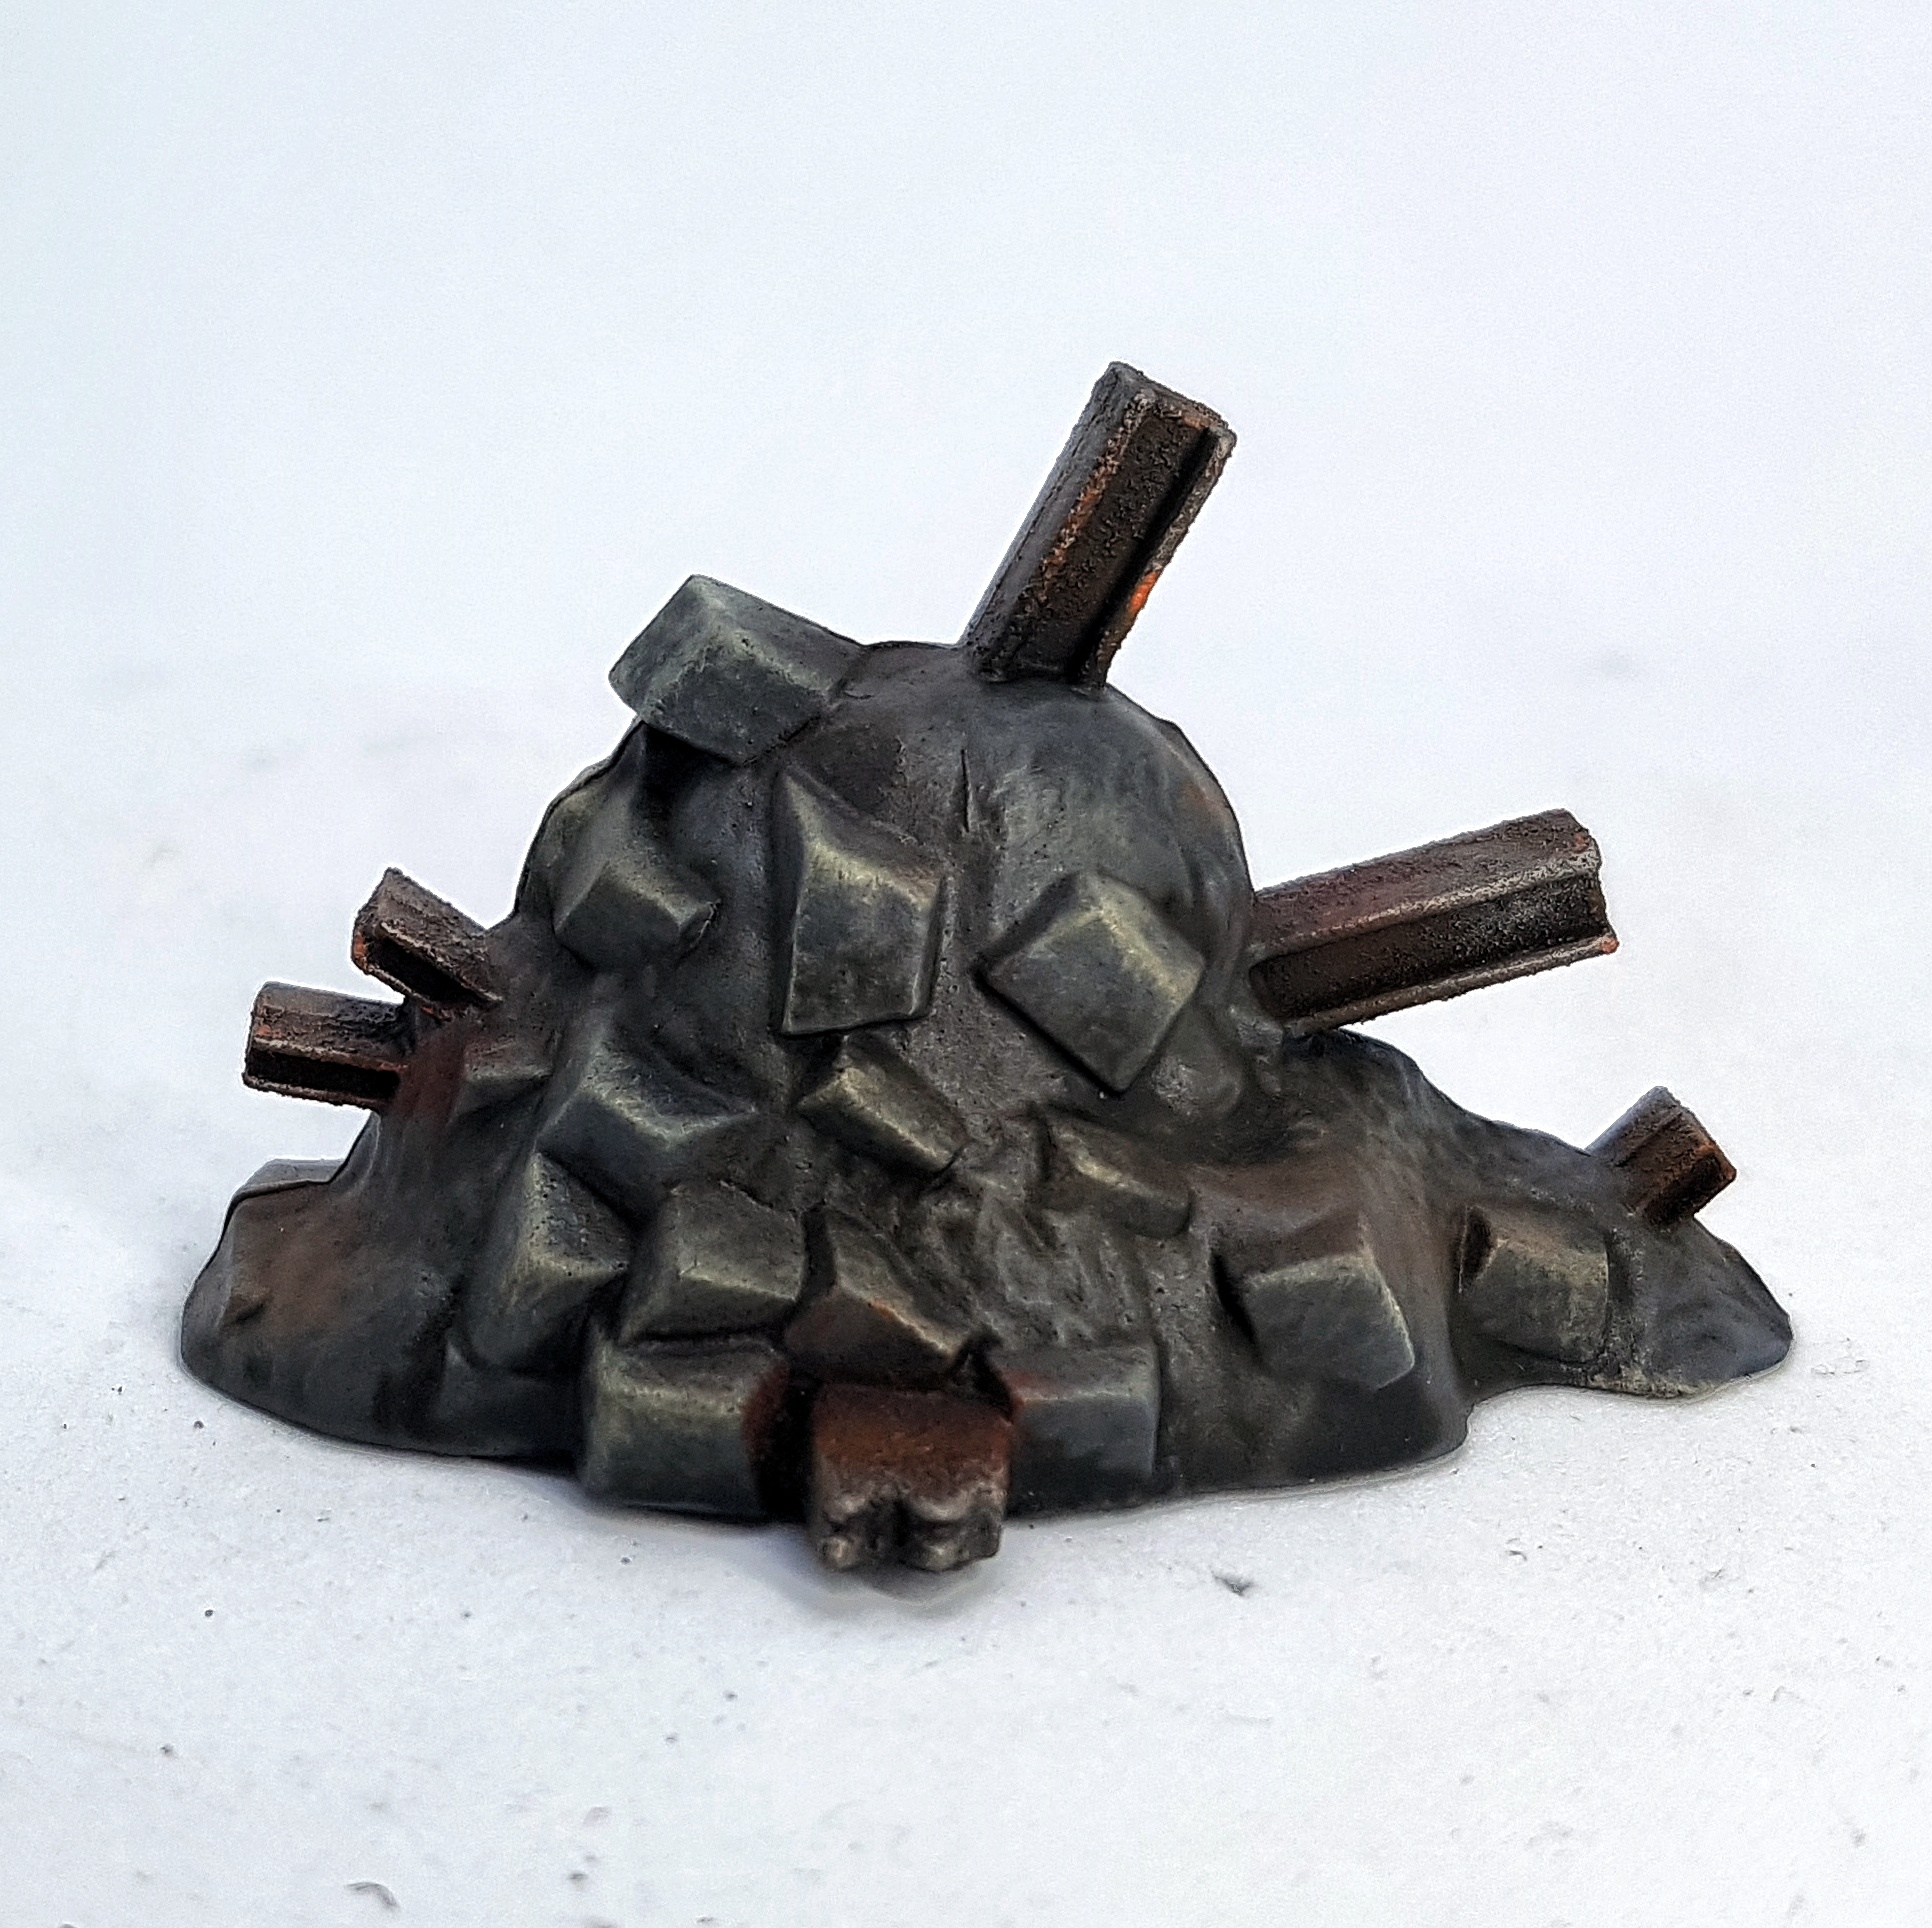
When I was ready to varnish I put on my dust mask (To stop my breathing from blowing pigments about) and applied 3 different pigments wherever I felt like across the rubble. Vallejo 73.109 Natural Umber as mud, Vallejo 73.208 Brown iron oxide as patches of rust on but the girders and stone, and Spot-On Pigments 02 EU Brown Earth Zero as a lighter fresher dirt. These were both rubbed in with an old drybrush, and dropped on by tapping a loaded drybrush held over the piece. The area was tided up and then they were gently sprayed with gloss varnish, doing my best to stop the airbrush from blowing the pigments about. You can see pics below of before pigments, and with pigments both before and after the varnish. If I were to do this again I’d consider going in for a second pass of the pigments, and perhaps adding more colours/tones when I do that.
Pretty sure I don’t have enough space here for all the finished pics, so I’ll see you in the next entry.
First Wave of Terrain Finished
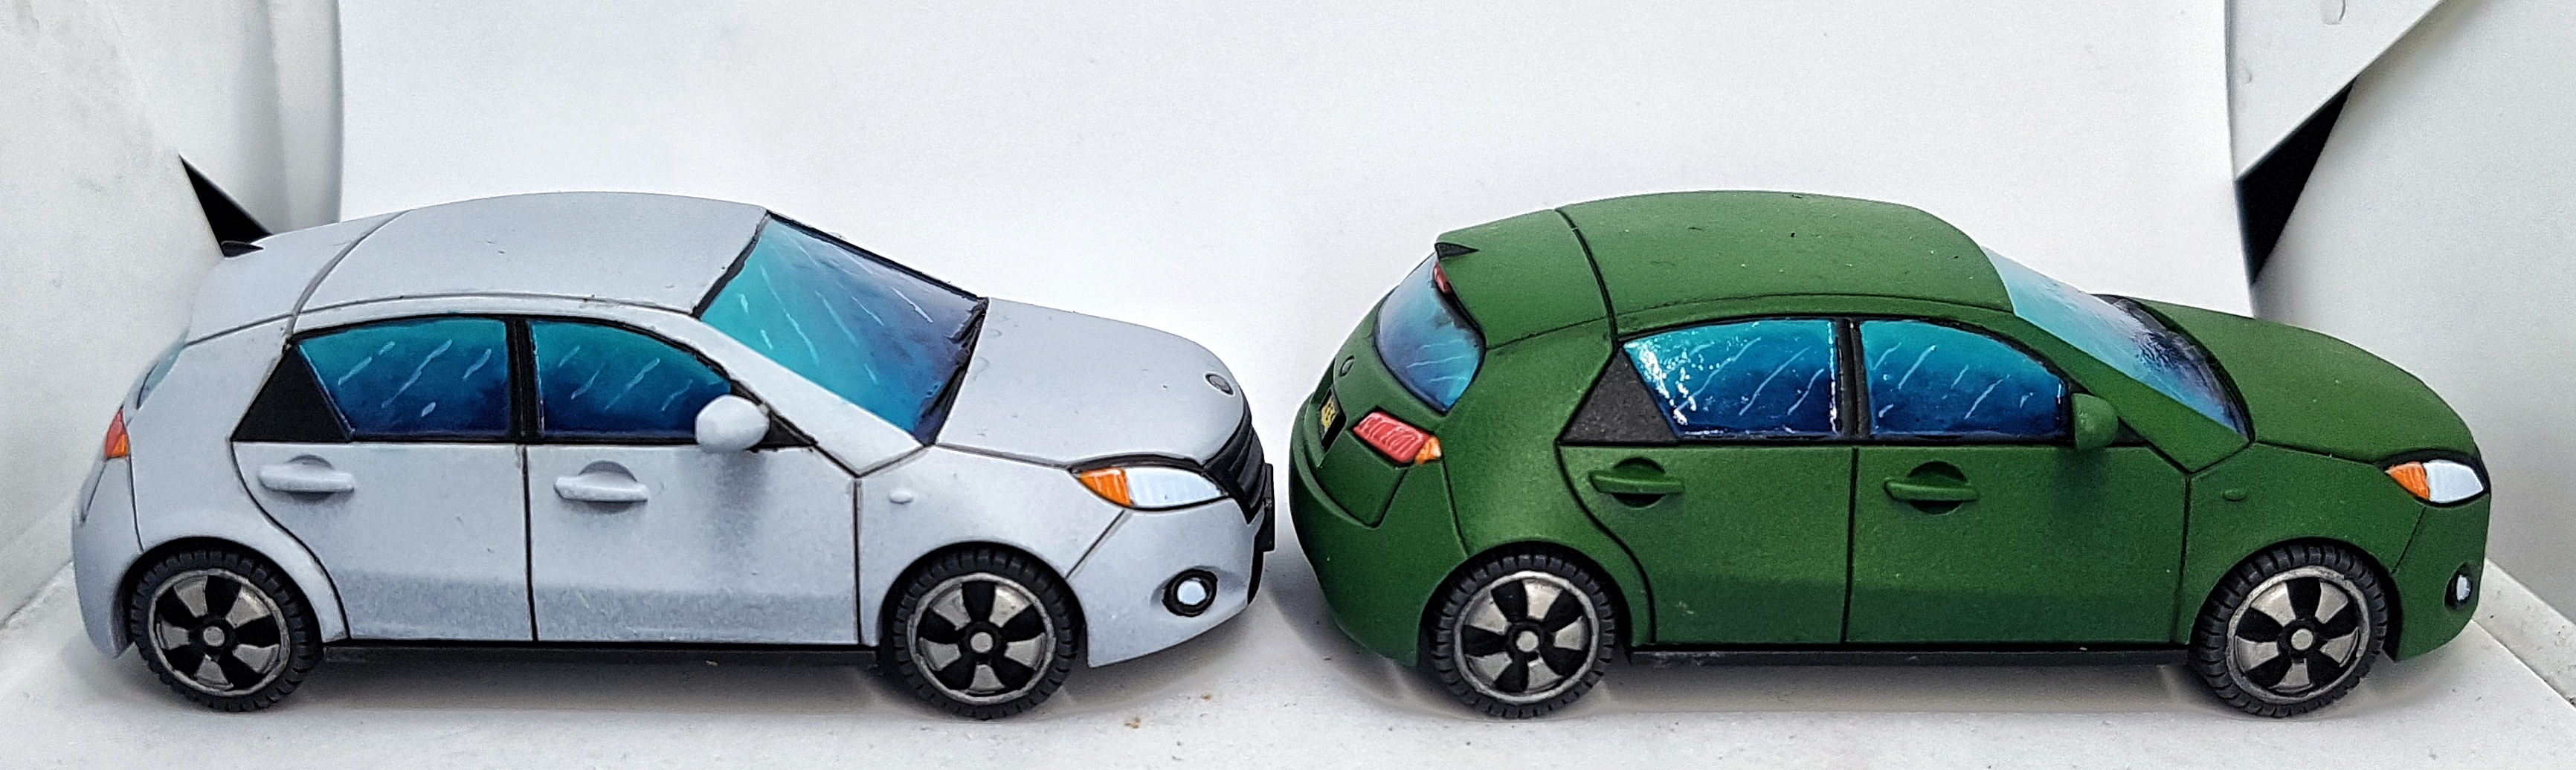
Here are my final results. 23 finished pieces of terrain in one week, while doing other time consuming things. I’m very happy, and I really like those cars. The windows got a final coat of gloss once all the matt varnishing was done. This does mean that in some of these pics they are really reflecting the light, making them look like they have white blobs on them. I’m not too happy about that, but they’re great in person and that’s what matters.
Once I have everything done I’ll be back here with some pics of everything on a table.
I’m back at work now so I don’t have much free time anymore. I’m currently working on that Loader. I’ve got to pick some areas out in black, paint the chair leathery, and do something with the hub caps. It wouldn’t be much, except it’s such a large surface area. I also need to varnish every coat because it keeps chipping off due to the moving parts bumping together, and from my handling. it’s too big to handle sensibly. No way it’ll fit on a hobby holder.
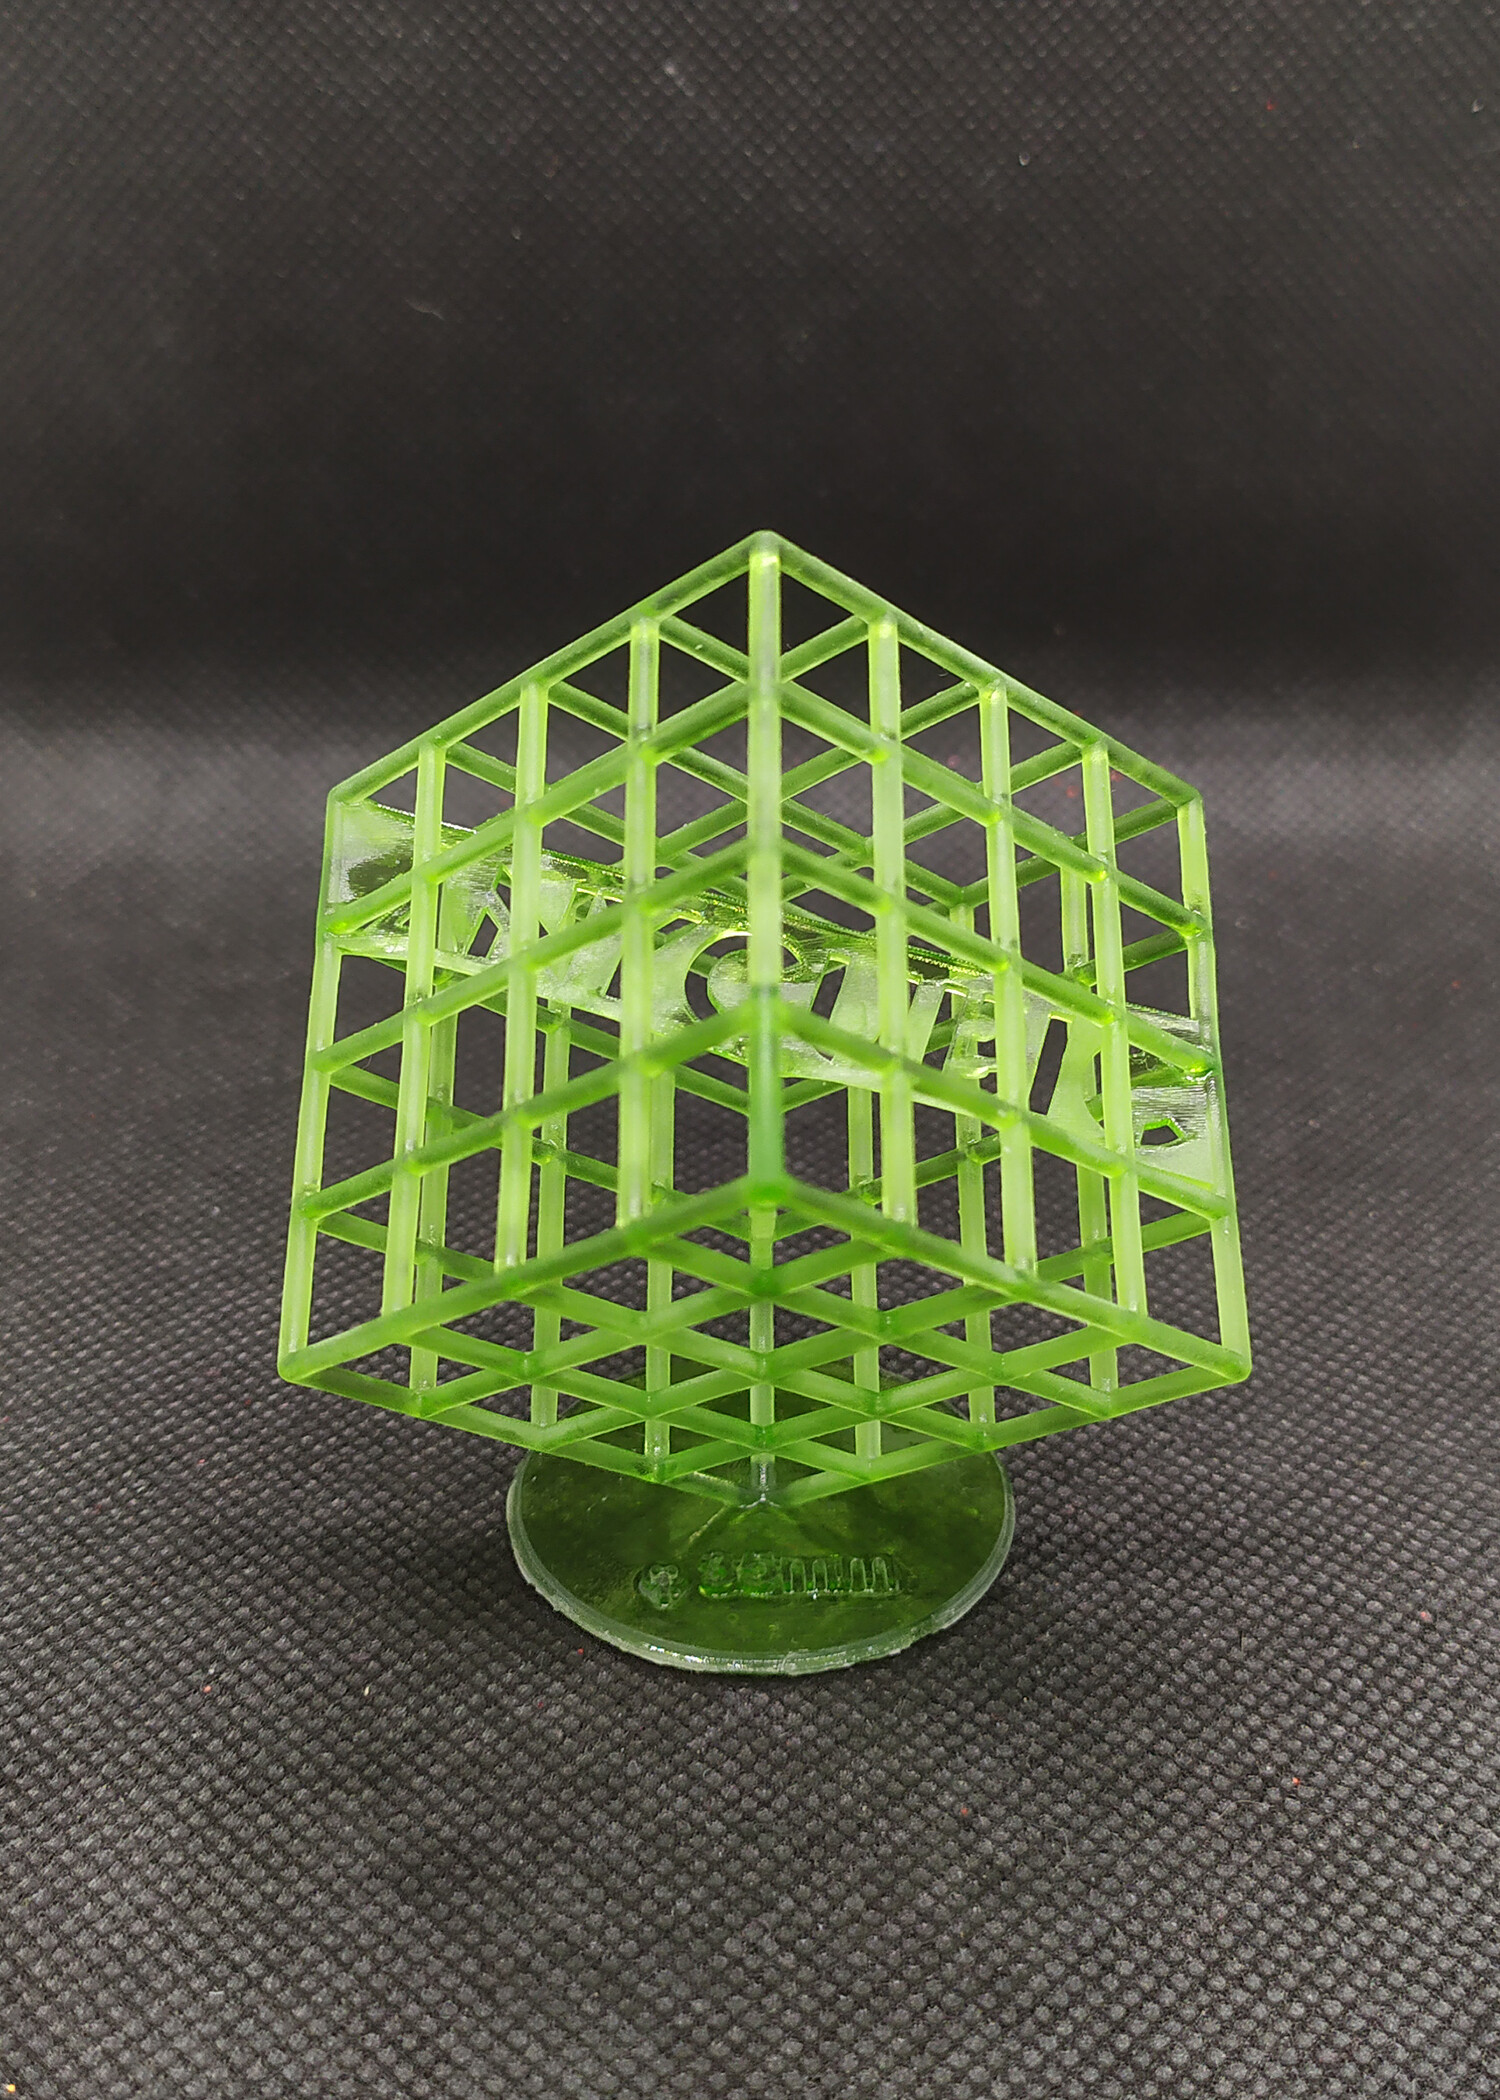
I’ve also had another idea for a piece of terrain. My first 3D print was the Anycubic test piece and it’s been sat untouched on a shelf for years now. I’ve always thought it looked like a corporate sculpture, so why not mount it on something and paint it chrome? I figure I get an old round coffee jar lid, turn it up side down and put a plinth for this in the middle. I then surround the plinth in sand and paint it as mud. Add some flowers and we have a large planter with a sculpture in the middle. Should be a good size 2 terrain piece.
Toy Loader from Tescos by Lena Truckies Painted
I was in Tescos a few weeks back and I saw a cheap plastic toy Loader for sale I thought might possibly be plausible in scale for MCP, even if it was a little big. They can be large in real life, and I could always mod the chair to make it look like a large vehicle scaled for small humans. Here are my before and after shots.
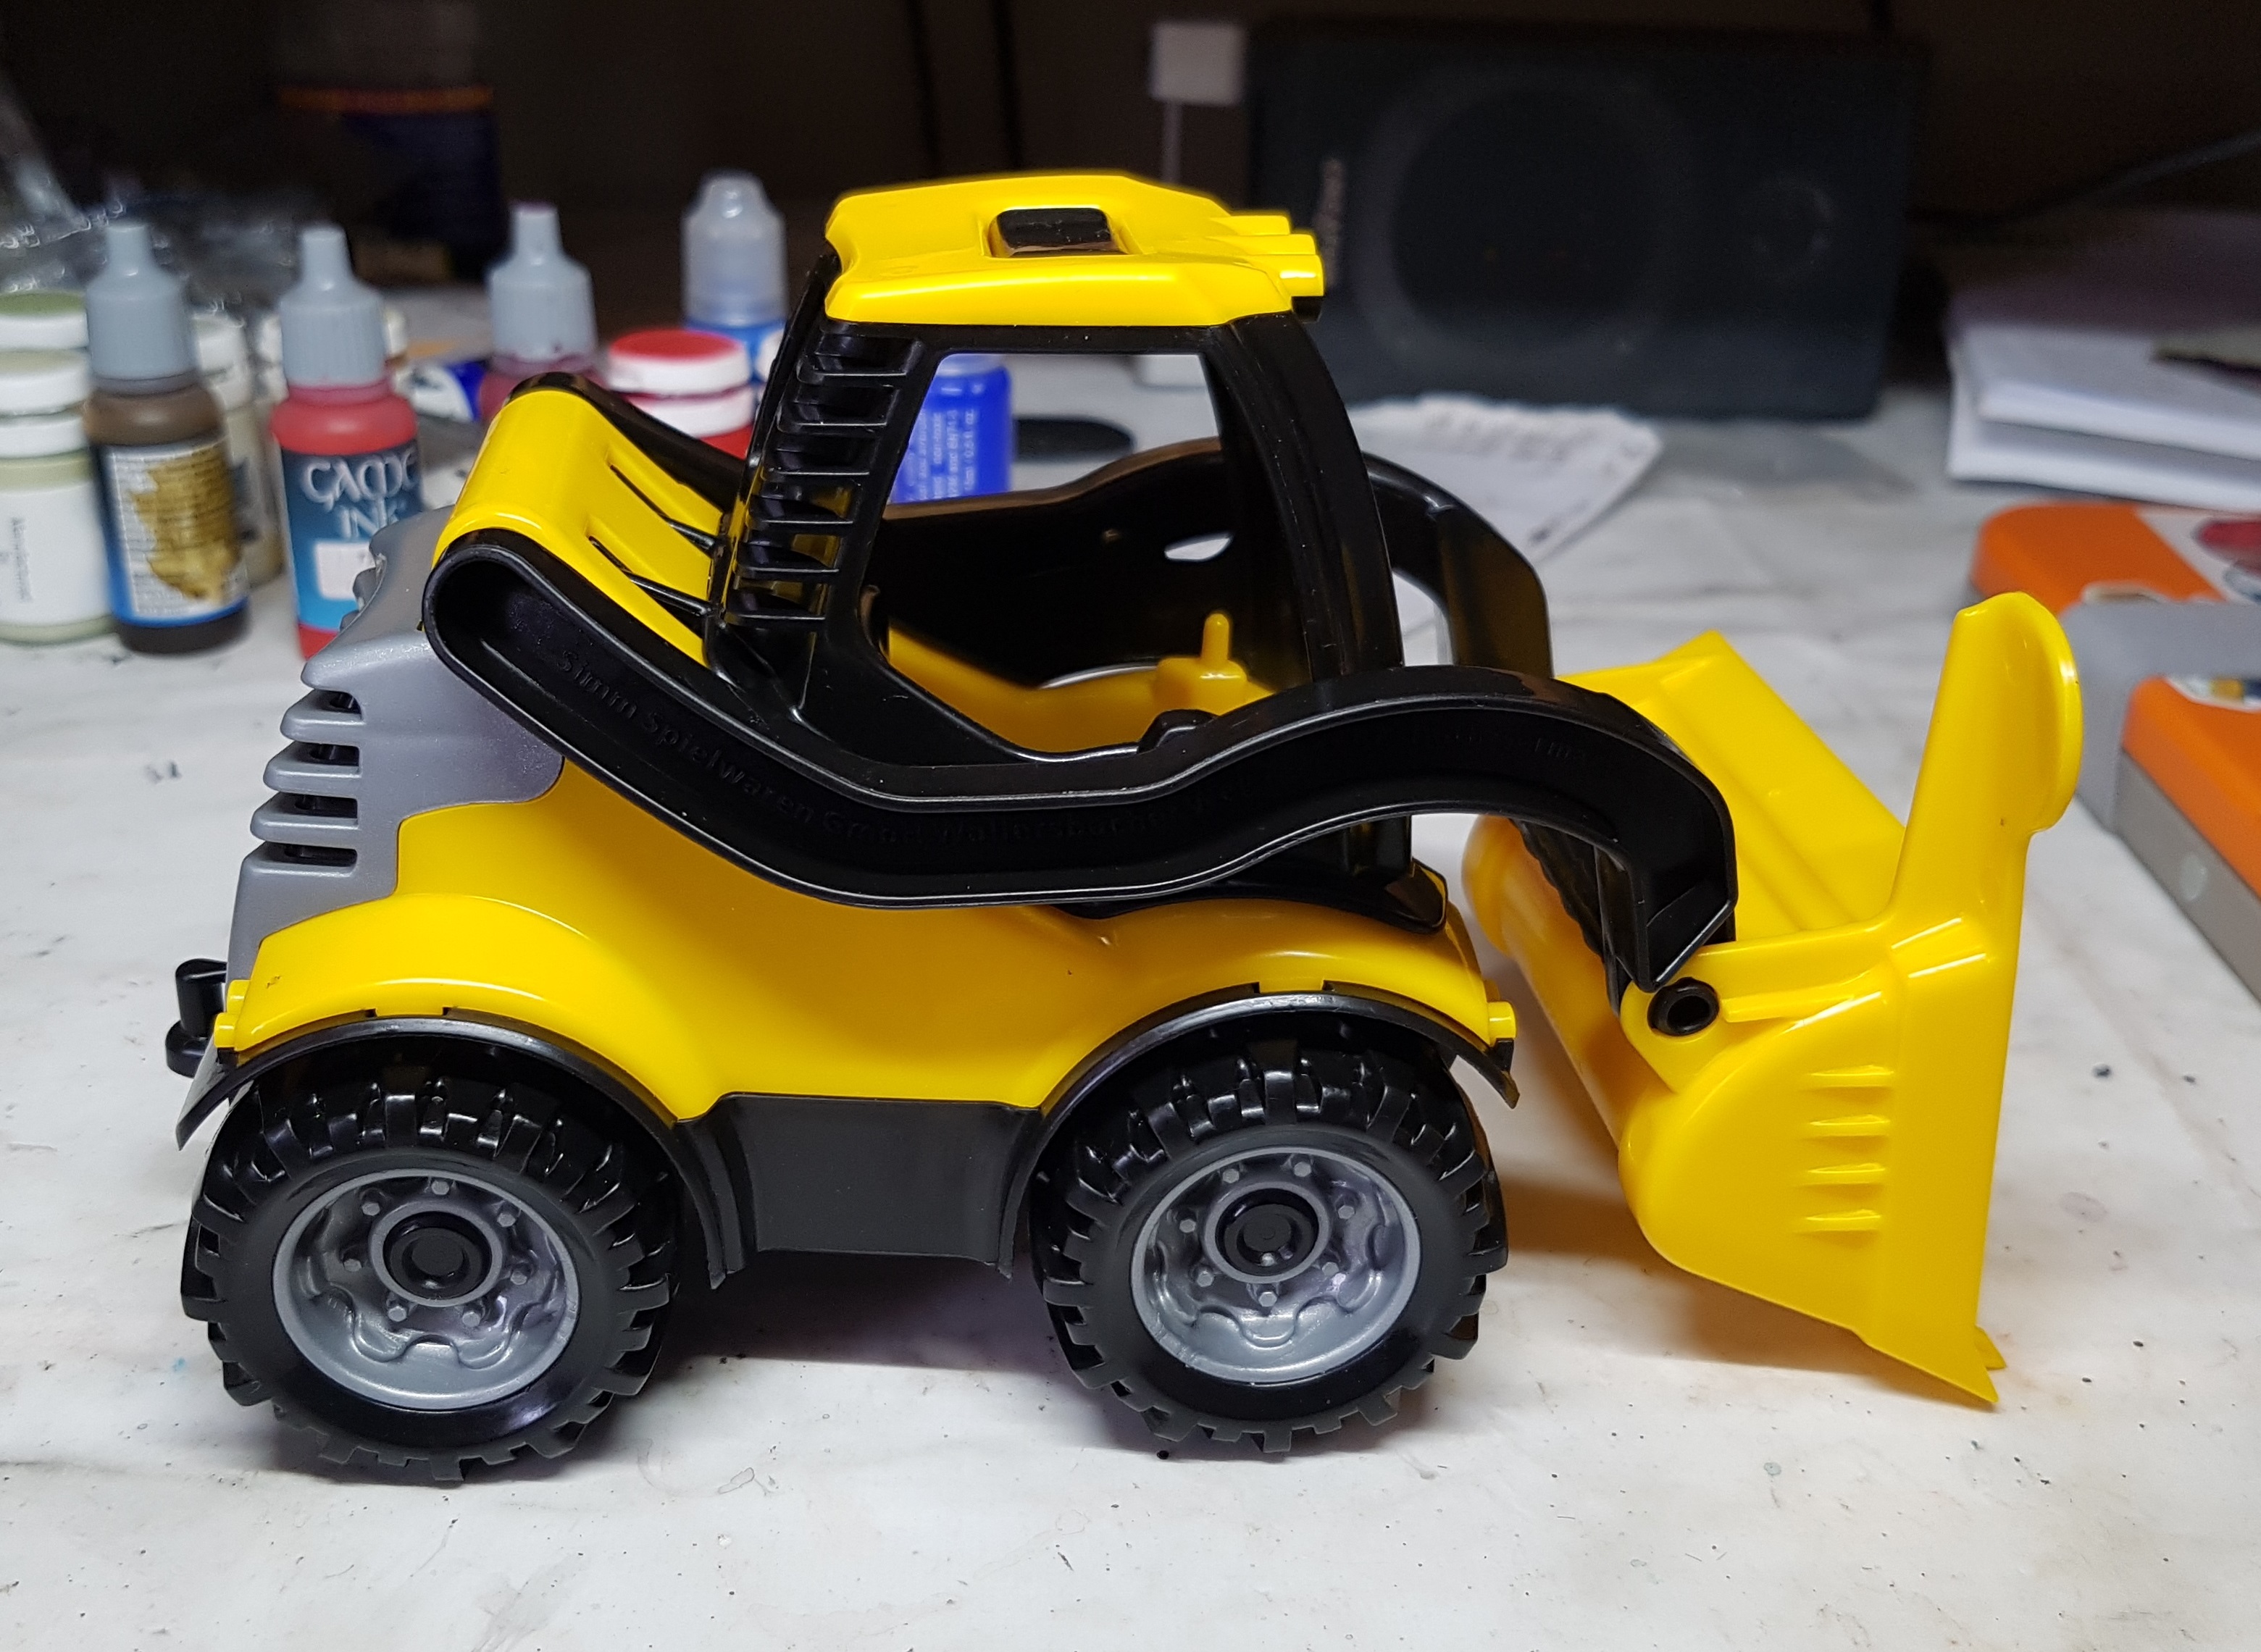 Fresh from the store (Tescos, £4.75). The pic does it a kindness. It was a lot shinier an plasticy than this photo shows.
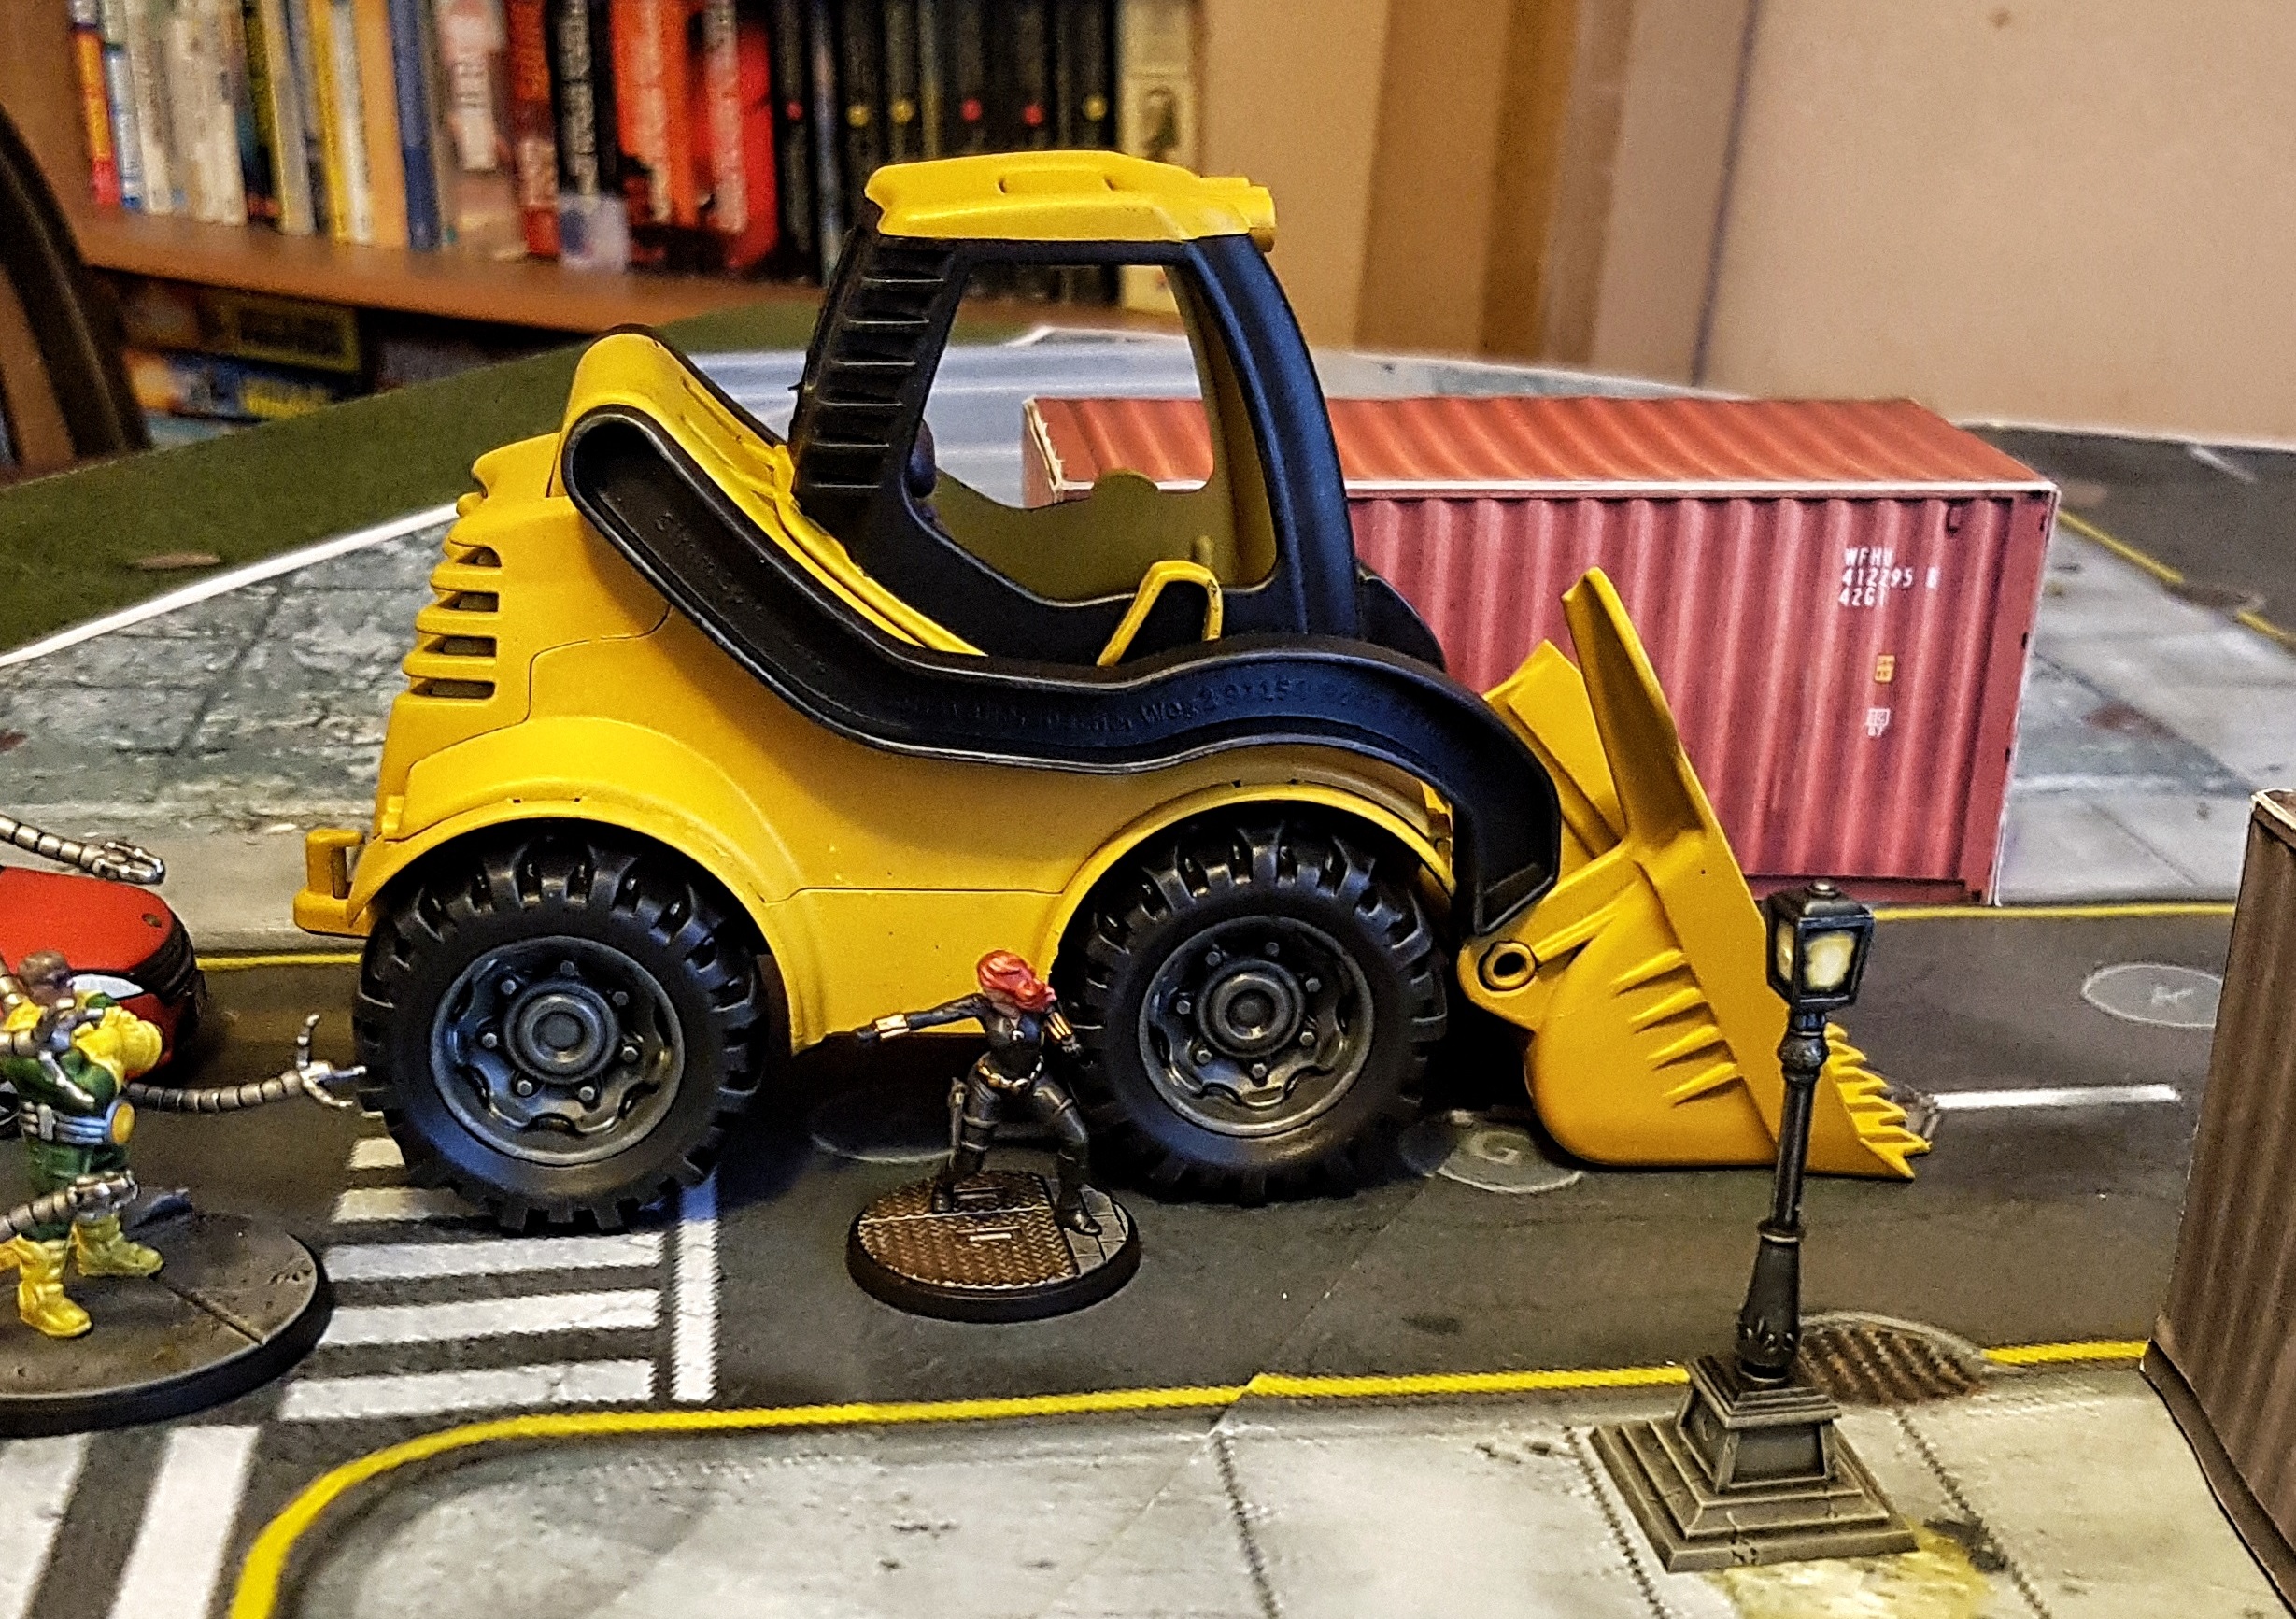 After I've painted it up
I had a go at rescaling it by building up the chair. I cut out a bunch of cardboard squares and raised up the height of the seat. i then padded it out with green stuff, pushing finger marks in to the cushion where the bum and legs would leave lasting indents. I’m definitely no sculptor, but I gave it a go. It works well enough, but I didn’t go far enough., The chair is still at too large a scale.
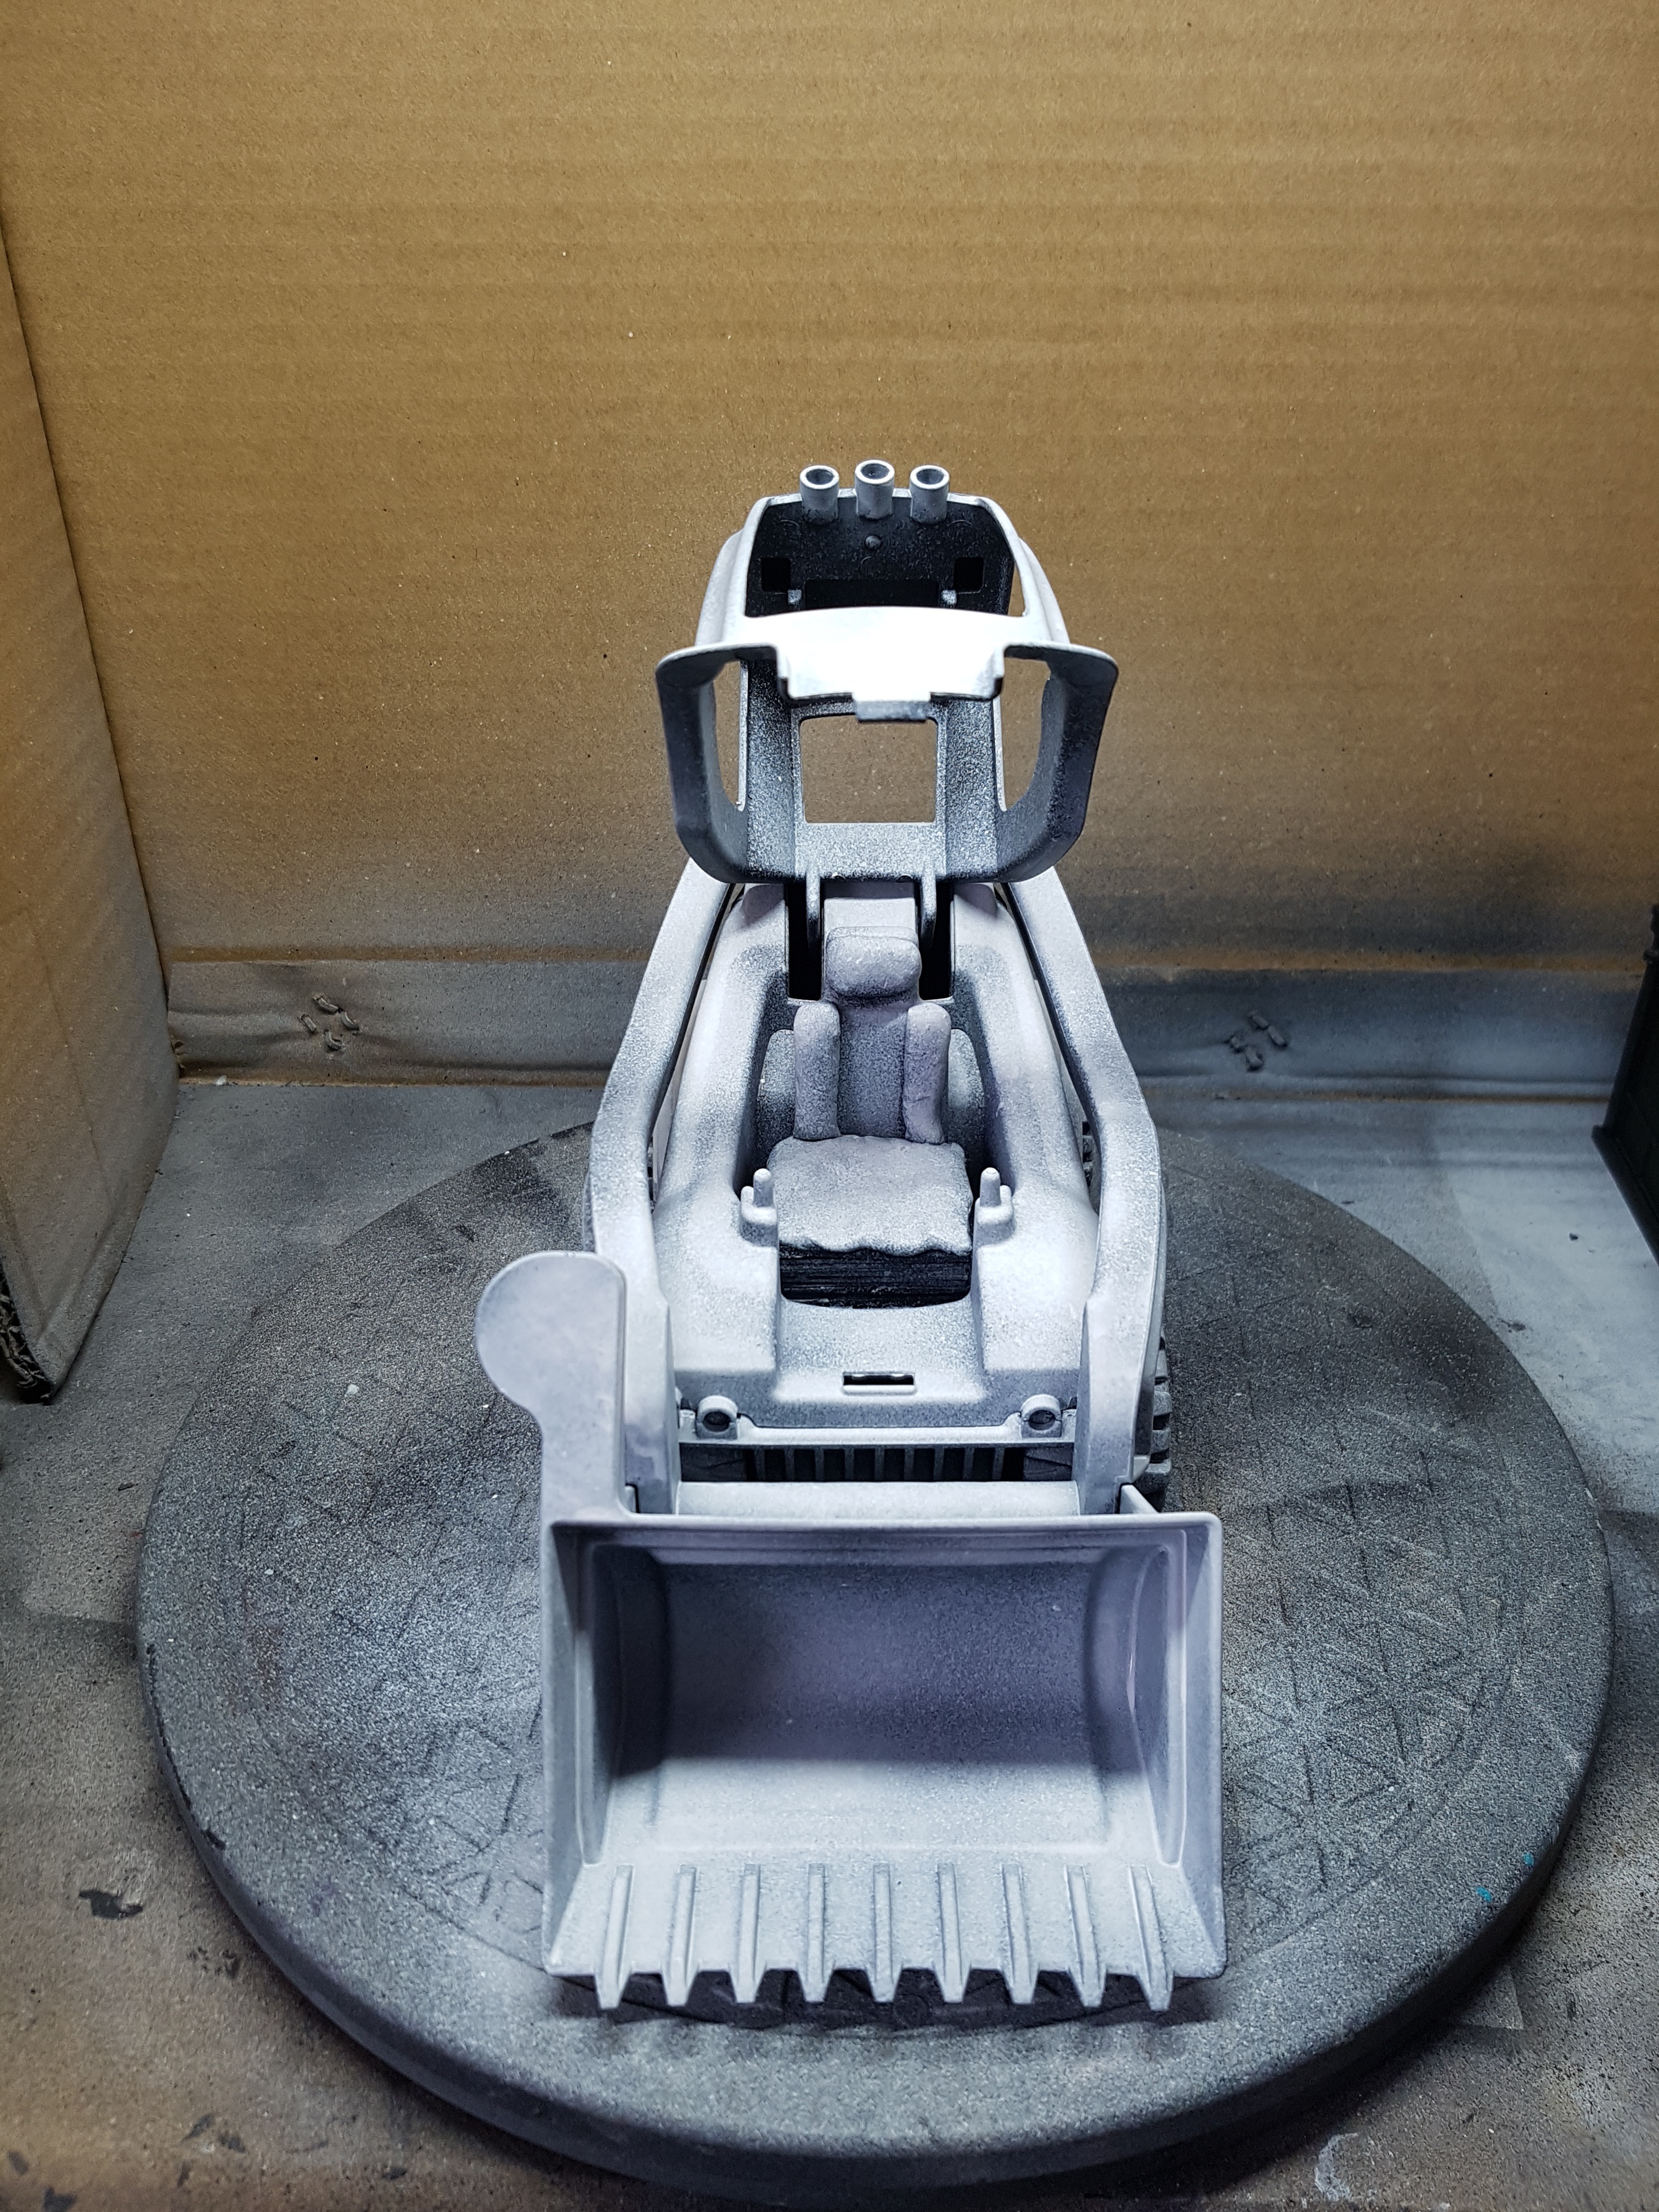
Once it was primed it was also varnished. Every time I painted any part of it, it got varnished with gloss and then matted down. it was too big to mount on a hobby holder and had too many moving parts. It was going to take lots of chipping and handling wear damage. The gloss protects, but repels paint. The matt allows paint to stick. It still chipped, but I took the best care I could.
The whole thing was airbushed yellow first, then I picked out the hub caps. The base of the chair was blacked out before painting its leather padding. Finally the black of the body, and lastly the tyres were painted.
Yellow
Undercoat VGC 72.150 Heavy Ochre
Zenithal Highlight Scalecolour SFG-08 Marduk Yellow
Hub Caps
Base P3 Ironhull Grey
Wash Jan’s Magimix (6-8 Parts GW Nuln Oil, 6-8 Parts GW Agrax Earthshade, 5-6 Parts Lahmium Medium, 2 parts Athonian Camoshade. Thanks, Januinevision)
Drybrush lightly with P3 Pig Iron
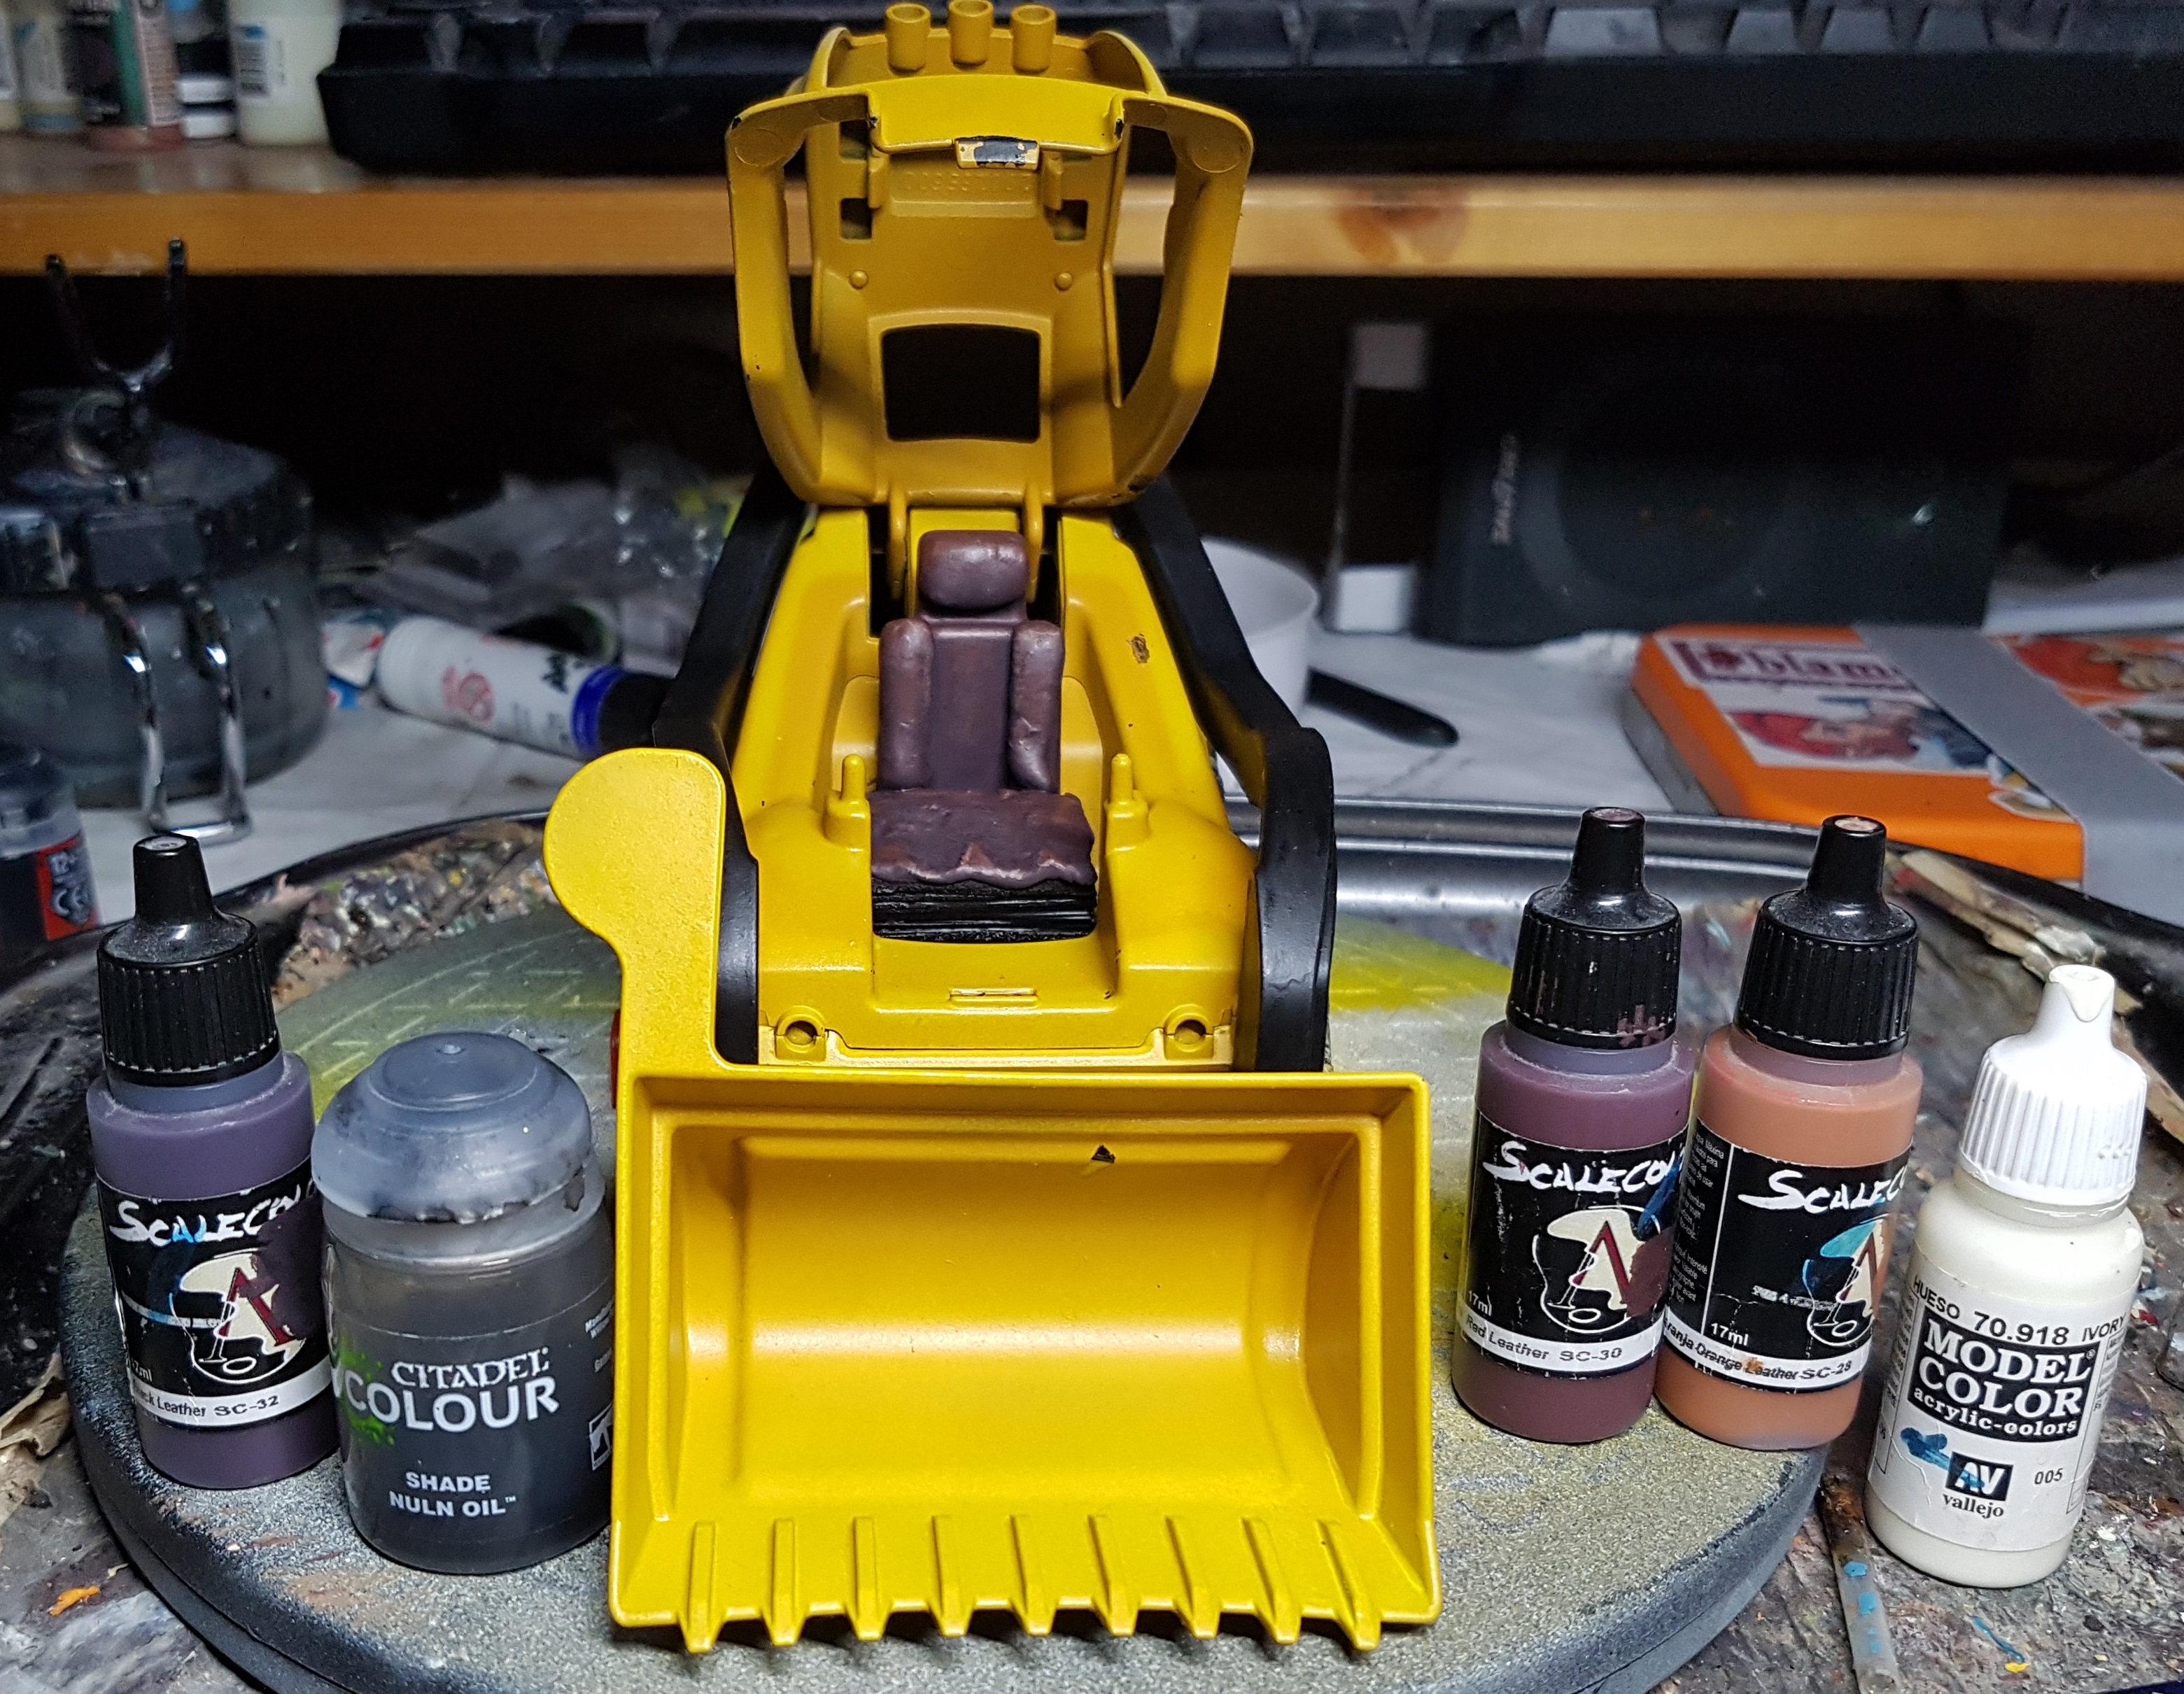
Leather
Base Scalecolour SC-32 Black leather
Pinwash GW Nuln Oil for deep shade
Highlight Black Leather mixed with Scalecolour SC-30 Red Leather
Highlight Red leather
Highlight Red leather mixed with Scalecolour SC-28 Orange Leather
Highlight Orange Leather mixed with VMC 70.918 Ivory carefully (I took almost all of the paint off the brush, and even then ended up wiping the paint off with my finger afterwards to leave just a pale trace behind)
Highlight Orange Leather mixed with more ivory Ivory carefully
Black Body
Base Black
Drybrush/sponge dab with P3 Pig Iron selectively
Tyres
Base Black
Drybrush P3 Greatcoat Grey
So am I happy? Yes and no.
Lets start with the no, and work in to the yes. The scale doesn’t really work. Nothing about this makes it feel like a huge machine for tiny people. It still feels like it’s for much bigger humans. I’ve spent a week on this and it’s not really fit for purpose, without some greater suspension of disbelief than usual. It is plausible though. They come in a variety of sizes, and even larger ones definitely exist. If I need to point that out though, then it doesn’t work.

The model was too large to work with safely, creating issues with with handling wear and chipping. Some of this could have been resolved if I had dismantled this and worked with the parts. It would also have meant I could have airbrushed different sections different colours. I didn’t think I could undo the clips without breaking it, or hurting myself. I should have taken some clippers to them and relied on glue to reassemble it. I’ve done this with Matchbox scale cars for Gaslands before. I wimped out here though, and made life harder for myself.
Given that I knew it wasn’t going to work, and that every time I handled it I risked chipping my work I decided against weather this piece. A bit of dirt, and some natural chipping effects could really bring this piece to life. Mine looks factory fresh.
We’re getting in to the yes now.
The pics don’t really show this, but in person the store fresh piece was clearly cheap shiny plastic that stood out as very wrong on the table. The finished piece has a matt finish, and smooth natural colour gradients which make it look more real. It’s painted with the same finish as the minis which makes it feel more like part of the same world as them.
As a proof of concept I am happy with this. If it had been half the size I’d be buying more of this range right now, and have taken the time to weather this one a bit more. This particular piece can go sit on a shelf, but I’ll be eyeing the toy section in Tescos with a greater understanding and more confidence going forwards.
Corporate Art
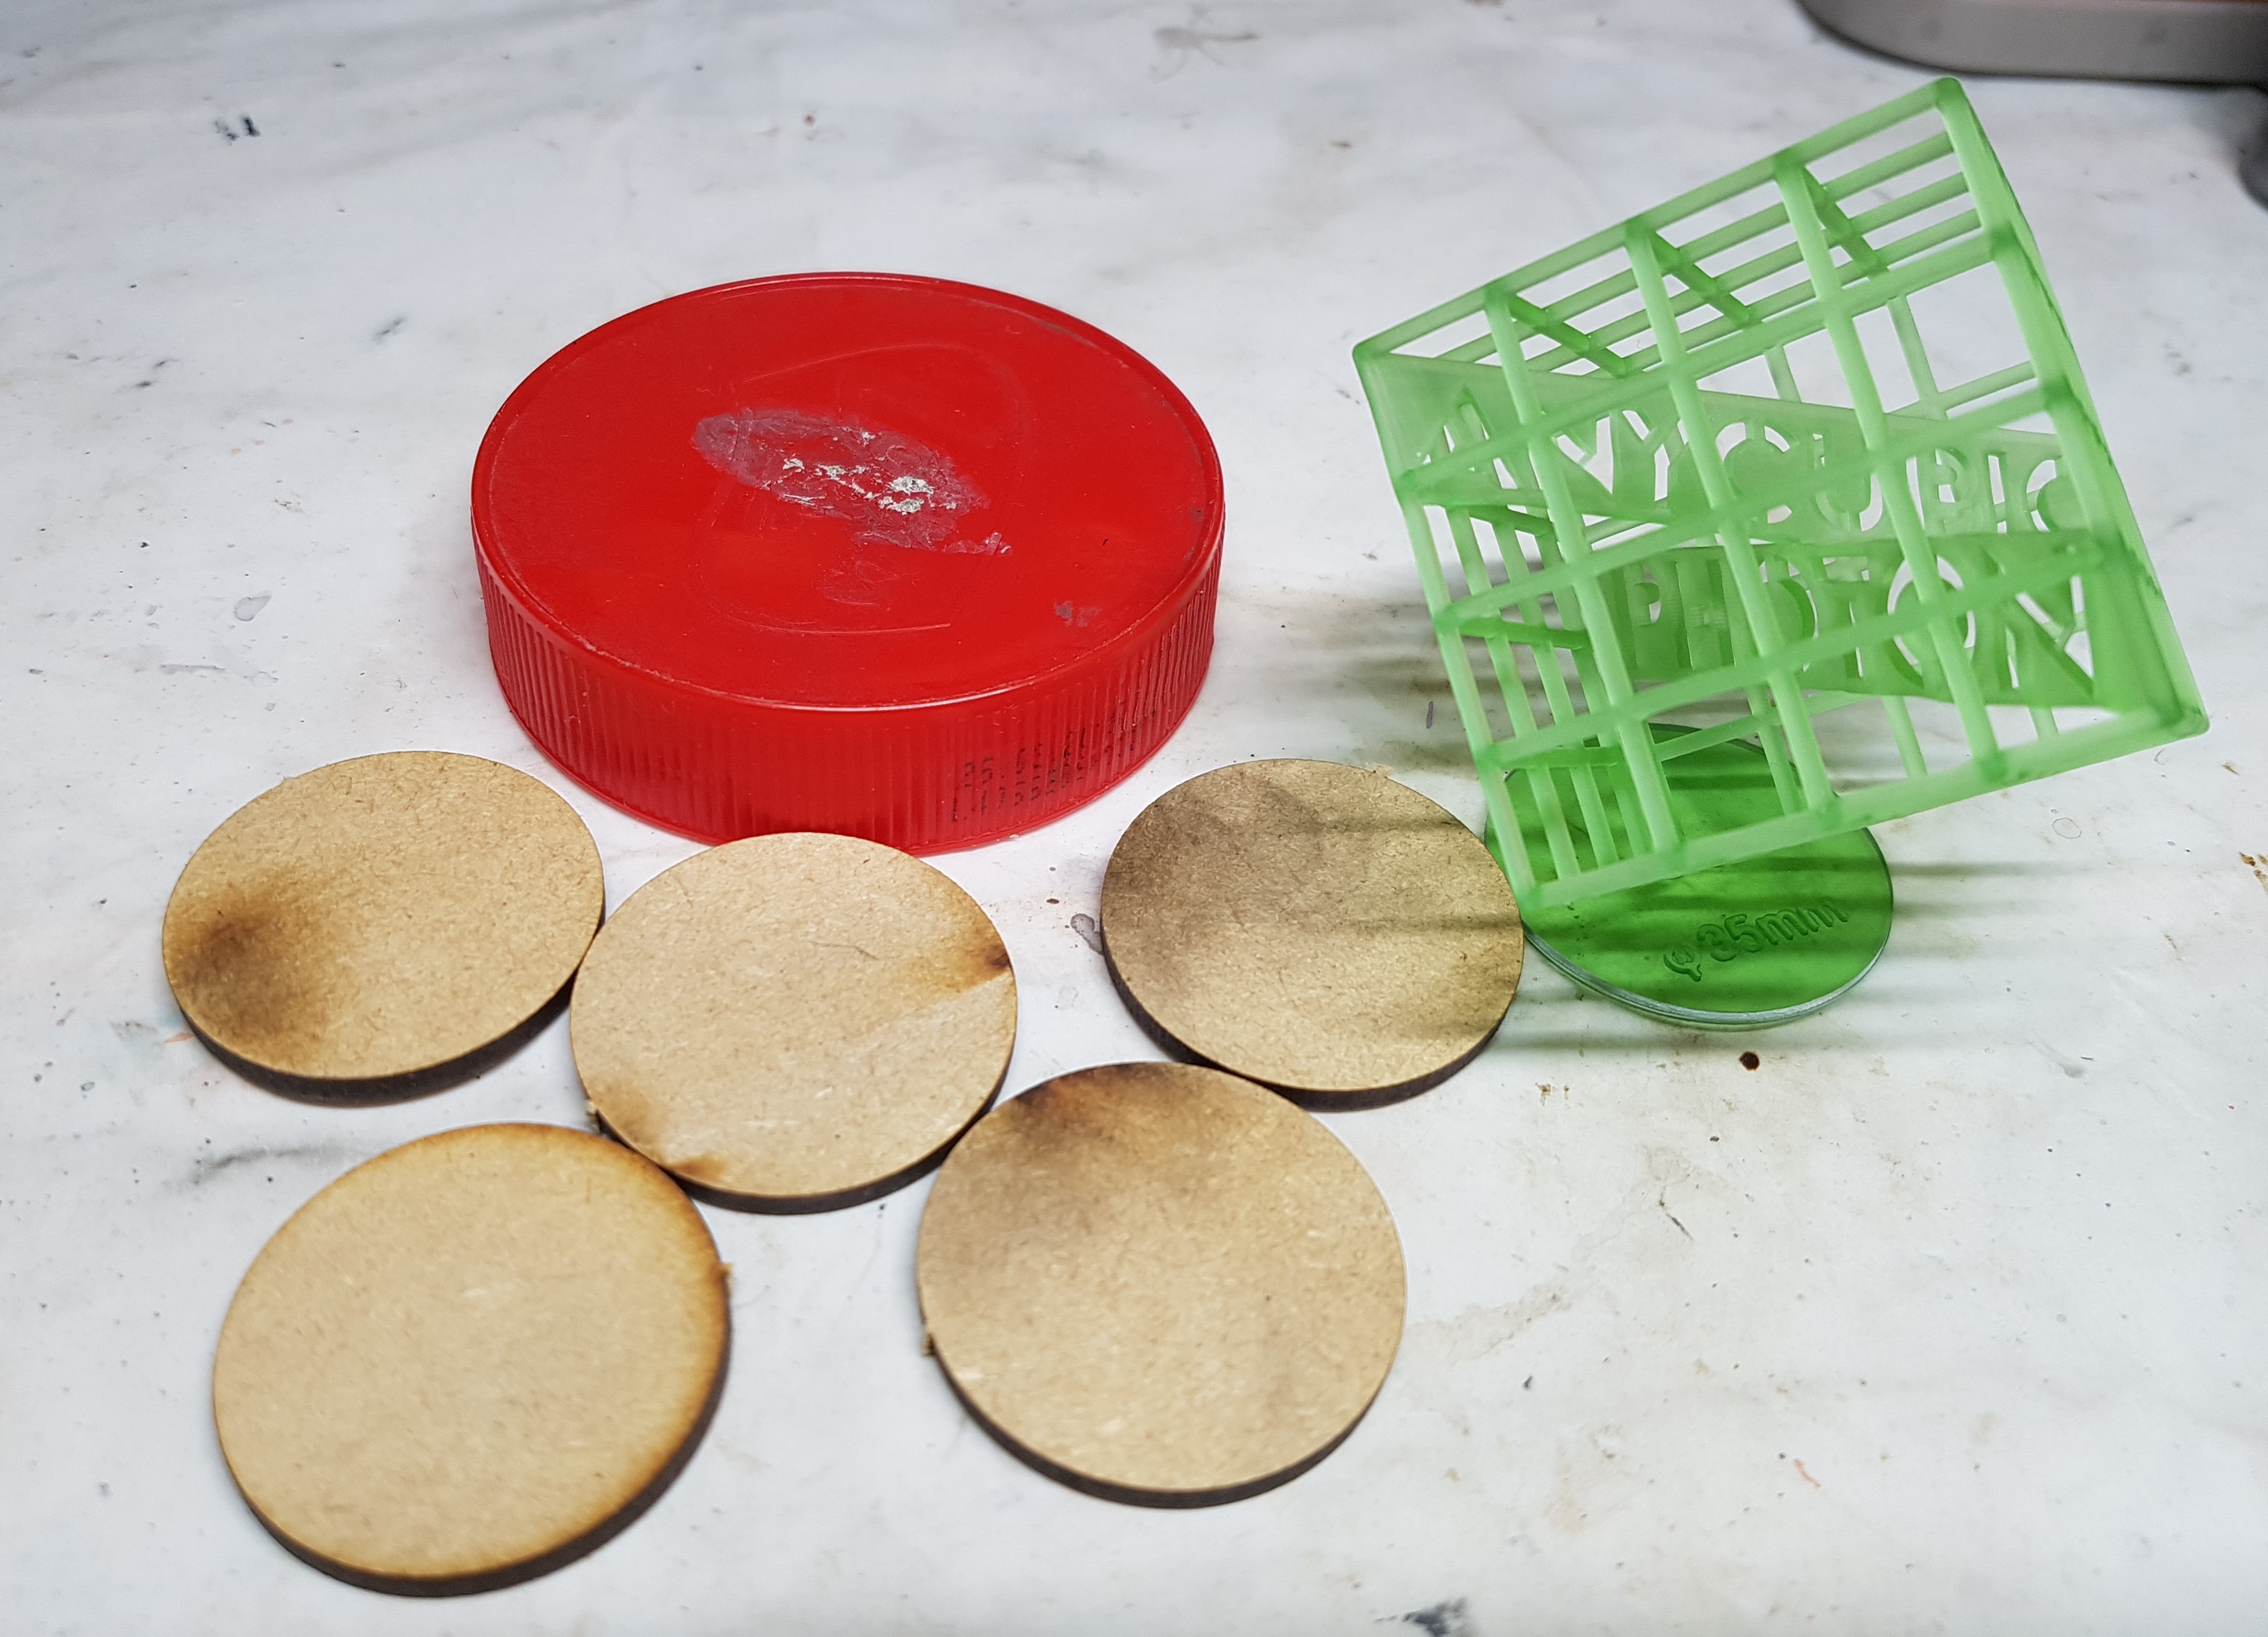
Work has begun on the Corporate sculpture idea. Here’s my parts. I had a variety of jar lids already saved up. I use them as hobby holders. I worked out which one to use by scaling them up against the minis. This one means the planter will be about bottom height, making it perfect for leaning against or sitting on. Not too high for people to comfortably look at the flowers on, and not so low people would casually walk all over it.
The lid comes from a jar of Biscoff spread (Try some. It’s delicious. Don’t bother with a sandwich. All you want is the jar and a spoon).
The discs are not bases. They’re “doughnut holes” from a paint rack. They’re about 36mm across, so too big for most bases, but not far off. I saved a load a few years back, figuring they’d be useful for something.
The sculpture itself is the default test print that came with my Anycubic Photon 3D printer. It had 35mm sculpted on it’s base, but I filed that down very carefully. The piece itself is fragile at it’s join. I broke a beam, but it’s been reinforced with superglue. Any resultant bumpiness can be treated as welds that would very likely be there in real life for the same reason.
The discs were scratched, and then glued together with superglue. The middle of the lid had a bump on it so I didn’t feel superglue would be thick enough to hold it in place. I put a healthy amount of PVA on the bottom of the disc stack and glued it to the inside of the cap. I then put a ring of PVA around that to help hold it in place. A sprinkling of dirt was added to this to help it dry in shape.
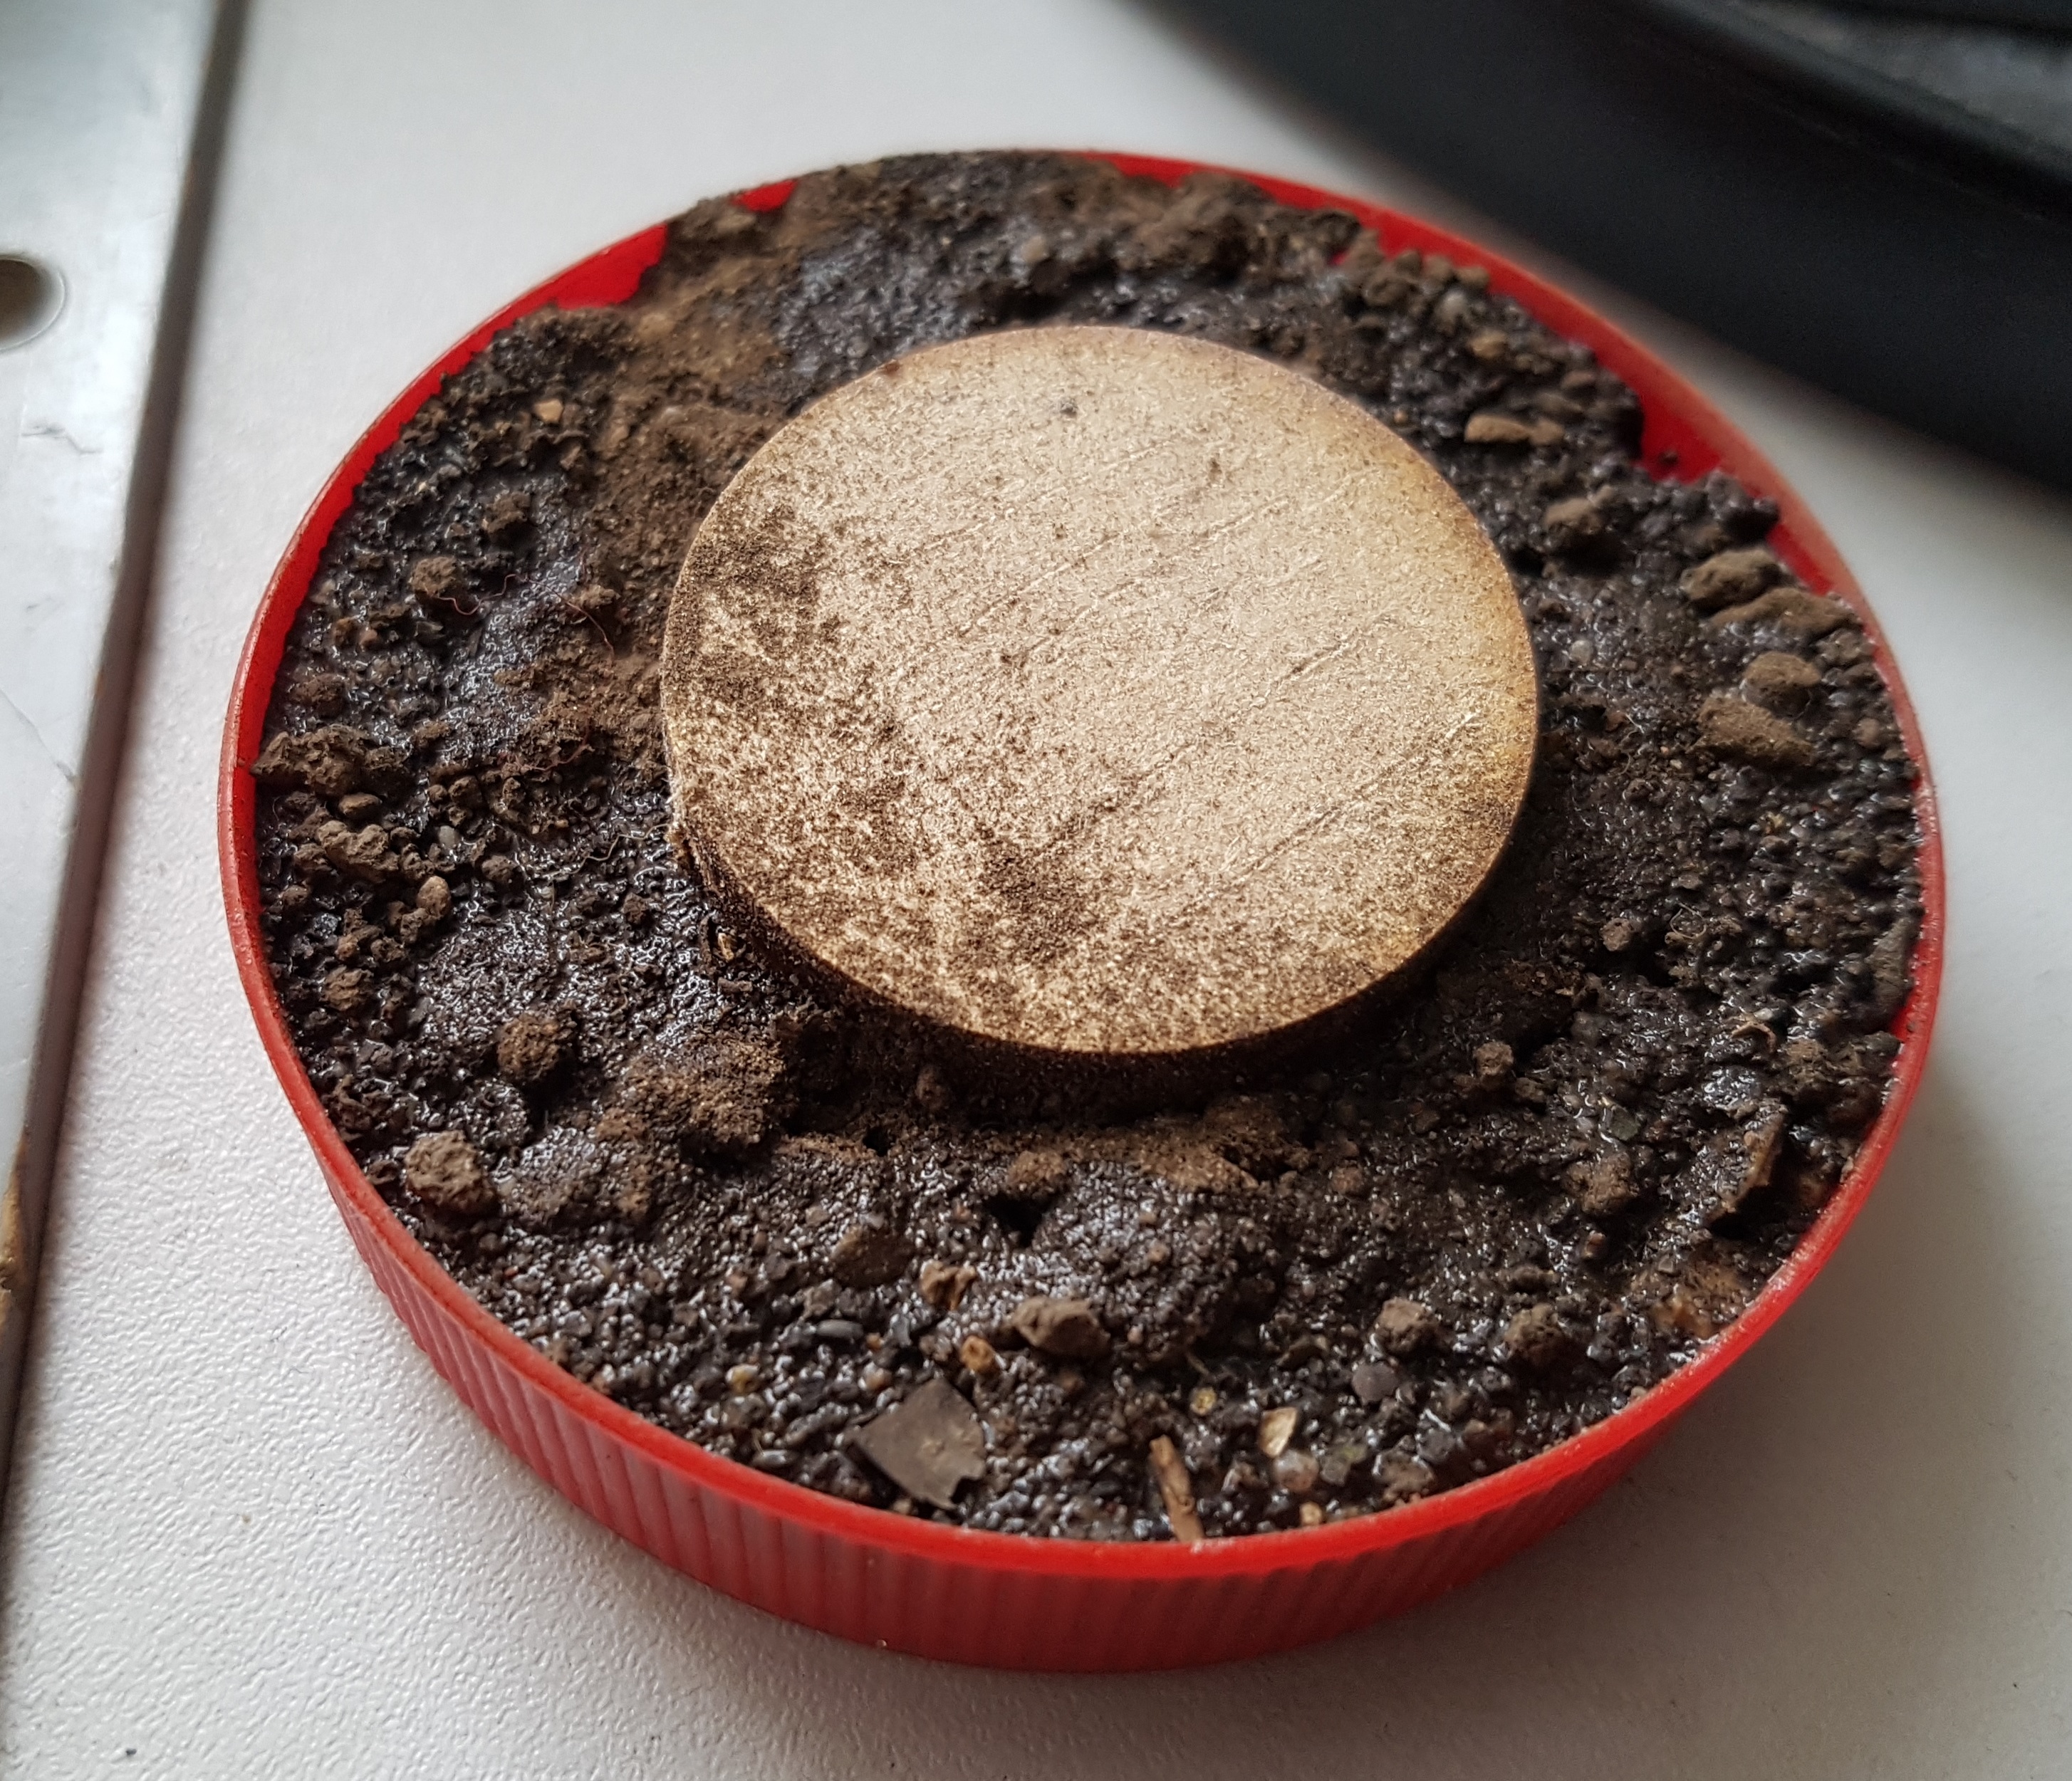
I thought about how to fill the cap up and decided to fill it with dry clean kitty litter. I keep a large pot as a source of rocks. Once I had a good depth of it I mixed up a cup of PVA and water and poured it over the rocks and let it soak through them, and left it overnight to dry.
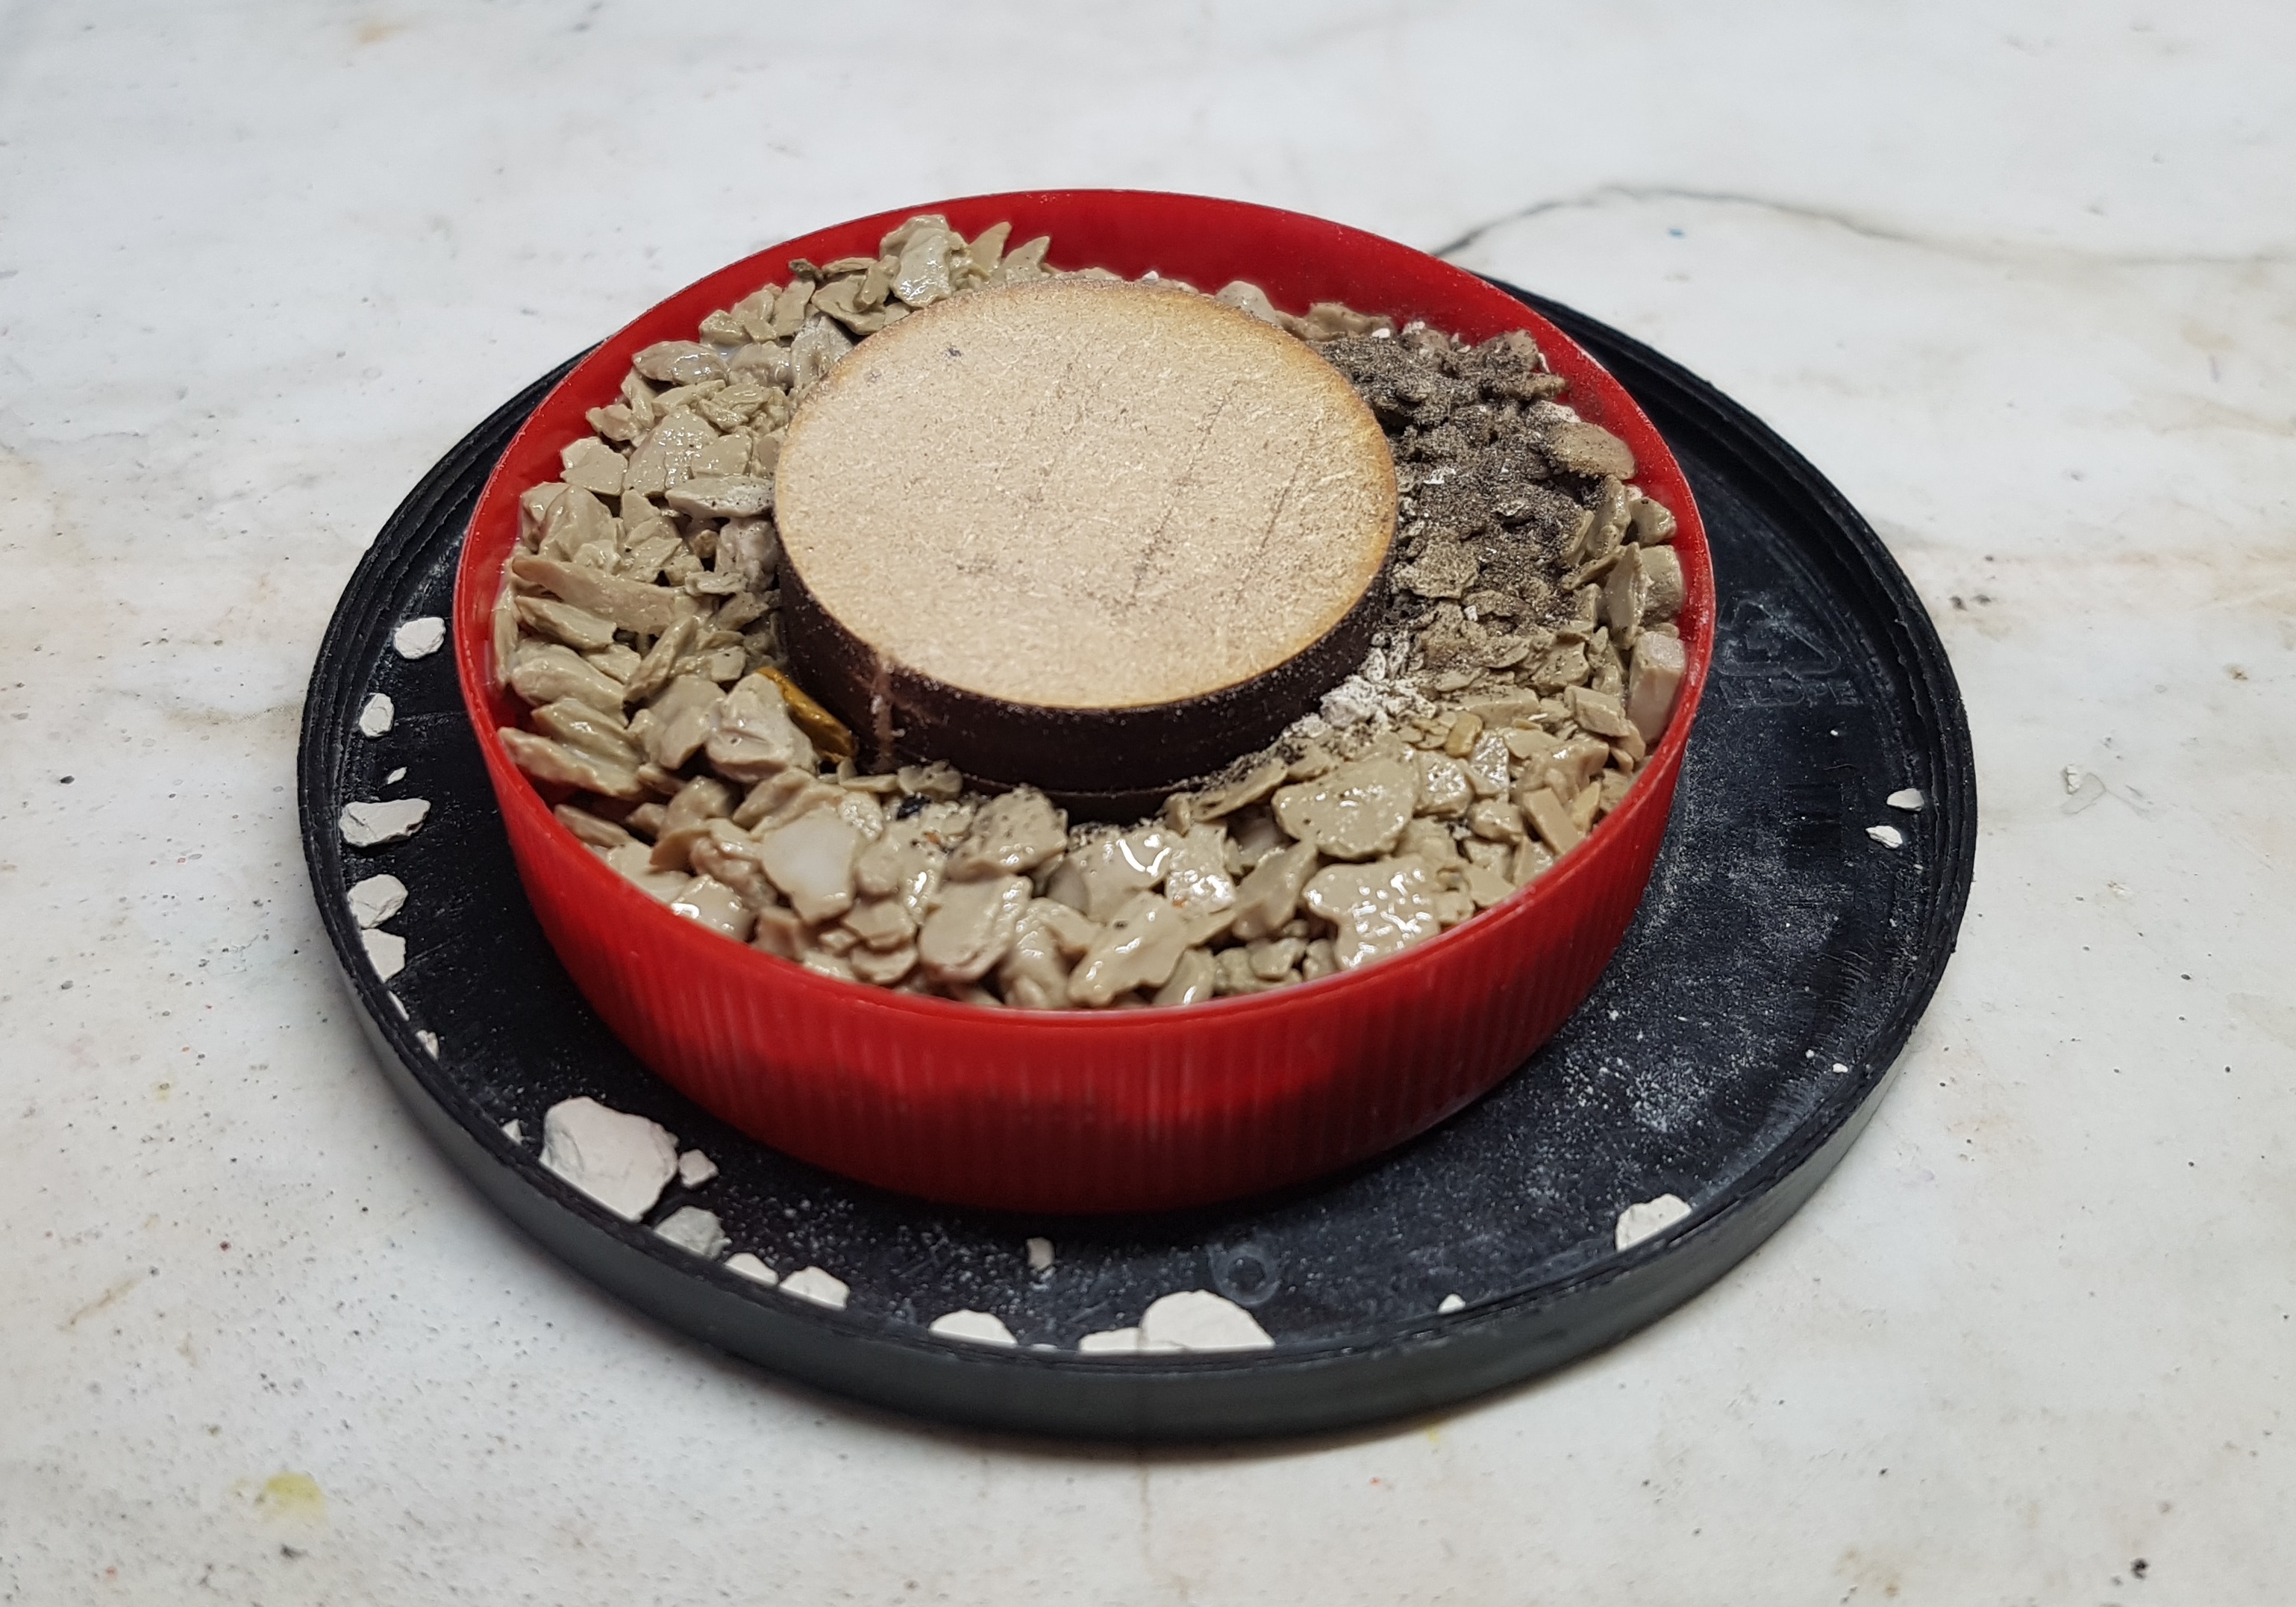 This will be a large planter with a plinth in the middle. At least, in theory
The next morning I applied another layer of PVA and water, but a little thicker this time. I then sprinkled some dirt over it and left it to dry. It was dry by the afternoon, but the whole thing is spongy. Maybe it always will be? I’m leaving it another day, and then I’ll apply another coat of glue and dirt to help level it off and fill the gaps that have appeared. Once I’m happy with the appearance I’ll seal it all in with another coat of dilute PVA. Hopefully it’ll be more solid by then. Once good thing about it’s currently flexibility is that it allowed be to level the plinth. It was slightly wonky.
If PVA drying times cooperate, I imagine I’ll have this piece finished this weekend as a side project around what I’m really working on.
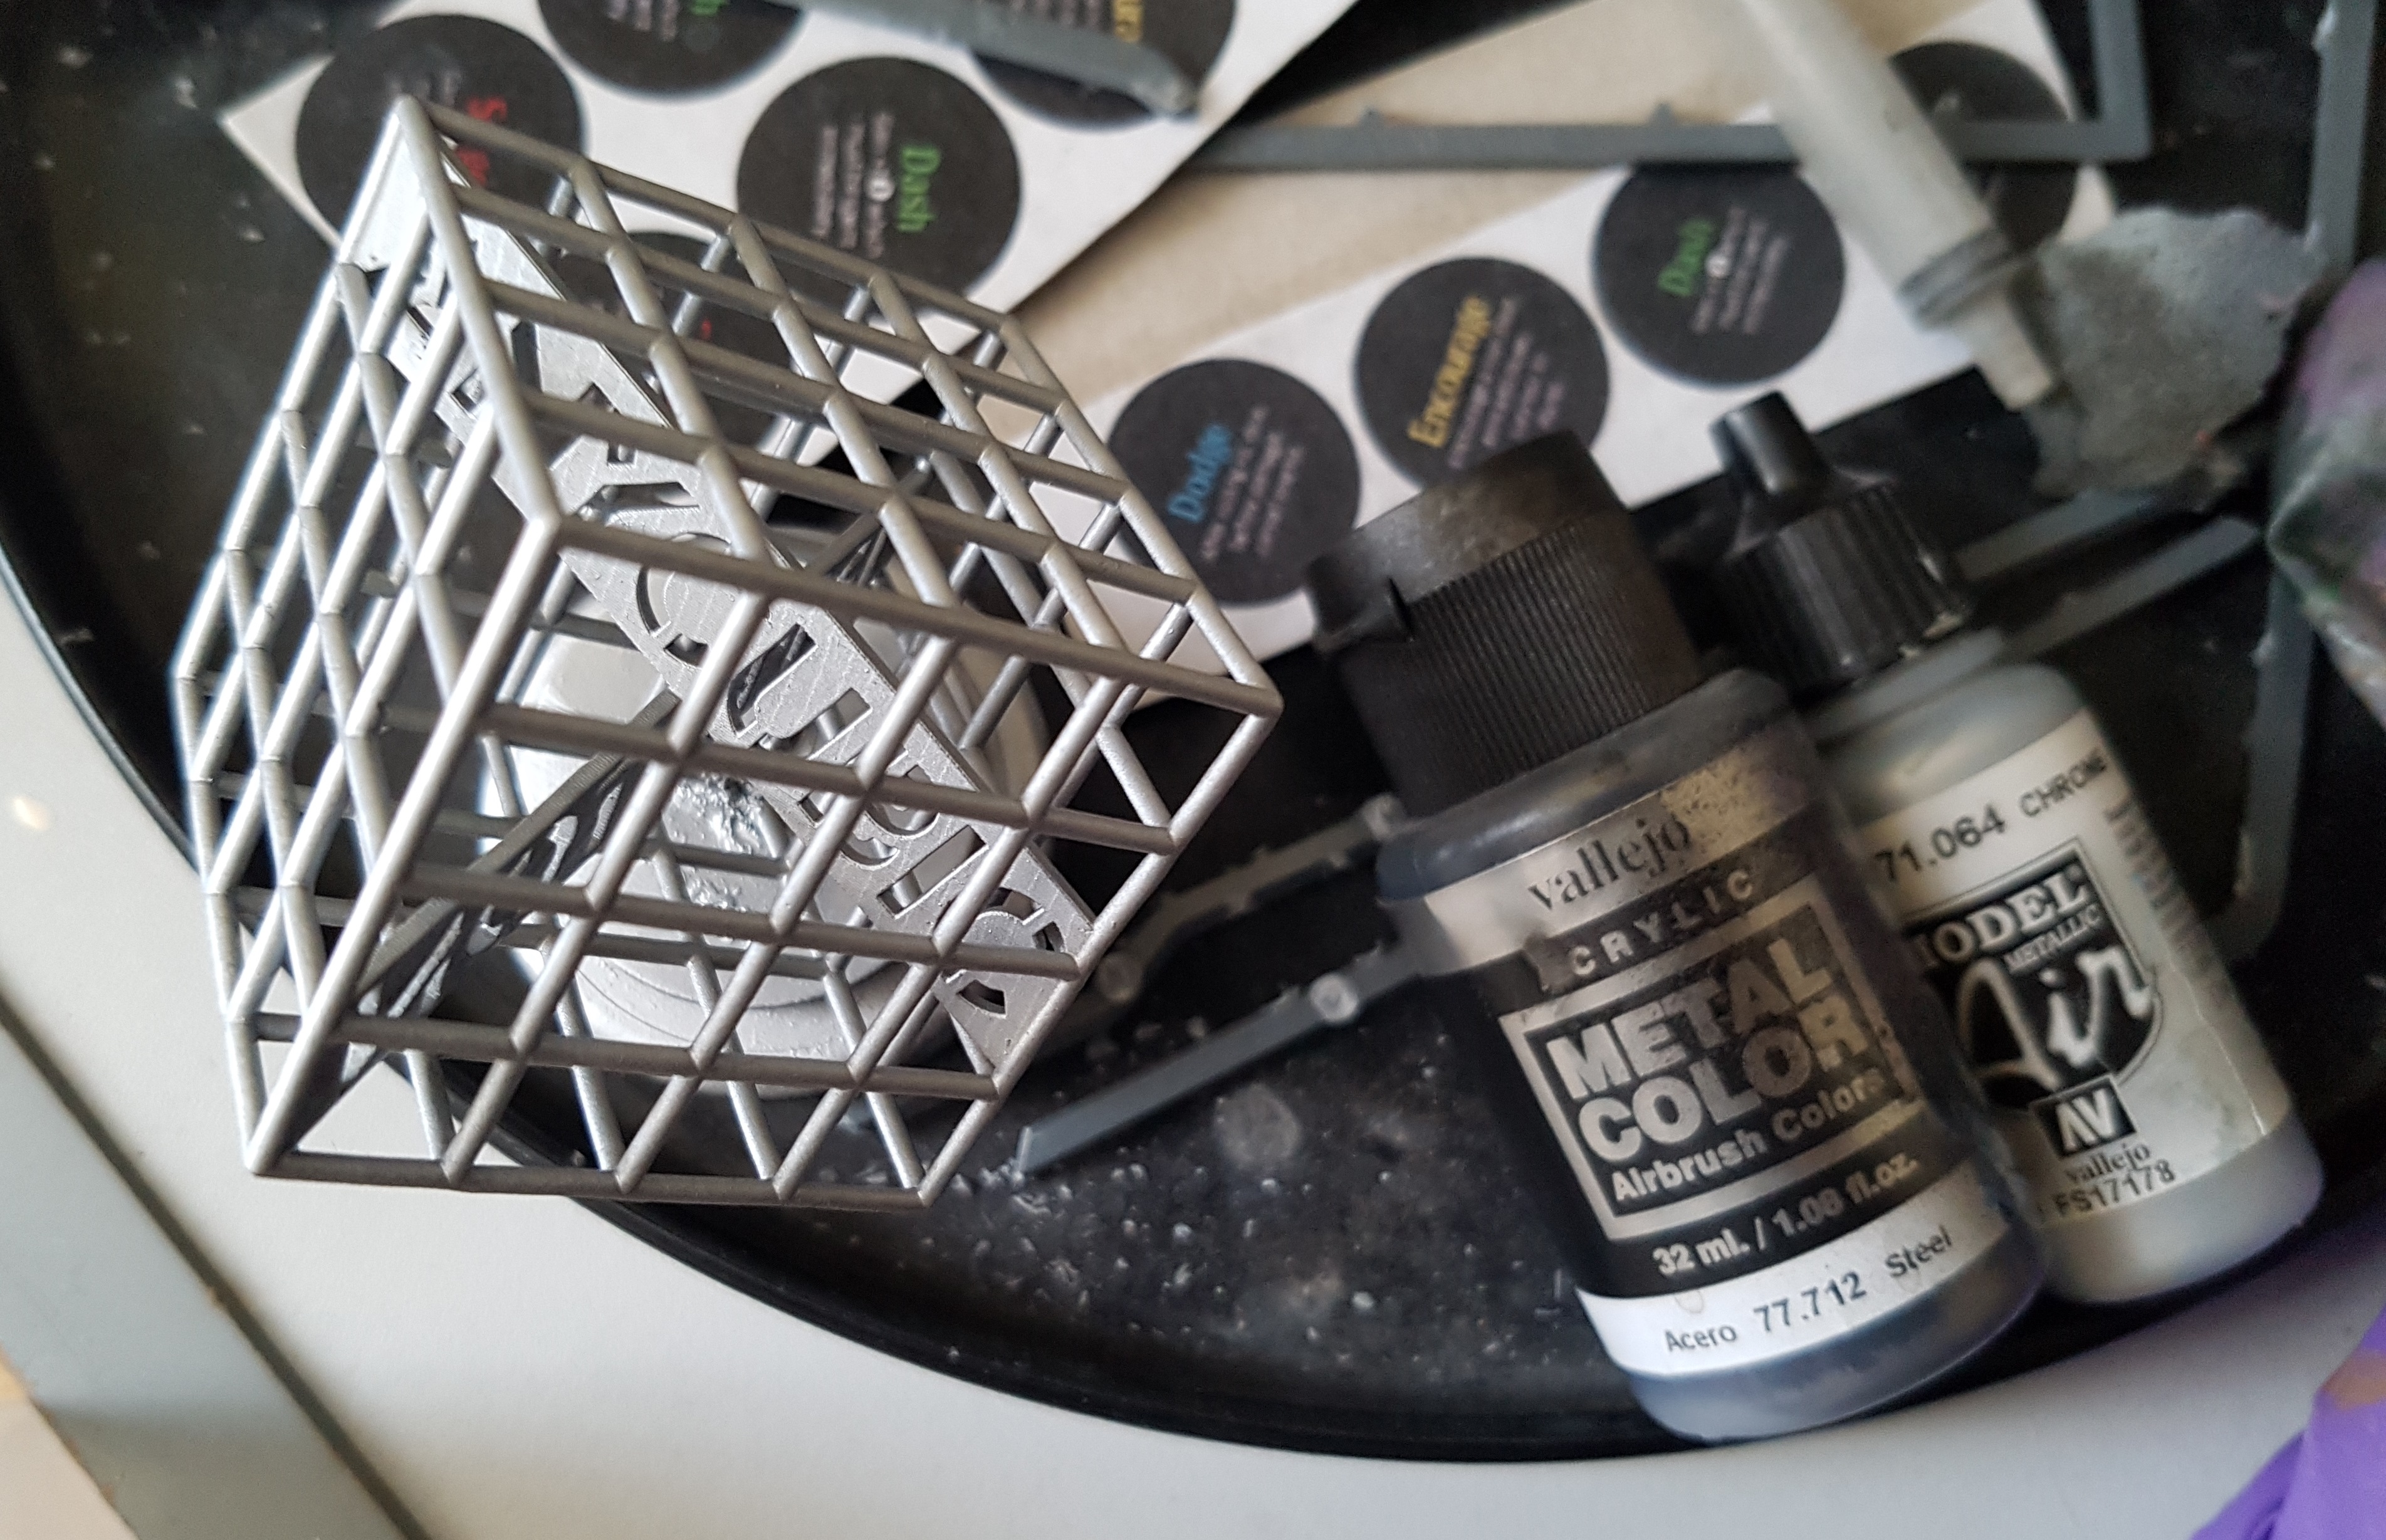
I had the airbrush out so I primed and painted the cube. It was primed black, and then base coated with Vallejo 77.712 Steel, and then zenithally highlighted with VMA 71.064 Chrome. I think my pot is showing its age. This stuff is usually the brightest shiniest metal I know of. It’s come out a little flat here. Oh well. This is meant to be a quick and dirty low effort piece of terrain so I’ll go with it. Maybe it’ll get a gloss or satin finish and that might help? Why haven’t they invented metallic finish varnish yet?
It’s getting no further painting than this. I really don’t want to even think about painting inside that cube. Maybe I’ll weather the base part a smidge?


