


Spring Cleaning A Garden of Morr Then Expanding Upon It


Recommendations: 227
About the Project
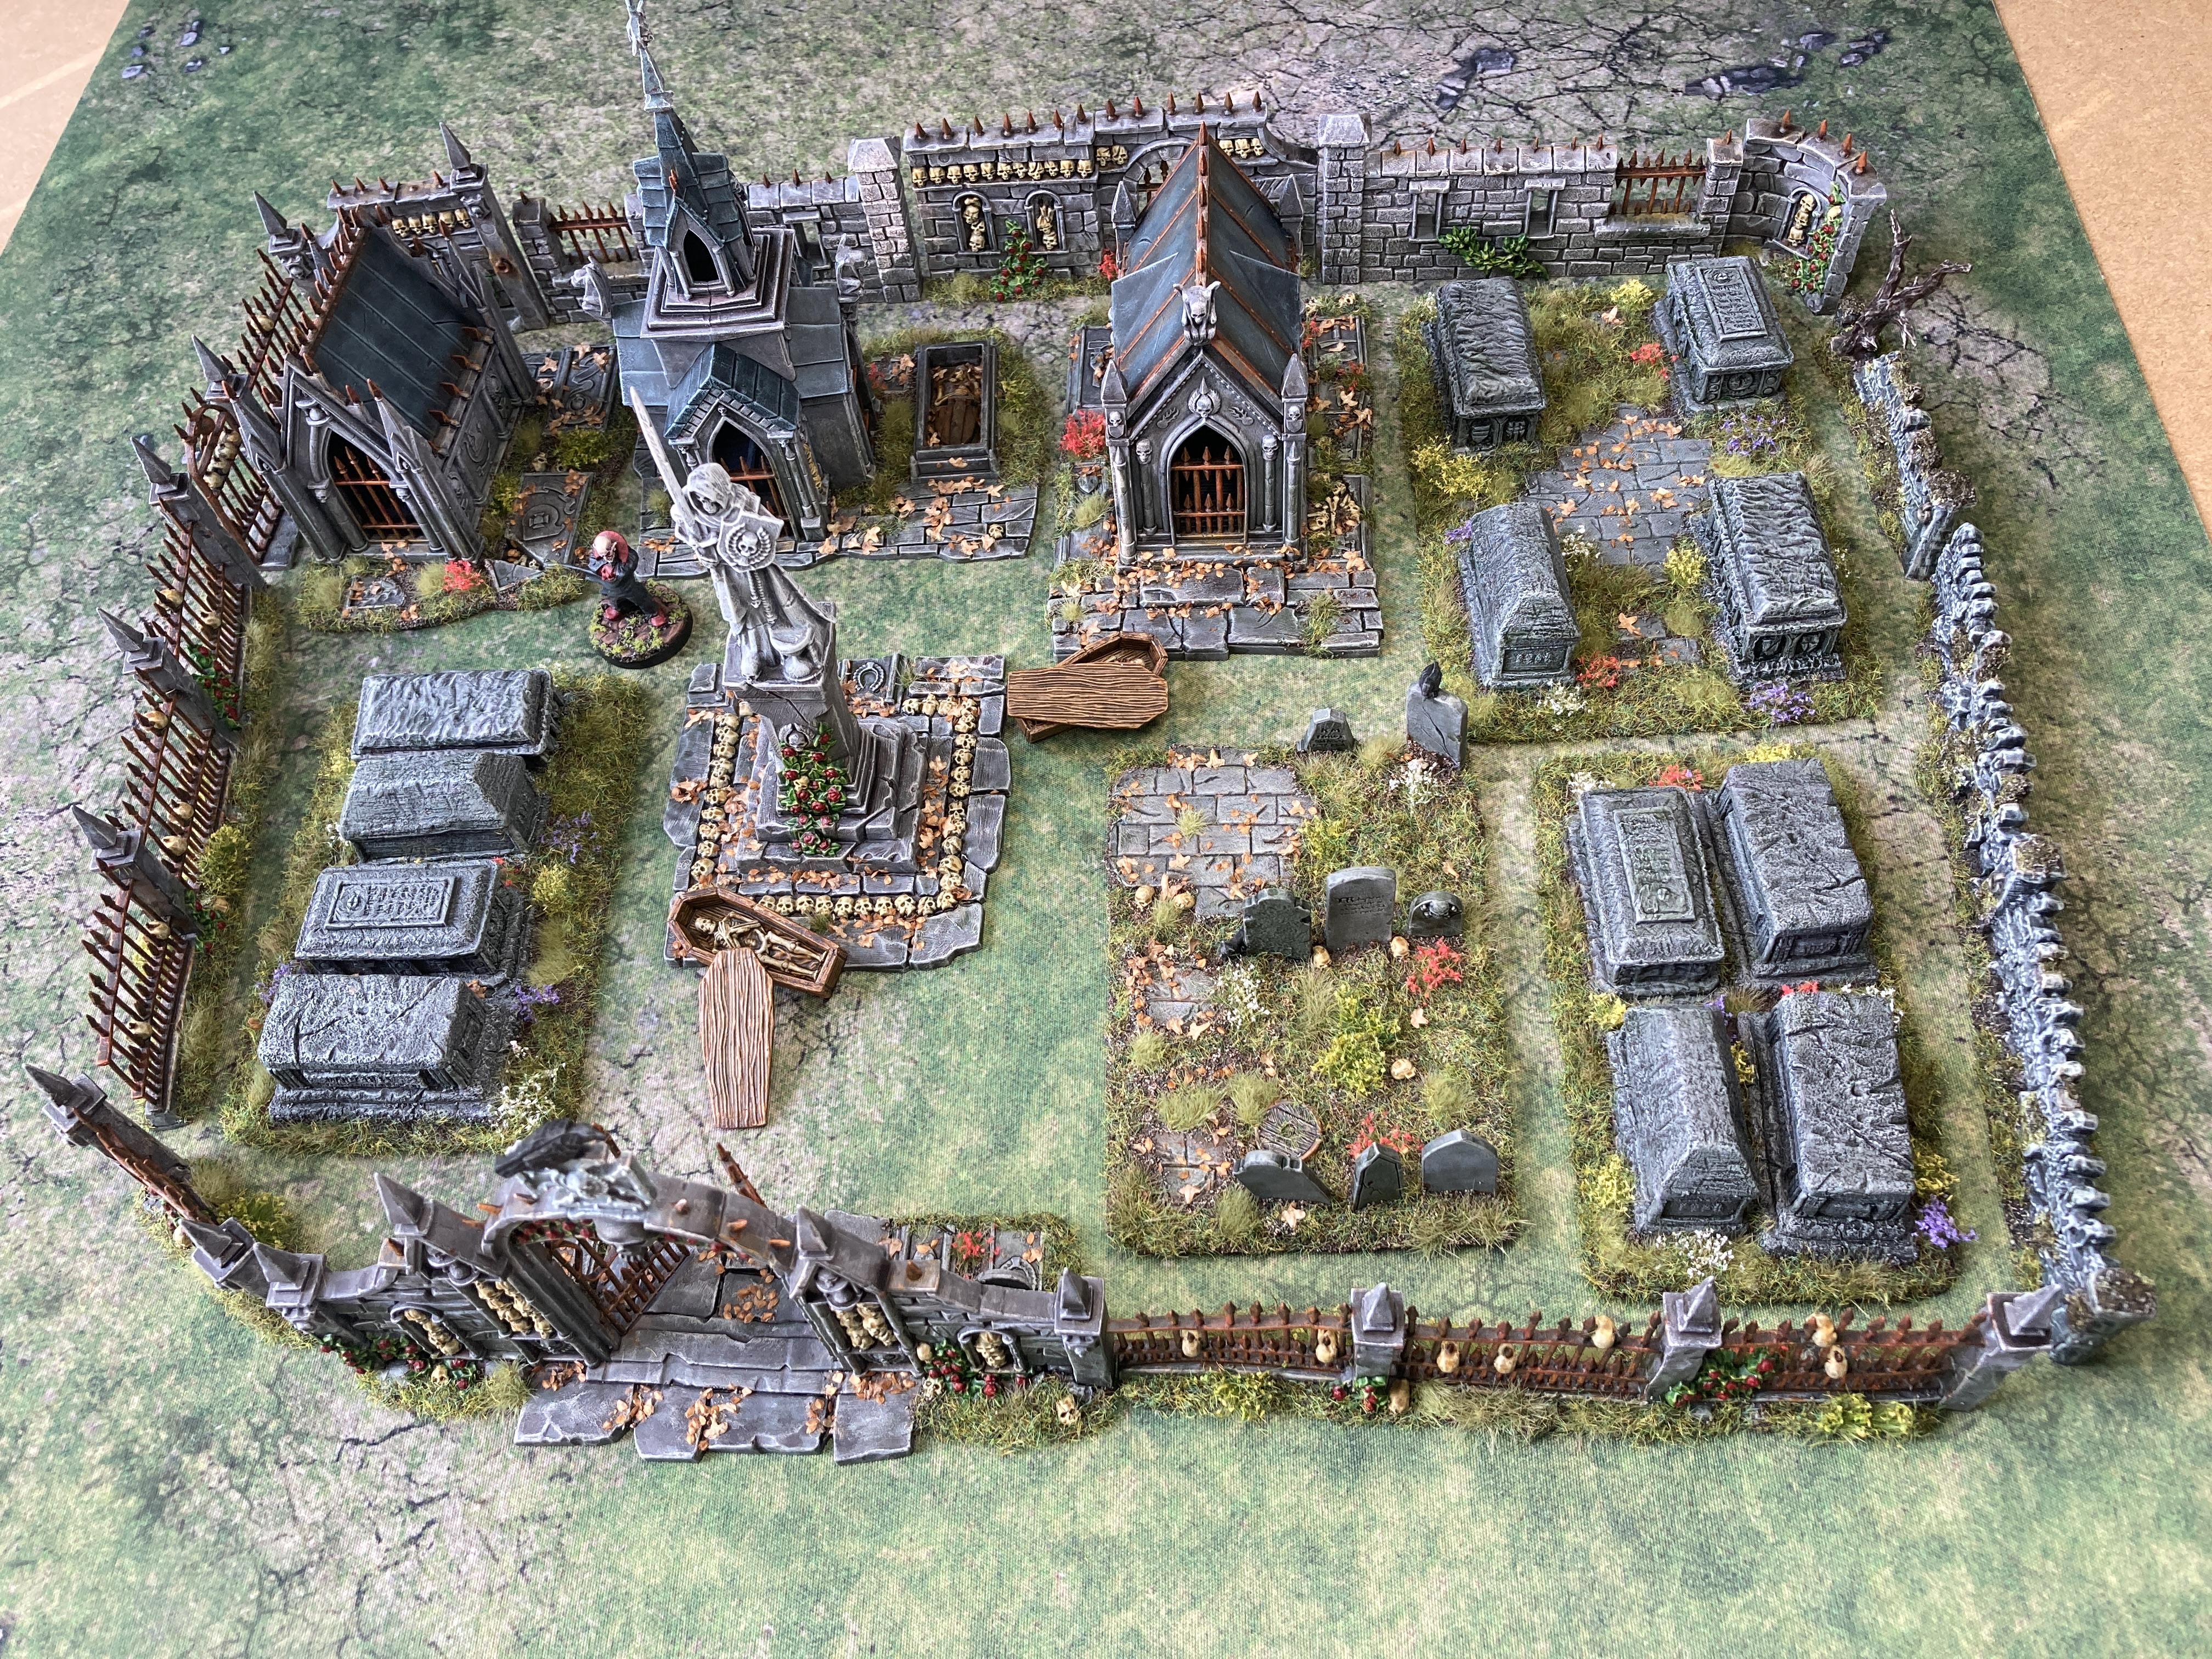
I bought The Garden Of Morr back in 2011 for Warhammer Fantasy Battle. Although it’s seen the table and many games over the years it’s never seen a lick of paint. I thought it was high time to get it painted. Once painted I want a whole 2x2, or even a 3x3 fantasy cemetery table for skirmish games which I plan to add extra pieces to that I’ll build myself.
Related Game: Warhammer Fantasy Battles
Related Company: Games Workshop
Related Genre: Fantasy
Related Contest: Spring Clean Hobby Challenge 2023
This Project is Active
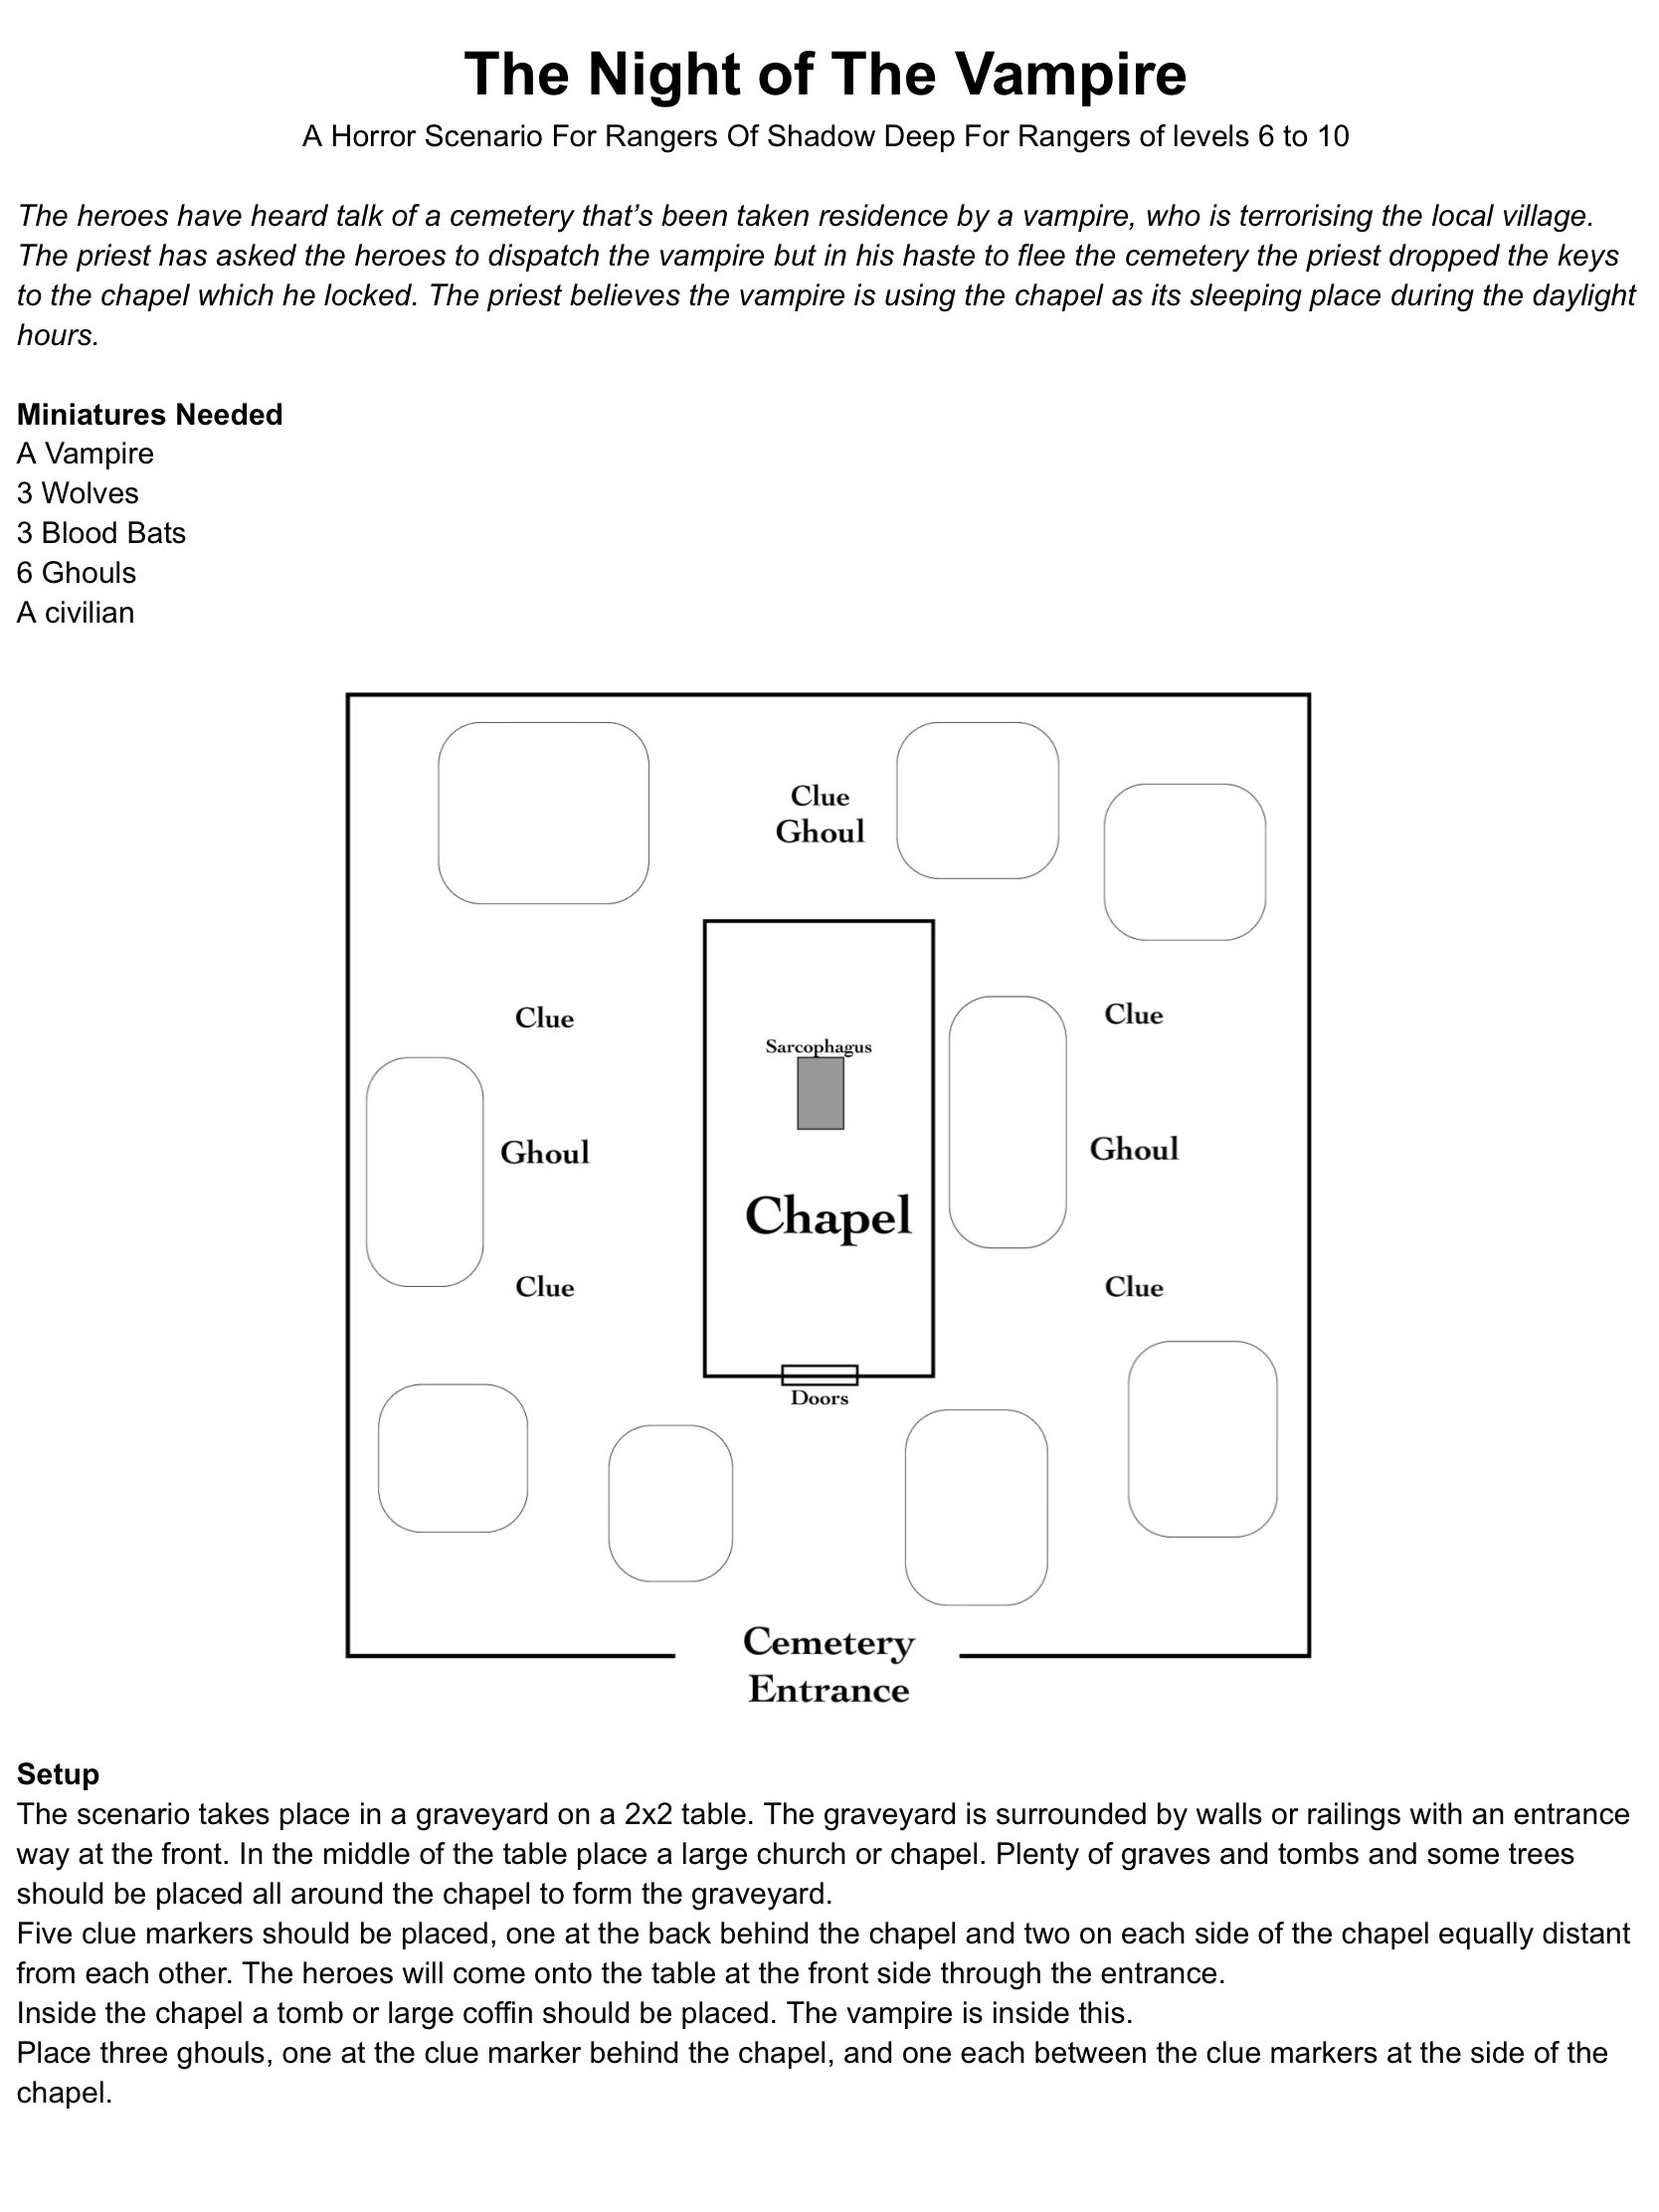
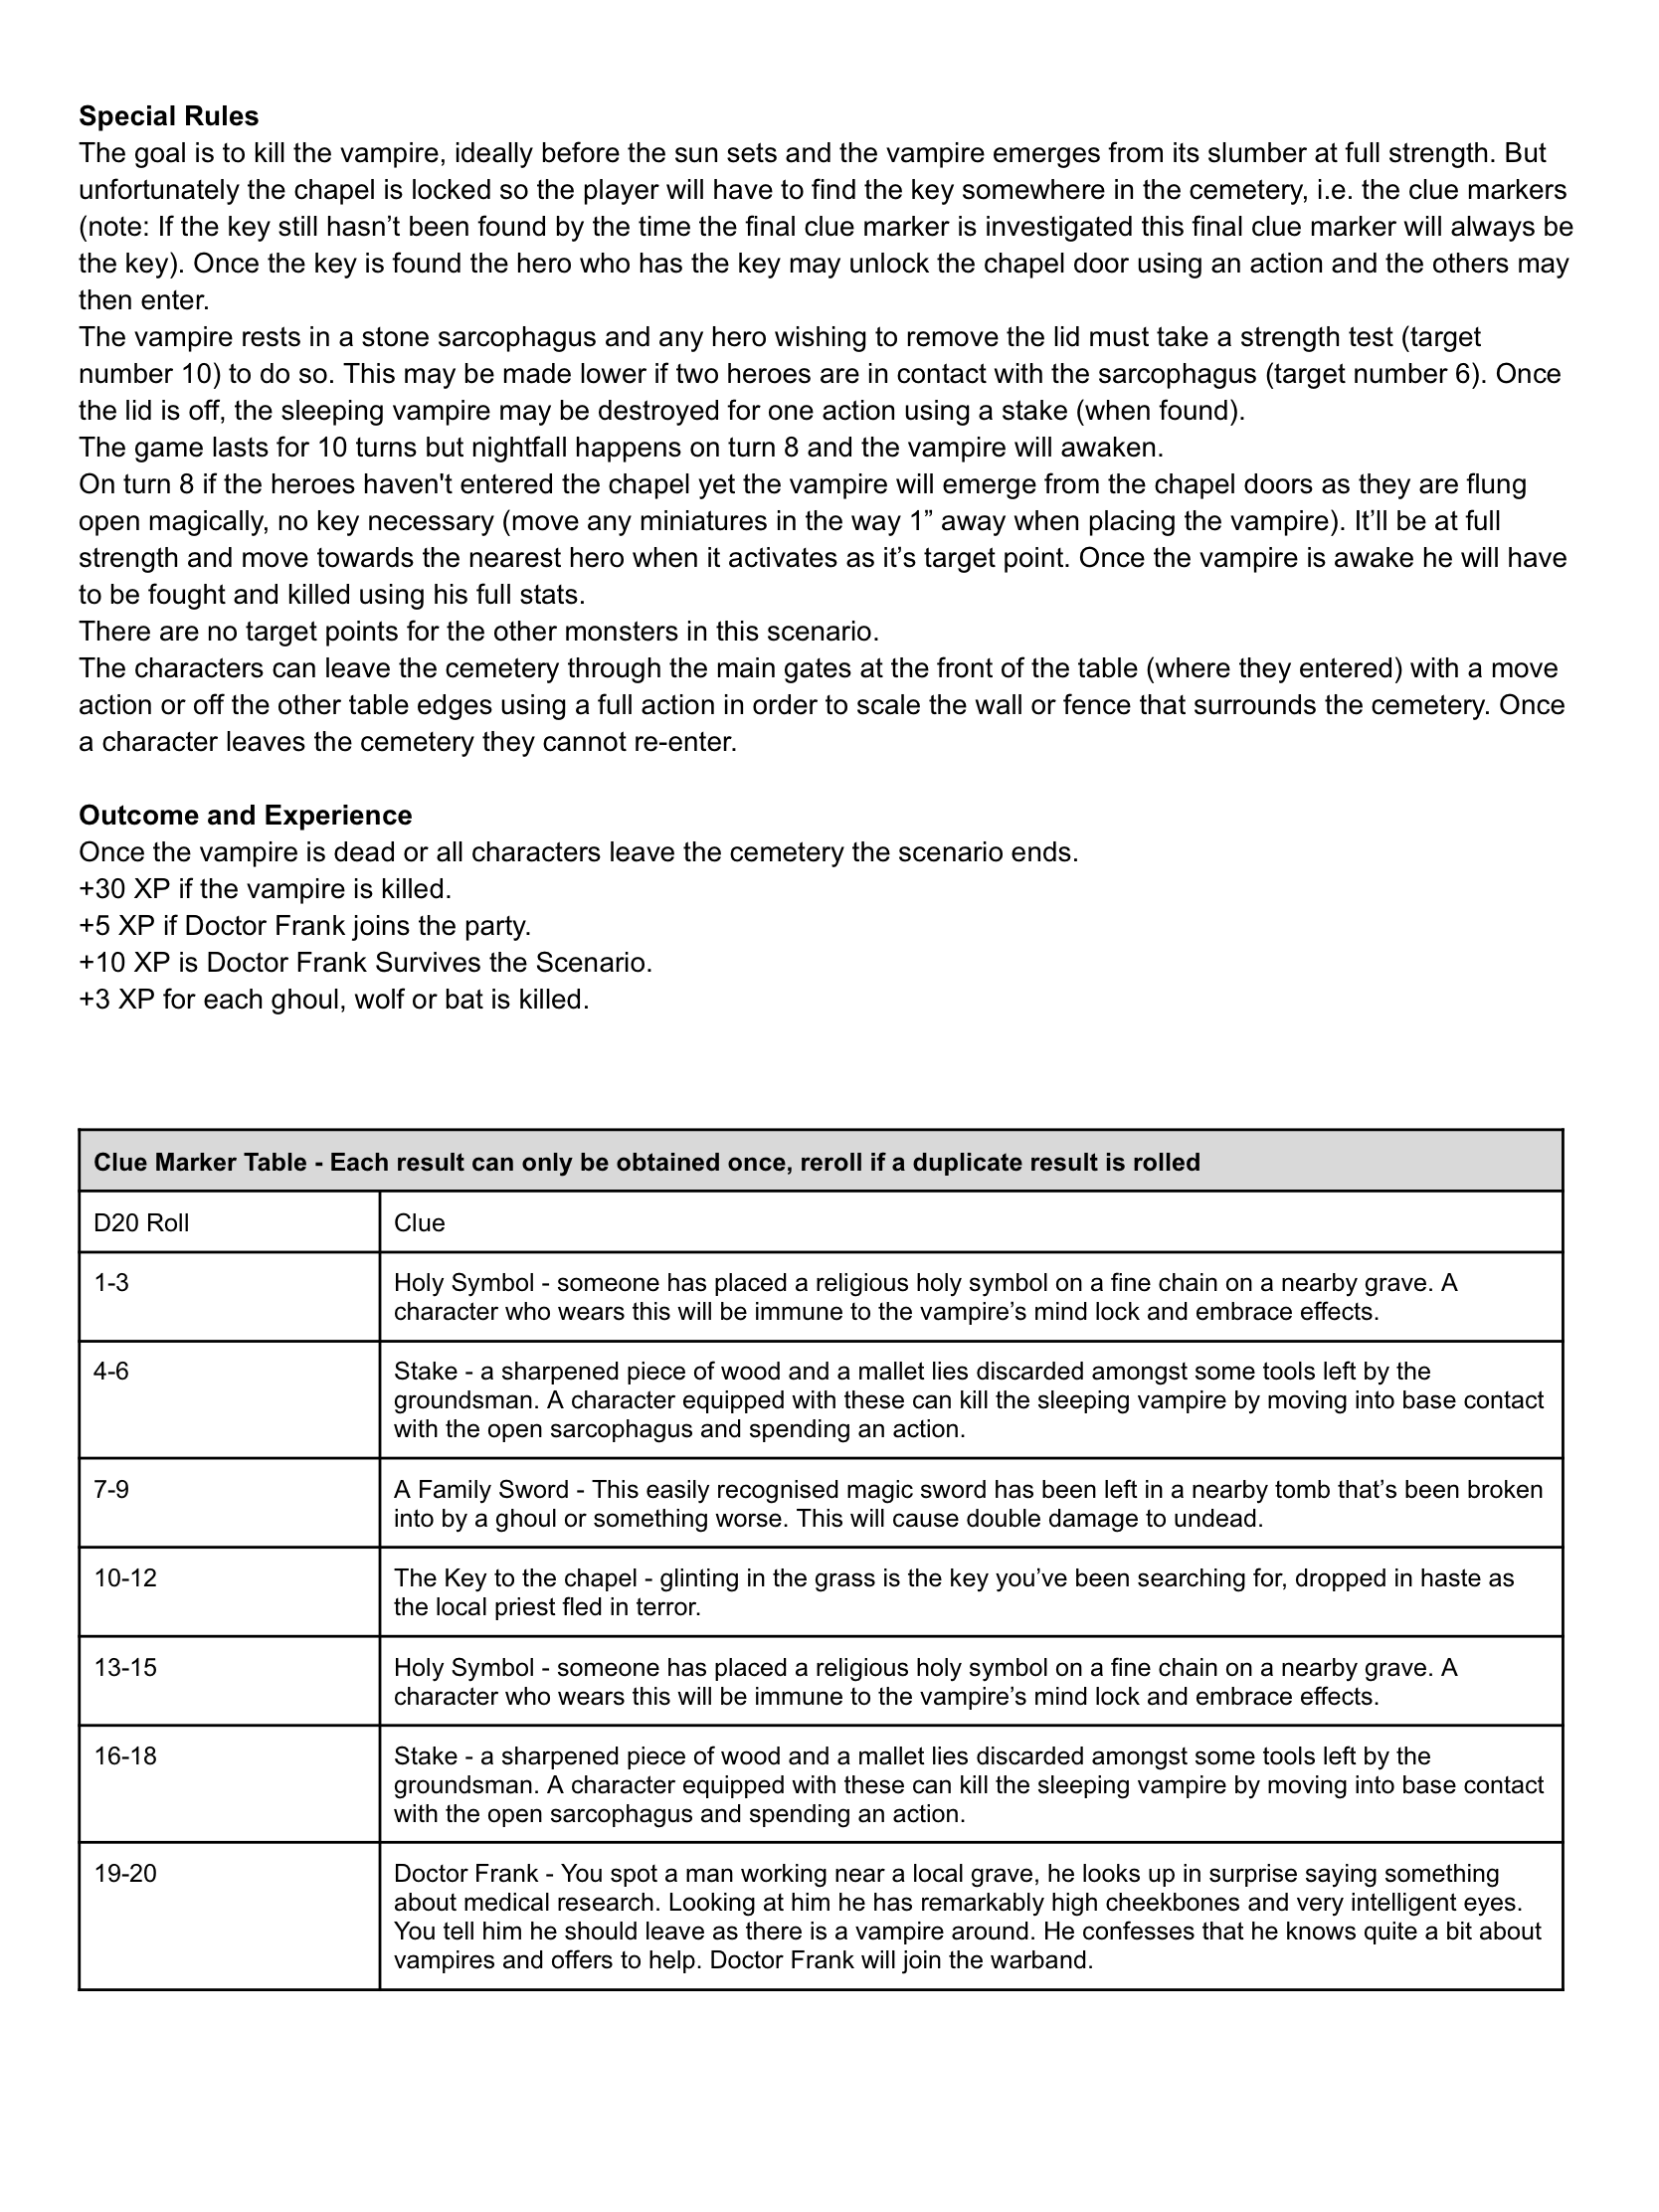
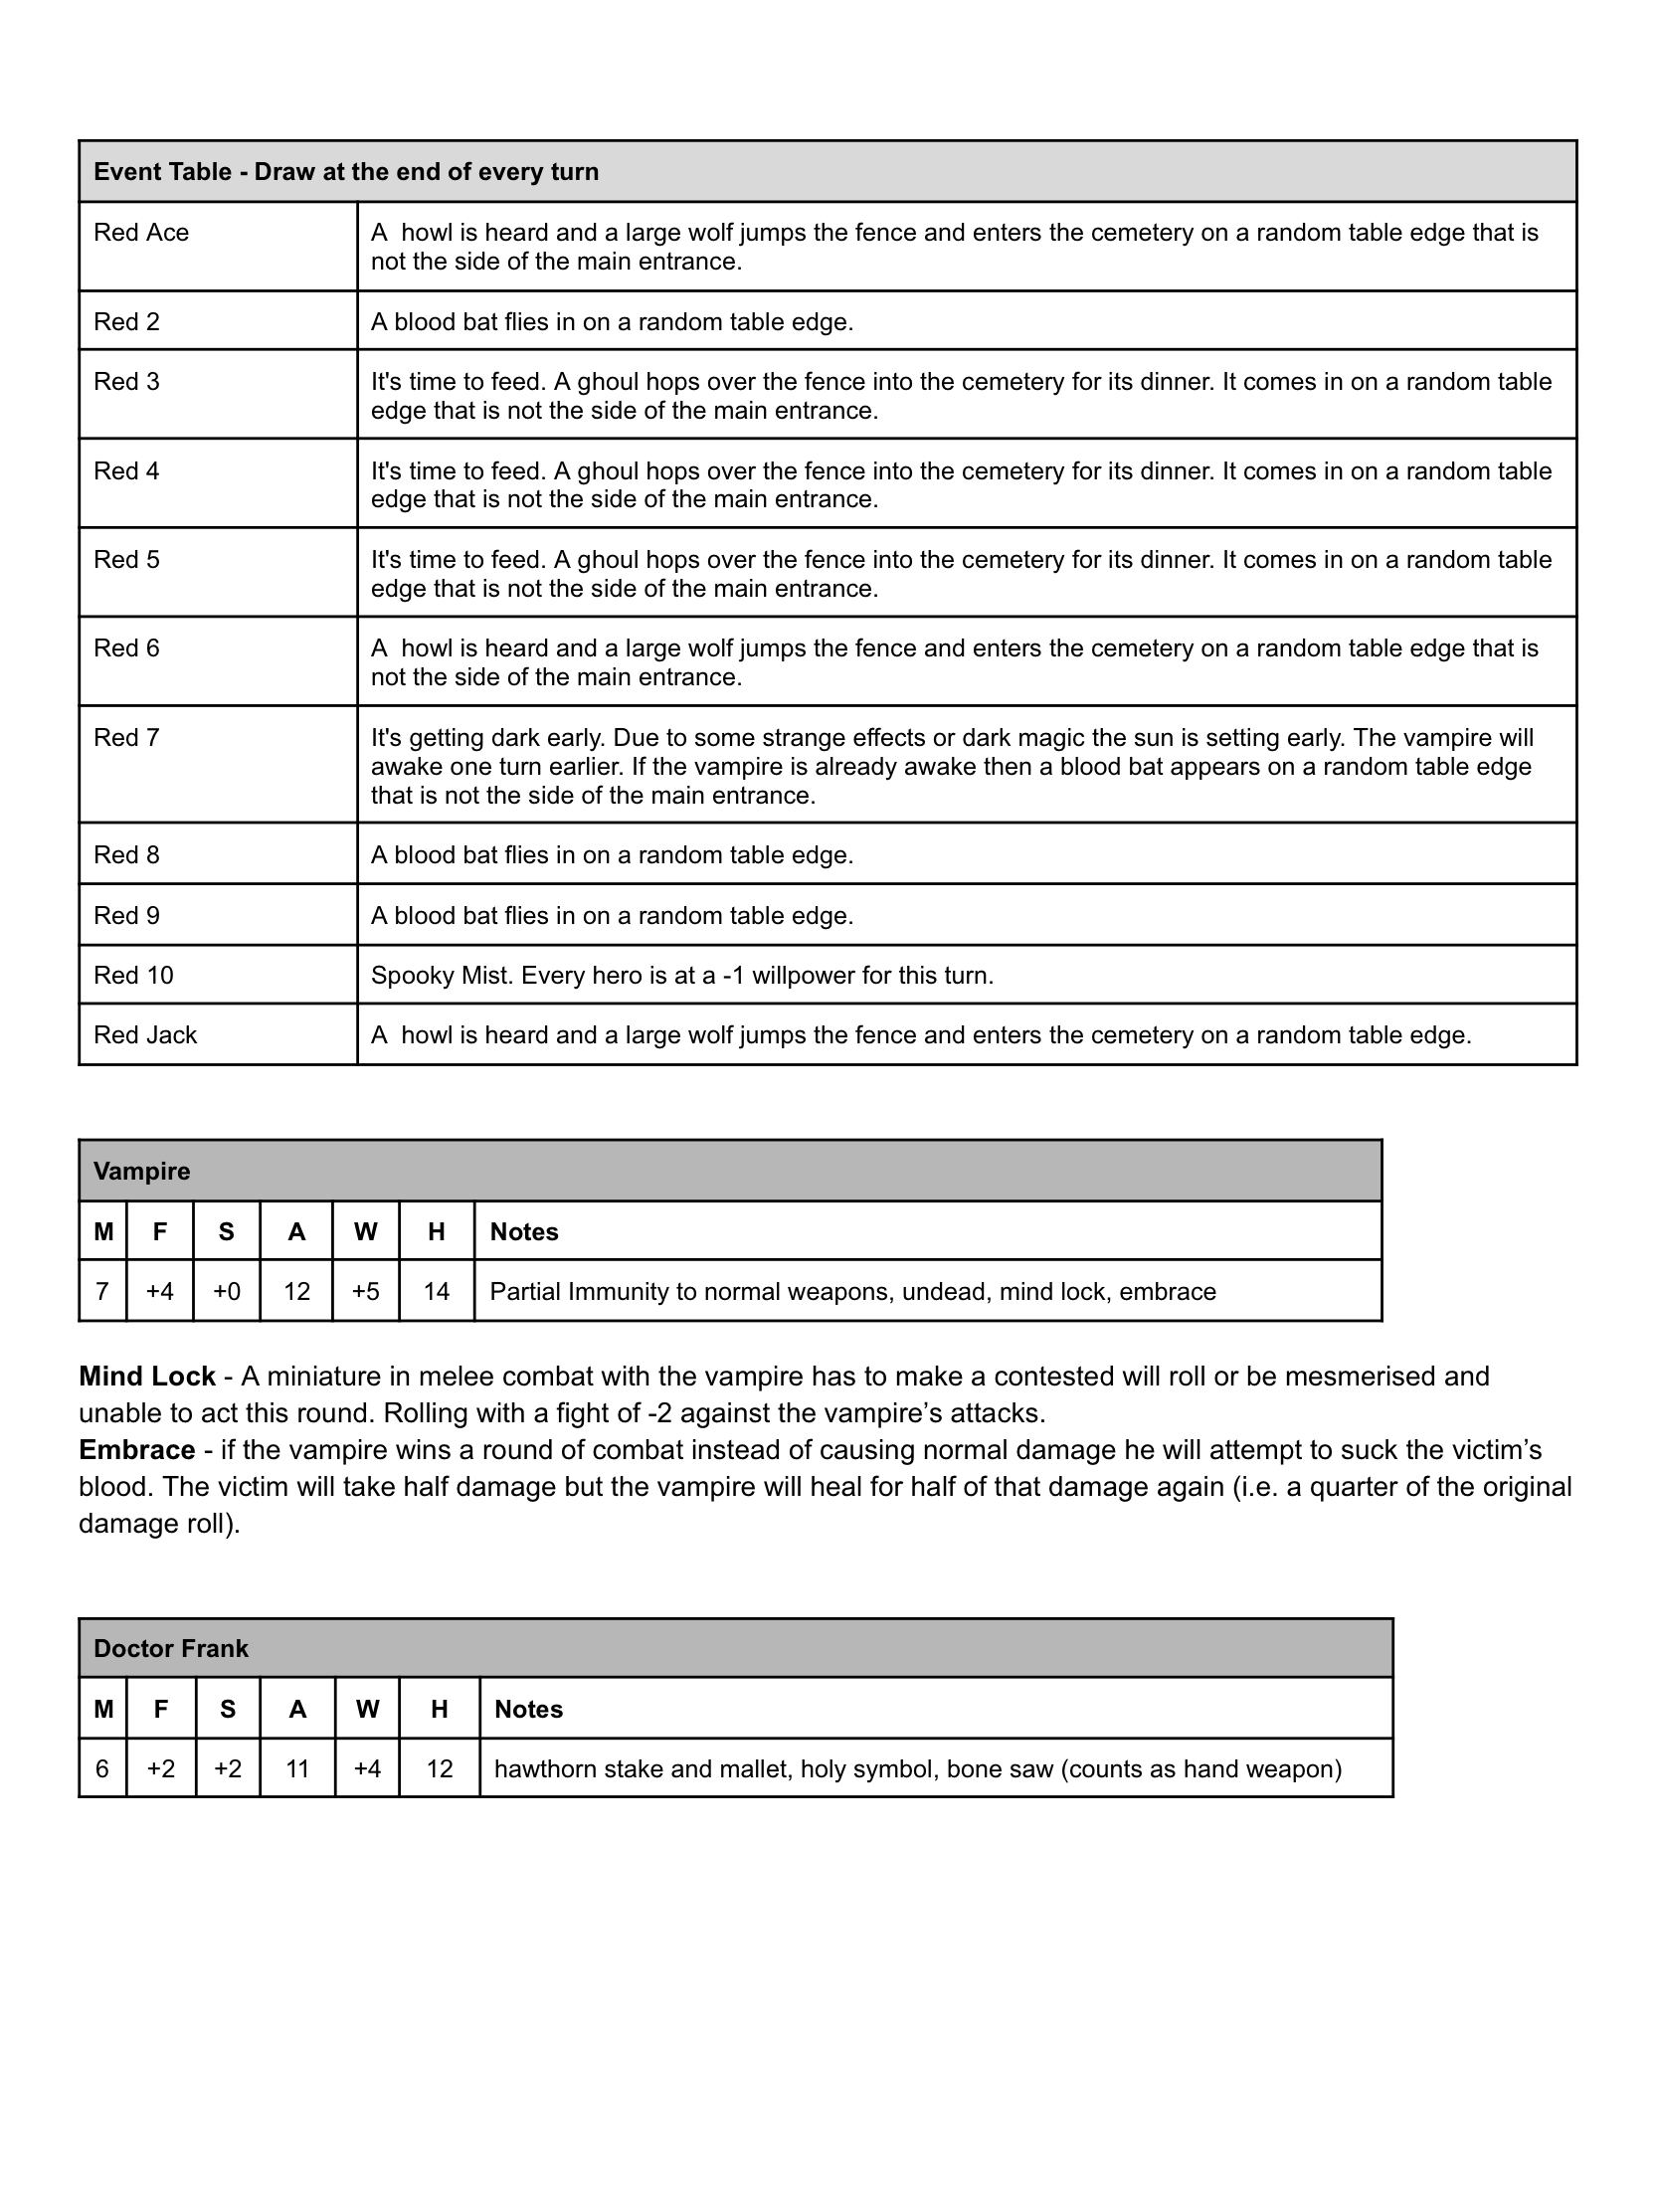
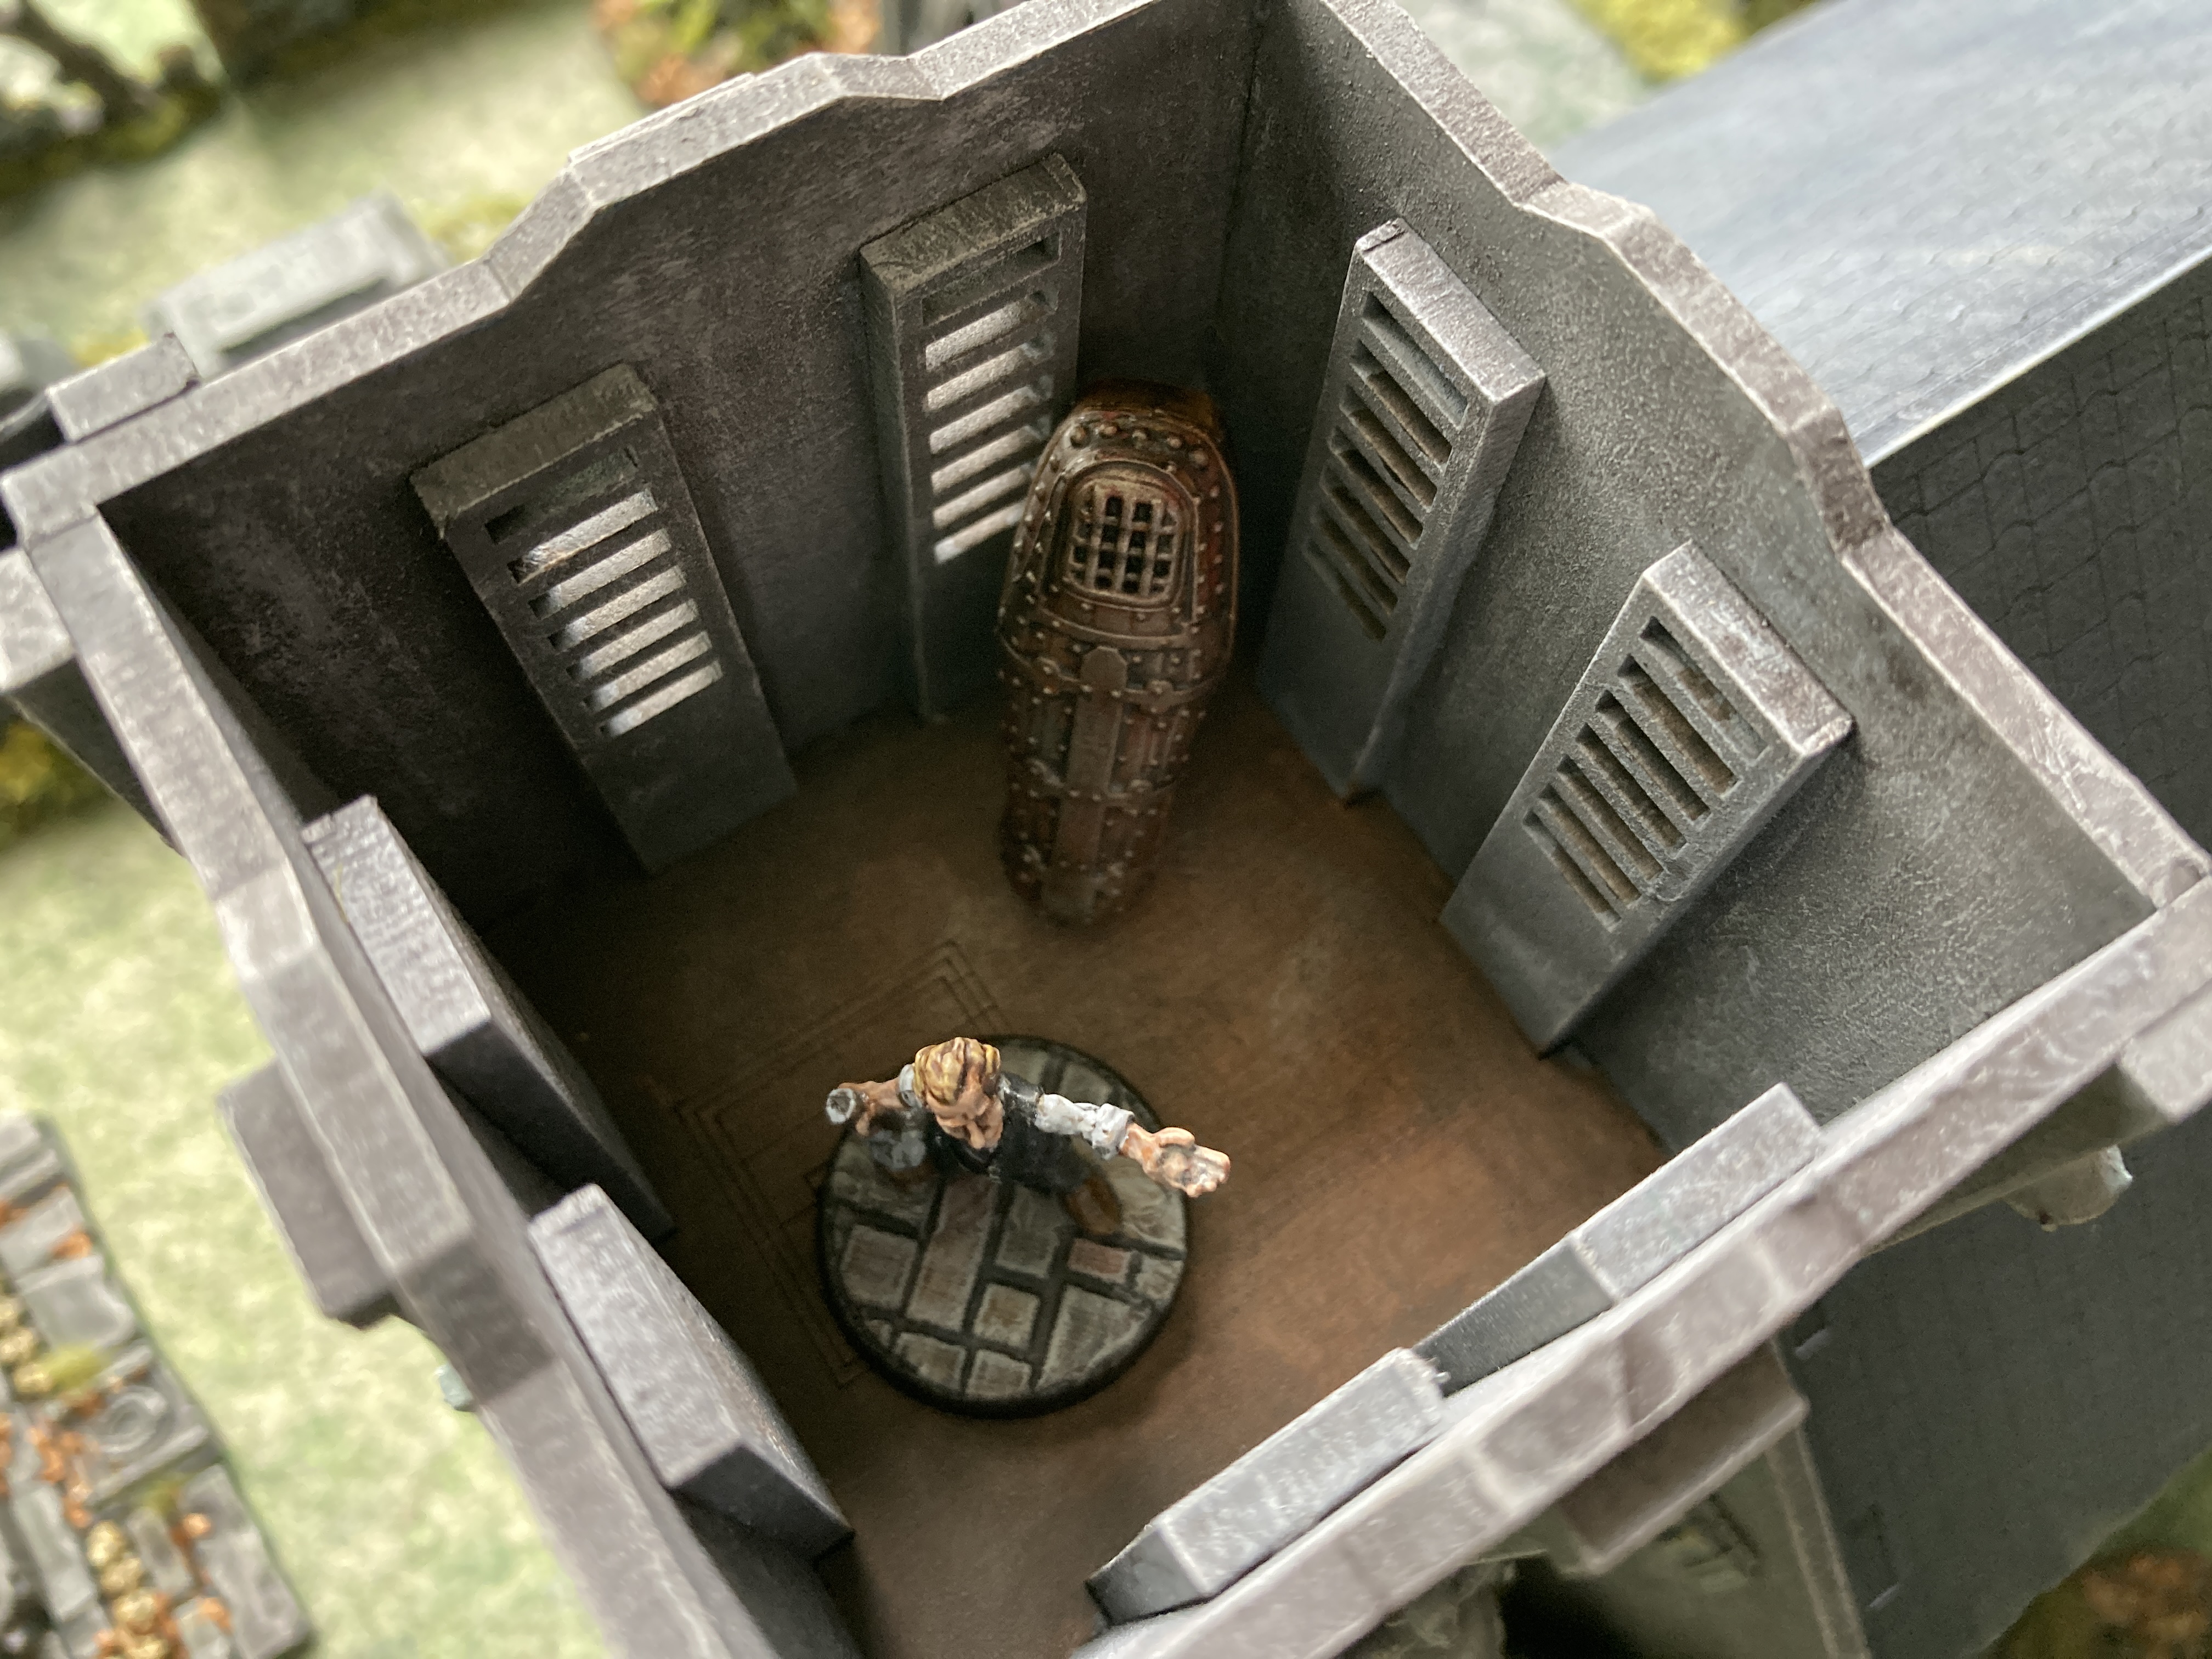
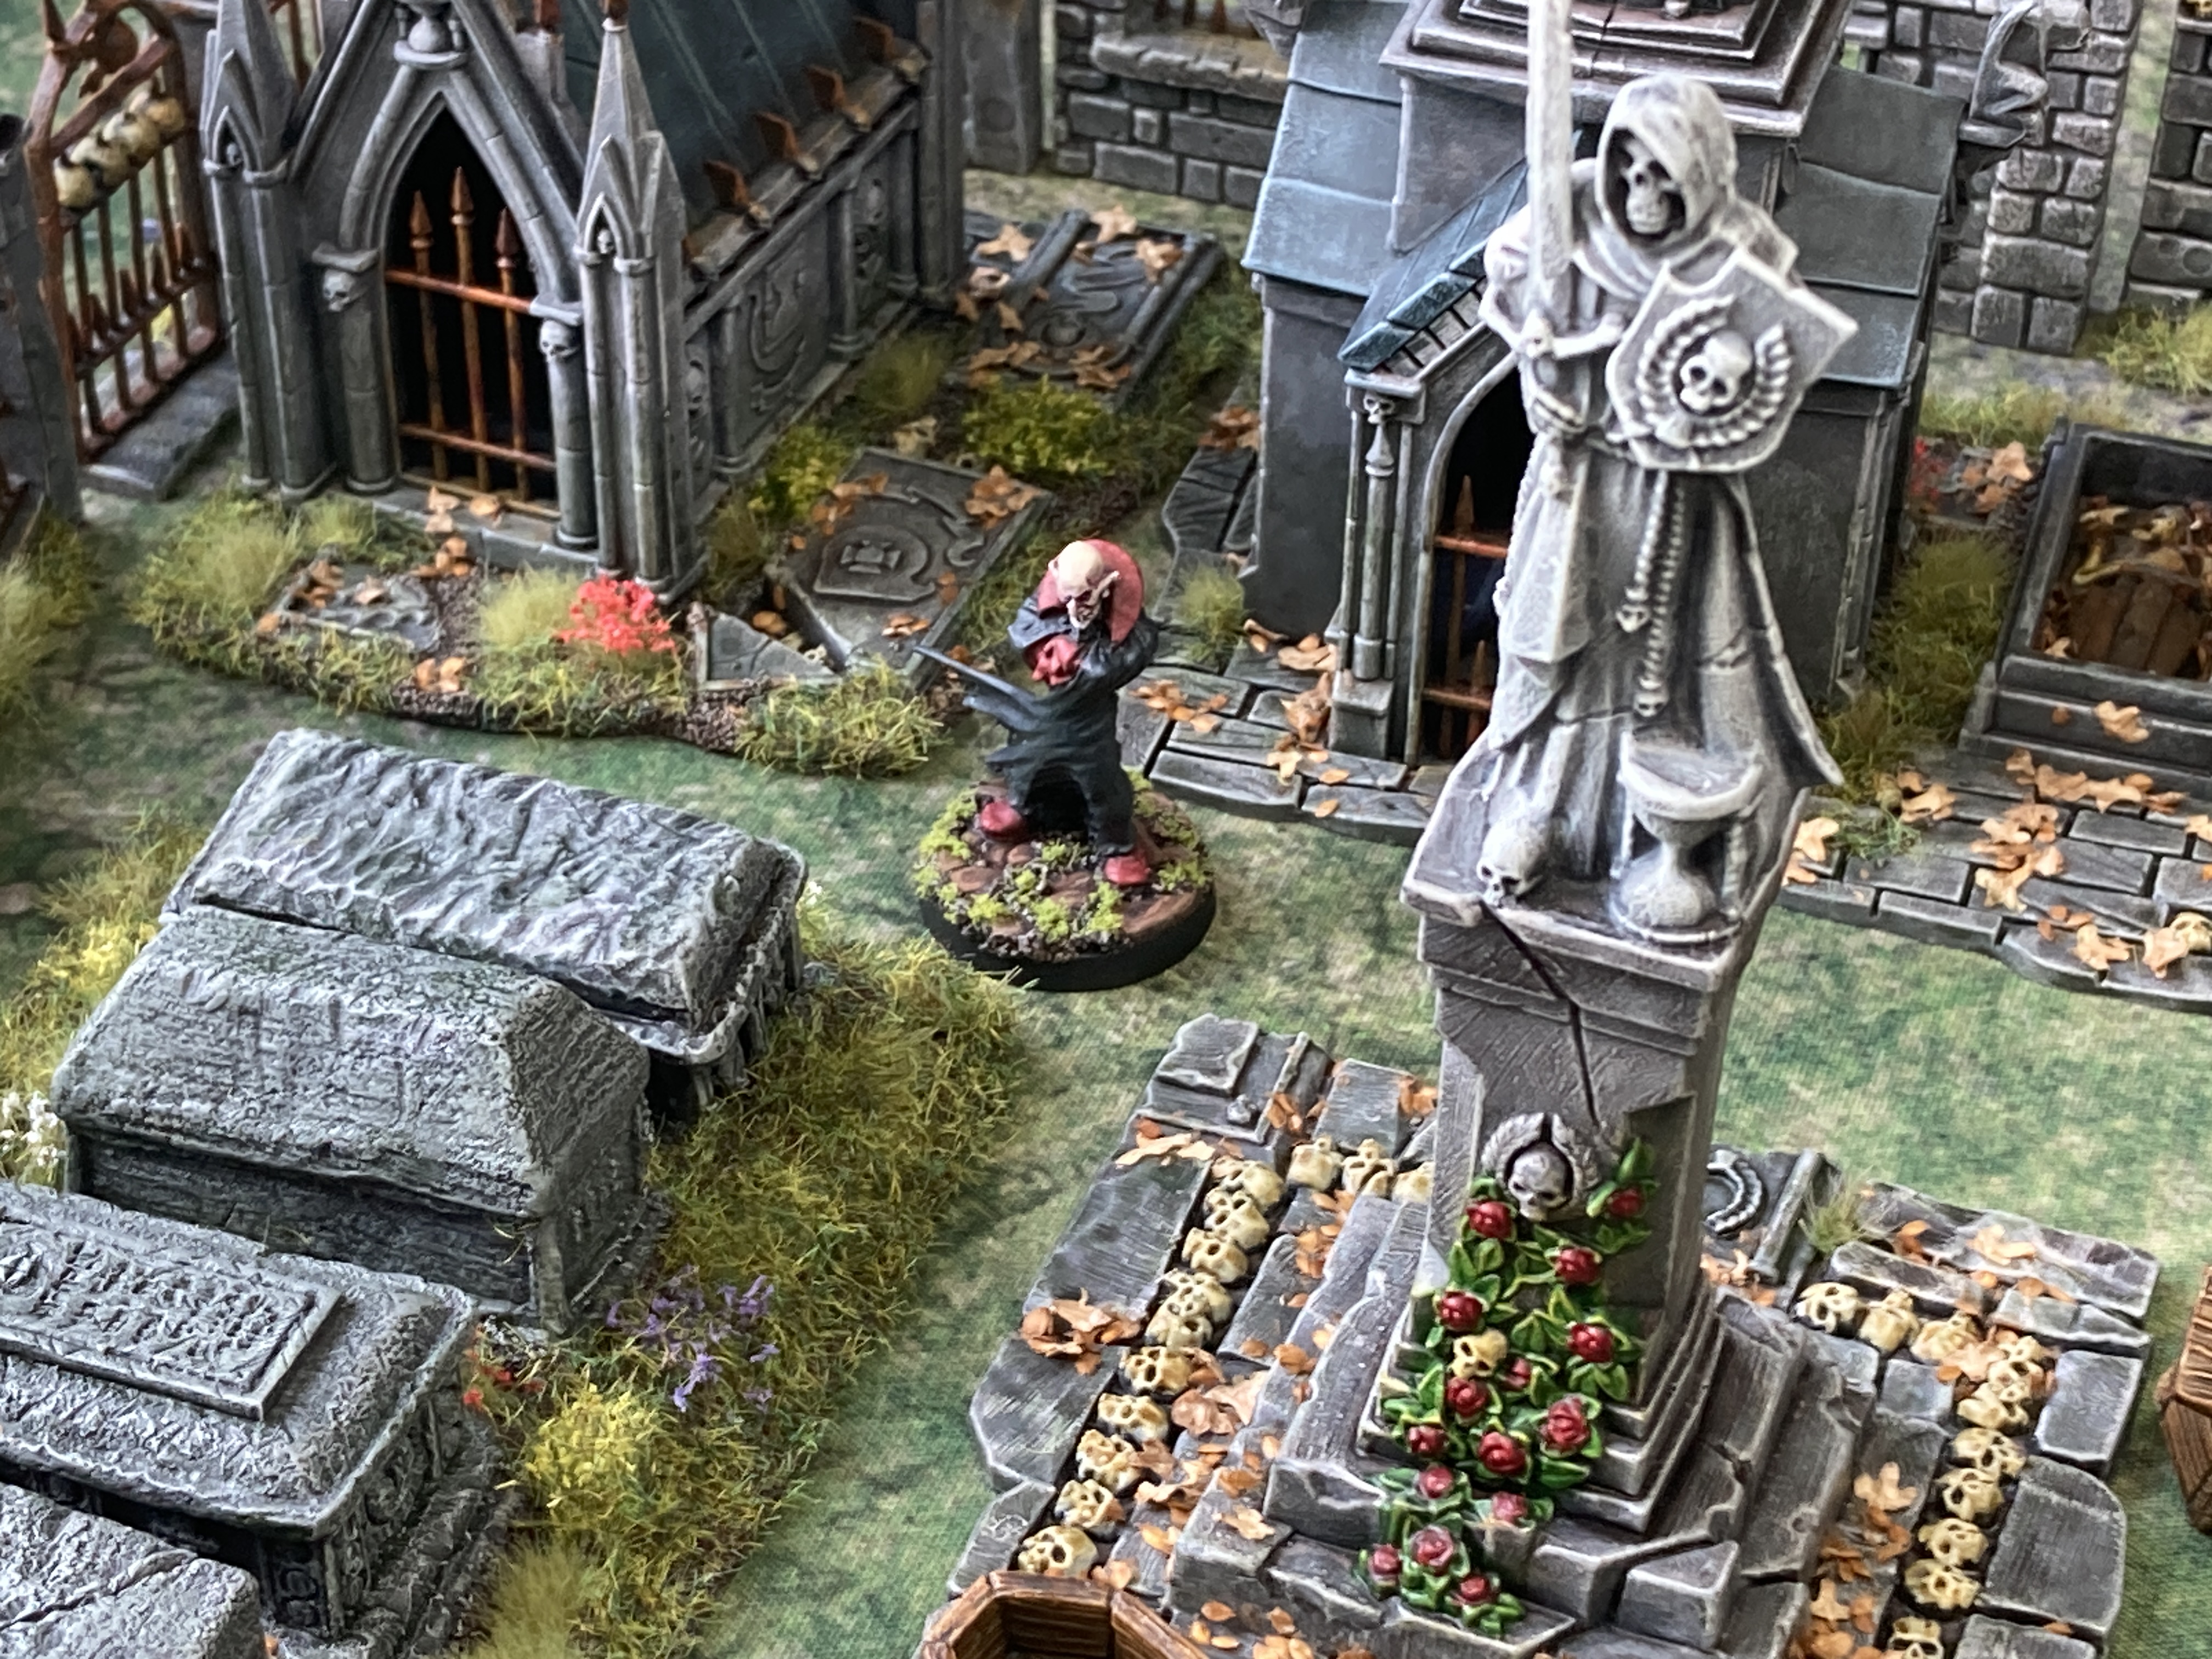
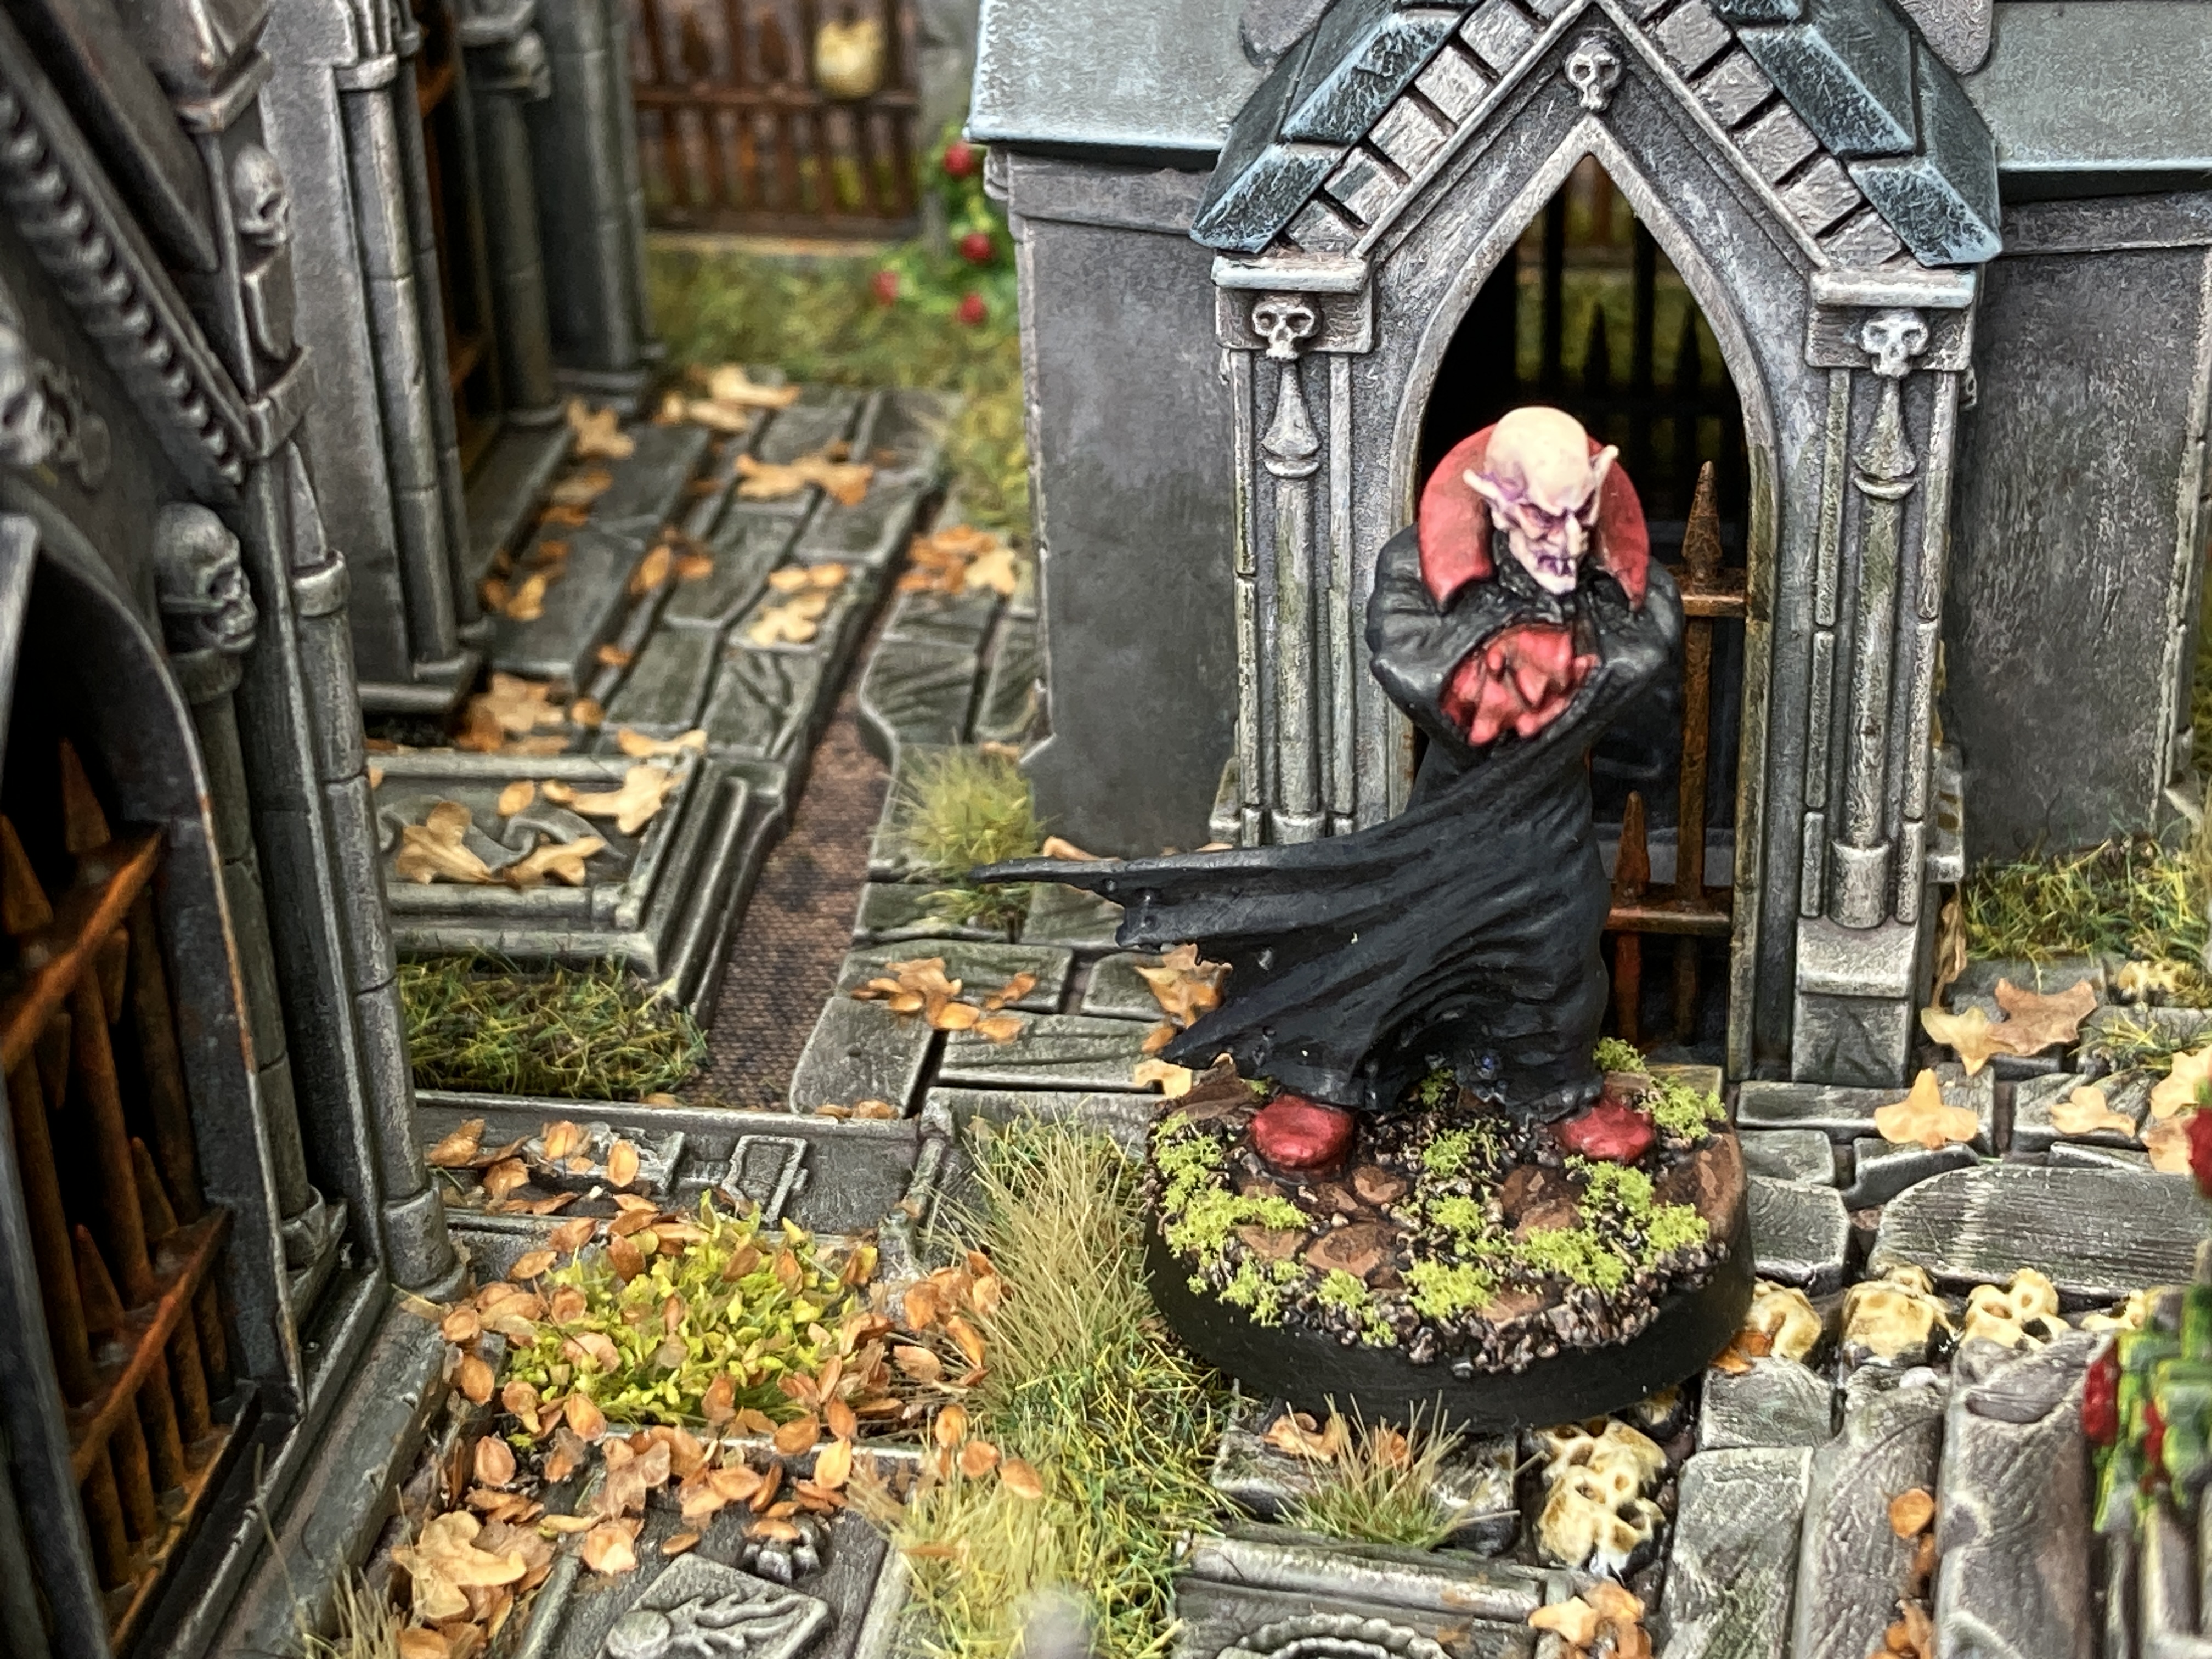
The Night of The Vampire - A Custom Scenario & Battle Report
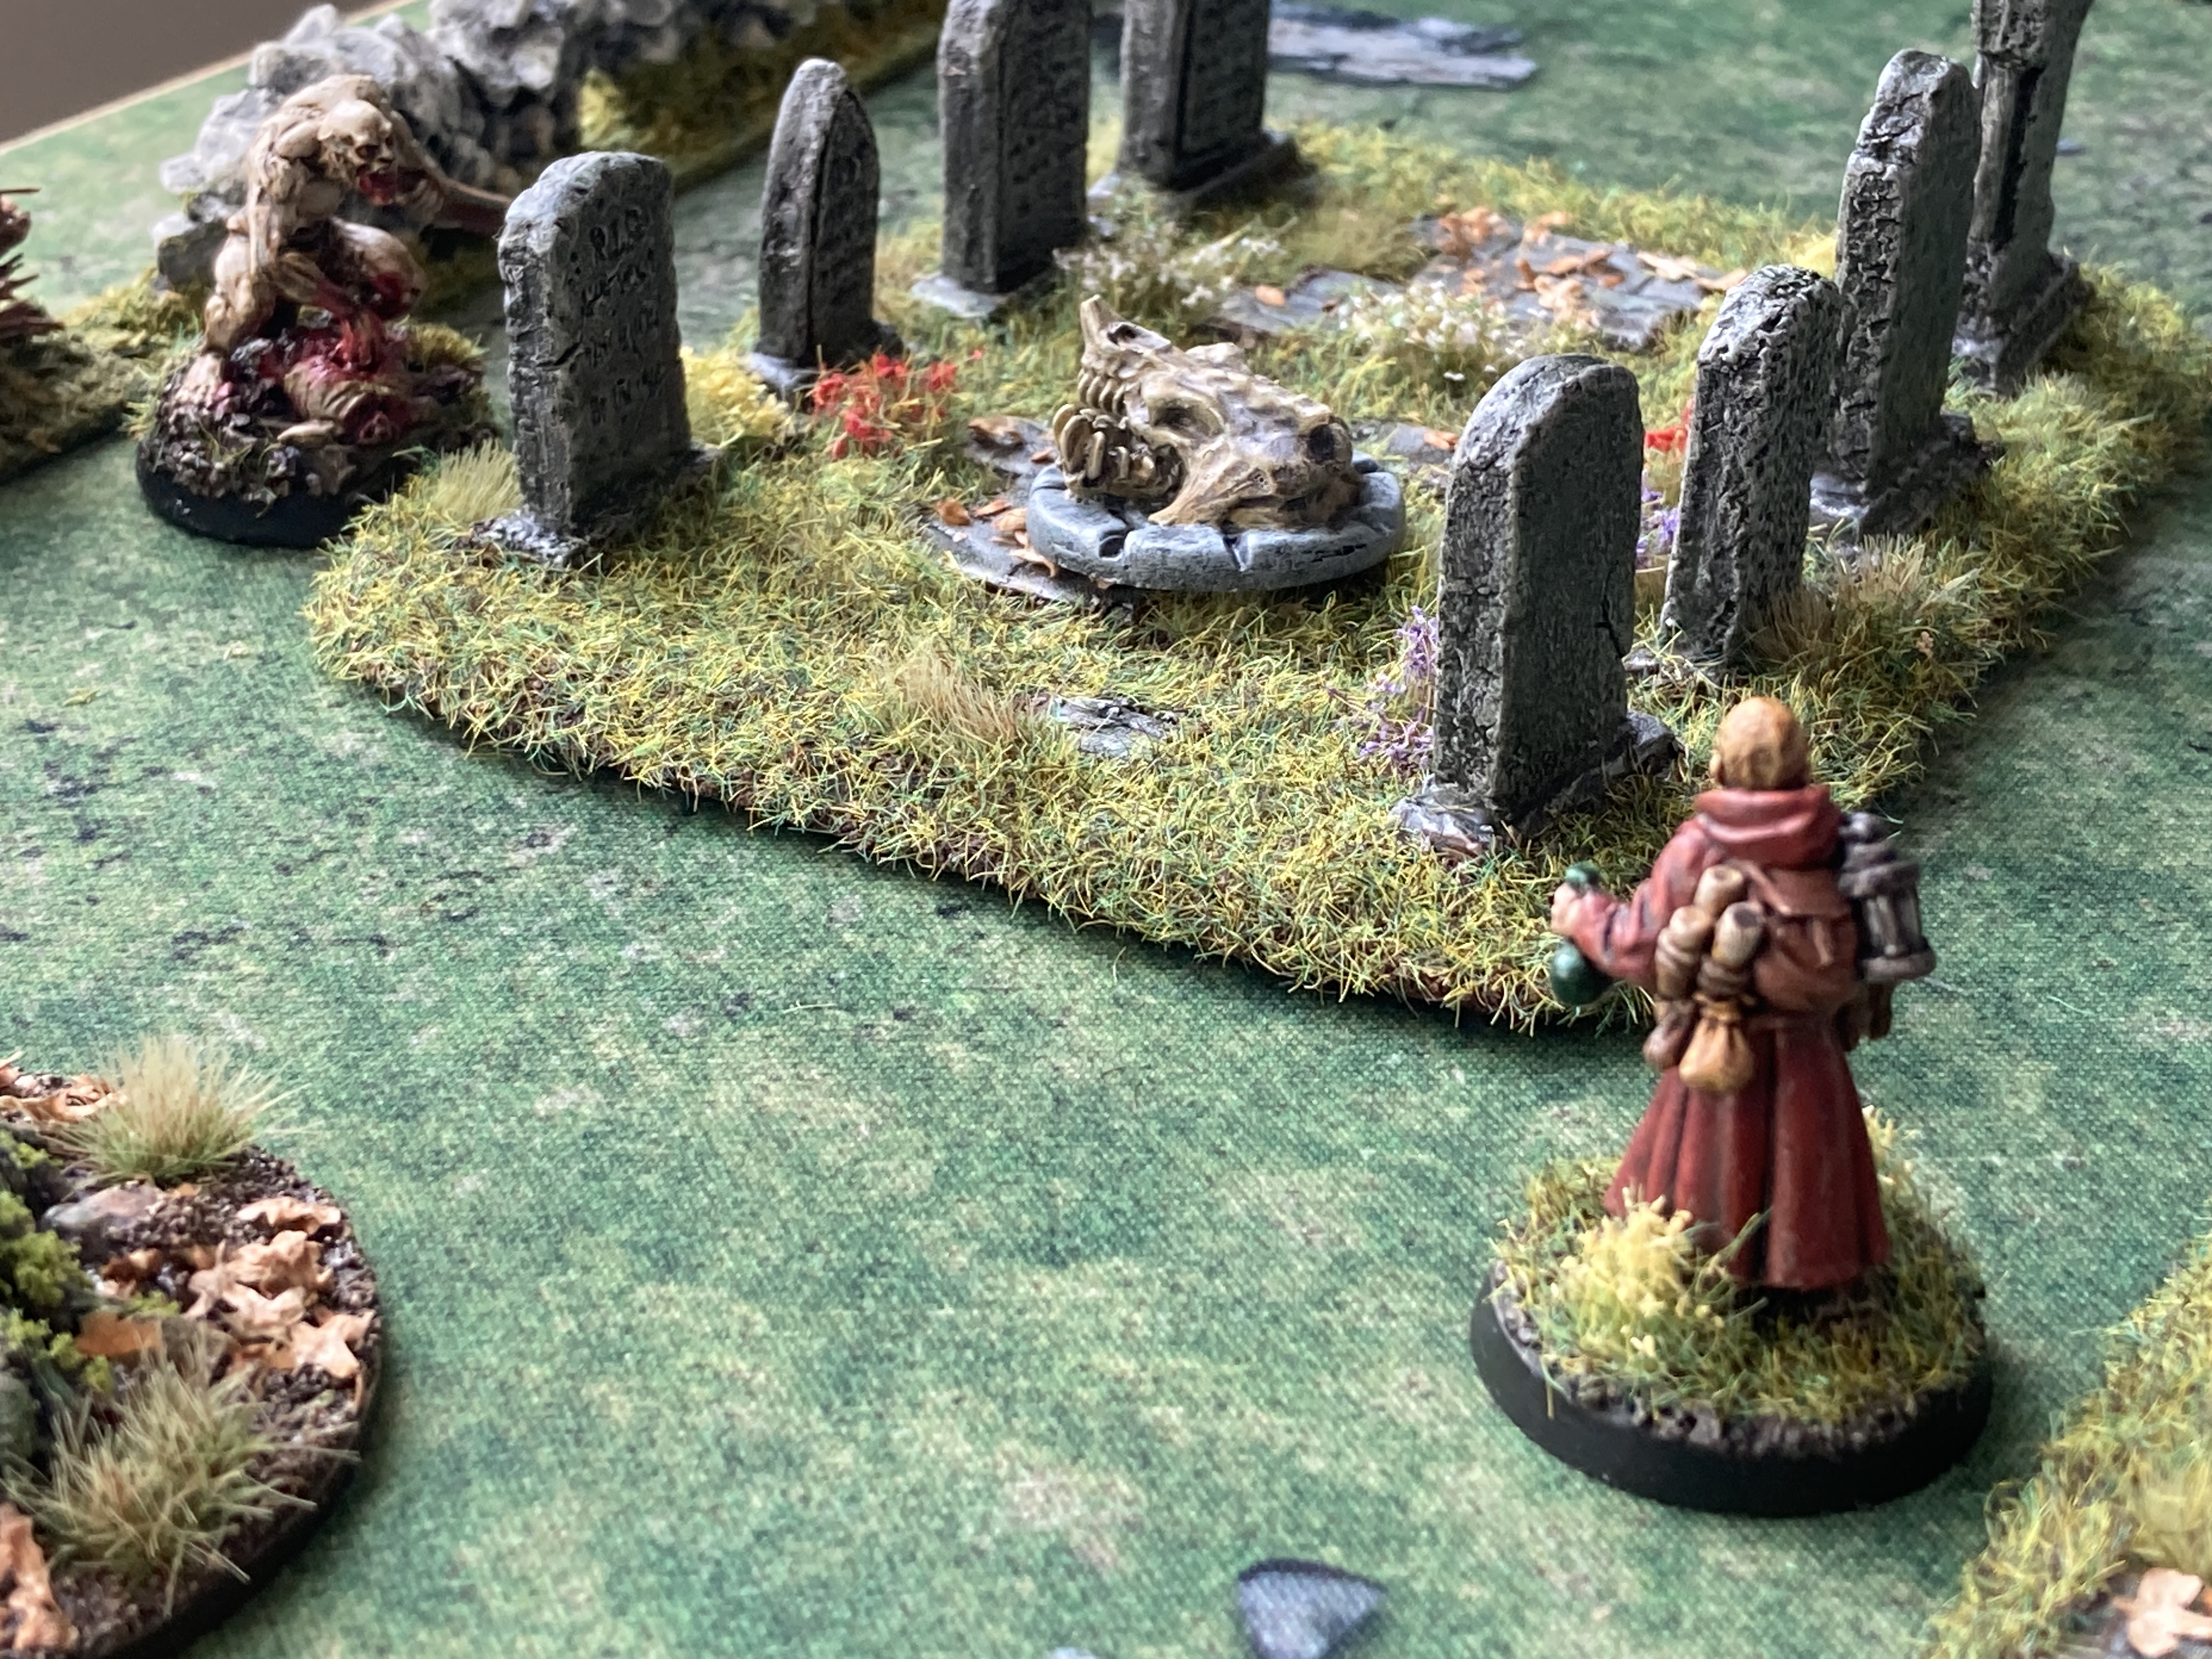
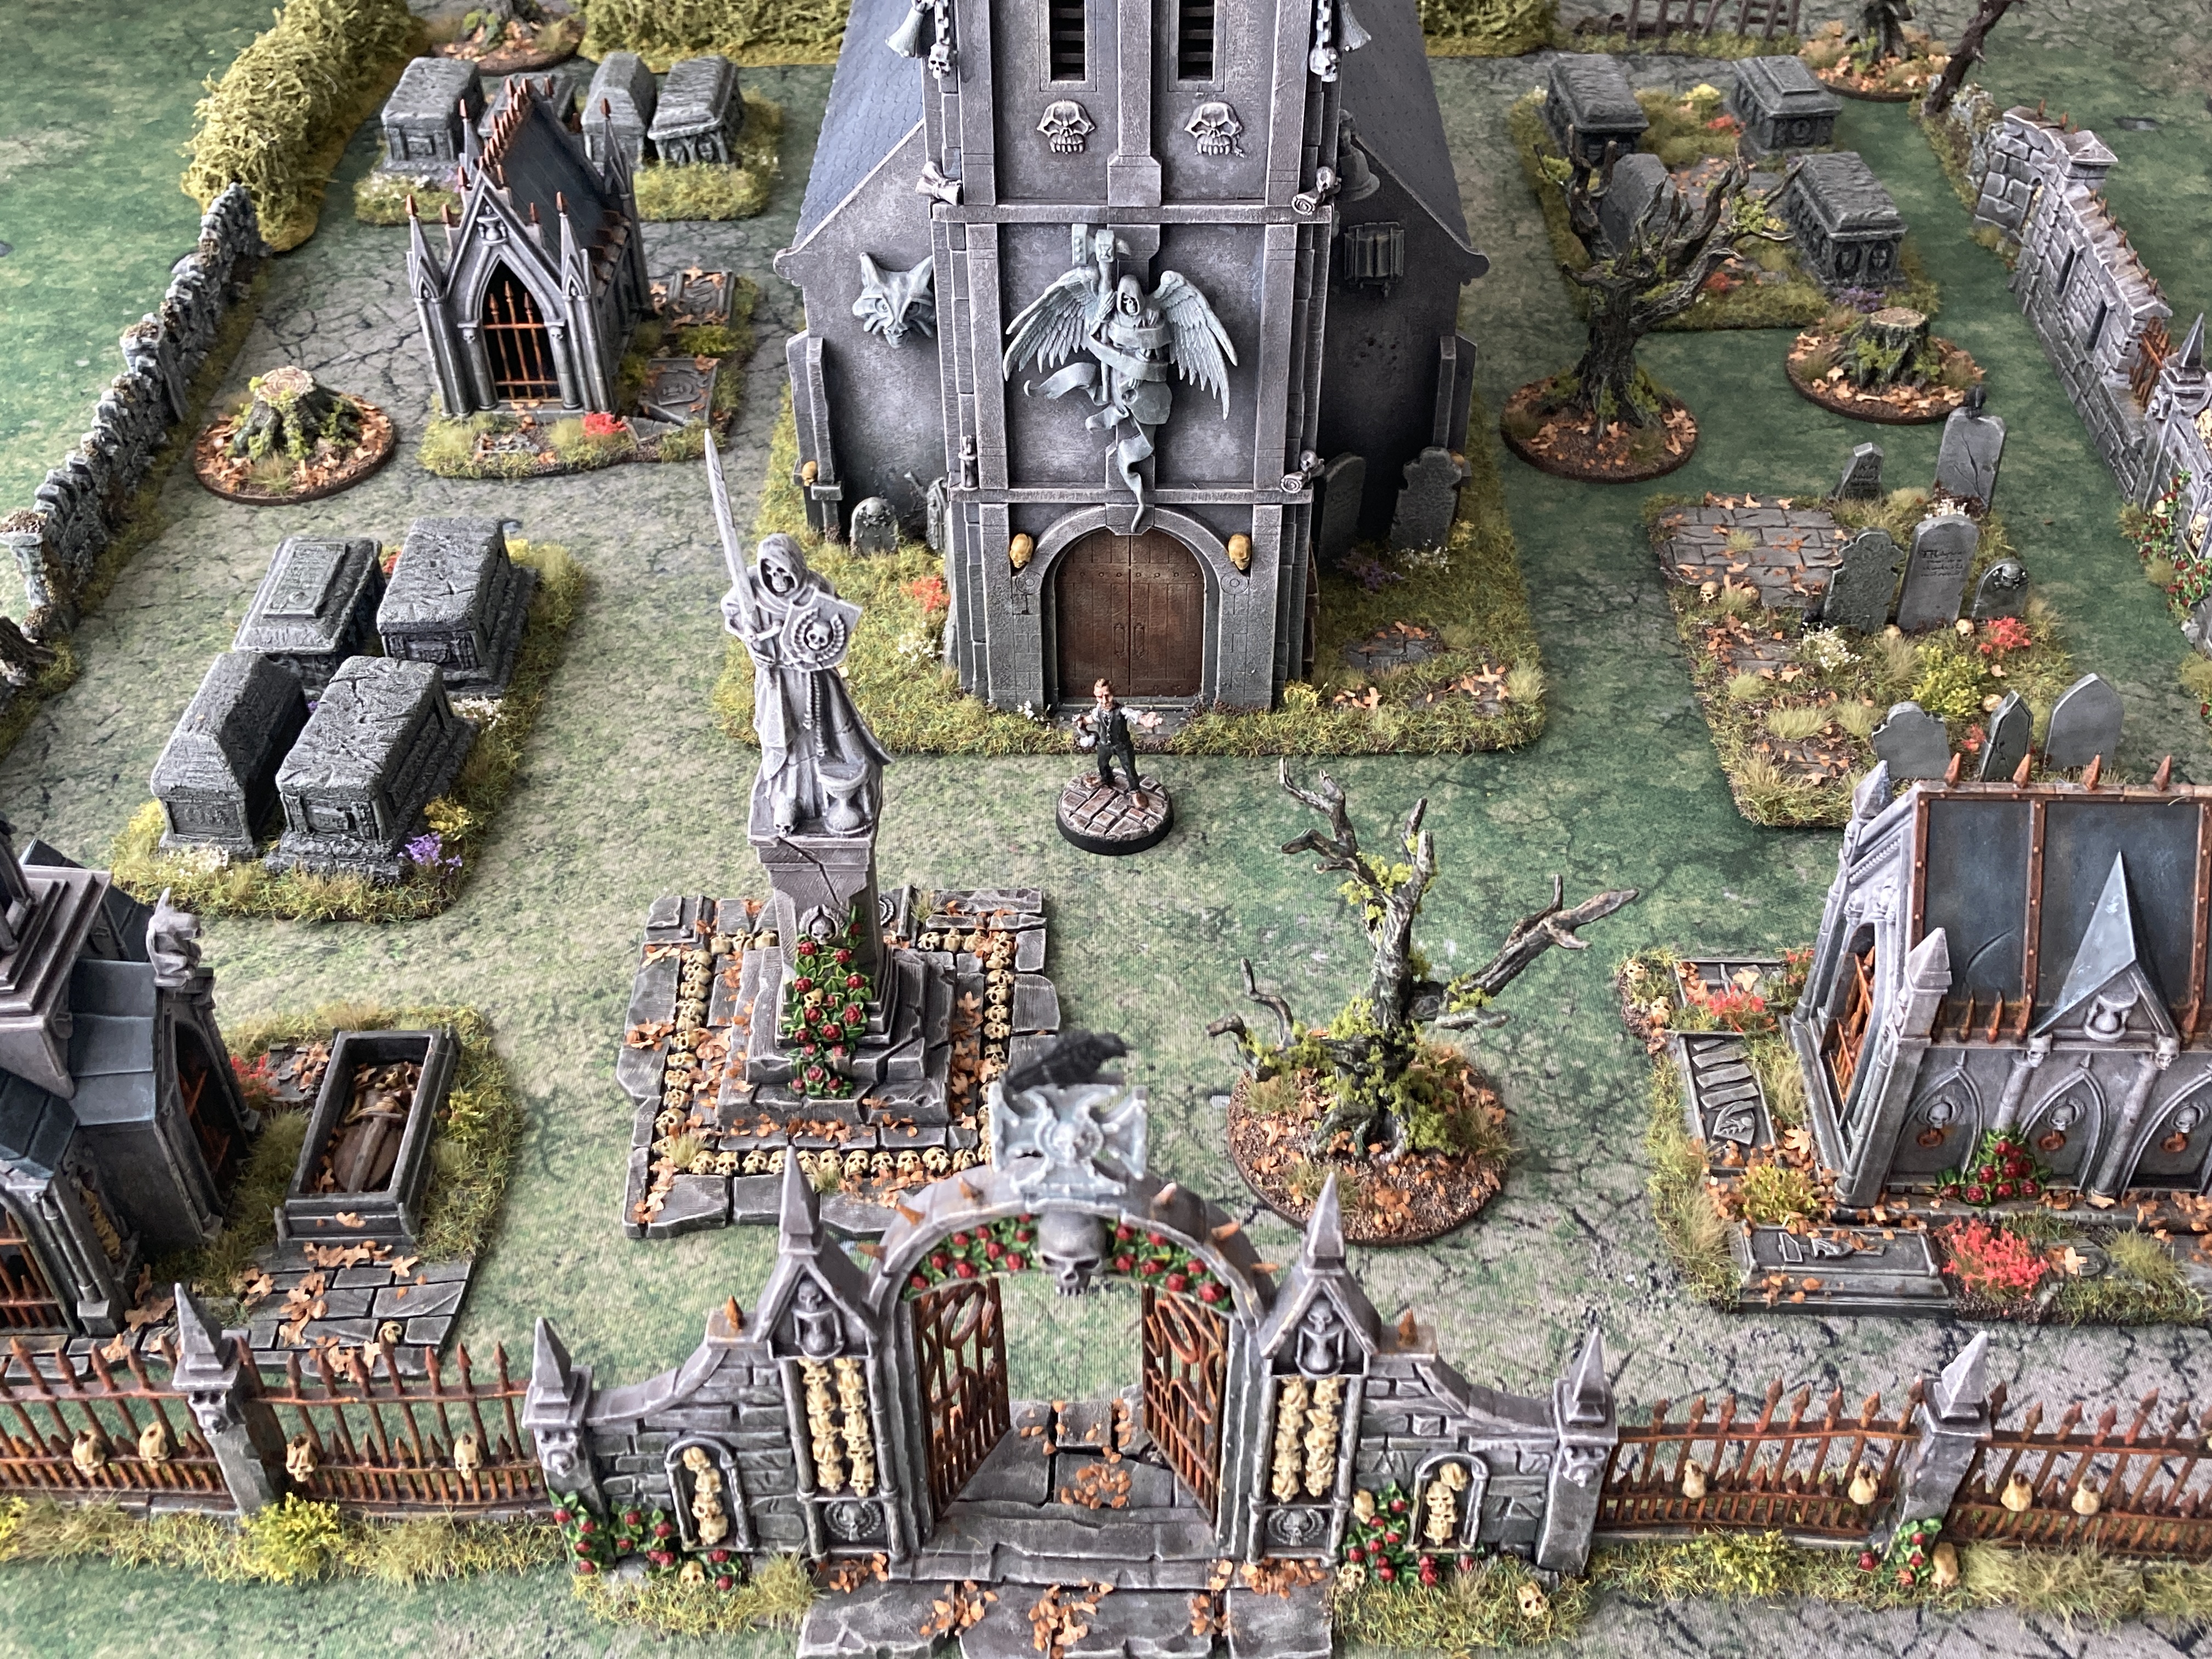
I’ve written a special scenario for Rangers of Shadow Deep using my new terrain and what follows is a battle report of me playtesting the scenario to test the difficulty followed by the final draft of the scenario as three screenshots.
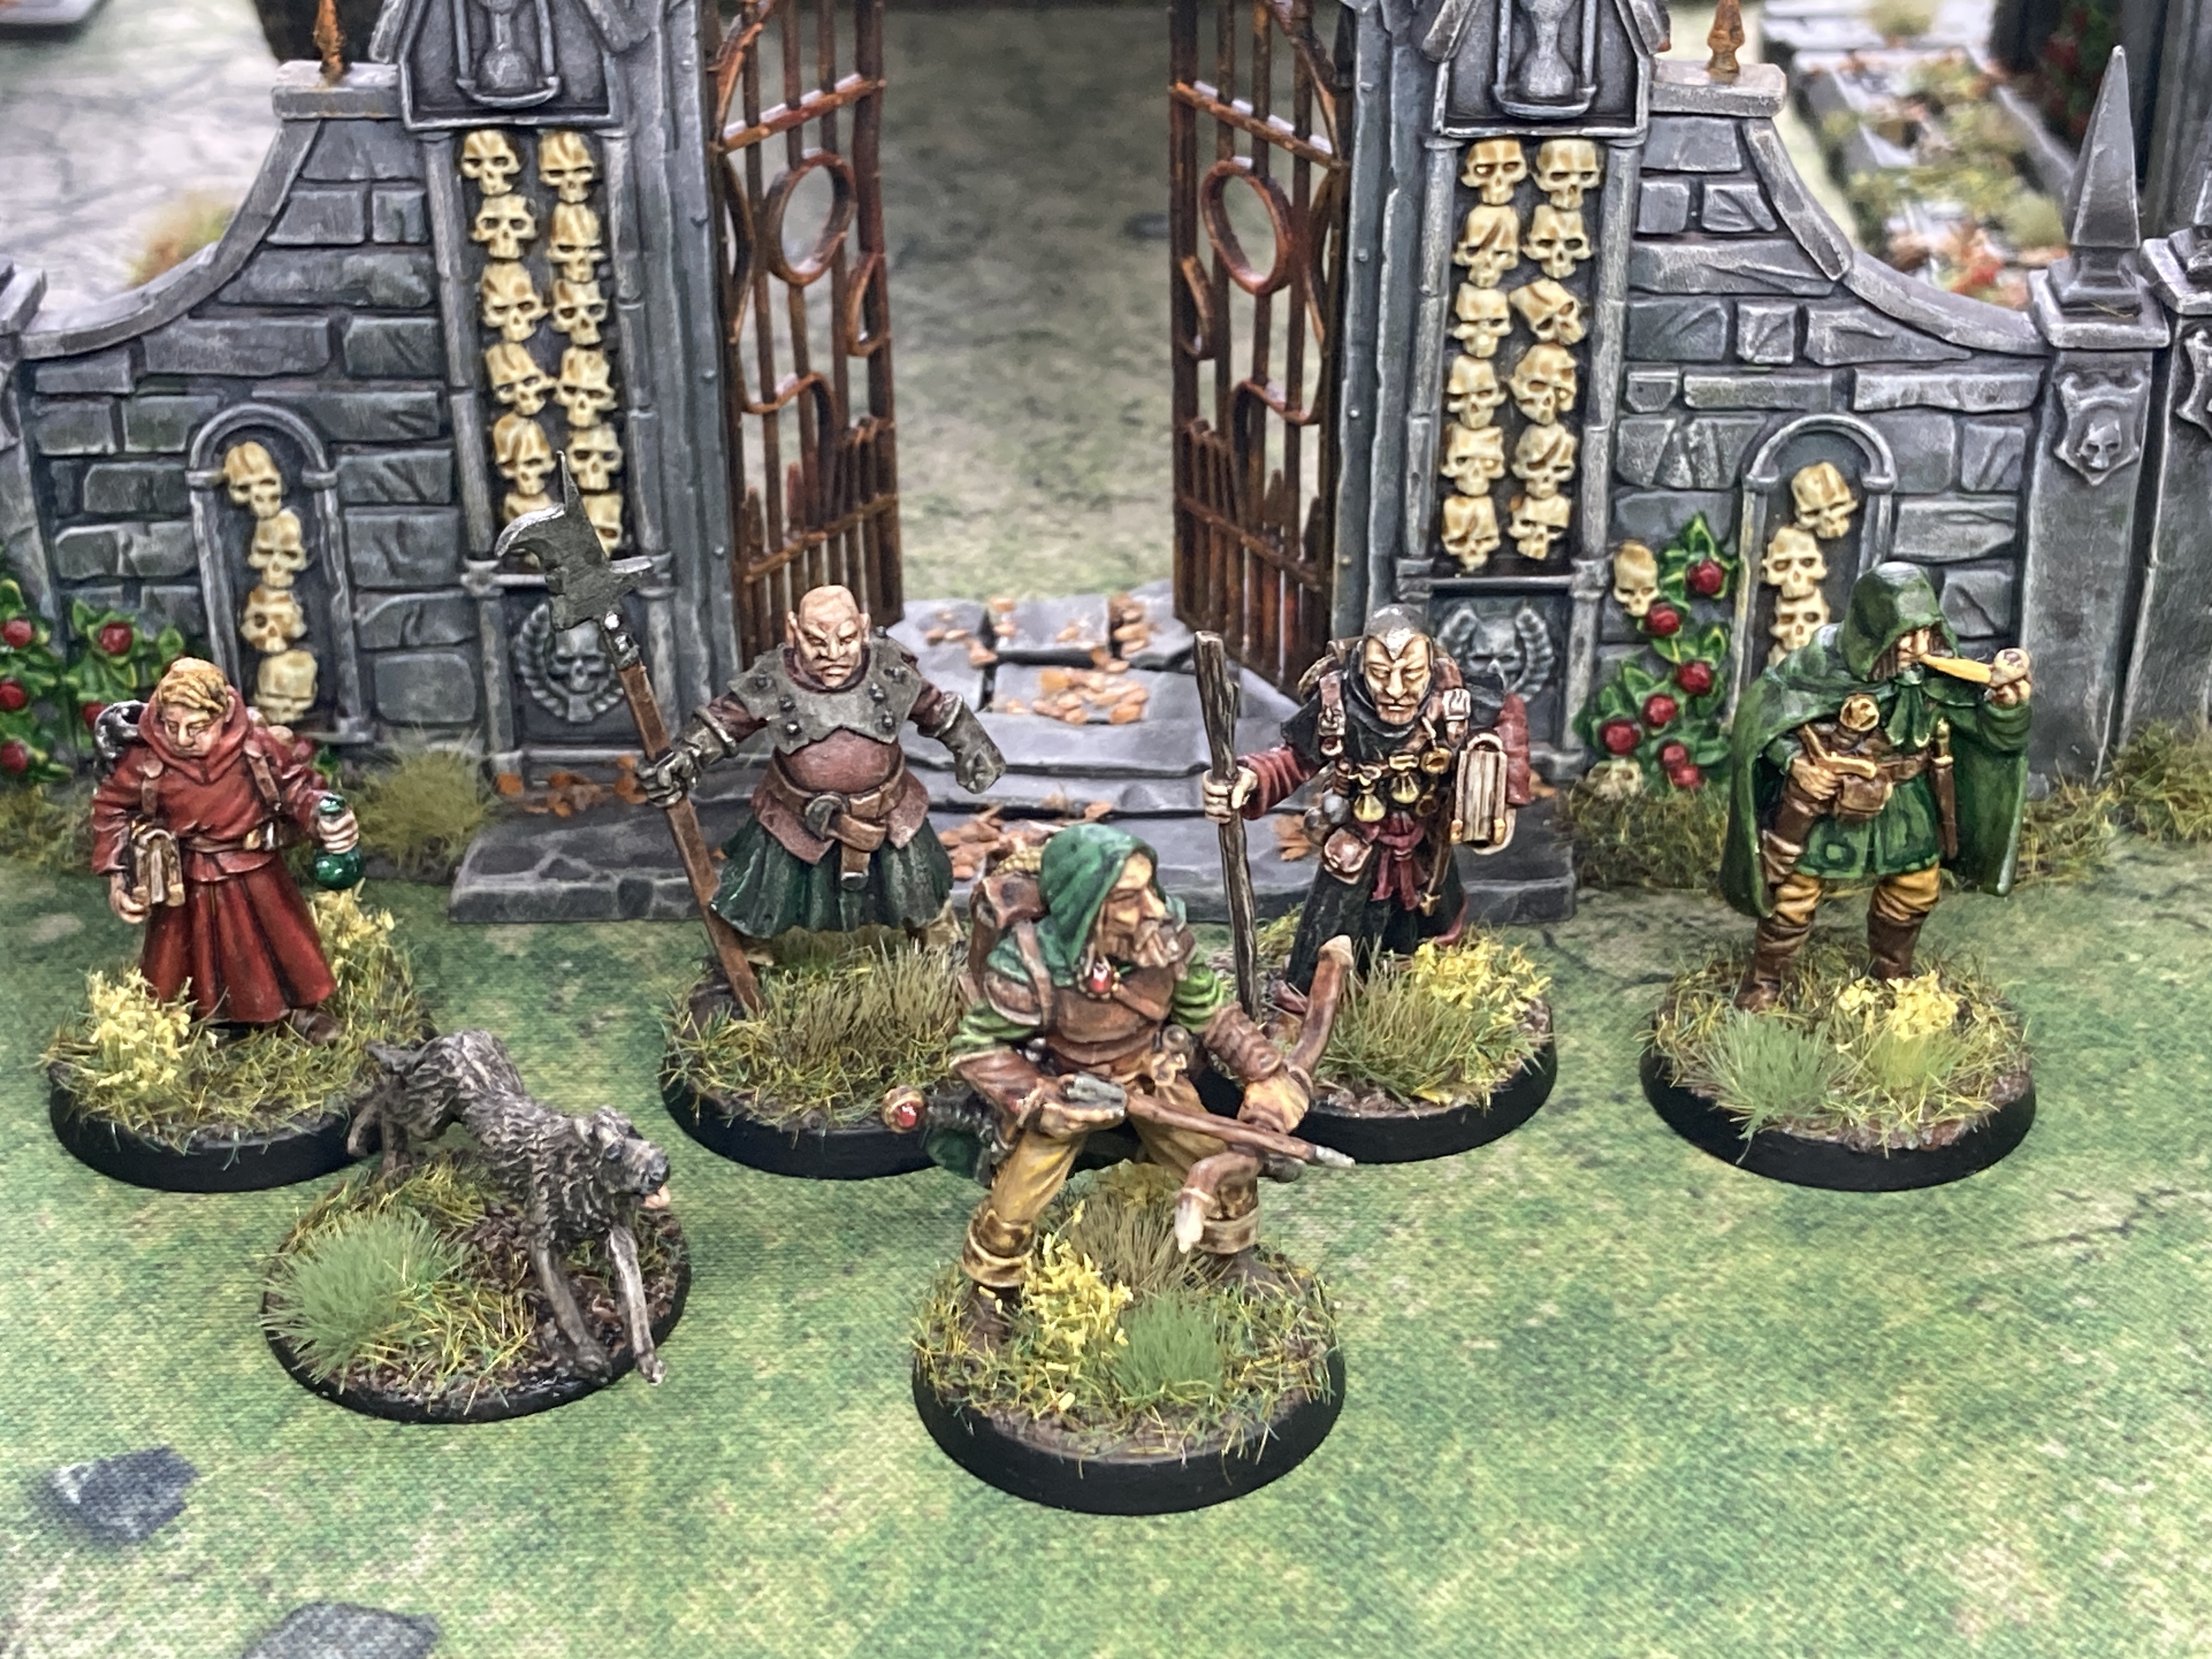
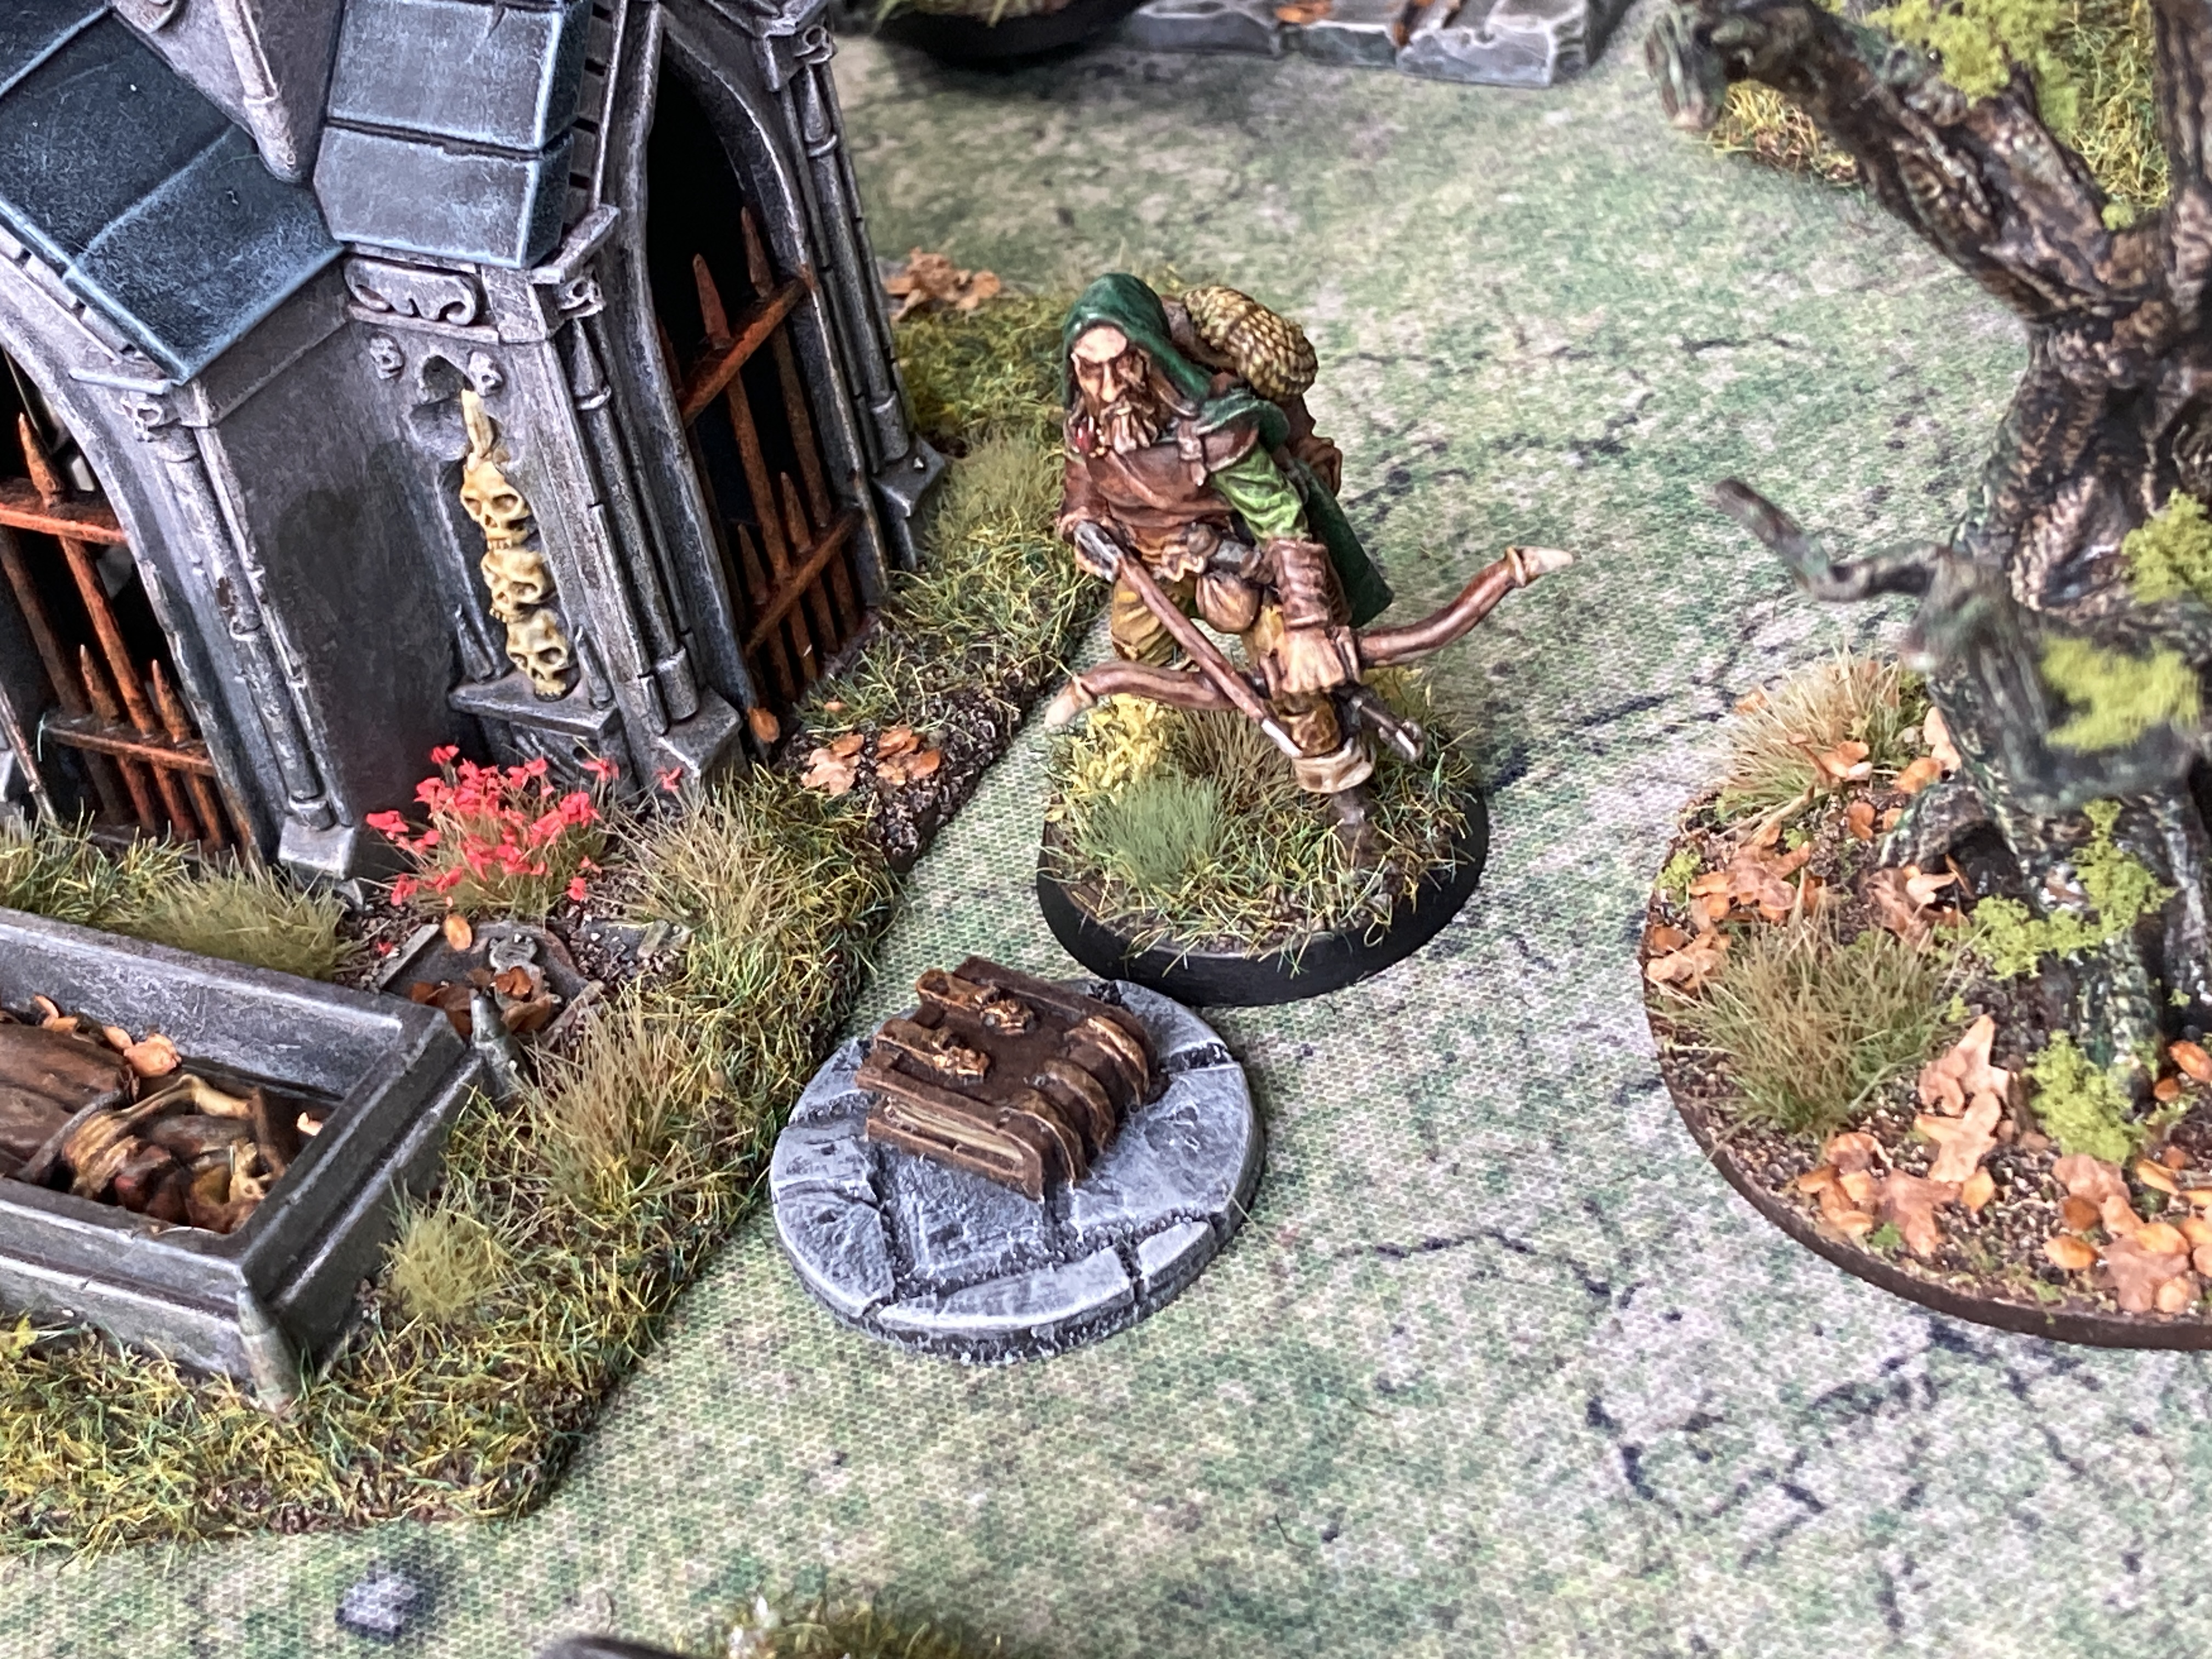
Here’s my setup for the game. I used my current warband for Rangers of Shadow Deep. For their earlier exploits see my project all about them here – https://www.beastsofwar.com/project/1646655/

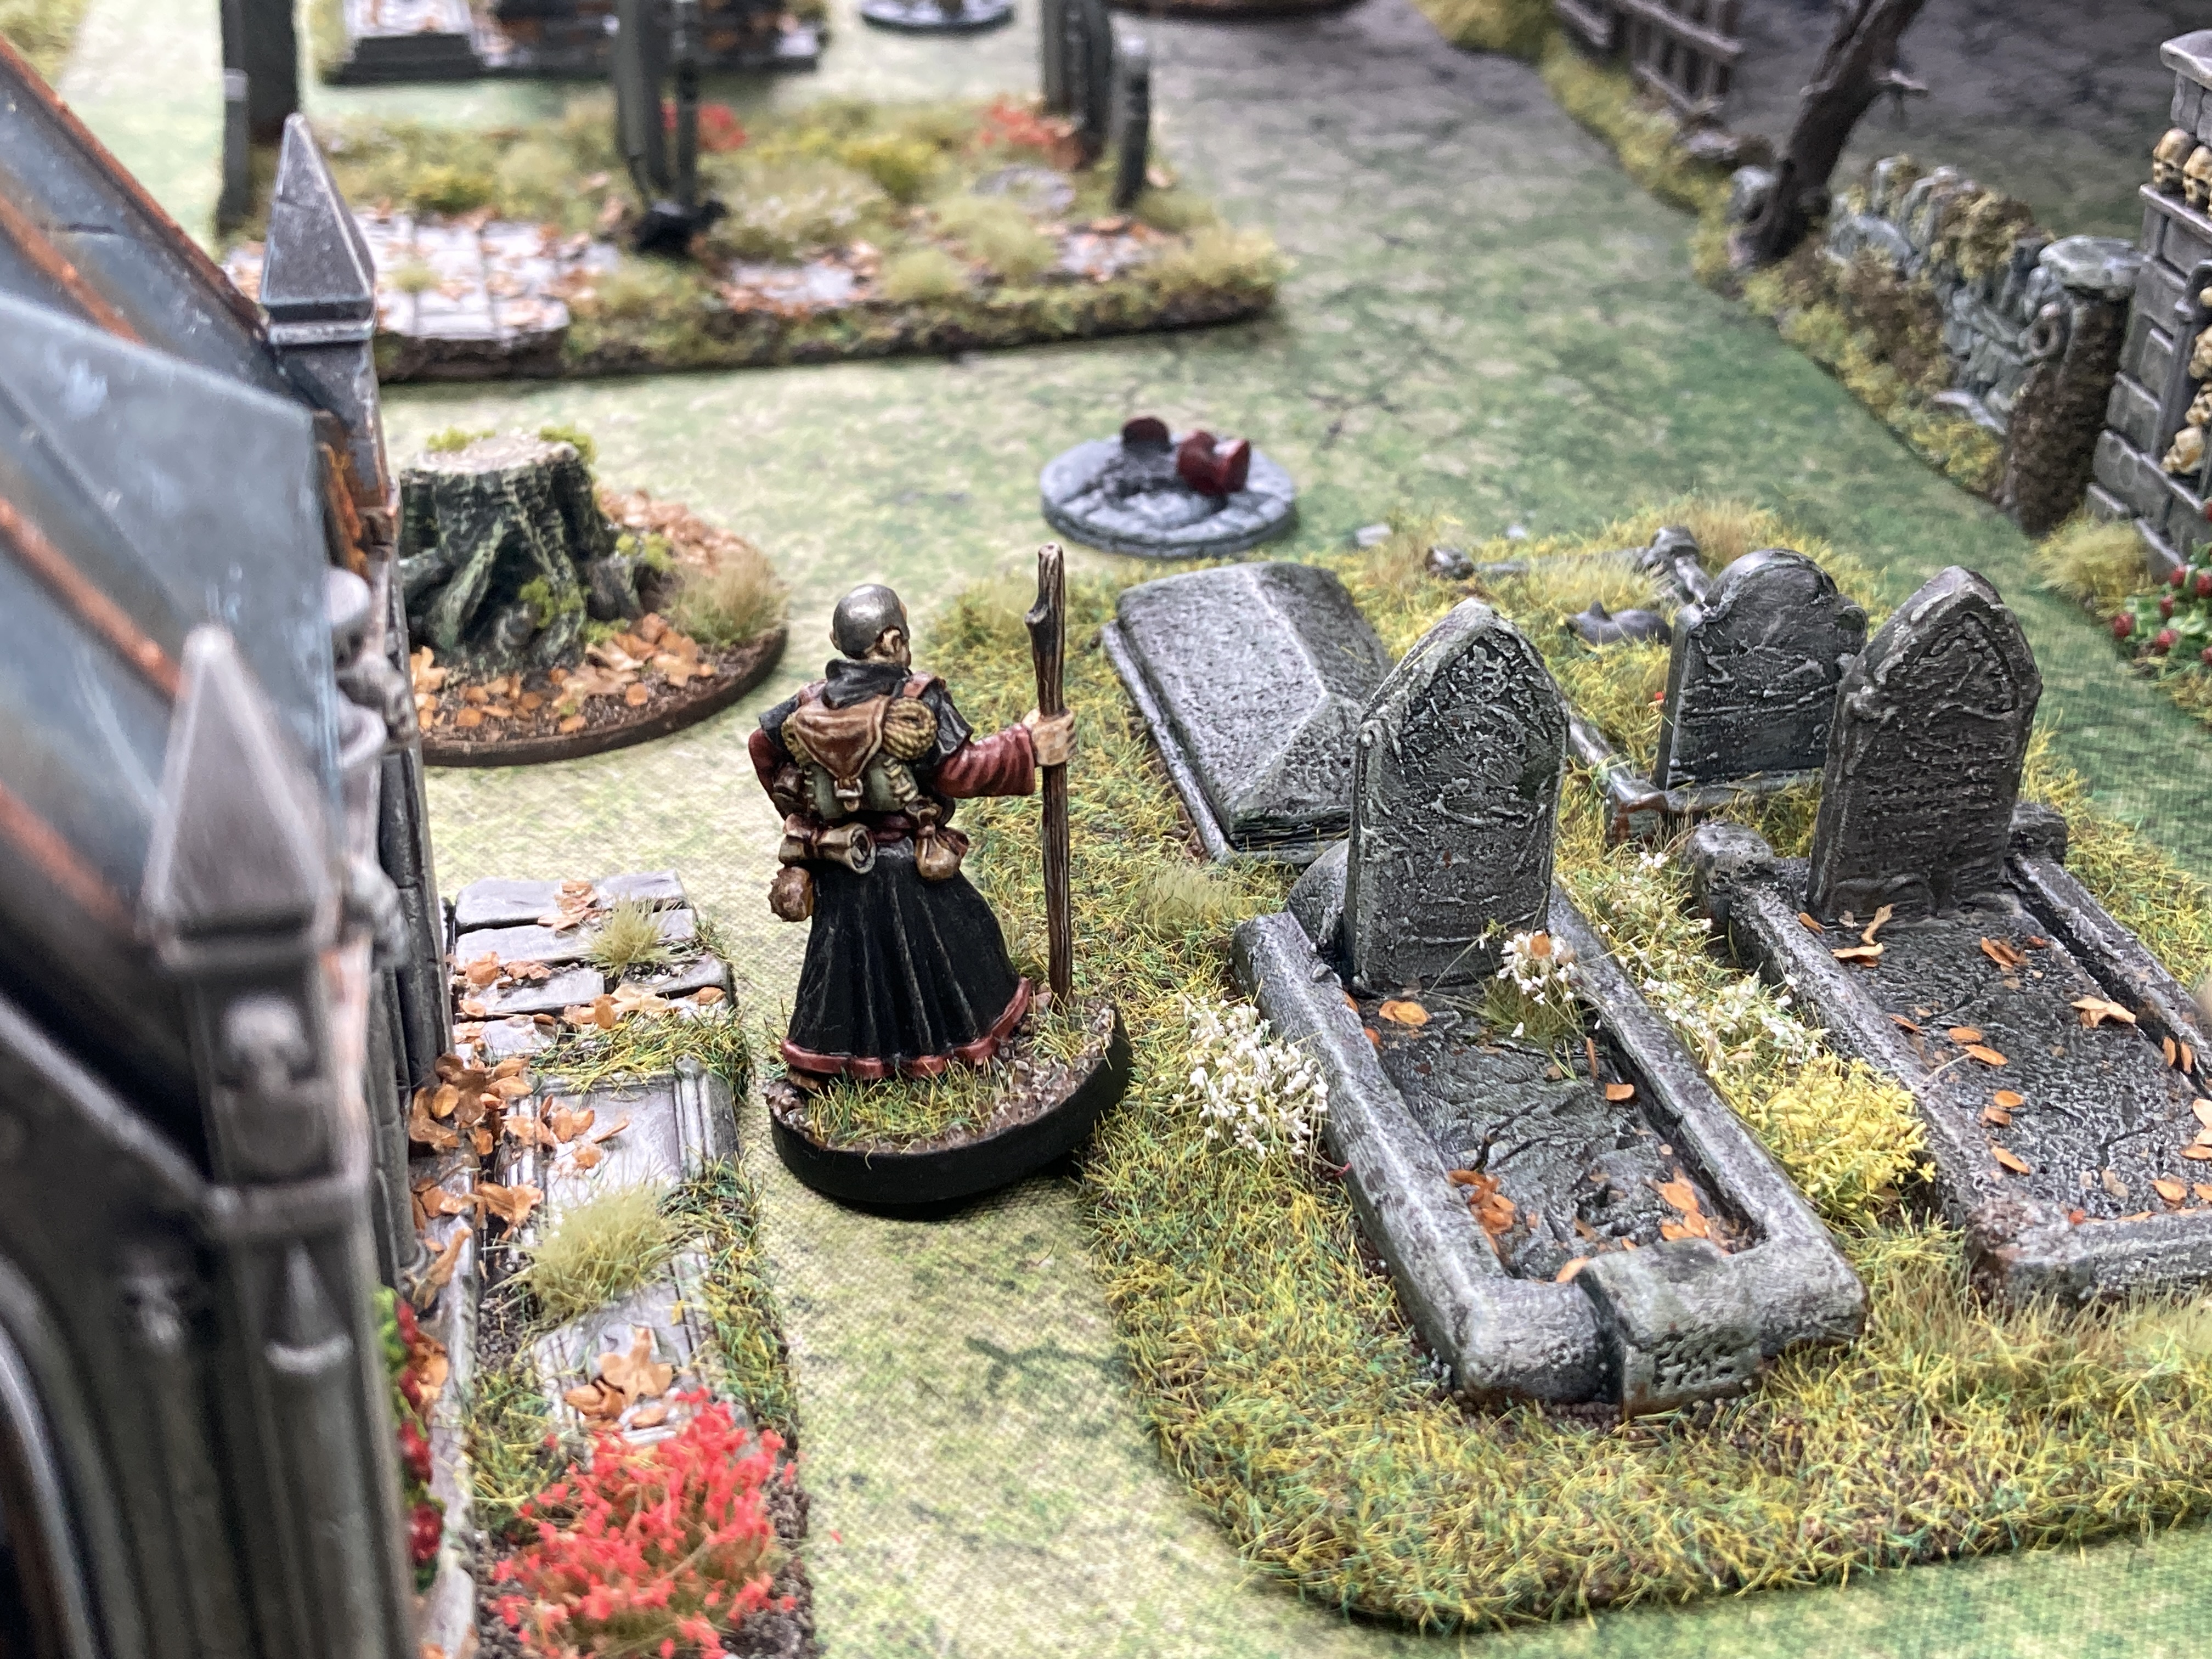
The heroes entered the cemetery and split into two groups, Bered the ranger, along with Trotter, the tracker, smoking his pipe were to head left towards the clue markers there, while Halleck with his massive billhook and Trysten, dressed in his red scholarly robes were to head right and those clue markers on that side. Both groups got set upon by ghouls almost straight away.
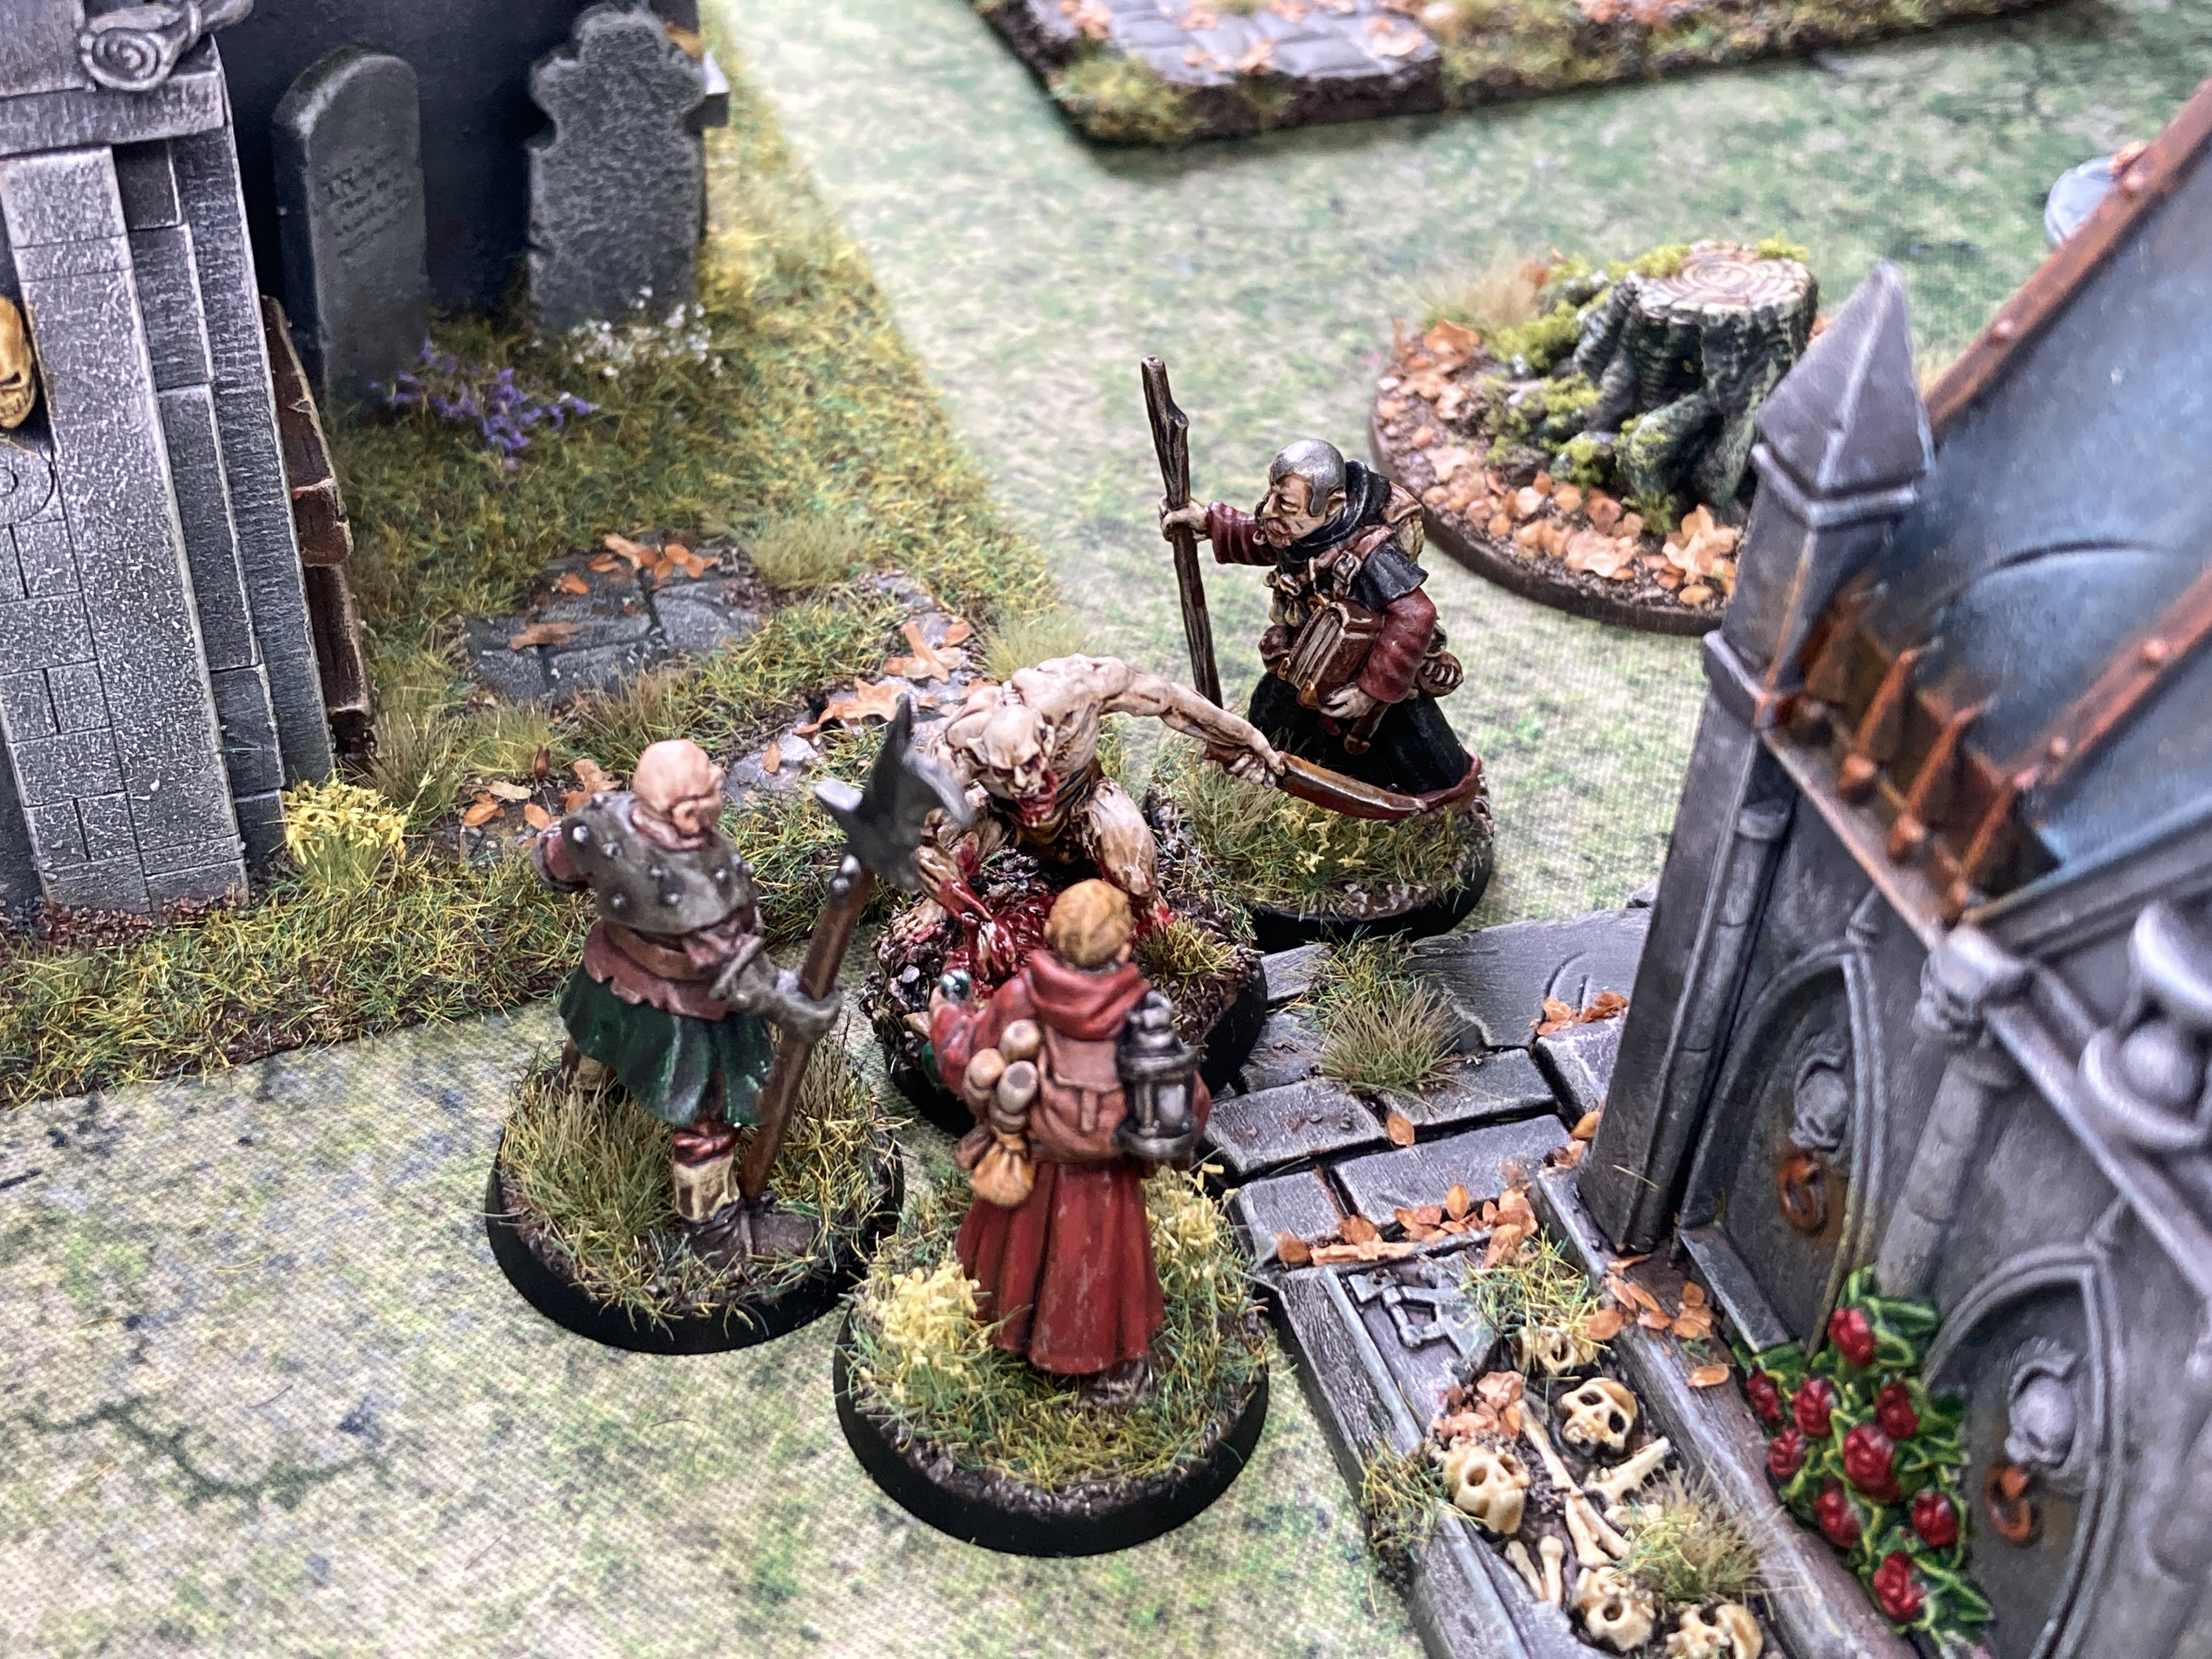
Merlin, the wizard was to head out in front to grab the closest clue marker but decided to help out in the fight with the ghoul when Halleck got badly wounded.
As the fight continued with Bered and Trotter (the tracker), Stitch the dog came to help but got taken out by the ghoul.
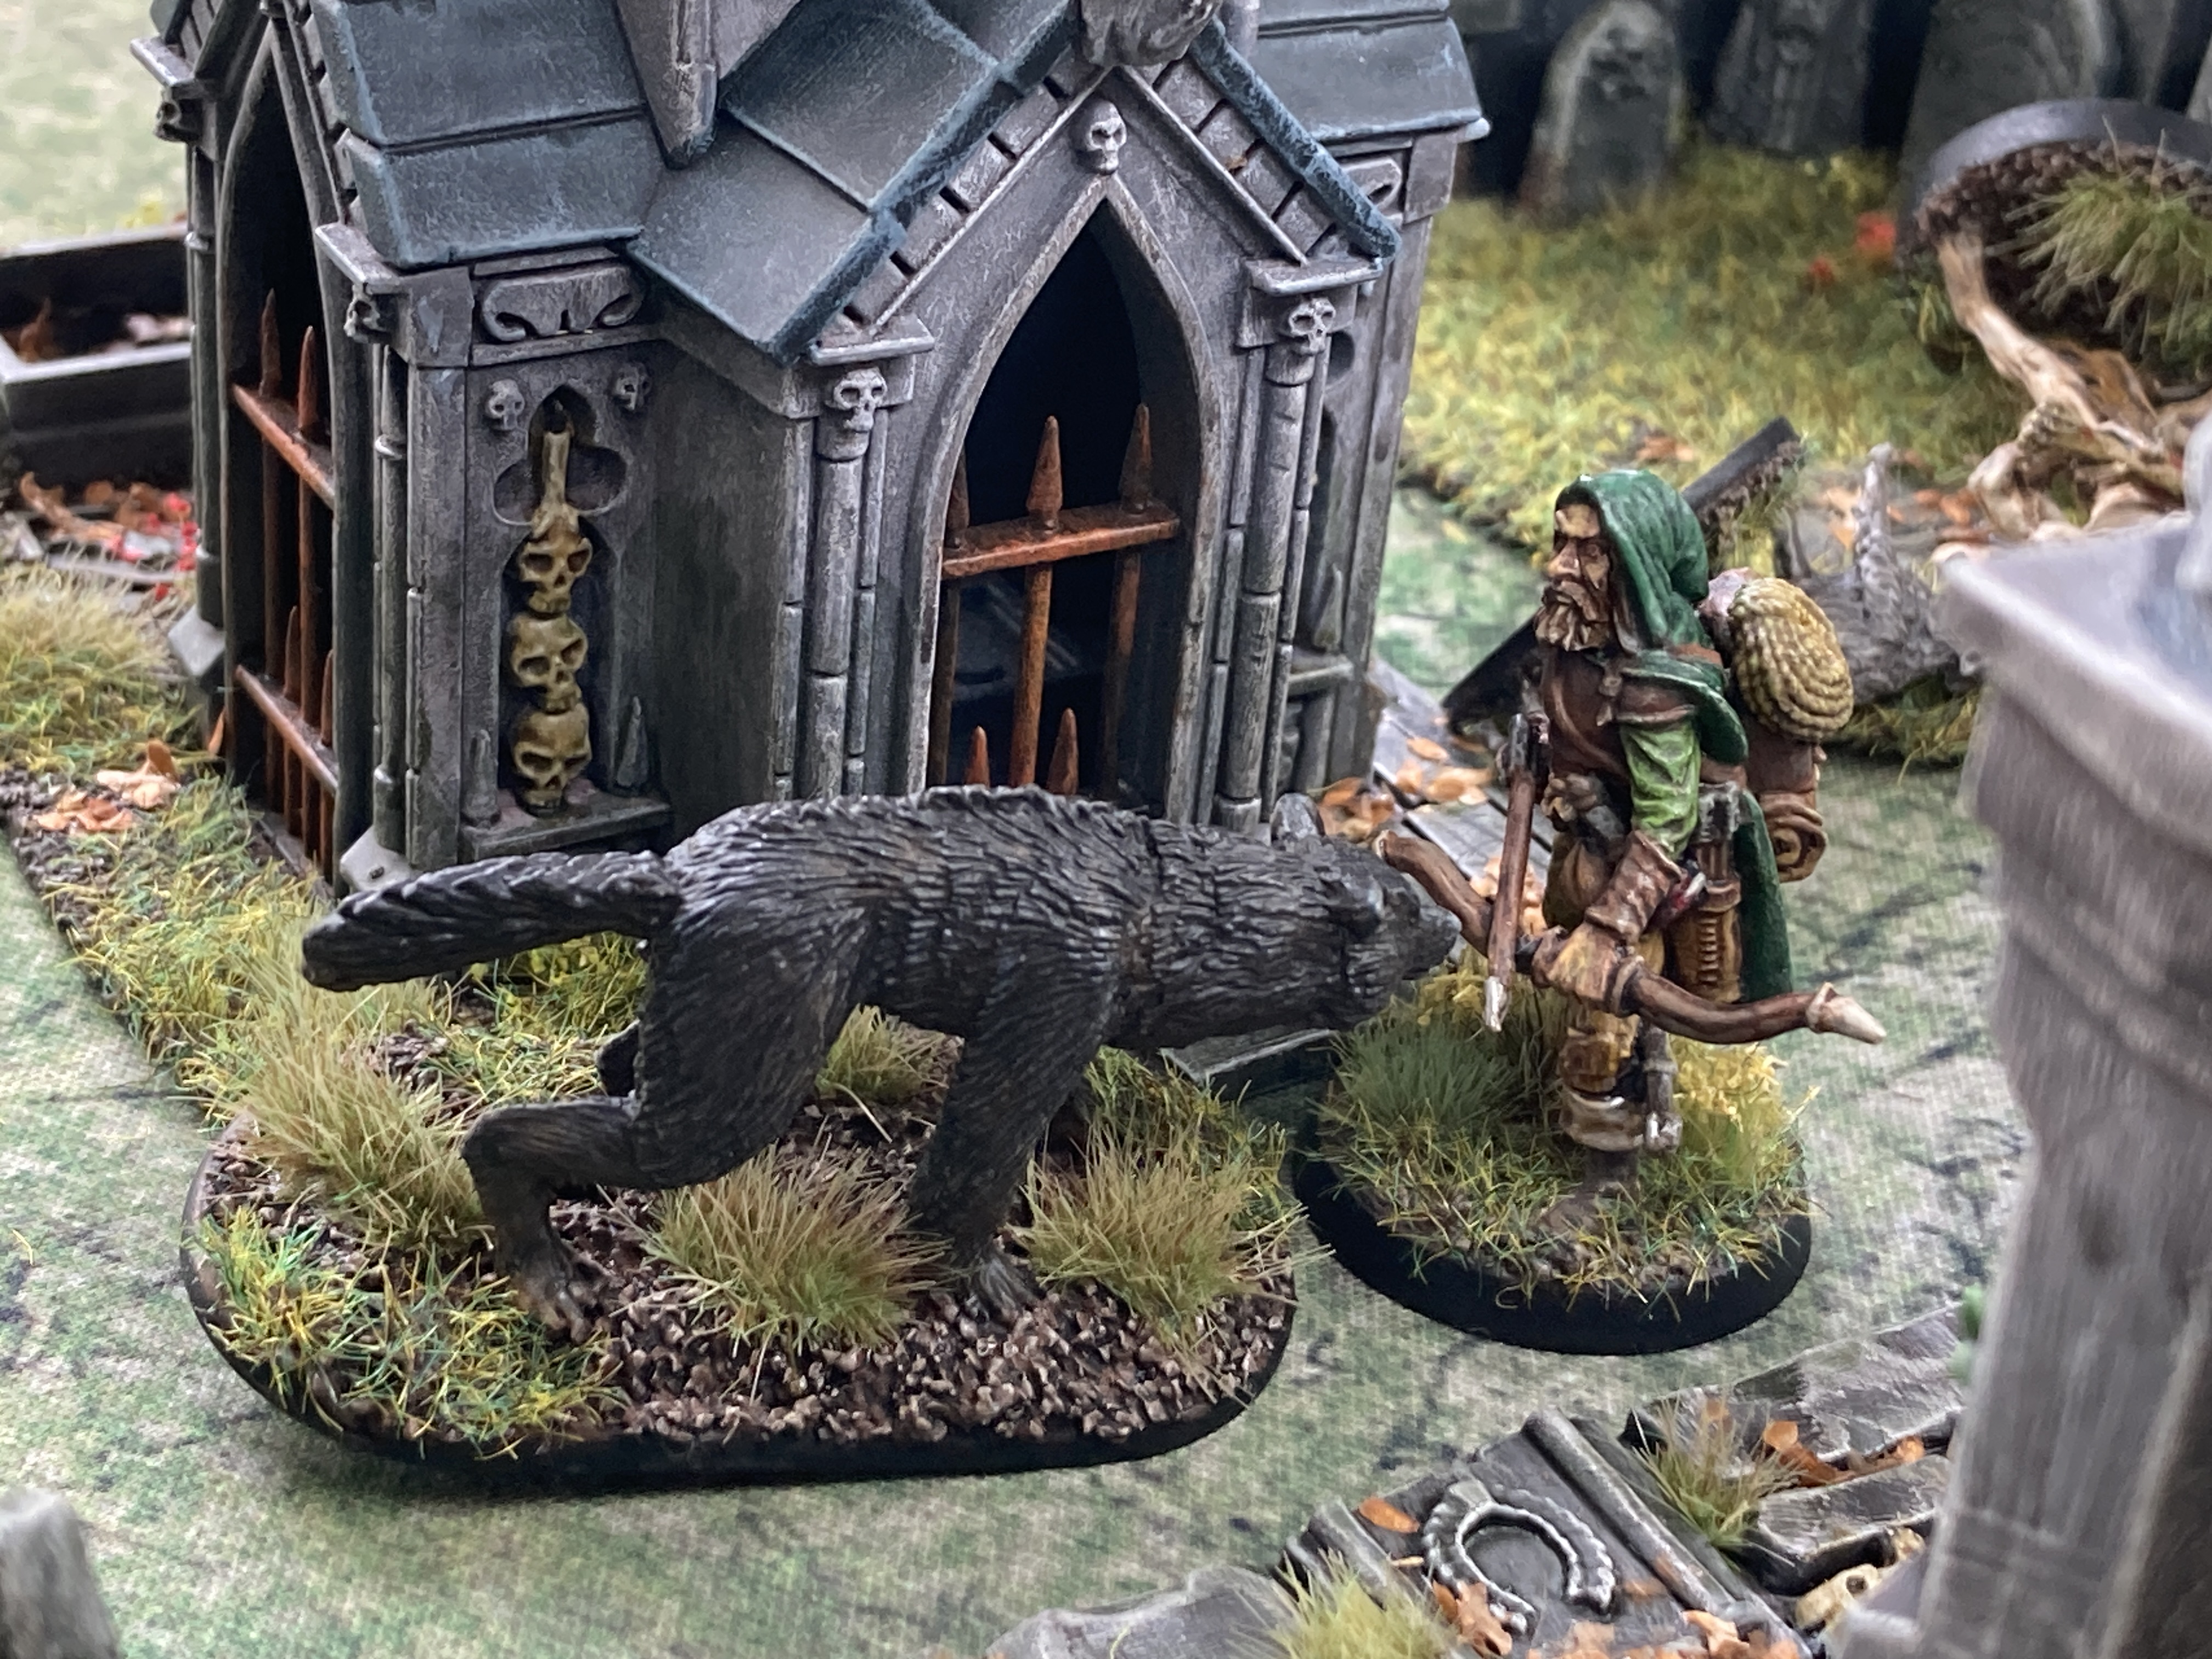
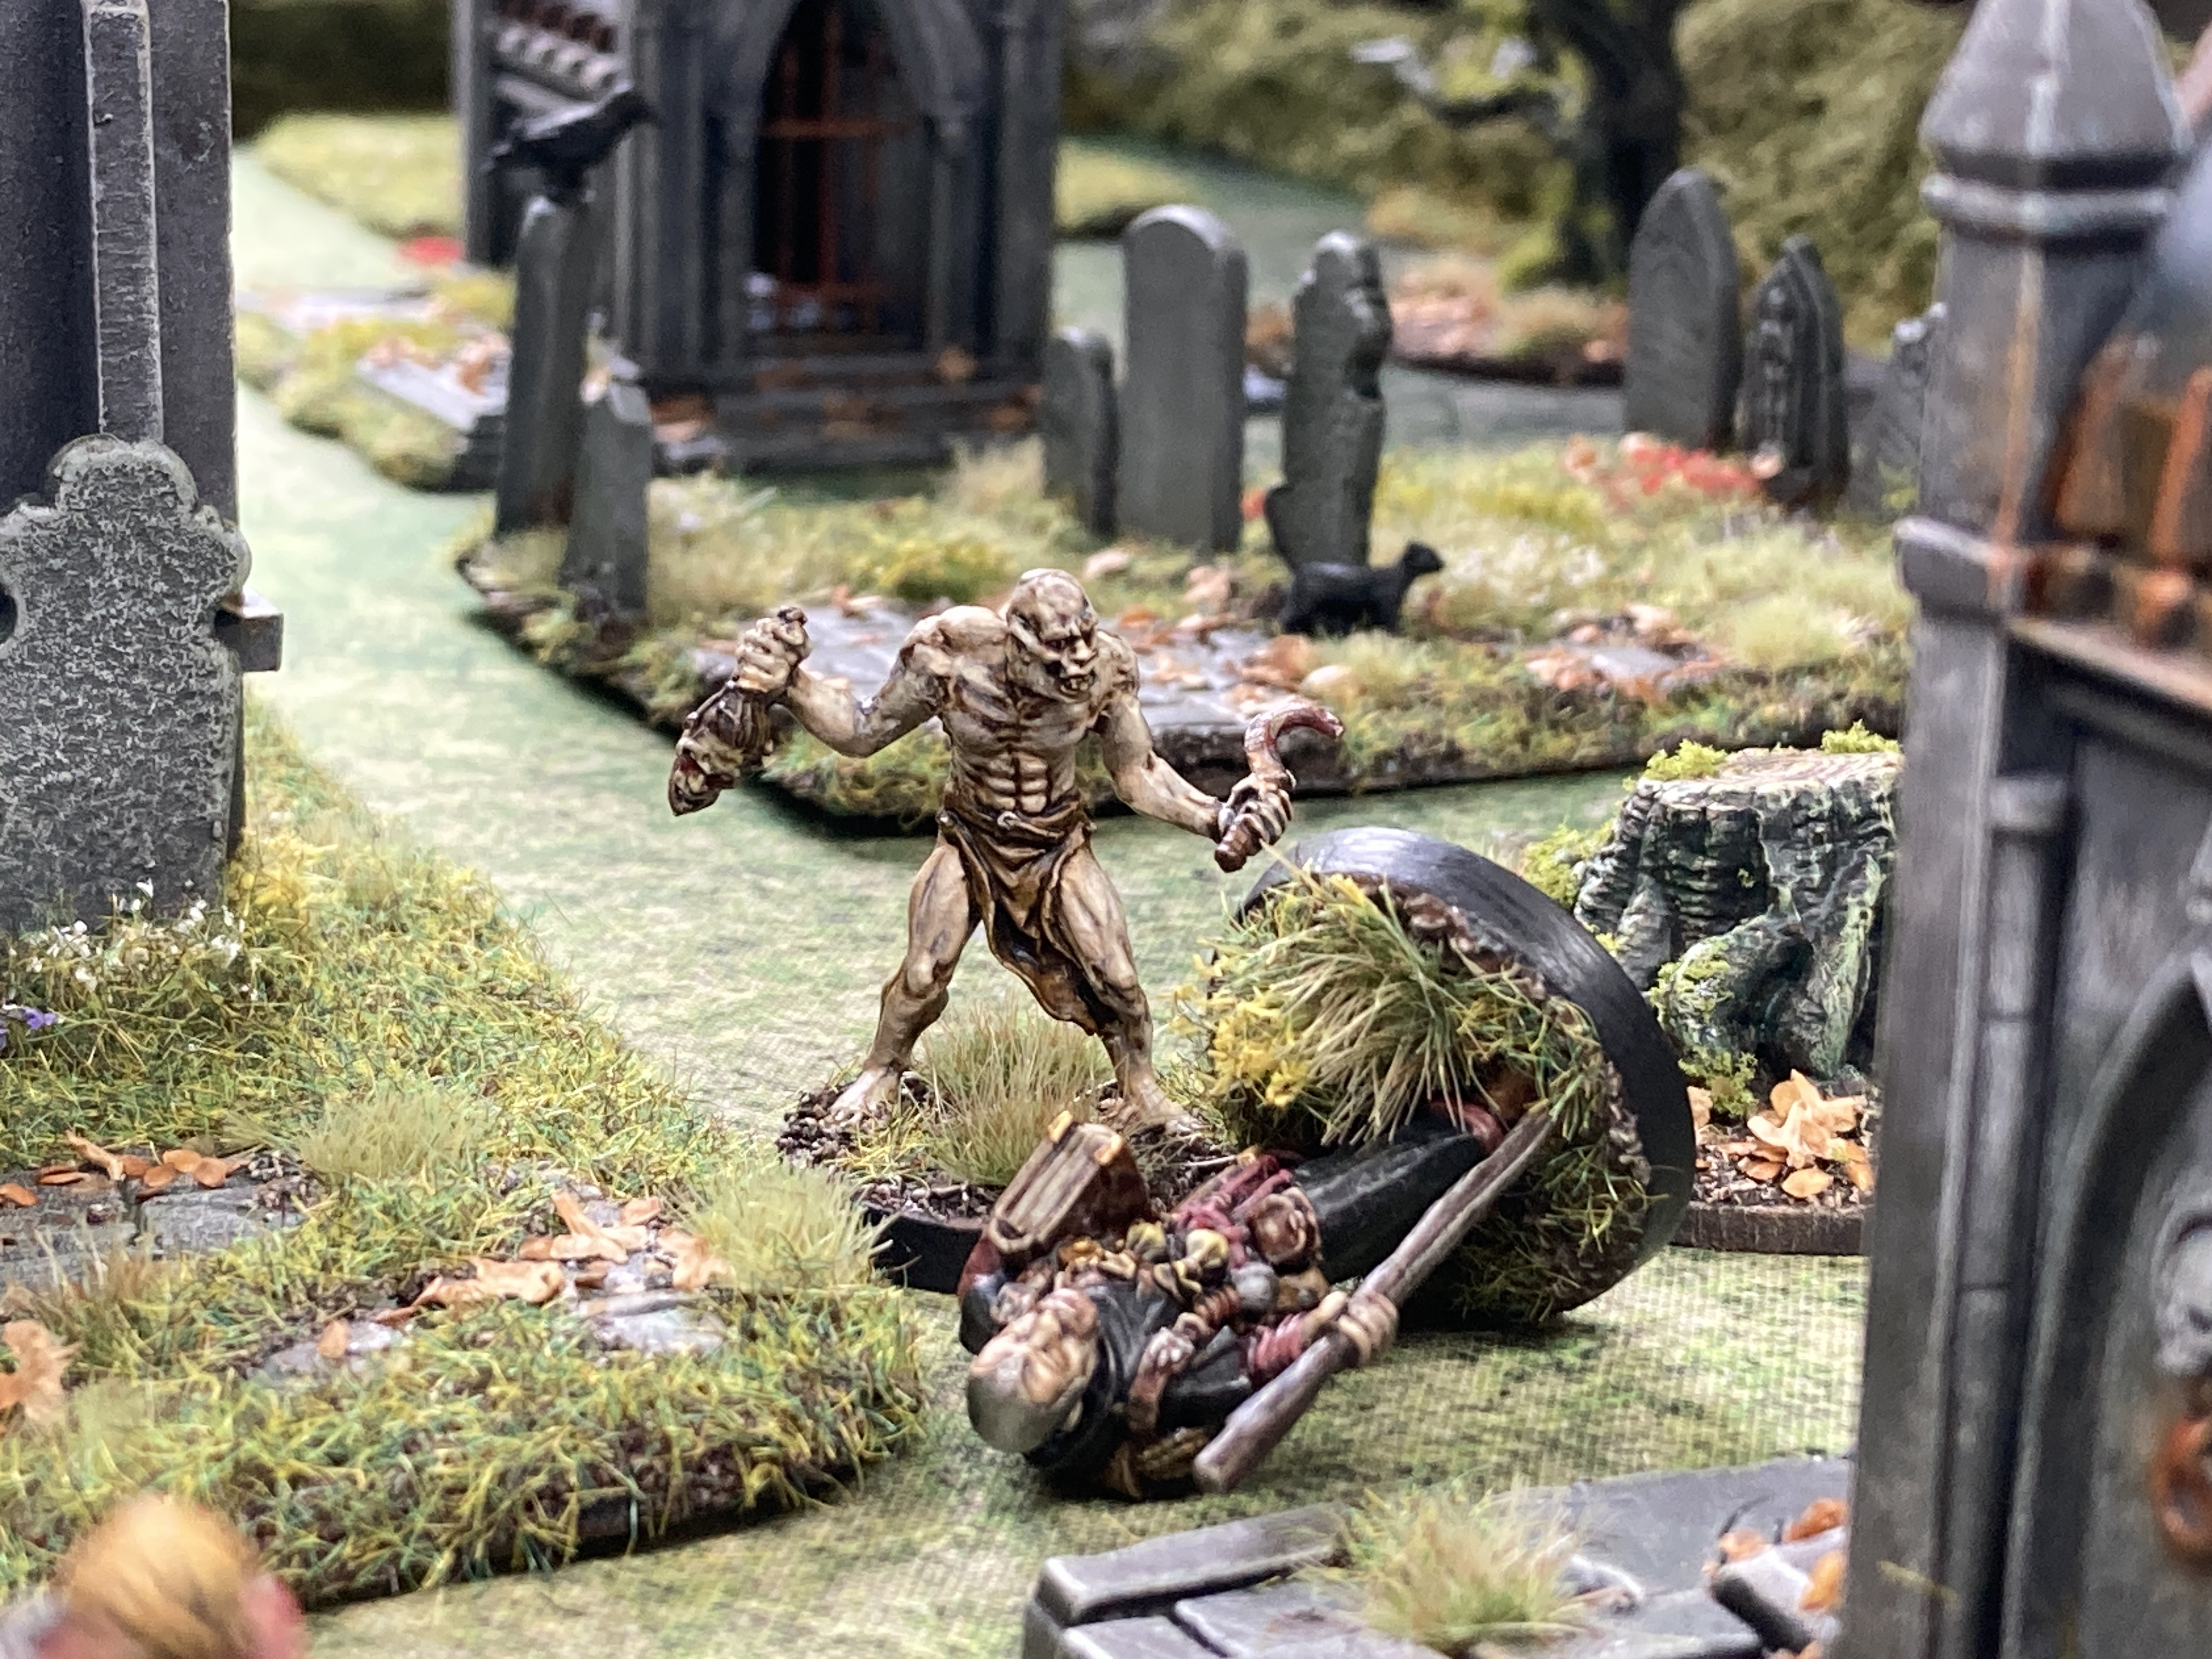
Eventually Trotter (the tracker) took out the ghoul and Bered pressed on to be confronted by a large black wolf. With Trotter’s help they killed it and eventually Bered was able to reach the first clue marker. Upon investigation he found some holy symbols, sure protection against the vampire’s powers.
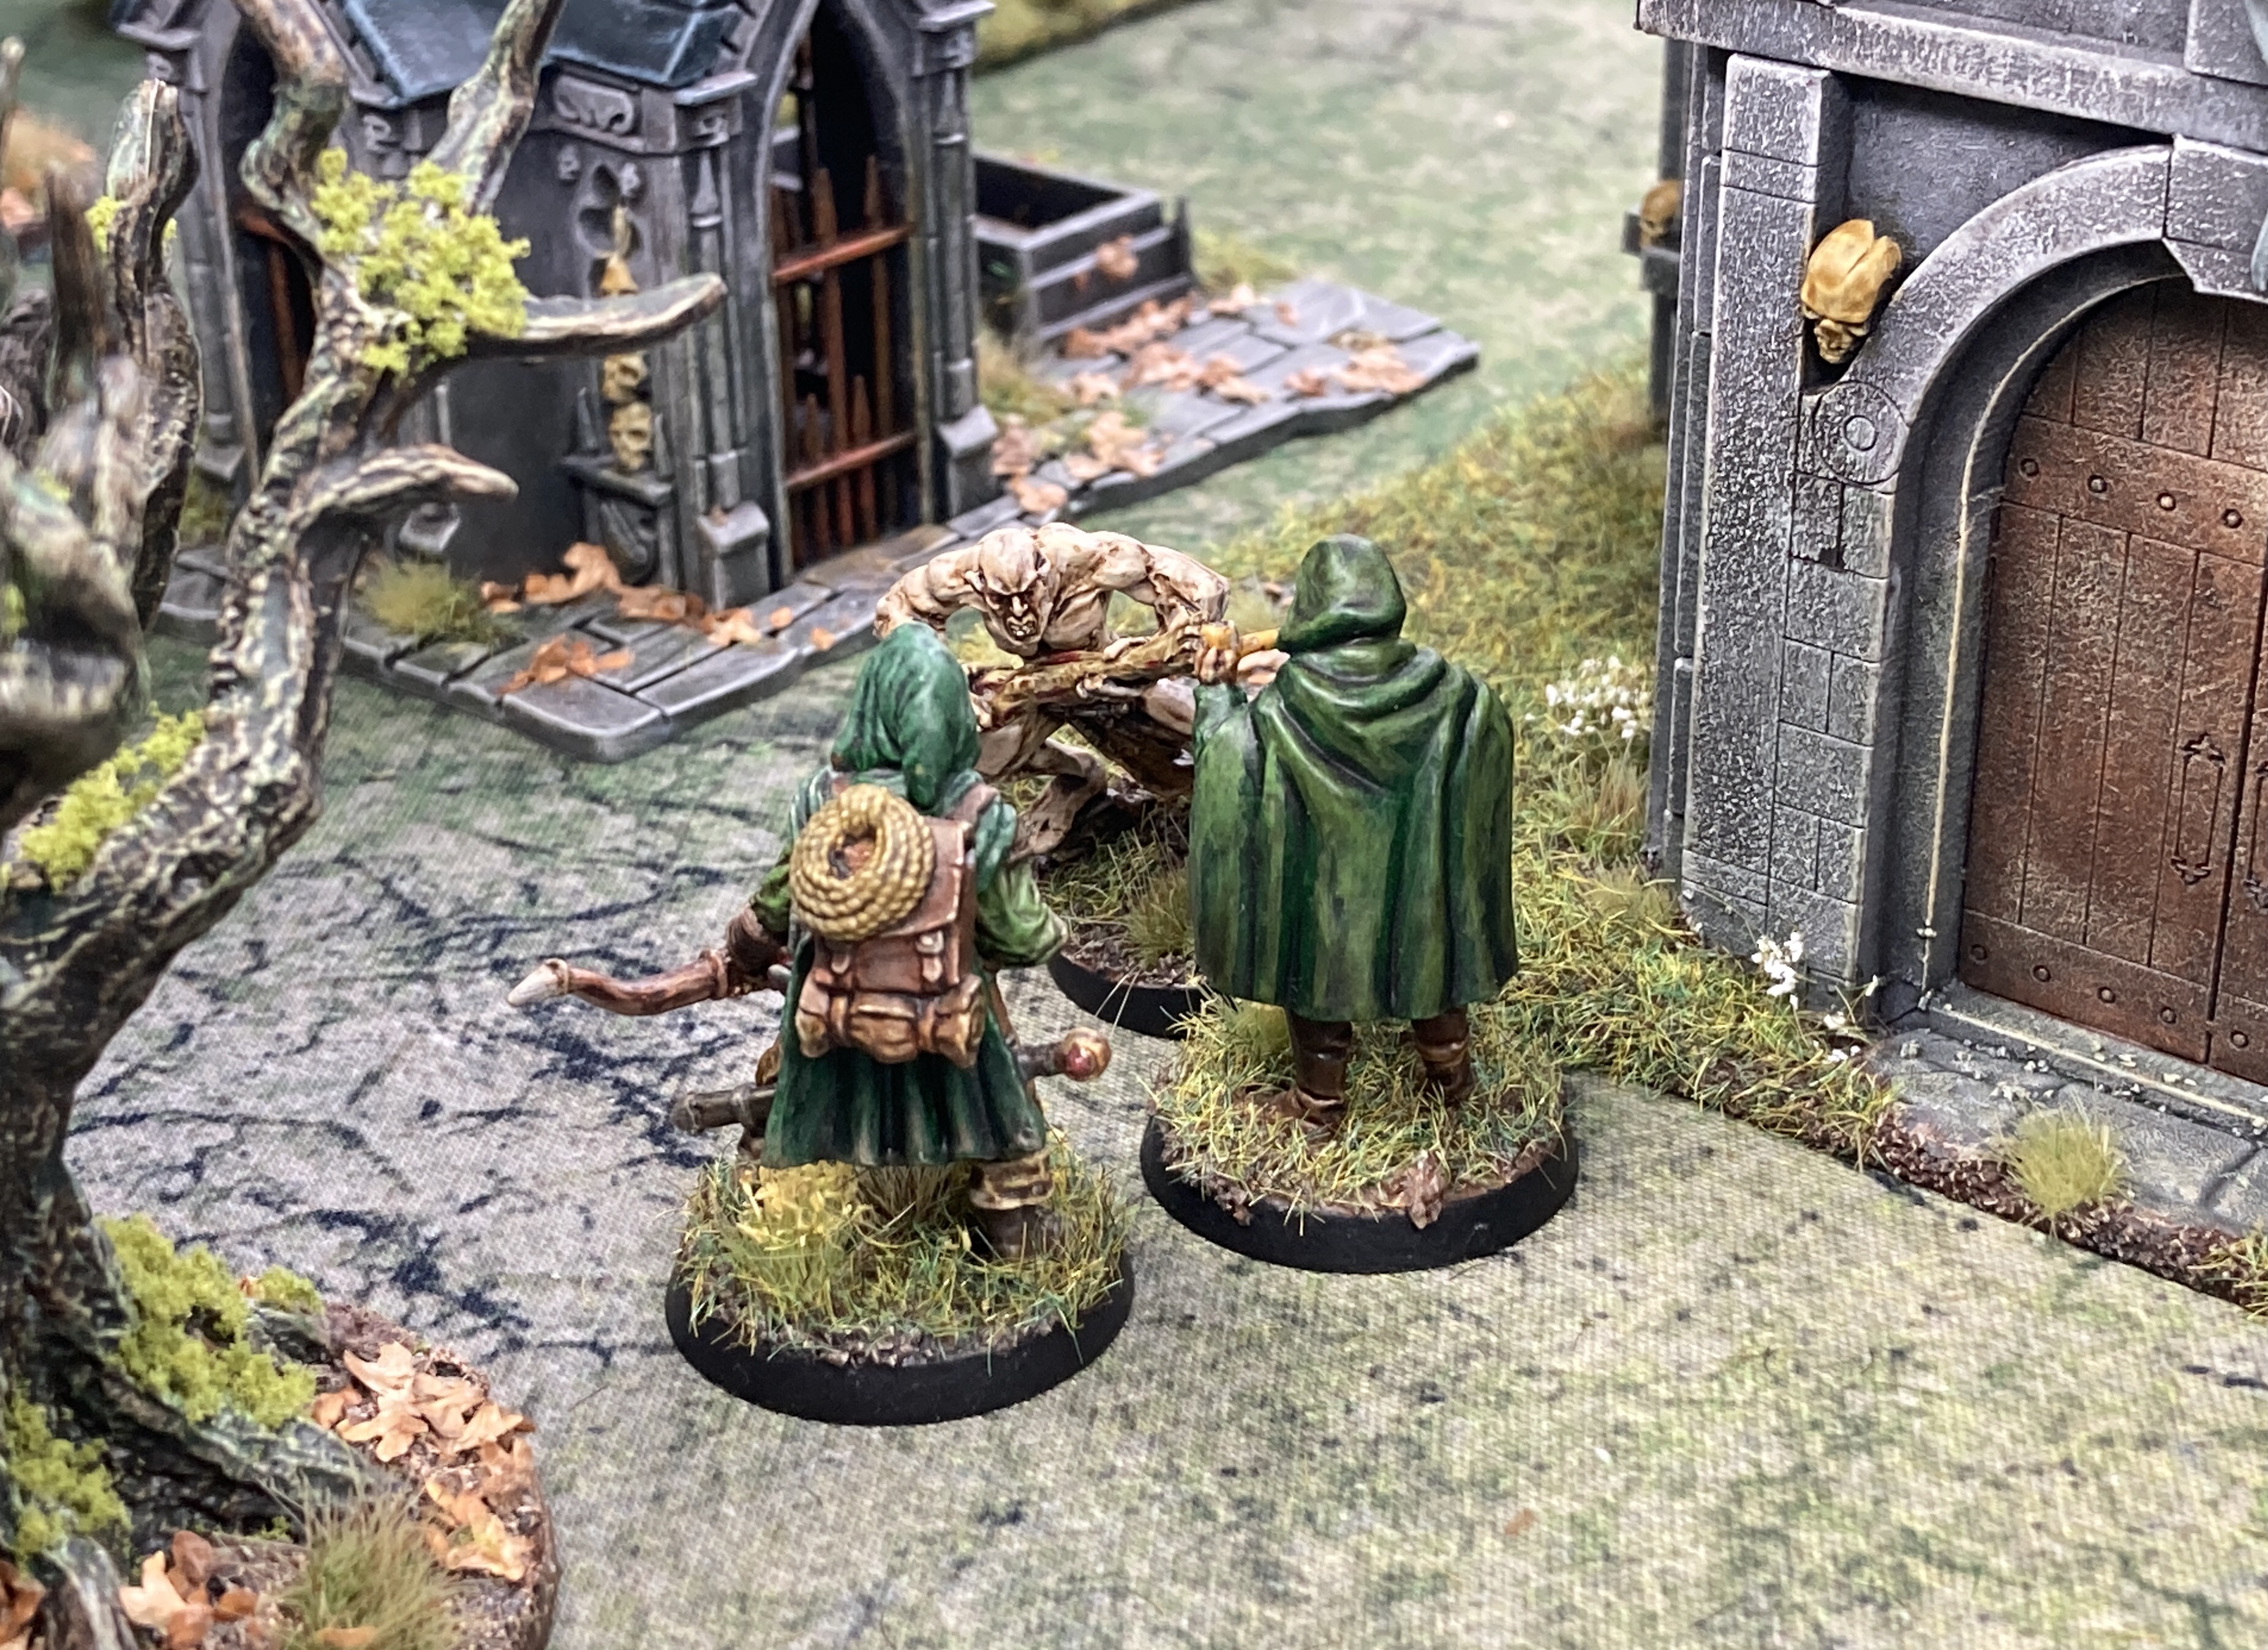
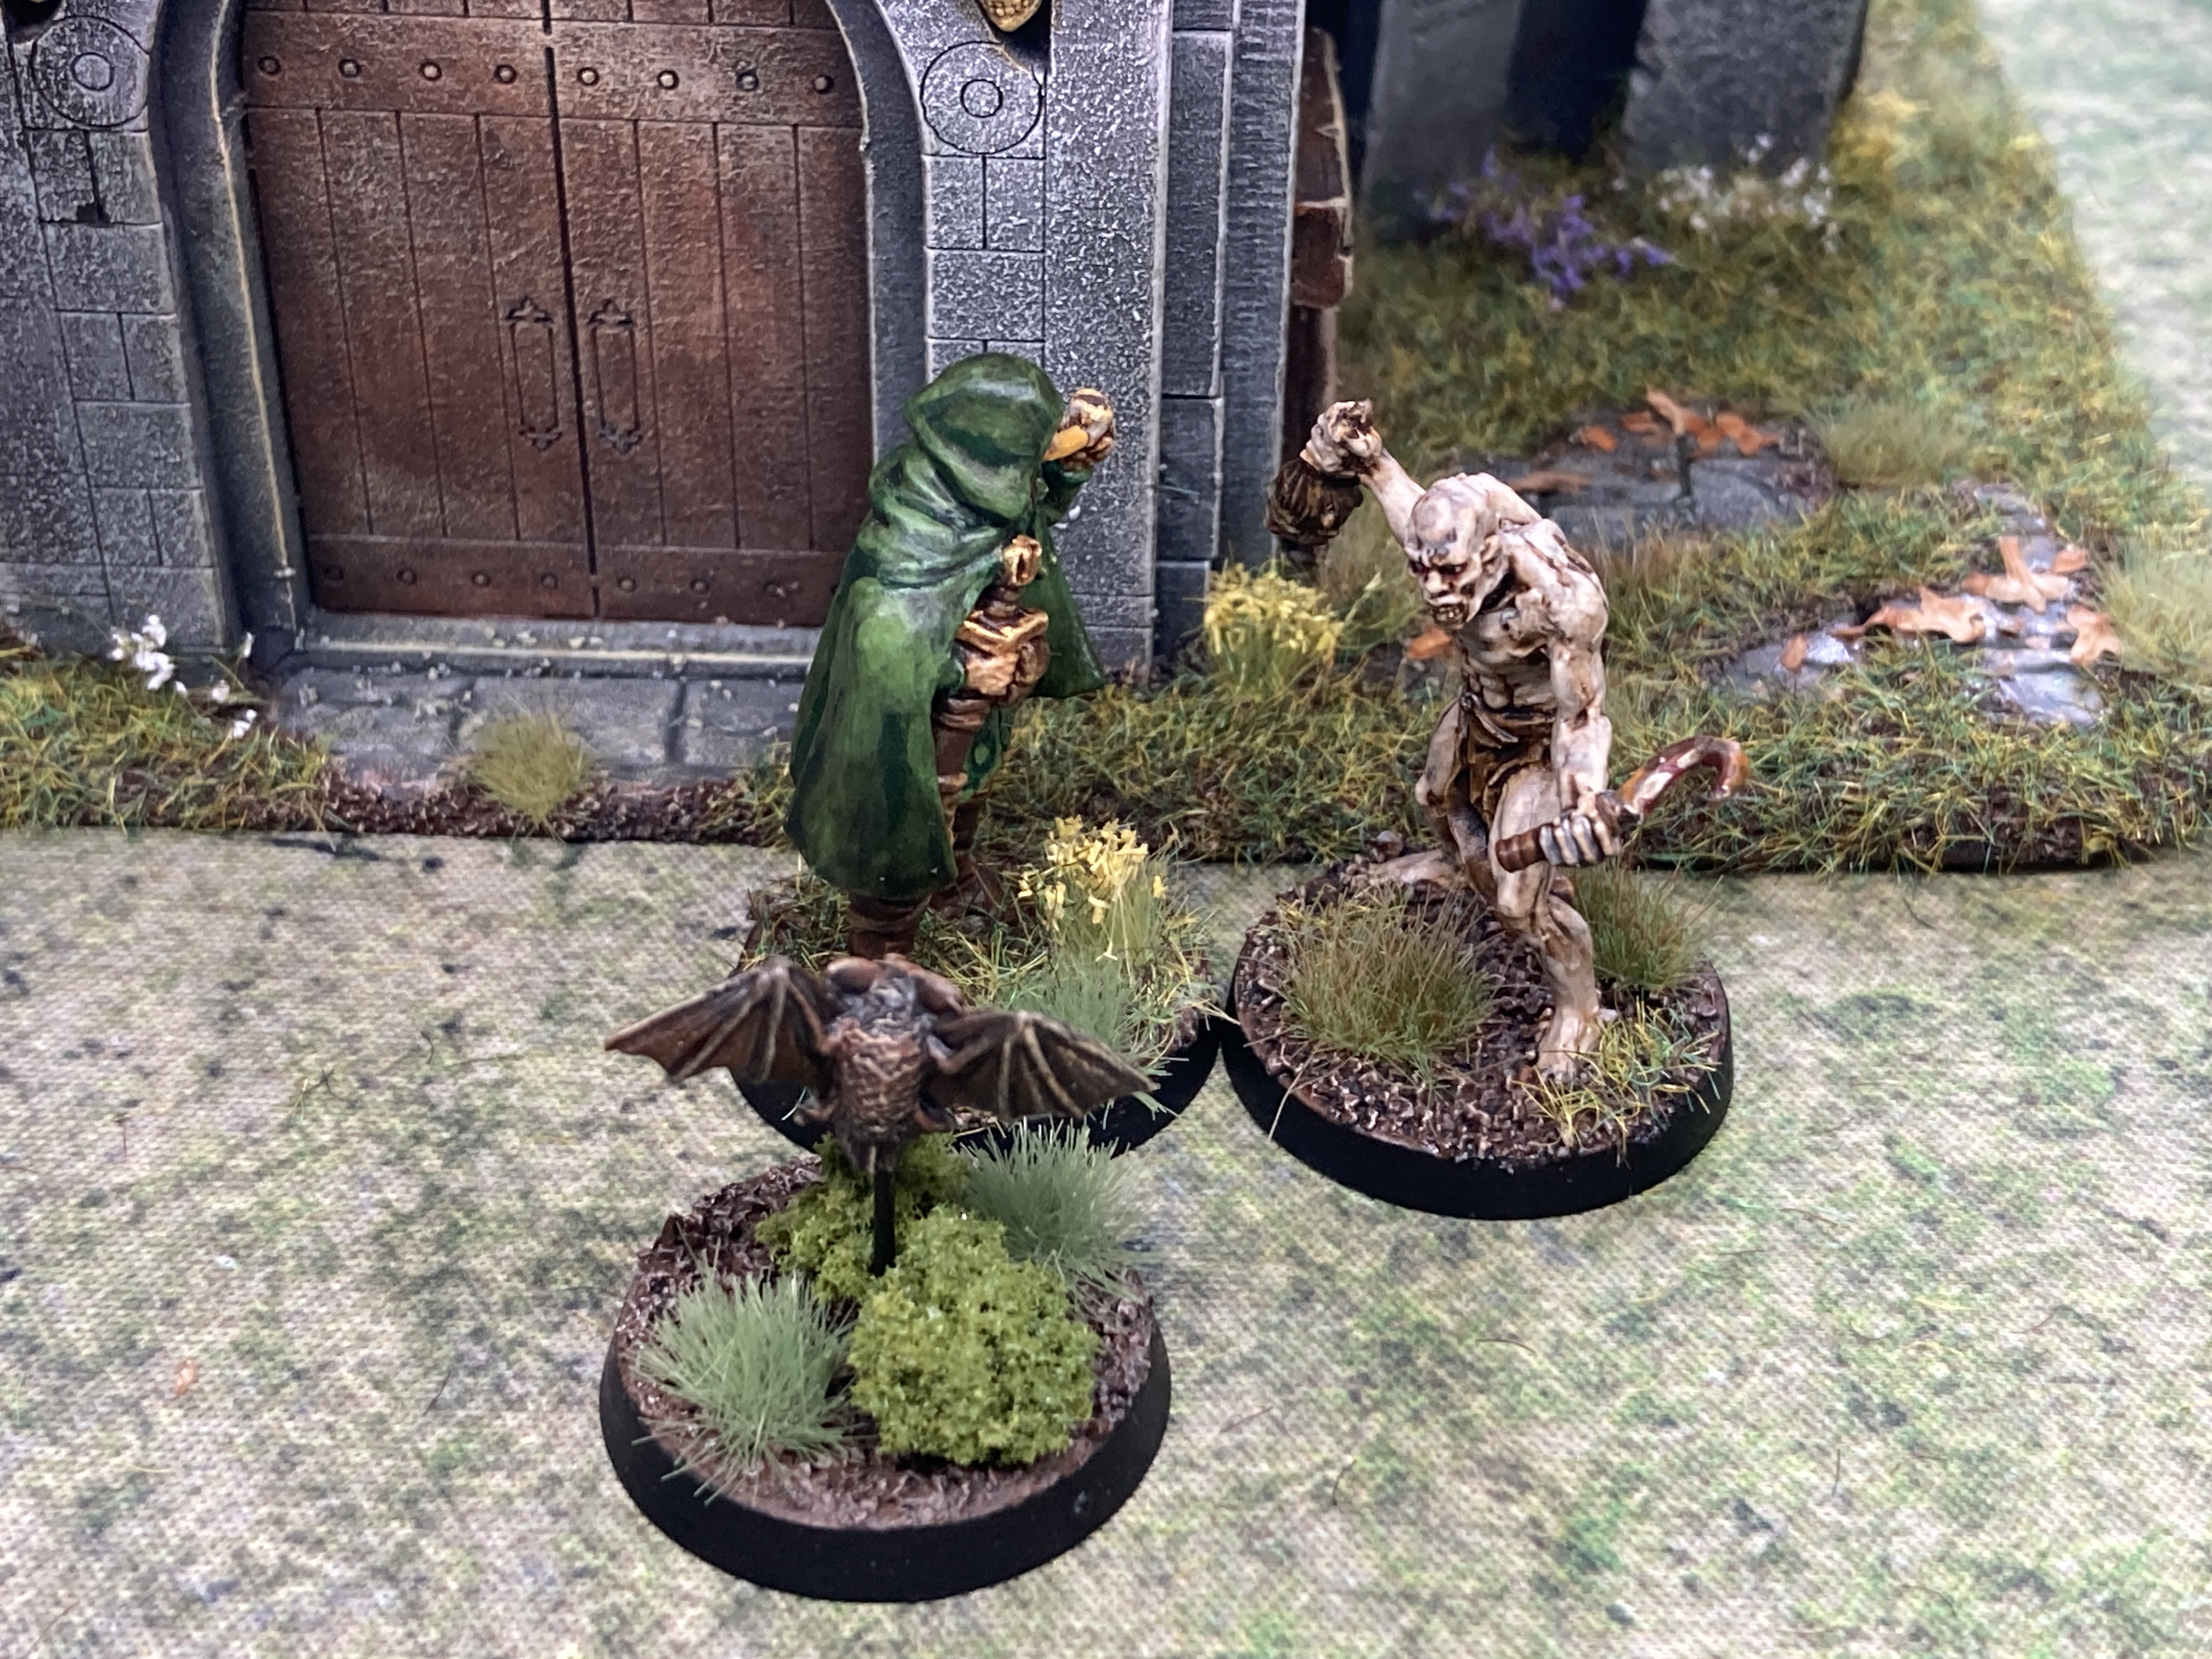
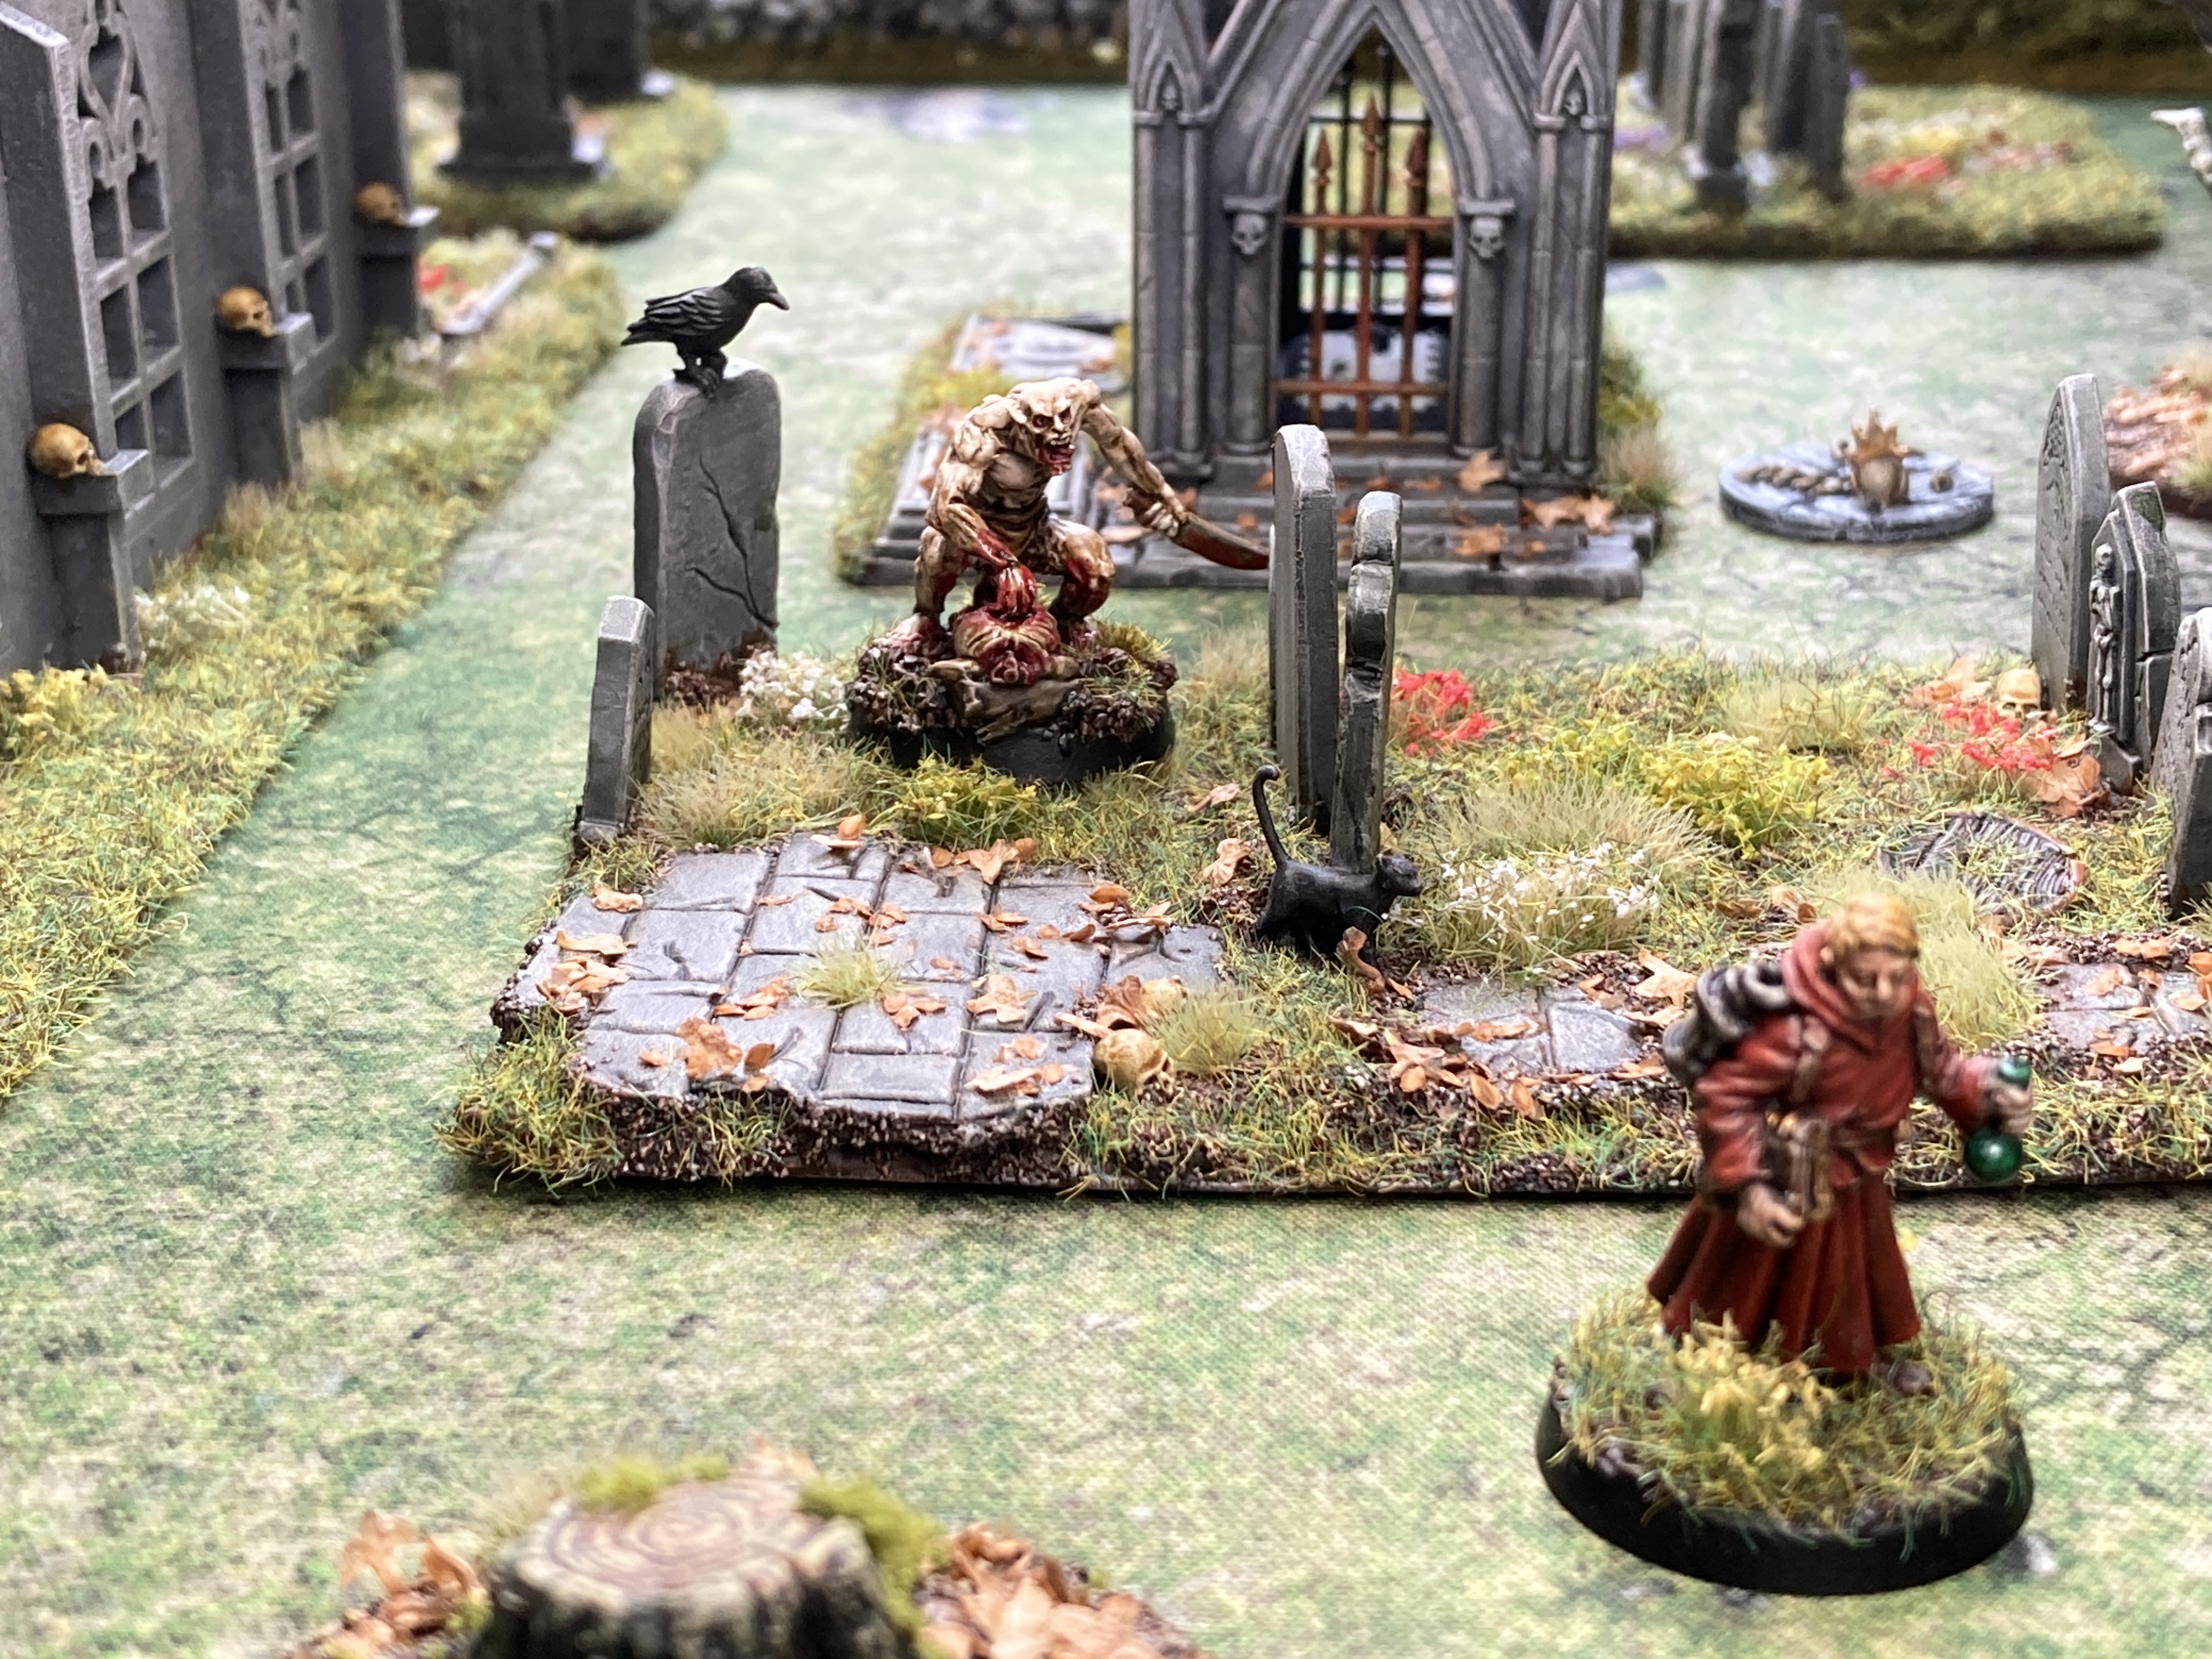
Meanwhile Trysten, Halleck and Merlin killed their ghoul, but another ghoul jumped Merlin and took him out. Then a few blood bats flew in and attacked Halleck and Merlin.

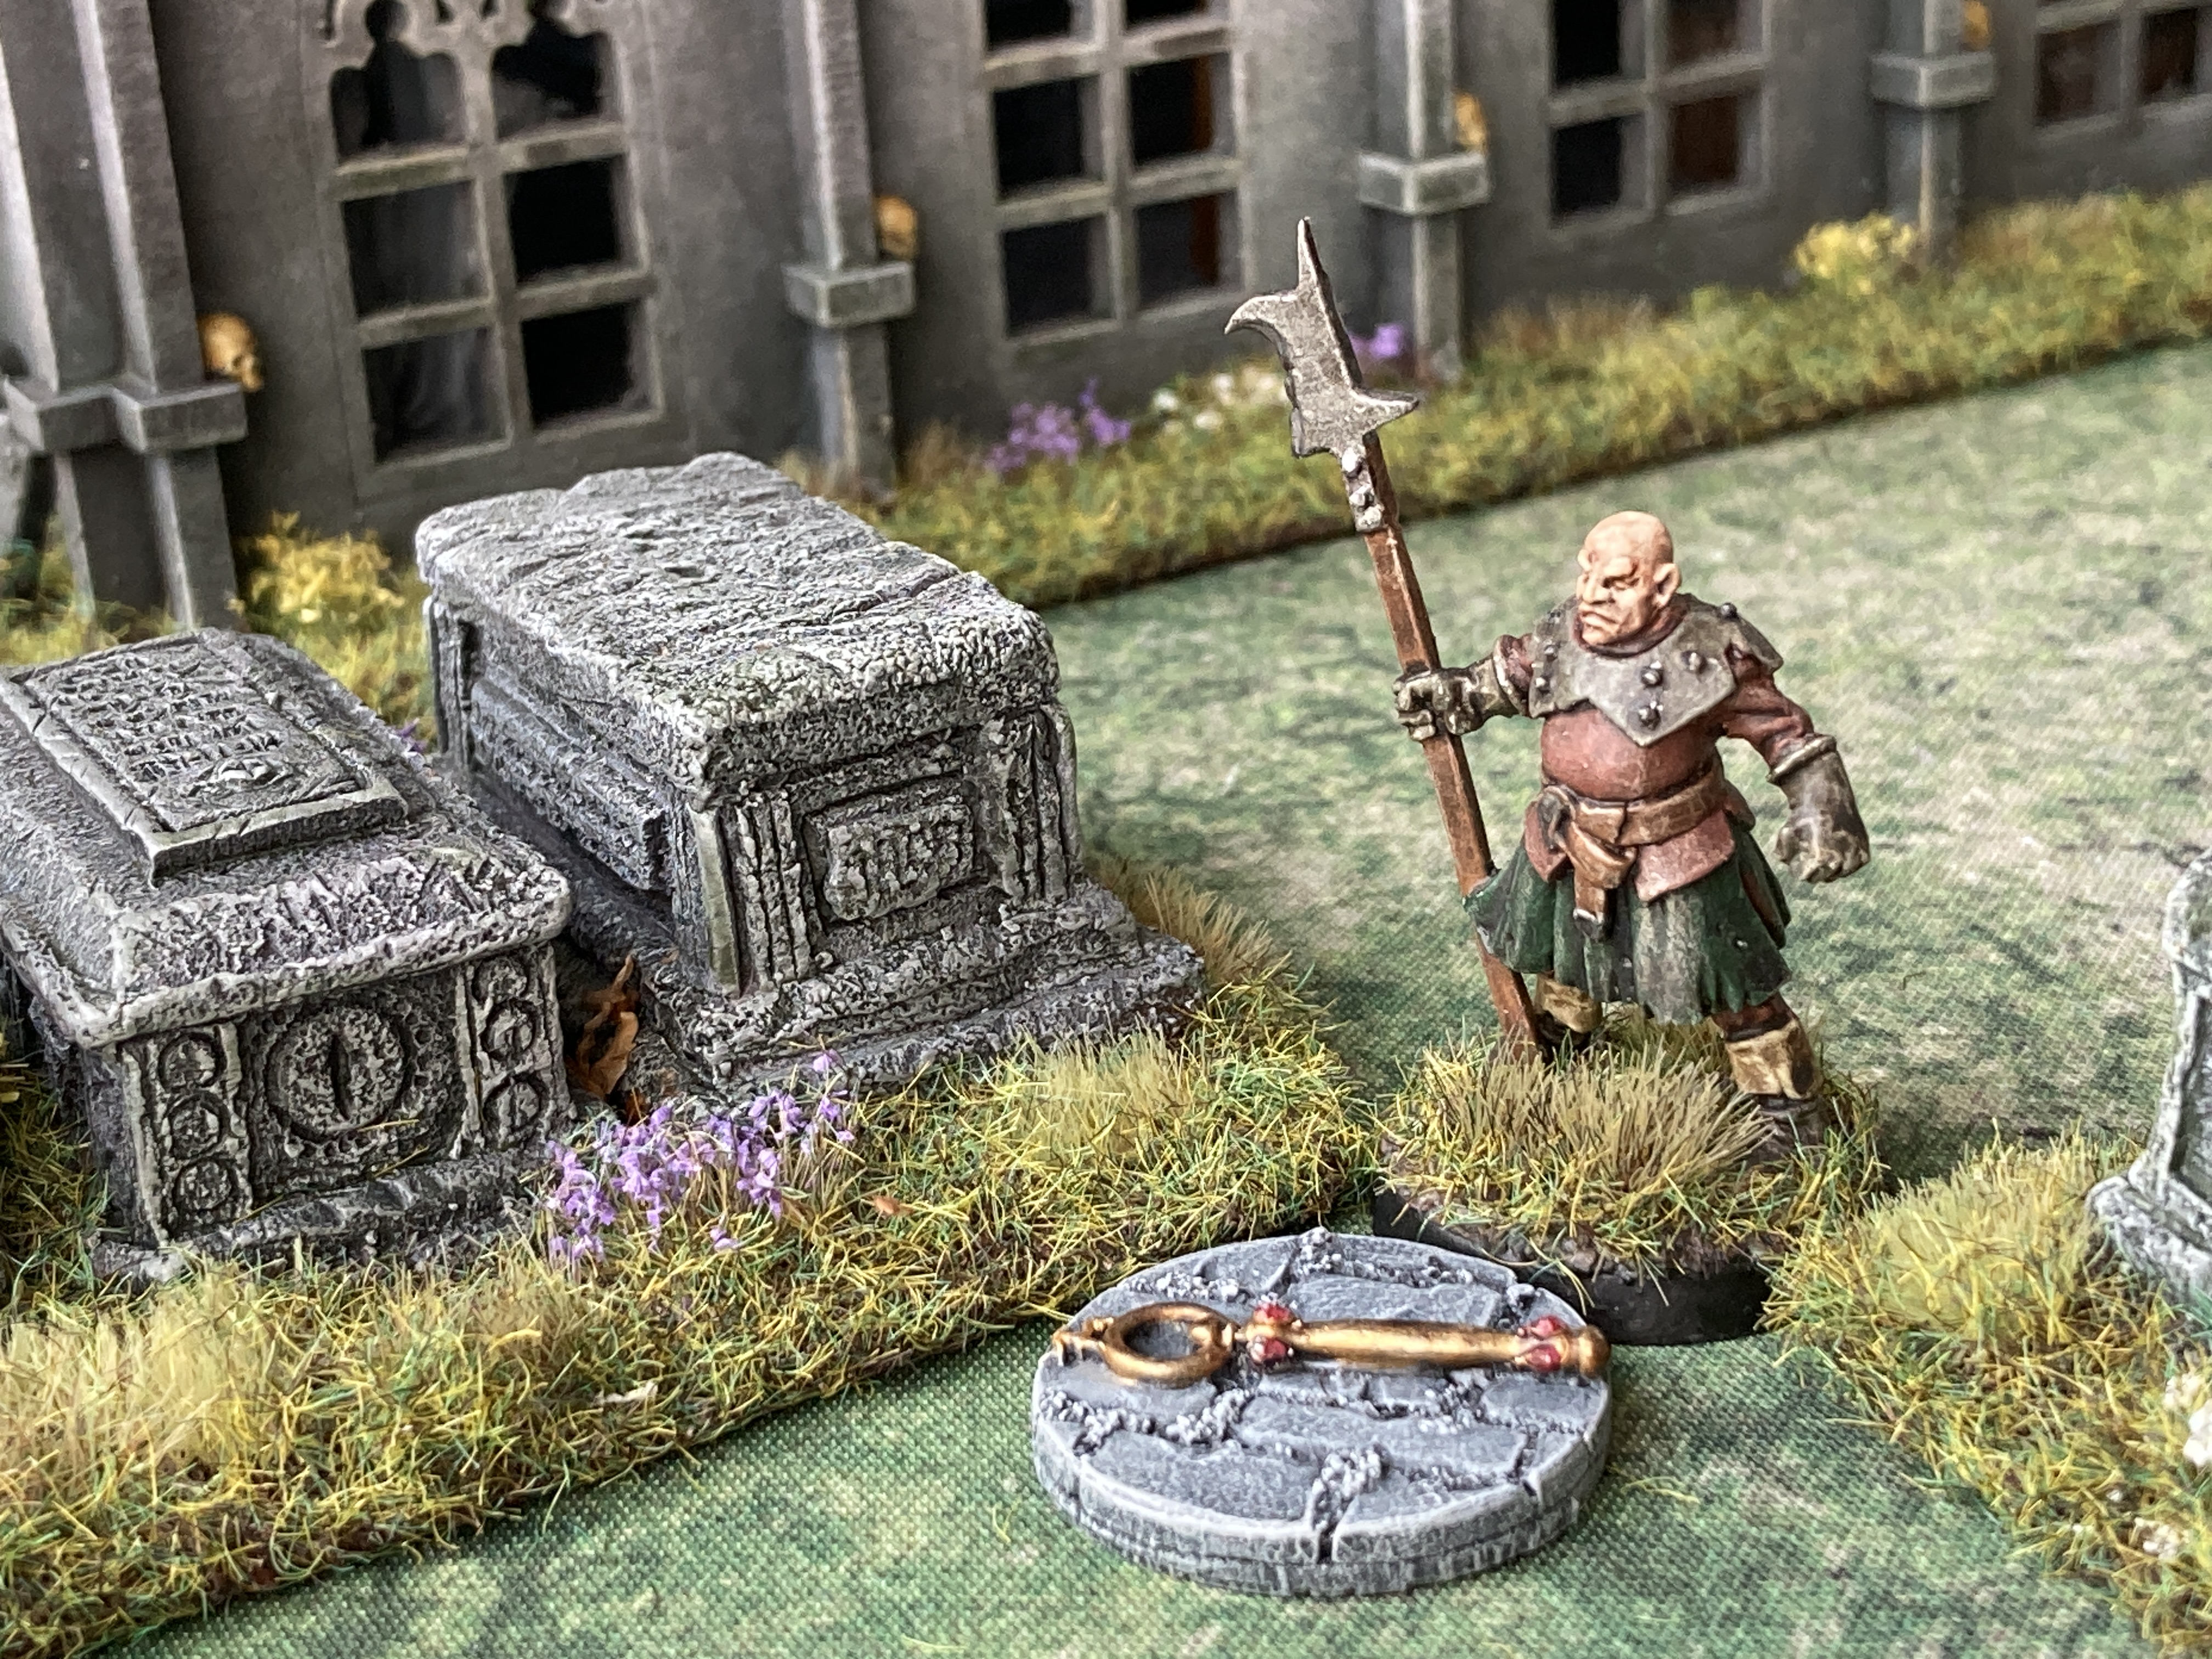
Time was ticking and night was fast approaching so while Bered the ranger and Trotter the tracker (and his pipe) held off the various creatures Halleck and Trysten made a dash further into the cemetery to search for the key to the chapel.
Halleck found the key almost right away while Trysten’s search around the back of the chapel got interrupted by a ghoul that had found its way in through a hole in a wall.

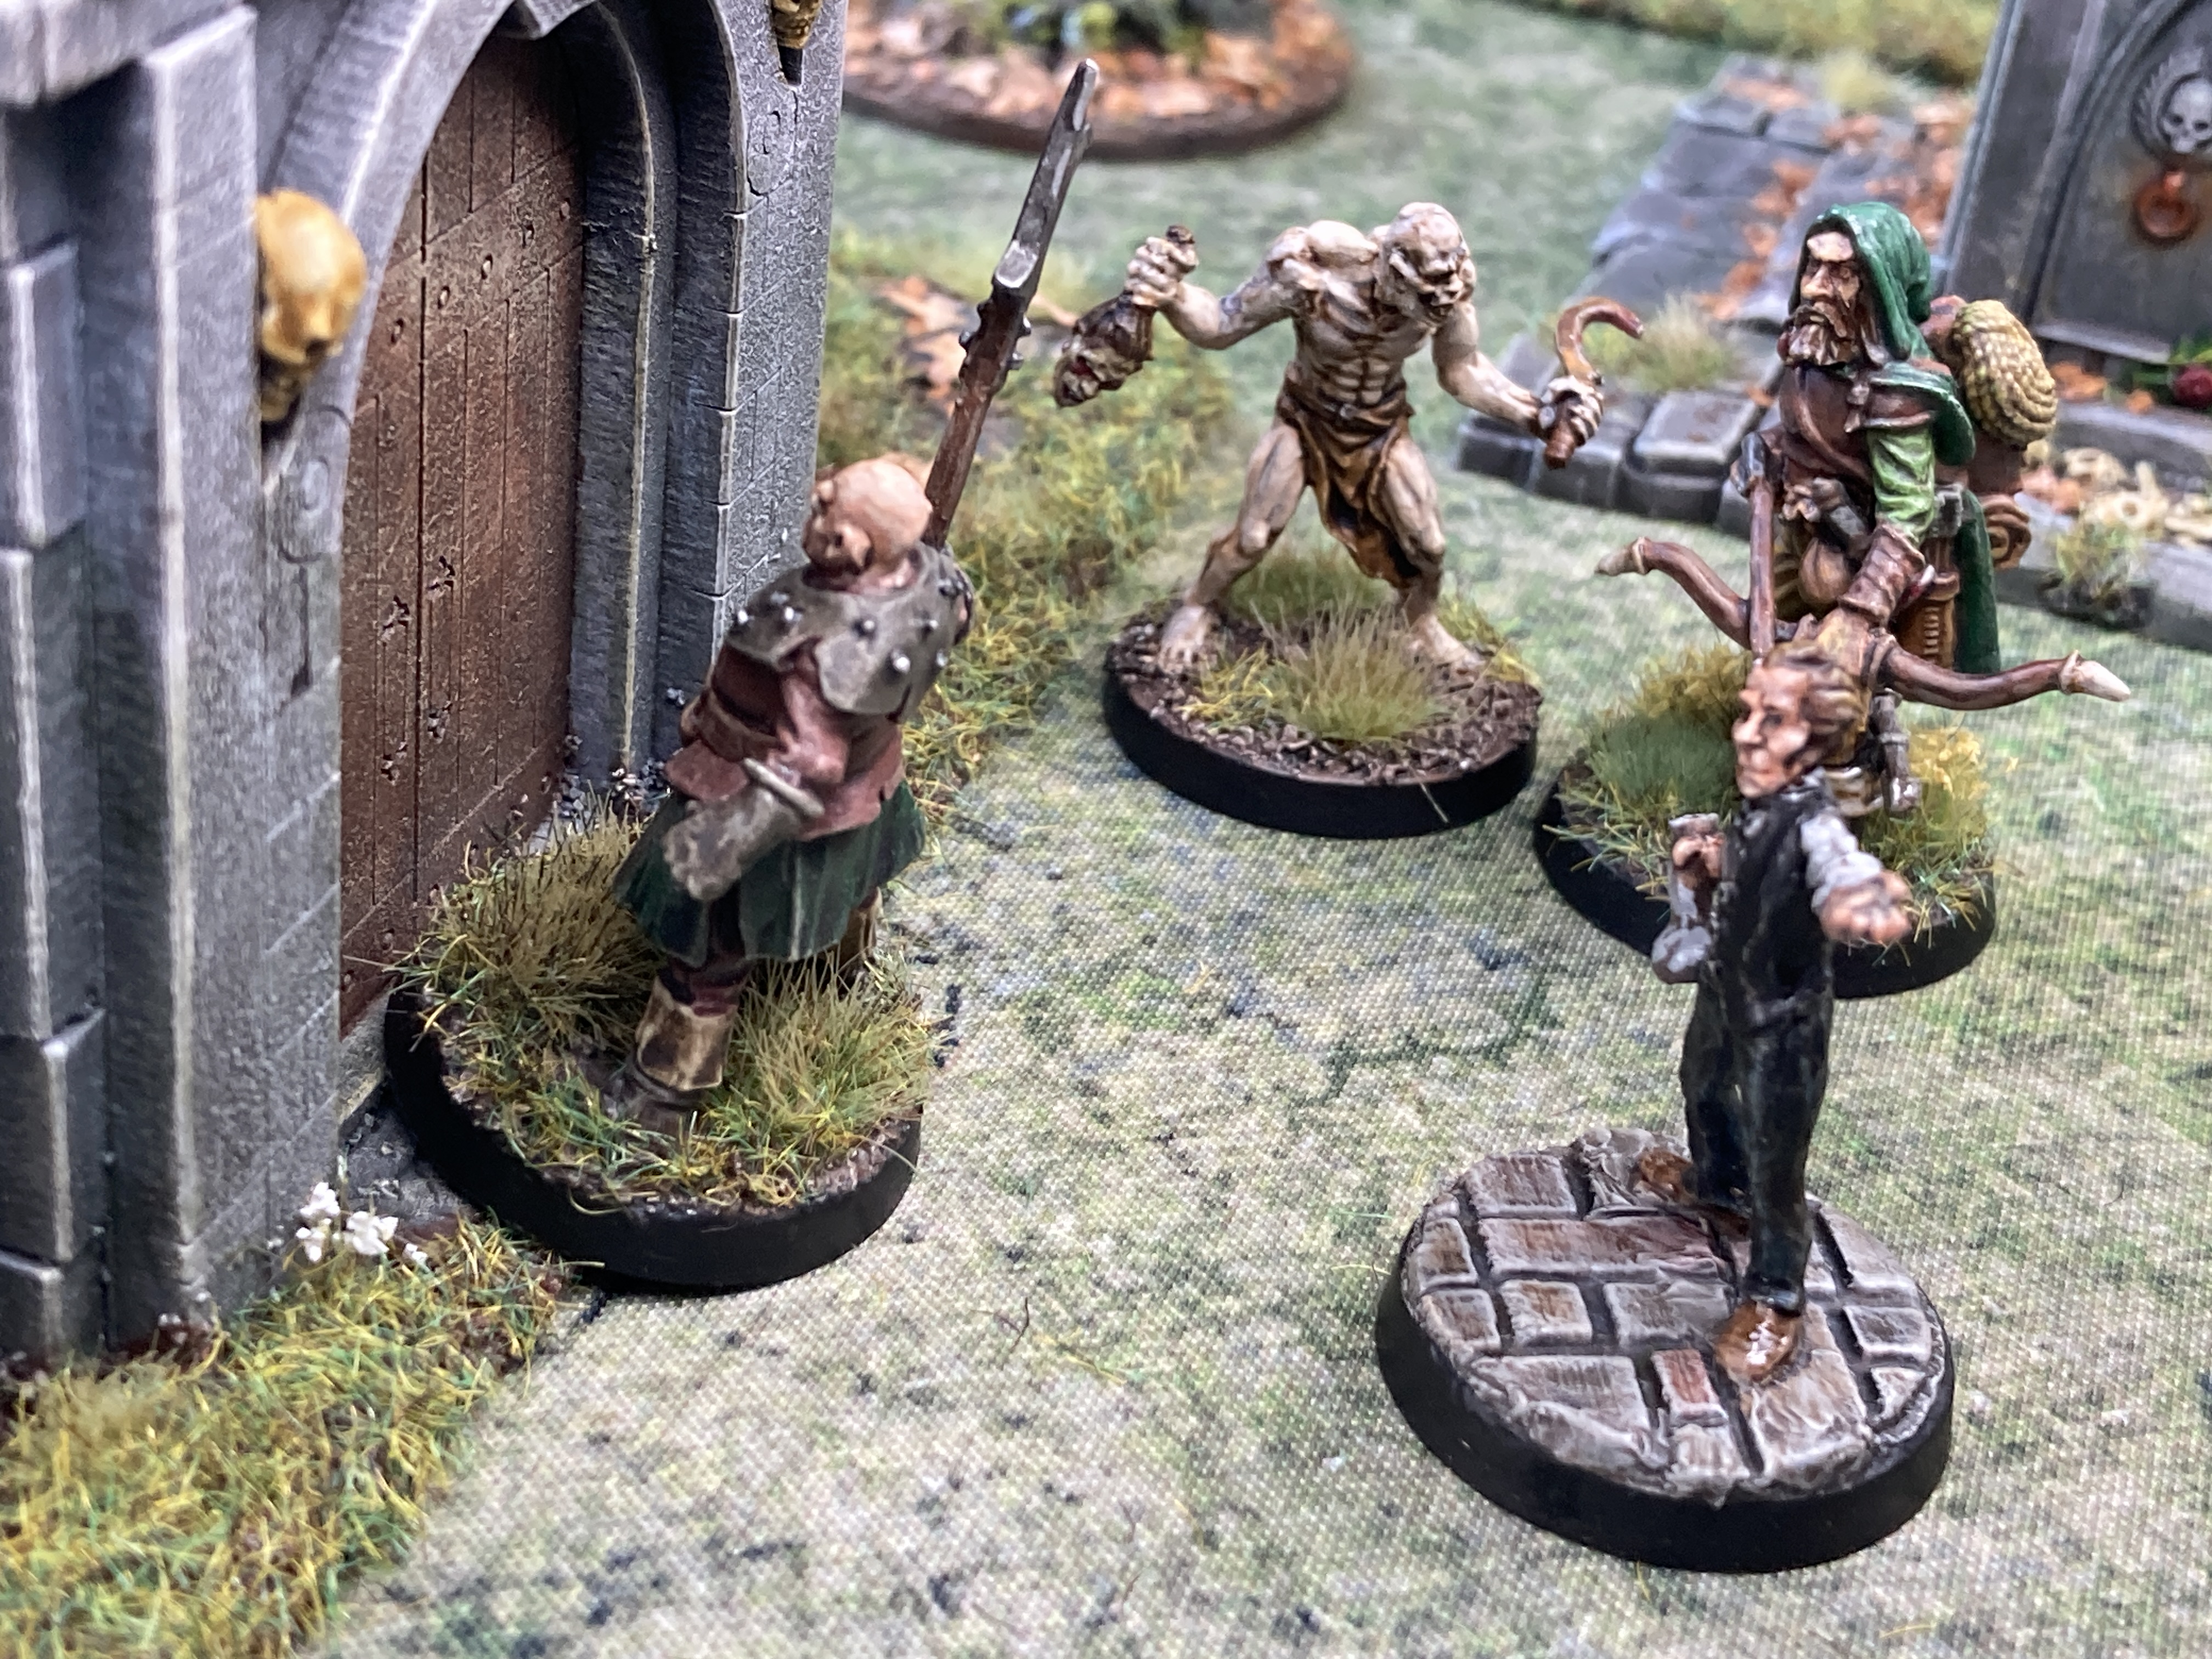
Trotter was the next to go down while Halleck, sweating in his leather armour, hurried back to the chapel door with the key.
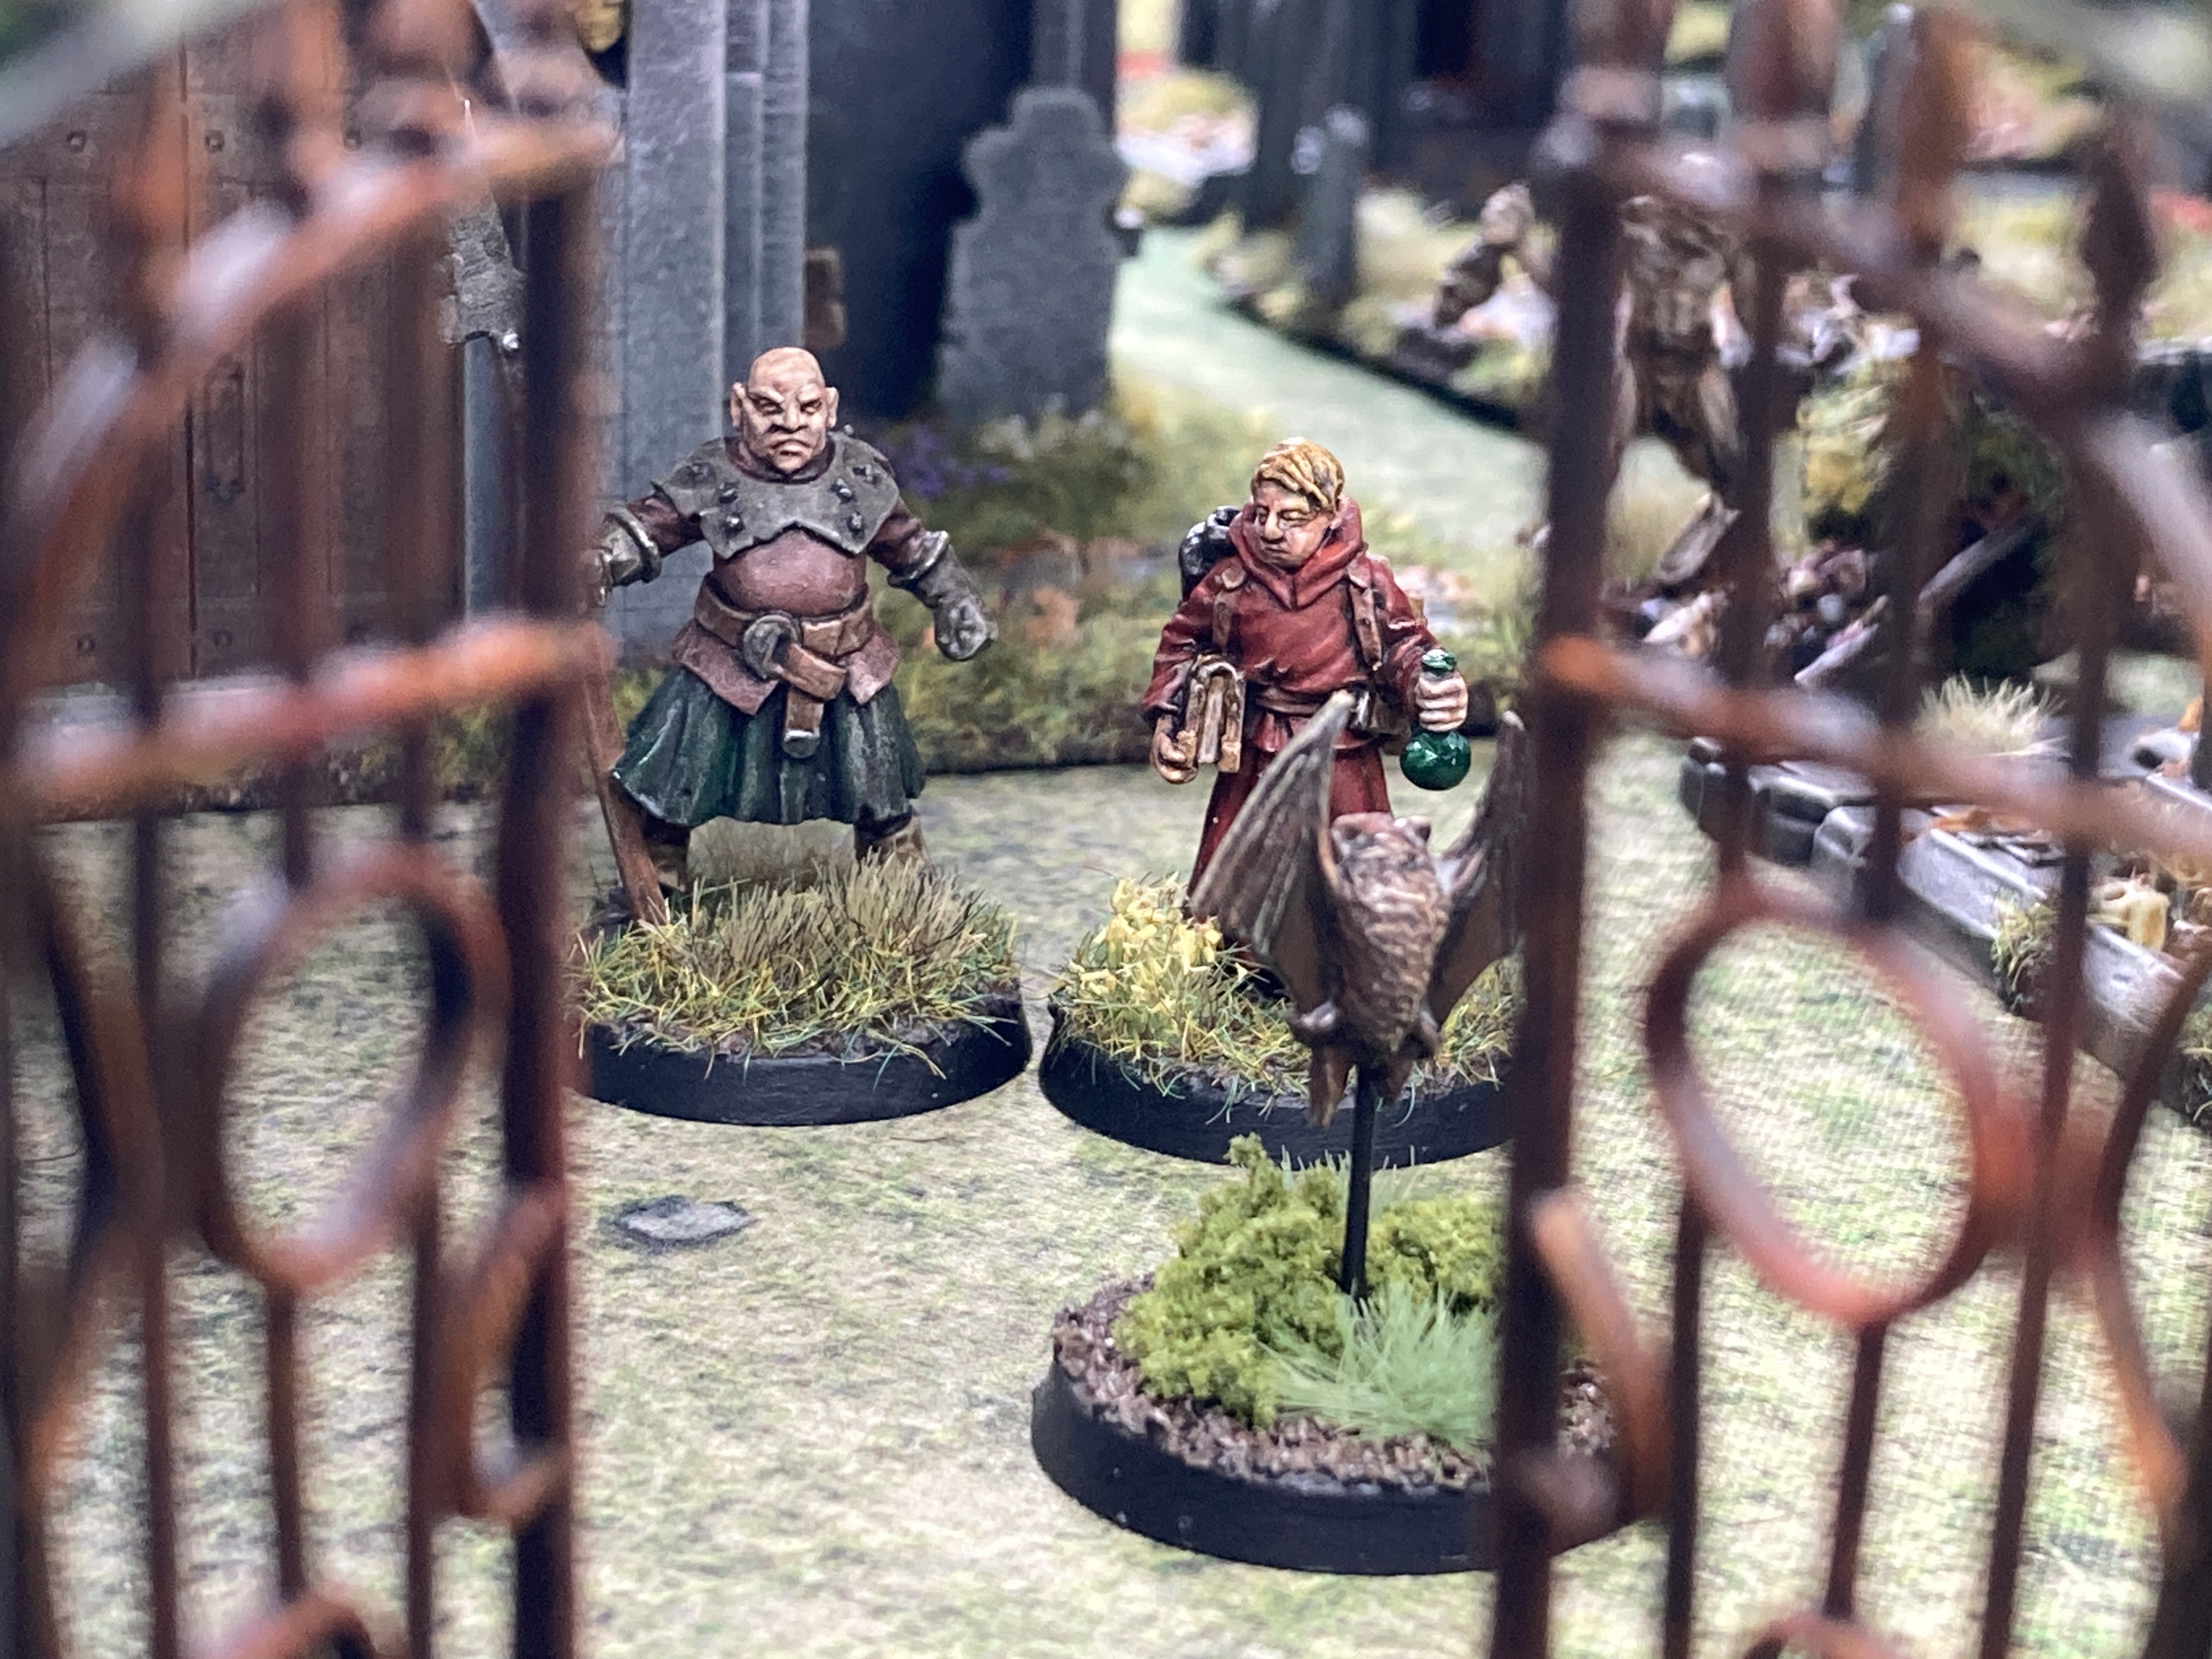
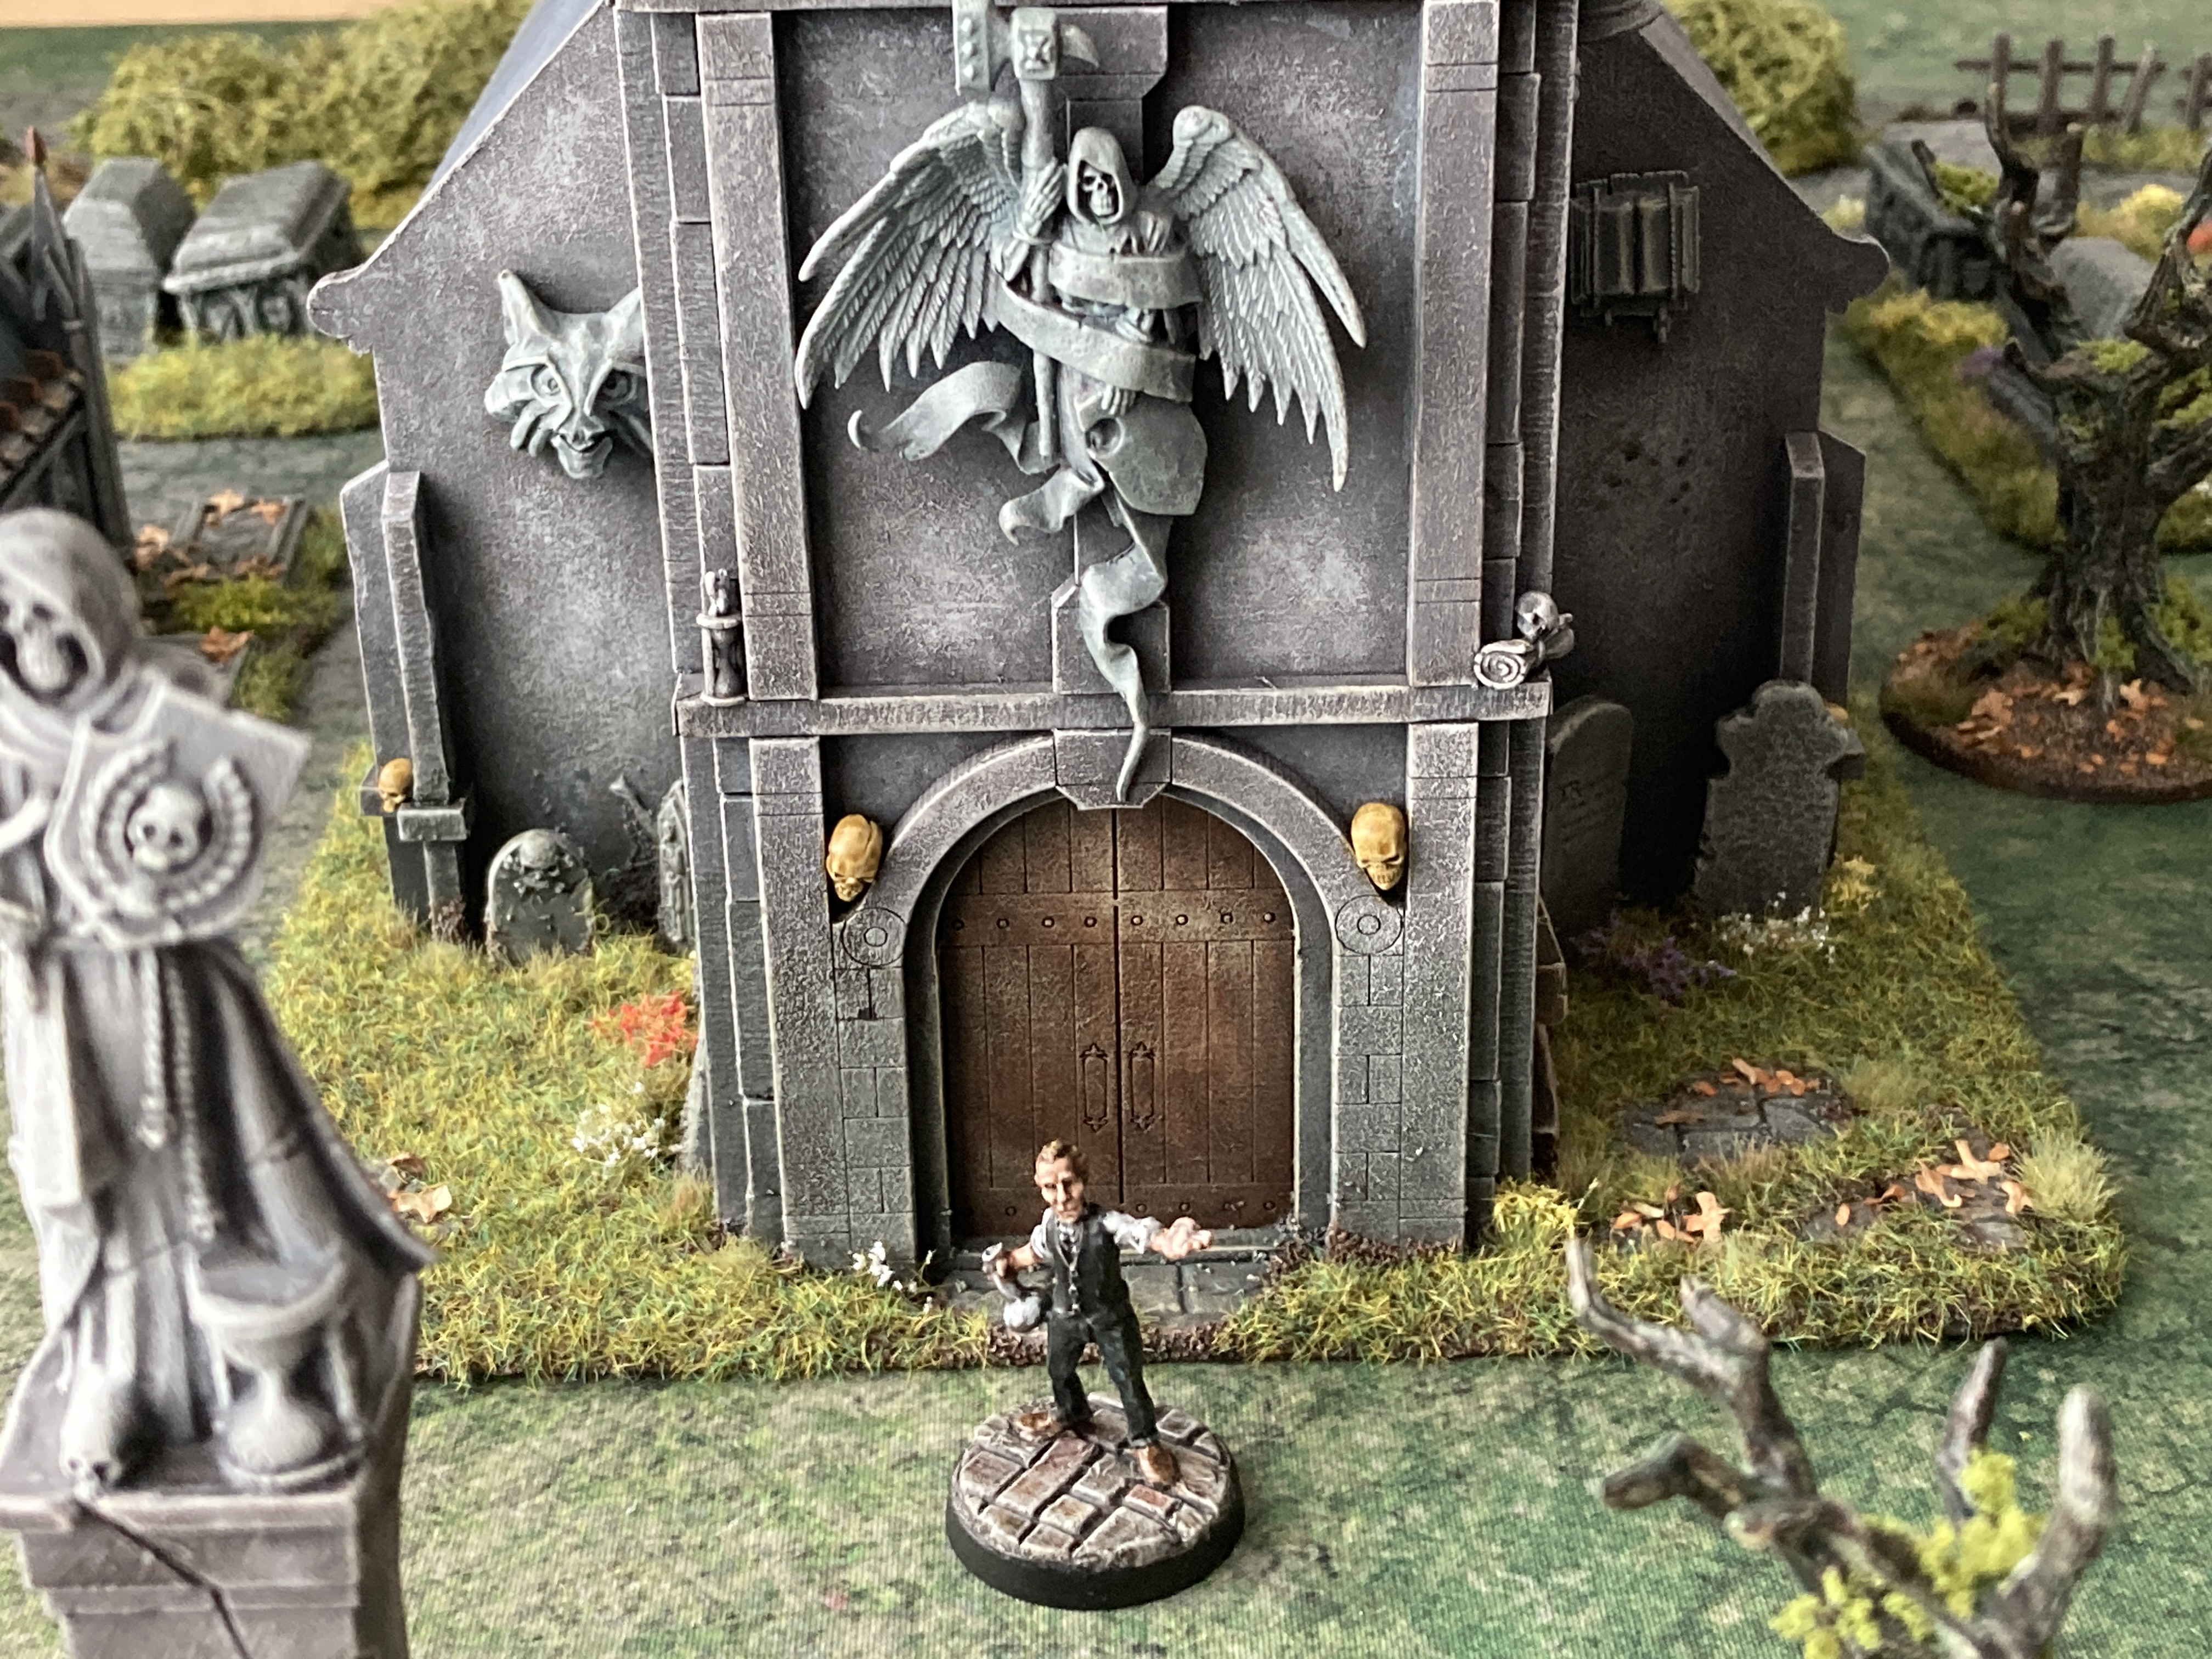
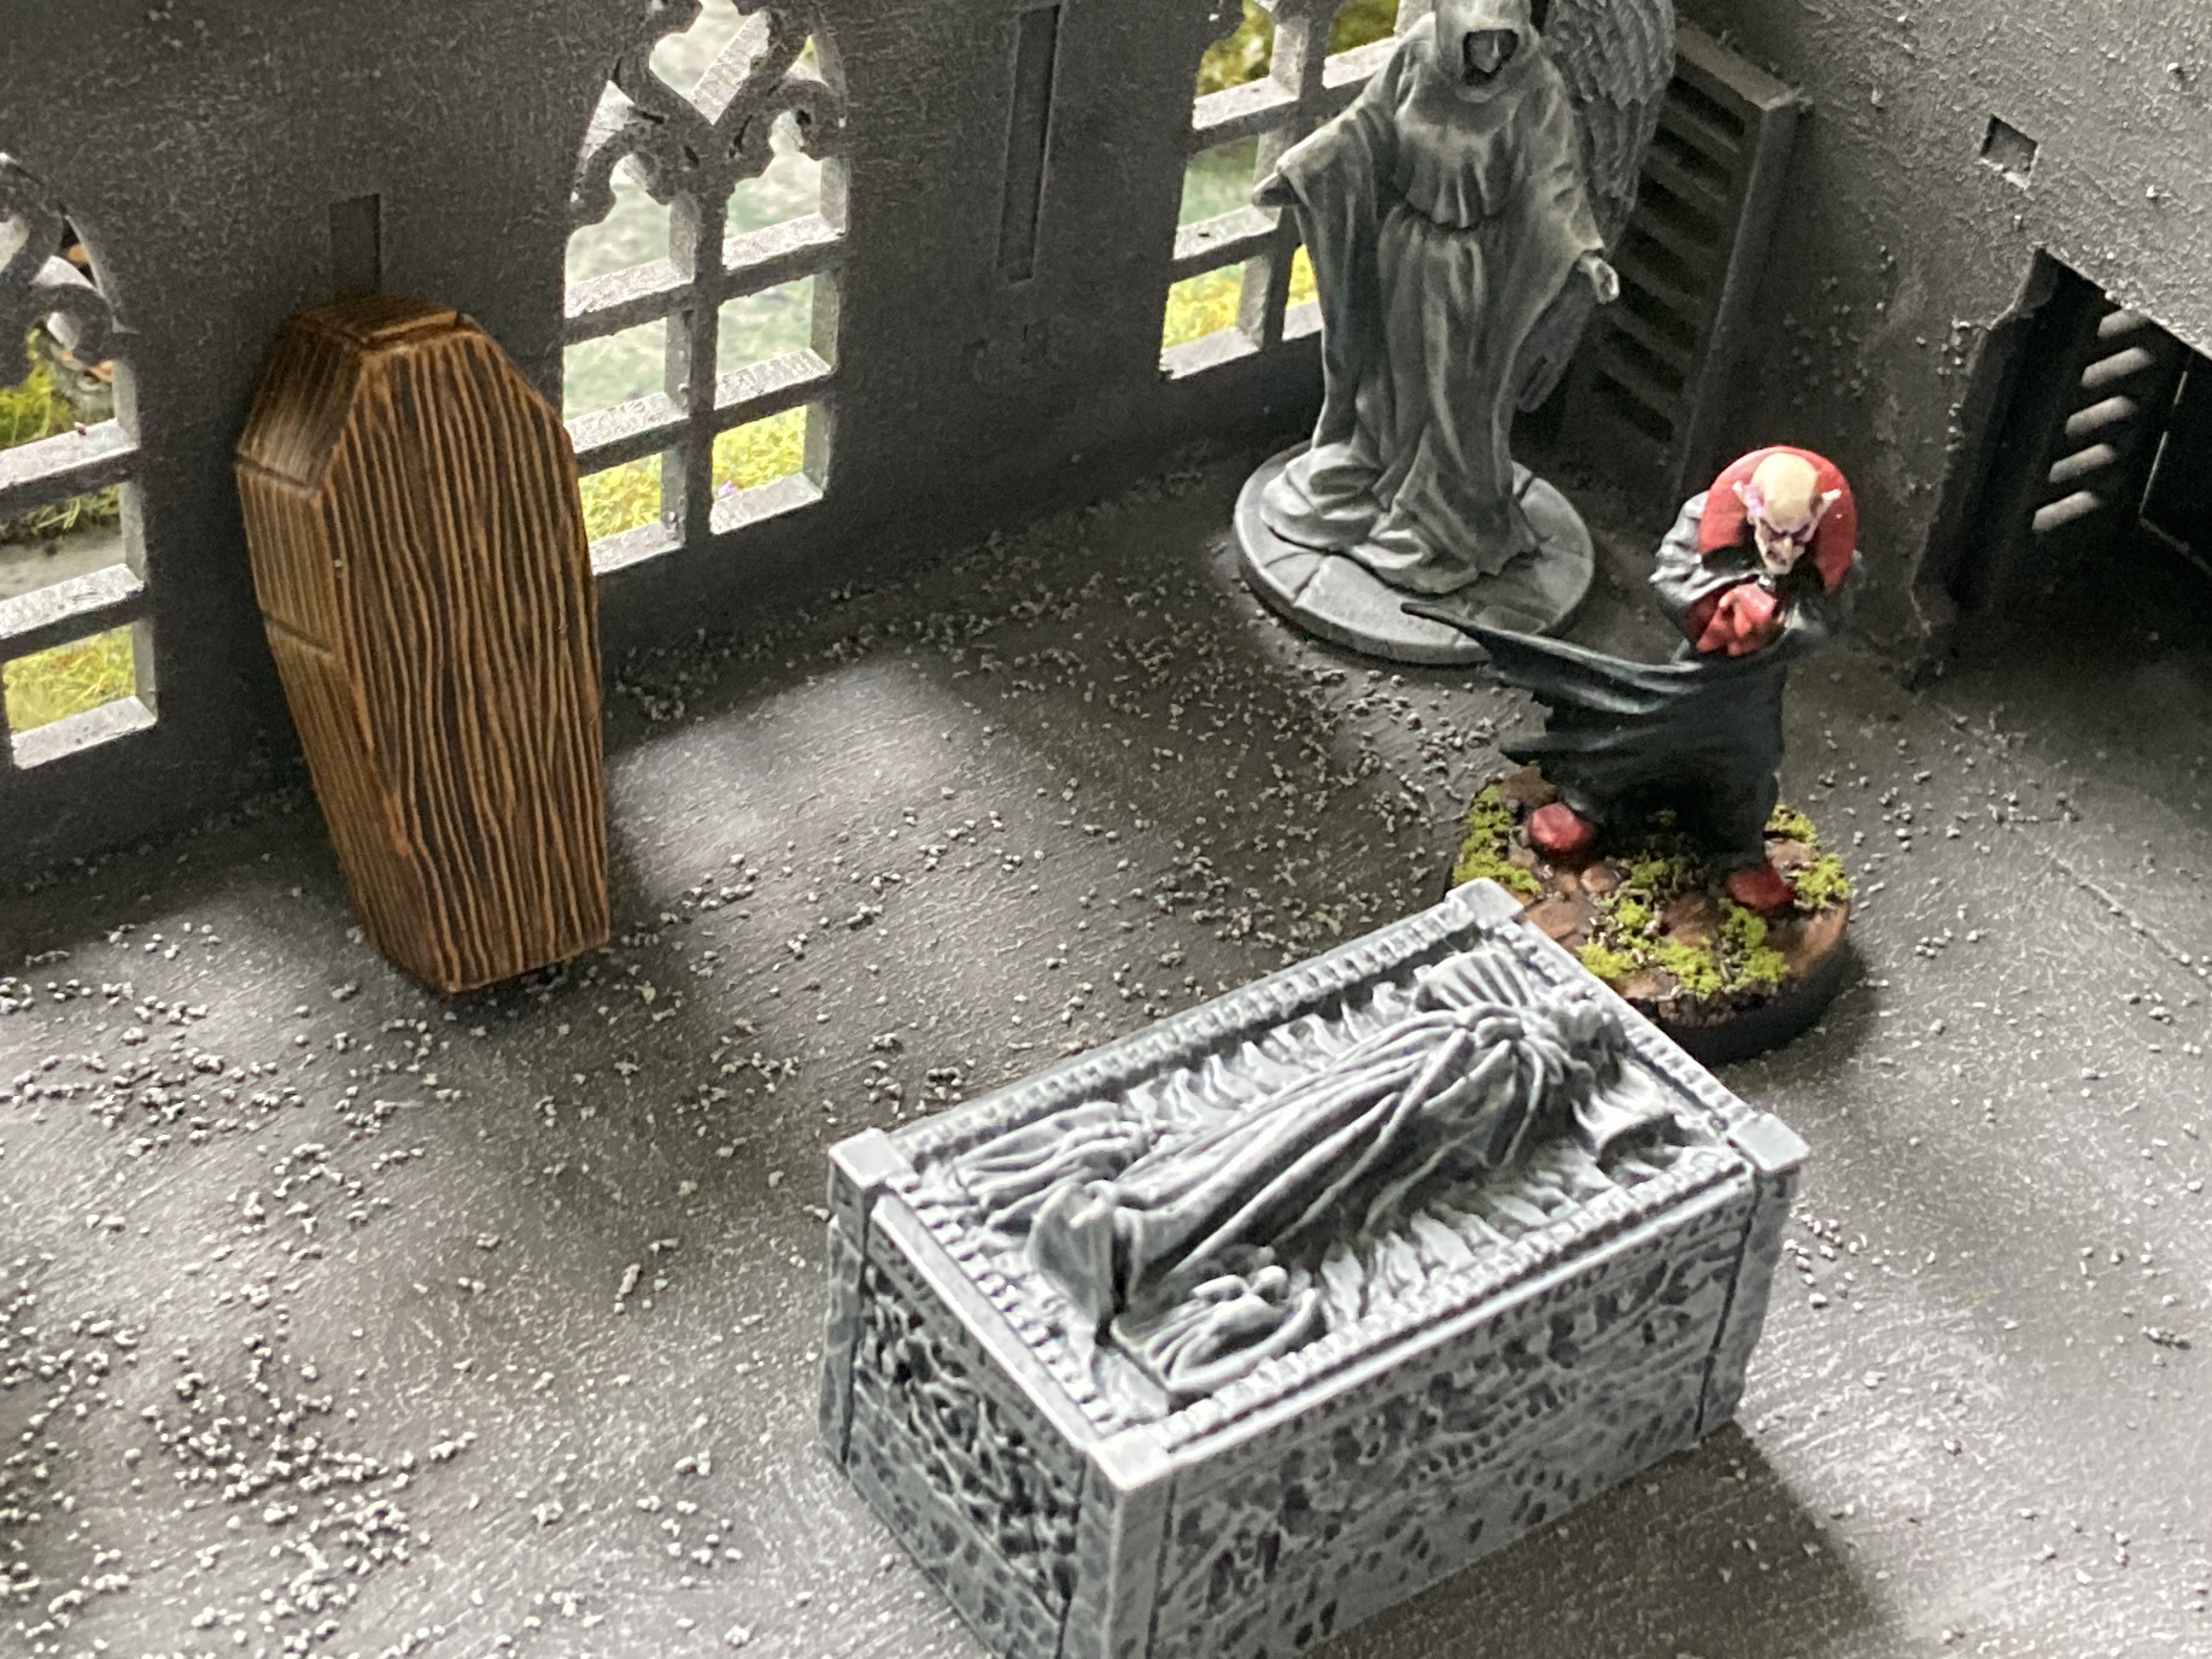
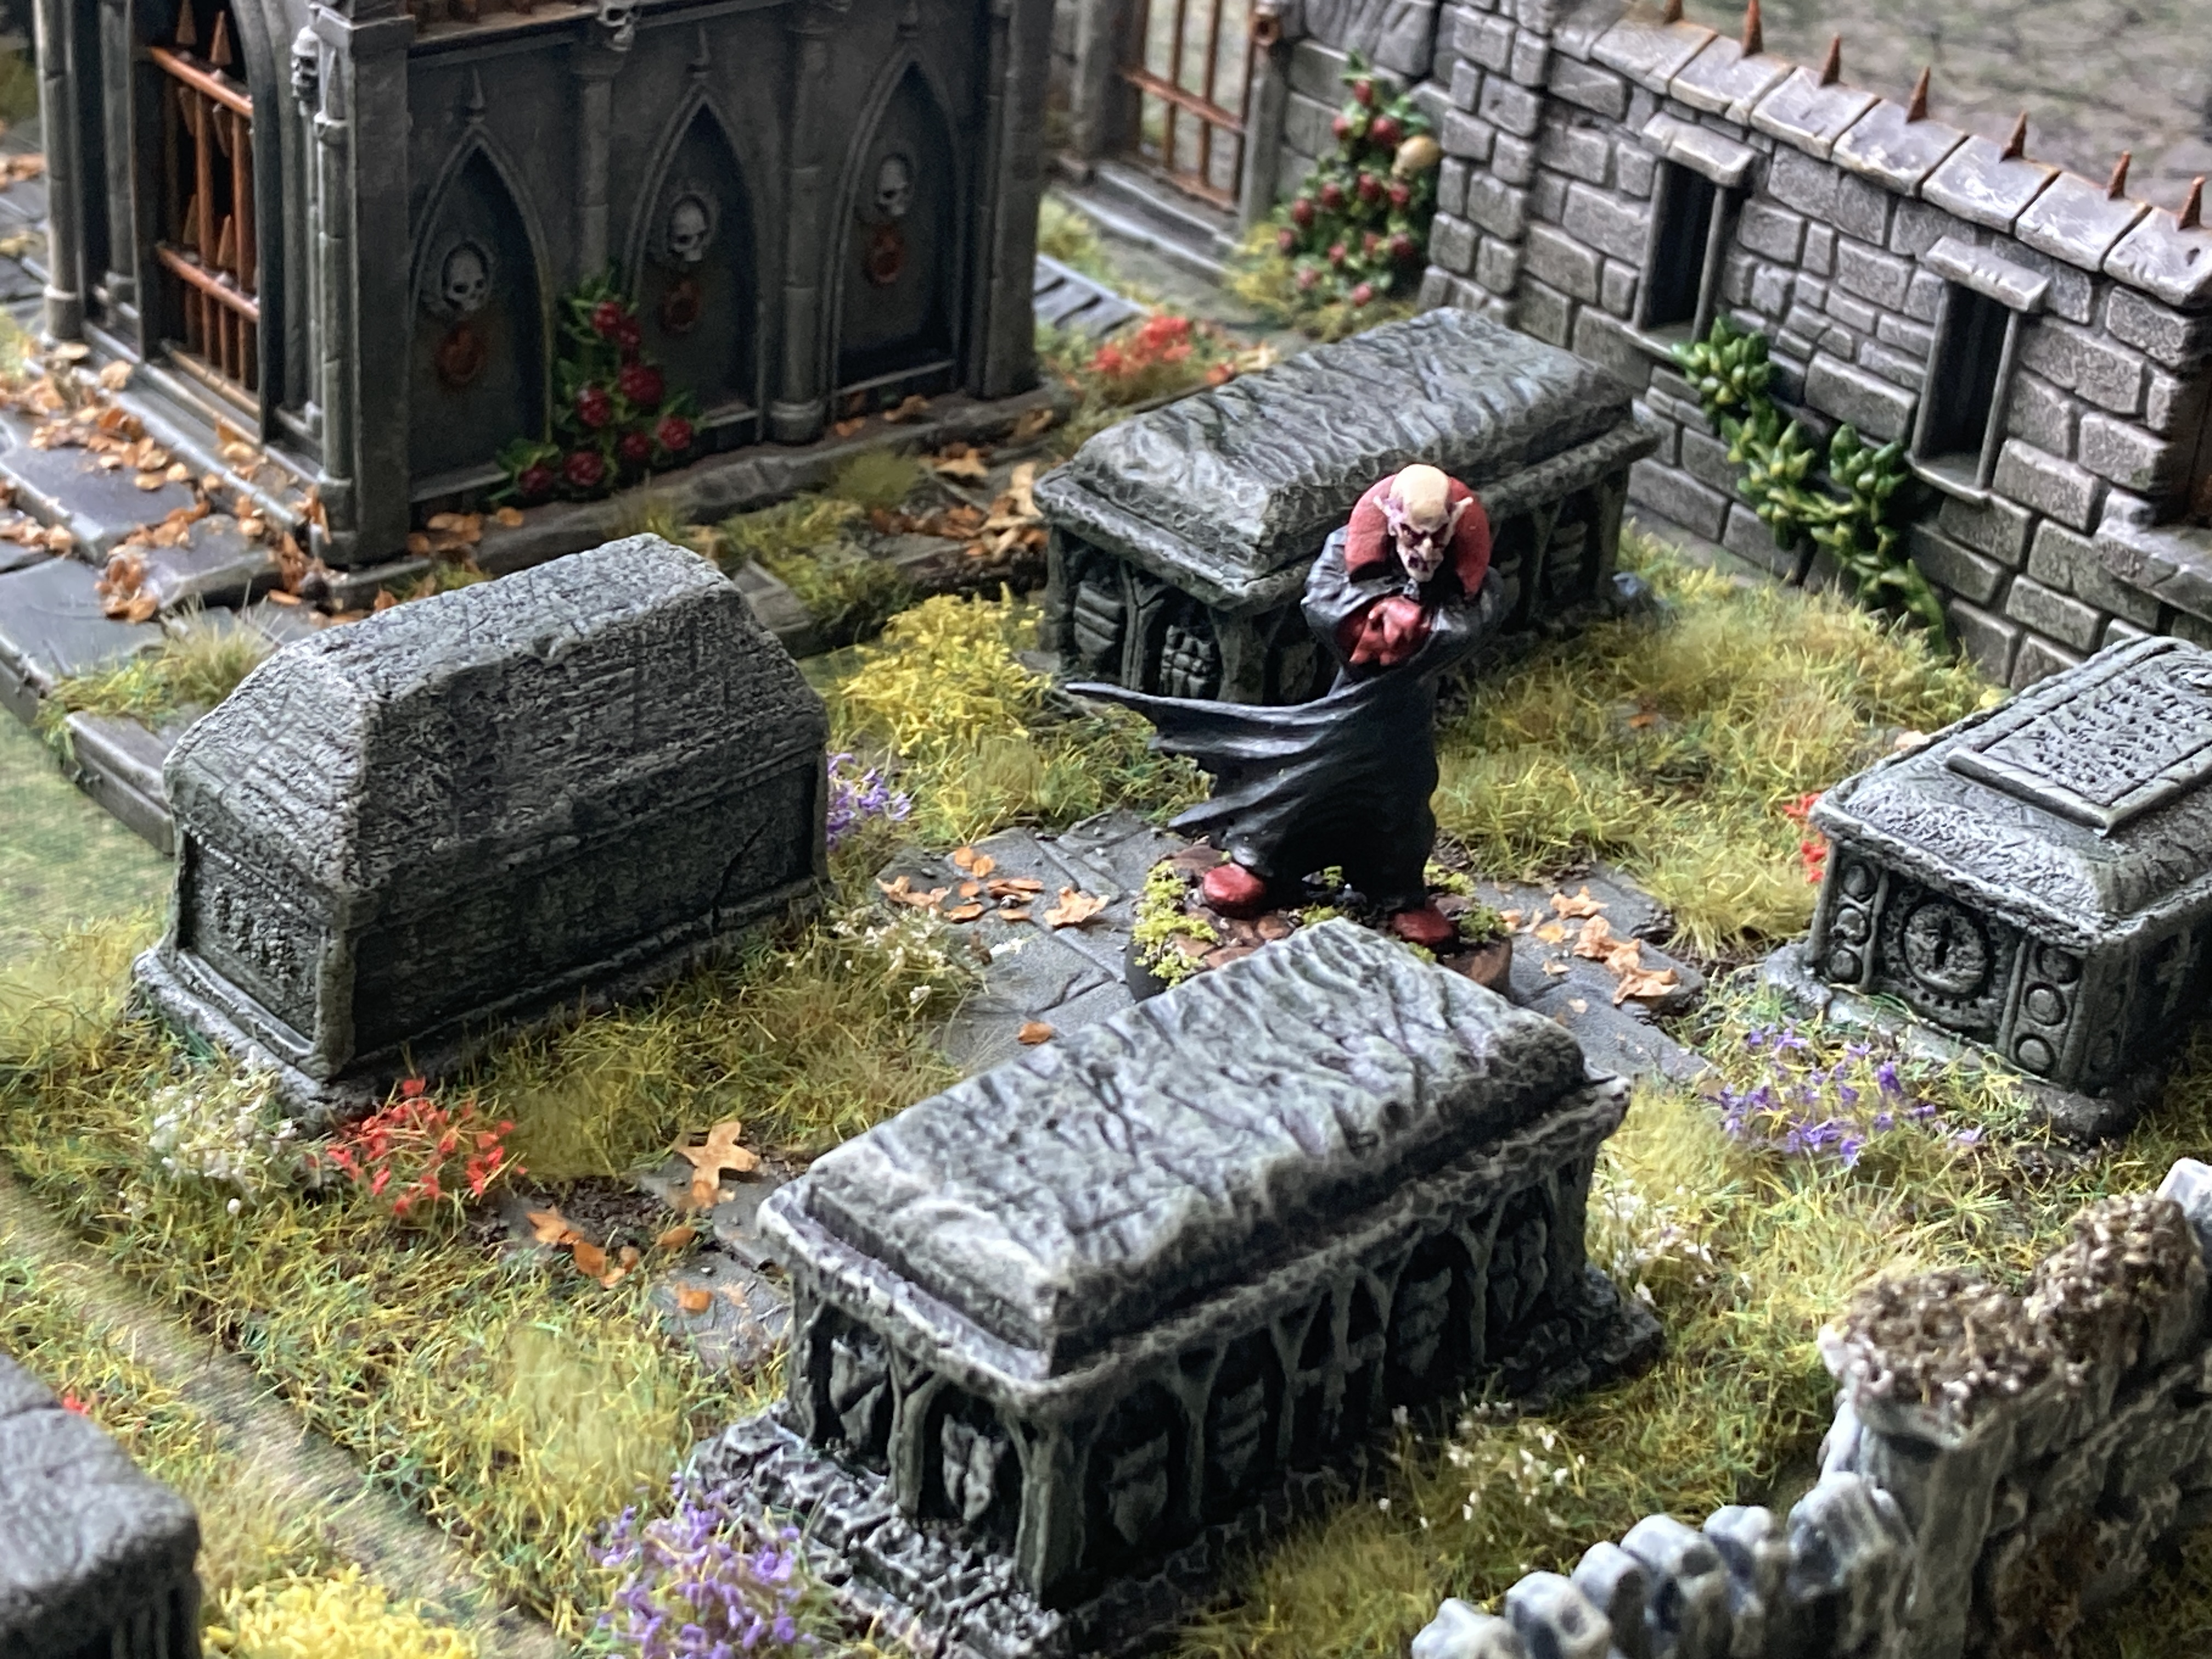
Meanwhile Trysten, while running from the ghoul, found a man called Doctor Frank with very high cheekbones digging at a grave. He mumbled something about medical research but offered his help when told about the vampire in the chapel, saying he knew quite a lot about how to kill vampires he dashed away toward the front of the chapel to help.
While Bered fought a nearby ghoul, Halleck unlocked the chapel doors, but at that moment the sun disappeared below the horizon and the doors were flung open and the vampire was there.
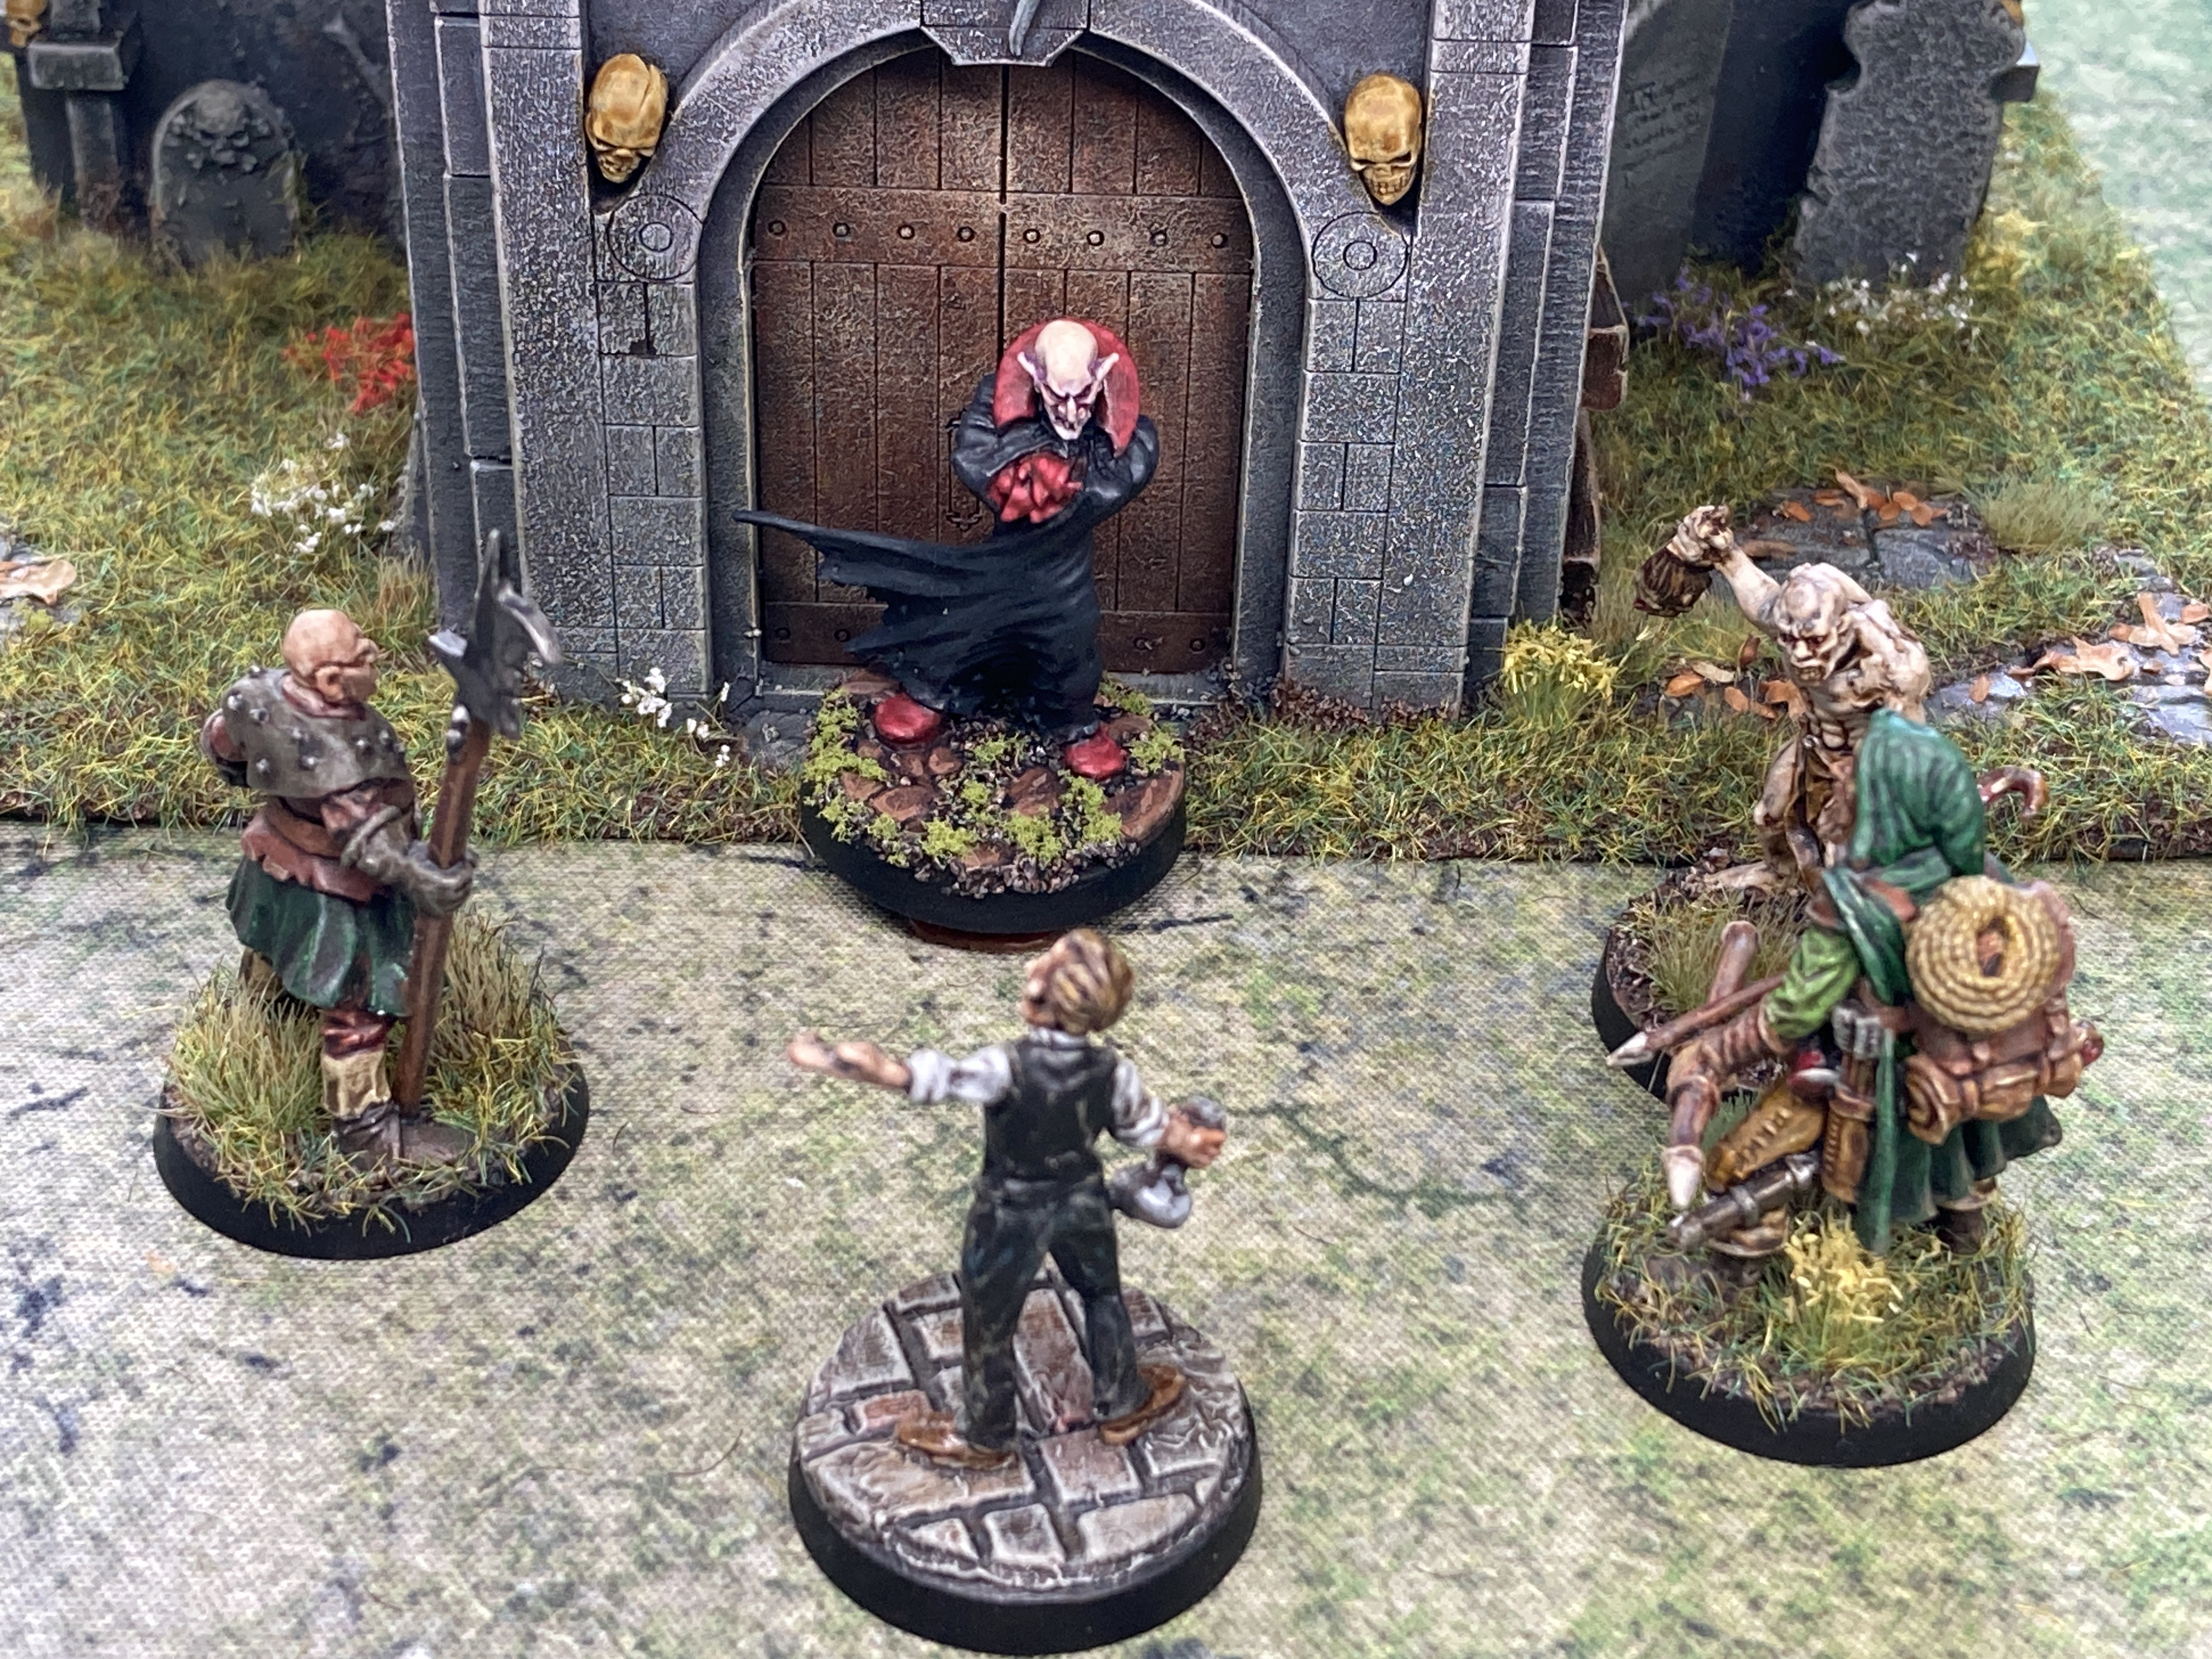
Both Halleck and the Doctor jumped at the vampire. Bered went down to the ghoul he was fighting but the Doctor killed it as it charged him next.
Between them Halleck and Doctor Frank fought the vampire, fighting for their lives. Ghouls kept appearing and the Doctor killed them. The vampire was severely injured but at one point managed to latch onto Halleck’s neck and suck his blood, partially healing itself. Eventually the vampire was killed and turned to dust.
Victory, just.
It was actually a pretty close game in the end, going to the very last turn. I’m very pleased with the sense of urgency as the game progressed. I think I wasted too much time in the first few turns trying to kill monsters rather than search the cemetery for the key to the chapel.
It’s also a shame that although I managed to unlock the chapel I never actually got anyone inside and tried to stake the vampire while it slept. I just ran out of time. I’ve altered the scenario to reduce the number of enemies very slightly.
So that’s it. Project done and complete with a battle report.
More Graves, The Final Build
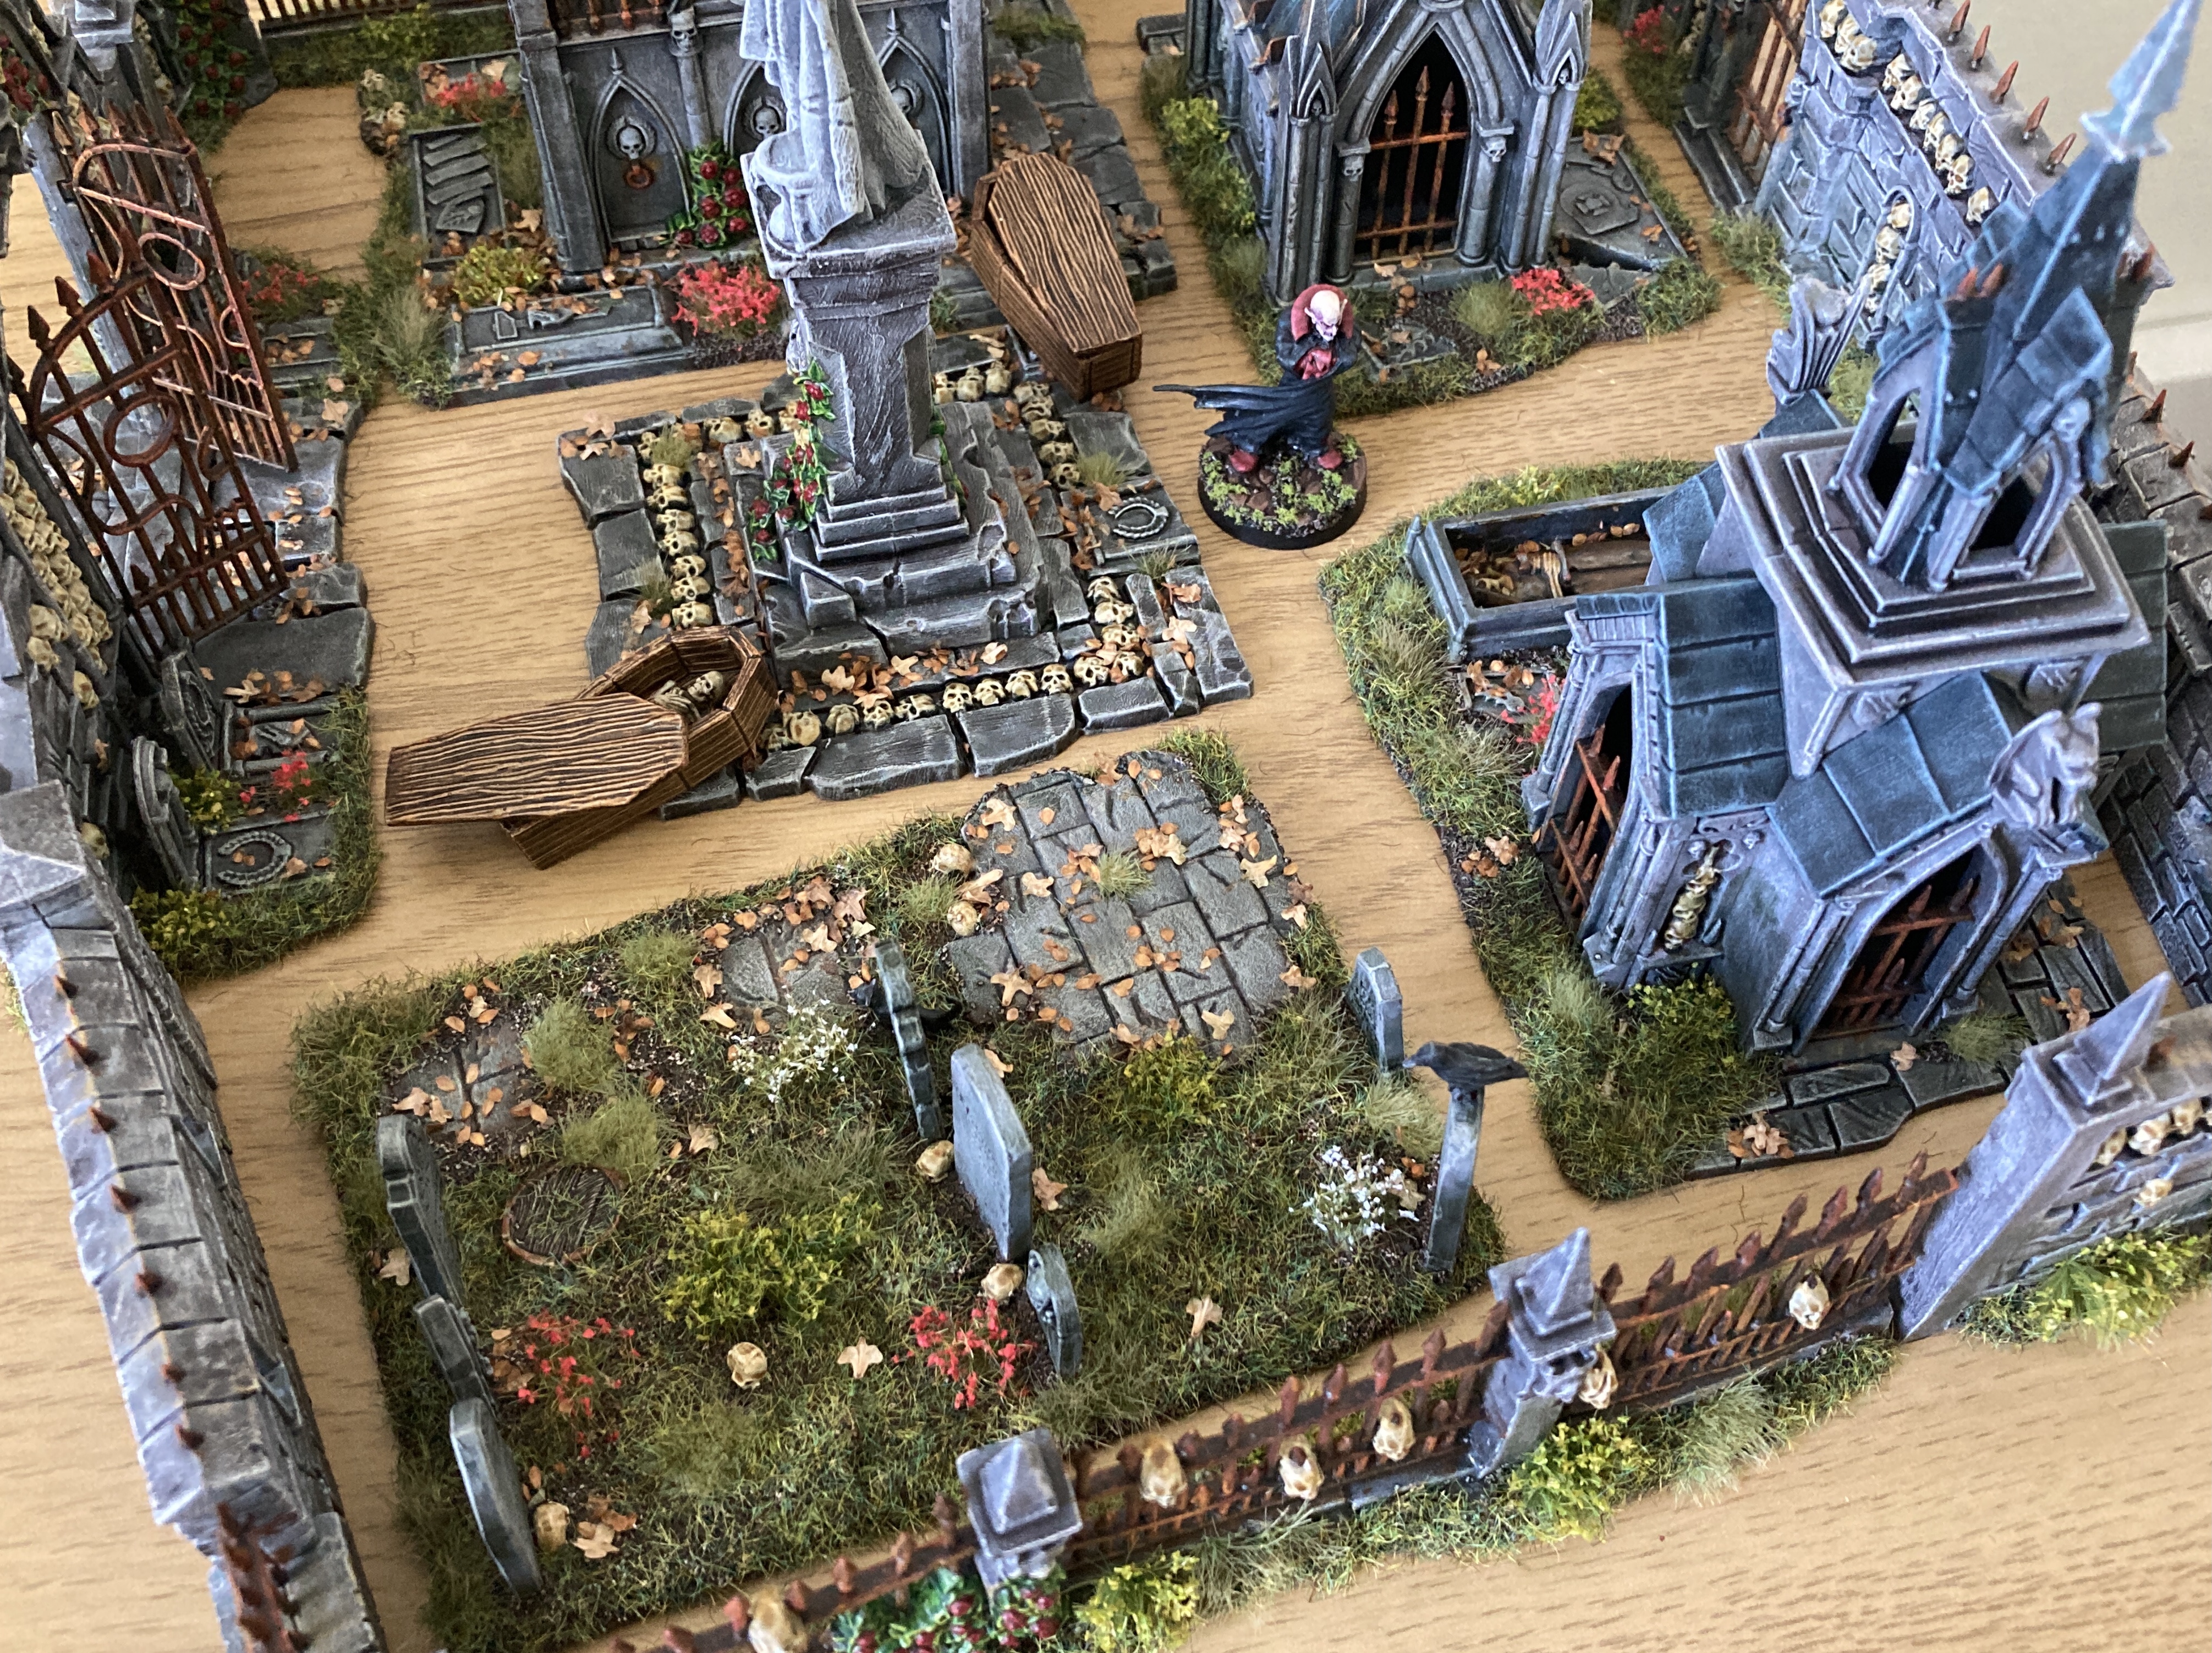
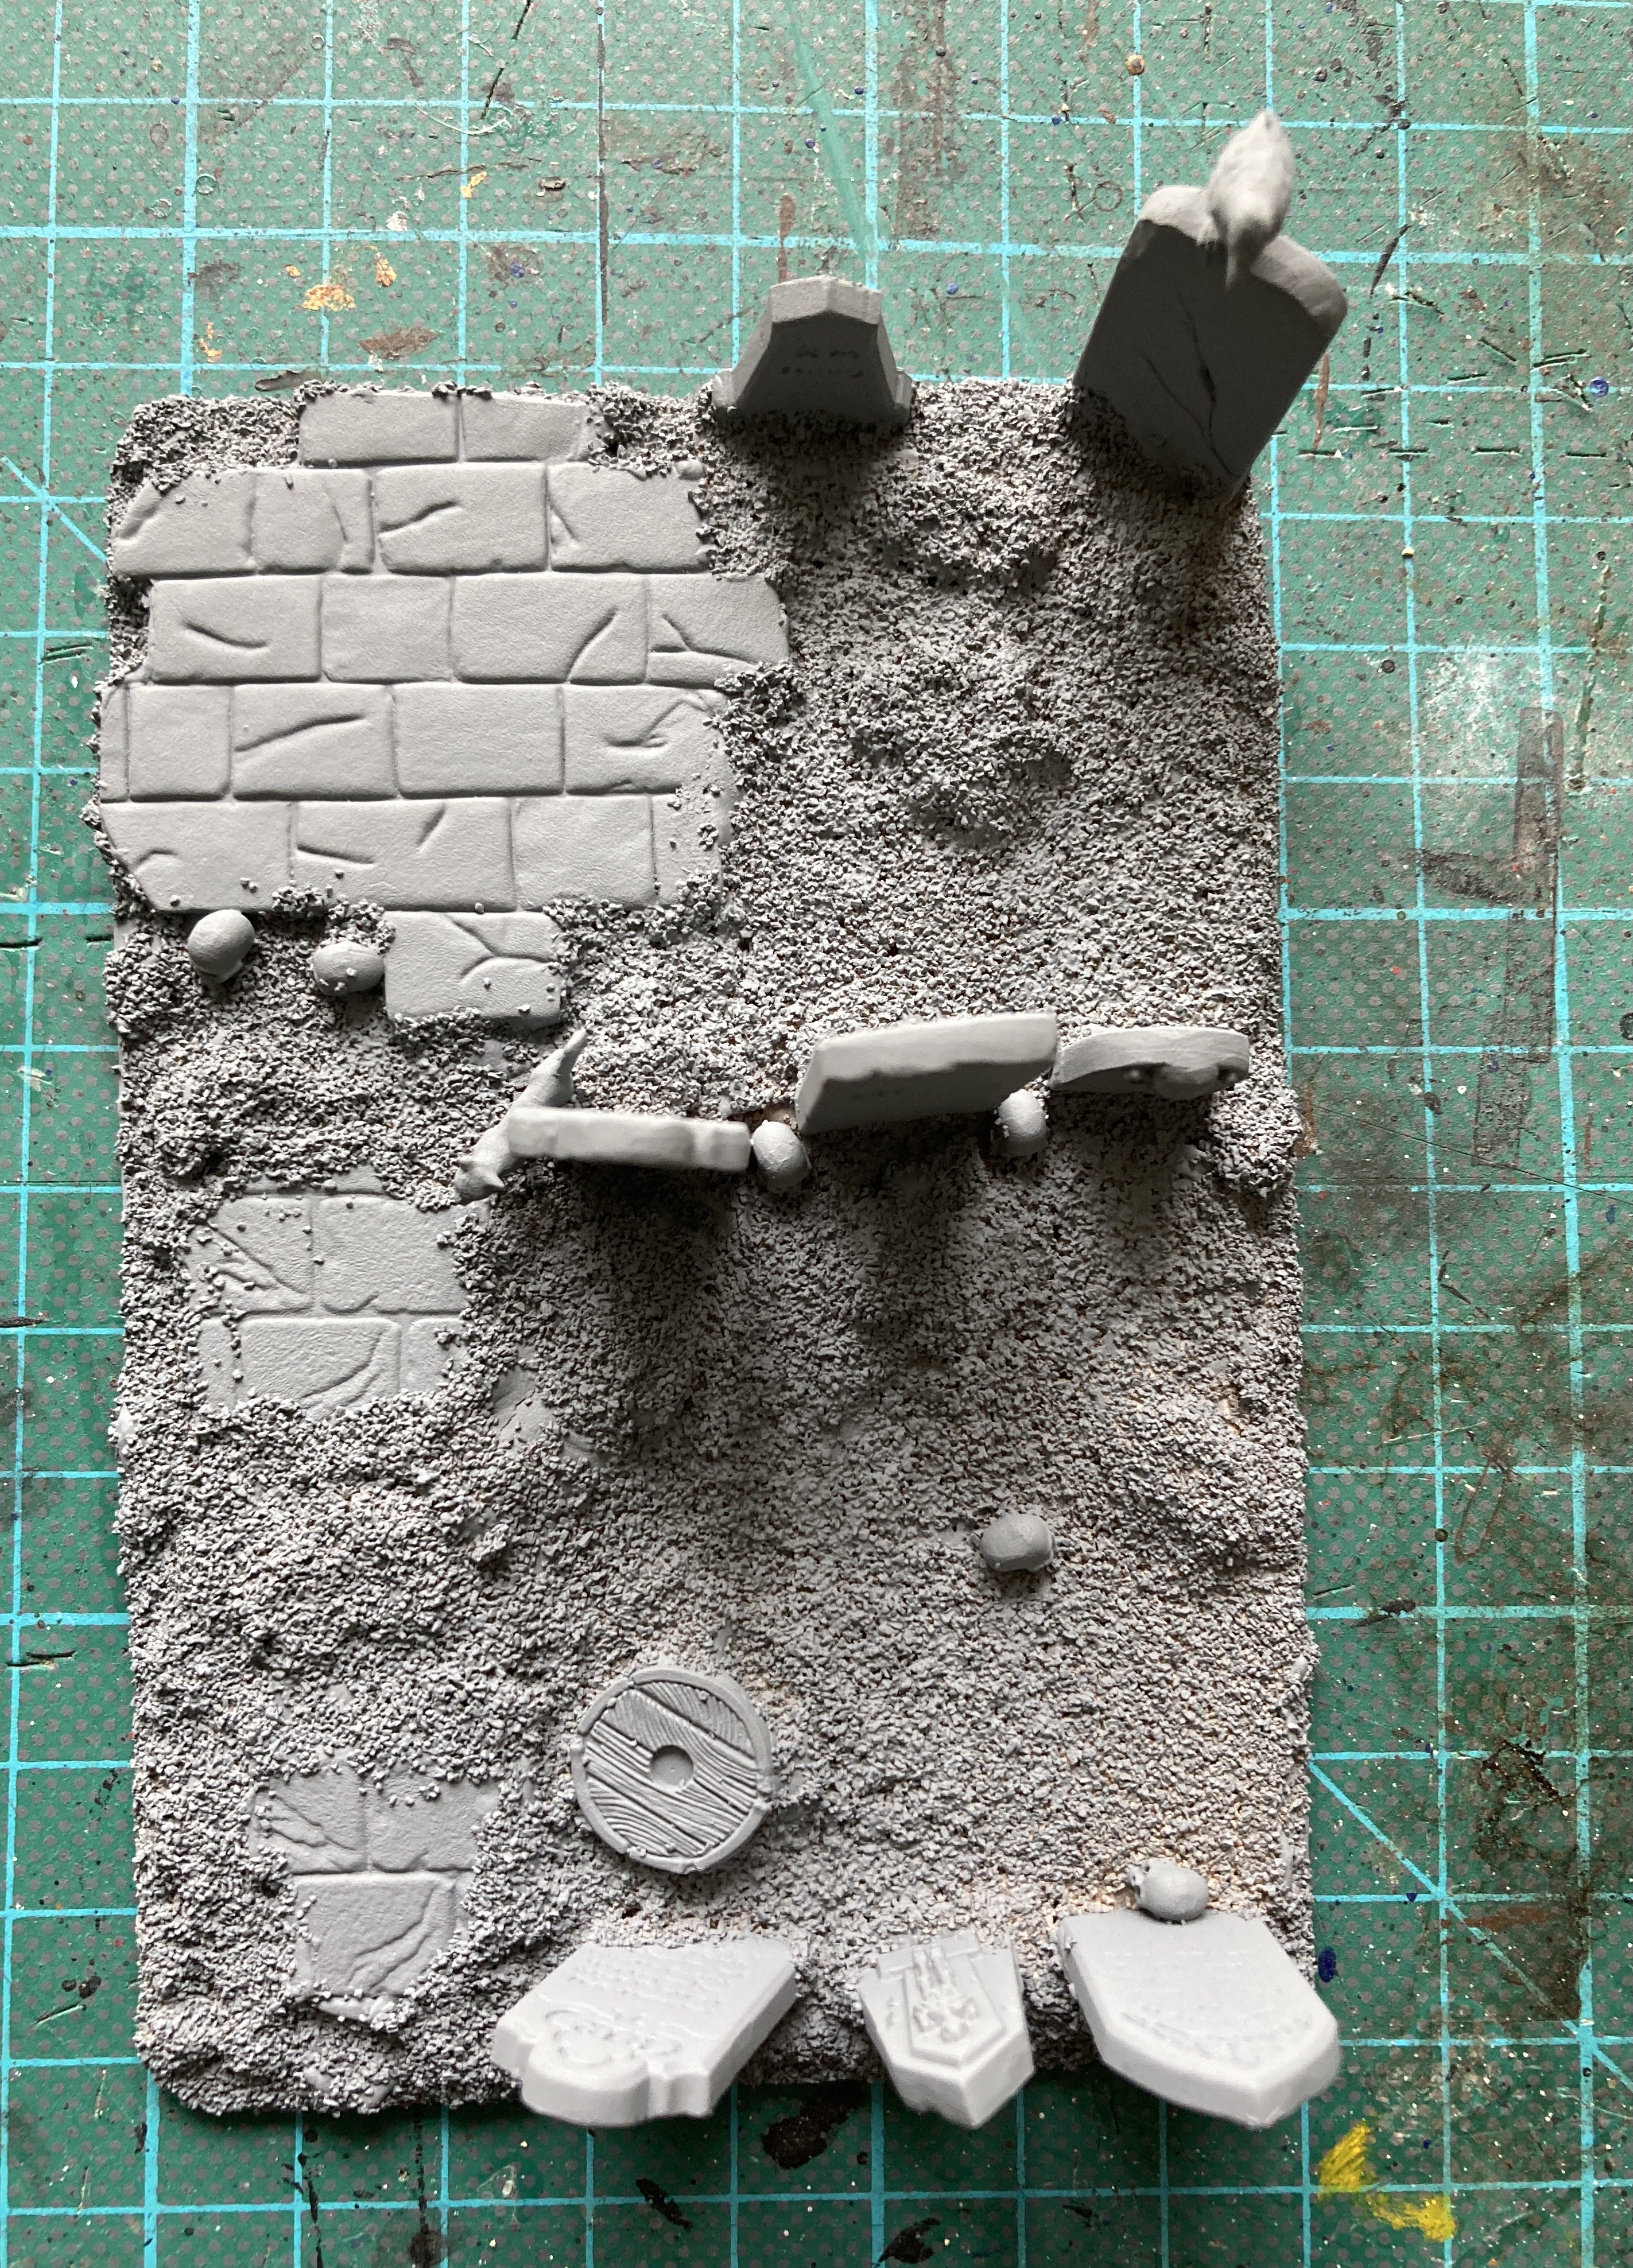
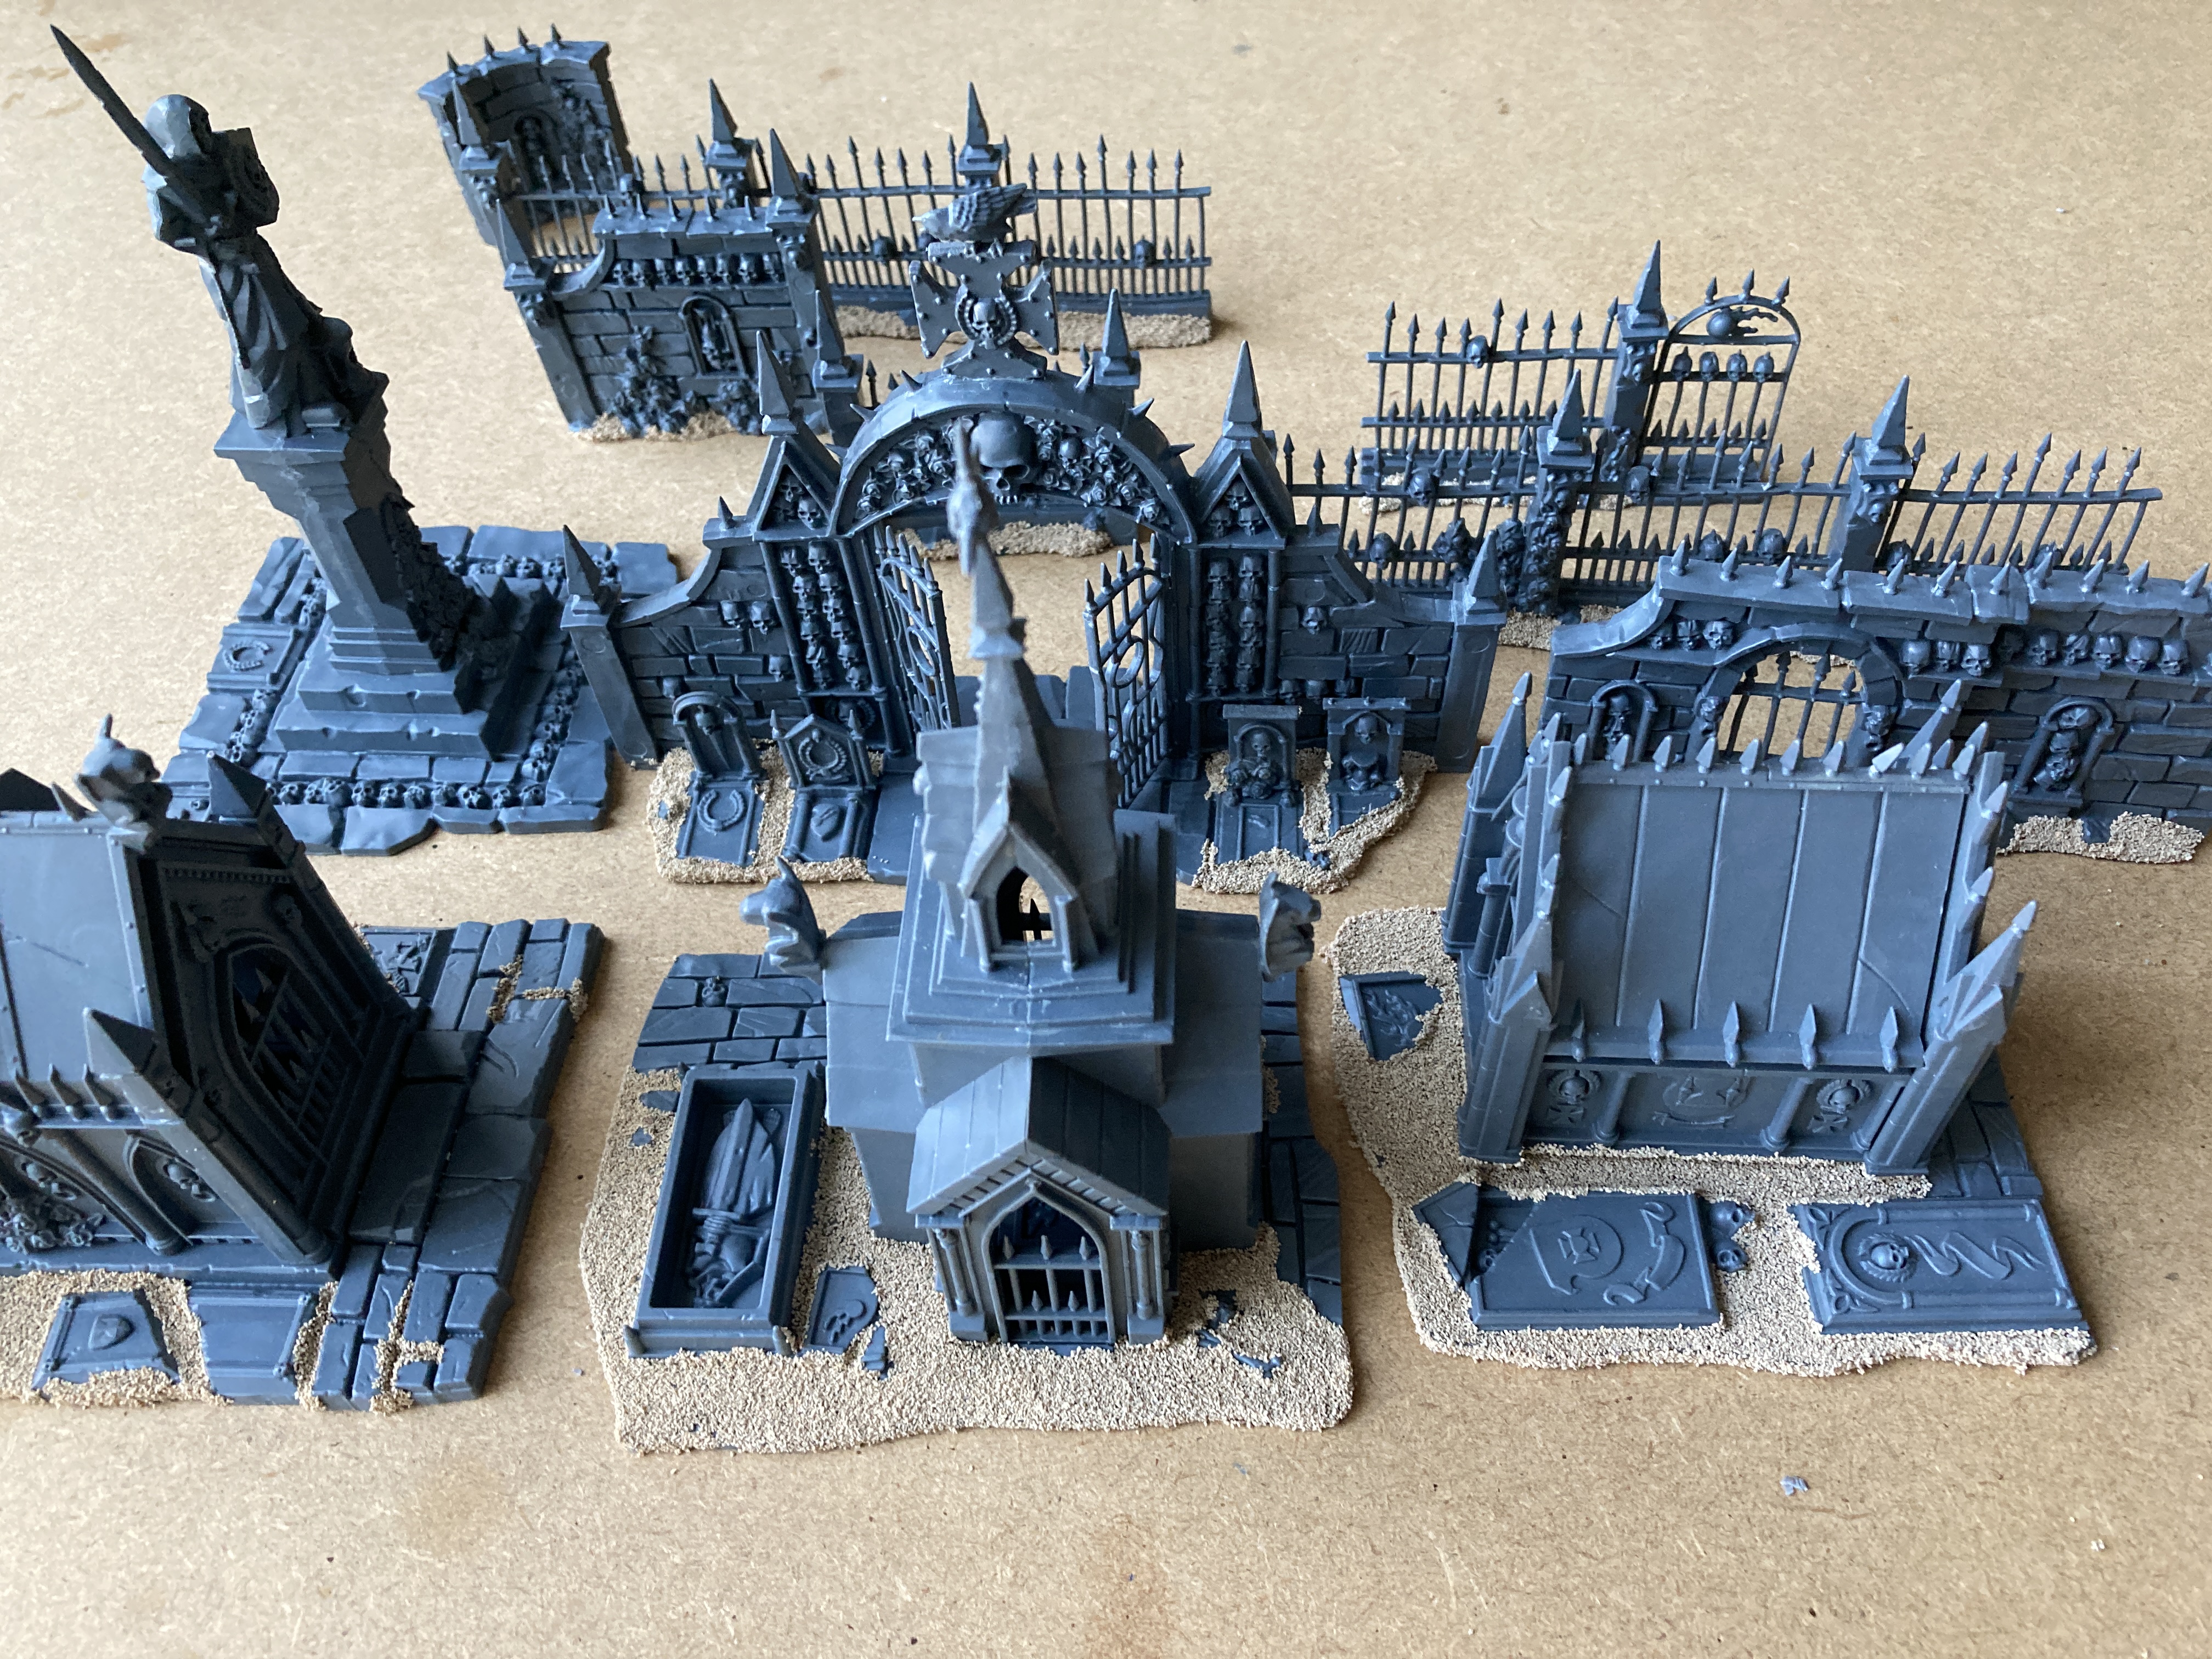
I’m almost done now. The cemetery is getting to be a good size but there’s always room for more graves, four more rows of graves in fact.
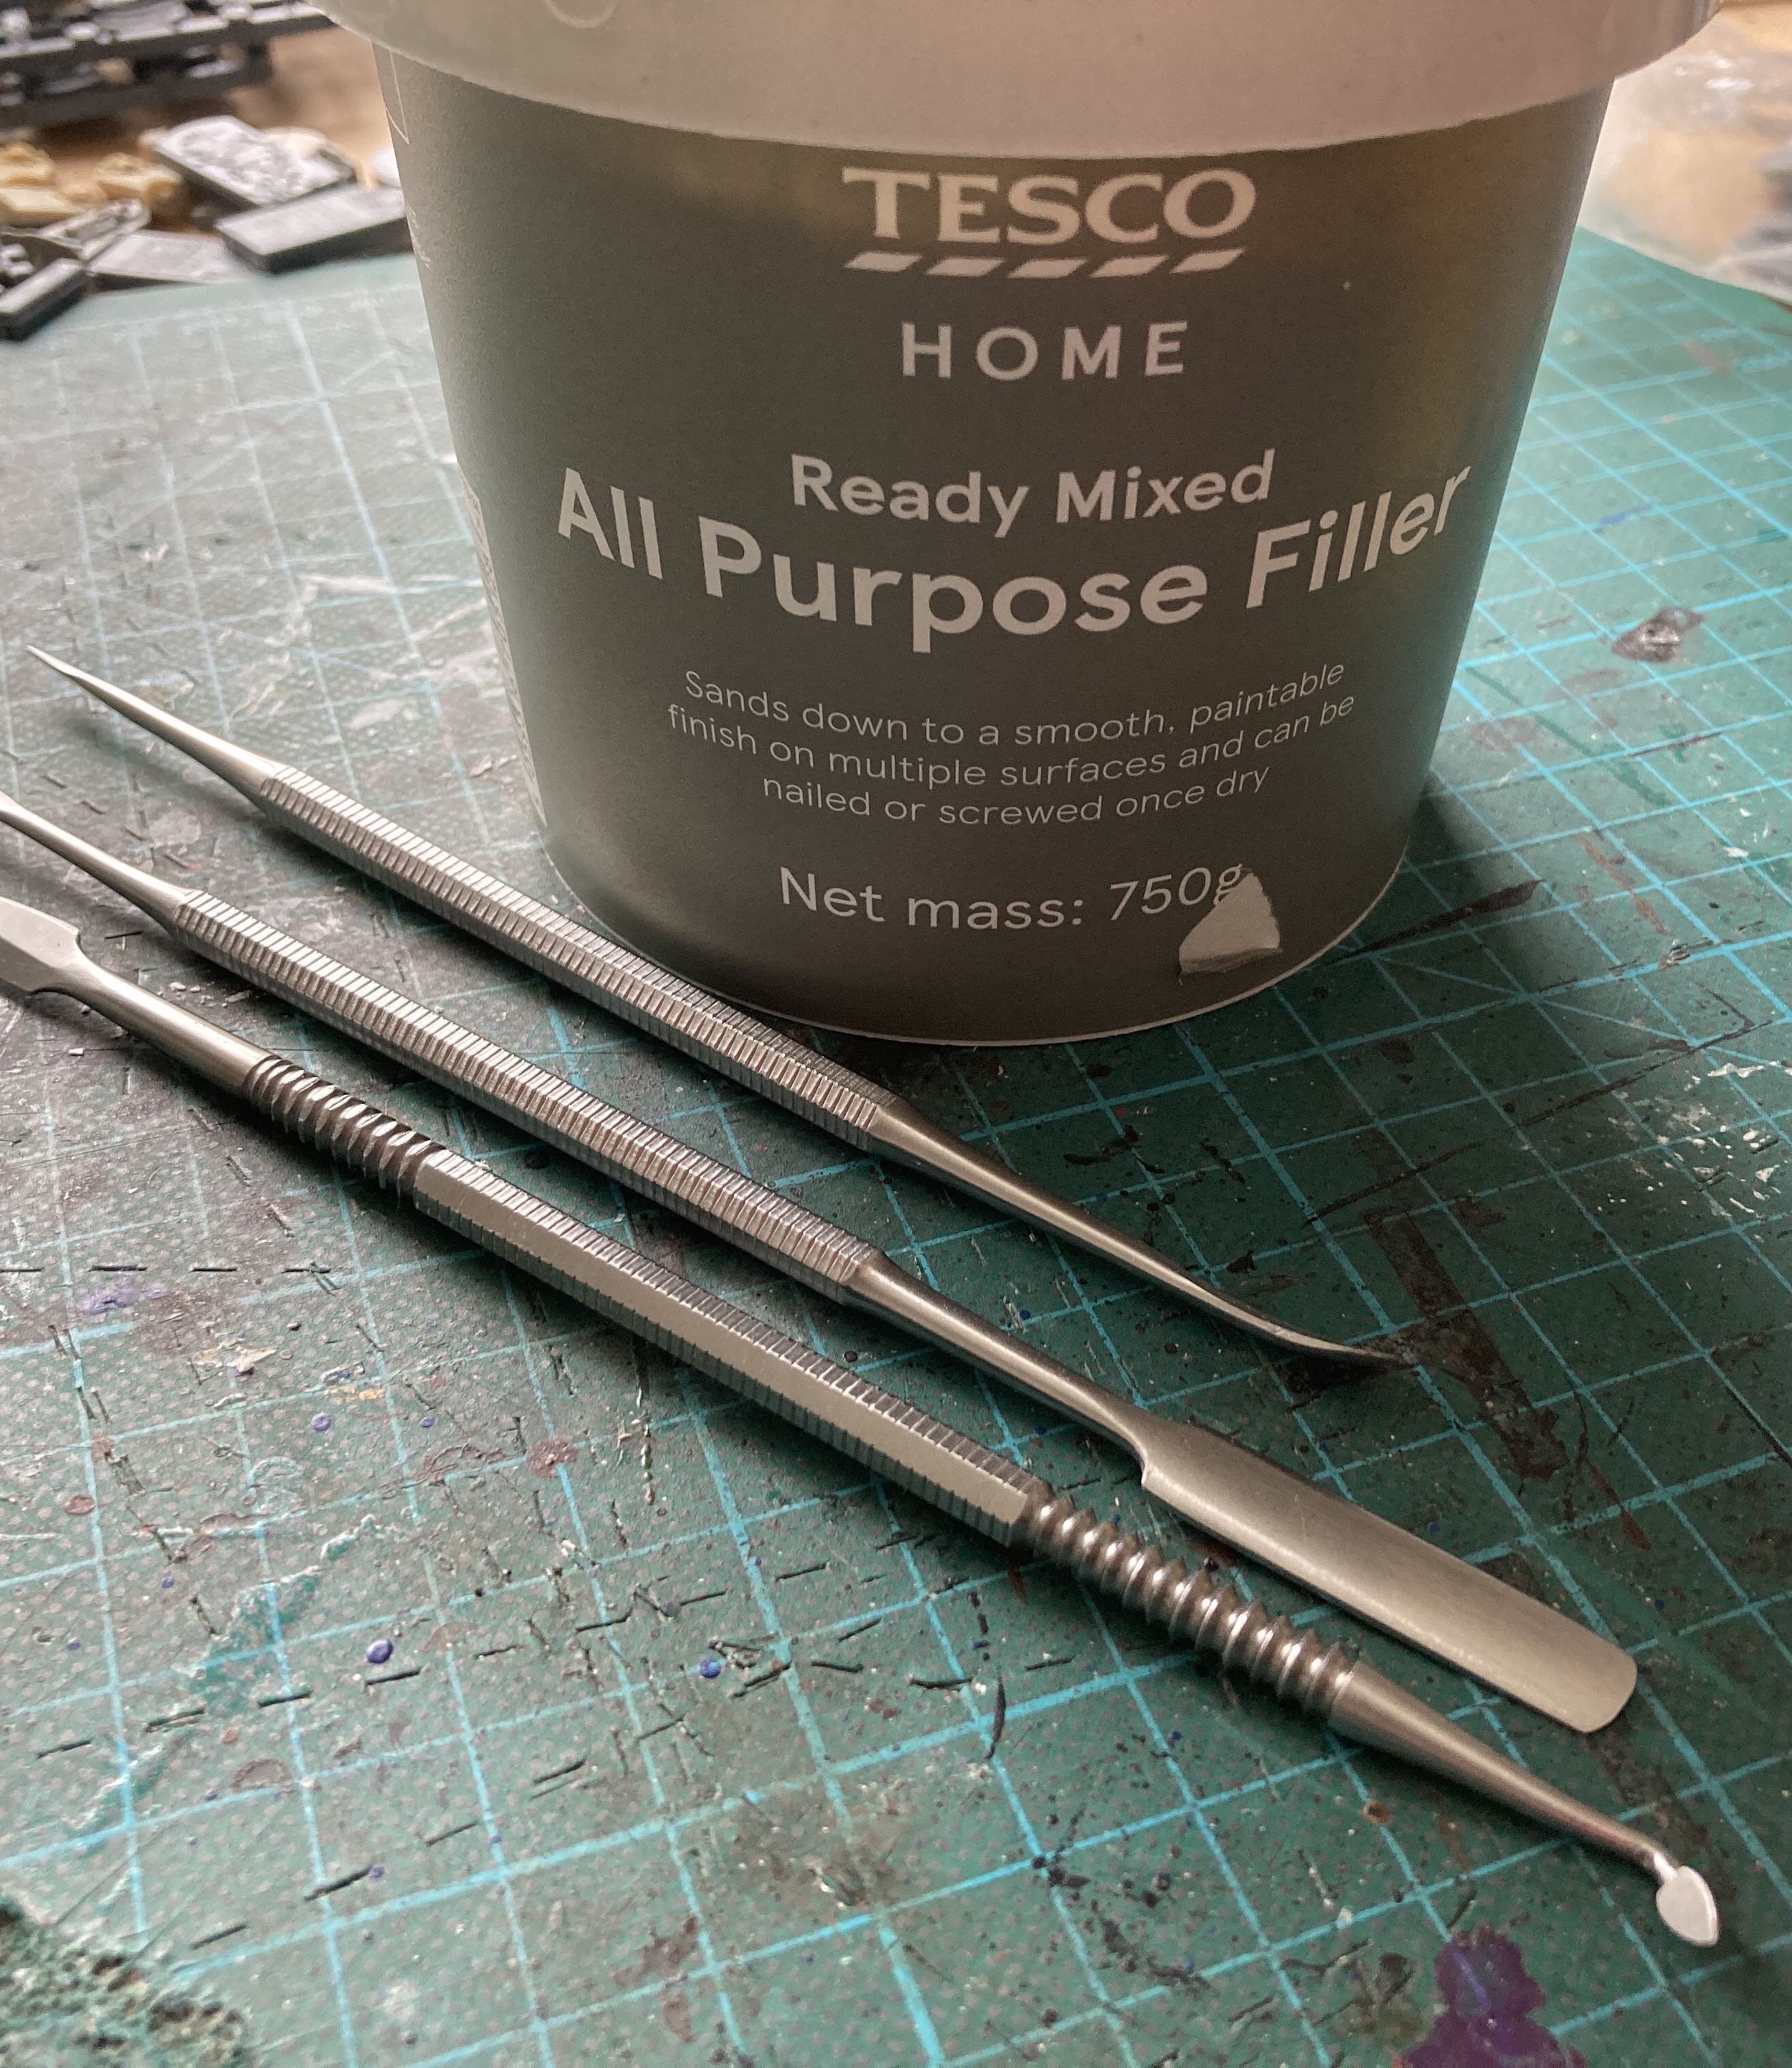
I’ve built these four pieces in exactly the same way as all of the other pieces, with 1mm plasticard (cut to size with scissors), cork board, ready mixed filler and then sand.
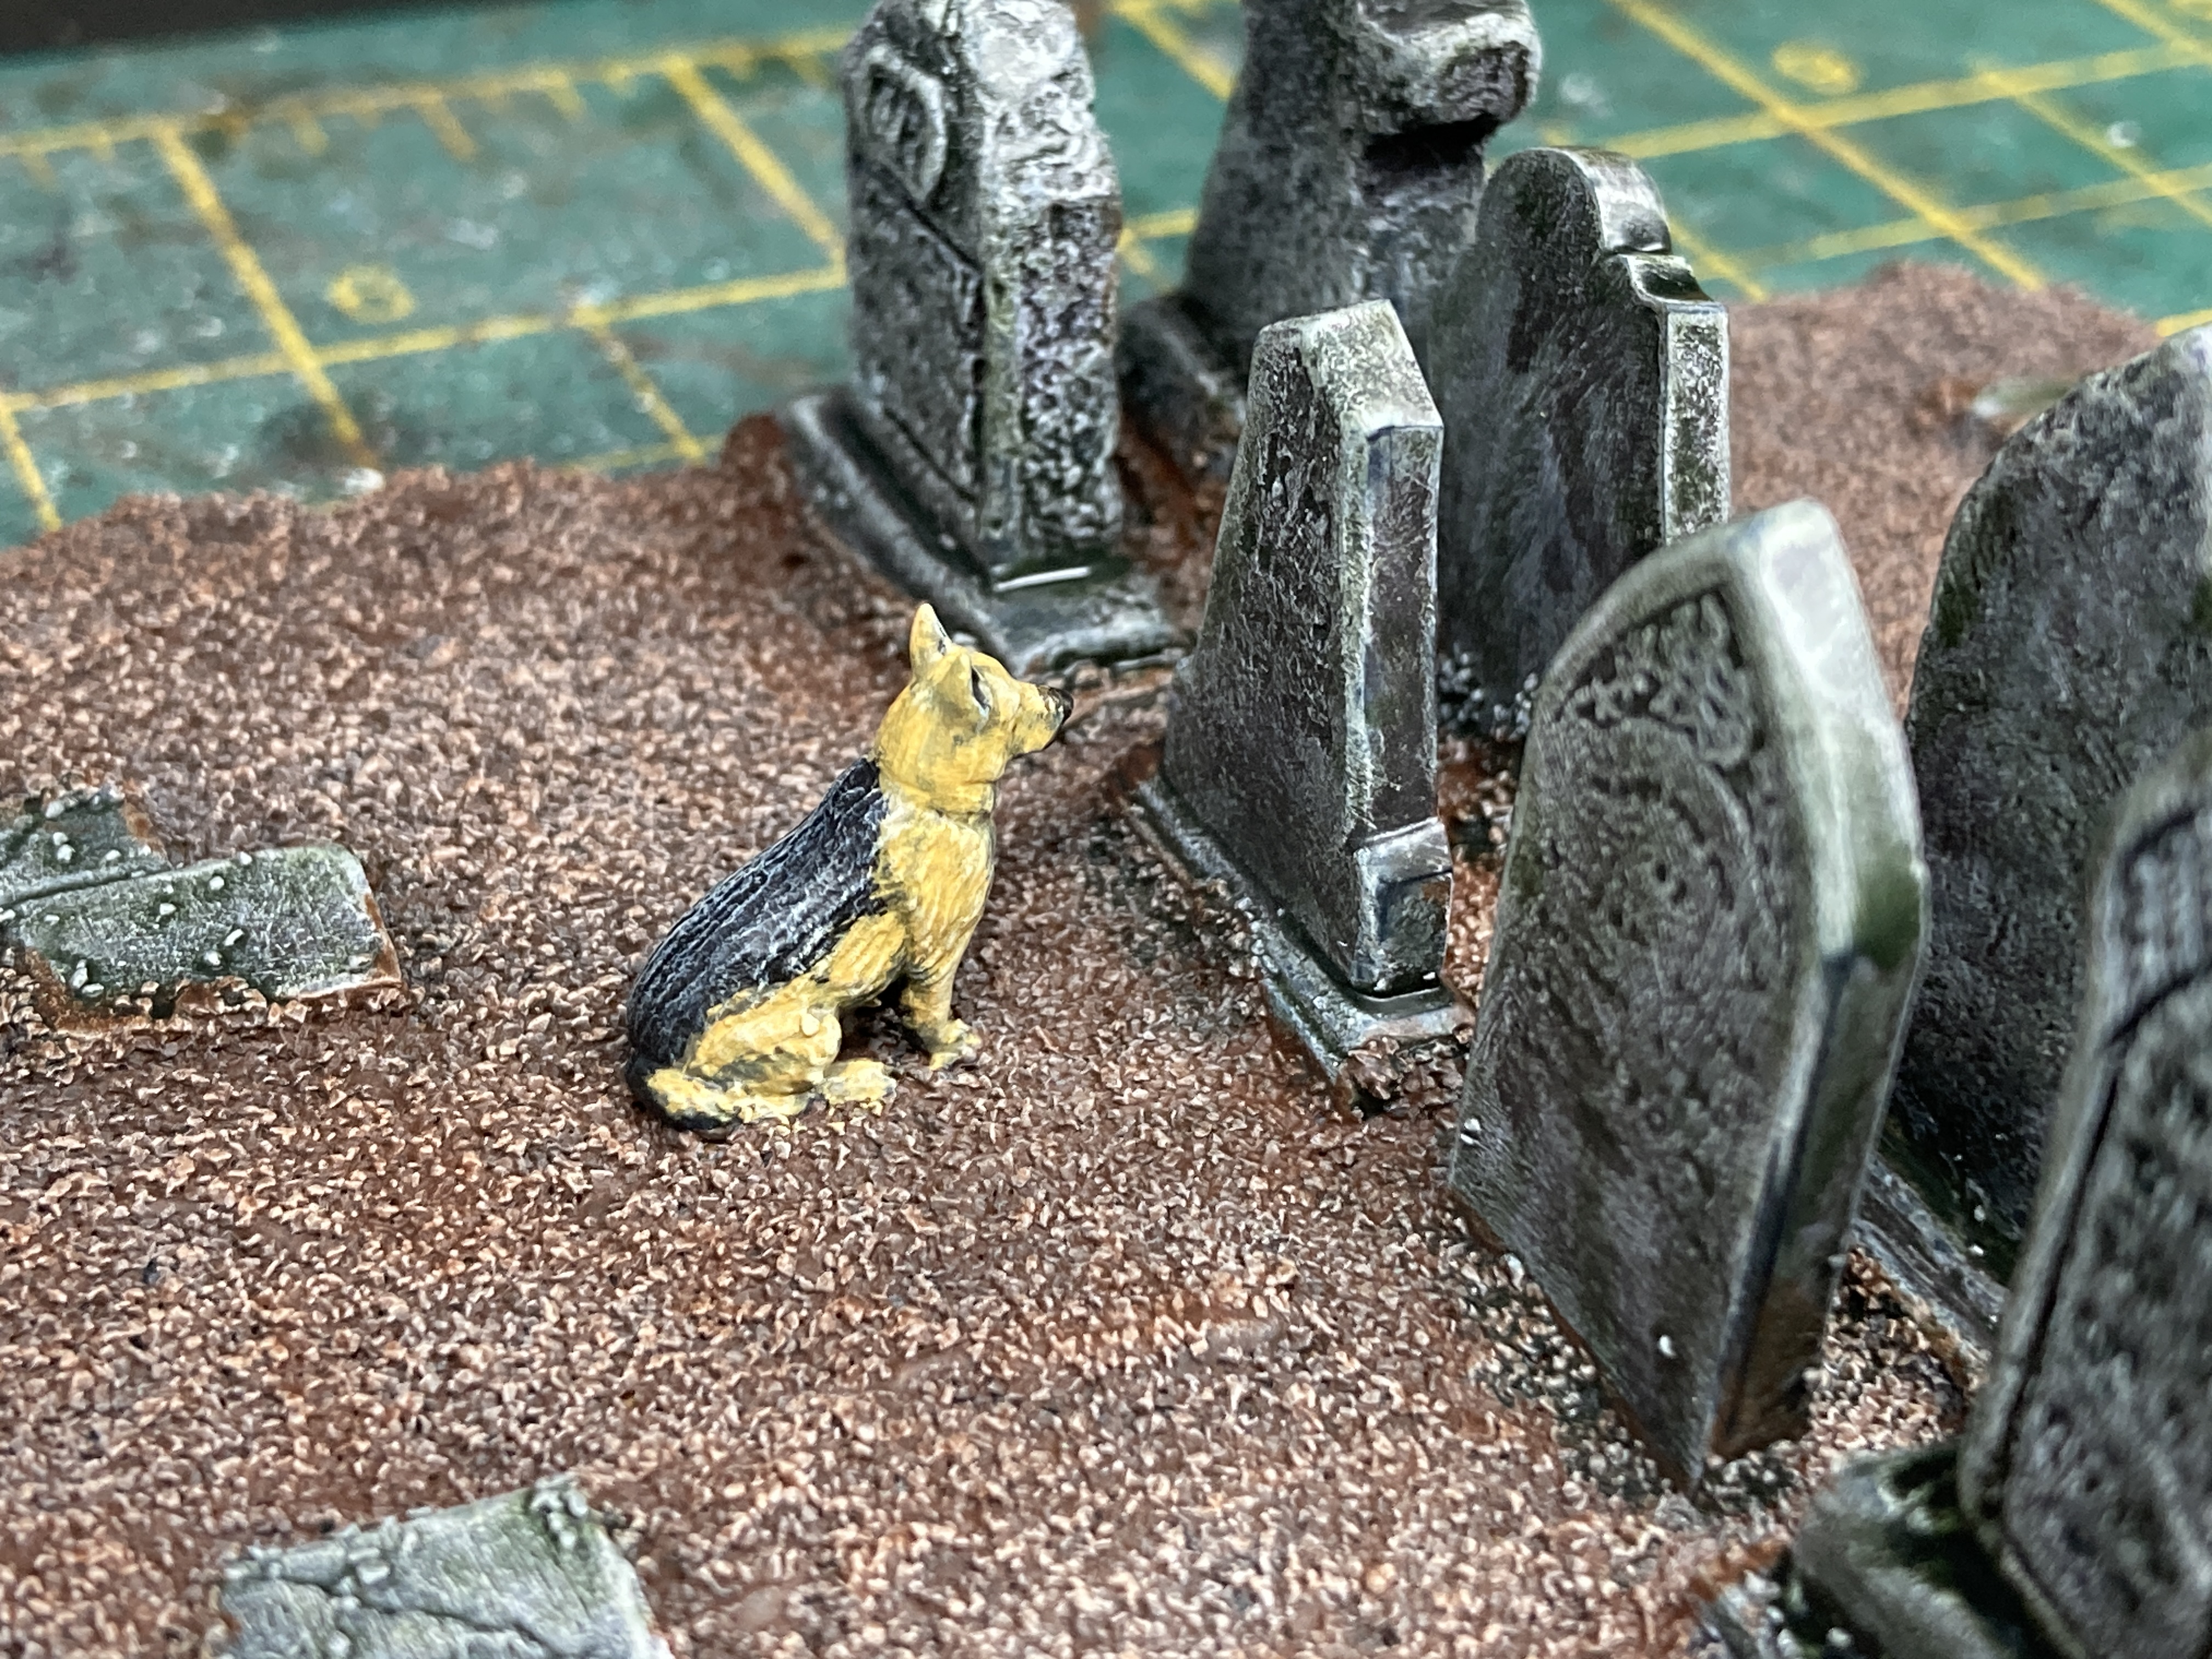
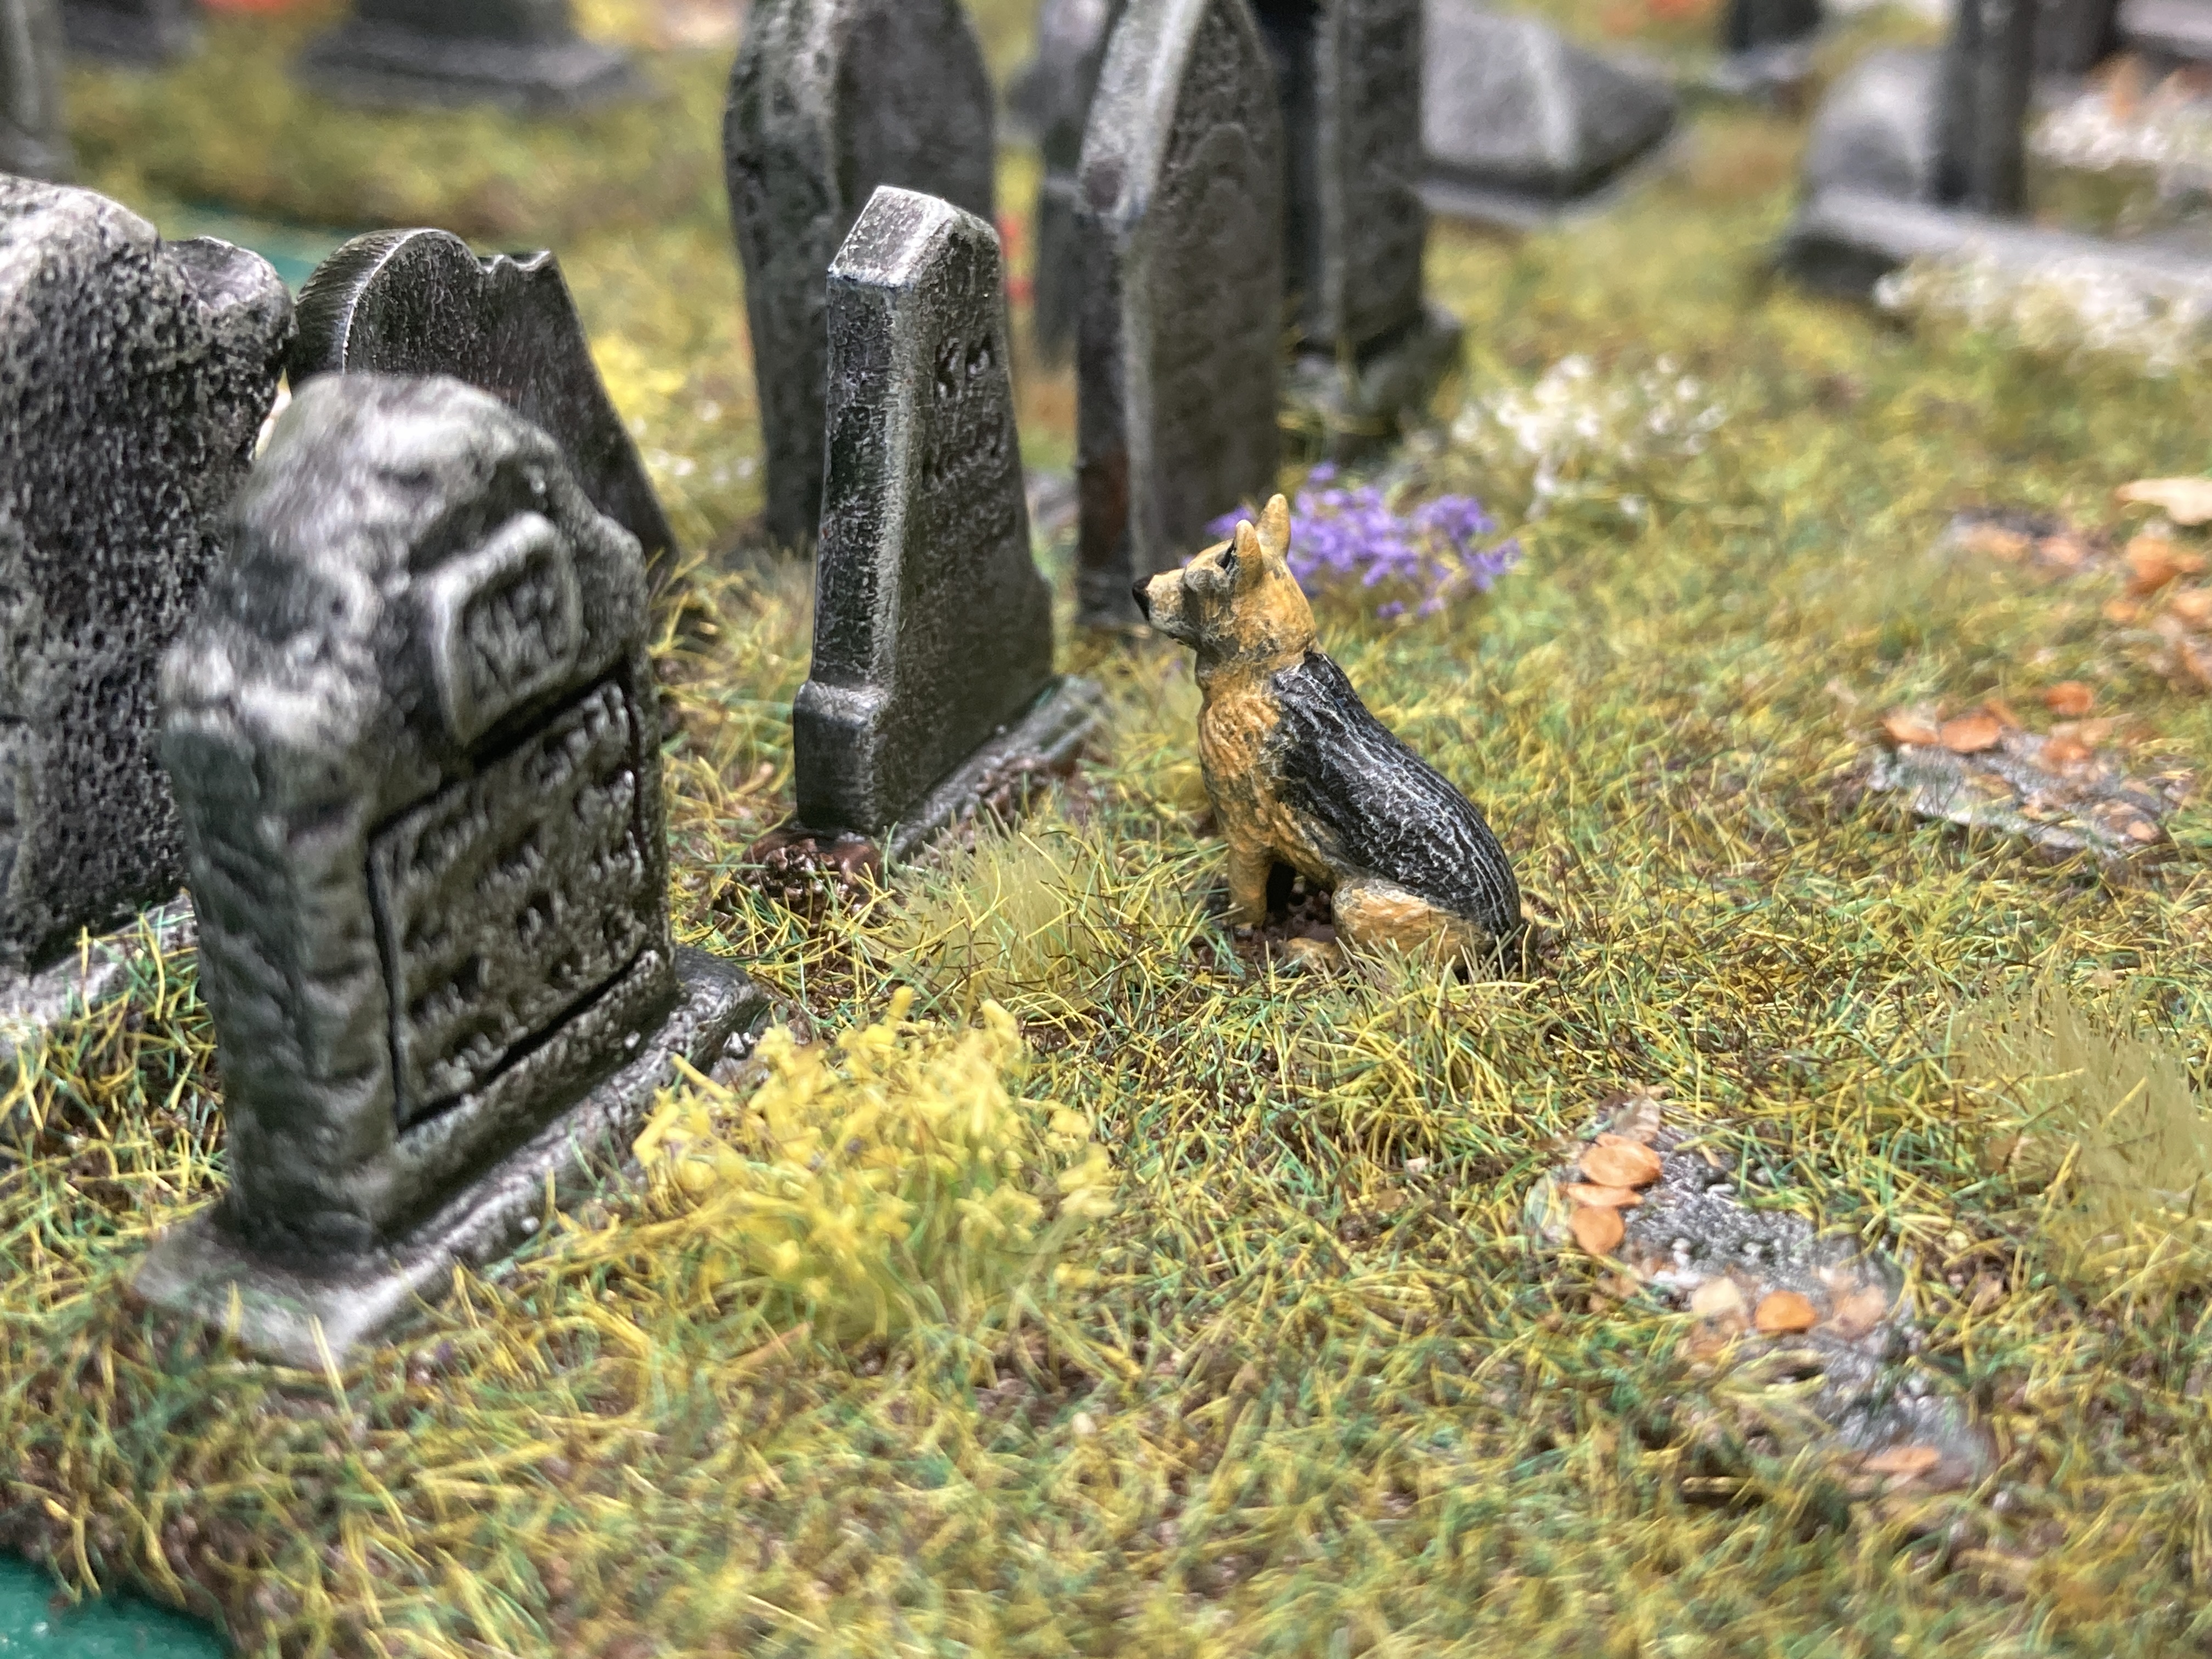
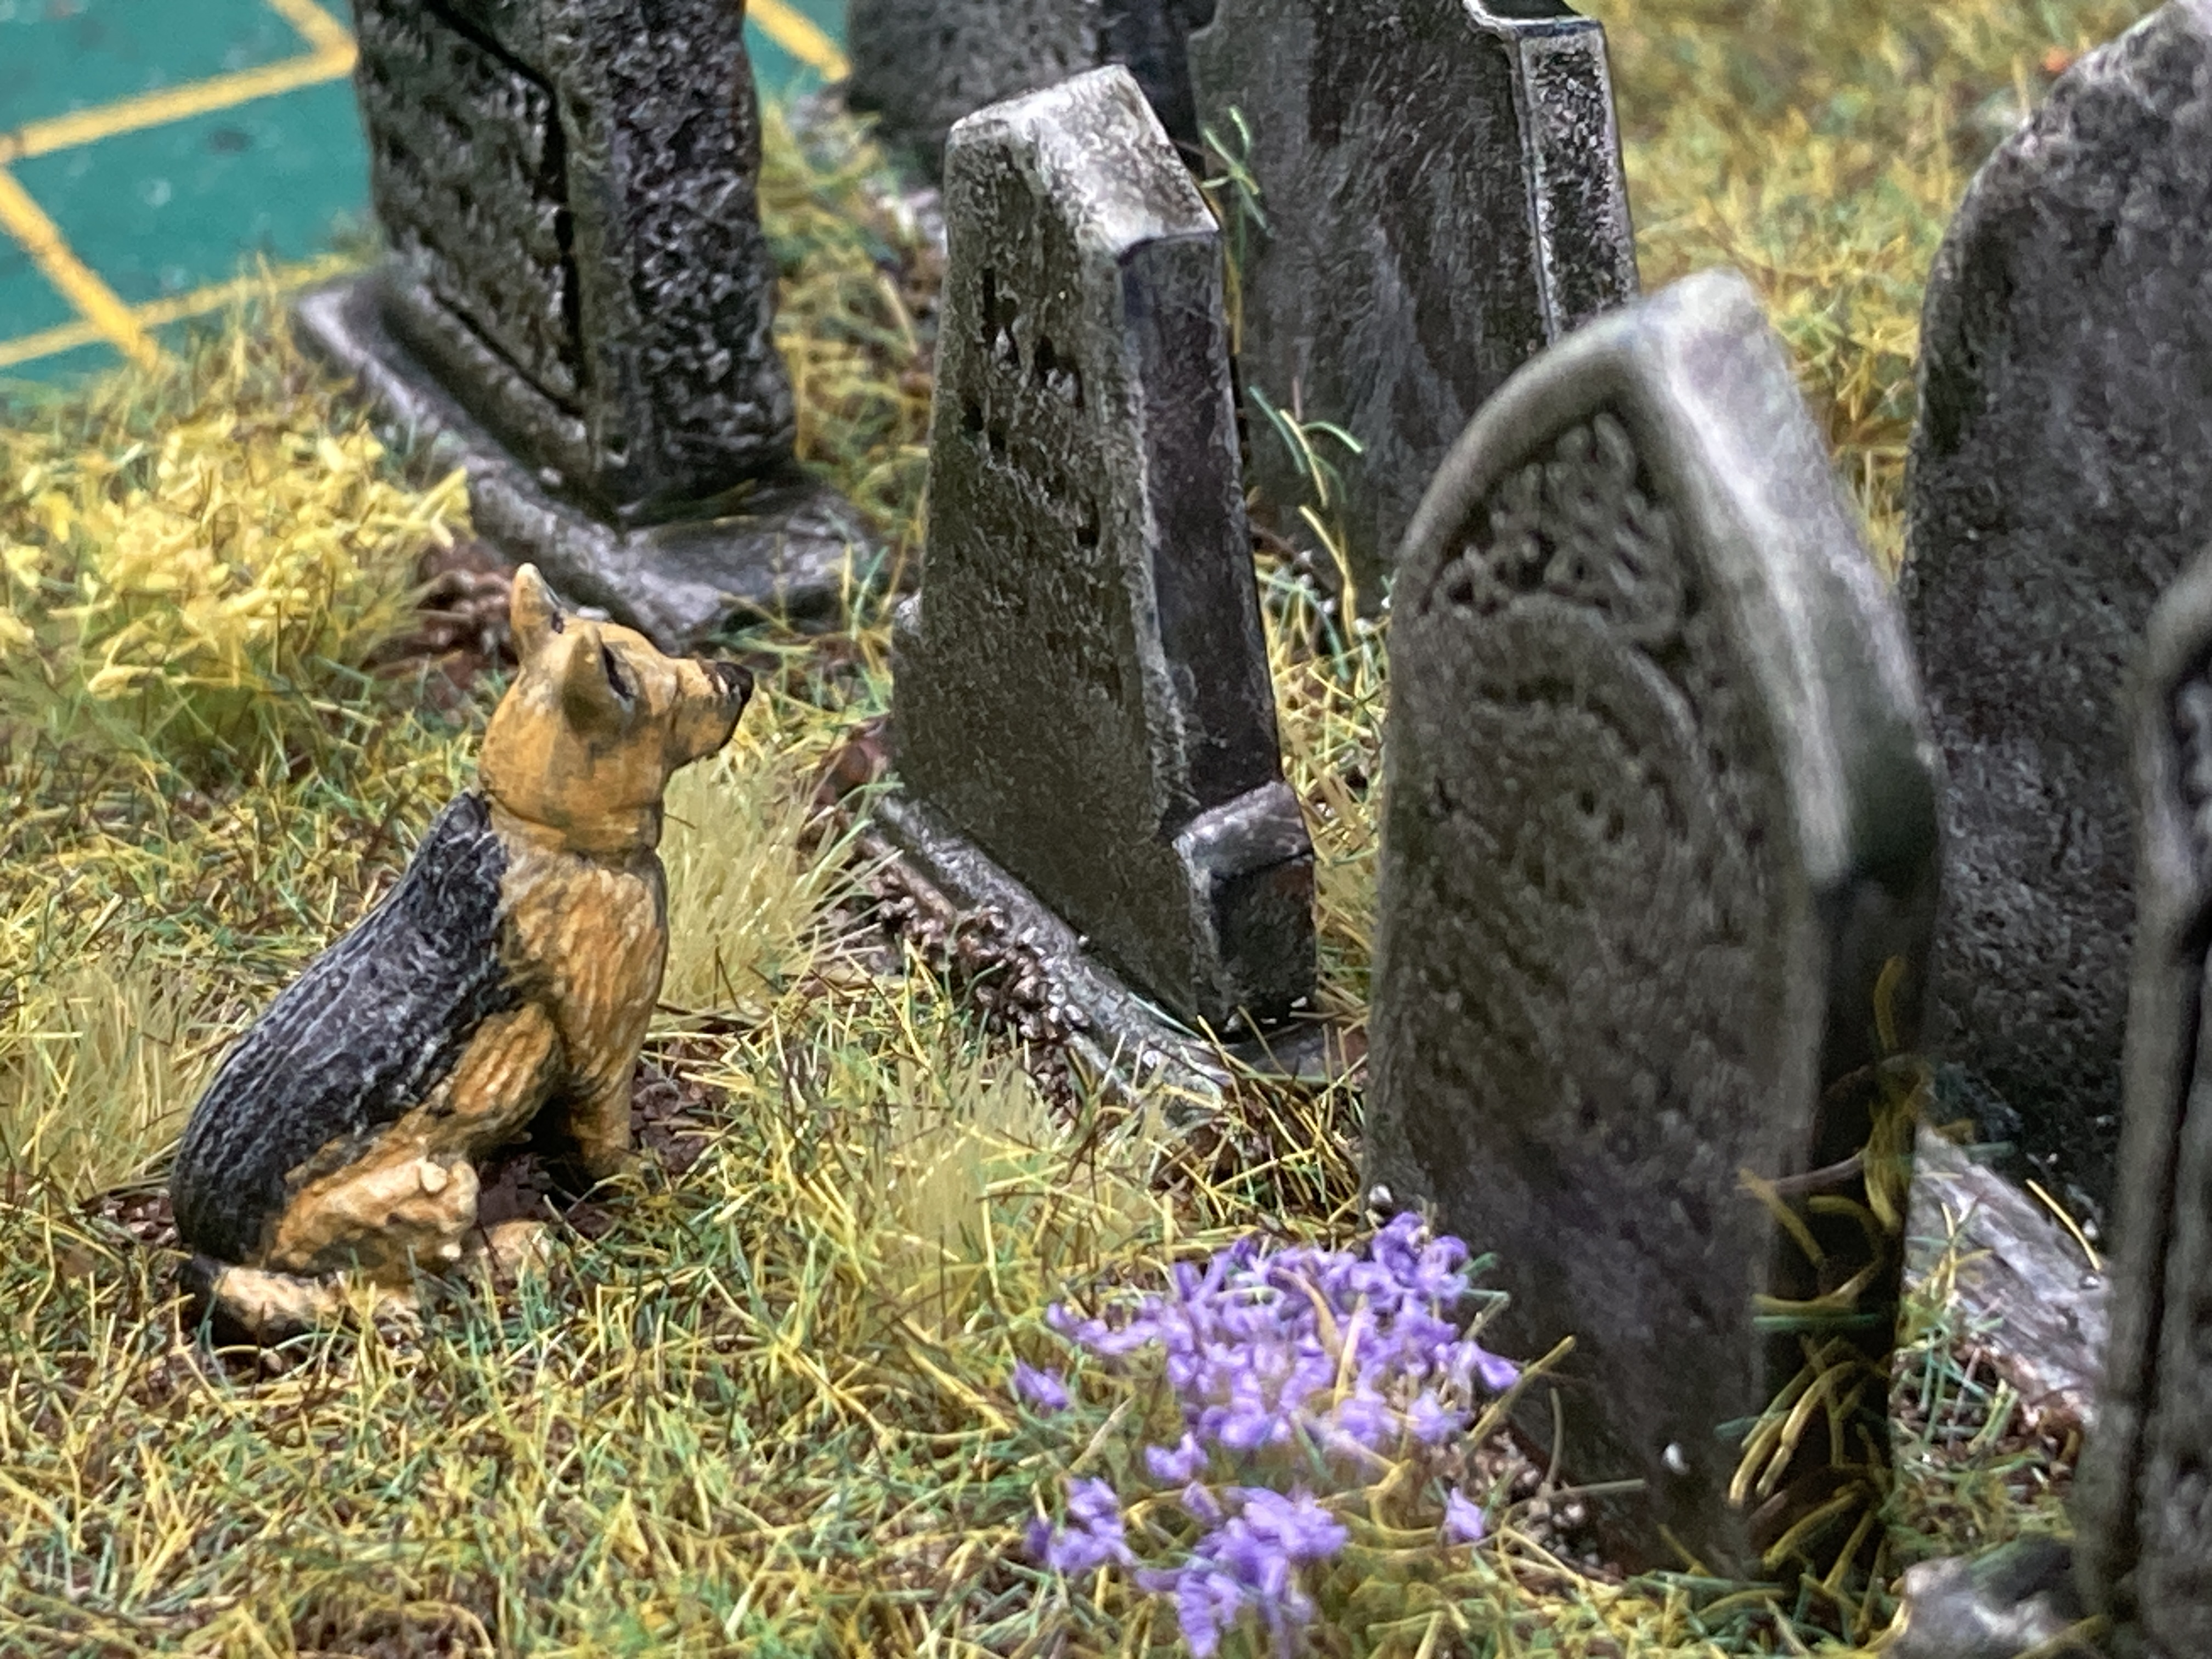
The graves were a mix of Debris of War and Renedra. I also included a curled up sleeping cat and a sitting dog I found in my bits box from a Warlord farm animals sprue.
The pieces were sprayed with Halford’s black then drybrushed grey, then light grey and finally white, all using cheap Hobbycraft acrylic paints. The stone work was then washed using the usual homemade wash I’ve had lying around for over a year. I’m pretty sure there’s a mix of black, burnt umber and matte medium in there but it’s been a while.

After a further application of green wash (Army Painter) I painted the soil using a watered down mix of black and brown cheap artists acrylics.
I painted the cat an orange before quickly painting it black as it stood out a mile. The dog I painted as a German shepherd using only three colours, and one of those was a beige for a quick drybrush.

After the usual tufts, static grass and a few birch seeds for leaves that was it. The cemetery was complete. Project done…
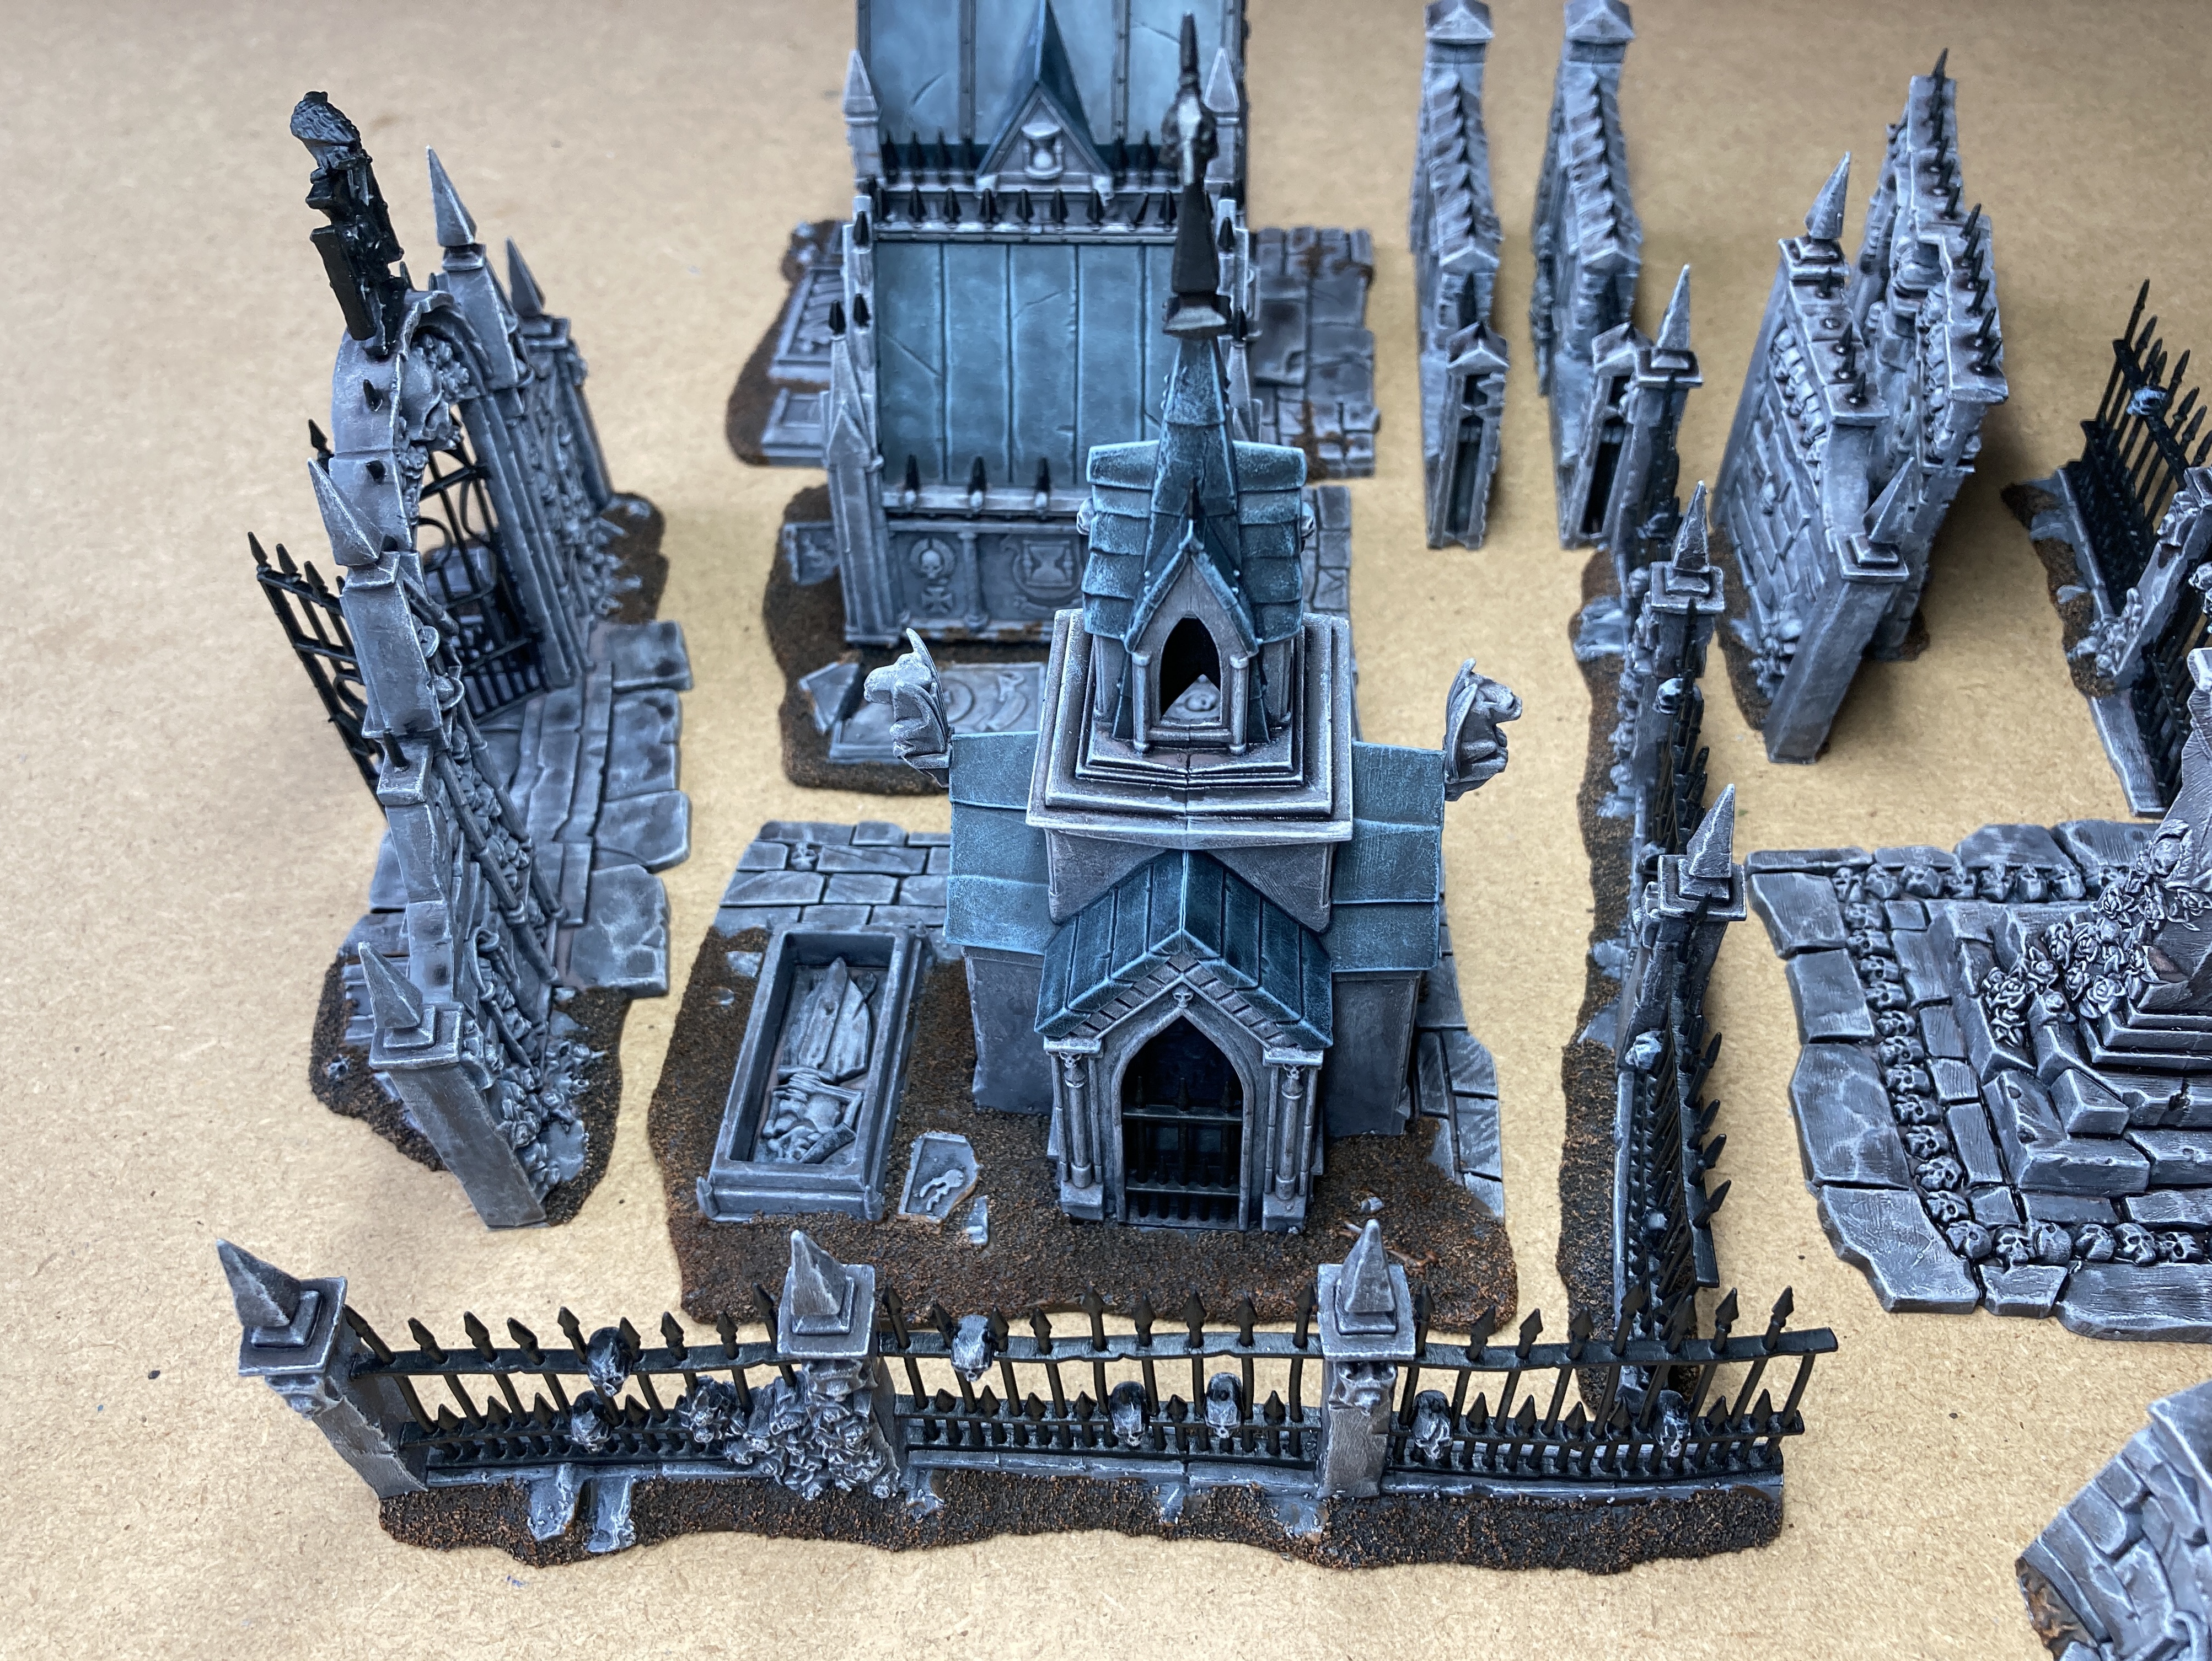
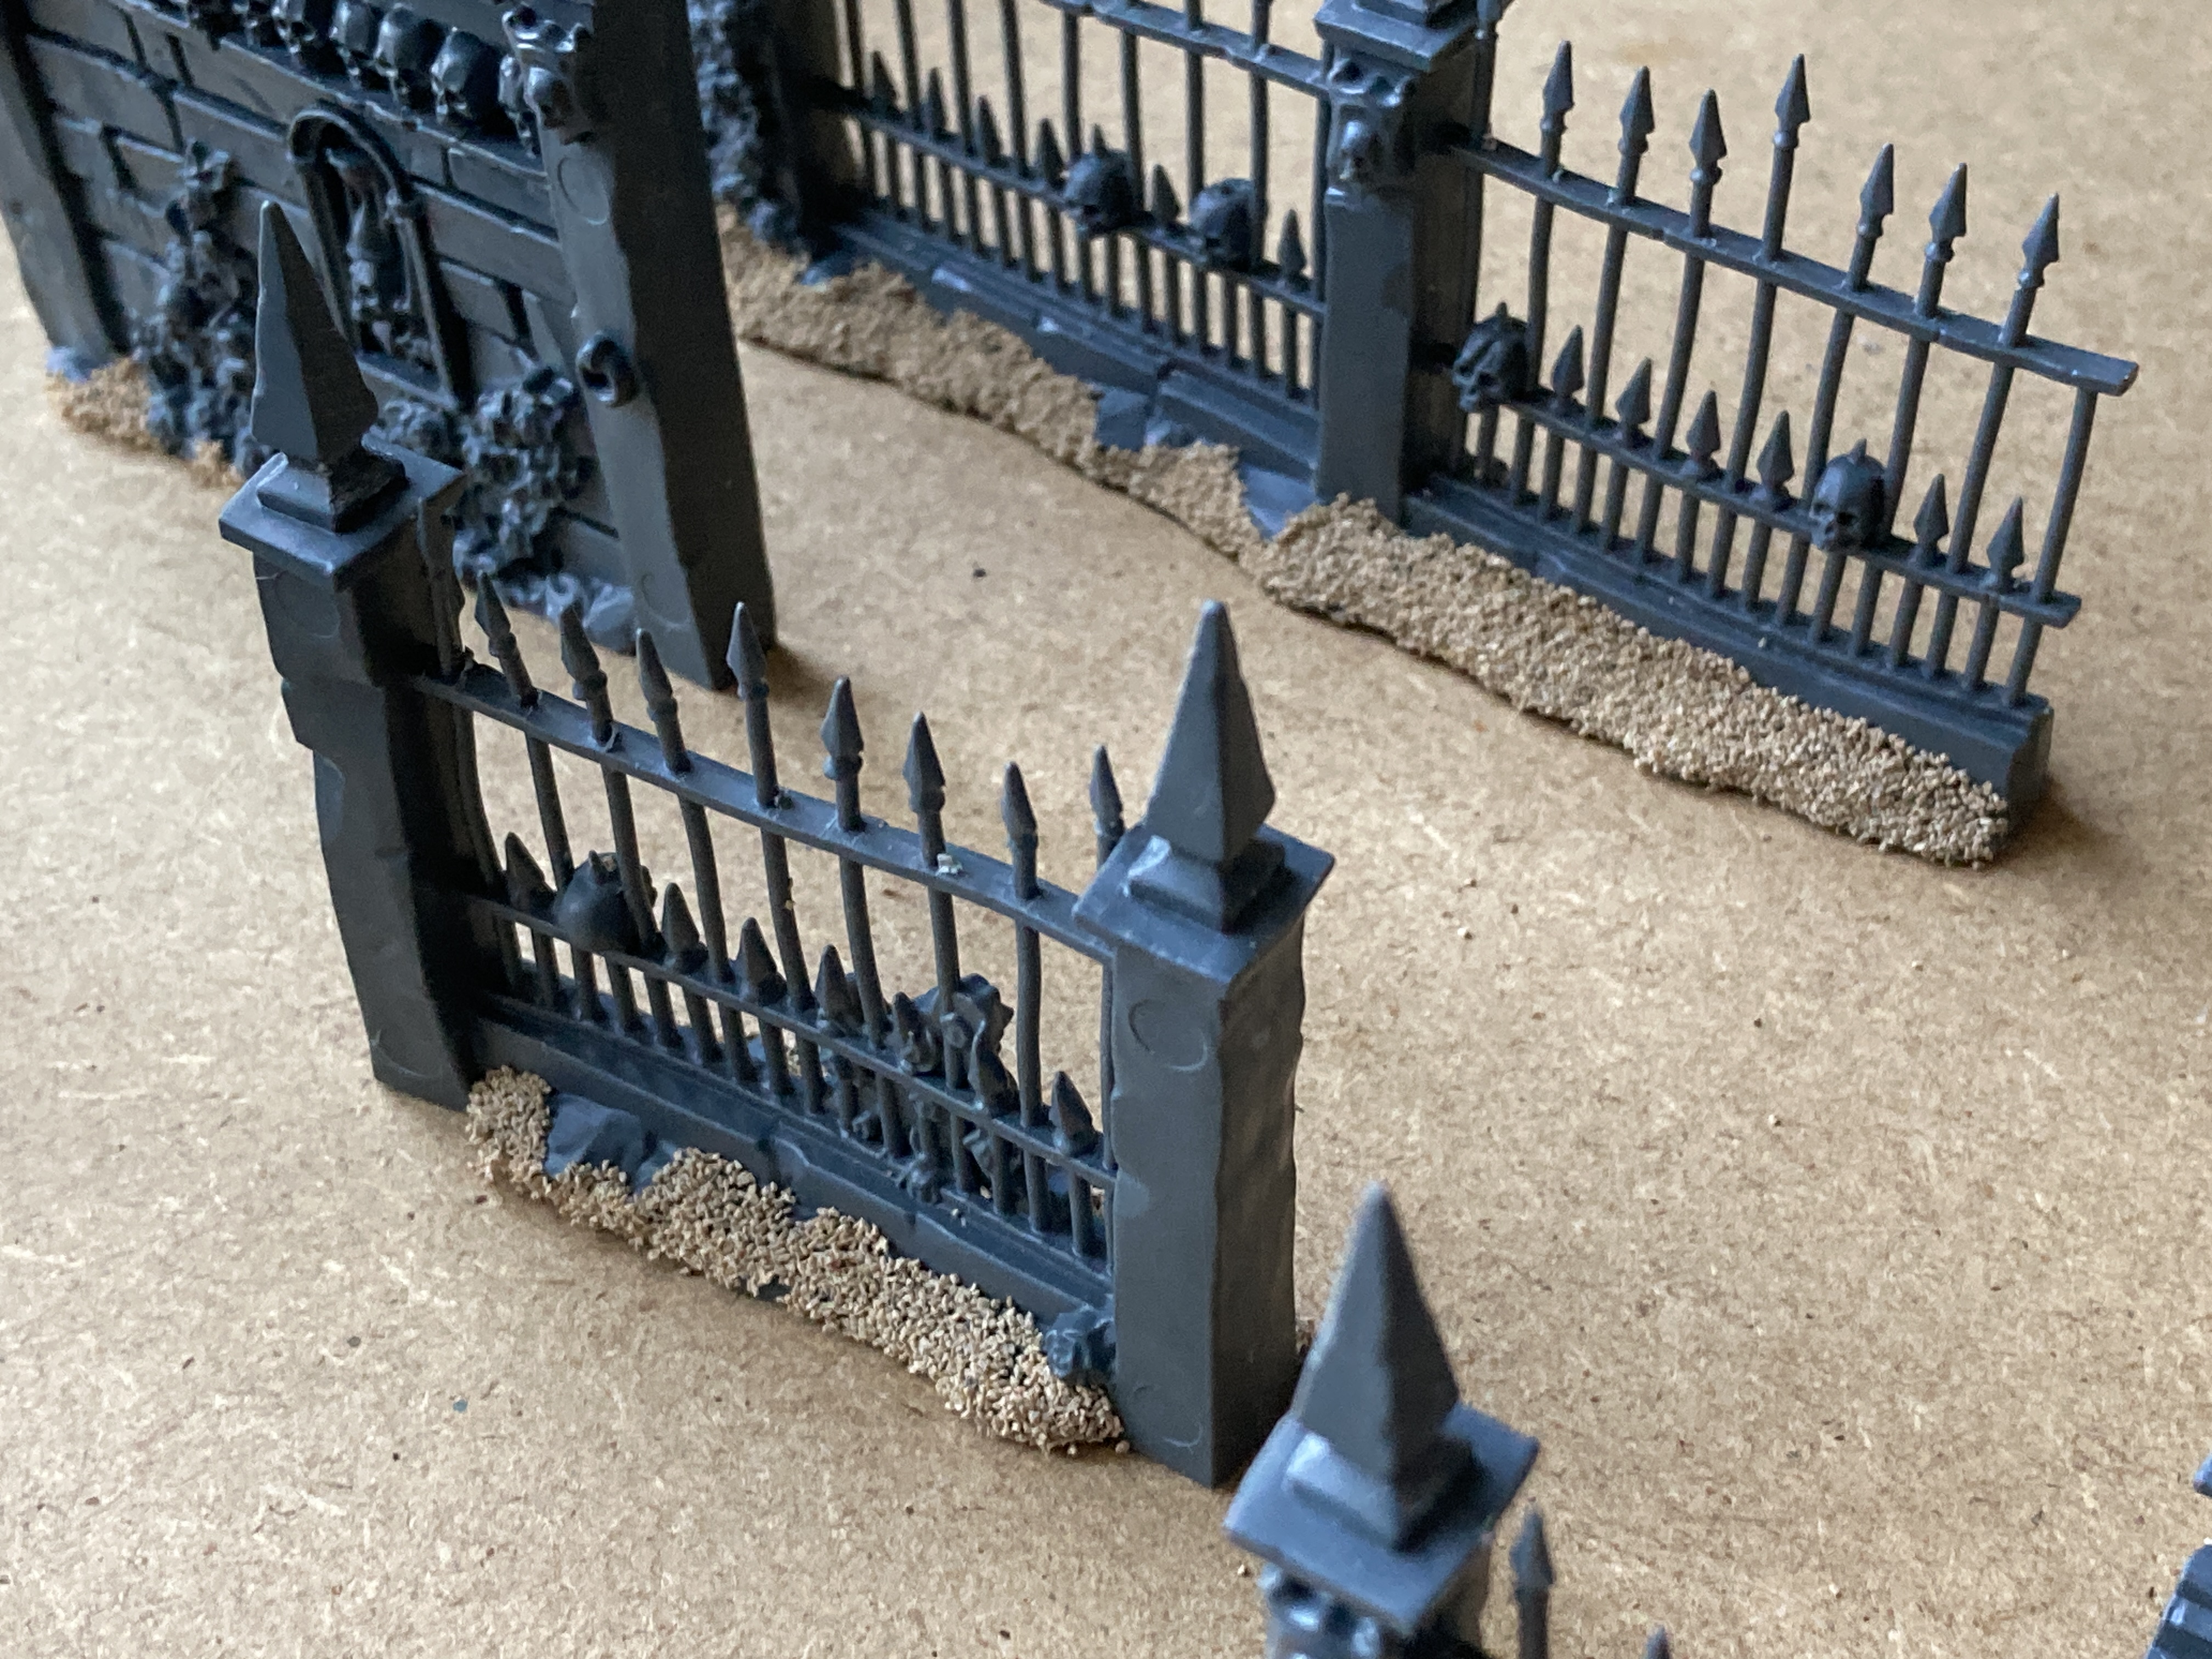
…for now at least. I’m really tempted to get some plastic iron railing fences from Renedra, enough for the rest of the cemetery to go with the Garden of Morr set for a full 2×2. If I do that will be later this year or maybe next year as I want to get on with other projects.
I’ve also got plenty of gravestones left so I could easily add more pieces but for now I have enough.
There’s just one thing missing from this project now, a Battle Report.
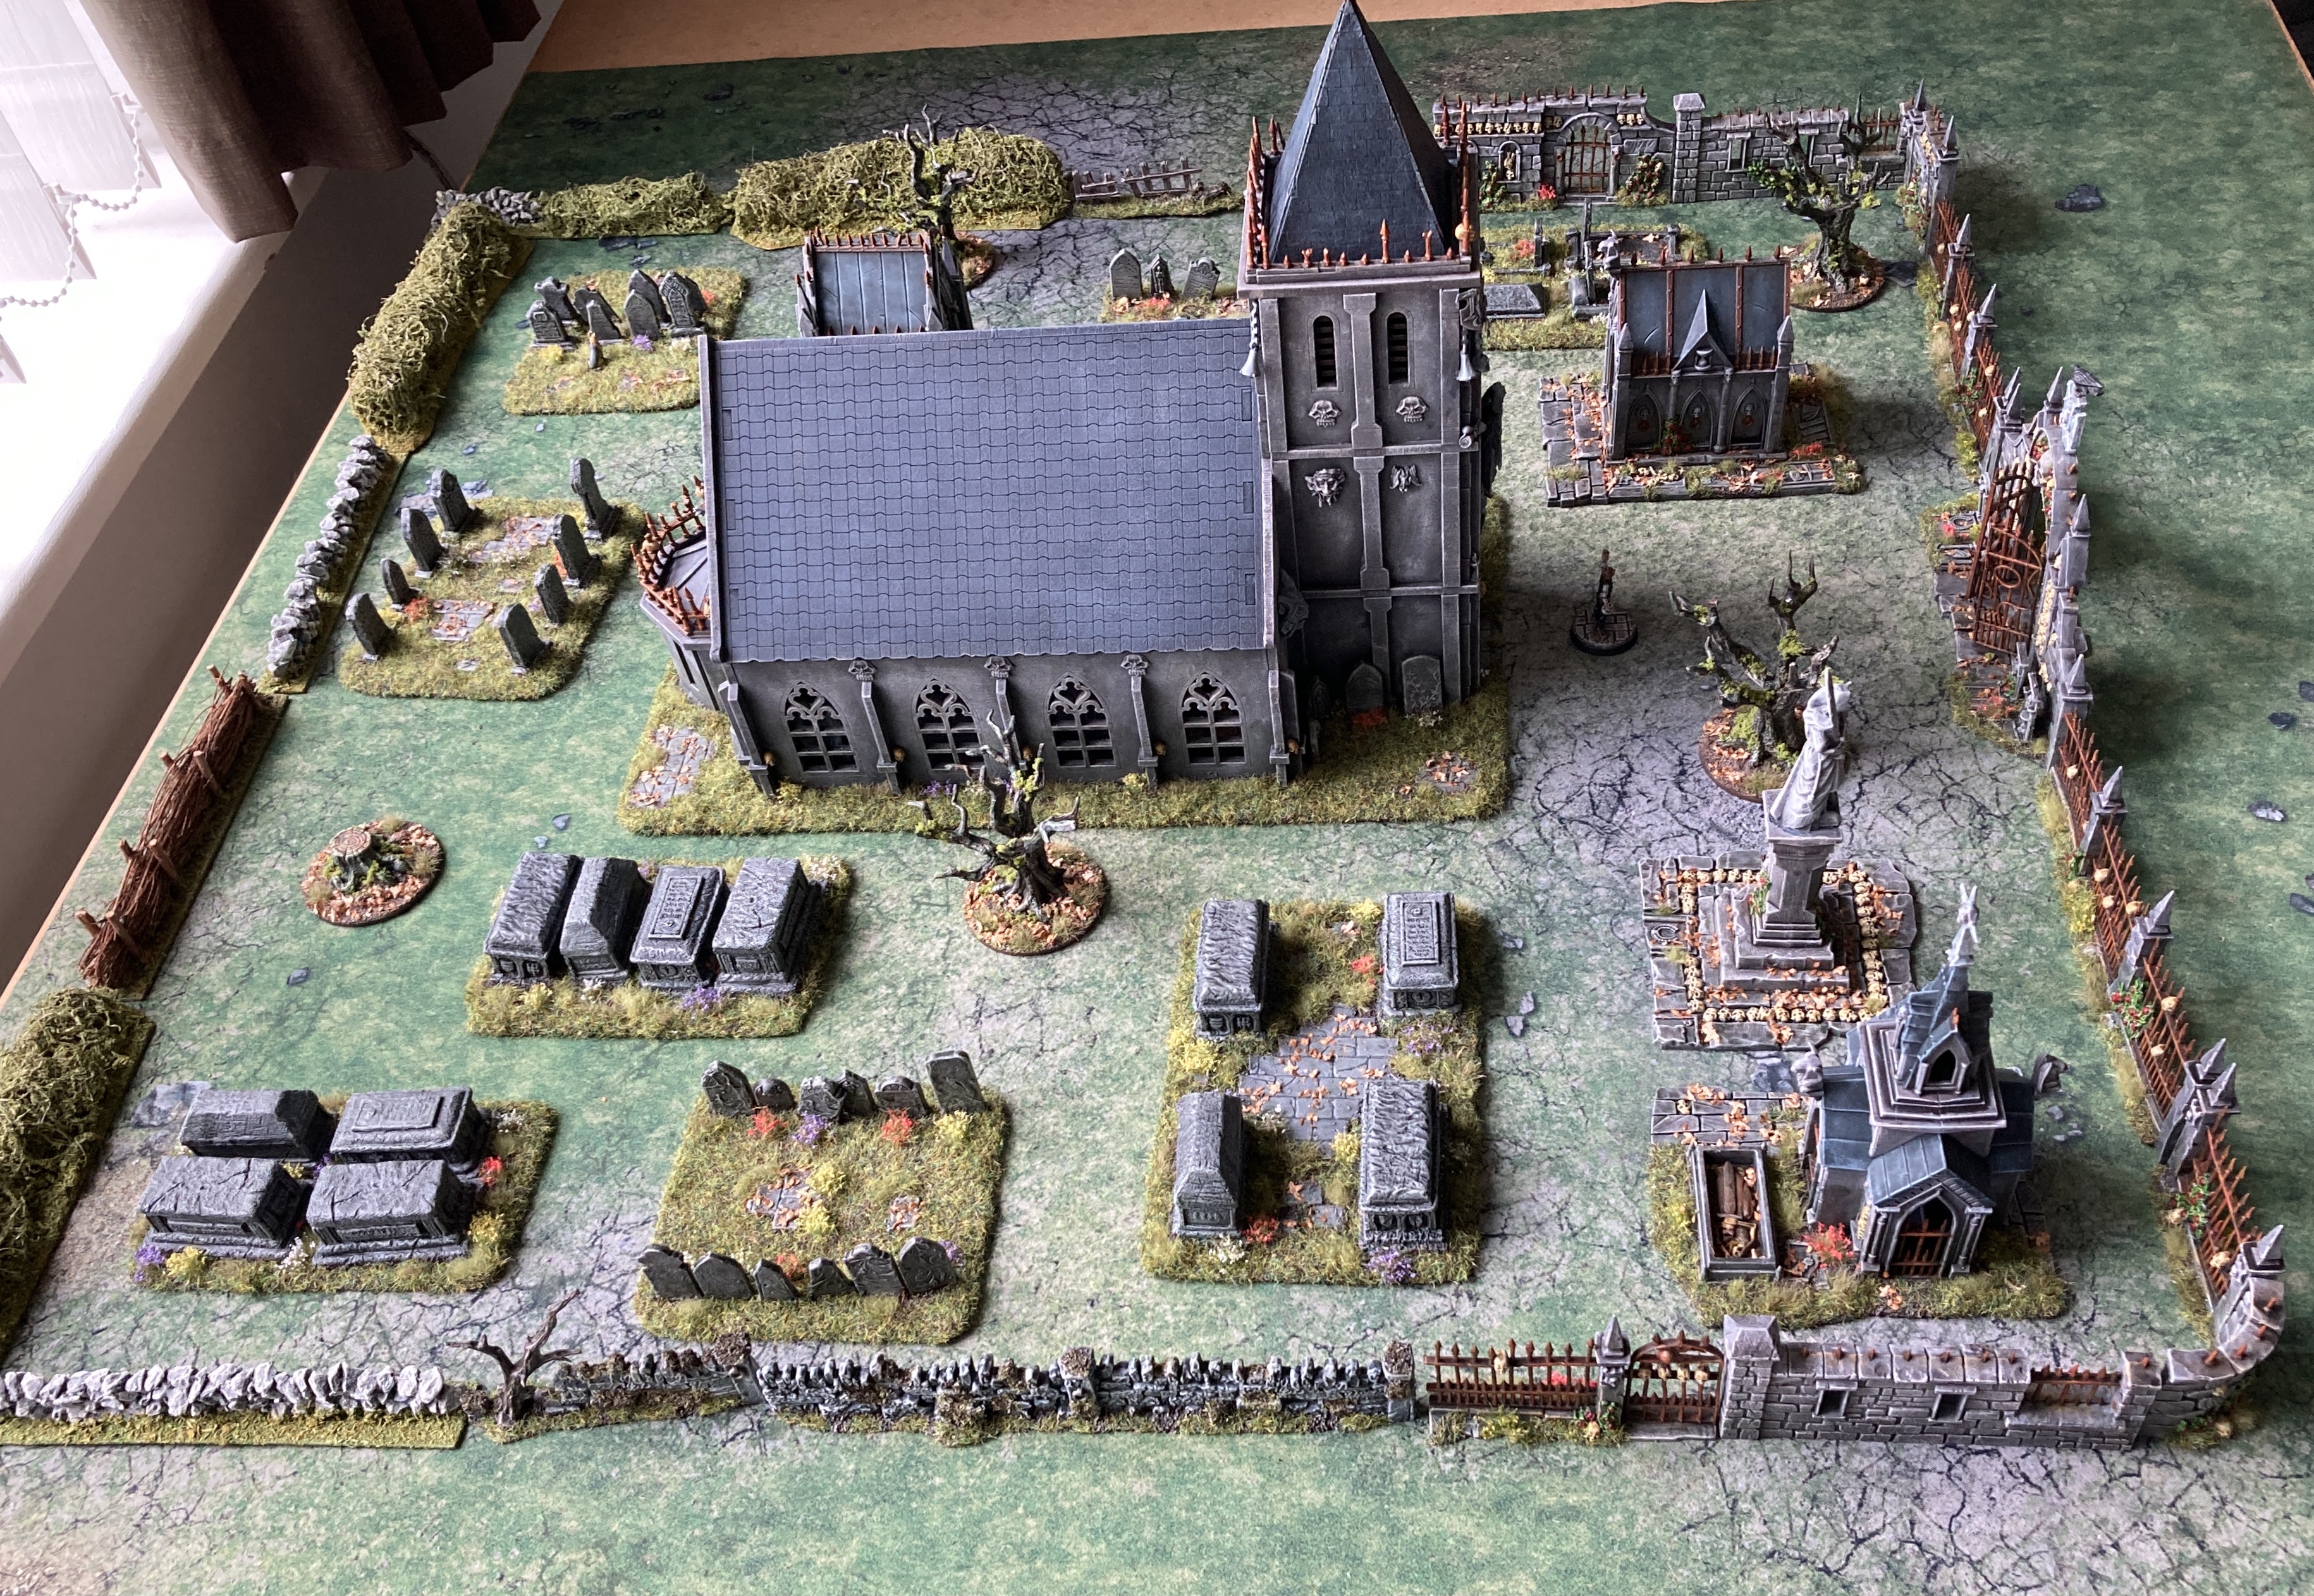
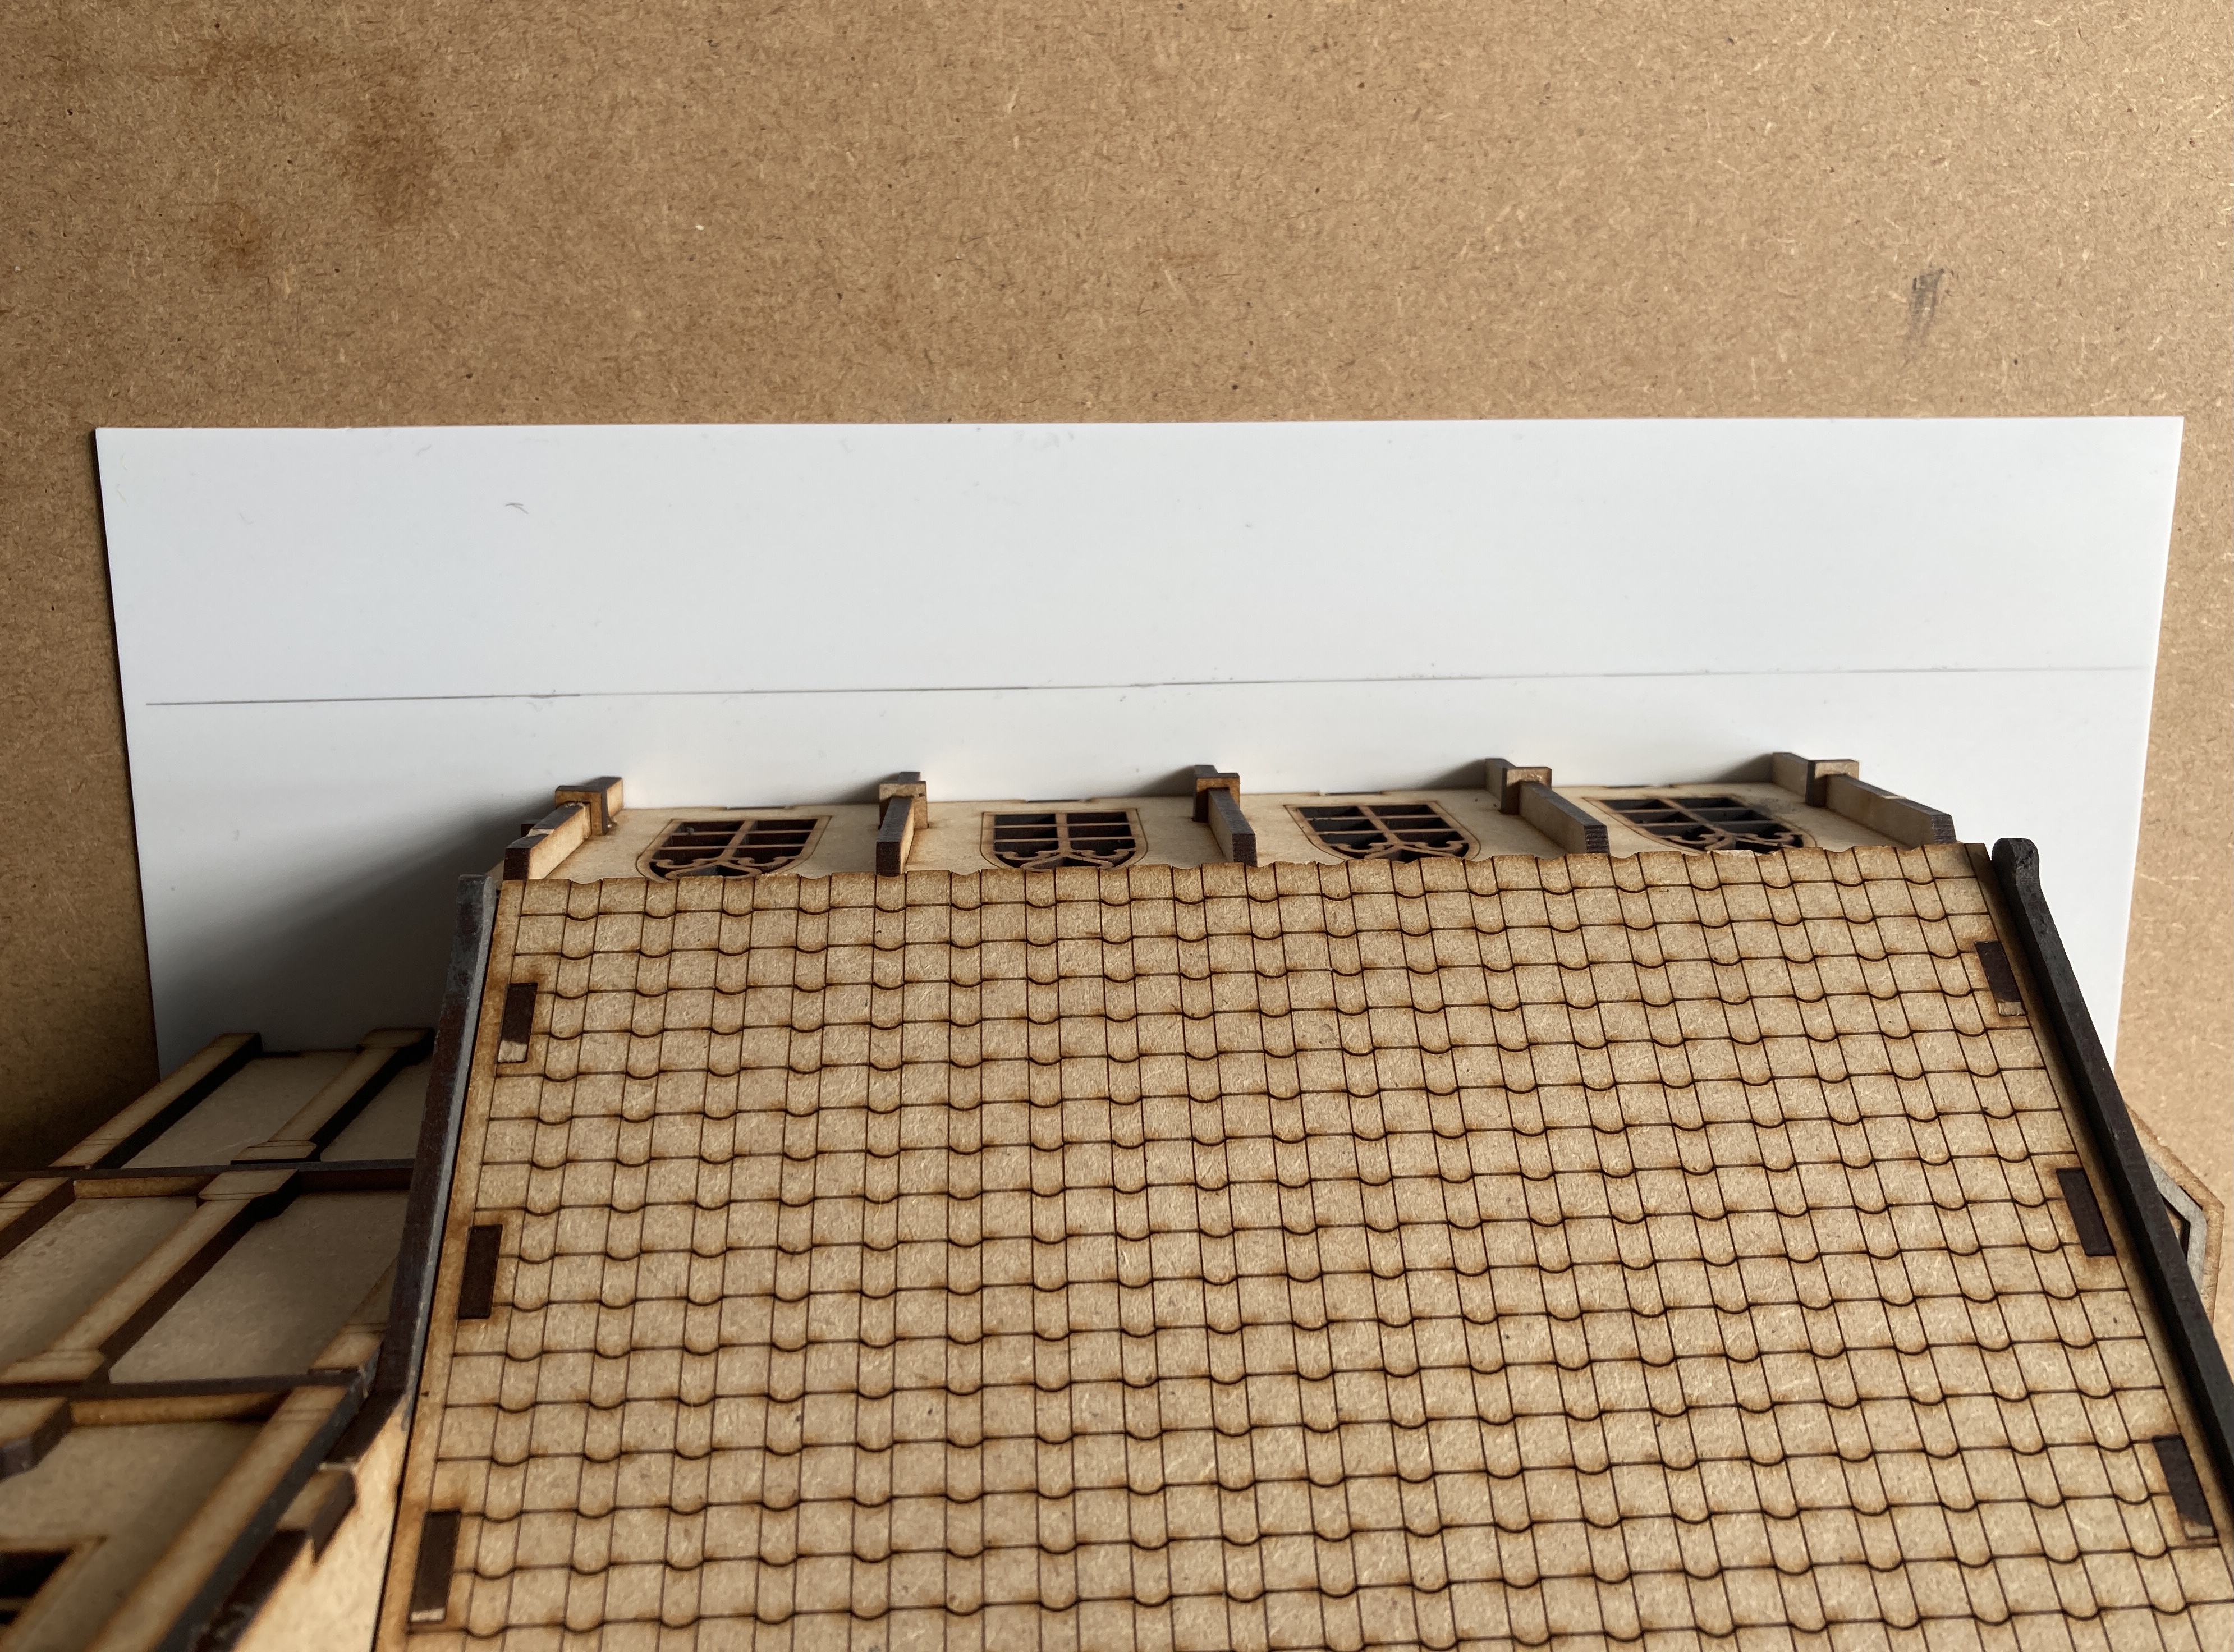
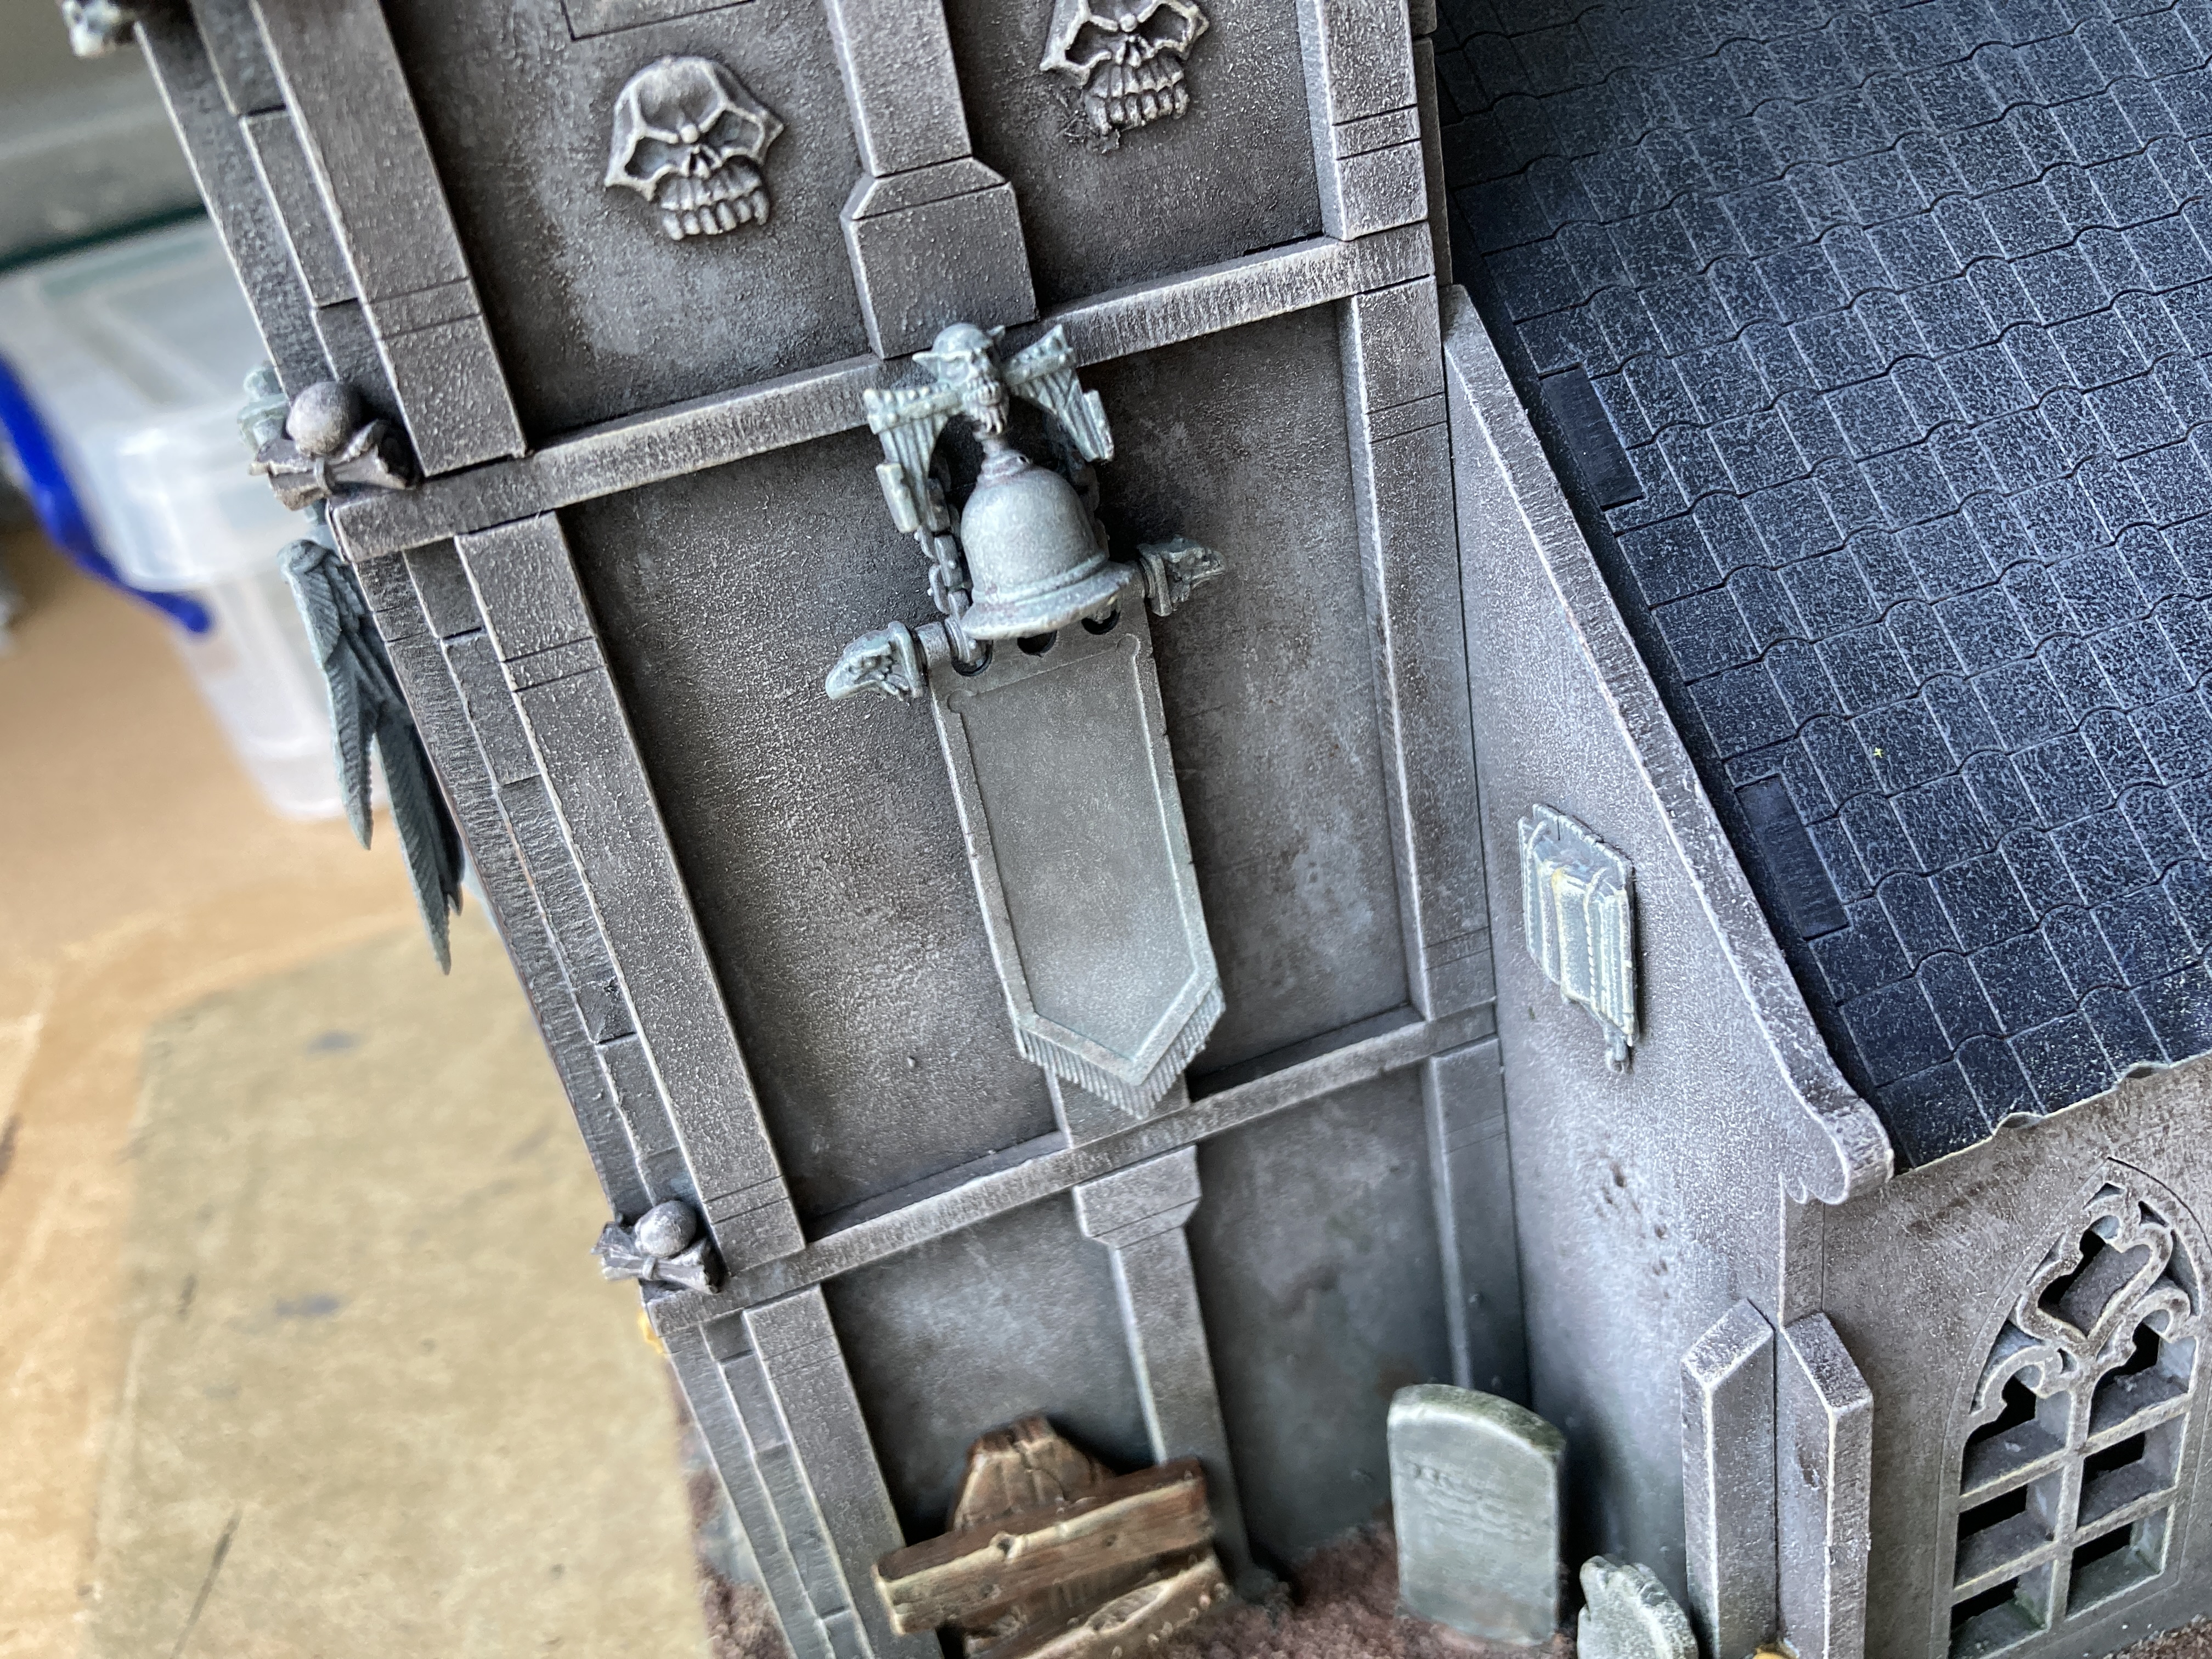
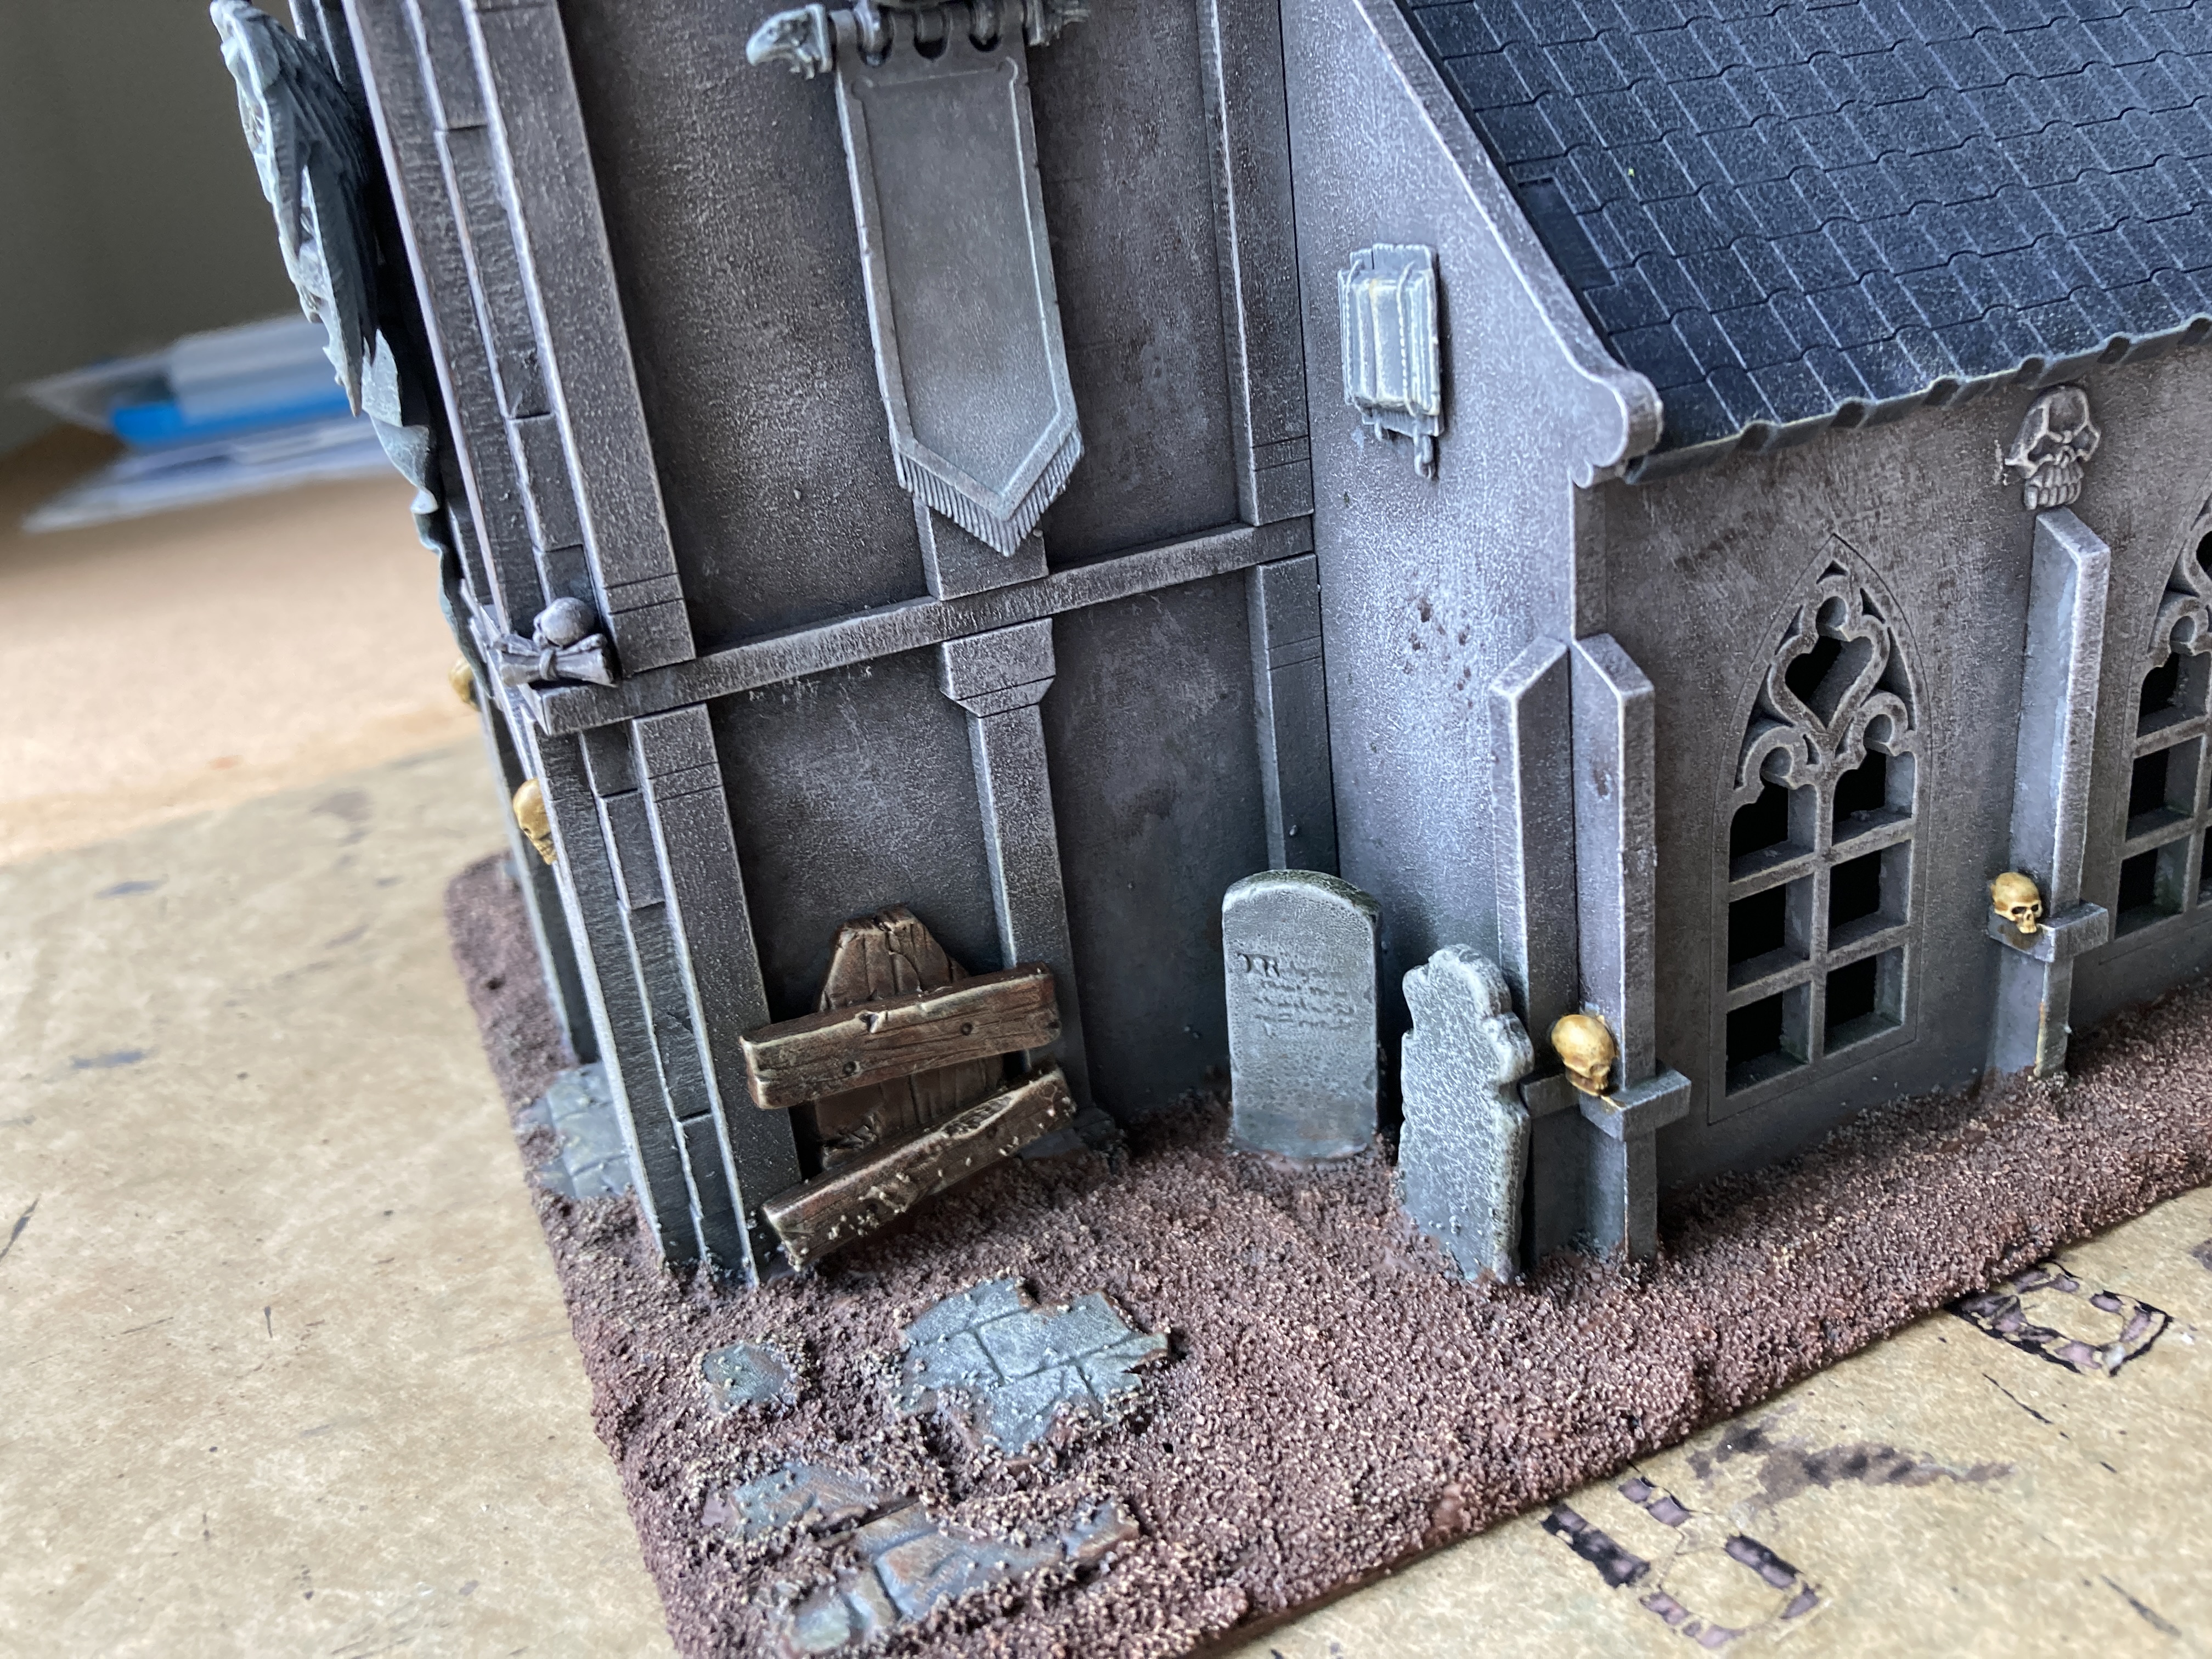
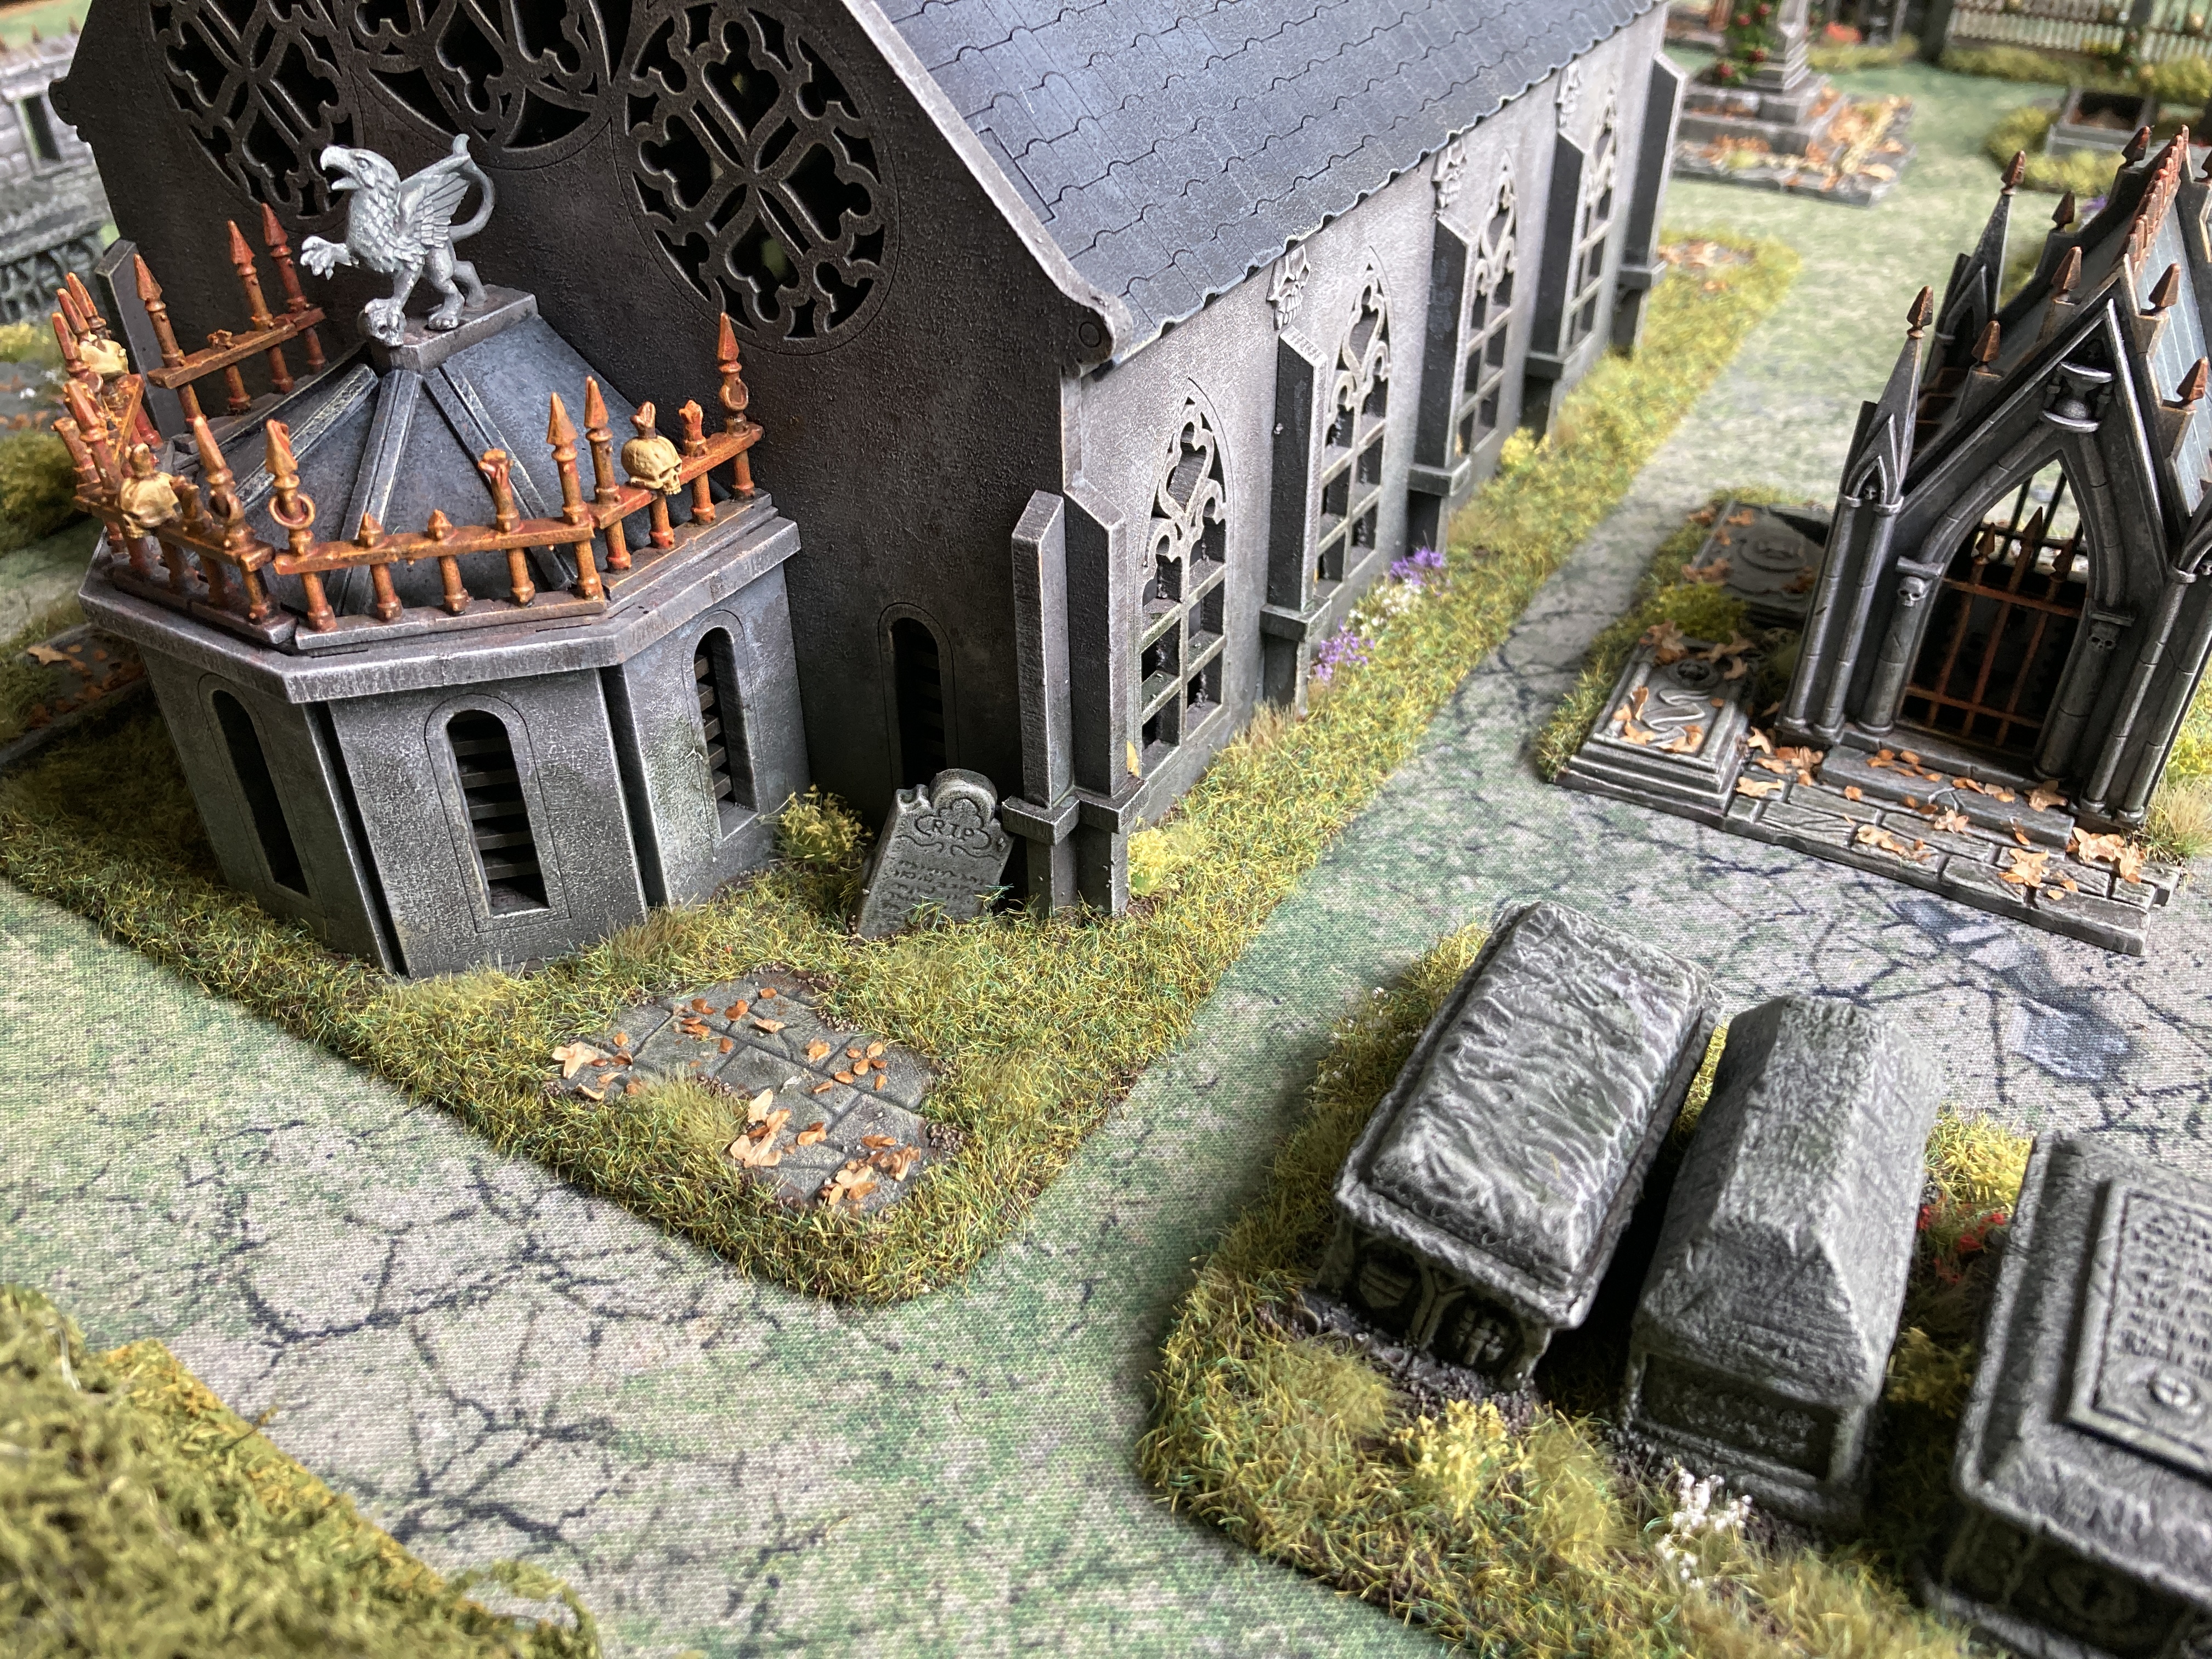
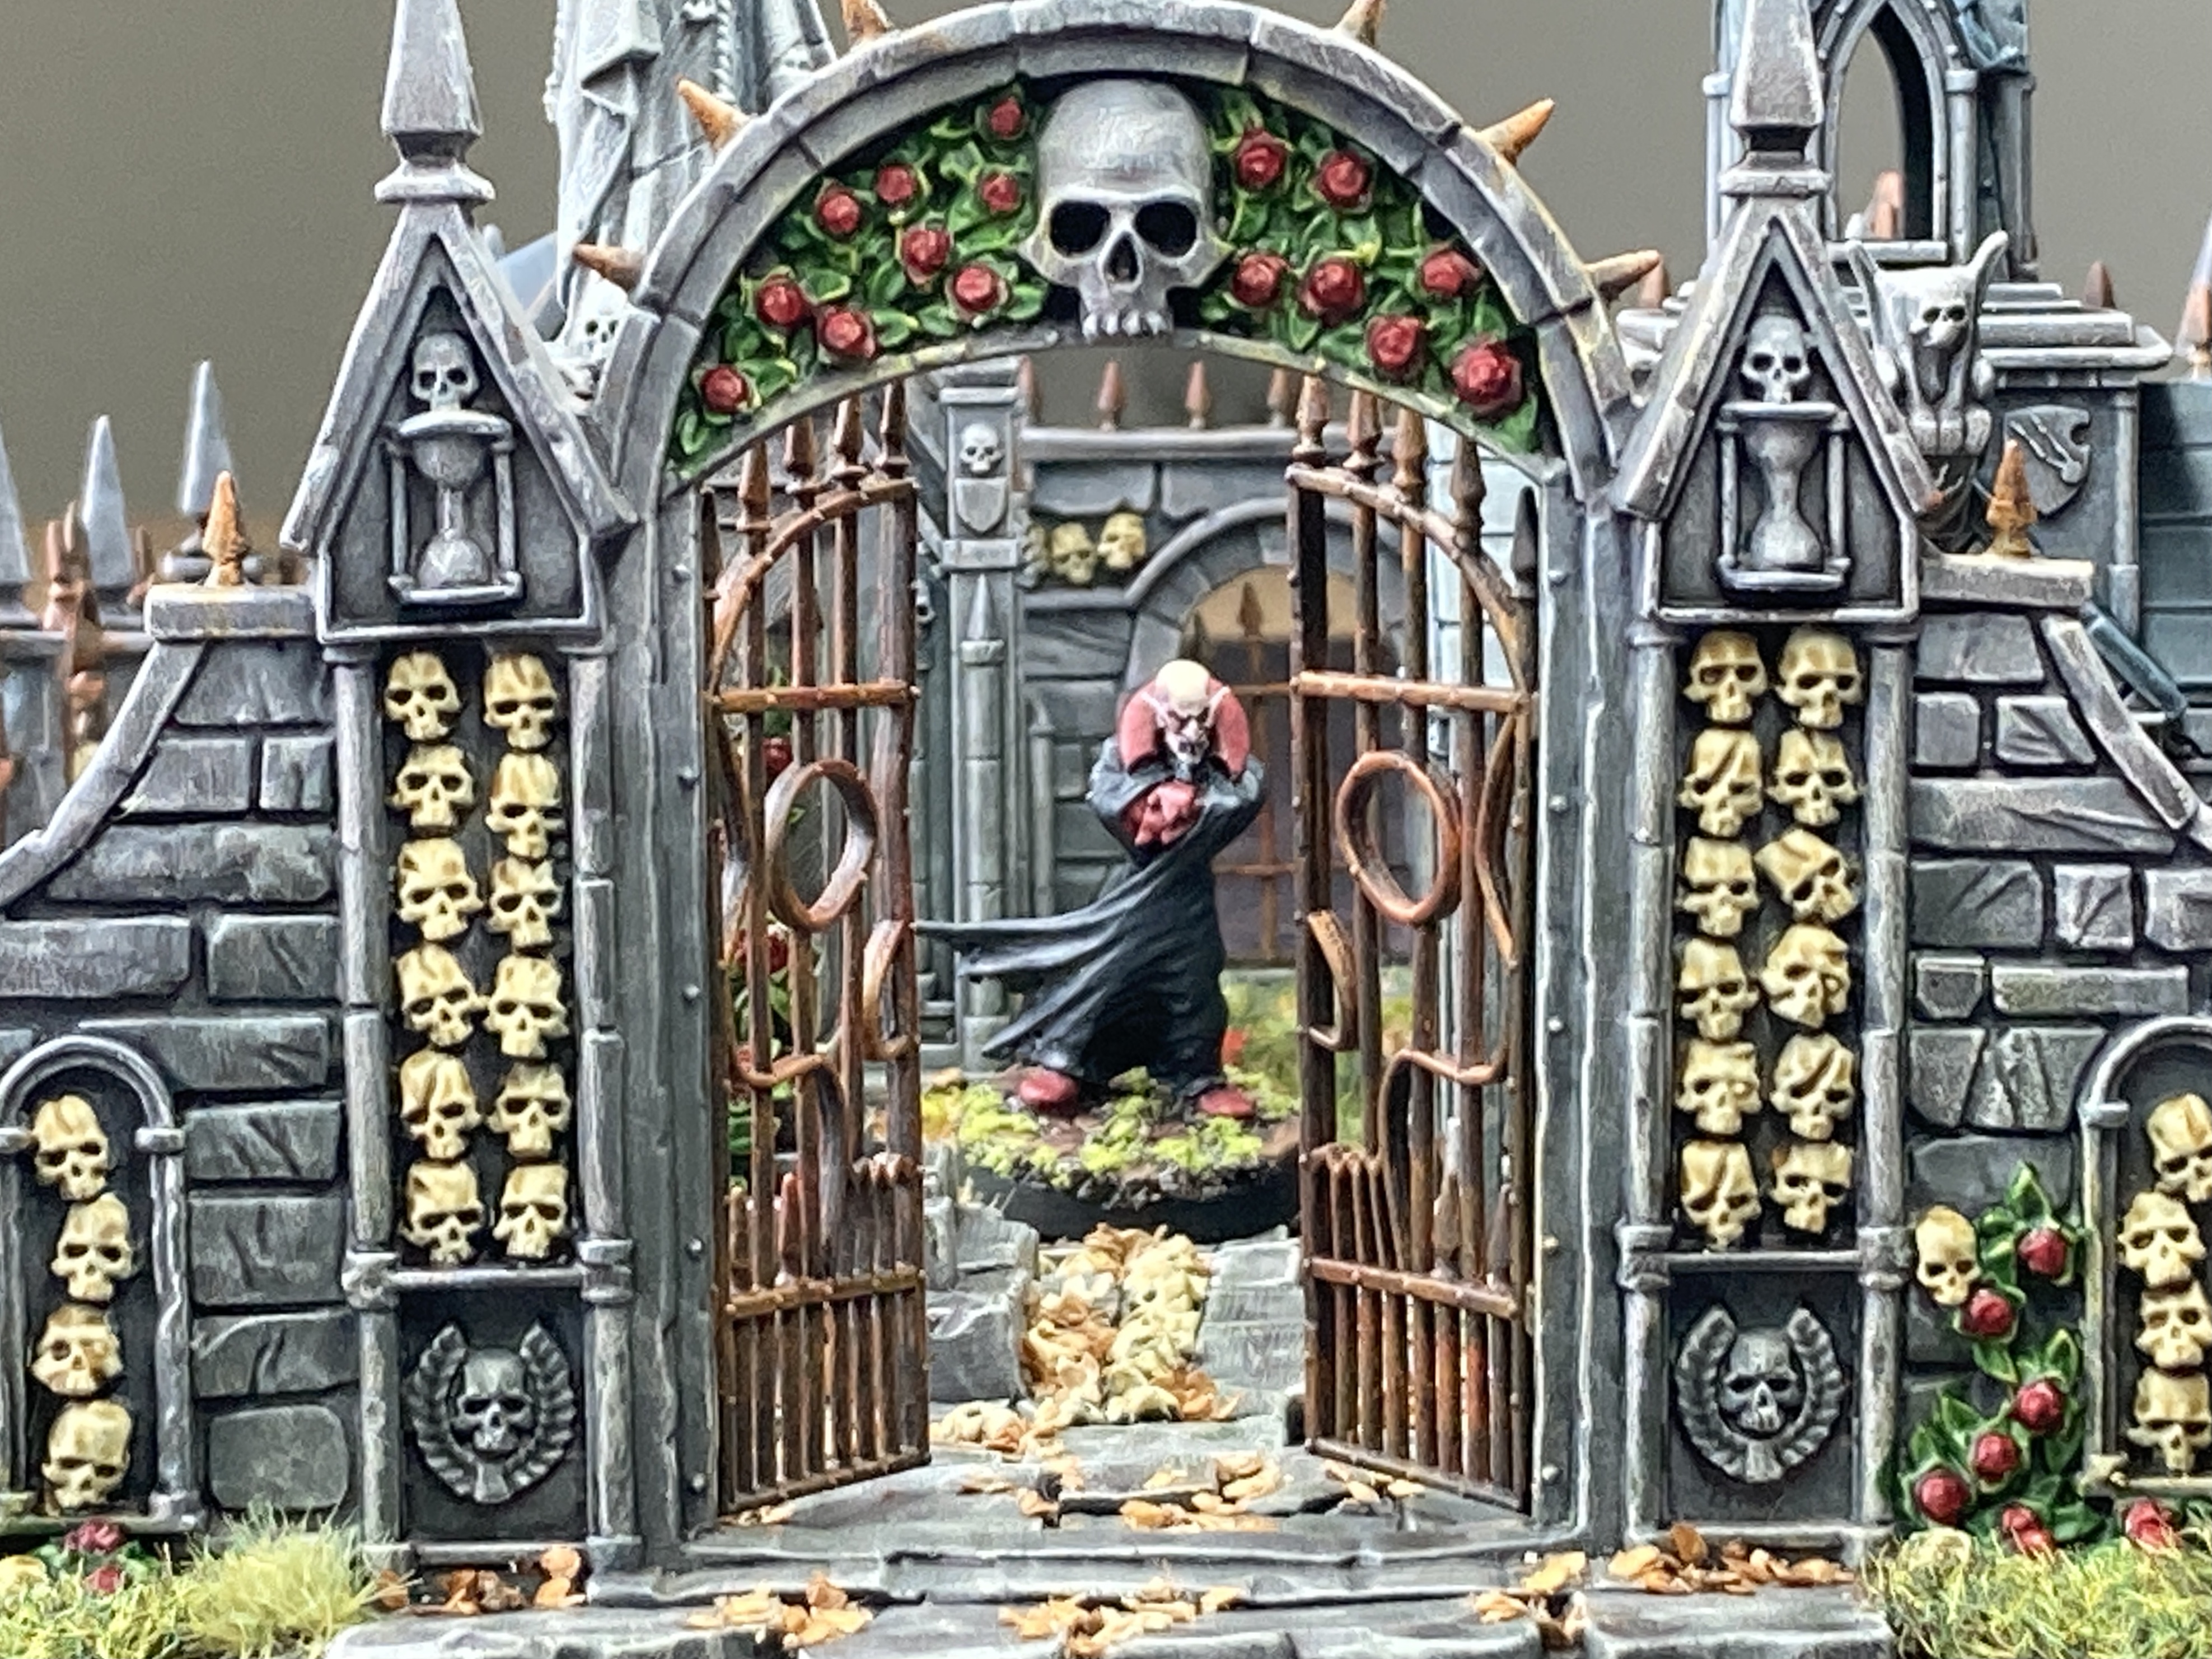
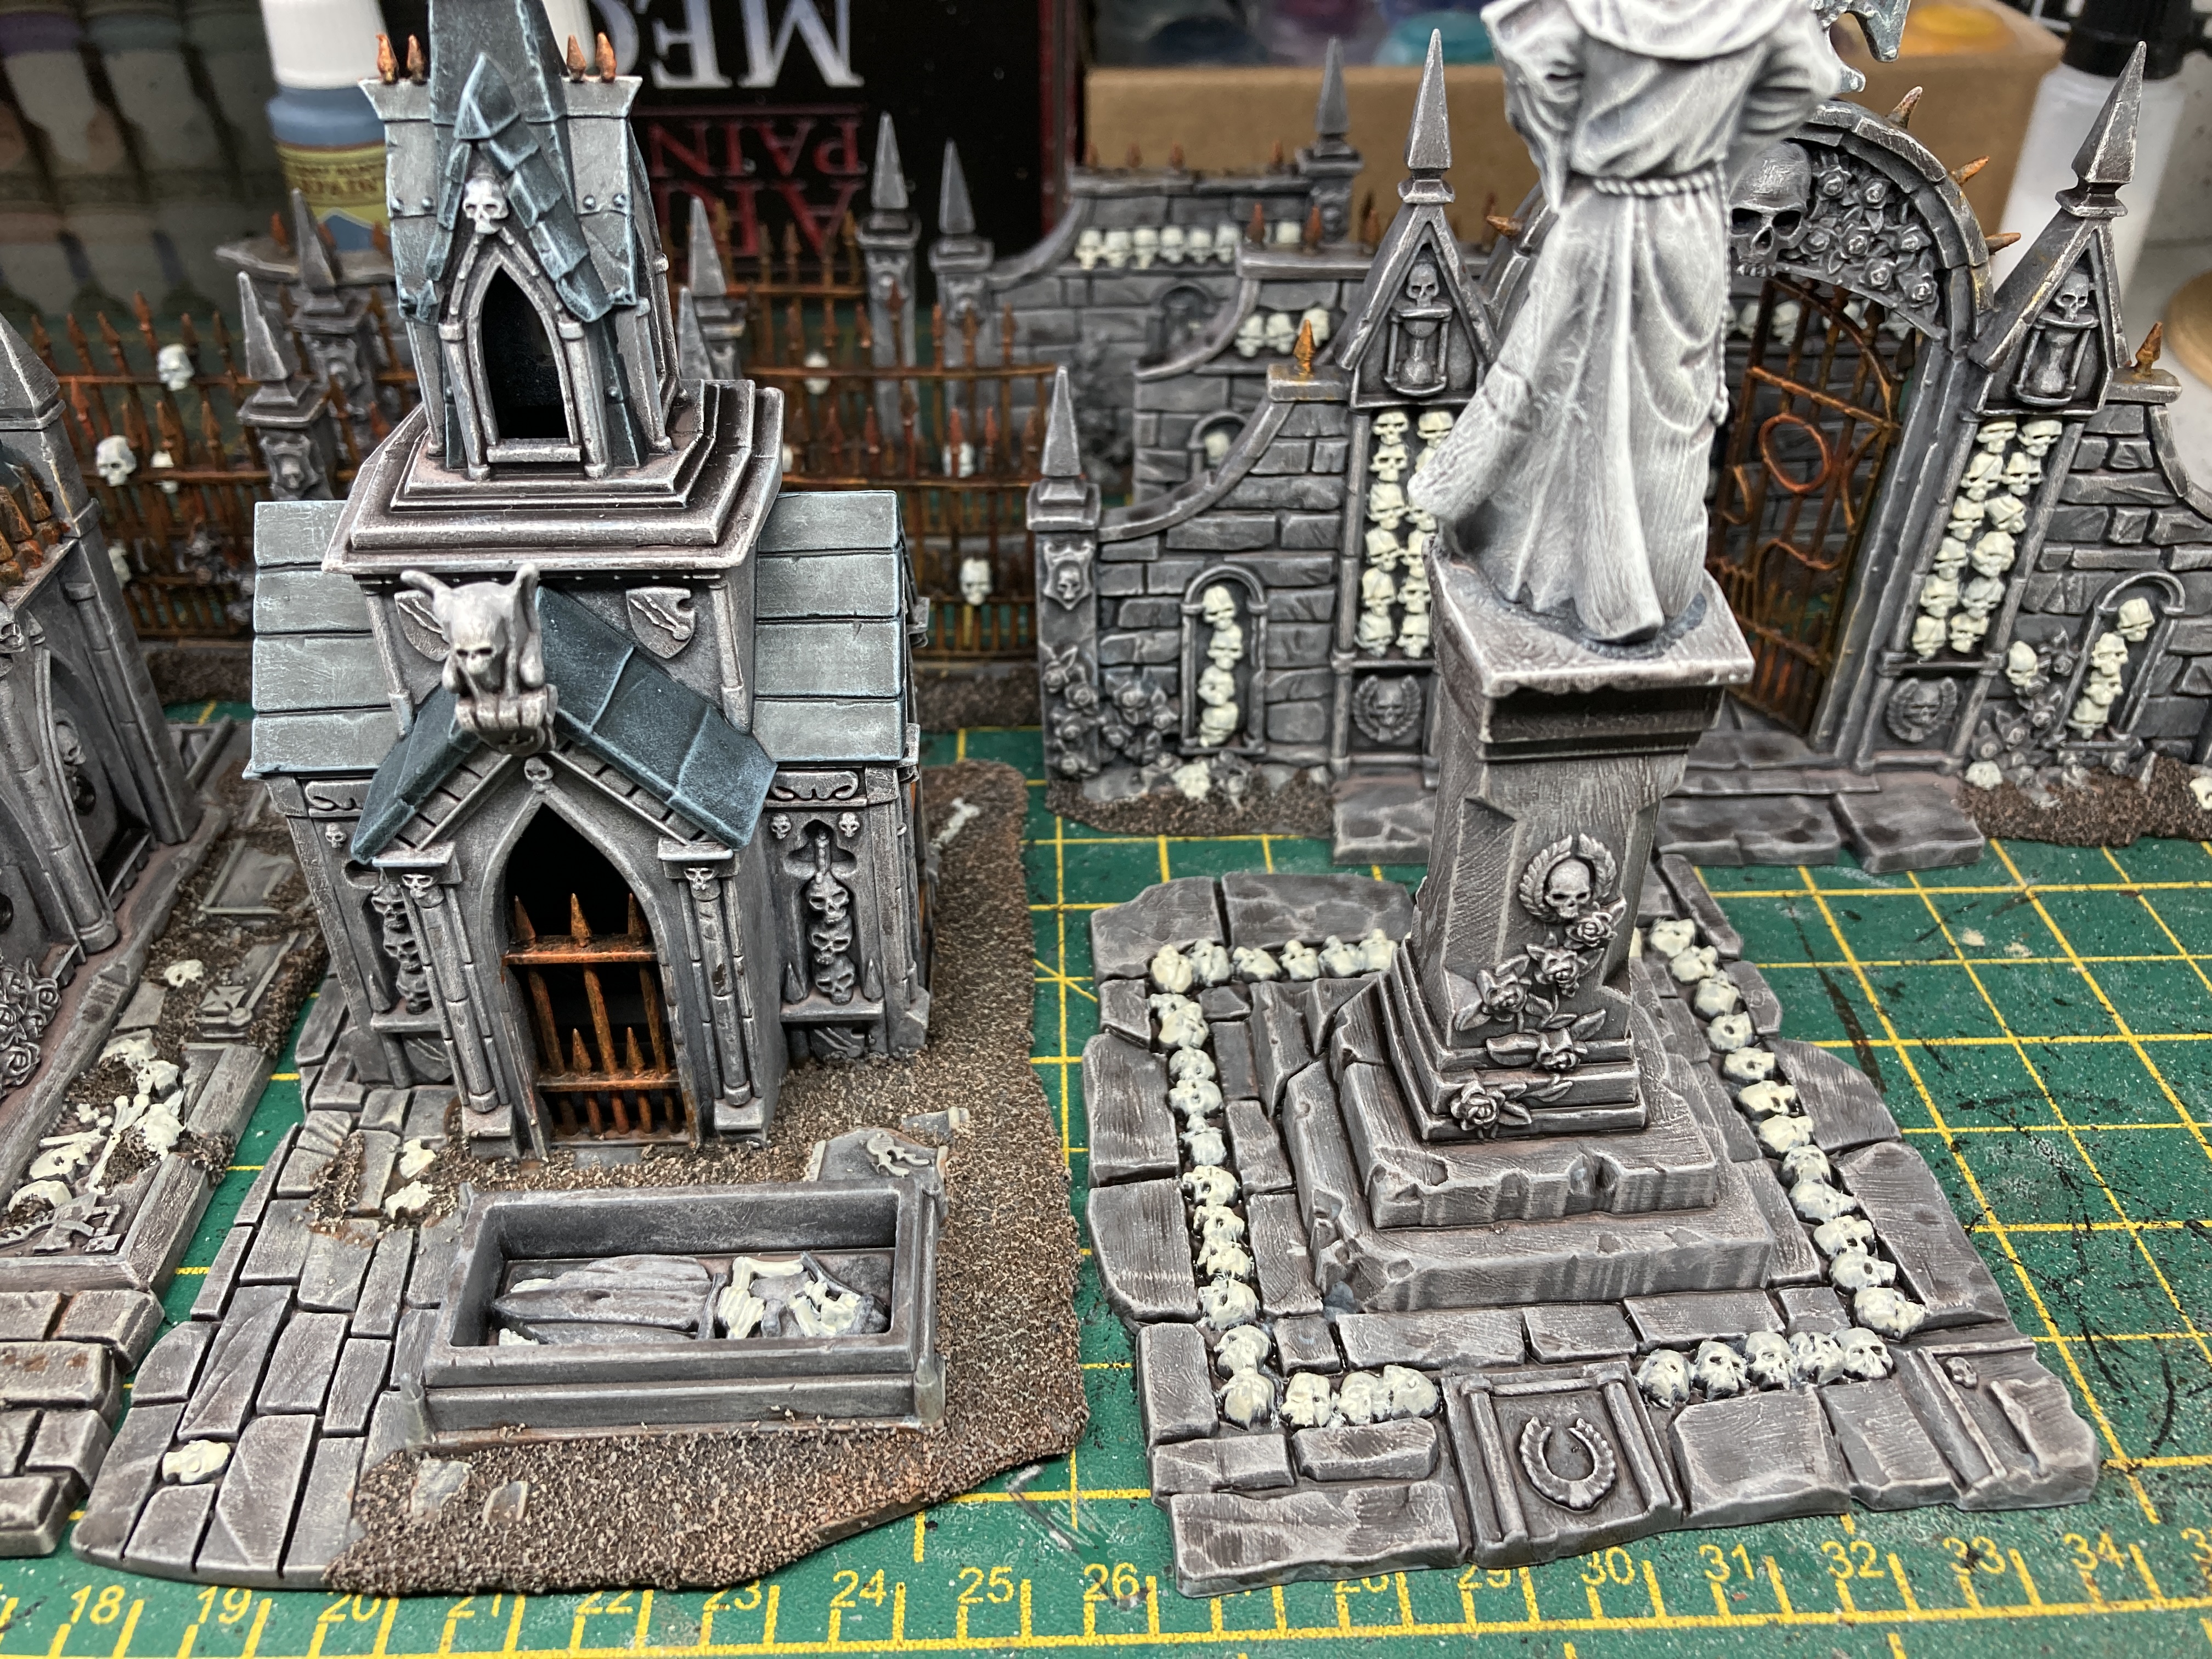
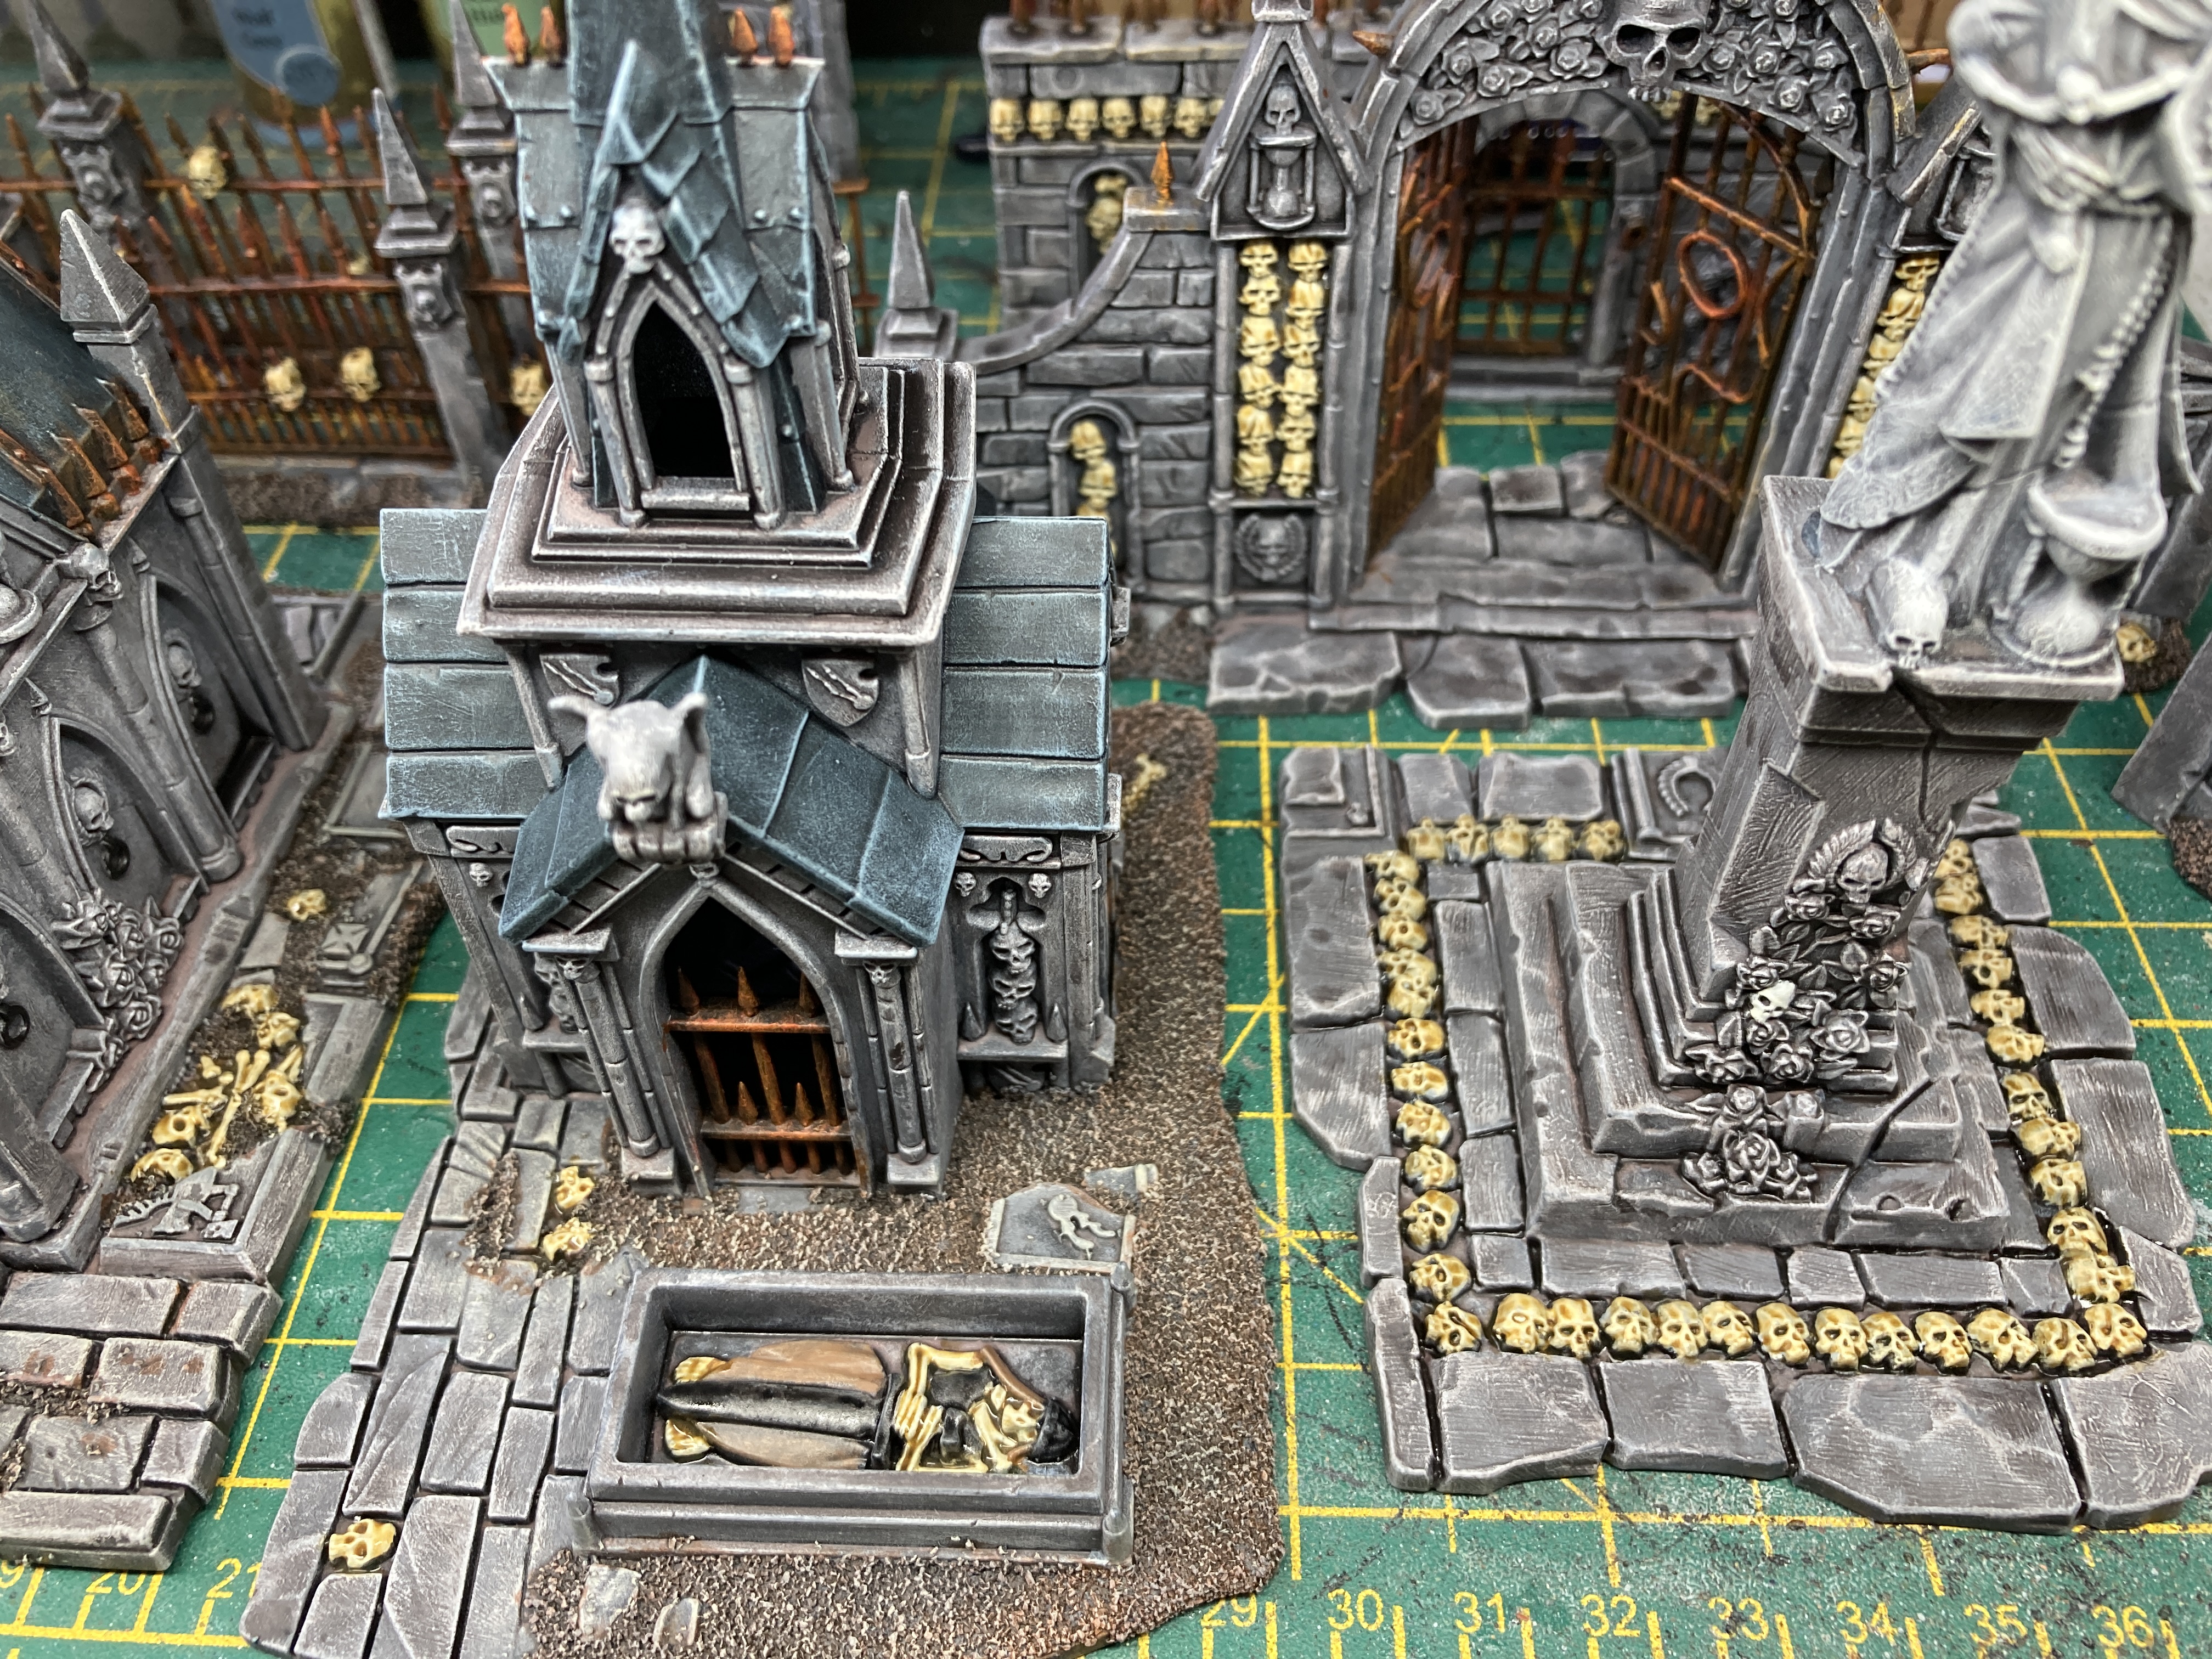
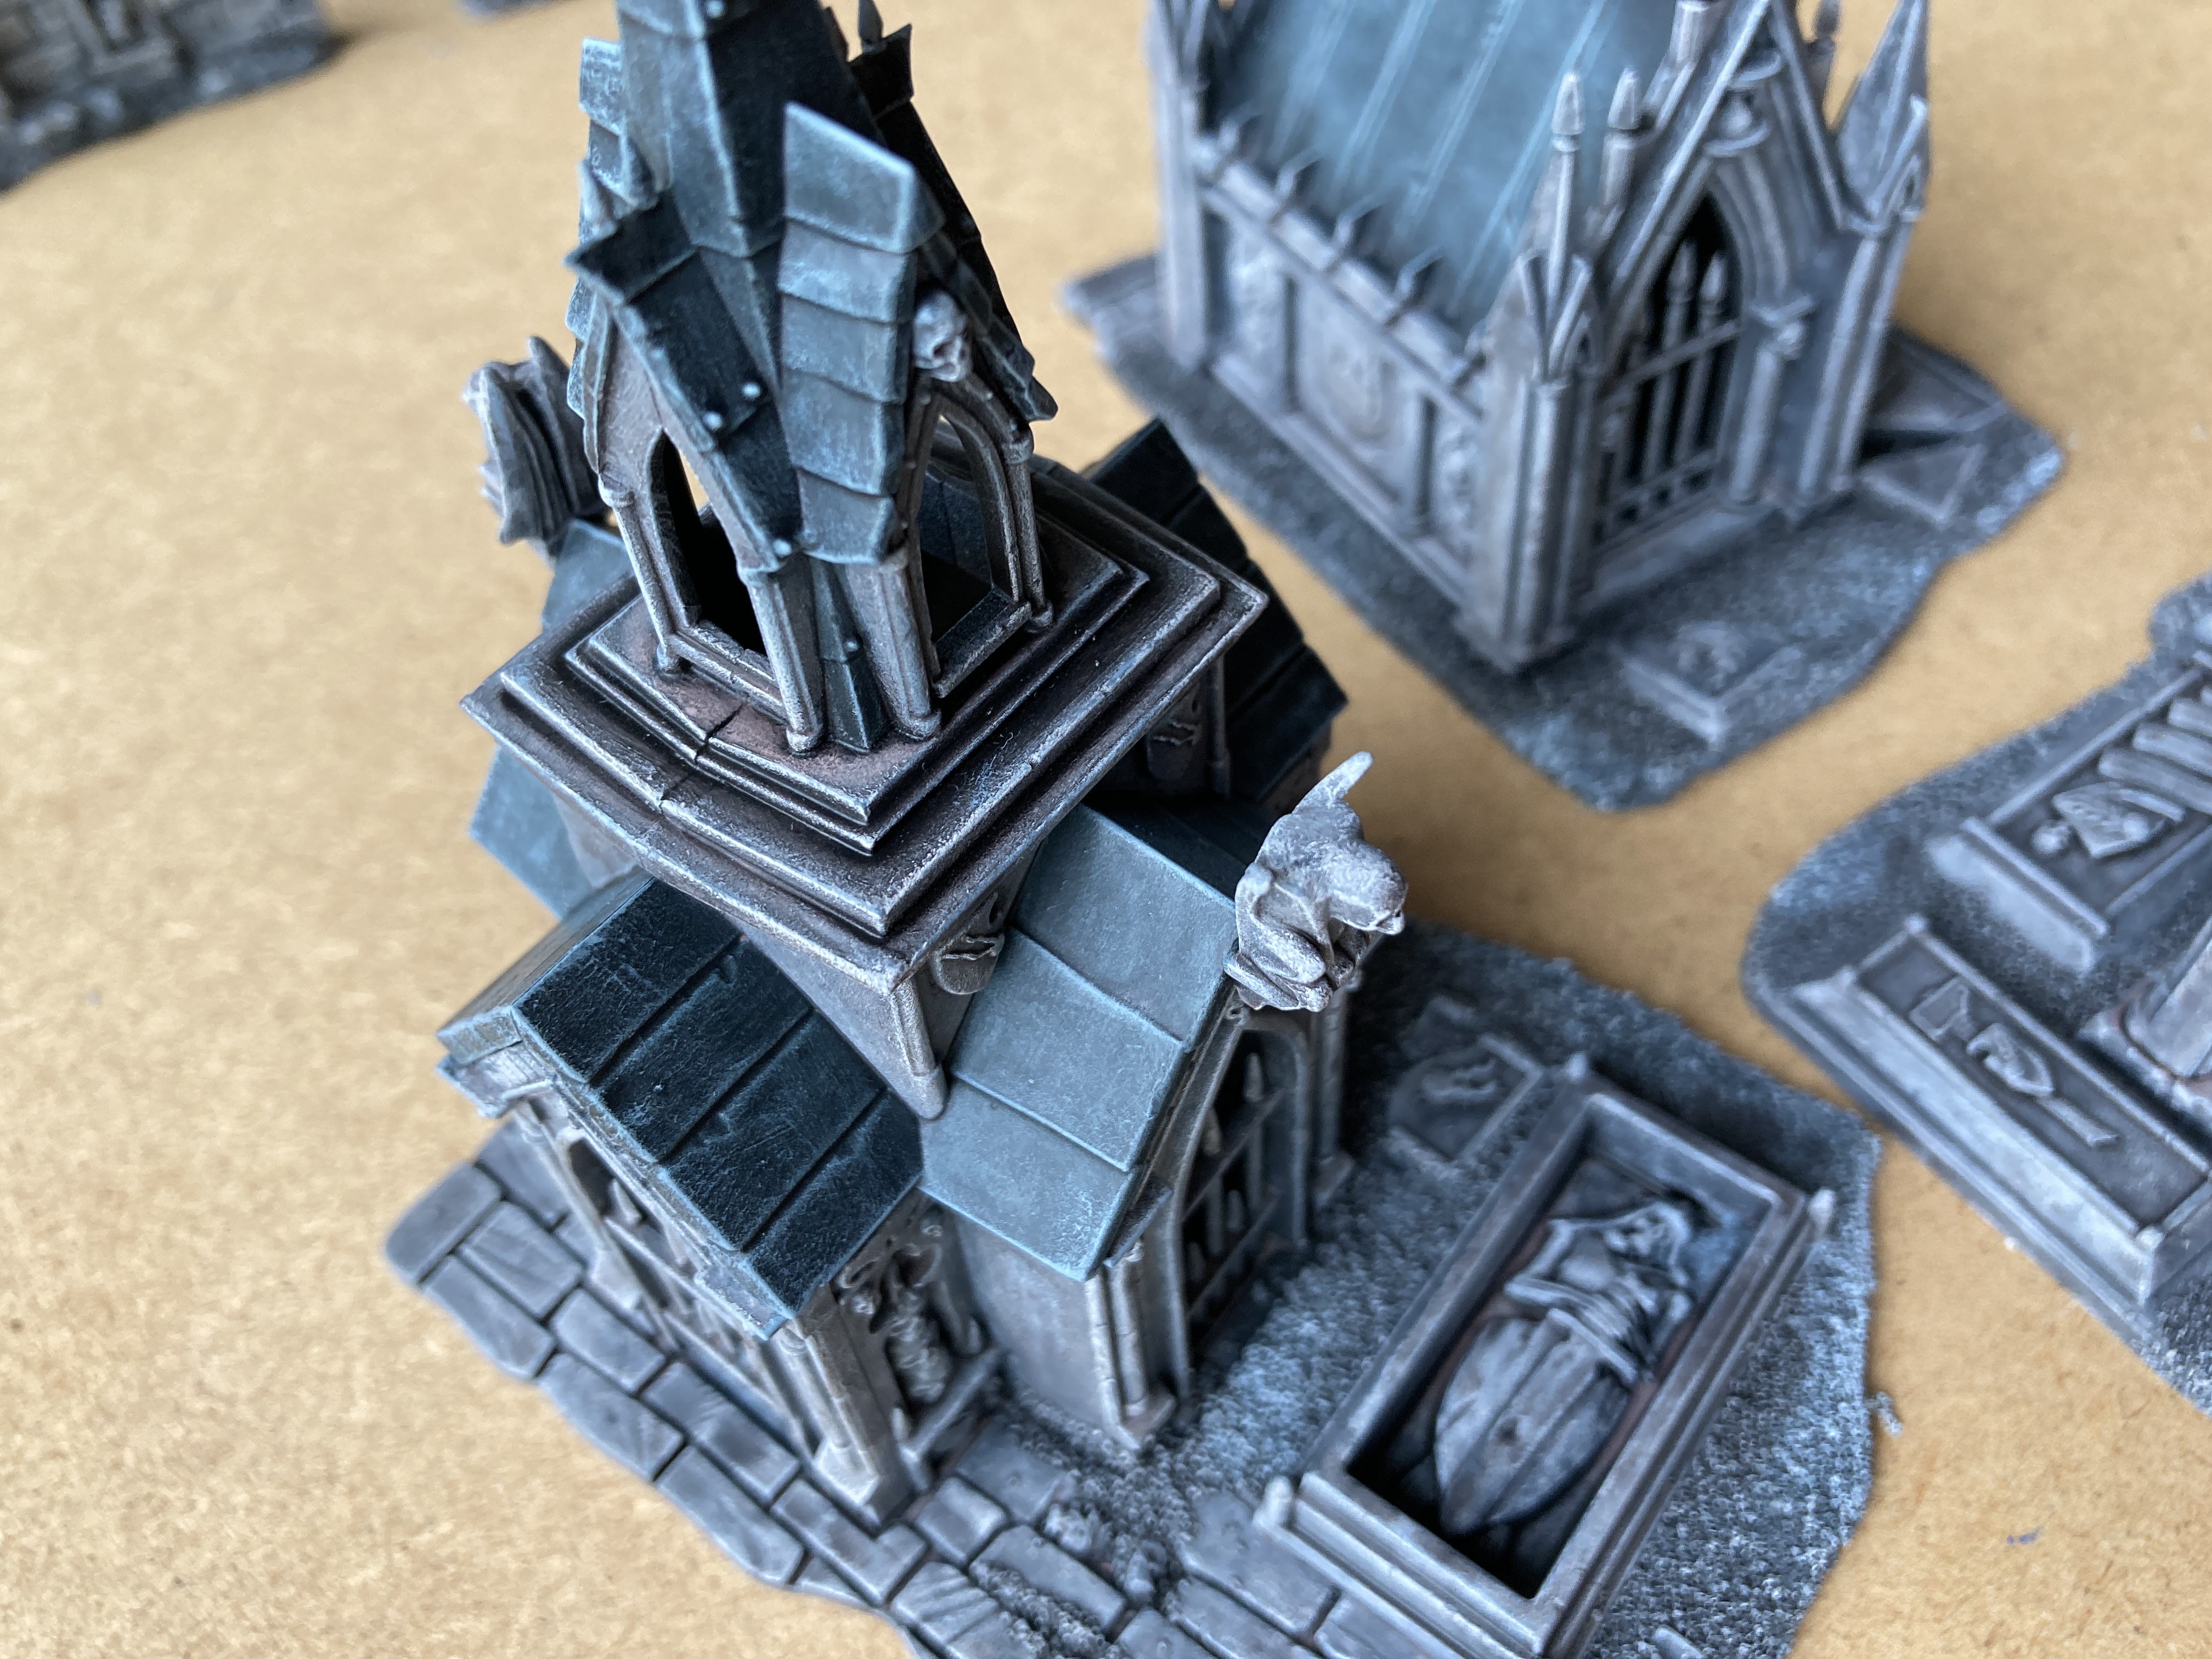
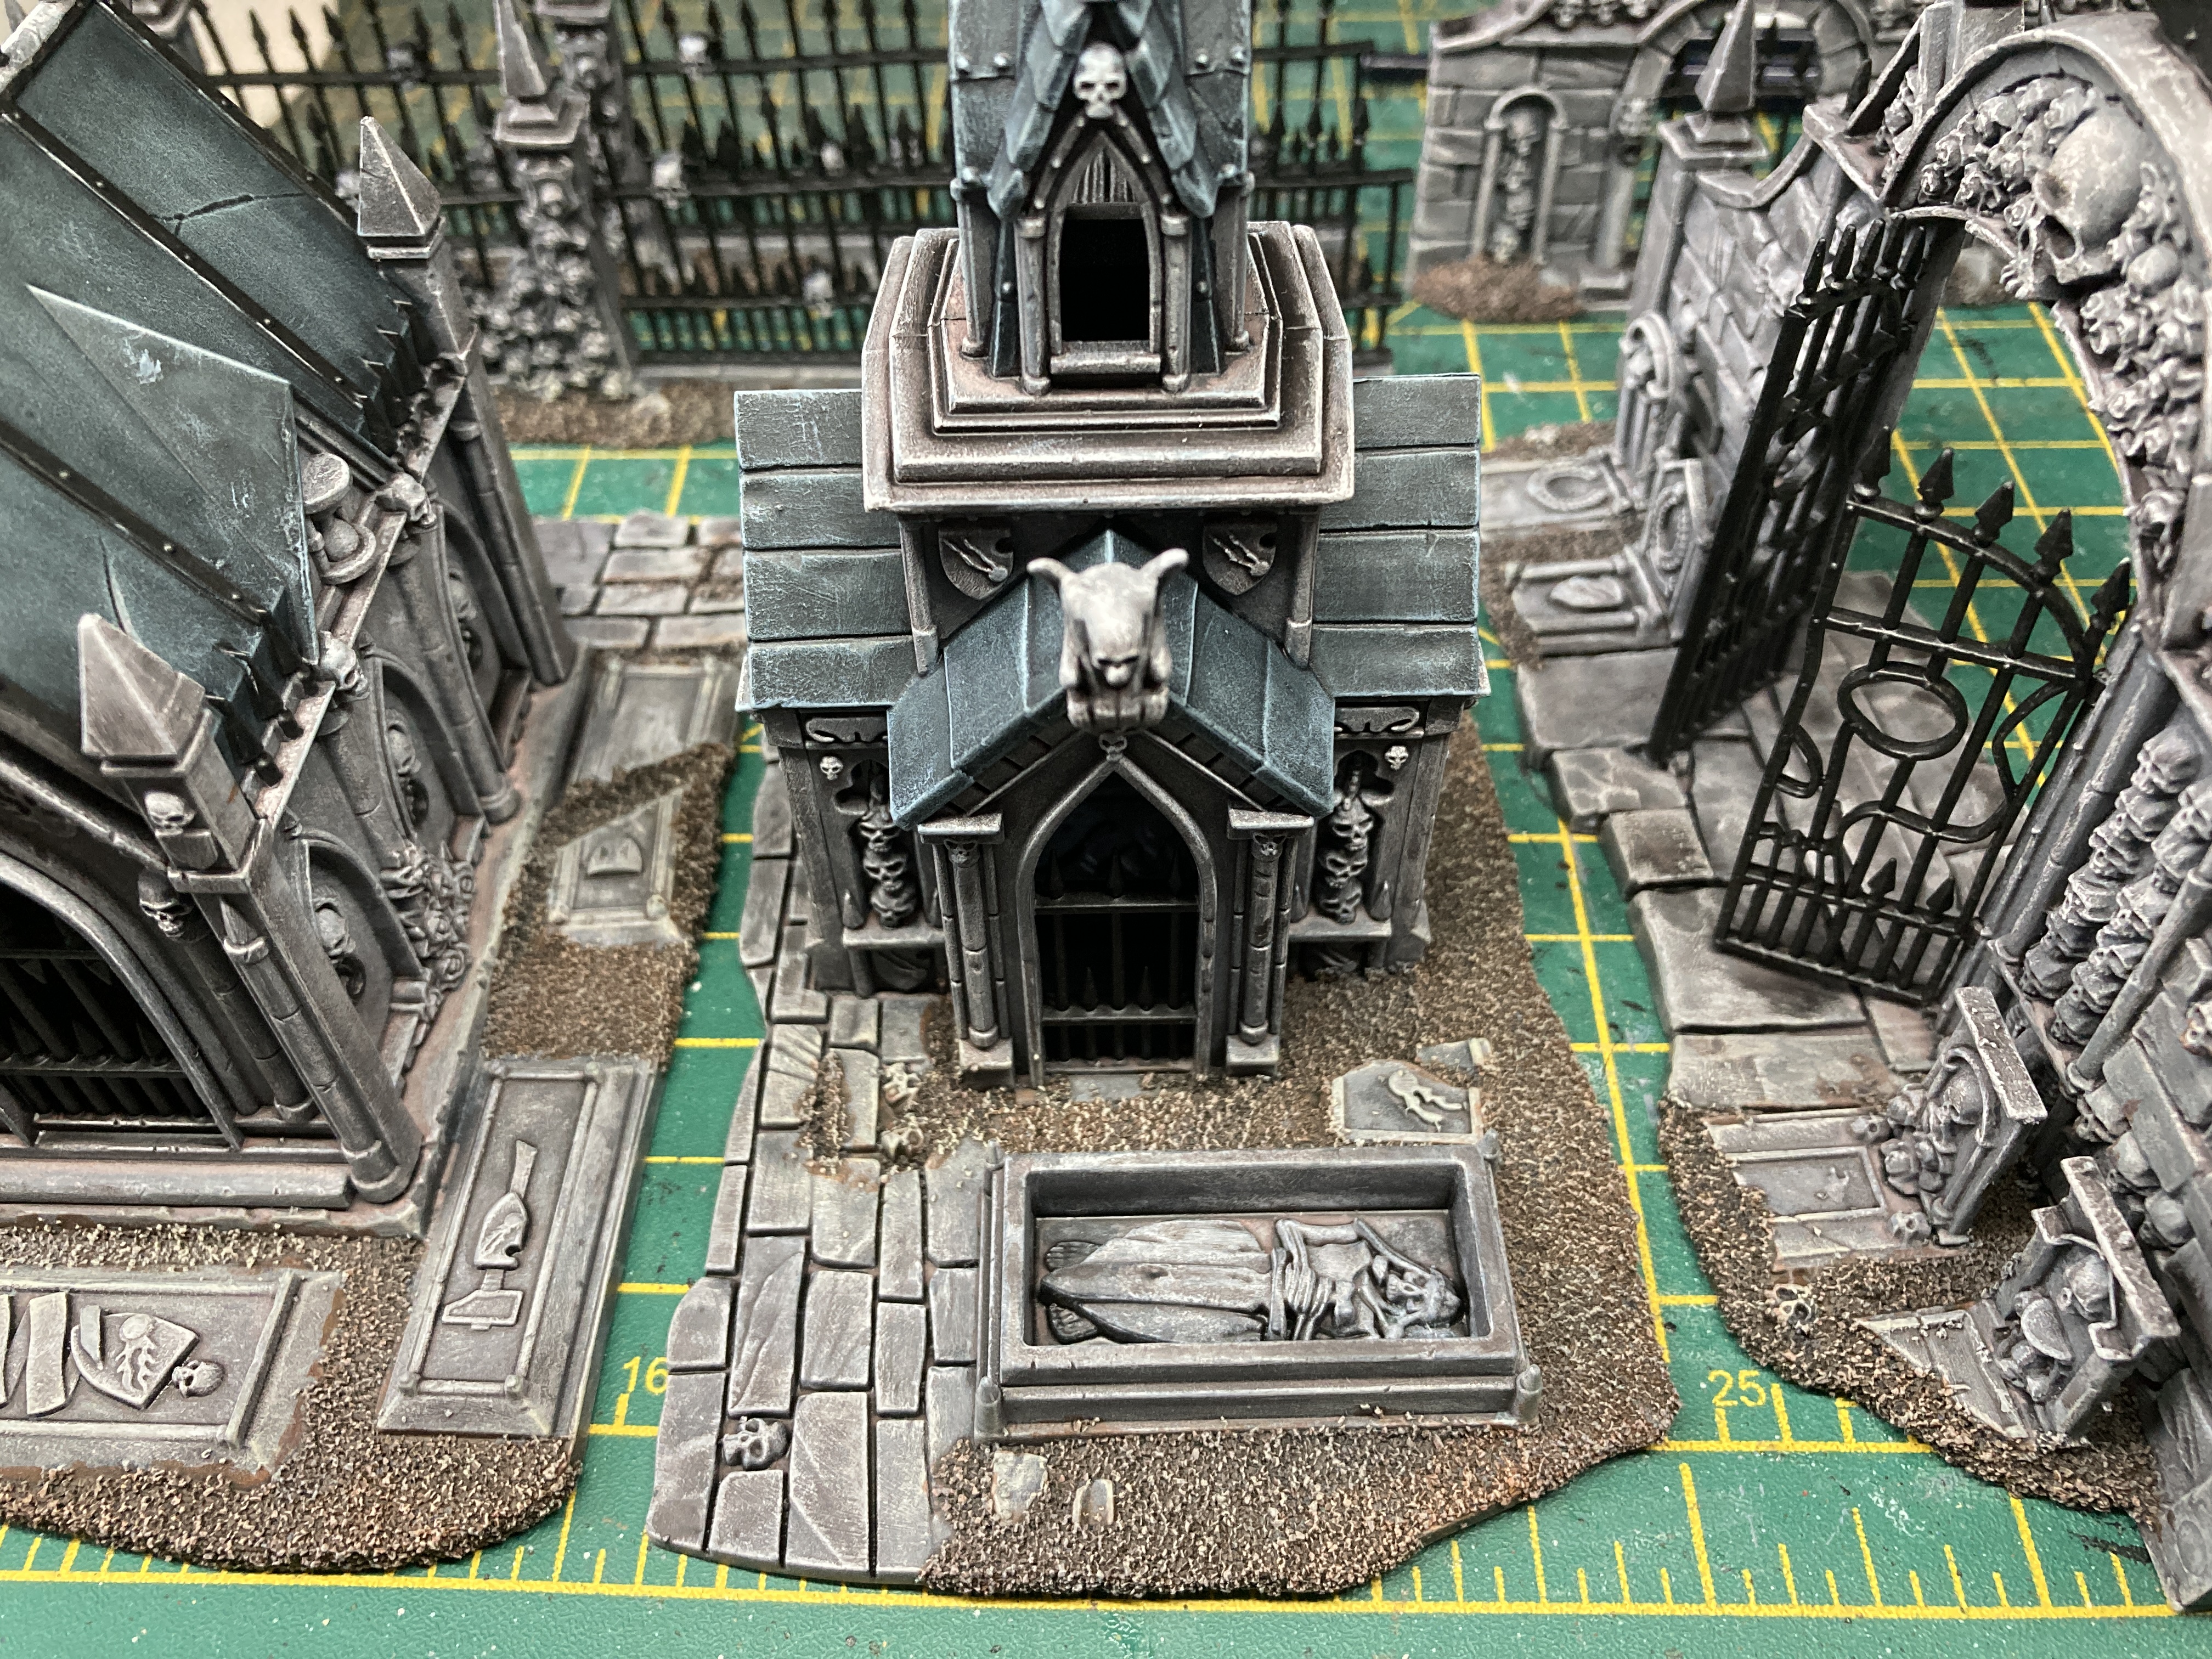
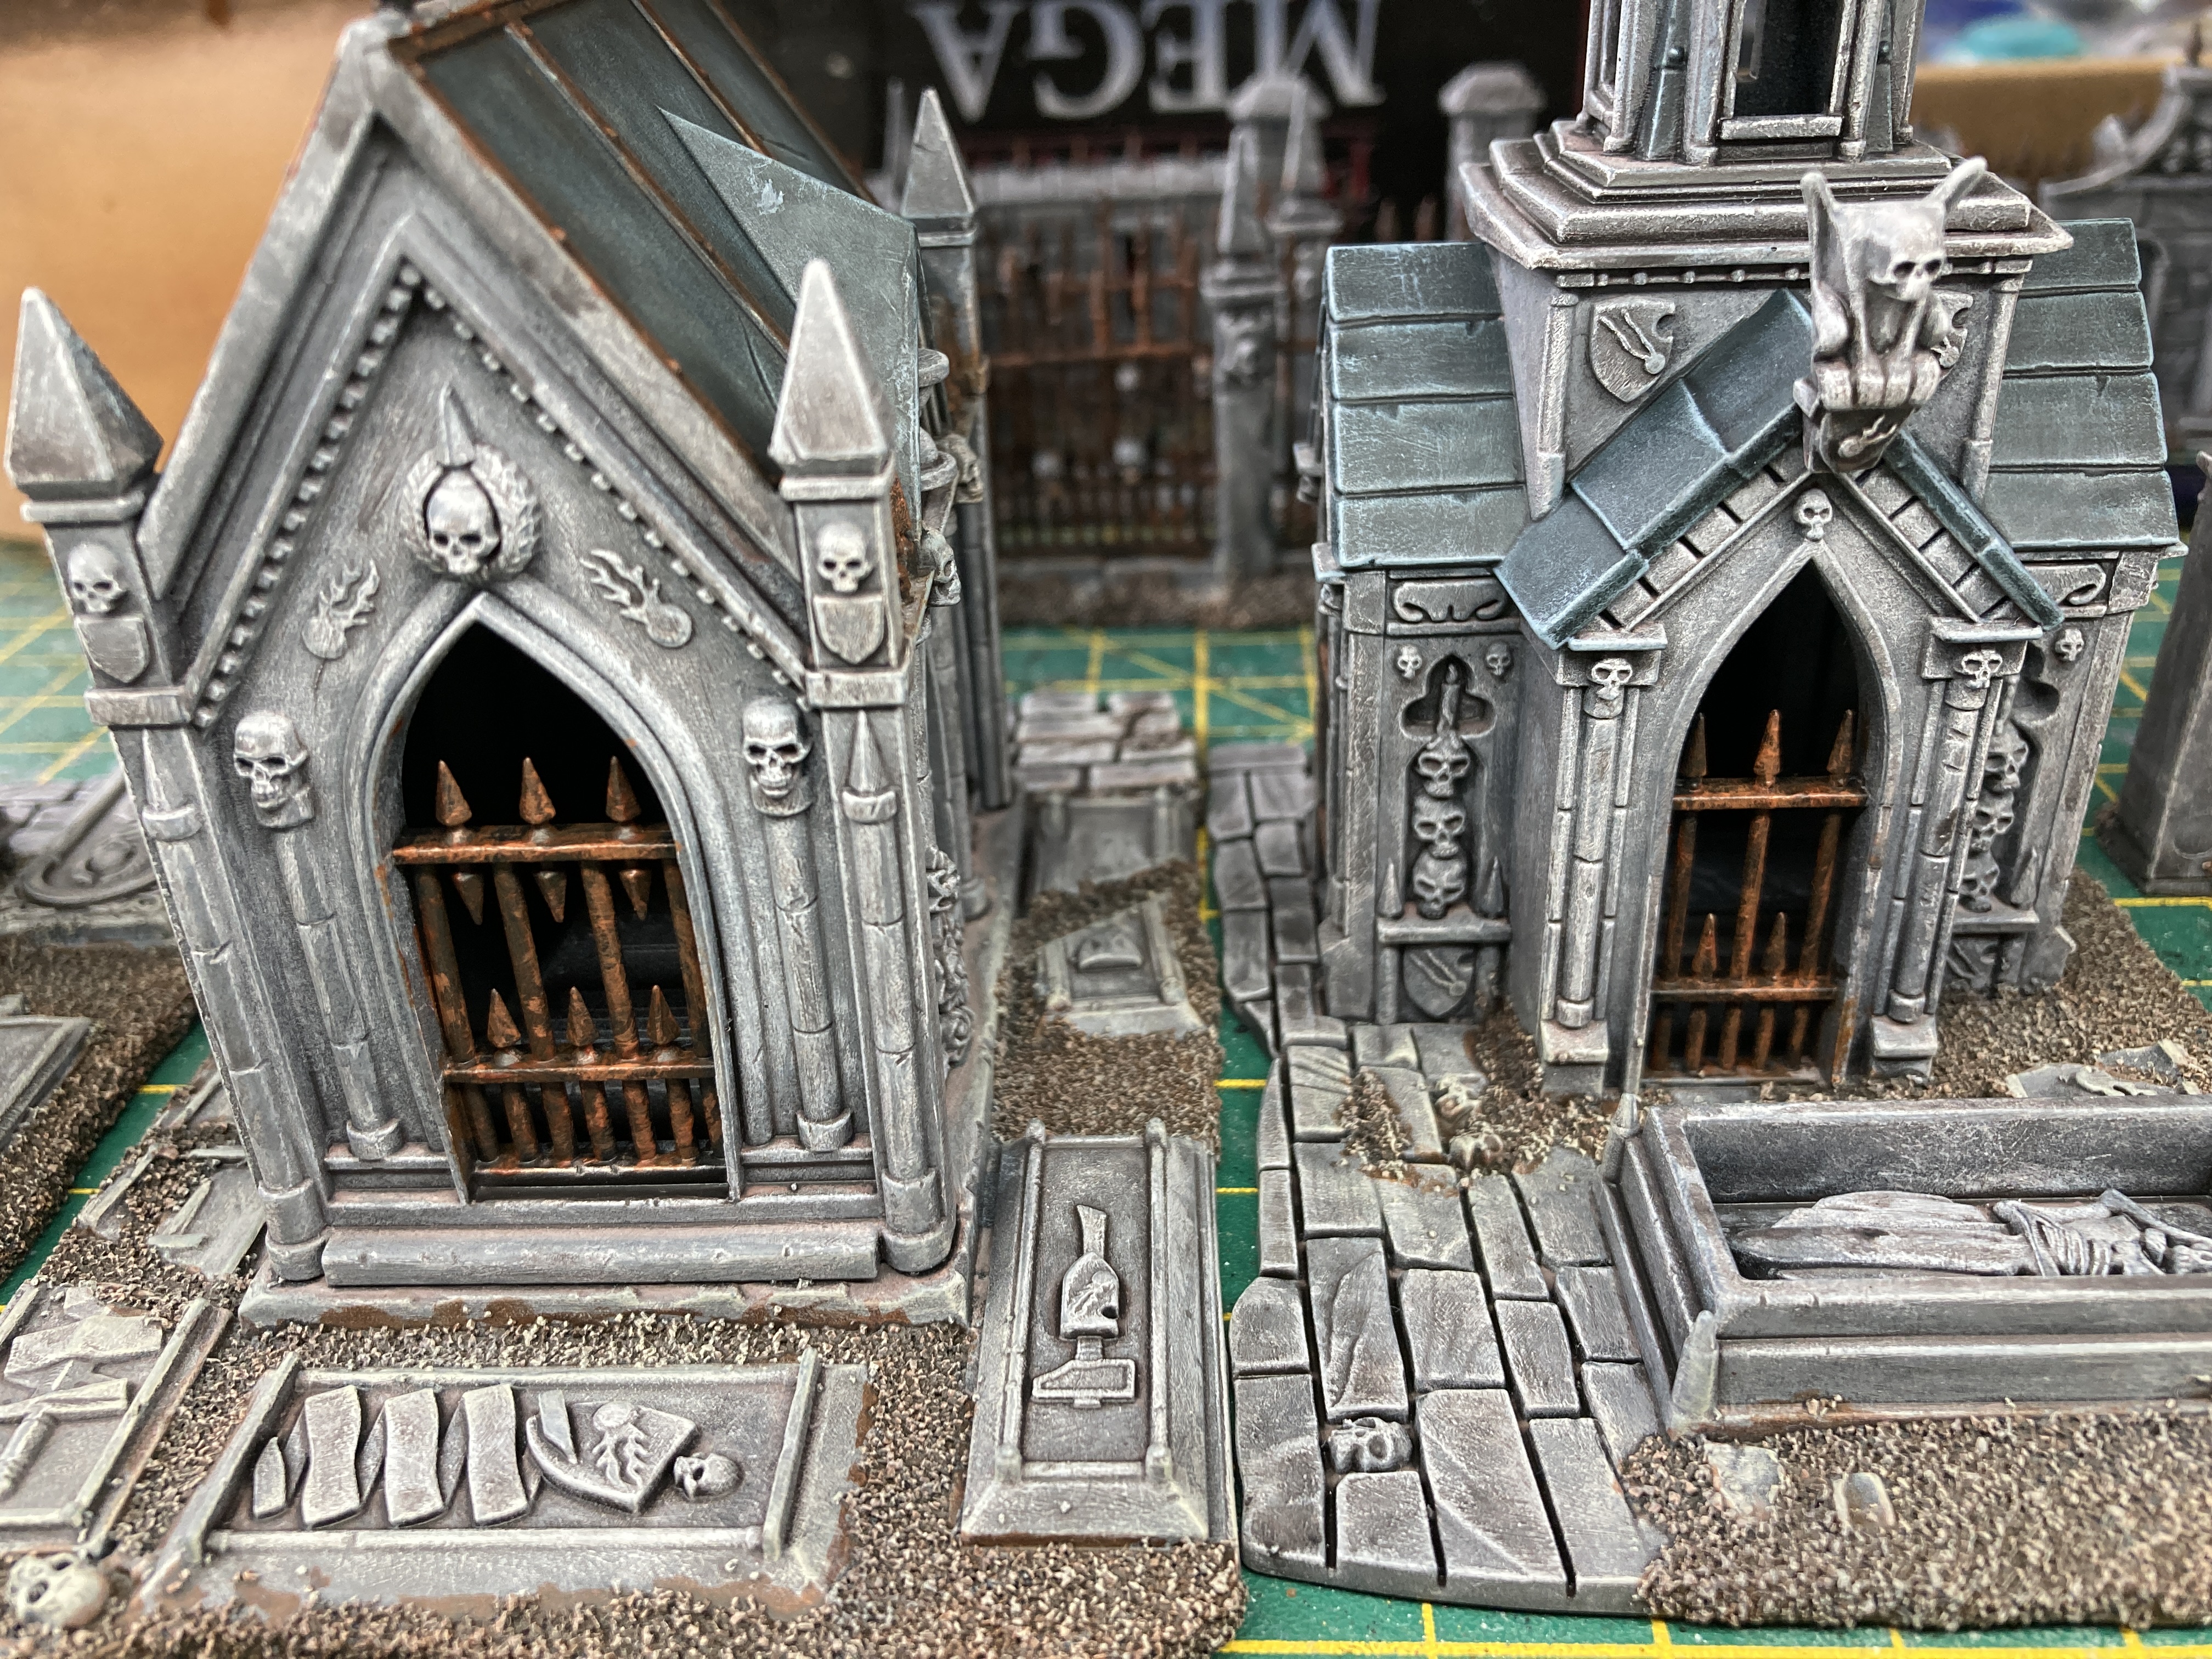
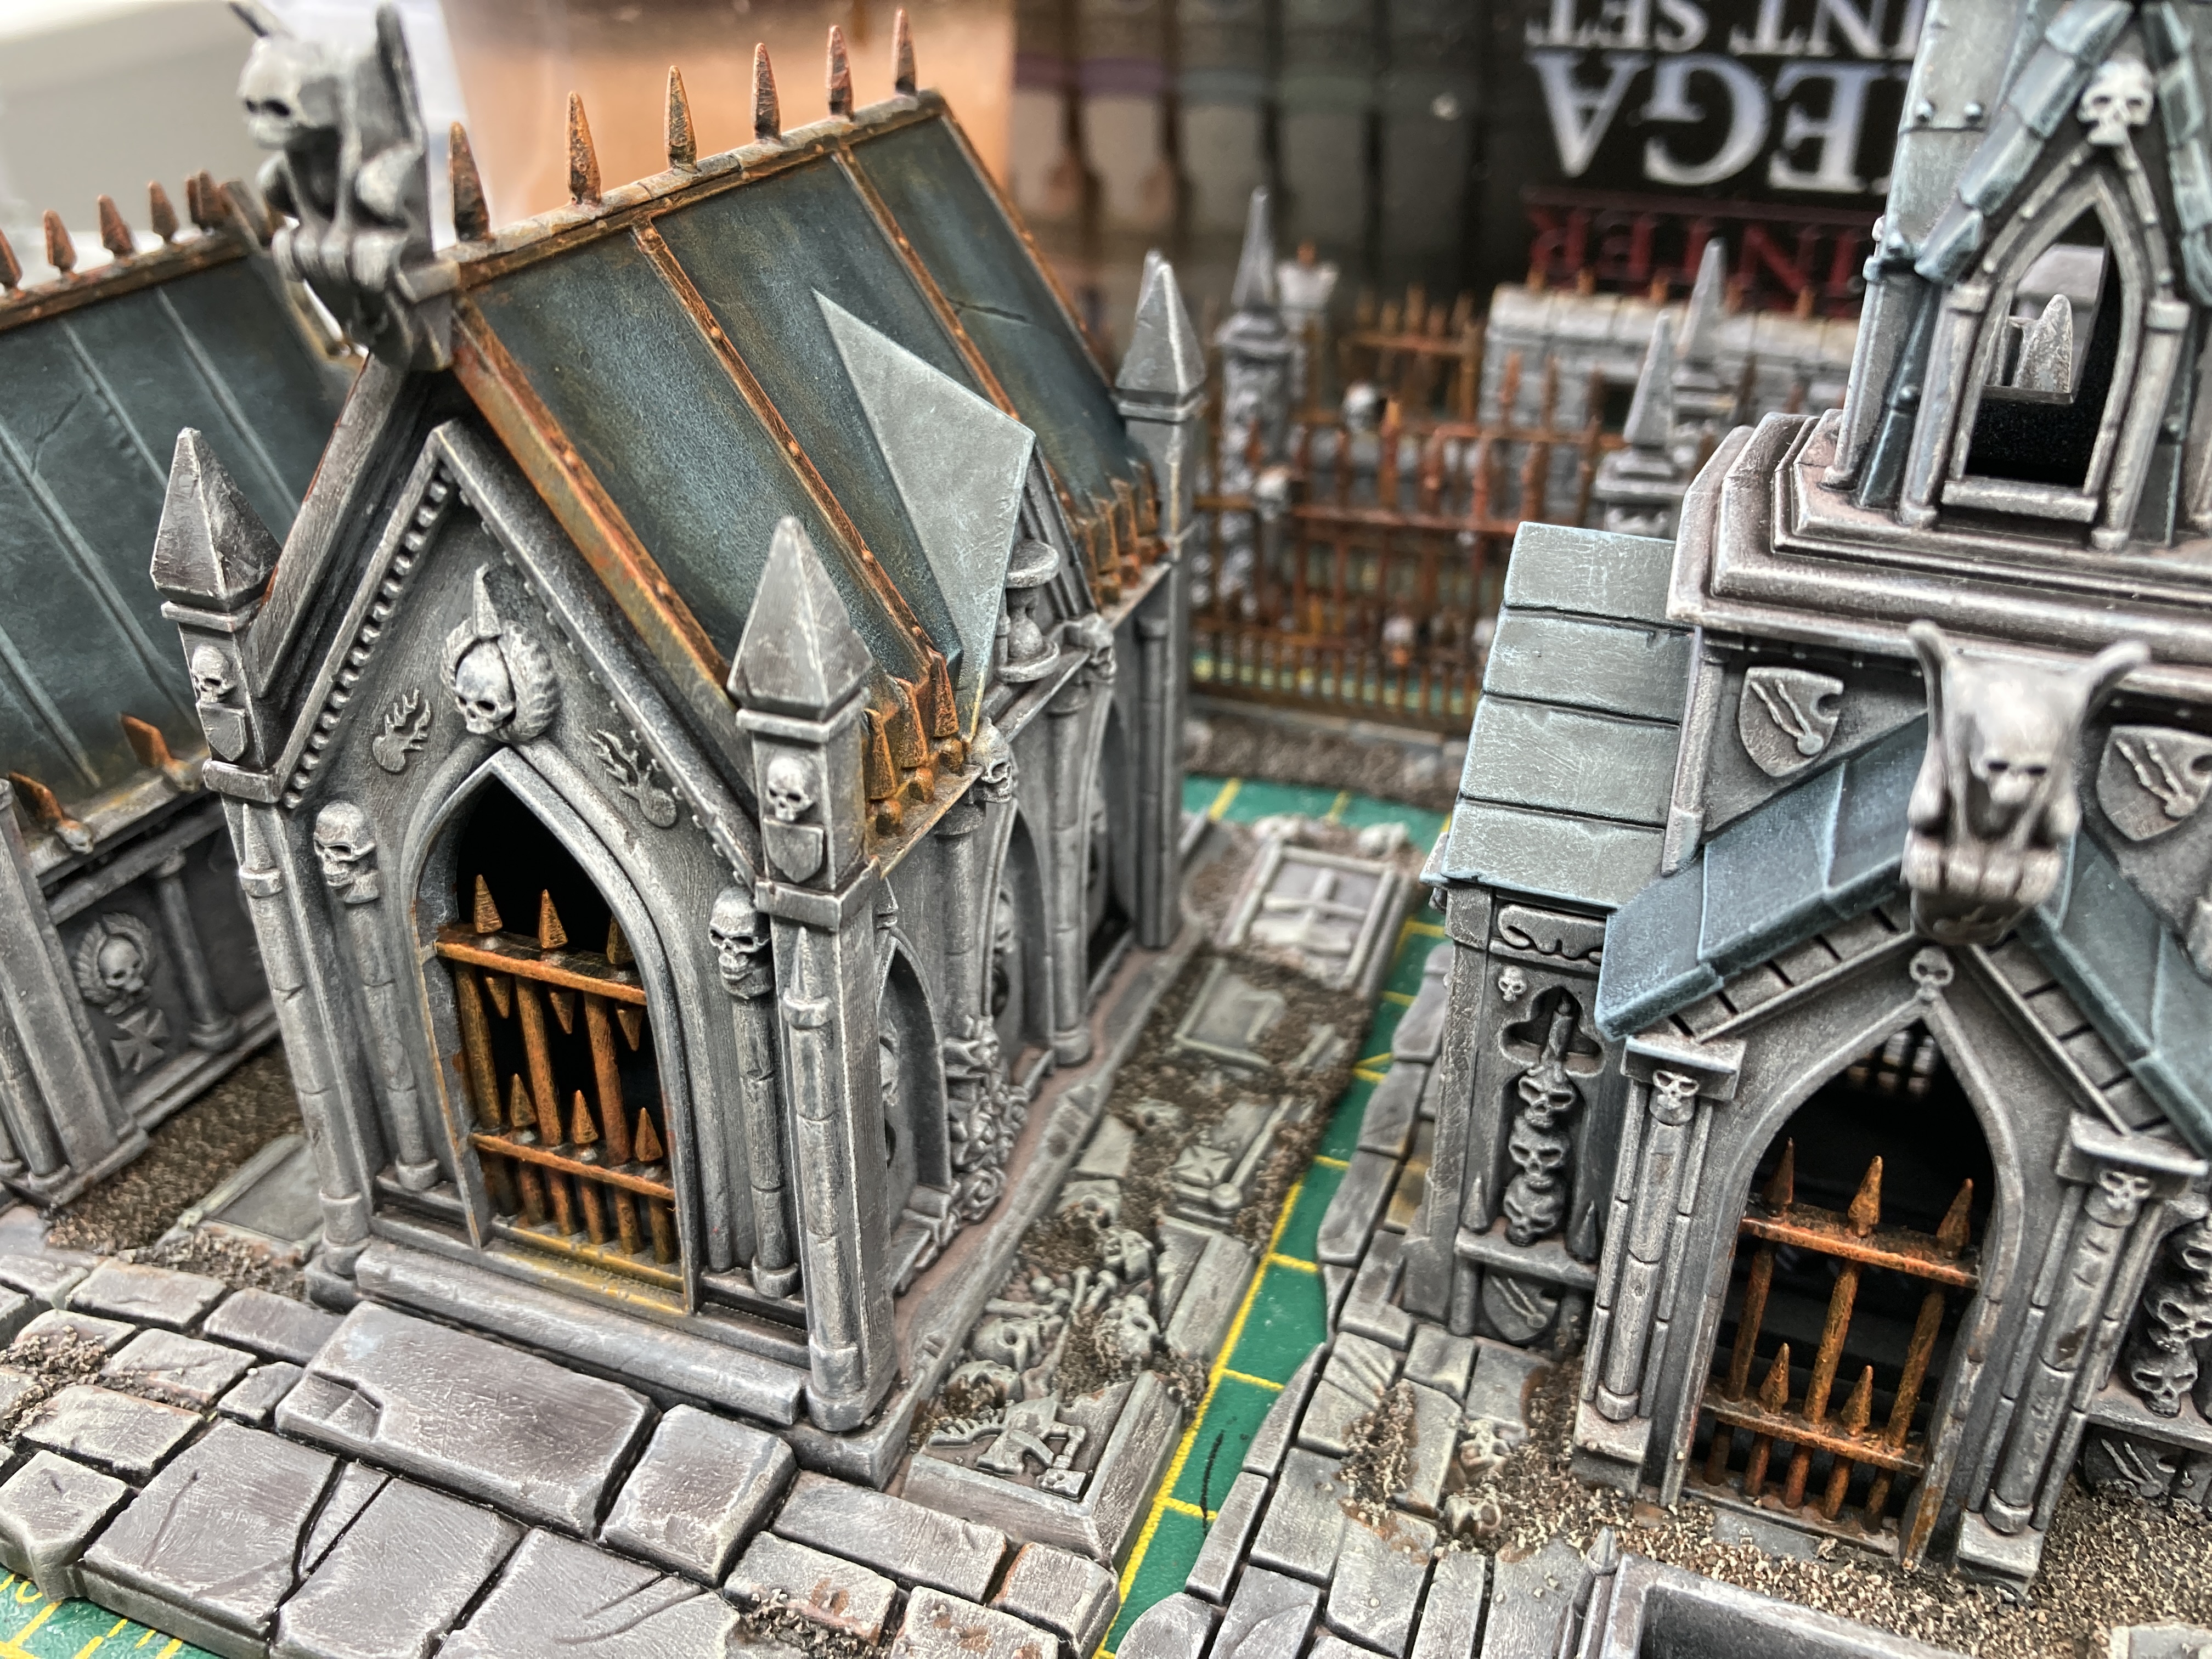
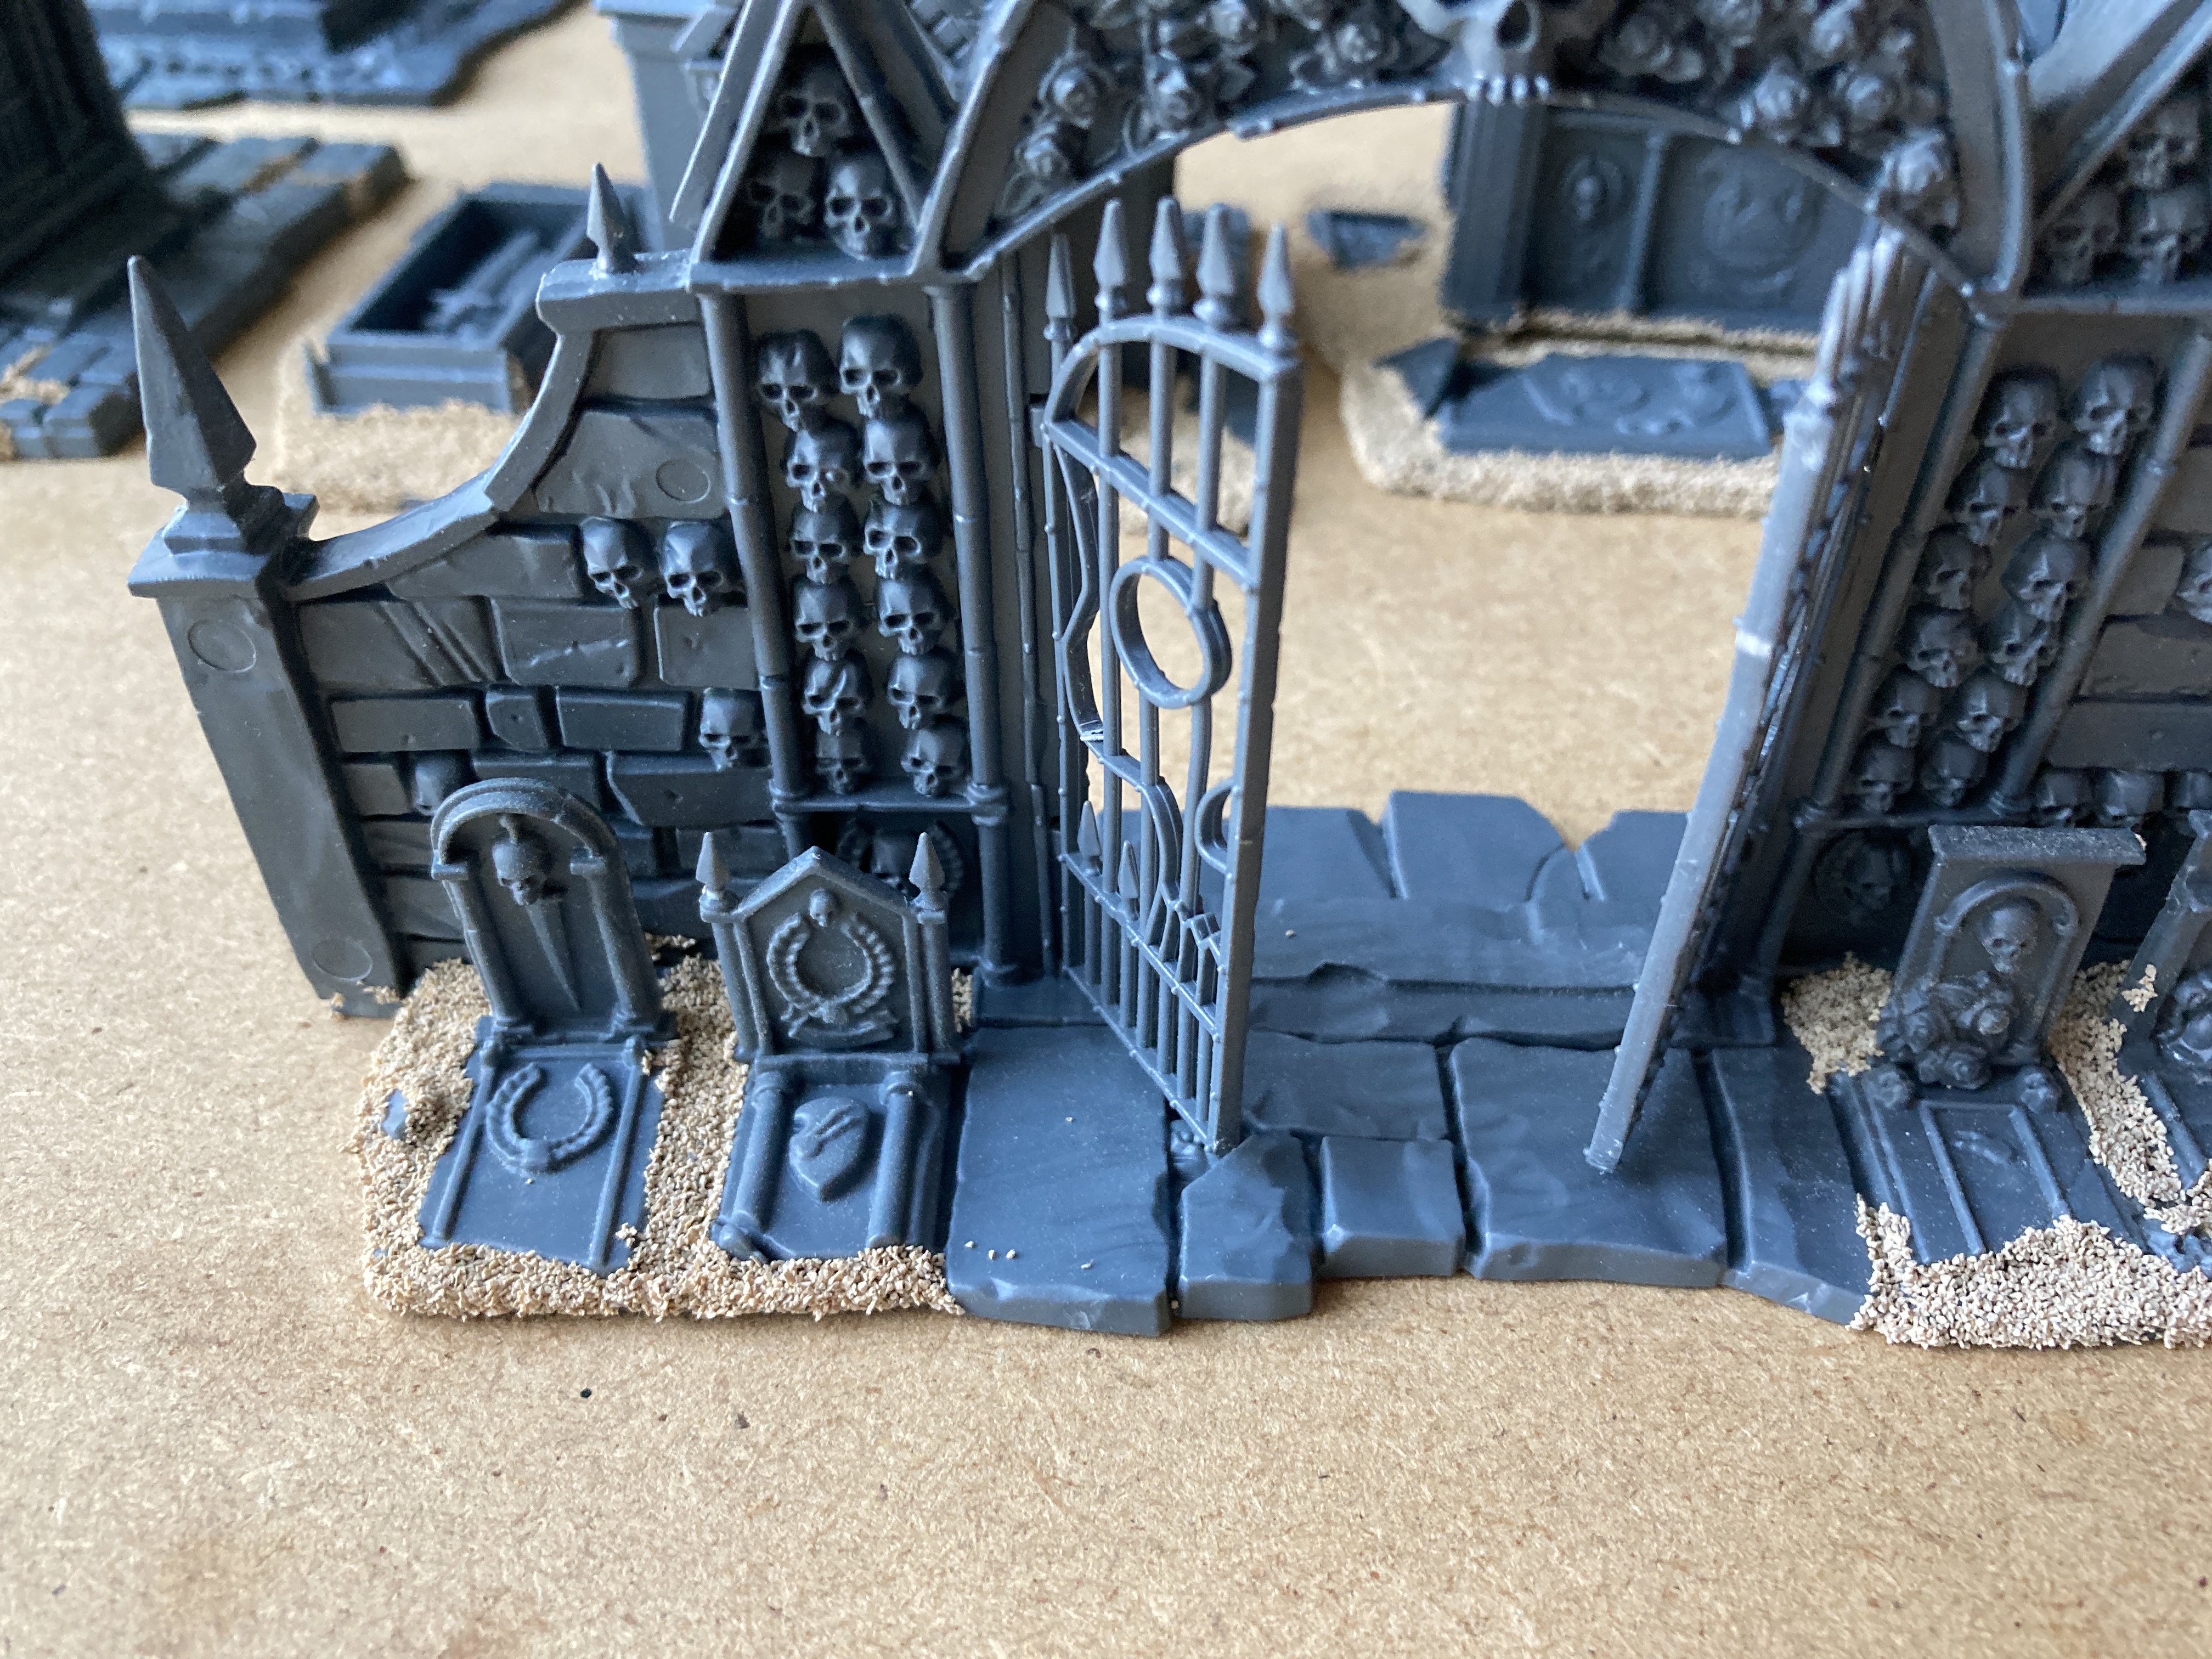
The Chapel of Morr
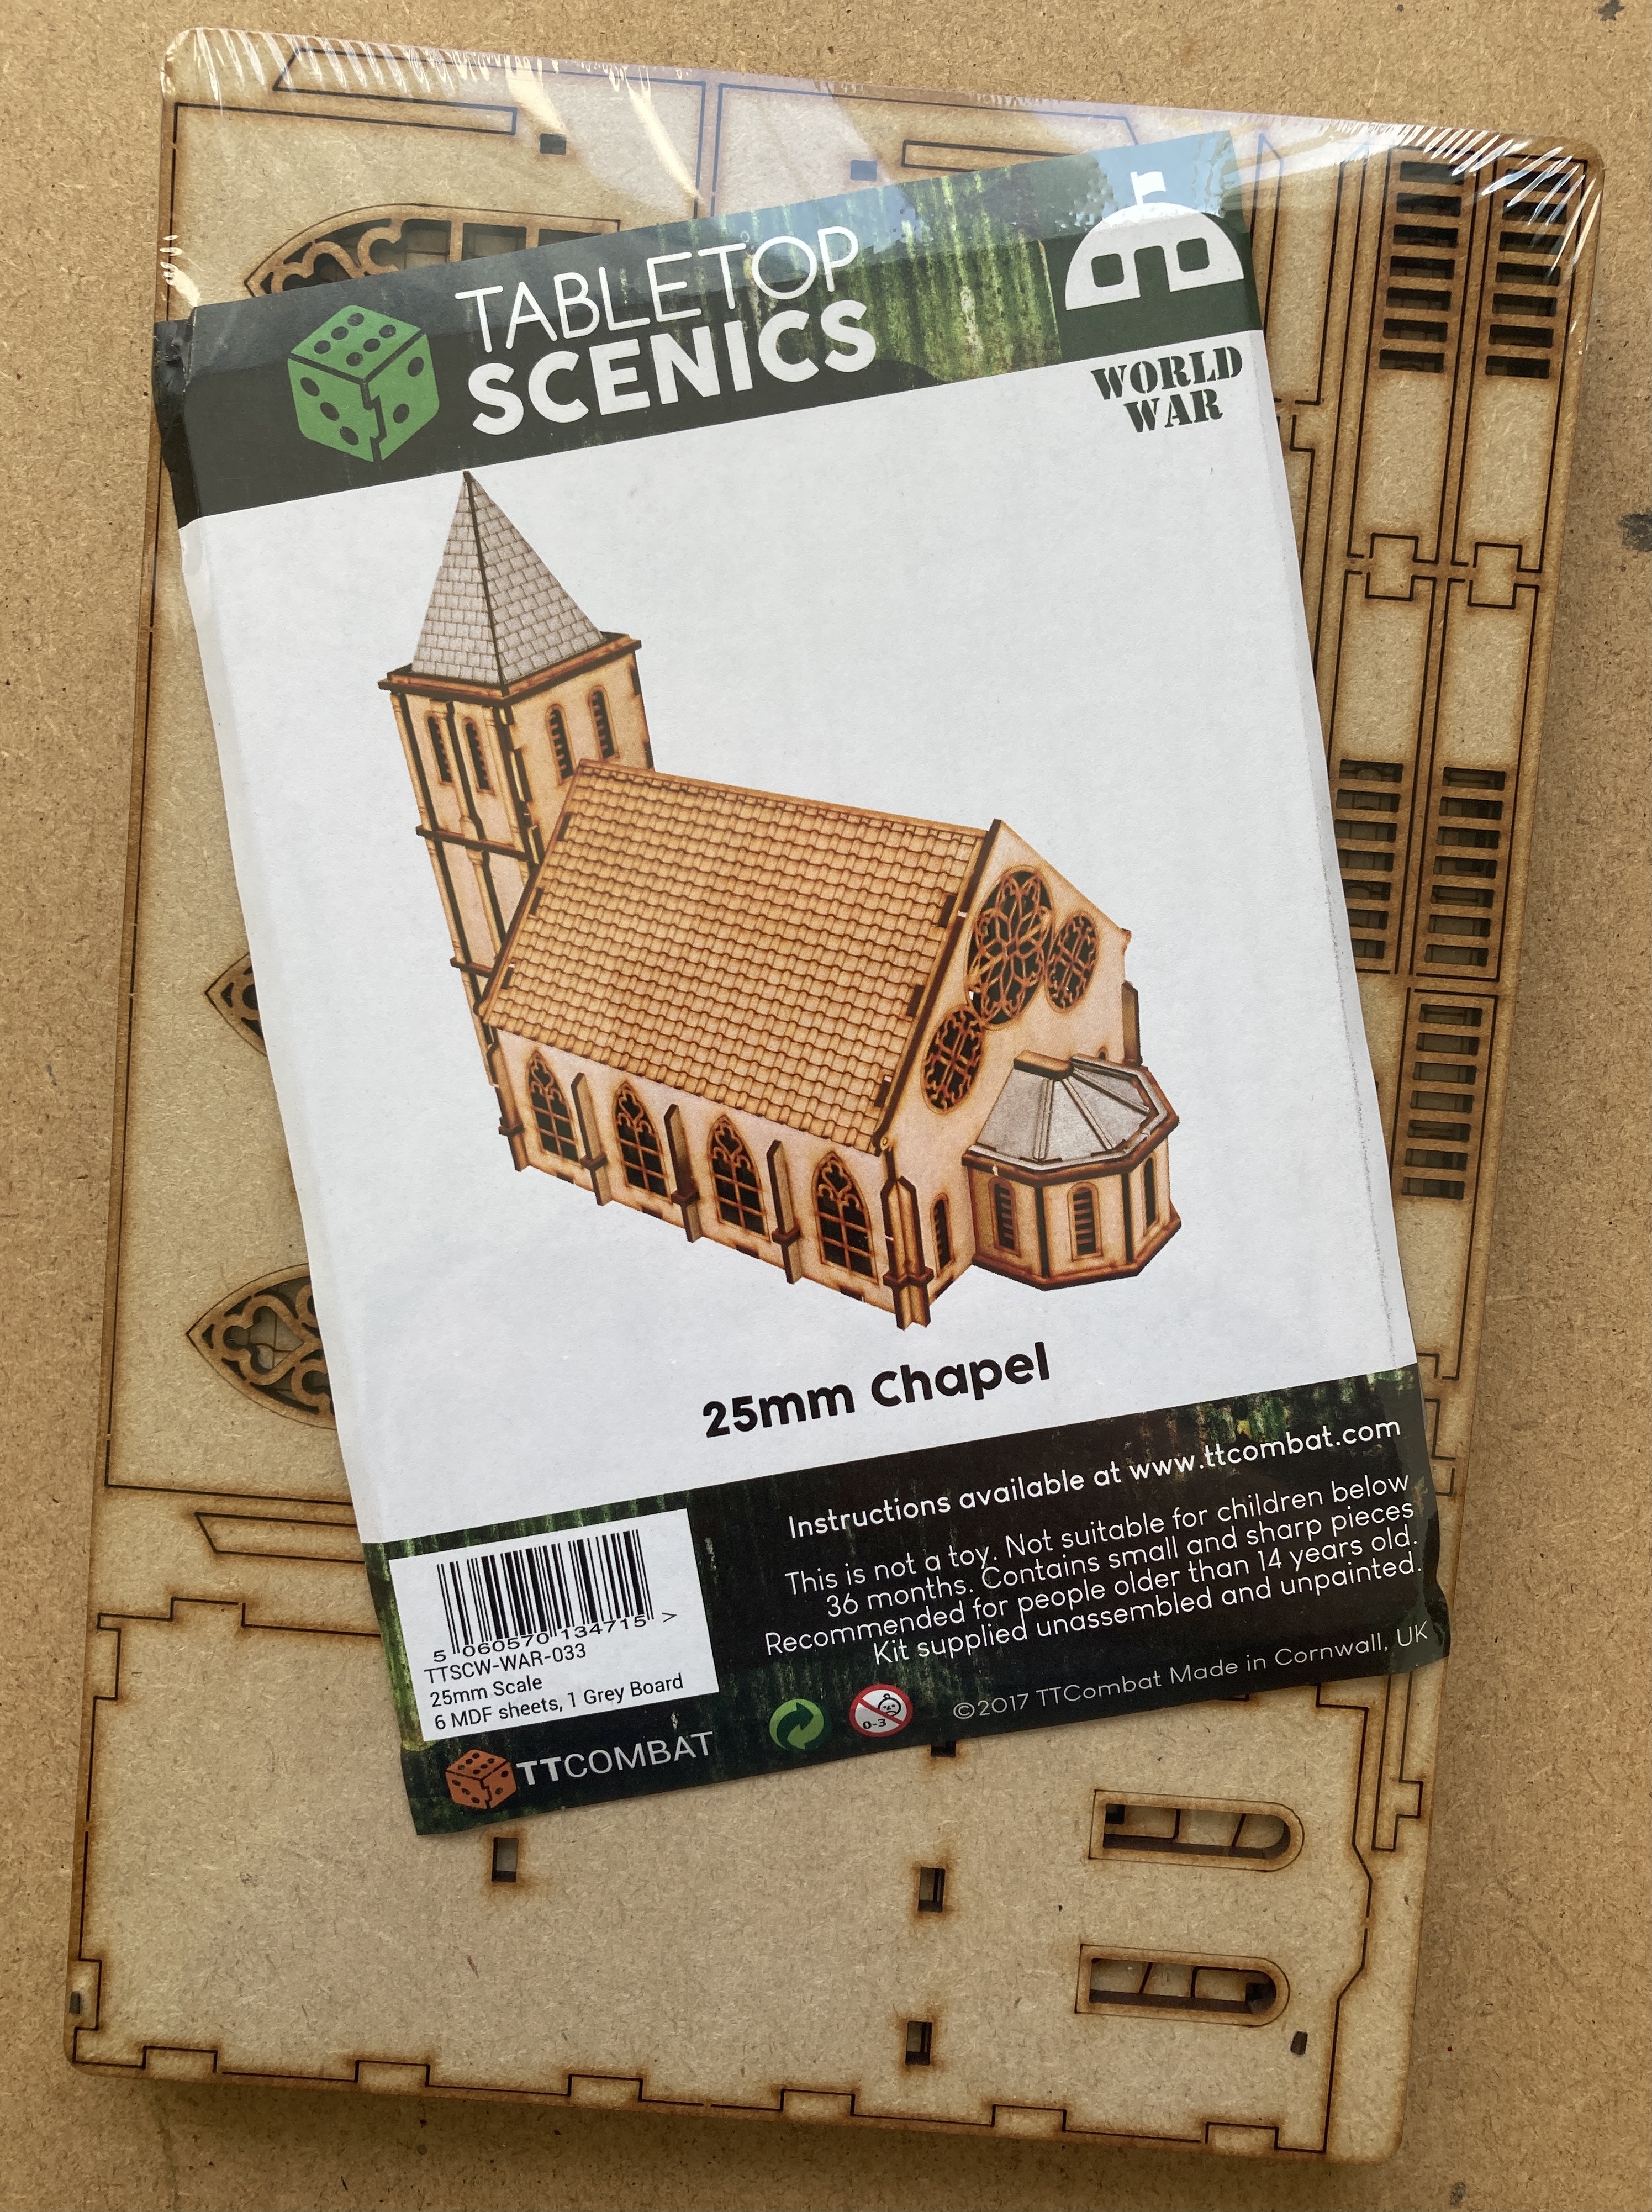
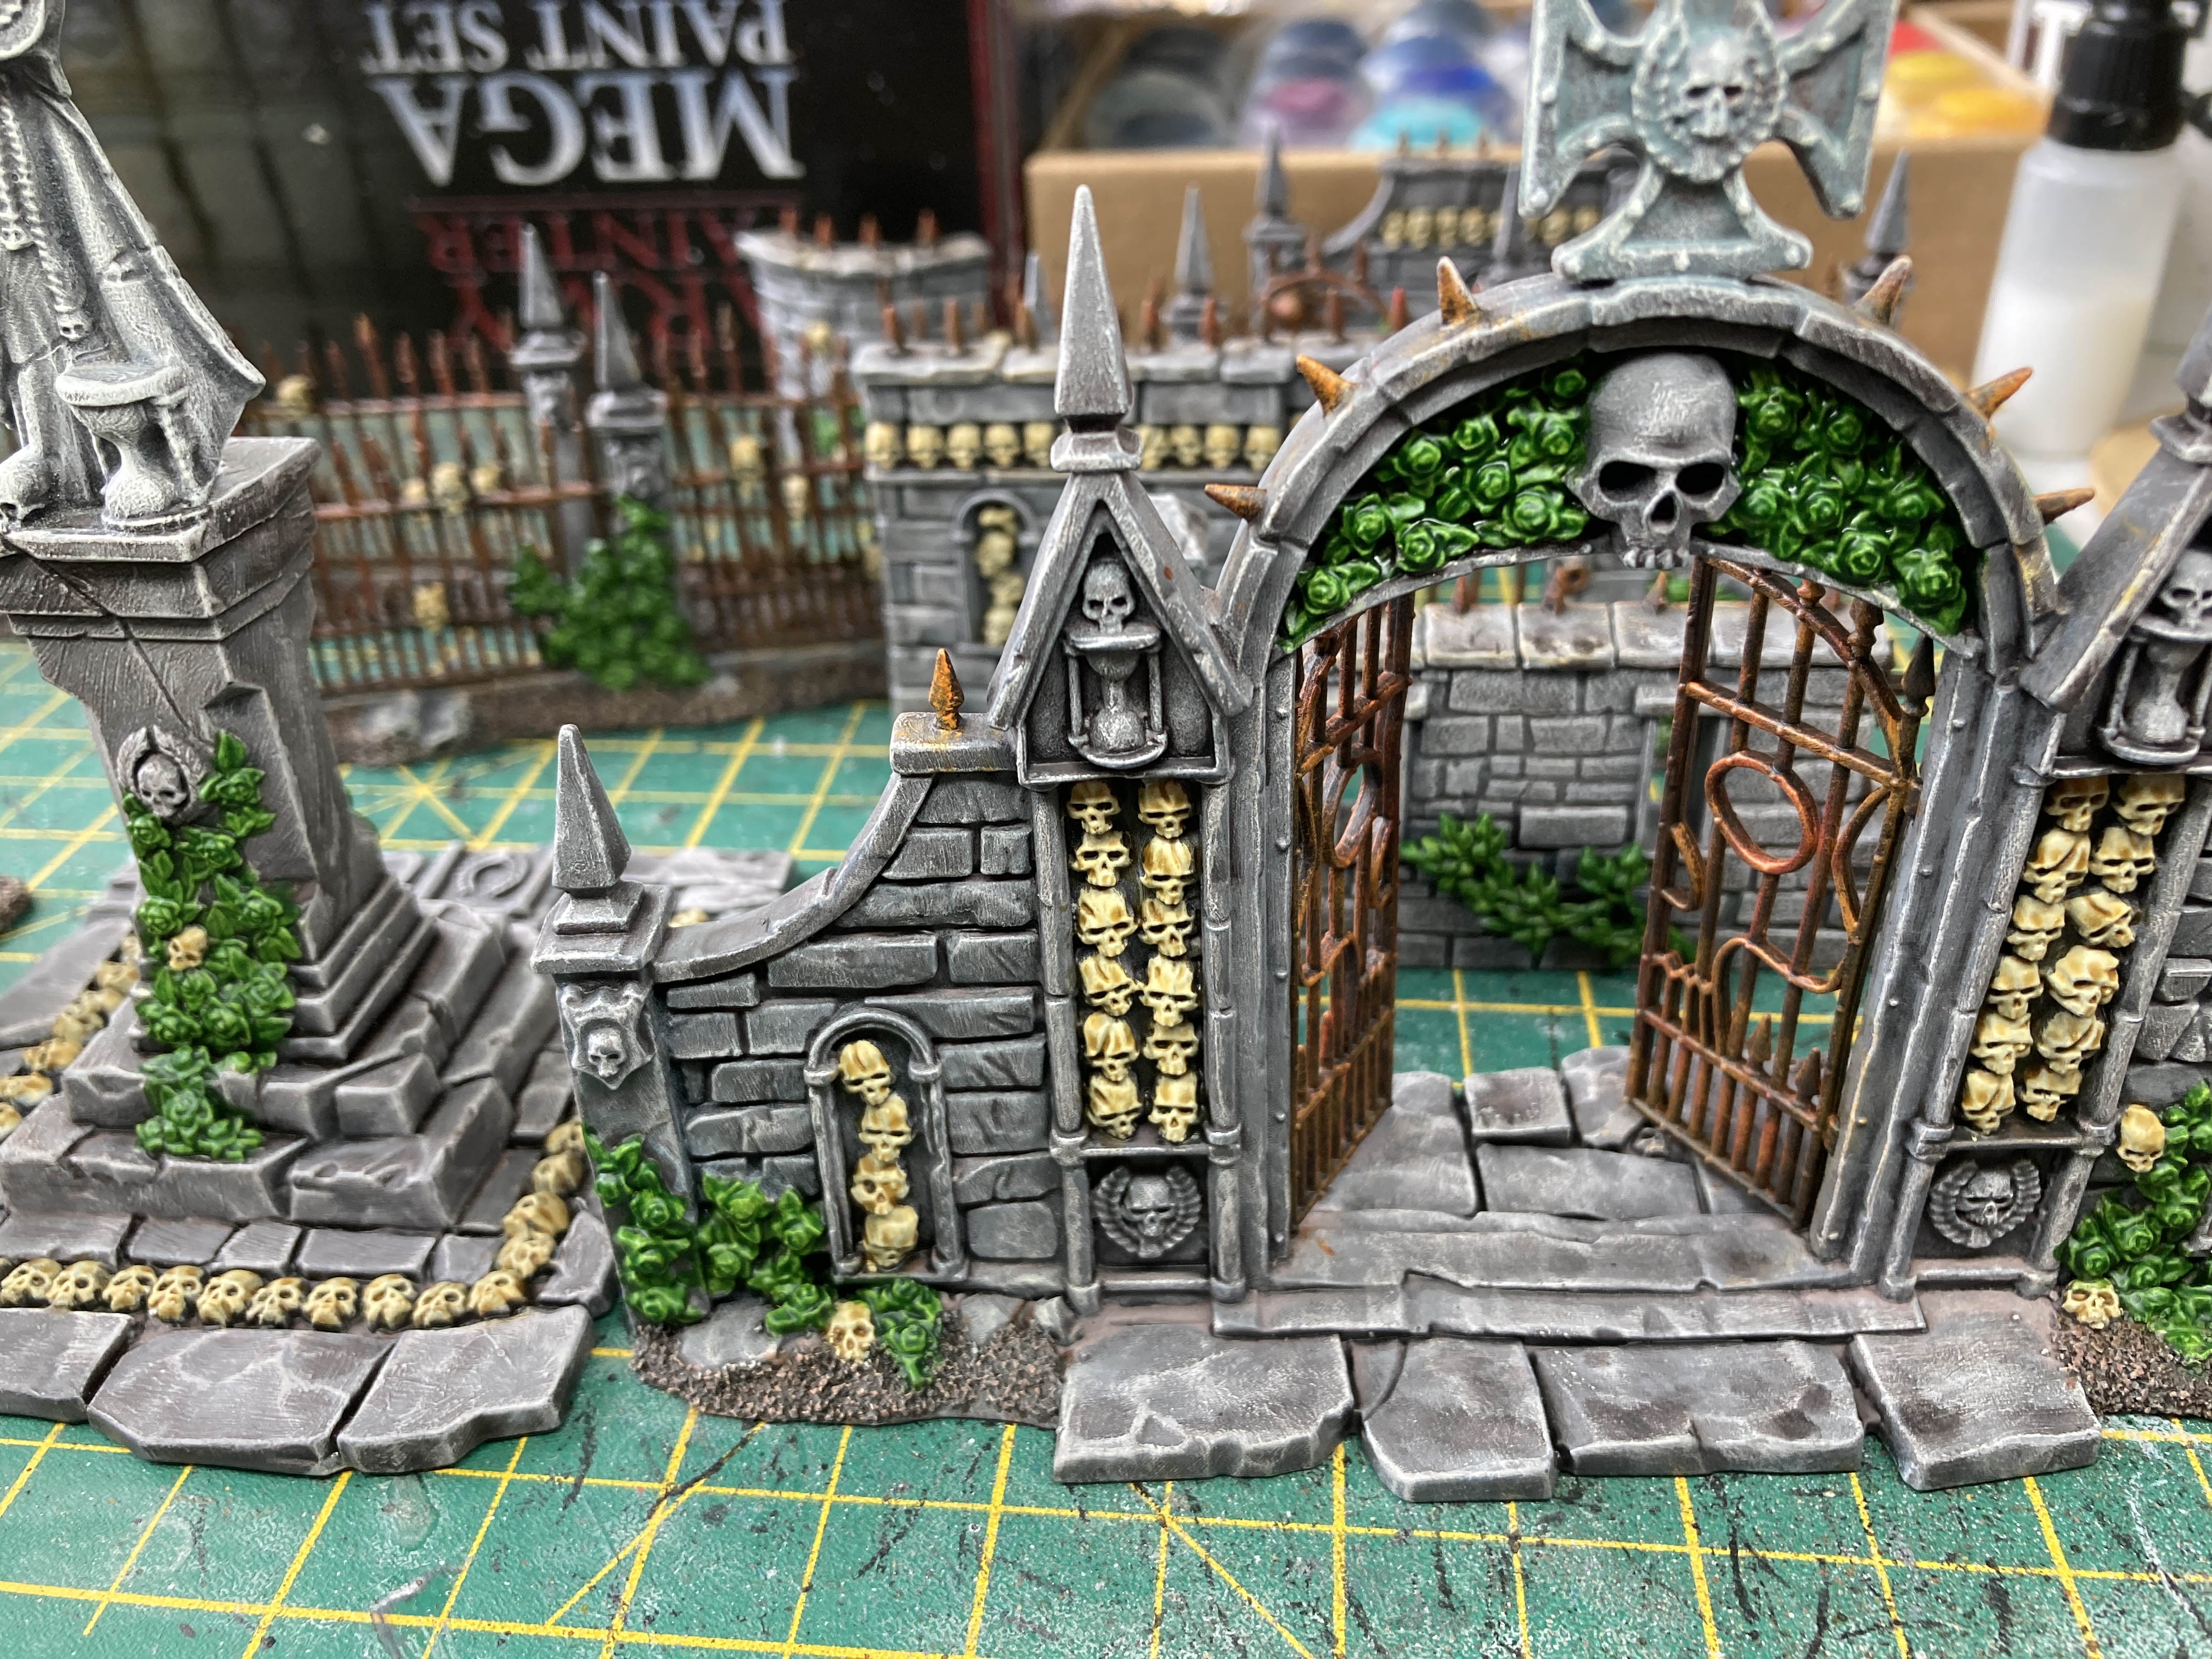
As previously mentioned I wanted a chapel to go with the Garden of Morr and to act as a centrepiece on the table. After looking around on the internet I thought this kit from TTCombat would be very well suited.
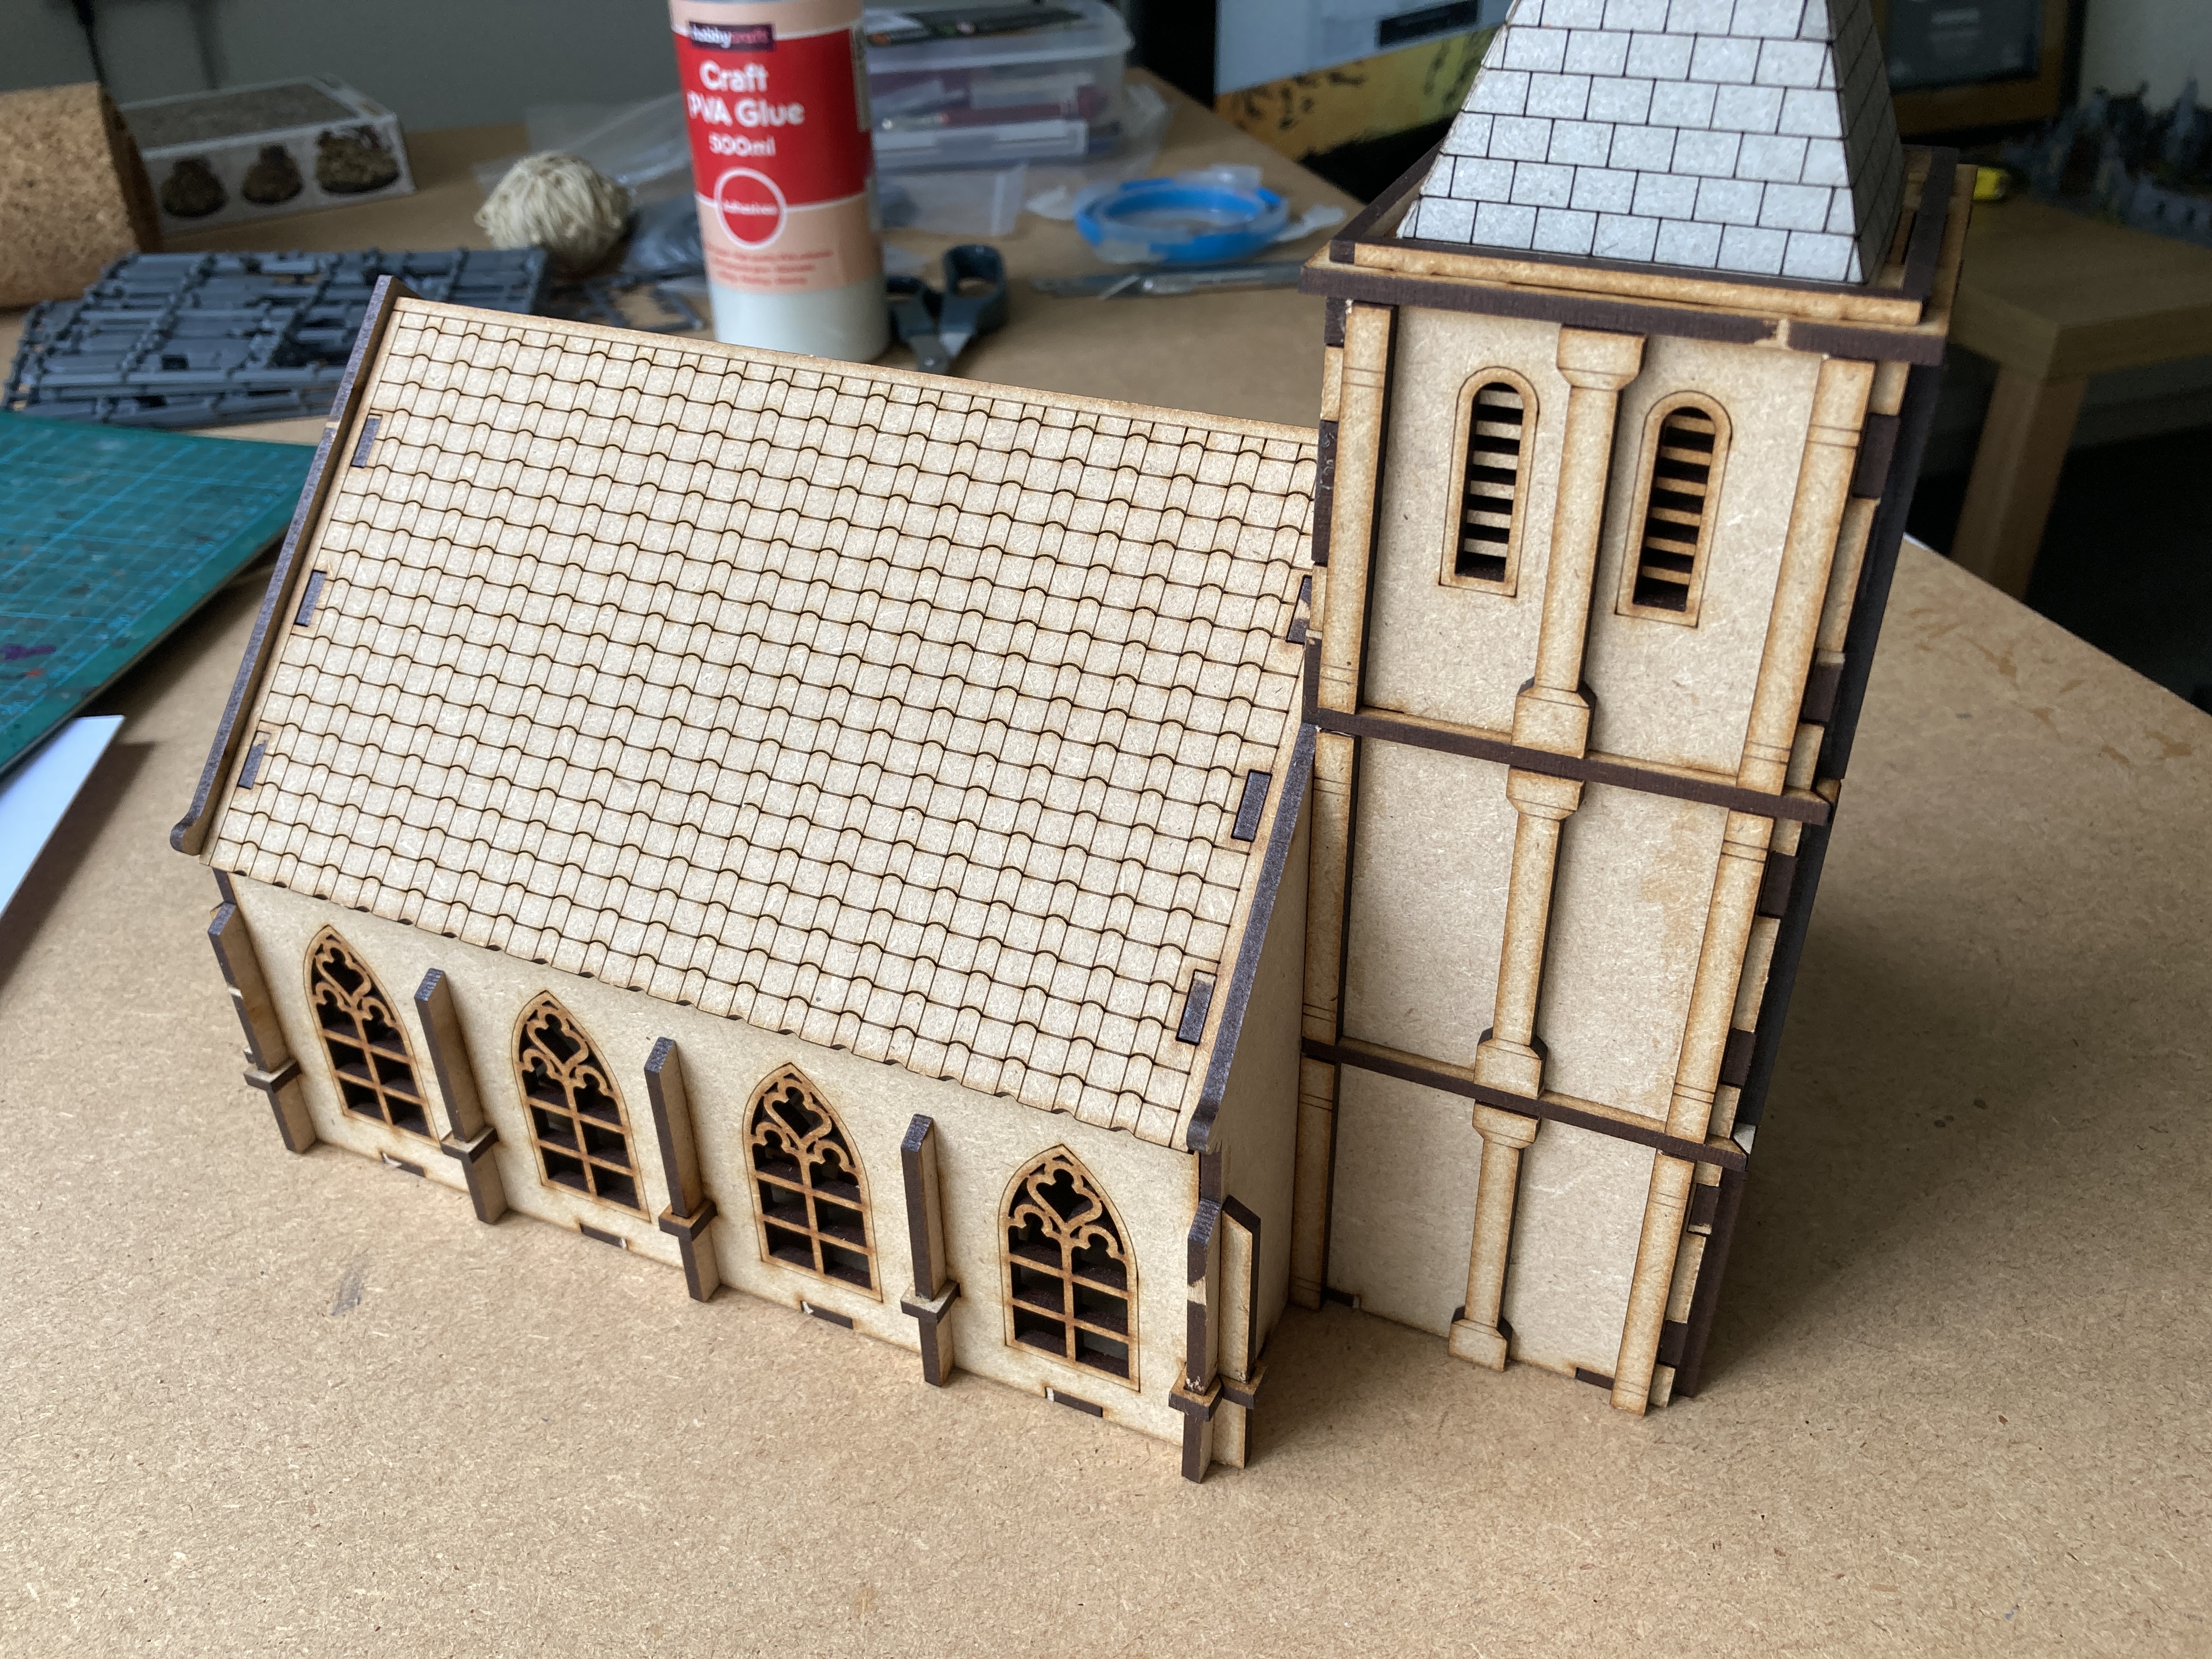

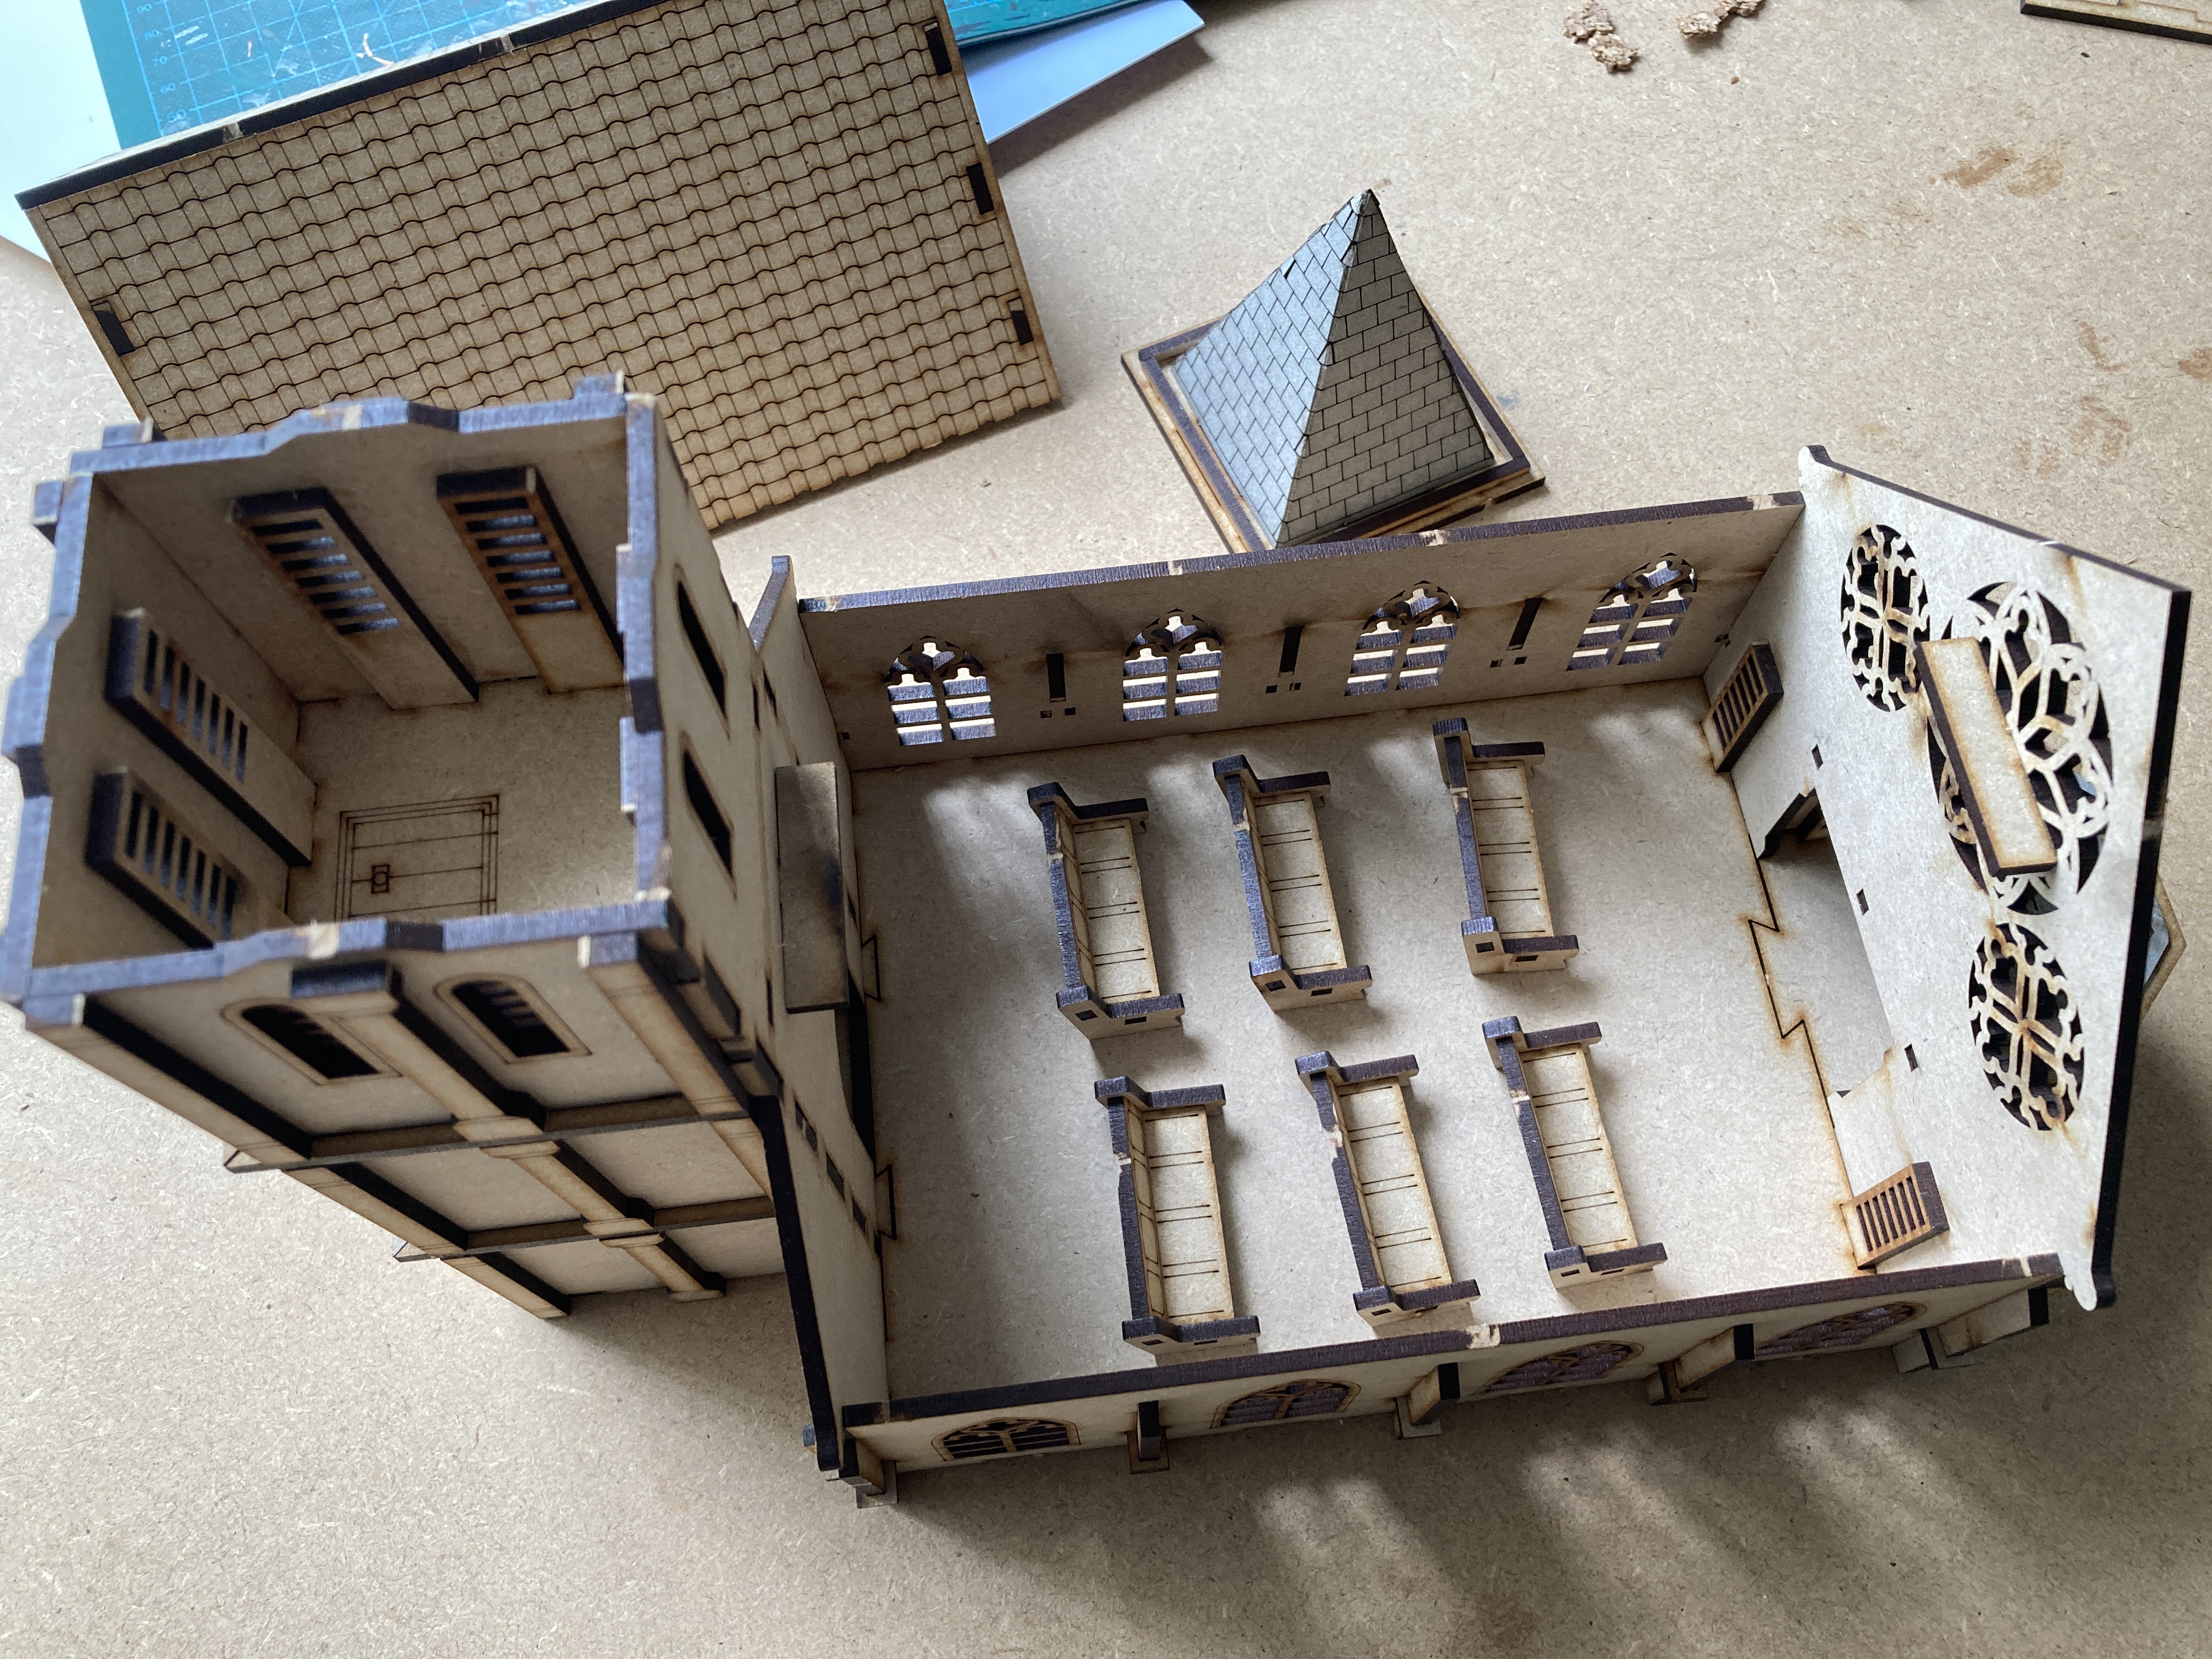
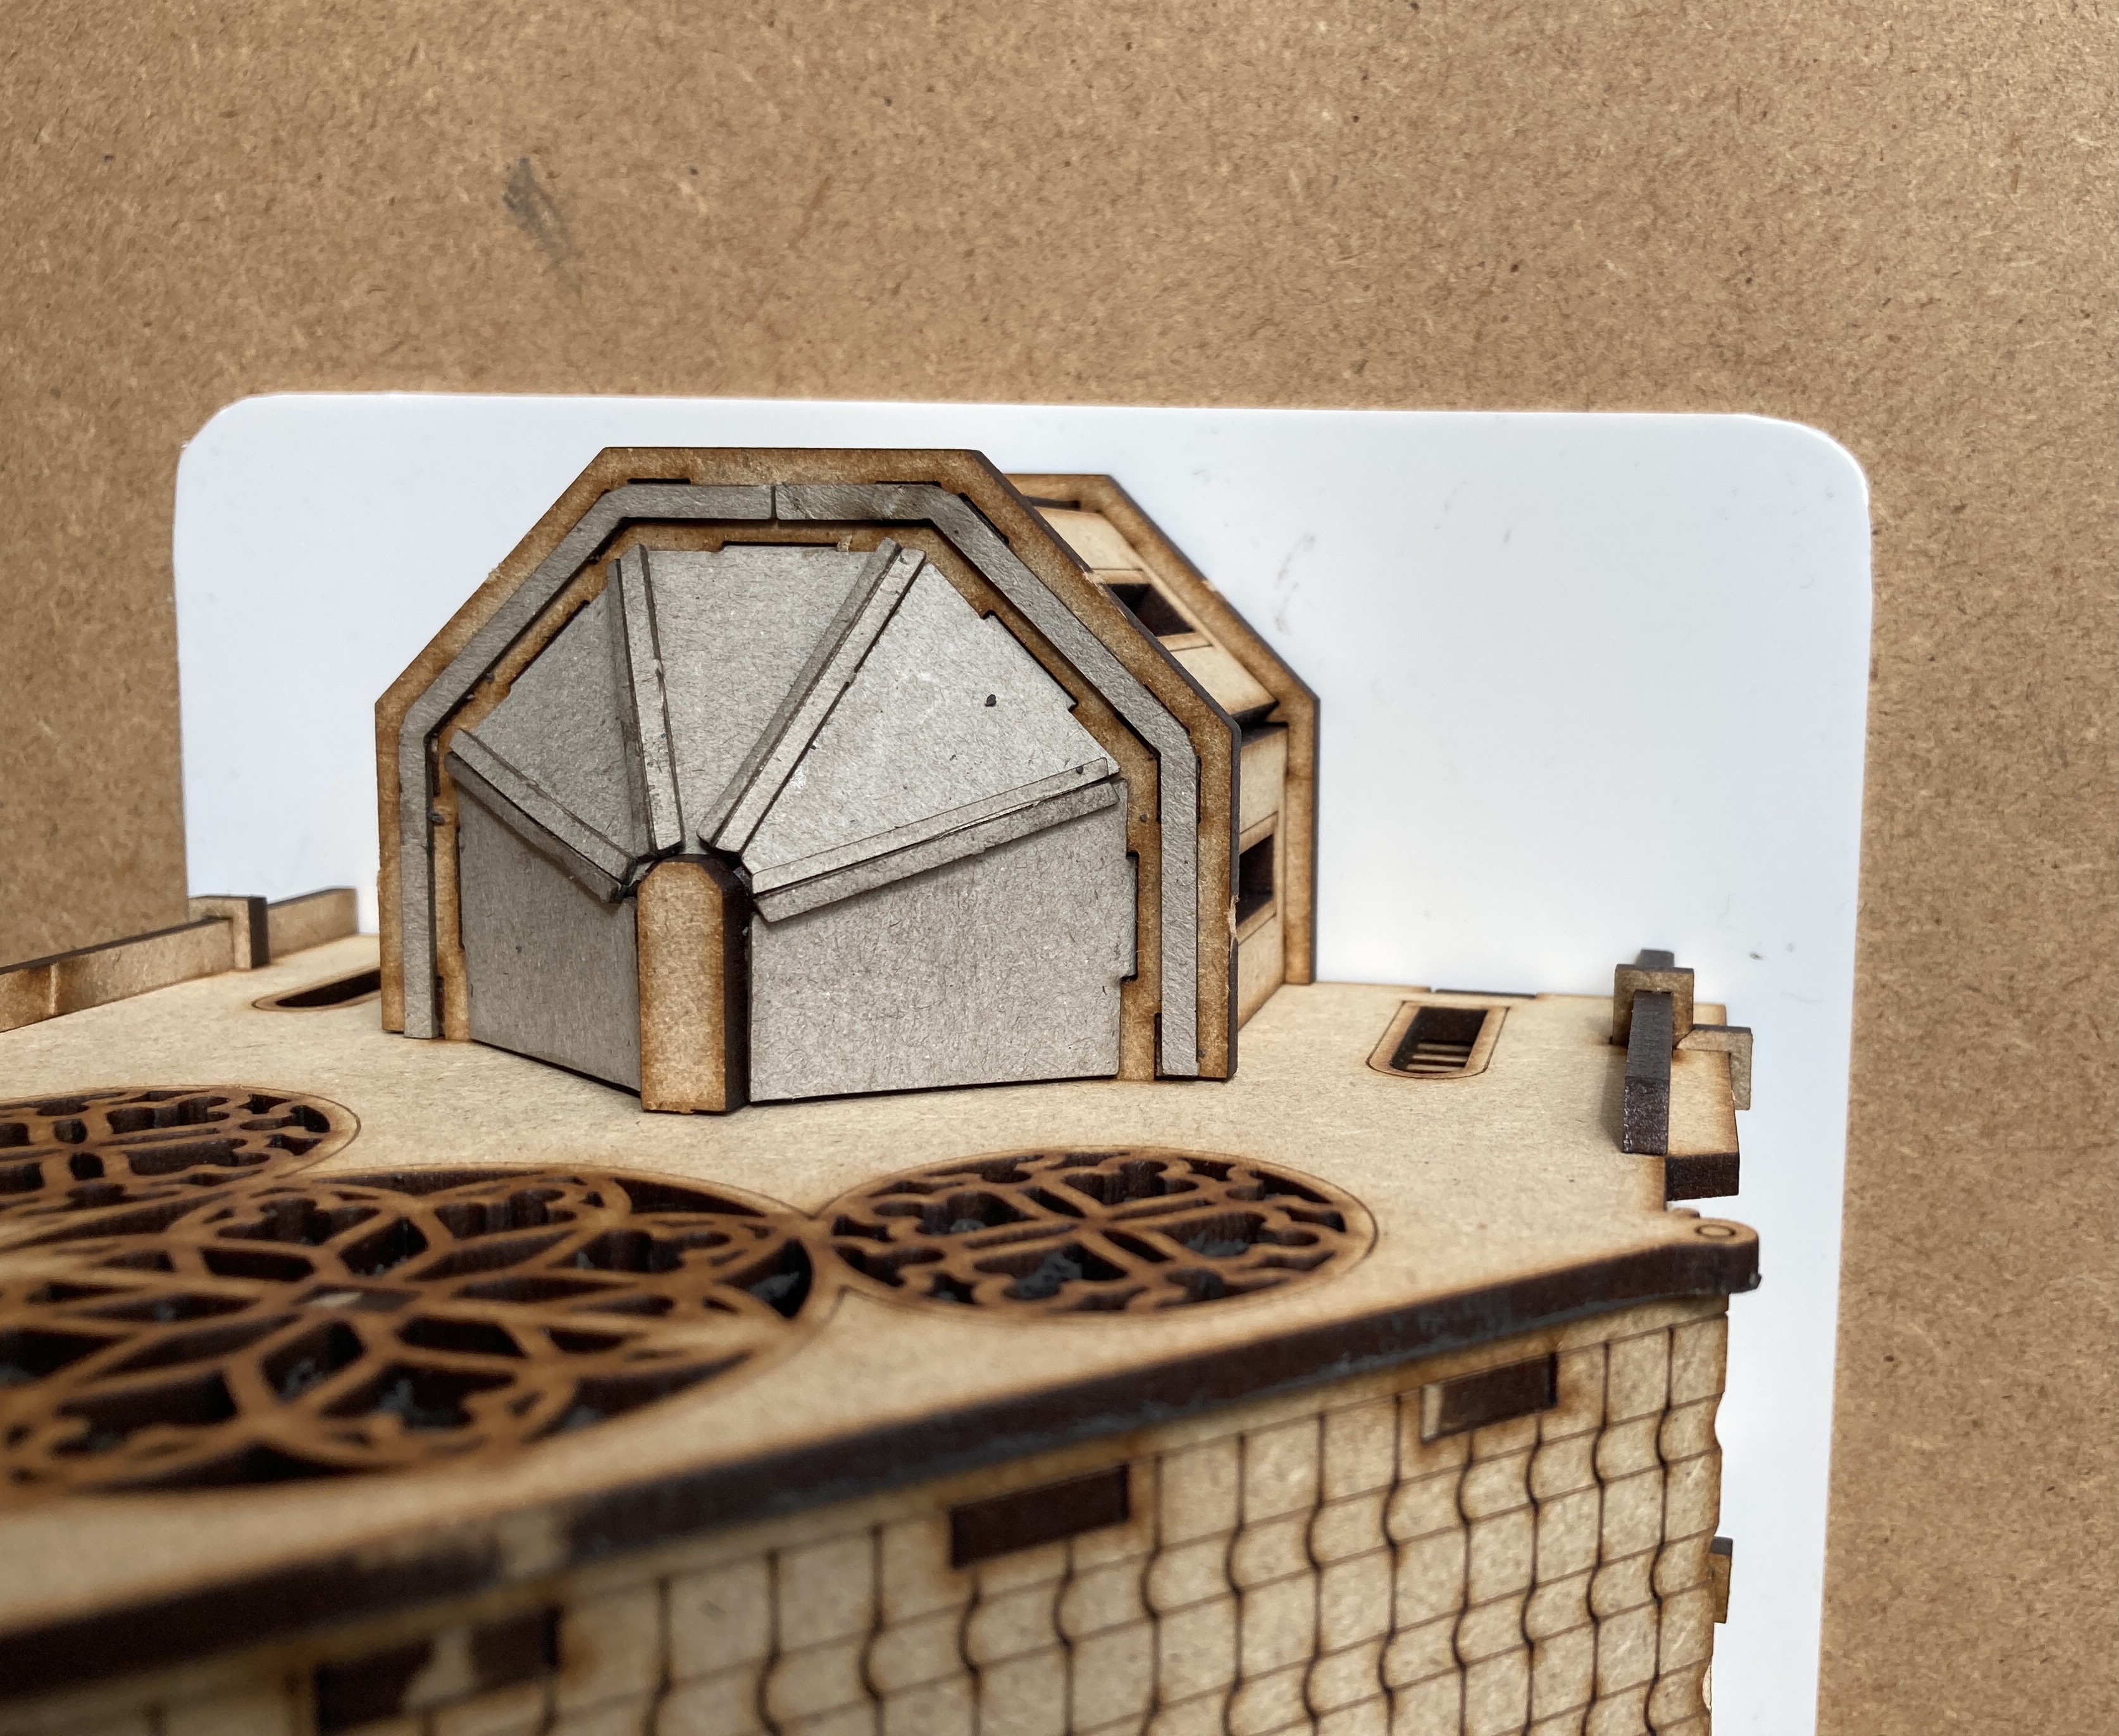
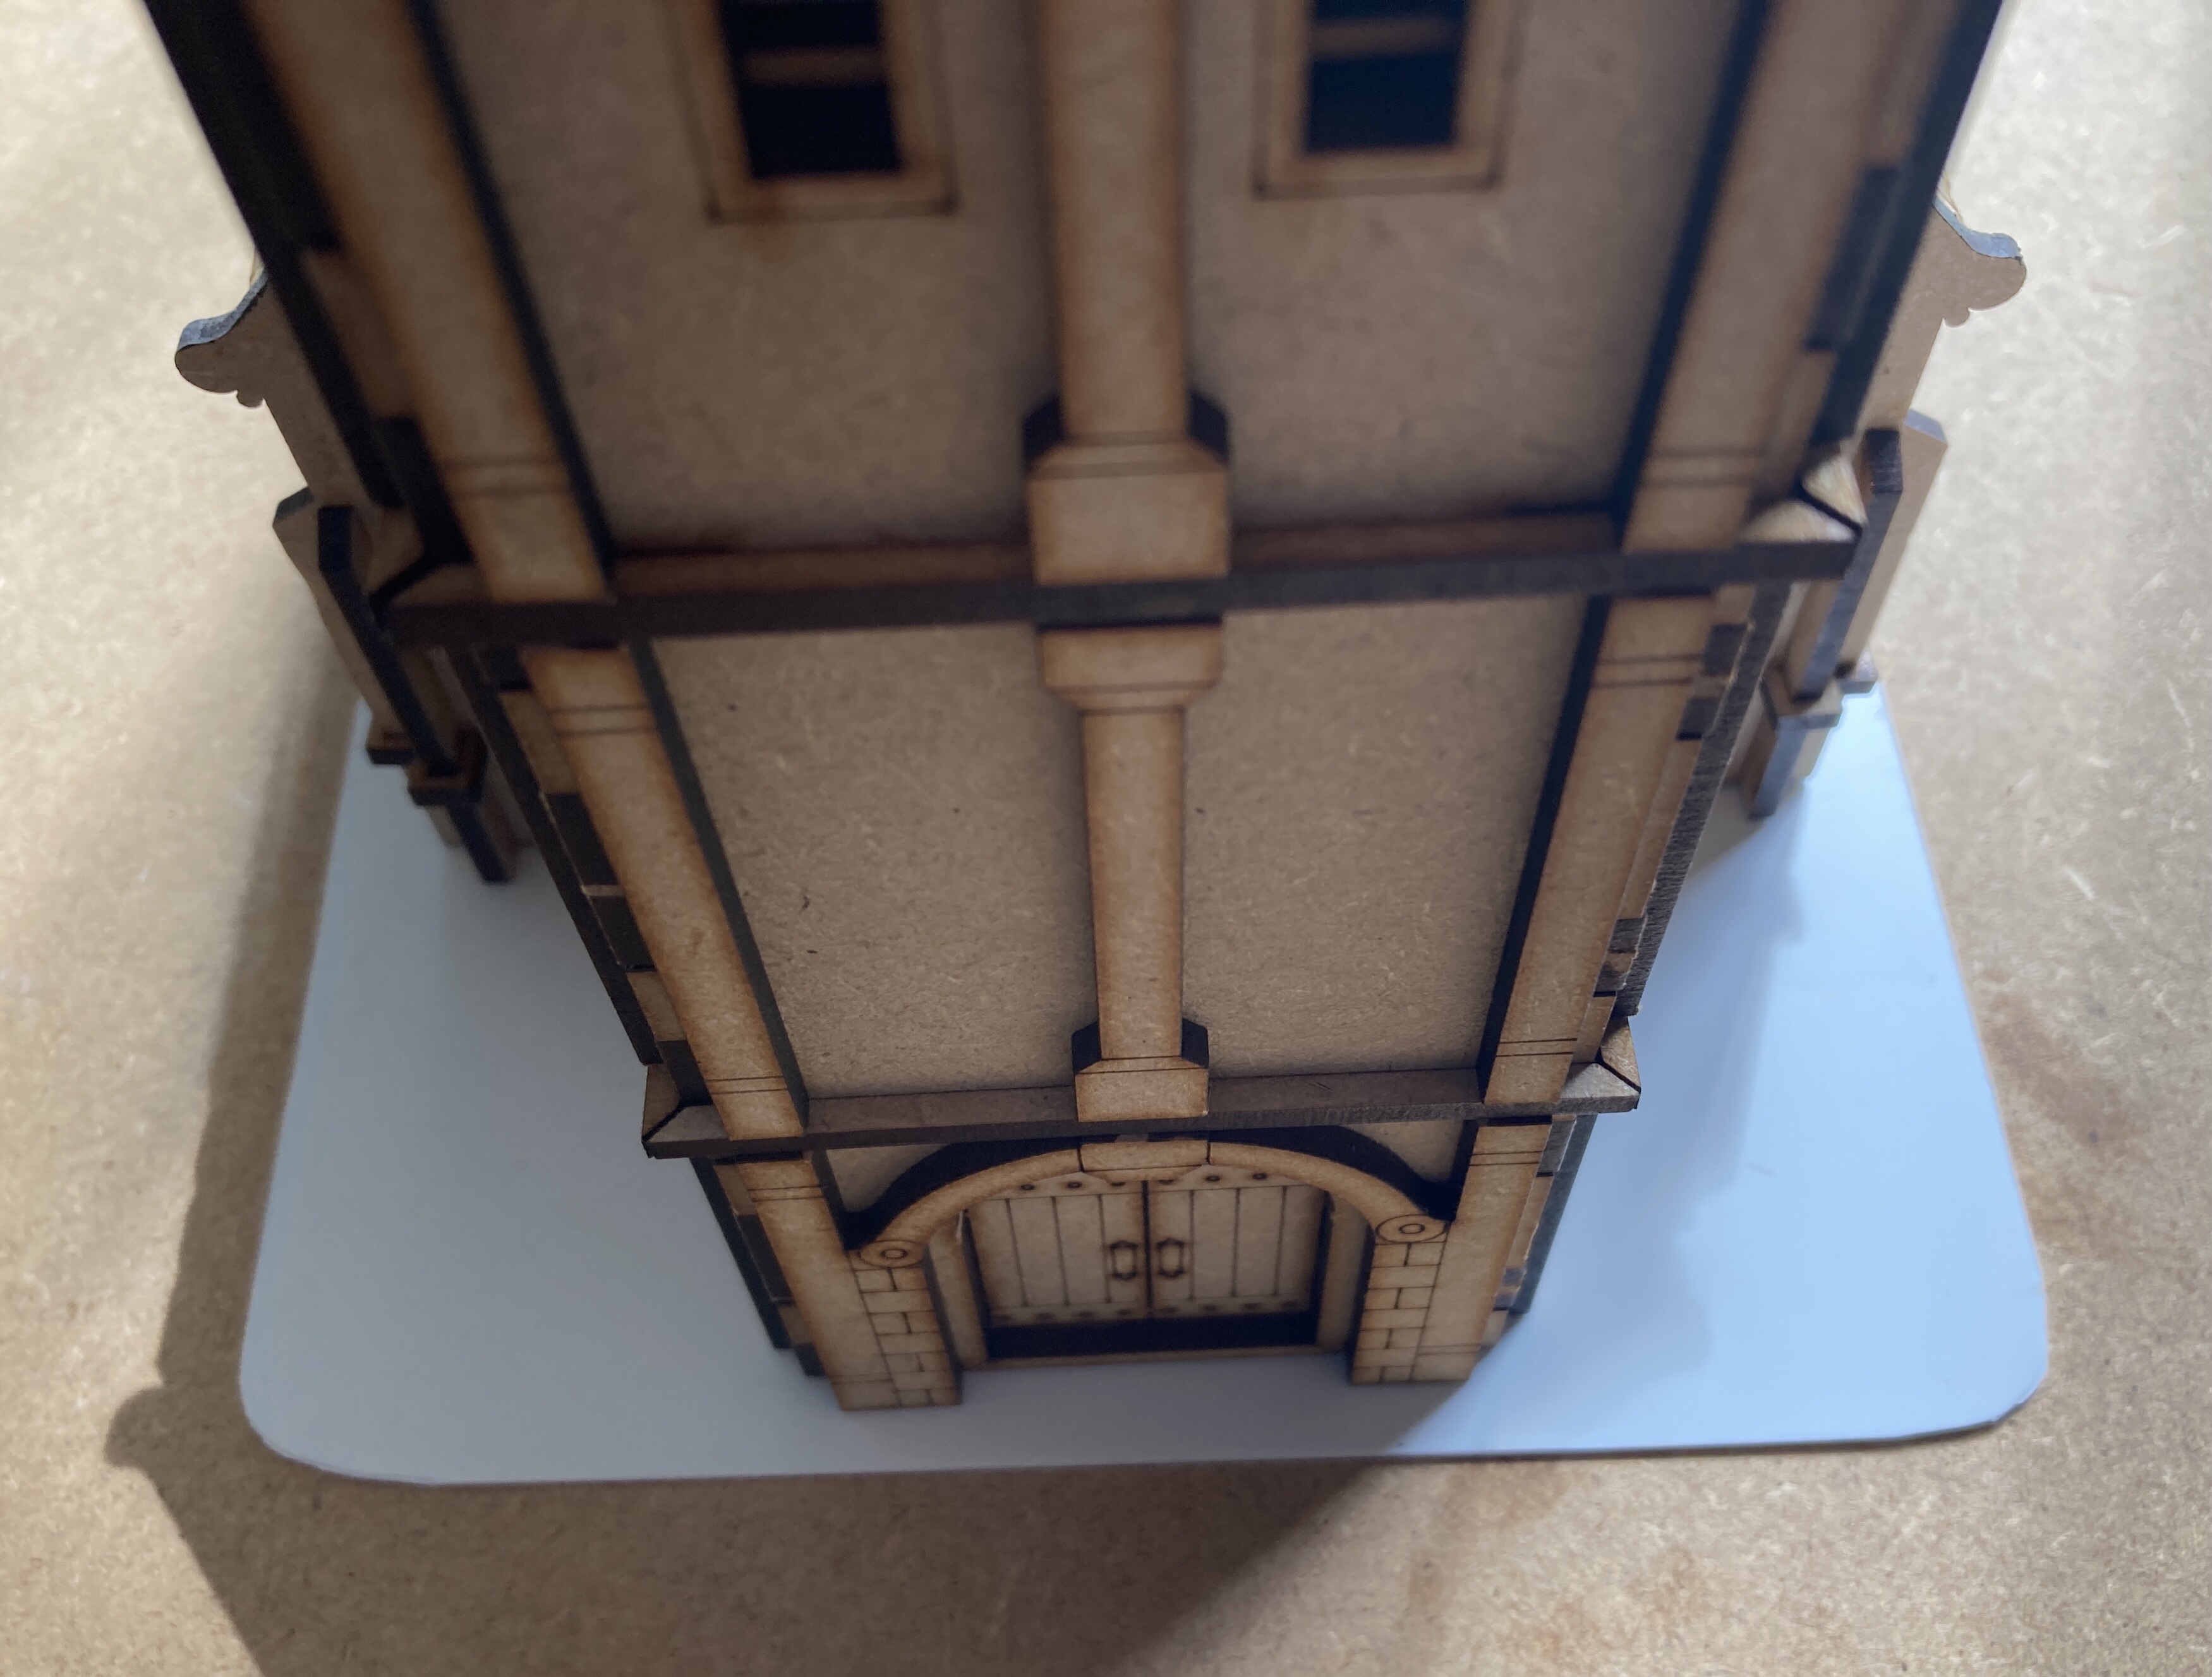

I built it as per the instructions on the TTCombat website.
I used a sheet of 1mm plasticard for the base, using scissors to cut it to size then round the corners off. It was then stuck to the mdf with superglue.
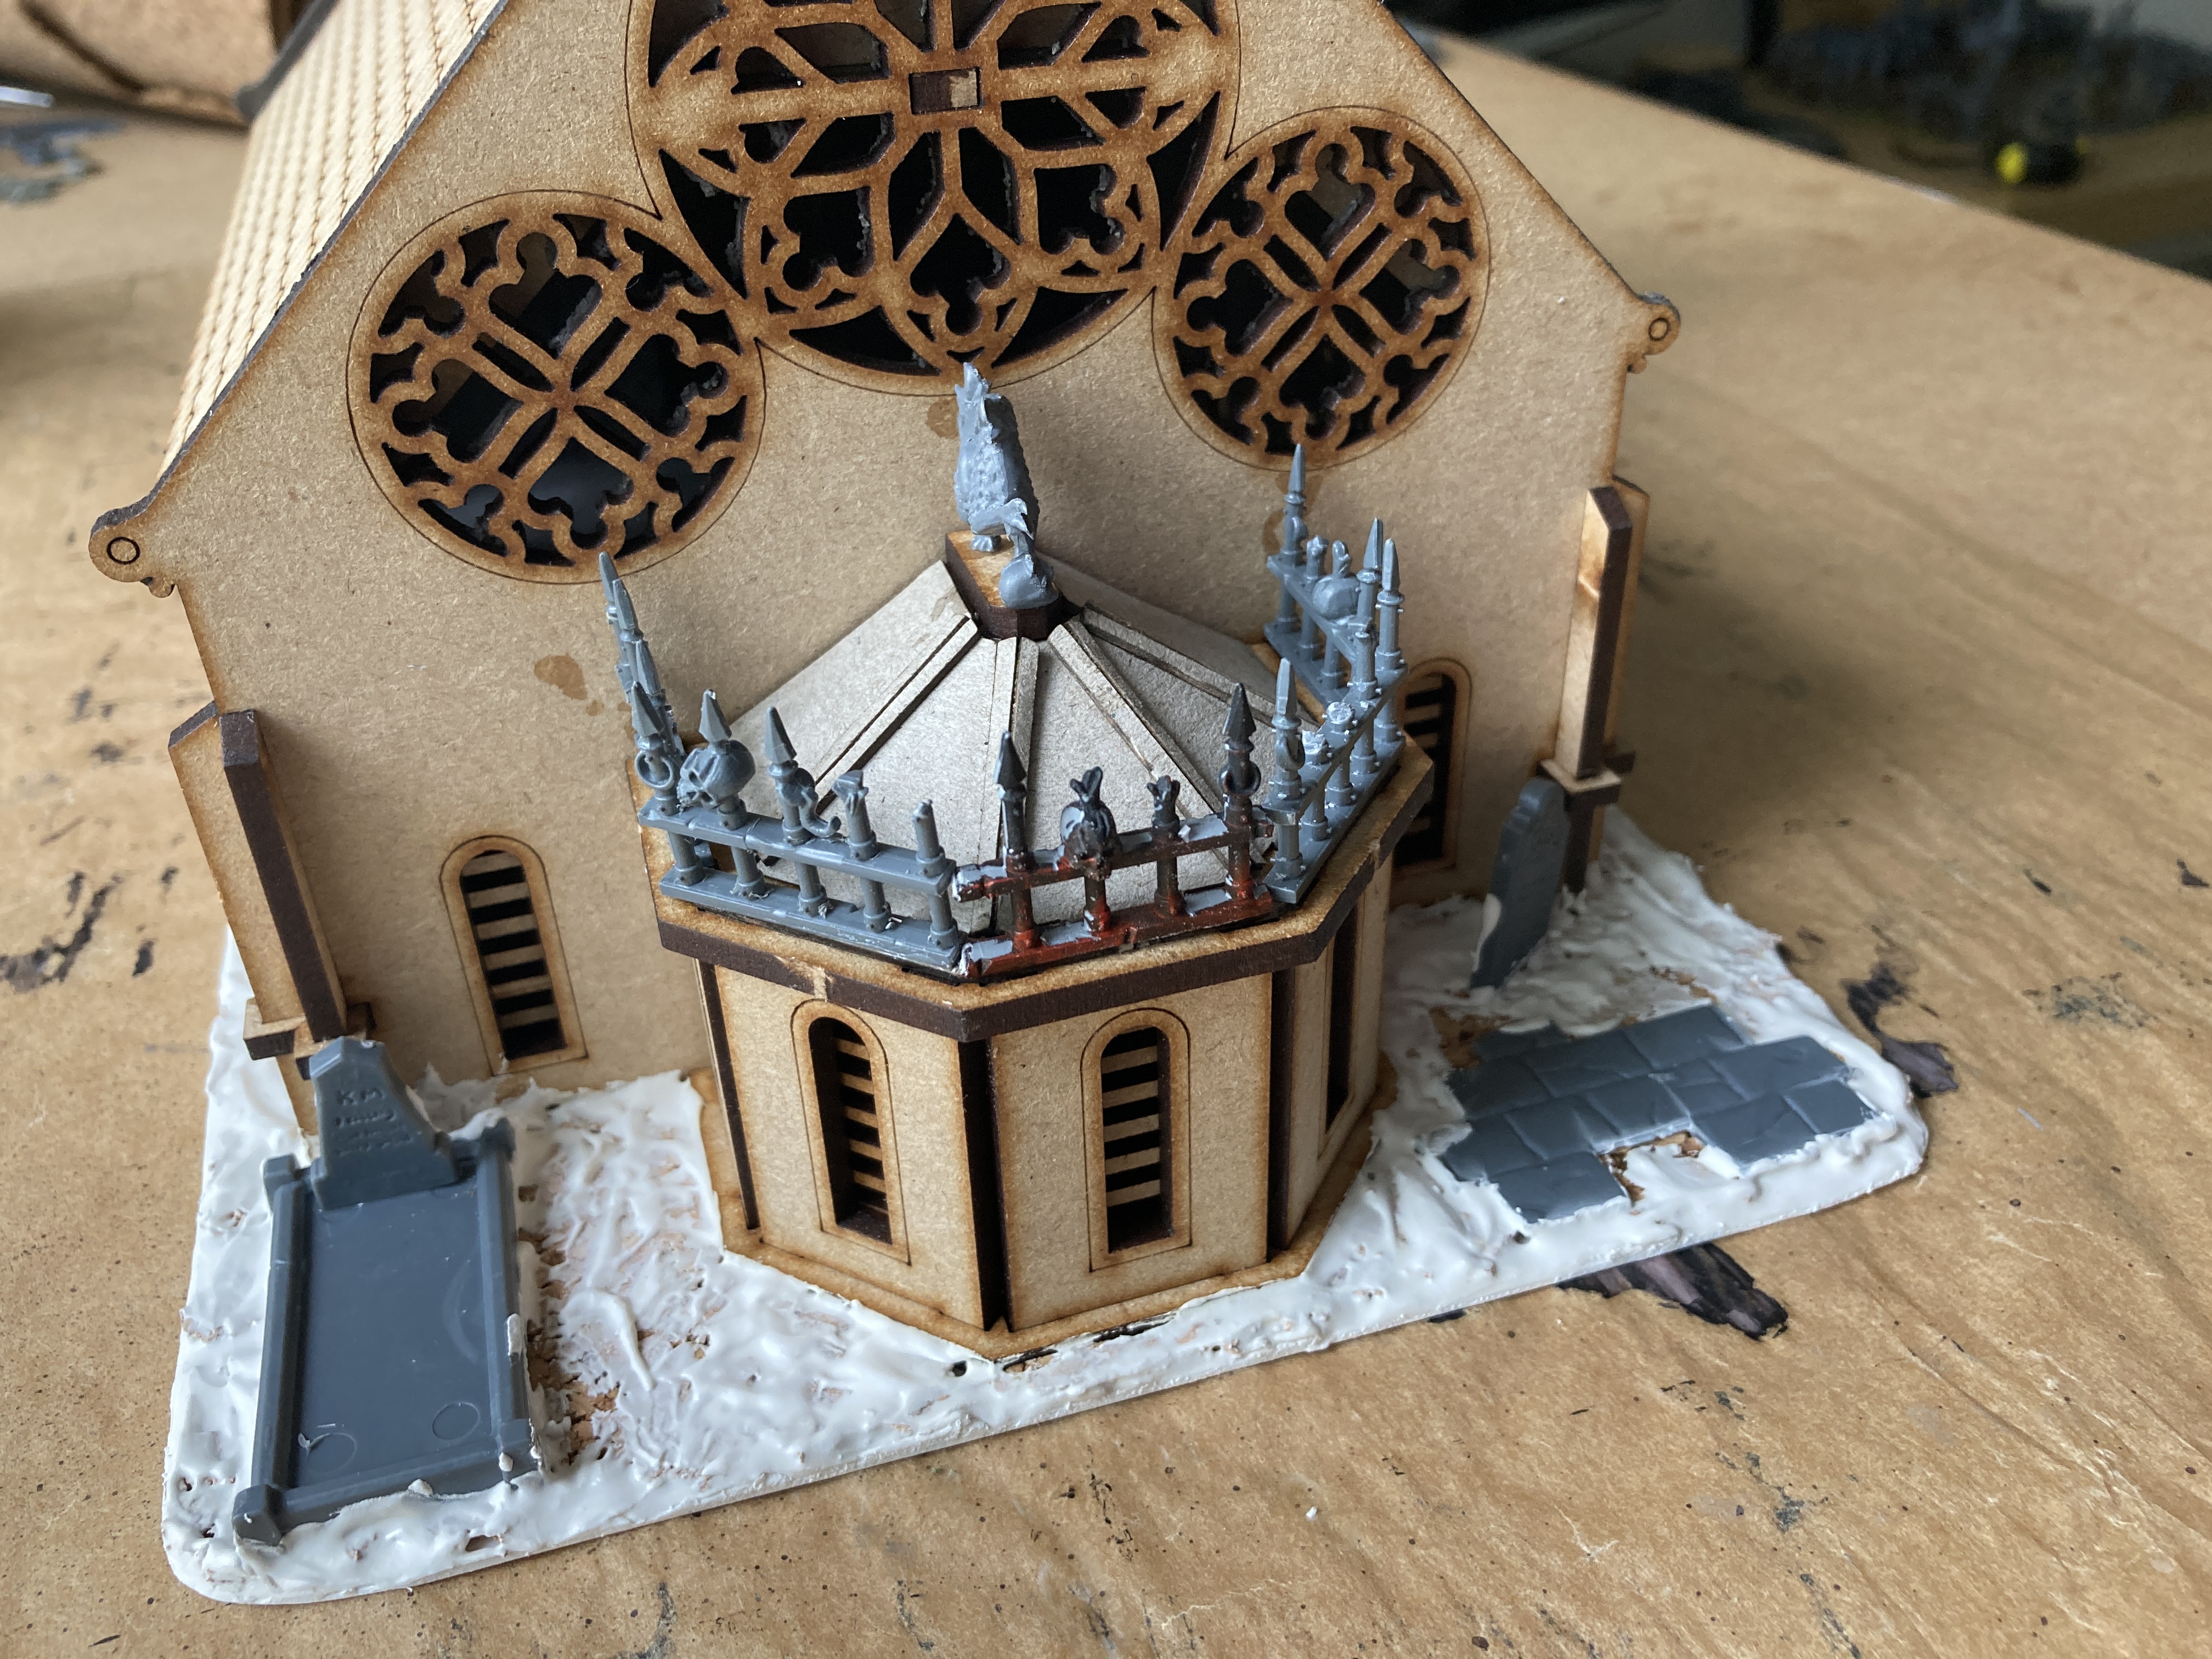
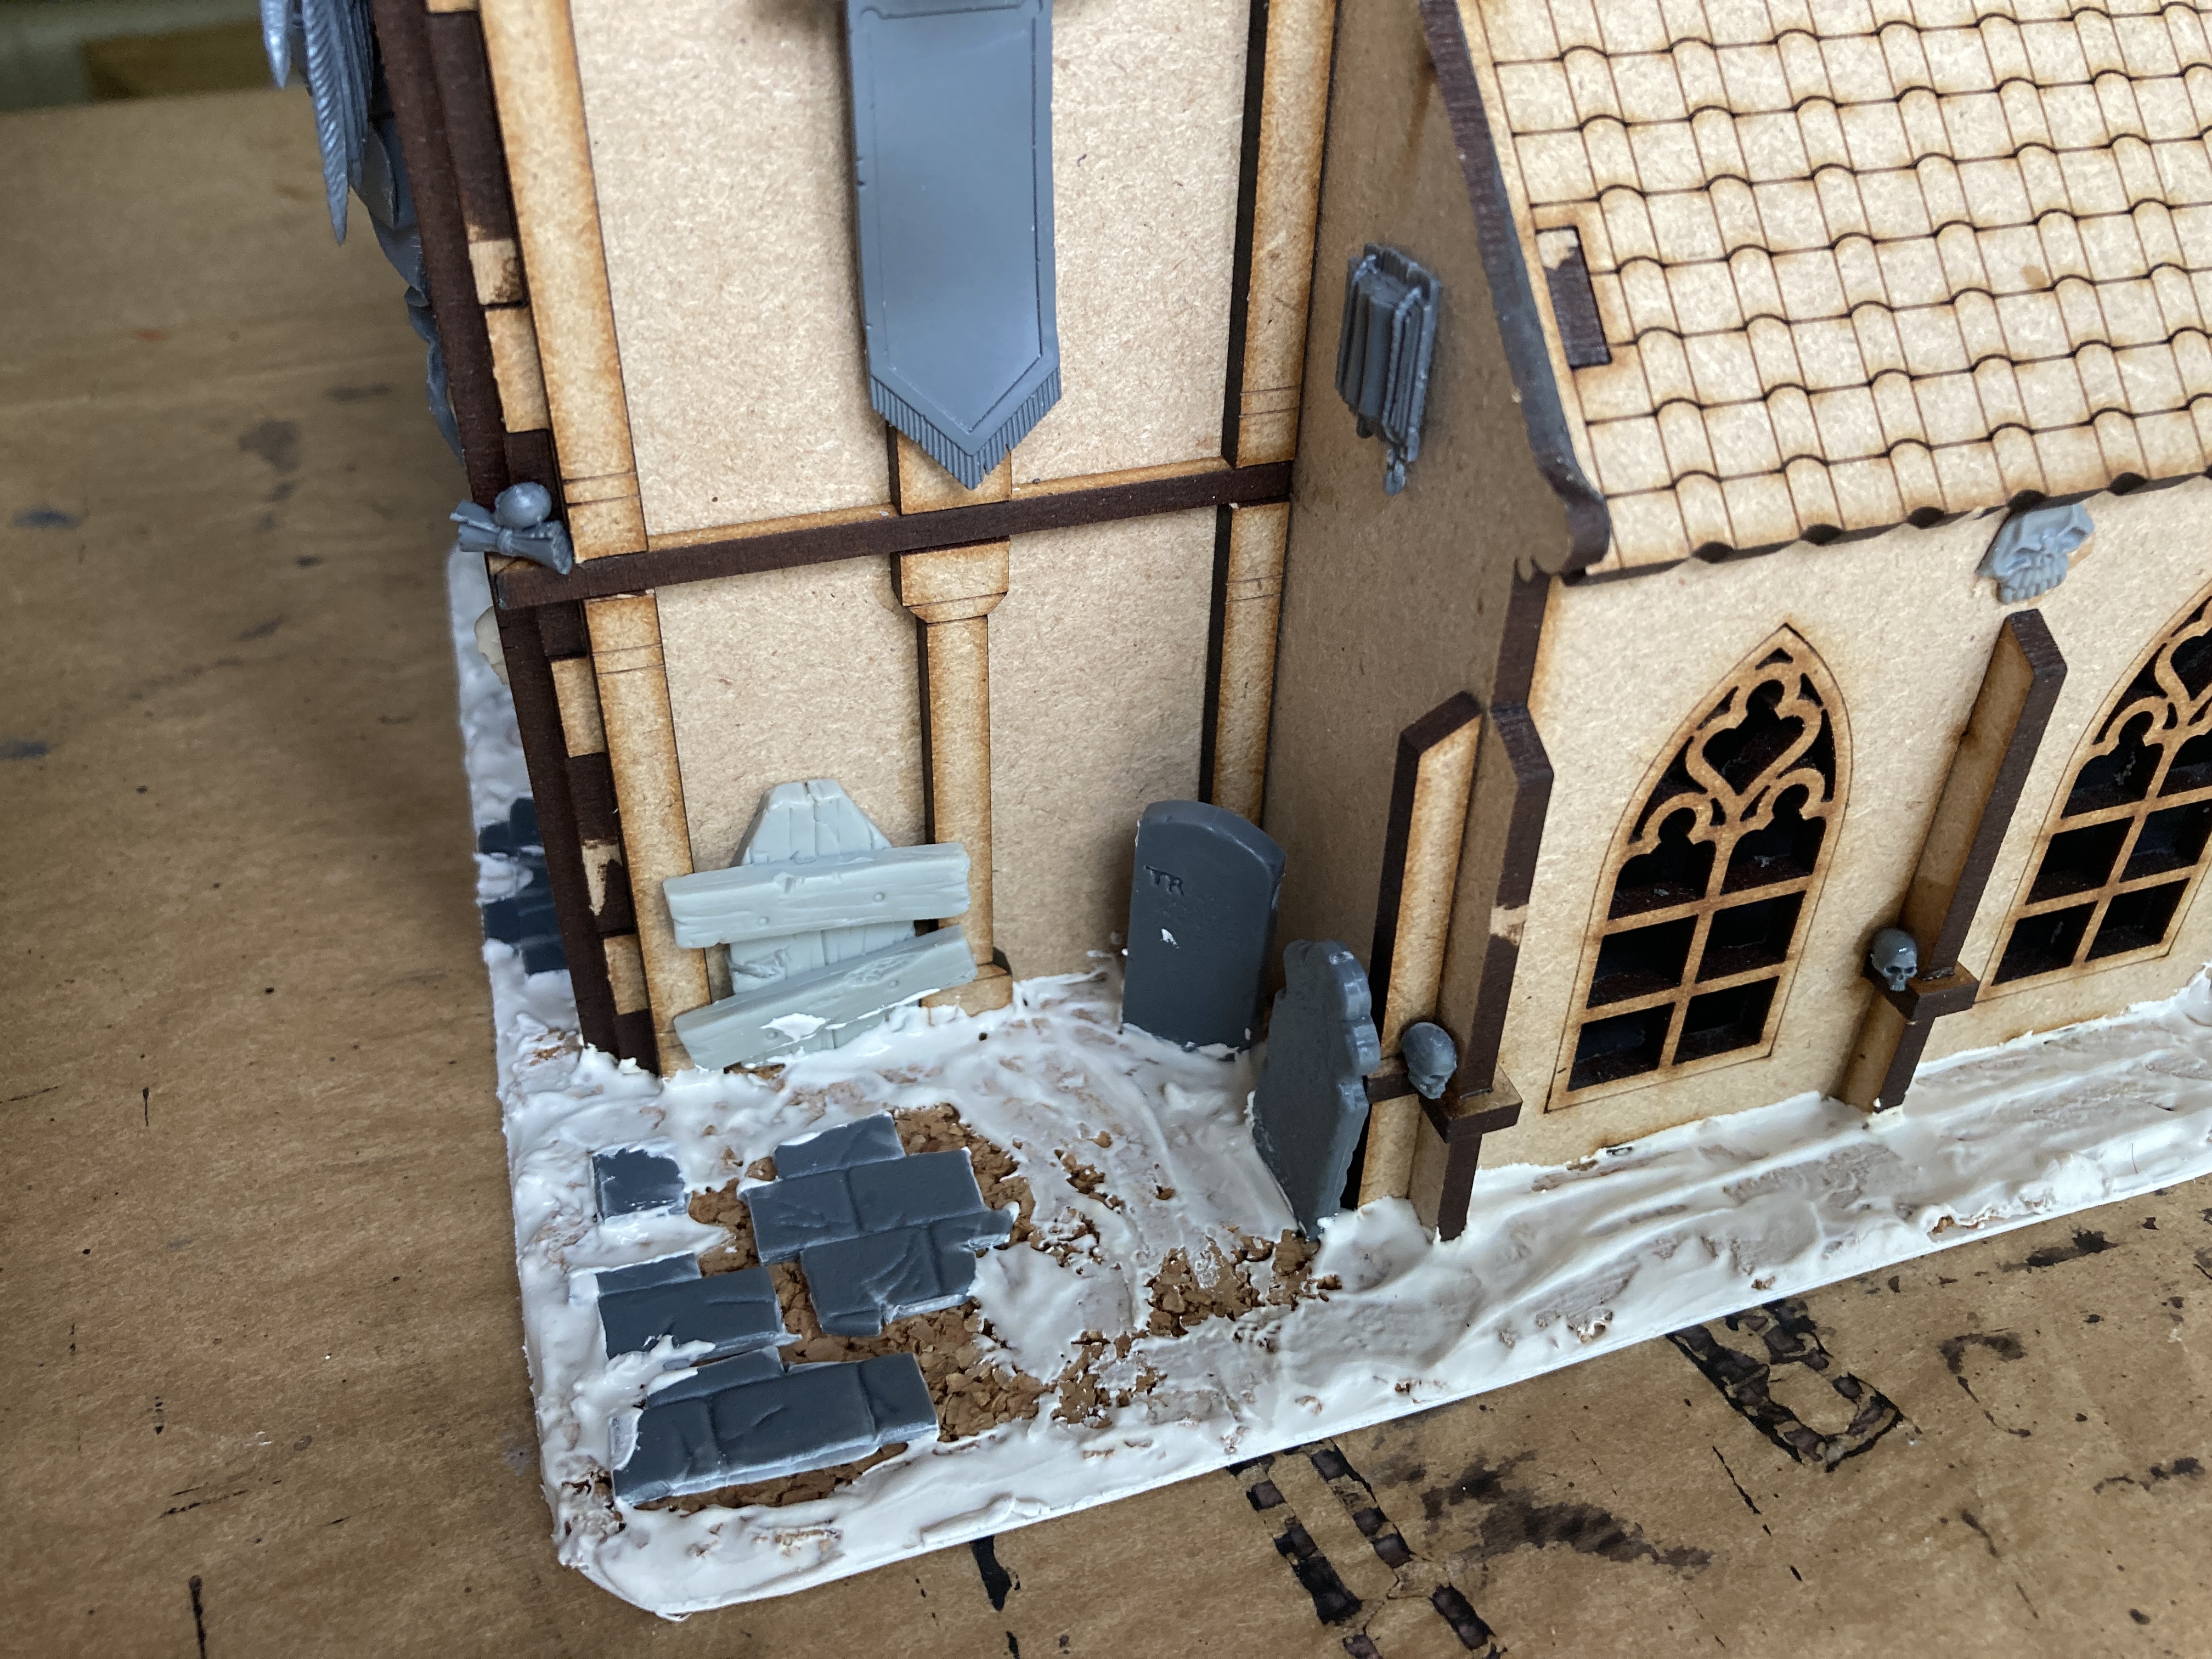
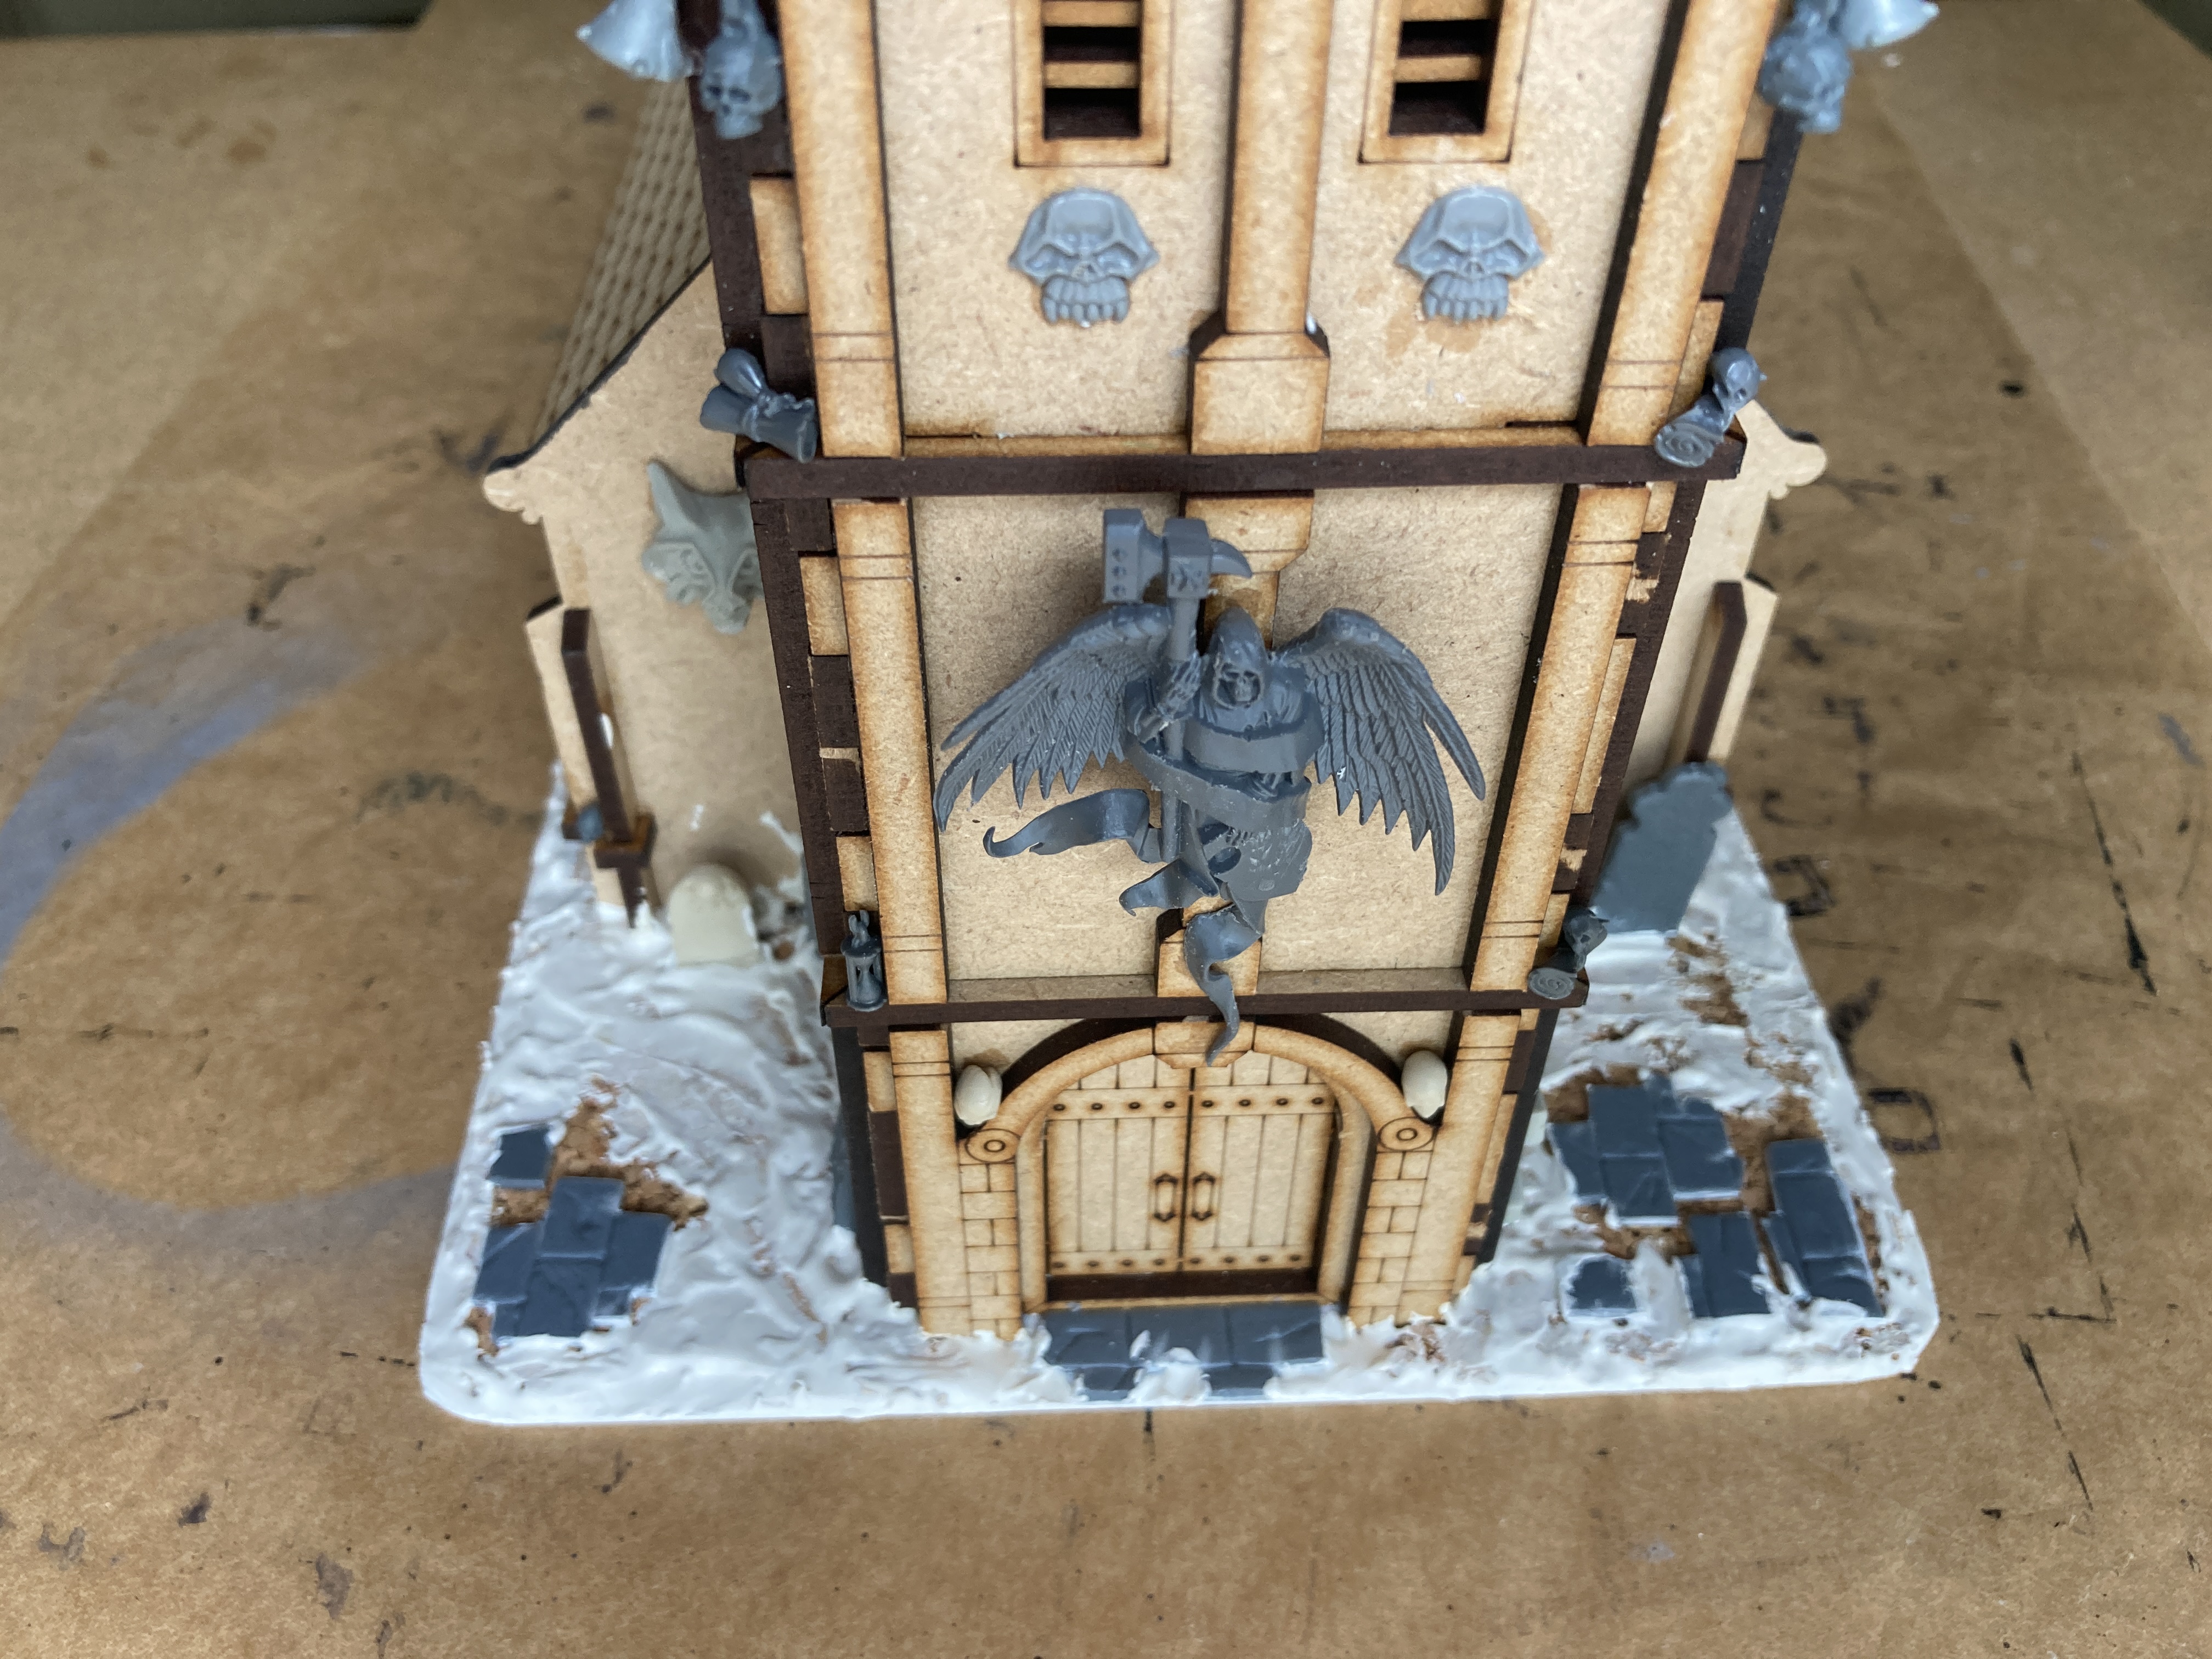

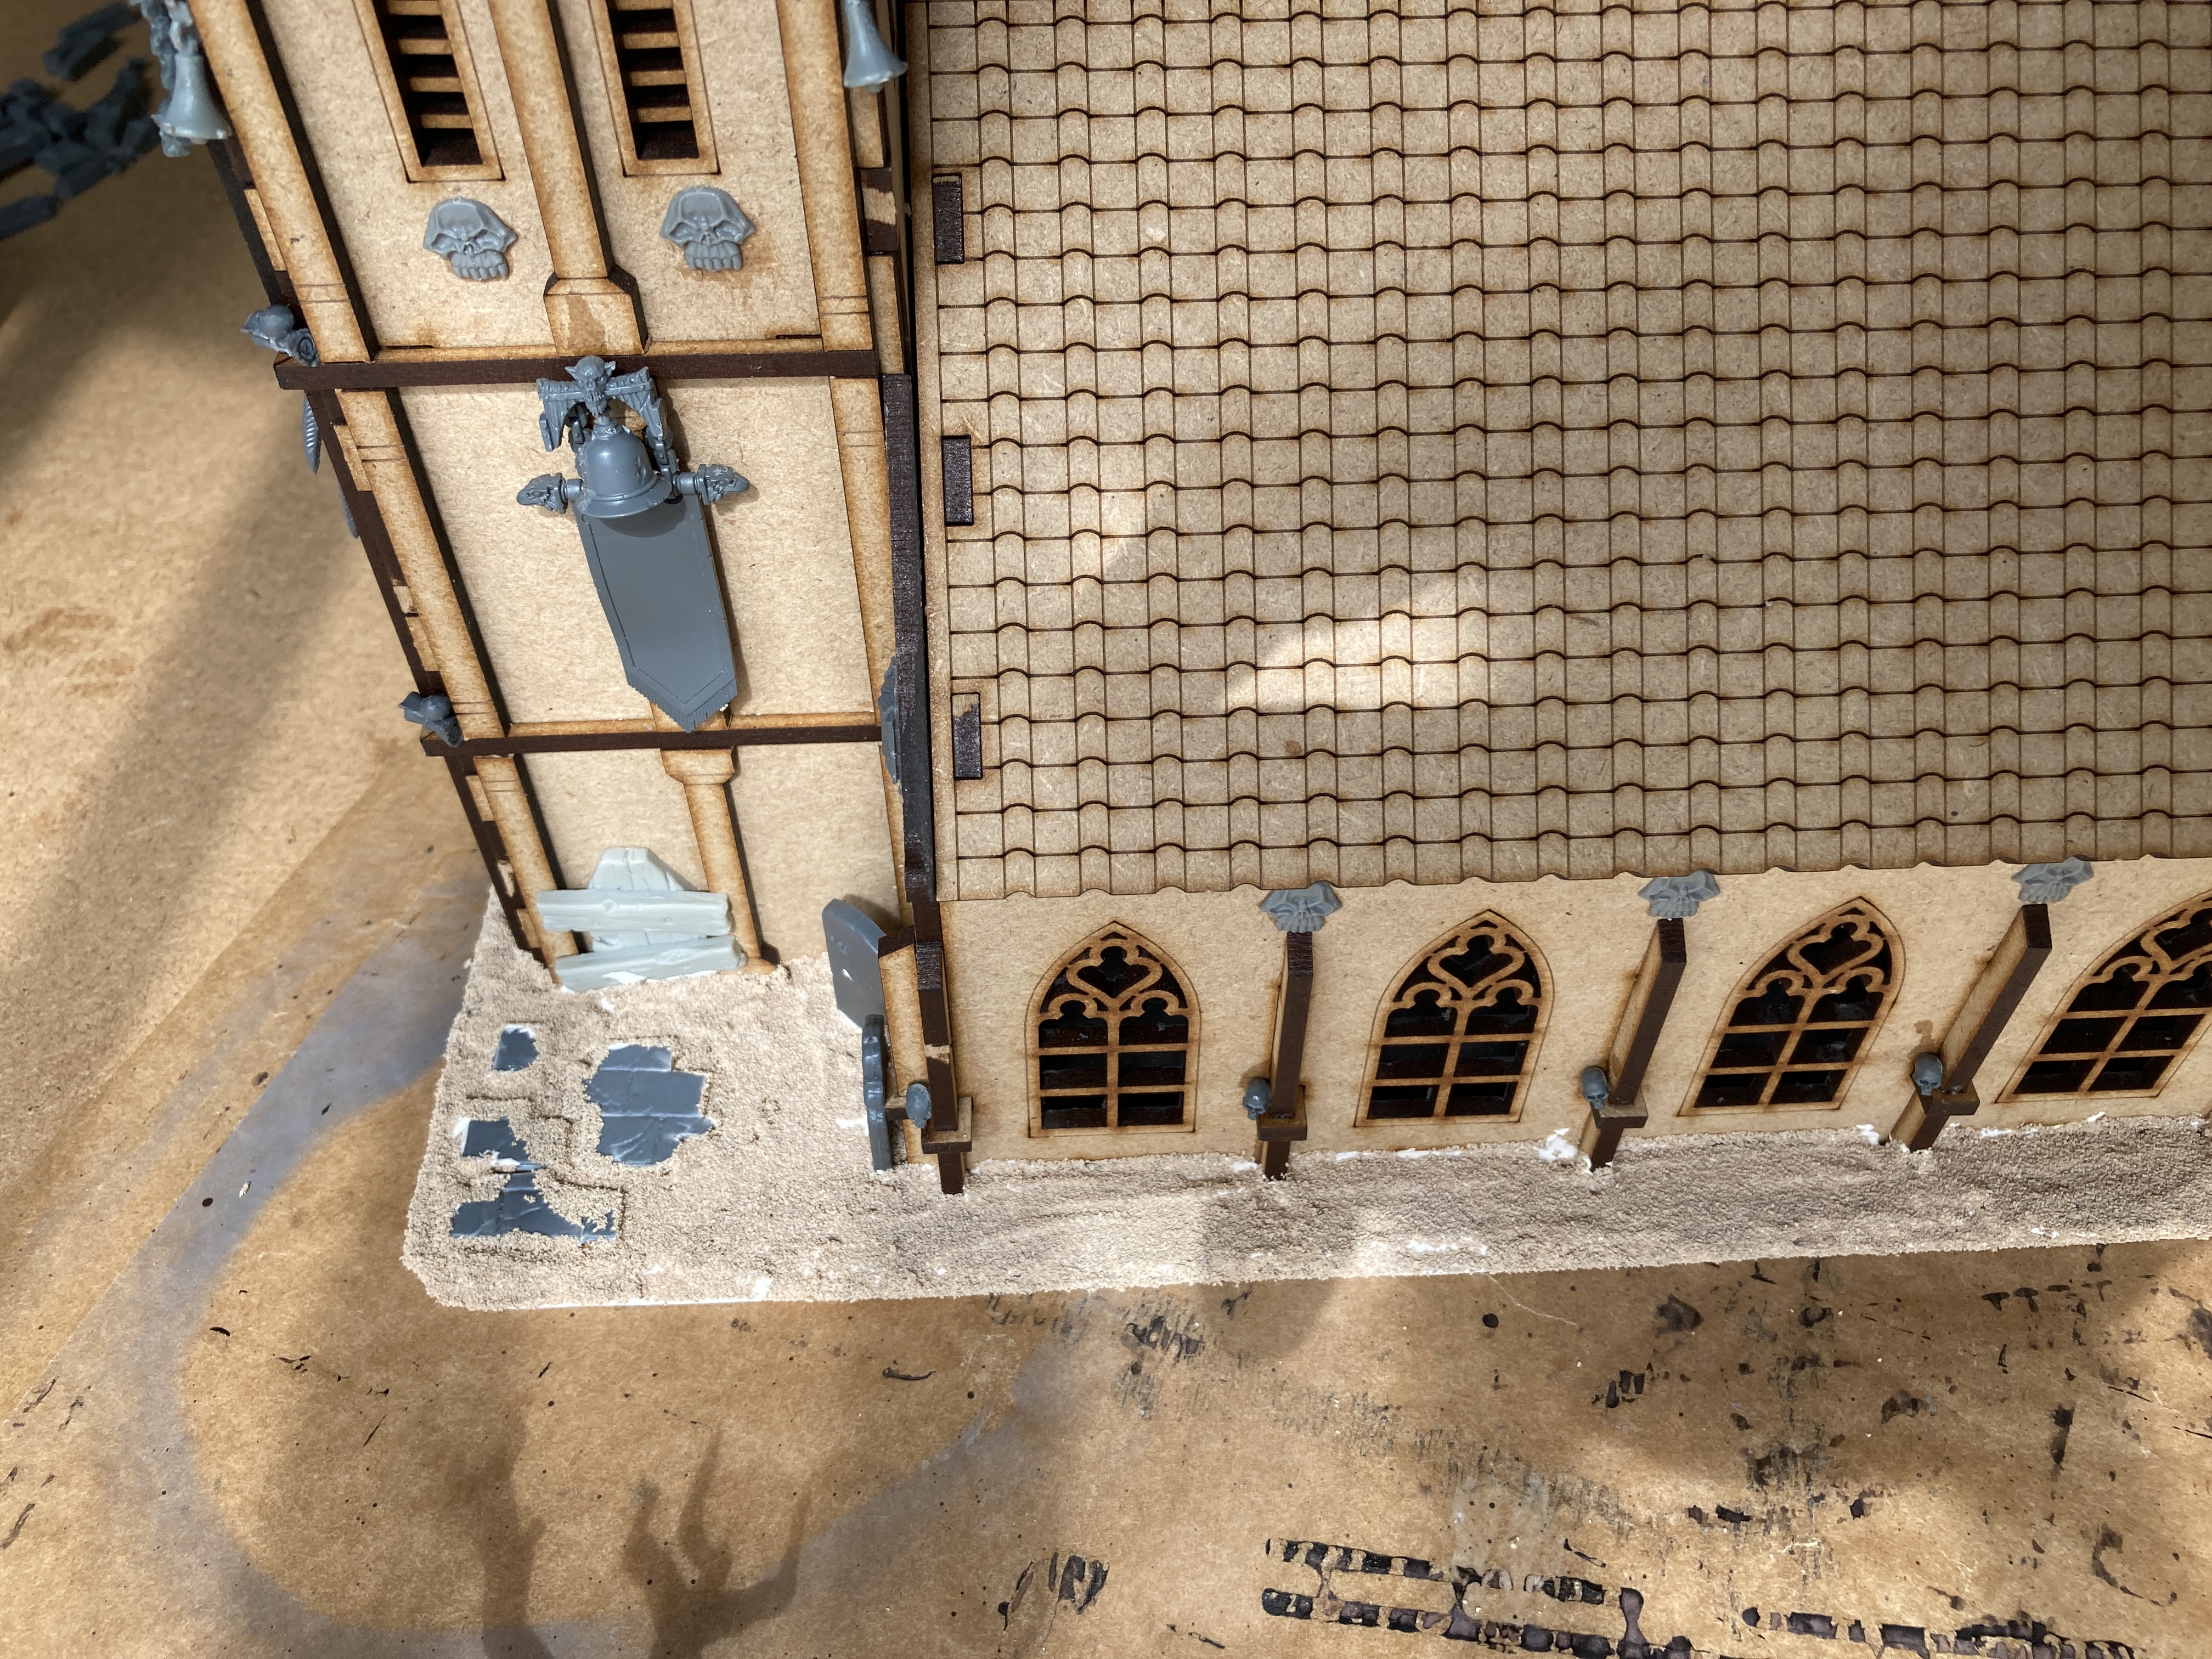

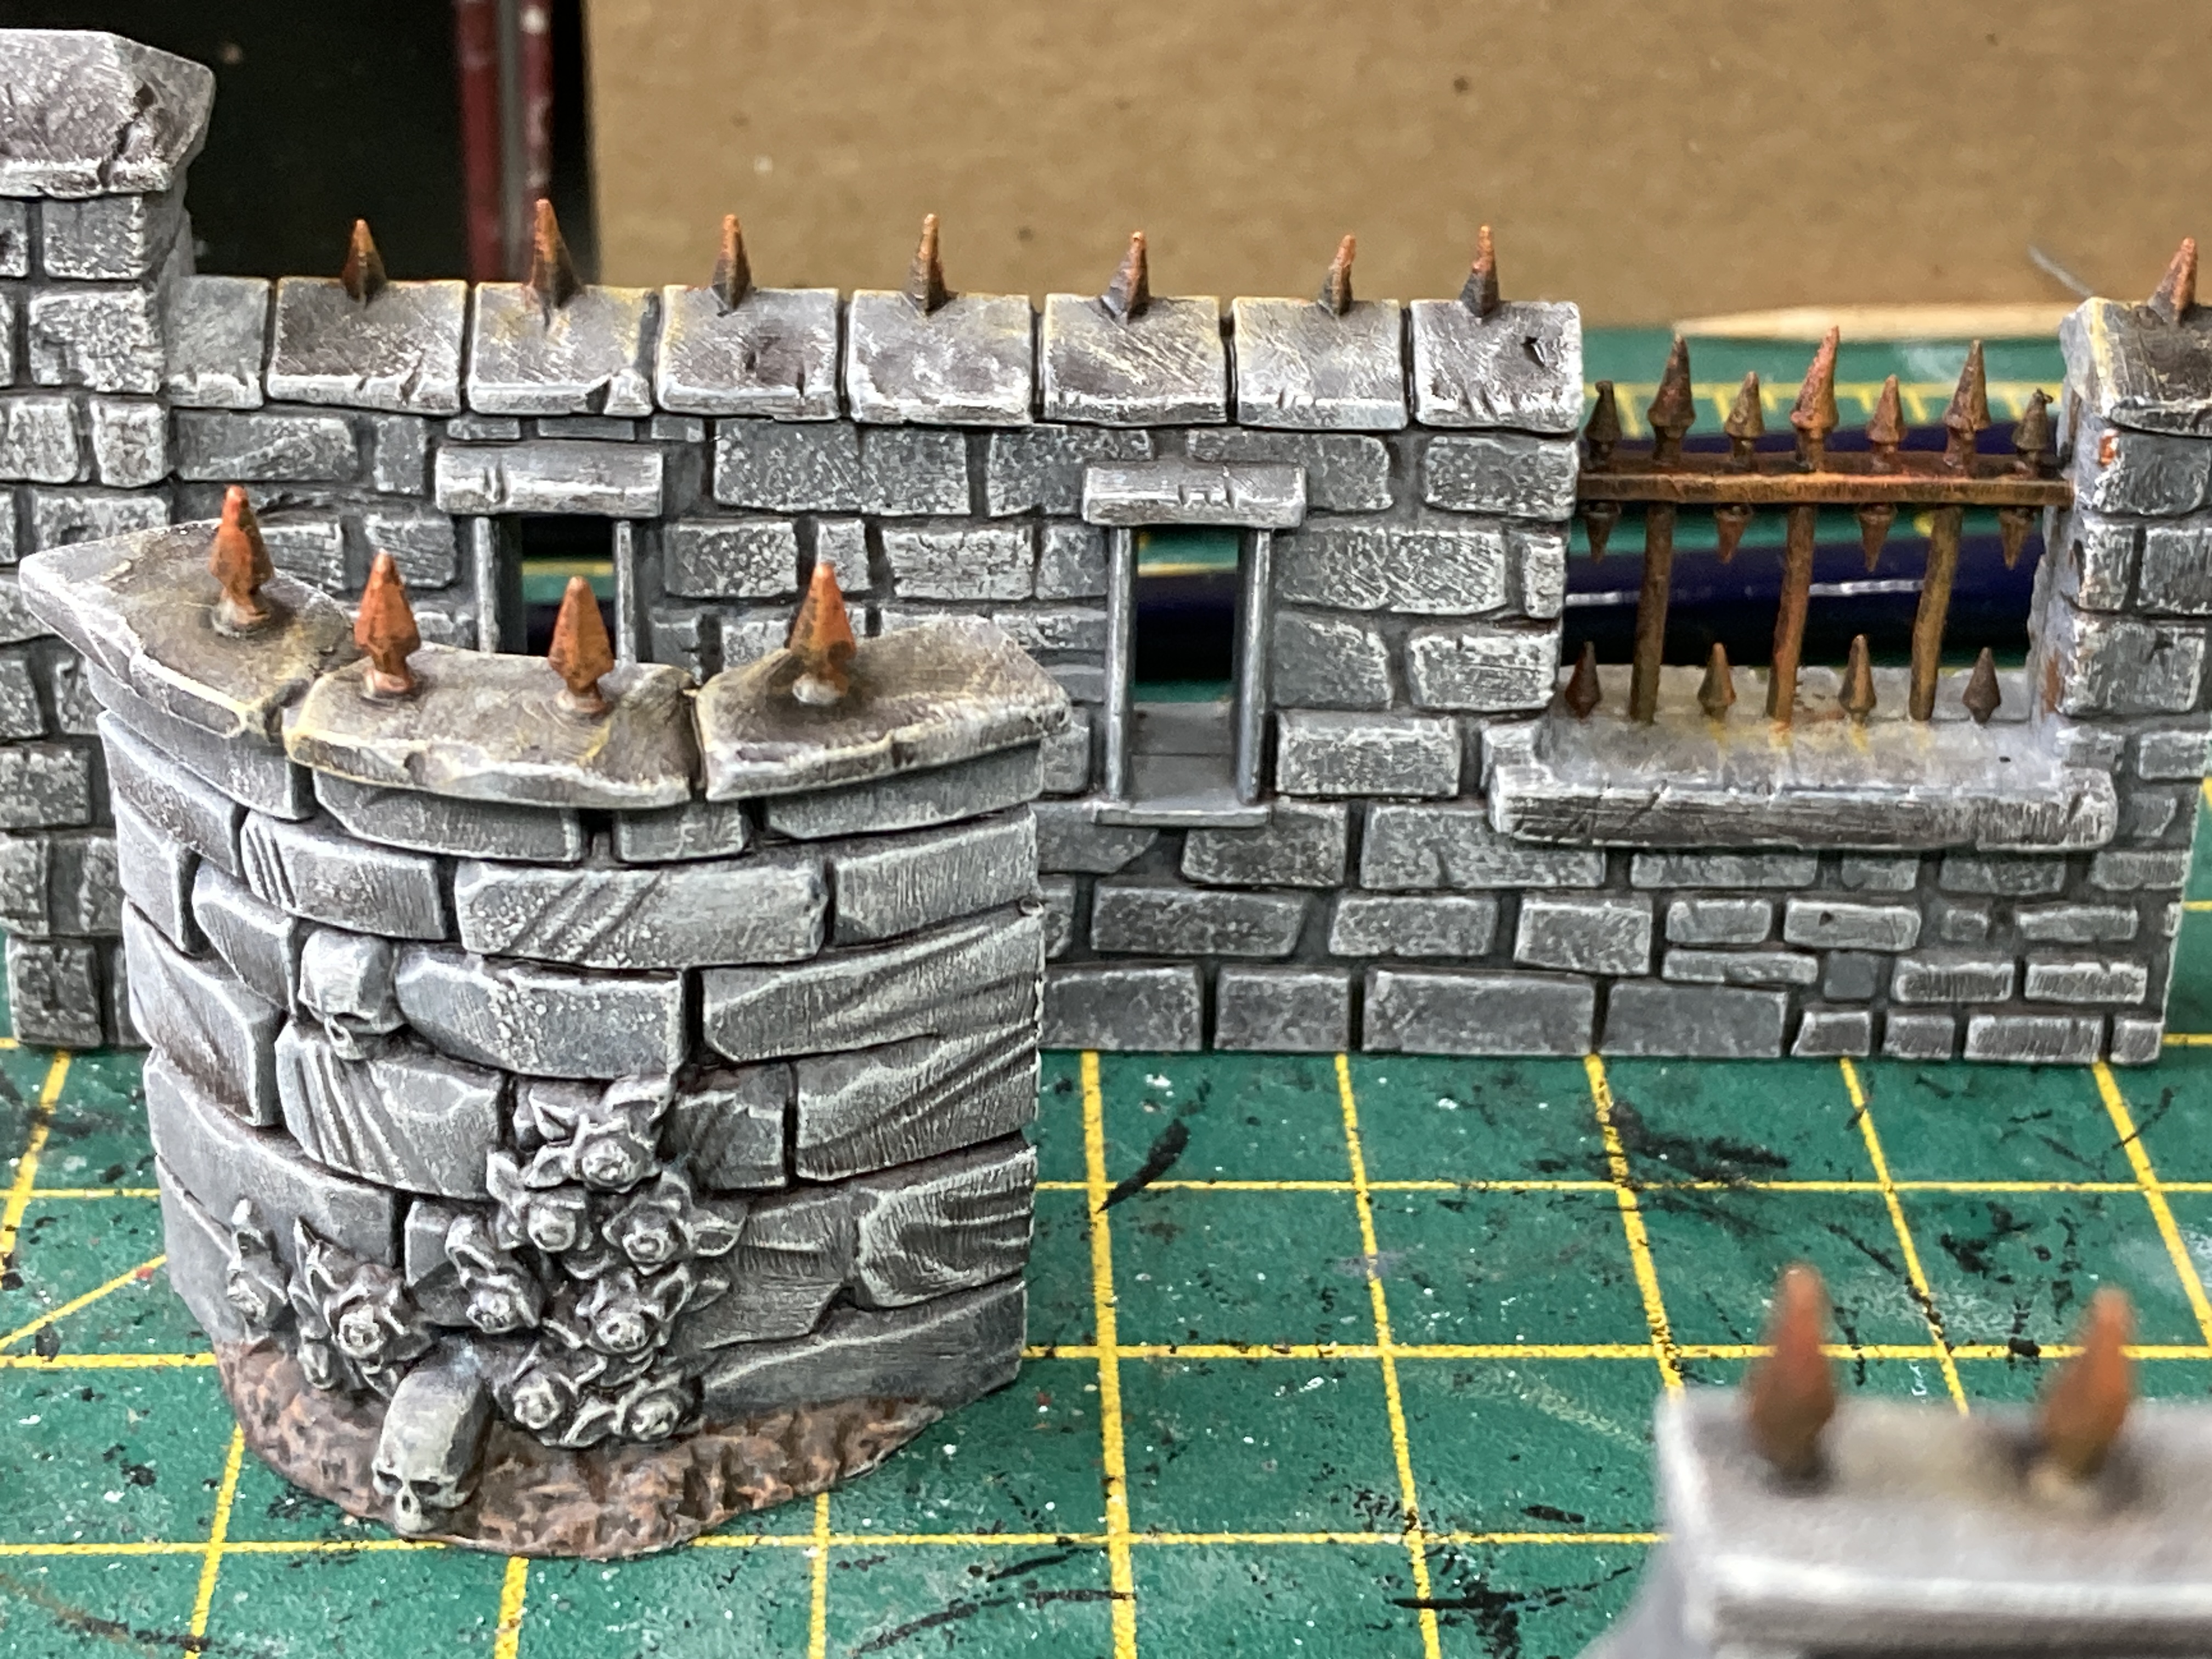
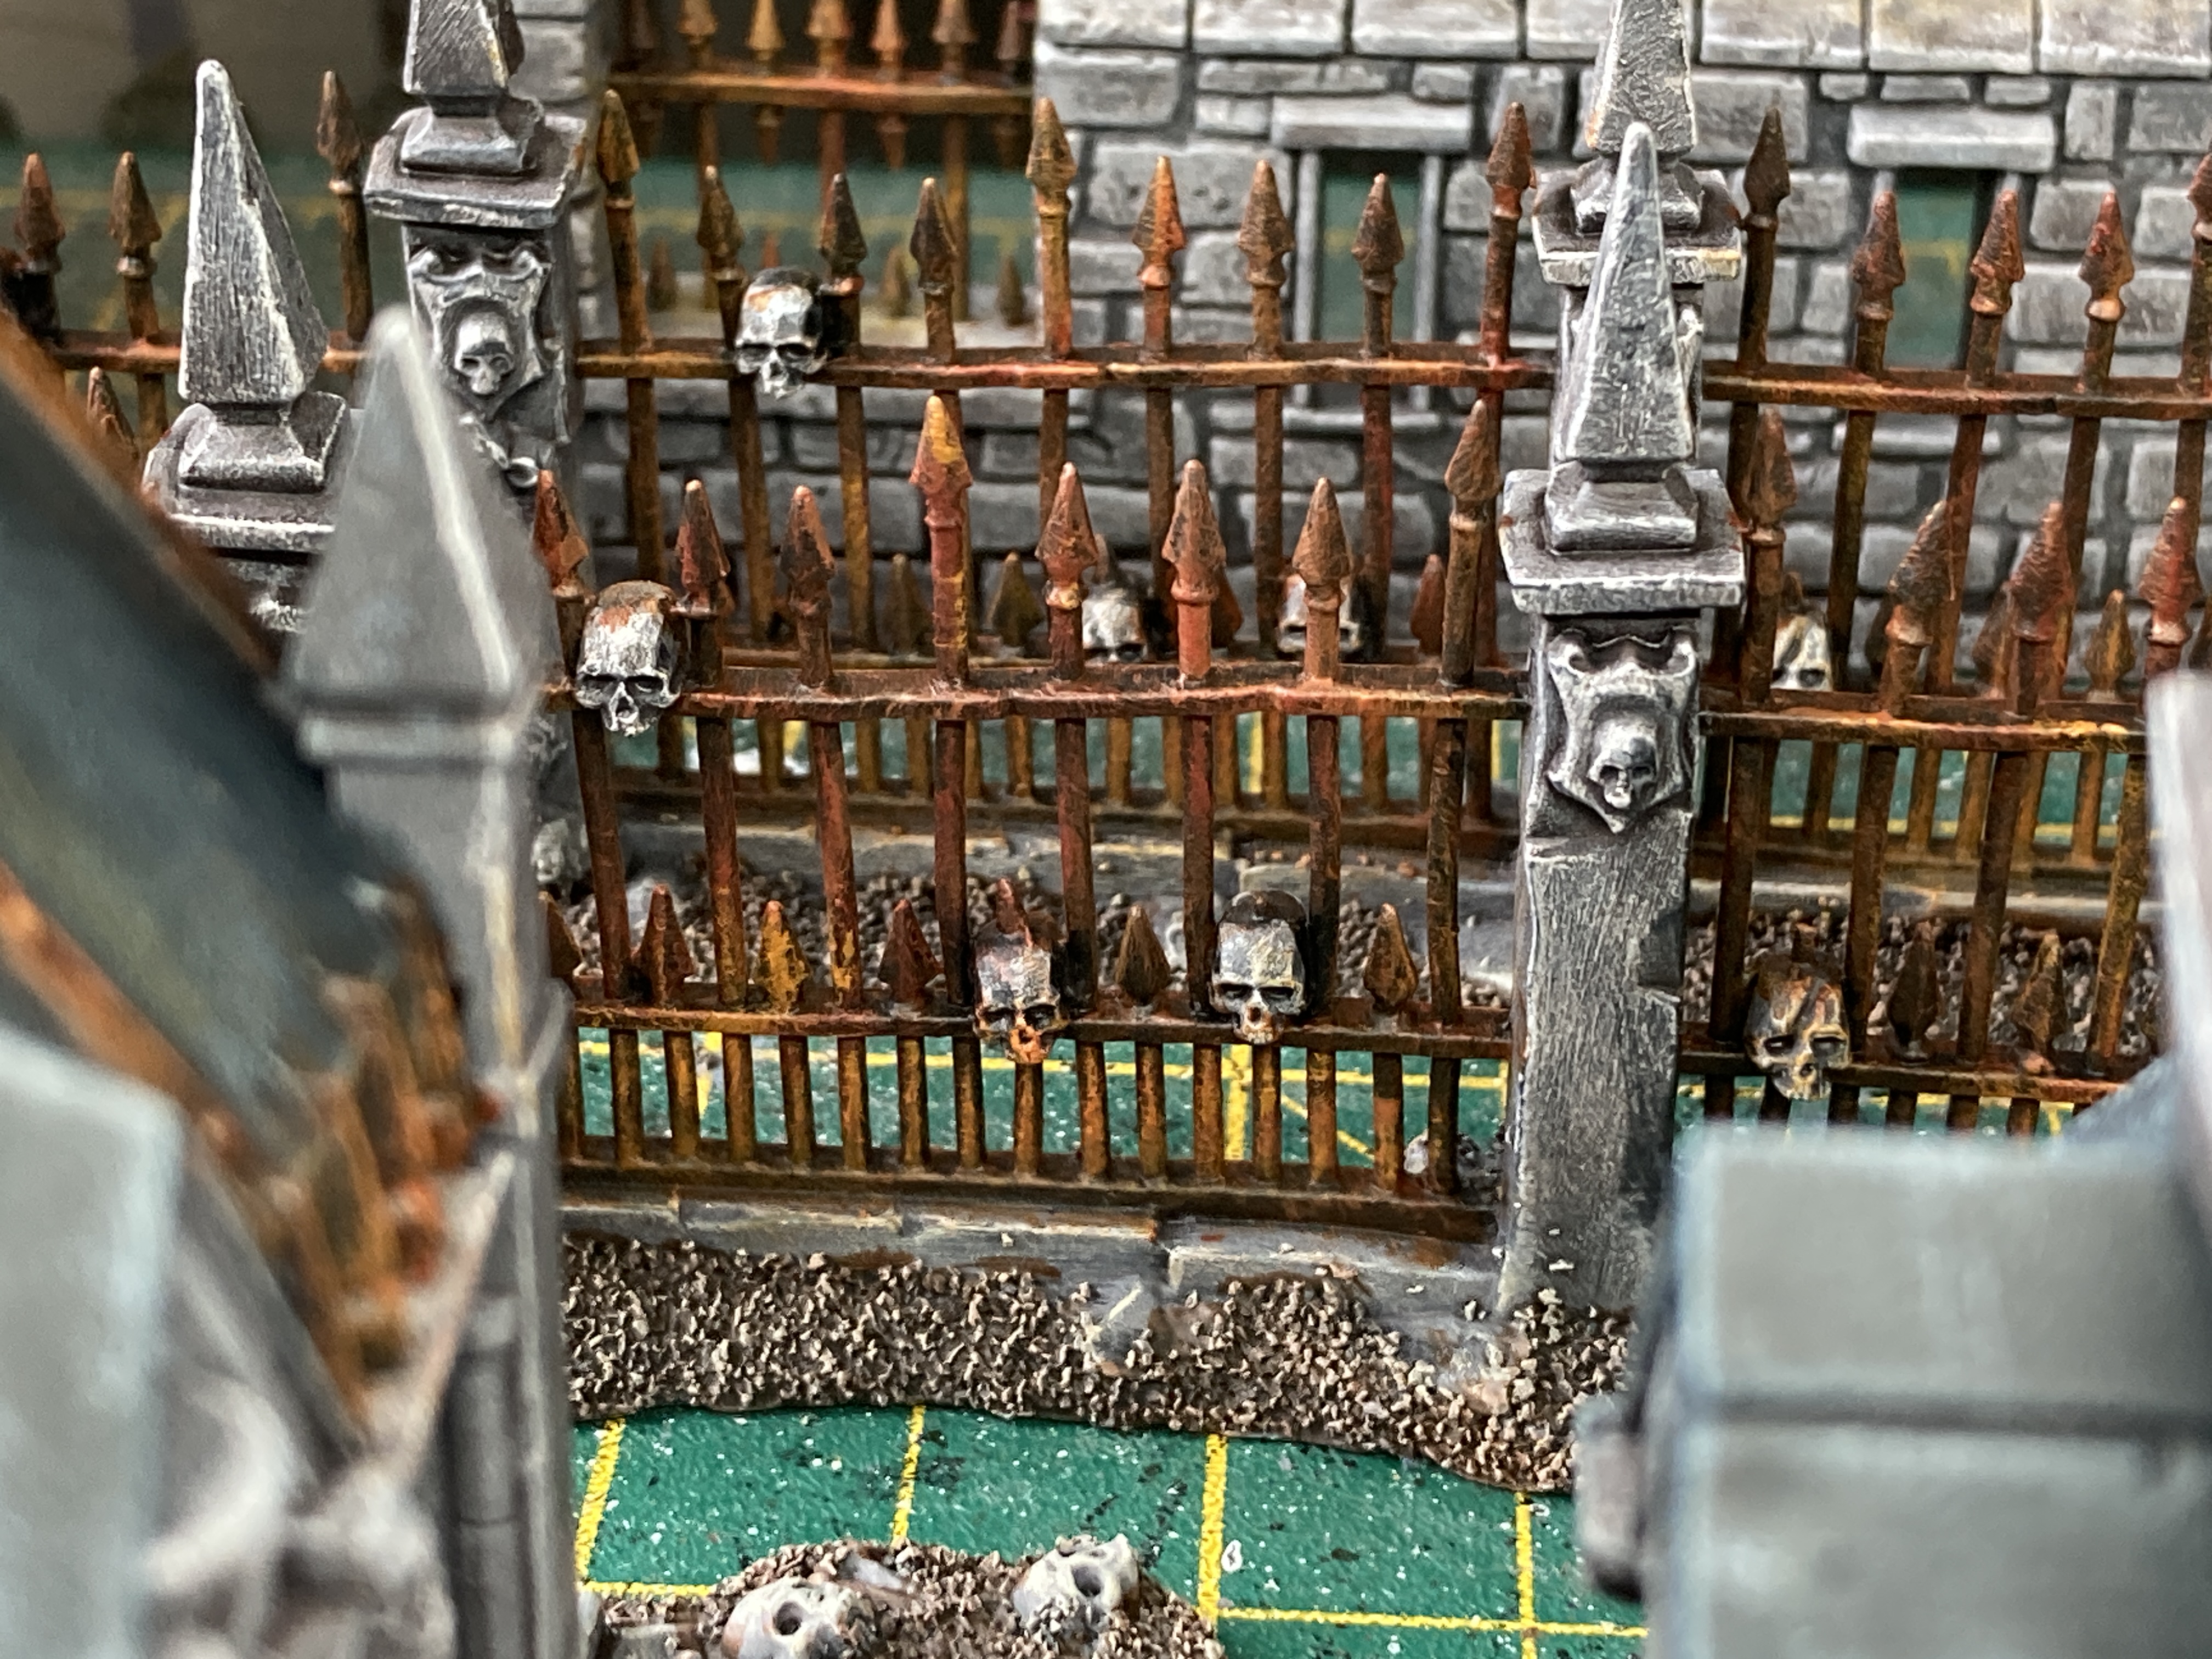
I built up the base with cork and ready mixed filler and then sand in the same way as previous talked about. I then went through my bits box and added all sorts of things to make the chapel more in fitting with a Morr. I’m particularly happy with the railings taken from citadel chaos vehicle kits.
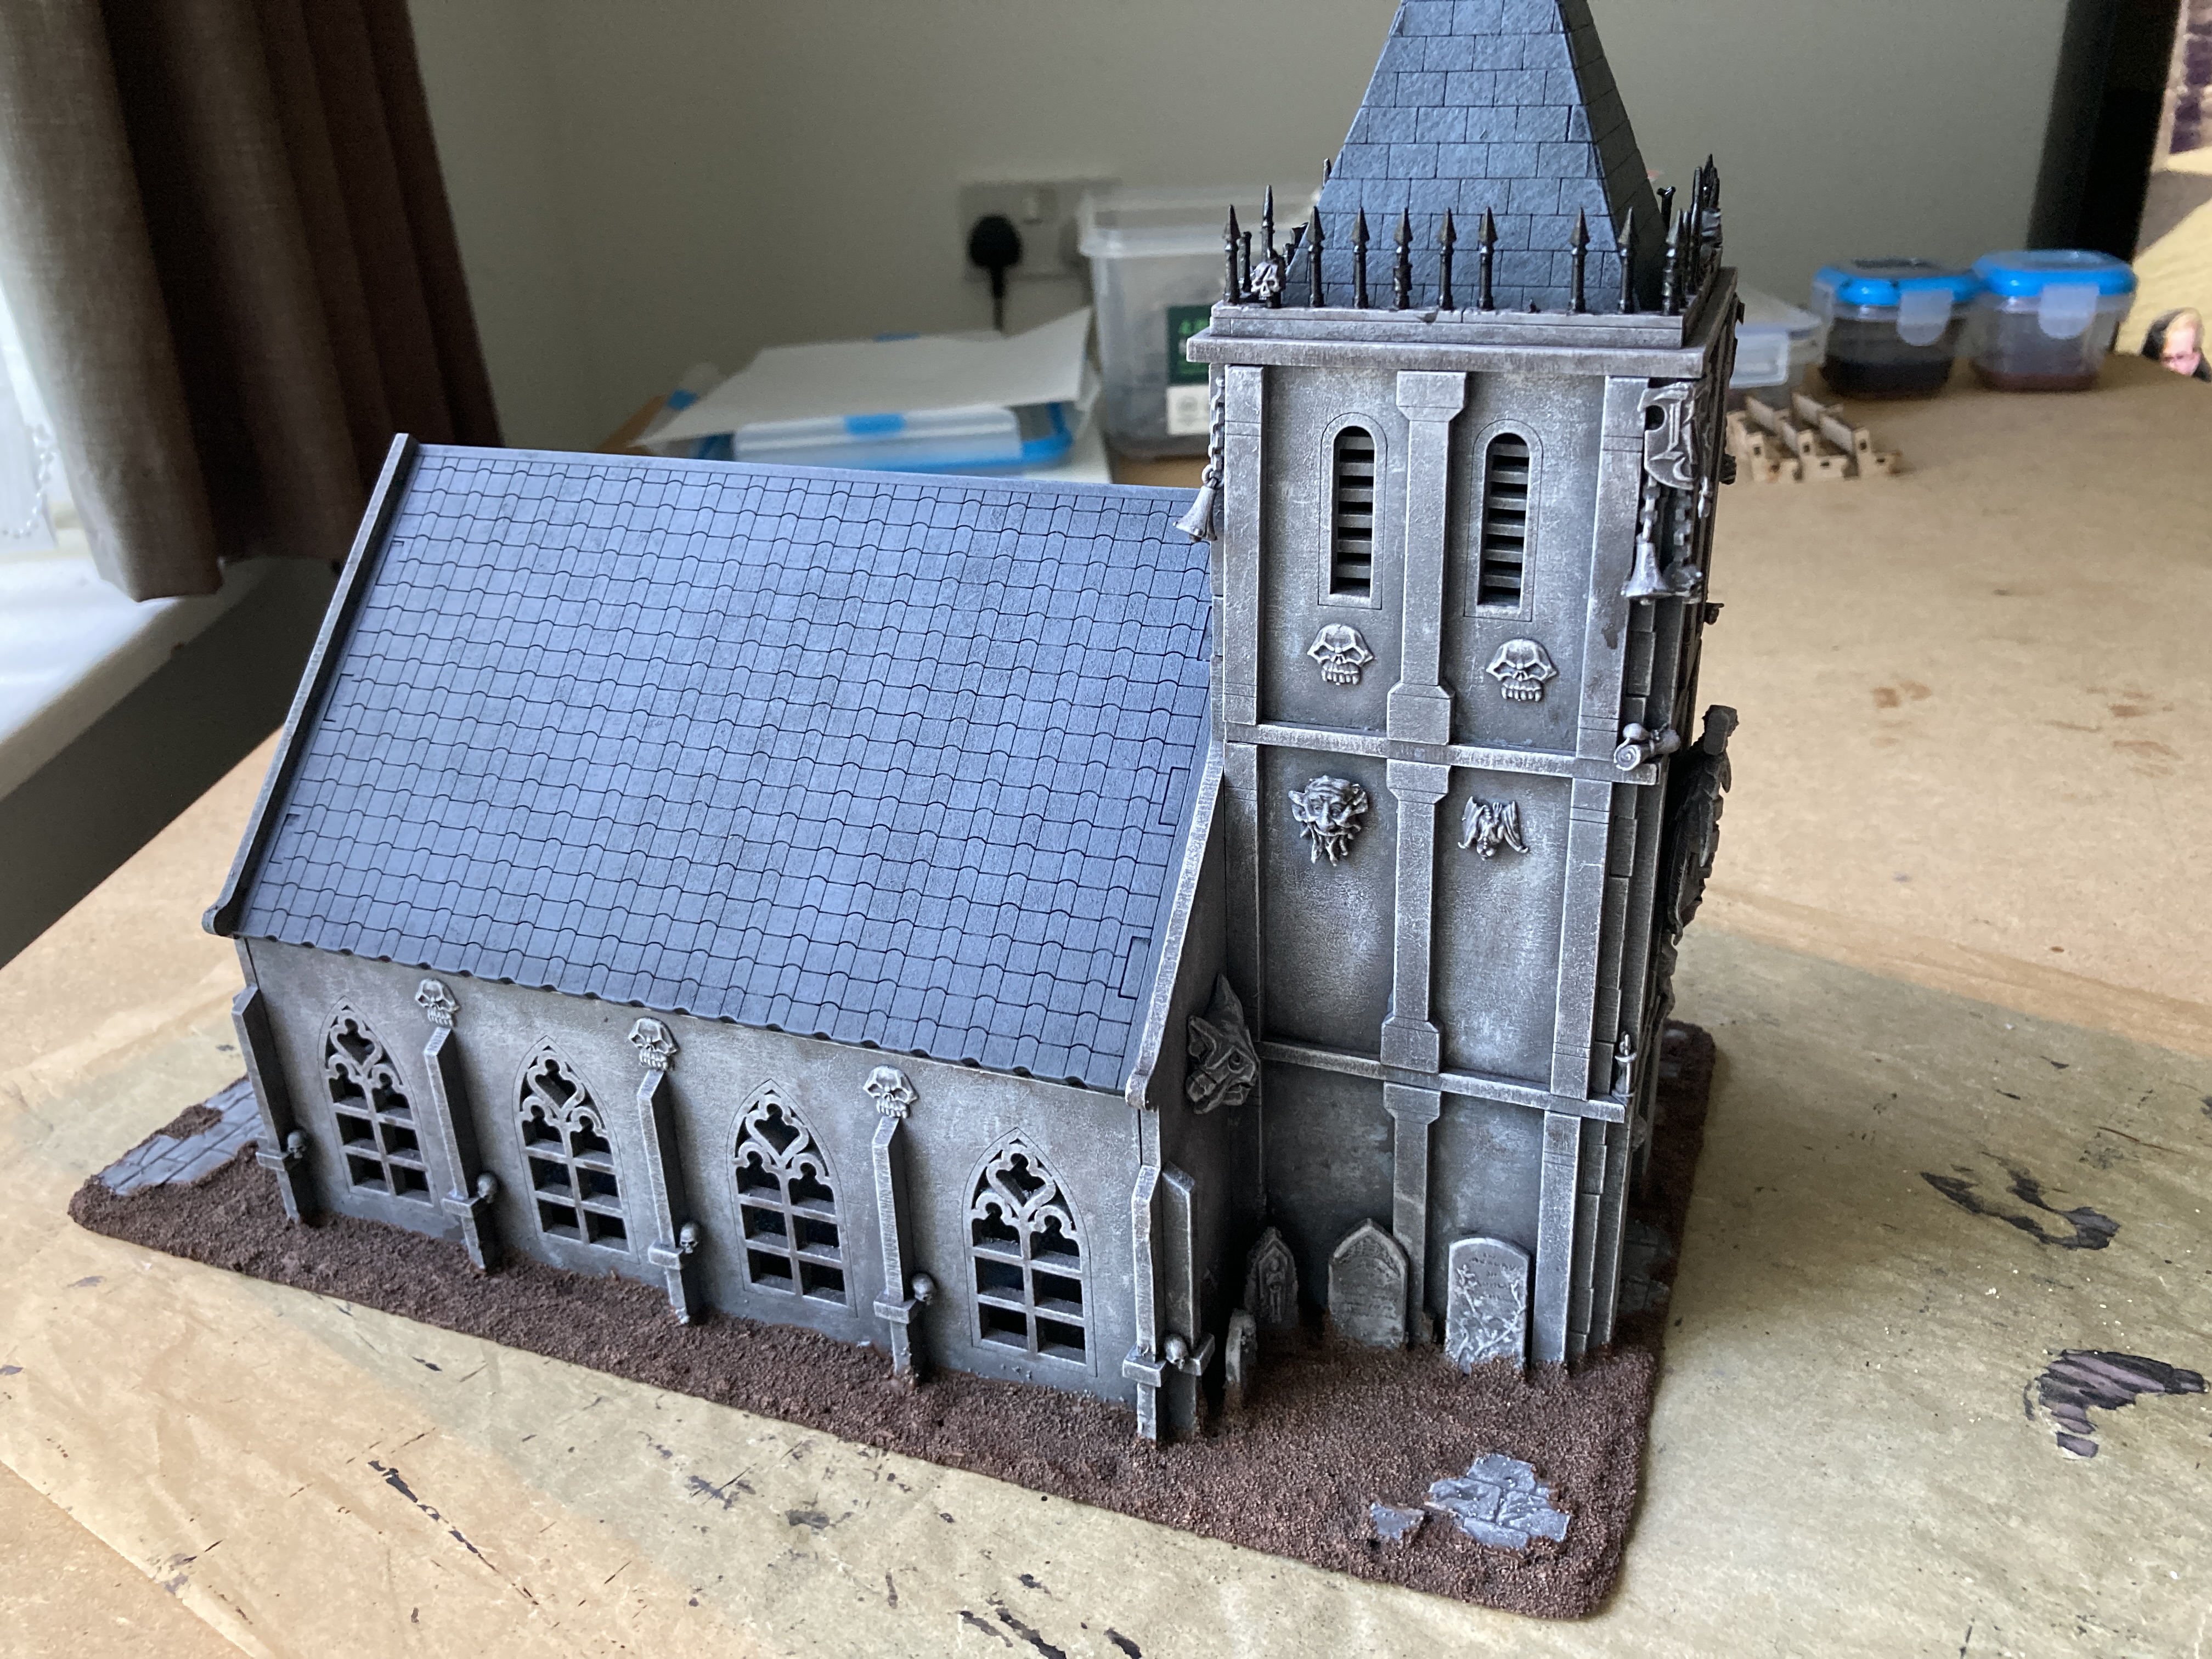

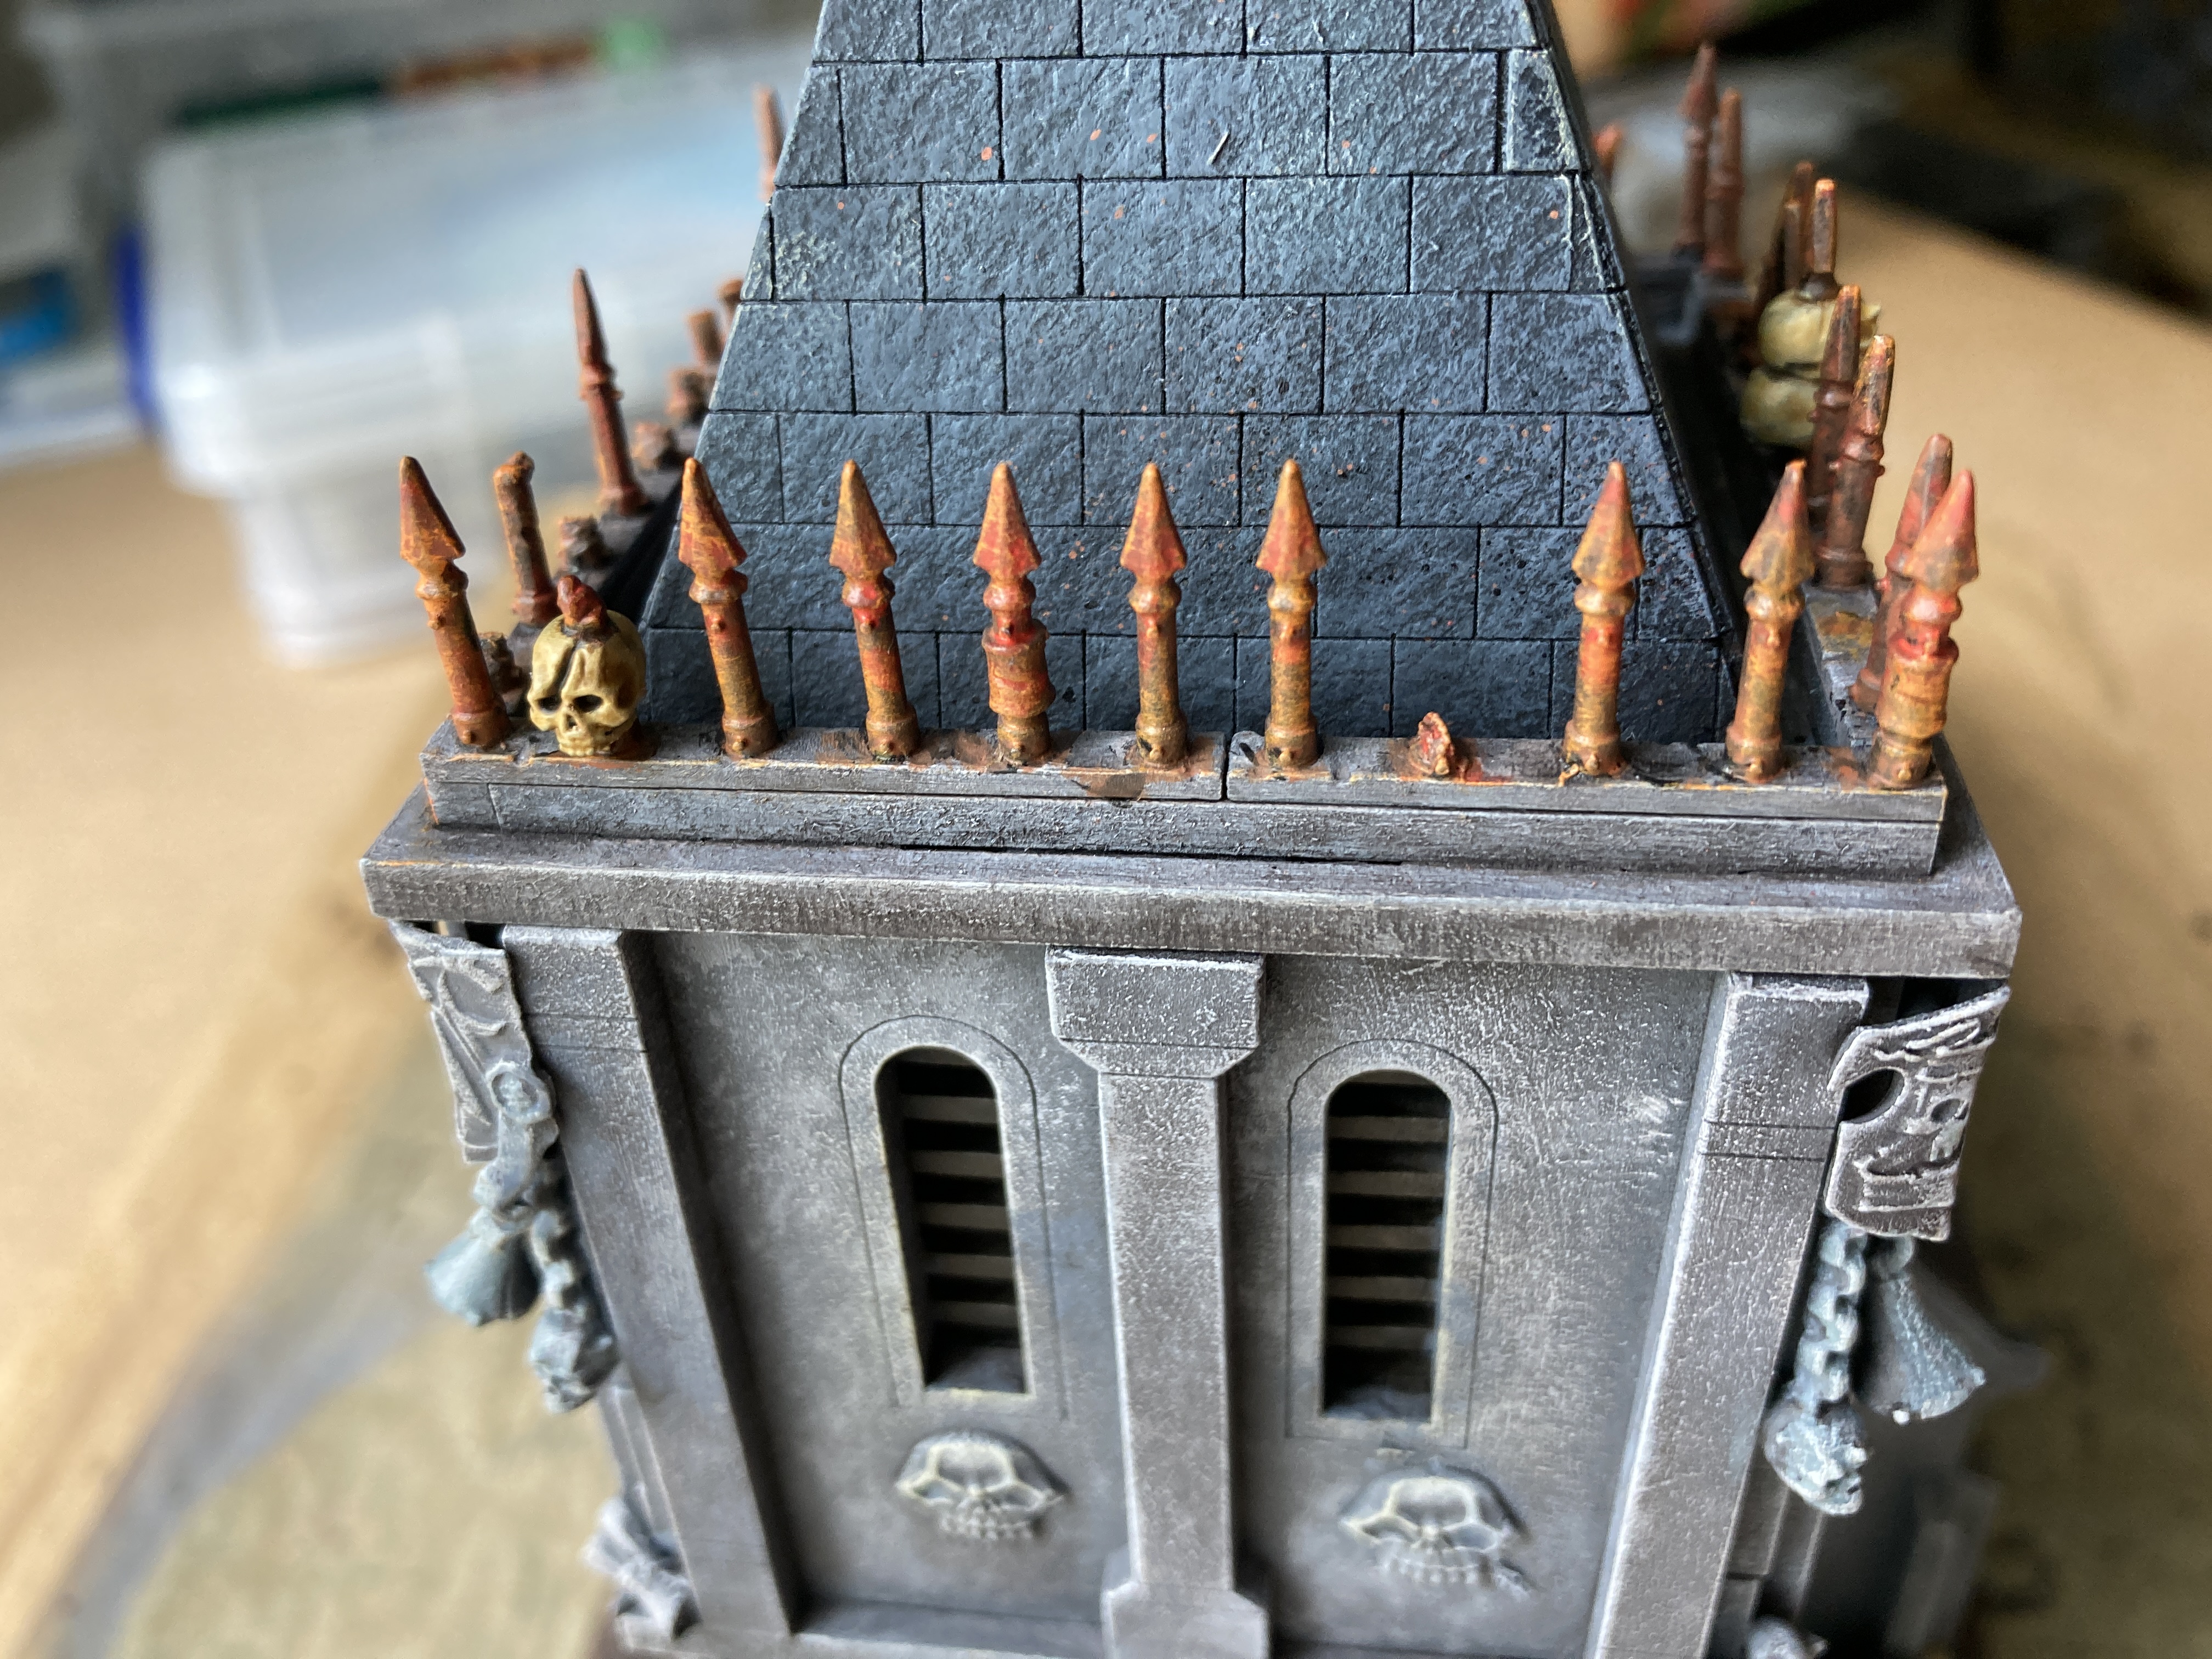
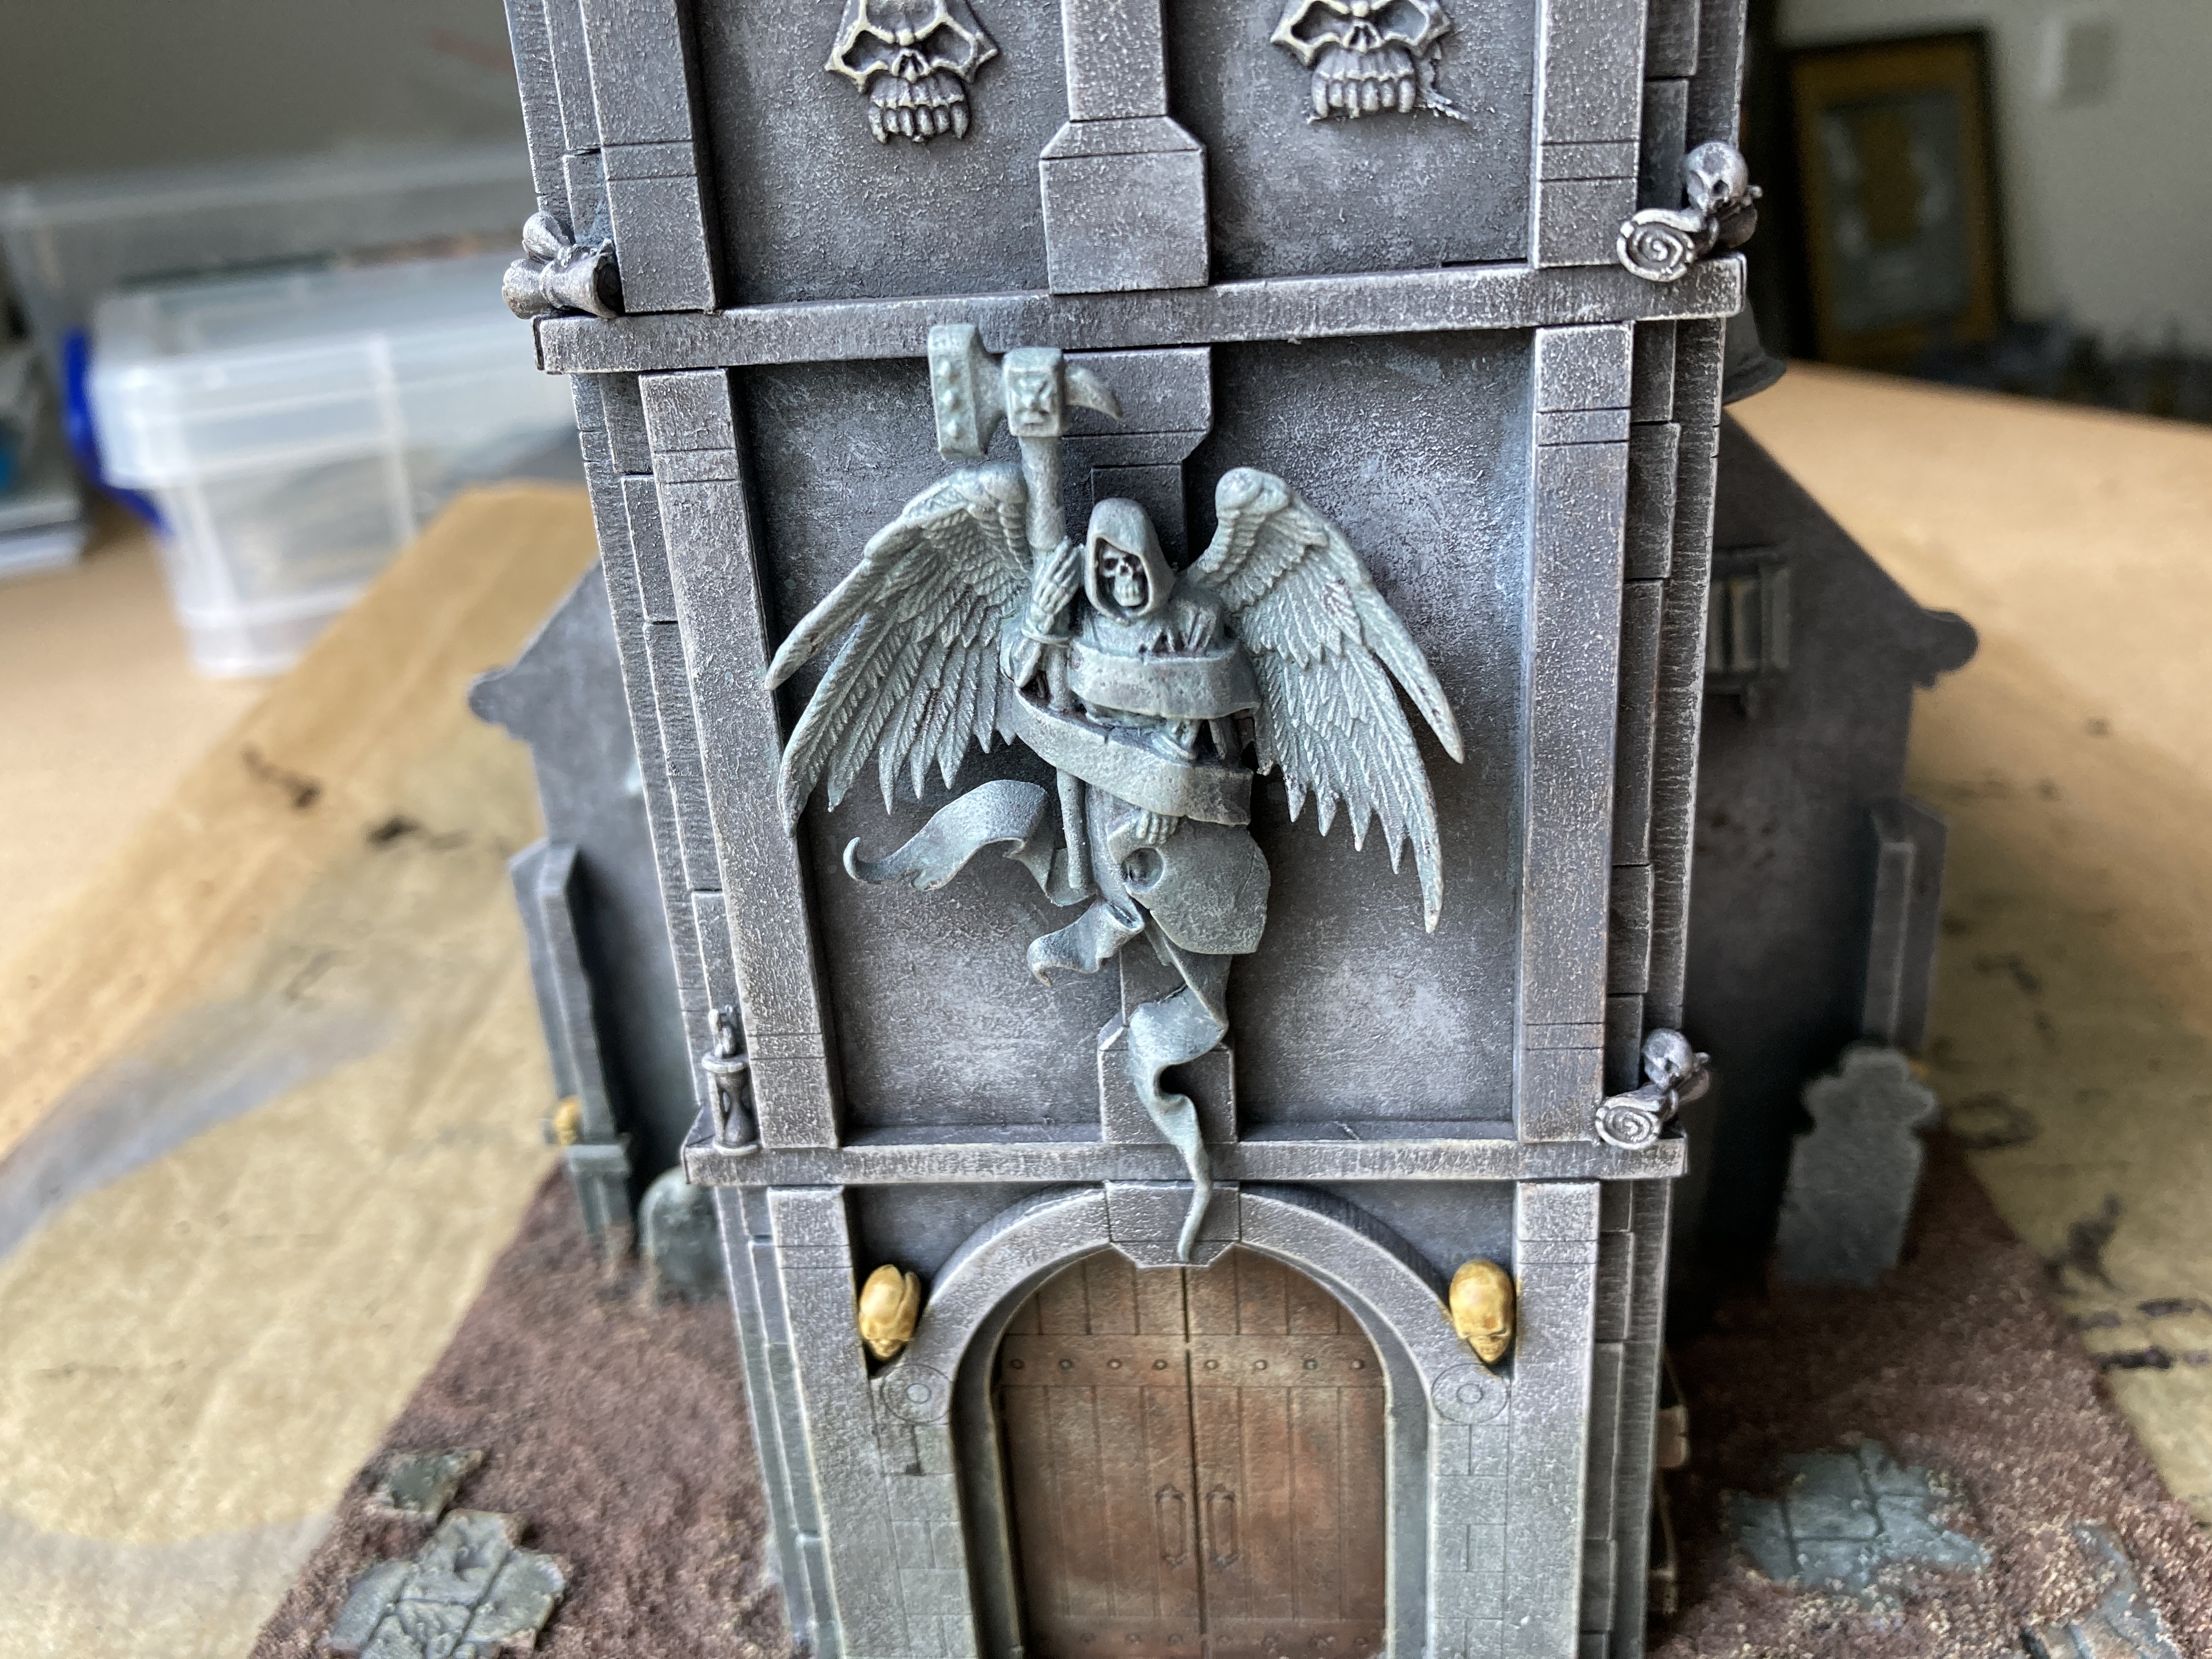
Now primed black then a heavy zenathal of grey the Stonework was painted and drybrushed in the exact same way as the tombs from the garden of Morr set using inexpensive artists acrylic from a tube.
The roofs, rust and skulls were also painted in the exact same way as for the garden of Morr. Indeed I looked up my earlier post to check for the colours for the roof.
I did make the main roof slightly bluer, as if it’s made from different materials.
I used Gor Grunta Fur for the wood colours and drybrushed it with a light beige for definition.
For the weathered bronze pieces on the tower I mixed a light green (Army Painter Scaly Hide) and light blue (Army Painter Wolf Grey) and added enough water to make a wash. This was painted over the stone colour to give these results.
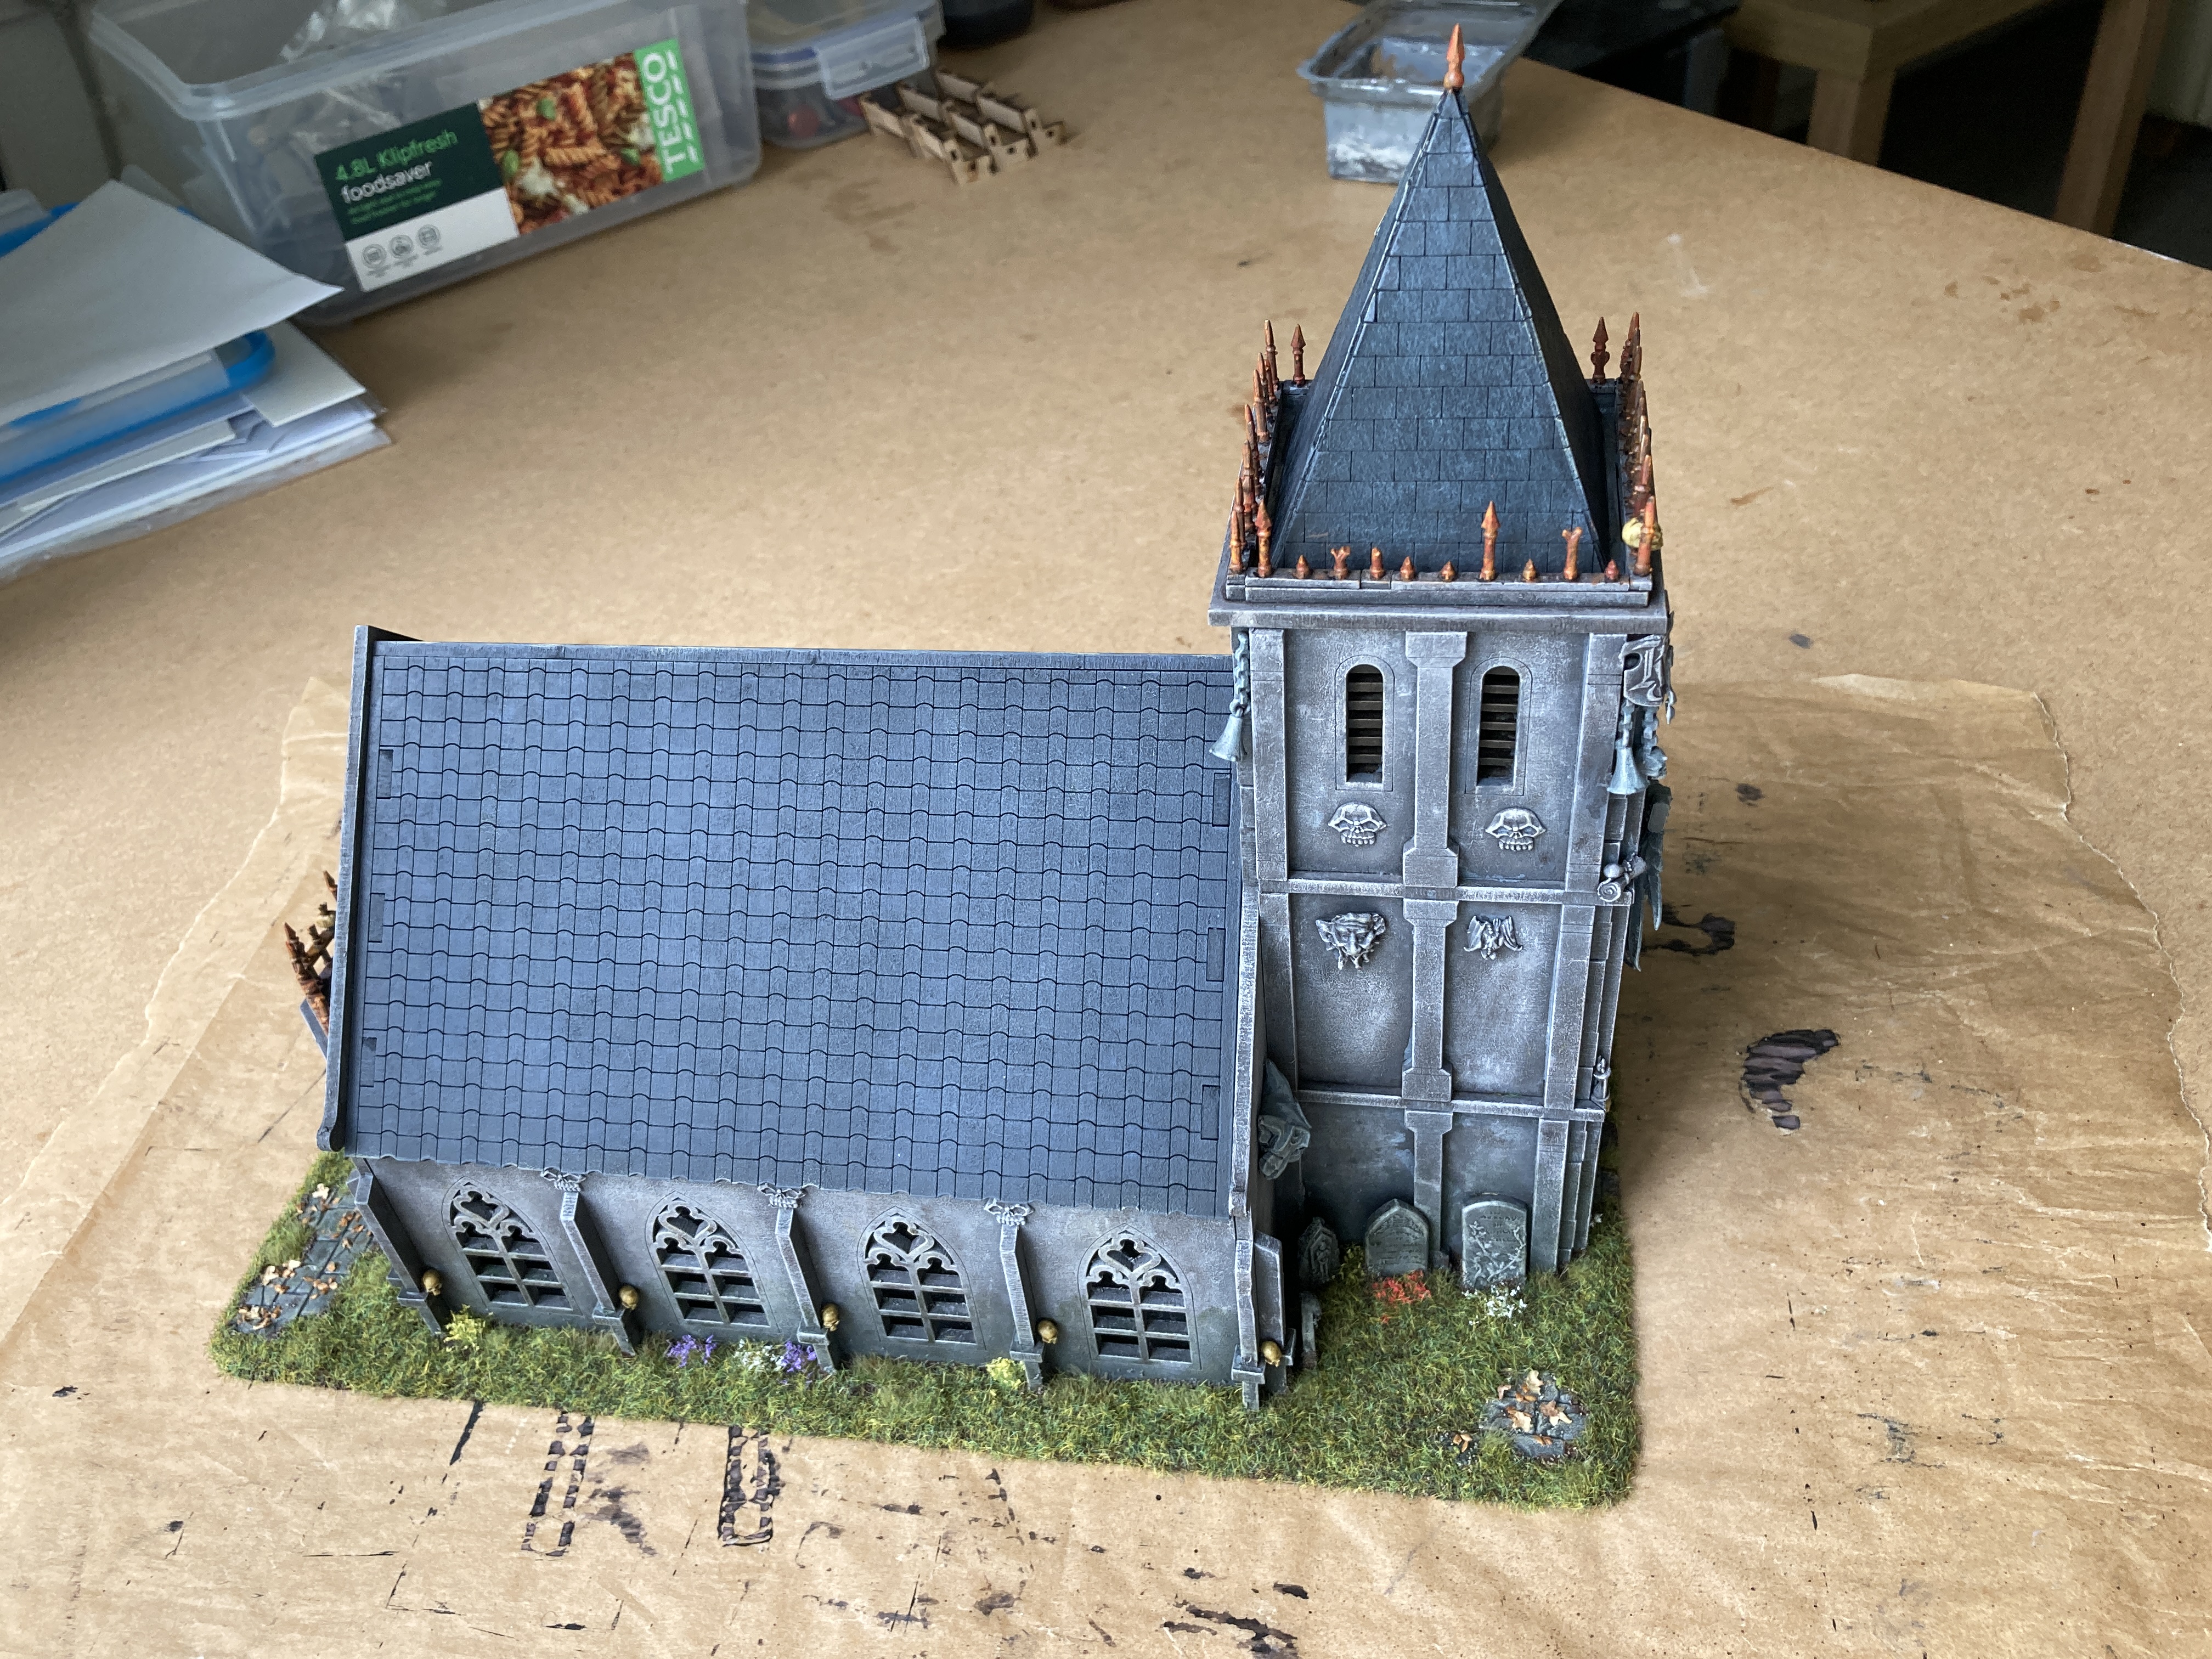
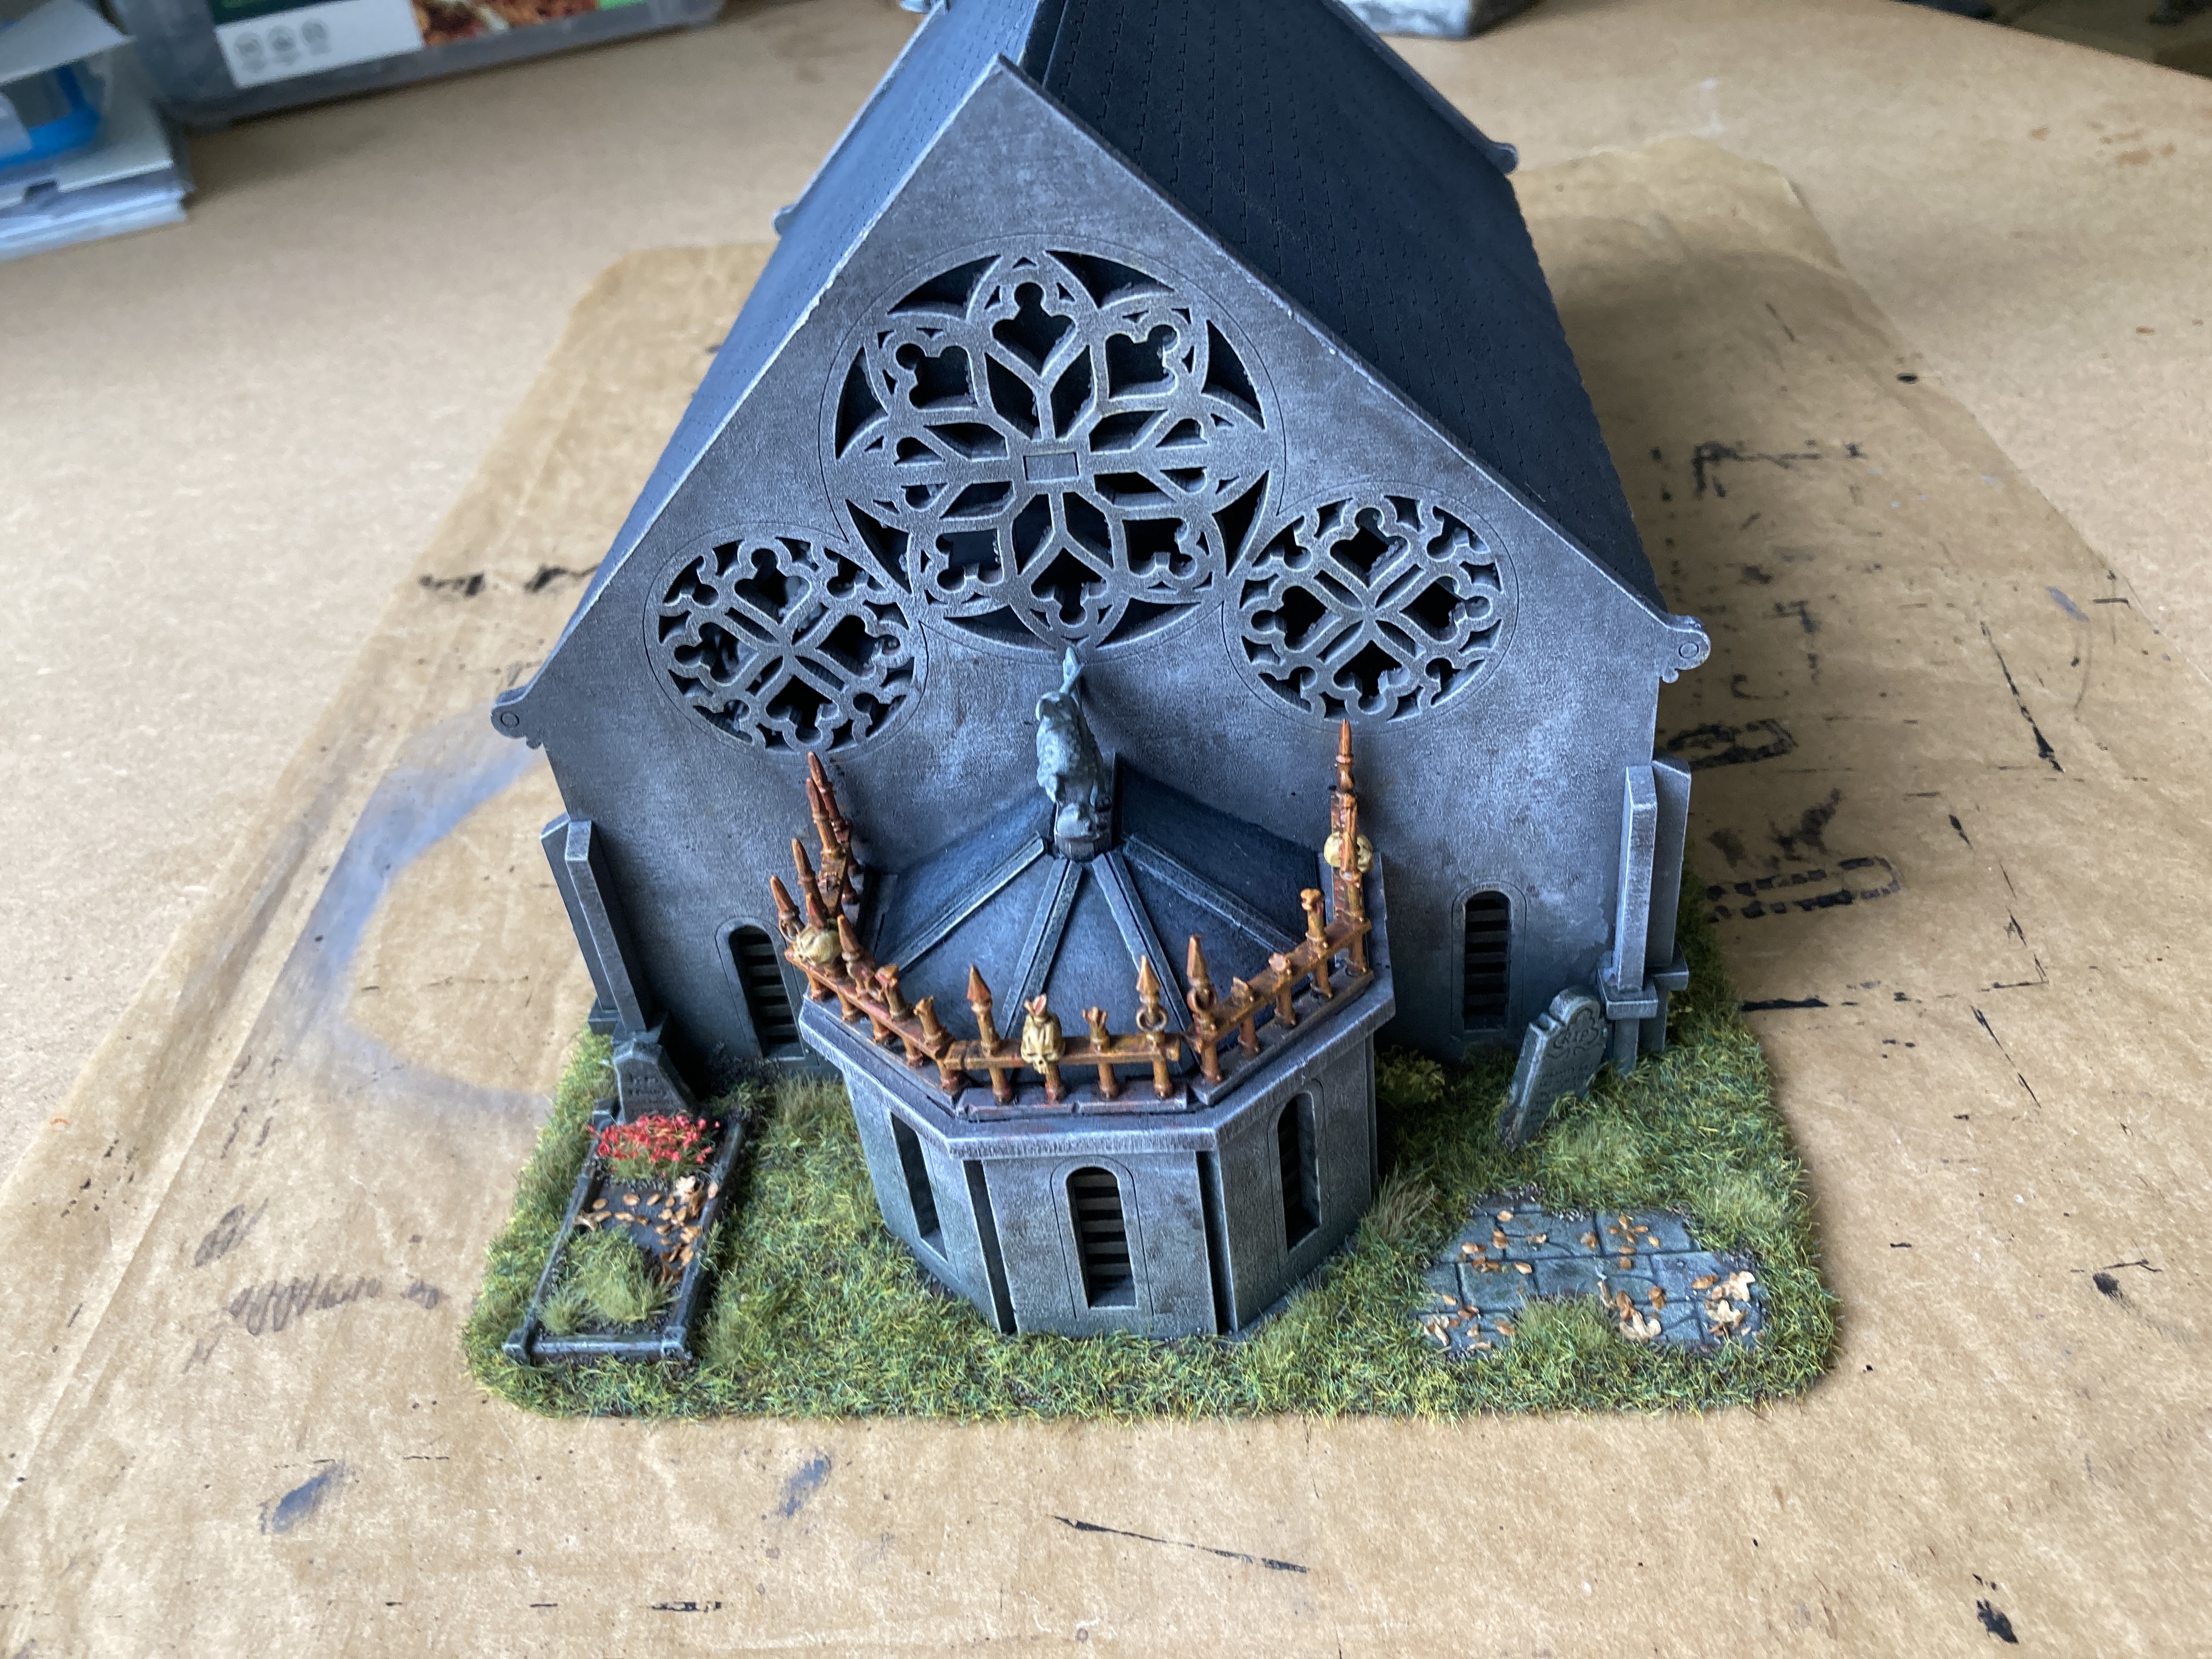

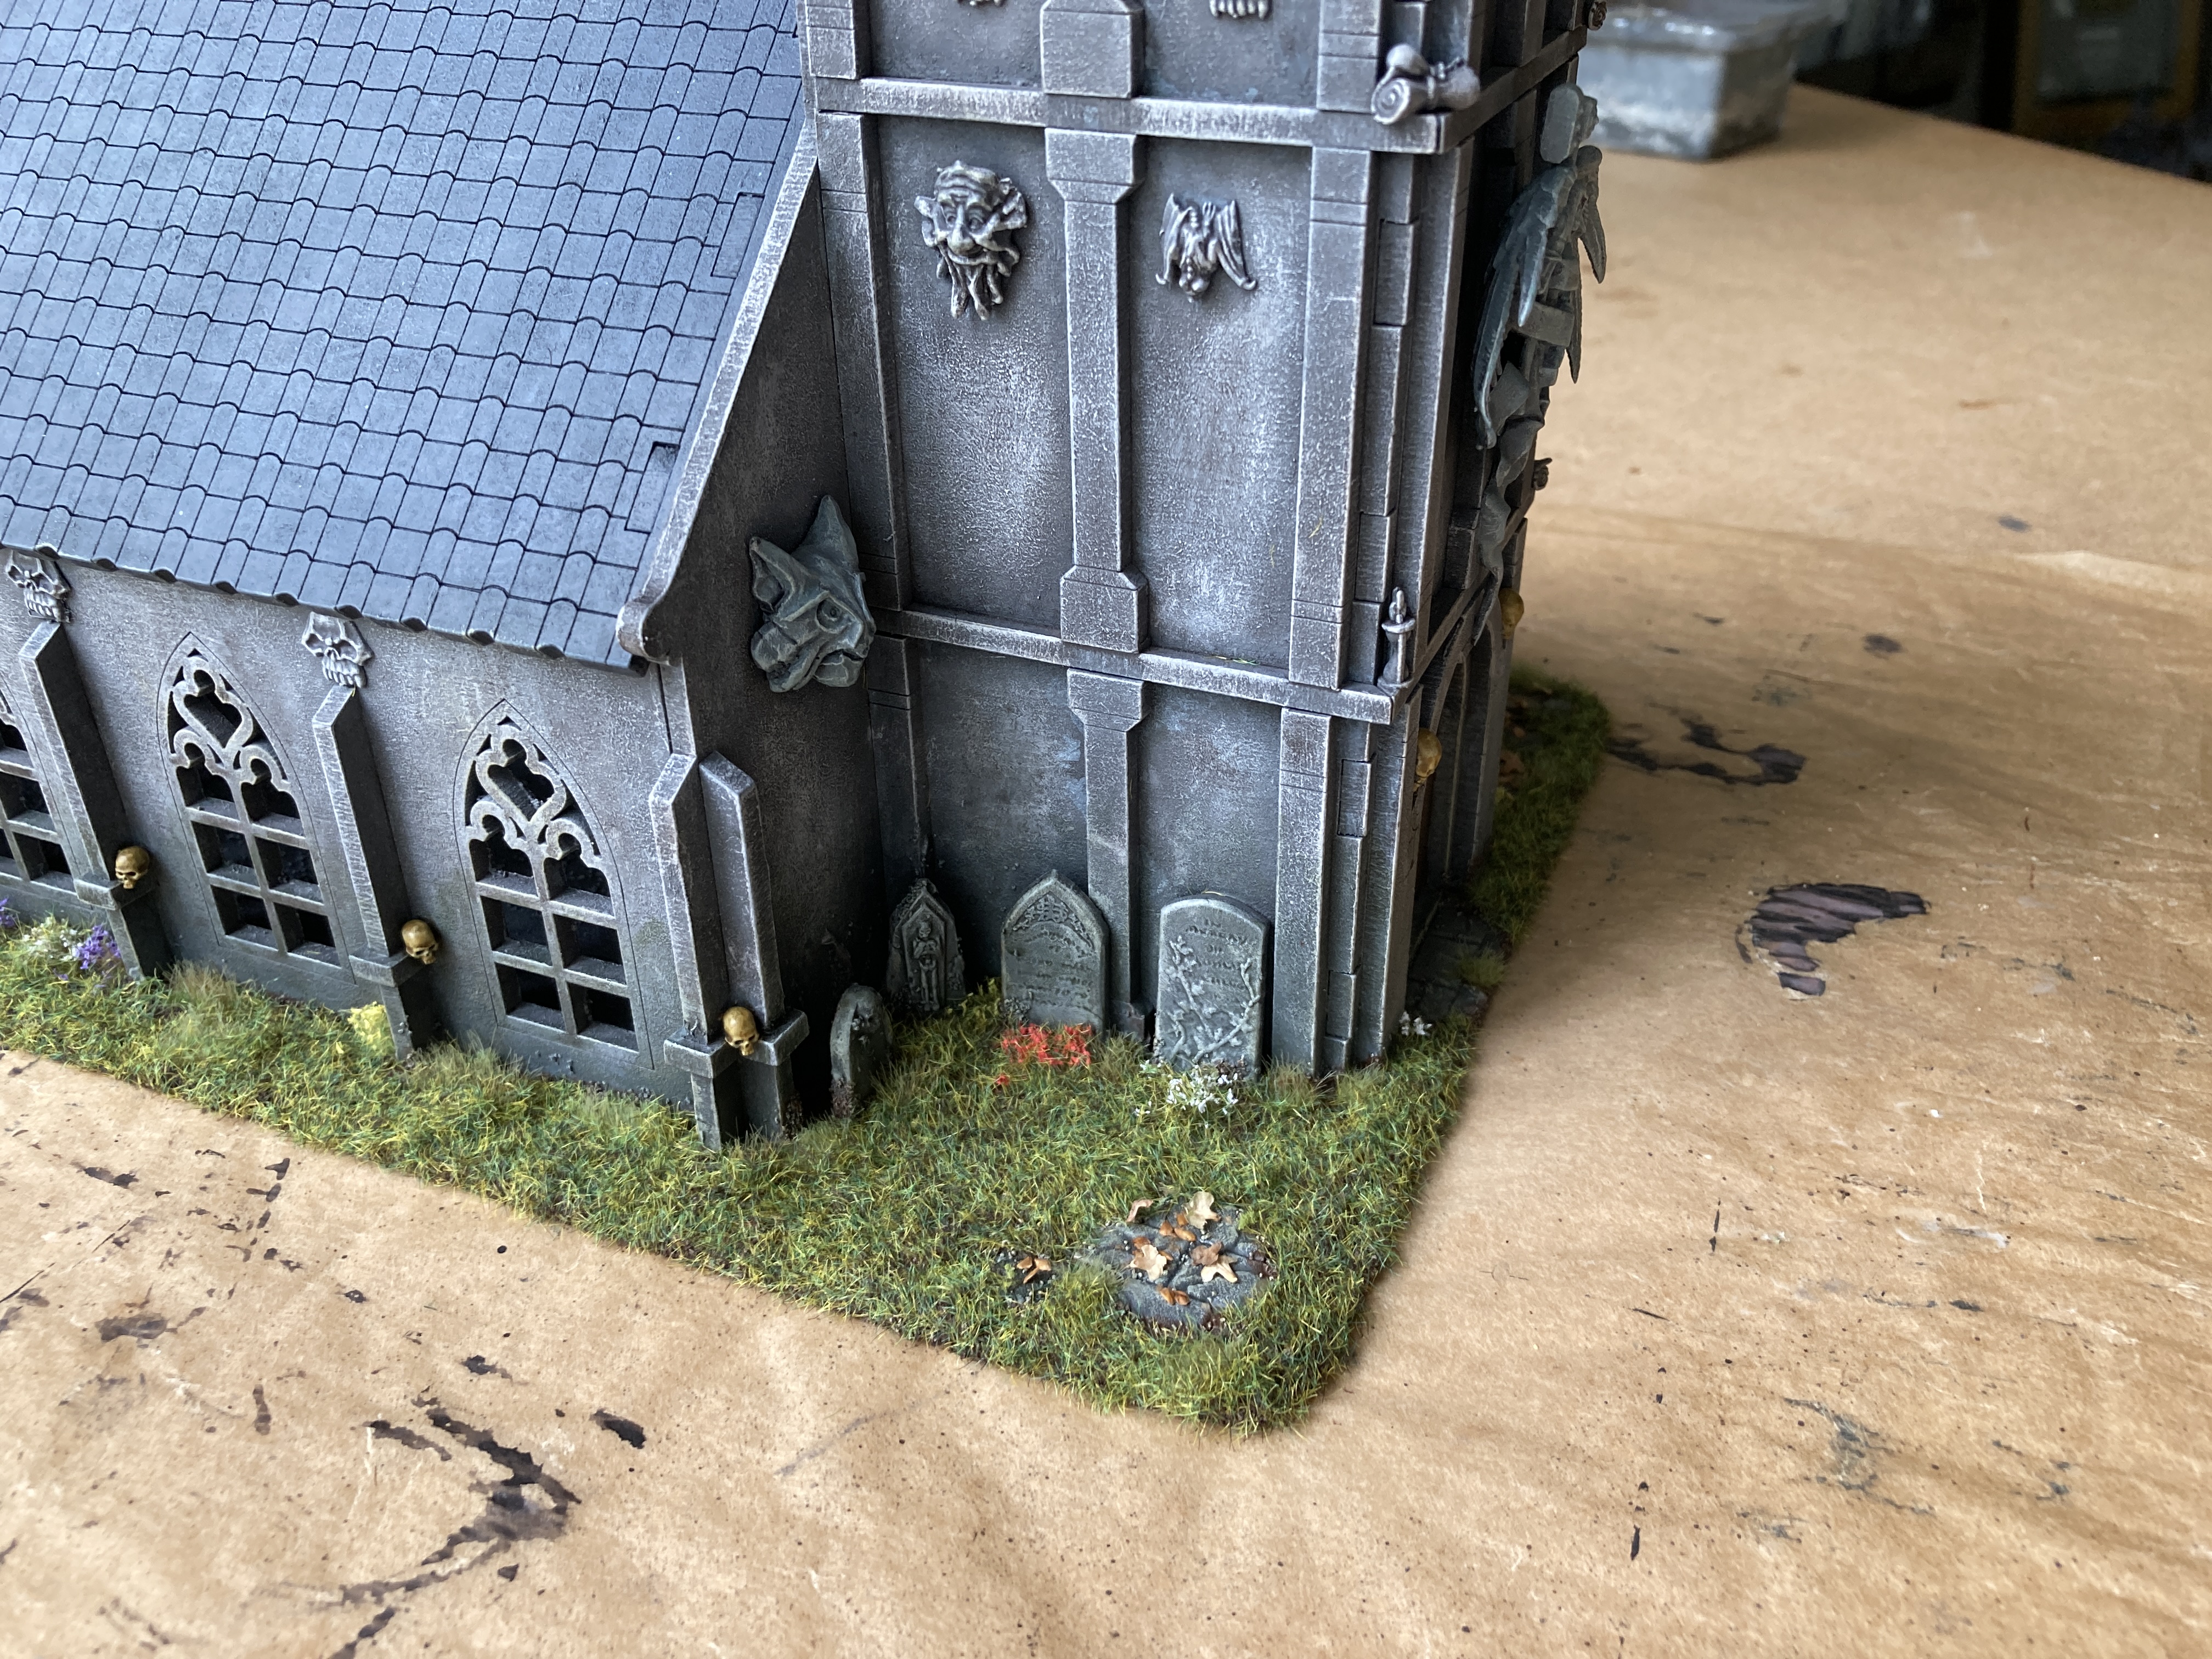
Lastly was to add various tufts, static grass and a few leaves to round out the build.

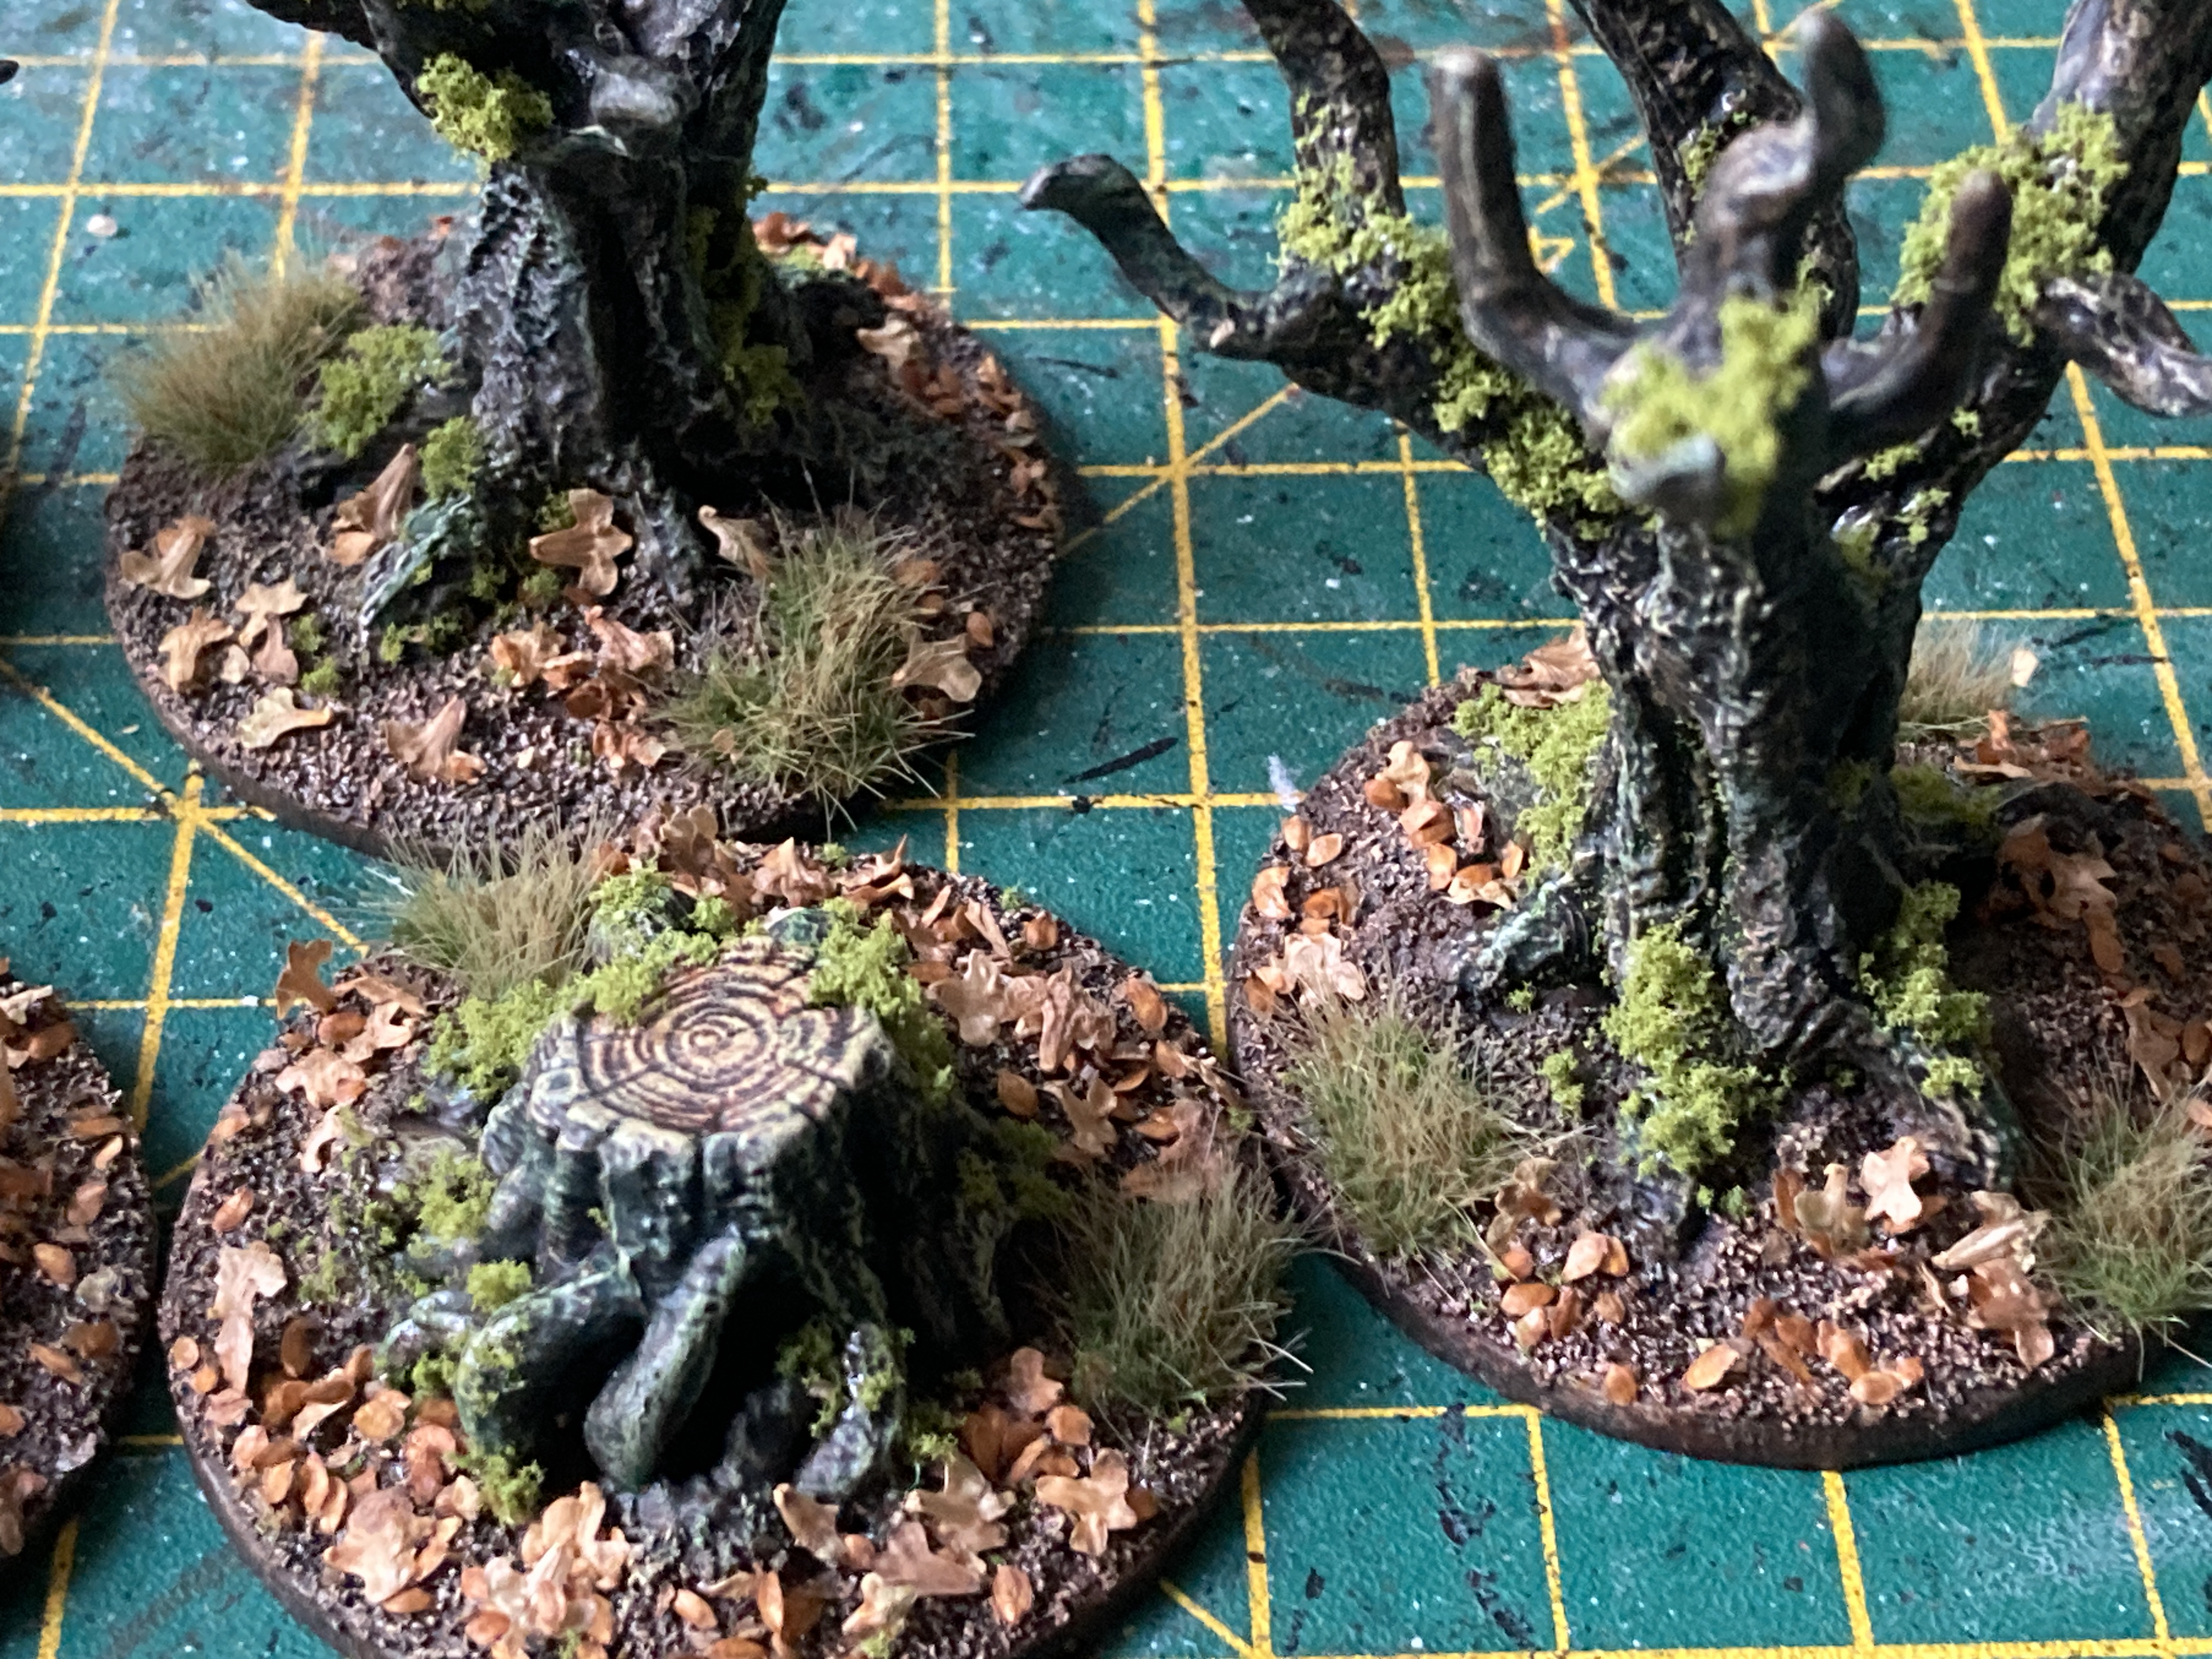
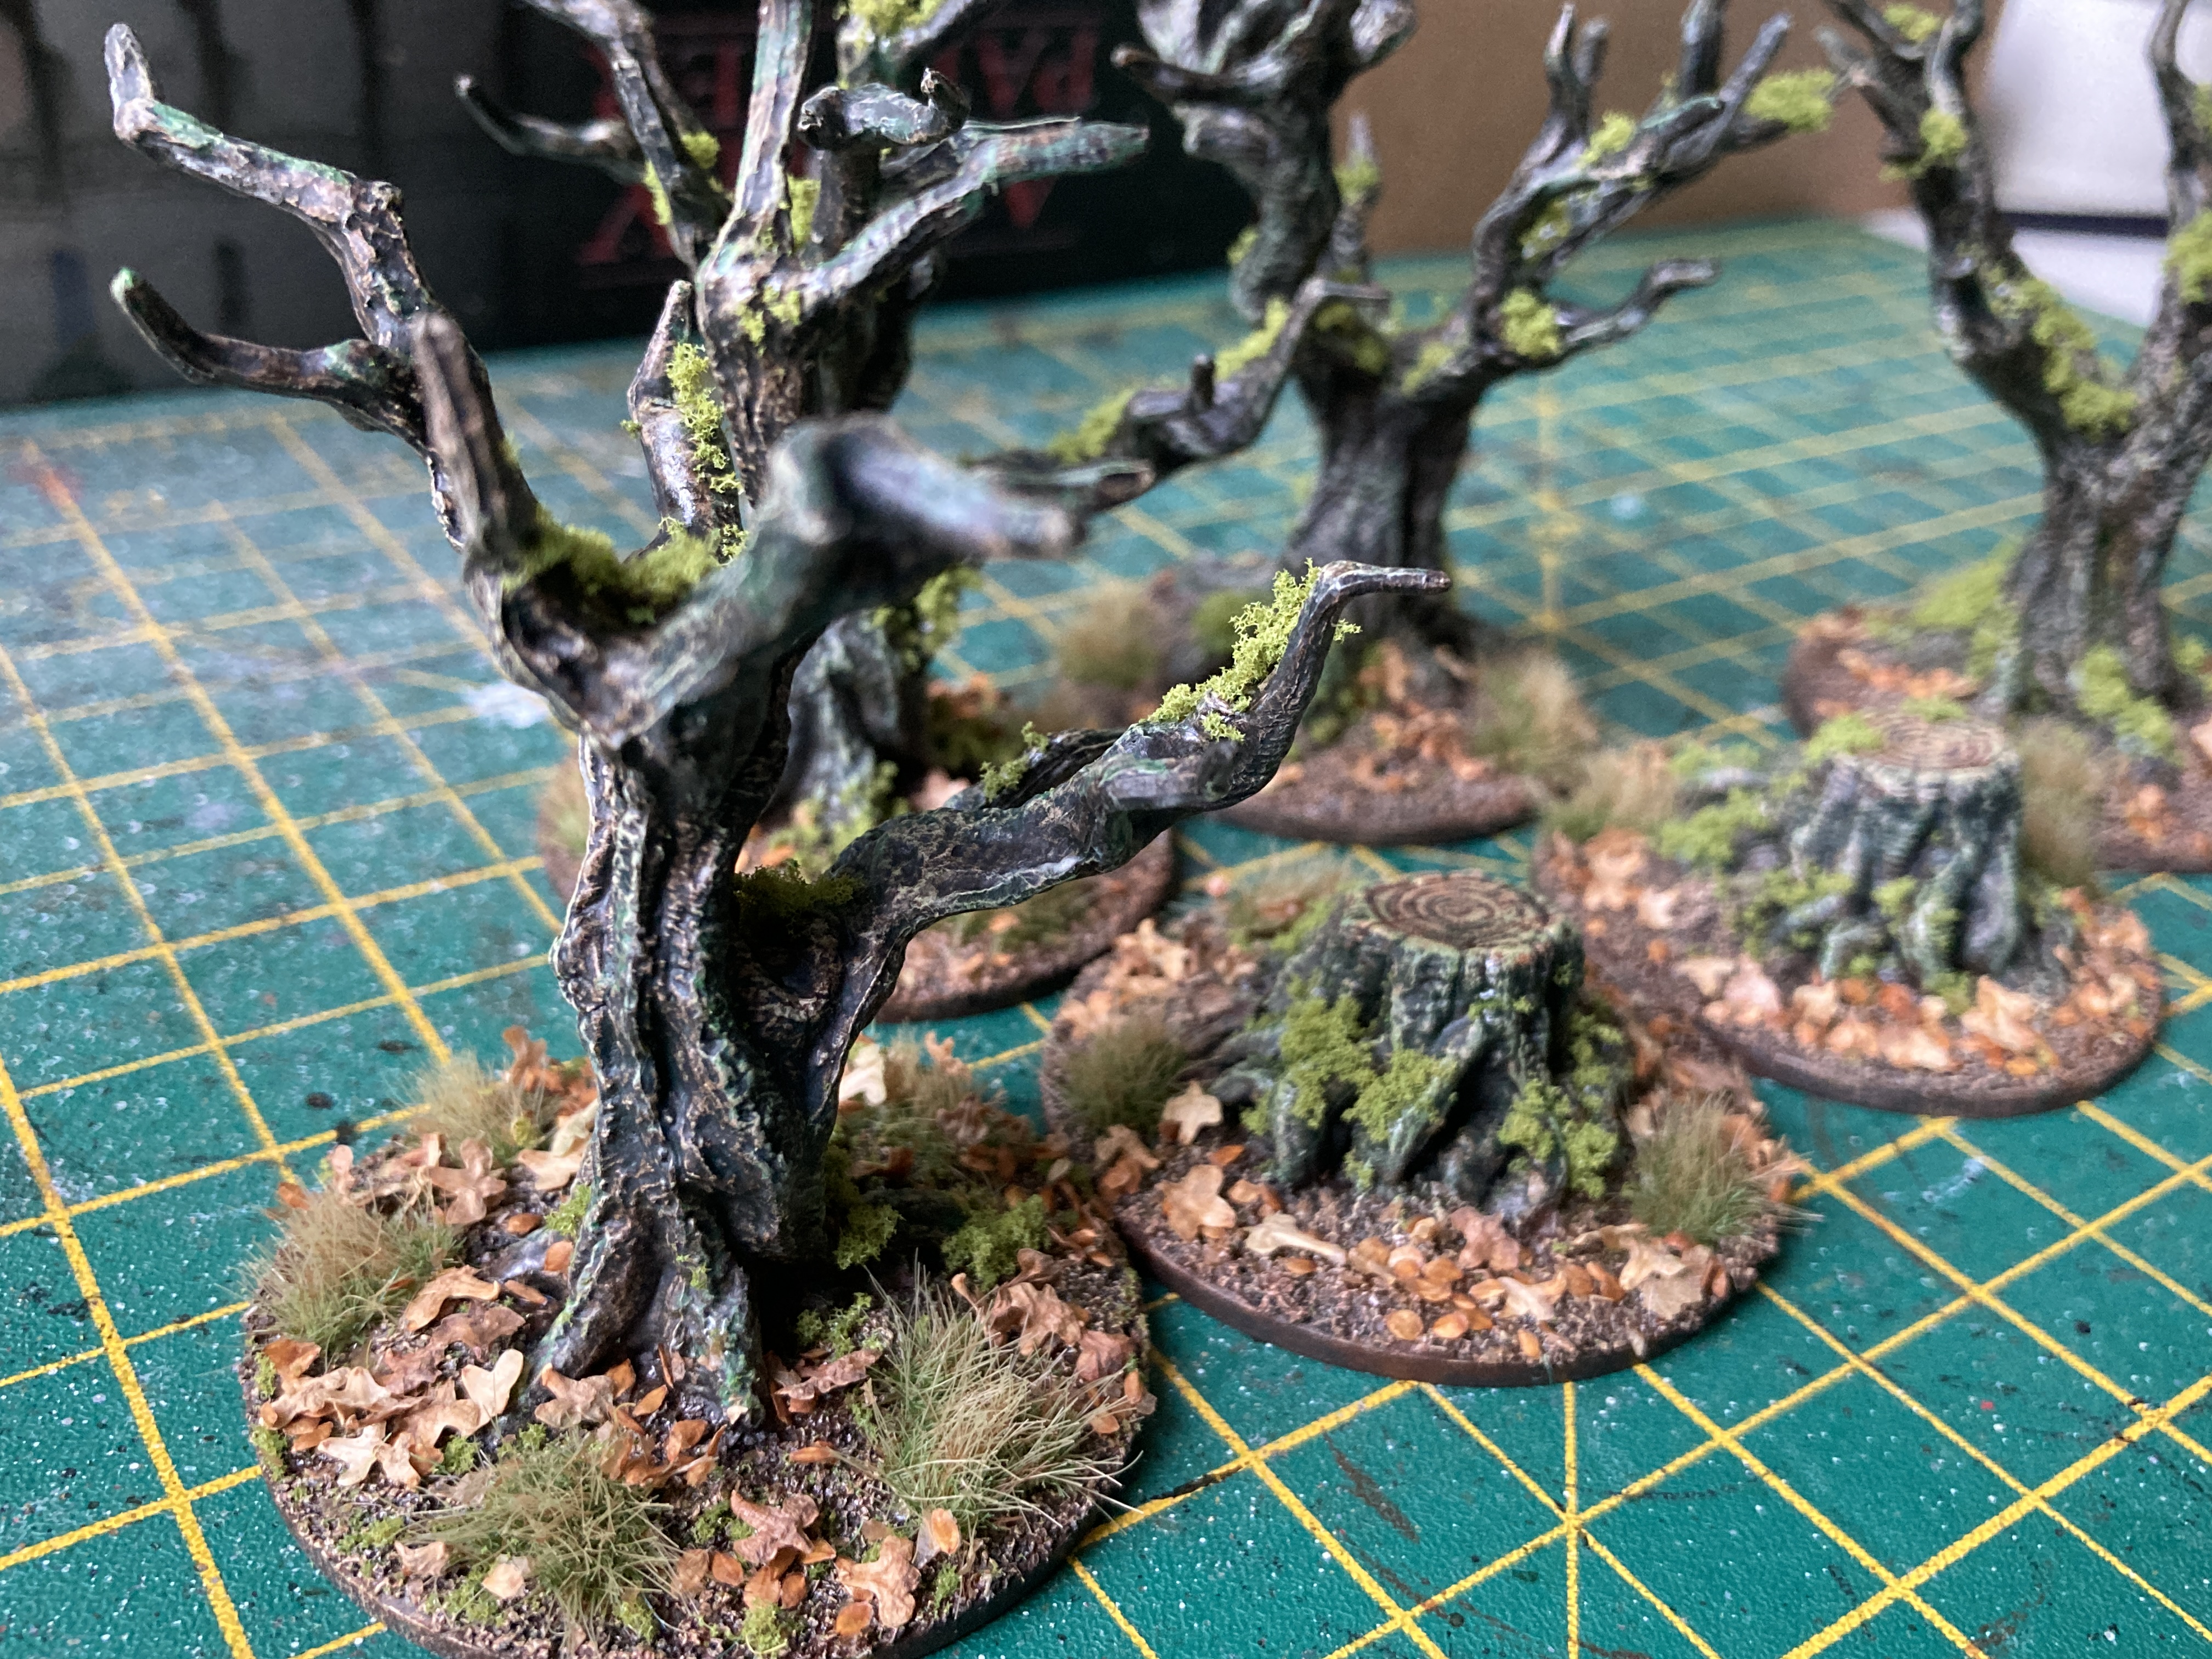
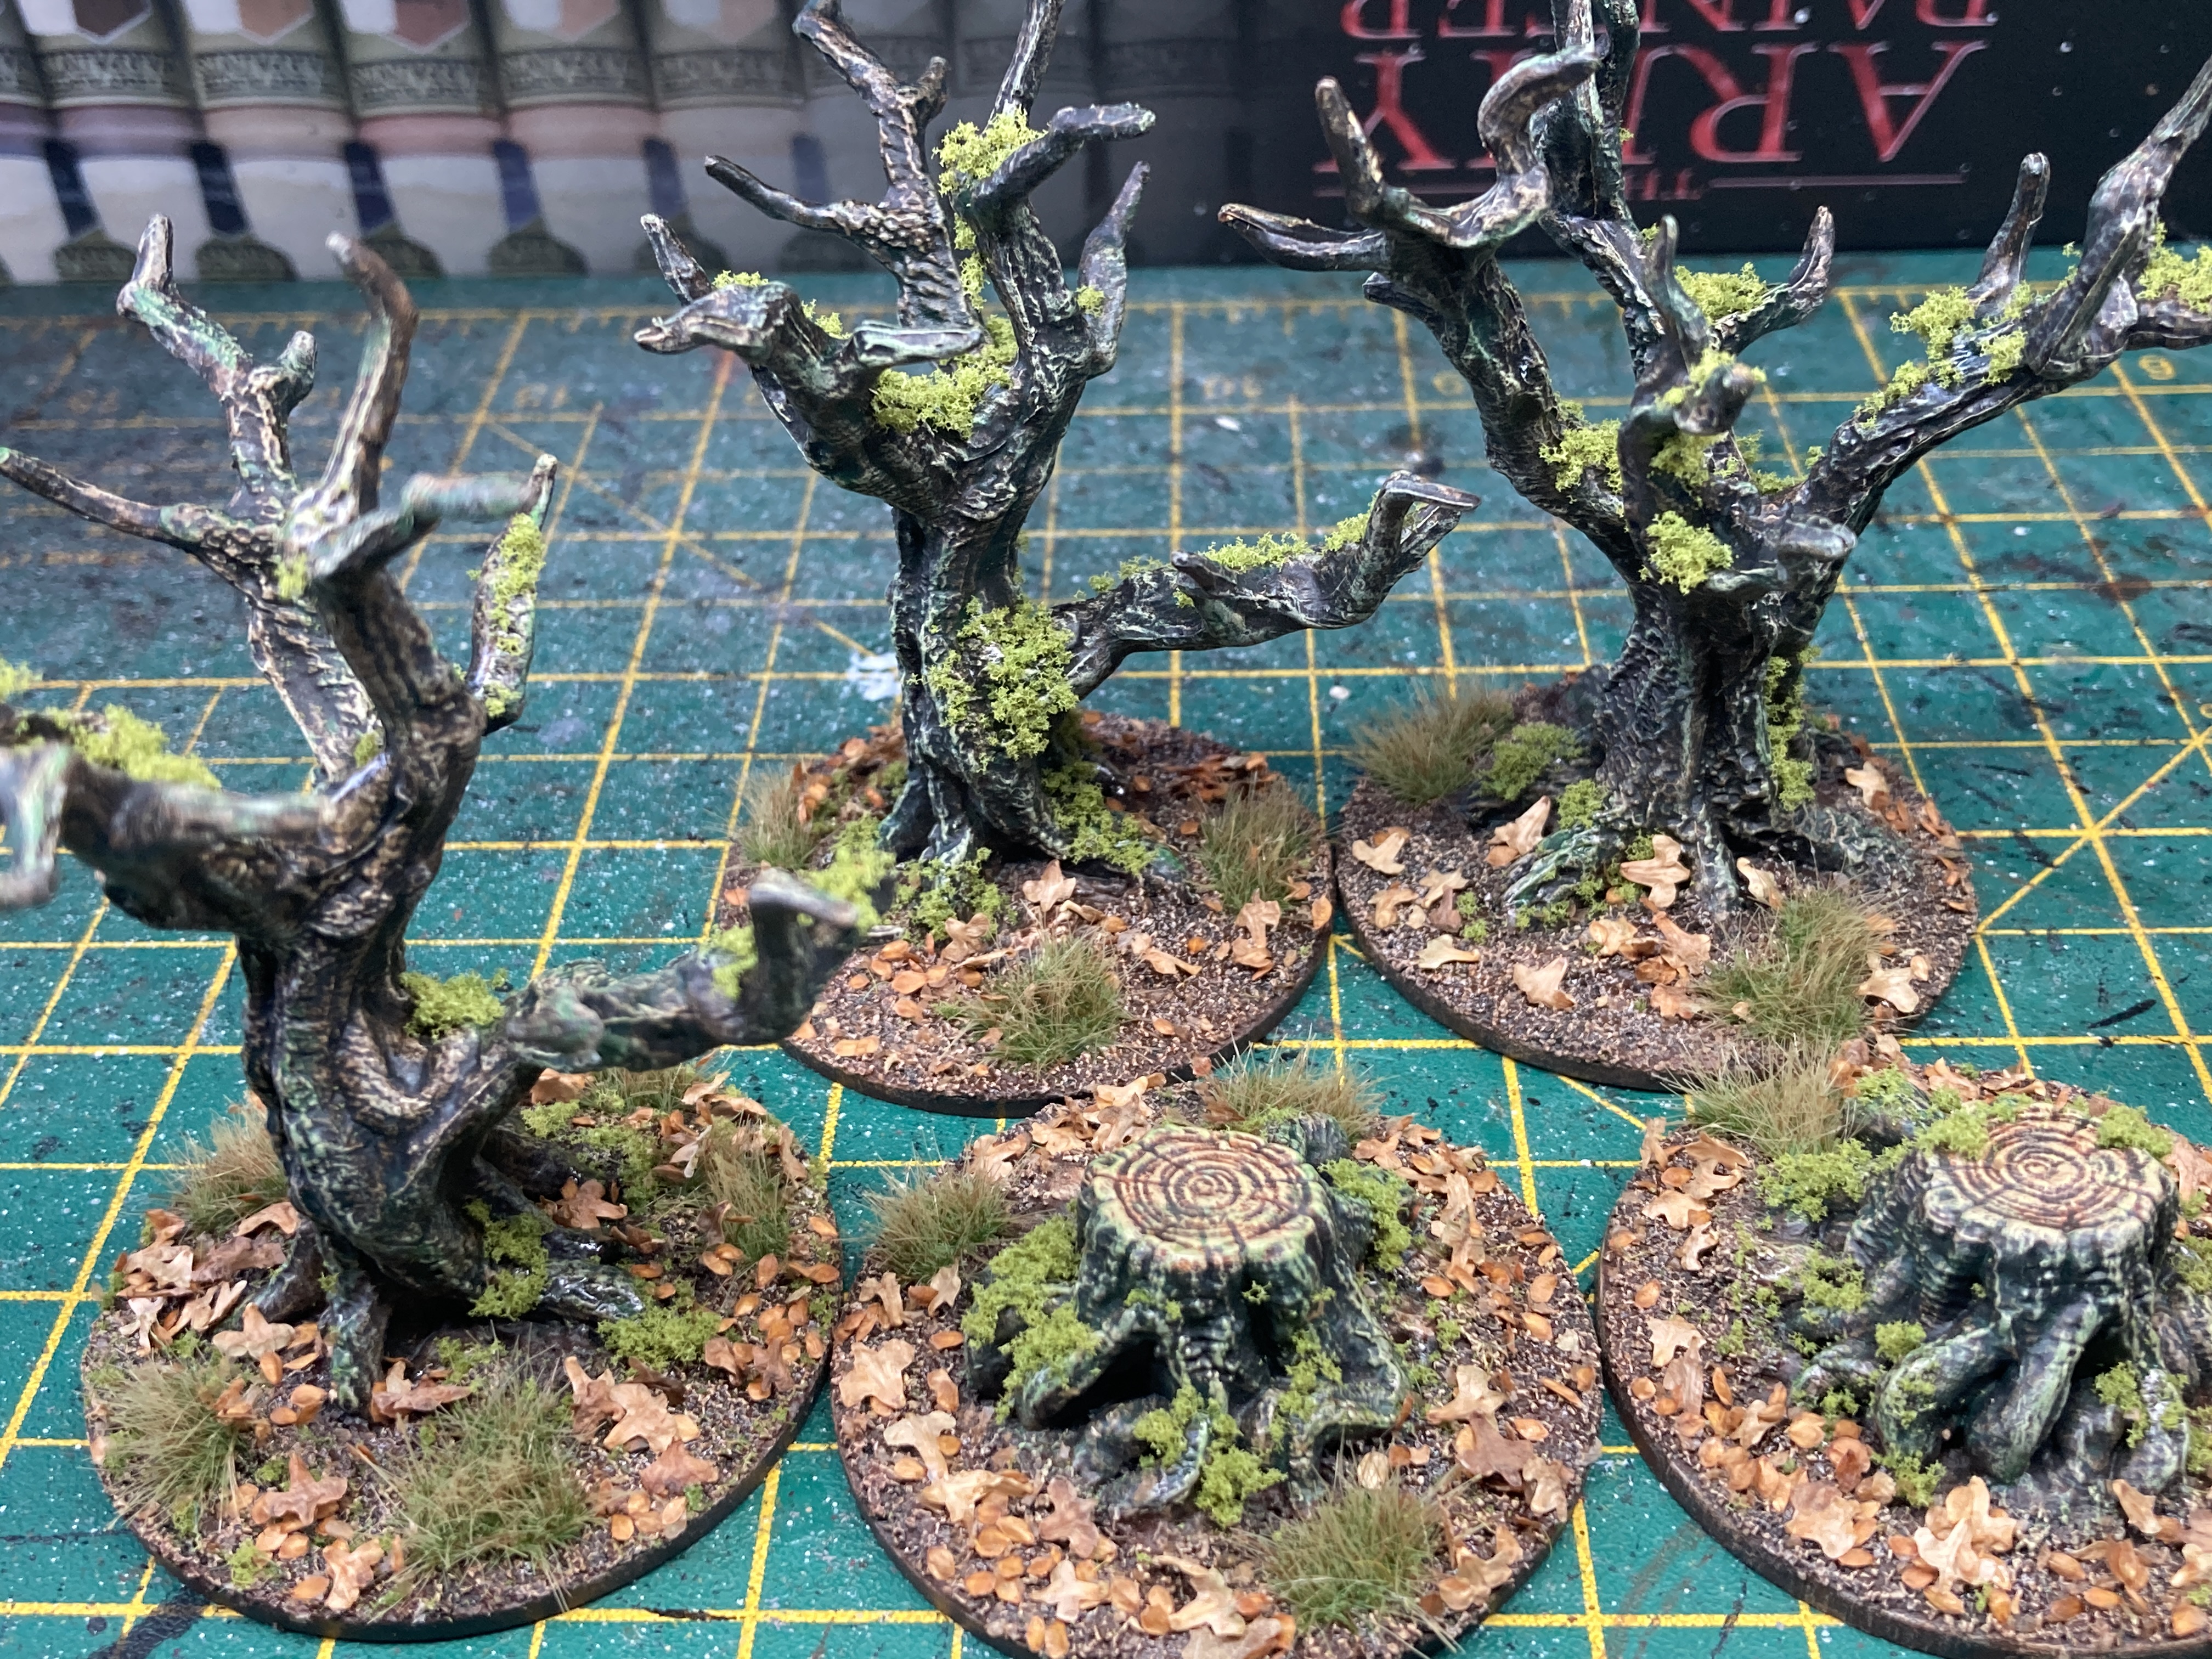
(Slap) Chopping Some Trees (or I’m stumped for a good title)
I thought these Mantic trees would be perfect for a cemetery so I ordered a set.
 I decided to stick them onto 50mm mdf bases.
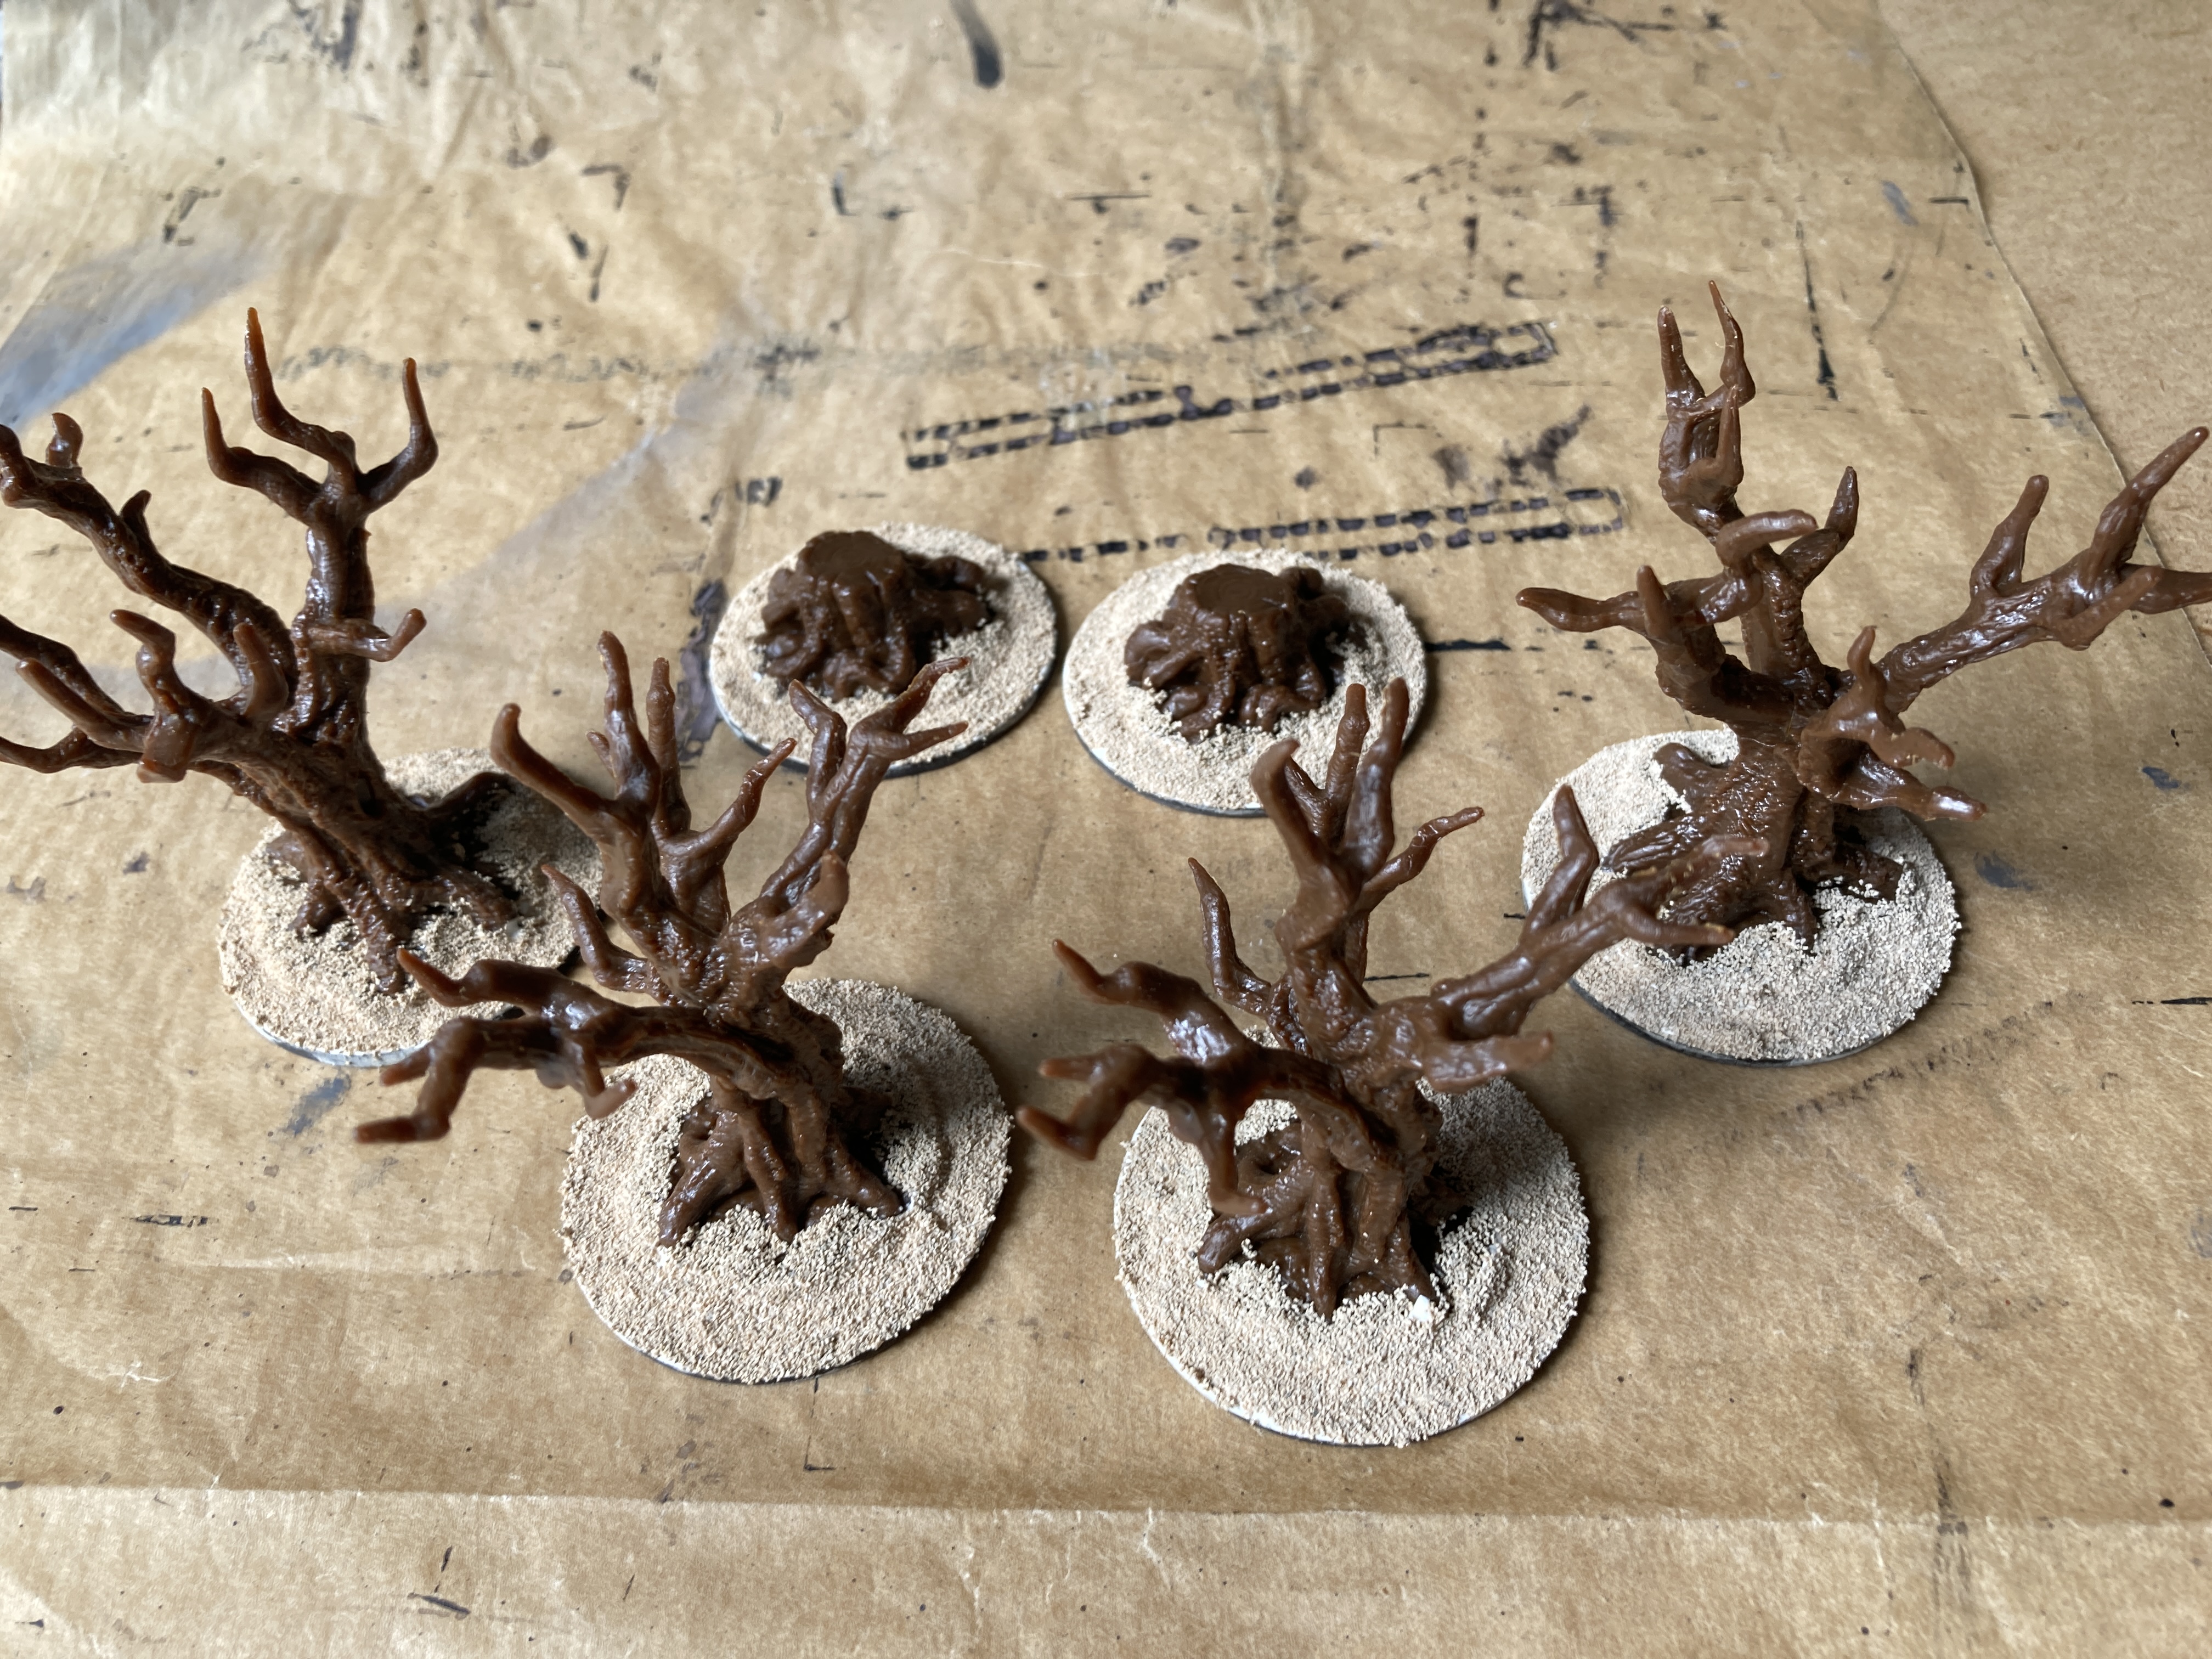 I used a little filler then sand for the bases.
 Once the black primer was dry I drybrushed them with a light beige colour followed by white.
As the trees were made from pvc plastic I used a Vallejo brush on primer just to be on the safe side. I’ve read of various problems (mostly with Reaper Bones) where the propellant in a spray primer can react with the pvc and cause it to go tacky.
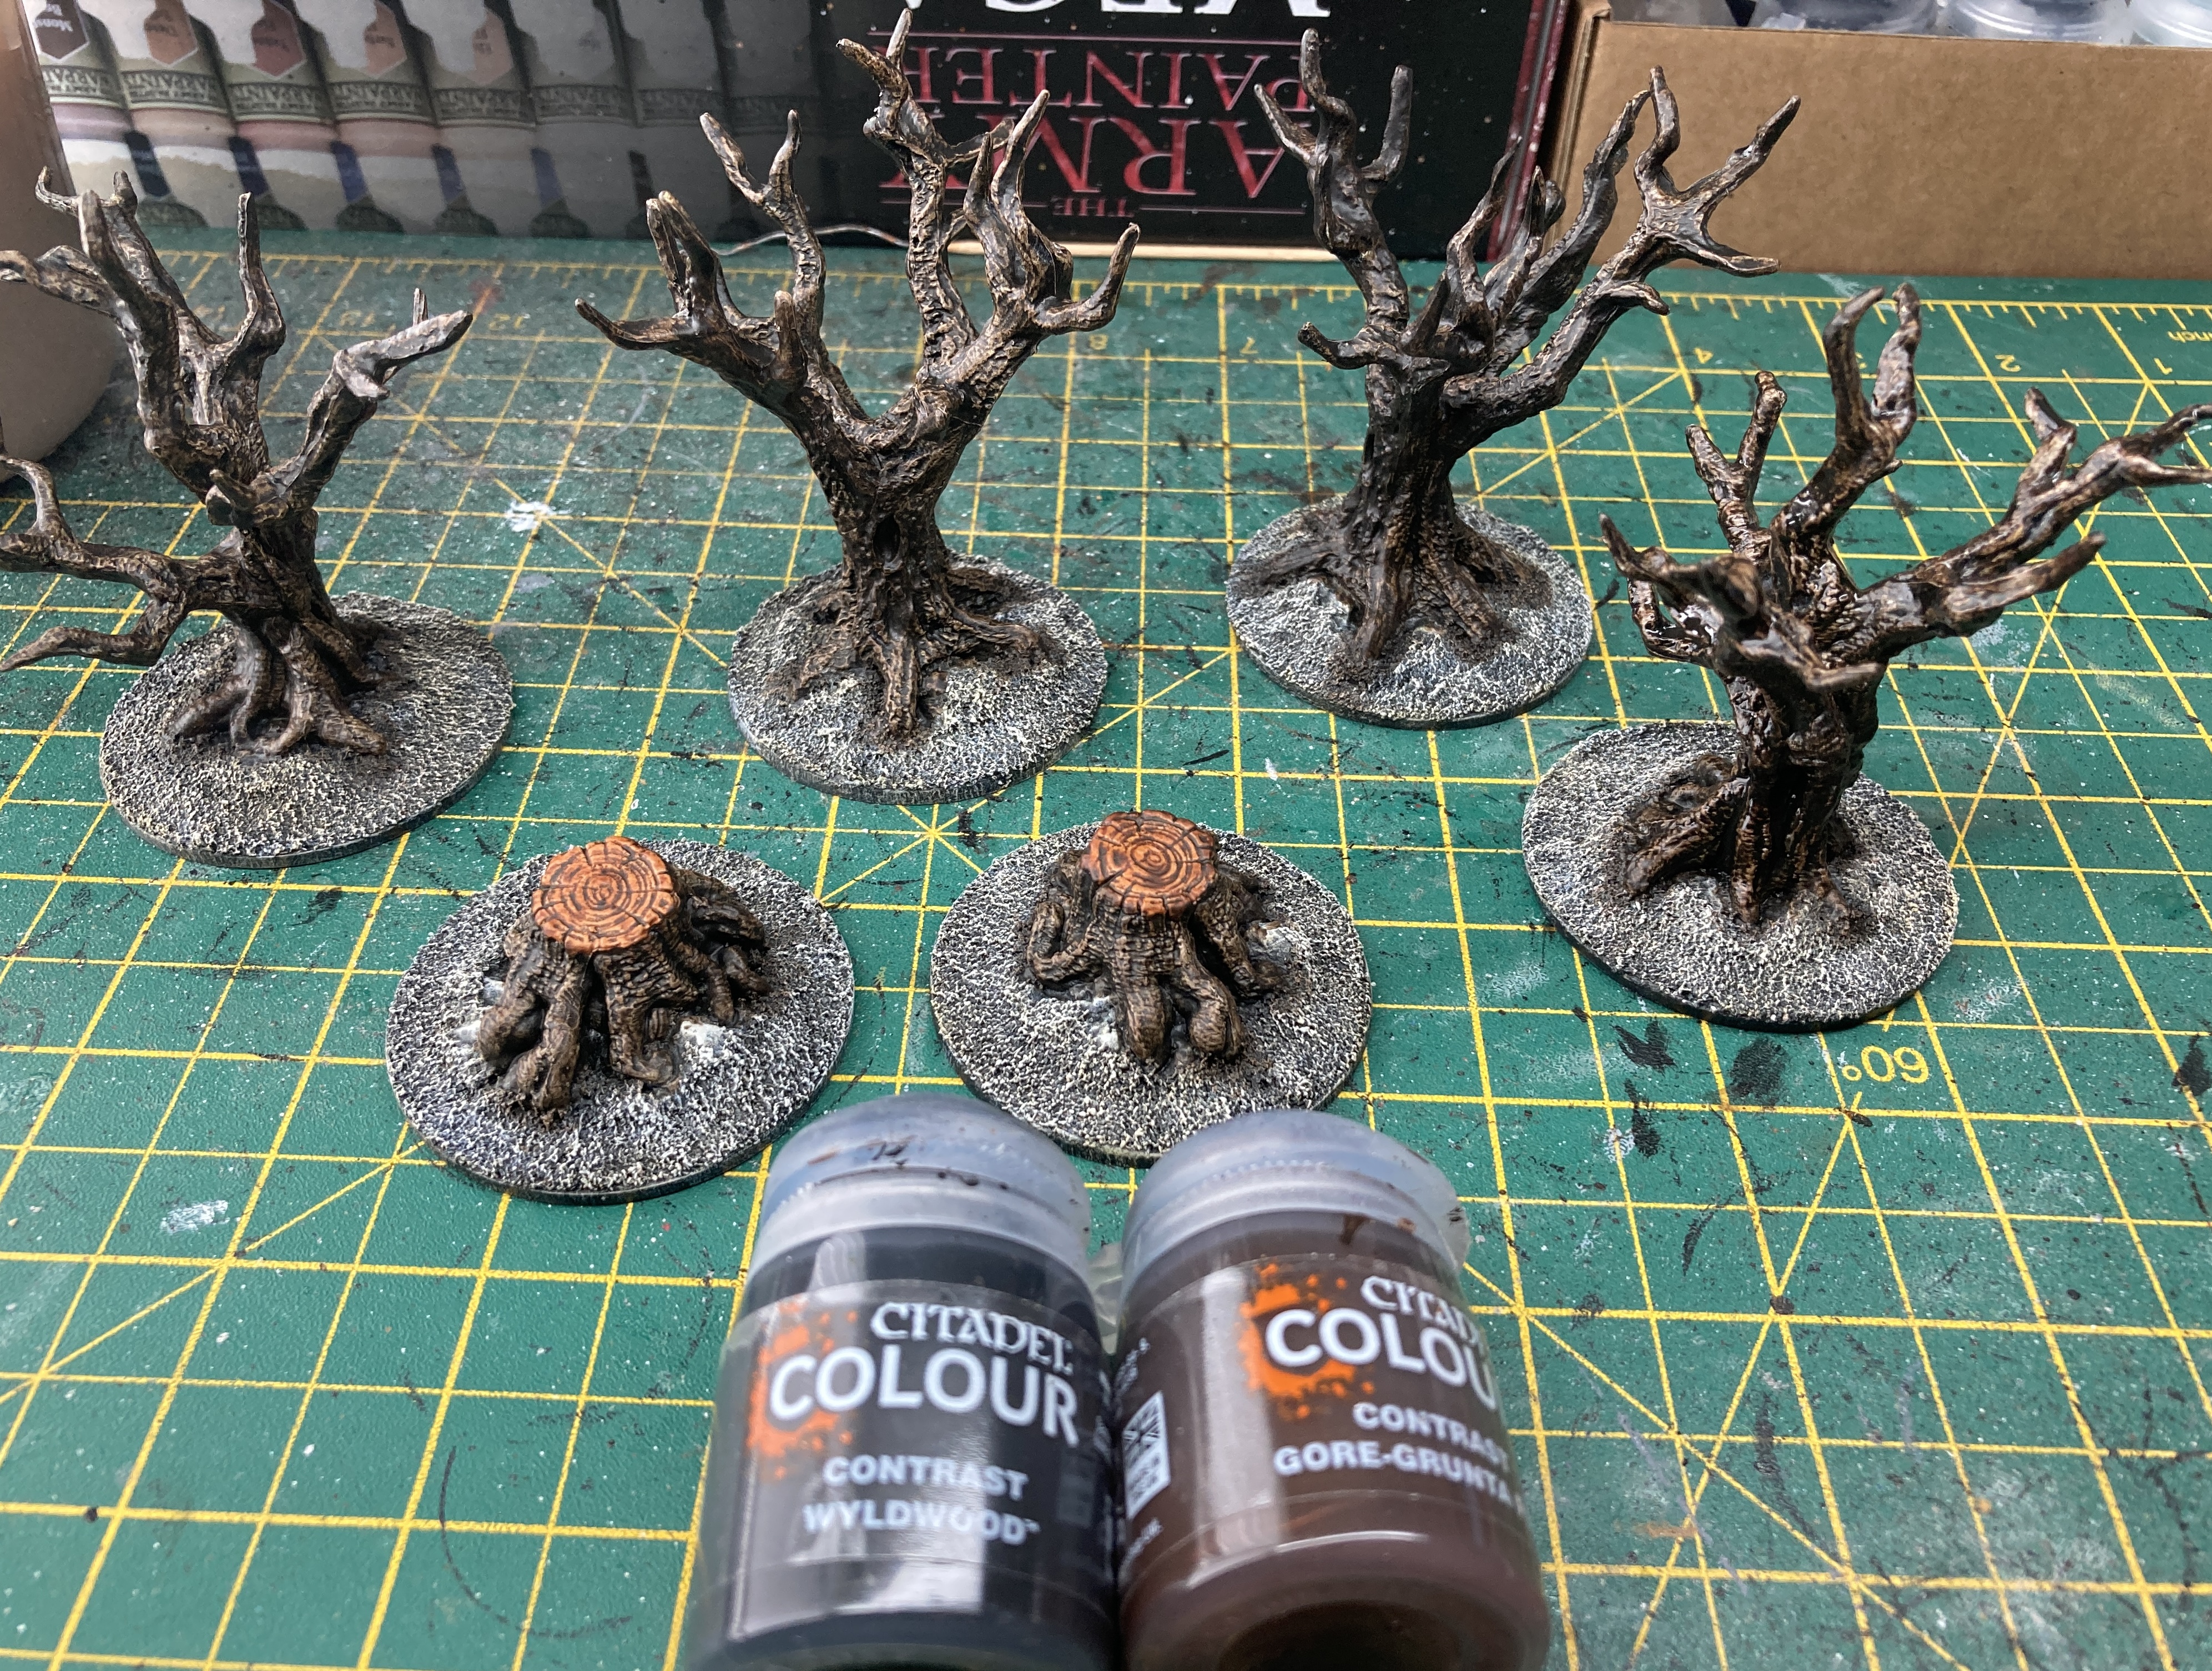 A coat of Contrast Wyldwood was applied for the bark of the trees and Gore-Grunta Fur for the raw wood.
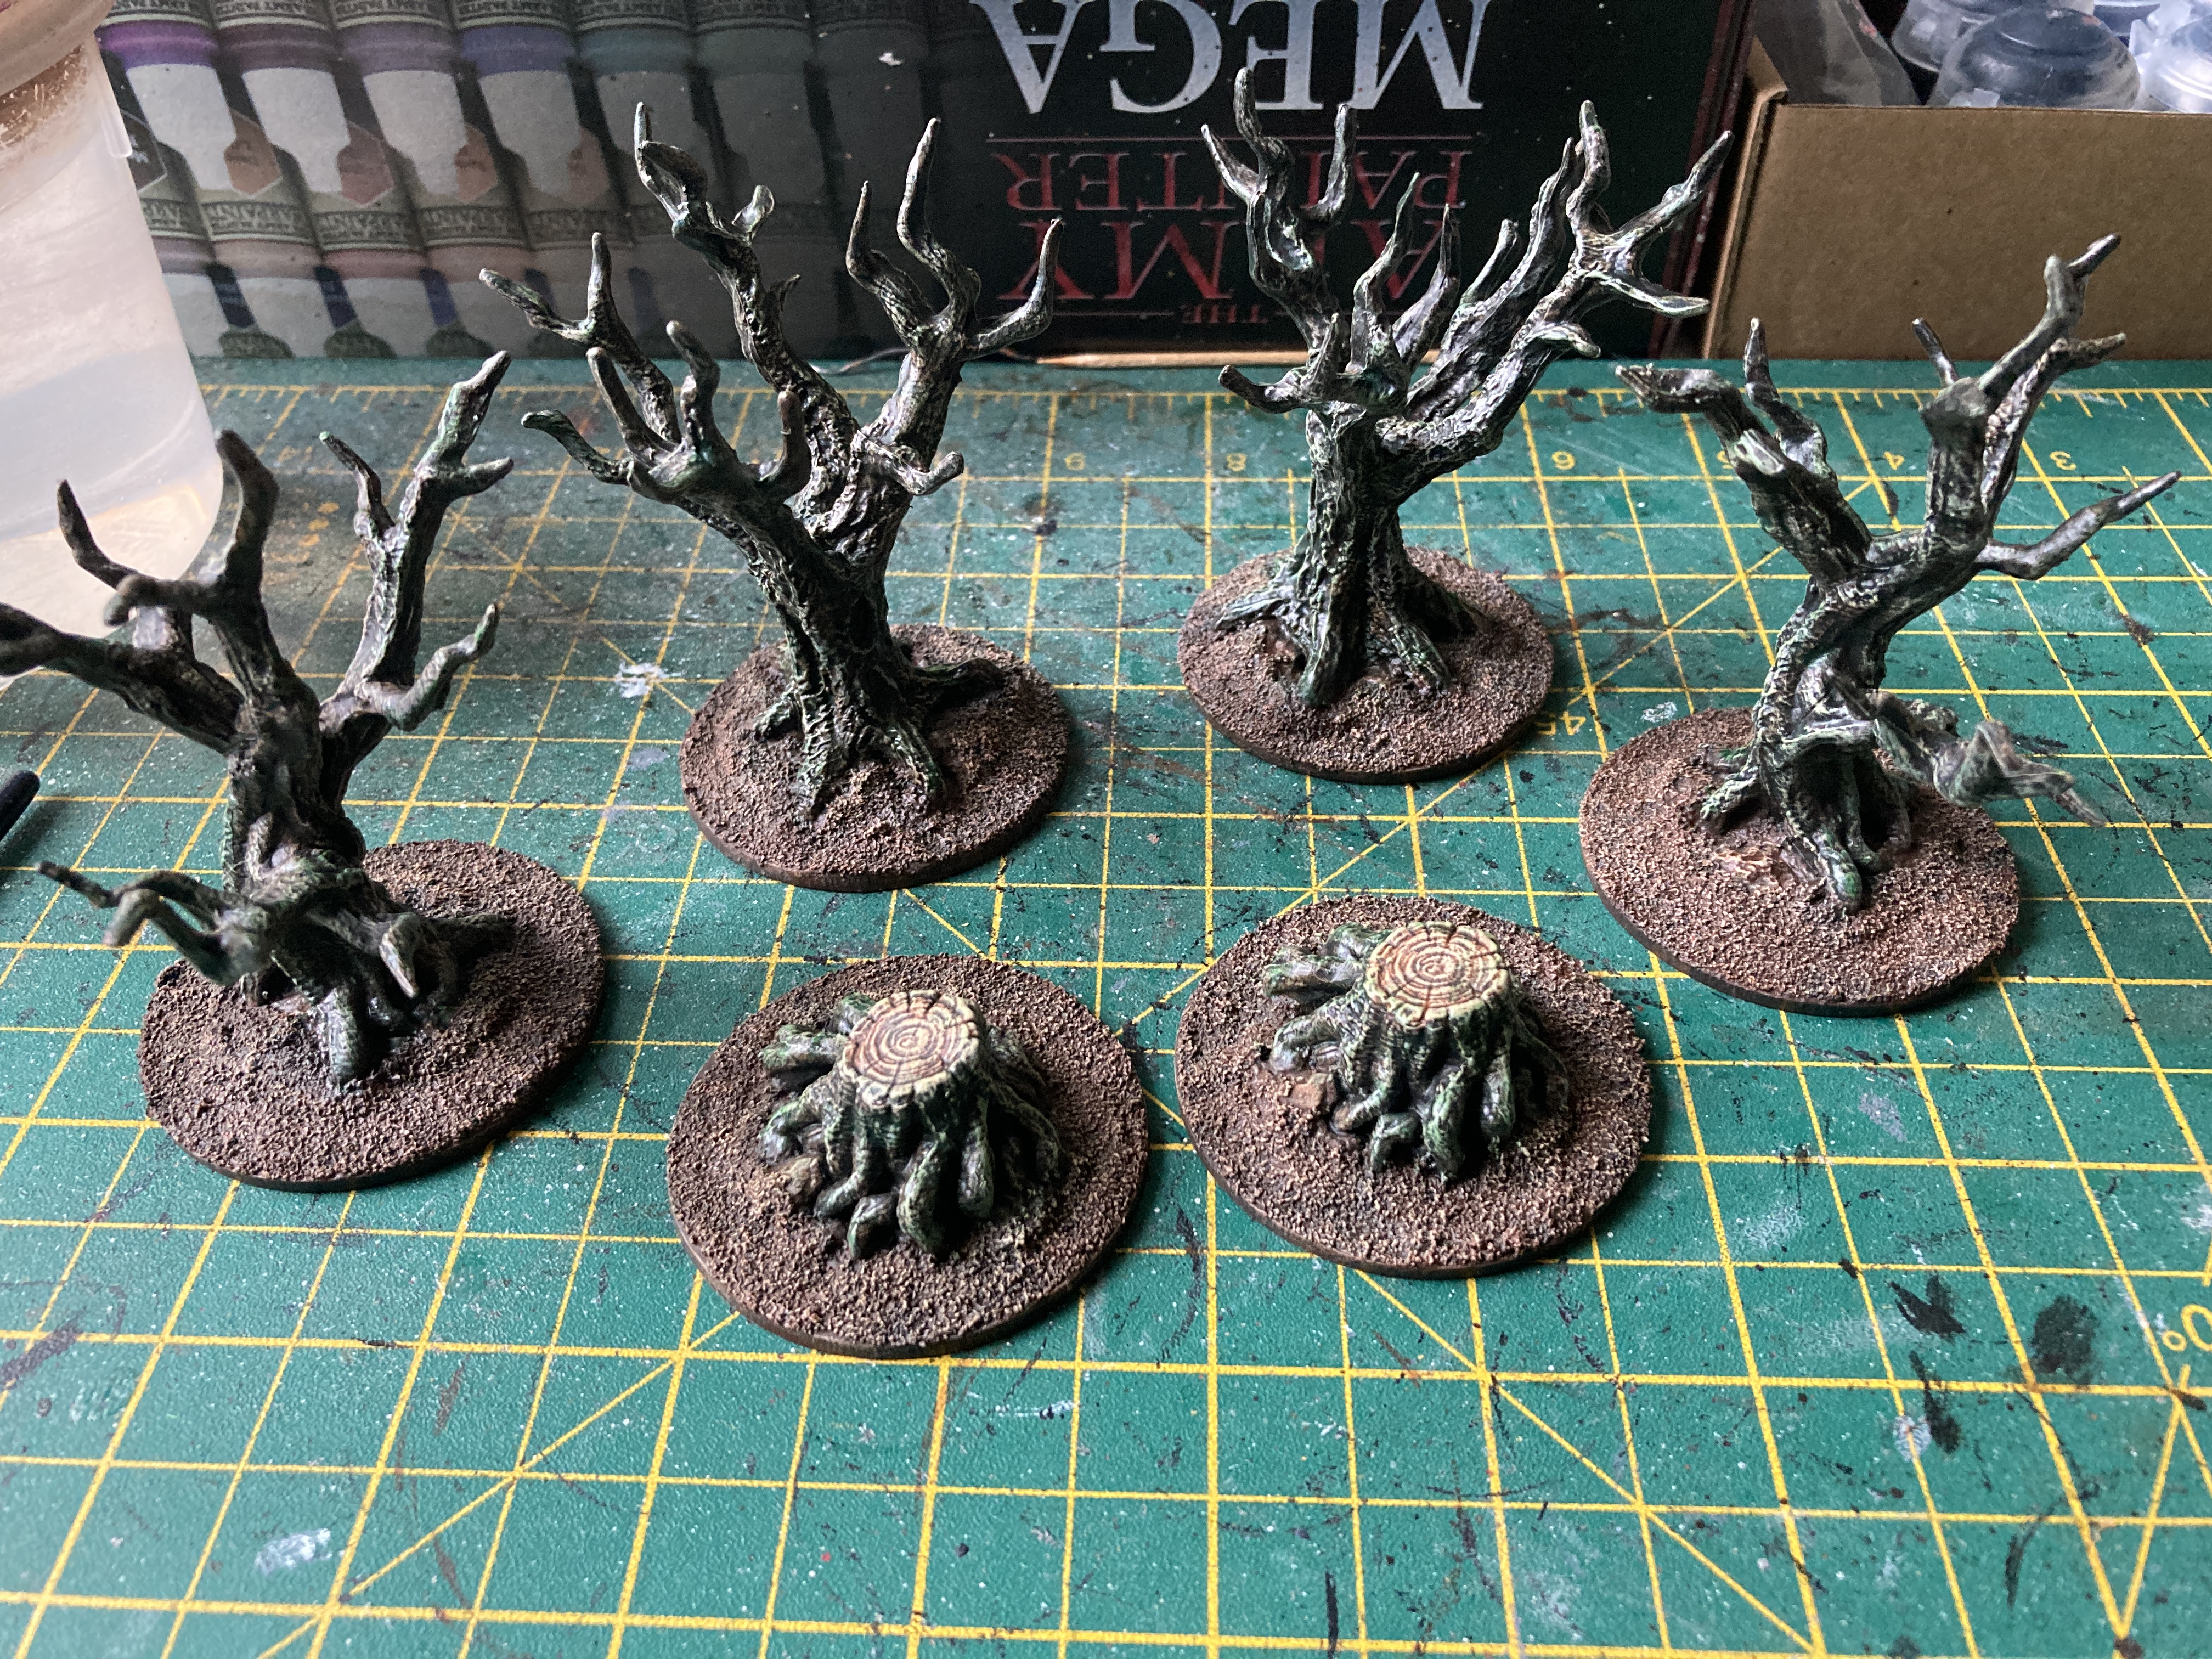 For the ground I went back my to cheap inexpensive artists acrylic. I also gave everything a light beige drybrush just to bring the details out a little more.
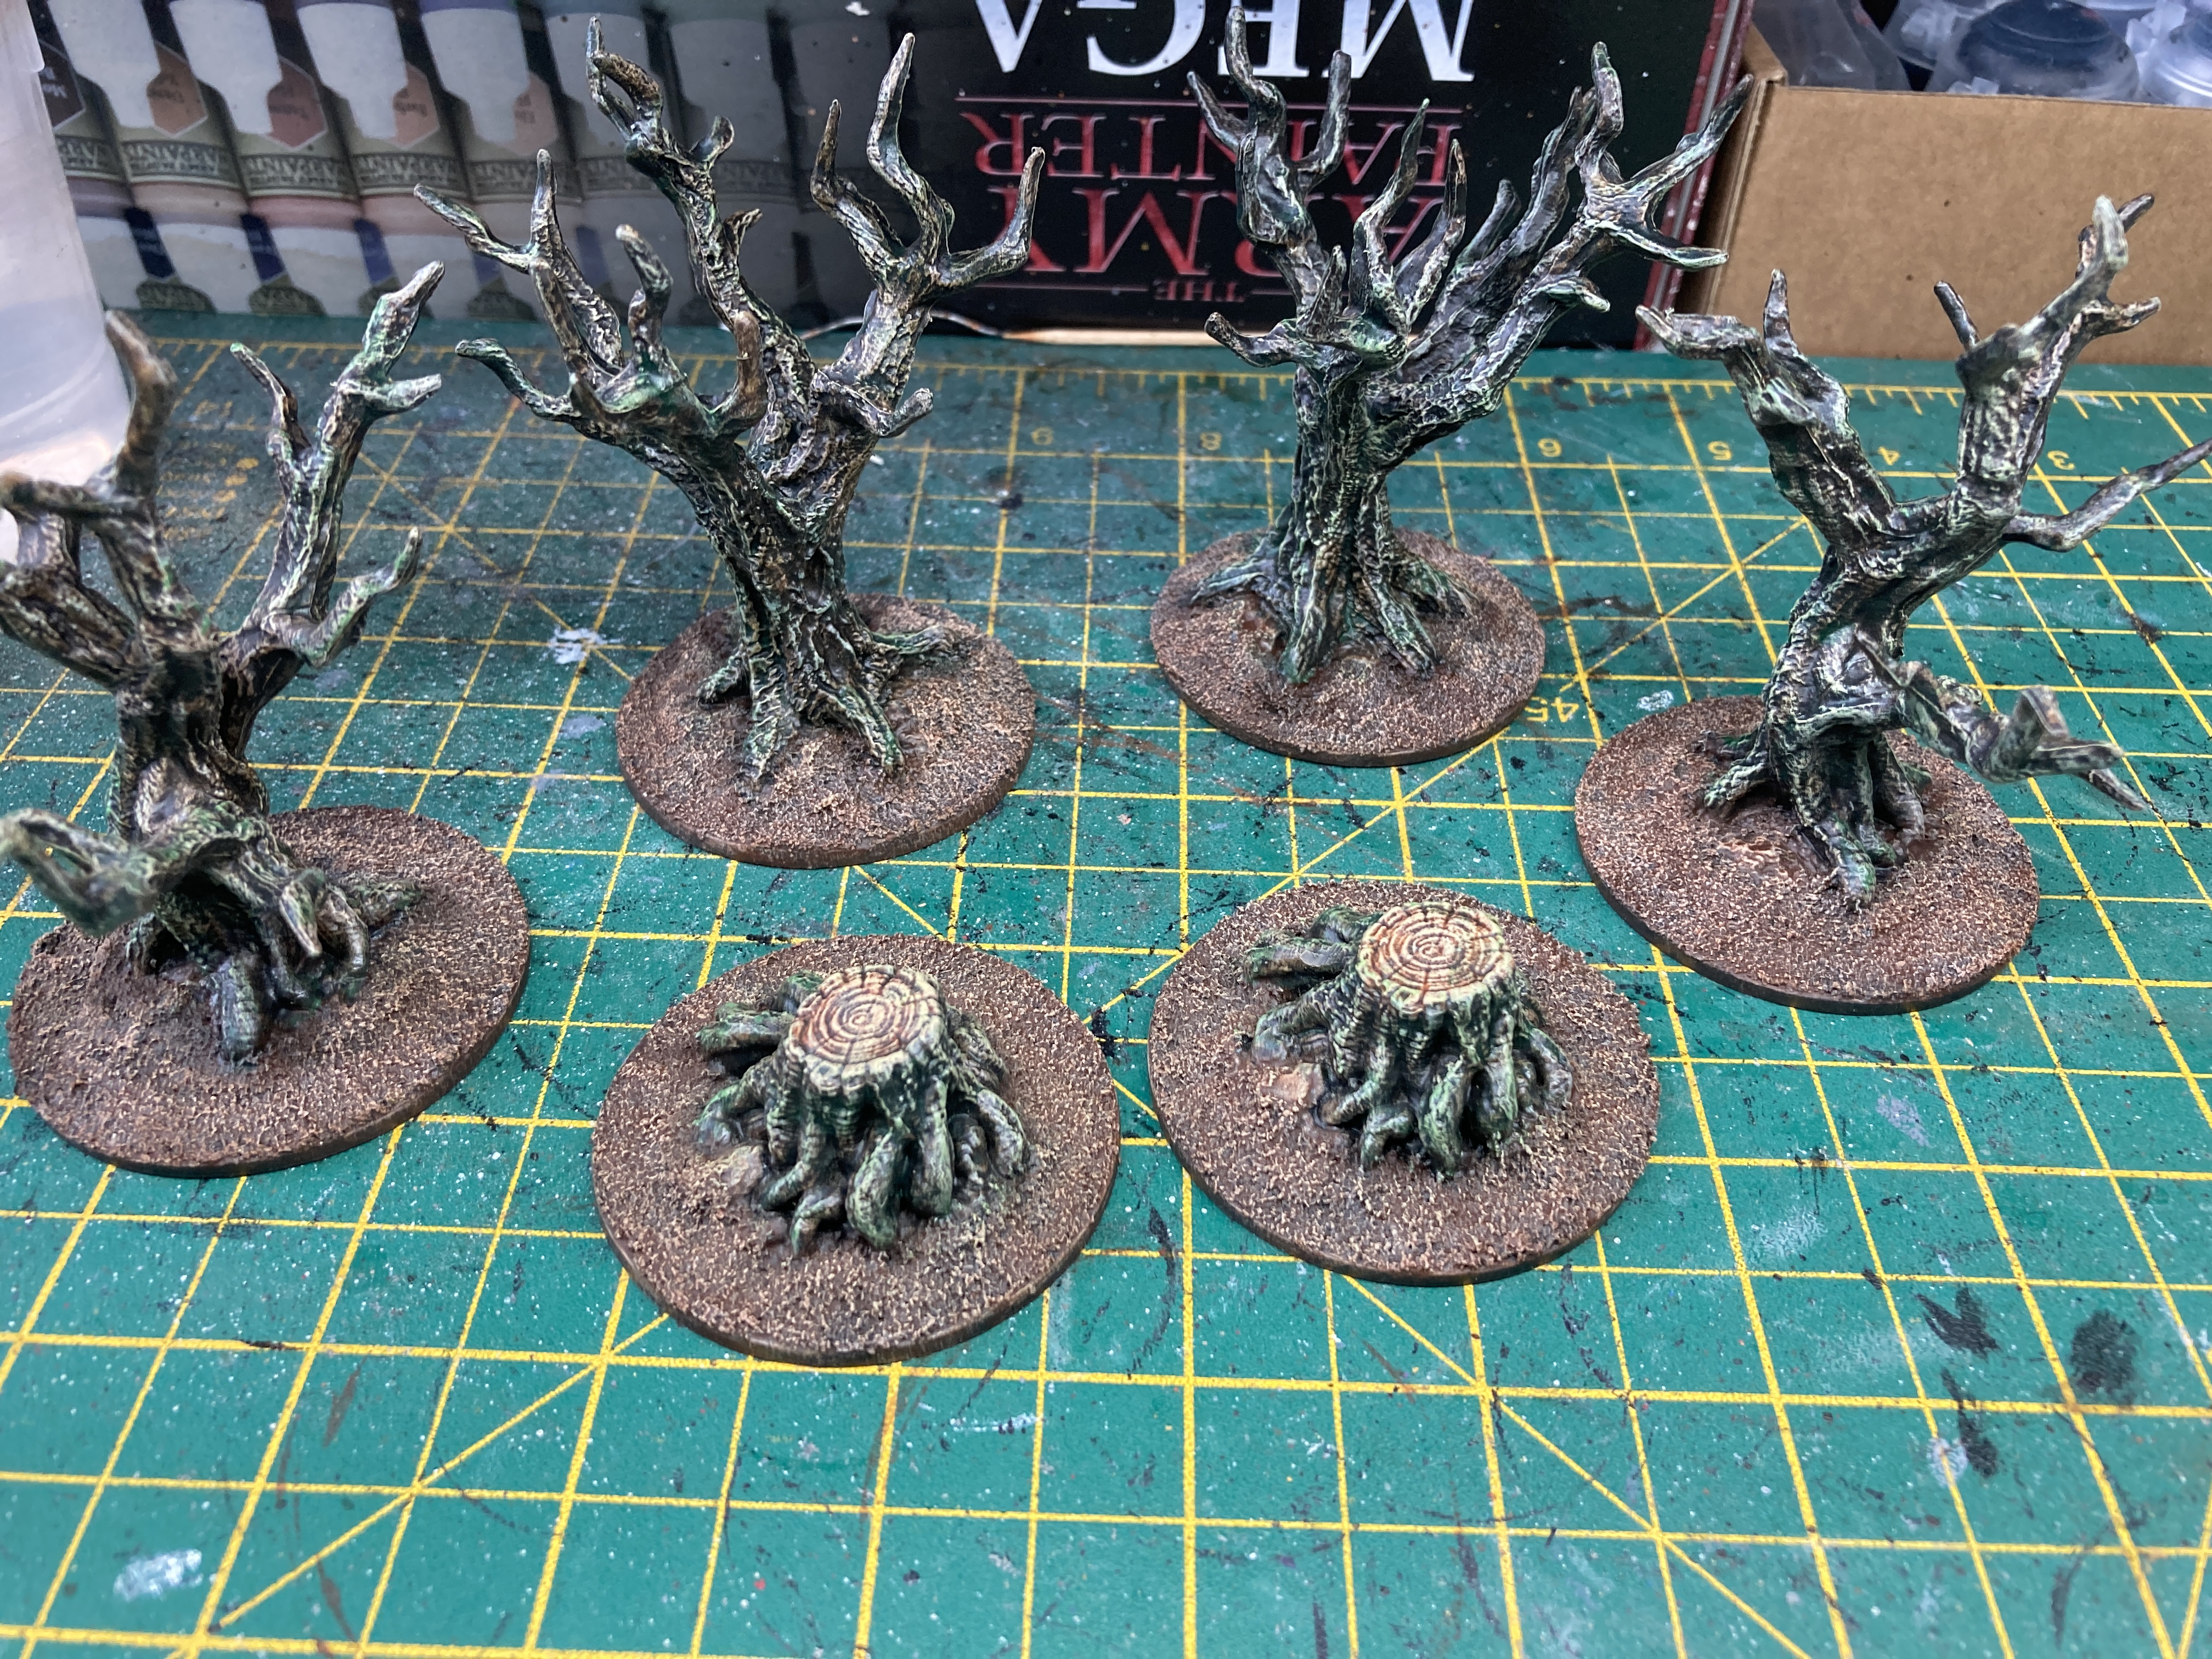 I wanted a touch of green so I dabbed a watered down Orc Flesh (Army Painter) green onto the trees then before it had time to dry I dunked the whole tree upside down into my paint water to rinse off most of the paint. This was quite experimental but I like the results. I guess I could have just drybrushed the paint on for similar looks.
 For the finishing touches I added various basing bits such as fallen leaves, a few tufts and clump foliage as moss or lichen to the branches.
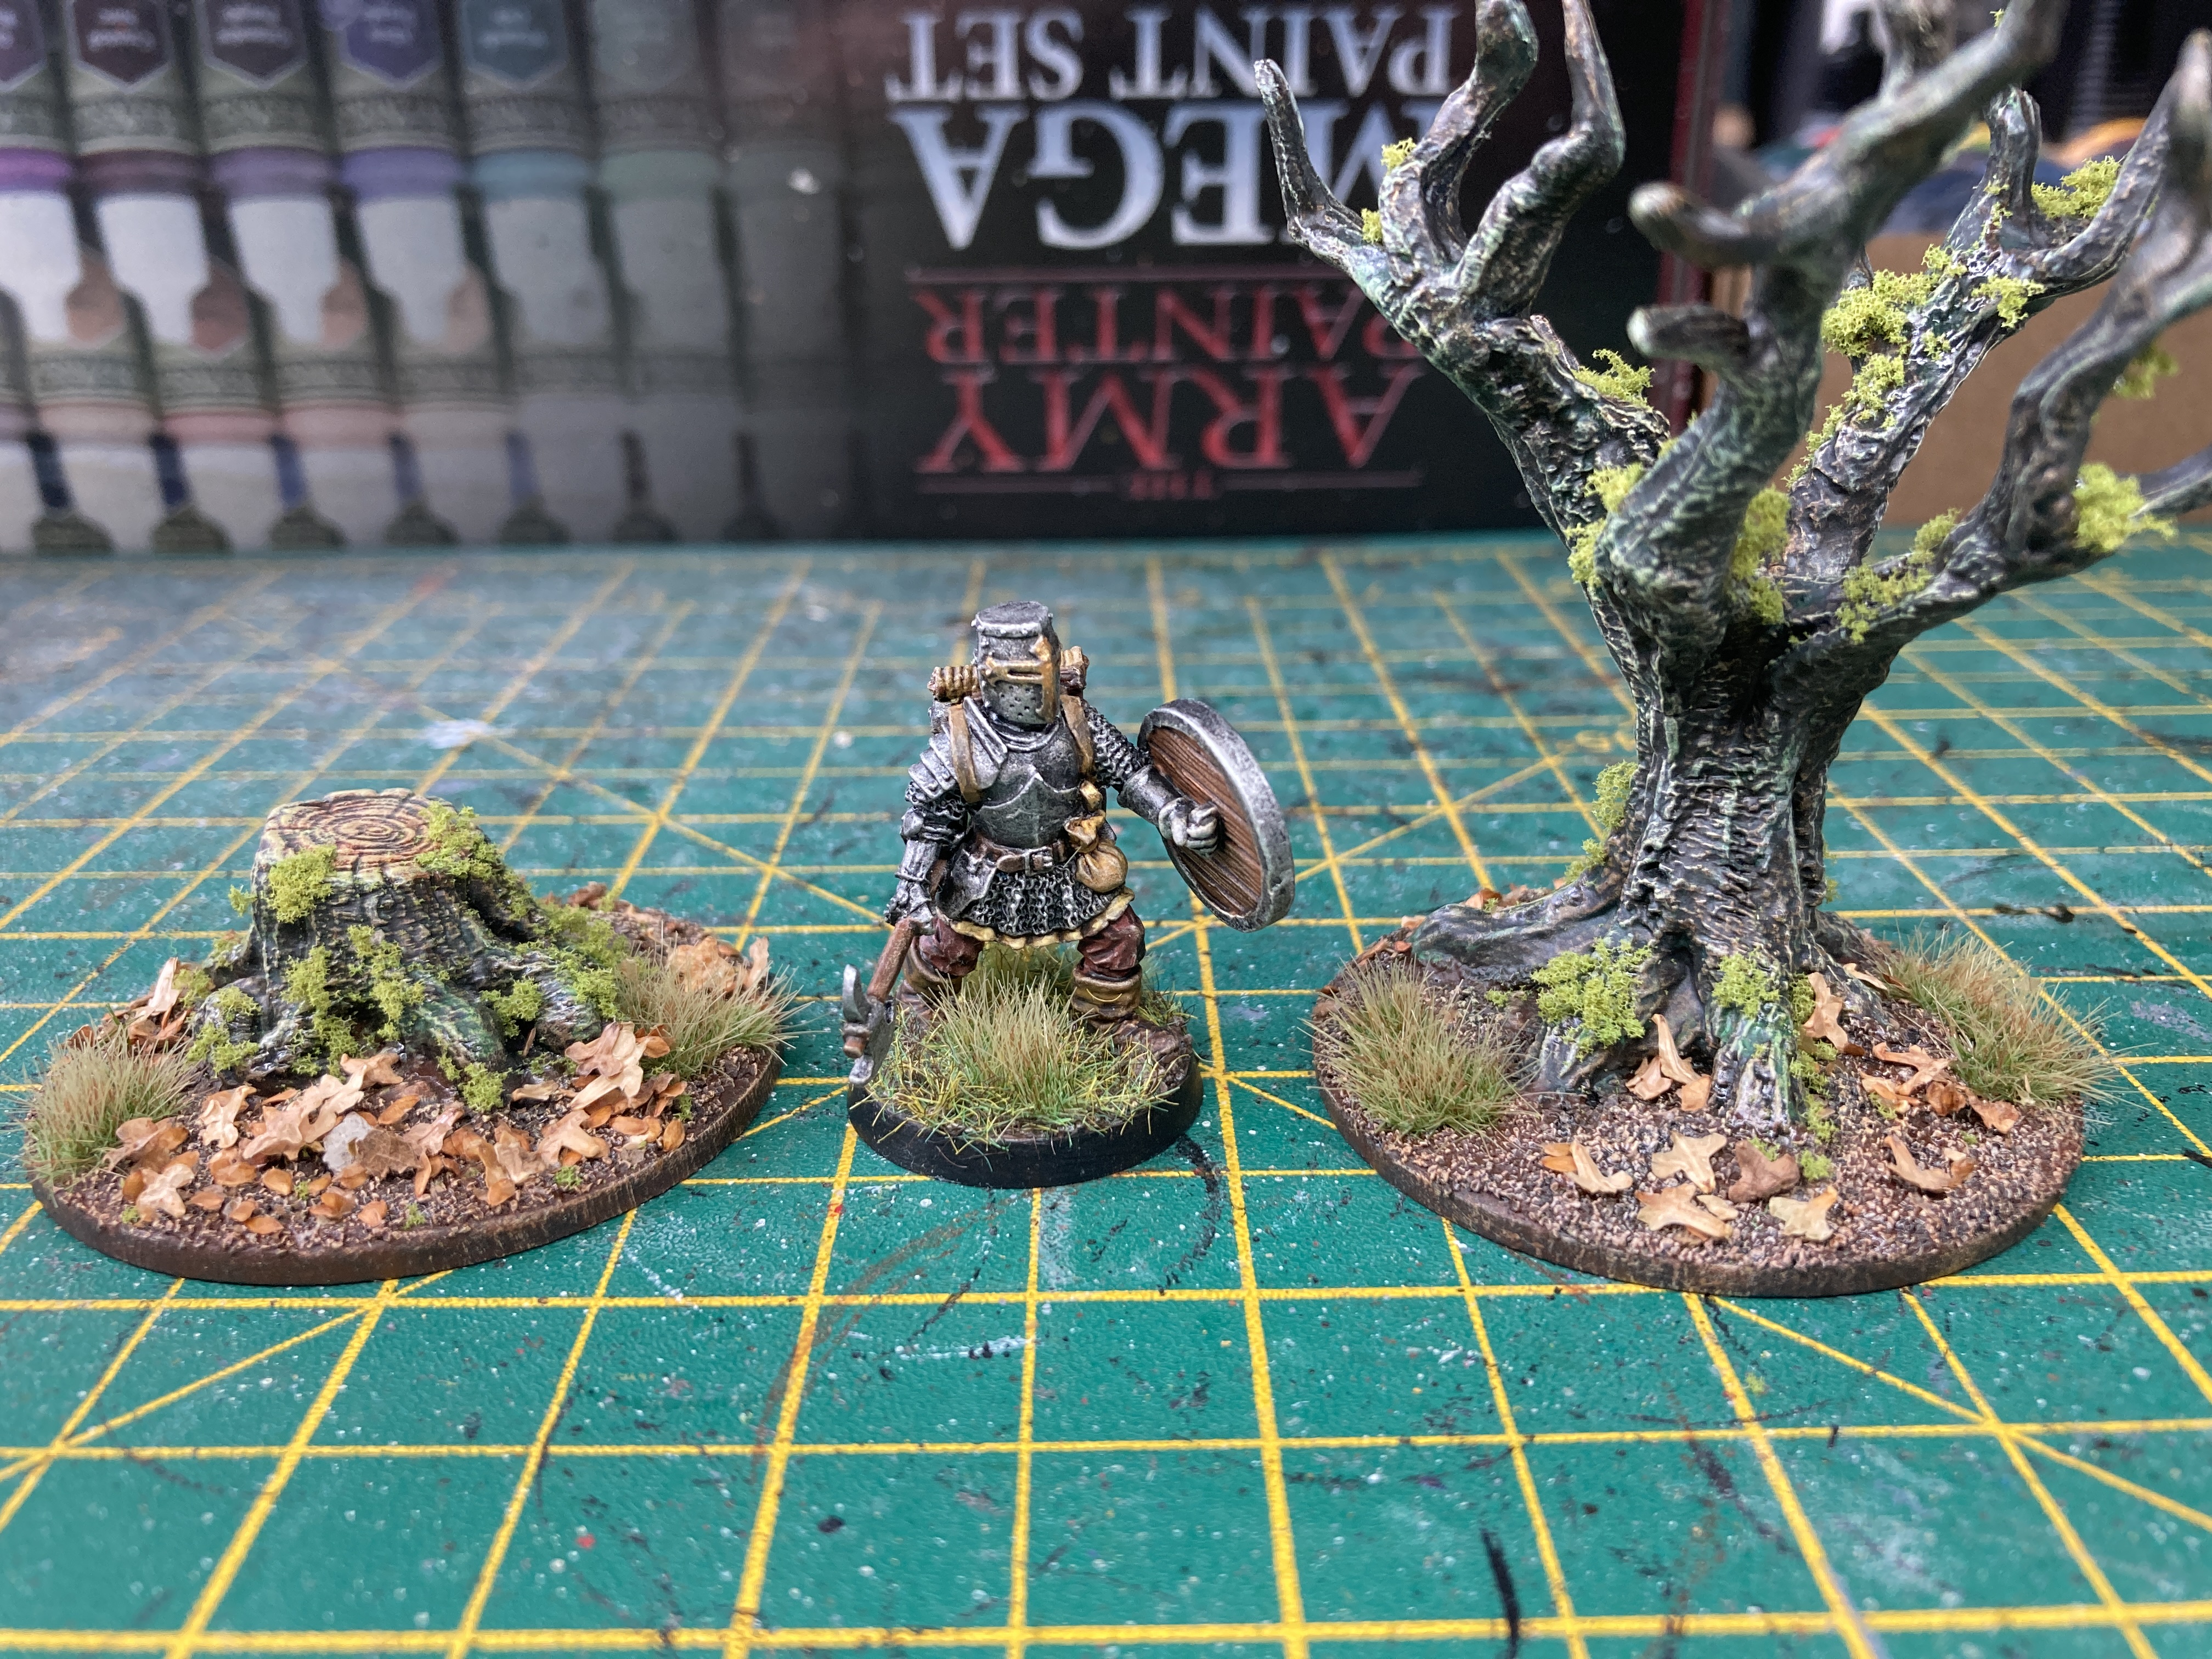 I was hesitant before getting these trees as I’d heard that they were a little small compared with others but they aren’t that small and certainly good enough for the table.
I really happy with how these turned out and look. I think I’ll be picking up at least another couple of sets sometime in the future, although maybe when this project is complete.

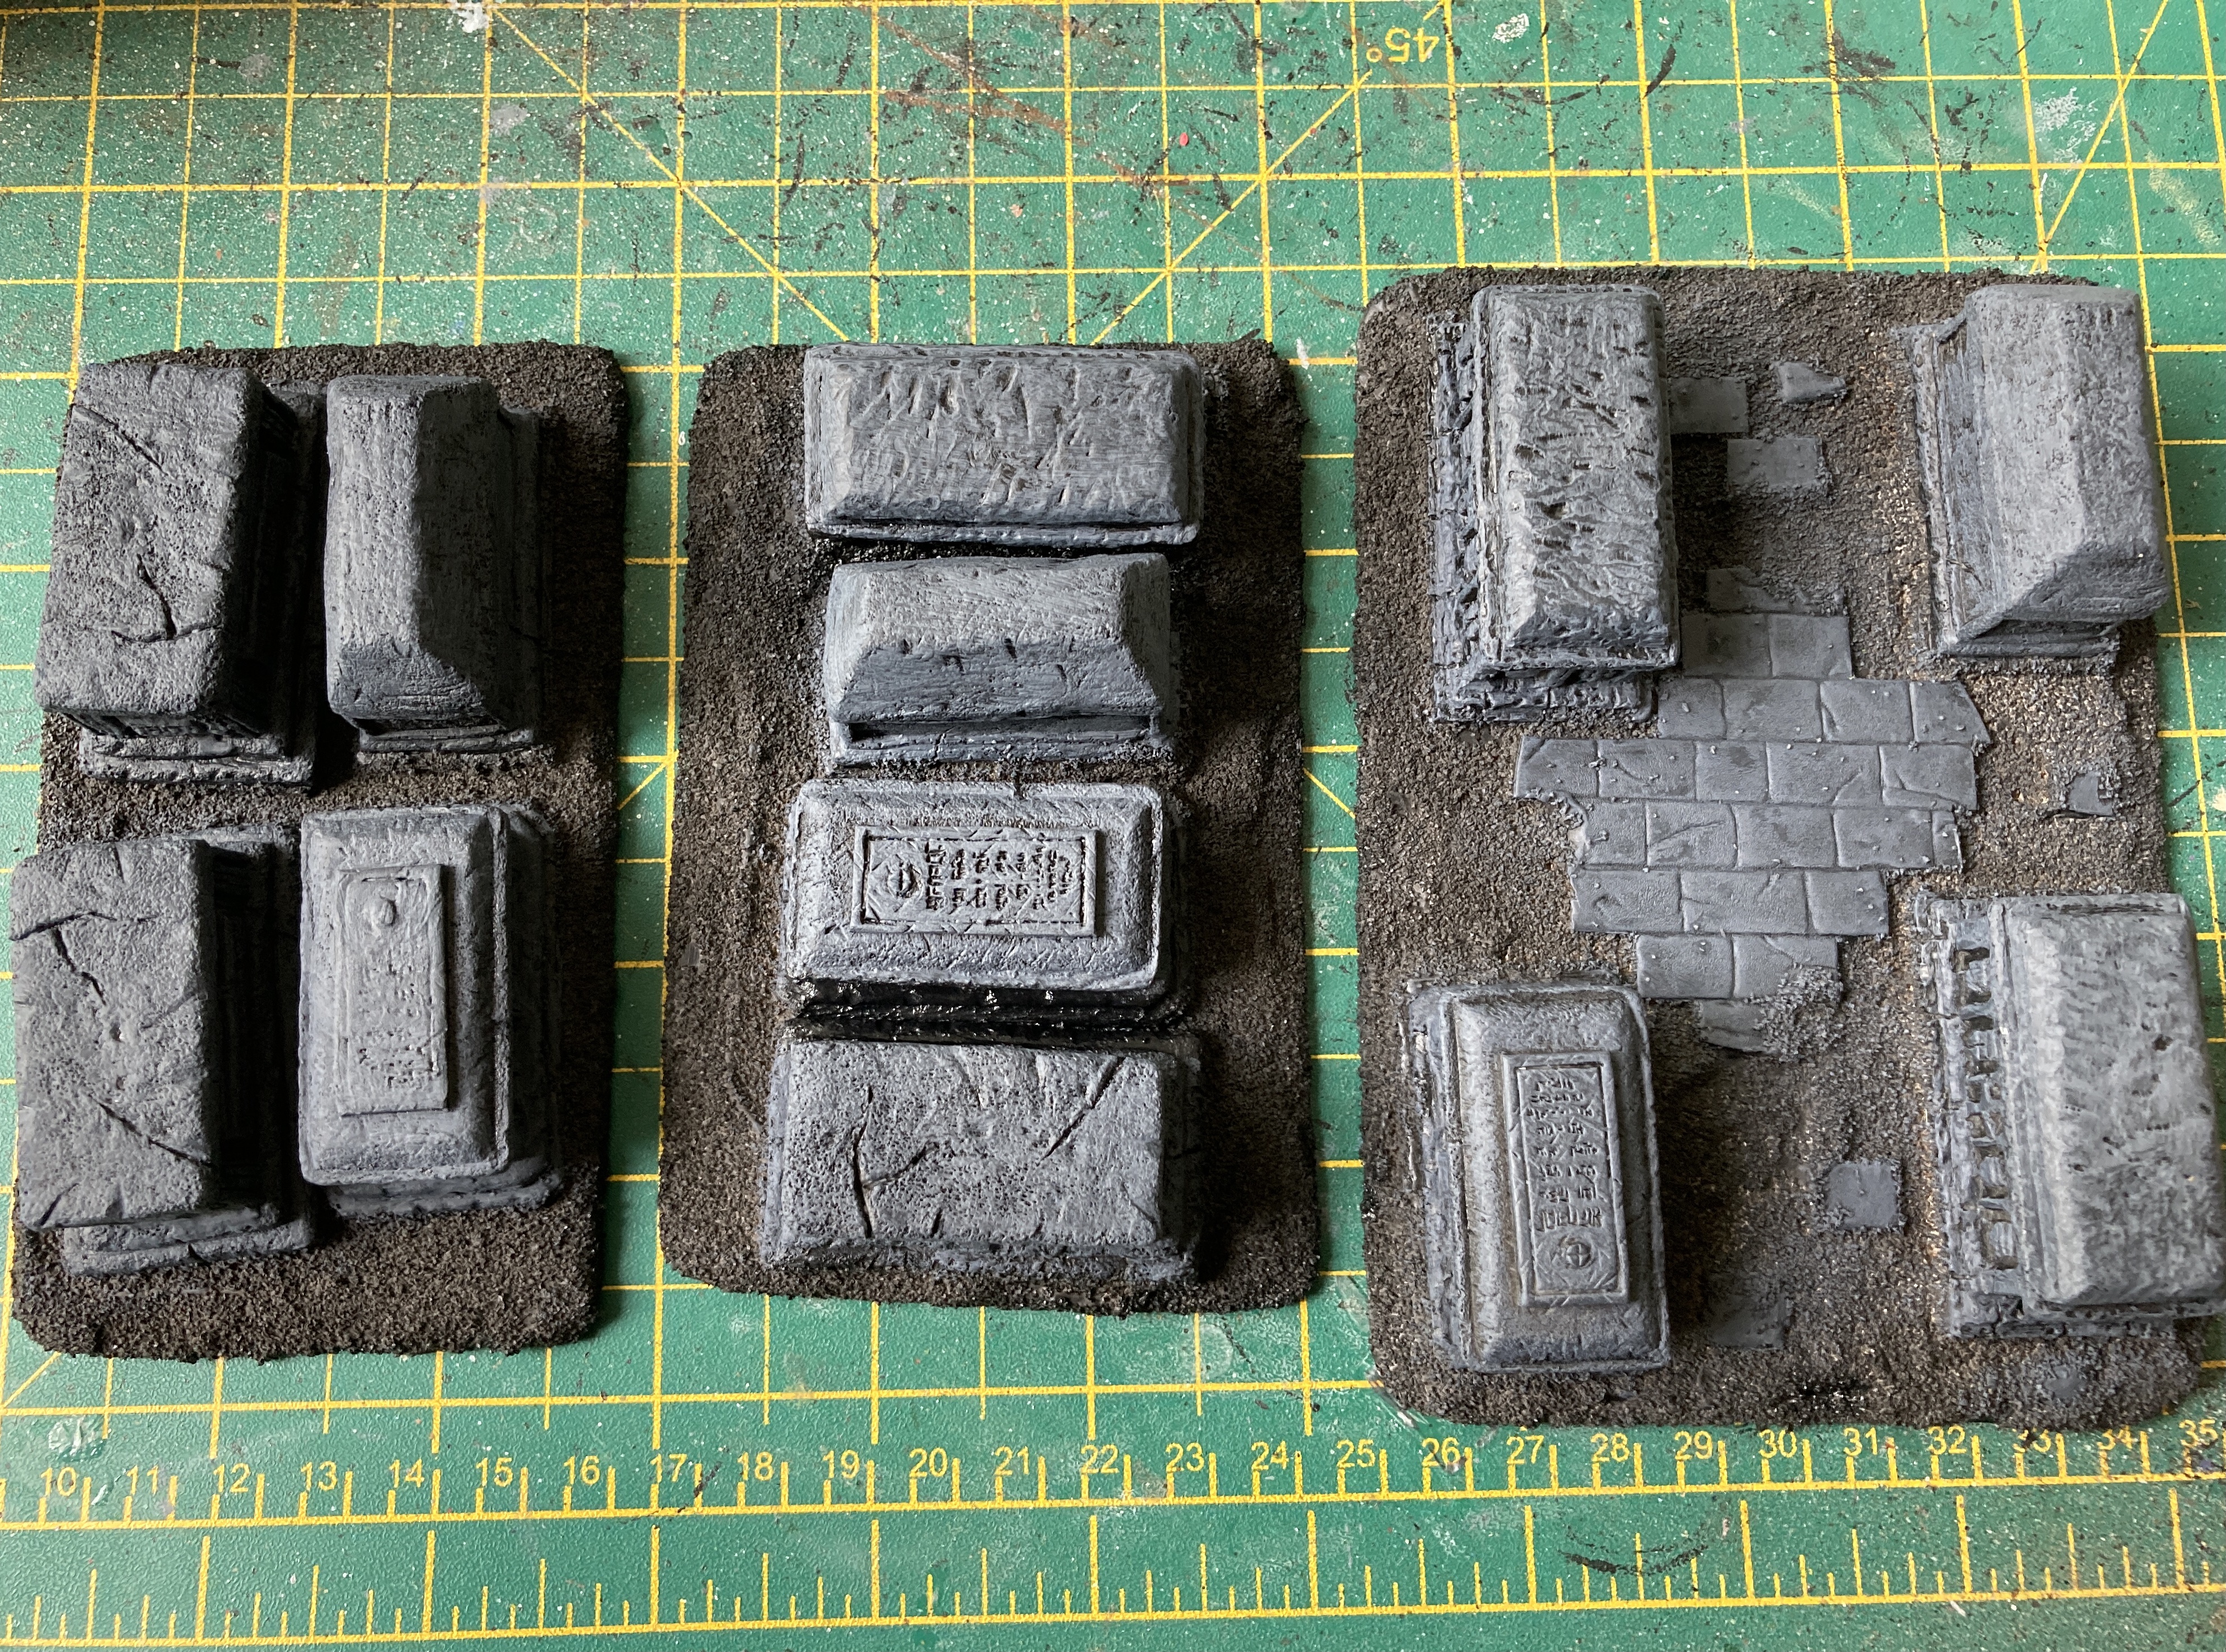
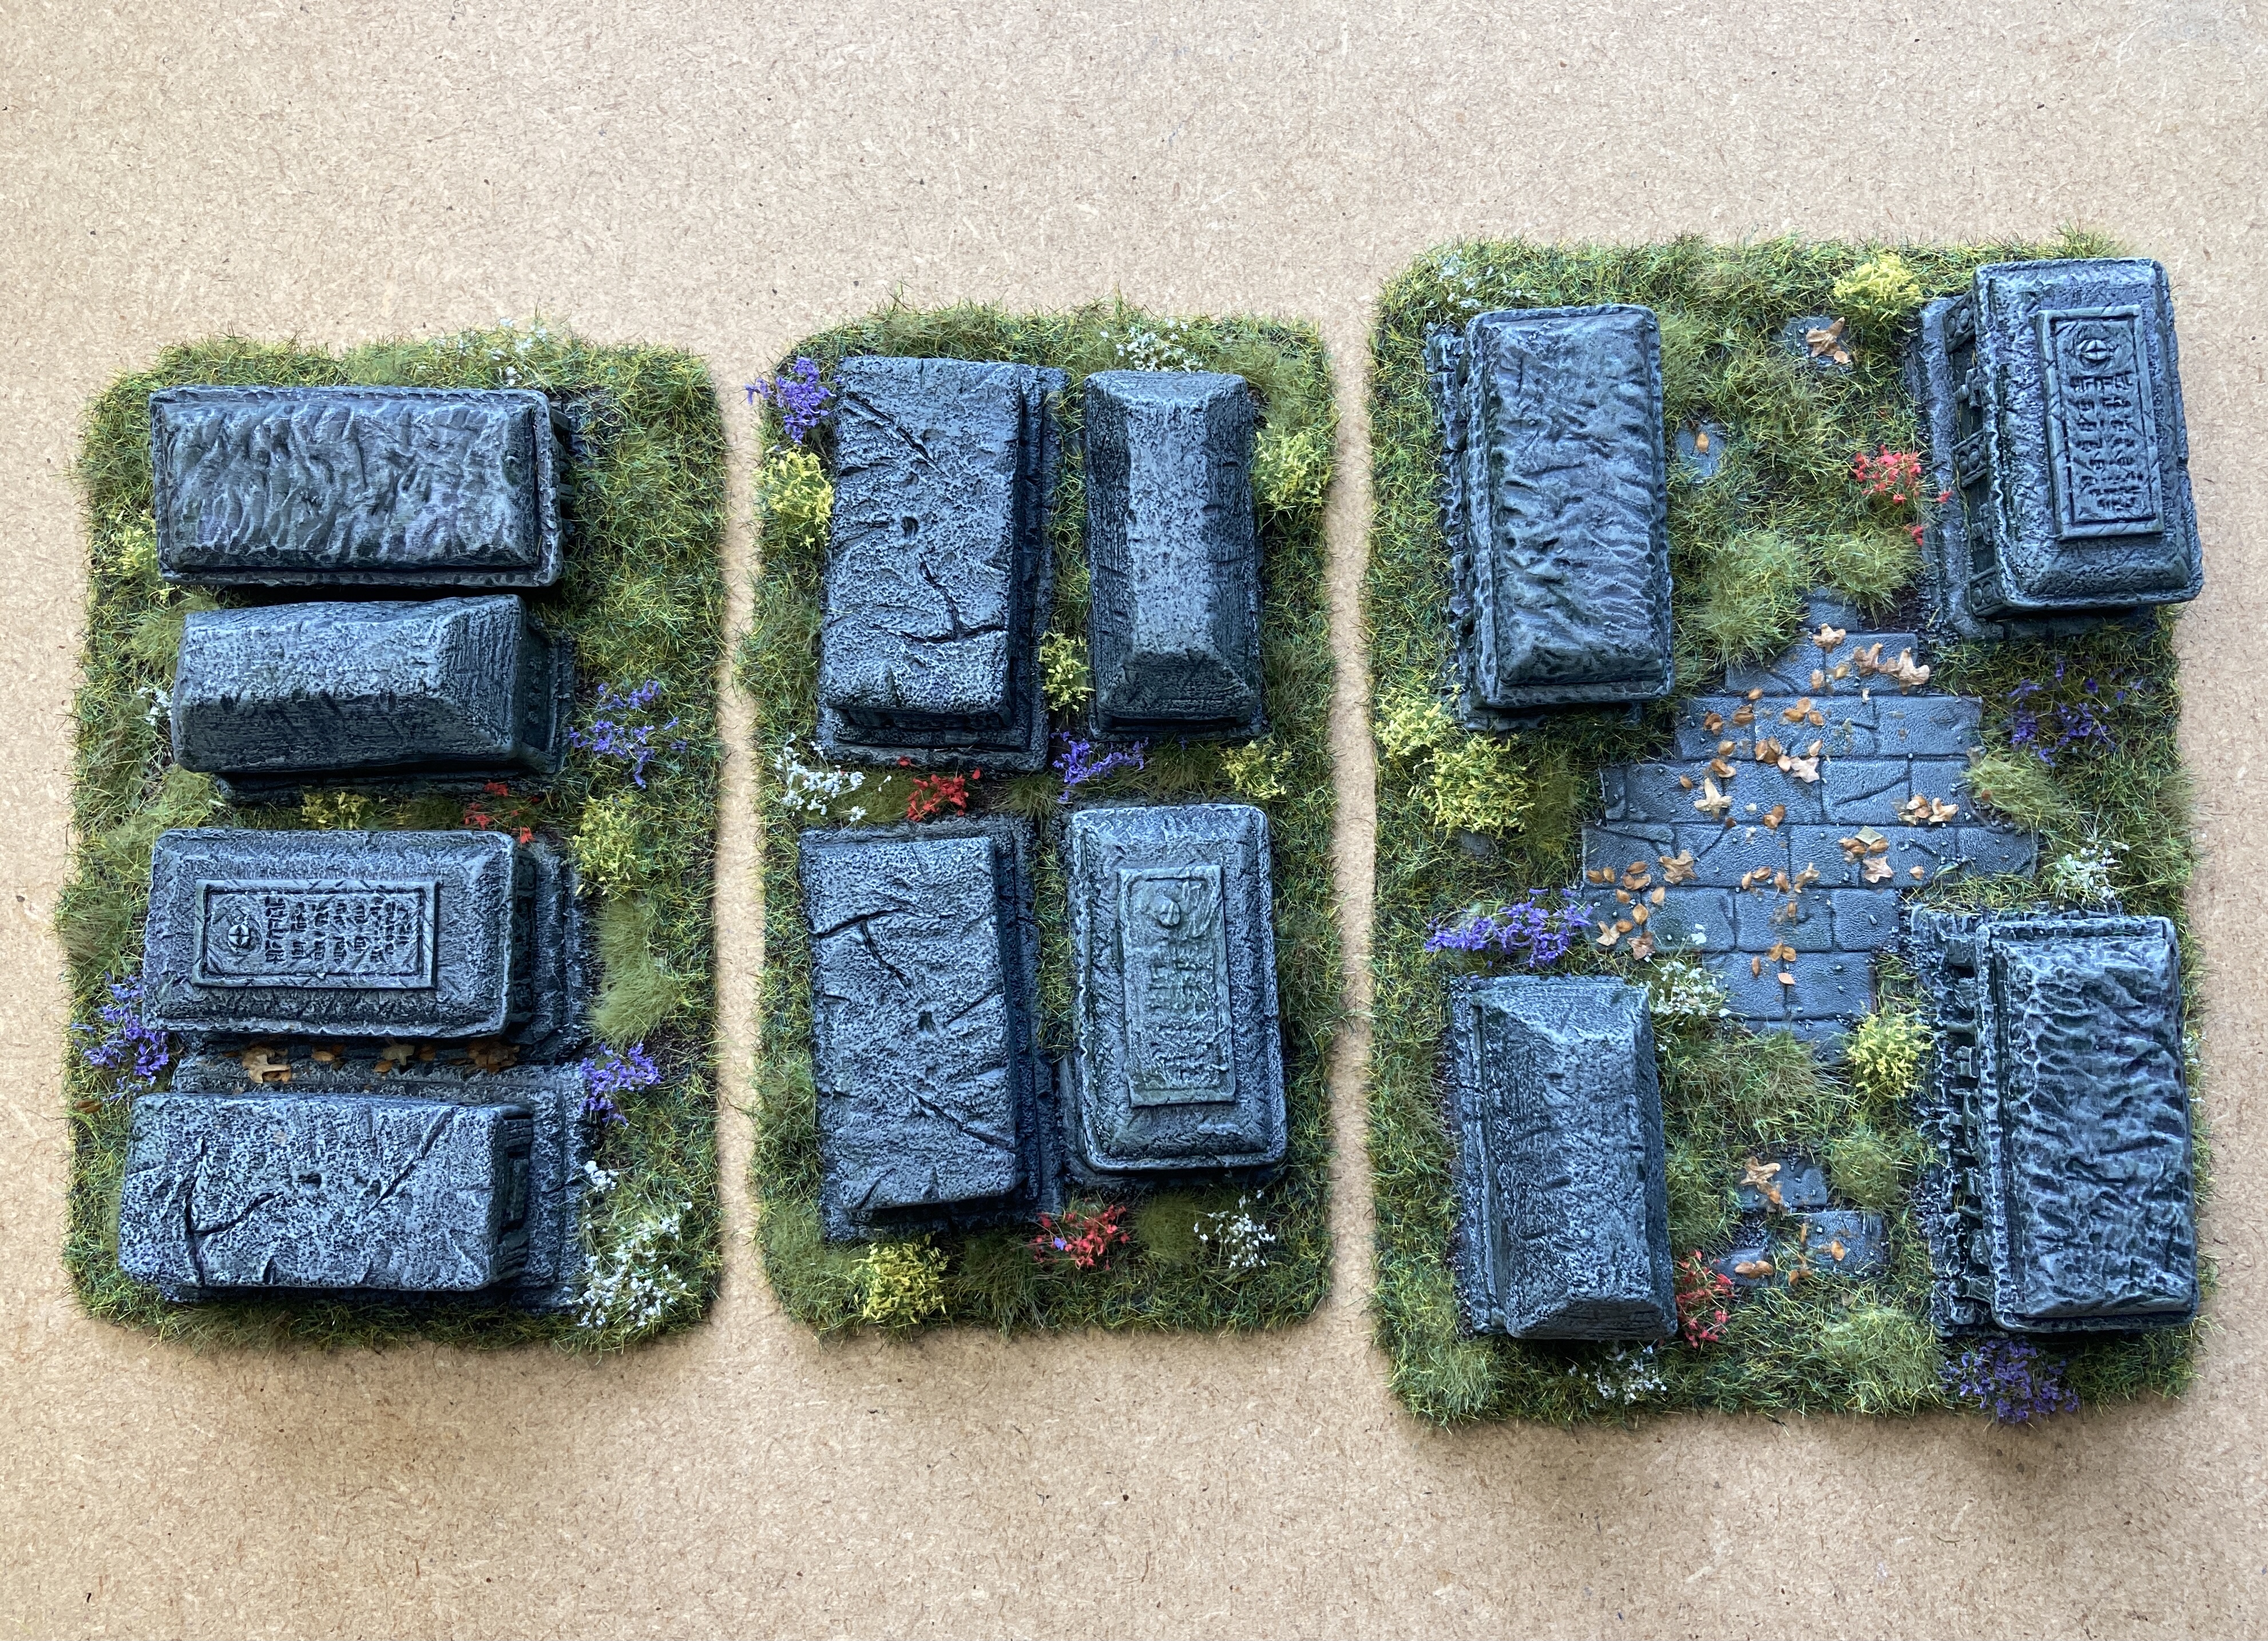
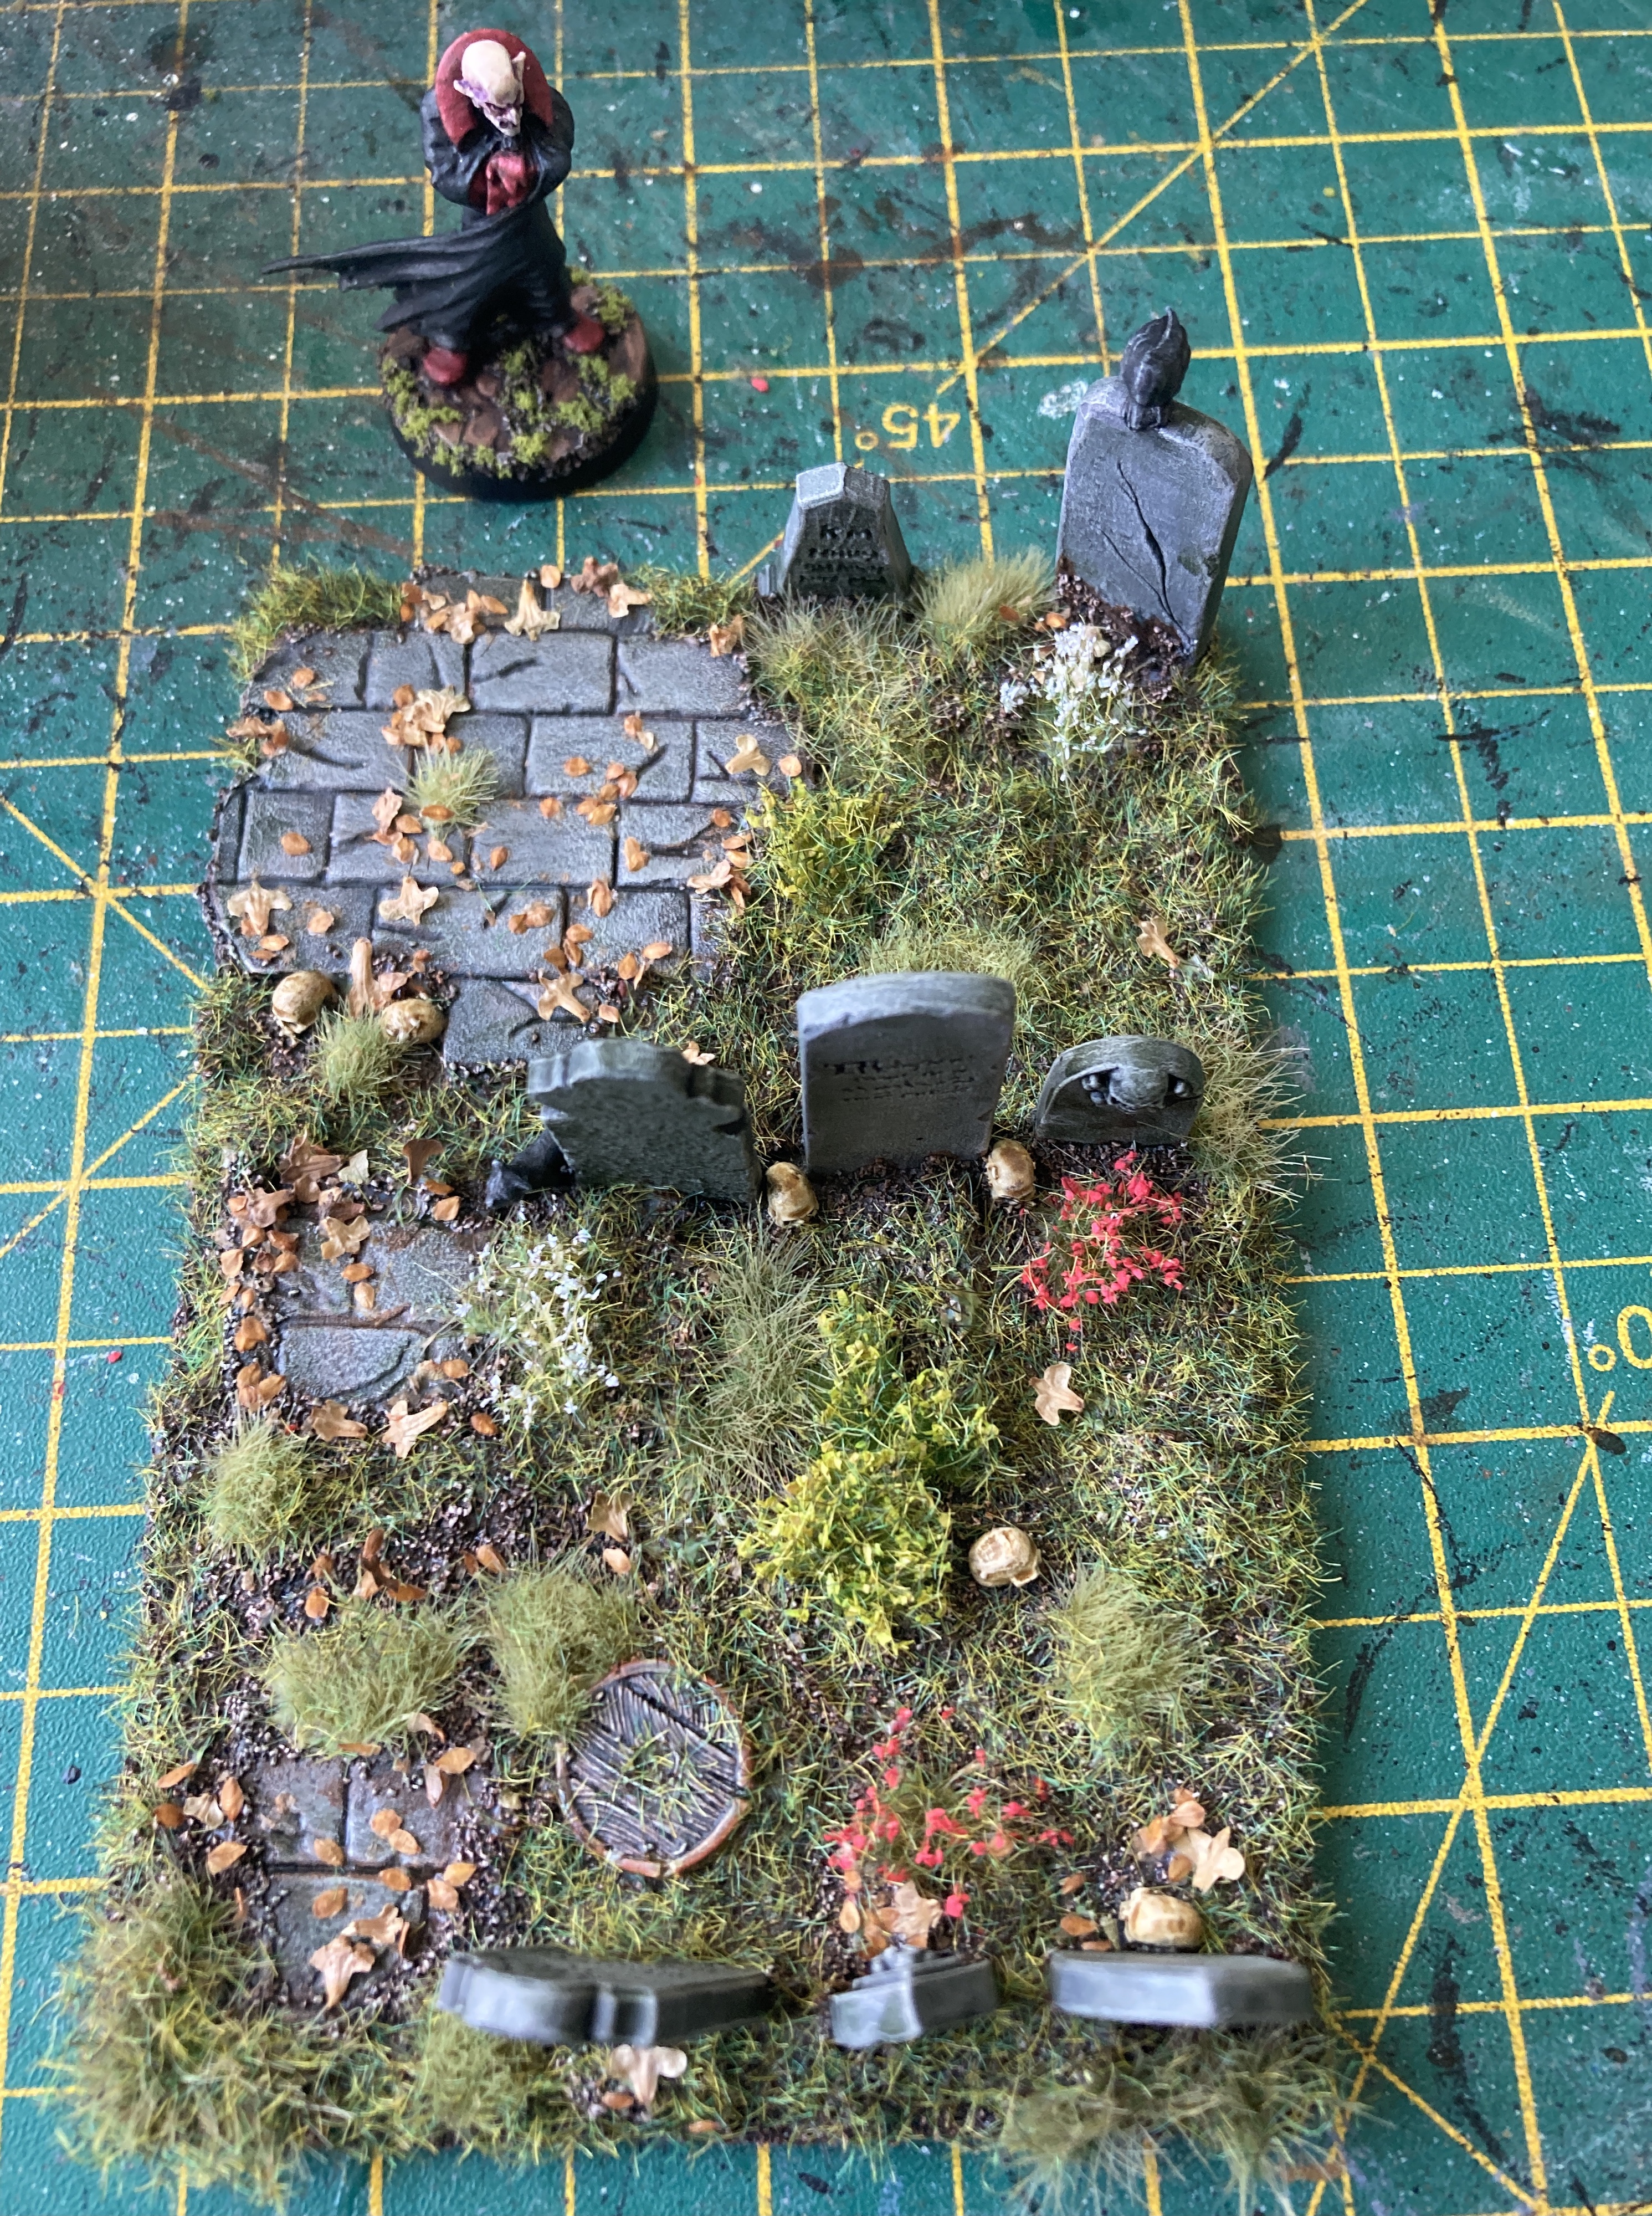
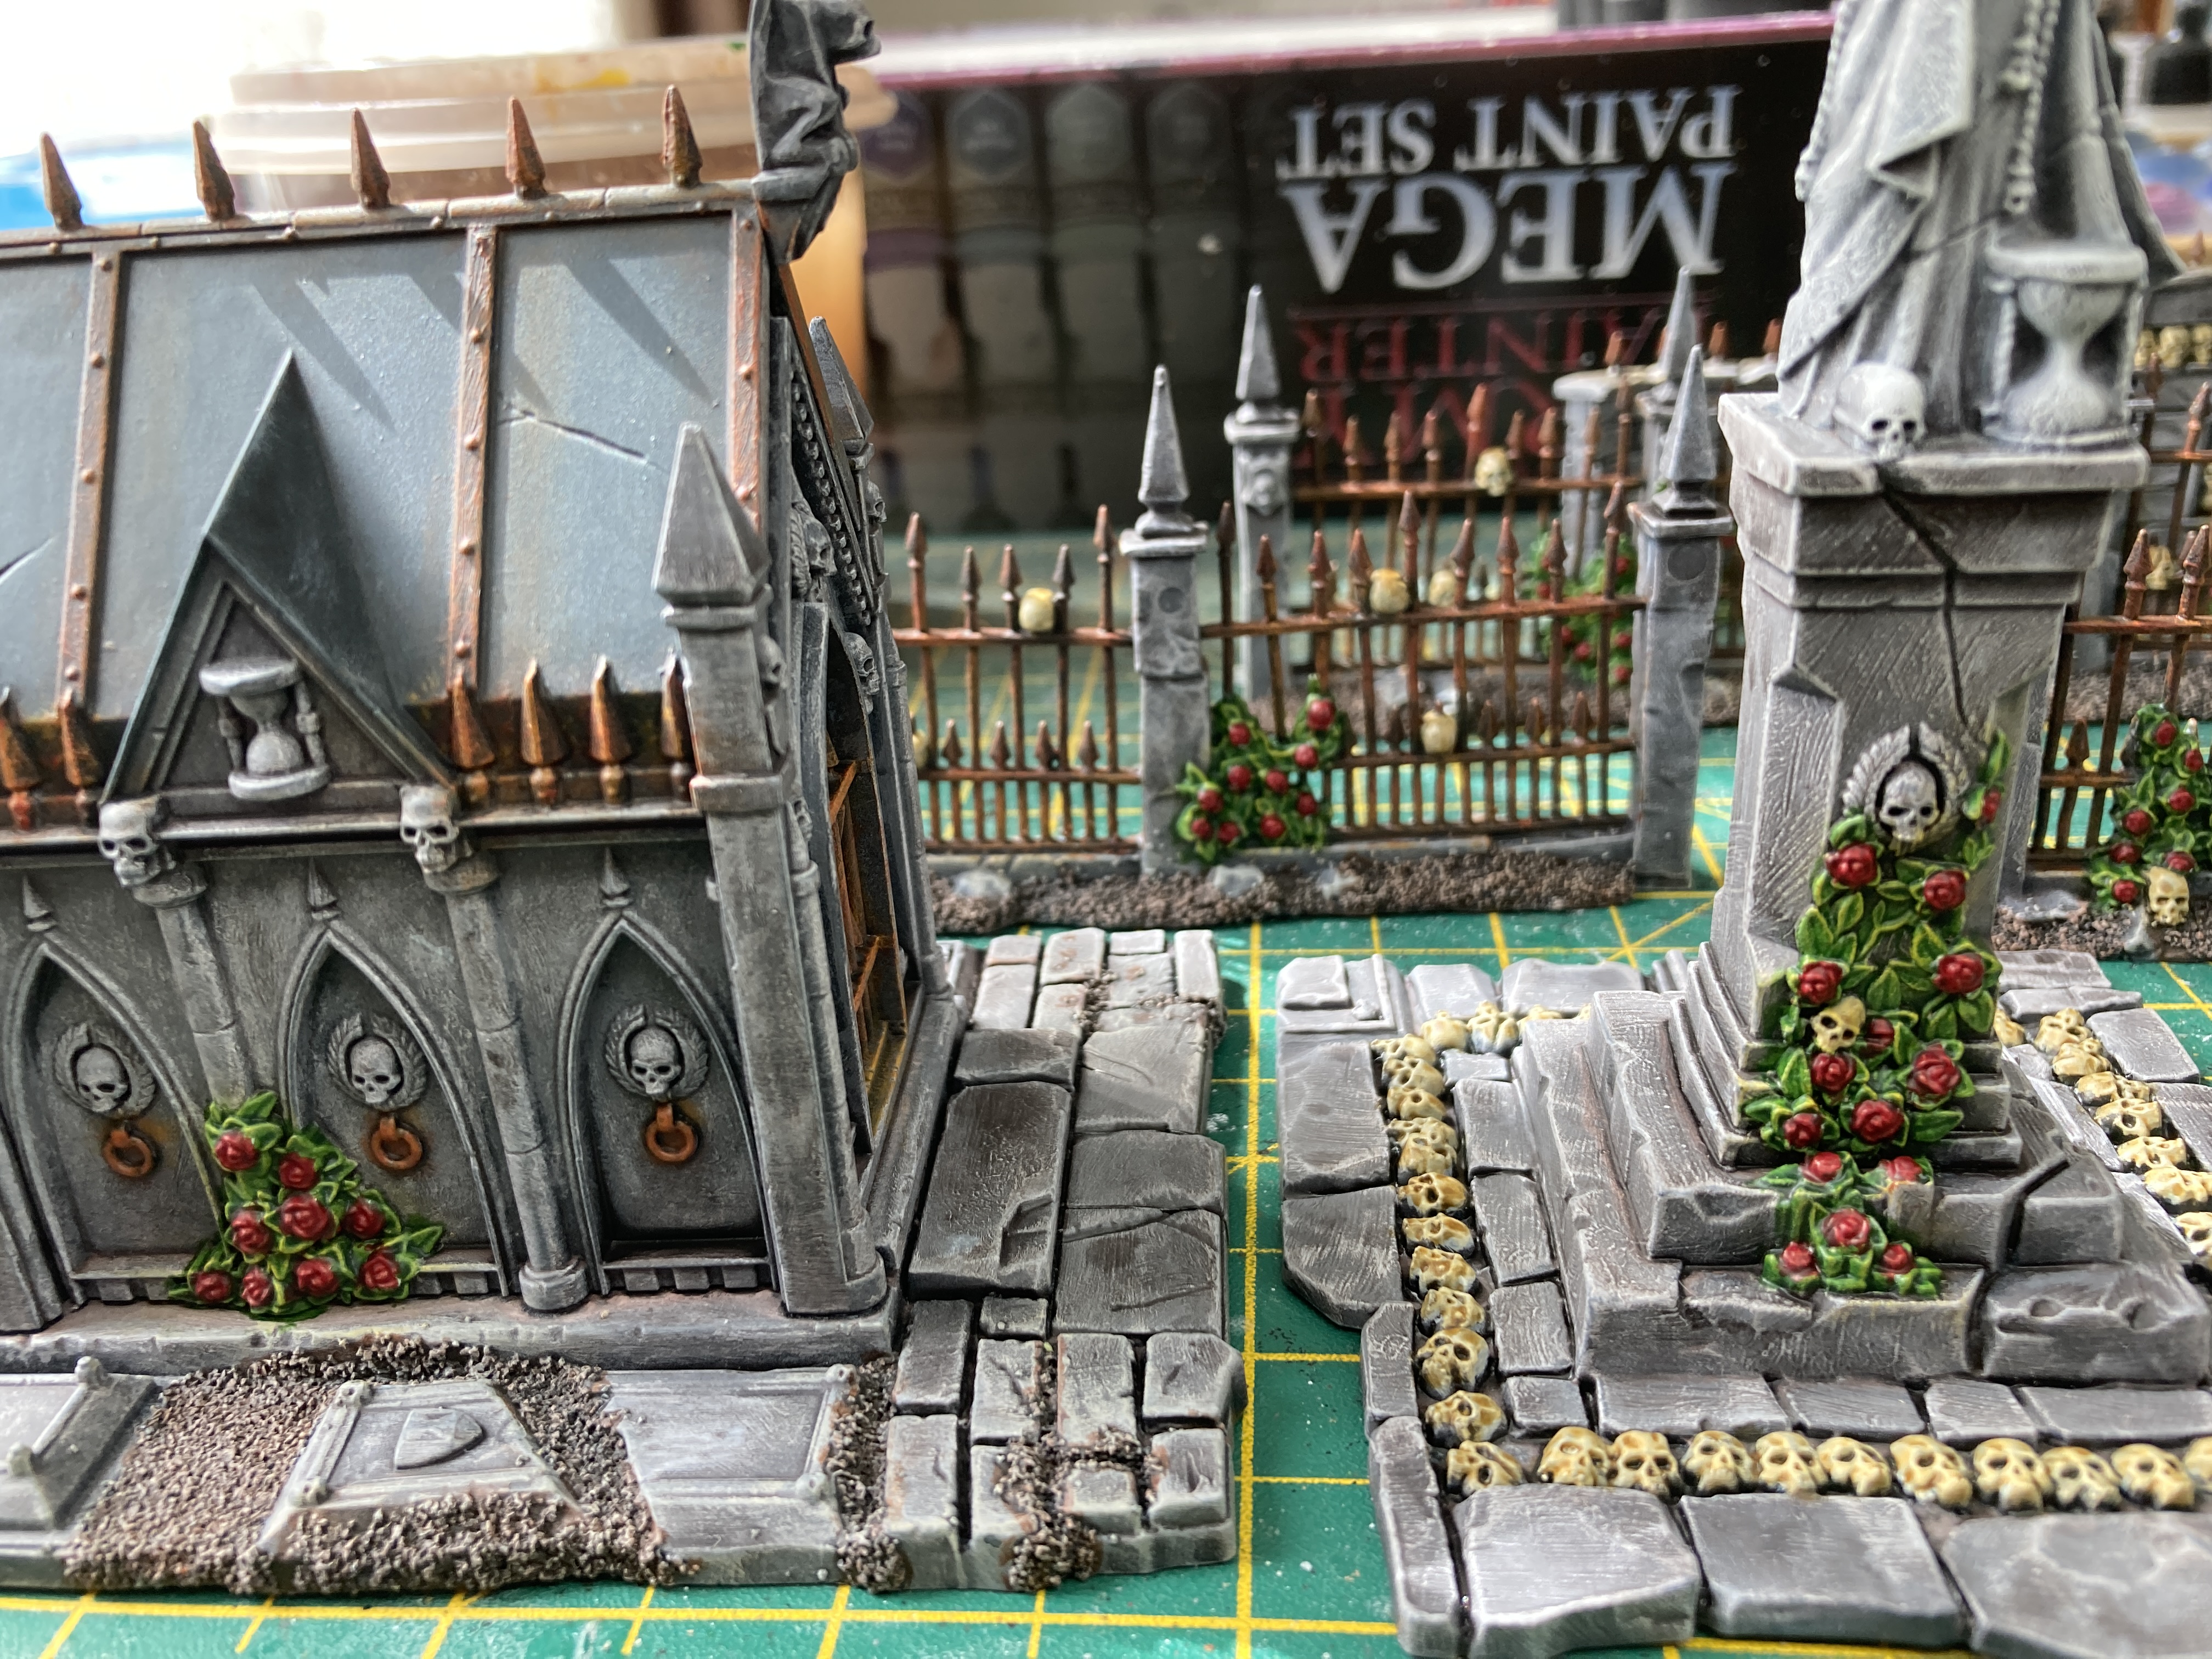
Tombstones

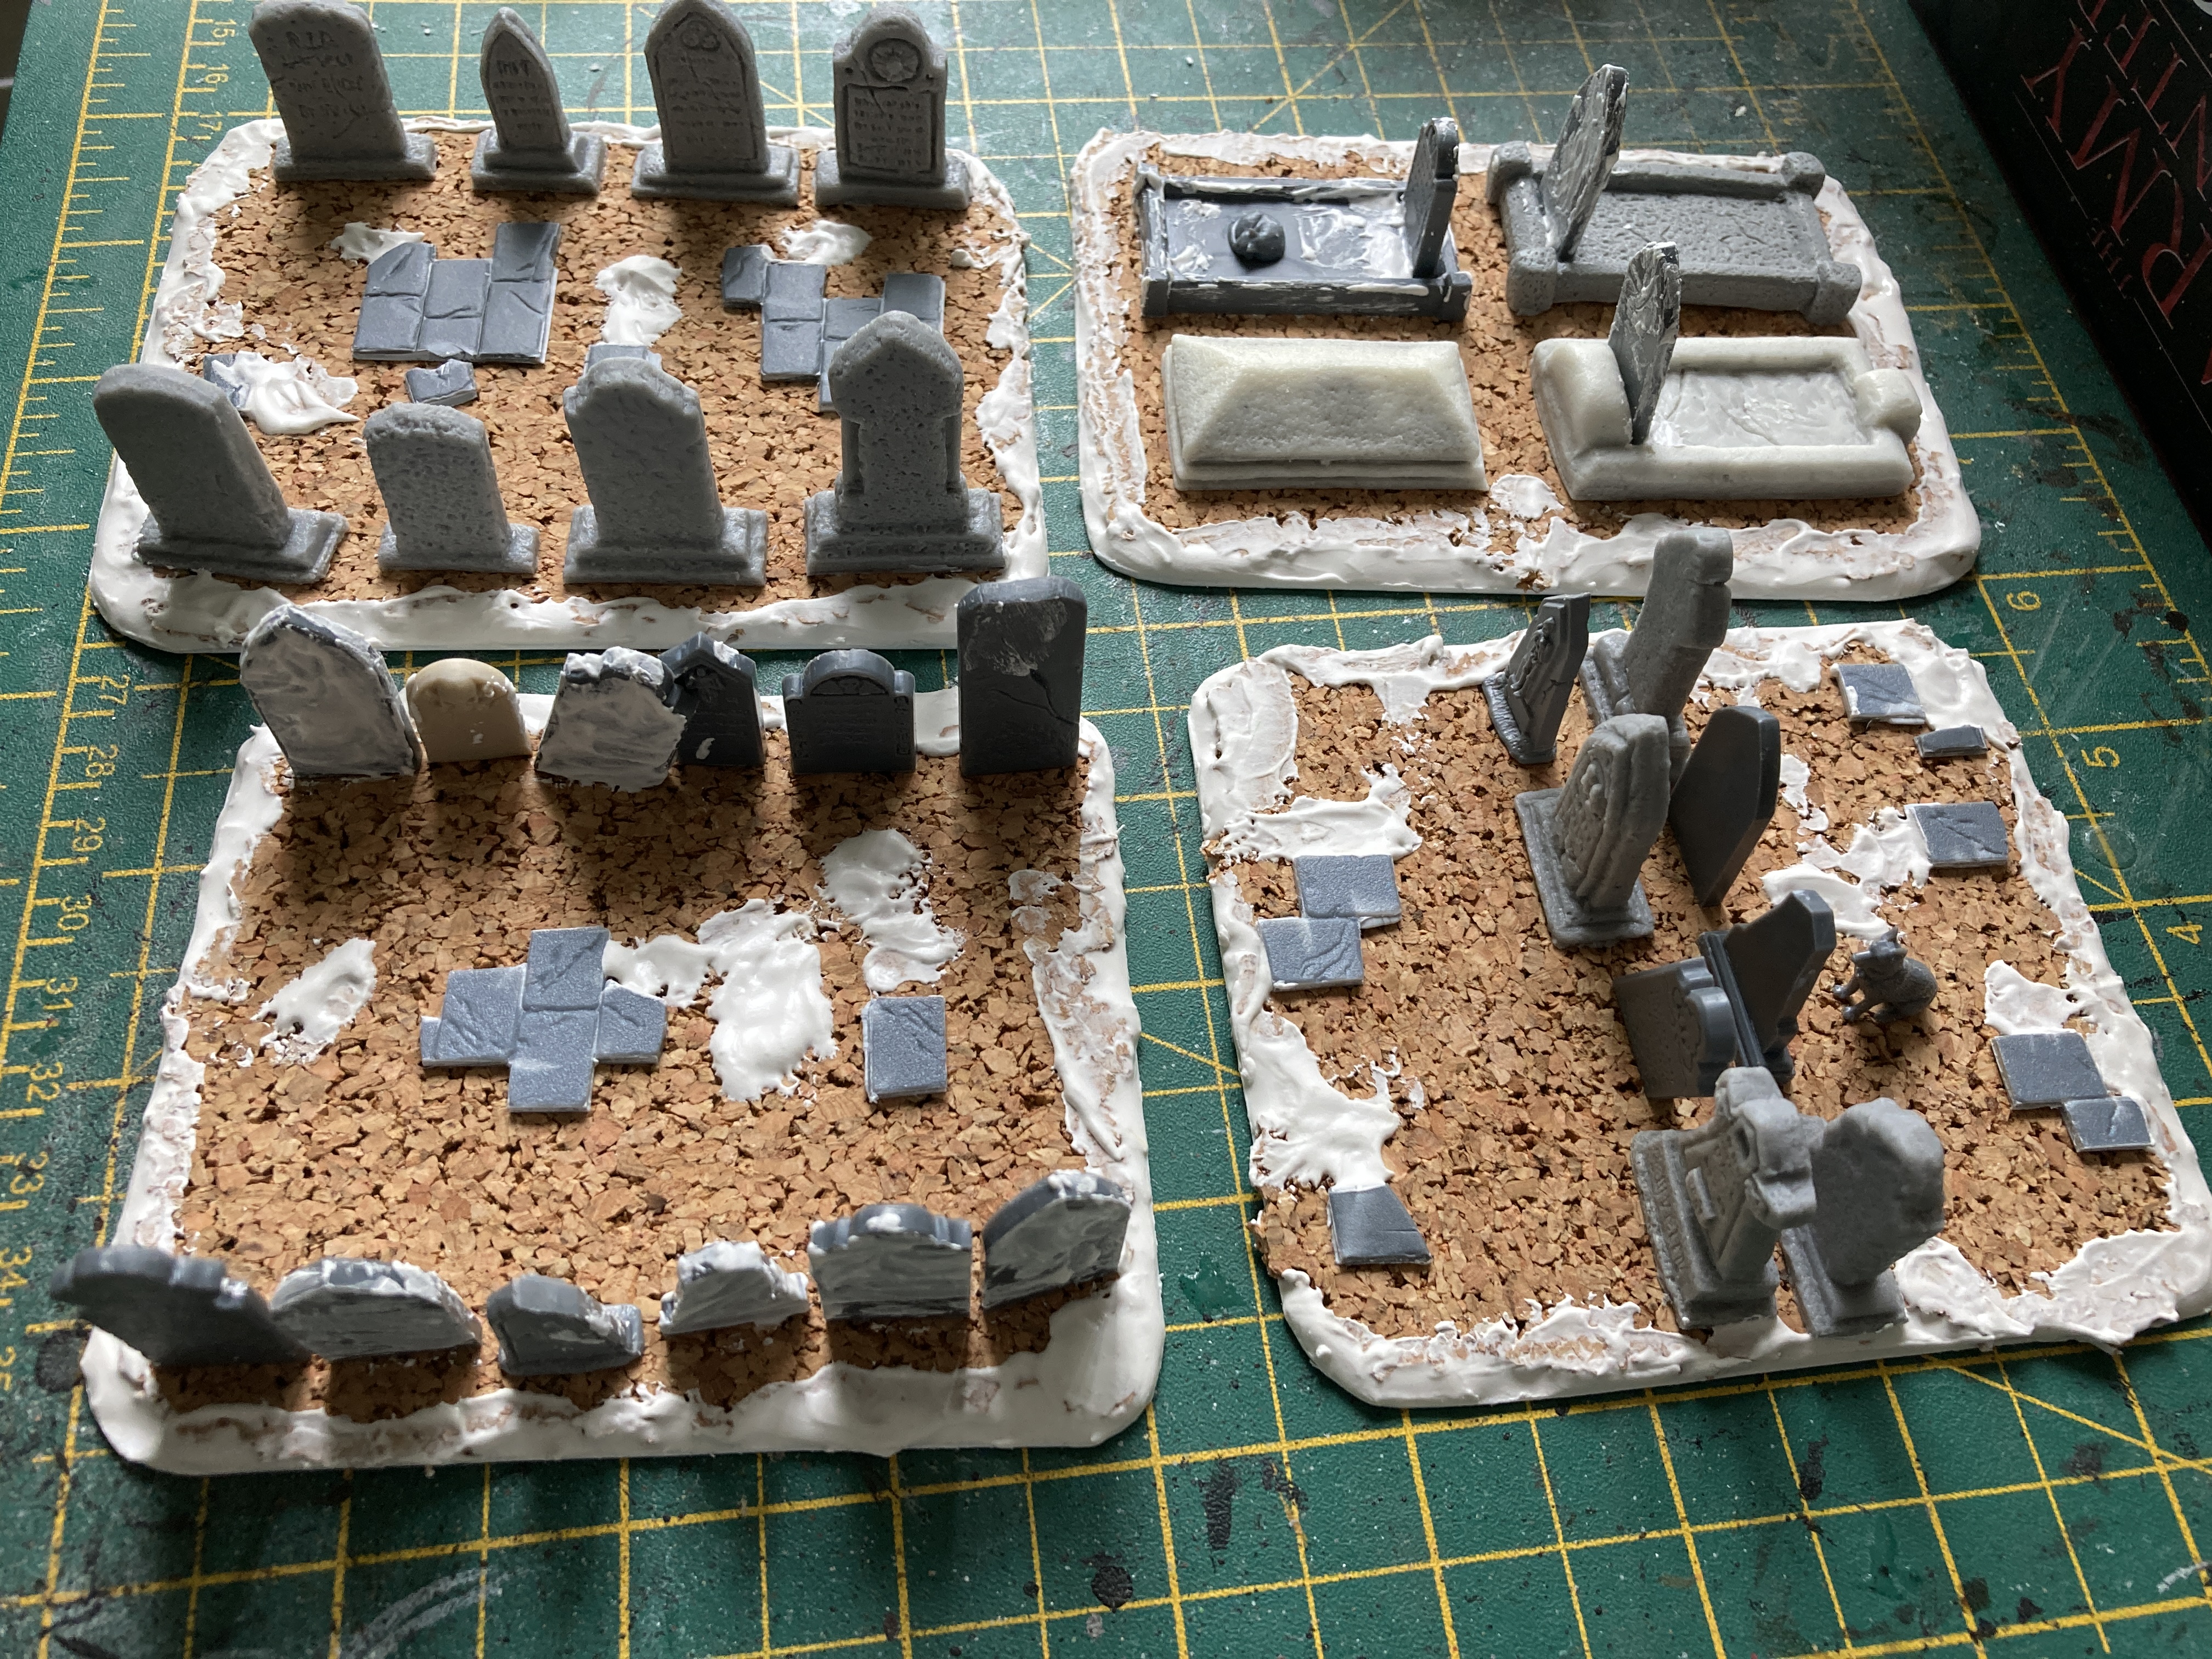
Now that the test piece is complete it’s time to work on a few more pieces incorporating what I’ve learnt. For starters I thought I’d use the Debris Of War tombstones to make three terrain pieces. These will be good to provide some cover from archery.
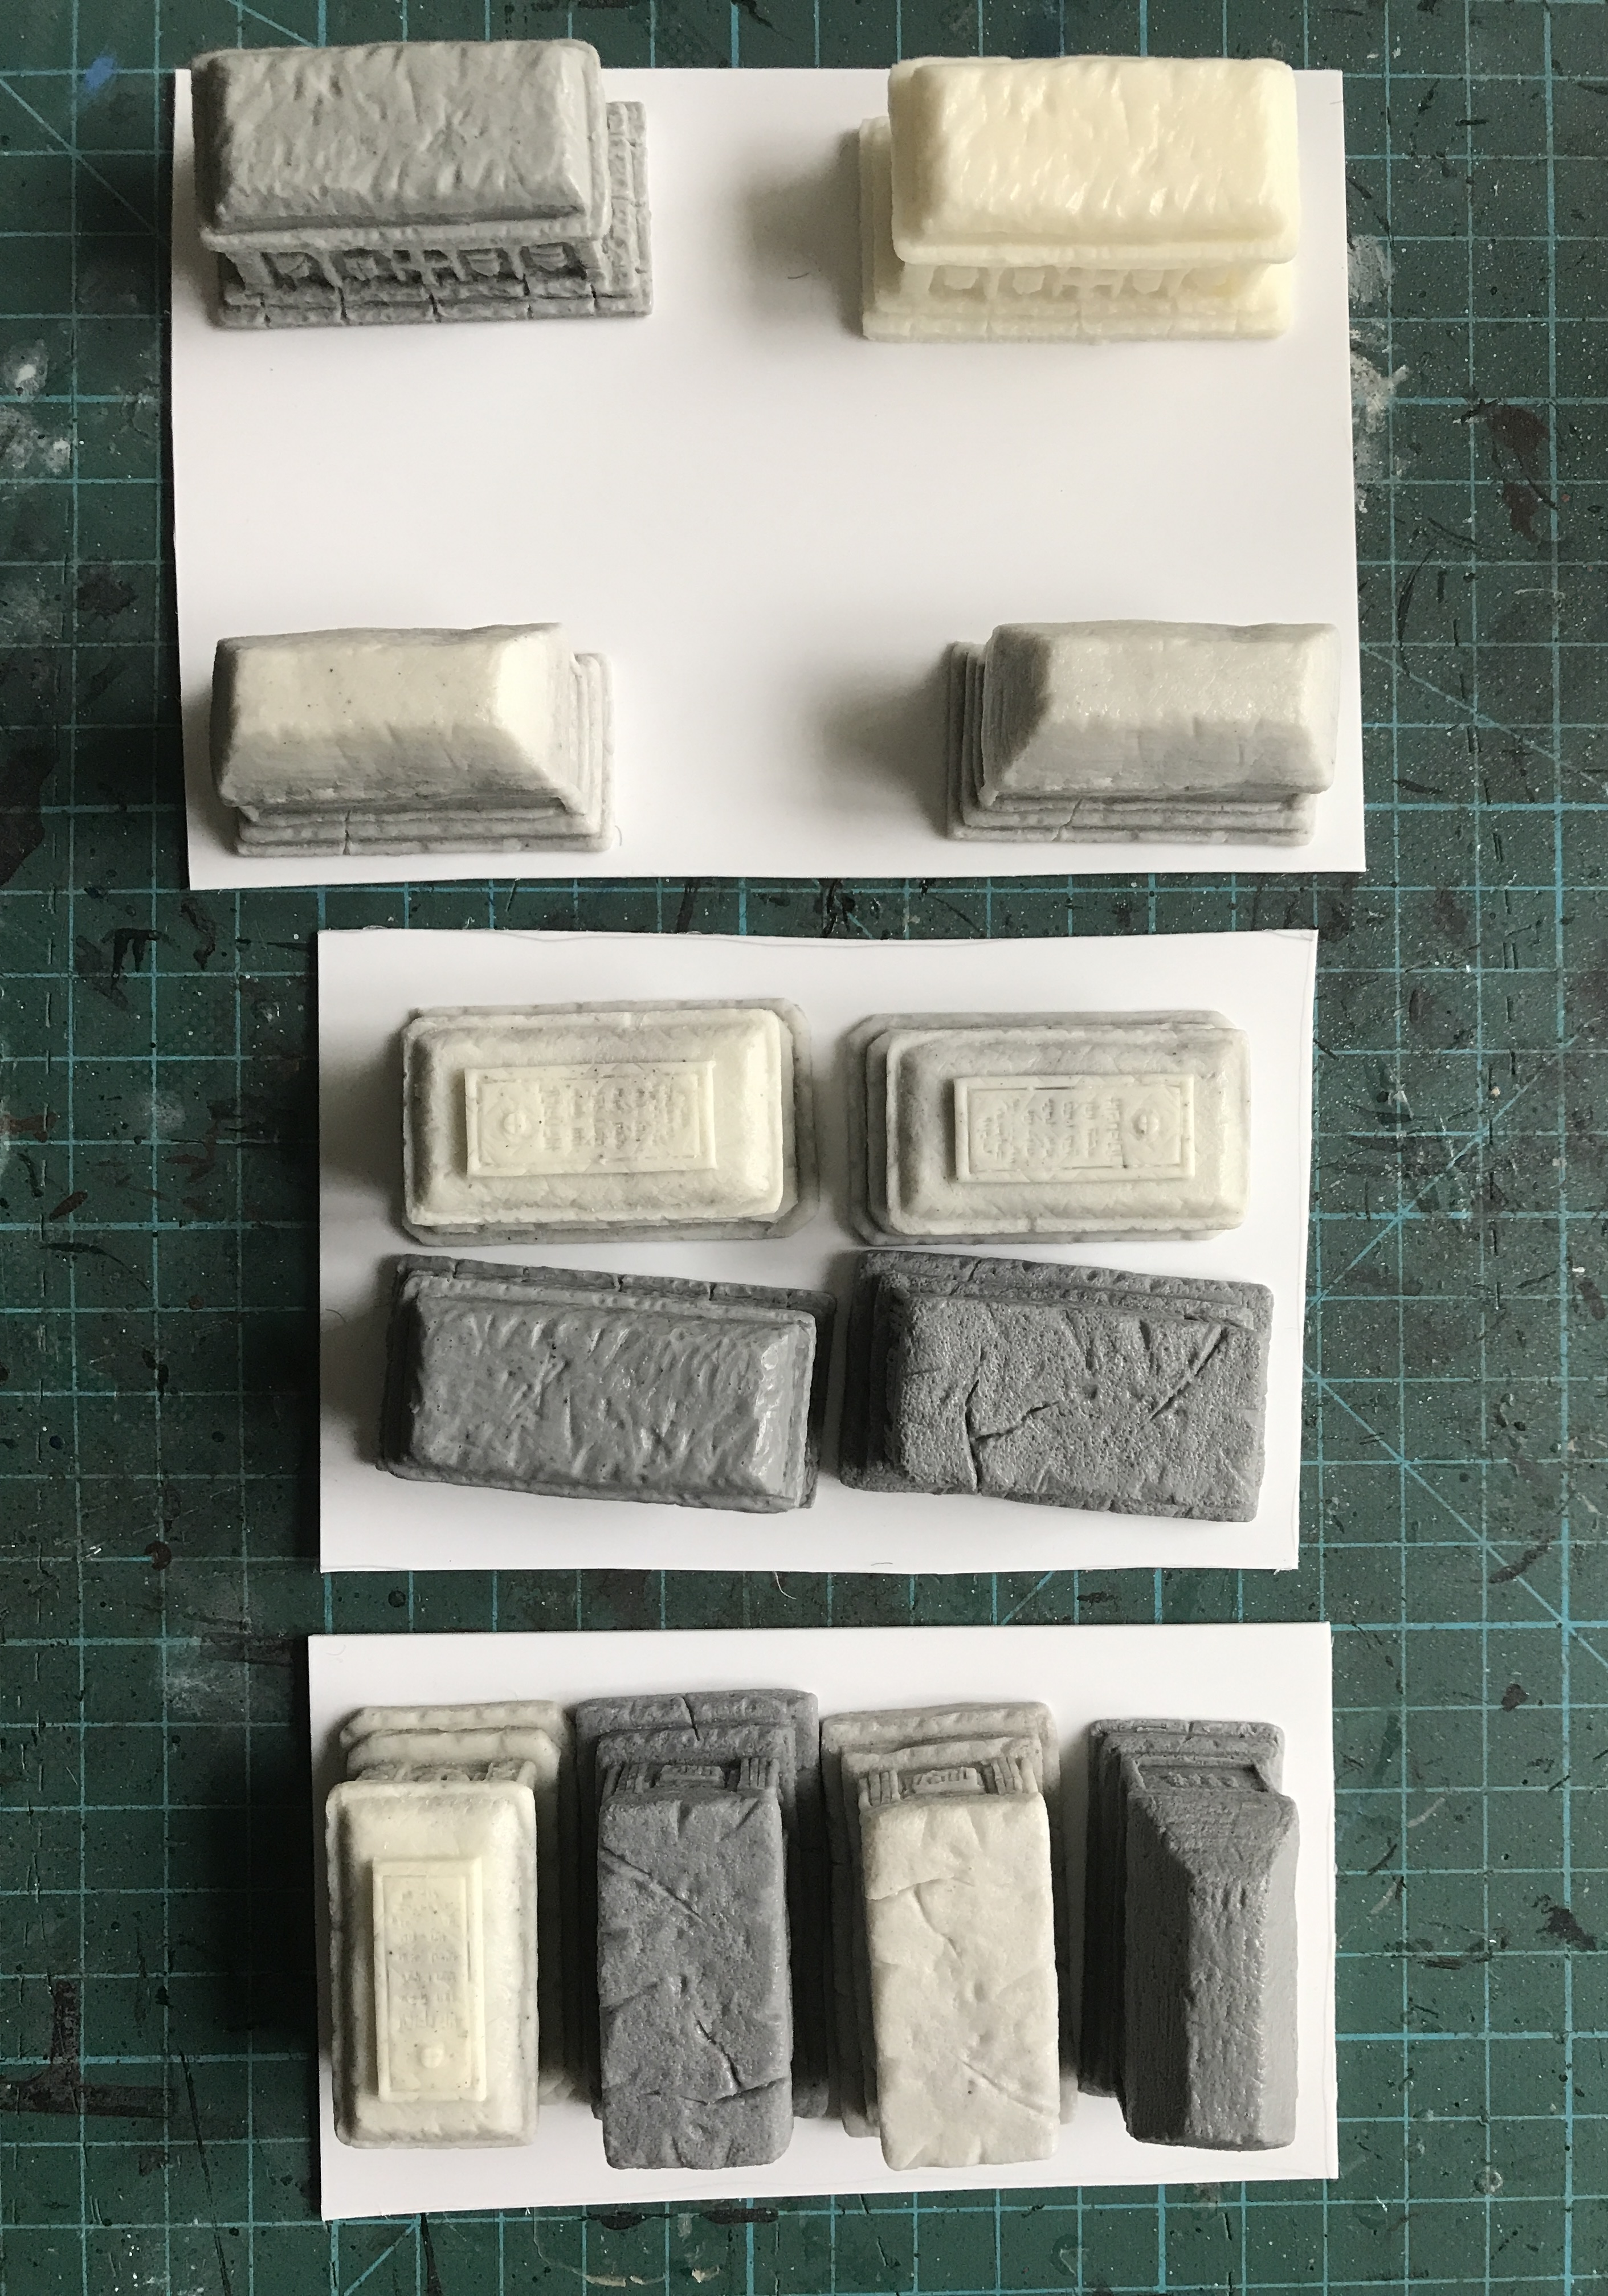
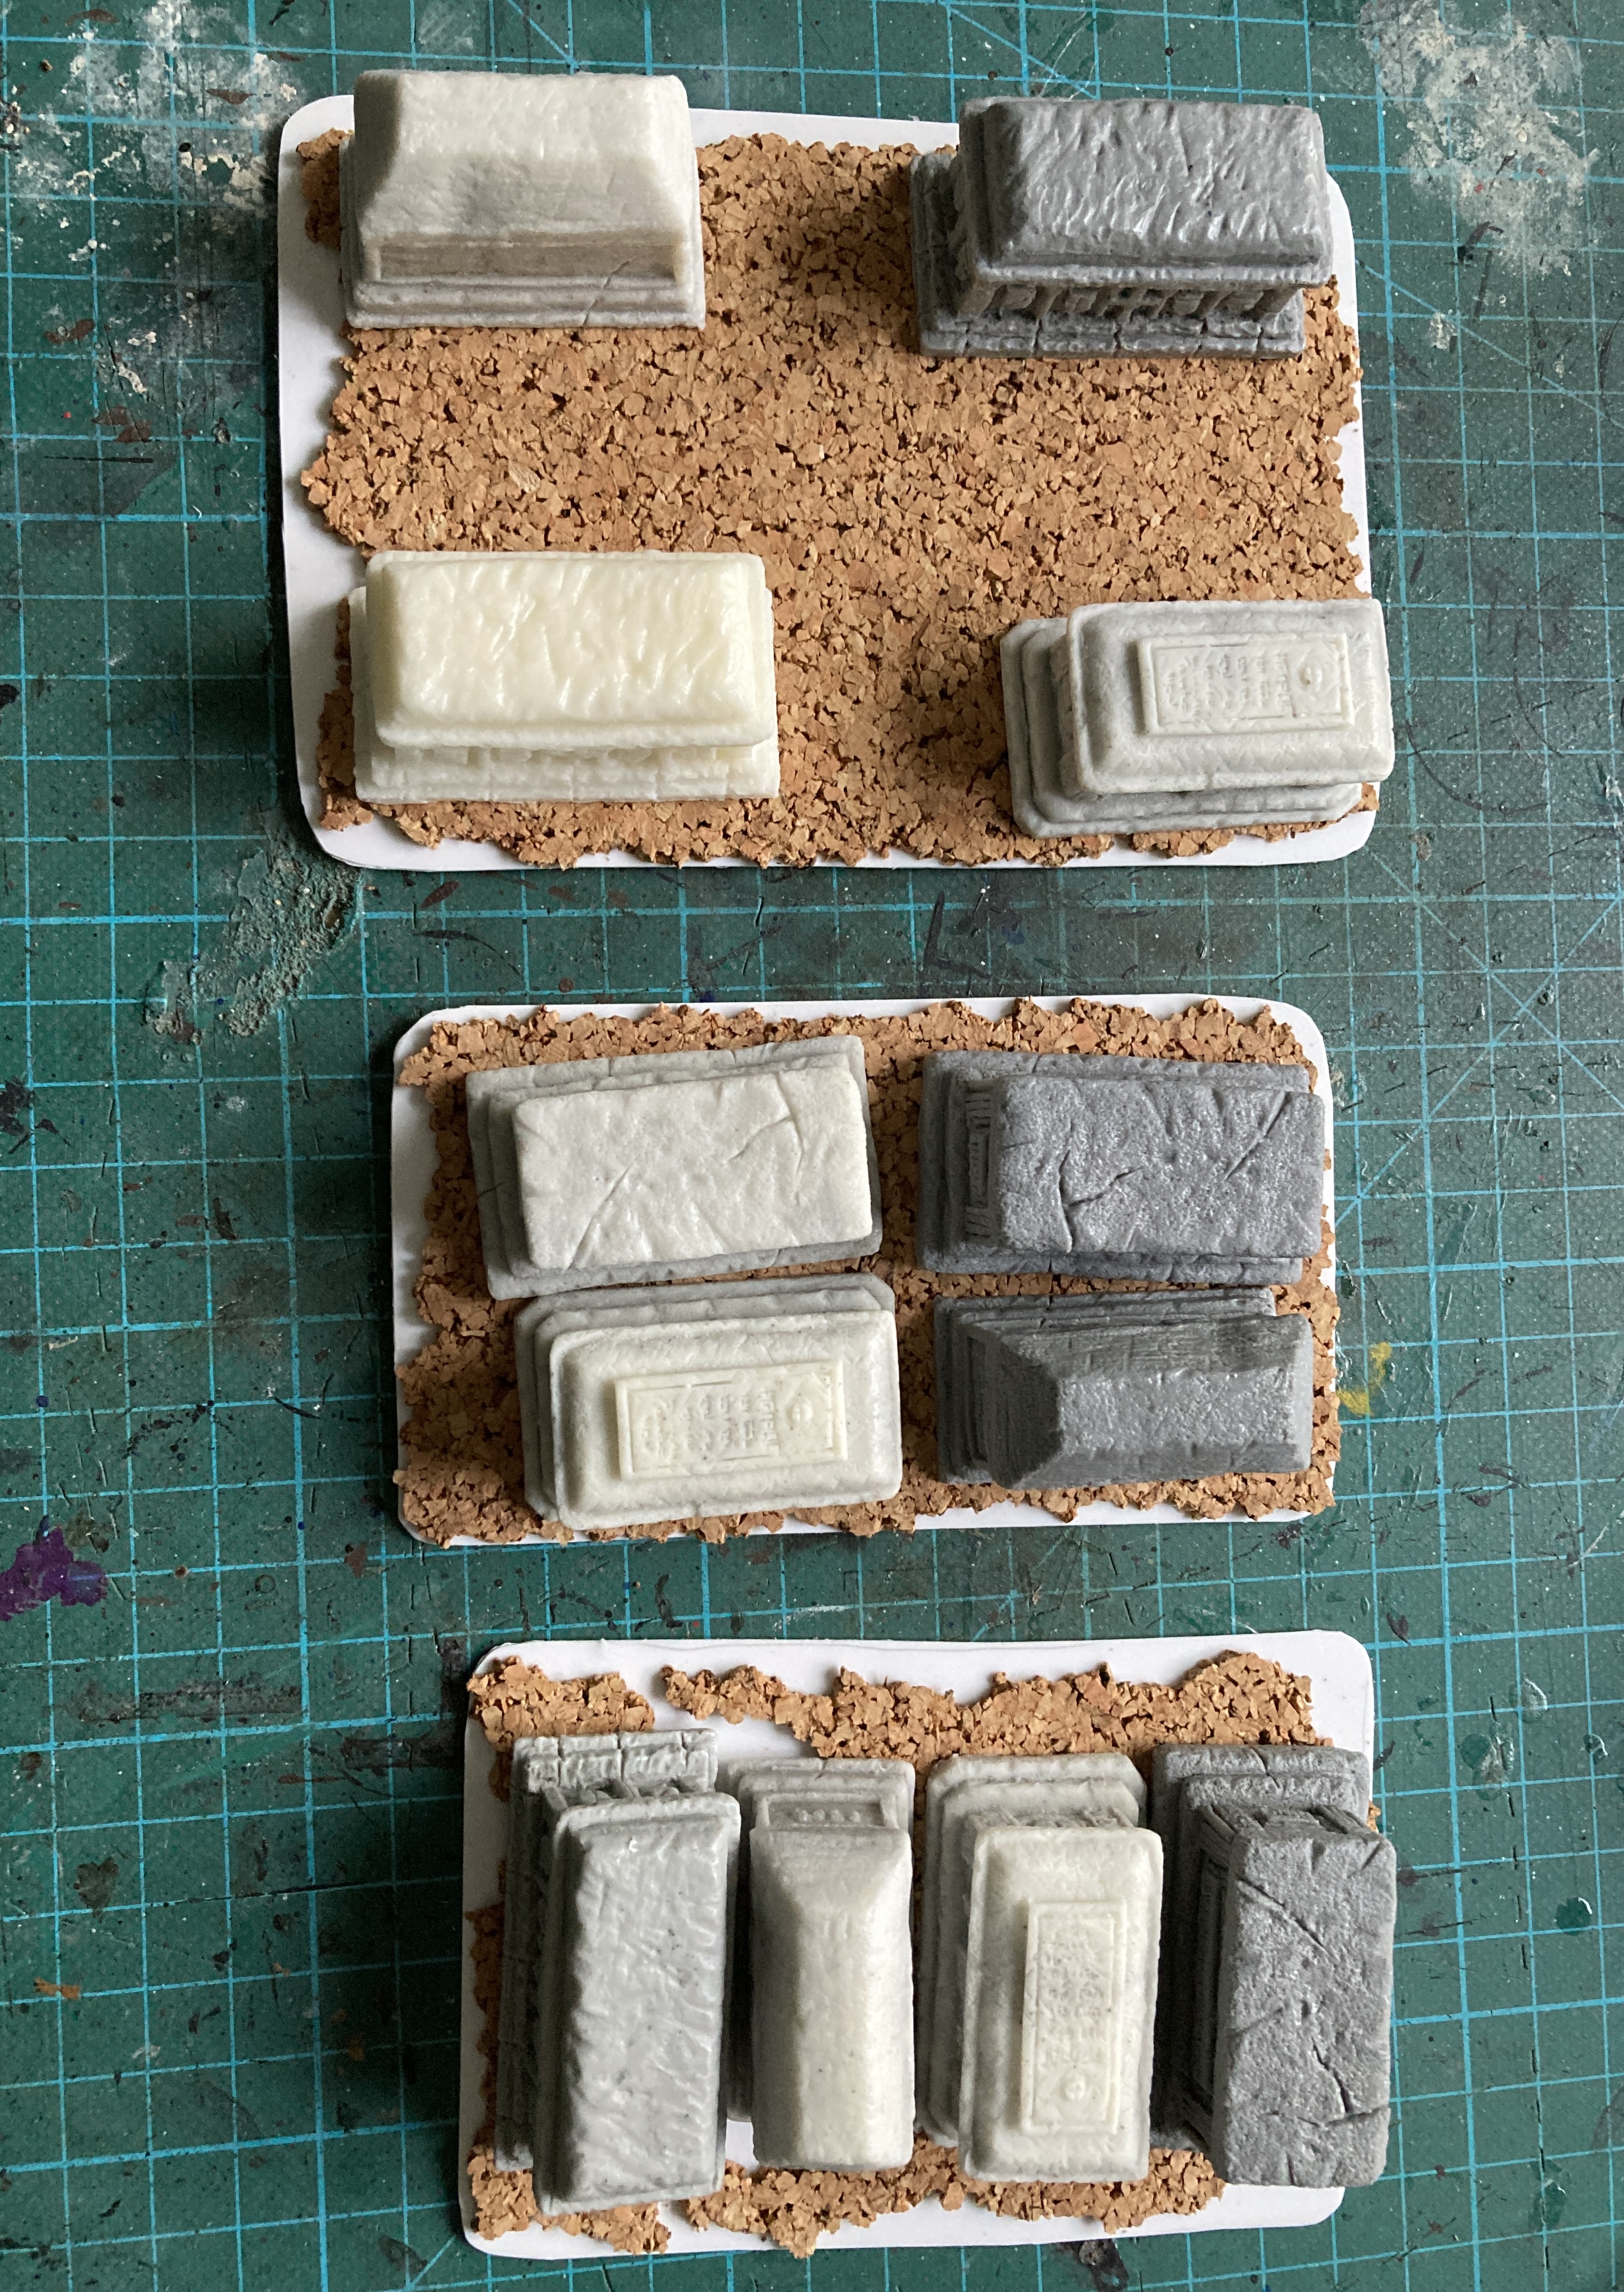
I built the three pieces in the same way as the test piece from the previous blog entry, but this time using thicker 1mm plasticard to prevent warping. This was still thin enough to cut with scissors.
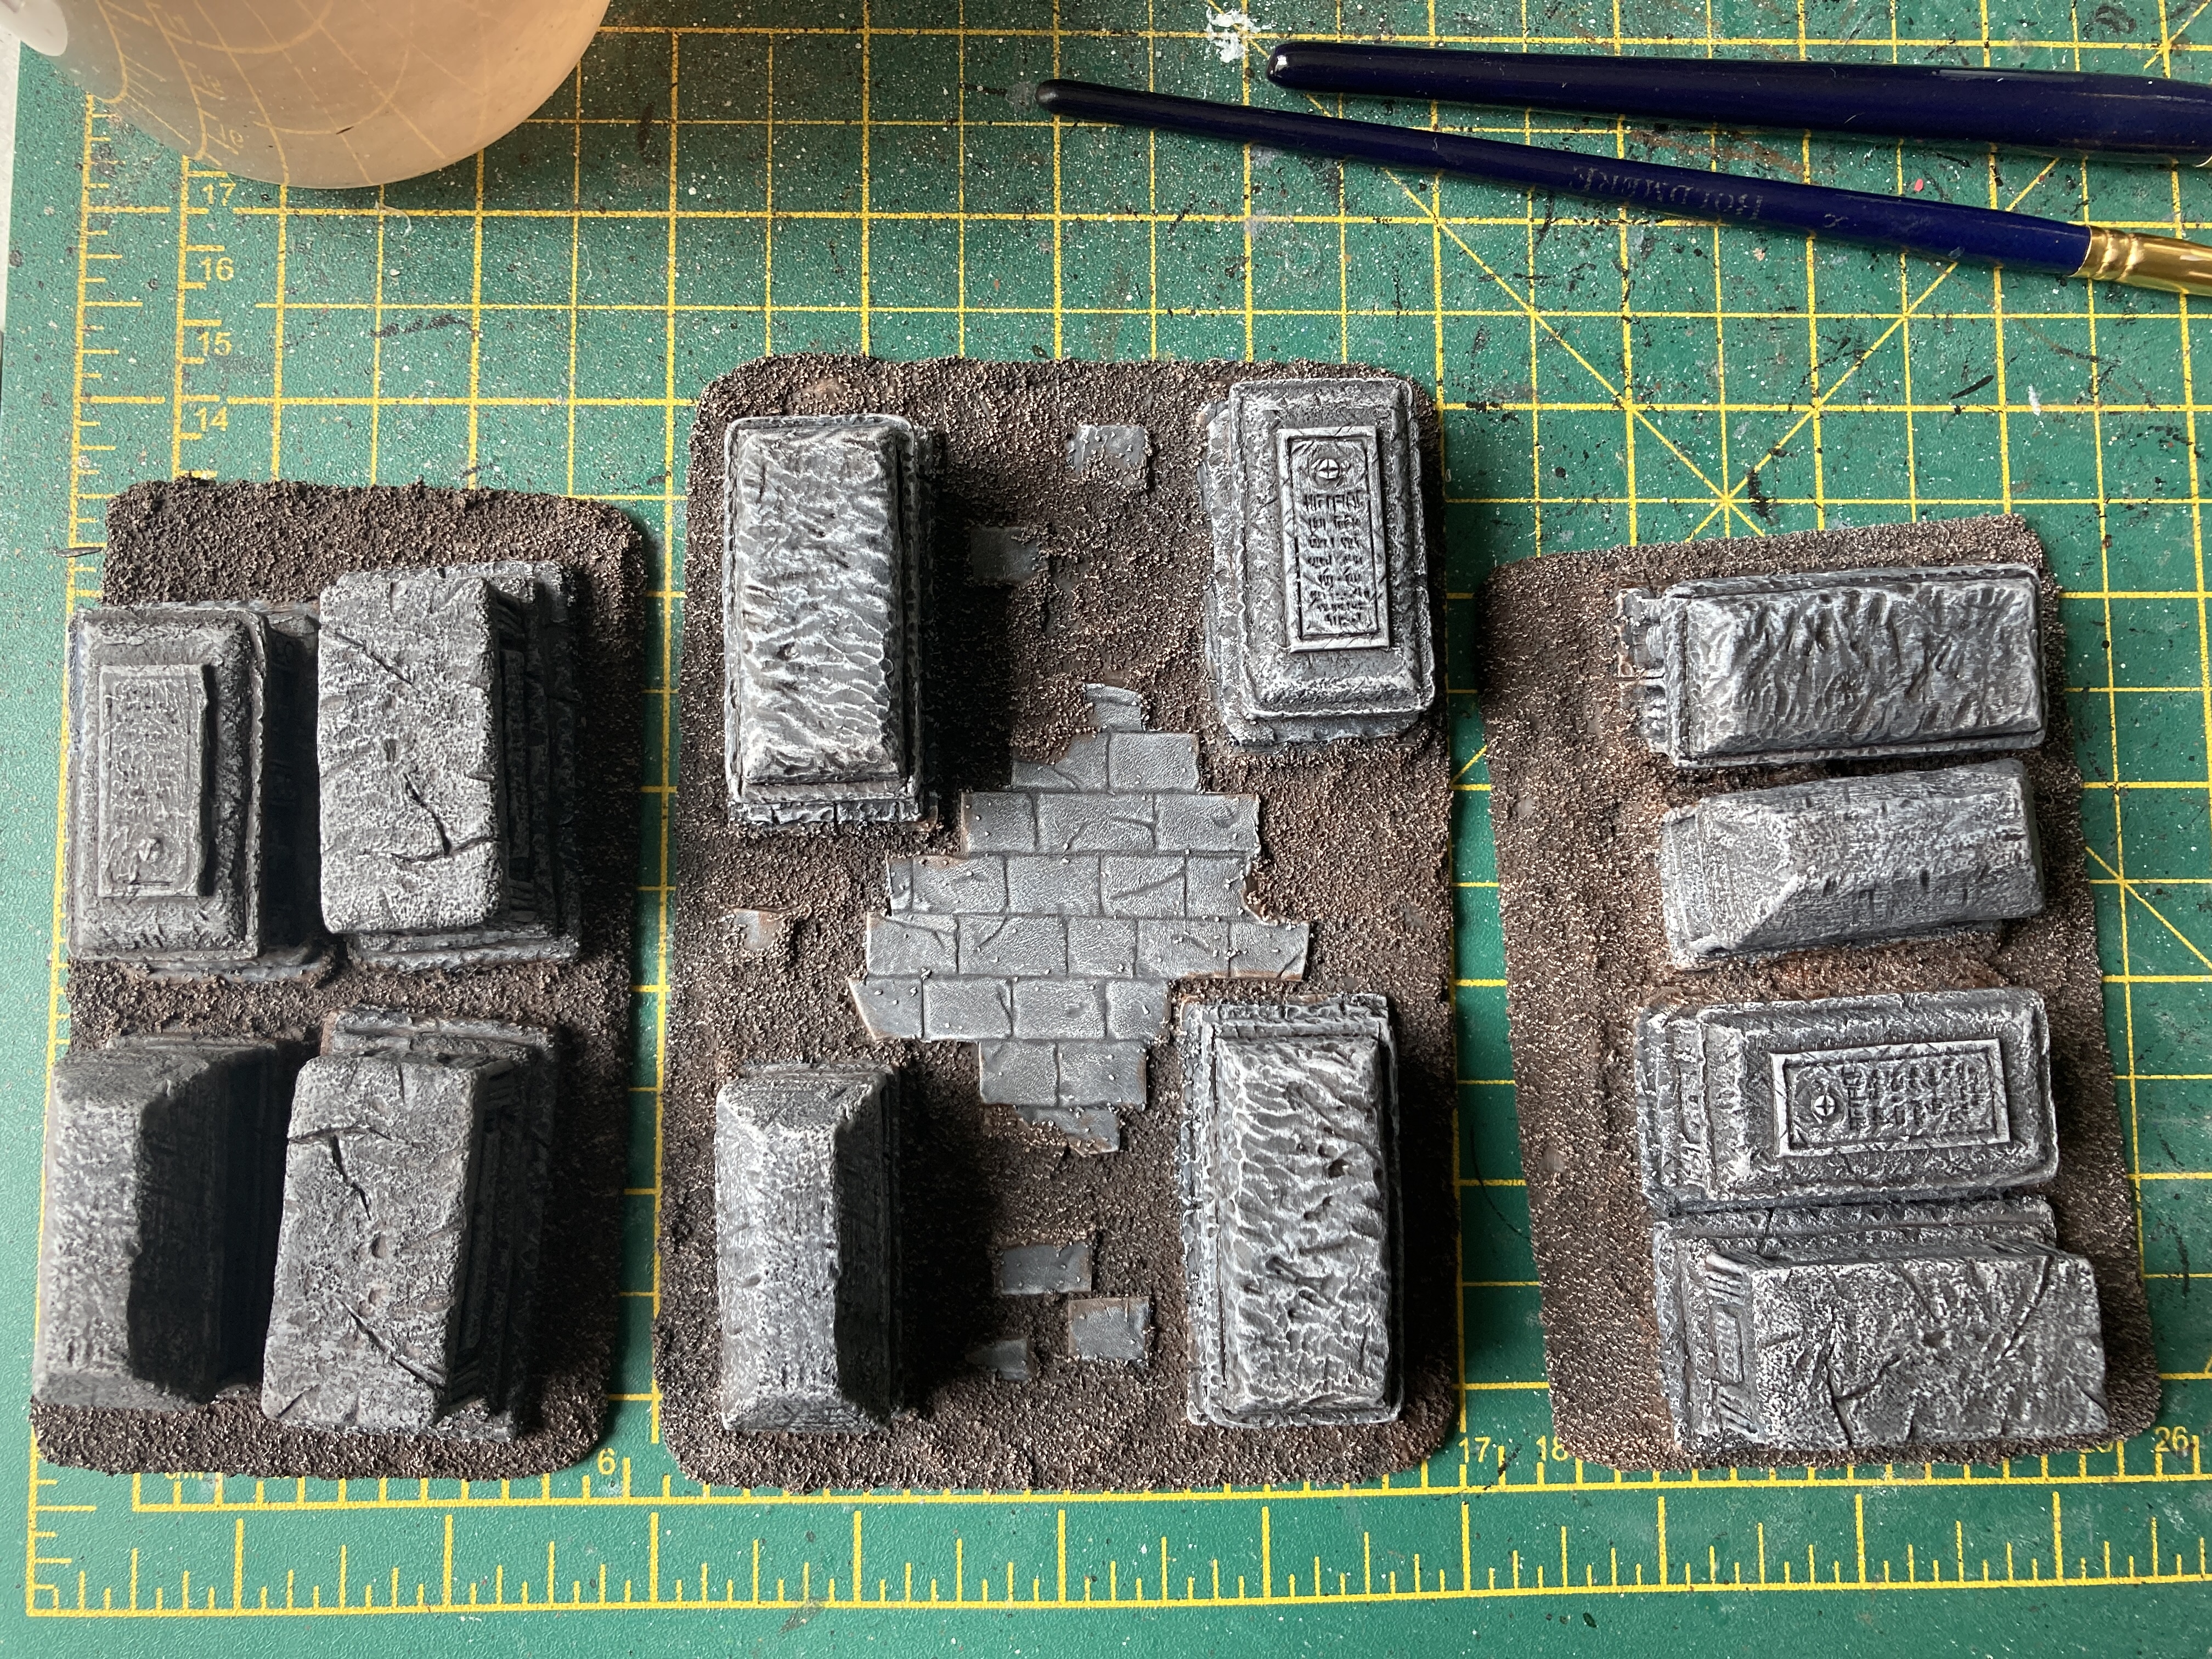
The painting was also done in a very similar way as in the test piece, although instead of using Gor Grunta Fur Contrast for the soil I used a watered down cheap artists brown acrylic from my local Hobbycraft. With all this terrain using contrasts for this sort of thing was getting too expensive.

With these pieces all done the cemetery is really starting to come together and fill some table space. I’ve had to dig into my collection of walls to cover the expanding area but no matter.
Also while I type this my delivery of Mantic twisted trees has just arrived while I think I may work on next.
Test Piece Complete
That’s the test piece all complete and added to the Garden of Morr. I think it blends in really well and it gives just a little more space for miniatures to move around. But I’ve a long way to go yet.

Because I used very thin plasticard, around 0.5mm the piece has warped very slightly. It’s not too bad but taking this into consideration I’ve placed an order for 1mm plasticard. I’ve used this thickness in the past for bases and so far this thickness has never warped. I just have to wait for it to come before I can start on some more pieces.
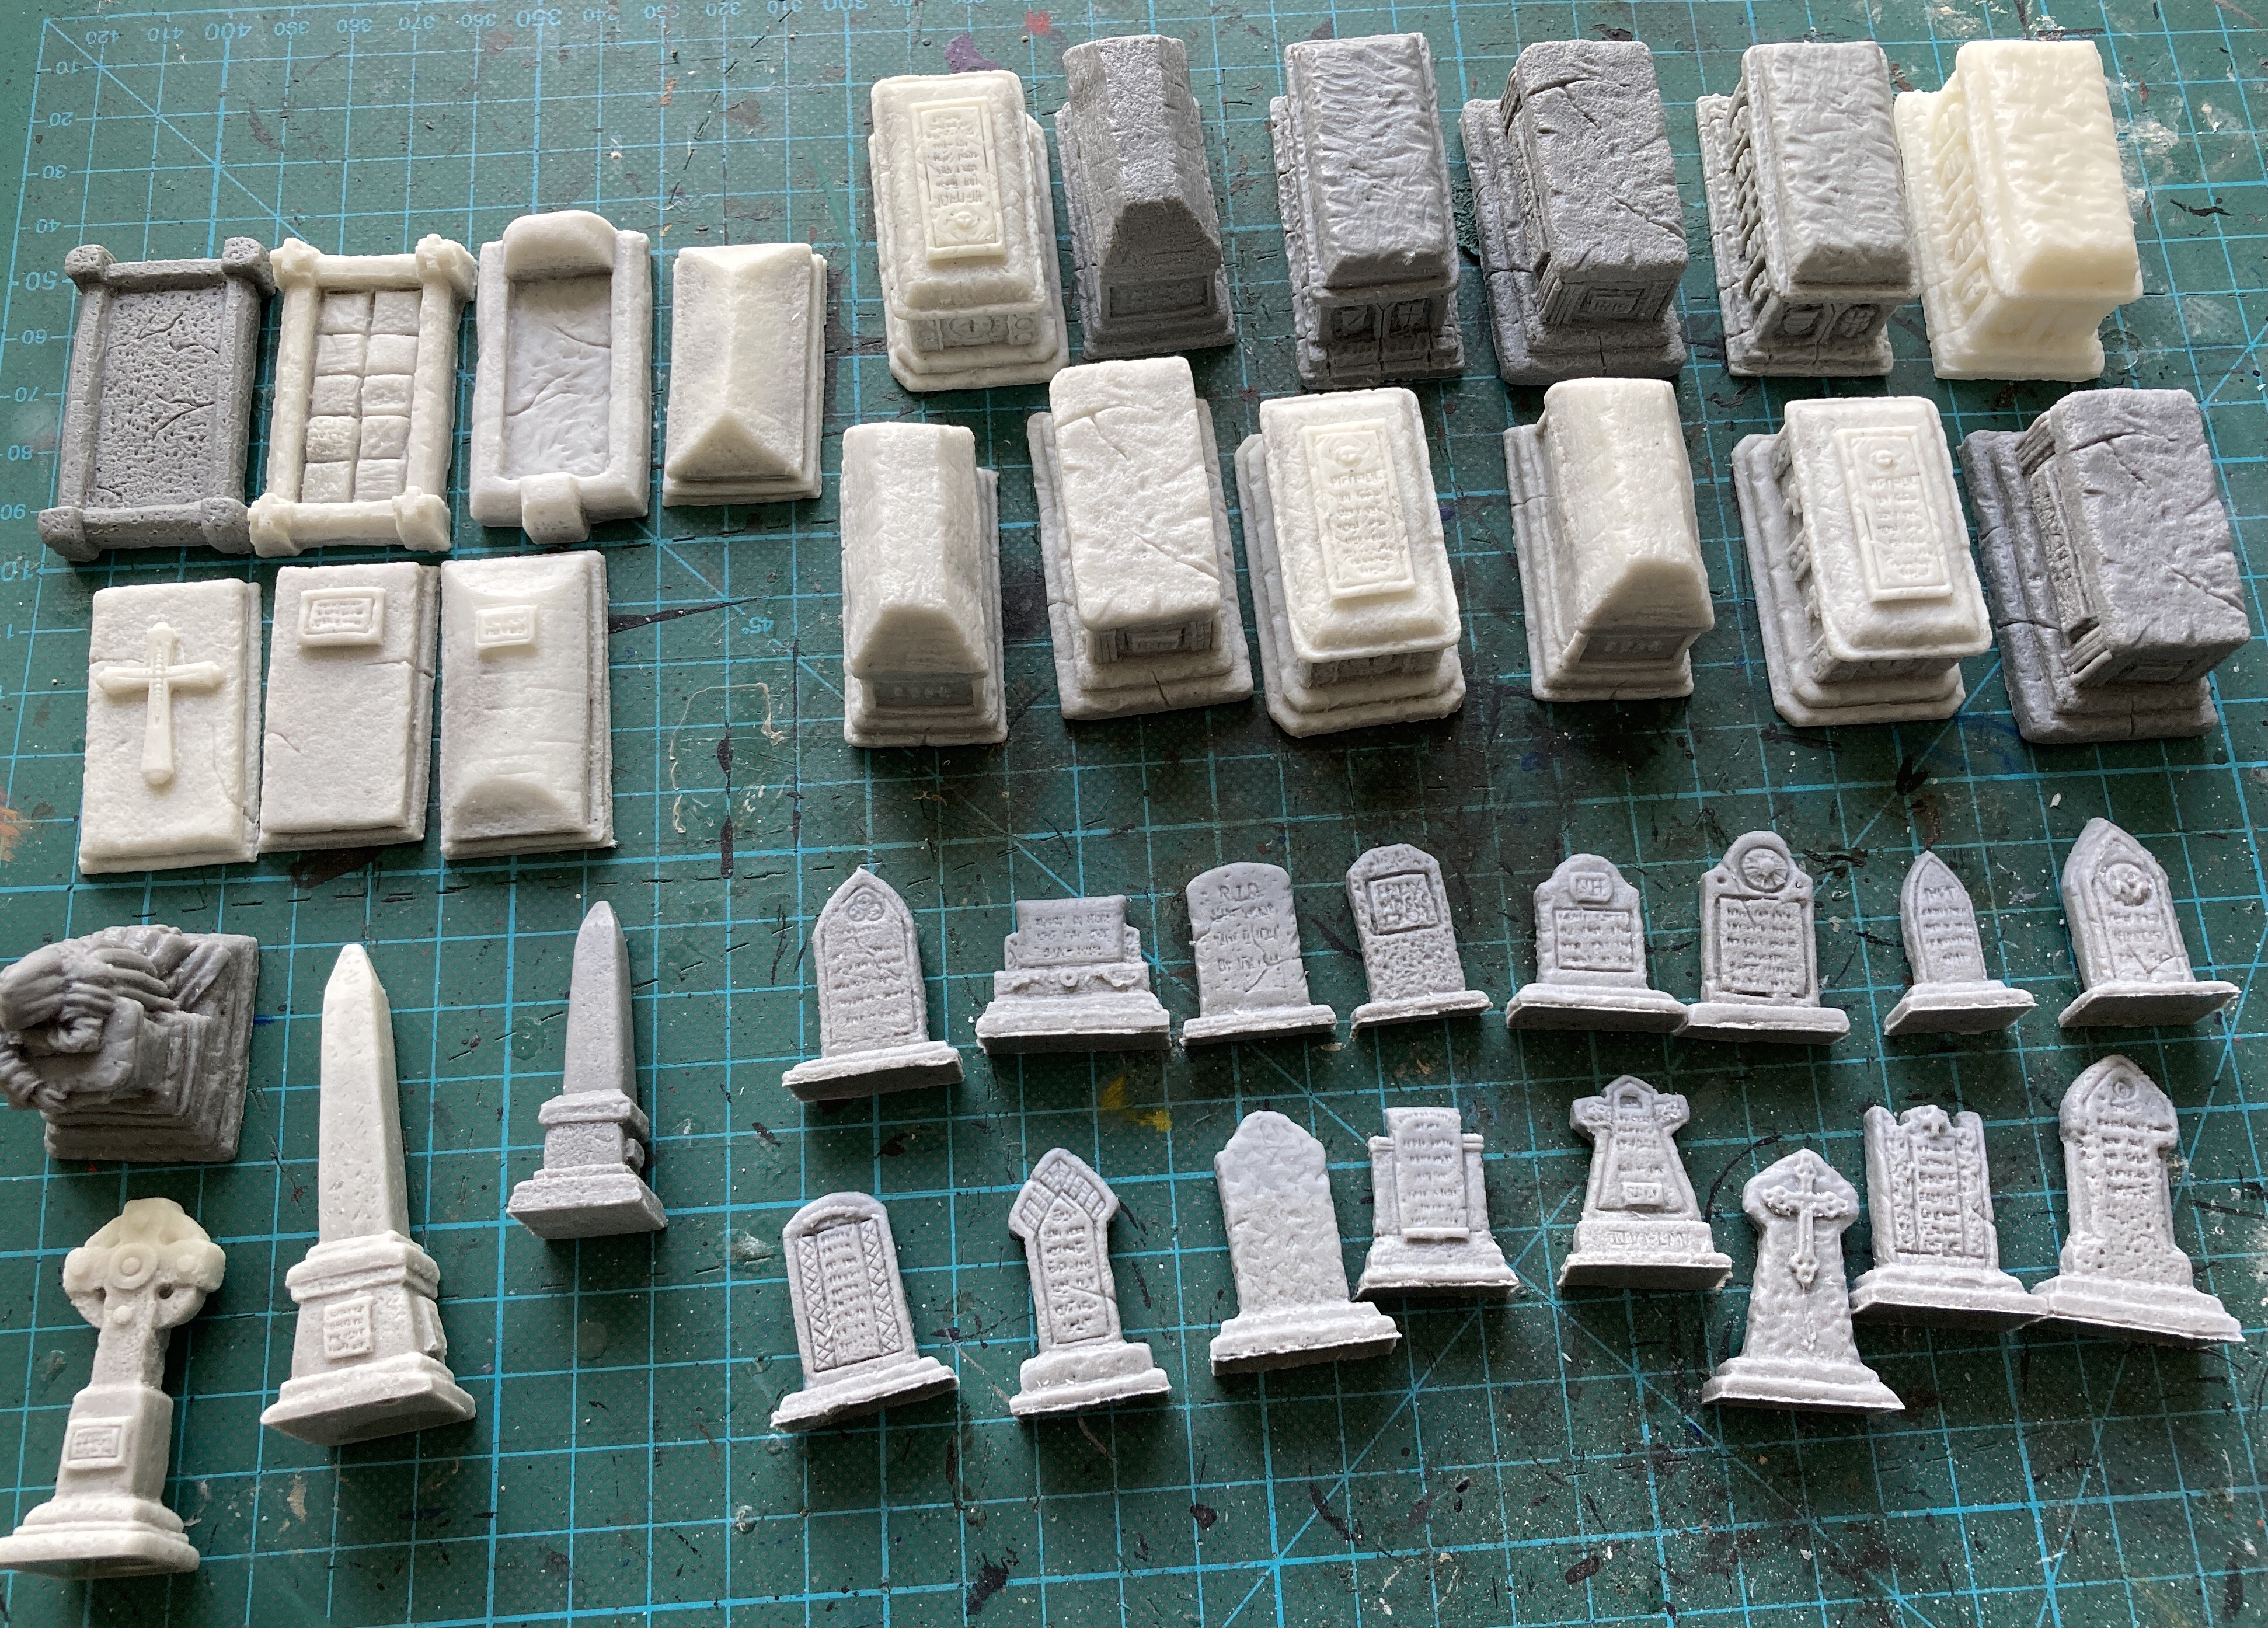 Tombstones and gravestones from Debris of War
  The eventual Centrepiece of the table
I now have plenty of gravestones, tombstones and other pieces to work with. Along with an mdf chapel I believe have more than enough to fill my 2×2 or more probably 3×3 table.
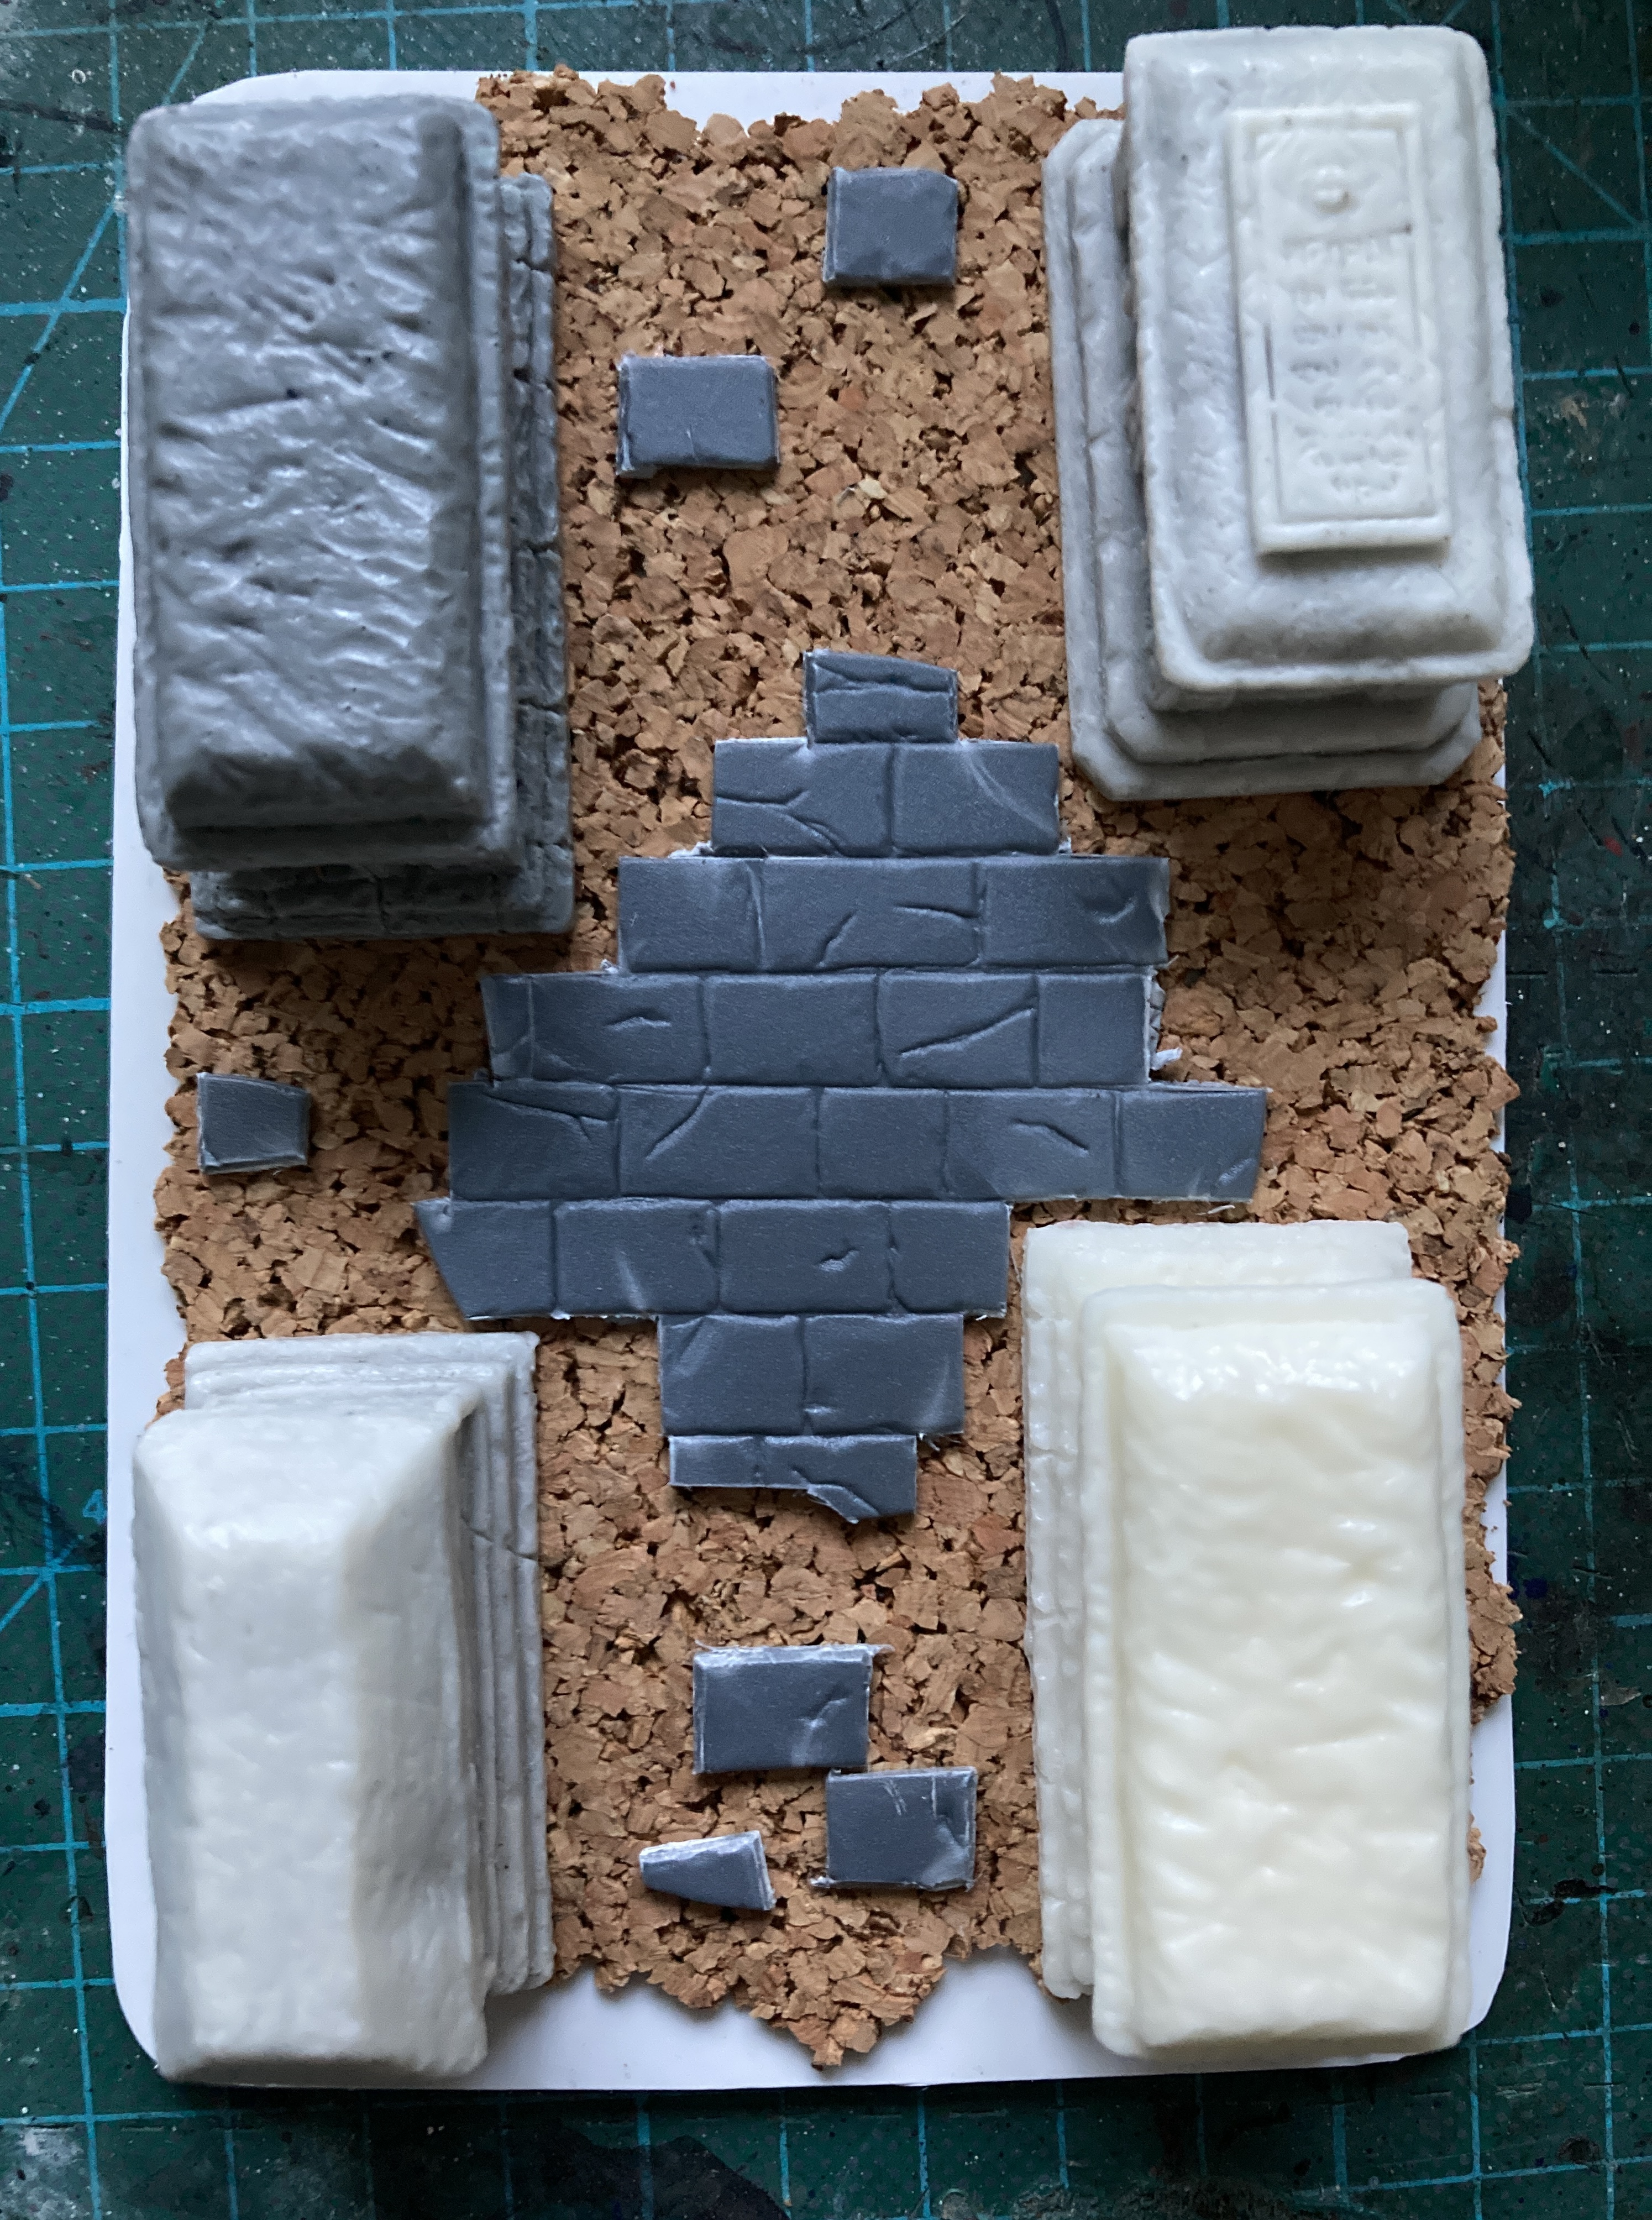
Expanding the Garden - A Test Piece
I want to creat a selection of additional pieces to go with the garden of Morr to fill out a table for skirmish games. I thought I’d experiment with a test piece so I could learn from any mistakes and refine the process for when I build several all at once later.

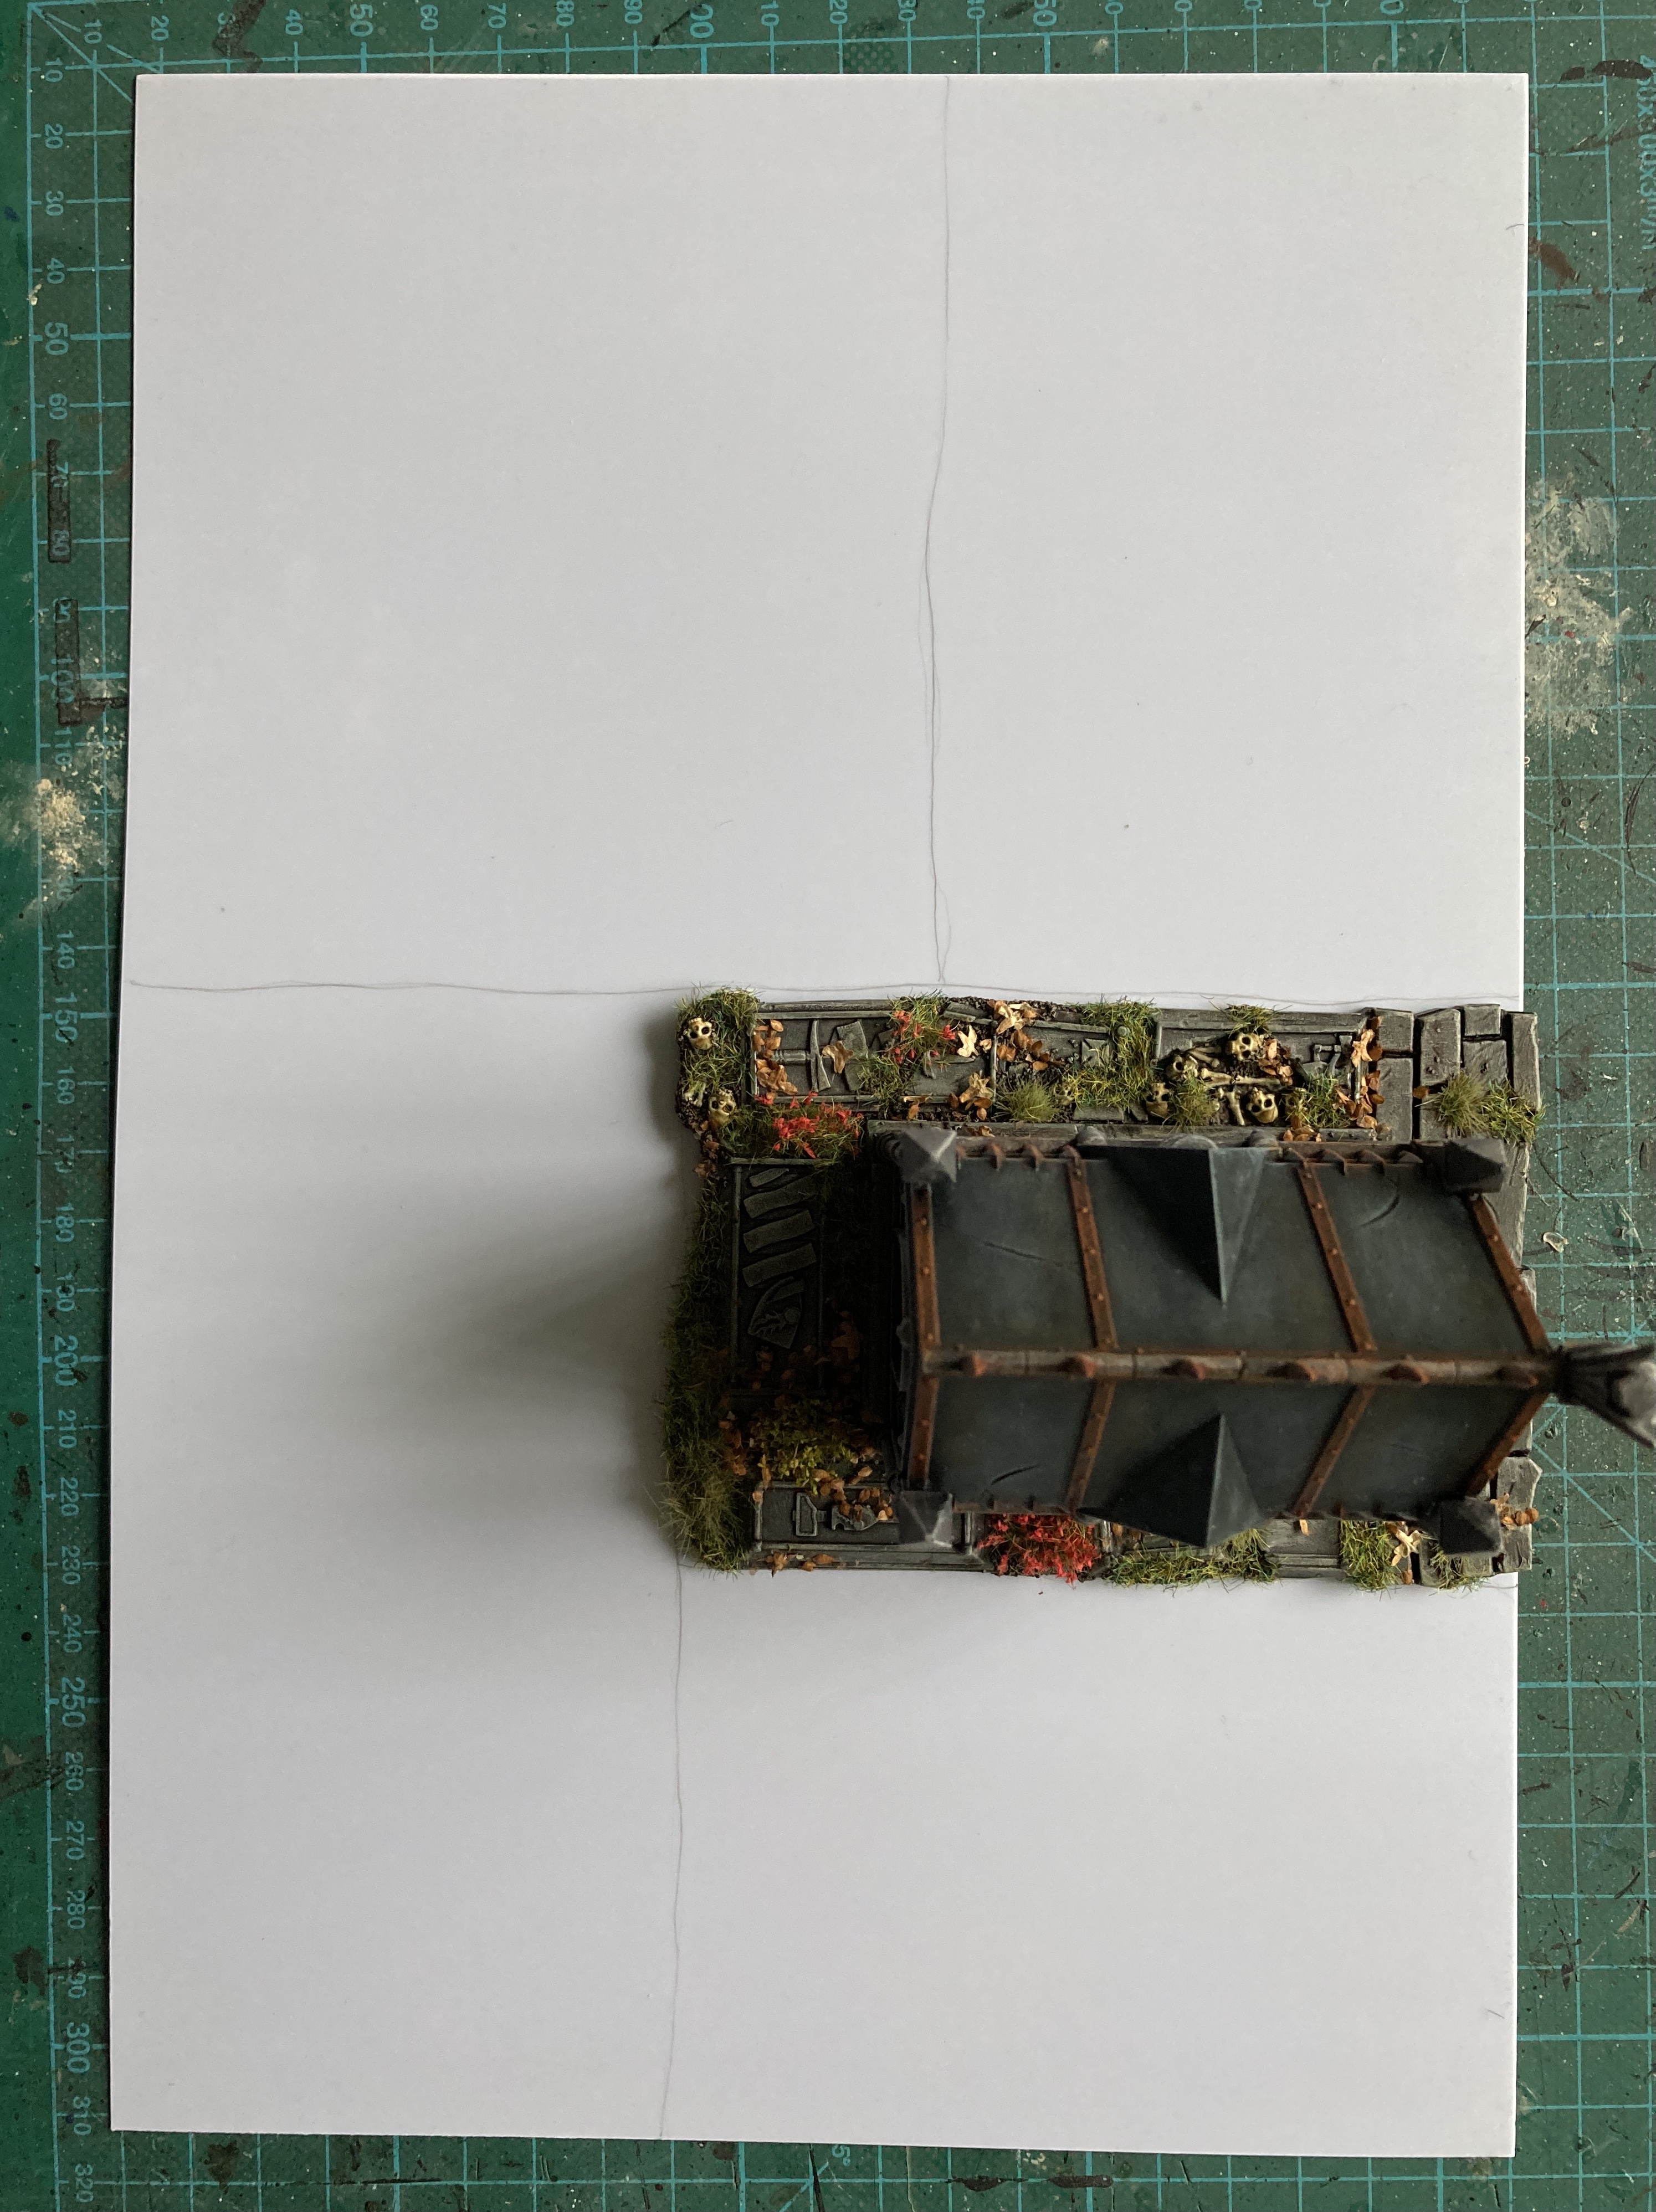
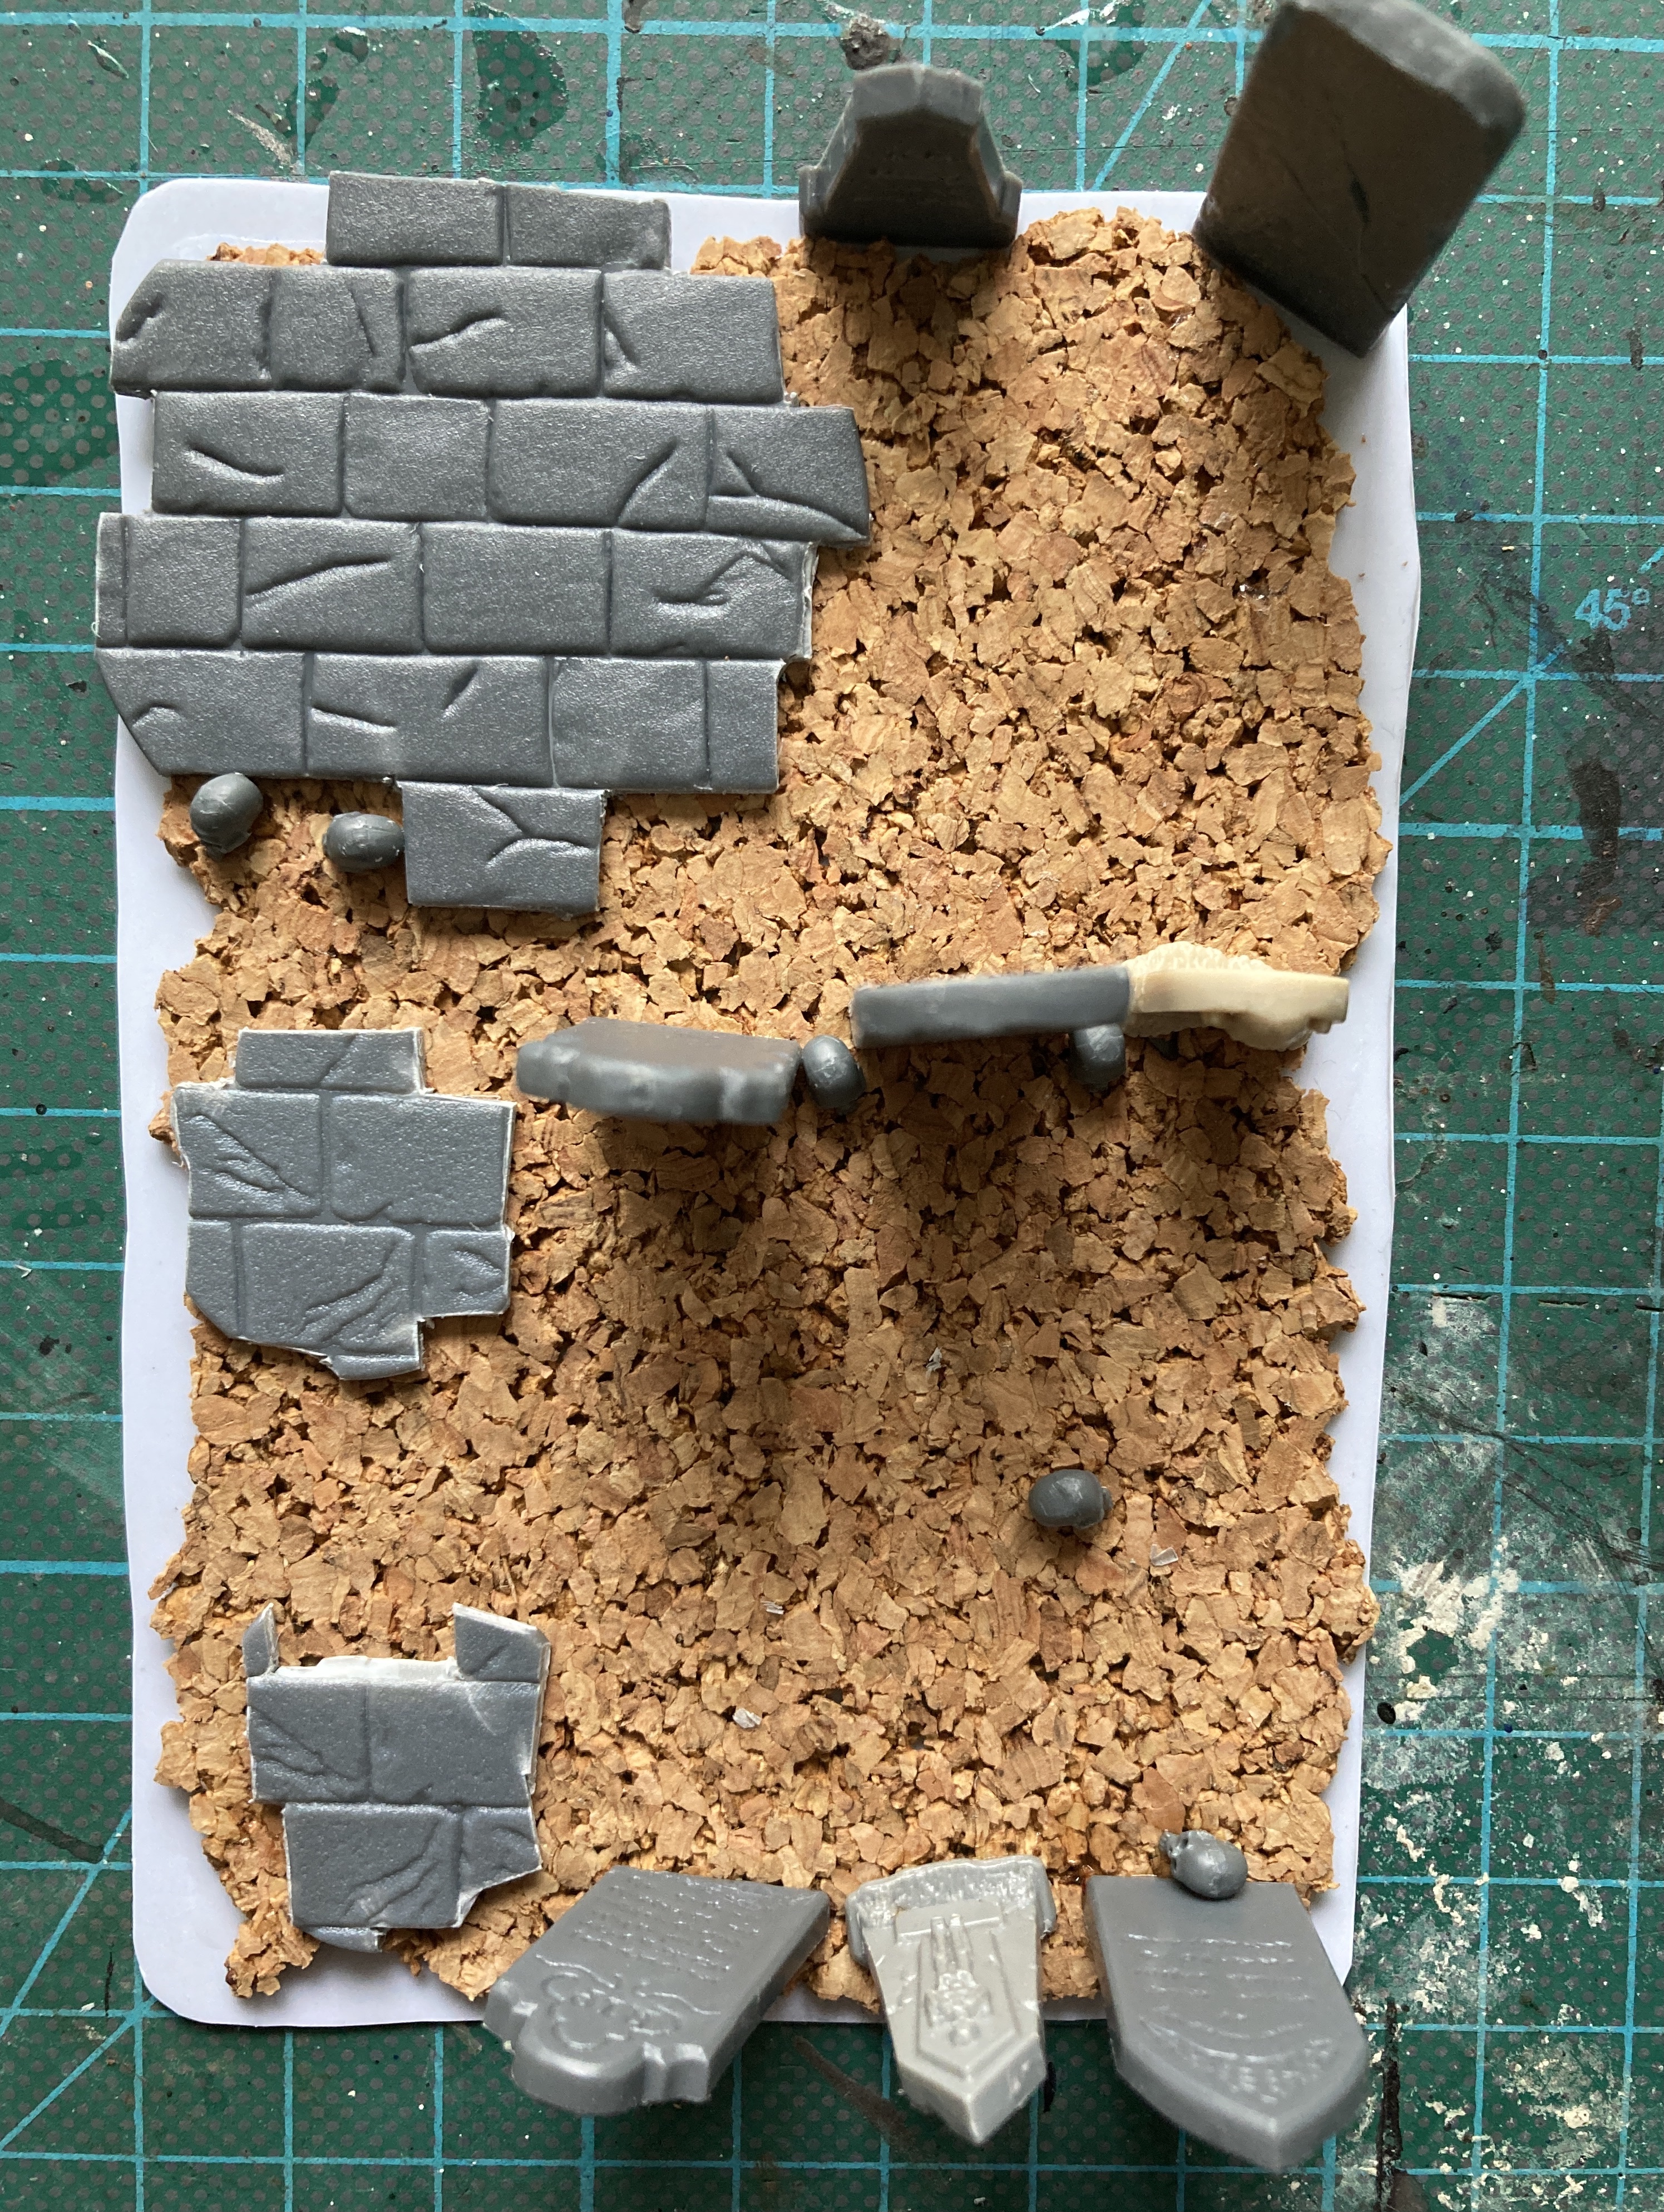
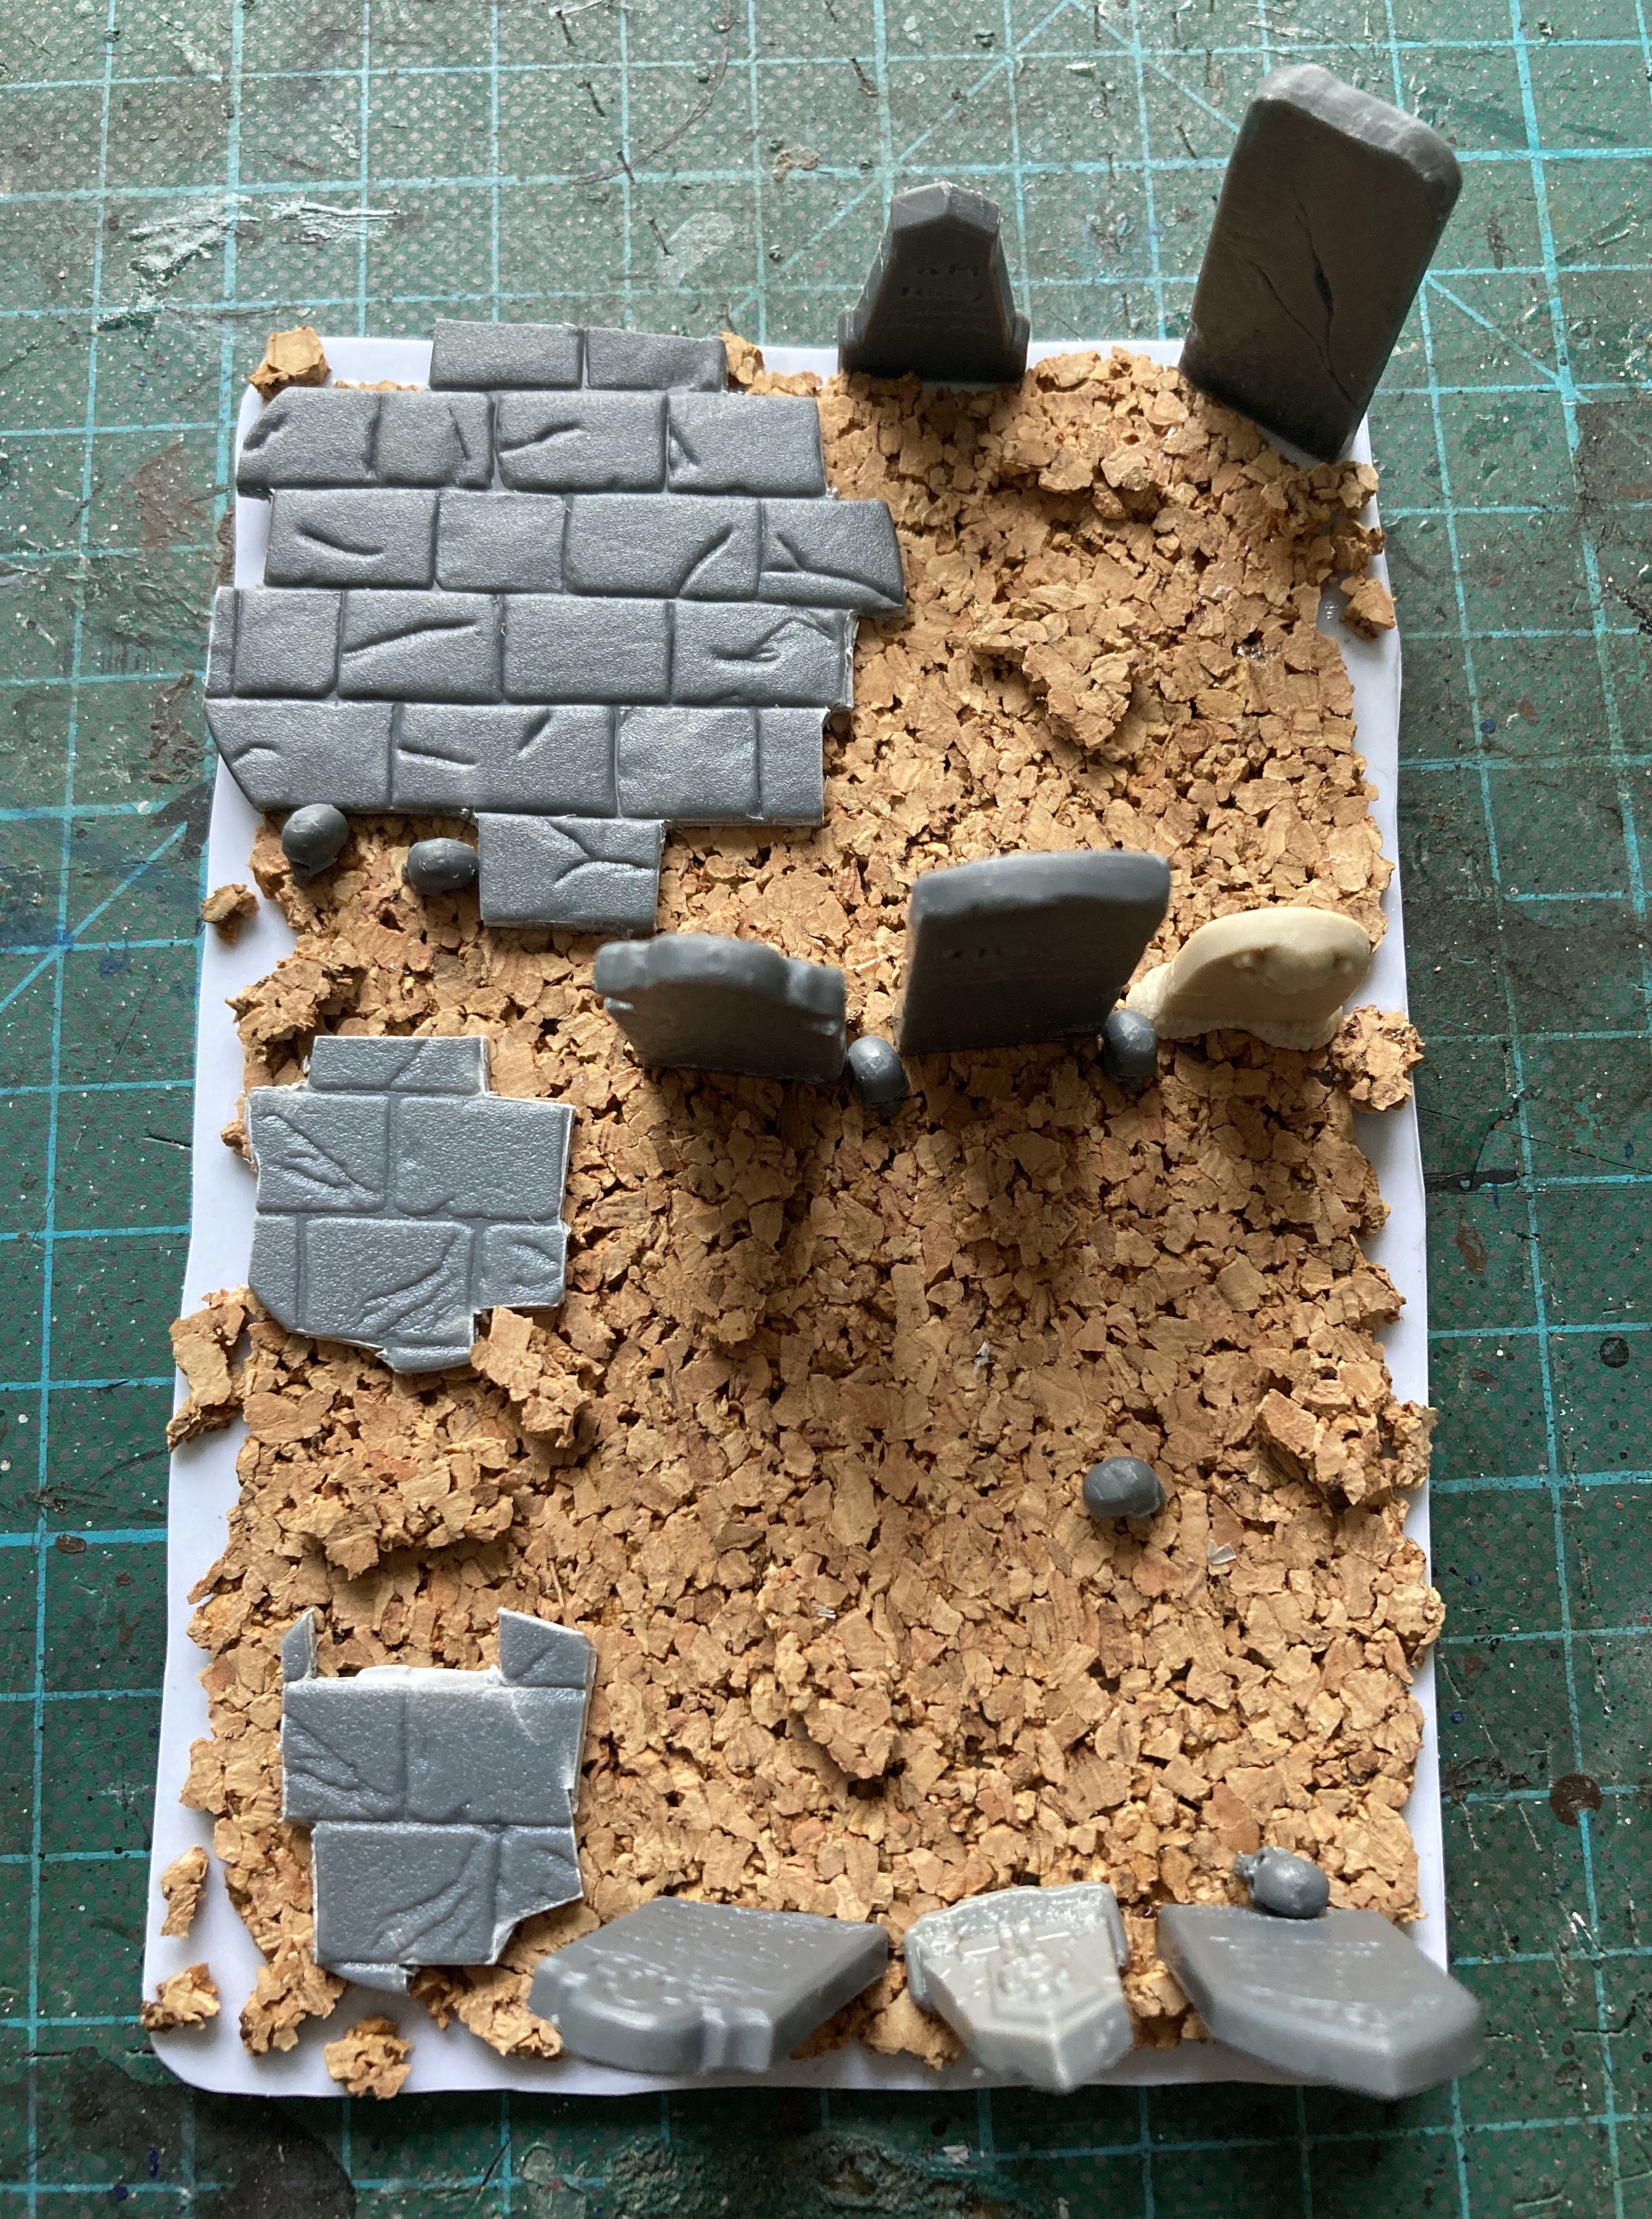
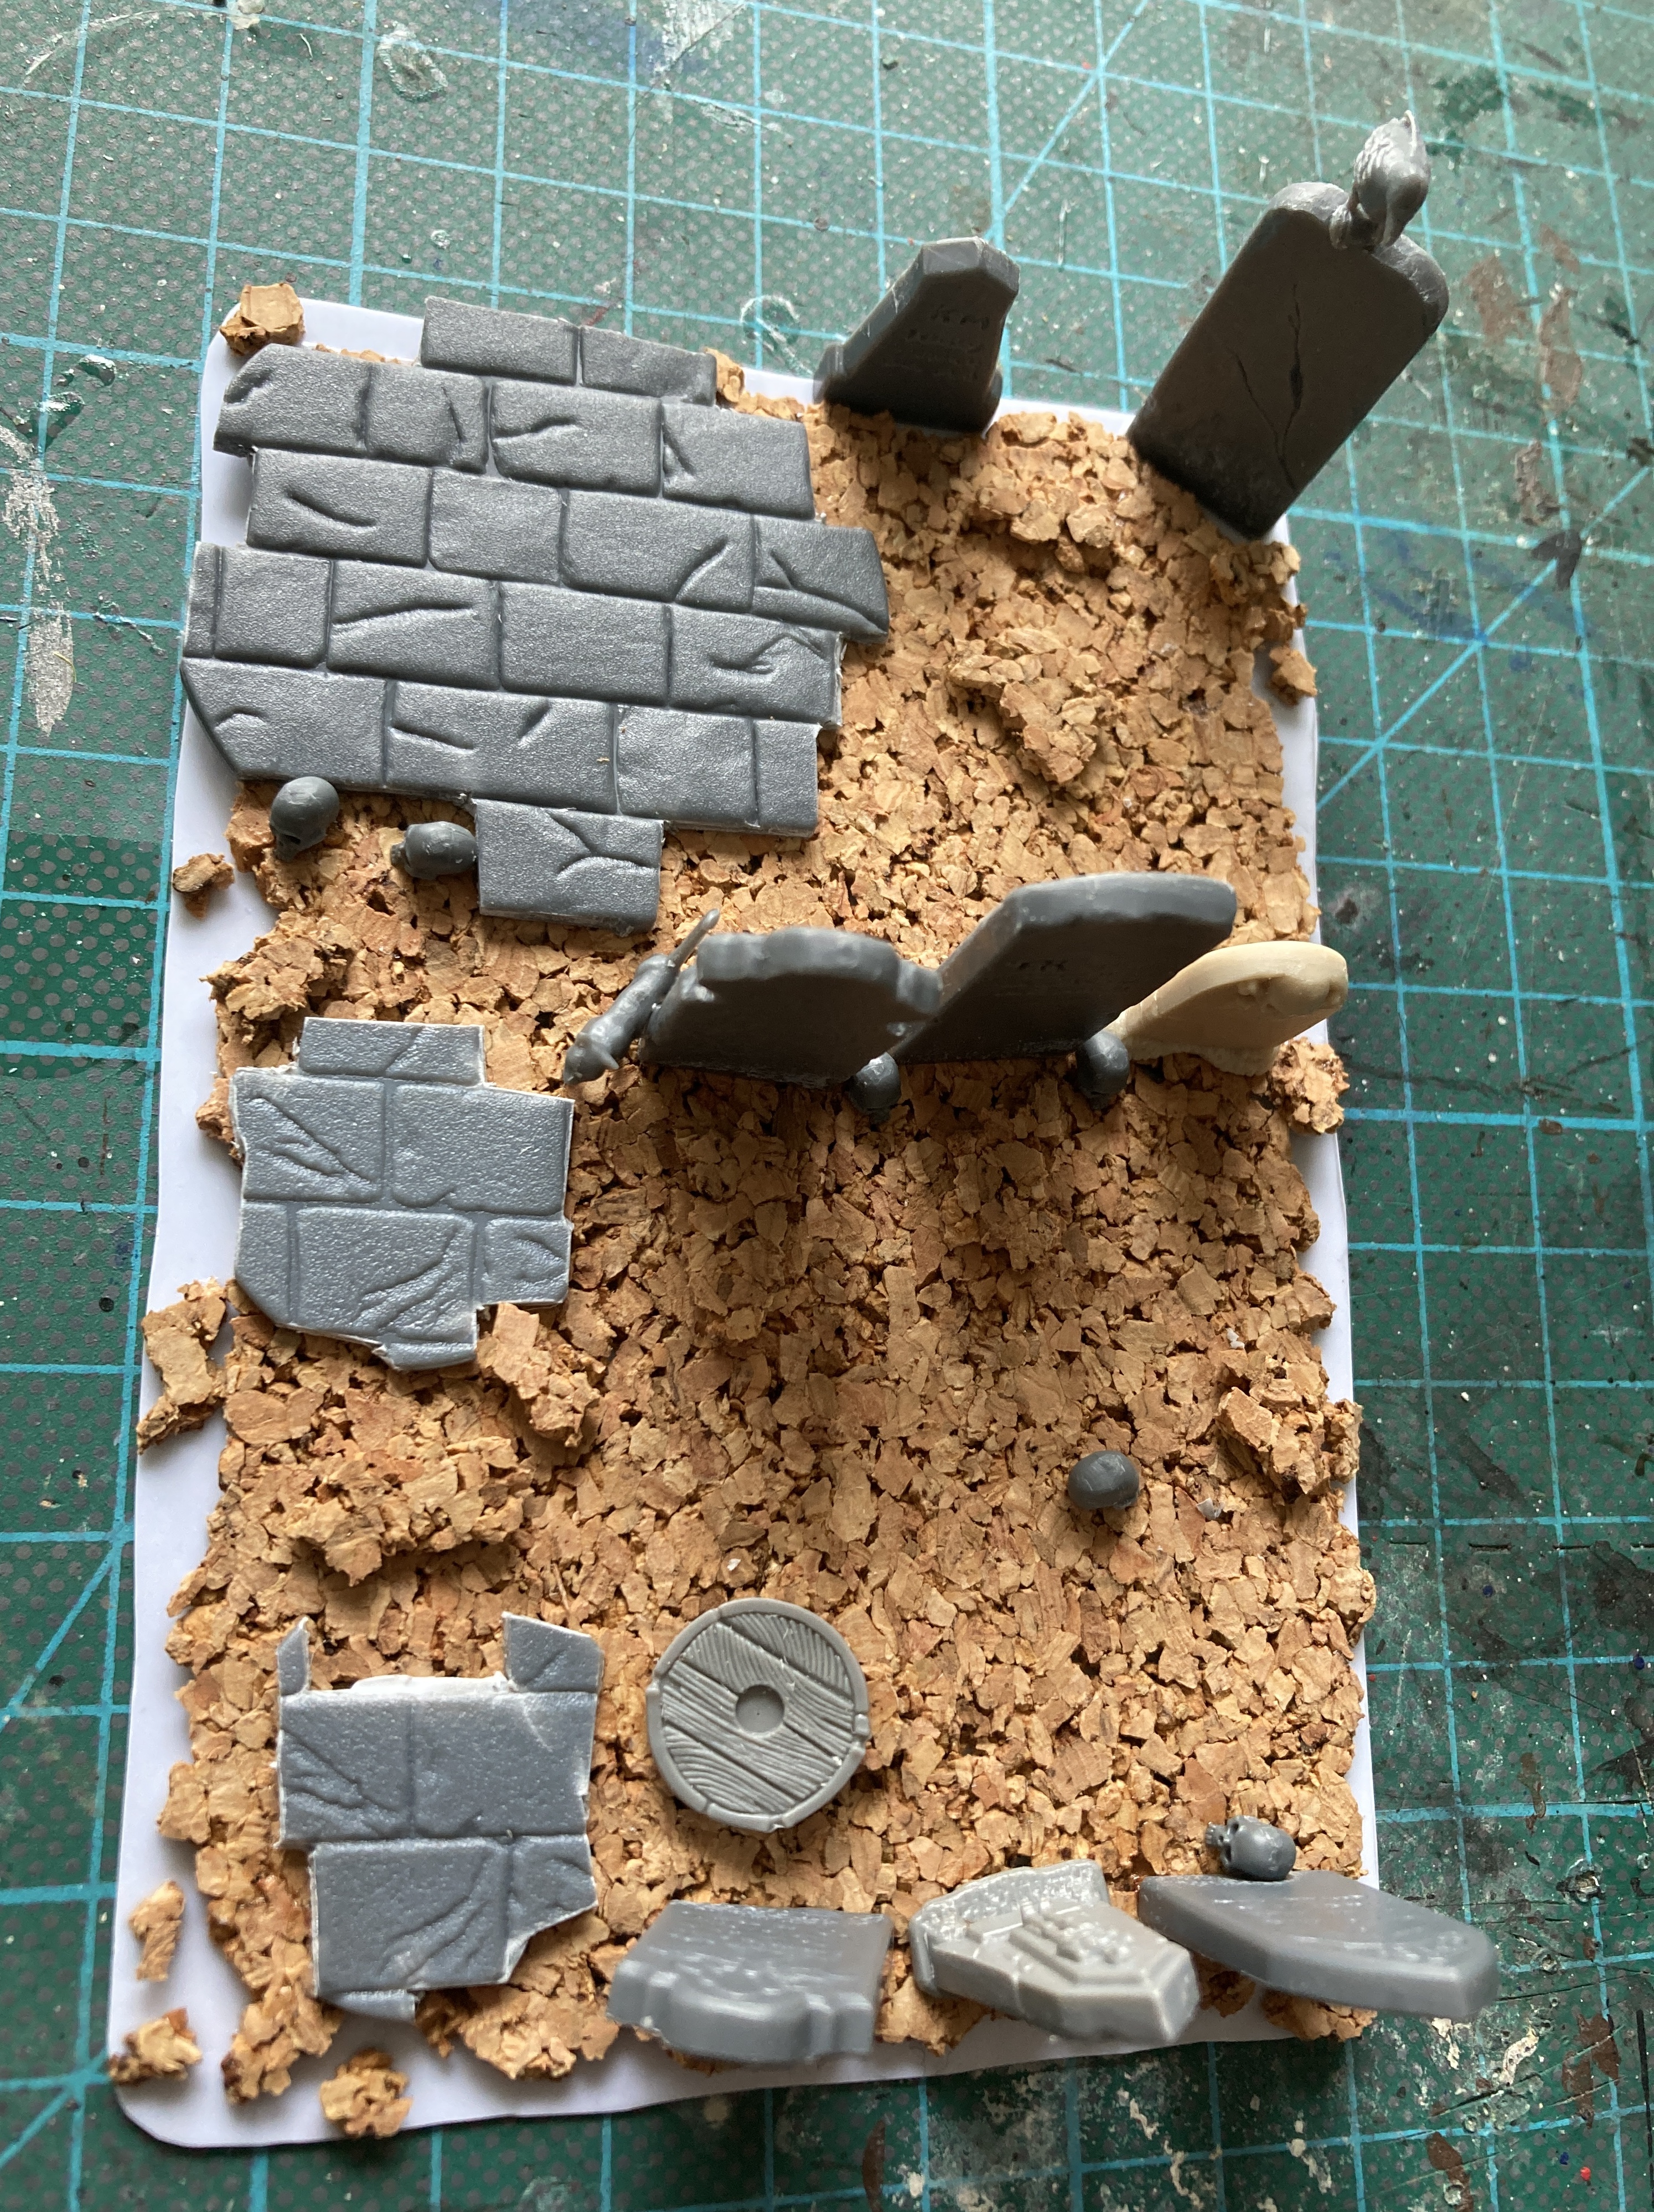
For the size of the pieces I thought I’d use one of the buildings as a guide. I took a thin A4 piece of plasticard and divided it up.

The plasticard was thin enough to use scissors. I cut only one piece out then rounded the corners off.
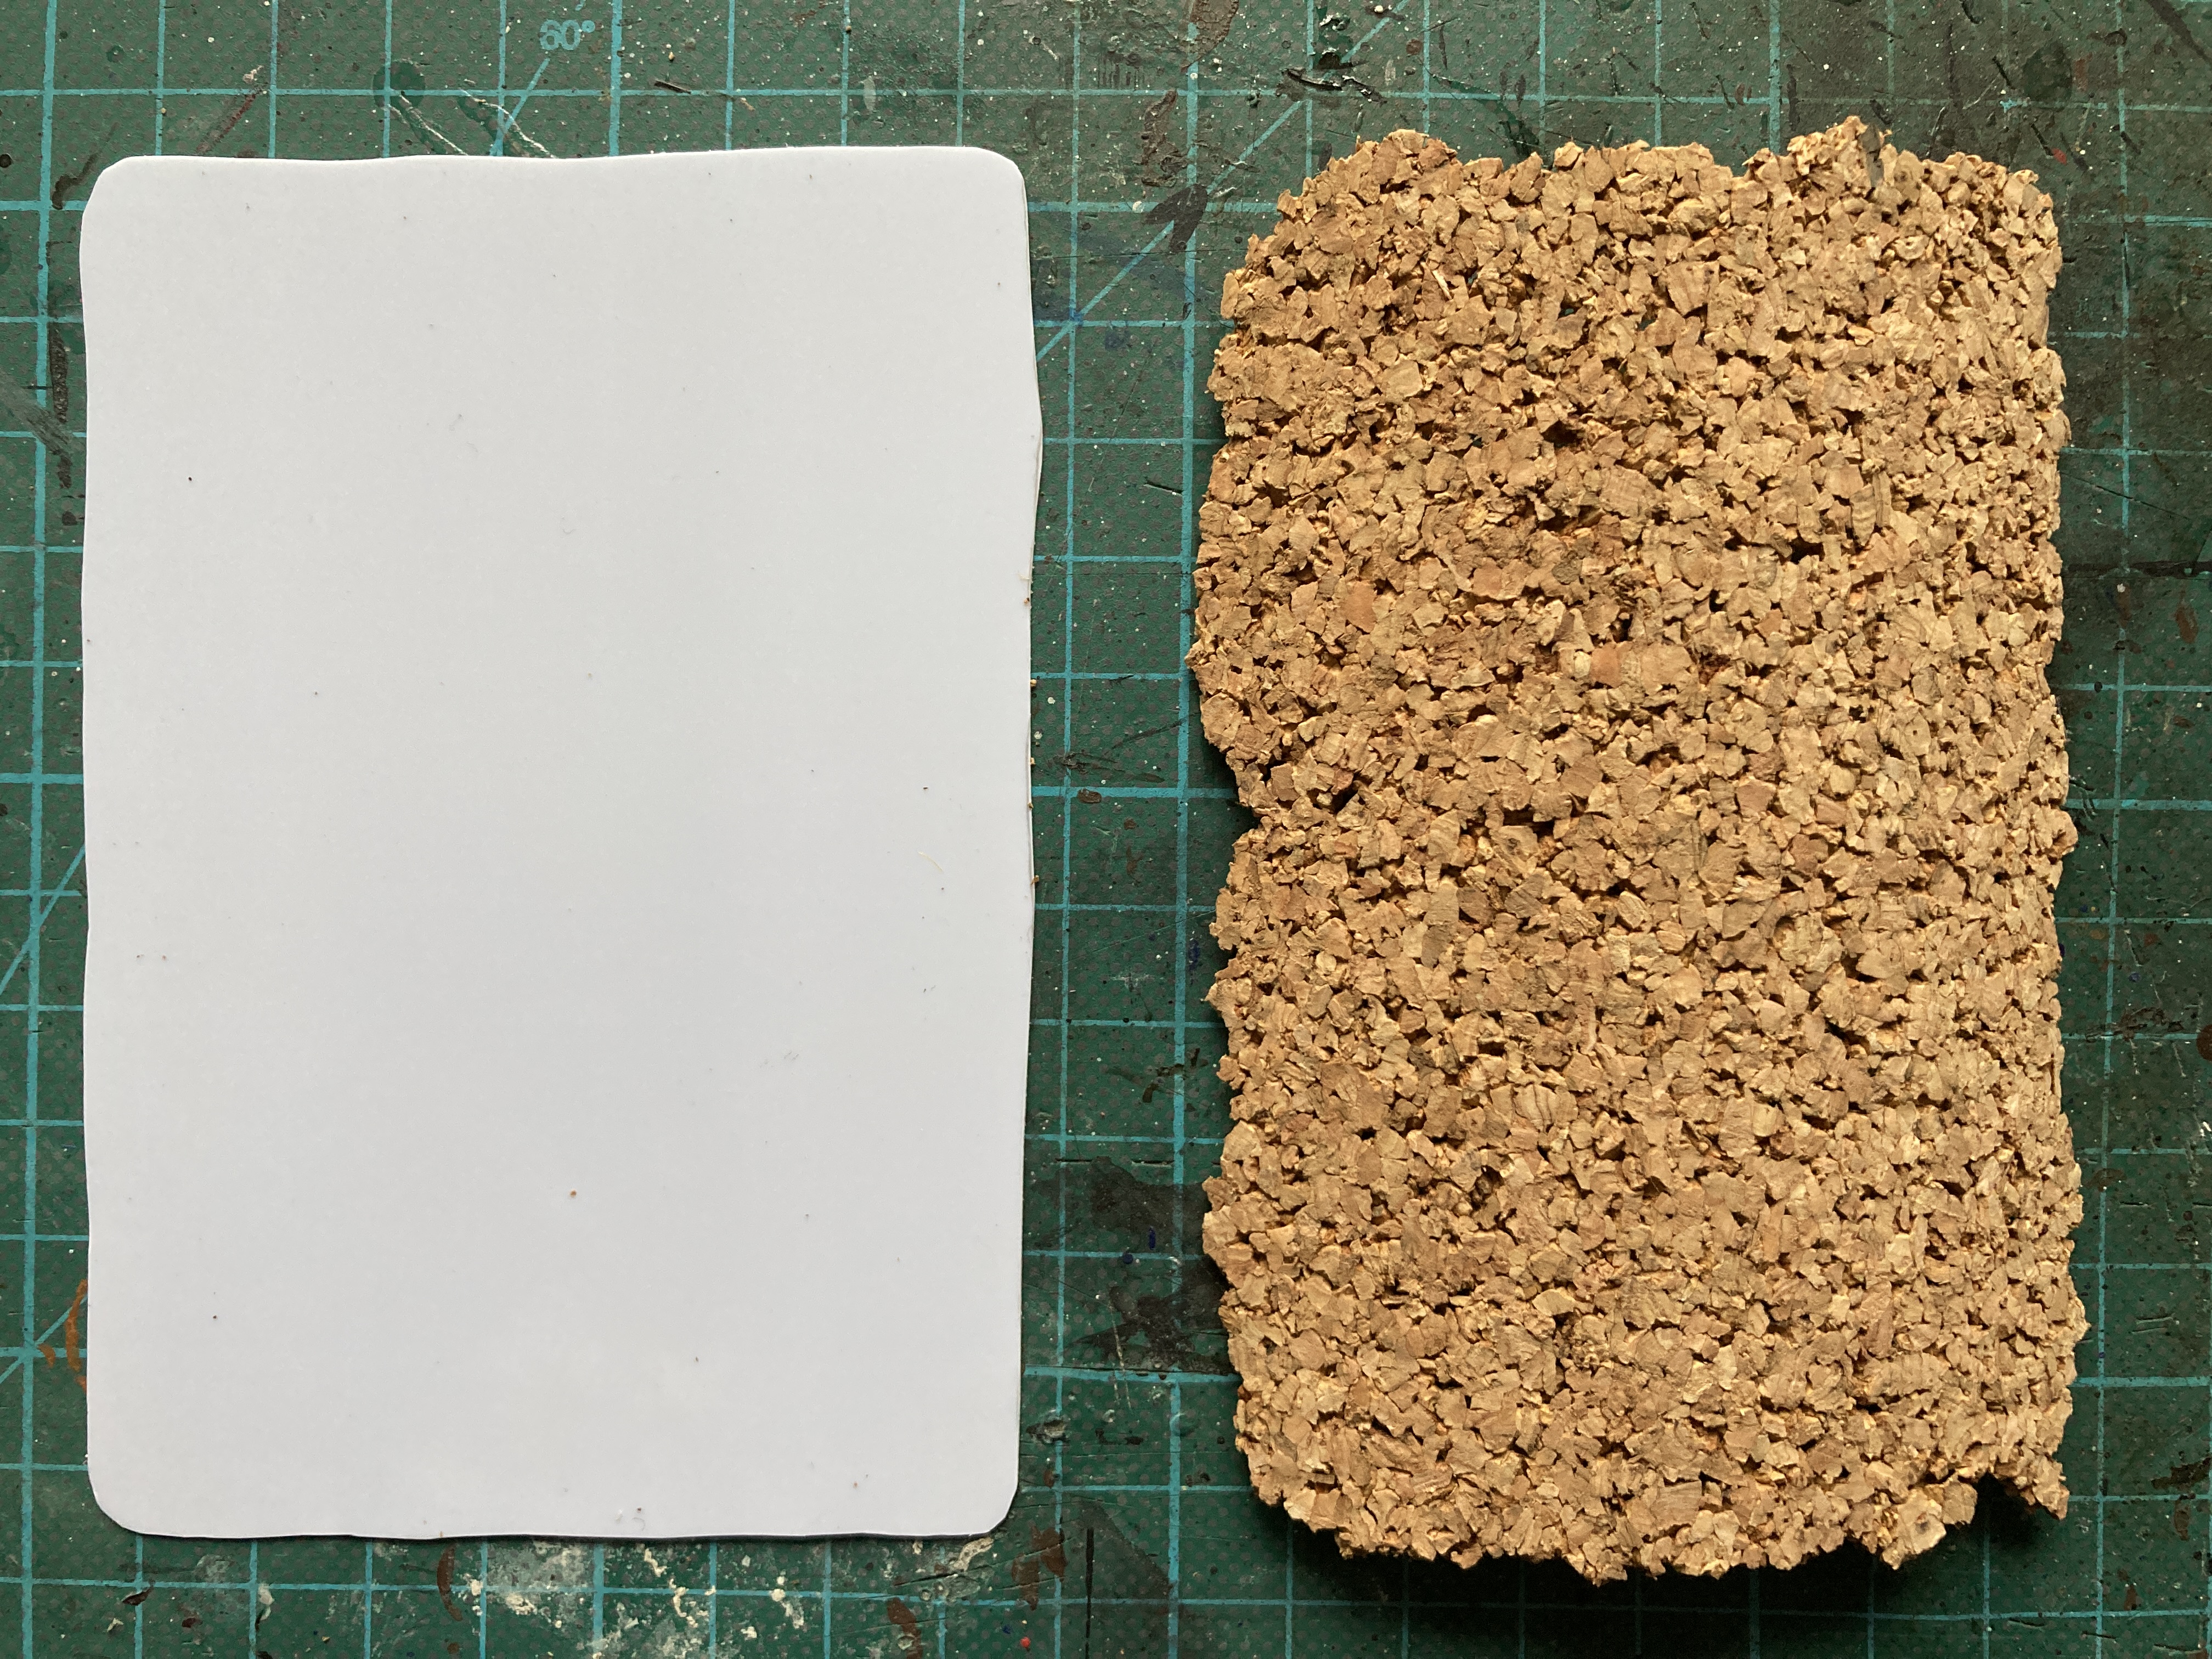
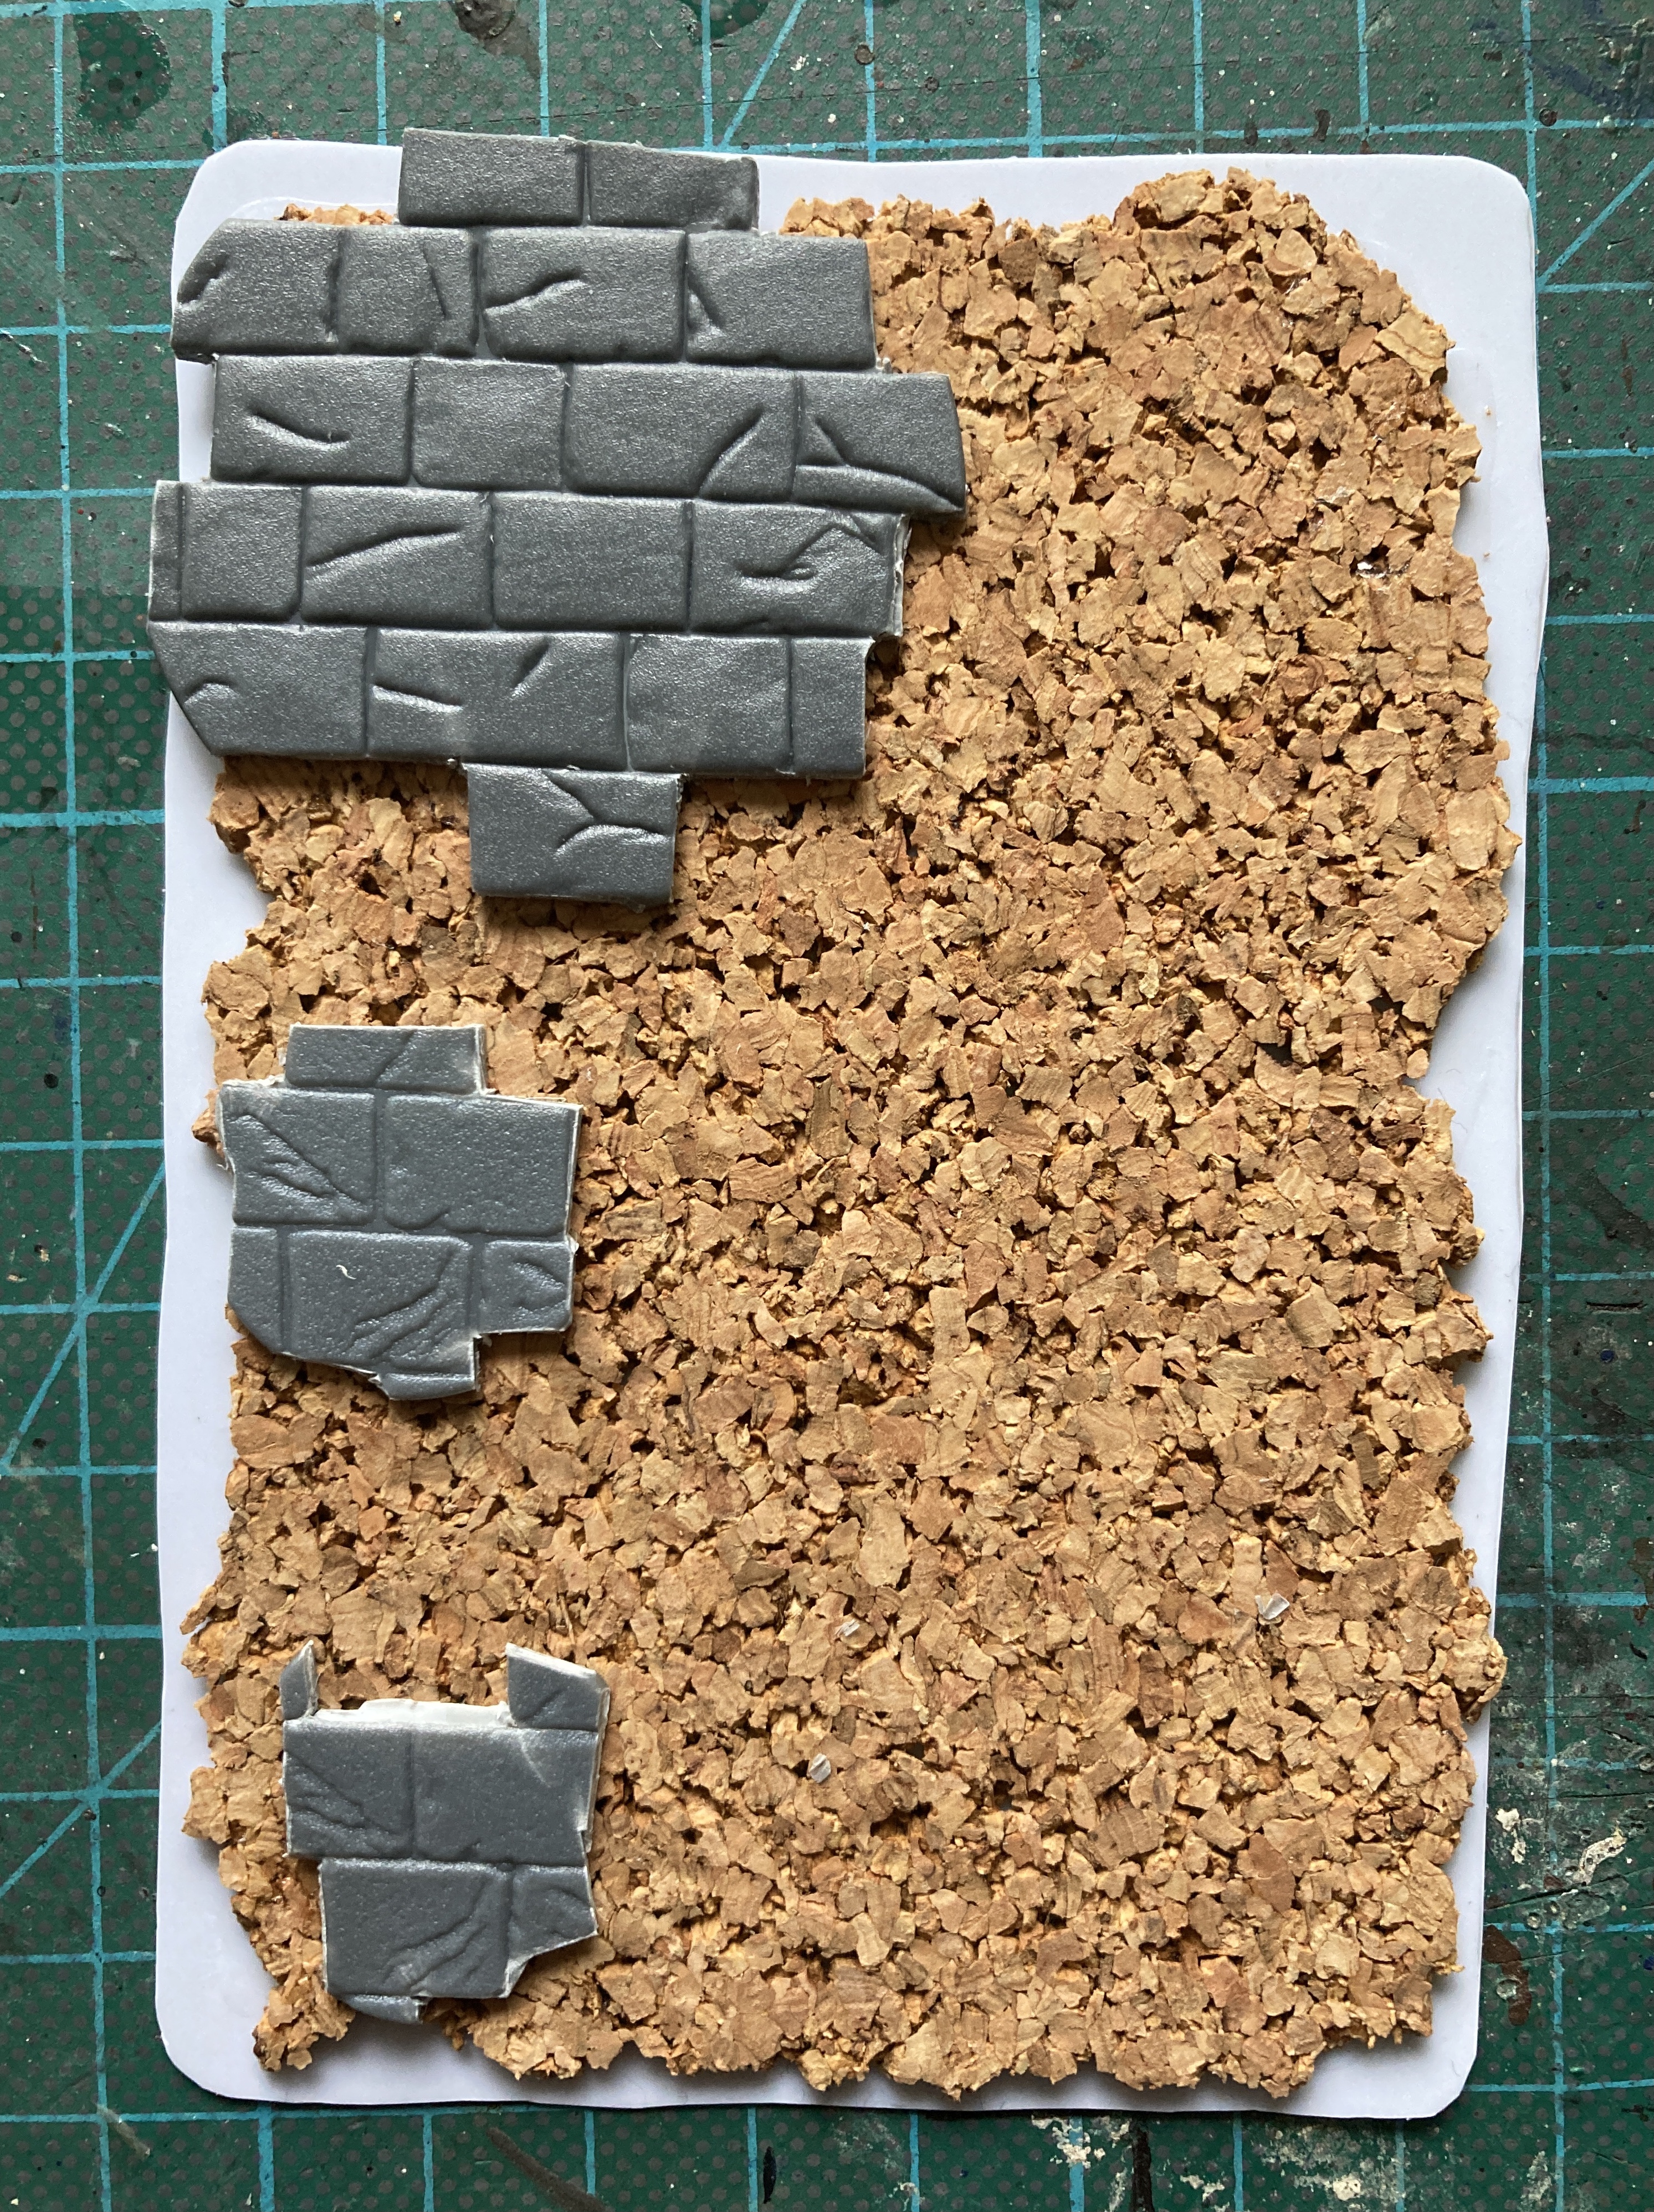
No it’s not a wheatabix, it’s some thin cork board from a roll I’ve had for years. I superglued this to the card to give the piece a slight elevation from the table.
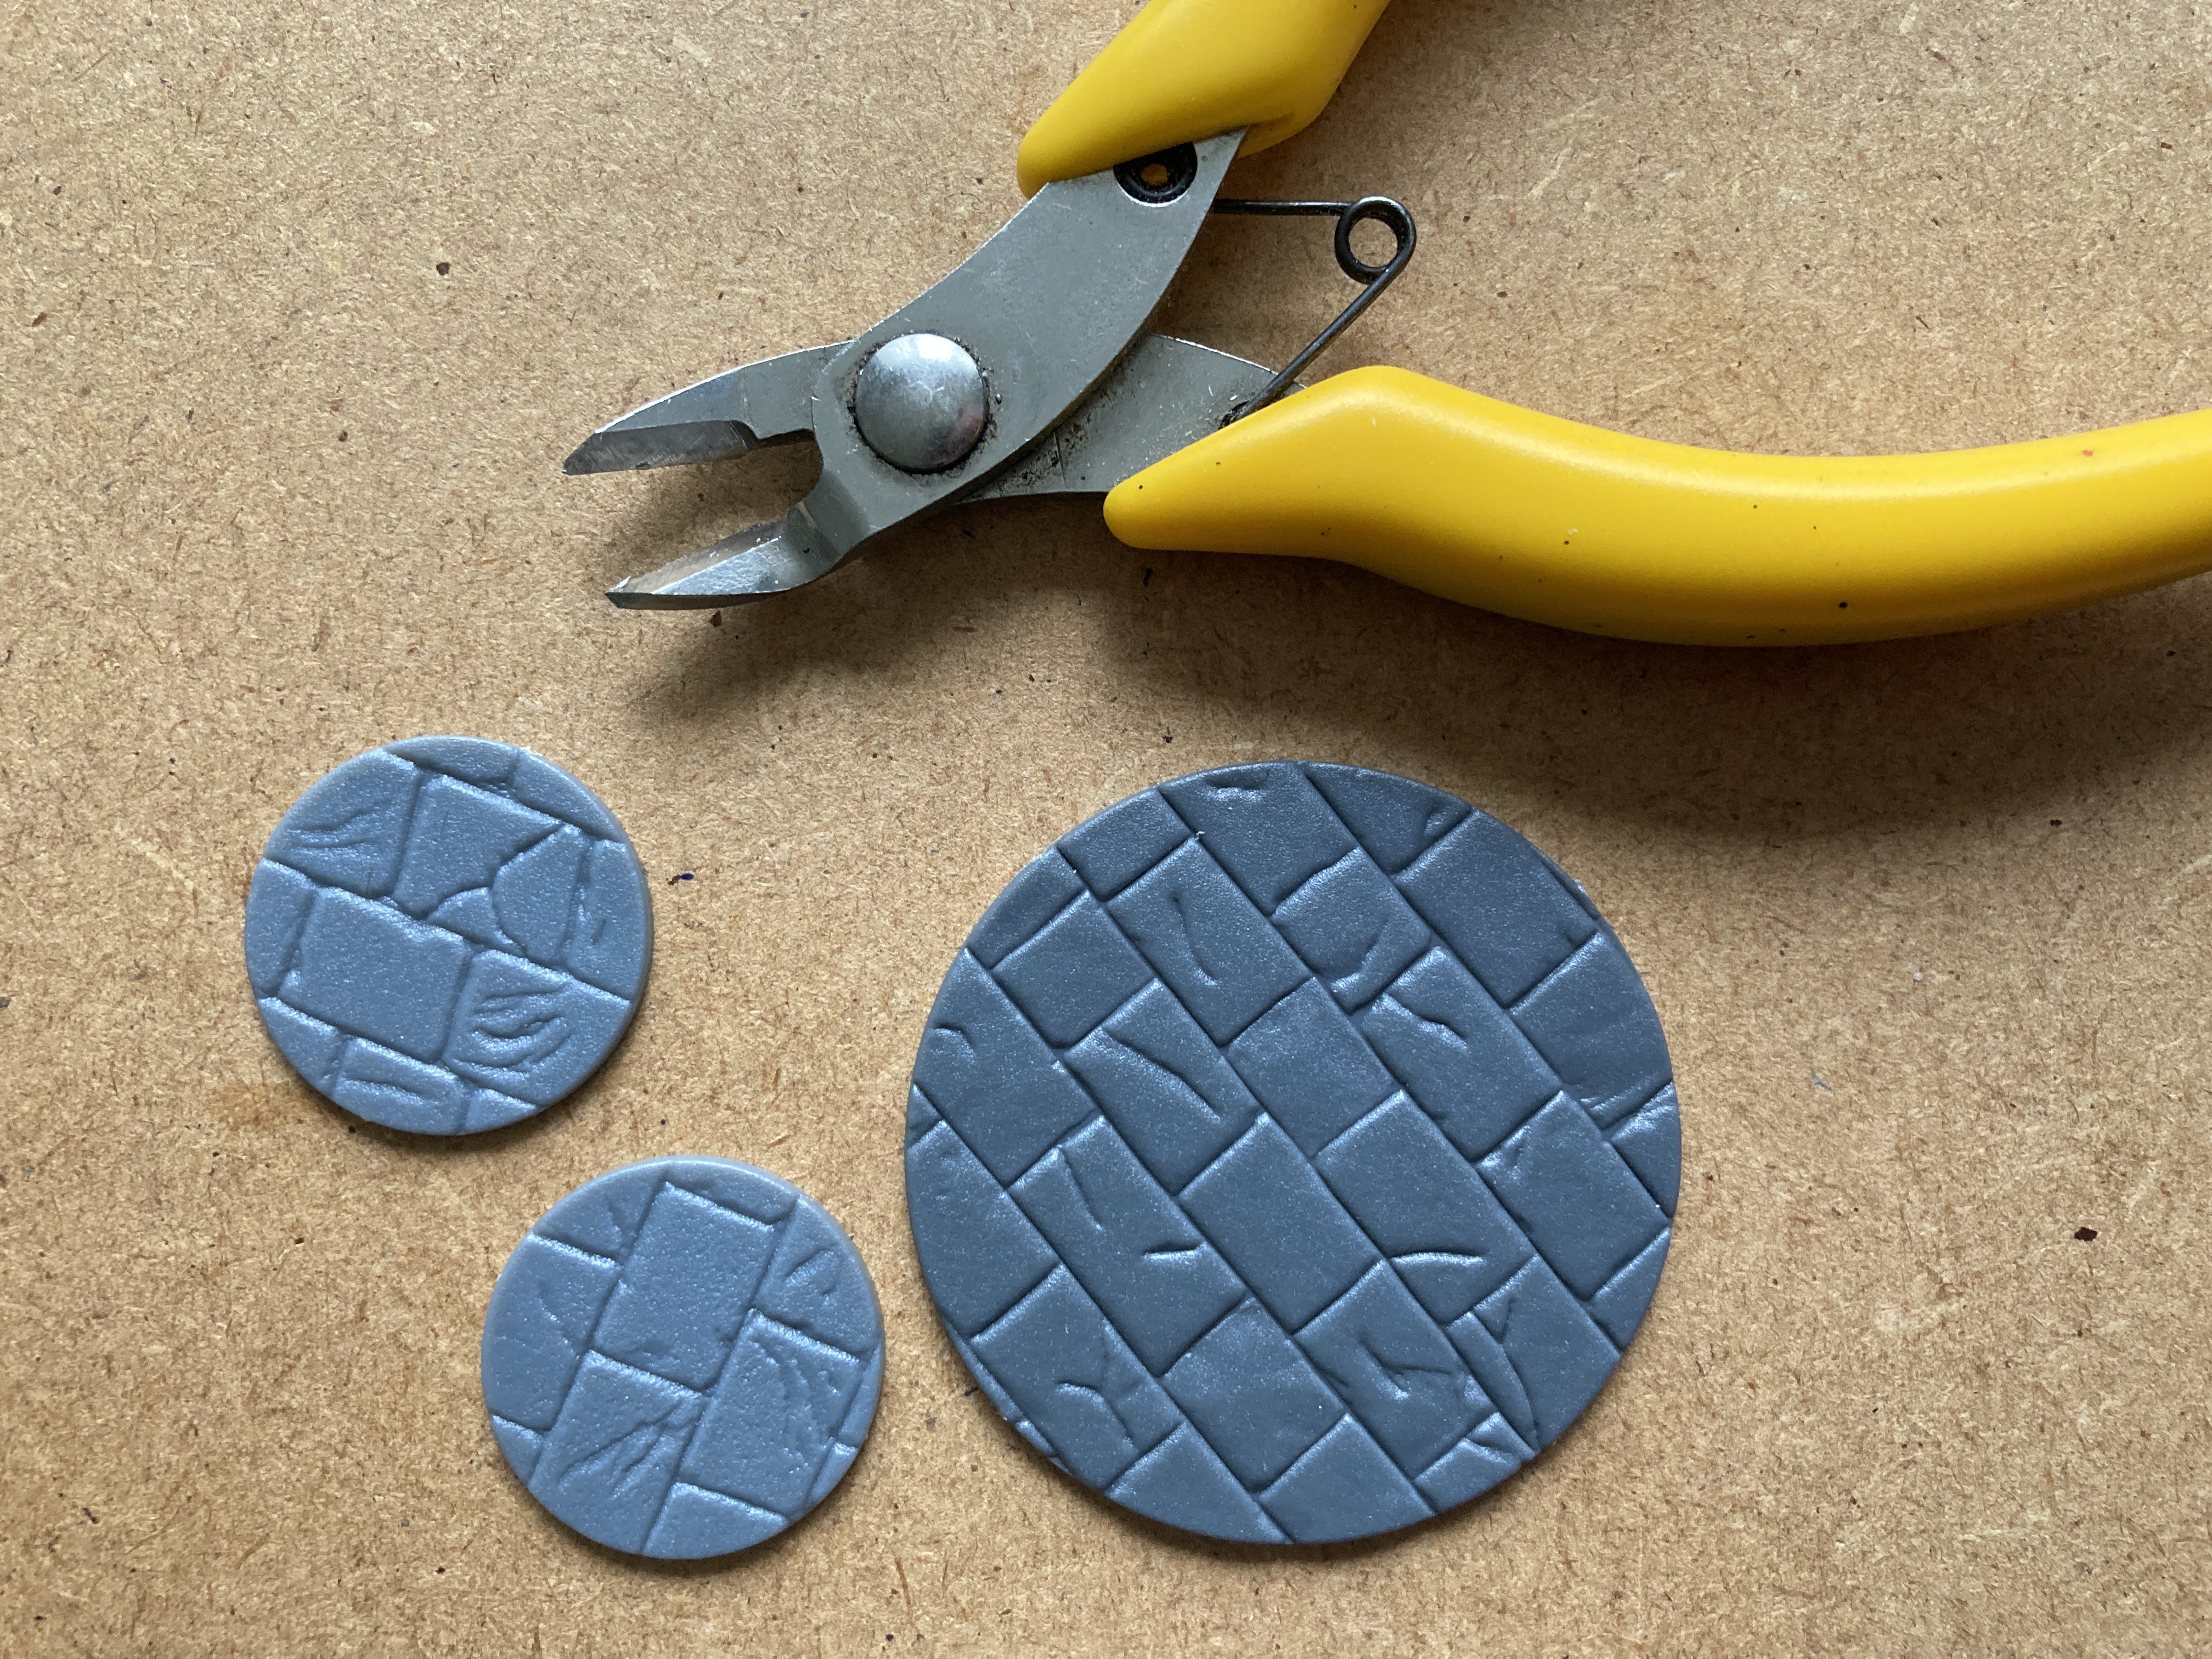
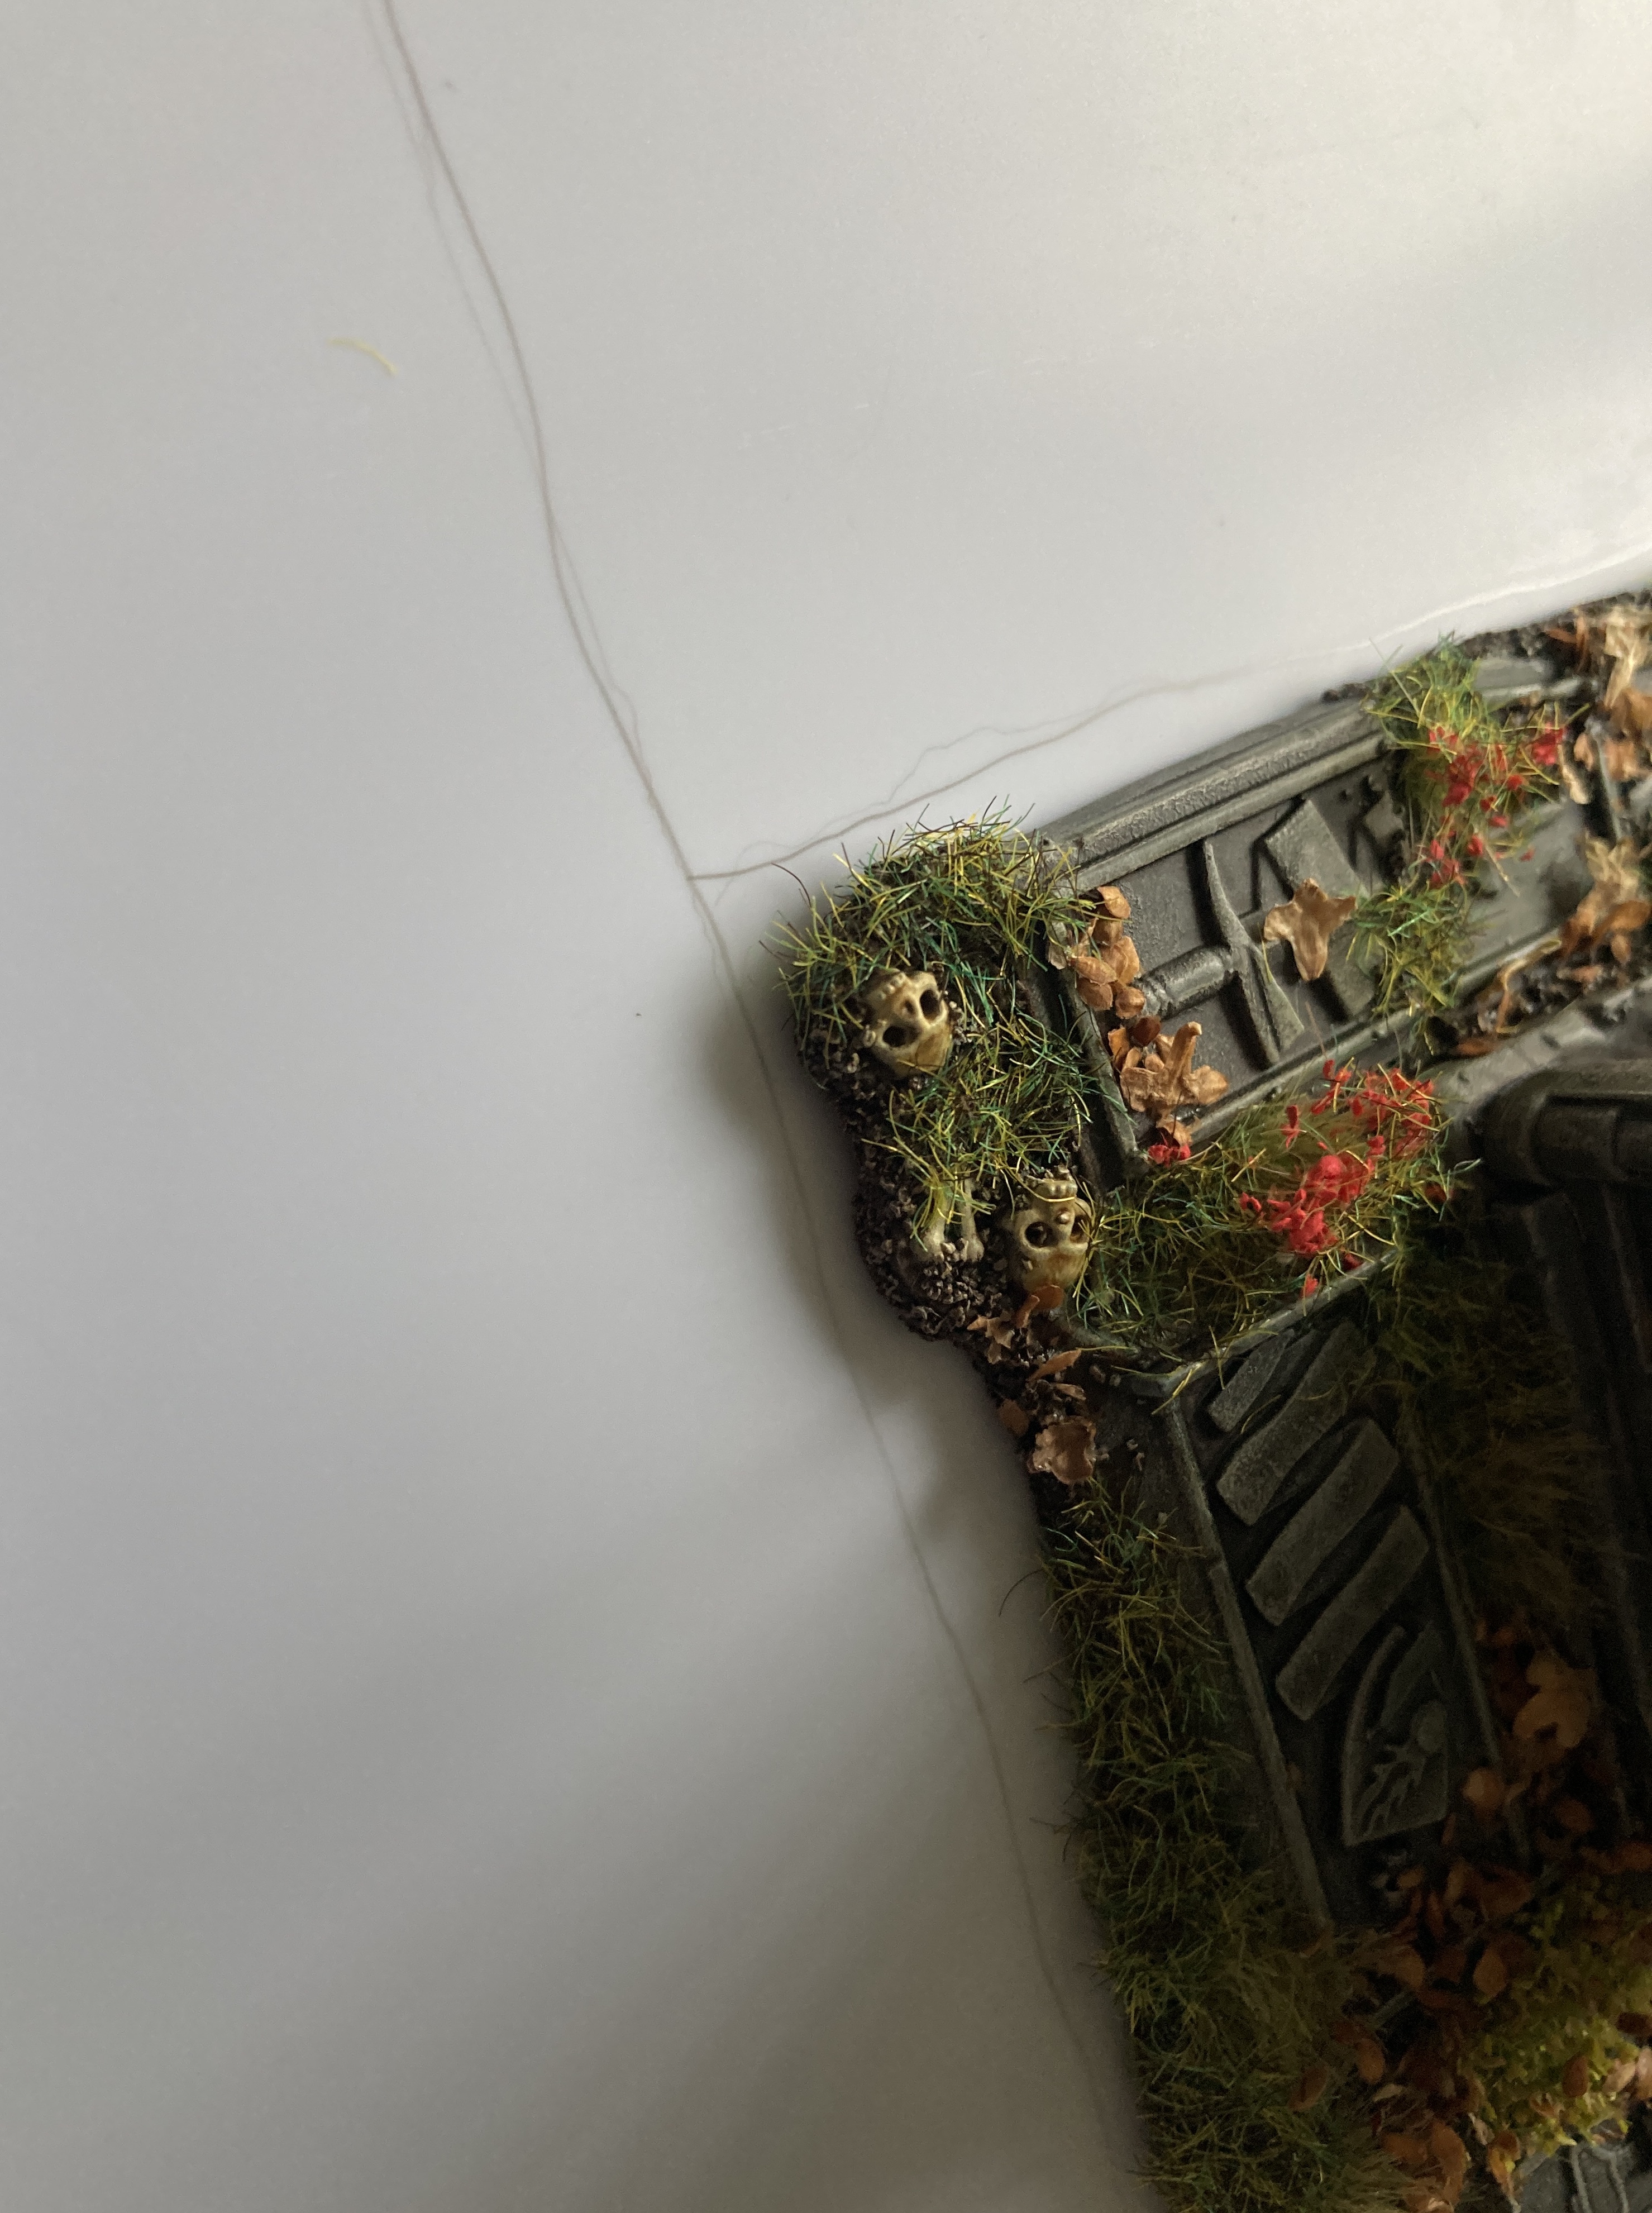
I cut up a few old flagstone bases from Renedra and added a few gravestones, a mix of Renedra and old Citadel from their Skeleton and Zombie sprues.
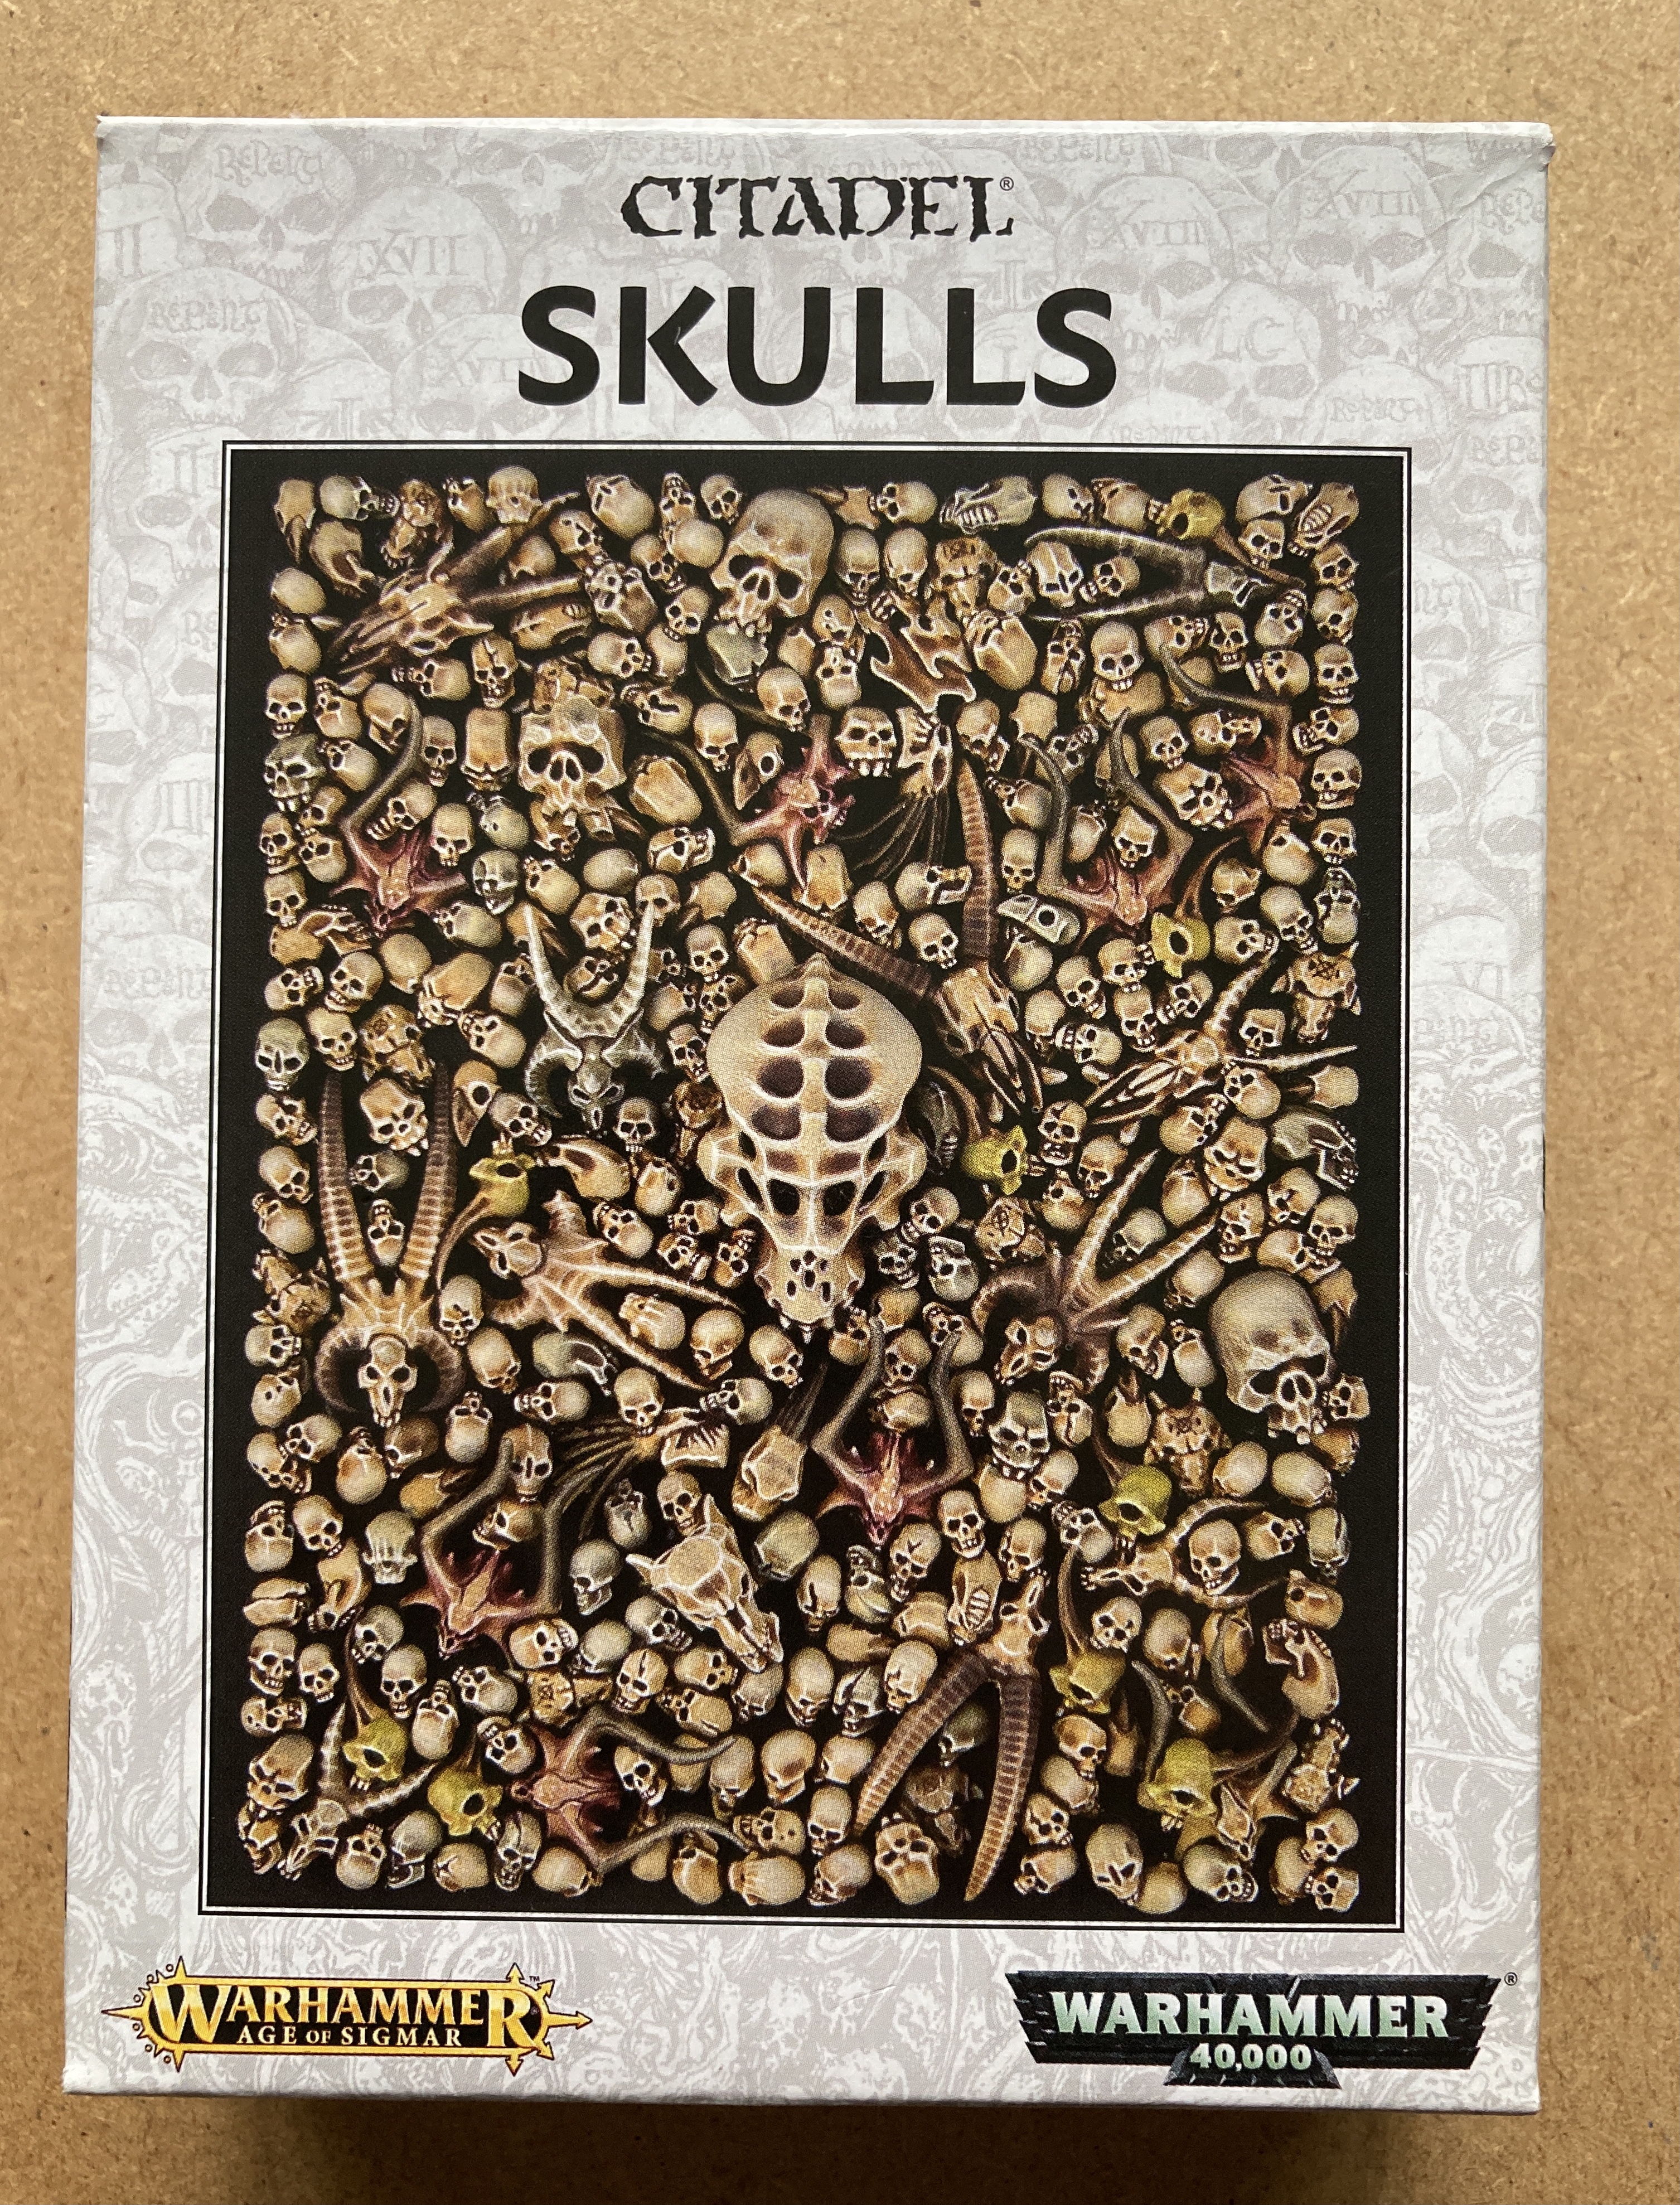
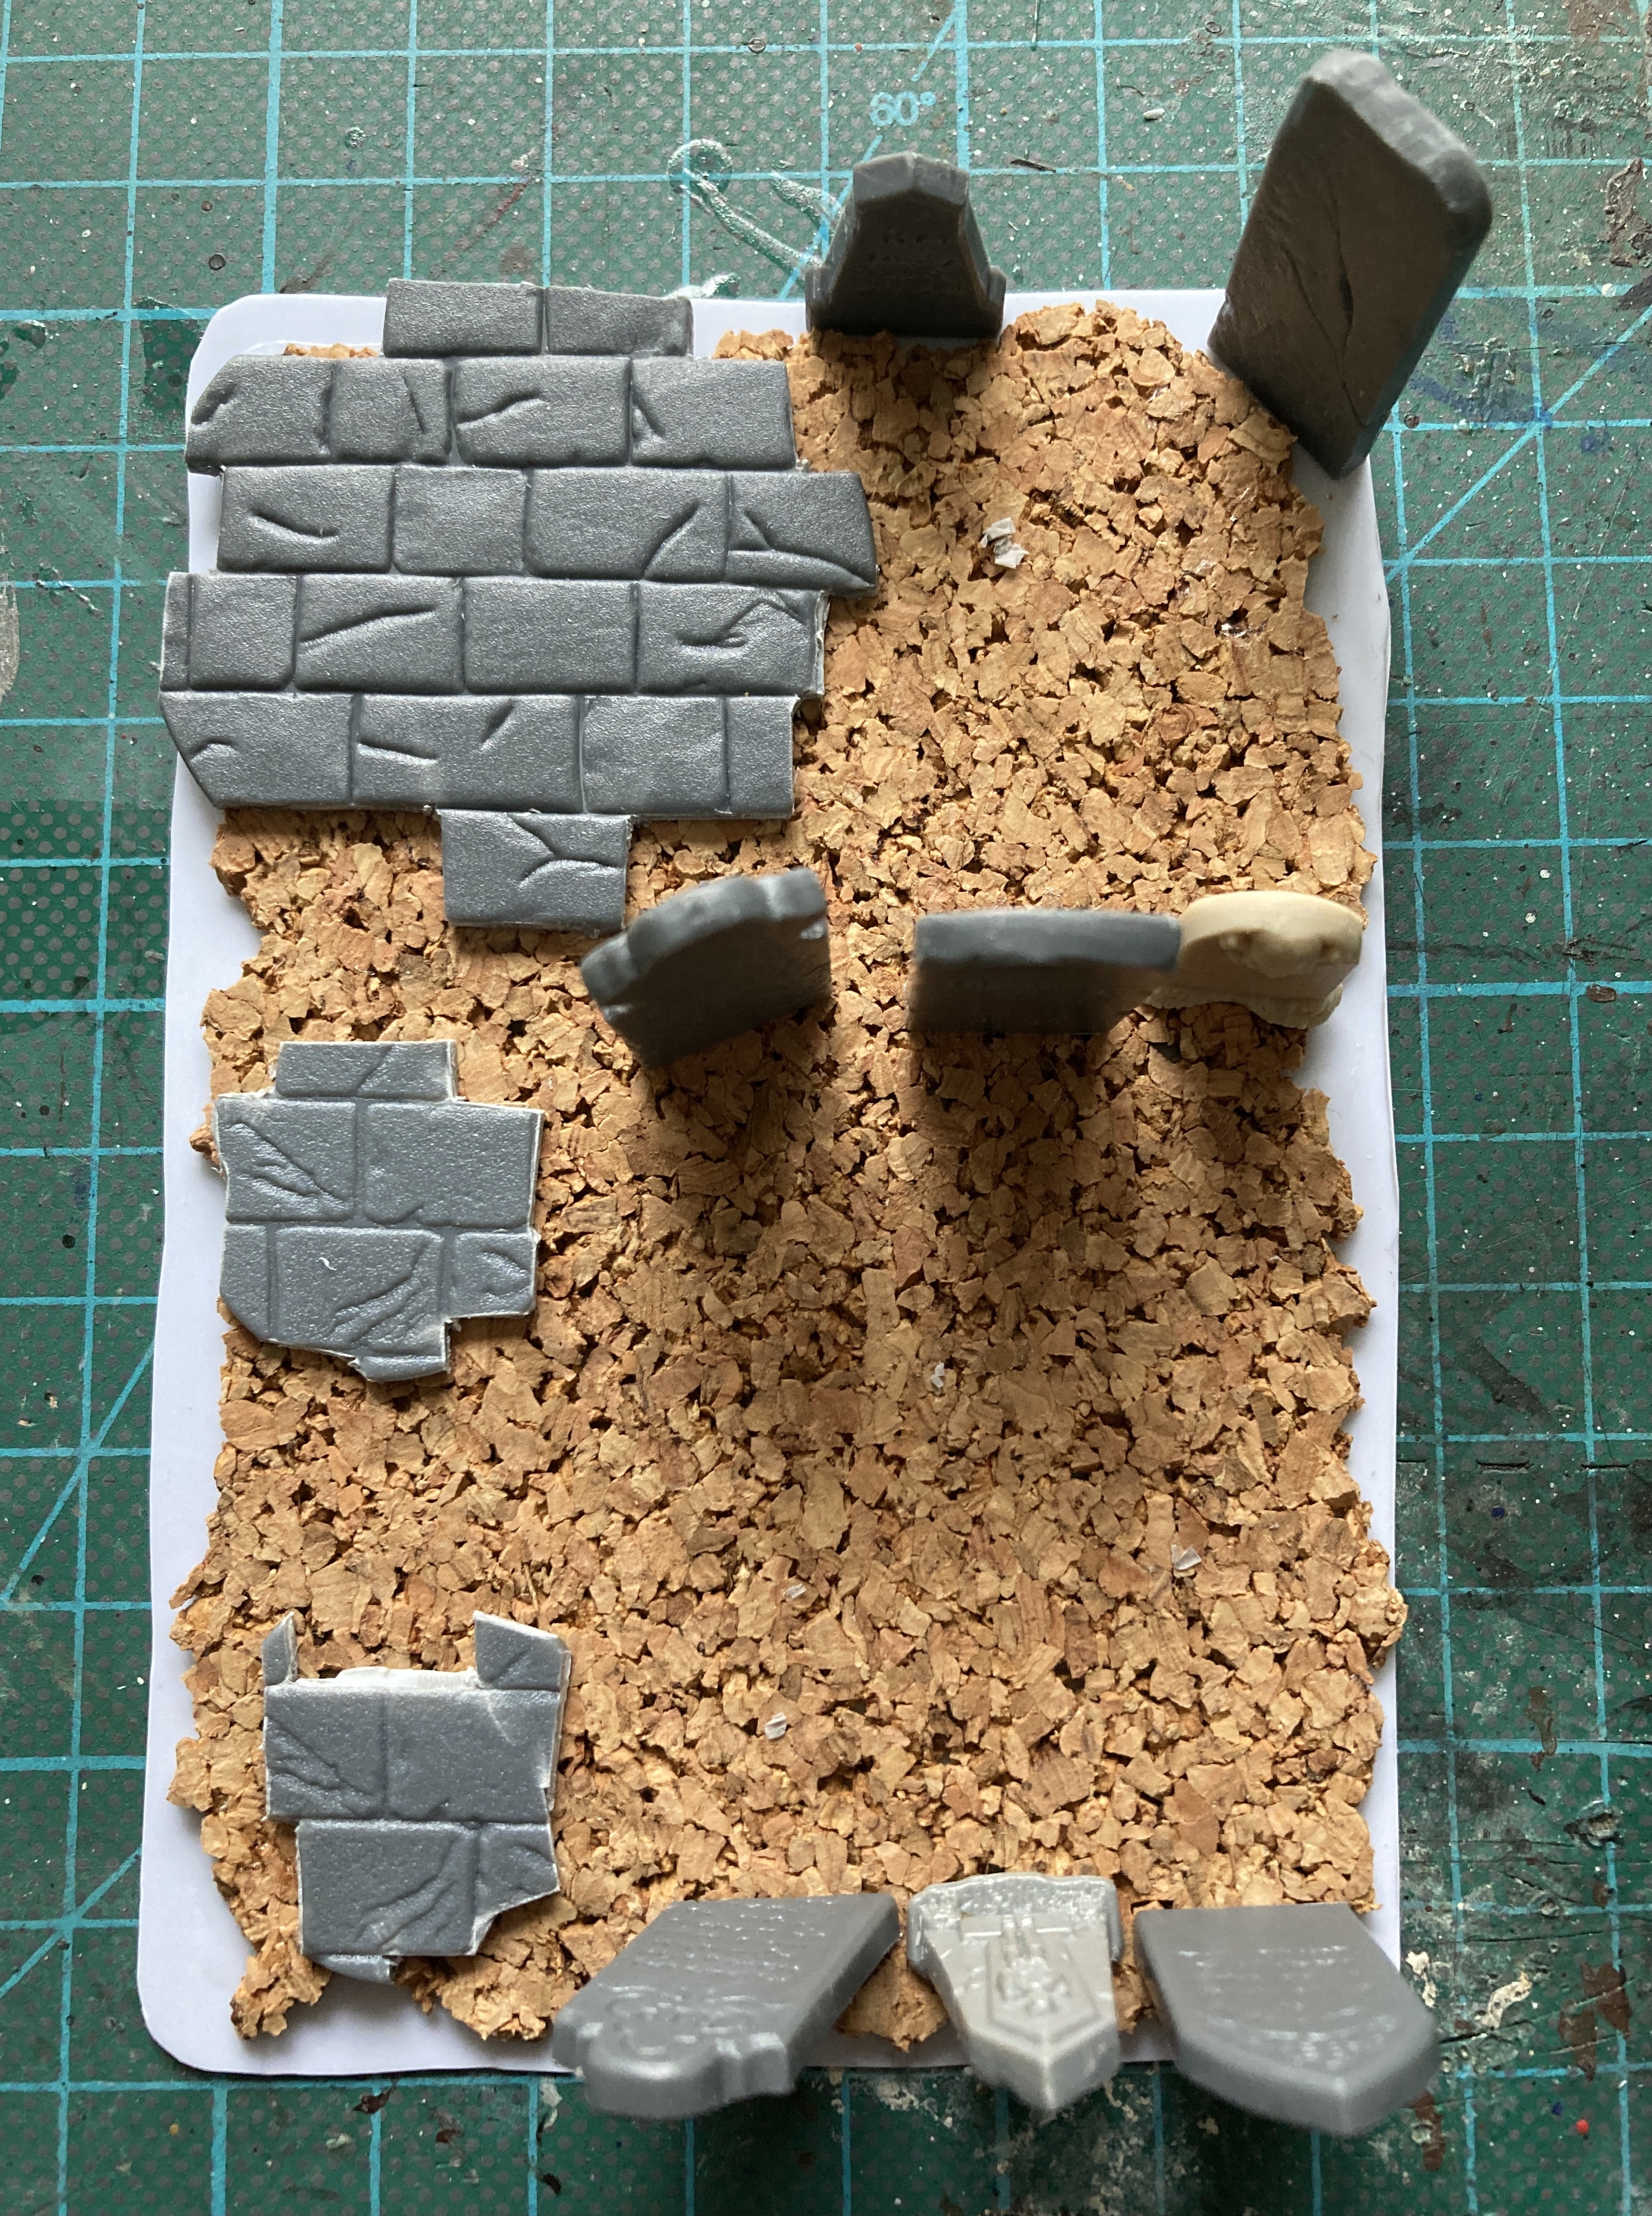
Now it was time to add details. First up I needed skulls, lots of skulls. Well, just six in fact, I don’t want to have to paint too many.
To make the ground less flat I added some smaller bits of cork to give lumps and bumps.
I found an old skeleton shield, a crow from the Renedra grave sprue and a cat from a Warlord games farm sprue.


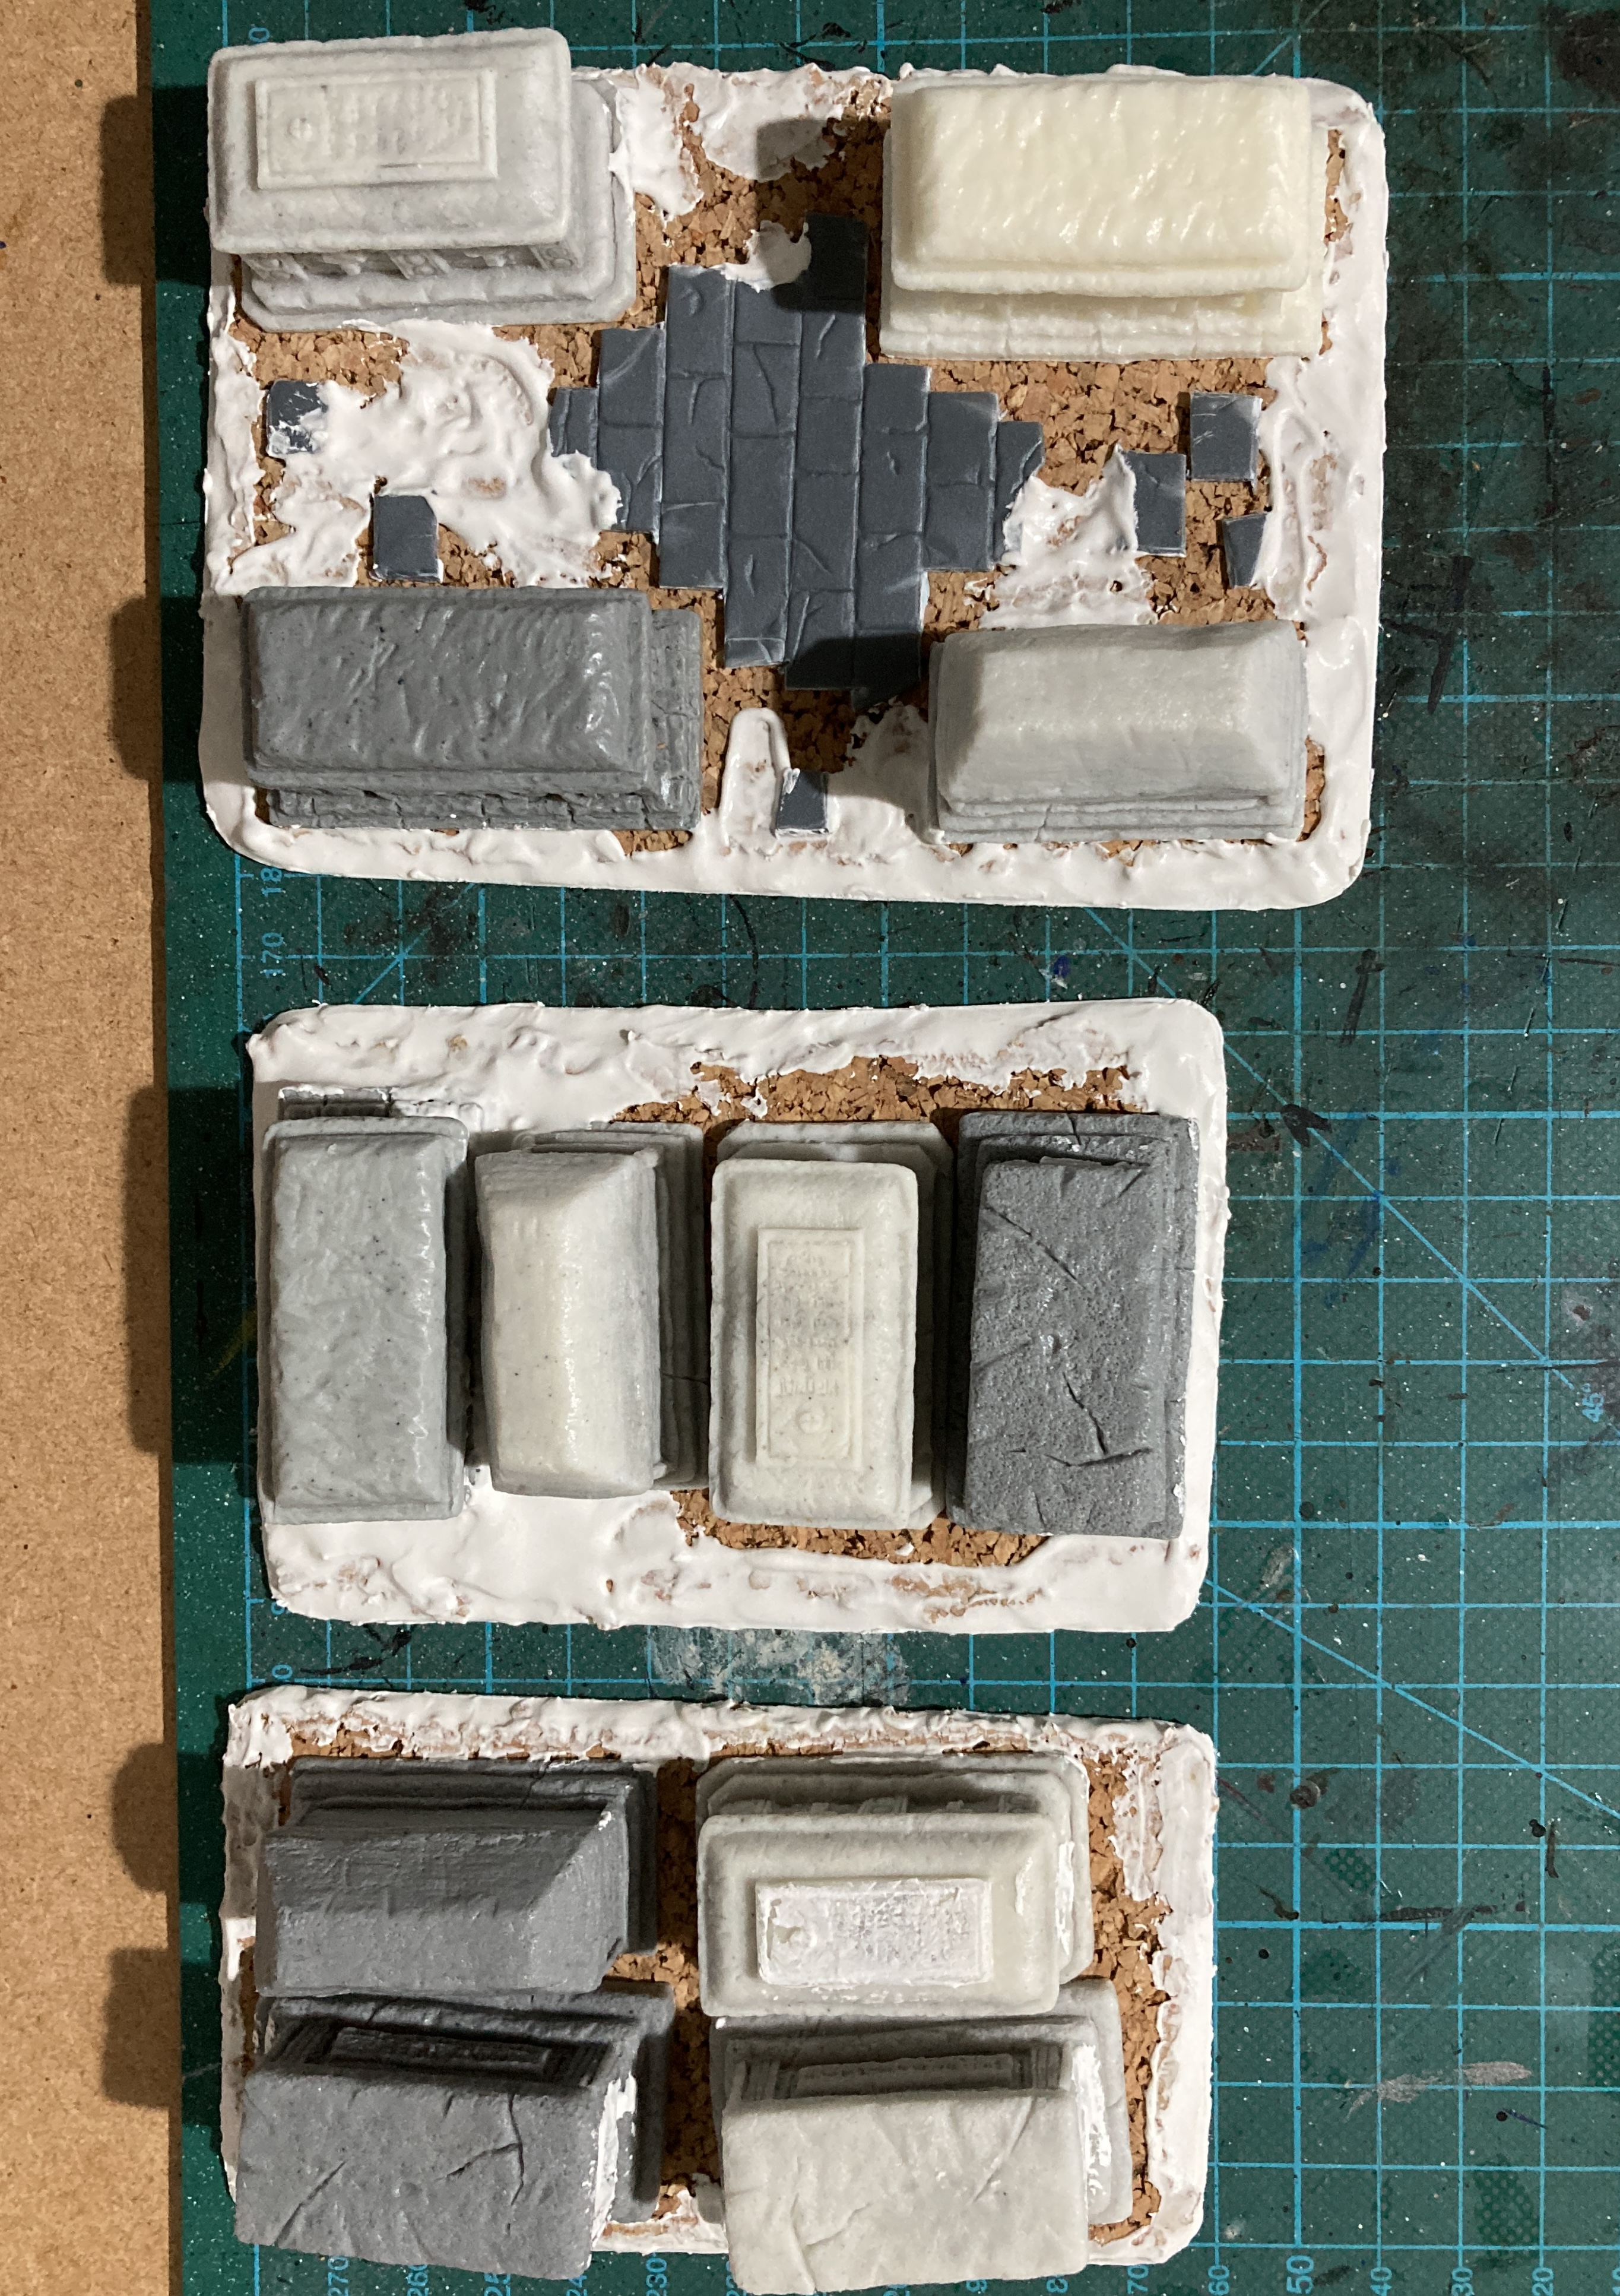
Finally I added filler to blend and smooth out the different layers of cork, followed by fine sand for ground texture then the whole thing was sprayed in Halford’s finest grey. I was going to use black but I’ve ran out. I need to get some more for when I make the others.
I plan on painting the piece in a similar fashion to the Garden of Morr so it should blend in. I also may use thicker plasticard as the whole piece is a little bendy, but overall I’m pretty happy with this so far.
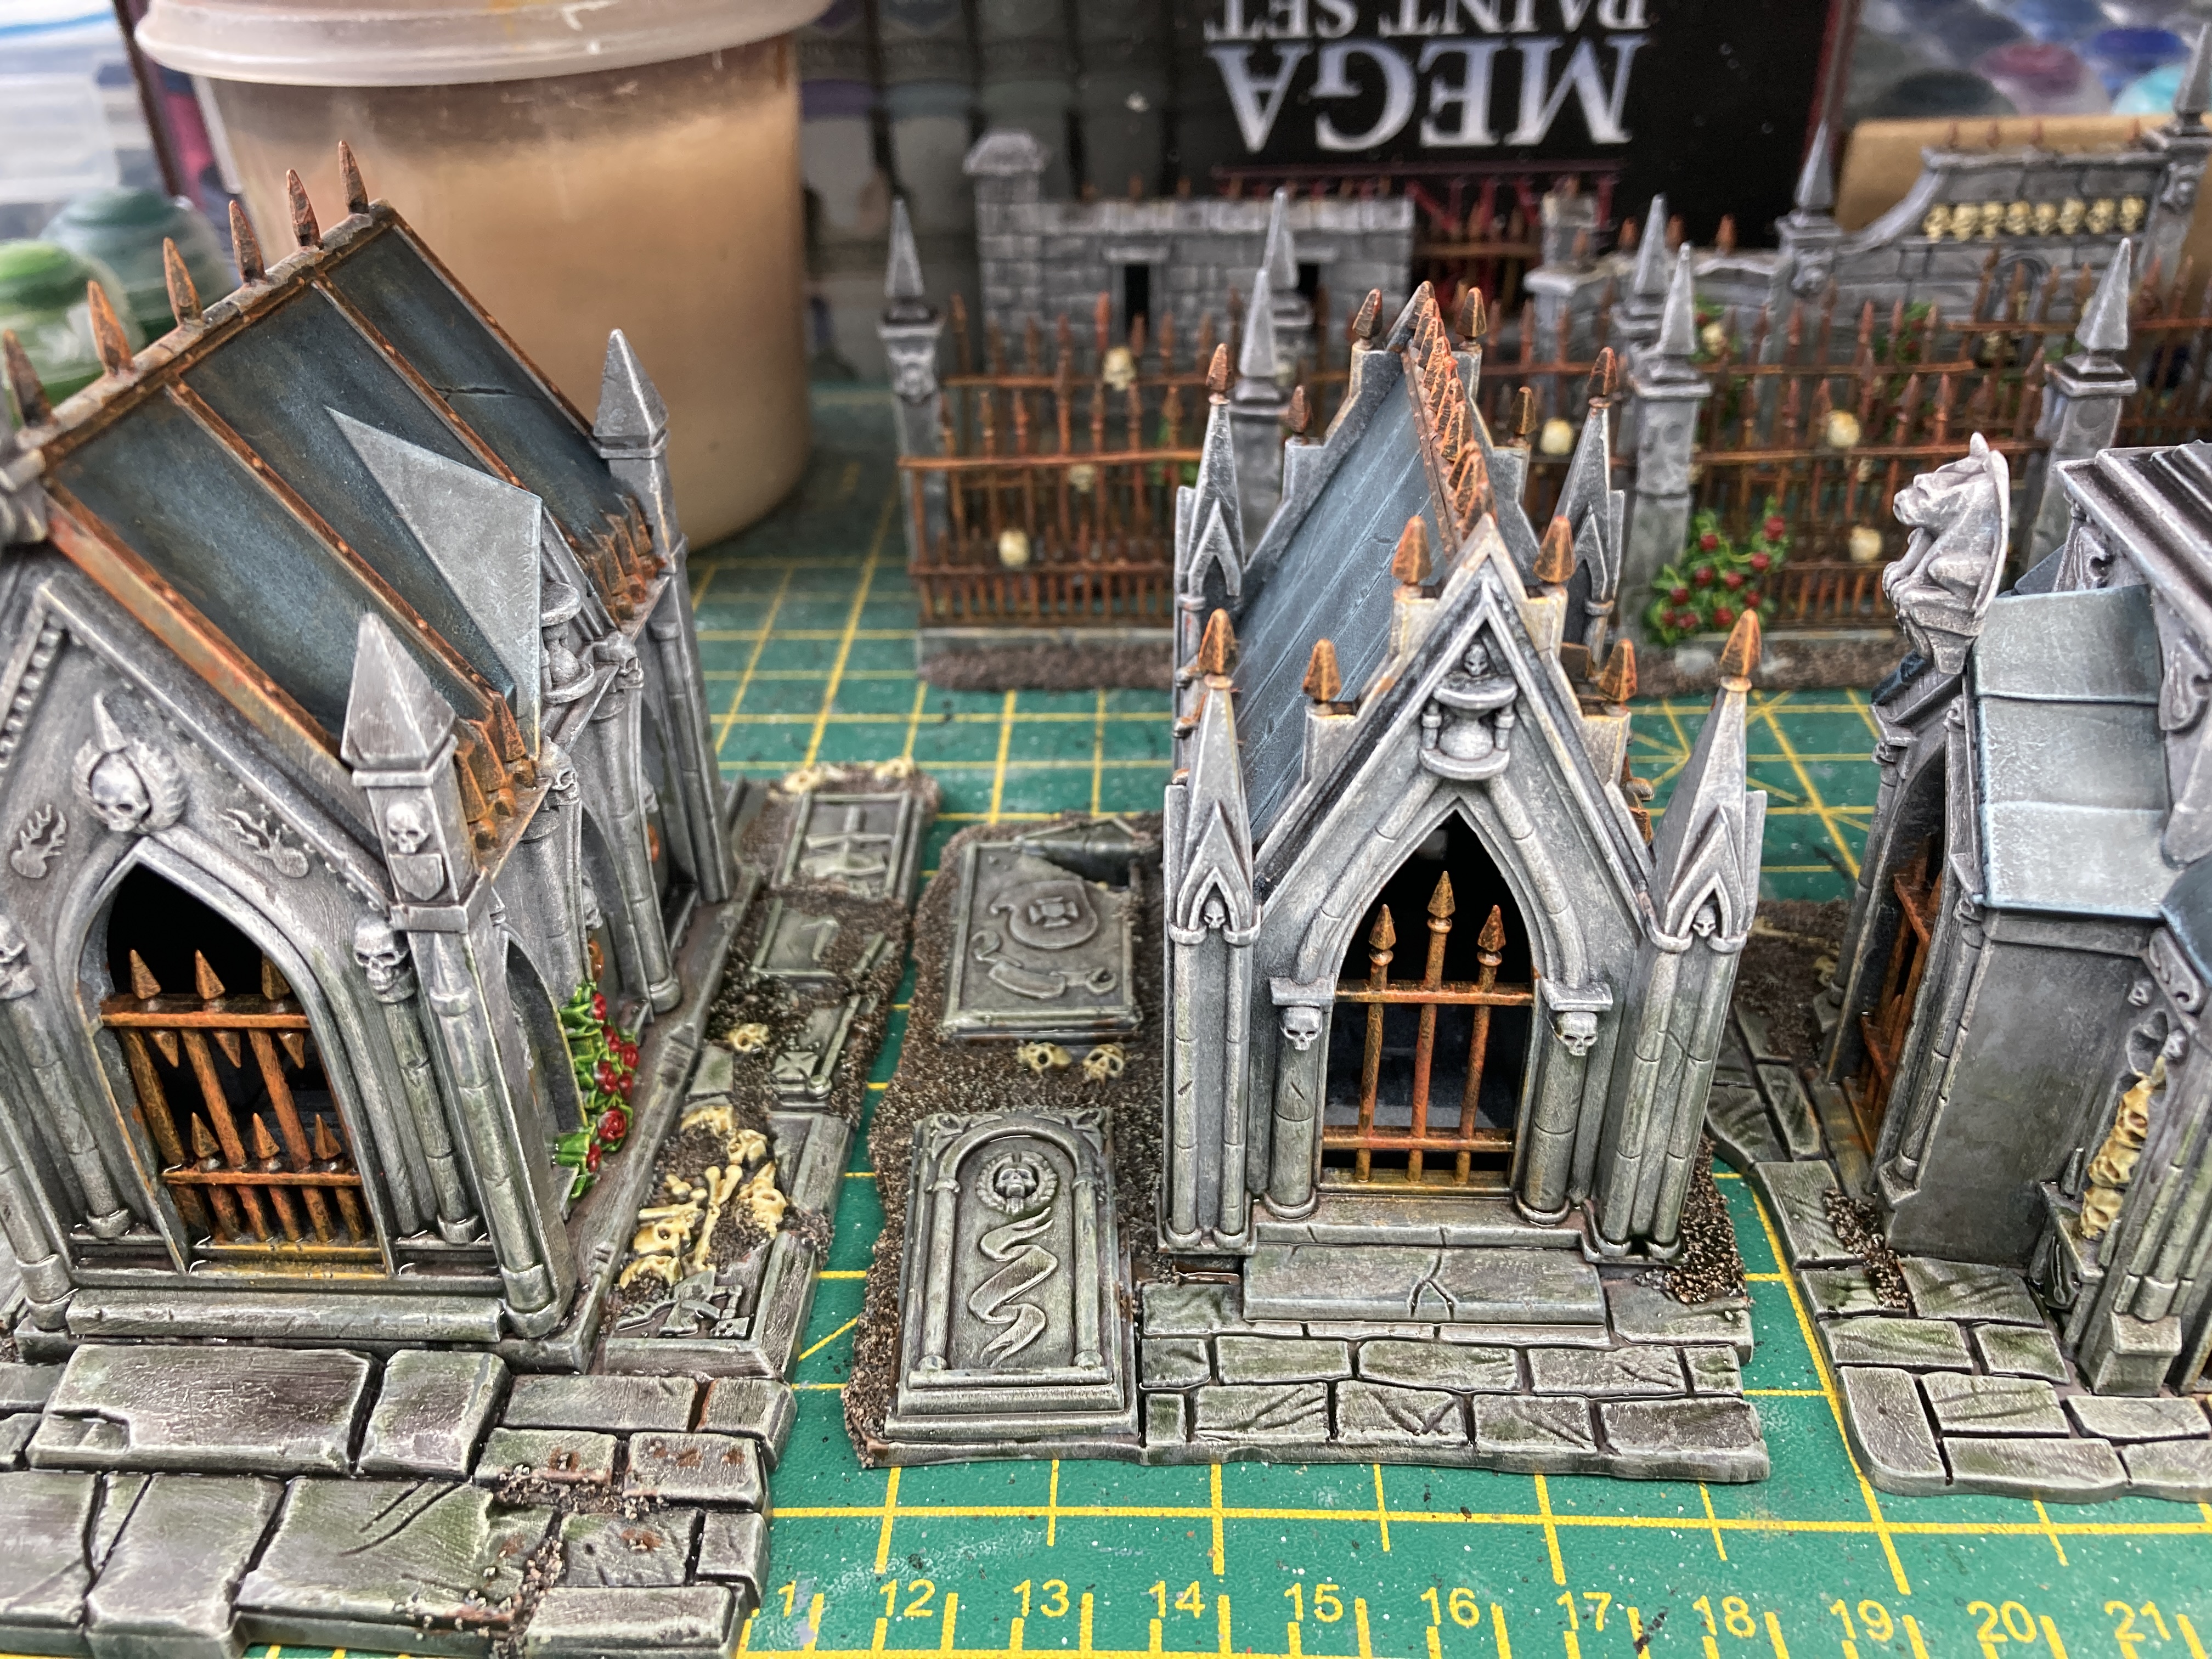
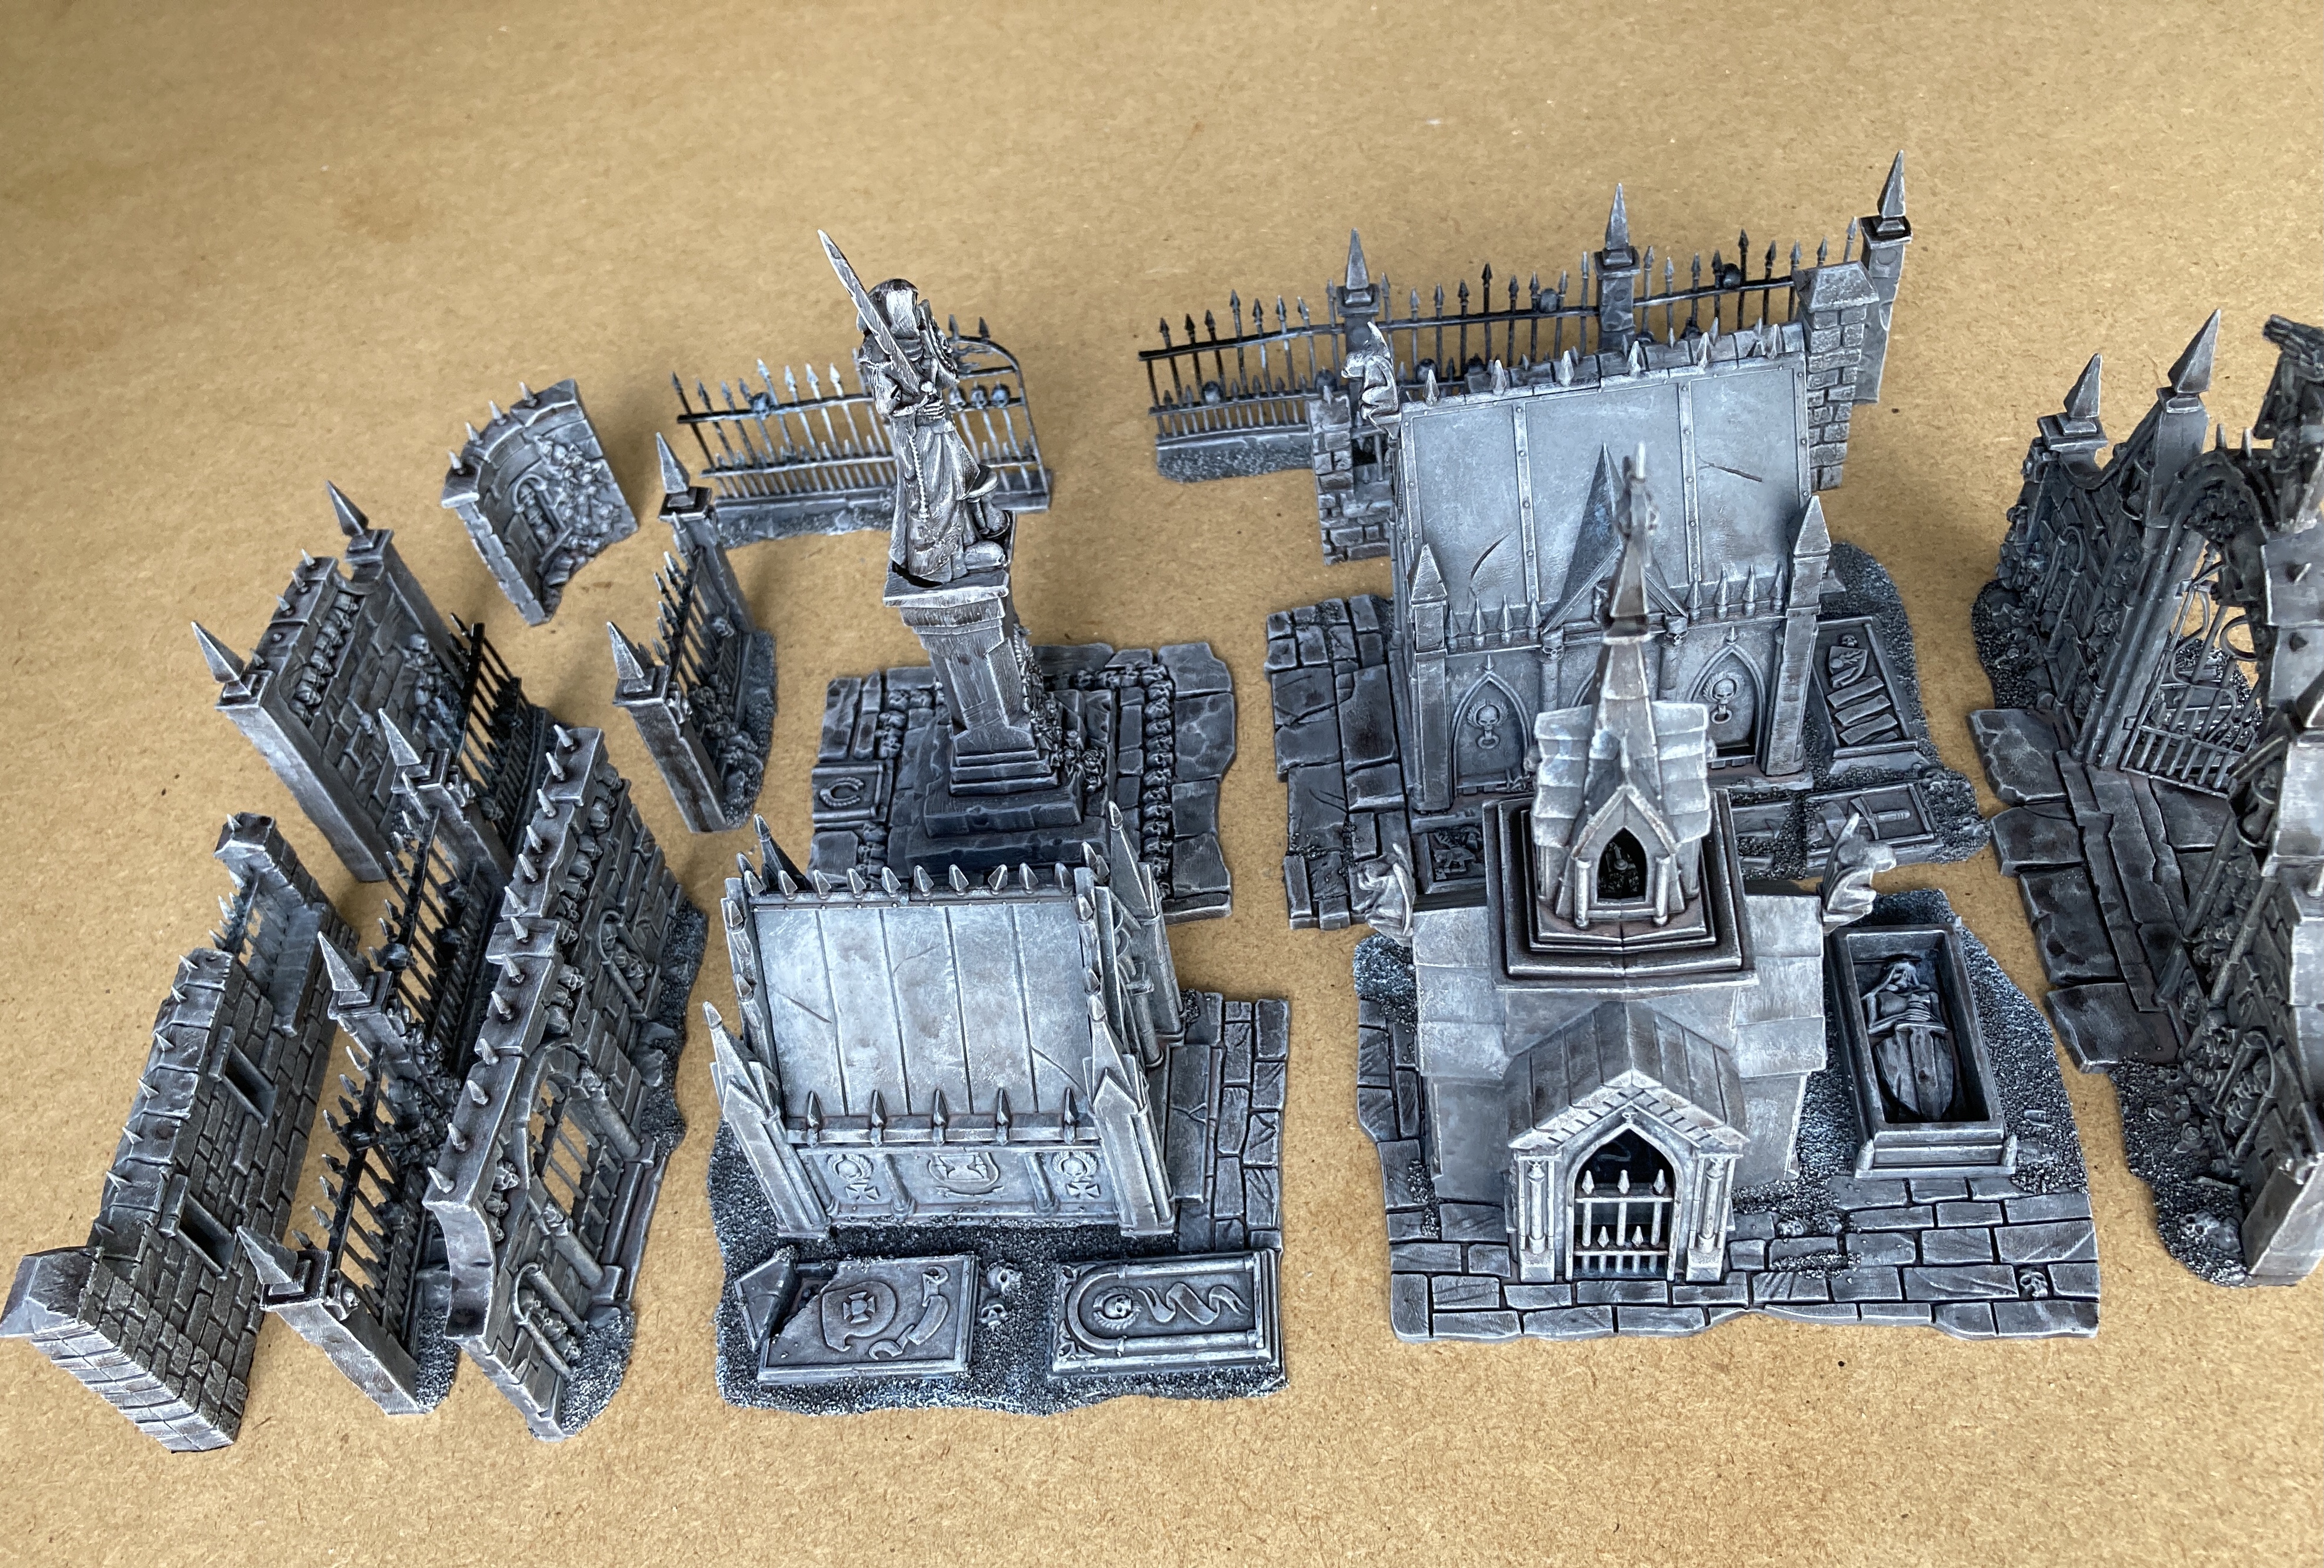
The Garden Of Morr Is Finished…Or Is It?
After only a week’s work I’ve finished my Garden Of Morr having only had it in grey plastic for about 12 years.
I must say I’m chuffed to bits with it. I wanted that overgrown cemetery look and I think I’ve really achieved it. I can’t wait to play a few games with it.
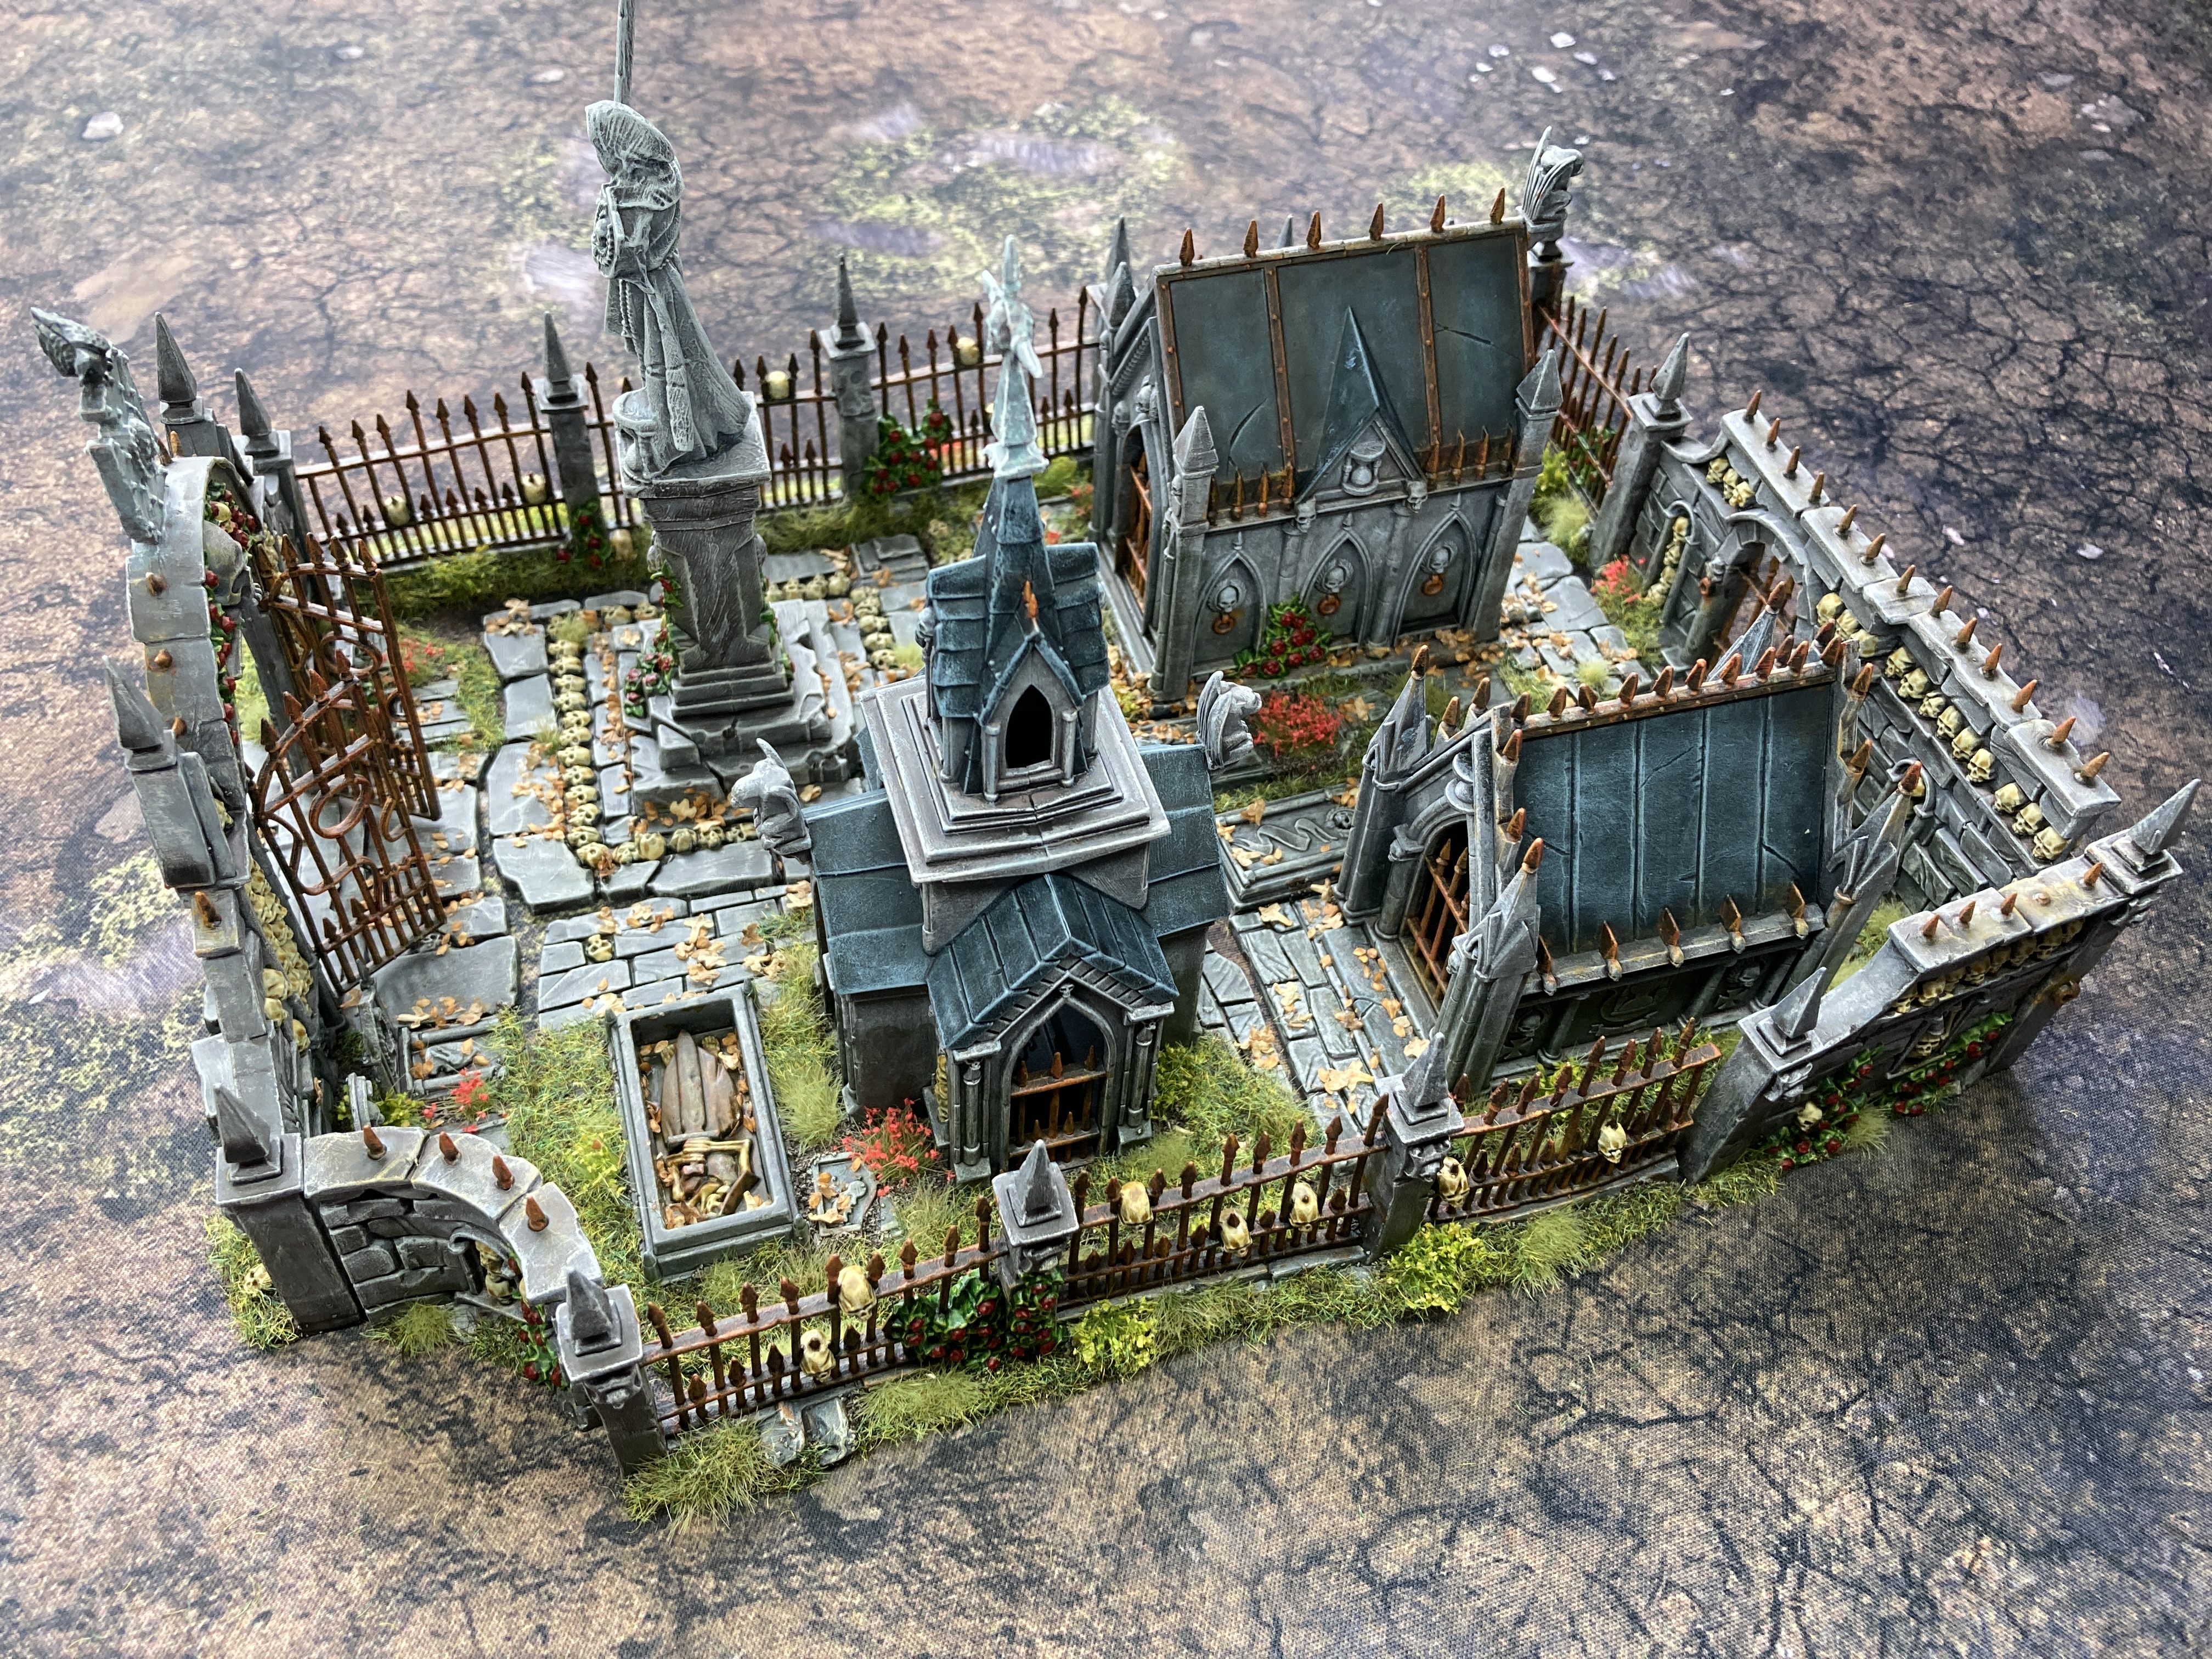
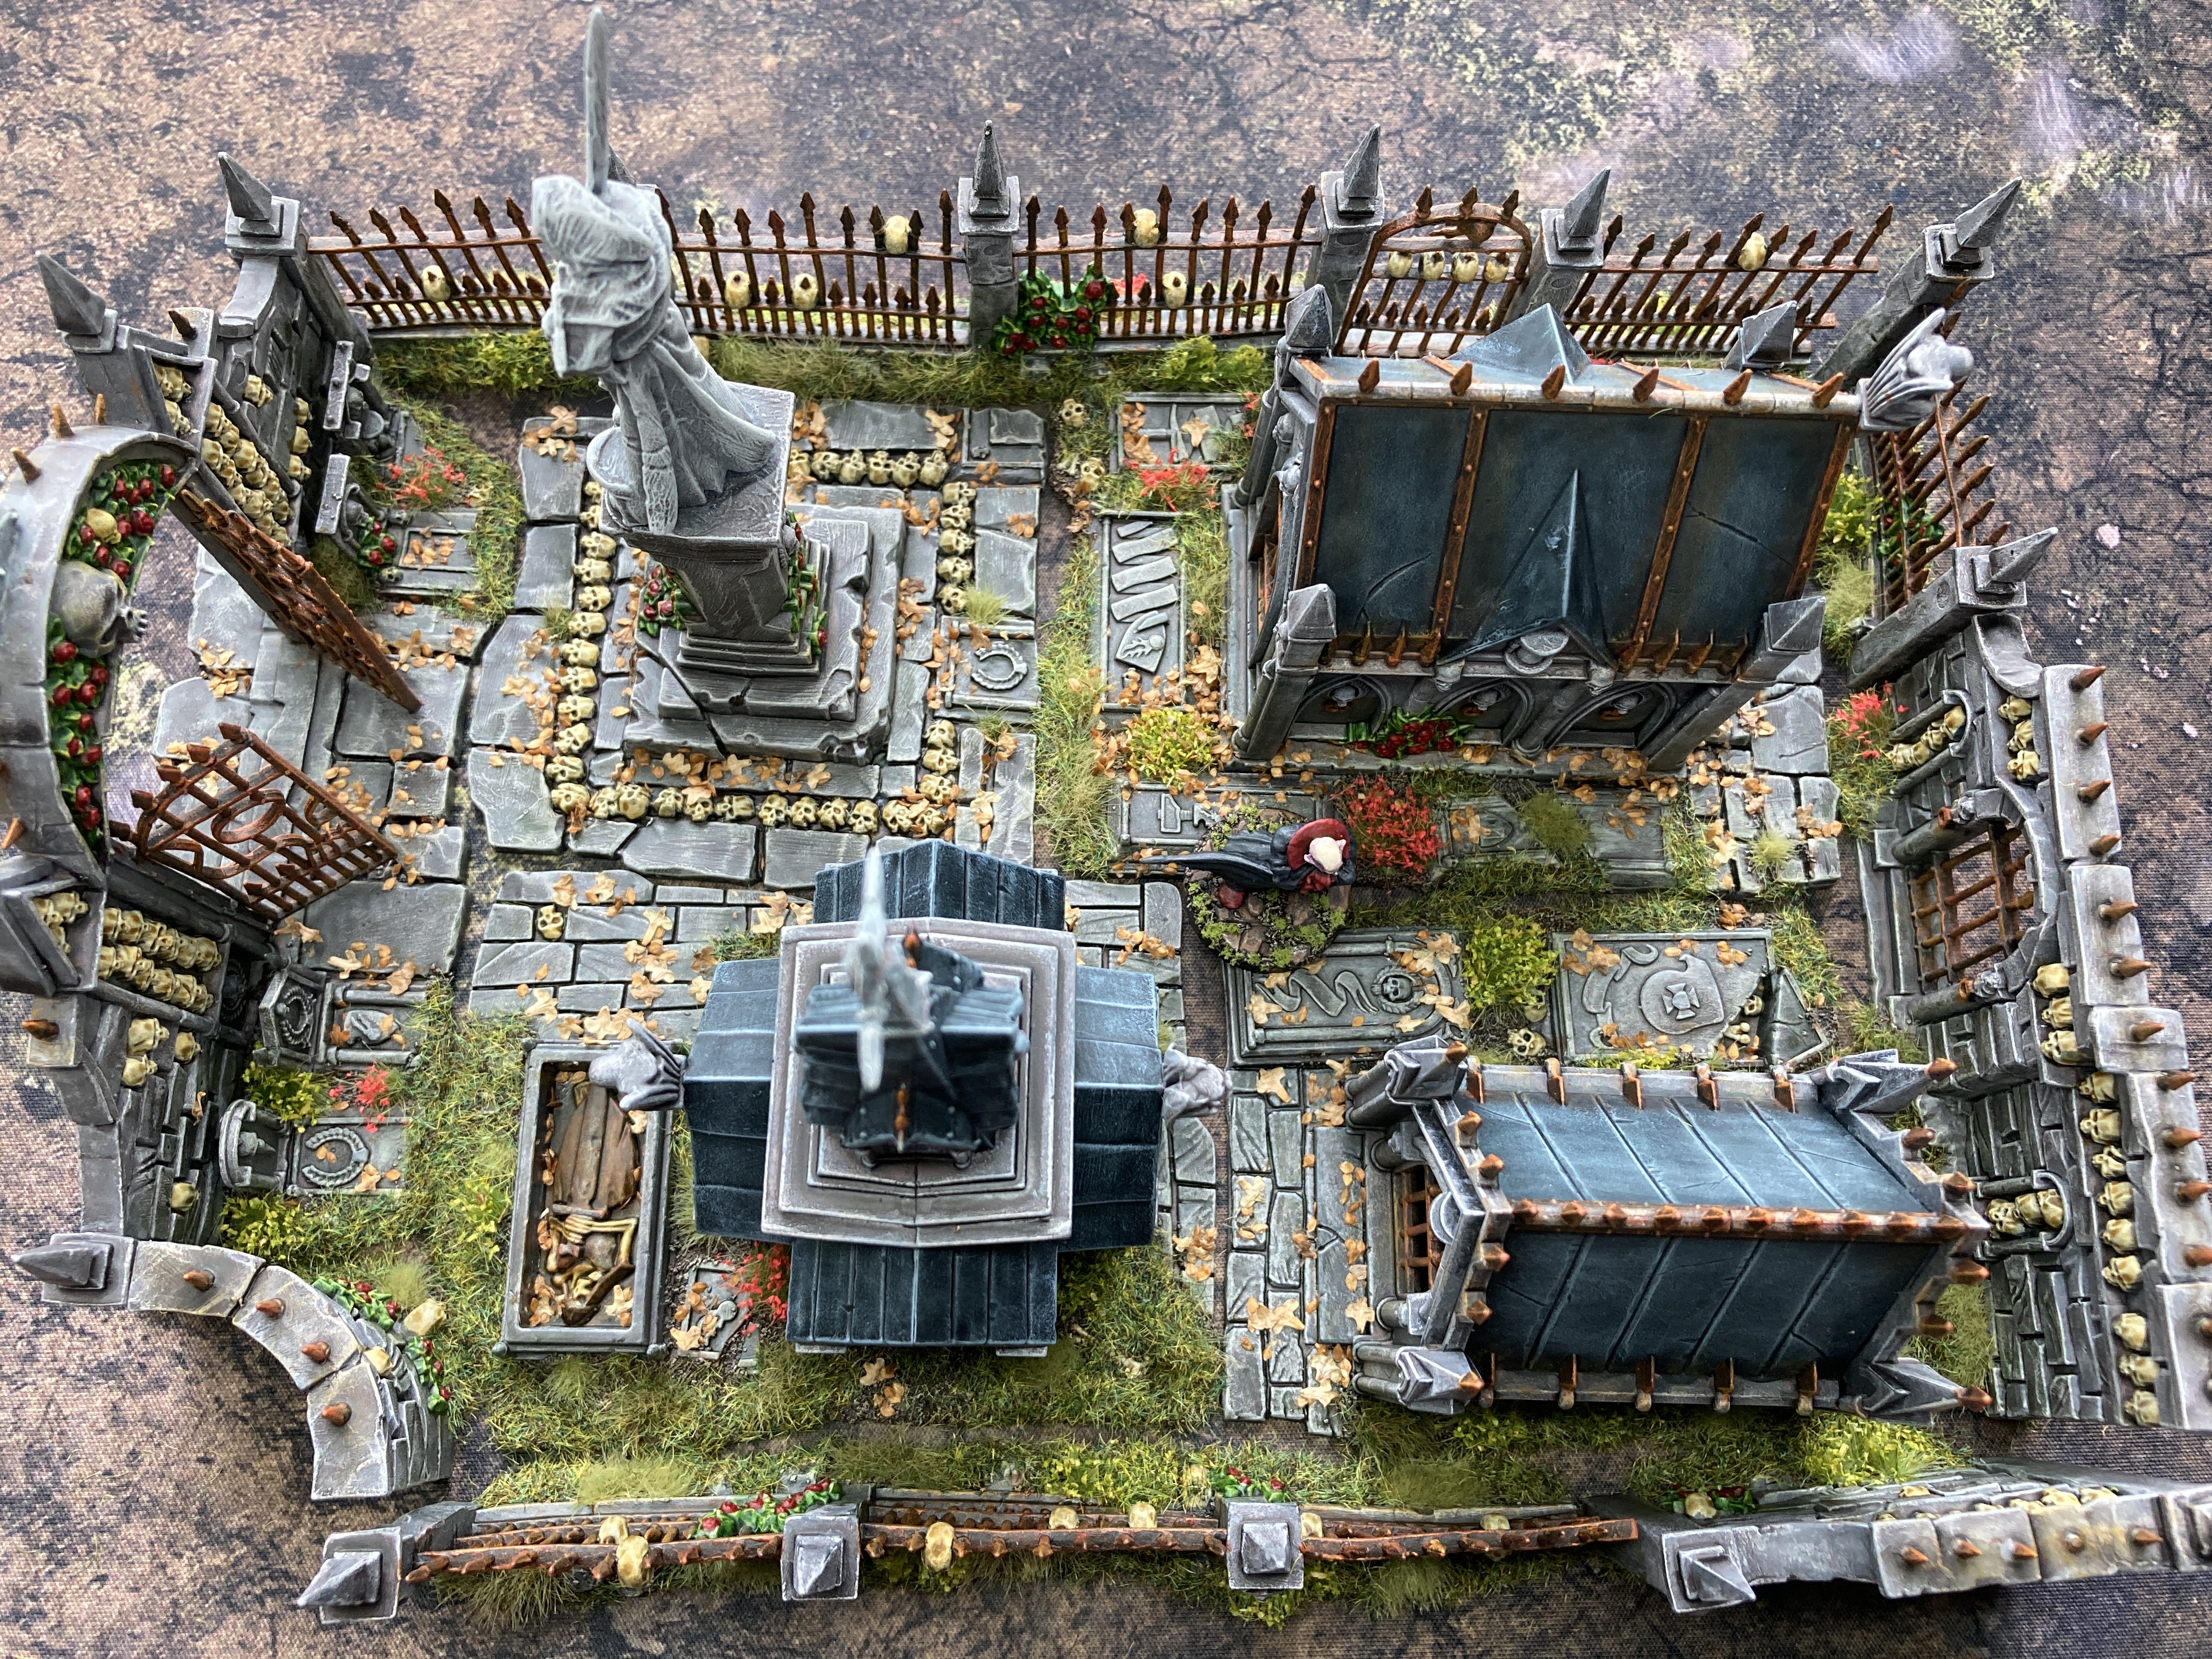
As you can see I raided my tufts collection and added a whole bunch of other scenic stuff including static grass, useful to fill in the gaps between the different tufts to make it all appear more wild and overgrown. I used leaves really only on the flagstones to help with the overgrown style but I didn’t go wild with them.

Going onwards I’m looking to expand the Garden out into a full 2×2 or even a 3×3 table. I’ve already got some spooky Mantic trees on order and I’m pretty sure I have a few grave stones in a bits box which I could stick onto some mdf squares to make rows of graves.
I’m also thinking of getting a church or chapel. Something not too big, but we’ll see.
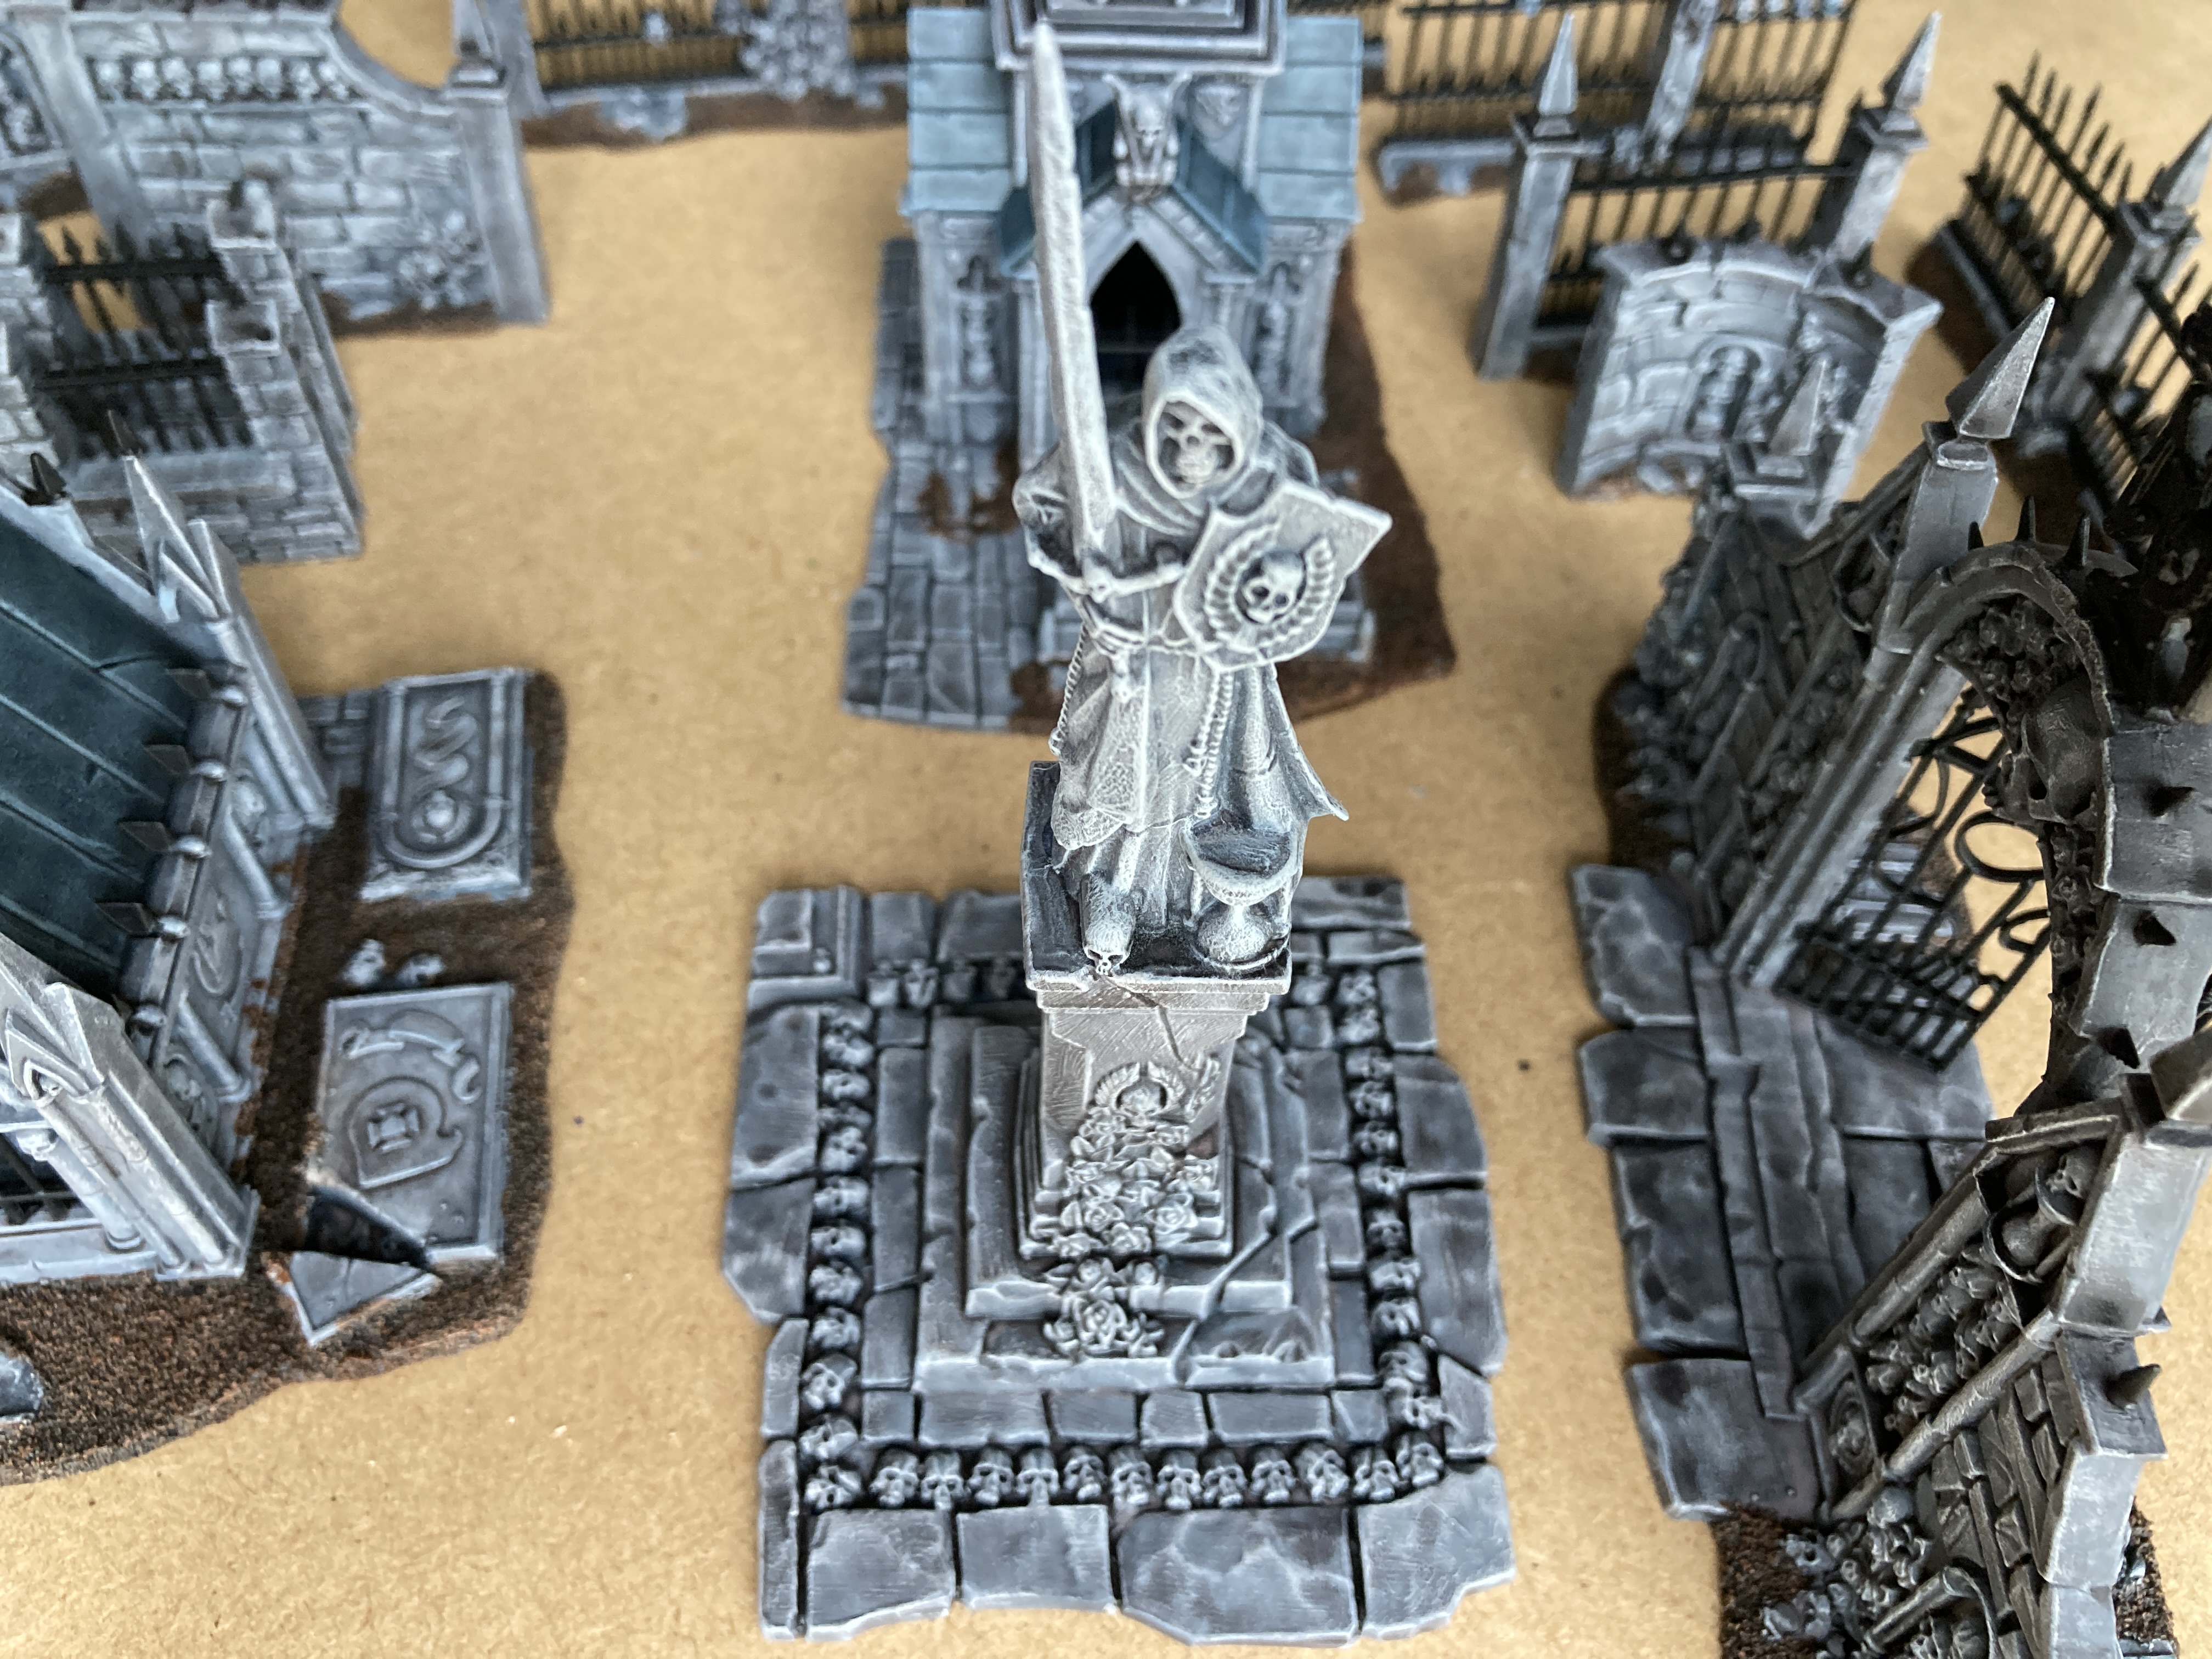
Fiddling With The Details
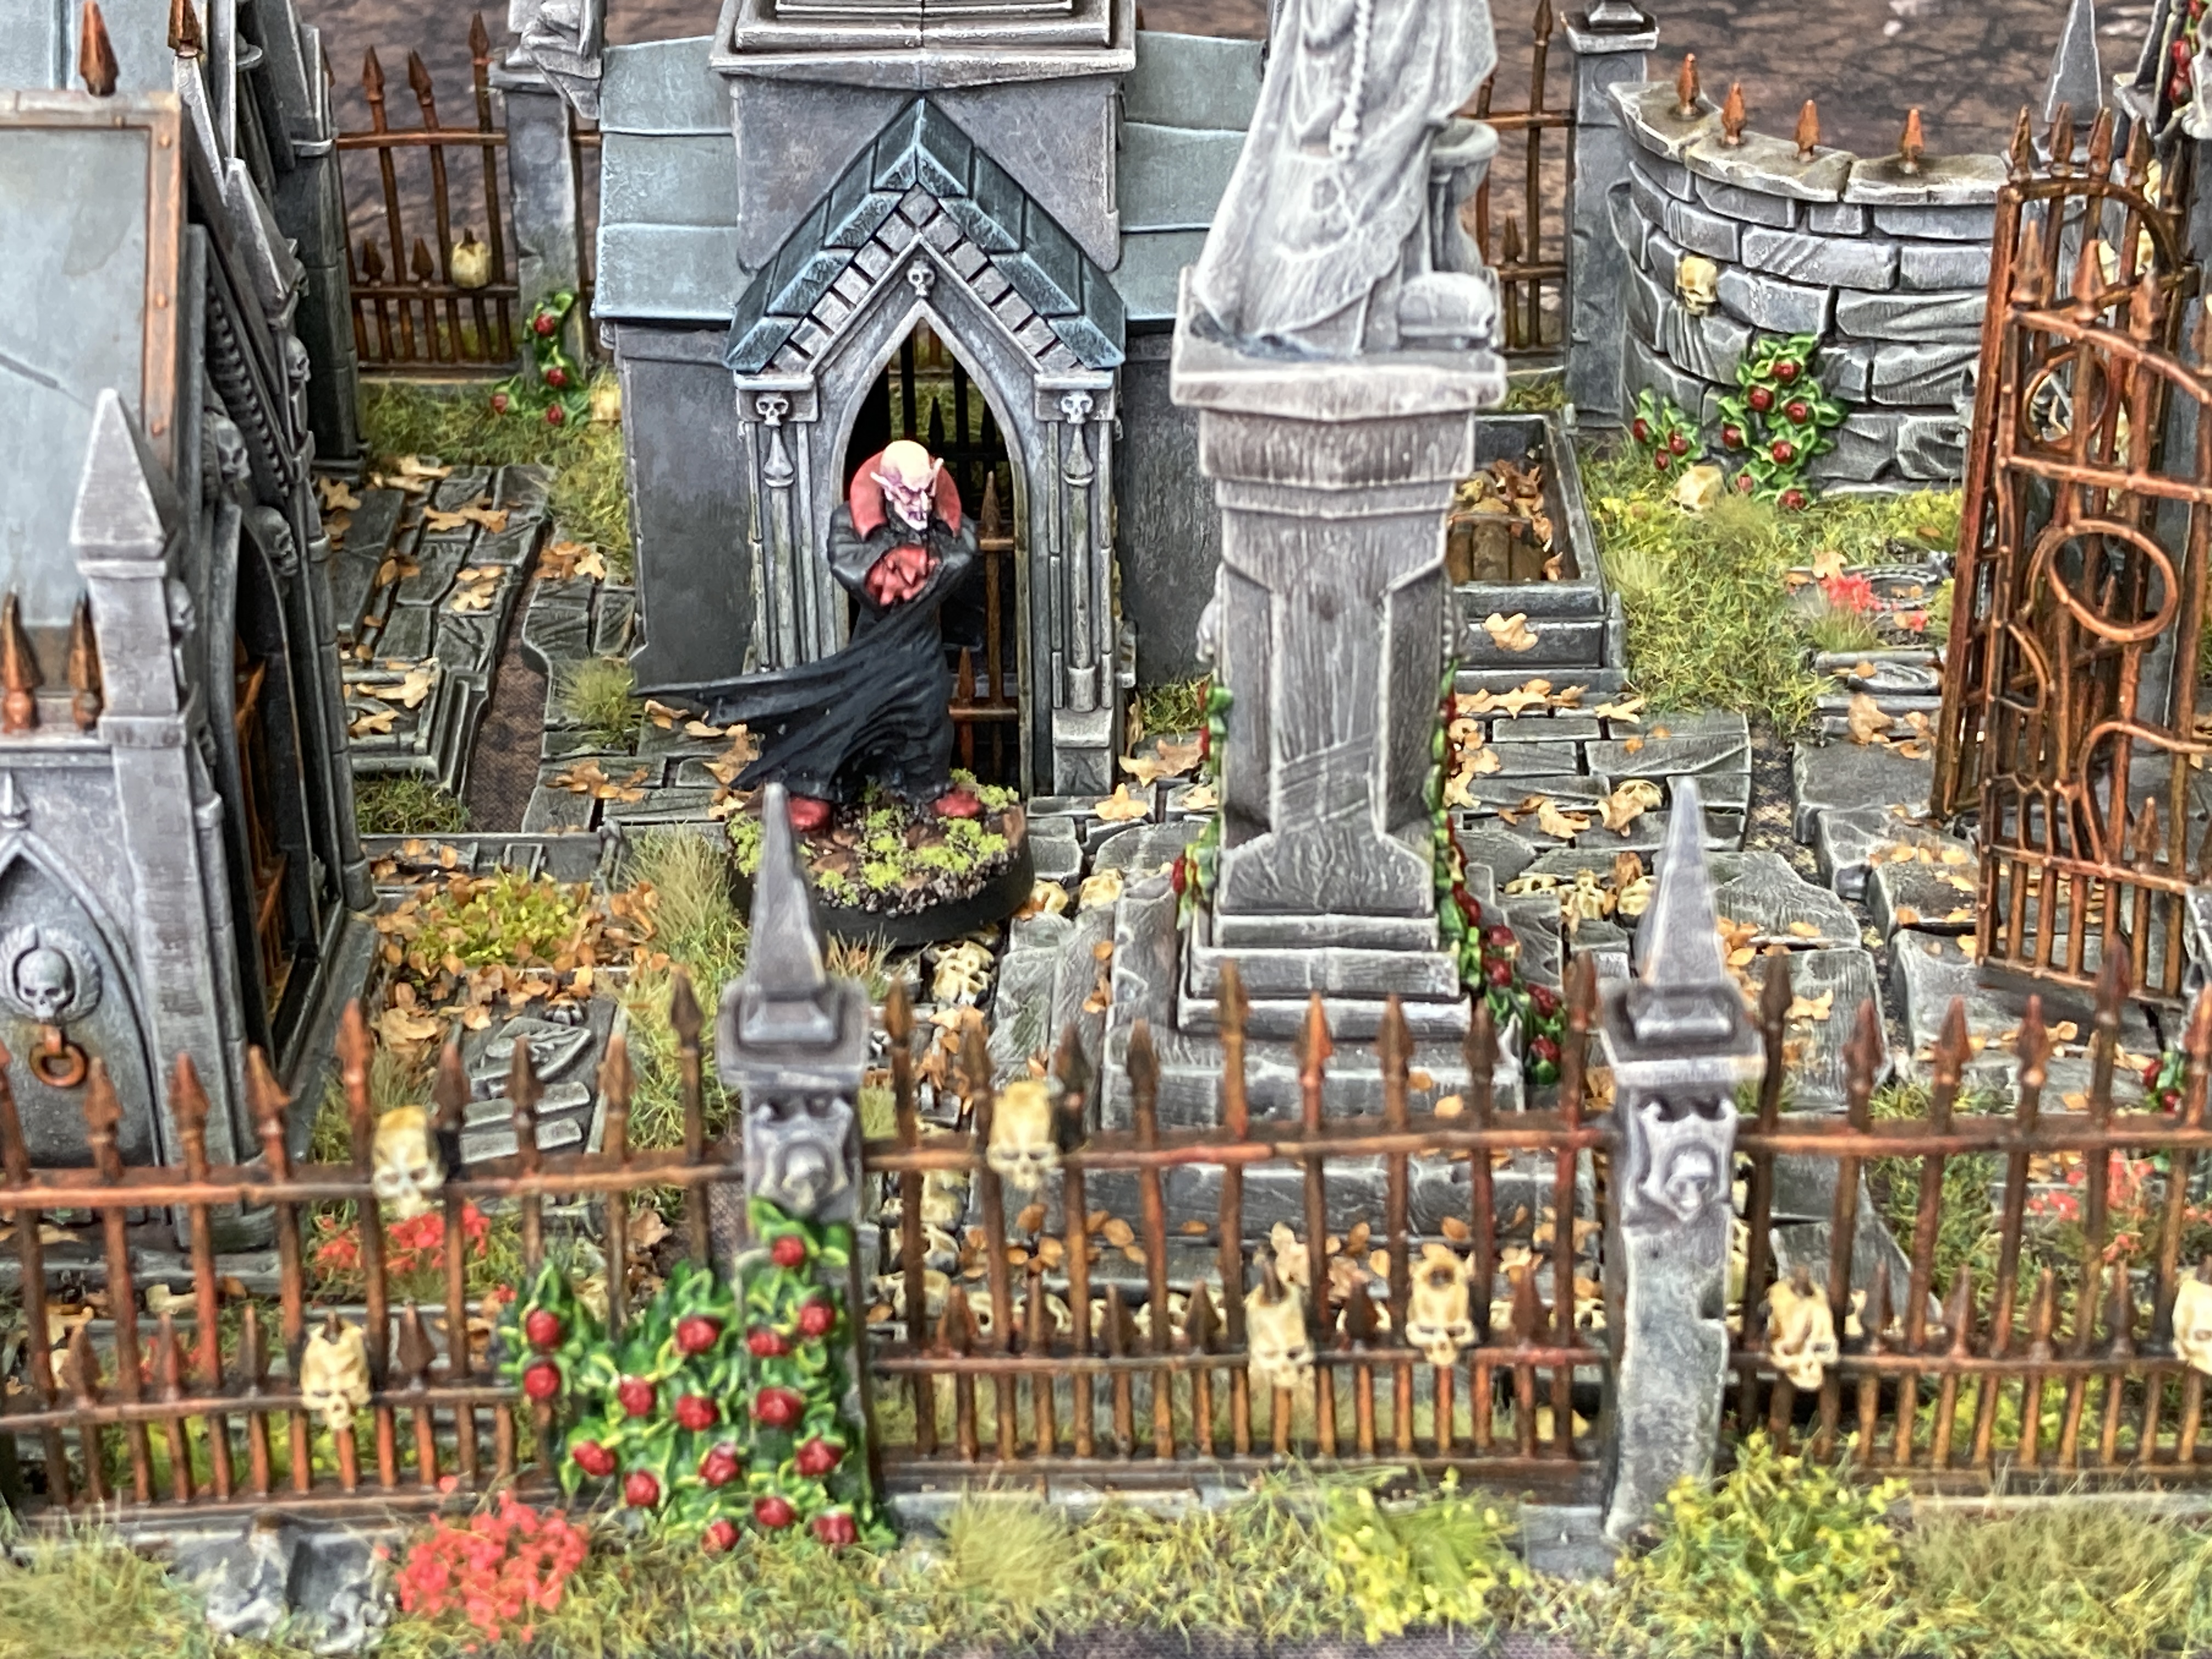
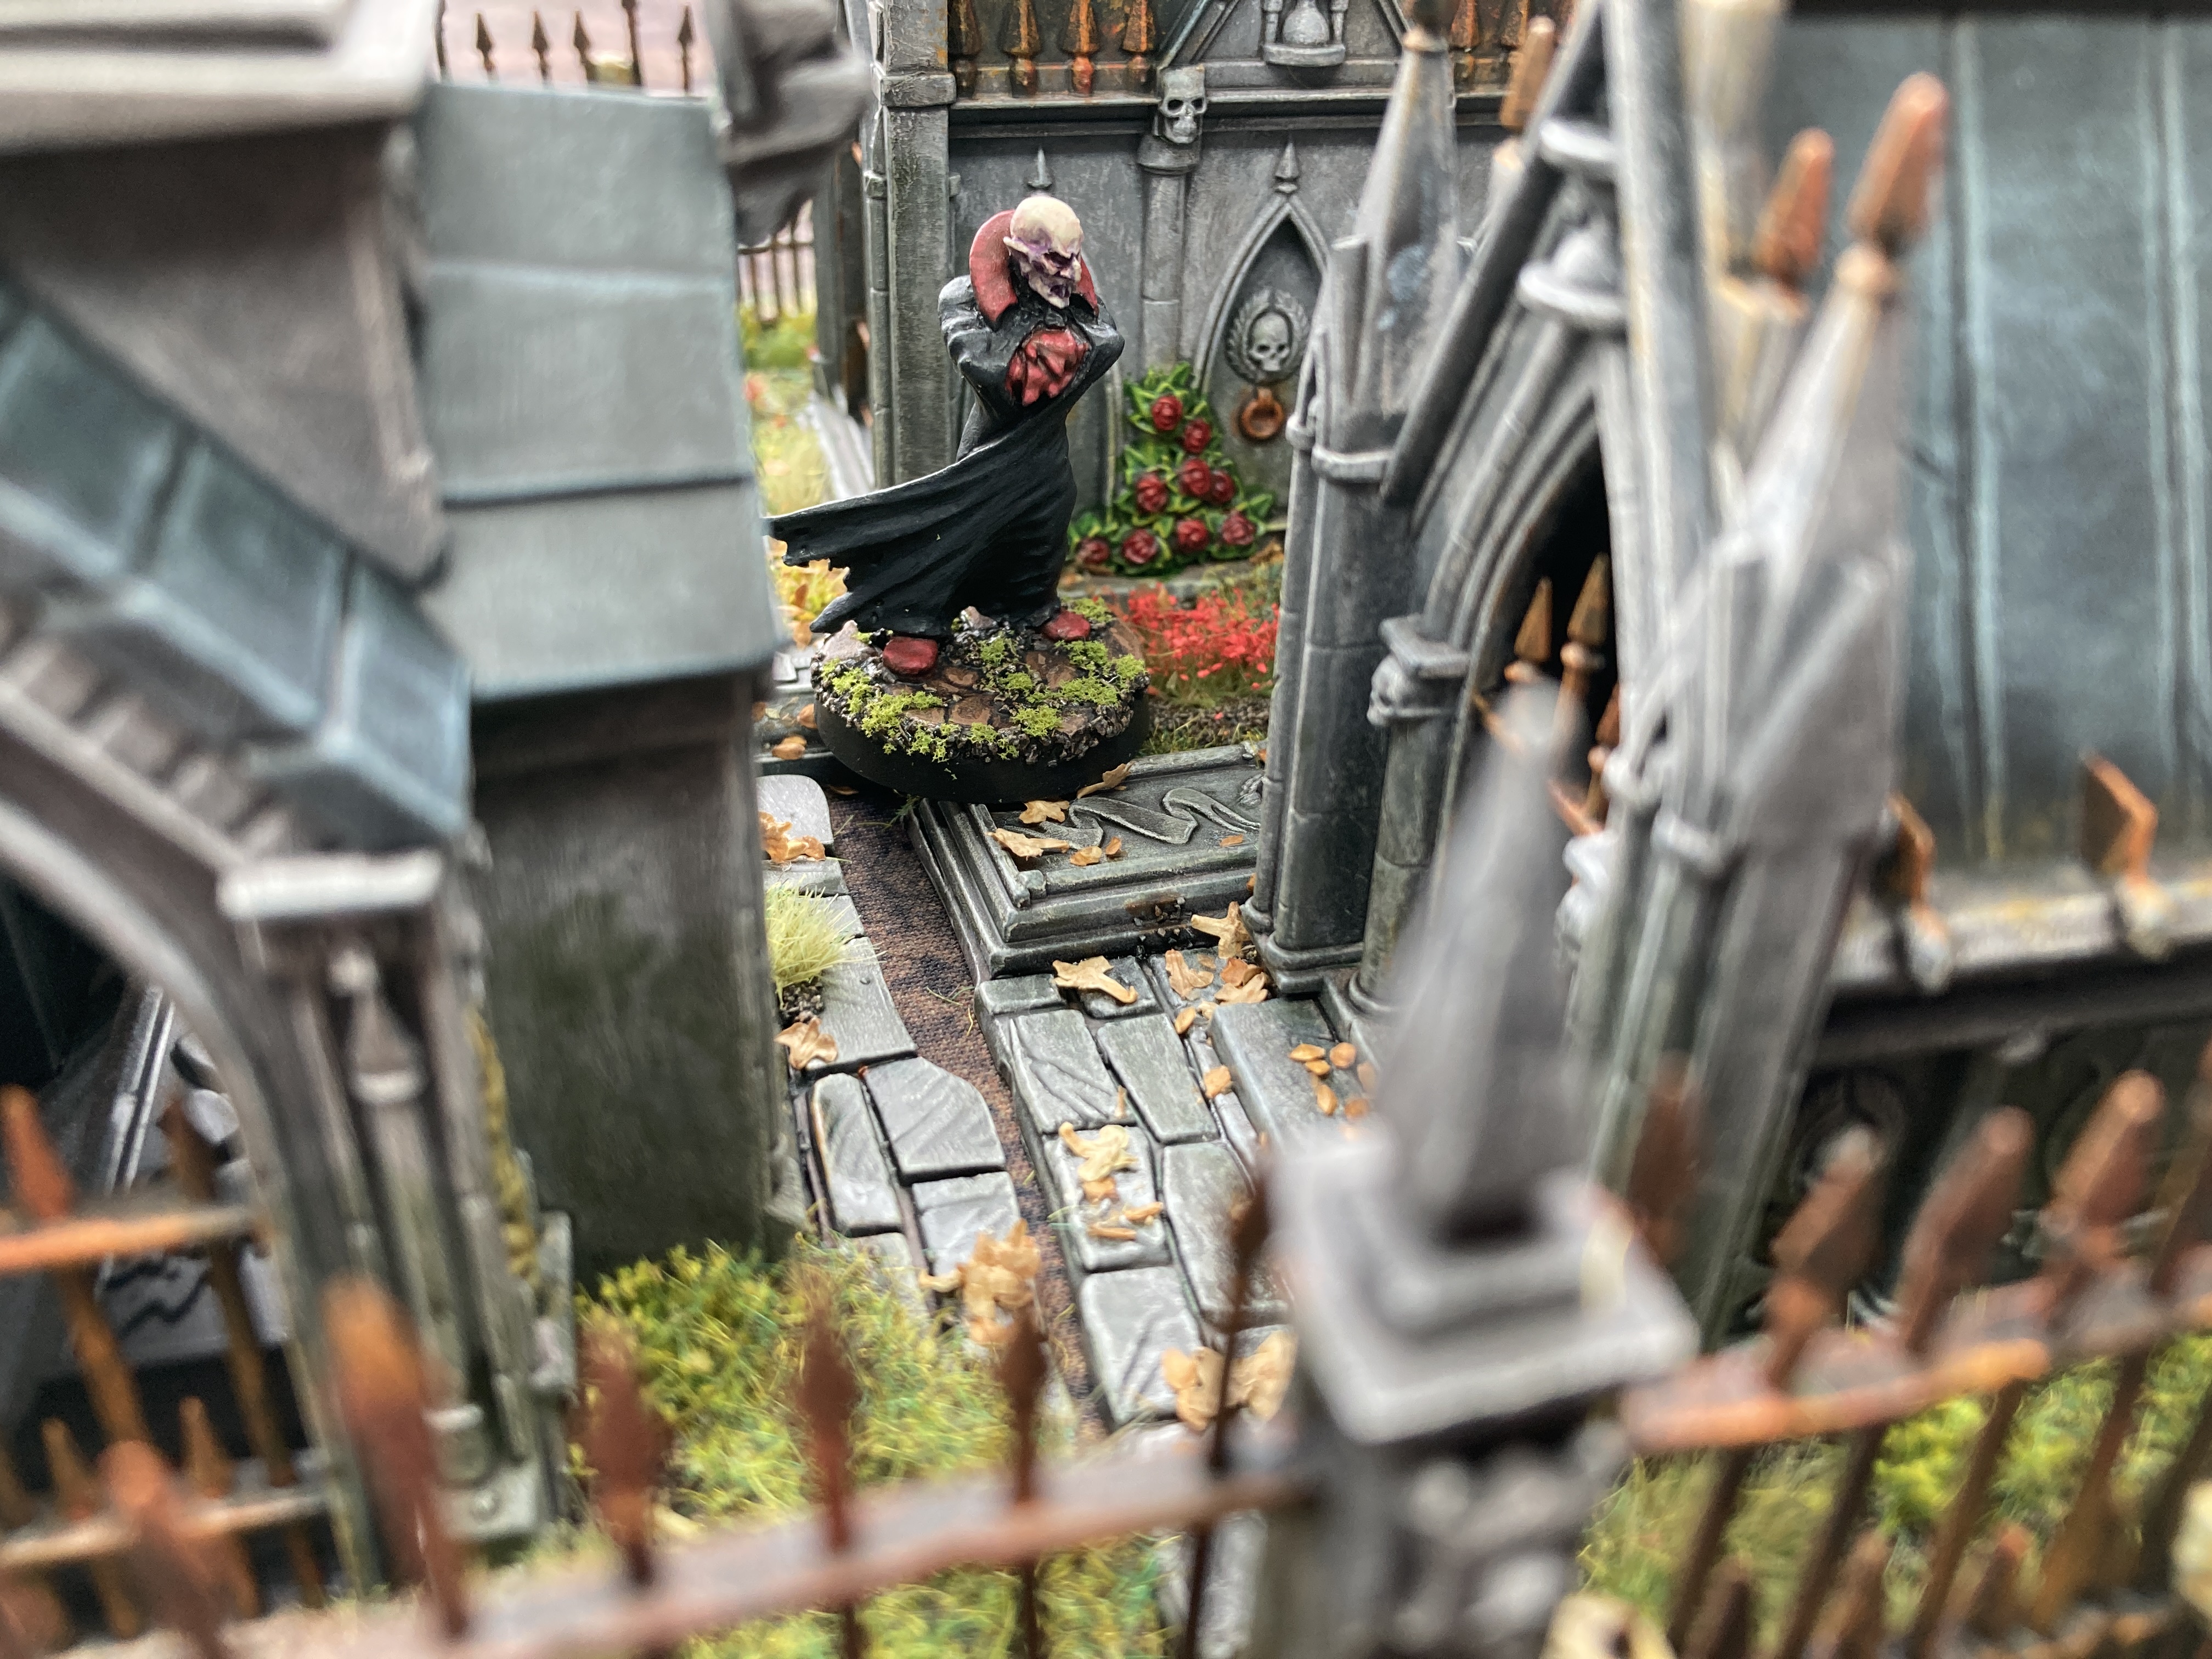
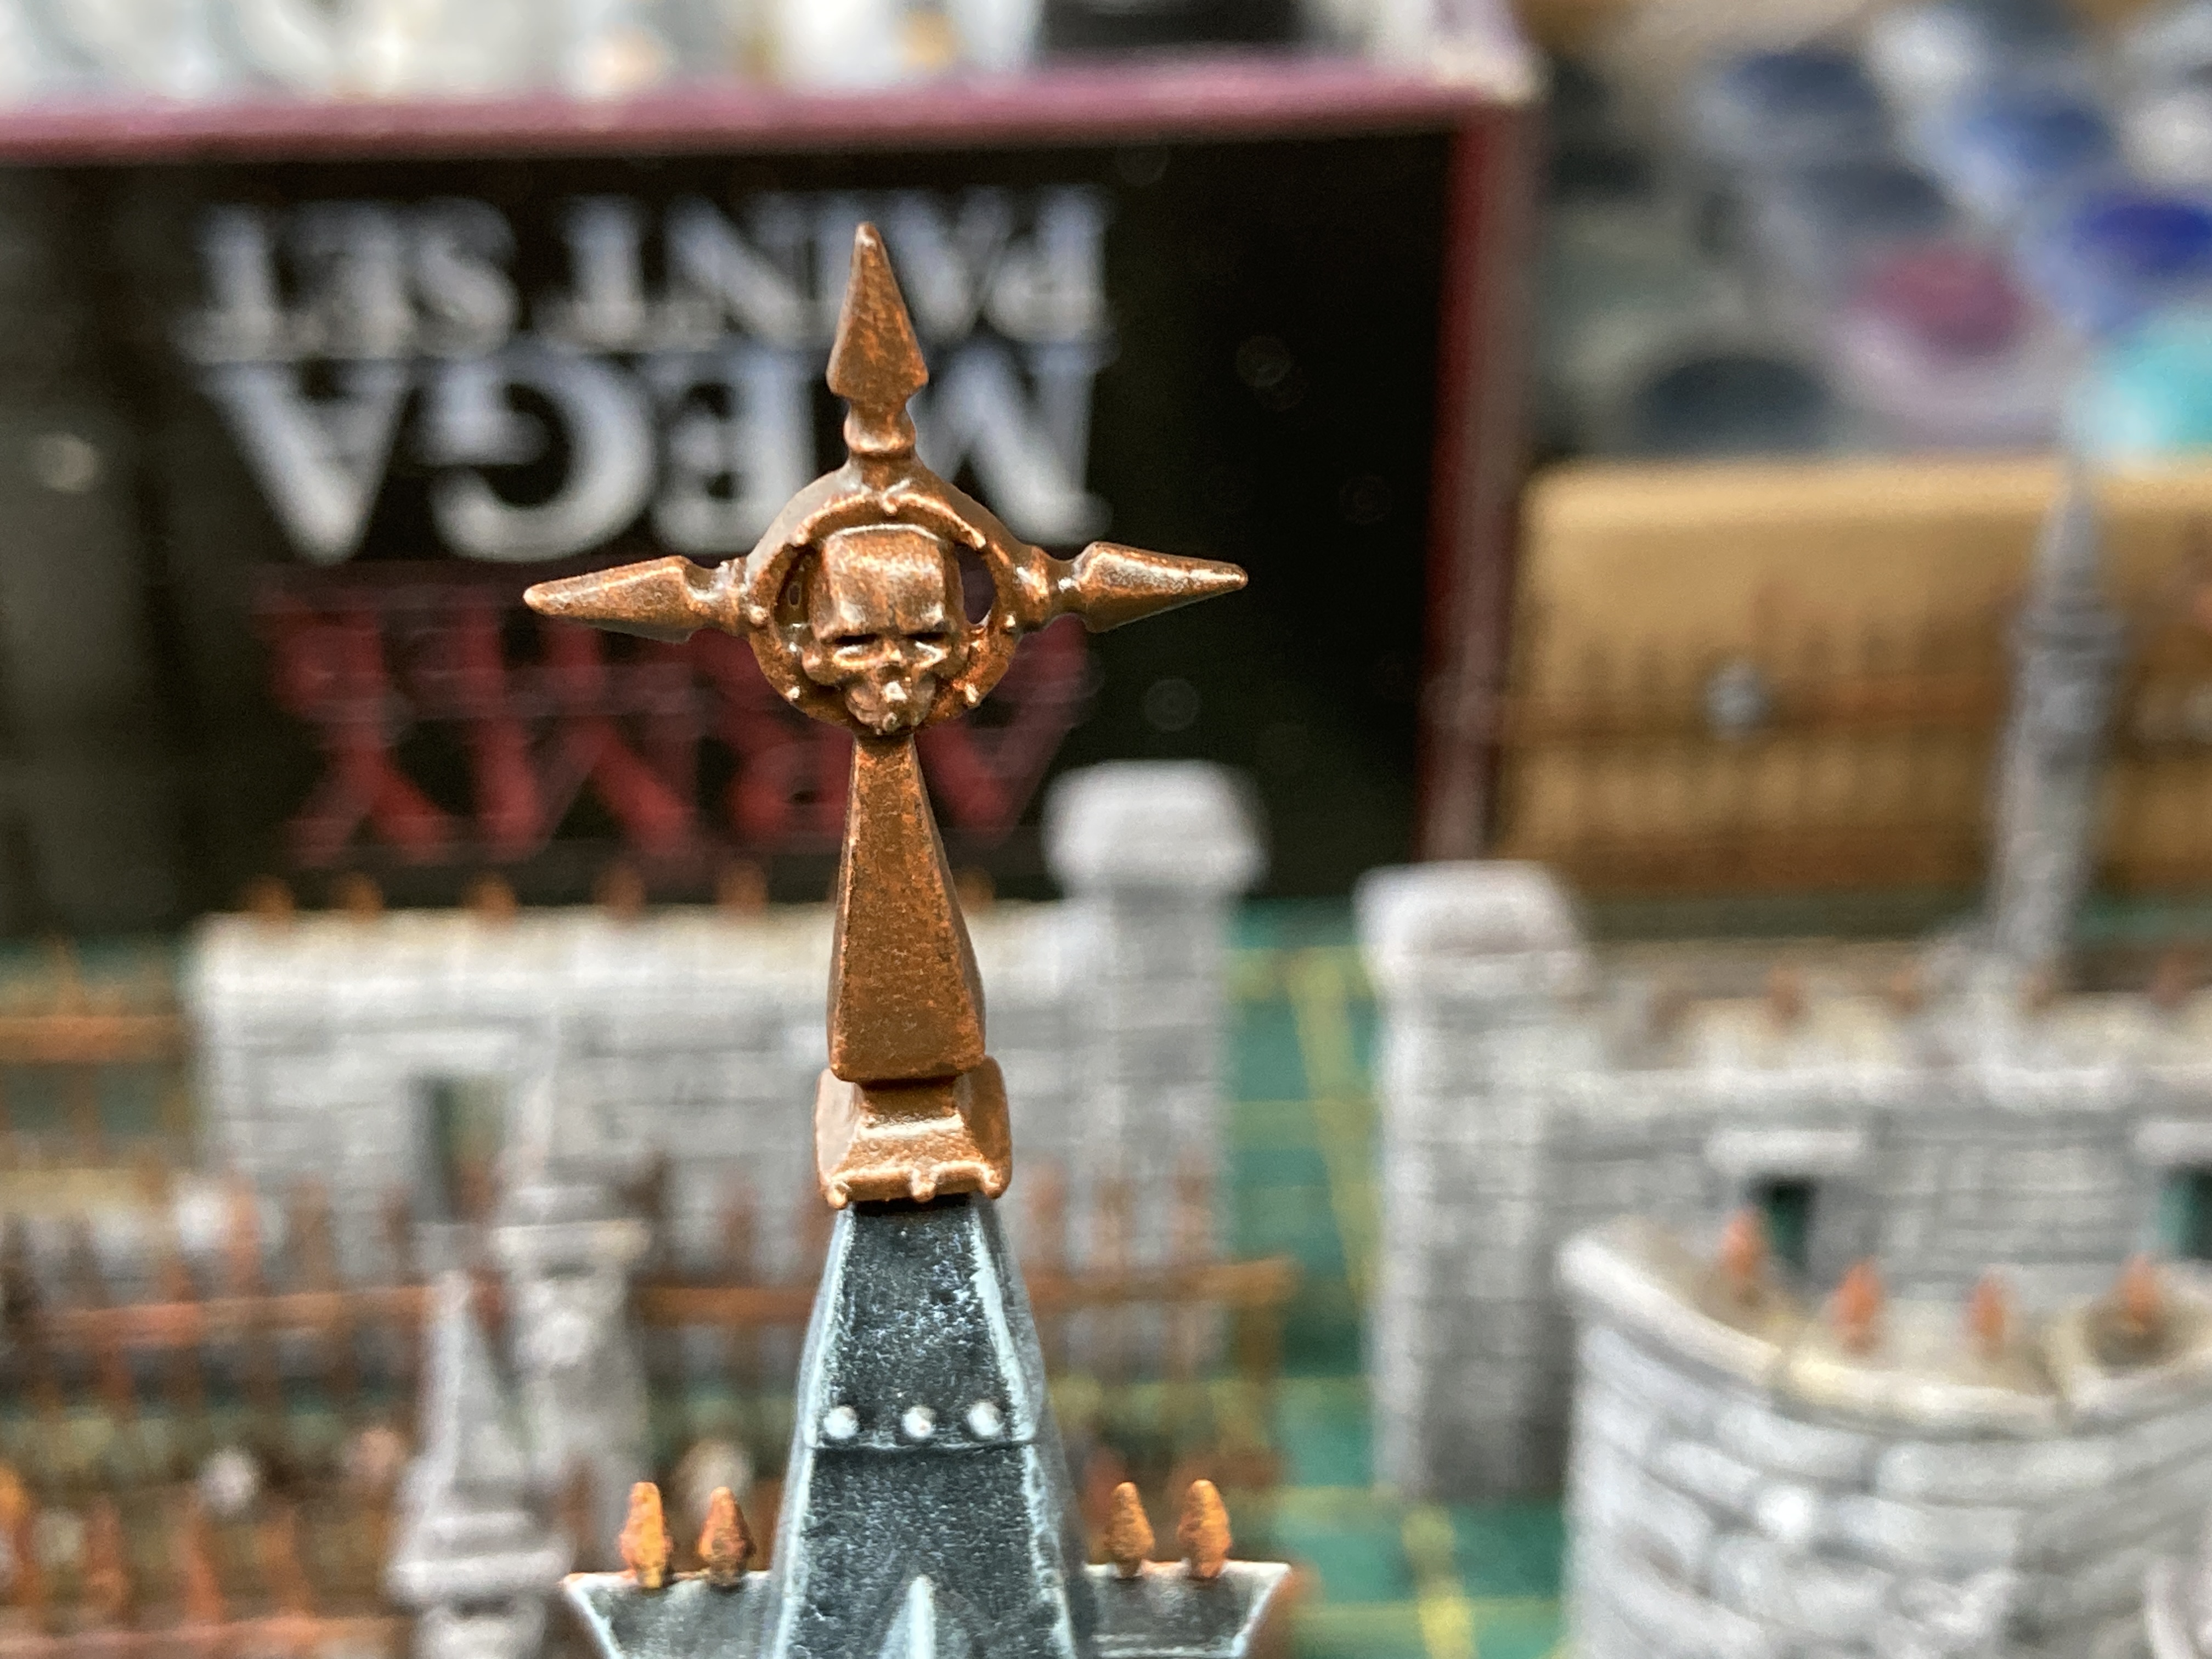
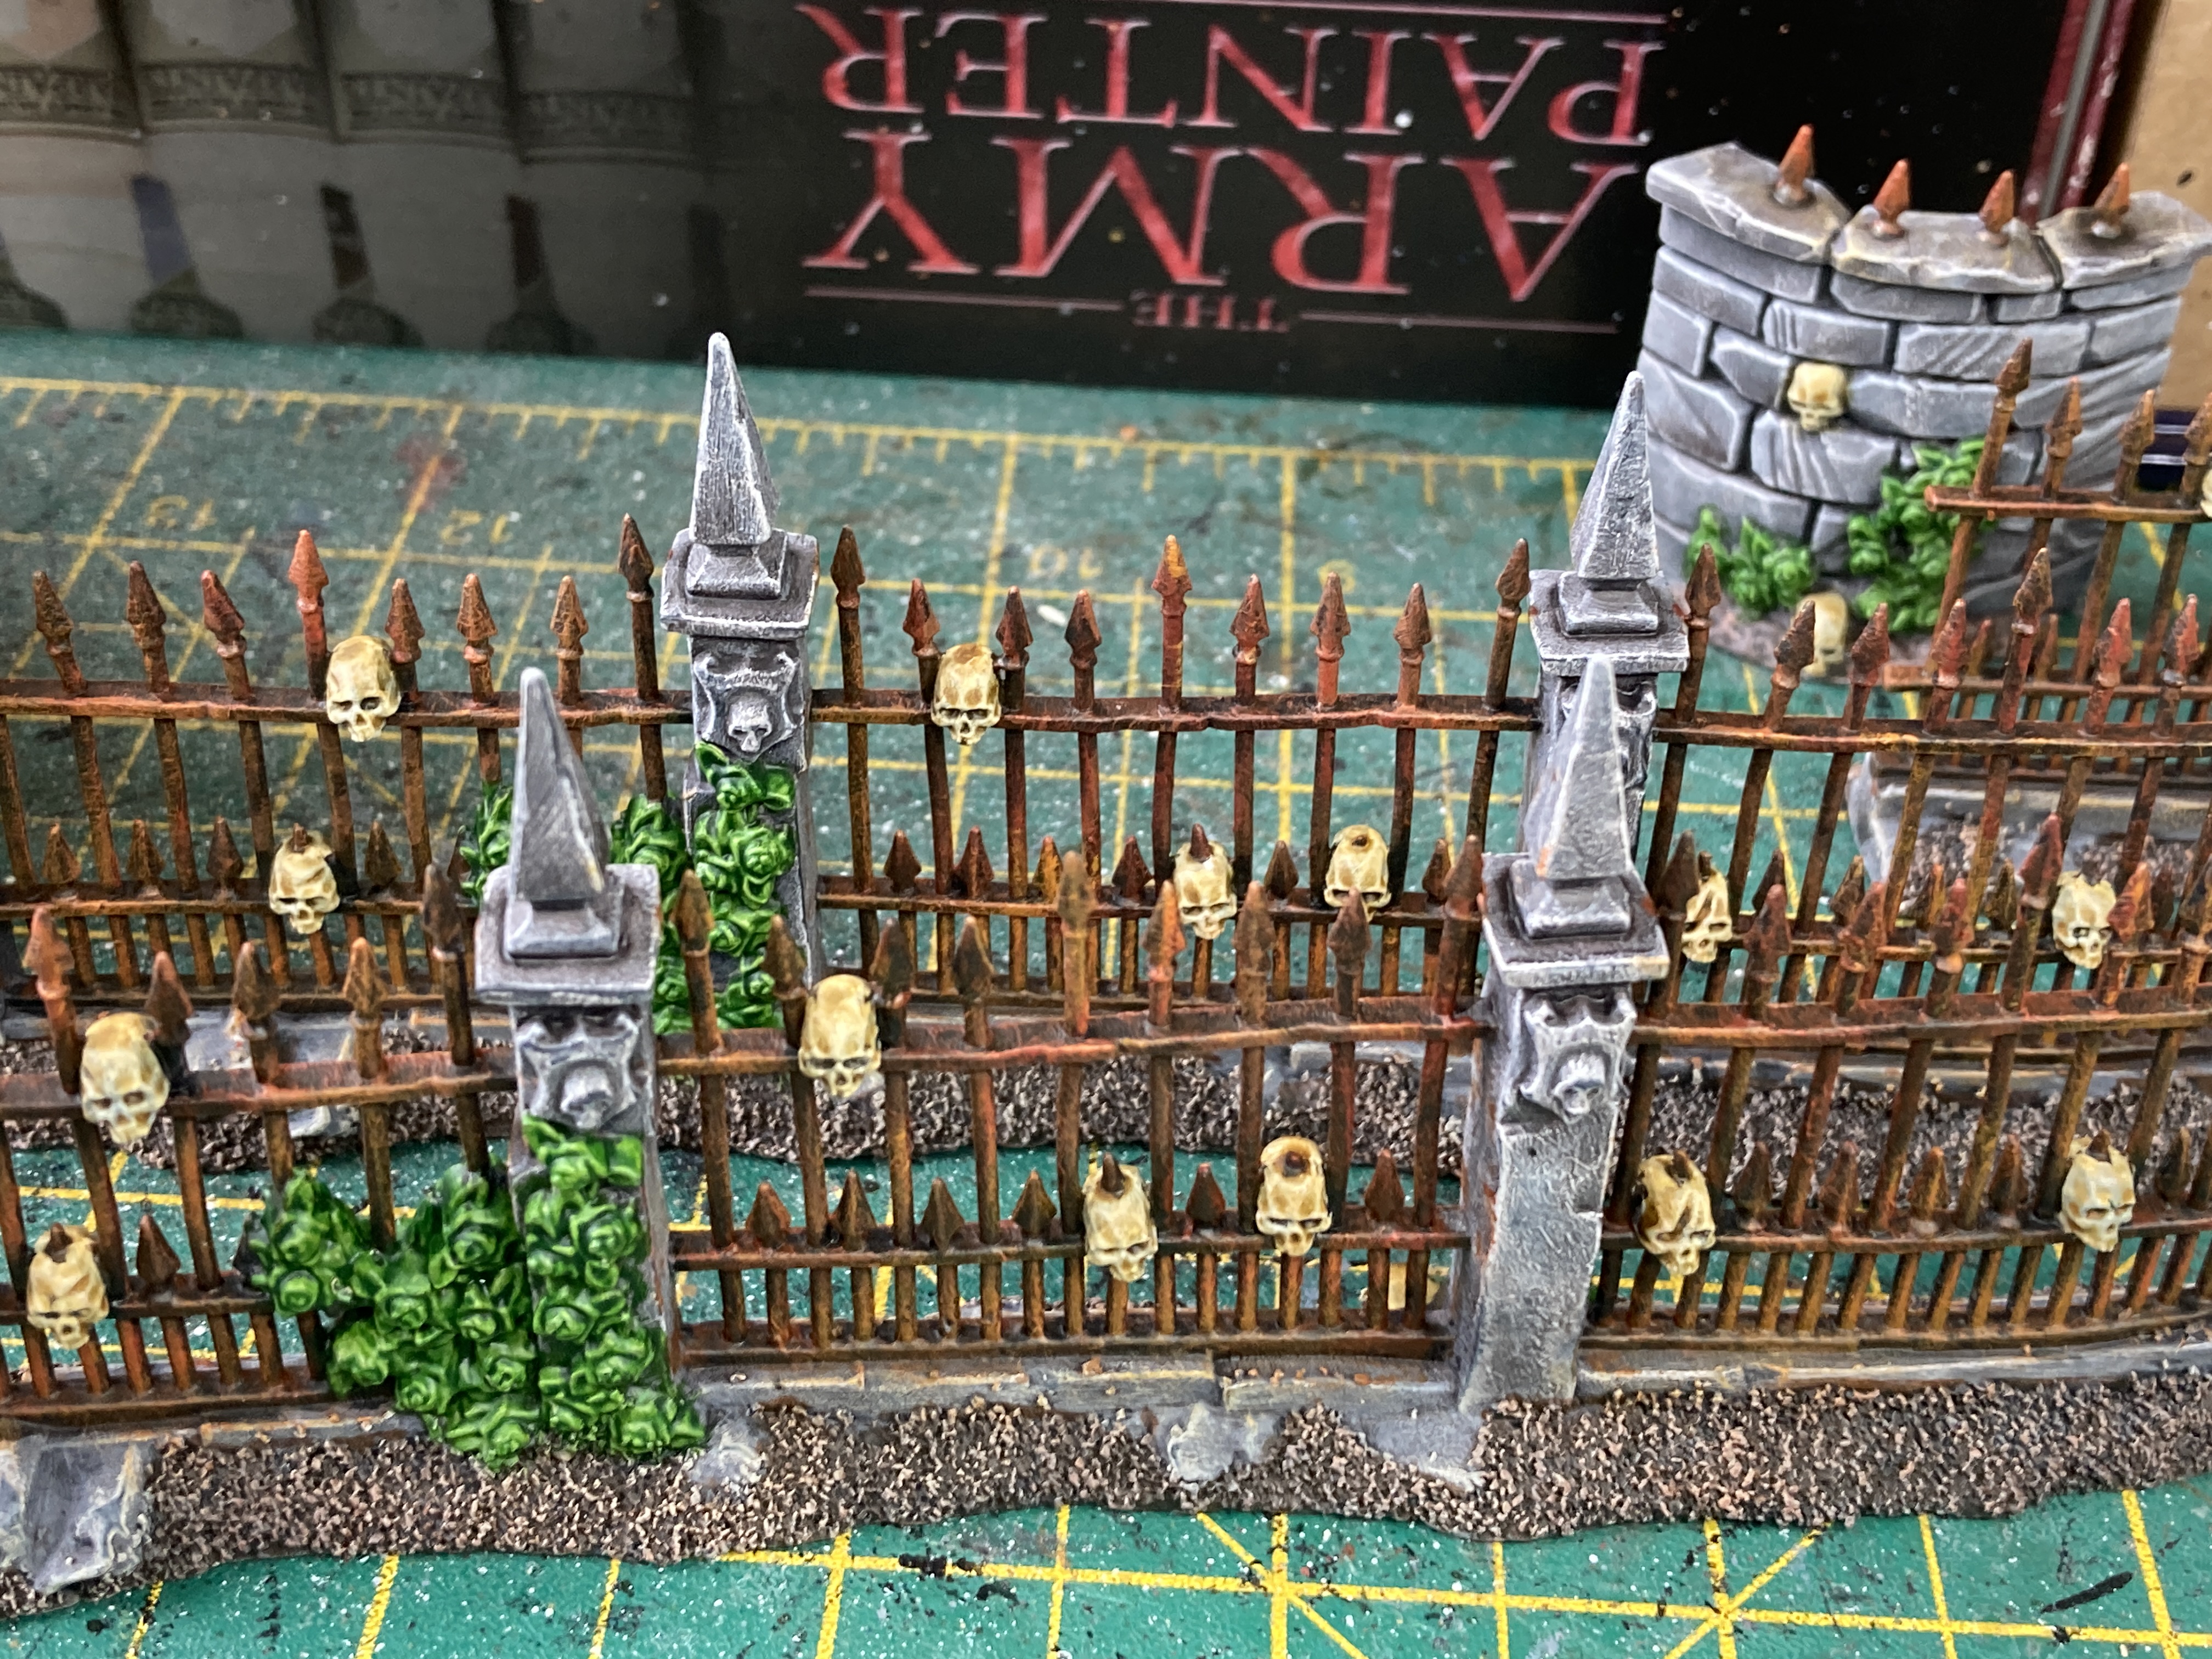
First up is the bronze work adopt the gates and the steeple. I first painted them in a metallic brass colour then stained it with a mix of Axrax Earthshade wash and Beast Brown paint (Army Painter) to mimic the colour of an old copper coin that’s gone brown, the first stage in oxidation.
Then I made a thin wash of scaly Hide and Wolf Grey (both from the Army Painter) thinned down with water quite a lot. This provided the blue/green corrosion. Finally I applied a light drybrush of white.

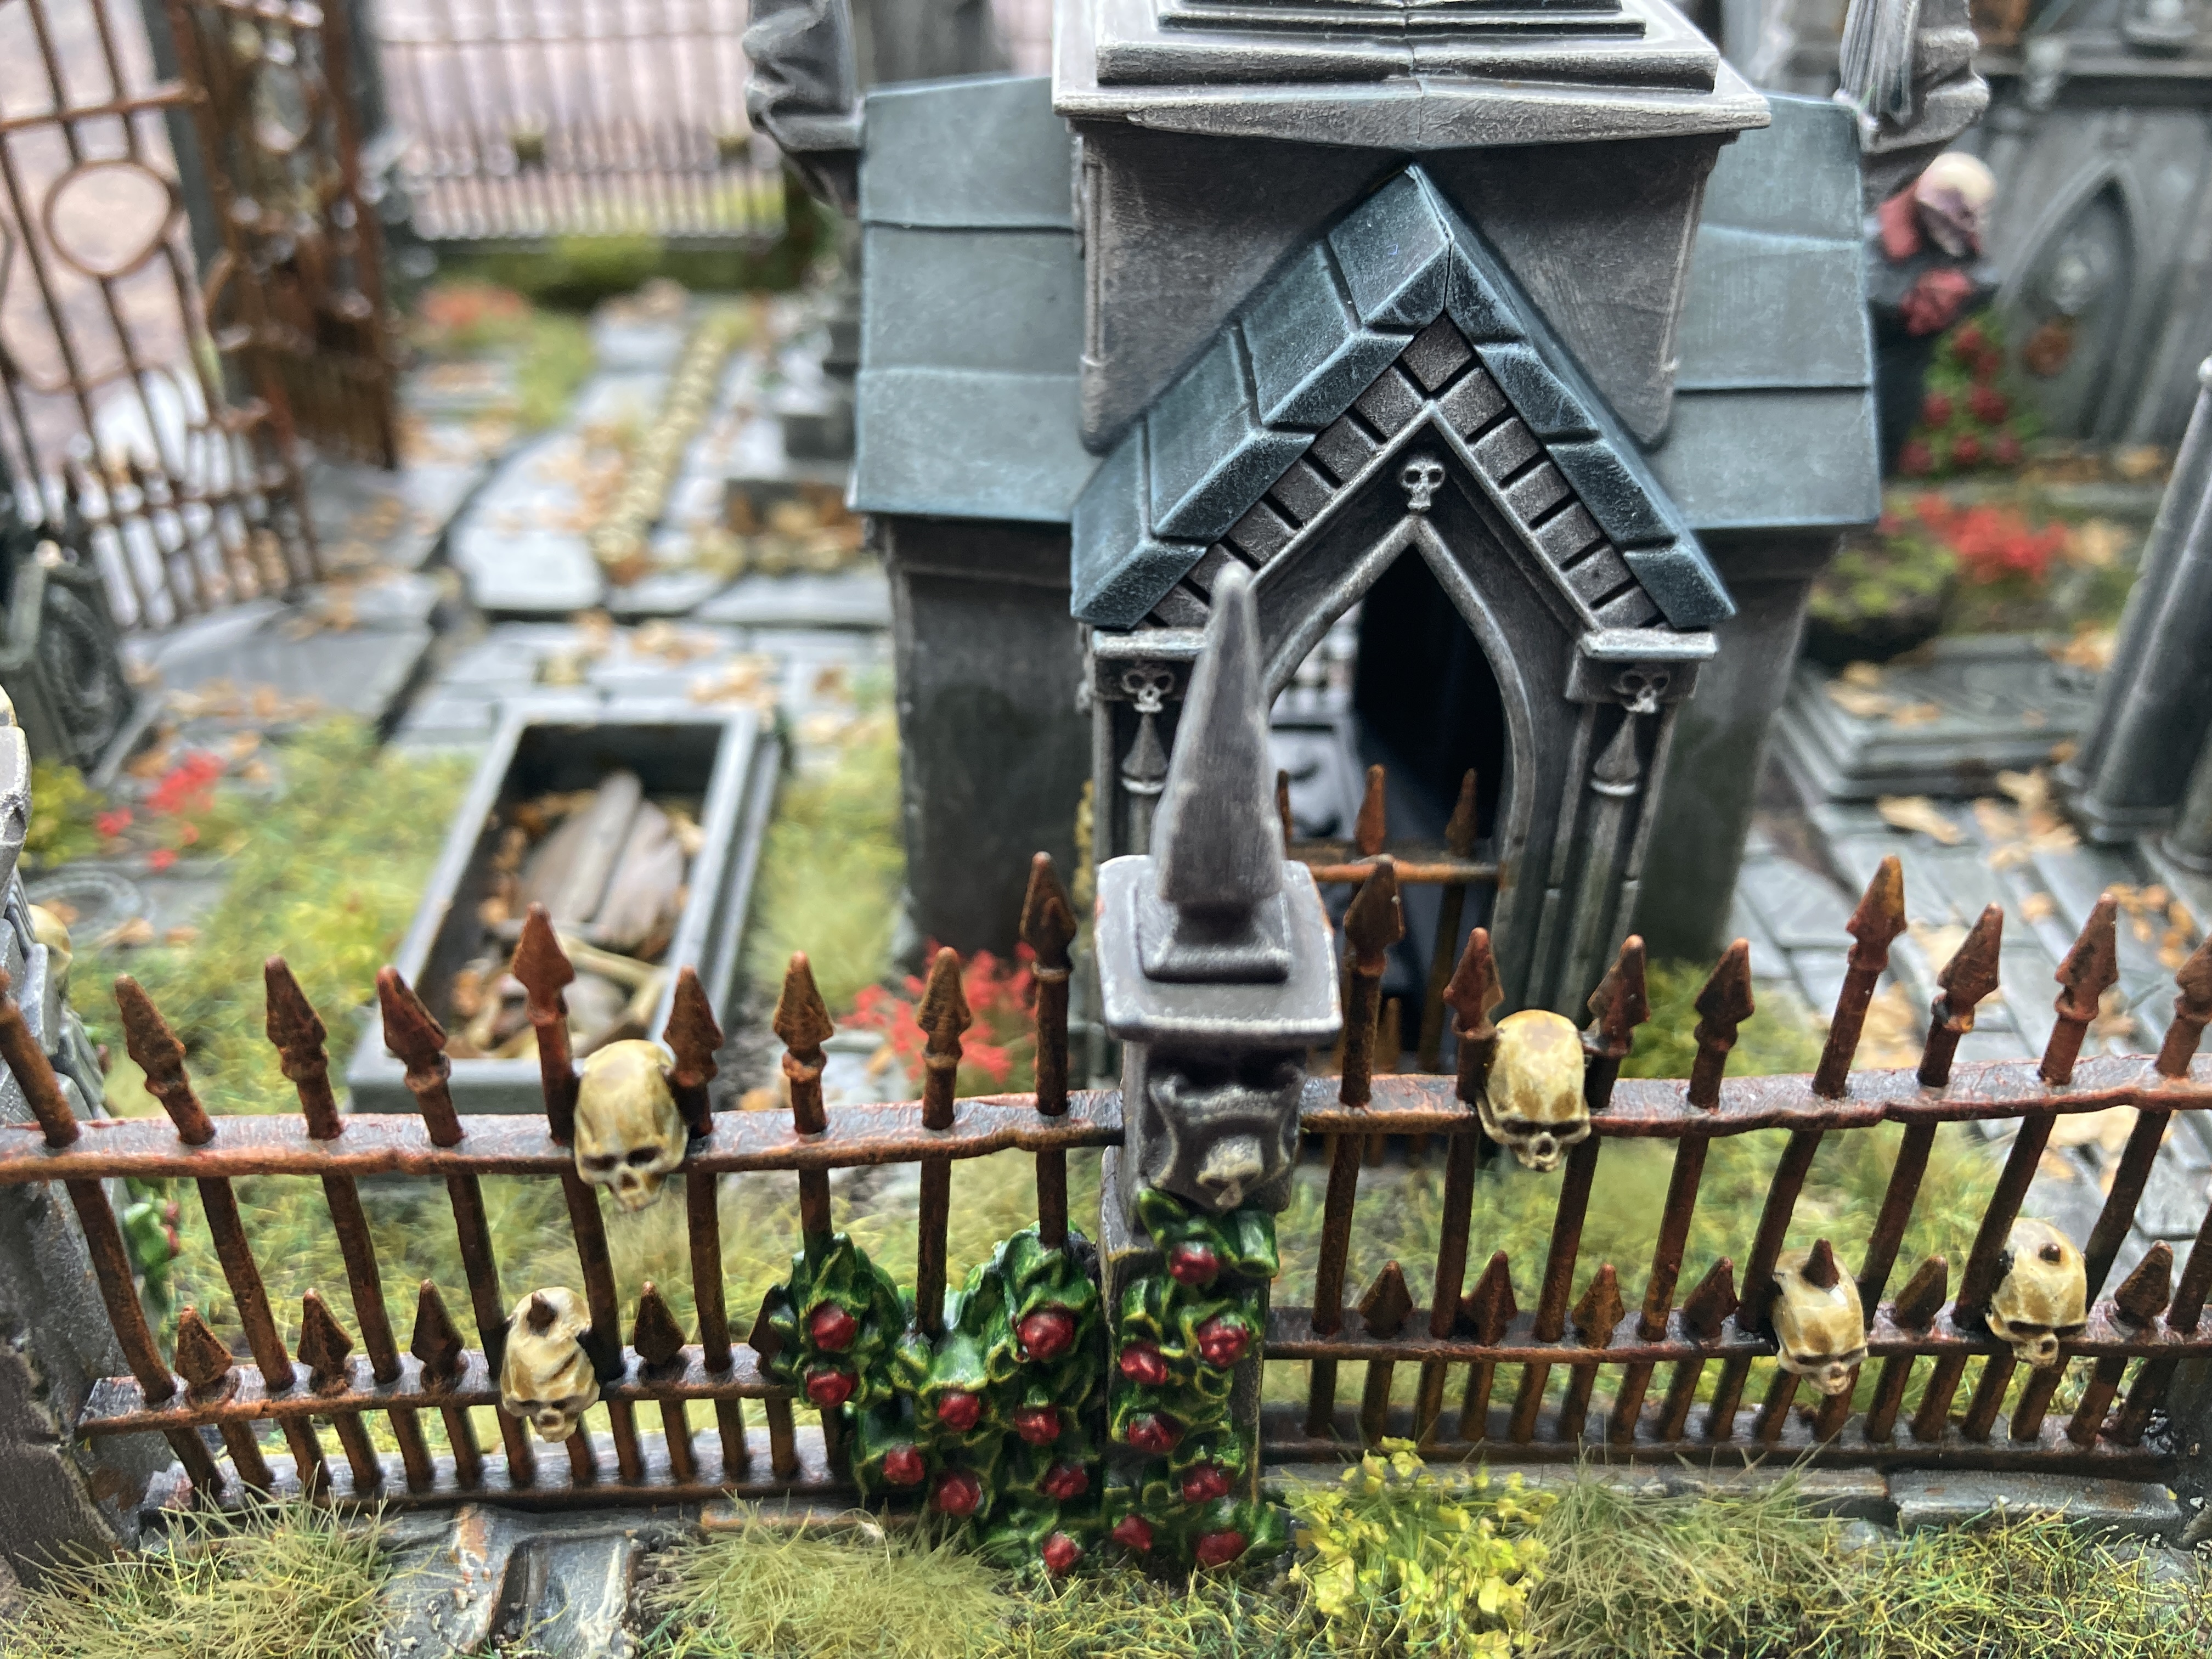
Next was the laborious part, painting all of the skulls. They were all first picked out in a light beige colour and then I applied the Contrast Paint Skeleton Horde. I thought about a further highlight but no. Time to move on.
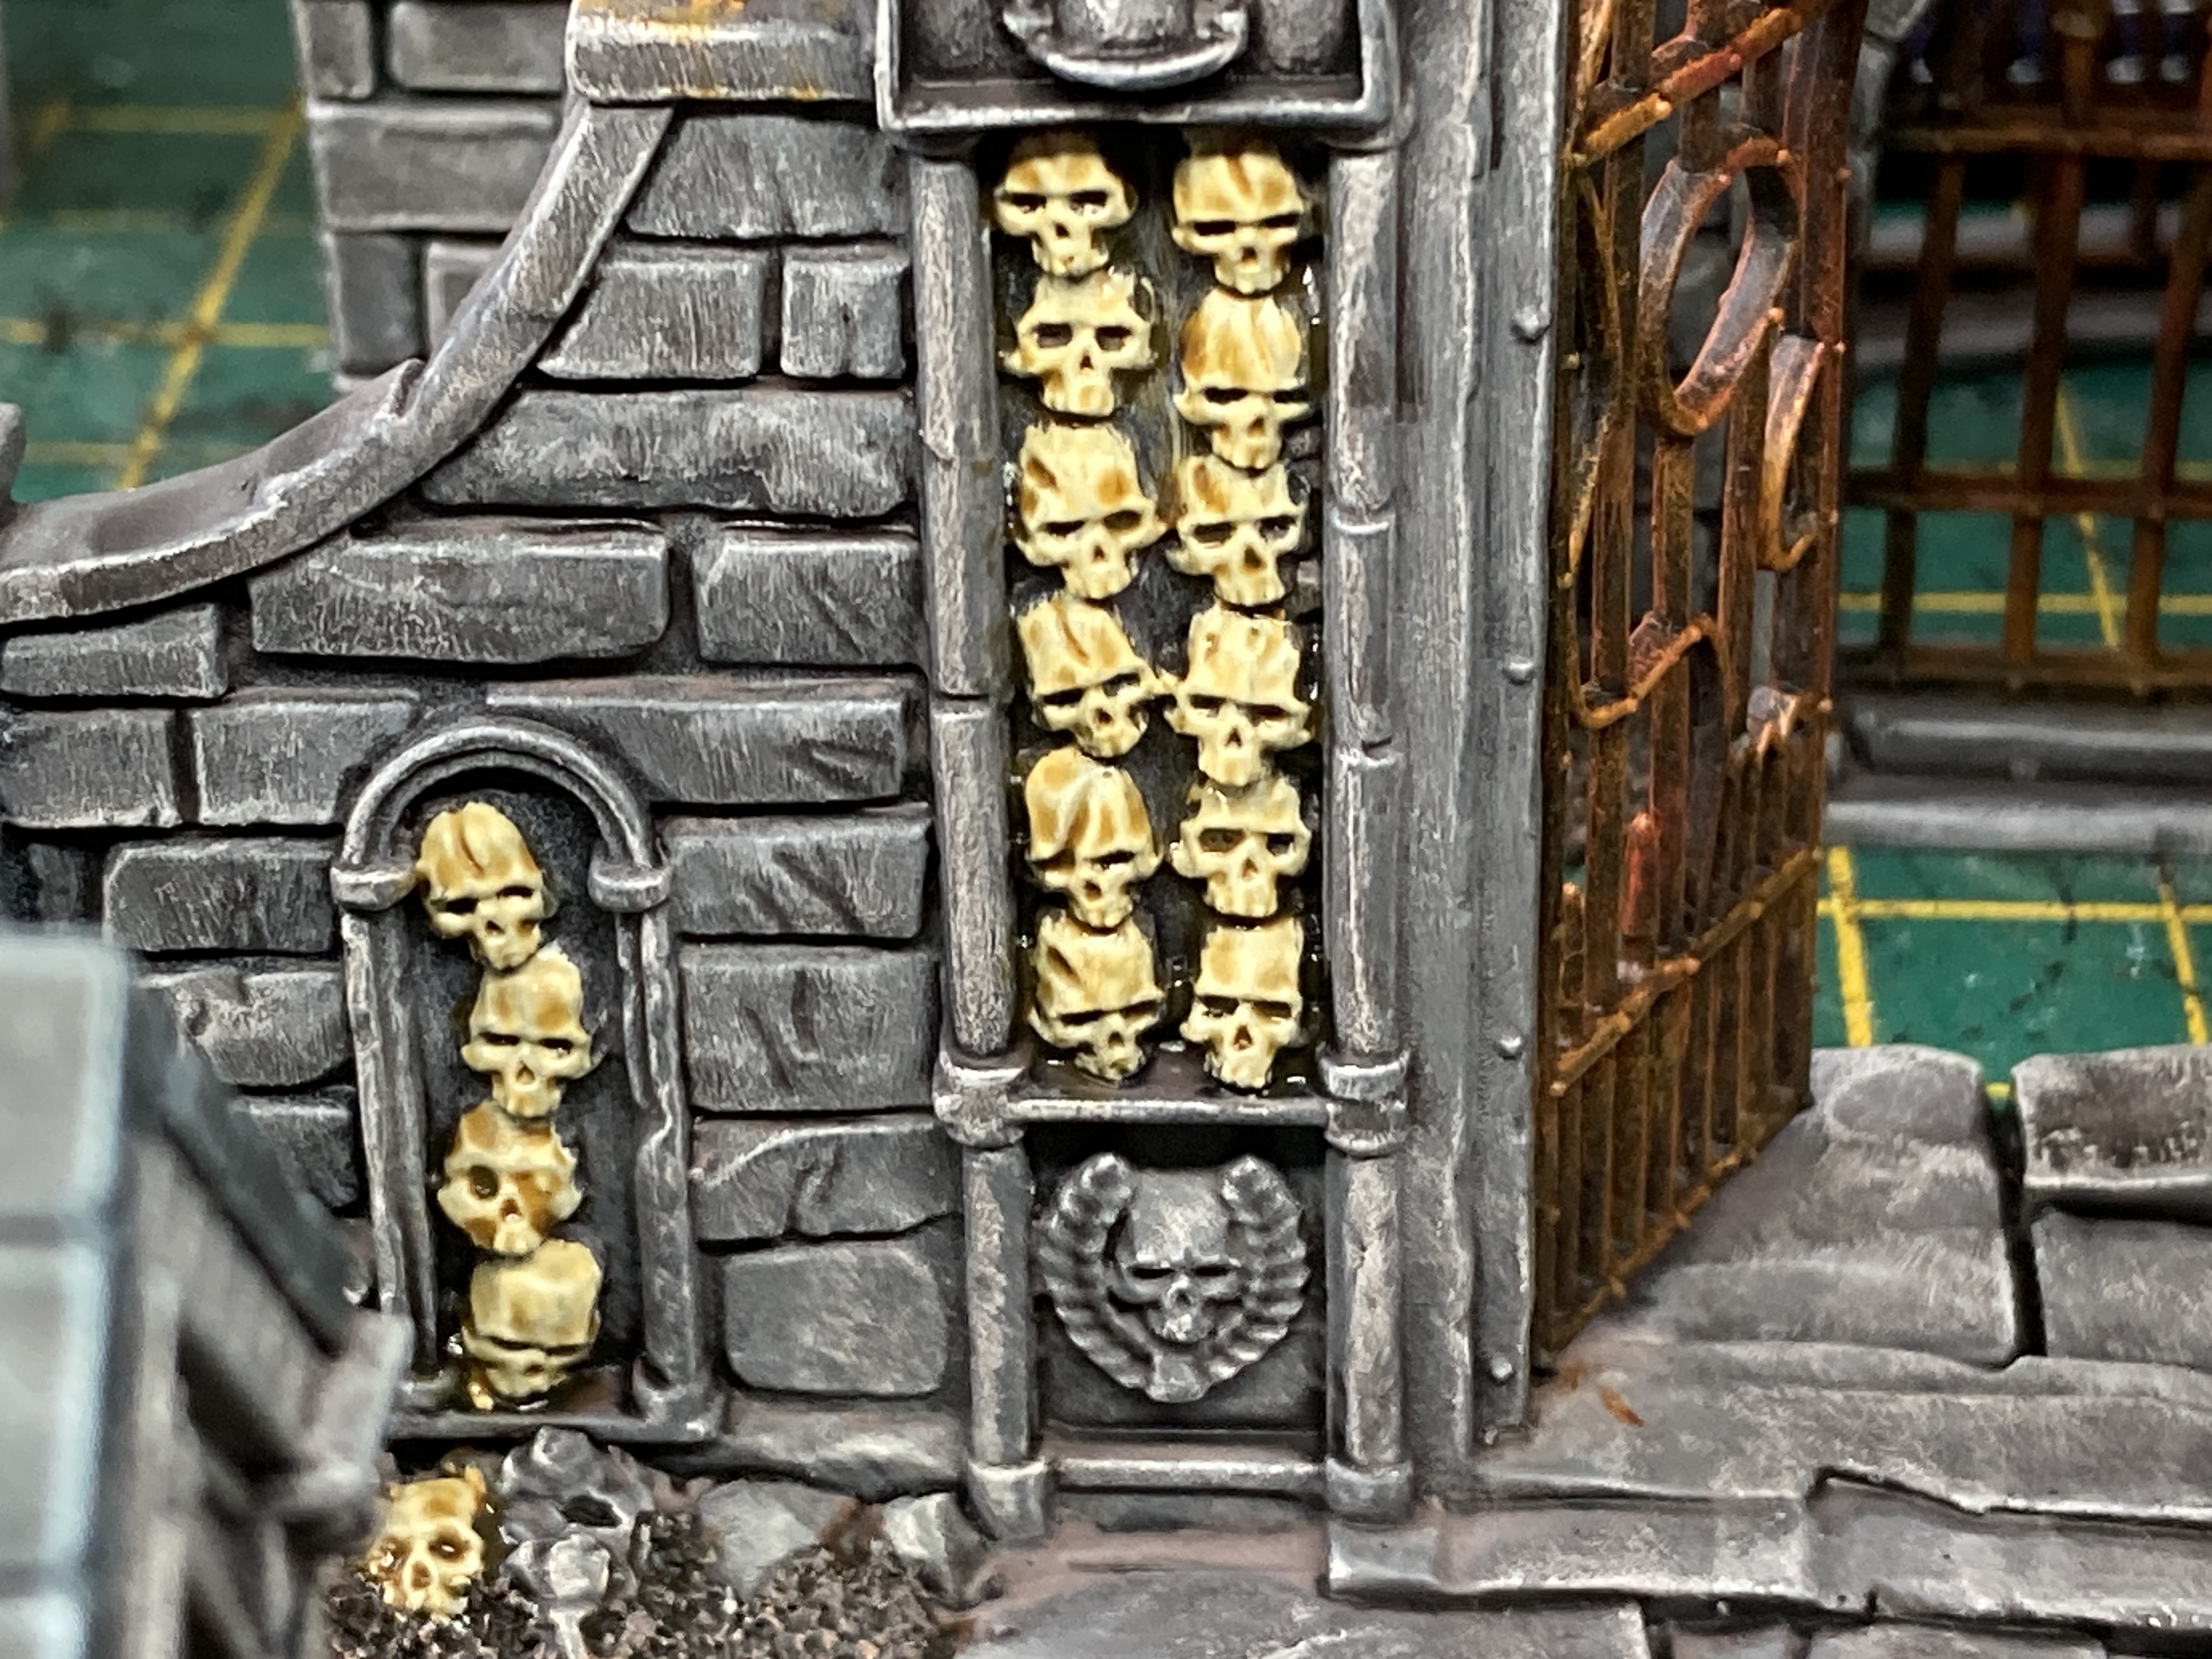
There’s quite a lot of flowers modelled on the set so it was now time to paint this. I again painted they all with a light beige colour before applying a Contrast. I prefer using beige rather than white as it gives a warmer feel.
This time I mixed Ork Flesh with Mantis Warrior Green and covered all of the plants. I then gave a very light drybrush of light beige before giving a light drybrush of yellow, just to bring out the details of the leaves a little.
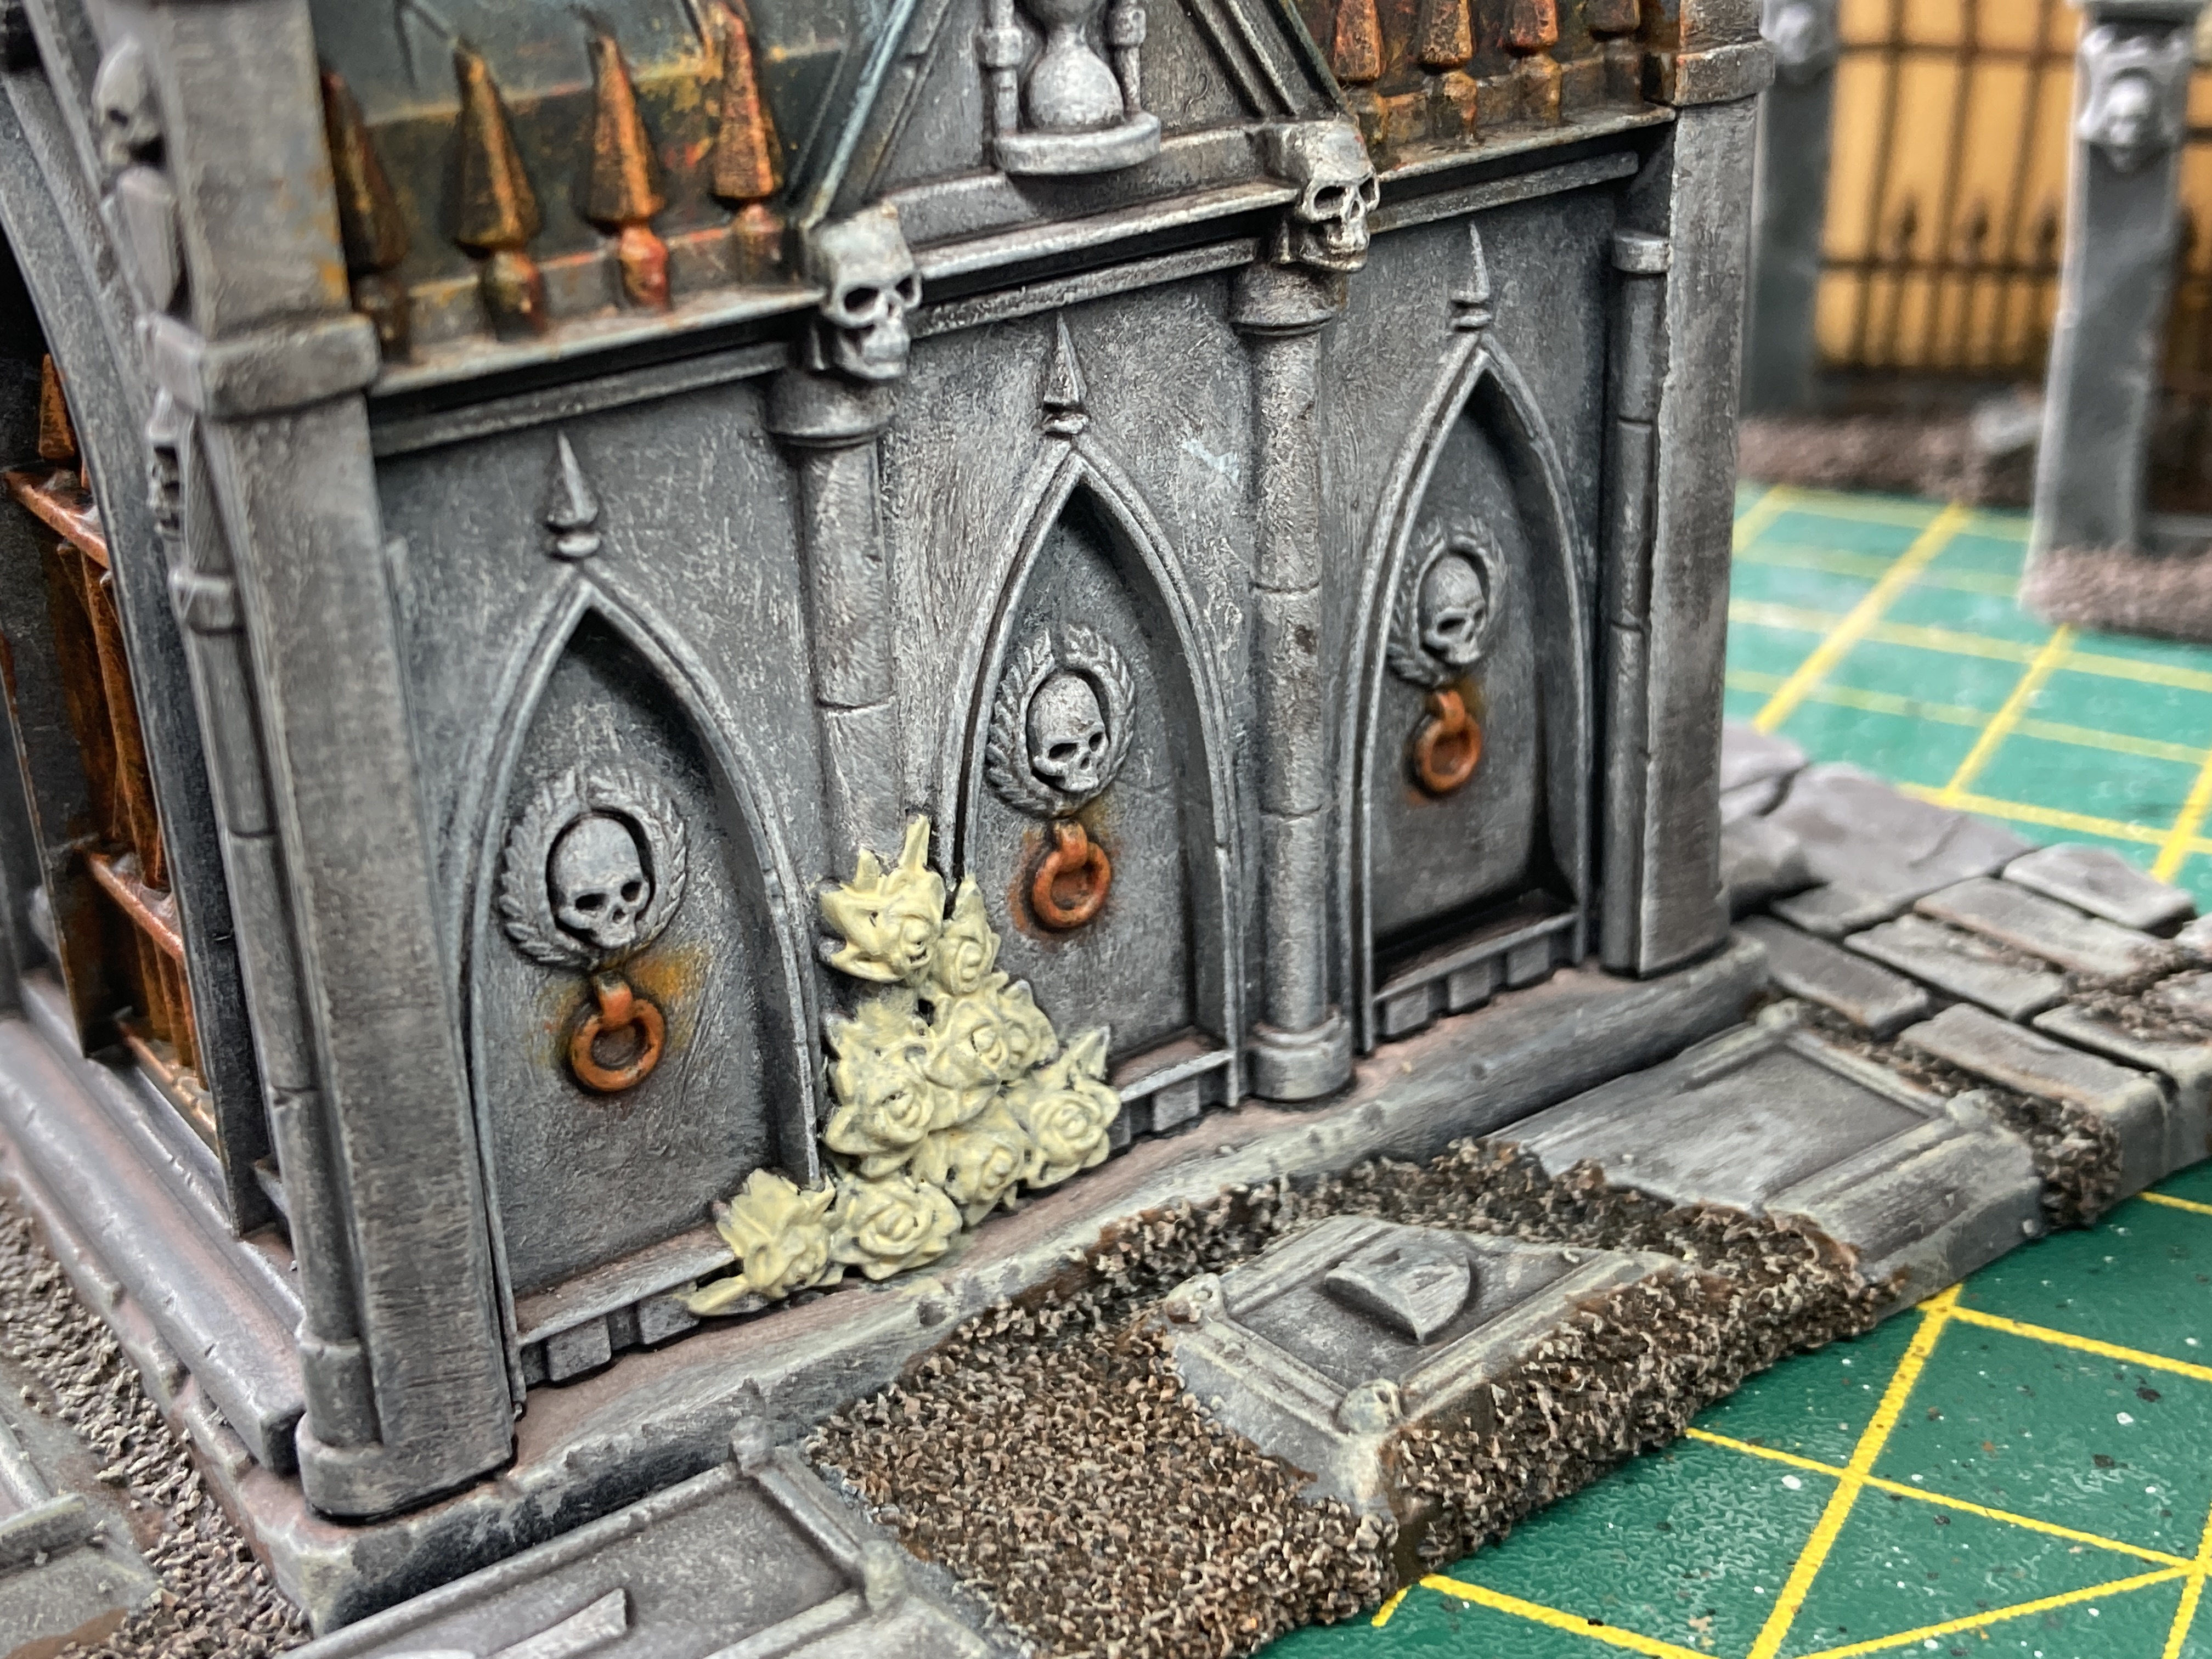
For the flowers I once again added a light beige to the flower heads, over the green then followed with a Contrast, Flesh Tearers Red. Simple enough.
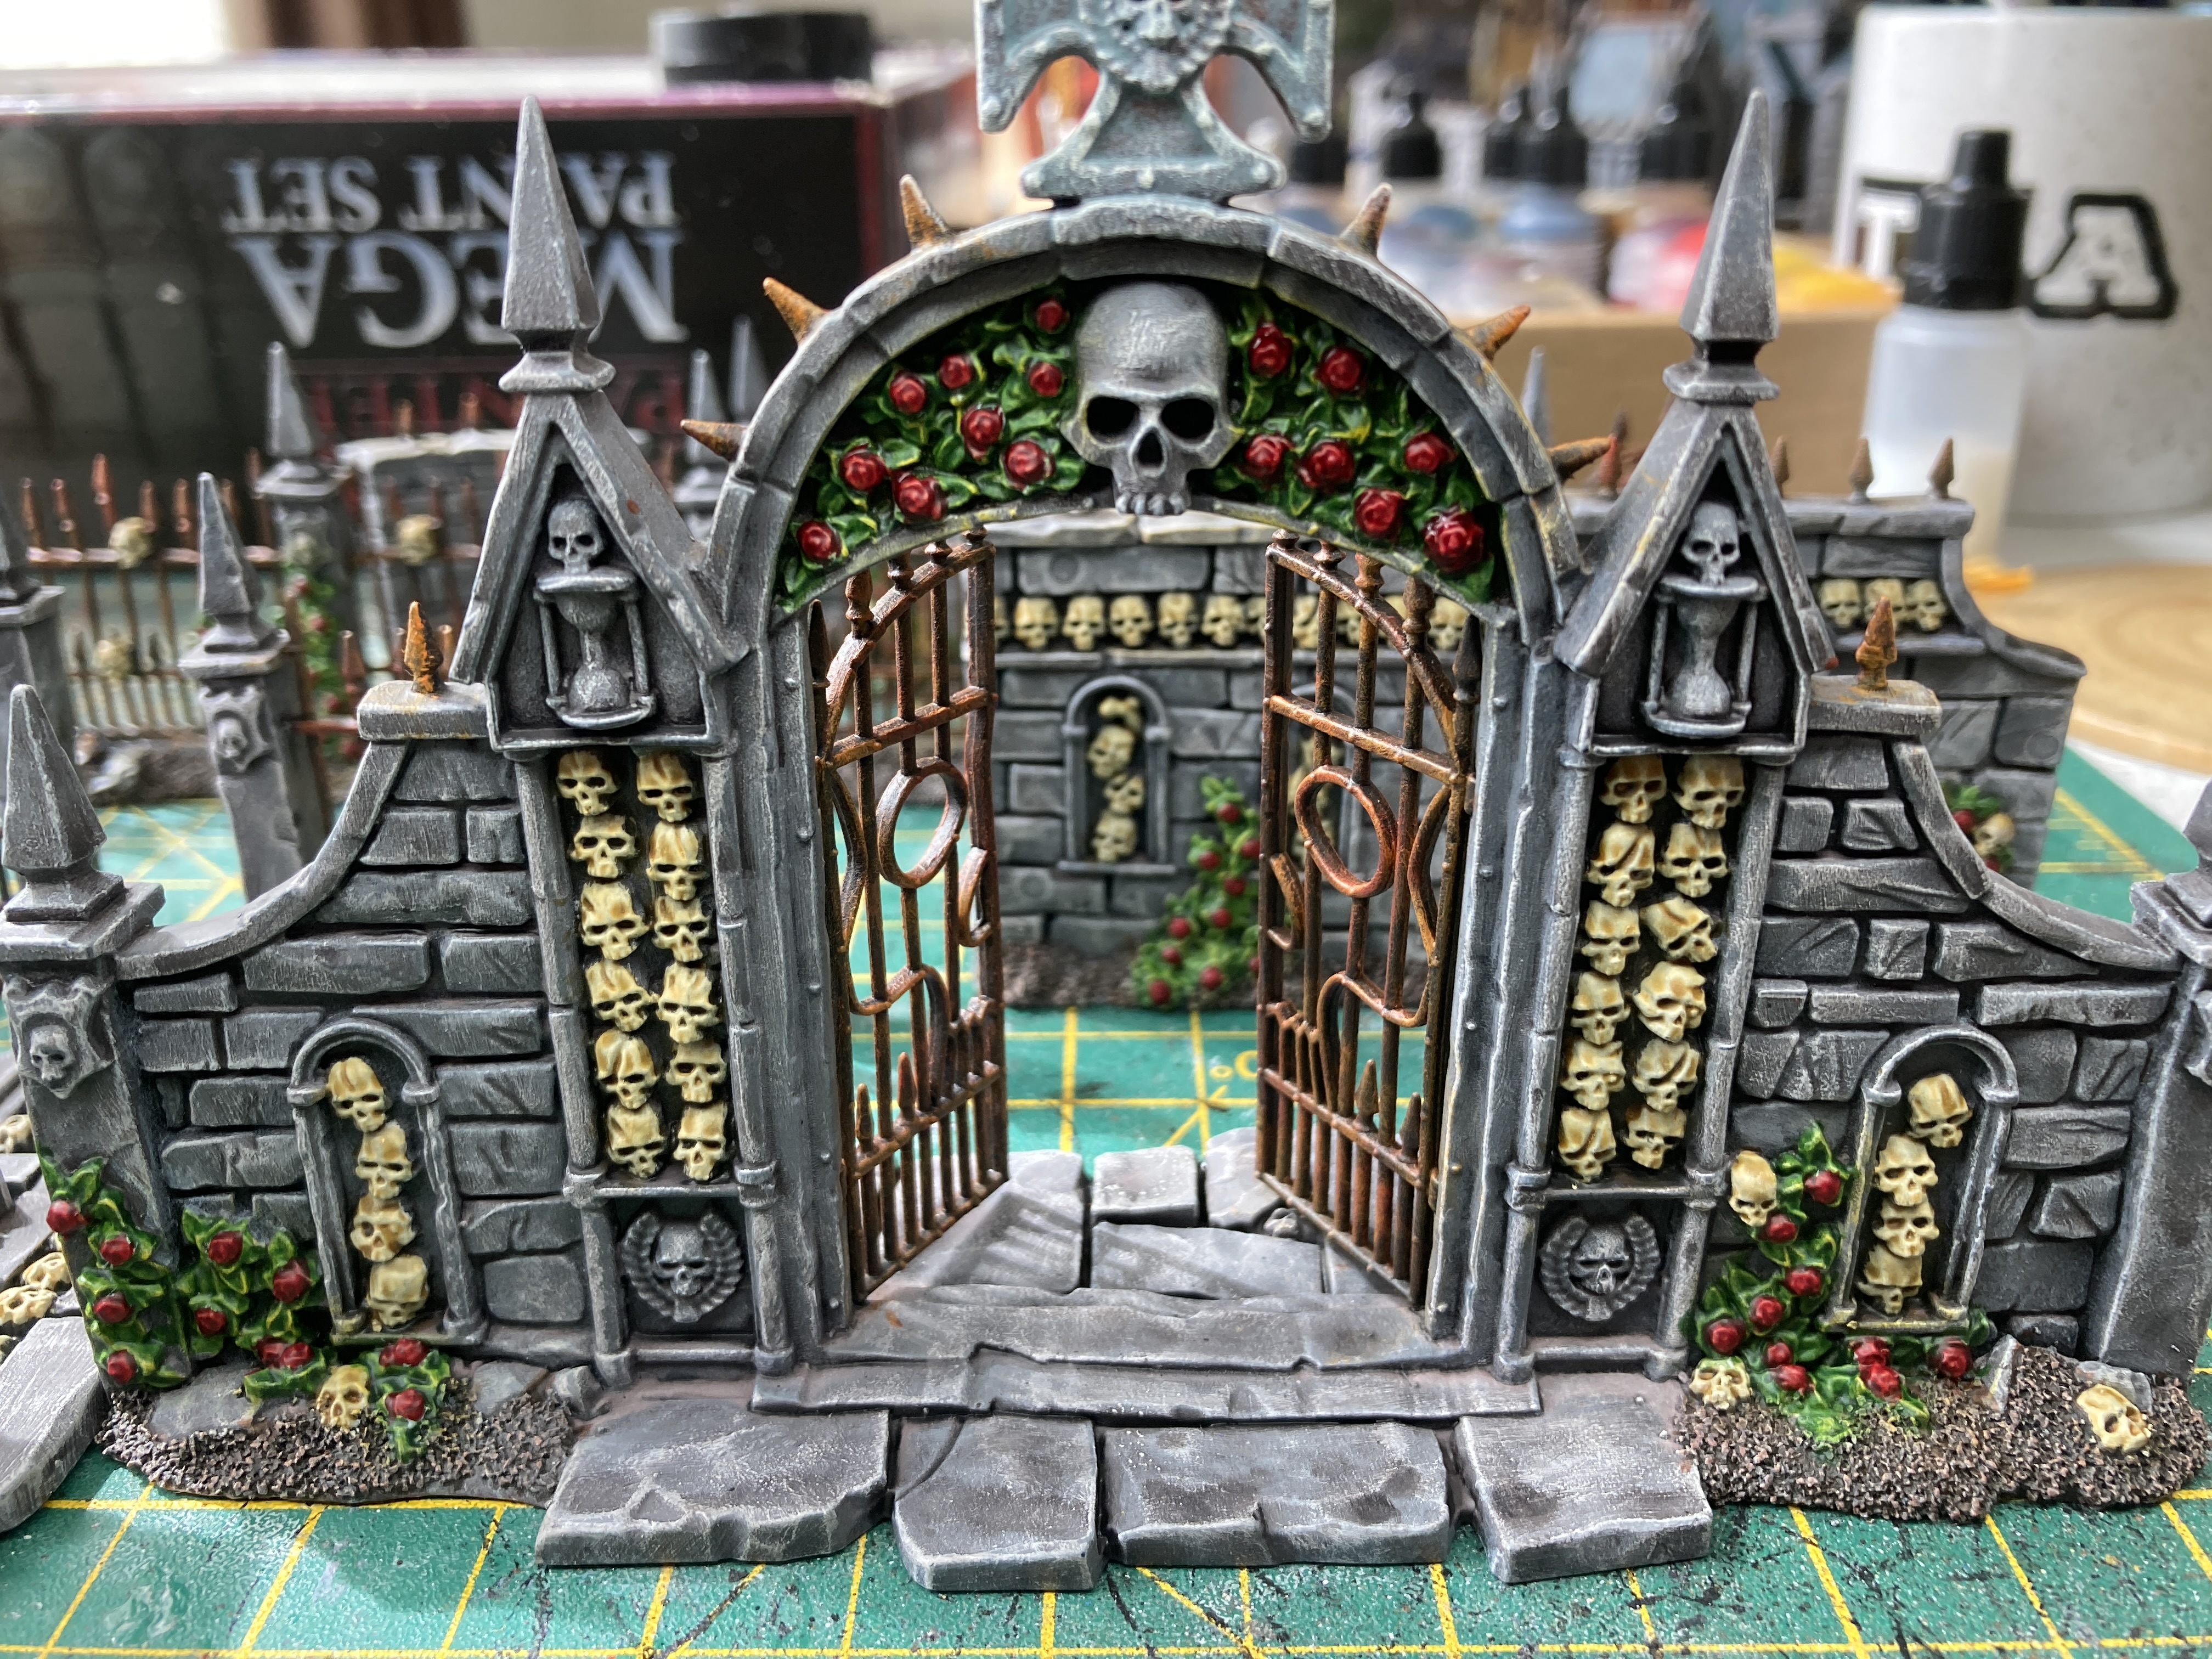
The painting is almost done. For the final phase I used army painter green ink and applied it to all of the stonework from the ground up to about miniature shoulder height to represent dampness and weathering.
So that’s it as far as the painting goes. Next I’ll be adding a load of grass and moss tufts and maybe some flock.
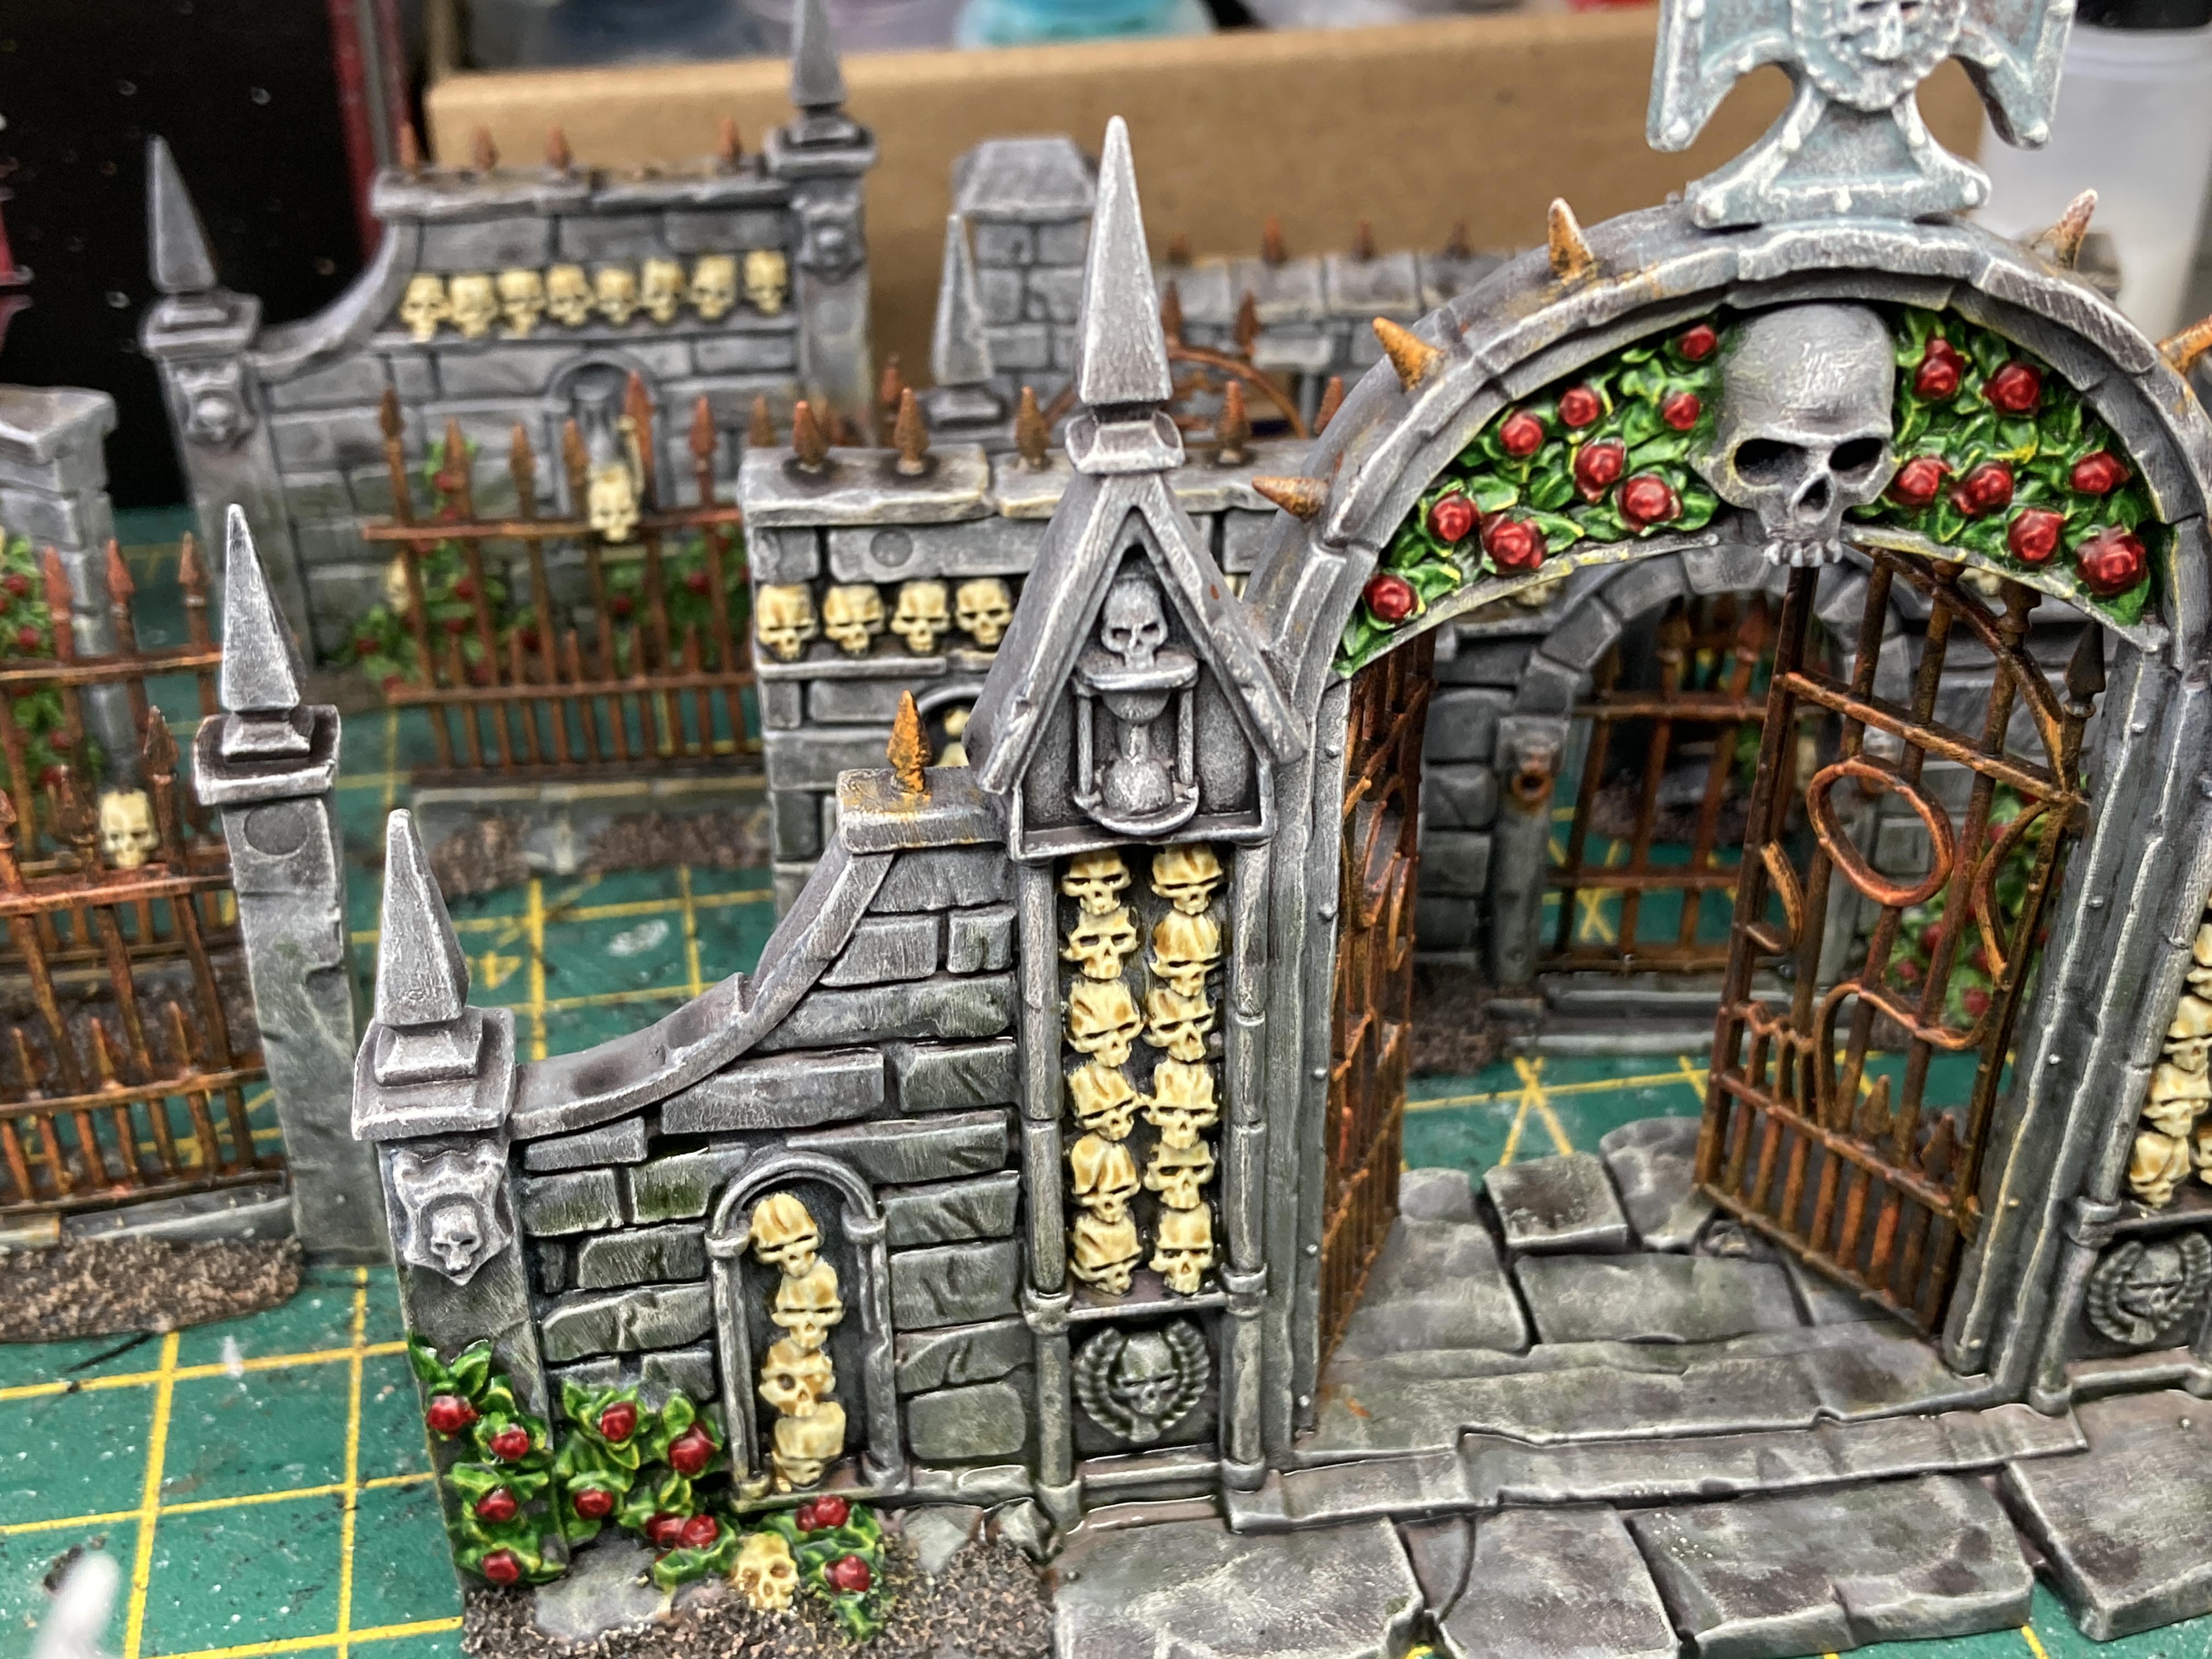
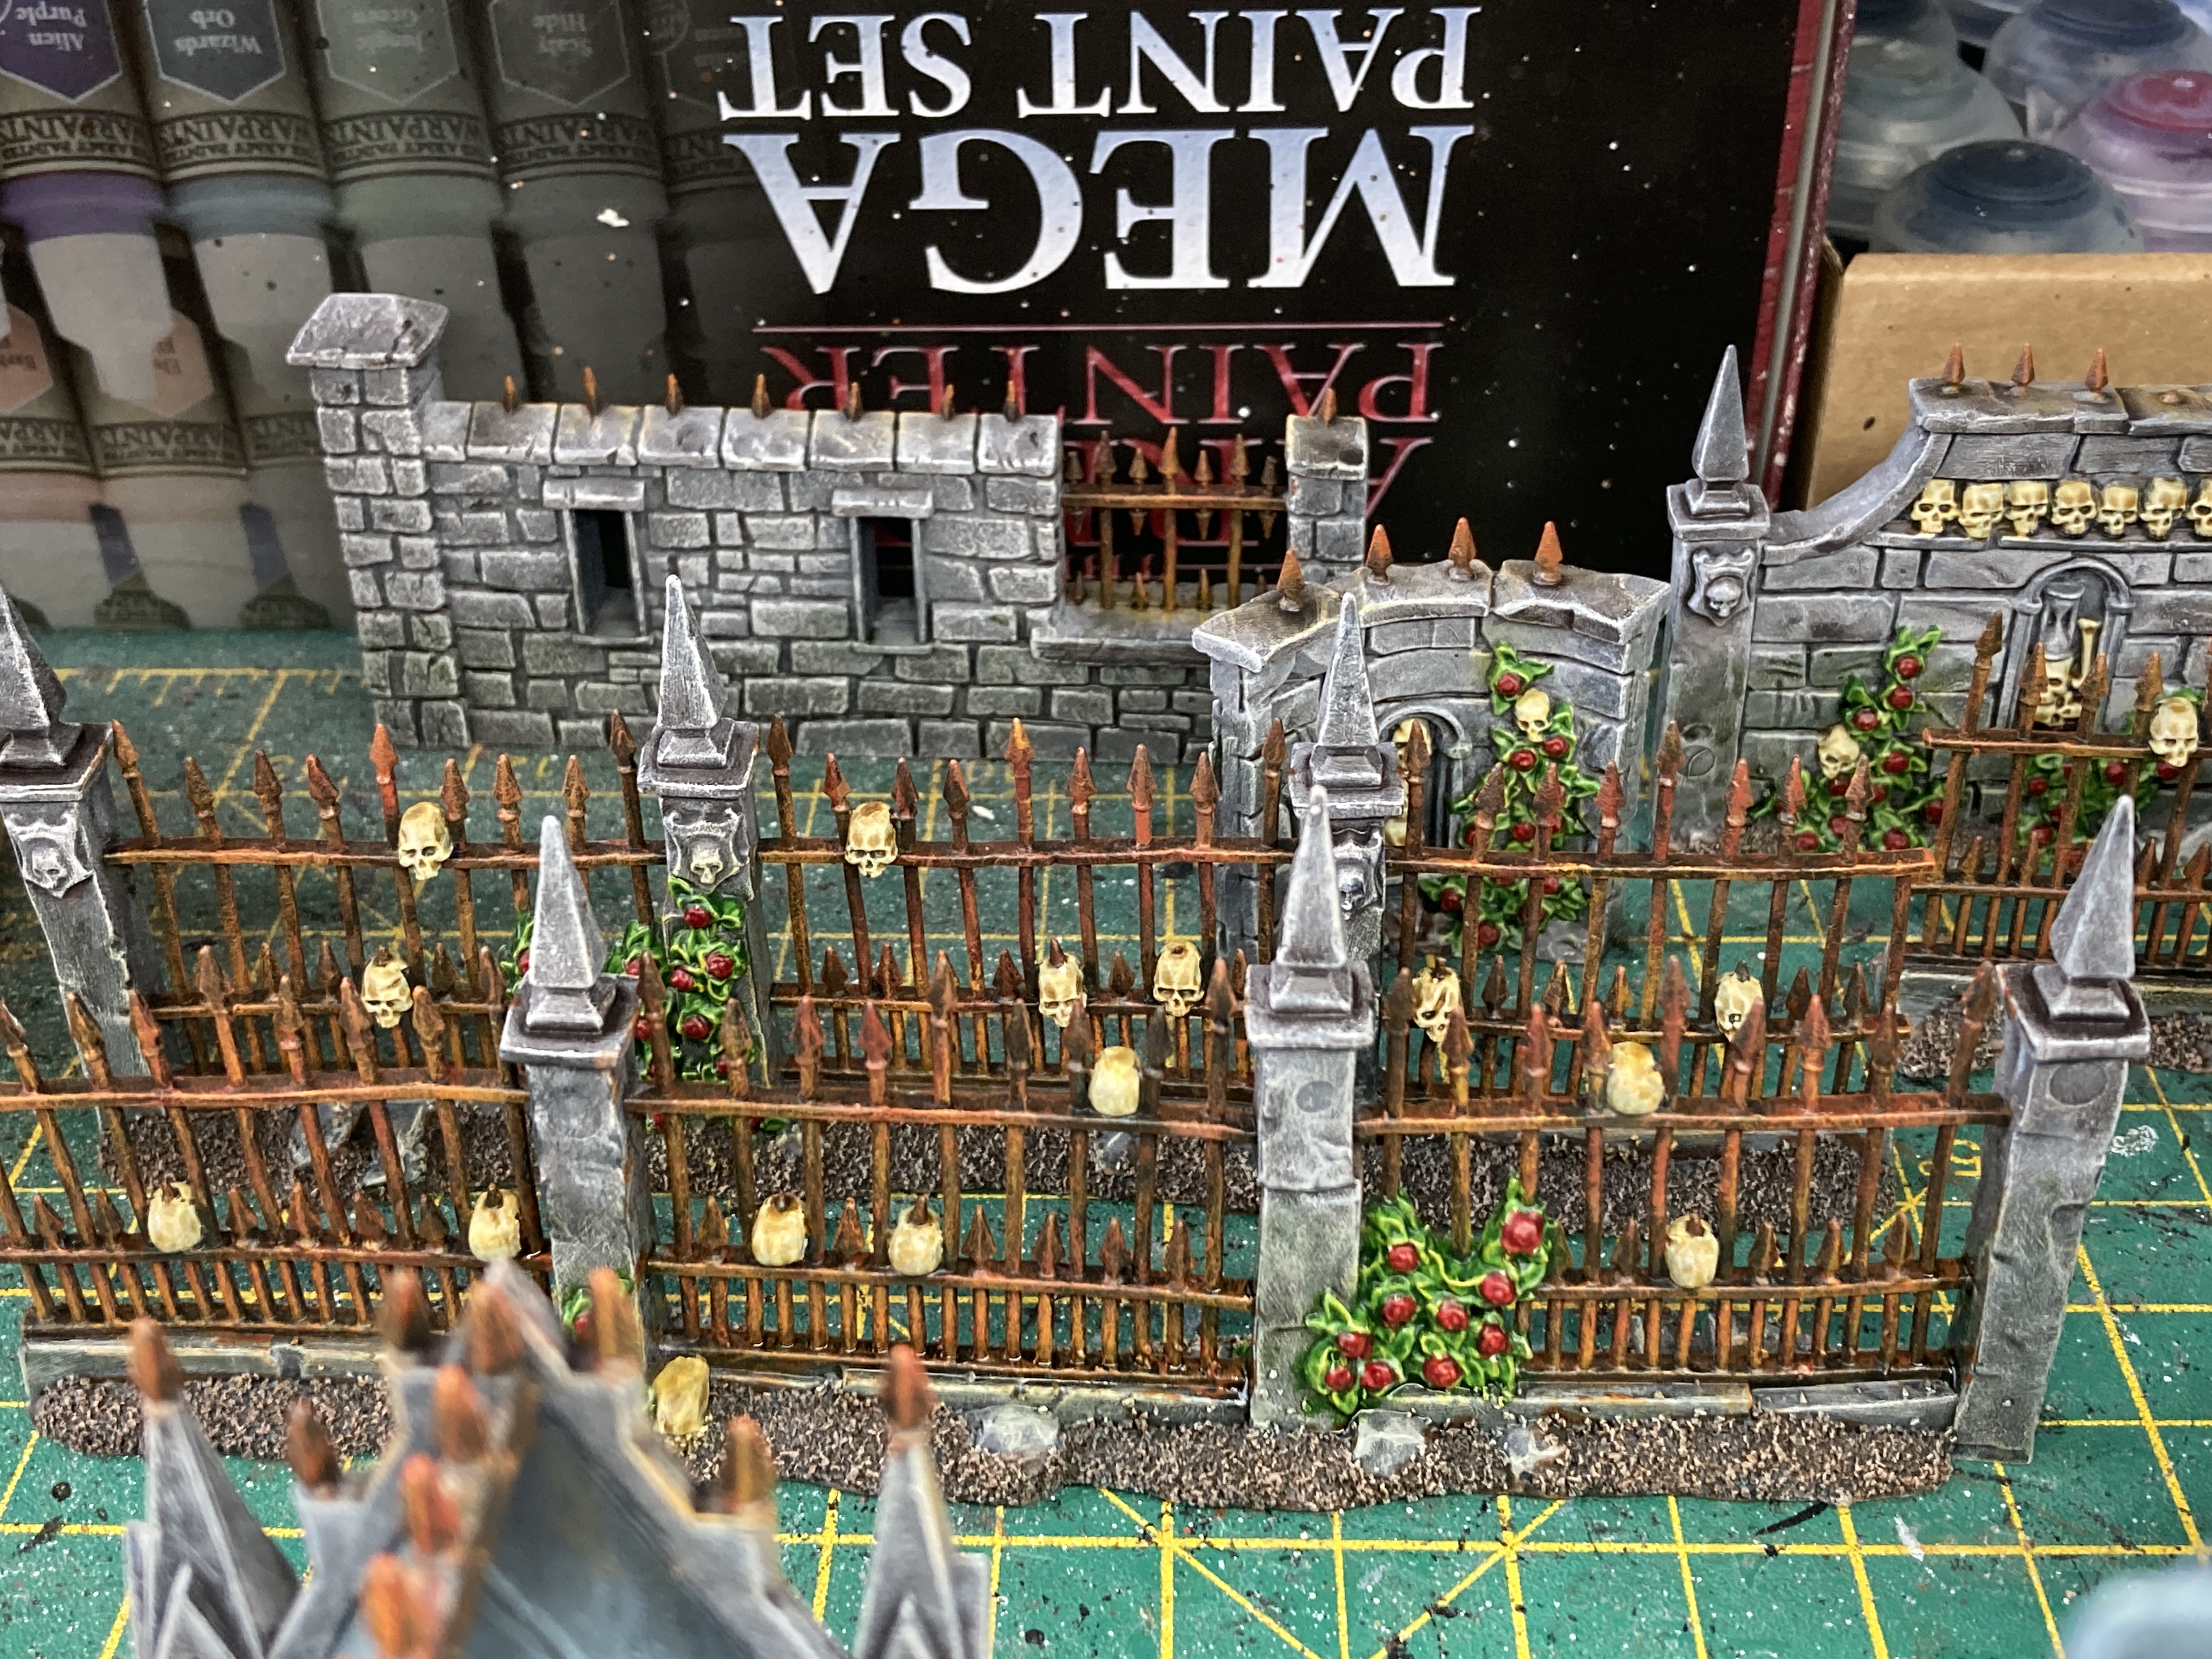
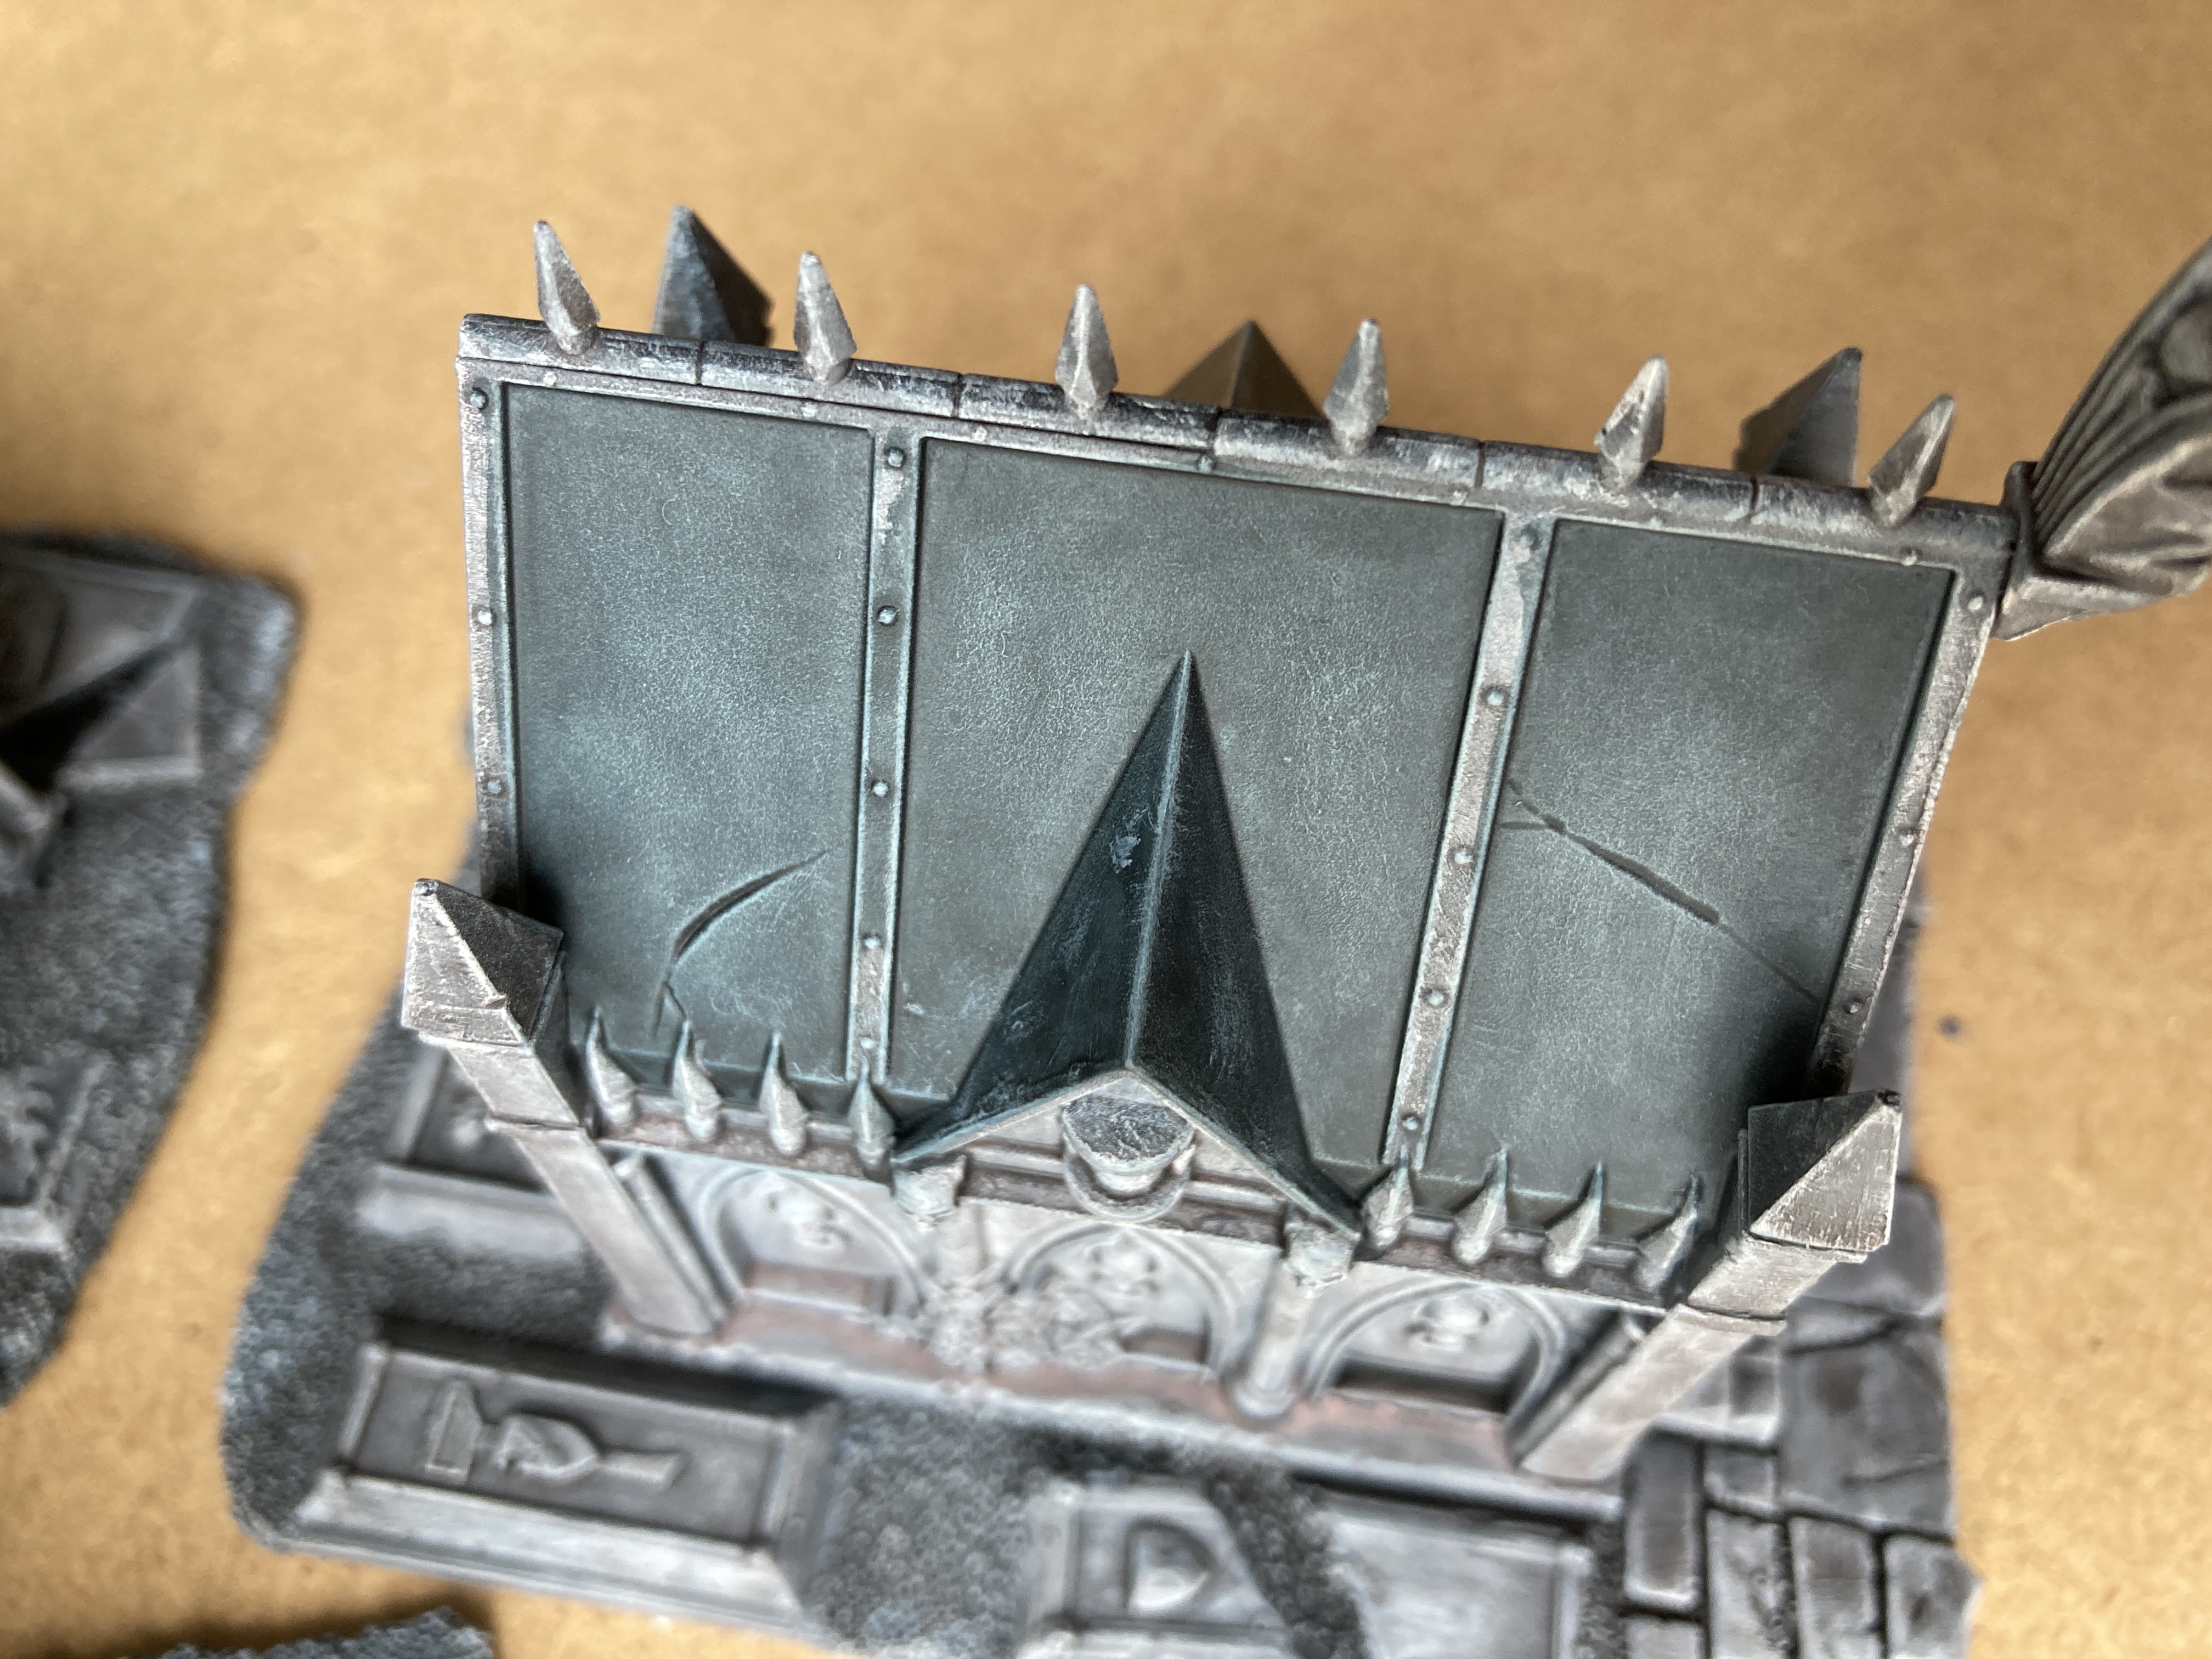
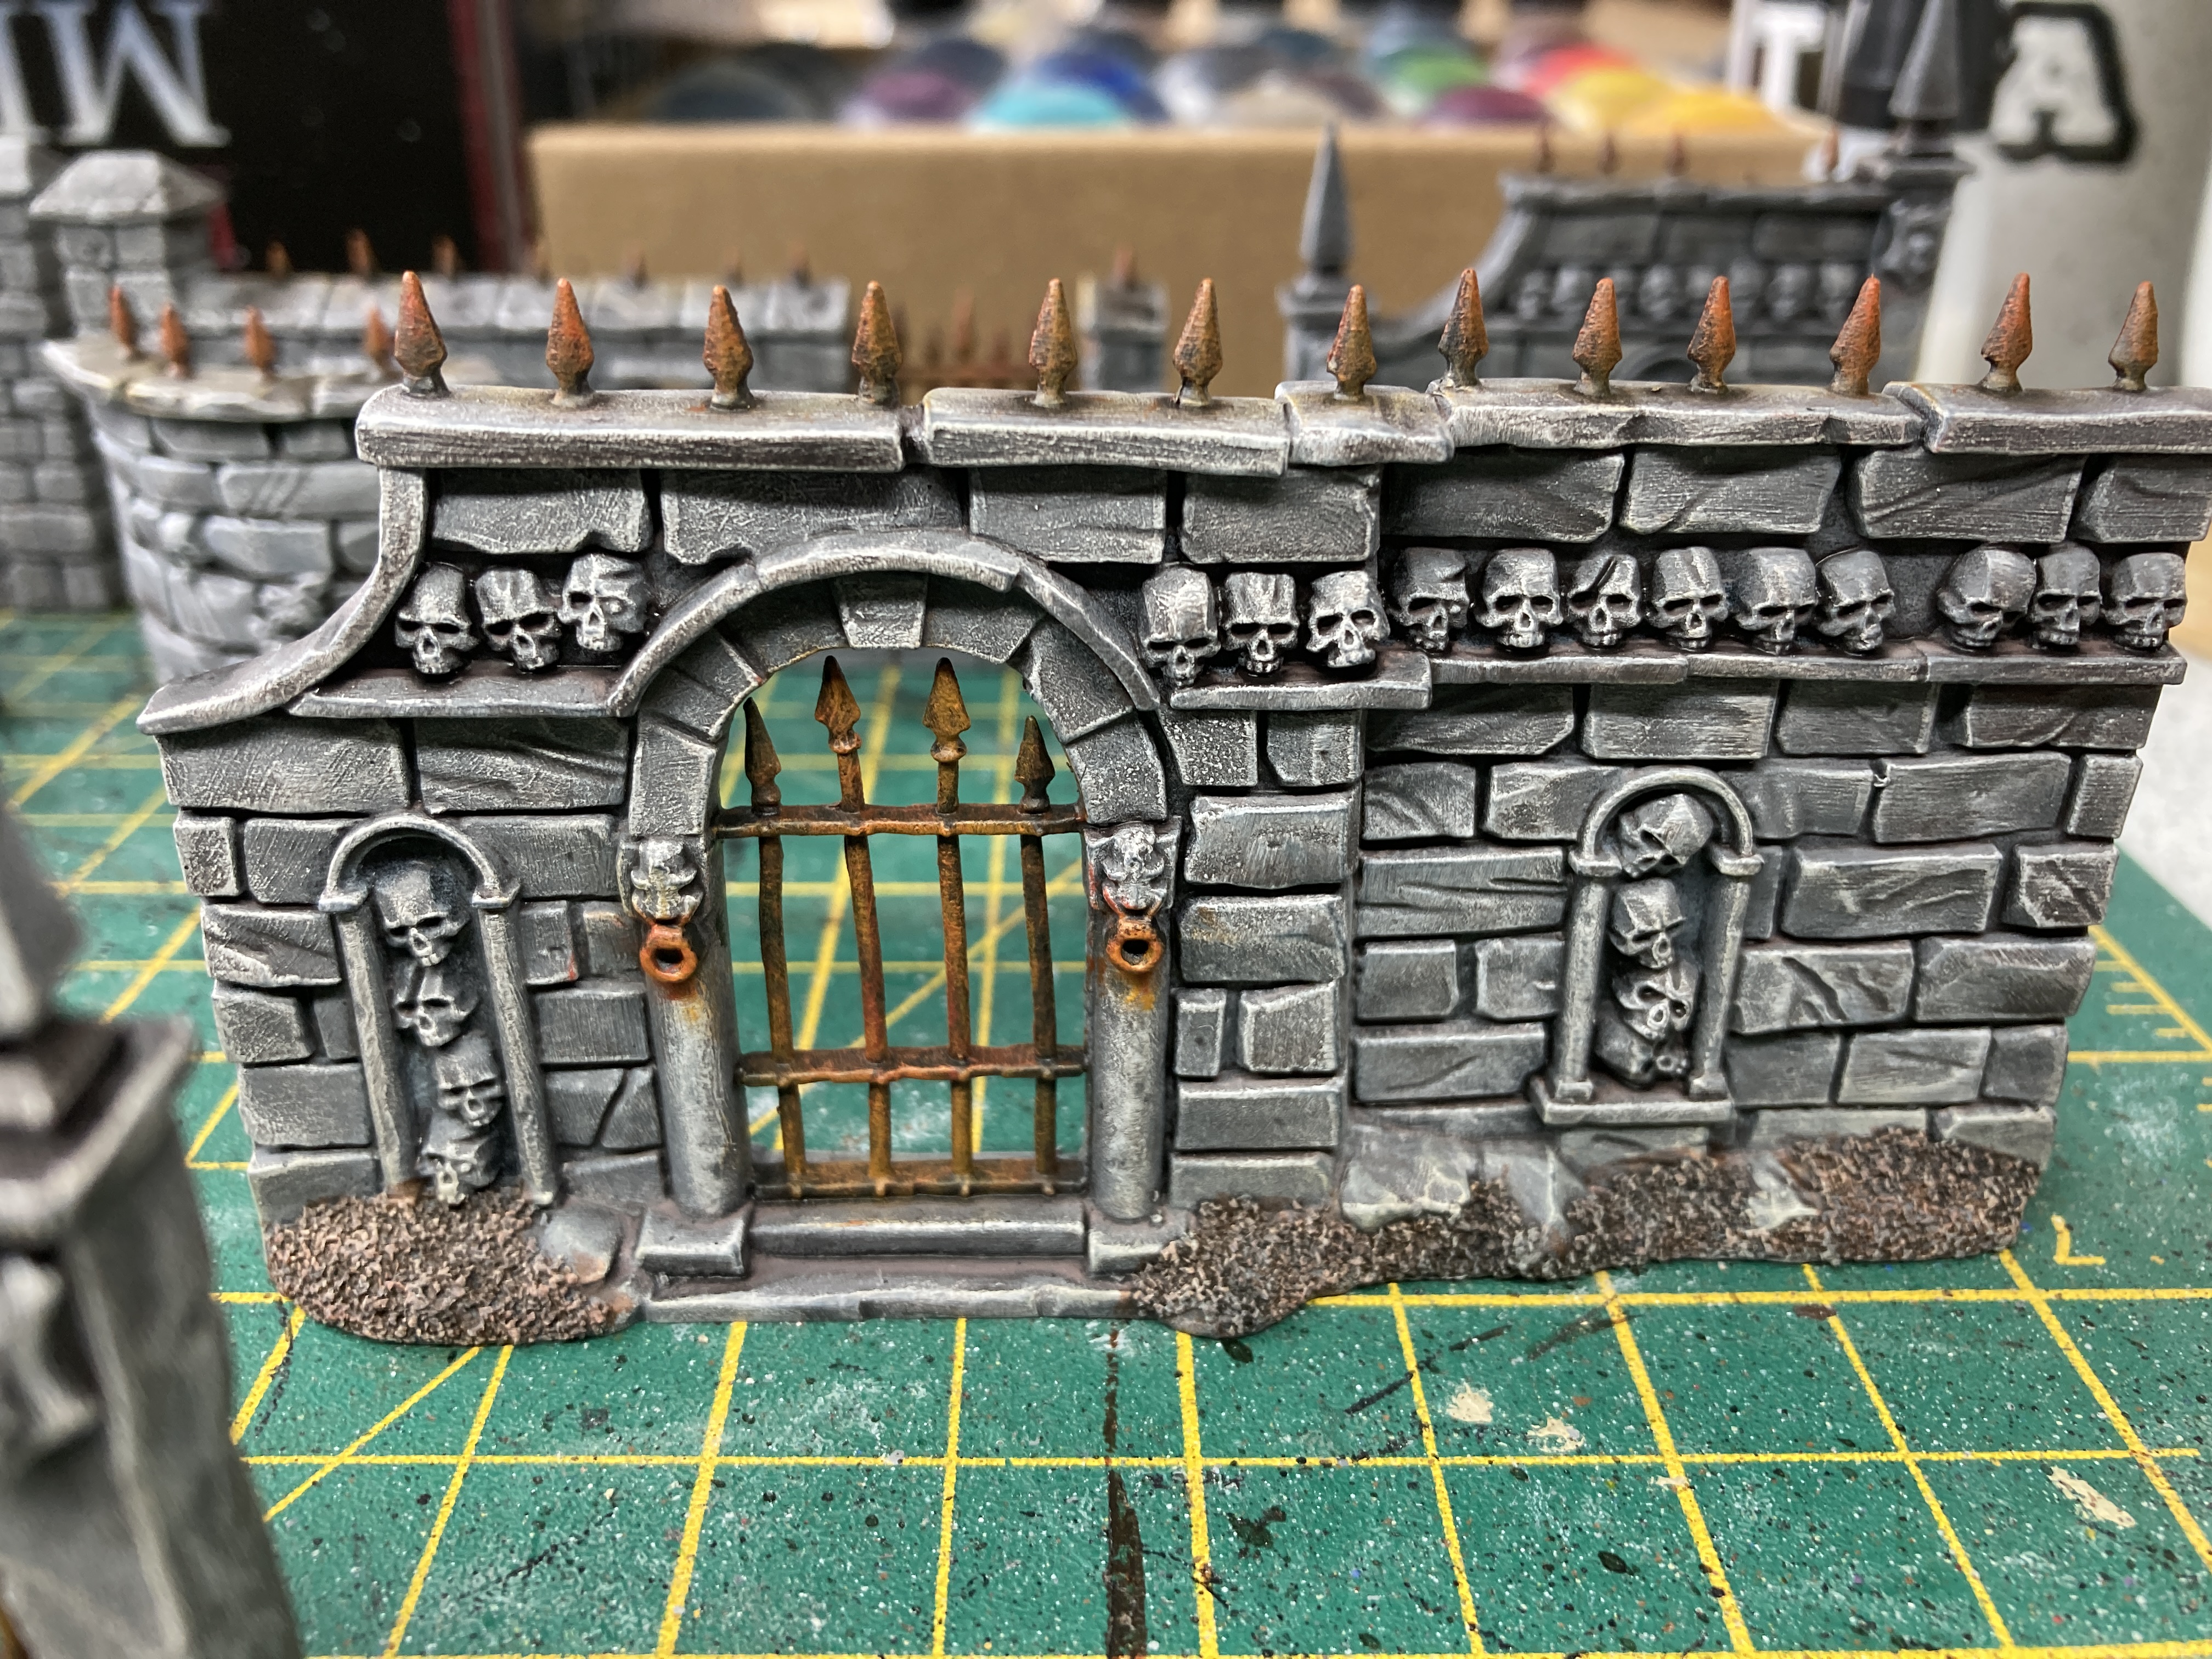
Roofs, Rust and Railings
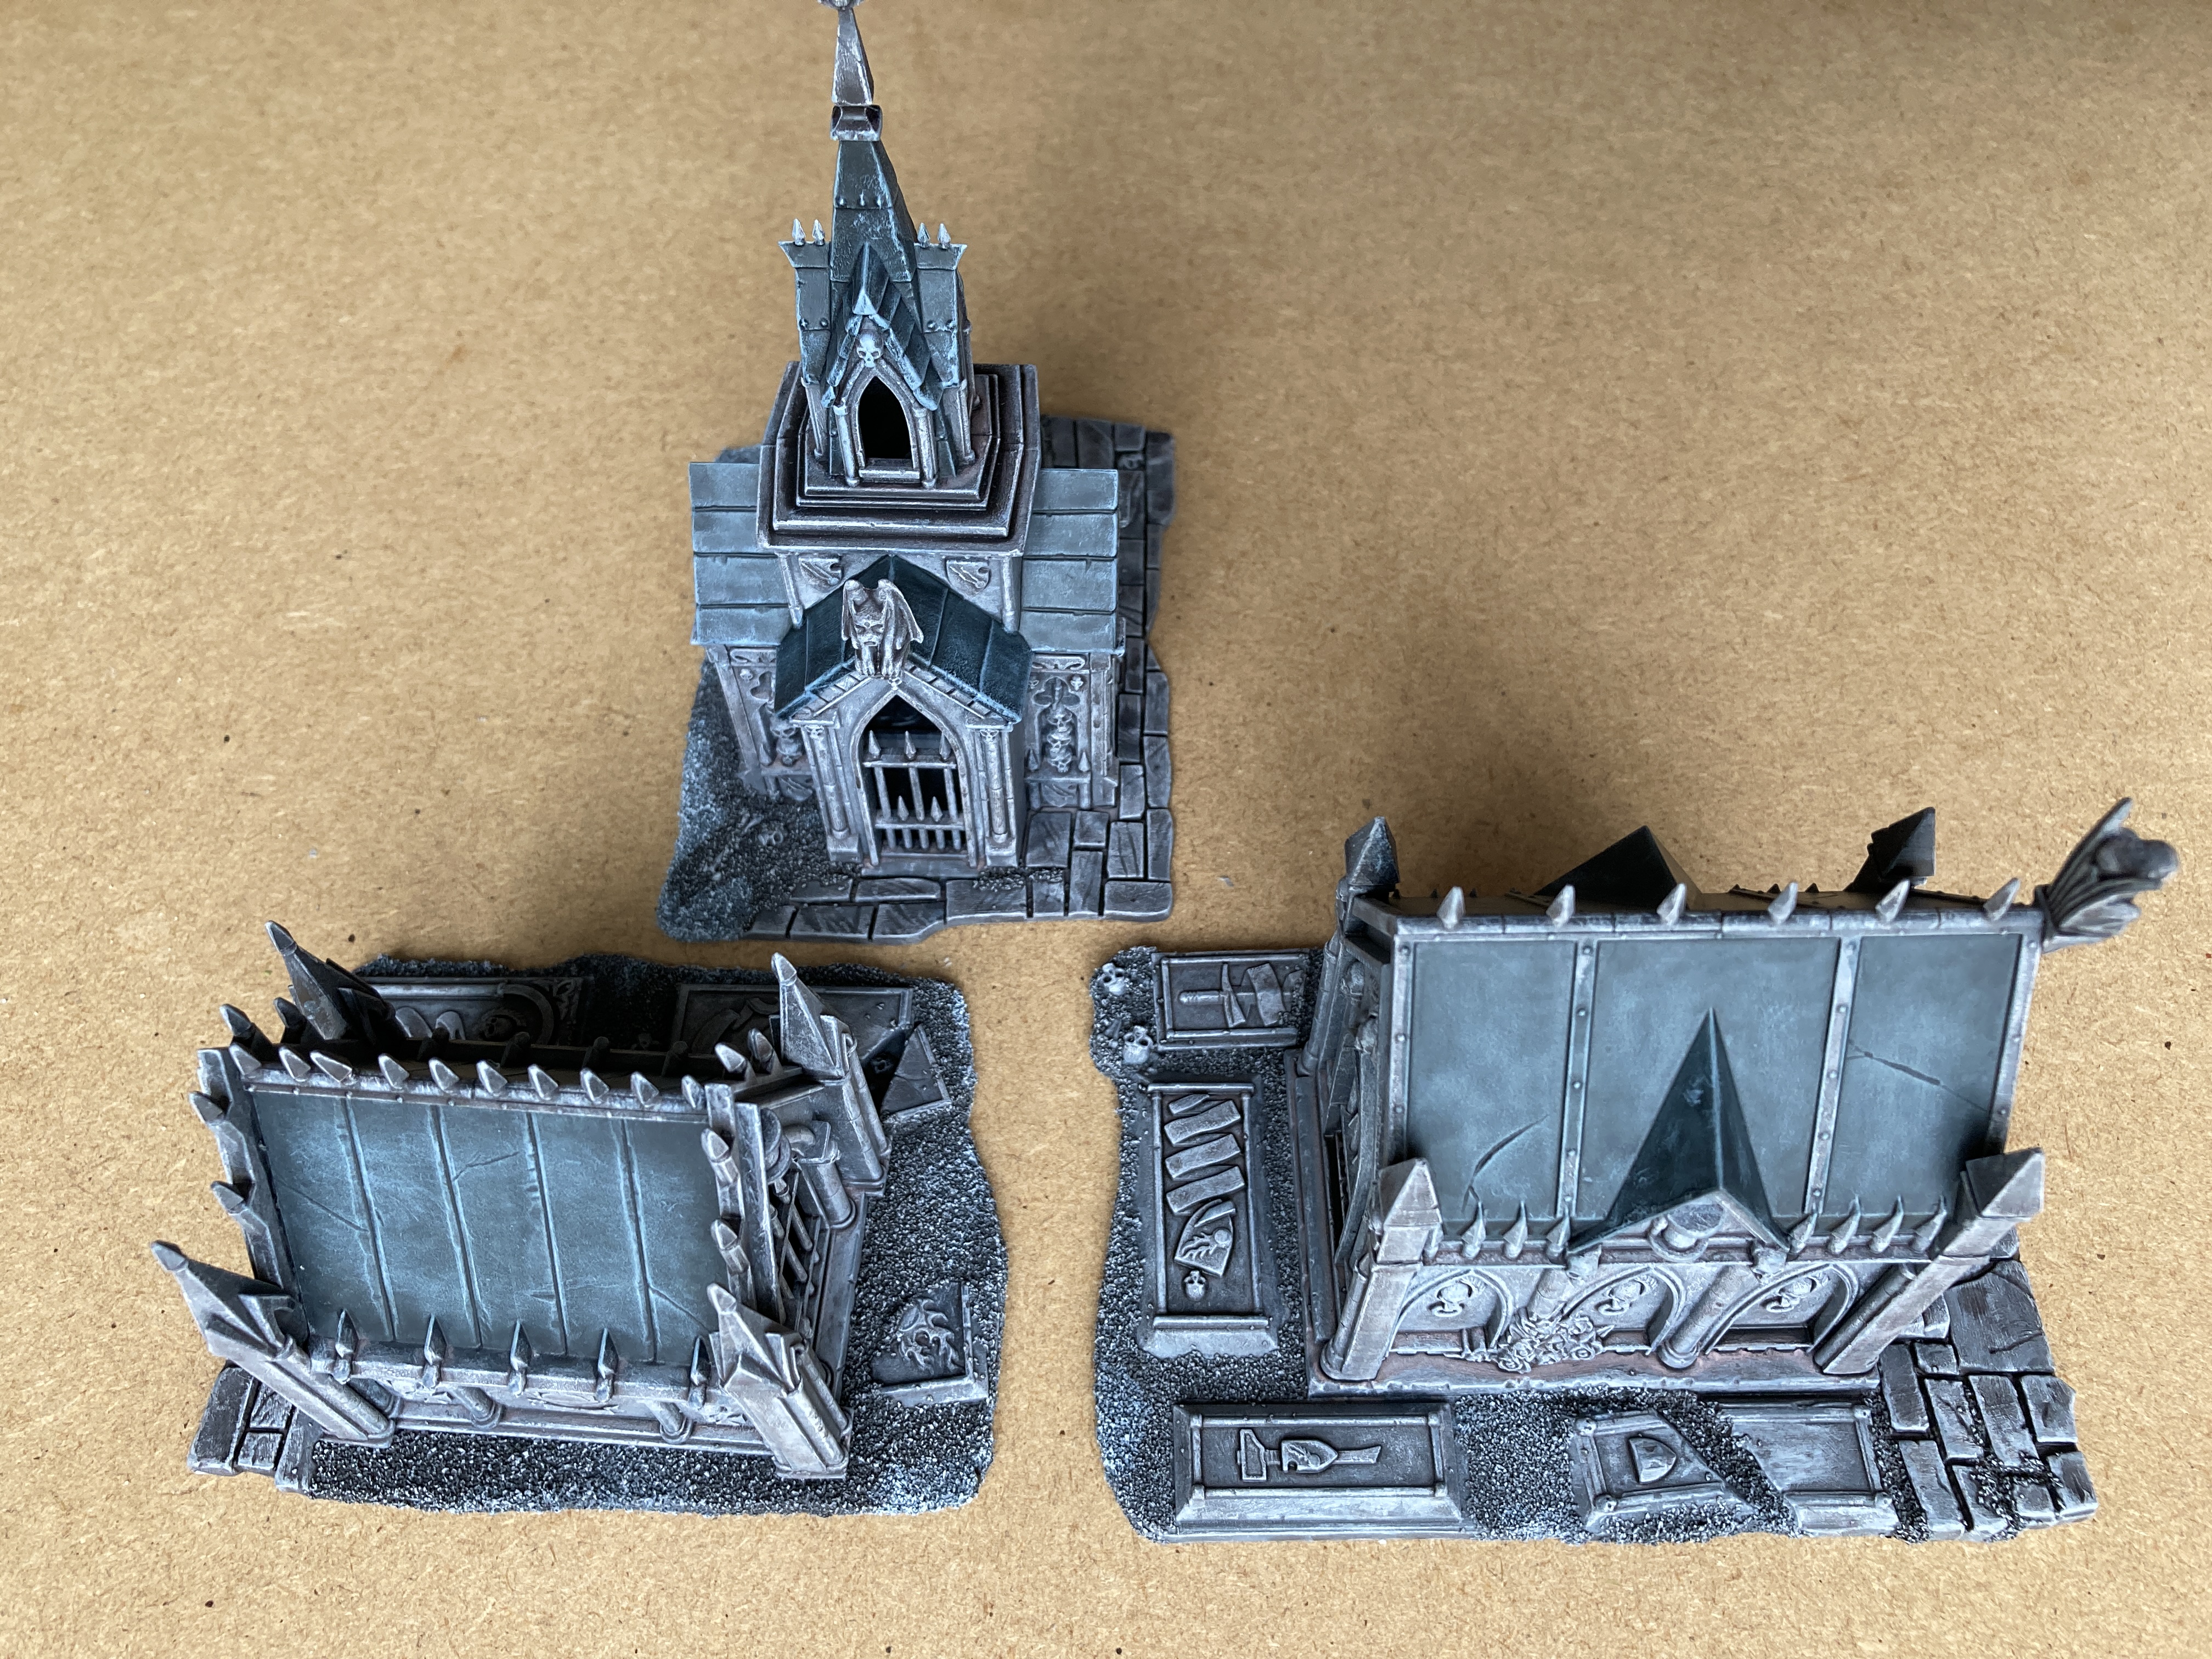
For the roofs of the three buildings I used an equal mix of Leviadon Blue and Creed Camo contrast paint mixed with equal part thinner. Rather than use a shop bought thinner I make my own from acrylic matt medium and water.
I applied two coats of this mix then once dry I lightly drybrushed with a light grey to bring out the details.
Next I gave the statue an additional drybrush to whiten it up a little to make I look like it was carved from a higher quality stone.
I then painted all of the ground earth with Gore-Grunta Fur contrast followed by a drybrush of a light beige.
I then painted all of the iron work black. This was a little time consuming but certainly a necessity.

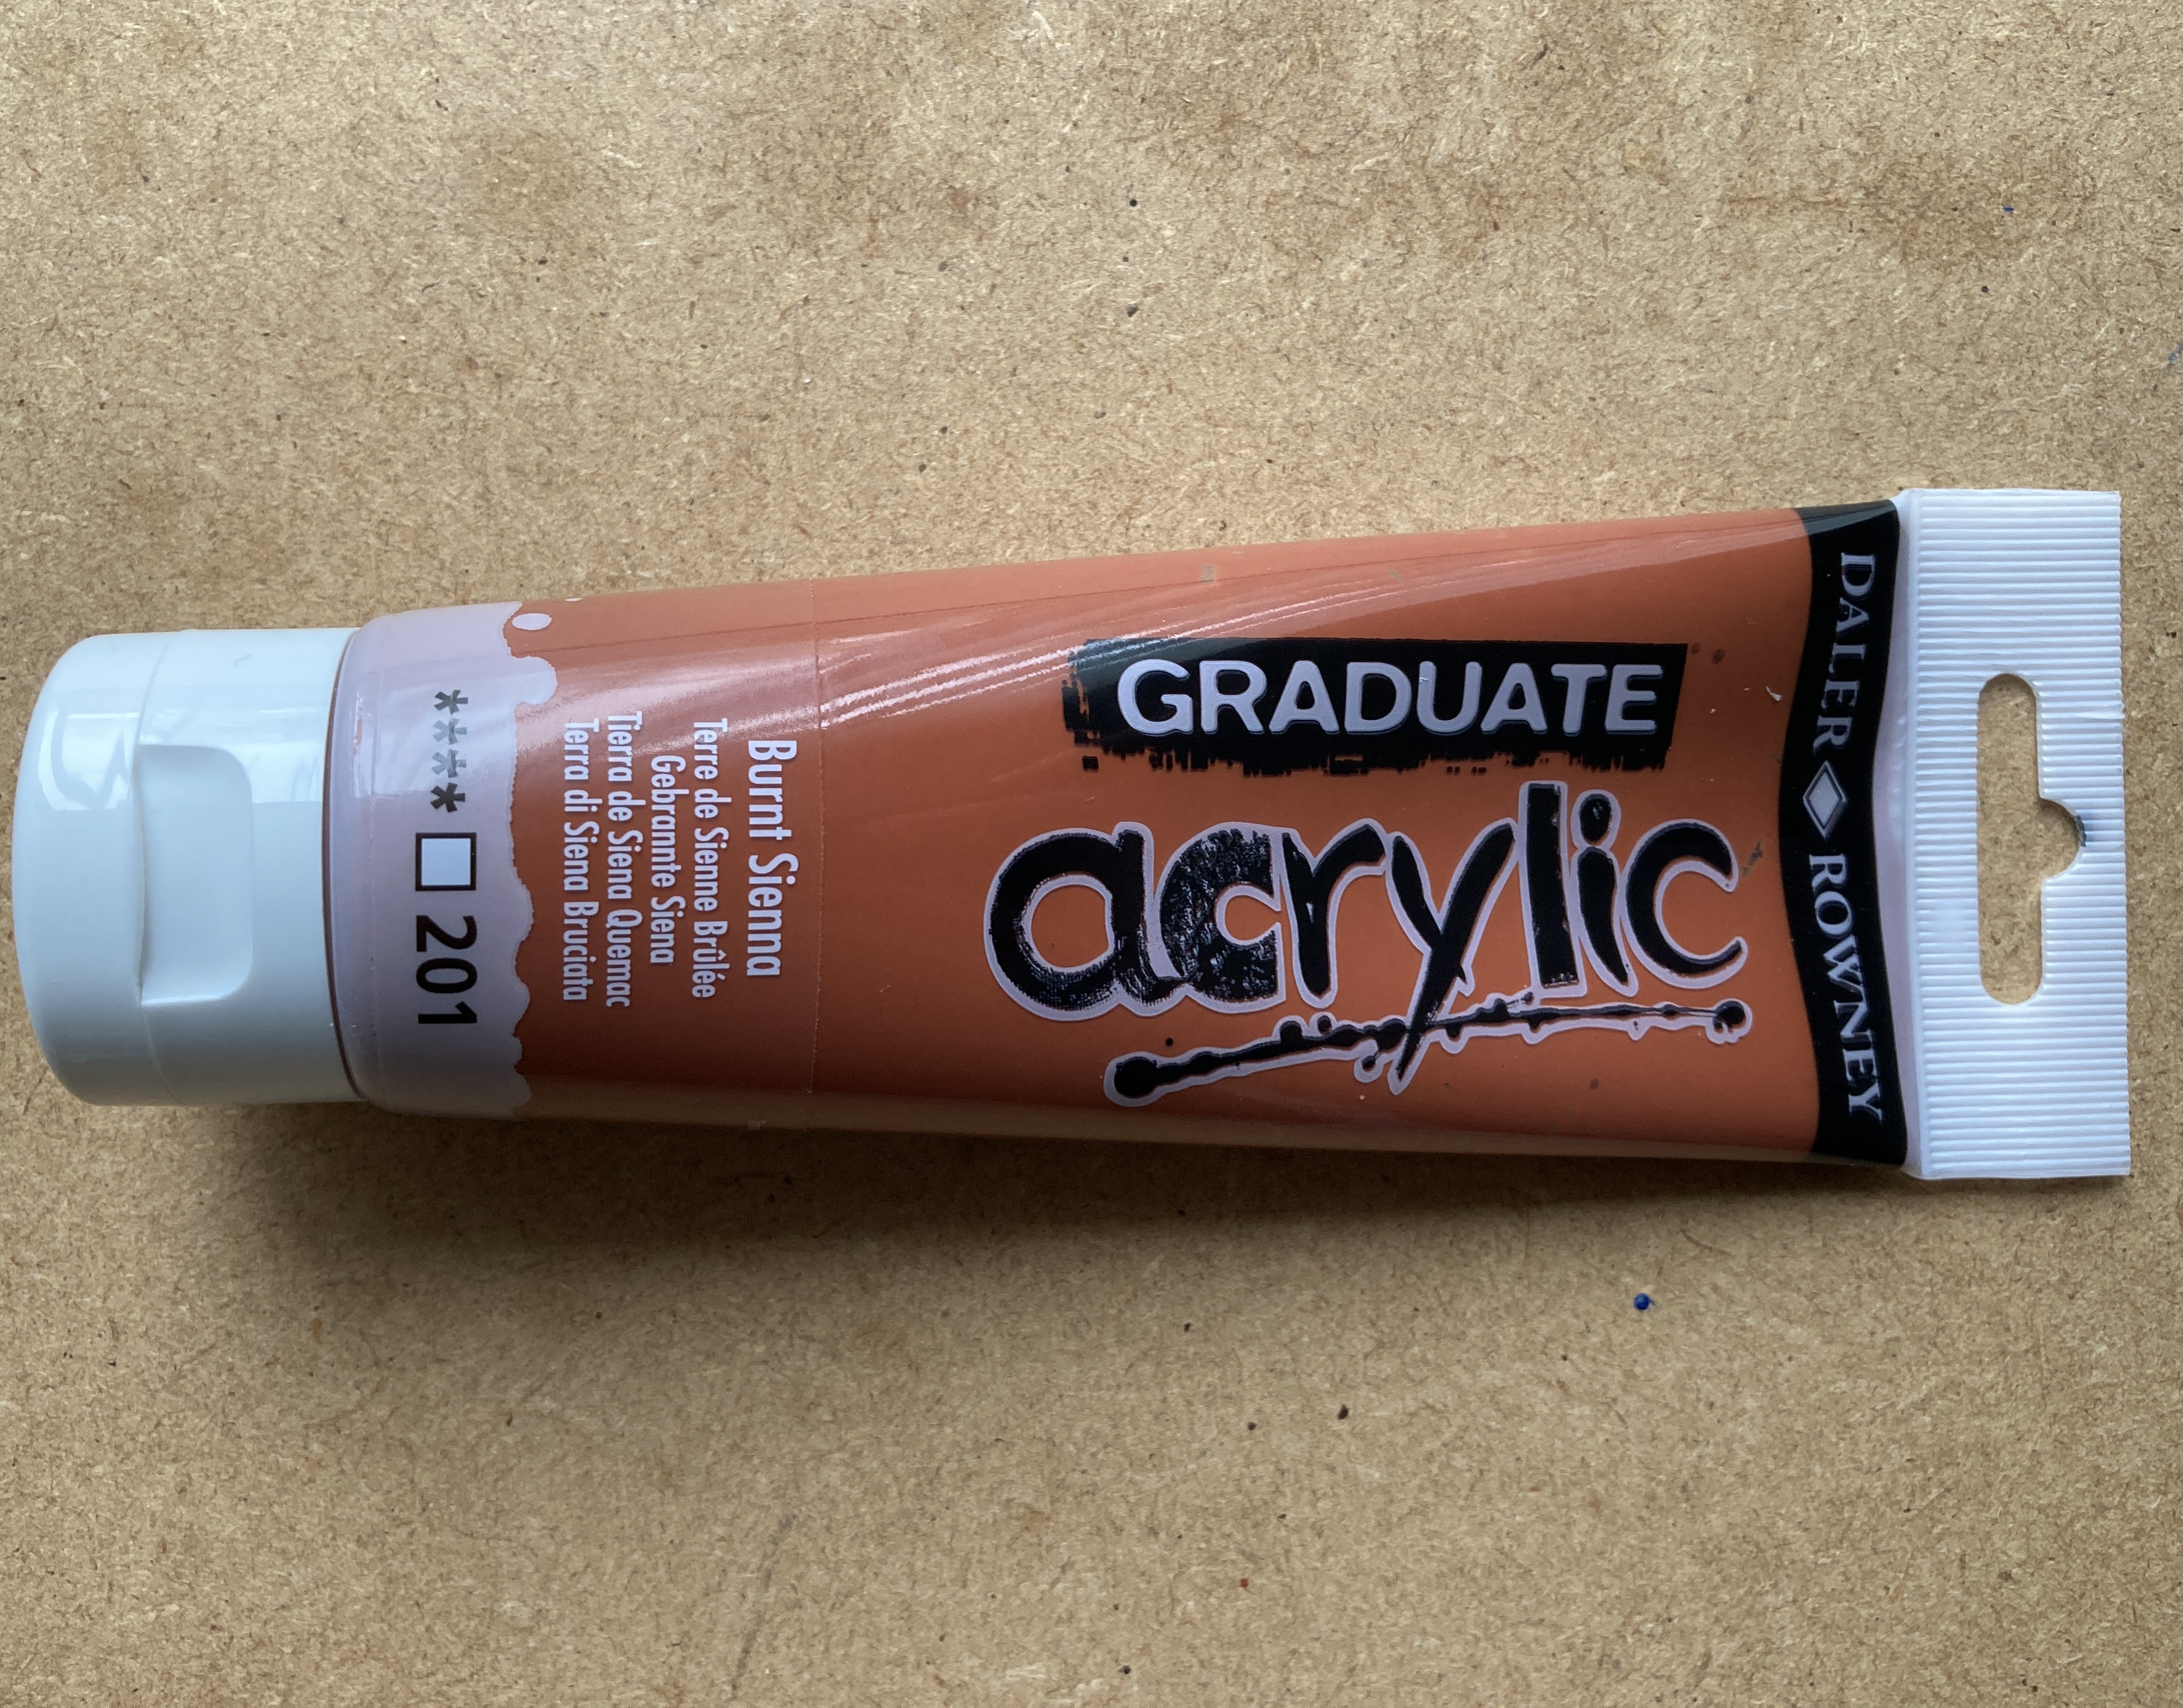
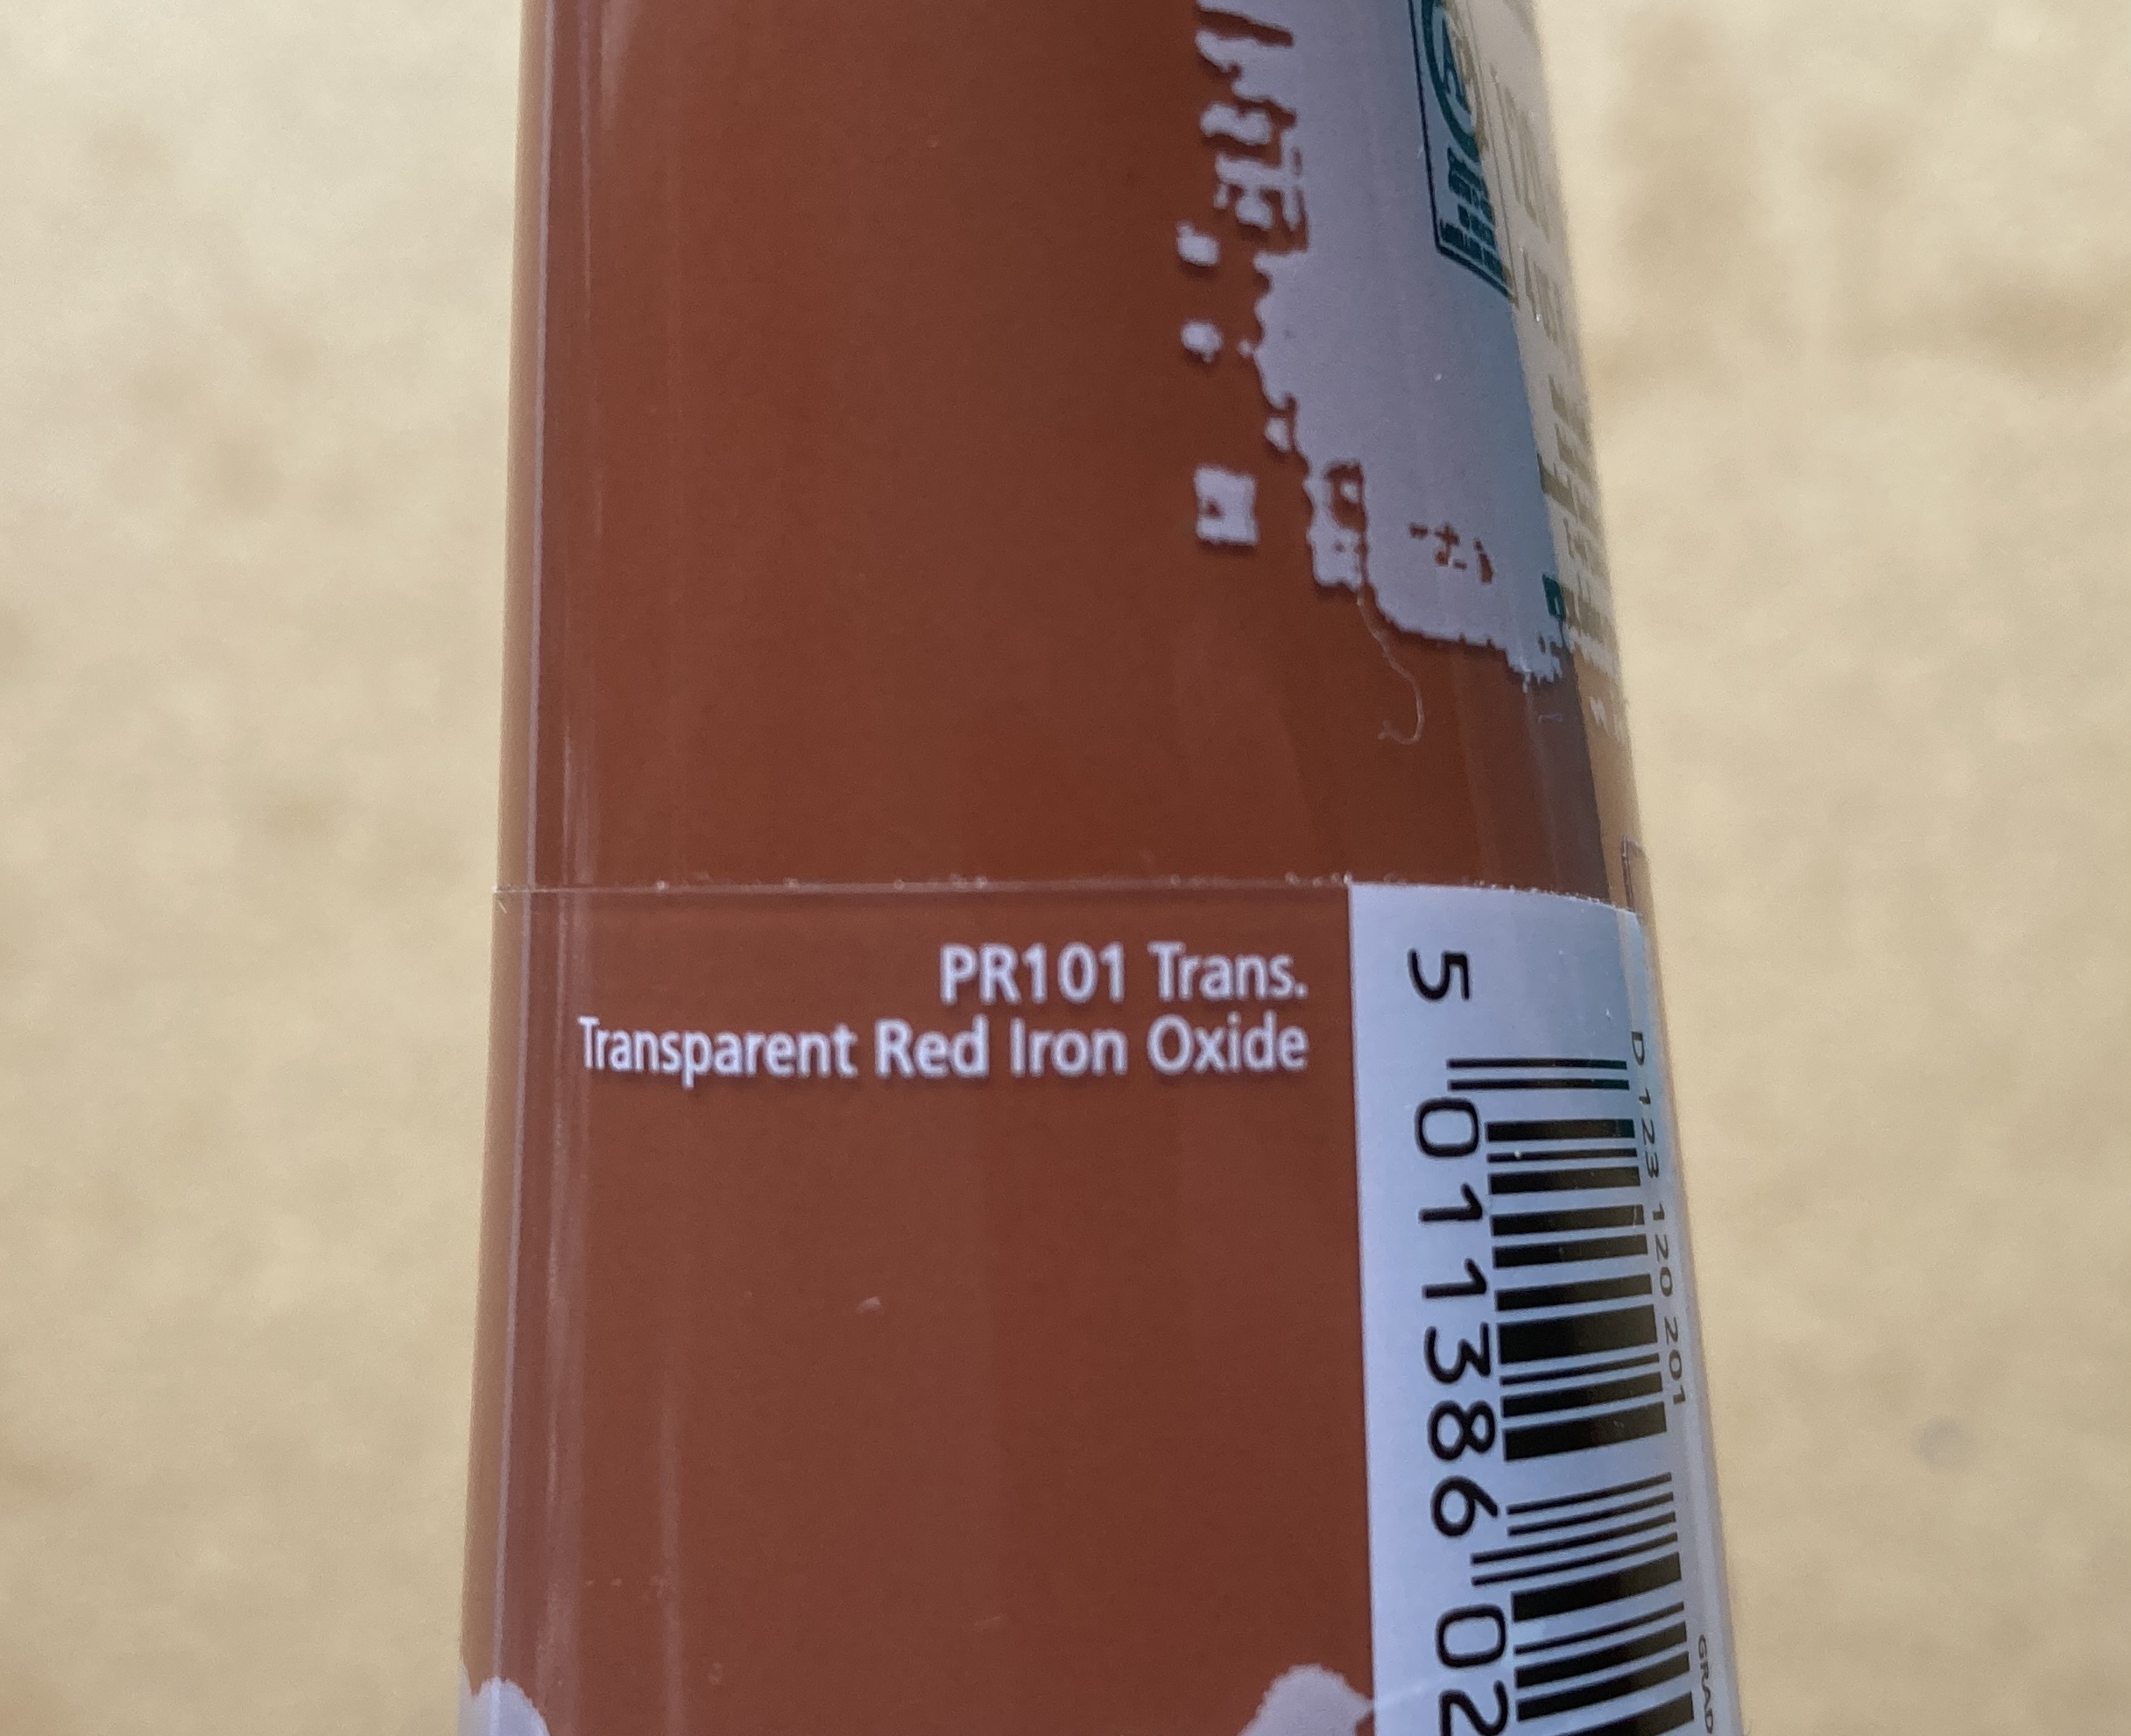
Next I started on the rust. The first paint was some cheap artist’s acrylic, burnt siena which actually contained red iron oxide as its pigment, ie rust. Unfortunately although it went on well enough when dried it faded and dulled quite a bit so I went over all the metal work again with Vallejo Red Leather Model colour which is pretty much the same colour.
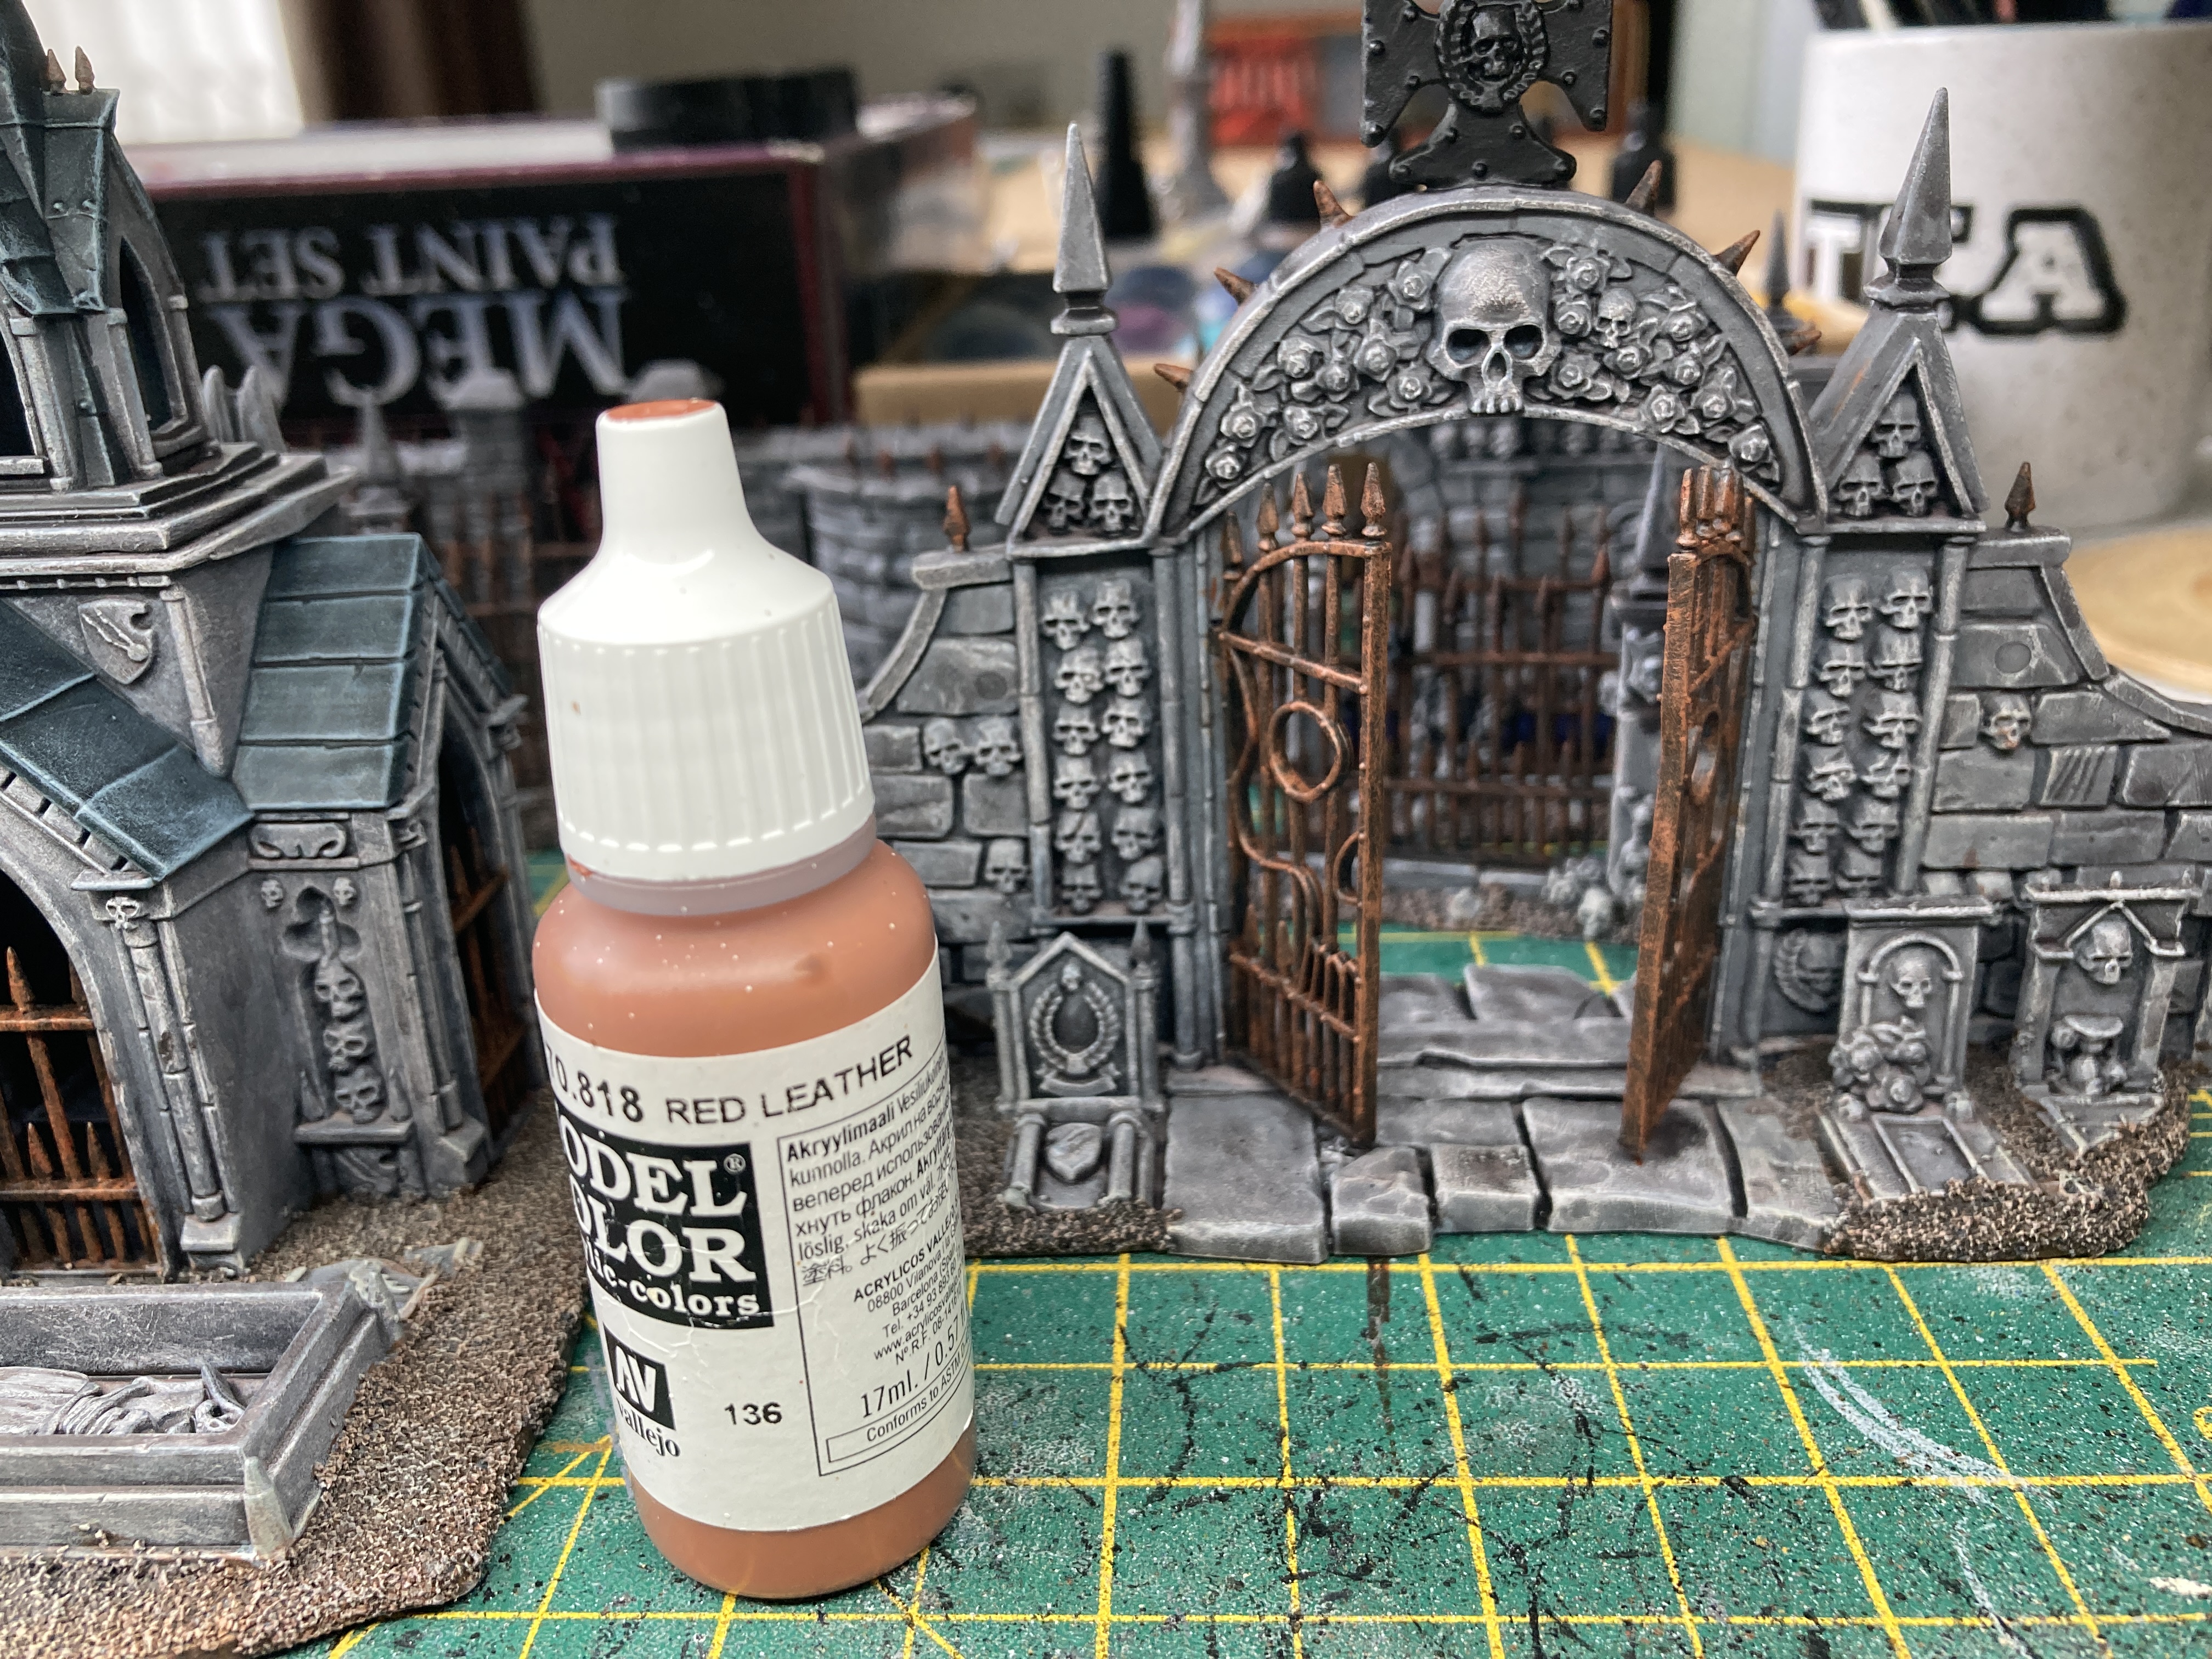
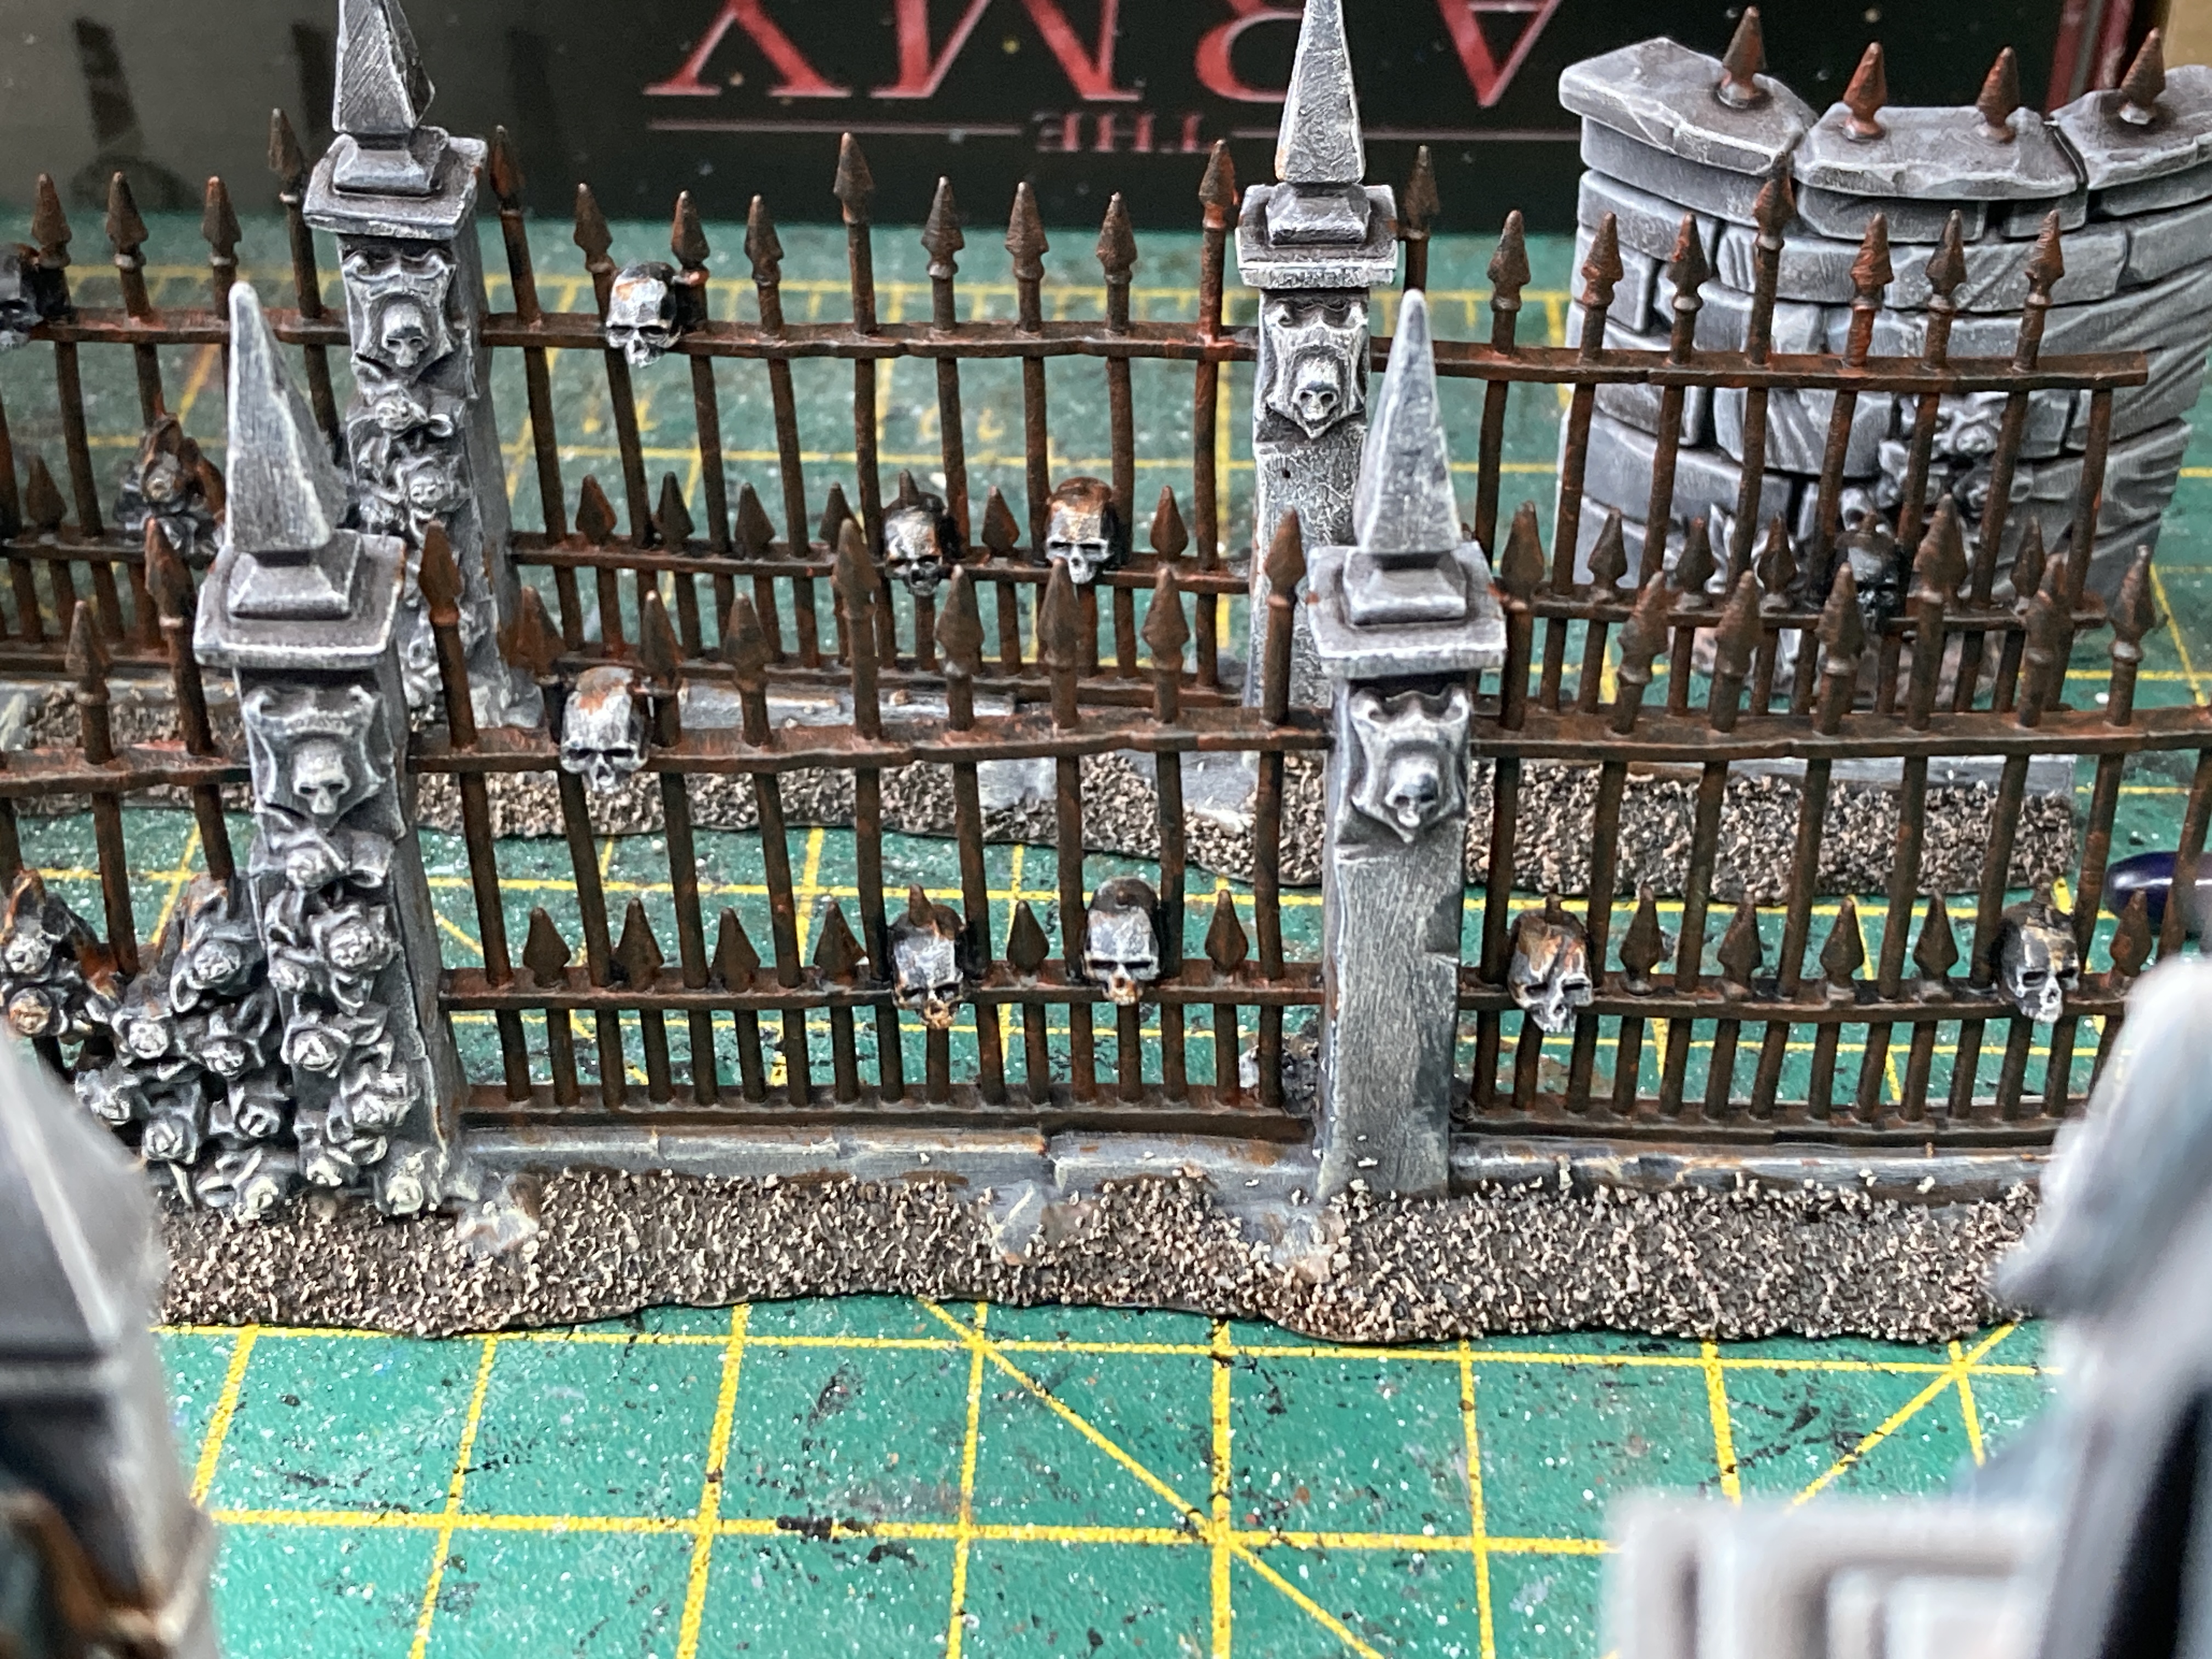
To finish of the rust effect I roughly drybrushed with Game Color Bloody Red and finally Game Color Orange Fire.
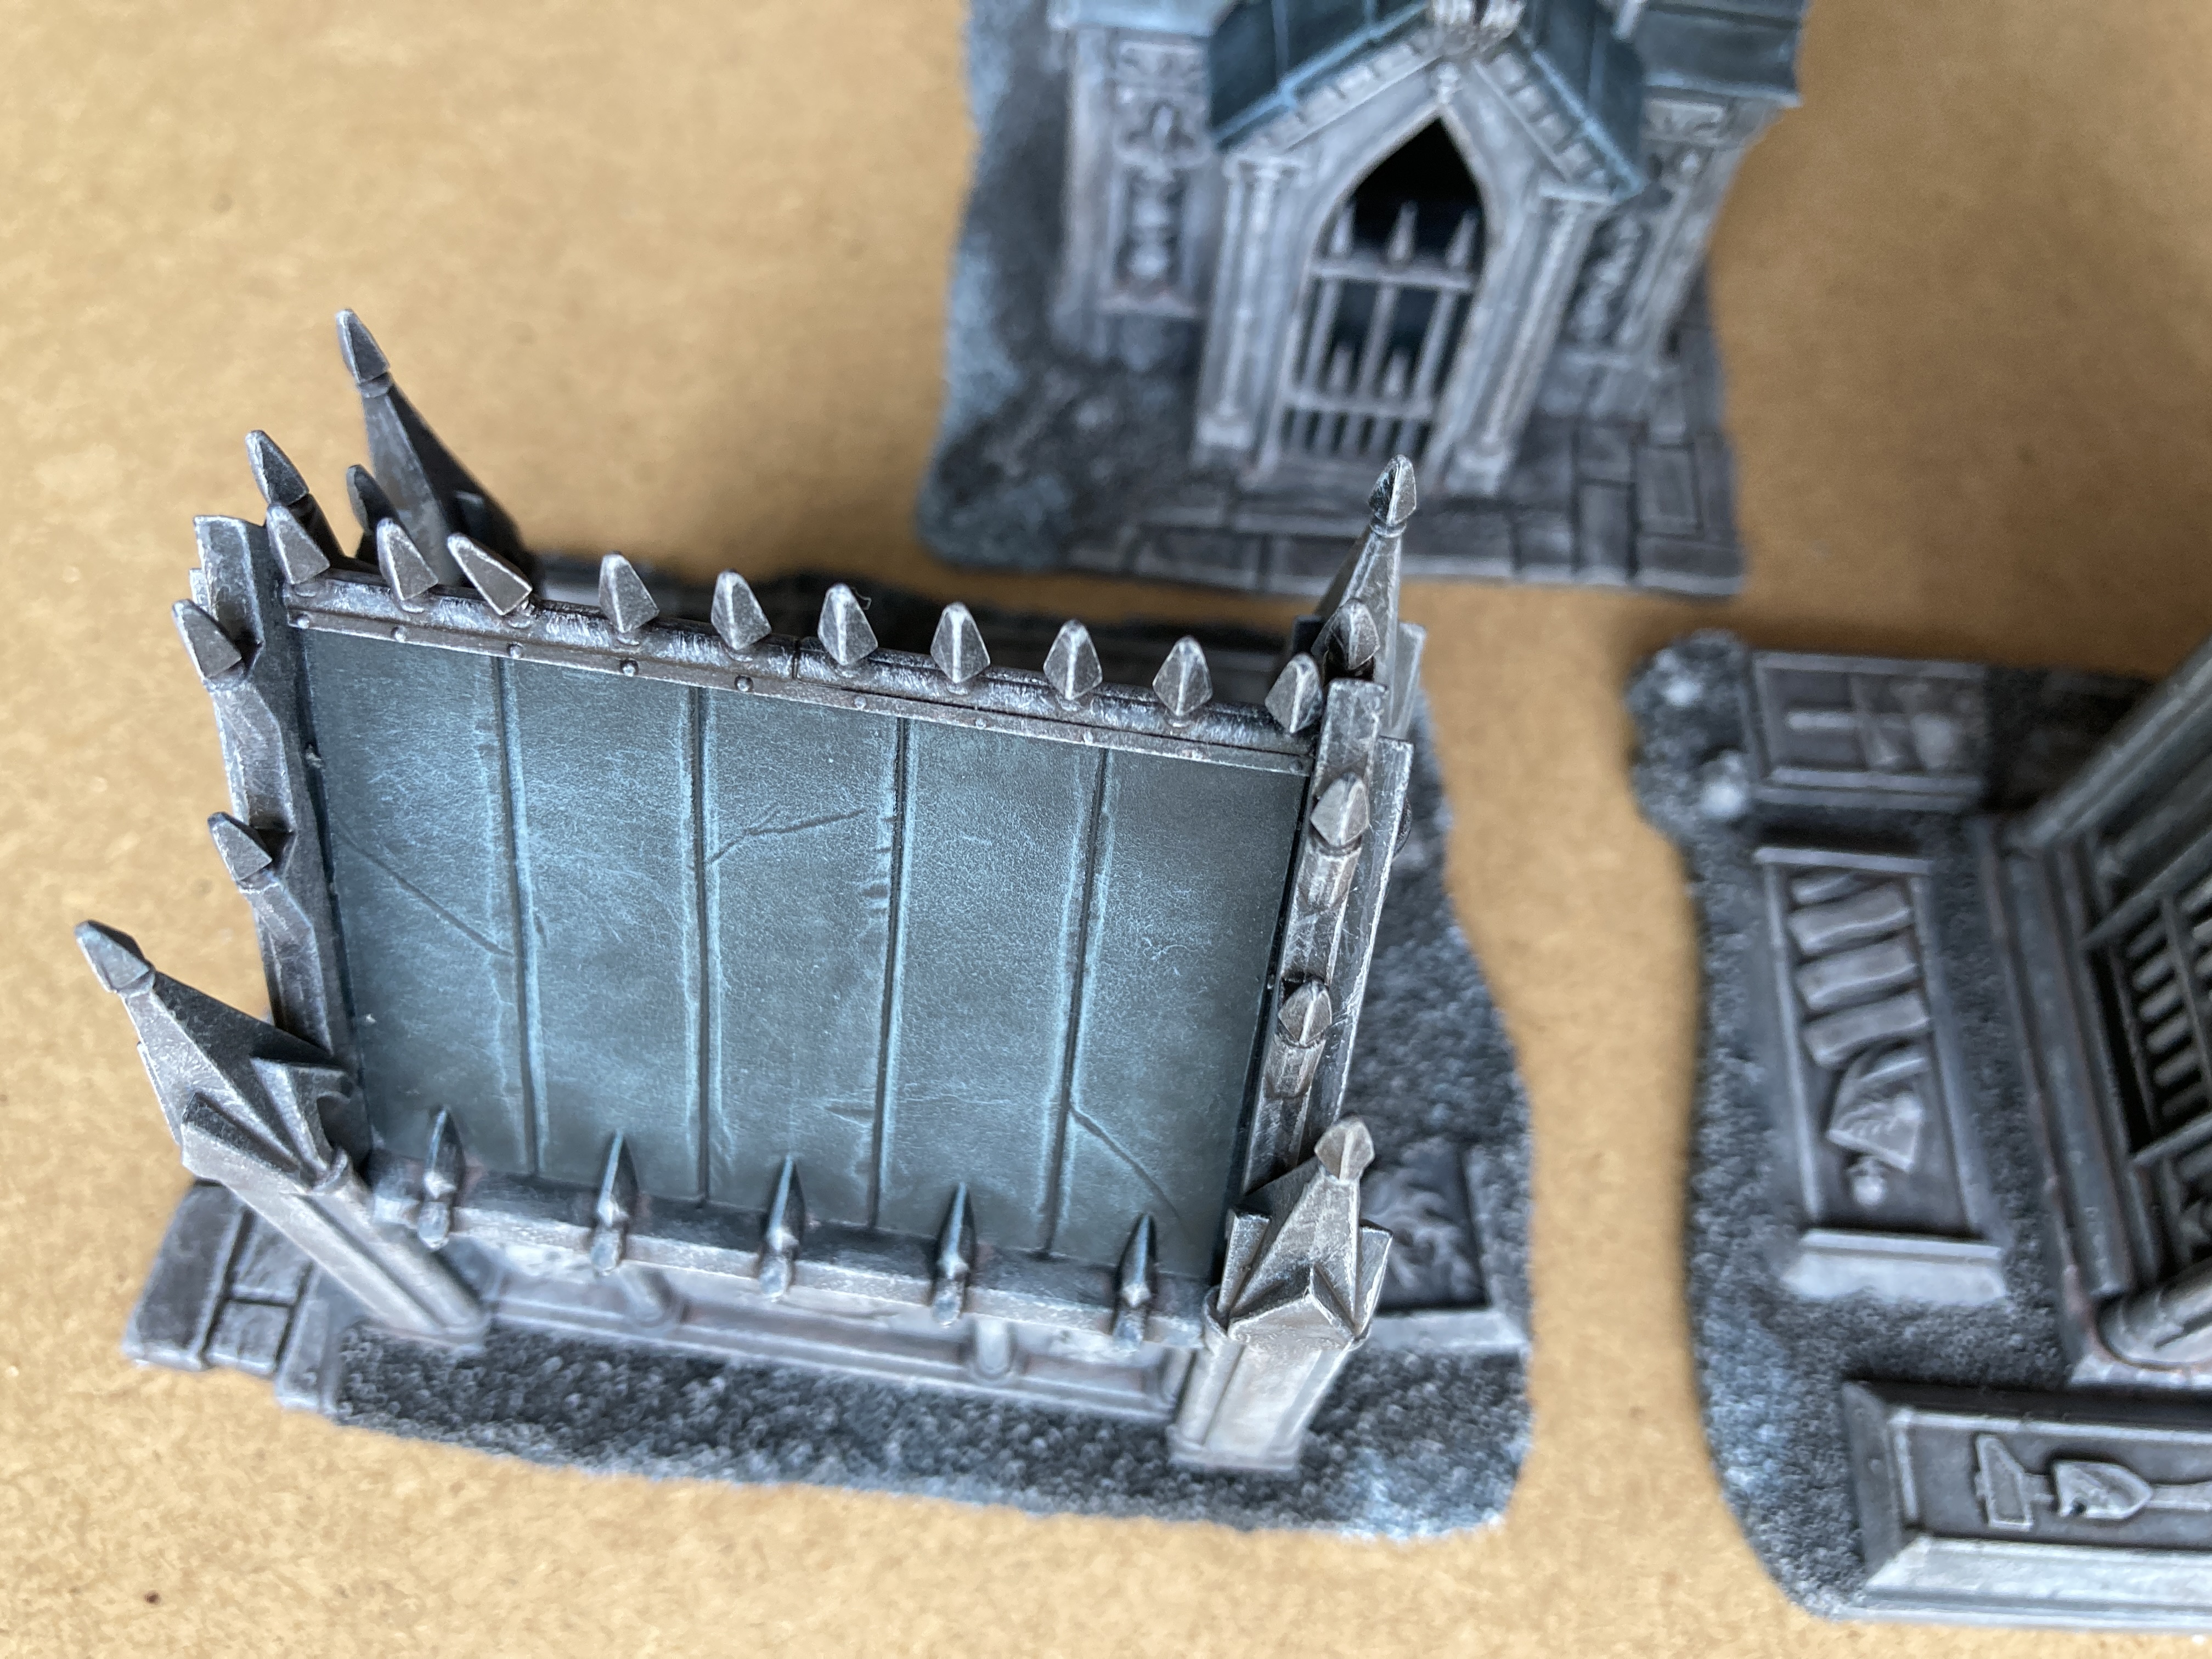
Starting Out and Getting Messy
After cleaning the worst of the mould lines I added sand to all of the ground areas. There was some texture already modelled on but it just didn’t look very good.

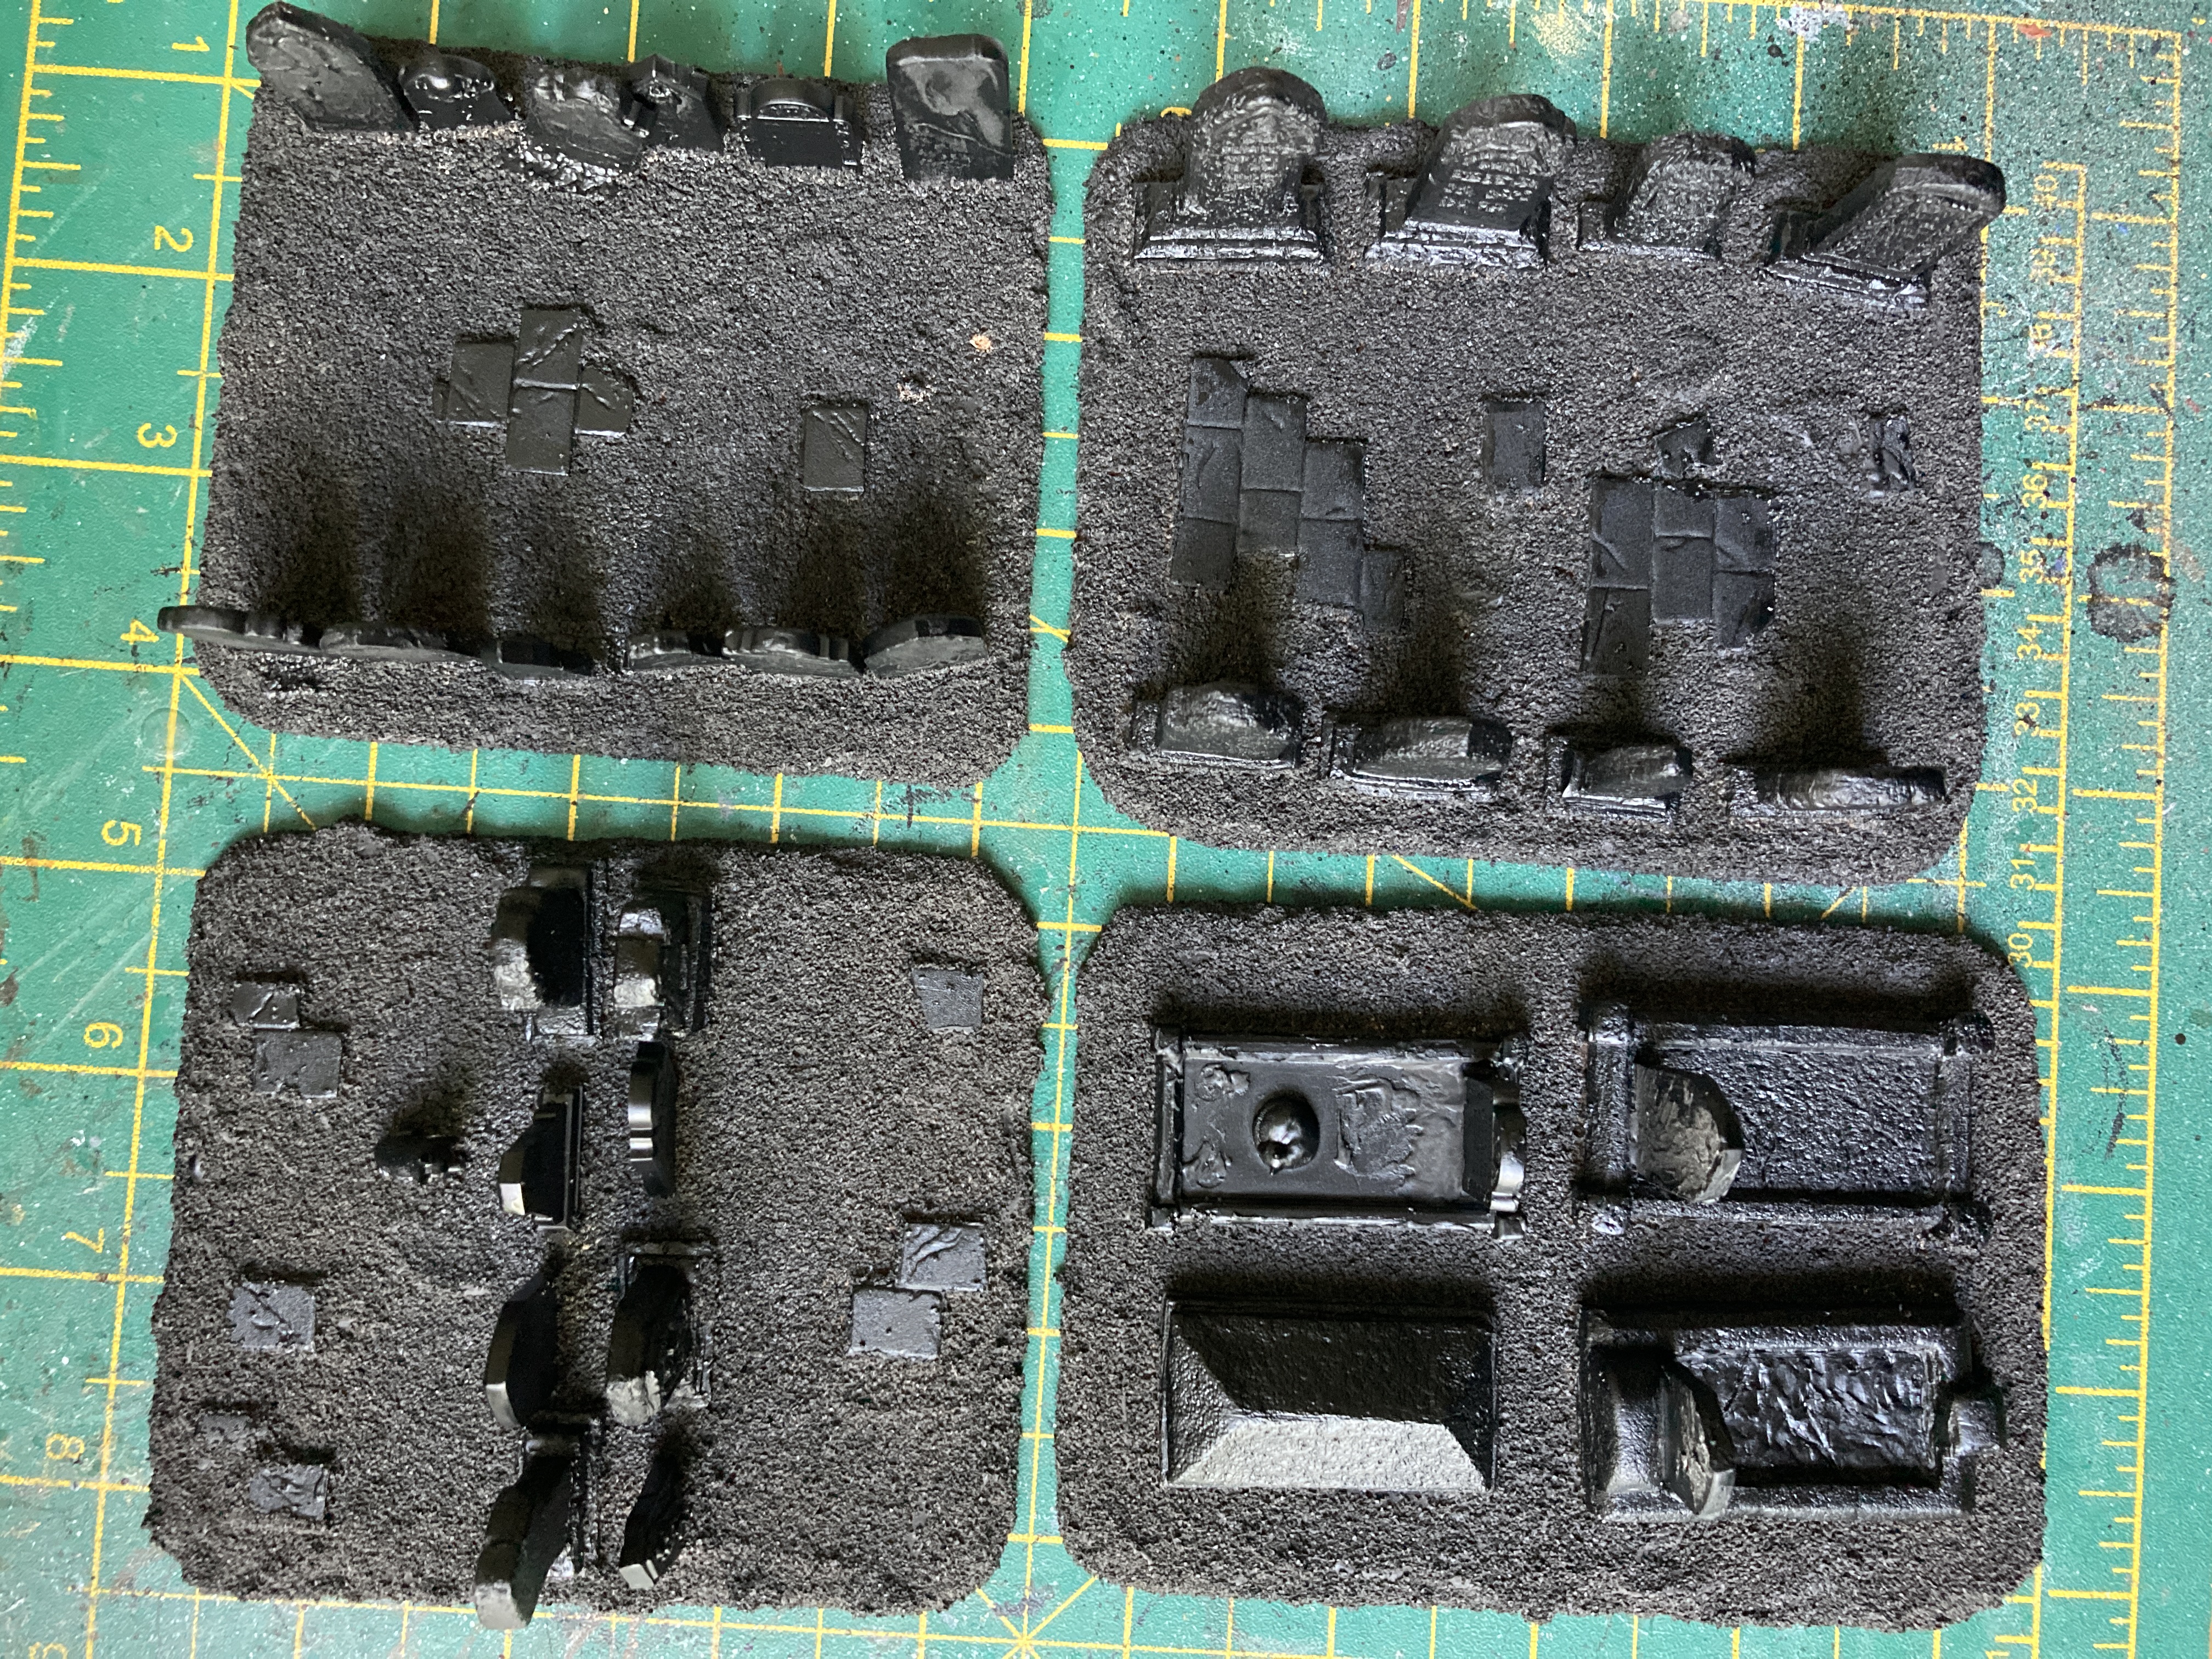
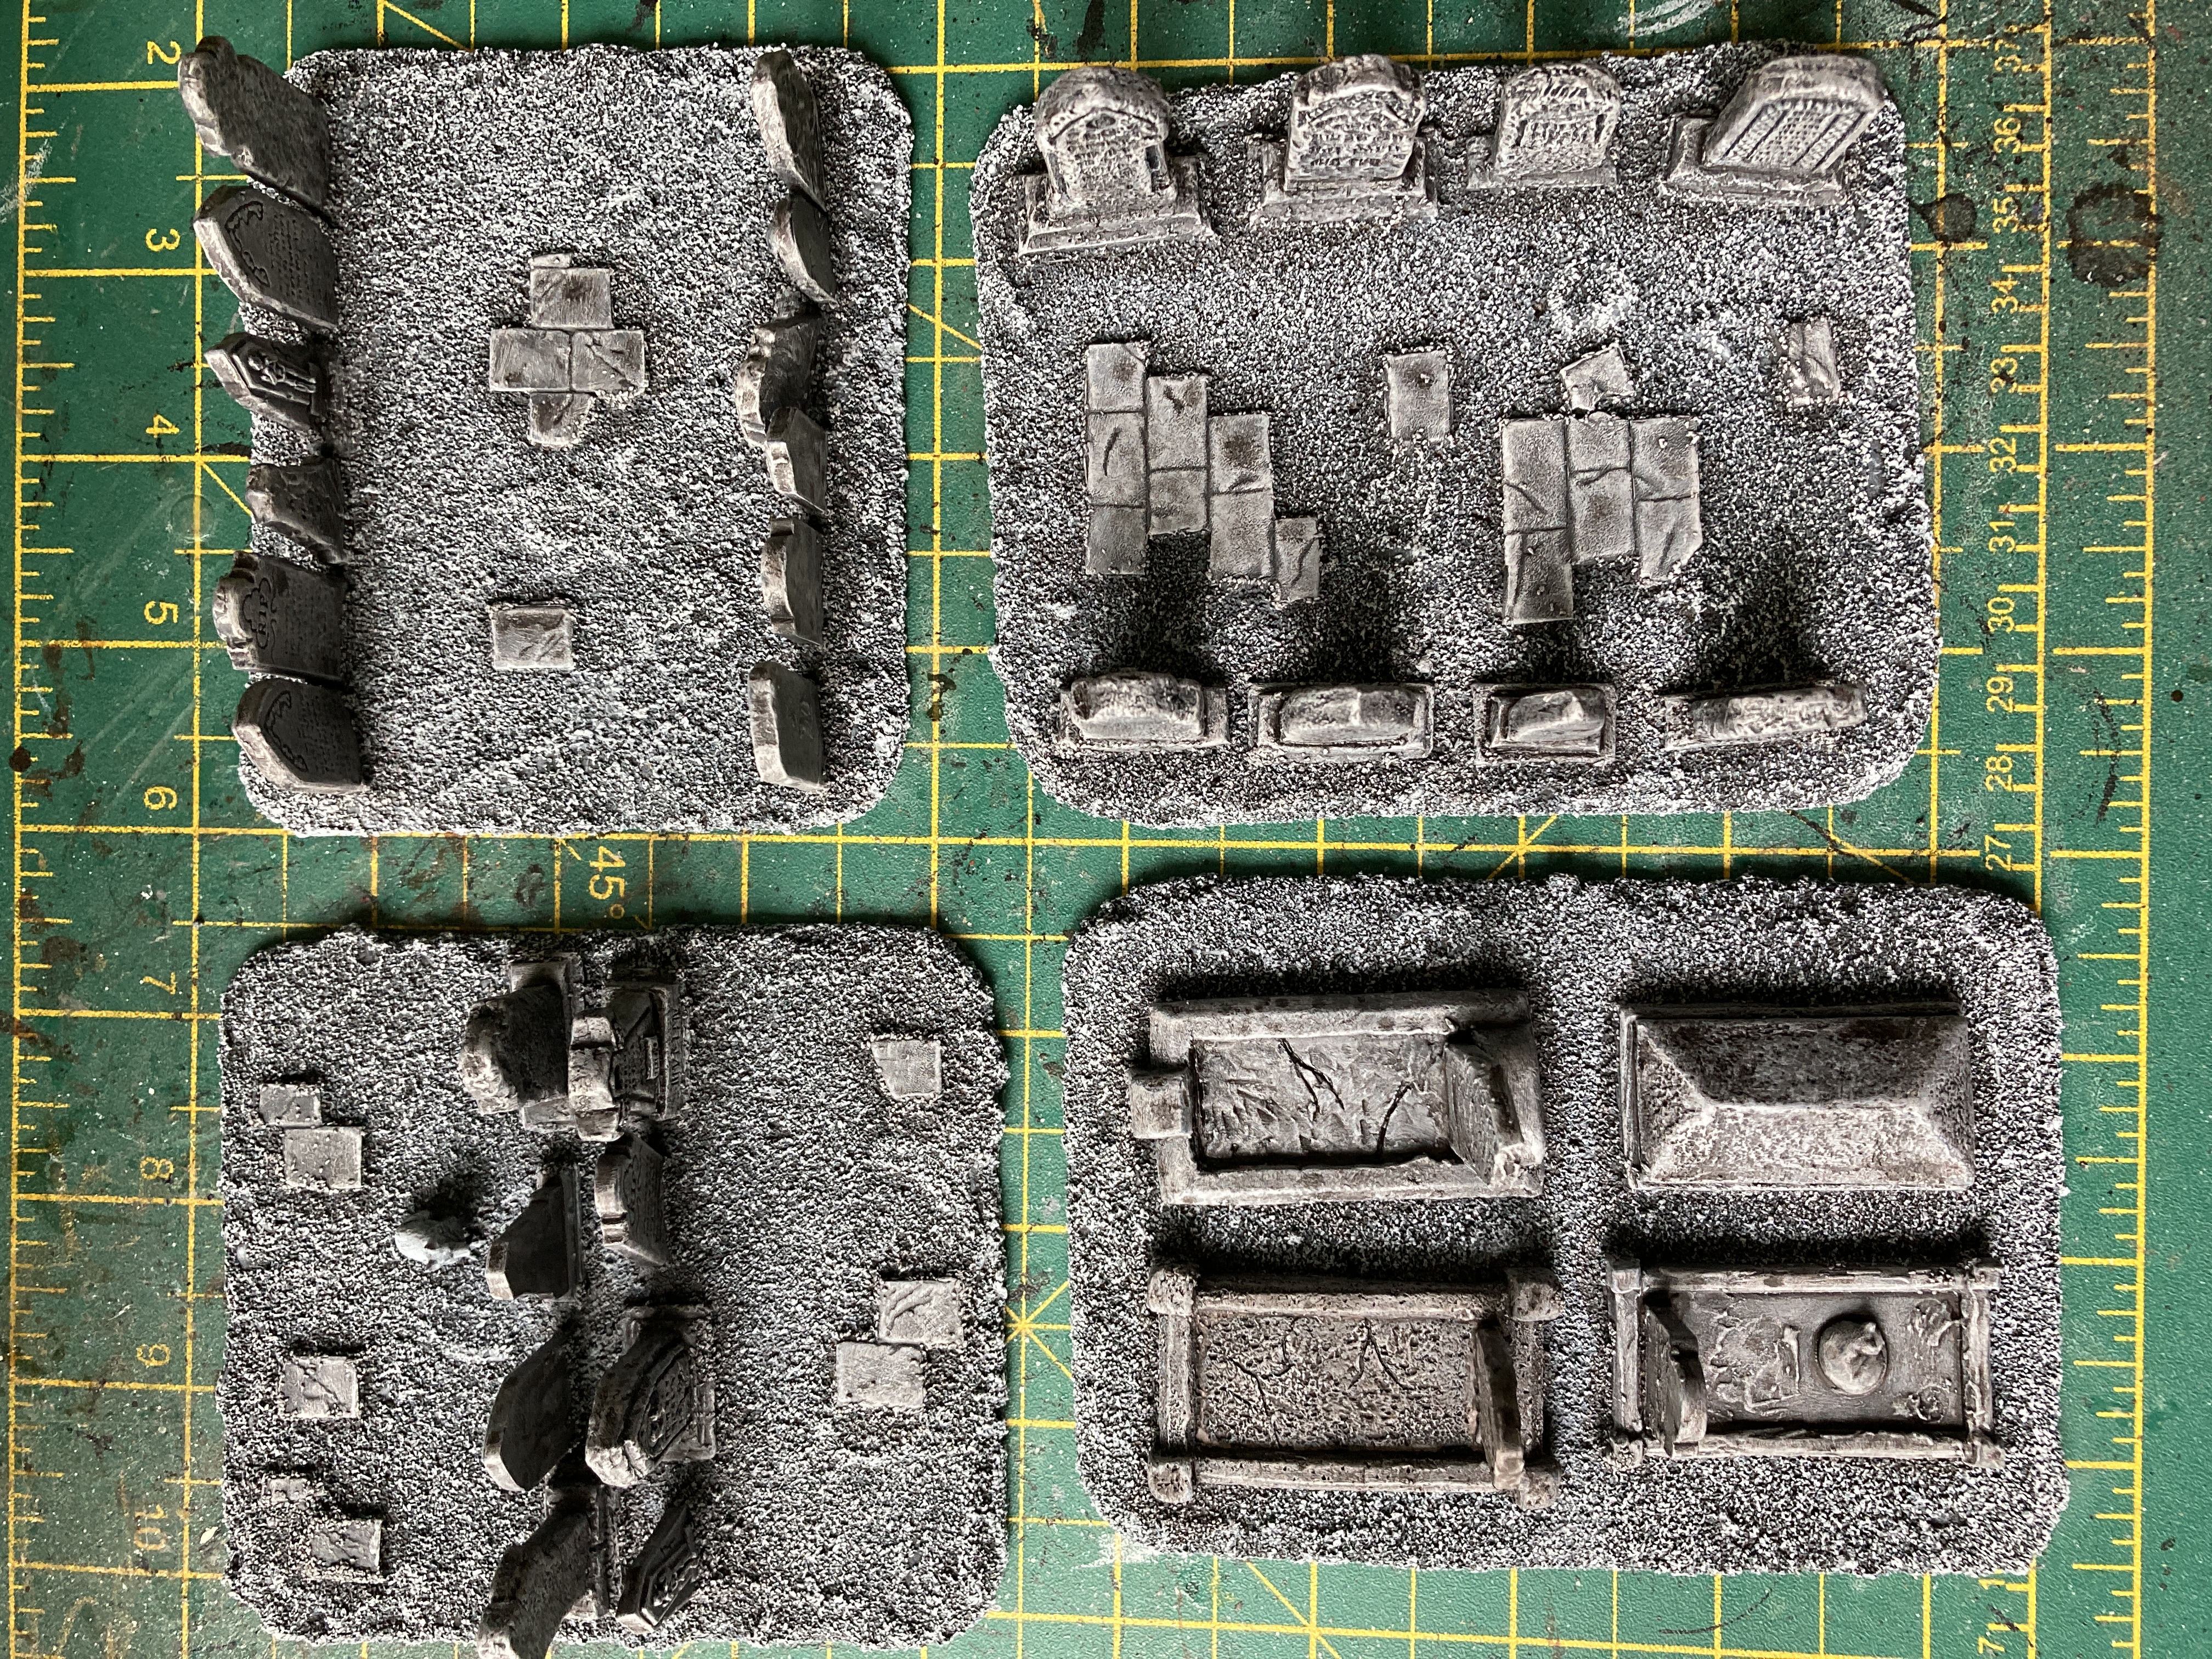
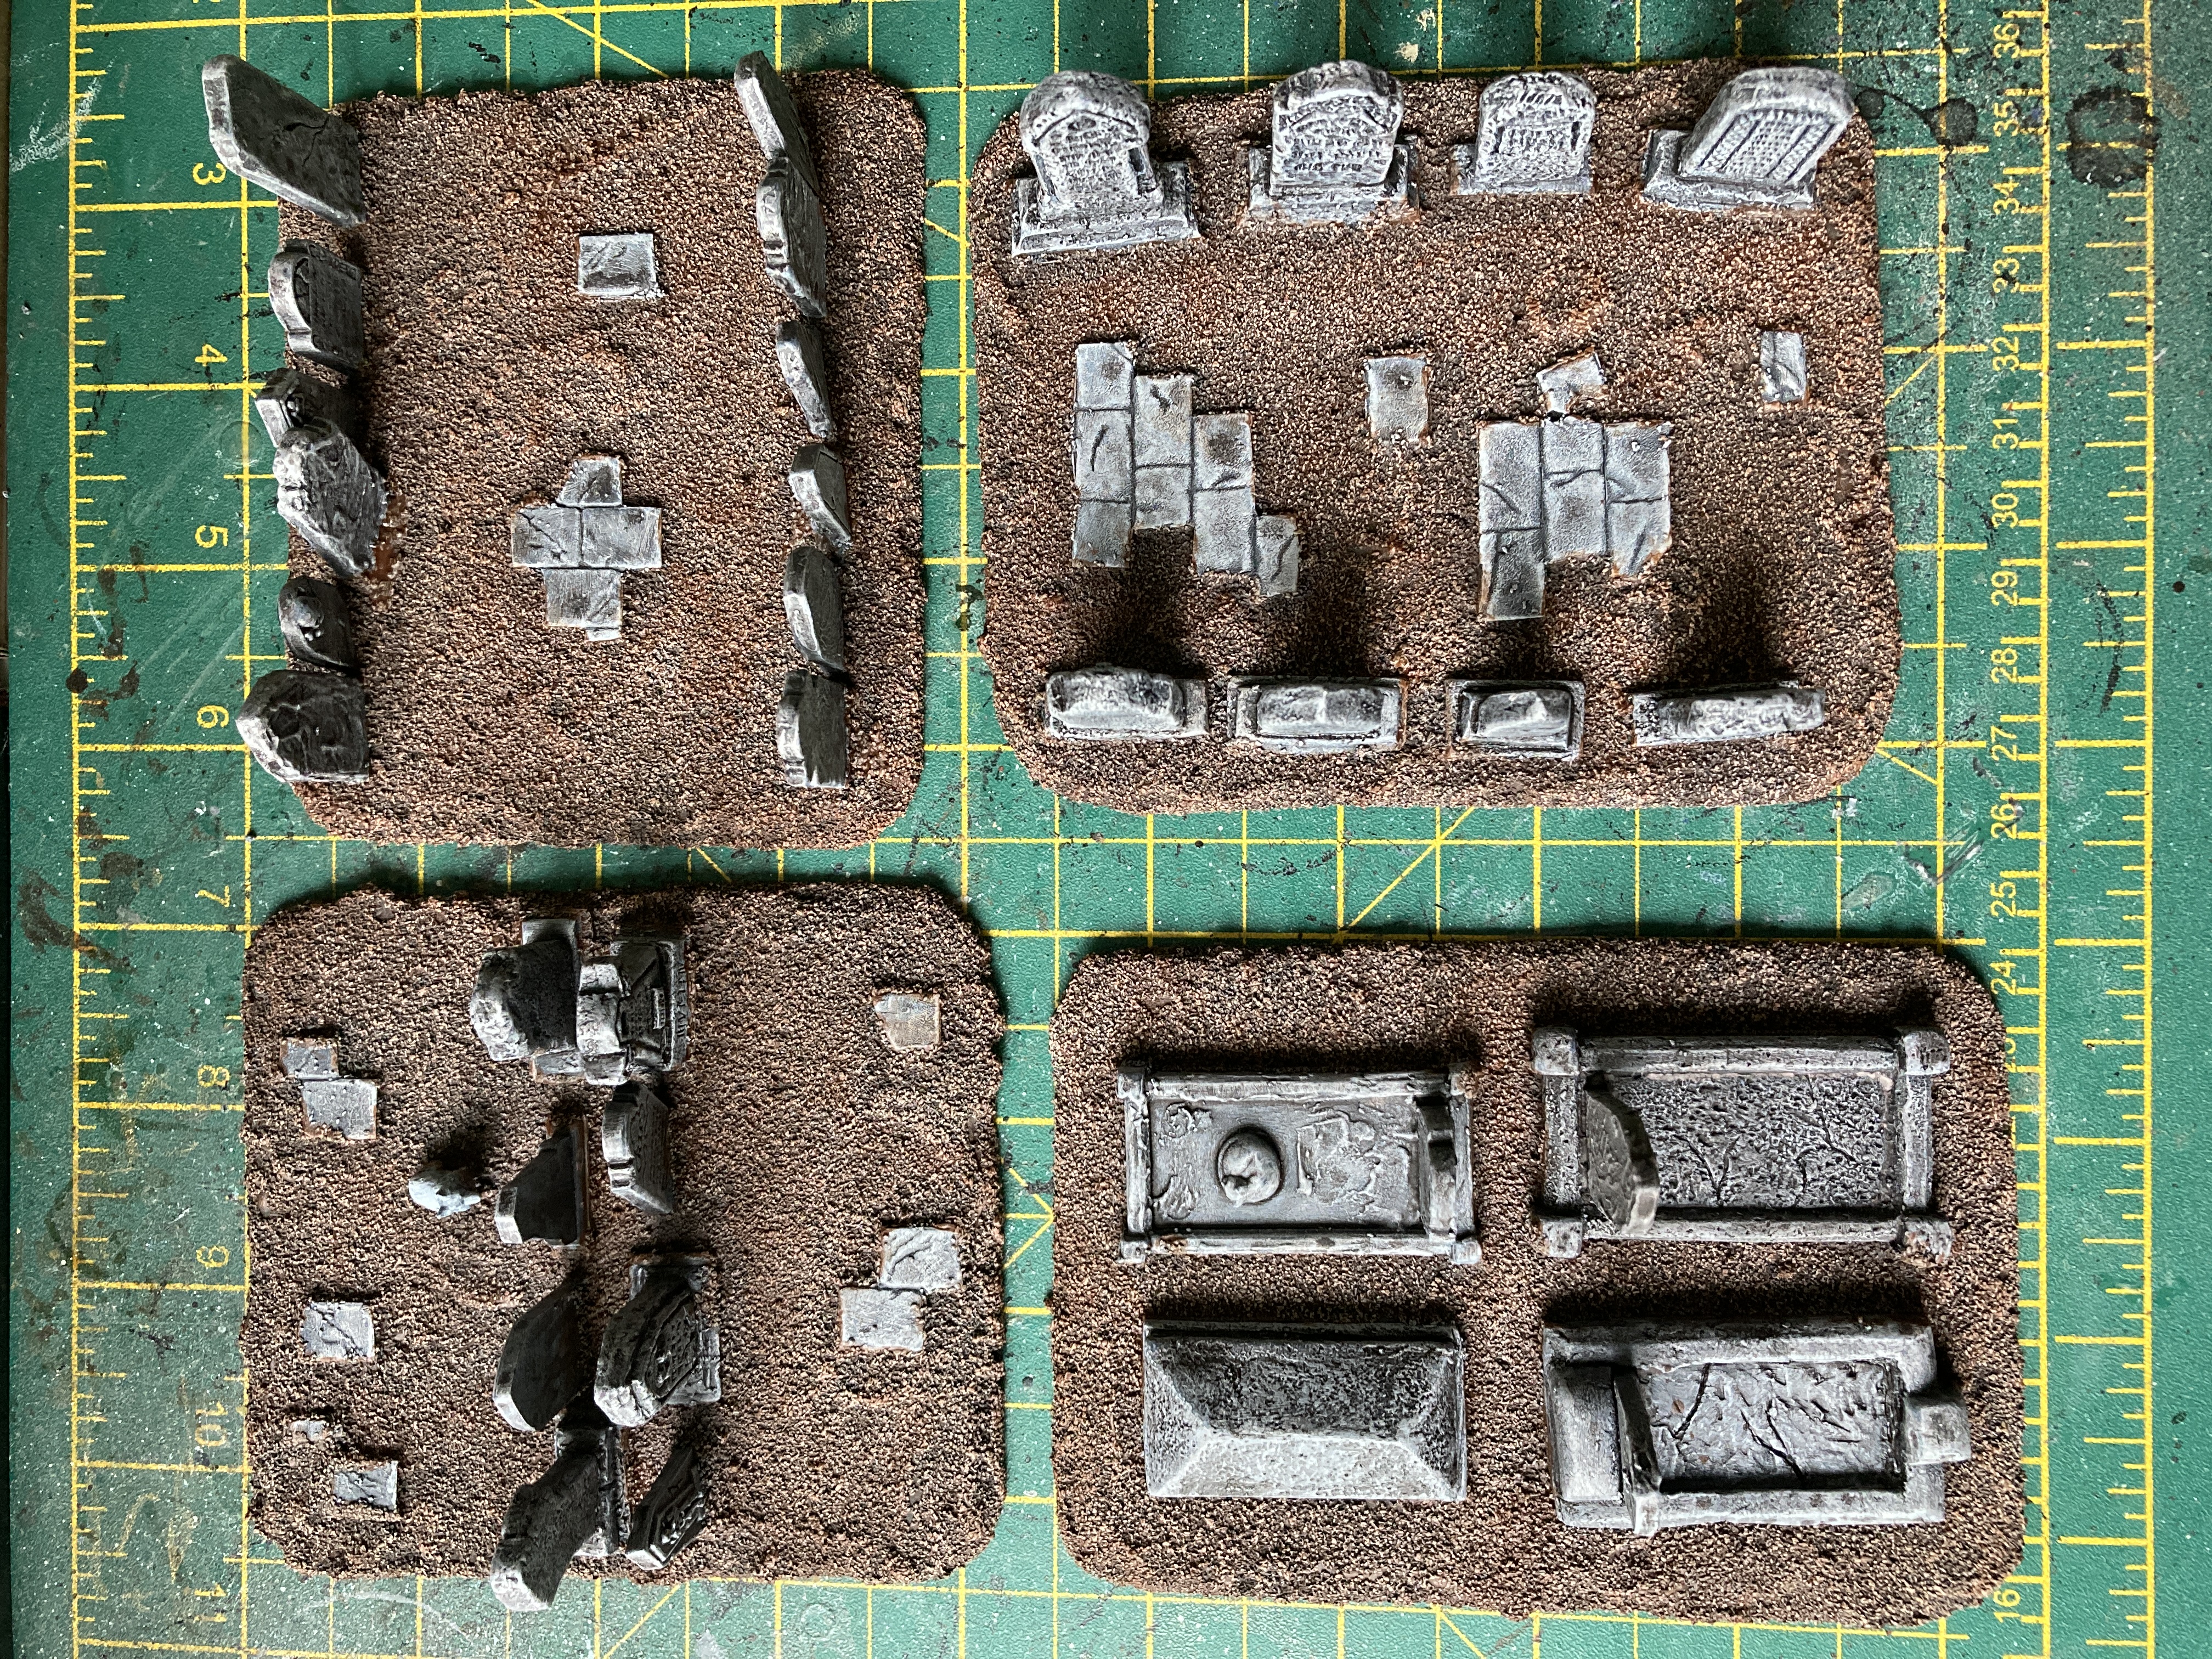
All of the pieces were then sprayed in first Halfords Black primer followed by a lighter dusting of Halfords Grey primer.
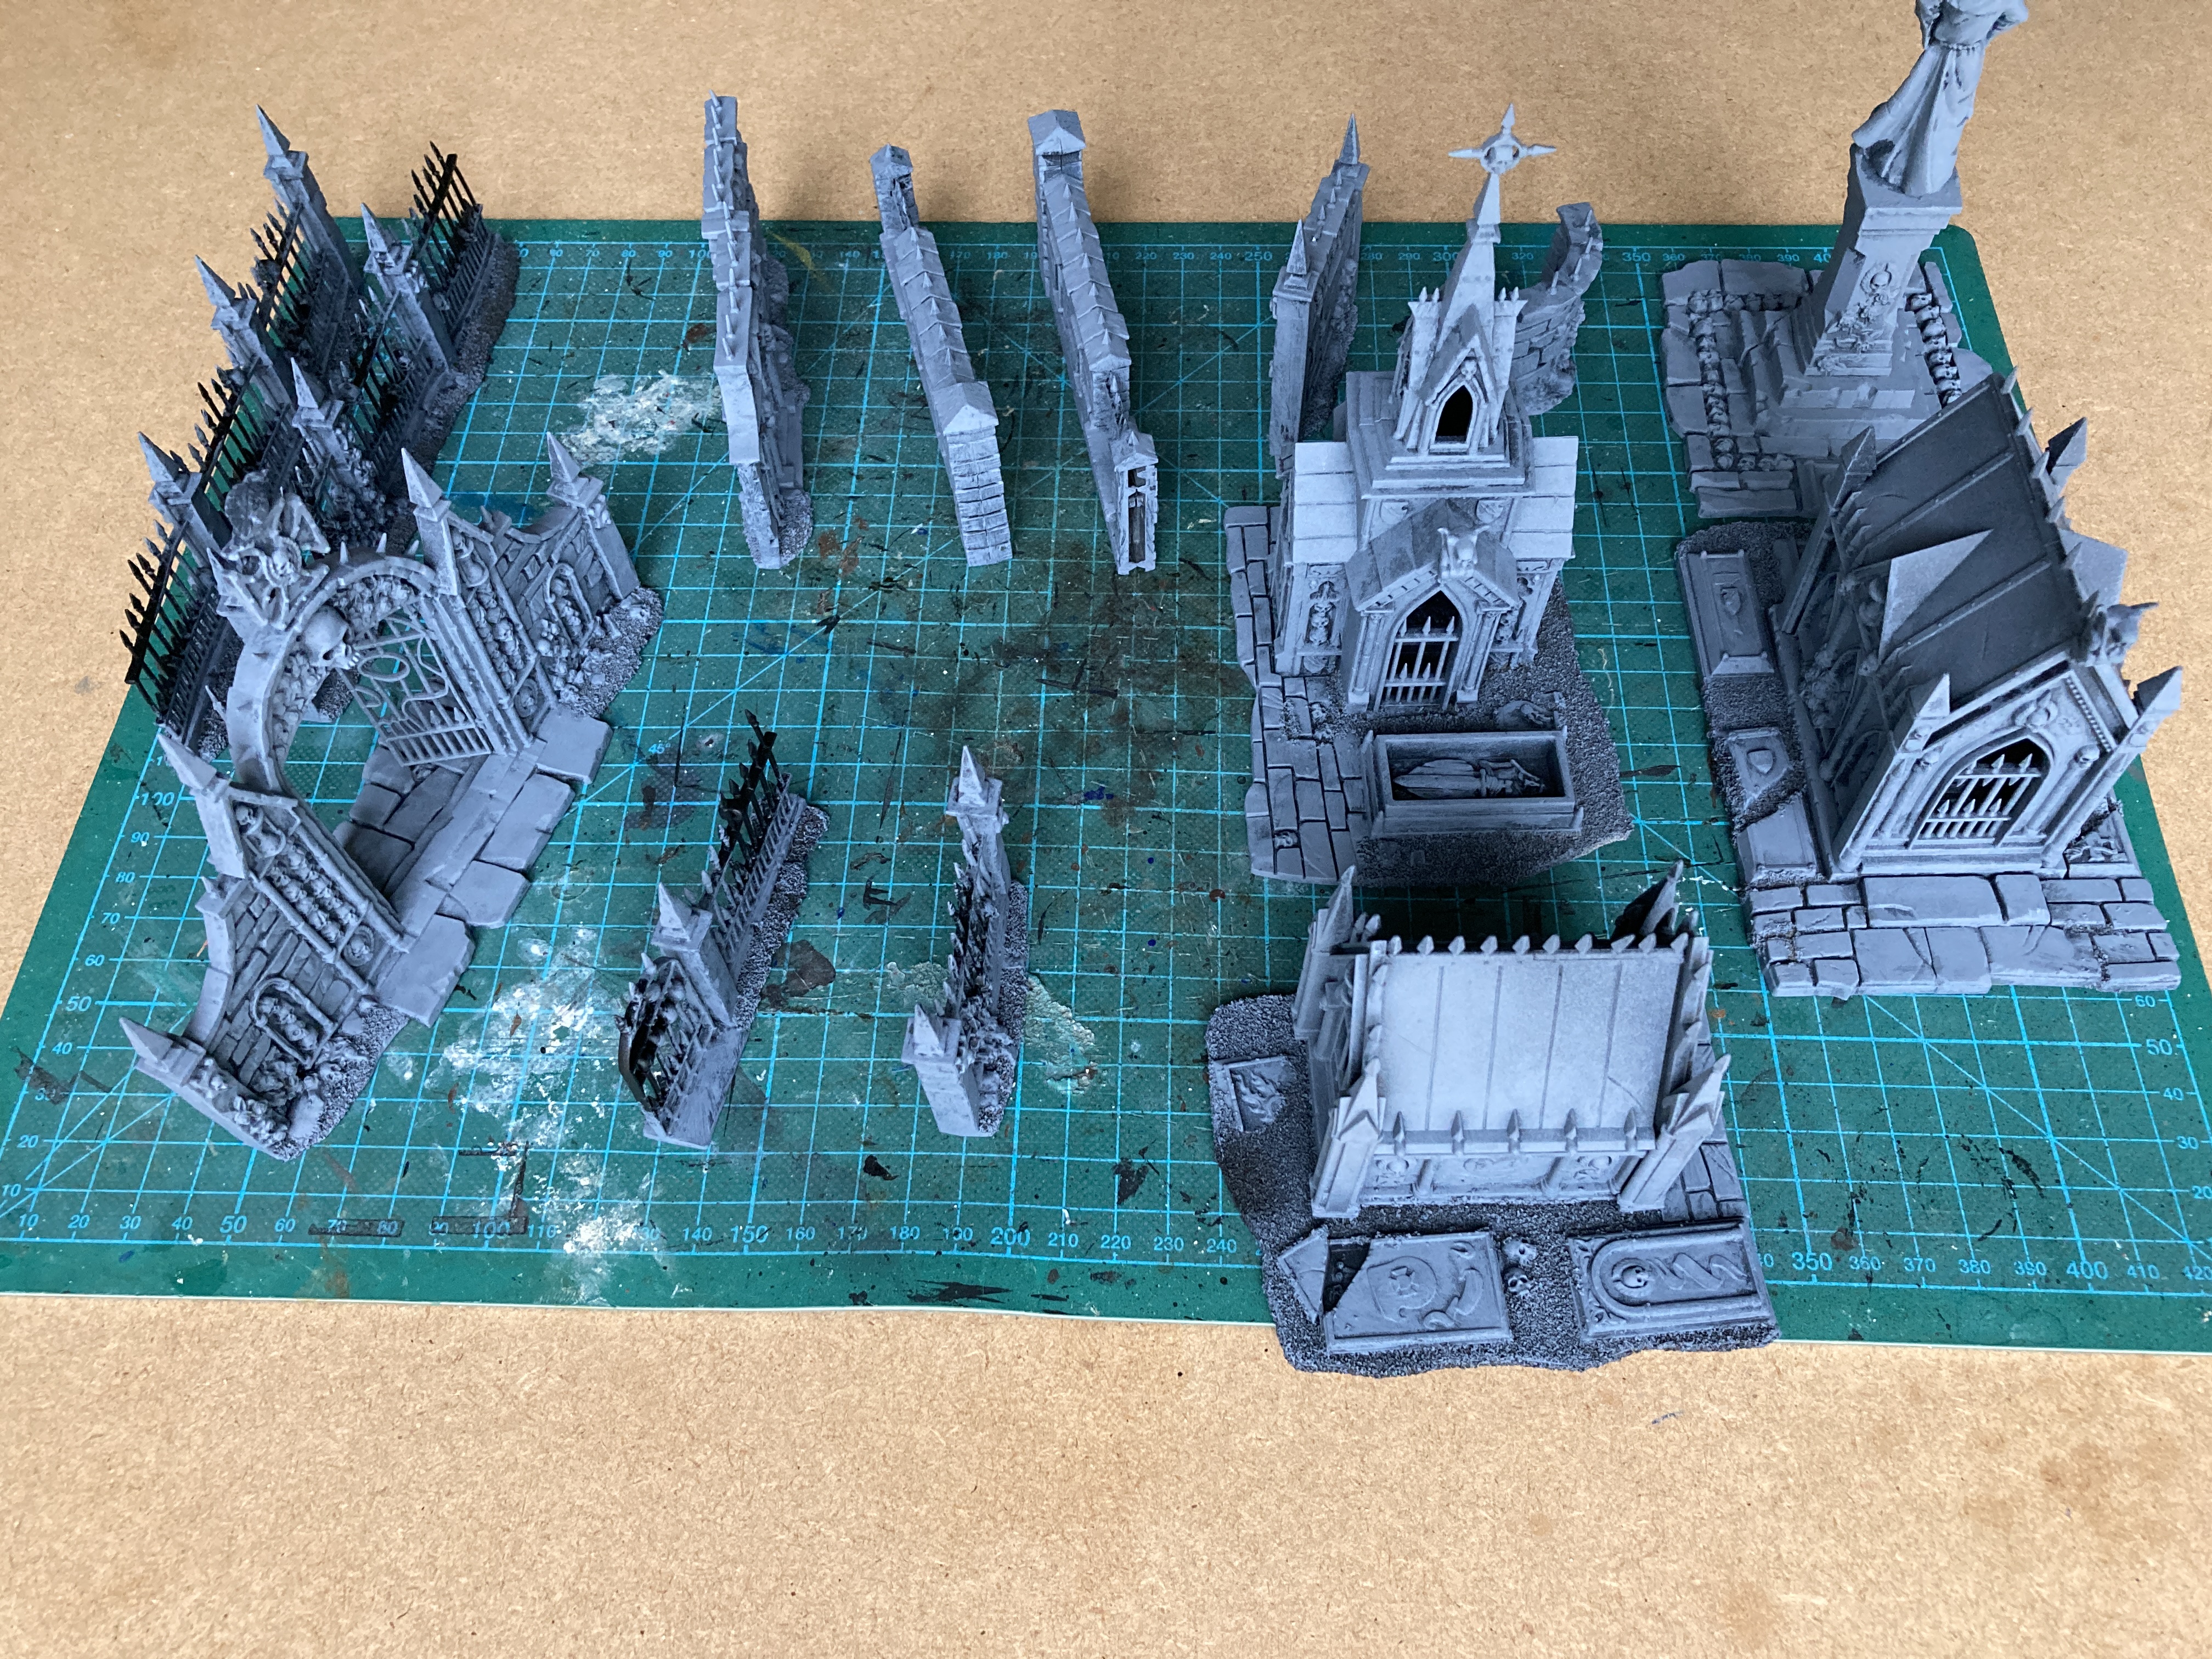
After a drybrush in white for all of the stone work it was time to get messy. I soaked all of stonework in a custom wash, a mix of browns and black cheap artists acrylic tube paint with plenty of water, matte medium and a small amount of washing up liquid (as a flow improver). The custom wash was something I made (plenty of) about two years ago so I don’t have an exact recipe.
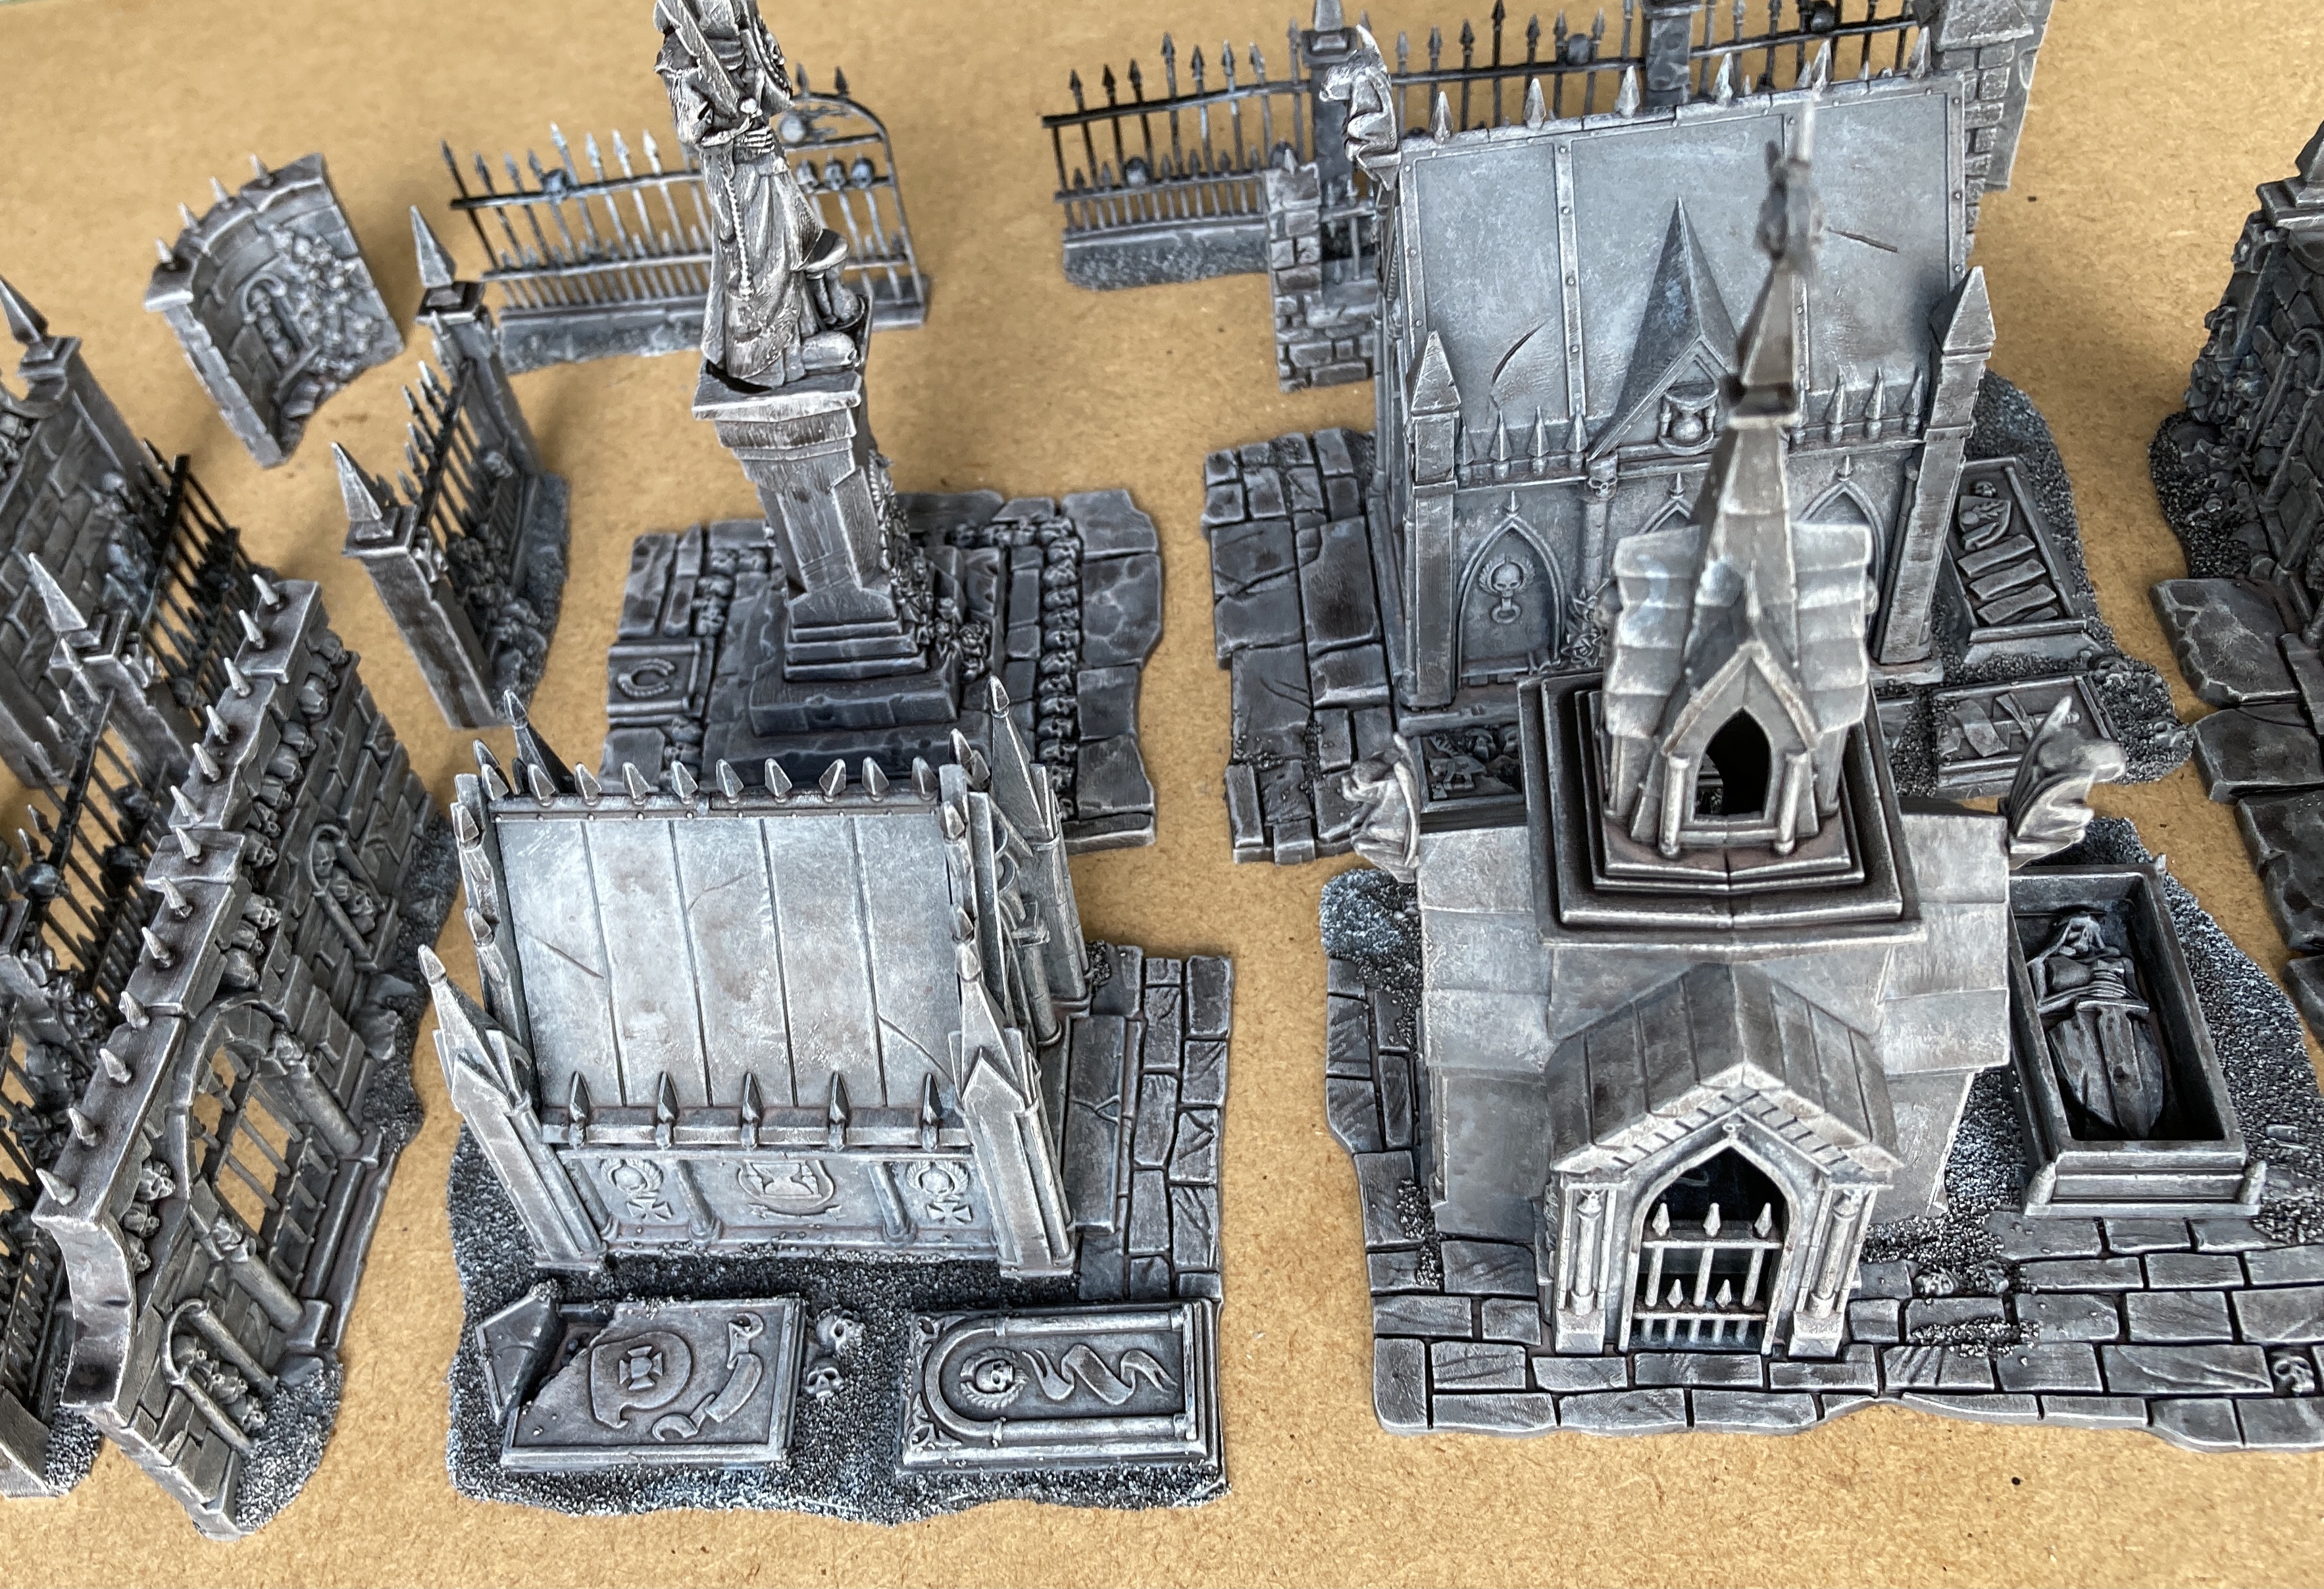 When dry the result was this.
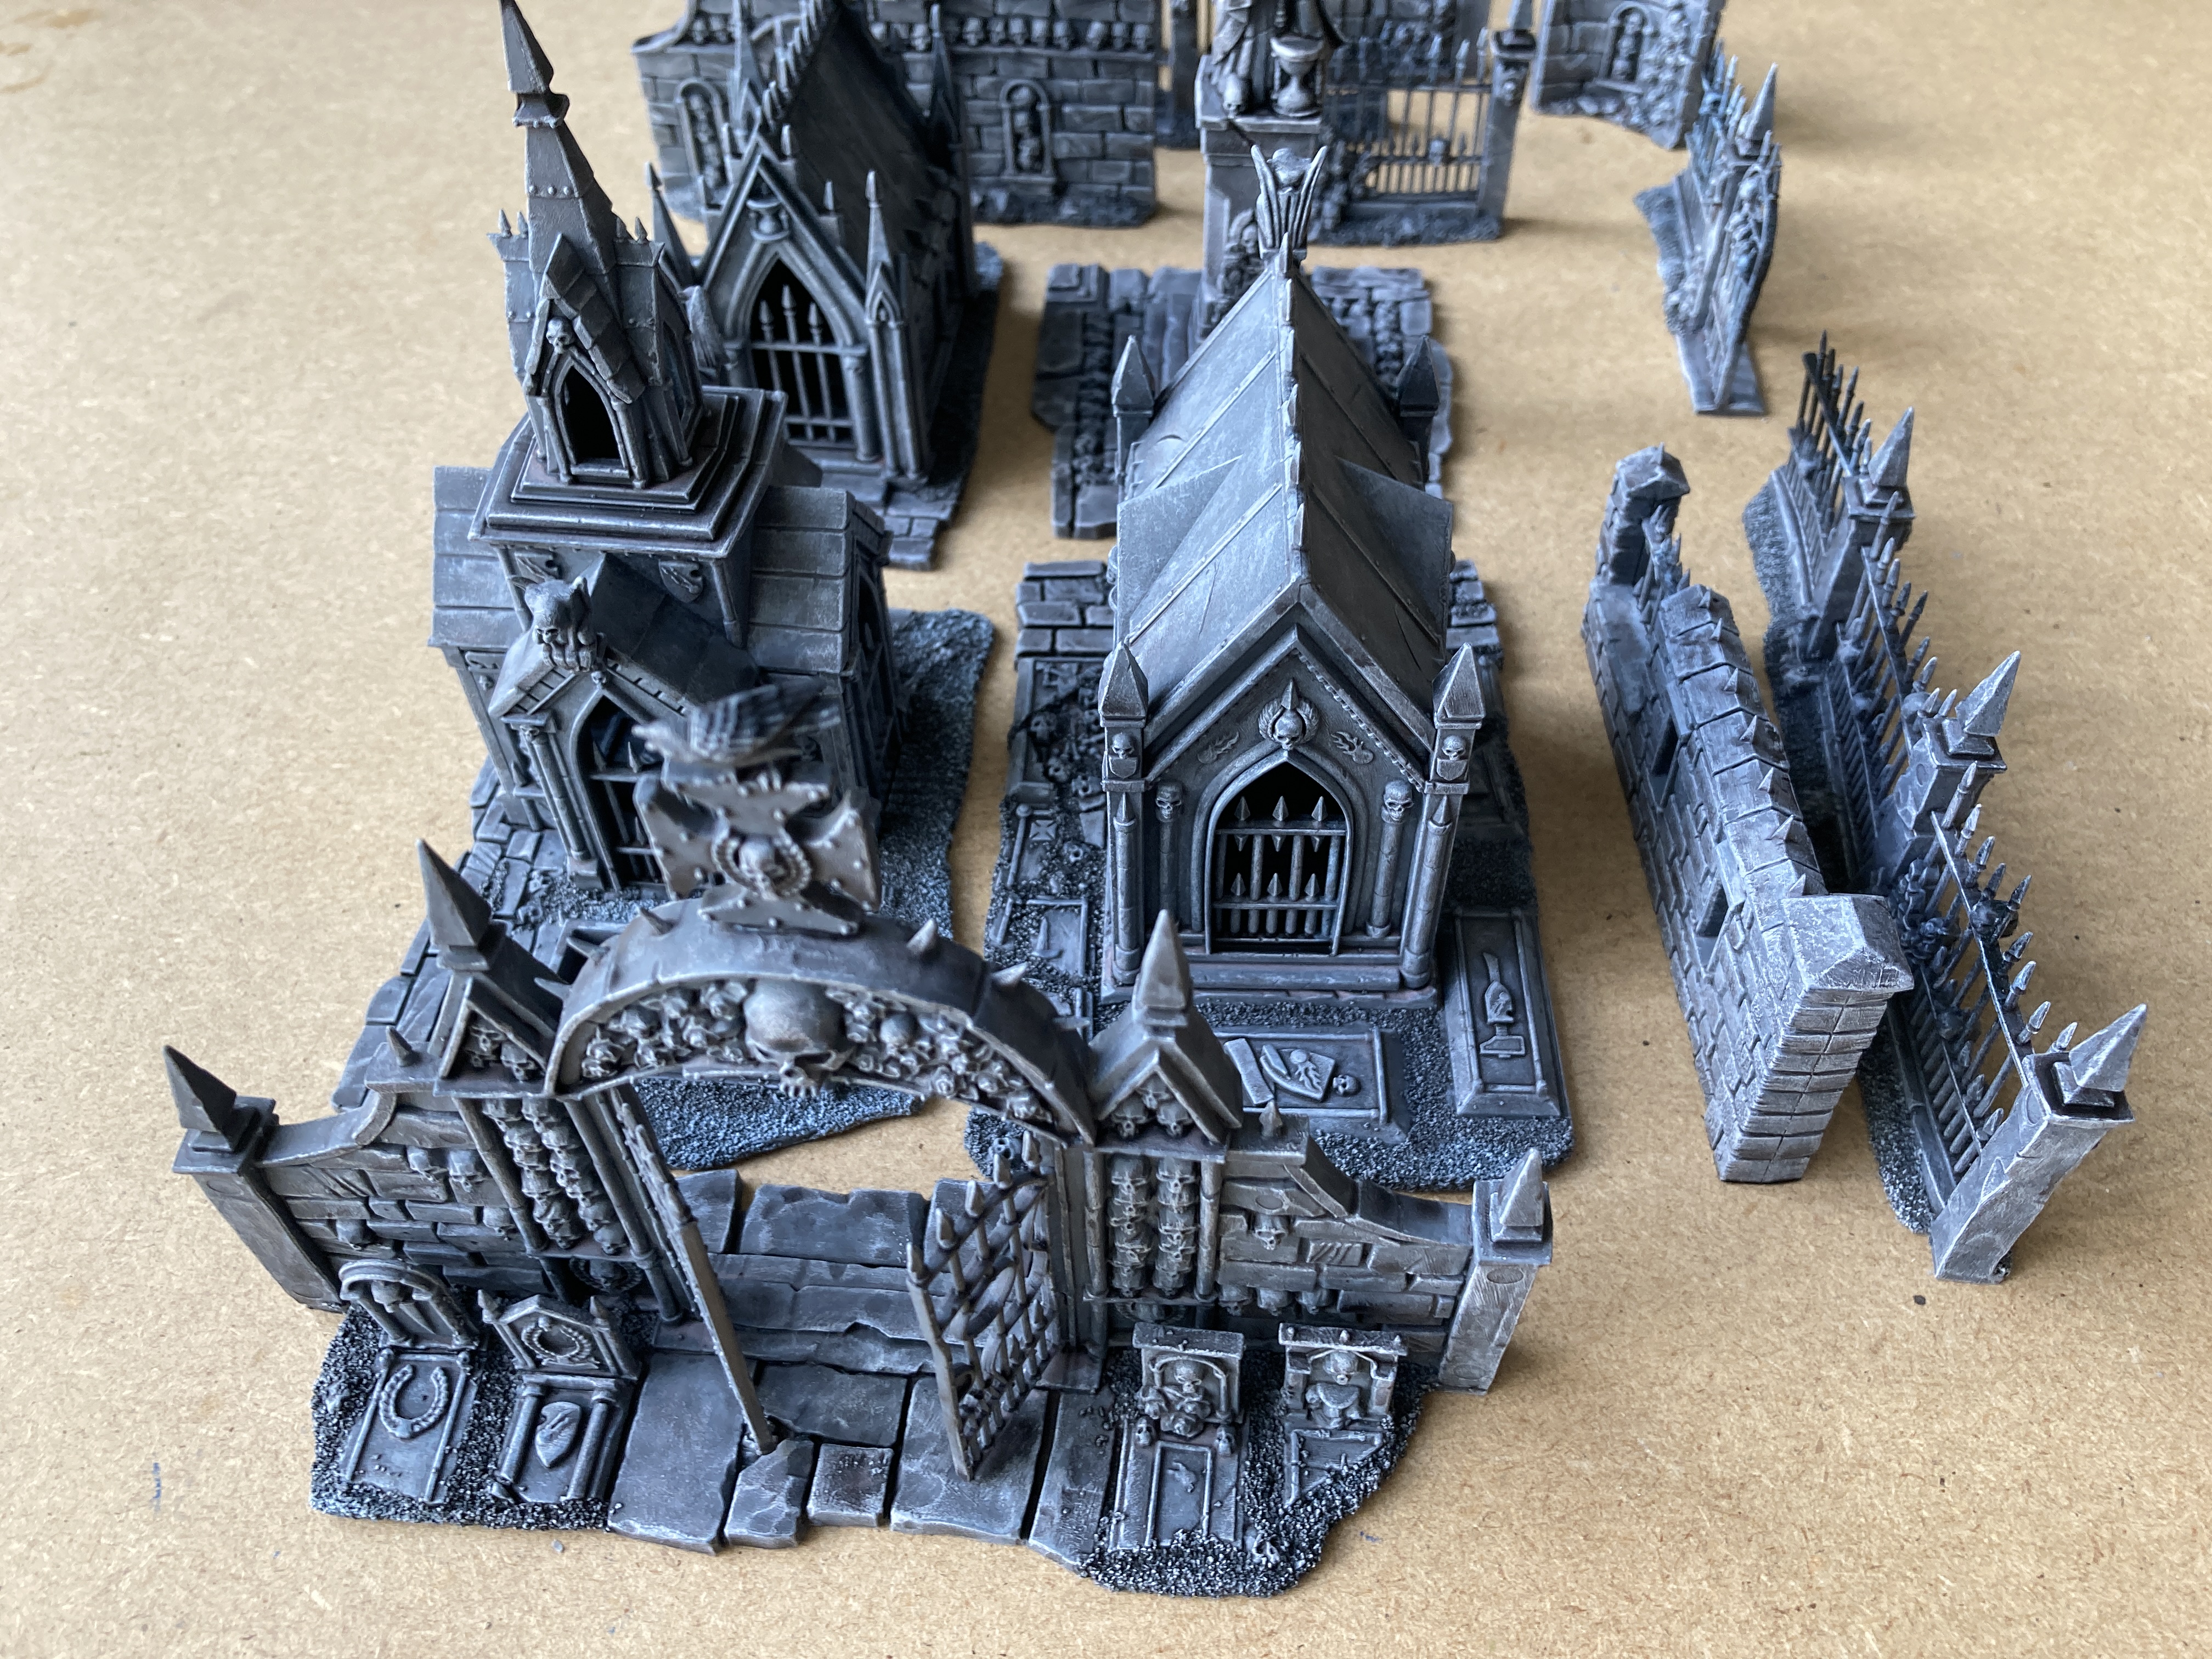

That’s all so far. Next I plan on painting the roofs of the buildings a blue slate colour, maybe using a contrast paint as I already have the highlights and shading done.
After that I’ll start work on all of the railings, spikes and the rest of the iron mongery.
A Box and Bare Plastic
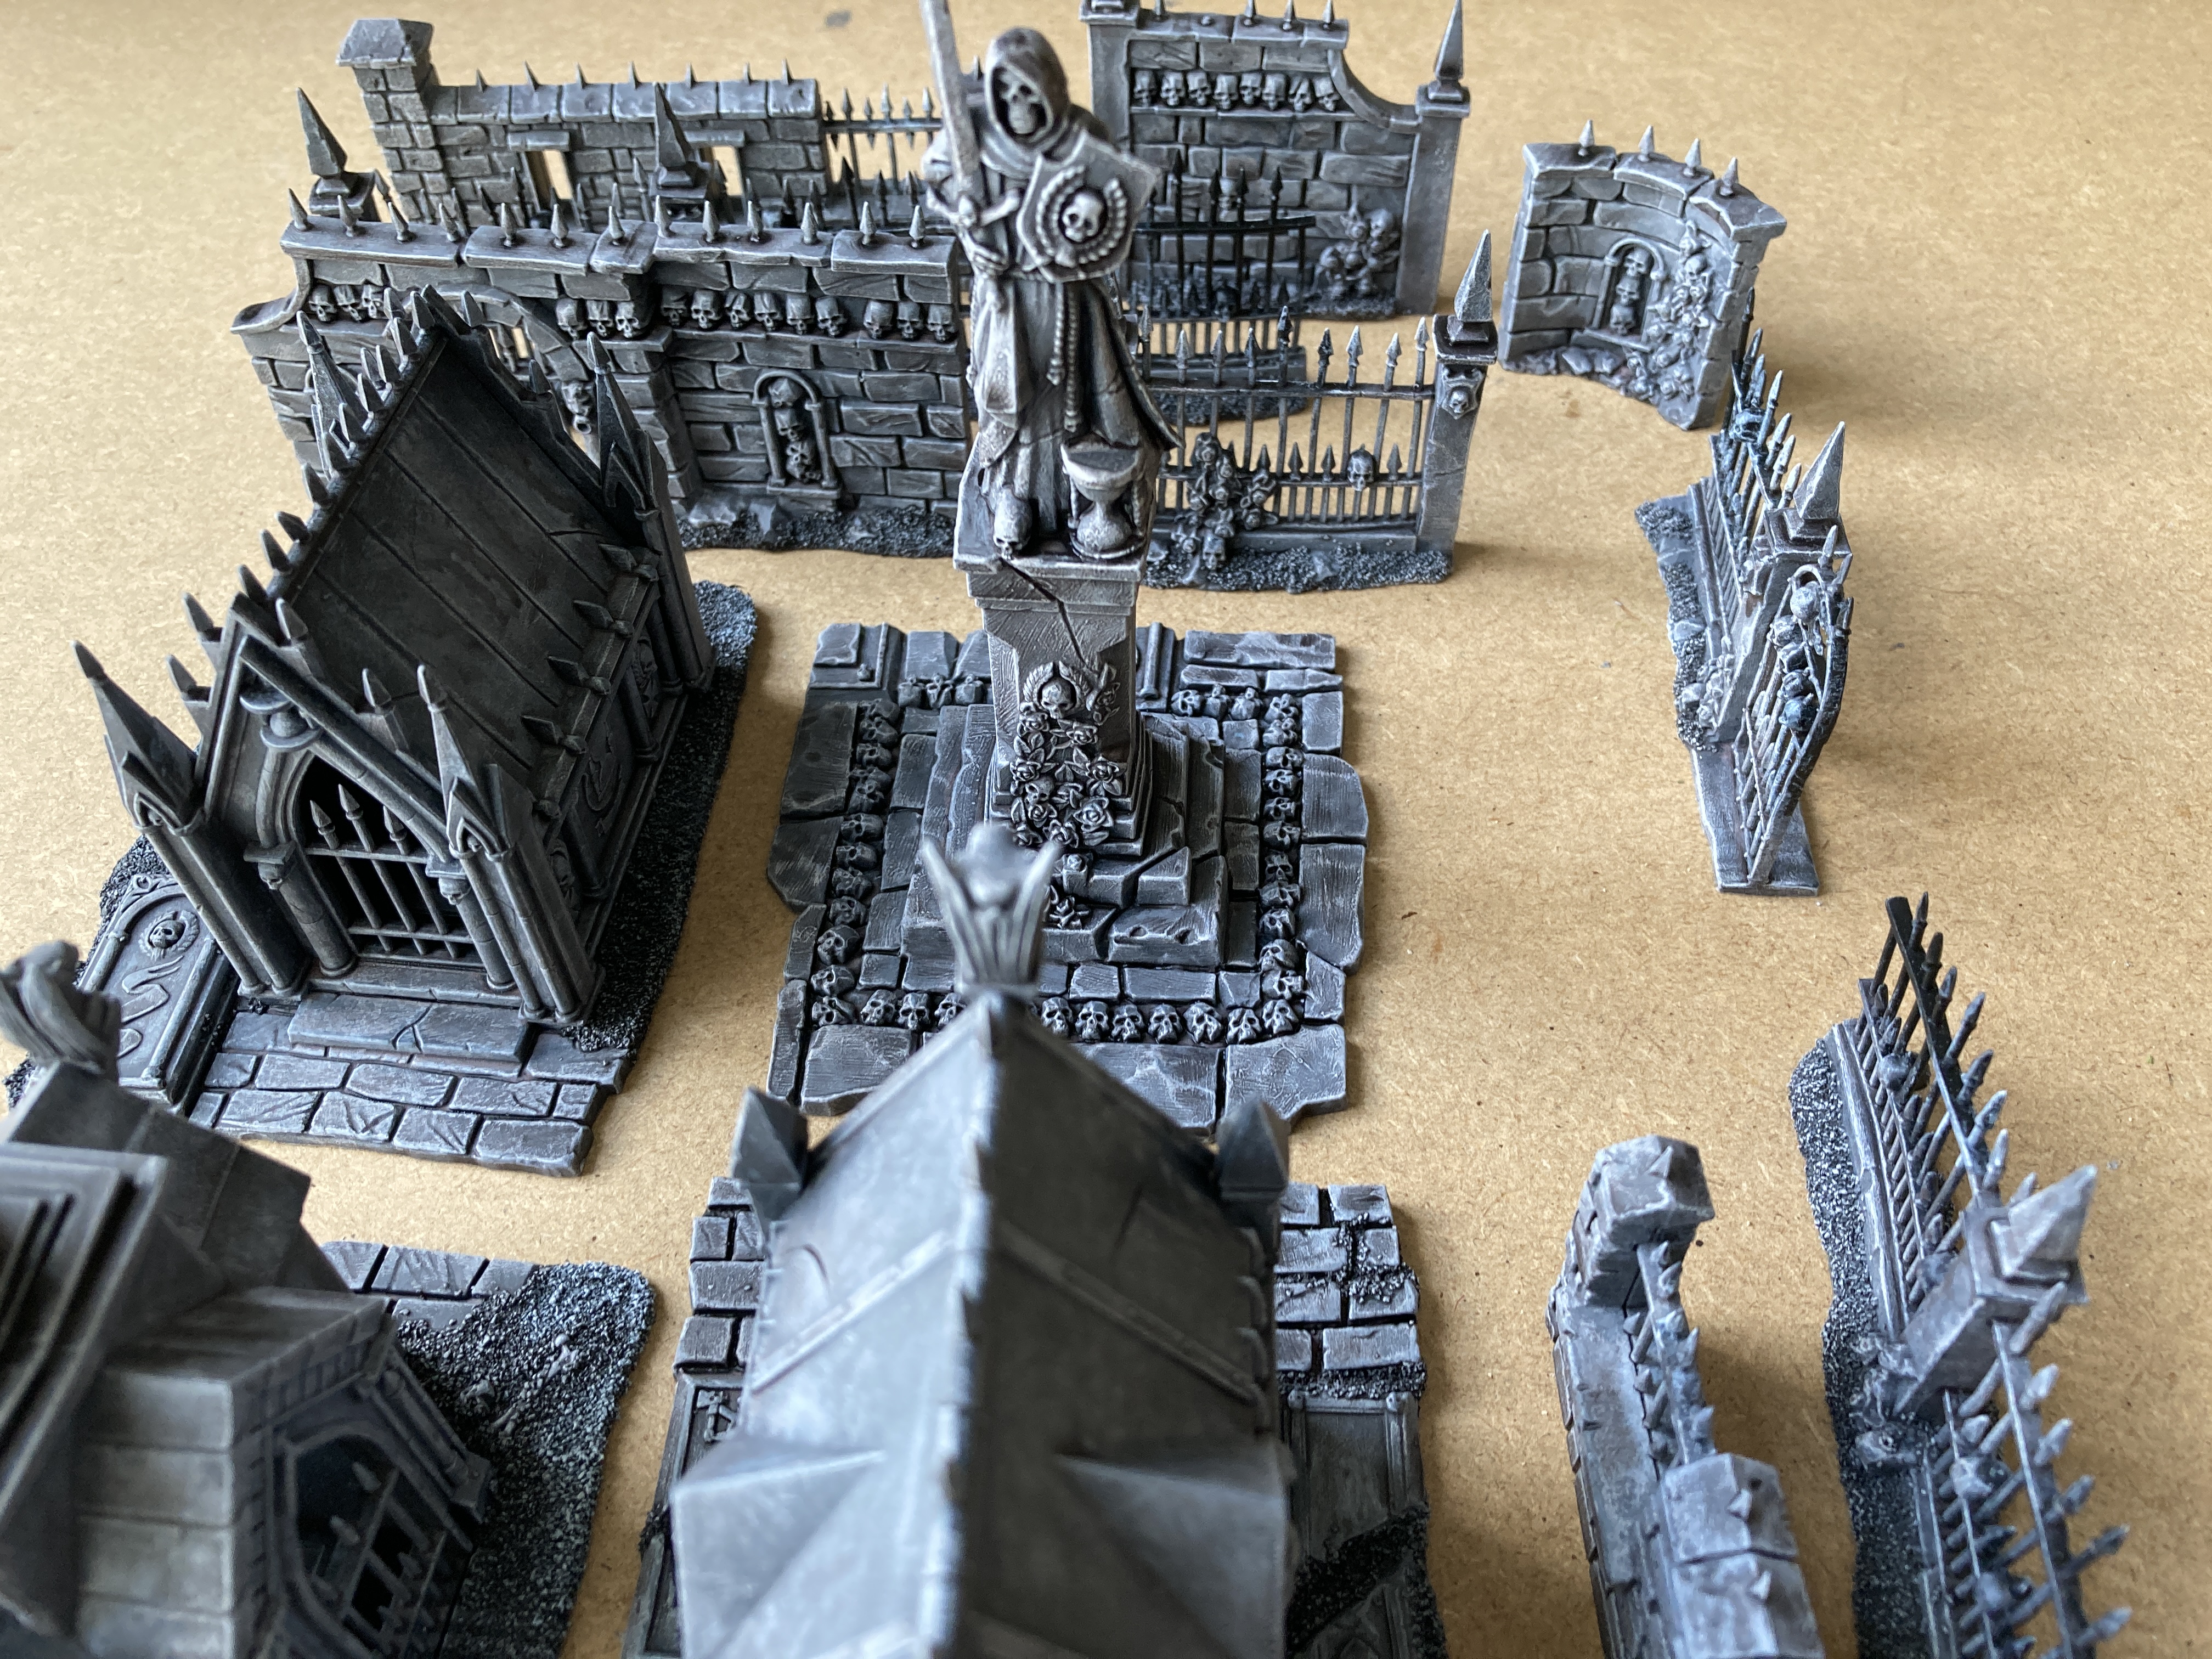
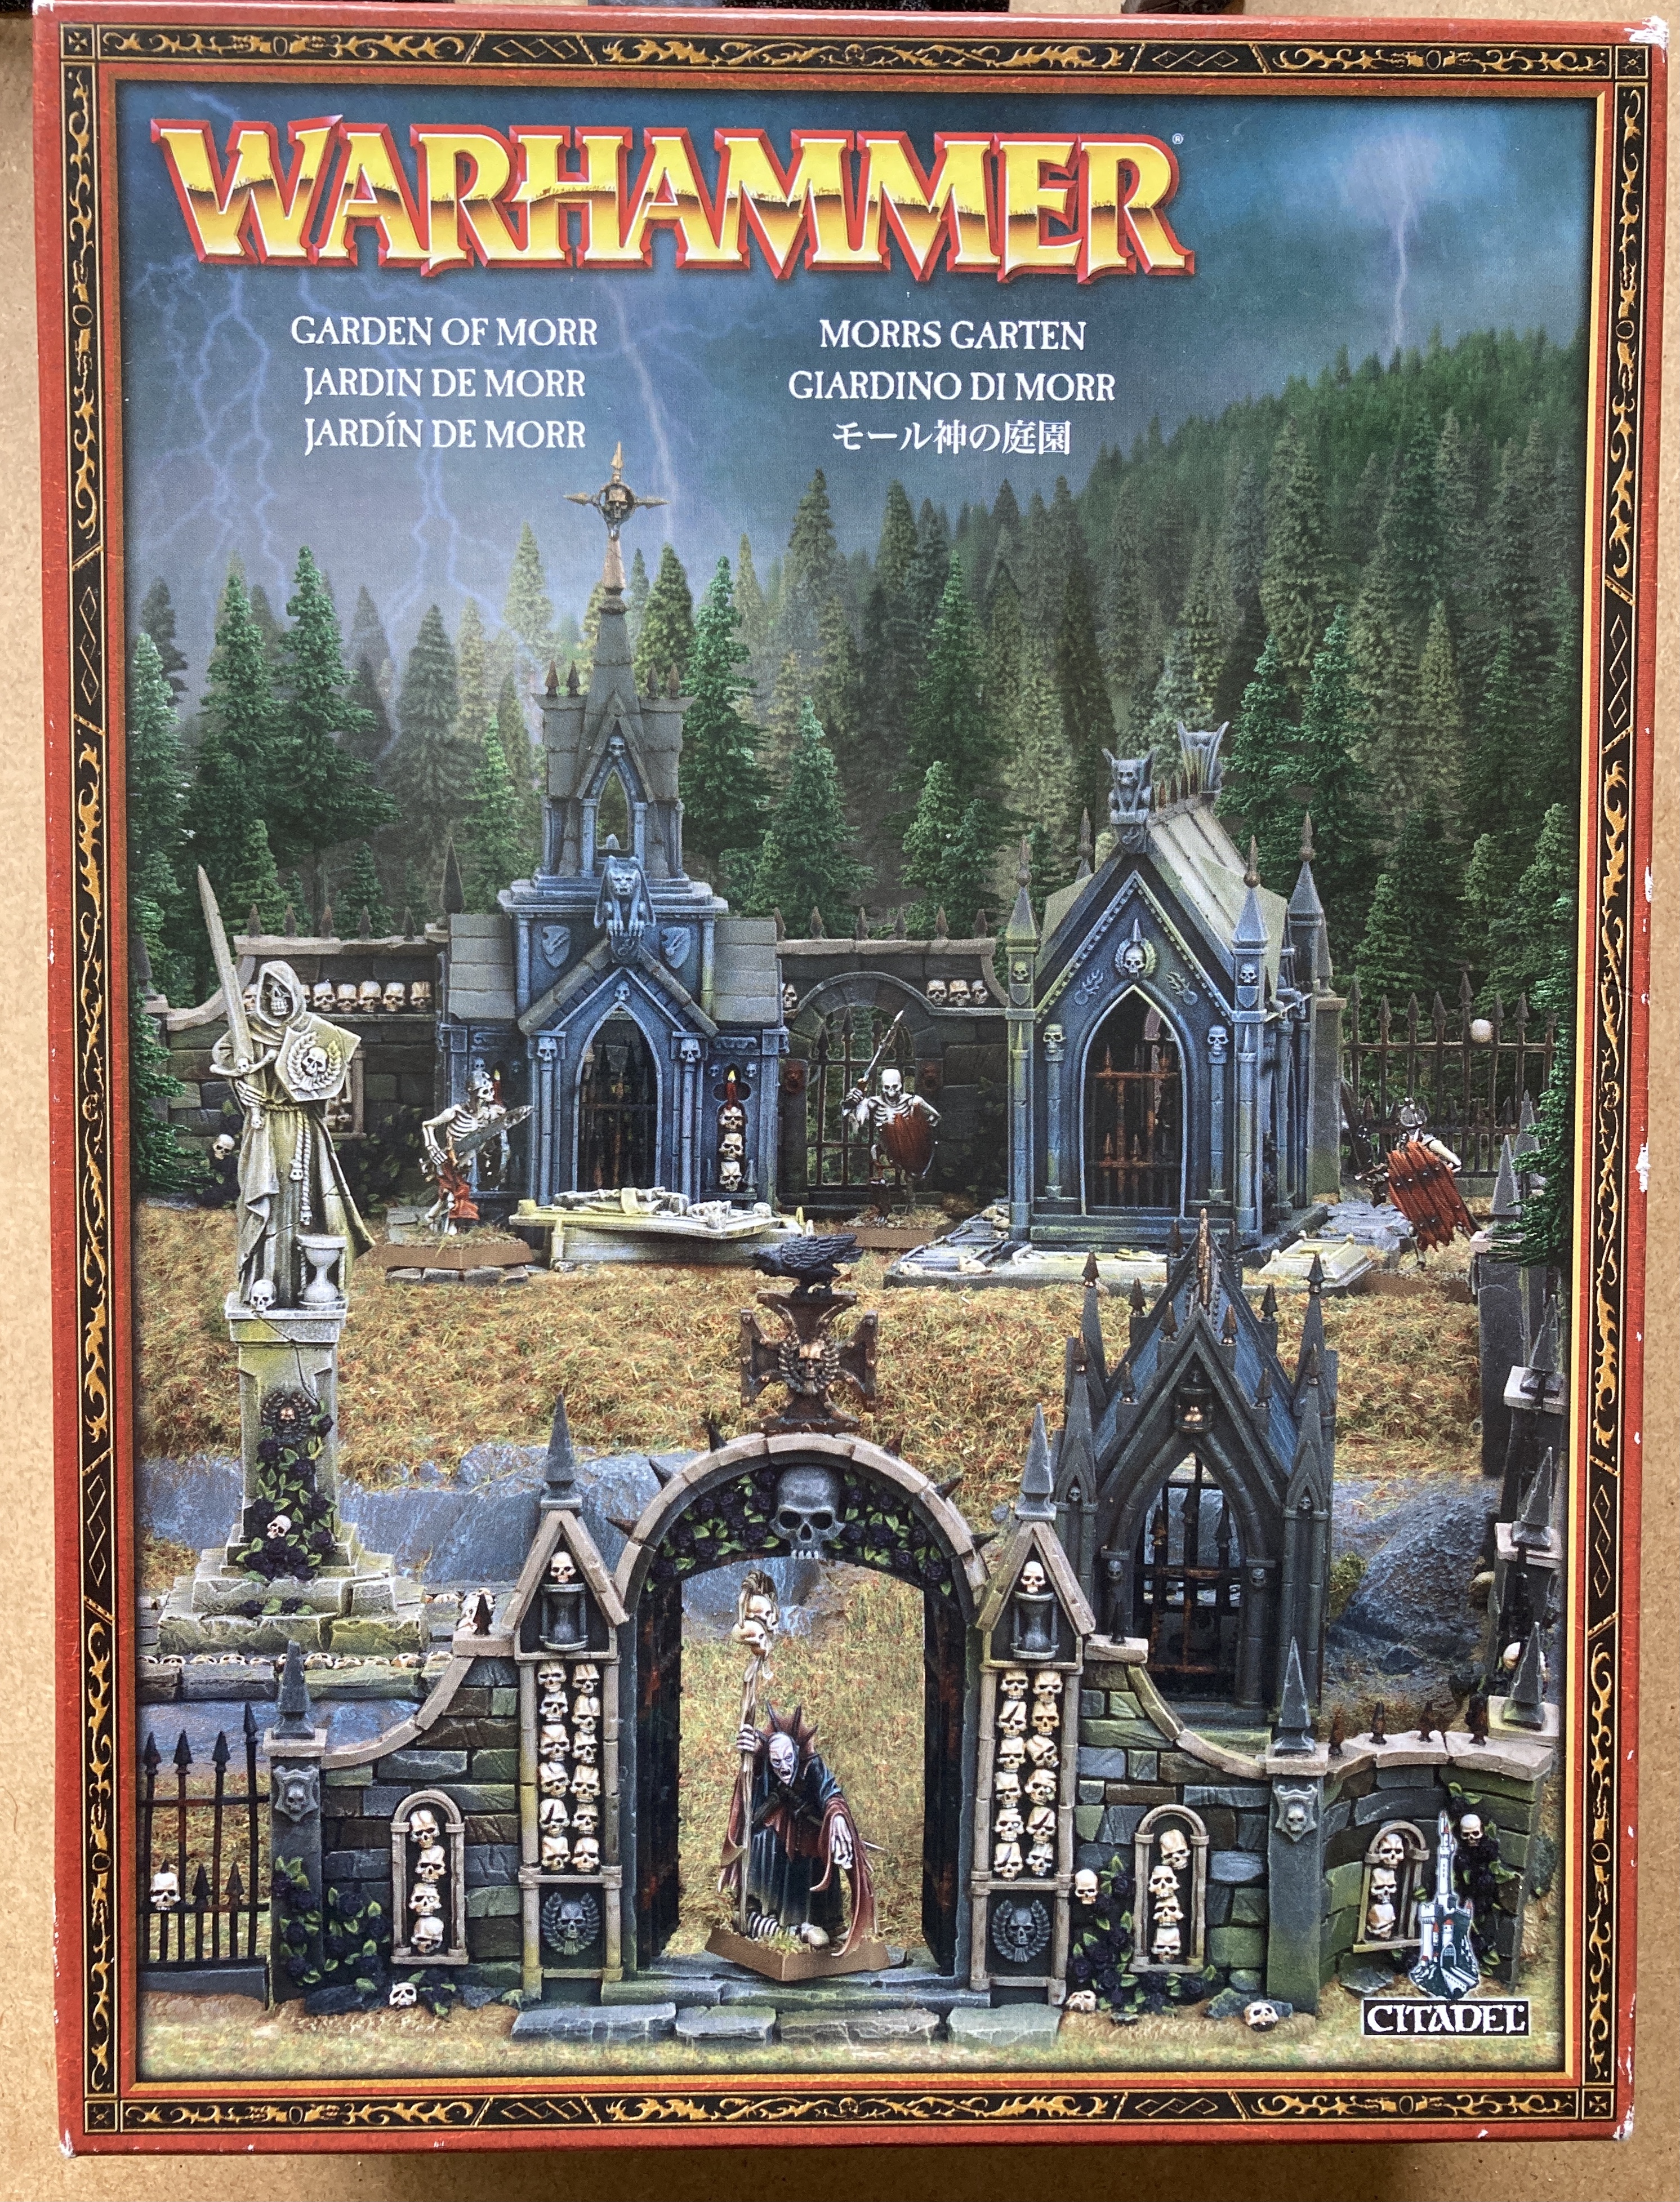 I still have the box.
 The back of the box.
I really like this terrain kit and it’s seen many games over the years but so far I’ve never painted it. I even still have the box, now mostly used to carry miniatures to a friends house when I go to play a game. It’s currently filled with bubble wrap.
 Look 2011.
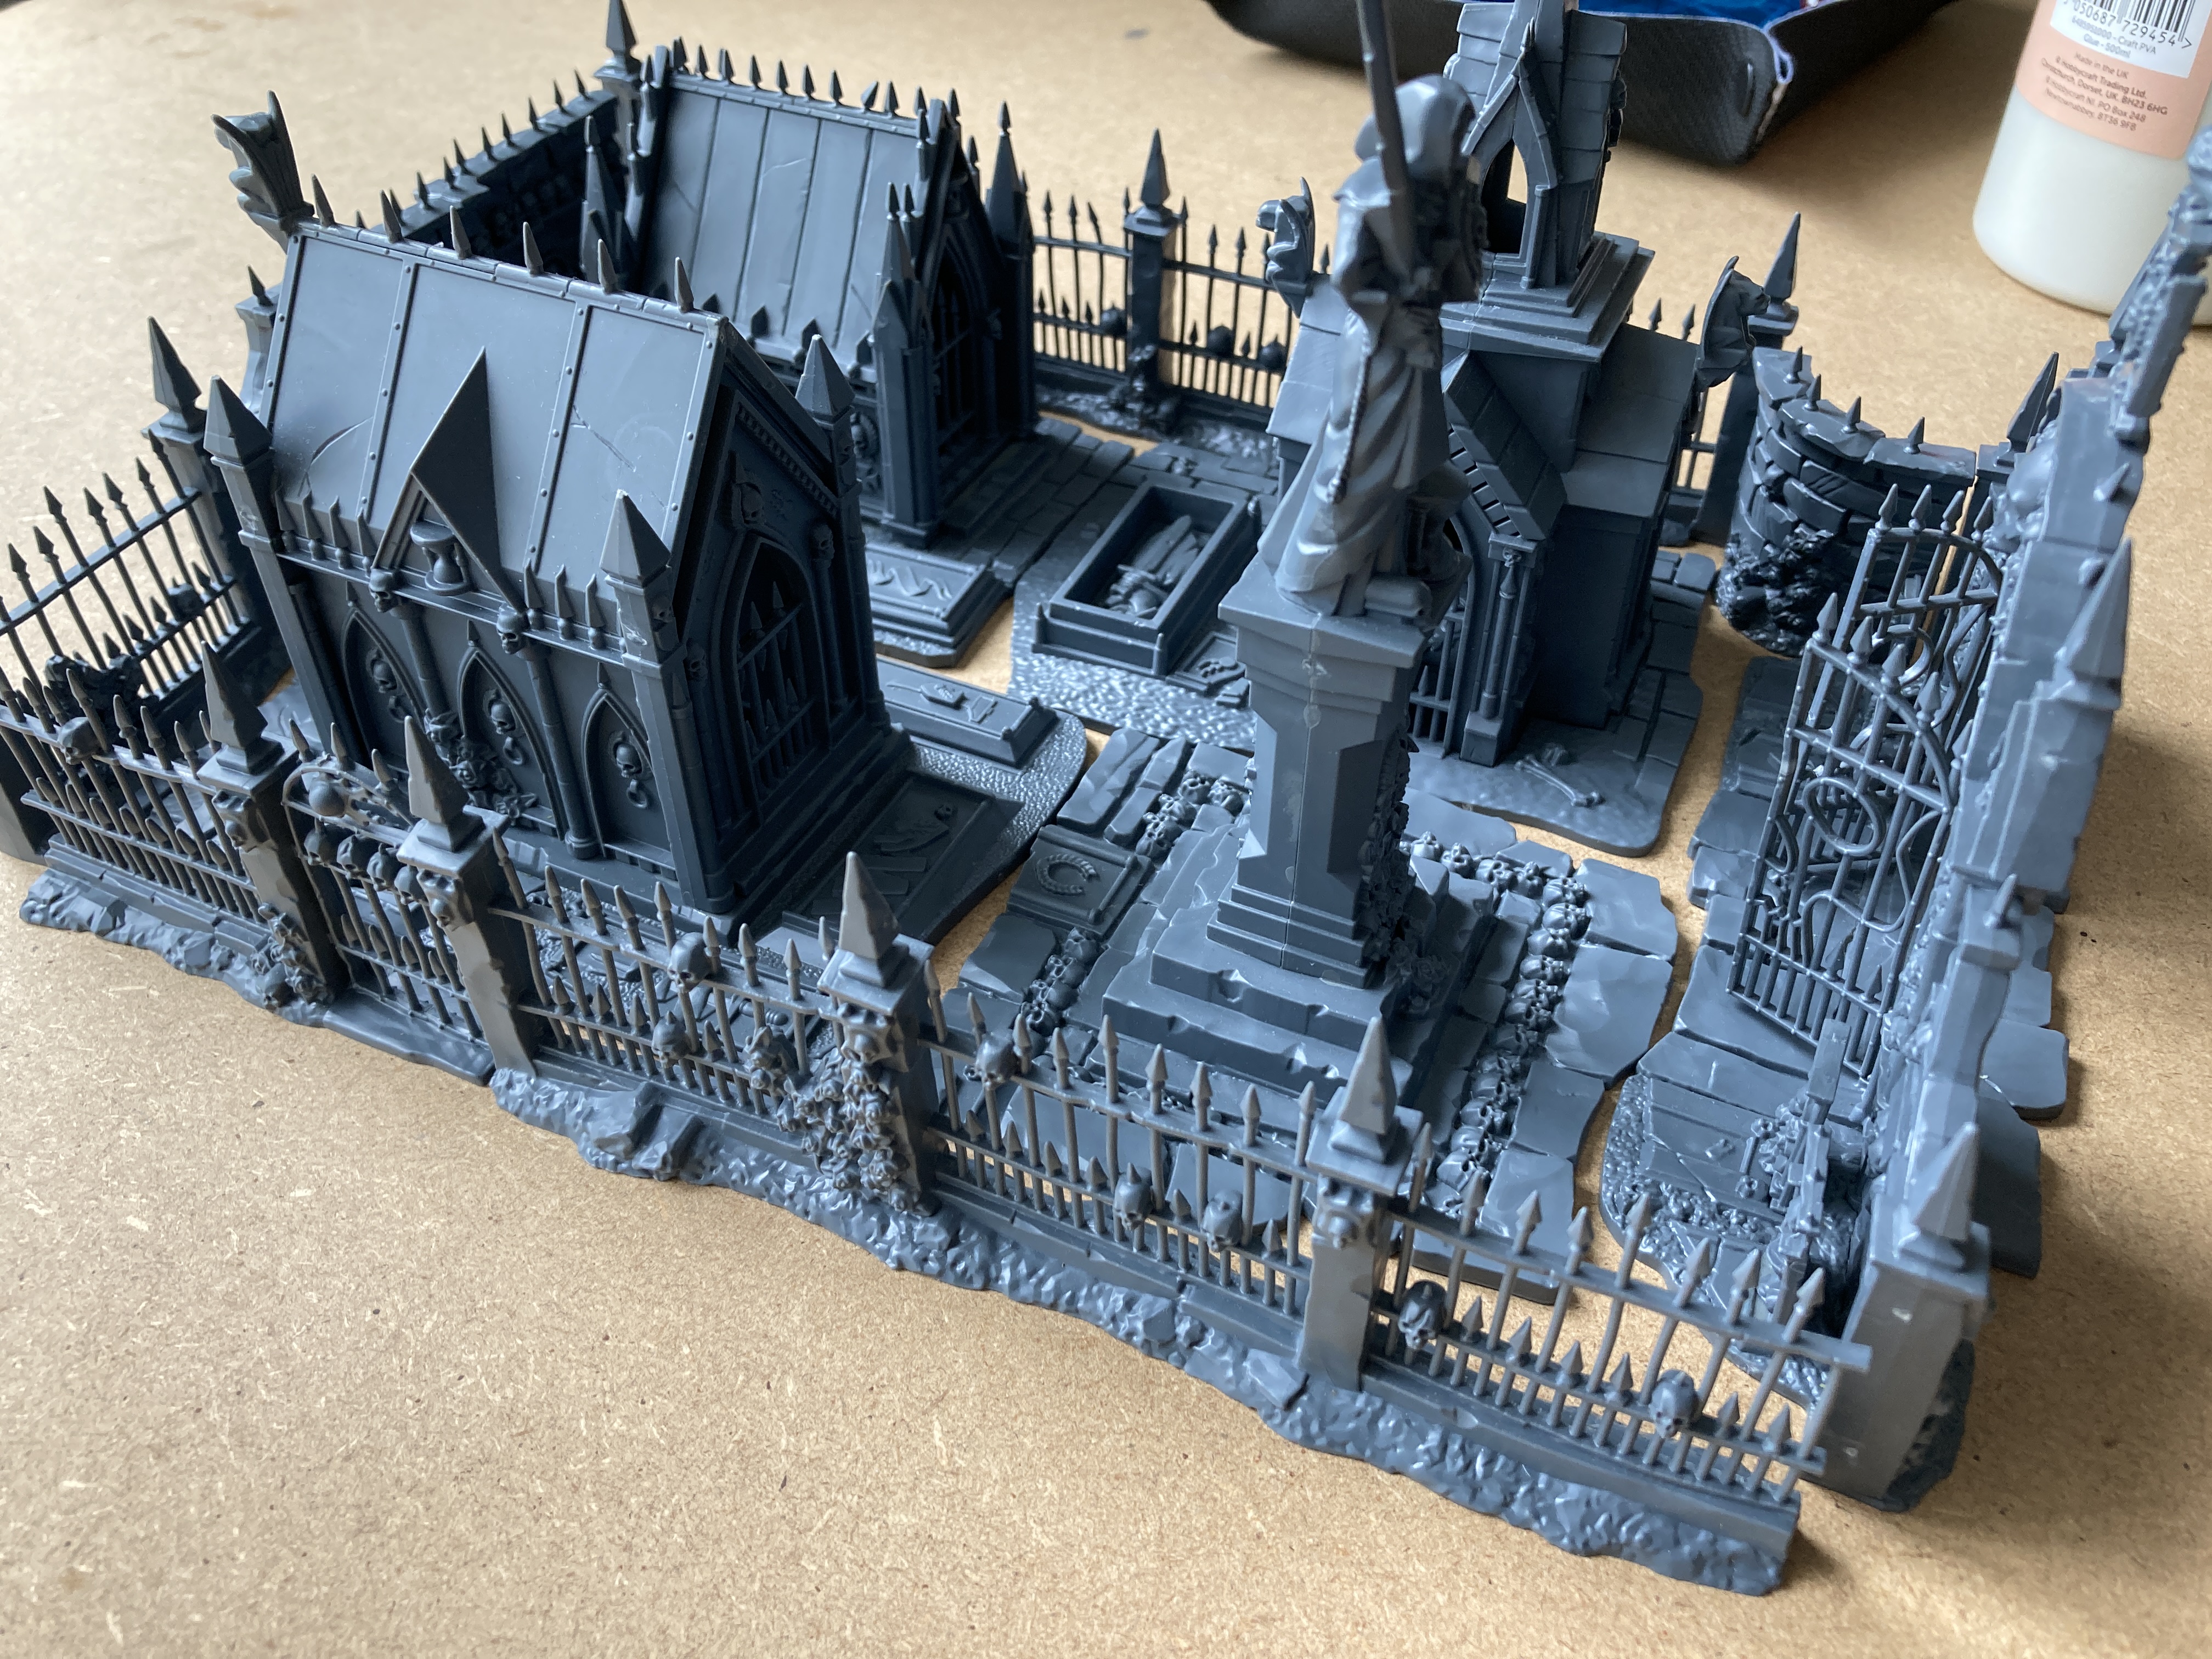 The contents. My Garden of Morr.


