A Long Time Ago…(A TerrainFest 2023 Blog)
Recommendations: 179
About the Project
Out of the box, the terrain in Star Wars: Shatterpoint is lightyears beyond what most companies even consider putting into a core box. Multiple levels, scatter terrain, and an attention to detail makes it some of the most fun terrain anyone could play on. However, I want to take it a step or two beyond and challenge myself along the way.
Related Game: Star Wars: Shatterpoint
Related Company: Atomic Mass Games
Related Genre: Science Fiction
Related Contest: TerrainFest 2023
This Project is Active
Episode VI: All Good Things…
It is October 31st.
Halloween.
The last moments of TerrainFest 2023.
I would like to say I was able to get more done with this project. I’m not disappointed, though. I was able to get a massive start on the metric ton of plastic that come in the Star Wars Shatterpoint core box. Plus I was able to learn/try several new things:
- Basing terrain to give it a better footprint on the board. It also helps blend the elements into the playmat. Yes, it can make it limiting on where the terrain can be used and not look out of place, but the visual improvement outweighs any negatives.
- Airbrushing base colors for a model. I’ve had an airbrush for almost 4 years now and this was the first time I used it for anything other than primer. I wanted the base coat to be nice and smooth, and I worried that a brush would leave too many streaks.
- Finding ideas in various places. I have already started using the rock mold from the hobby train section in another project, while the craft store snake skeleton has already given me multiple pieces of scatter terrain.
The festivities might winding down, but the work it just beginning.
A massive thanks to the crew at OnTableTop for hosting the event and to everyone who stopped by to take a look.
Until next time!
I would make a skeleton joke, but you wouldn’t find it very humerus.
Episode V: Achievement Unlocked!
This is the part I’ve been dreading the most since starting this project – painting the terrain.
I’m to a point where I think I’m decent enough to not be embarrassed by my miniature painting, but terrain is something entirely different. Miniatures will come on and off during a game, terrain is there the entire time. Sometimes it’s a focal point in the game. Too much pressure!
Still, I committed to this so let’s get to it.
Using an airbrush and Badger Stynylrez White and Gray primers, I coated all of the terrain and scatter bits.
I’m not going to lie. Seeing all the terrain together and primed made me think two distinct thoughts:
- This actually looks sort of solid. Maybe it won’t be that bad.
- I could pivot and make this a Hoth or generic-sci-fi-snow-planet board.
If it weren’t for the fact that I have two desert themed playmats, I might have just done that. Alas, I don’t want to hunt down and buy another playmat.
I hopped over to a local game store and picked up a bottle of Army Painter Warpaints Air: Skeleton Bone, Army Painter Warpaints Air: Bleached Bone, and Army Painter Warpaints Air: Uniform Gray.
Fun Fact: My younger brother bought me an airbrush for Christmas in 2019. Since then, I have primed and varnished dozens upon dozens of models. This is the very first time I’ve tried actually painting with it. I know it is just the base coat, but it feels like a hobby milestone for me.
I’m rather pleased with how these came out. There is a bit of overspray here and there that I’ll need to manually touch up. Still, I don’t think that is too bad for my first outing.
With the deadline looming, I decided to focus on the four primary structures at this point. Even then I’m not entirely sure I’ll get them all done. Still have to try though, don’t I?
Until next time!
Why did Van Gogh become a painter? Because he didn’t have an ear for music.
Episode IV: Snakes On A (Desert) Plane
This is being filed away under “Ideas that sounded great at the time”.
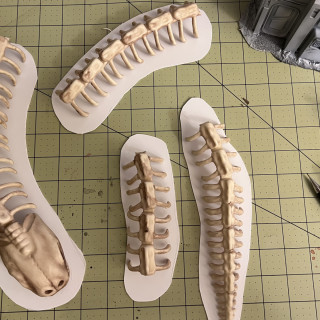
While at a local arts and crafts store, I was wandering about the Halloween section. There I found something I thought would make fantastic bit of scatter terrain for the project: a snake skeleton!
At 30″+ and a pretty decent scale, I was thinking of all the cool little stuff I could do to add this to my board. Bonus points for the wire going through the underside so that it could be easily posed. It was an easy purchase (especially with a 60% off coupon).
The plan was supposed to be a simple one. I was going to chop it up into multiple pieces due to its length and base it like I did the main terrain. This would allow me to use as much, or as little, of it as scatter terrain for each game.
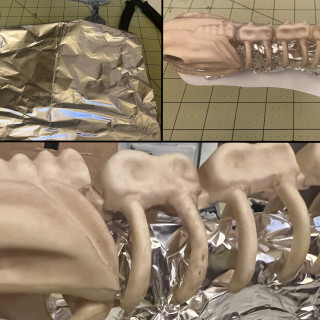
Additionally I wanted to give it a little extra height. I was going to achieve this by sculpting some sand dunes using tin foil and milliput. Then using texture paste and my sand mix, I’d blend it in with the rest of my build.
At this point, however, things started falling apart.
I know the popular phrase in the art and hobby world is to “trust the process”, but by time I got to the dune part of the process I wasn’t liking it. It could have been the nagging thought in the back of my mind that I had so much more to do on the main project and October is almost over. It could have been the idea of sitting and mixing enough milliput to cover it all was going to drive me insane.
Ultimately, I’m putting a pin in this little side project.
I may return to it at a later date and look at it with fresh eyes. Worst case scenario is that I can just leave the chopped bones as they are and just put them on the board.
Until next time!
What is a snake’s favorite tv show? Monty Python.
Episode III: Almost Got 'Im
In my town, outside of the normal local game stores, we have a couple different hobby stores. These stores cater to the miniature hobby outside of miniature/board games, with things like model cars and trains. I needed to get some more .040″ polystyrene sheets for the Shatterpoint project, so I paid one of these shops a visit.
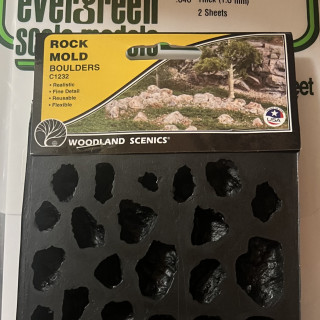
One thing I love doing is walking the isles to find things that are adjacent to our hobby but I wouldn’t think about using them specifically for miniature games. There are so many cool tools and products. On this trip, I came across these Woodland Scenics: Rock Molds (Boulders).
I promise this project isn’t sponsored by Woodland Scenics, they just appear to be the most common hobby supply manufacture the stores around me carry.
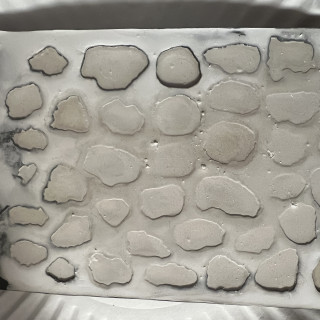
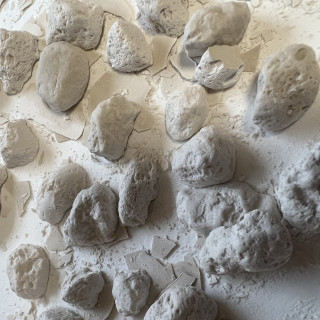
With a very small amount of plaster mix, I am able to create a lot of varied rock formations. Since these are scaled for model trains they look fantastic next to Shatterpoint terrain.
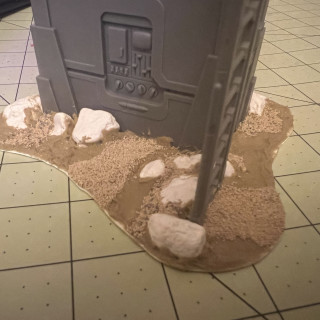
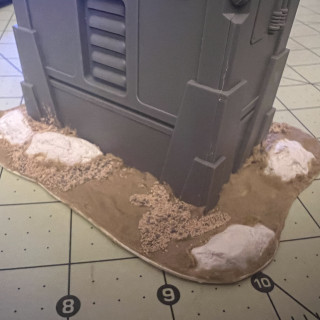
Following the steps in the previous two steps, I added the base and texture with the rocks to the last of the core set terrain that I want to fix up like this. The set includes a second of these towers, but I want to keep that one free to add height to the other buildings for variety. I think it might look a little weird with a base onto of those.
Those little boulders definitely add something to the bases when mixed with the texture paste and ballast. Hopefully they will look as good when primed, which should be the next step in the process for this project.
Until next time!
What did the geologist’s partner write in their anniversary card? They promised to never take them for granite.
Episode II: Enter Sandman
Before starting this entry, a little update on the previous entry regarding the texture paste…
Did anyone else know that texture paste shrinks as it dries? I sure didn’t. It isn’t a big deal, but it sure was annoying to see.
Alright, for this entry (which will be the third time I’ve posted it because the project system hates me for some reason) I added some additional texture to the bases prior to the priming step. I was planning on priming immediately afterwards but time got away from me.
Supples I used for this portion of the build:
- Woodland Scenics: Fine Ballast
- Woodland Scenics: Medium Ballast
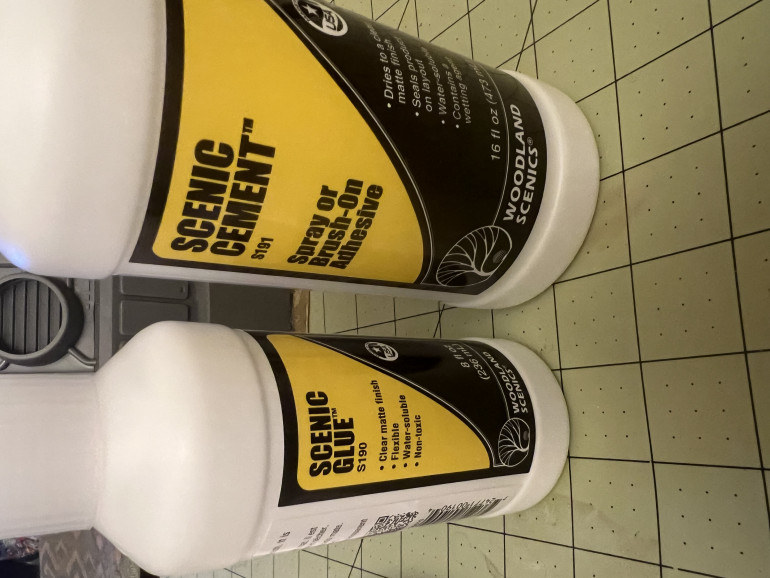
- Woodland Scenics: Scenic Glue
- Woodland Scenics: Scenic Cement
One thing of particular note here is that I had the Scenic Glue/Scenic Cement on hand from another project. Some regular old PVA glue would have down the job just fine. I was just too lazy to dig around the closet for it.
Step 1: All Paths Lead Home
-Adding texture to the paths leading to/from the doors-
If you looked at the photos from the previous entry, it probably seemed strange to leave the paths in front of the doors of the two buildings empty. I did this because, narratively in my mind, I imagine these would be worn down from people coming and going. With that in mind, I add a layer of Fine Ballast to break up the texture paste.
Lesson Learned! Something I stumbled across when doing this is that, for some reason, the Scenic Glue did not want to hold the Ballast perfectly to the Polystyrene sheet. I’m not sure if the sheet was too slick and couldn’t get a good enough grip, but I had to add some extra after the first layer dried. For the later terrain pieces, if I need to do this again, I’ll either rough up the sheet or had a thin layer of something to make sure the materials stick better.
Step 2: Imperfections Make It Perfect
-Adding visual interest via texture-
While the texture paste looks nice, I wanted to add some visual interest with the Ballast.
To begin with I mixed the Fine and Medium Ballast in a small container. My preferred mixture was 1 tablespoon of Medium to every 2 tablespoons of Fine. While there isn’t a strong visual difference between the two, I wanted the Fine grains to be more dominant.
As with the outlining/cutting of the bases originally, I did not want the placement of the mixture to be symmetrical. Nature is weird (even in a galaxy far, far away). This also allowed me to cover up some of those awkward spots from the paste drying.
This was definitely a spot that felt like I did a lot of work but, at the same time, didn’t do a lot of work. They say trust the process, but I don’t trust myself (lol).
Anyways, what is next?
I’ll get these three primed and dry brushed before sending them over to my painting table. I’m still not 100% on my color scheme yet. I have some ideas, including maybe some various details, but we’ll see. One step at a time, Tim.
I’ll catch you all next time, take care!
Why do lawsuits against sand and silt never make it to court? Sediment always settles.
Episode I: All About That Base
I had an idea/vision board prepped for this project but I think I want to be a bit loose with it. After all, Rule #4 – Have fun!
So lets just dive straight in.
One of the things I love about the core box terrain is it includes two large buildings that remind be of the of the bases you’d have in old school first-person shooters, like the original Halo. I could imagine that, in a Star Wars-theme PVP game, you would spawn in at one base while your opponents spawned in at the other.
The one thing I don’t like about the core box terrain is that the buildings’ profile just stops flat on the mat. There isn’t anything blending the terrain into its surroundings. Granted, this probably makes it usable on multiple style boards, but it’s boring. Also, while highly detailed, the plastic is super lightweight and could use a little something to keep in better grounded.
Step 1: Giving Our Bases A Base
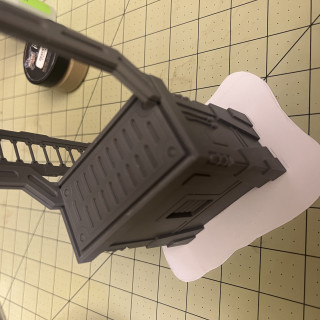
For the first step, I used the Polystyrene Sheets to give the two main buildings a bit of a base. This will give us stability on the tabletop as well as give us a canvas to work with.
Supplies used:
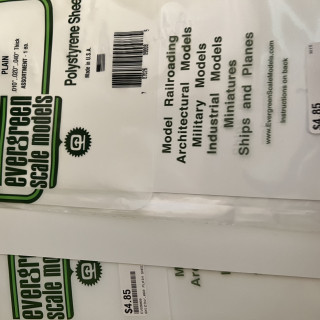
- .040″ (.10cm) Polystyrene Sheet (x1)
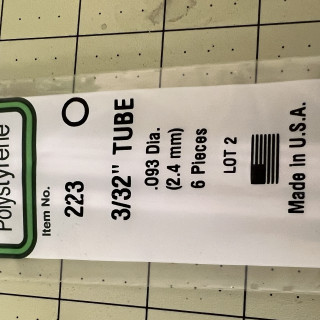
- .093″ (2.4mm) Polystyrene Tube (x2)
- Huge Miniatures Texture Paste – Desert
- Plaster Rocks
- Super Glue
- Scissors
- Sculpting tool or old paint brush
- Sandpaper (or something to file down some edges)
 First thing I did was trace the out line of the building (with some extra space between them and the edge of the sheet).
Step 2: Finding Some Shade
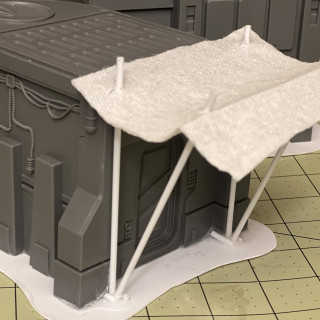
For each of the bases, I wanted to give them a little something extra to make them unique. For one of them, I decided to give them a canopy over the entrance to add some flair and texture to the model. Of course I completely forgot to take pictures/measurements when cutting them.
To be quite frank, I just went with rule of cool. I wasn’t too specific on the length, I just wanted something that felt right.
Please ignore the paper napkin acting as a canopy. I’m debating between a couple fabric solutions but can come back to that at a later date.
Step 3: Adding Sand
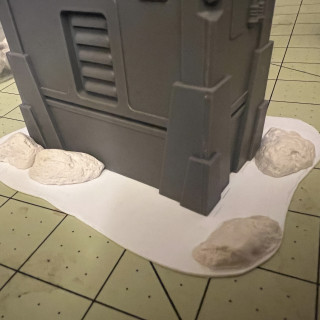
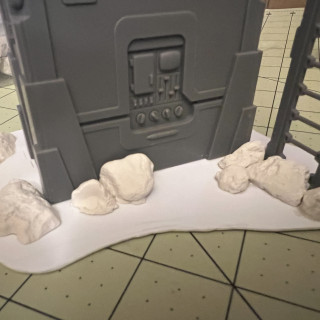
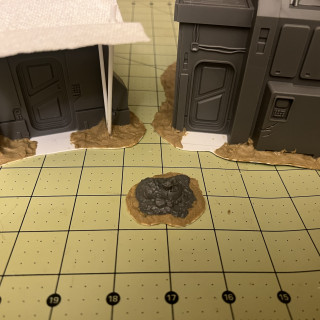
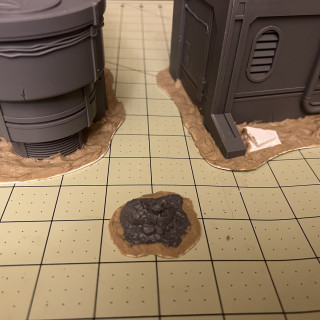
With everything glued into place, I added the Huge Miniatures: Texture Paste – Desert all over the bases. Using a sculpting tool, I made sure to push the paste up into the corners of the models to give the impression the wind has pushed the sand into the corners or cracks in the wall.
Optional: Before adding the texture pasted to the back of the base without the canopy, I glued down a couple of the plaster rocks. I wanted both bases to have a little unique detail or feature.
That should be about it for now. The texture paste takes a little bit of time to cure and harden. Once that is done, my next step will be to add a bit more texture via the Fine/Medium Ballast before I move onto priming. My next update should cover that.
One last thing. It was pointed out to me by my closest group of friends, that my last project blog (the Space Marine) was a bit…well…of a downer. I hope the energy and emotions I have for this project our showing through these entries. In case they aren’t, have a chuckle on me:
Did you hear that they actually nominated a scarecrow for the 2024 Noble Peace prize?! Evidently, it was outstanding in its field.
The Saga Begins….
One thing I am so horrible at doing, in the miniature hobby, is keeping track of my “recipes” for things like paint schemes. This becomes a massive problem for me when I start an army, get bored, and put it away only to come back months (or years) later and try to remember what I was doing.
With that in mind, this entry will be a living document to track all of the supplies I use on this project. Hopefully this might even help anyone out there that might have a similar idea but not be certain one what products to get or avoid. Plus, it’ll also help me keep track of staying on budget (see the rules I made in the previous post)!
Anything listed without a date will be the supplies I initially started with from my own table and drawers of supples.
Terrain Sets/Kits/Etc:
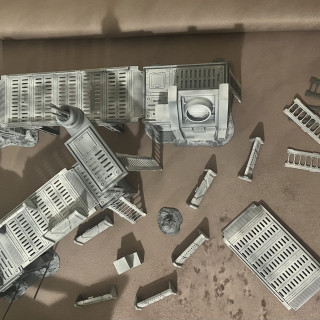
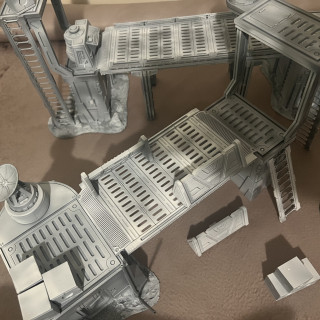
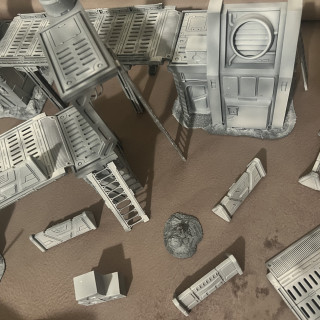
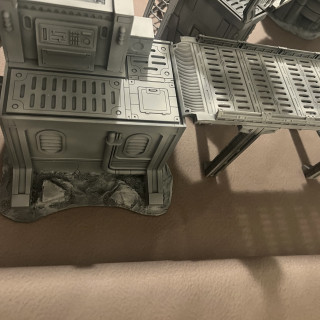
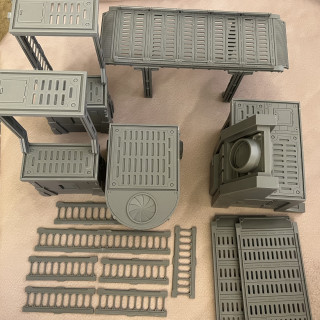
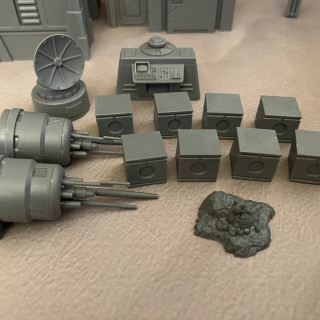
- Star Wars: Shatterpoint Core Set terrain. Simple and to the point. So much terrain was included in this box! (Pictures 1-2)
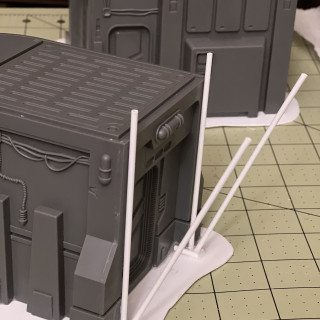
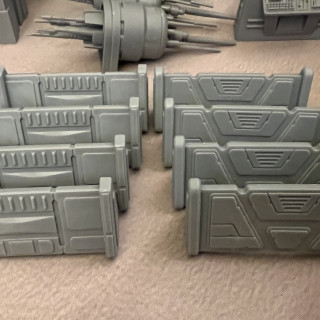
- Star Wars: Legion Barricades. Yes, already sort of breaking the rules. However, when gathering all of the terrain to assemble, I noticed the barricades in a scatter terrain box. I haven’t played Legion in years, so might as well put the bits to good use. (Picture 3)
- Random hobby store snake skeleton Halloween decoration (10/26/23)
Supplies/Materials:
- Basing Materials:
- Rubble made from plaster (specifically made from PerfectCaster)
- Cork. Everybody loves a good cork rock or tower, right?
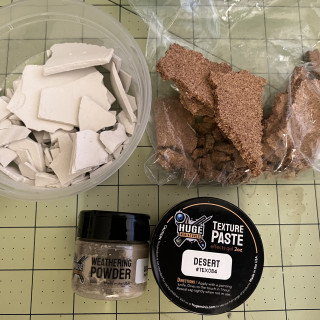
- Huge Miniatures Weathering Powder – Sand.
- Huge Miniatures Texture Paste – Desert. I have used the Snow versions of these products in a previous tutorial on Youtube, so I’m hoping these work the same. Ironically I got these two specifically to spruce up the Shatterpoint model bases.
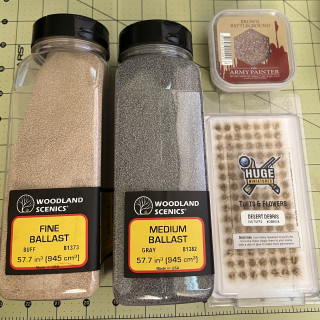
- Woodland Scenics: Fine Ballast.
- Woodland Scenics: Medium Ballast.
- Army Painter Brown Battleground.
- Huge Miniatures: Tufts & Flowers – Desert Debris.
- Woodland Scenics: Scenic Glue*
- Woodland Scenics: Scenic Cement*
- Woodland Scenics: Rock Mold (Boulders) (10/16/23)
- Badger Stynylrez Primer: White (10/29/23)
- Badger Stynylrez Primer: Gray (10/29/23)
- Scratch Build Materials:
- Evergreen Scale Models: Polystyrene Sheets .
- Evergreen Scale Models: Polystyrene Tubes.
*Can use PVA glue as a substitute.
Alright. I think that covers everything, except things like paint brushes, sculpting tools, and so on. I figured that would be silly to include as they aren’t specialized tools, and everyone has their favorites. If I come across something I need a specific tool for I’ll add it.
Now…onto the build!
Pitch Meeting: Star Wars Shatterpoint Edition
So you have a TerrainFest 2023 project for me?
Yes, sir, I do!
Hopefully that reference doesn’t fall too flat on its face. If it does…well, sorry. I couldn’t think of how to actually start this blog.
Anyways…welcome back, folks.
My name is Tim, better known as The Late Night Players on the internet (or SenjiMakoto here on Beasts of War OnTableTop). After my previous foray with the Spring Cleaning Hobby Challenge 2023 (my entry can be found here), I found a new found revitalization in the hobby. So much so that I actually entered categories at this year’s GenCon and got Bronze with both entries.
Enough with the past, though. The new hotness is Warhammer 40K: 10th Edition!
Wait, what?
It isn’t? Then……let me check my notes.
And we’re back.
Sorry for that, folks. I seem to have gotten my notes mixed up. What I was trying to say was that that was the past and the new hyped hotness is the TerrainFest 2023 challenge! Seeing that terrain for the games I play tends to be the very last thing I ever think about finishing, this seems like a fantastic idea. Best case scenario is I win a sweet prize. Worst case scenario is I have some awesome terrain and maybe teach someone something cool along the way (be it myself or a reader). Sounds like a win-win to me!
The only real question at hand is: what terrain do I pick? Do I go for something generic and pick something that’ll fill in the tables of various games? Or do I zero in on one system and hope I make the right choice as the theme will make or break the entire project?
The answer is really, really simple to figure out. I mean…look at the header, the title of the project, the title of this first blog post, or the little detail box to the left on your screen. We’re going with Star Wars: Shatterpoint terrain, baby! Specifically, I’m going to focus on the core box. If there is time, perhaps I’ll try getting a crack at the various terrain expansions.
Before I get headfirst into turning a bunch of grey plastic into something resembling a functional table, I feel I need to set some ground rules for myself.
You’re probably asking yourself, “Tim, this is for a fun competition. Why restrict yourself to a bunch of arbitrary rules?”
That’s a really good question, faceless internet user. The reason is that I have a tendency to think larger than I have the time or ability to do so. Often times this leads to a sense of failure and self-defeat that tends to put me into a funk or put off of doing anything (see my previous competition entry linked above). A simple set of rules or guidelines will allow me to work at a steady pace, not overthink things, and hopefully complete this on time.
So what are my rules?
TerrainFest 2023 Self-Imposed Rules V.1*
- Old school is the best school – Try to limit the use of 3D printing. In order to push my own skills, I want to complete as much of this as possible by hand. Scratch building is a great way to release those creative energies. Plus 3D printing will take away from the time I actually have to complete this project.
- Keep it within a budget! A good project should have a budget from the get-to to keep things in check, especially when you are someone like me that thinks way too big sometimes. The budget for this project with be $150(USD). I won’t be counting anything I already have in my supplies or bits boxes towards that, as the cost of the core box exceeds that by itself.
- Keep it on time! I have three weeks left in the month to get the project completed. Yes, the OnTableTop gang have said that the projects do not have to be 100% completed to qualify for judging, but I plan on using this terrain in our 24-hour Extra Life charity live stream on November 4th. Might as well give myself a dedicated end date to focus on.
- Most importantly – Have fun! If we aren’t having fun, what’s the point?
(*Named V.1 in regards to the fact that I’ll probably add more rules to myself as I go along.)
Well, that’s enough talk for now. It’s time to get to work.
Allons-y!


