![How To Paint Moonstone’s Nanny | Goblin King Games [7 Days Early Access]](https://images.beastsofwar.com/2024/12/3CU-Gobin-King-Games-Moonstone-Shades-Nanny-coverimage-225-127.jpg)


Aliens Colonial Marines Dropship – droppin’ with style


Recommendations: 79
About the Project
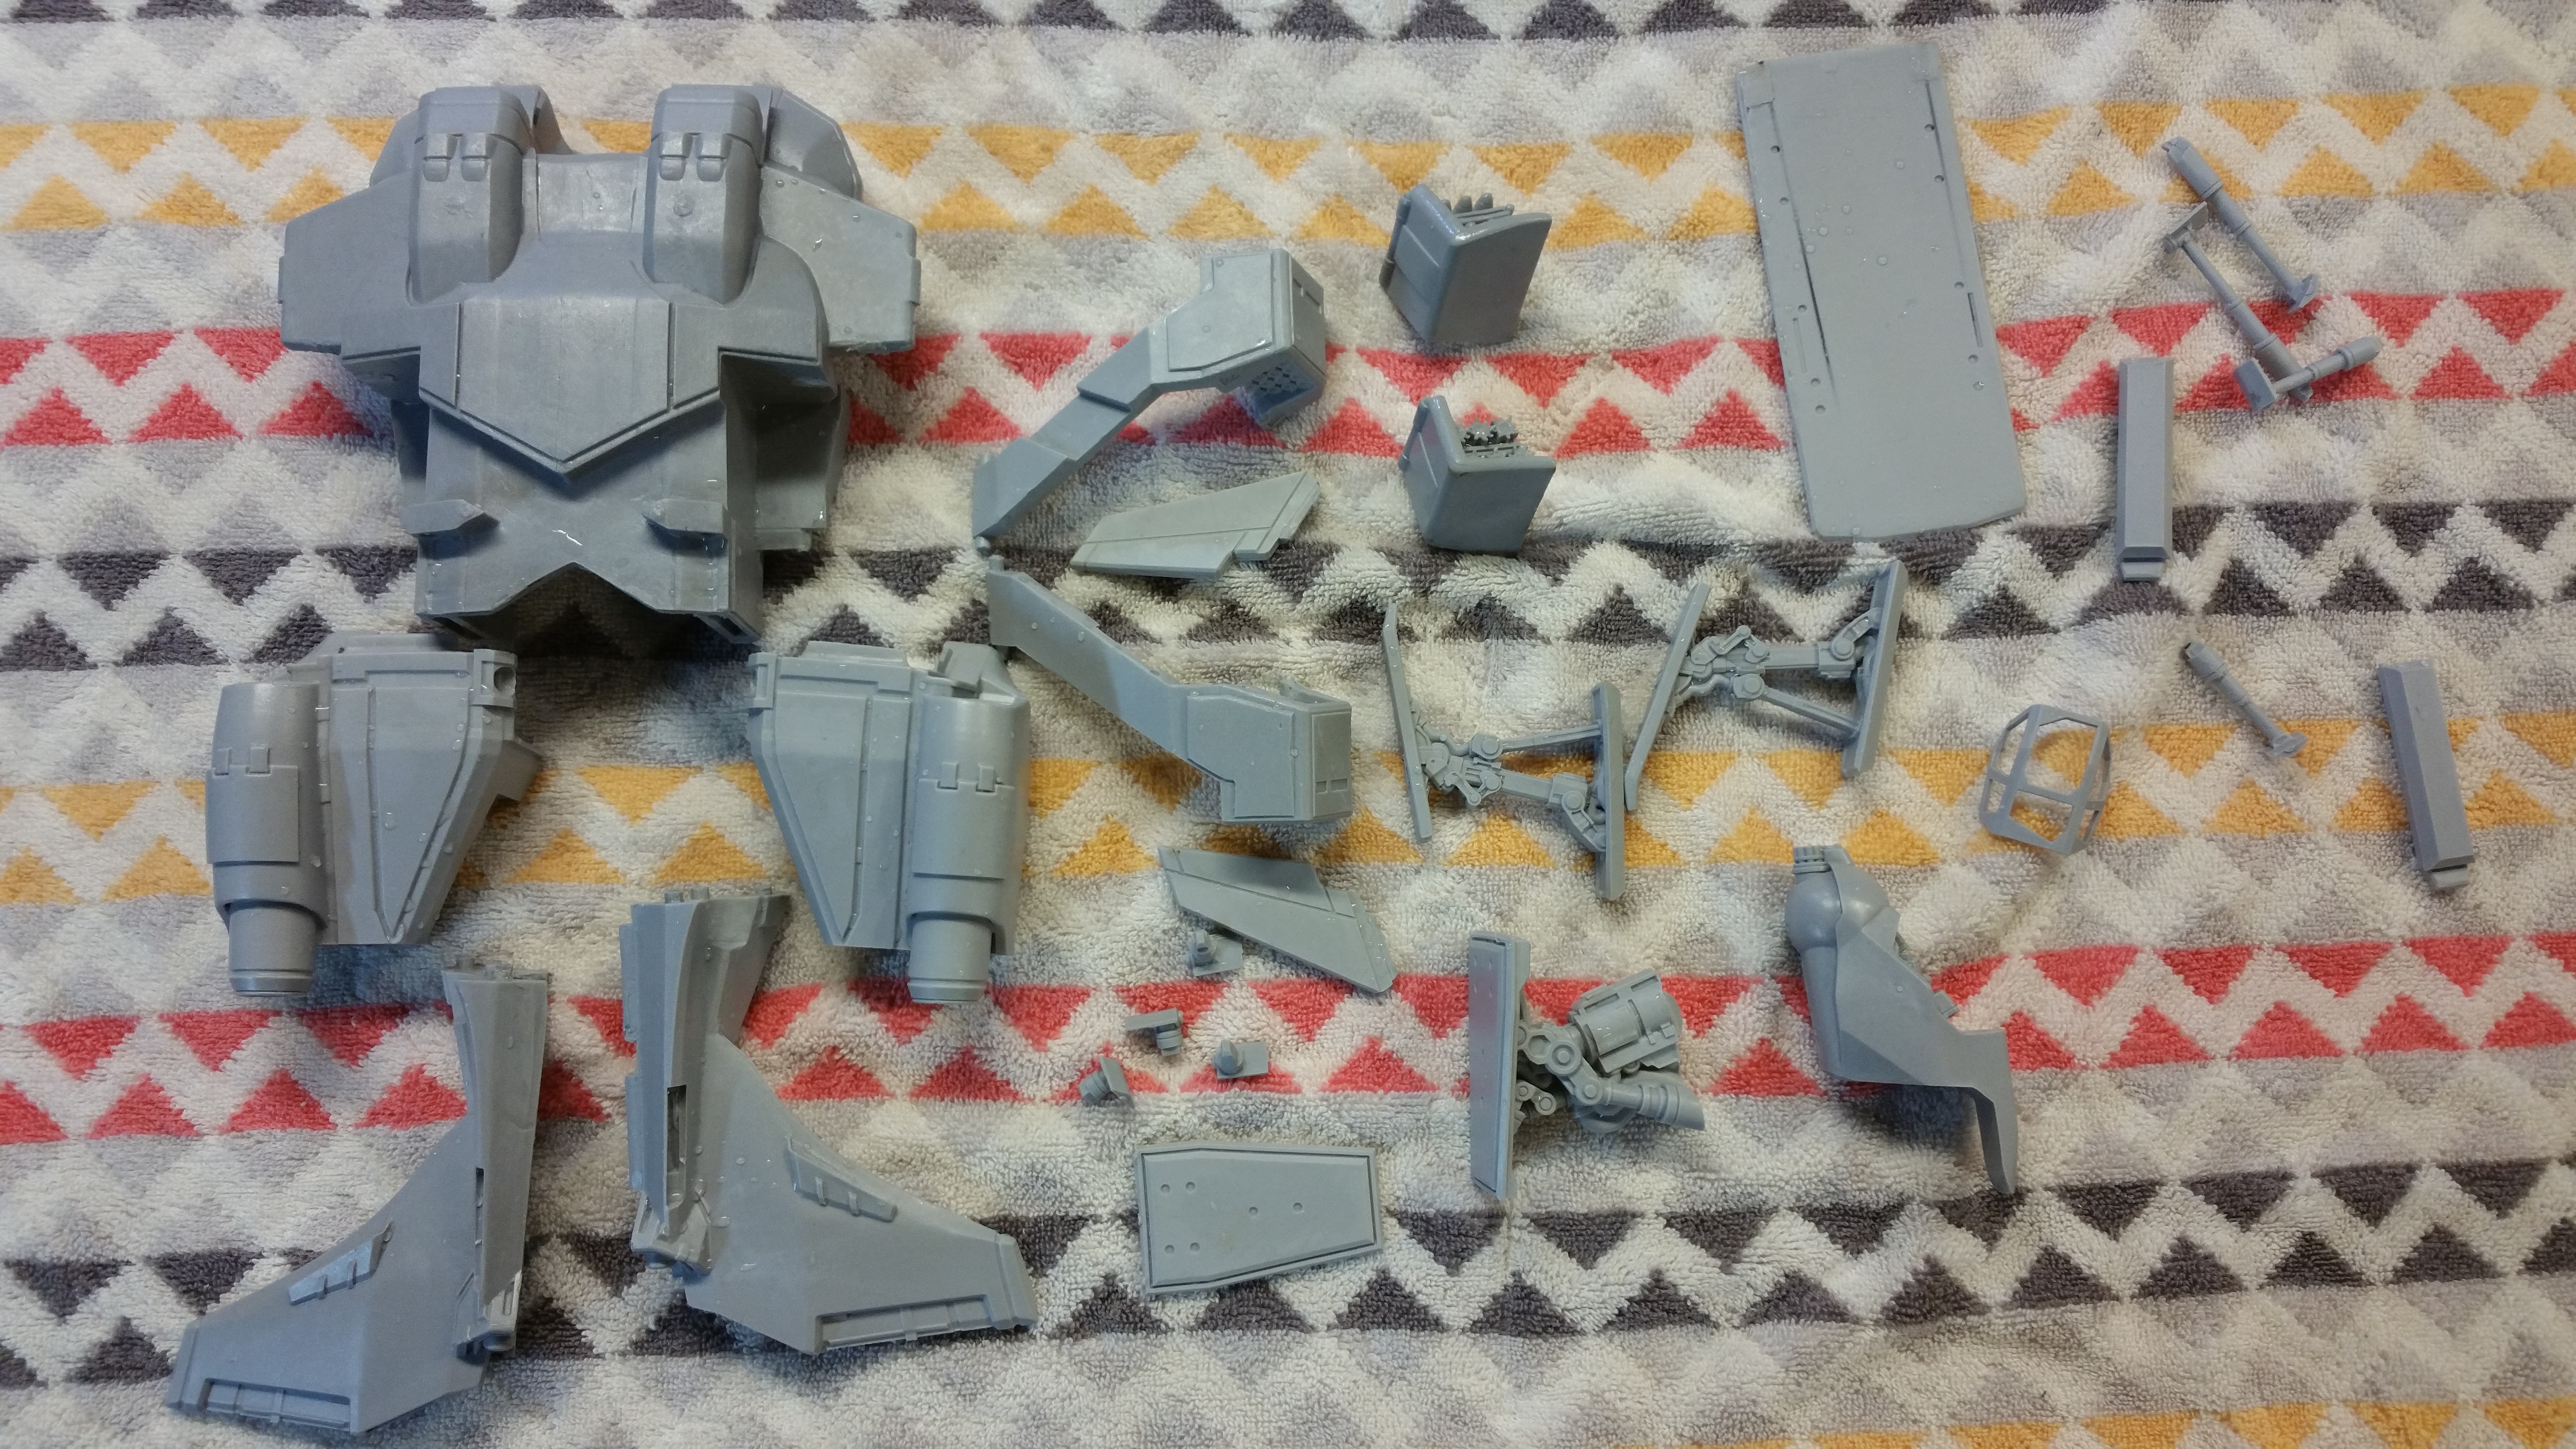
When I first saw the Prodos Games Dropship "coming soon" I couldn't wait to get my hands on it. Upon opening the box I found a real challenge as a builder, but then that turned into "opportunities." The kit is a great base and with some work, even a mediocre builder can end up with a ship even Hicks...uh.. I mean "Hudson" would be happy to ride to a bug hunt. I videoed the work so folks can follow along with the challenges with the kit and the techniques I used to address them and give it a few special modifications.
Related Game: Alien Vs Predator
Related Company: Prodos Games
Related Genre: Science Fiction
This Project is Completed
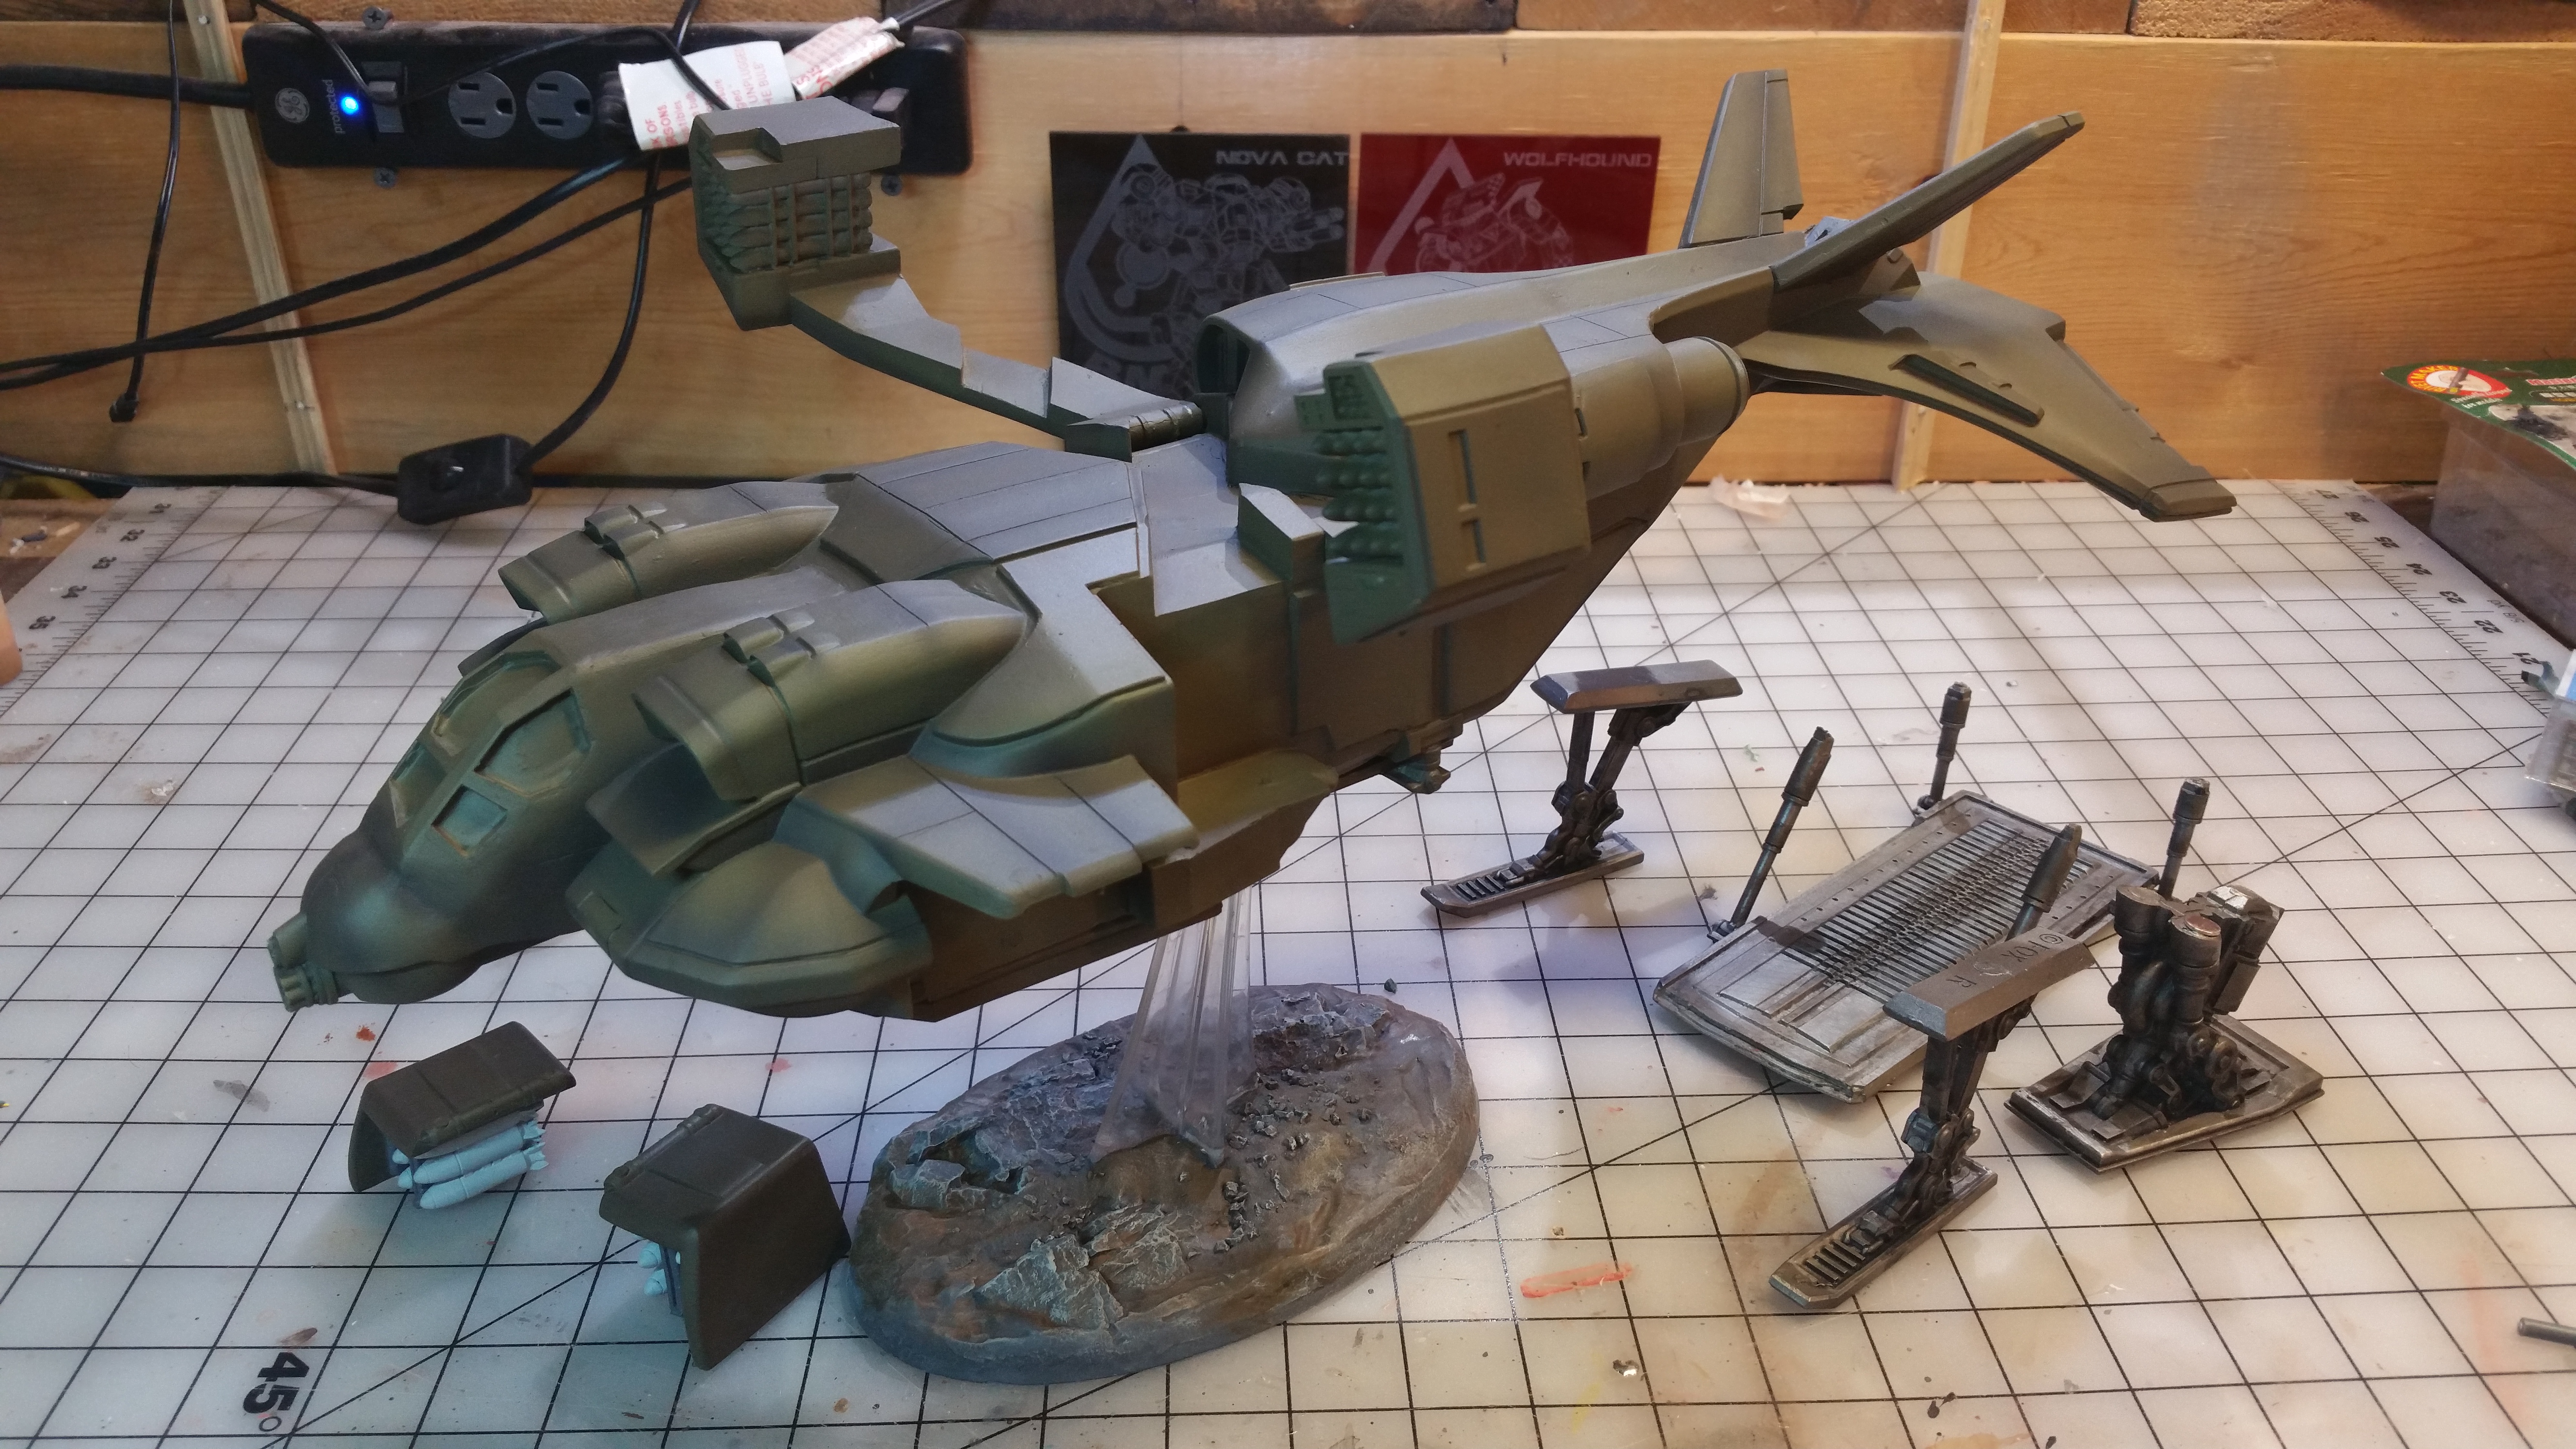
First look - digging ito the box and making the plan
The start of the project entails going through the box and looking at all the pieces, figuring out how they all interact, and begin making the plan on what needs special attention and what extra little bits of work I want to do with it.
Minor quibbles, mostly around the details and a few quality concerns. Nothing is totally insurmountable, and every issue can be addressed, it just might take a bit more modeling skill than I would have liked.
Overall, it’s a great base to start with.
Step 2 - digging in and the first few assembly steps
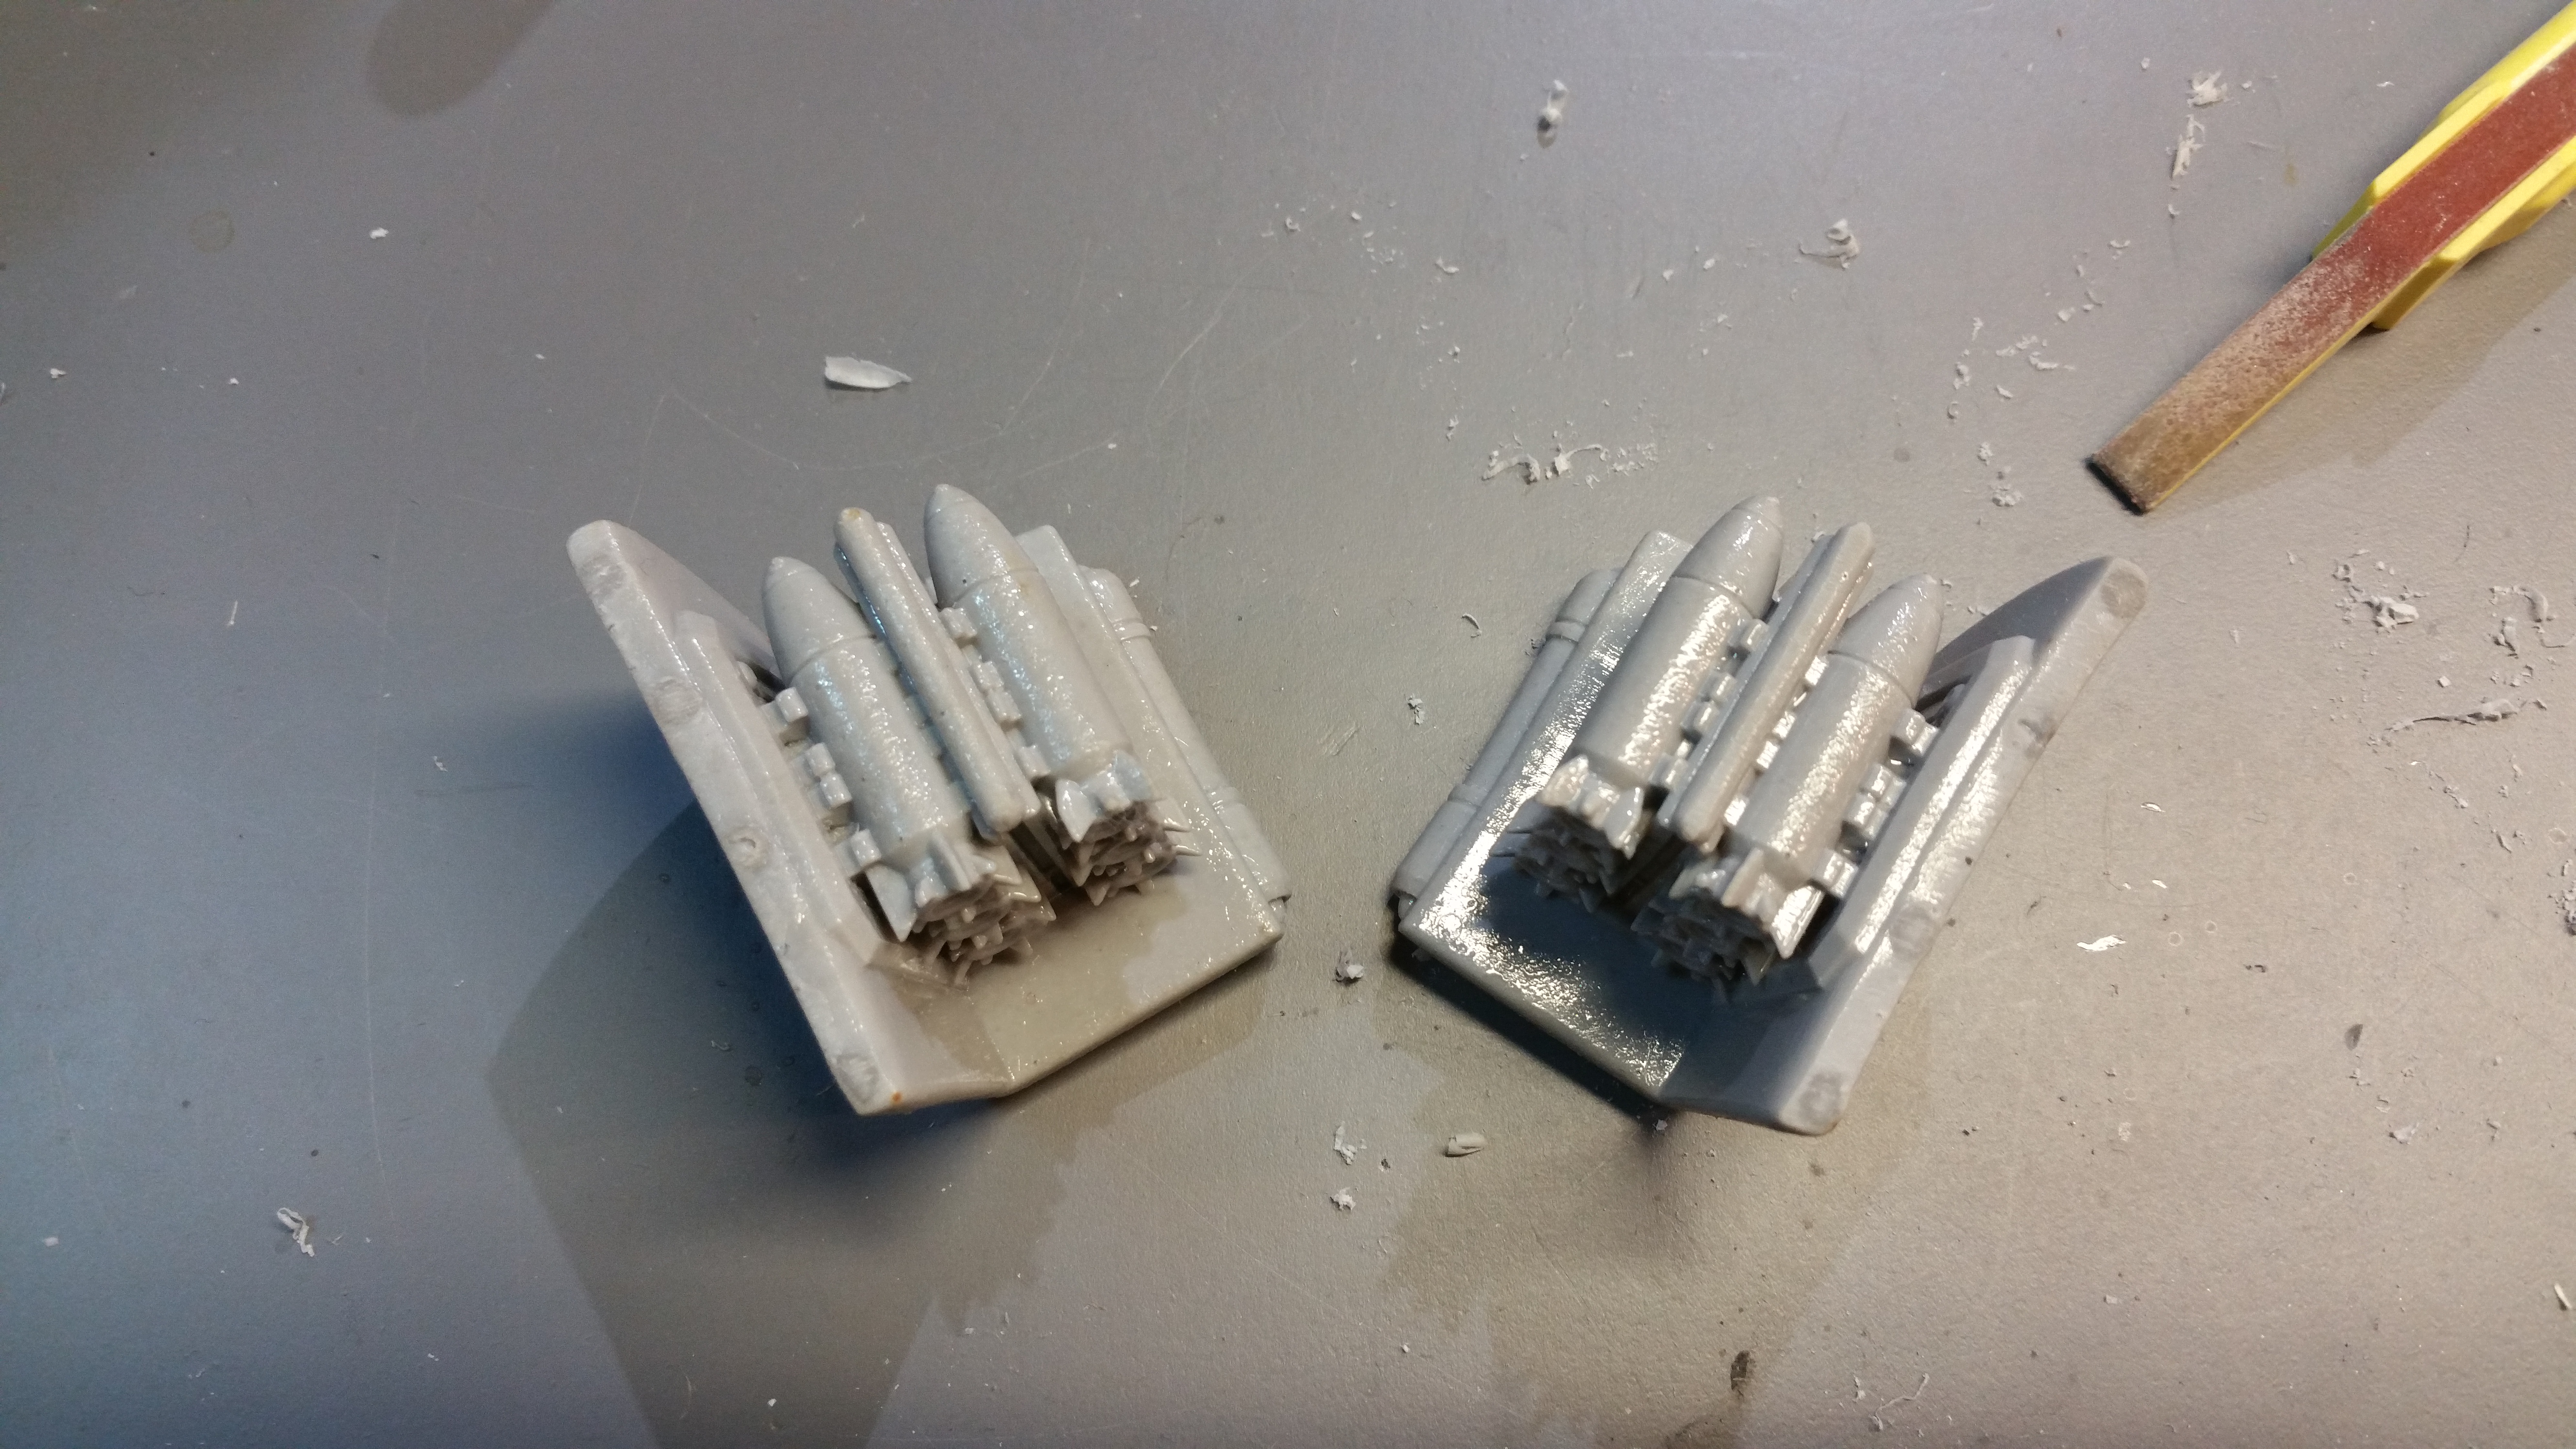
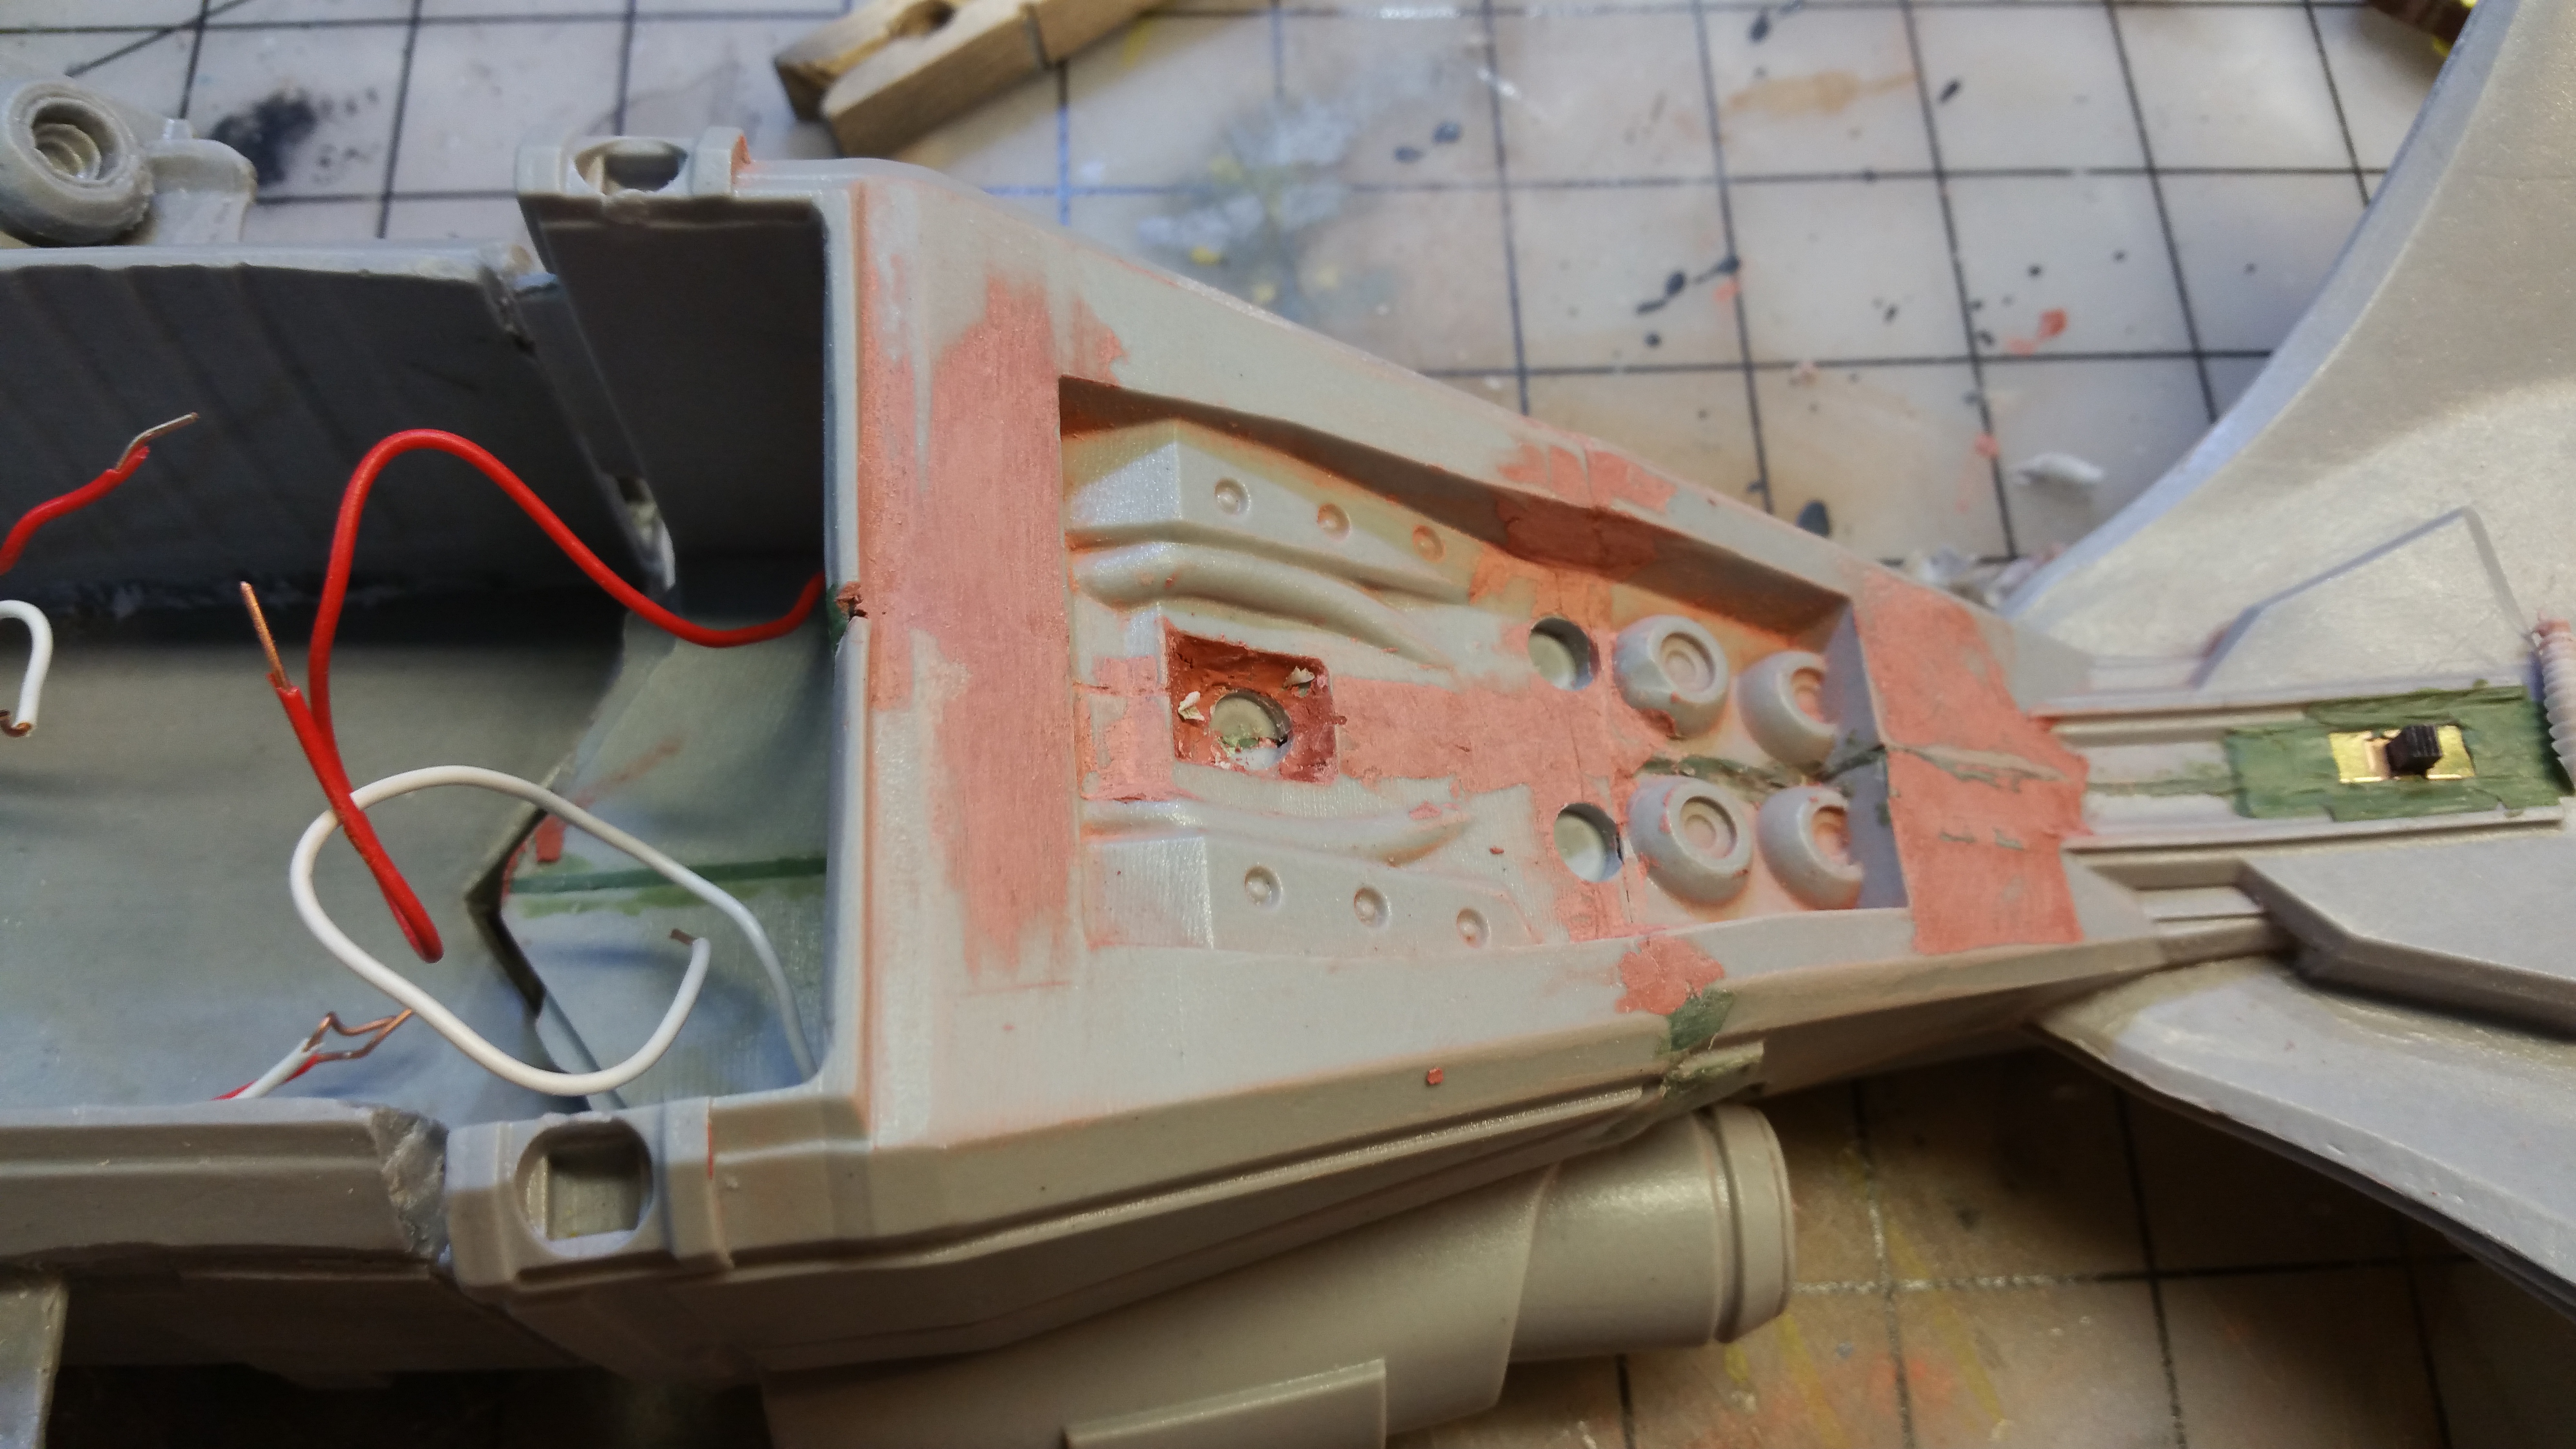
Getting started into the build, I’m working from the tail forward. The tail assembly has some gaps, and there’s a look at what to do about the forward-hull wings with the bomb racks. Those pieces never fully cured, so I need to come up with a plan.
This look goes into the tail and engine part assemblies as well as the installation of the lights for the engines, and what the plan is for the battery and switch locations.
Step 3 - Tail fin, filler, filler and more filler...
Working on the upgrades.
Starting out with the tail, it’s mostly filler and sandpaper work. The gaps are not negligible but with time and layers (and layers…and layers) we can make that go away.
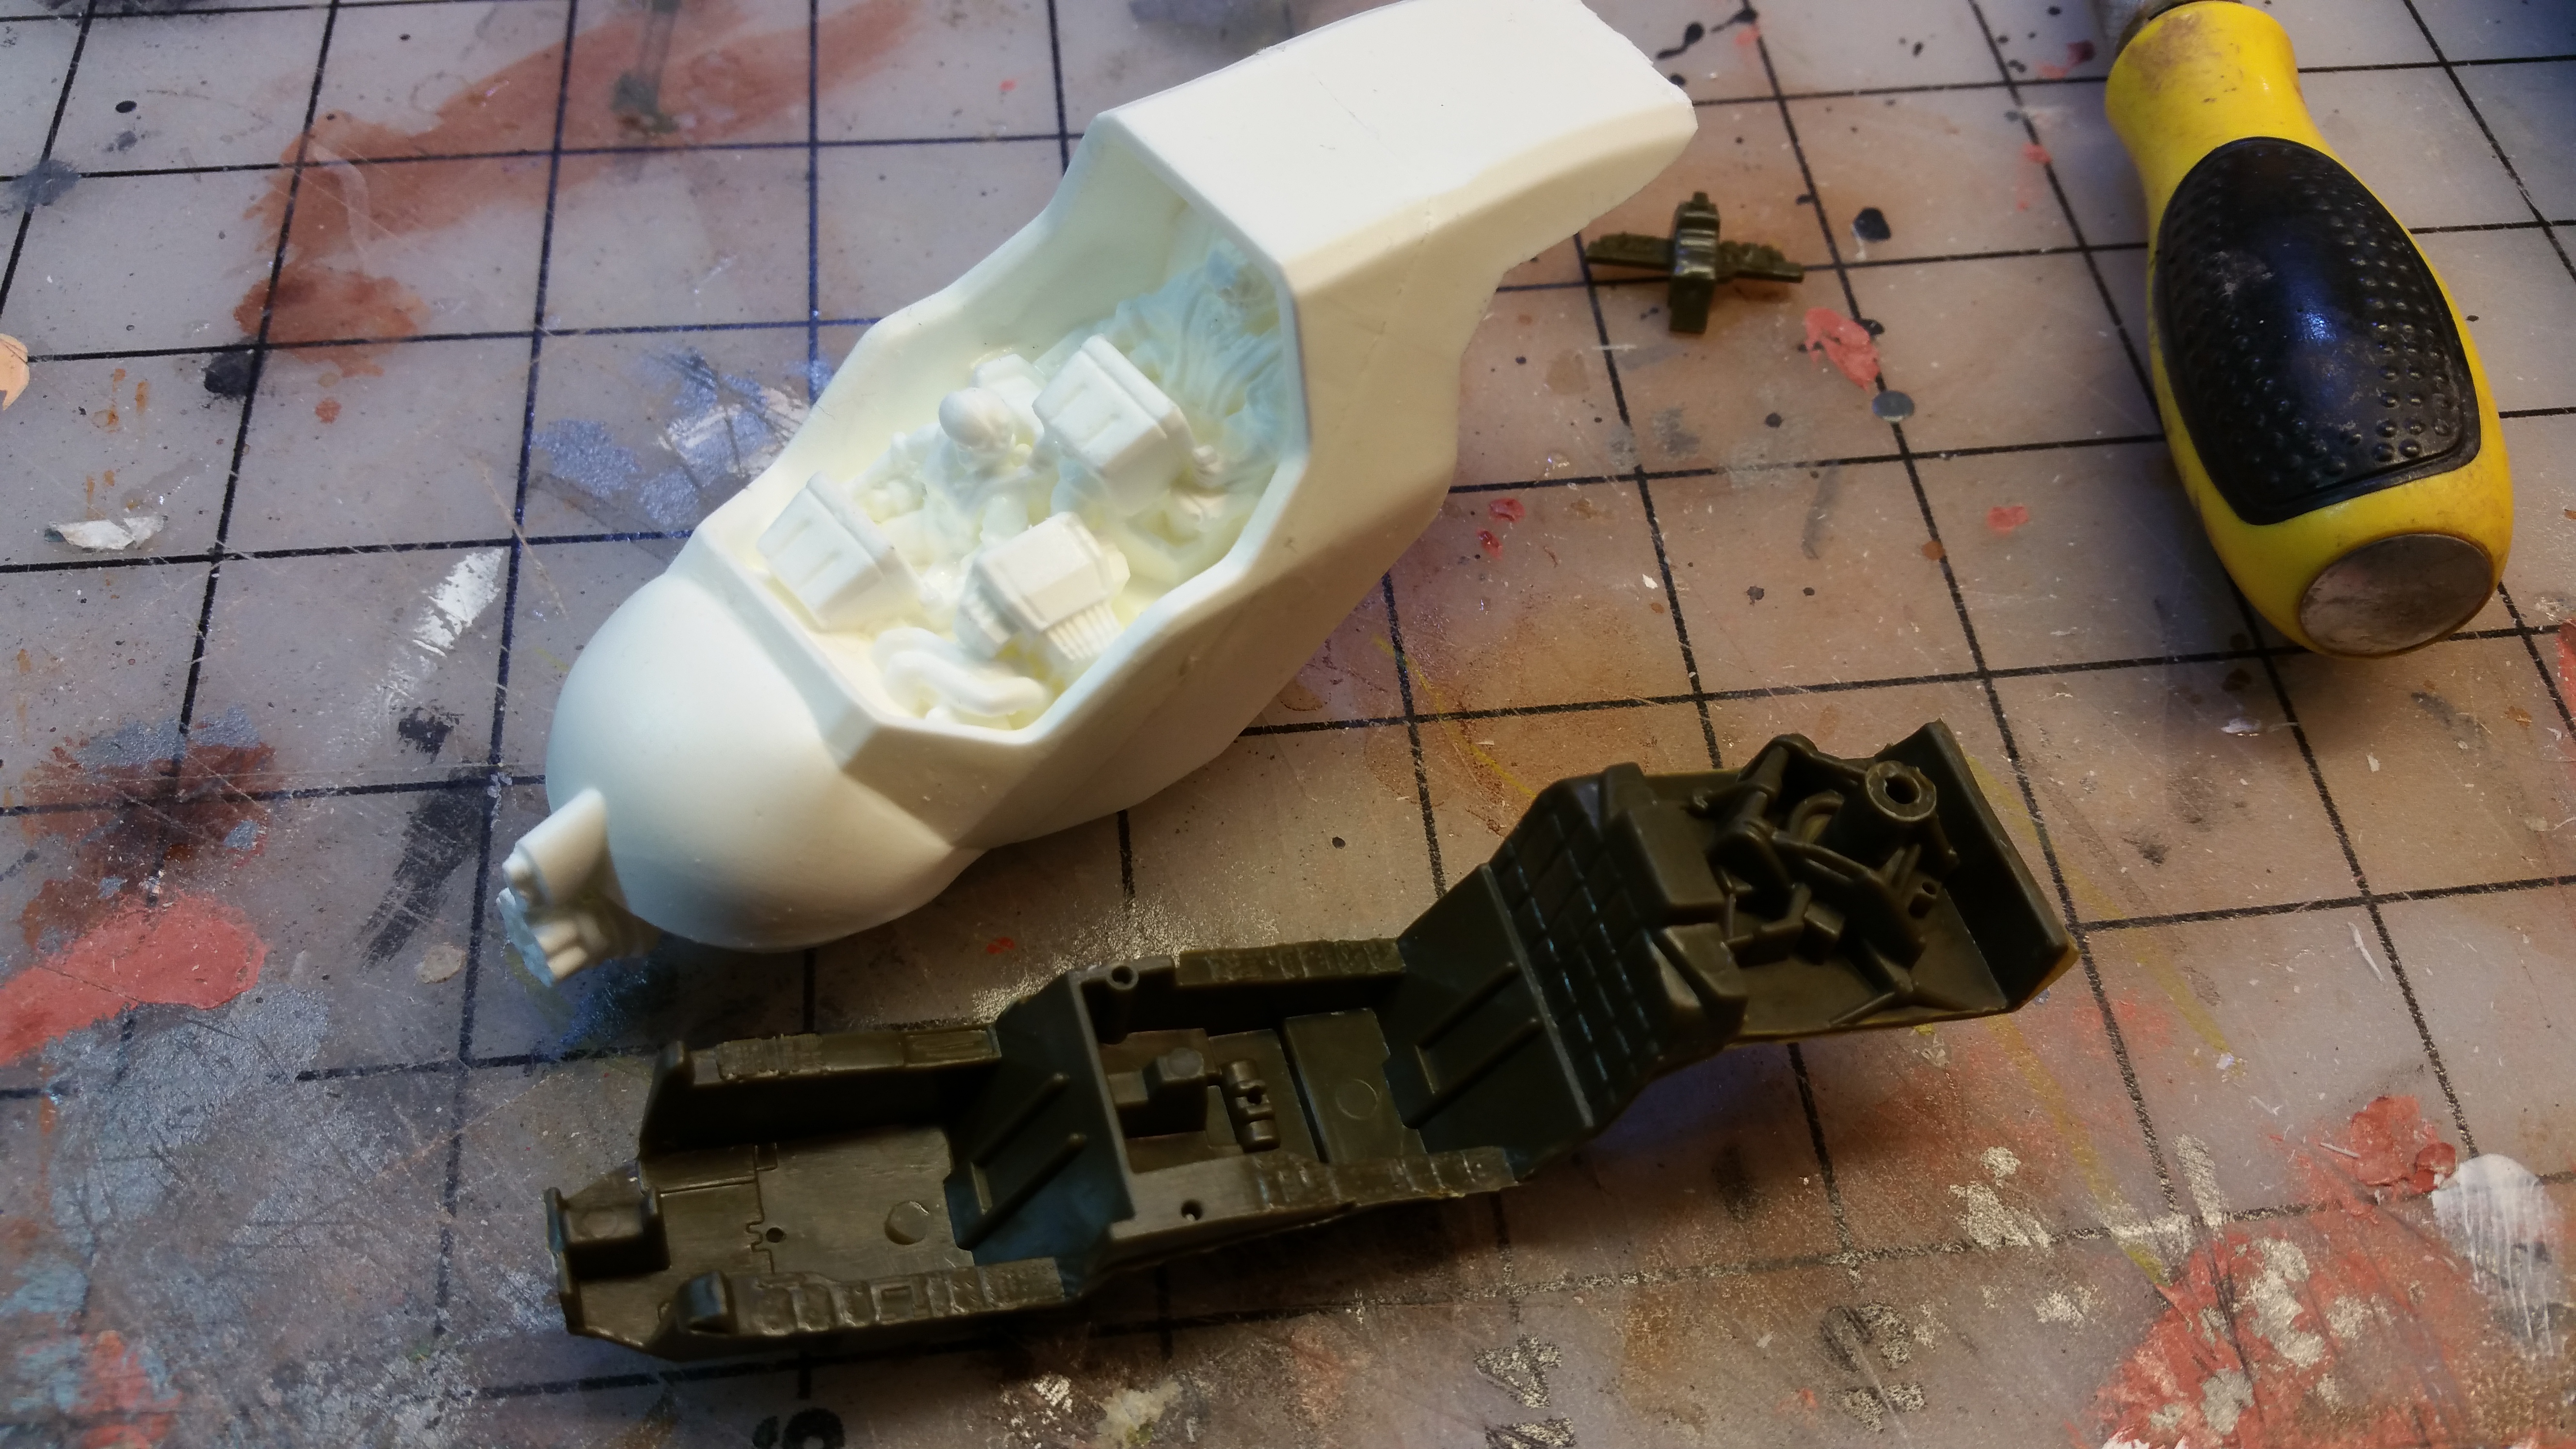
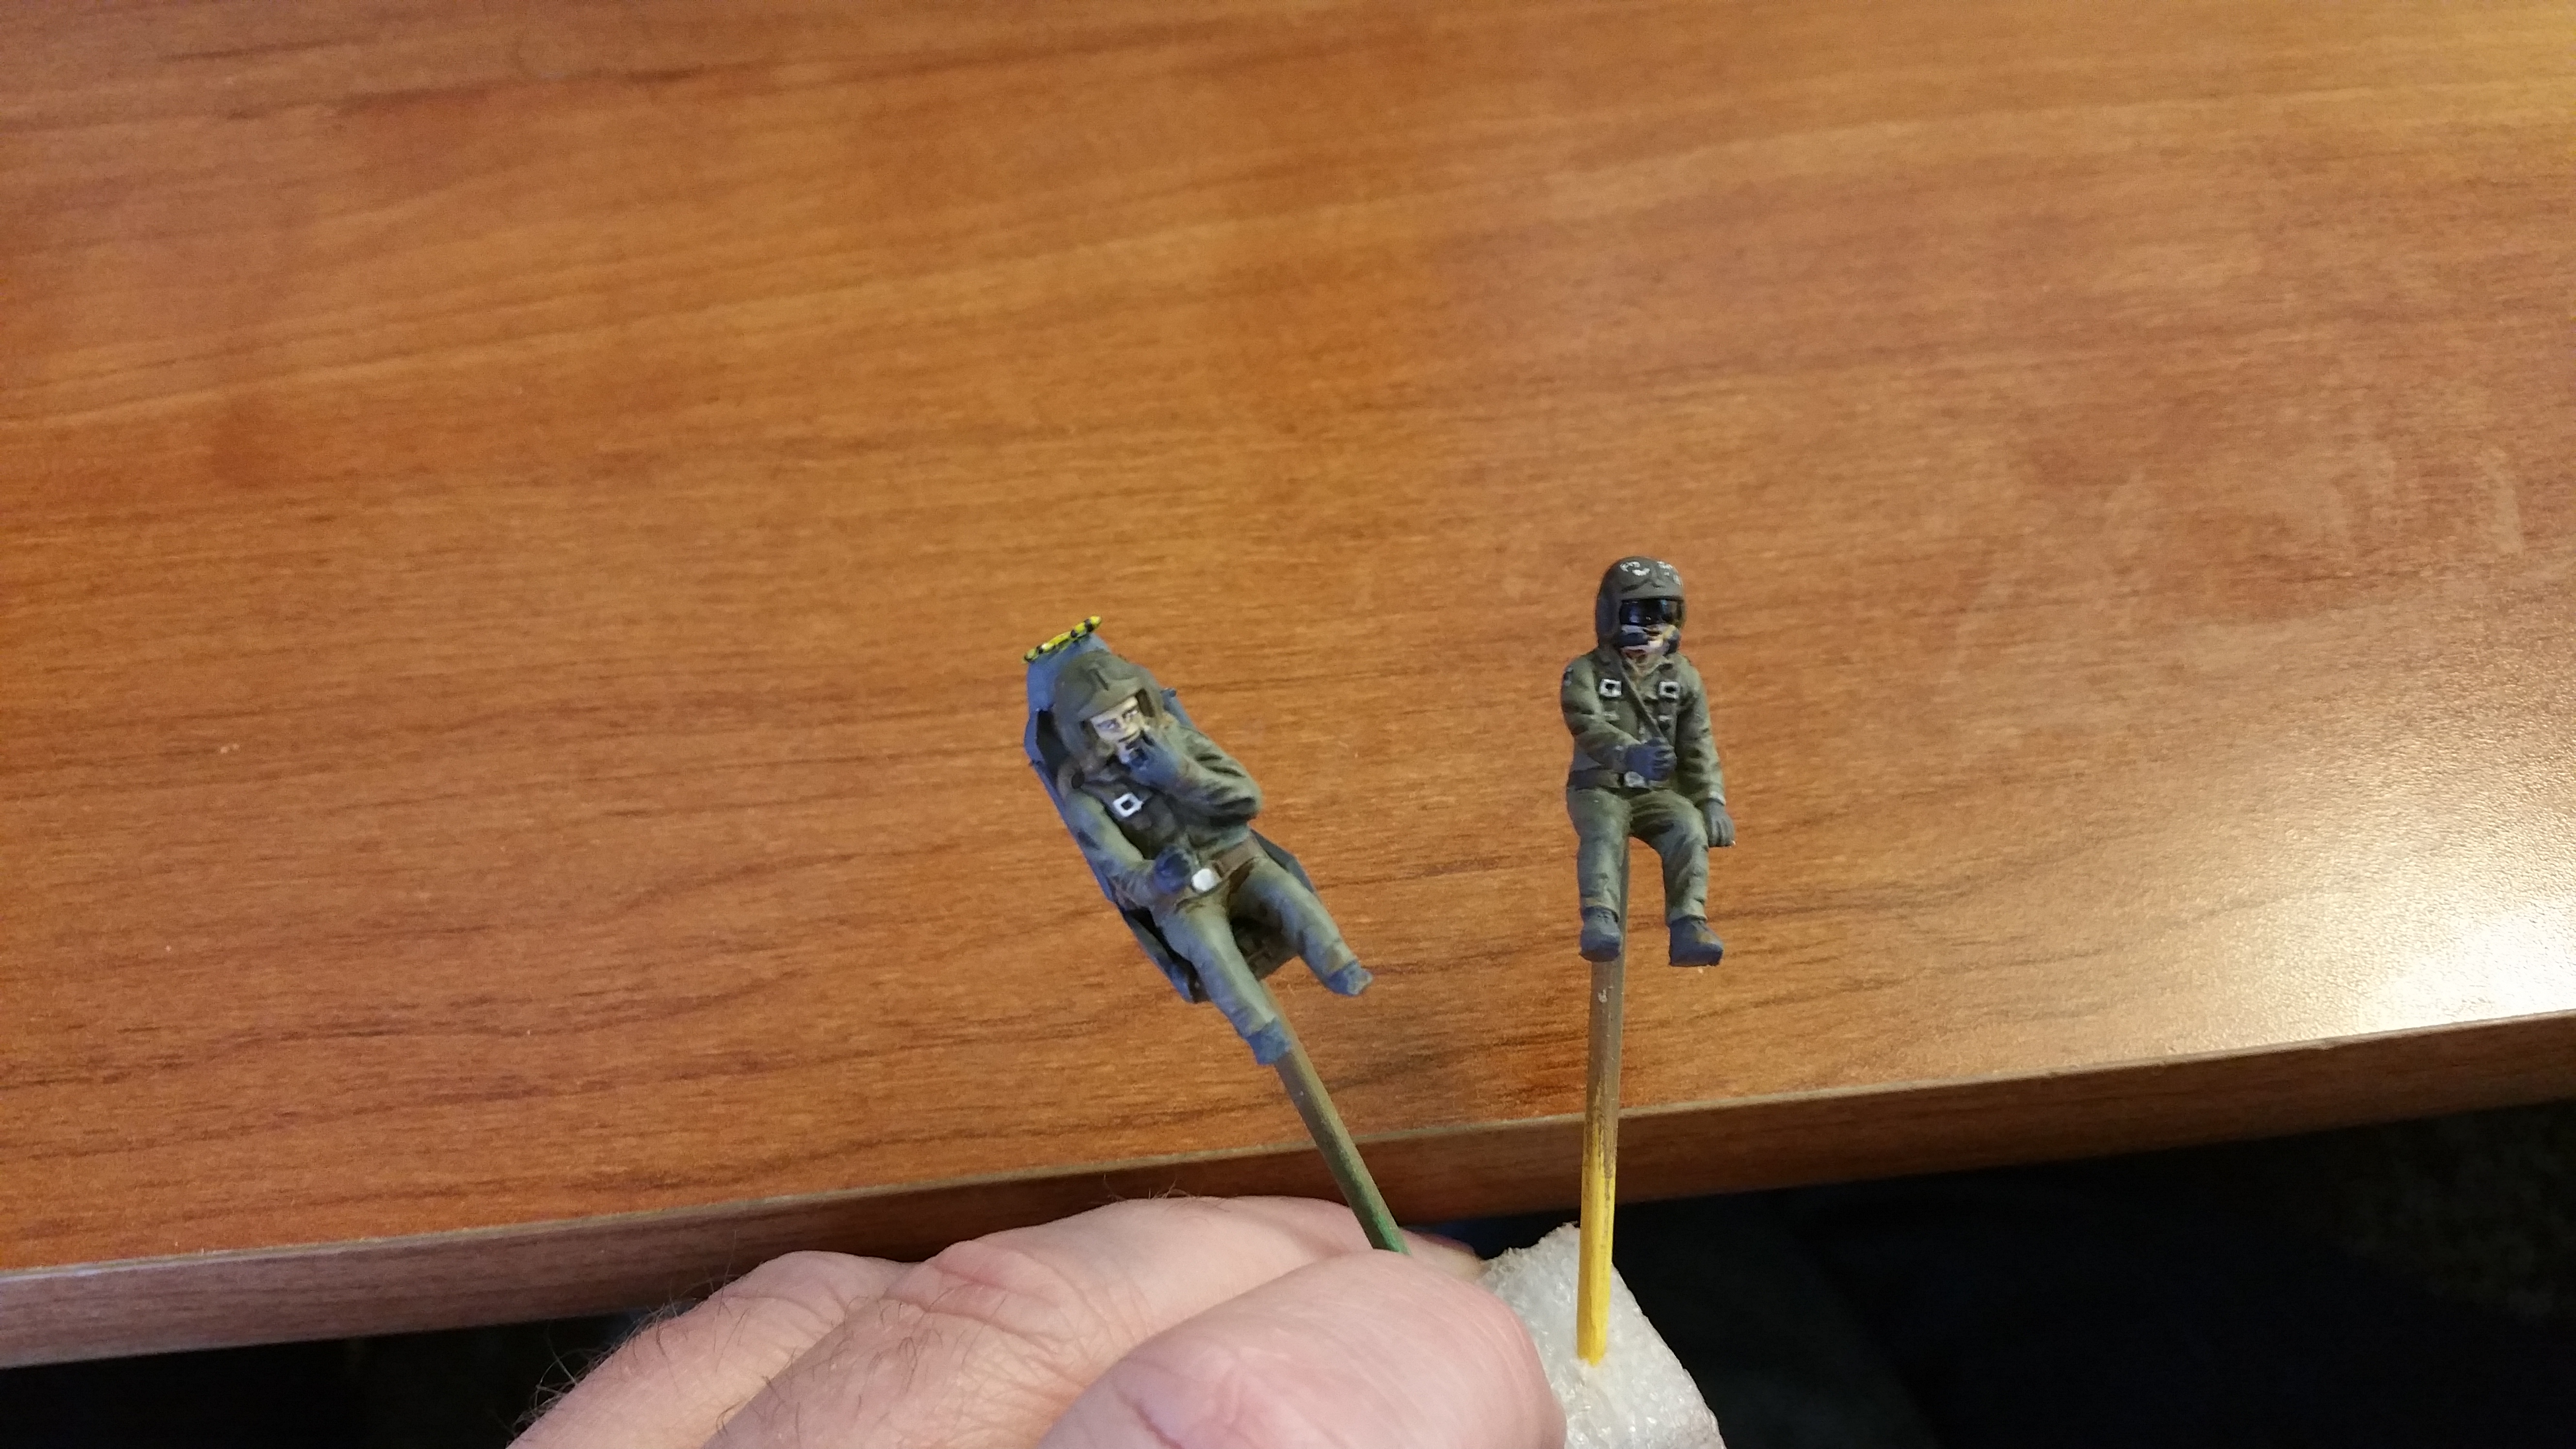
Then we move on to the front half, and I talk through the concepts of what I chose to do for the cockpit. Since I really can’t do things the easy way, I decided I would custom build a cockpit tub using a 1/48 Apache assembly as a base. In the video I talk through the decision making process as I weigh options and look for different methods that would work for what I had in my head.
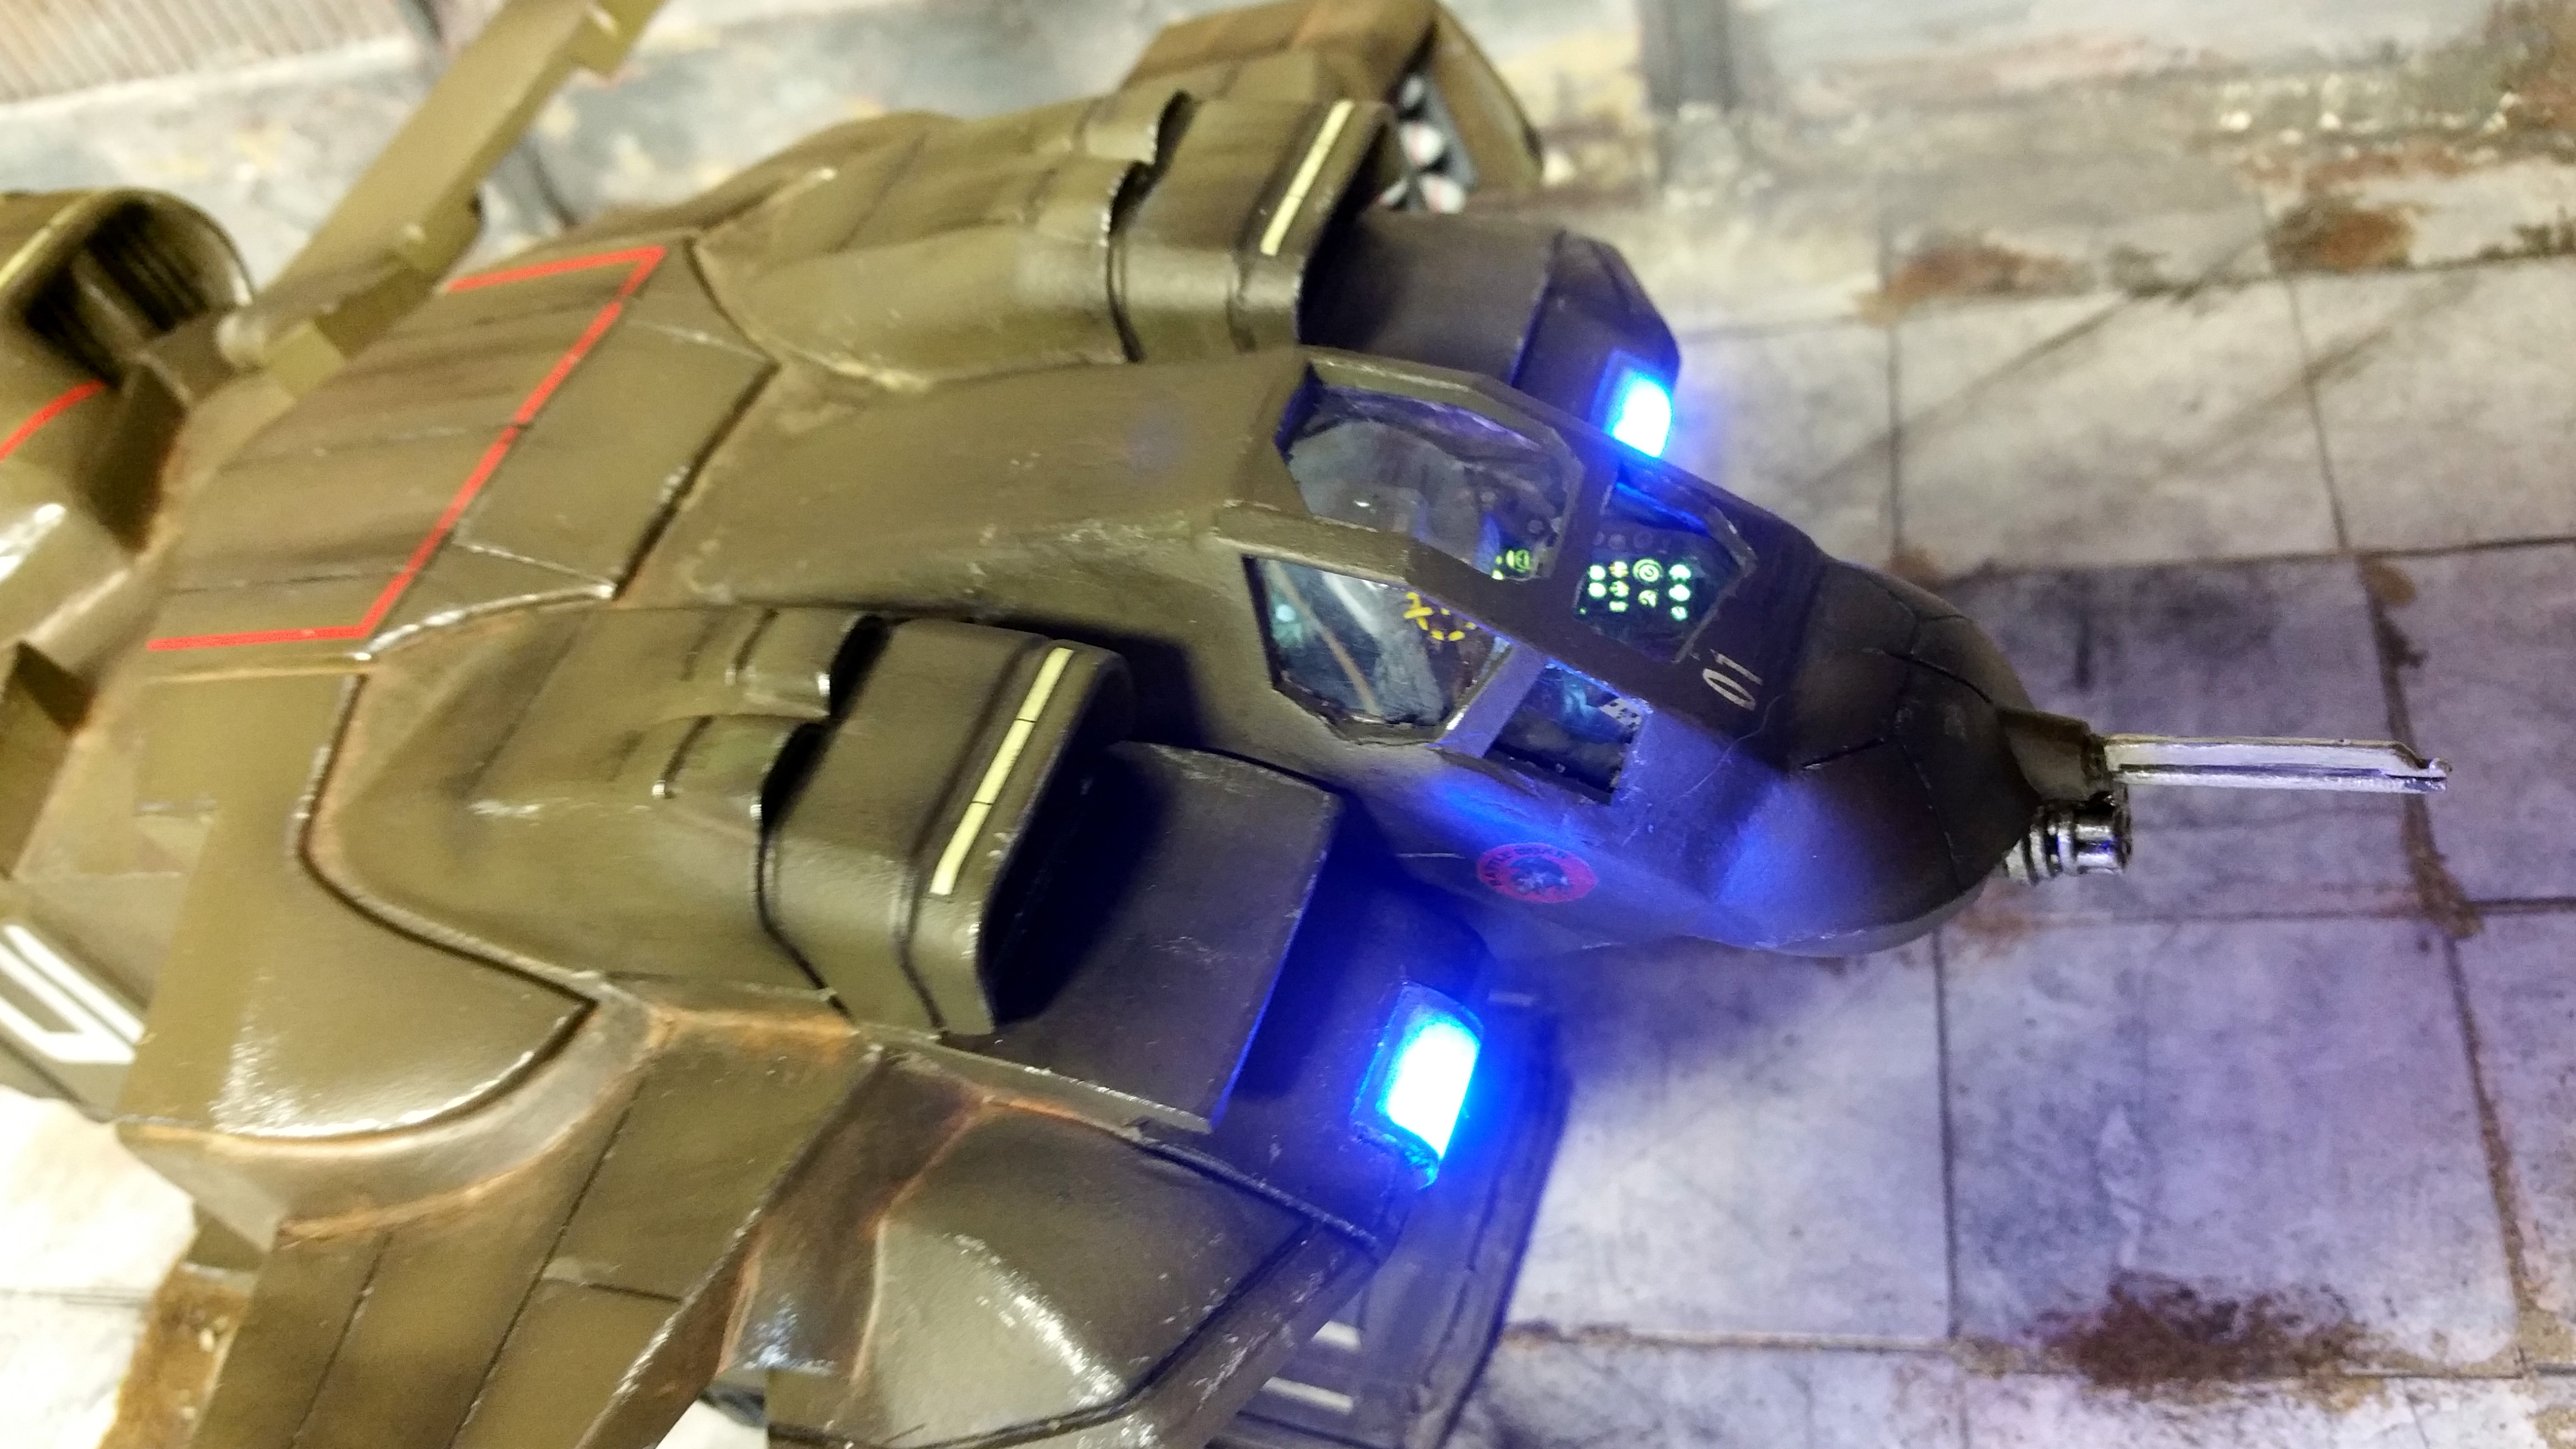
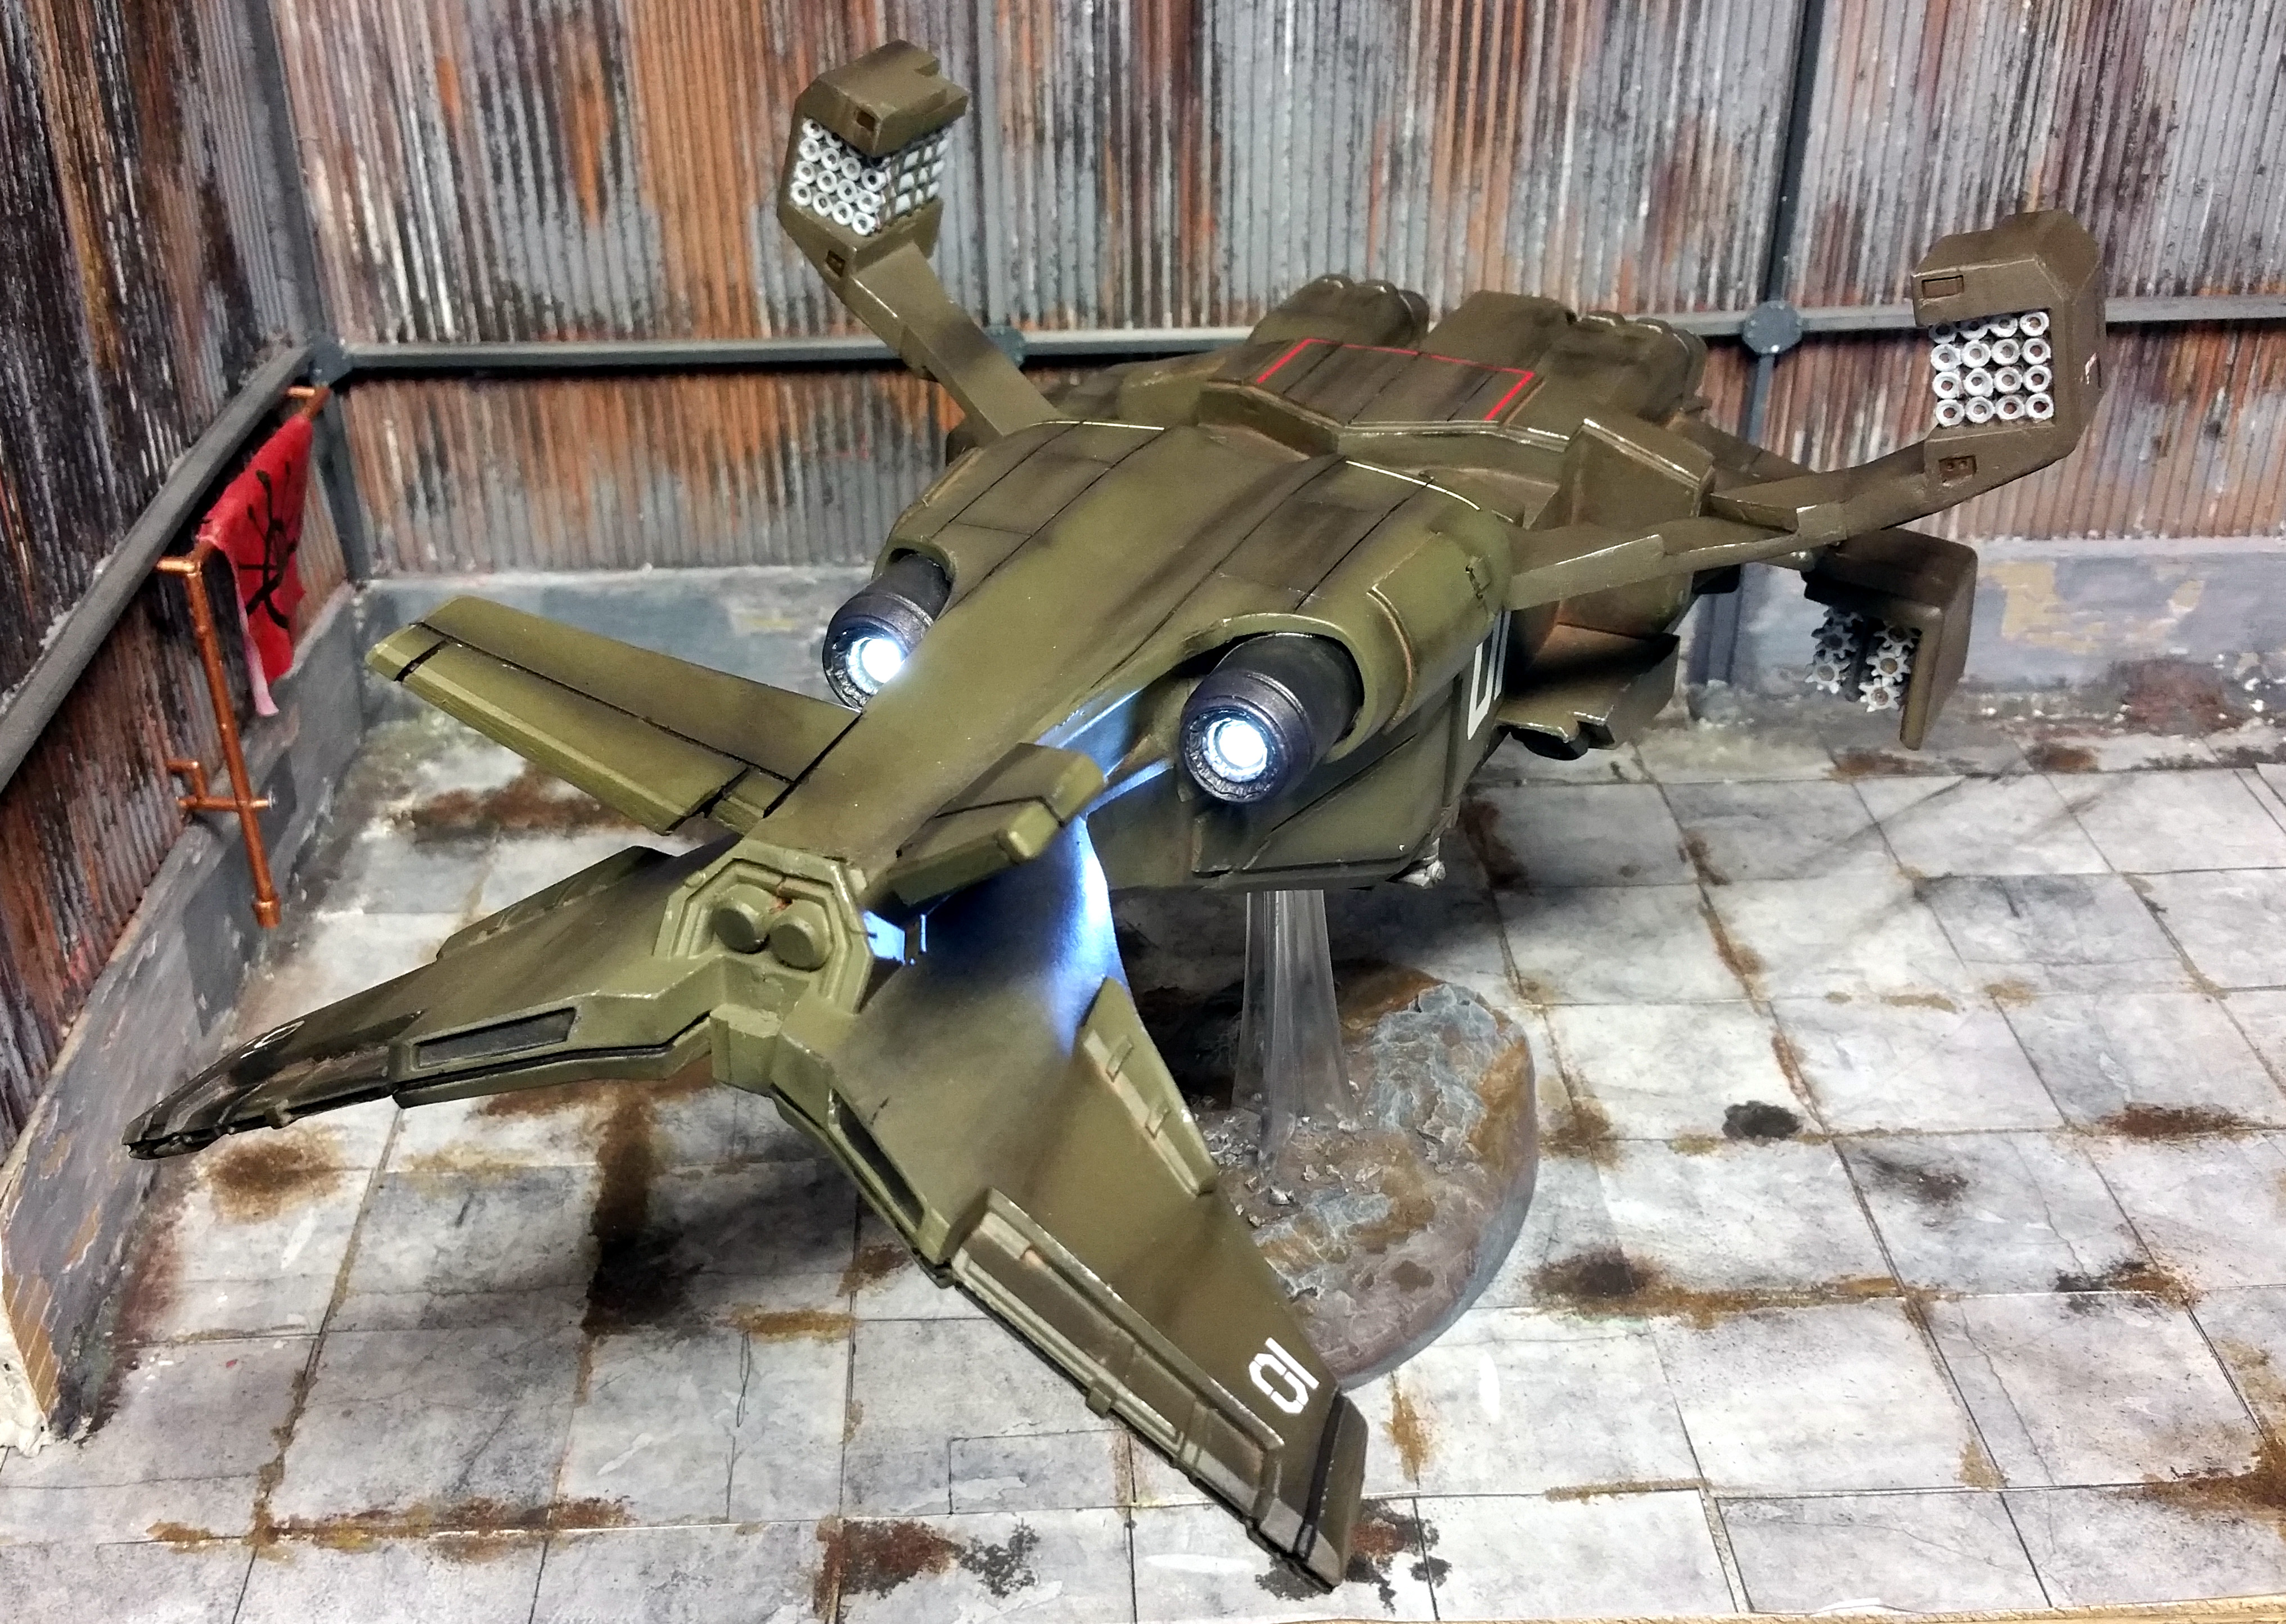
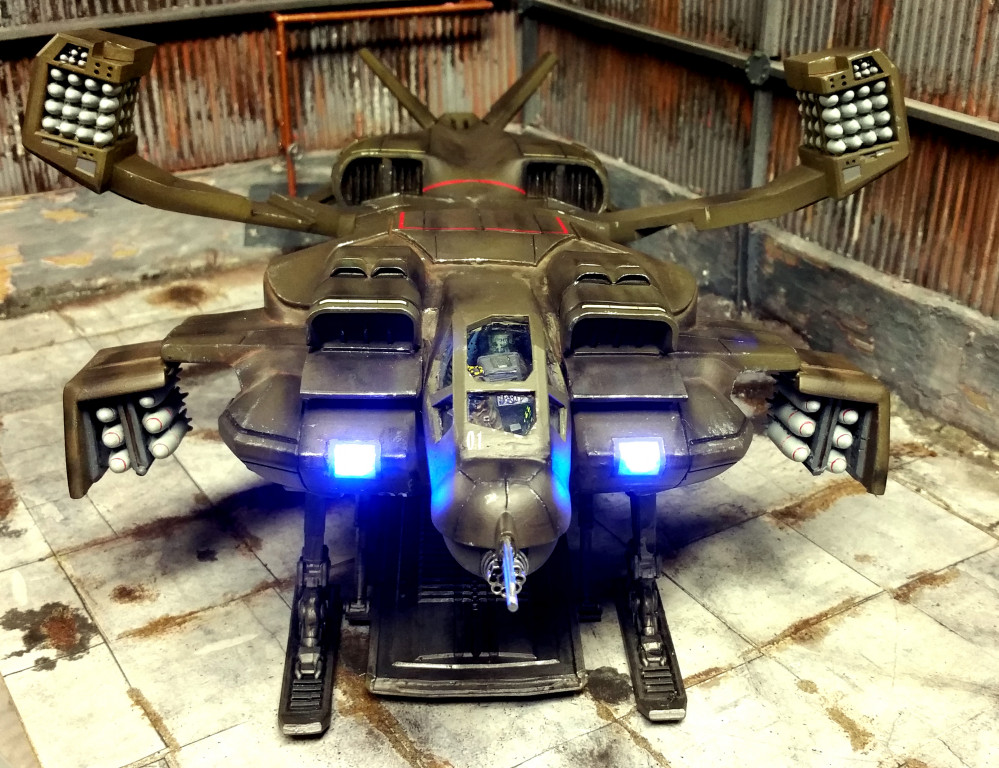
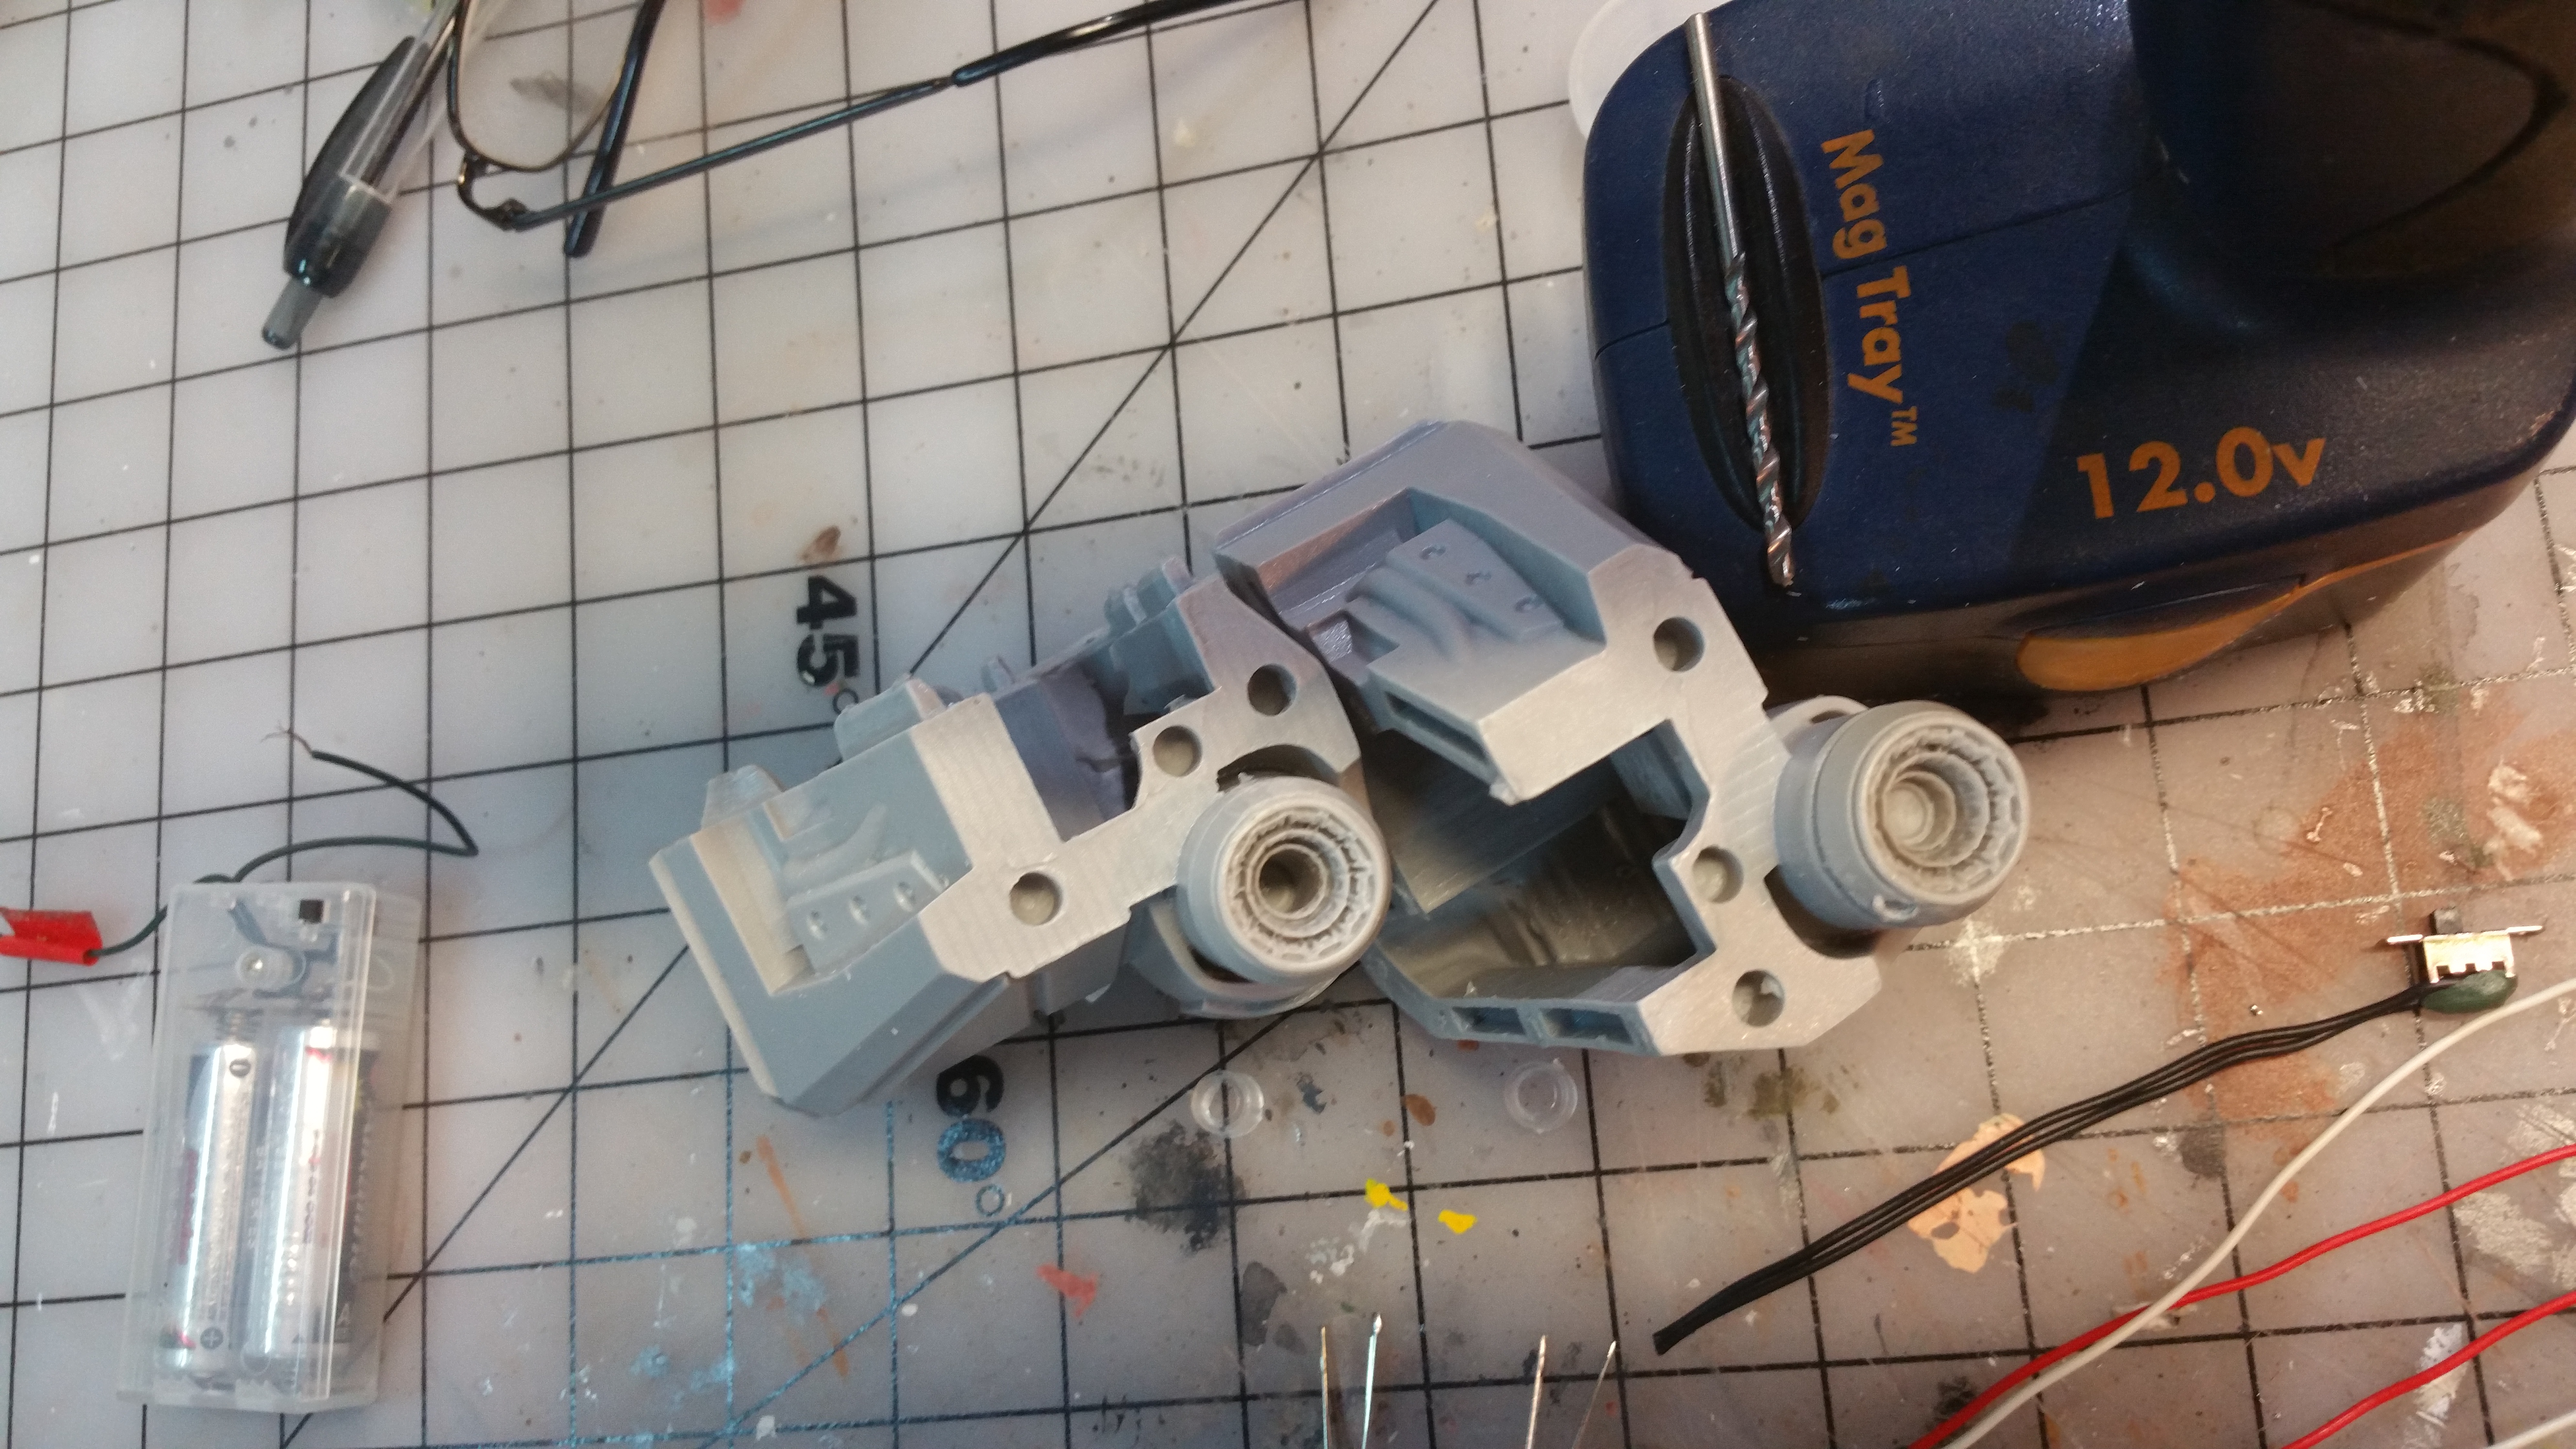
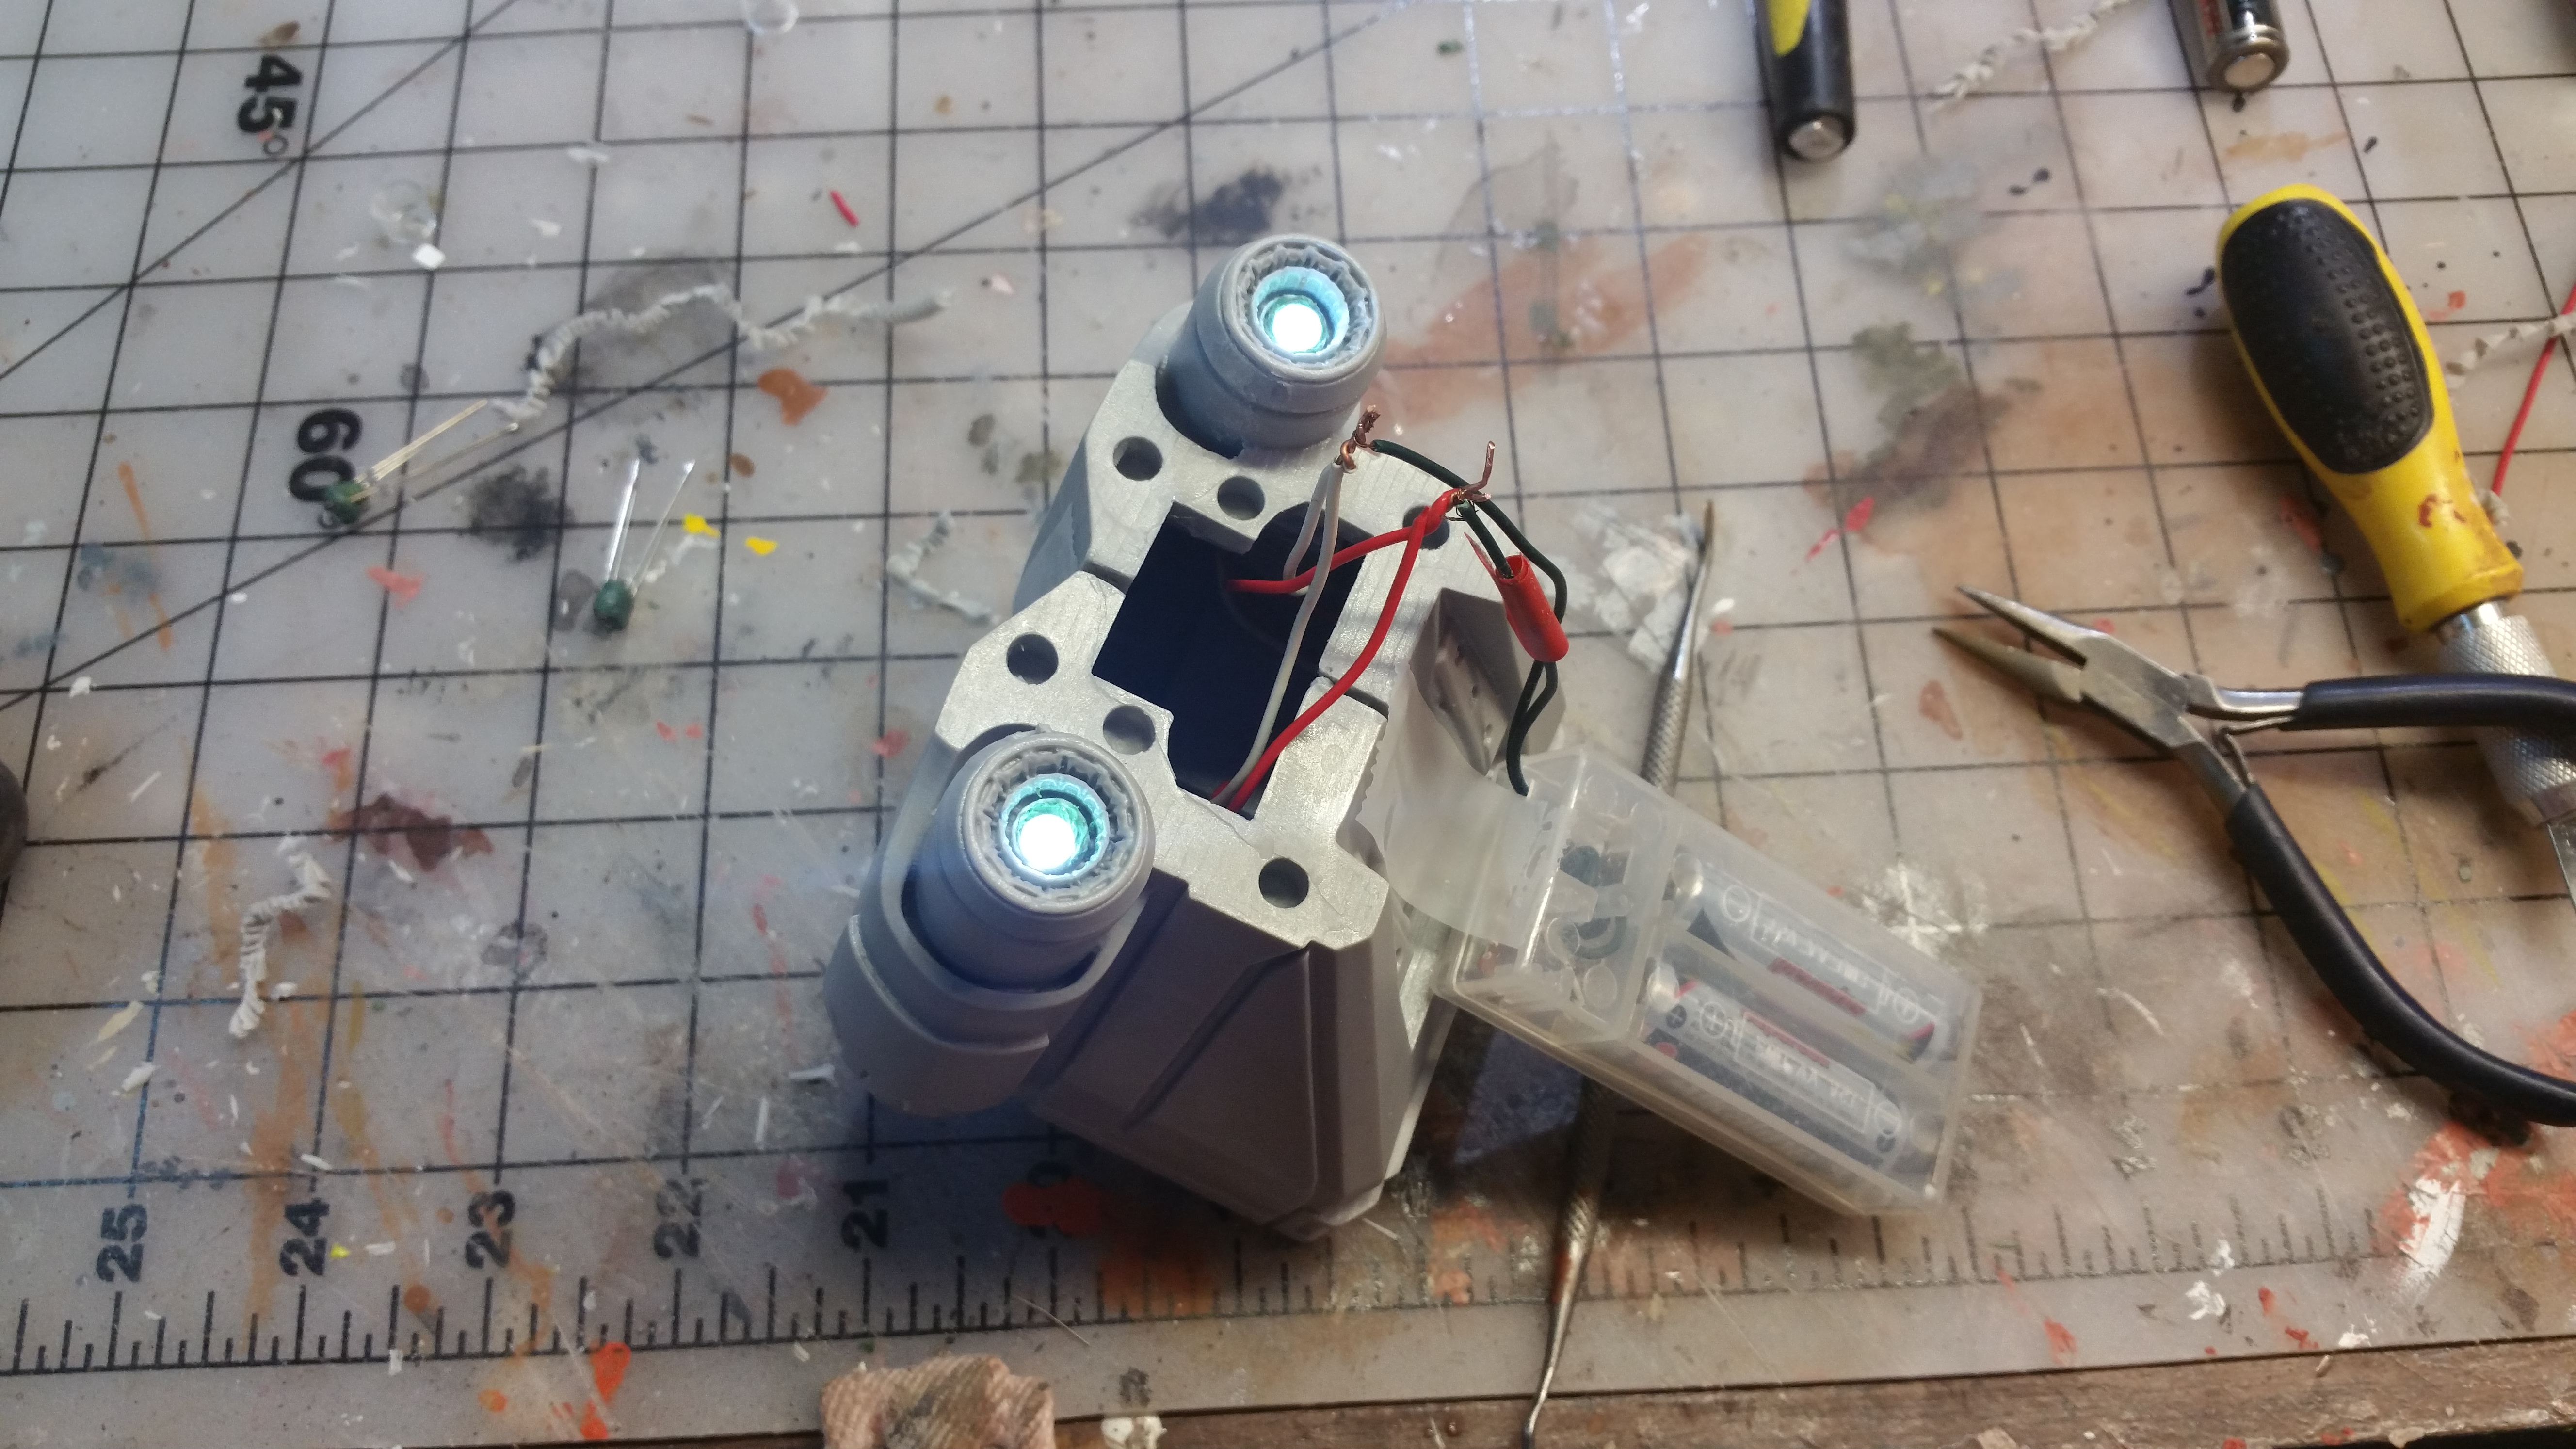
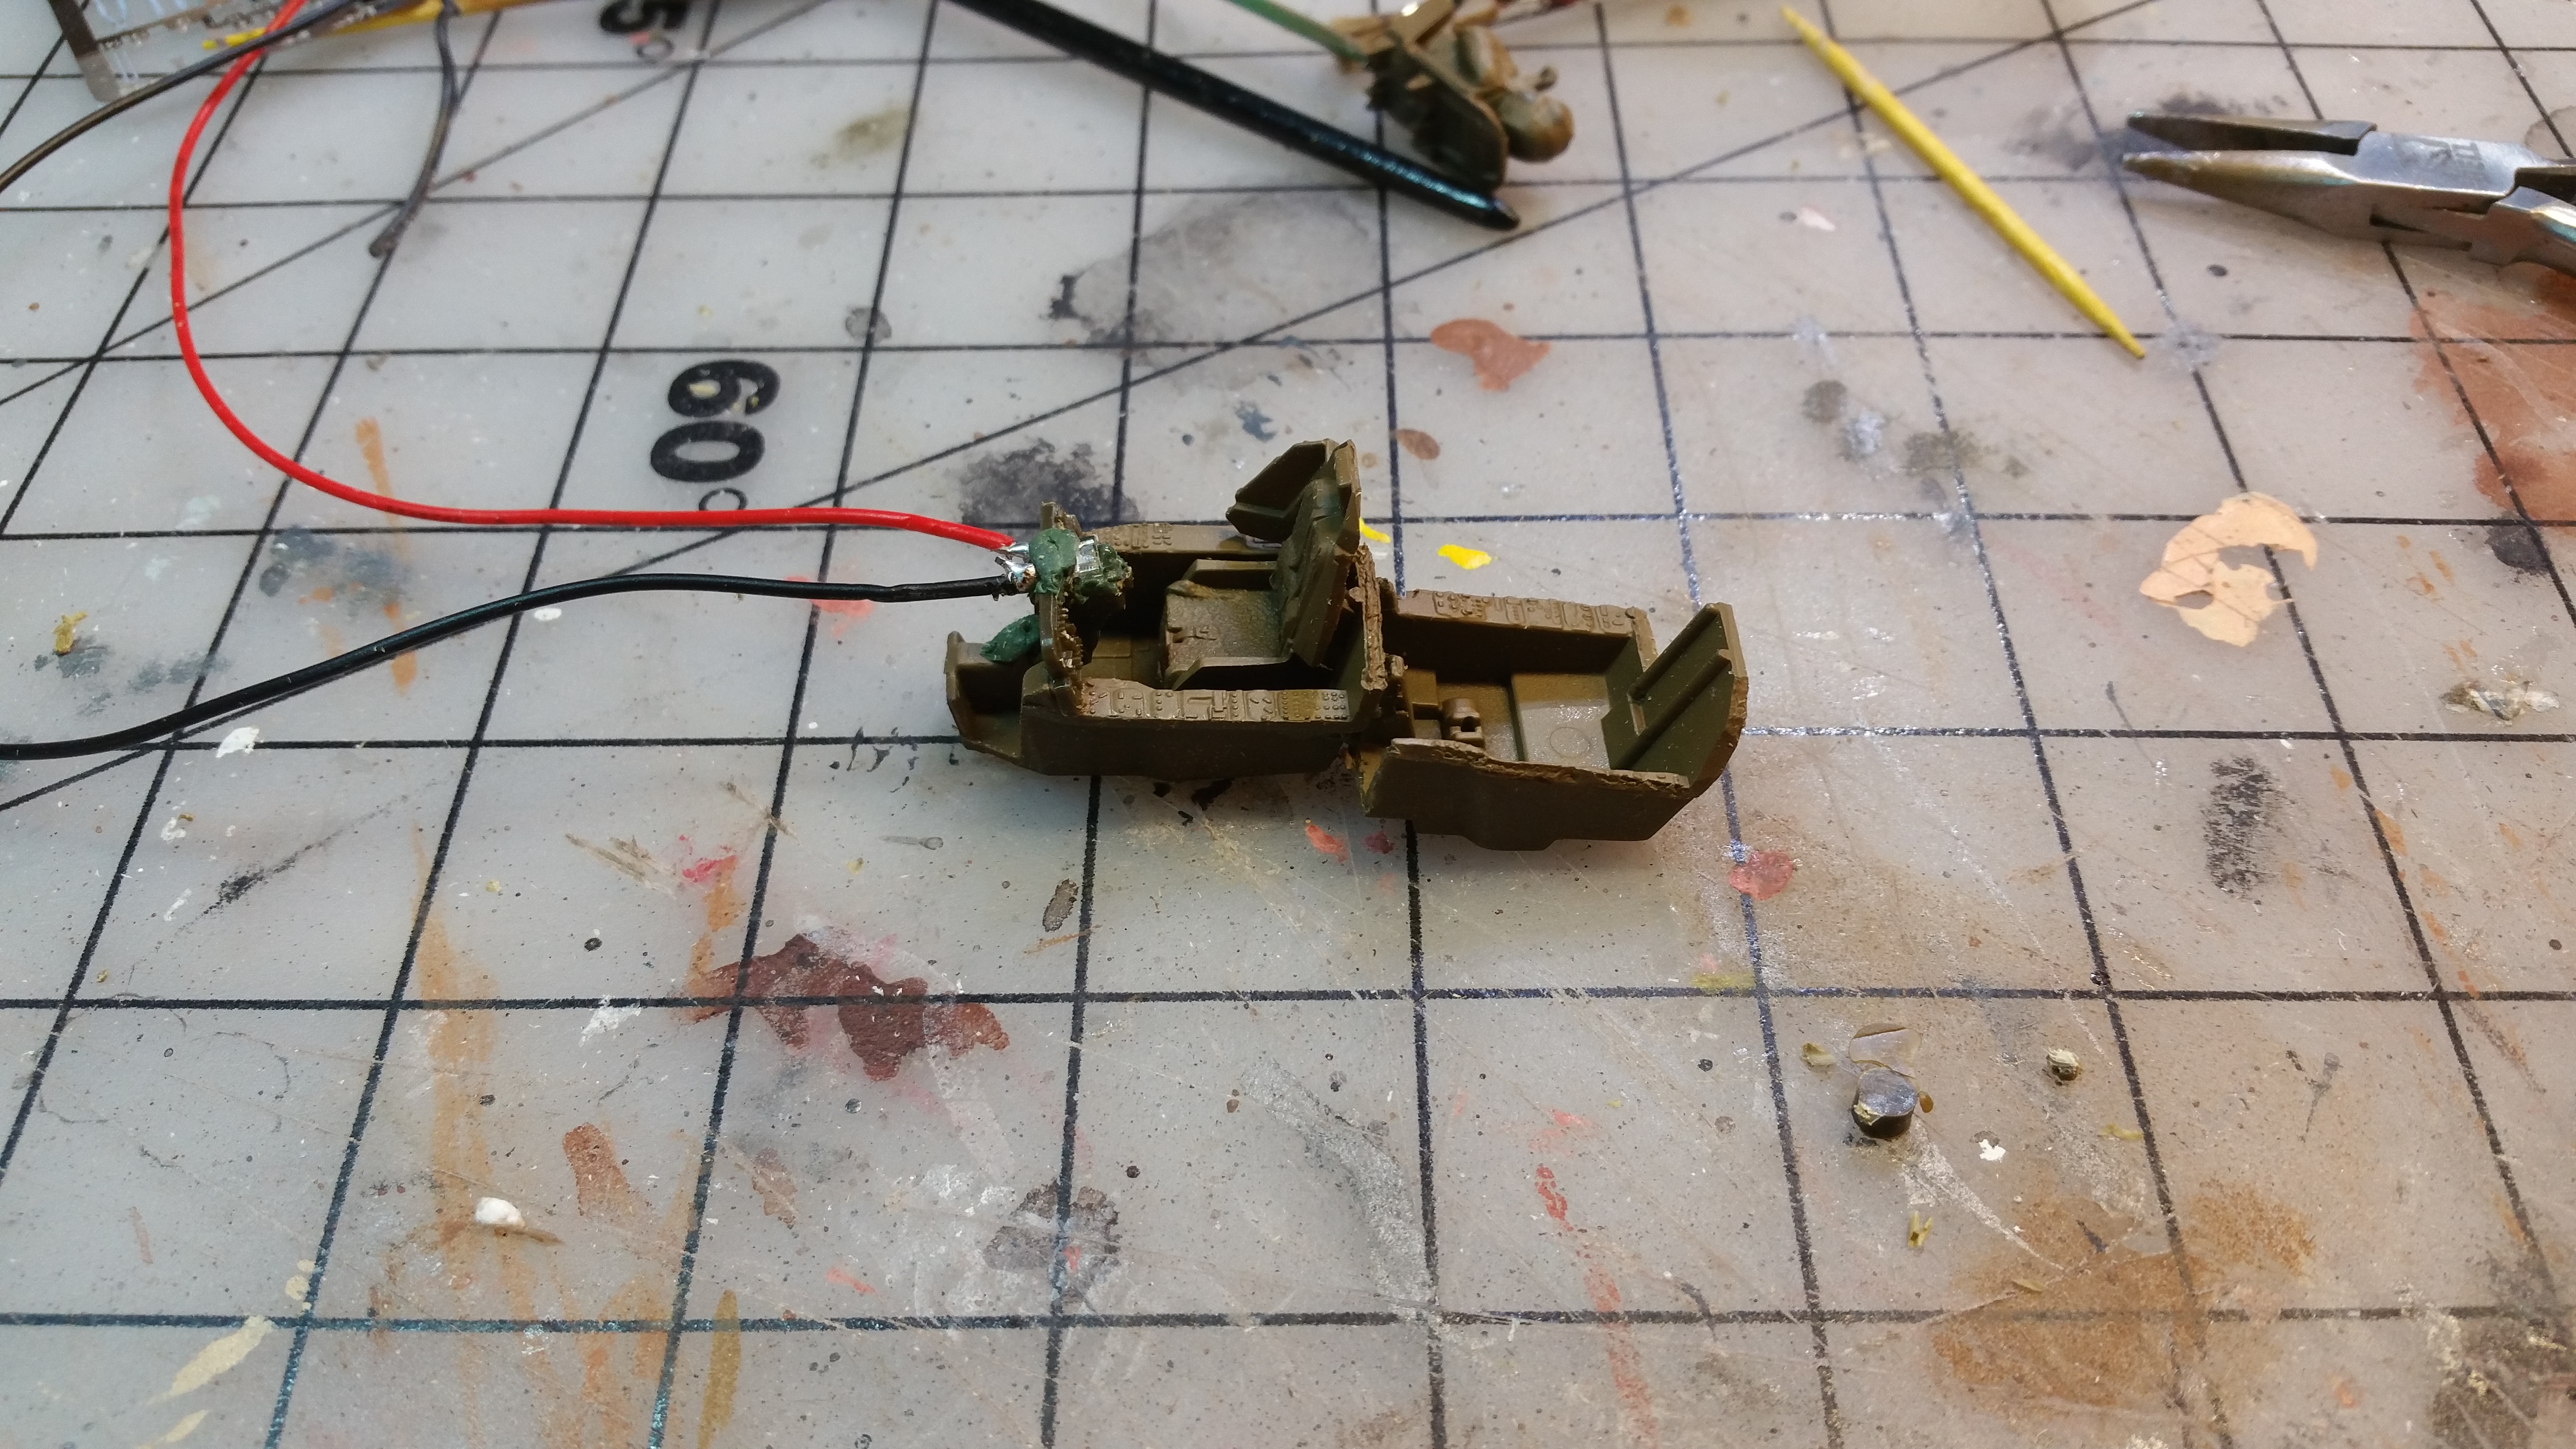
In addition, about this time I drilled out the forward lights, and installed paired 1.8 mm blue leds. A little greenstuff later and the housing is resculpted.
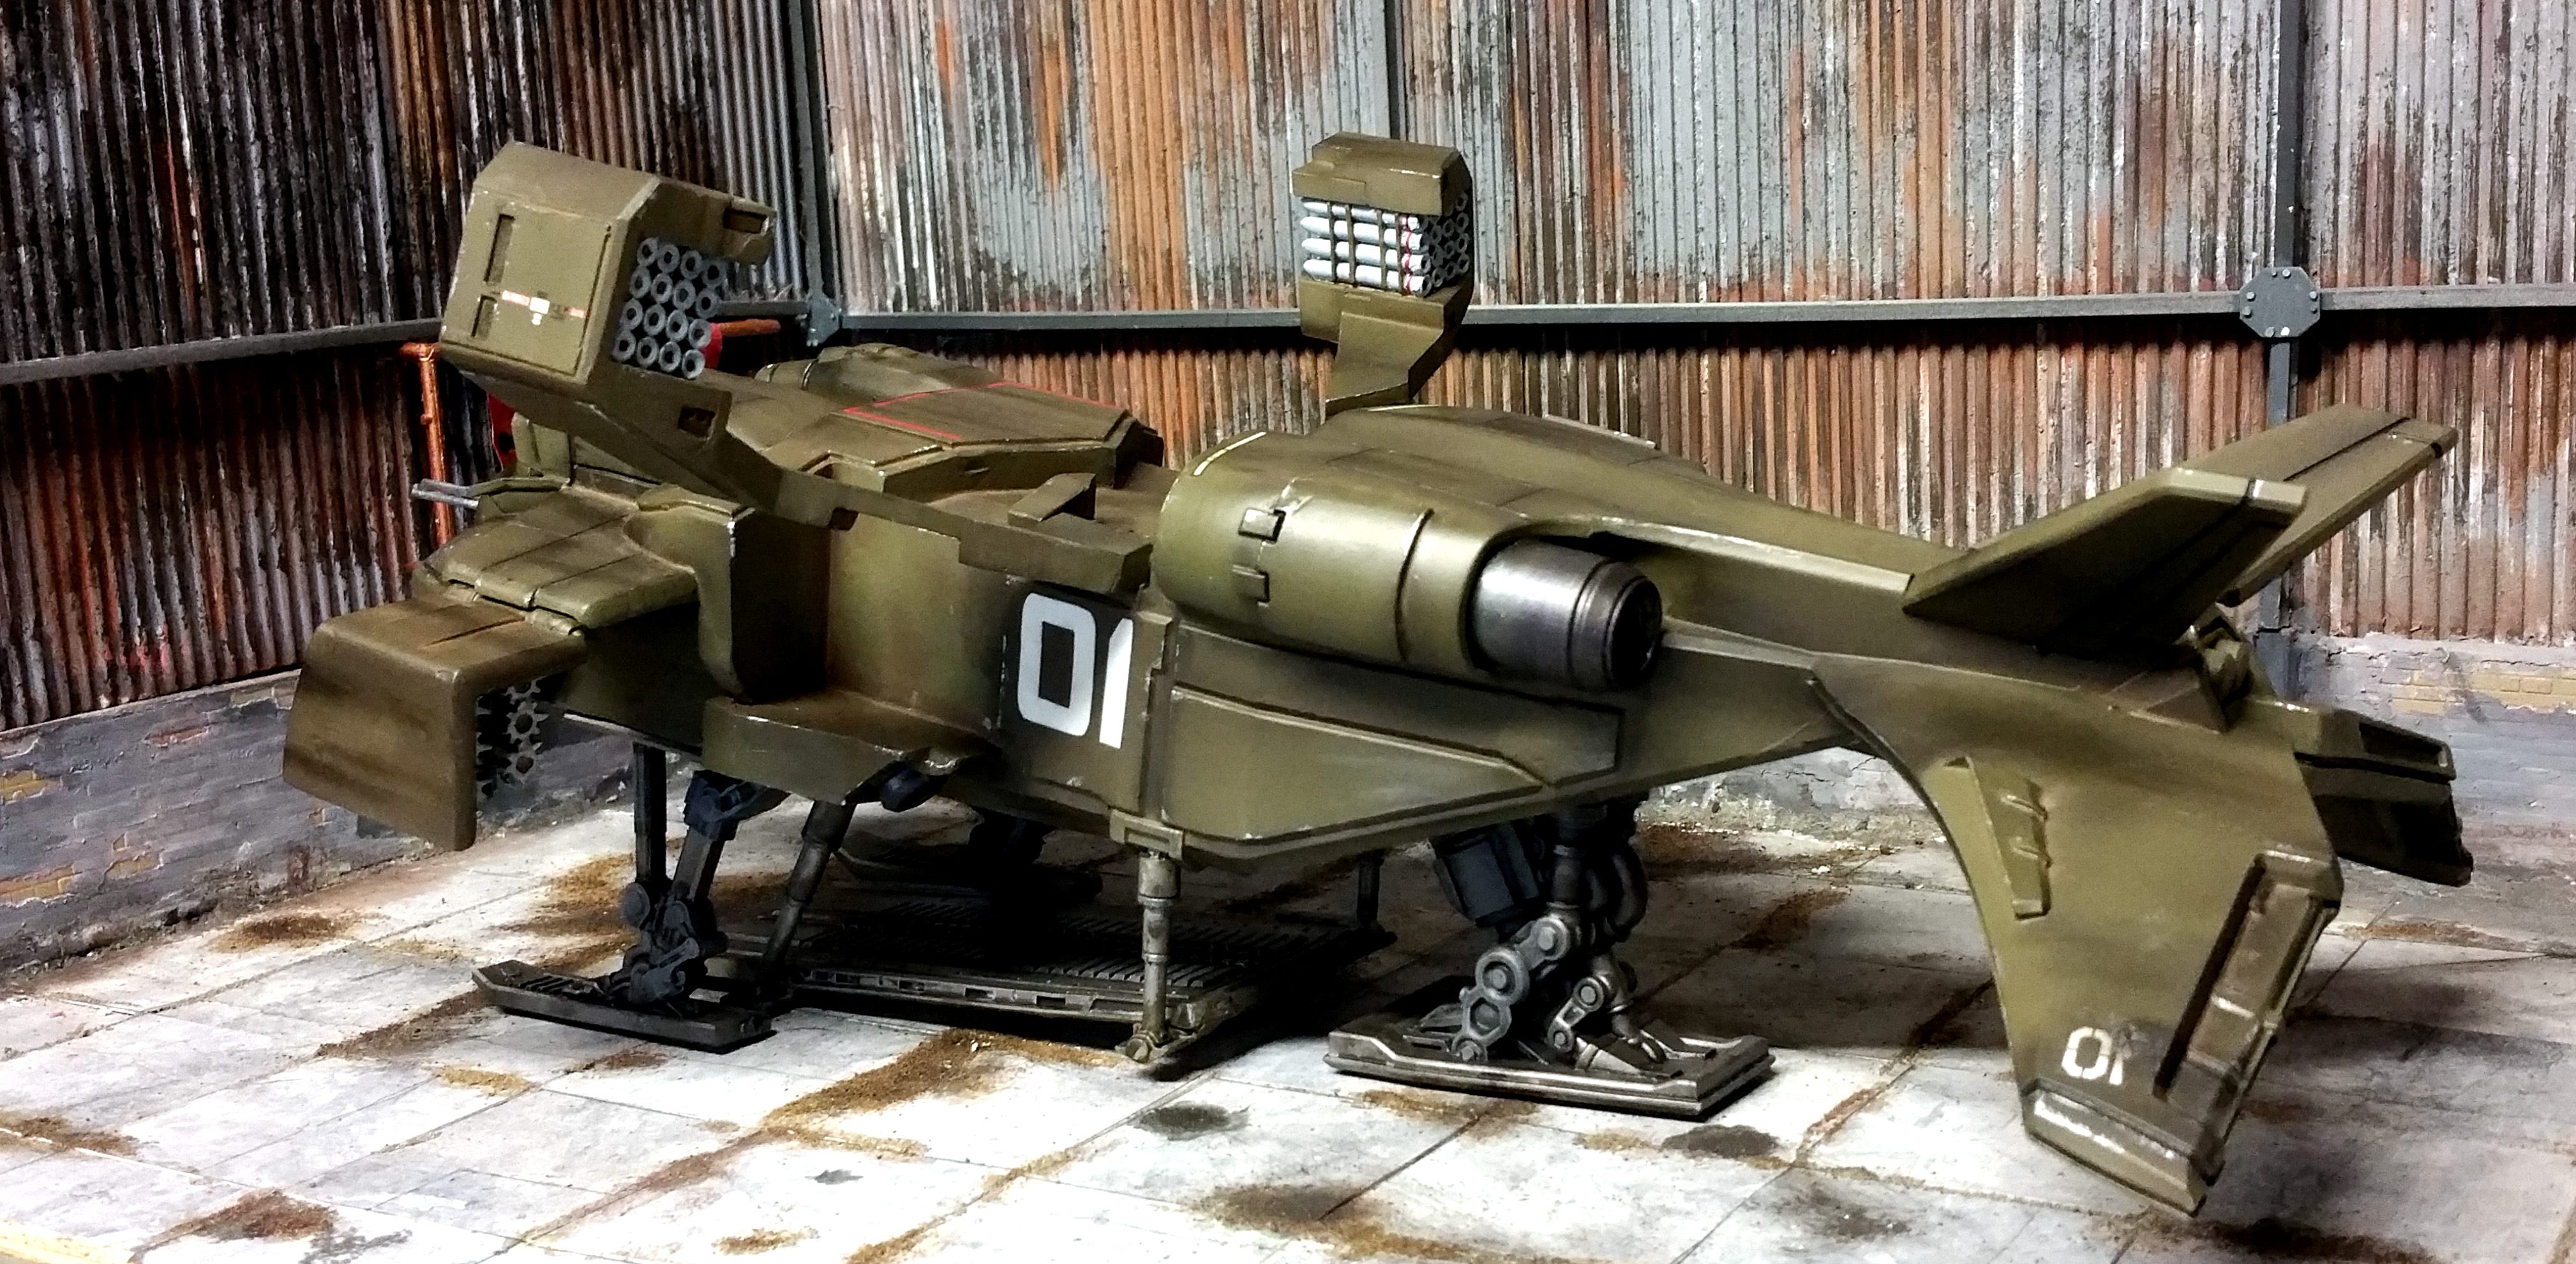
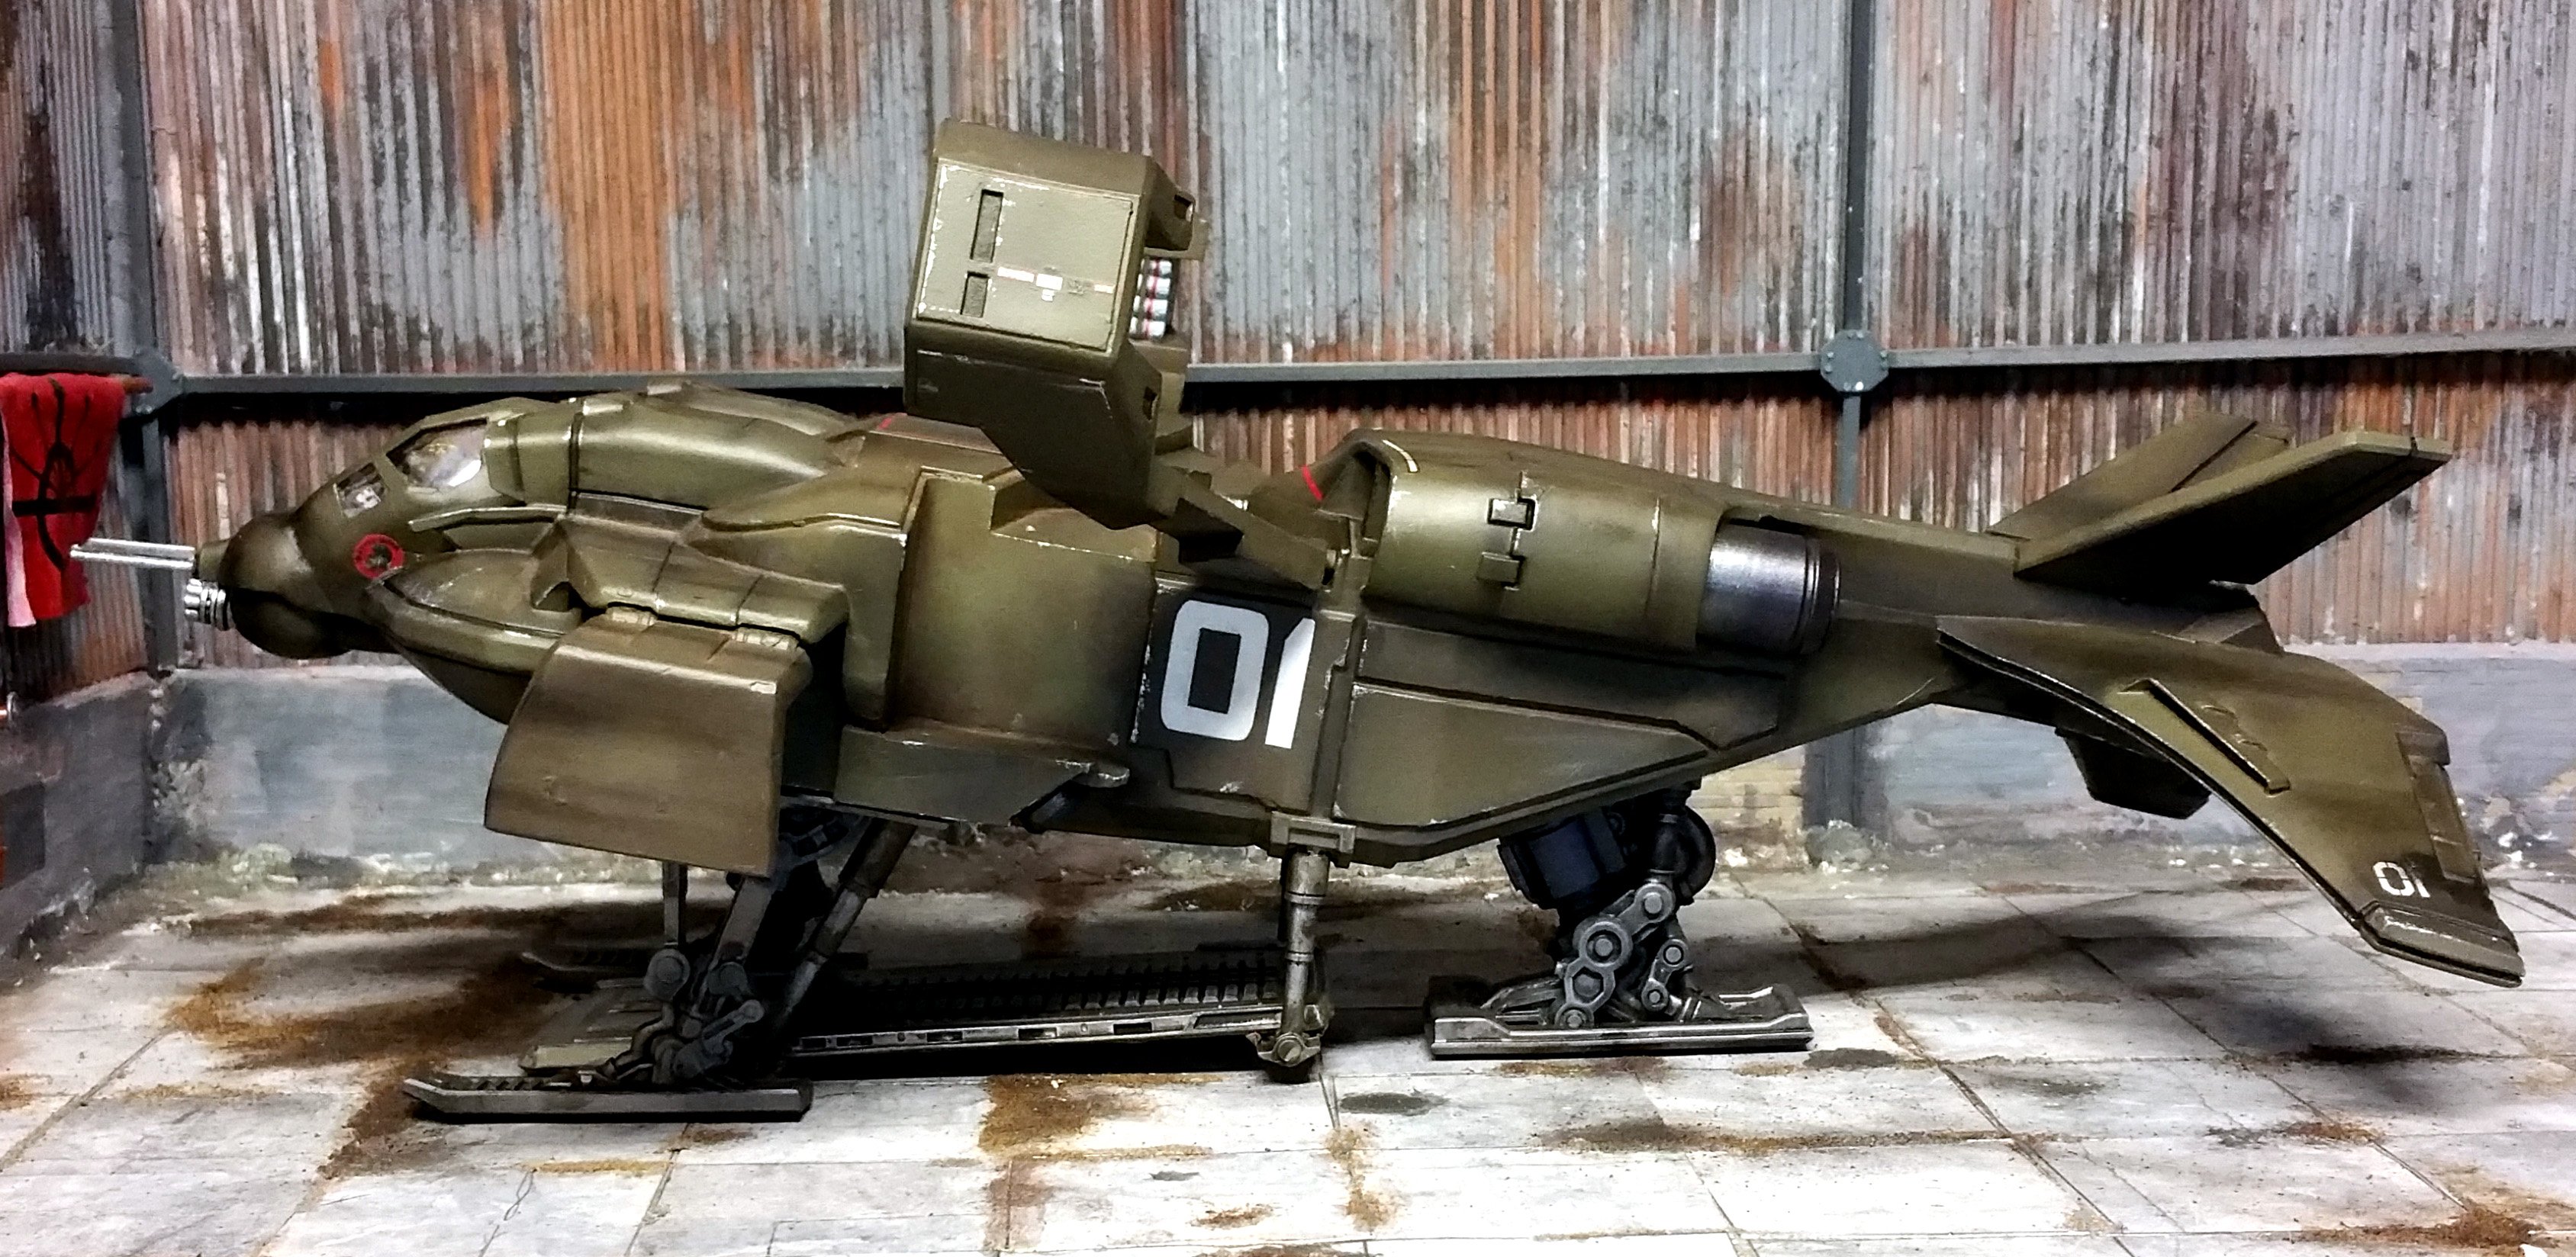
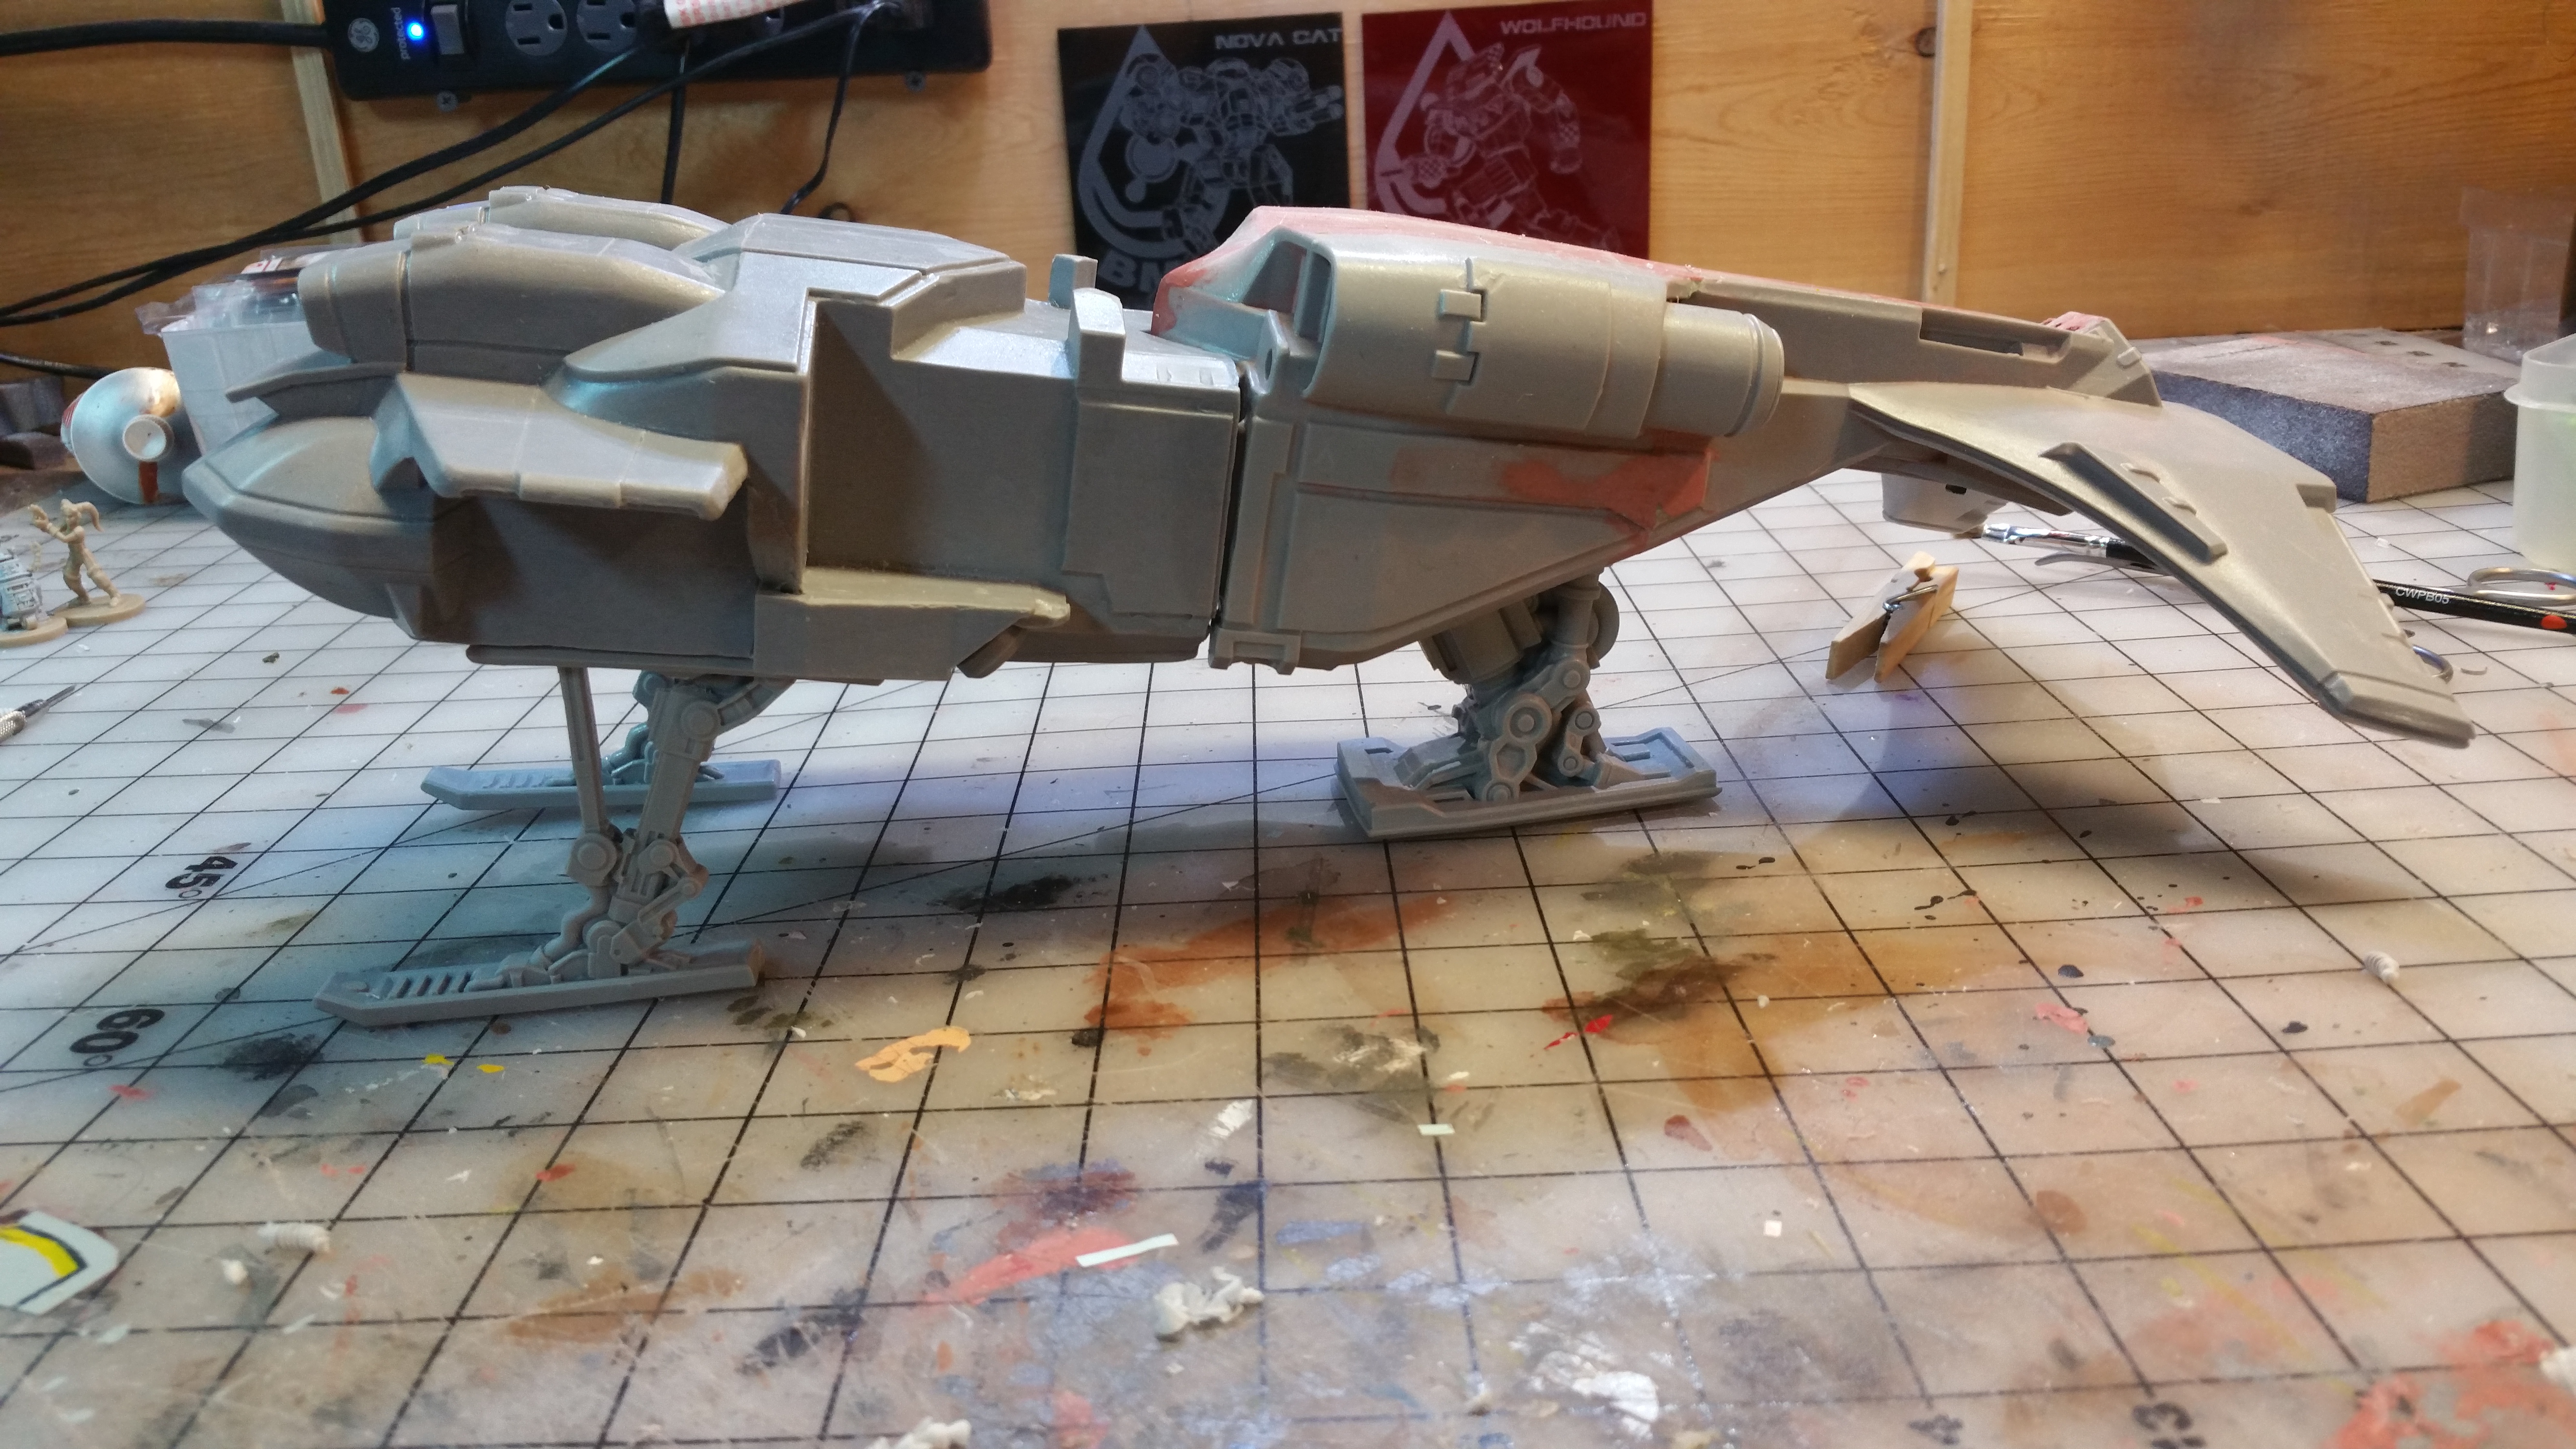
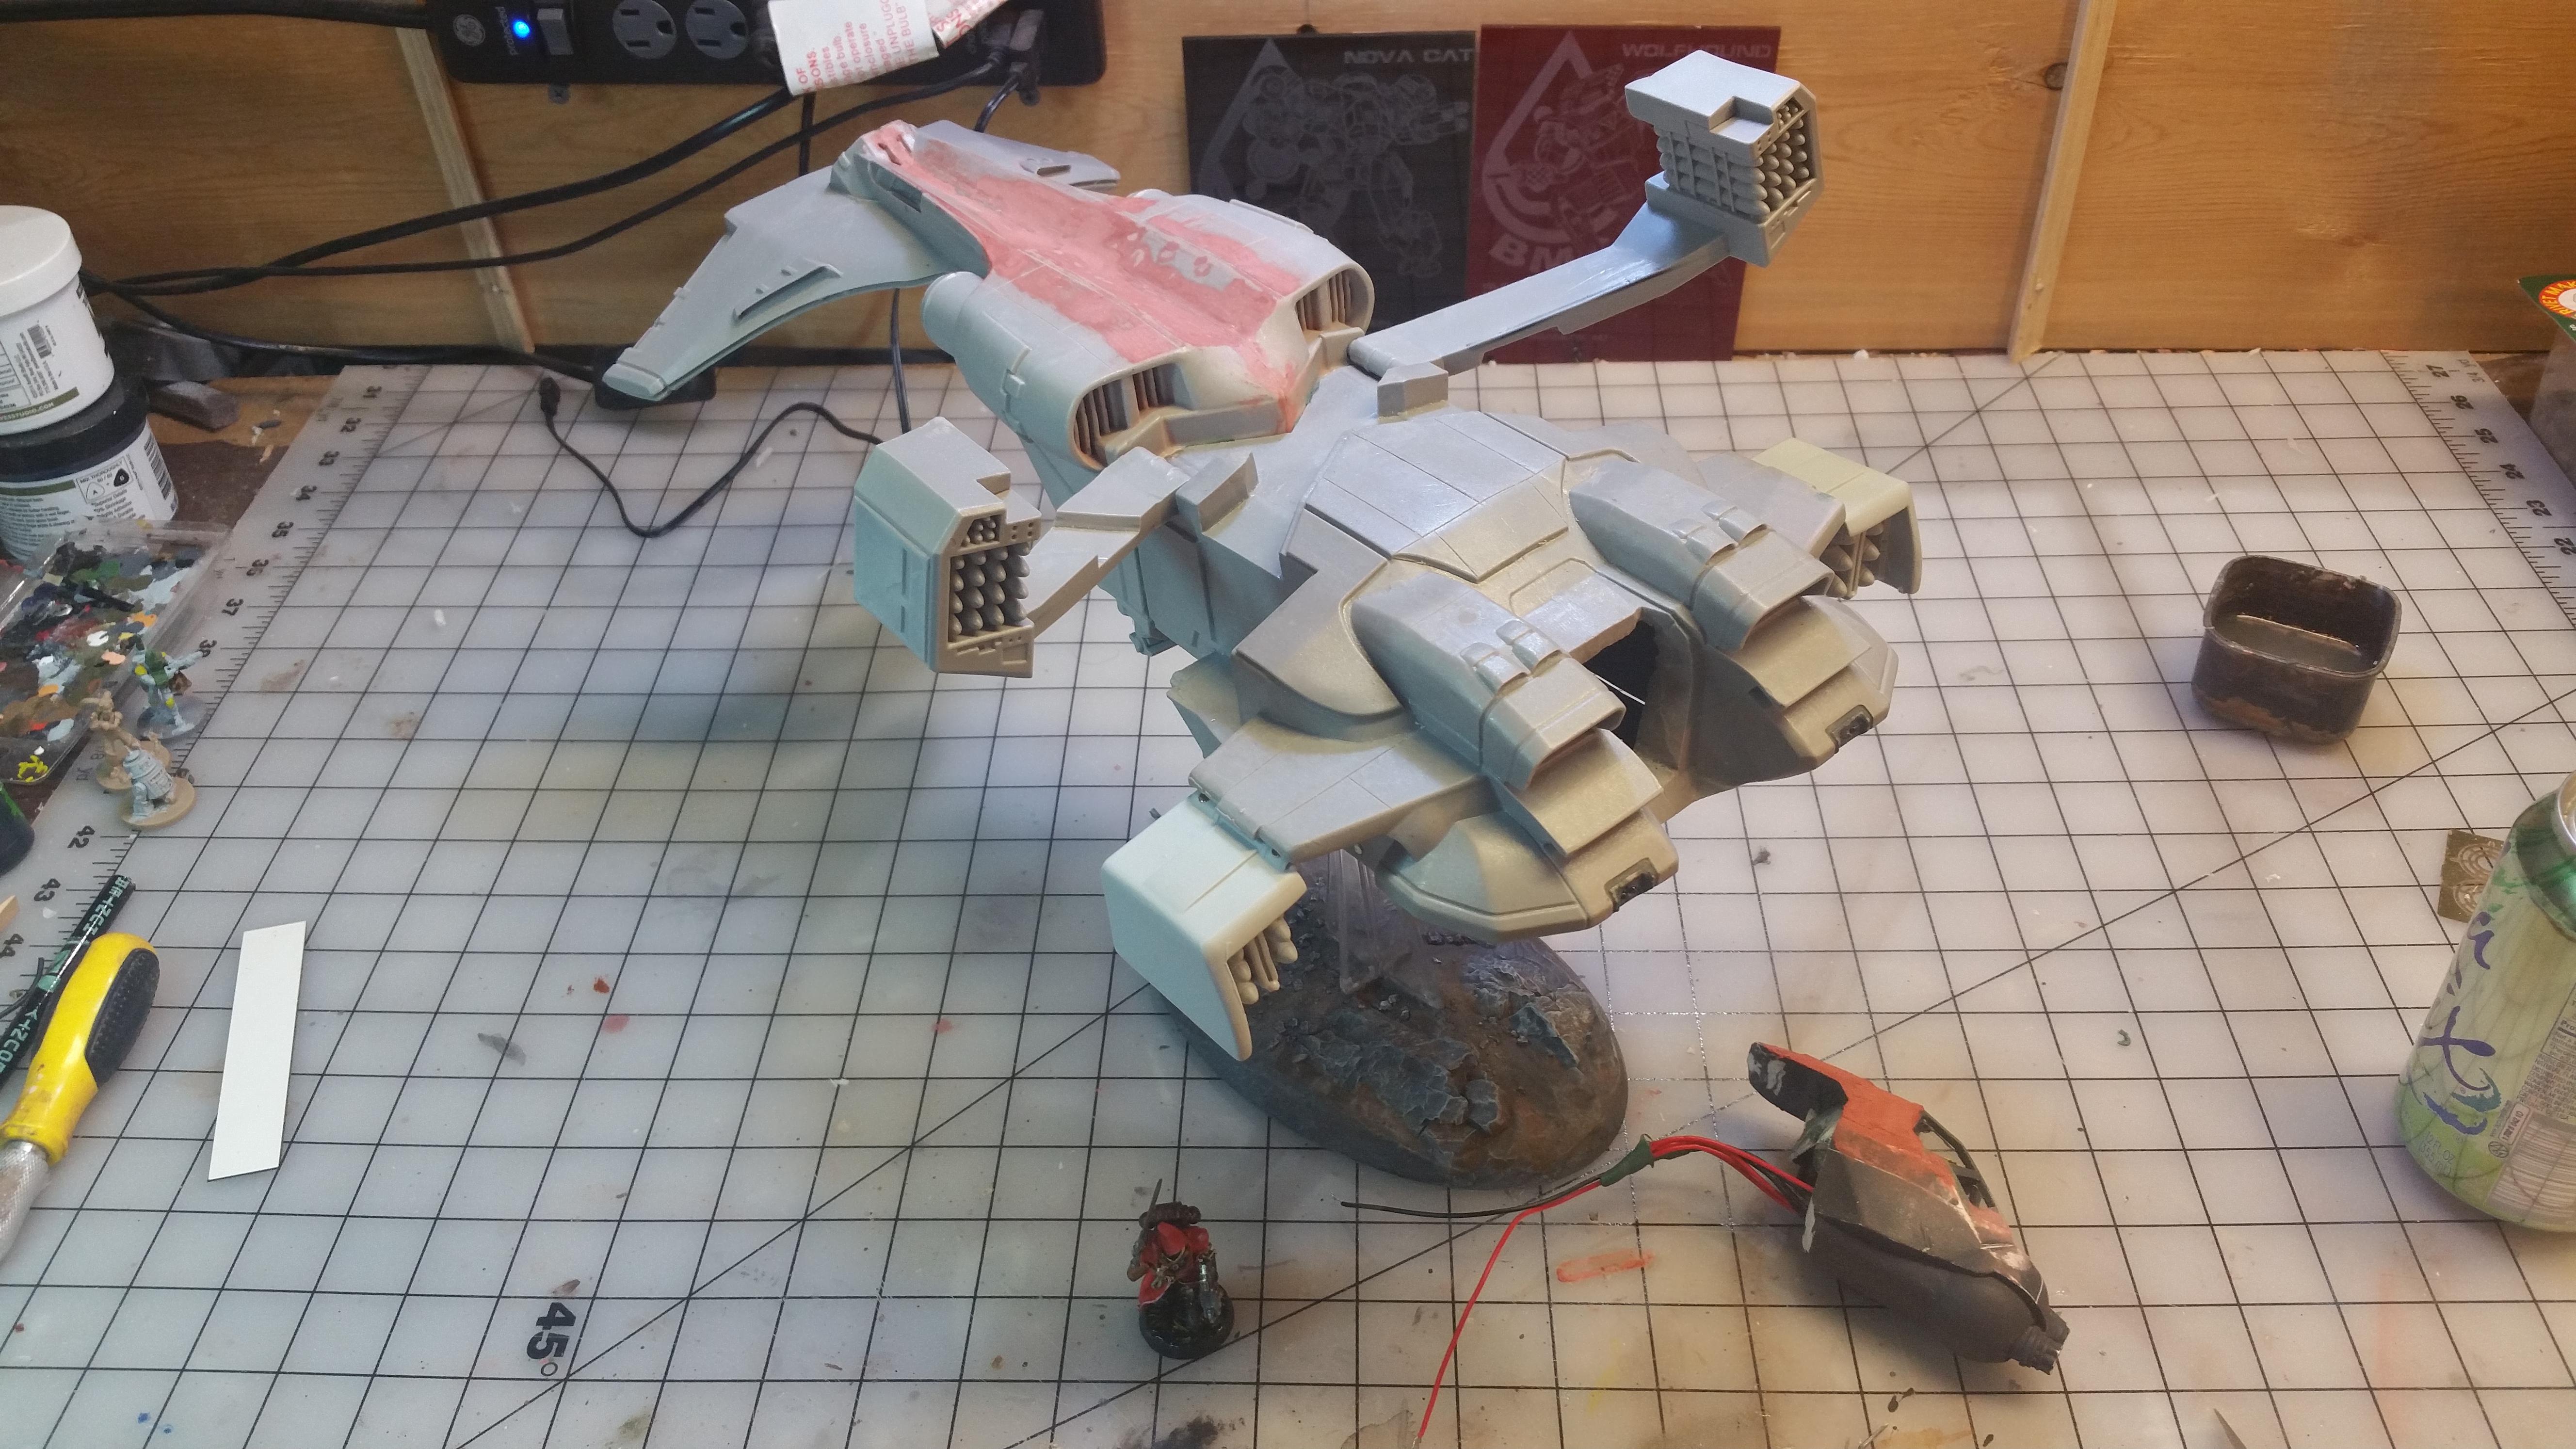
Another option to figure is the display method. The kit has parts for gear up, in-flight or gear-down, landed. Of course I had to do both. I chose to make a second landing ramp from Sintra to attach to a flight stand scarfed from a Games-Workshop flyer. The gear then get magnets so they can be snapped on and off, as desired.
Step 4 - working on the cockpit.
This step is the work on the cockpit.
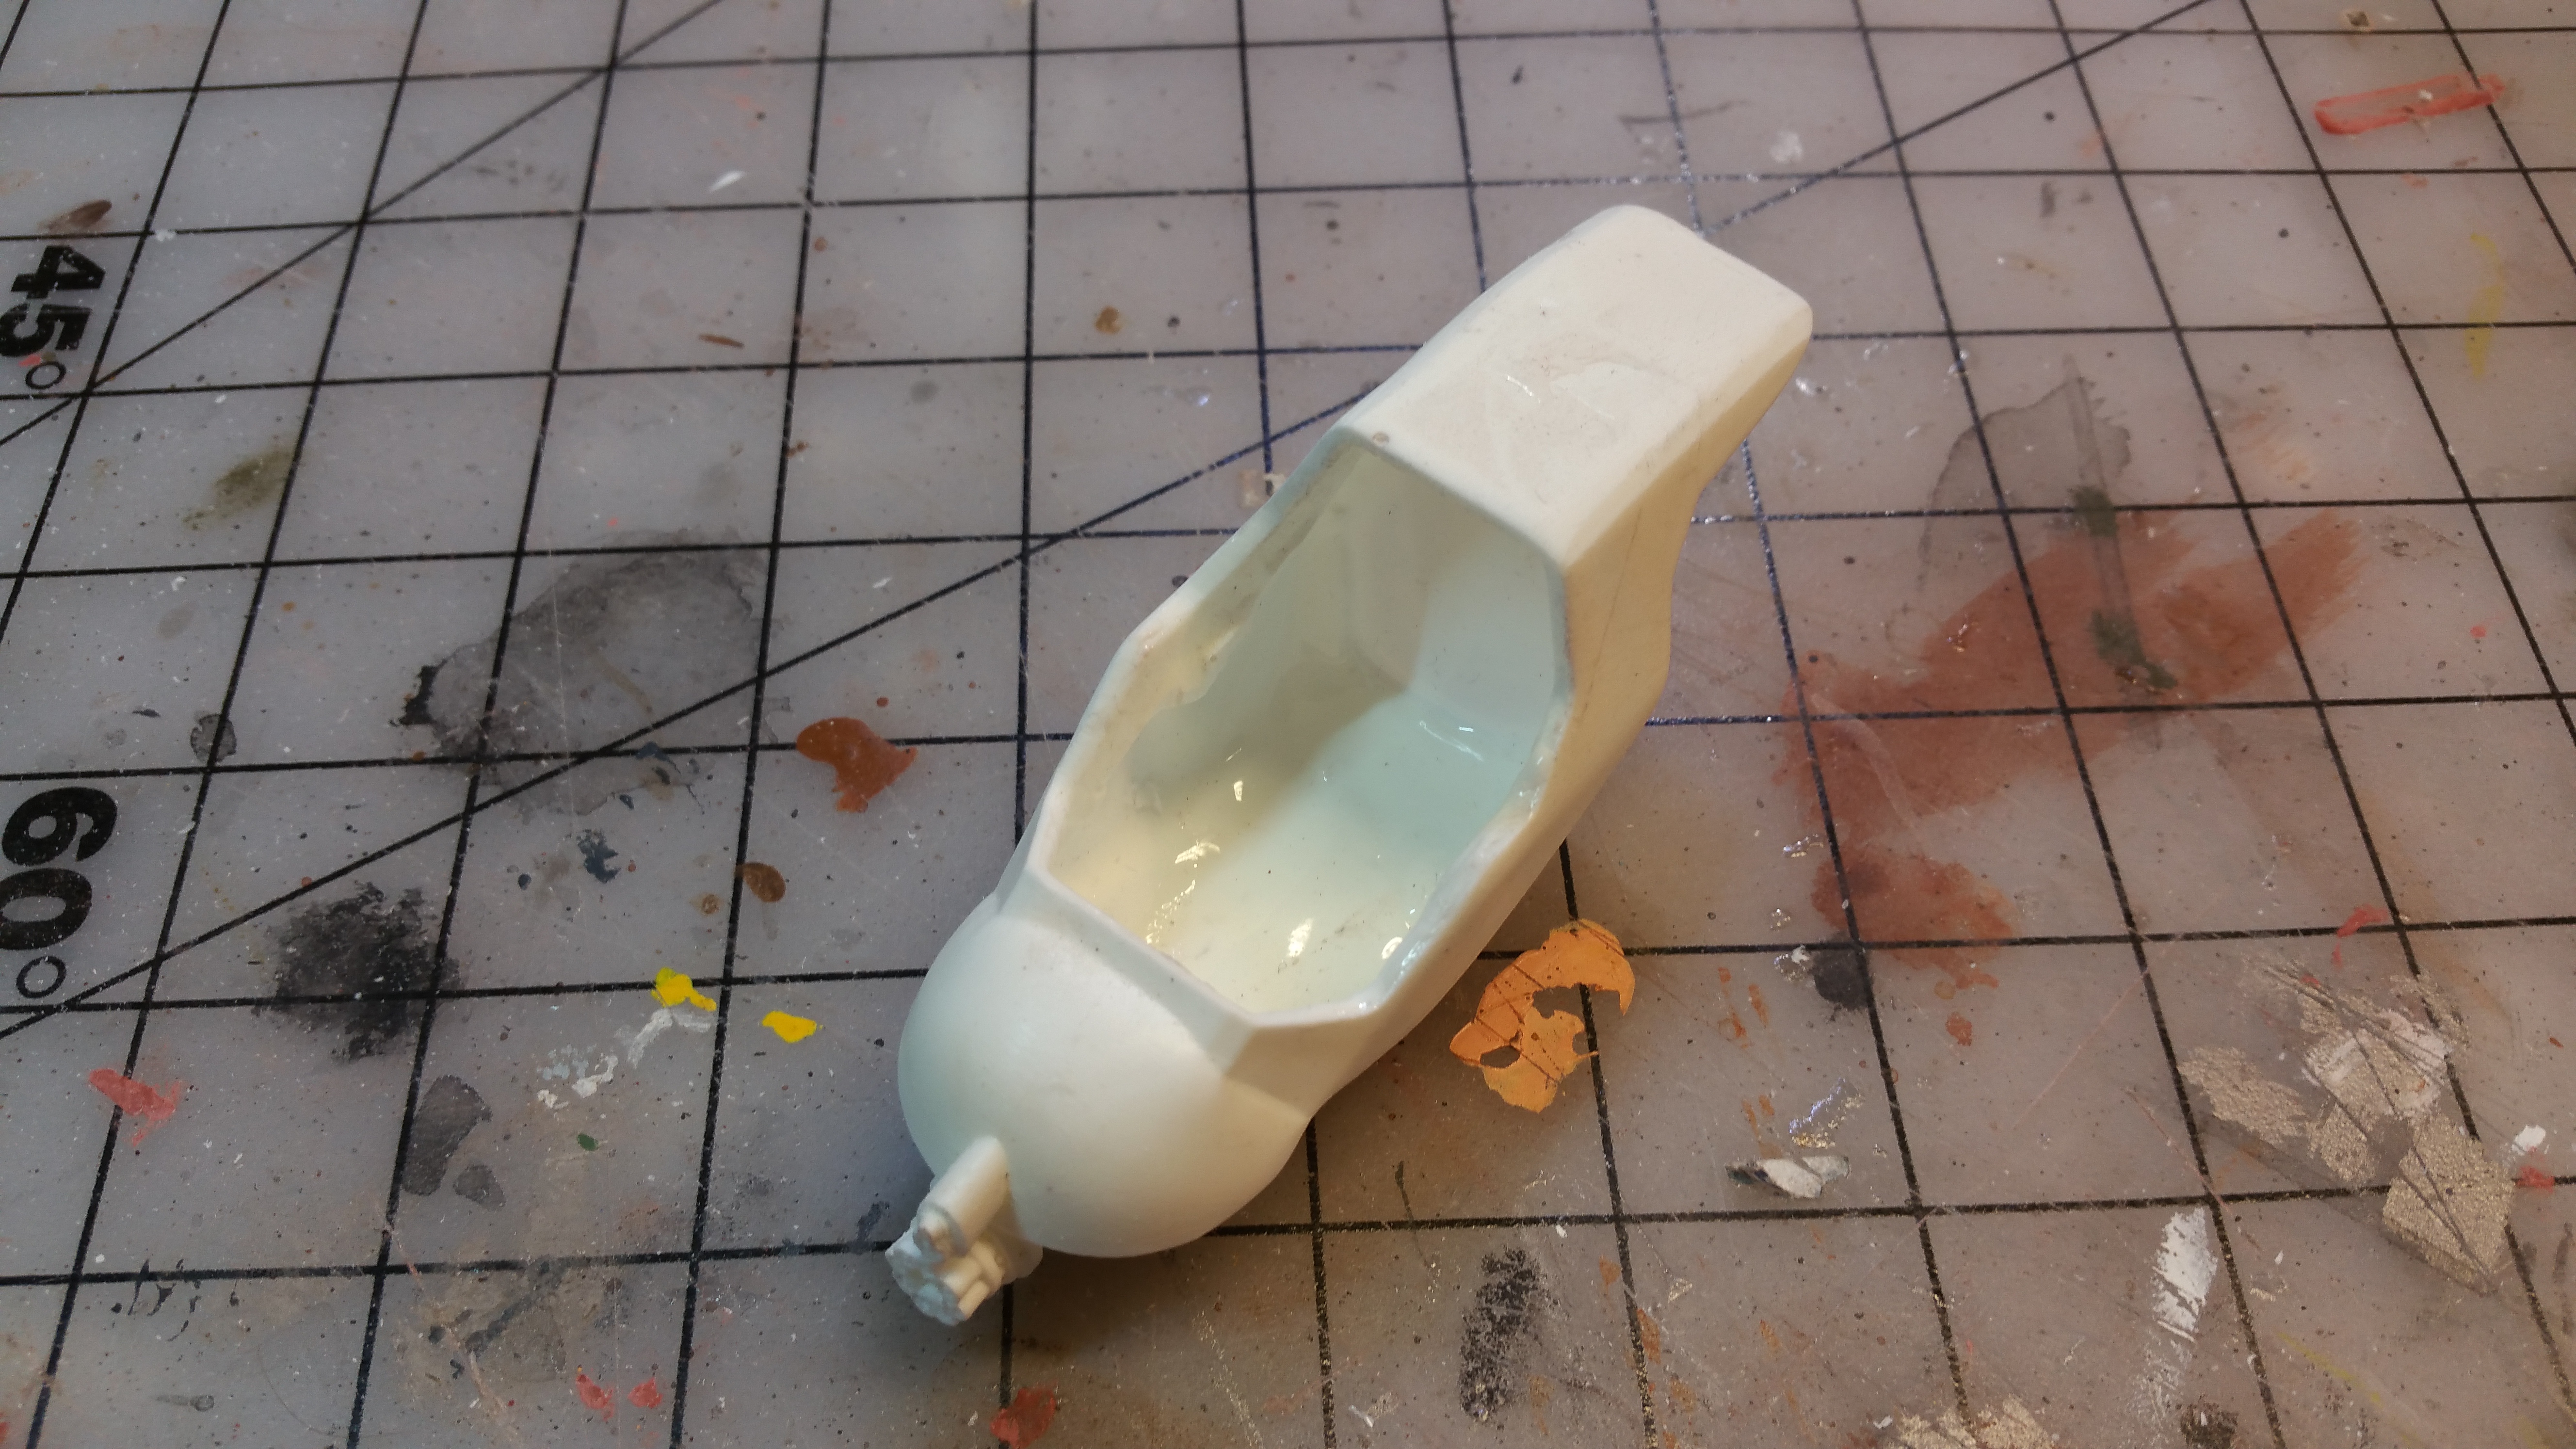
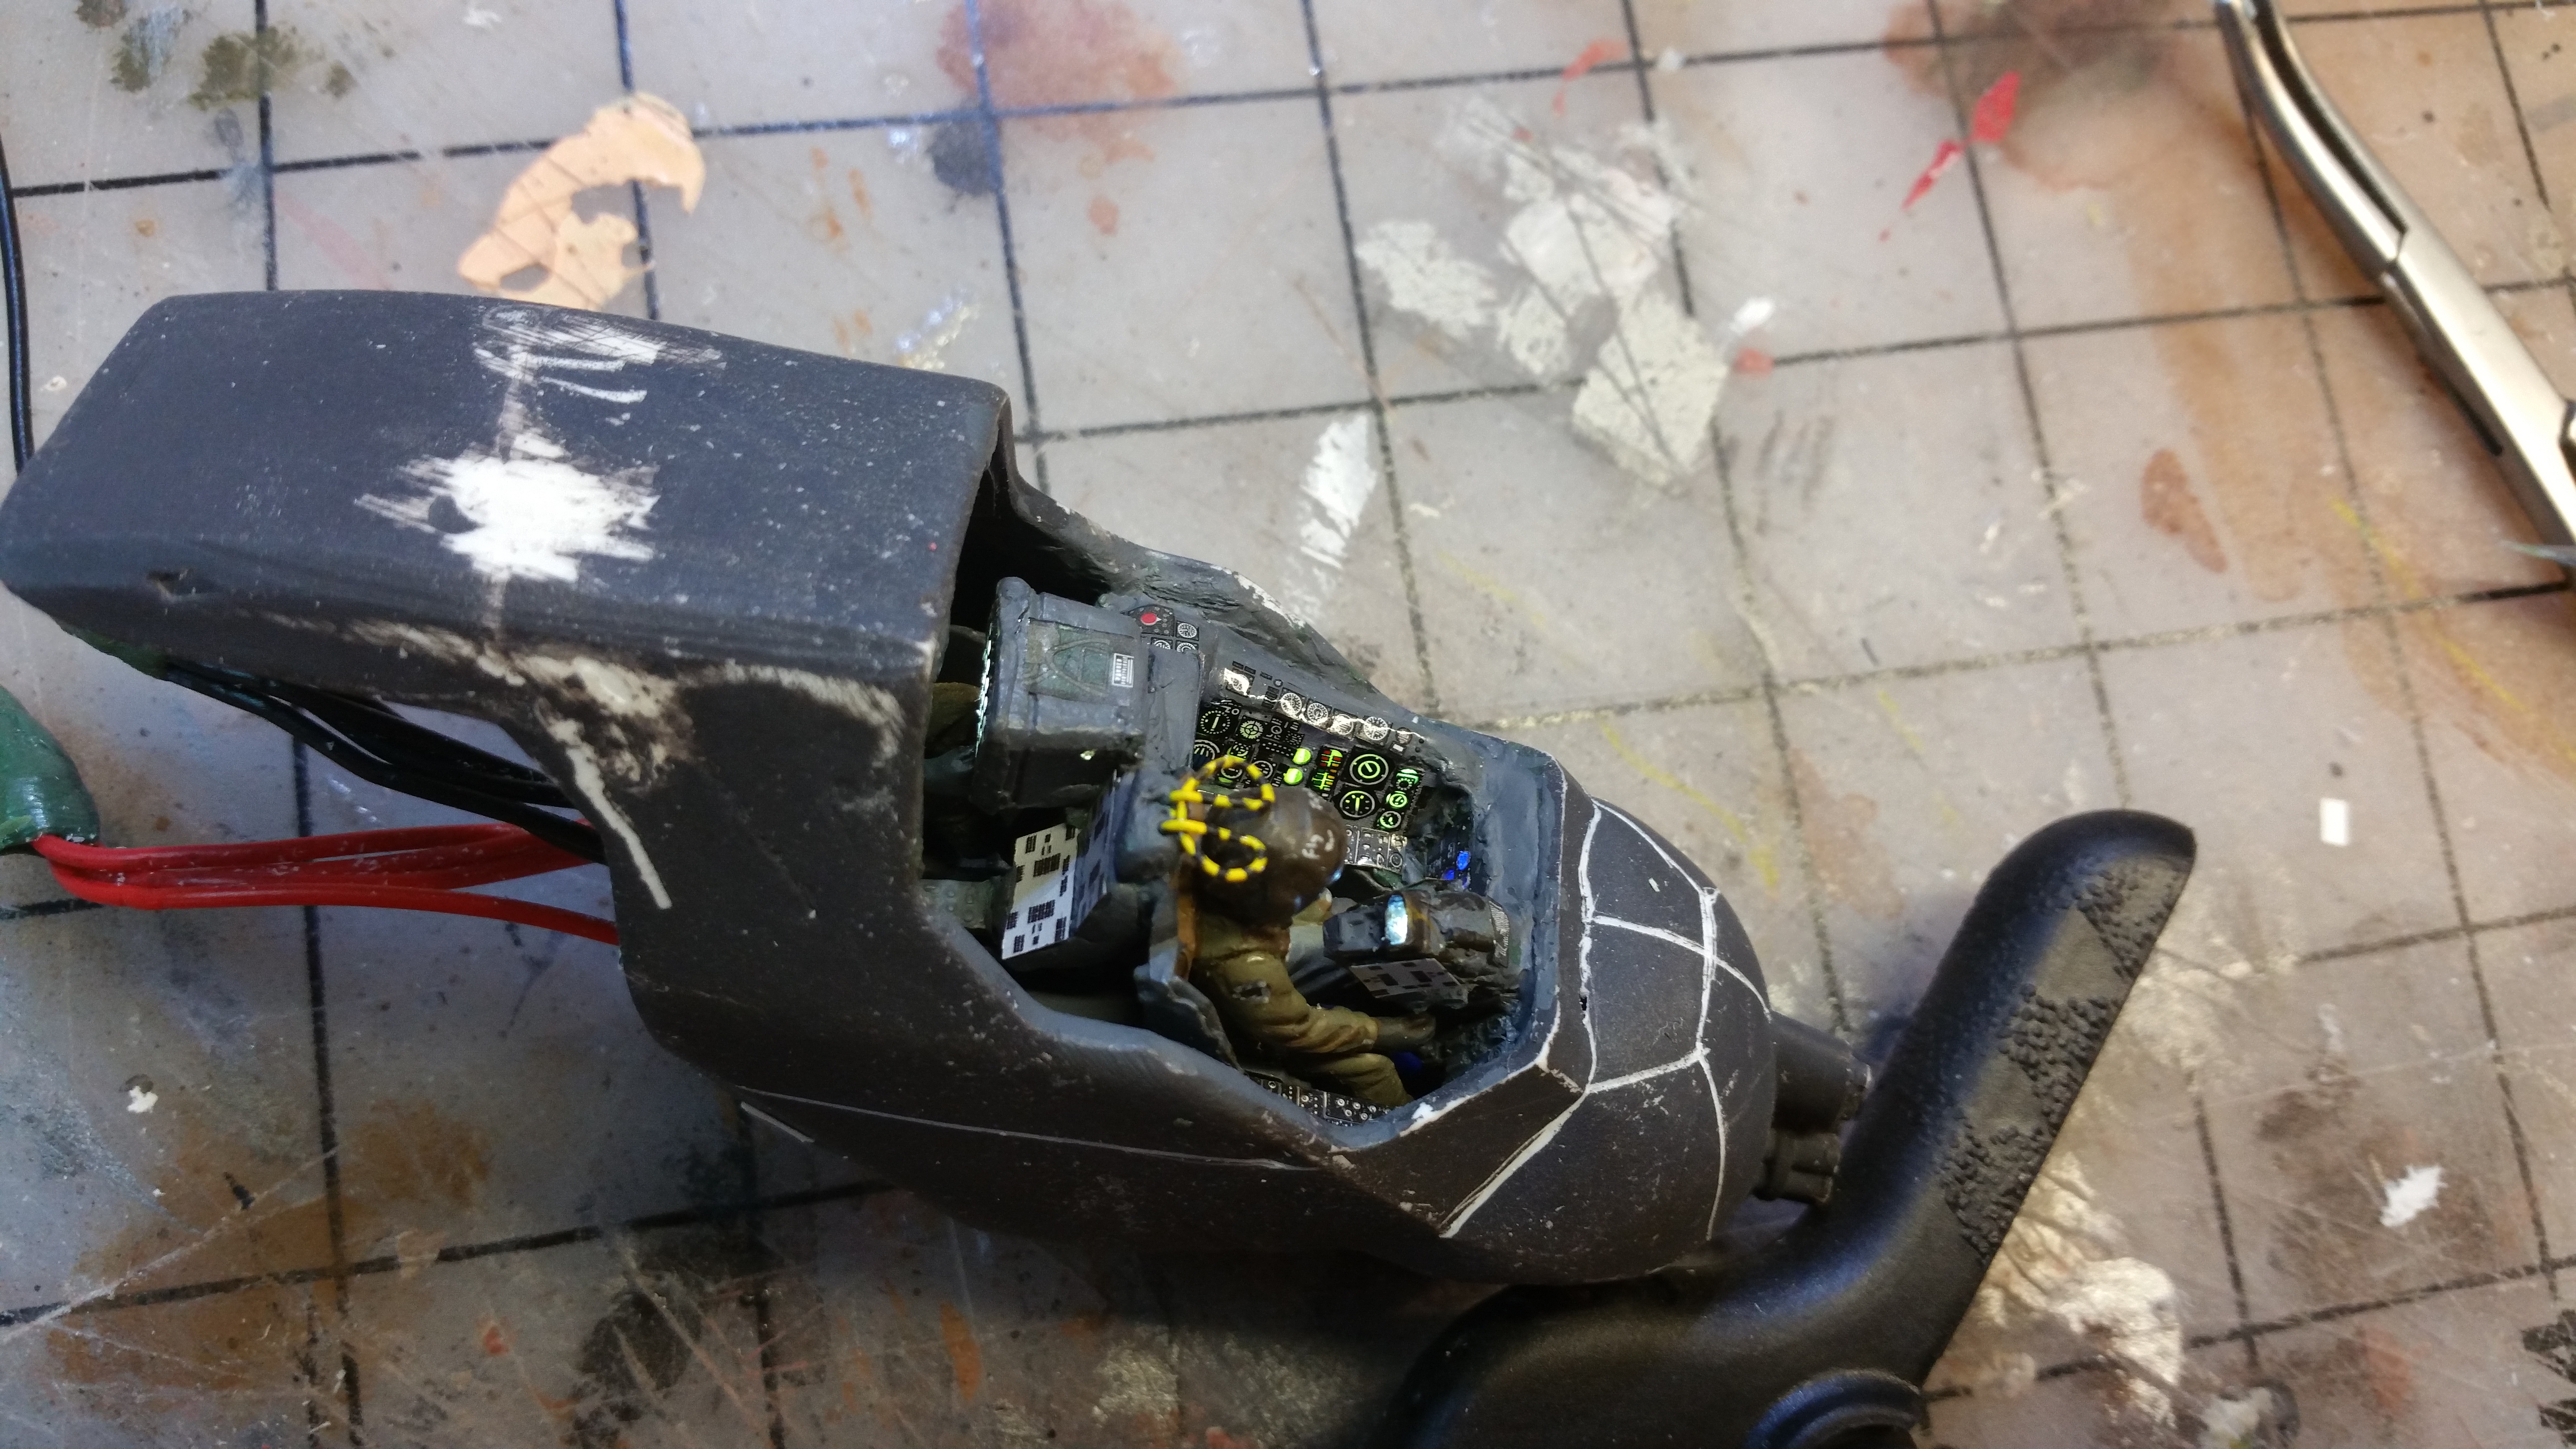
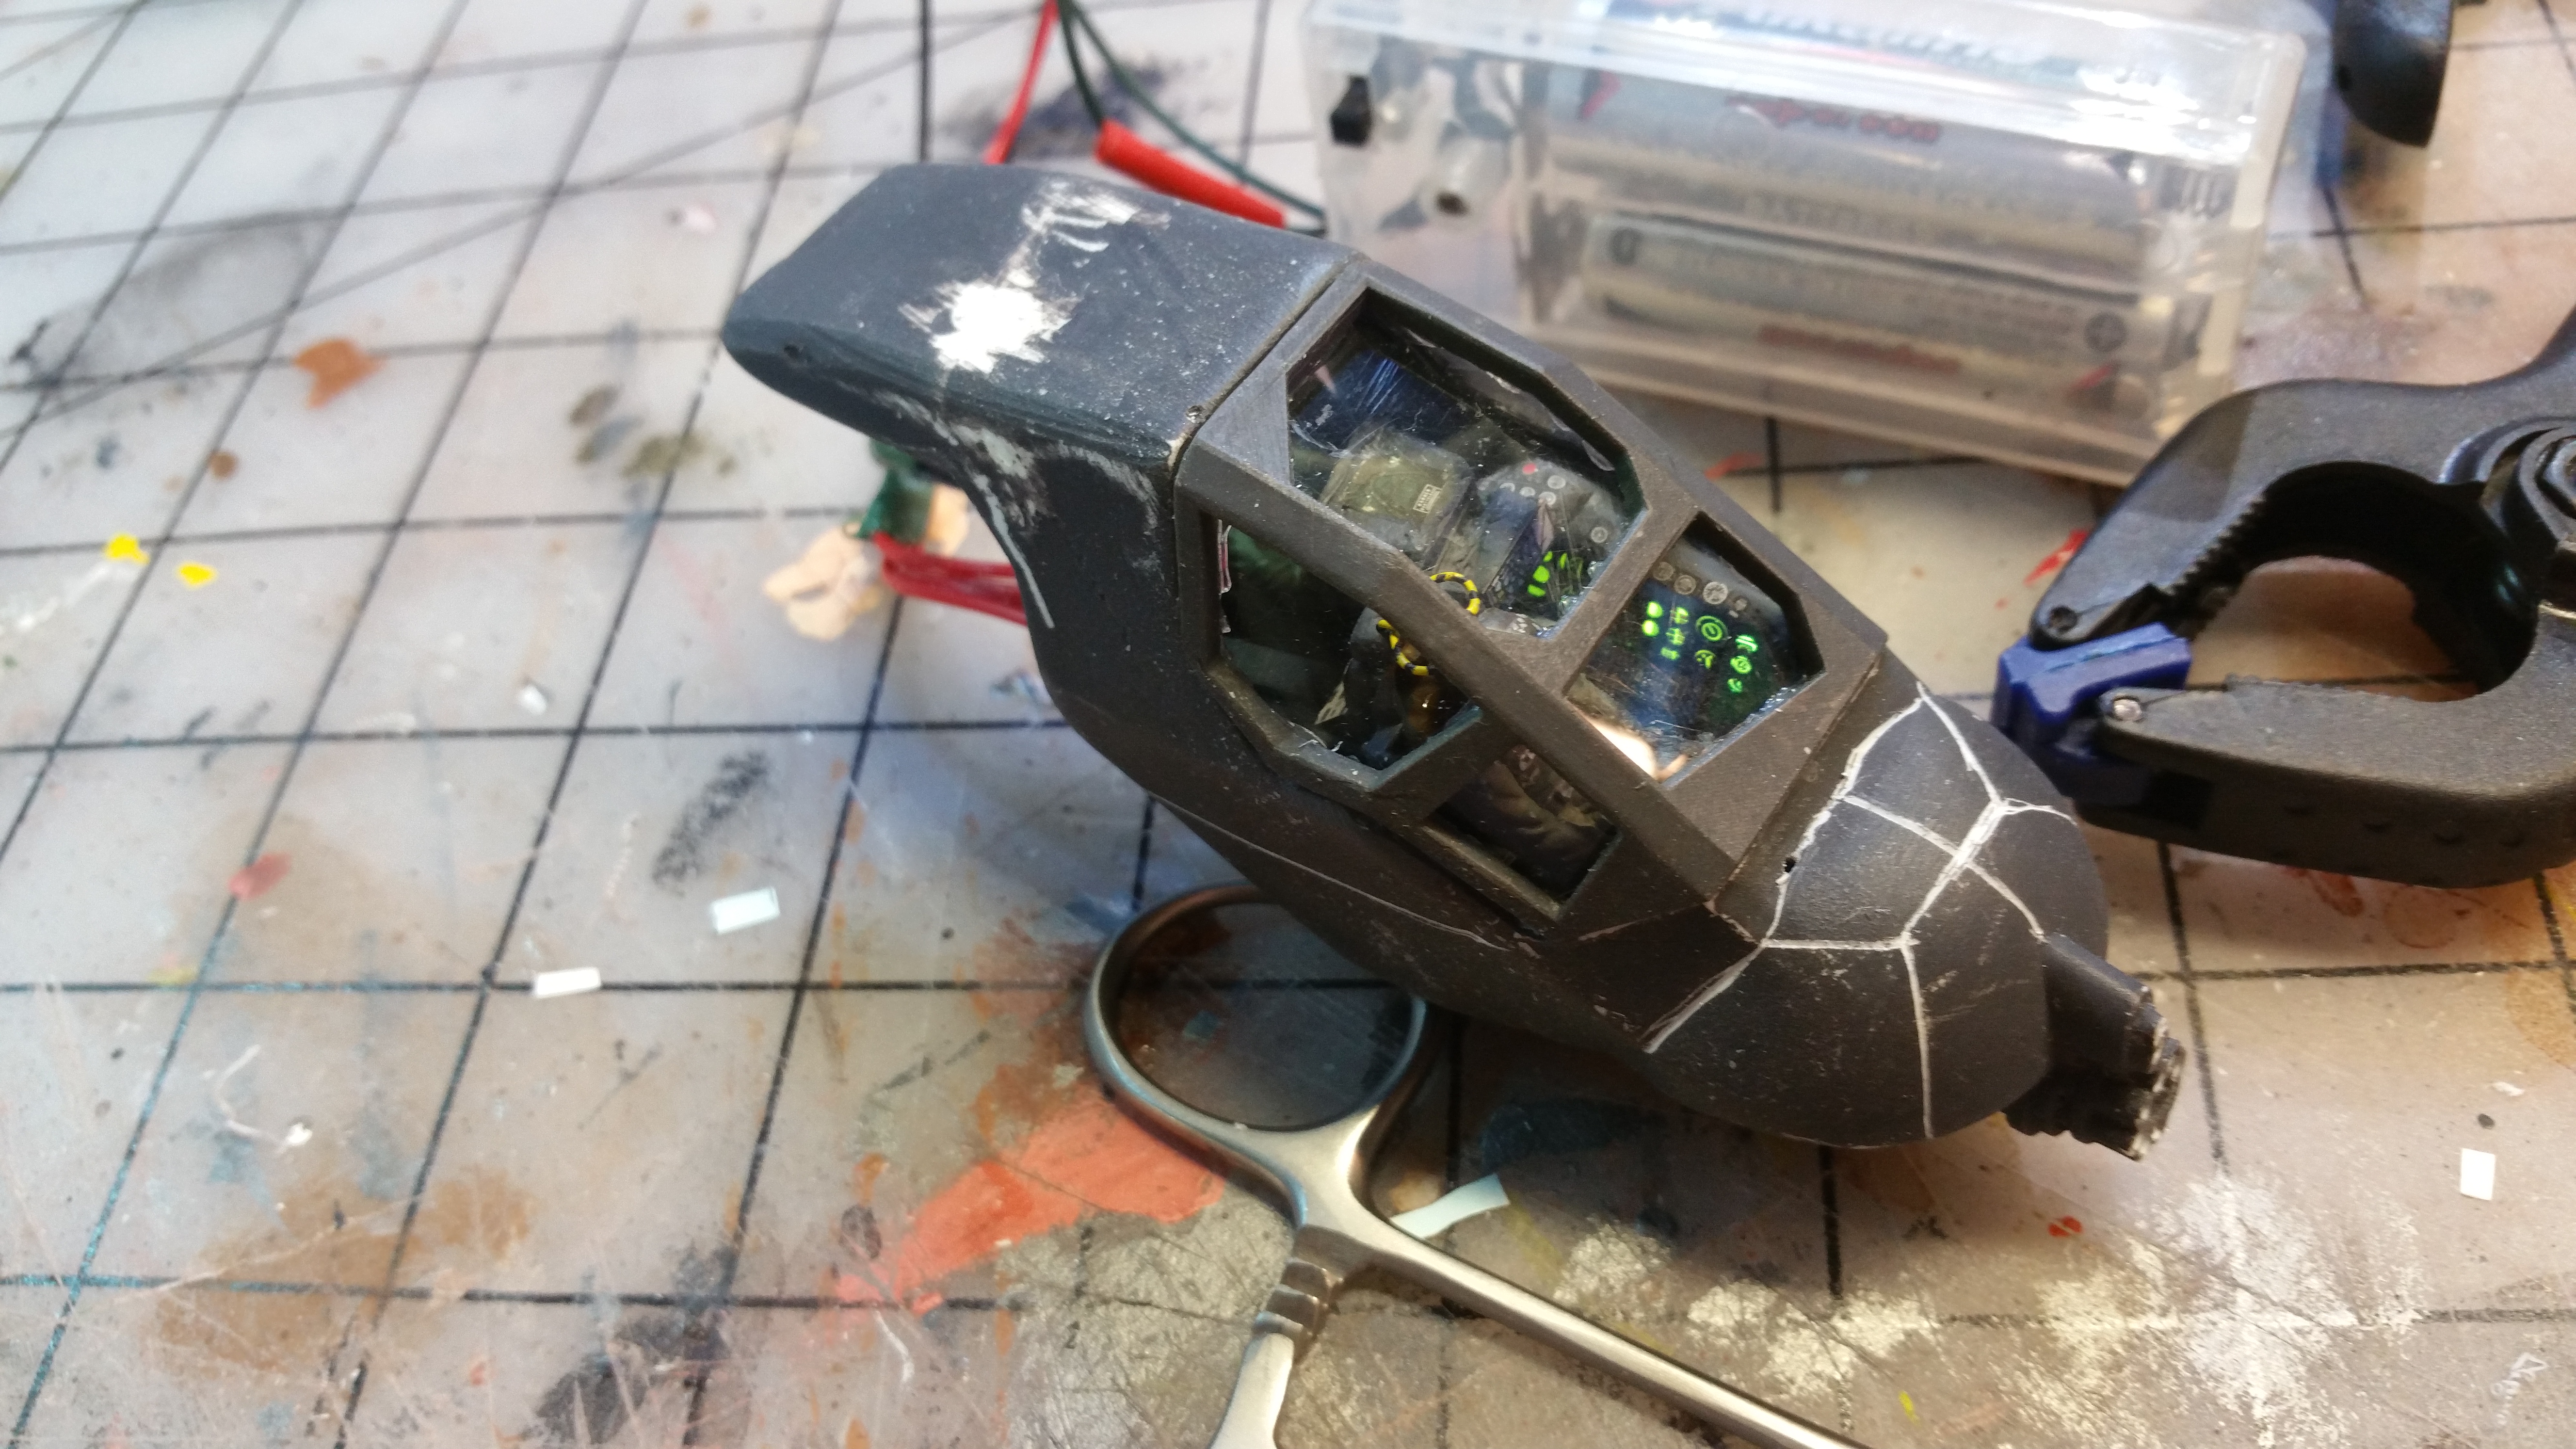
The canopy doesn’t have clear plastic for the canopy, so I talk about my choice on how to address that. I use clear plastic that you can get at most hobby stores in sheets. A quick little demo on just making the glass from the sheet.
There is also some test fitting of the cockpit tub with the lit parts to find out where things fit and don’t. The test fitting is a fiddly and repetitious process but it makes all the difference. Most of the details for the cockpit come from Eduard cockpit photo etch. The great thing about those is that they are both light-tight and pre-painted. Once they get into the cockpit, they look much better than they would otherwise.
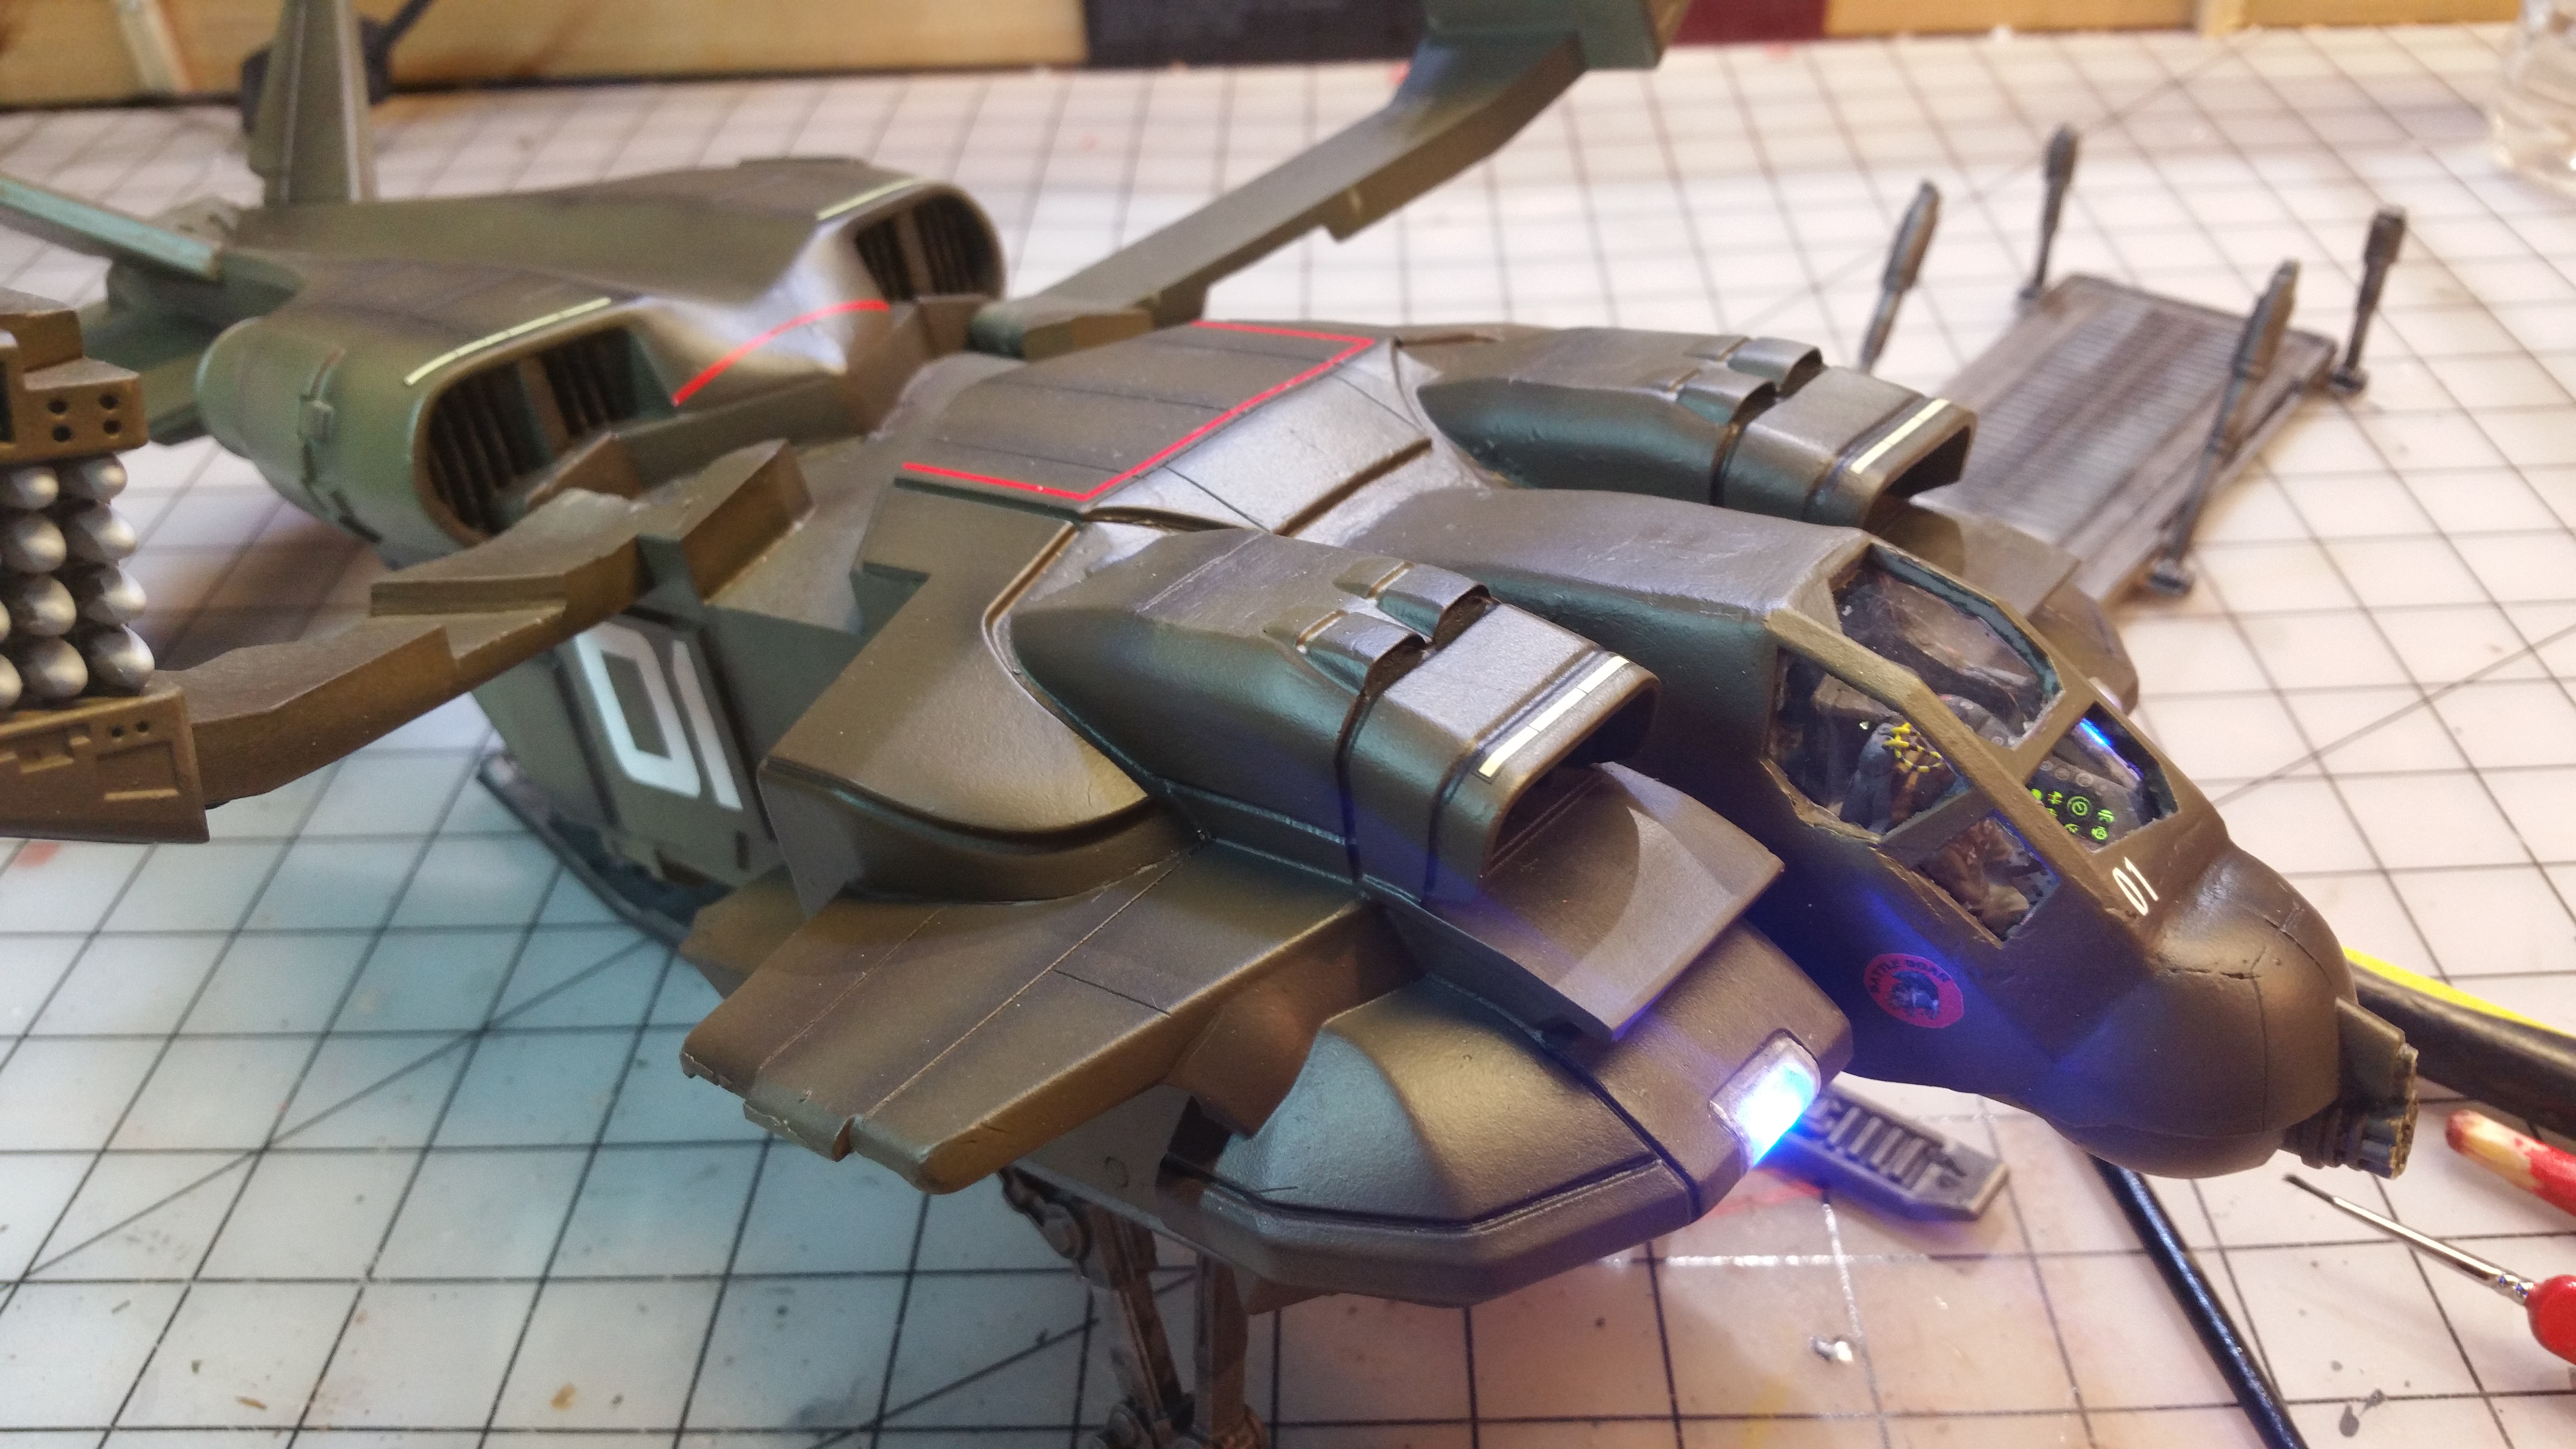
Step 5 - Lighting, cockpit and magnetization.
This update goes into the finishing off of the cockpit. The canopy “glass” has been done and the cockpit tub is installed into the nose section. We also see the lighting for the cockpit details and how the drivers and the instrument panels are illuminated, showing the effects of that.
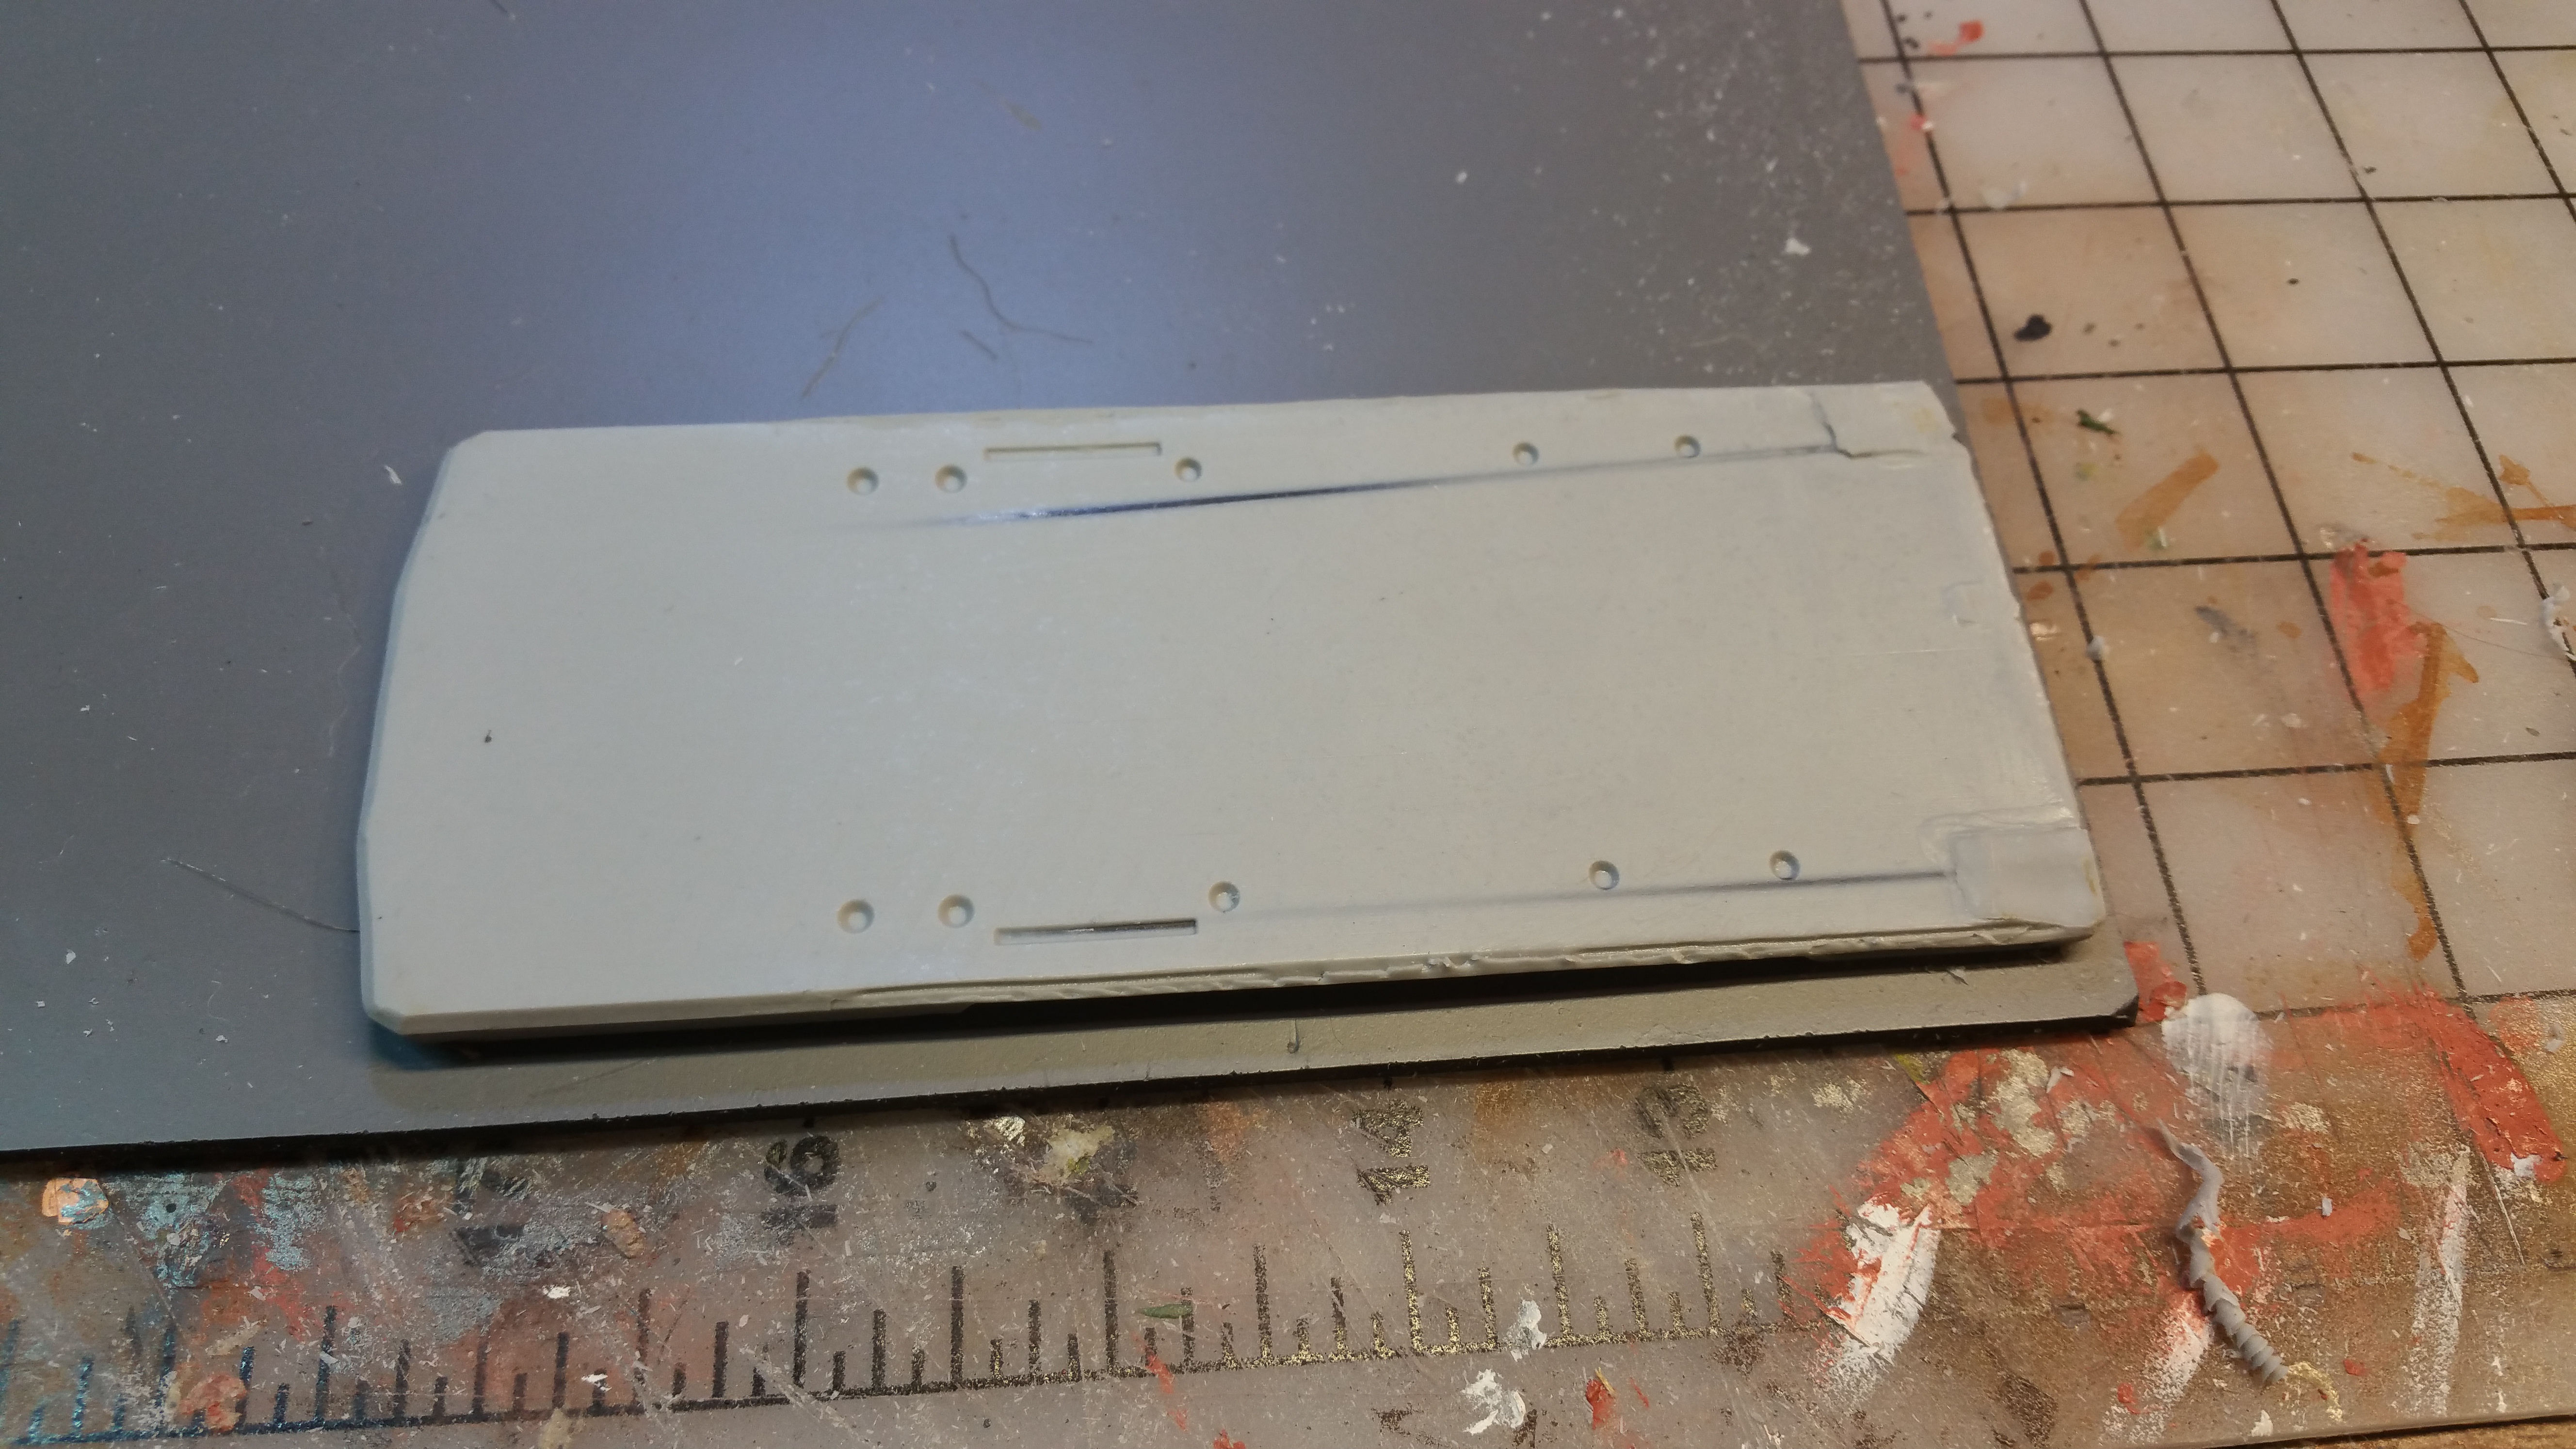
The wing pod and landing gear magnetization is also finished off at this point. The forward wings need extra support, just a magnet won’t do. It *could* have been just glued in place, but I wanted to try to make it variable. I also point out a few extra panel lines that have been scribed in to those very large, flat surfaces to give it some more interest and detail.
Step 6 - Main Assembly methods: working with Greenstuff
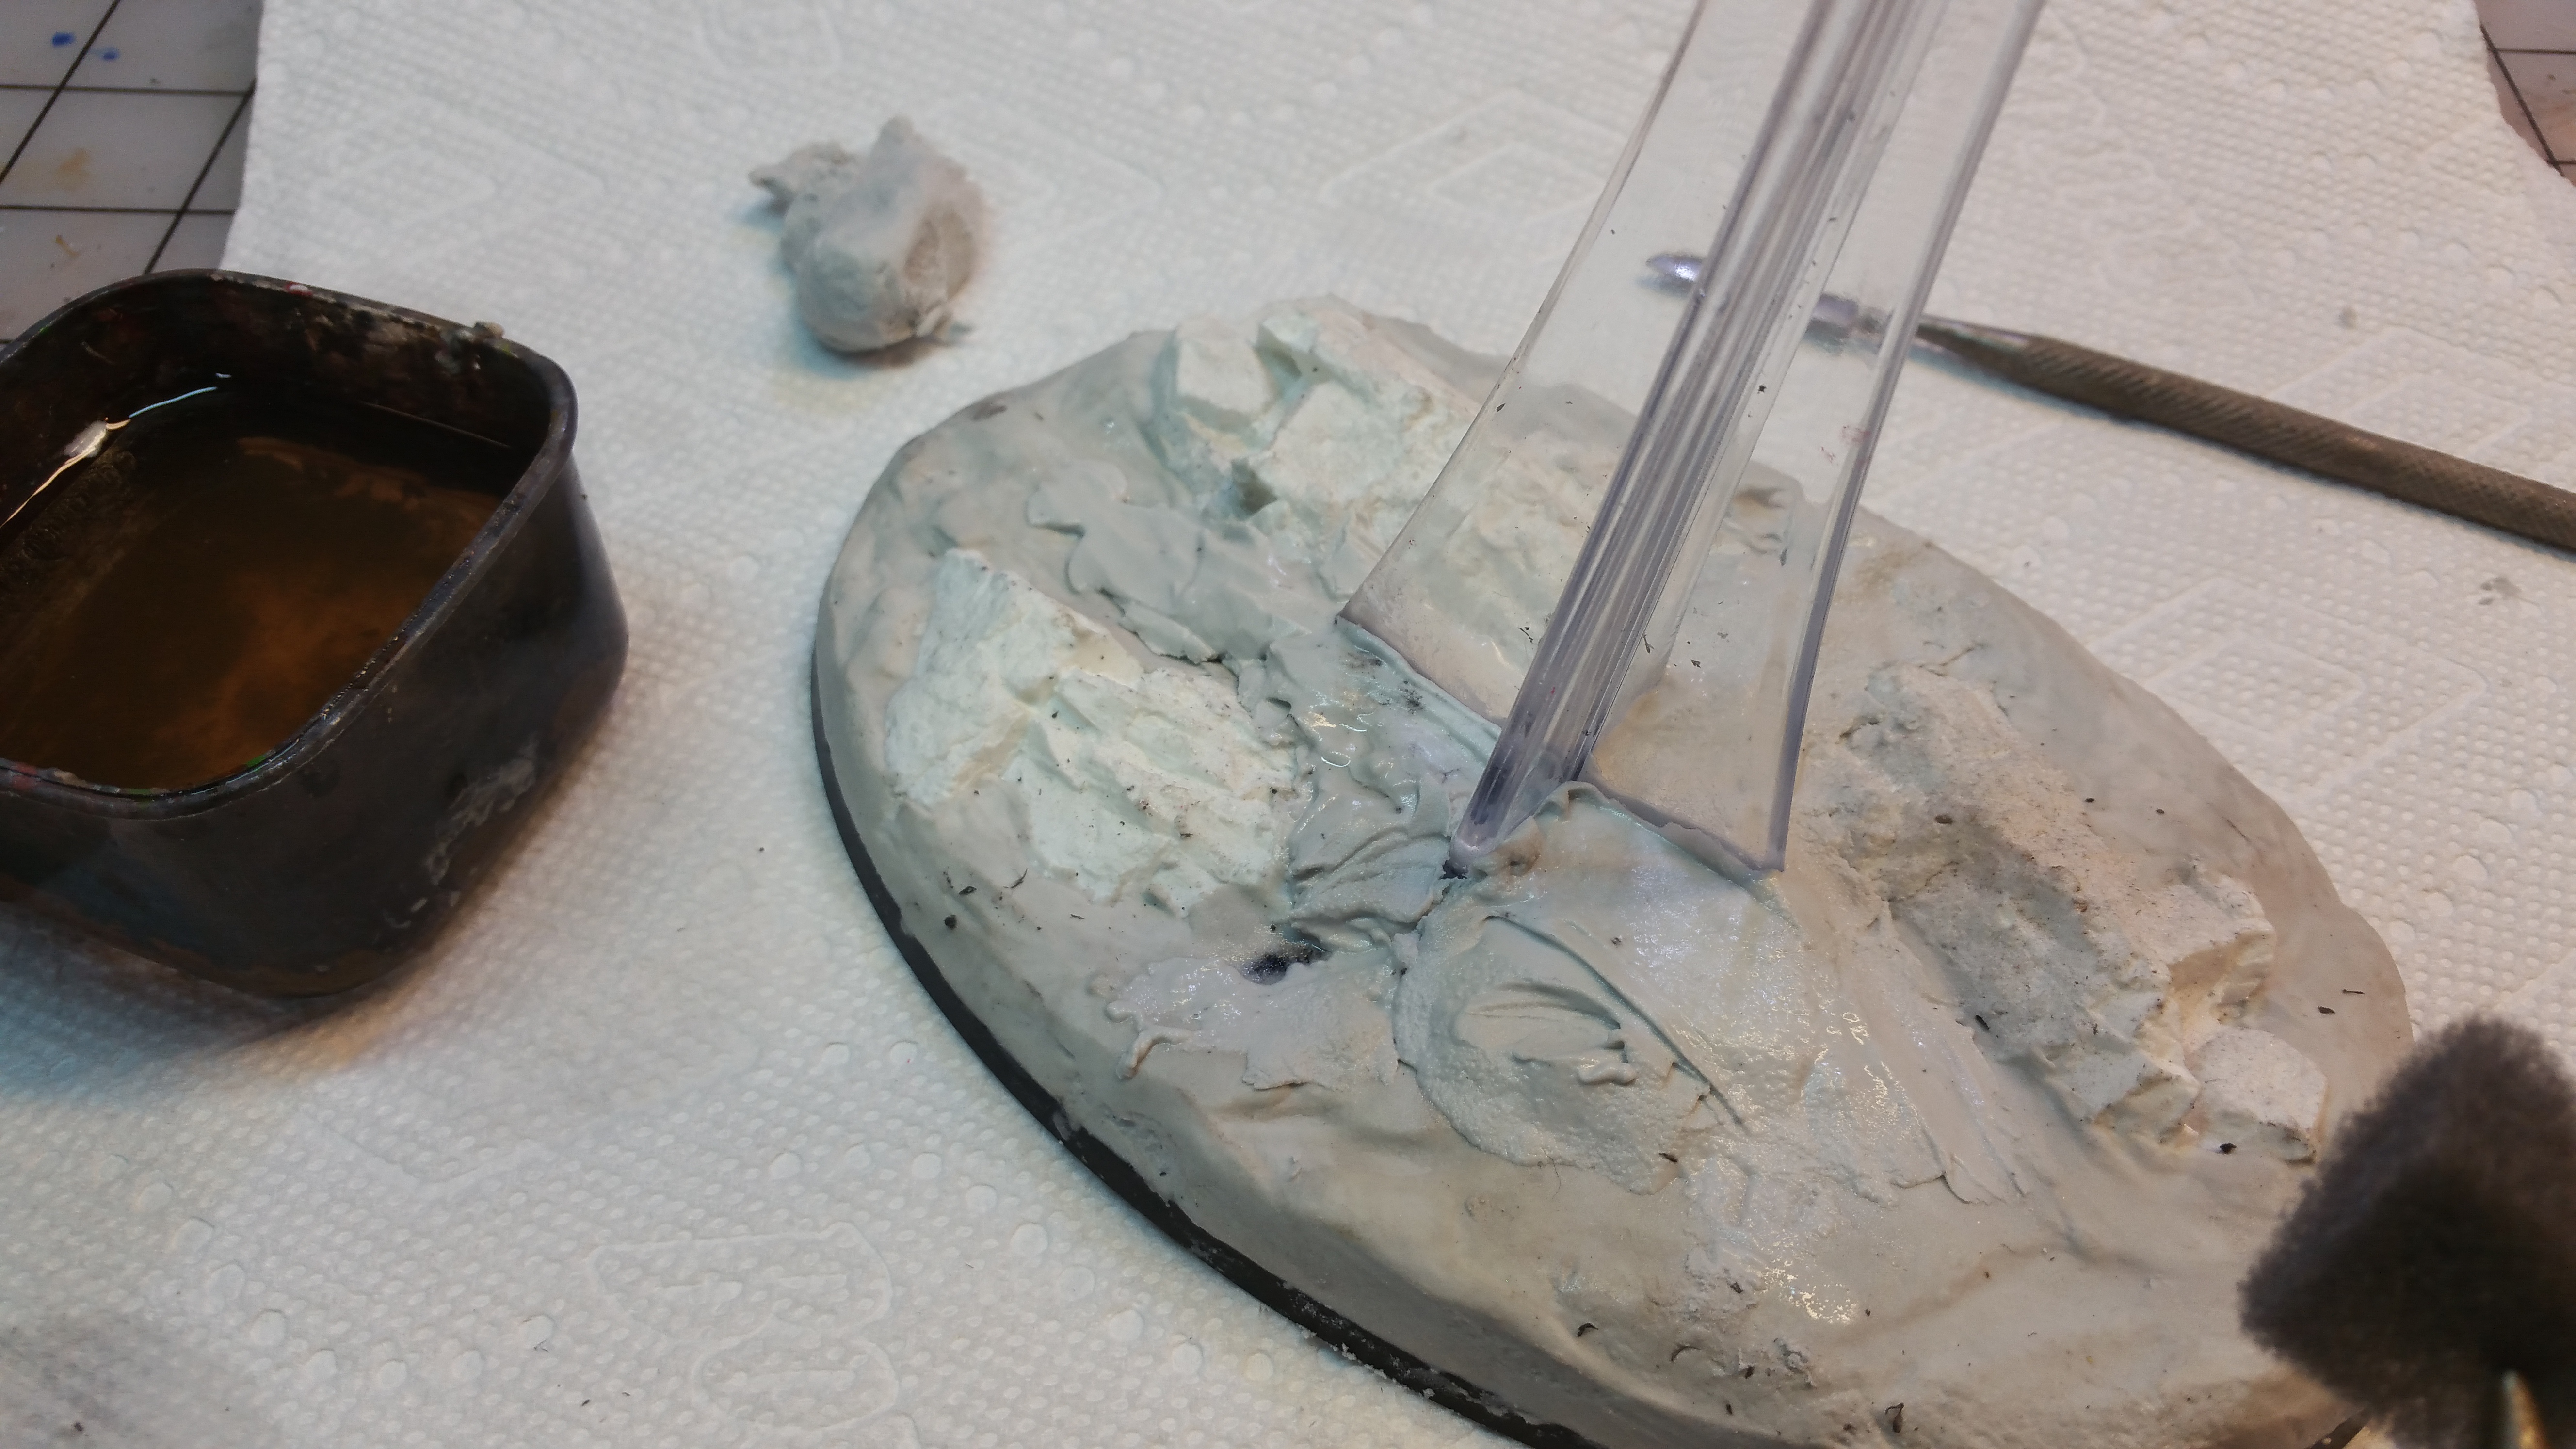
This update is pretty much just about how I handled the Grand Canyon-esque gappage between the primary pieces. I handled them in pretty much two phases. The first was to use greenstuff as a fixative to bring the pieces together, and then again as a primary gap filler. Once that’s in place, I used a sculpting tool and water to smooth the surfaces and put in any detail that might need to be put in place. The next day, when that’s all cured up, I layered up putty as a surface to be sanded and give a final coat.
At the end, I also show how the new “flight stand” ramp was made and affixed to the mount parts from the kit.
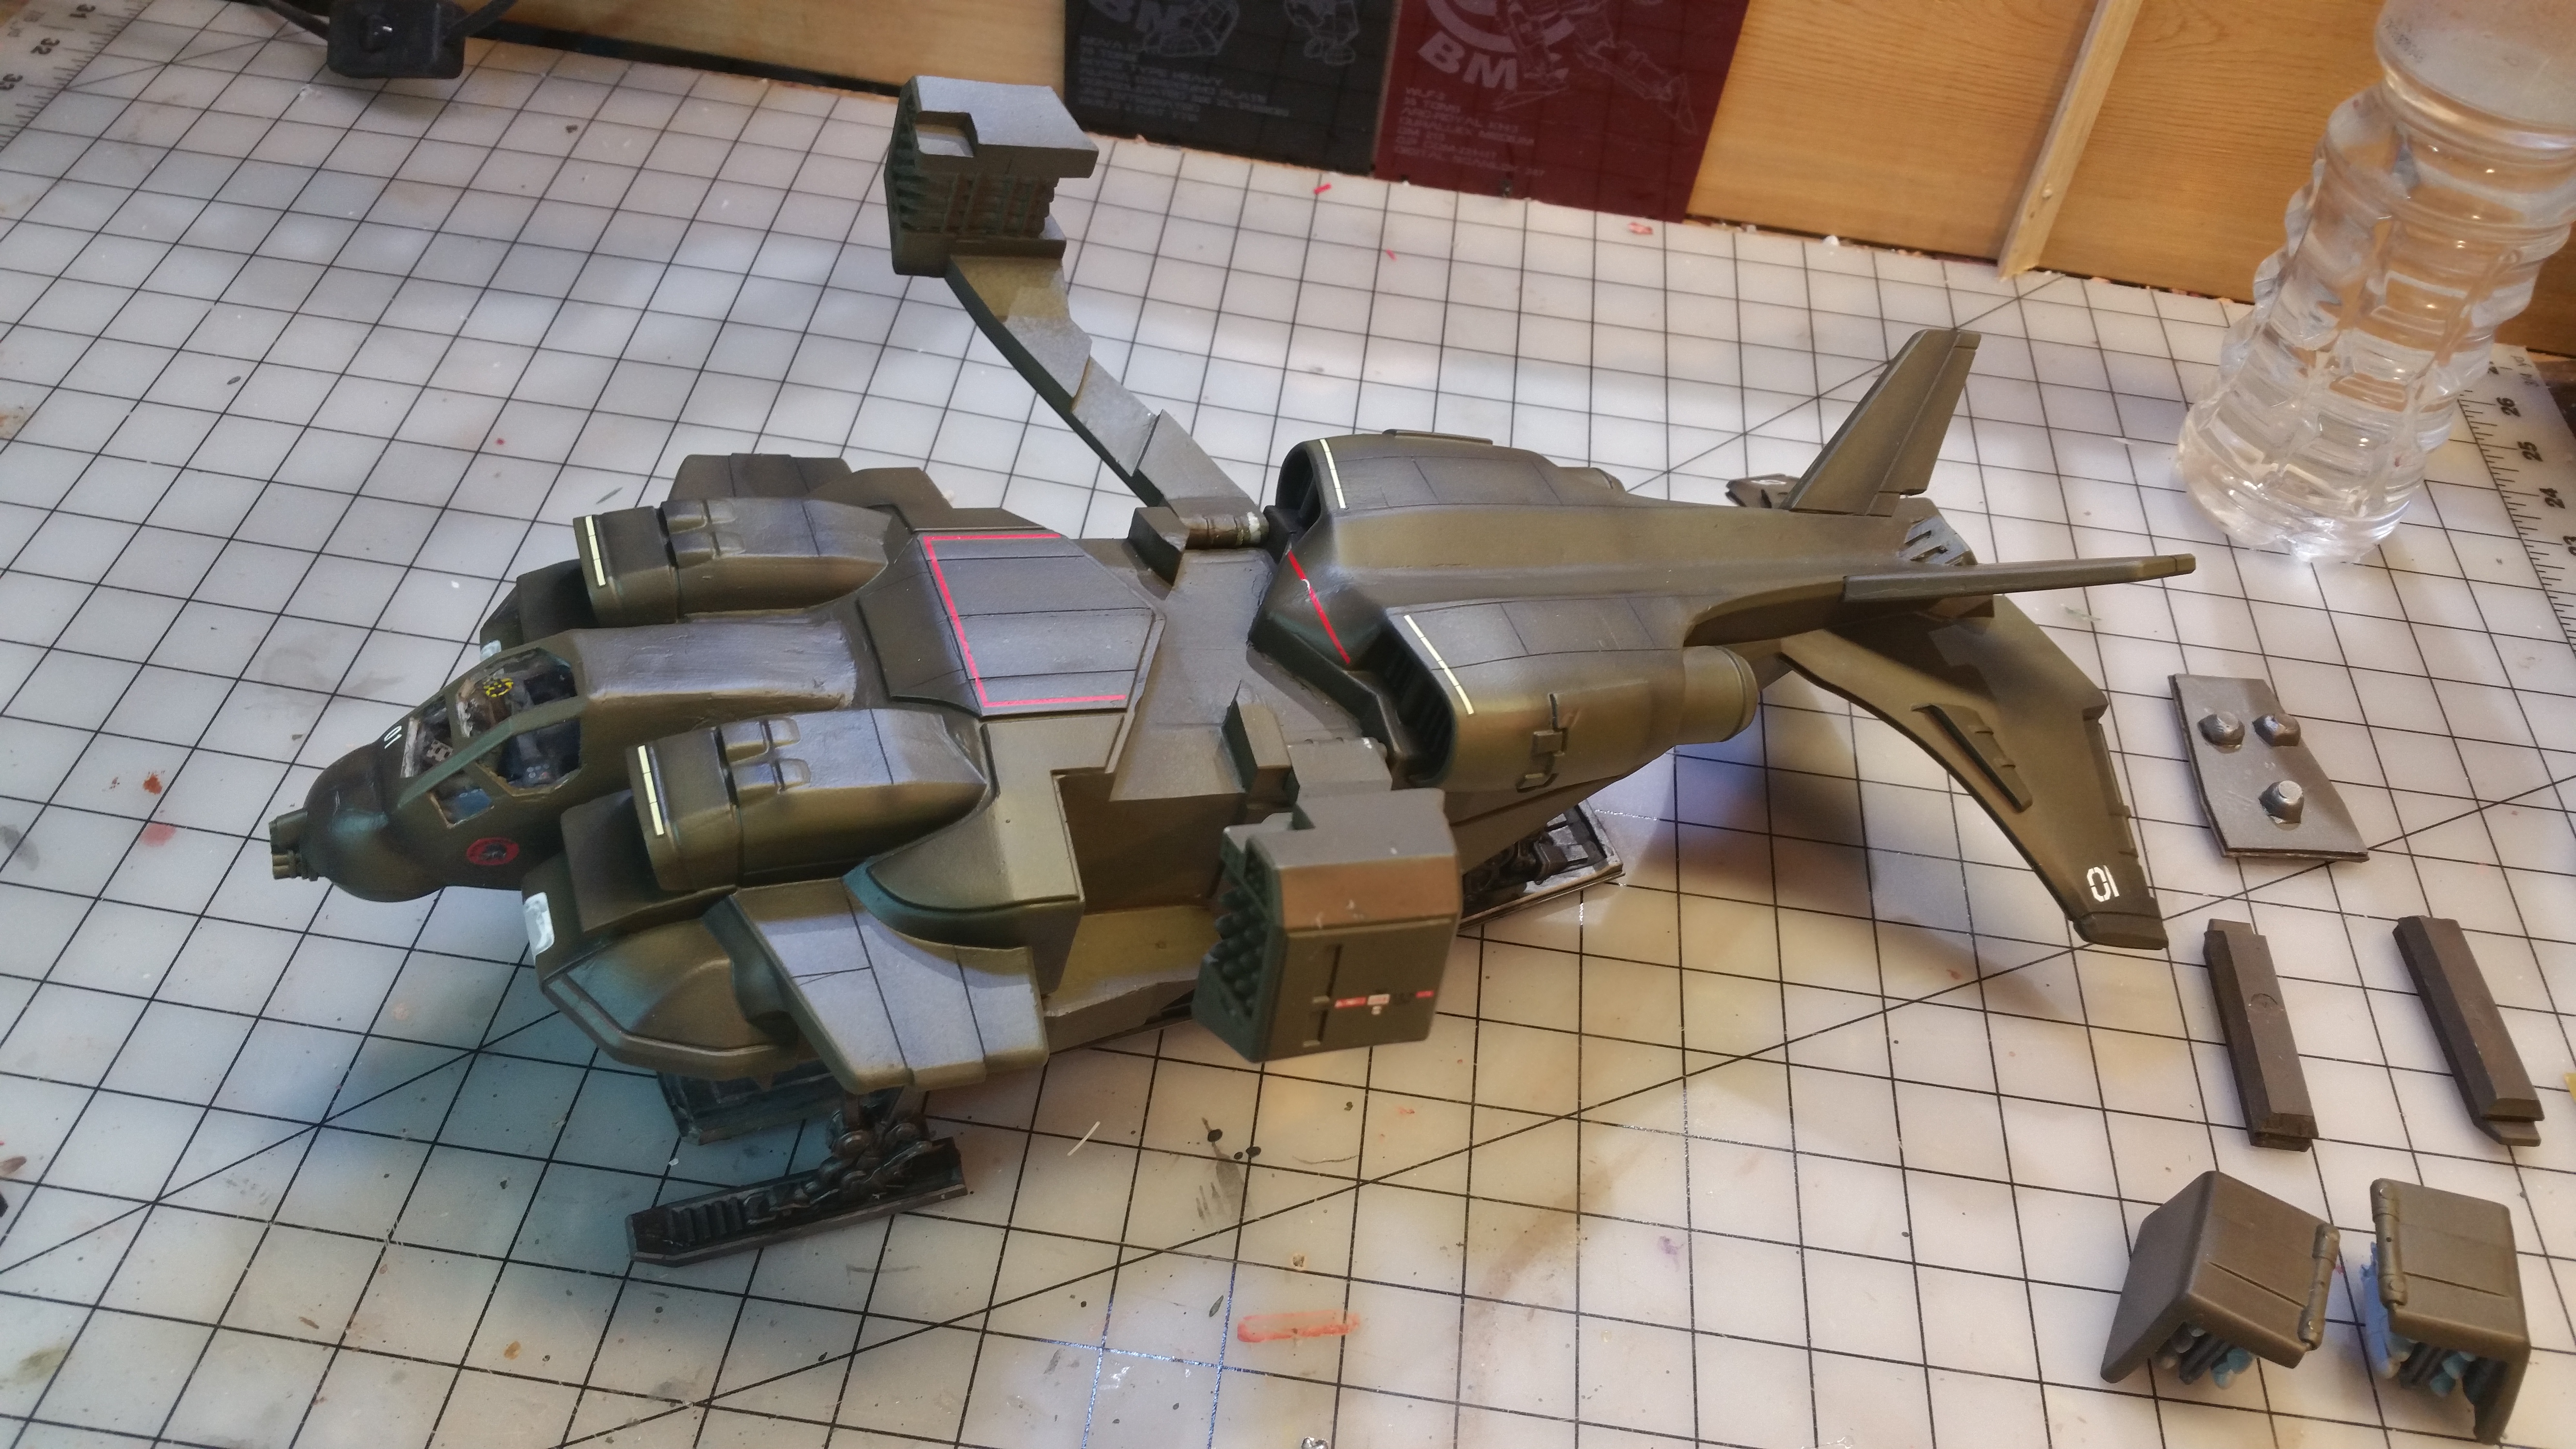
Step 7 - Final Assembly and first layer of paint.
The cockpit is installed and the gaps are filled. This is a gotcha-point. Pay attention to where the cockpit goes on, there are very large gaps and the front end can be put pretty much anywhere up or down/side to side. Just take care and align it.
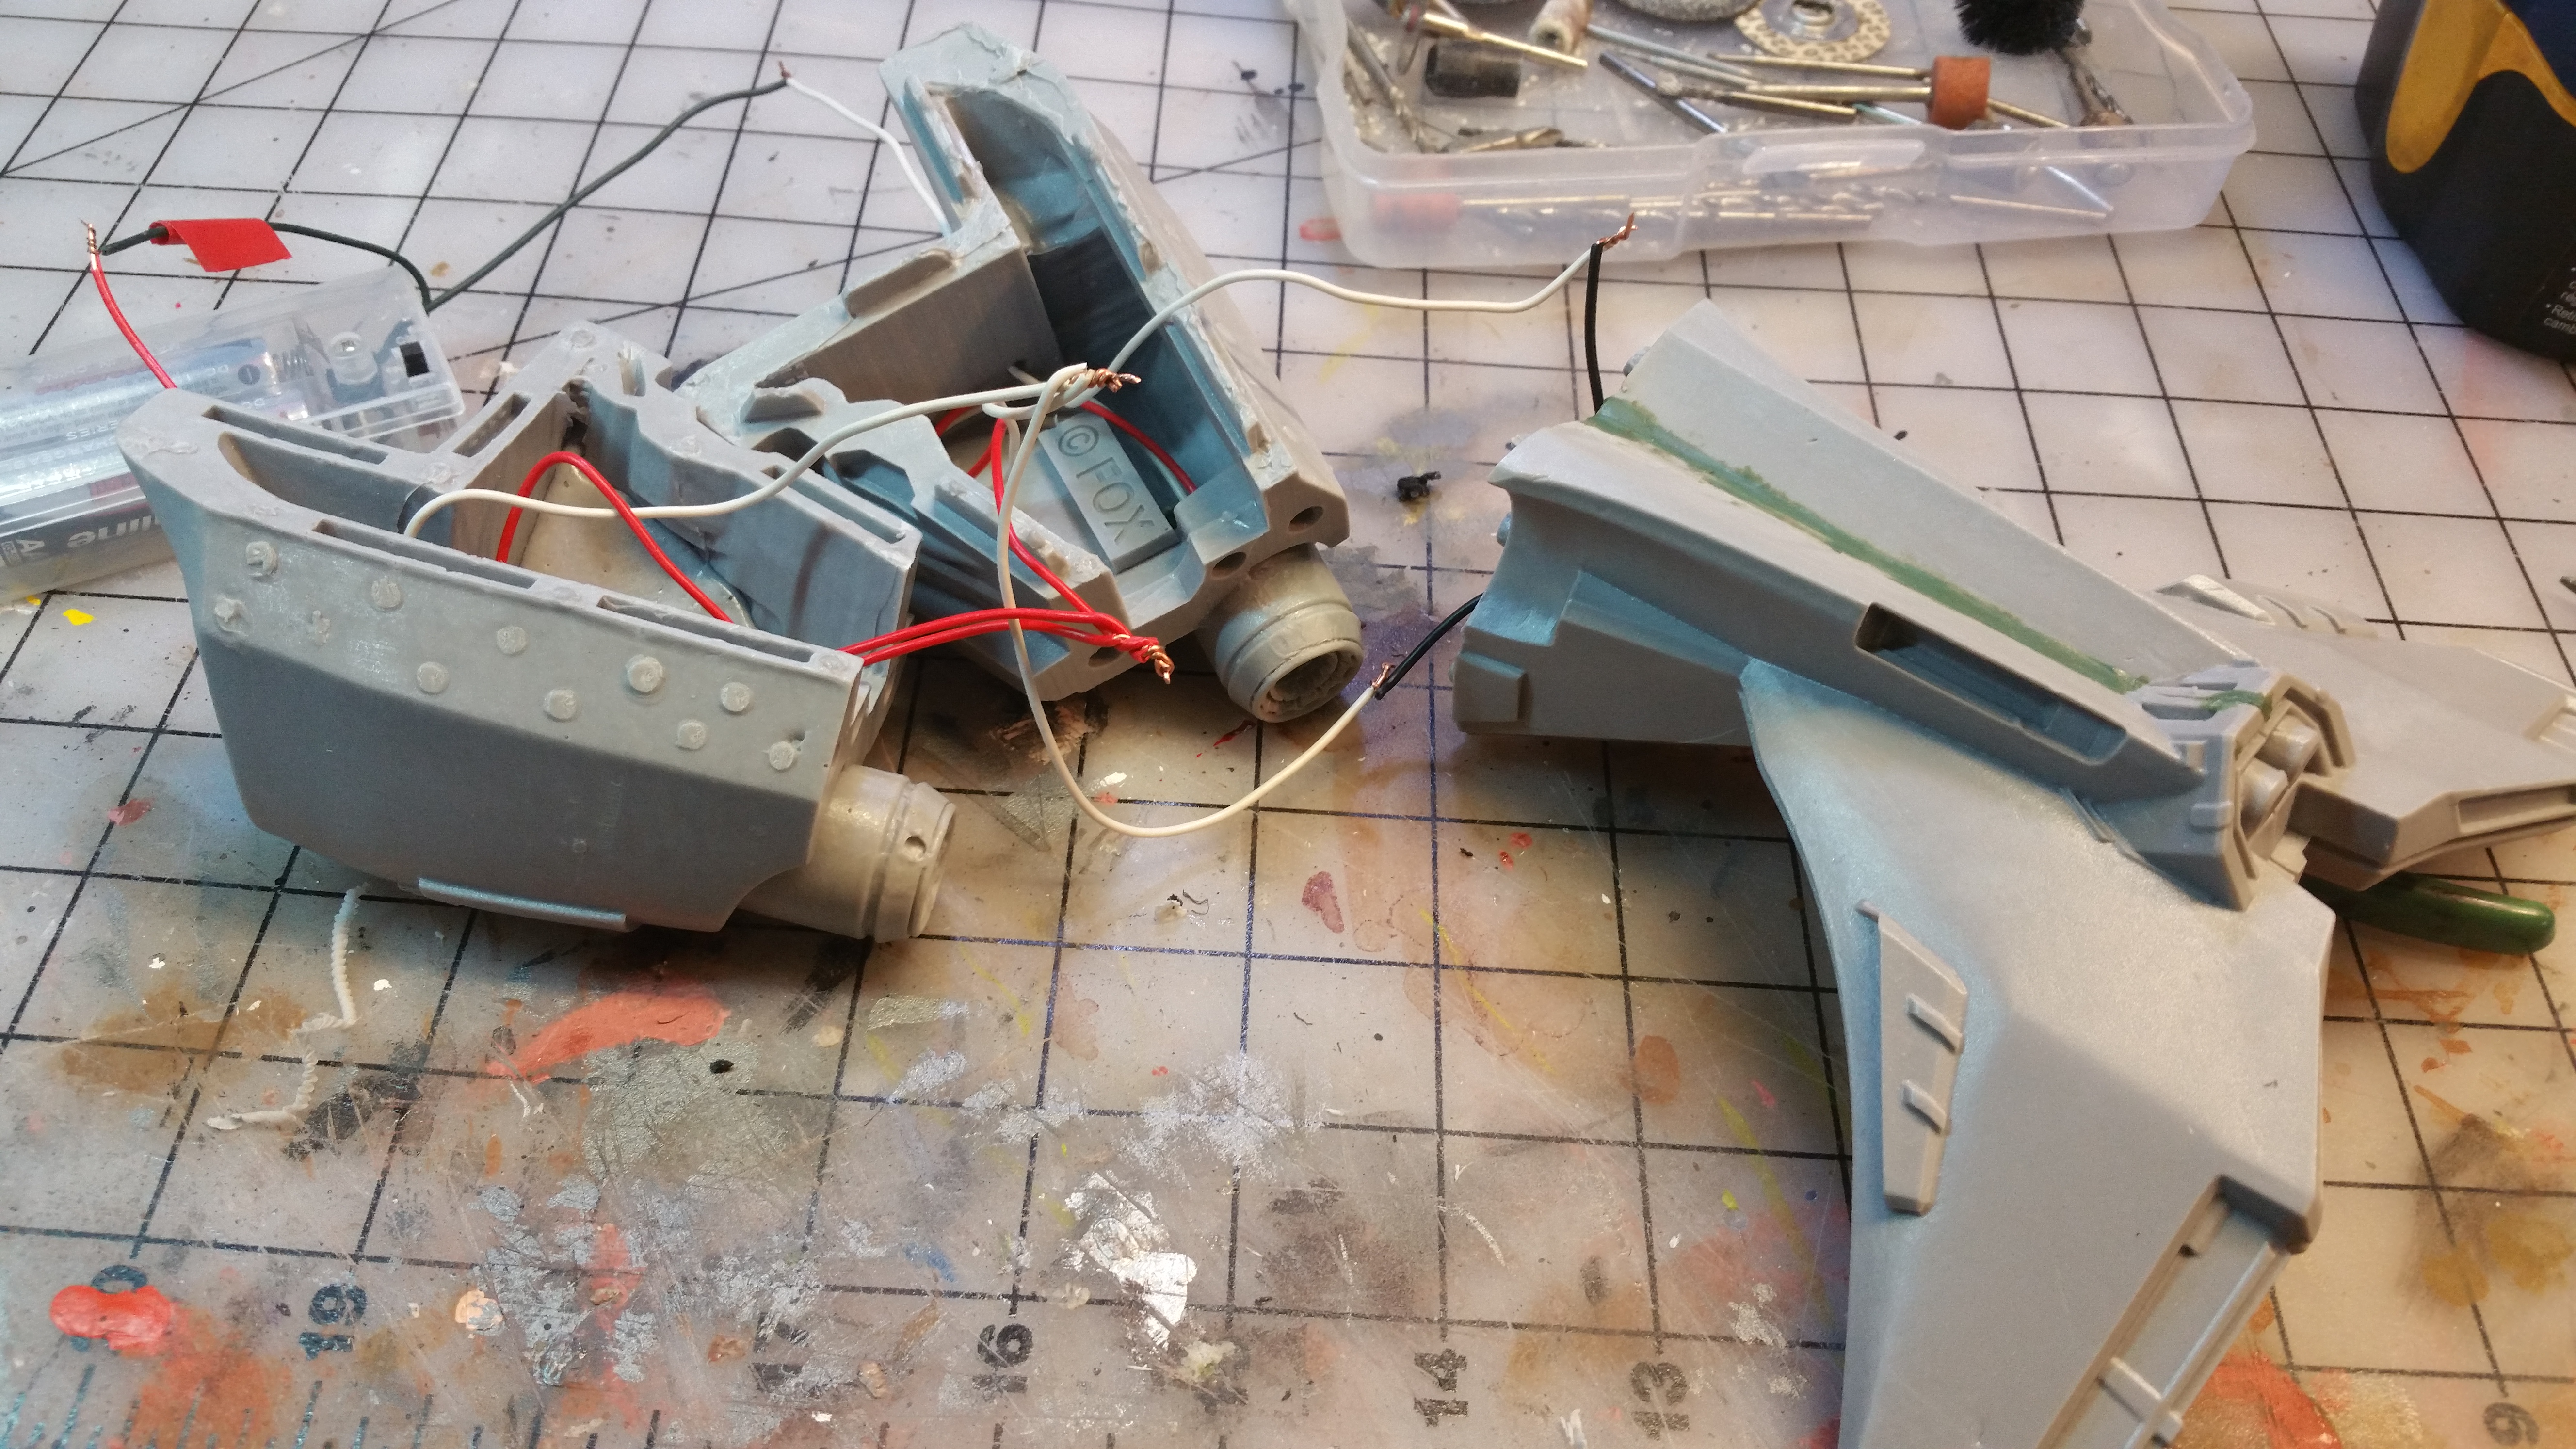
Once I got that on and settled, I finished up the “battery compartment” in the top of the main bay. The AA batteries are easy to get to and simple to exchange. I did oops, and mucked up the wiring, so there are two switches, one to the forward half of the model and one to the engines. Essentially, I built a false roof that hid all the wires and used a magnetized card to cover the open area.
After that, I go through the finished flight stand and the landing ramp, and then preparation for the final painting and putting on the transfers.
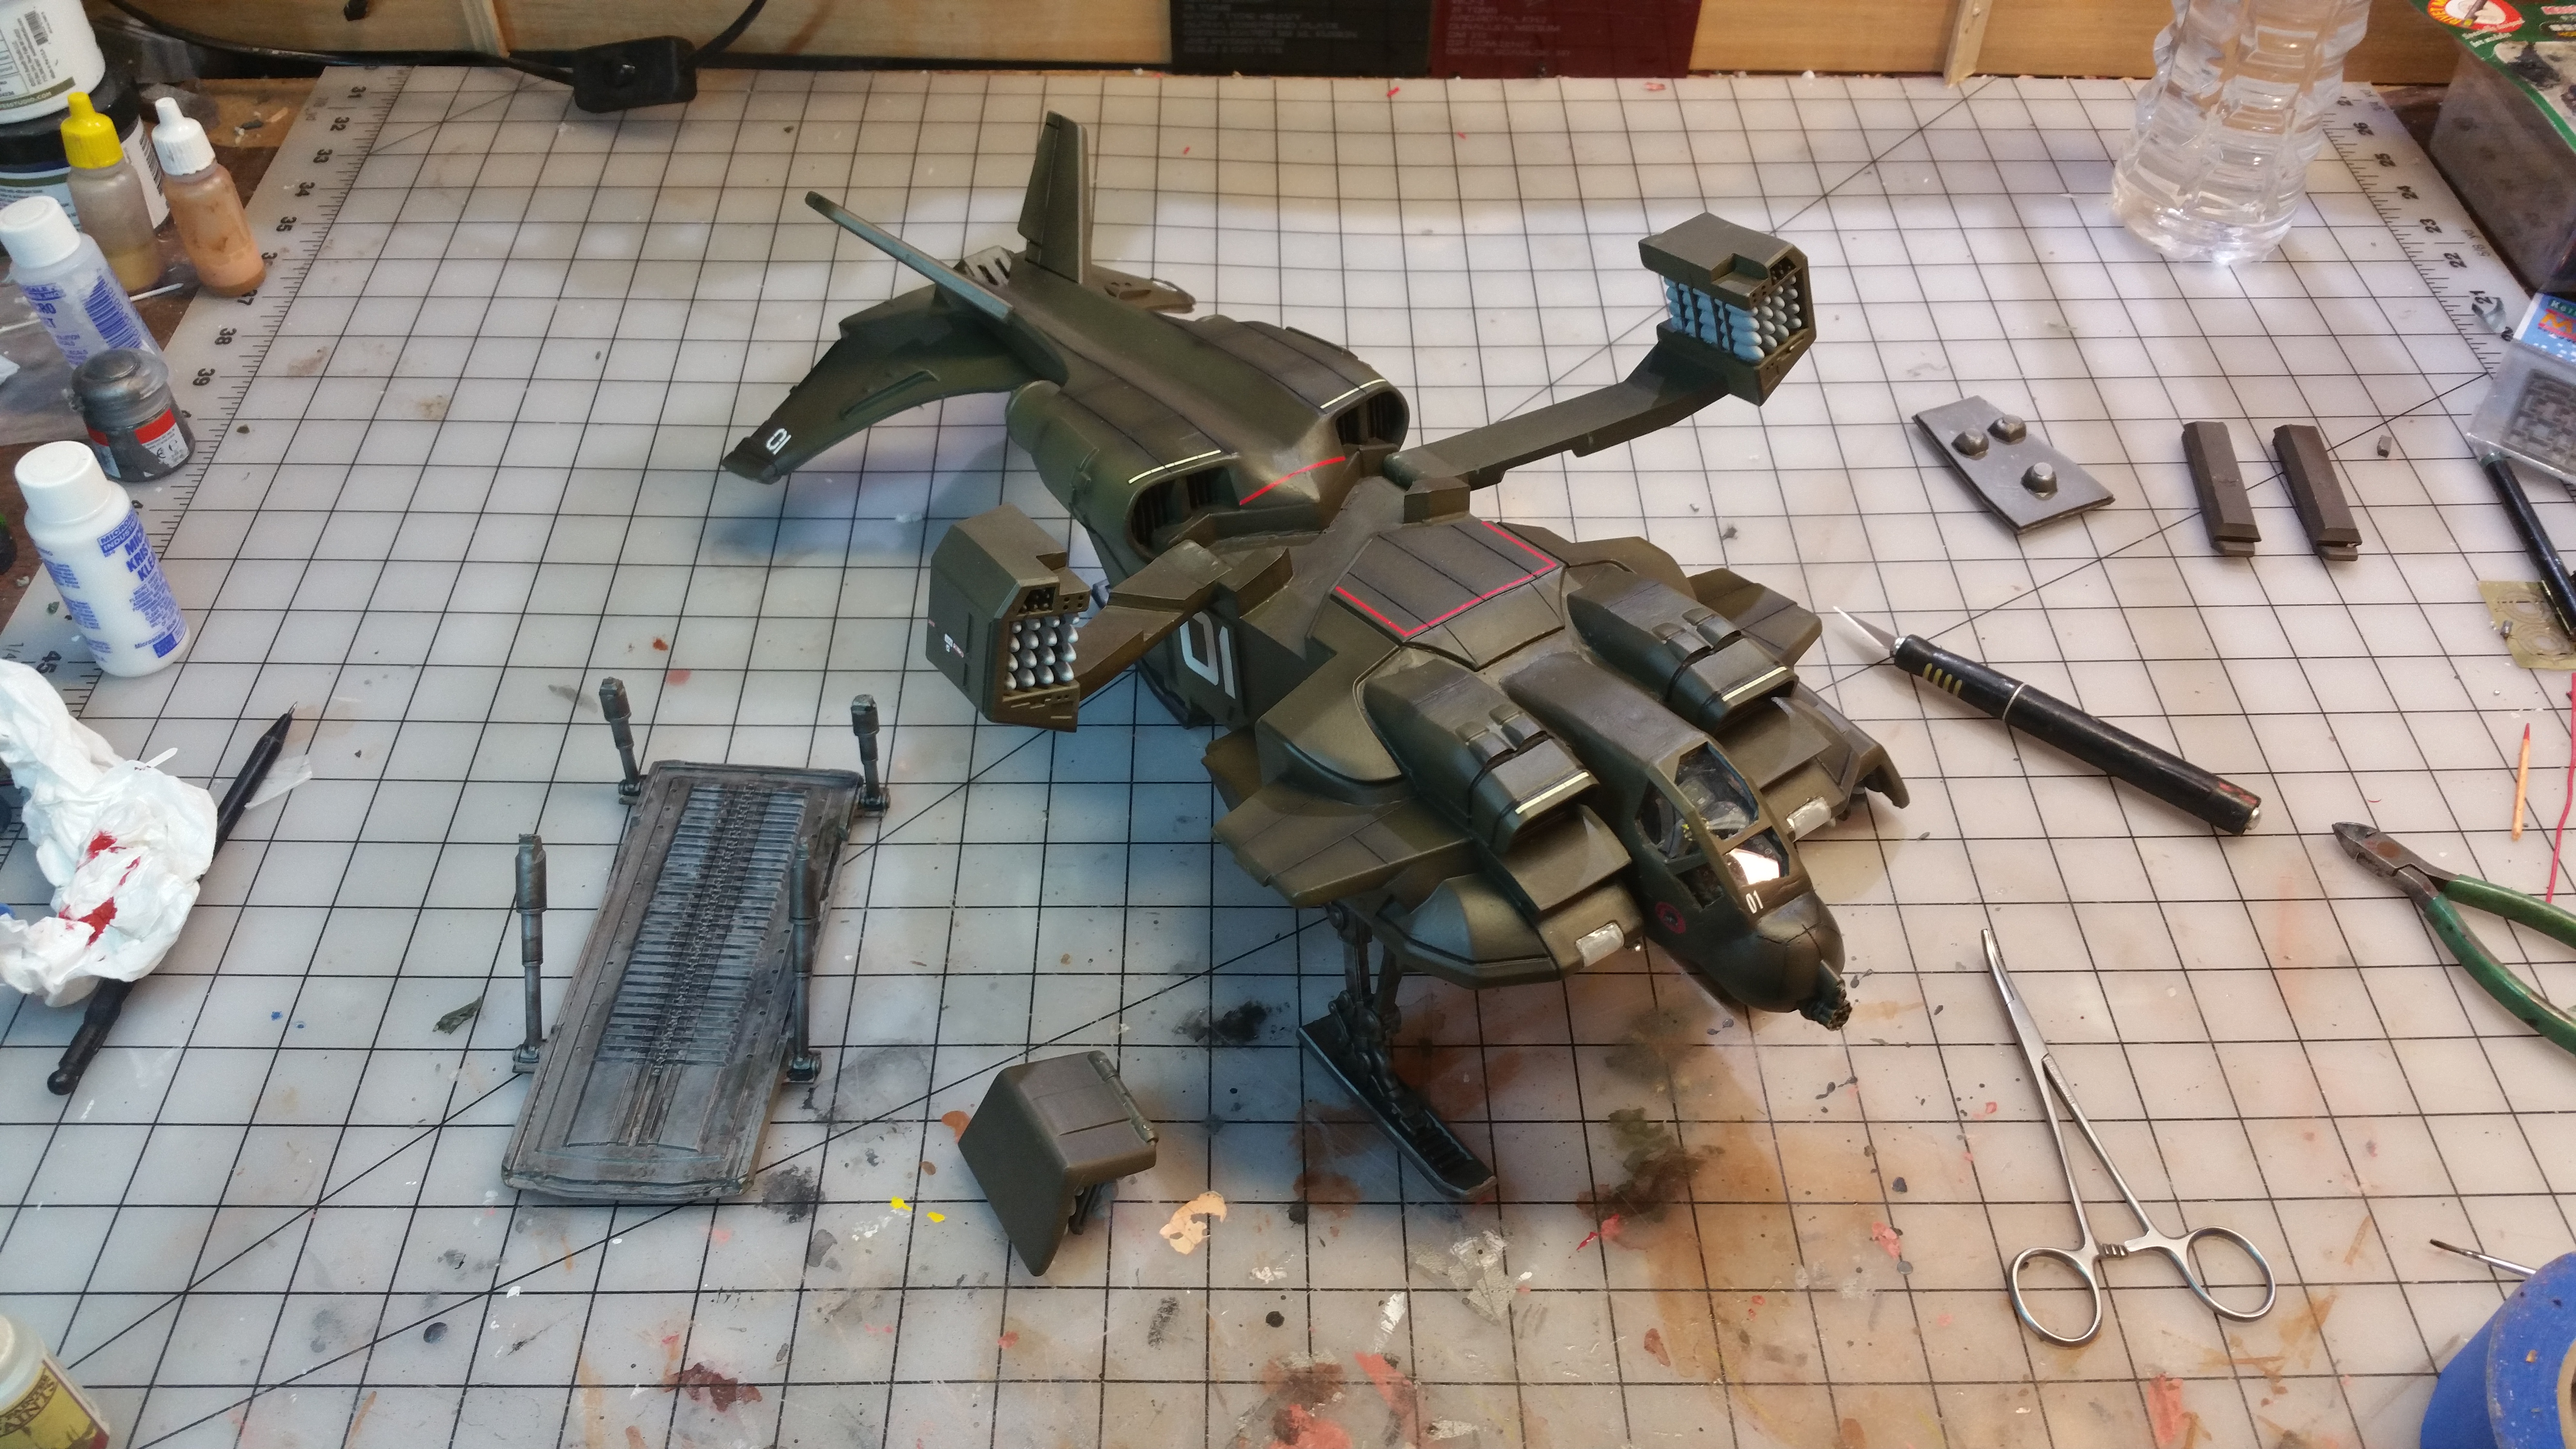
Step 8 - Painting, transfers and beginning shading.
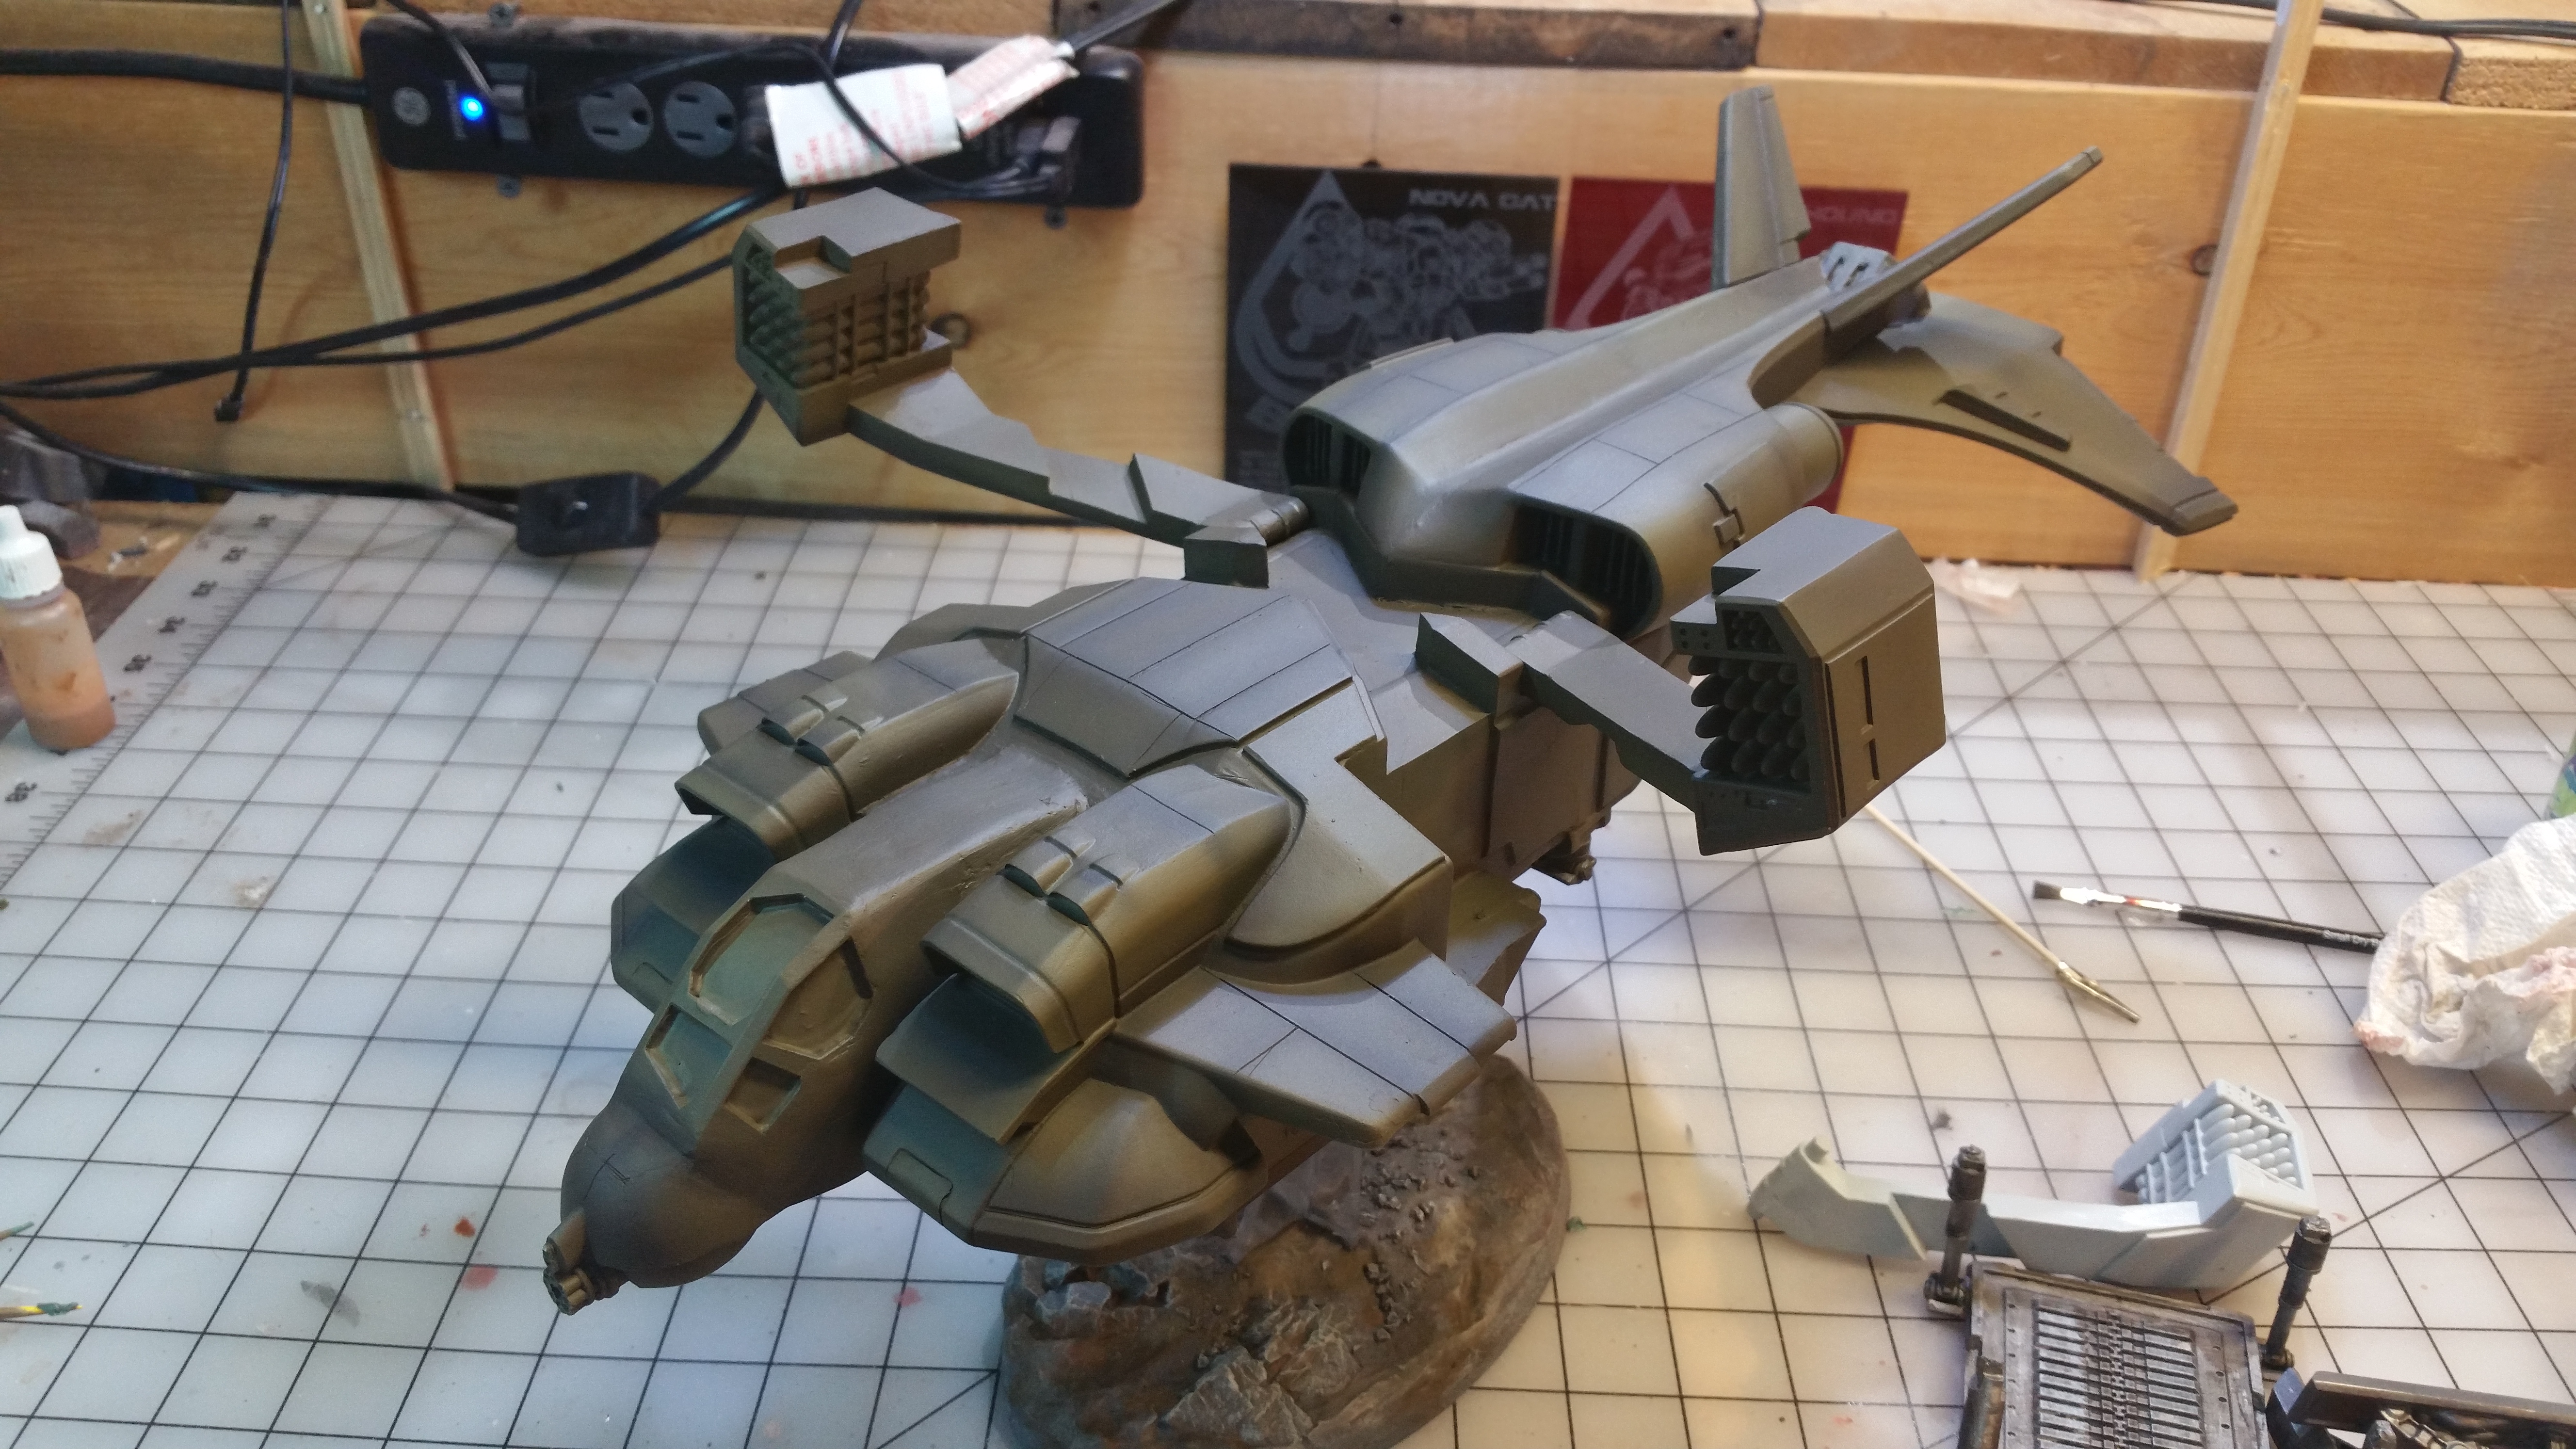
At this point all the assembly is done and the base painting is down. I’ve done some pre-shading of panel lines with another overlayer of the final color. I chewed on what color to use, since the actual model is much more of a brown than a green. I ended up mixing a custom color with vallejo paints to get the final base color. I used Vallejo’s US Olive Drab, Brown Violet and pale grey blue in a 6-2-1 ratio. It still has the greenish cast but it’s dulled down and closer to the color I was looking for.
The exposed metal from the landing gear is basically leadbelcher or gunmetal with shading.
For transfers, I pulled stencil details from several model kits I’ve been through, although I did end up custom printing a few that I needed for specific purposes like the nose art and the big numbers on the side.
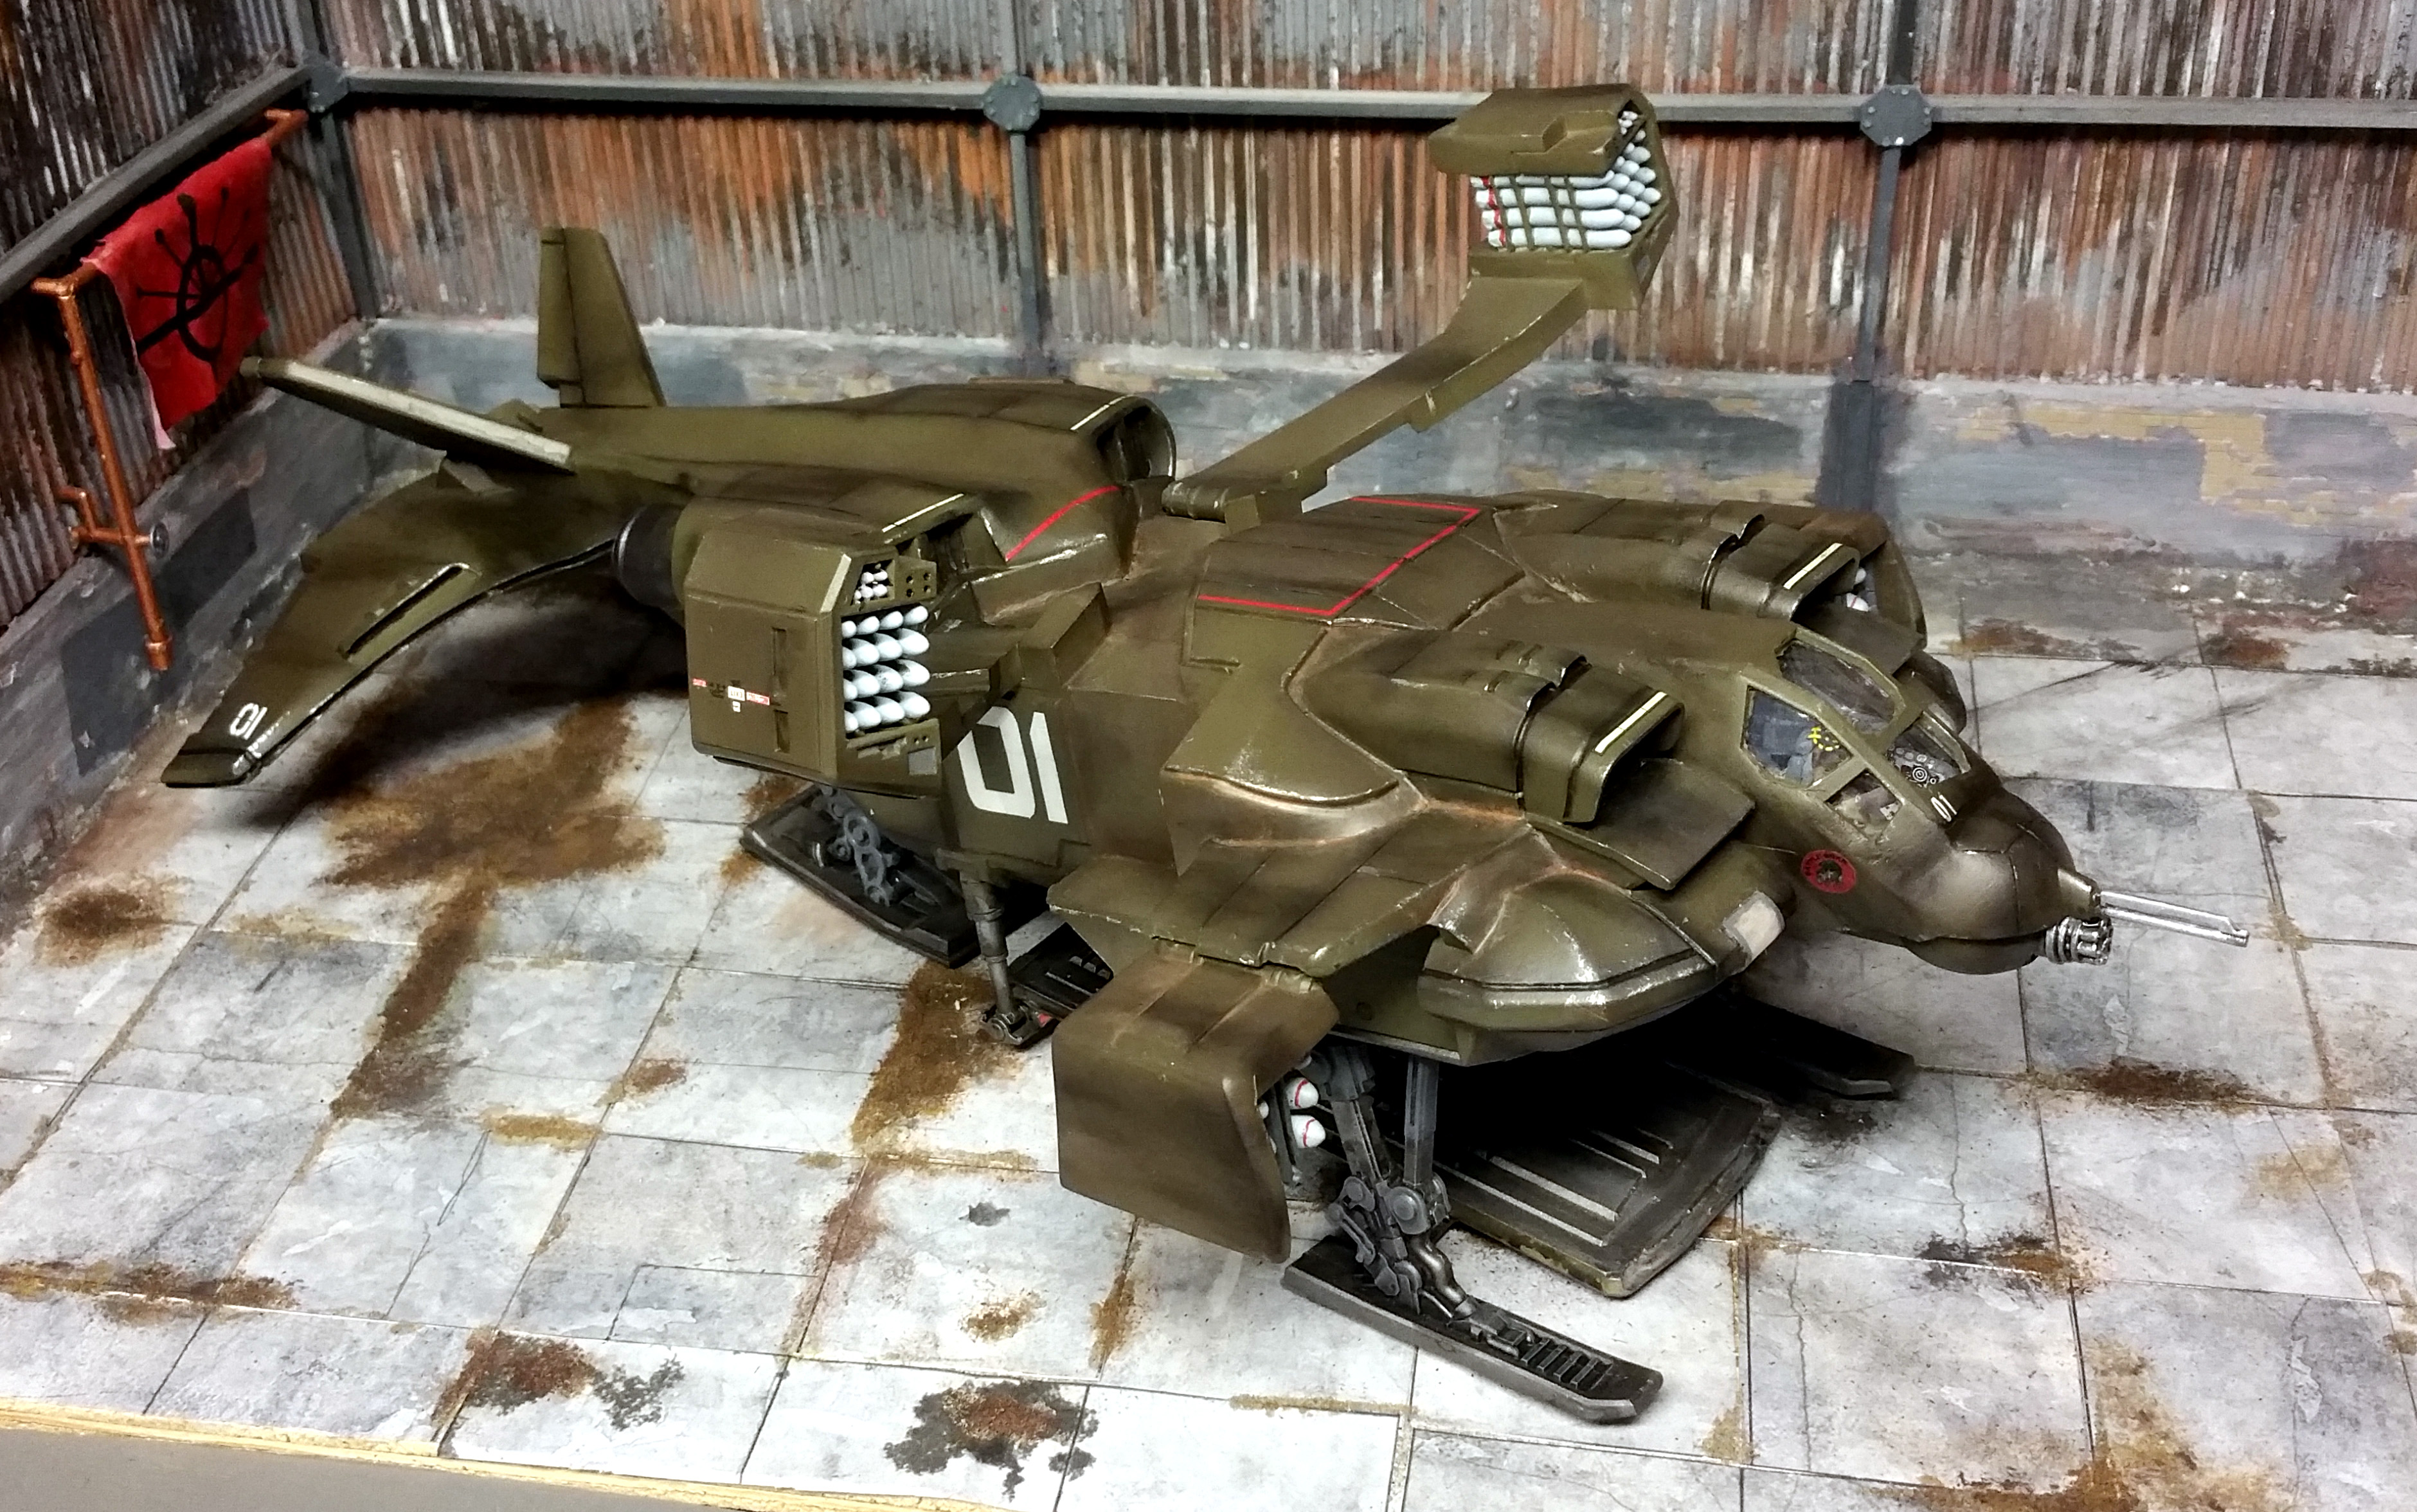
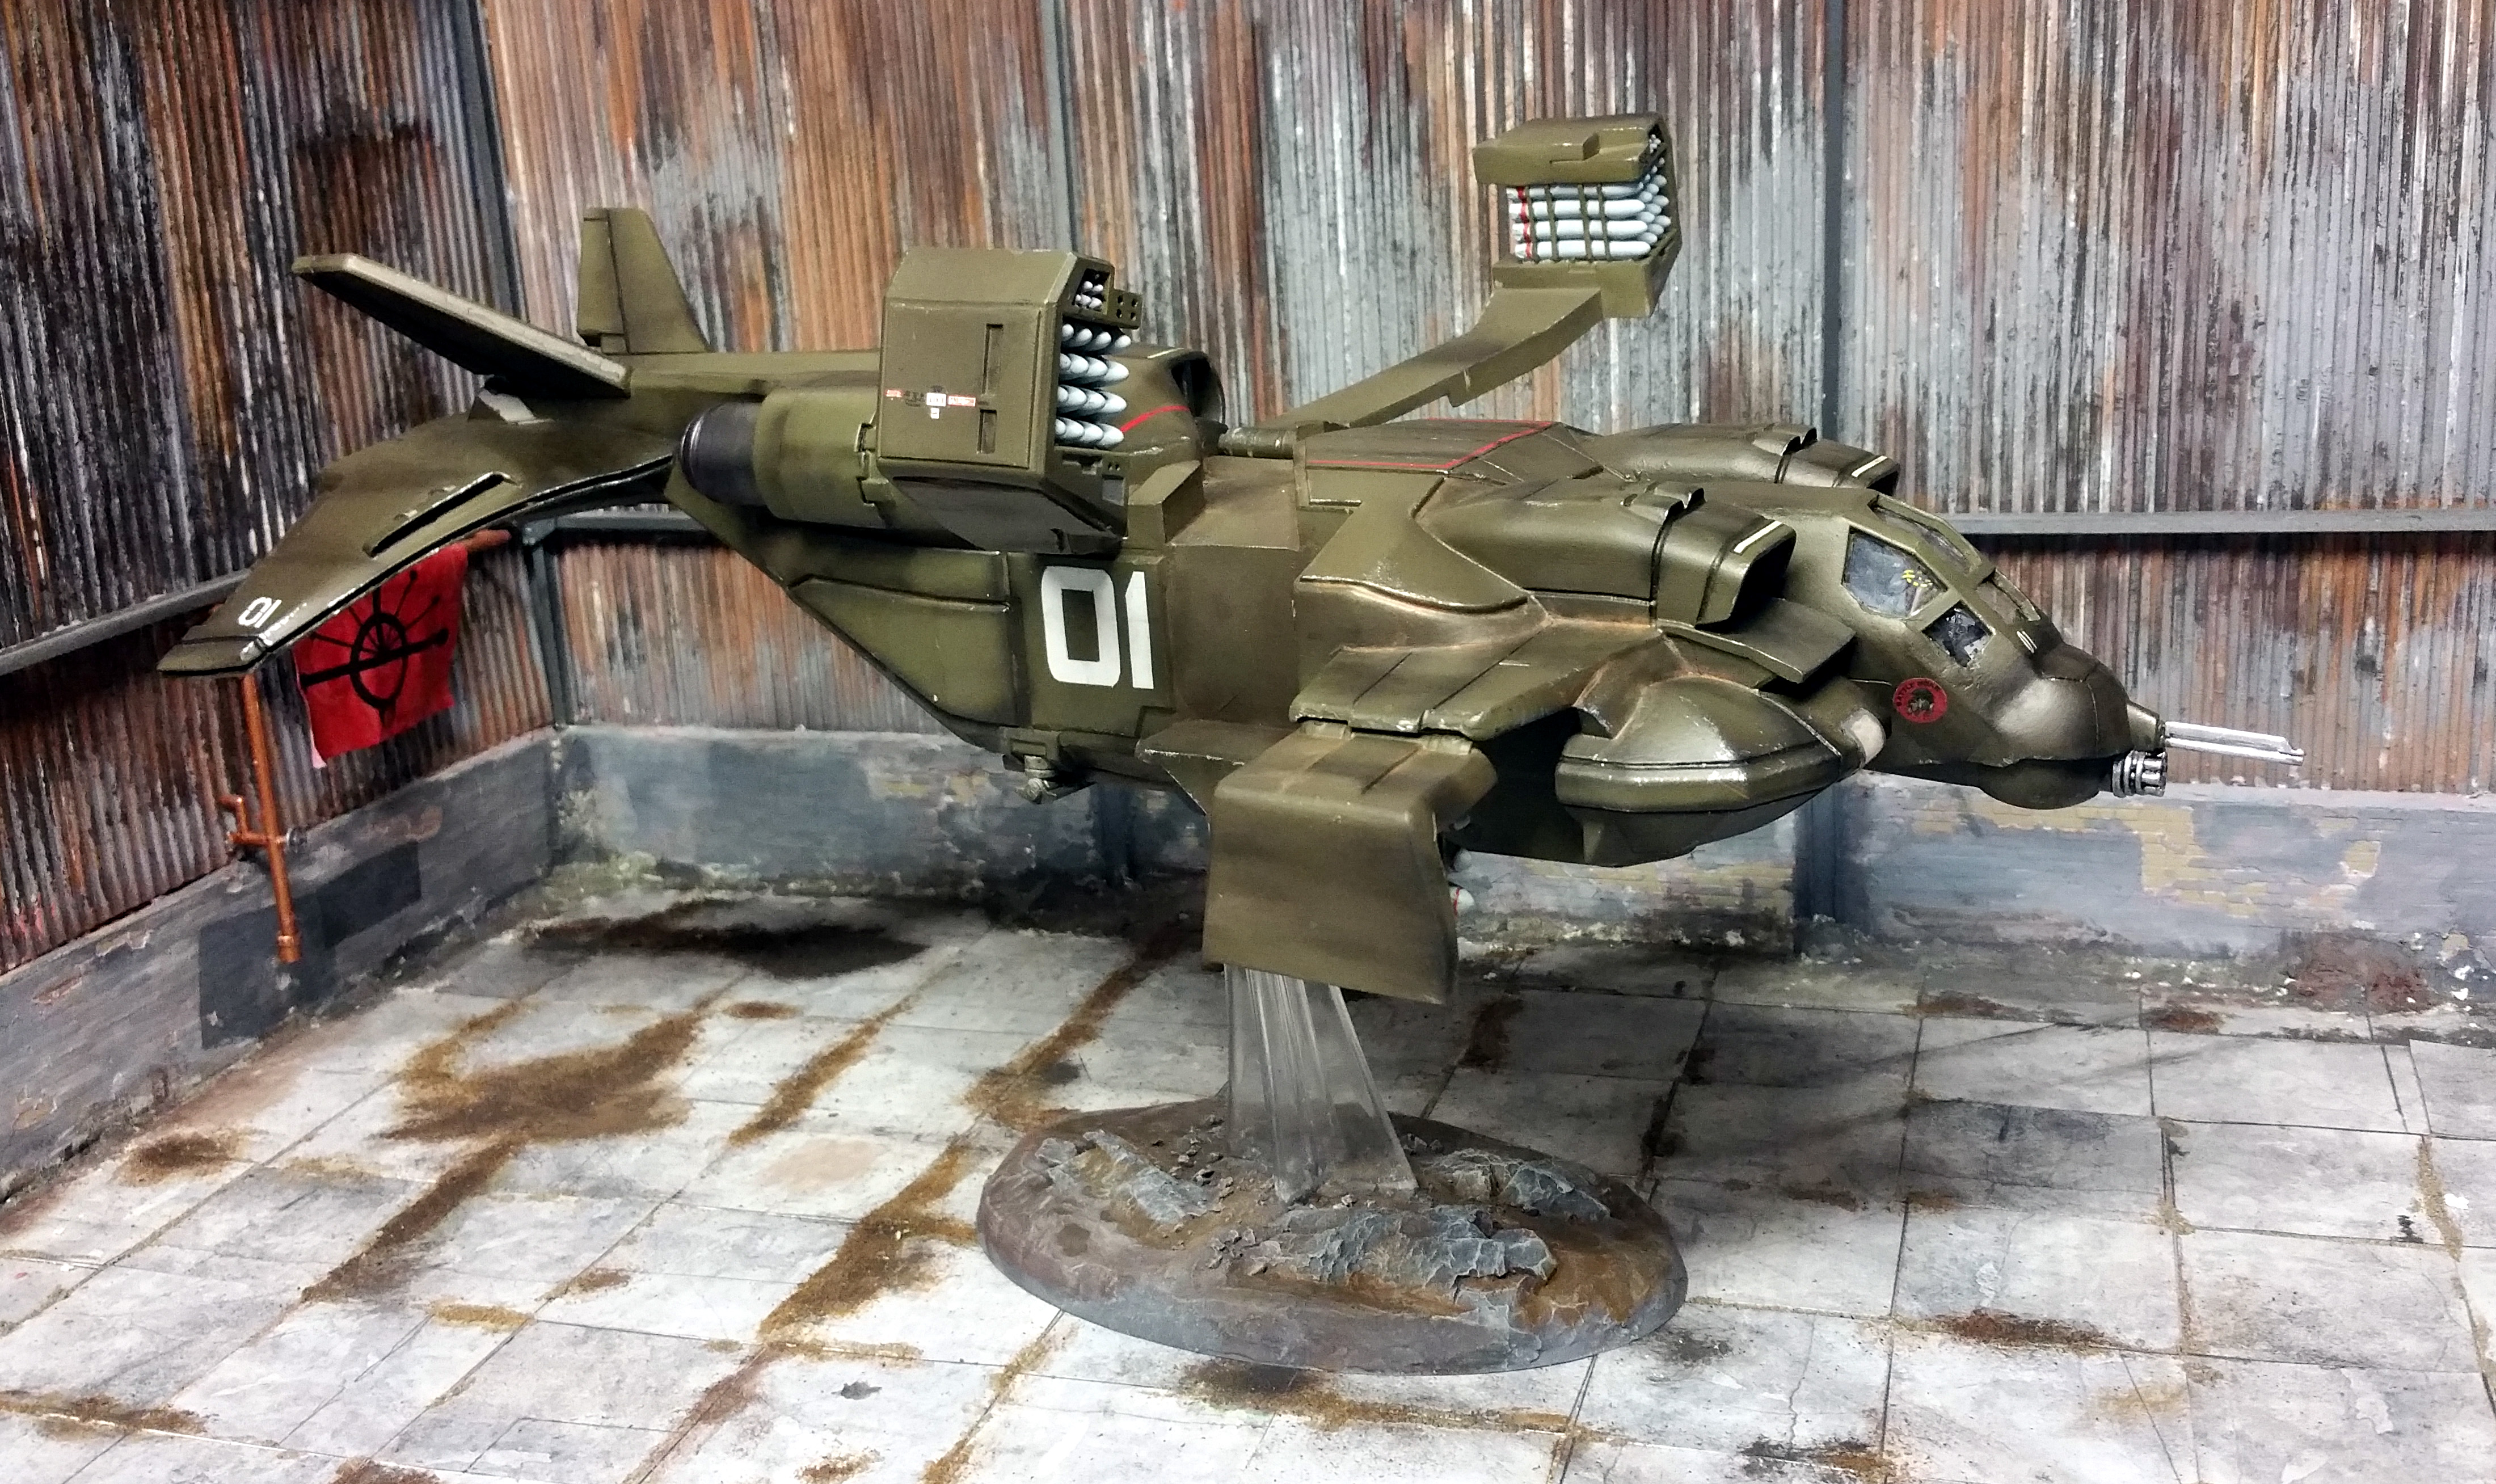
Step 9 - Finished.
The completed result.
The painting makes the model really pop. To my eye, getting all the little things done when assembling gets a good base for the subject, and it’s the painting that finally brings it all together. The lights and cockpit give this a good focal point, but to get a good result with this kit, those extras can be left out if you take the time to execute the paintjob well.
The extra panel lines and the shading techniques helped this come together at the end. I did make a point to put on a great deal of paint chipping in that just subtle enough so it’s not overly obvious but it is all over the model. And then I got very liberal with the carbon shading, following what would be airflow over the contours with blacks and browns to try to give it a well worn and used look.
It was a fun kit, and it came out much better than I thought it would when I first saw the pieces.