


We Re-Fight The Battle Of Rorke’s Drift
January 28, 2017 by lloyd


Last weekend we fought the Battle of Rorke's Drift as it was the Anniversary, with the help of community member avernos. Here's a bit about the game we played and what happened.

It's a labour of love for him and he's been working away on his set for a long time. In fact, avernos dived in and gave us some thoughts on what he was doing here with this project. The gameplay is based on The Men Who Would Be Kings, by Osprey Games, with some tweaks by avernos, with the building and most of the miniatures coming from Warlord Games and 4Ground's set.
It was a twelve turn game with each turn representing an hour of the battle and it was a fantastic way to spend a Sunday afternoon in the Beasts of War Studio. Let's hear from avernos, the man himself, as he takes us through the different stages of preparing and playing the game.
Preparing & Playing Rorke's Drift
In preparing to play a game of Rorke's Drift for the tabletop the first question was, what did I want to achieve? It was a convention game, so it needed to be simple enough to run for a group of people who didn't need to know the system. At the same time, it needs to play well enough to keep people's interest and offer tactical choices.

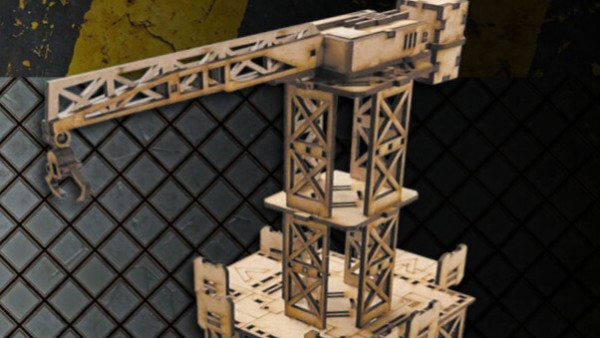
In one of the Osprey campaign books, they have a plan drawing of the defences based on Lt Chard's own sketch. Using this I worked it that the defenders would be having to cover defences of roughly 5x2 so right off the bat the usual 6x4 was out the window, instead, an 8x6 table would give us the accuracy I craved.

As Tony started work on the Zulus and I started on the scenery the big question was still what system to use to get a flavour of the encounter.
Settling On A System
Eventually, Osprey's new colonial rule set The Men Who Would be Kings was settled on.


The system is simplicity itself, fire and fight values are set and the number of hits required to cause a casualty are modified for range and cover. All of a sudden the Zulu snipers on the Oskarberg ridge need to roll four sixes on sixteen dice, while a platoon of British volley firing into the charging impis needs a single three or more to kill.


The second attraction to the rules is the use of leaders. Every unit has a leader and depending on who they are they make the activations easier or harder. Every time a casualty is taken two dice are rolled and on a double one, your leader has died! Straight away this offered some amusement and threat.


Every British unit would be lead by a named character who had better leadership than normal and for each of them we came up with a rule to flavour them to the film. Chard's "Sing damn you, sing" allows all pins to be removed once per game as he rallies the troops being an example. In the end, I decided on six platoons of ten men for the British lead by Hook, Ardendorff, Sgt Windridge, Colour Sgt Bourne, Lt Bromhead and Lt Chard.


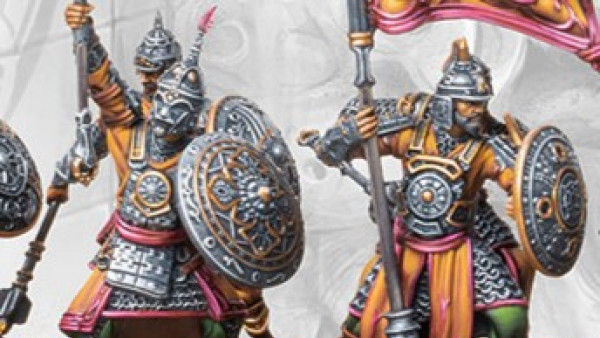
For the Zulus we decided to allow them to recycle troops to simulate the waves of attacks but I also wanted to give the impression of numbers on the table, the Zulus that attacked the Drift were made up of four Impis; iNdluyengwe, uThulwana, iNdlondo, and uDluko or Leopard's Lair, Dust Raiders, Poisonous Snakes and Savage in thankfully pronounceable English.


These four regiments would be represented by two units of sixteen men each, with a ninth unit of iNdluyengwe who would act as the snipers on the Oskerberg Ridge.
A Card Based System
The rules suggest using a random card draw for multiplayer games to keep people on their toes. This is a great idea, like in Bolt Action and other games, the fact that no one knows when they're going to act, or when they will act next, really adds another level to the game. You can't leave yourself exposed safely in the knowledge that you'll act before your opponent next time.

The six red face cards worked for the British but I wanted to keep it balanced in terms of draws so I tweaked the rules slightly for the Zulus. Each regiment got a card, so every two units only had one card to act with, as long as both units from the regiment were within four inches of each other they could move together, but to fire, charge or go to ground it could only be played on one unit.

To this, I added a card for the snipers on the ridge, essentially just a set of shots to rain down on the defences and finally the joker. The joker could be played on any unit. This would let a unit act twice in one turn, or could be used to activate a unit that didn't have a card (if their sister unit had used it instead).

Finally, recycling Zulu units. This was a simple matter, as when the card for the unit was drawn it could be used to bring on a previously destroyed unit, or a regiment if they had unluckily lost both. Alternatively, a depleted unit could be retired as if they had they hid in the long grass and skulked away so they can return on next turn.


With the mechanics pinned down the scenario just needed to be set, thankfully we have both the film and historical accounts for that.
The Game Begins
The action took roughly twelve to fourteen hours, so I took the lower number of twelve as the number of turns the game would last.
Win conditions were also fairly easy. In the film the Zulus left saluting the "fellow braves" but in reality, Lord Chelmsford's cavalry column was returning from Zululand and the attackers fled before the approaching army. So, at the end of turn twelve, if the British had any platoons inside the perimeter unbroken they would win. The Zulu's needed to finish the garrison before the sands of time ran down.
Lastly, a mix of historical accounts and some Hollywood magic for added flavour. The platoon lead by Pvt Hook had to start in the hospital while the other five platoons were deployed at their owners choice. Here the British found their first choice, the close order formation is best to defend with, but in doing so they can't cover the whole perimeter of the defences.
The Zulus initially attacked from two fronts despite having surrounded the whole area. So, they would deploy randomly to match those fronts, only after turn four would they be able to deploy in from the other sides and again this was random, forcing the Zulus to not just rely on the weight of numbers and the British to not abandon whole sides of the walls.
We've all seen Hook and the hospital defenders battling through the flames so from turn four onwards I would roll to see if the fire set off and in subsequent turns would make that easier with a chance of it spreading to adjoining rooms.

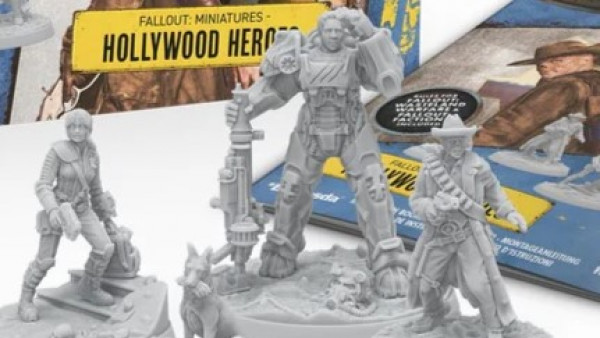
Finally, a couple of figures were added to represent the Ferryman Daniels and Pip his dog. Accounts claim that Pip stopped several attacks by alerting the defenders of the otherwise hidden Zulus. I decided that I would randomly move them at the start of each turn and the closest Zulu unit within eighteen inches would lose their cover bonus for the turn.
Tony being a graphic designer by trade came up with some beautiful play sheets to hand out that contained all the information needed for each unit, all that was left was to paint the miniatures and play the game.
The first run out at BeAcon was a great success and we decided that it should be inflicted on the guys back in Coleraine at our first opportunity. As it happens that would be January and when we realised that the club would be meeting 138 years to the day of the attack on the Drift it made perfect sense to queue Richard Burton's narration and get to playing.

Lloyd and Justin decided to play the British. Each took command of three platoons, so in the end, Justin had Ardendorff, Colour Sgt Bourne and Lt Bromhead. Lloyd defended the northern end of the camp with Hook in the hospital and Sgt Windridge and Lt Chard. Tony and Jonathon took control of the Impis intending to gain spoils and honours that had been denied them at the previous battle at Isandlwana when they had been held in reserve.

The speed of the elite white shielded 'Dust Raiders' almost took Pvt Hook by surprise. In short order, they had assaulted the hospital several times and despite fatalities Hook's men held firm and repulsed the Zulu at every turn.
Likewise, Chard and Windridge's platoons were under constant threat from the long grass before them, while the southern platoons scanned for an enemy that wasn't there.
Dissension In The Ranks!
This lead to some dissension in the ranks with the senior Lieutenant questioning why his support was firing at nothing on the ridge but the order must not have reached him for Lt Bromhead's men stayed resolutely still.

Eventually, the sustained assault on the hospital forced Hook to flee and his men came to take up positions on the ramparts beside Sgt Windridge's men, this alas was mistimed and they arrived only to be assaulted by a unit from the Savage's. Hook watched his men cut down around him before fleeing himself, only to be cut down with an assegai in the back.


Chard and Windridge began to retreat towards the smaller enclosure at the southern end of the compound with Zulus hot on their heels as the flames lapped from the hospital. By this stage Chard was roundly cursing his subordinates, Bromhead in the storehouse, Bourne firing turn after turn into the ridge against ghosts. Only Ardendorff had tightened the line and come to his aid.
Whether this lack of movement would help in the long run was disputed. As the British commanders bickered their opponents were much more united and an audacious move by the 'Dust Raiders' saw a unit getting inside the burning hospital, the other was pinned by Bourne's men at the veranda and stuck outside.
However, inside the burning building, they stayed ahead of the flames and just as smoke billowed from the thatch they launched a vicious assault on Bourne's unit who wavered and broke, fleeing towards the safety of the final redoubt.


By now the British forces had reached the internal wall only to find they were moving alongside their foes. Lt Bromhead finally retreated from the storehouse having faced no opponents and immediately took up positions inside the redoubt watching as the ring of Zulu warriors tightened on the dwindling number of British soldiers.
Ardendorff's men were cut off and mercilessly butchered without crossing the biscuit box walls, while Chard managed to make it over with only a bugler and rifleman alongside him. Windridge hastily formed his five men into close order as he realised that while focused on the northern threat a unit had arrived skirting the deserted British tents.

However, this show of strength was enough and the 'Poisonous Snakes' flinched at the first time of asking when trying to charge. Time was running out and this would prove costly. At the second attempt their leader stiffened their resolve and with little ground given by either side Sgt Windridge's men were beaten back and pinned. Lt Chard died last as his two companions flee trying to prevent them crossing the mealie bag wall.
The Final Sortie
Smoke filled the air as volley after volley from Lt Bromhead's platoon was poured into the advancing Zulus and despite two units throwing themselves against the rampart walls, they held firm. In the distance, the Prince Dabulamanzi kaMpande sighted the approach of Lord Chelmsford's cavalry and ordered the retreat.


Eleven men from the British forces held on for a victory by the narrowest of margins, but the Zulu Impis will return.

The day was a lot of fun, but there is more work to do, the Perry's are releasing British troops in plastic for Zulu wars this month so I'm now looking at making it a 1:1 force for the British, which will mean more Zulus as well. Also there is still a tonne of painting needed to finish the current miniatures off and I think a few more rules tweaks to balance the game out. But, as a great man once said: "art is never finished, only abandoned".

If you get a chance to do something like this we highly recommend it.
Have you ever played anything as massive as this when a Historical anniversary comes around?
"...it was a fantastic way to spend a Sunday afternoon in the Beasts of War Studio"
Supported by (Turn Off)

Supported by (Turn Off)
"This lead to some dissension in the ranks with the senior Lieutenant questioning why his support was firing at nothing on the ridge but the order must not have reached him for Lt Bromhead's men stayed resolutely still..."
Supported by (Turn Off)


Always been fascinated by this historical battle. I always adored the battle report “The Last Stand at Glazer’s Creek” in white dwarf 222, it was the same thing, they just replaced the Zulus with Orks.
Because of that I bought a ton of the praetorians when they were given a limited release. And of course we had the famed orc’s drift from GW as well, not surprising considering how big a fan John stallard is of the action. He wrote a fantastic article for WI many moons ago that peaked my own interest beyond that of the film
We probably won’t see the Perry figures before Salute unfortunately..
But (at least for the British) I am planning the same as @avernos .
😎
Ready for January 2018!
To be honest for gaming pieces I think the warlord/empress plastics are better. I am using a mix of them and perry’s Sudanese British and lost several of the wafer thin bayonets just getting them assembled and painted. (Although not finished as you may have spotted). In the end with a box of the new perry’s plastics it will be roughly half and half and will give variety if nothing else.
Kind of disappointed that there was no mention of my sterling rendition of men of Harlech, or my constant potted history and “interesting” facts that everyone loved. Definitely loved. Yup. 😉
Maybe the lads at BoW could get you into the studio and it could be included in the next podcast
every note pitch perfect, every joke piss poor. That’s me
🙂
Brilliant 😀 . I have a ( very ) amateur interest in all things to do with military history and battles, this hit all the right notes for me. I was actually a little sad when i read about Hooky brought down by a spear, then i got to Chards death 🙁 and thought it was a very bad day for the defenders this game. Revenge must be sought the next time you guys fight over Rorke’s Drift.
Great stuff
cheers matey
next time you’re over you can play a Zulu if you’d like 😀
So you gonna do it again?? when? 🙂
I’ll play it any time I get then chance, you need to ask the bigger boys when they’ll let me take over a chunk of real estate again. Also I really need to get the painting finished and maybe add a couple more units of British.
I would love to play as well! I showed my Dad this and he thought it was amazing! He was the one that got me interested in this war. Why not go bigger and fight out the Battle of I Isandlwana. I want to play Lieutenant colonel Anthony William Durnford and the Native Natal Horse.
Are you over for the fow bootcamp? If not just just give me a poke when you’re coming over again and I can dust it off. Who knows it may even be fully painted by then ☺
Also I have a really nice Durnford model based on Burt. But he’s on foot so end of the defense time really.
Thank god it wasn’t a video bat rep with Warren in charge. It would have been a bloodbath narrated by endless innuendo.
wasn’t far off a bloodbath as is, I remain tight lipped about the length of any
innuendo…oh err missus
I dont mean to be an arse but the hospital building is facing the wrong way, not that it maters. Chosen men id a great game to adapt for any colonial setting. Good to see it can be used to recreate this classic.
oops got chosen men on the brain at the minute, I meant the men who would be kings
chosen men is also an interesting game, I do think it needs tweaked though, I’ve left my copy with @Warzan to tempt *coughs* I mean so he can browse it at his leisure, no pressure or anything
it is you’re correct, I missed it when we moved the table from a 6×4 to 8×6 and in their defense the other guys didn’t know and I was flapping to get the game done and dusted. On the other hand the footprint means that no advantage was gained or lost. Funnily enough I was wondering how long it would take someone to spot that. You may have 5 internet points to spend where ever you so wish.
I’m a Rorkes Drift geek. I got to go to the actual sight this year. It was a dream come true, Great to see it tackled on the table top. I’ve done it myself but I have found it hard to find a rule set that does it justice.
TMWWBK is a fantastic set to do it with, very much in the vein of the movies but you can be as accurate as you want to be
Great job, seriously. Always glad to see historical get a “serious” look. 😀
you can’t spell serious without “Hollywood”
Oh how I wish GW would bring back the praetorians! I only have a few but they were so cool.
I would buy them up in a second.
I have soooo many of them, they were my first foray because I loved Zulu so much.
Really enjoyed this report, as any glance at my avatar would tell you, i am partial to a bit of military history and Col John Rouse Merriott chard VC in particular (but Stanley Baxter does just as well).
Bloody idiot I am!! That’s Baker, not Baxter. But that would have been funny, Chard in. Large Victorian ladies dress 🙂
in many ways that sounds better 😉
This was a great read! Wonderful pix too. Would you believe I had a chance to visit the battlefield (as well as Isandlwana) back in 2000 when I took part in a Zulu War archaeology dig in Eshowe. Check out the Siege of Eshowe on Wikipedia if interested in another little known siege of the war.
I really enjoyed helping out with this project and especially playing it.
It’s nice to see it up here in full Technicolor! 🙂