Warzone: Resurrection Tactica – How To Use The Bully & Emancipator
June 14, 2017 by crew
The end of May heralded a wave of Warzone releases that were being dubbed as the “Armoured Assault” by Prodos Games. The name is apt, as this round of releases is a mixture of new and existing vehicle models for the various factions within the game. The first two releases will be the Capitol Bully and the CTL-F800 Emancipator.
In this article we're going to look at some tactics for using these massive miniatures on the tabletop.
The Bully
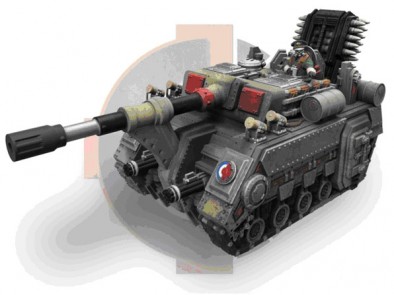
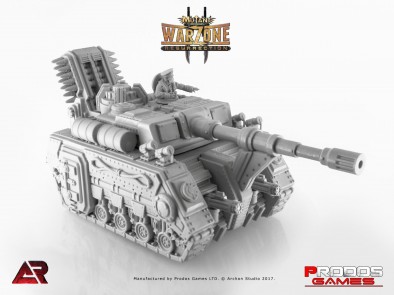
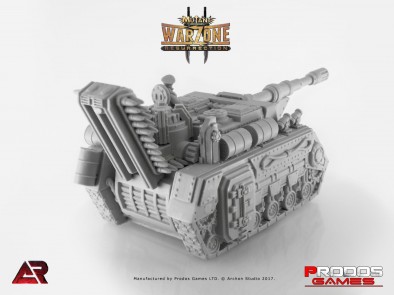
The Bully is the long-awaited heavy vehicle option for the Imperial Ministry of War. Like all heavy vehicles in the game, it comes in two flavours; the heavy vehicle version which is known as the Bauhaus Bully, and a light vehicle option (the Capitol Bully) which is more appropriate for Standard OOC games.
Historically the released model has been named after the heavy vehicle variant even though it could be fielded as either, but in this case, Prodos have gone with the light vehicle name with the option of releasing a dedicated Bauhaus Bully model sometime in the future. Either way, right now this is the Bauhaus Bully or Capitol Bully depending on the level of game you want to play.
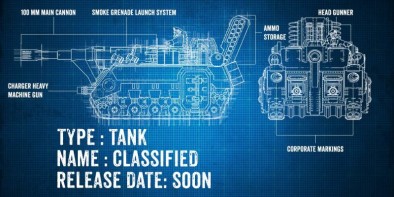
Although it looks like a tank, the Bully is more of a tank destroyer, without the turret trait that would allow it's main weapon to traverse. This limits the vehicle to firing in the front facing, and with a speed of 3", 6" or 9" it won't be moving around very much on the table.
However, with a range of 30" and a nasty combination of Critical Force (2) and at least two shots on the rifled gun, this is a premium tank killer that is likely to knock out any other vehicle in a single round of shooting as long both rounds hits the same location.
For infantry defence, the Bully also has a pair of Charger HMGs mounted on the hull and although it requires two Action Points to perform the Torrent of Fire action (the only way a vehicle can fire more than one weapon in a single shooting action without the "Paired Weapons" trait), the fact that the Bully won't be racing around the battlefield is actually an advantage - you will usually want to be aiming via the Battle Focus action, then firing with a Torrent of Fire action.
This will ensure your first shot from the main gun is all the more devastating, with at least seven more shots right behind it.
The Bully - Tabletop Tactics
On the table, the Bully has two issues you need to be aware of...
- It is highly vulnerable to attacks from the rear where the armour is significantly weaker, particularly from models using Flank or Rapid Deployment who are looking to get close enough to engage the vehicle in close combat.
- The gunner only has a Ranged Skill of 13, or 15 if you pay for the "Head Gunner" upgrade. By the time you factor in range (-2 RS), cover (-4 RS) or enemy skills such as Camouflage or Hard to Hit, that main gun isn't such a sure thing.
The first issue is a matter of deployment. Positioning in the corner of the table or backed up against the table edge cuts prevents the enemy from arriving right behind your Bully, but exactly where will depend on the table layout because the Bully needs a clear field of fire if you aren't planning to move it around. Even then, it will still need some support to prevent those same models from attacking the flanks (3 - 5 o'clock, and 7 - 9 o'clock).
If you prefer to stay within the Ministry of War, a squad of humble Trenchers will do the trick - perhaps with a Varg Rider attached to allow you more opportunities to react to an enemy using Rapid or Flank Deployment to get close to the Bully. Alternatively, why not attach Sgt Taylor? Not only will he grant the Trenchers an armour bonus if he is close to the Bully but once per turn he can repair the Bully as well!
Wolfbane Commandos, Mourning Wolves and Brotherhood Troopers armed with Guardian Shields are also good options to protect your expensive vehicle from close combat attacks, with my preference going to the Wolves simply because they are cheap. That said, a Brotherhood Trooper on sentry who is ready to cast Luminous Cage or Rushing Tide on a squad arriving nearby via Rapid or Flank Deployment will make your opponent sad indeed!
The second issue is a question of synergy - Trenchers should be using their Targeting Flares to mark targets for the Bully and there are certain cards in the Advanced Combat Deck that can give an additional buff to the Bully's Ranged Skill. You can also stock up on a few (probably no more than 3) O´Laughton Clan Markers, which will help to ensure that the aimed shot from your Main Gun will almost always hit.
Combat Deck Options
If you are playing with the Advanced Combat Deck, here are some more cards that will help you get the most out of your Bauhaus or Capitol Bully...
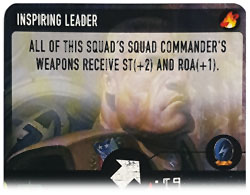
Inspiring Leader: Vehicles and characters are usually the best target for cards that only affect the squad leader. The main gun won't benefit from the +1 RoA unless played on the Bauhaus Bully (the Capitol Bully has the "Slow to Reload" rule on the main gun), but the Chargers will, and all guns will benefit from the +2 Strength.
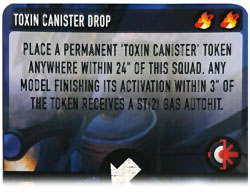
Toxin Canister Drop: A good area denial card that an Imperial player should have in his or her deck anyway. It complements, but does not replace, the measures you put in place to protect your Bully. Don't be put off by the low Strength of the auto-hit - a model resists with it's Constitution score against Gas attacks, not Armour.
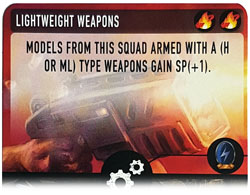
Lightweight Weapons: Mobility isn't something you would normally associate with the Bully but if you wanted to surprise your opponent, this card will allow your vehicle to move 4" / 8" / 12". Pair with a couple of Loughton markers and now you're moving 5" / 10" / 15". Best of all, this is a Gear card so it sticks around for the rest of the game unless your opponent has some way to remove it.
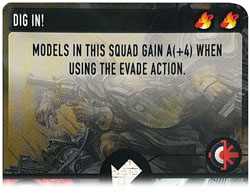
Dig In: Another card an Imperial player should always have in his or her deck, this is especially potent if combined with Sgt Taylor when attached to a squad of Trenchers guarding your Bully. Hold on to this card until a credible threat appears near your Bully, then play it on the squad of Trenchers (and Taylor!) - the bonuses to their Armour will stack, giving your Trenchers Armour 26 for the turn and Taylor 27 as long as you don't mind spending an AP to perform the Evade action.
The CTL-F800 Emancipator
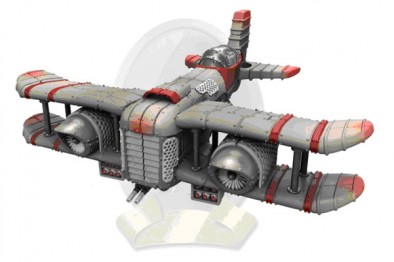
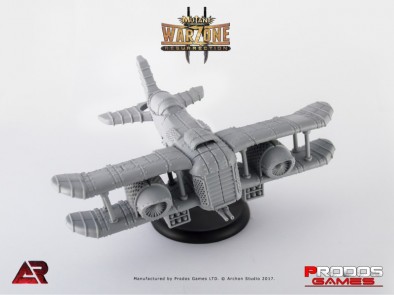
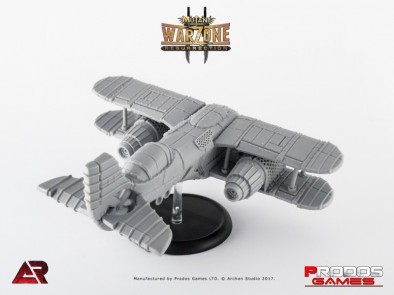
A joint Capitol/Bauhaus project, the CTL-F800 Emancipator is an aircraft that has been produced for use by the Cartel, a United Nations-like organisation that is supposed to be a collaborative effort to tackle to the threat of the Dark Legion. Because it has the "Cartel Agent" ability, this flyer can be used by the Brotherhood and ALL of the mega corporations.. everyone, in fact, except for the Dark Legion.
The Emancipator is a light vehicle (no heavy vehicle variant here!) which can be fielded in a squad size of one or two though at 120 points each, a pair of these will take up 25% of a regular force and importantly, occupy your only light vehicle slot in Standard OOC games. Because it is an "out of faction" choice, you can not apply your faction upgrades to it although there are ways around the slot usage if two vehicles is not enough!
For example, an Airmobile Capitol battalion can take the "Shark Assault" Enhanced Tactic which allows a squad of Purple Sharks to be fielded as a support choice, freeing up the light vehicle slot for some Emancipators.
The Emancipator - Tabletop Tactics
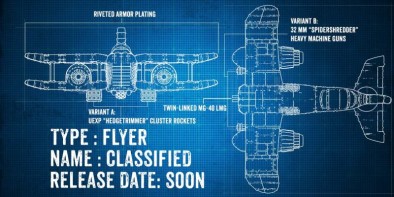
The aircraft itself is a relatively straightforward unit, fast and durable, with two weapon loadouts to pick from and these will largely dictate how the Emancipator is used. When armed with a pair of HMGs, the aircraft is a solid anti-vehicle option and it is especially good at taking out smaller, agile vehicles that tend to have the Hard to Hit ability.
Although high RoA weapons without Critical Force can often turn a vehicle into Swiss cheese without actually destroying it, the six (or up to eight) shots you can get from the pair of Spidershredder HMGs should be enough to cripple a larger vehicle or destroy a smaller one.. and woe betide the opponent who bunches his vehicles up!
Due to the "Paired Weapons" ability, you will be able to perform a Combat Move action (moving 14") and fire both HMGs in a single Shooting action, but if you really want to make sure you hit the target, you can perform a slower Tactical Move action (7") followed by a Torrent of Fire action.
This allows you to fire the MG-40 as well, which critically is loaded with tracer rounds. Thus you fire the MG-40 first to deny the target any bonuses from cover or Hard to Hit, then open up with both HMGs. Because the HMG is a Rail (R) type weapon, you might even end up hitting multiple models with each shot, although the downwards angle of the line will often mean that catching enemy infantry will be tricky (Hint: Buy a laser line!)
If your opponent didn't bring any vehicles, your Emancipator will still be very useful thanks to the "Pinning" ability of the HMG. With two of them, you can target two separate enemy infantry squads and have a good chance of pinning both of them, forcing the surviving models to go to ground and costing them at least one Action Point each when they next activate.
However, at Strength 10, the shots are equivalent to a basic infantry rifle so you will need to hit as many targets as possible with the Rail effect to get more than 2-3 casualties in a single strafing run.
If you expect to be facing a lot of tough elite infantry (particularly the Dark Legion) then the Cluster Rocket configuration might be more appealing. Although each yields only a single shot, non-vehicle models caught under the small explosion template can not use Heal against the (effectively) Strength 15 hit with Critical Force (2) and once again, with that "Paired Weapons" ability, you can fire both pods in a single attack and still move 14" in a turn.
This is a great way to deal with Razides (two templates over the same Razide) or Nasca Razides (one template per Razide), as well as the various two Wound models fielded by the mega corps such as the Bauhaus Juggernauts and Mishima Demon Hunters.
The trick to using the Emancipator lies in the use of the "Flyer" trait. As you might expect, this vehicle can move quickly across the board and it ignores all terrain movement penalties but this is also it's weakness; Flyers treat their models as being 4" above the table and are never considered to be in cover. Anything that is in range to take a shot at your Emancipator will probably do so, making an assassination run a costly proposition.
Yes, with the Preemptive Strike deployment option it could be 26" up the table on the very first activation of the game and thus put the enemy commander in range of a double rocket attack. But even if you succeed, your opponent then has an entire turn to fire back at the exposed Emancipator and is the loss of a 120 point aircraft a good trade for a ~100 point commander?
Perhaps, but a more cautious use of the Emancipator would be to keep it near your own deployment zone where it is able to pick off isolated enemy squads who have deployed via Infiltration, or who will arrive later in the game via Rapid or Flank deployment.
If the opponent over extends down one flank, leaving the Emancipator's activation until your penultimate activation of the turn would allow you to swoop in and attack the squads who have already activated this turn and even if you fail to seize the initiative for the following turn, only one squad can possibly shoot back before your Emancipator peels off and returns to the relative safety of the 'other' table edge.
Combat Deck Options
Finally, here are some cards from the Advanced Combat Deck that work well with the Emancipator...
Inspiring Leader: More useful on the HMG configuration (template weapons get the "Slow to Reload" ability, which prevents the RoA from being increased), 3 extra shots and all at +2 Strength will help against vehicle and infantry targets alike.
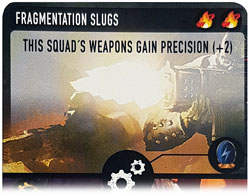
Fragmentation Slugs: Useful on the HMG version, but much better on the Cluster Rockets, this gear card capitalises on the anti-infantry effects of the weapon by increasing their Precision ability by 2, making each shot effectively Strength 17 against soft targets.
This will also apply to the MG-40. Better yet it applies to the whole squad, so this is a great card to play on a pair of Emancipators early in the game.
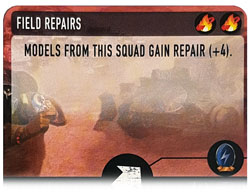
Field Repairs: Although the Emancipator already has Repair (5) which accounts for much of the aircraft's durability, it certainly wouldn't hurt to have a few of these in your deck for those times when you absolutely HAVE to fly the Emancipators within range of enemy anti-vehicle weapons in order to attack a prime target.
The cap for the Repair ability is 8, but this still gives your Emancipators a 40% chance of shrugging off every hit that gets through the fighter's armour.
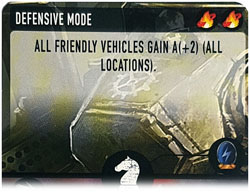
Defensive Mode: ...and speaking of armour, why not pair the tactic card above with this strategy card to push the Emancipator's Armour to 30/29/30/29. I would not include this card in your deck if you only have one Emancipator but if you have a squad of two and perhaps a transport vehicle on the table as well, buffing all of them before making a coordinated push into your opponent's half of the table is a good move.
Will you be adding the Capitol Bully and CTL-F800 Emancipator into your force on the tabletop?
"The Bully is the long-awaited heavy vehicle option for the Imperial Ministry of War..."
Supported by (Turn Off)
Supported by (Turn Off)
"A joint Capitol/Bauhaus project, the CTL-F800 Emancipator is an aircraft that has been produced for use by the Cartel..."
Supported by (Turn Off)


![How To Paint Moonstone’s Nanny | Goblin King Games [7 Days Early Access]](https://images.beastsofwar.com/2024/12/3CU-Gobin-King-Games-Moonstone-Shades-Nanny-coverimage-225-127.jpg)











the tank/SPG looks fabulous.