


Ork Expansion


Recommendations: 289
About the Project
It's the perfect storm; lock-down, working from home and a Spring Clean Challenge. What better time to dust off some minis that have been sitting around for years and expand an army?
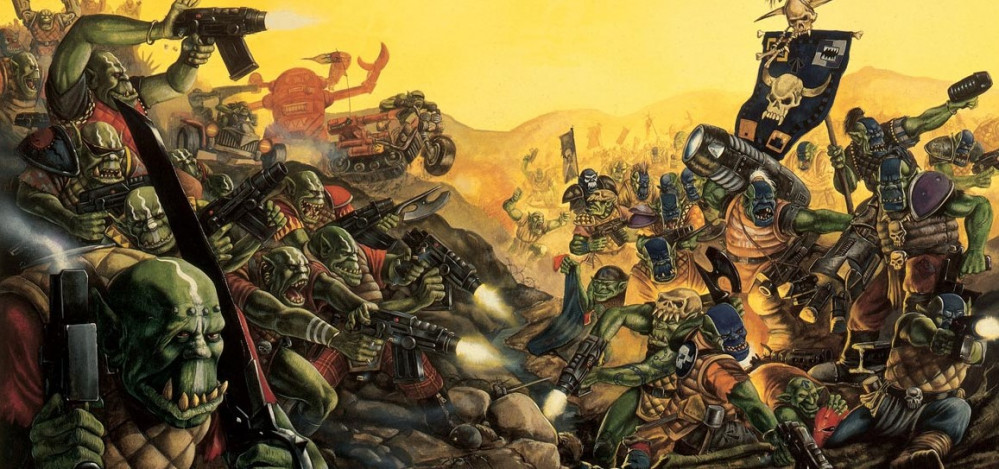
Related Game: Warhammer 40,000
Related Company: Games Workshop
Related Genre: Science Fiction
Related Contest: Spring Clean Hobby Challenge (Old)
This Project is Active
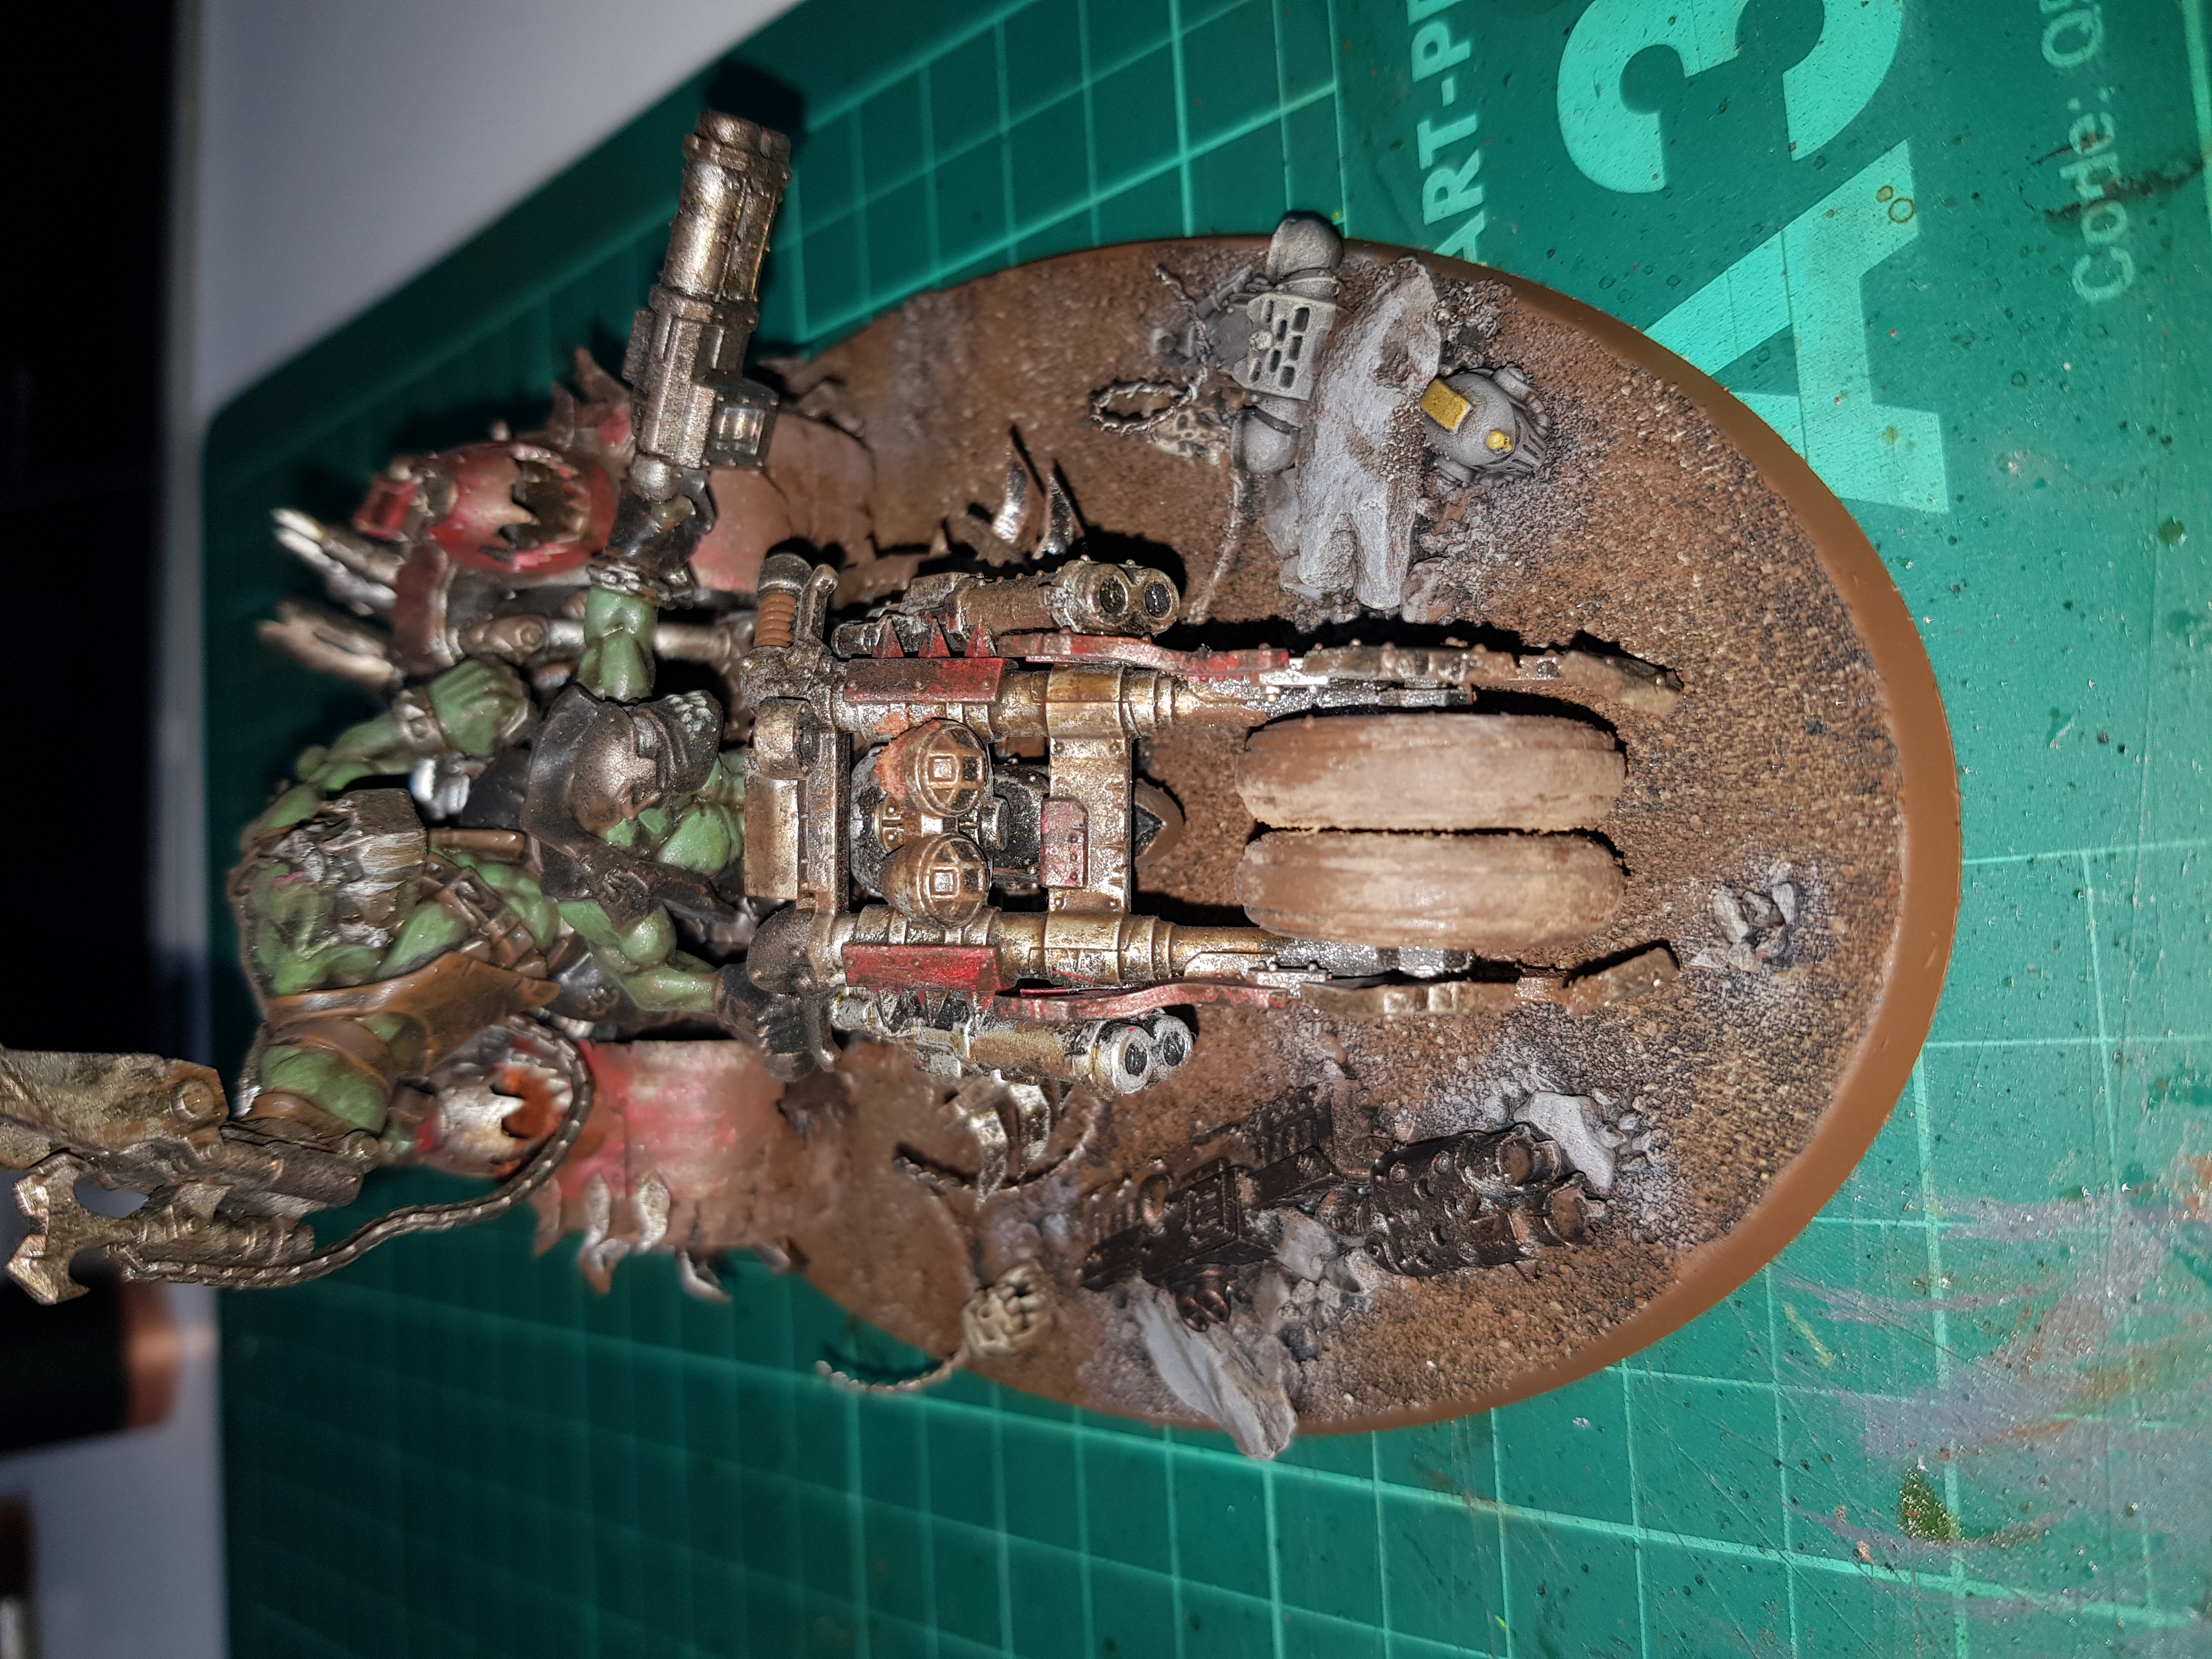
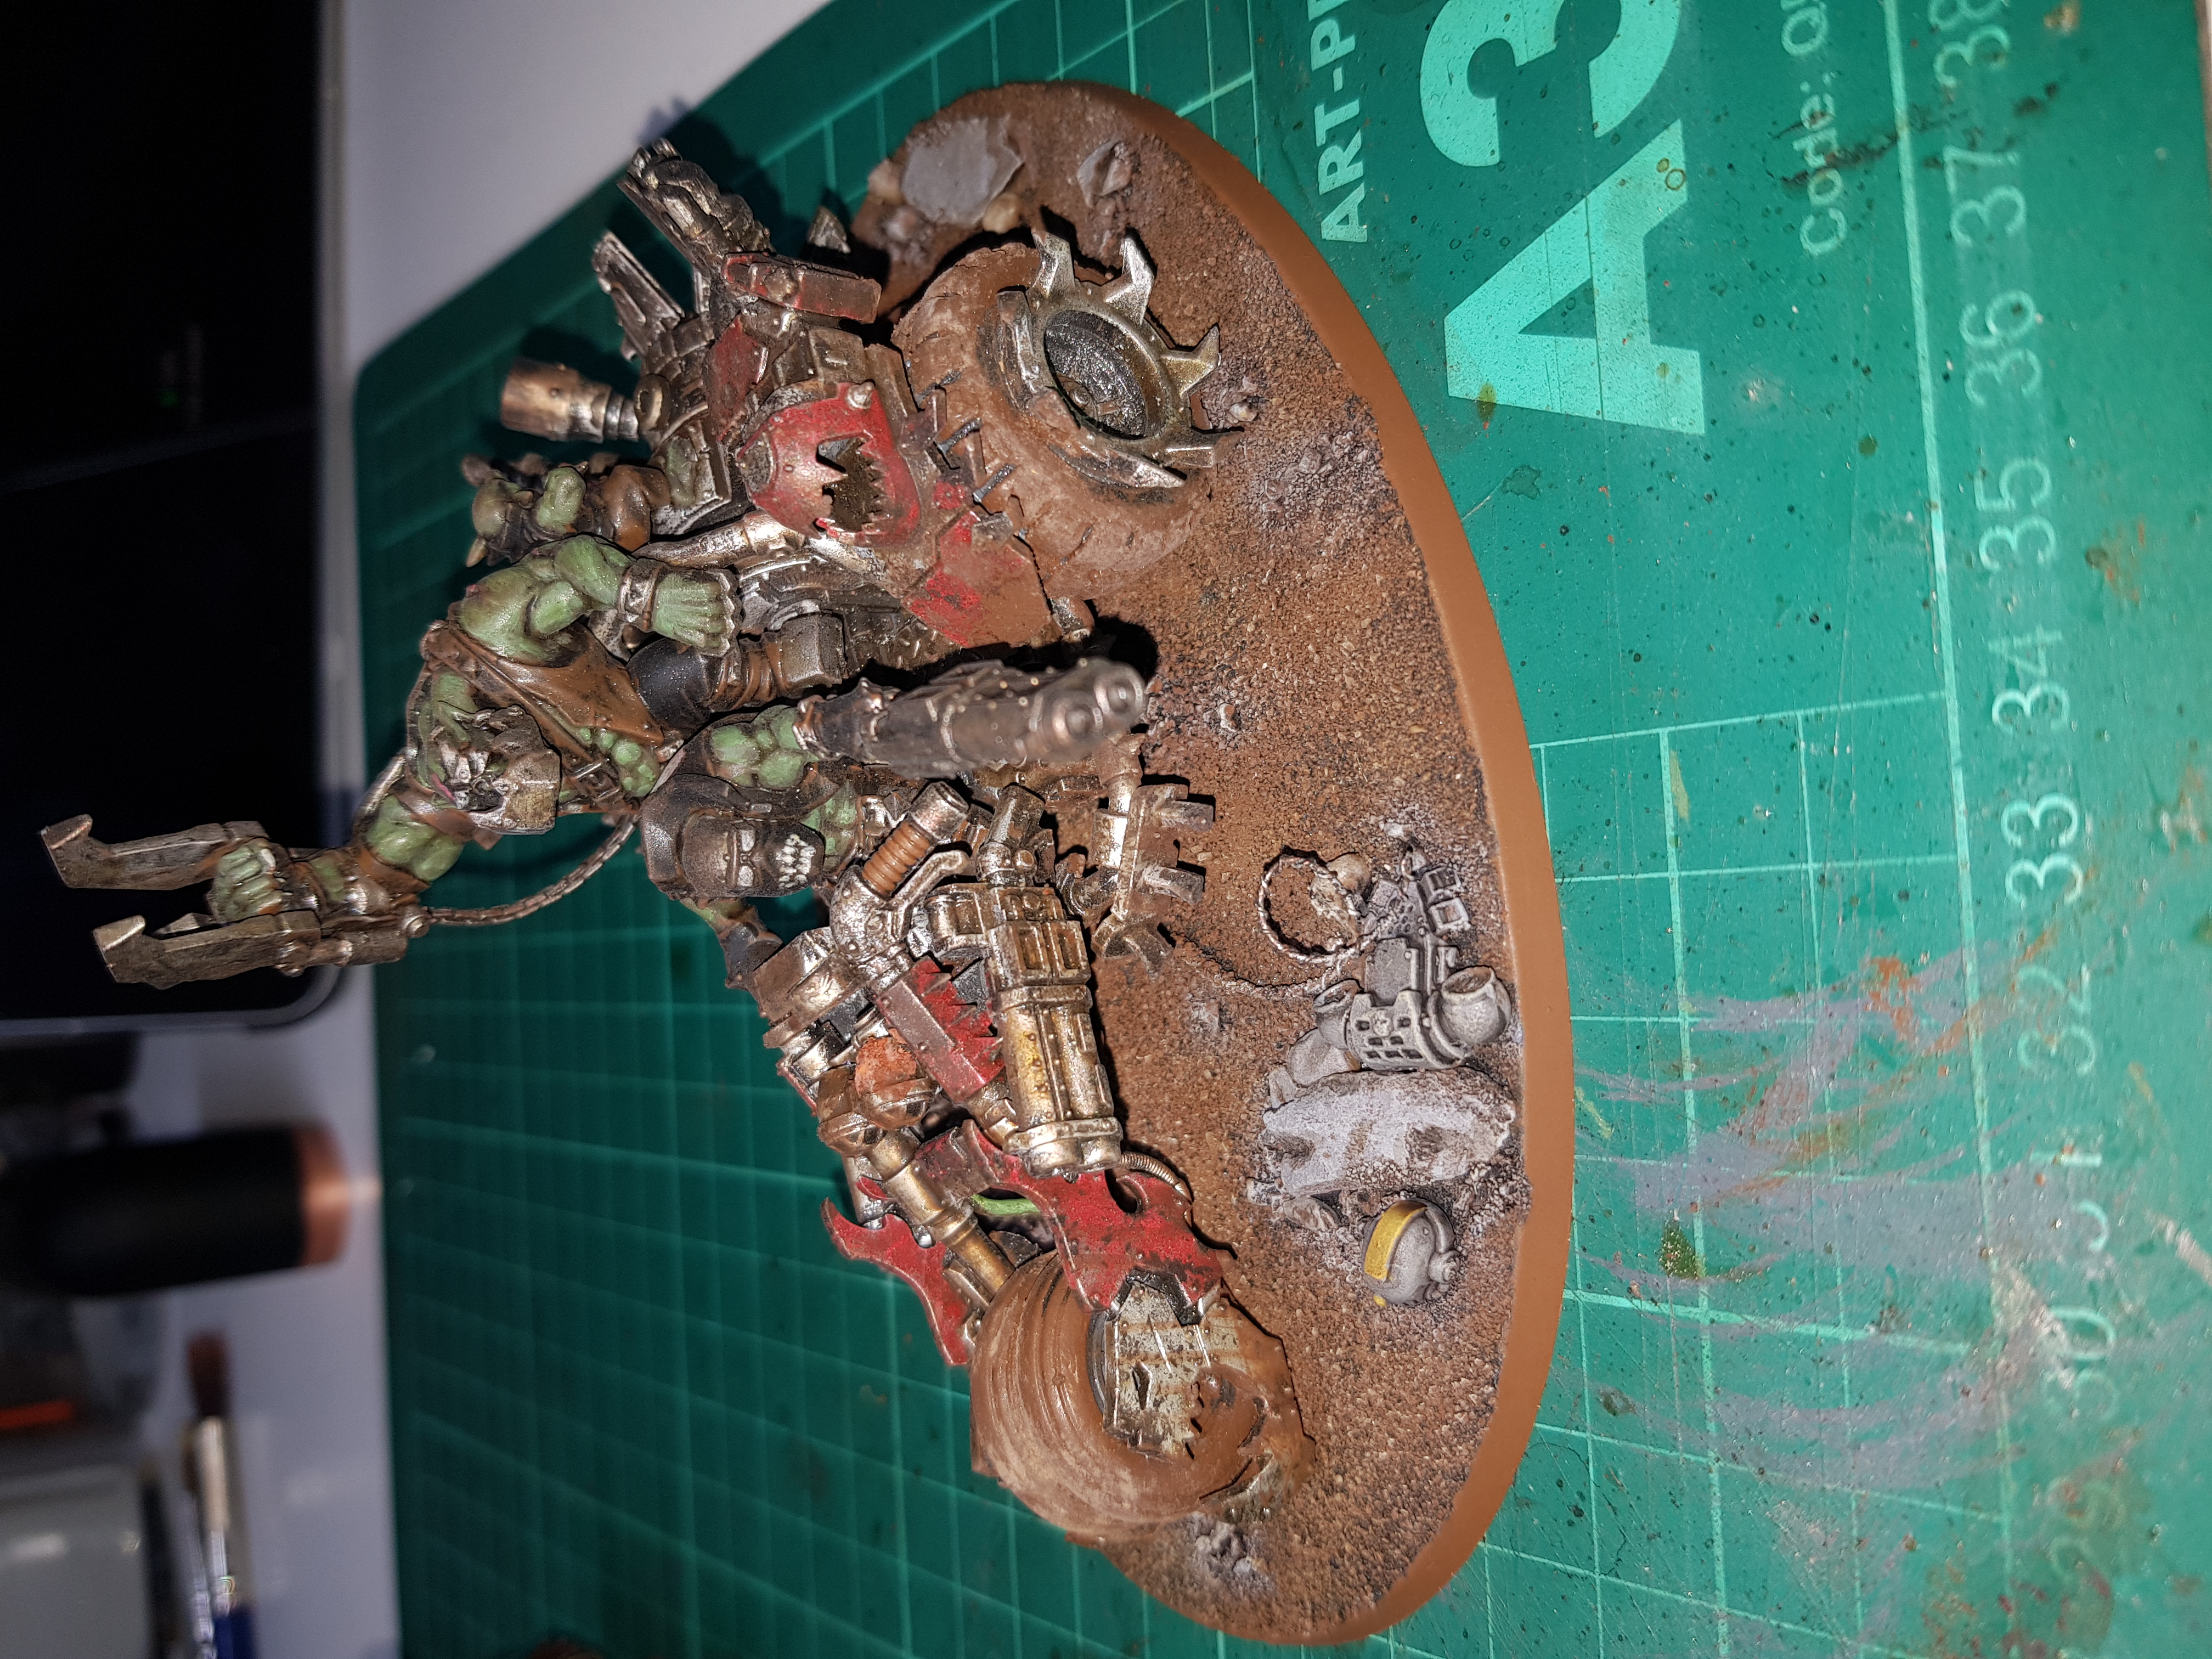
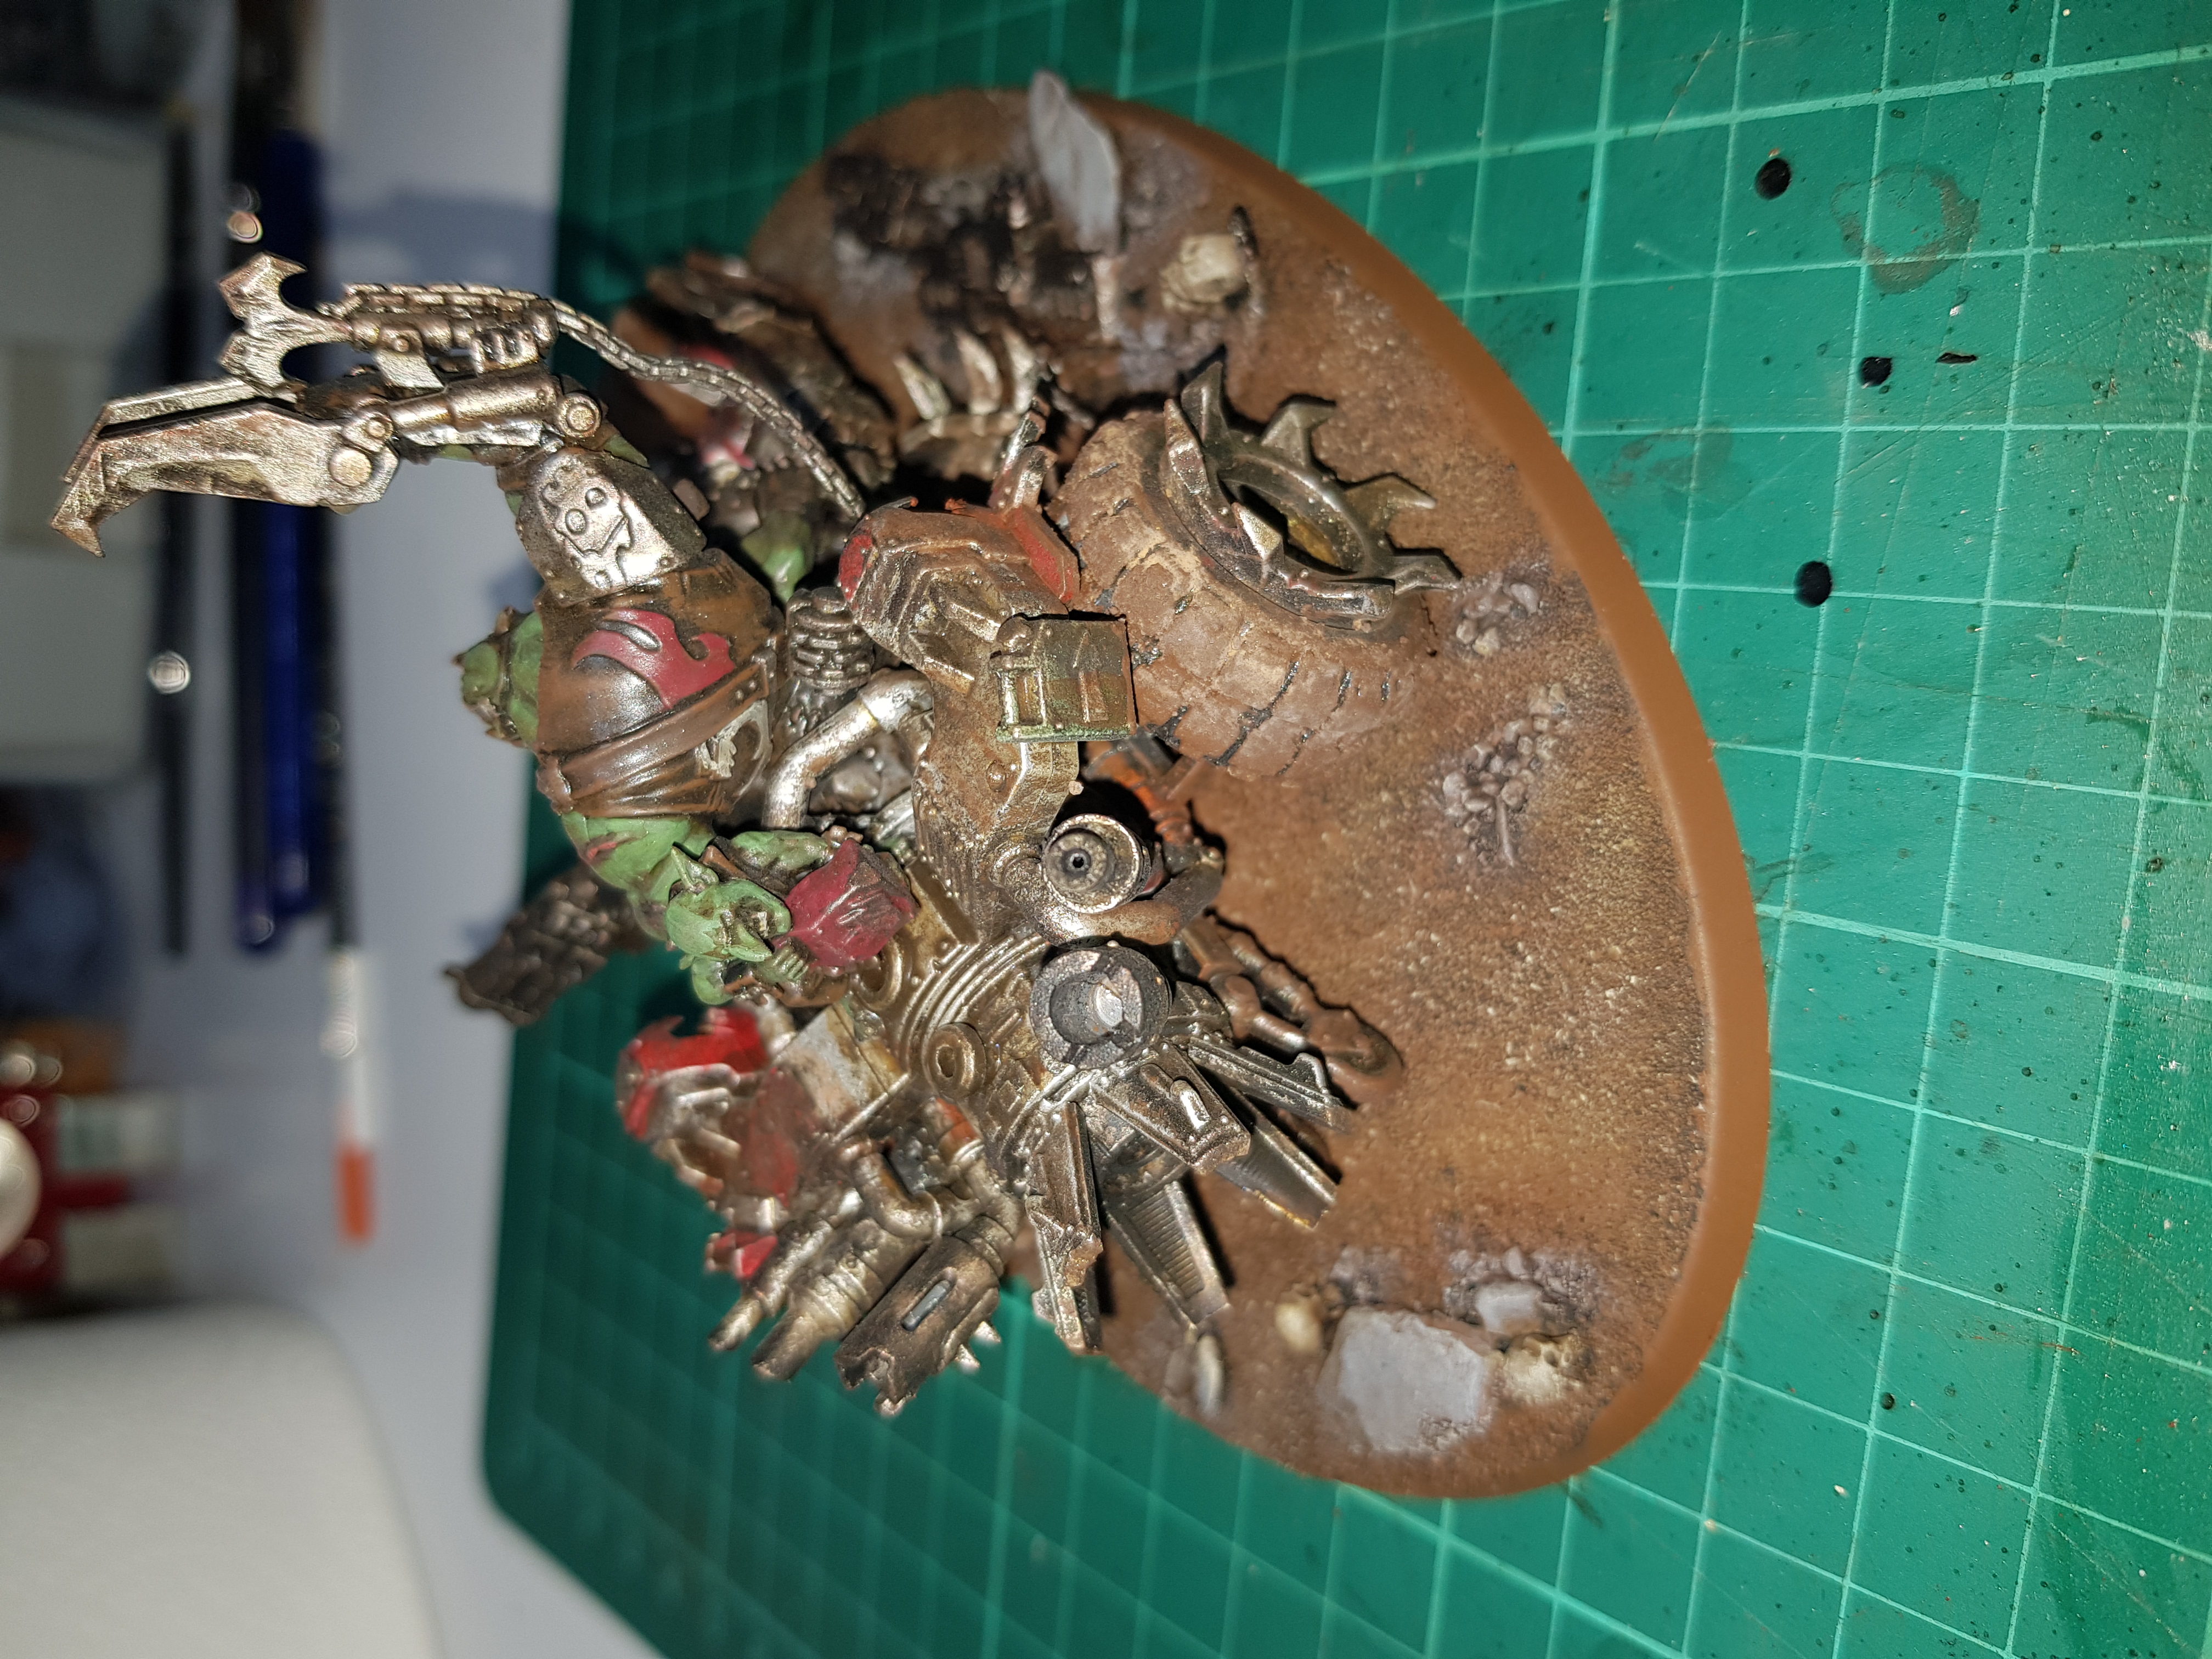
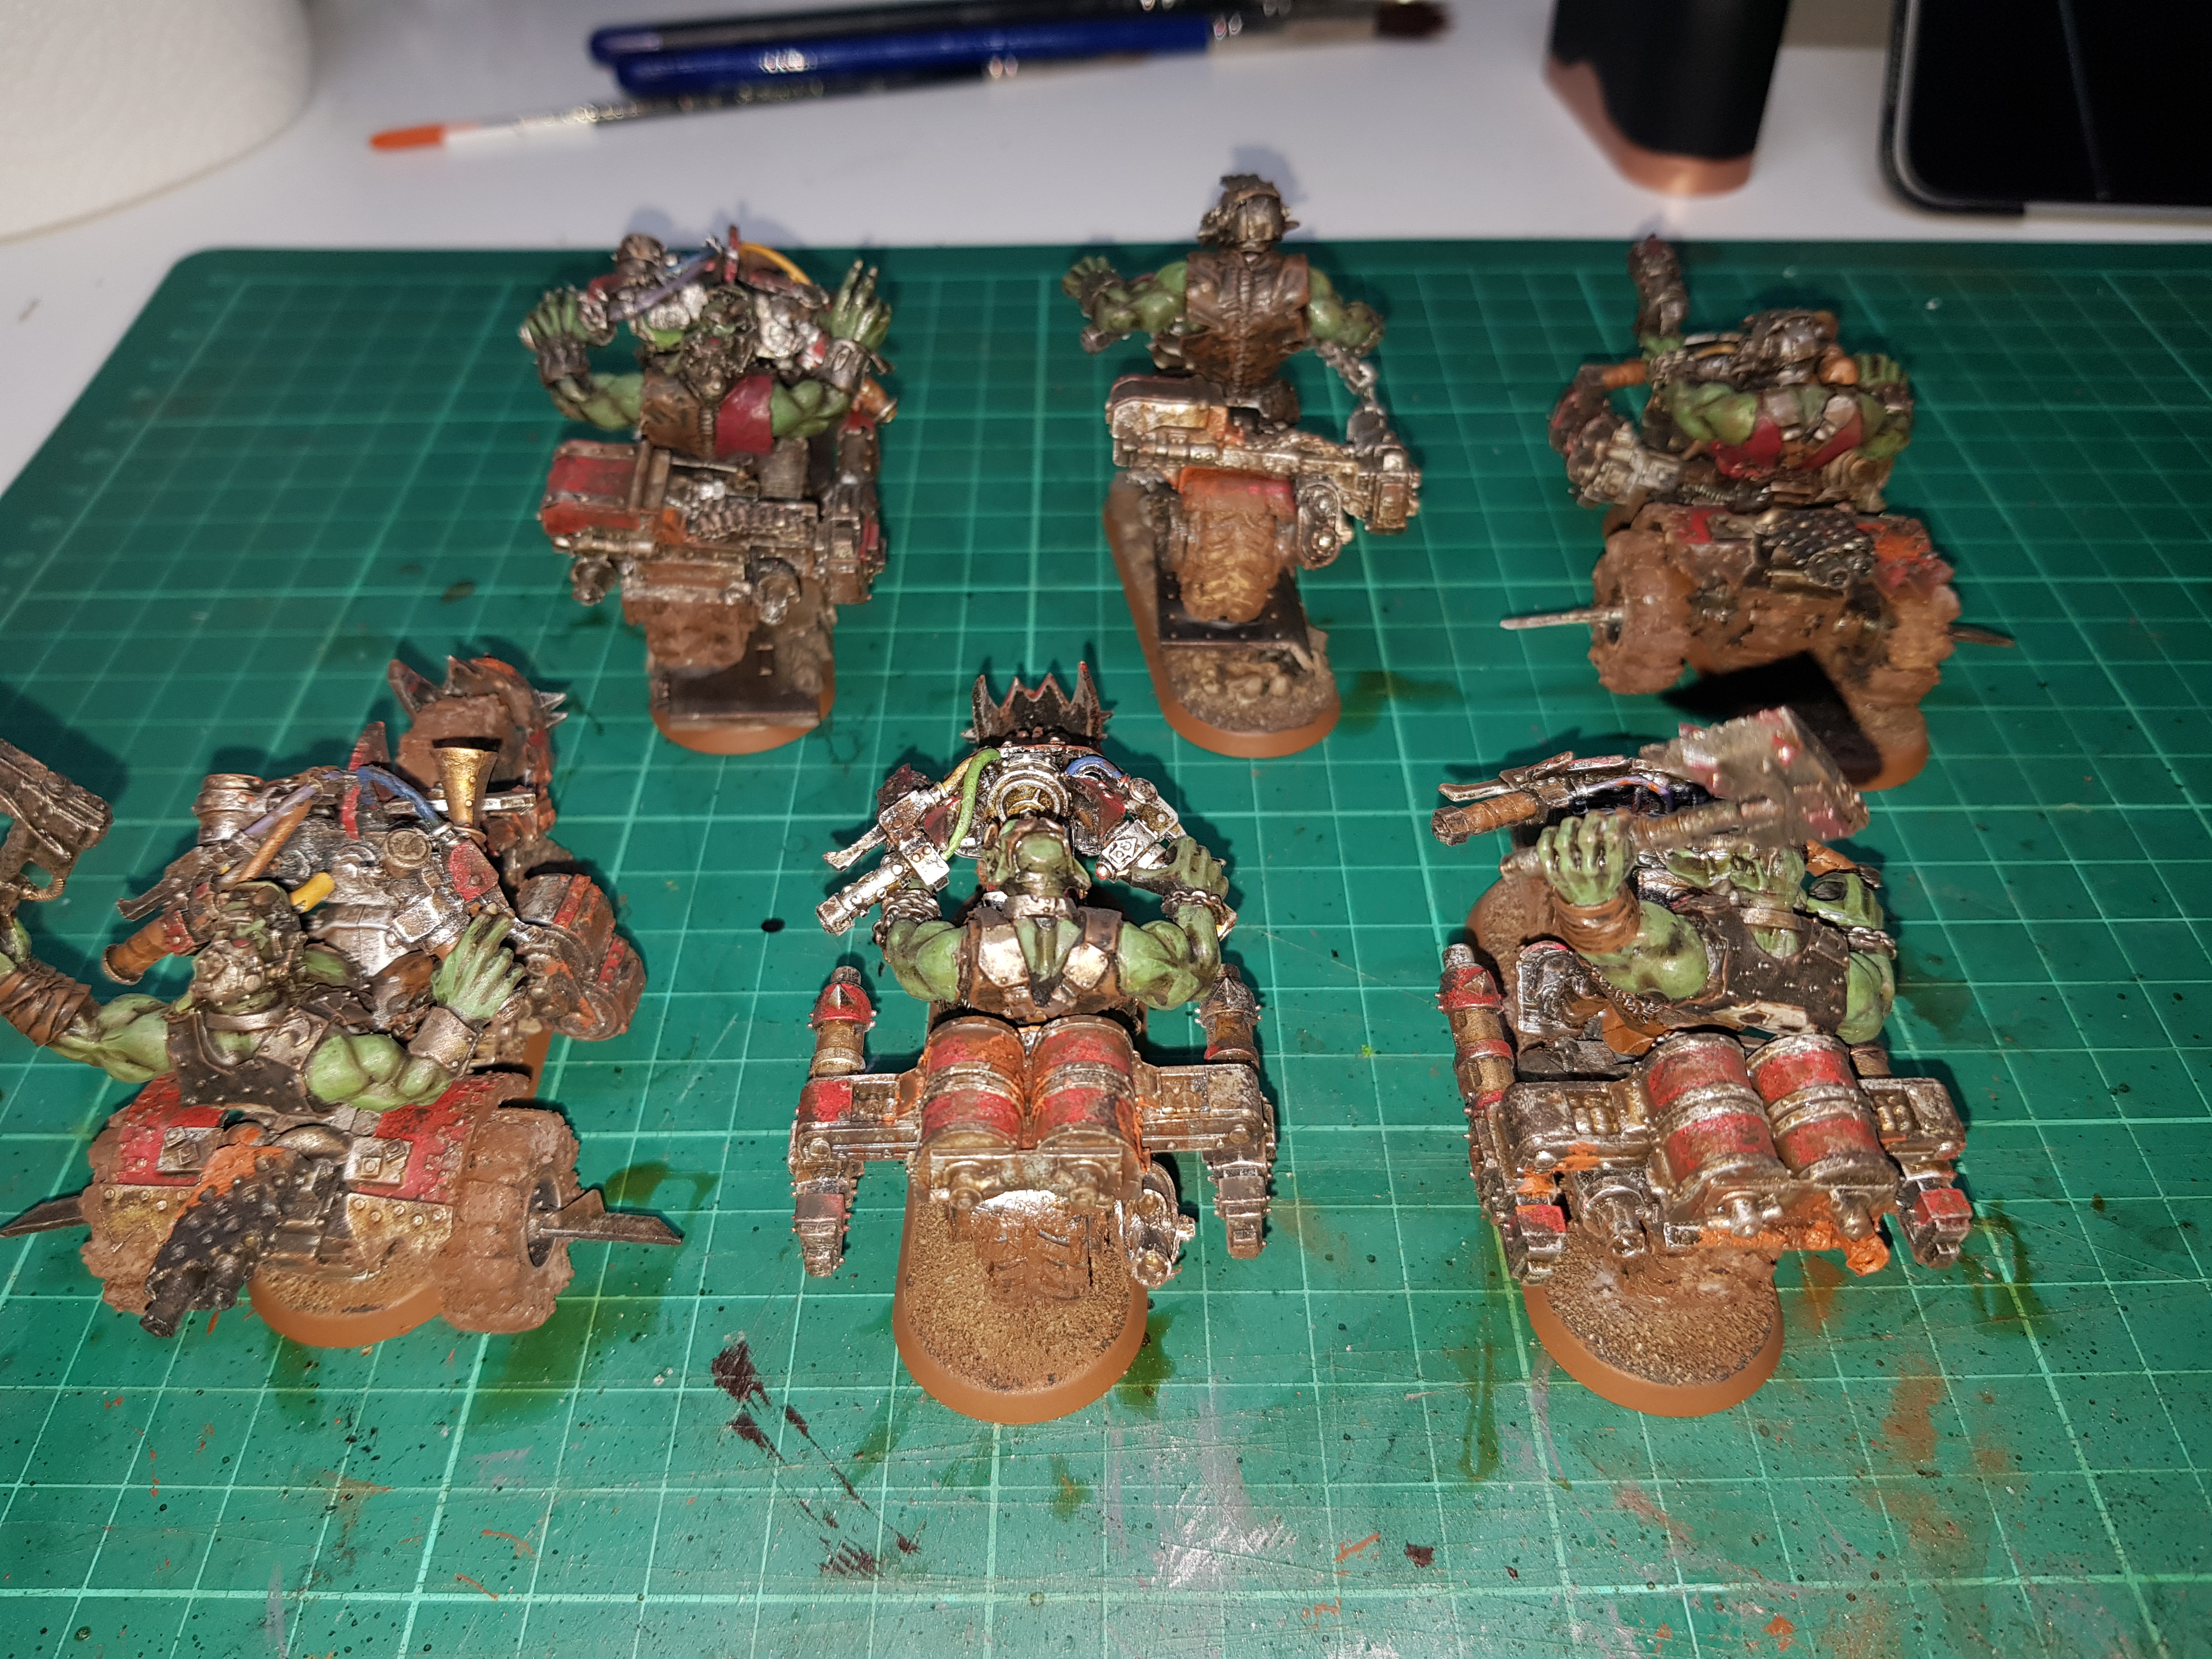
Completed Bikers
The bikes are all complete! Hooray!
But… I think since I got these they’ve now been repackaged with larger bases. Whilst I’m not too bothered from a gaming persepective, larger bases would have been nice from a modeling perspective (a lot of the details added have been lost once the bikes were attached) and the Nob Bikers which are trikes look ridiculous on those tiny bases (the back wheels actually straddle the base).
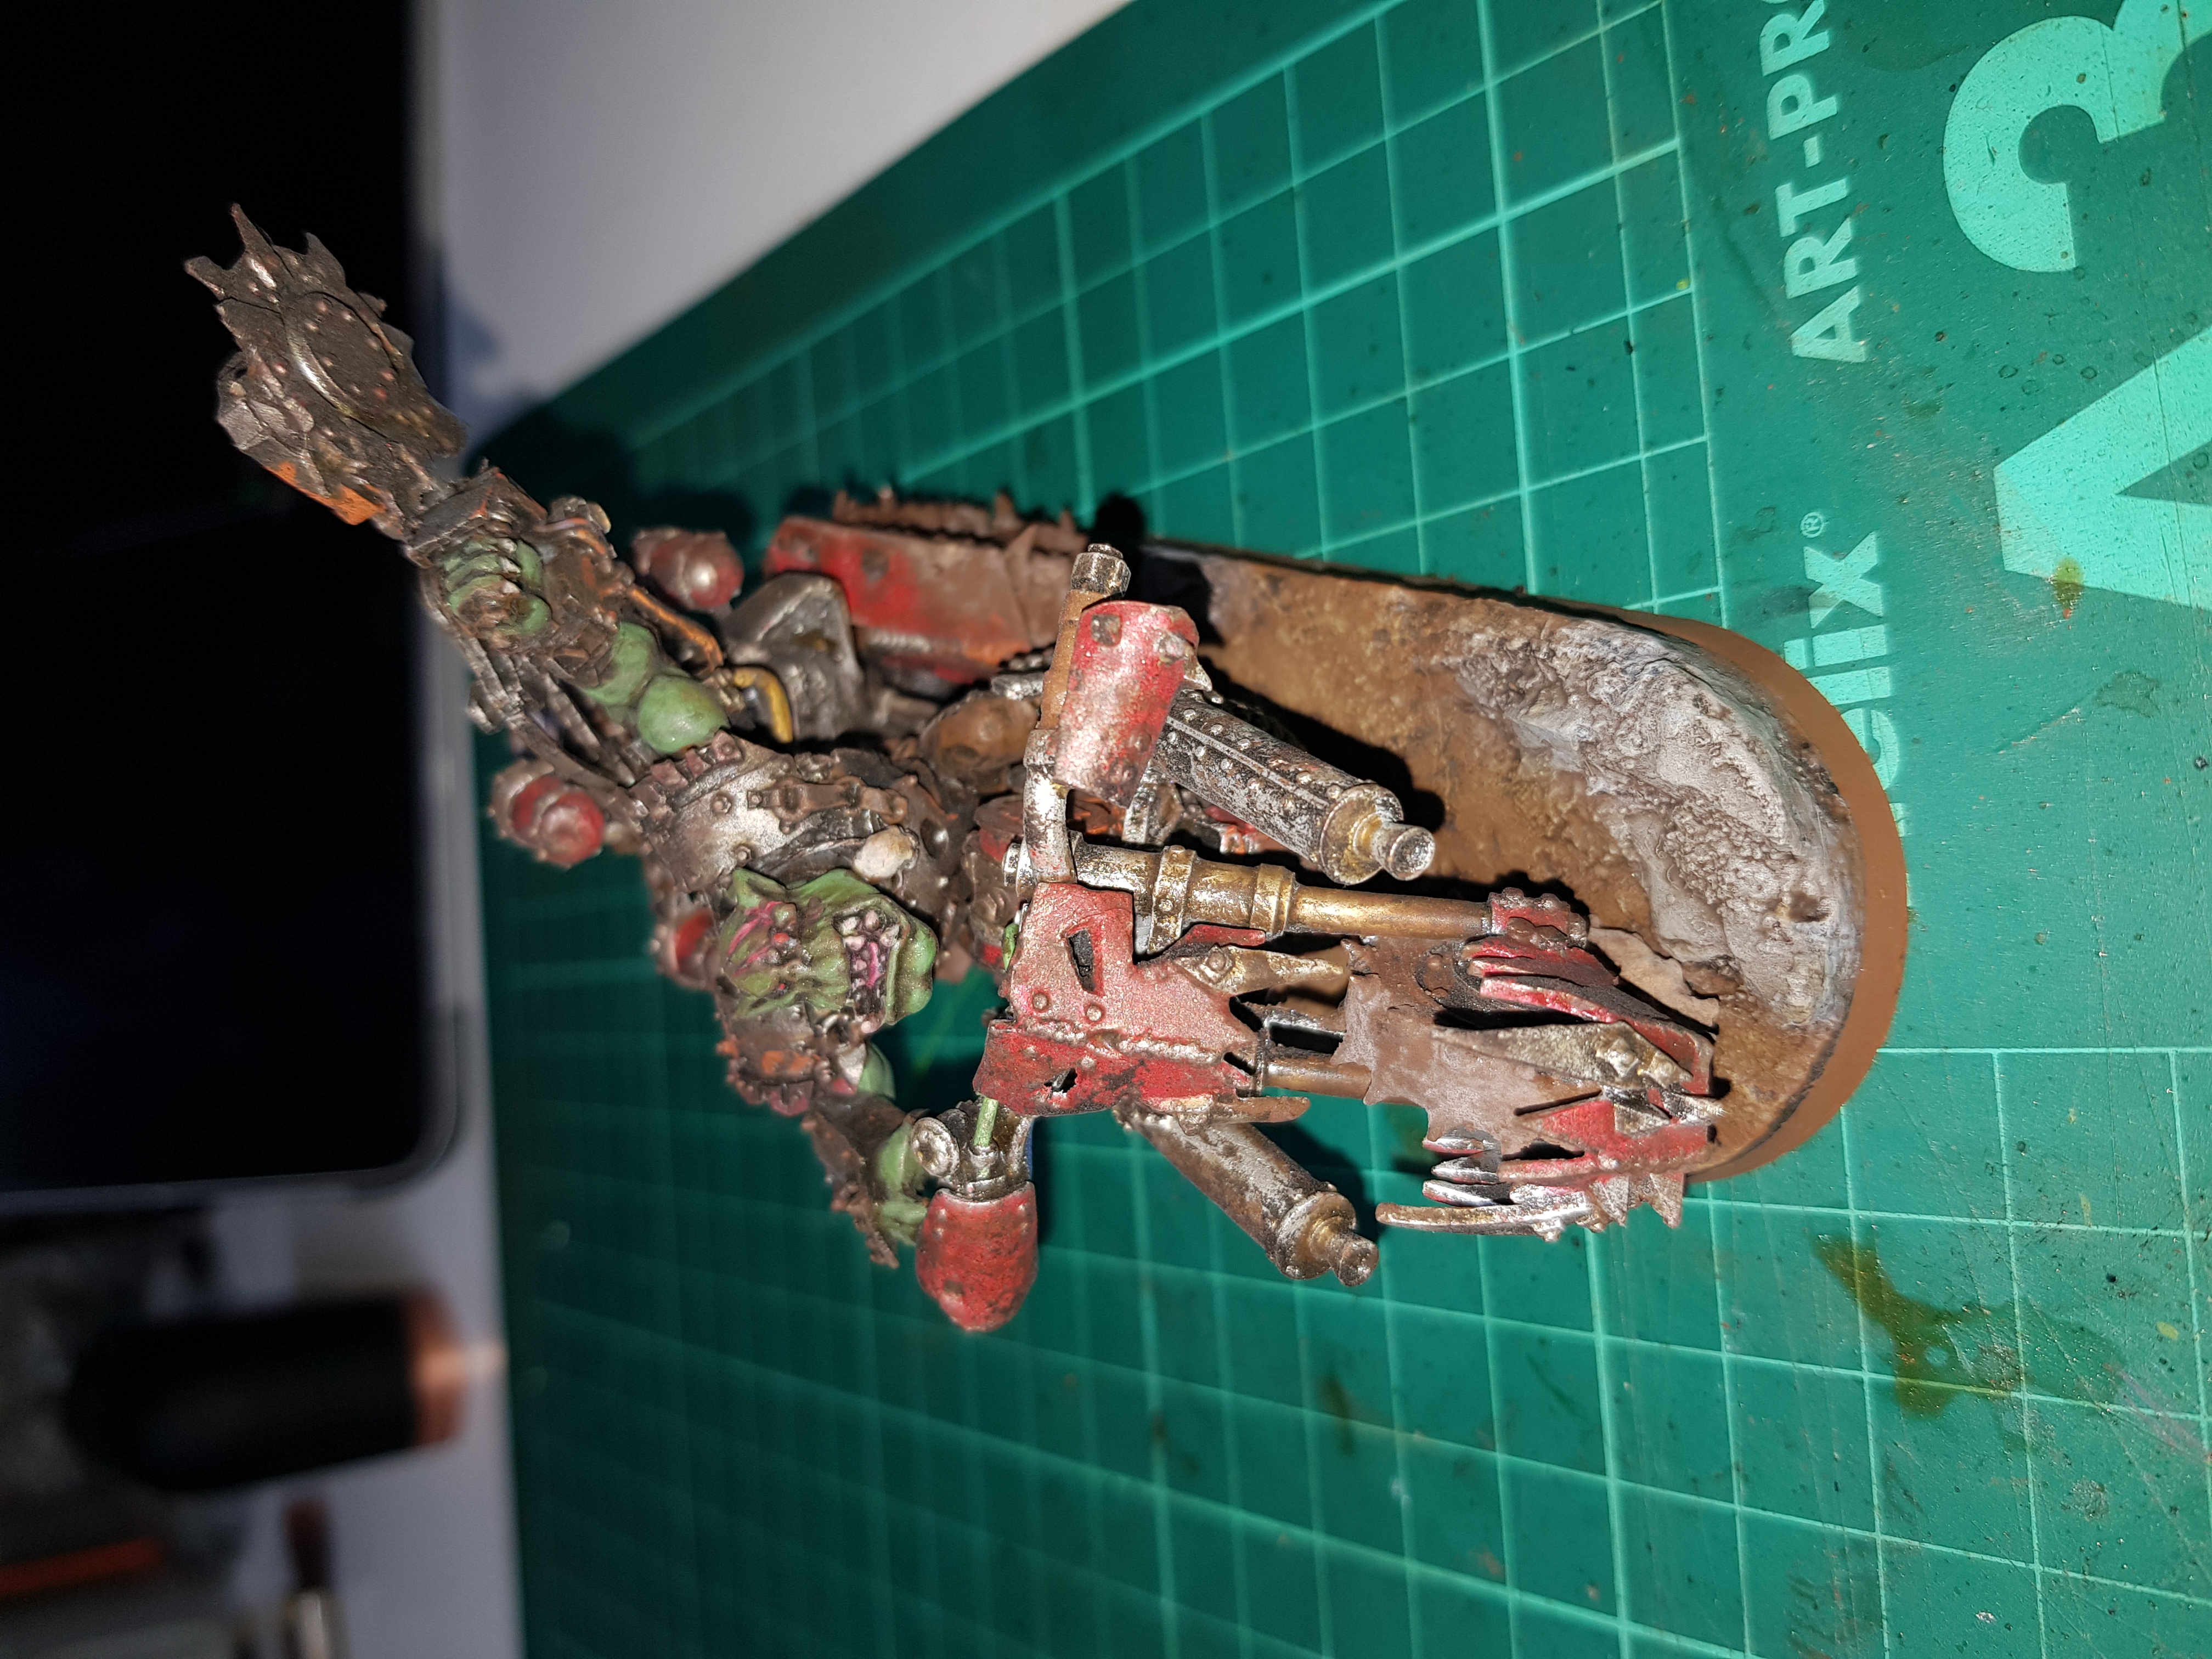
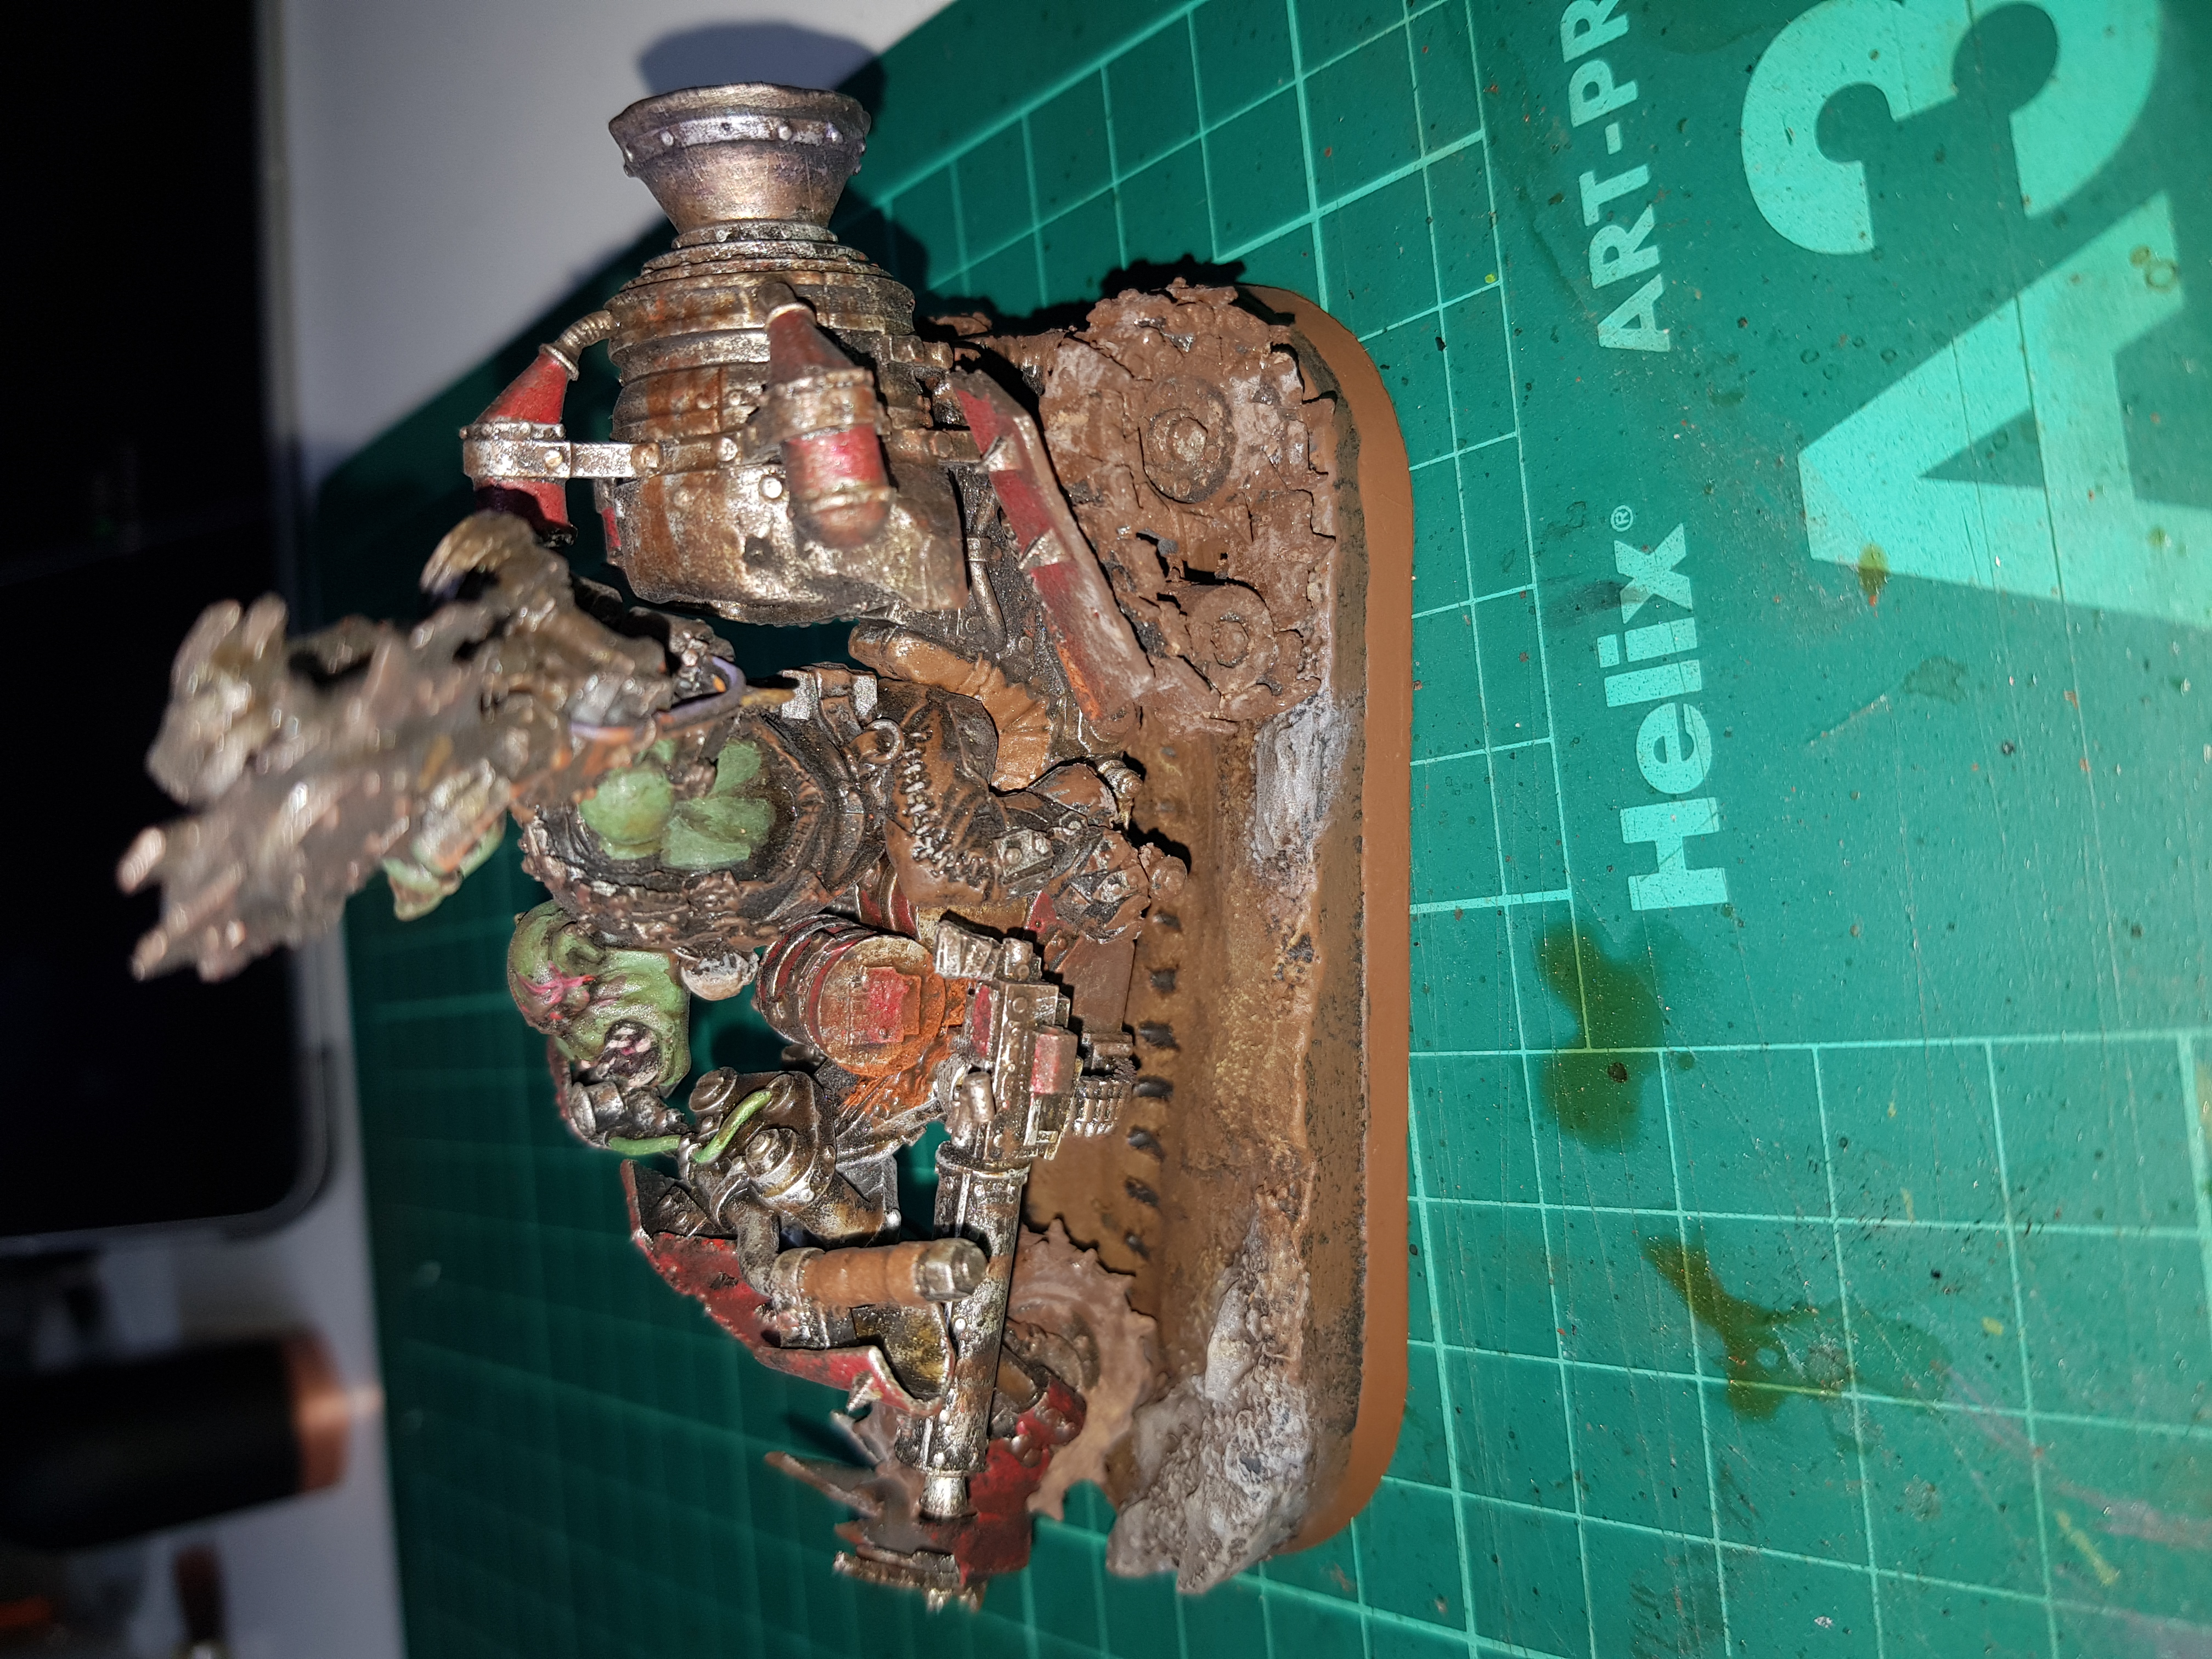
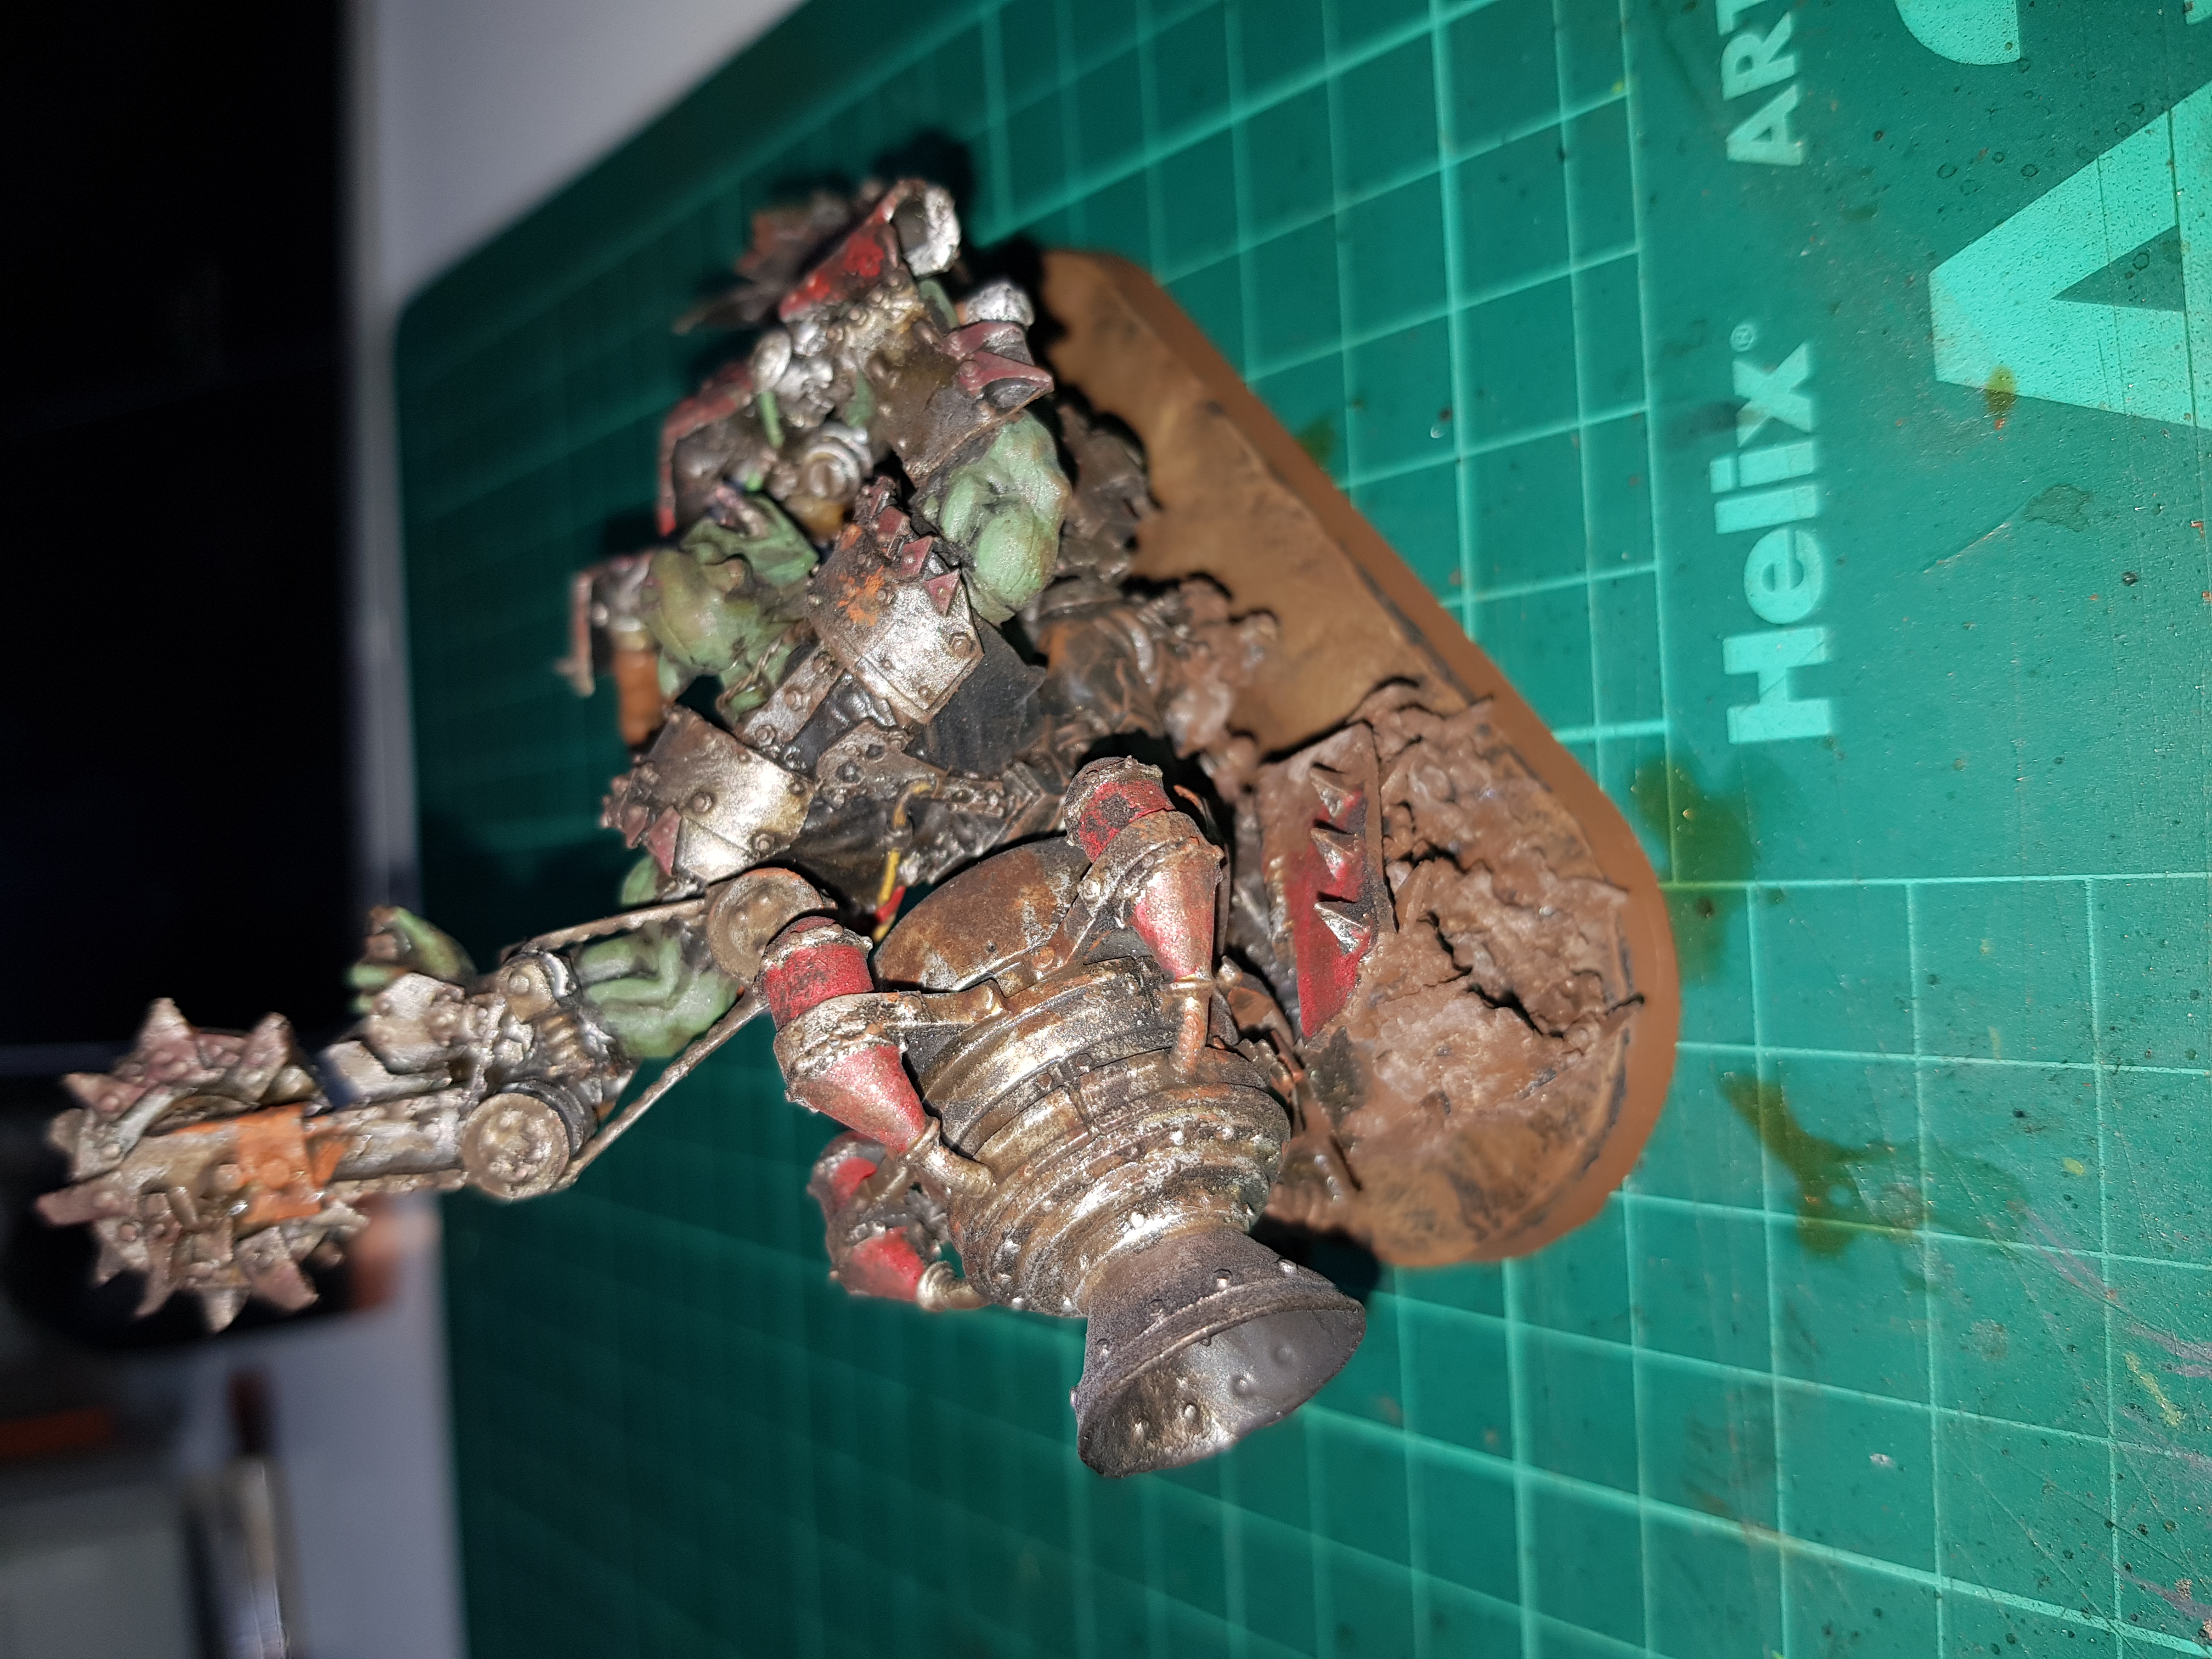
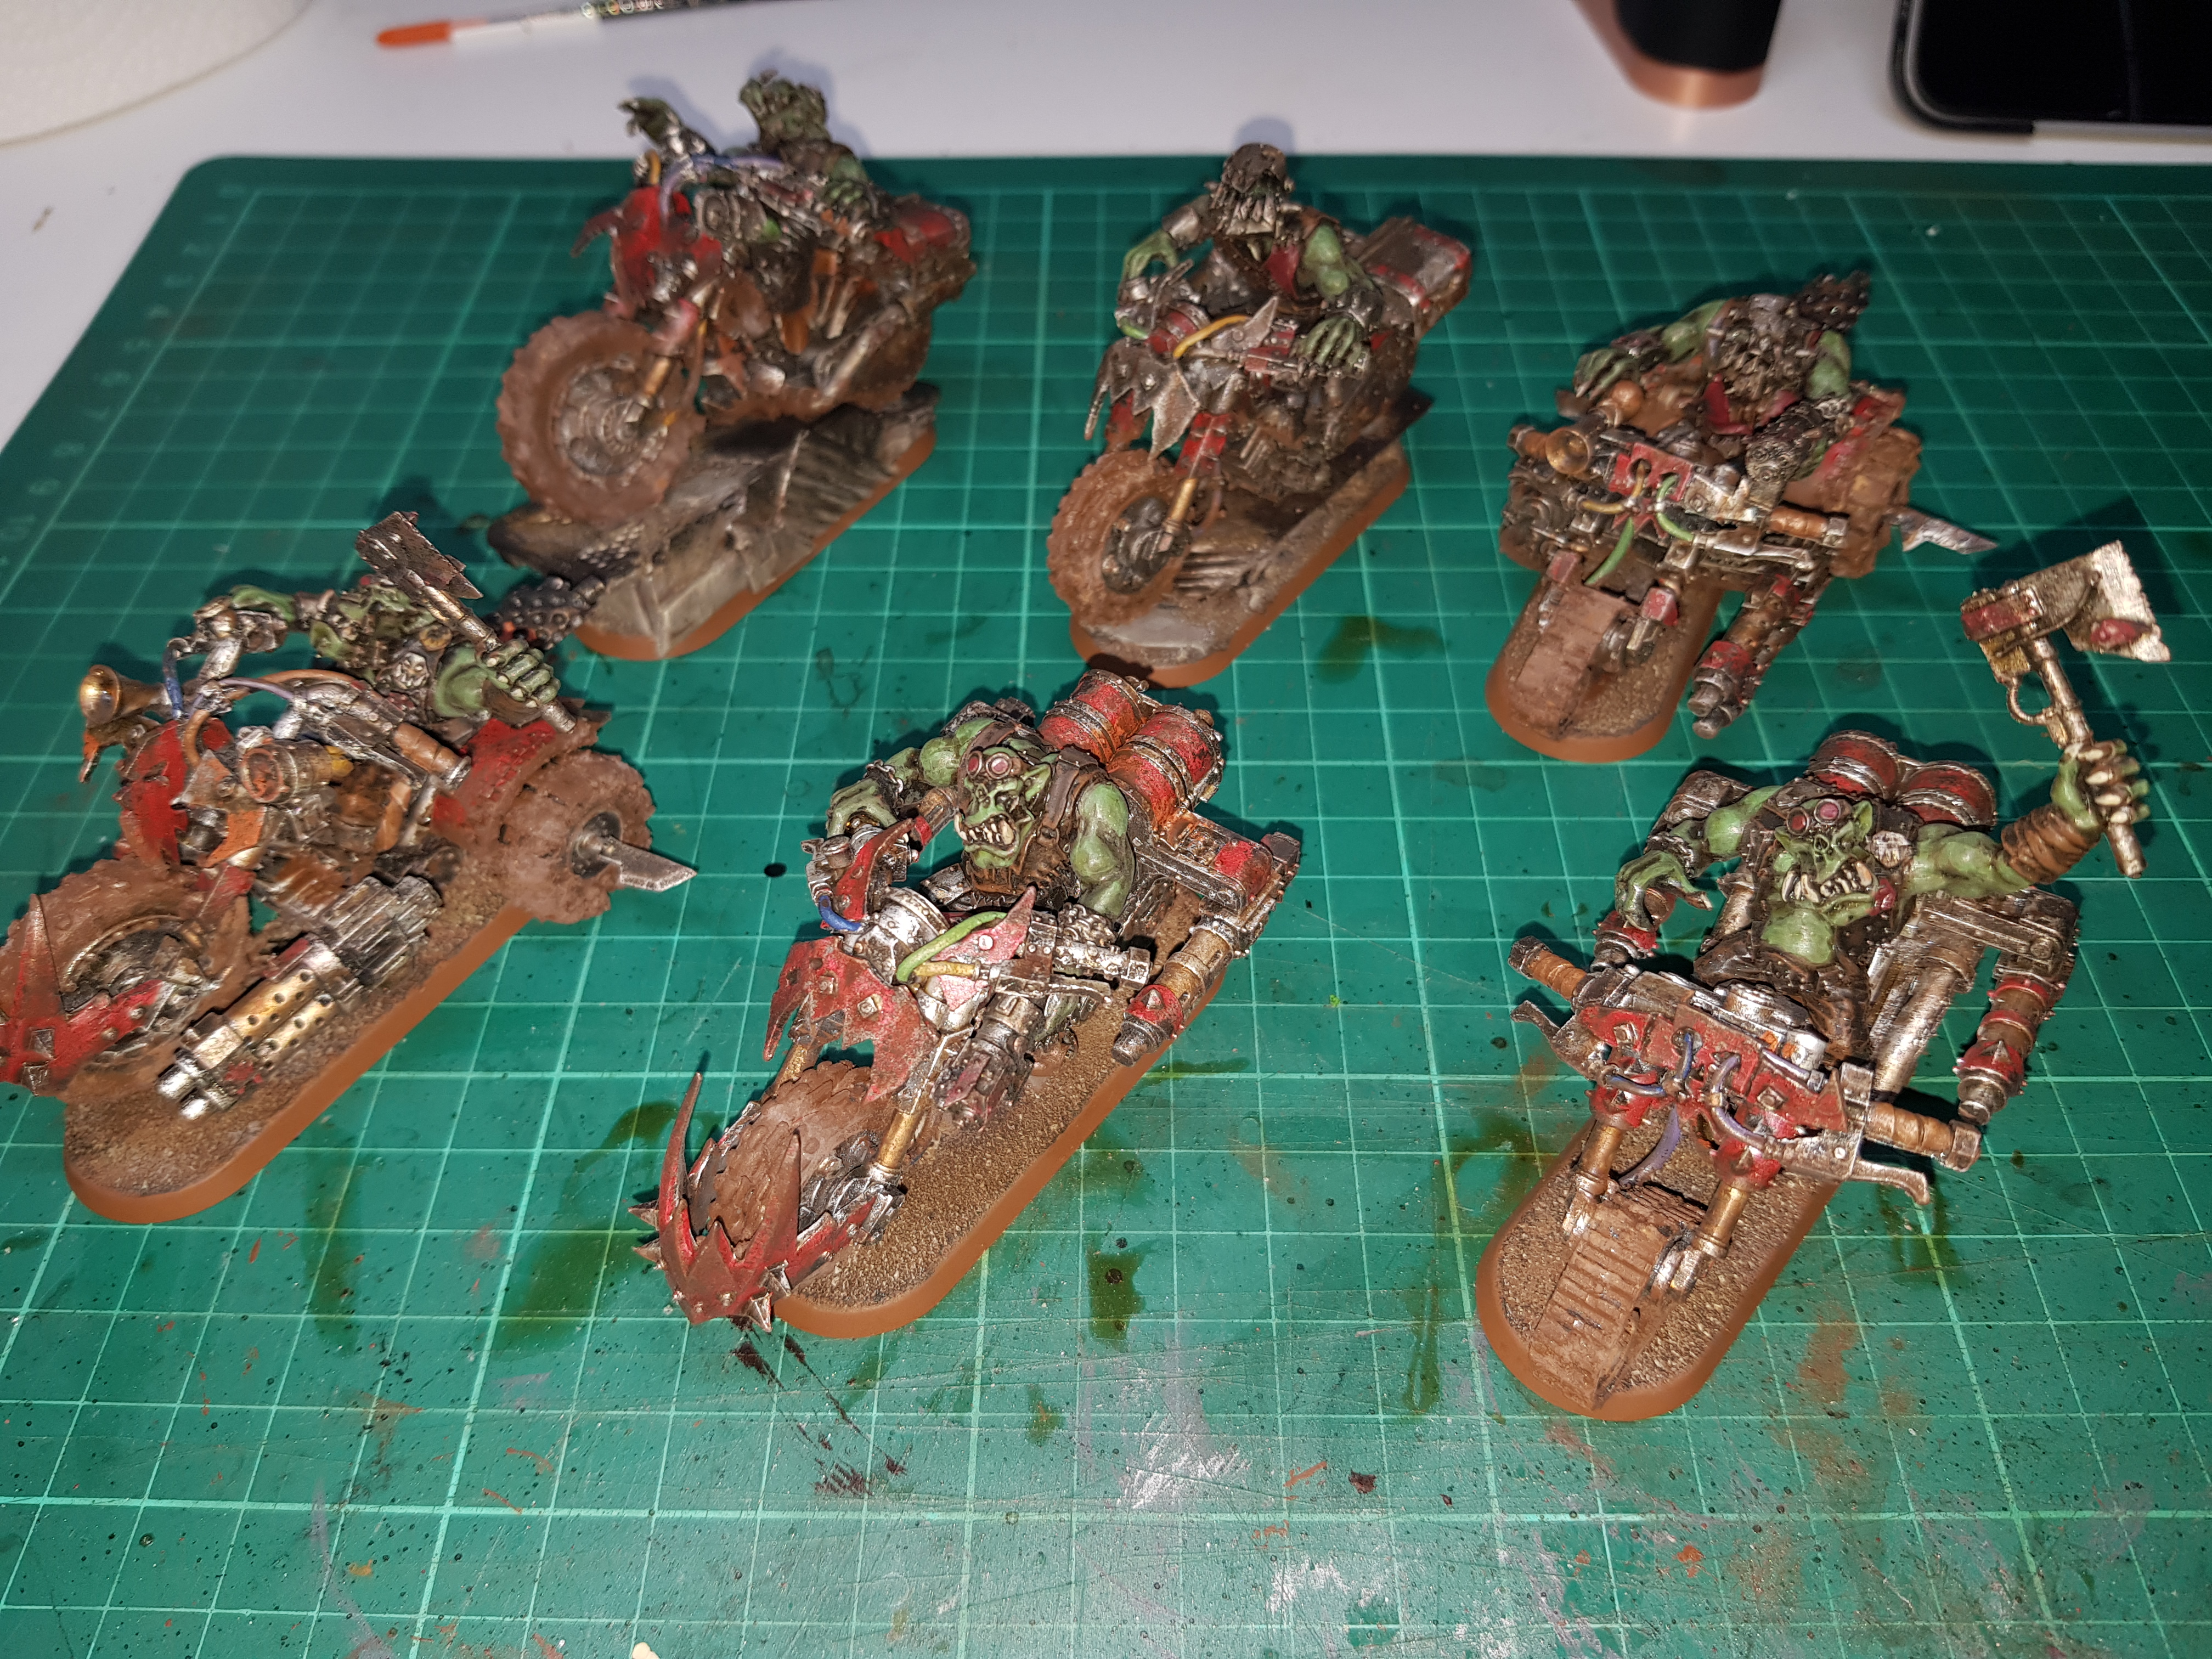
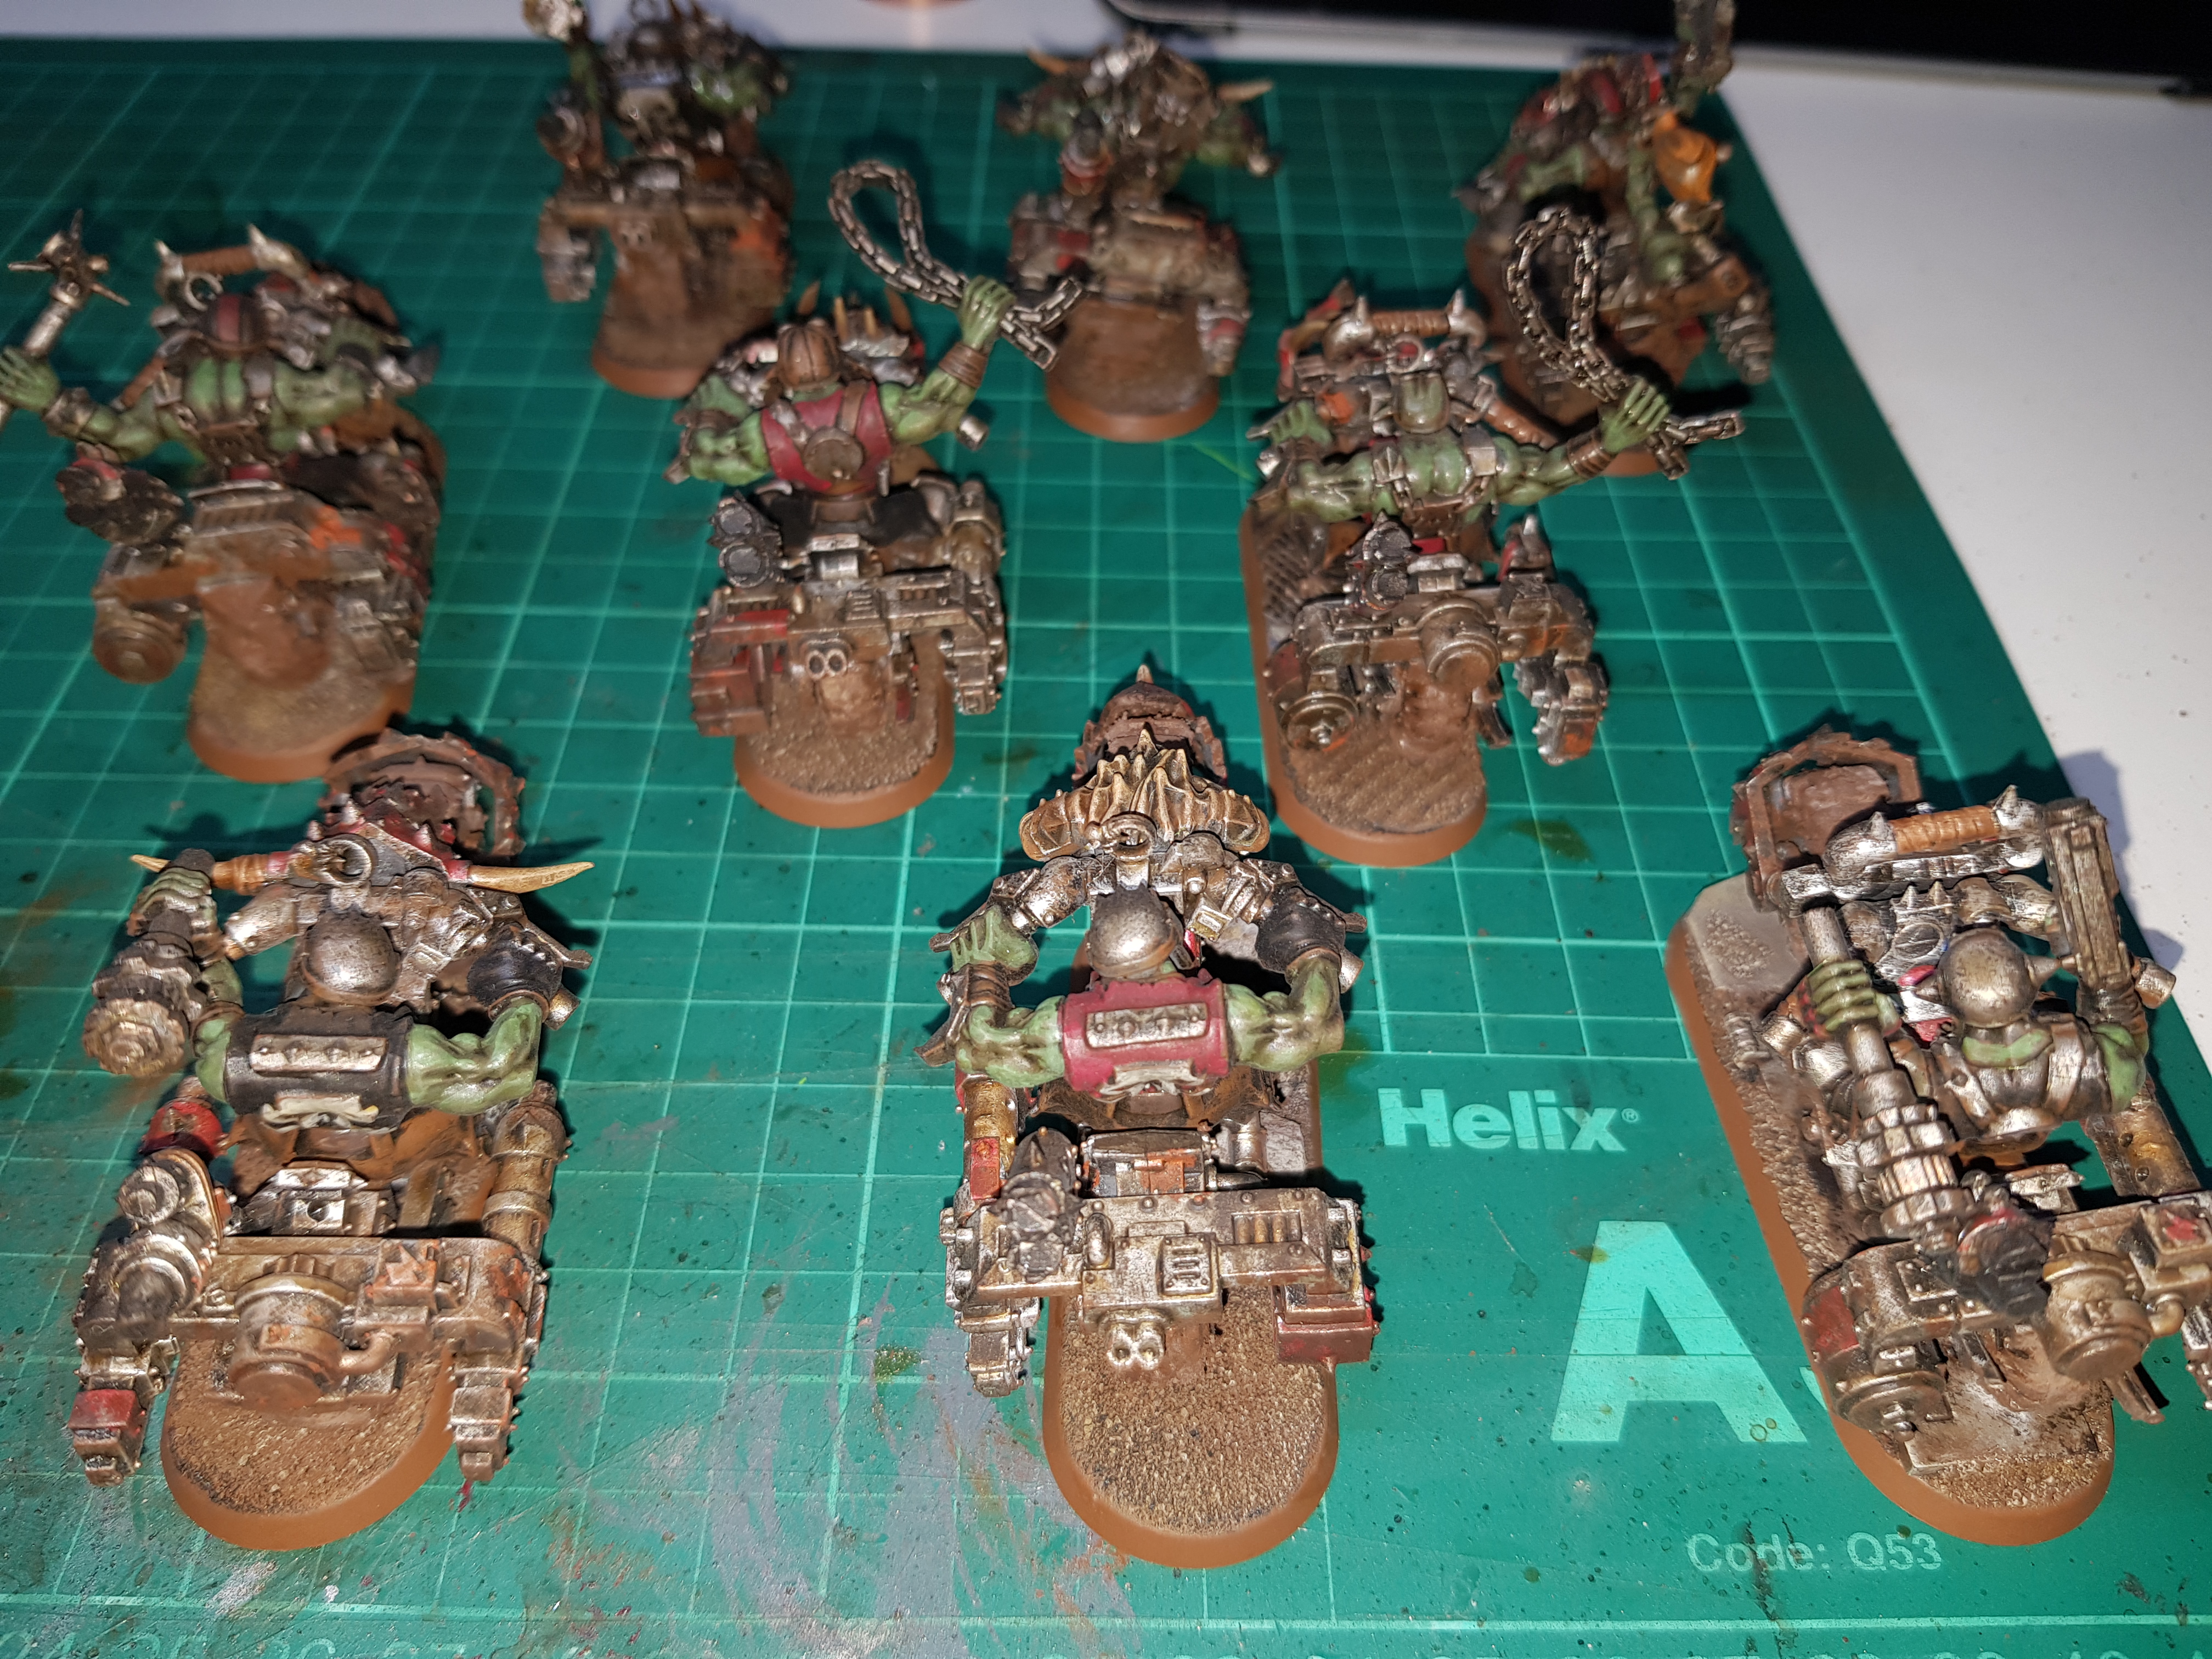
How Many Bikes?!
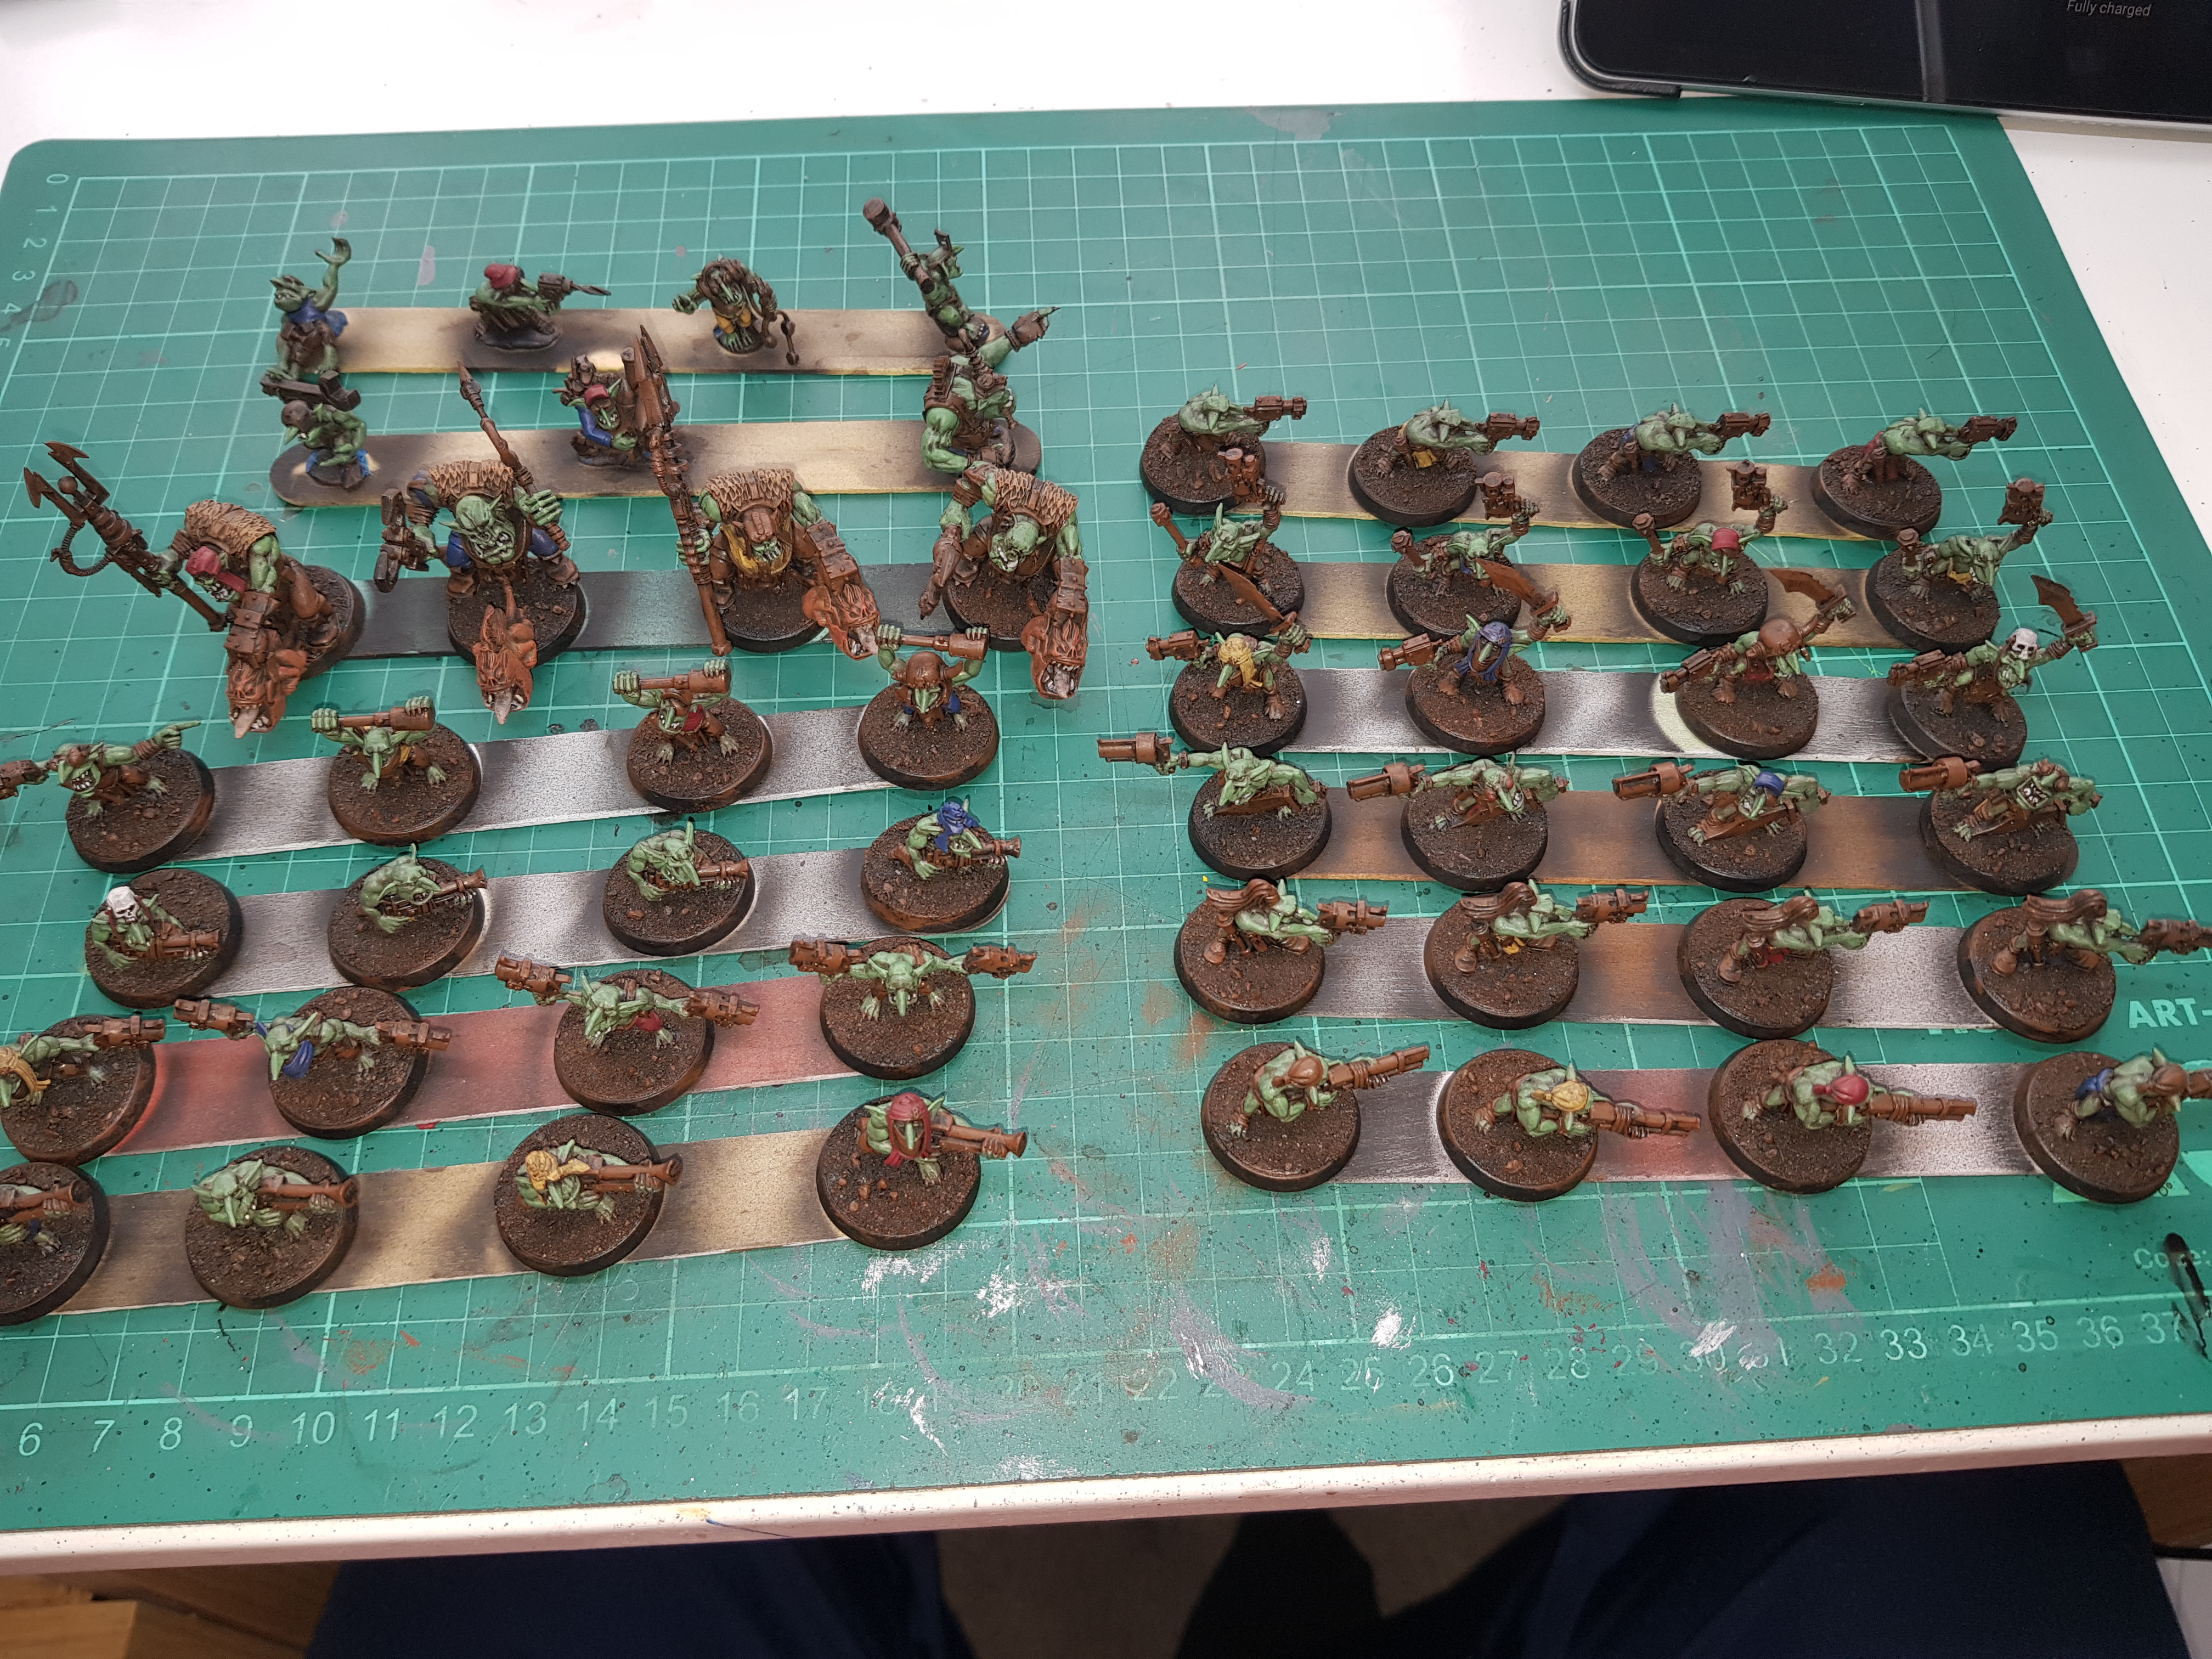
Last Saturday I finally finished the Grots as well as all the bikes/trikes apart from their bases.
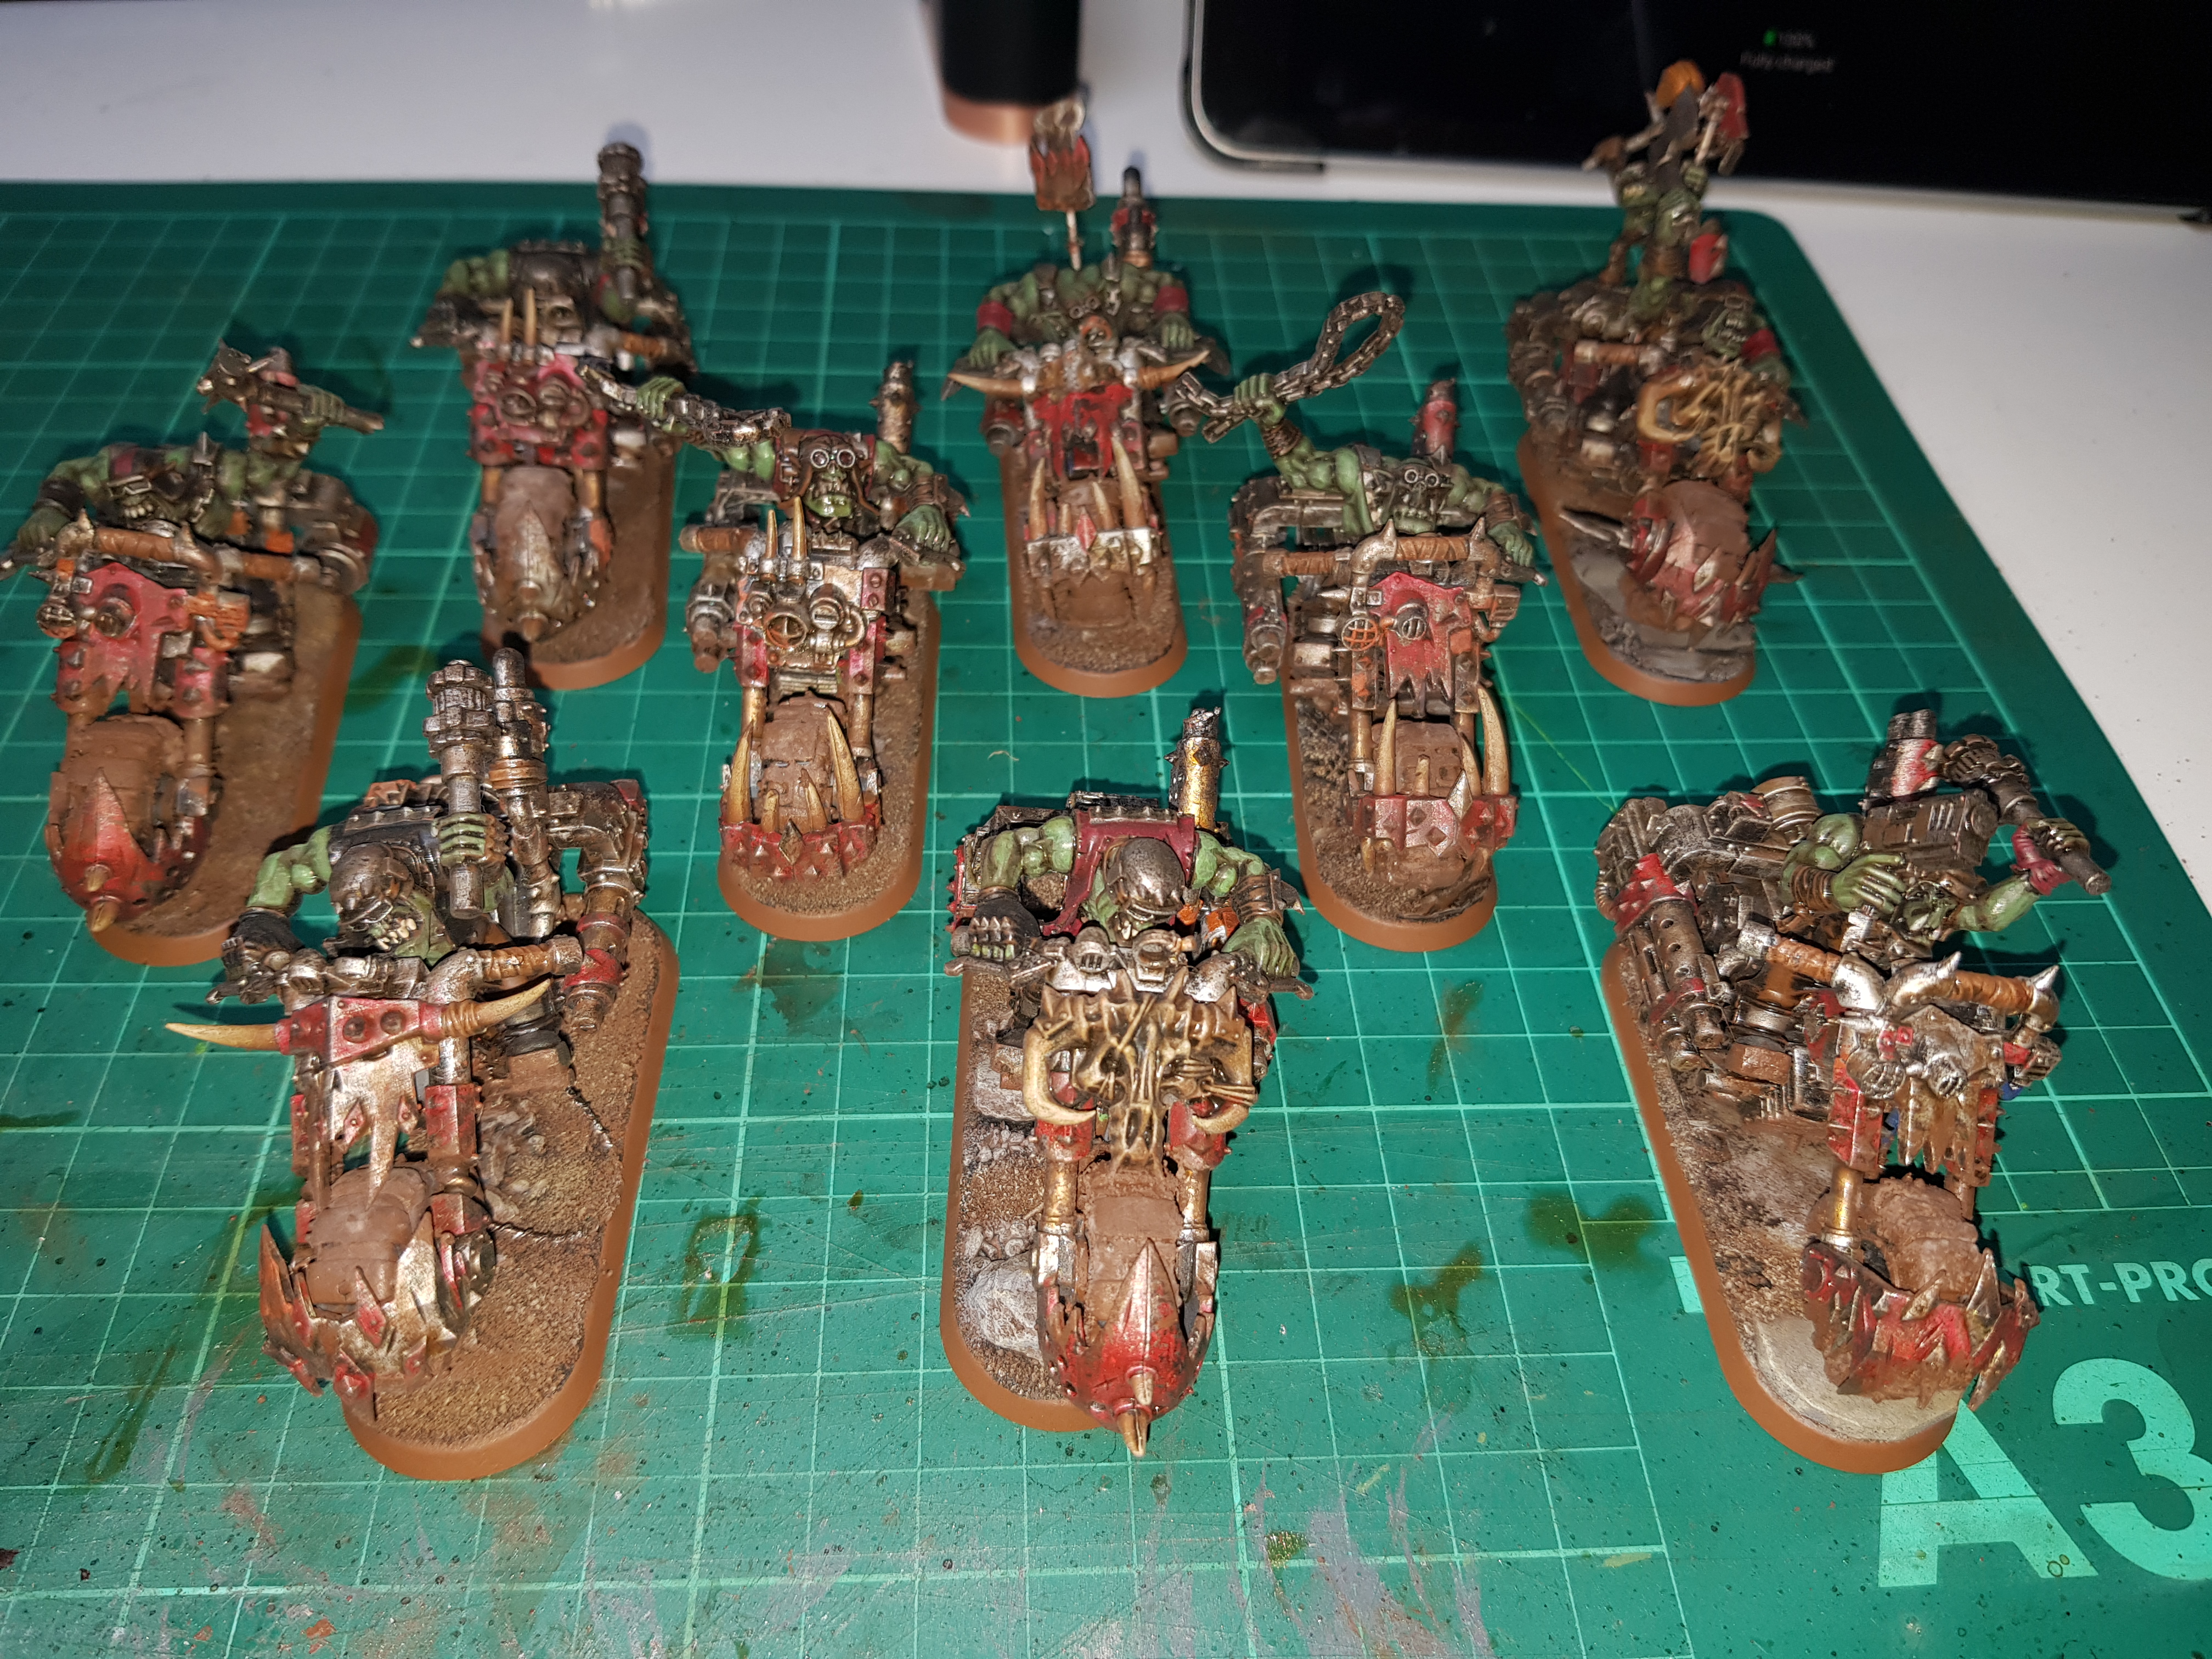
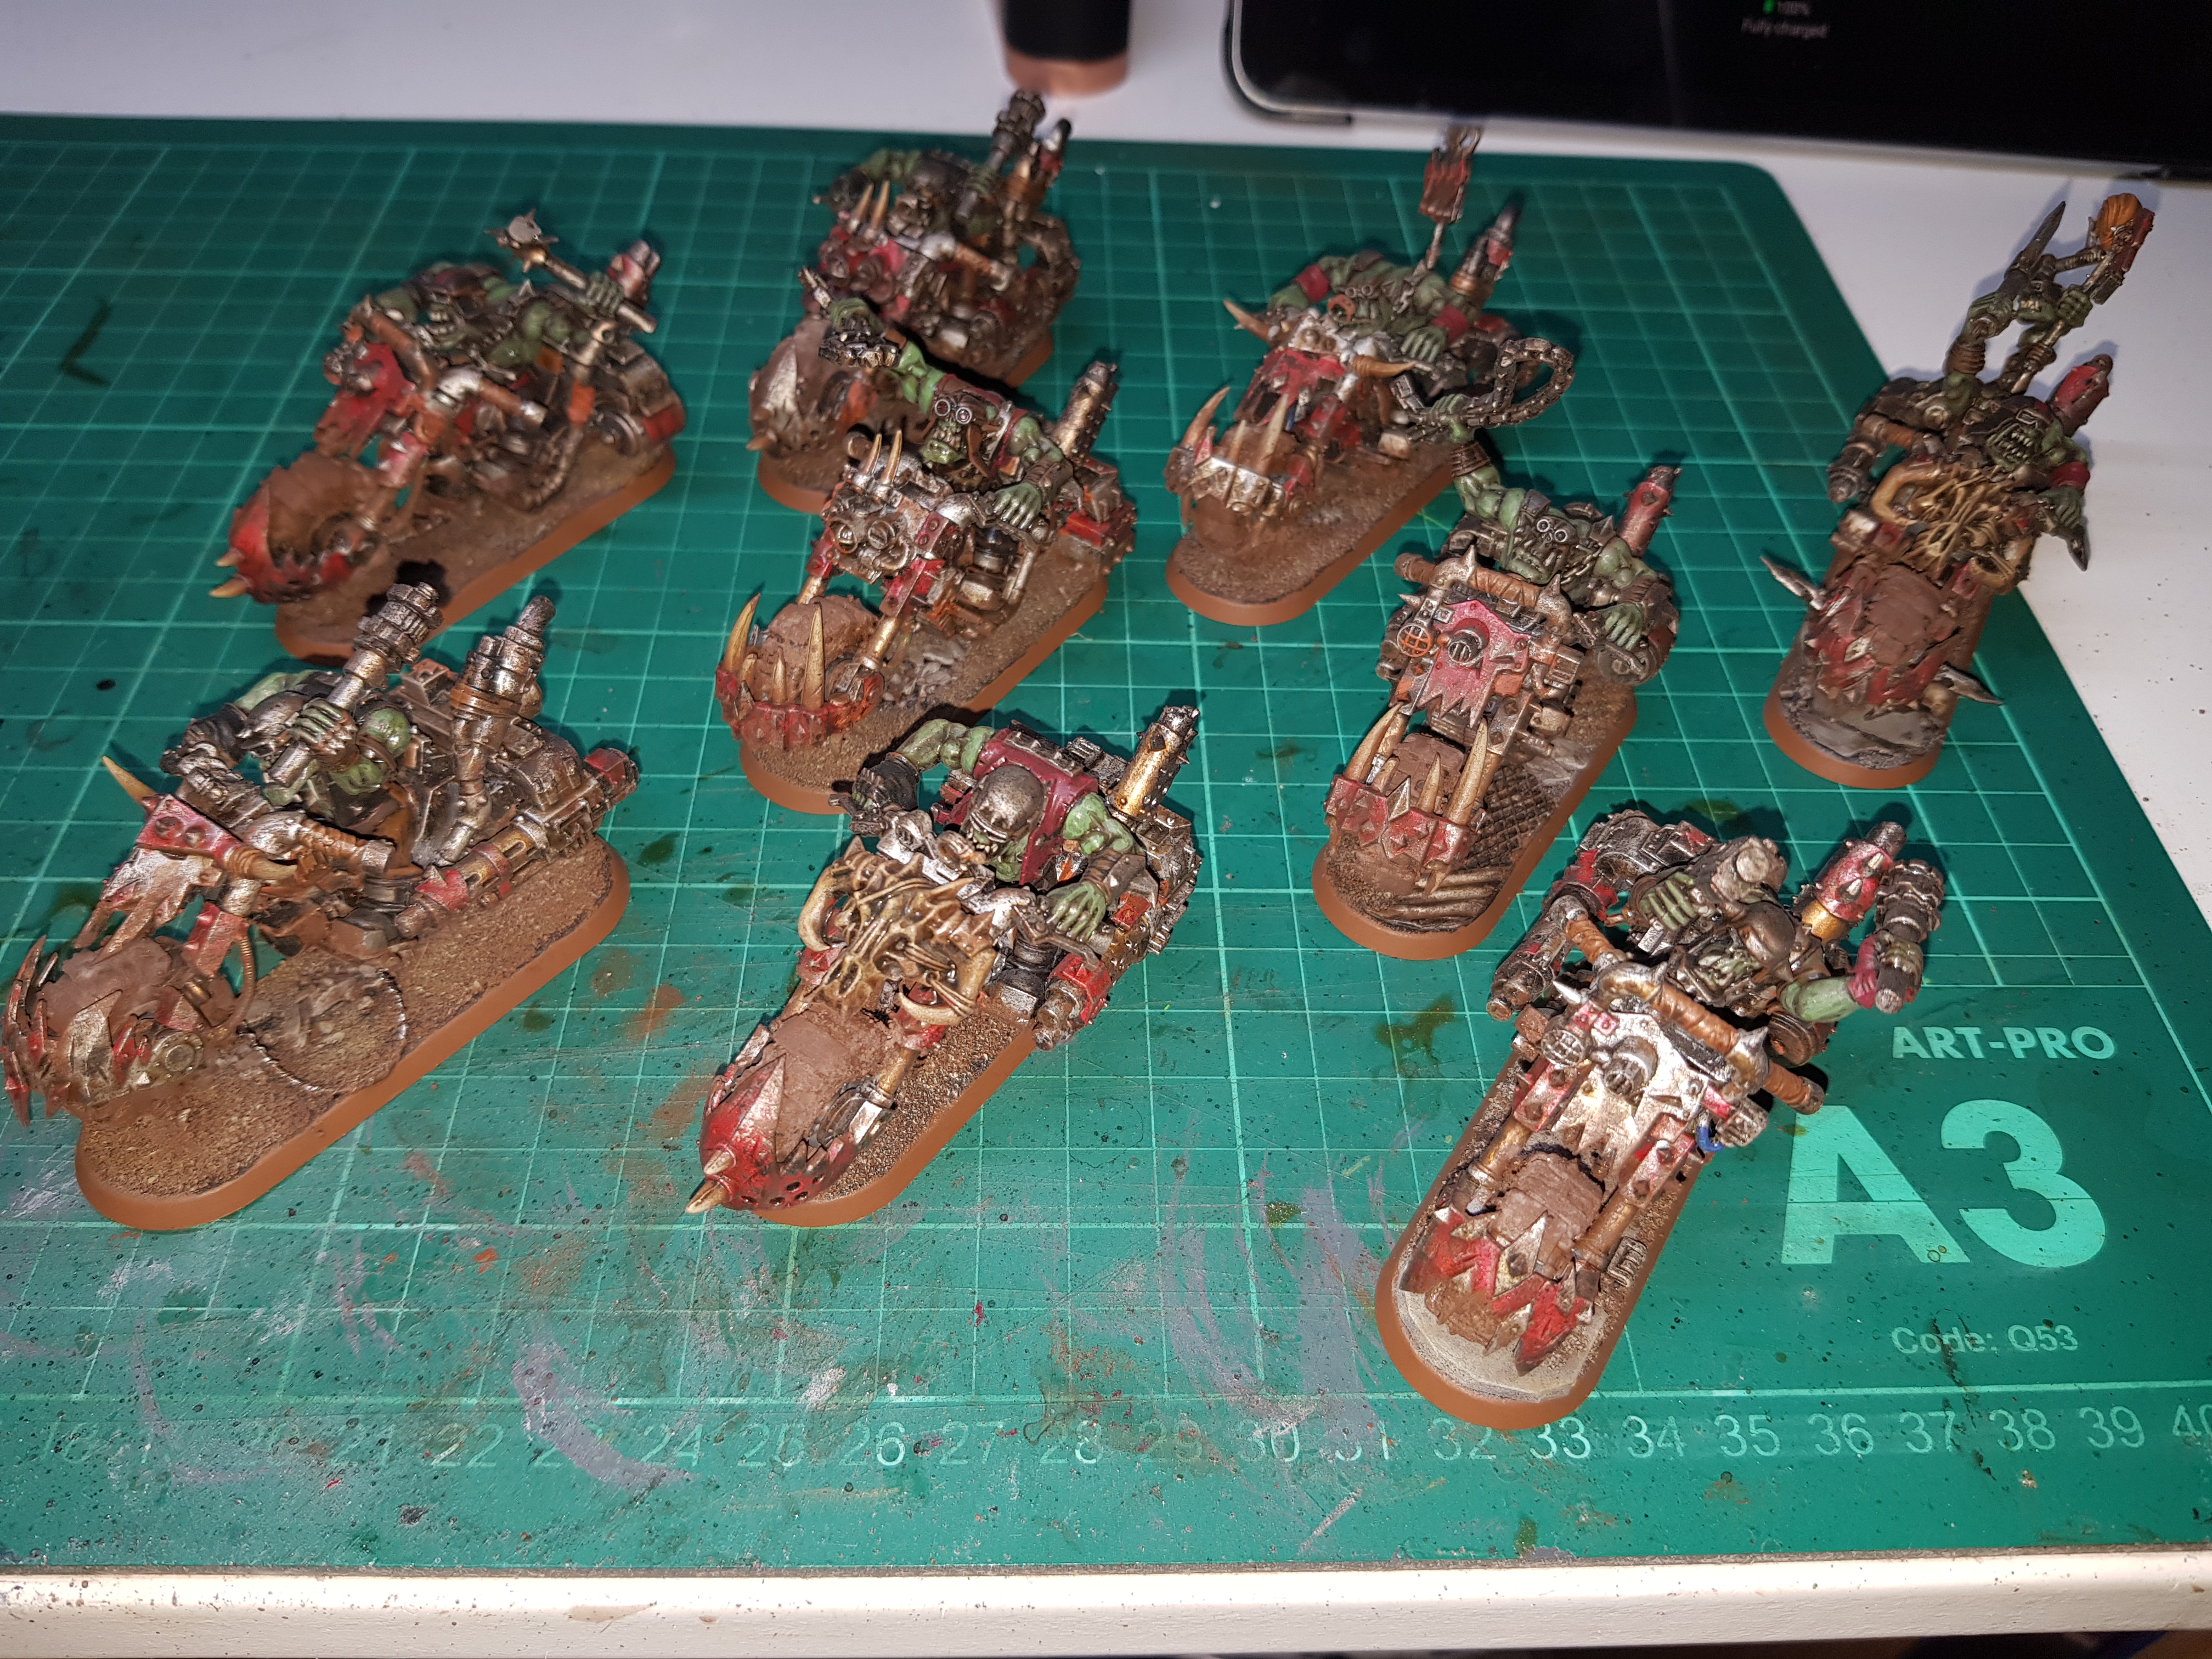
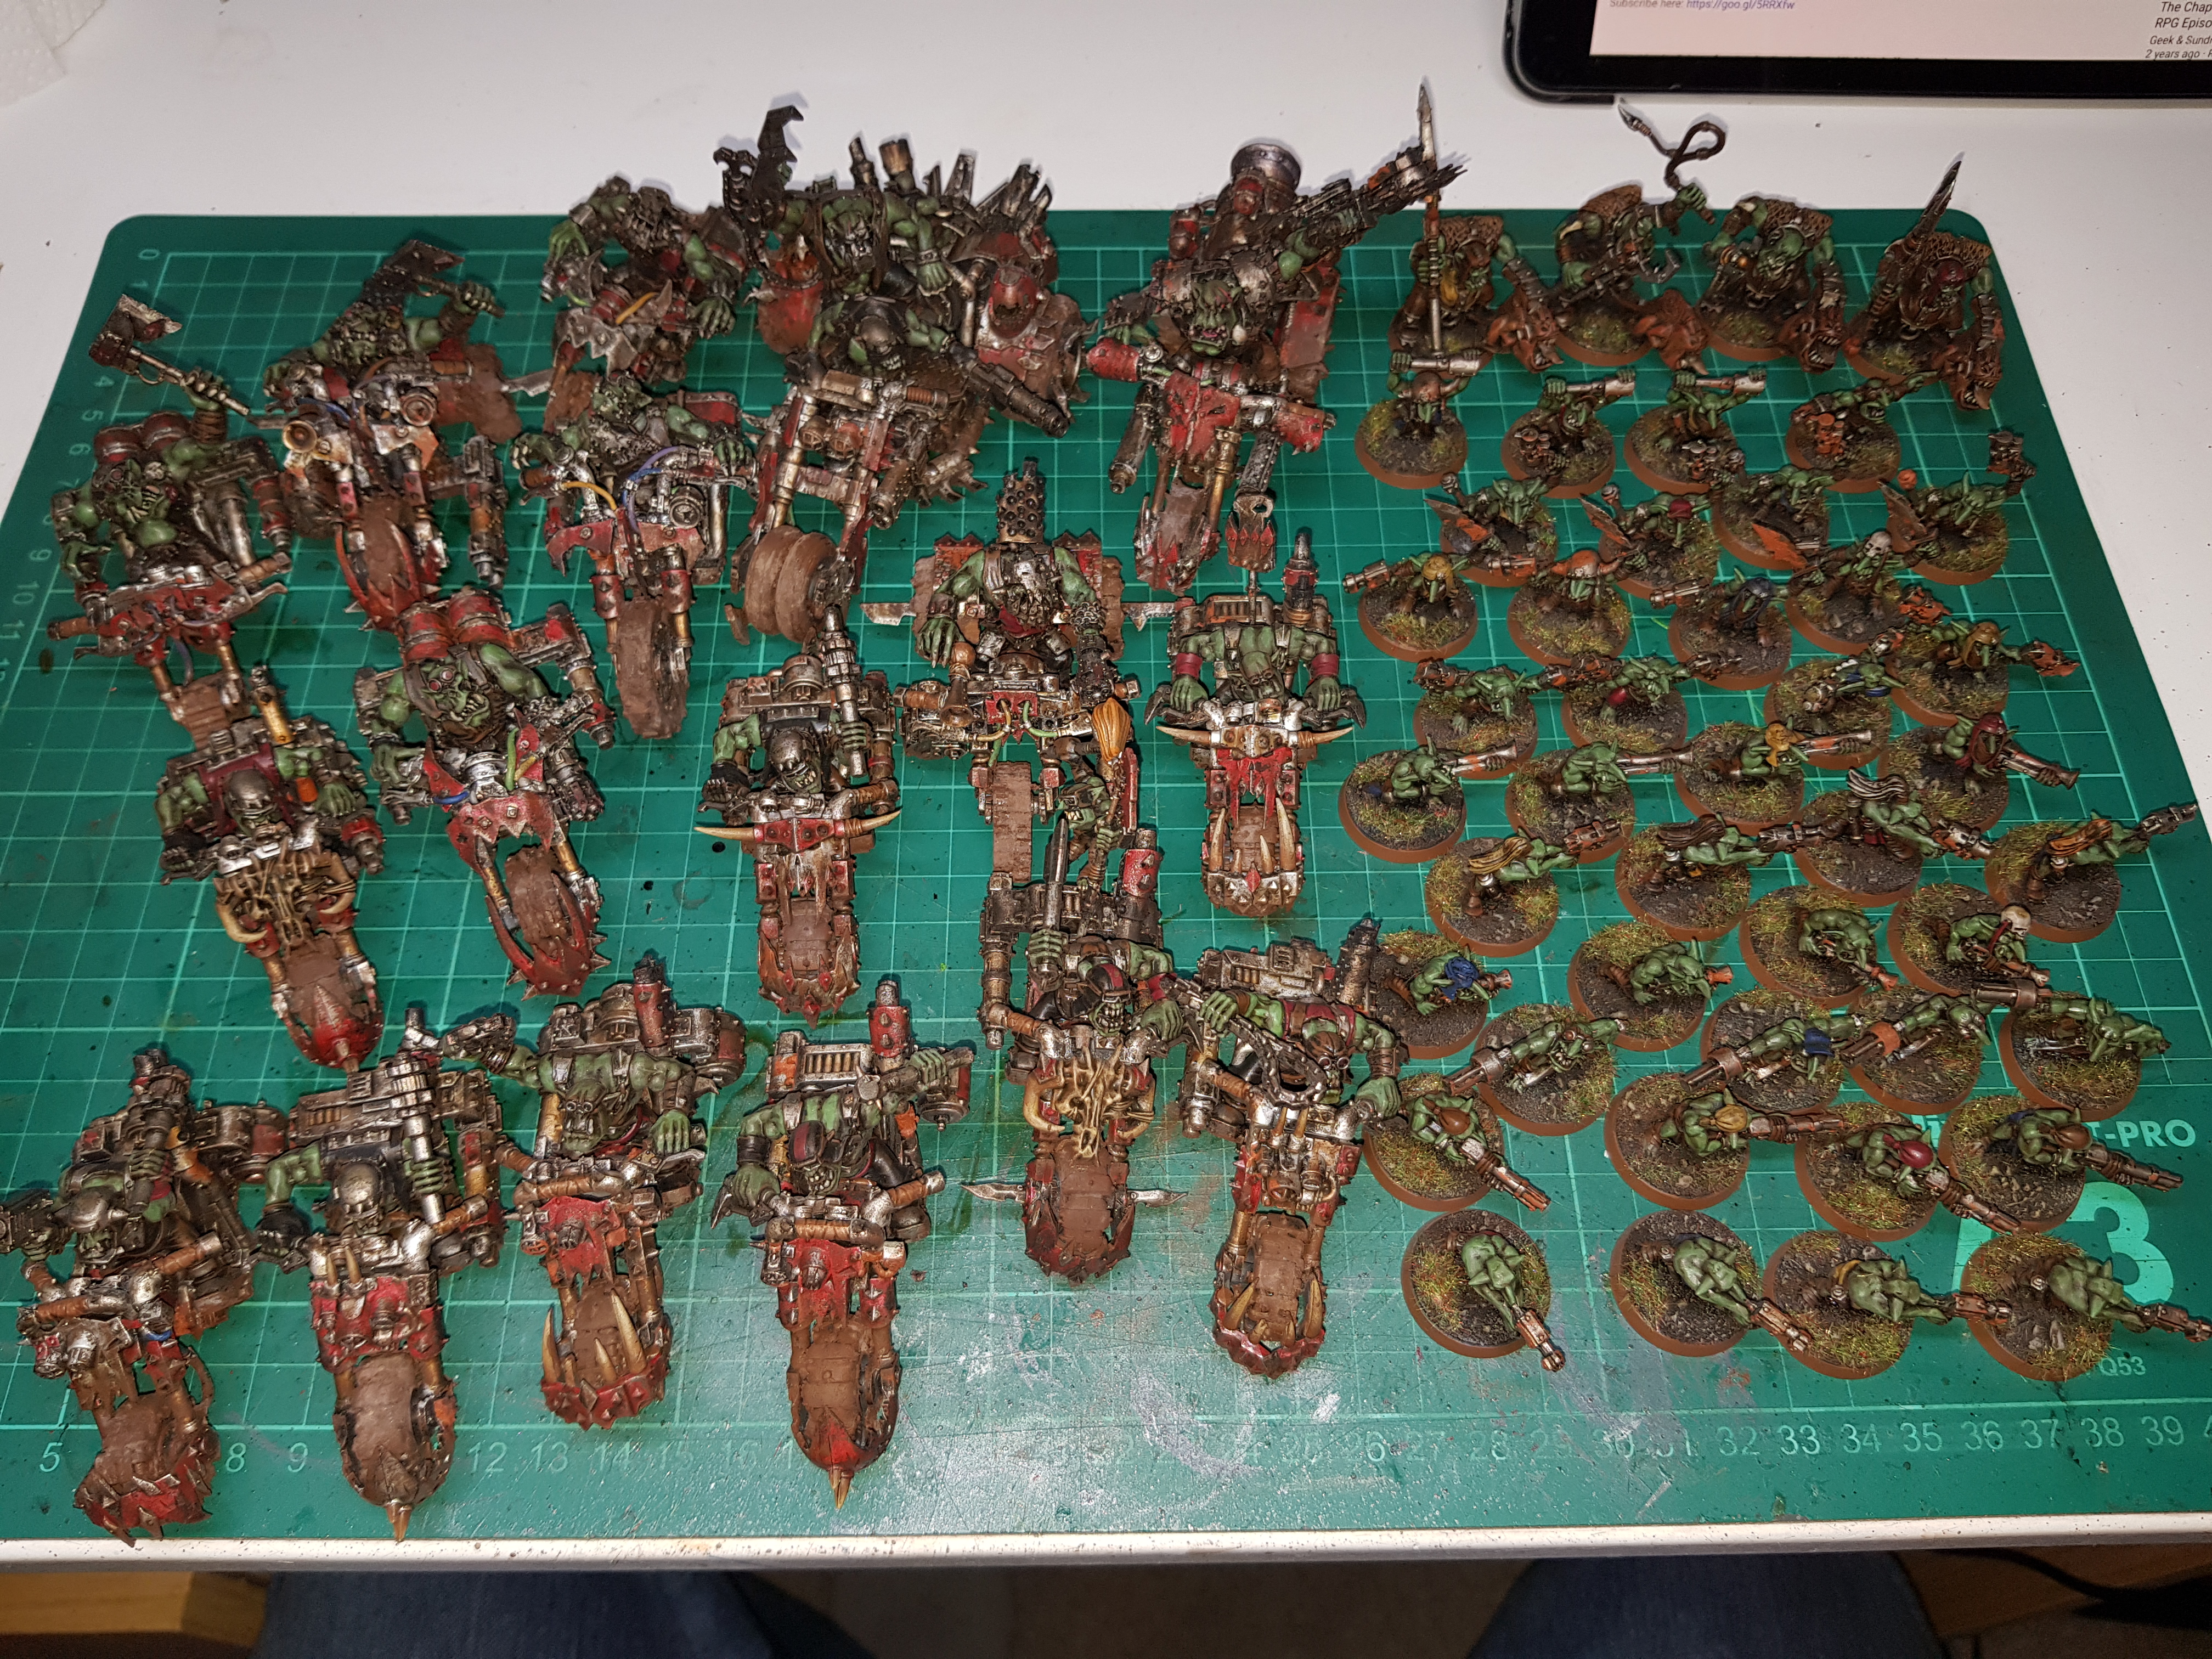 Lots of near enough finished minis!
Having rushed through all of these over the course of a week I was a bit burnt out and needed a break. I didn’t so much as look at Orks for a bit, played some video games, sorted out some unrelated minis and generally chilled out.
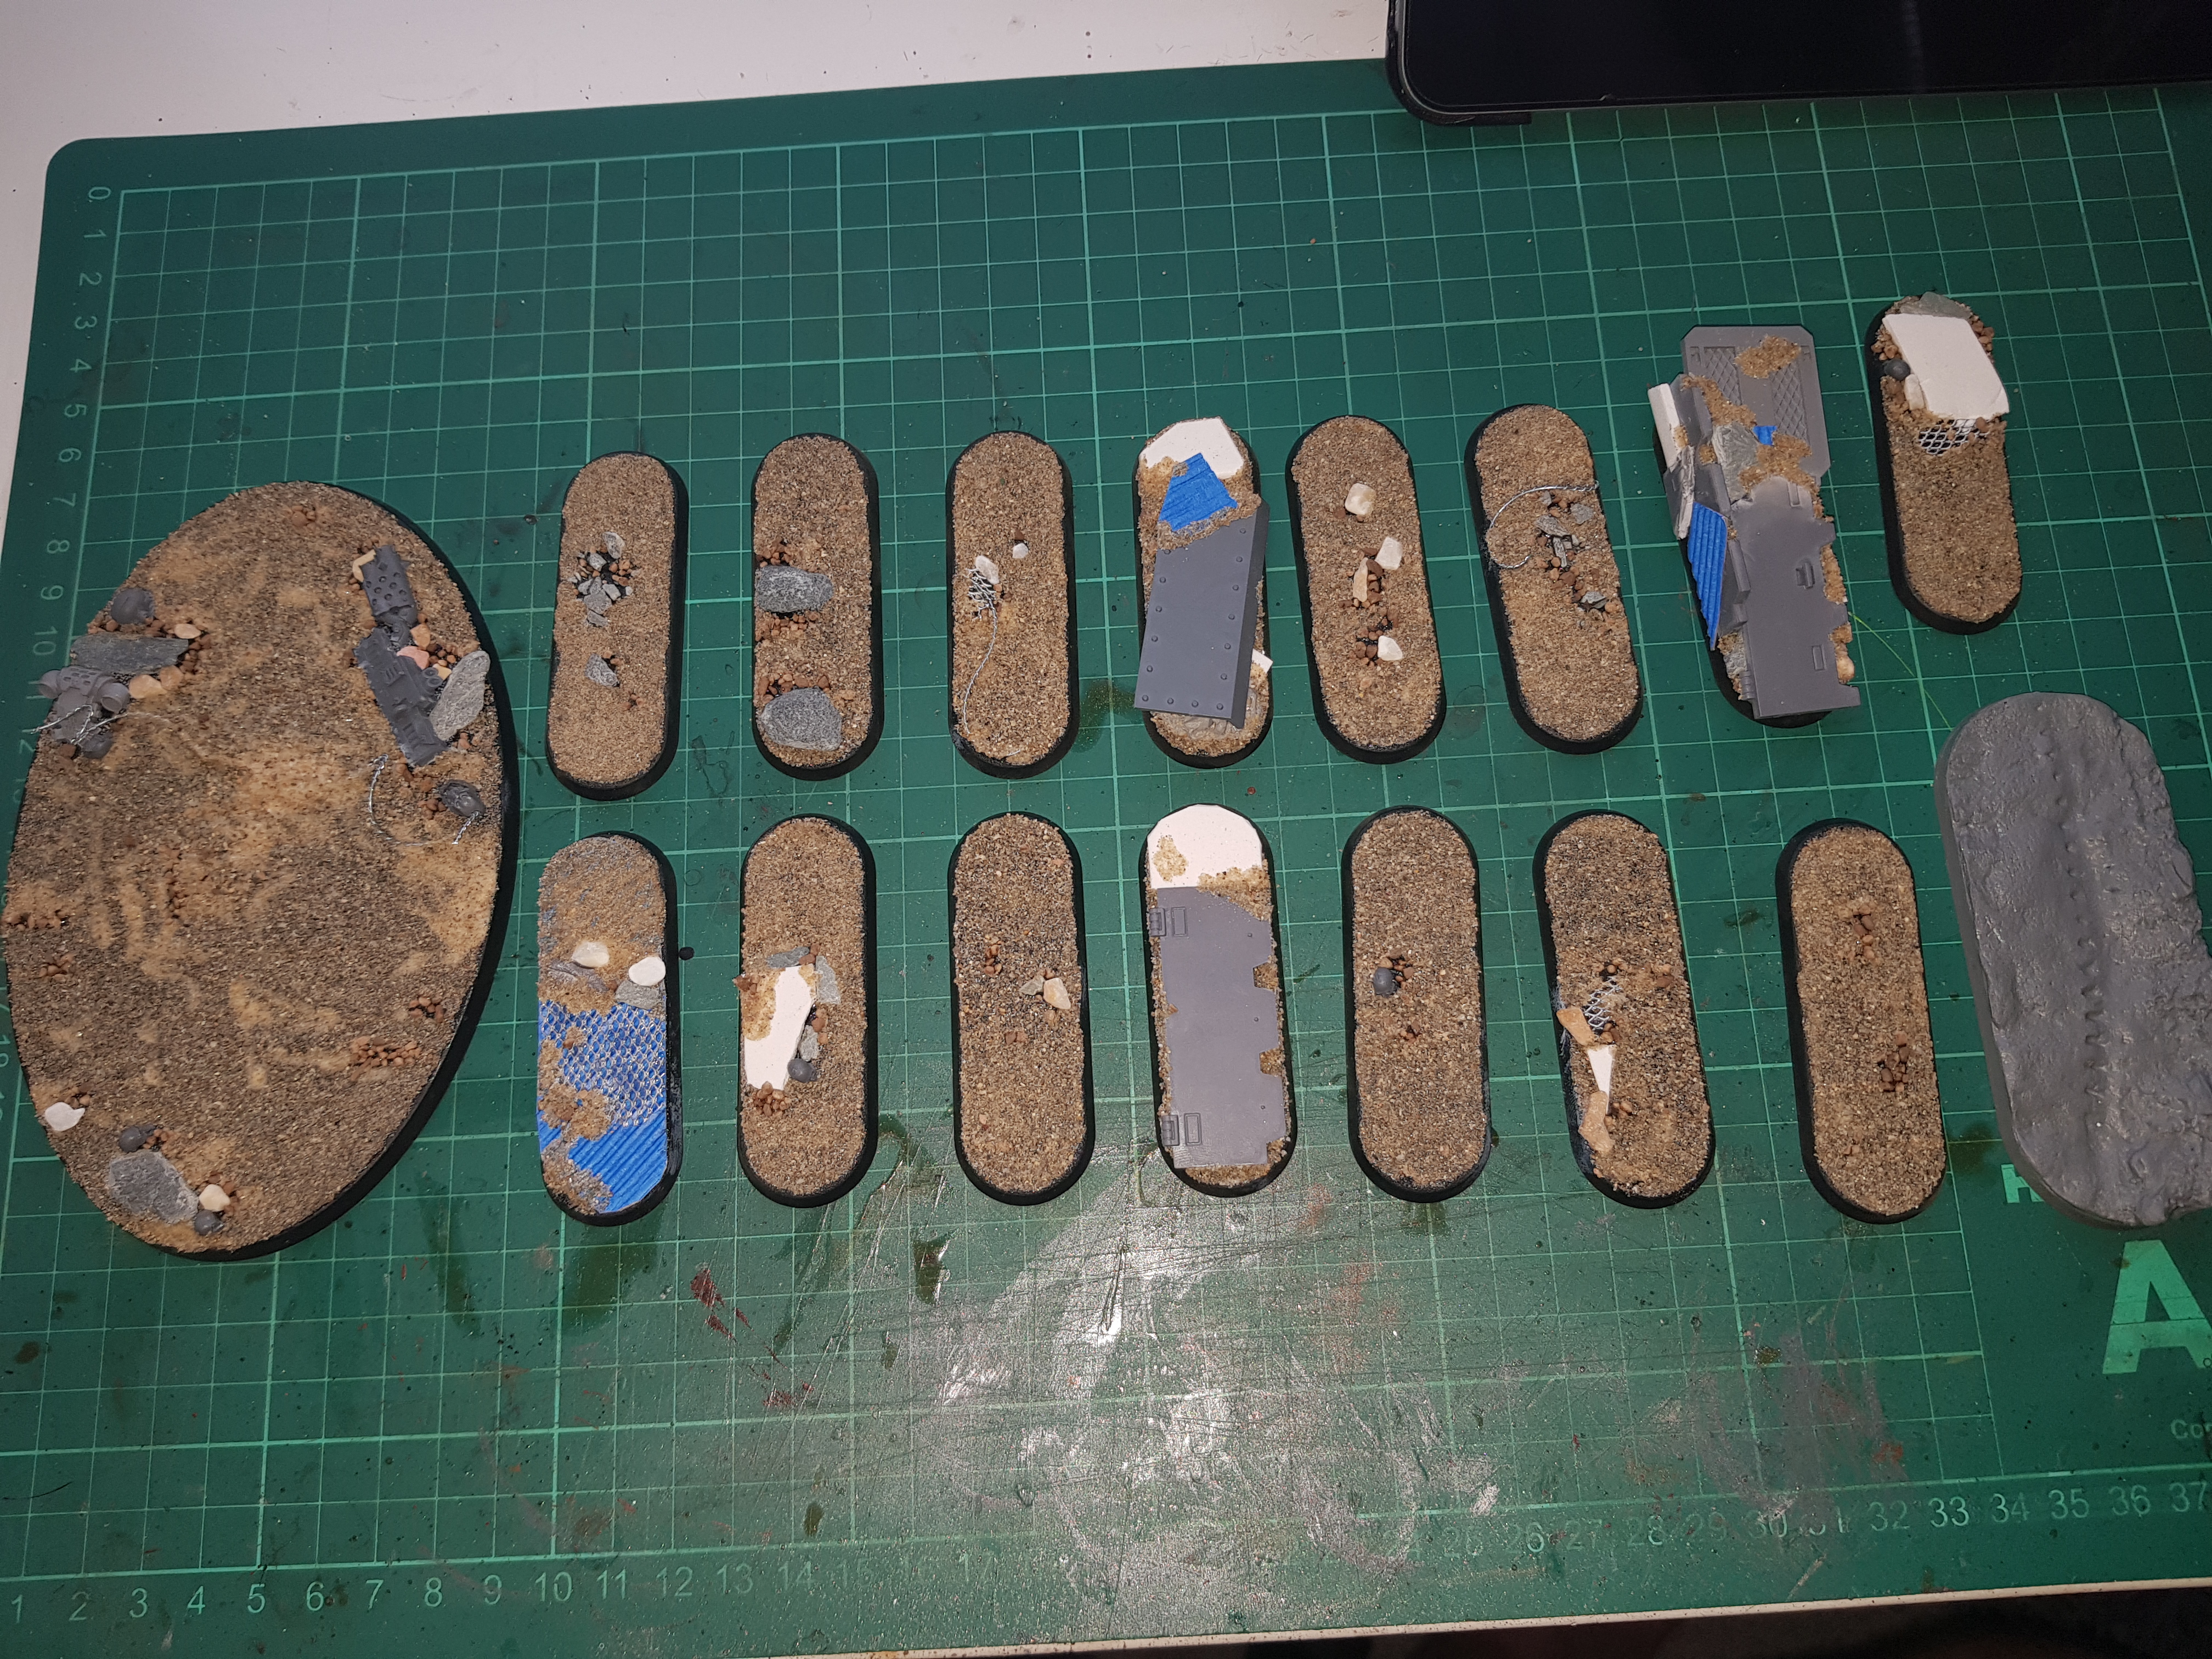
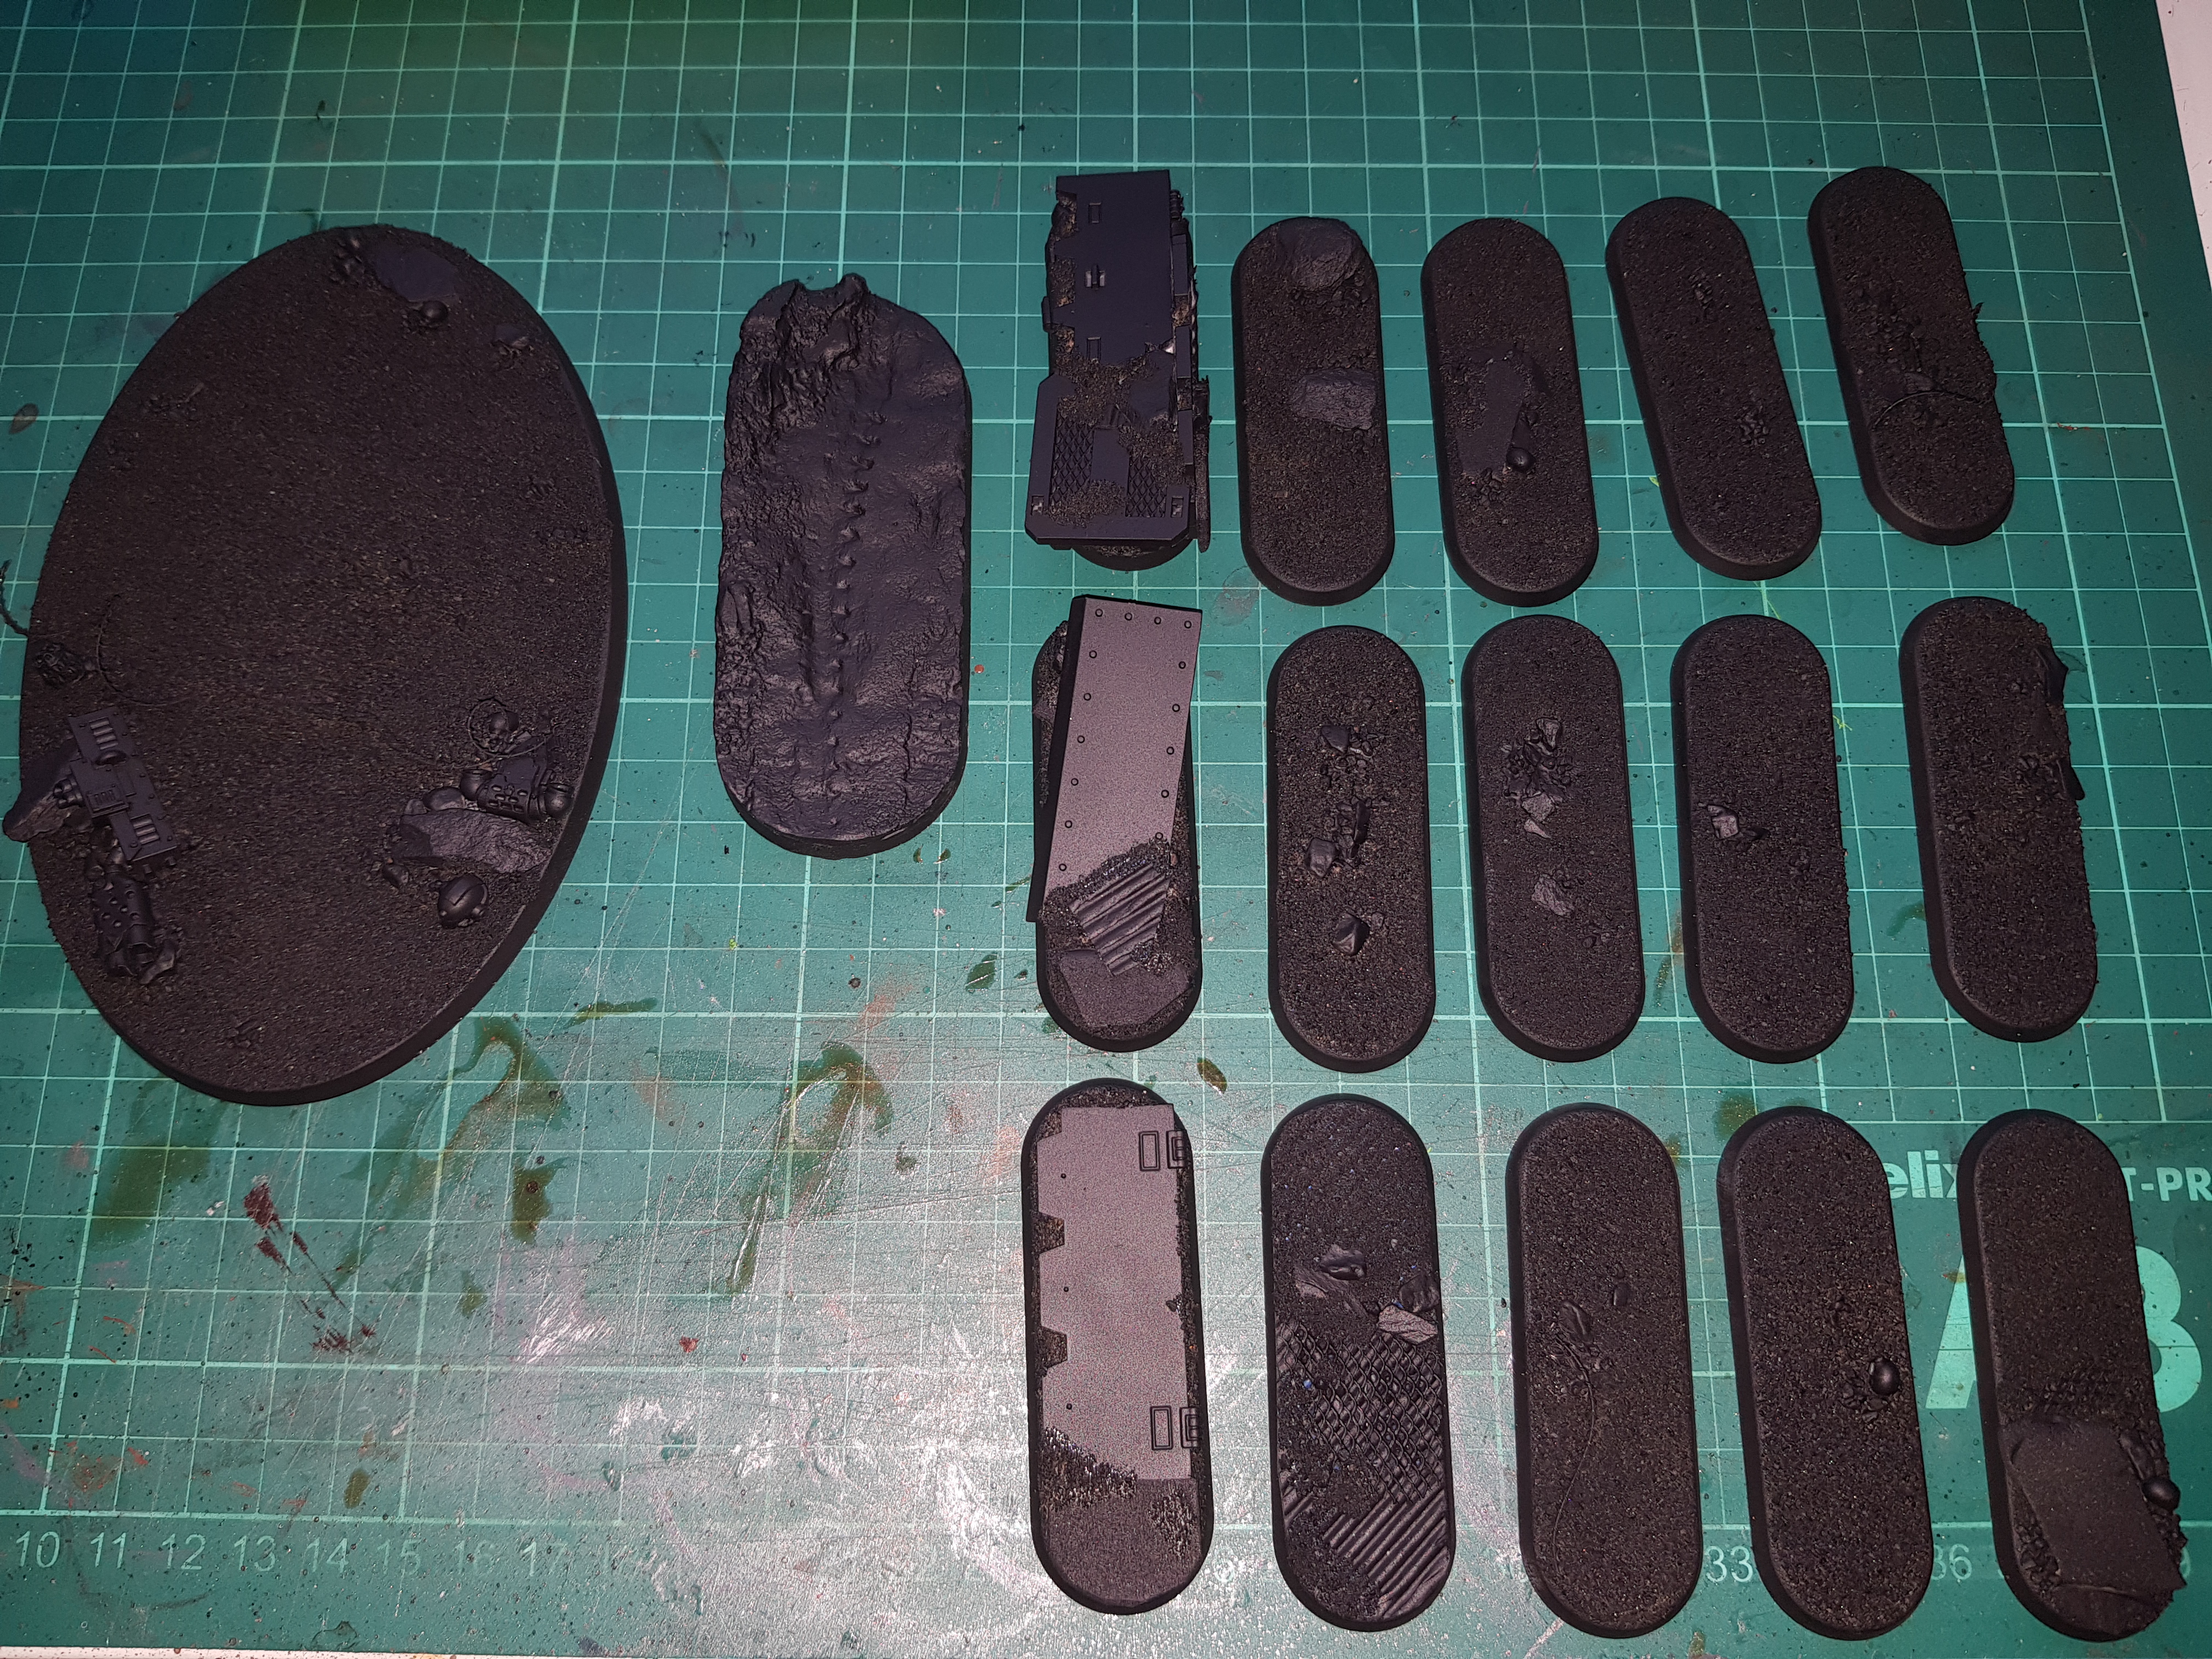
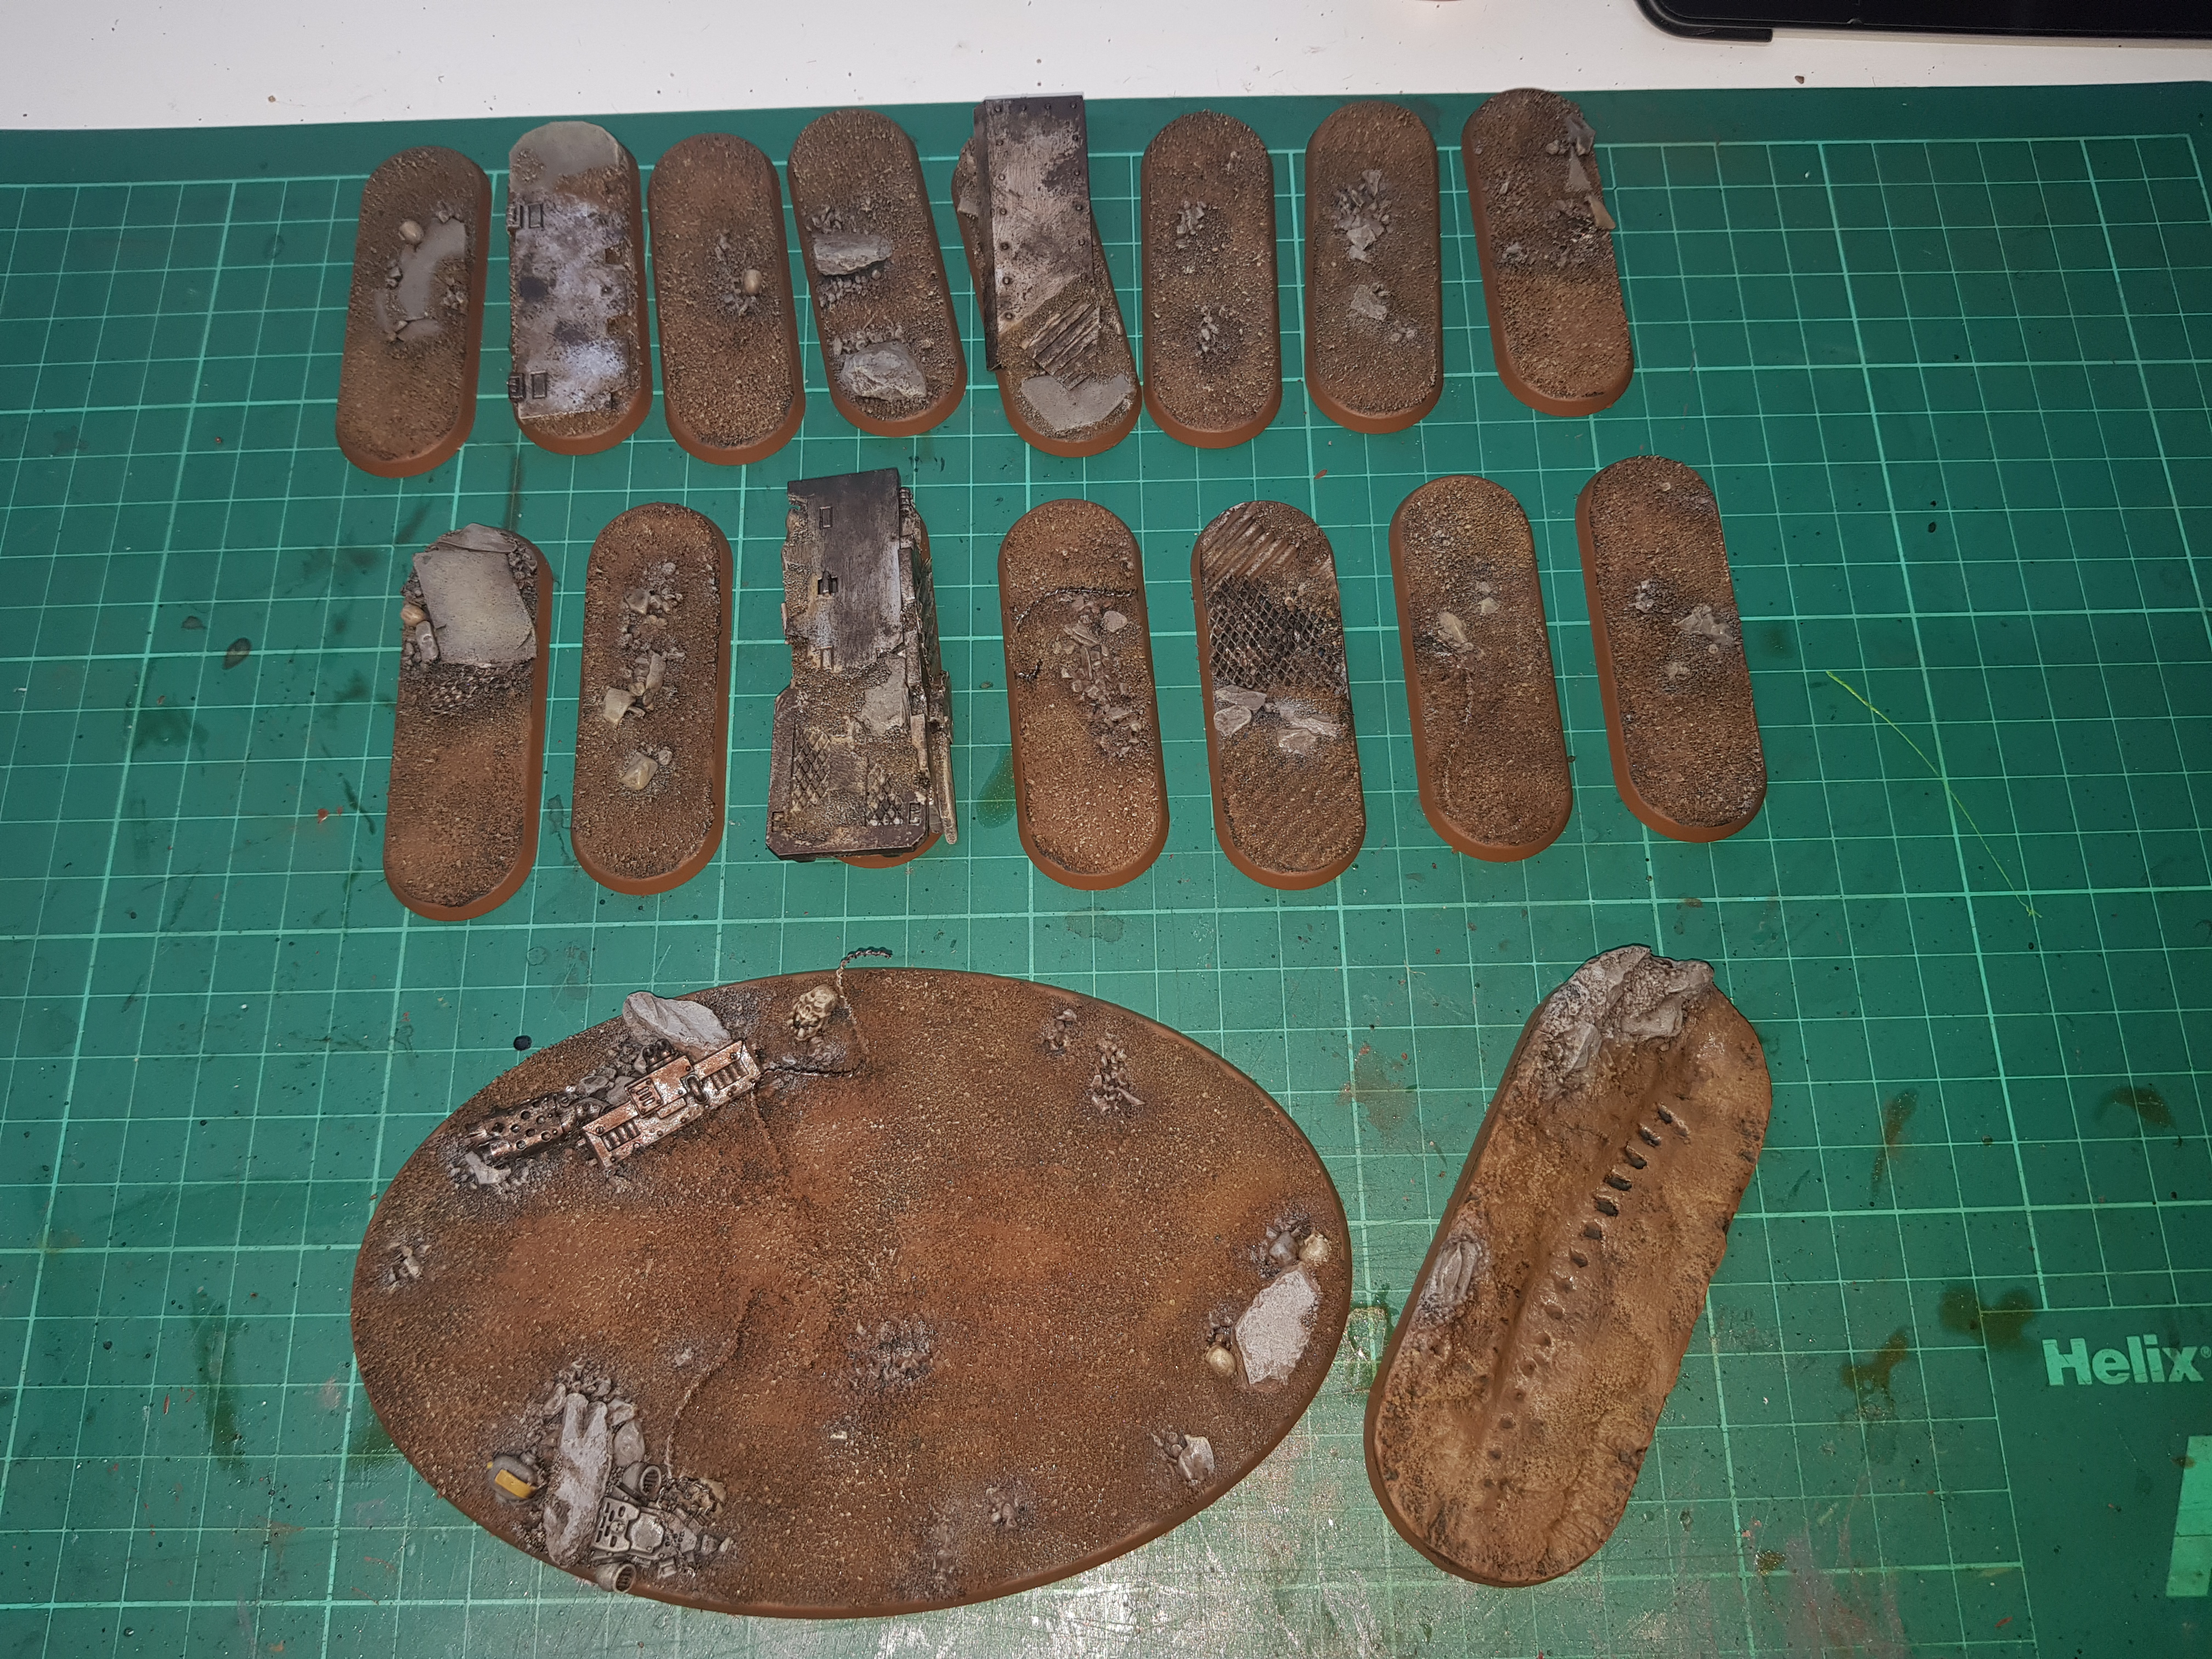
But… those damn minis aren’t finished ’til the bases are done and on! So, feeling refreshed and recharged, I’ve spent some time getting the bases done. In the gallery below you can see the bases once I’d added some debris and texture, the bases once they’d been primed and them painted up ready for a spray of varnish.
Nearly there…
What's Next?
I haven’t forgotten the Grots!
I was trying to decide what to do next when I was notified of a one week challenge; post a picture of WIP/pile of shame on Saturaday and post a picture the following Saturday of the progress made.
Collating my entire pile of shame would likely have taken the week so I’ve picked out some of the rejected projects from this log.
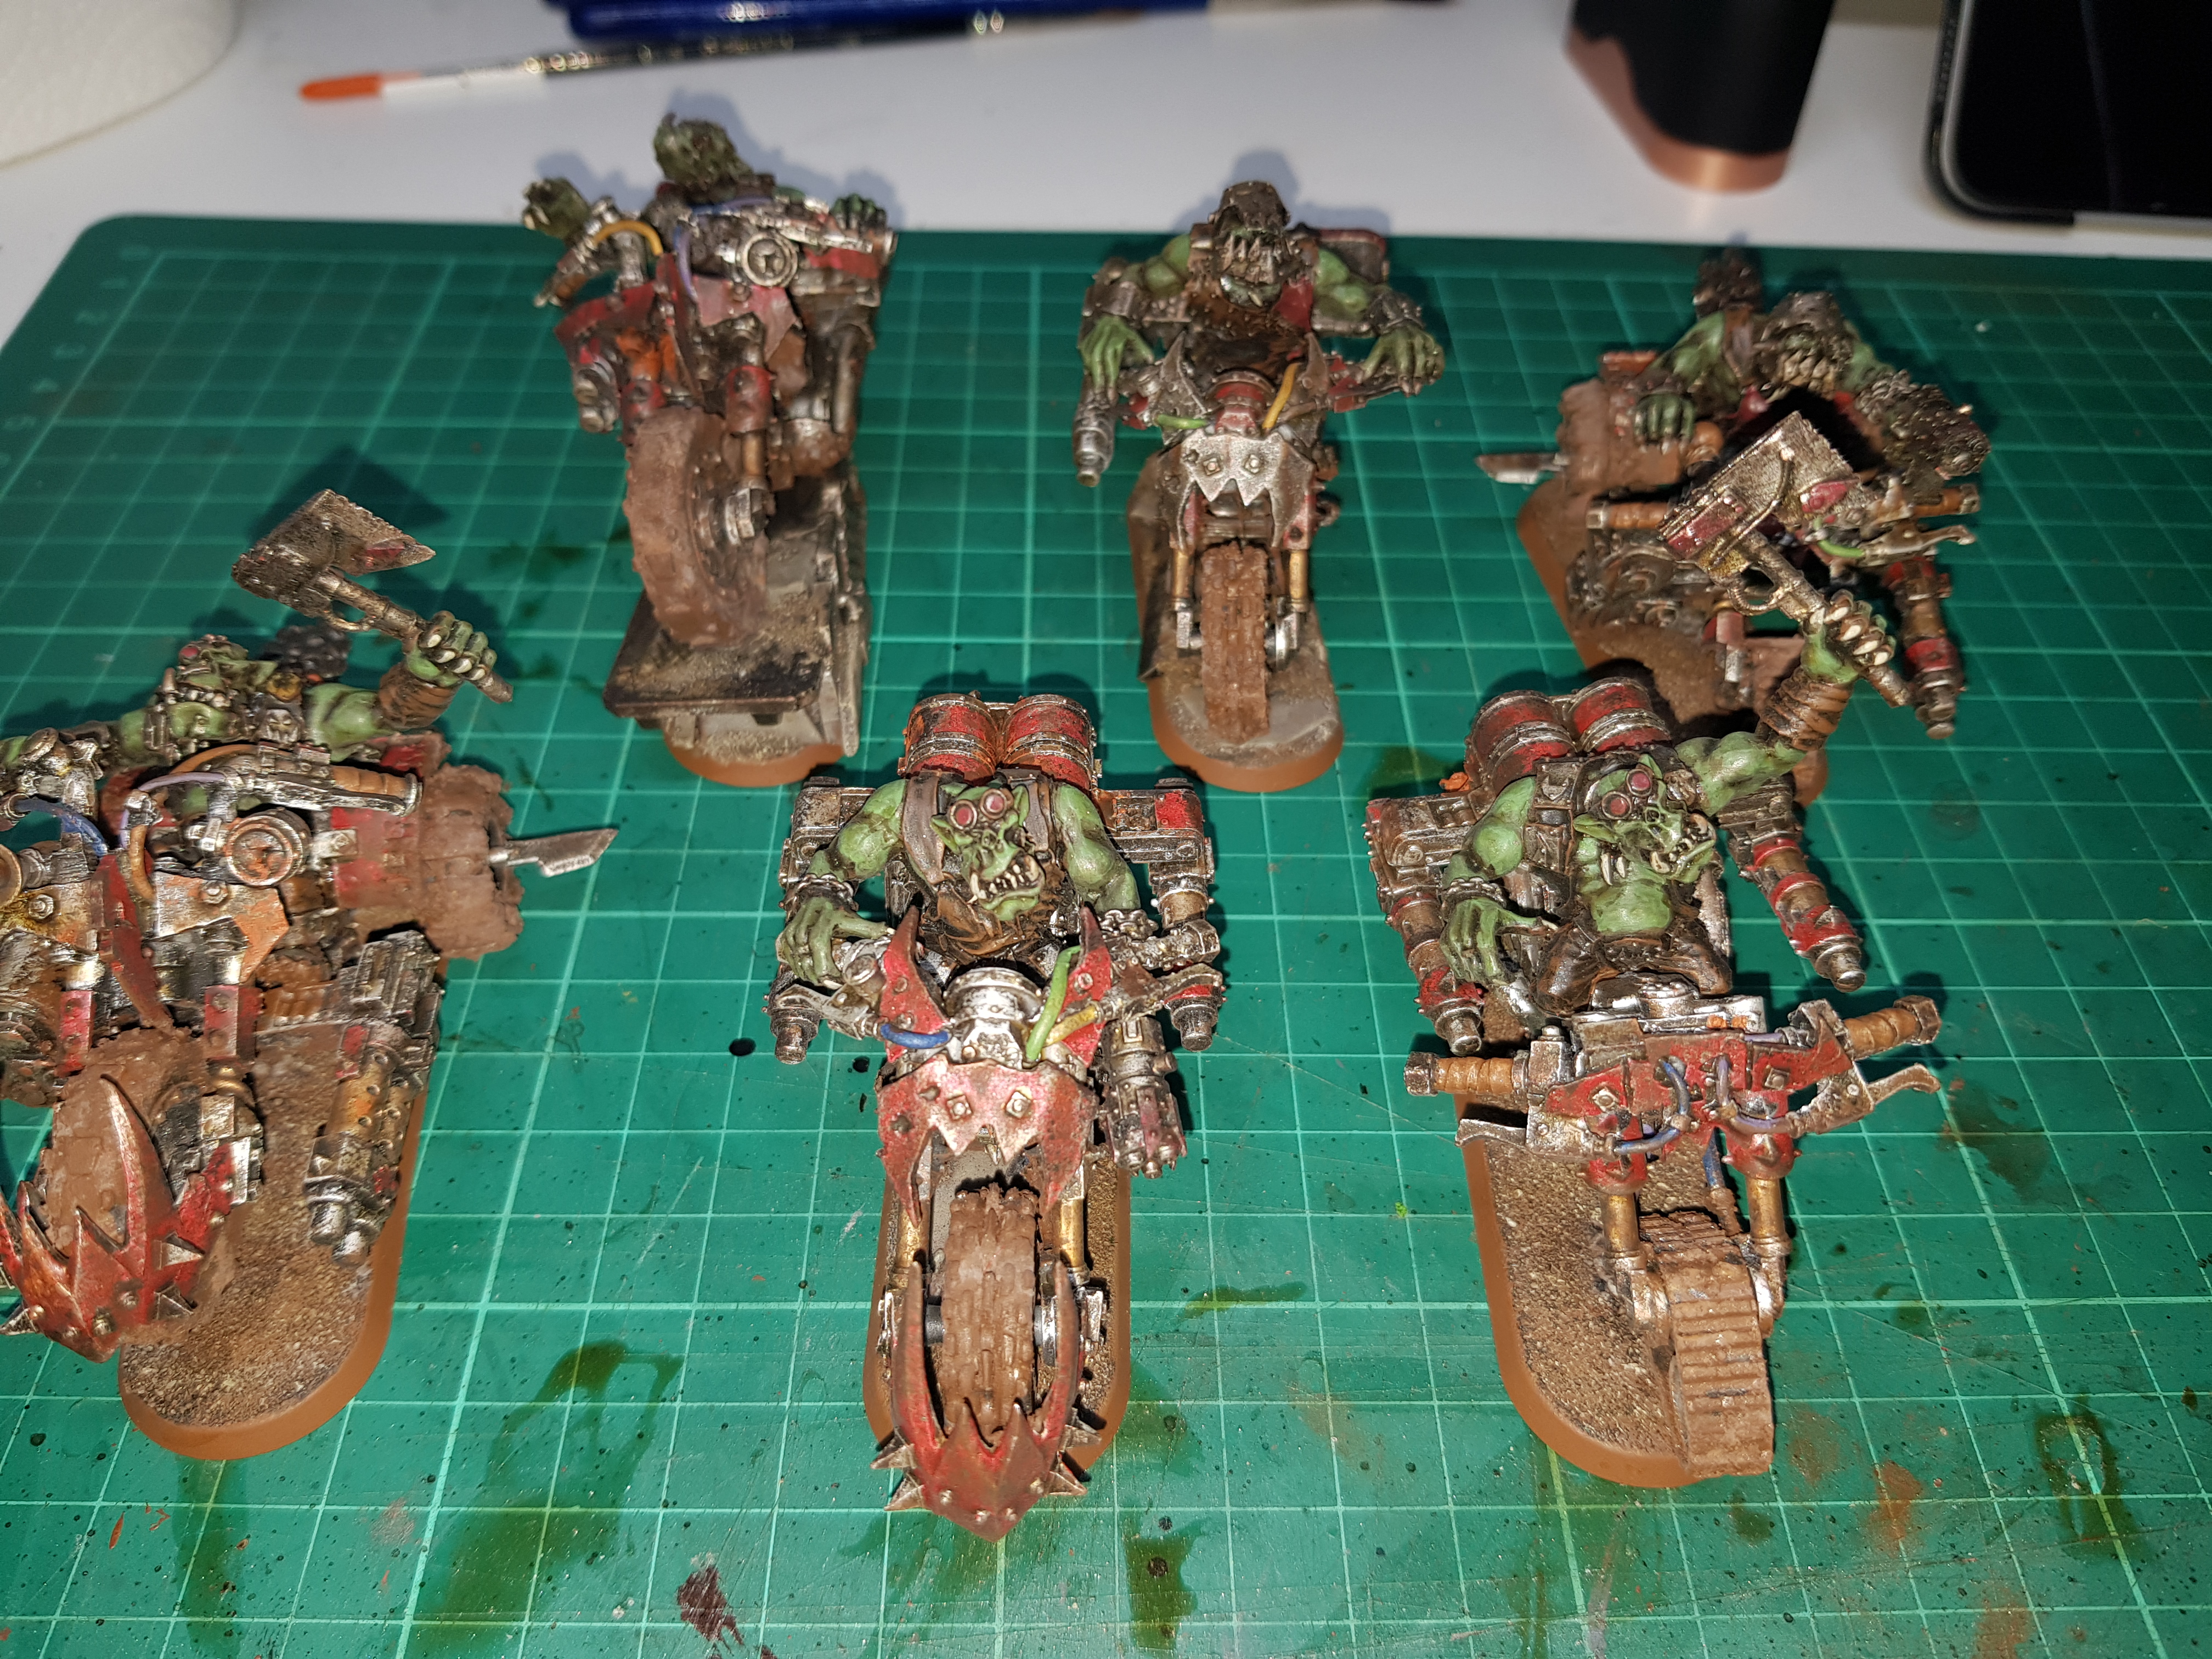
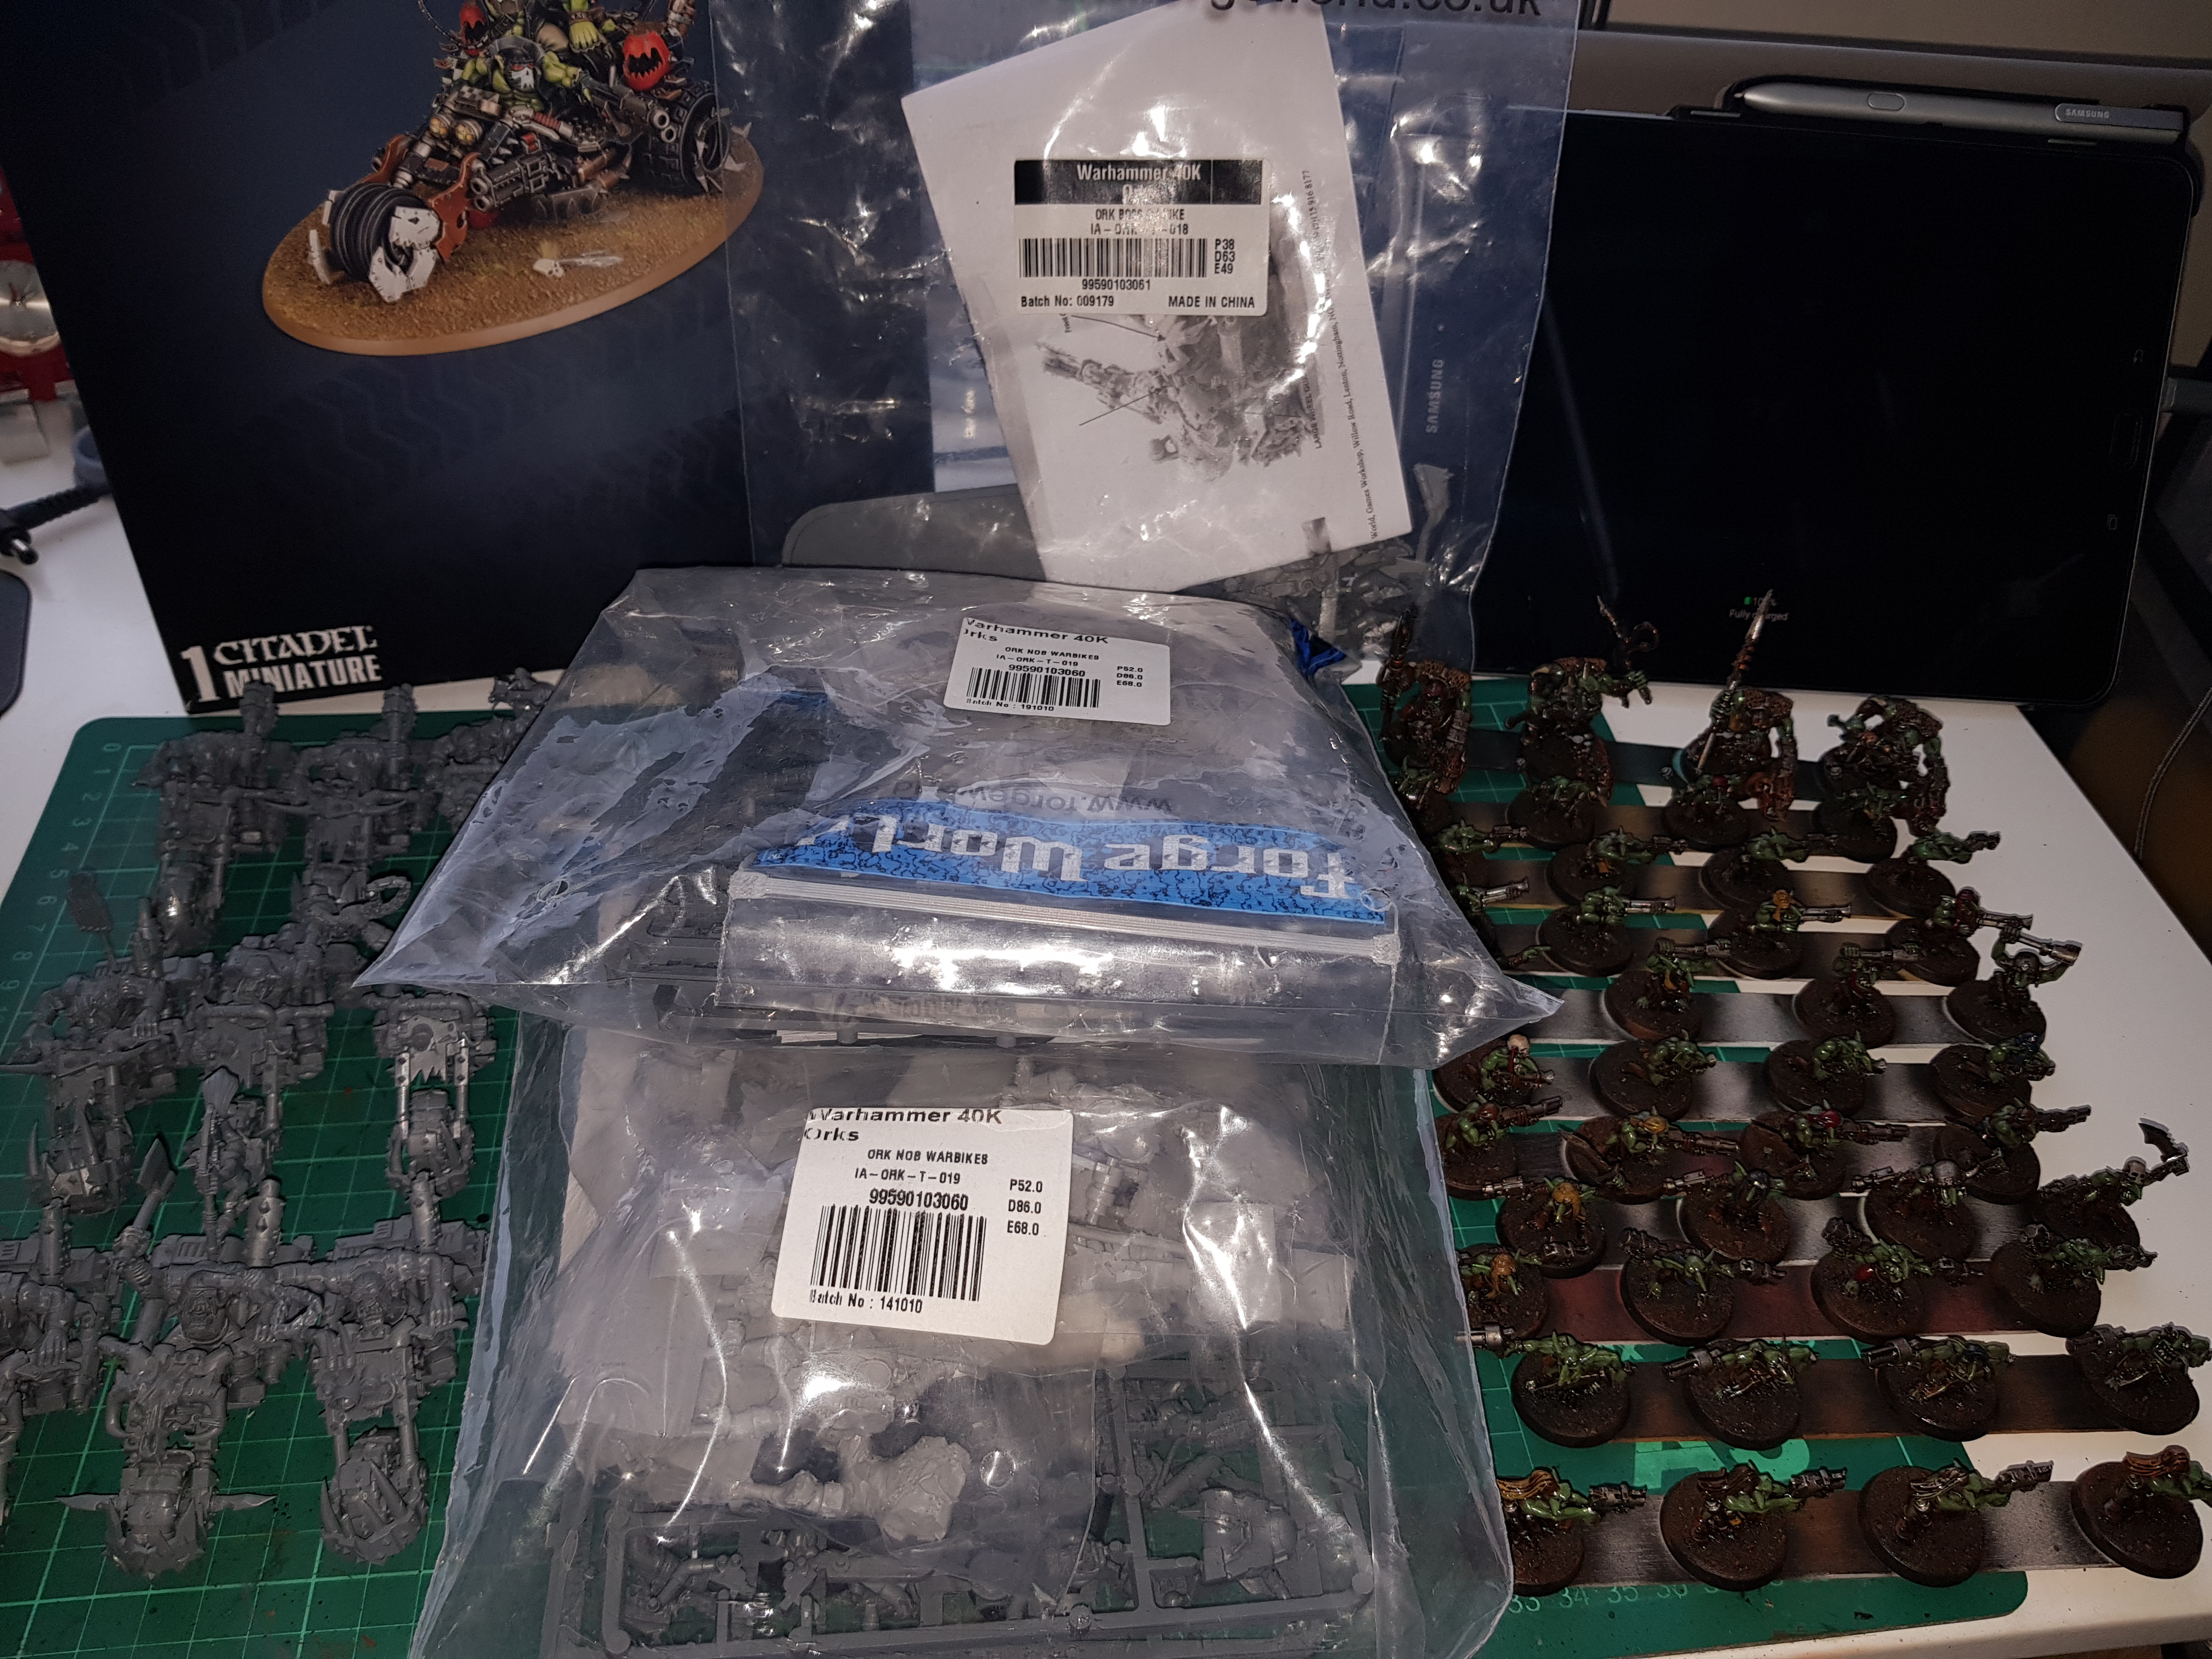 The Grots and an assortment of bikes/trikes.
Given that this picture was posted on Saturday, I have made a bit of progress. Assembling those Forgeworld kits was a bit of a turd and took an age; I’m sure some combination of the Nob Biker kits go together in such a way that all the riders can look remotely seensible whilst holding the handlebars but I couldn’t find it!
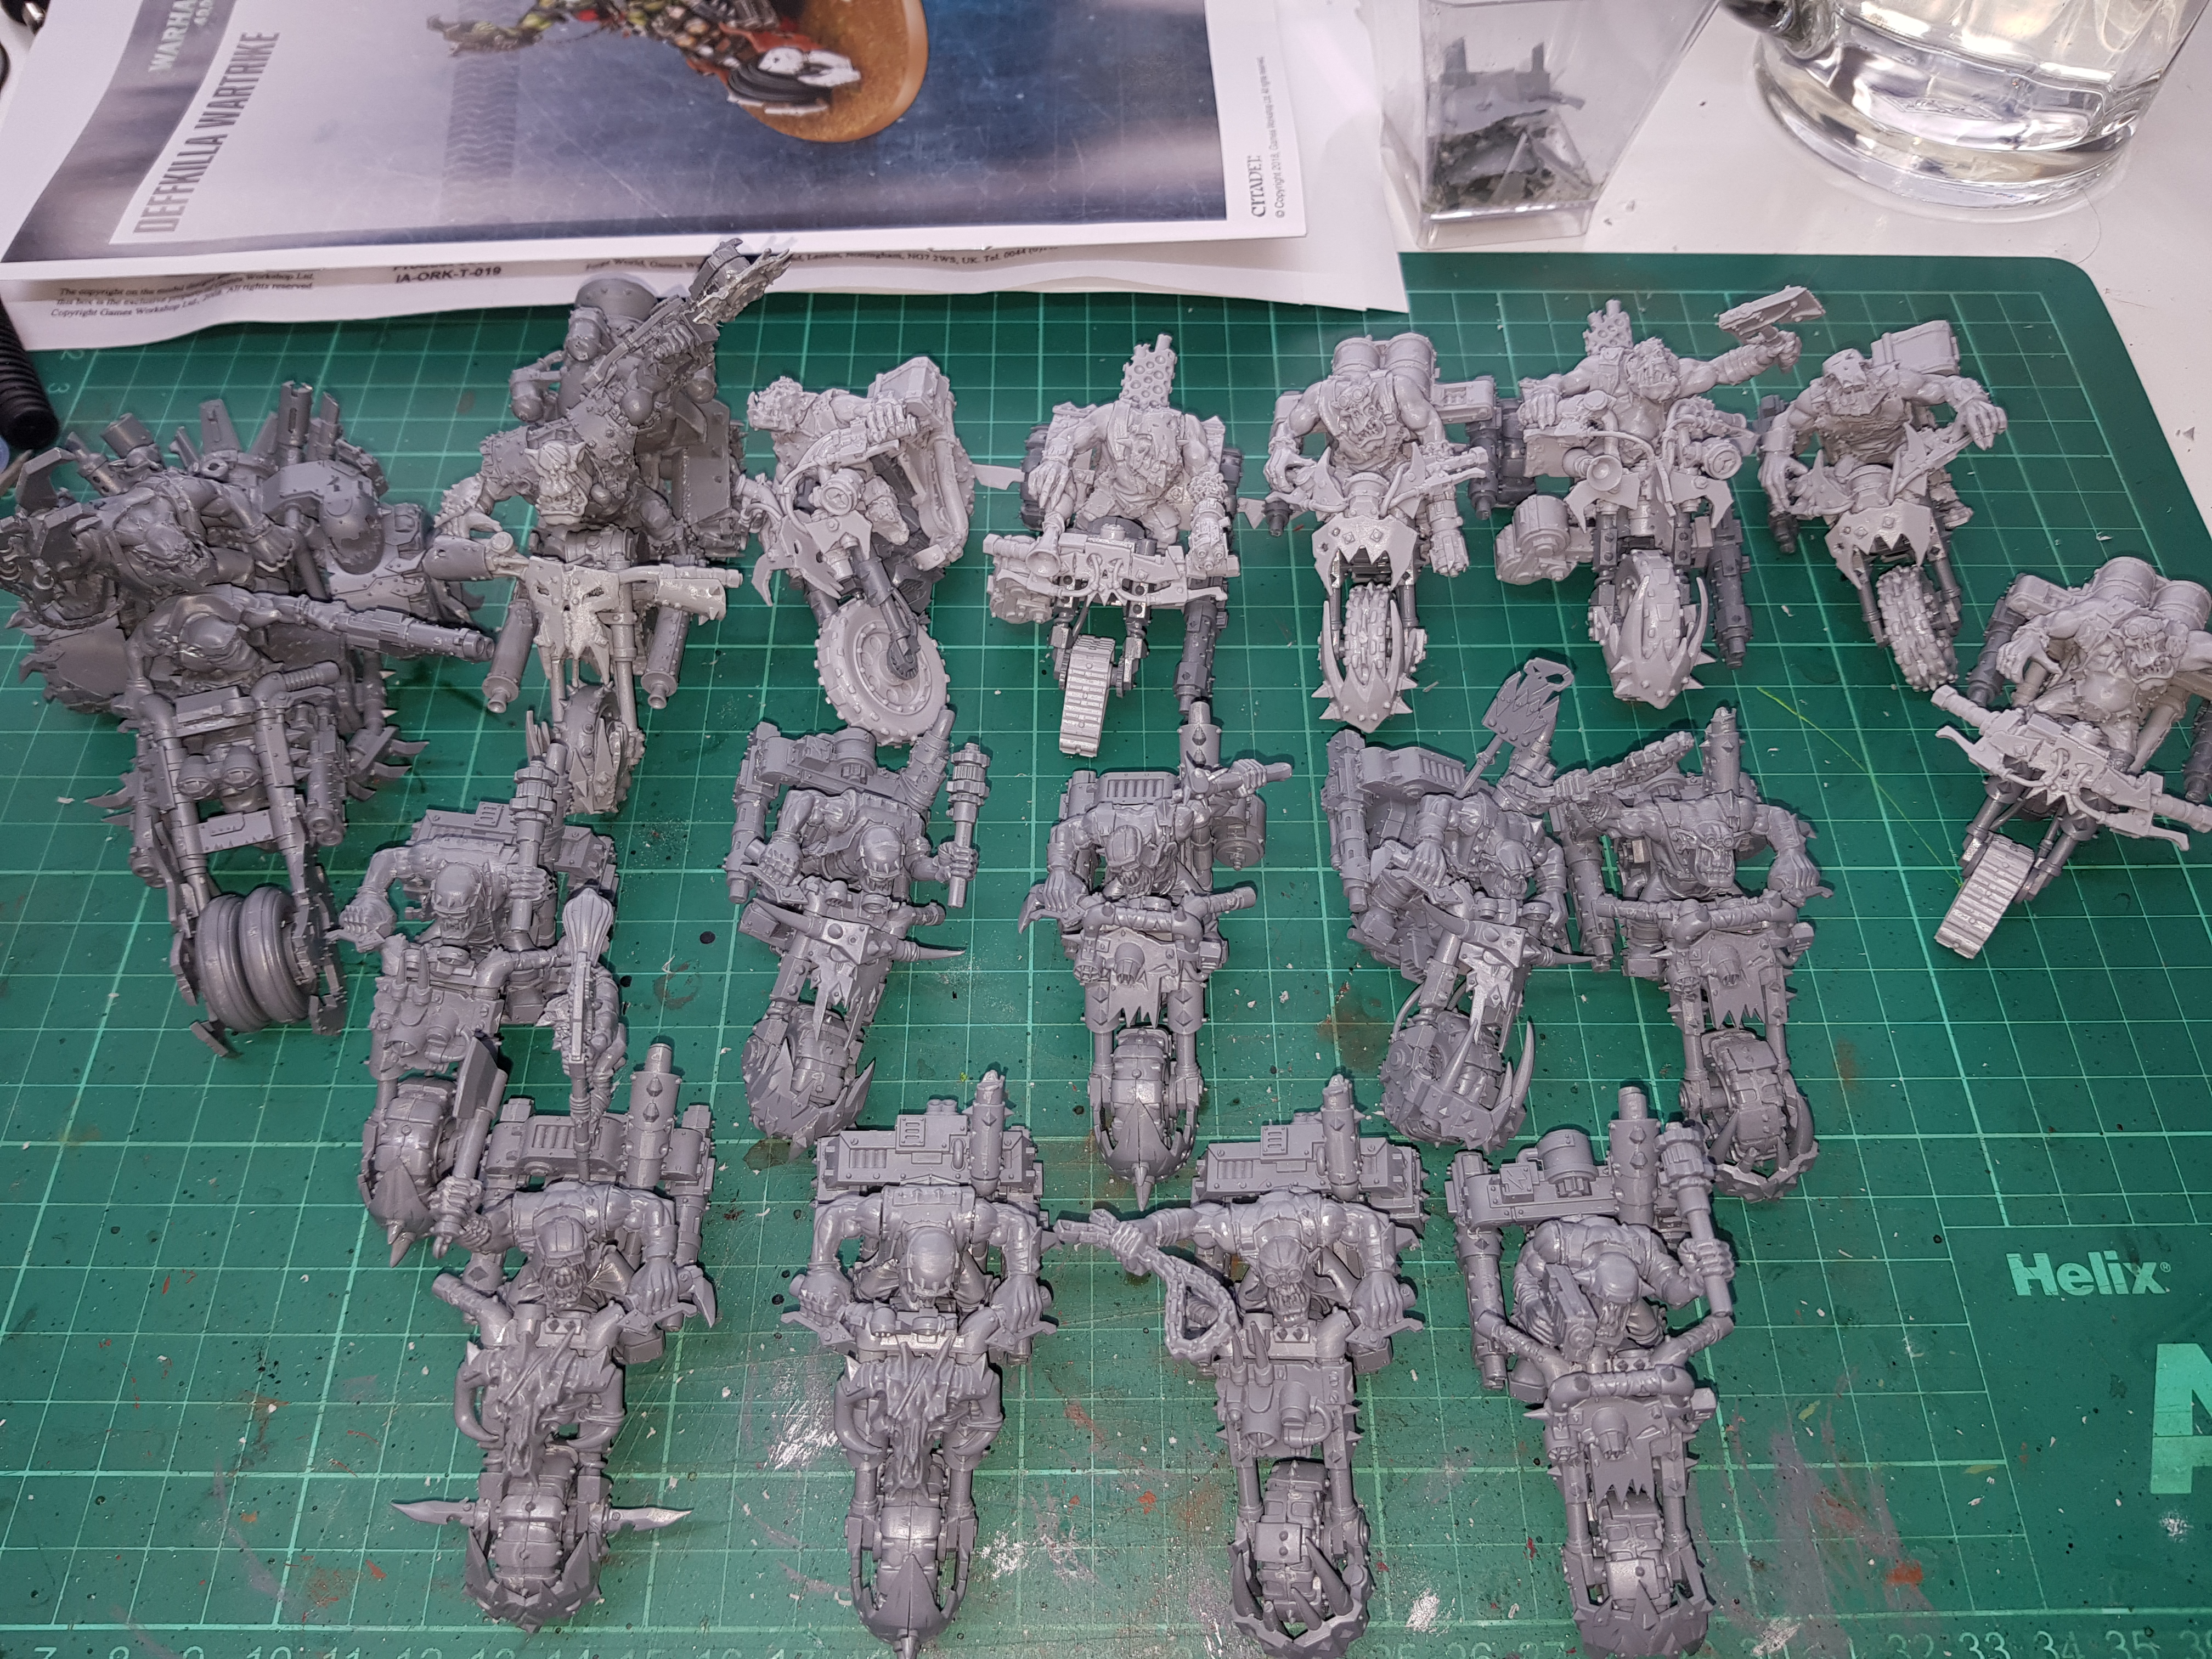 Enough bikes/trikes?
These will be primed shortly.
I’m unsure how far I’ll get with these over the course of the week. I’m still undecided as to whether I do everything in a production line to get them all to the same position, whether I concentrate on certain minis to try and get them finished or something inbetween.
I’ll post some updates throughout the week although these will be brief as I want to devote as much time as possible to cracking on with them.
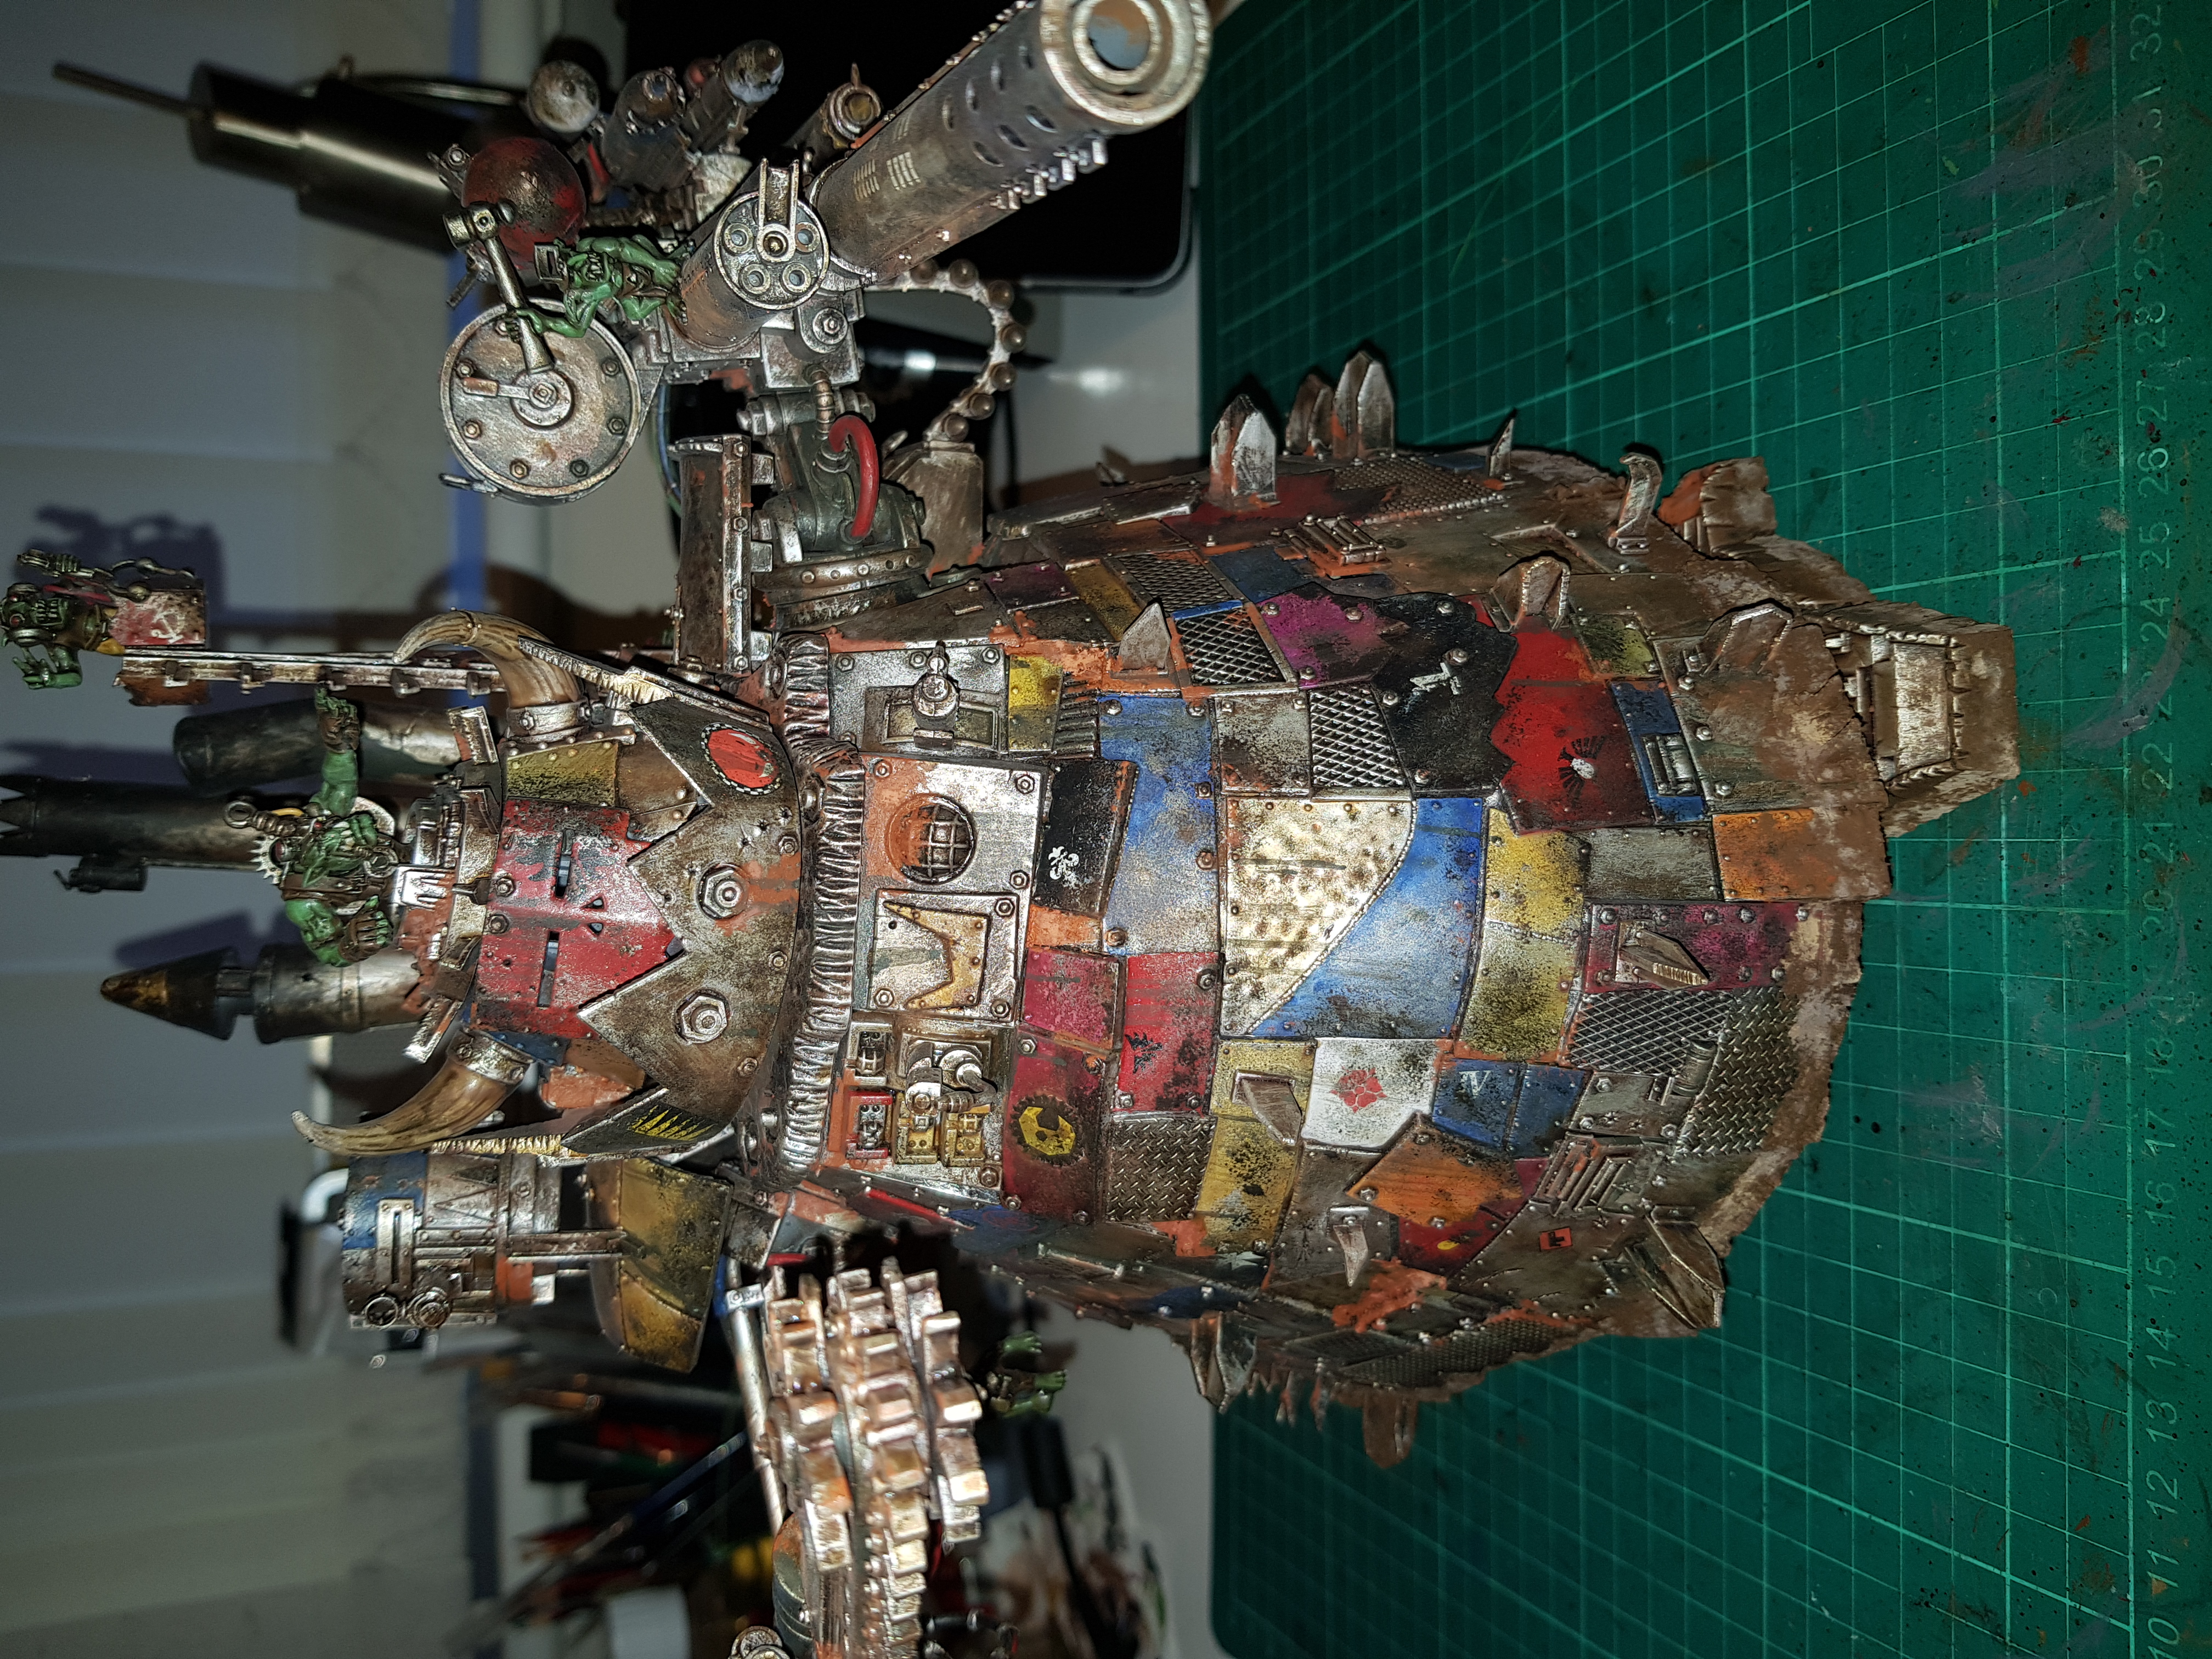
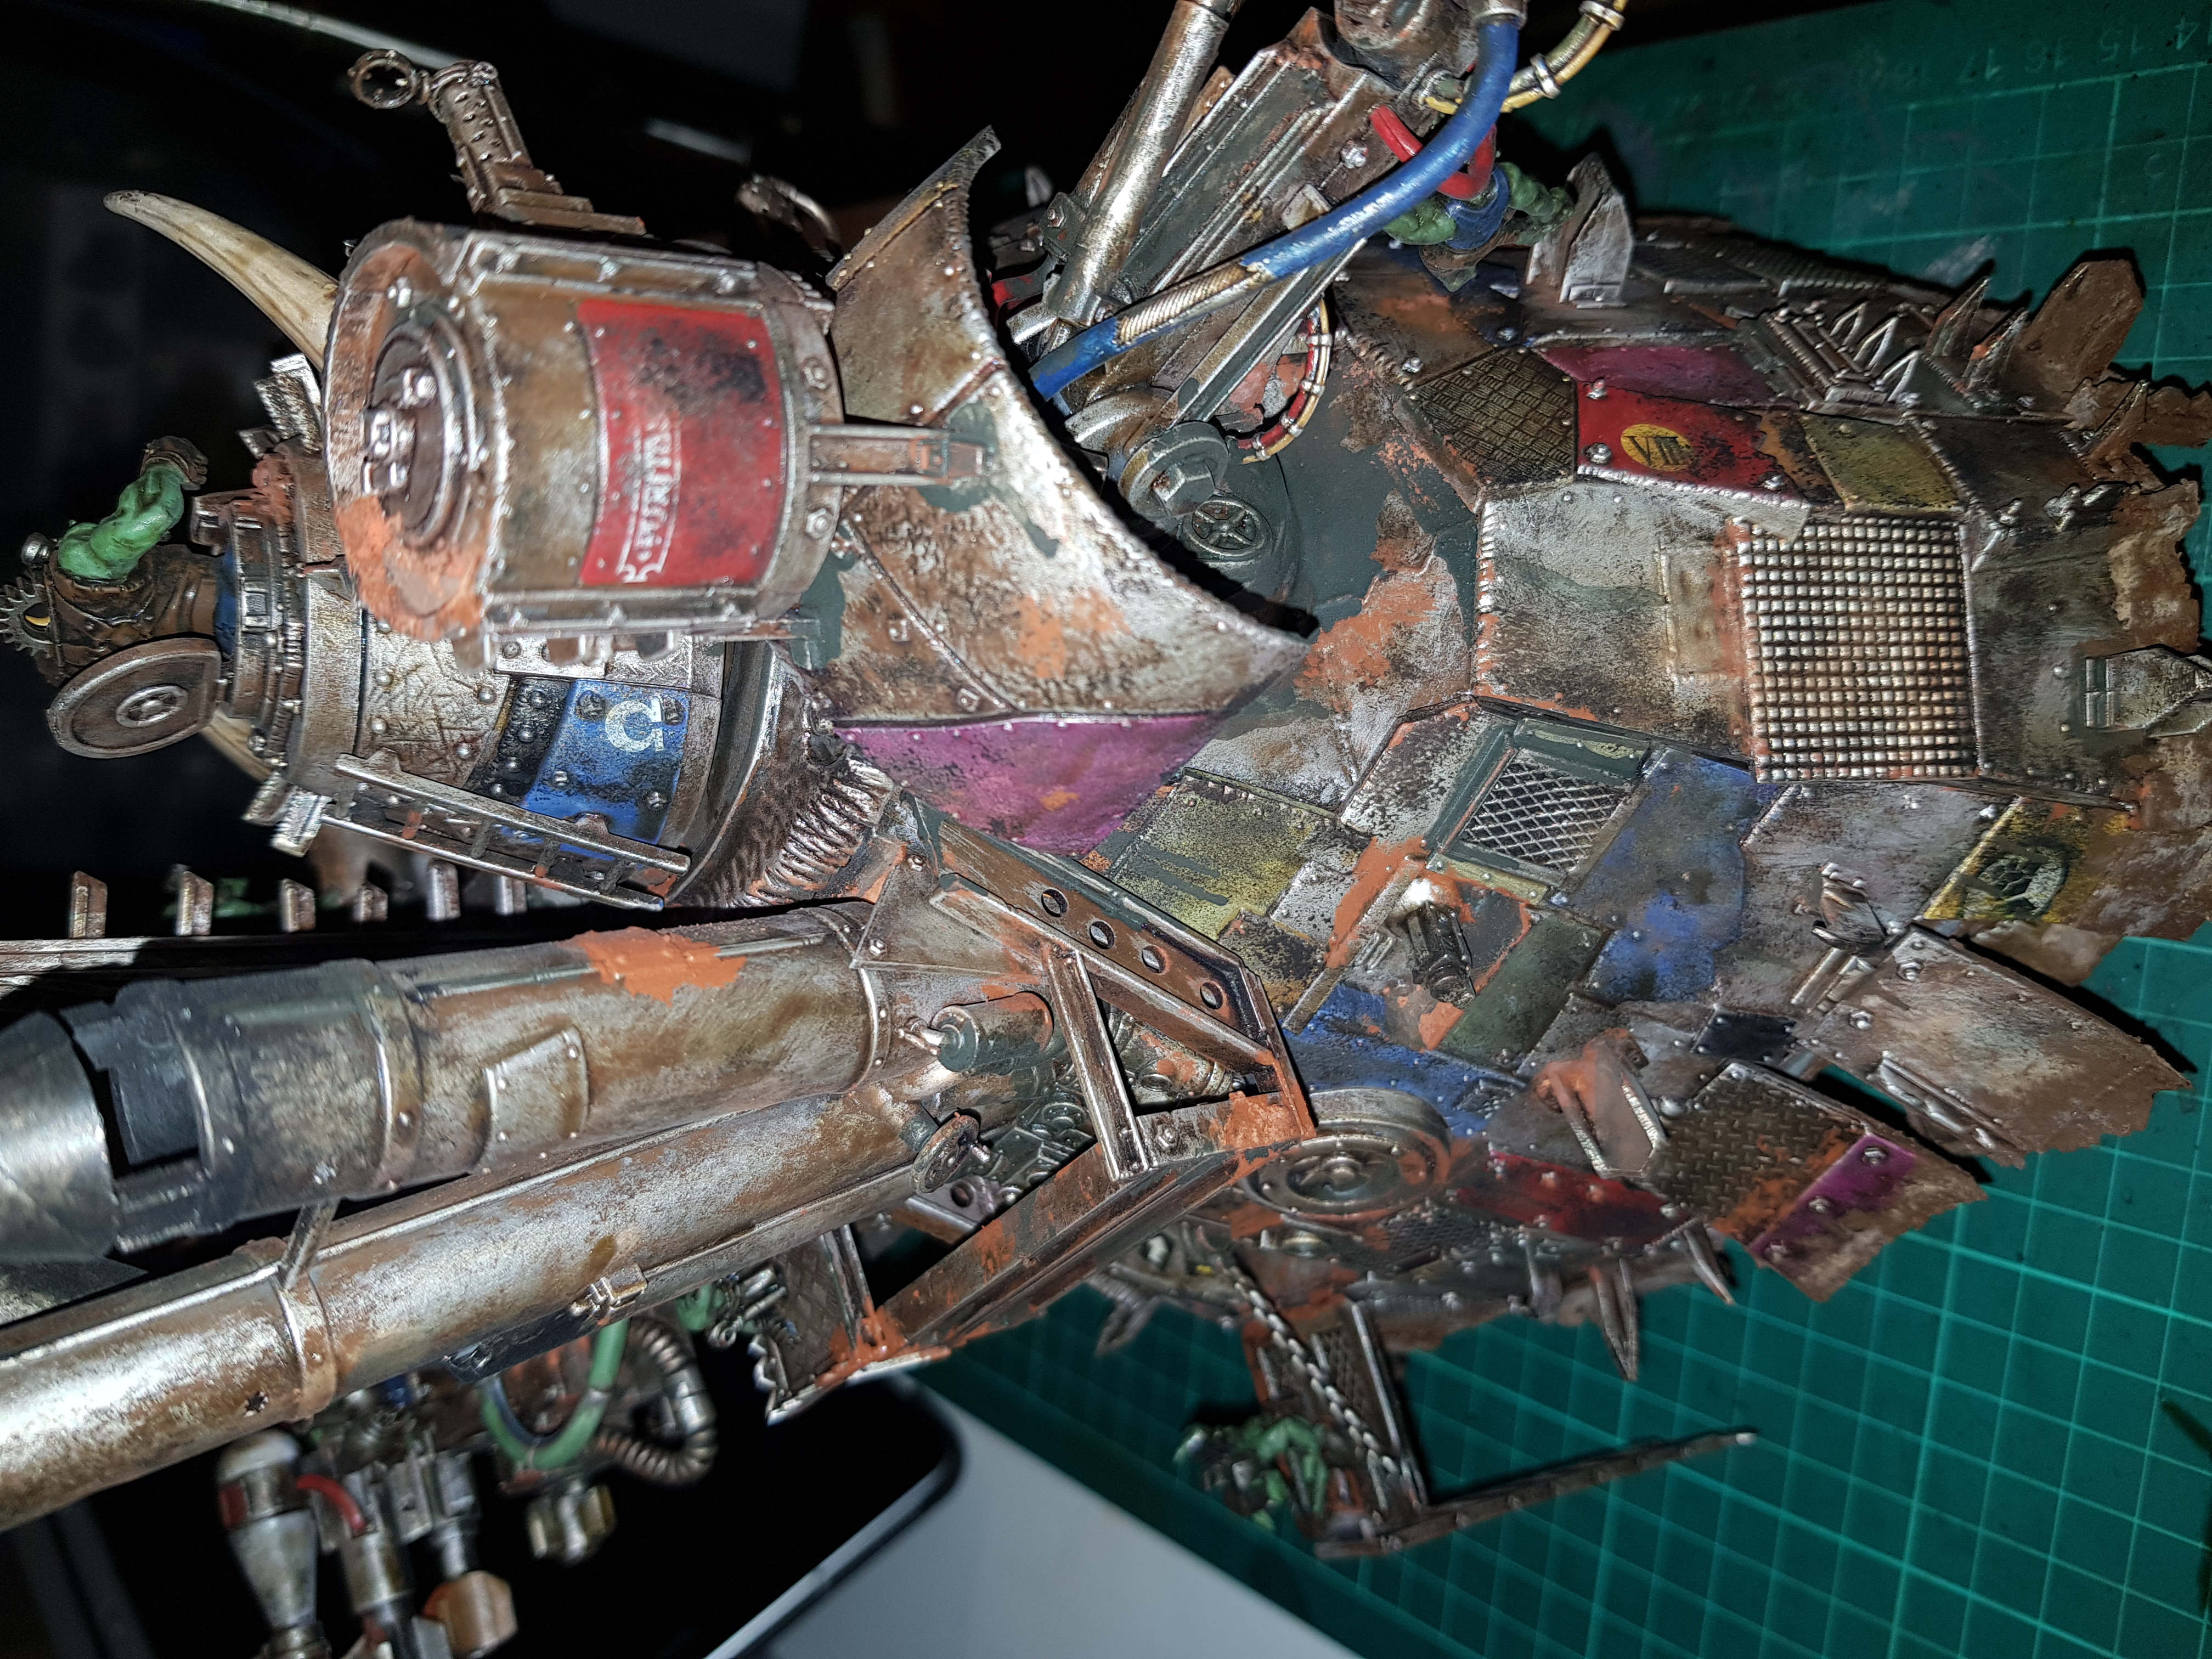
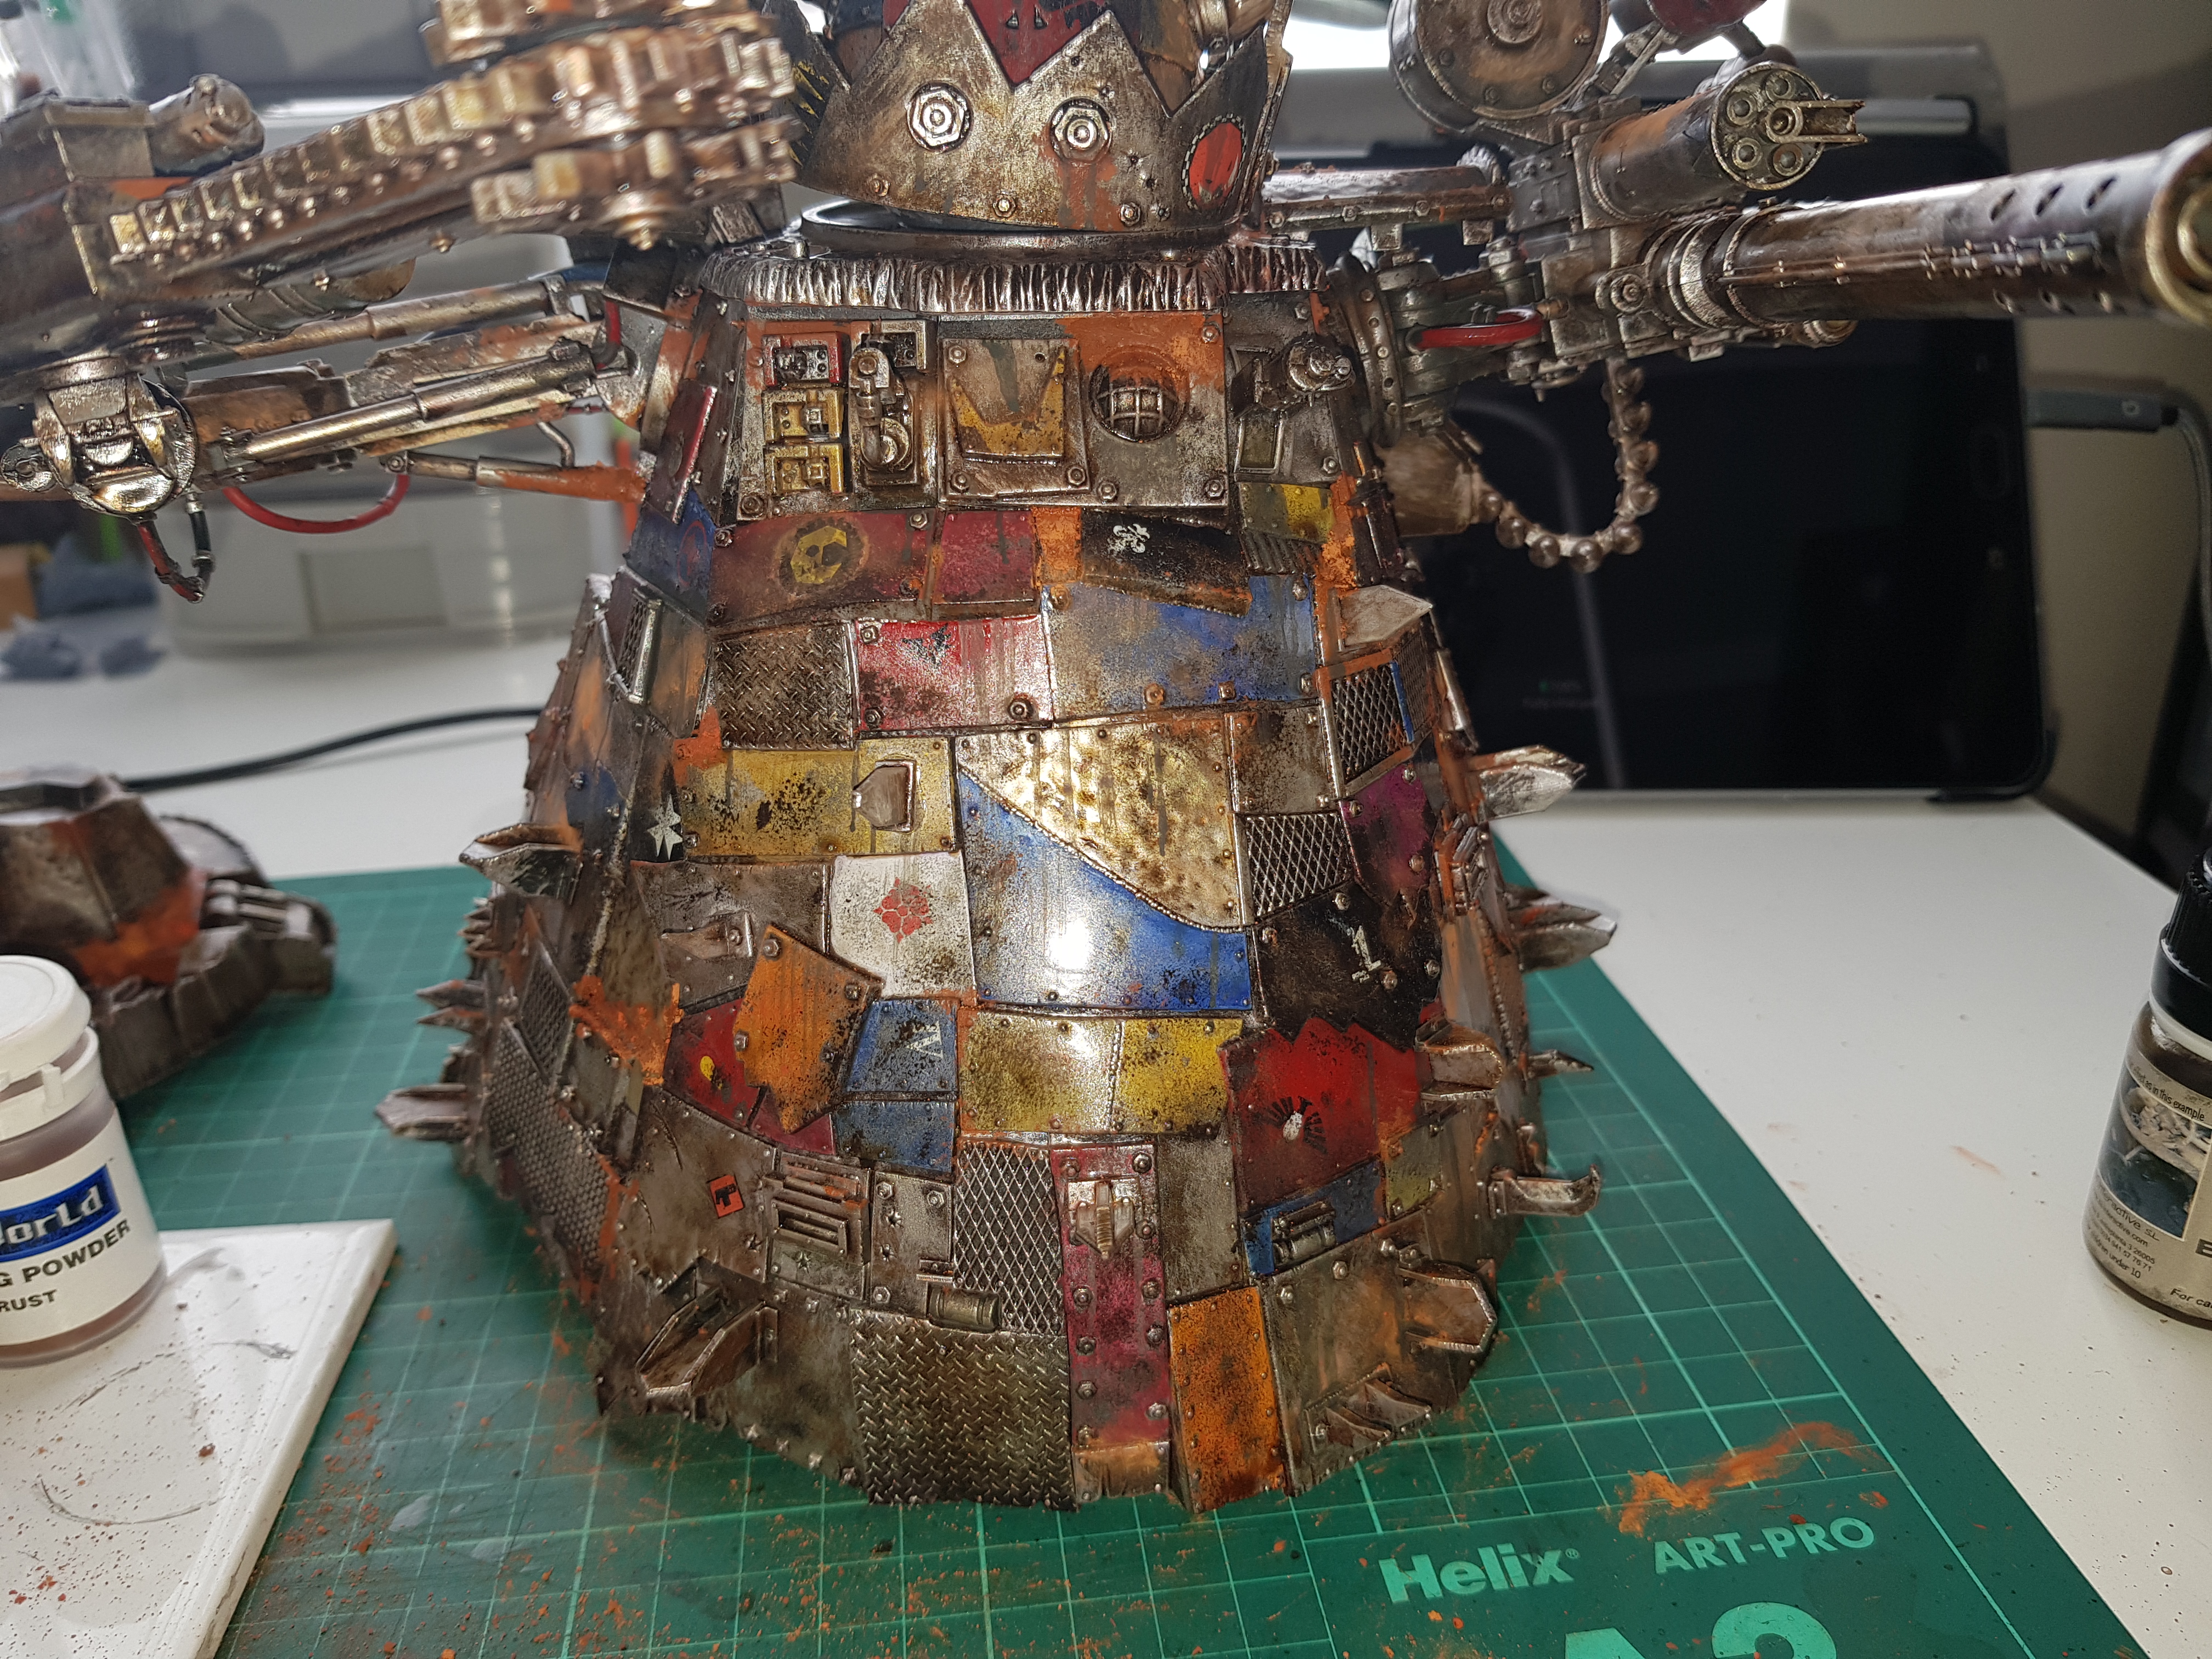
Stompa Complete!
That’s it! It’s done!
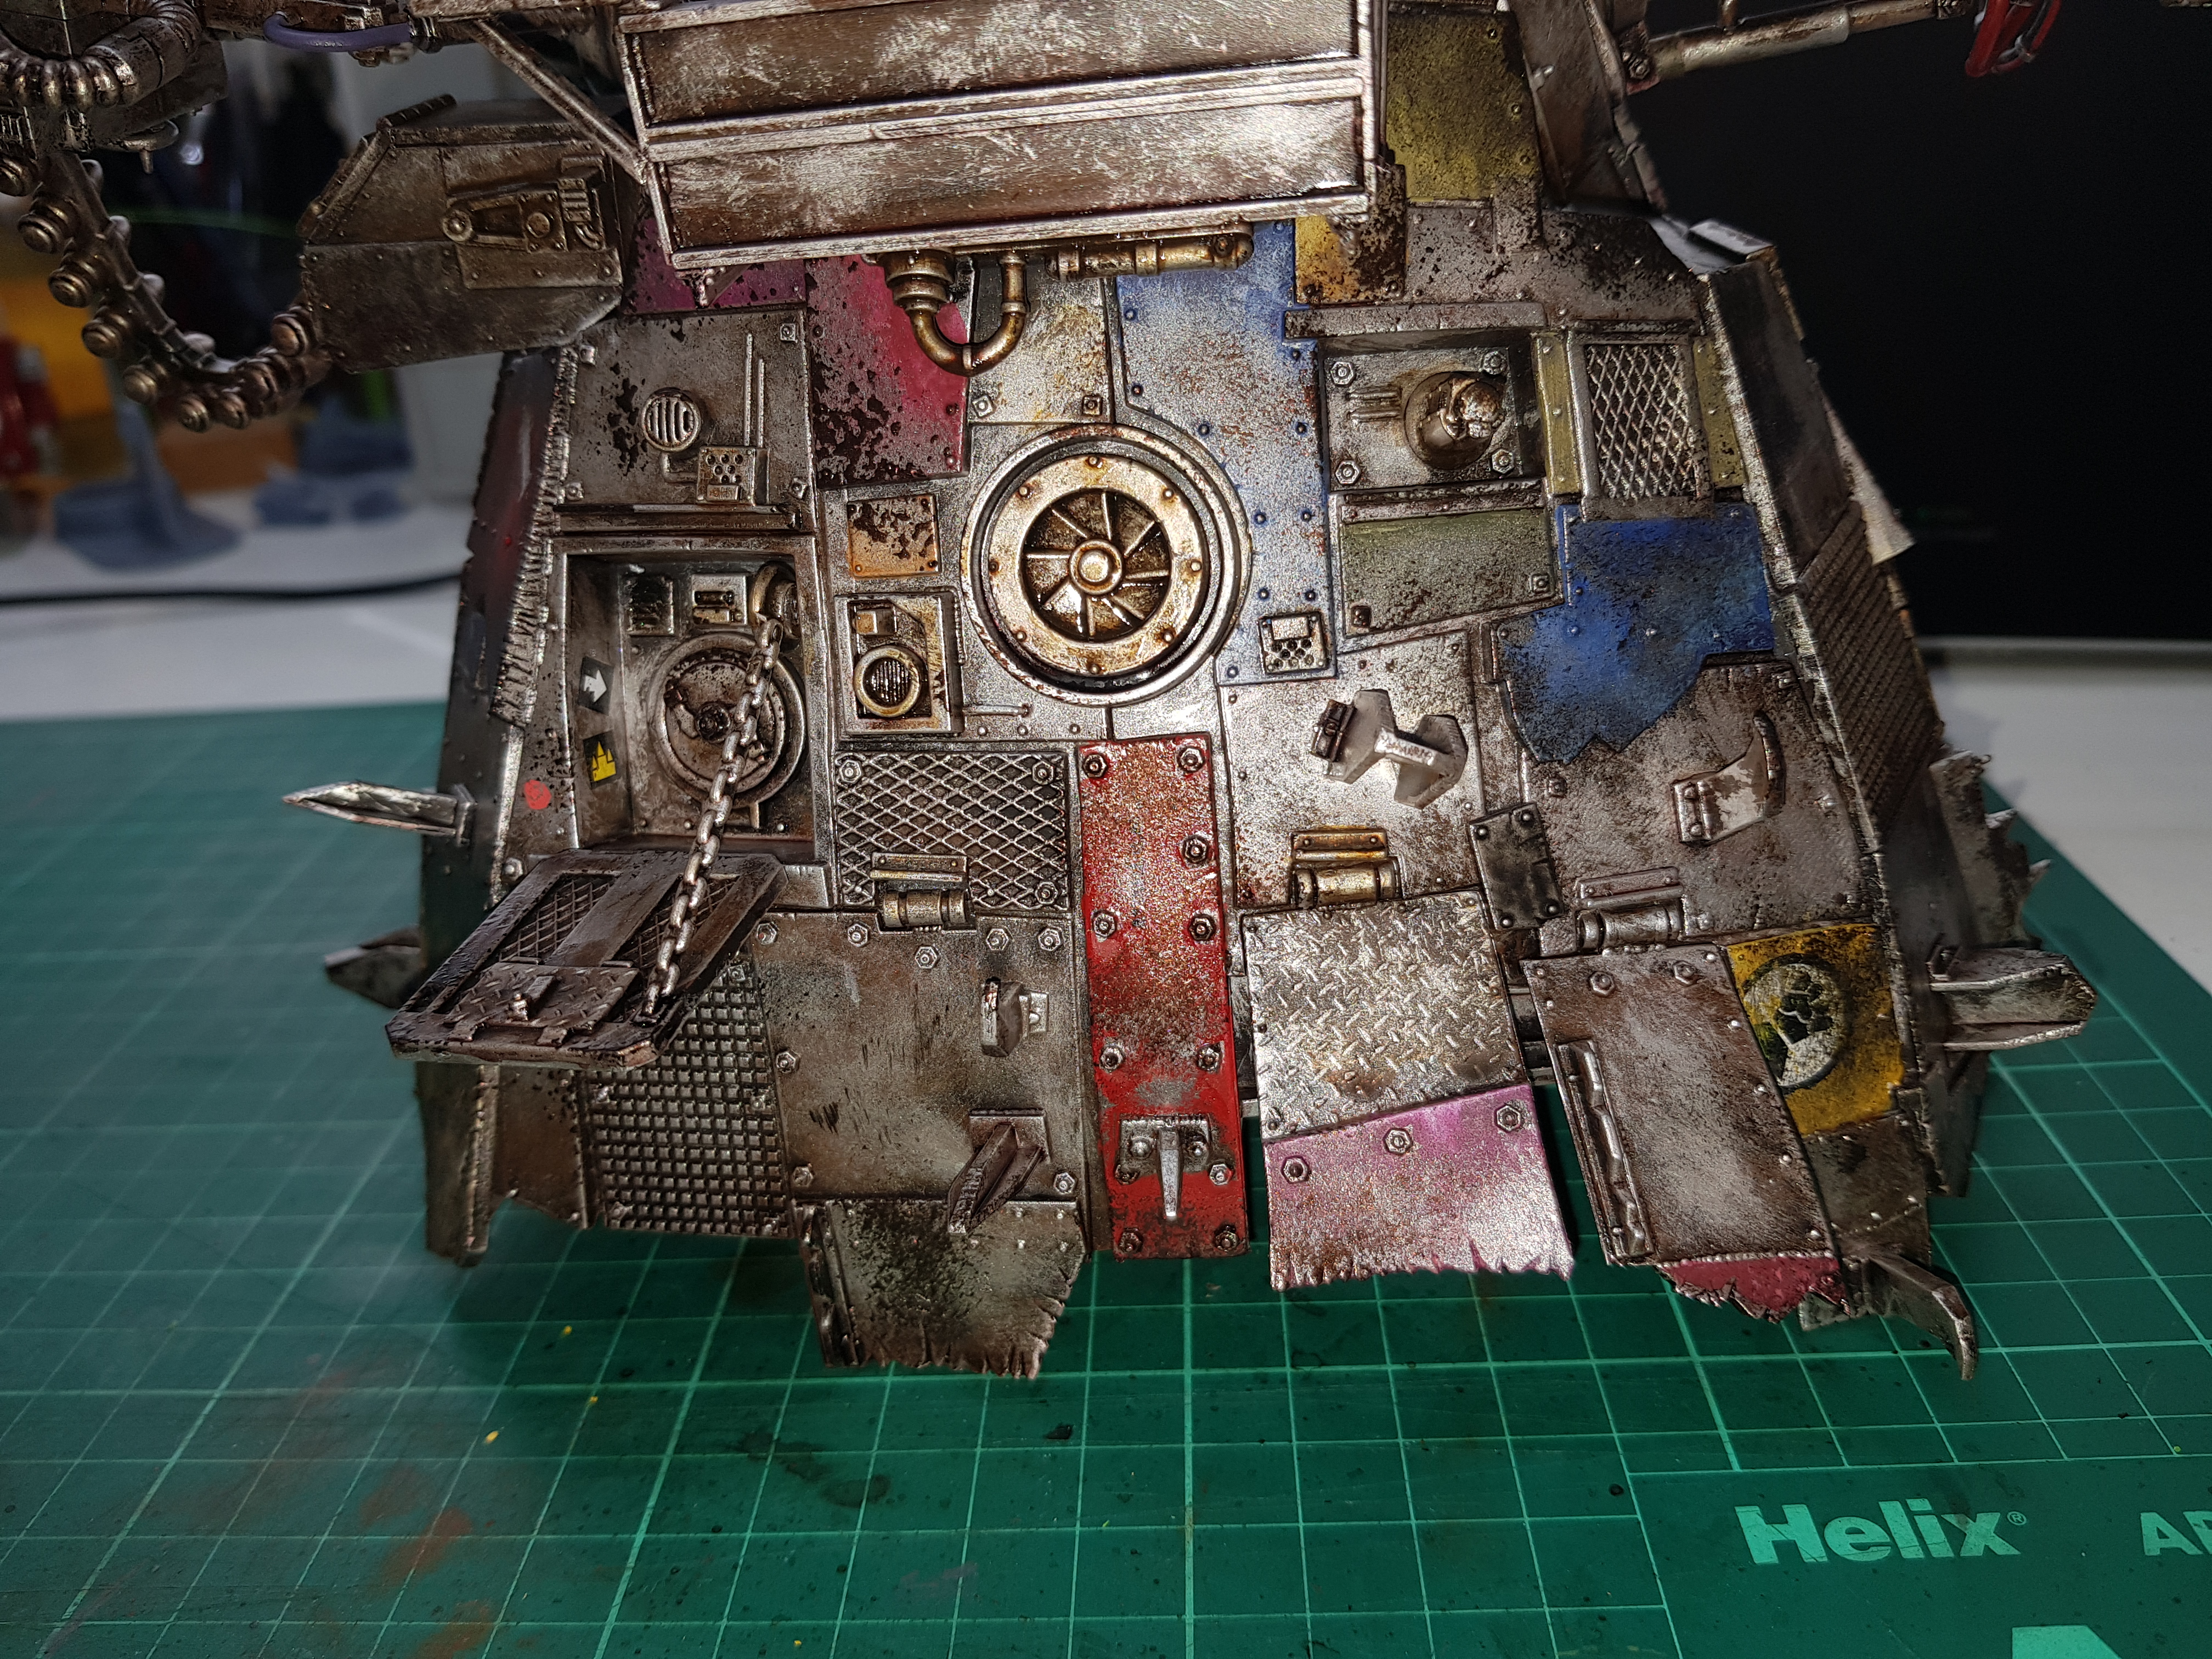
Final stage was some muddying of the bottom, feet and very base panels.
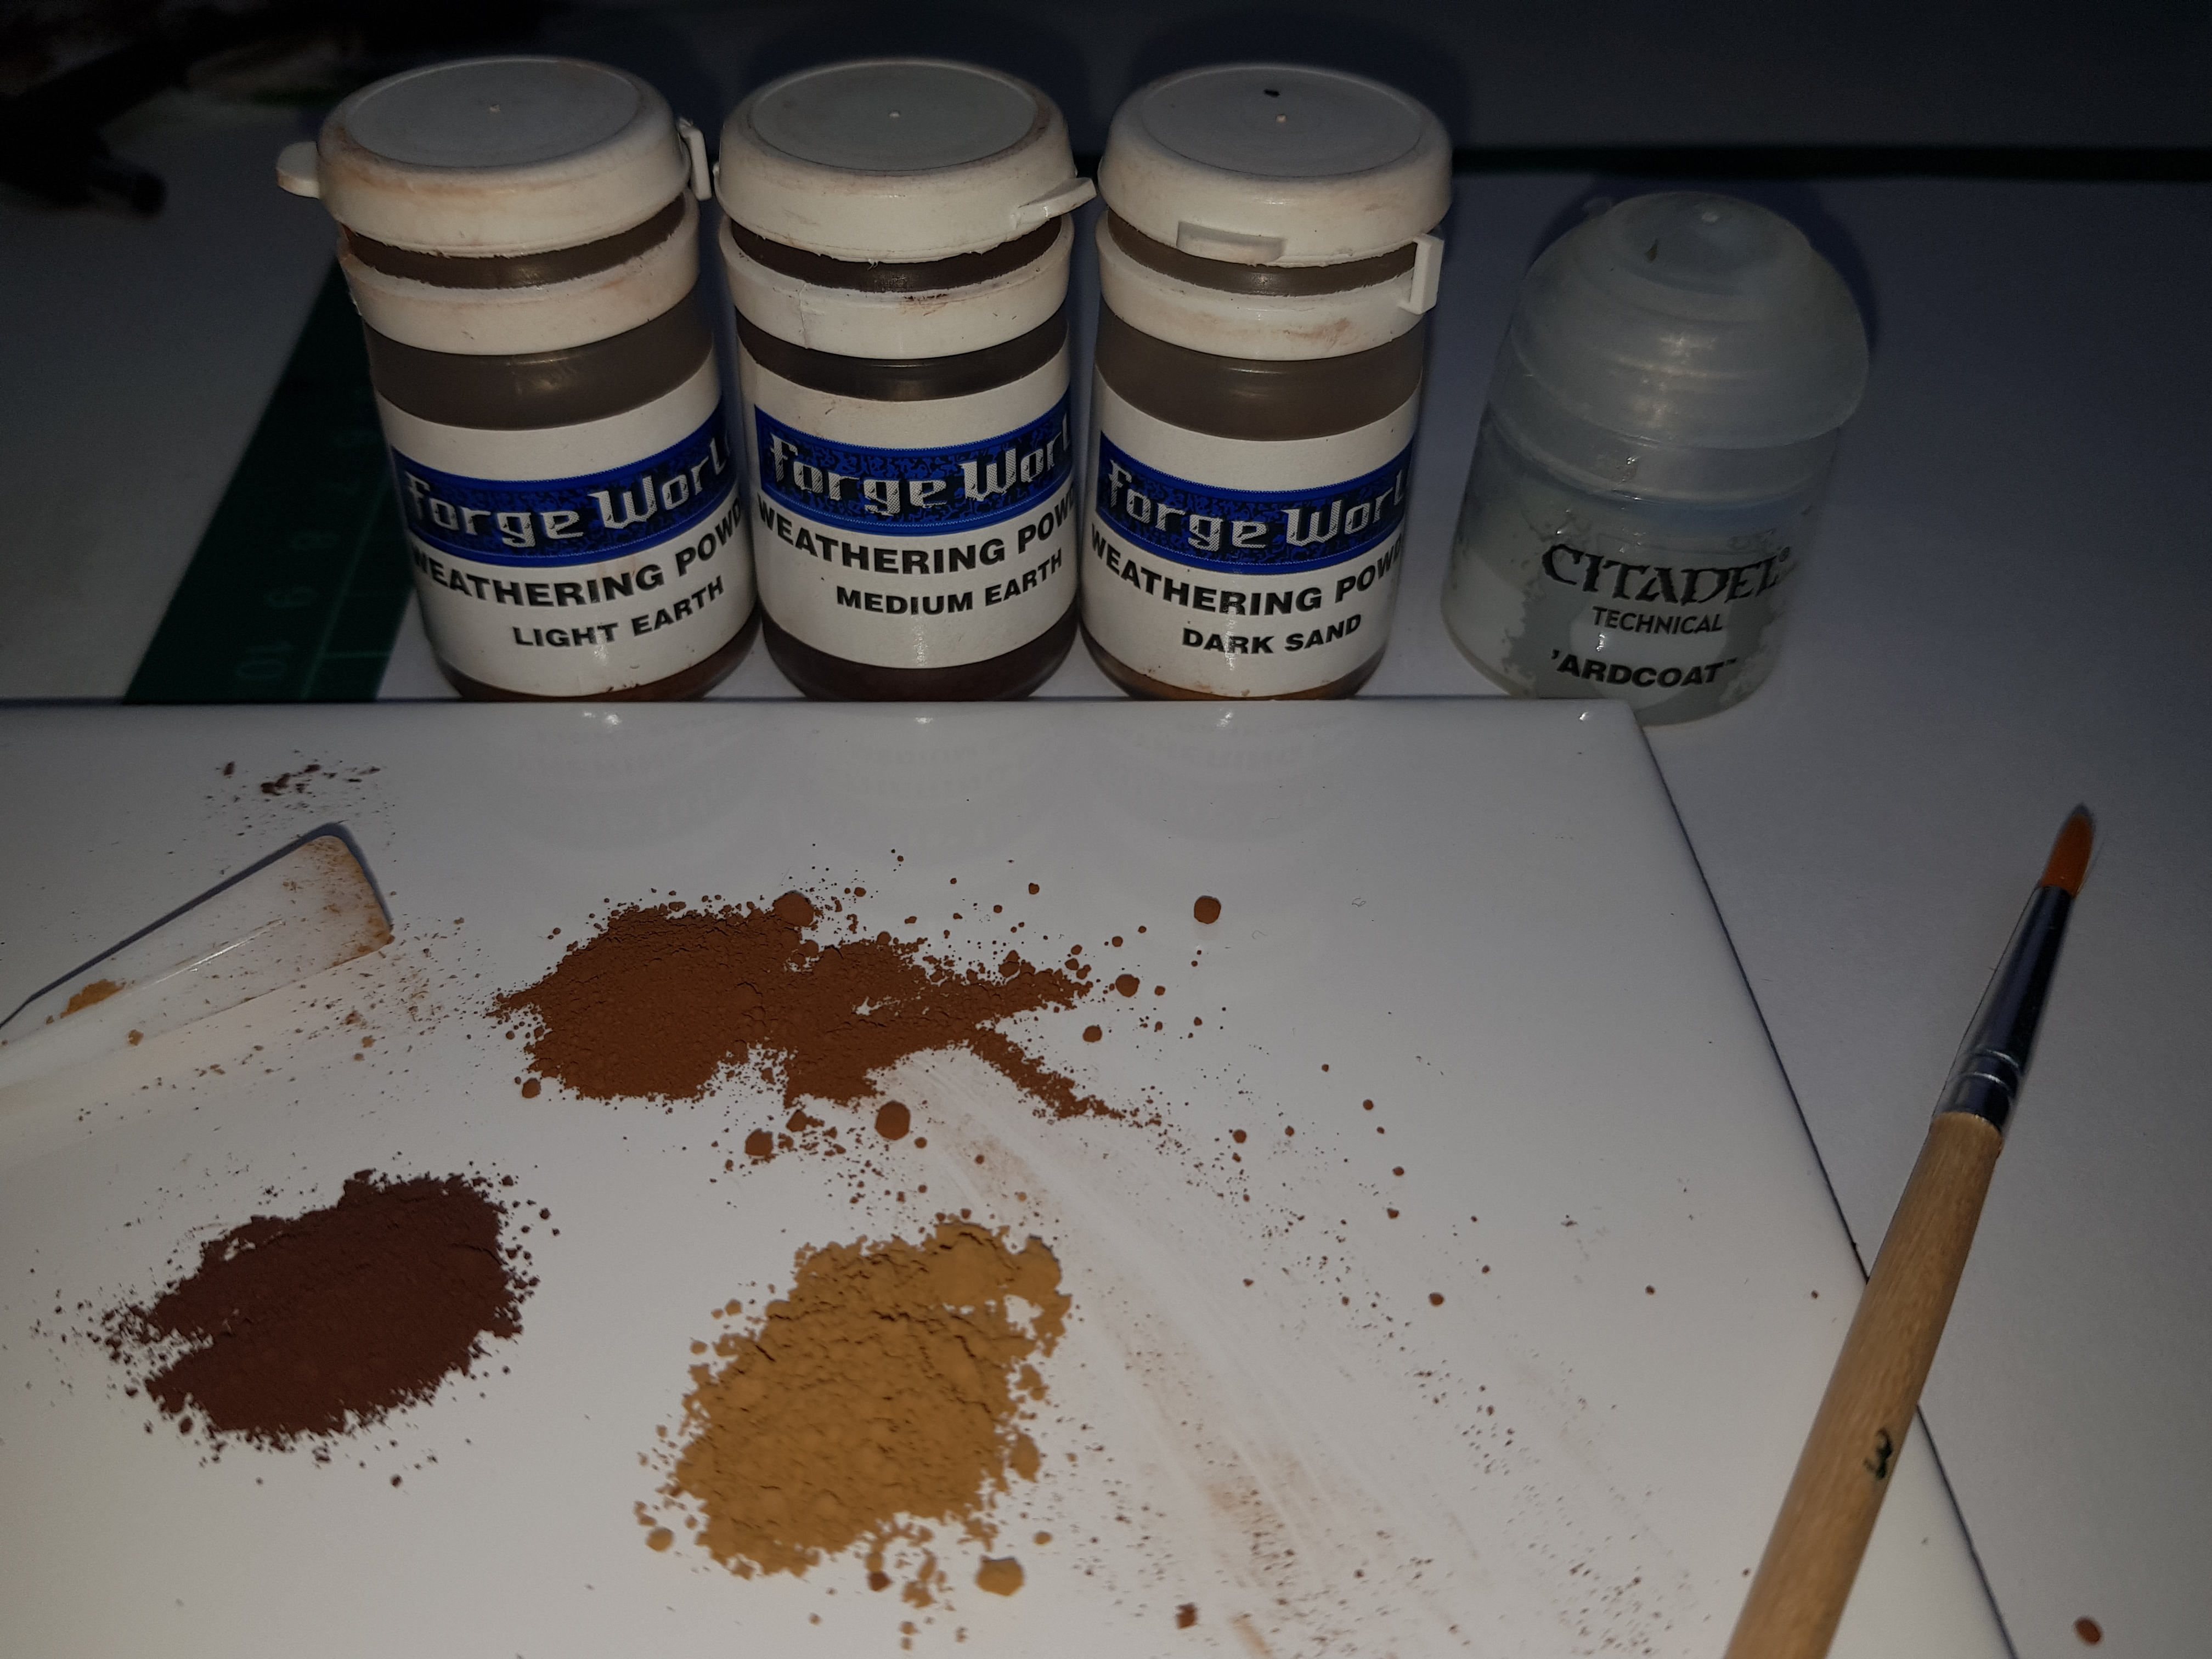 Varying shades of mud.
As with the rust effects, I used three shades of the Forge World weathering pigments fixed with ‘Ardcoat.
I left the feet seperate still so that these could easily be worked on and the bottom of the body was accessable so that I could add some mud texture to the bottom. I also varnished these areas a matt varnish through the airbrush before attaching them and then attaching all of the members of the crew. Once everything was together I gave it all a good blast of matt varnish. I might give it another going over to ensure that all of the weathering is secure but other than that this mammouth mini is done!
Time for a beer…
Even More Dirt
The Stompa still wasn’t dirty and battered enough!
I attacked it with some pigments to make it look as though it had some serious rust.
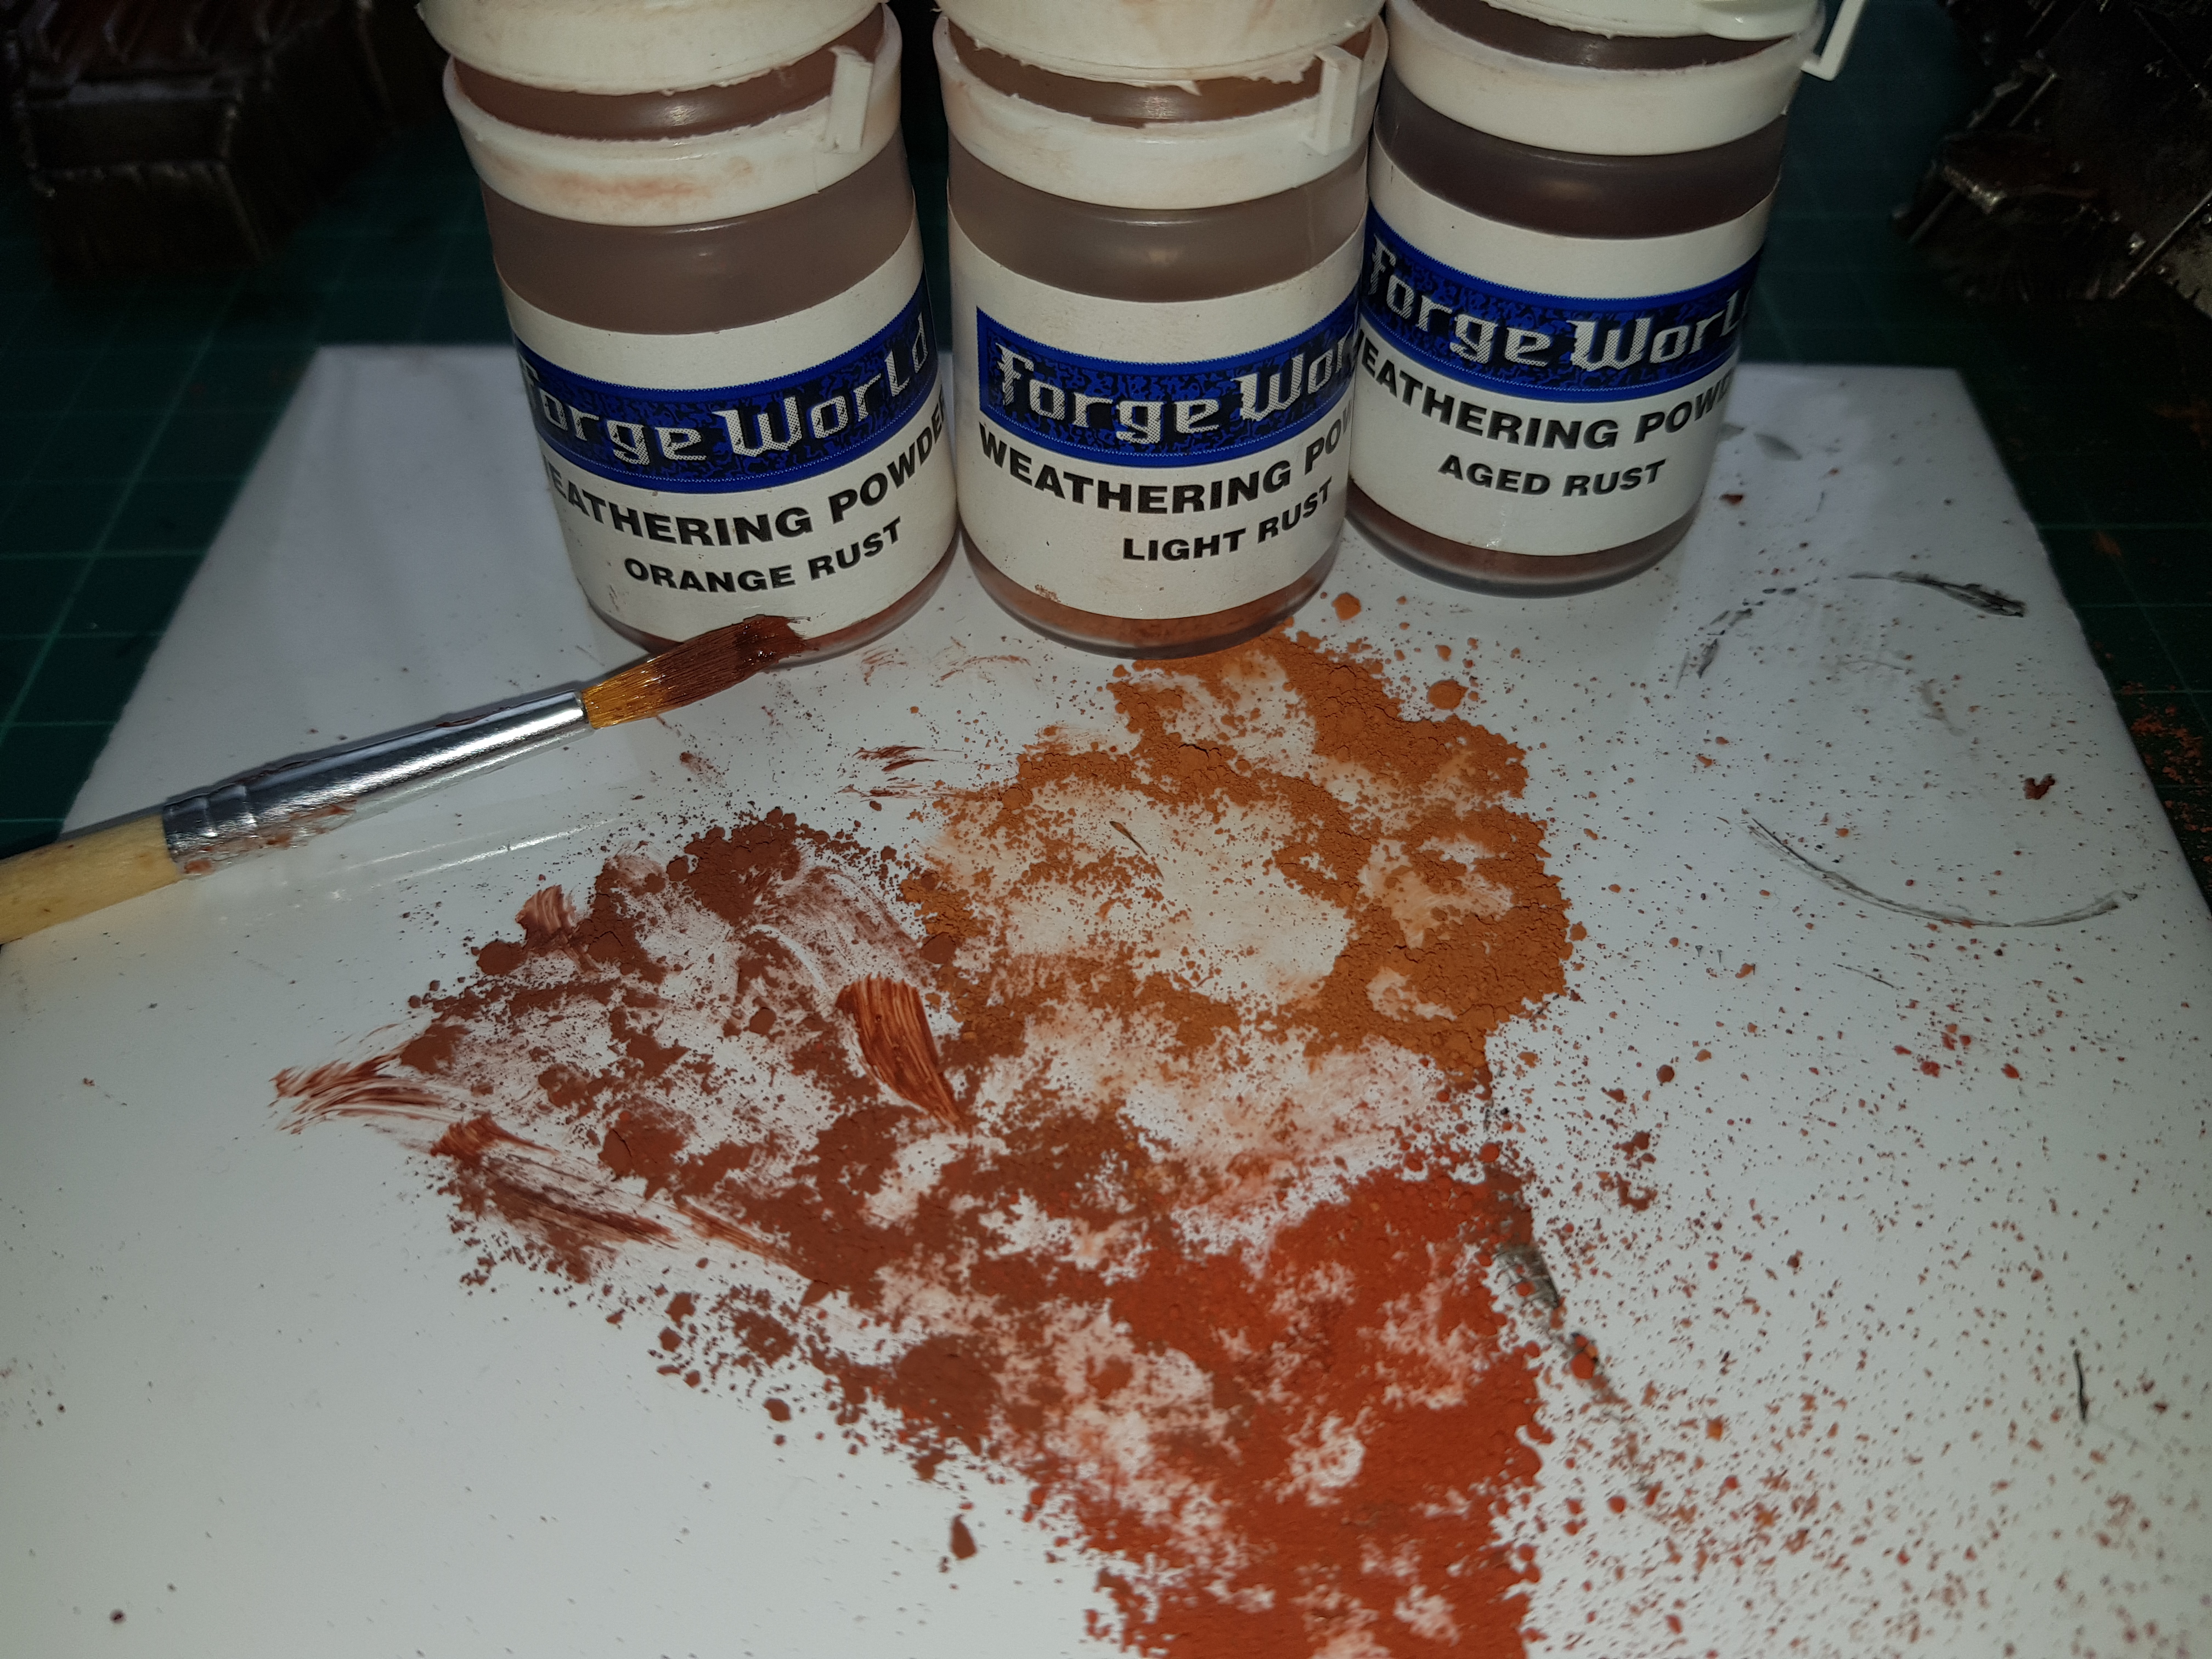 Some old FW pigments. Are these even still available?
I used three different rust shades to add some variation. Firstly, where I wanted big areas of rust, i.e. whole panels, I painted on a thick layer of ‘Ardcoat and then dabbed on a mix of the pigments.
Eventually the brush ended up in such a state that I could simply stipple areas to get patches of lesser rust.
After that I dusted a little of the pigment more or less all over to give a rusty effect. Much of this will likely run off/down during the varnishing stage so will tone this down a bit.
In some instances I tried to pick areas where water might gather and cause rust but given that this is an Ork contraption made out of scraps I figured that lots of areas would likely be old and rusty.
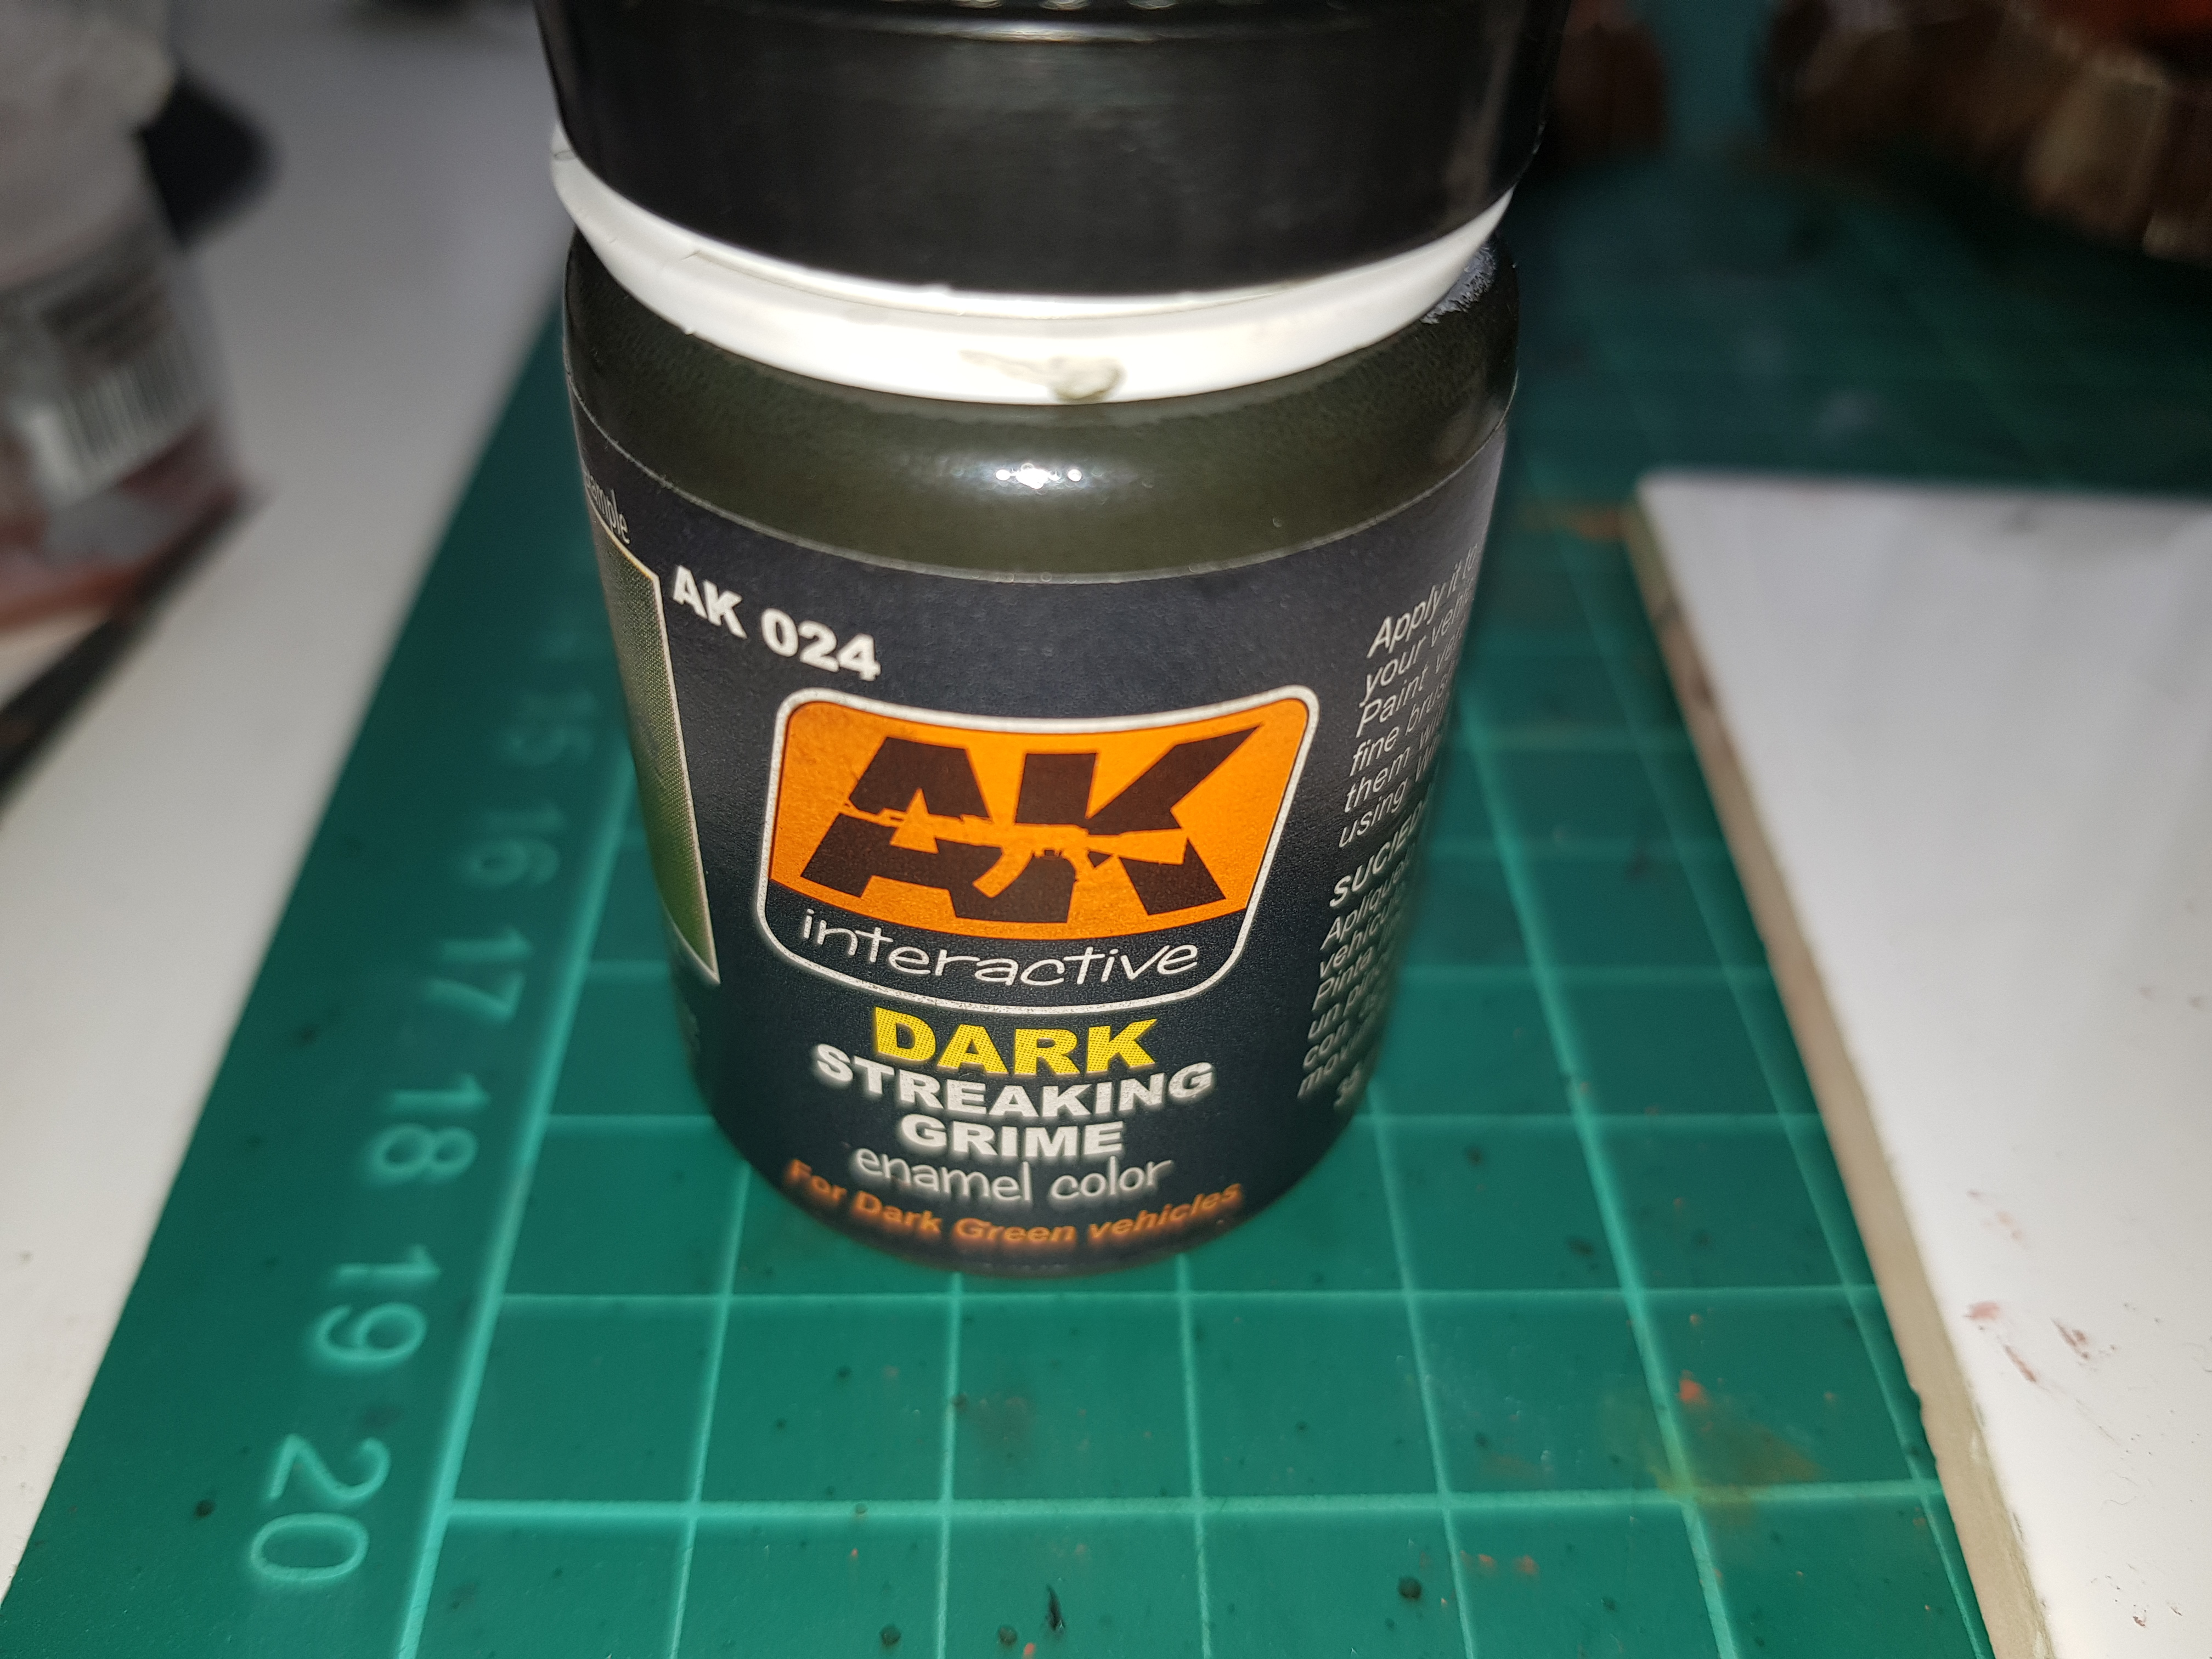 Next some Streaking Grime.
This was given an almighty shake (it had seperated a lot).
I used this over most of the mechanical areas to add some engine grime, pooled it in areas and used a small amount on a thin brush to streak down some of the panels. In some instances I flooded areas and allowed the liquid to run down the mini naturally.
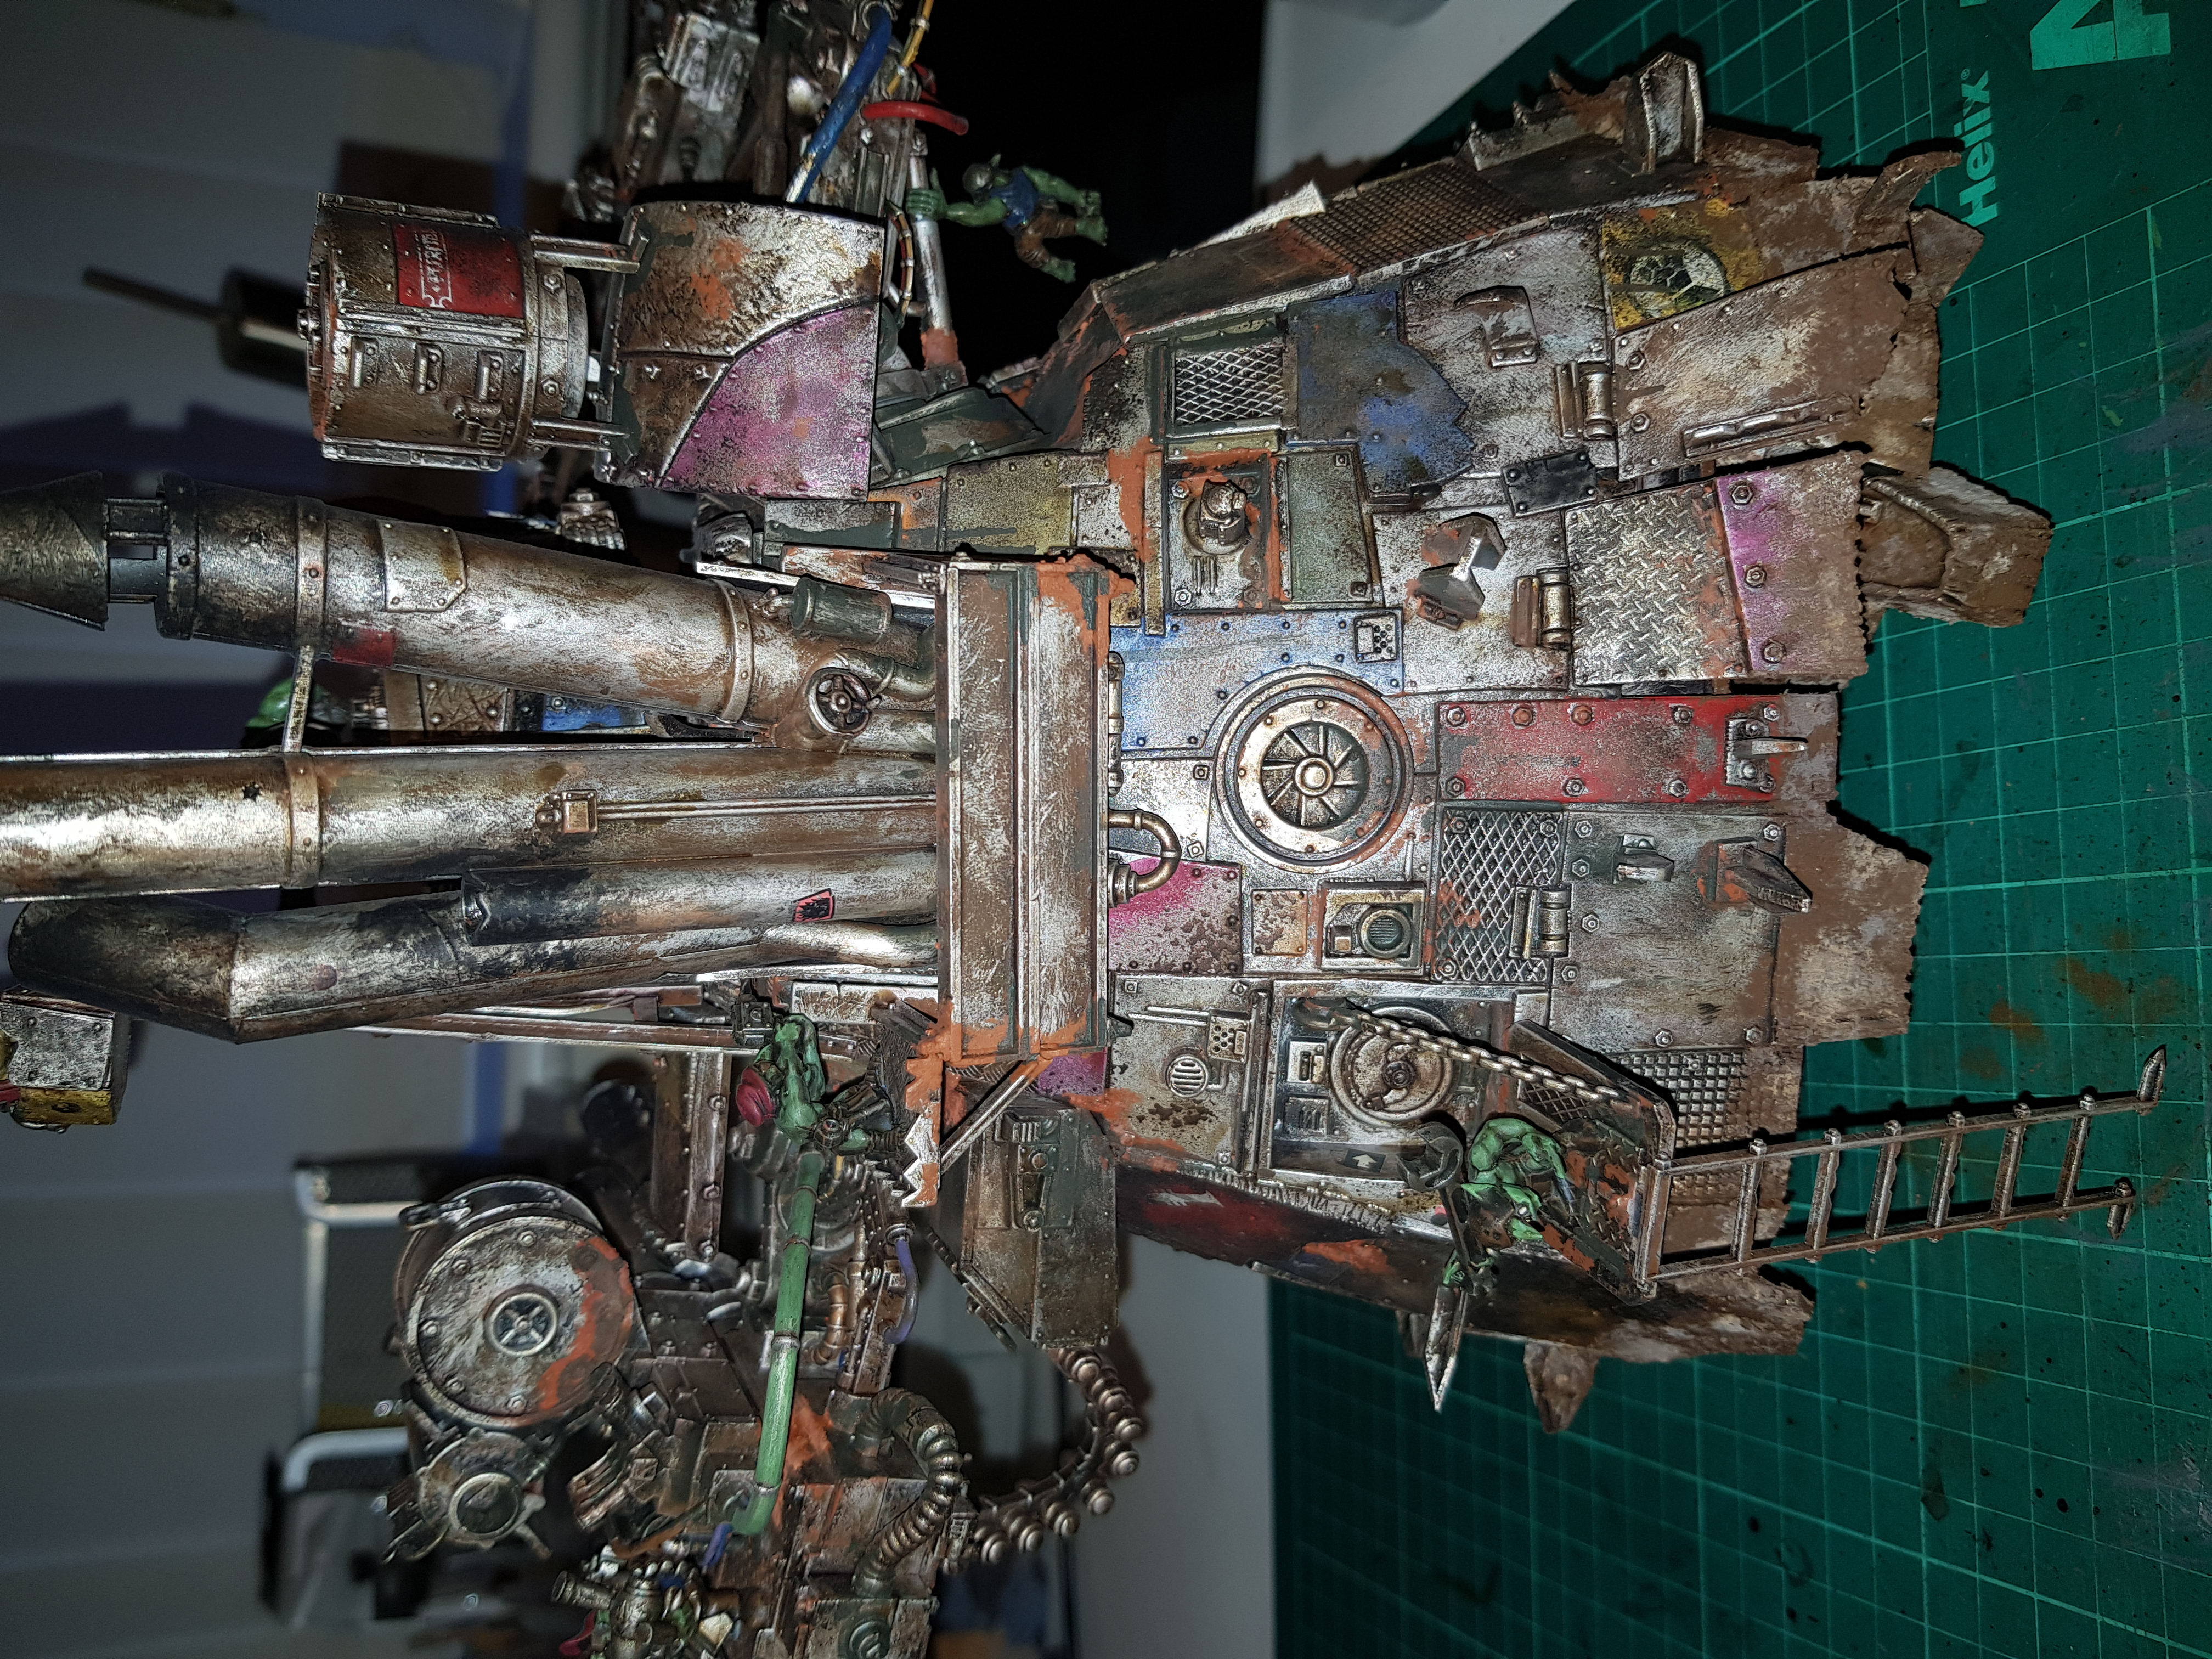
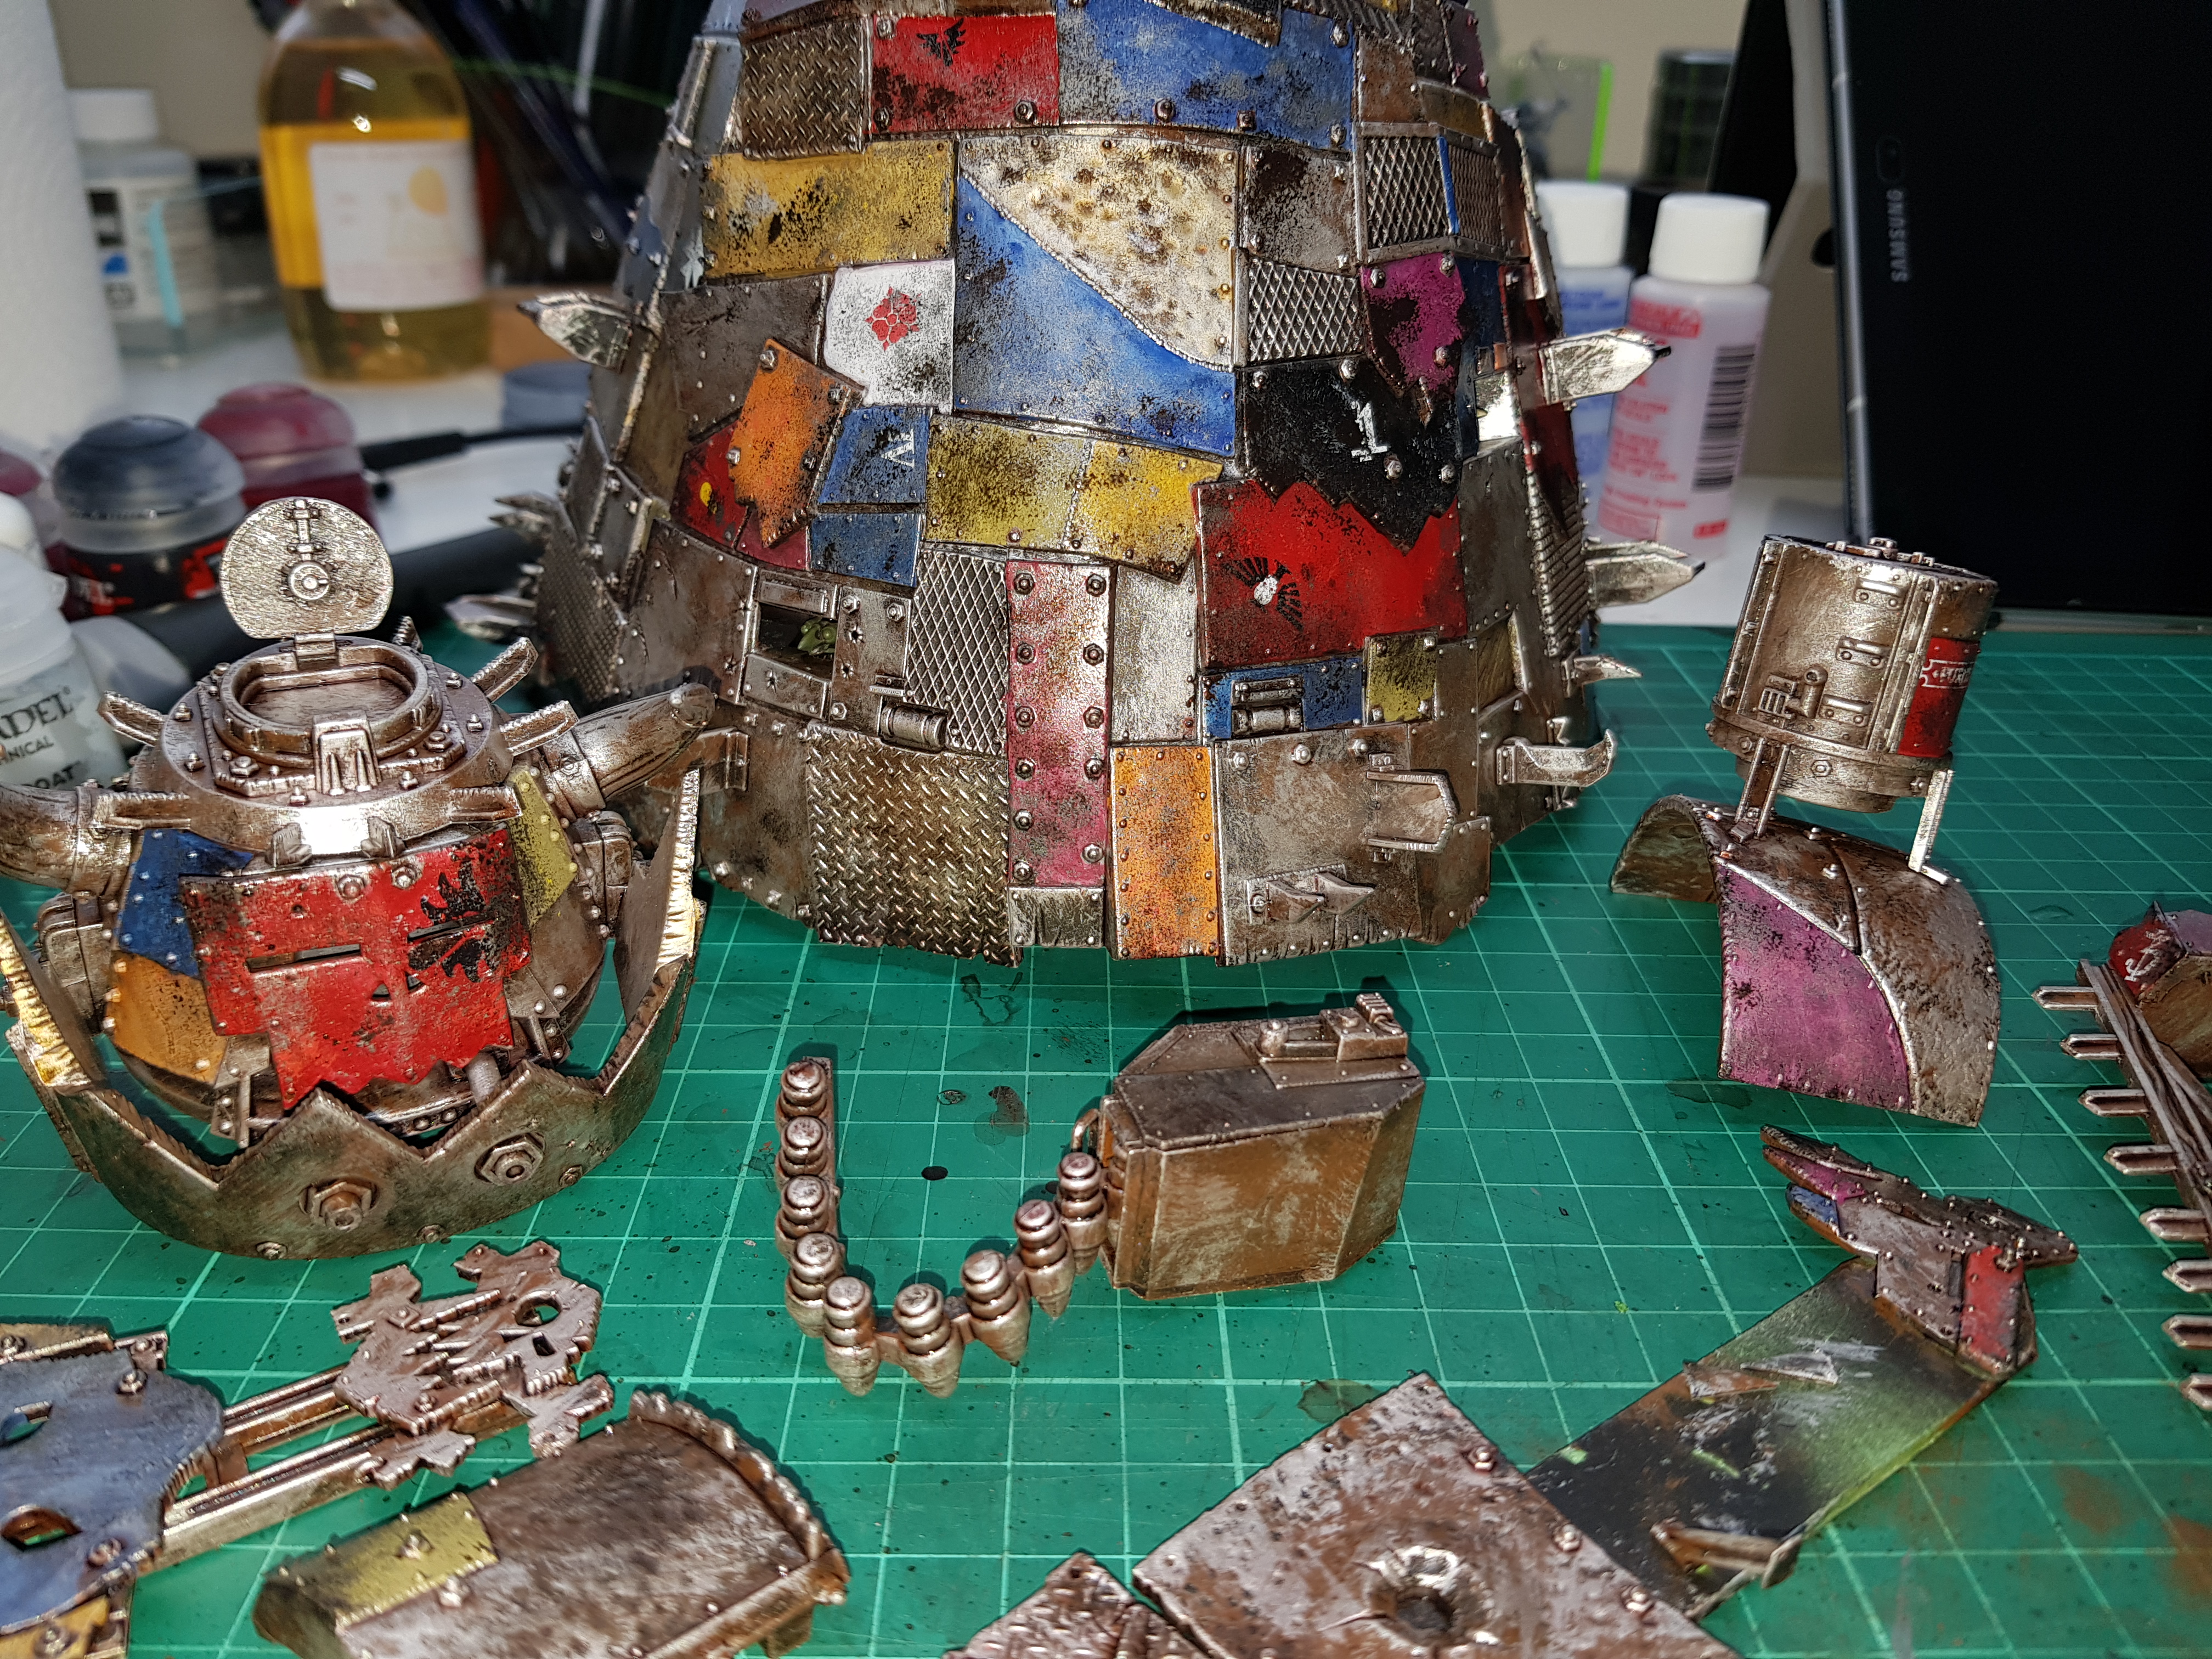
An Overdue Update
Progress has been made with both the Stompa and the Grots. Unfortunately, in my excitement and haste I forgot to take as many pictures as intended but a lot of what I did during those steps was repetition of work done on other areas and so is already documented.
The work on the Stompa is as follows:-
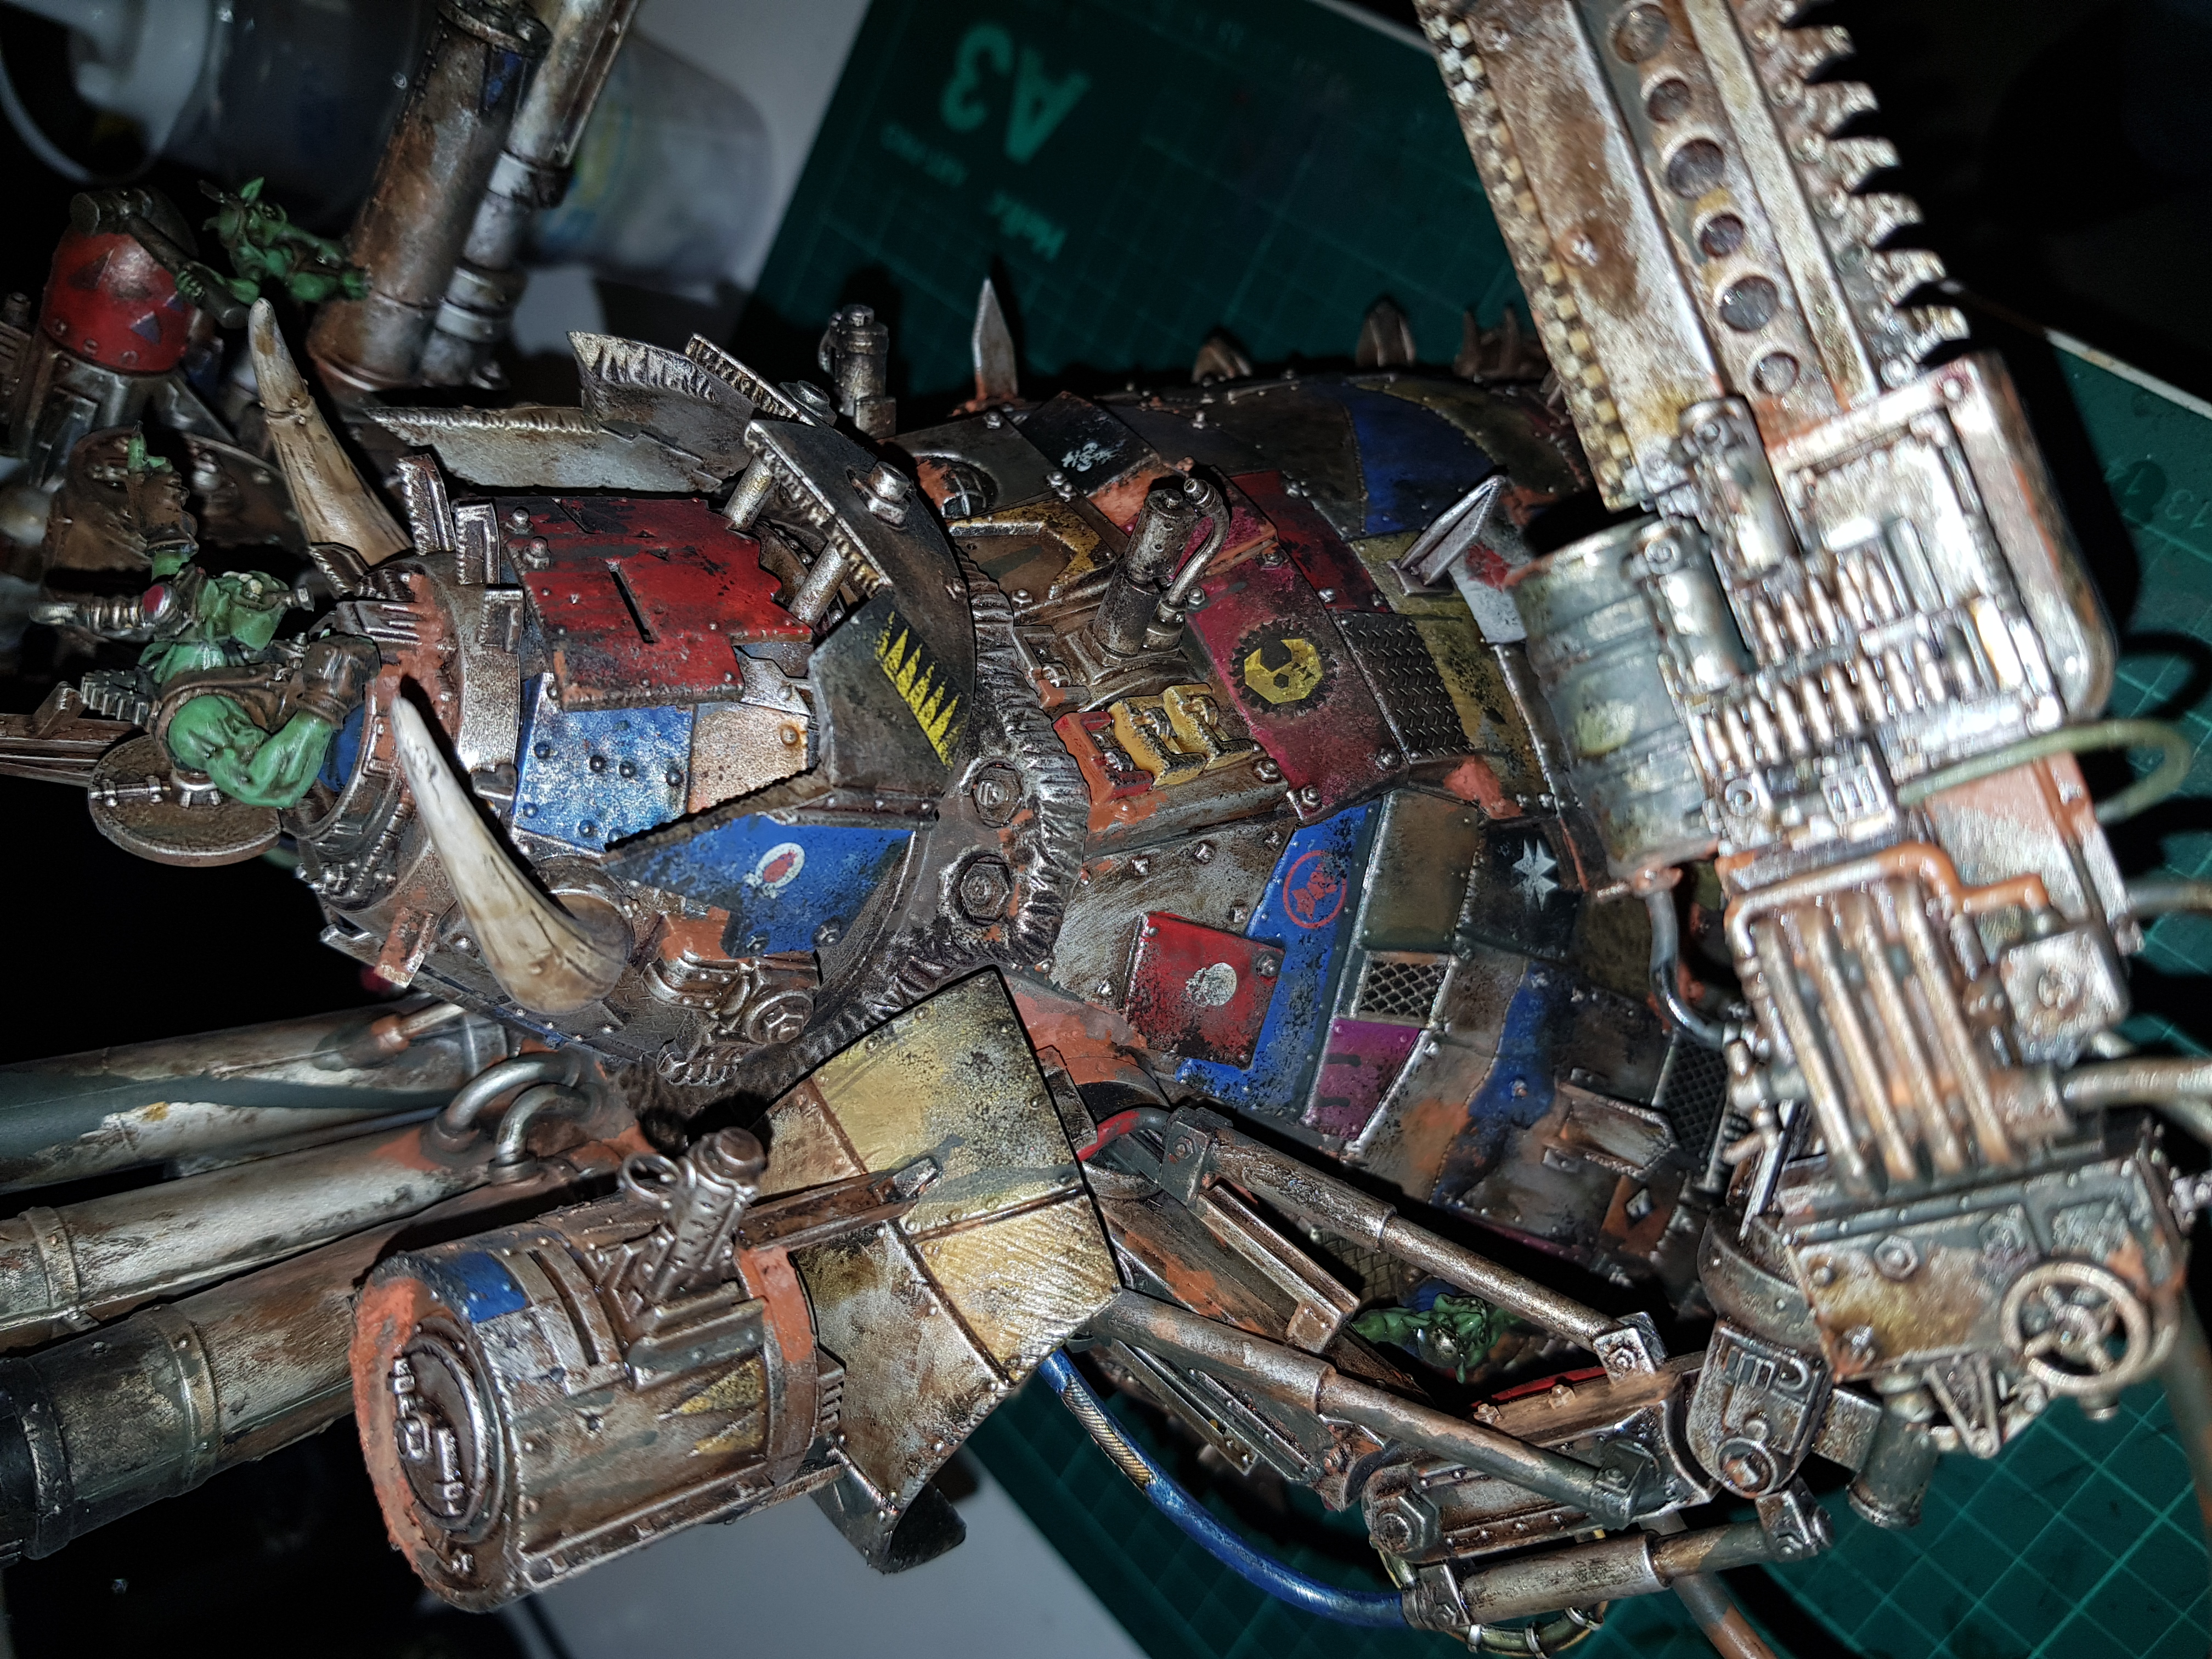
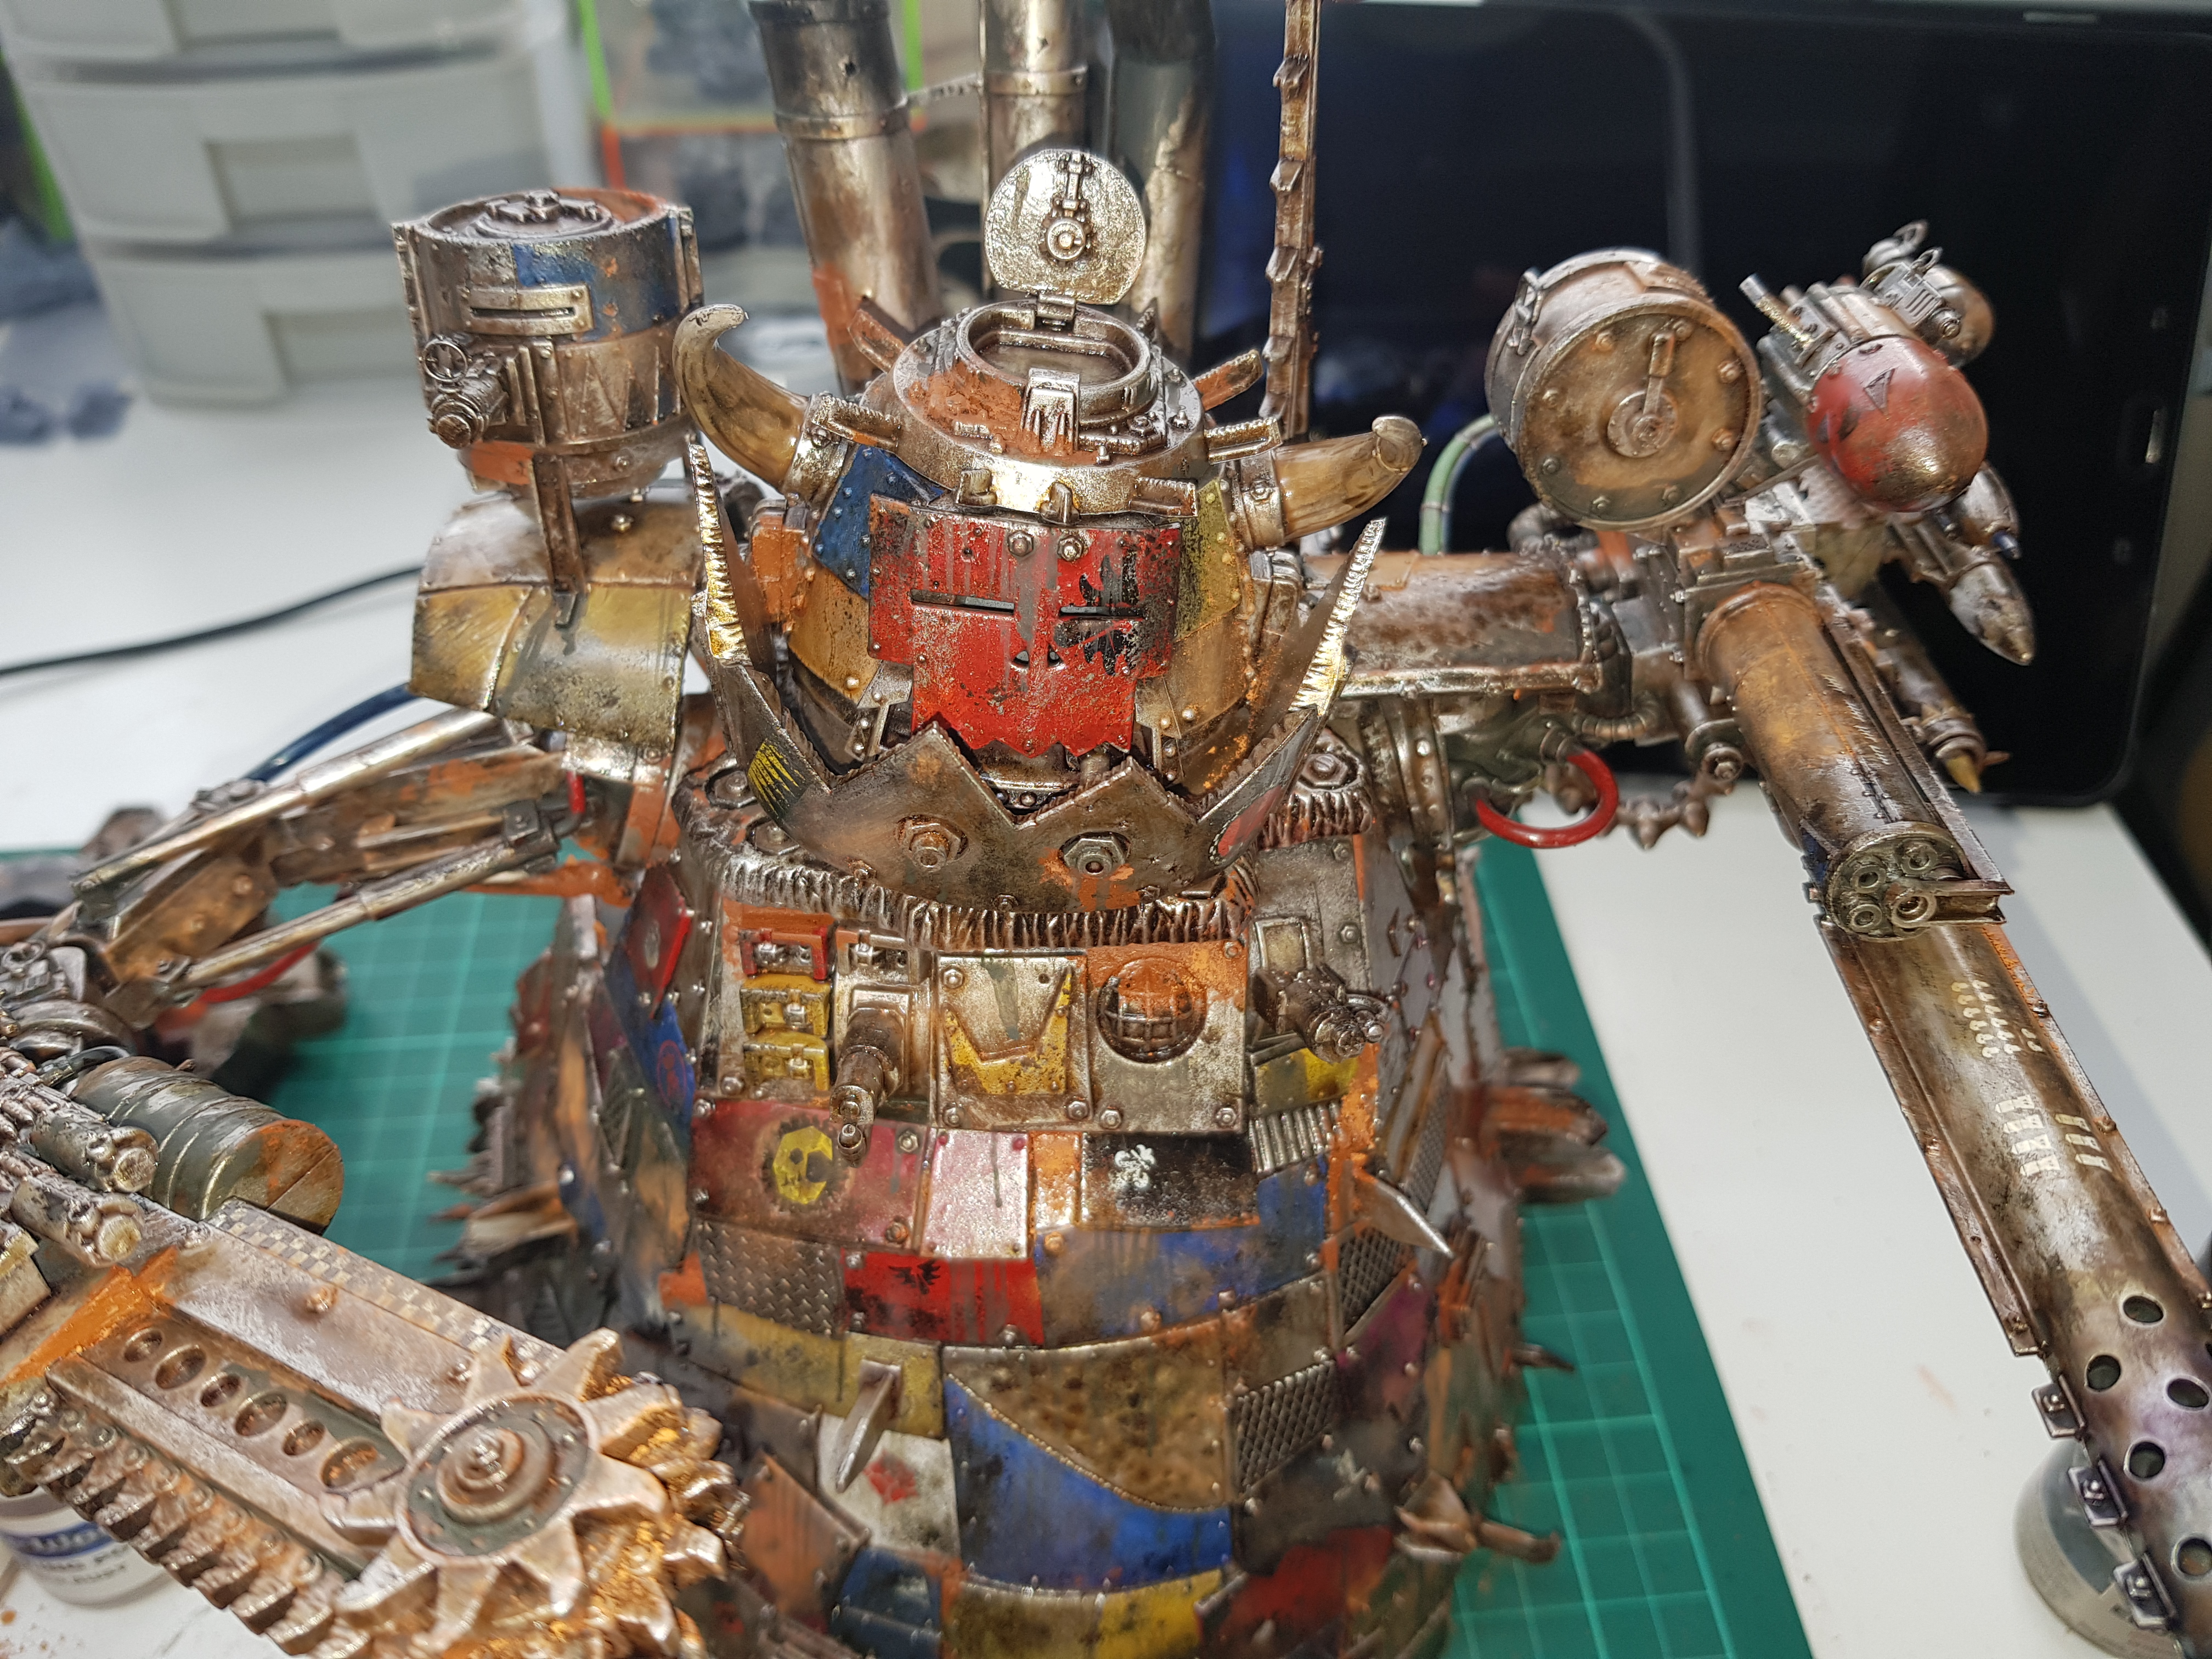
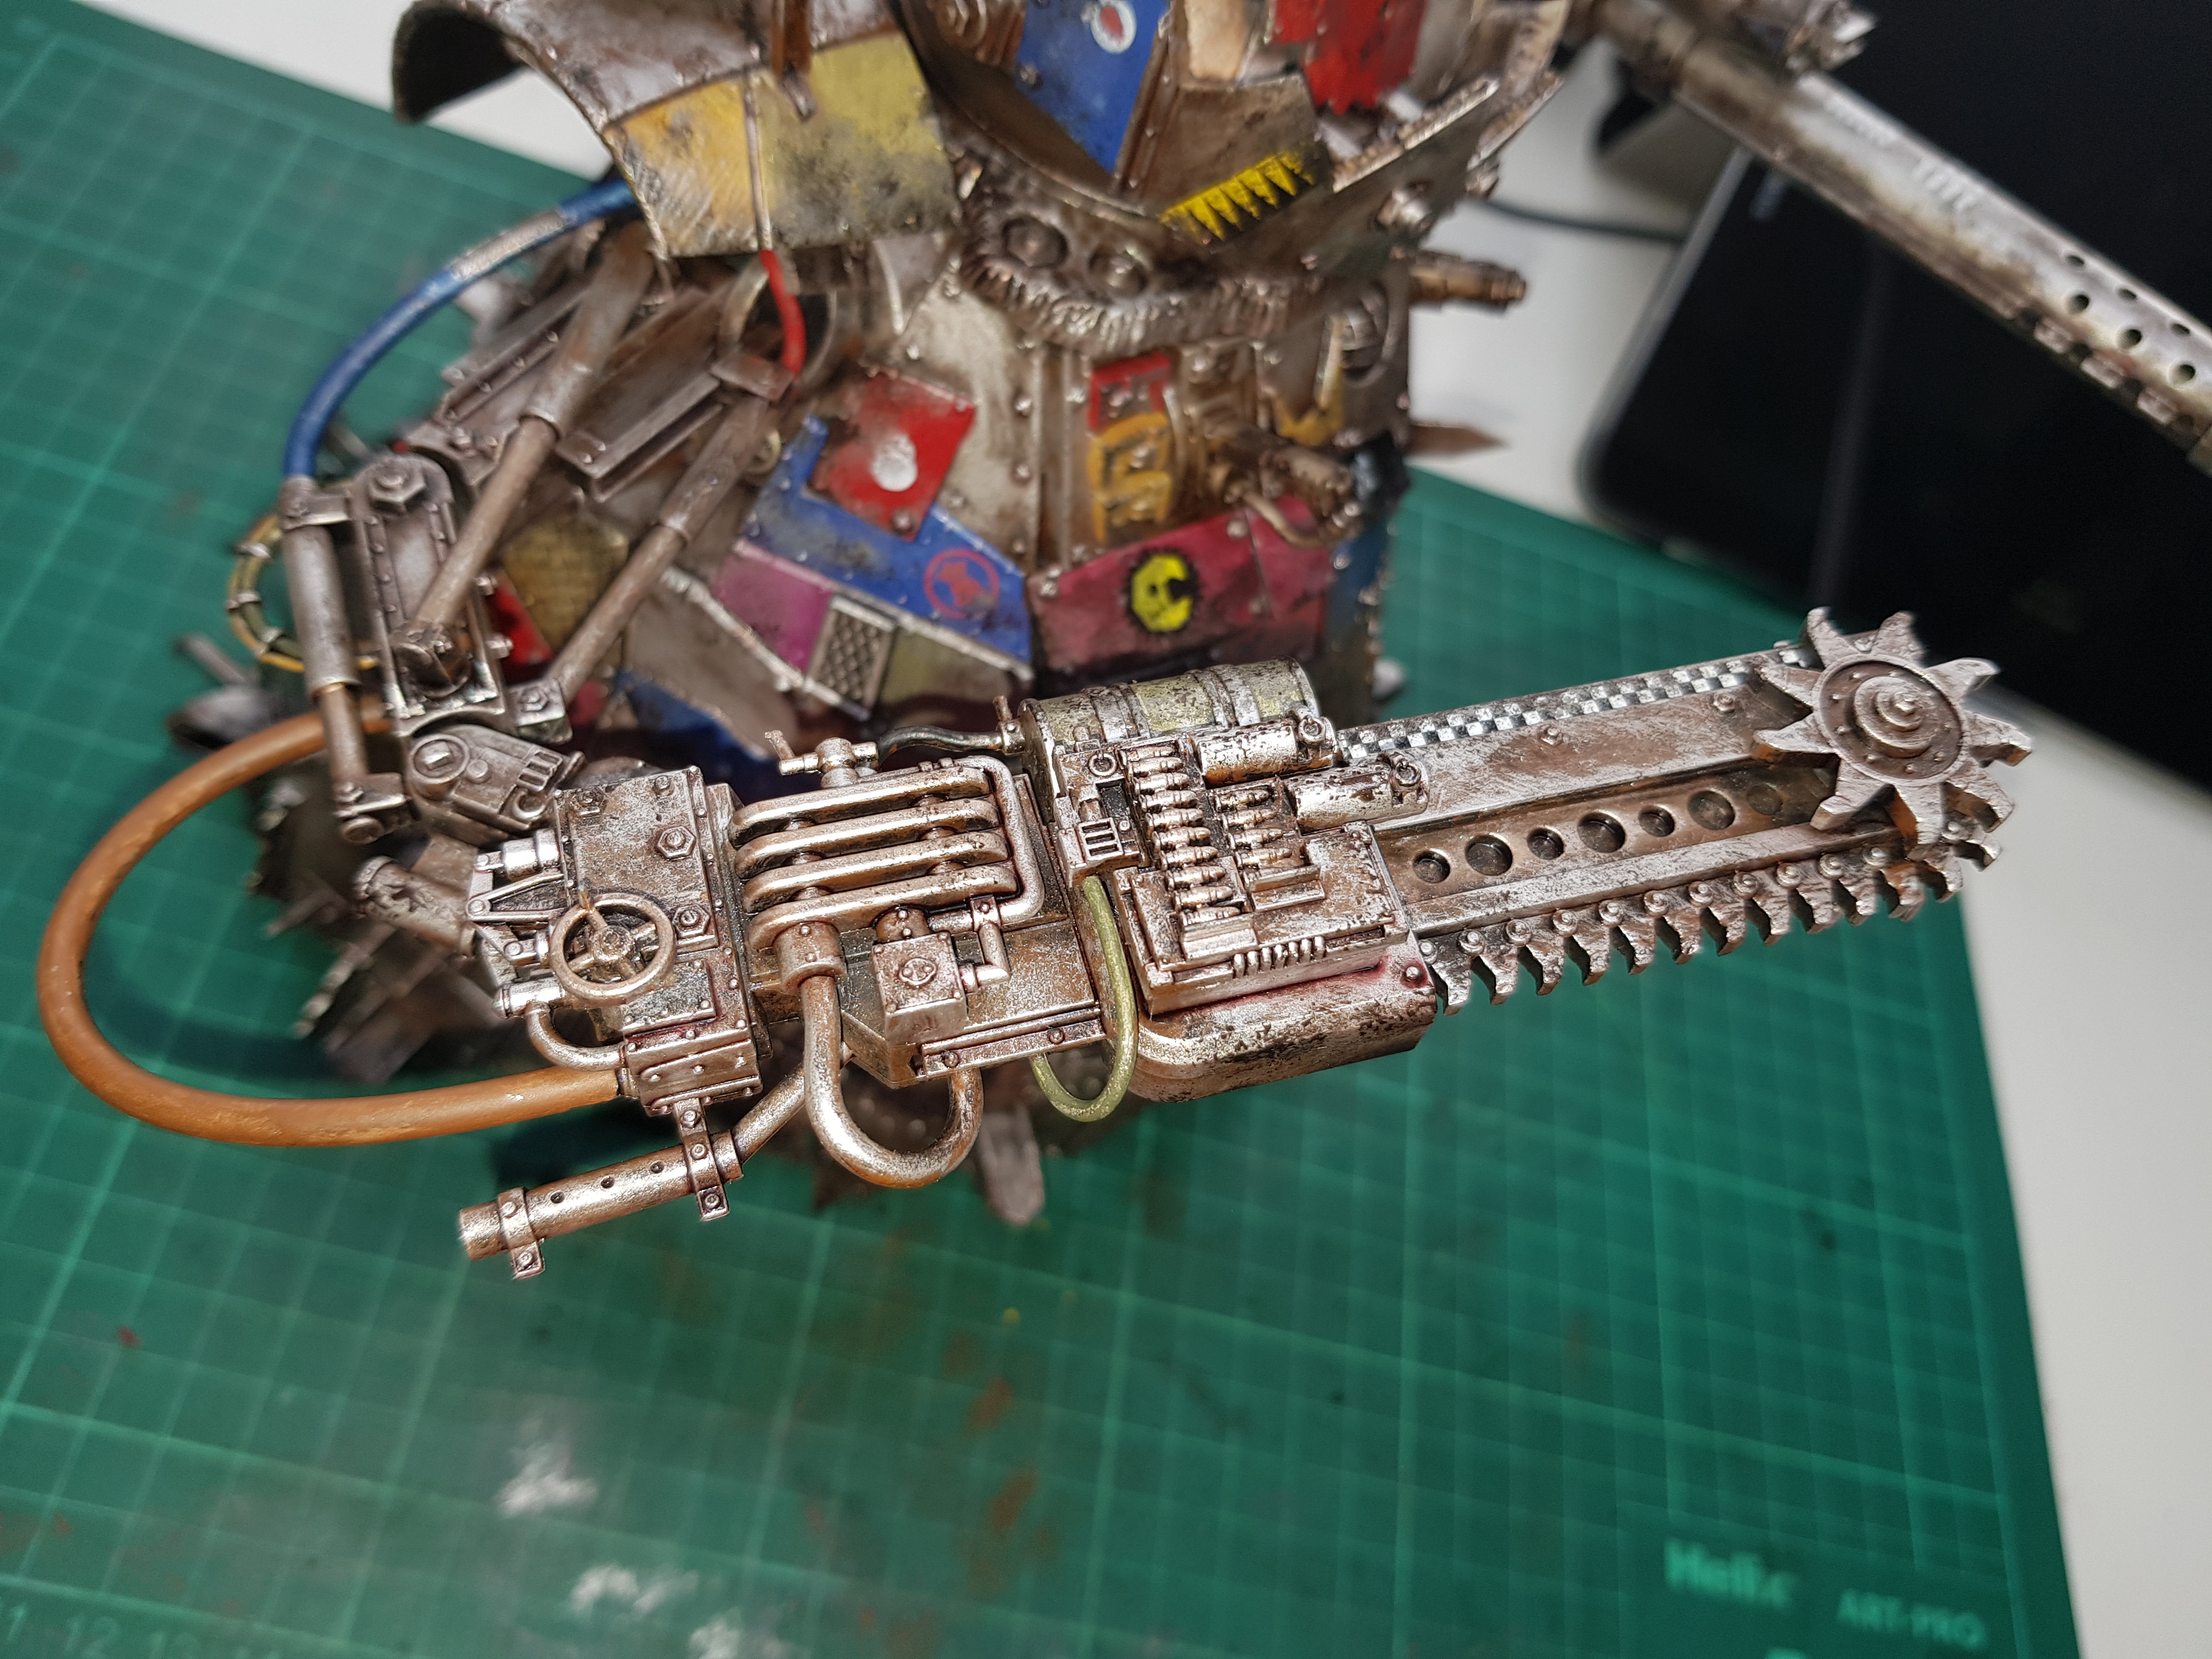
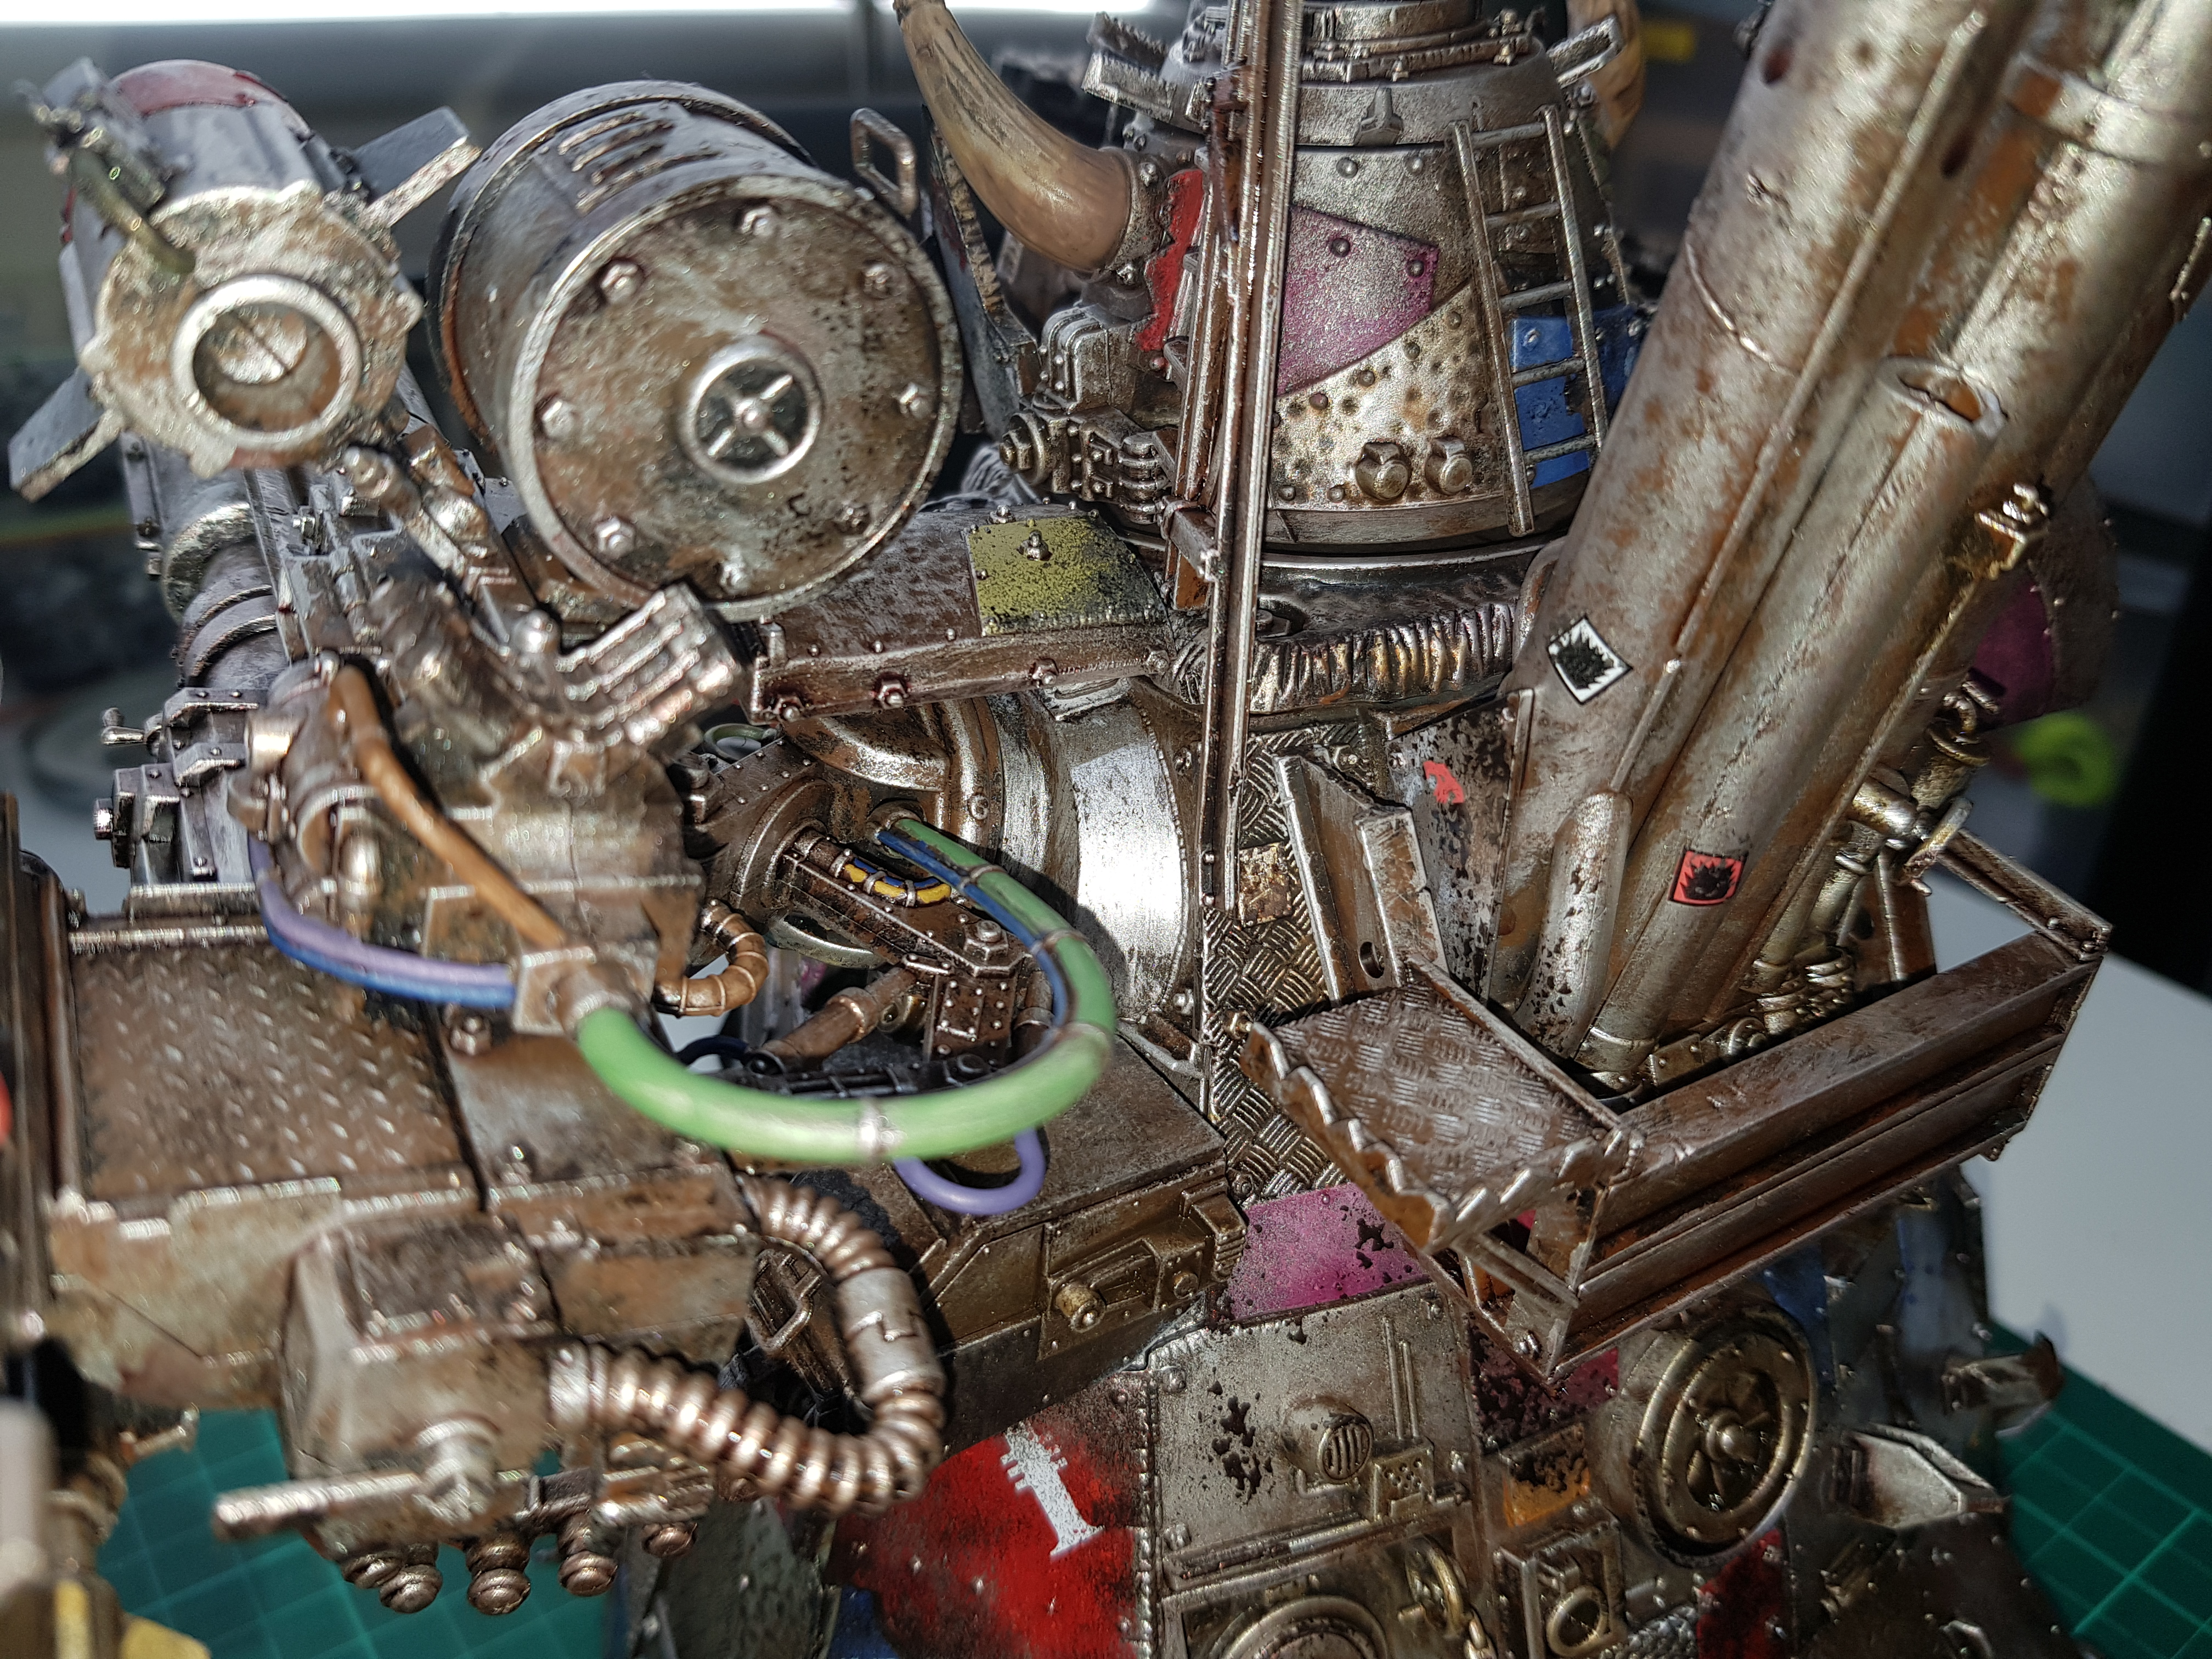
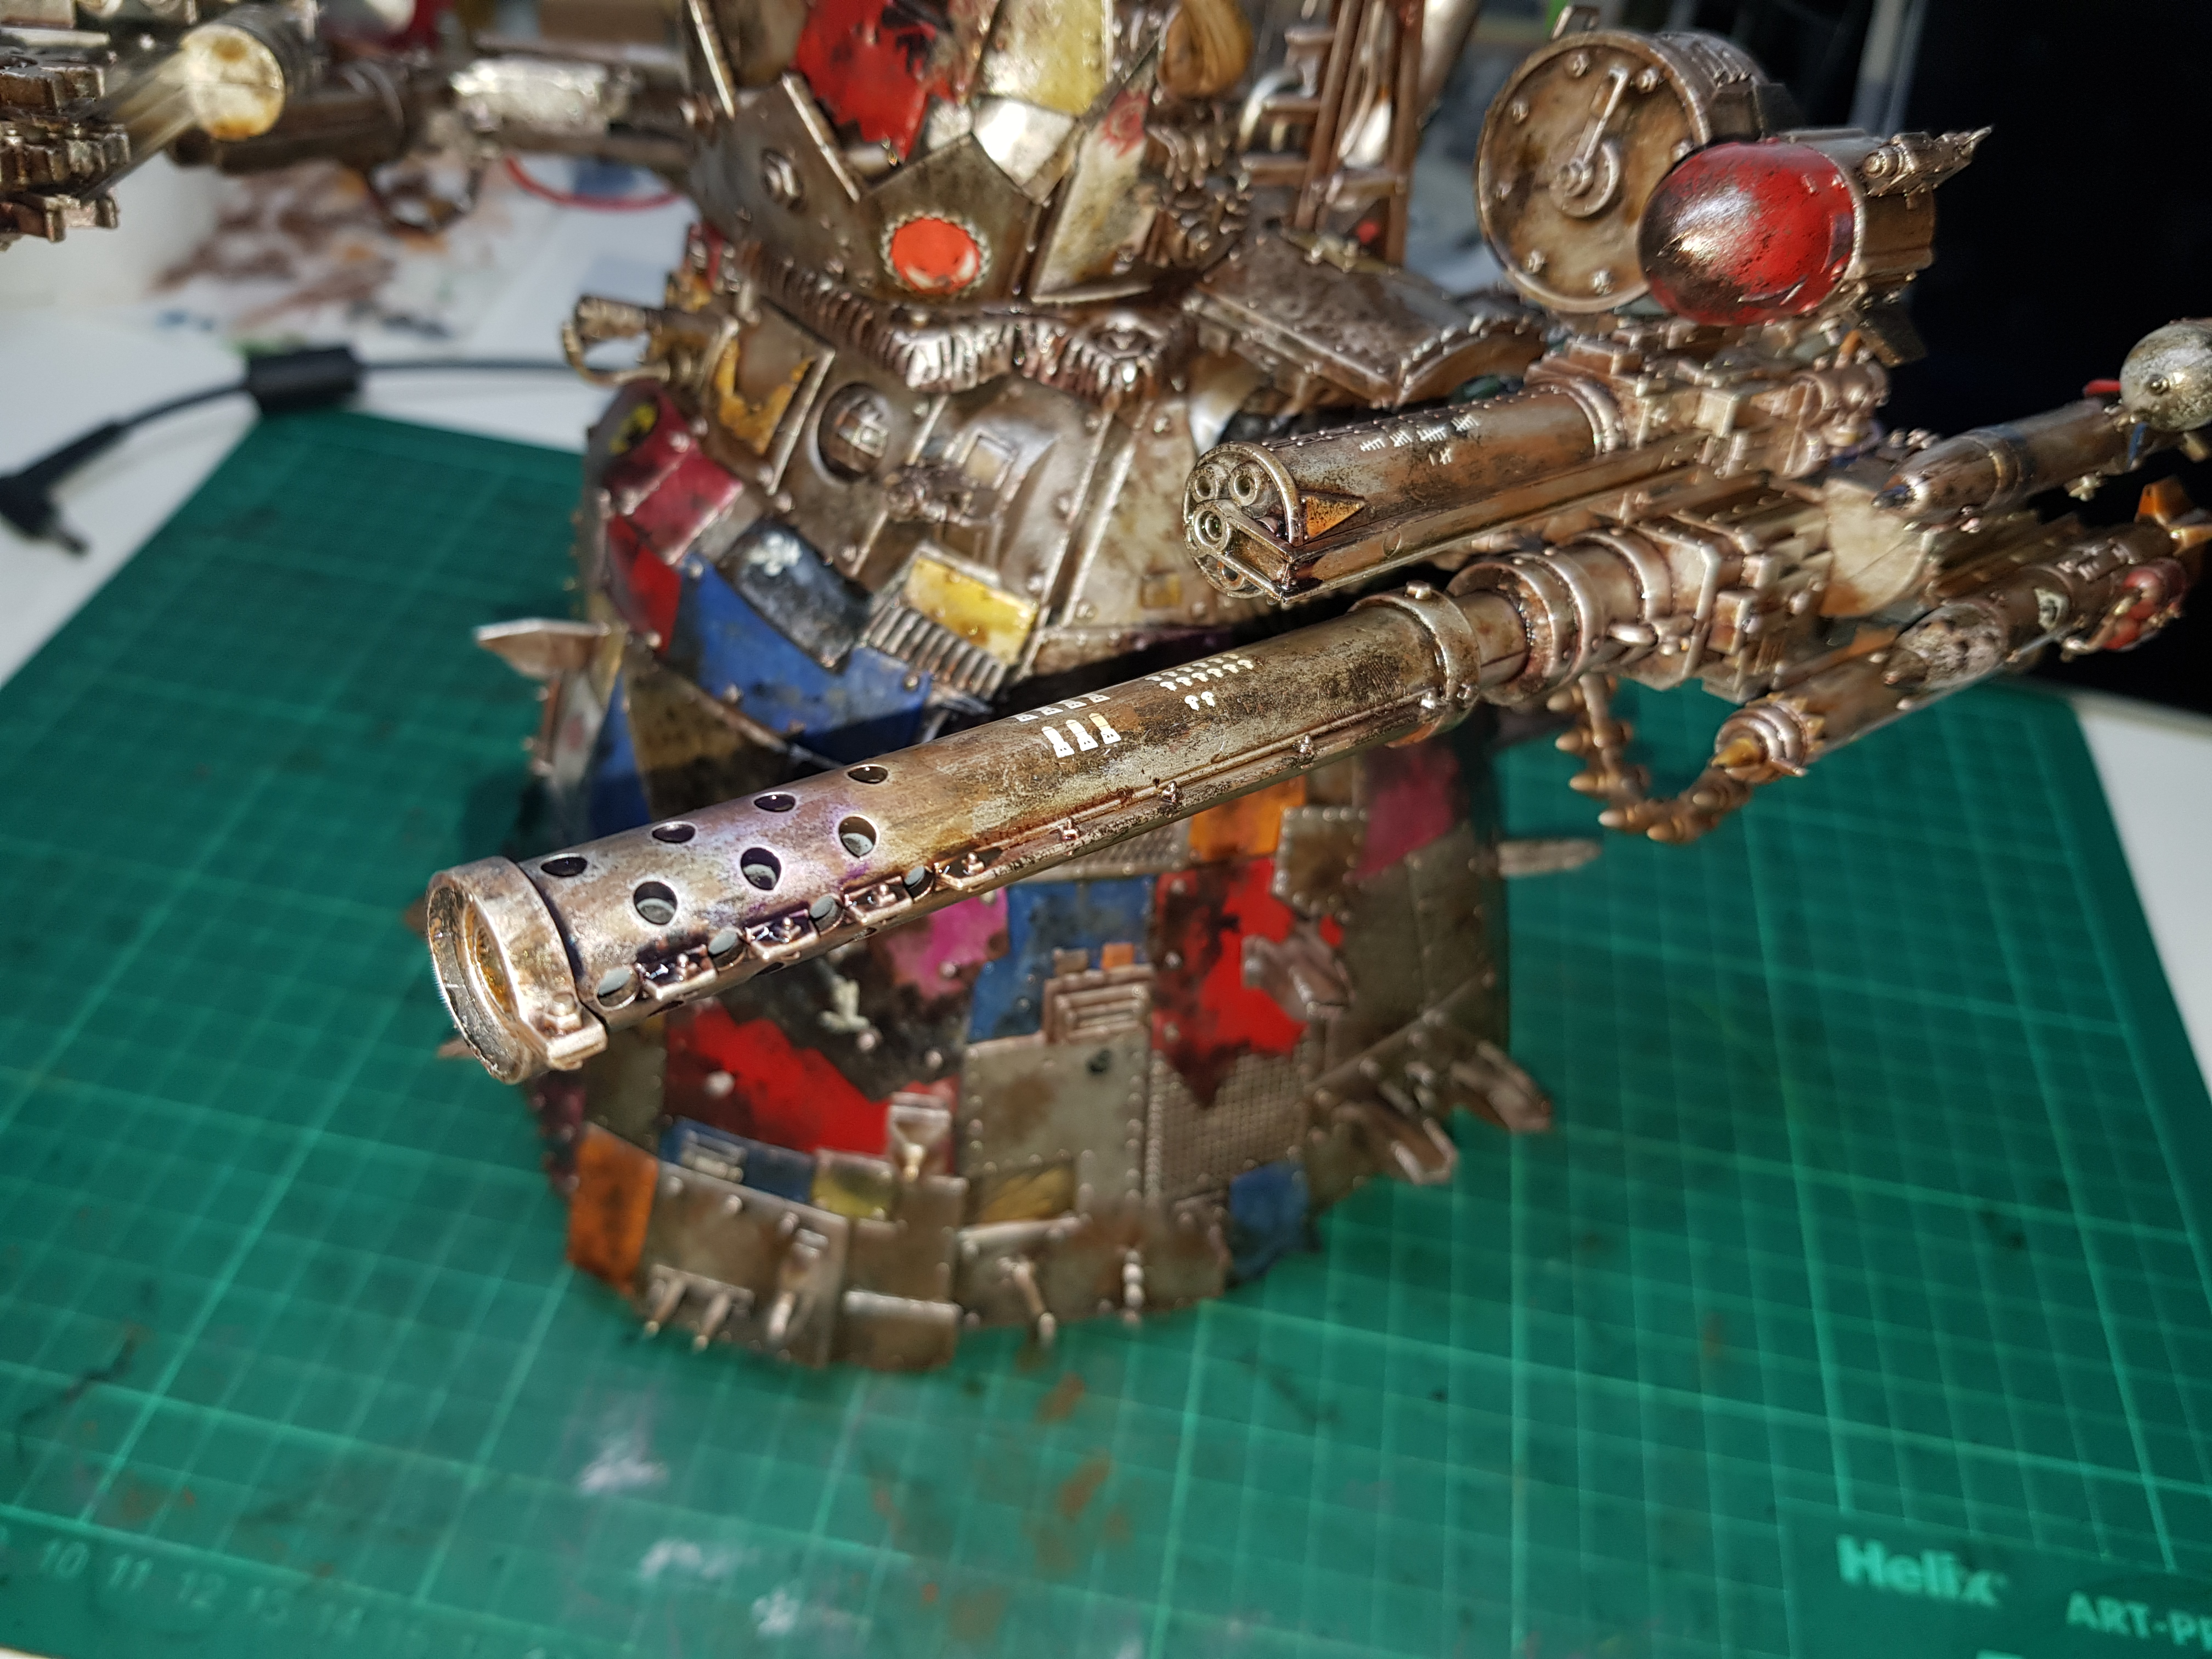
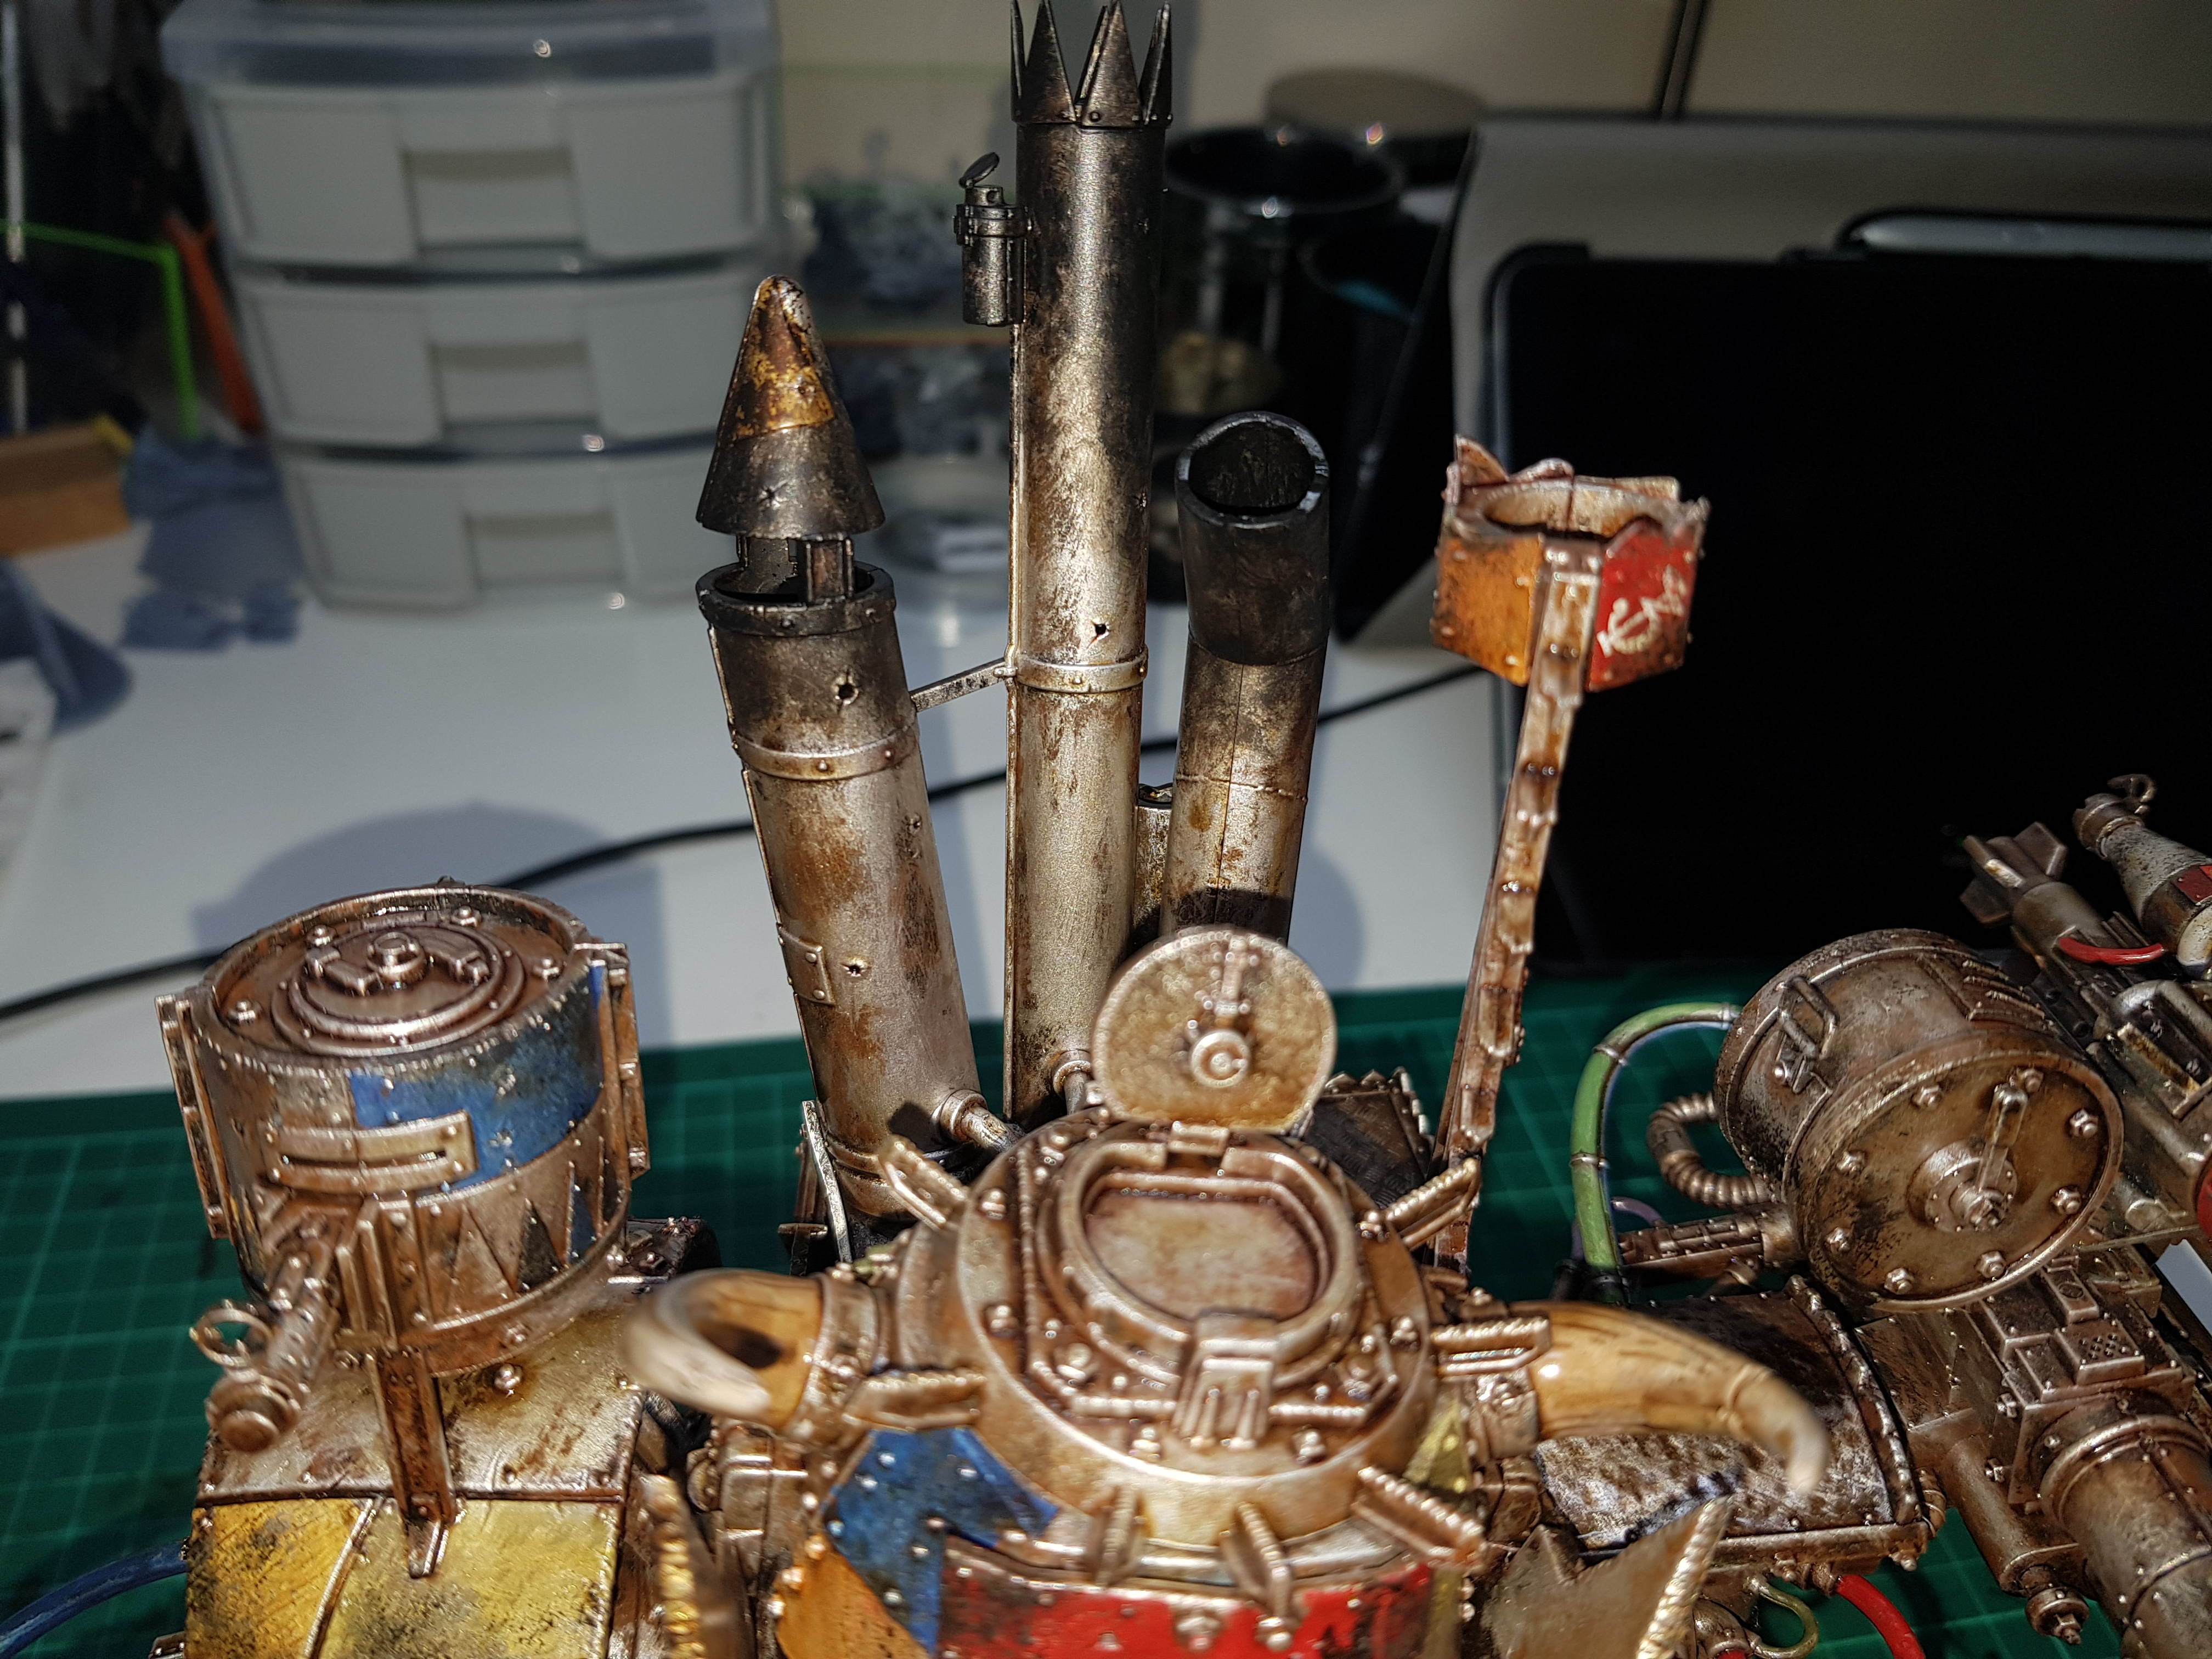
- The arms/weapons were given a similar treatment to the body in terms of picking out areas in colour and then weathering the metal with a sponge. Given that there are less armour panels on these pieces the colour was added to the cabling and missiles, etc.;
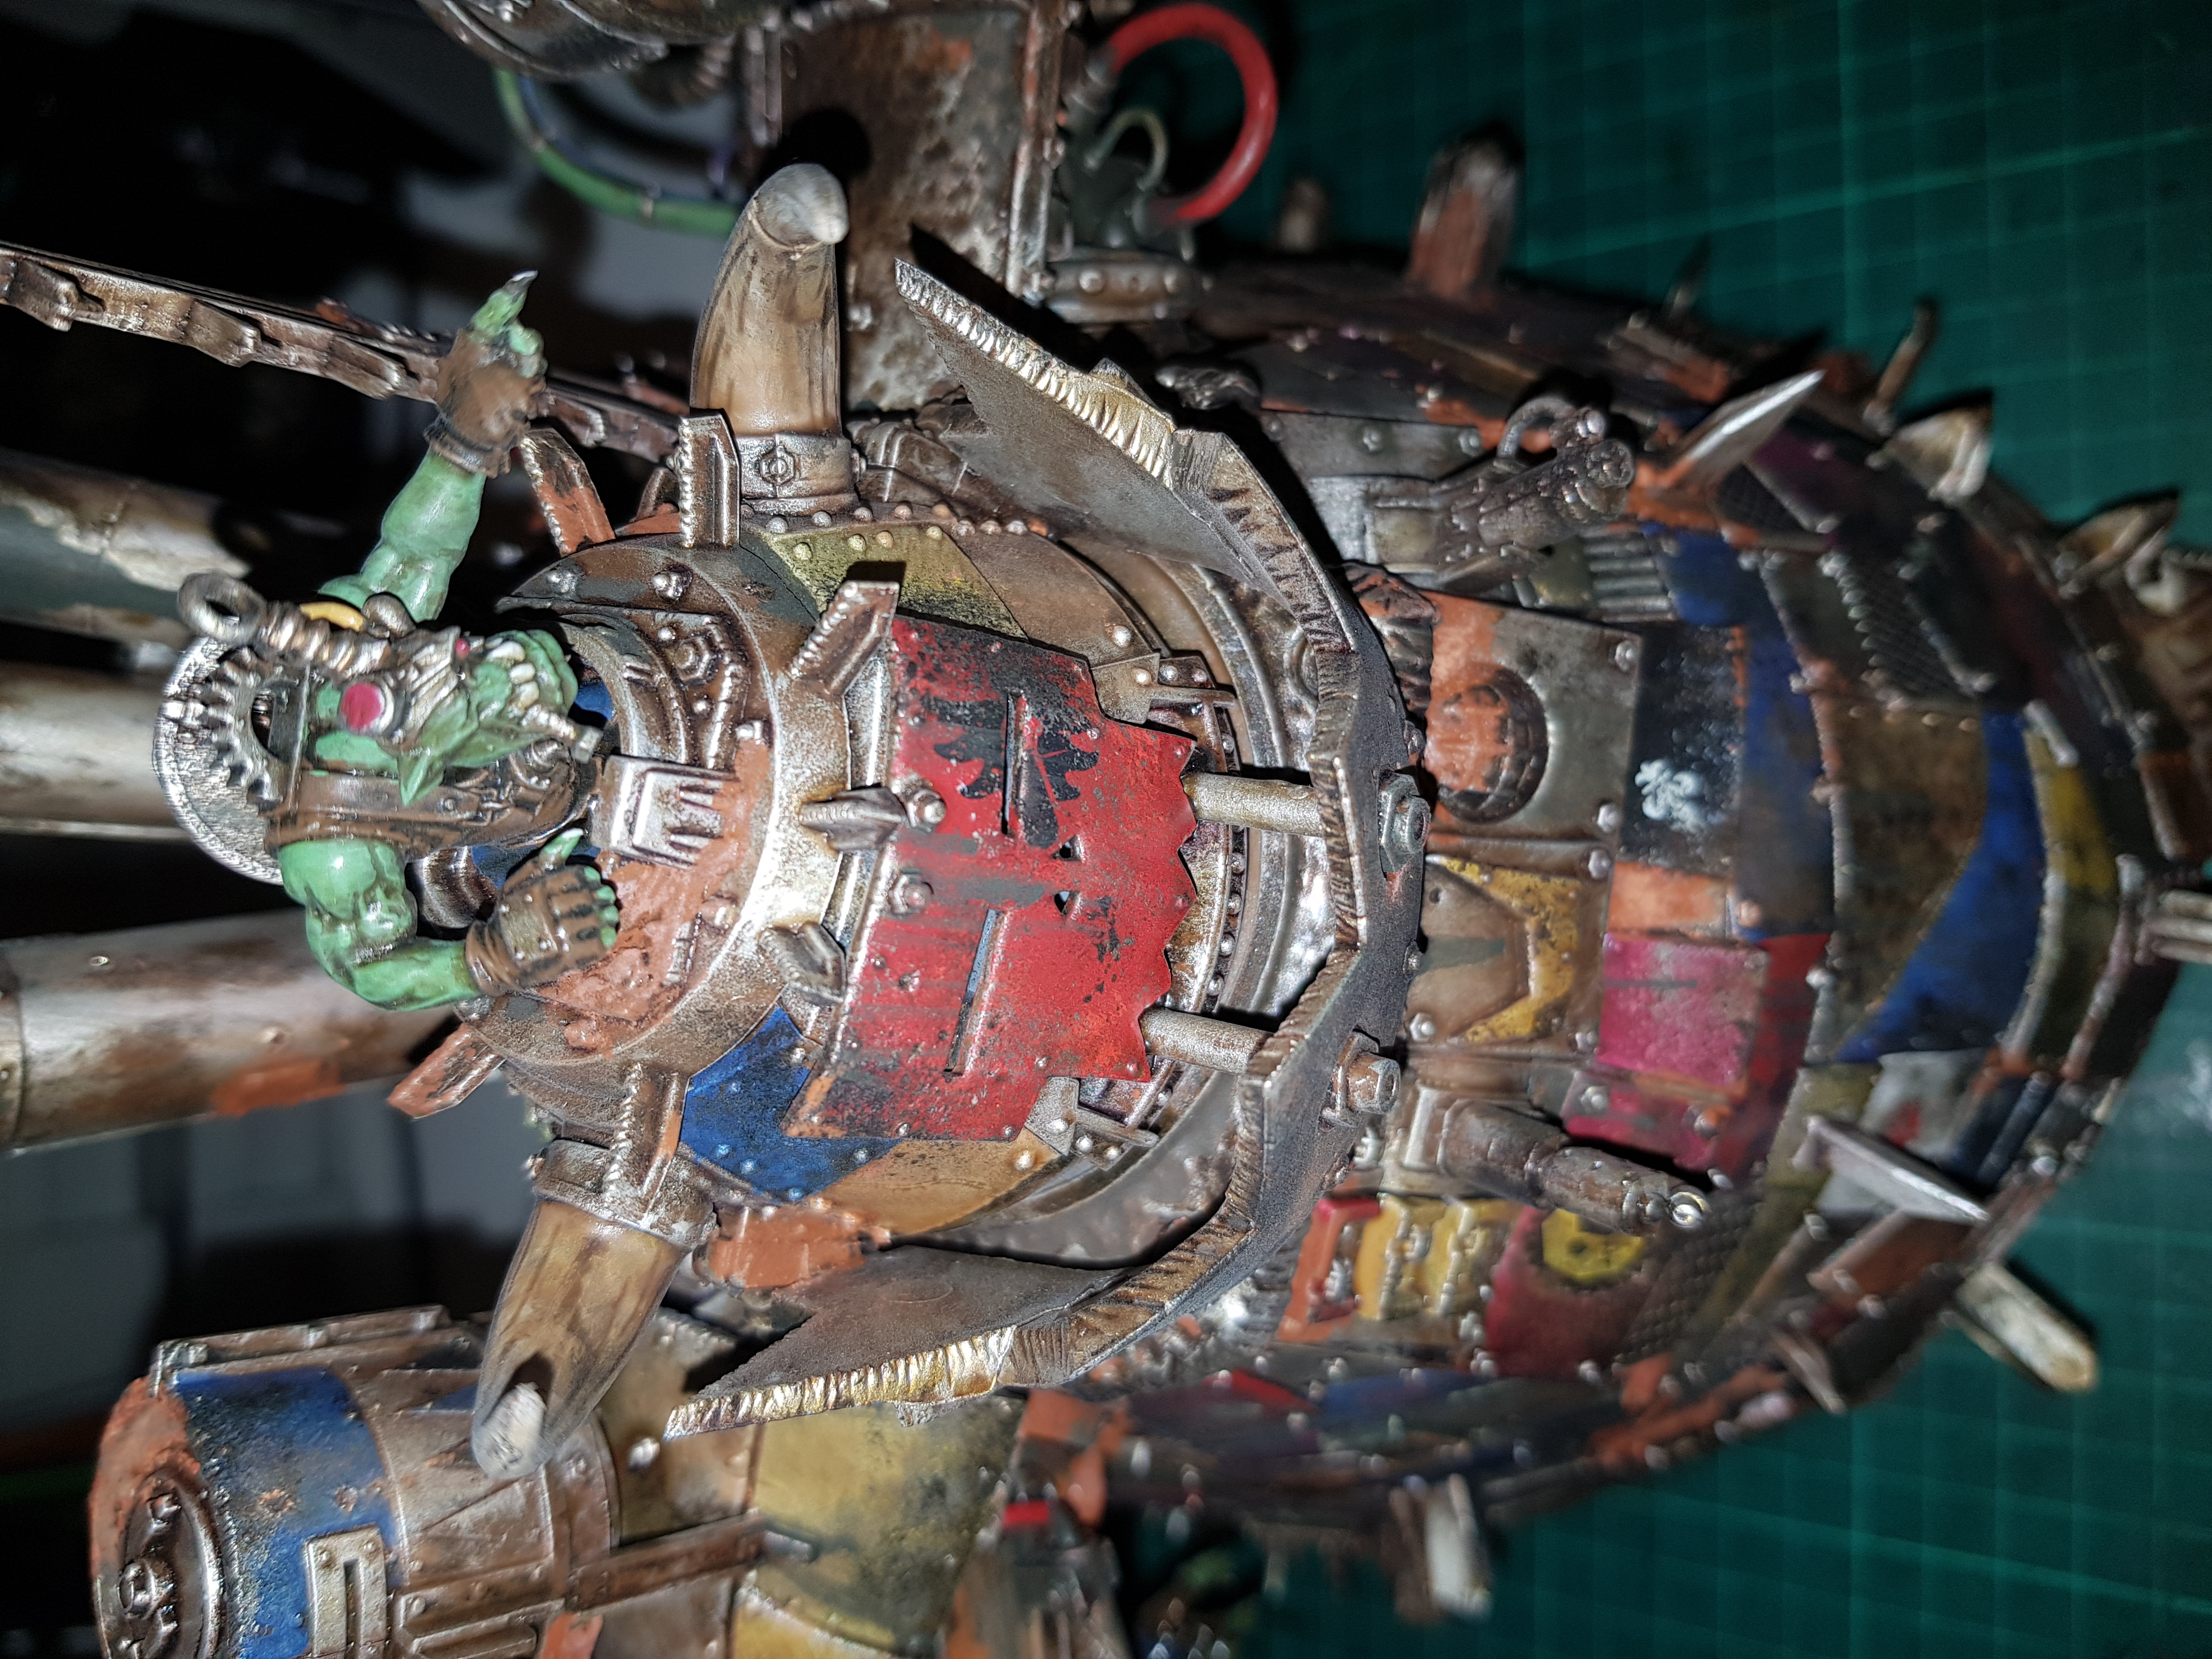
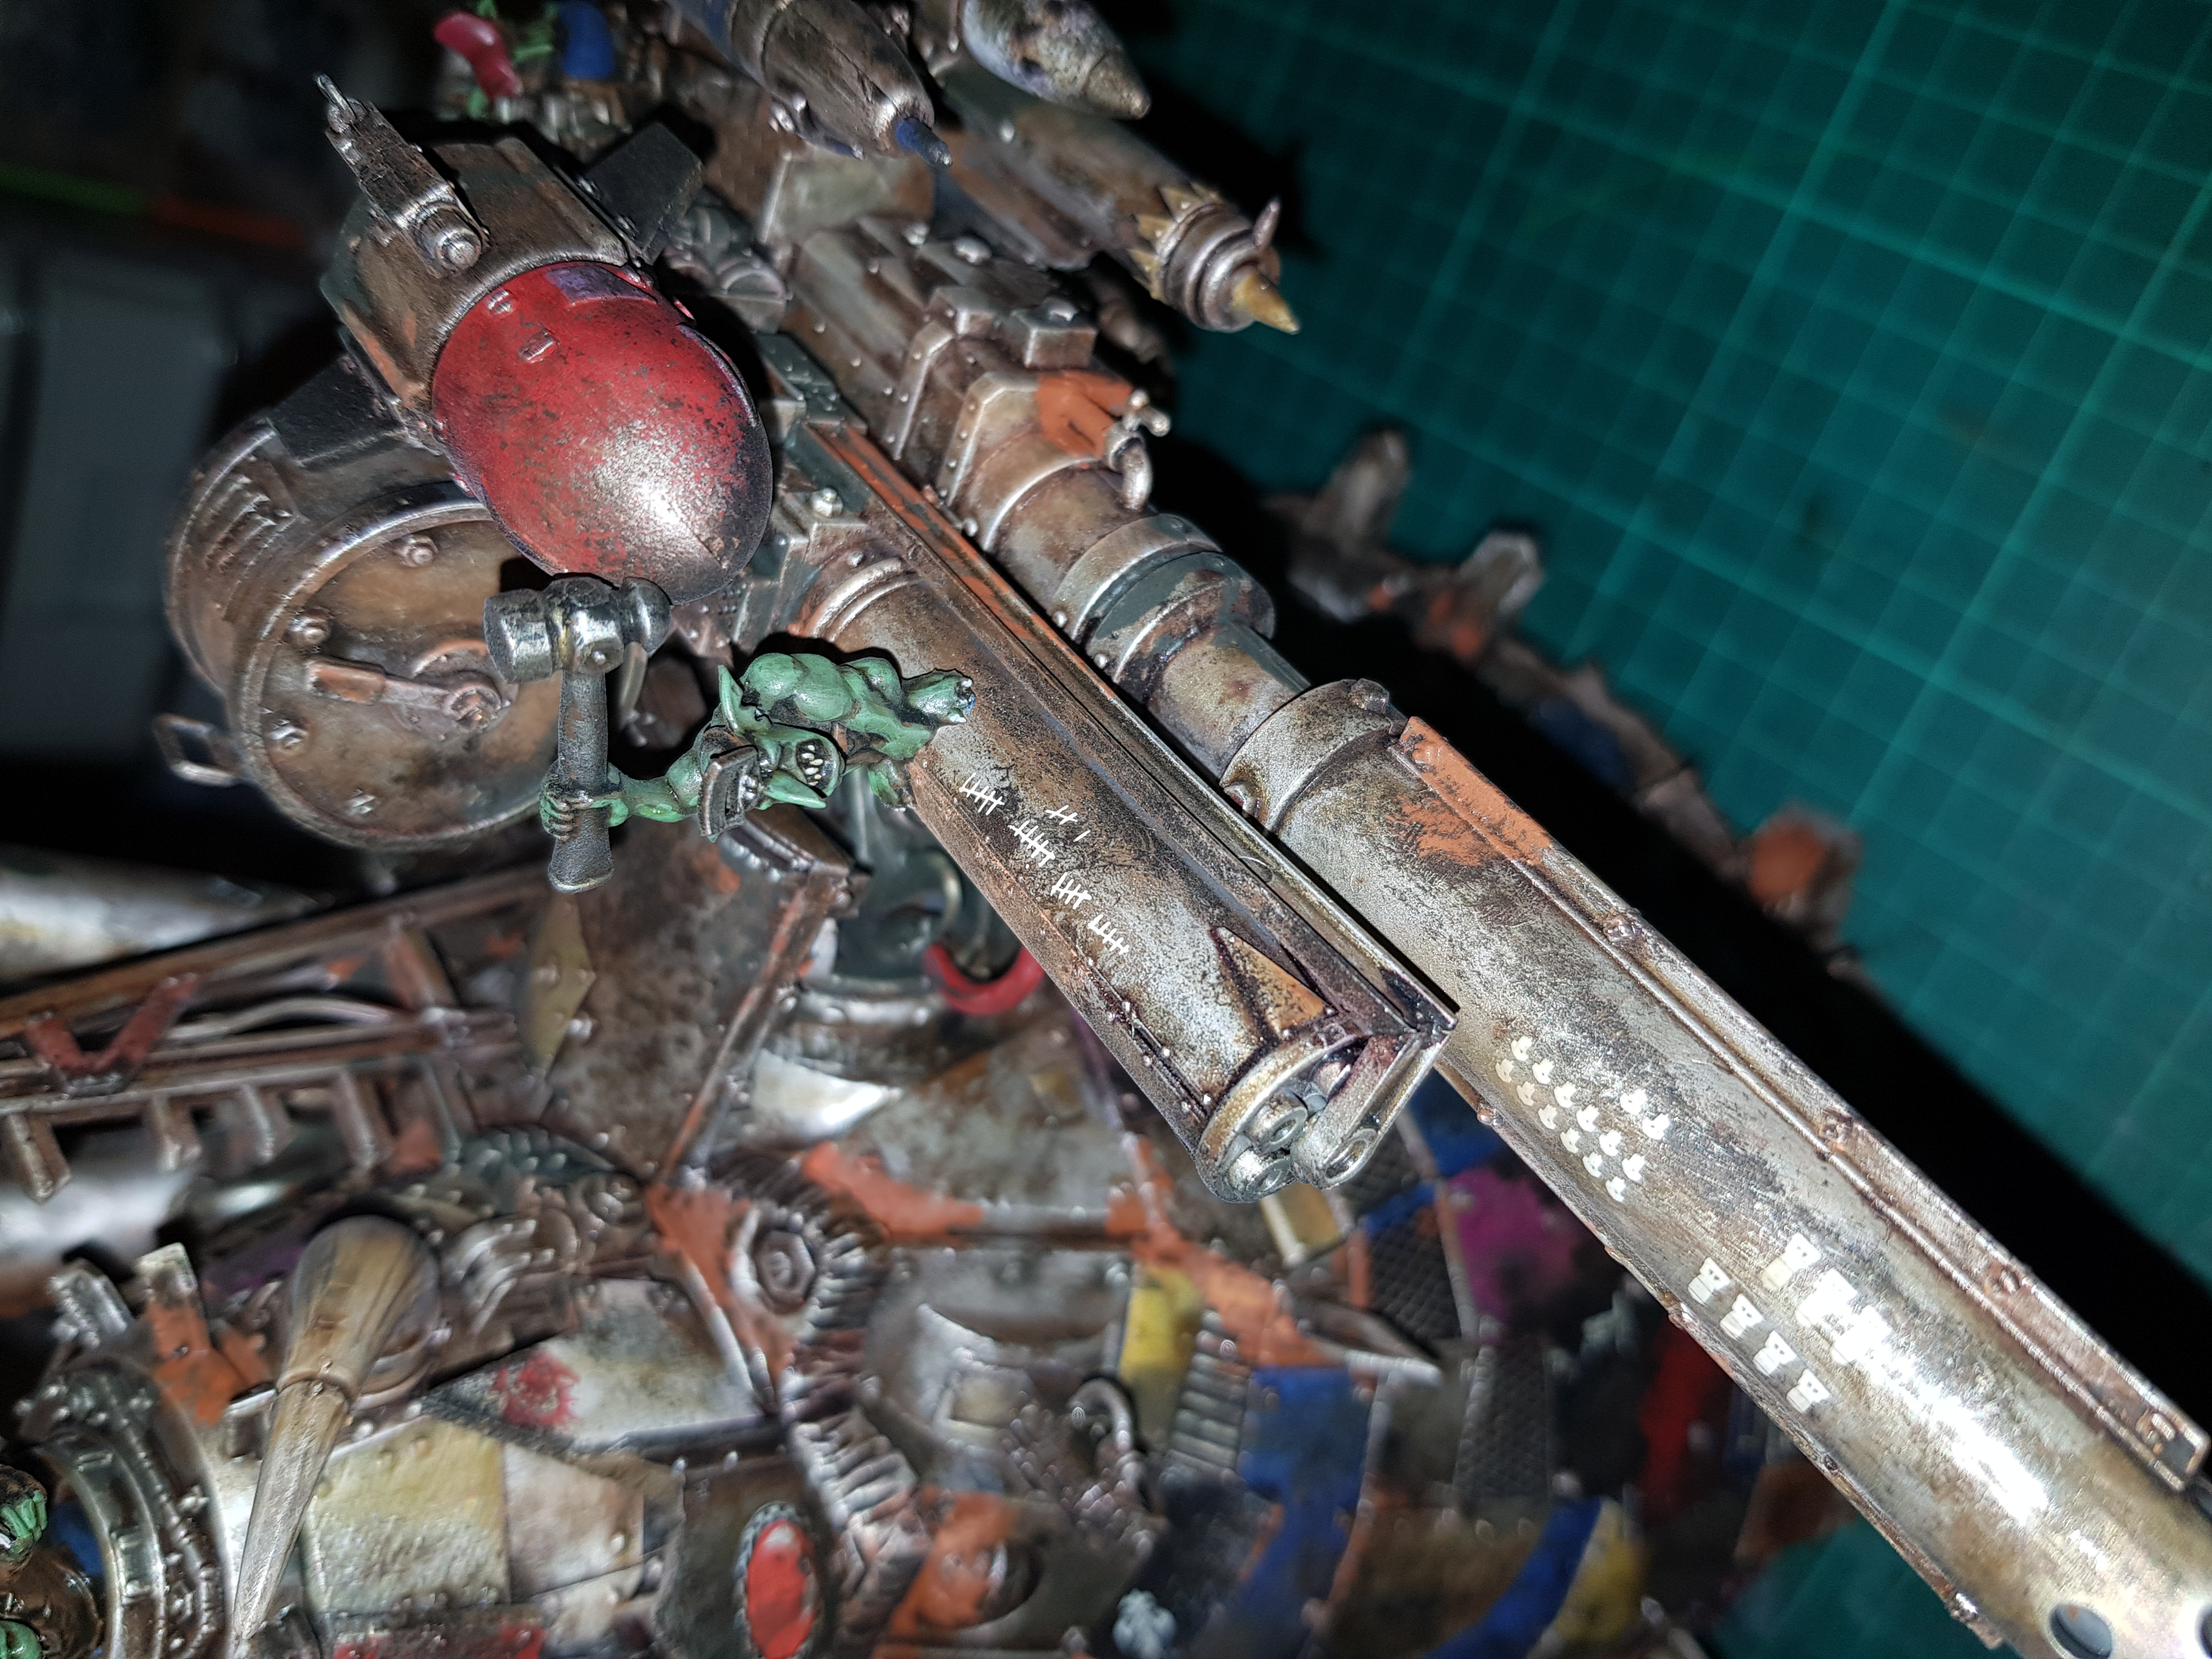
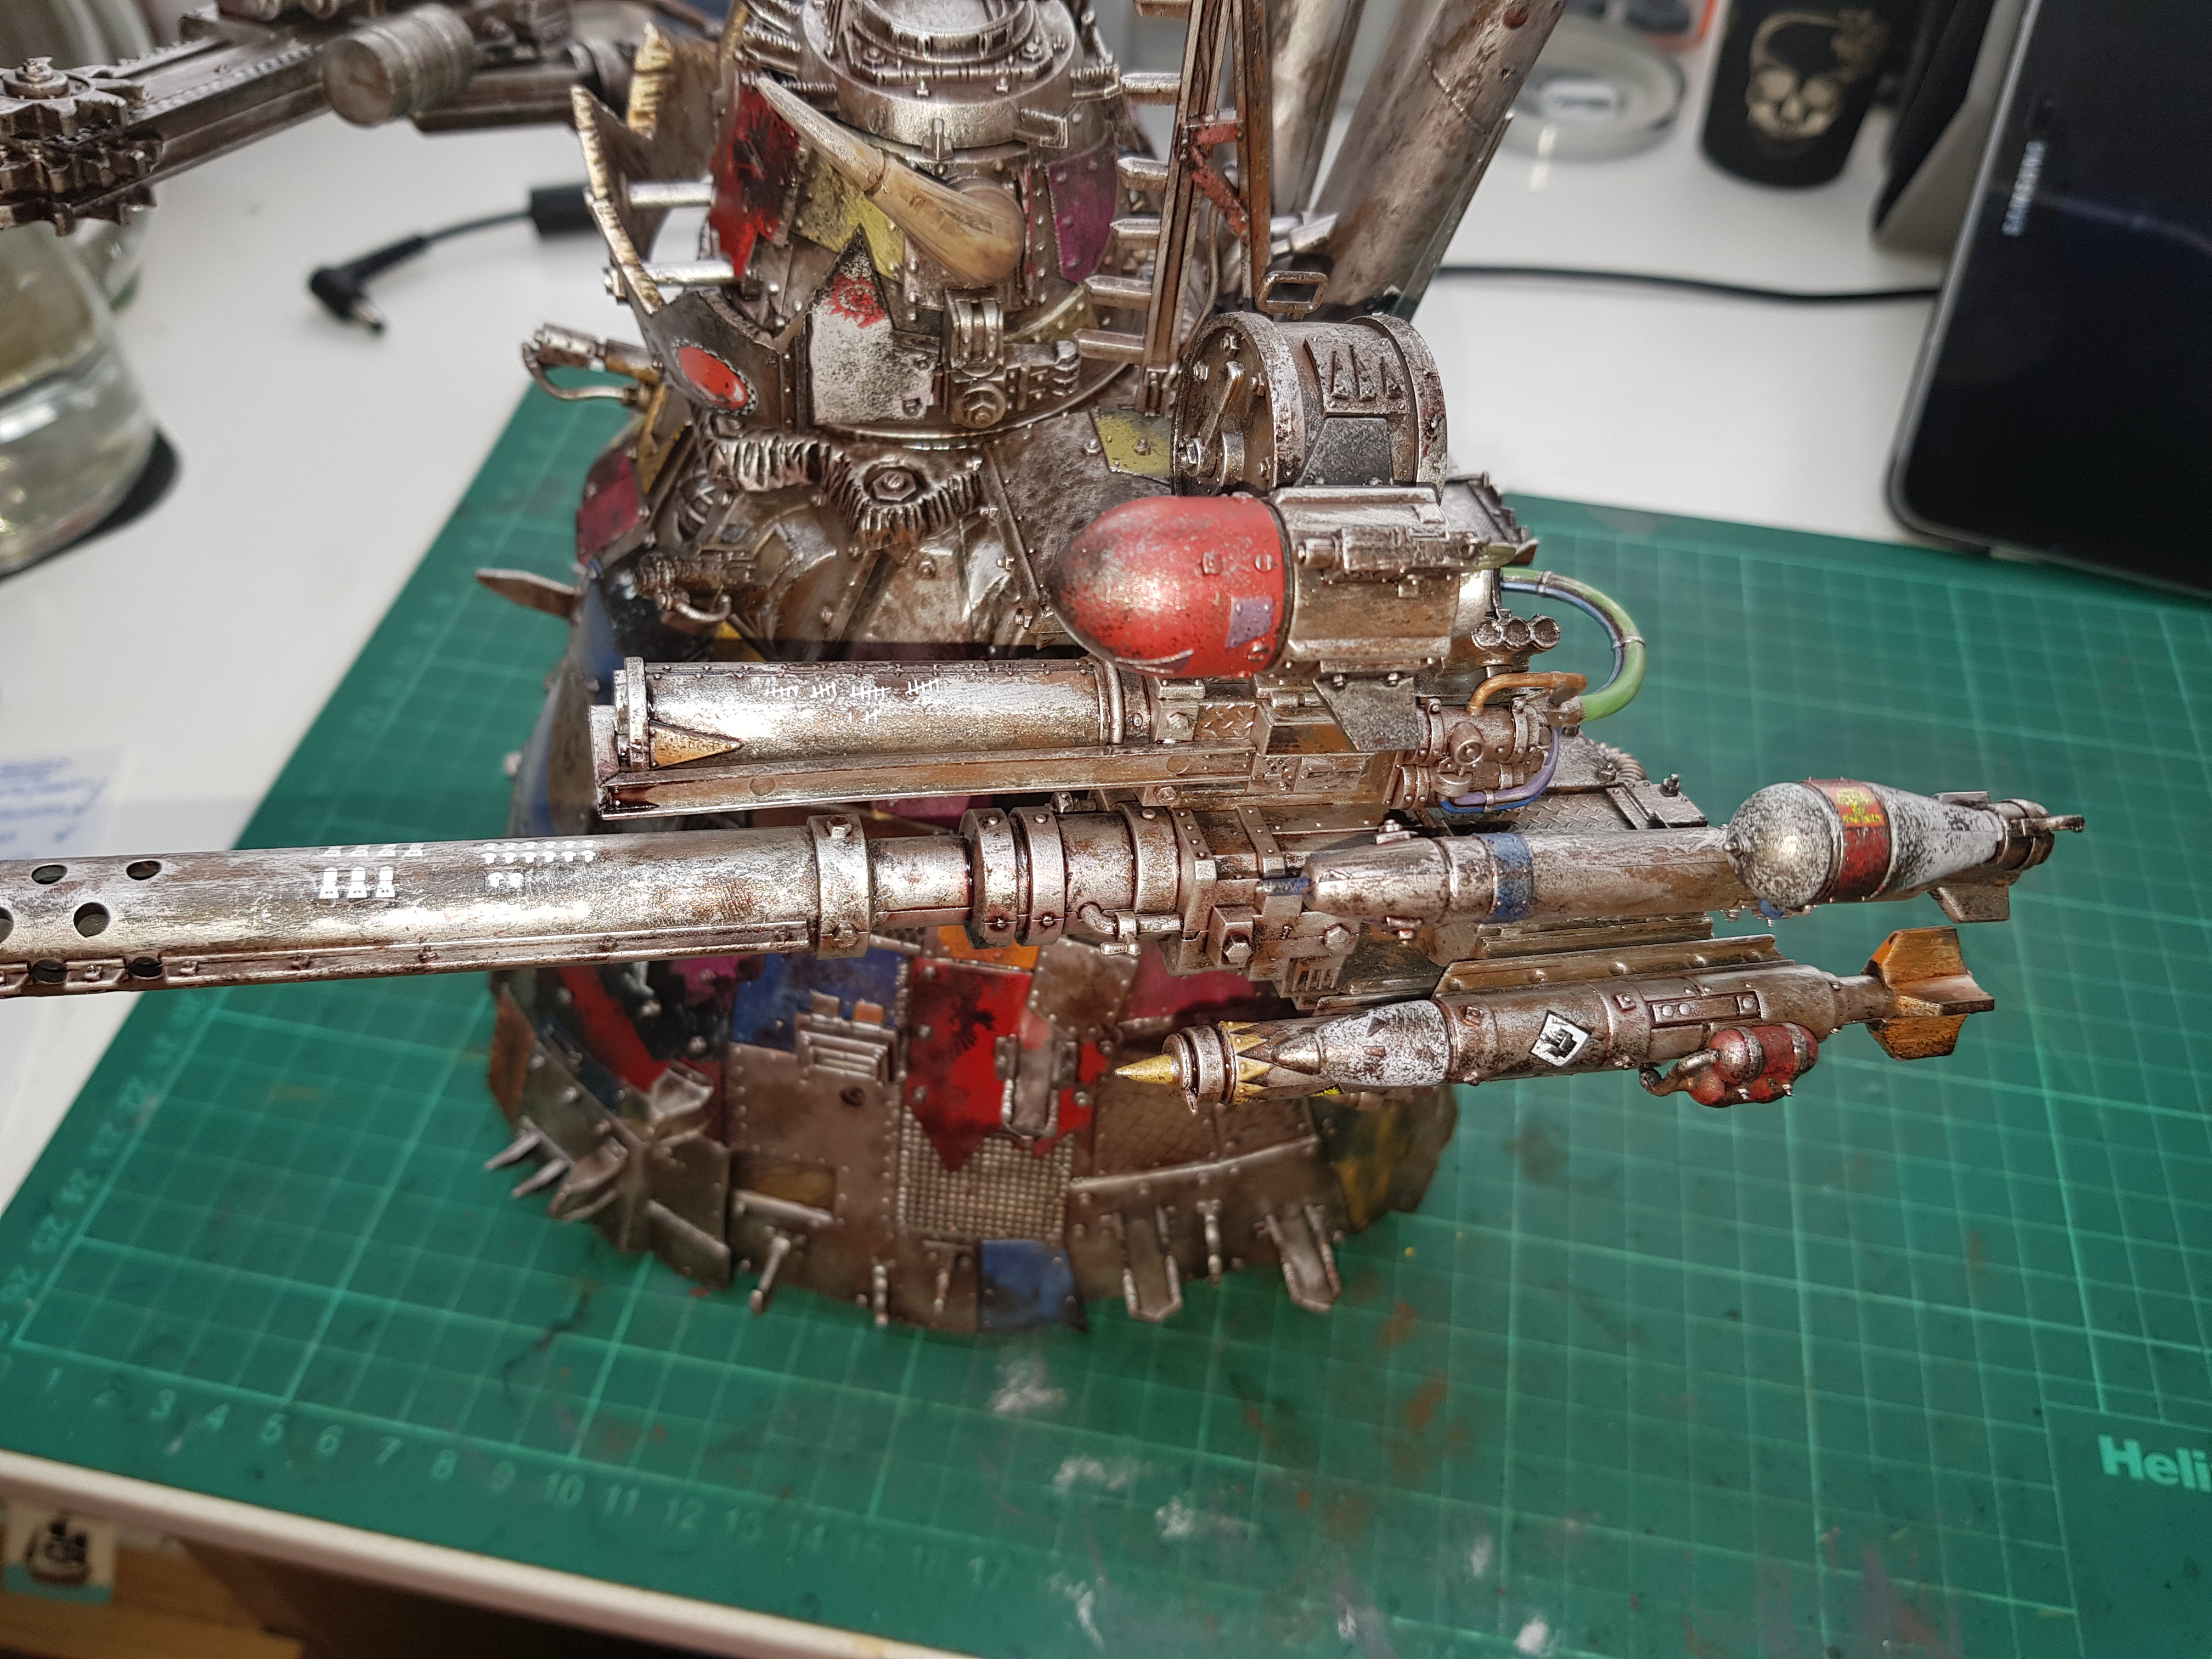
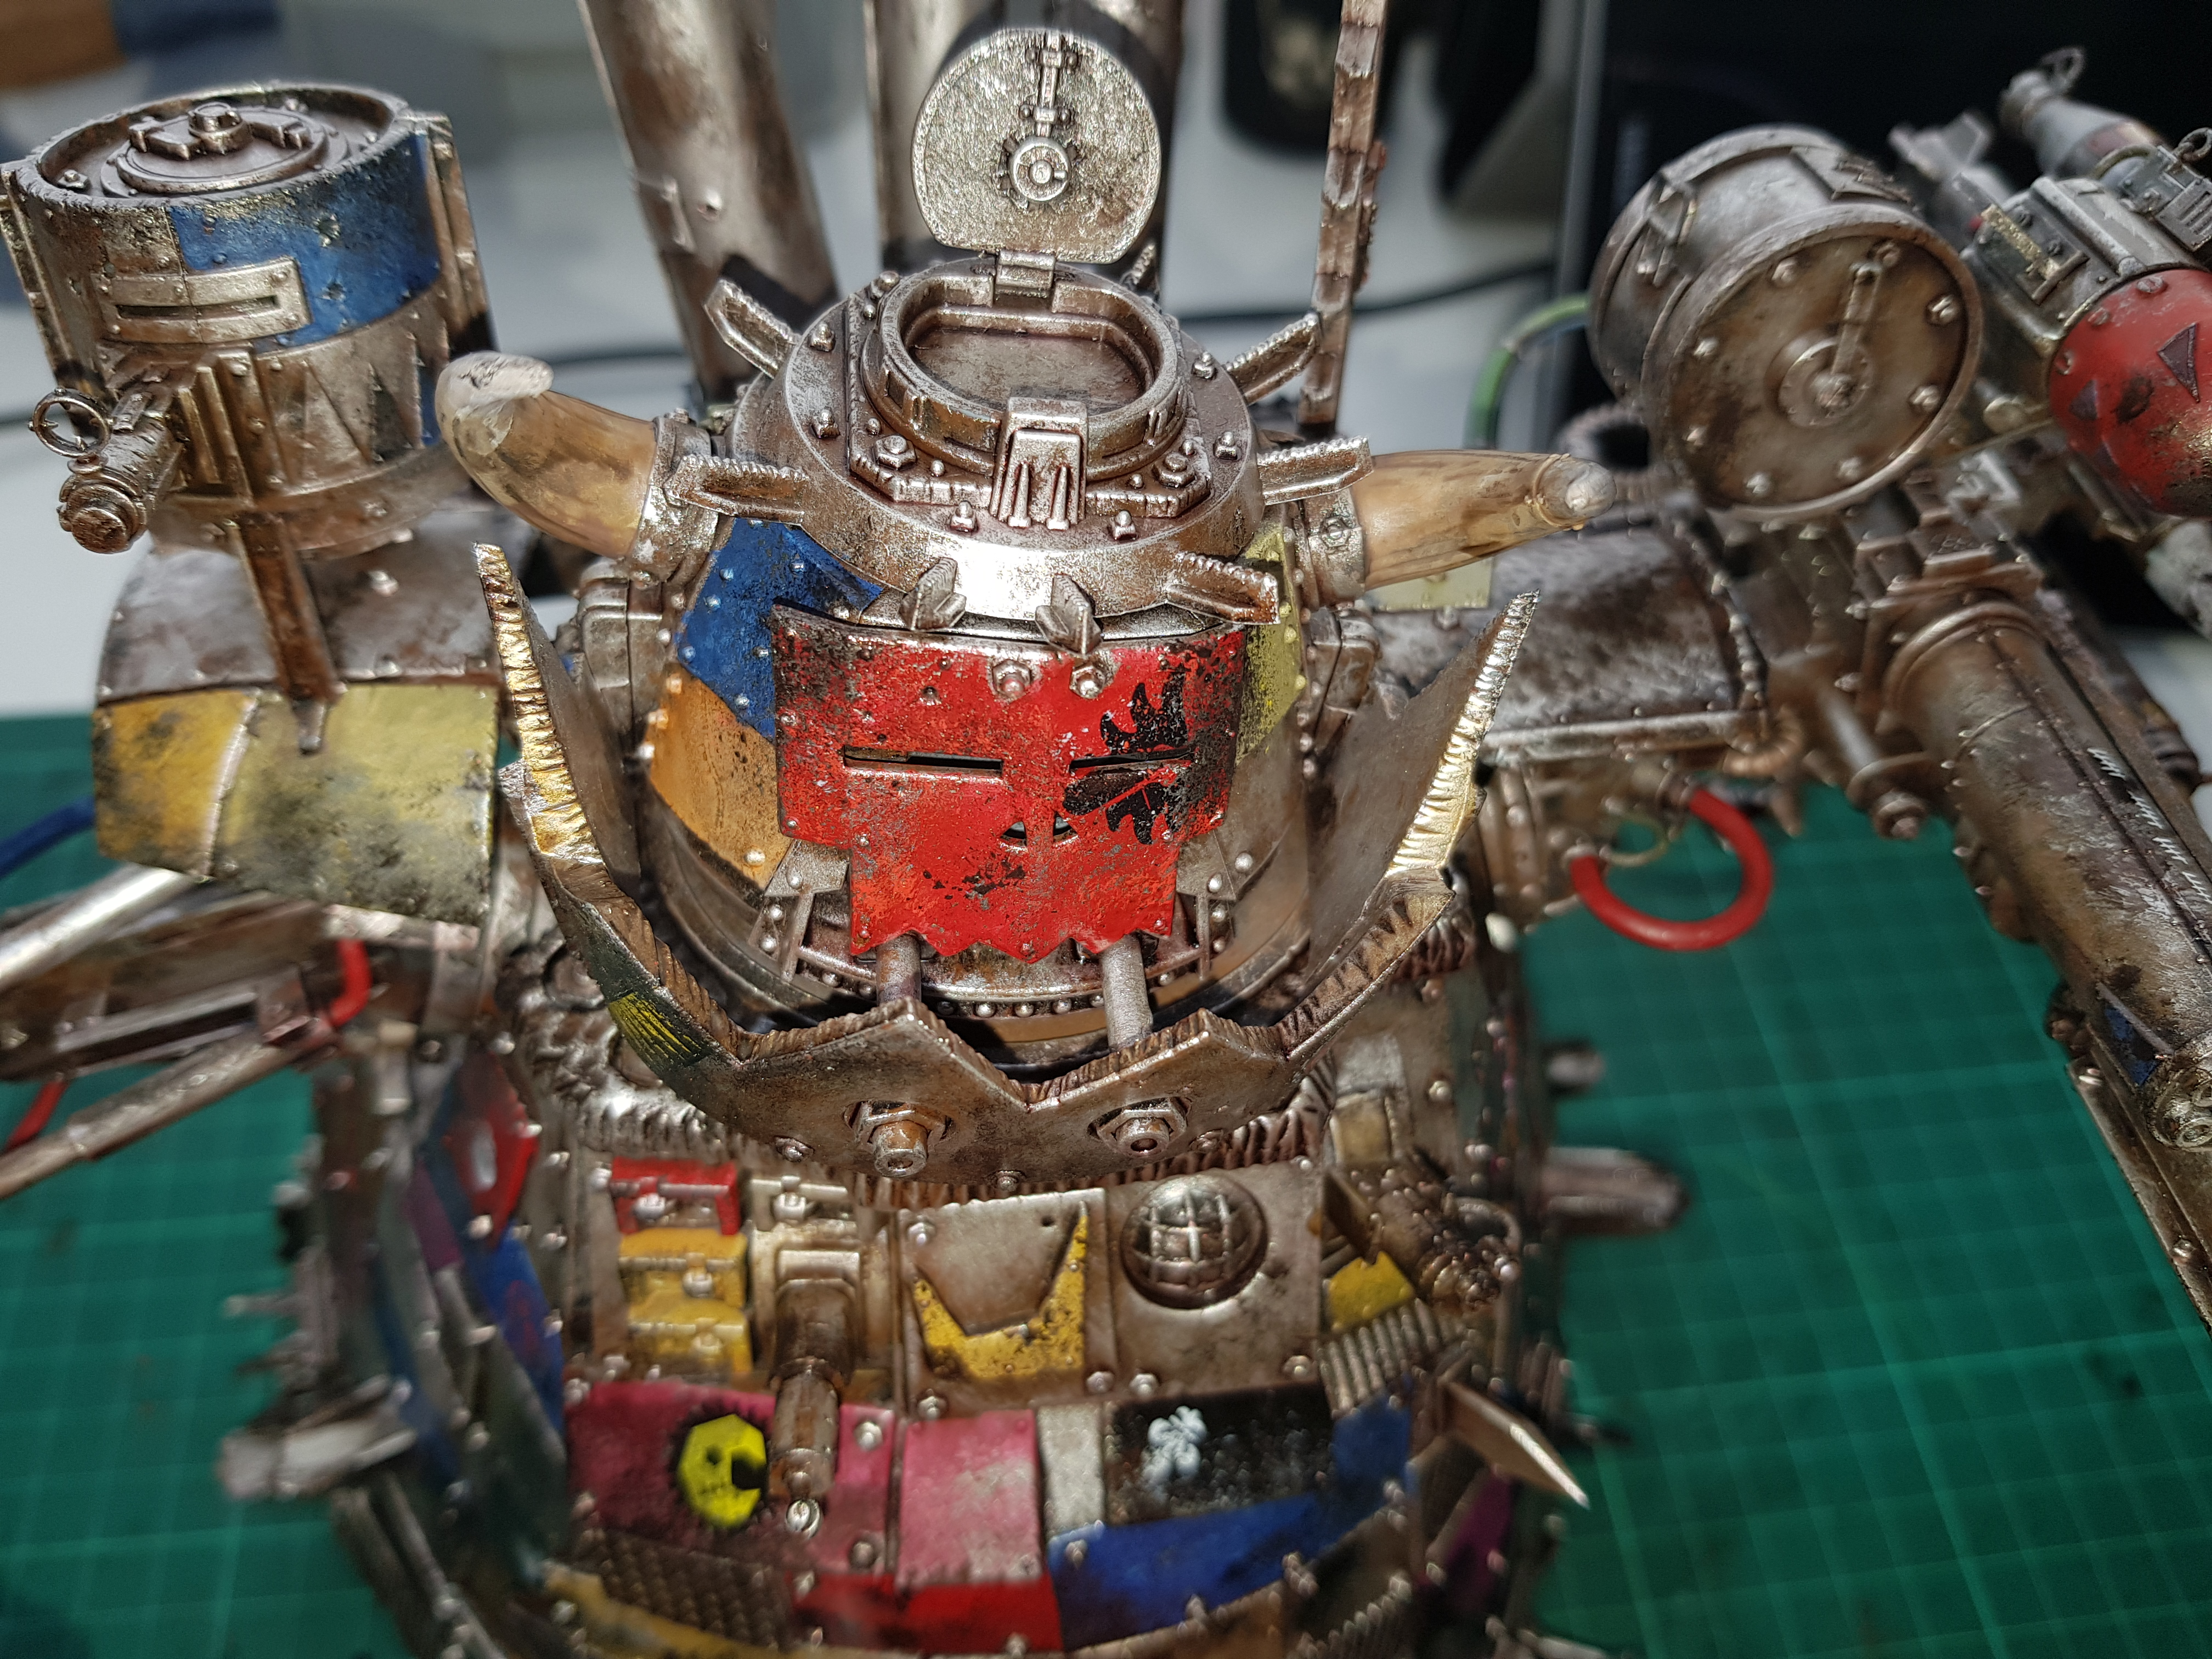
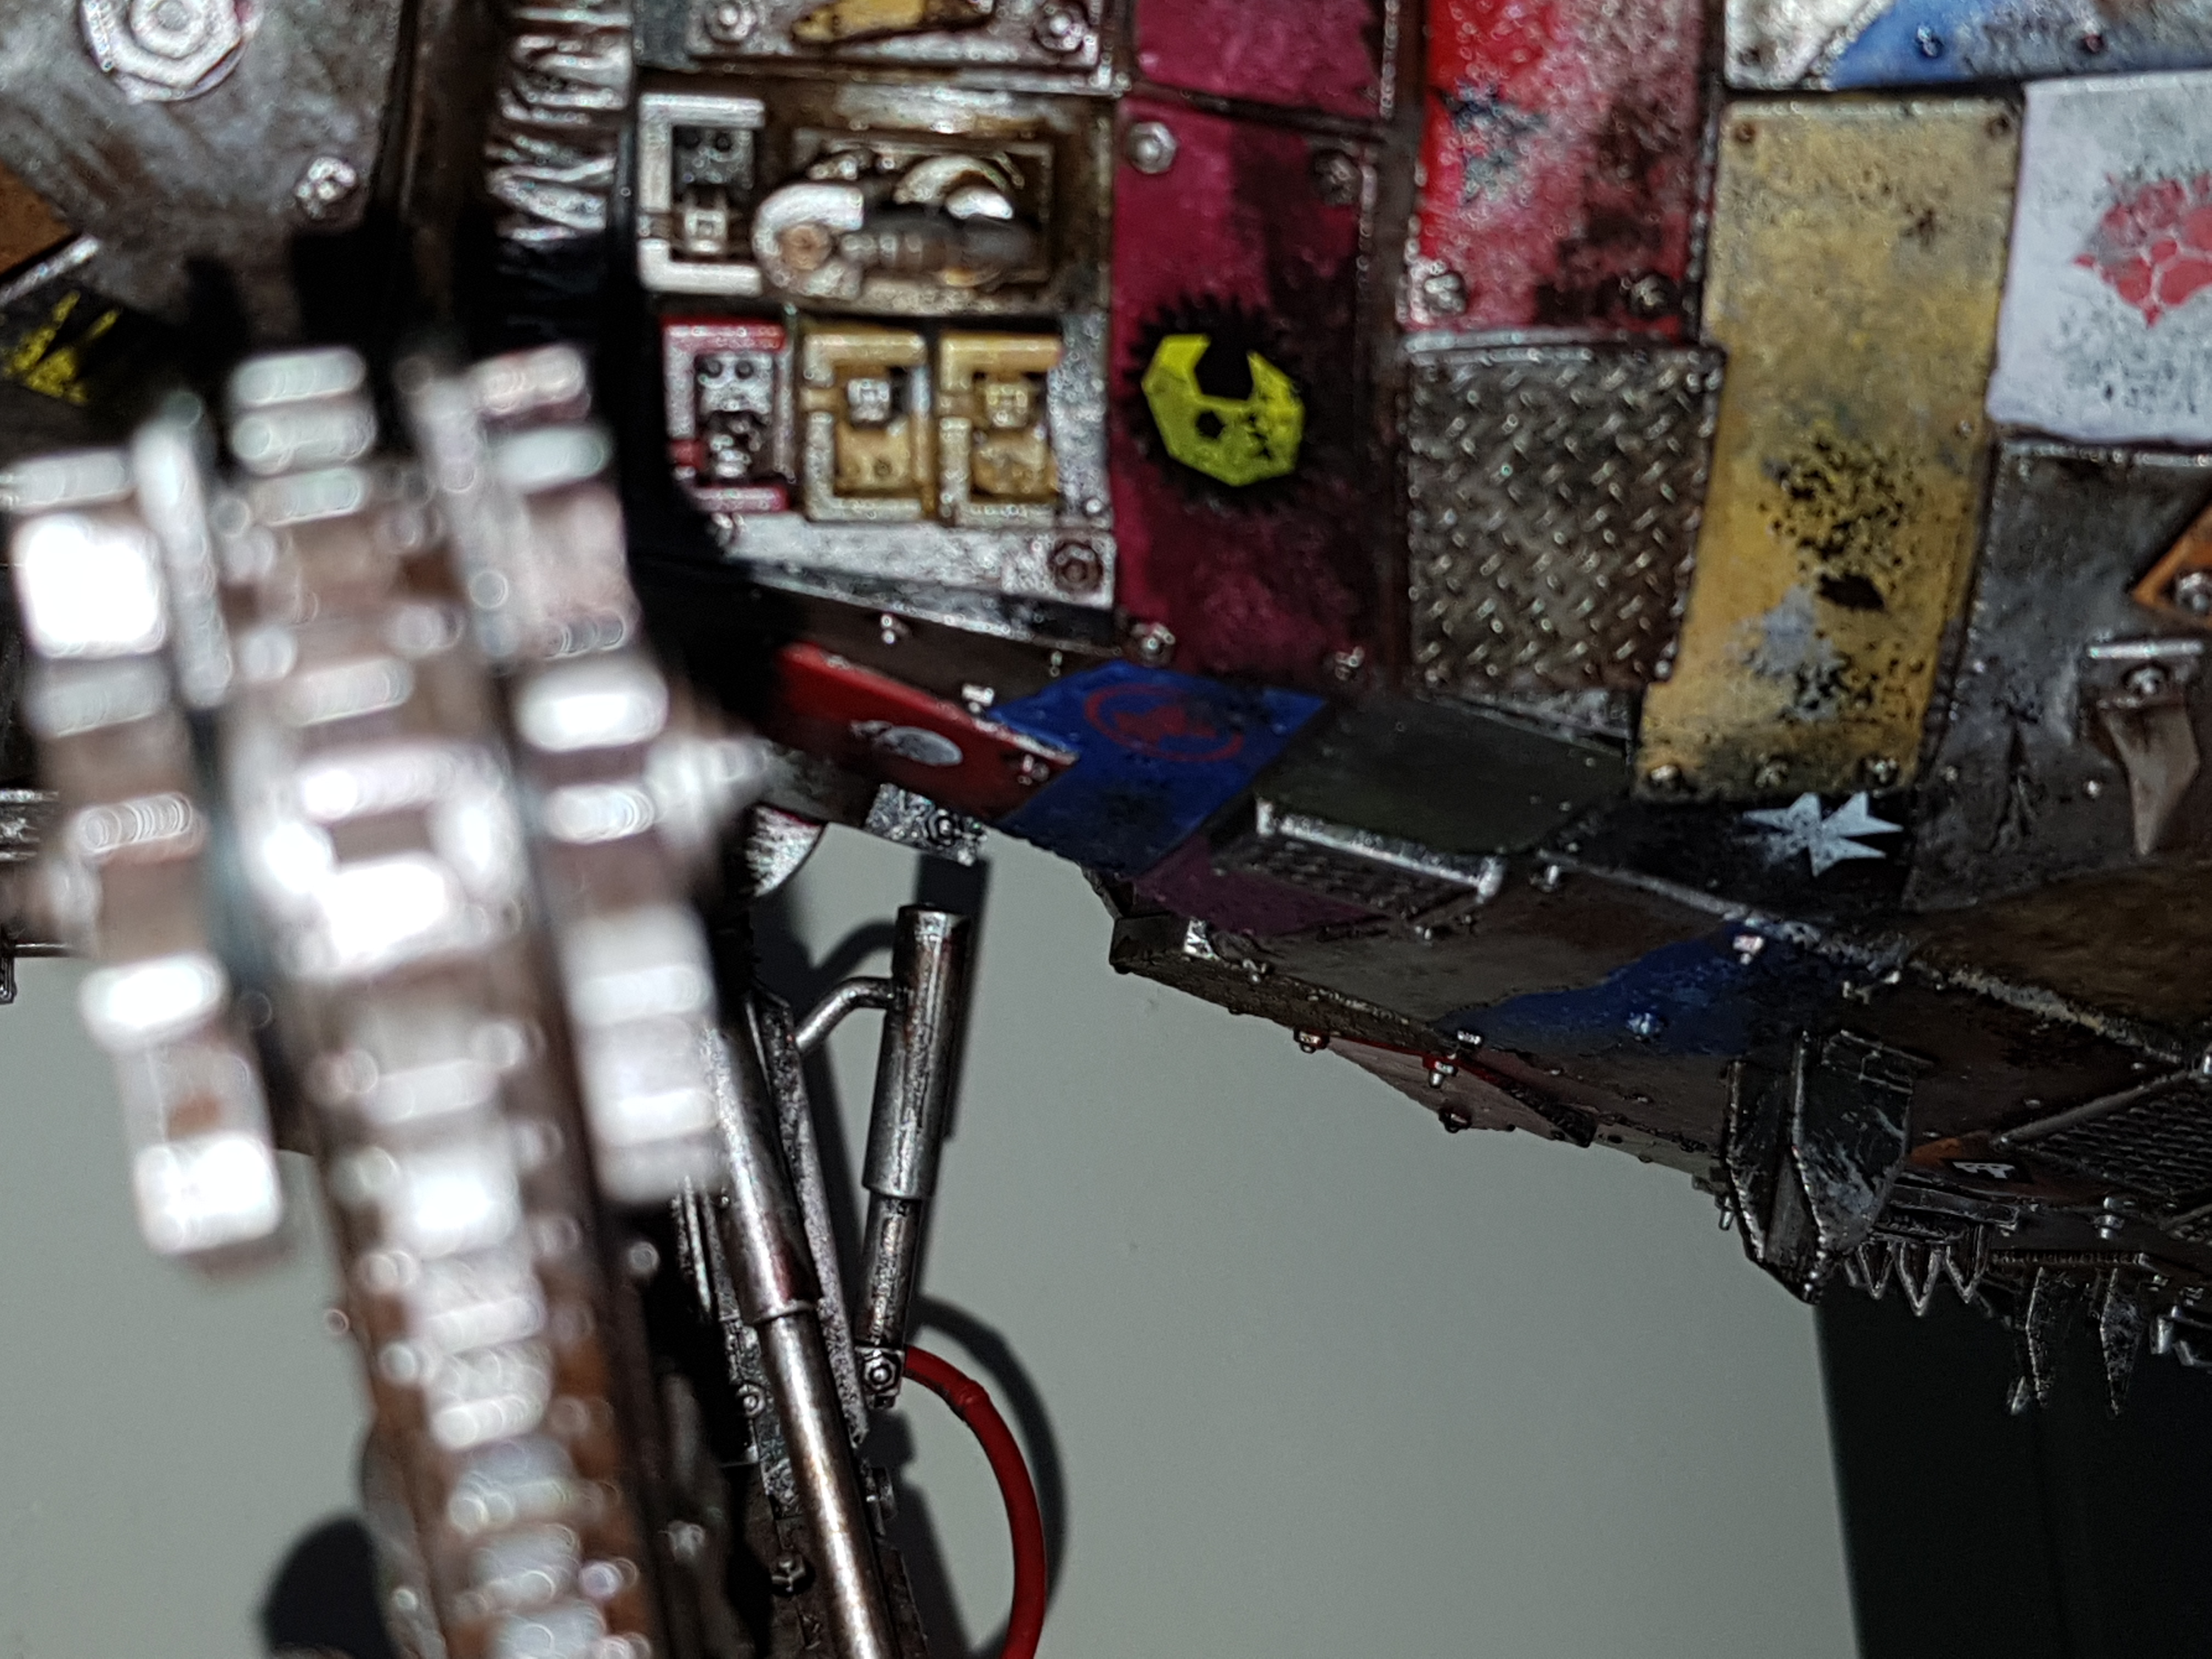
- Ork specific decals were added to various parts of the Stompa. I’ve been quite sparing with these, there are a few largish ones but the majority are smaller ones; I like to think of them as graffiti and notes that the Grots have added, hence they tend to be near entrances, walkways and the Grot hatches as well as kill tallies on the large guns;
- The horns on the head were painted. This was with various shades of brown with the lightest at the tip;
- Black was added to the tops of the chimney stacks. This was solid colour at the top and stippled further down;
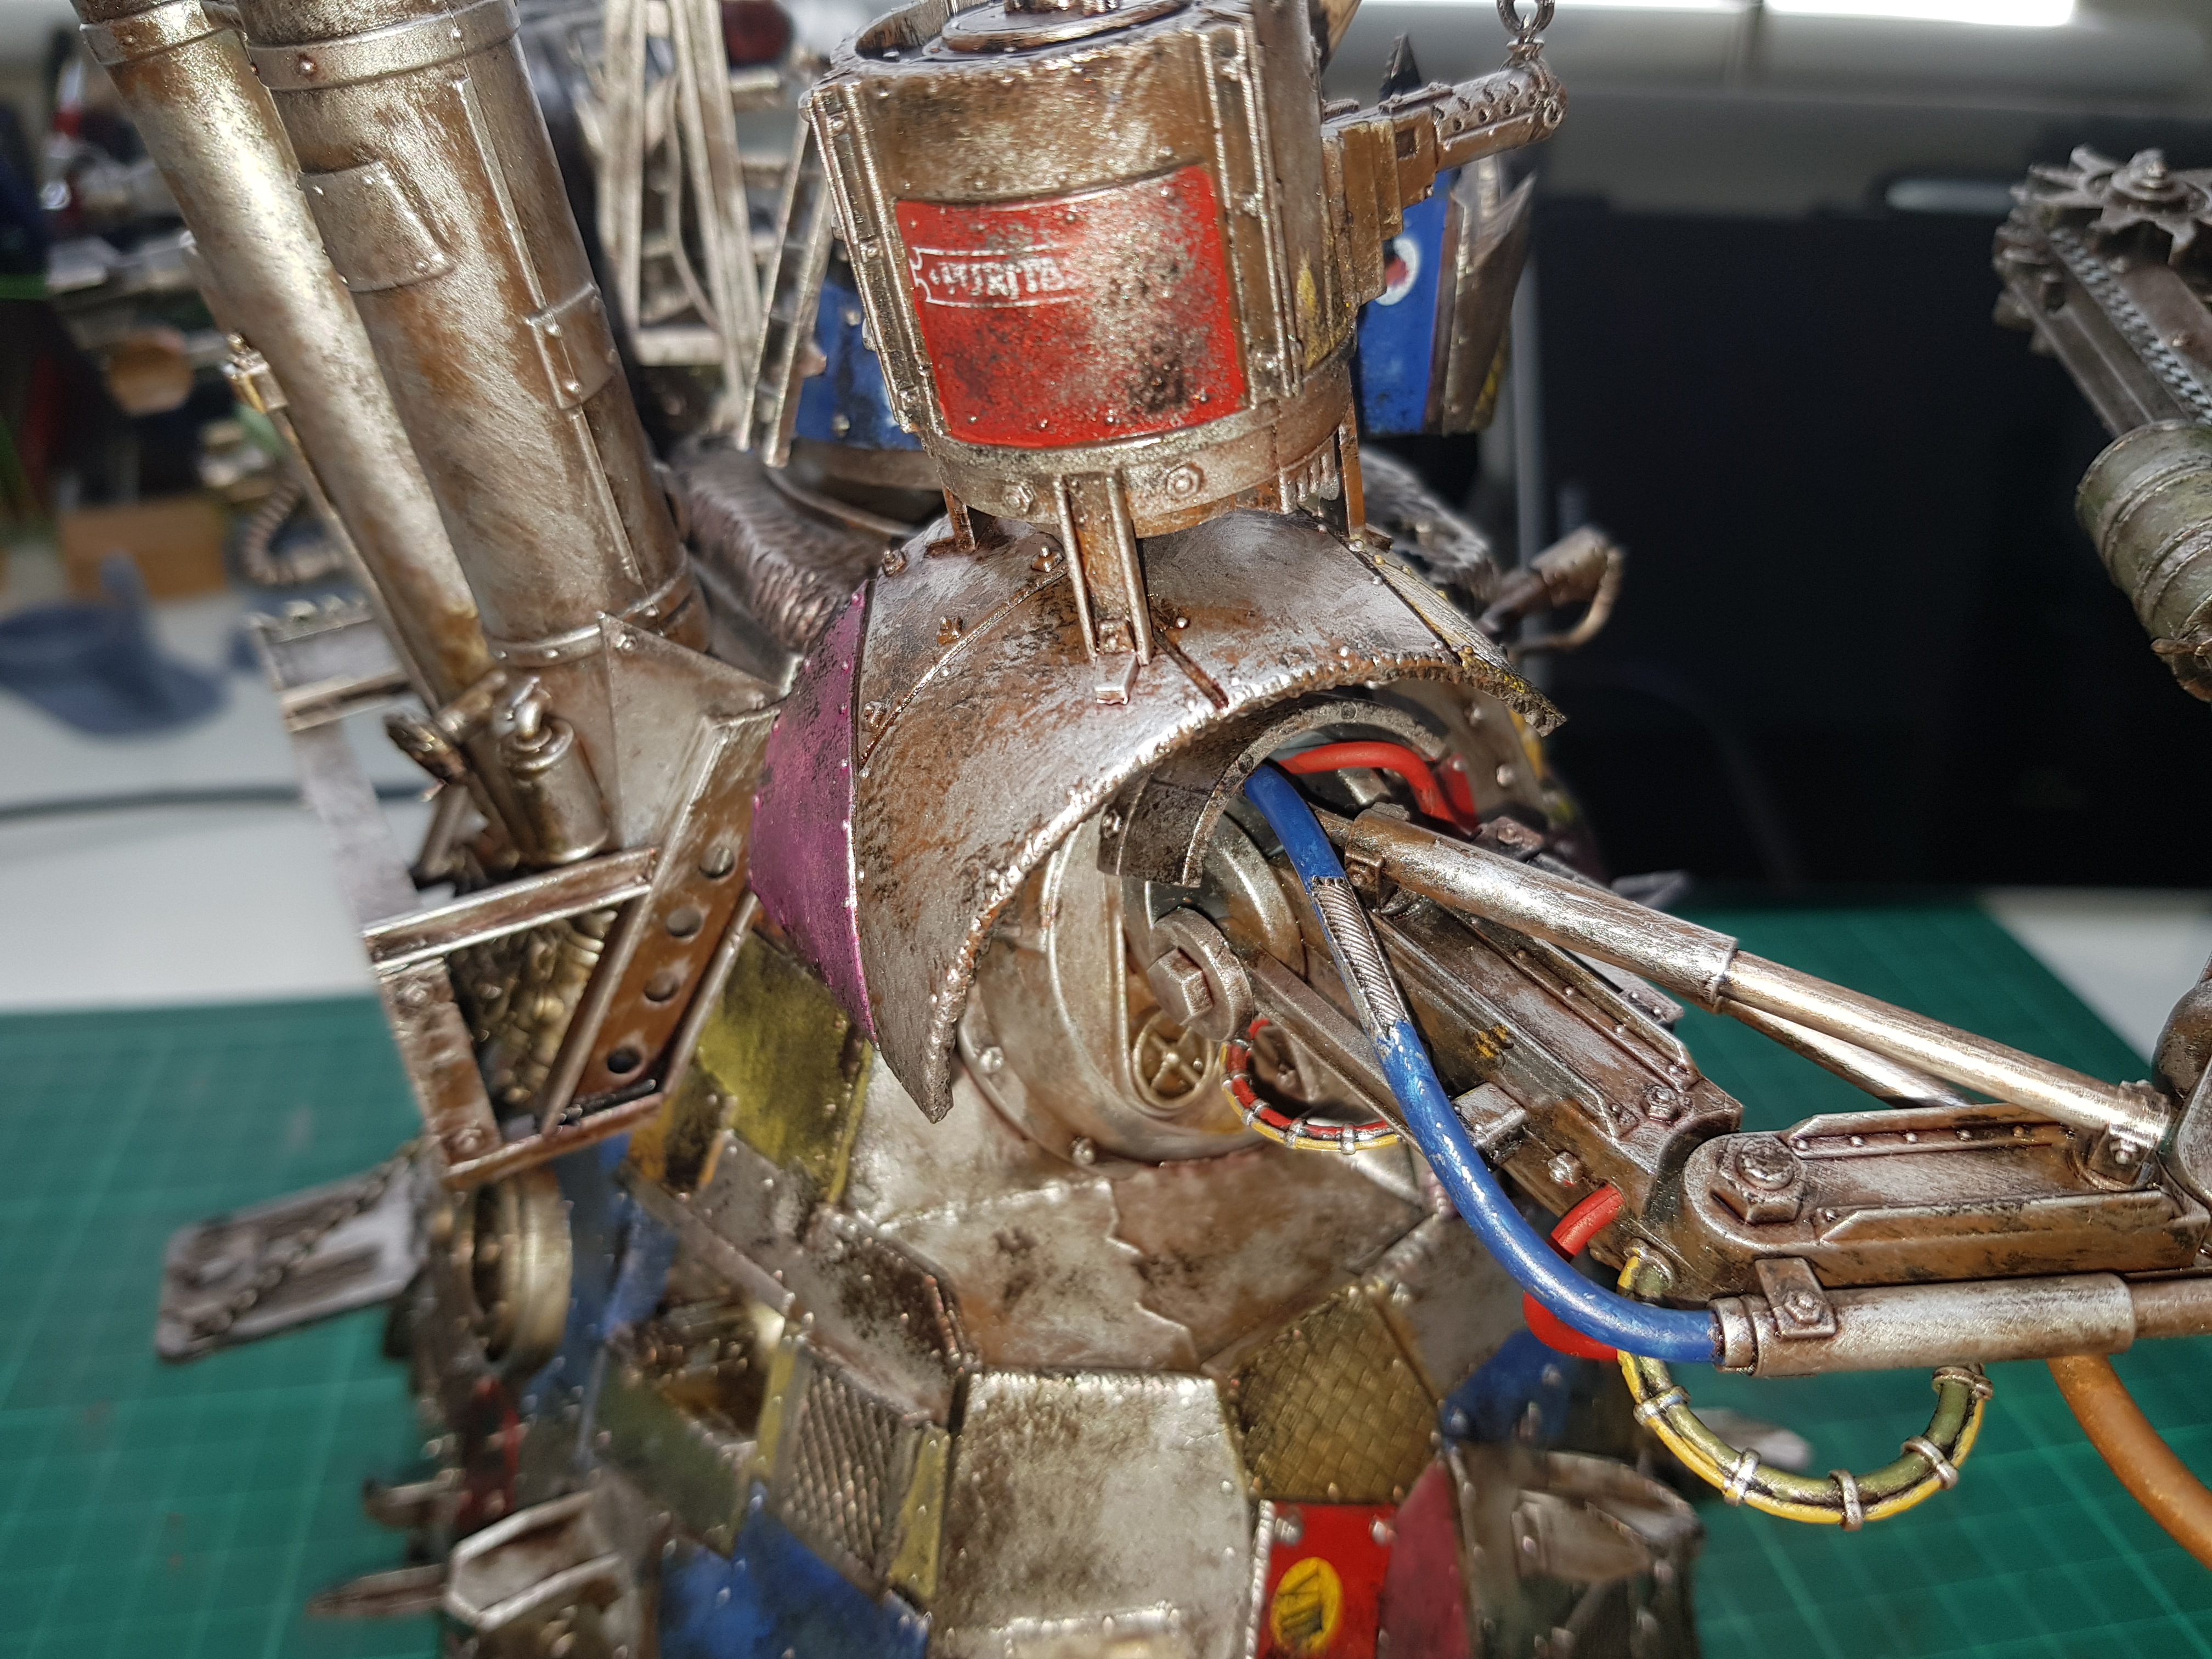
- Heat damage was added to the tip of the main gun. This was done with blue, purple and sepia washes. This was a very quick job to give a bit of an effect/interest but isn’t particularly bright; and
- The majority of the pieces were assembled. The main pieces to be left off were the feet (to assist with work still to be done), the rear ladder (as this cannot be attached without the feet) and the Grots (as they’re still to be finished). When assembling I found that there are a number of bits that I’d intended to use which cannot fit. These will come in handy for future projects. As I said in one of my earliest posts, I’d heard that some of the parts can be a pain to stick together. With this in mind, when attaching some of the larger parts I used both plastic and superglue to get a good bond. This worked really well. Despite dry fitting the arms a couple of times, I somehow managed to attached the choppa arm in an unintended position. This isn’t too problematic other than the way the arm had been assembled meant that one of the piston type parts was too short. This likely wouldn’t have been noticeable but in the position the arm is in it’s really obvious. I solved this using the really technical solution of cutting the bottom off a suitable diameter paintbrush, painting it and inserting it into the gap. The before and after can be seen in two of the pictures below. There’s still a slight gap but this will be rectified later.
In terms of the Grots:-
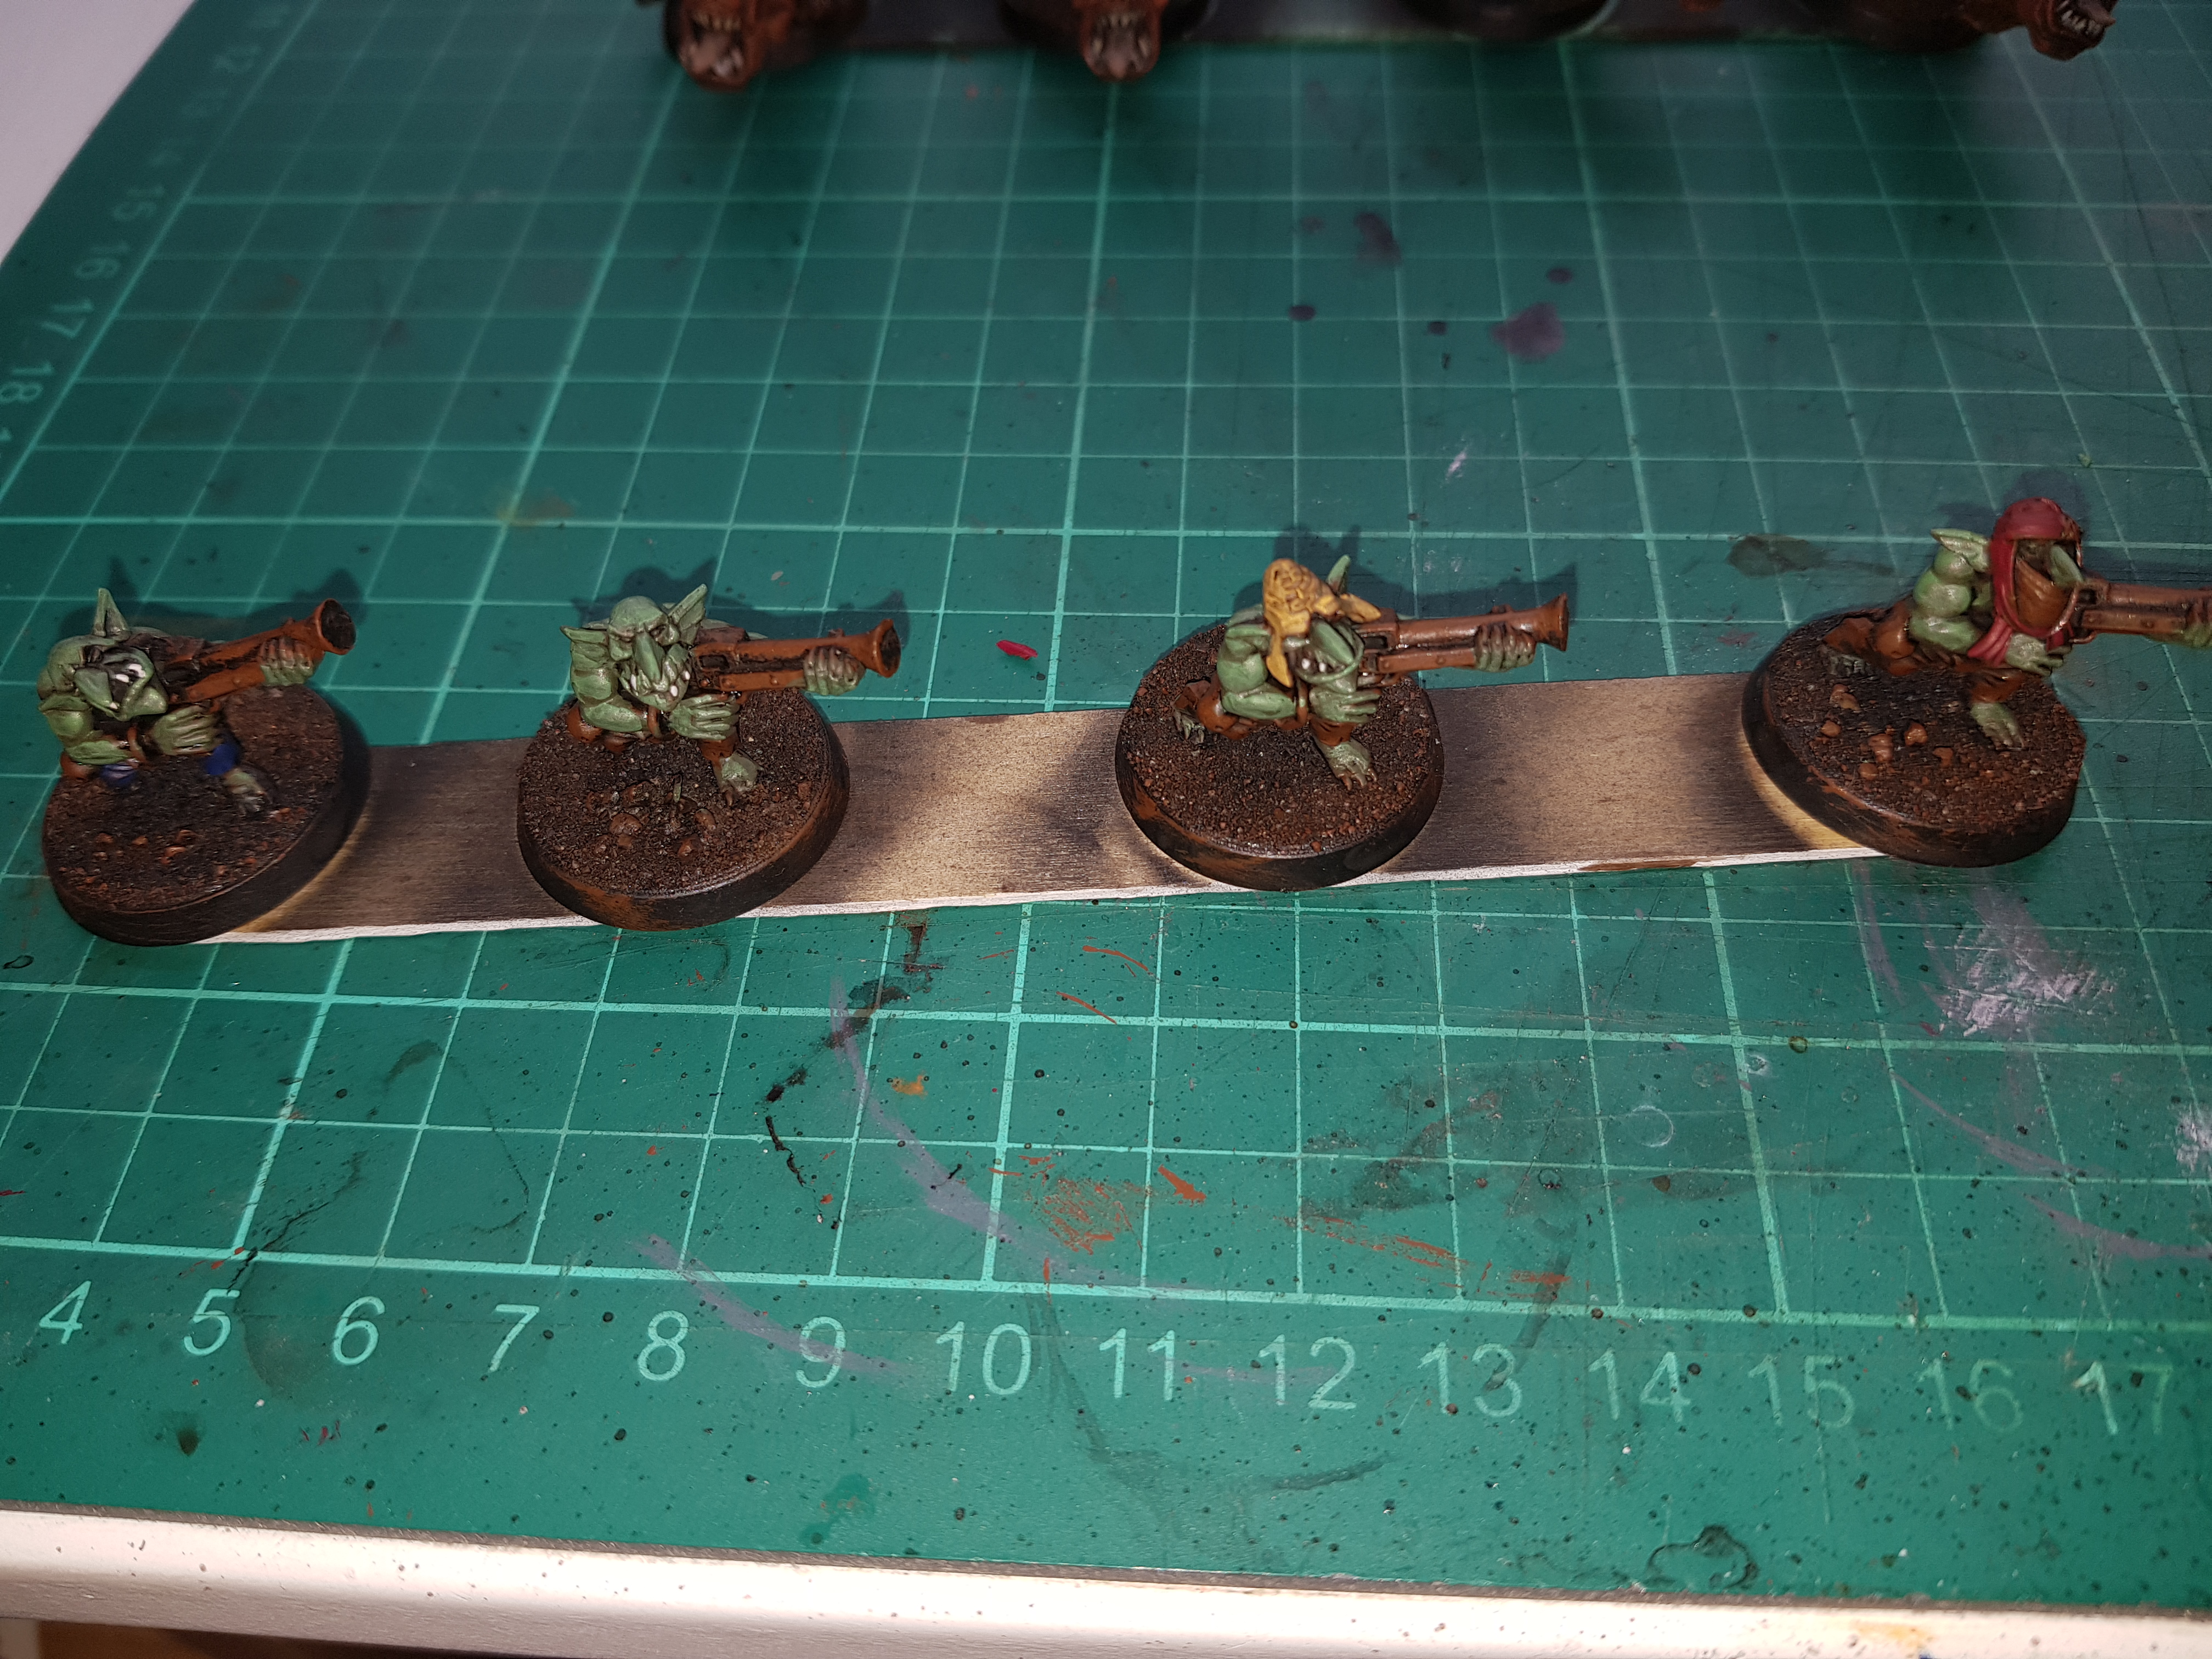
- The teeth and a few other areas were picked out in an off white;
- In order to differentiate between the squads, colours were added to various minis. Each of the sticks that the Grots are stuck to contain four minis of the same pose. On each stick one mini had a detail painted red, one blue and one yellow with one remaining predominantly brown. The same was also done with the Runtherds;
- The additional details on the Runtherds were also picked out in suitable colours; and
- The crew for the Stompa were painted to this stage using exactly the same steps.
Once this was done, all of the areas of the Grots now had at least a basecoat in place.
 Annoying gap clearly visable.
 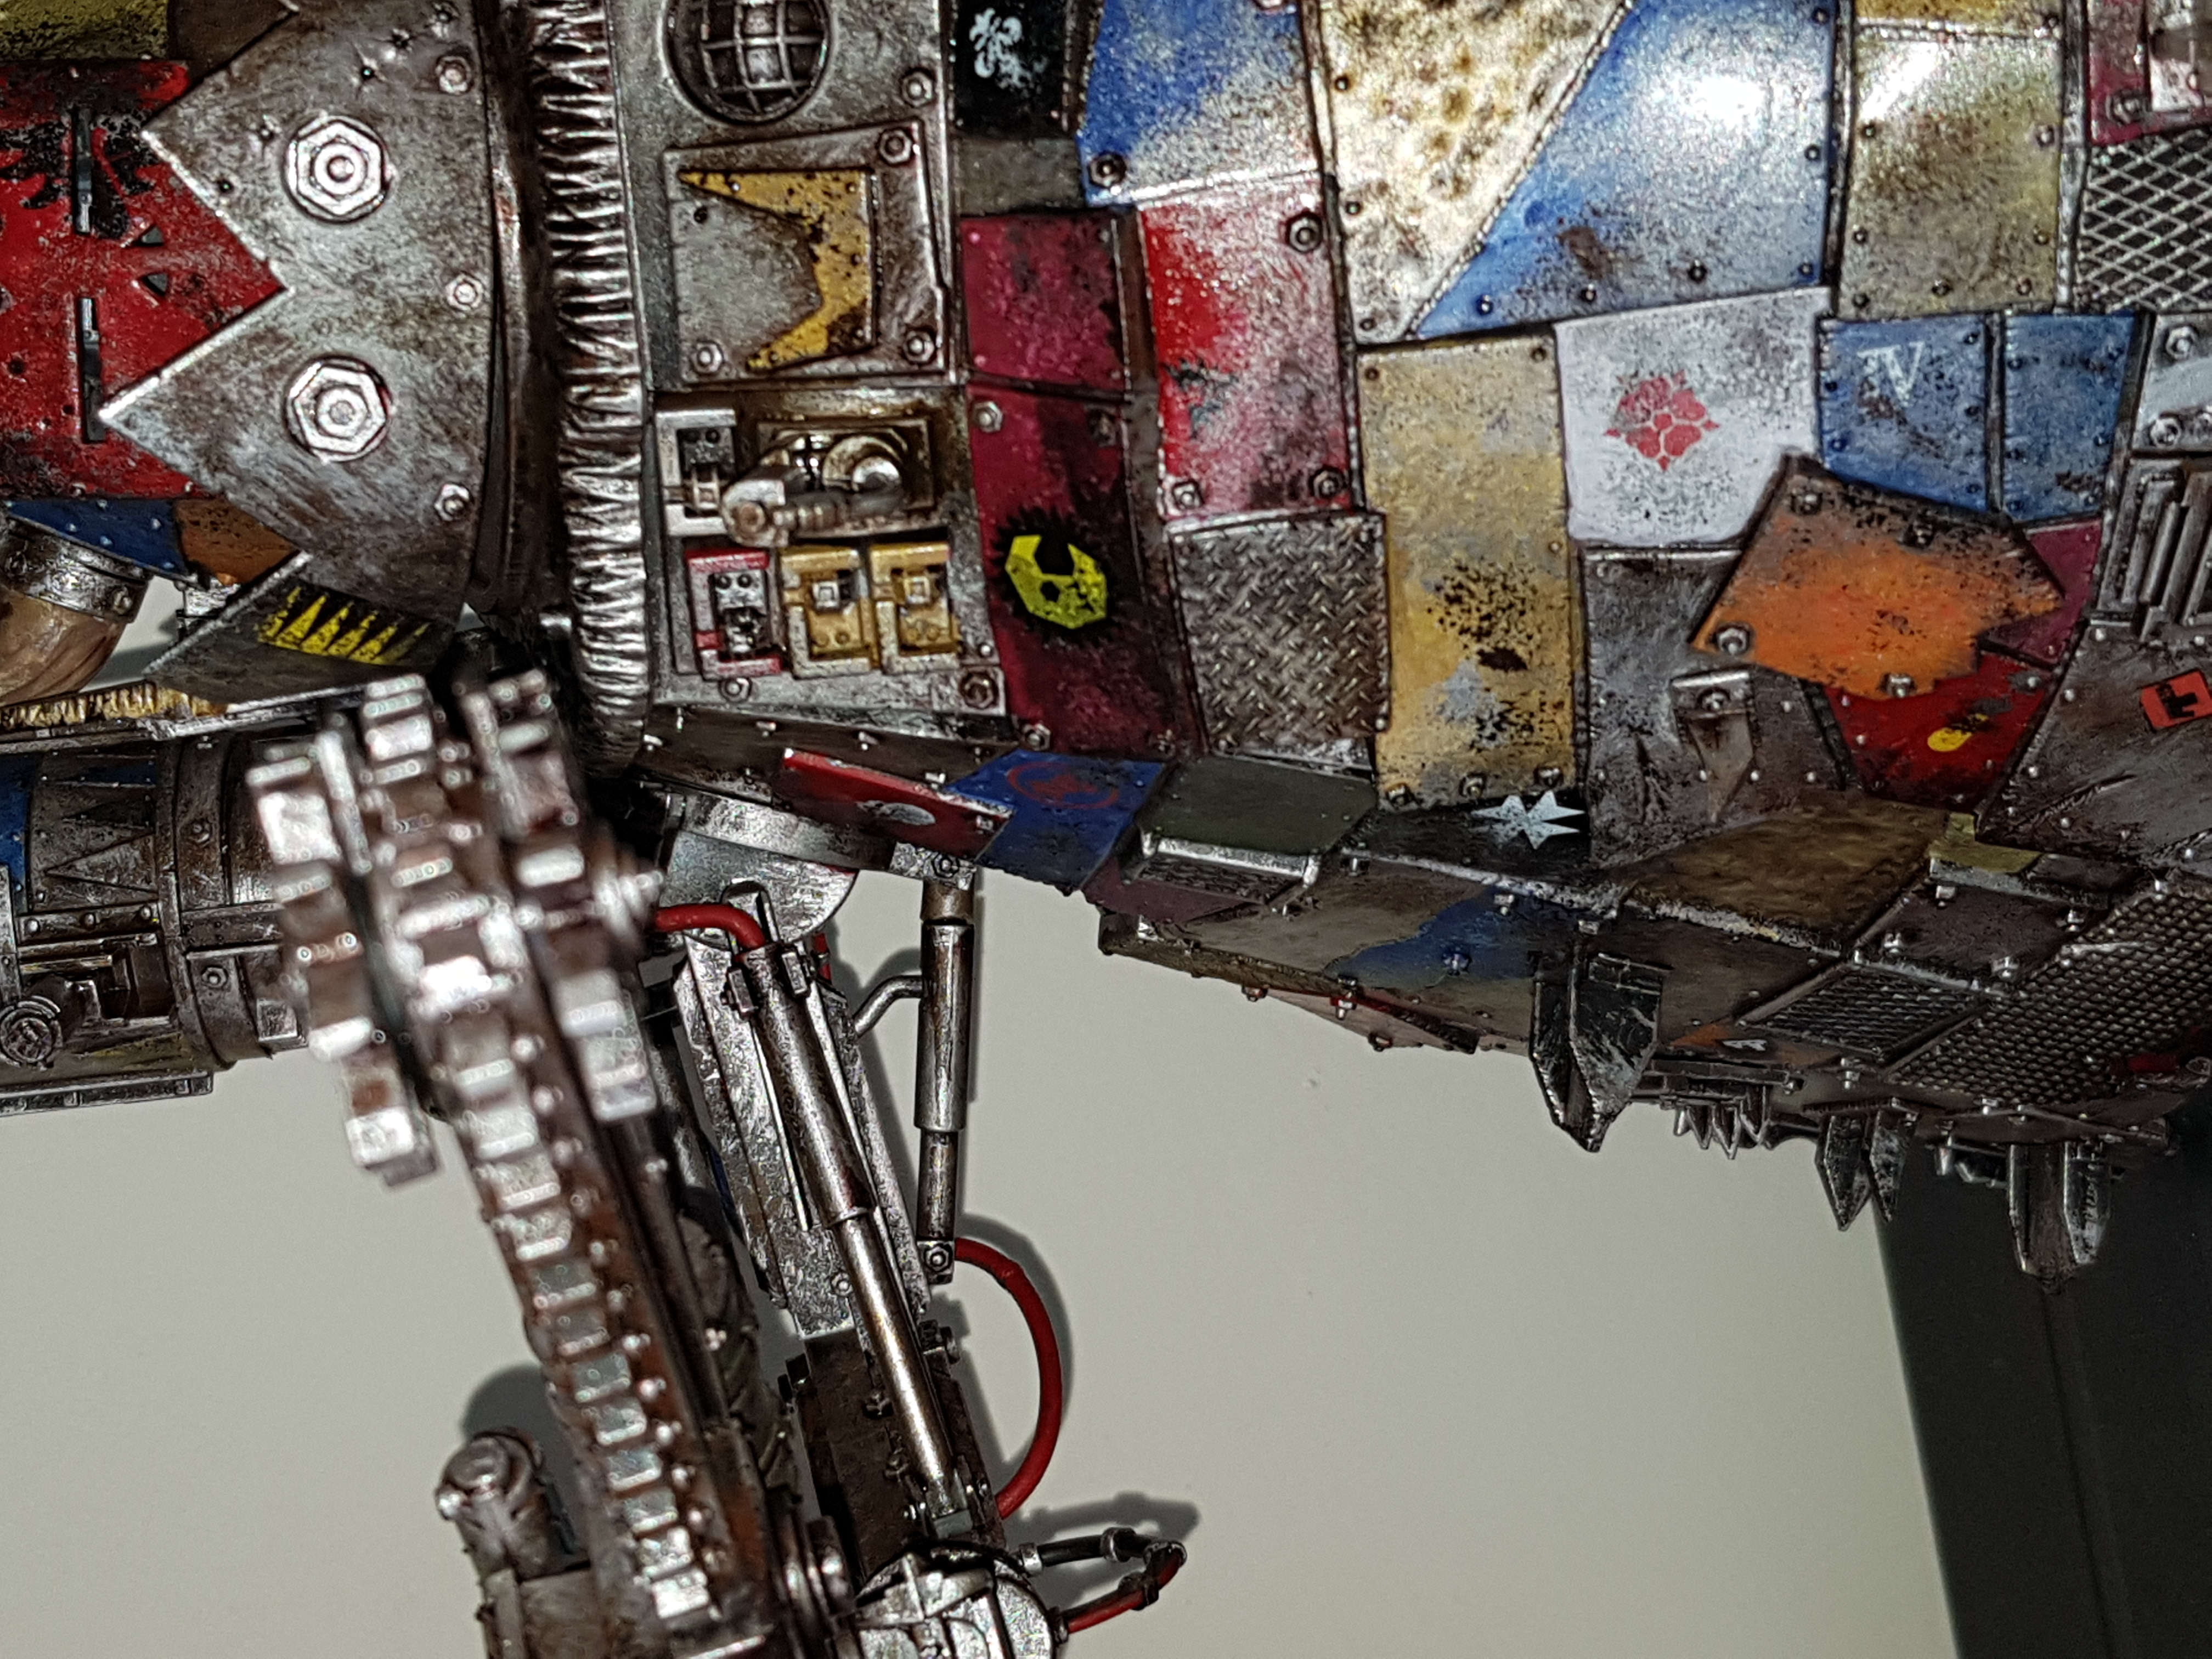 Annoying gap somewhat sorted.
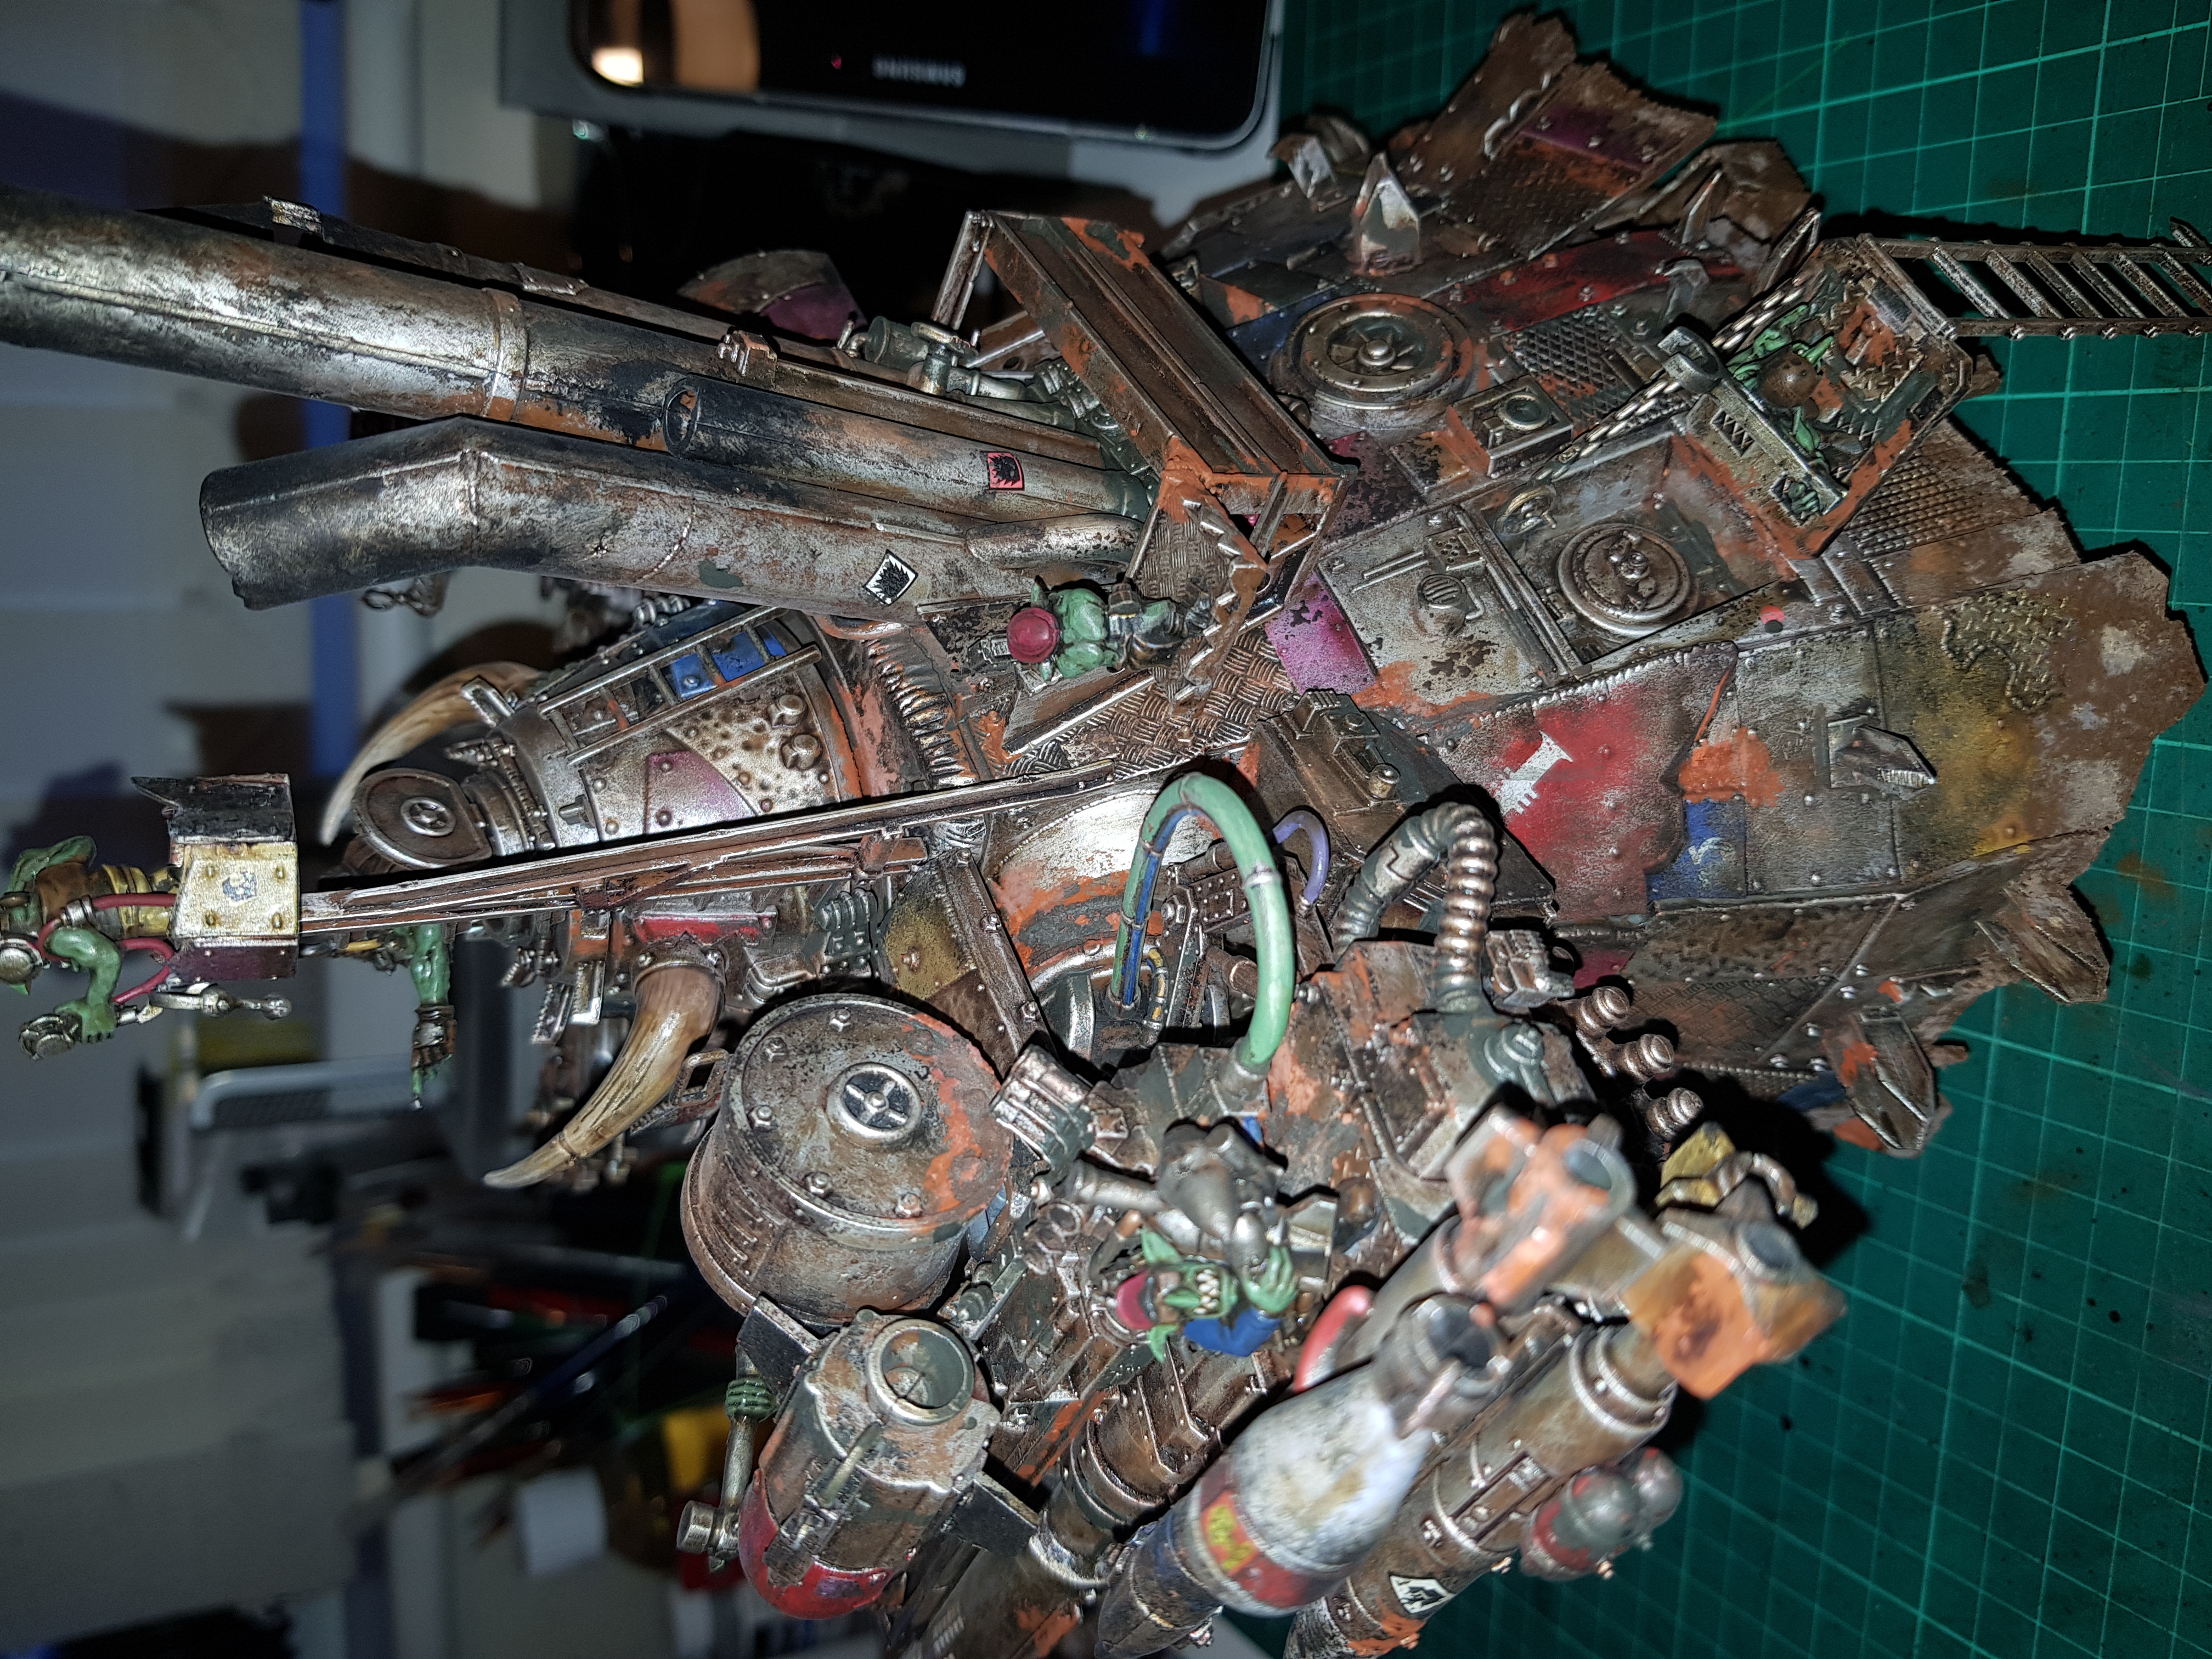
Once all of the above had been completed it meant that both the Stompa and the Grots were now ready for the same next stage.
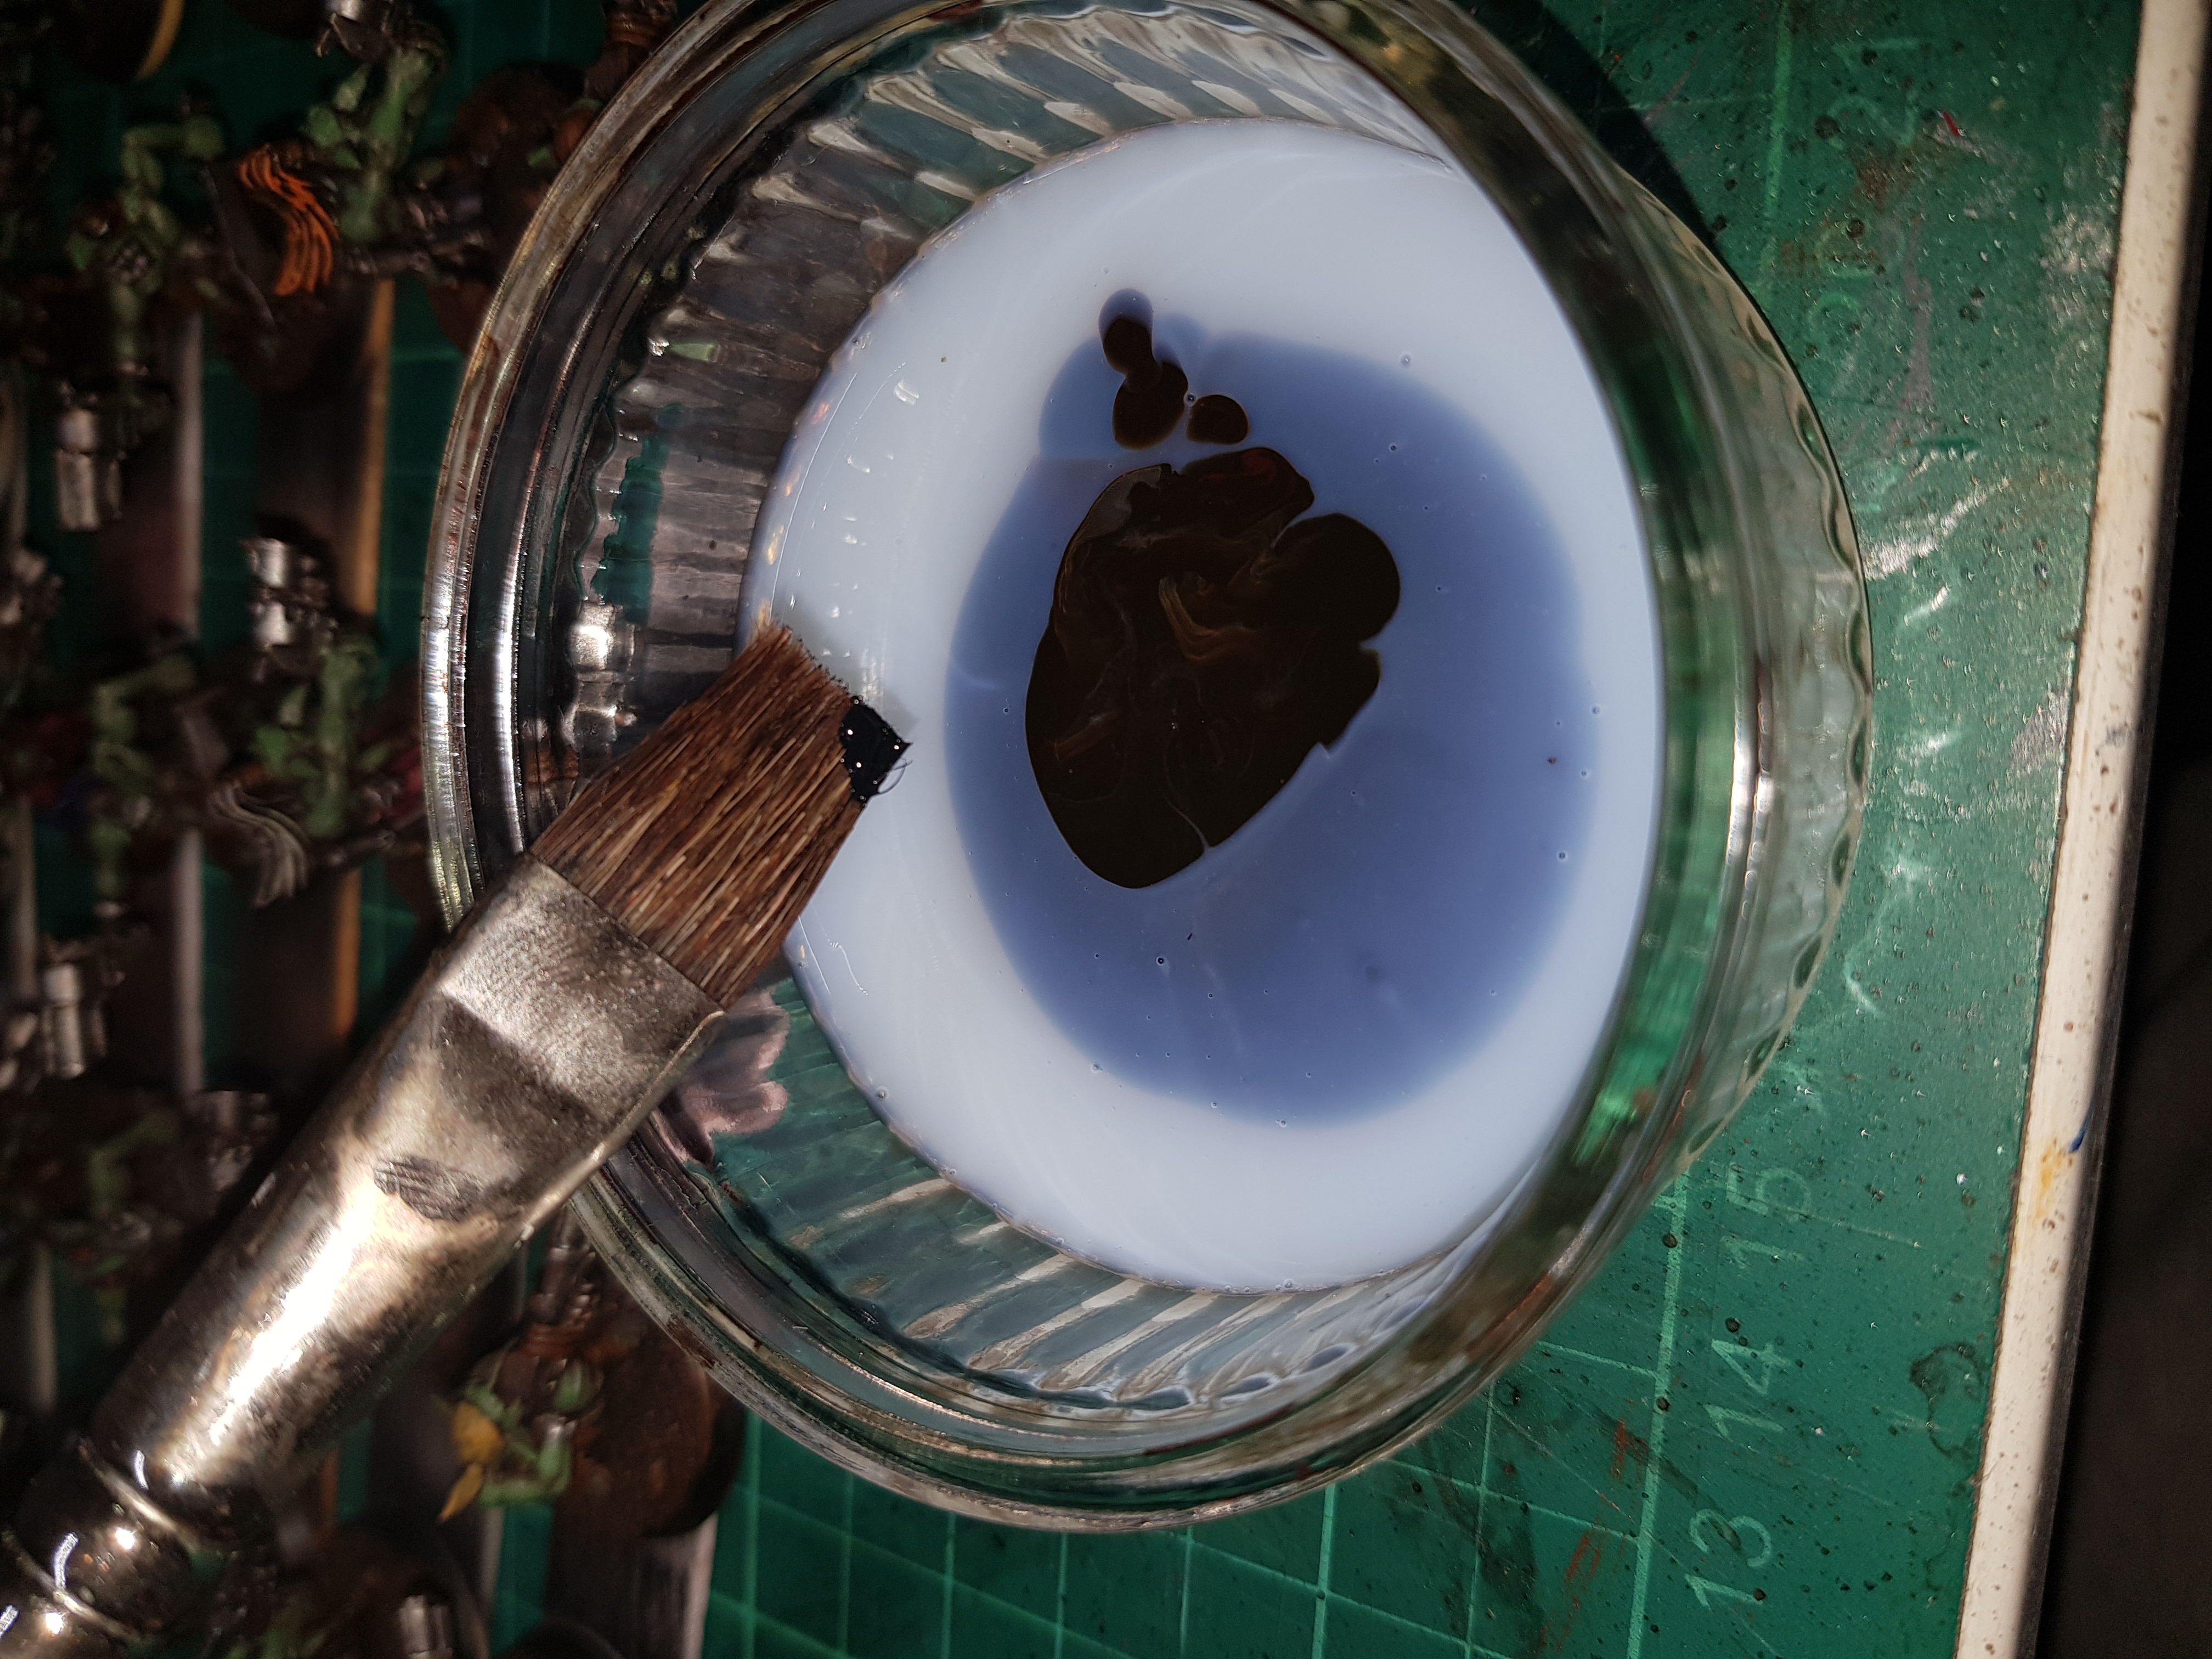
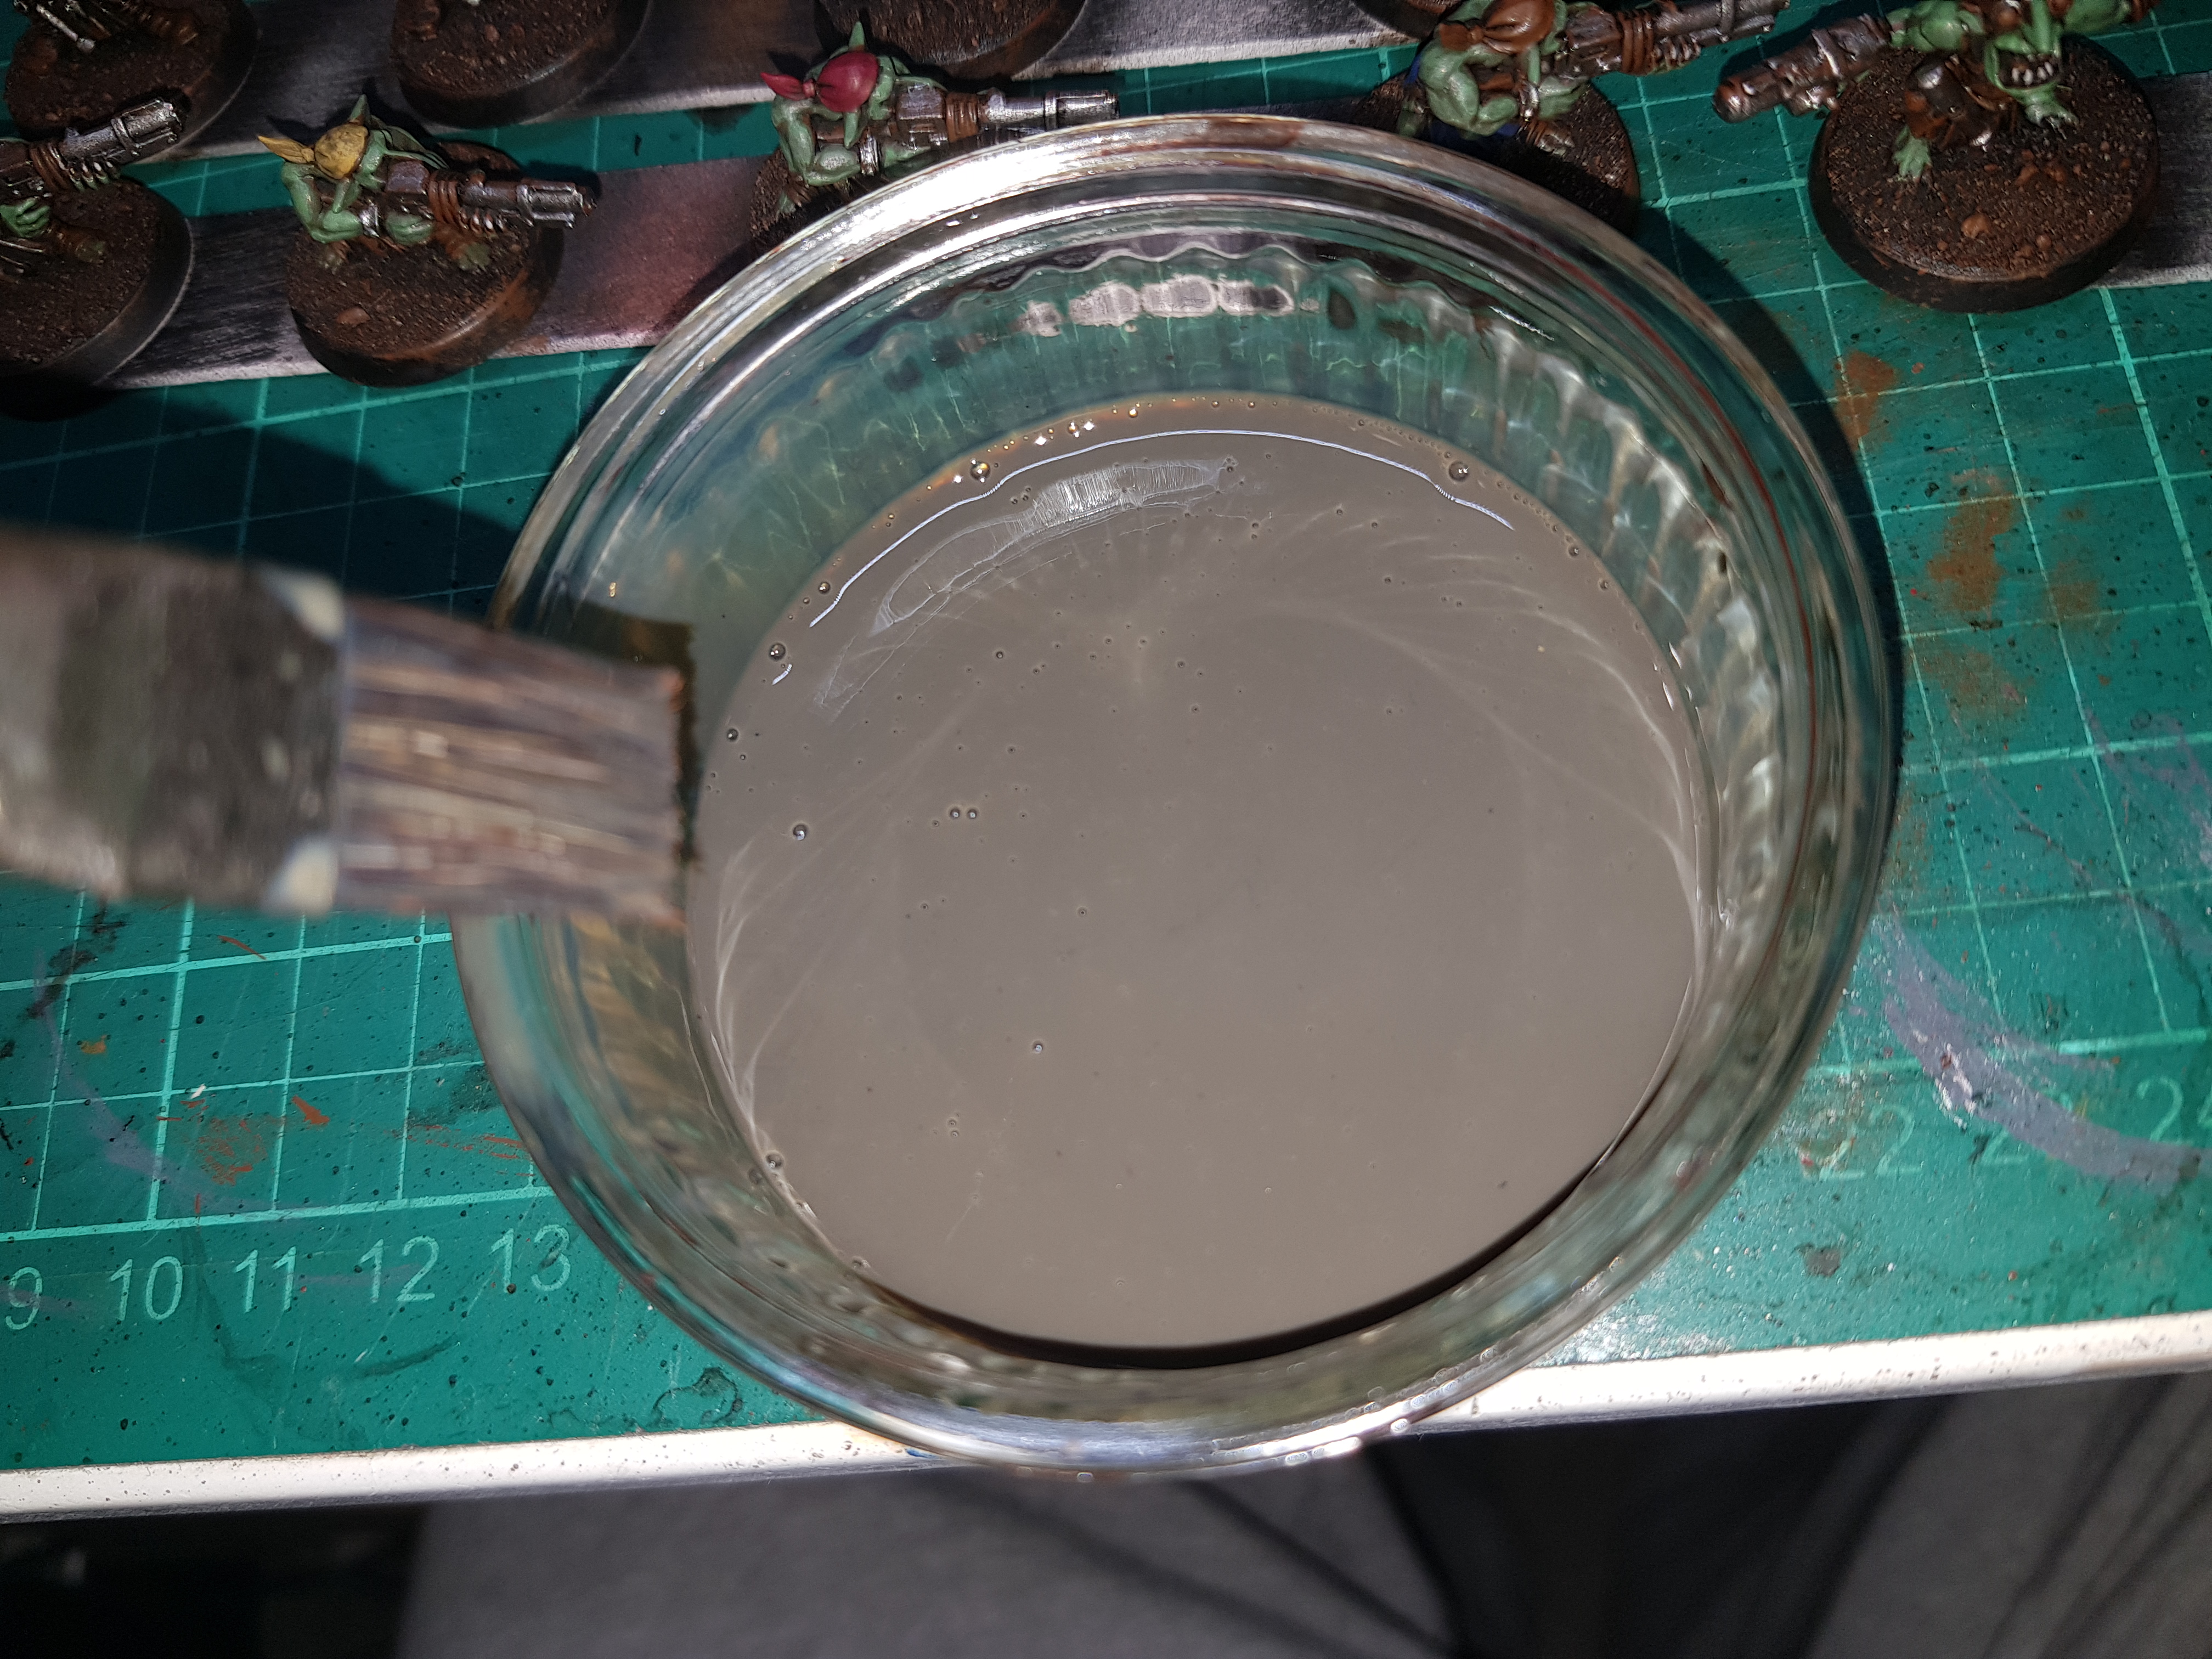
This is a method that I have used on all of my Orks which is relatively quick, provides some overall shading and also dirties everything down. This is a wash made up of three products, ‘Ardcoat, Seraphim Sepia and Chaos Black, as a rough guesstimate, this is five parts ‘Ardcoat, one part Seraphim Sepia and a tiny spot of black. In the pictures below you can see the amount initially added but I added another spot before mixing this together. In hindsight, I could have added even more black for a darker effect. This was applied over all of the Grots and the Stompa. As with any wash you need to be careful to avoid pooling but on the Stompa itself this is less of an issue as any pooling and dripping add to the grimy effect.
With that done I’m getting closer to the final few touches before this can be called complete.

 The current state of the Stompa and a selection of the Grots.
Let's Get Dirty
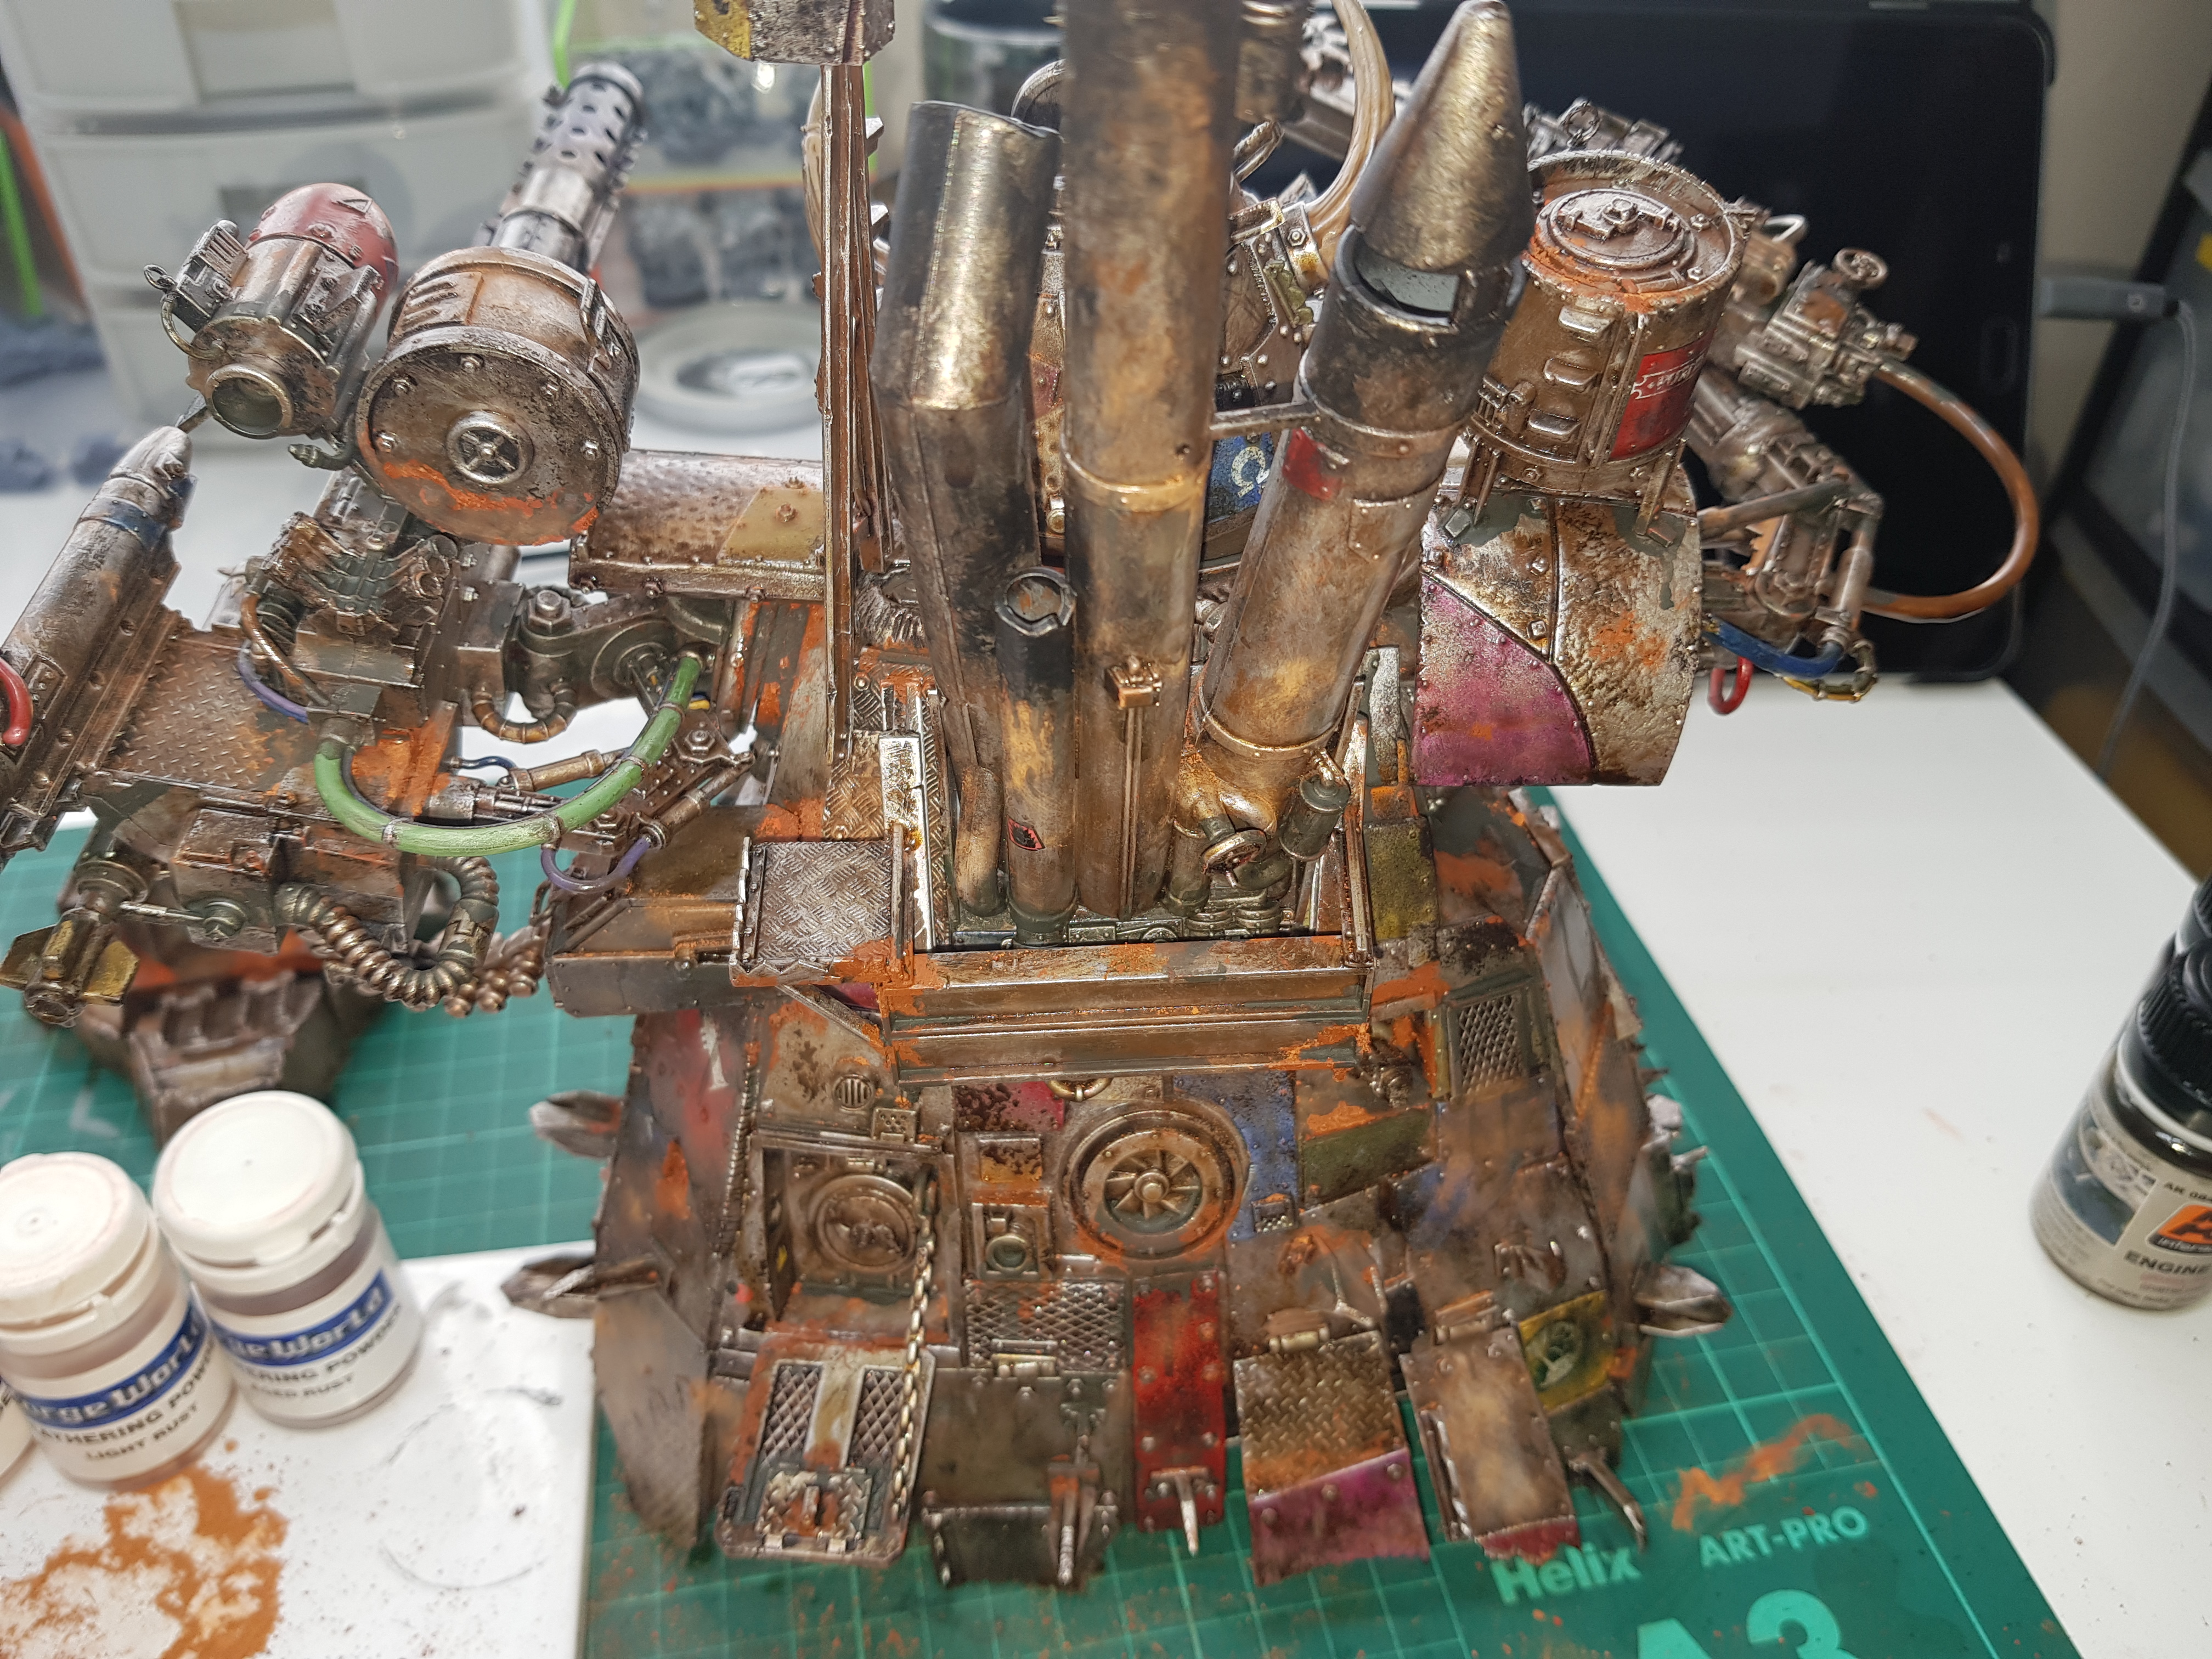
It’s weathering time. I’m hopeful that, as bad as the Stompa has looked so far, this is the start of the upward curve where things start to come together and get closer to the inteded finish.
This is another step that’s pretty simple in terms of execution, there’s very little skill involved, just spreading paint on with a sponge.
Before starting this, after adding the decals I hit a number of the bare metal panels with washes (Agrax Earthshade, Nuln Oil and Seraphim Sepia) to pick out some deatail/add depth.
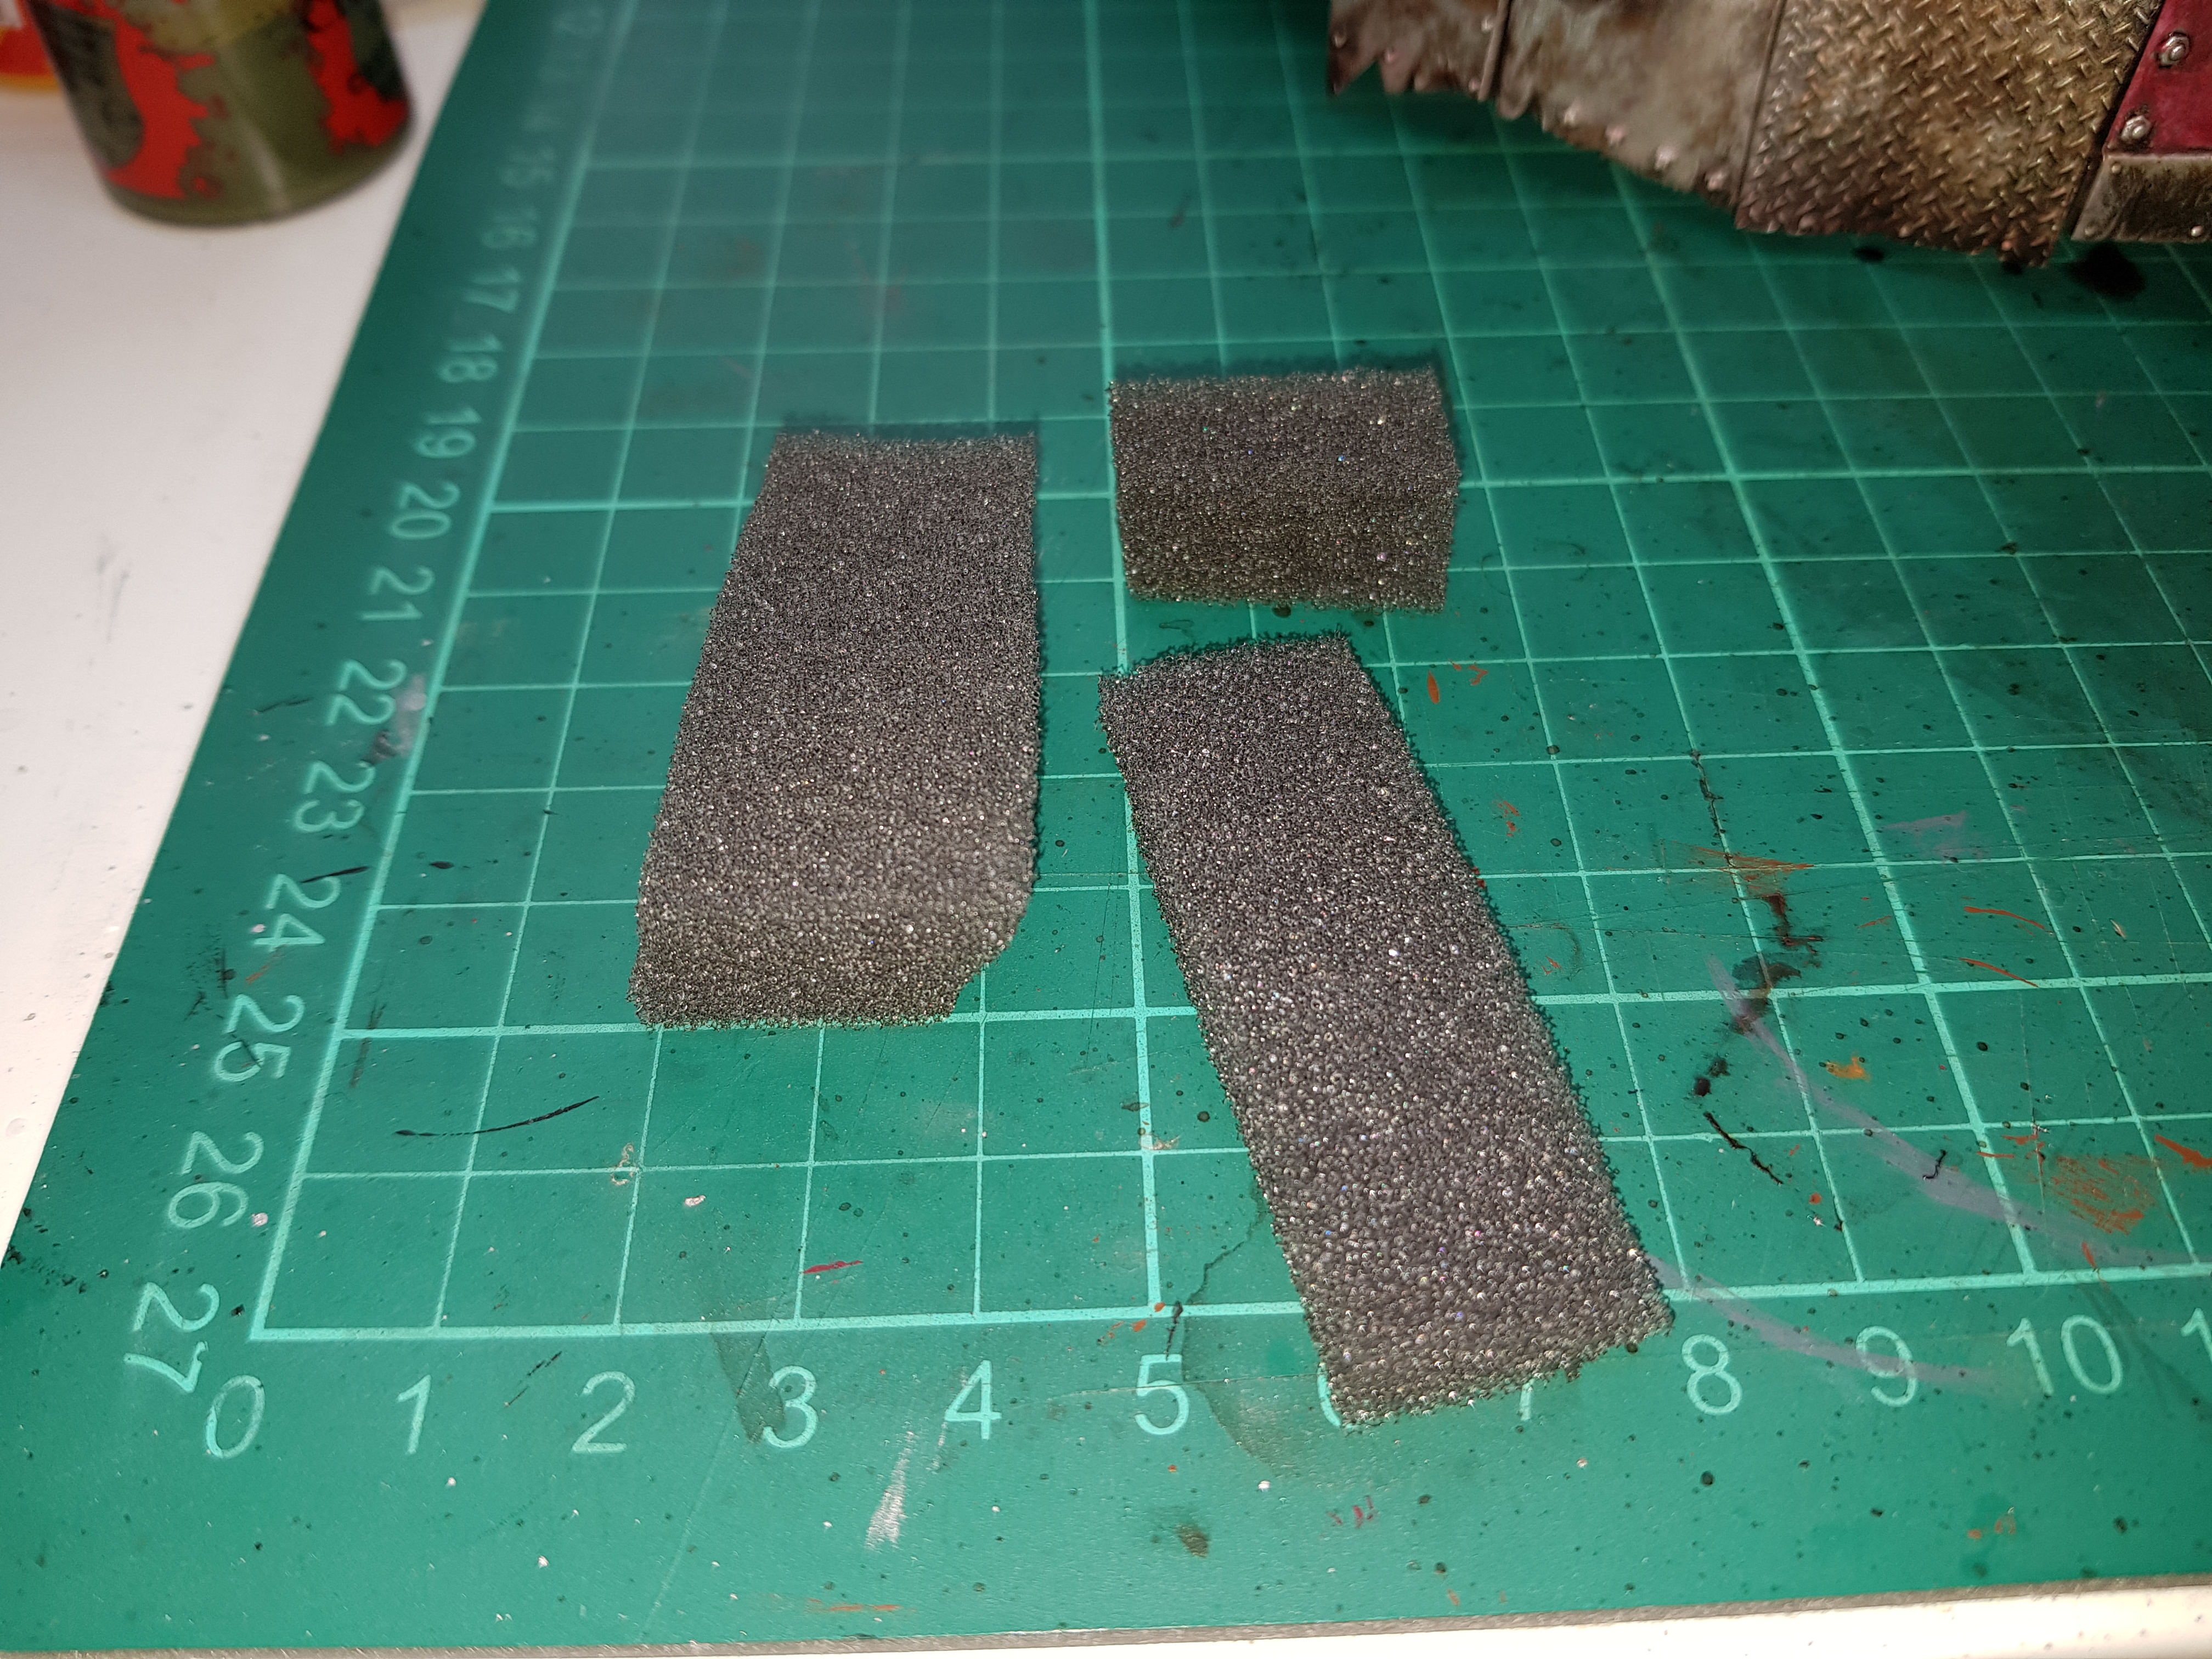 No idea where this came from, just some bog standard sponge that I tore into tiny chunks.
The first step was to dig out some paints that are slightly lighter than the various panels that I’d painted.
I dipped a tiny chunk of sponge into the paint, wiped the excess off in a similar way to preparing for drybrushing and then pressed this on to the relevant panel. Obviously the harder you press the more paint you get on the mini and you get a different effect as the paint runs out or dries on the sponge. I’ve tried to be as random as possible, the intention is to get a sense of scratching and wear on the panels. In addition to using lighter versions of each colour I also used some Administratum Grey which gave the impression of wear down to the primer layer of the vehicles the panels were salvaged from.
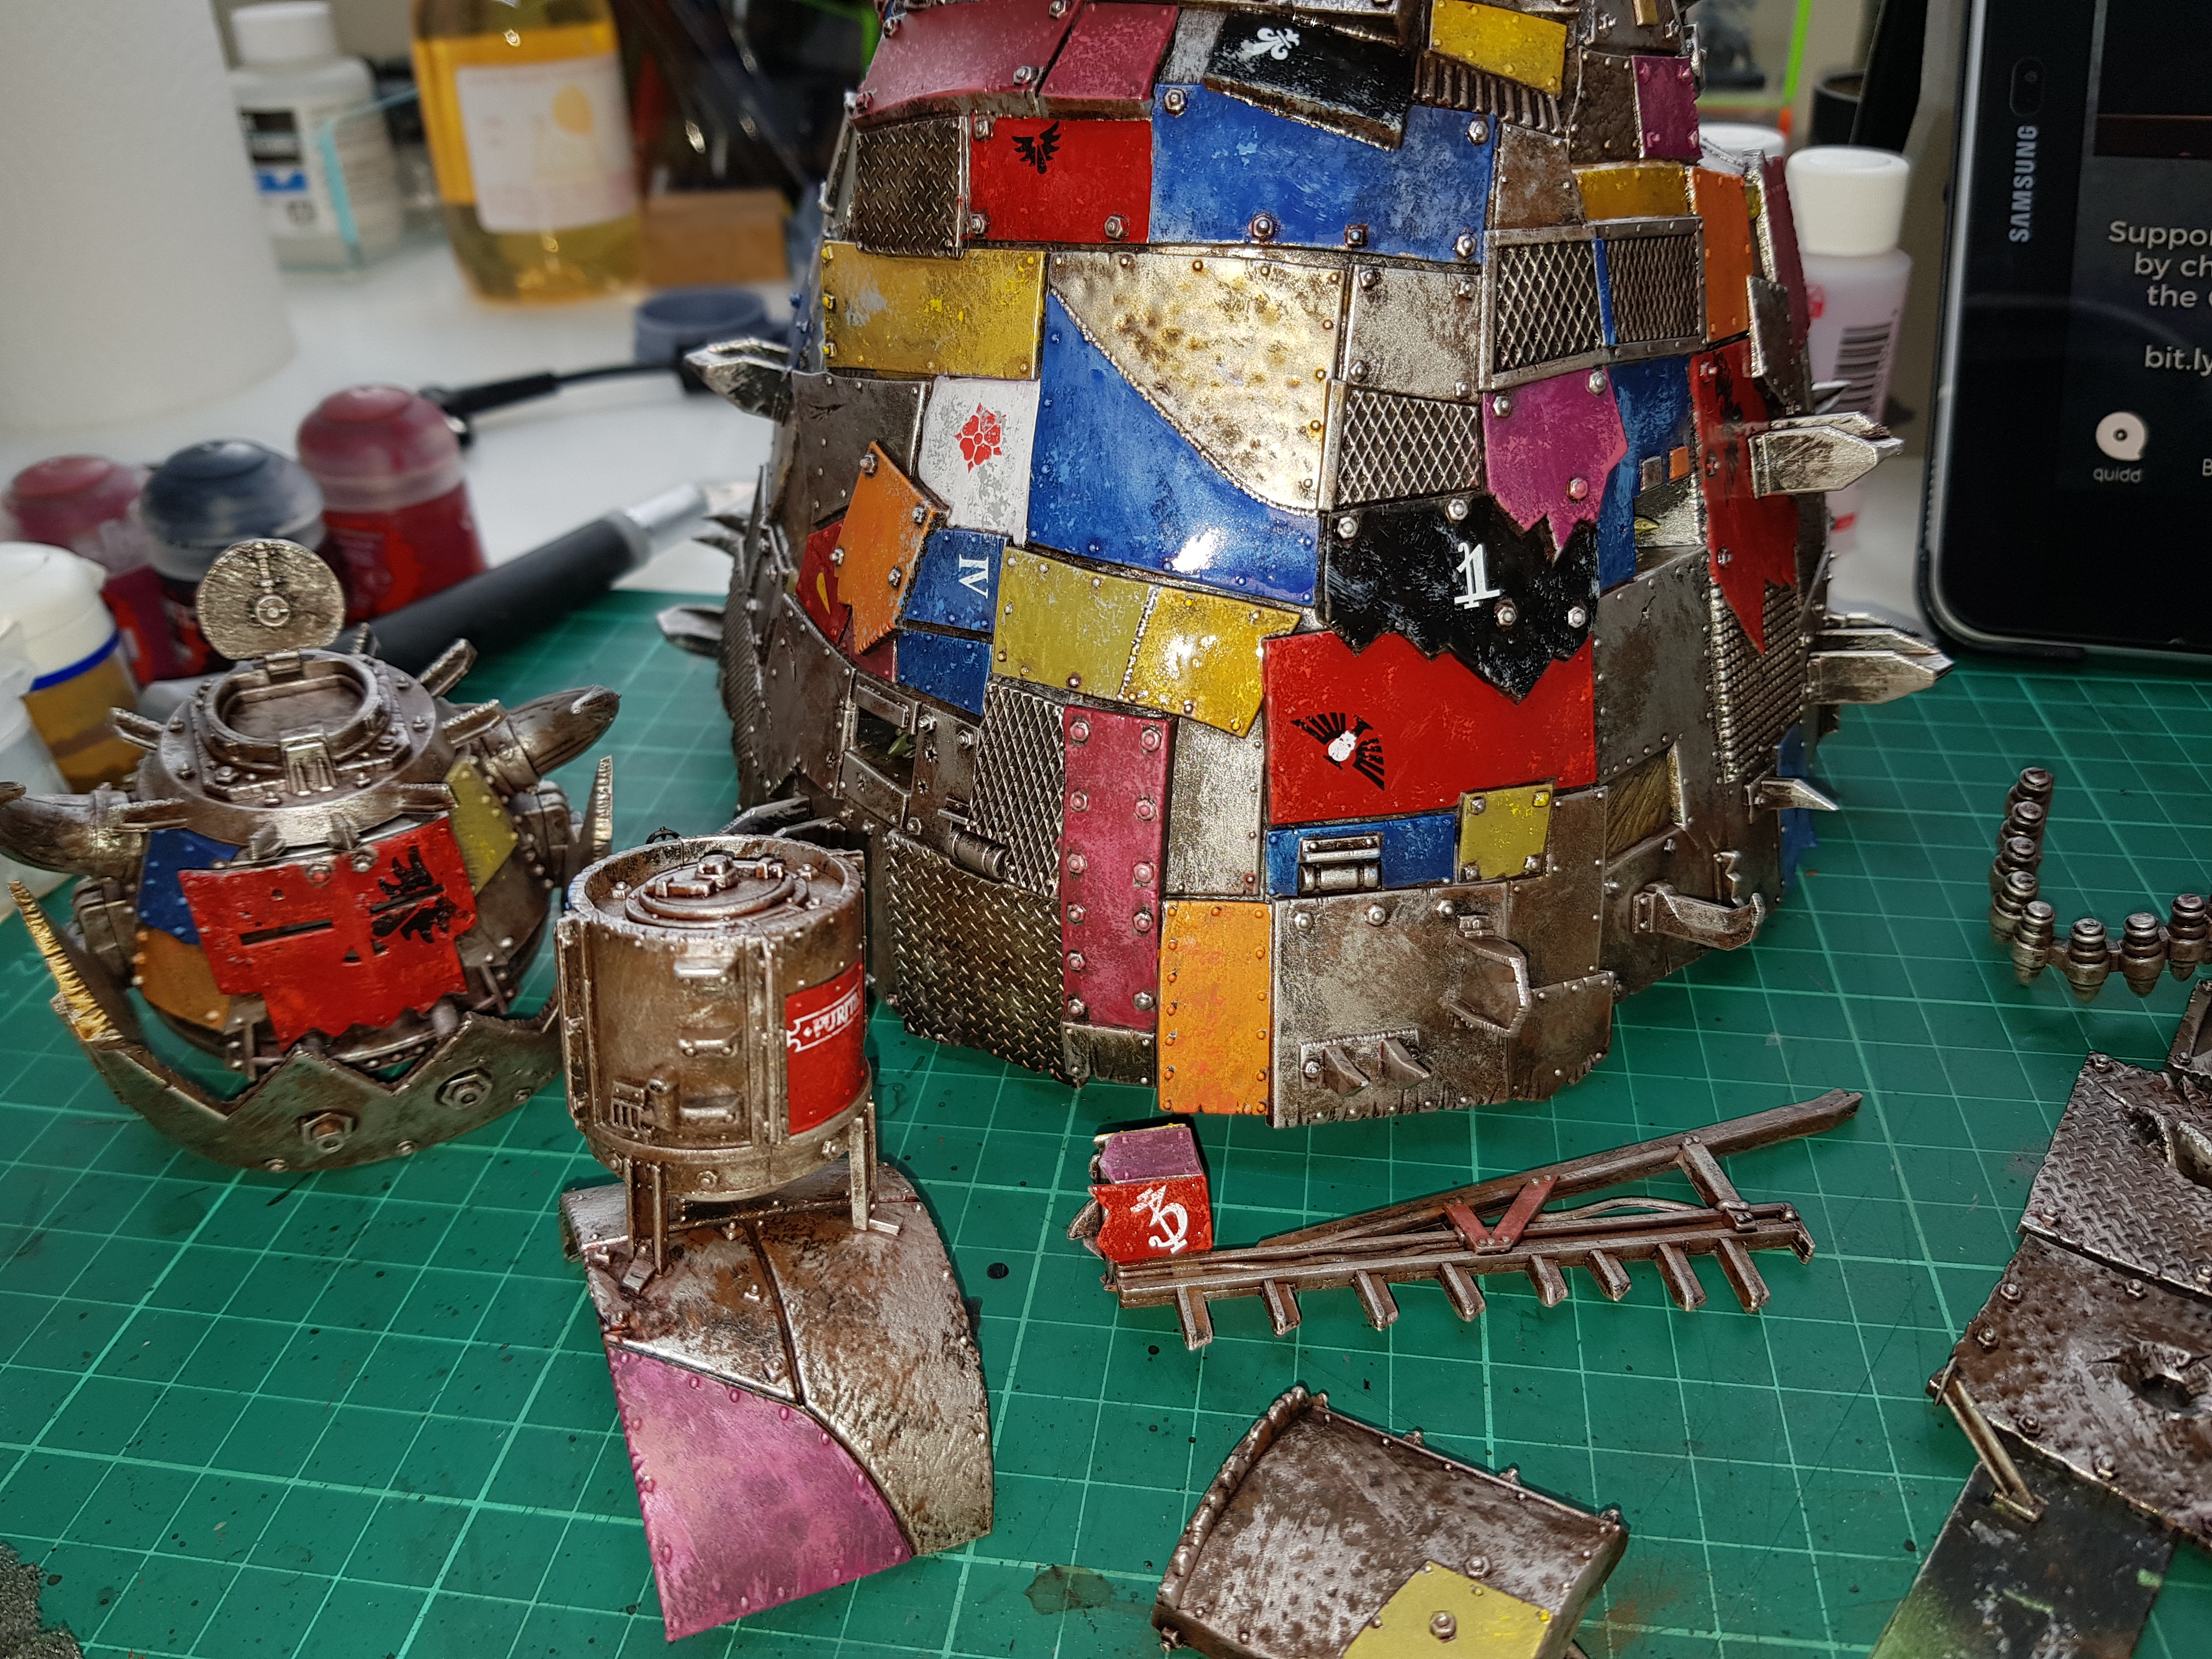 The Stompa once the various light colours had been added.
This process was then repeated with Leadbelcher followed by Warplock Bronze. The Leadbelcher was applied more liberally than the Warplock Bronze.
I tried to pick out each panel individually so that they look individual rather than having wear that carries over from one panel to the adjacent ones.
In addition to dabbing the sponge on it is also scratched/dragged across the surface to imitate scratches.
An advantage of doing this is that the rivets on the mini that had been accidently hit with colour now get covered in the metallics which is a better colour for these.
 I forgot to take a picture after the Leadbelcher stage so this is the Stompa at the end of this process.
Decals
The next stage was to add some decals.
As is the norm, I floated these off in some warm water and applied them to the model (the panels gloss varnished in the previous step). I’ve used Micro Sol and Micro Set. This was probably overkill given that the surfaces they’ve been applied to are pretty flat but seeing as I have them I thought I might as well use them to get as good a finish as possible. Looking at the dried decals now I think that was a good move as, on the whole, the silvery edges that you can get with decals are not noticeable.
 Here you can see my ancient go to decal floating Tupperware bowl.
Rather than using Ork decals, I’ve raided my decal box for enemy decals to attach to contine the narrative of the Ork Meks constructing the Stompa from salvaged scrap.
As you can see, the decals are not orientated as they would be on Imperial vehicles; the Orks would be slapping the panels together as they see fit.
All of the decals were attached by lifting them and applying with a brush (some of the larger ones required a larger brush to prevent them from rolling up). A few were attached overlapping the edges of panels. Once dried and a bit crispy these were trimmed flush to the panel using a sharp hobby knife.
Still looking quite garish at the moment, I’m hoping the next stage is where things will start to improve, everything will start coming together and I might look like I have some sort of idea what I’m doing…
 Decals haphazardly attached.


