


![NO Weekender Or Cult Of Games XLBS This Weekend [Updated]](https://images.beastsofwar.com/2026/03/No_Weekender_and_XLBS_this_Weekend-225-127.jpg)


Paint Station Alpha


Recommendations: 214
About the Project
Due to an unfortunate change of circumstances I found myself living with my brother and without anywhere to indulge in my hobby. Given the stresses associated with the causes of my change in circumstances I knew that I needed to try and resolve that quickly as keeping the mind focused and active is incredibly good for your mental health. So I Decided to build a hobby desk in the attic both for me and my brother; as well as being somewhere to which I can retreat and just relax, it's something that when I eventually move out again I can leave behind for him as a thank you for helping me out when I needed it most. And if I was building something by golly was I going to do it properly!
Now, before you read any further I should point out I am not a tradesman, I am a software engineer. I have no previous experience of woodworking or electrics (both of which feature here). I started this with nothing but enthusiasm, some power tools and a vague idea of what I was trying to build. Therefore it's not really going to much use as a tutorial but I sincerely hope it can be an inspiration. It's certainly inspired me to learn some new skills and helped me through some fairly hard times. I will give top tips where relevant so that if you try and attempt something similar you can either avoid pitfalls I fell into or benefits from things I did that I found useful.
Related Genre: General
This Project is Completed
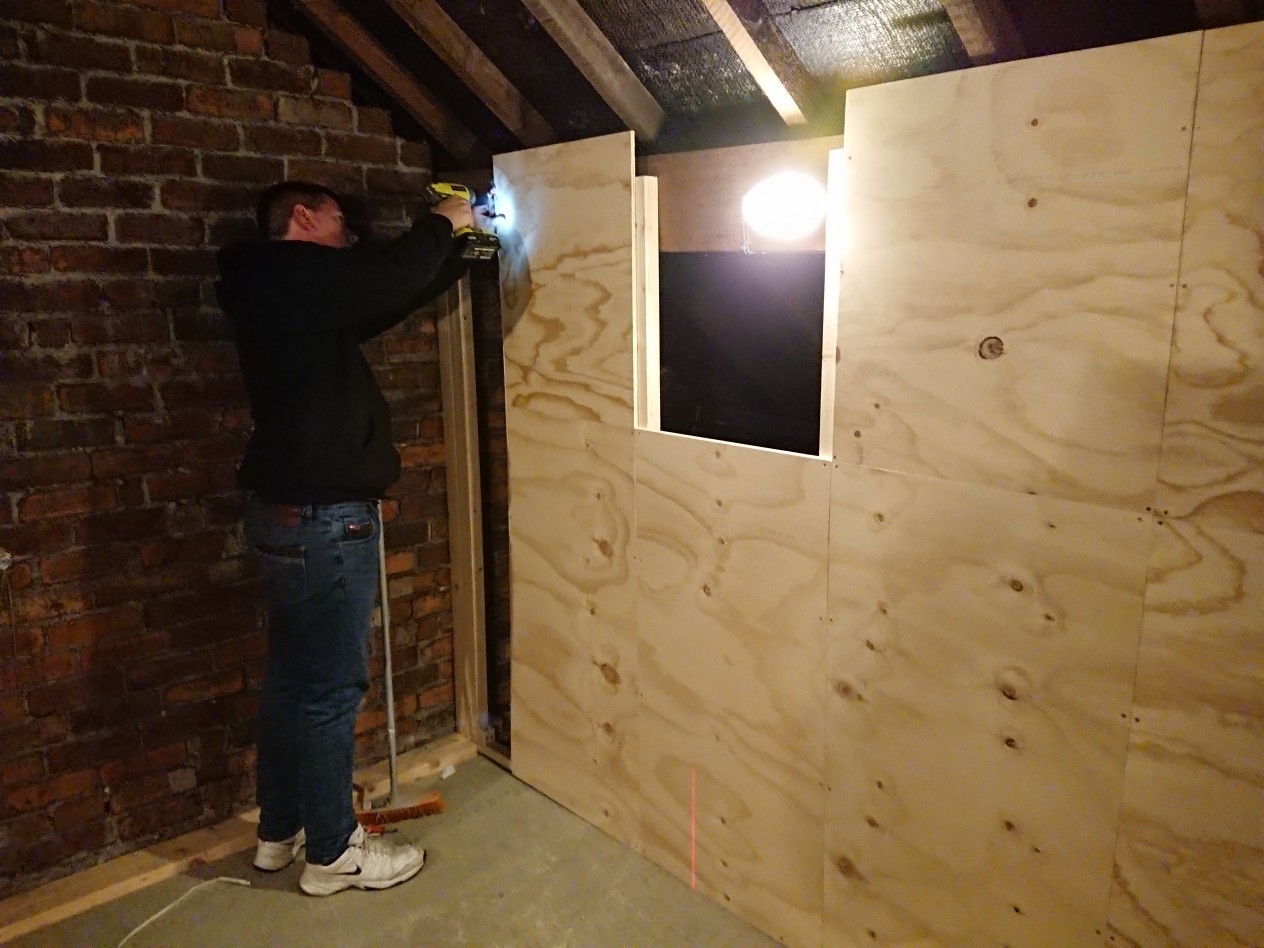
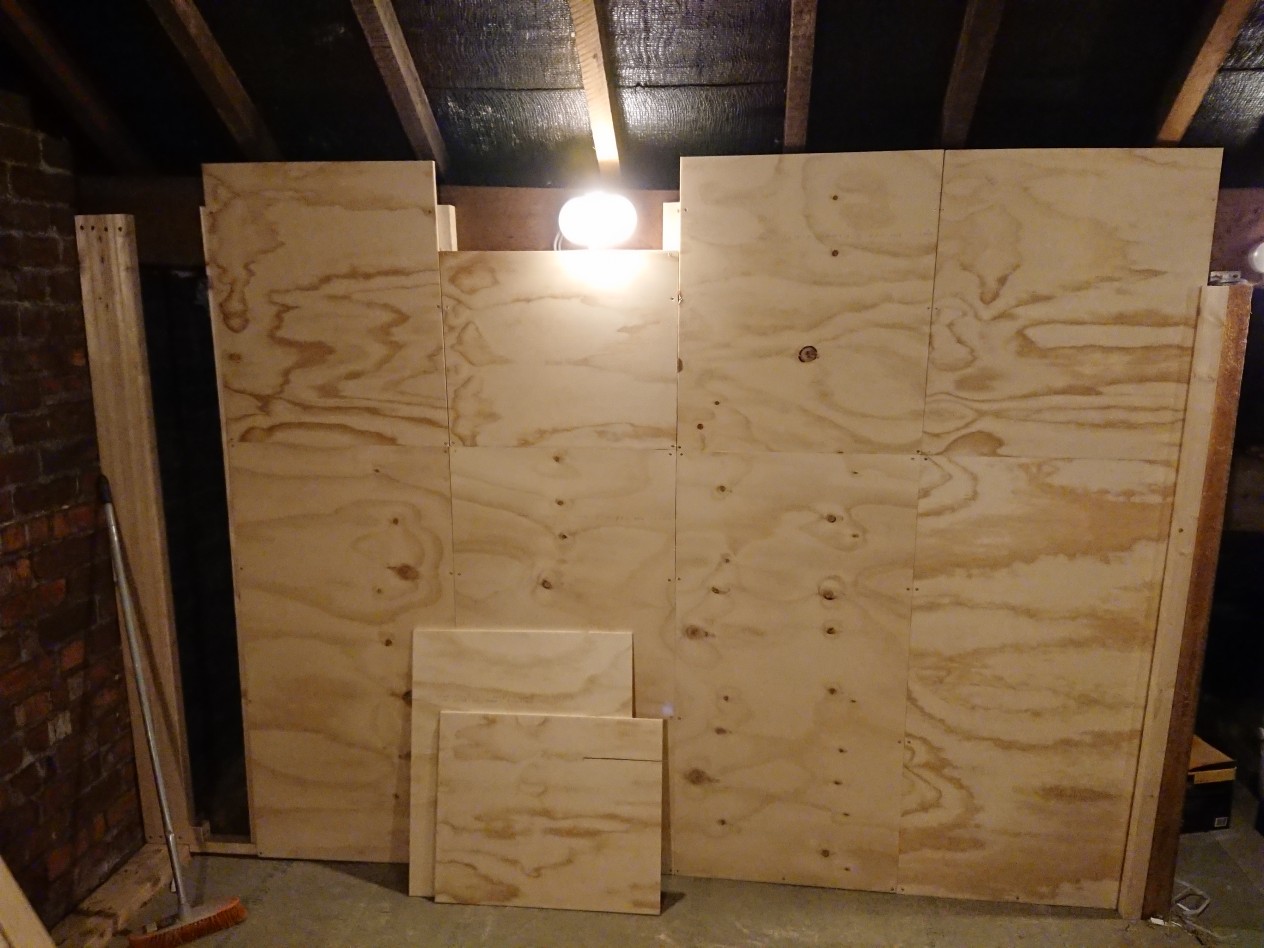
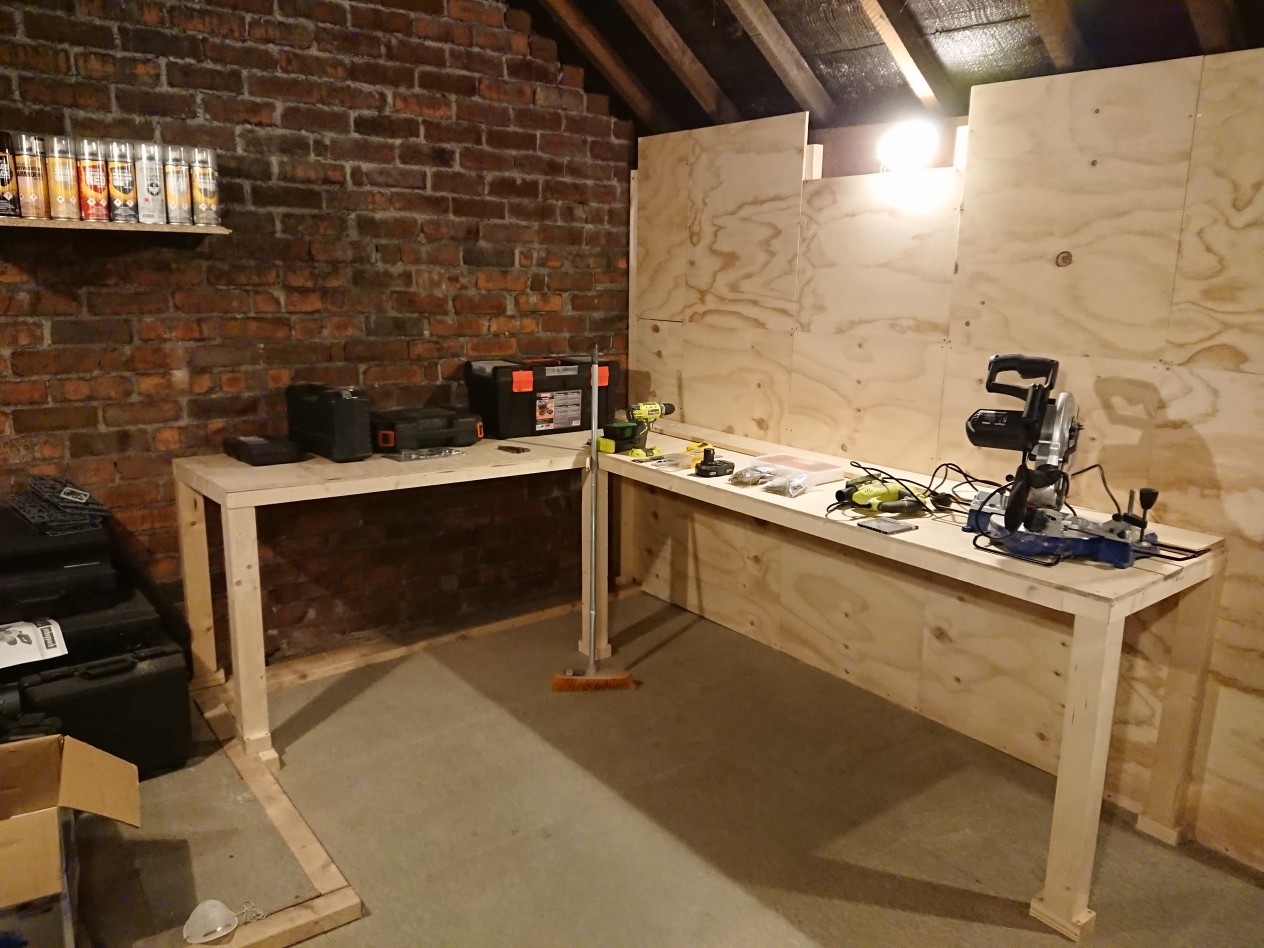
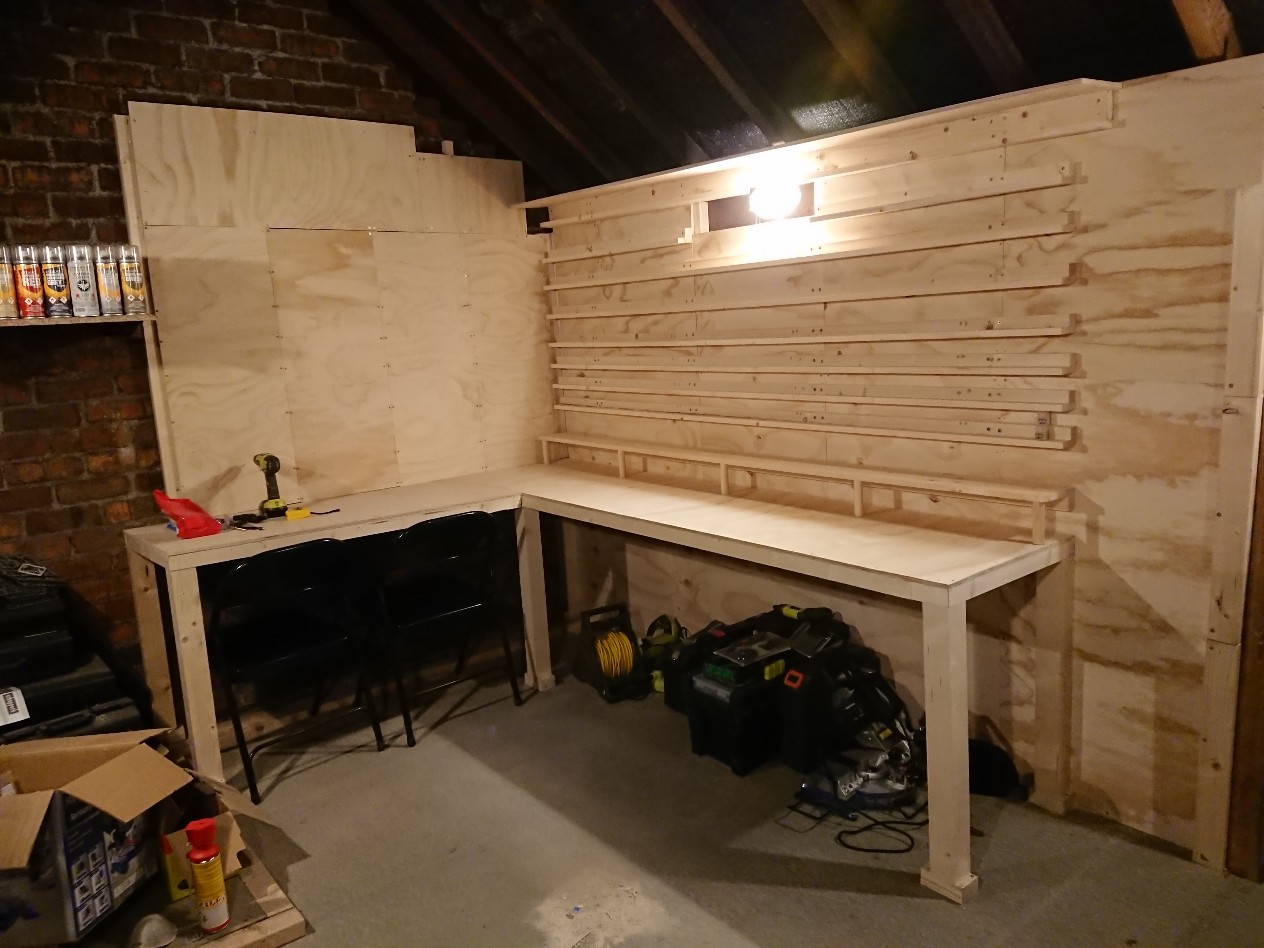
Step 1 - The Wall
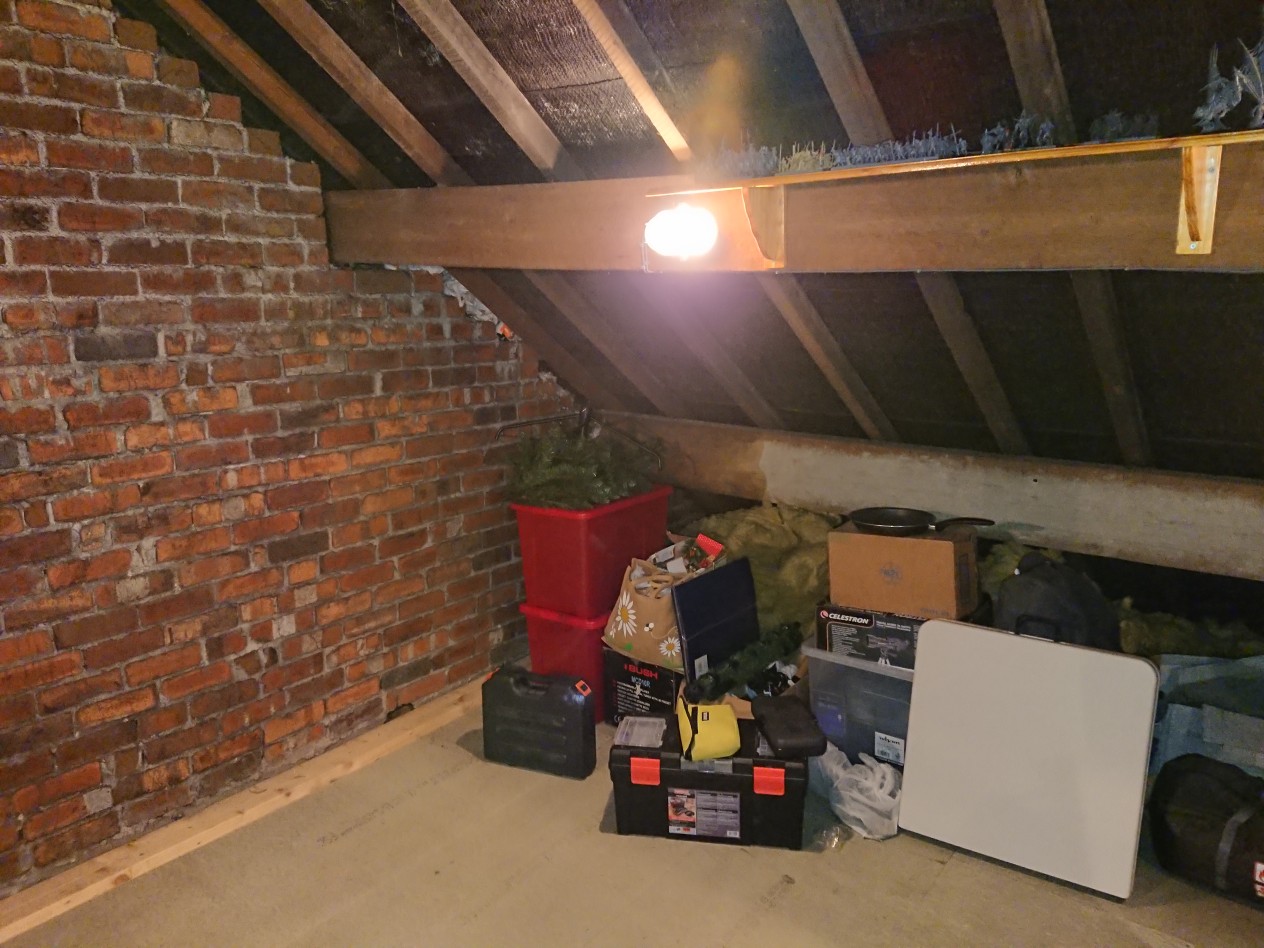
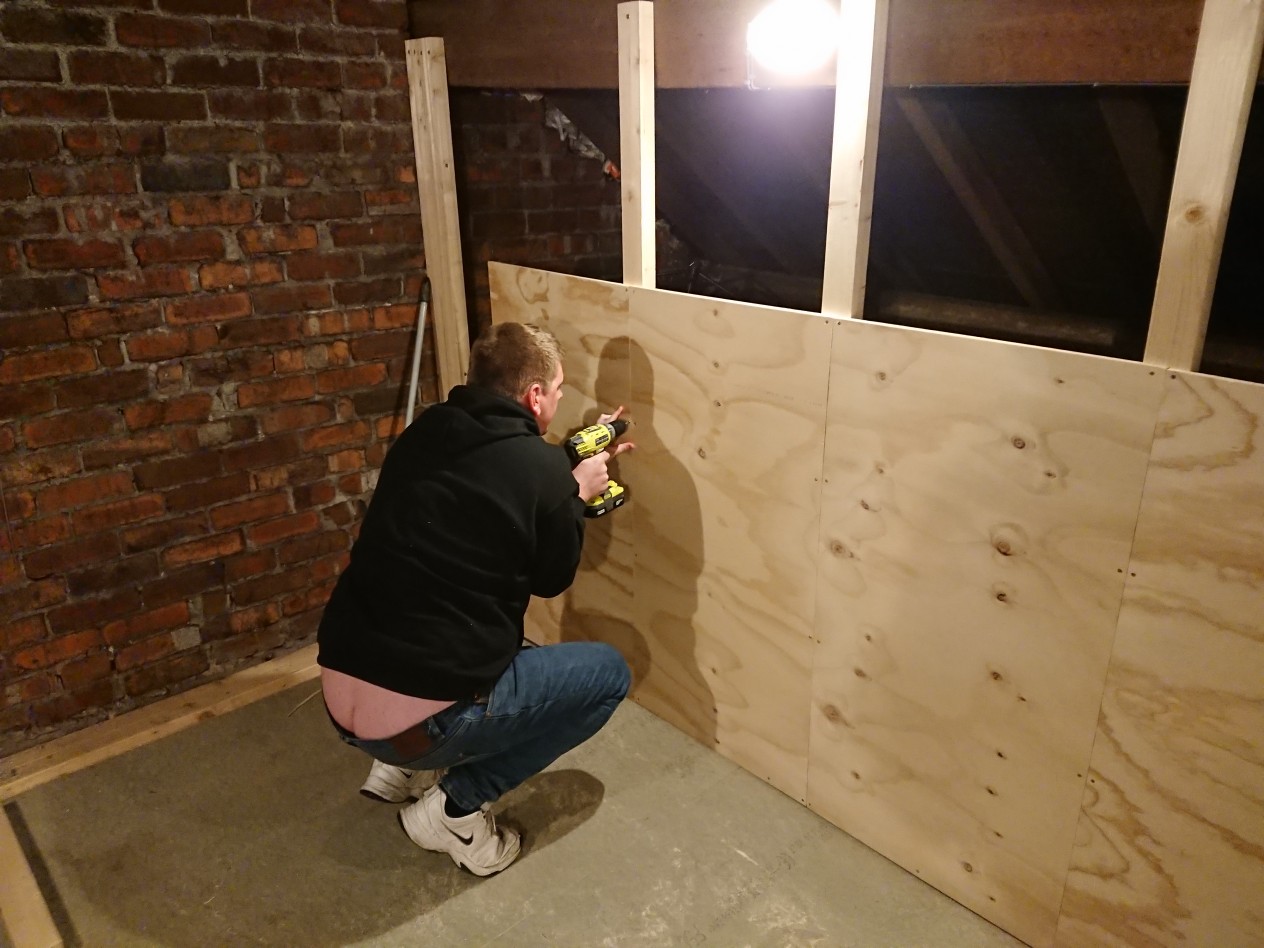
The initial plan for the desk was that it would be a two seater desk with enough additional work space to handle either large projects such as scenery or a potential third person. Because of the size of the attic and the fact that we already have a sizable gaming Table in there I opted for an L shape. This would mean building a false wall in the attic against which the desk would be built and on which shelves could be mounted. And so step one was building that wall – and buying a mitre saw because what self respecting bloke doesn’t want more power tools right?
I apologise for my brother’s bricky’s arse.
TOP TIP – Get yourself a mitre saw. Sure, you could do all the cutting with good old elbow grease but these tools definitely pay their way in terms of time saving. And don’t worry, you will still get a work out assembling everything. And also Mitre Saws are cool. Did I mention that?

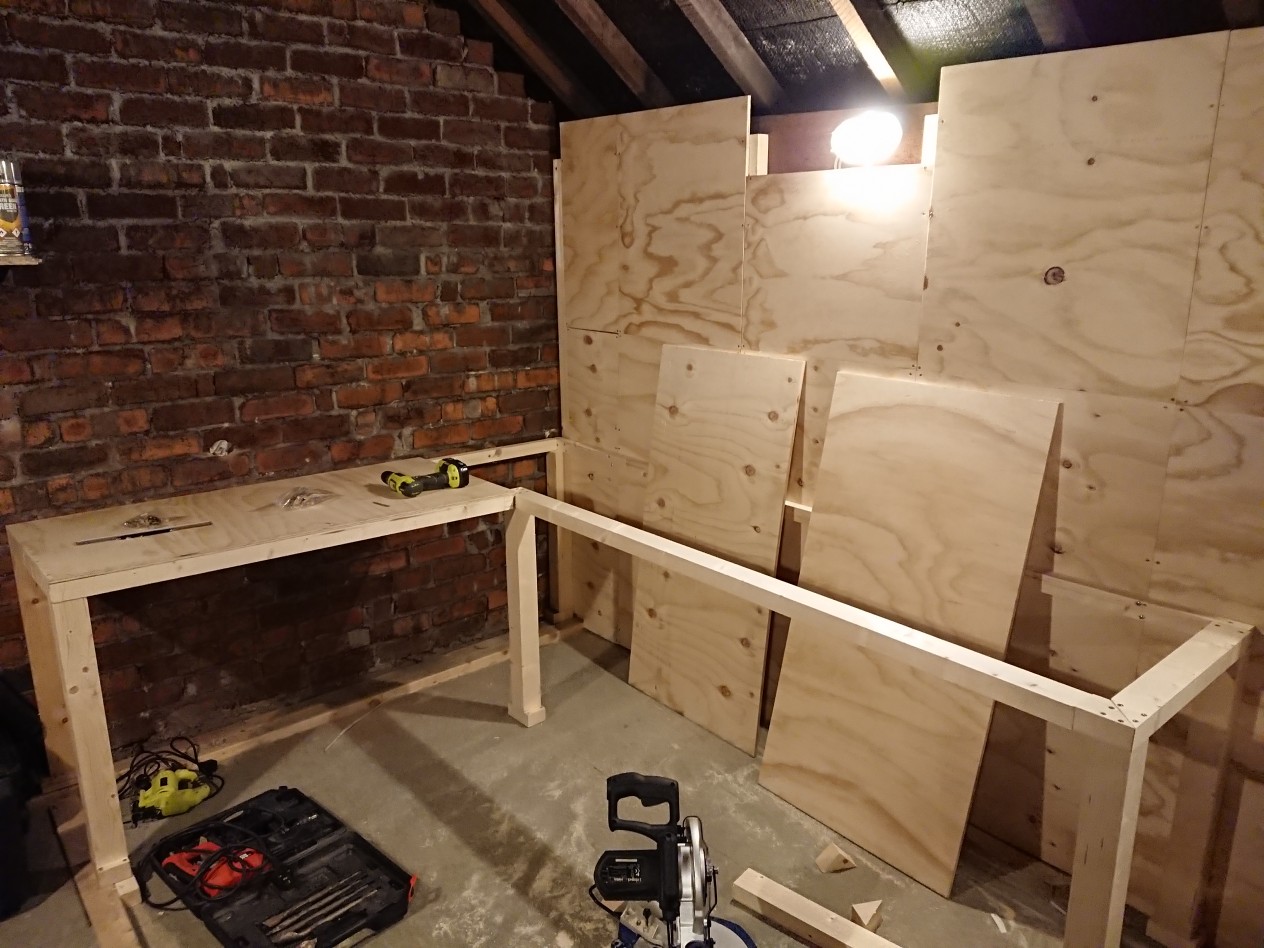
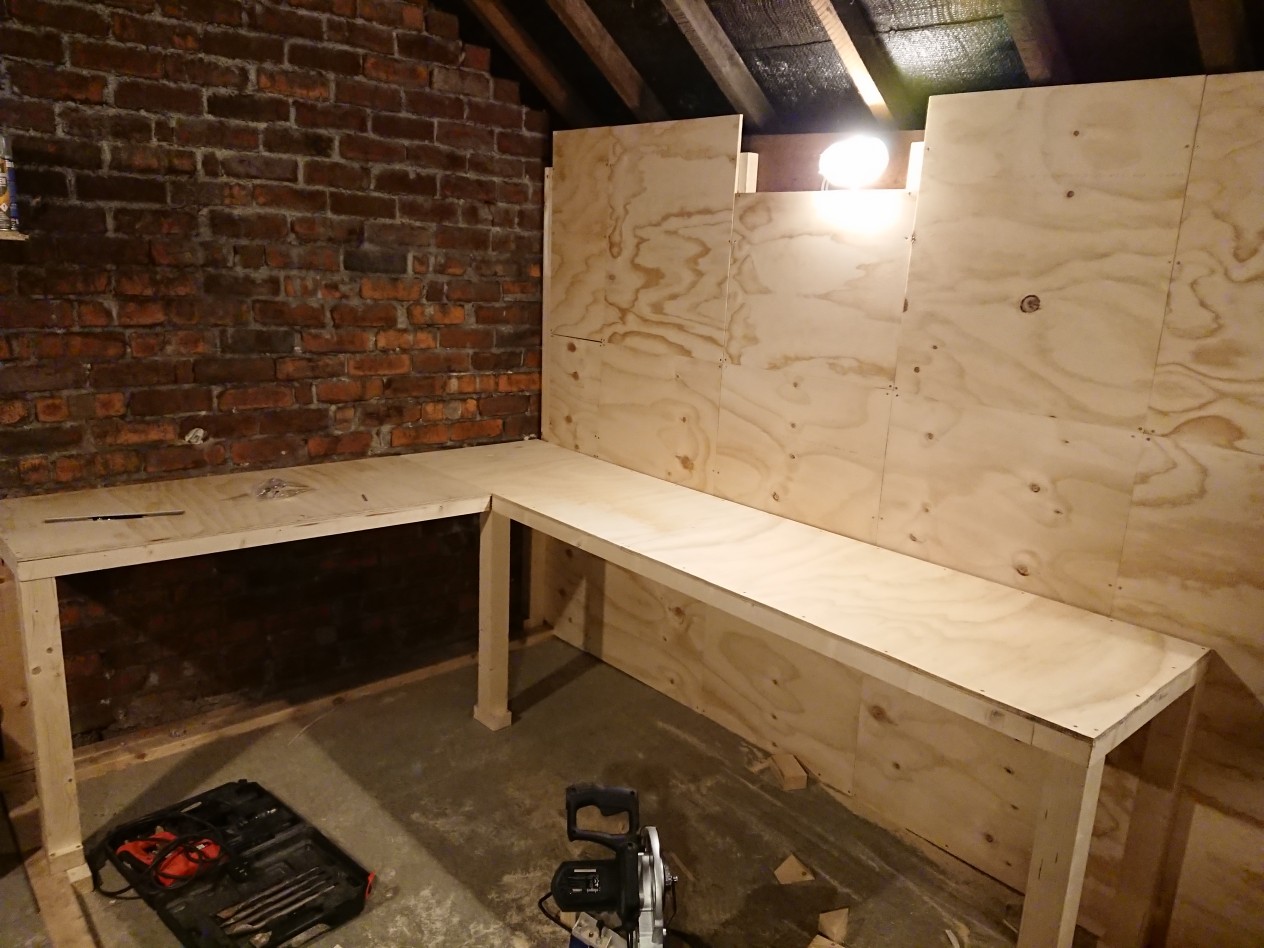
Step 2 - The Desk
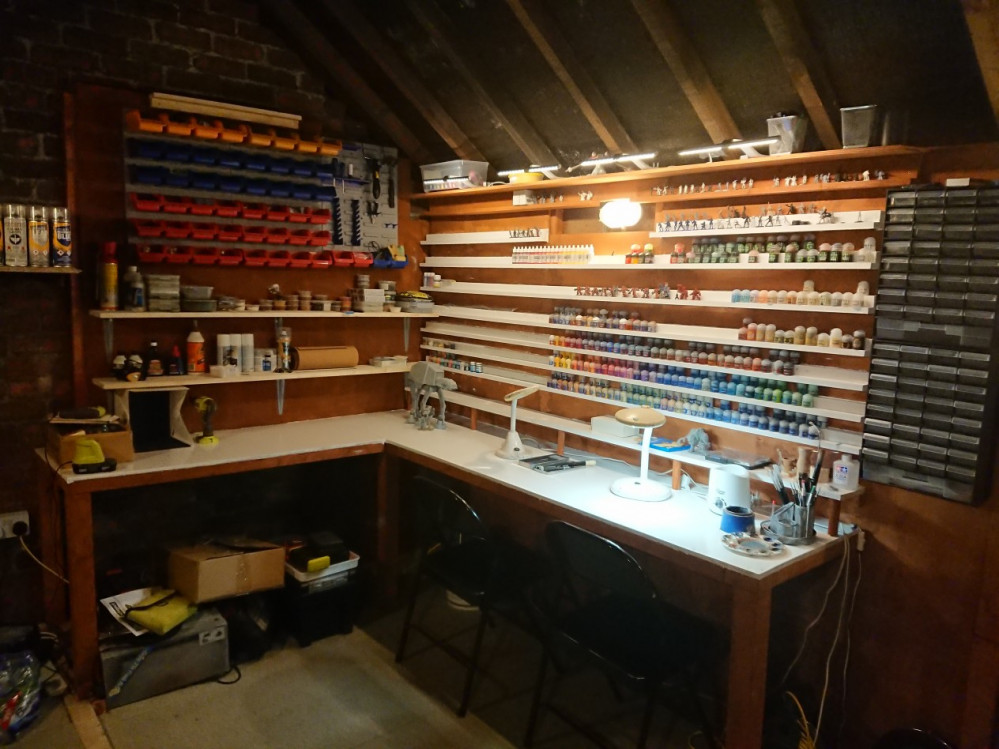
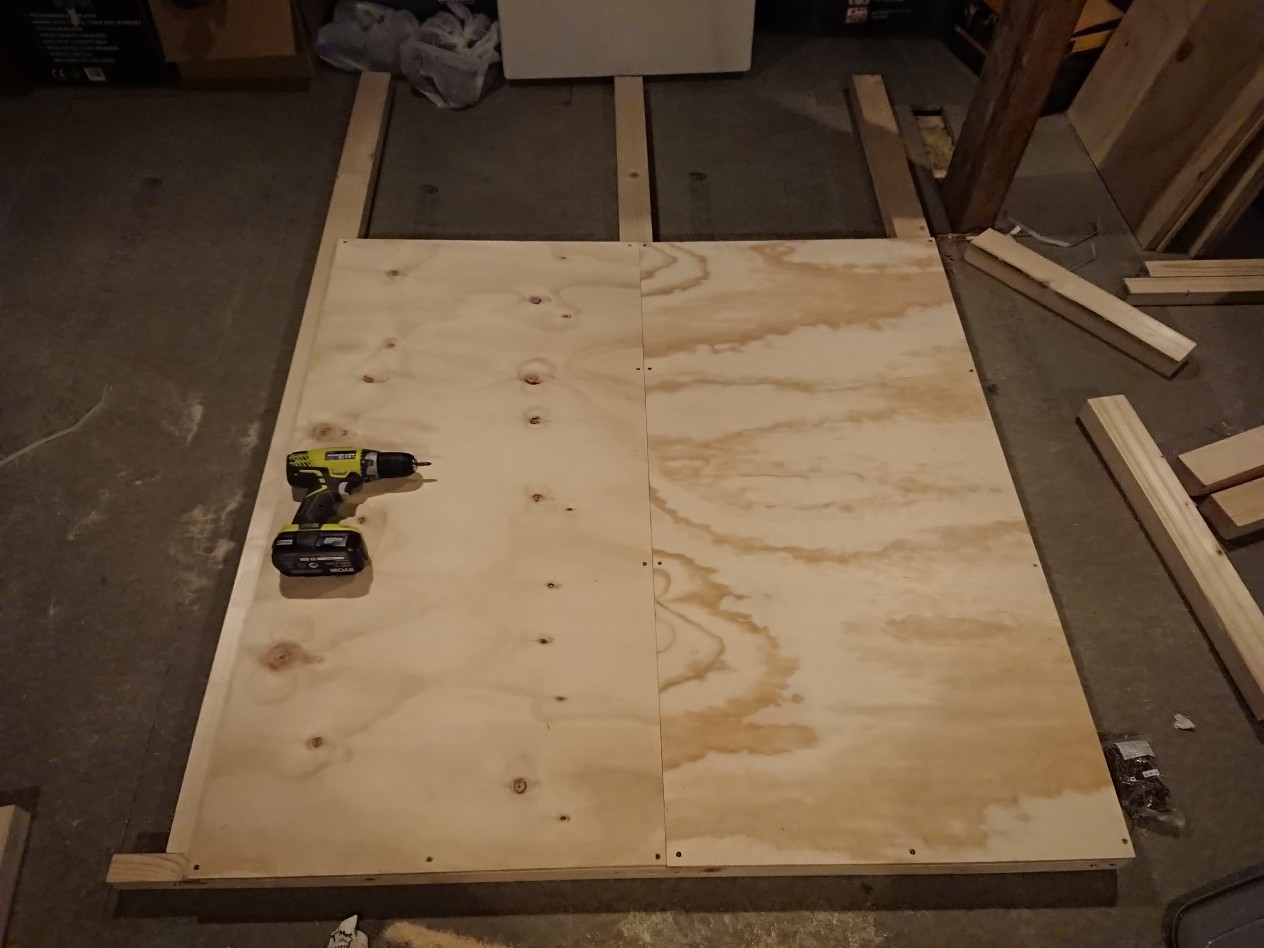
With the false wall in place I could start building the desk. The idea was to have a fixed desk that was fastened to the false wall and could not be moved. To facilitate this I built a the back edges of the desk onto a frame which was fastened to both the brick wall and the false wall and built legs for the front edges. I also used a very thick beam to build the frame so I didn’t need to build as many legs. The longest edge will happily support my fat arse sitting in it and doesn’t even creak. I wouldn’t want to try standing on it but then again it’s not designed to be stood on either. It’s incredibly sturdy and more than strong enough to cope with the rigours of miniature painting.
TOP TIP – When working with soft wood such as pine, it’s worth drilling guide holes for screws. Even the smallest screw can cause the wood to split.


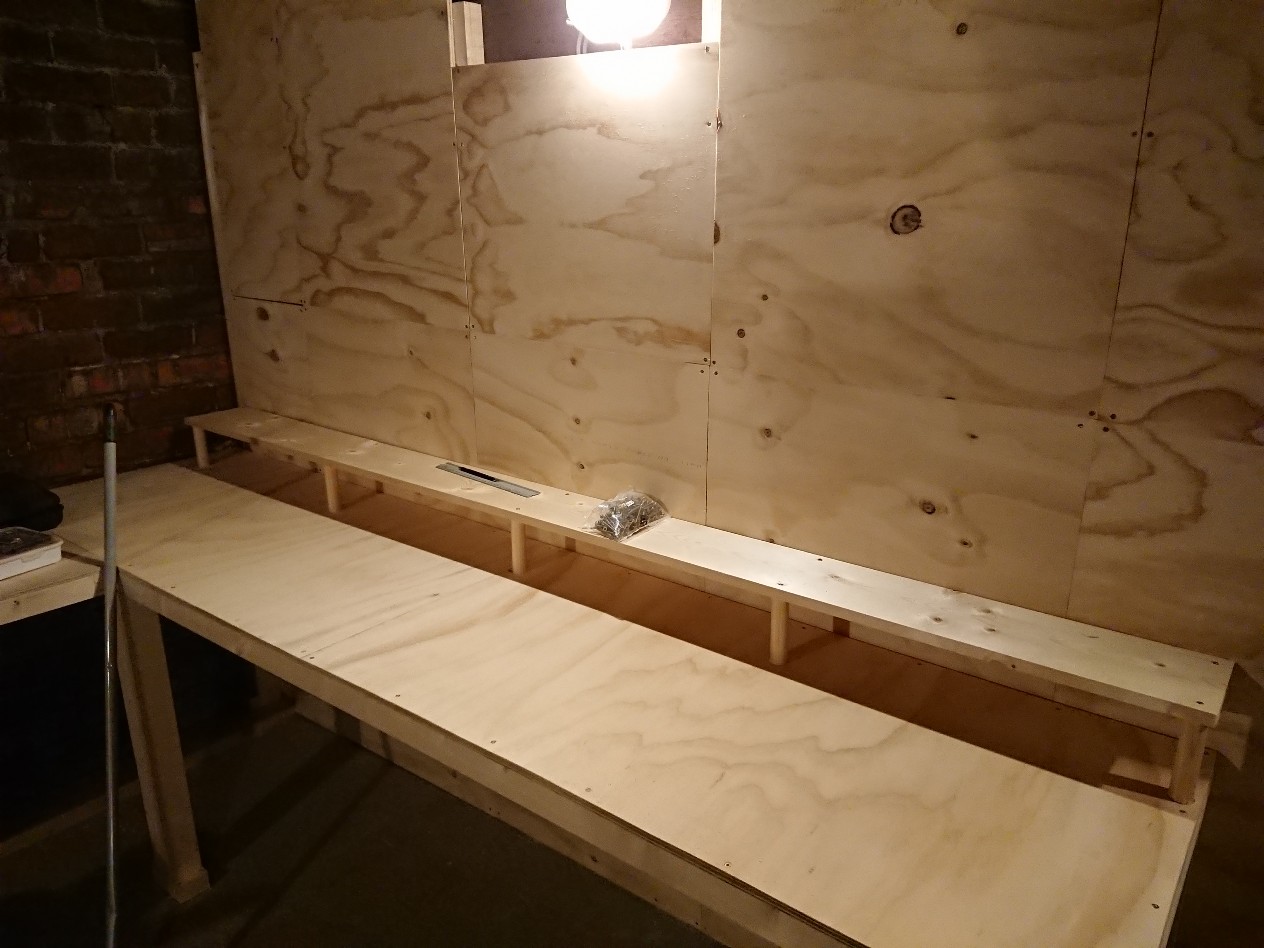
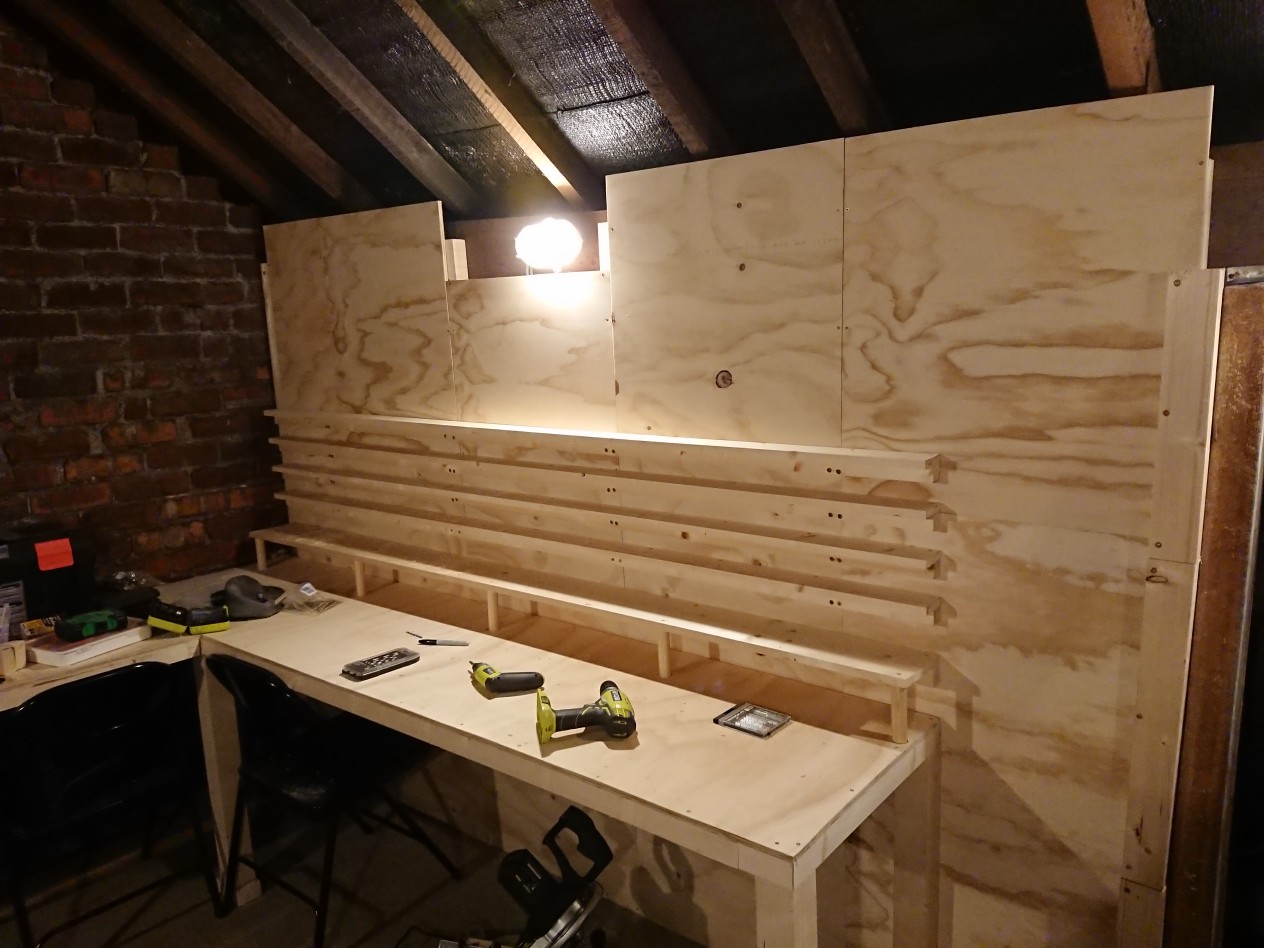
Step 3 - Shelves and Storage
With the main desk complete it was time to start considering storage. I had considered drawers but ultimately I decided I preferred shelves for storing paint. I like being able to look up and just see the paint in front of me and reach for the one I need rather than having to rummage through drawers. And with all that wall space something would need to live there.
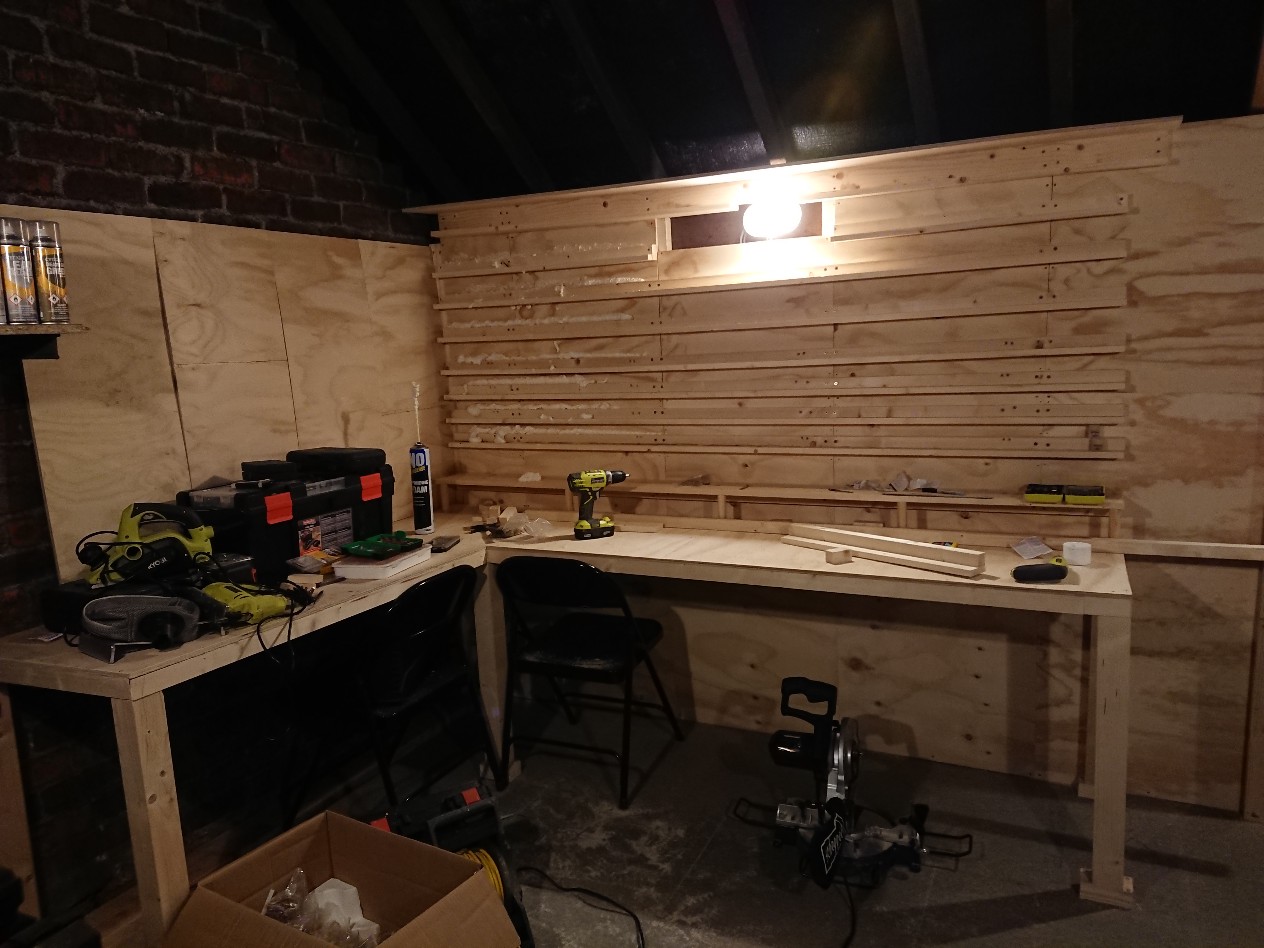
The shelves were constructed using some of the timber spars fastened together in an L shape. This creates a two tier shelf, which is great for storing different shades on a single shelf or, as I will probably do, storing a backup for each shade.
In addition to the paint shelves I made a small storage shelf just above the desk. This is for storing WIPs, drinks and anything else that I might want close by but allows me to keep the workspace clear. It also, as a secondary benefit, will provide a means of keeping wires and cables tidy on the desk; two hobbyists are likely to have a number of electrical devices including lamps, phone chargers hobby drills, you name it and the last thing we want is trailing wires everywhere. I also thought that the additional shelf looked quite nice.
Finally I added some additional boarding to the wall at the end of the desk. The intention here is to have a wall mounted tidy system for storing assorted equipment and supplies, chiefly bases, basing supplies and tools.
Top Tip – if, like me, you are doing the shelves a different colour to the rest of the desk, paintbthe shelves before you mount them. I didn’t and I really wish I had.

The First Casualty of War
No, it wasn’t my hand or my brother. It was my trusty brush. I was being uncharacteristically tidy whilst working and making sure I swept the attic at the end of every work session. I literally worked the brush to death.

Step 4 - The Home Straight.
With the desk assembled it was time to give it a coat of paint. I didn’t really do anything fantastic for this, favouring practicality over style because the desk is likely to take some punishment (it’s for building stuff, not just painting).
I used simple fence paint for the most part and painted the shelves and other surfaces with a one coat gloss. Which as always ended up needing two coats.
Once everything was dry it was a simple case of moving in! To aid visibility I added some Ikea wall lights over the top of the desk area. These have a very cool, white light which helps counter the warmth of the rest of the lights in the attic.
On the end wall I also added two additional wooden shelves for storing basing materials and other large bottles and I also added a tool tidy system. The red tubs contain bases of all shapes and sizes, the blue, for the most part contain scenic pieces for terrain building and the yellow contain hobby tools.
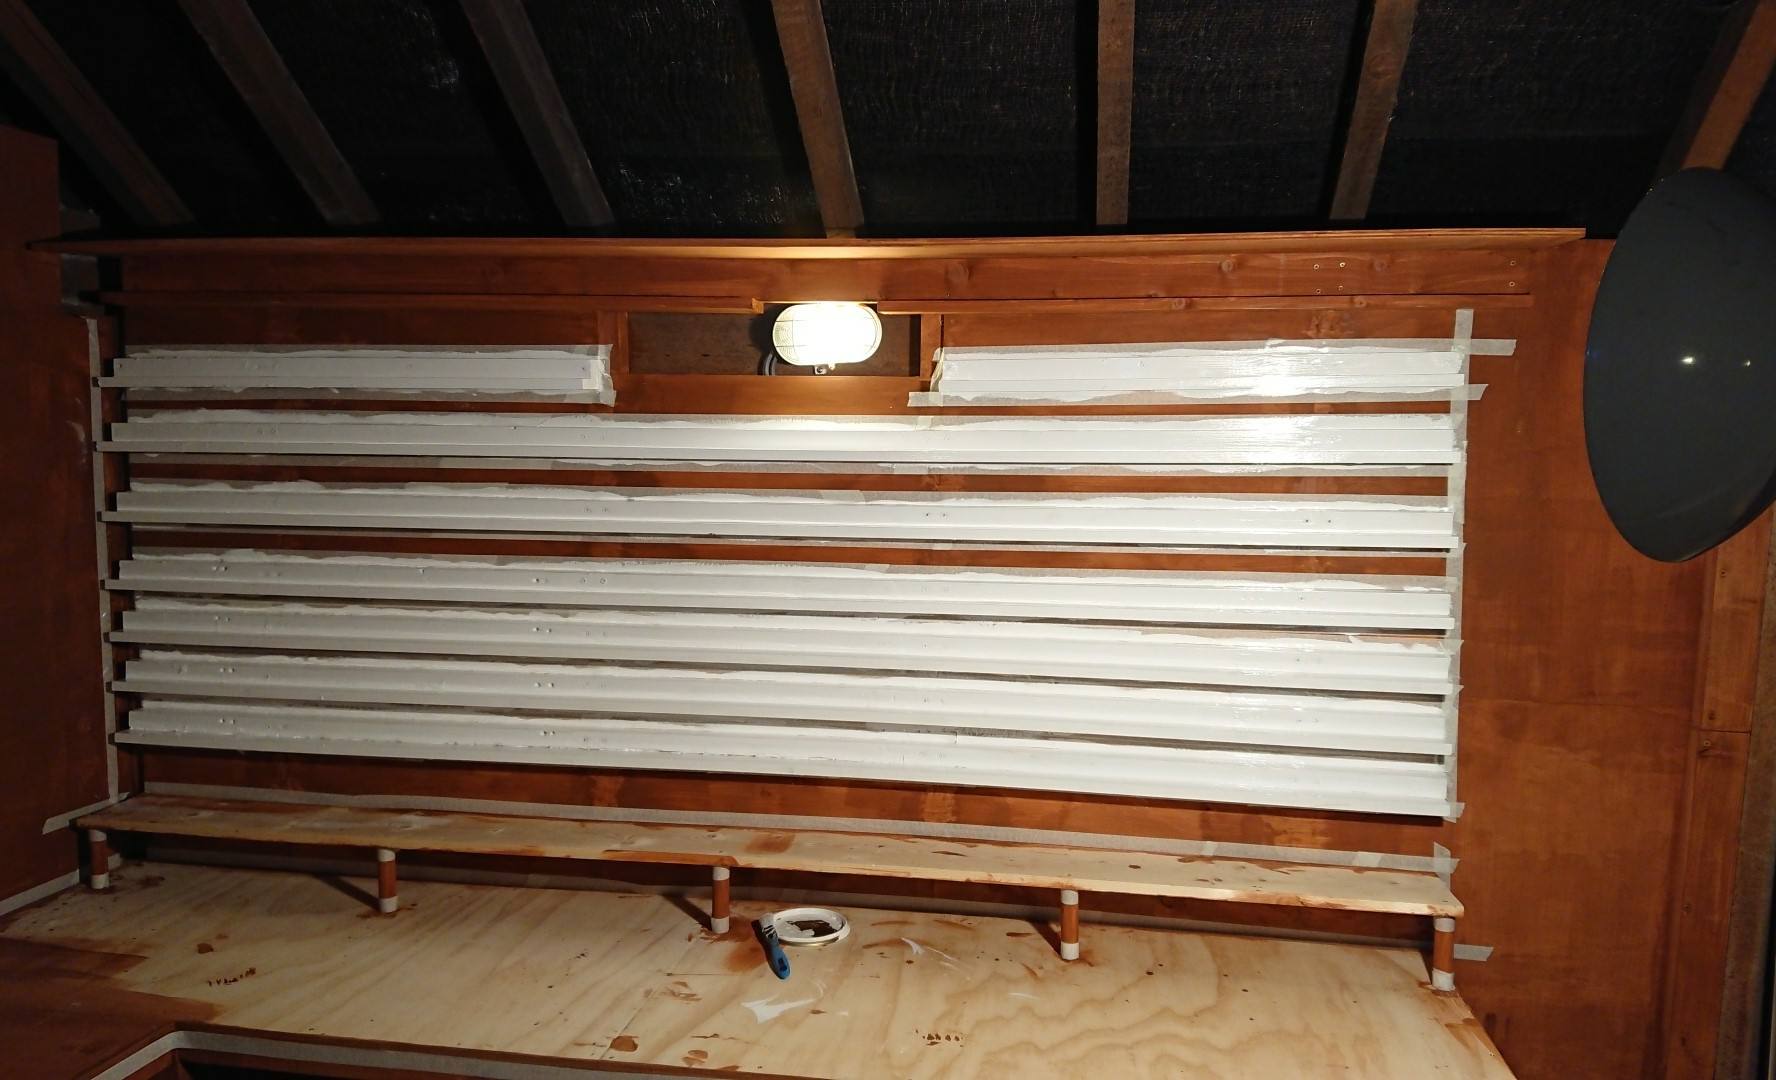
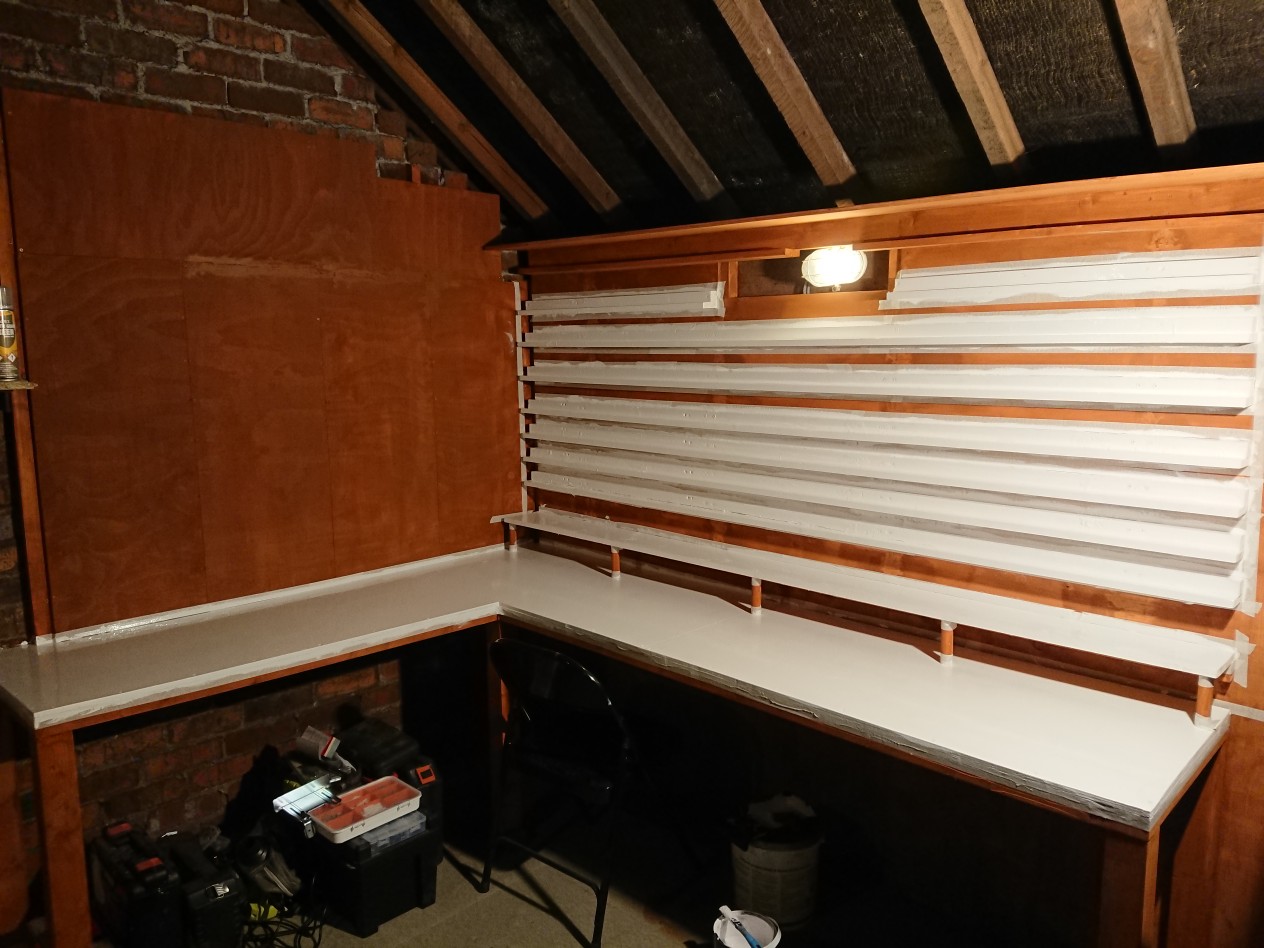

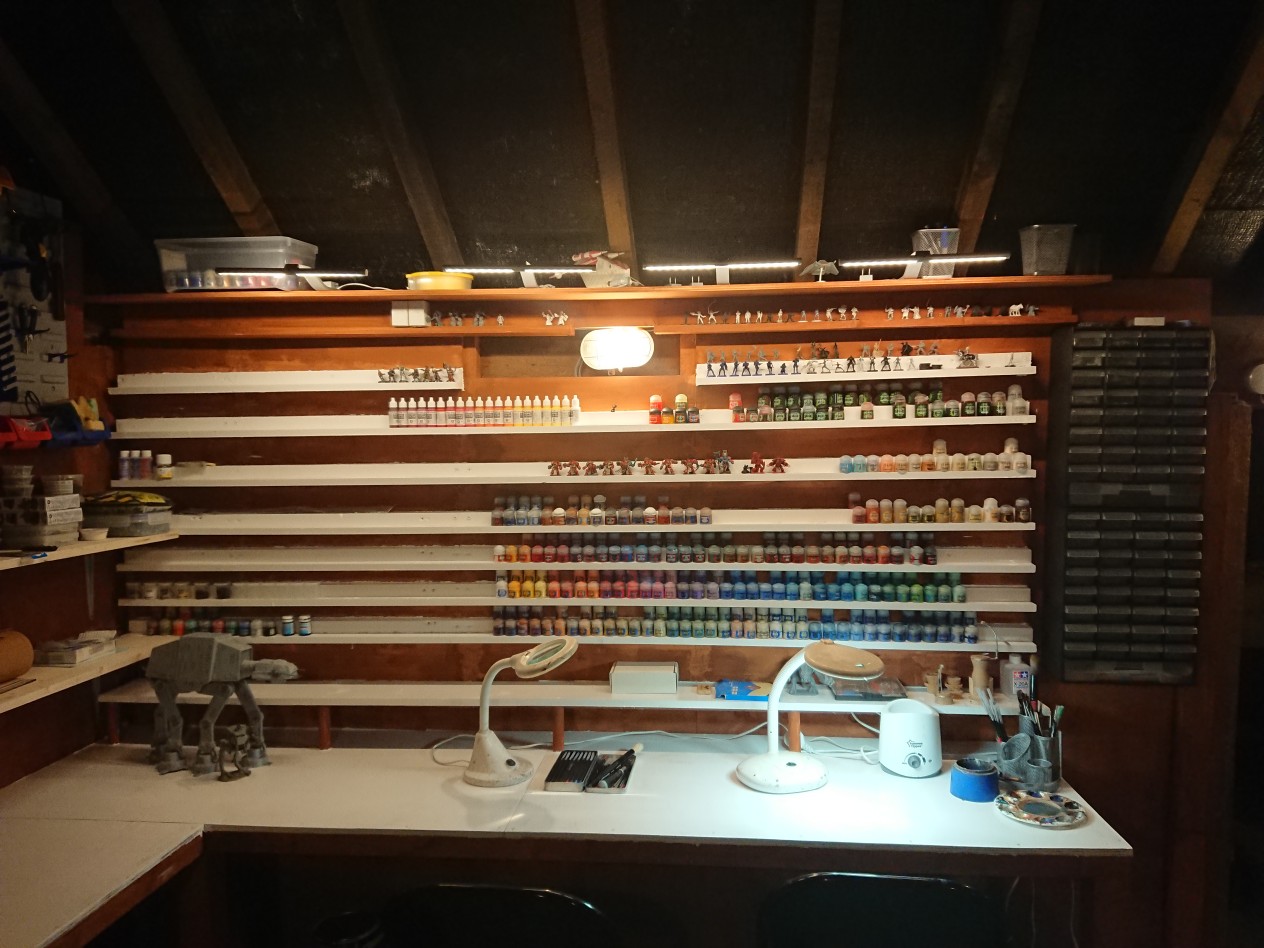
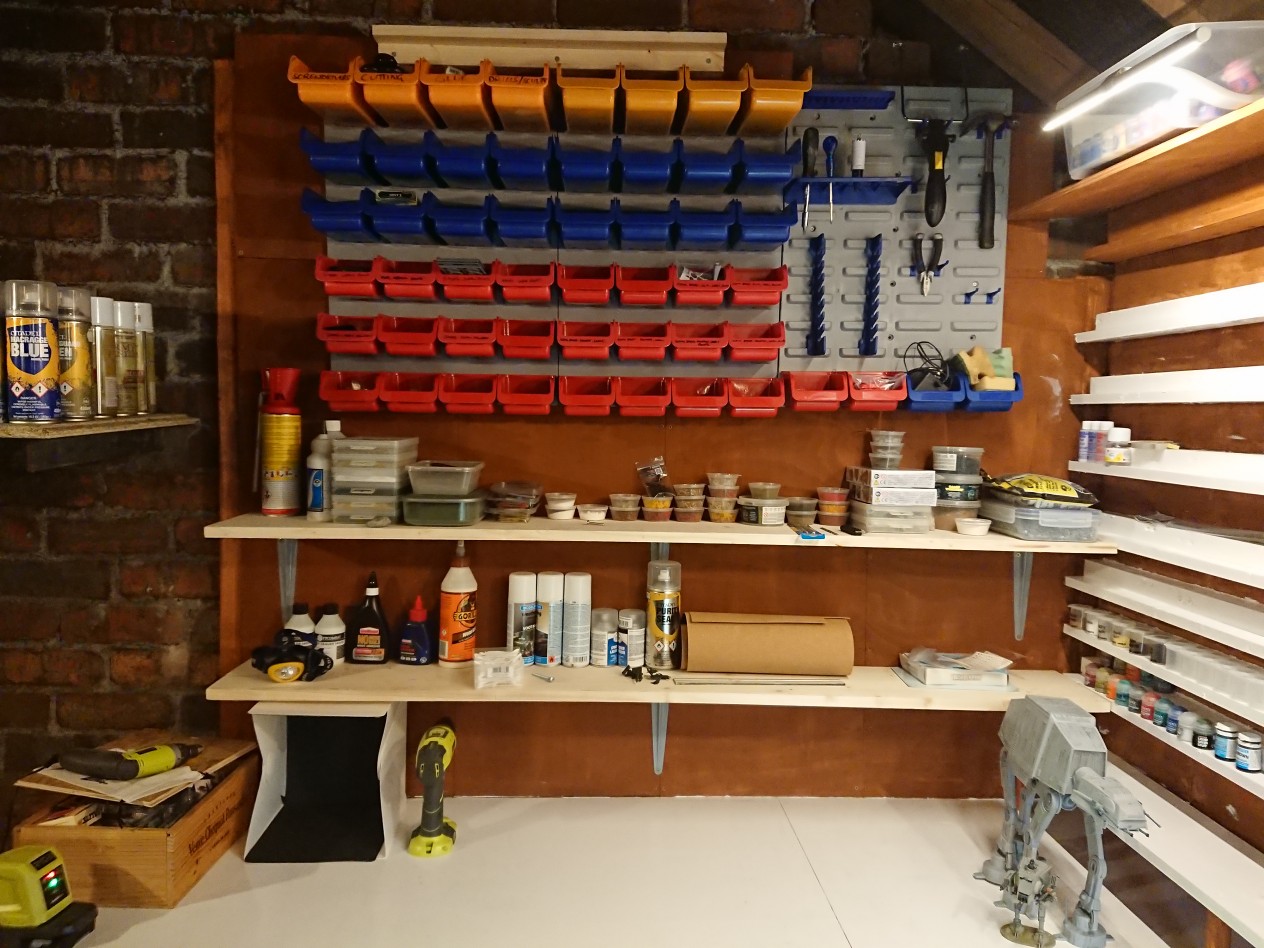
Photo Galleries Issues
I have been playing around with the project for a few weeks before I published it and somehow this still escaped my notice. Some of the images in the Image Galleries have incorrect thumbnails and/or link to incorrect images. This appears to be a technical issue with the site and I have posted it in the tech support forums.


![StarCraft Tabletop Miniatures Game Pre-Orders Live Now [Updated]](https://images.beastsofwar.com/2026/03/starcraft-tmg-news-cover-600-338.jpg)


