


![Alternative Trench Crusade Miniatures? Trench Missionaries Review | Wargames Atlantic [7 Days Early Access]](https://images.beastsofwar.com/2026/03/unboxing-wargames-atlantic-trench-missionaries-coverimage-225-127.jpg)


Luna Wolves Reborn a.k.a. Cawl’s personal Guard – by Bothi


Recommendations: 291
About the Project
With 8th Edition of 40k I completely turned around on the game. Having played nearly no games in 6th and 7th and painted nothing, 8th managed to capture my attention and imagination again. So I bought the then new Box "Dark Imperium" and the "Dark Imperium"-Novel. Having read a few bits of Bolter-Porn in the past I had no high hopes for the novel. But it actually wasn't that bad. I really enjoyed it. And they took the story forwards. After 25years. The mountain was moving.
I really love the character of Belisarius Cawl. And one thing he said to Bobby G stuck in my mind. He has access to all 20 original Geneseeds and tried to convince Papa Smurf, that he should be allowed to create Primaris Space Marines of all original 20 Legions. This was obviously denied to reasons how this would affect other troops fighting along side Primaris Death Guard or Primaris Sons of Horus. But it kept me thinking...
Cawl being a secretive character and always doing what he wants wouldn't be able to resist the chance to prove the Primarch wrong. Primaris Marines of the Traitor Legions would be loyal. Because their genetics are much better than 10.000 years ago. So the idea to paint my Primaris Marines from the "Dark Imperium" Box as a Loyal Traitor Legion was born. And I decided to go with Luna Wolves for two reasons.
First the Luna Wolves actually never betrayed the Emperor. Those where the Sons of Horus. And those few loyal survivers of the Sons of Horus changed their name back to Luna Wolves and went back to a white armour scheme. Secondly_ I always wanted to paint white Marines. So here we go...
Related Game: Warhammer 40,000
Related Company: Games Workshop
Related Genre: Science Fiction
This Project is Active
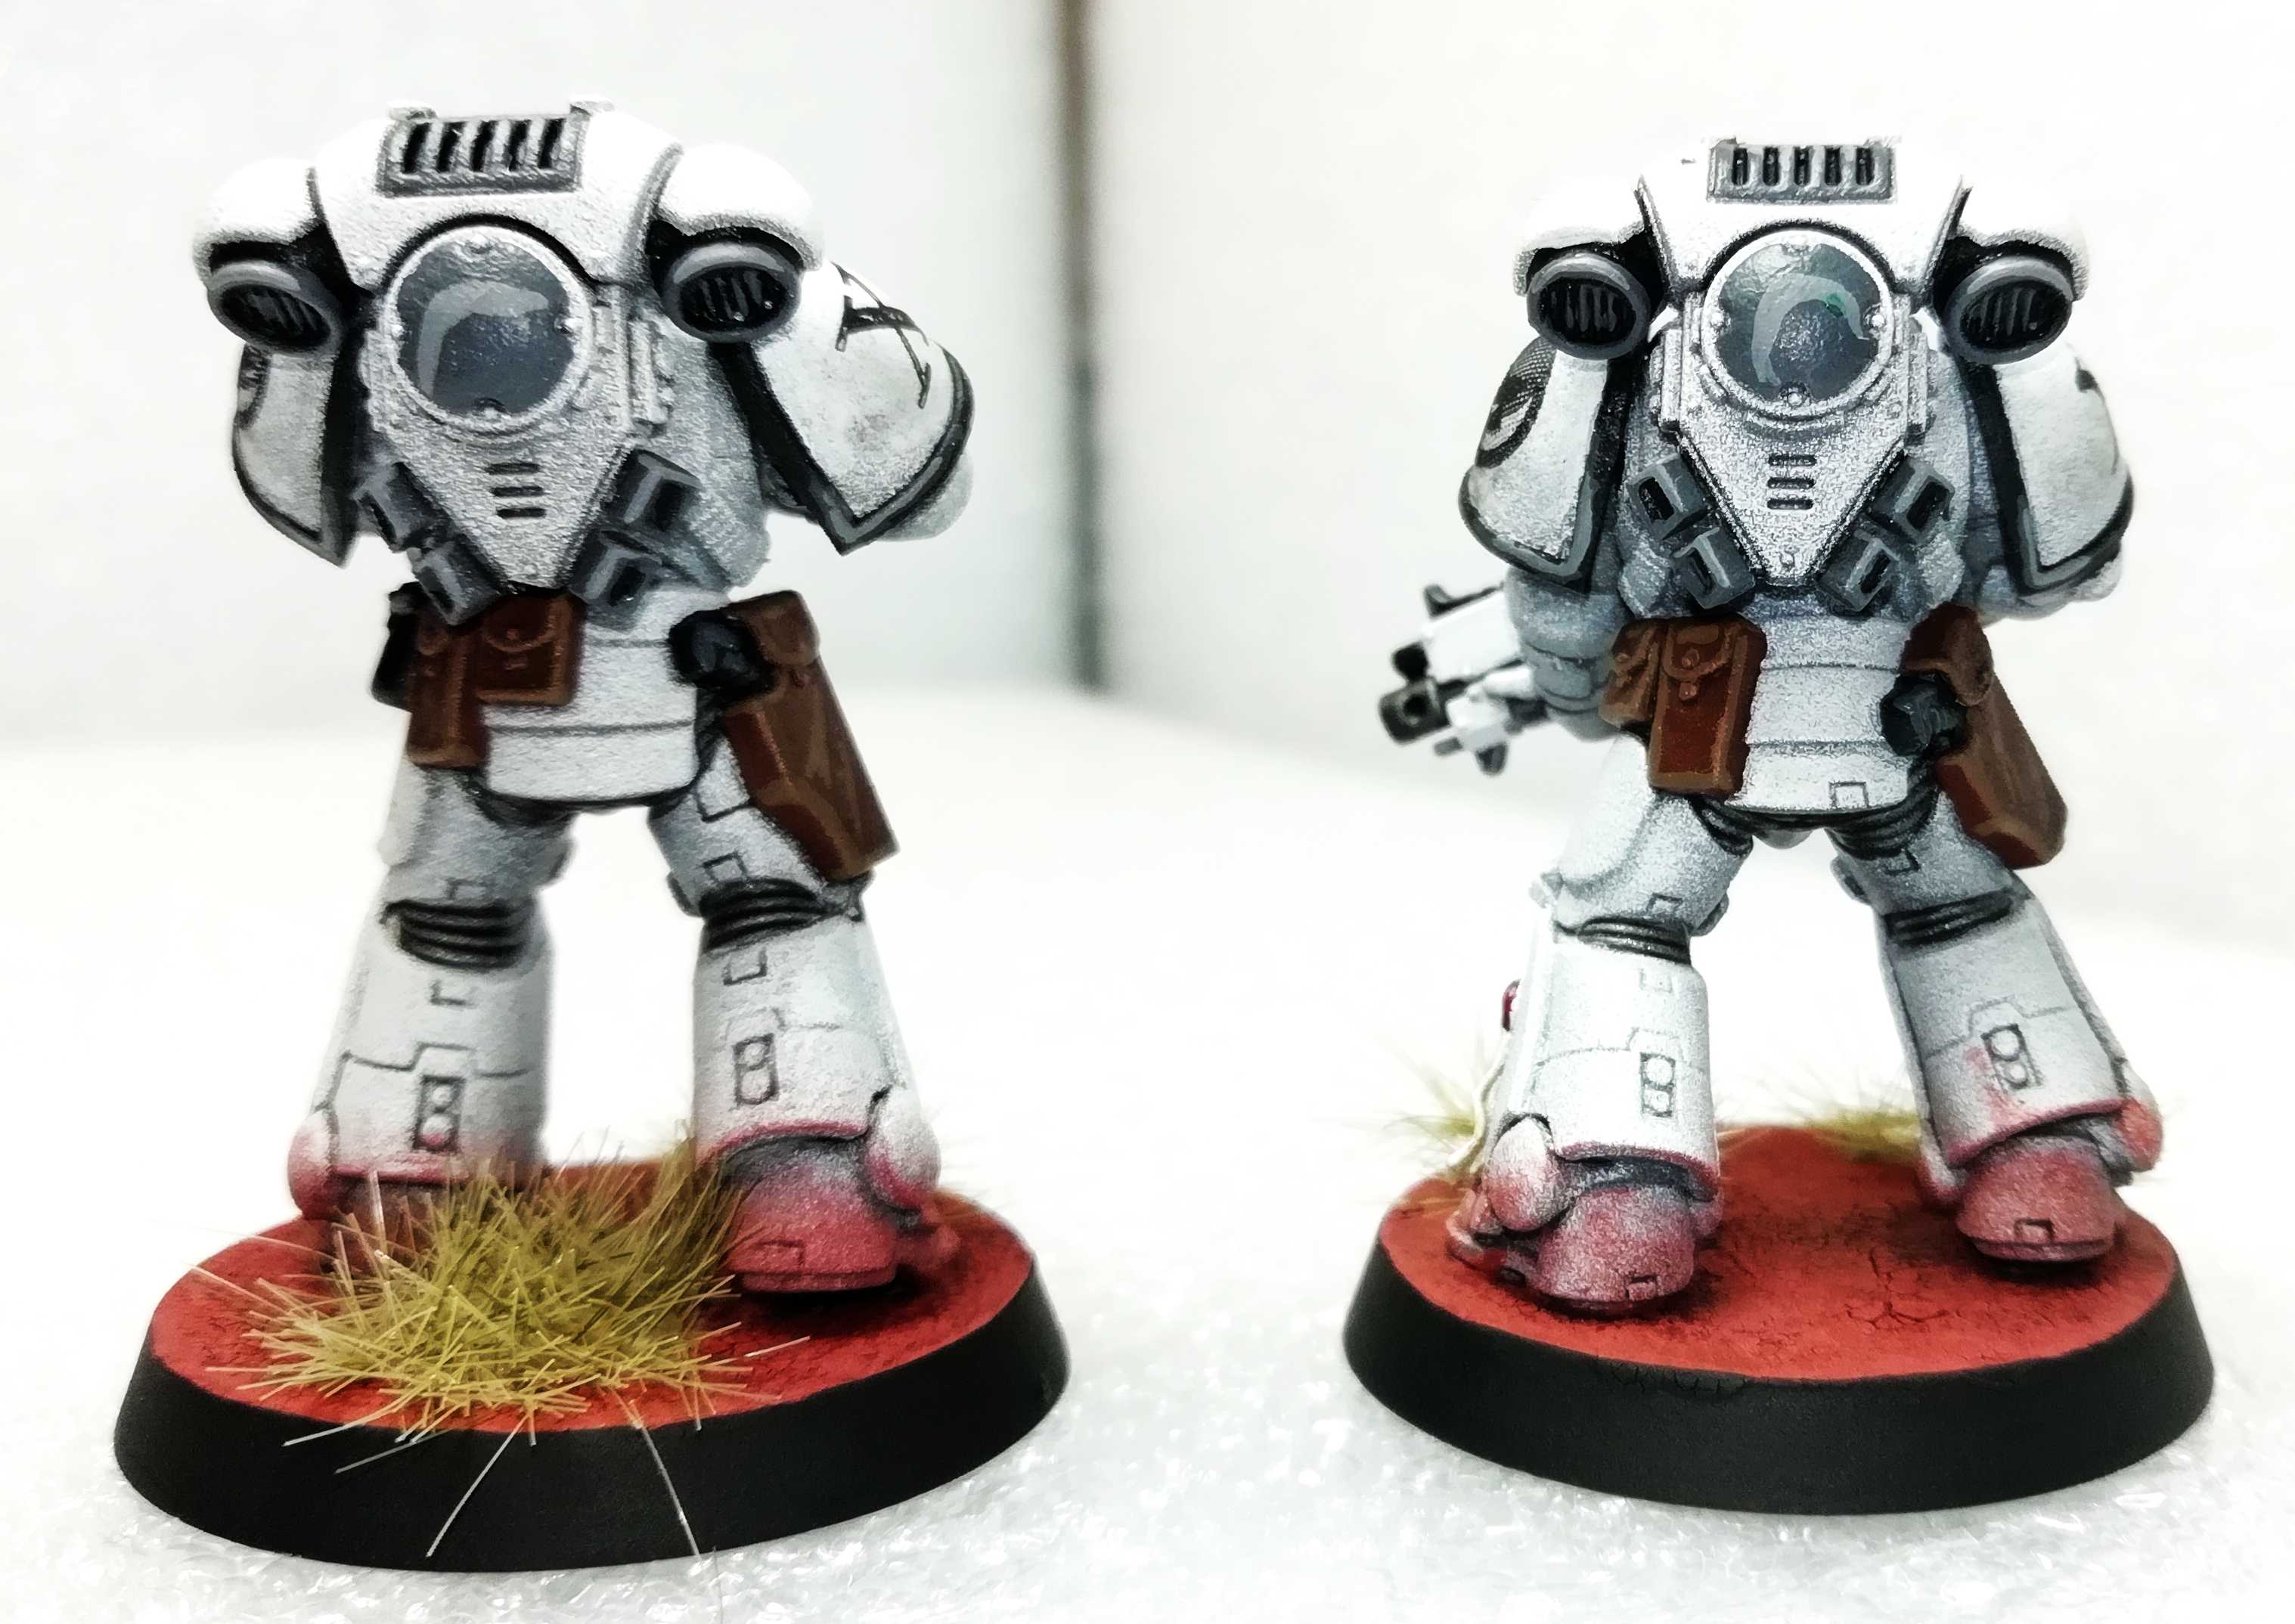
Bases: Step by step
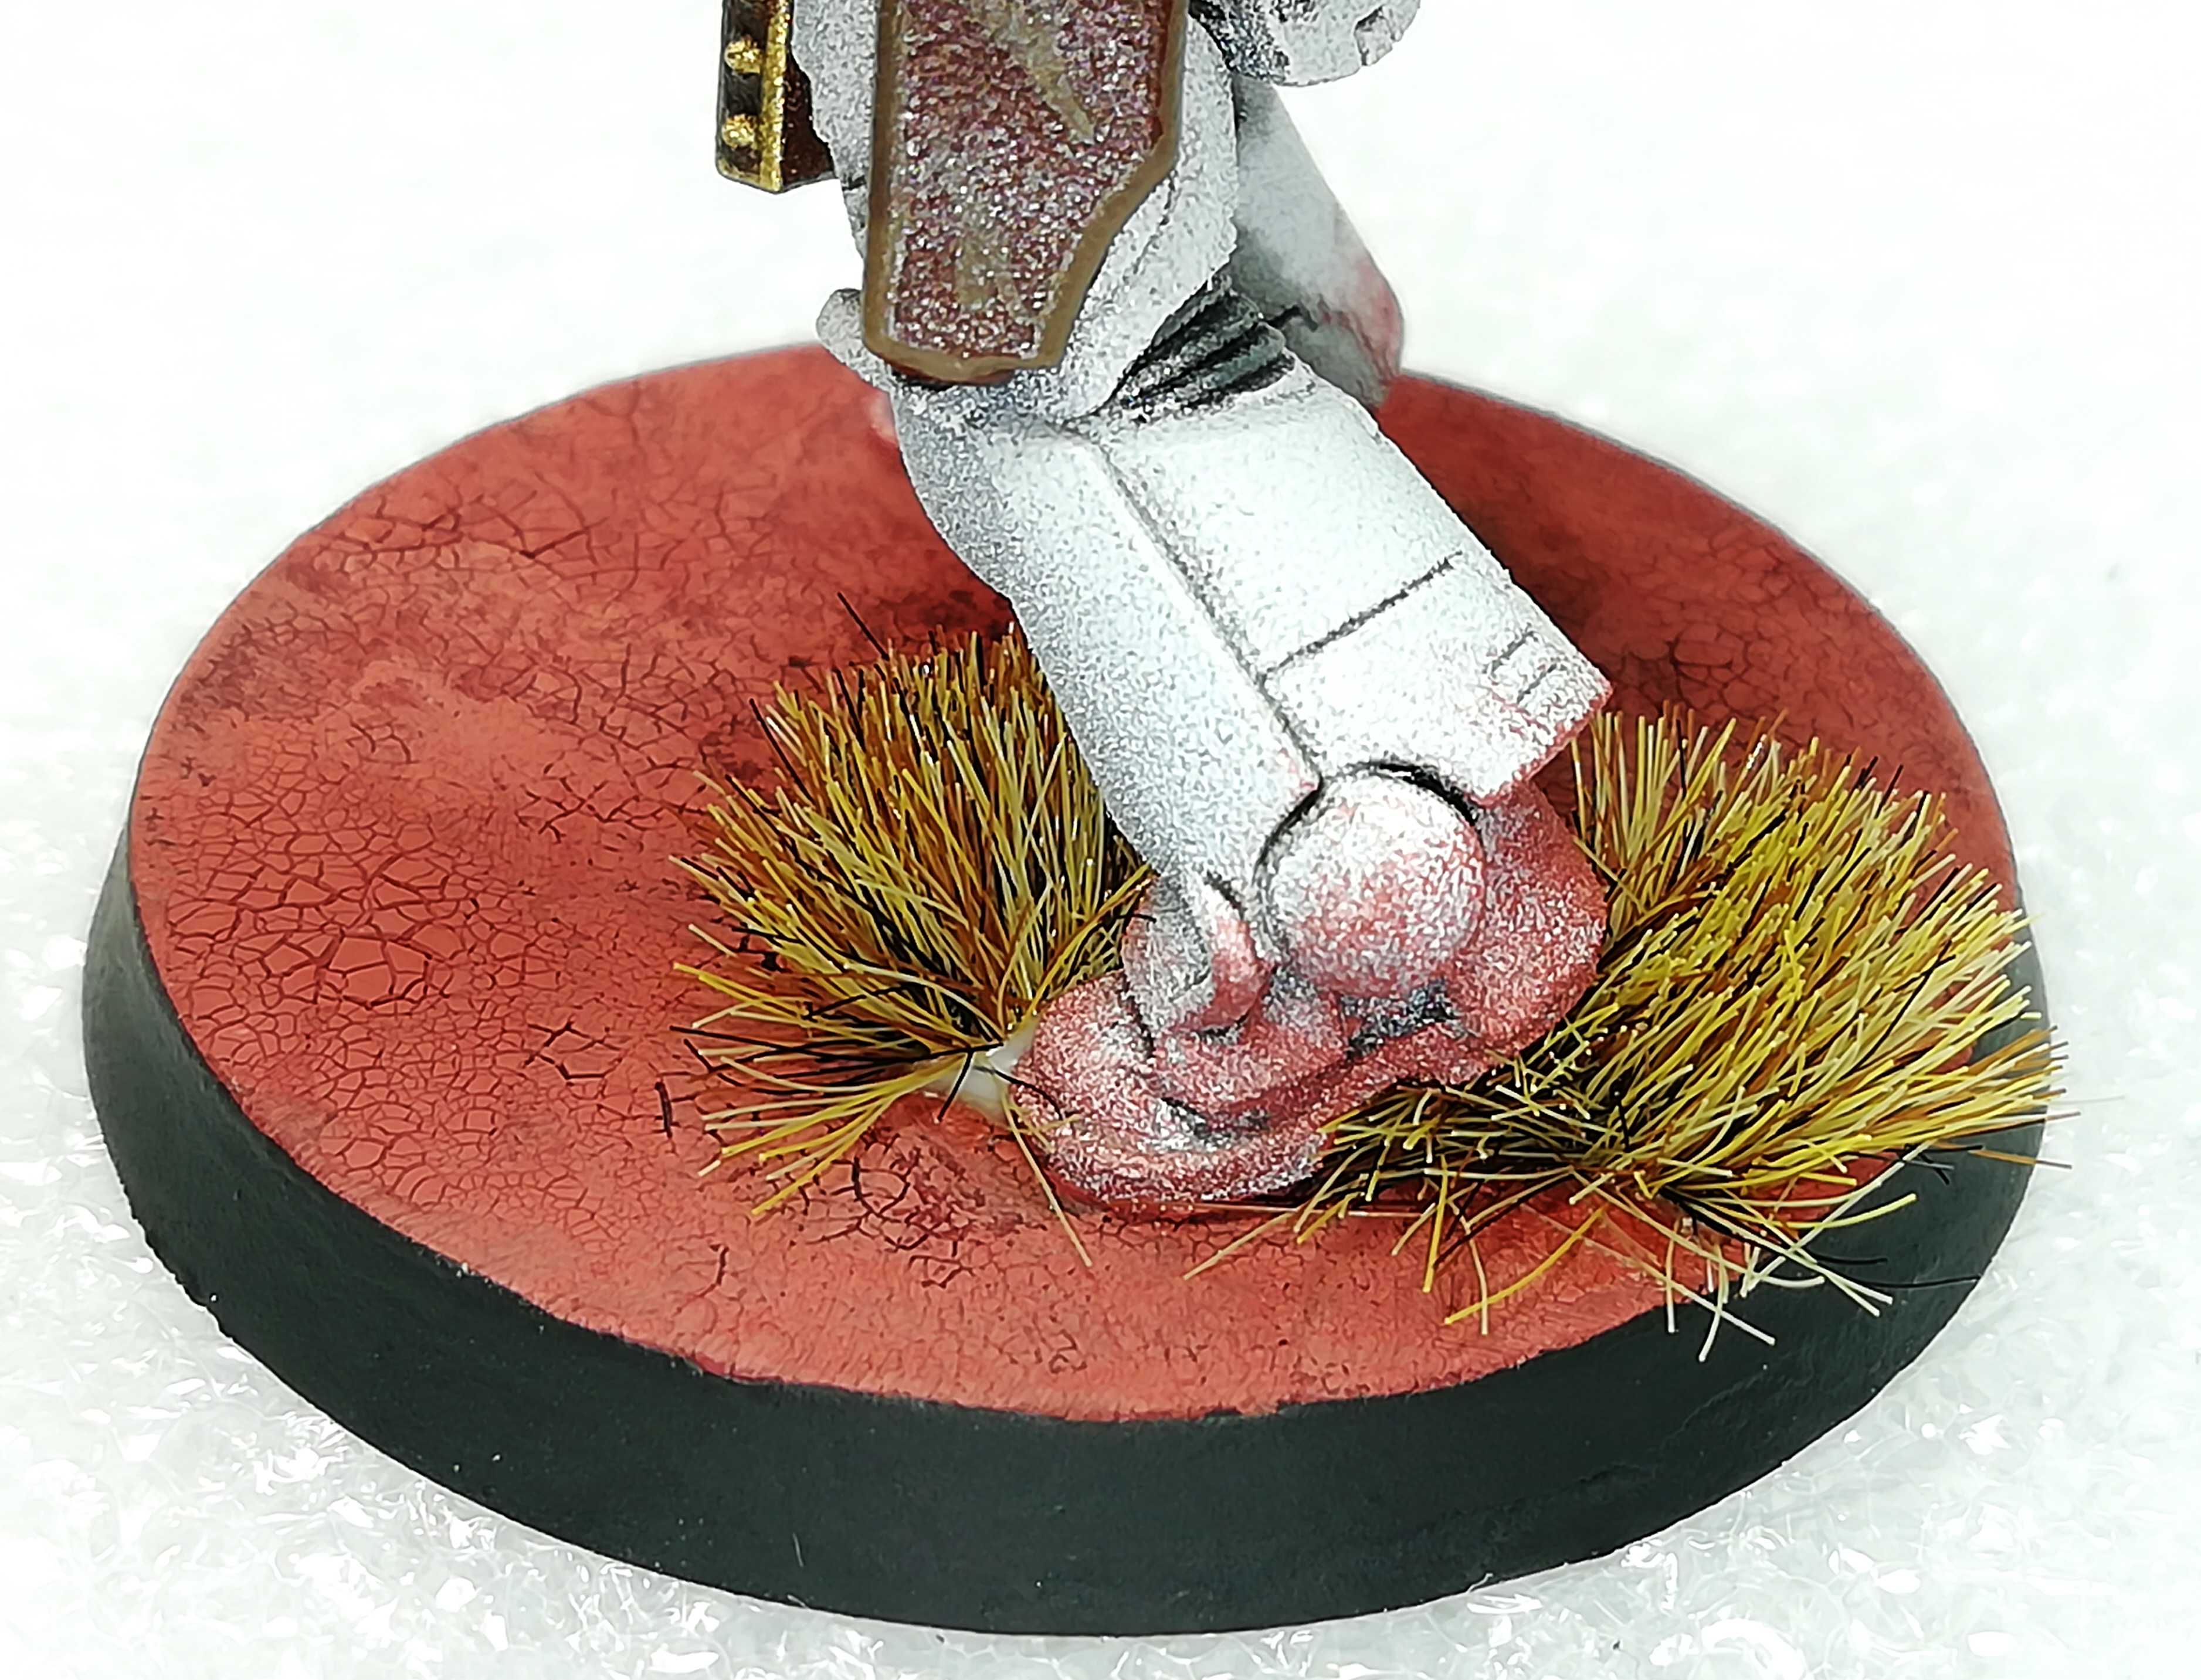
I was asked multiple times how I do my bases. I already posted a small overview in a the painting guide down below a few month ago. But I wanted to go more into detail and create a step by step photo guide on how I do these bases. So here we go.
Stuff you need:
- Your Base (Duh!)
- Black Paint (I use Army Painter Black)
- GW Martian Ironearth
- GW Carroburg Crimson (dark red wash)
- Some Bushes/Tufts (I use Warlords Patchy Tufts)
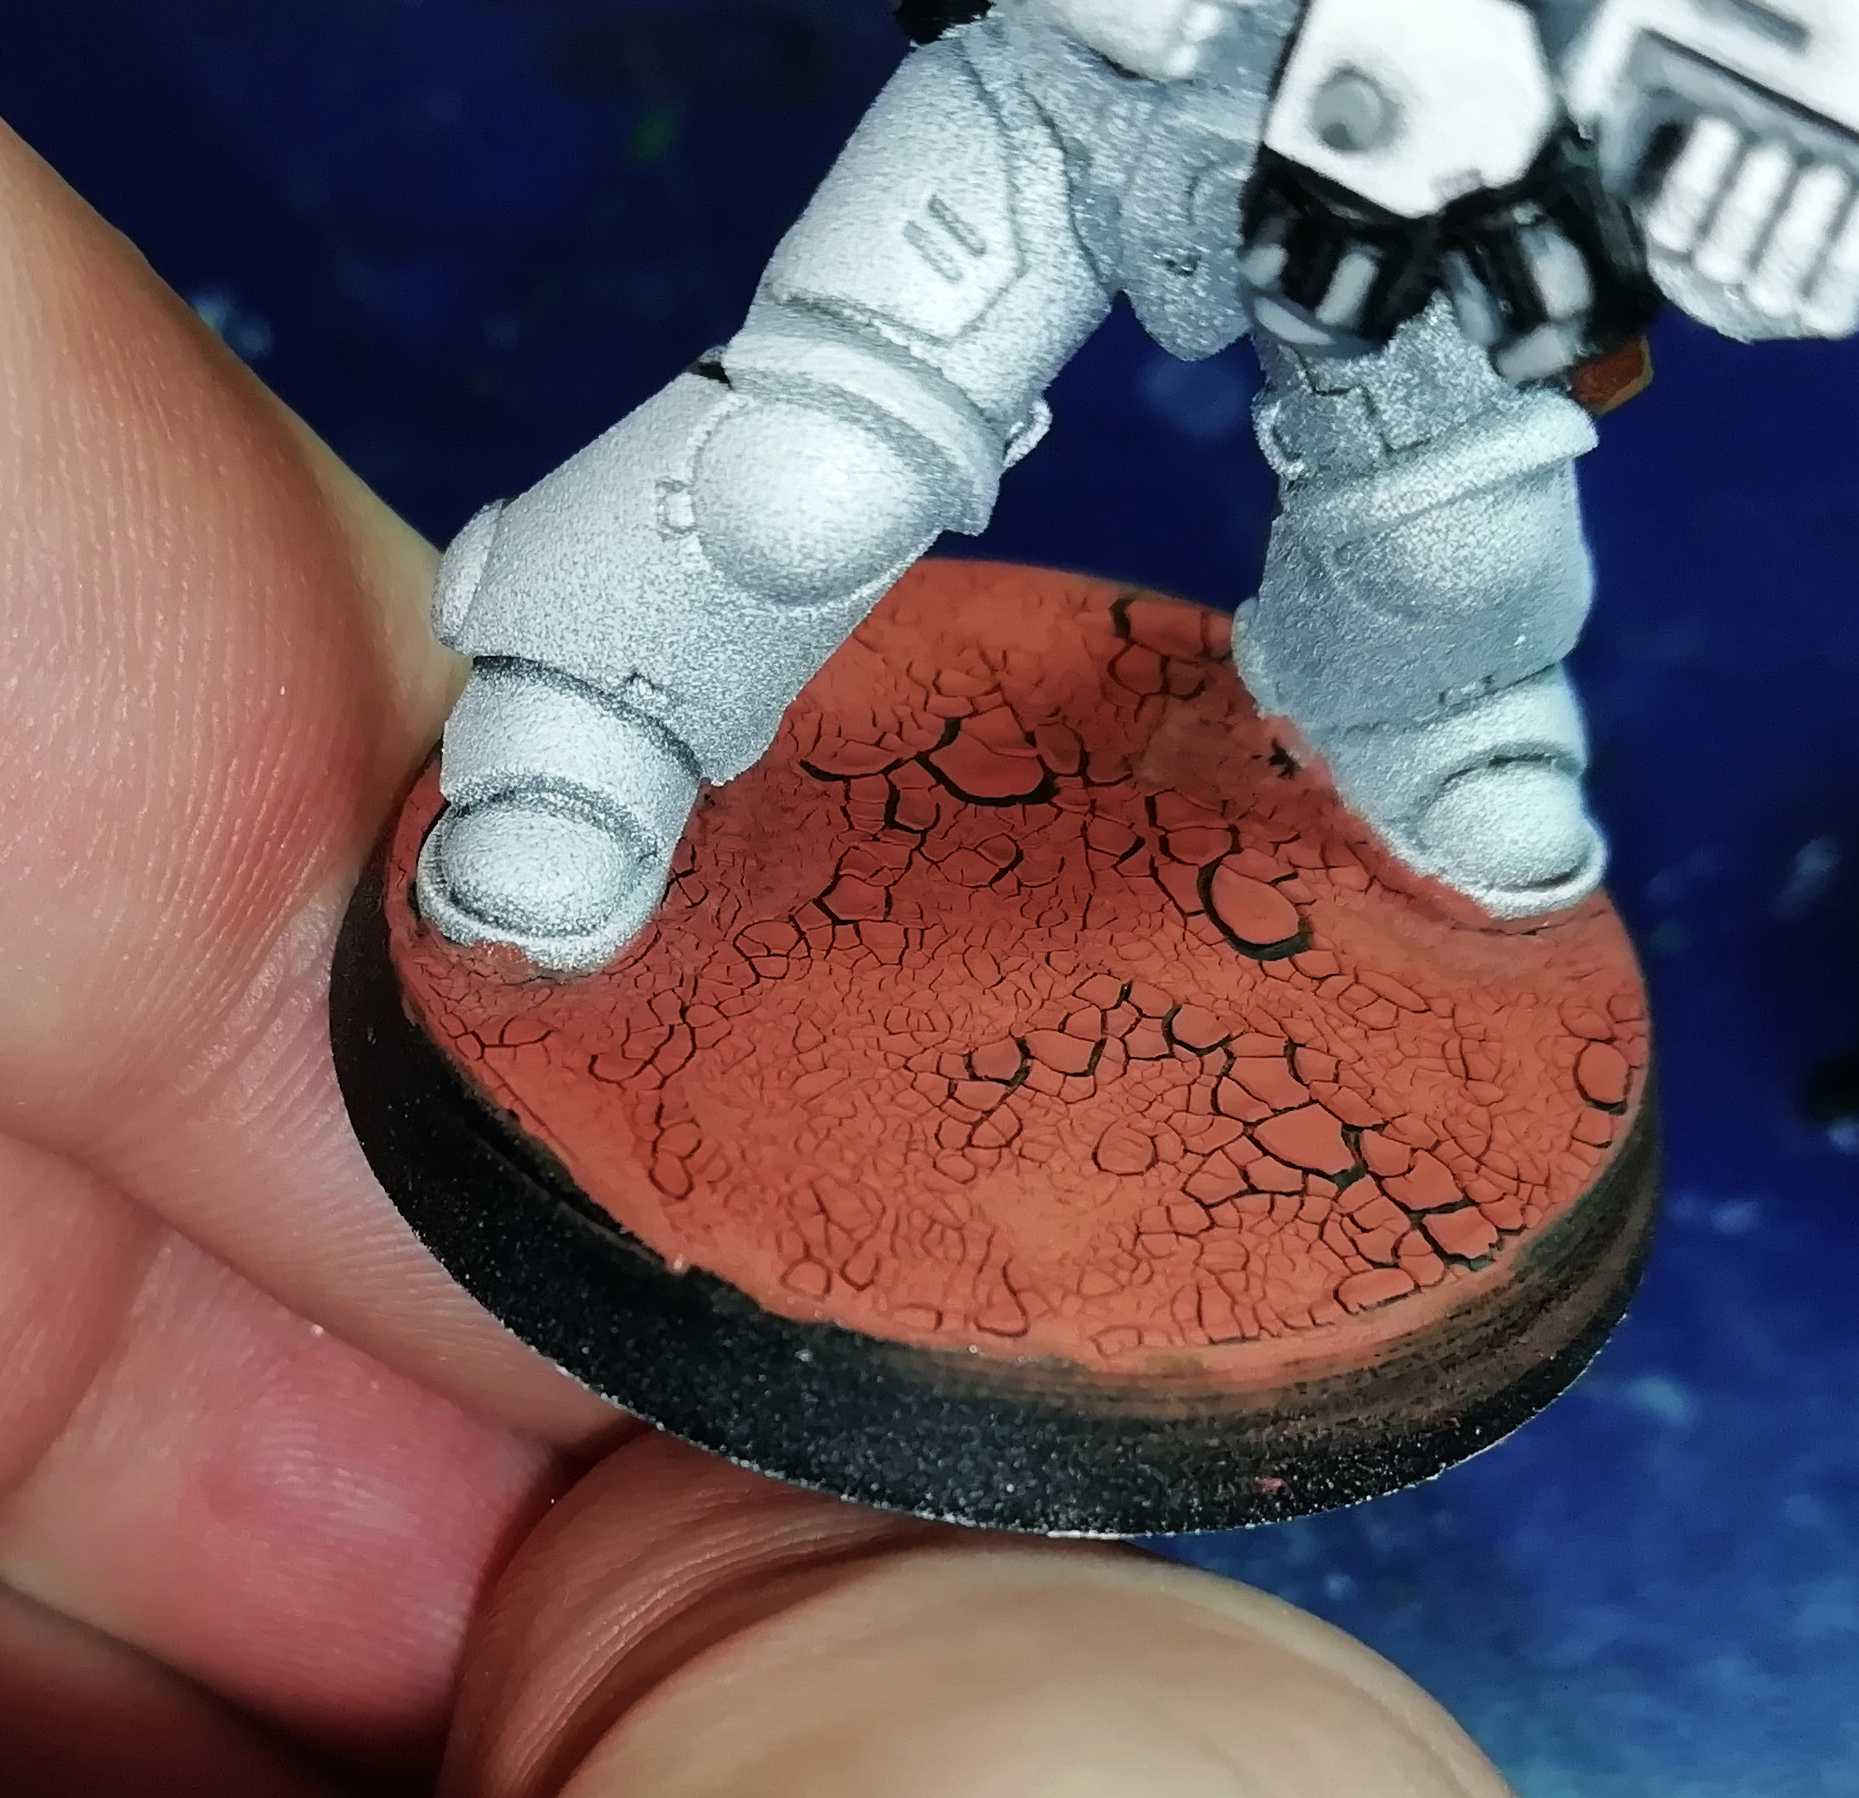
 Step 1: Painted Mini with blackened Base
Step 1:
Paint the mini as you would normally do. In my case it is a white Primaris Marine. Then use a normal black paint of your choice and blacken the entire base.
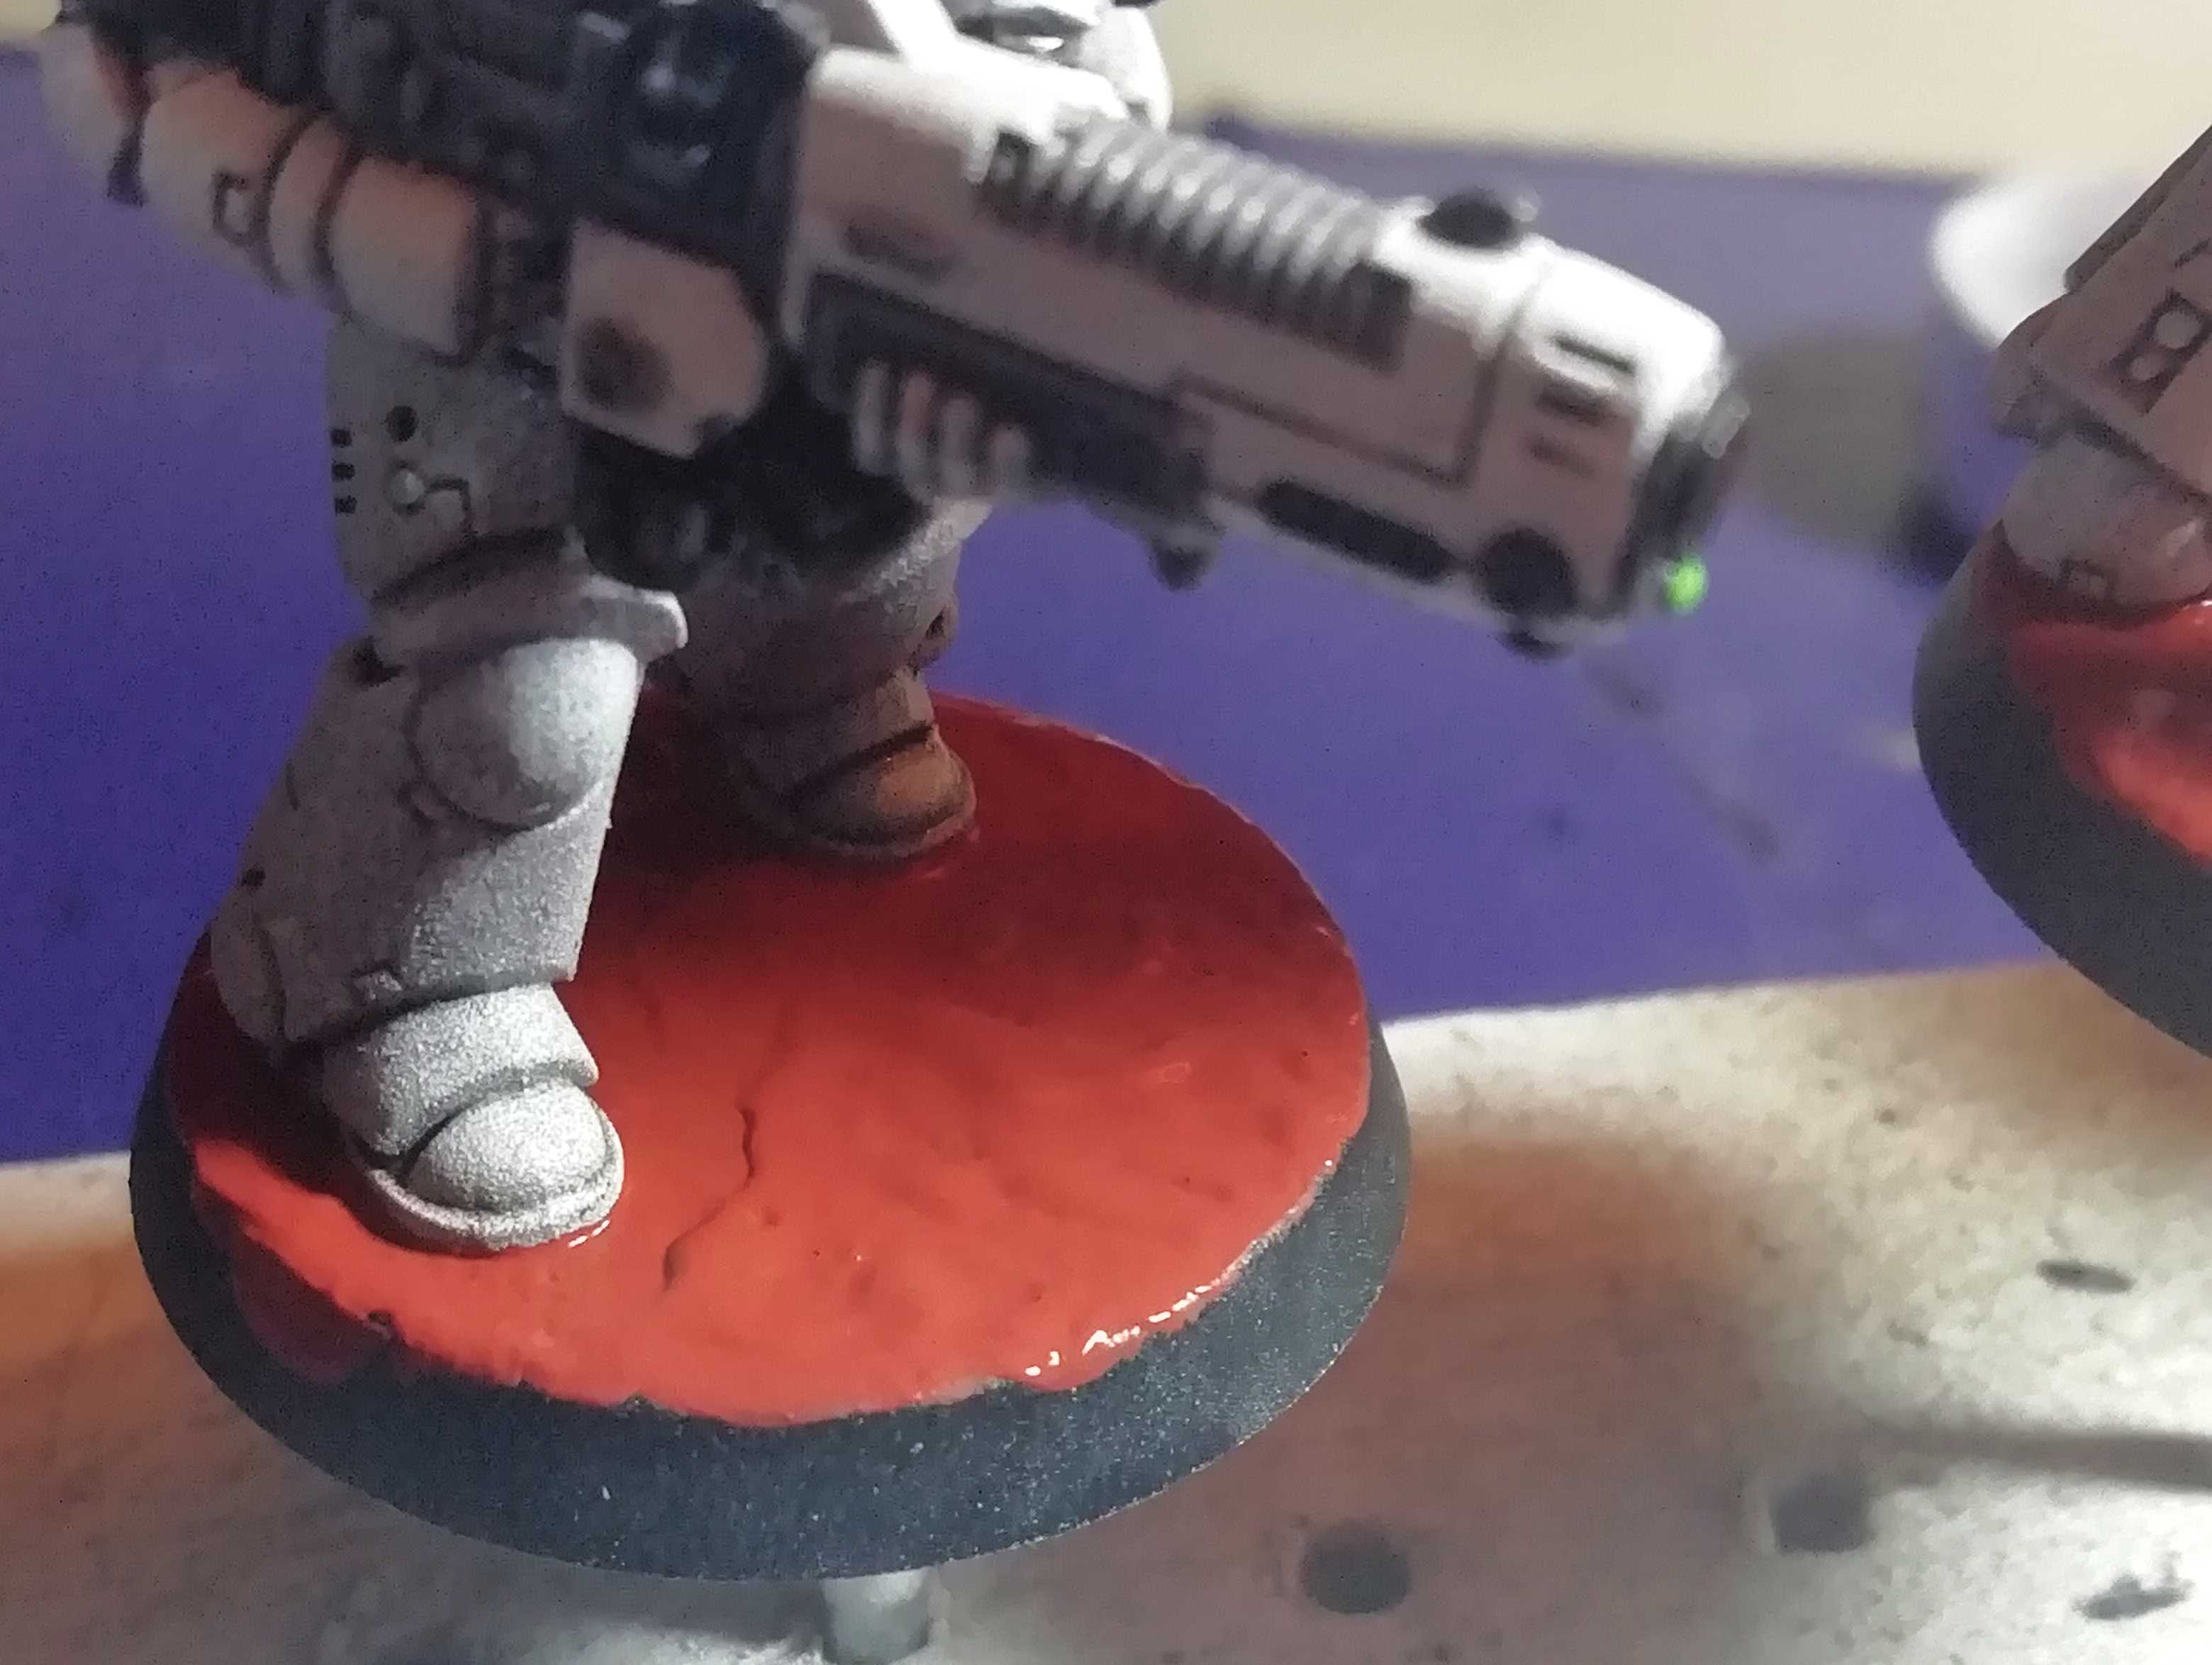 Step 2: Apply GW Martian Ironearth
Step 2:
Apply GW Martian Ironearth to the flat area of the base. If you get some on the rim use a tissue to wipe it of. Don’t worry if the rim stays a bit red, but you don’t want to get the thick stuff on it. Also don’t worry if you get some on the mini. You can use this later.
Most guides say that you should apply this stuff very thin. I completely disagree. I suggest you apply it from thick to really really thick. Like up to 2mm. I worked with this stuff a lot and it seems that the thicker you apply it the larger the crevasses you get. Try around a little and see what results you like.
In the pic below you can see how it looks completely dried. Let it cure for at least an hour. Notice the different sizes of crevasses.
 Step 2: Dried
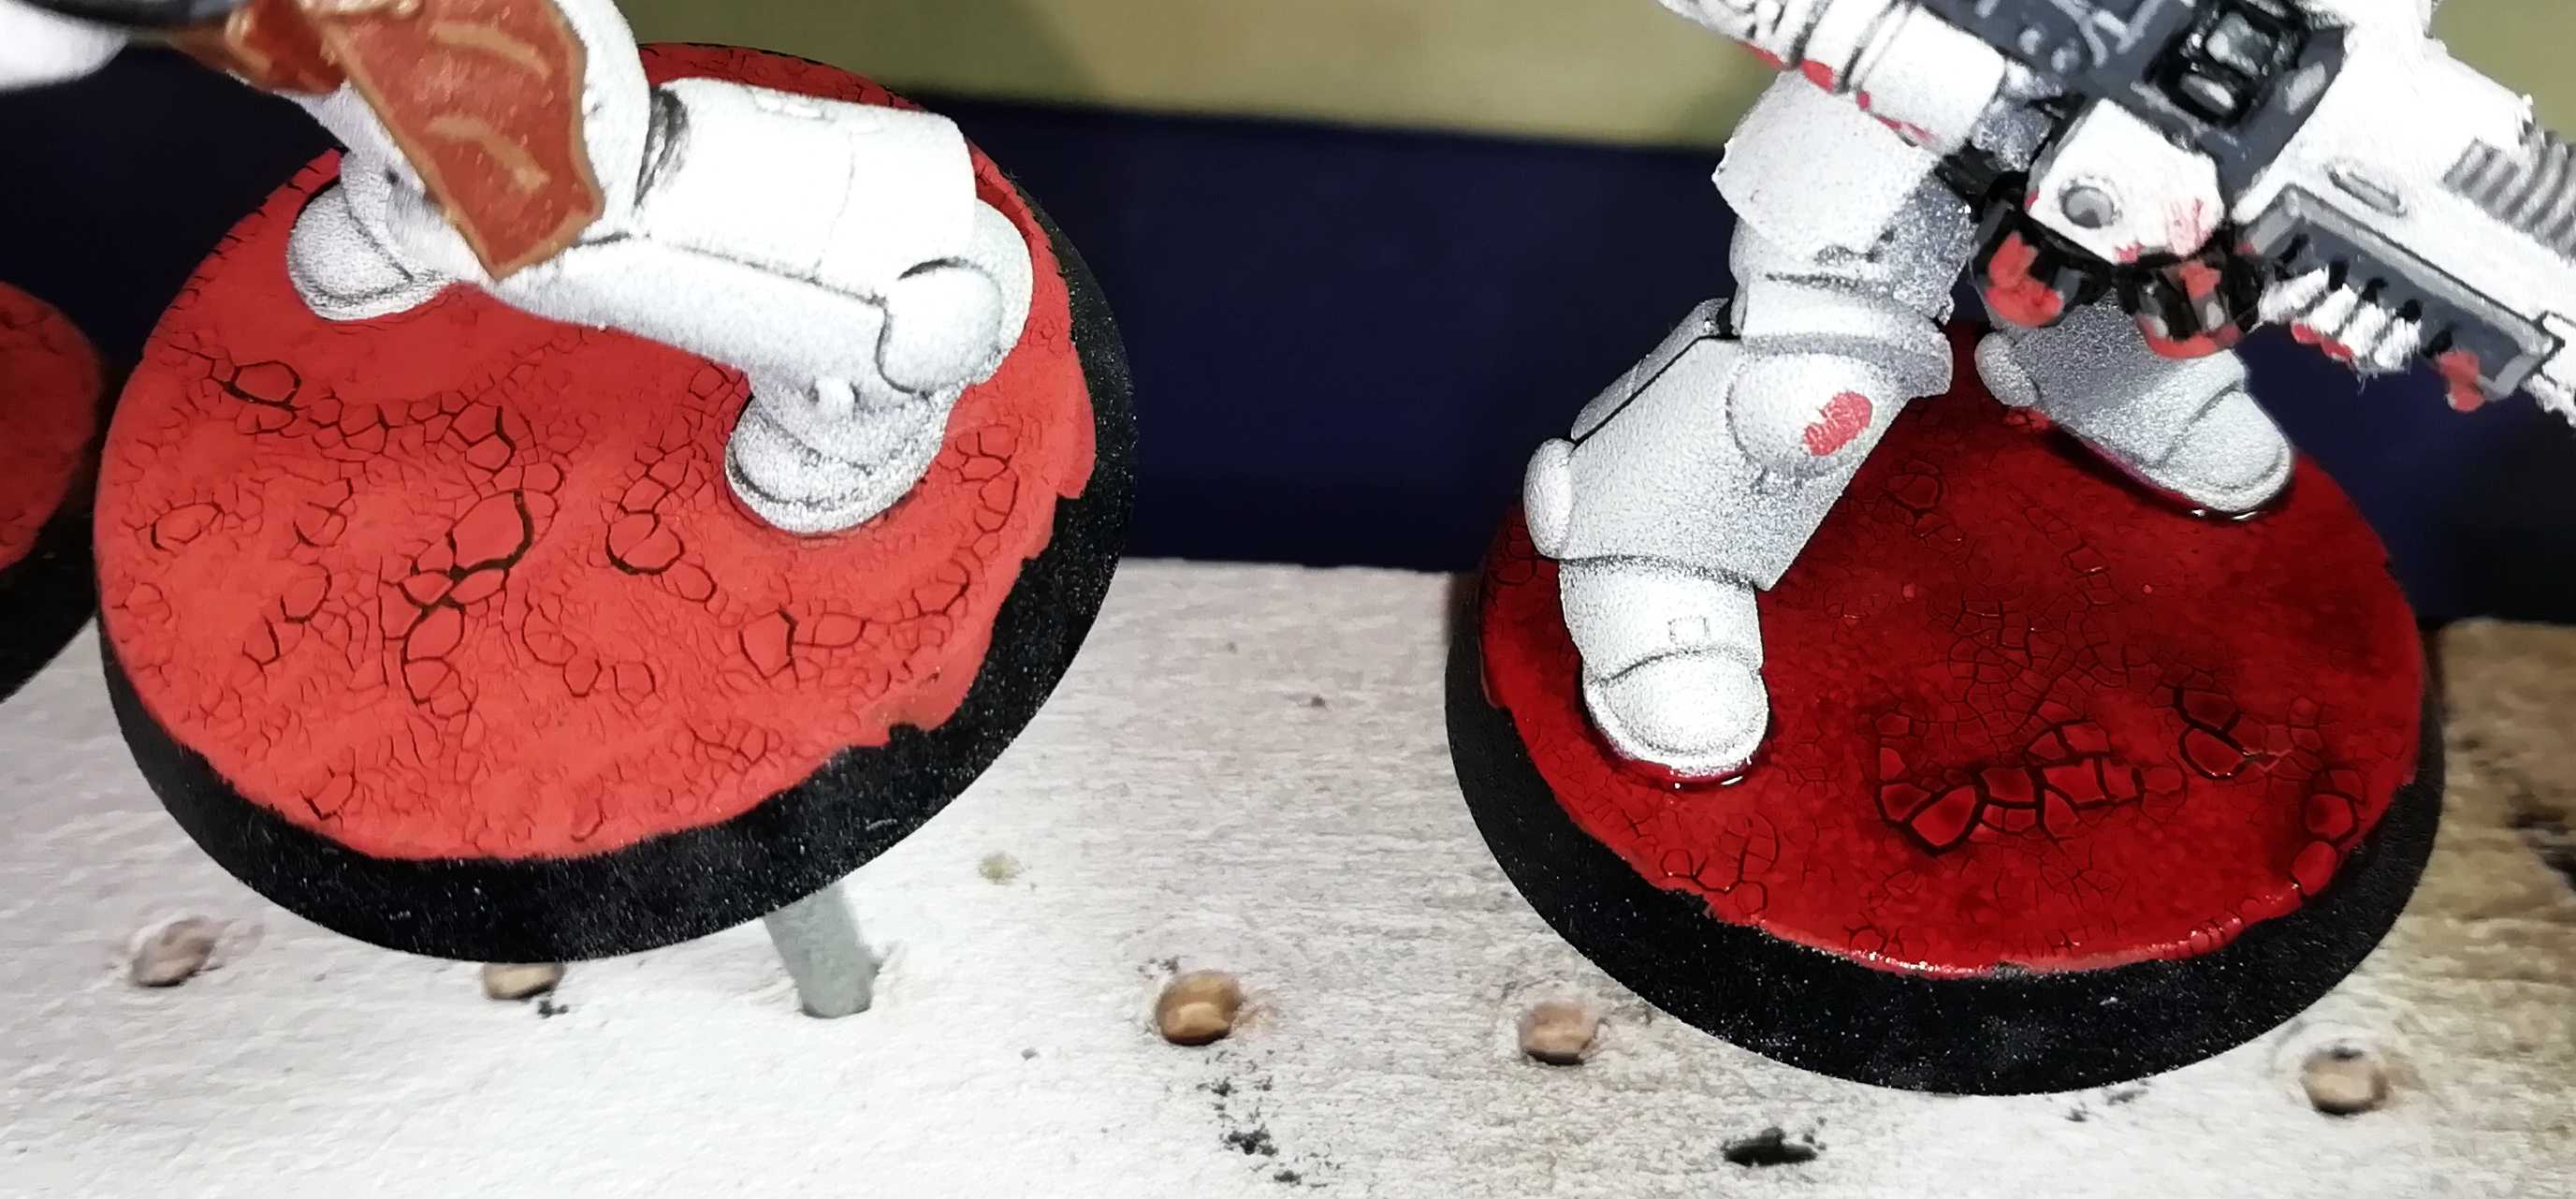 Step 3: GW Carroburg Crimson
Step 3:
Apply GW Carroburg Crimson to the entire base. Don’t worry if it pools in places. This only gives you deeper shadows.
Unfortunately I didn’t took a picture with the wash dried. But the base gets really dark.
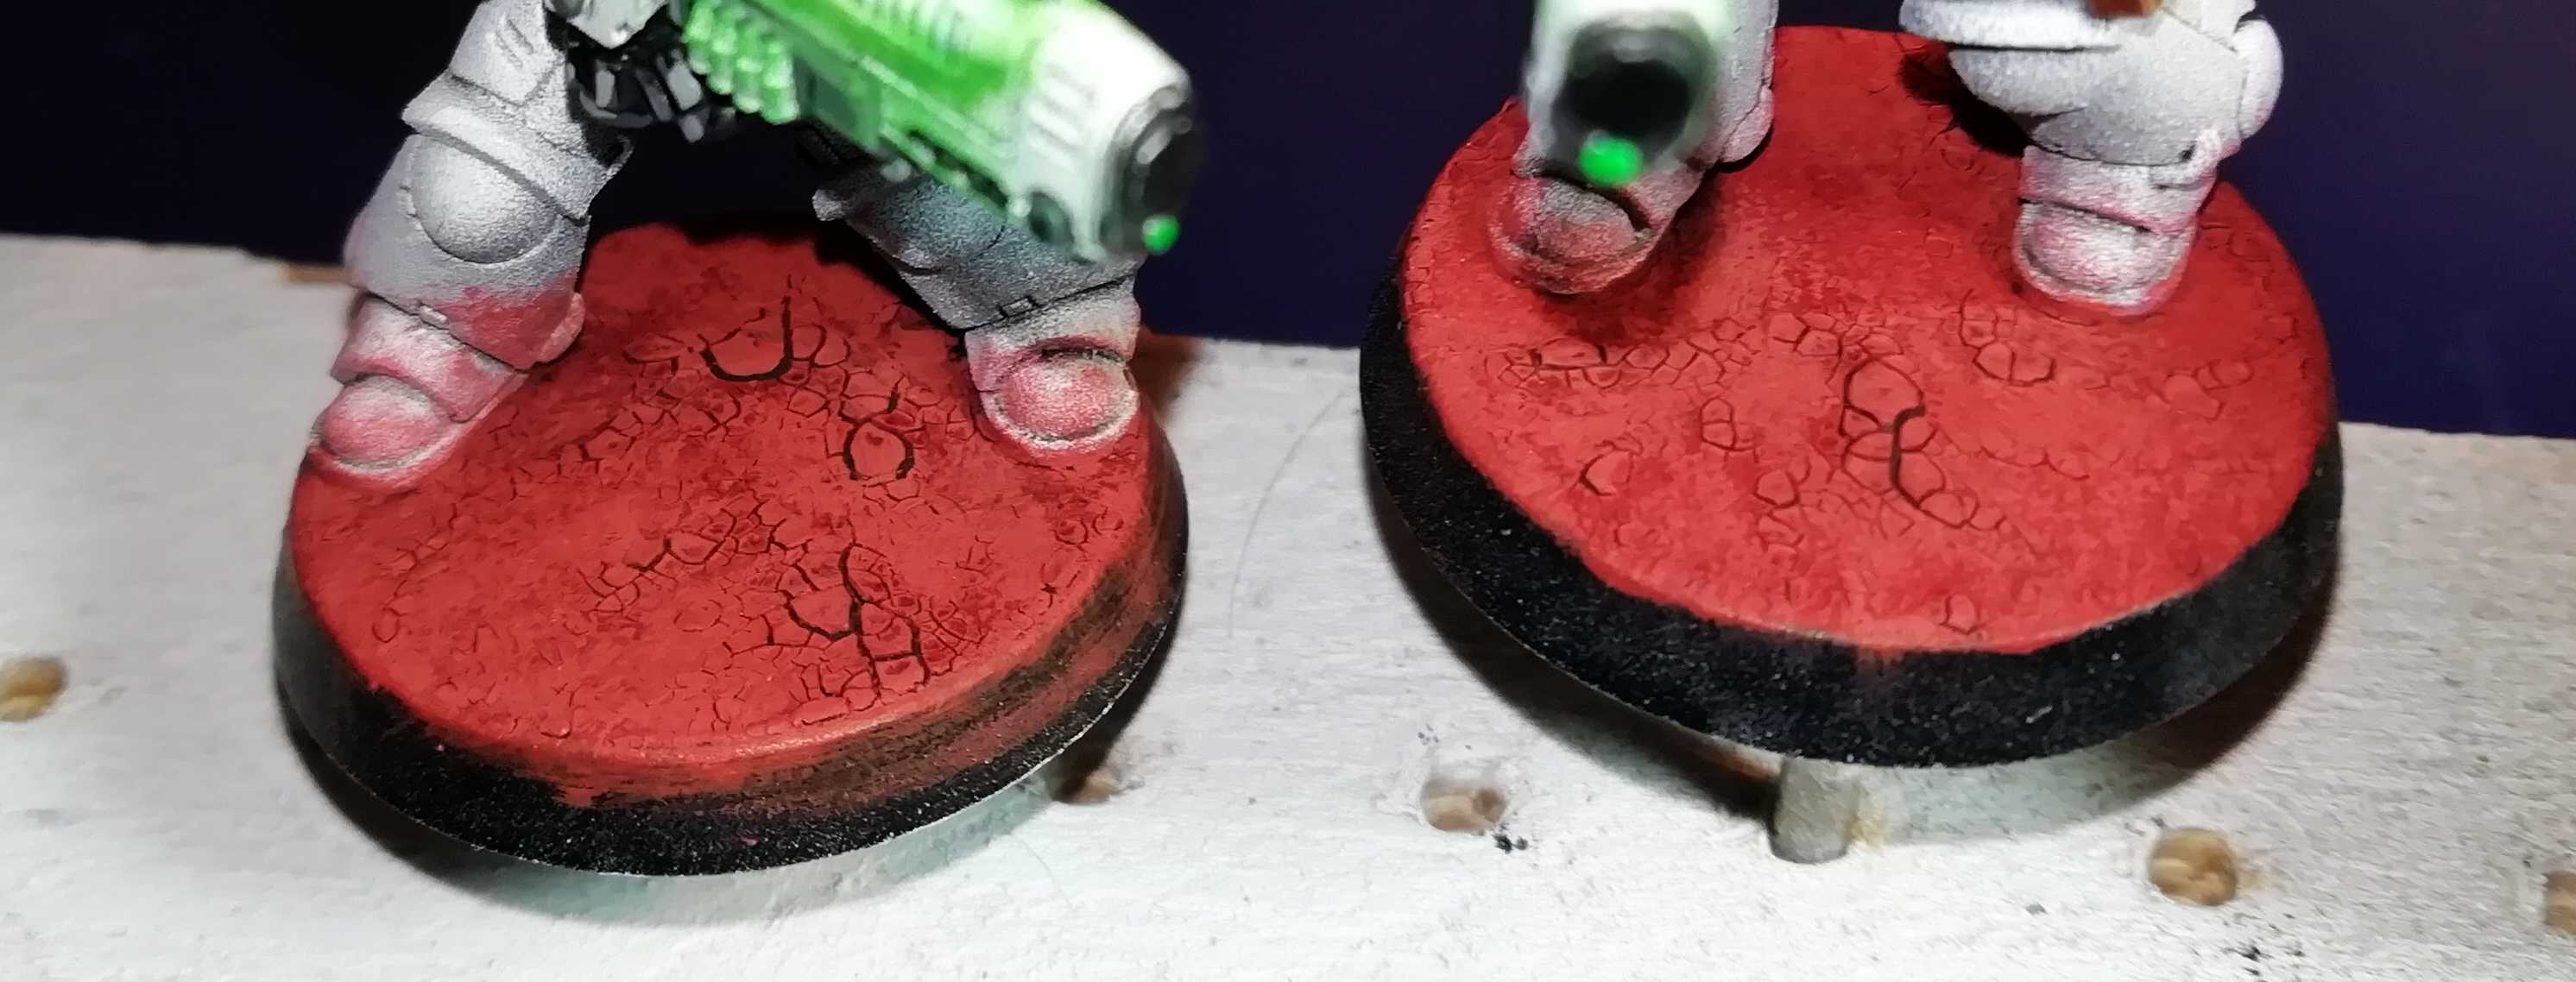 Step 4: Drybrushing
Step 4:
Now you only need to drybrush the base again with GW Martian Ironearth. Don’t be too heavy with the drybrush or you destroy the shadows you created in the step before.
Also in this stage you can drybrush very lightly over the boots/feet of your mini (as I did). This creates the illusion that some of the dust has settle on your mini.
As mentioned before now you can use some mistakes you maybe made earlier to your advantage. If you got some of the Ironearth on you mini, just drybrush over and around it. Make it look like as if the mini was lying in the dust or fell down. Looks especially great on elbows and knees.
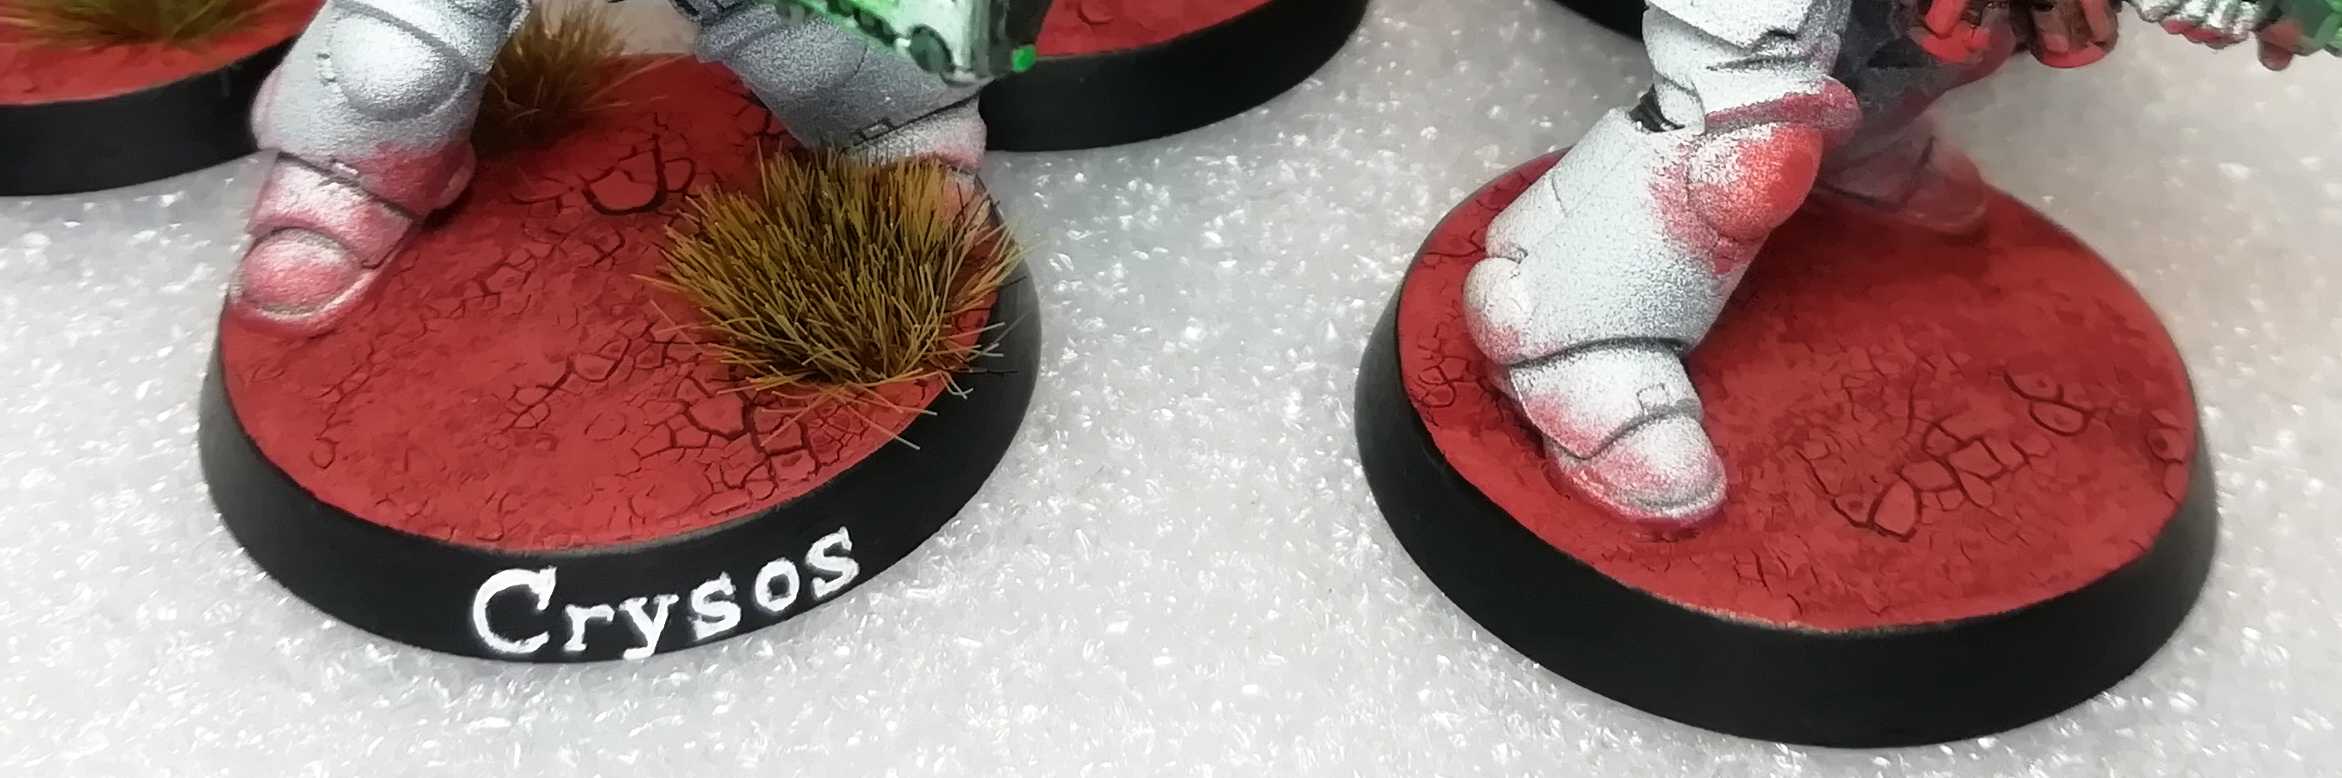 Step 5: Finishing Touches
Step 5:
First get your black paint out again and paint the rim of the base black. Be careful not to get anything onto the top area of the base.
Then just glue a tuft/bush here and there and you can be finished. I like to put bushes were I went too heavy with the drybrush to cover that up.
Notice the red knee guard on the right marine. That’s what I was talking about in the step before.
Lastly I like to have name-labels for my Sergeants and other Characters. But this is of course optional and not needed for this base style.
That sums up mostly of how I do my bases. Hope to get another post out tomorrow with the last two characters.
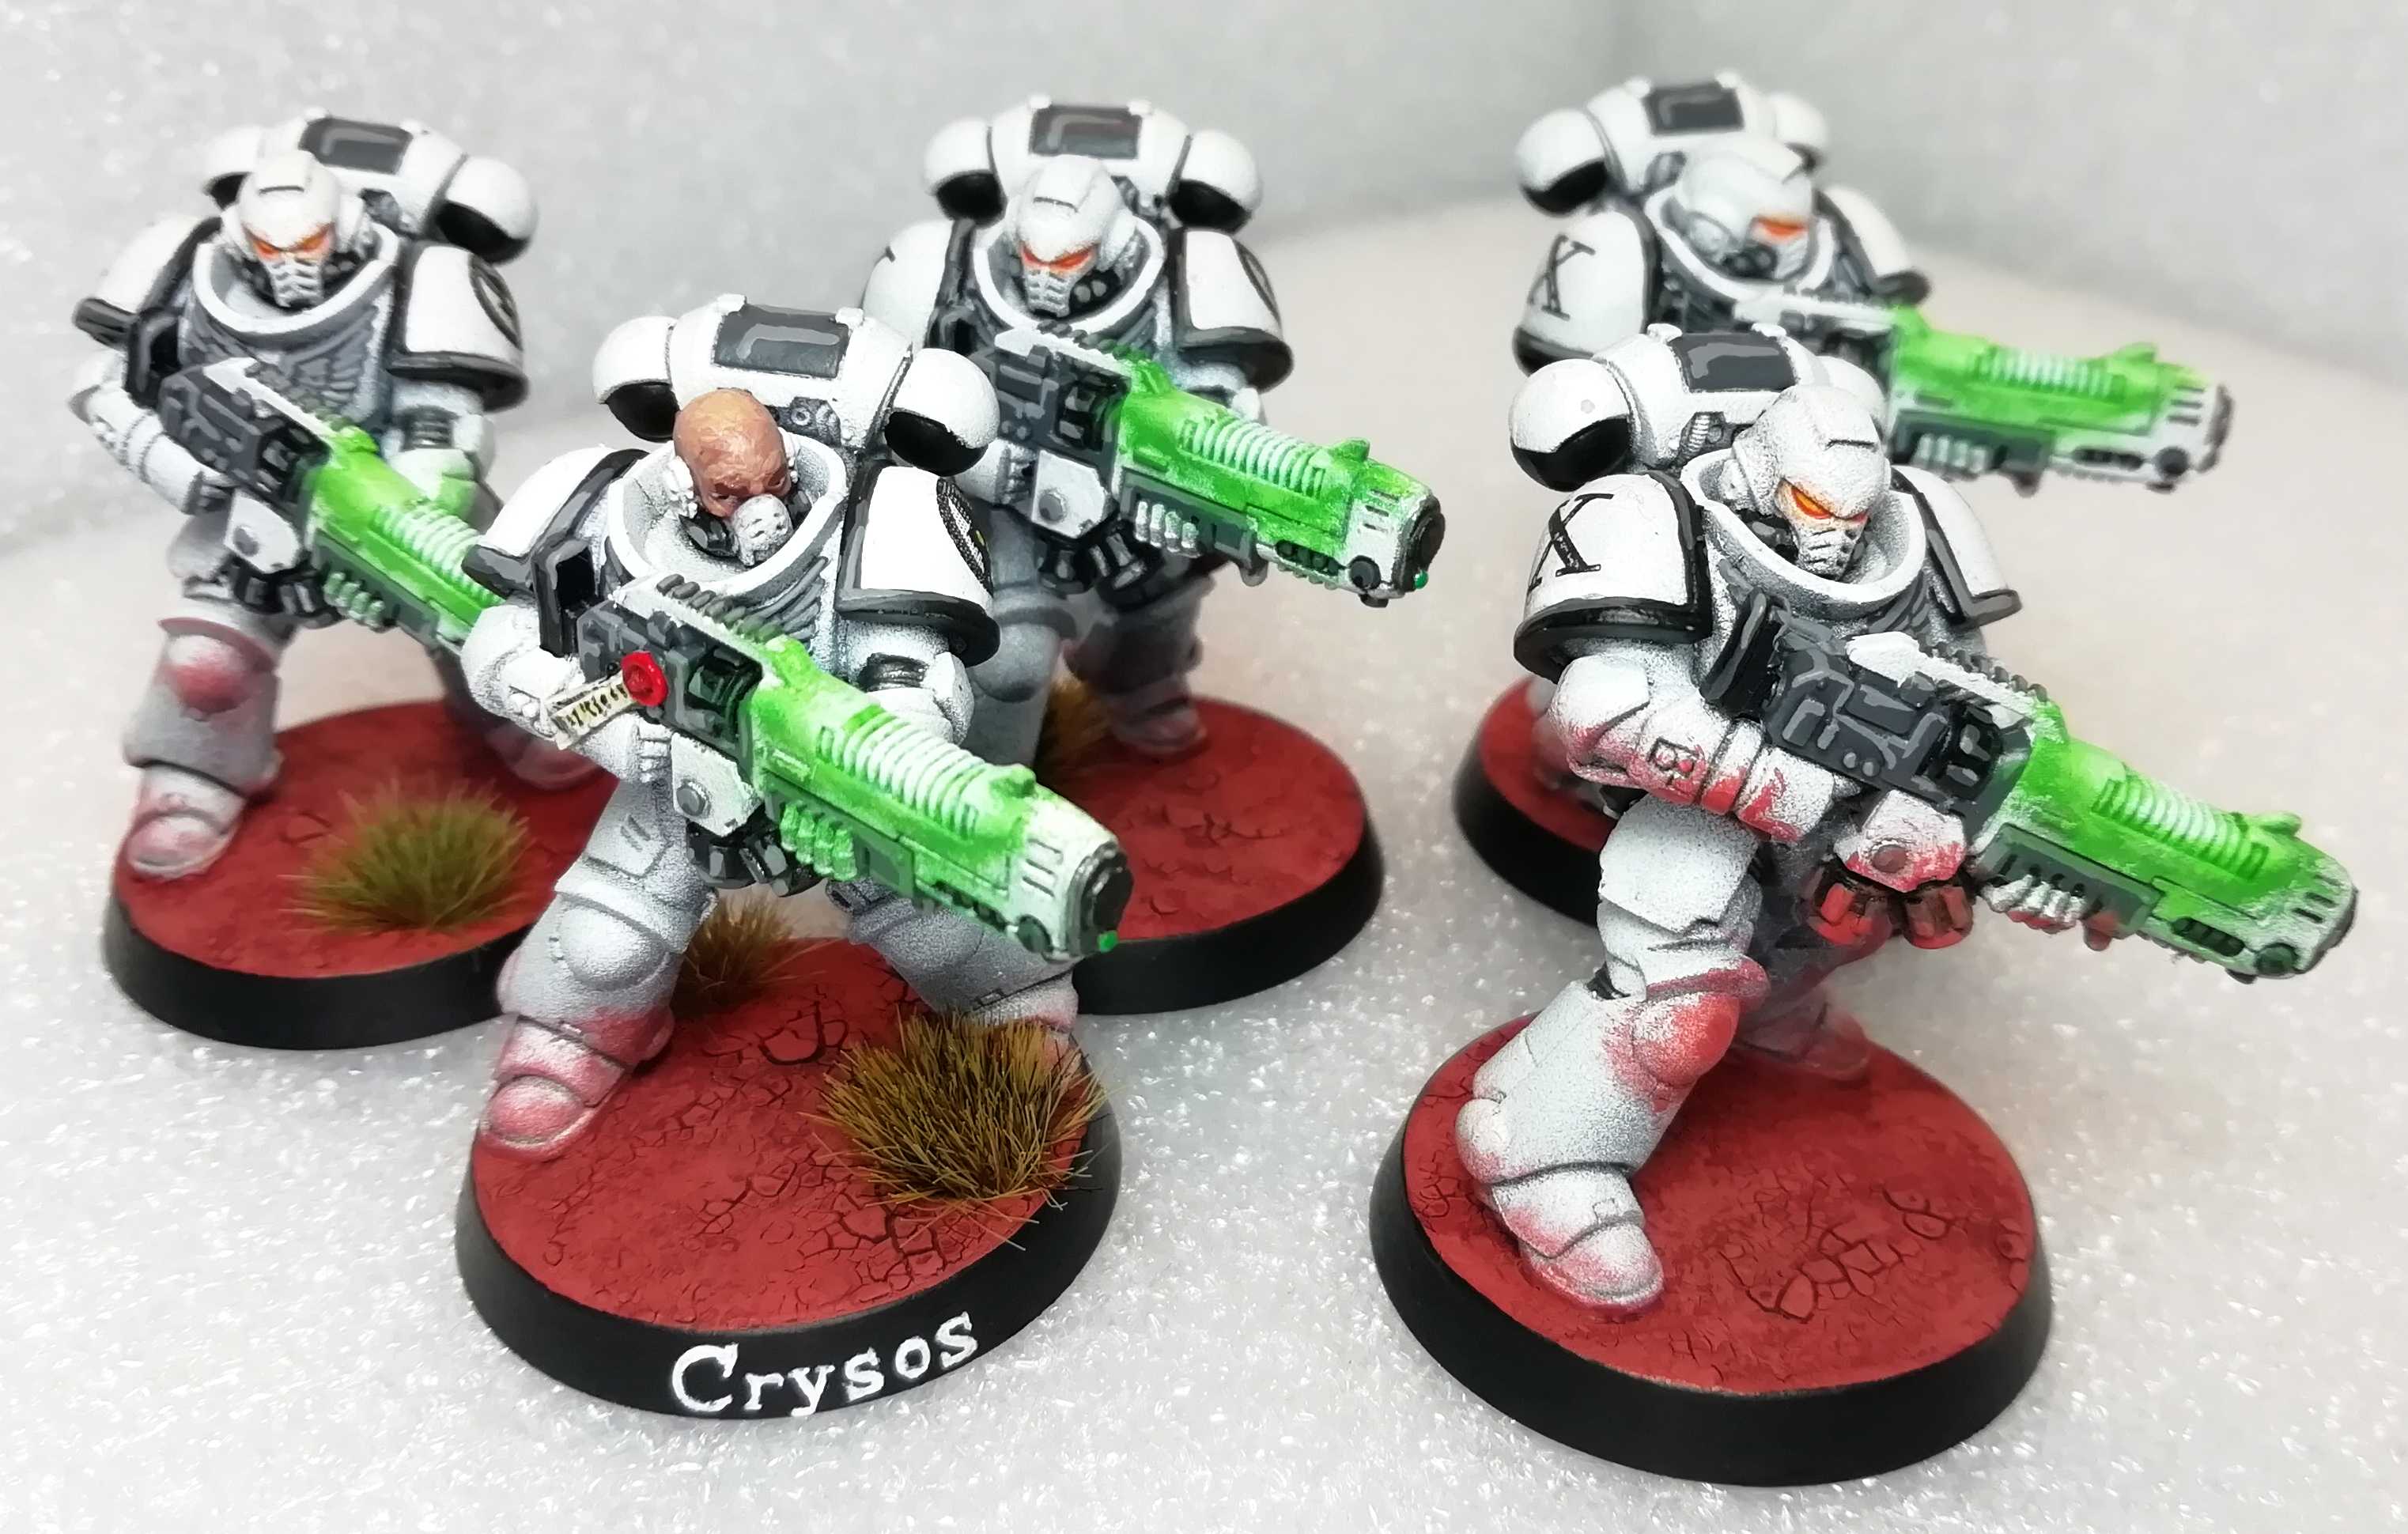
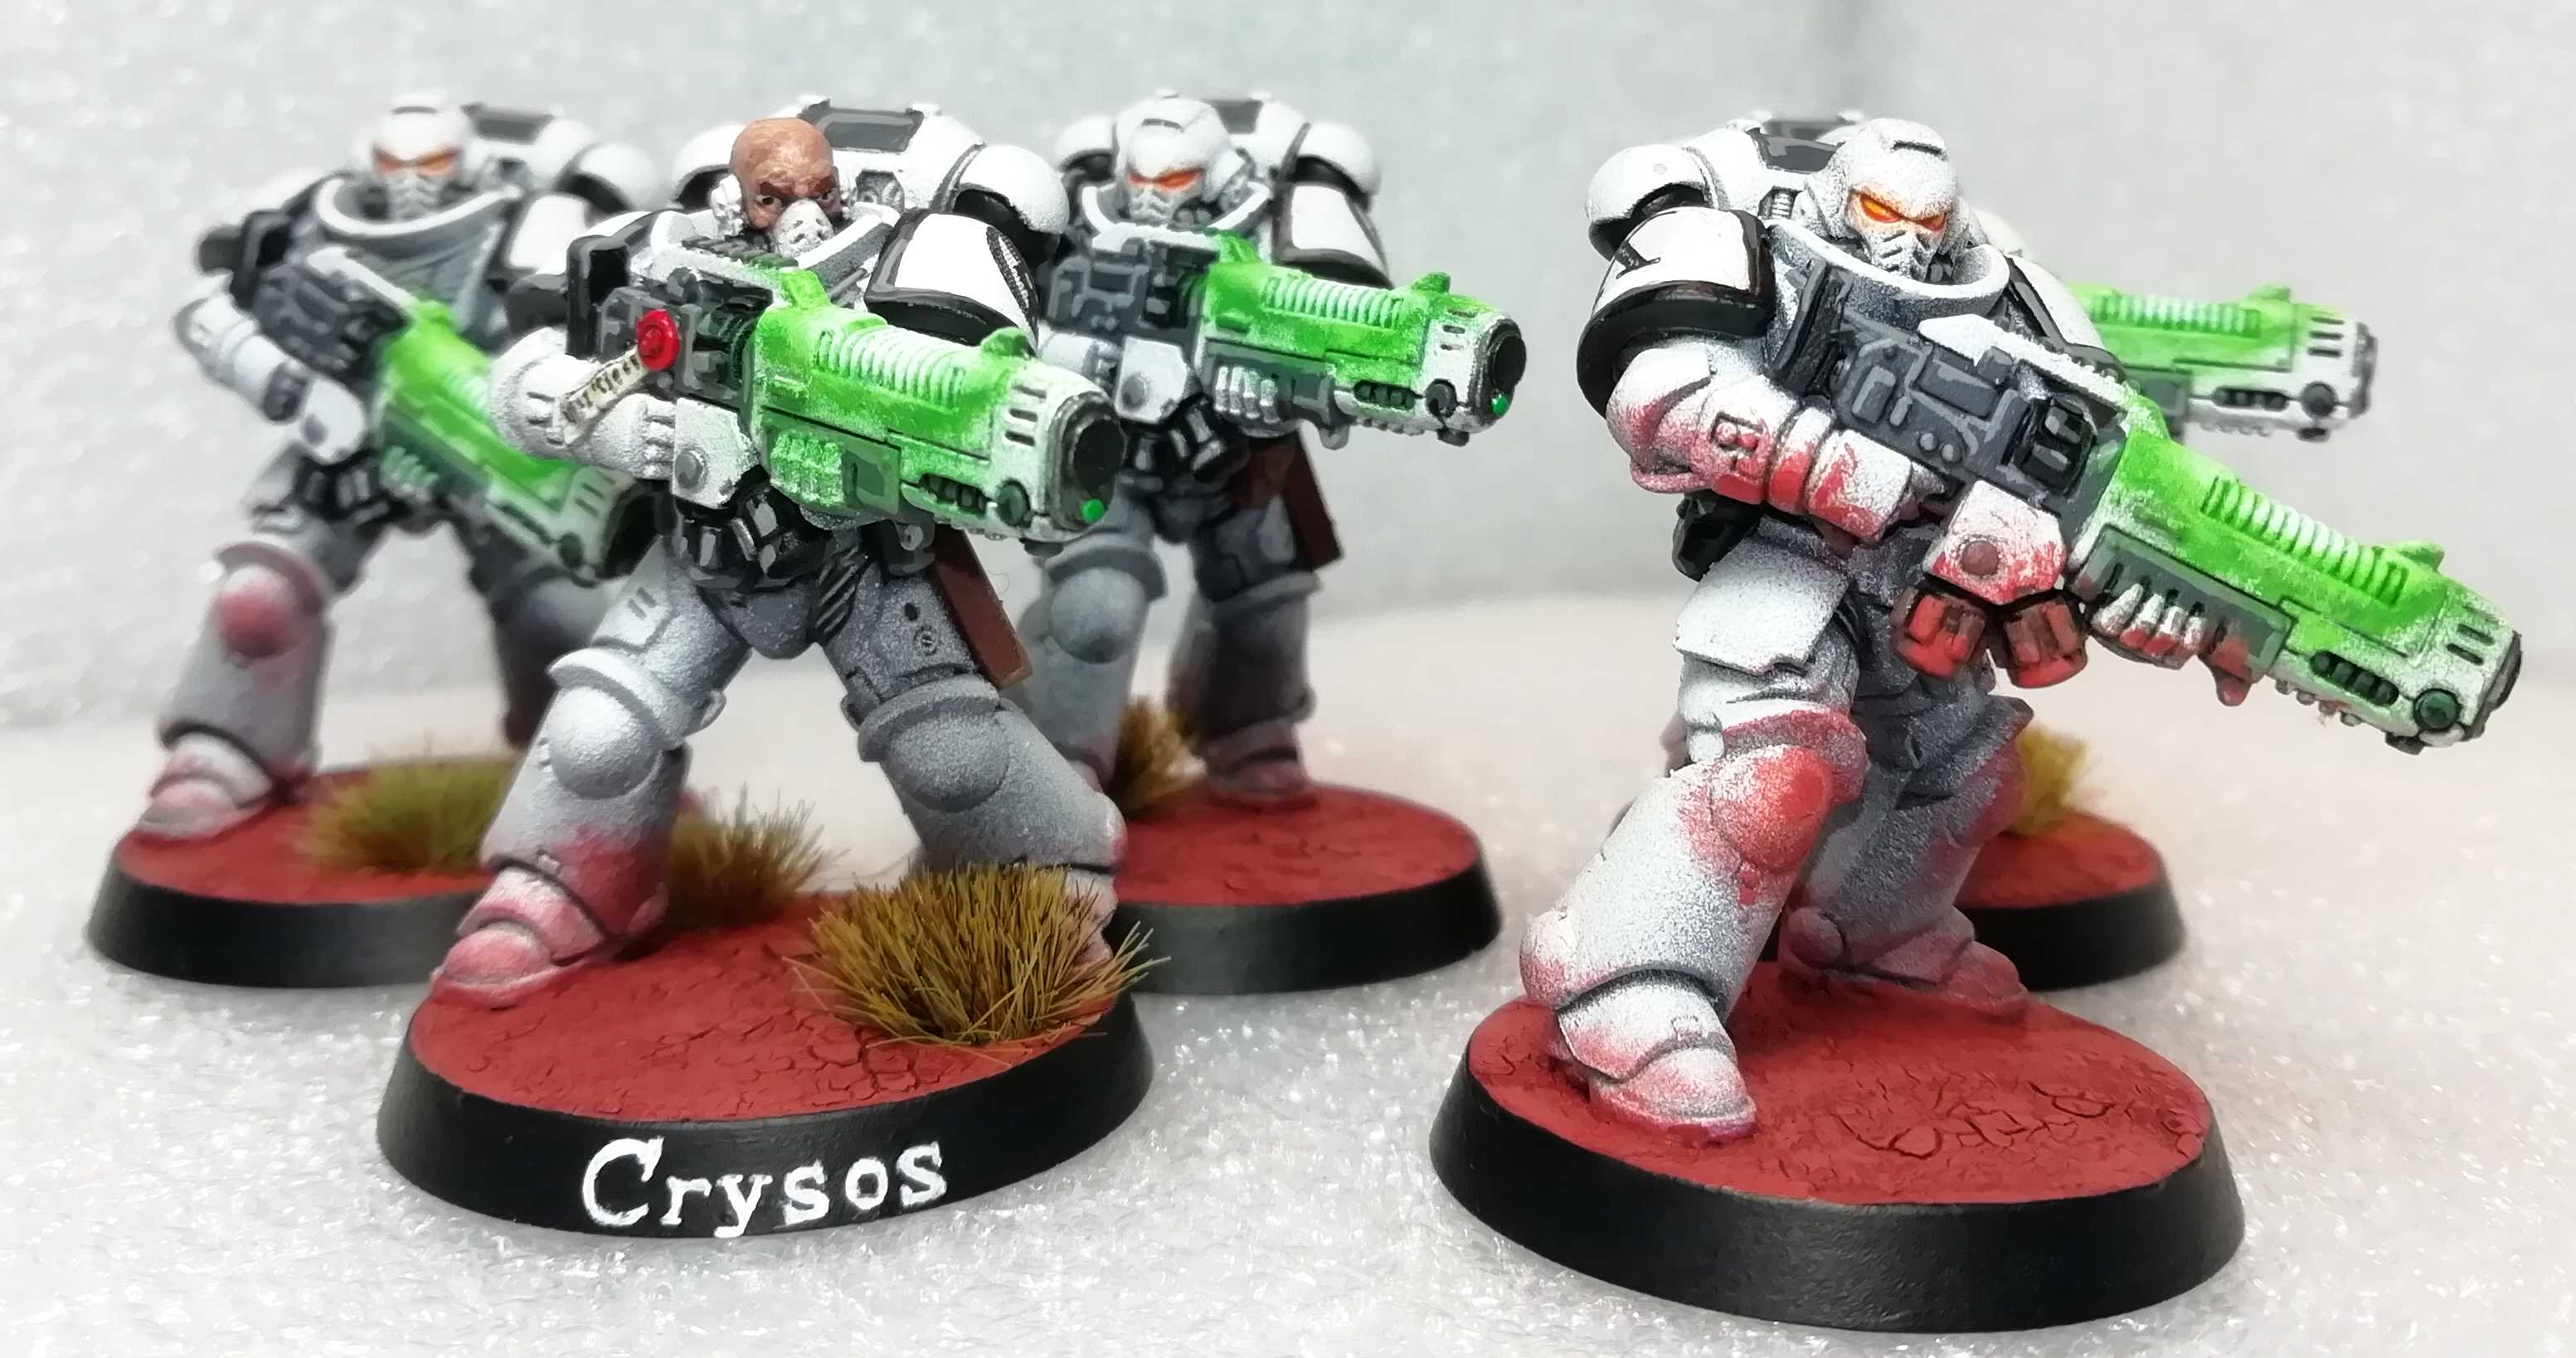
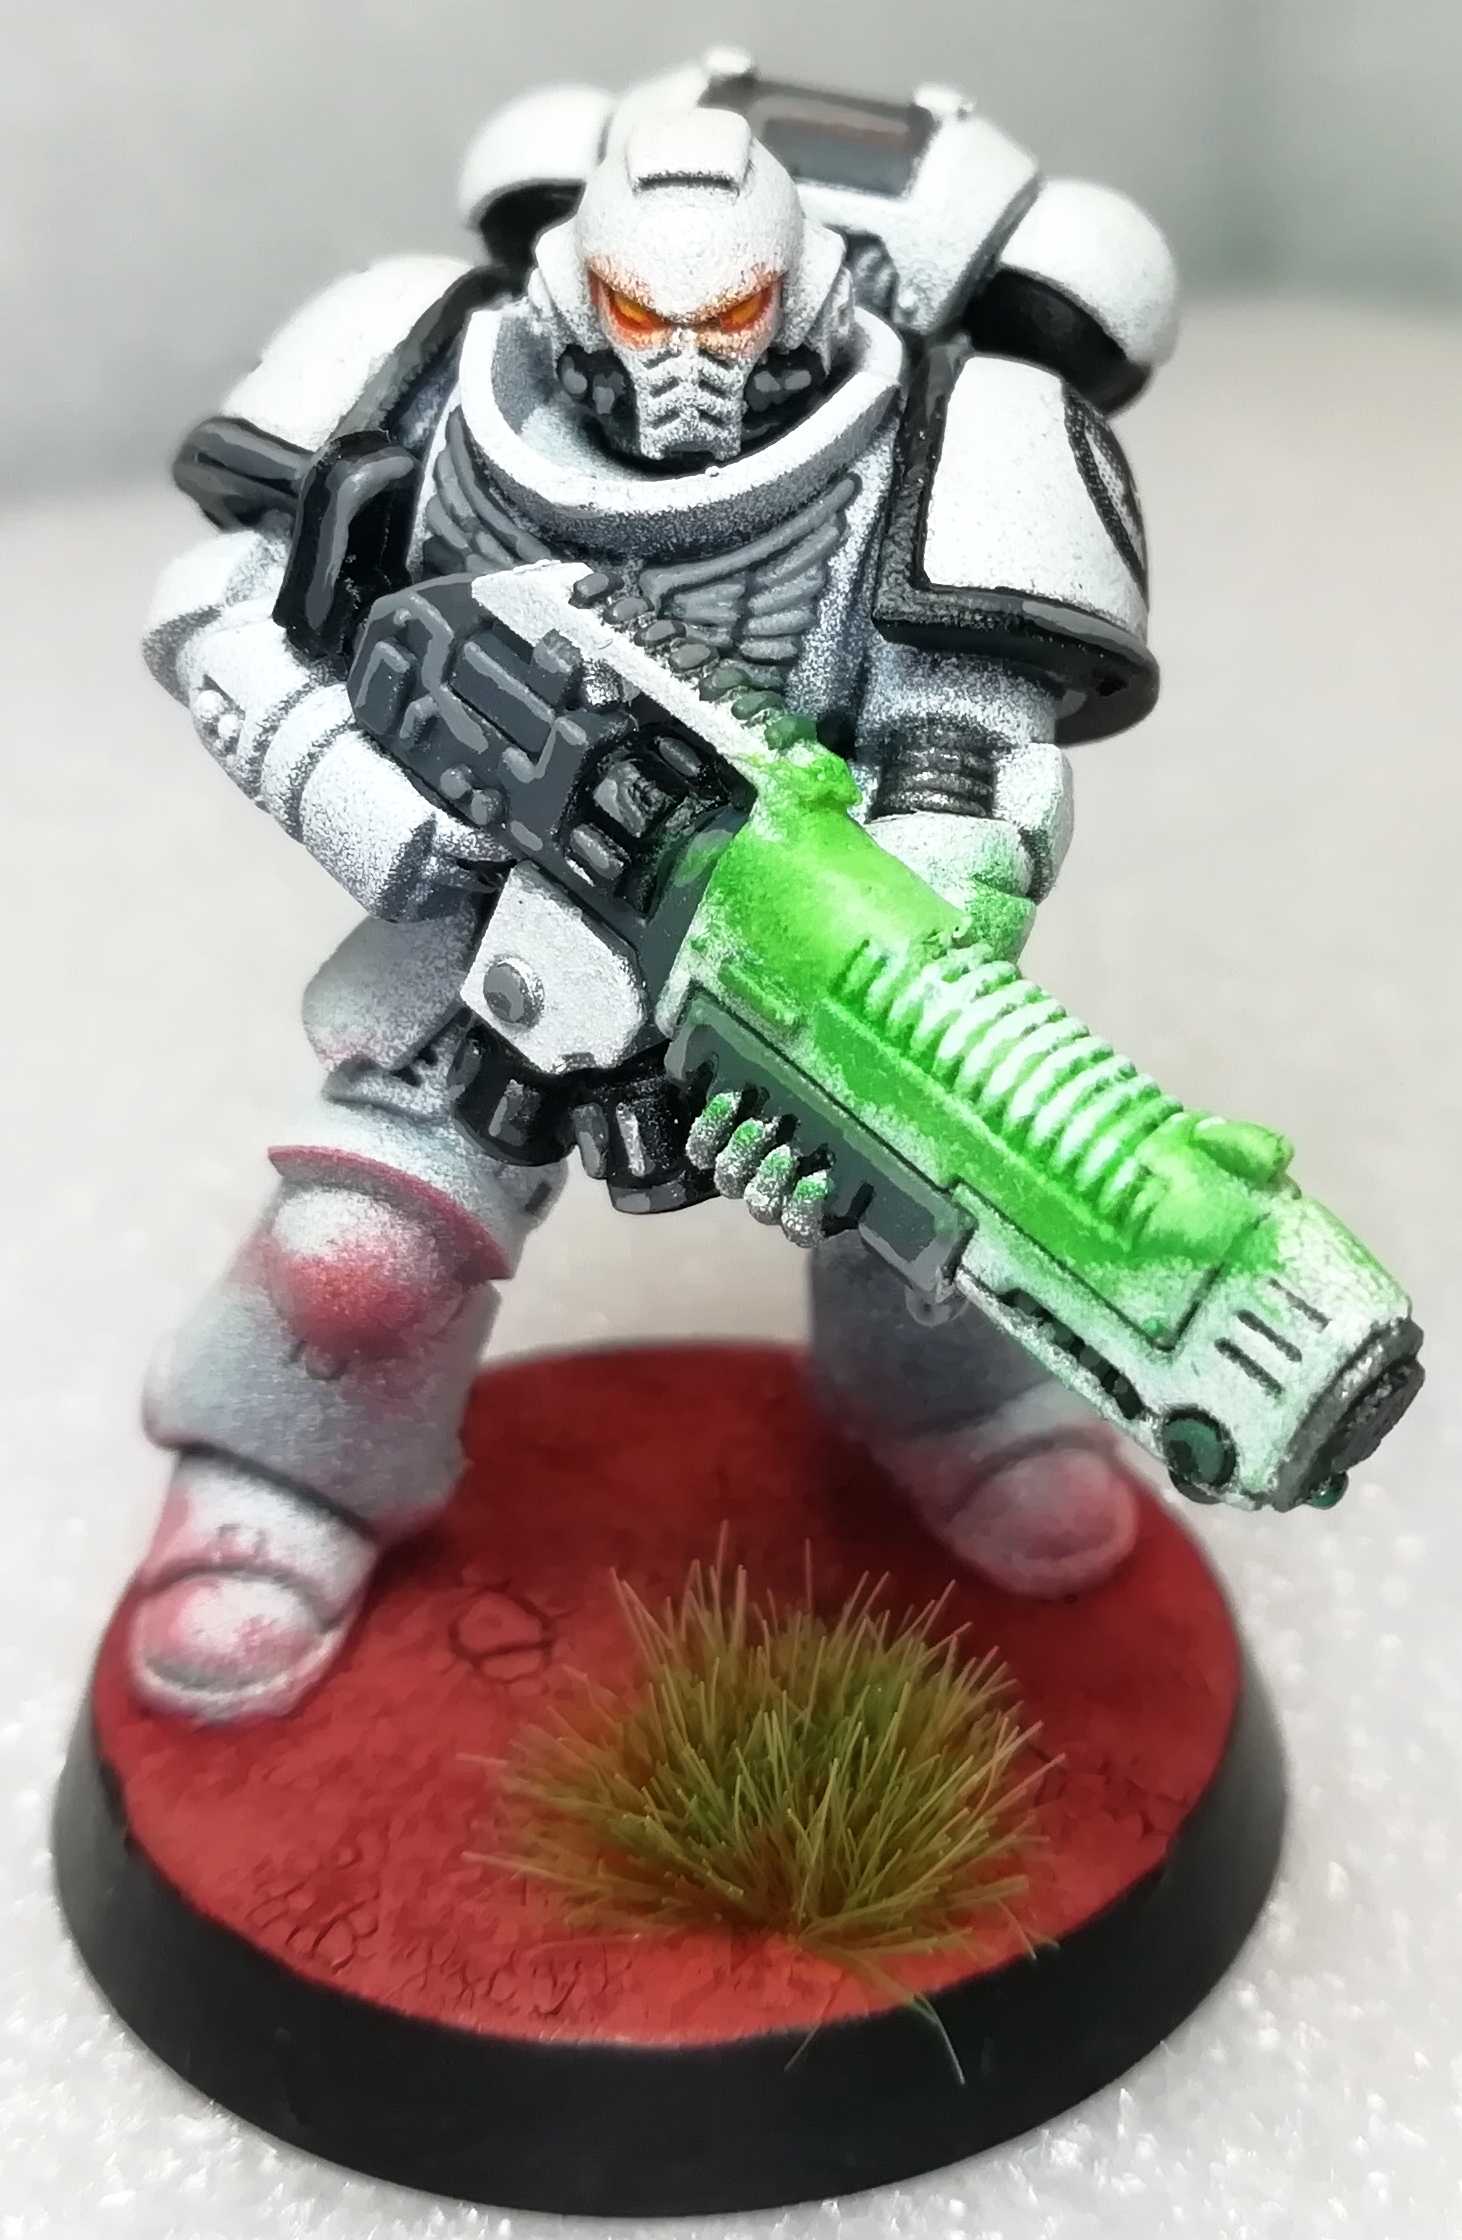
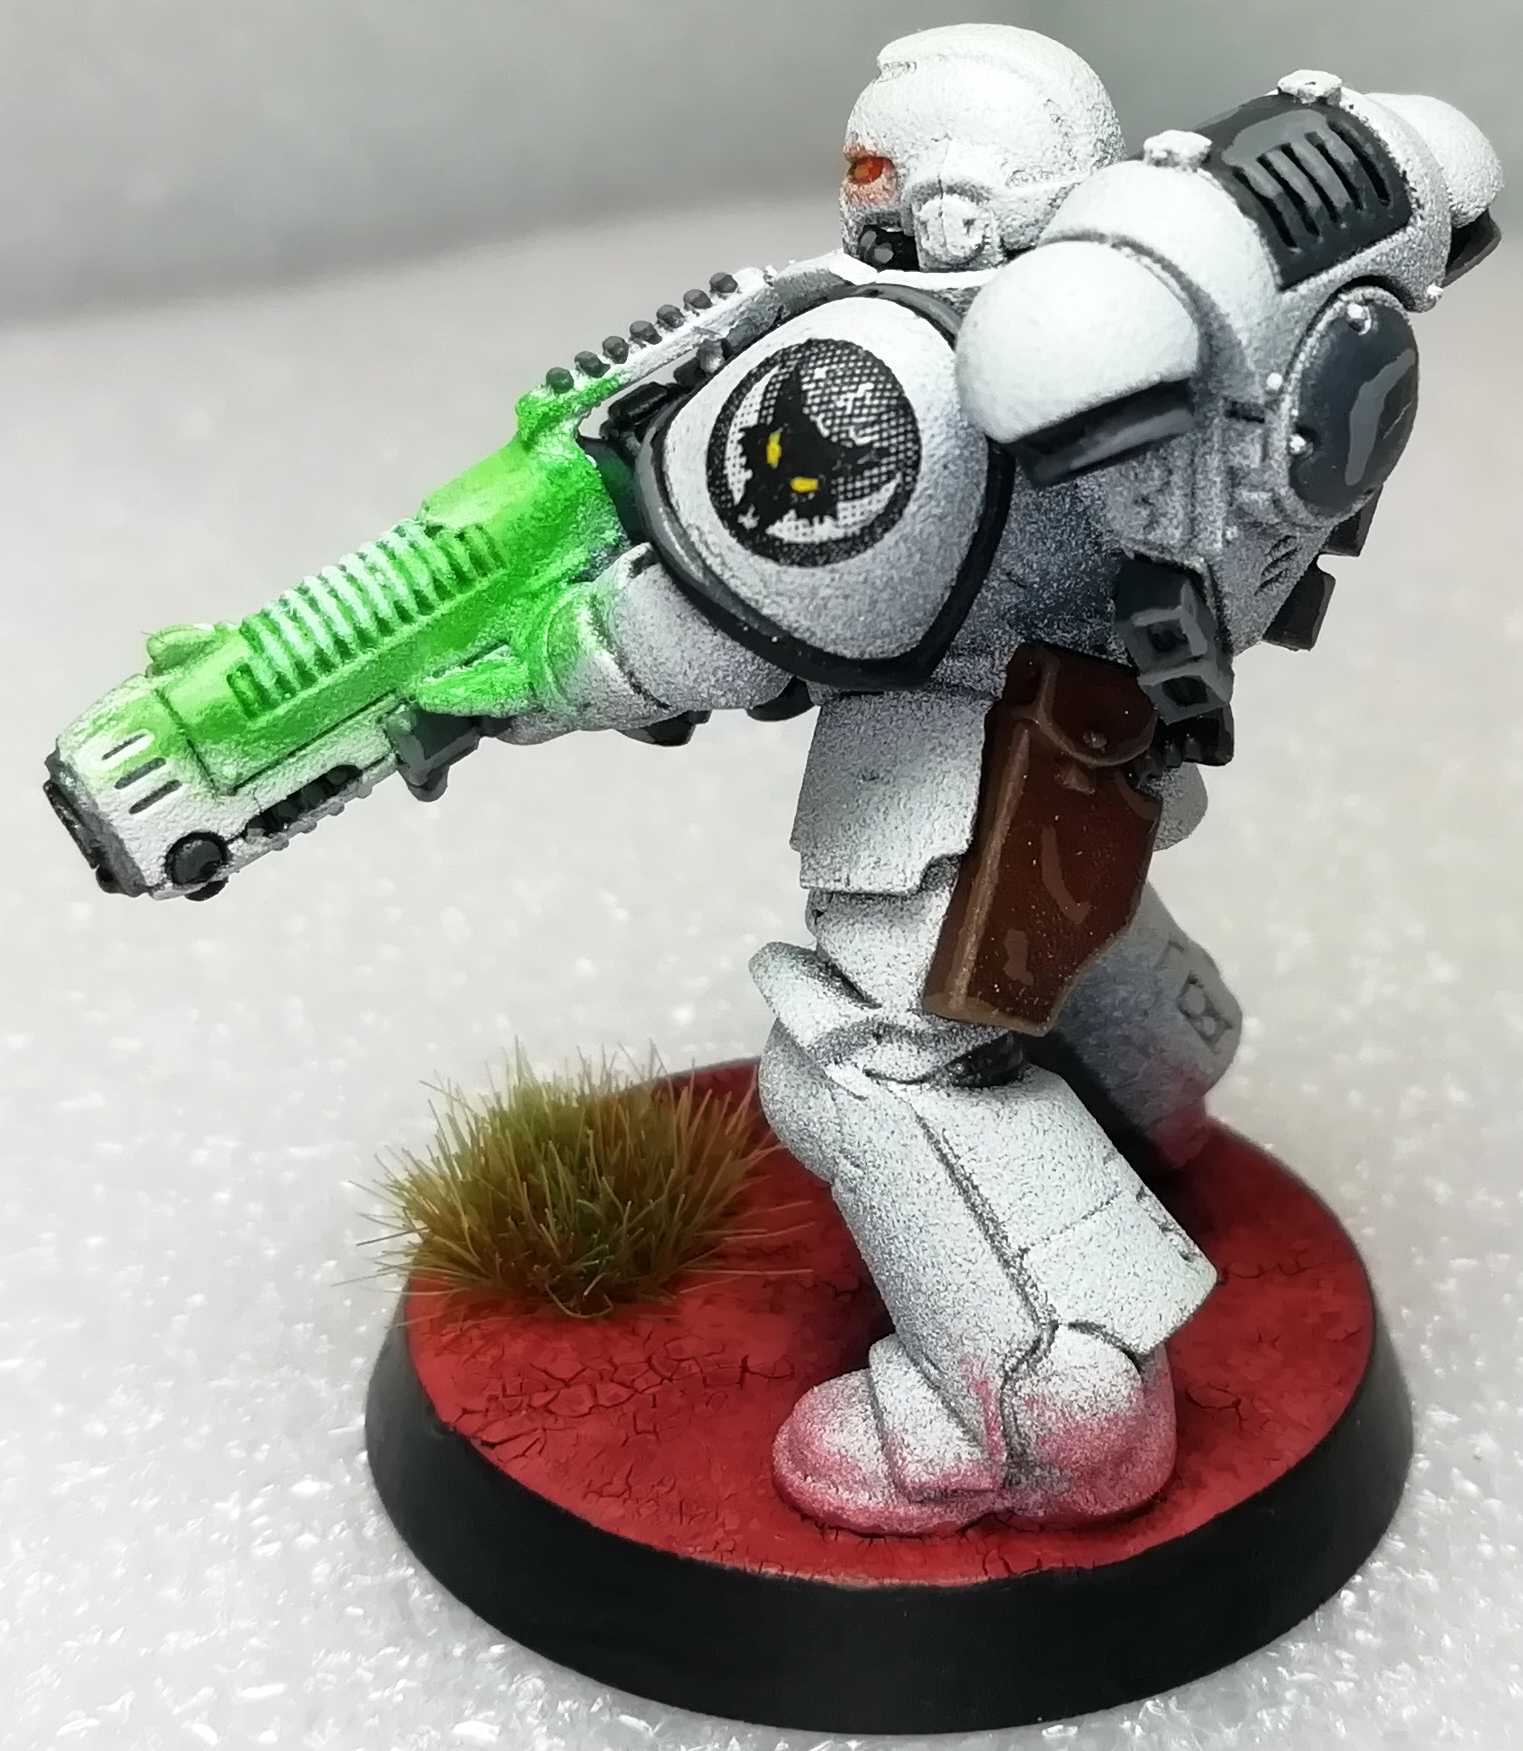
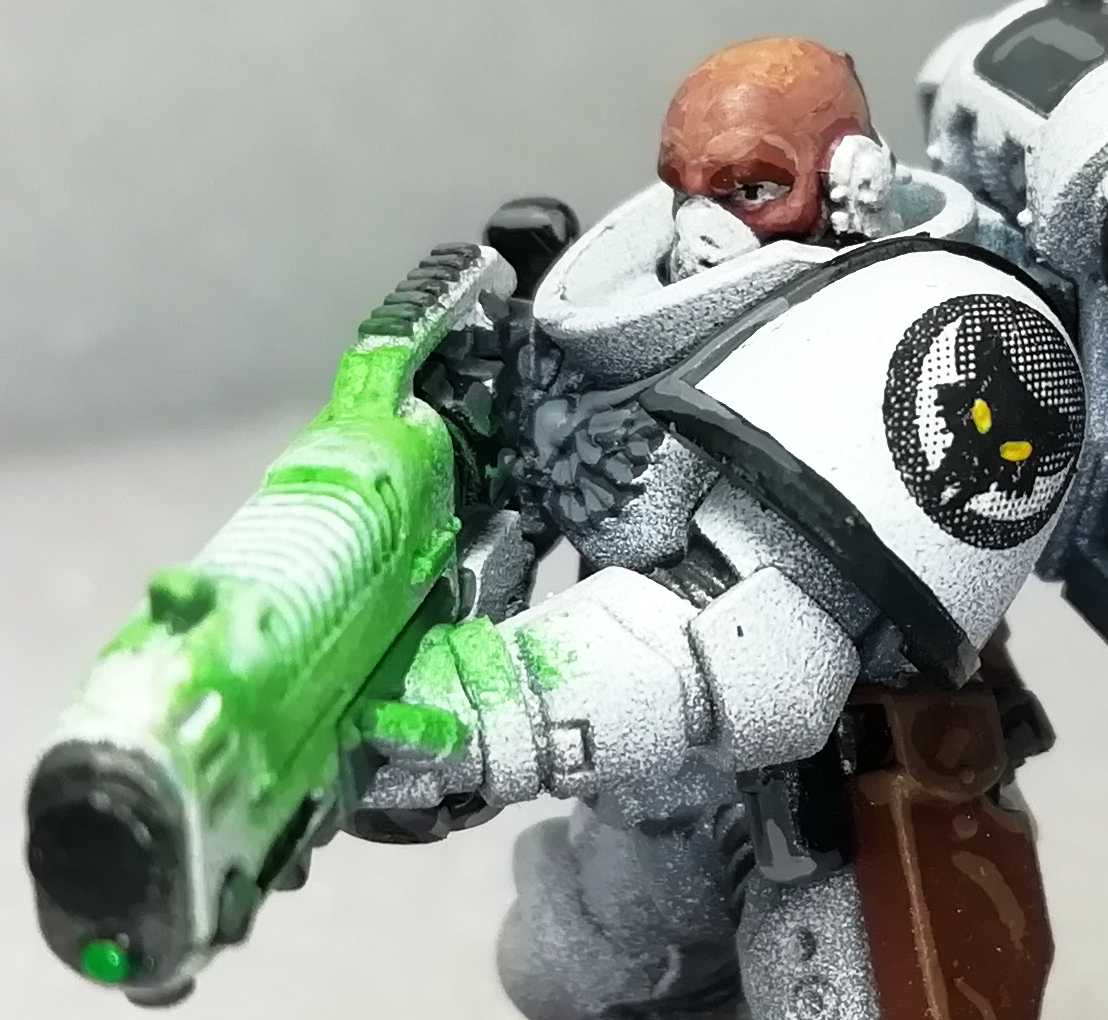
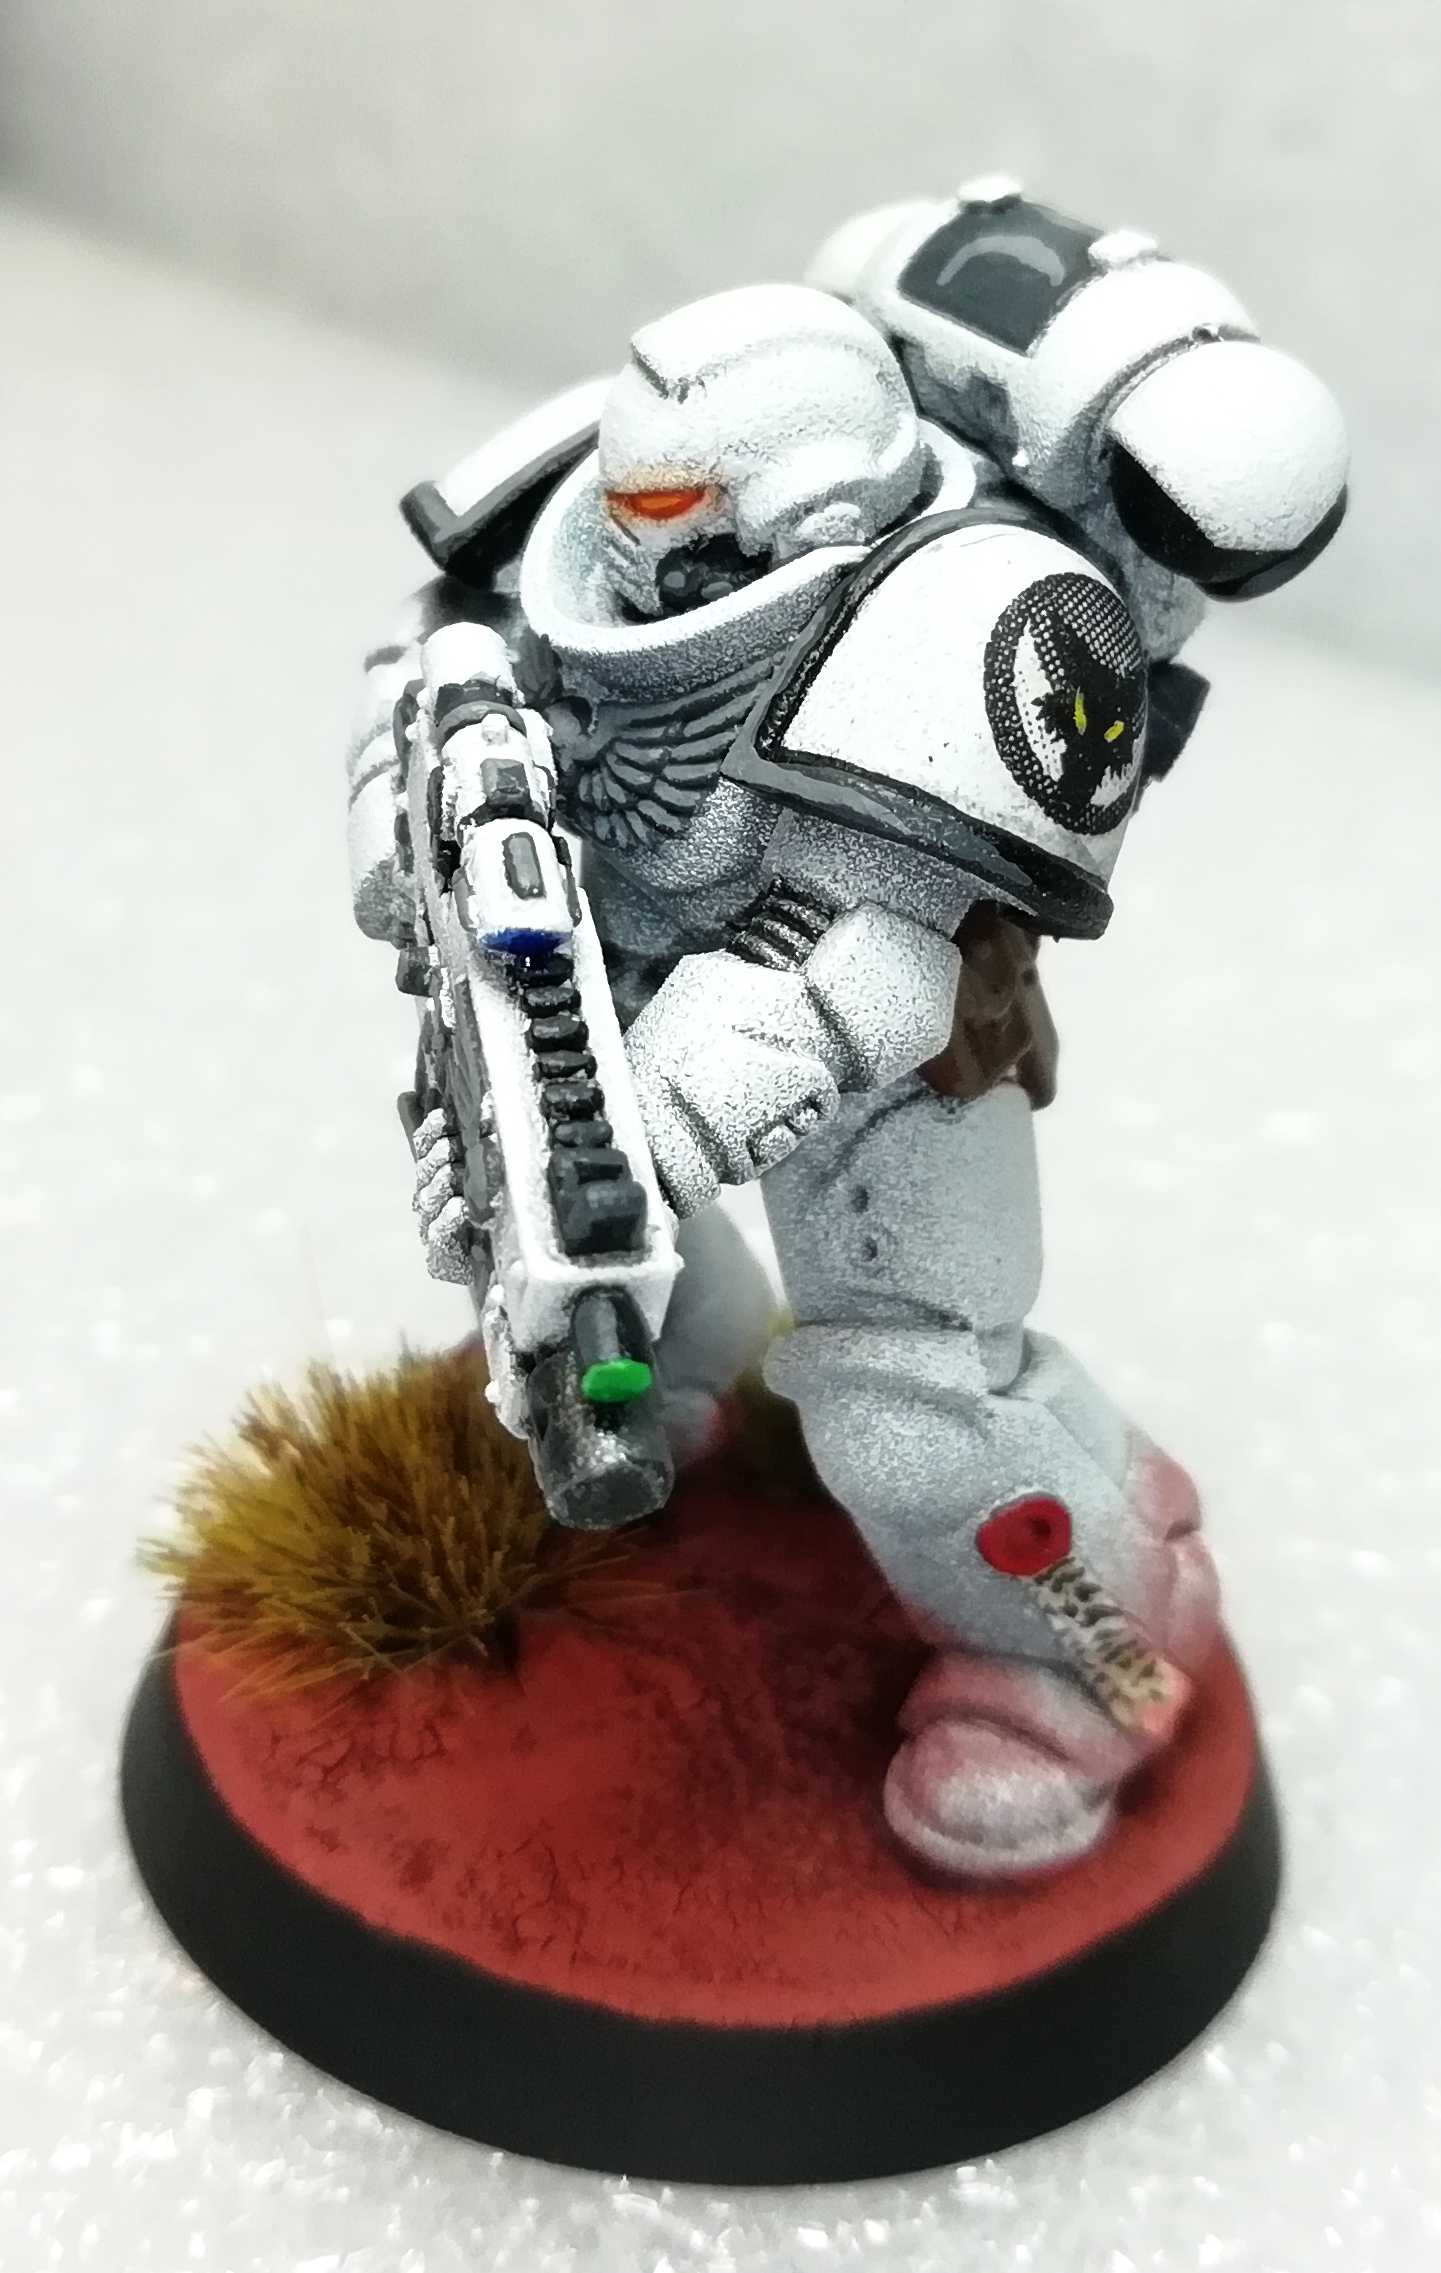
Hellblaster Squad Crysos
As the title might already give away, next up were the Hellblasters. The Sarges name is Crysos, thus is the Squad named Crysos aswell.
I decided to go again for a really bright green glow on the plasma weaponry. This is painted up from old GW Snot Green, over nearly as old GW Purtrid Green to pure white. Then glazed with GW Waywatcher Green and a last dry brush with white.
Everything else is the same as described a few posts below.
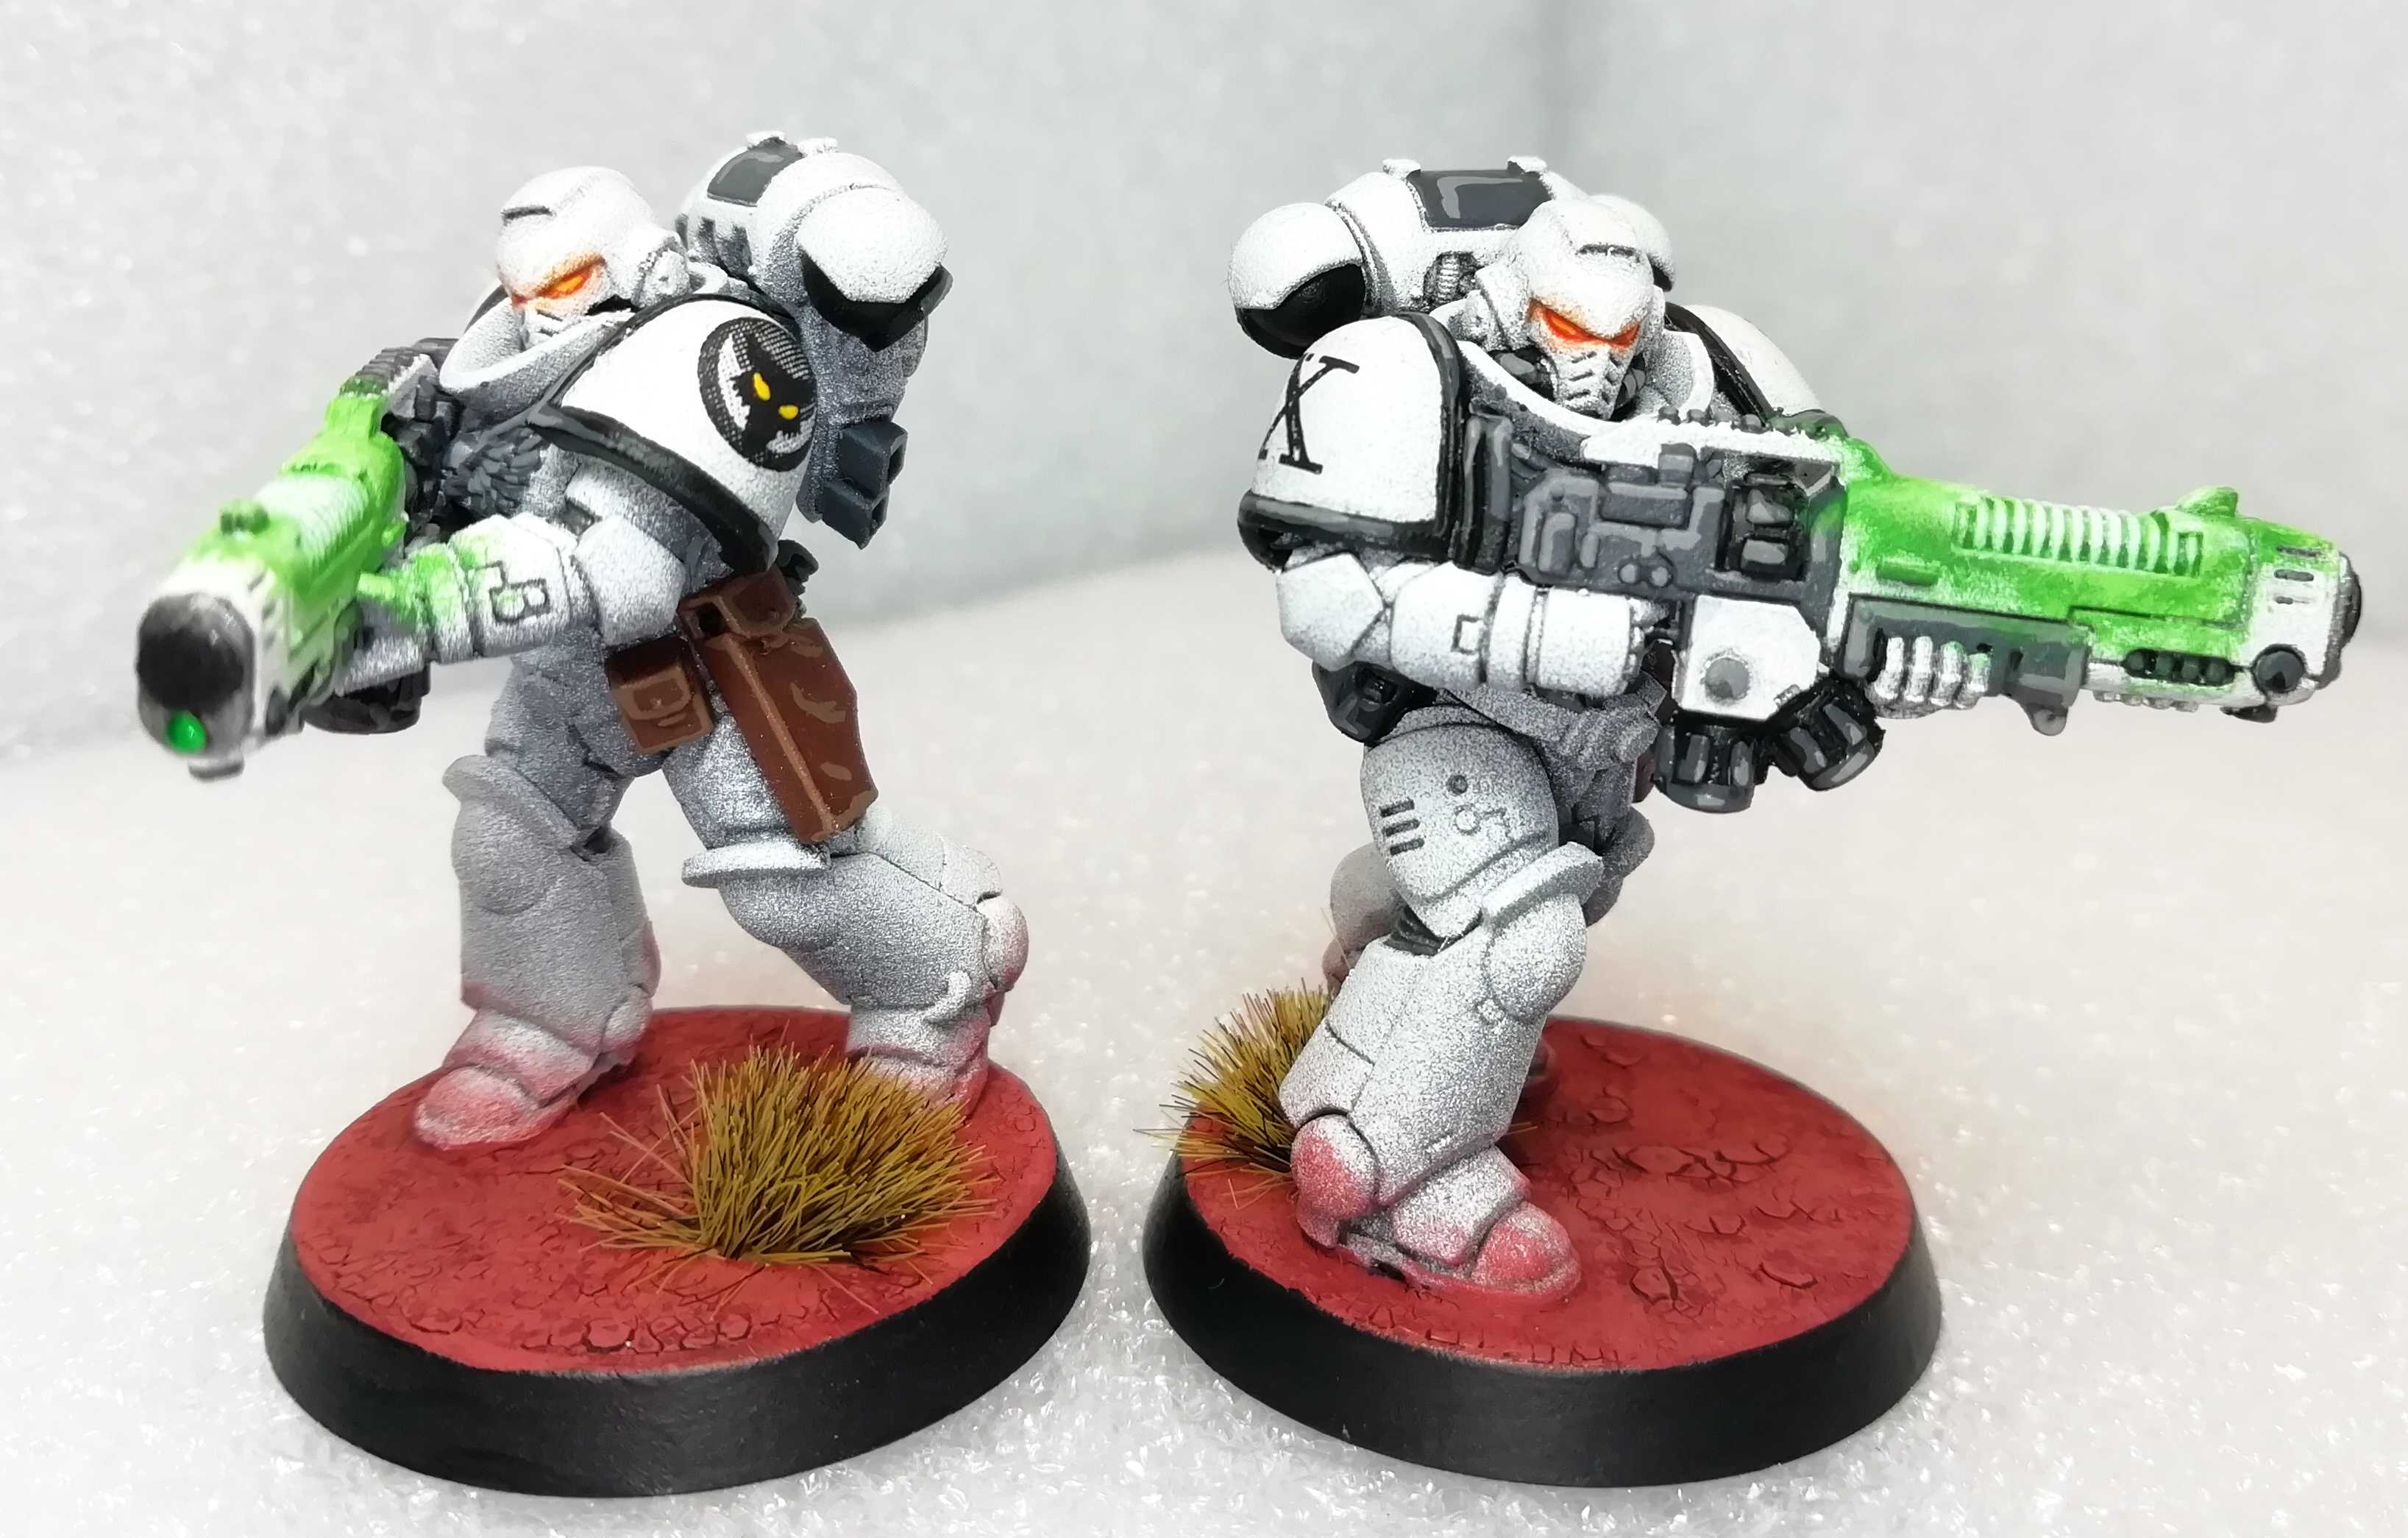

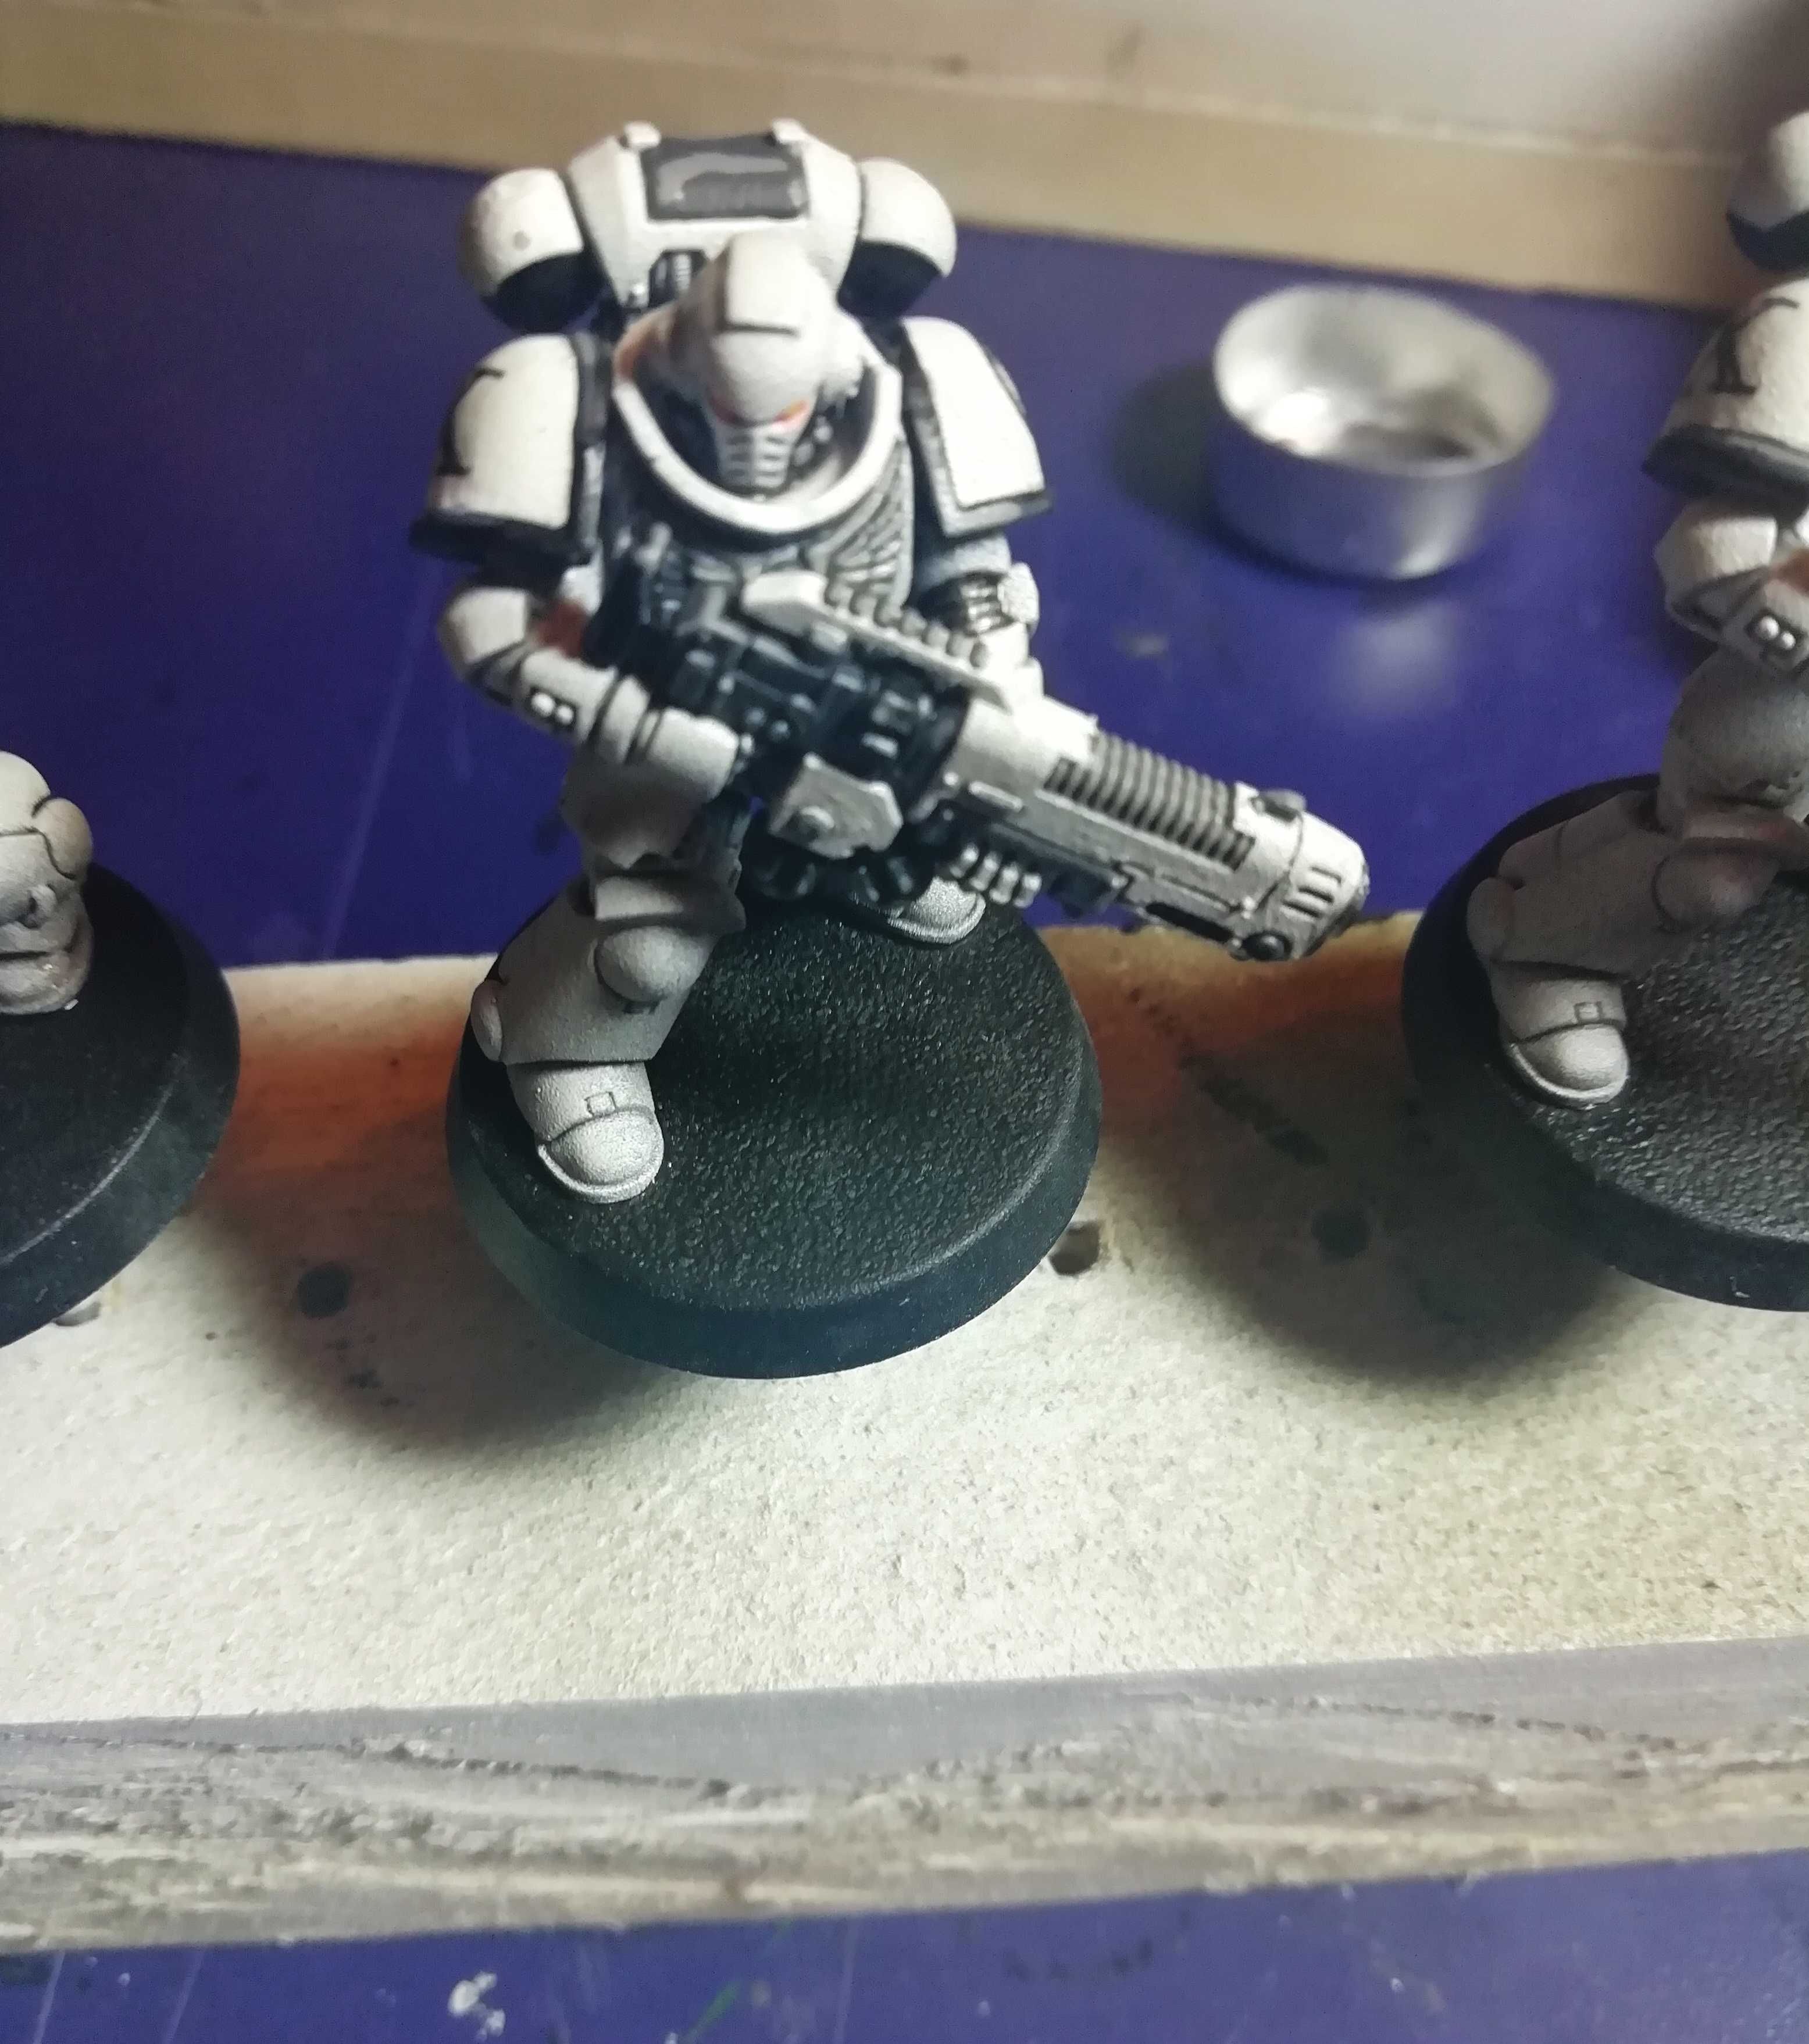
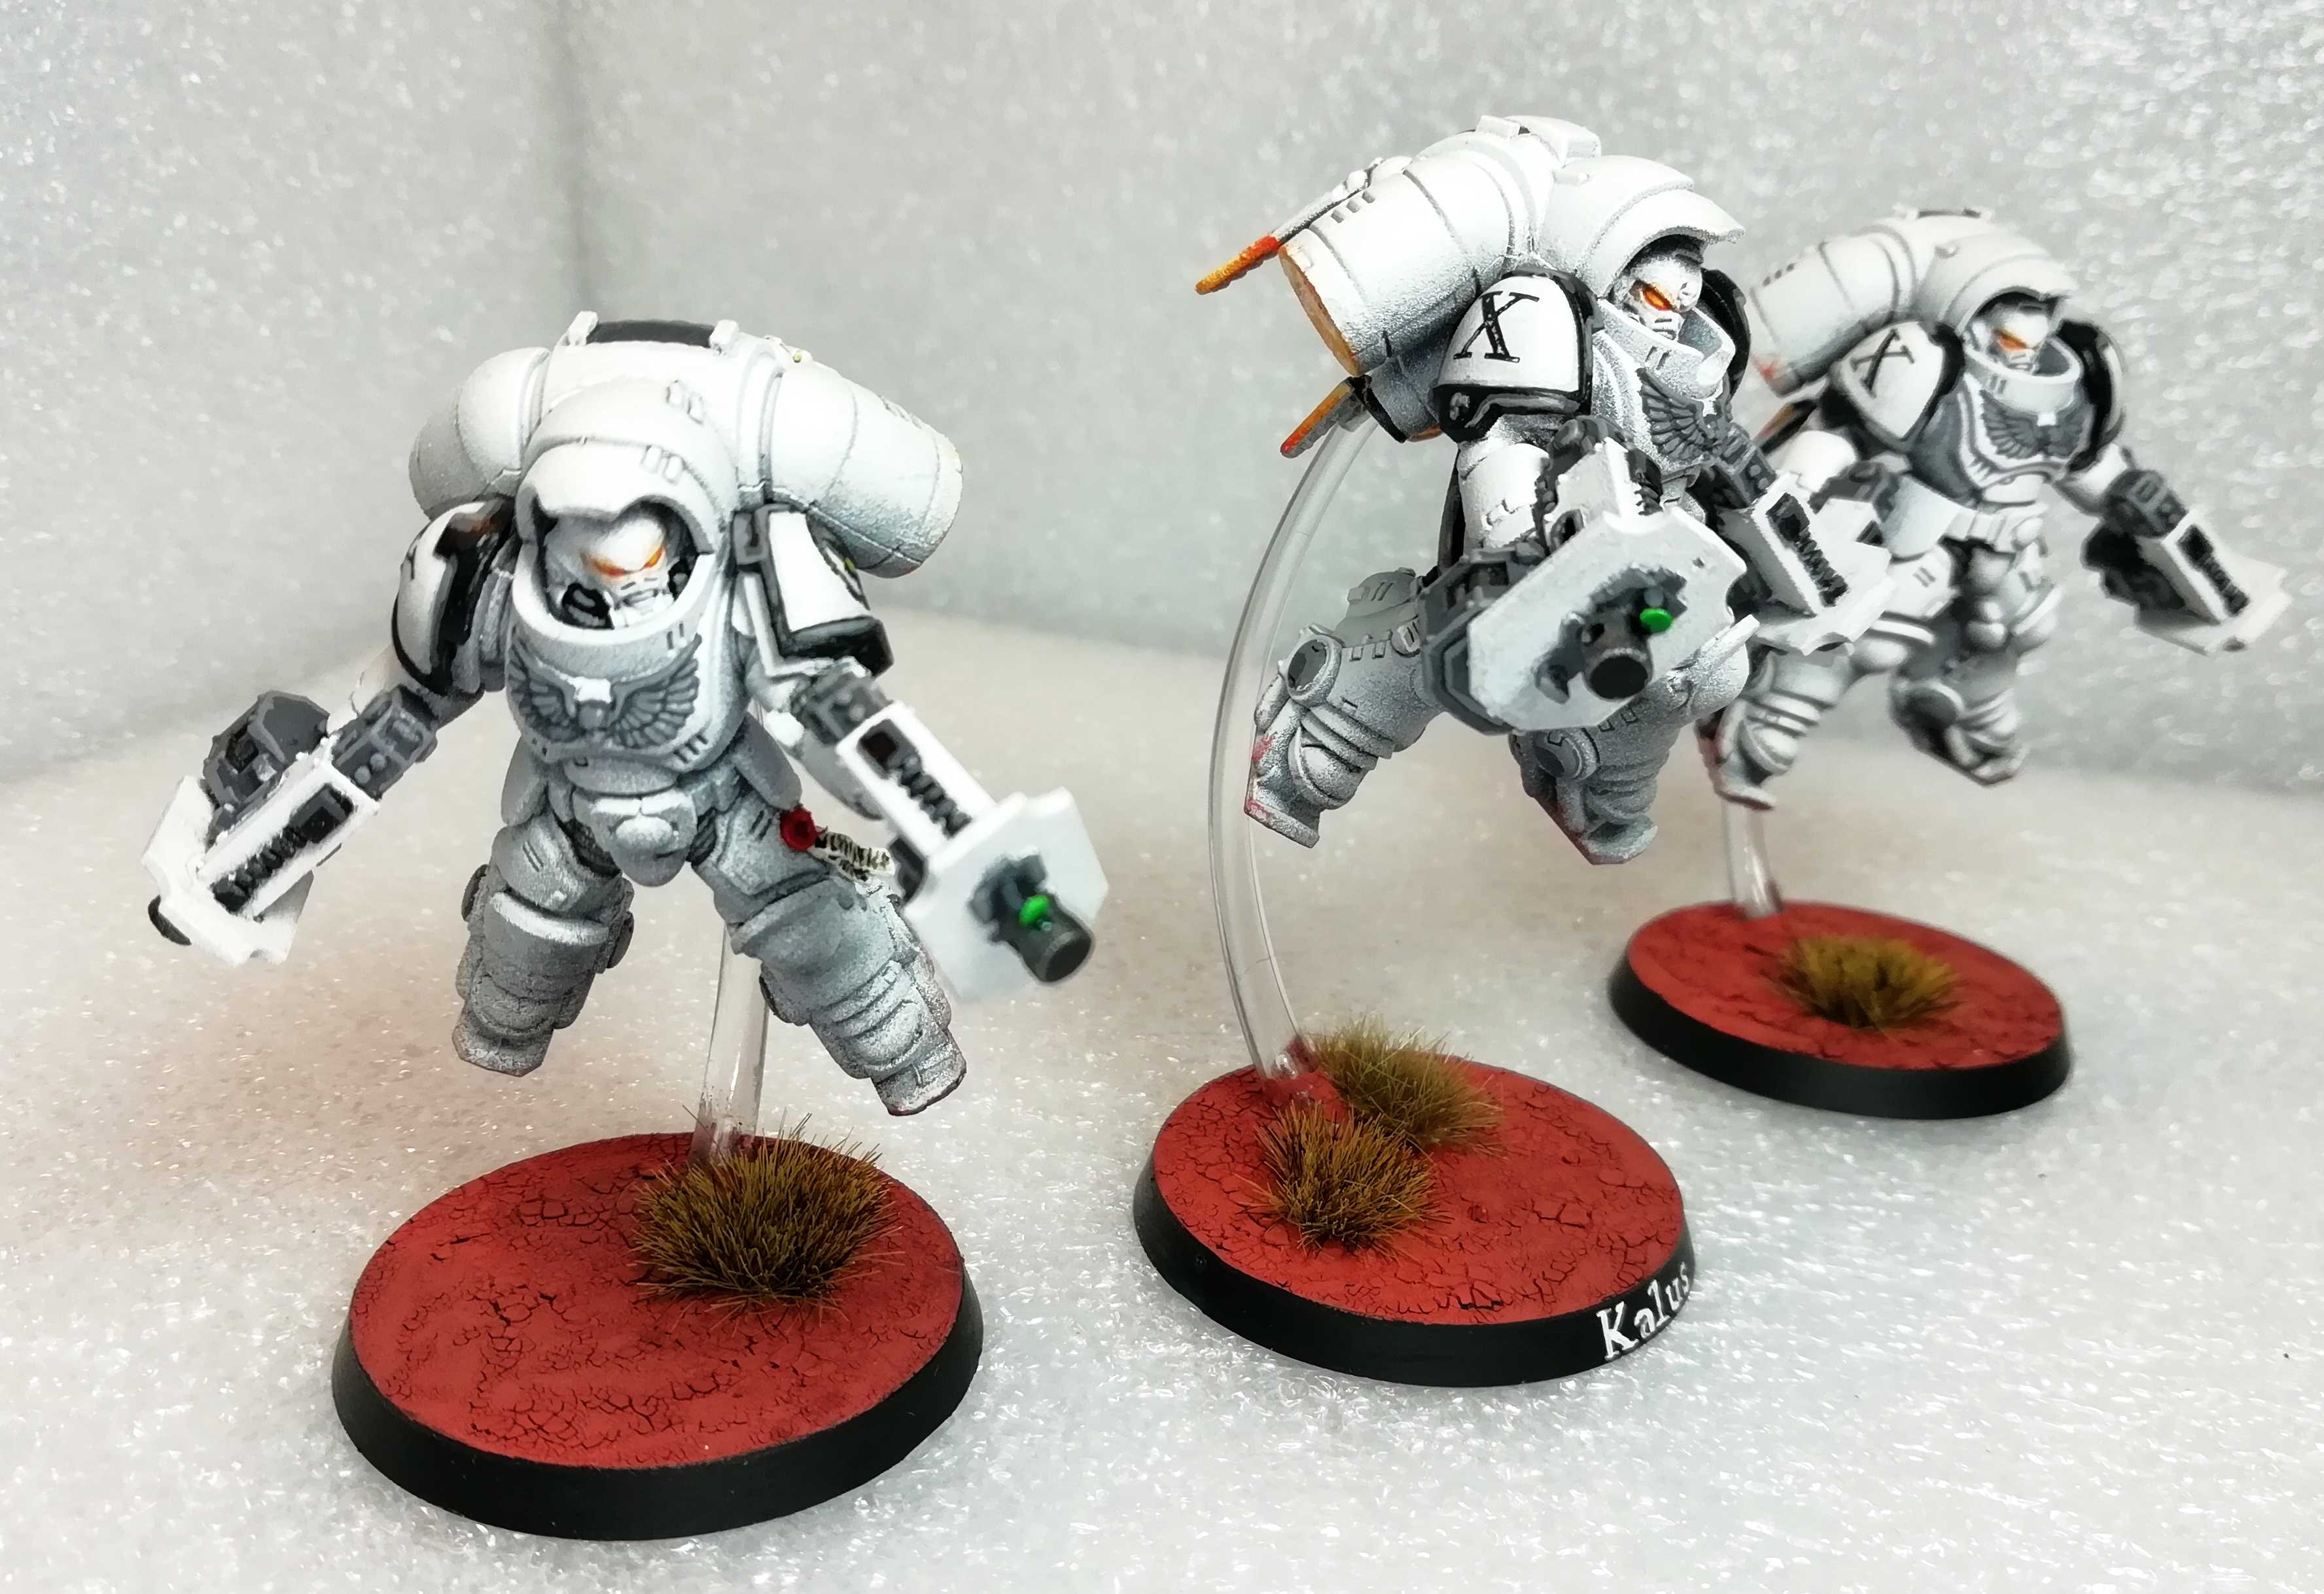
Inceptor Squad Kalus
As it’s holiday season over here I didn’t get as much painting done as I would have loved to. But we never have 30+ degrees over here and it would be heresy not to take advantage of this.
Nevertheless I managed to get some more Luna Wolves painted. As I am still painting my way through the Dark Imperium box I decided to go with the 3 man Inceptor Squad next. These models are a bit larger than the normal Primaris Marines and have a few different details (especially the guns) but I still think that my “quick-painting-scheme” works quite well. I nearly busted the 2h per model limit on these. But in the end I managed to finish just around the 6h mark (from priming to finished bases). Take a look for yourself:
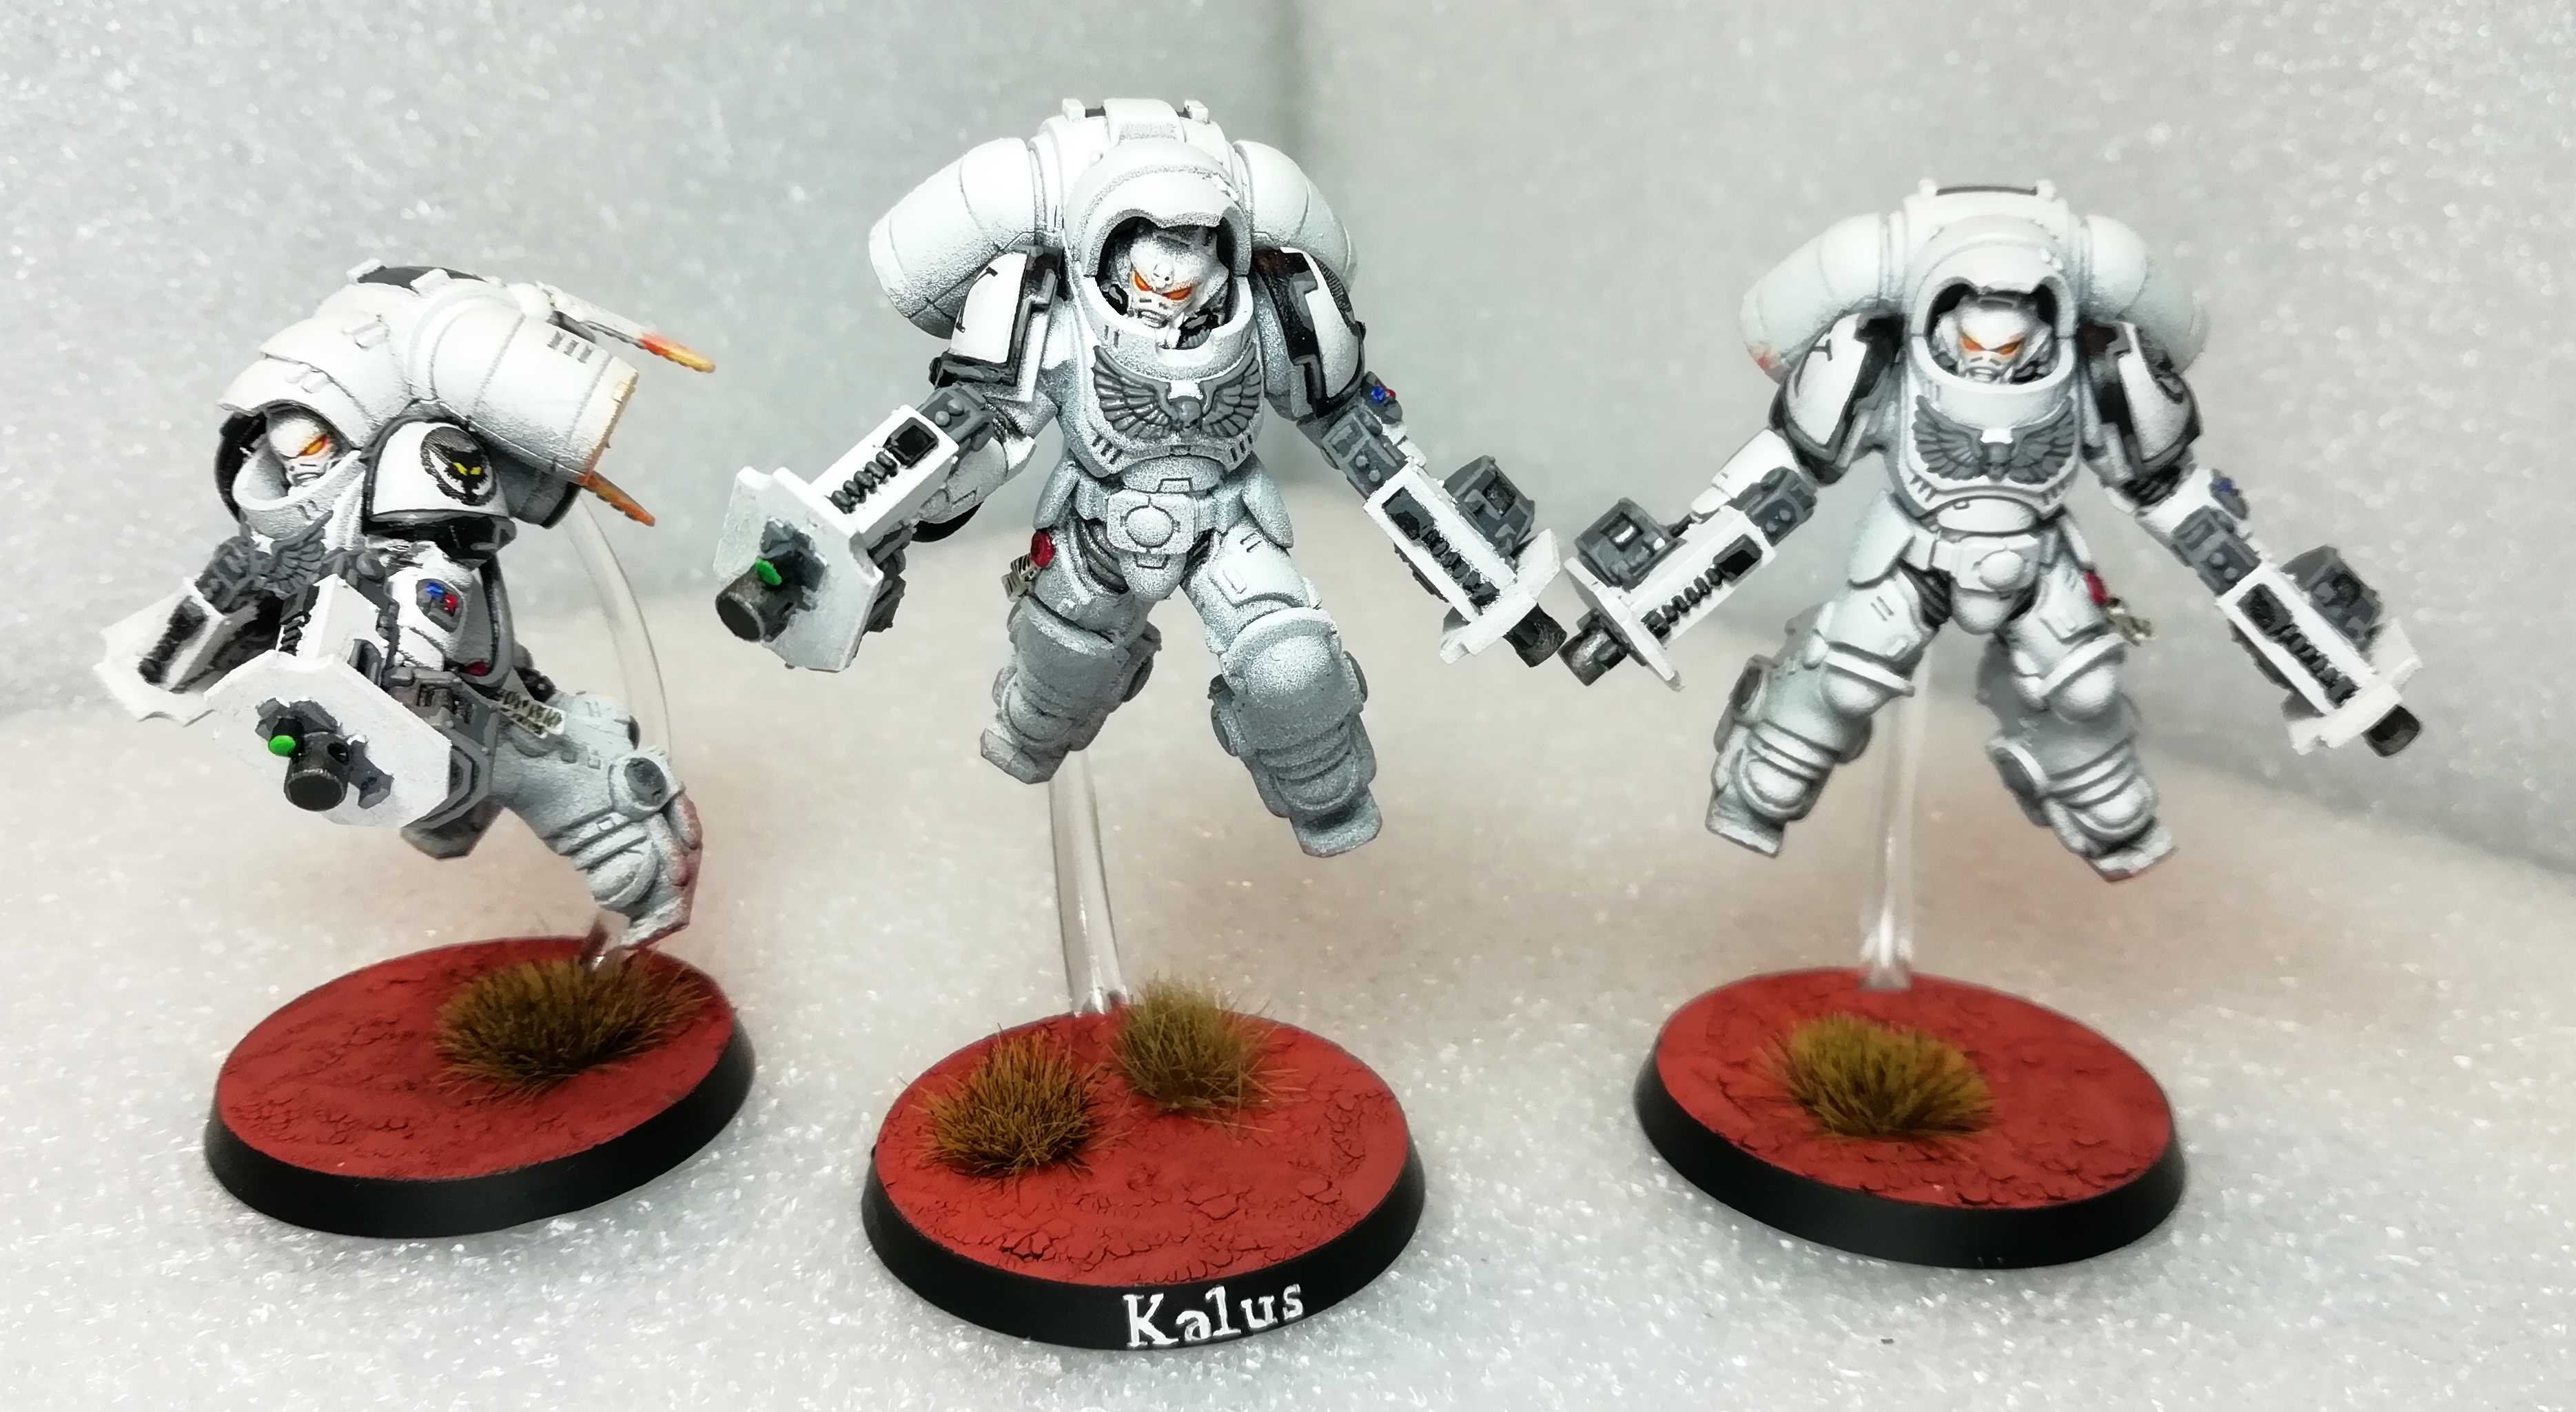 entire squad
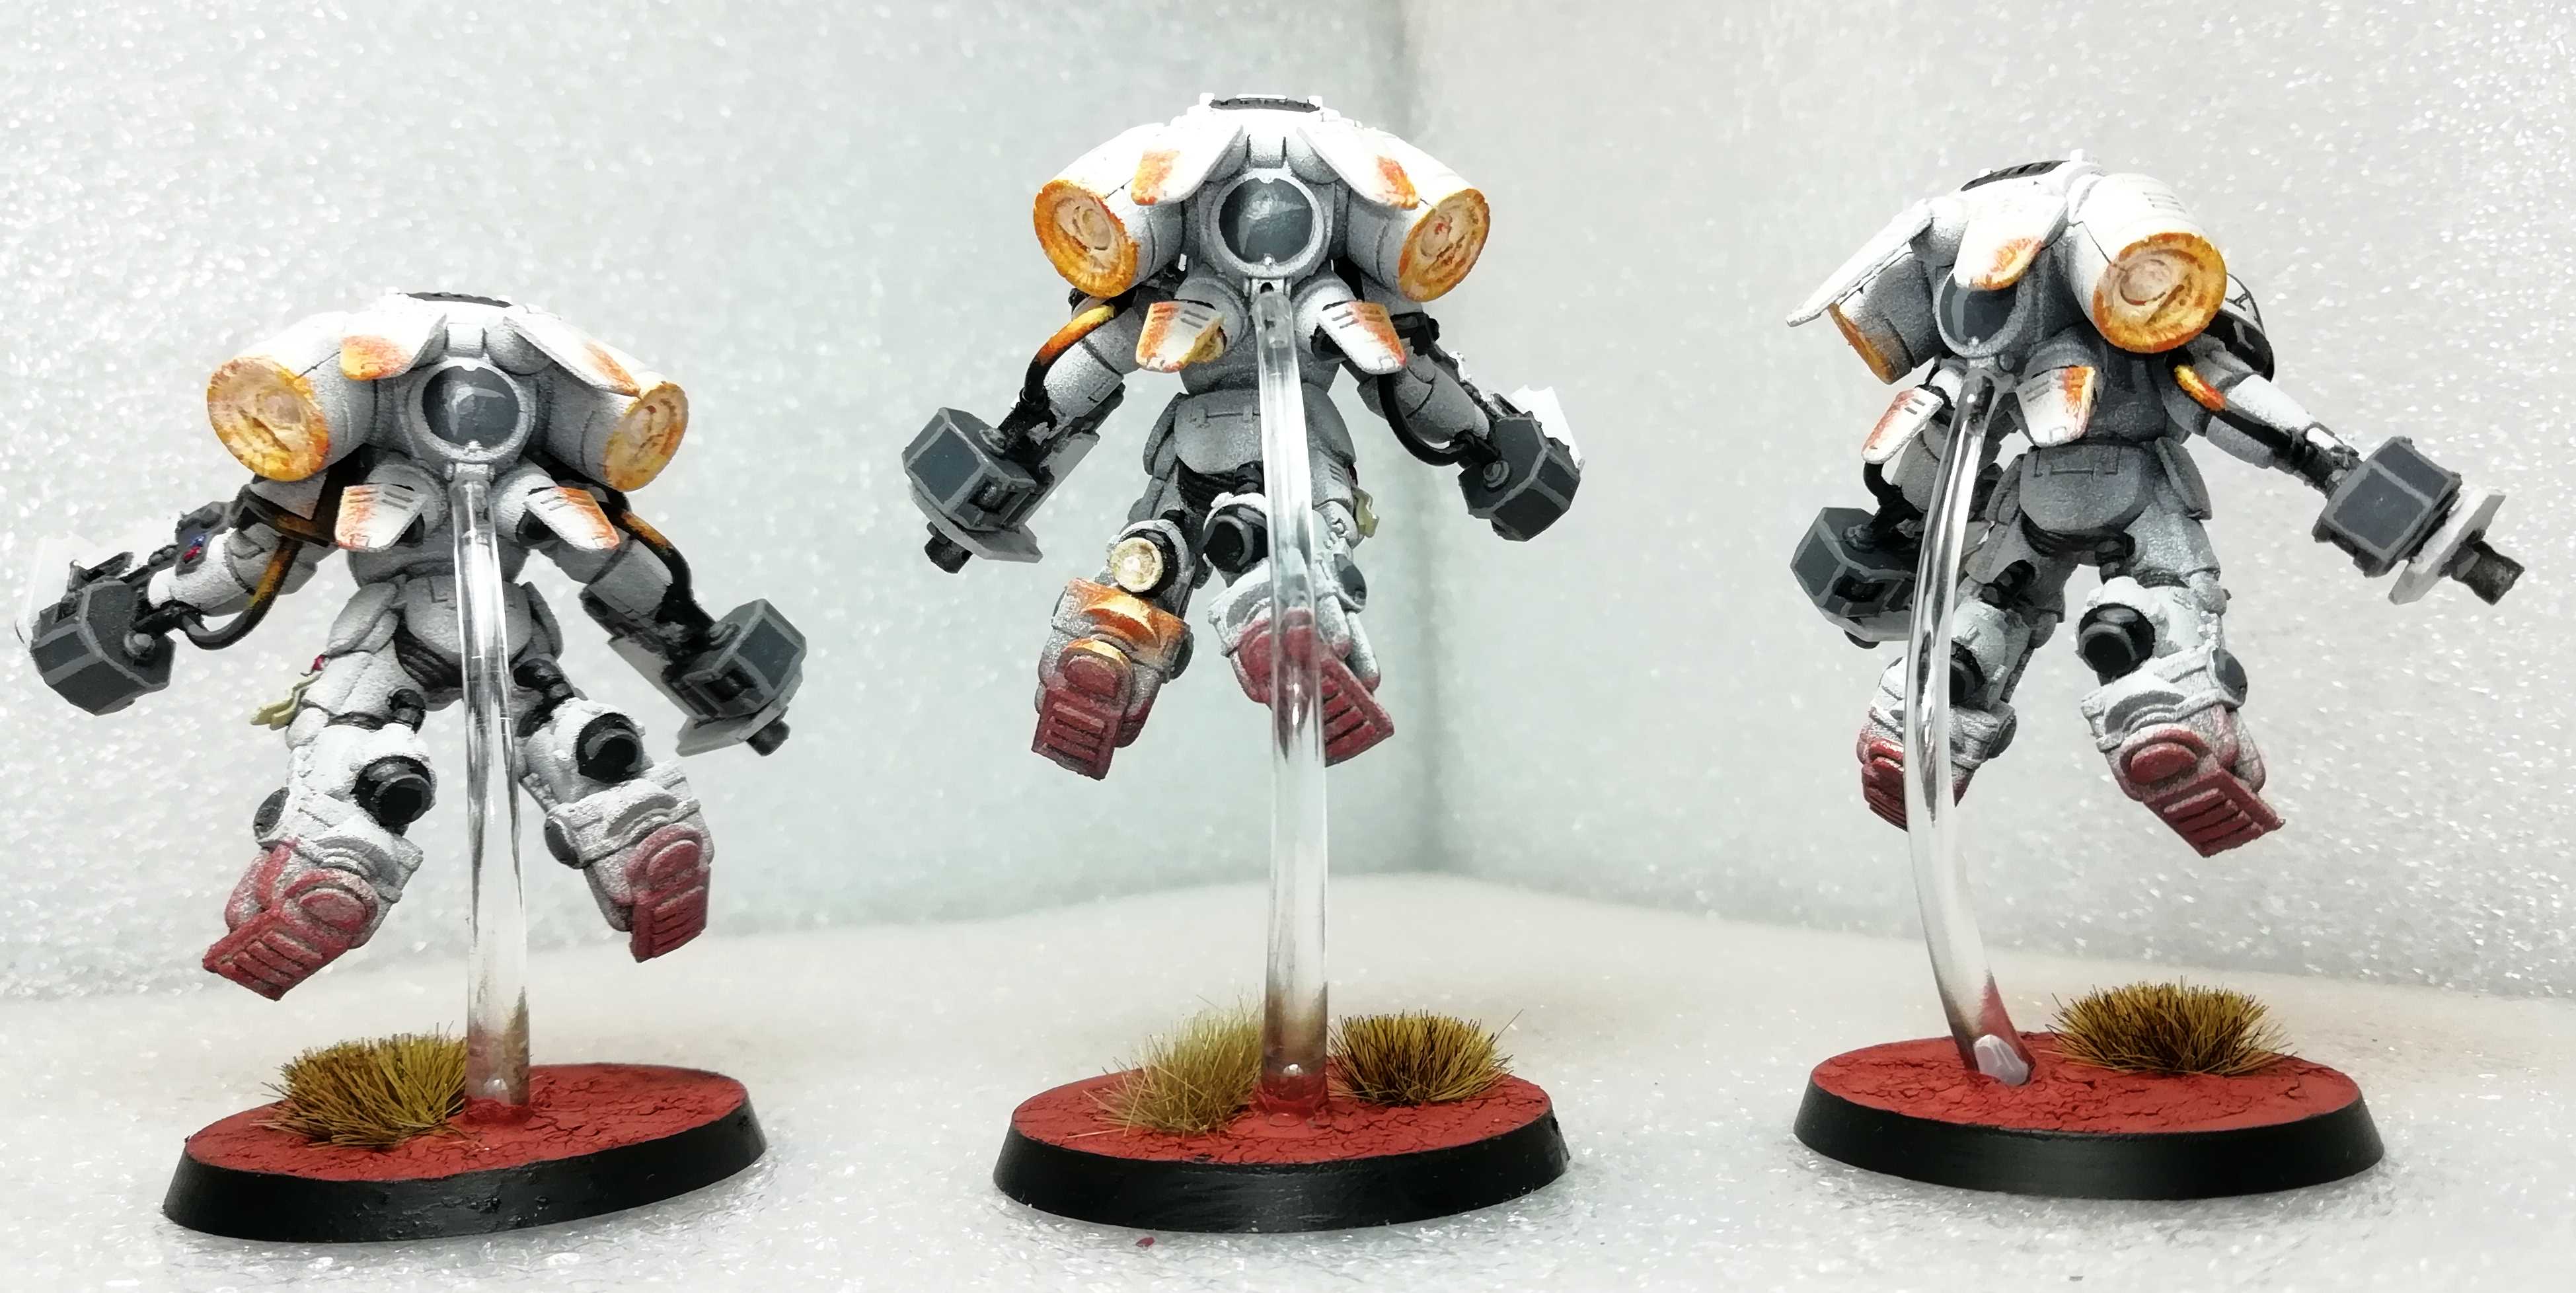 Lloyd shot with the "burning" jump packs
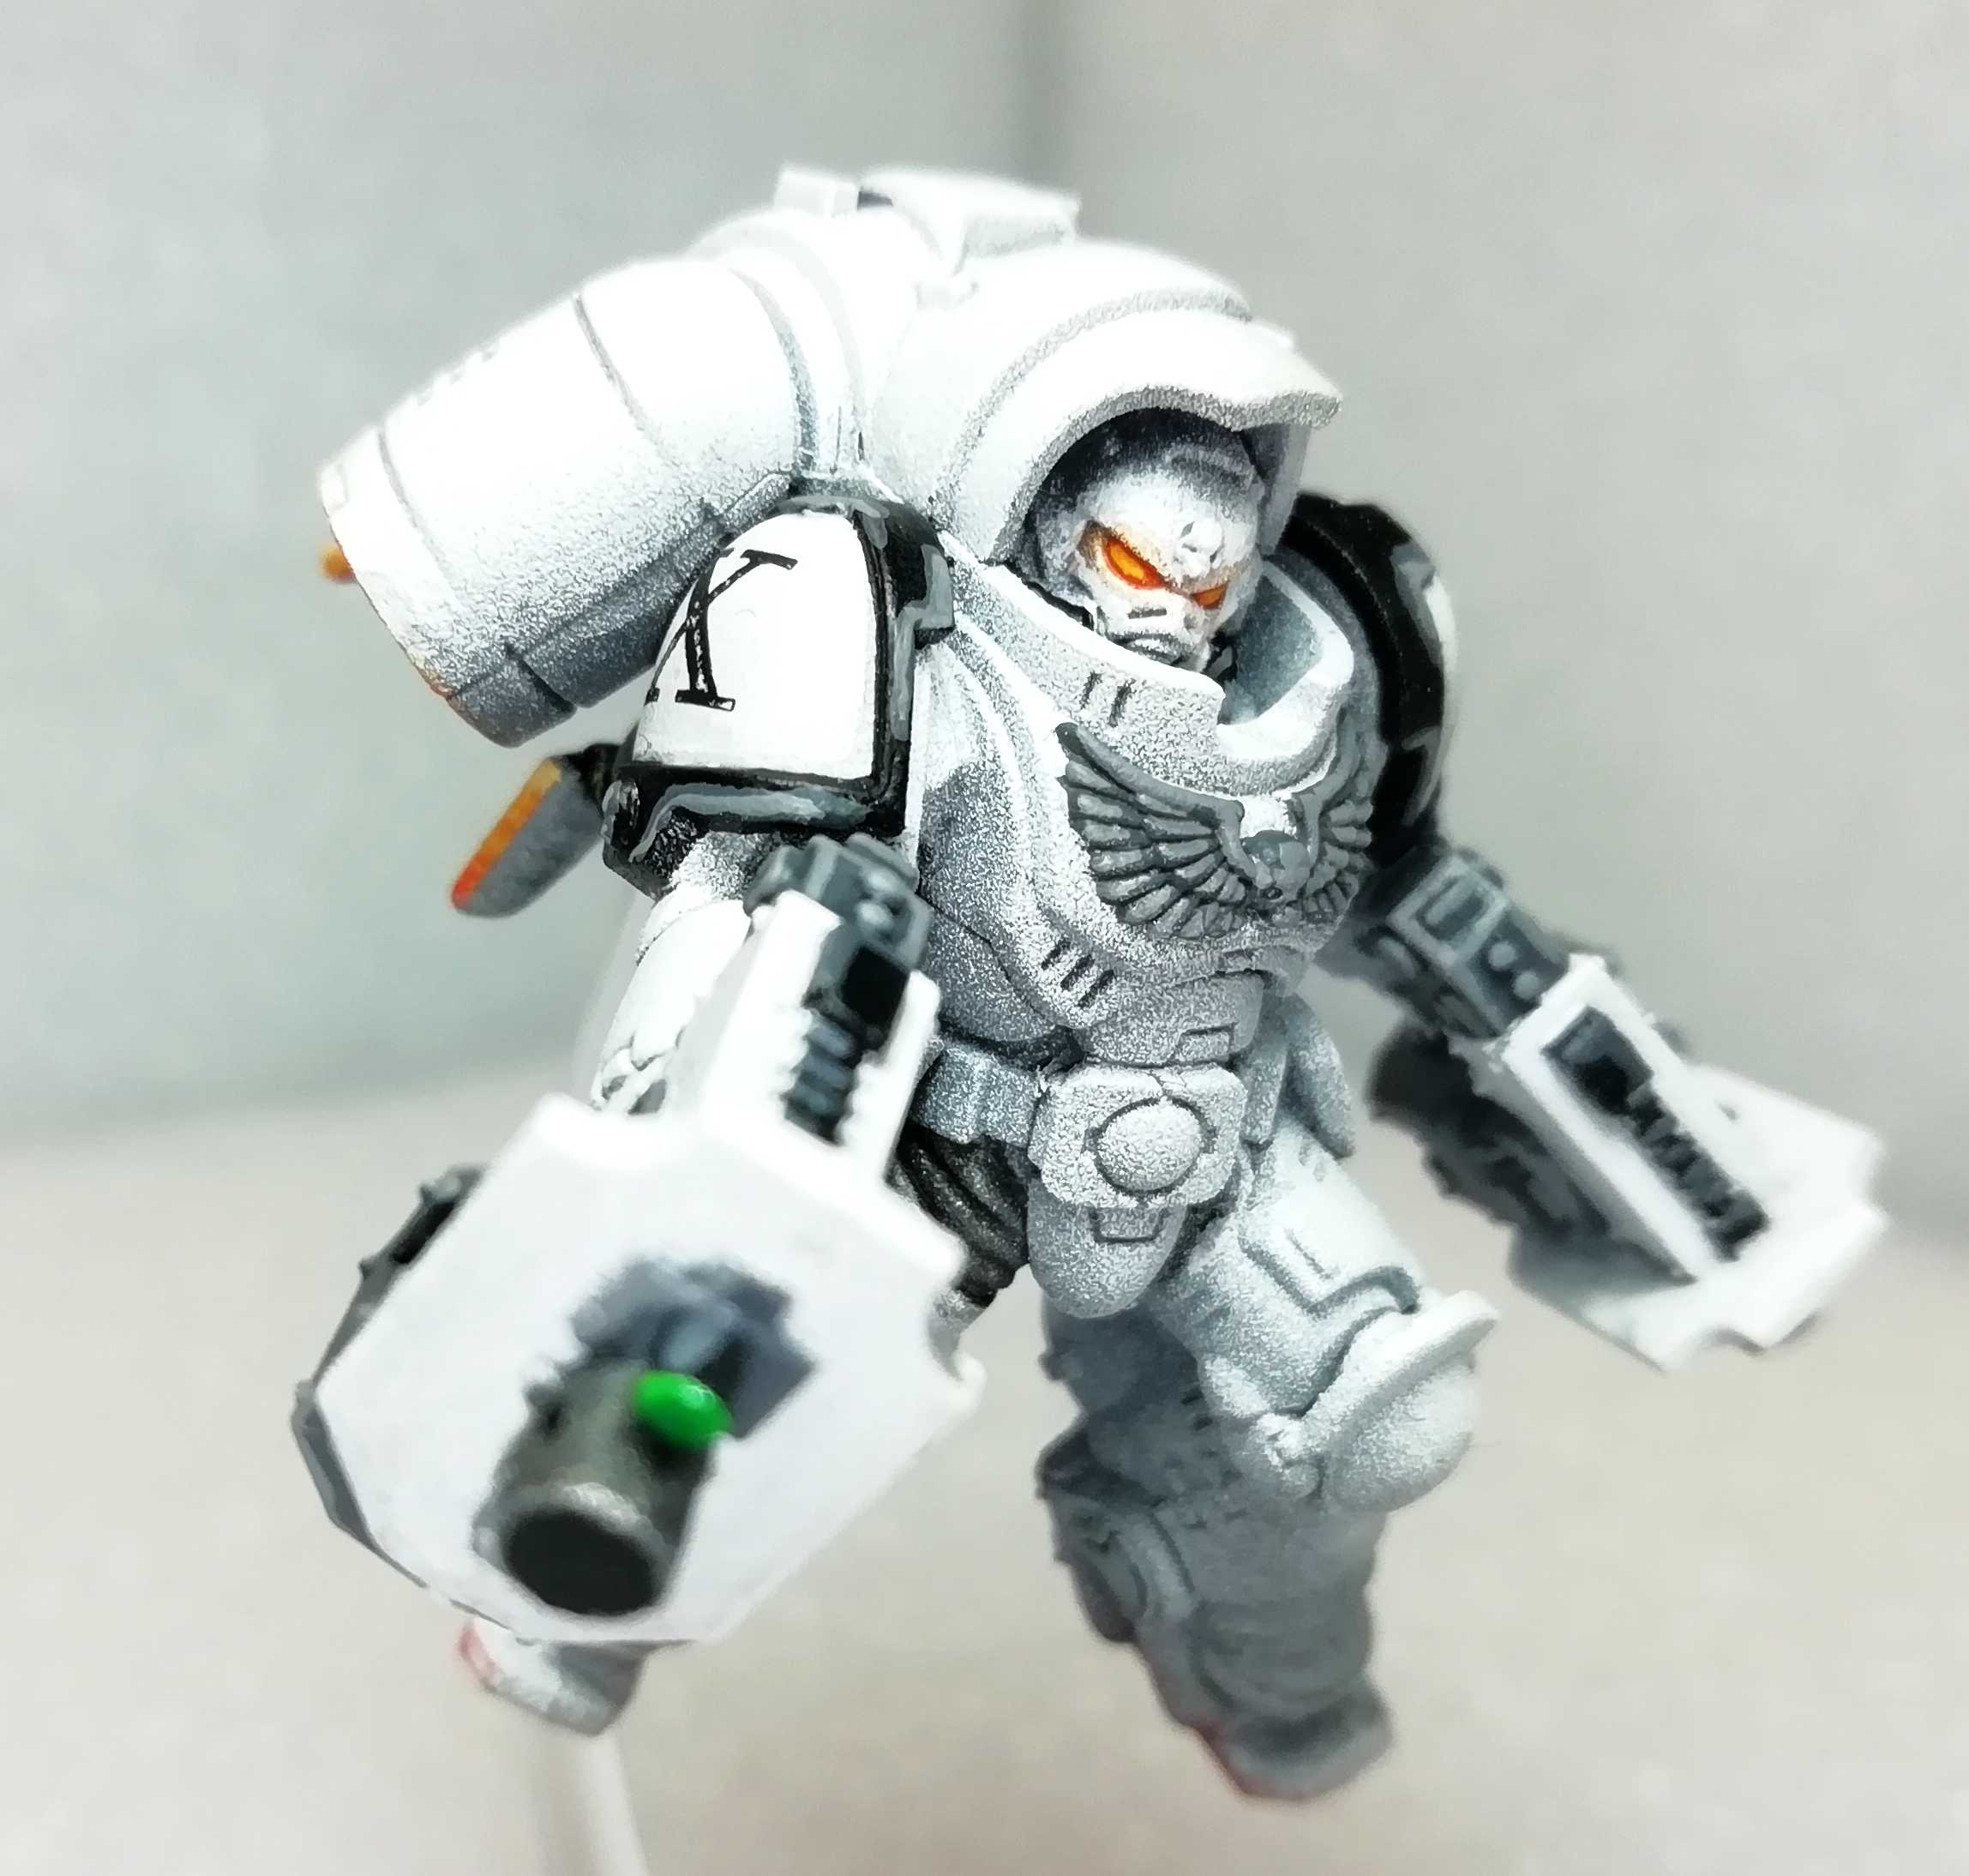 close up of the Sergeant Kalus
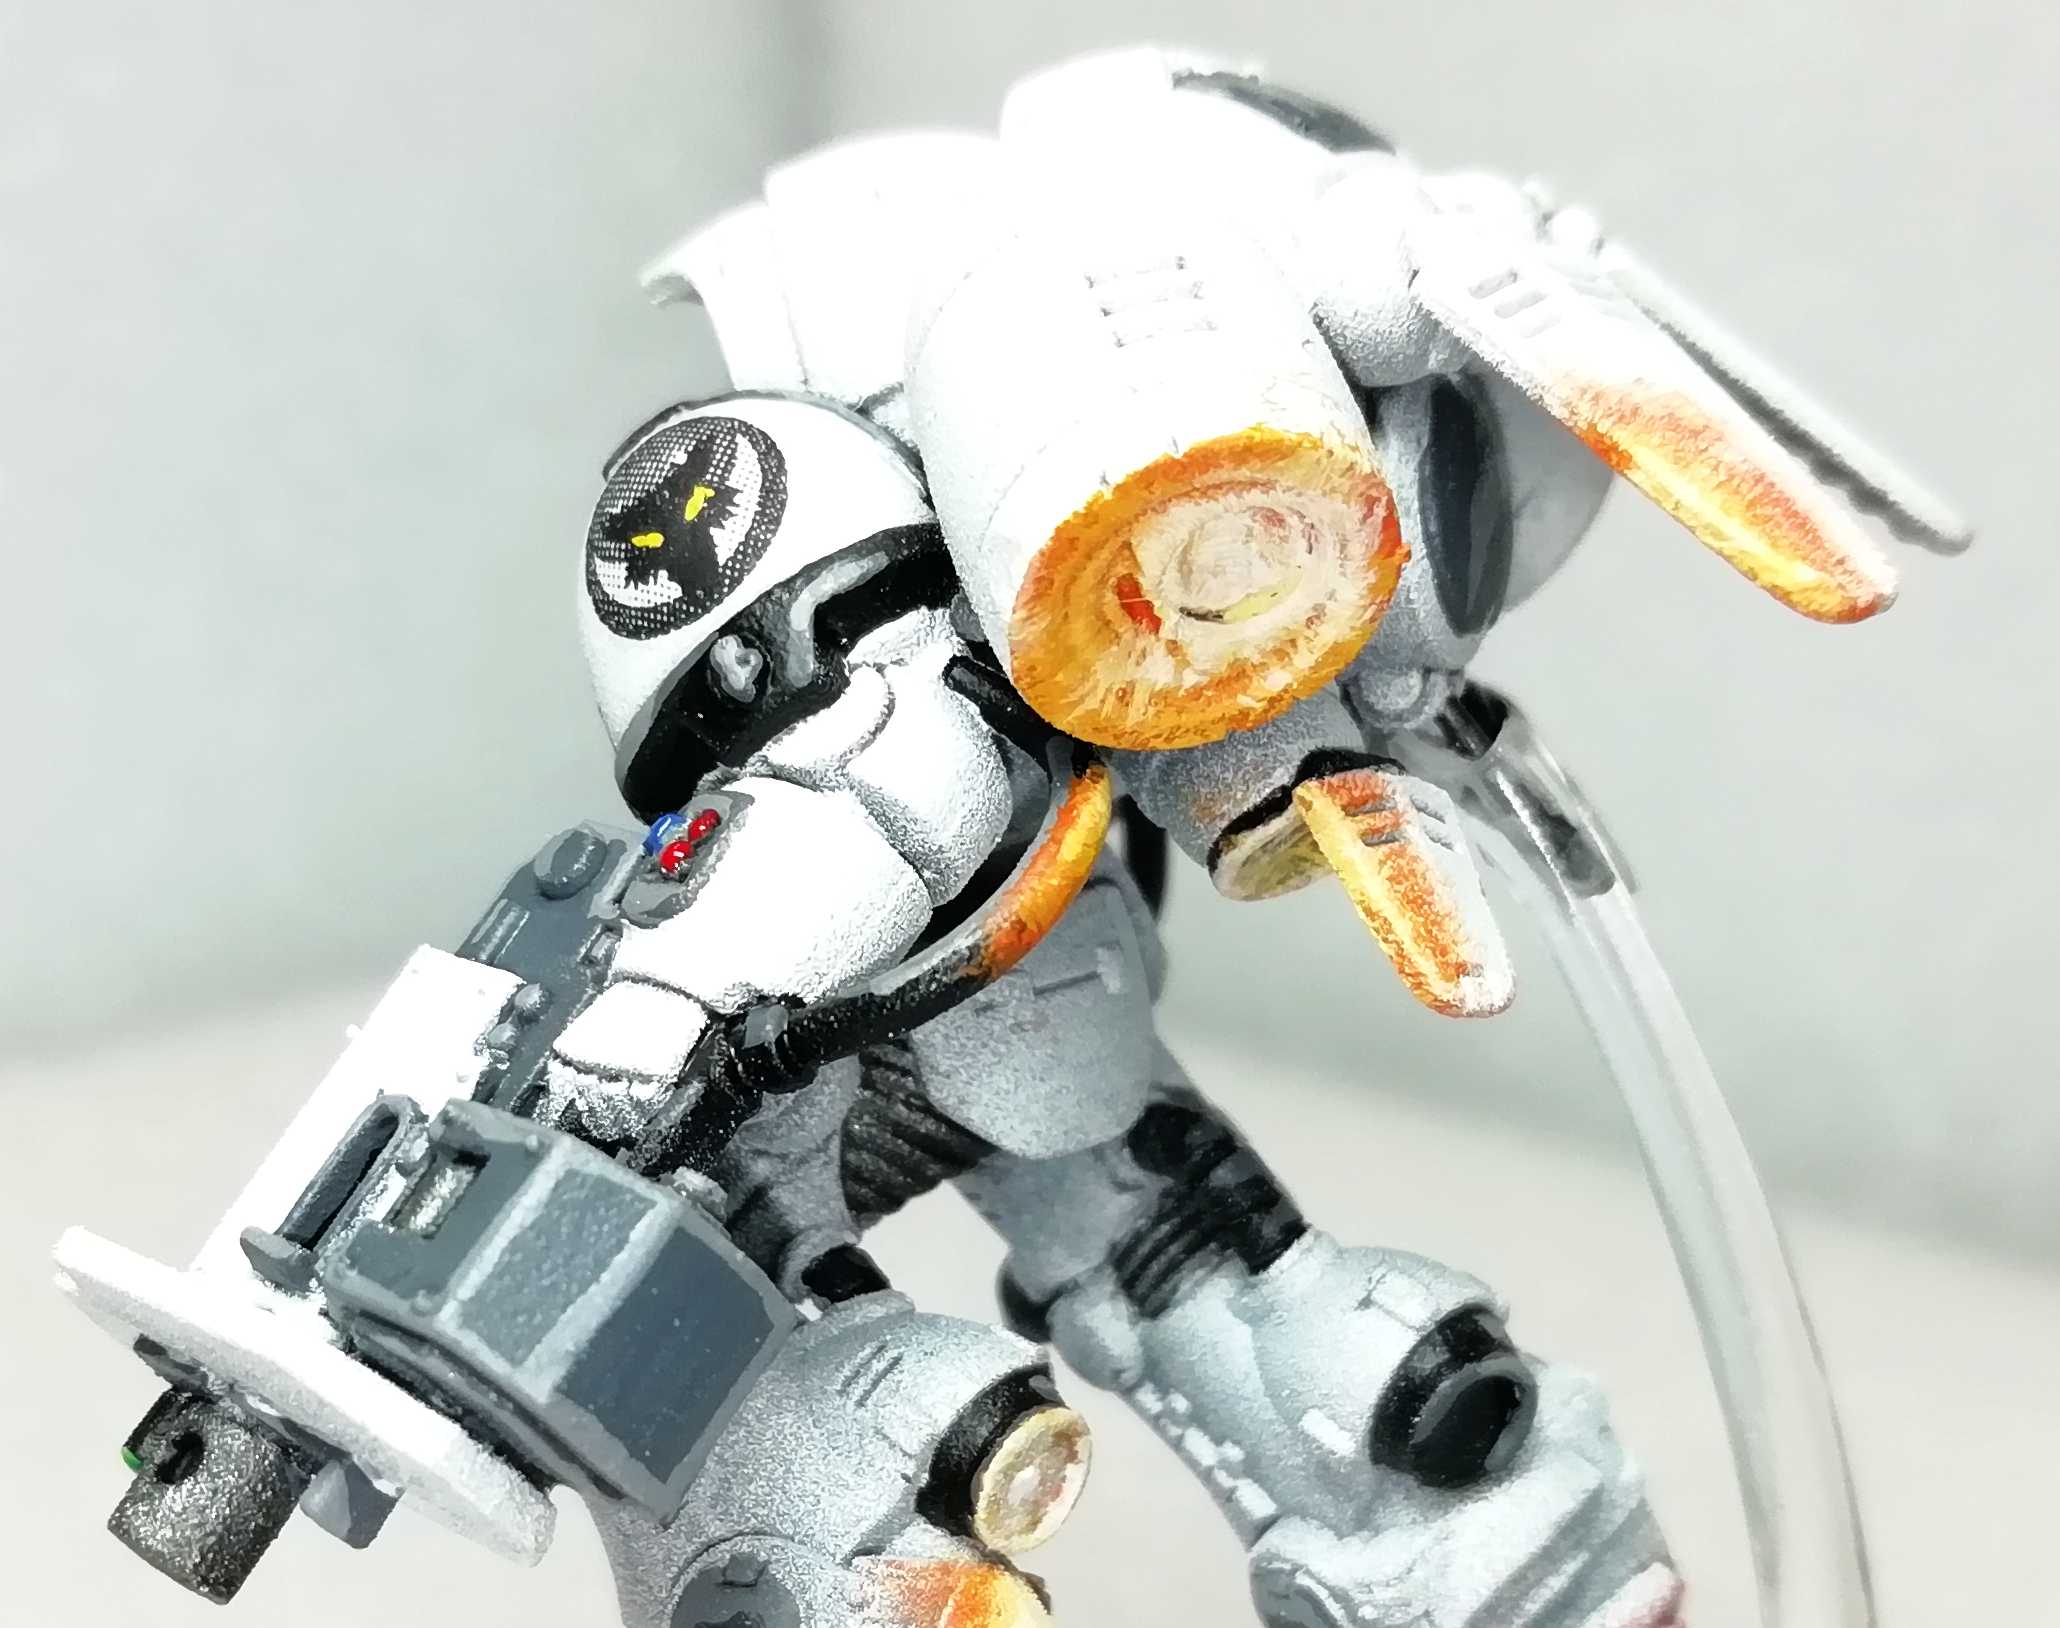 and of his jump pack
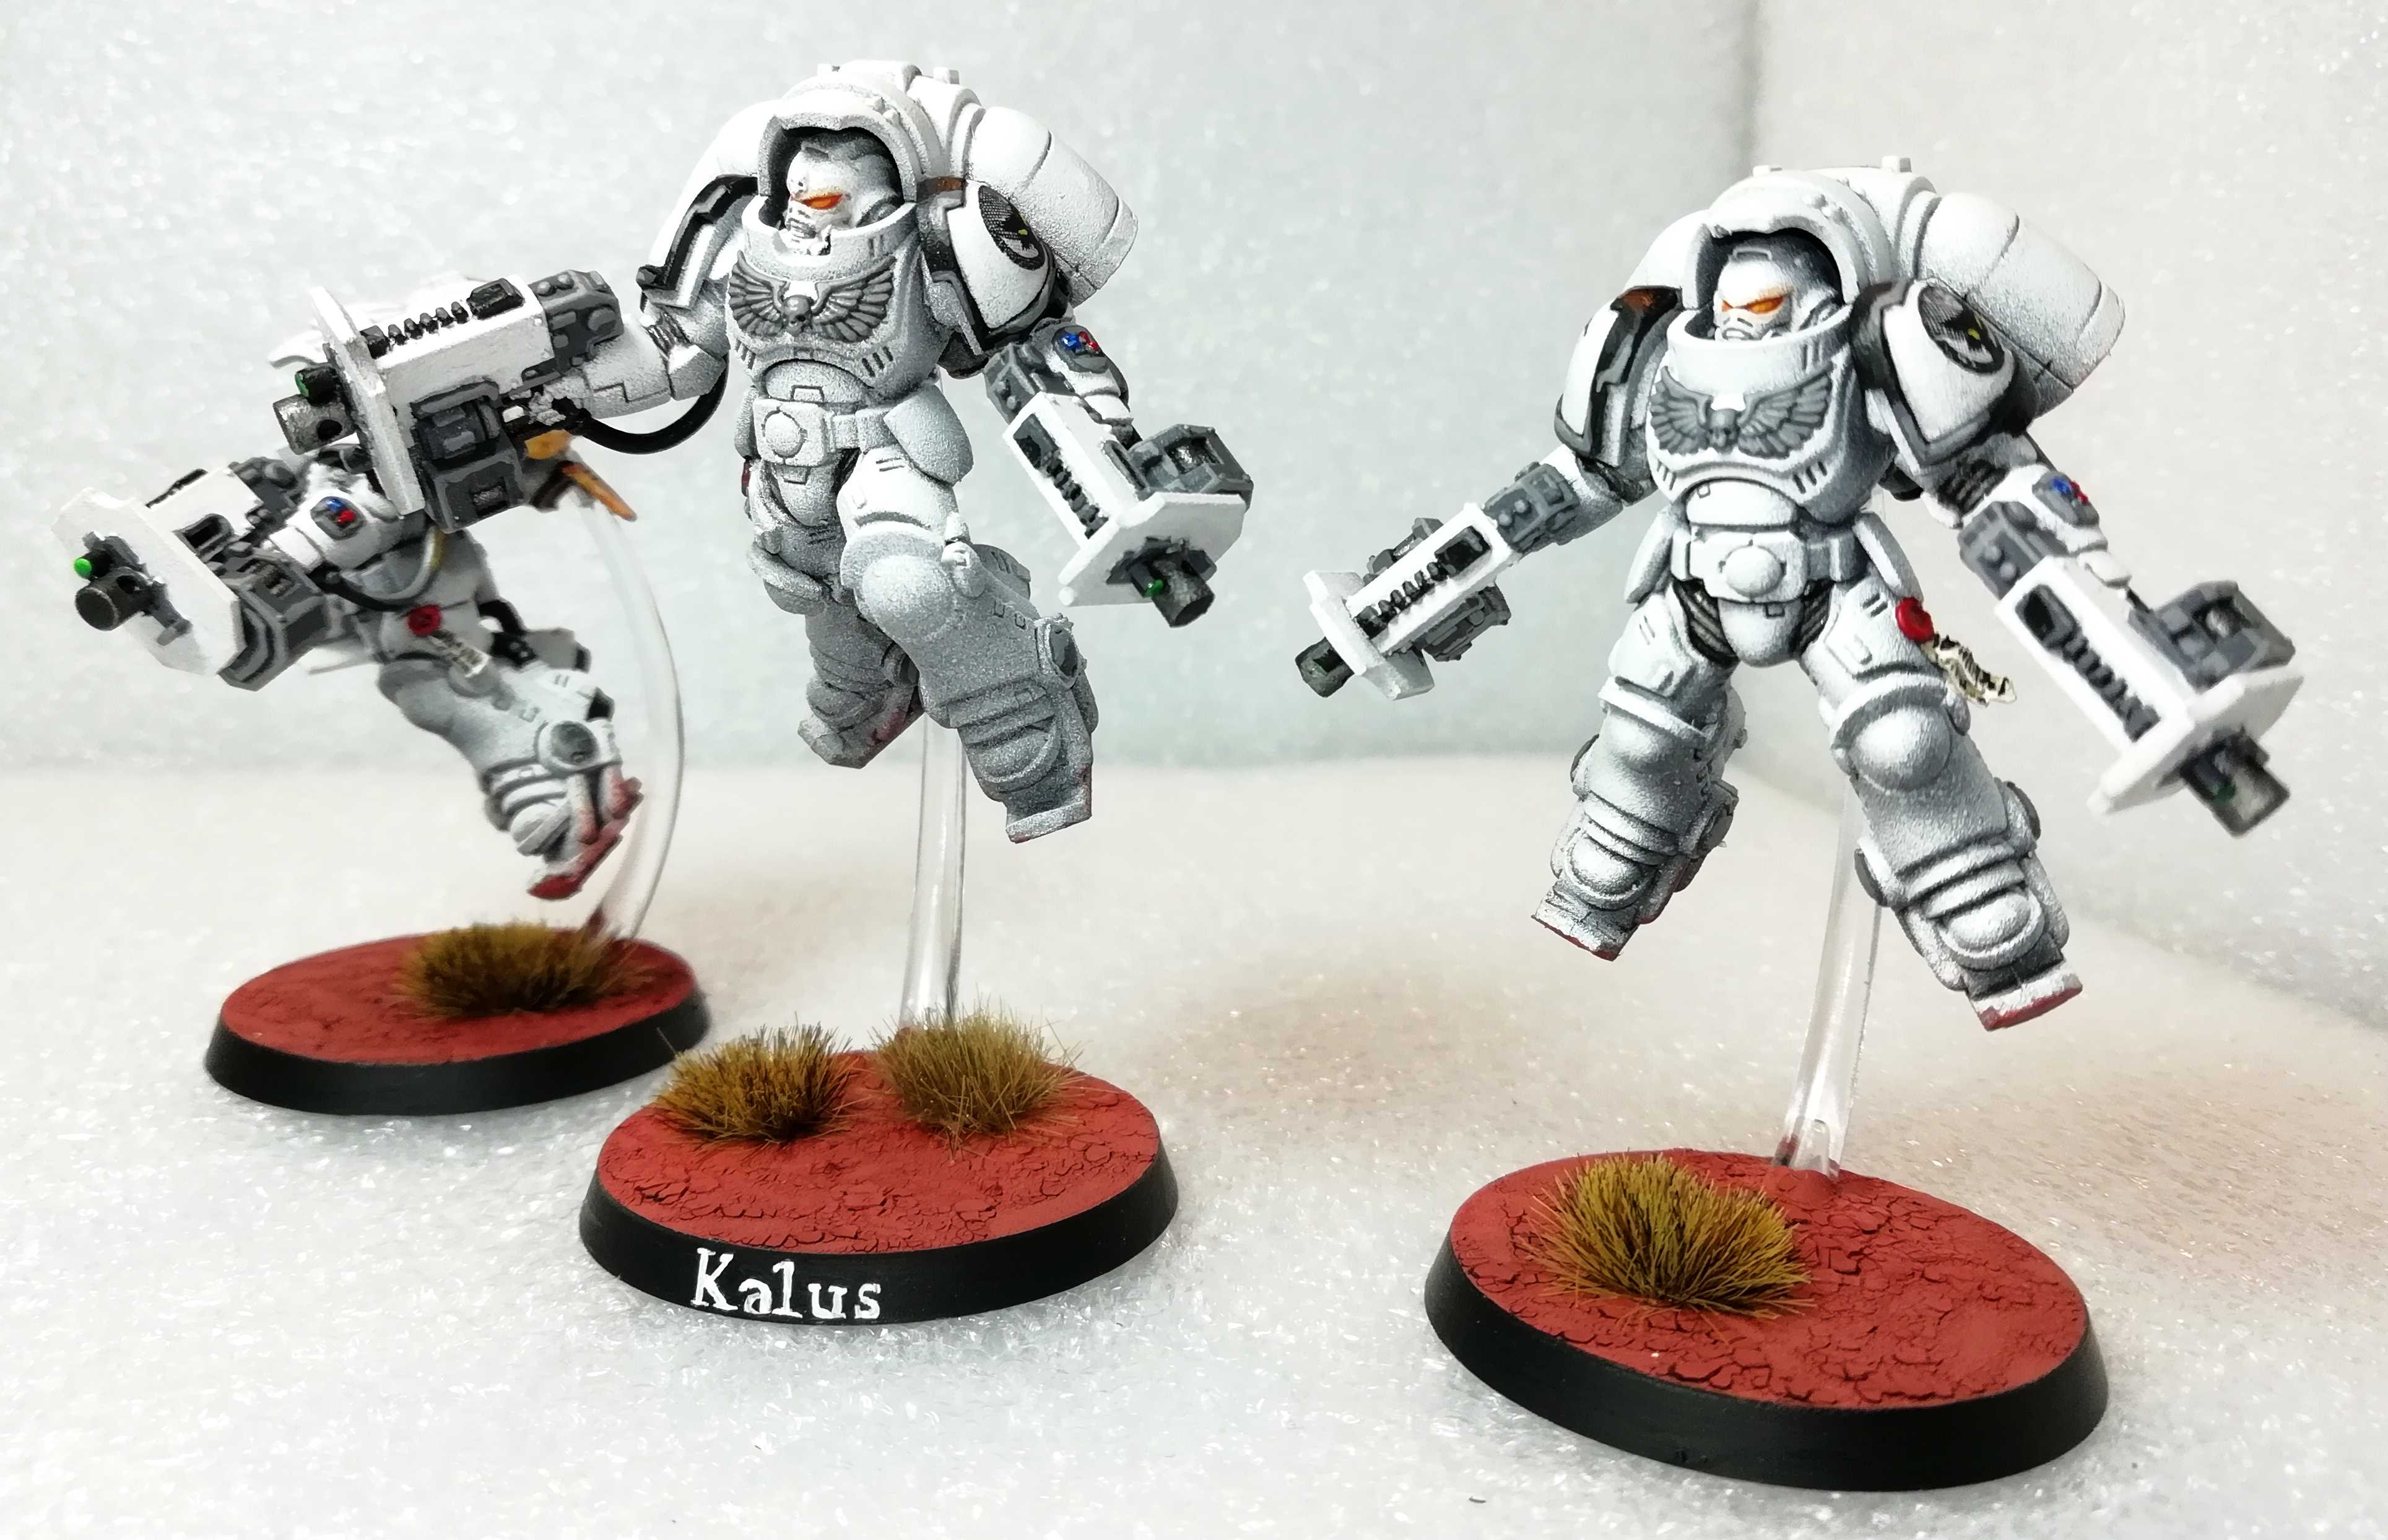


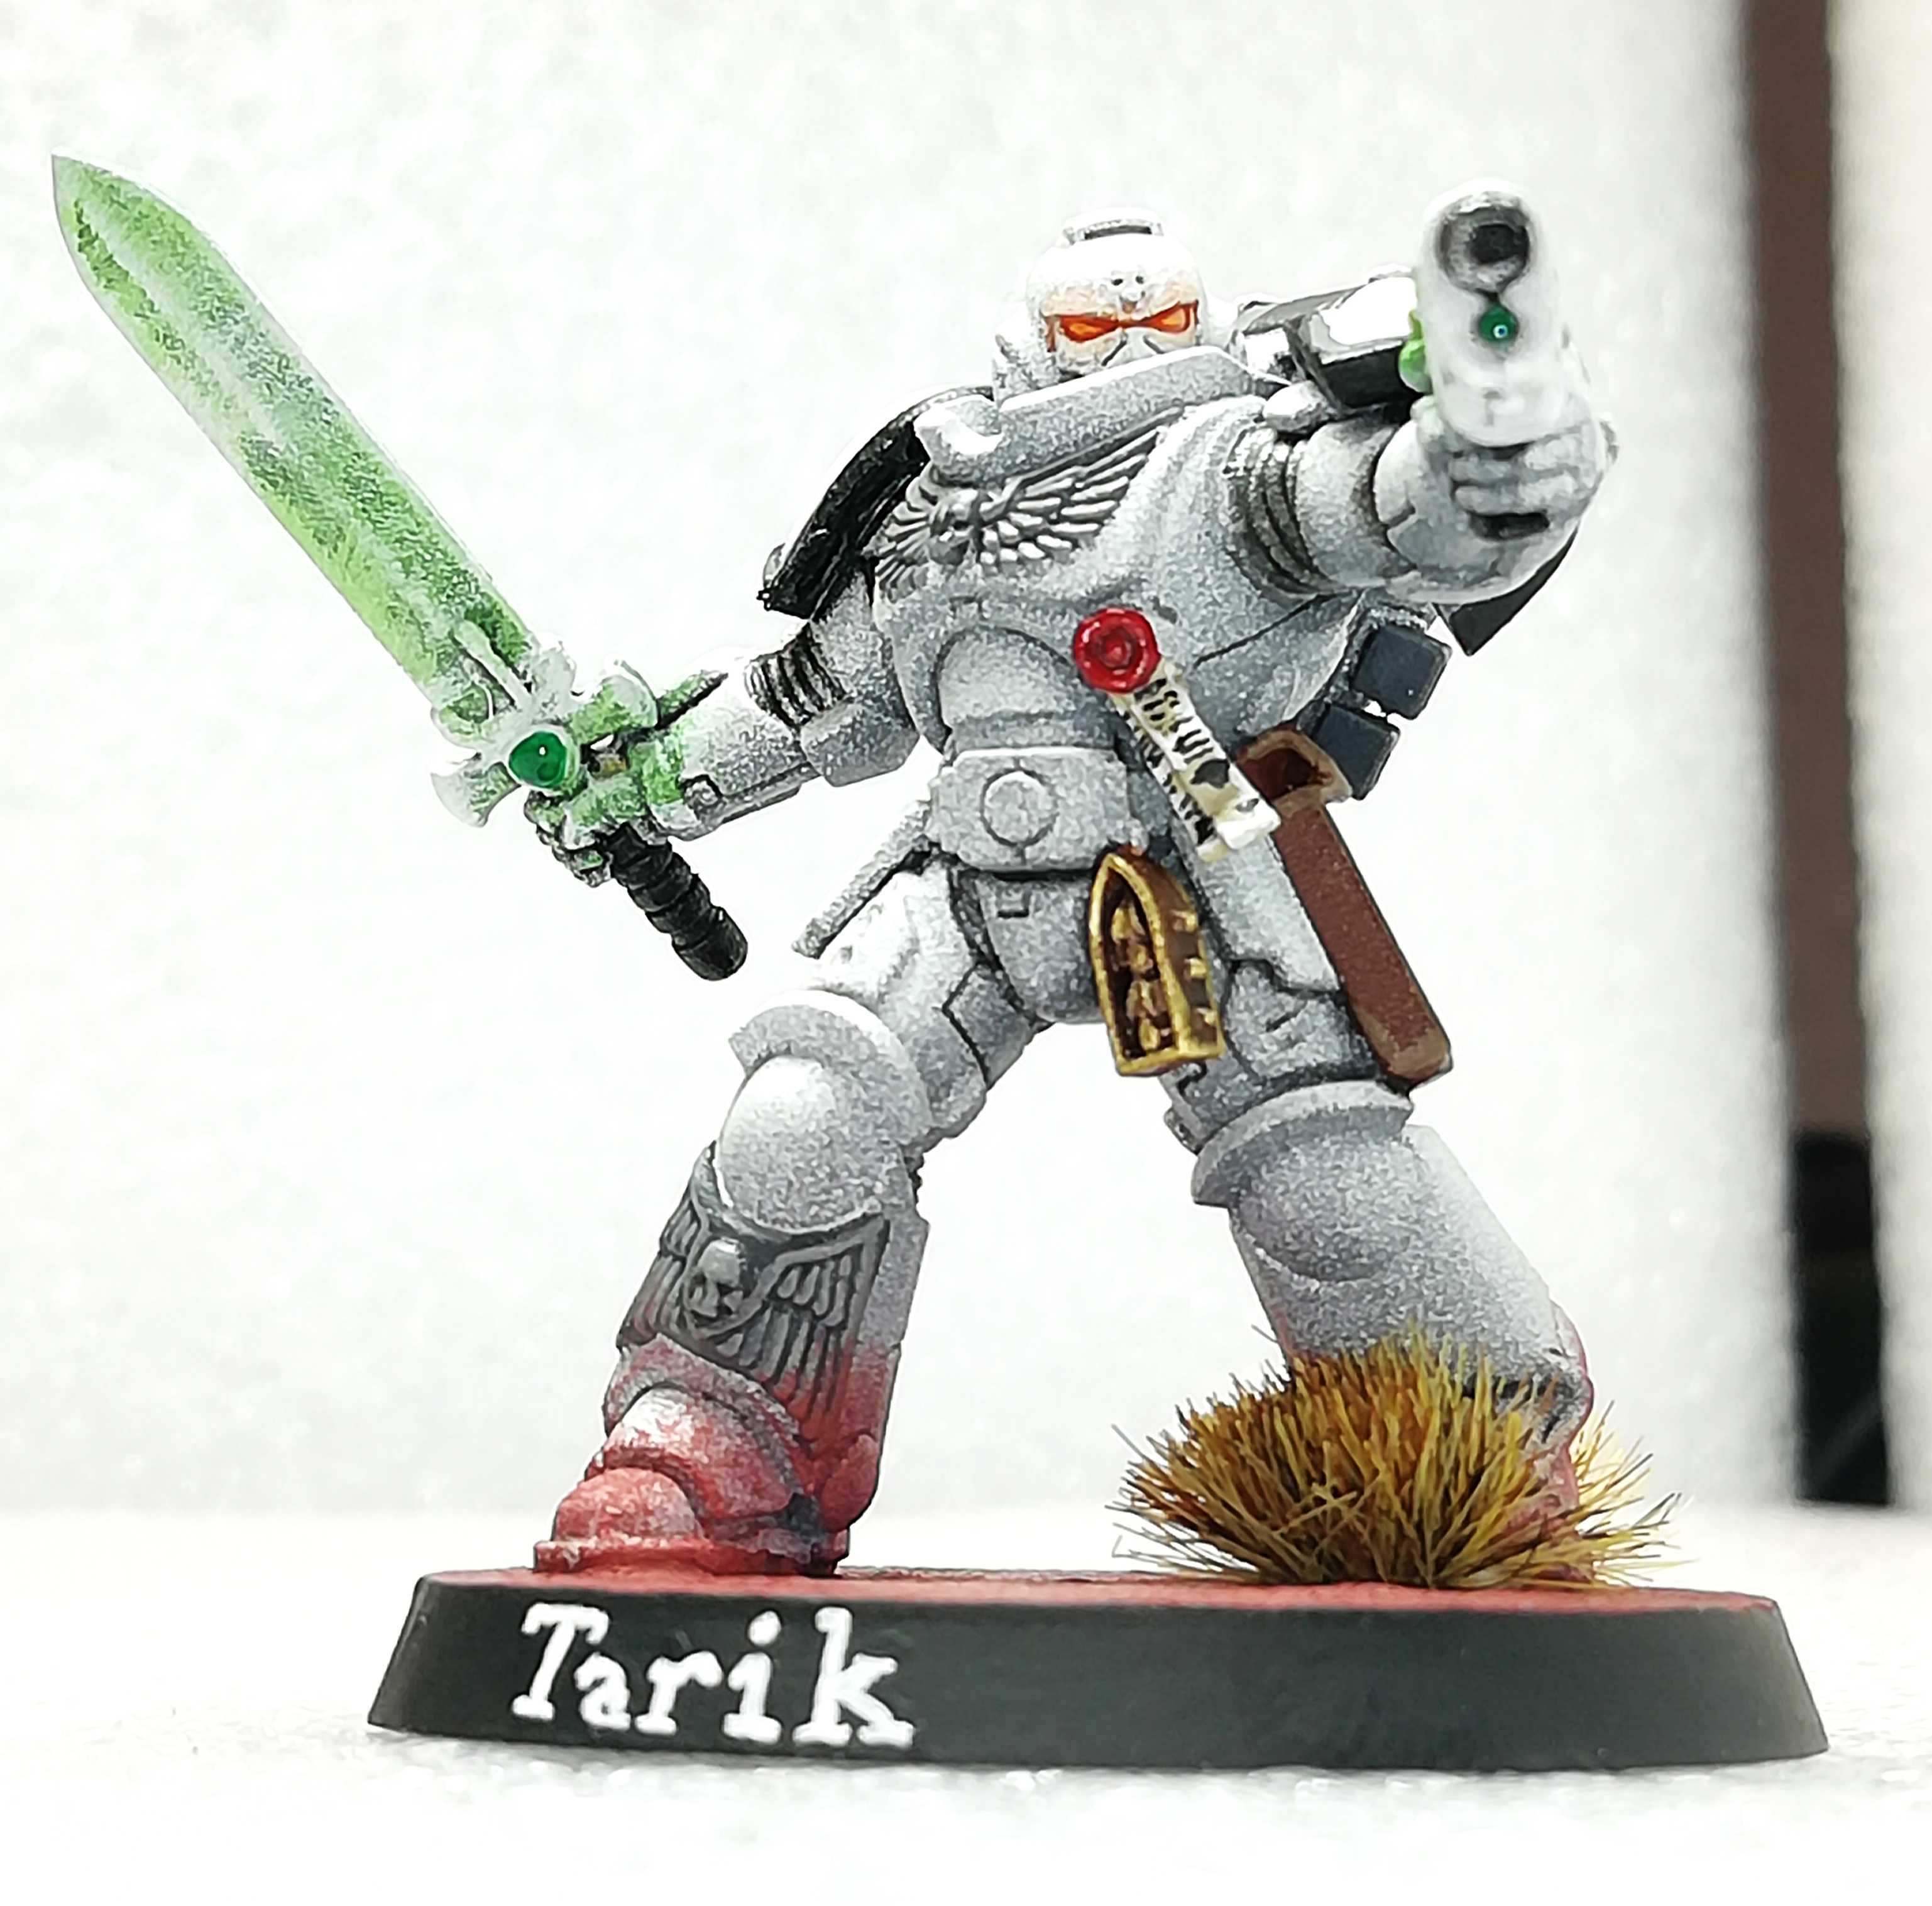
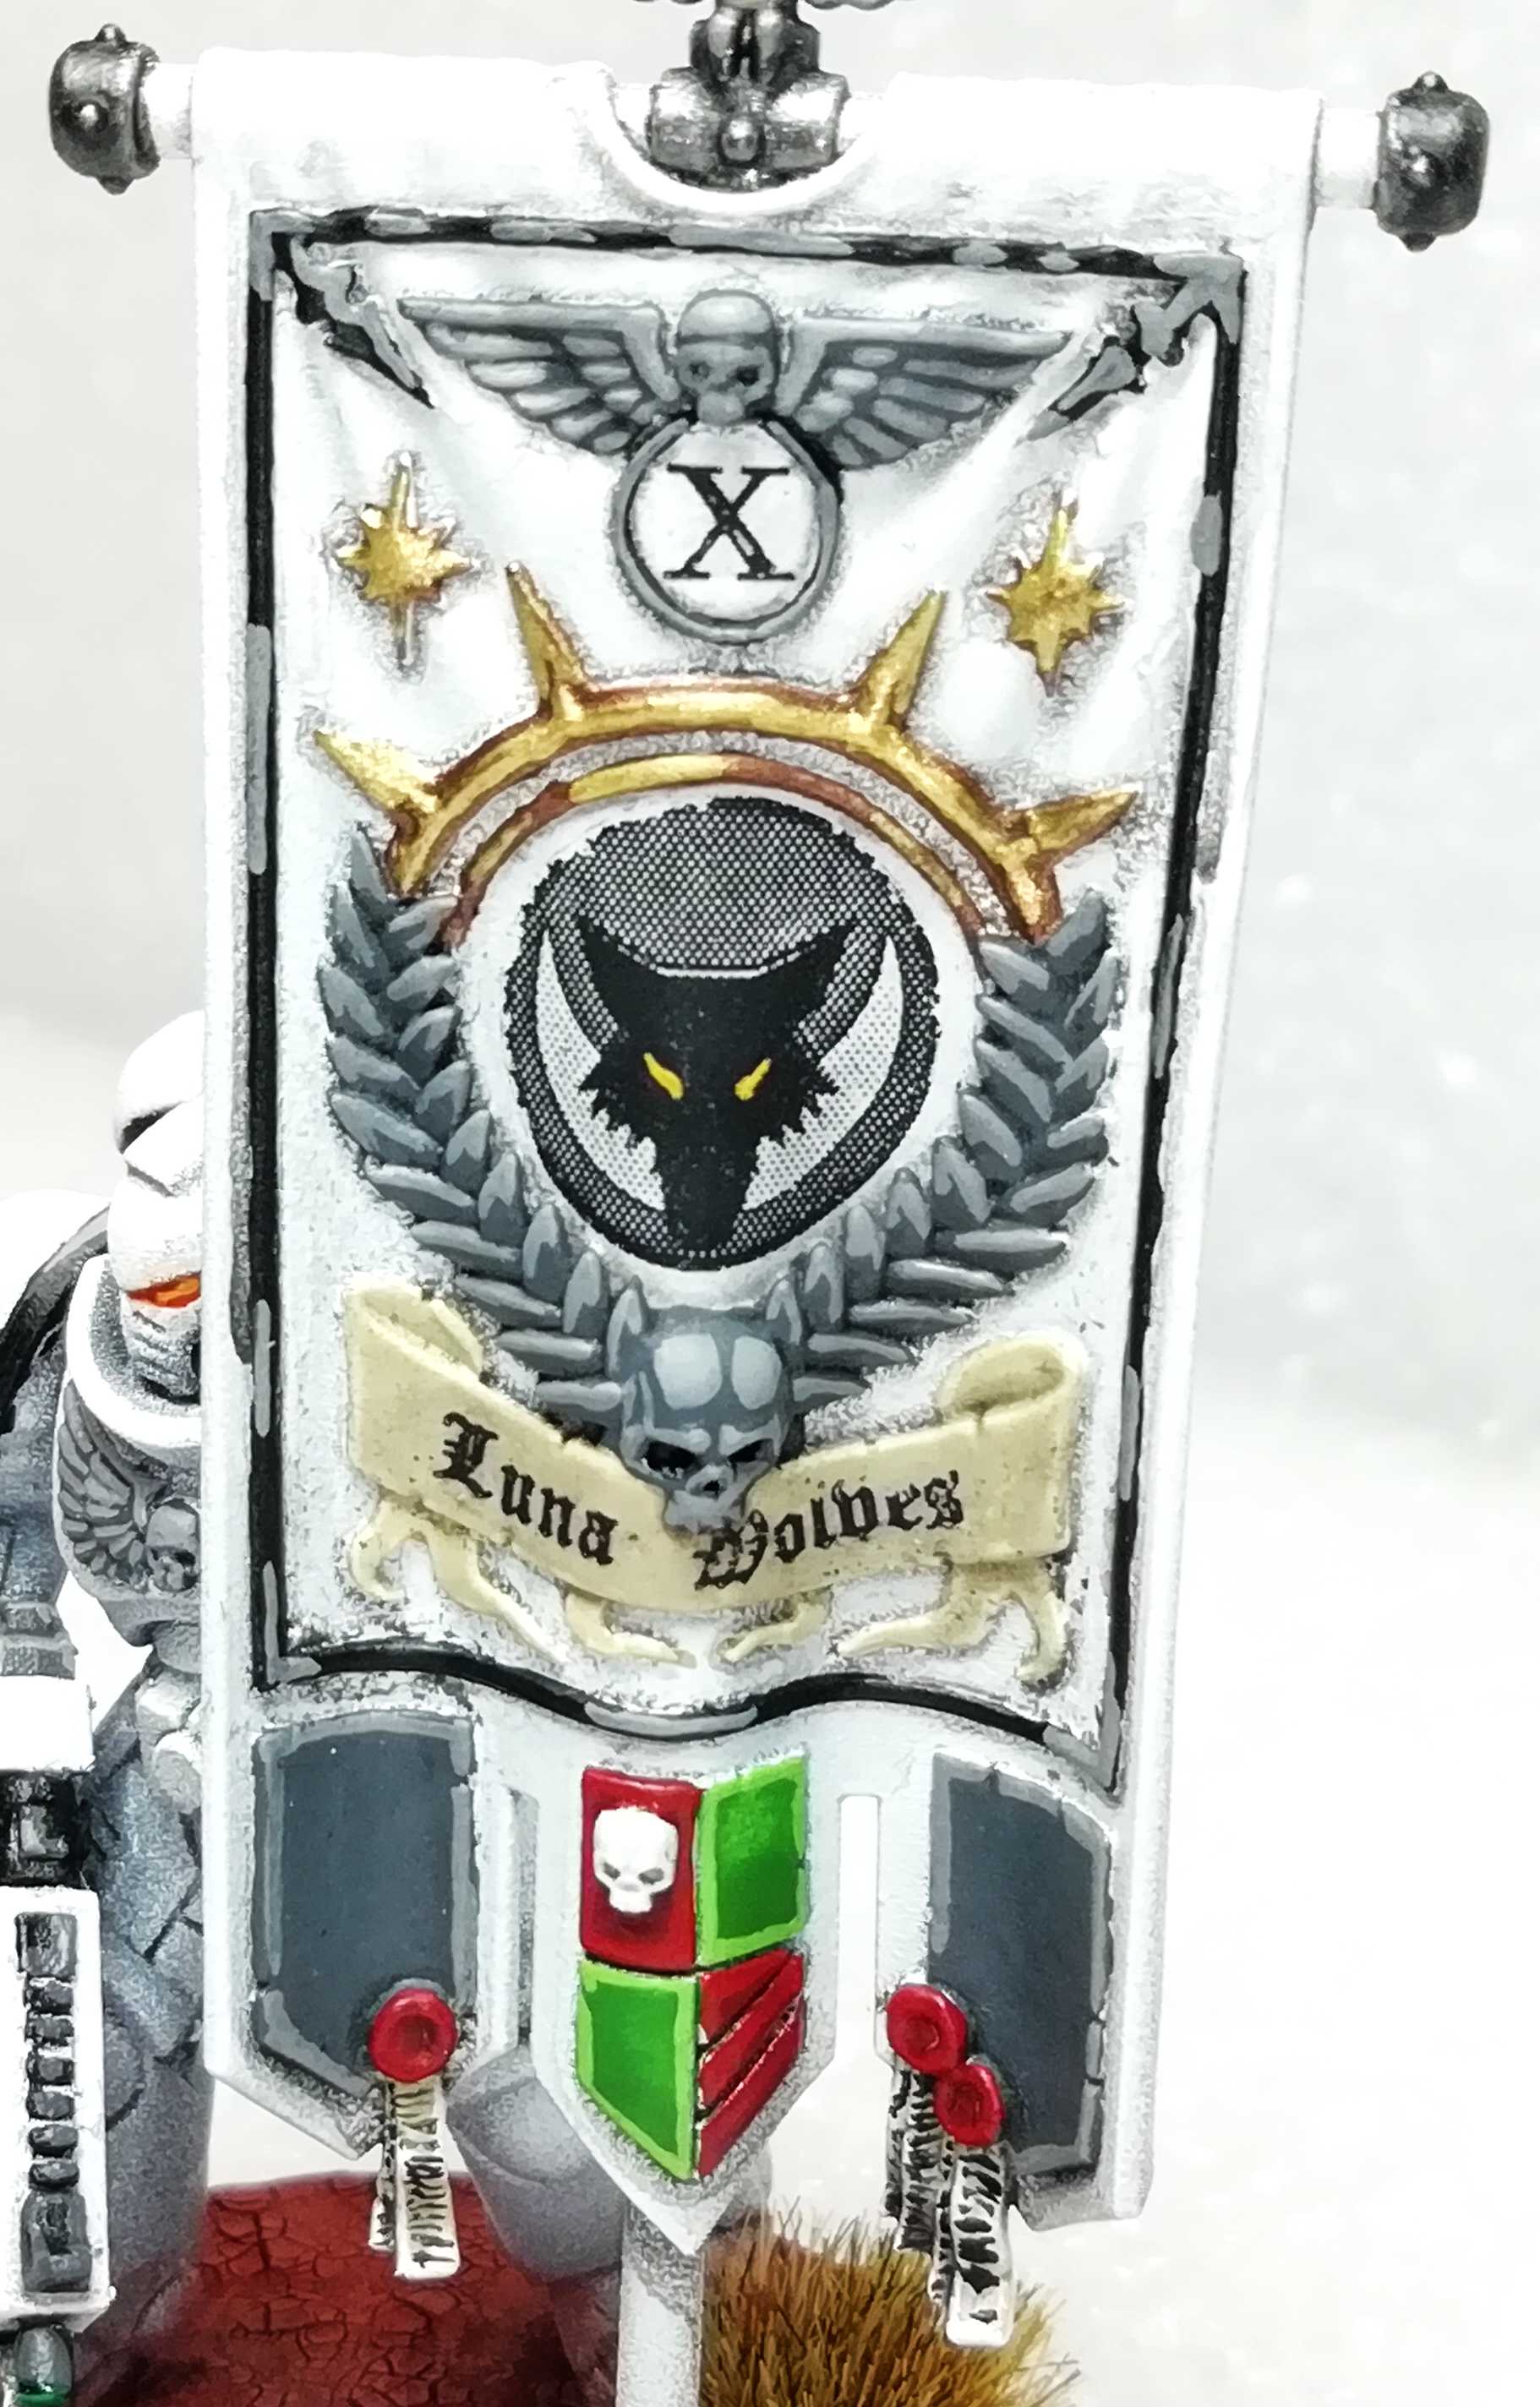
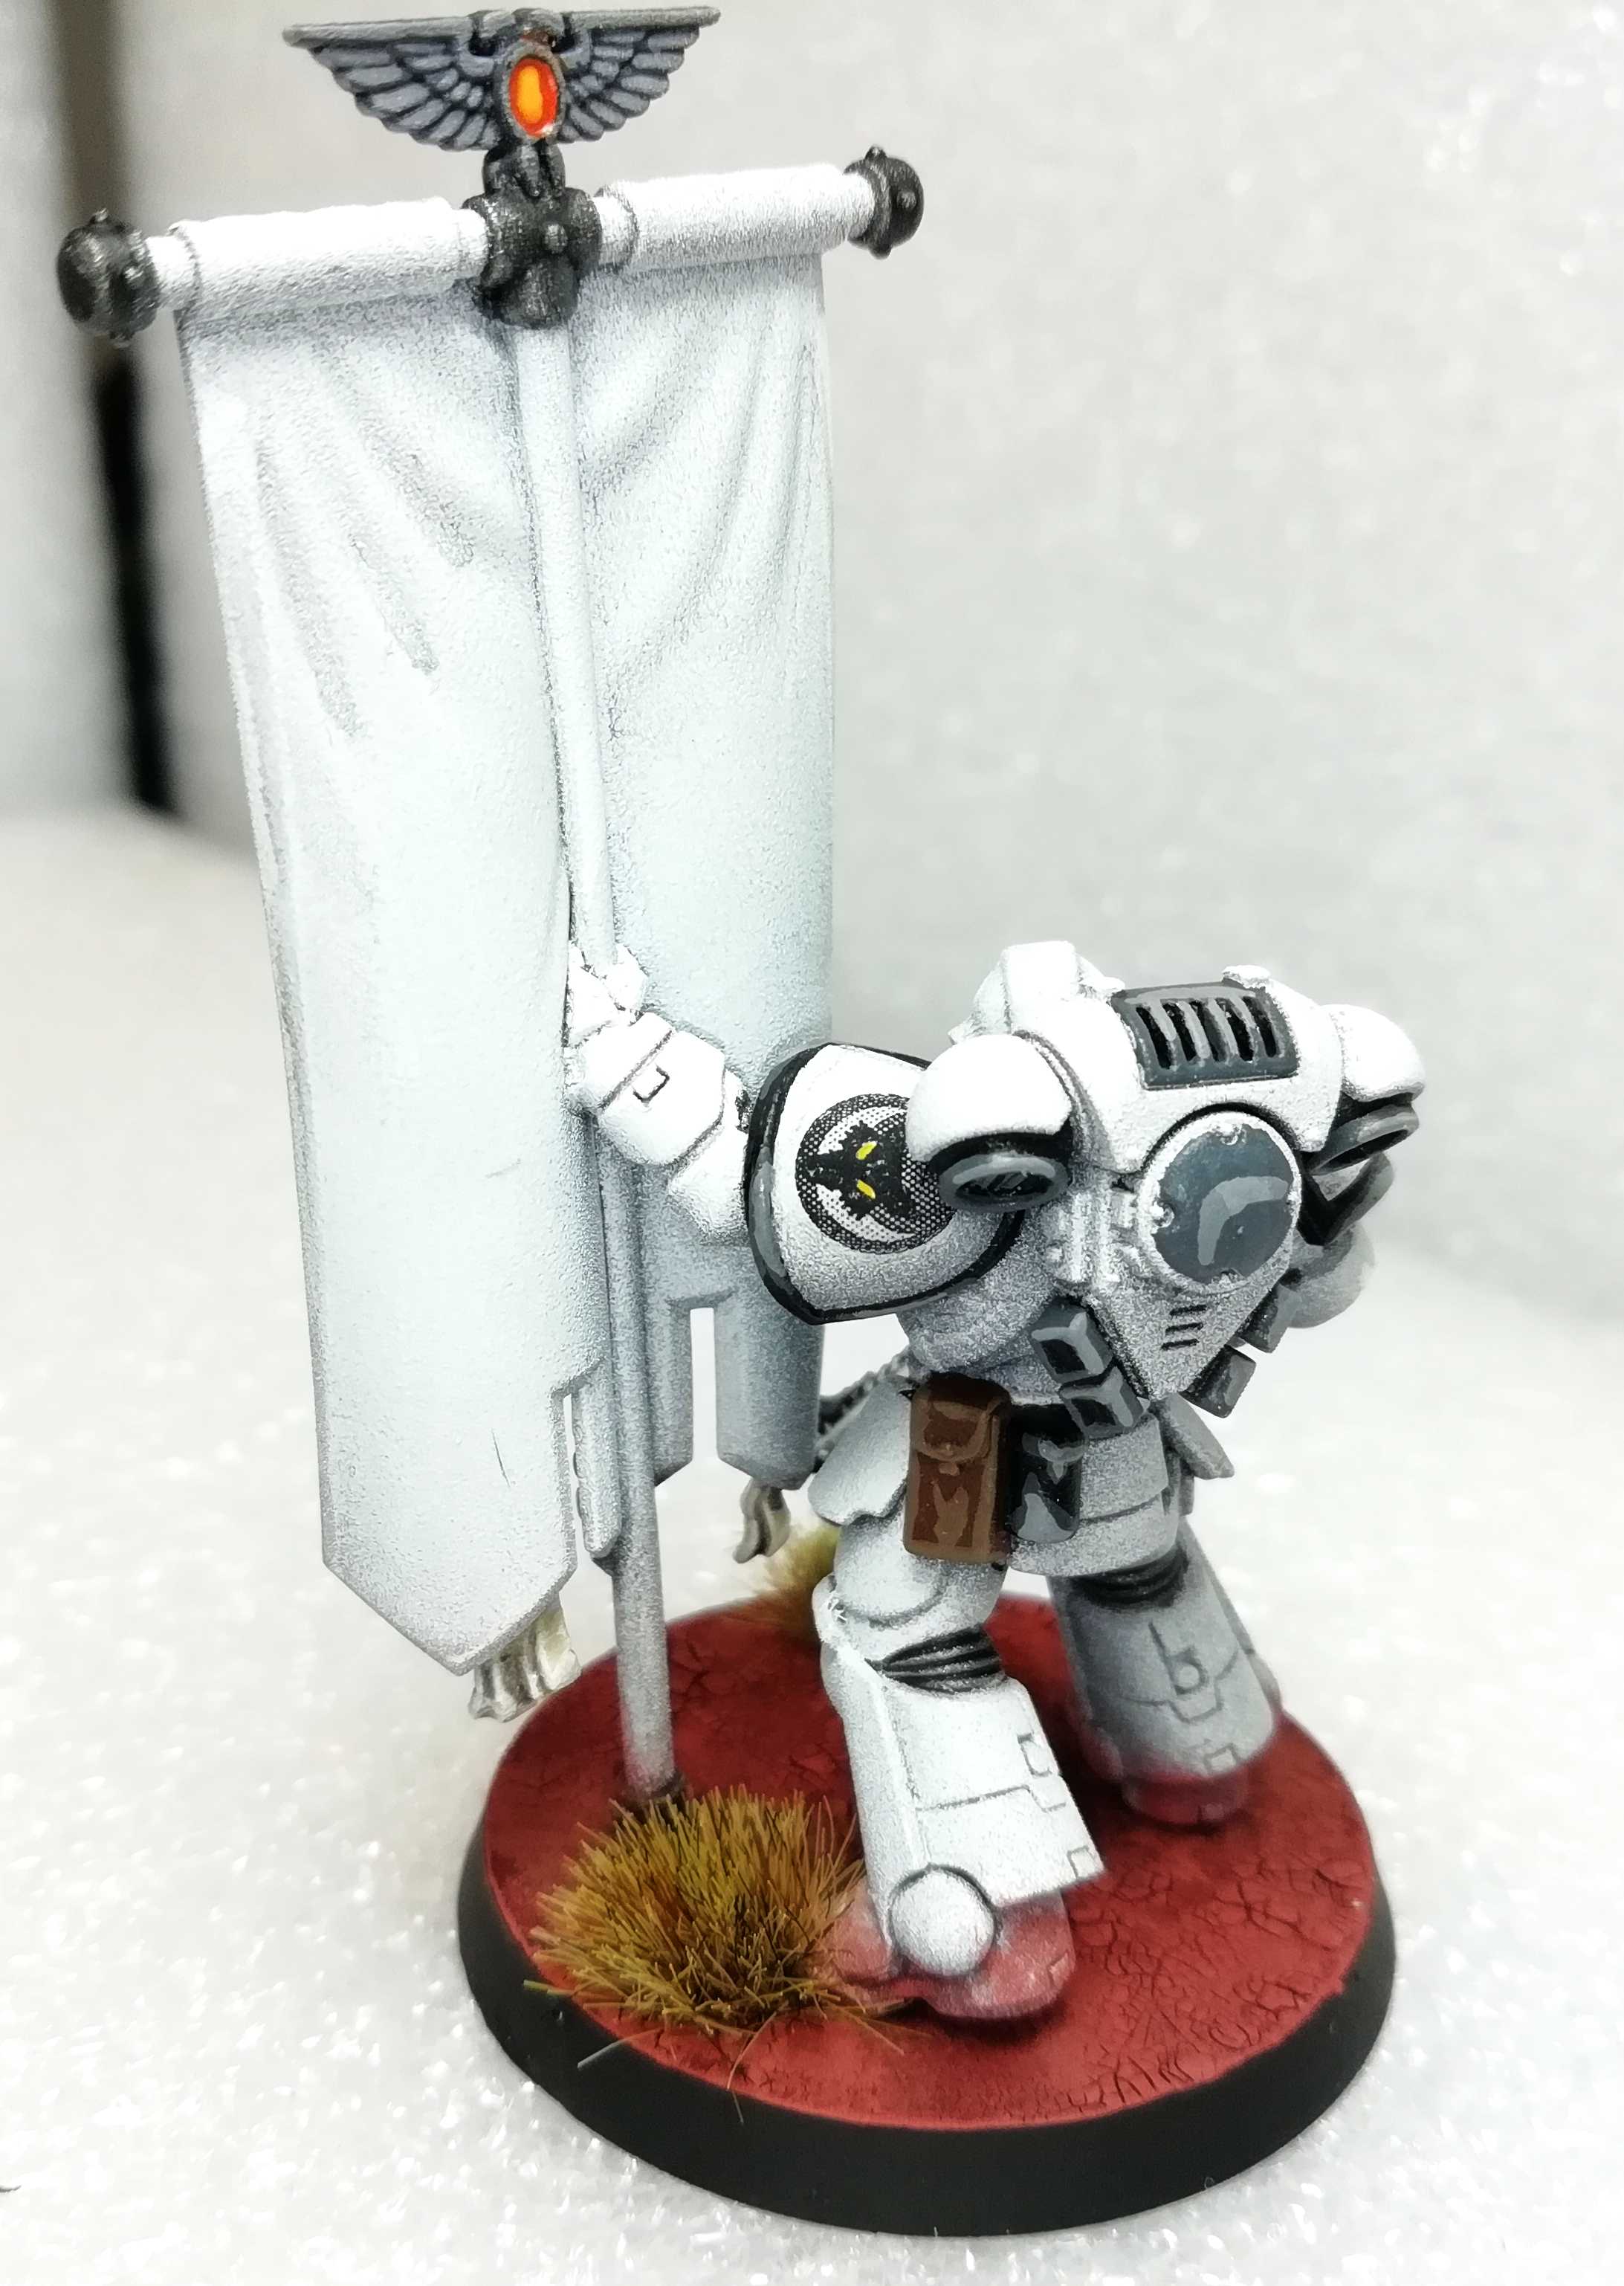
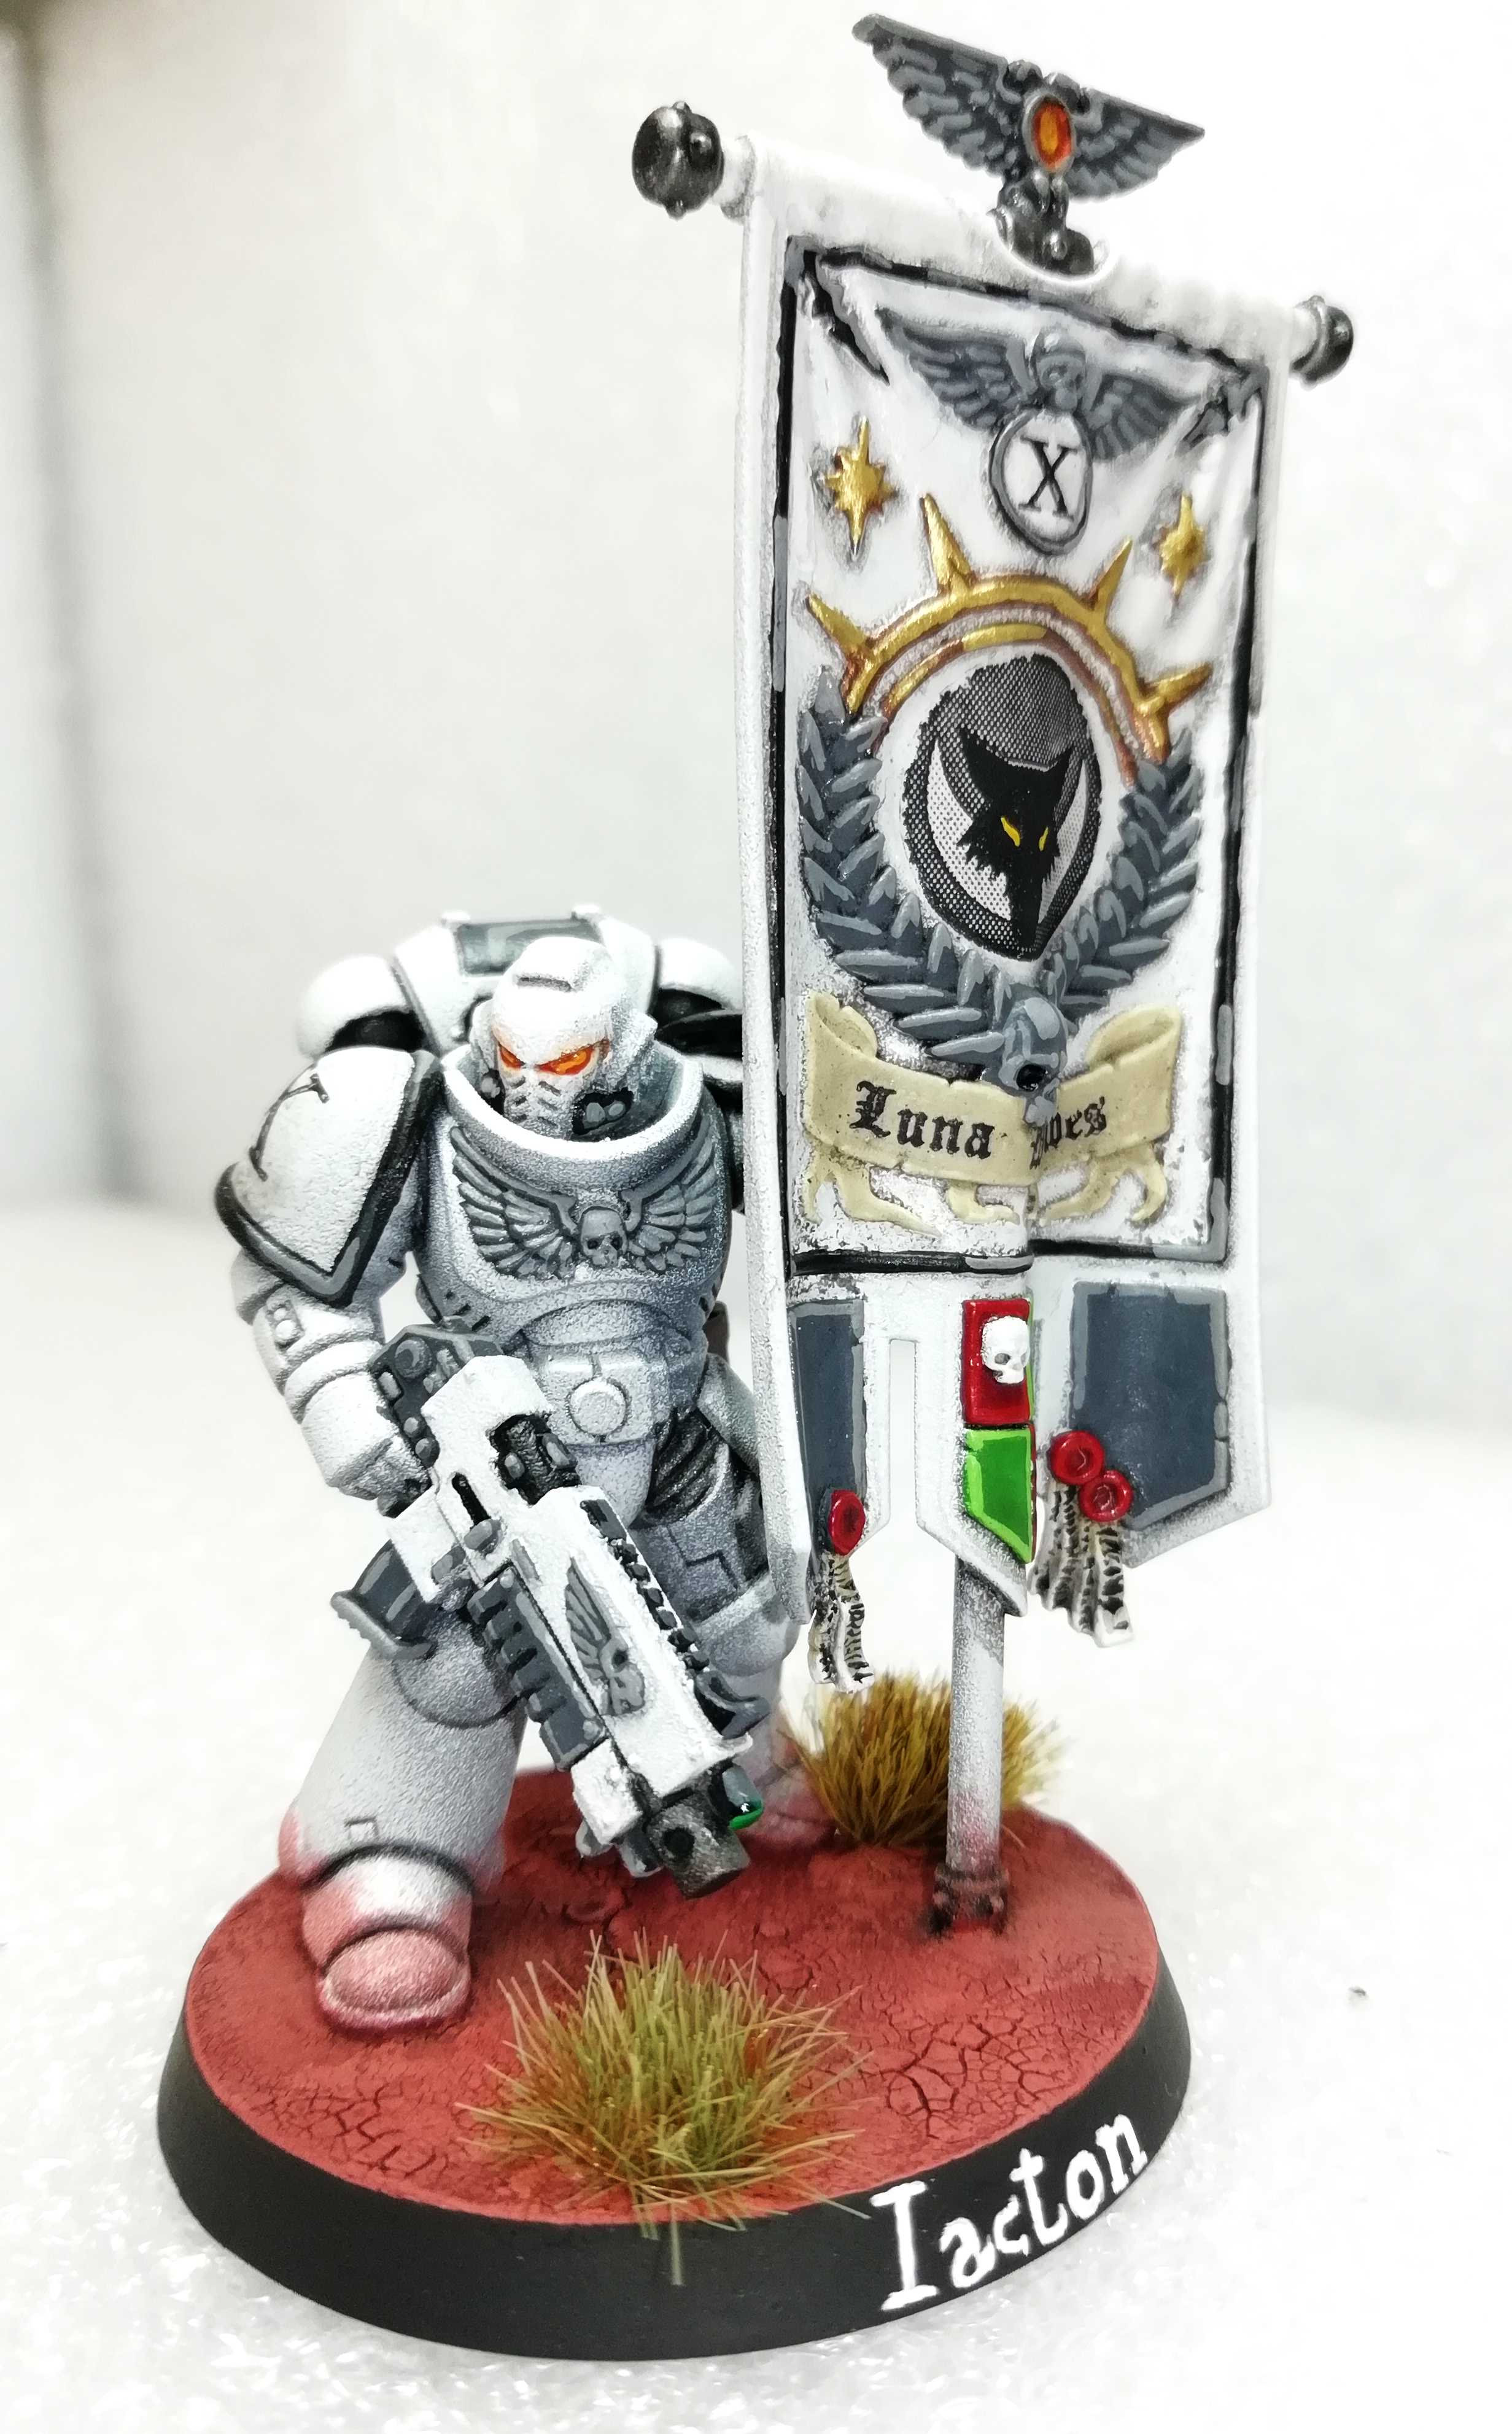
Ancient Iacton and Lieutenant Tarik
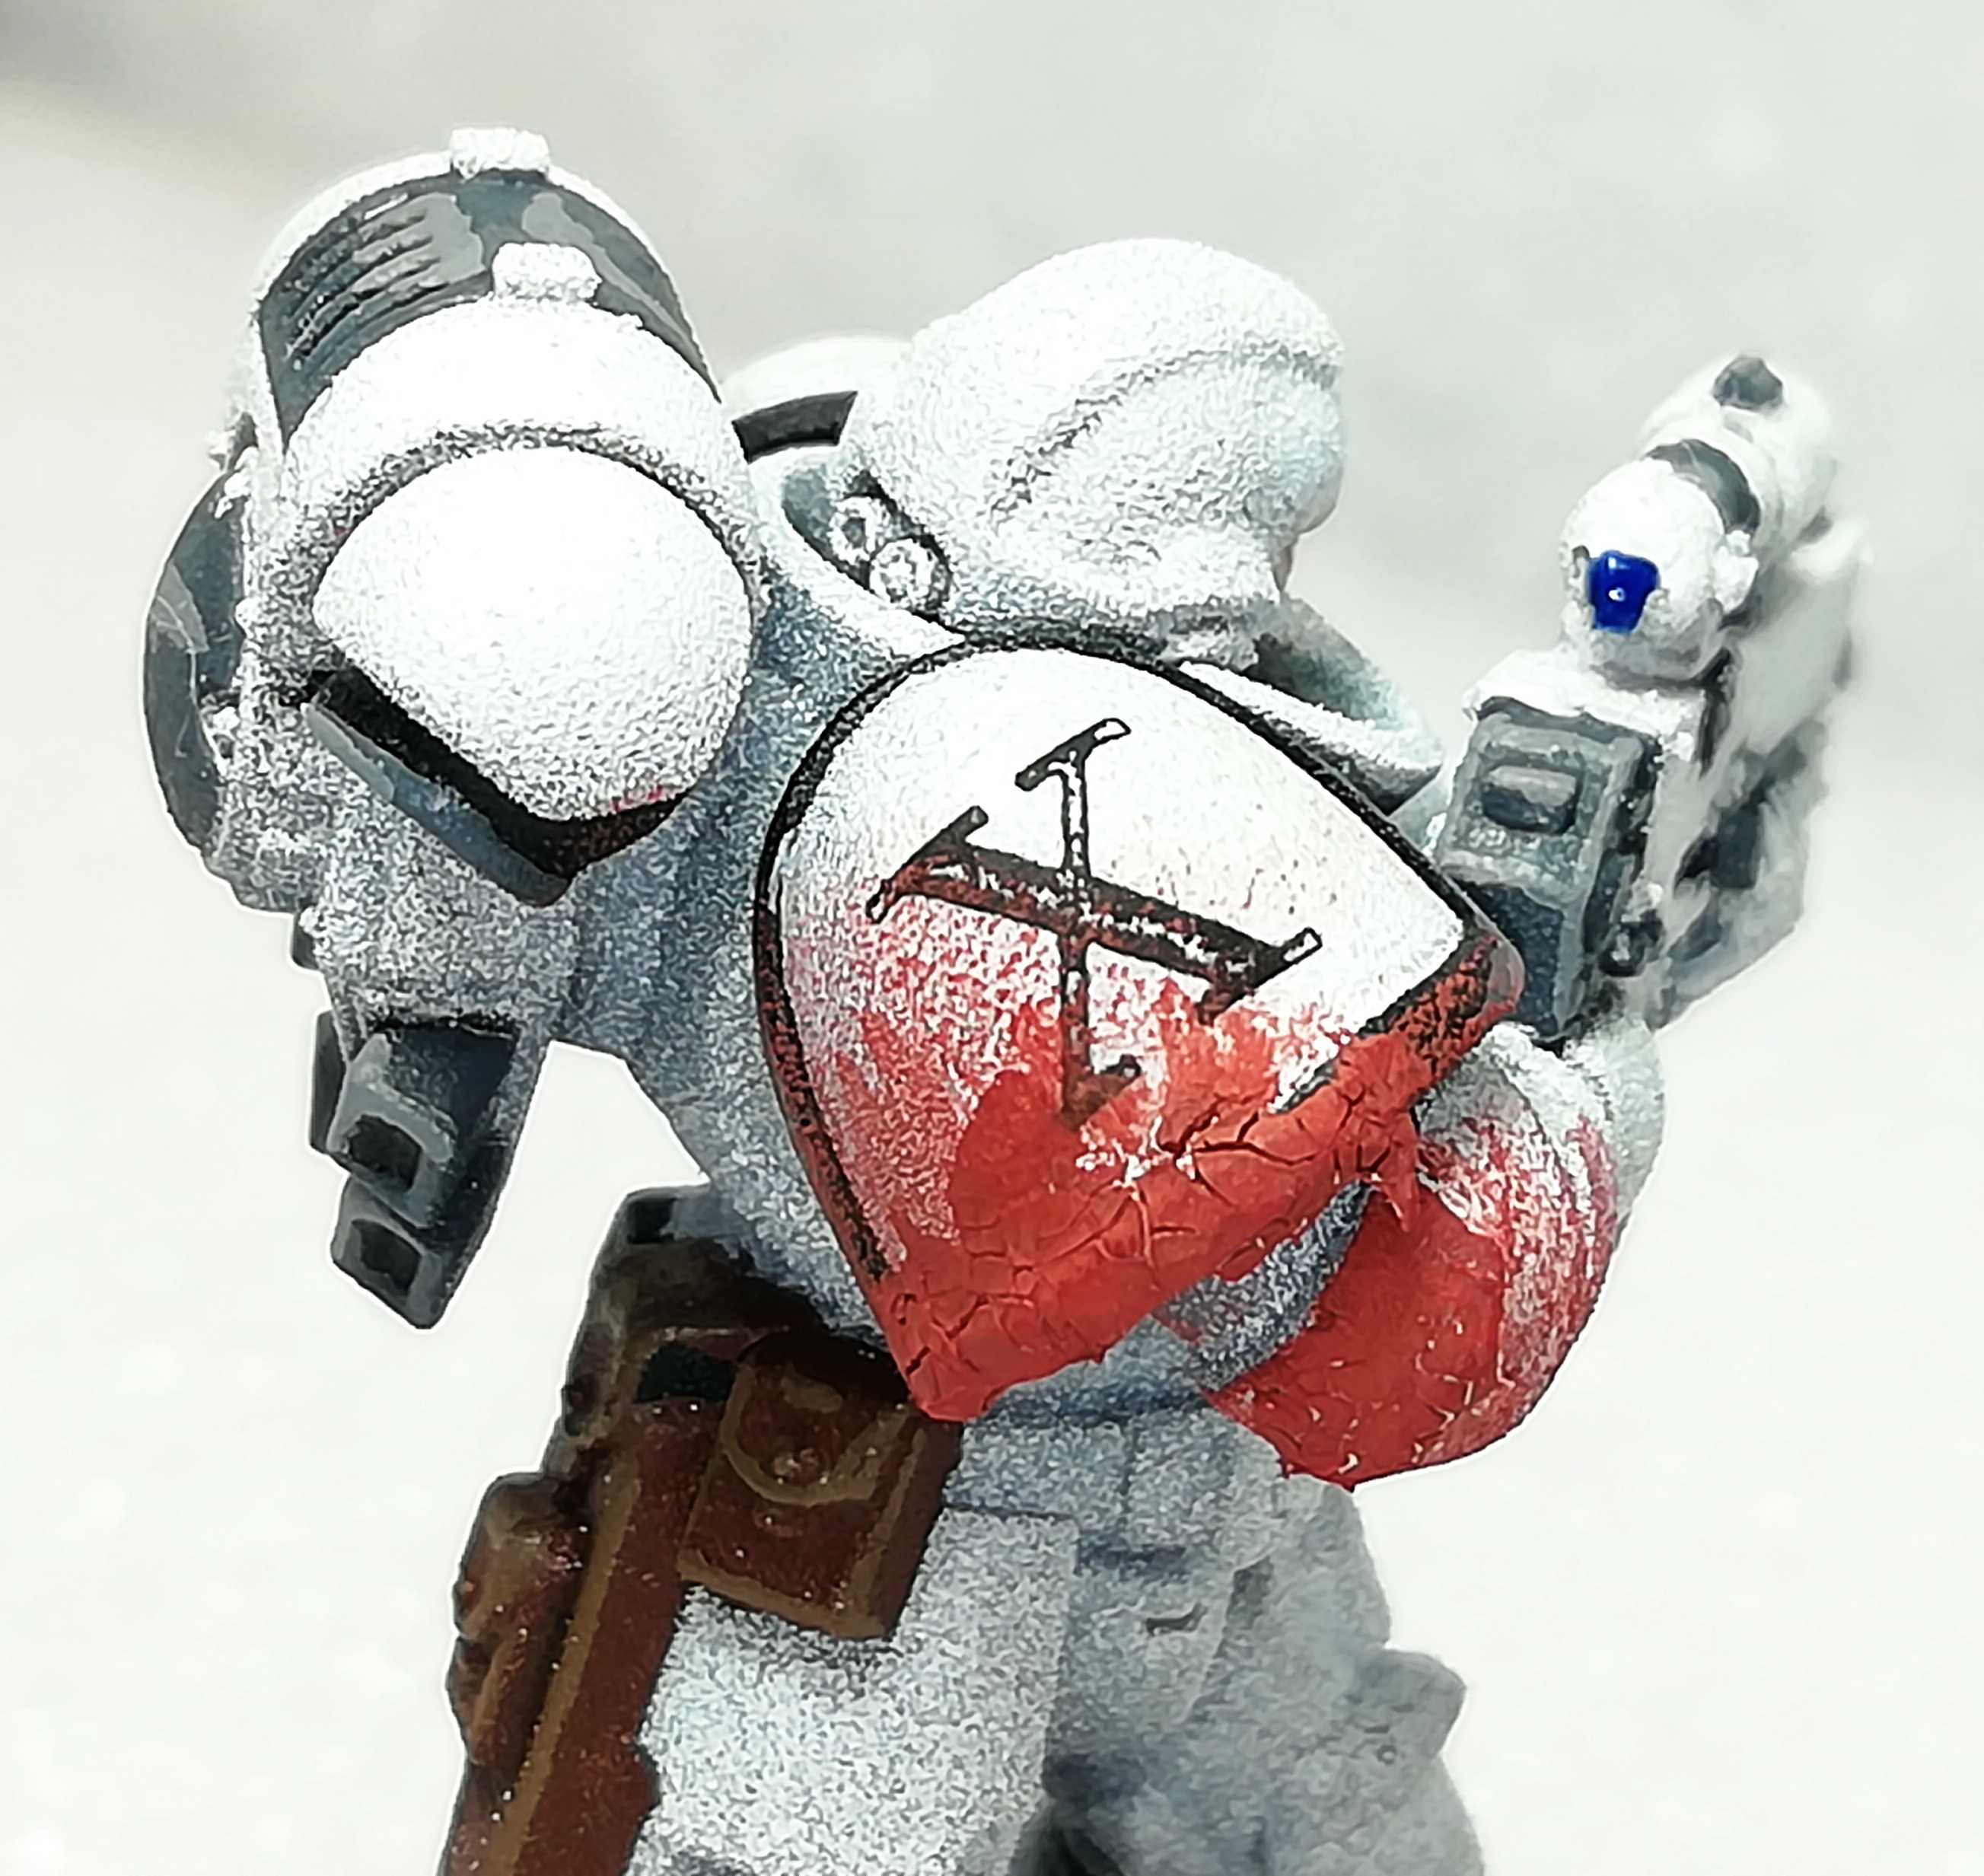
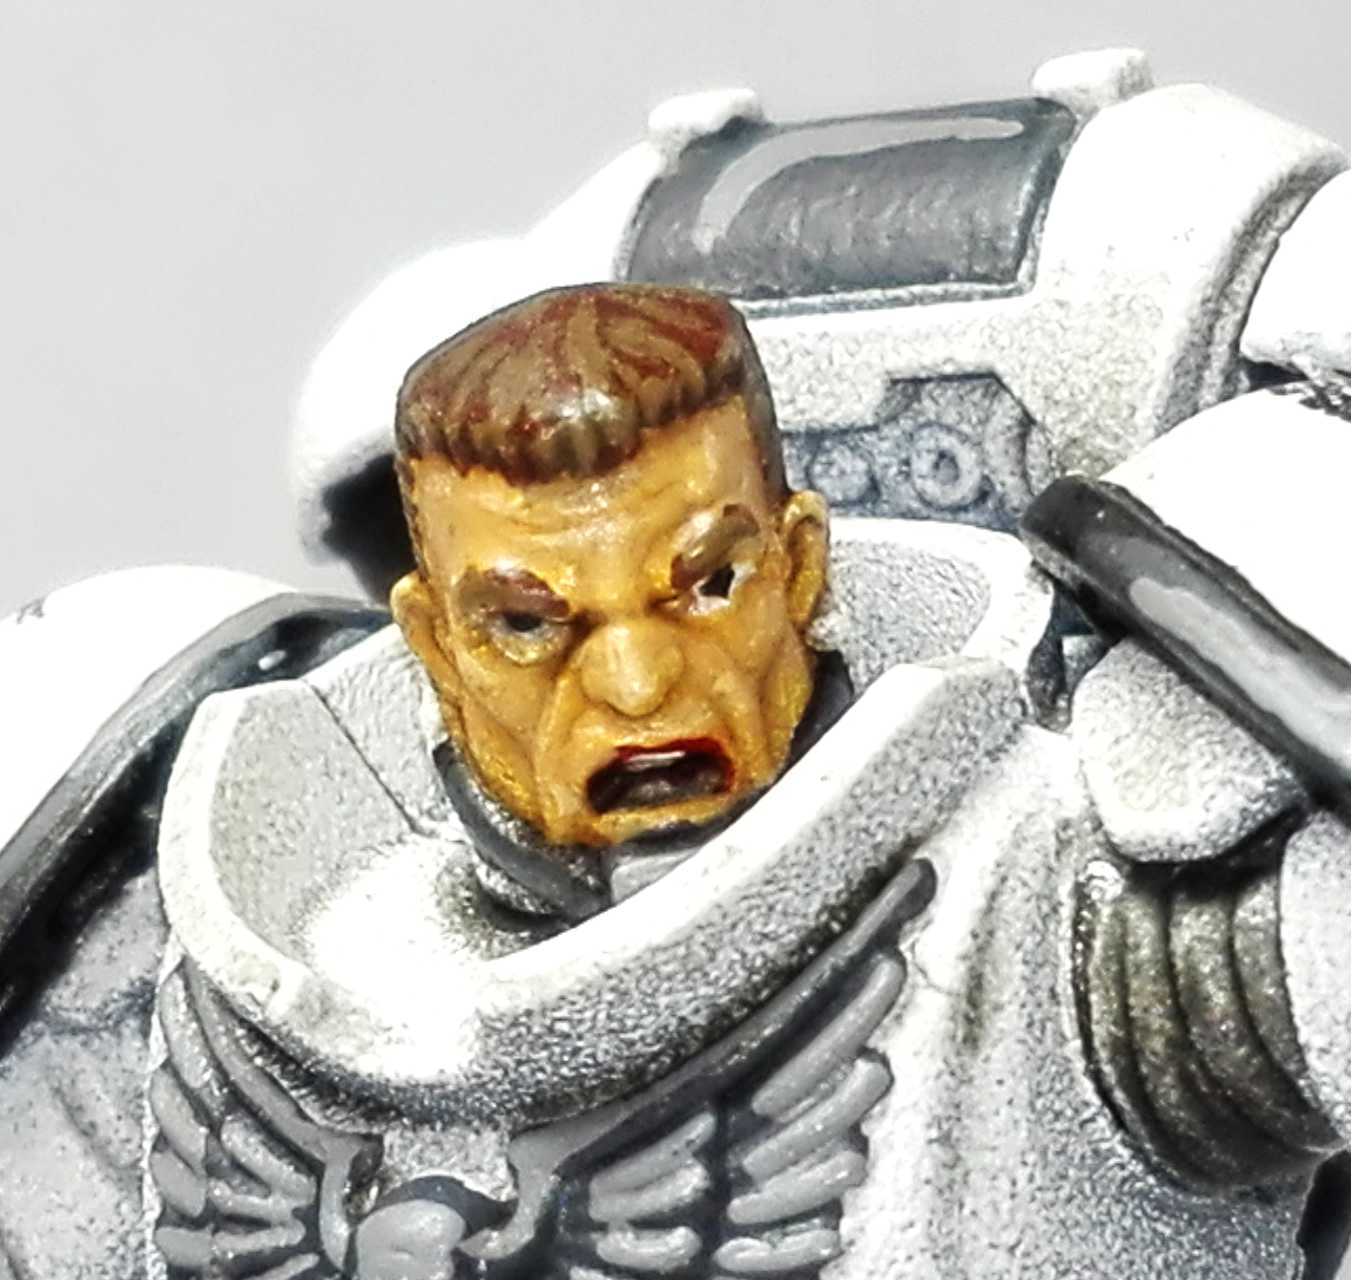
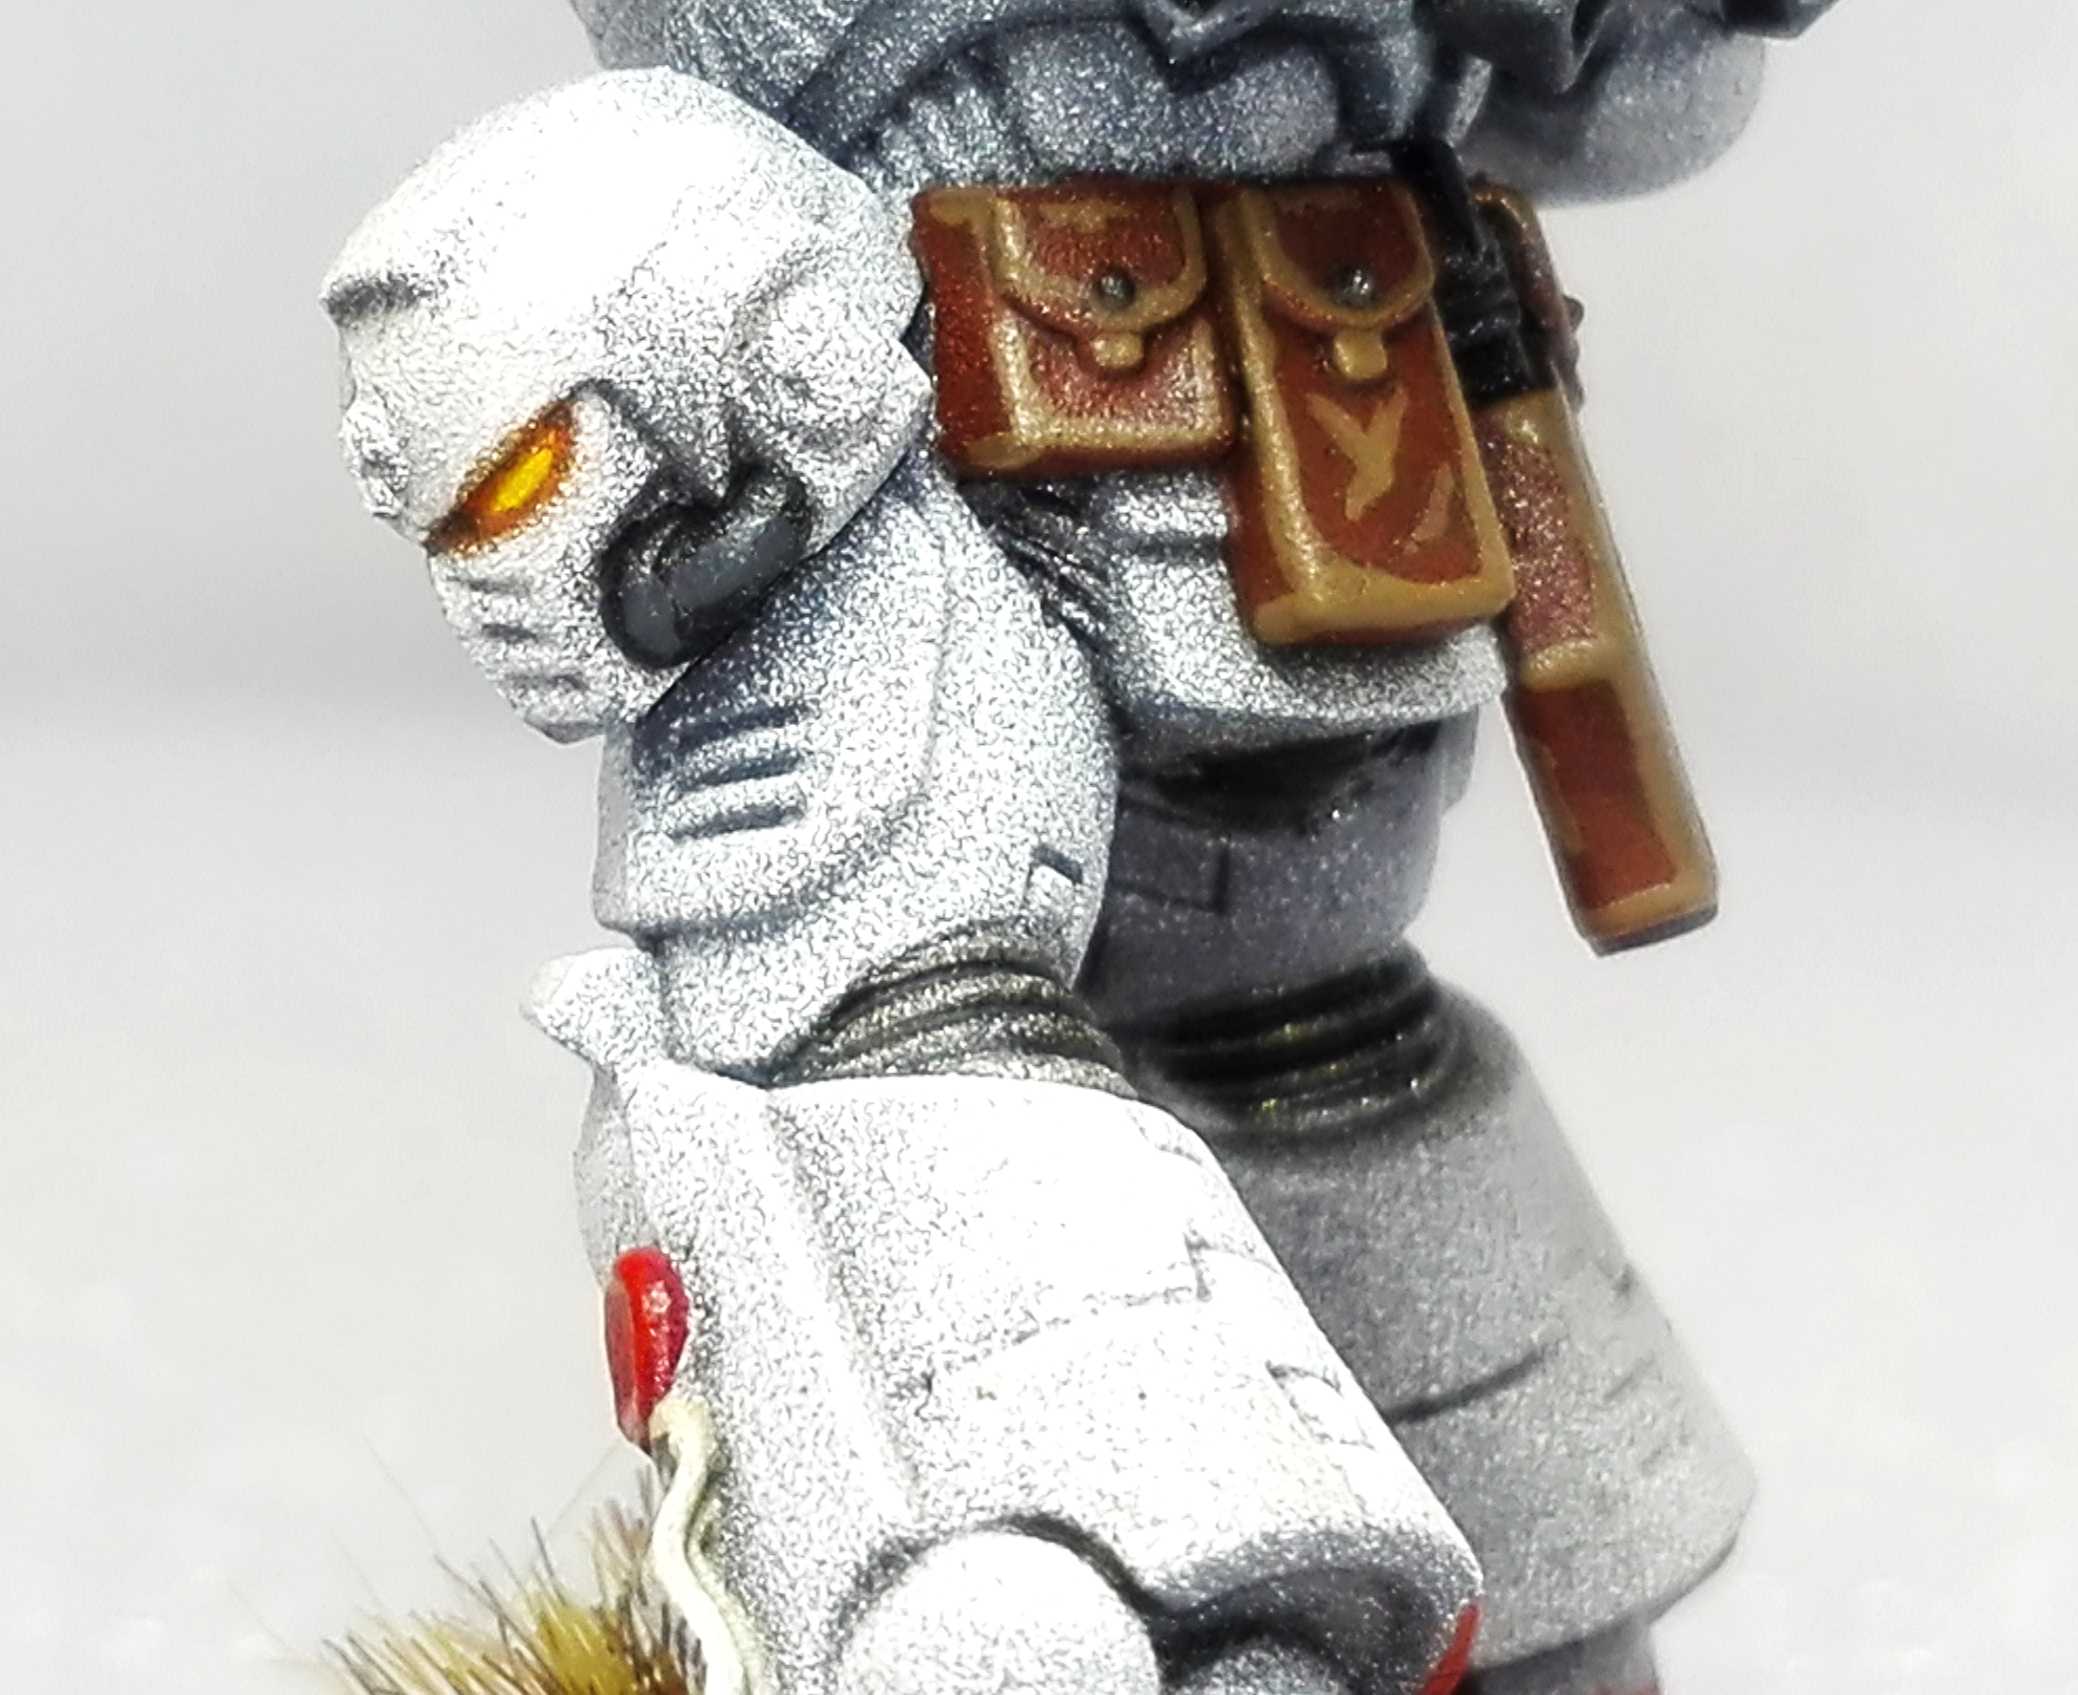
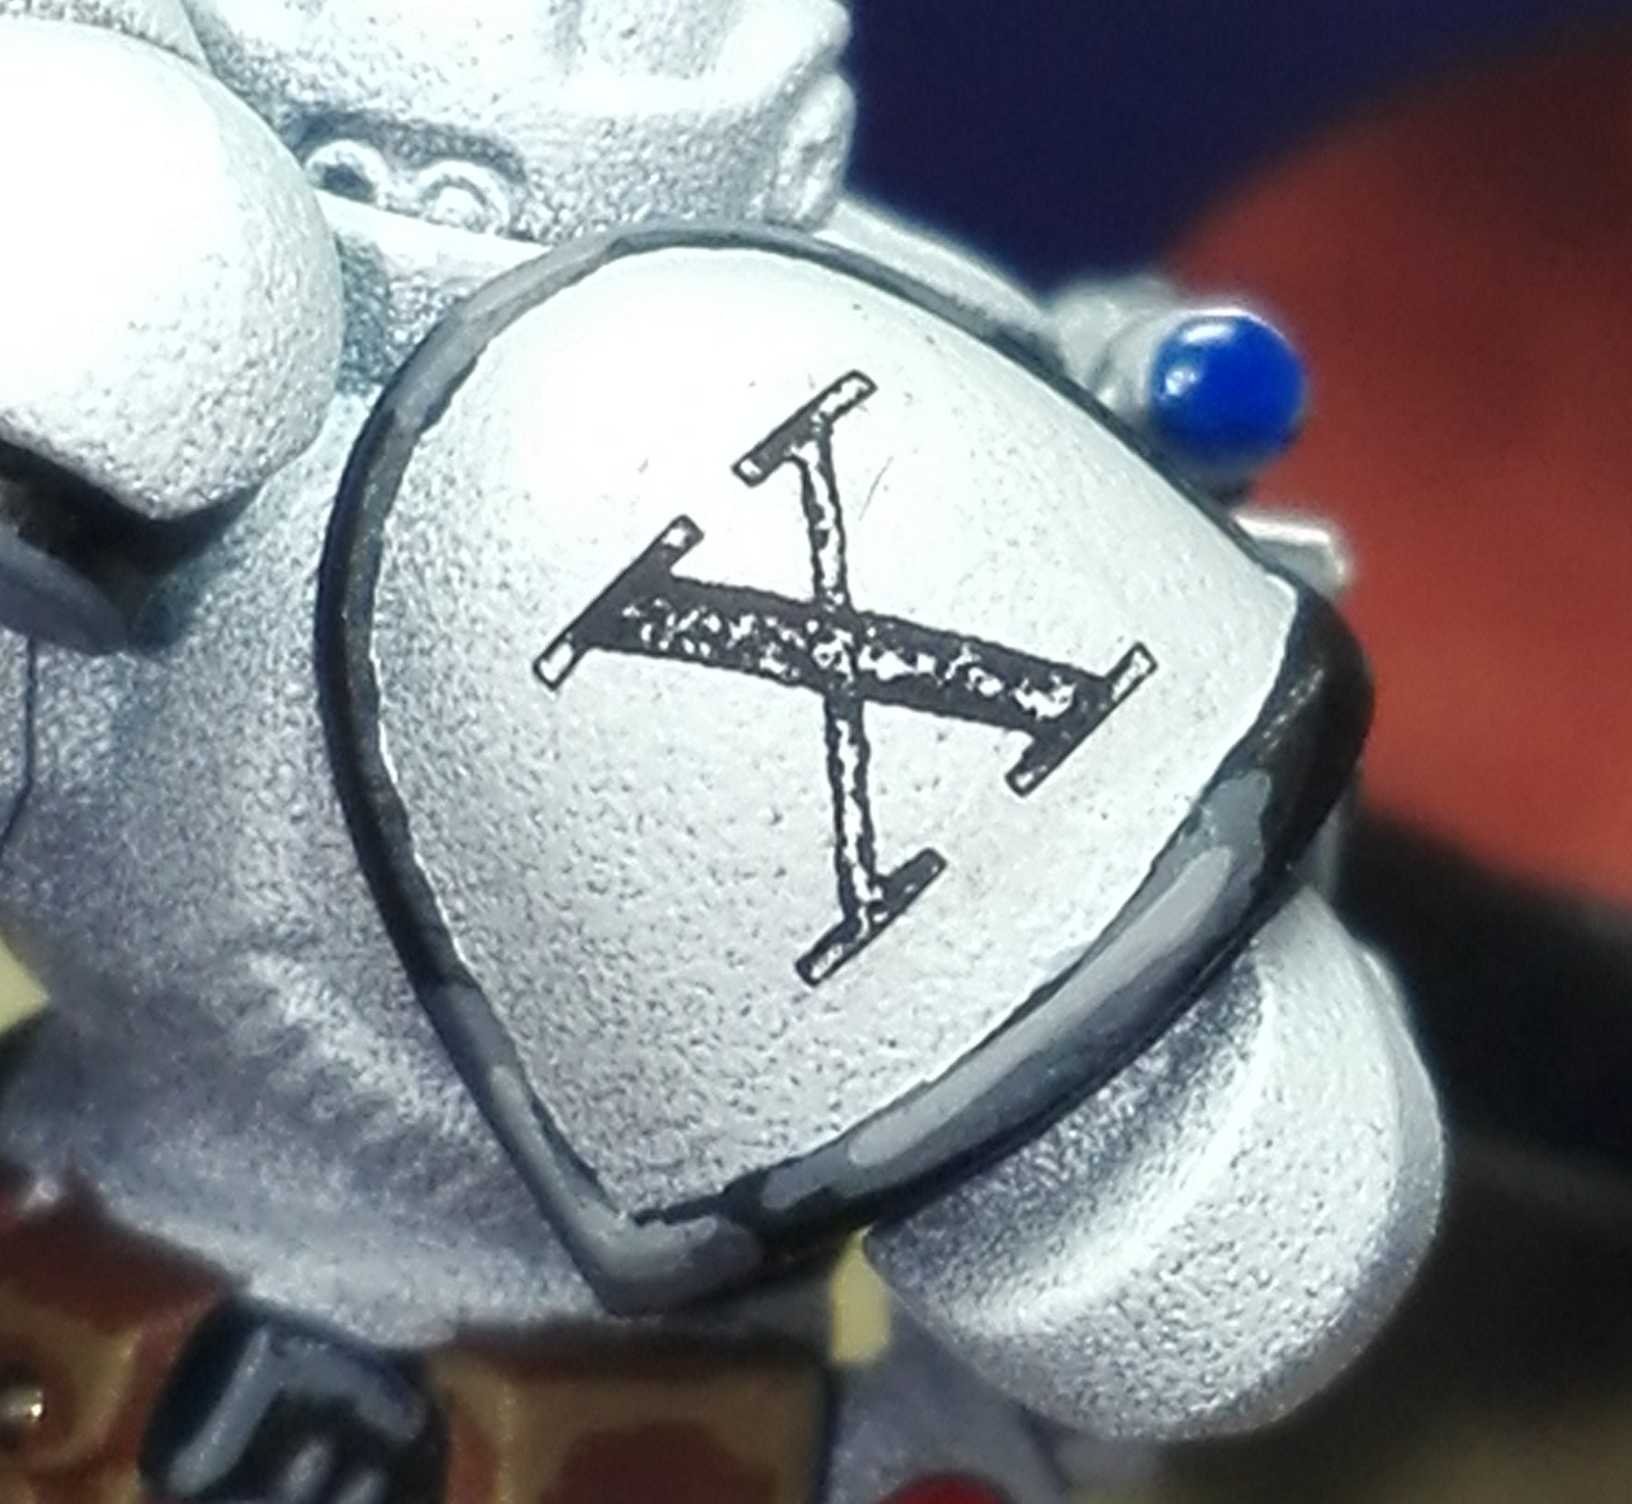
Due to some heretic watching of football it took me a bit longer to finish those two than expected. But here we are. The Lieutenant and the Ancient for my Primaris Luna Wolves. Named after another two original and loyal Luna Wolves.
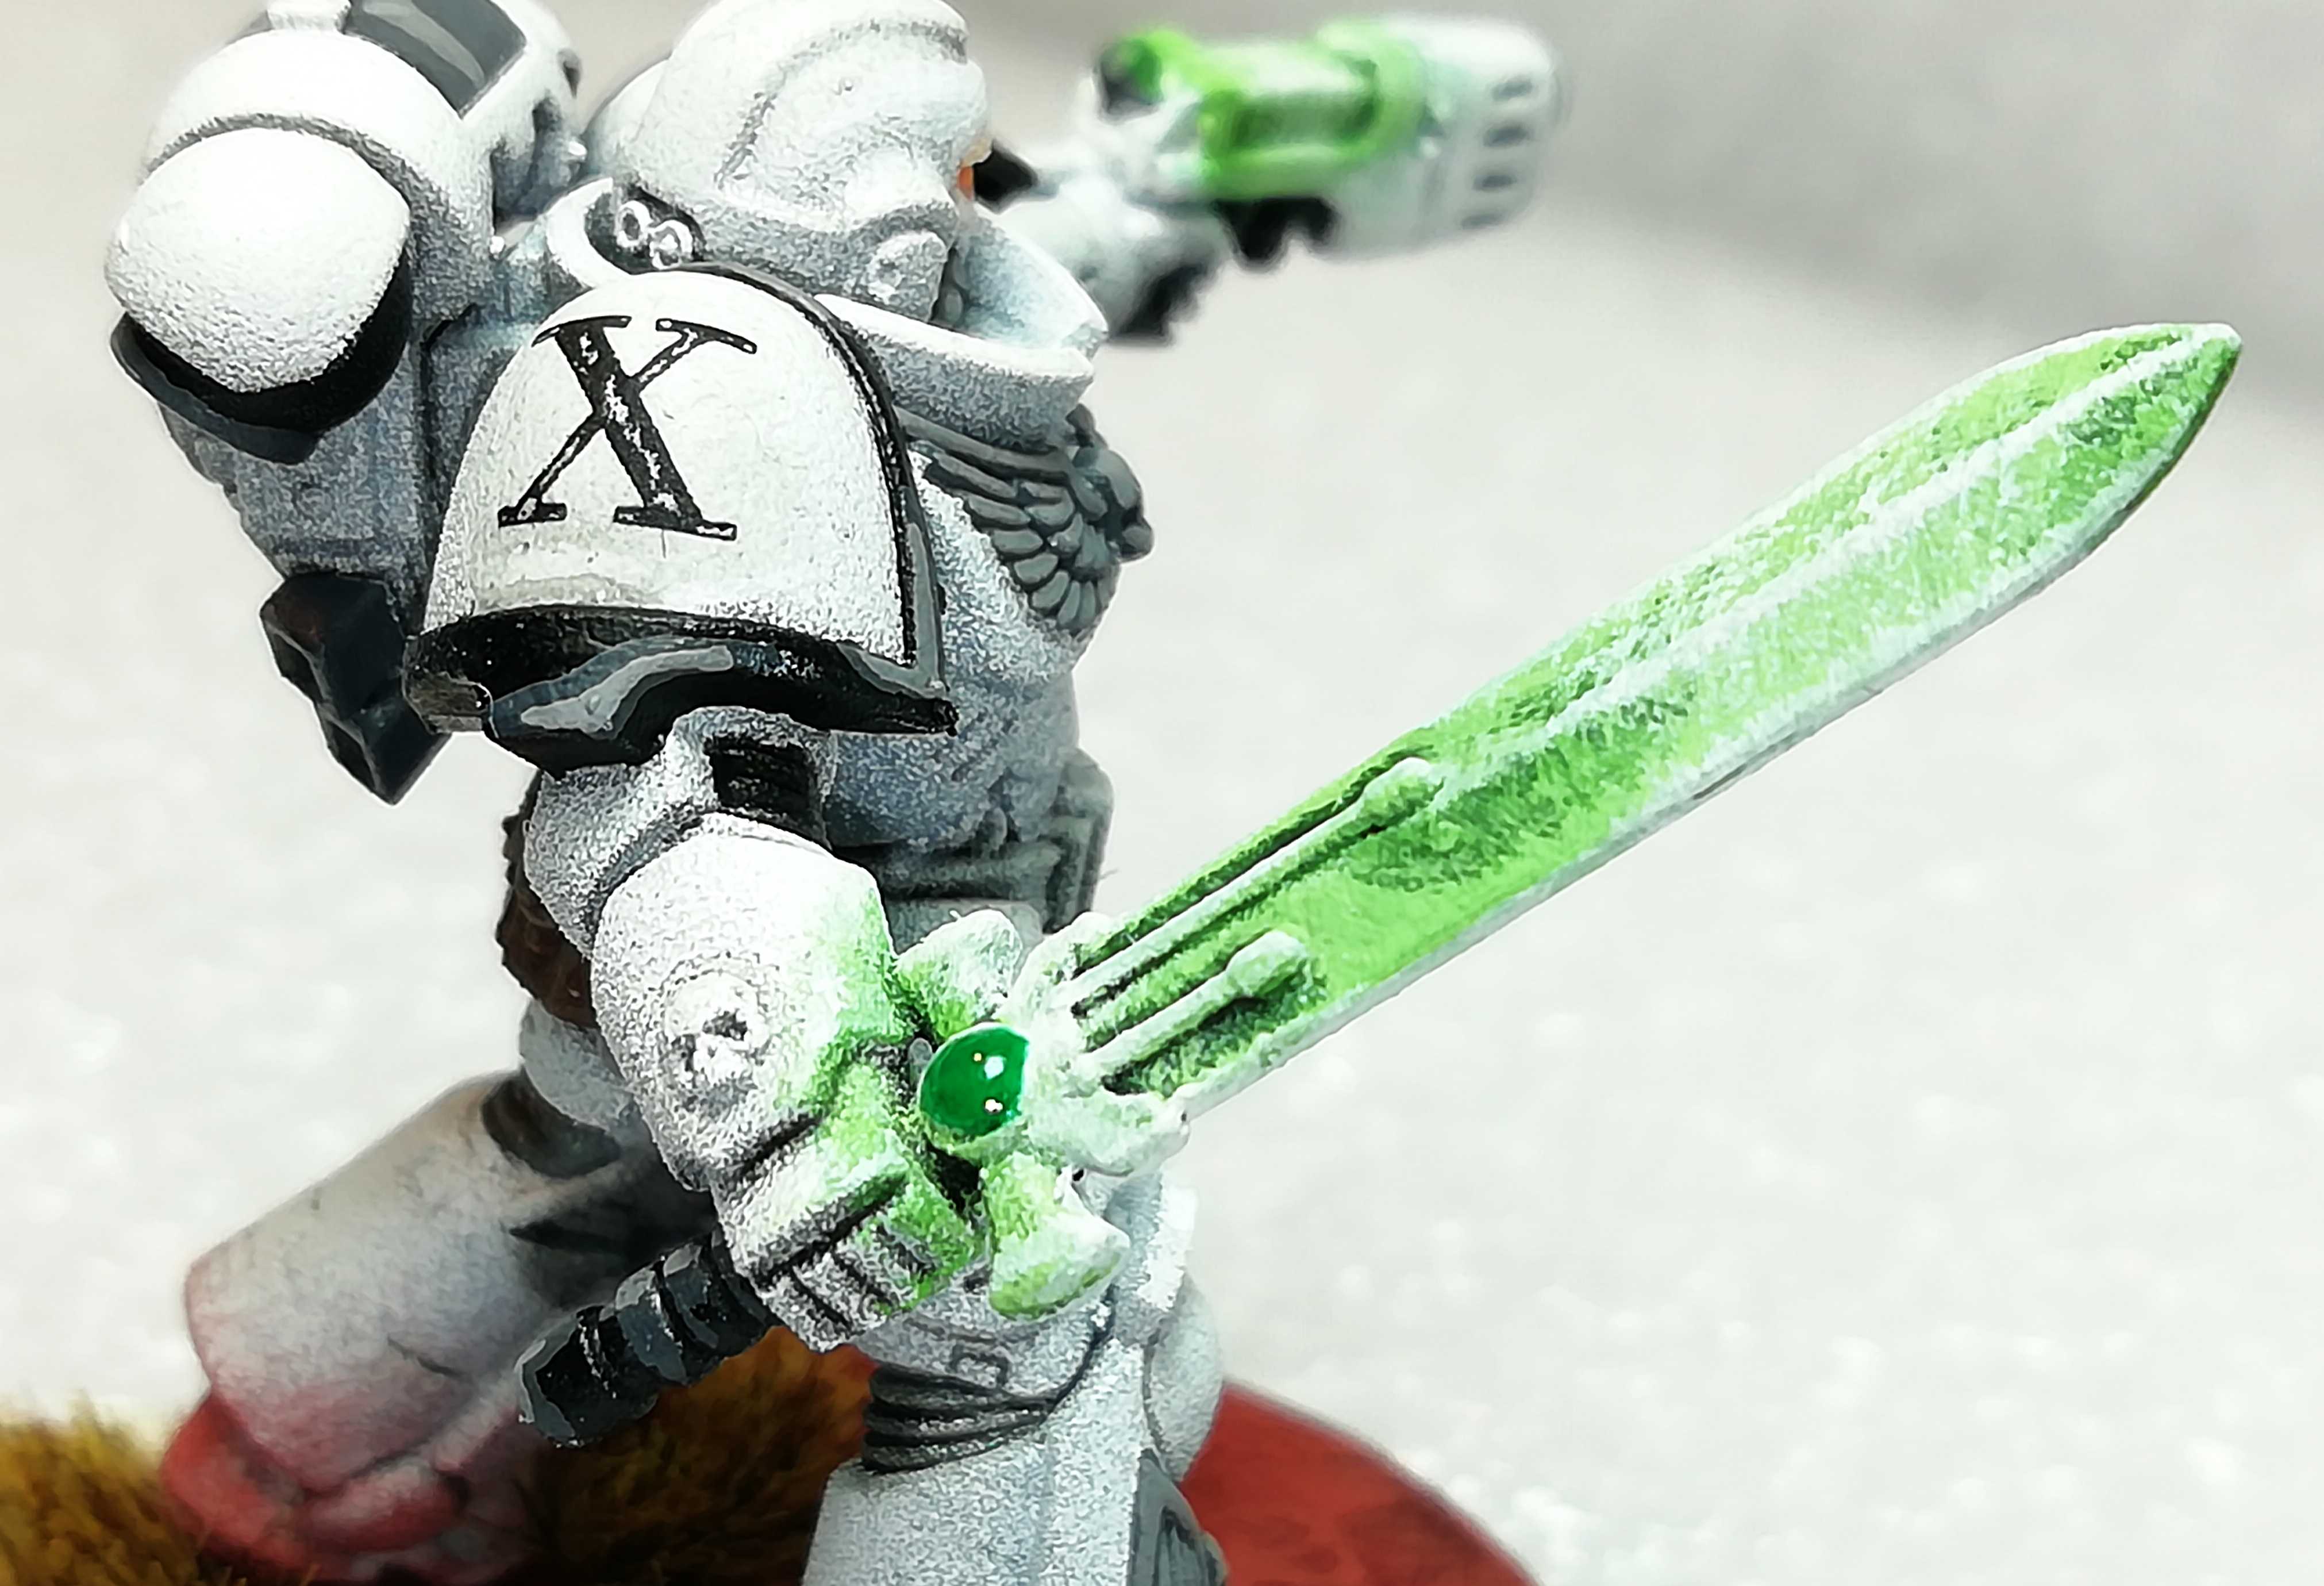
The Lieutenant took about 2h 15m and the Ancient nearly 3h due to the banner. The Insignia (Wolf and Roman 10) on the Shoulder Pads and Banner are again my self printed decals. So is the “Luna Wolves” label on the Banner. The names on the rims of the bases are freehanded. As I said I am not that good at it.
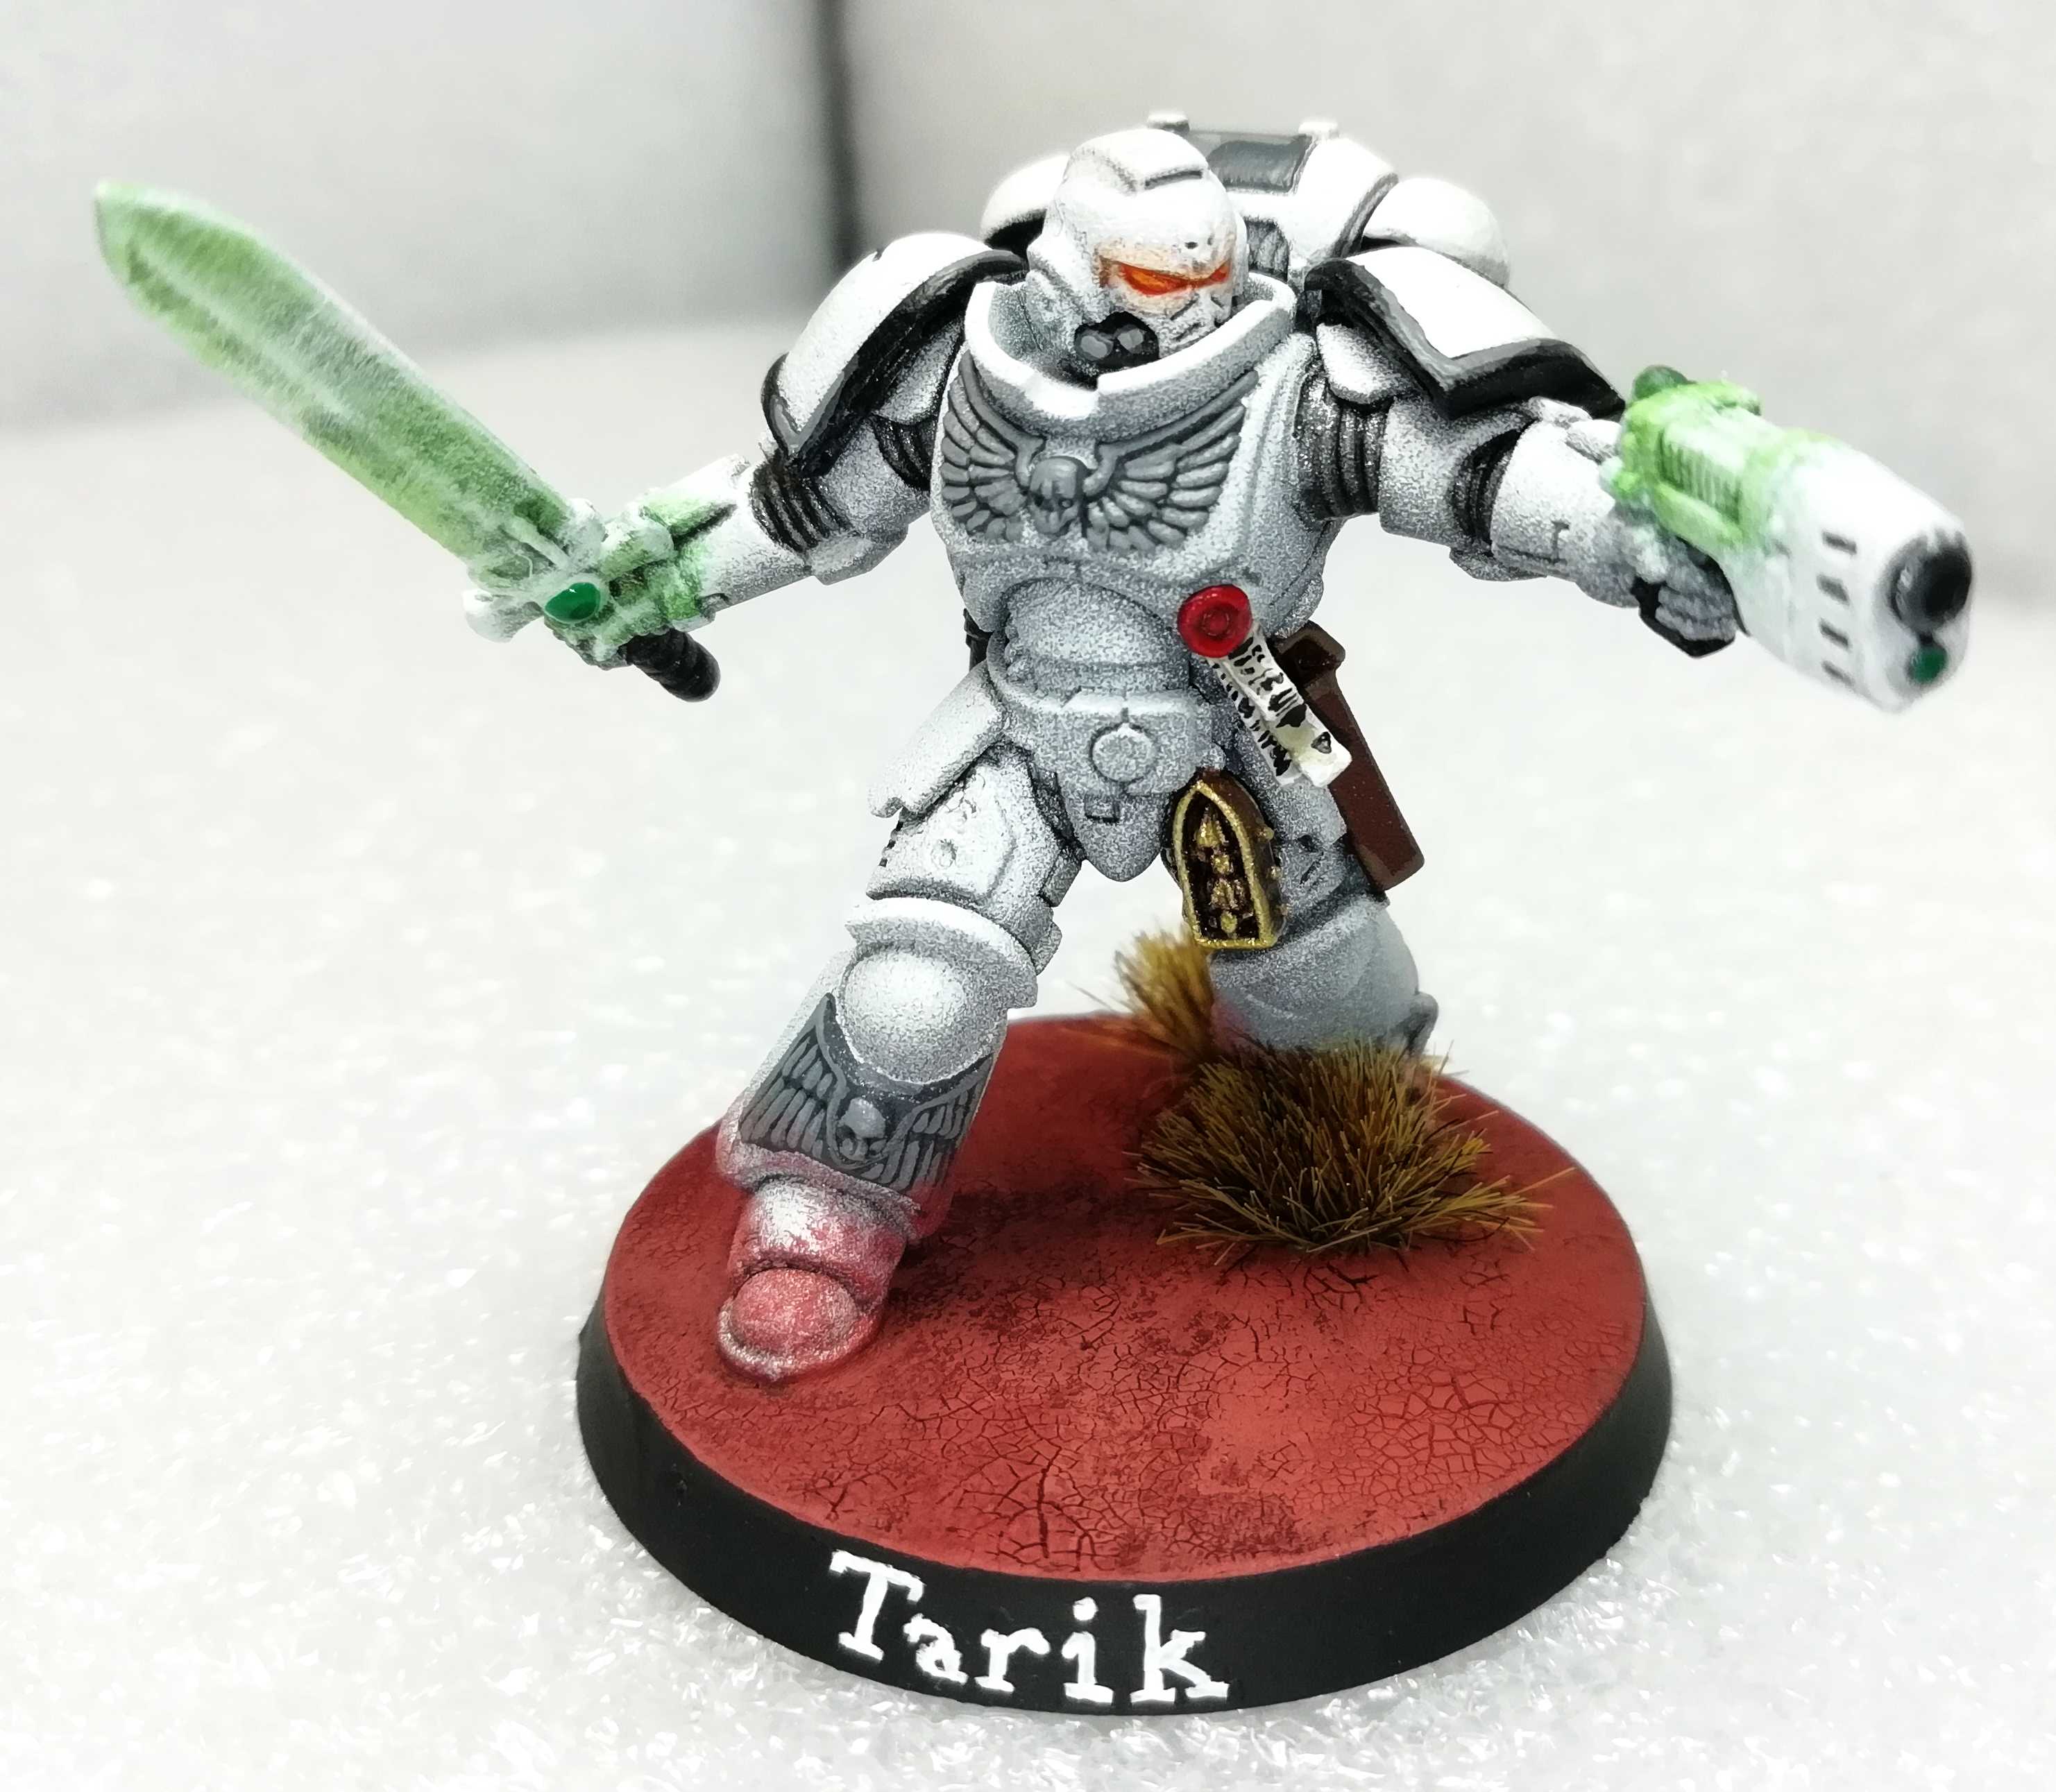 Lieutenant Tarik (Torgaddon)
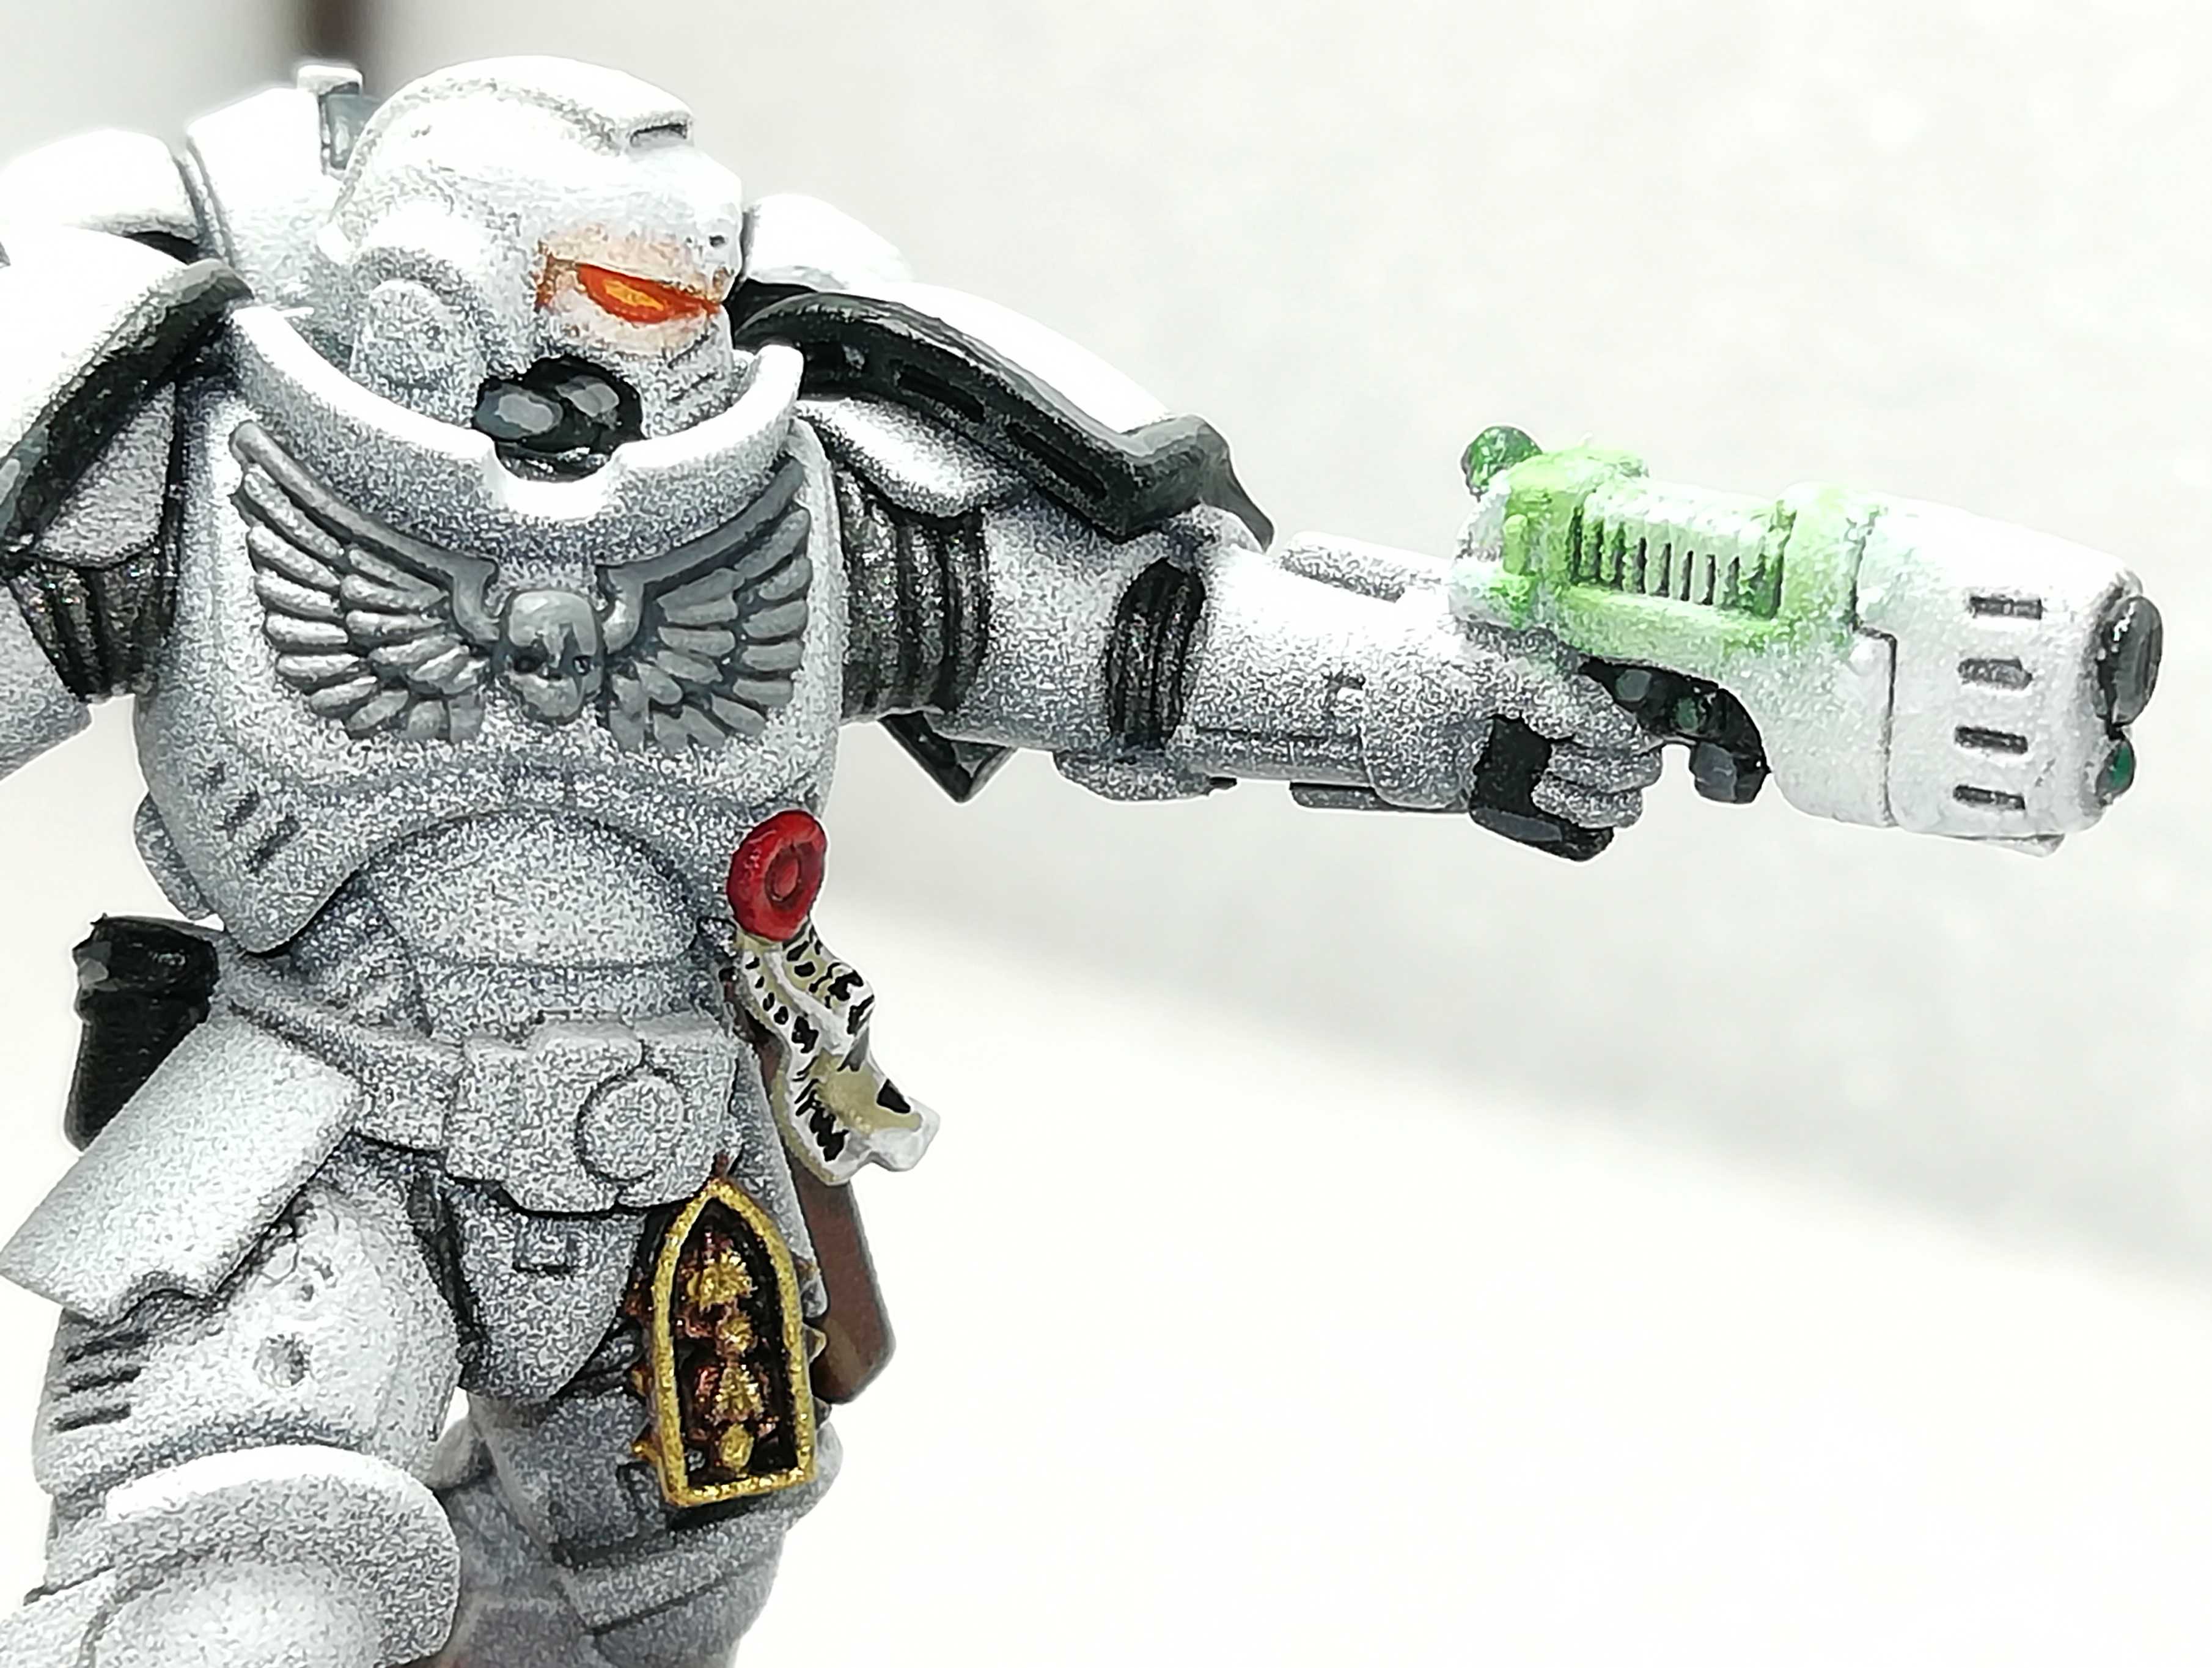
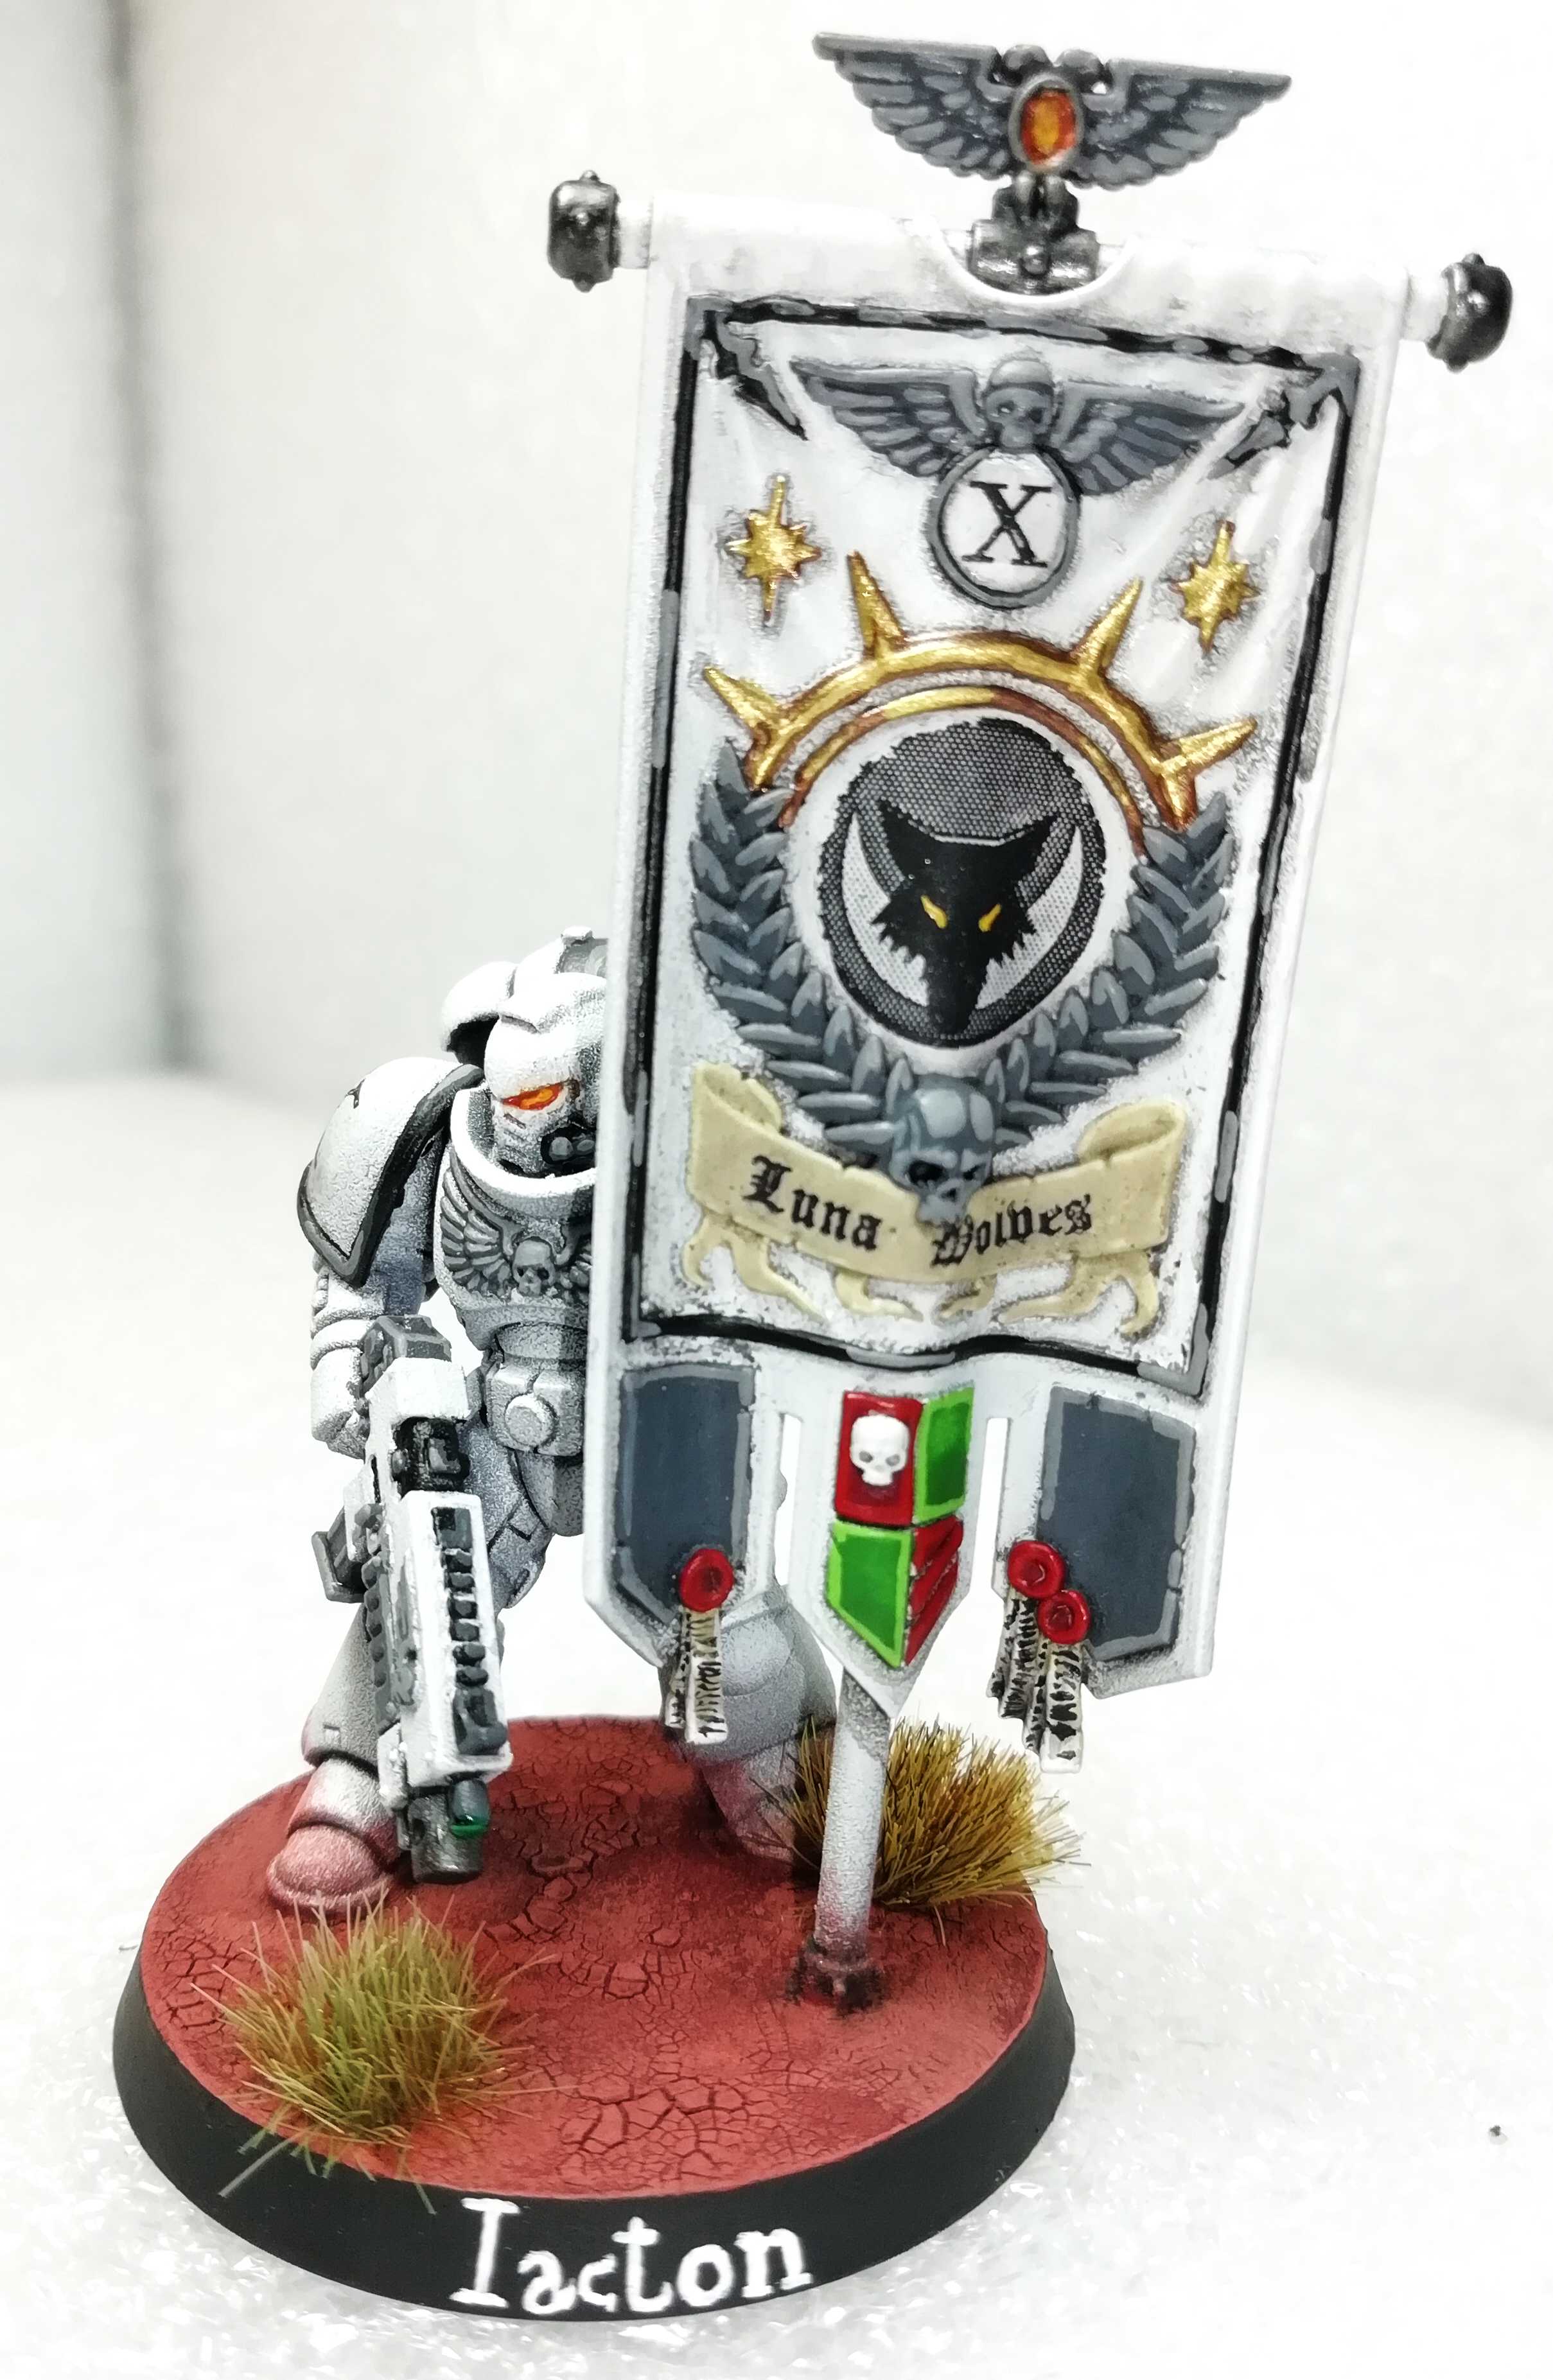 and Ancient Iacton (Qruze)
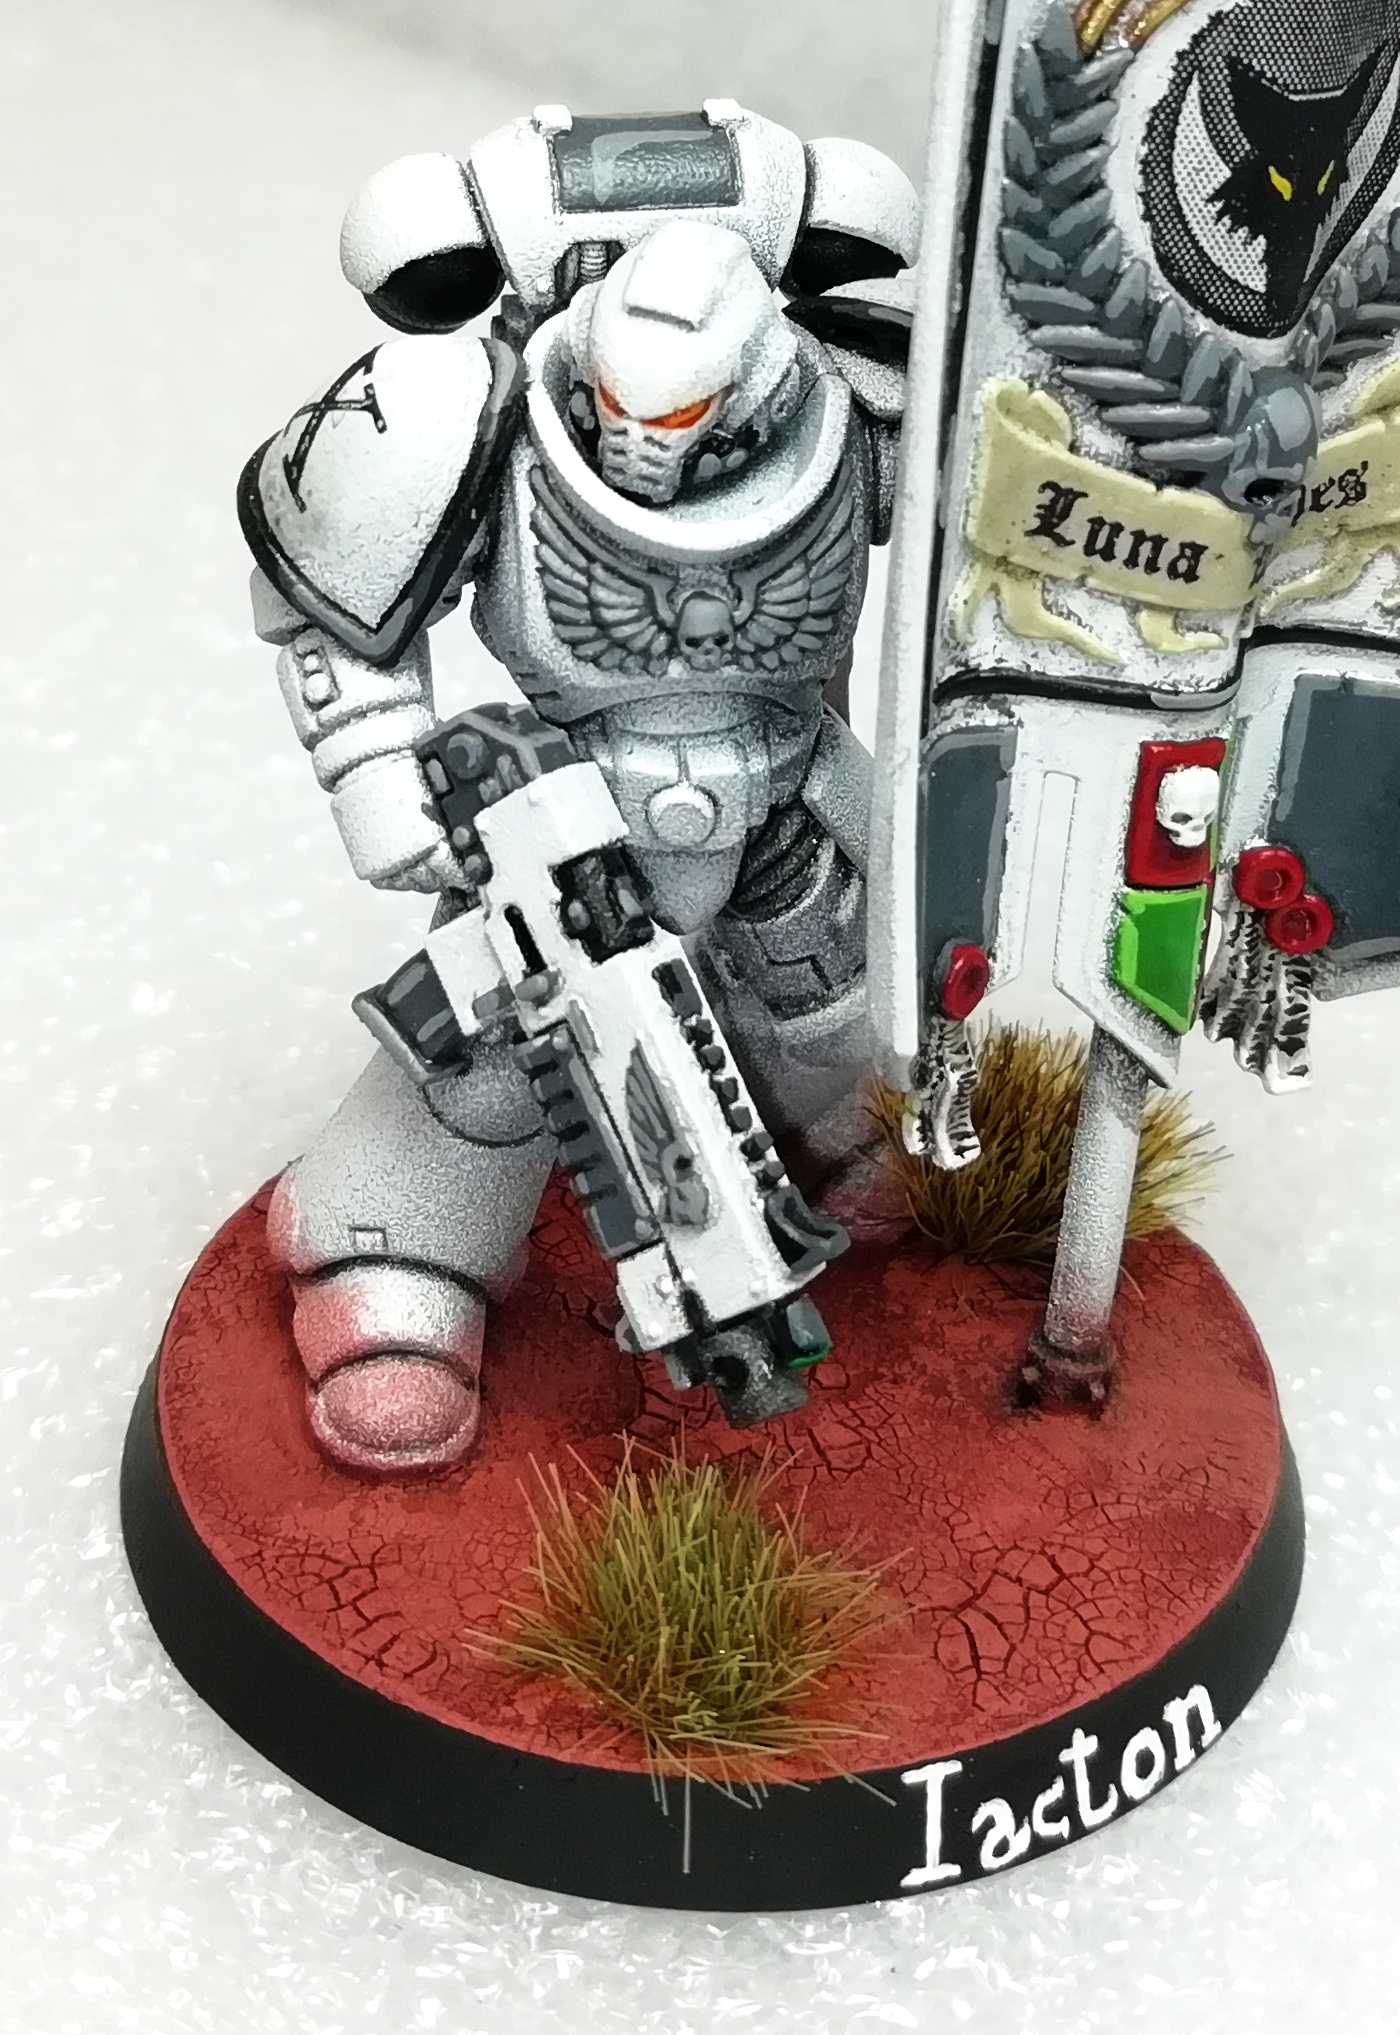
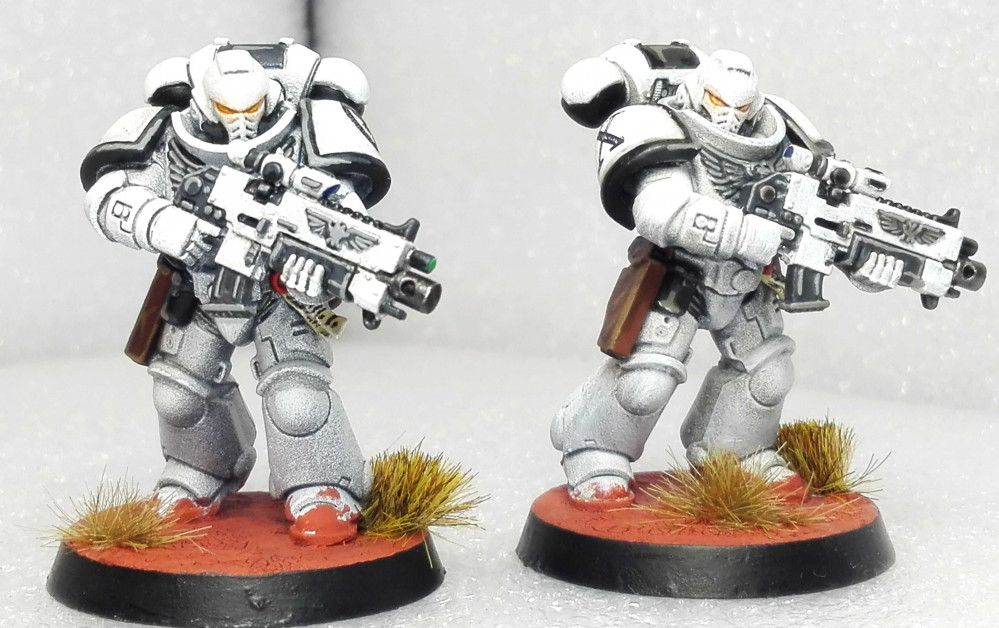
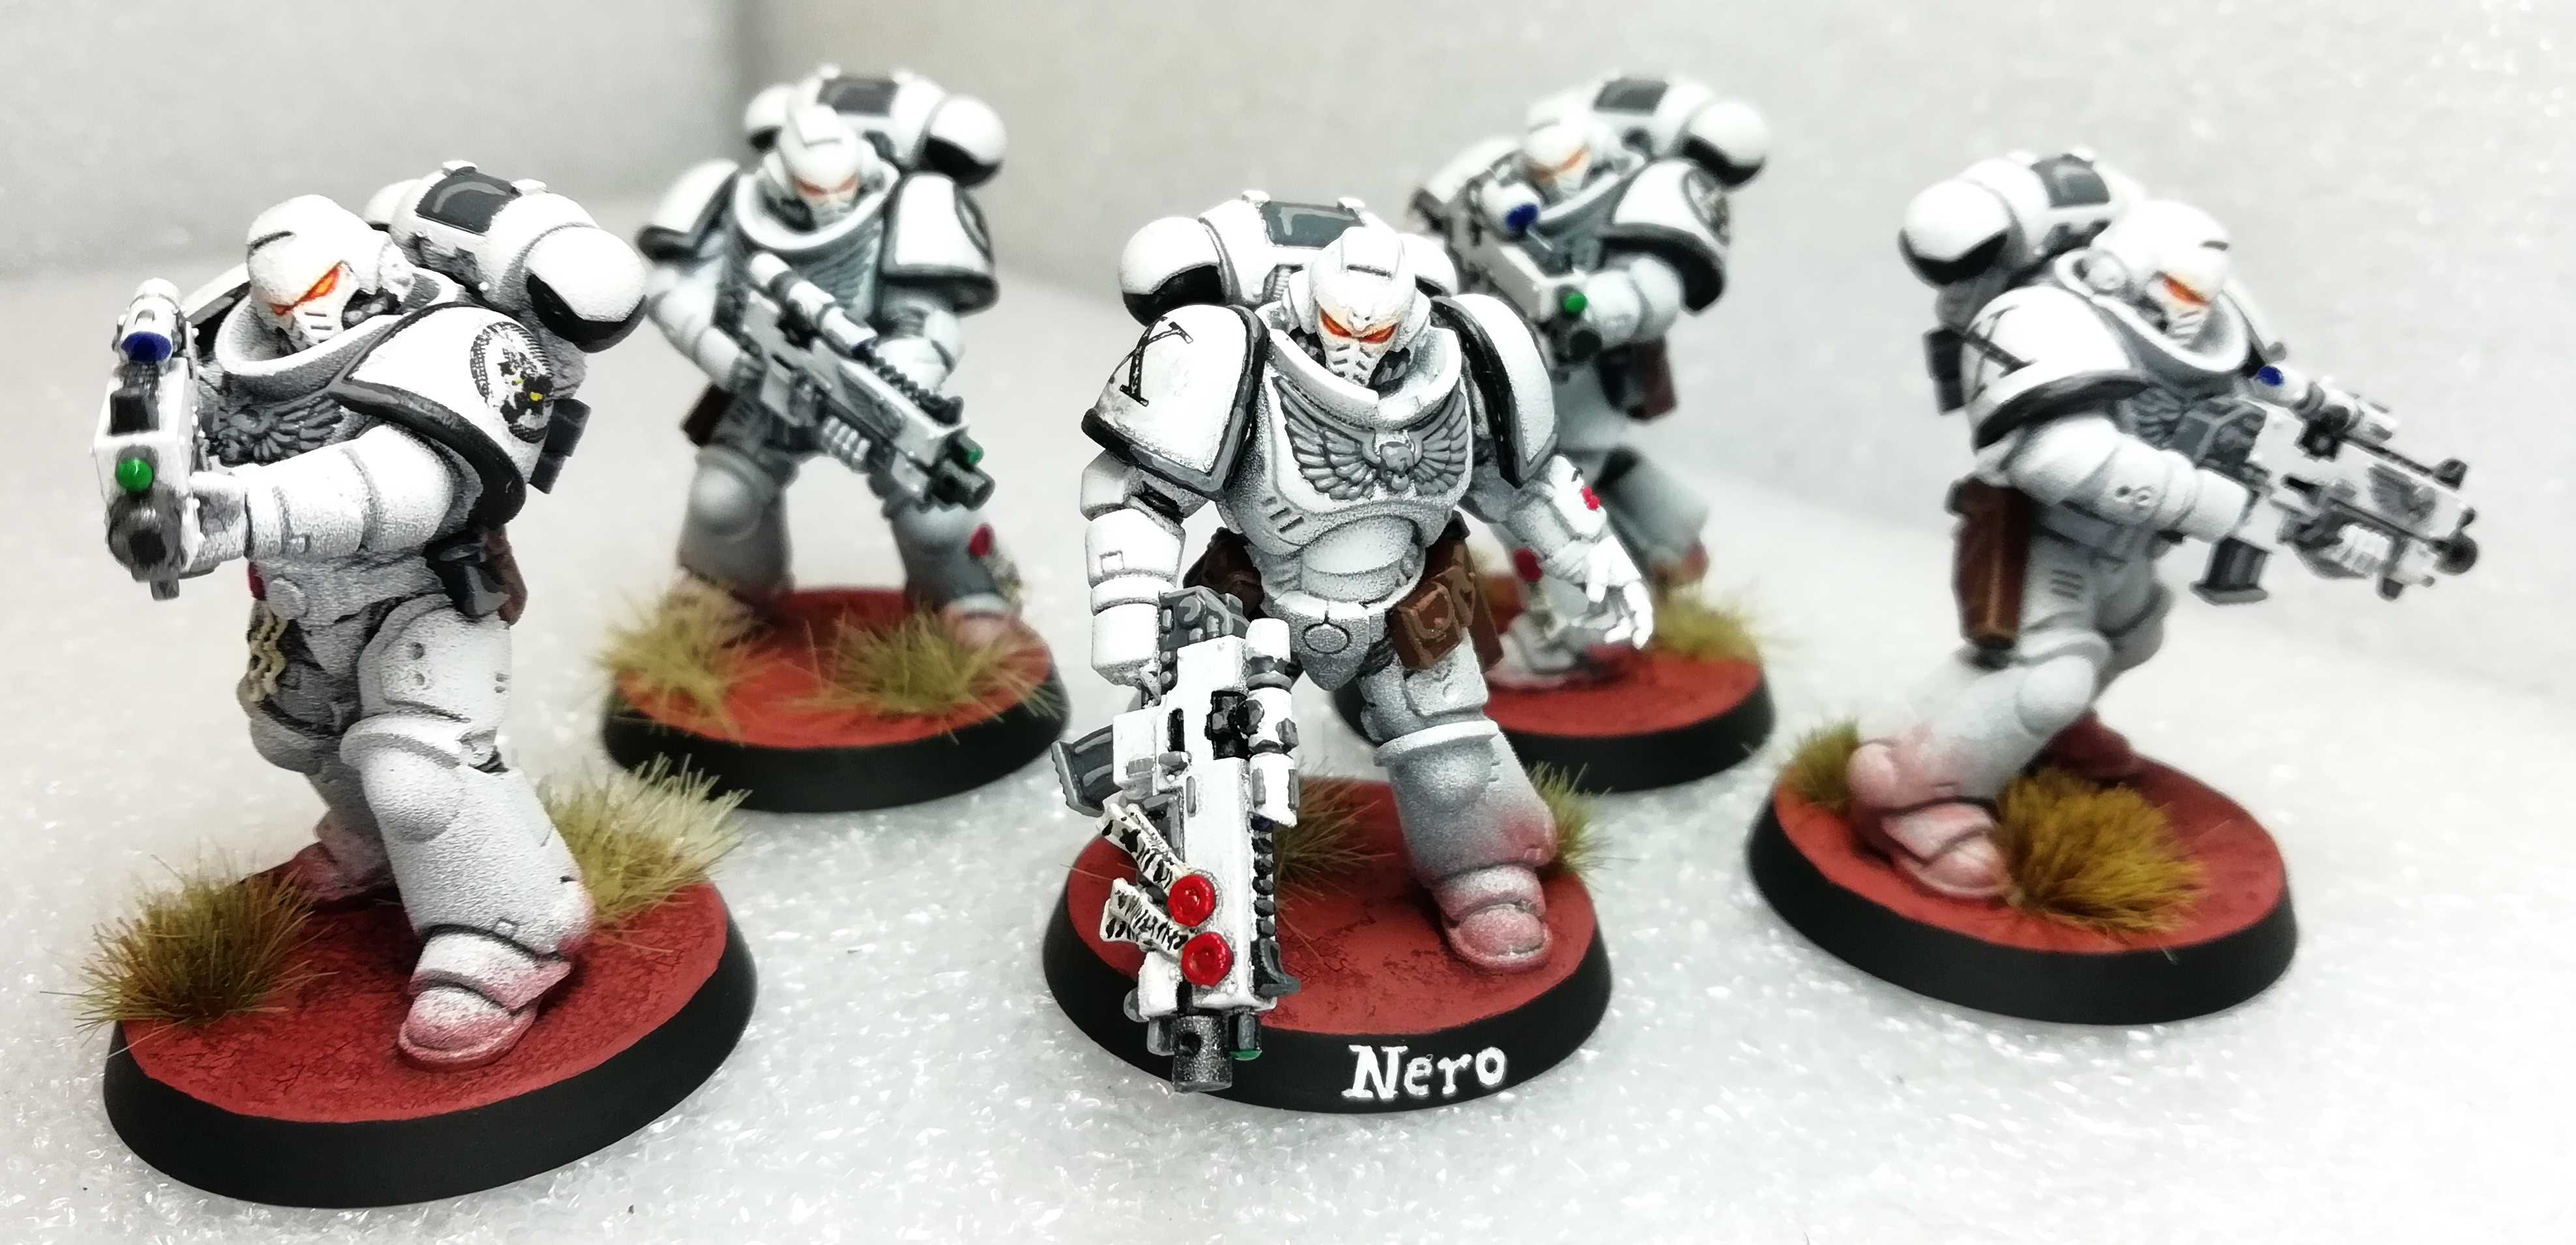
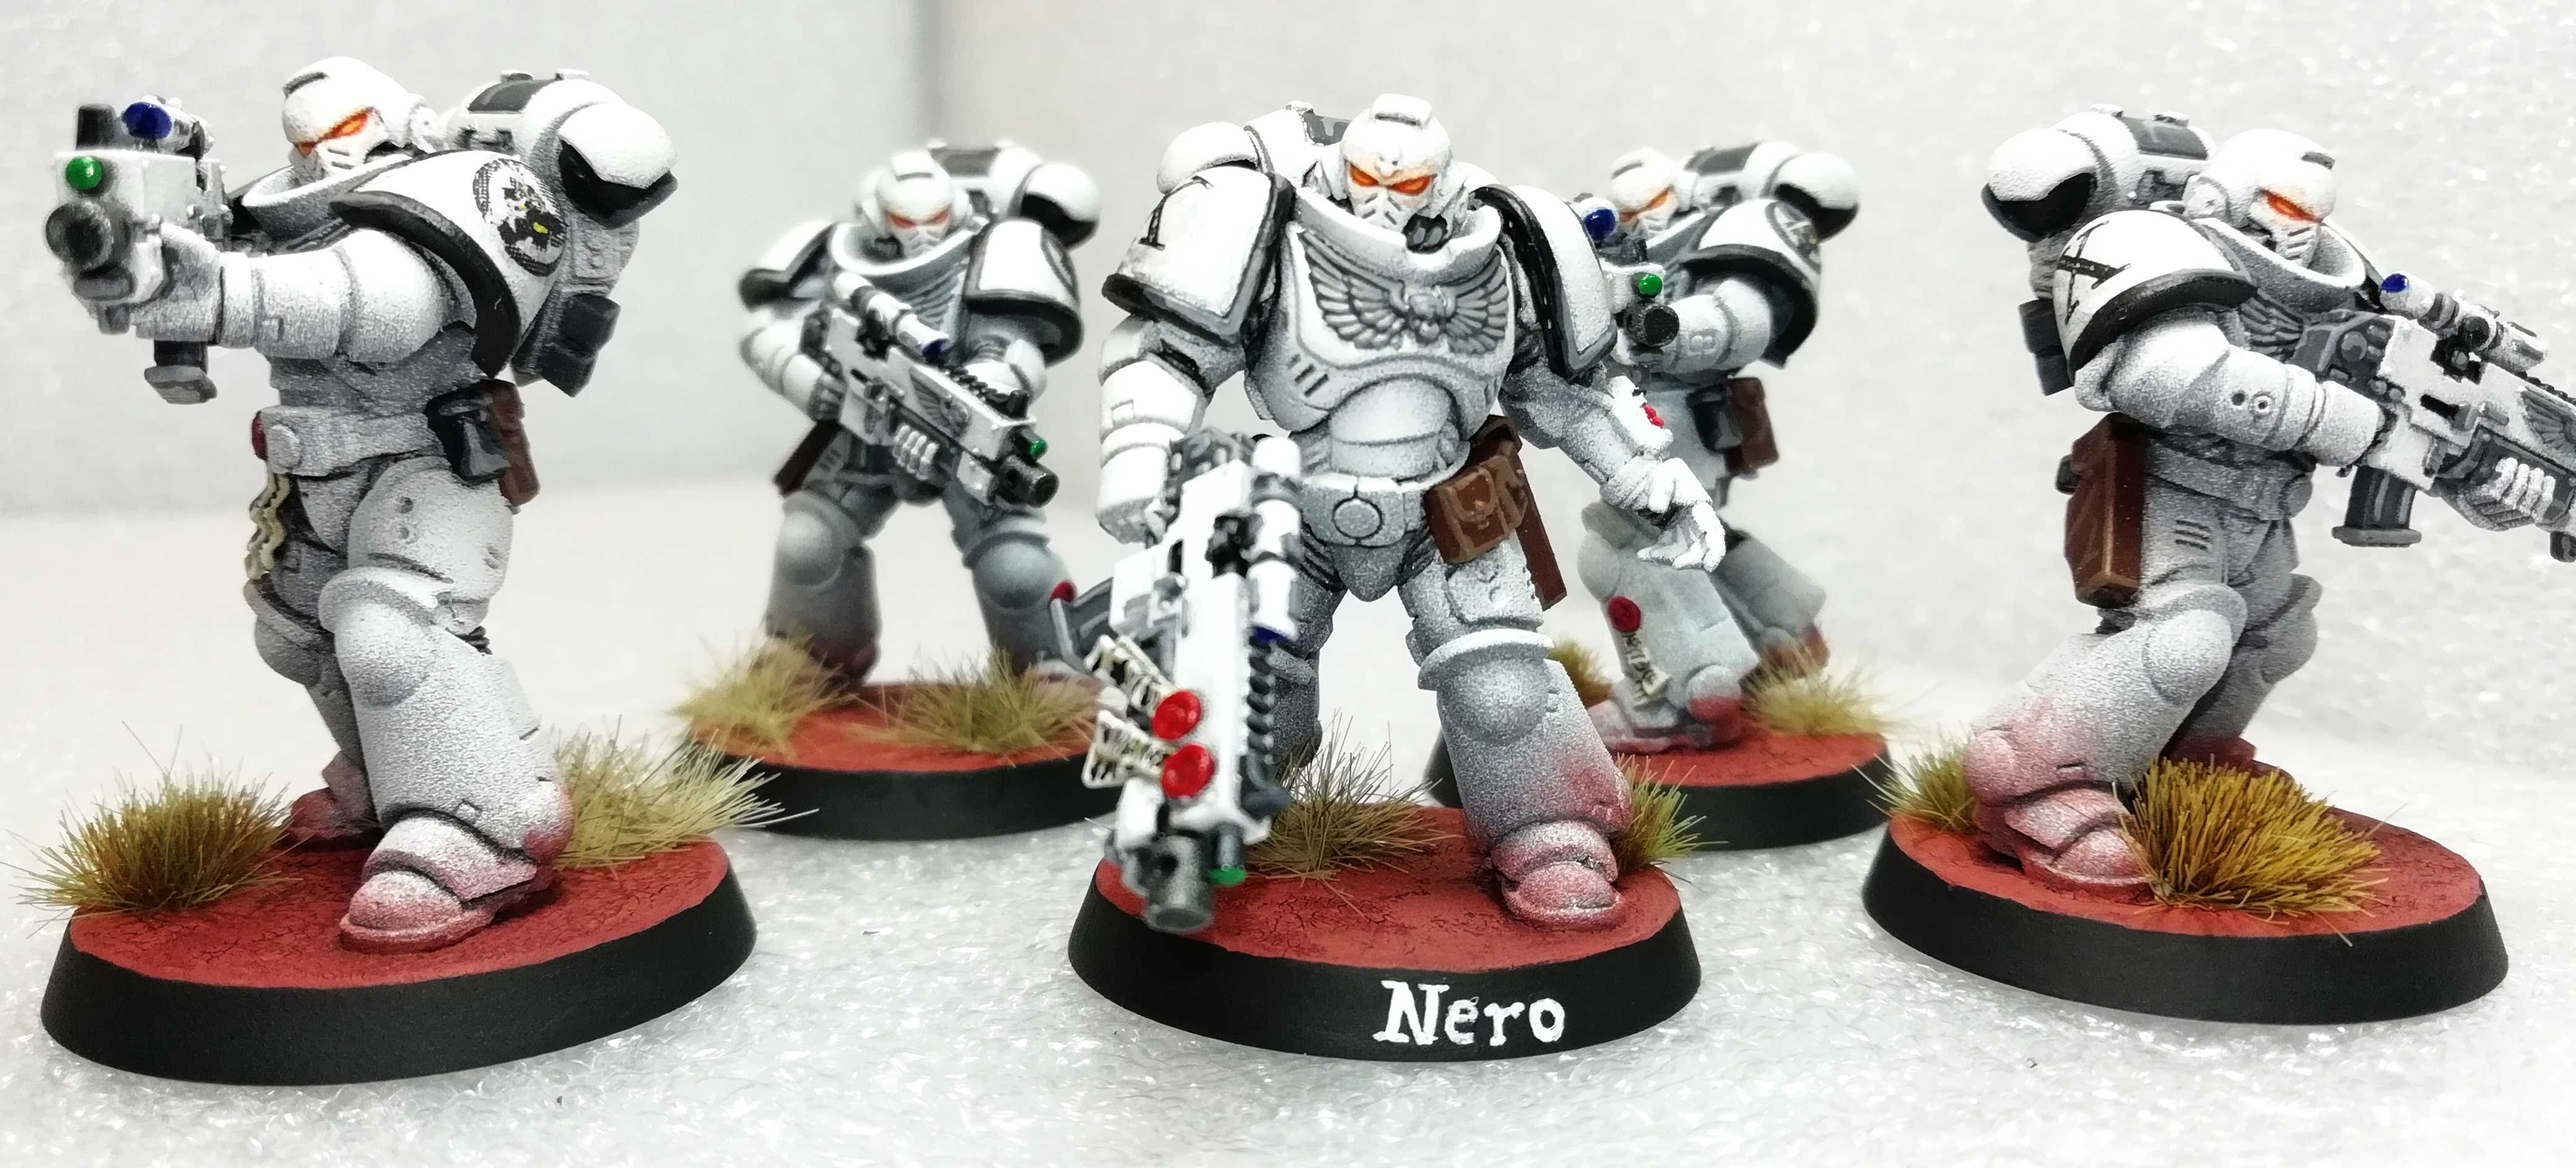
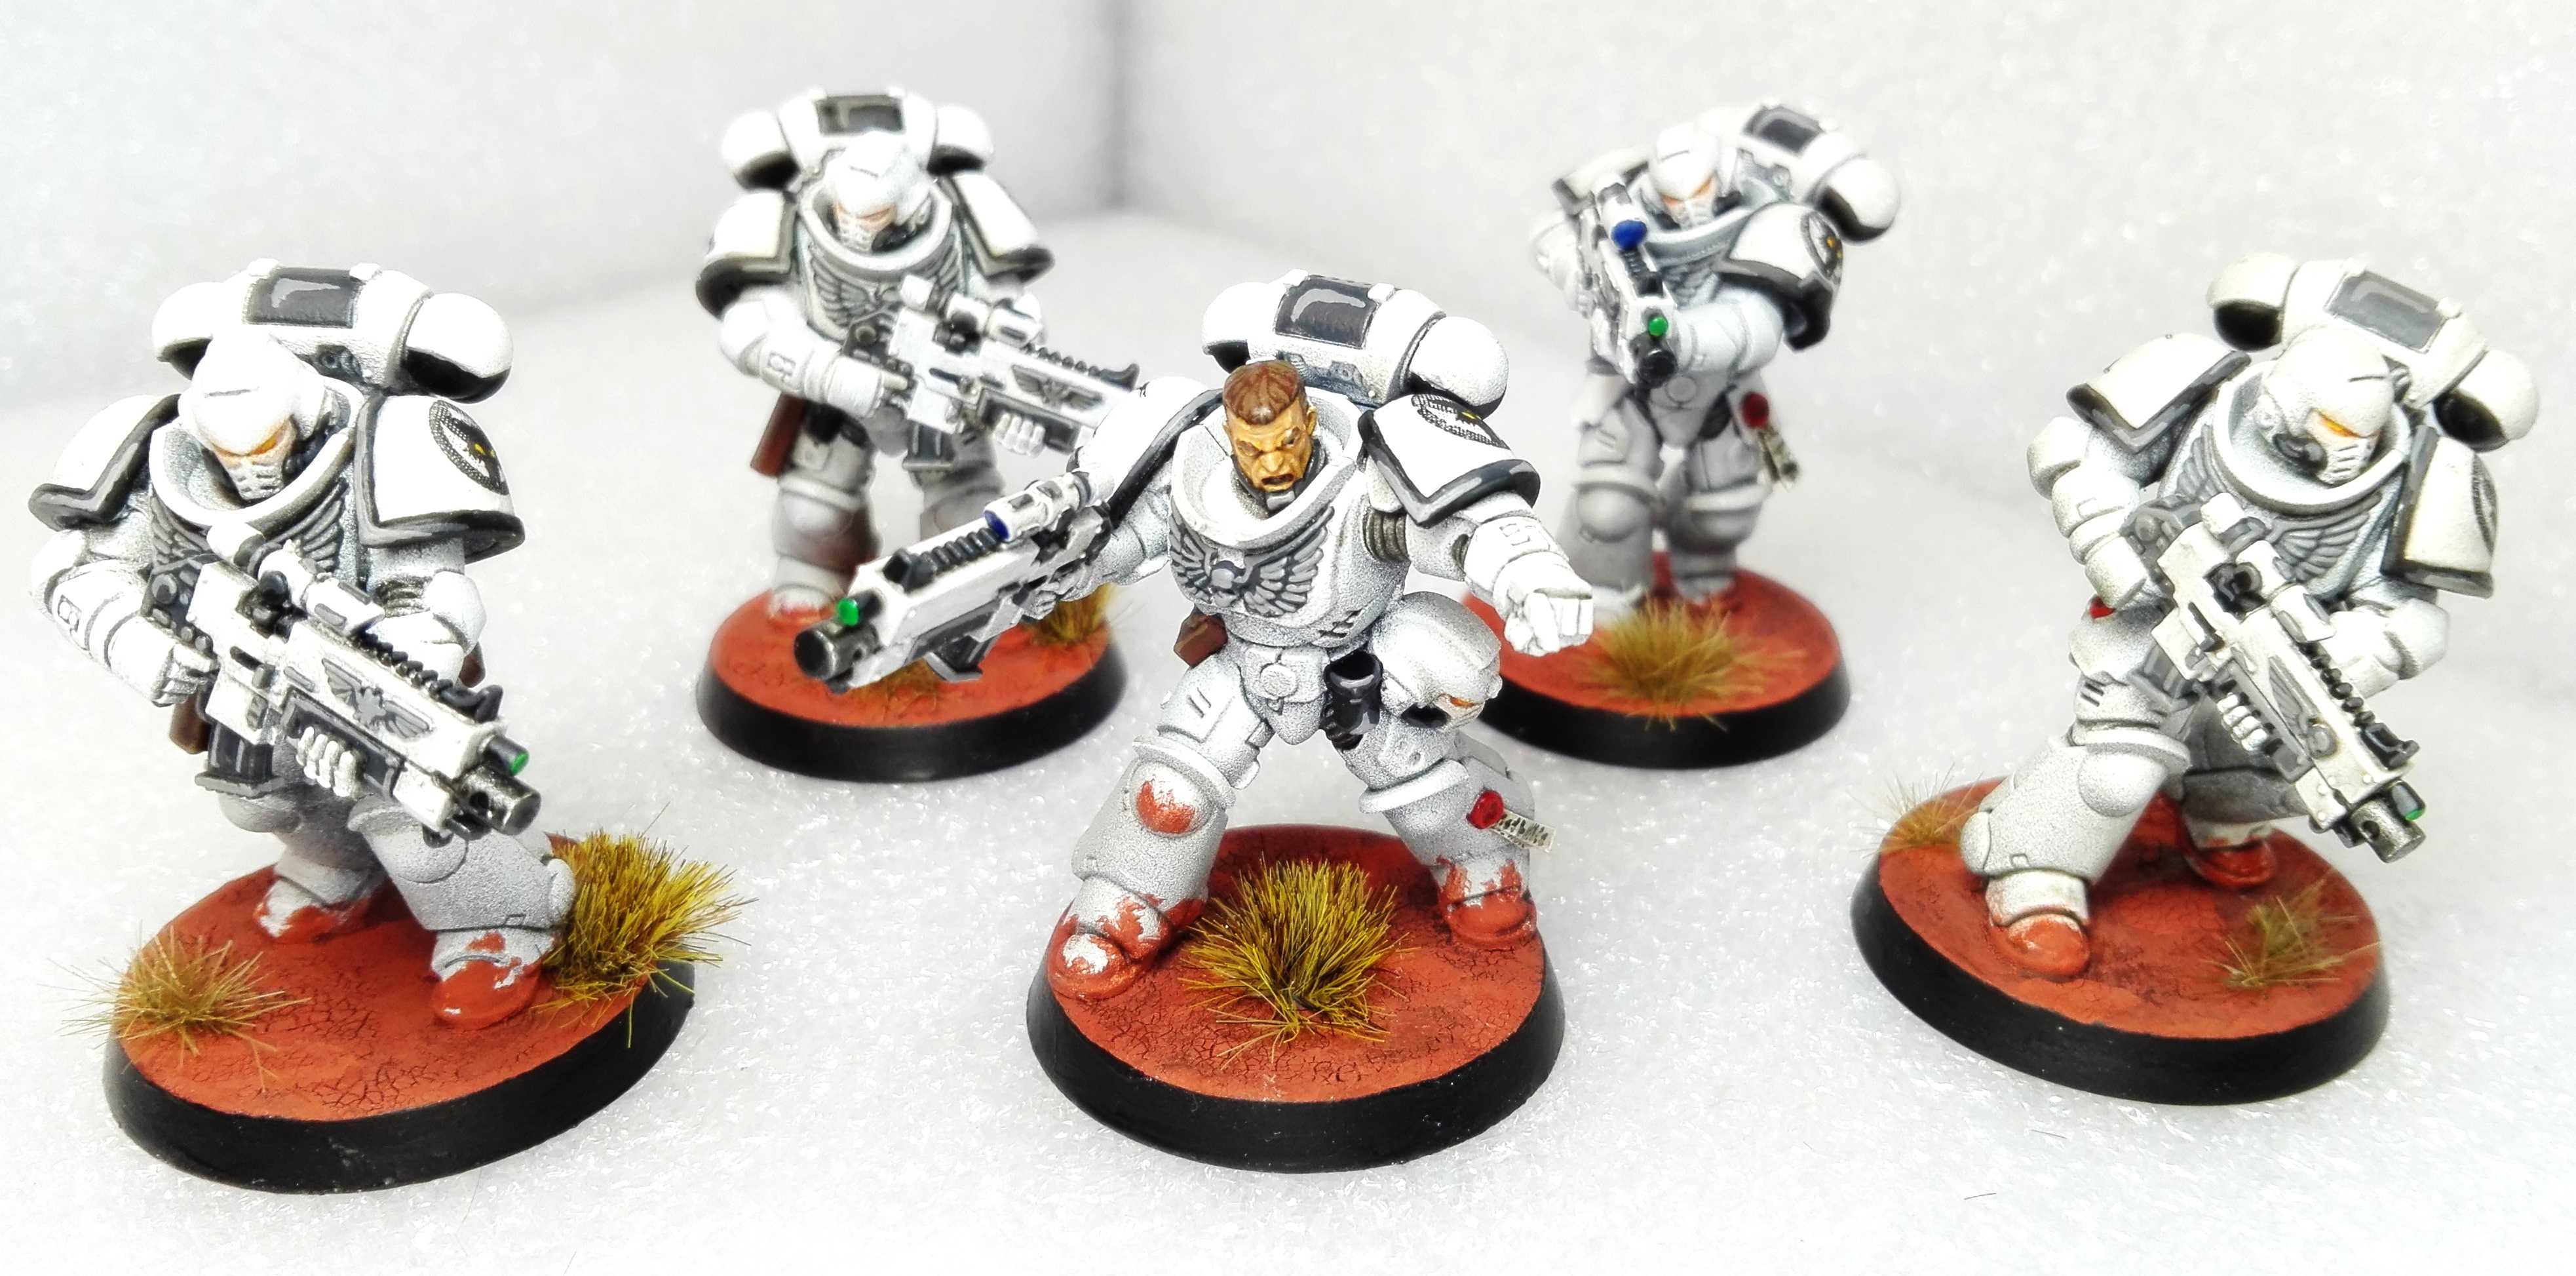
Squad Vipus - 5 Intercessors
To cement my know-how in the color scheme I decided to paint up another squad of 5 Intercessors next. And I just finished today. This time I managed to get an exact timing. I put a bit more effort into them an it took me a bit less than 9 hours of ideal worktime on these. That’s not counting wait time between steps. So thats about 1h 45m per Marine. A bit more than I planned, but still acceptable for “speed painting”.
 Entire Squad
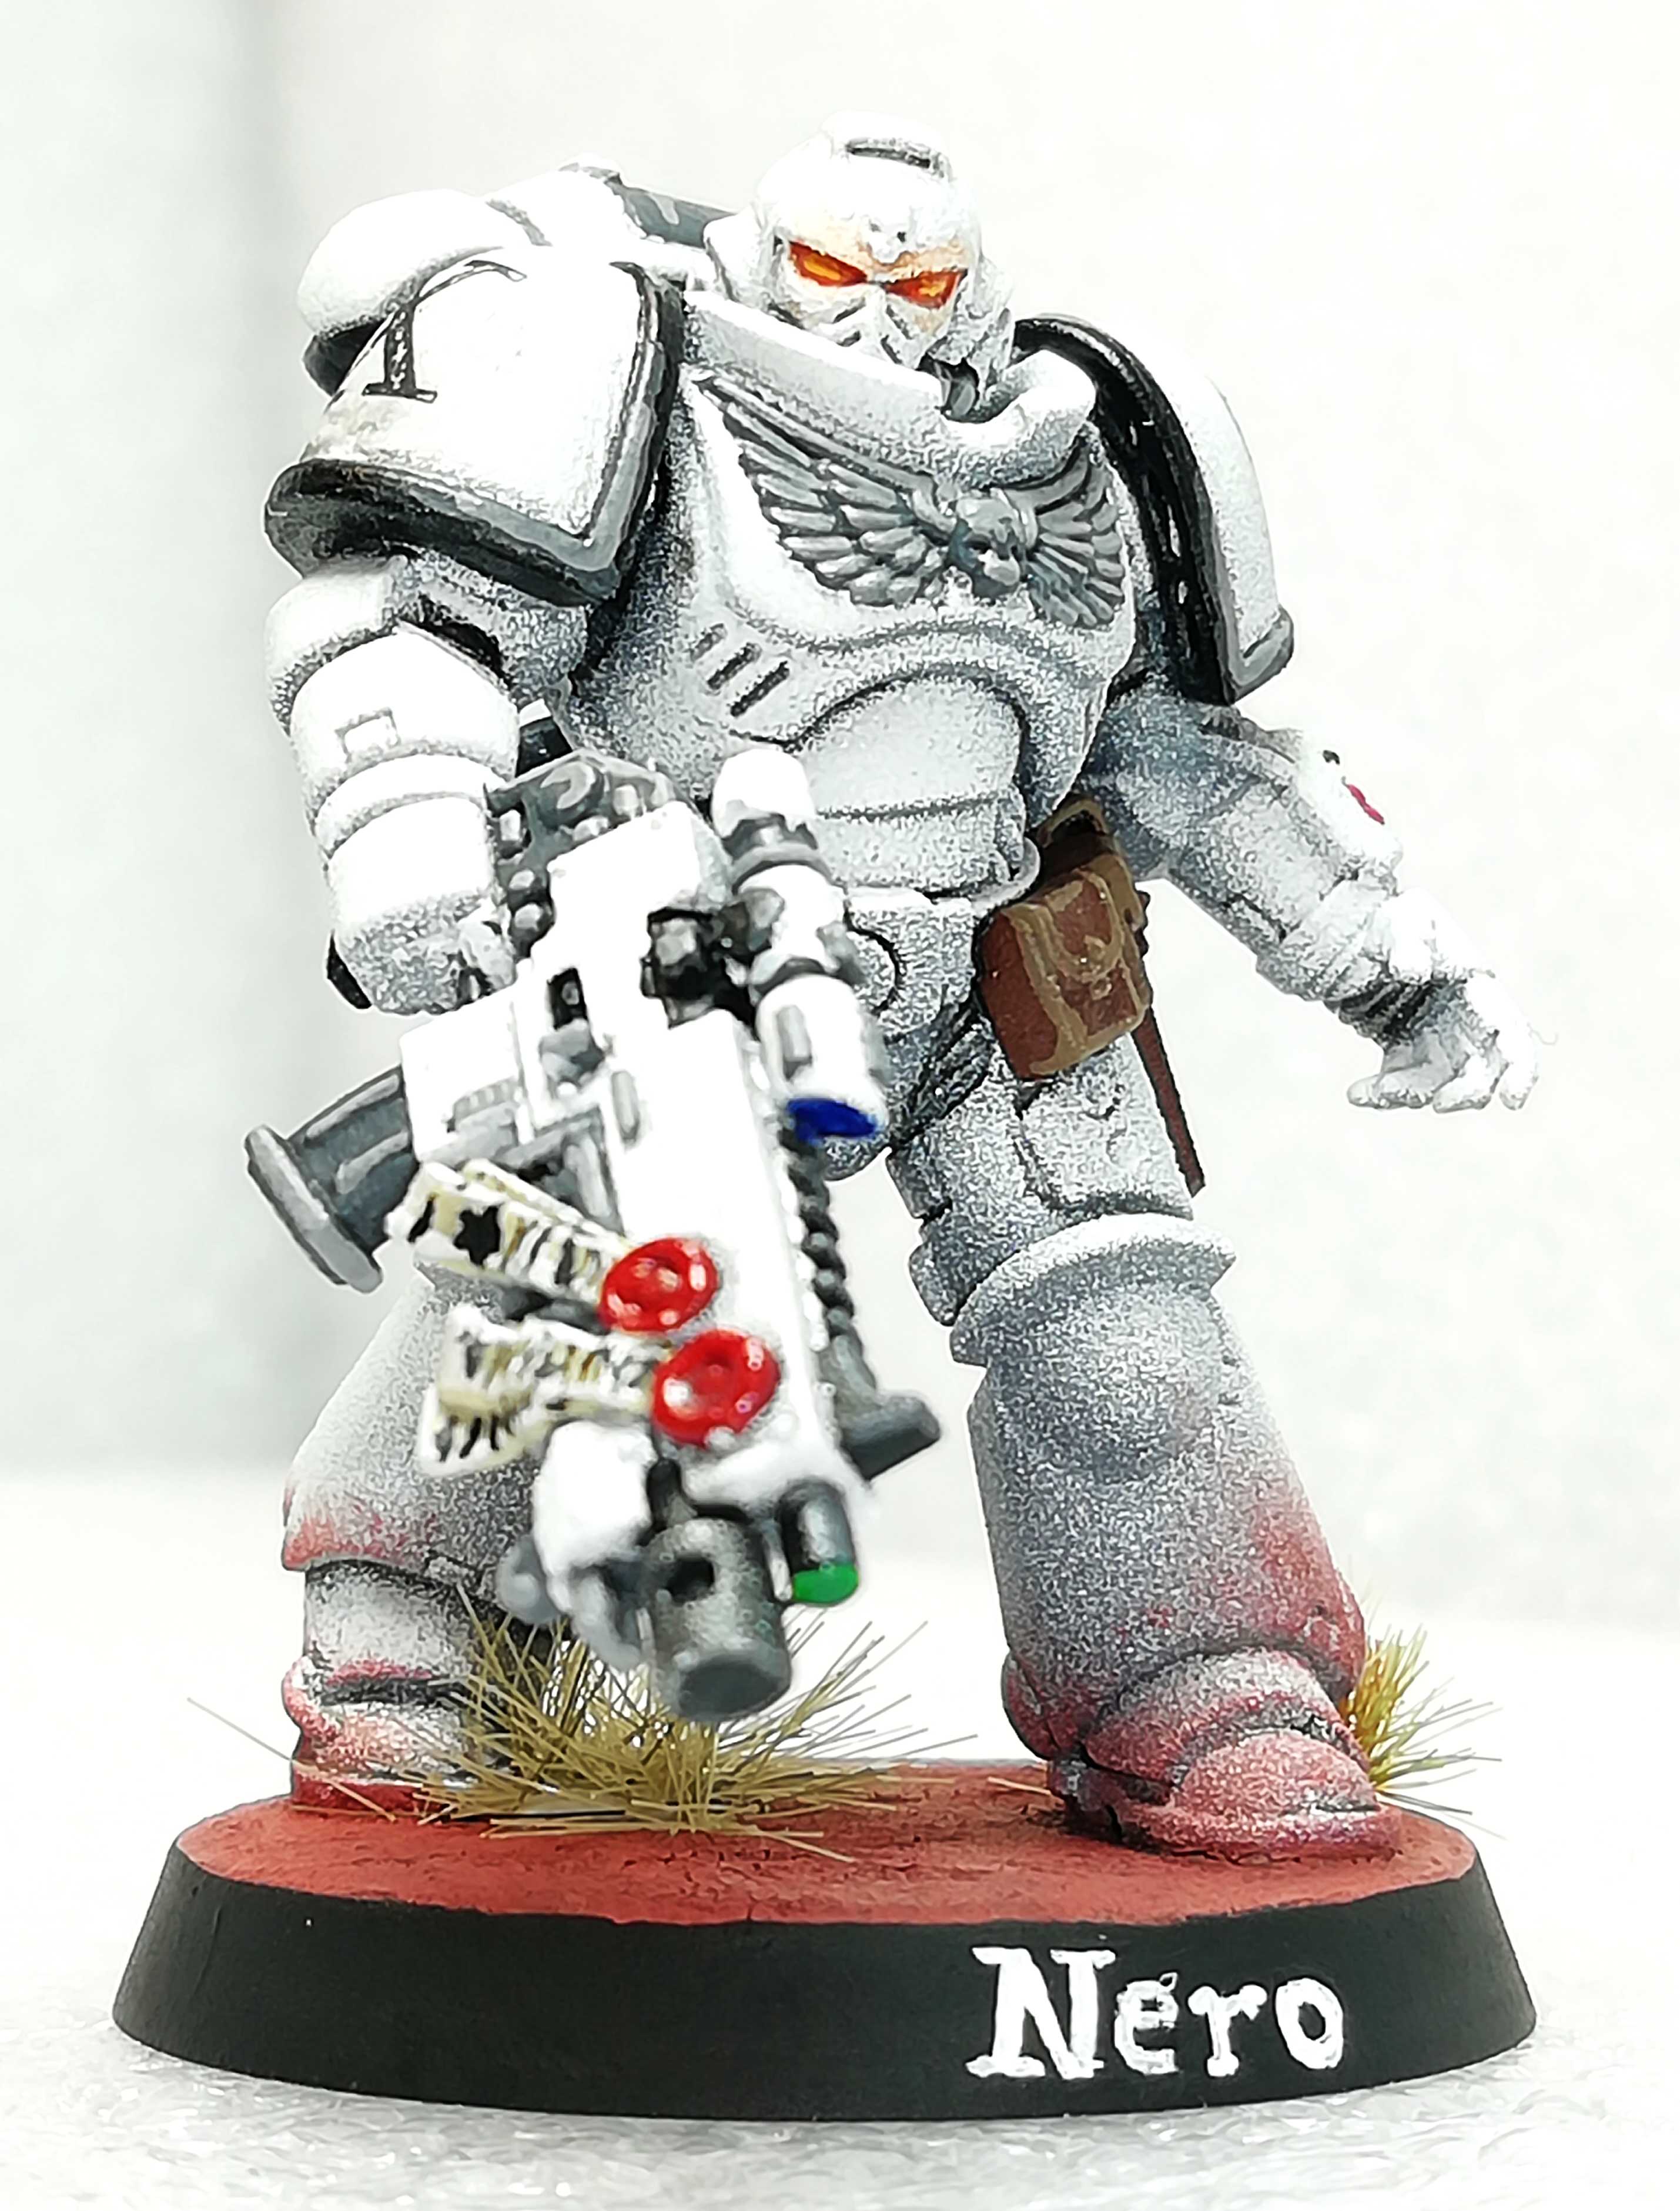
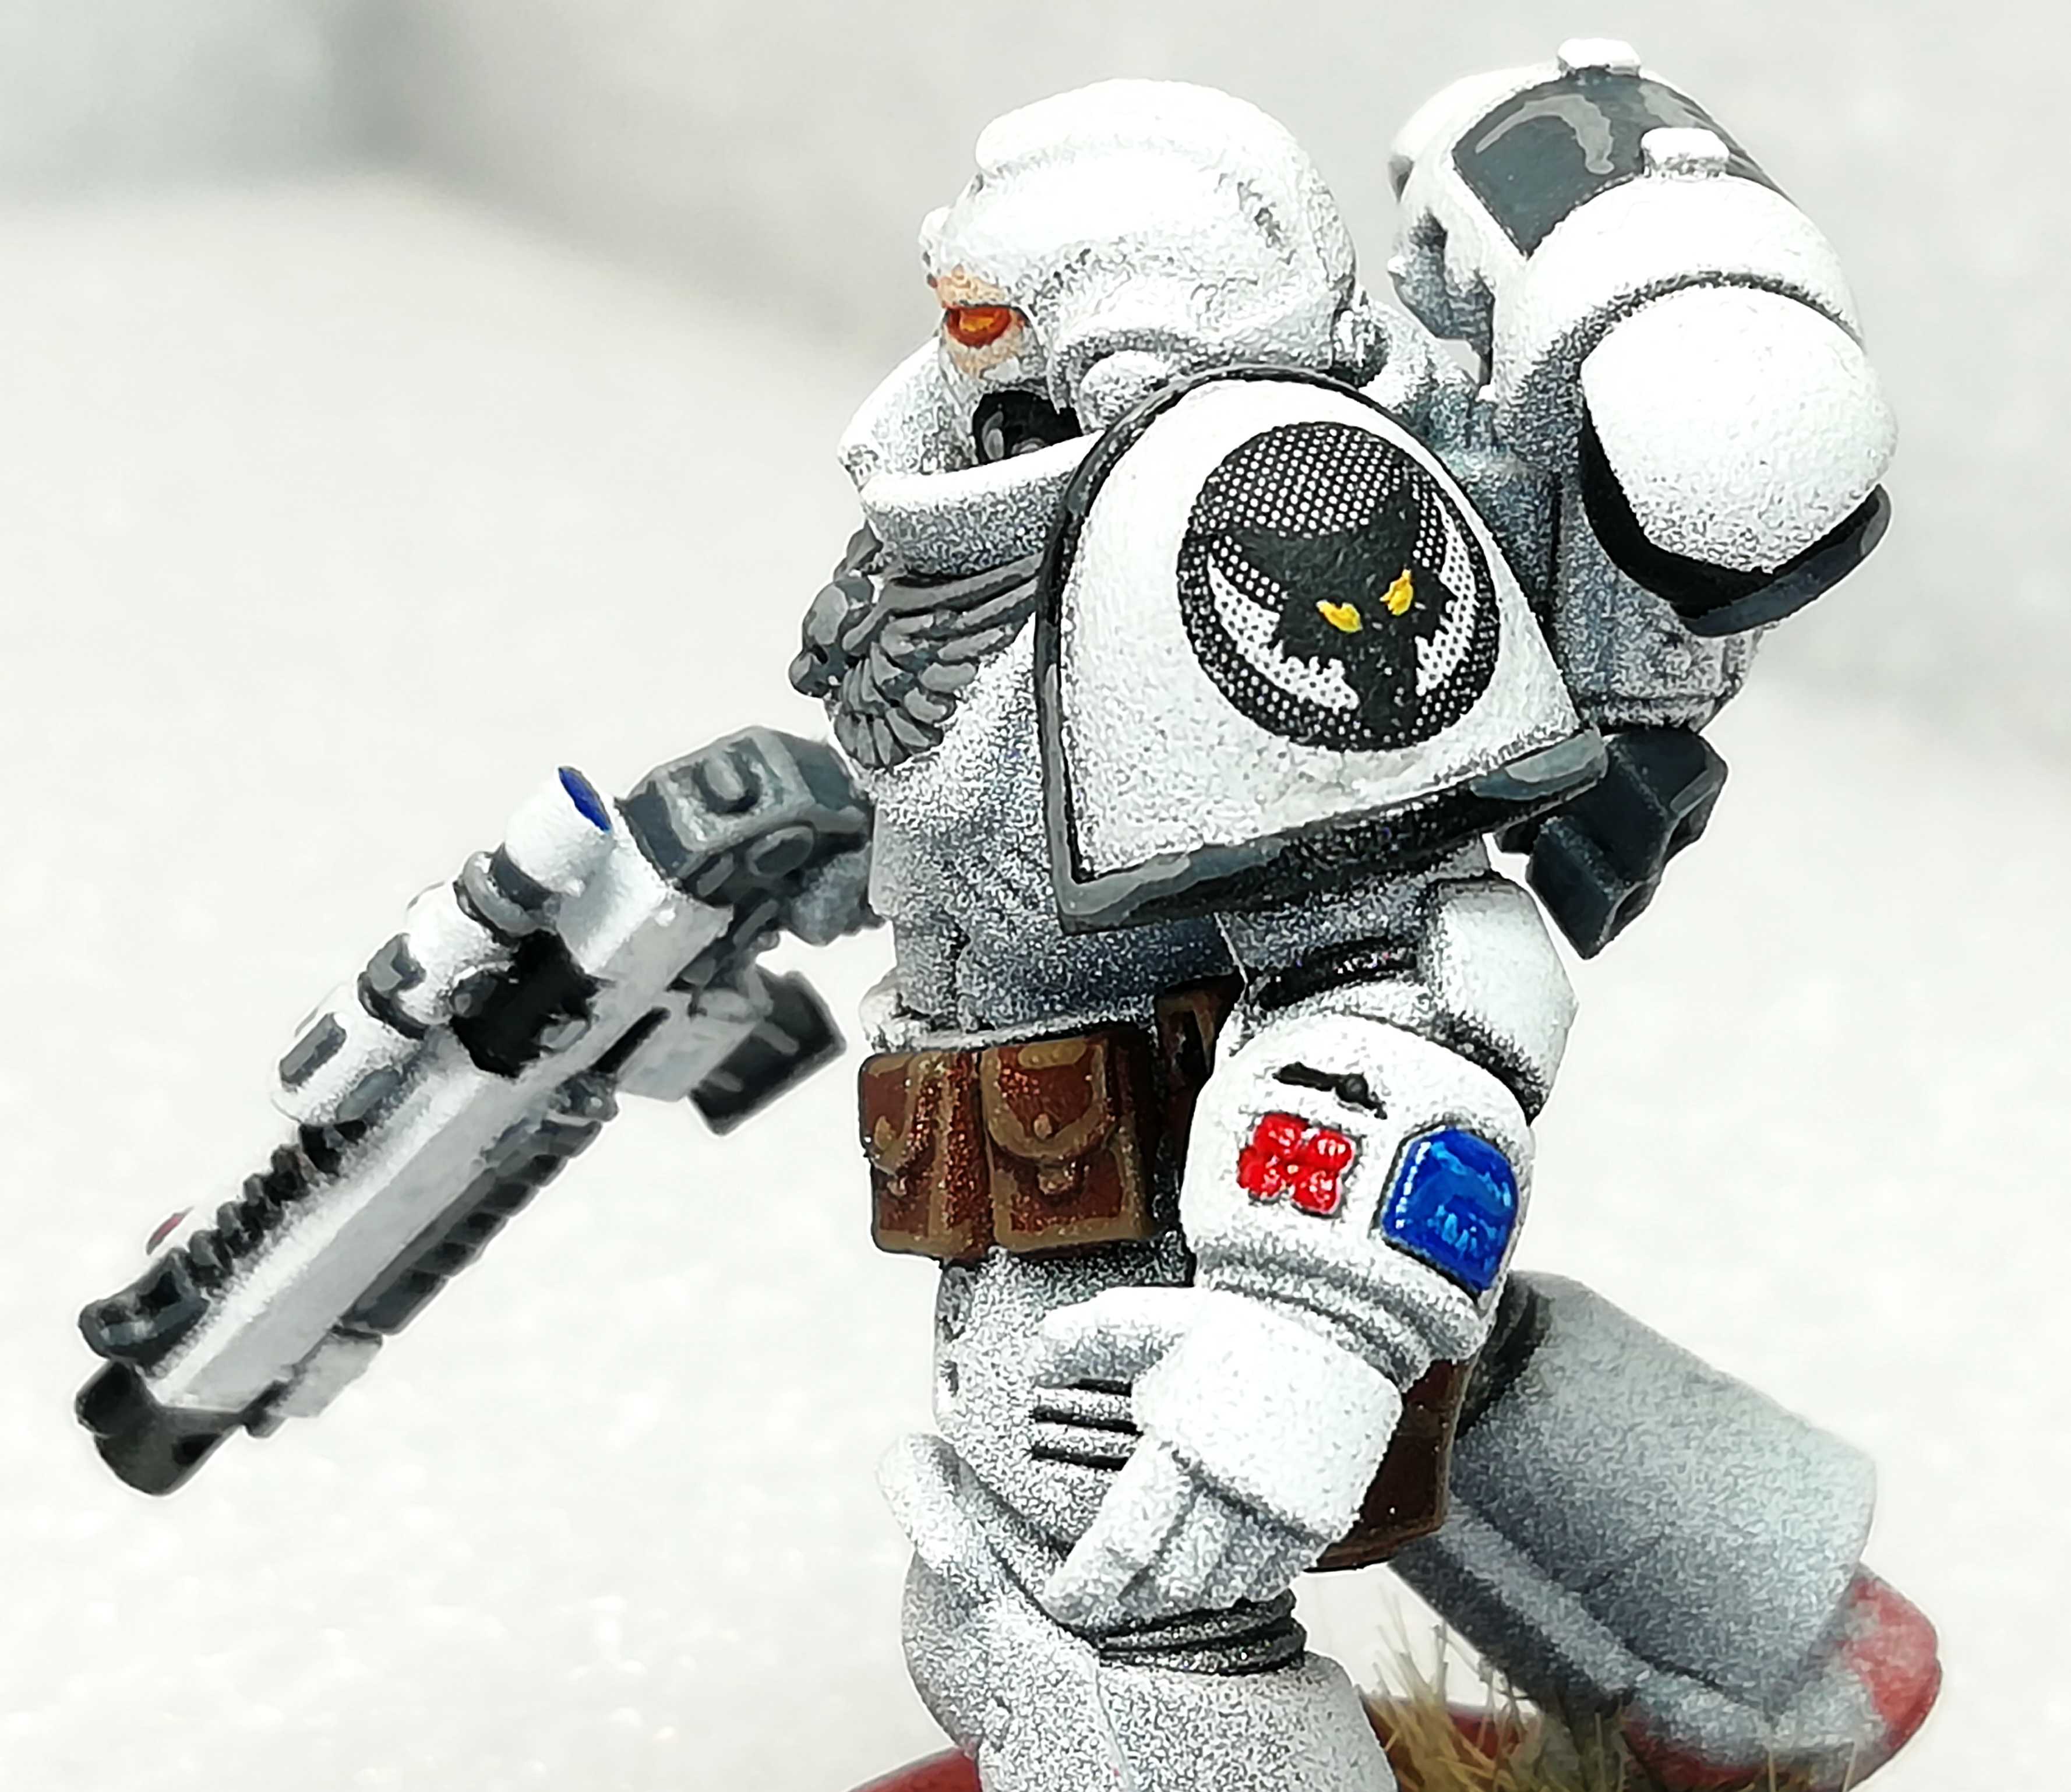 Sergeant Nero Vipus
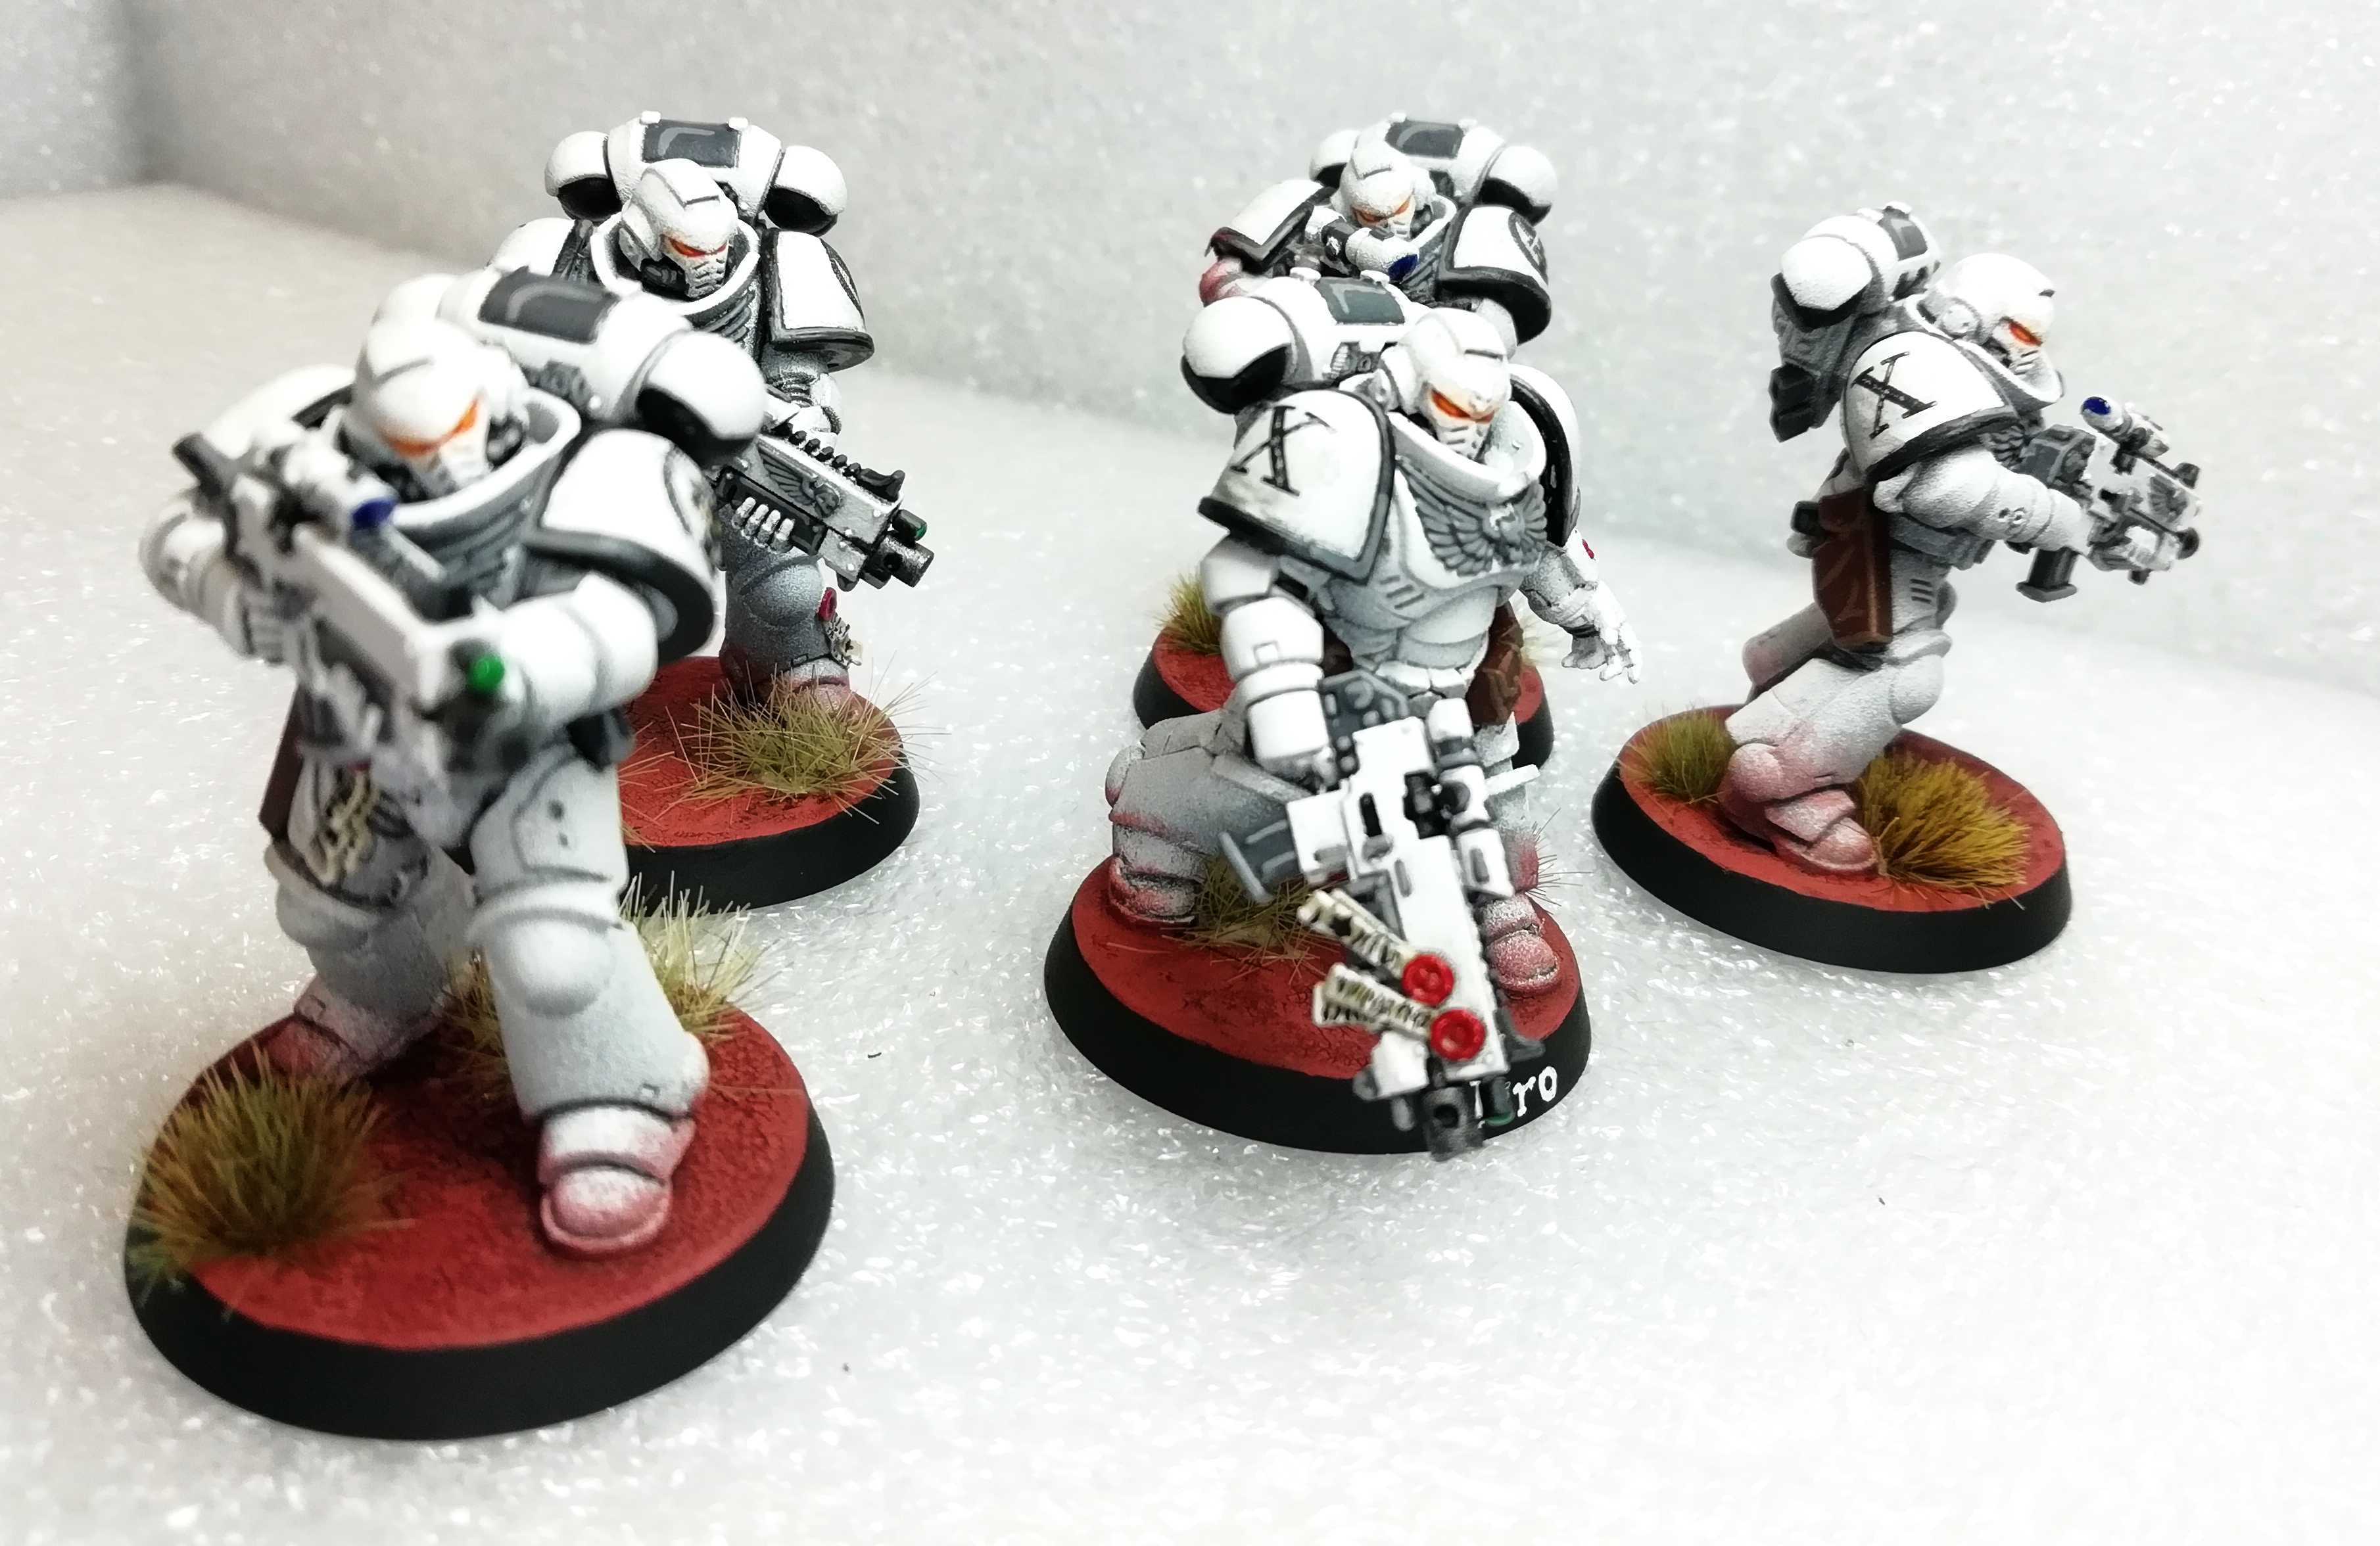
 Not to forget the "good old Lloyd-Shot"
I started work simultaneously on the Lieutenant and the Ancient. These are at about the same stage (besides the bases), but have a few more details (power weapon, banner, etc.). Should be able to finish these tonight or tomorrow.
... and his four Brothers!
I guess I haven’t mentioned it before, but these marines are of the 10th company. Paying respect to the original 10th company of Luna Wolves (Garviel Lokens company) which didn’t join Horus and nearly all died on Istvaan III.
First enjoy a few pictures of the finished squad. Below I’ll put a complete step by step of the painting process. It should be noted that it took me less than 7 hours (if I remember correctly) to paint these. I’ll take a more exact timing on the next batch.
 Entire Squad
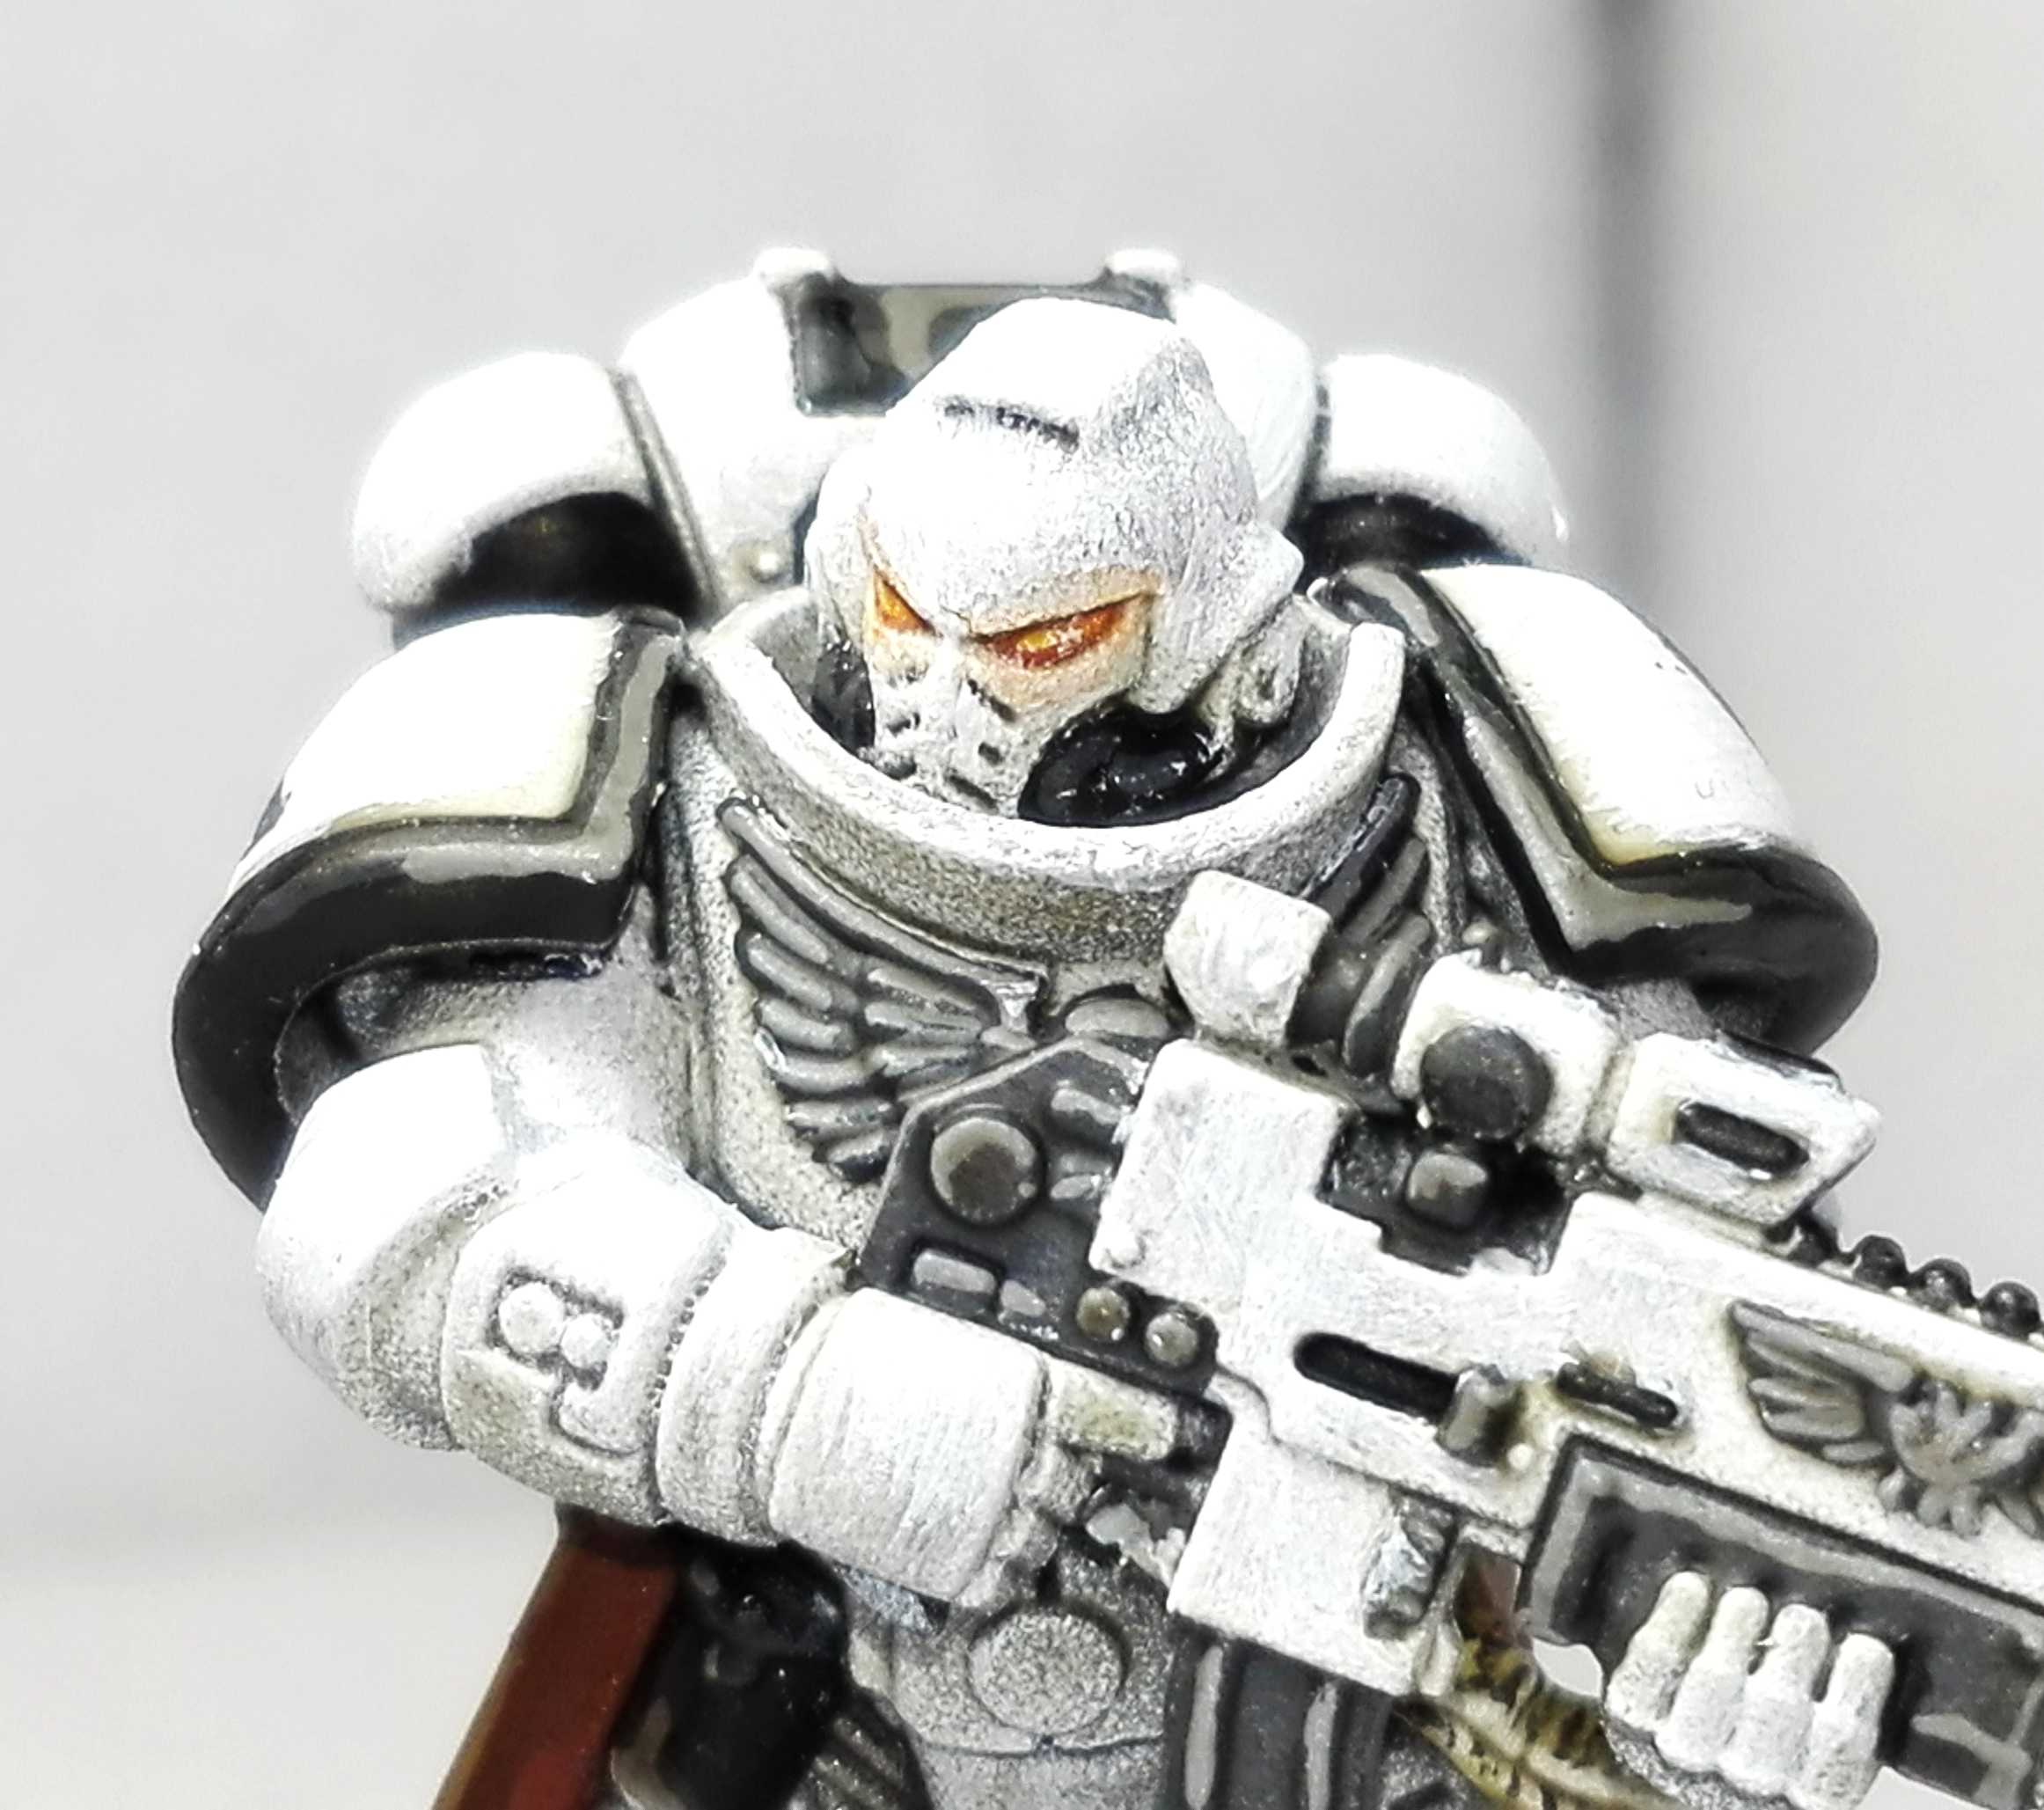 Upper Body
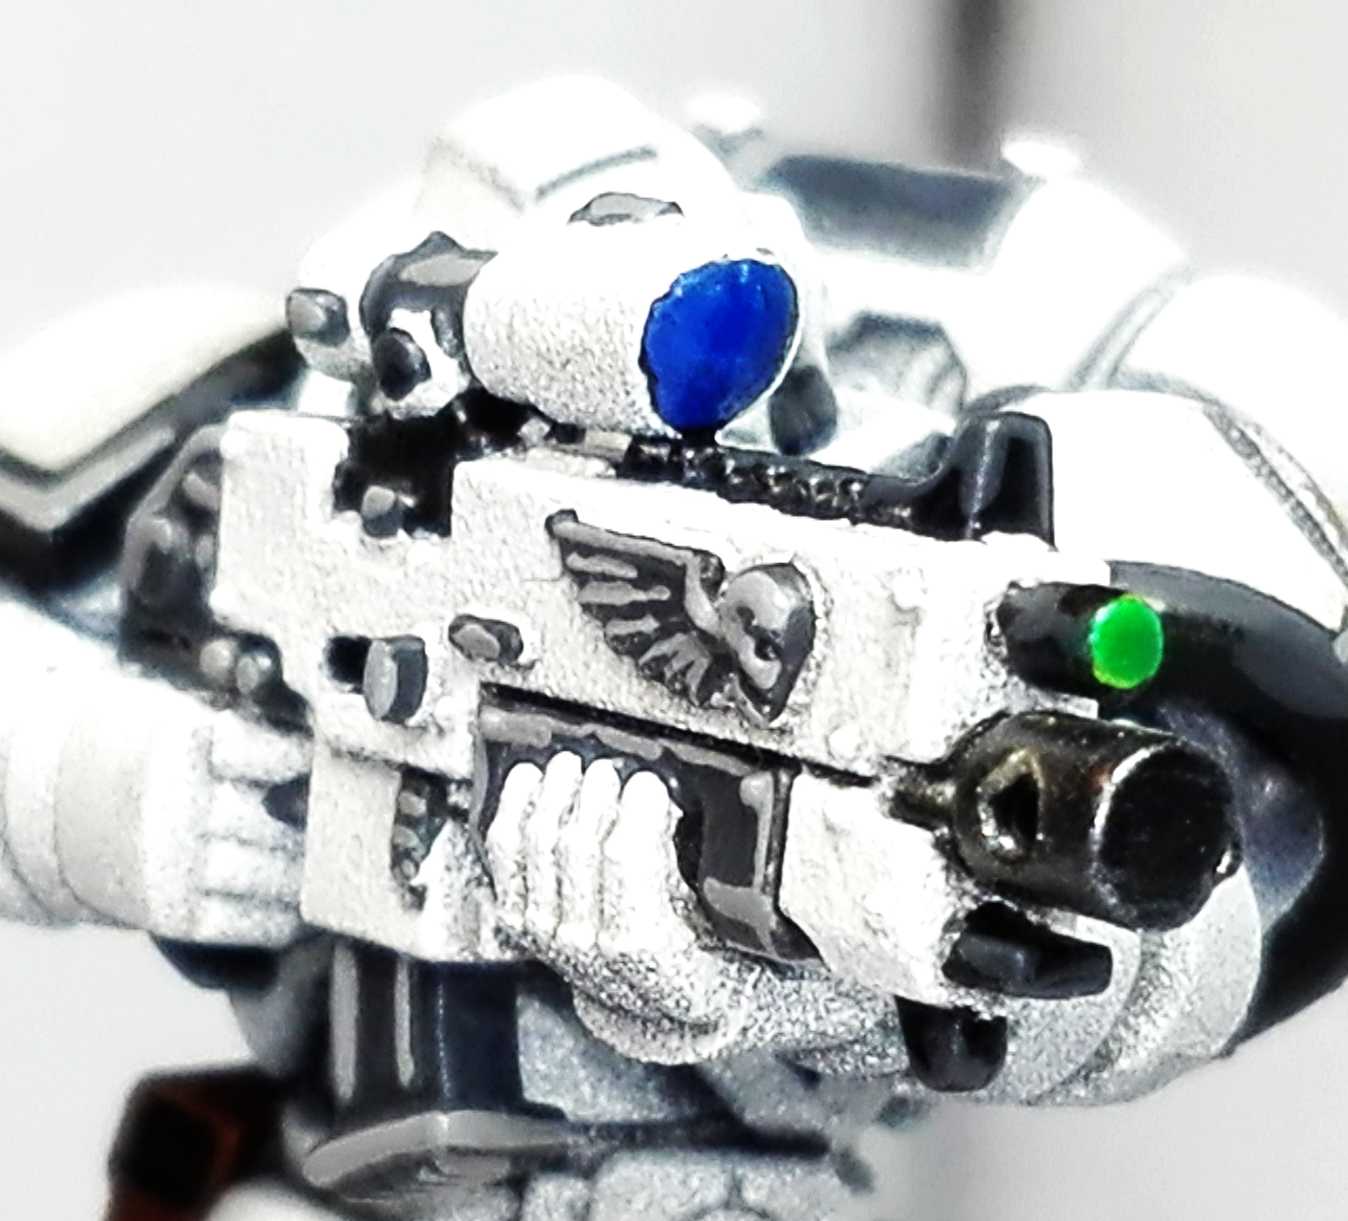 Boltgun
 I went for martian red bases to create a strong contrast.
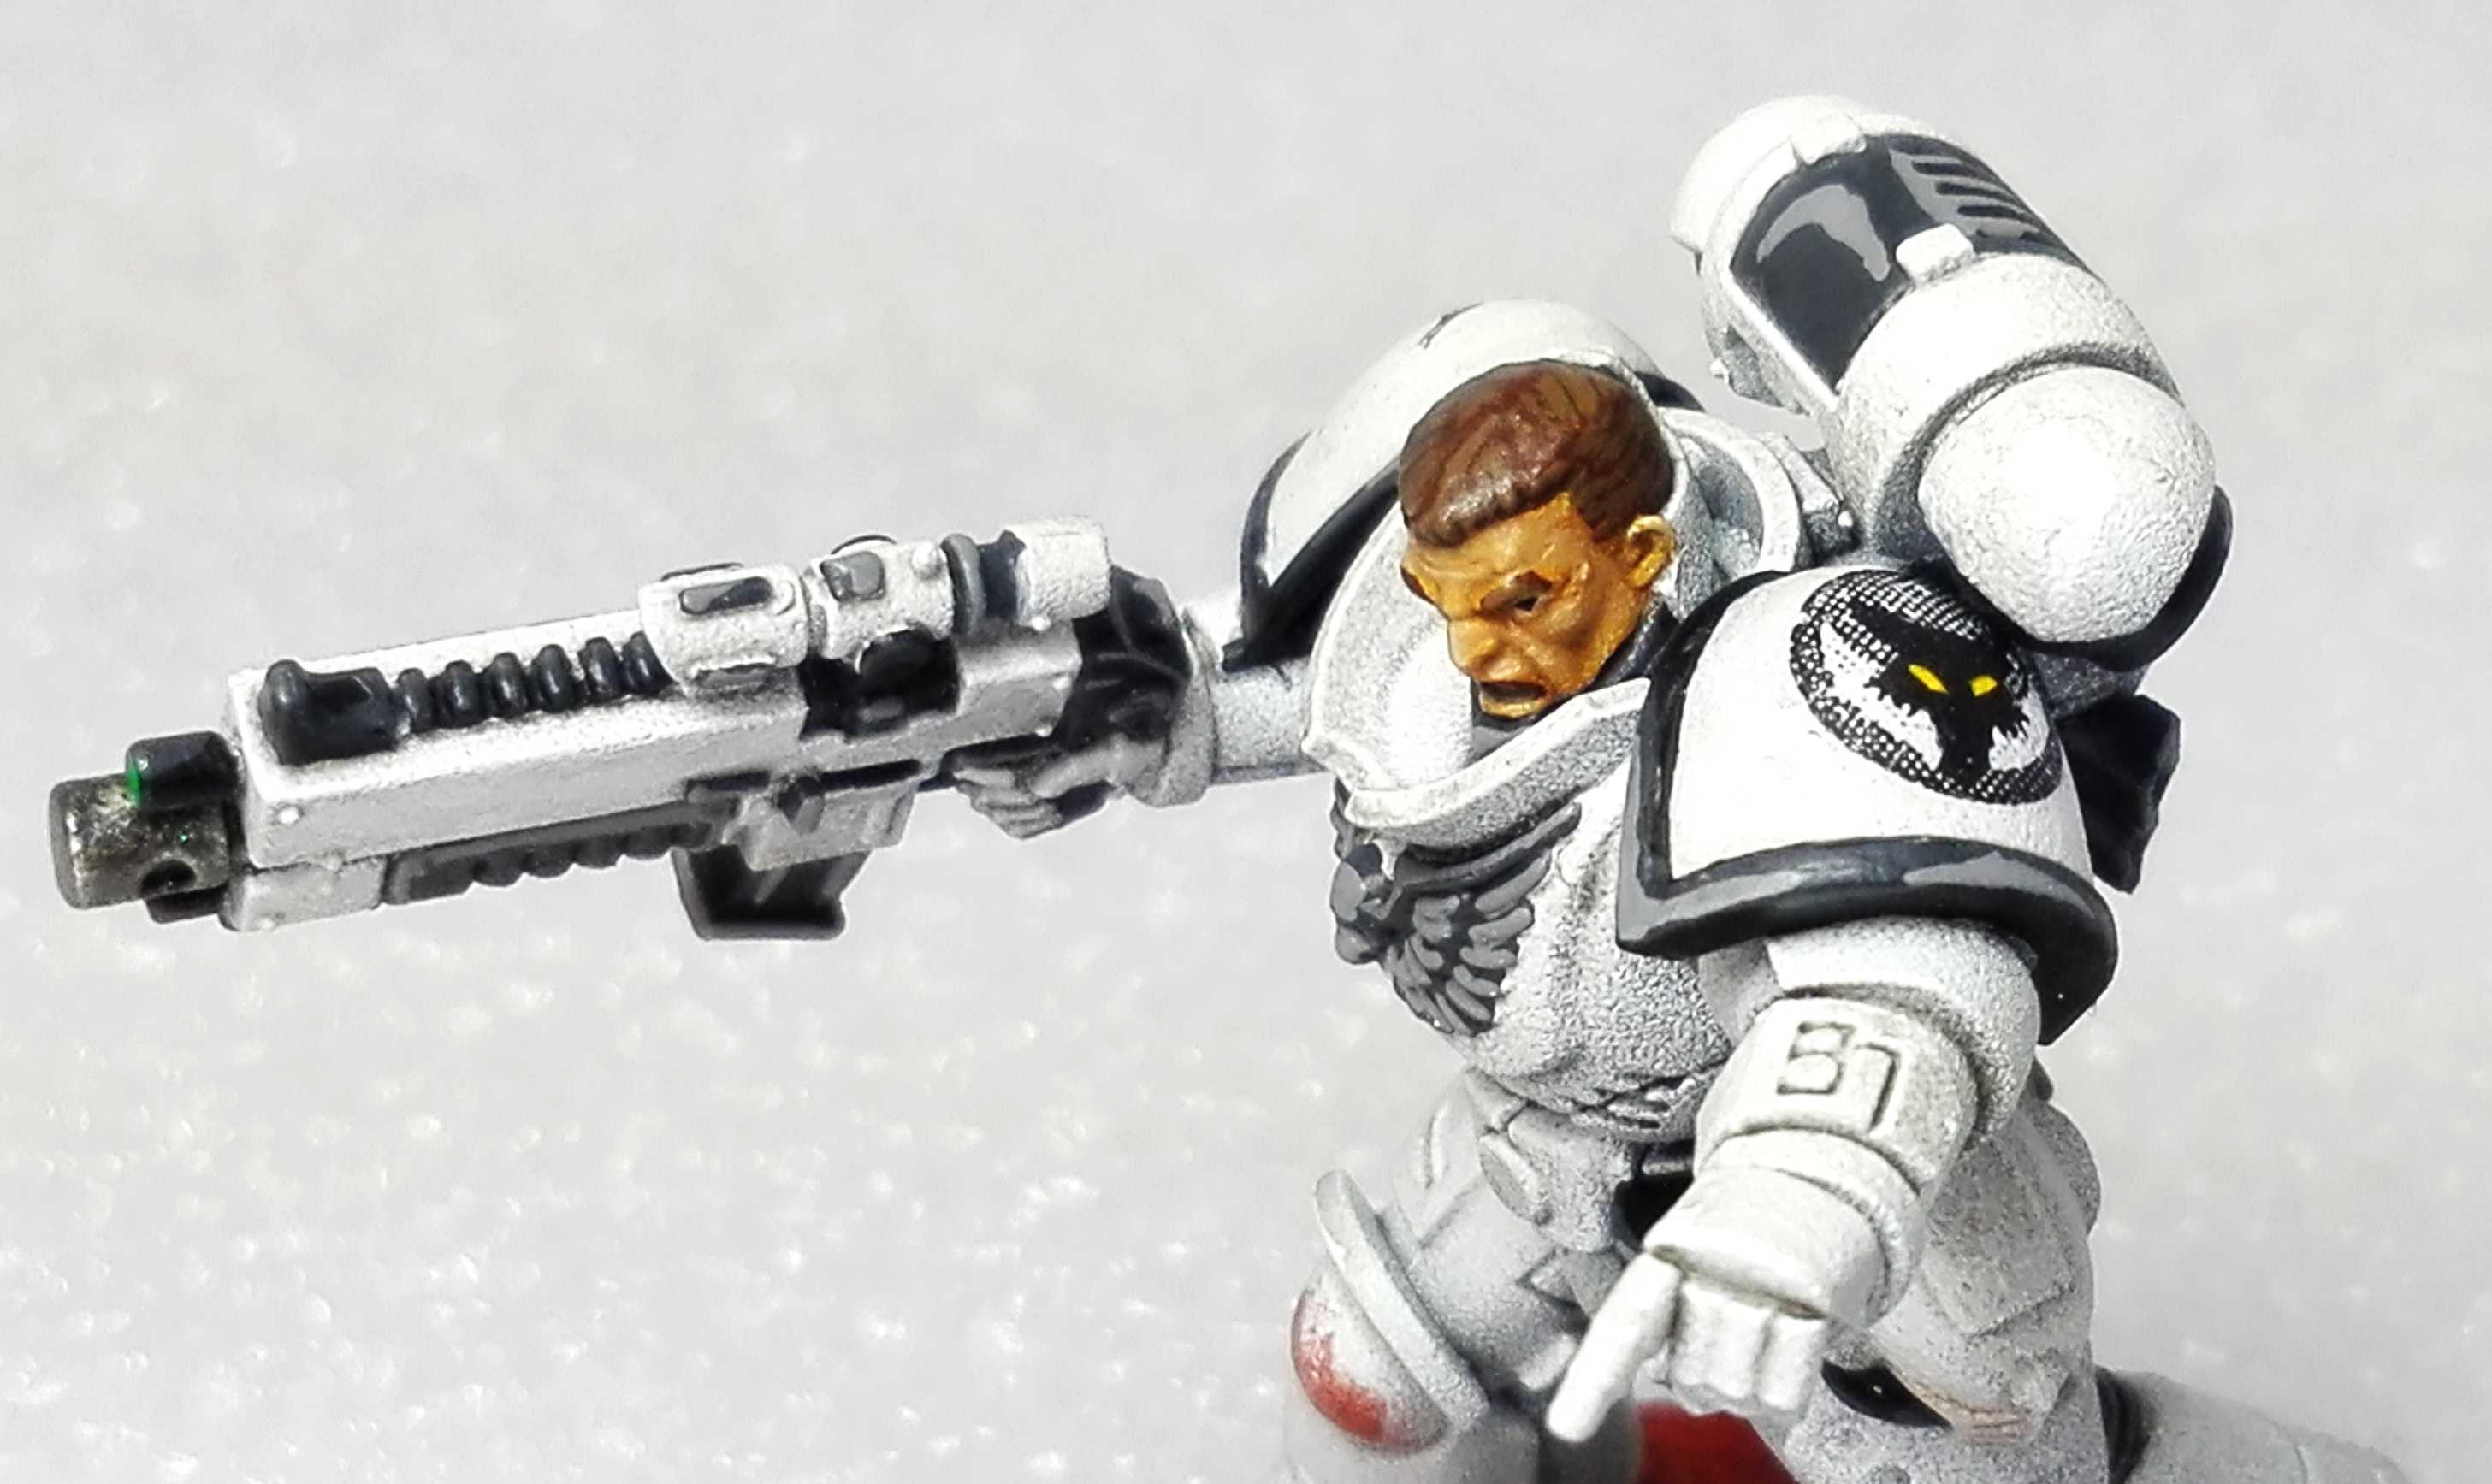

Paintingsteps. First natuarlly comes
Priming:
- Entire model with AP Unifrom Grey from the rattle can. Make sure you get into the deepest corners. I glue my models on nails for painting so I have a good handle on them while priming (wear a glove)
- 45° up to 90° with AP White. Also from the rattle can.
- Entire base with AP Black. From the dropper bottle with a (large) brush.
Base Colors:
- AP Black. You should have some left on the palette from the priming of the bases. This goes on the rims of the shoulder pats, a few larger parts on the backpack, the respirator, gun handles, grenades and a few pieces on the guns itself.
- Vallejo Brown. All the bags and gun holsters.
- GW Gore Red. On the top parts of the sigils.
- GW Bleached Bone. On the lower parts of the sigils.
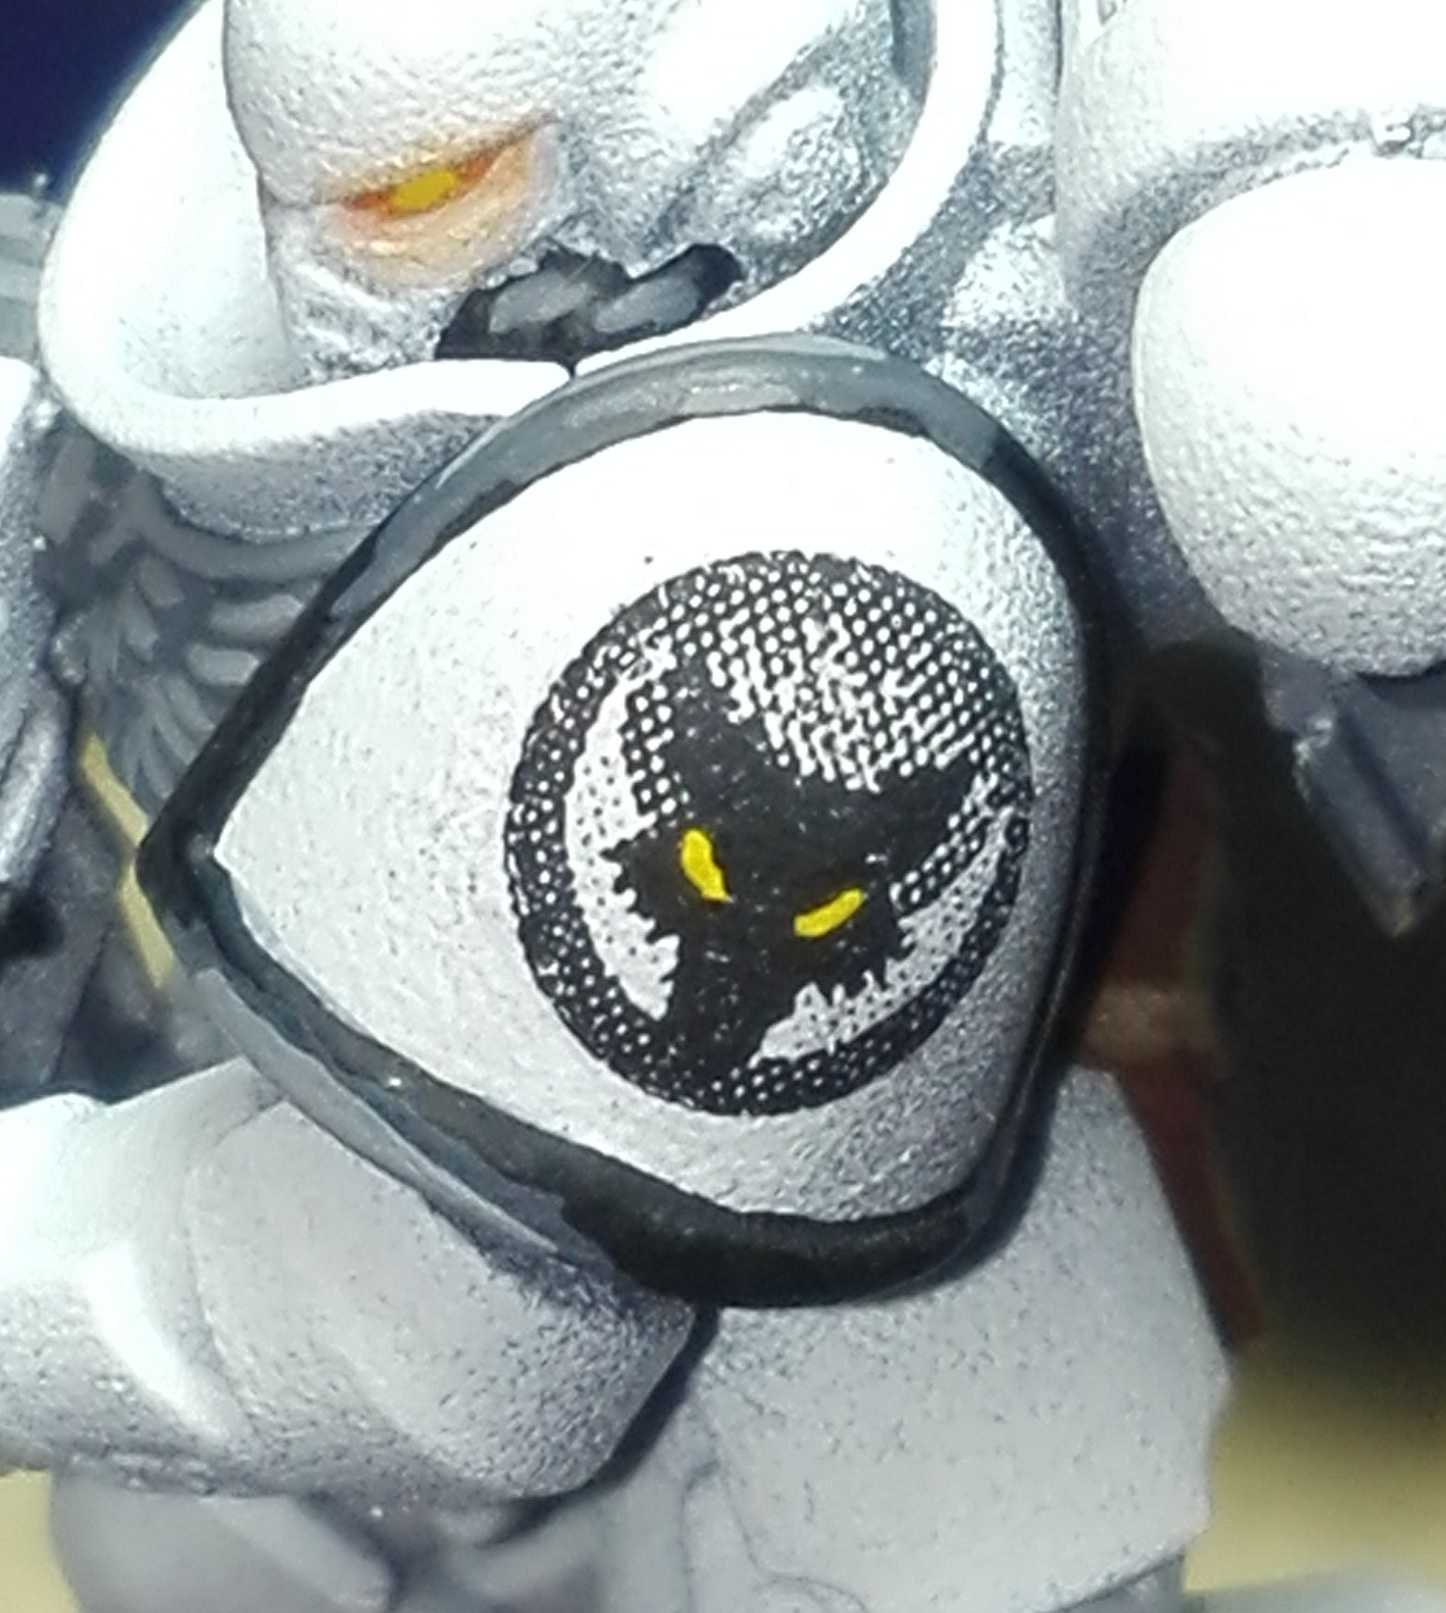
- GW Trollslayer Orange. On the eye lenses.
- Vallejo Gunmetal. On the armour joints and gun muzzles.
- GW Ultramarine Blue. On the gunsights.
- GW Purtrid Green. On the laser marker, front of the boltgun.
- Dark Grey. This is a 50% mix of Vallejo Cold Grey and AP Black. This goes on the exhausts and larger parts on the backpack, the aquila, front handle on the boltguns, a few single parts on the bolt guns.
Highlighting / Layering:
- Dark Grey. Same mix as above. You should have some left on the palette from the previous step. Edge highlighting on everything that is black. Make these large on the shoulder pads and the grenades as these get a second highlight.
- GW Sunburts Yellow. Layering on the orange in the eyes.
- GW Blood Red. The rim of the upper part of the sigils.
- GW Graveyard Earth. Edgehighlighting on the brown things.
- Vallejo Cold Grey. Layering on the larger parts on the backpack. Edge highlighting on everything else that is dark grey (aquila etc.). A second hightlight on top of the dark grey highlights on the shoulder pads and the grenade. The respirator can take a second highlight aswell, when you have a really fine brush.
- Vallejo Foundation White: Edge Highlight on the sigils.
Clean up:
- Depending of how clean you have worked you only have to do a bit of white here and there. I use Vallejo Foundation White for this. Also I layer the white parts of the boltgun completly with white again, because the zenith shading looks weird on them
Decals:
- Cut the decals very precisely so they are as small as possible.
- Put them in water, apply Decal Set on the shoulder pad.
- Wait 30 seconds.
- Slide the decal on the shoulder pad.
- Apply some Decal Sol and move it into position.
- Wait 1-5 mins until Decal Sol is dry.
- Apply another layer of Decal Sol and try to brush the decal flat.
- Repeat until decal is completely flat on the round surface.
- Apply a layer of AP anti shine (from the dropper bottle, only on the decal).
Note: With 4 marines the Decal Sol was nearly dry when I finished the last marine with the step before. With 5+ you should be able to work without waiting.
Base:
- Just a really thick layer of GW Martian Ironcrust. This will break up, hence the black undercoat on the bases.
Washing:
- AP Quickshade Dark Tone (water based, from the dropper bottle) undiluted on the gunmetal parts.
- Super Light Wash: 5 drops AP Quickshade Dark Tone (same as above) with 5 drops of Vallejo Airbrush Flow Improver and 10-20 drops of Vallejo Airbrush Thinner. This applied to the entire model. Pick it up again if it pools somewhere. I like this effect a lot. It keeps the bright white but still shades the deeper parts a bit more. Also it binds all the colors together with a slight matt varnish.
- GW Carroburg Crimson. Apply to the entire base.
Finishing Touches:
- GW Trollslayer Orange. Thinned down like 10:1. Then applied around the eyes to create a glowing effect.
- GW Martian Ironcrust. Drybrush the base with it. Also drybrush on some places where the marine got dirty. Like the feet and the knees
- GW Soulstone Blue on the gunsights
- GW Waystone Green on the laser pointer
- AP Black. Some writing on the sigils
- Some tufts on the base ( I use the Warlord ones)
- AP Black. Just a black rim on the base.
… and TAADAAAAA, you’re finished!
The first of a new generation...
As said before I started with my first prototype. A single Intercessor with that new Boltgun. Mostly this should be a proof of concept that the zenithing and the self printed decals would word on it. And to my suprise: it did!
I am quite happy with the decals. Although my printer doesn’t have the greatest resolution. I used white decal paper and not clear one as my printer can’t print white. The paper is specialized for a laser printer is like 2€ for an A4 sheet. More than enough for an entire company of marines. To get the decals on the round surface I used Decal Sol and Decal Set from Microscale Industries. This stuff works wonders for decals.
I am ok with the zenithing method. It looks a bit weird on large photographs due to the sprackled nature of the rattle can. But from like 20cm away this blends in and look amazing.
So next up should be rest of the 5 man squad.

![StarCraft Tabletop Miniatures Game Pre-Orders Live Now [Updated]](https://images.beastsofwar.com/2026/03/starcraft-tmg-news-cover-600-338.jpg)


![Mounted US Cavalry On Kickstarter For Dead Man’s Hand! [Updated]](https://images.beastsofwar.com/2026/03/us-cavalry-main-600-338.jpg)


![Play WW2 Commando Operations With Butcher & Bolt [Updated]](https://images.beastsofwar.com/2026/03/relaunch-600-338.jpg)


