


![1918 Spring Offensive Wargame | Full Rules Overview with John & Gerry (WW1 Tabletop Game) [7 Days Early Access]](https://images.beastsofwar.com/2026/03/unboxing-warfulcrum-games-1918-spring-offensive-review-coverimage1-225-127.jpeg)


Spring Cleaning in the burrows


Recommendations: 401
About the Project
I started this project about a year back from memory. I finished a single burrow and started a dozen smaller projects for my board. Some are components salvaged from older unfinished boards for Bolt Action and Lord of the Rings. I haven' touched it in about 6 months and the spring cleaning challenge seemed like the perfect way o kick it off again and get some closure ;) Lots of scratch built and converted village houses and burrows to come.
Related Game: Burrows & Badgers
Related Company: Oathsworn Miniatures
Related Genre: Fantasy
Related Contest: Spring Clean Hobby Challenge (Old)
This Project is Active
Step one, finish a small task first and celebrate.
So I decided to get this little village home out of the way first to make me think know i was making progress;)
GW paints, mostly just baseboard, drybrush and a soft wash nover the rest.
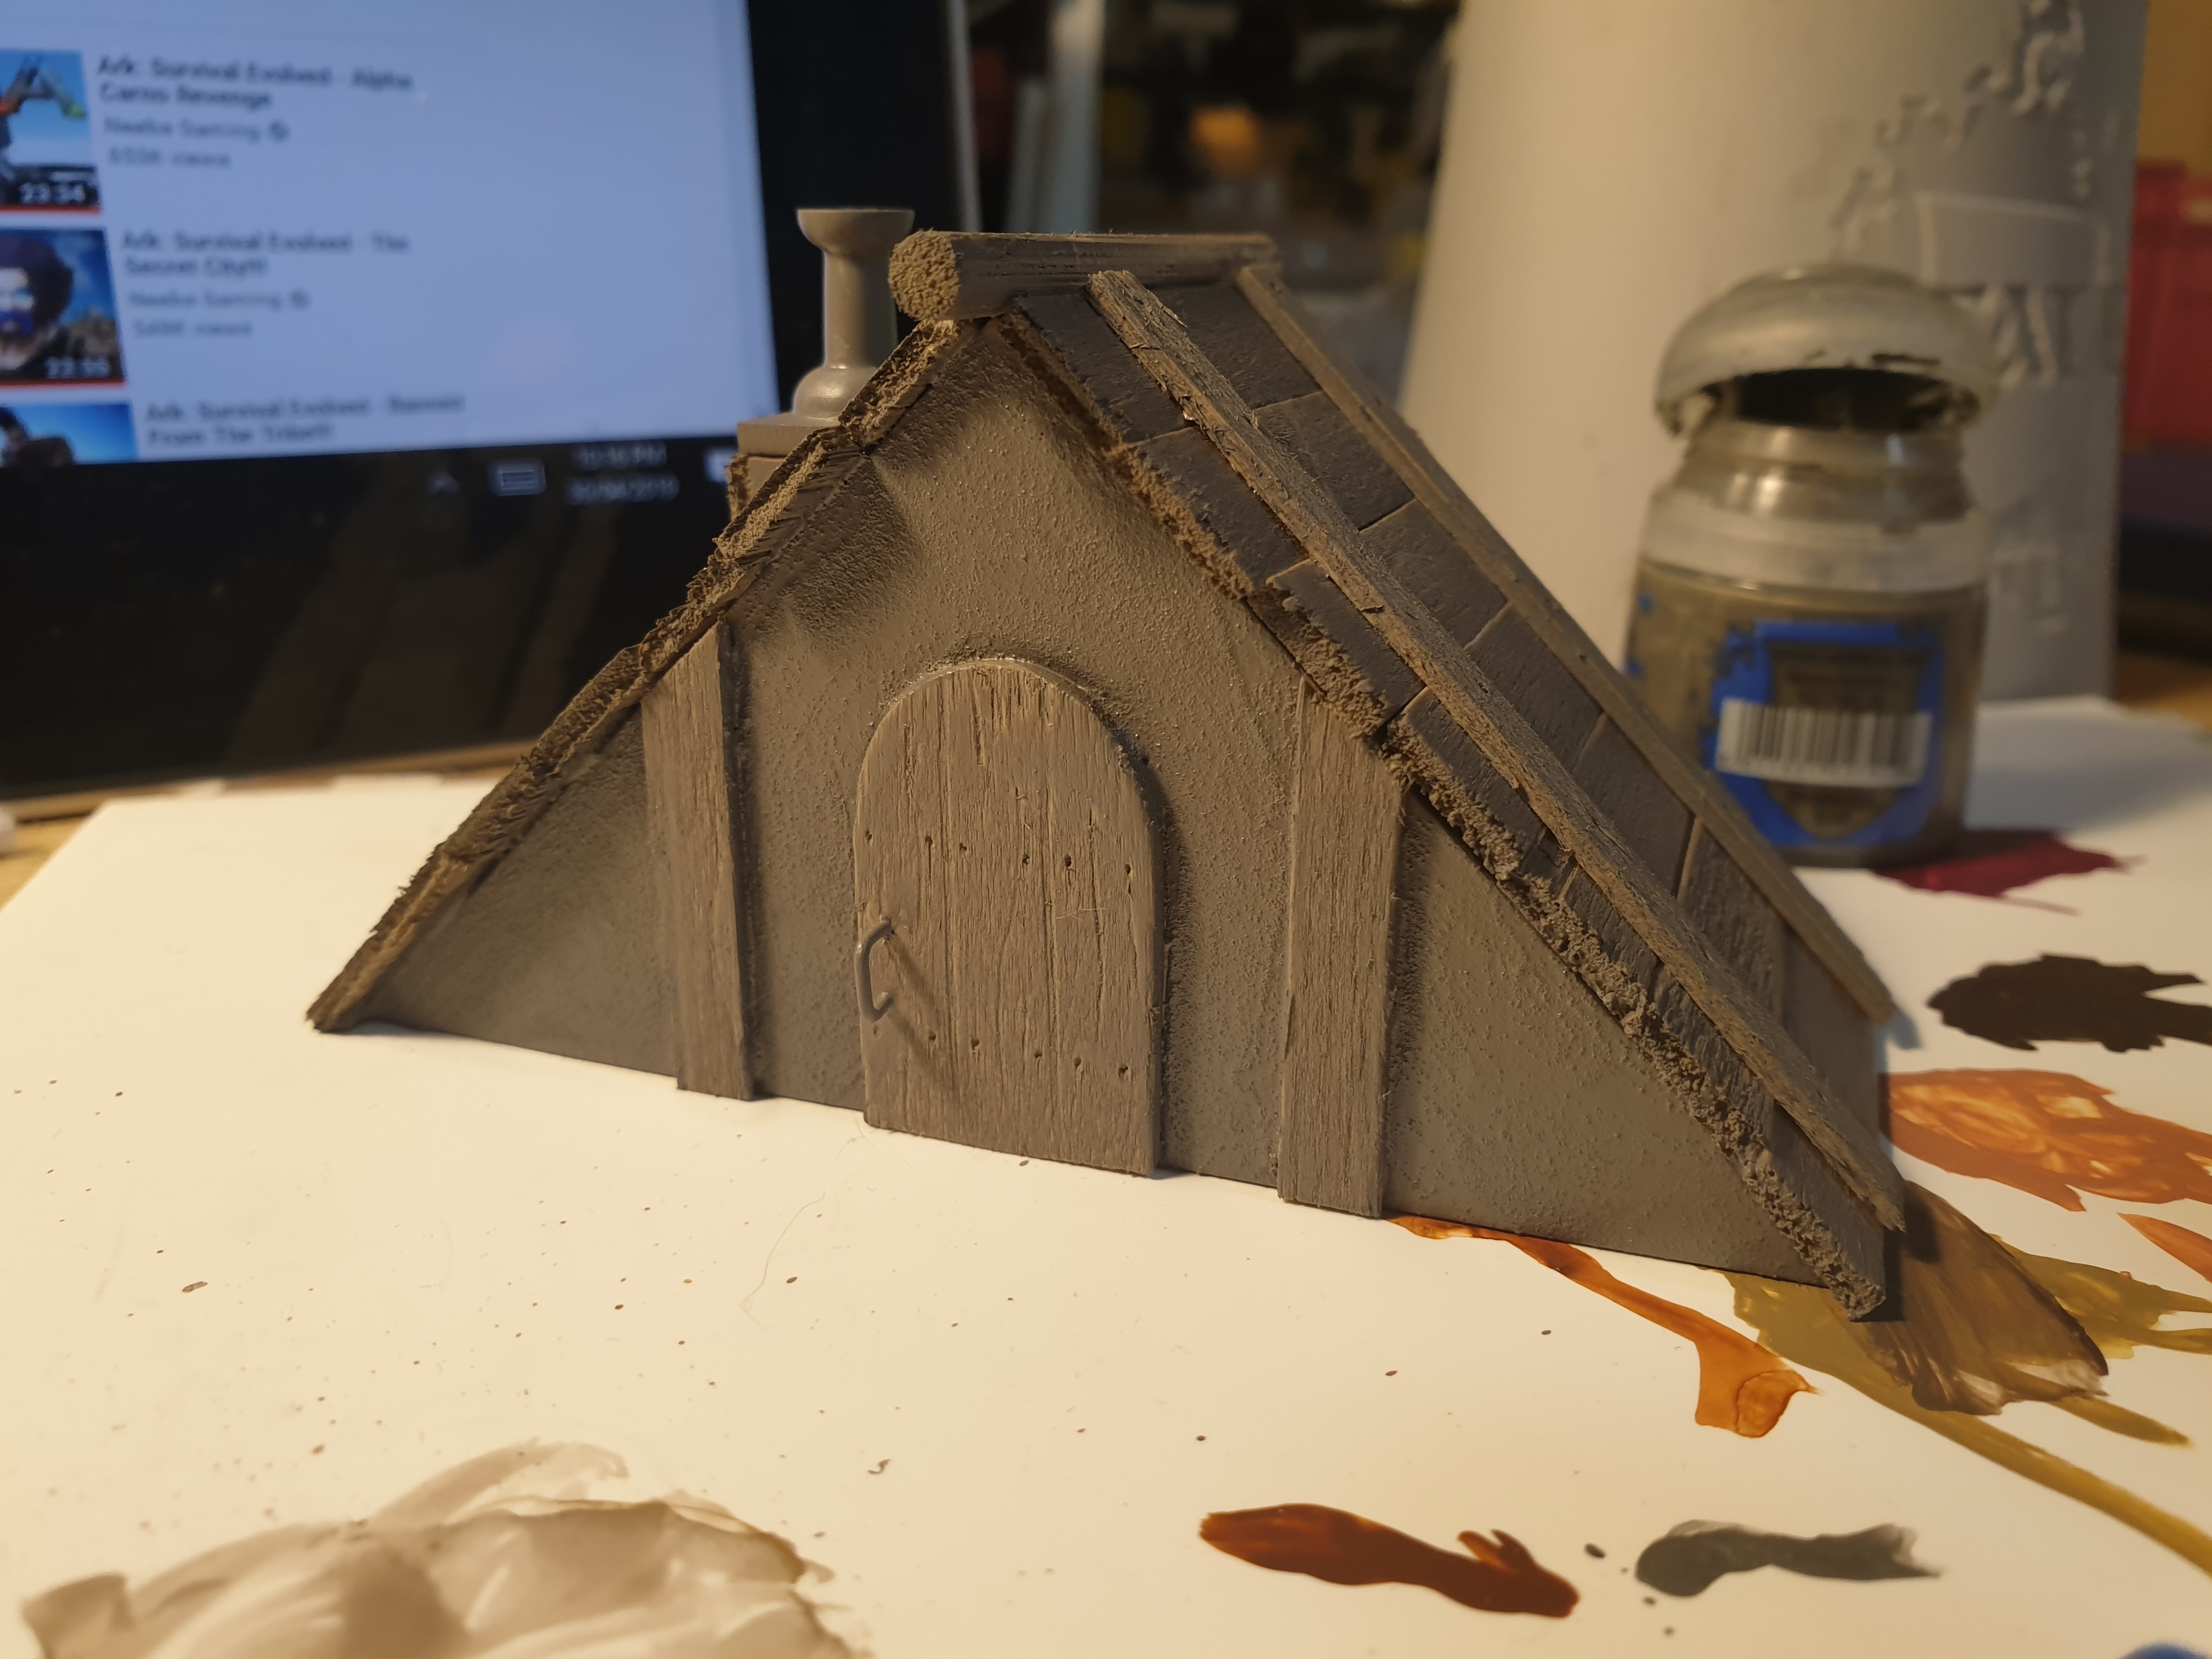
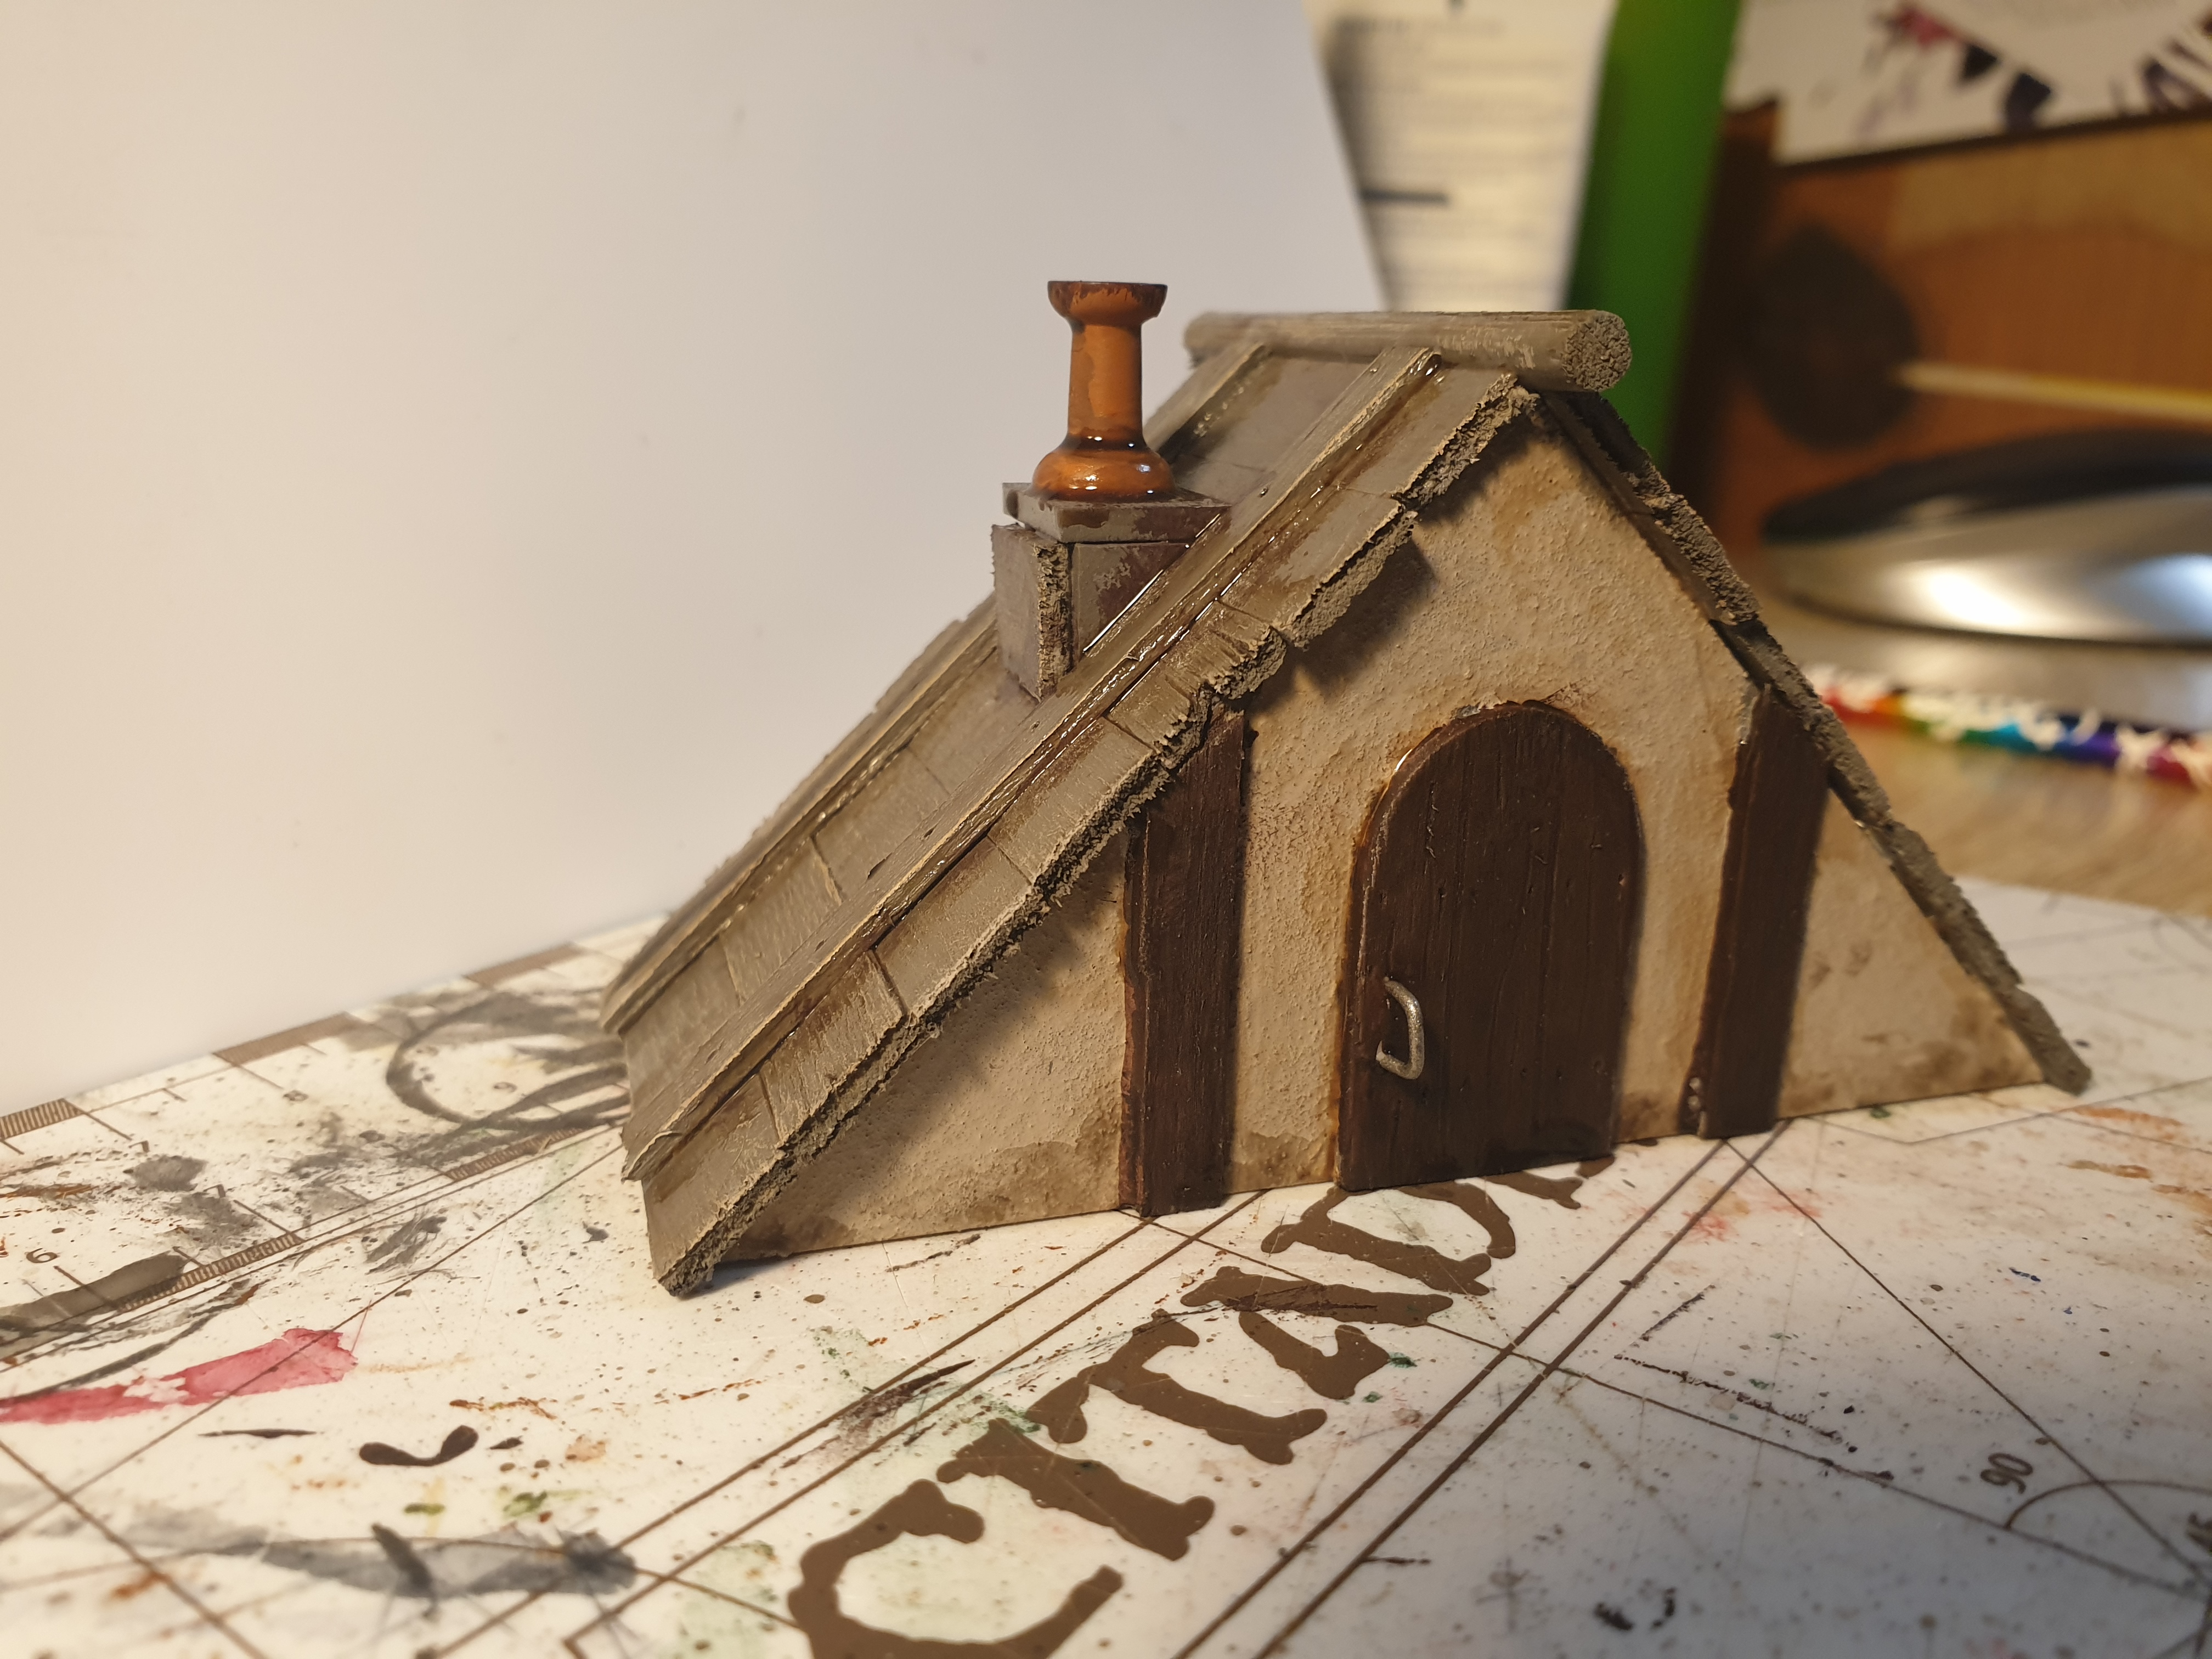
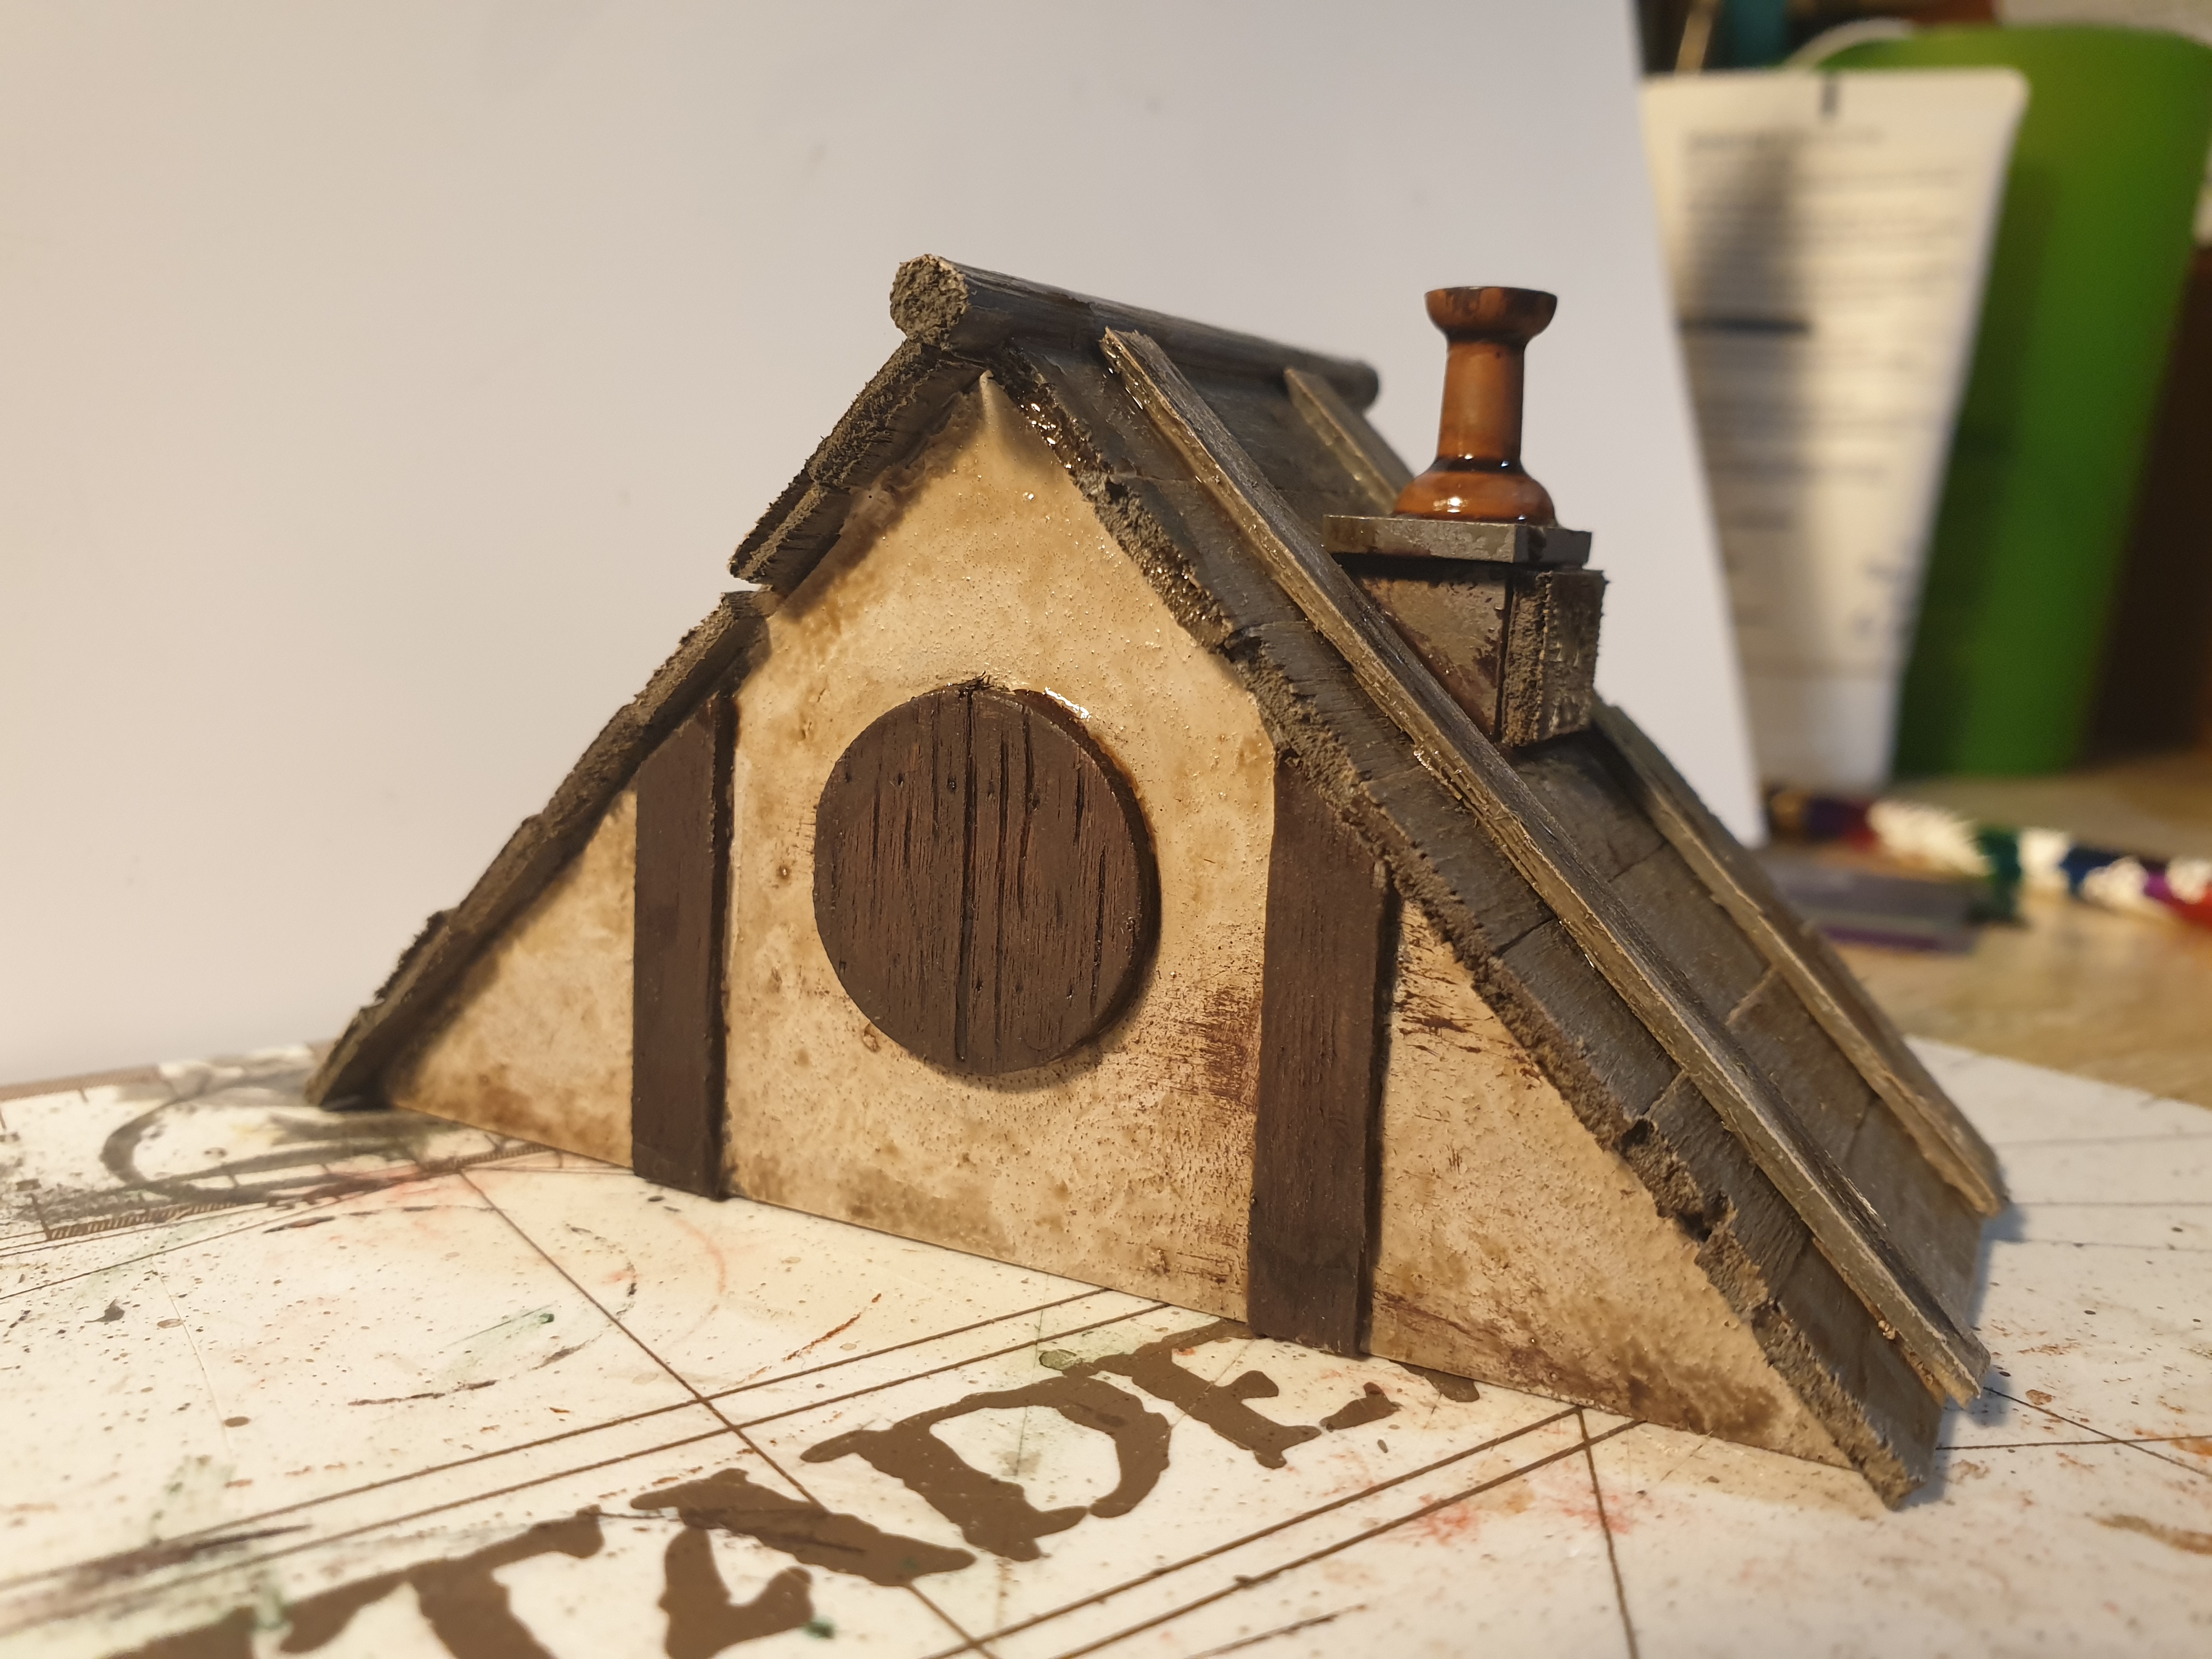
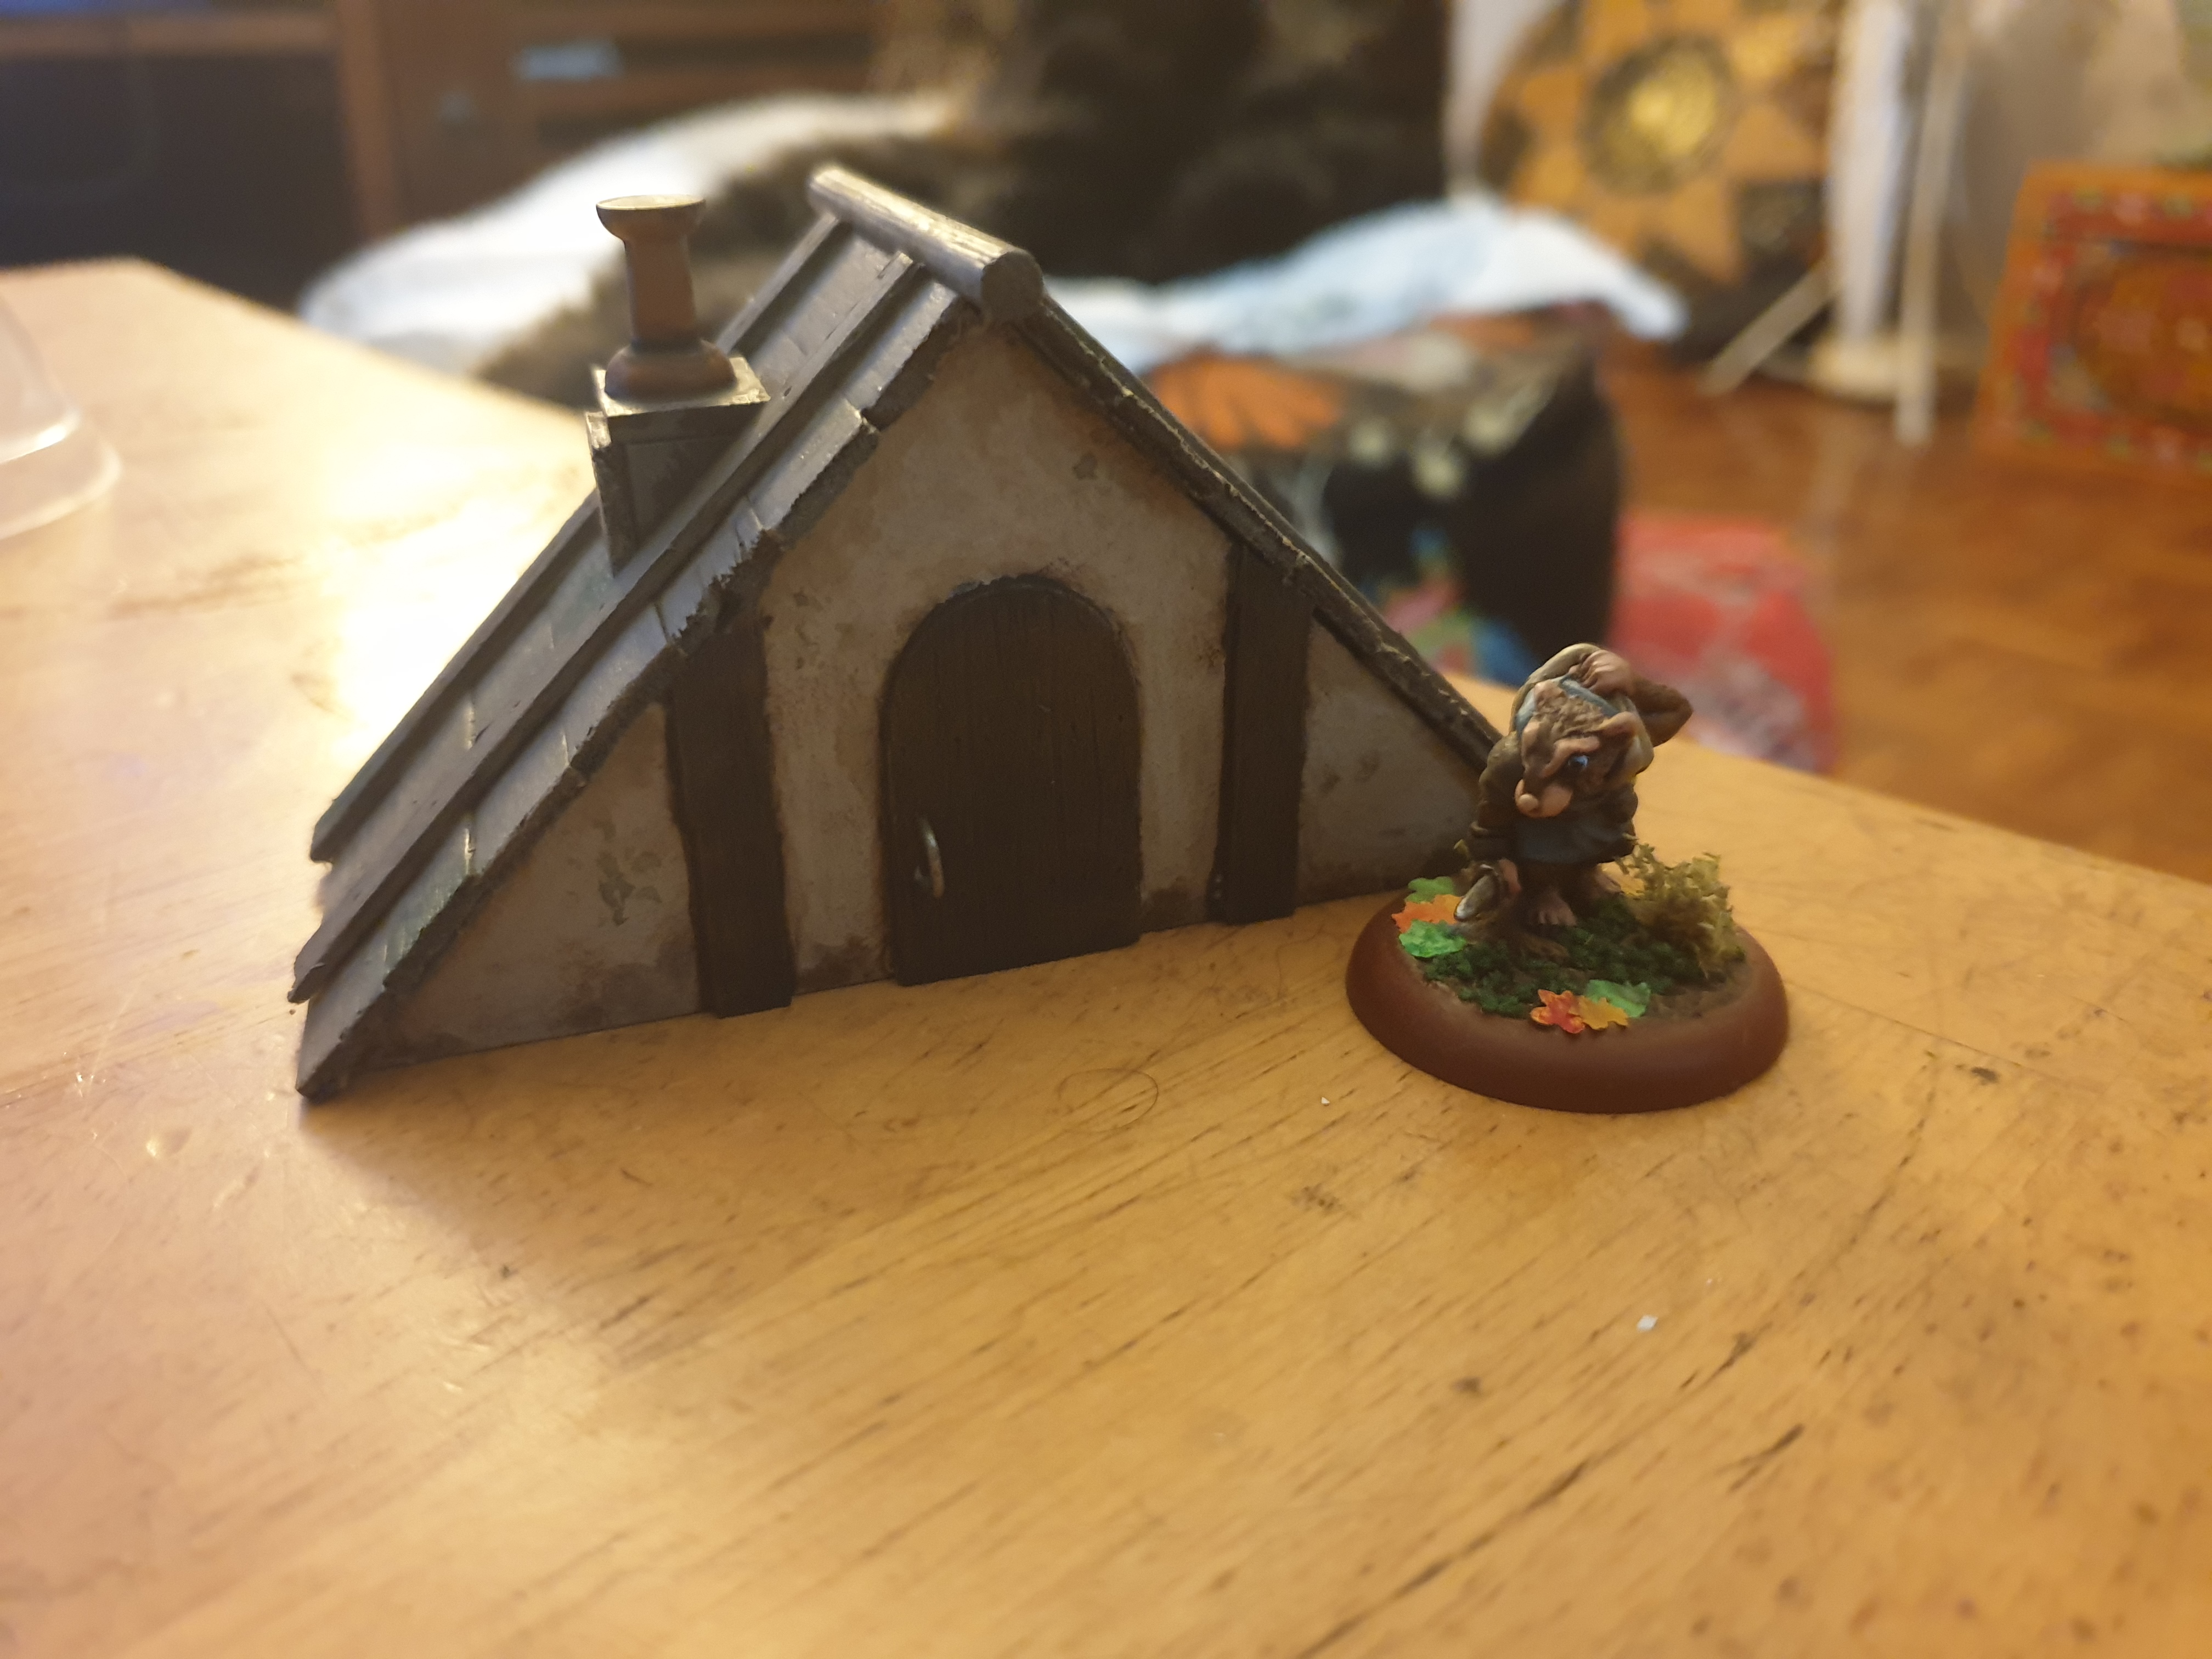
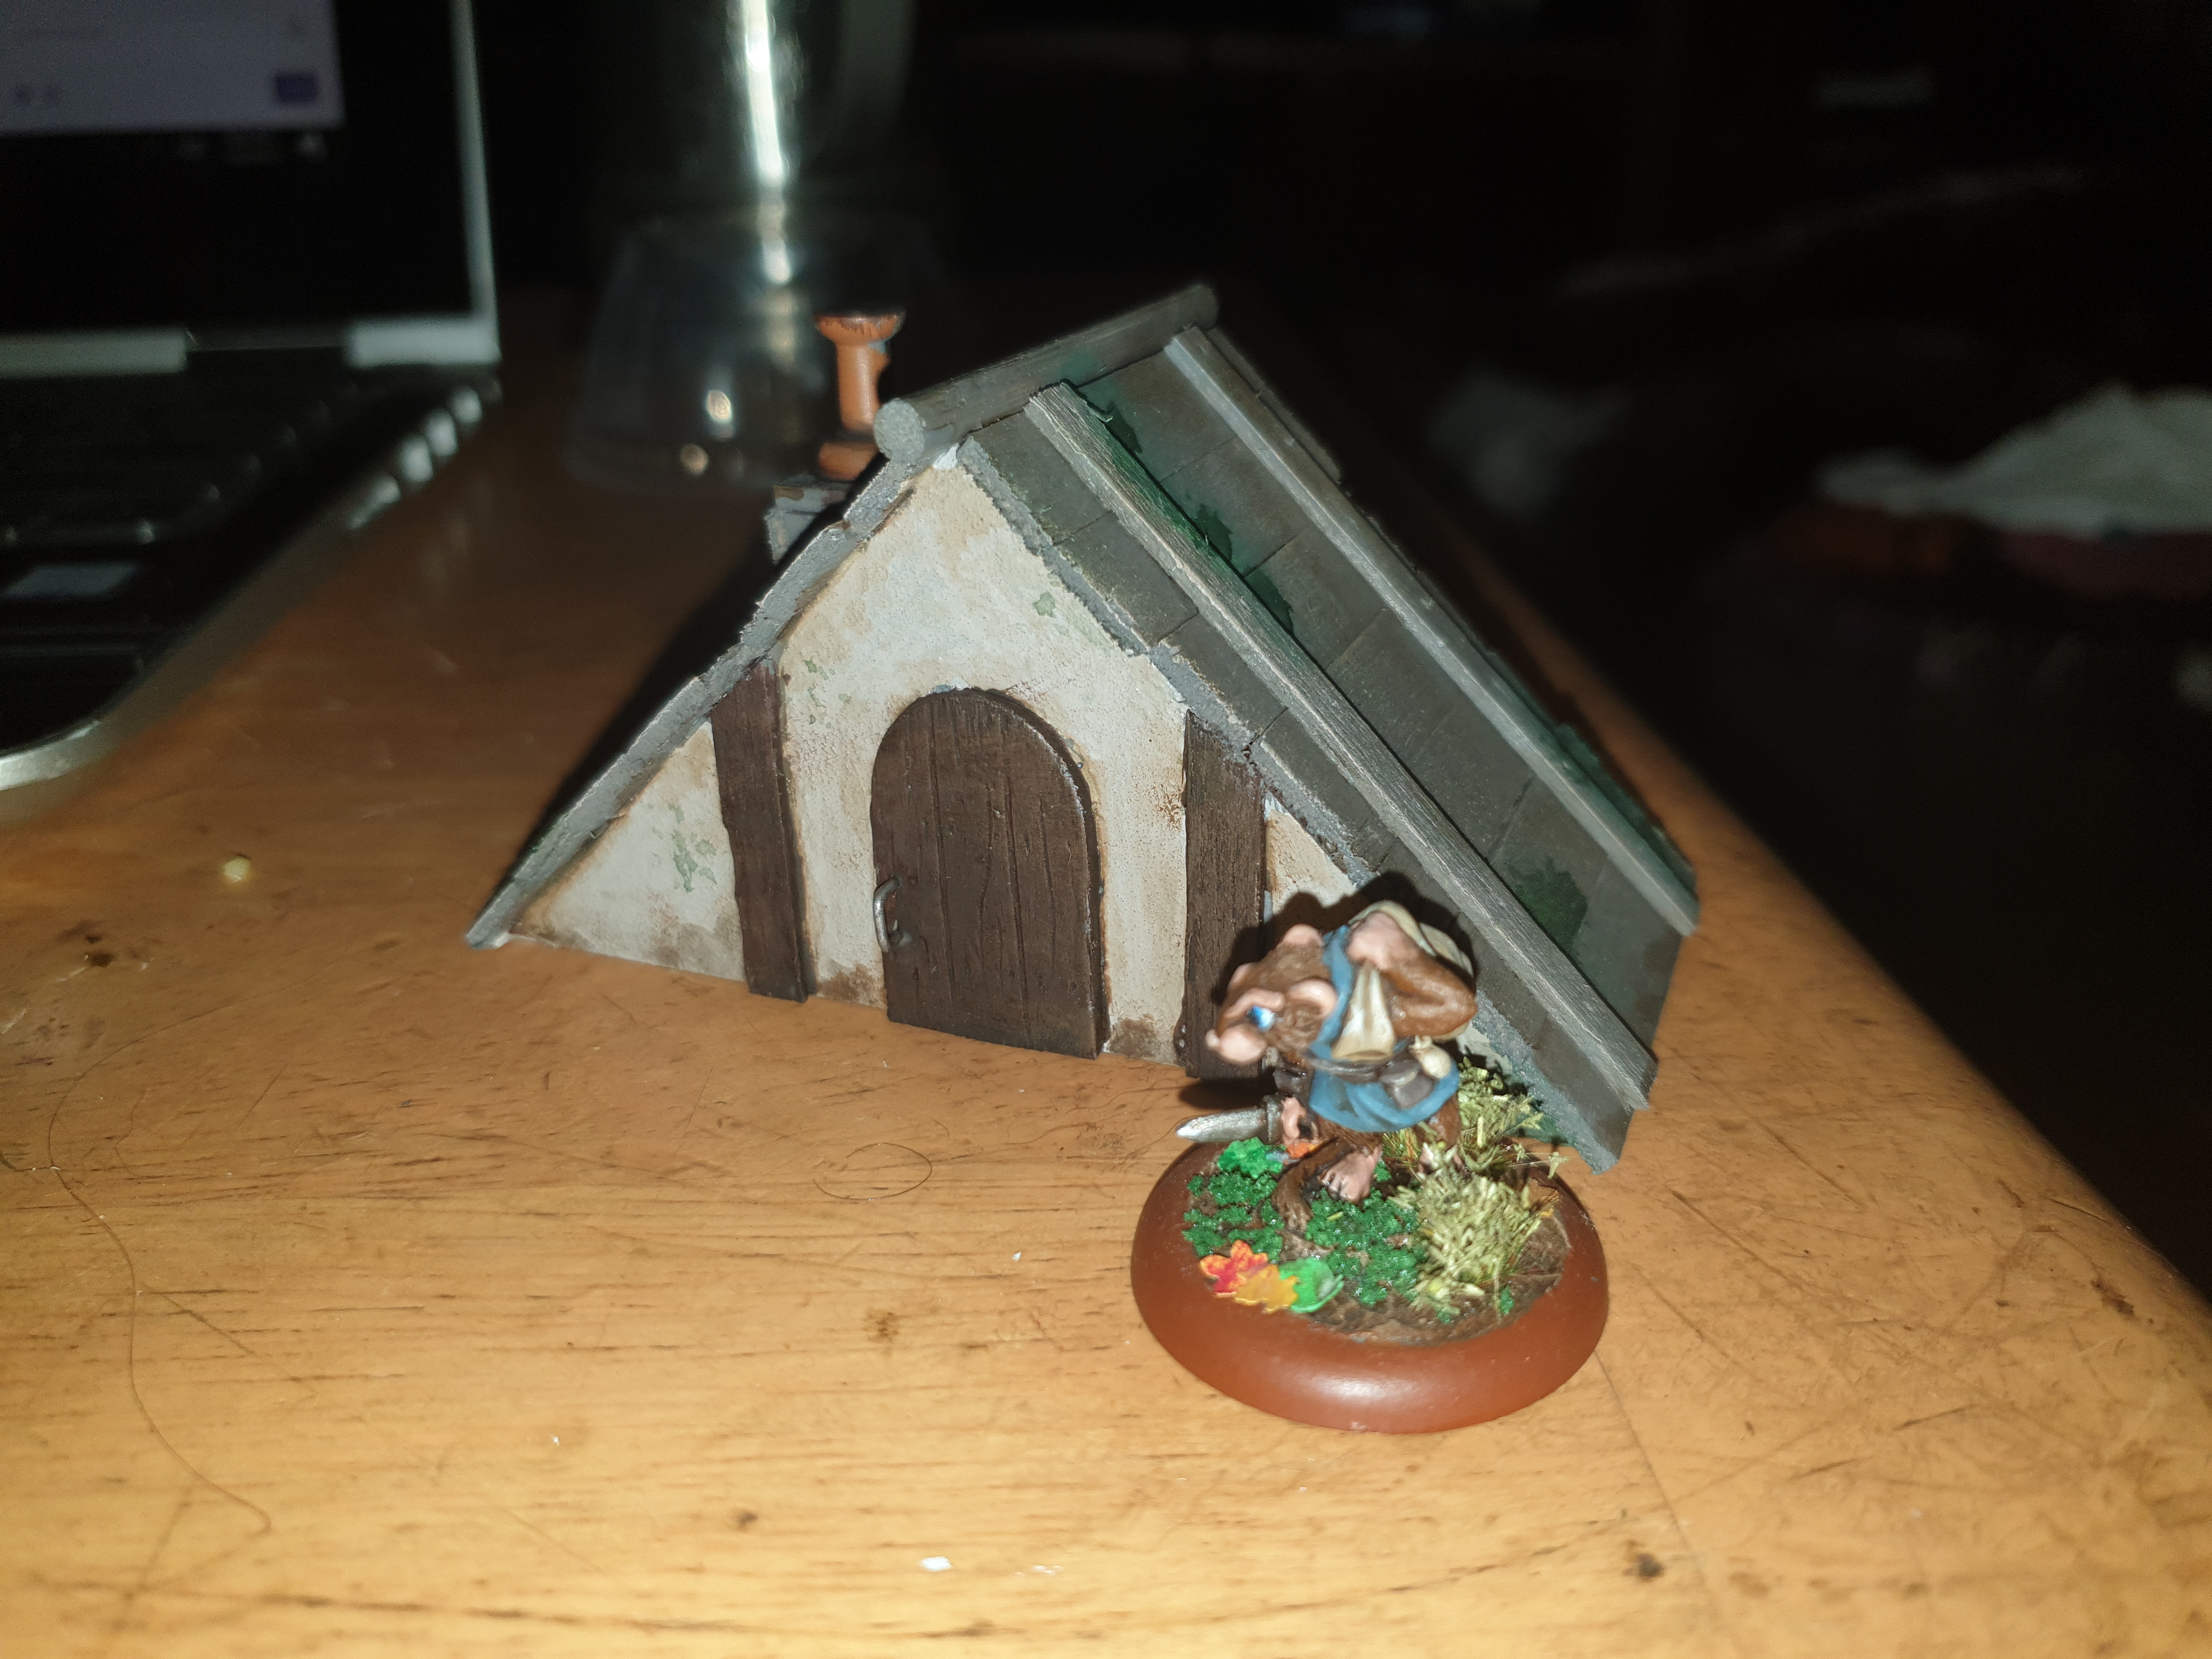

The walls were done with two layers of Typhus corrosion to make a fine textured surface. That takes the wash well. I then sponged off the excess with a tissue and added some stippled browns and greens for moss and mud around the eaves.
Now onto some really old stuff…
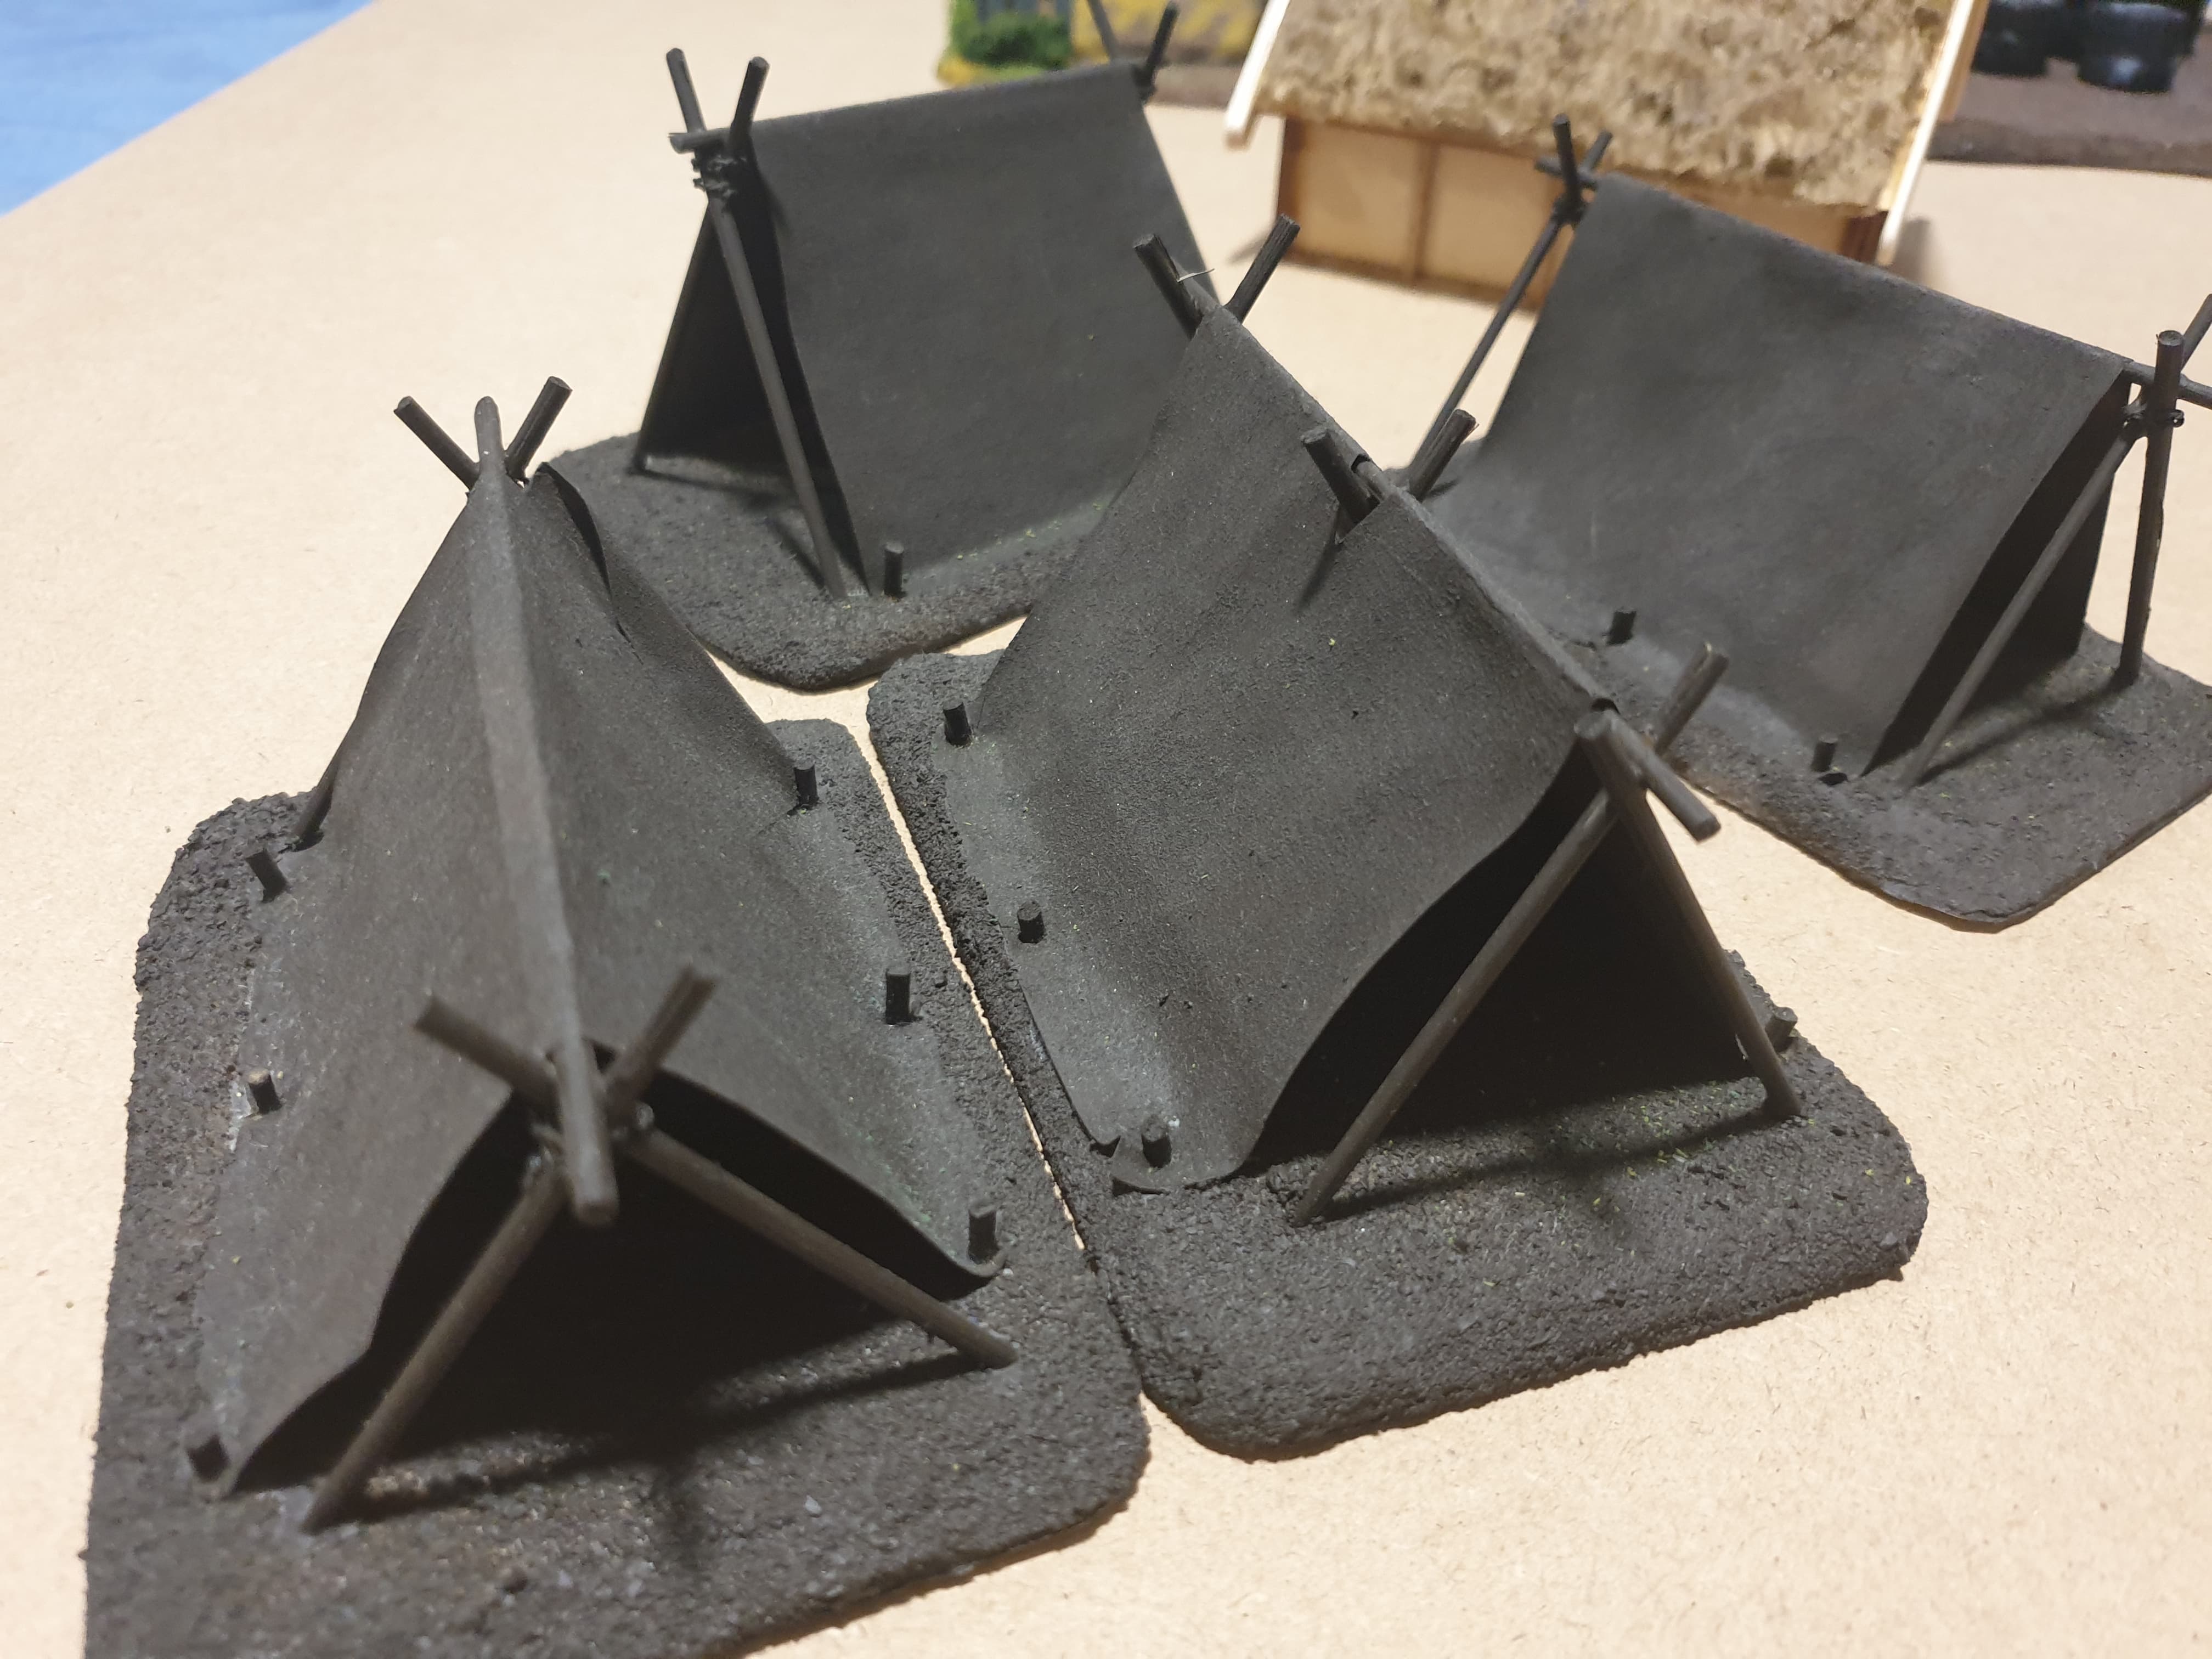
Spring Cleaning part 1
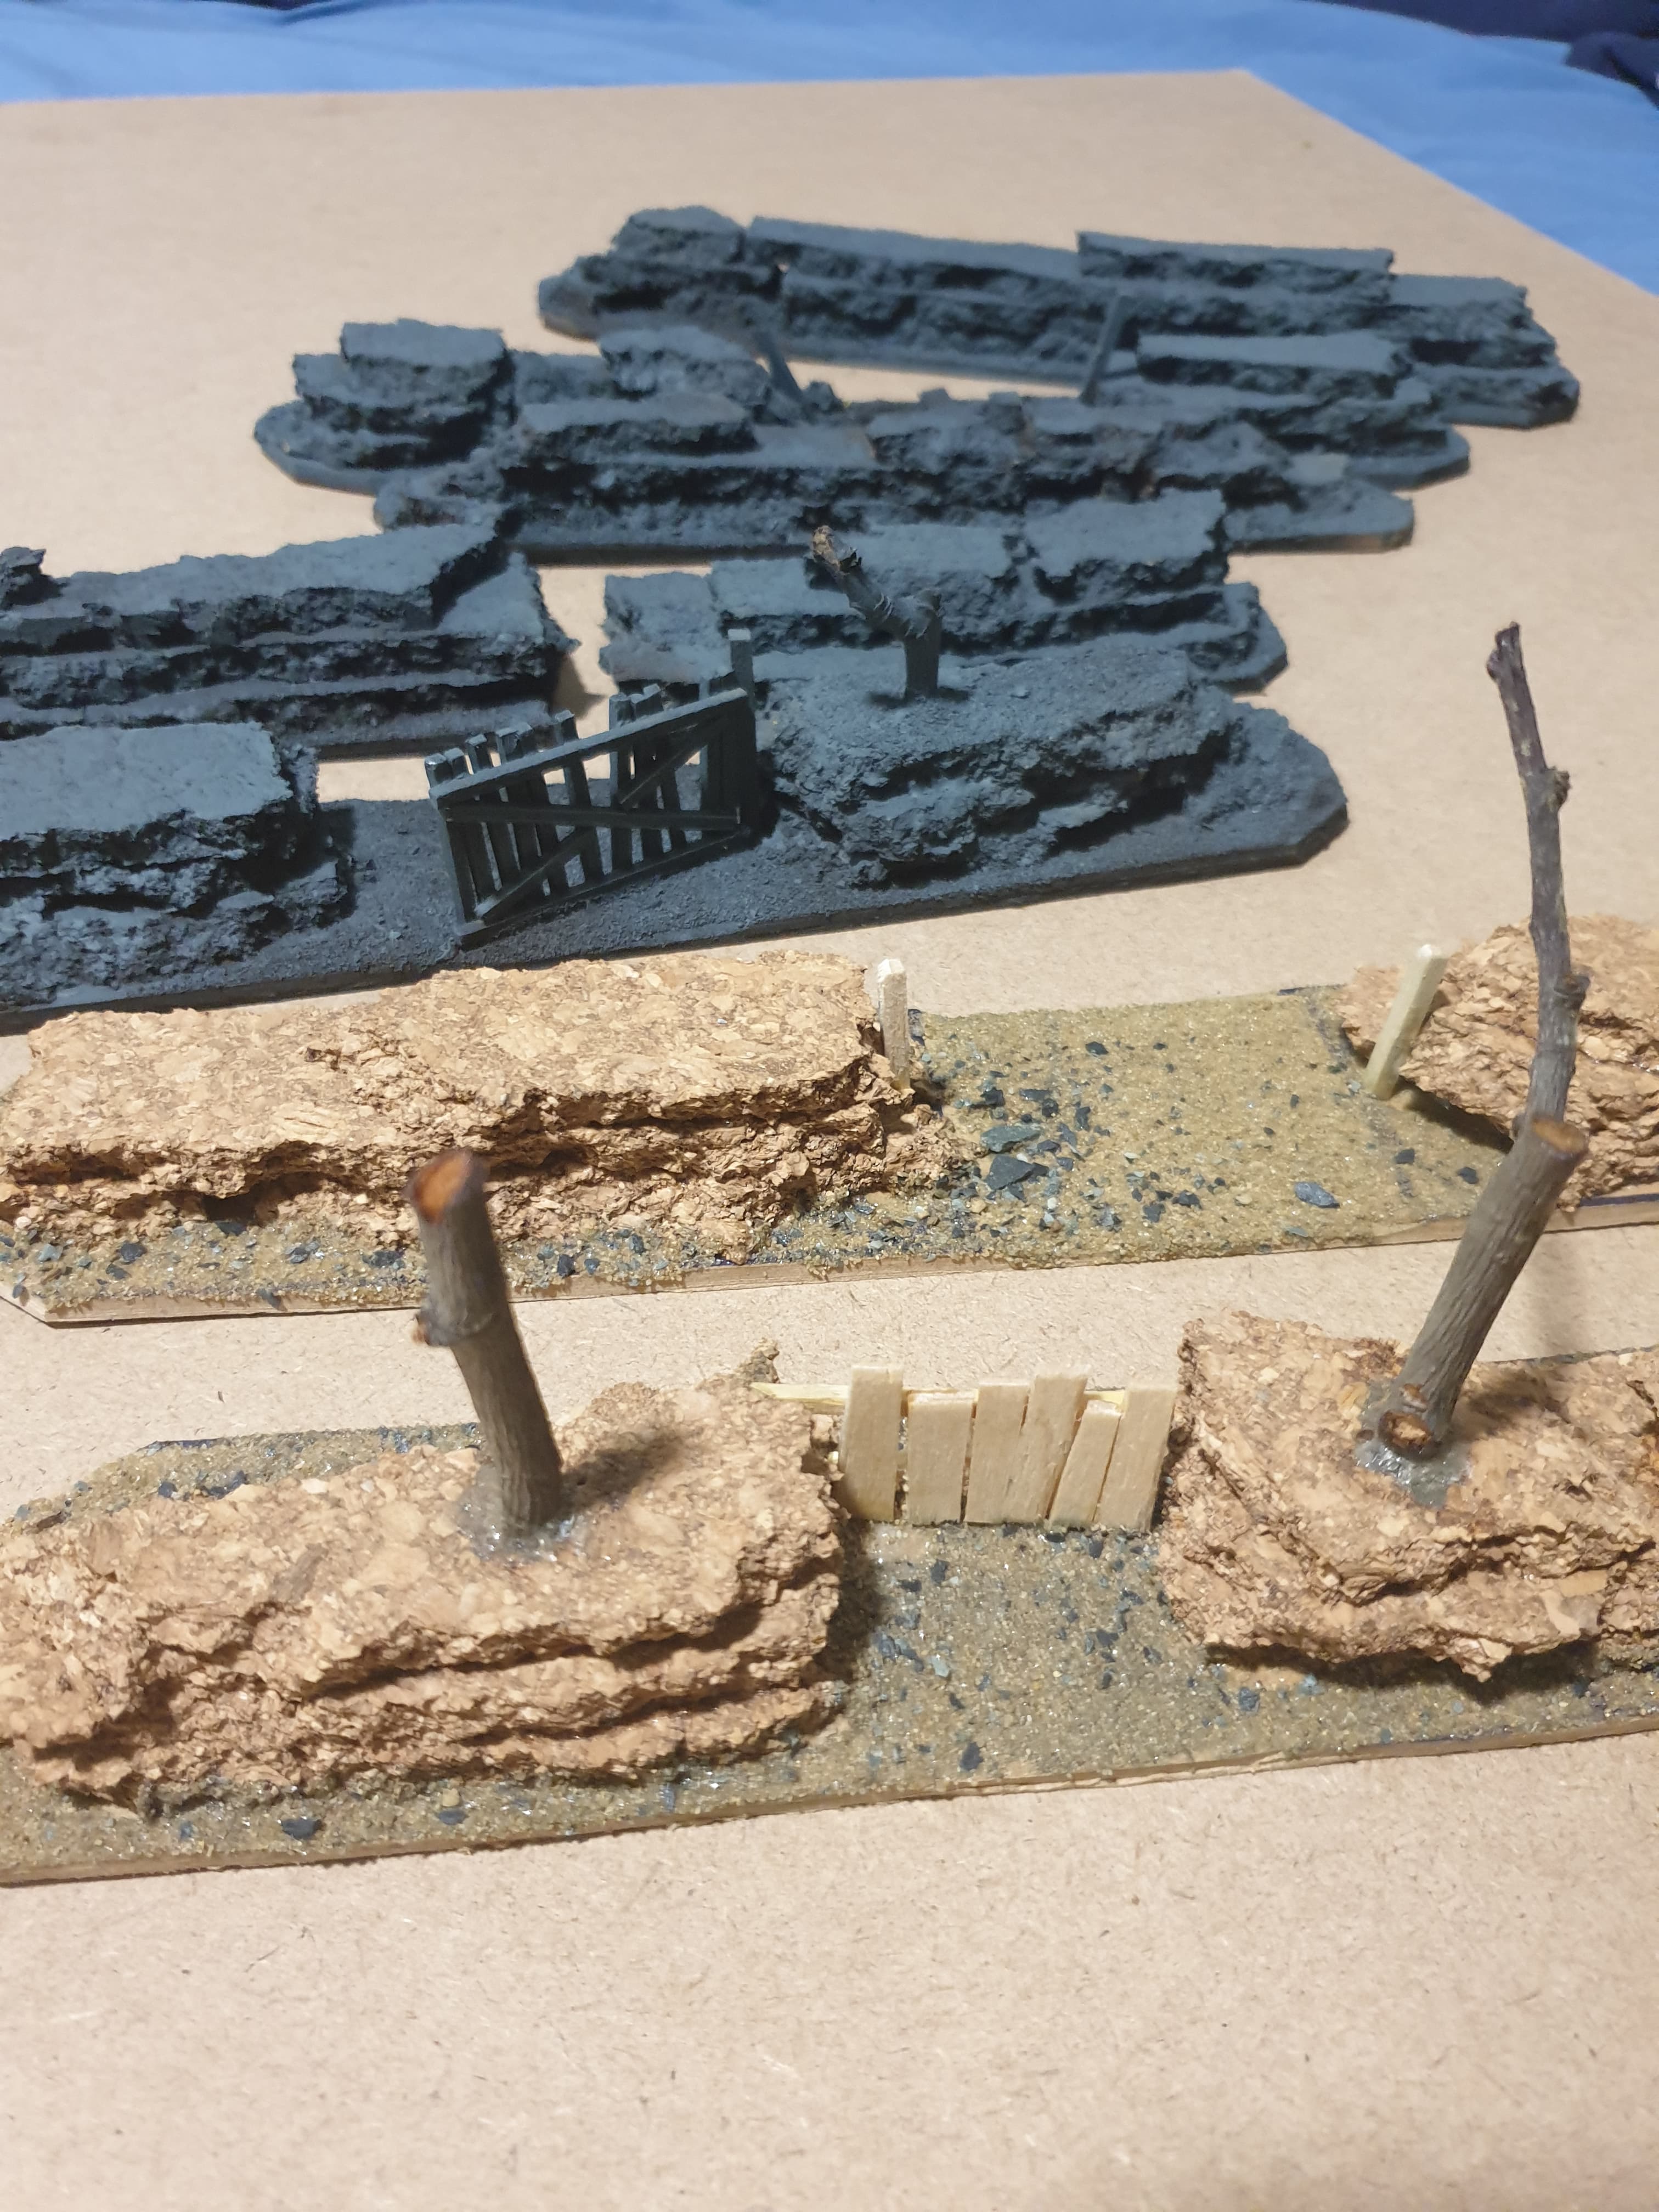
My spring cleaning challenge it to complete this dusty stack of unfinished terrain. They range in age from a year to decades, the tiny Shrewholm house is the latest, the paper tents were for Lord of the Rings back in it’s GW hey day.
A couple of these items might get away with a paint job but most of them have some serious detailing, new roofs to build, crops to sow and more.

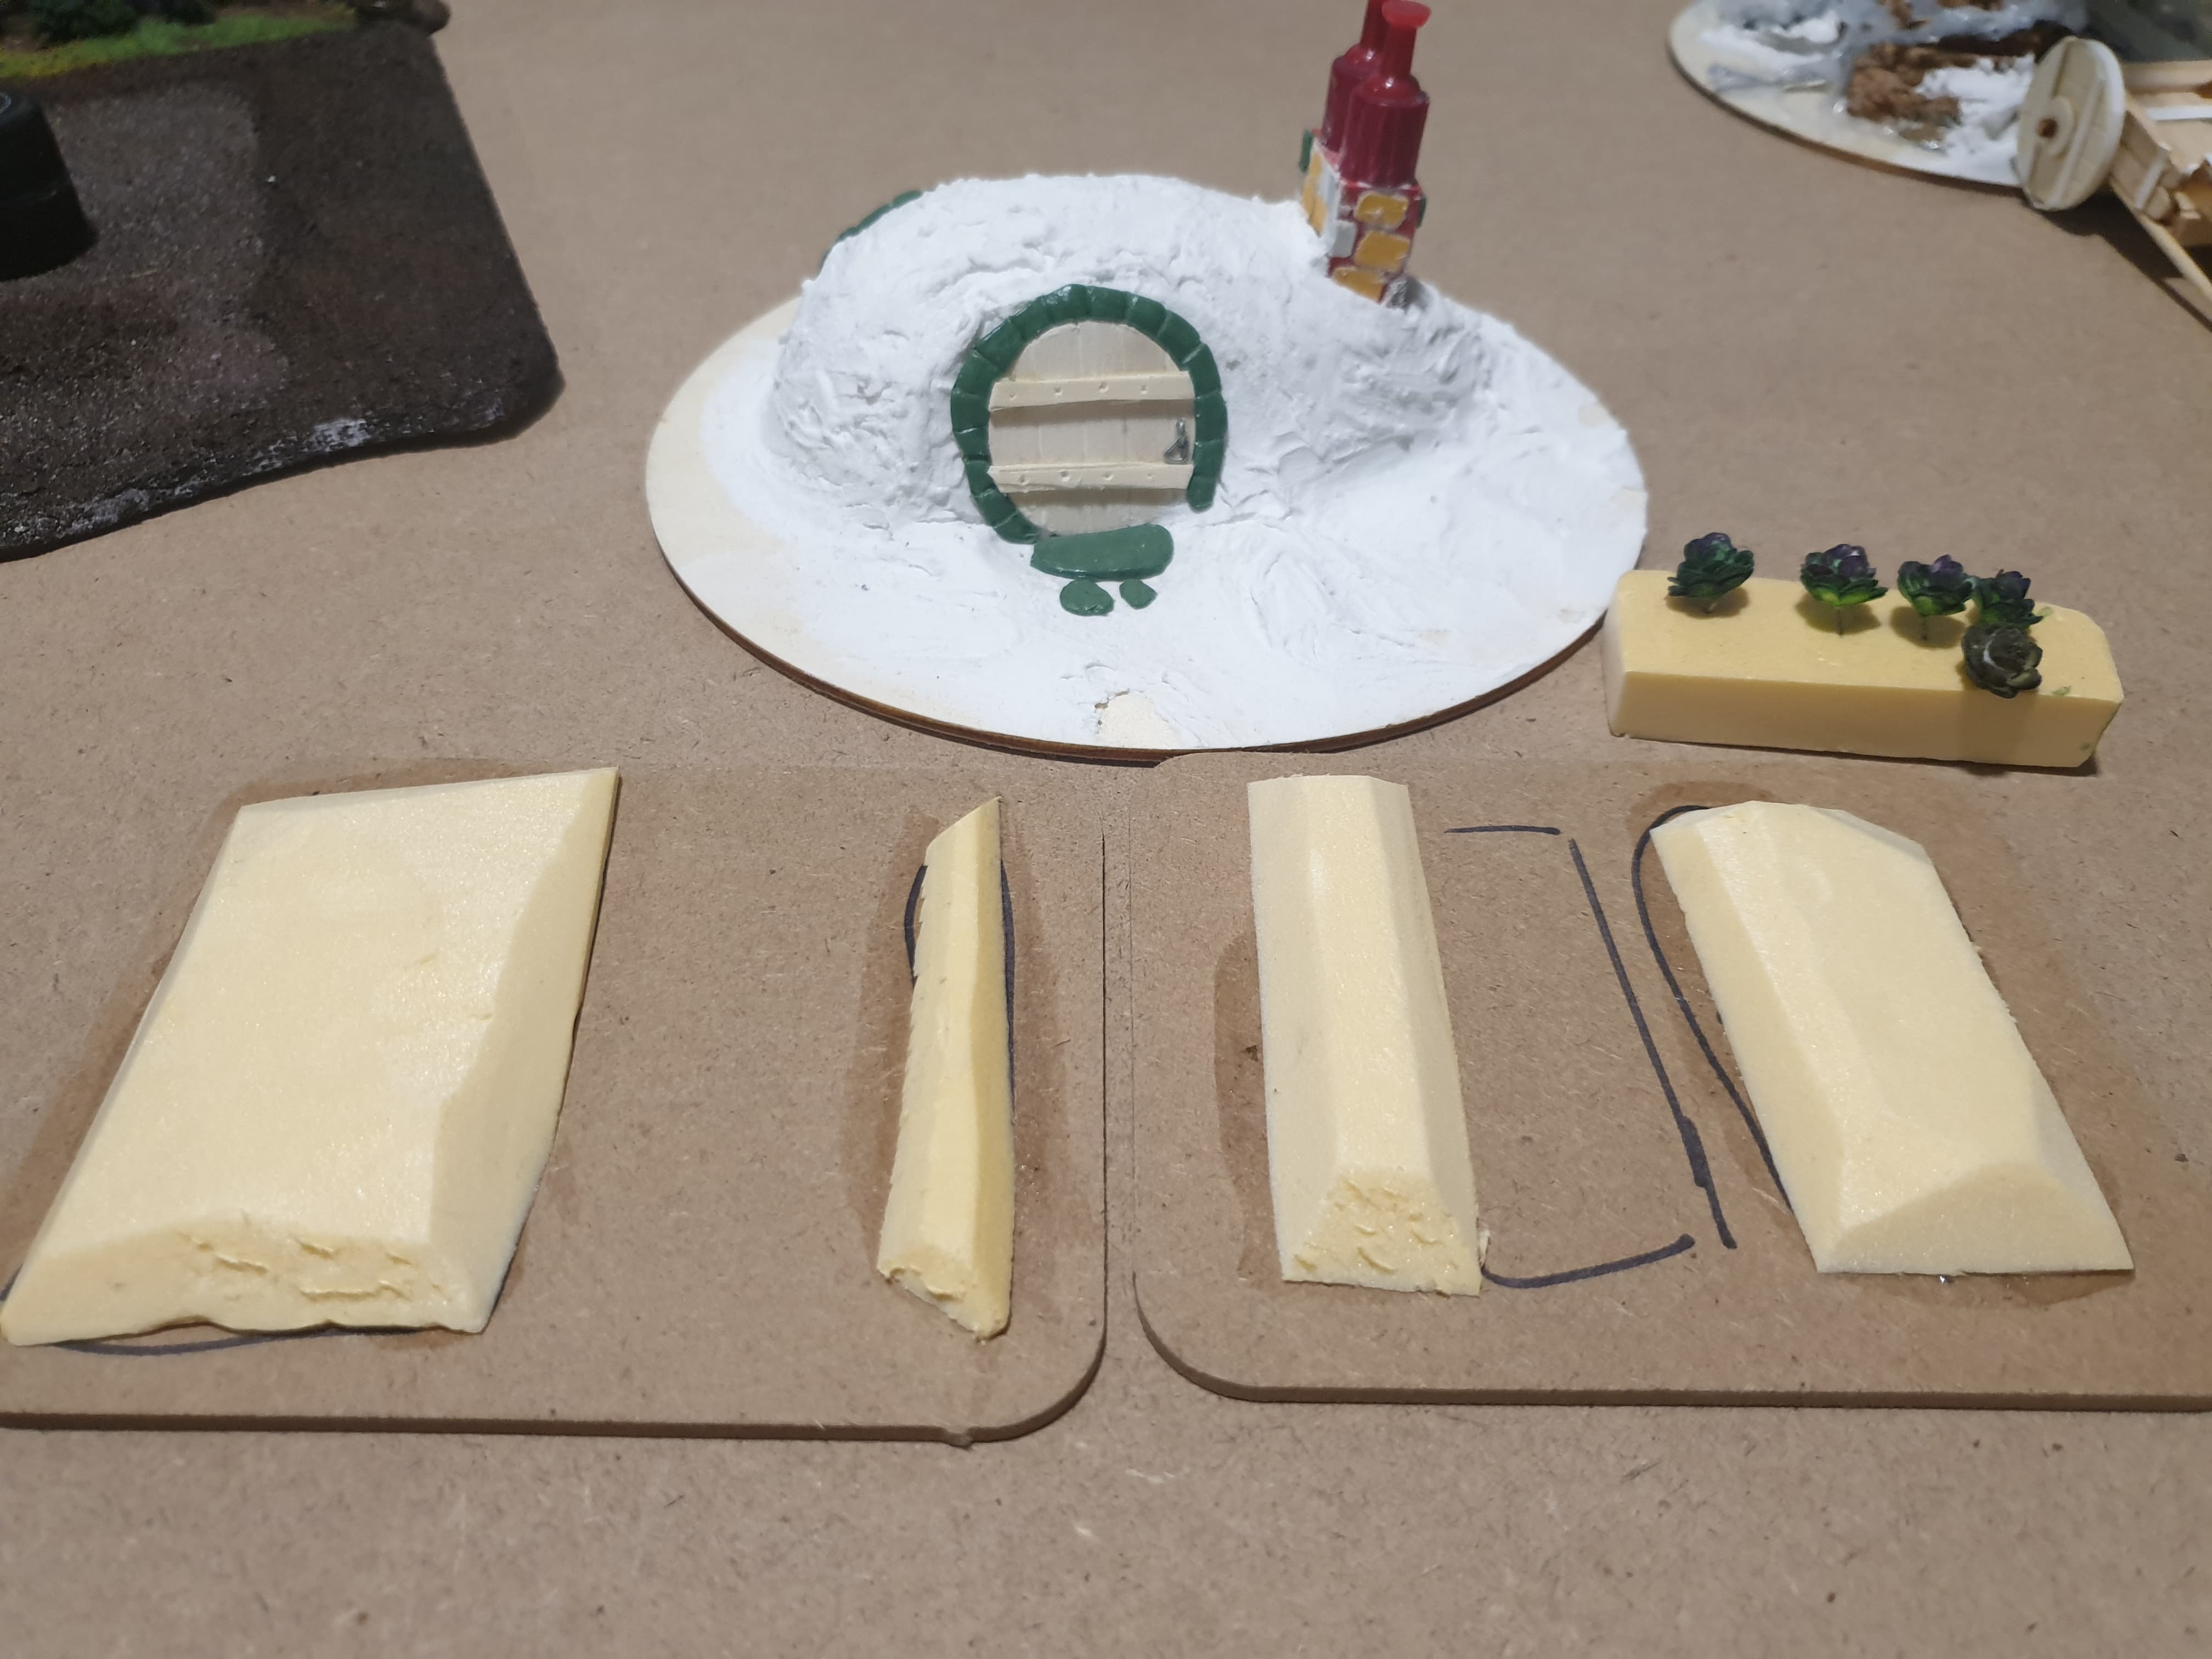

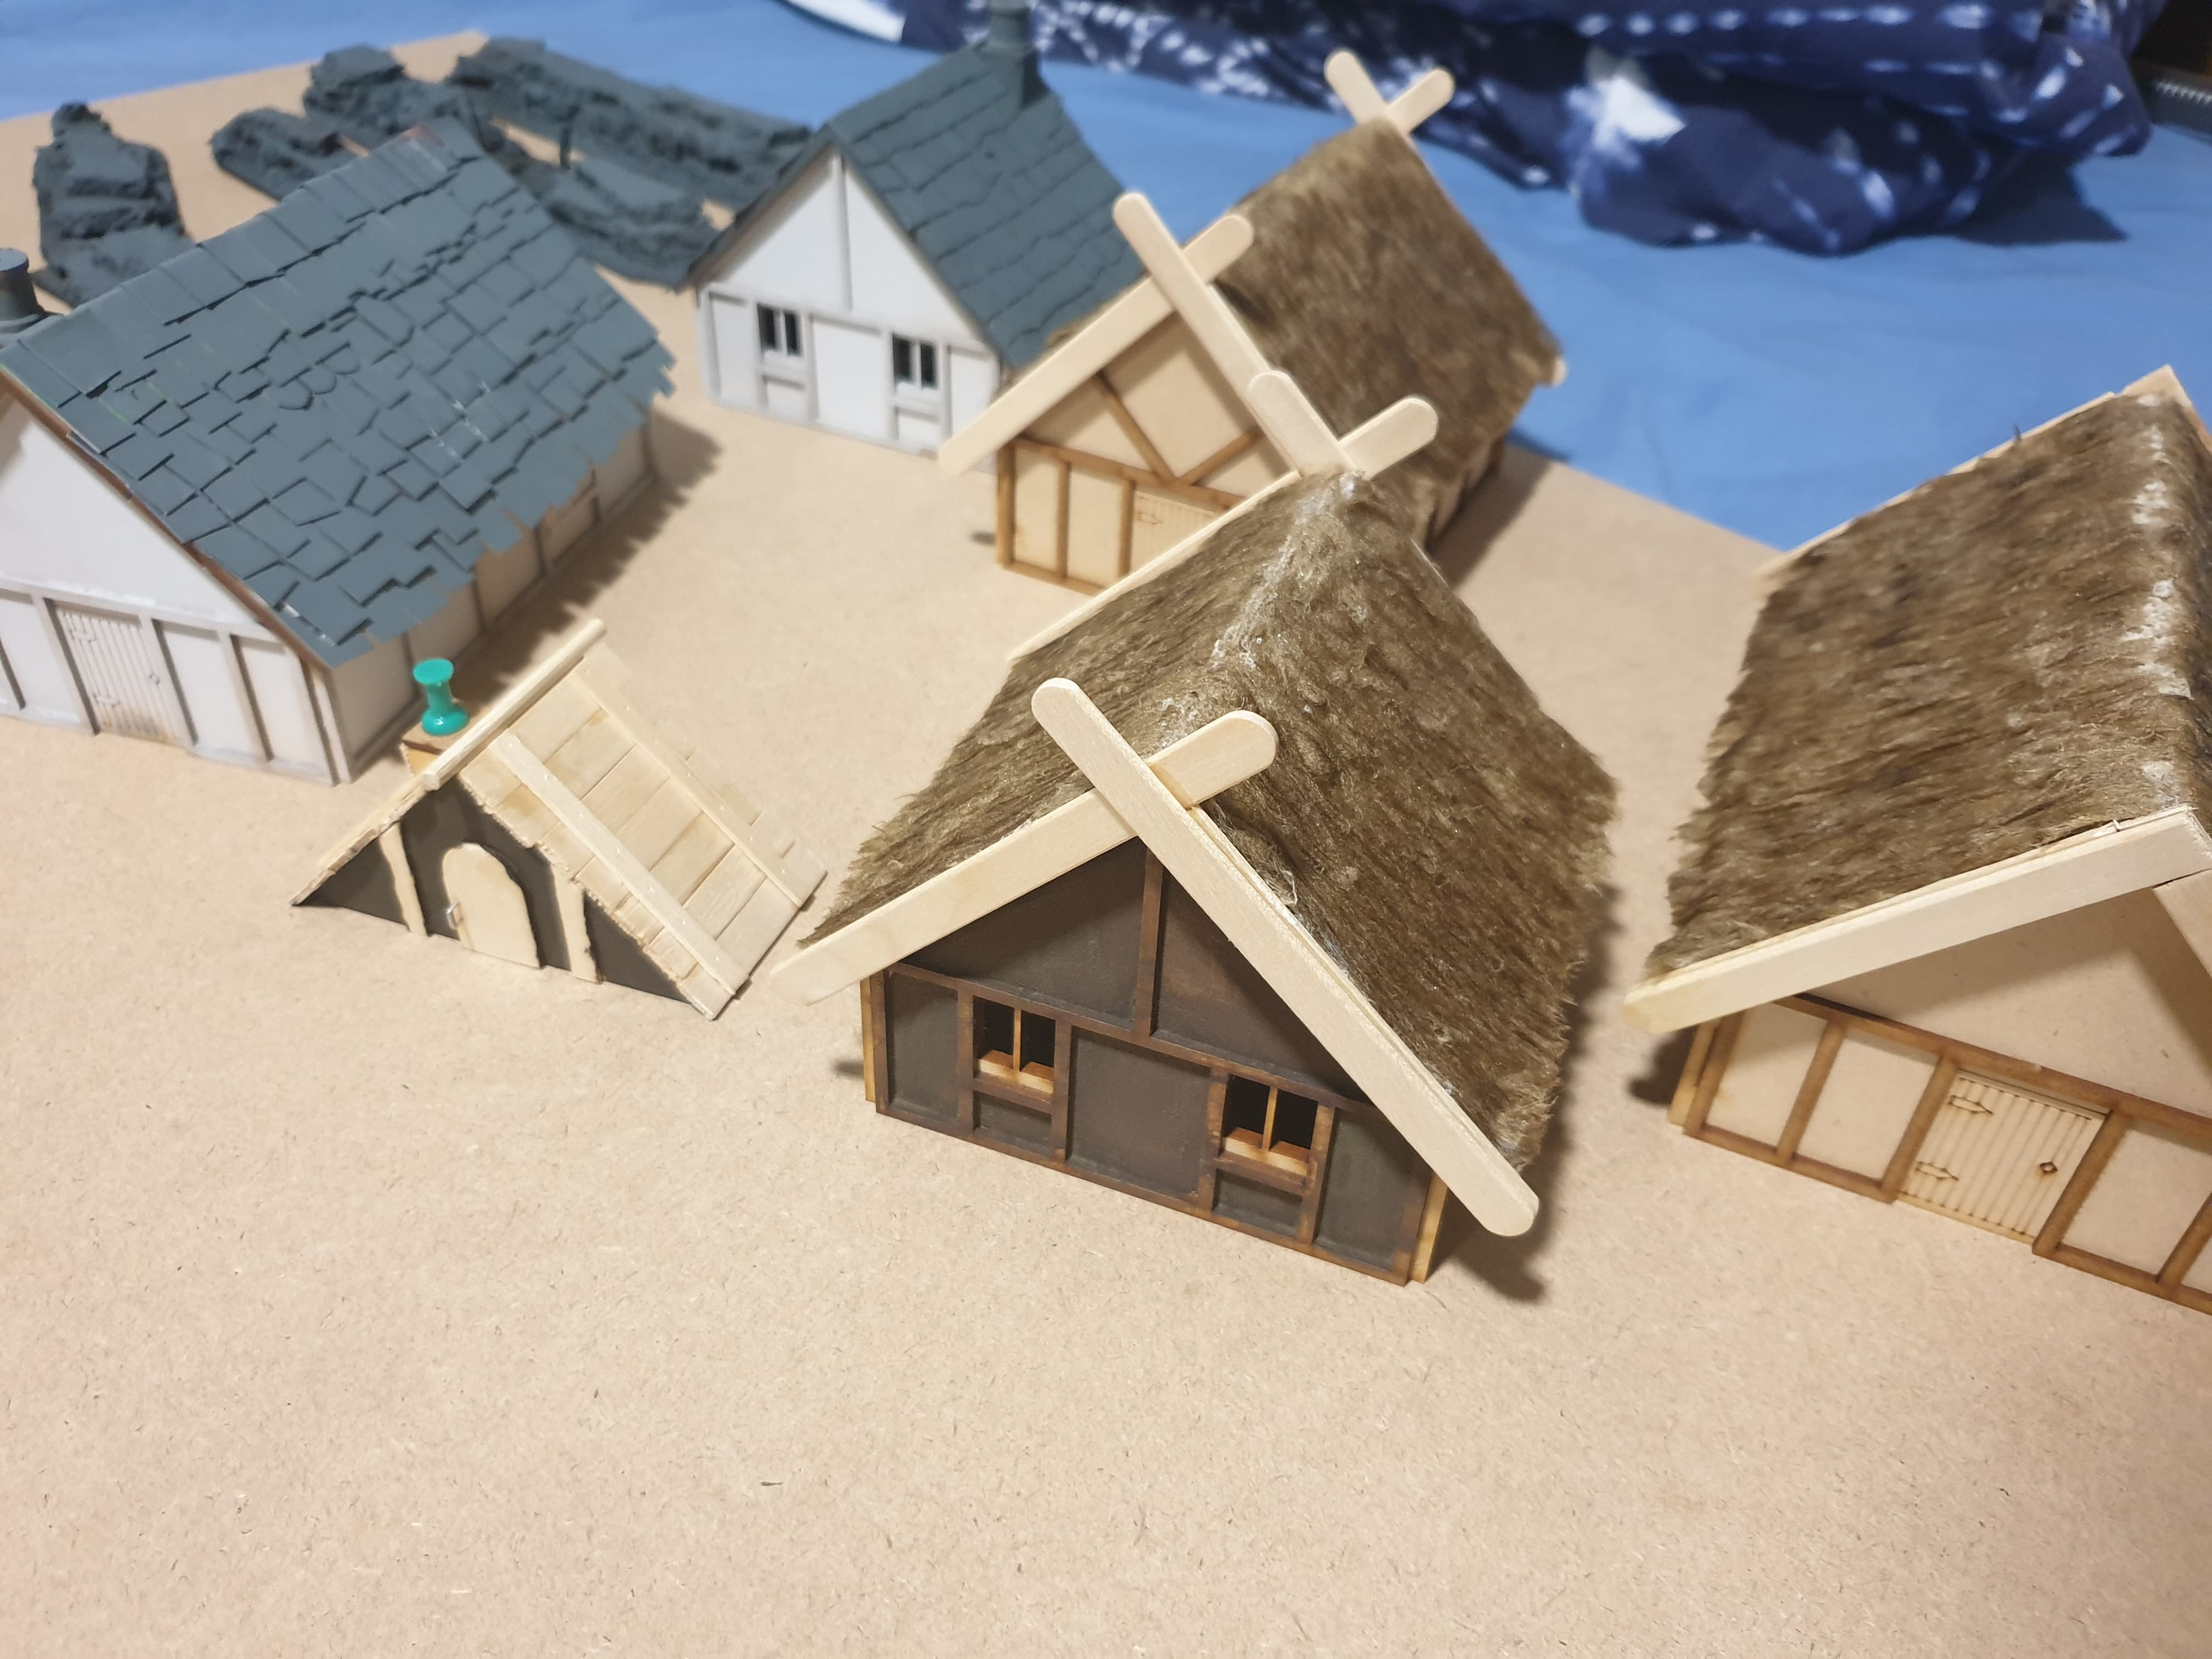
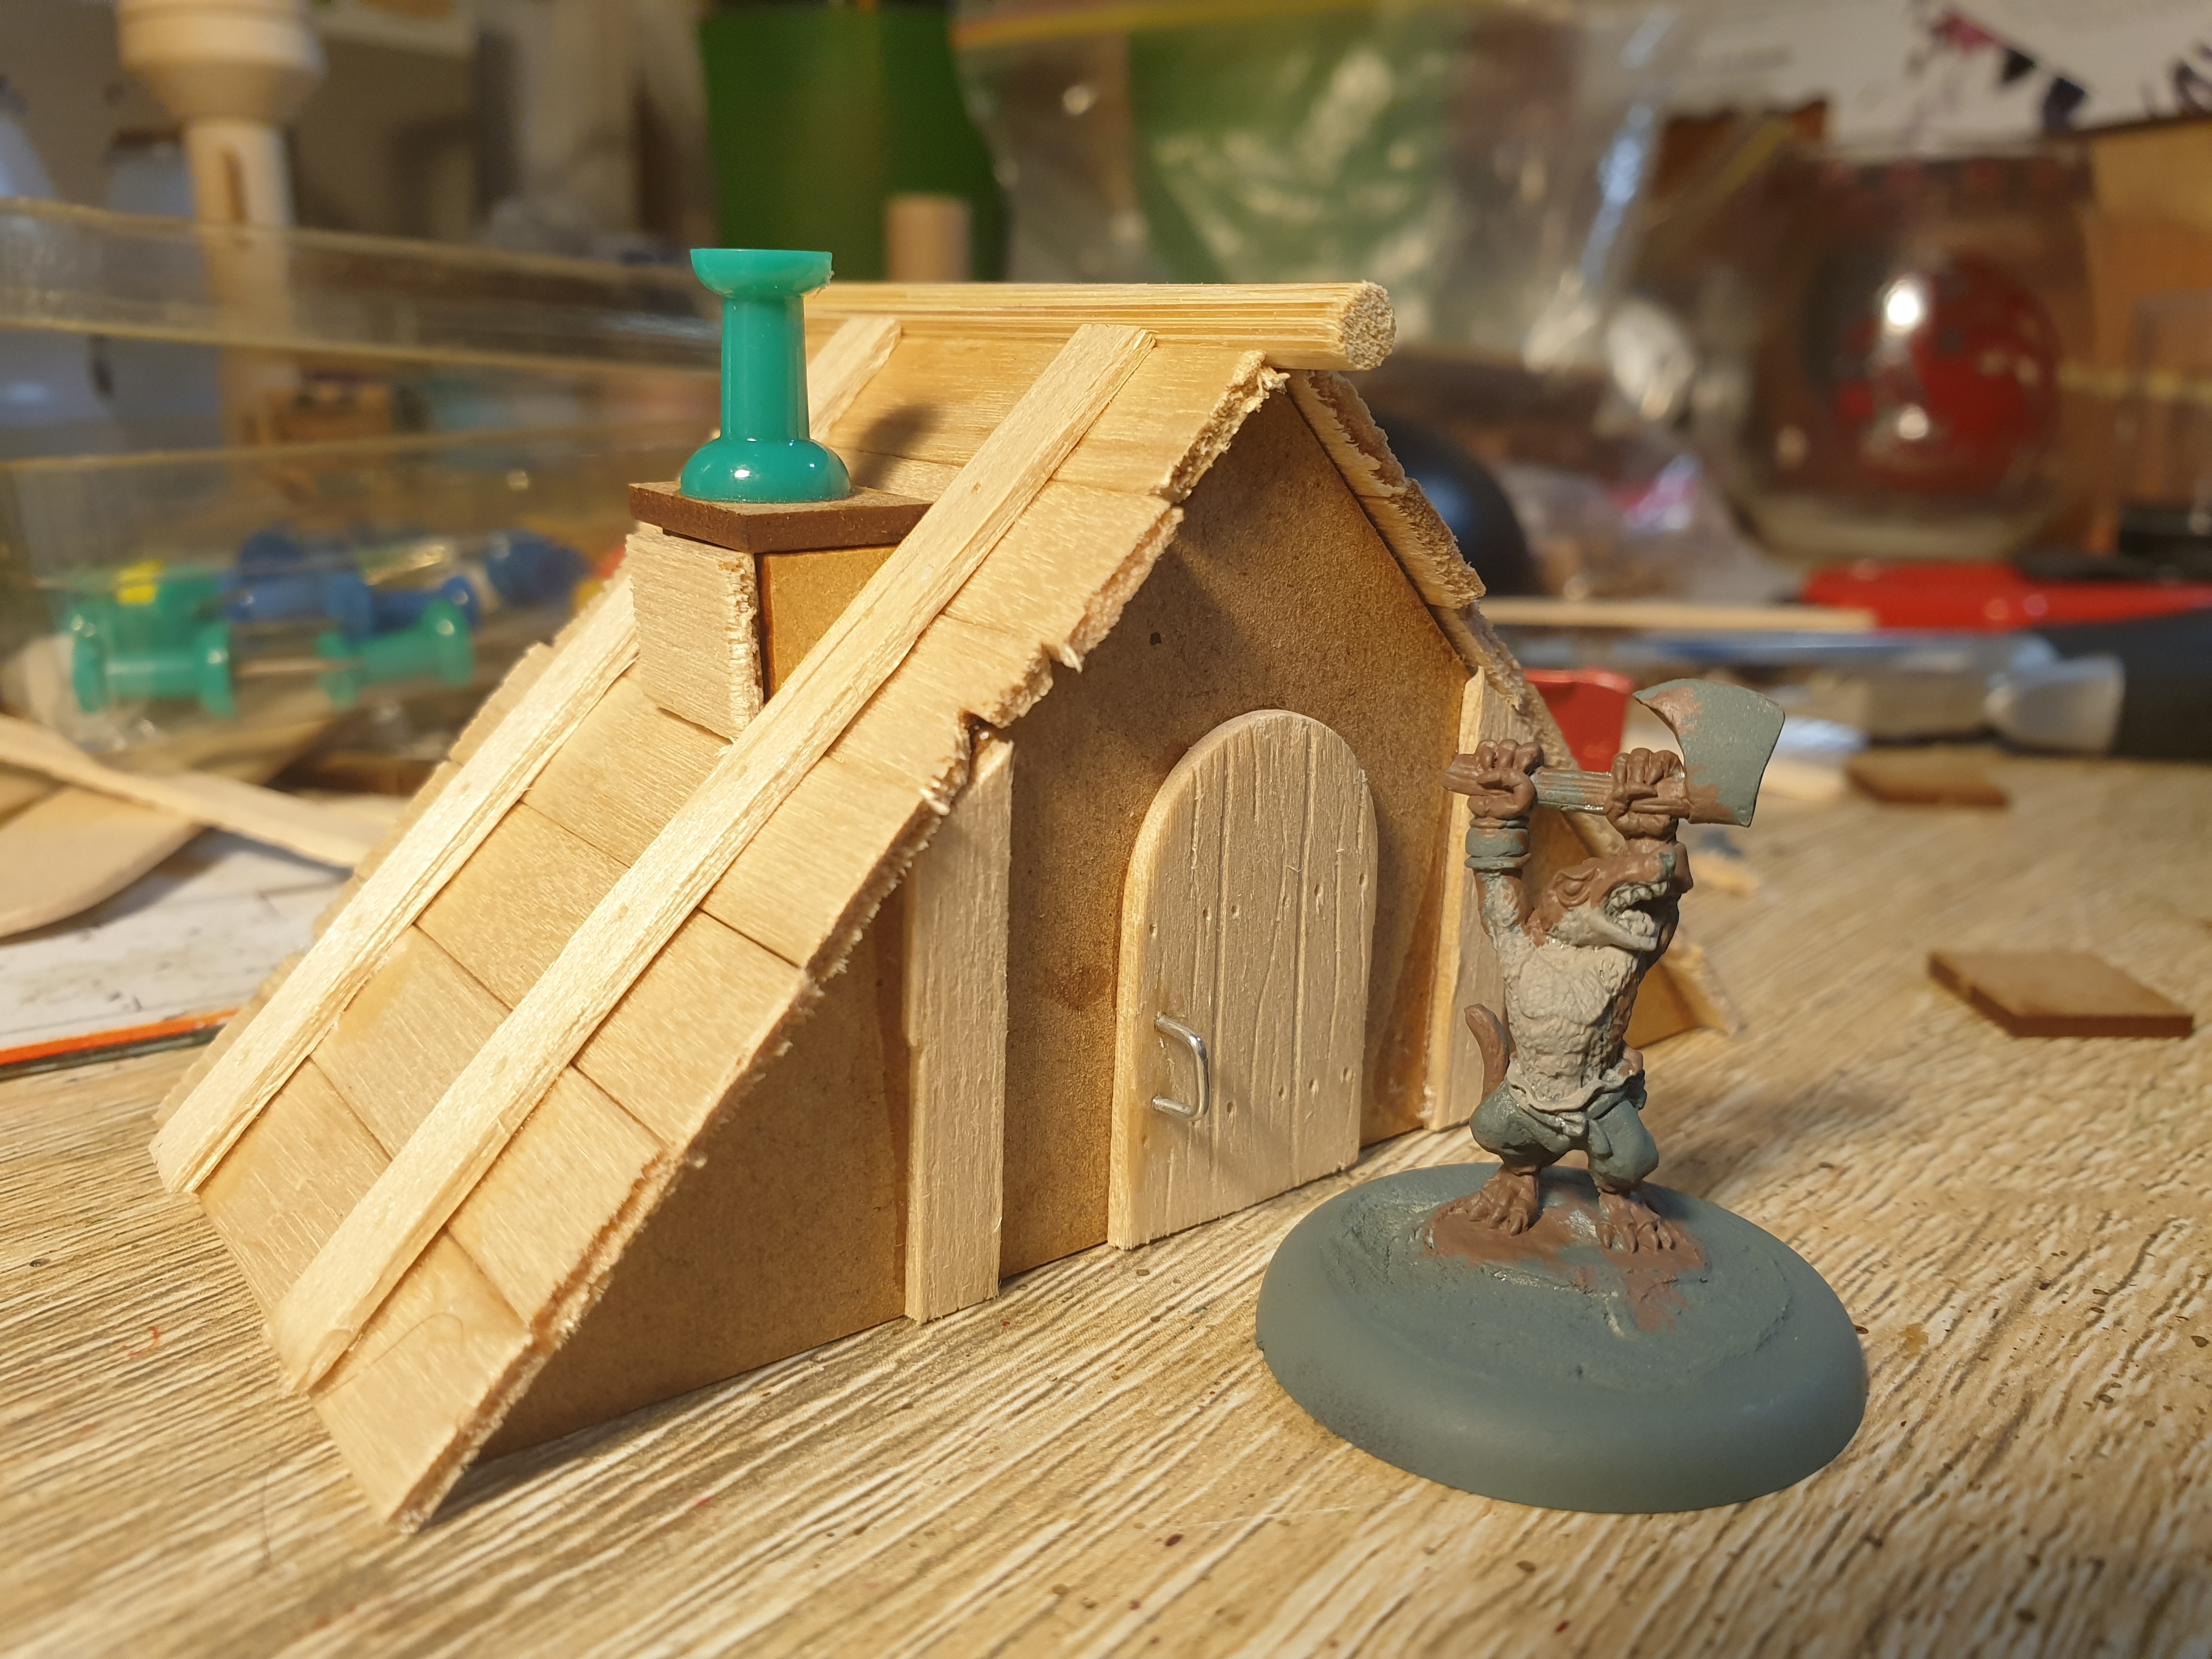
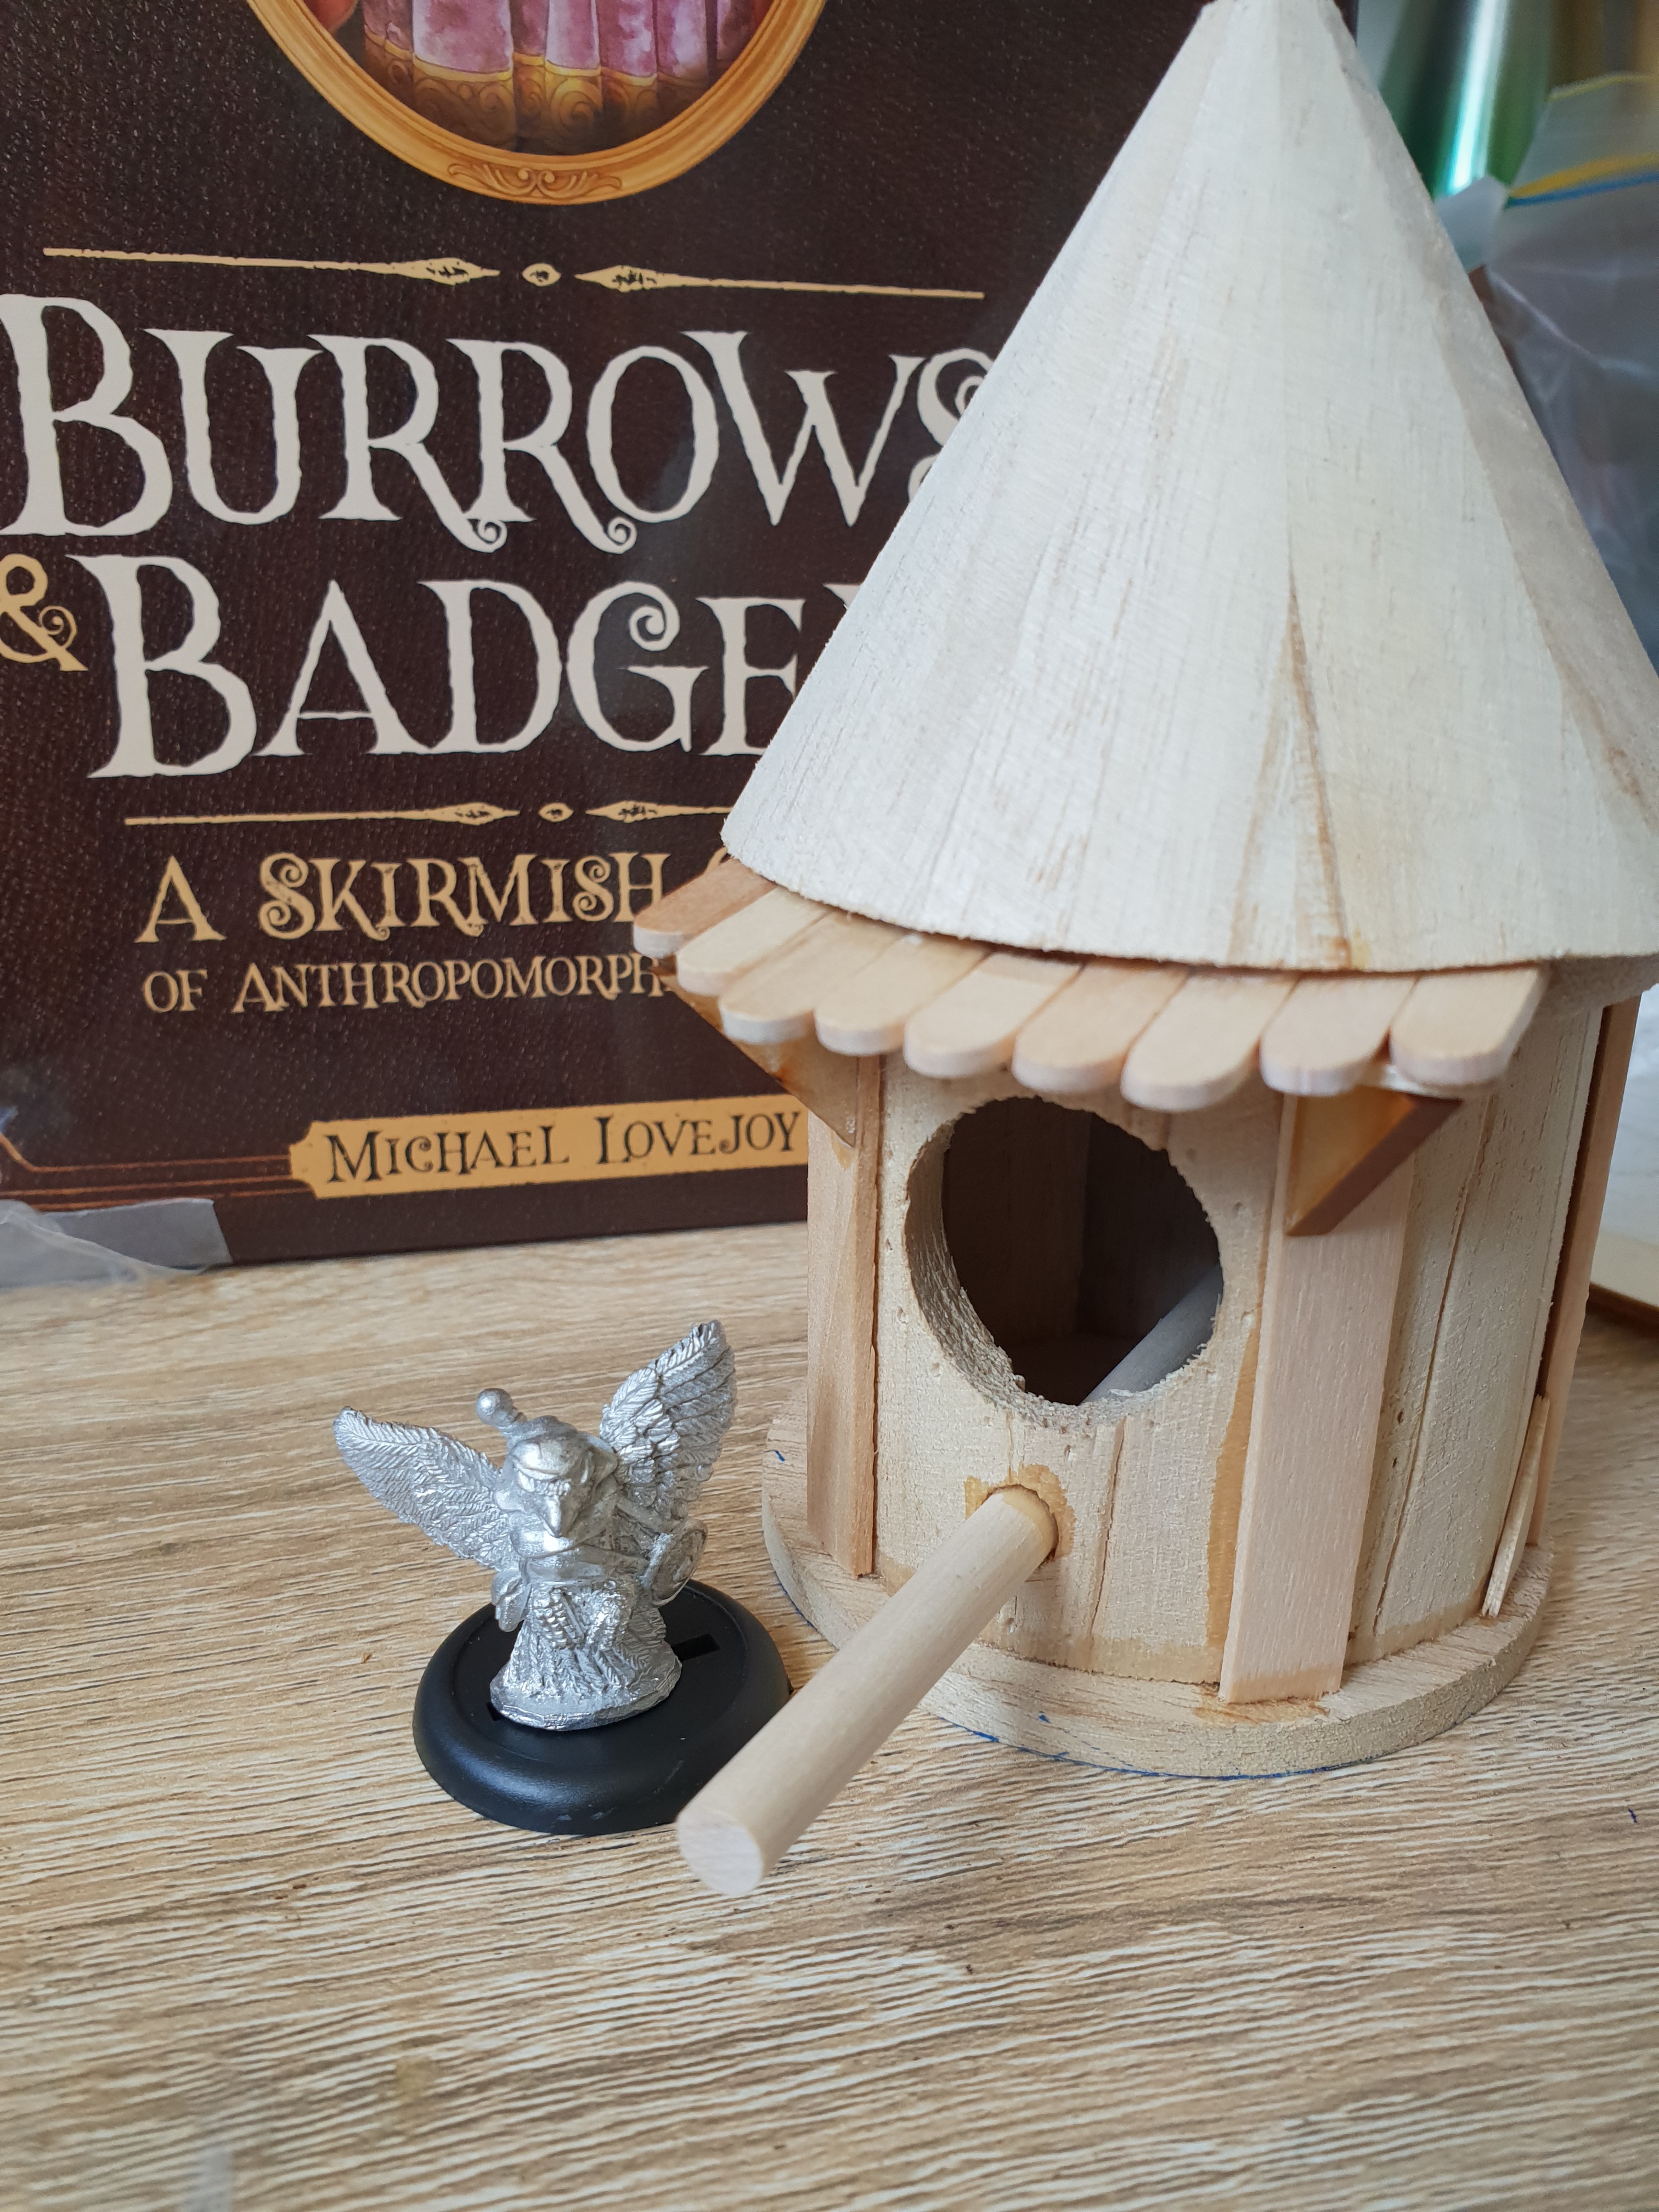
Shrewholm village house.
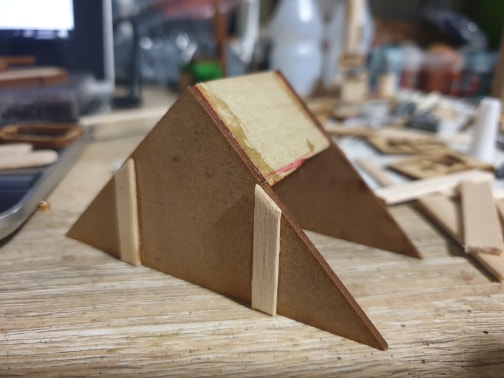
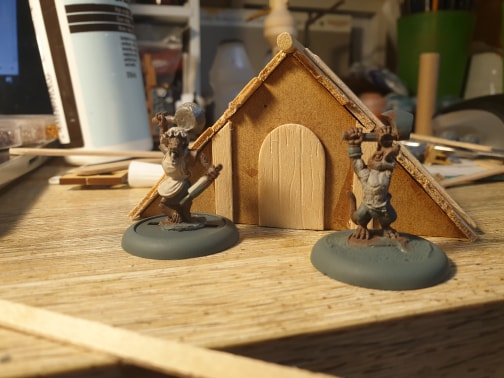

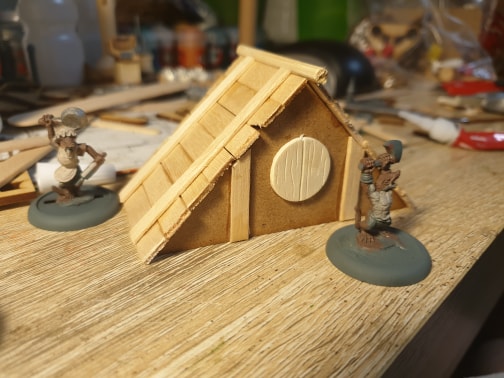
For this I used and old wooden block and two mdf triangles from a terrain kit. Layered up with paddlle-pop sticks for roof planks, a tongue depressor for the door and a pin for the chimney.
I think I’ll try form mould and moss on the door when its done.
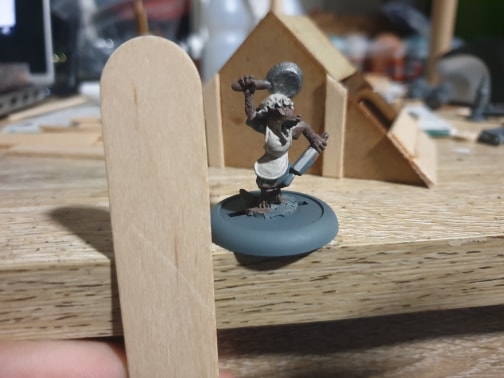
A break from our scheduled terrain...
So I’m taking a little break from all the scenery to paint up a few residents for the village and having loads of fun with it. It’s really refreshing to work on just a couple of models at a time instead of huge squads (which i my usual thing).
So here are the first three completed minis for my collection, enjoy
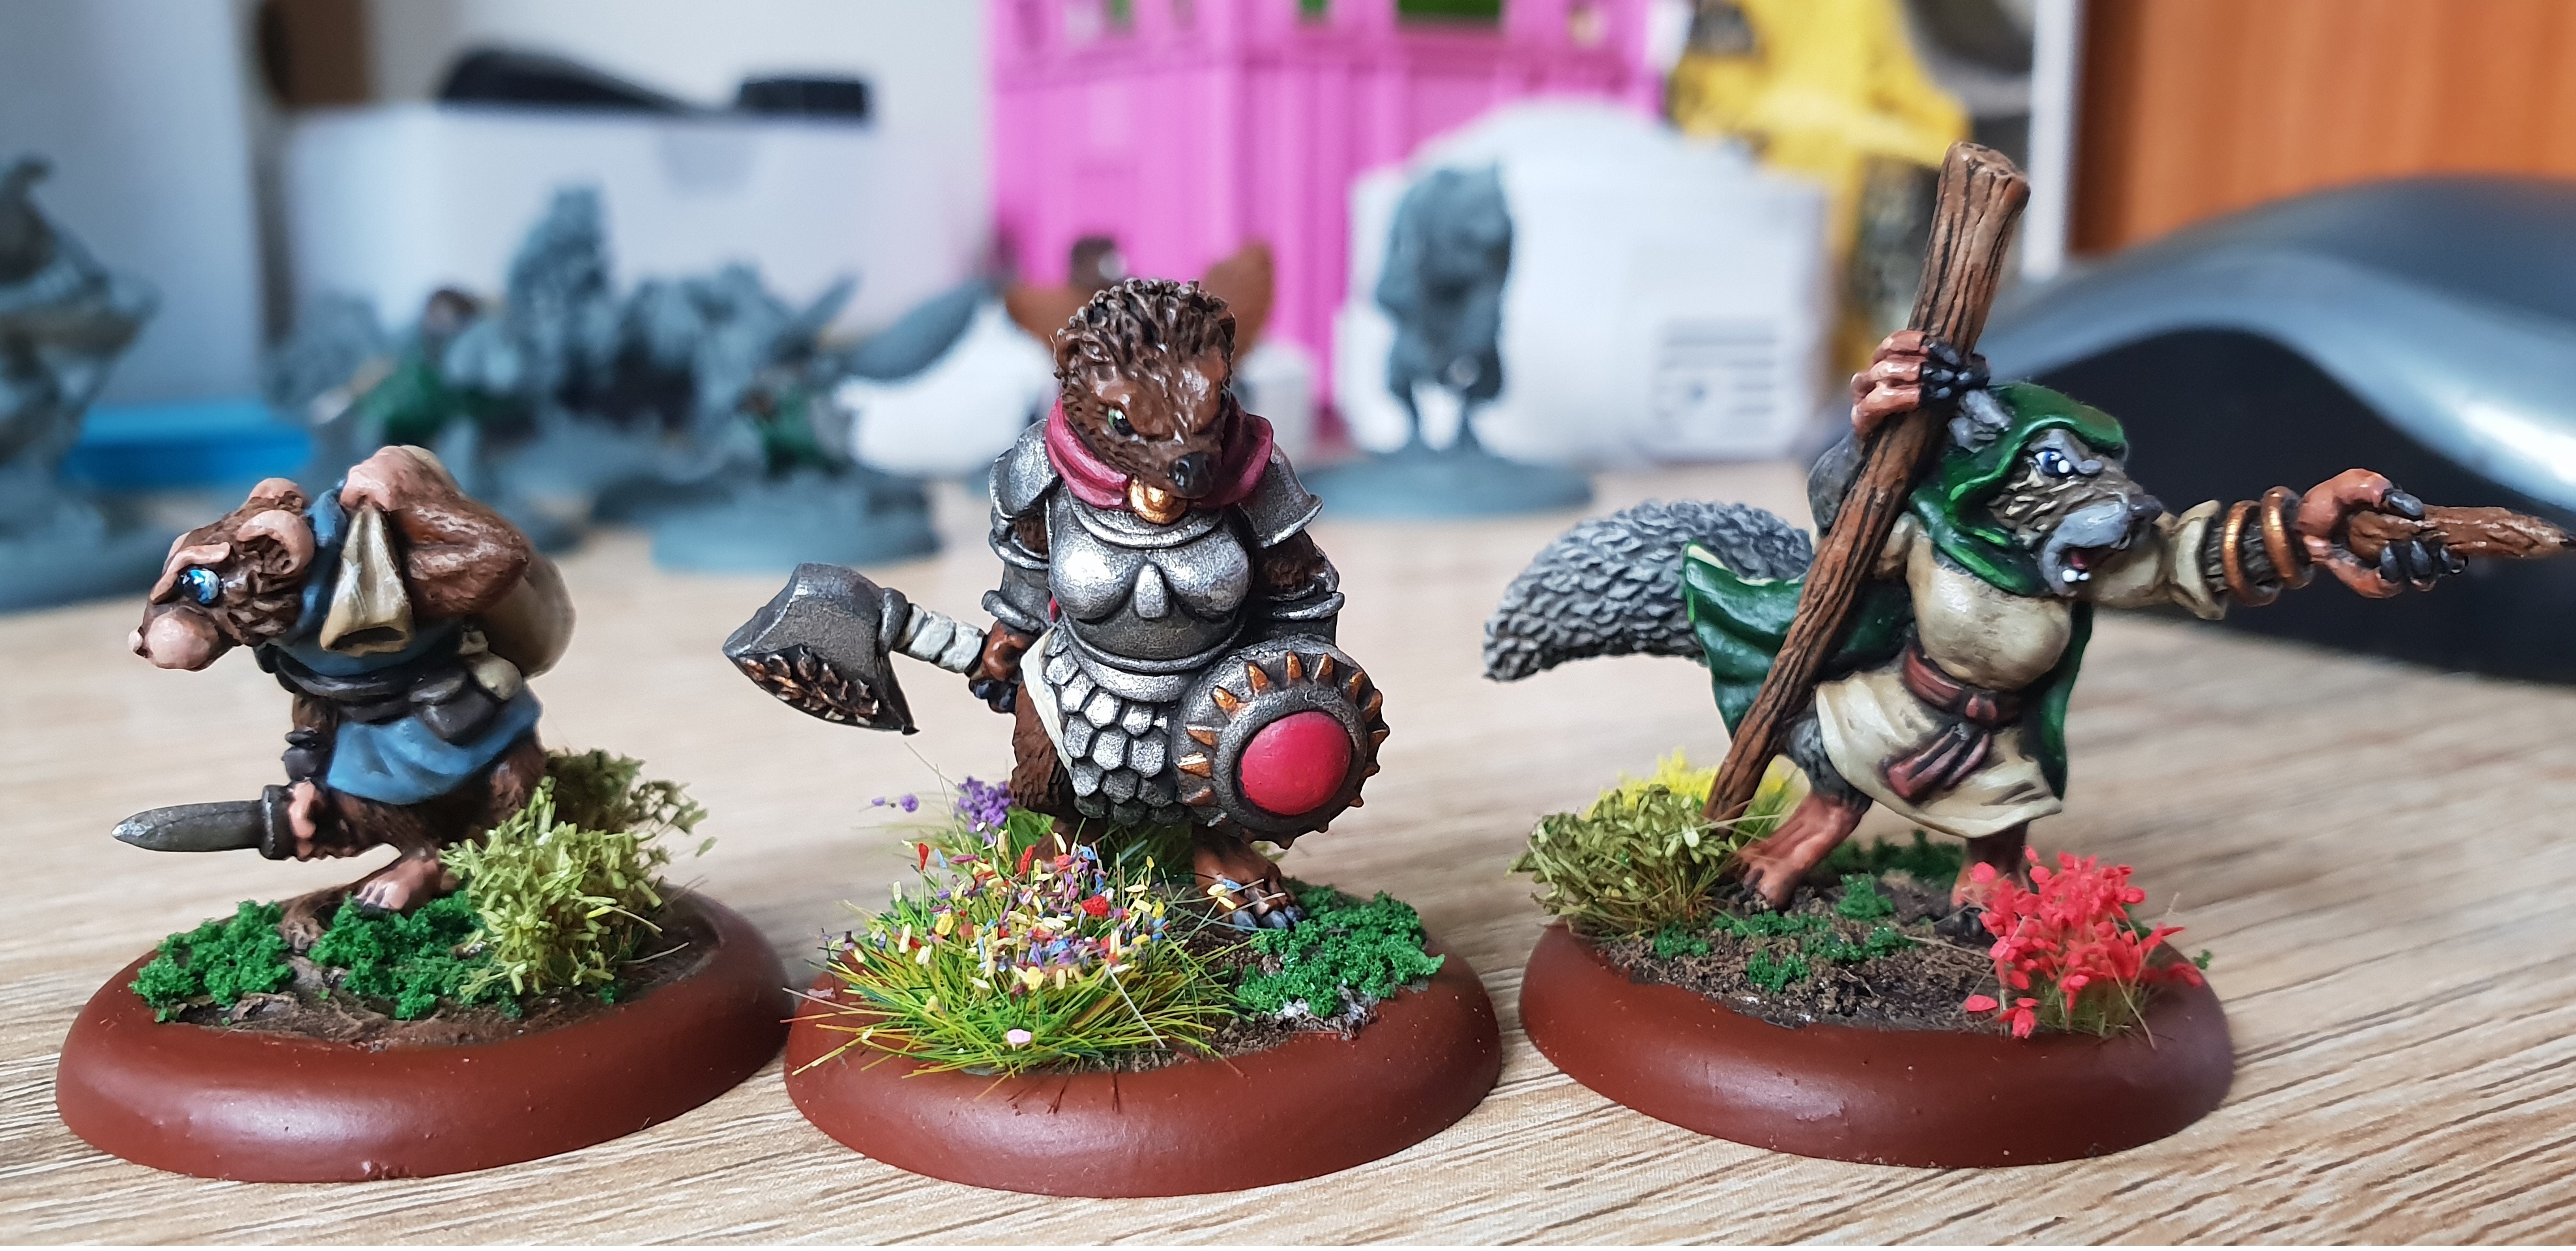 The first three of many...
 Gromley the mouse burglar
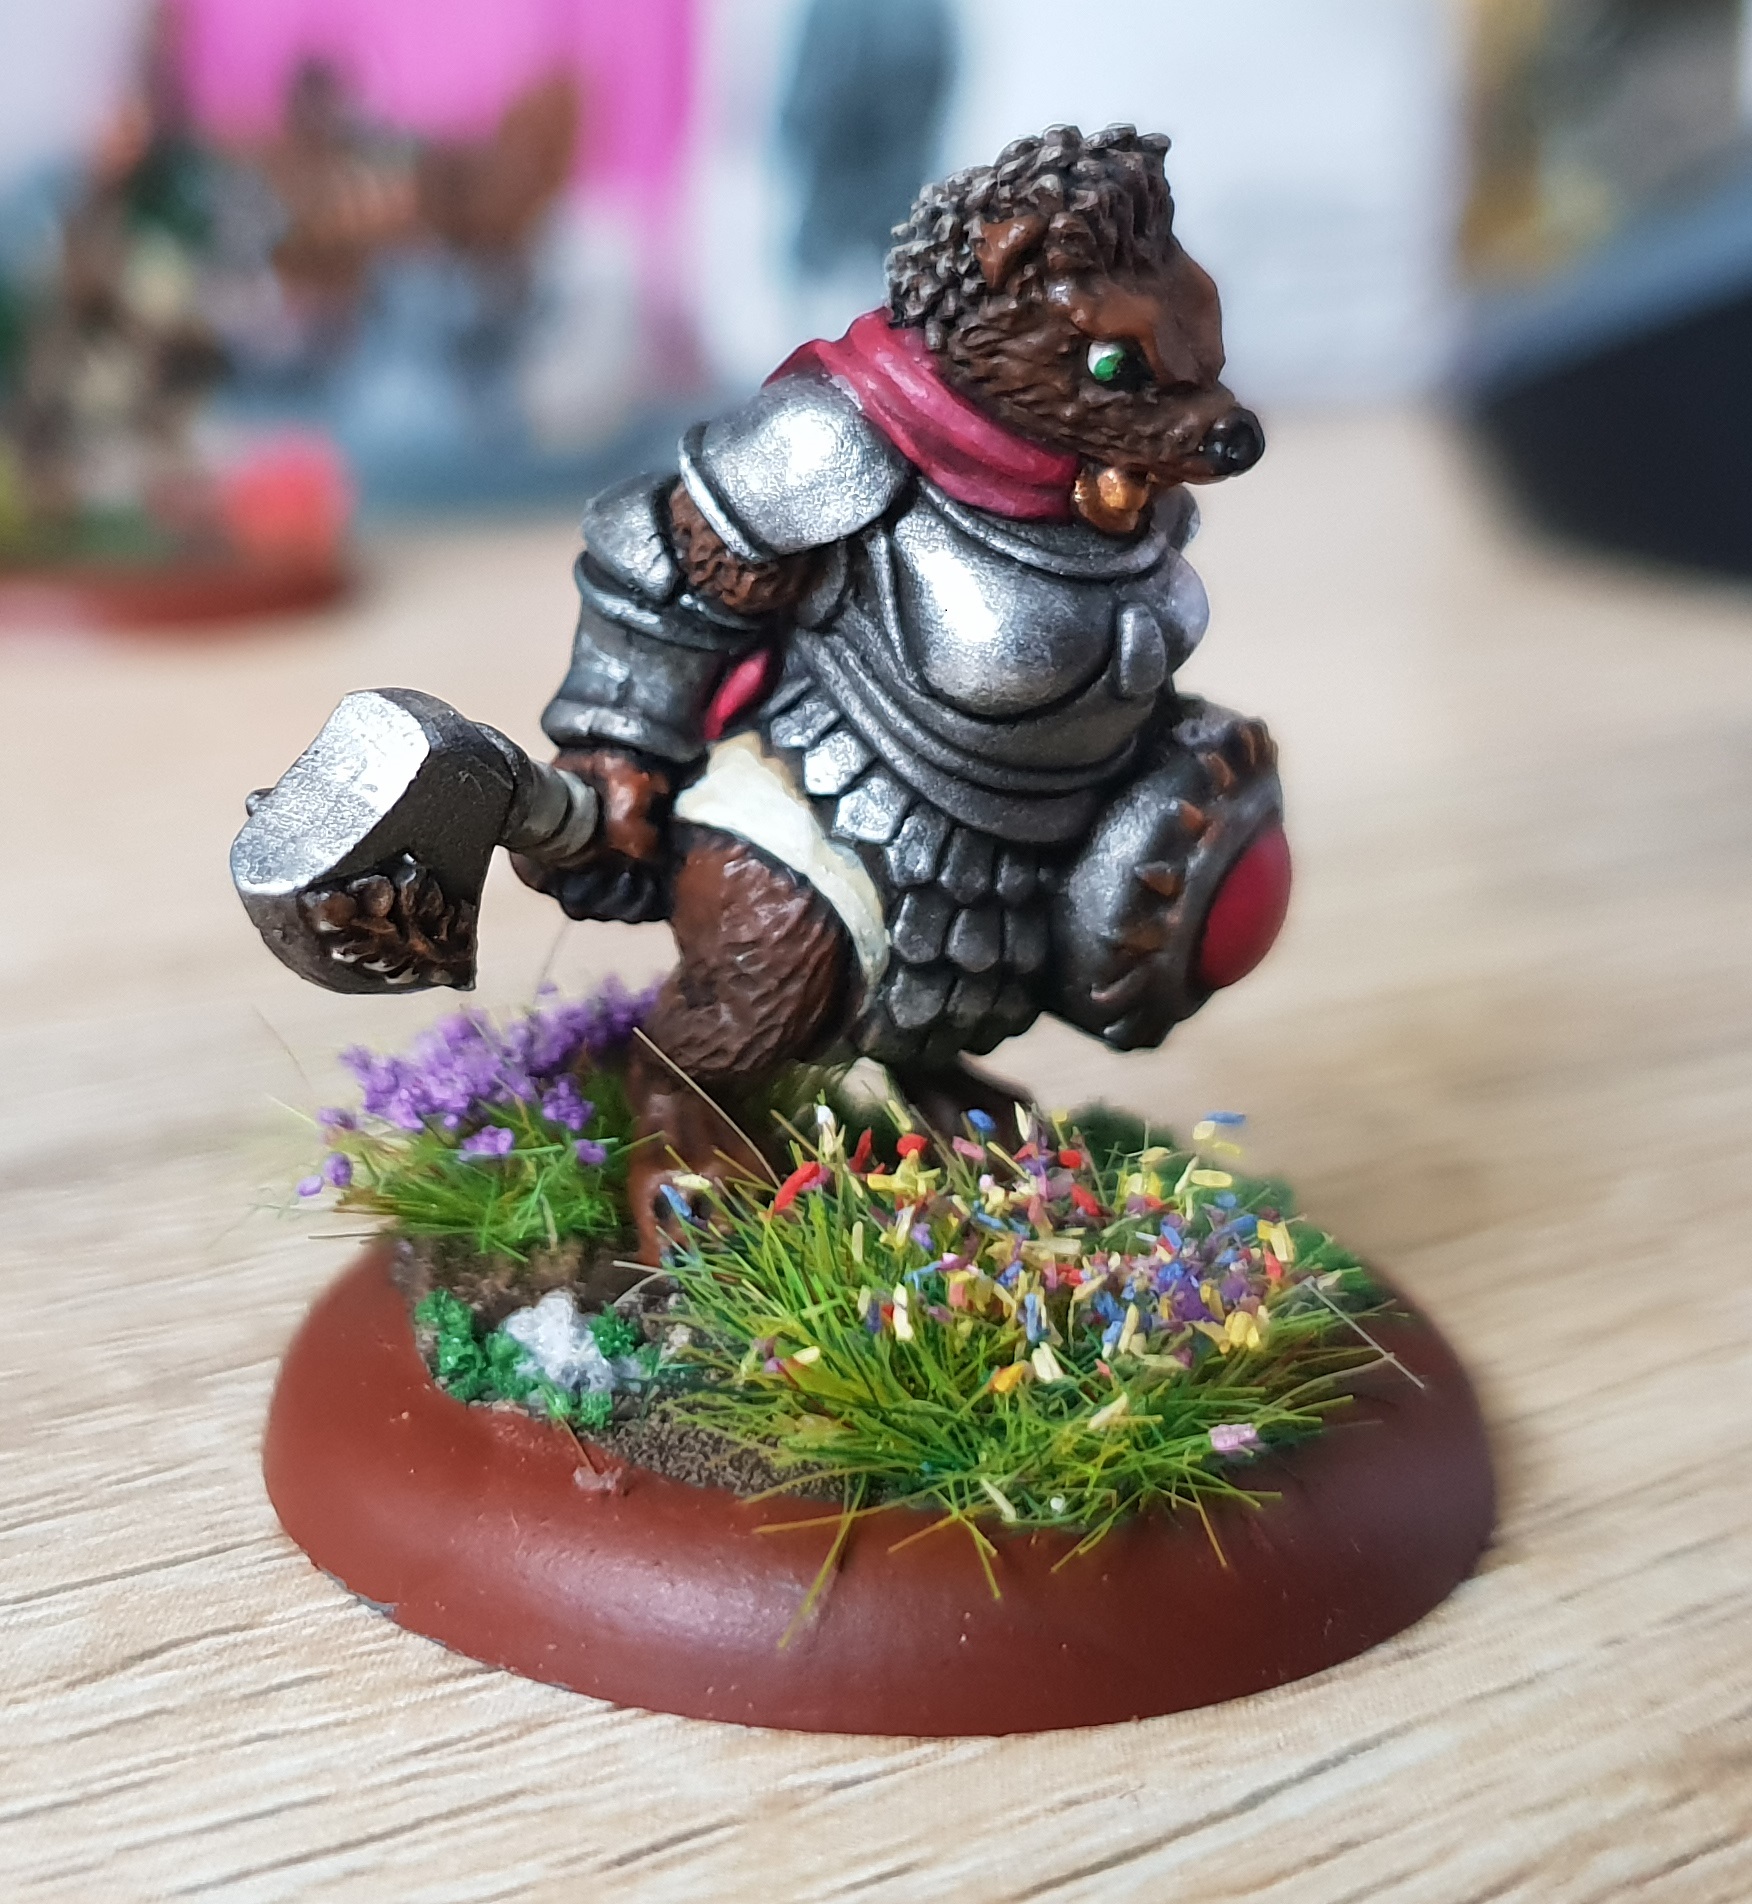 Jenni the hedgehog warrior
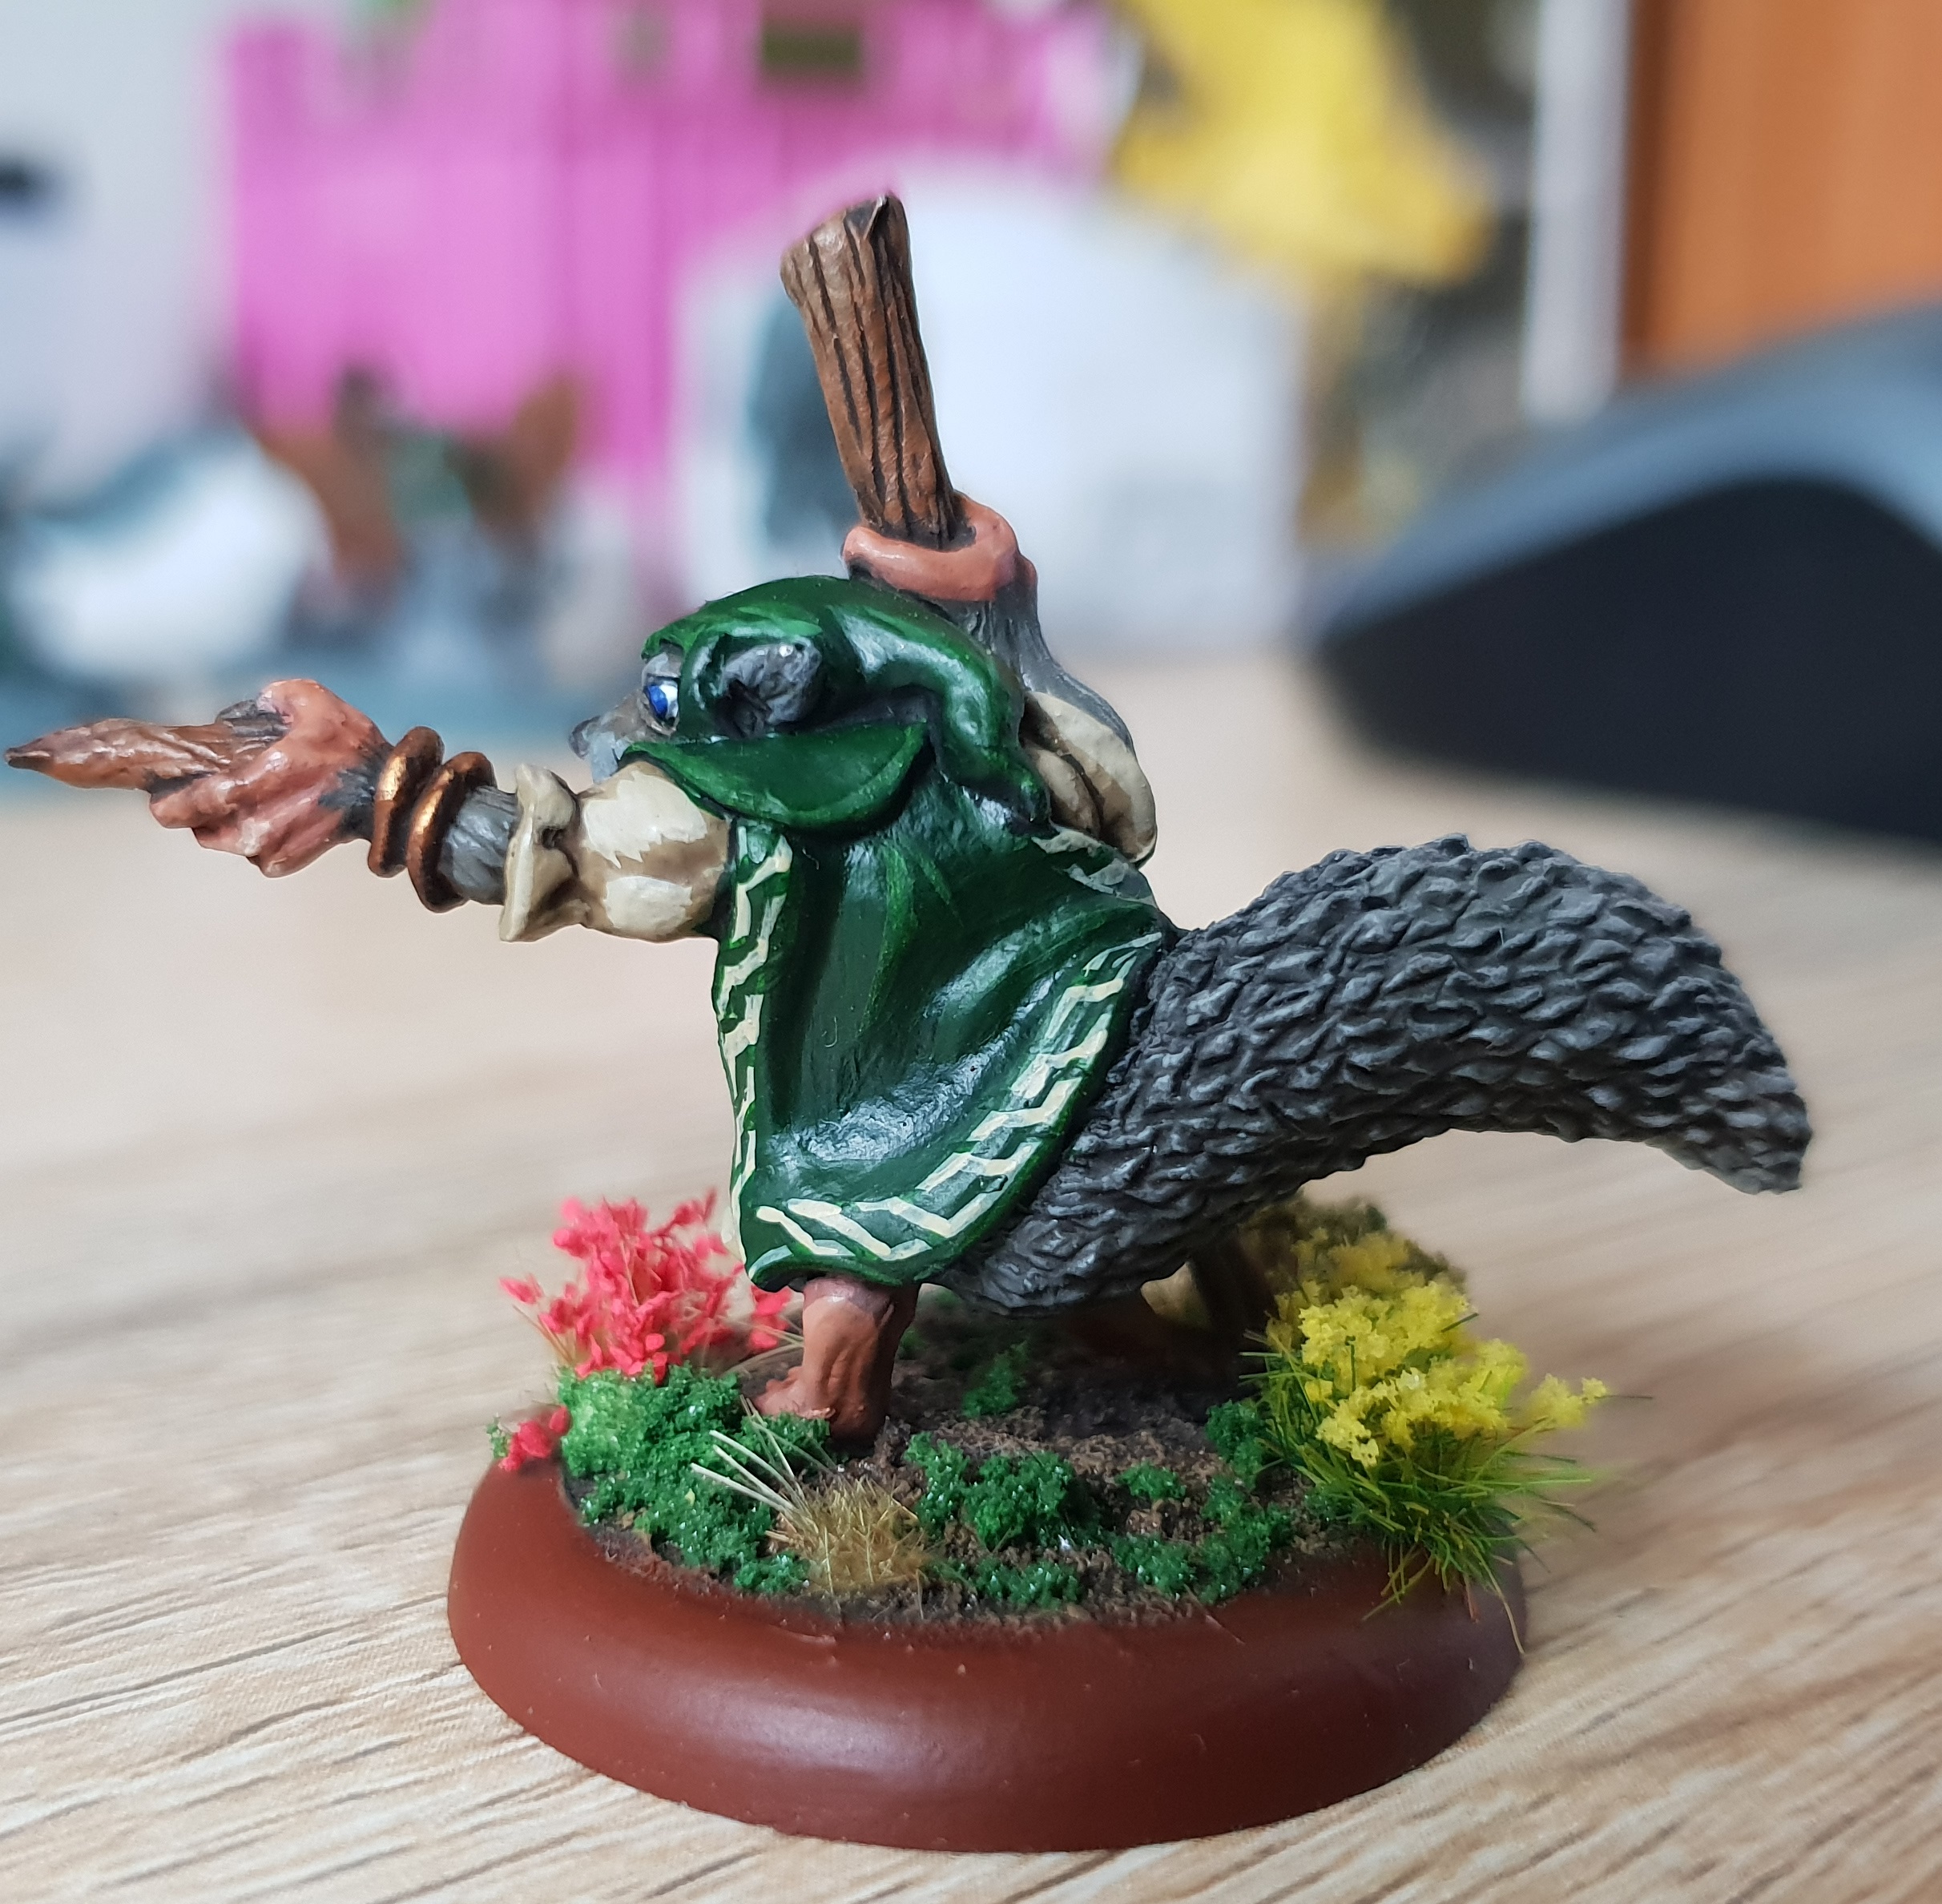 and Hollystone the squirrel nature mage.
If there’s any interest I’ll do a painting tutorial on some minis in later updates.
Cheers, T.
Detailing the village 3
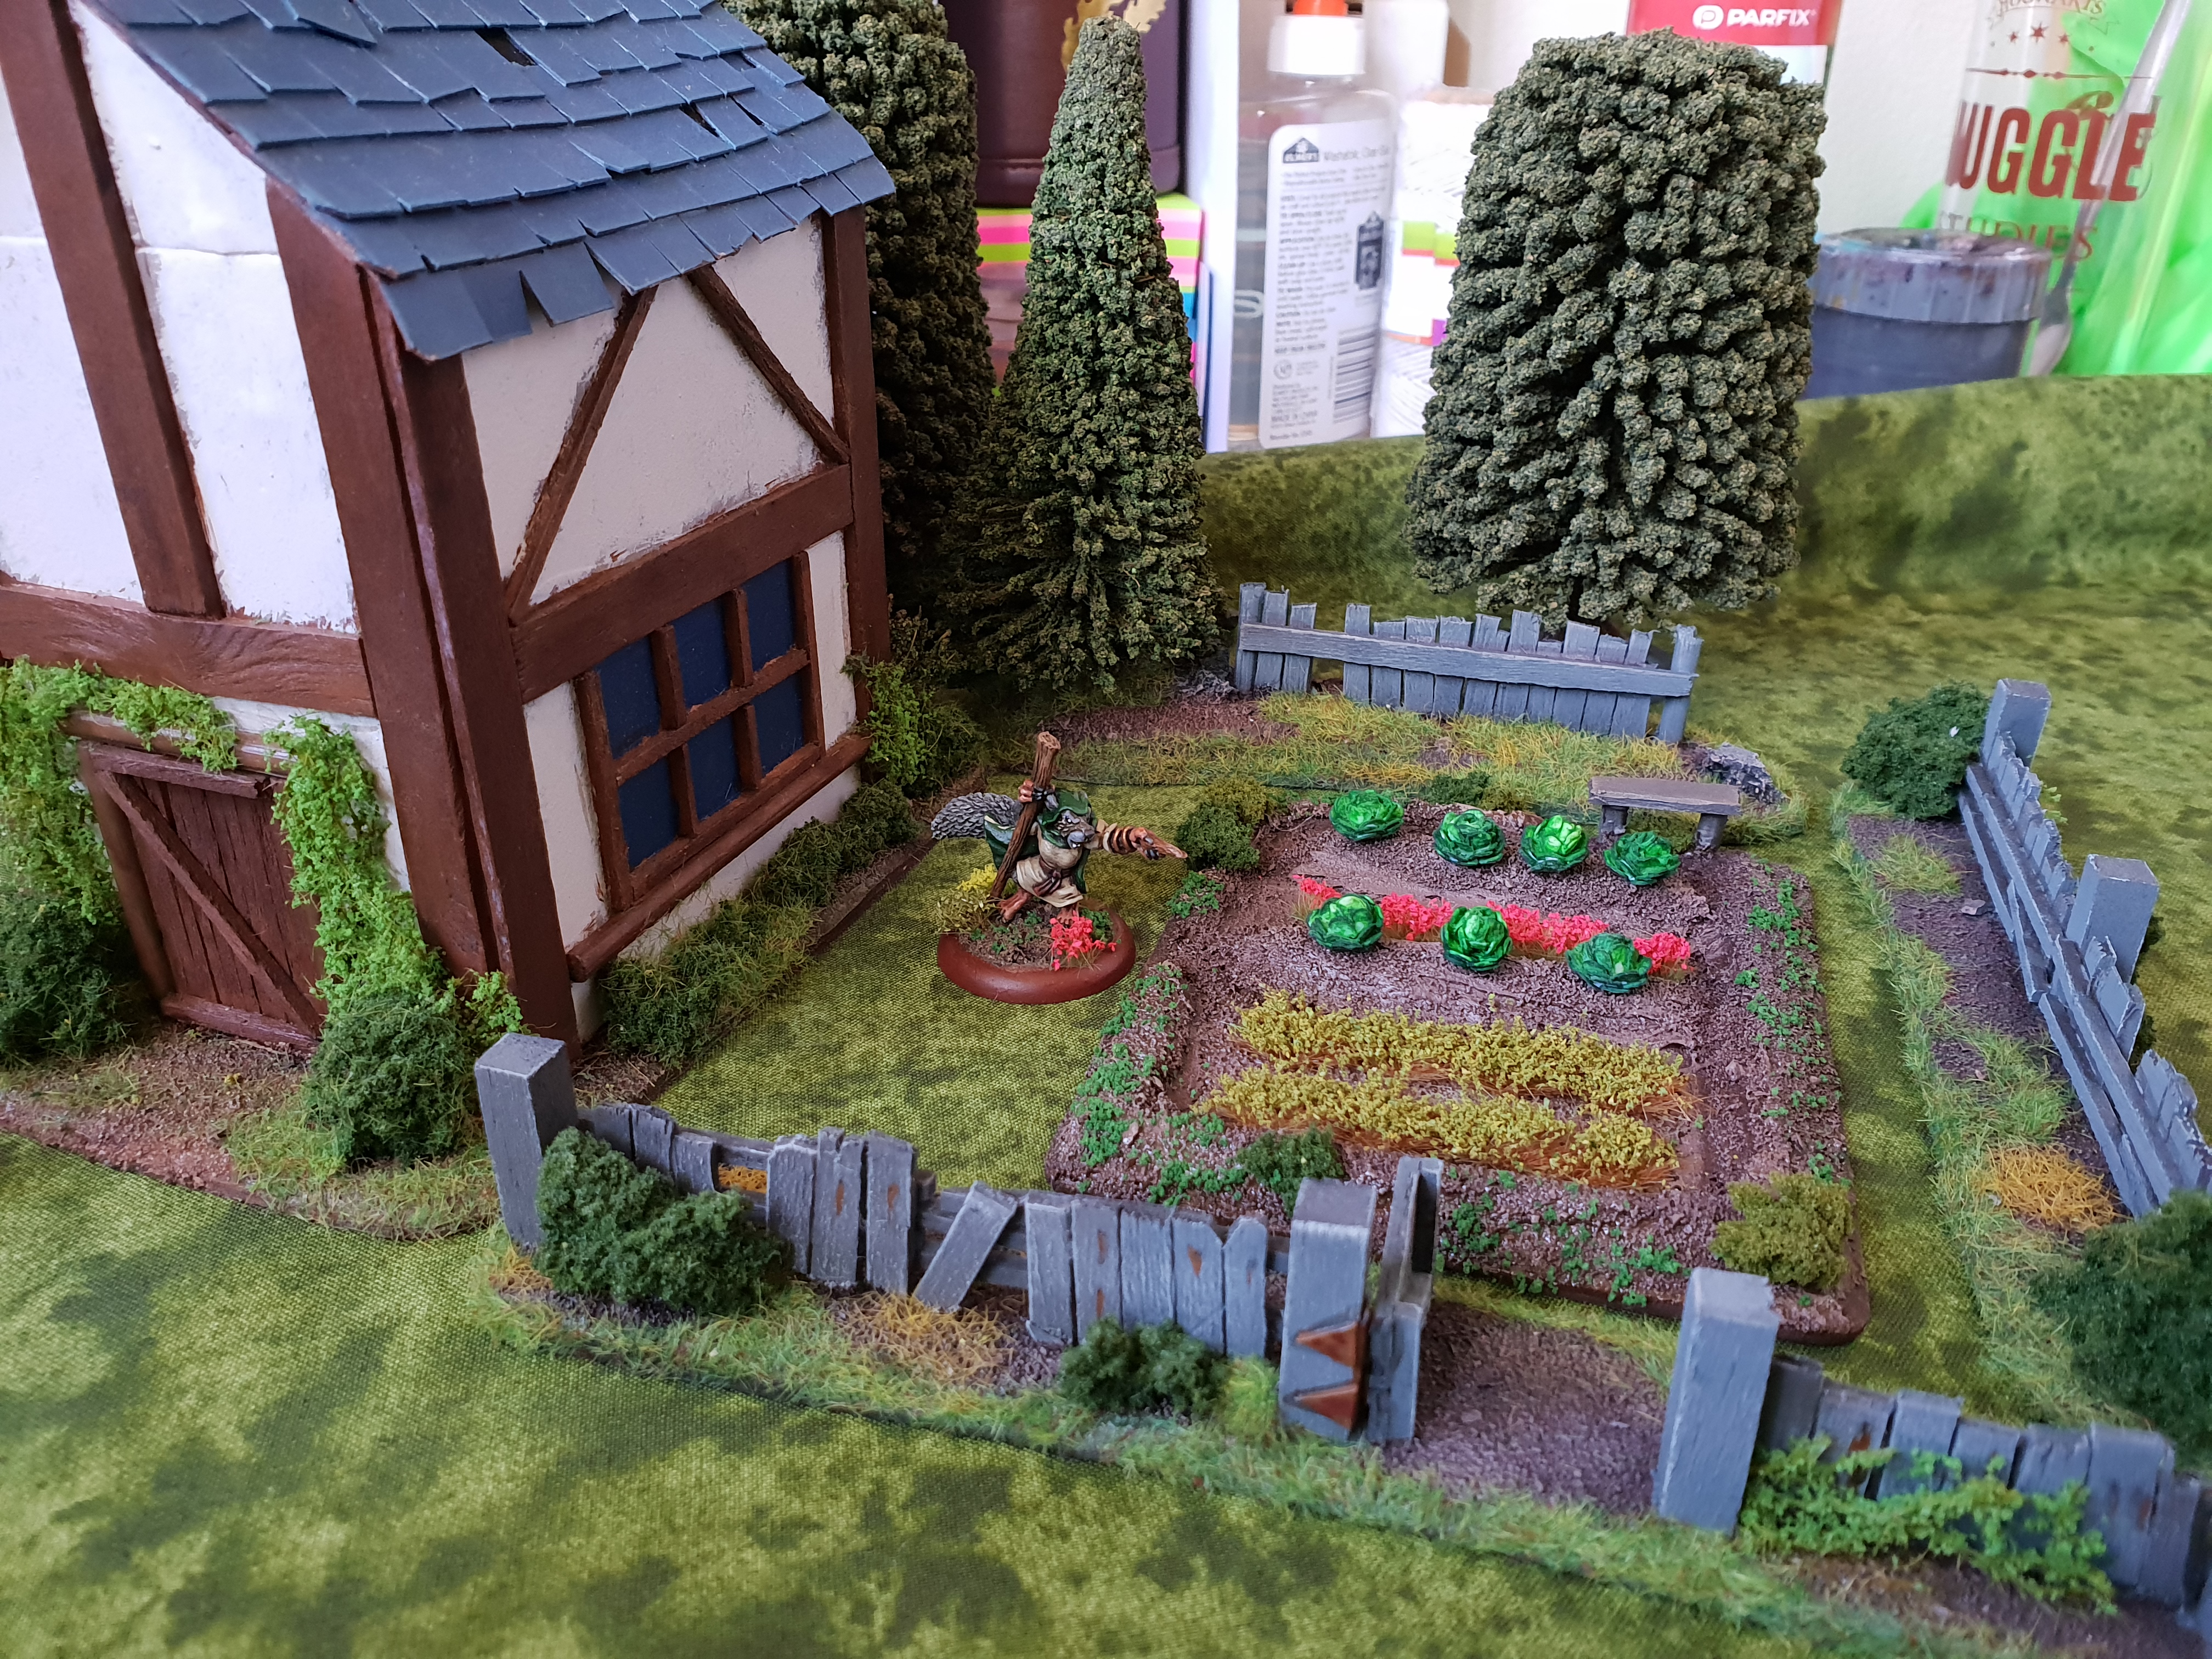 I don't think nature magic works that way....
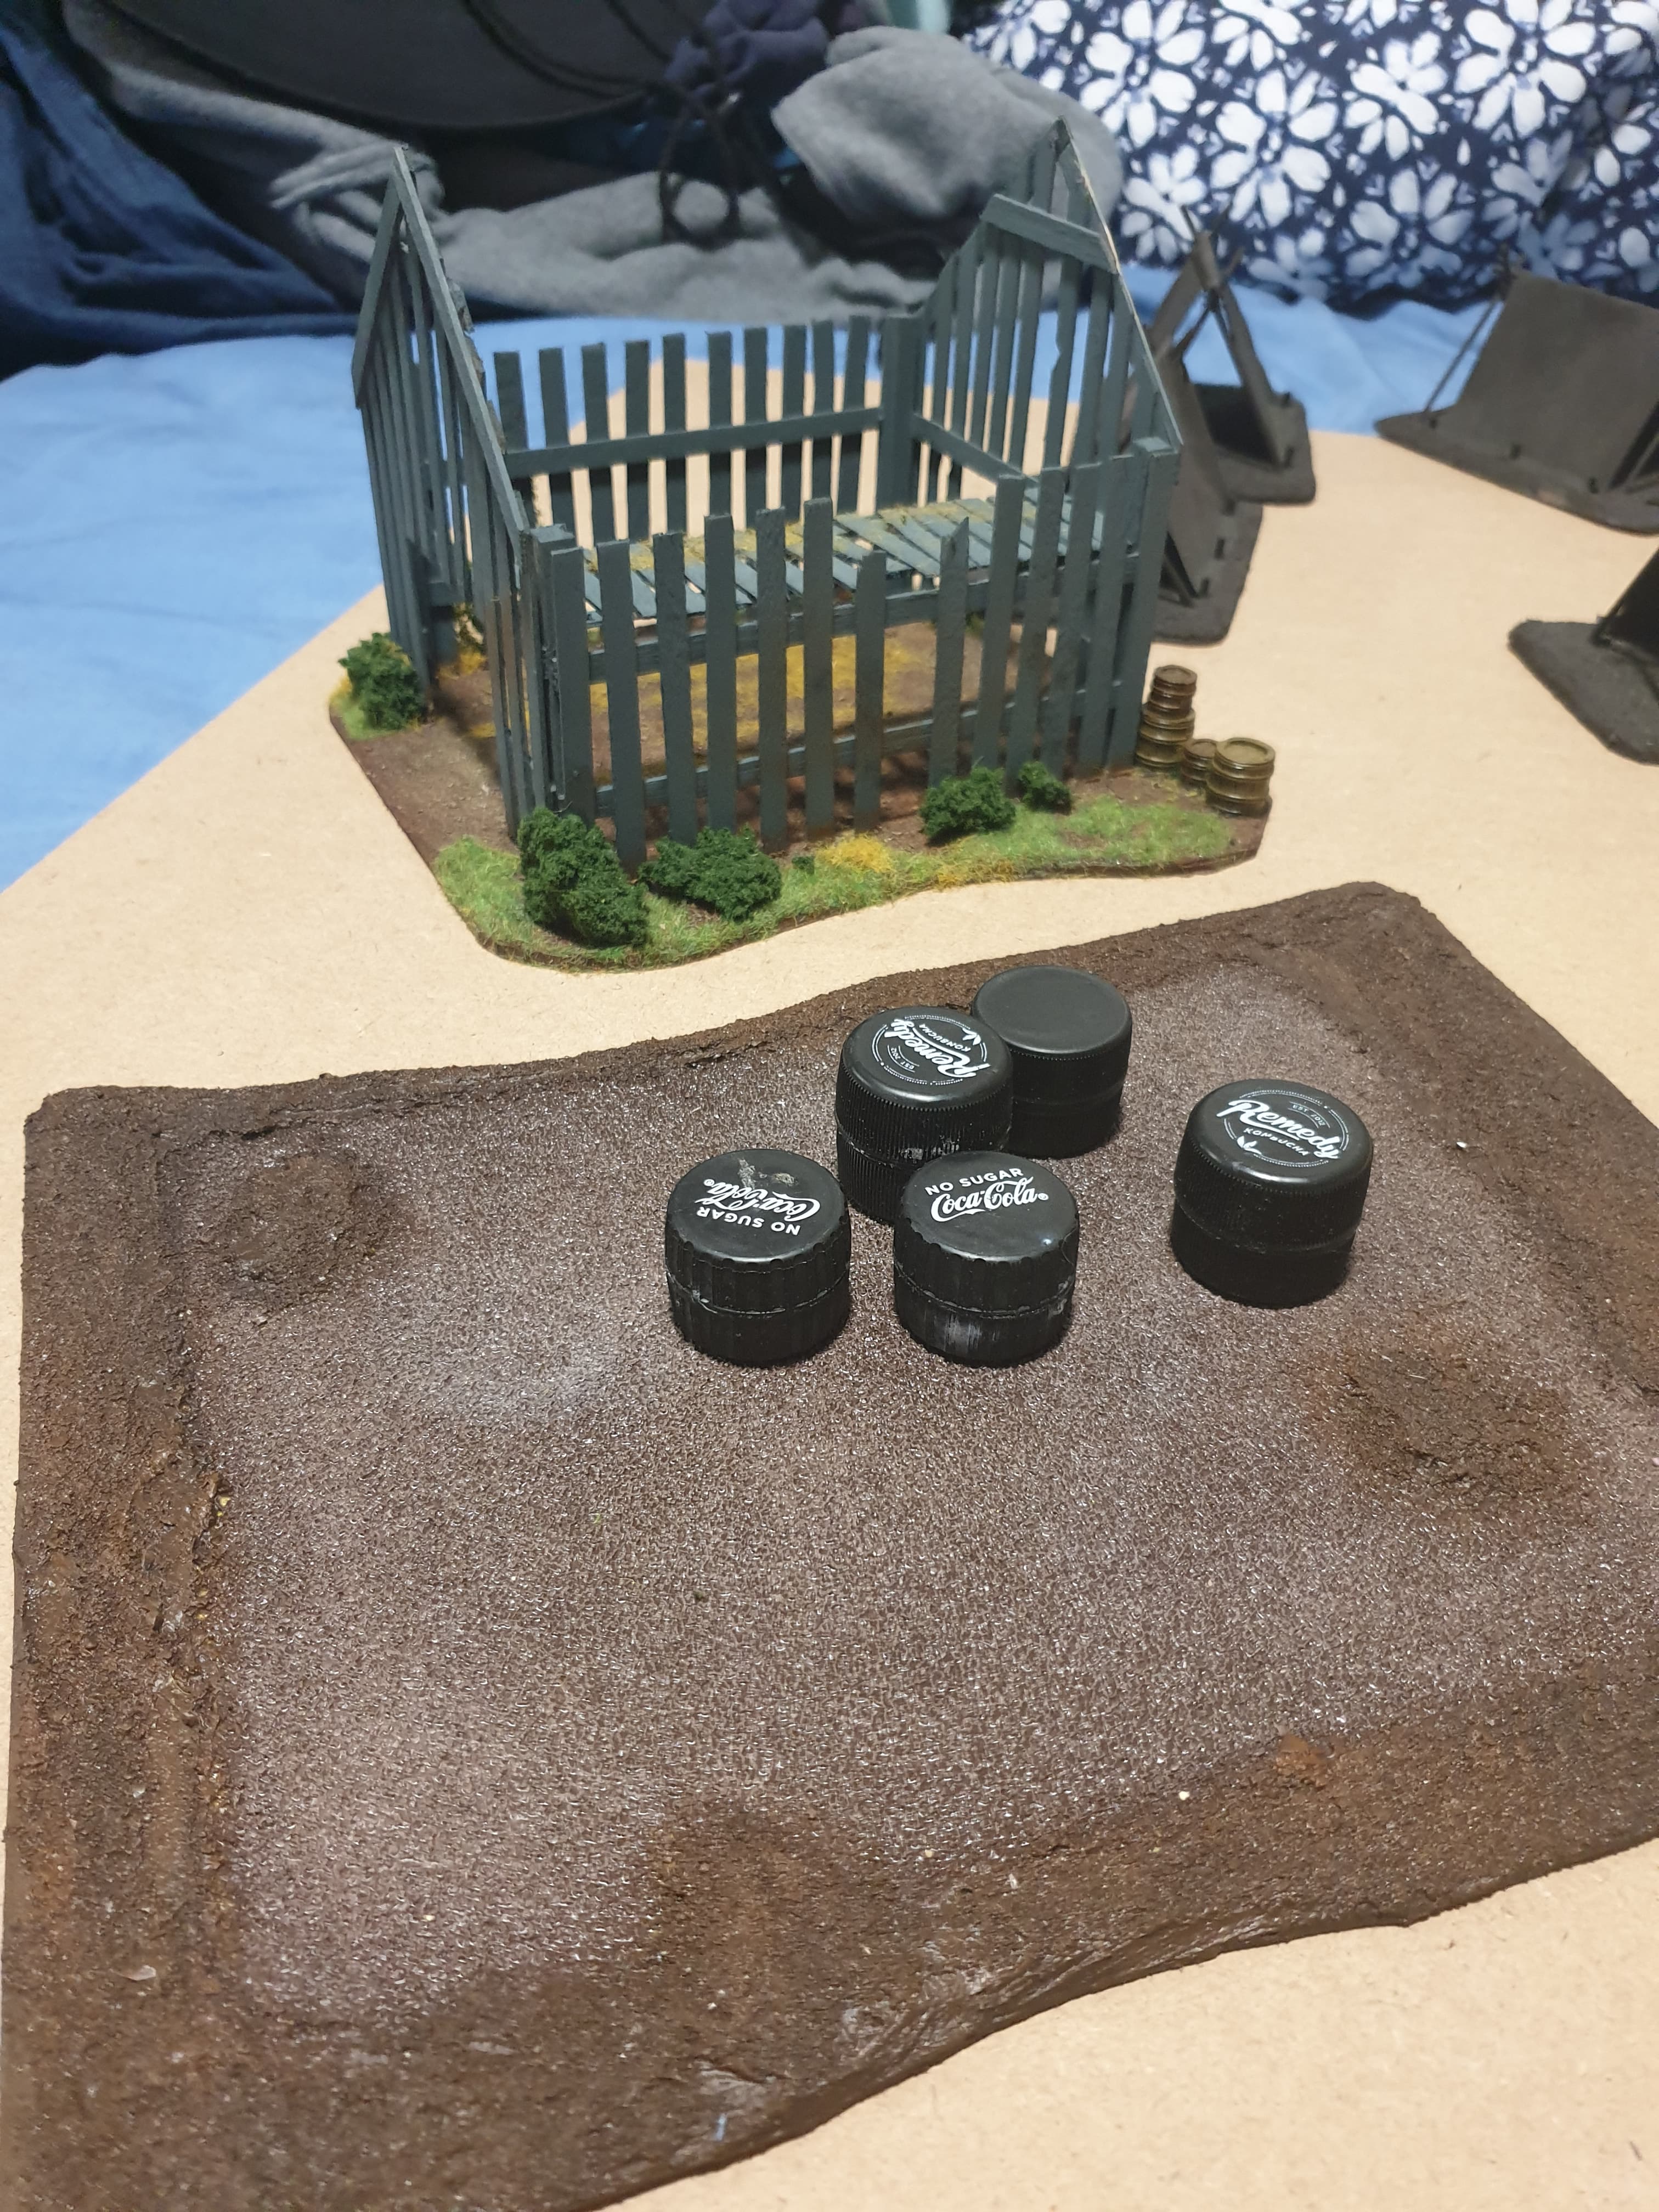
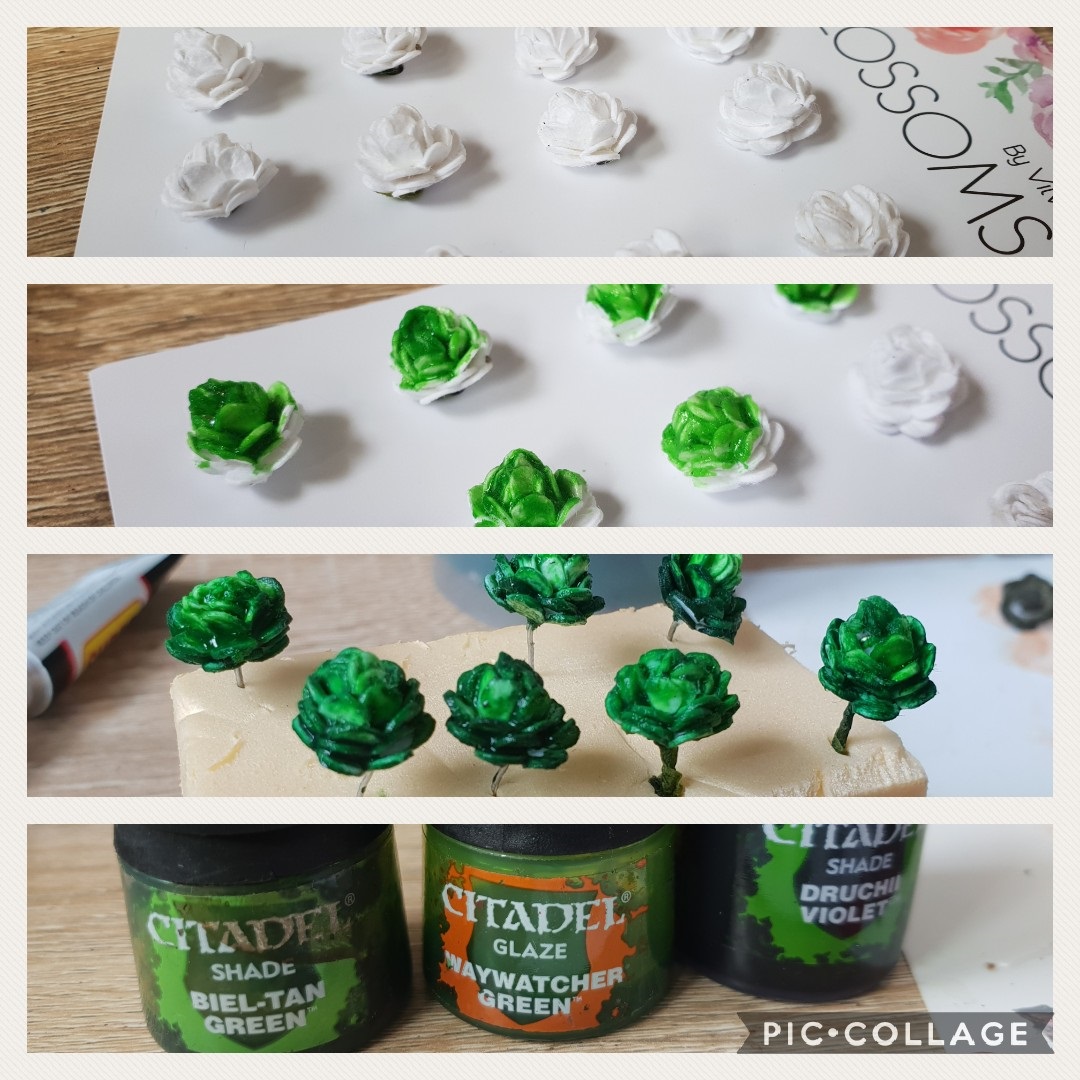
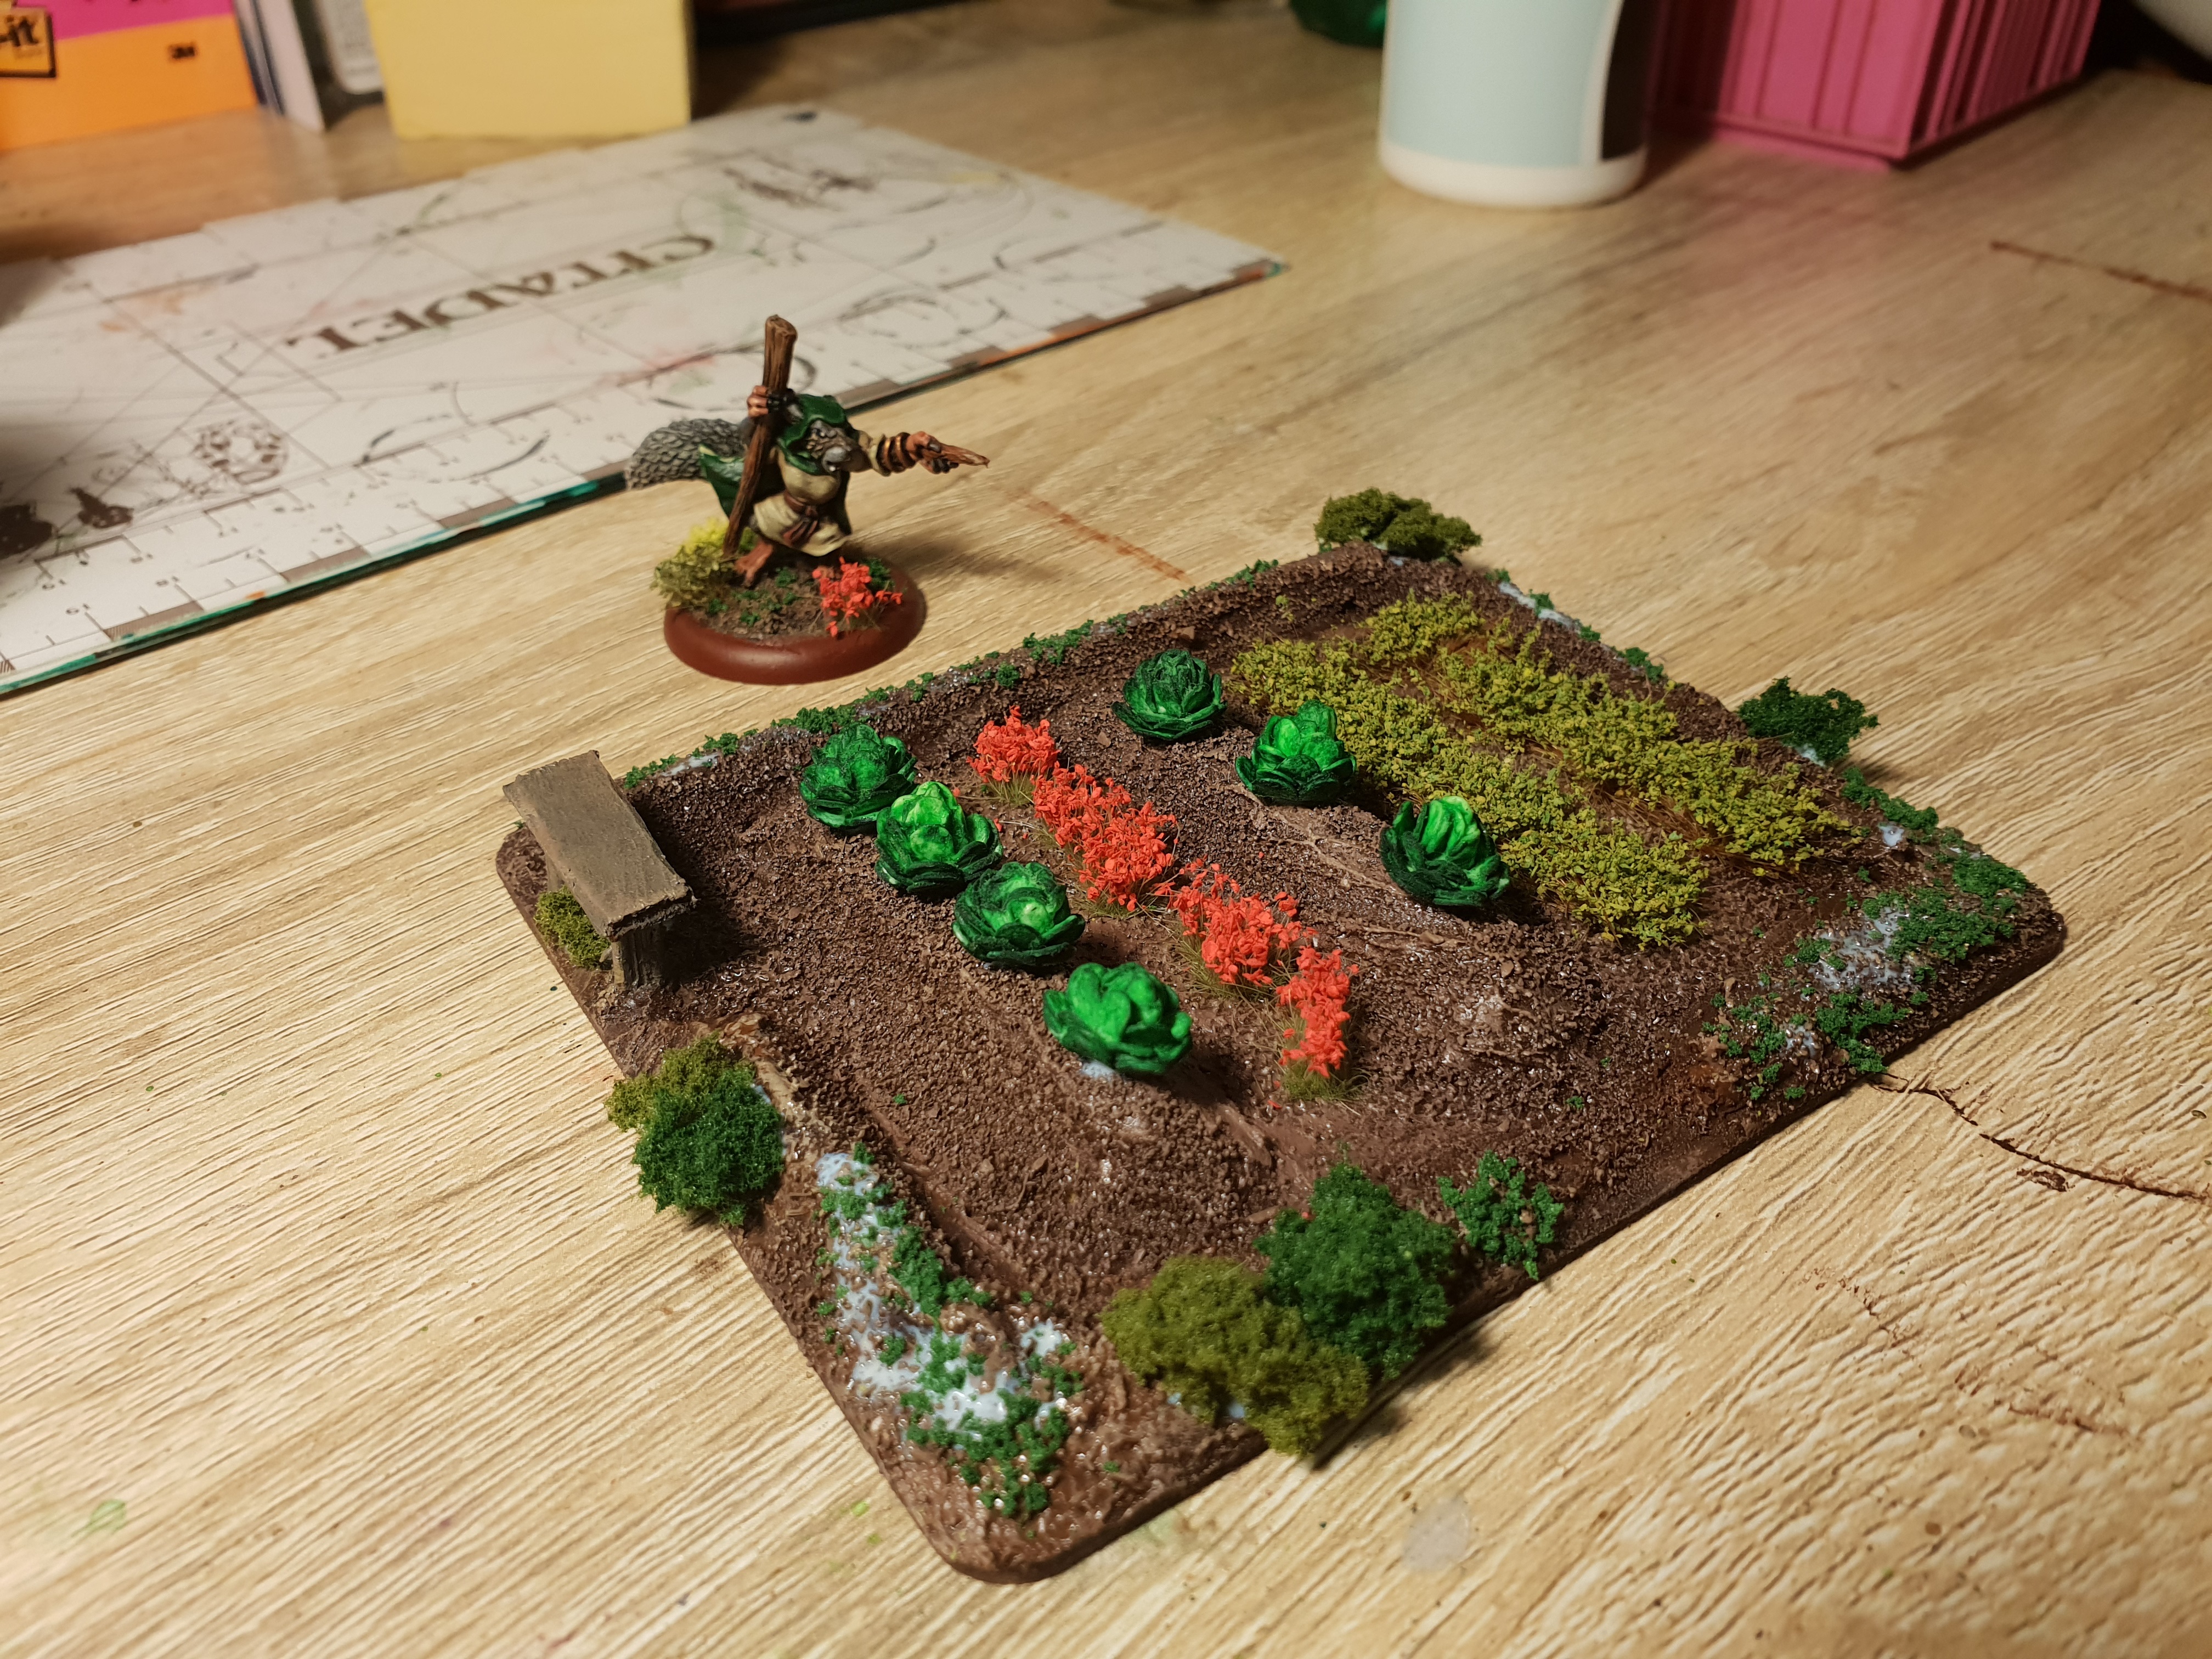
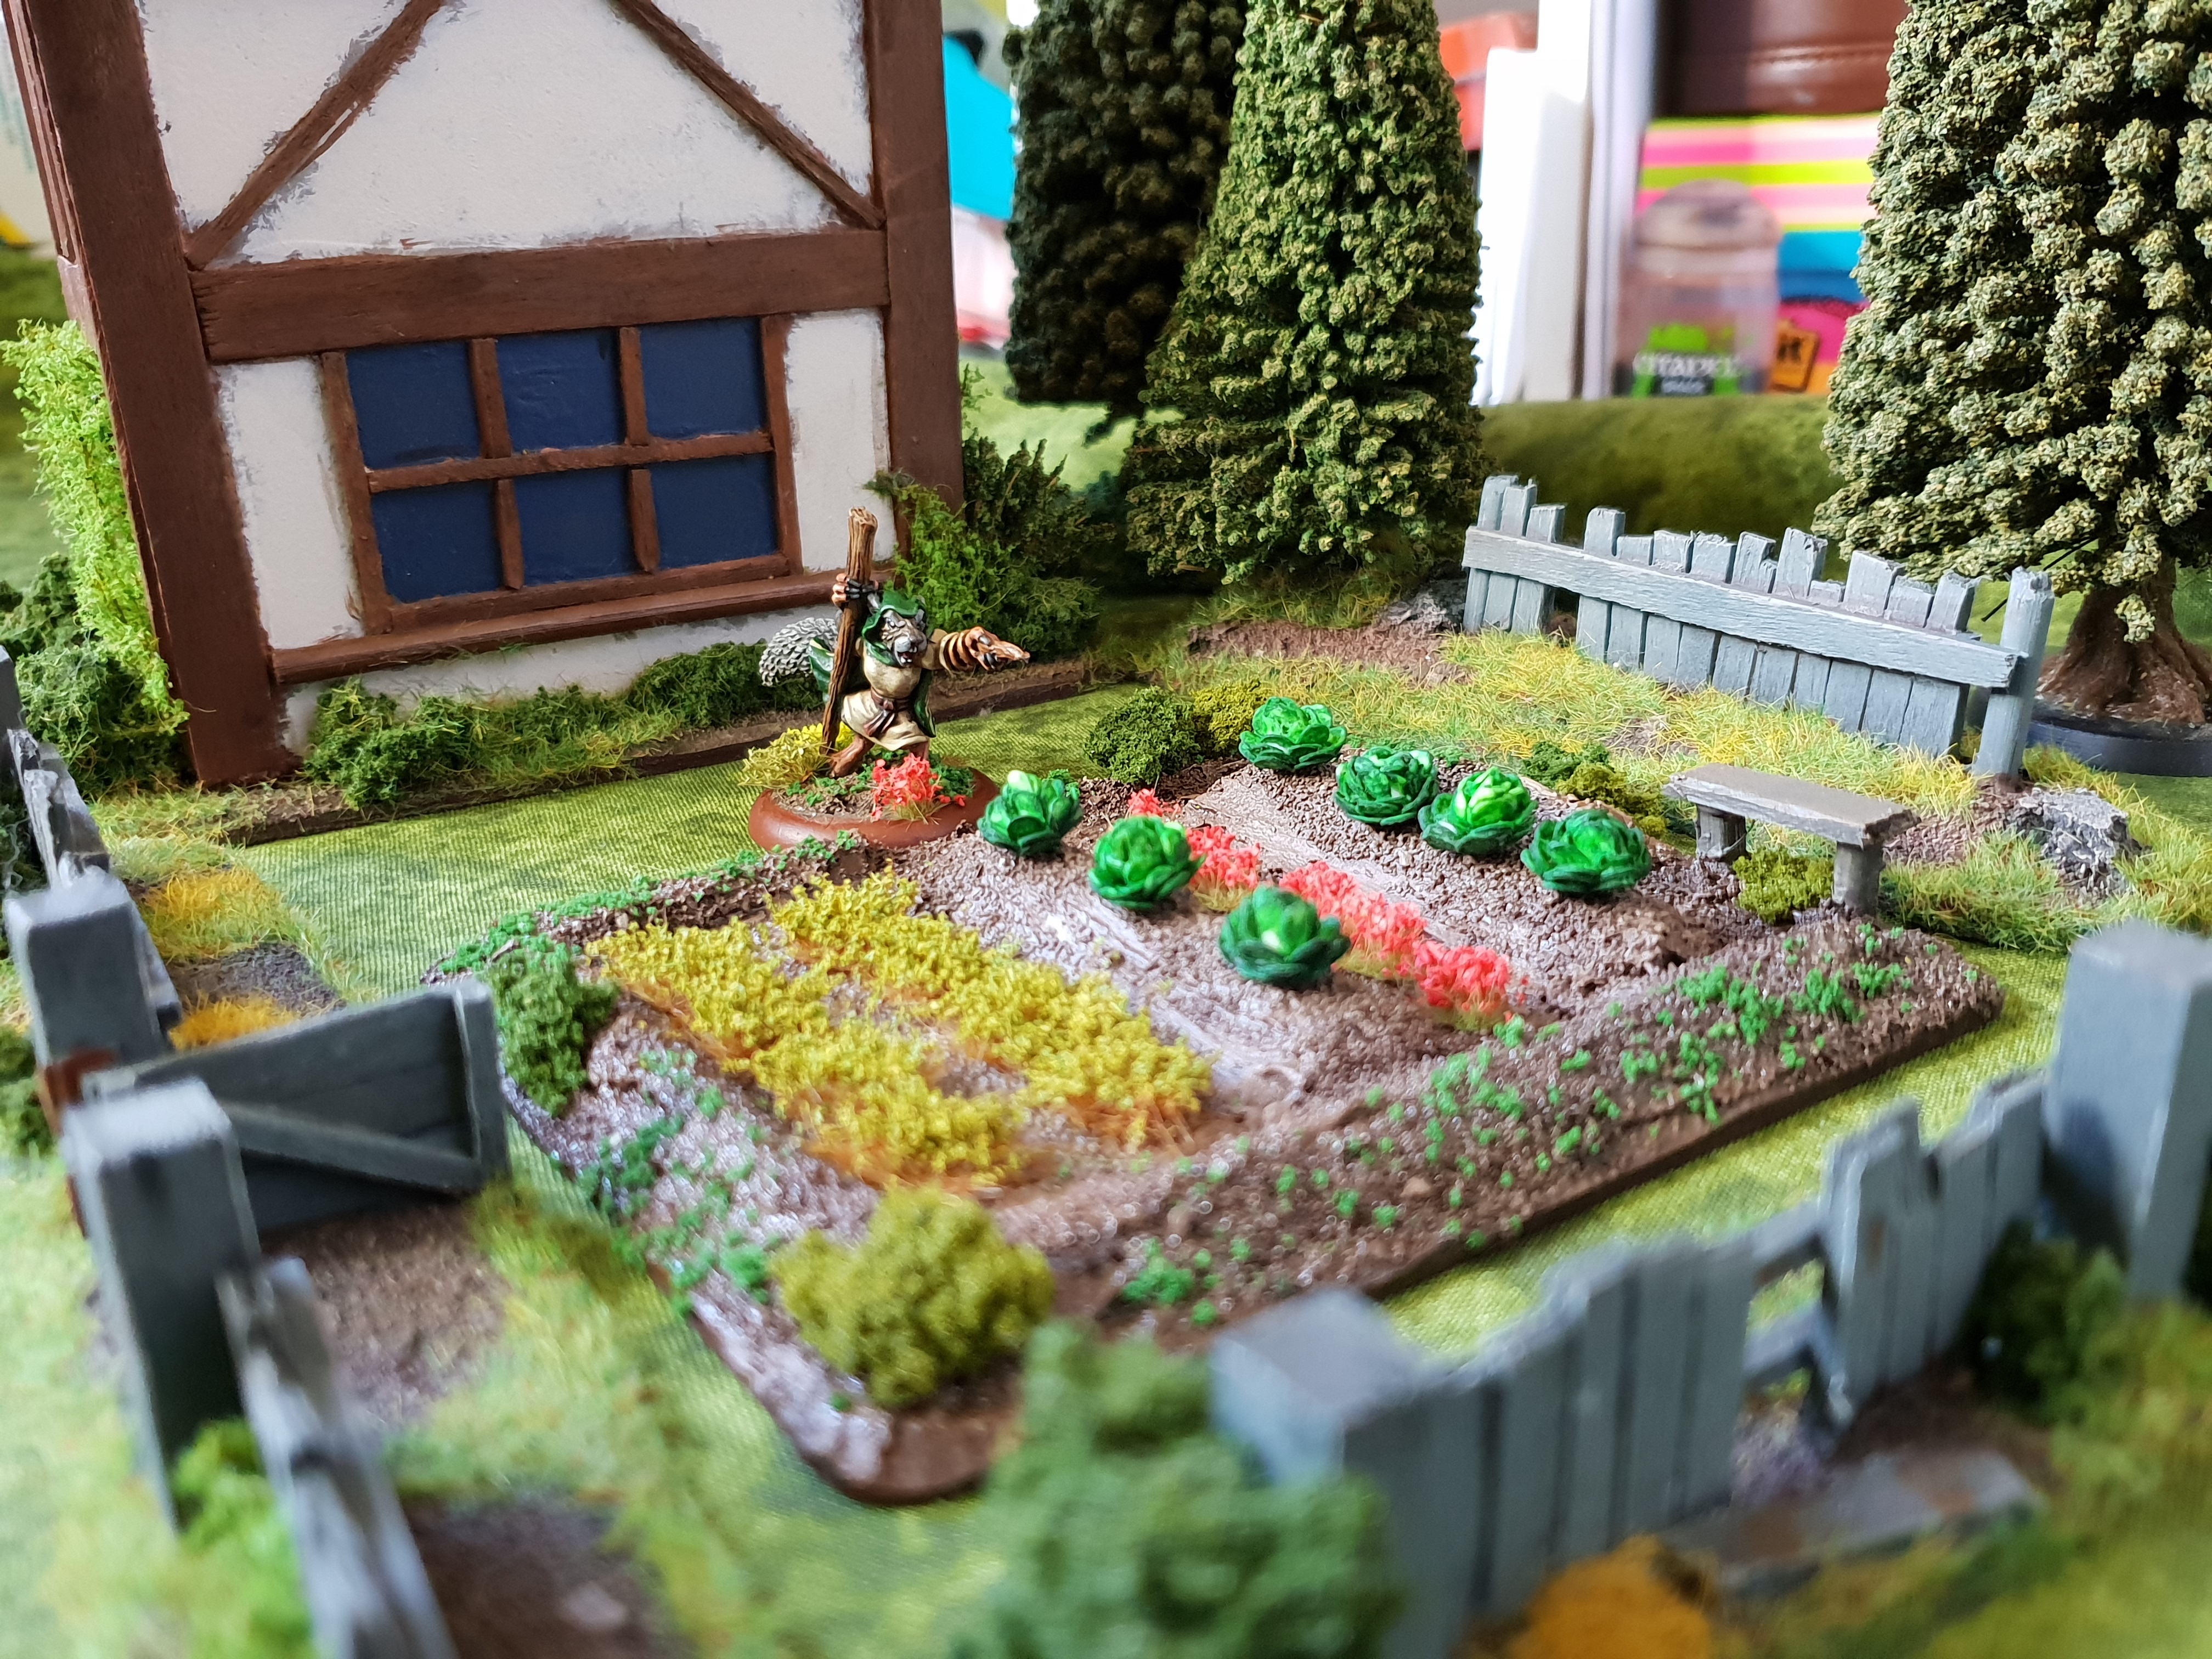
So I took a day to work on a LOT of different things but focused on finishing one small project for the blog. The veggie patch!
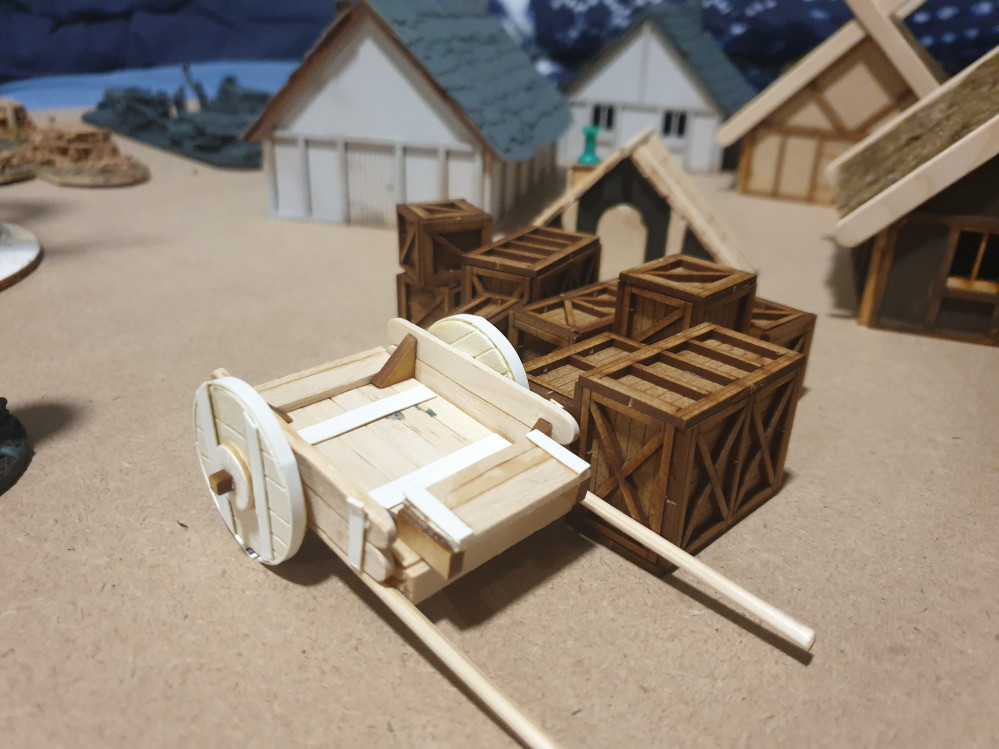
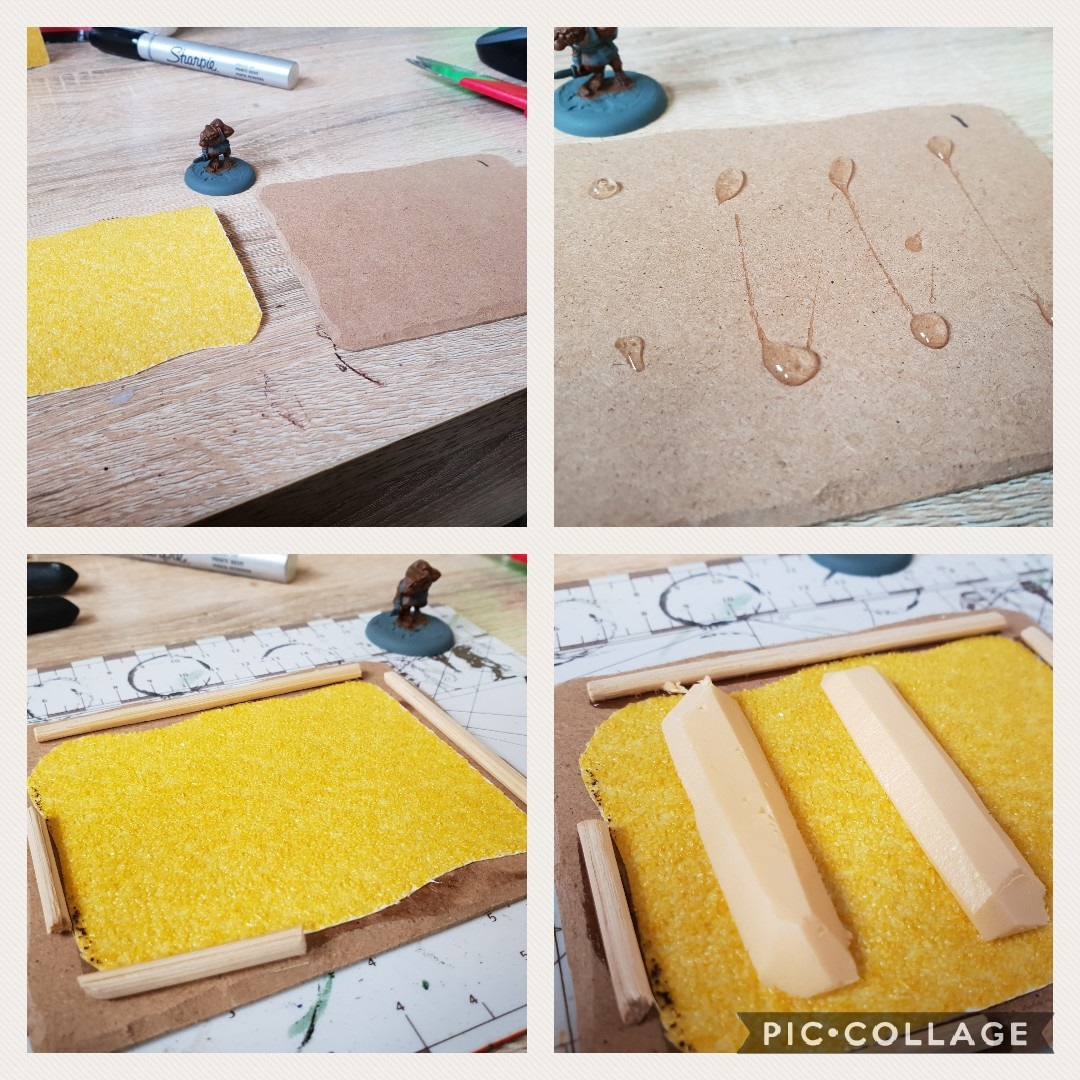
This is a pretty easy build but does use a lot of different resources. YOu could swap them out for fewer or cheaper alternatives.
Here’s how:
-I grabbed a stack of cheap MDF coasters from a craft shop. I cut a rough square of very cheap sandpaper to fit the centre.
-I used dots of Elmer’s glue to avoid a whole layer warping (This is a test for a larger field) I also applied a border of super glue too.
-Then I glued some BBQ sticks where I wanted borders and some XPS foam strips where I wanted veggies (the foam is so I could push in the pins on the cabbages.
-I filled gaps with hot glue, smeared on some filler and used PVA glue to texture the rest with sand and grit.
-I sprayed it dark brown and dry brushed it up using a rich brown for the garden and a sandy brown for the edges…it made no difference because I rushed it.
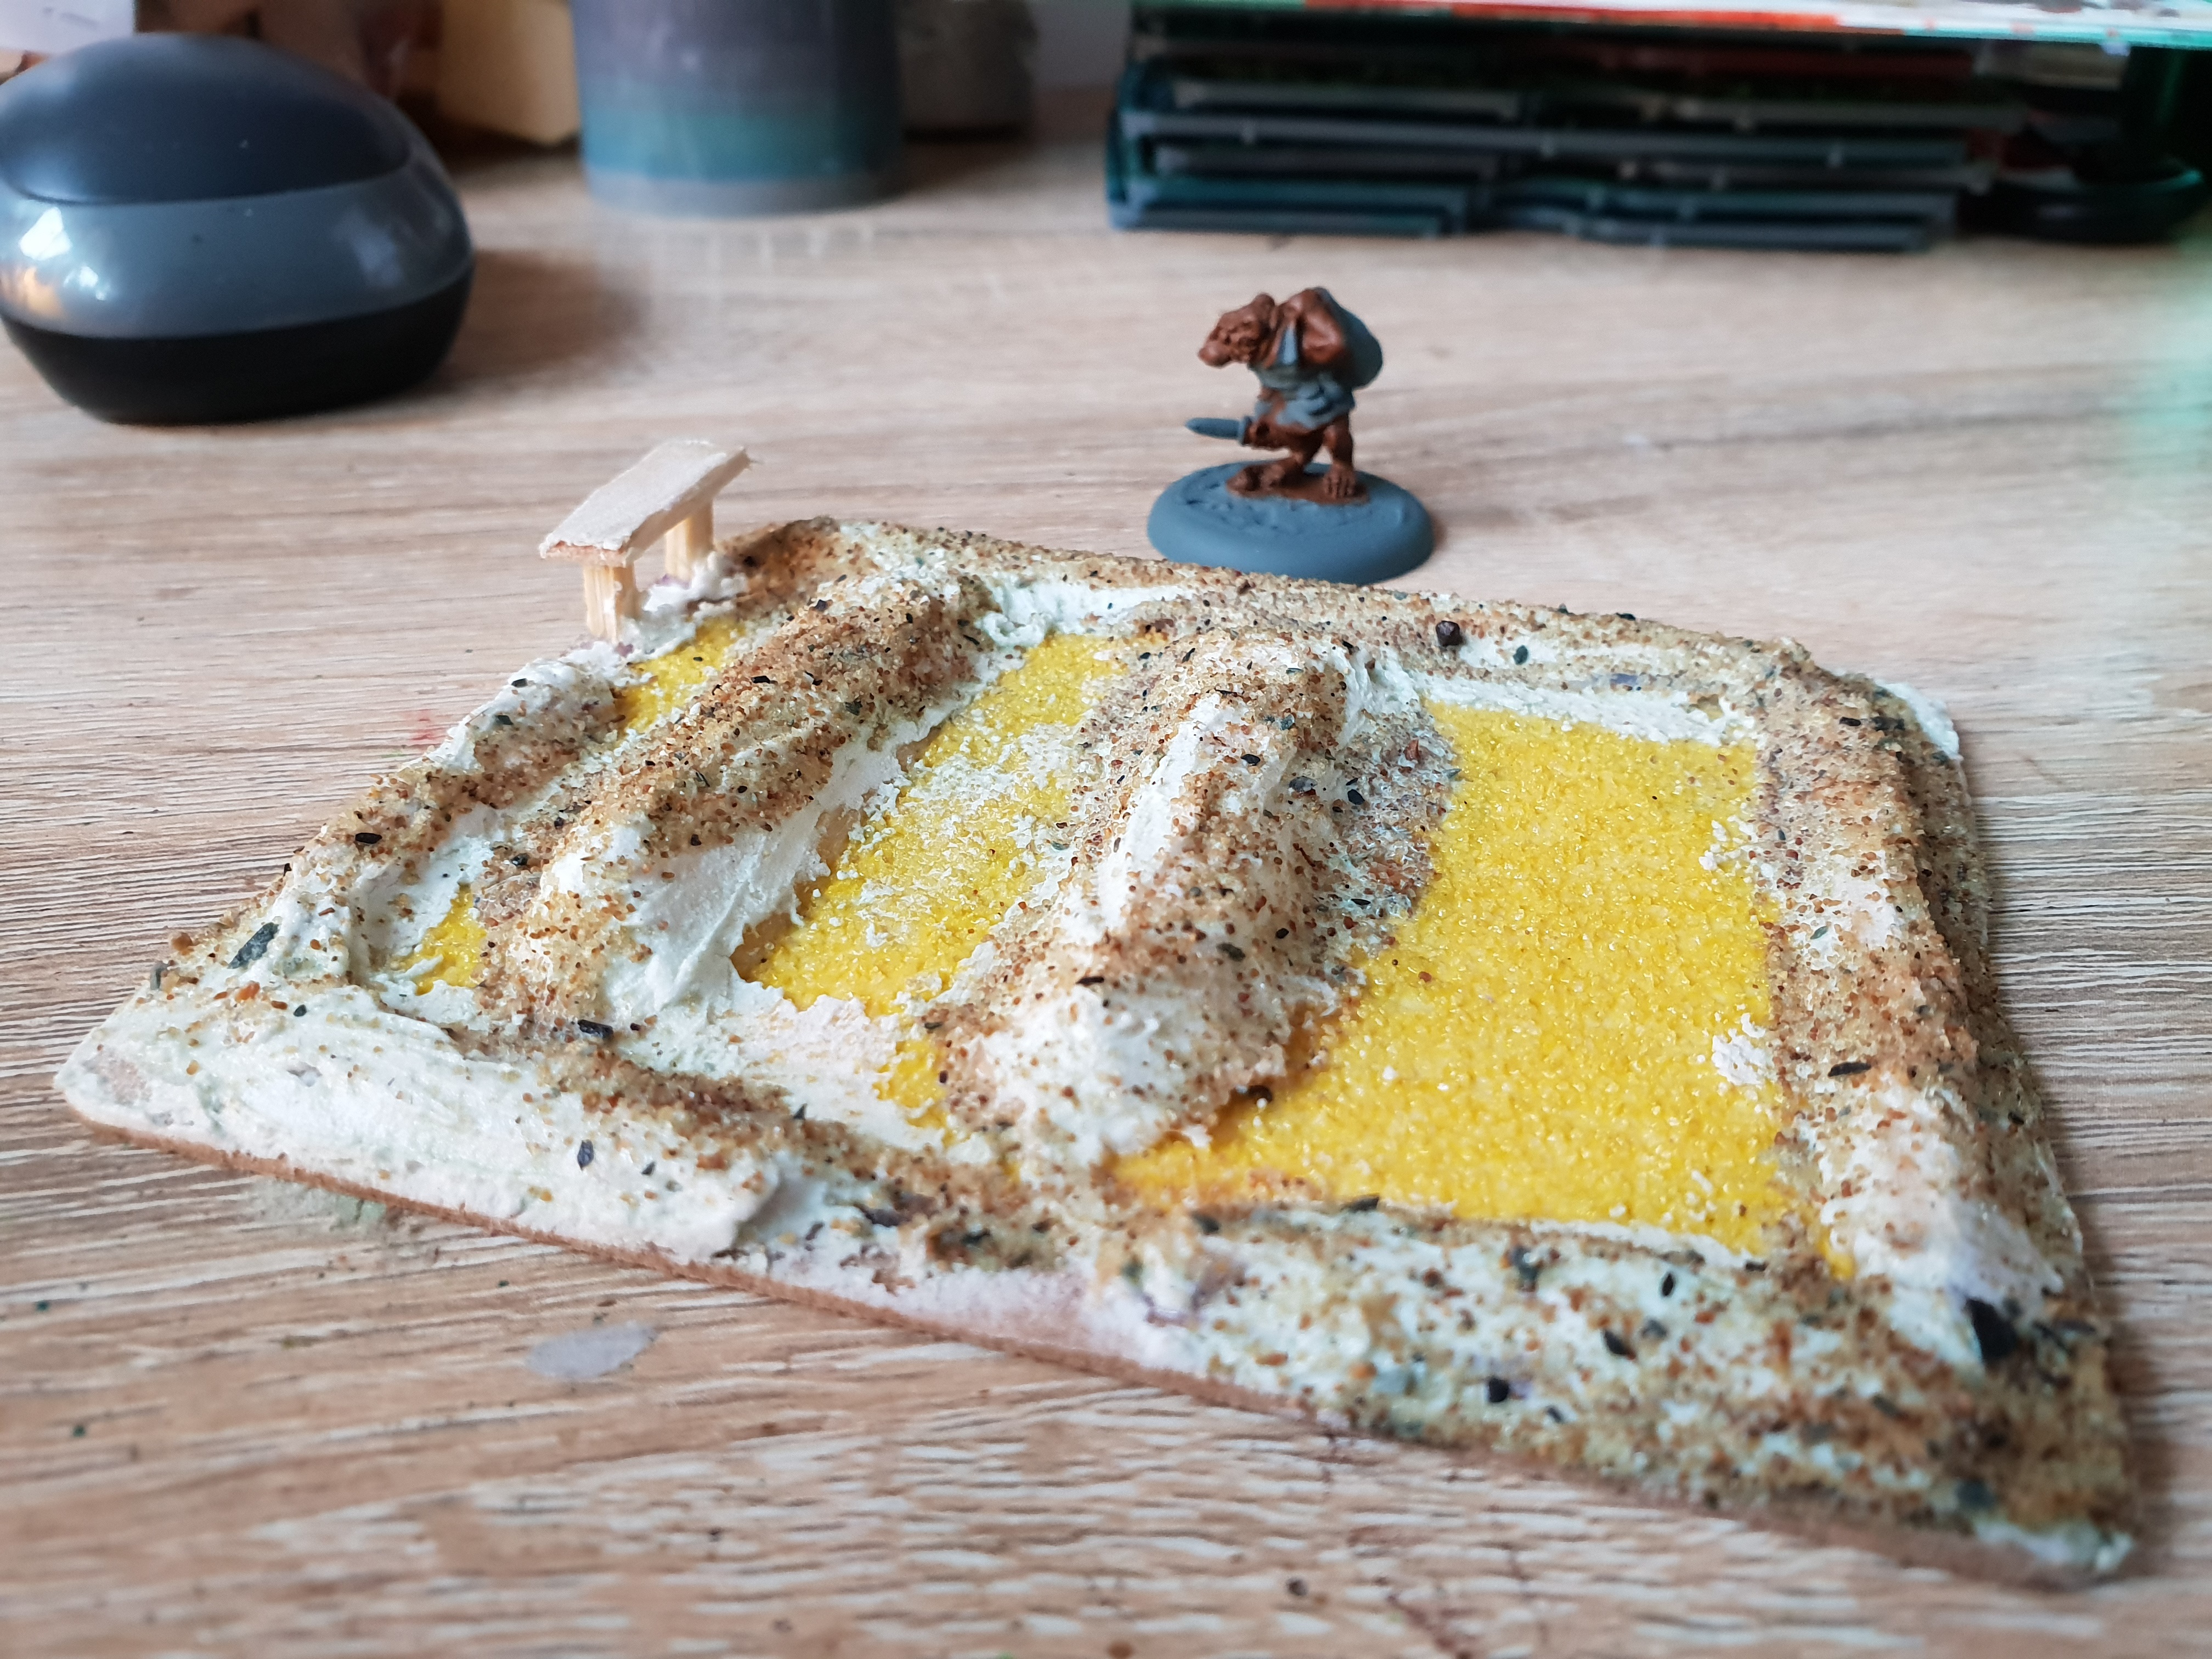

Next up the veggies and other greenery.
-I bought some cheap cardboard blossoms from a craft store and loaded them up with a range of green washes, lighter in the centre and darker on the outer leaves.
This takes a while as the wash soaks in and reveals more white as it dries.
-I sprinkled some scatter onto the edges, added some small clump growths and a few rows of flowers and generic vegetation to the garden.
It will need a final spray of watered PVA to lock down the delicate parts before a matt varnish.
I think it looks perfect beside some of the town houses and I could easily make a few more to scatter about the place.
Hope you enjoyed this one, I sure did,
Cheers, T.
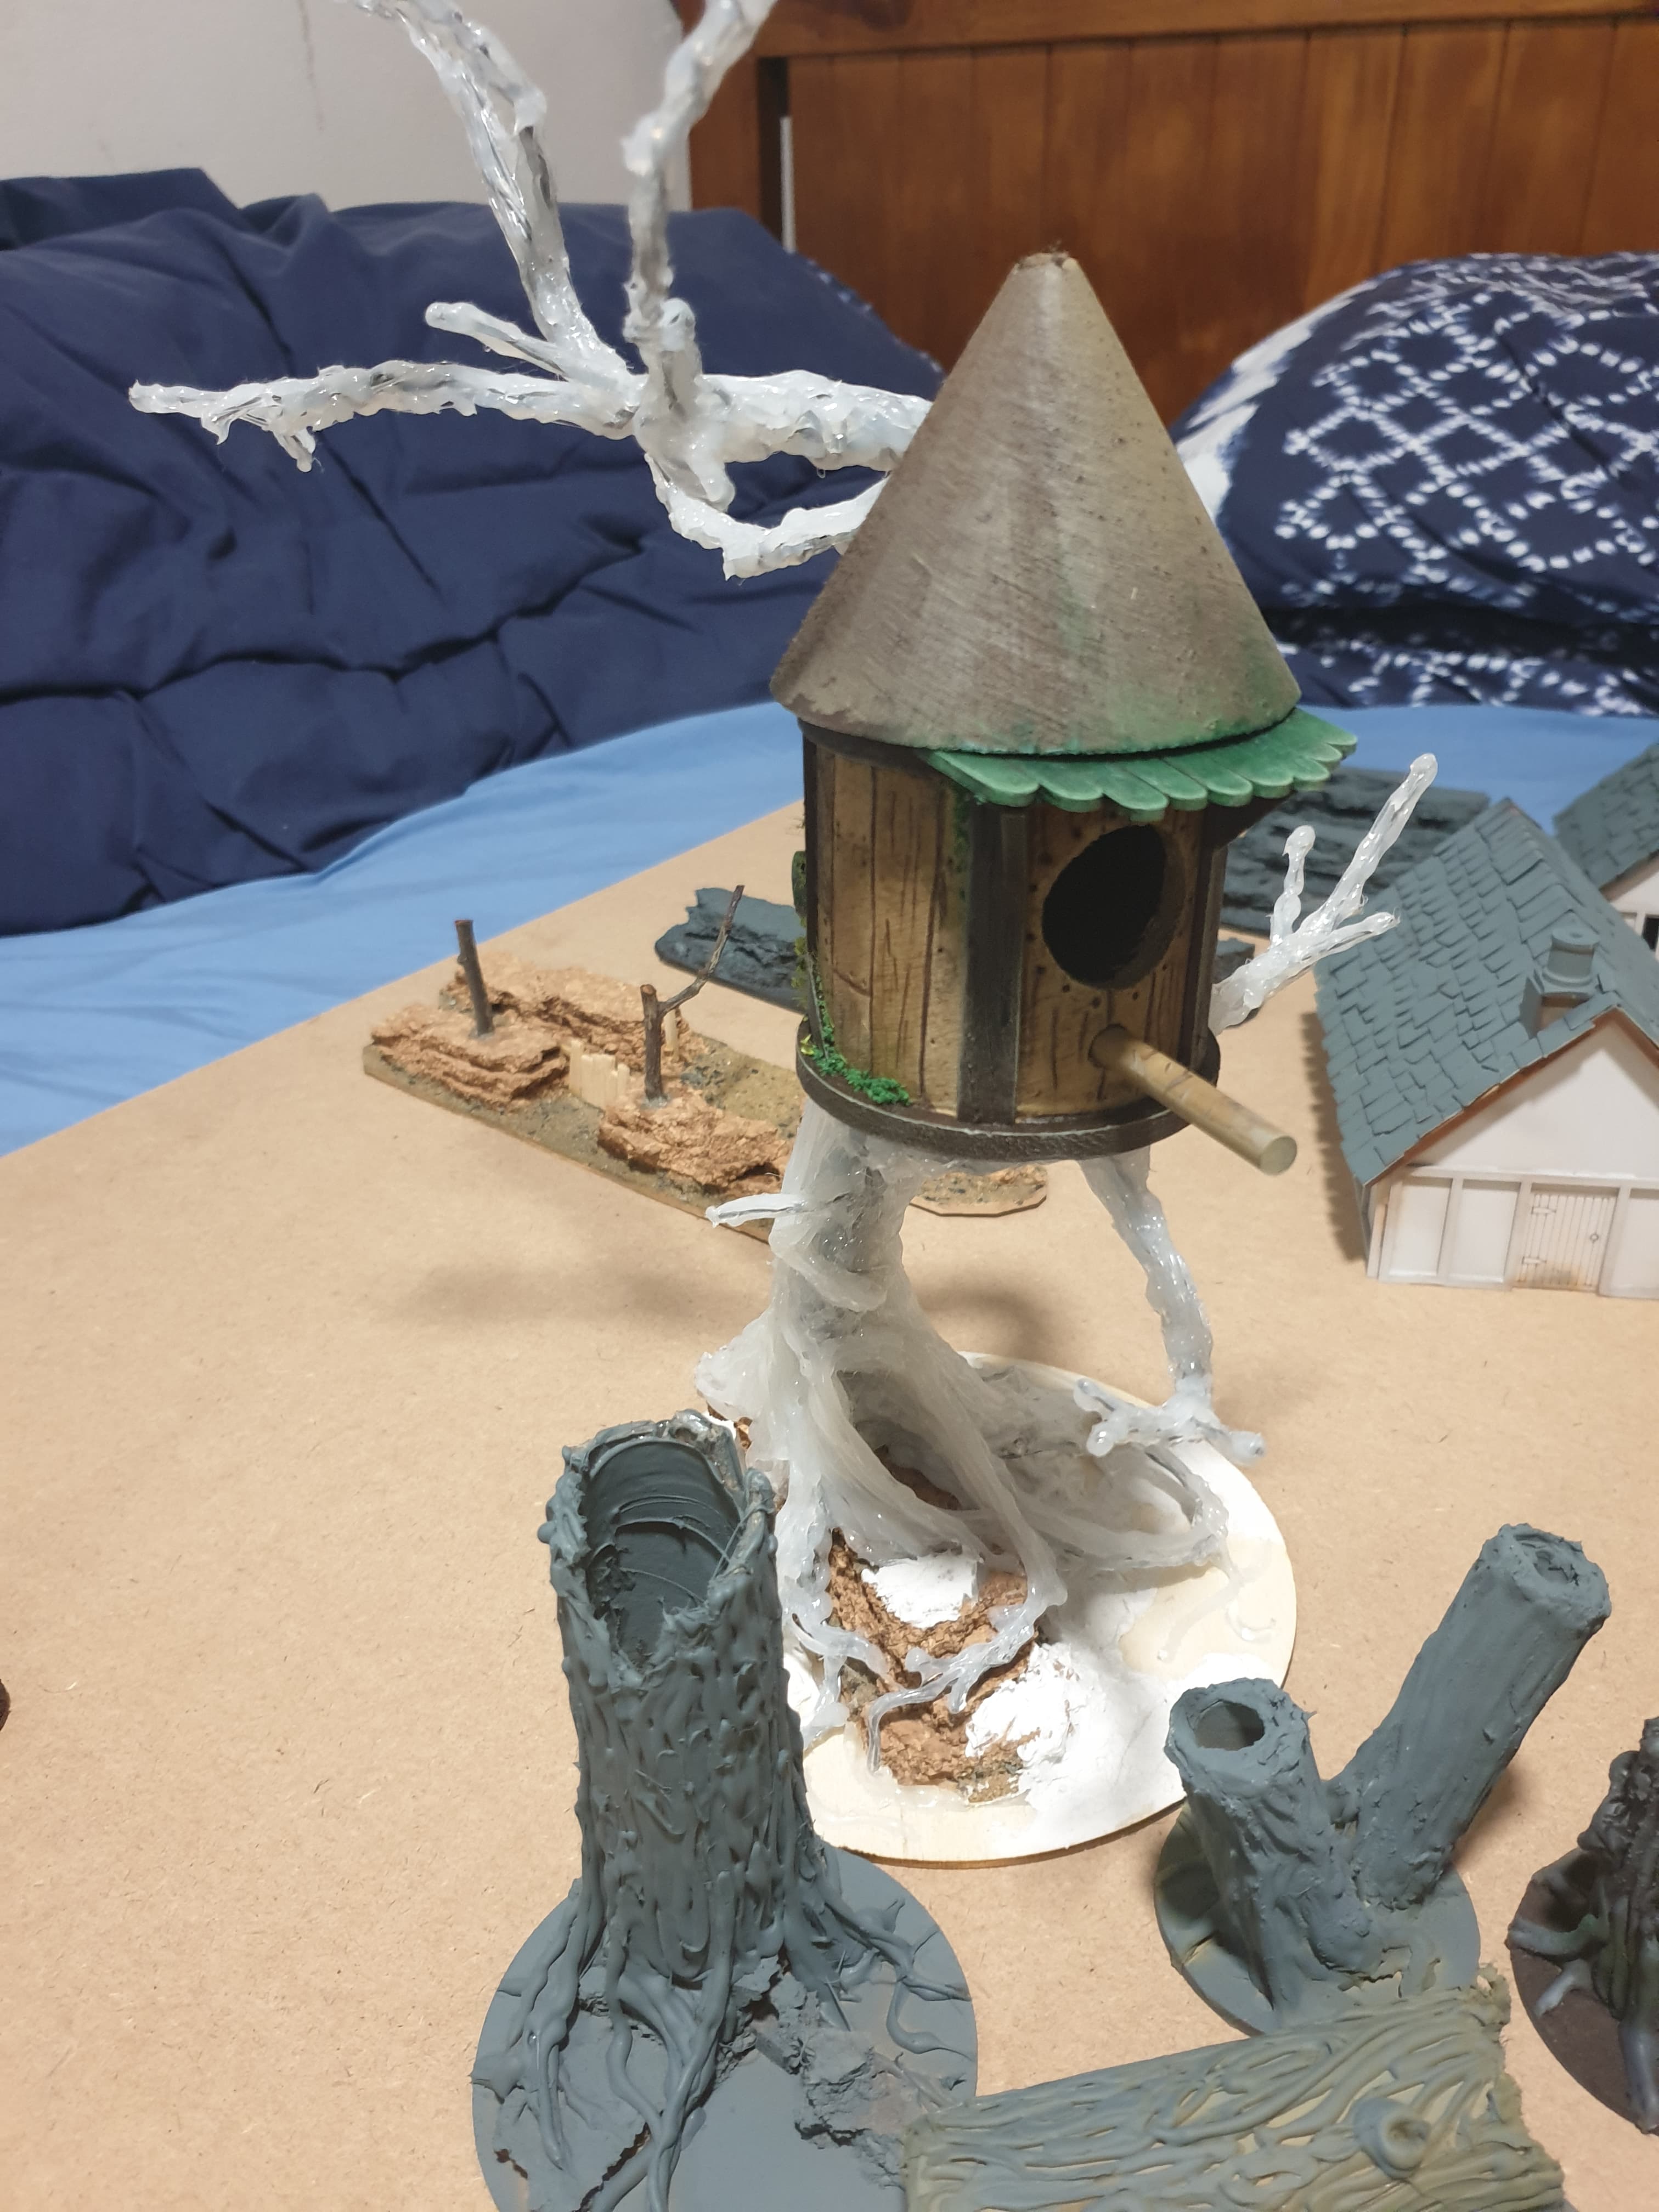
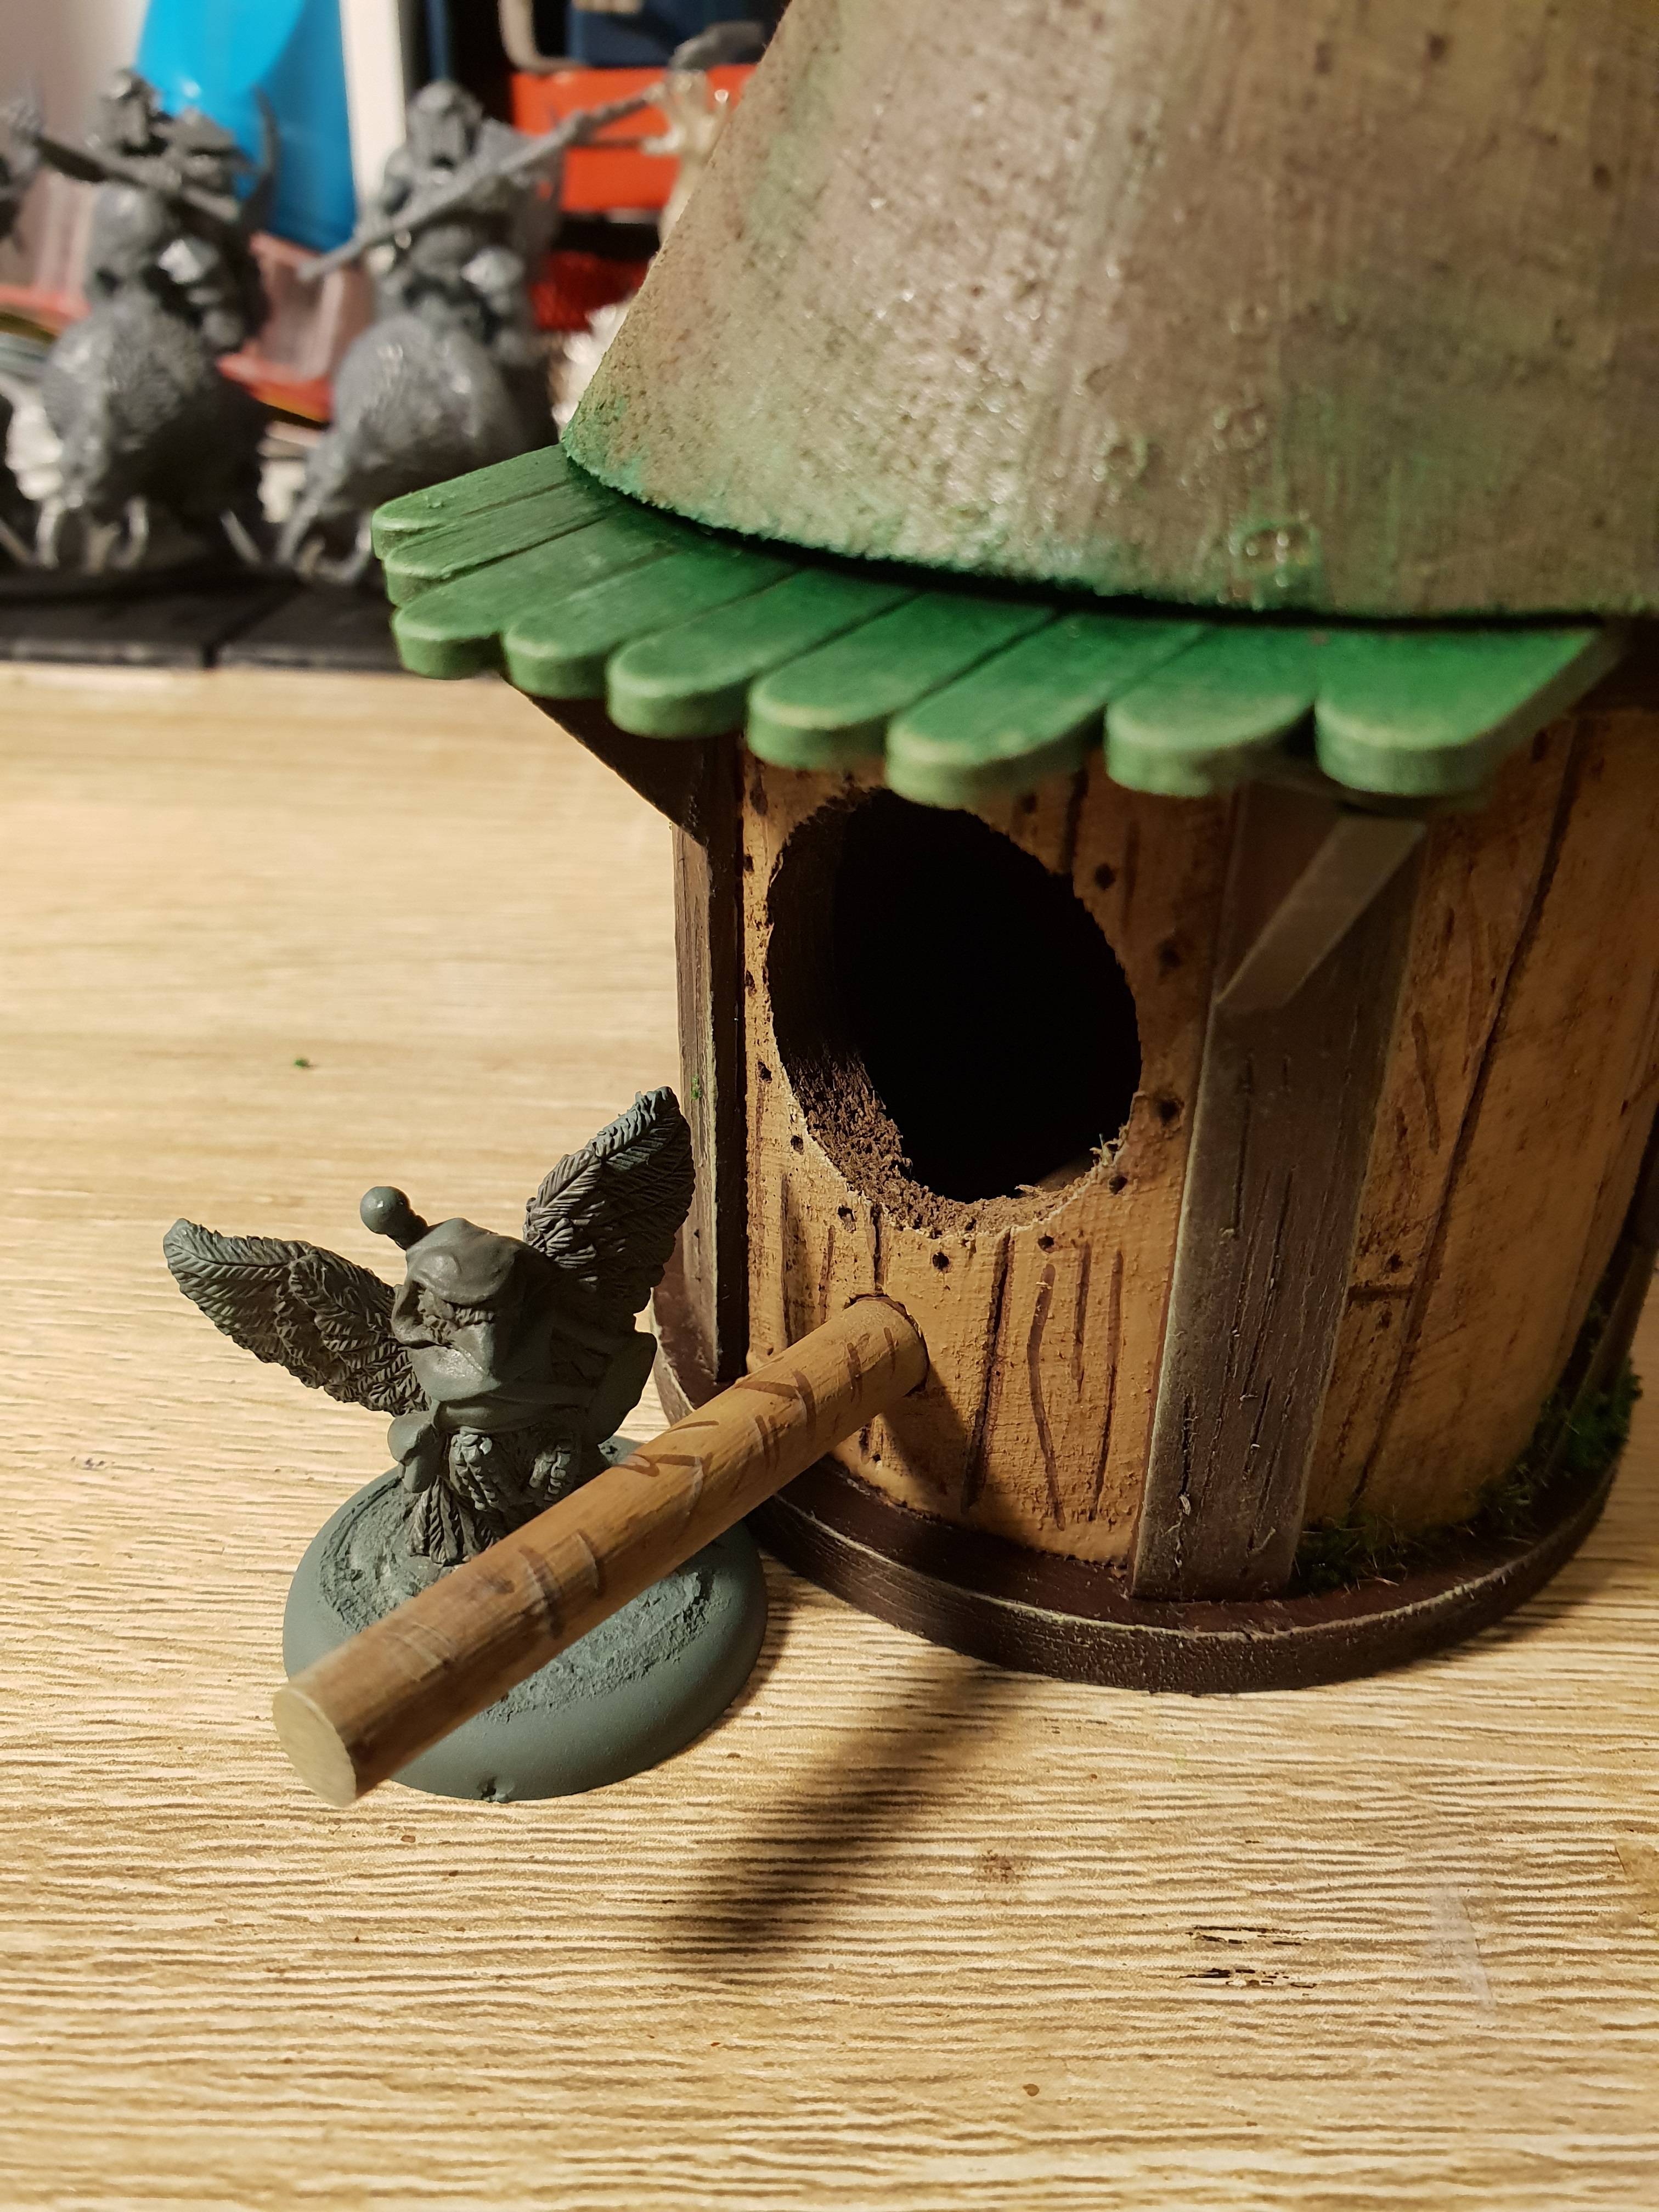
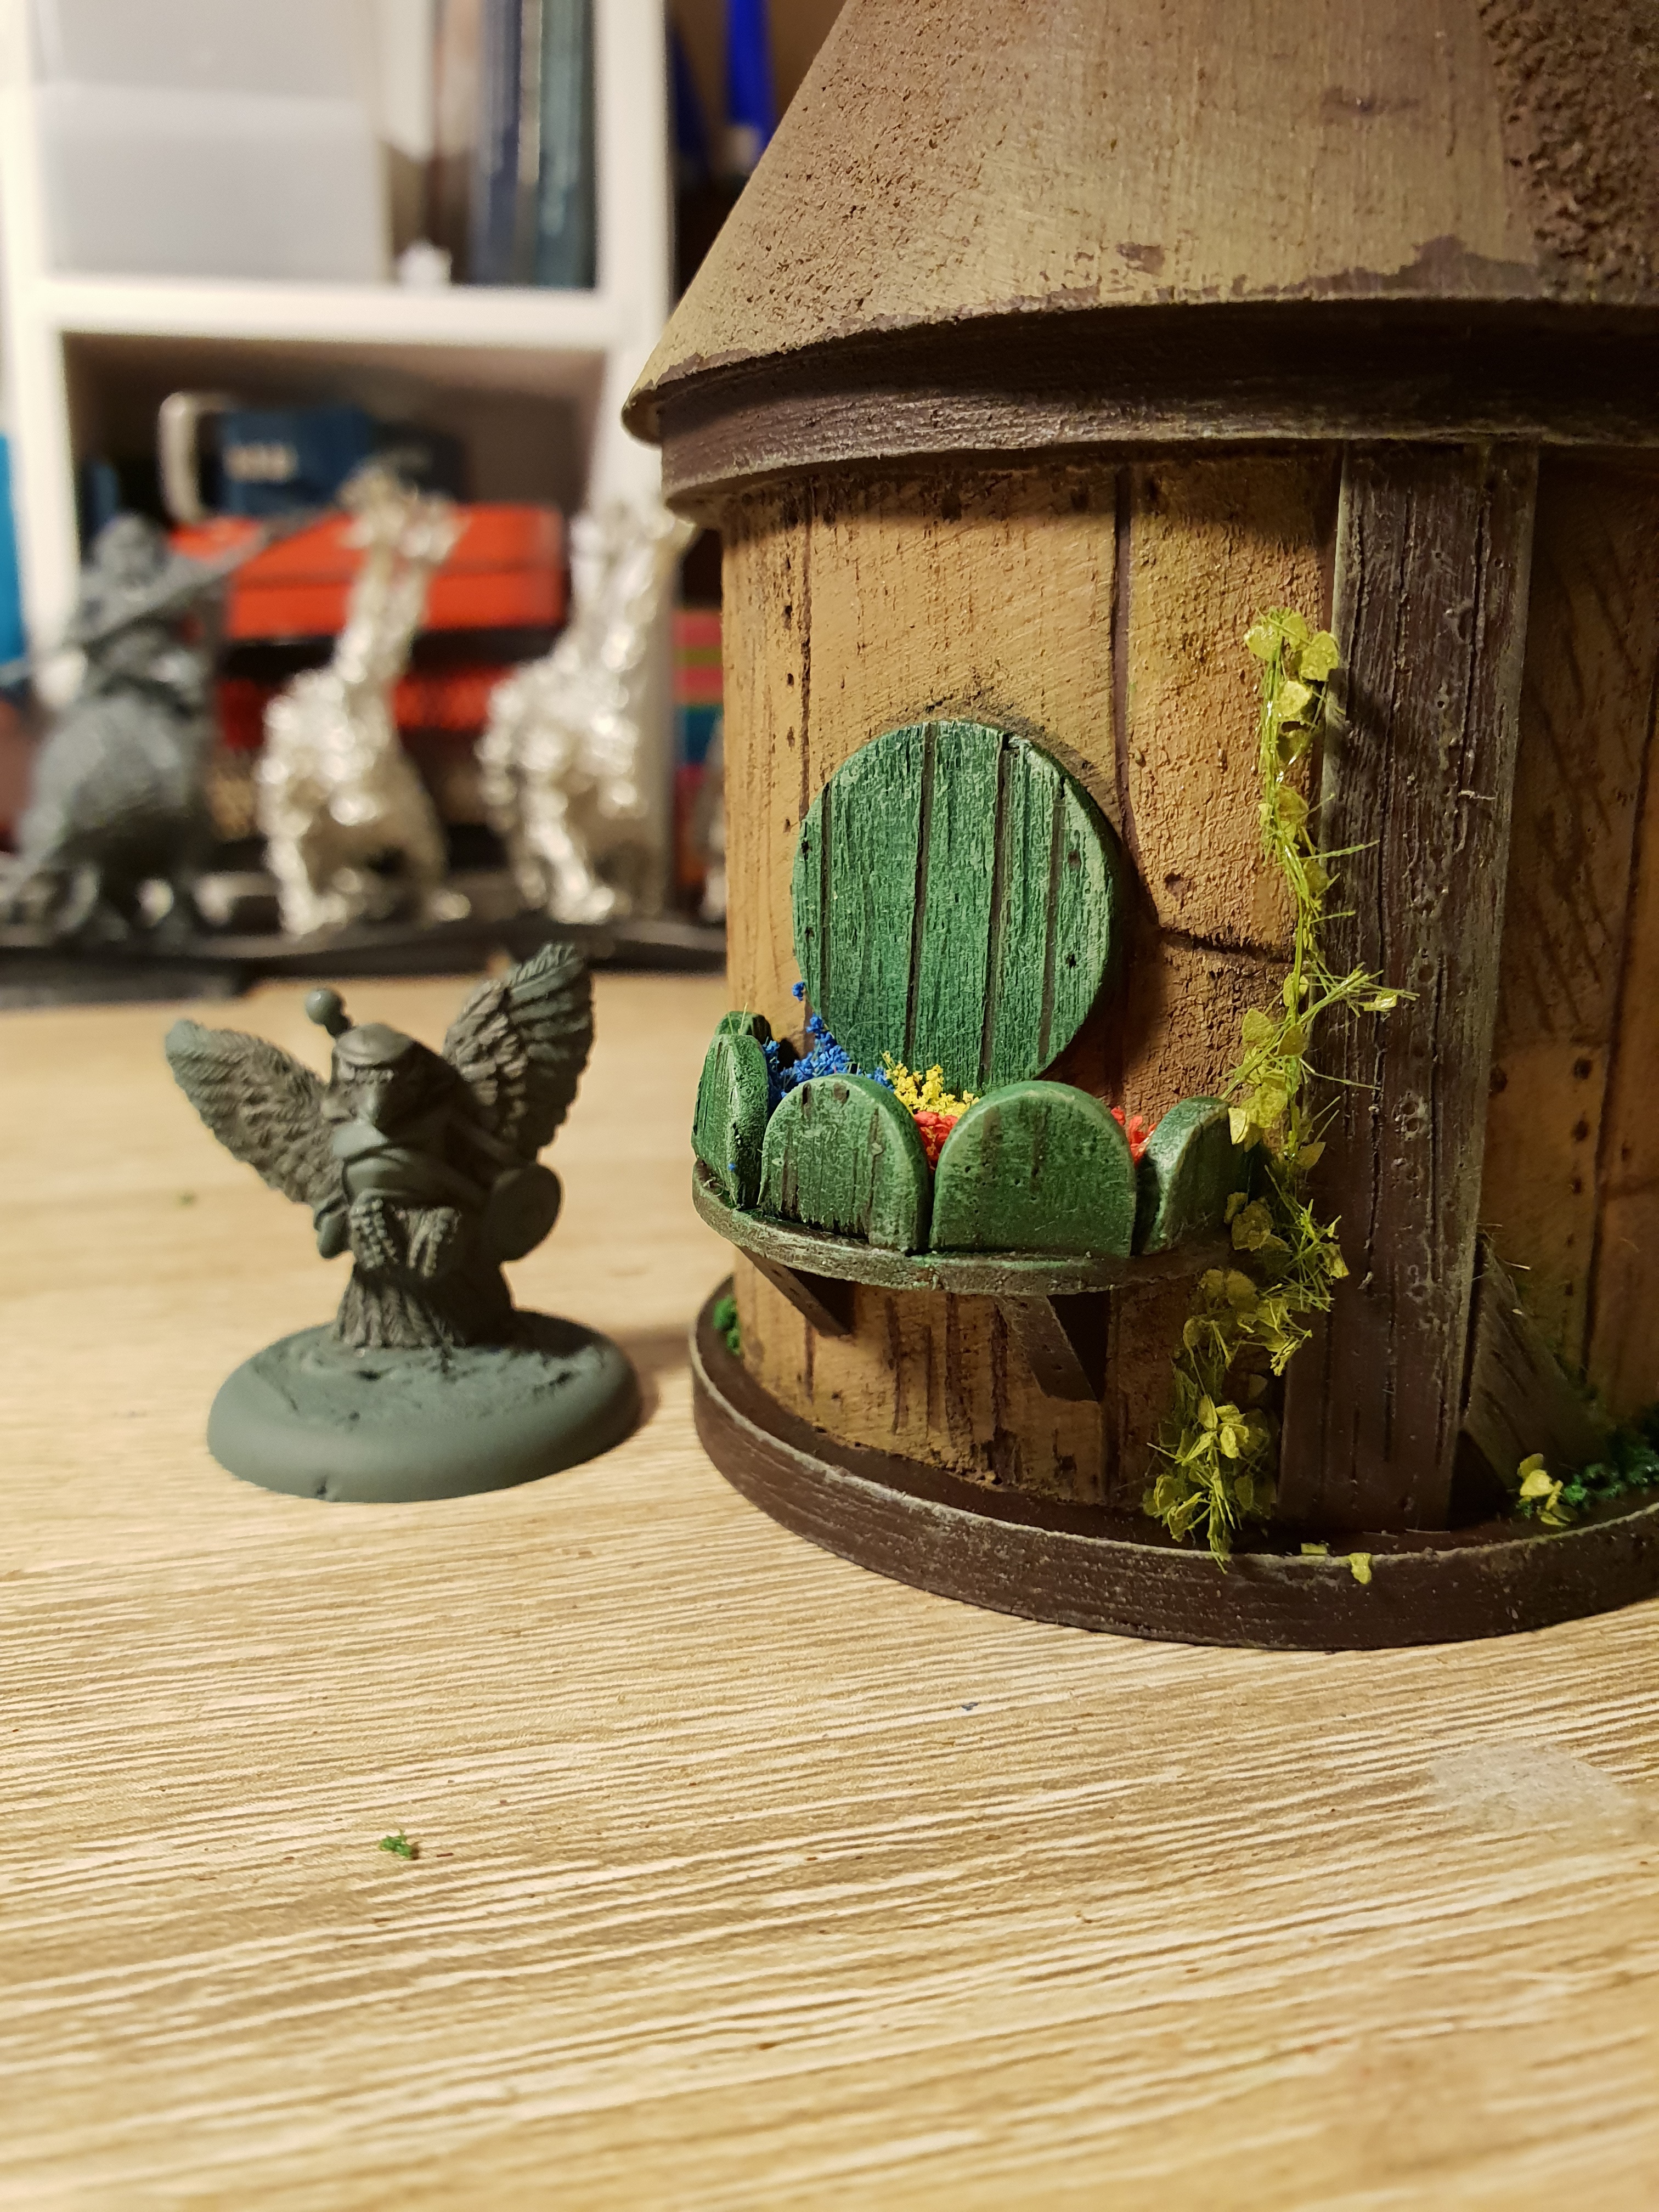
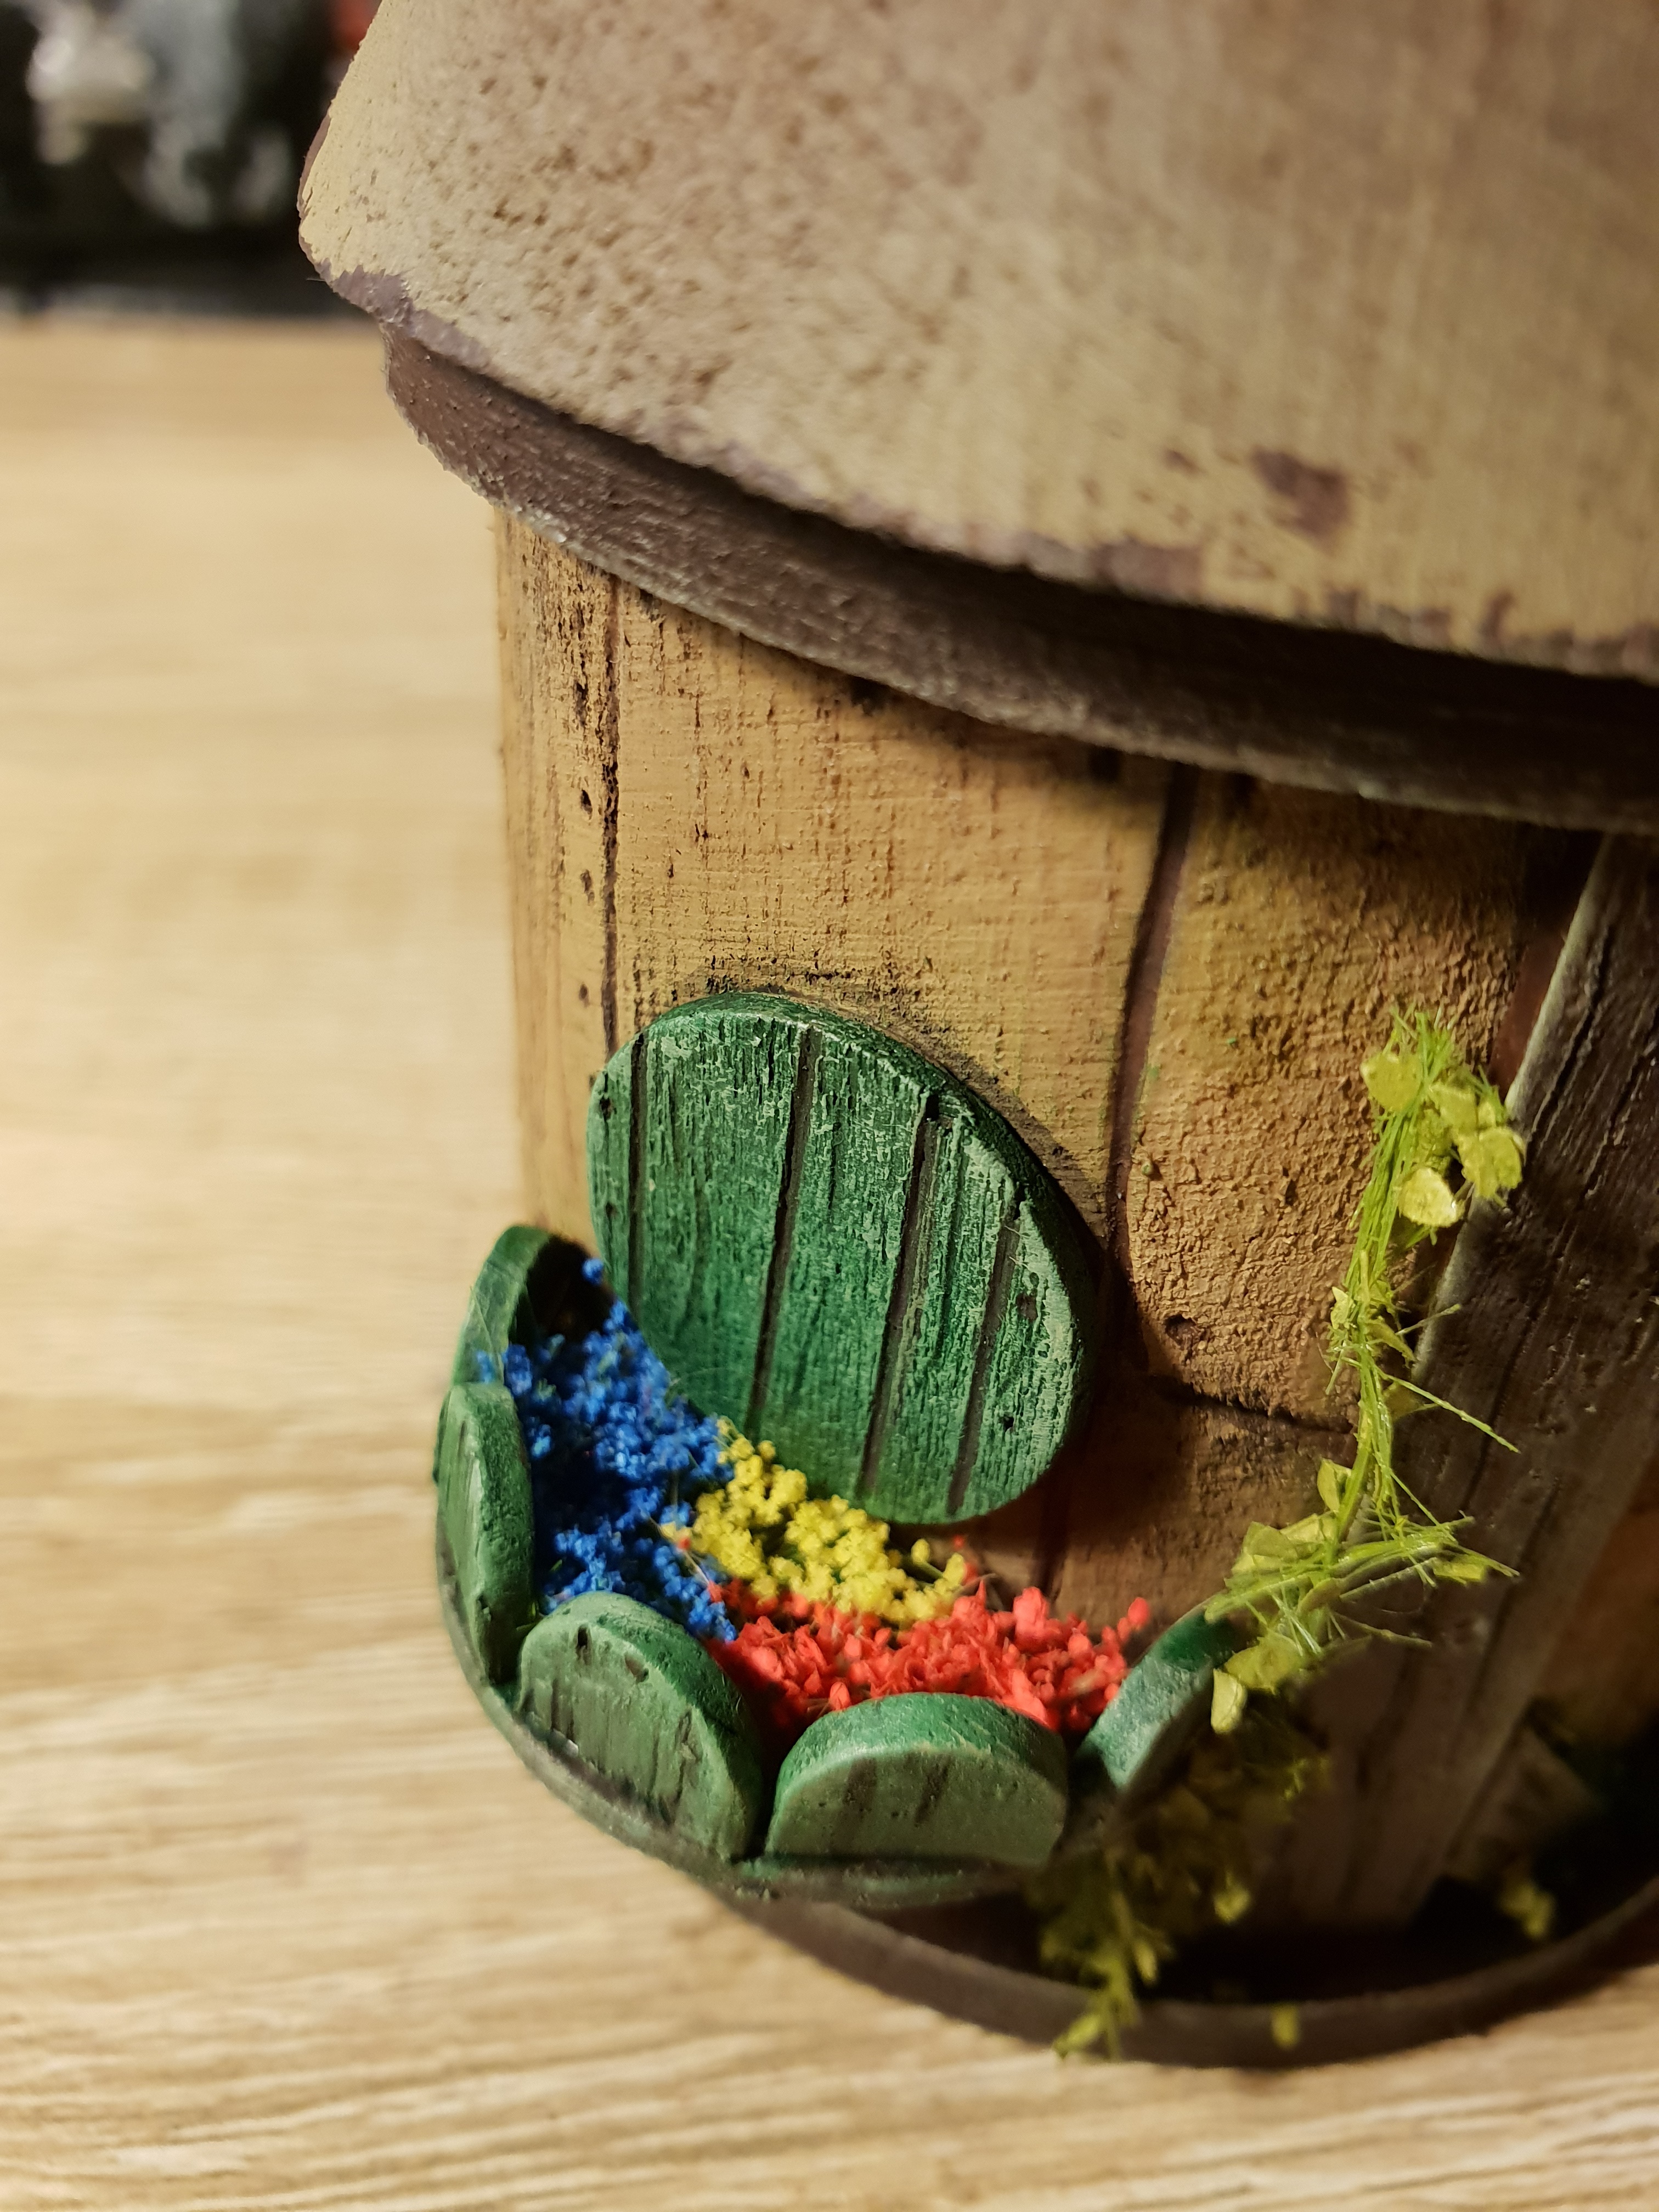
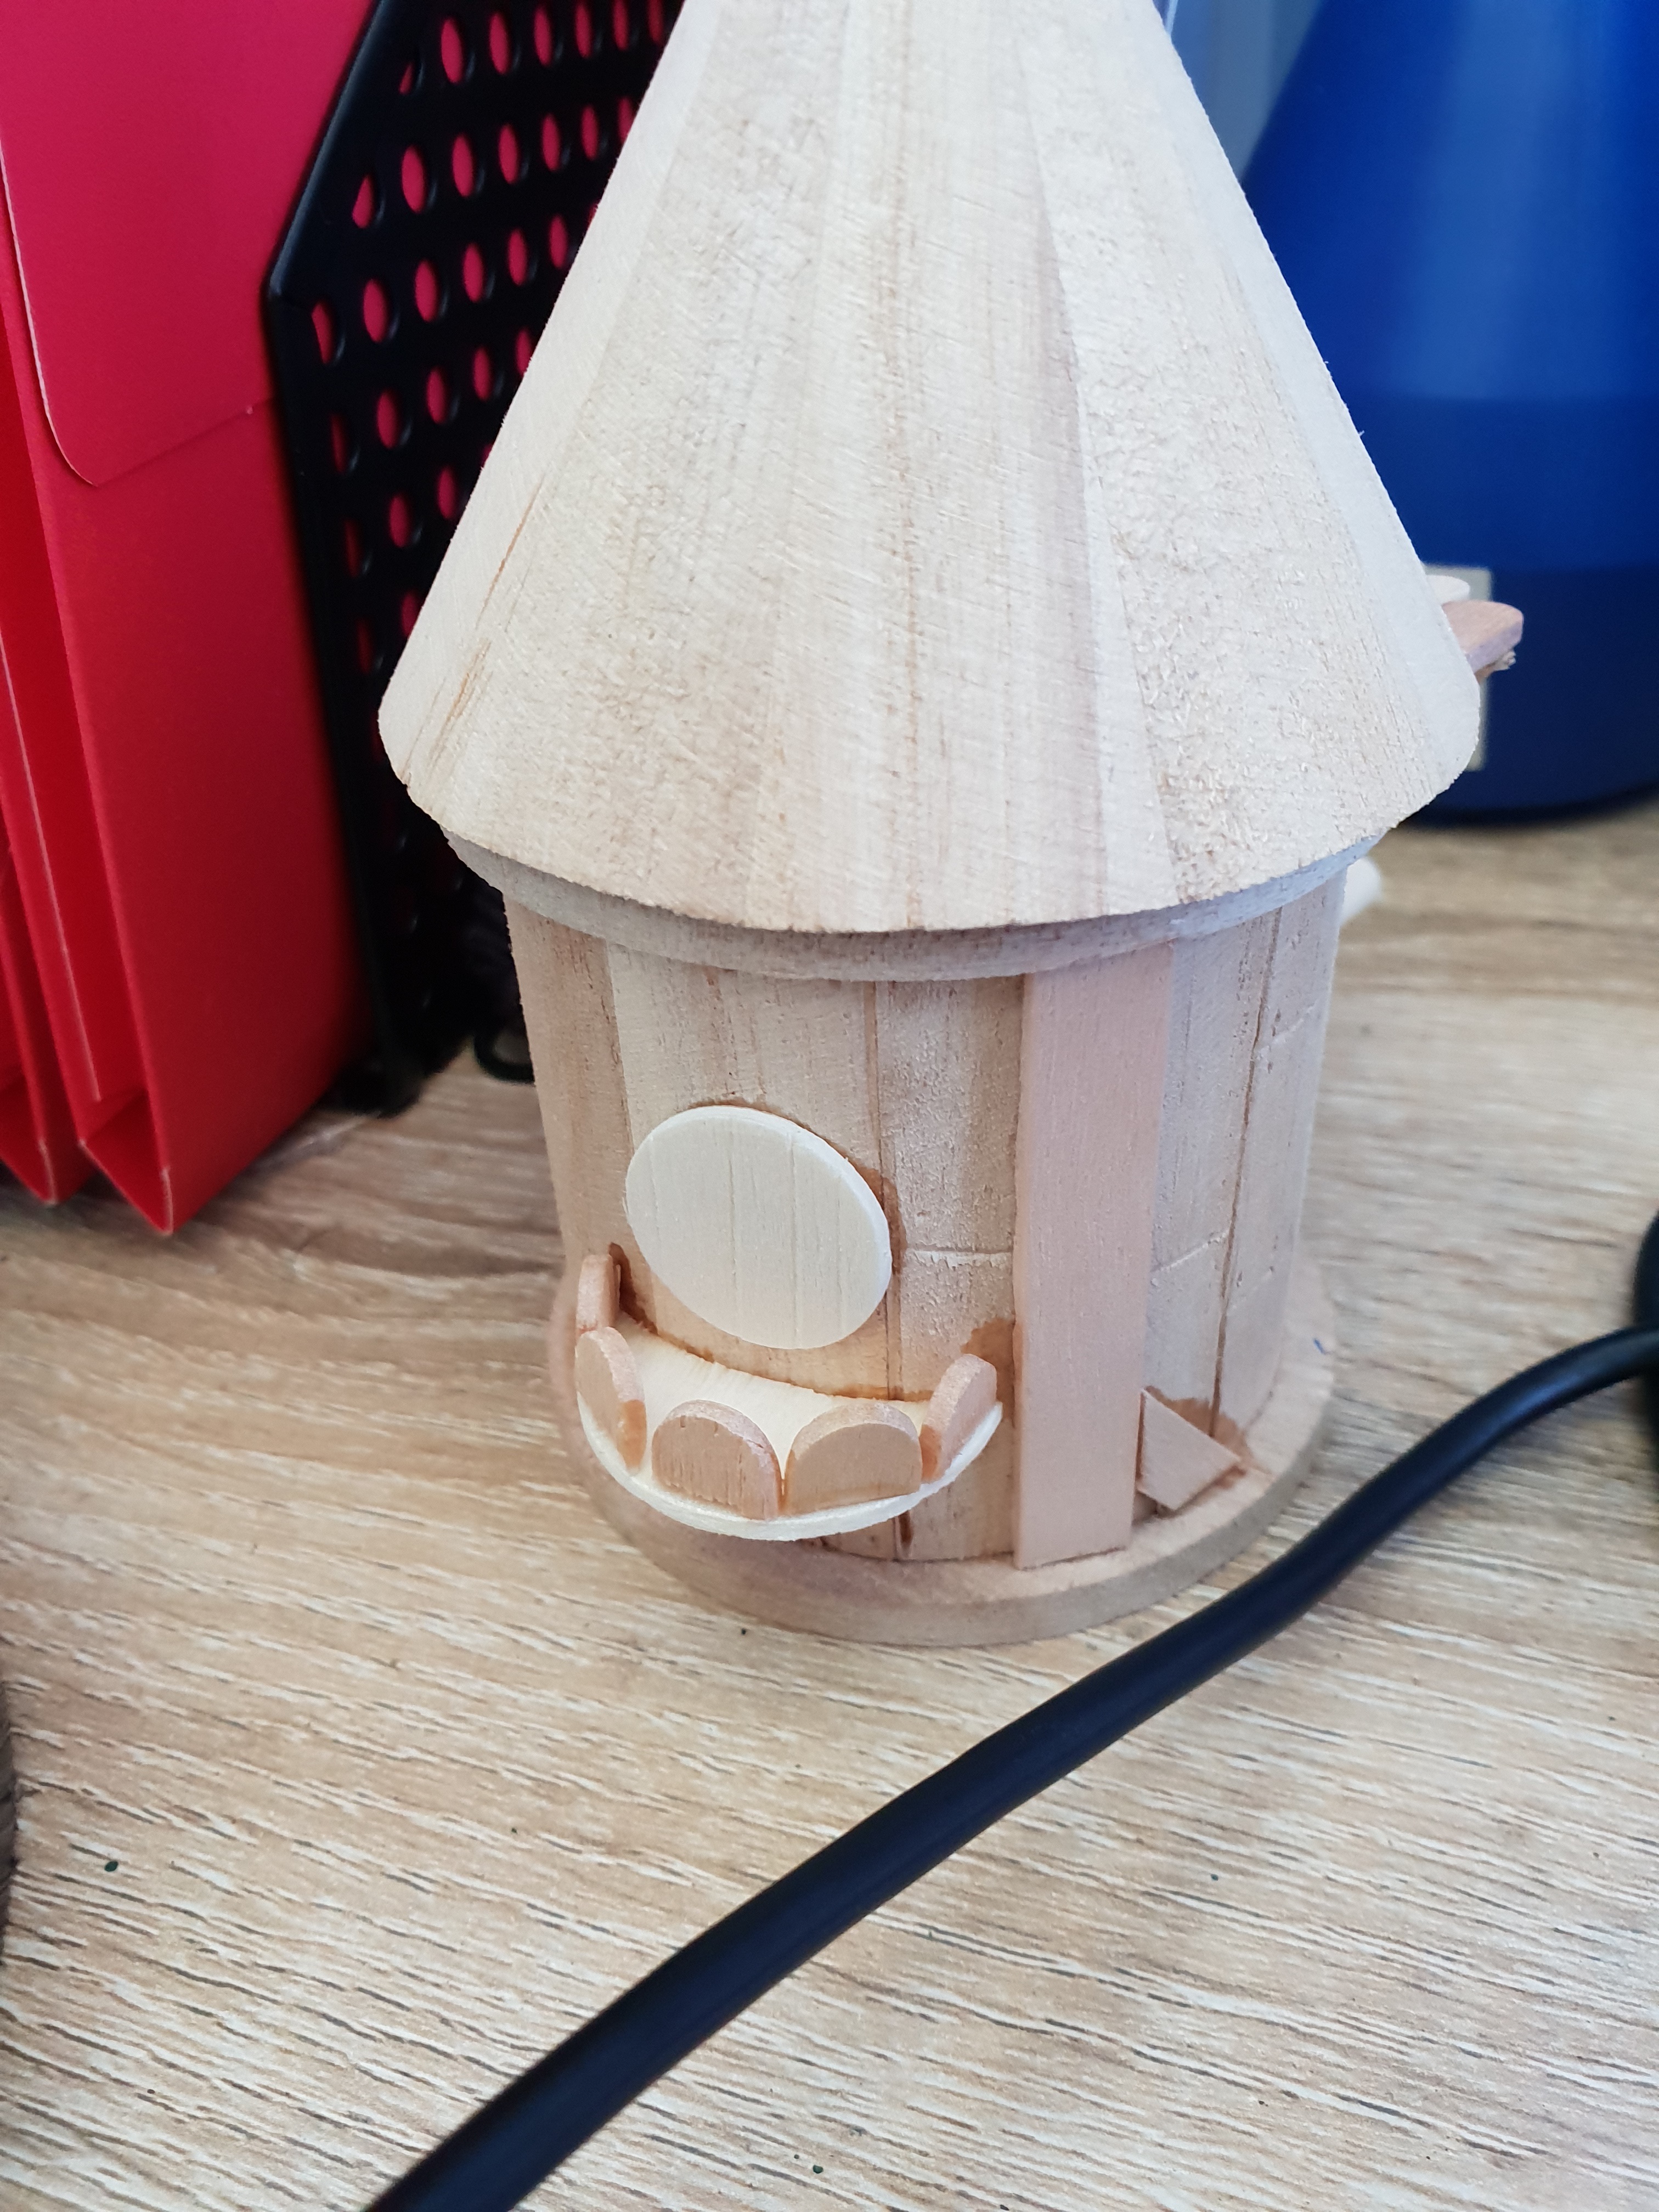
A room with a view: 4
Not much of a tutorial this time, just some pics of the WIP of the bird house with Wee Jimmy Sparra for scale.
Steps:
-I undecorated the whole thing in a dark brown for shading, similar to Rhinox Hide from GW.
-Next I directed some blasts of a pale tan (Zandri dust) onto the main wall panels and zenithal on the roof.
– Then I painted in some different panels of wood in other pale tones for variation. All the wood was then washed with dark brown and quick dried with a hair dryer.
-Some of the details needed a second direct shade to make them pop.
-The support beams and trusses were touched up with Rhinox hide and dry brushed.
-The eaves and window was painted dark angels green, direct washed in recesses and then dry brushed by adding zandri dust.
-Athonian camoshade, a dirty green wash, was applied to some areas to represent moss and mould. Some pva and scatter flock completed the effect.
-I added some vines here and there and filled the window box with flowers.
NEXT
The next step is to either thatch the roof or, my preference, to layer it with small sticks like an inverted nest.
I think this will look at home in a tree or on in town on some sturdy legs, like a water tower.
As always, comments and criticism welcome.
Cheers, T.
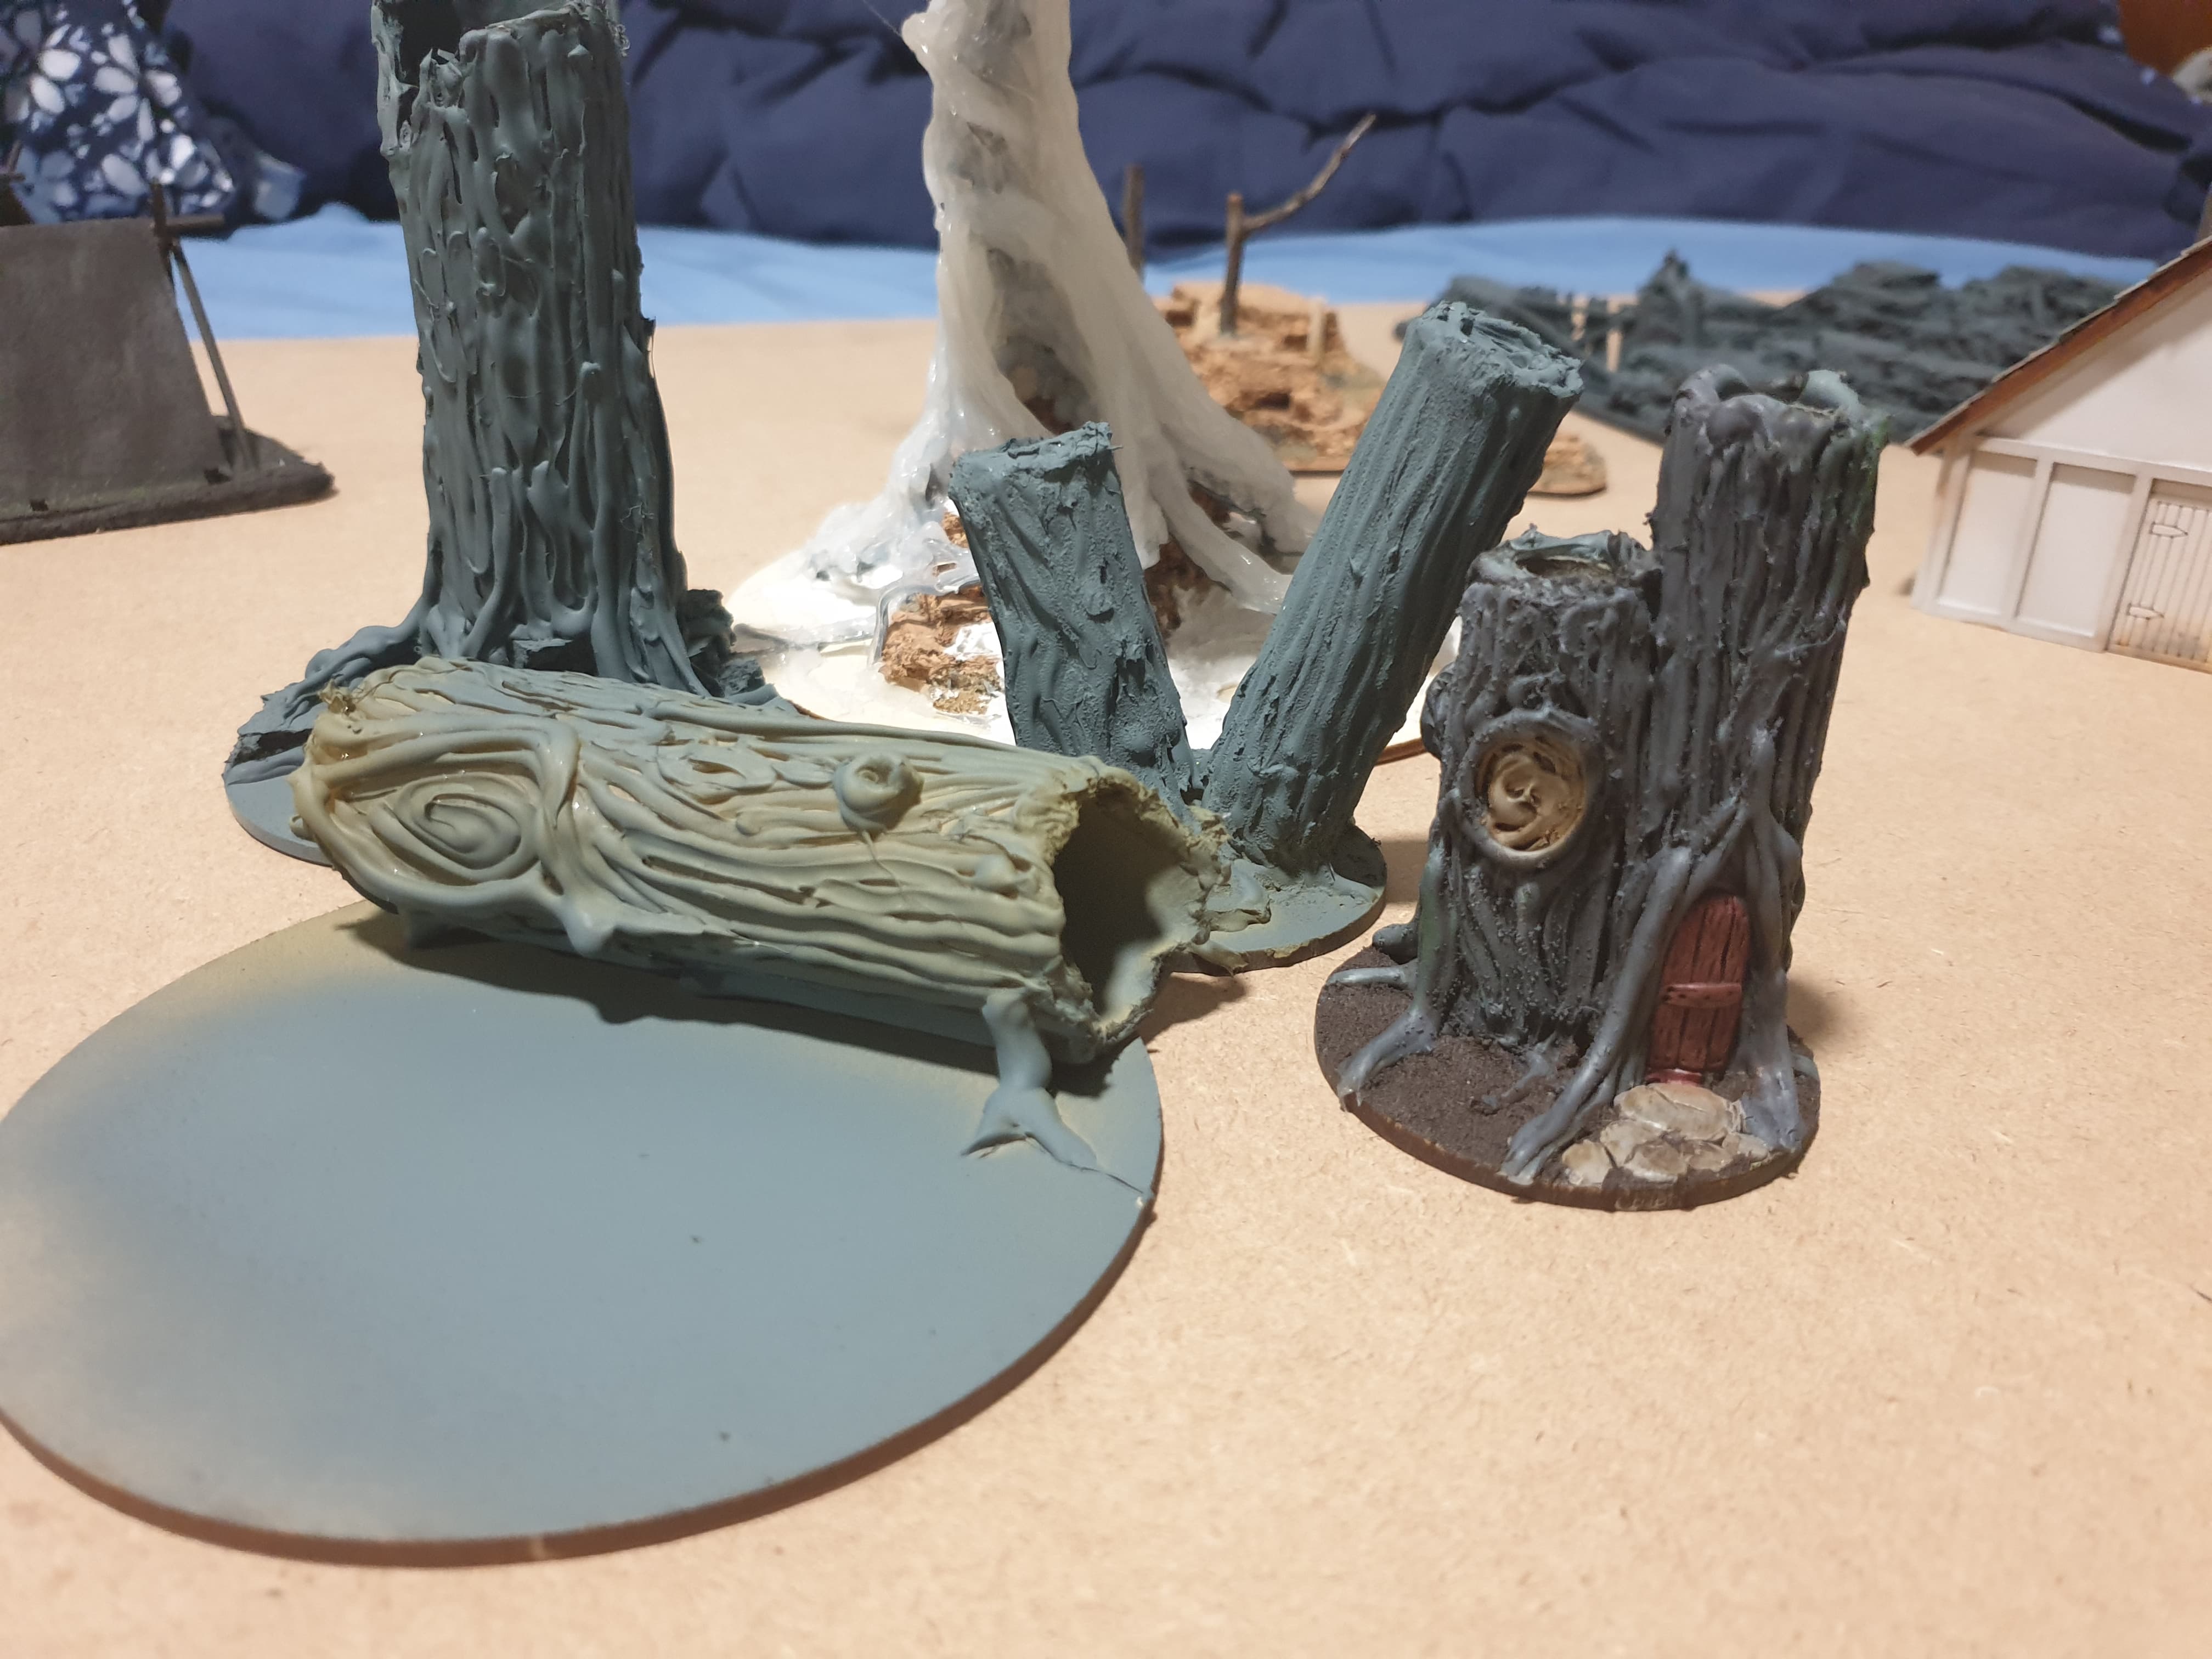
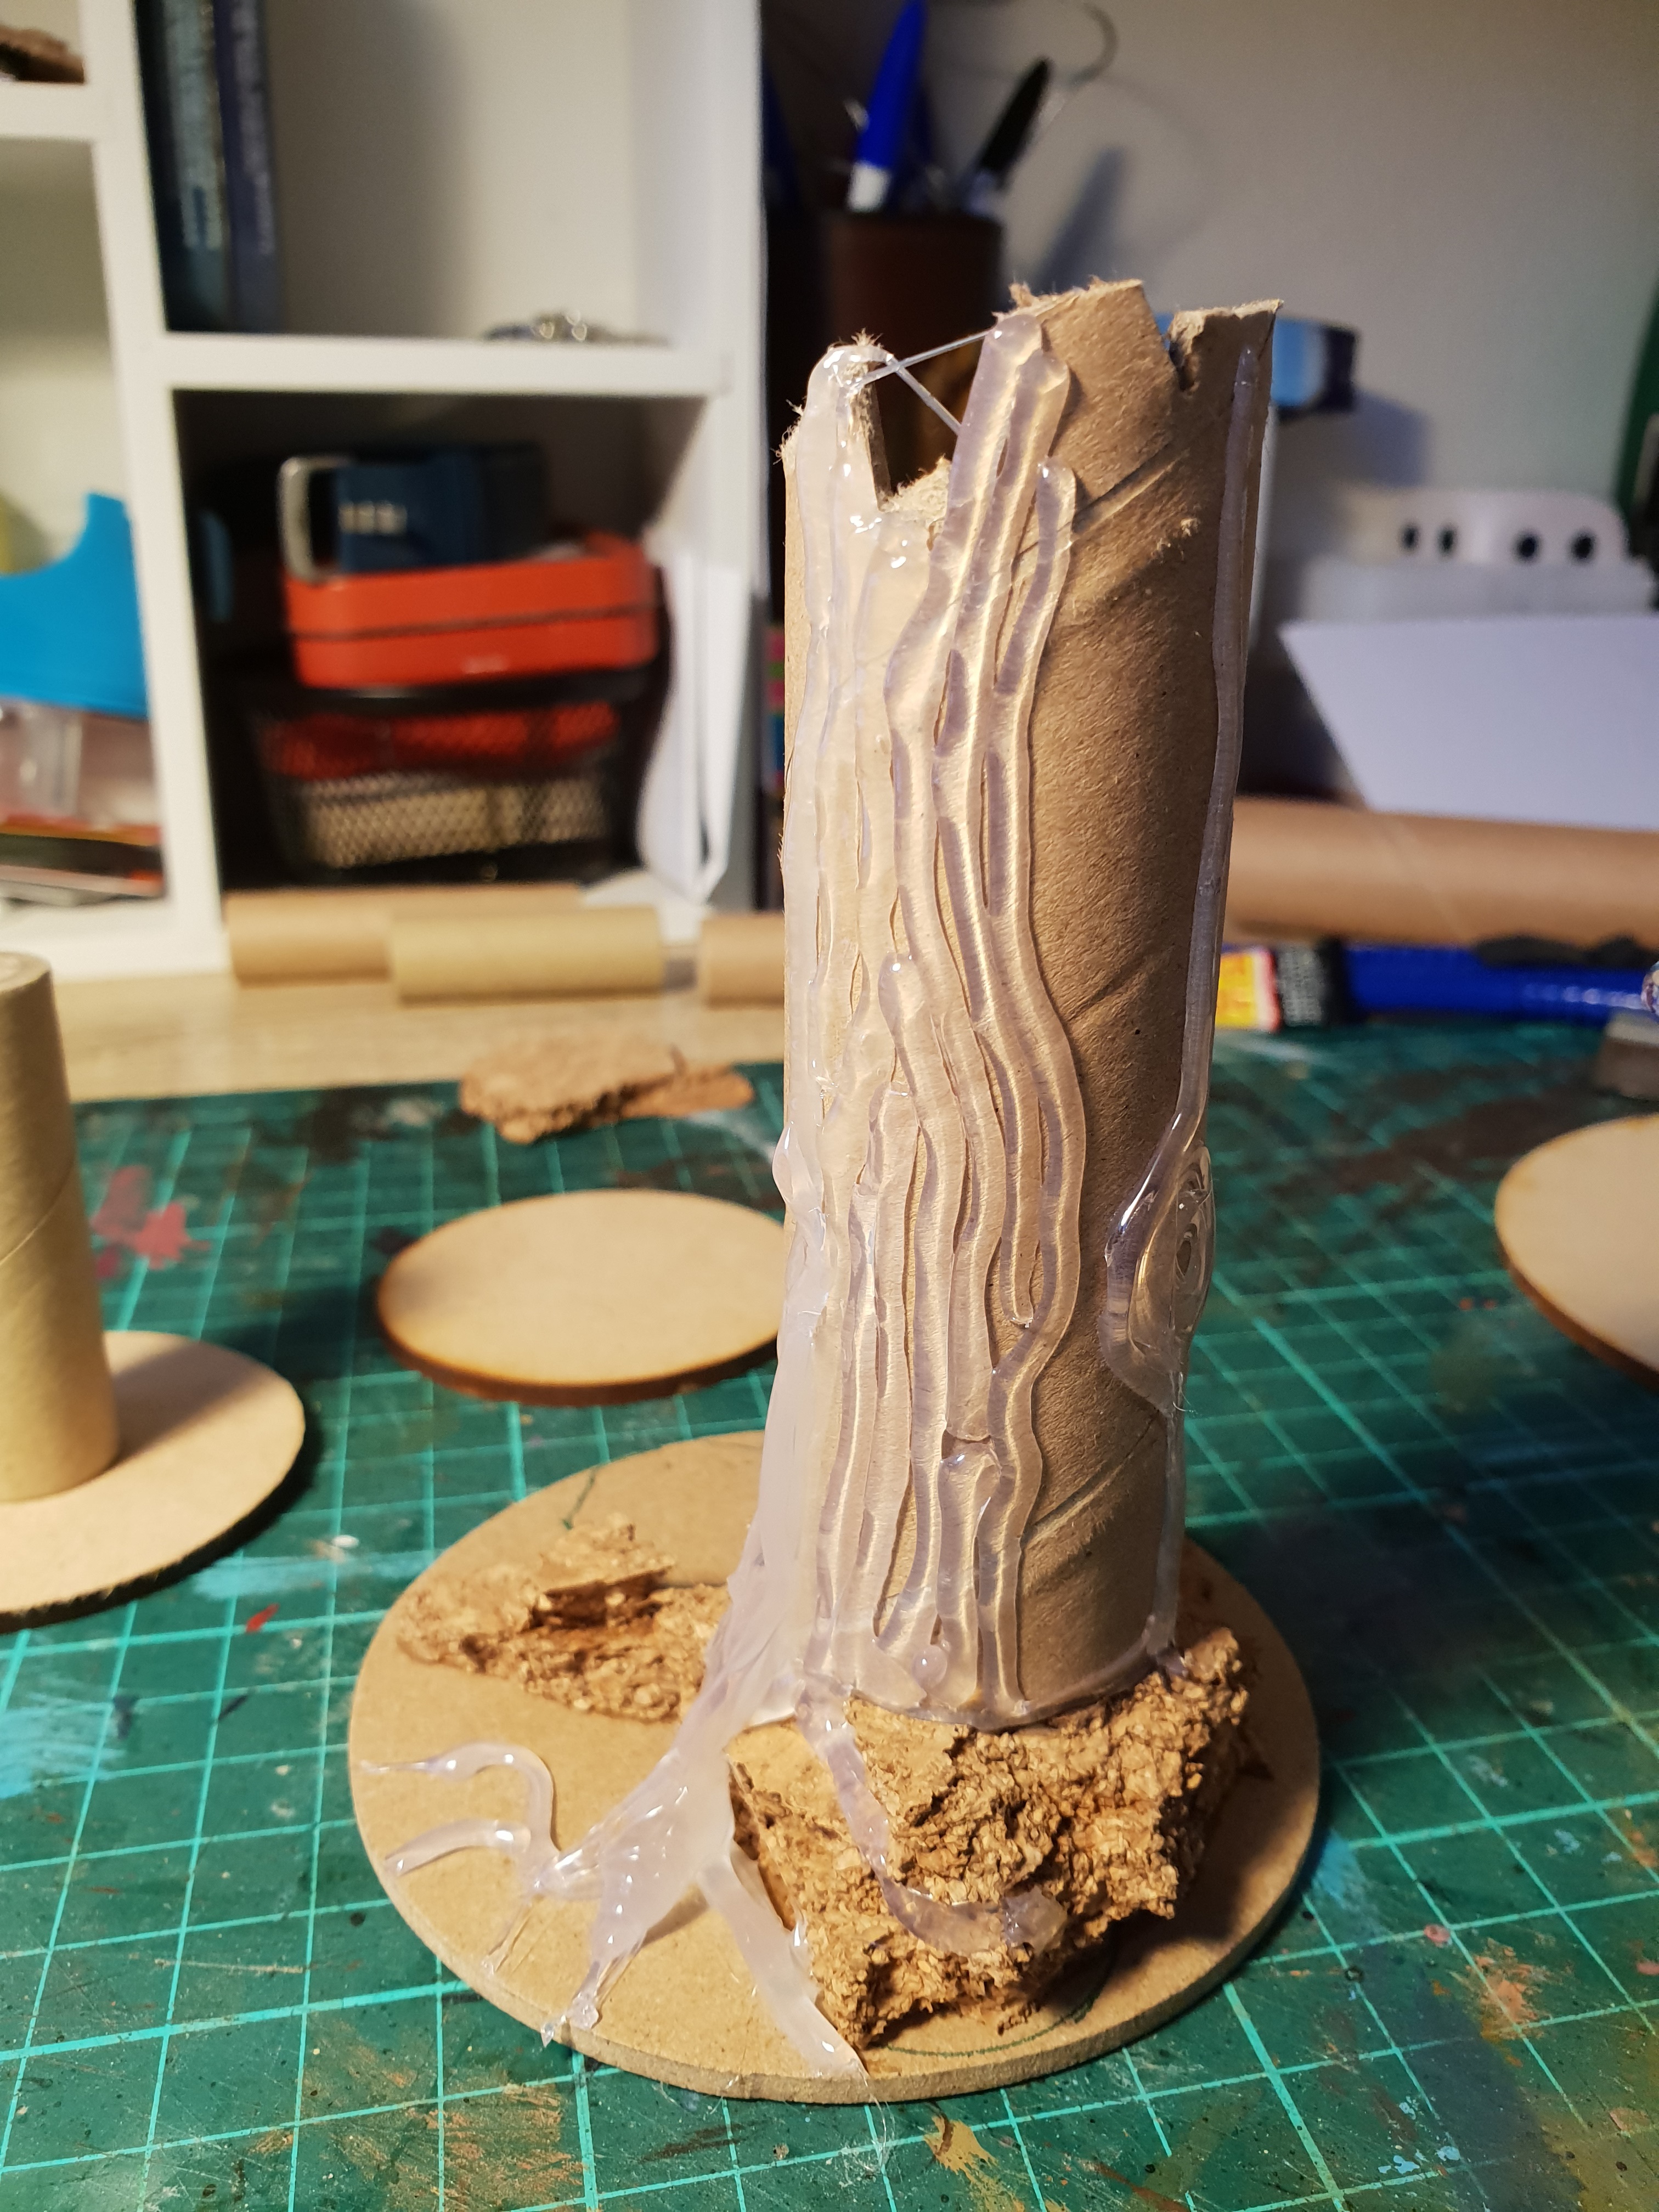
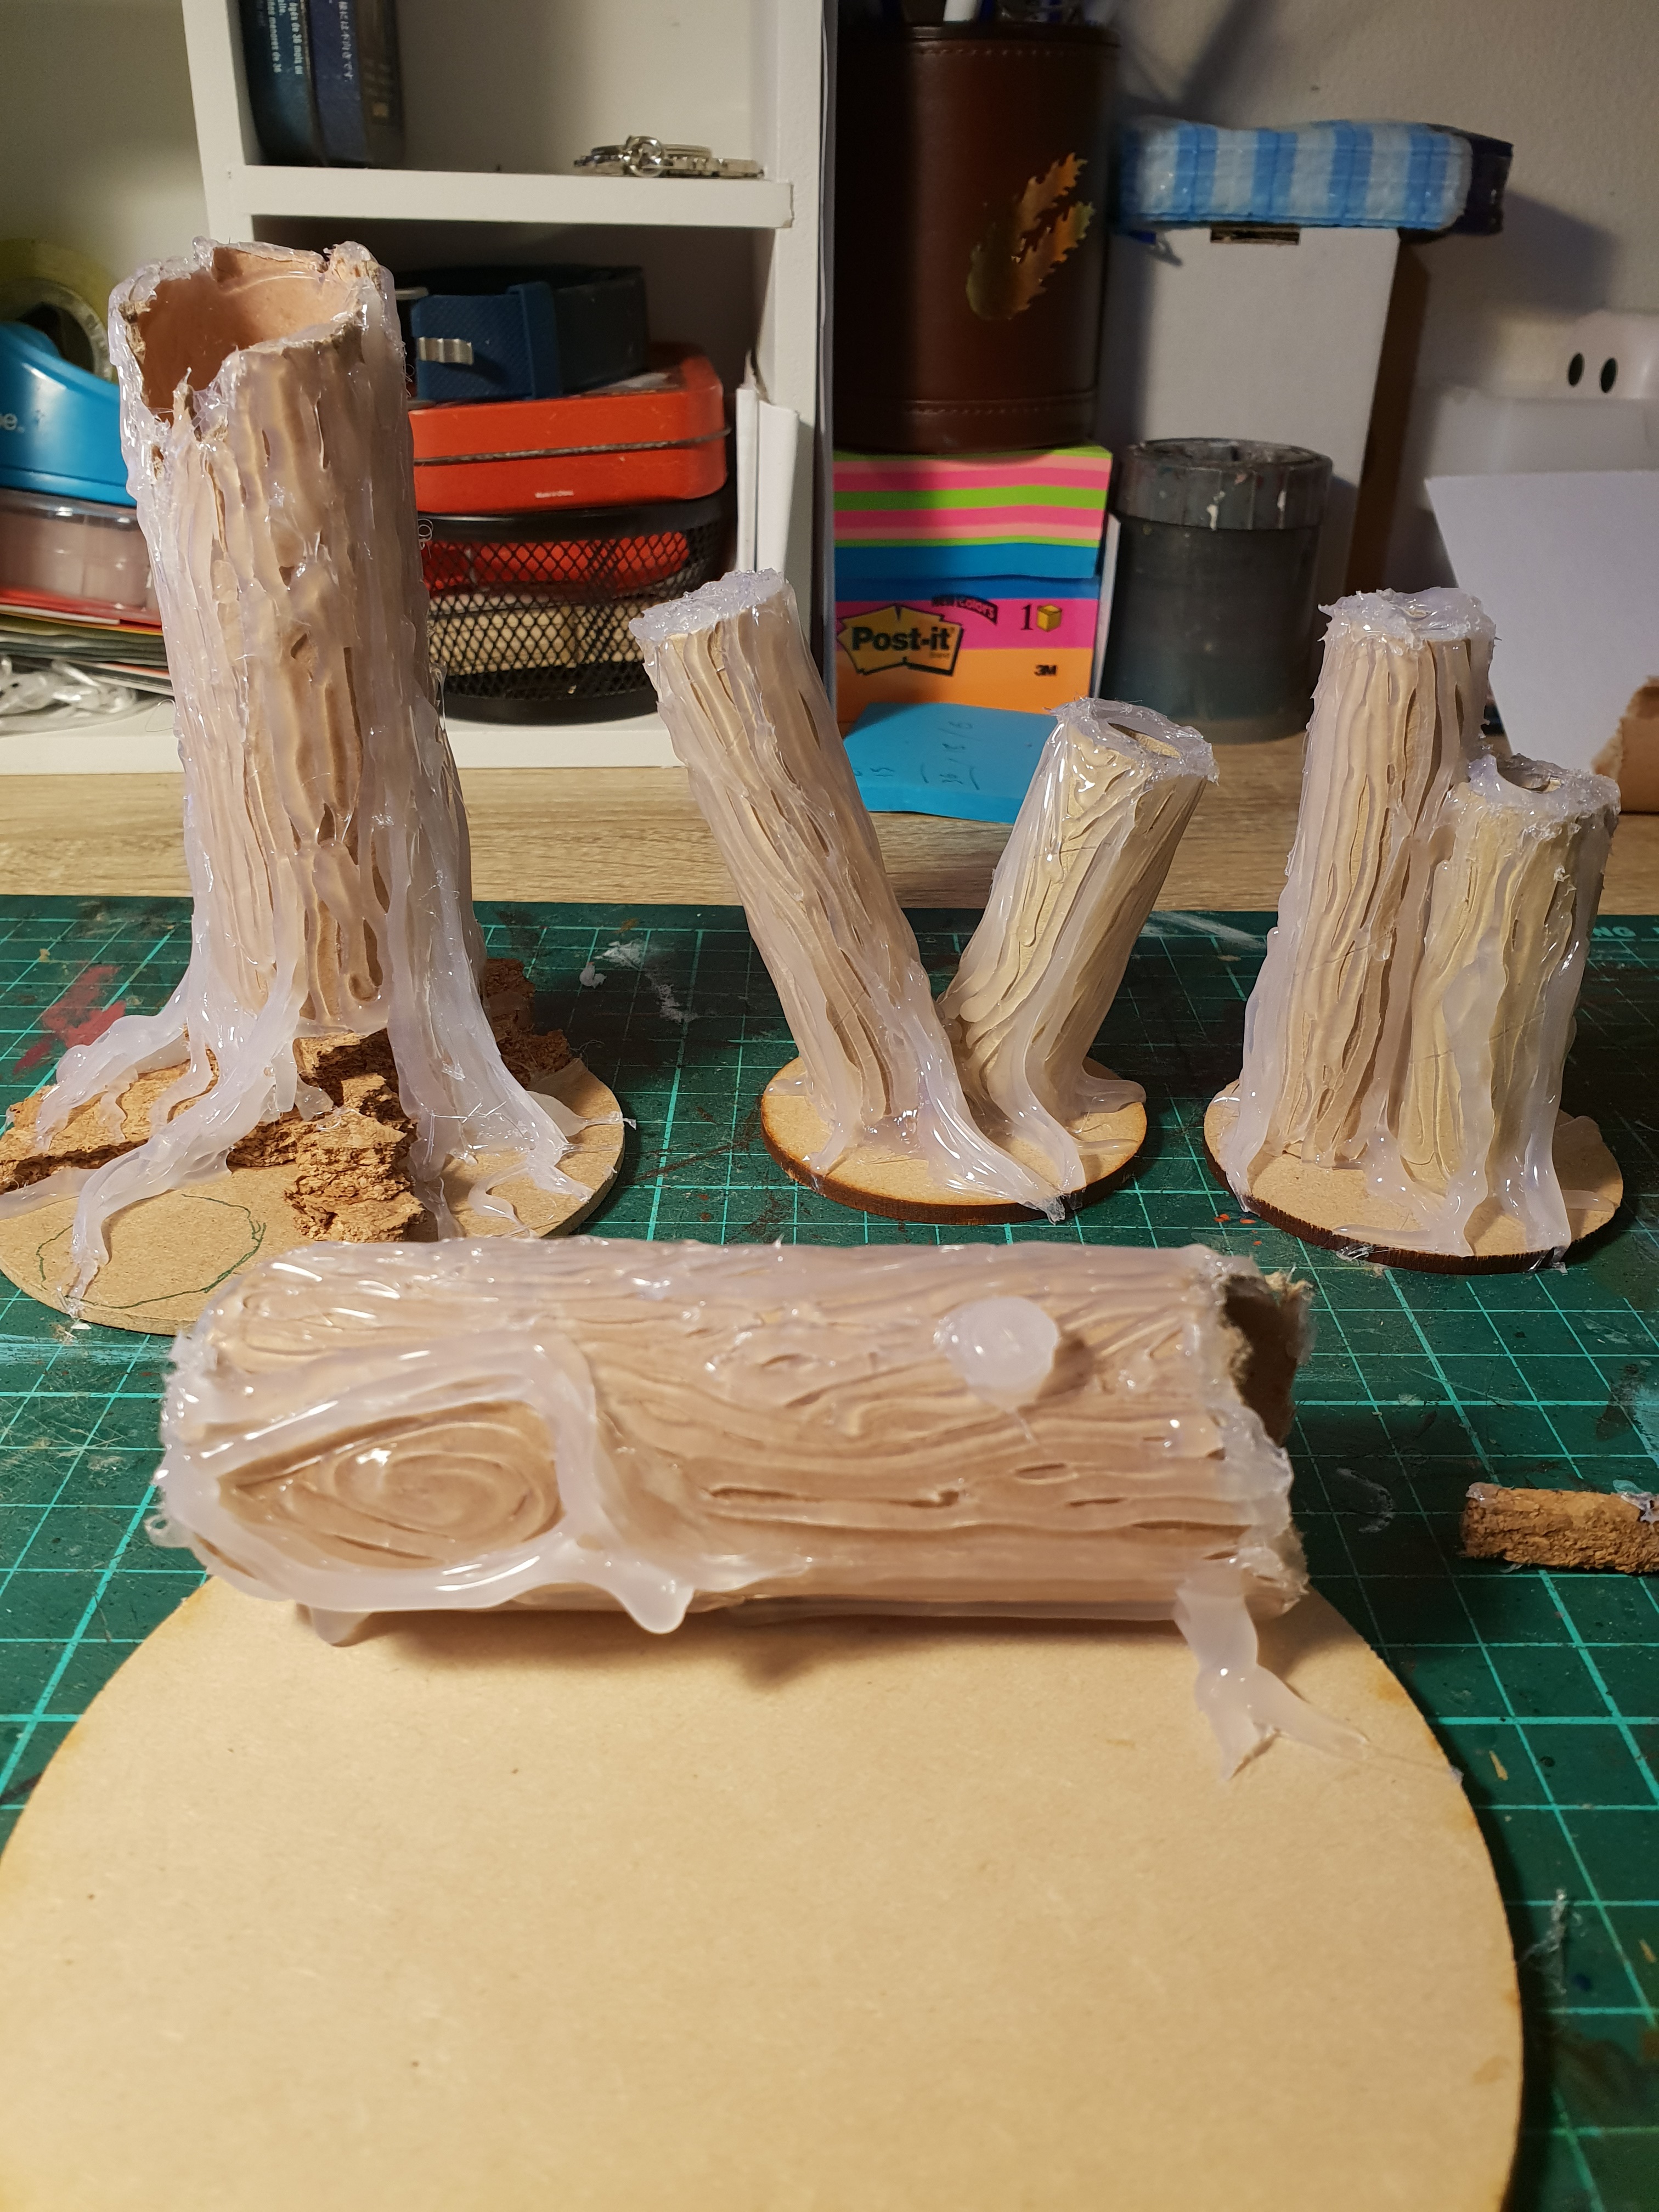
Can't see the forest...
After trying out hot glue as a base for bark I decided to do a batch of dead logs and trees to test some techniques on. Heres how:
-I found the best natural looking results were from a mixture of long and short sections of glue rather than just up and down lines.
-Random patterns and knot holes make a big difference.
-The trailing bits of glue dont look particularly good and need to be snipped off with some plastic cutters.
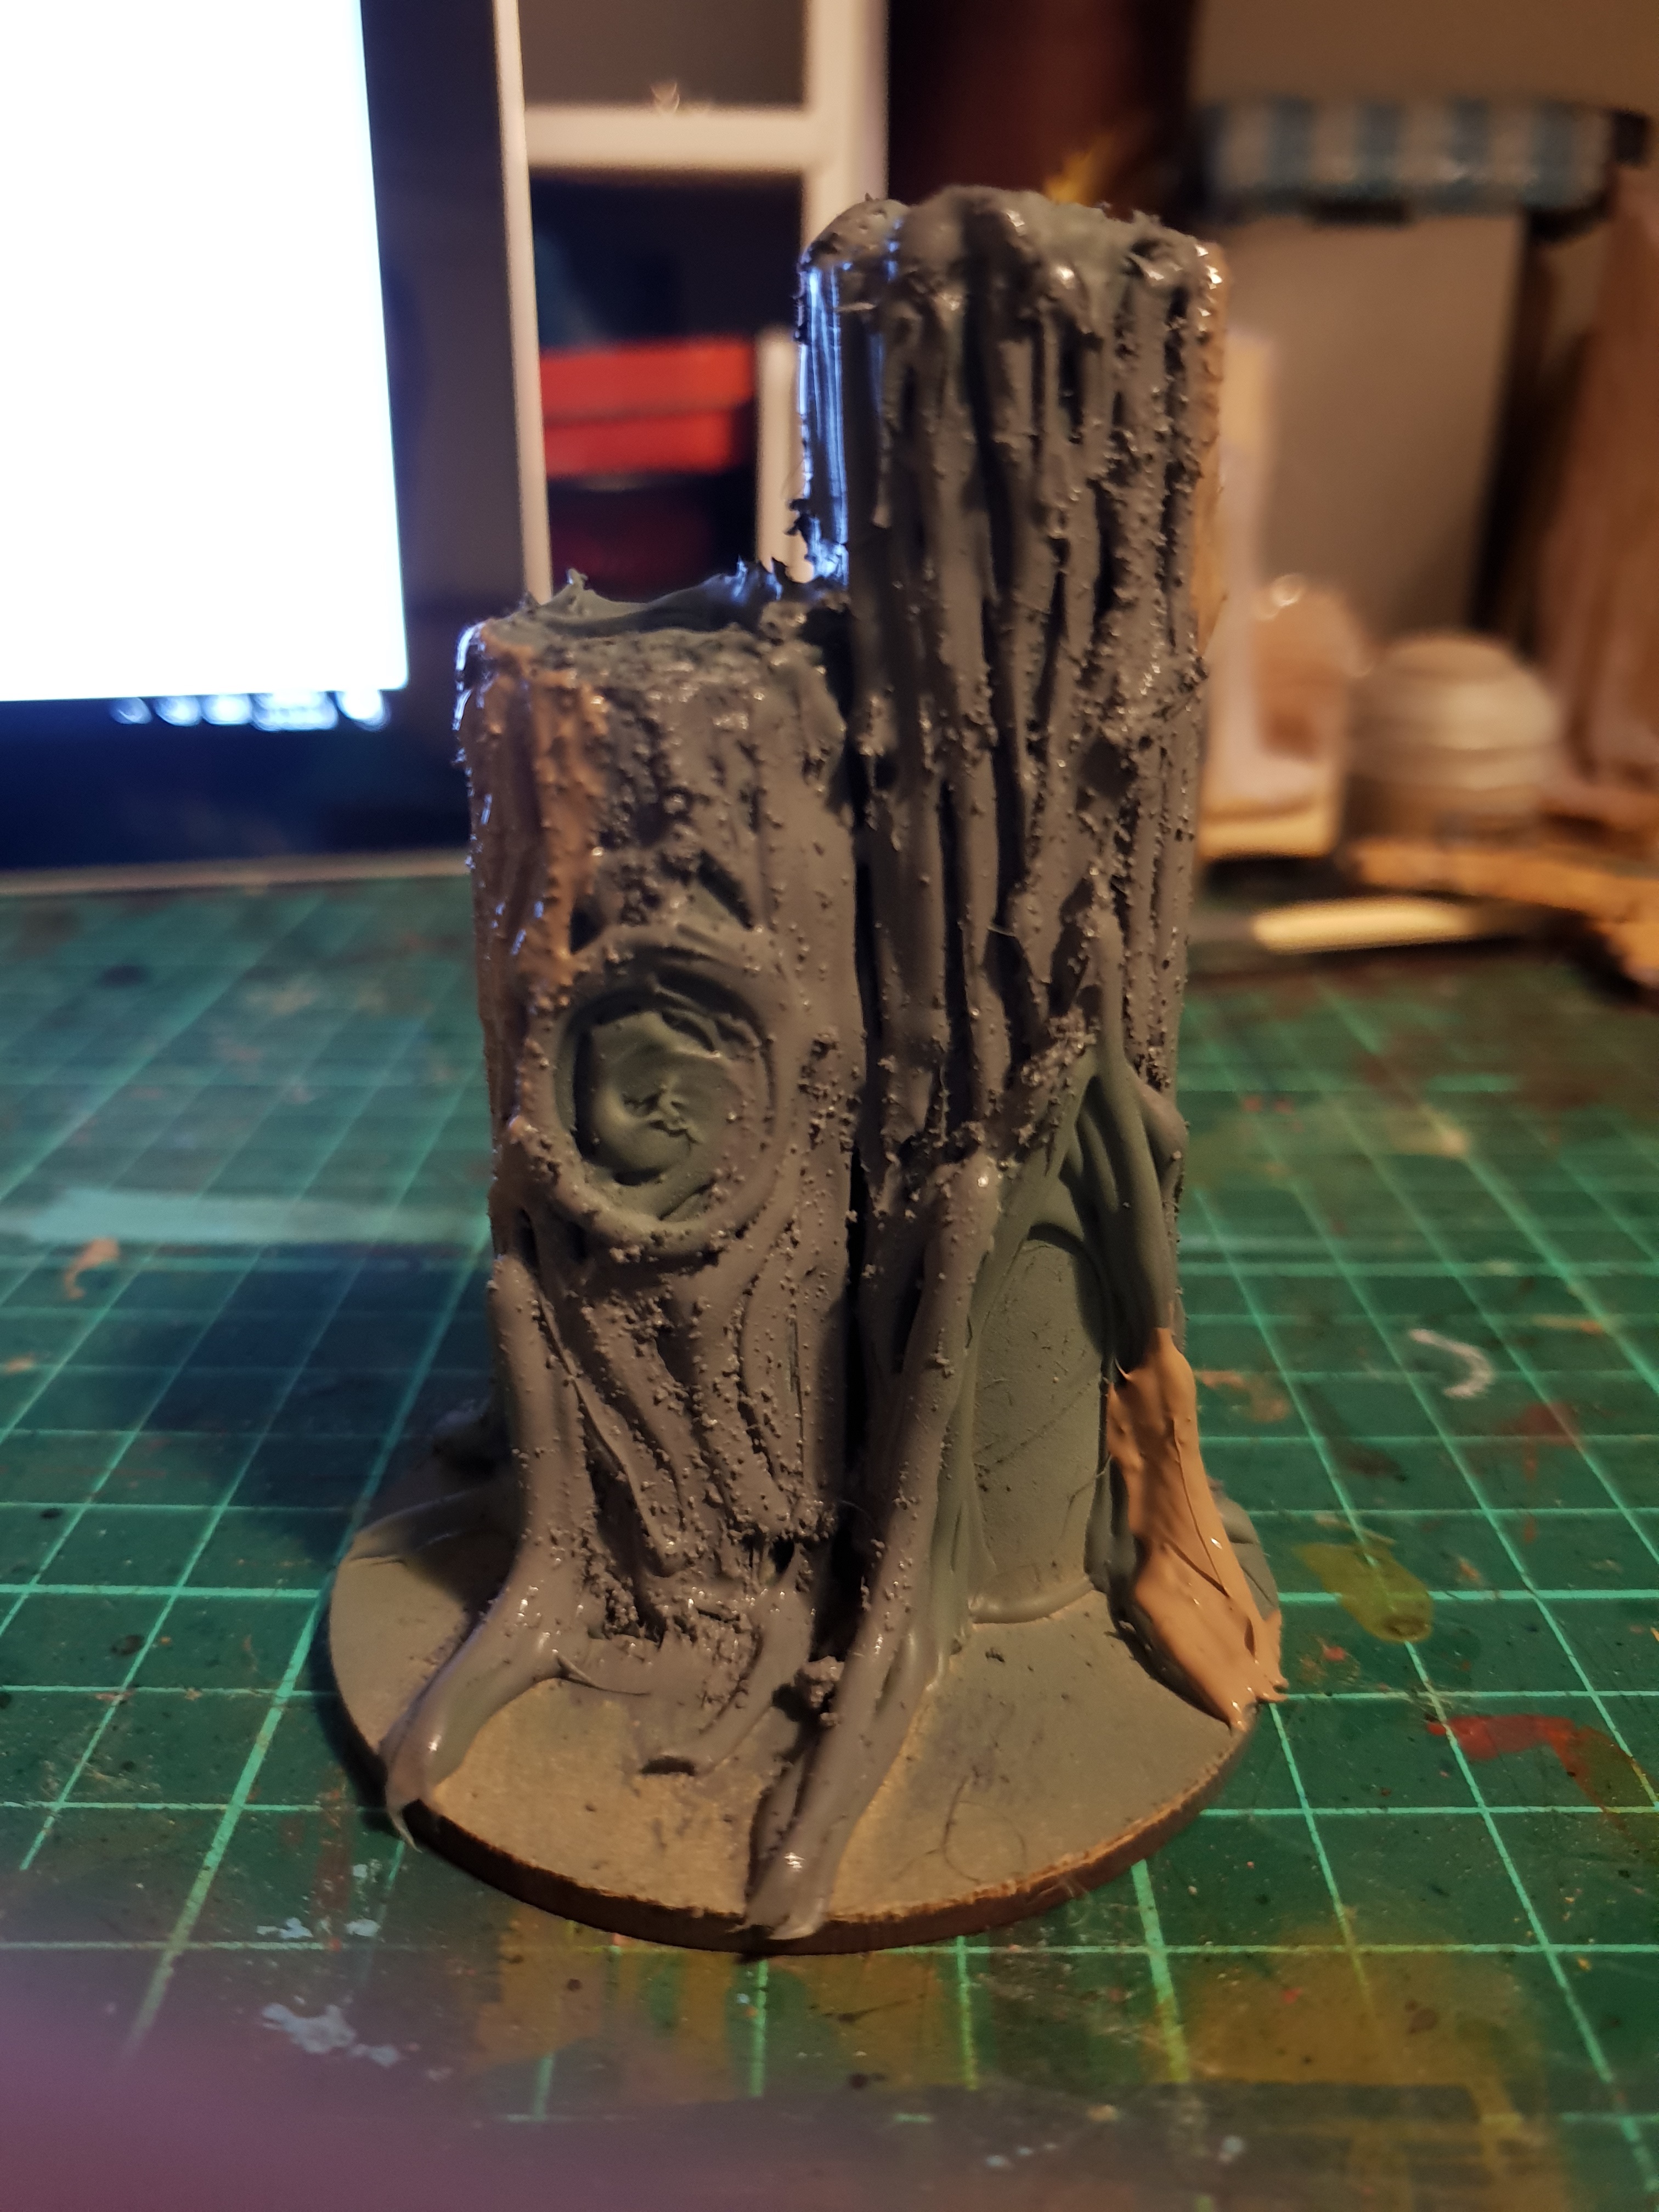
-I picked one set and undercoat it grey to see how it looked and it was too smooth and the lines looked really obvious.
-My first texture test is to brush it all over with GW texture paint and then a few blobs of crackle paint to experiment with bark texture.

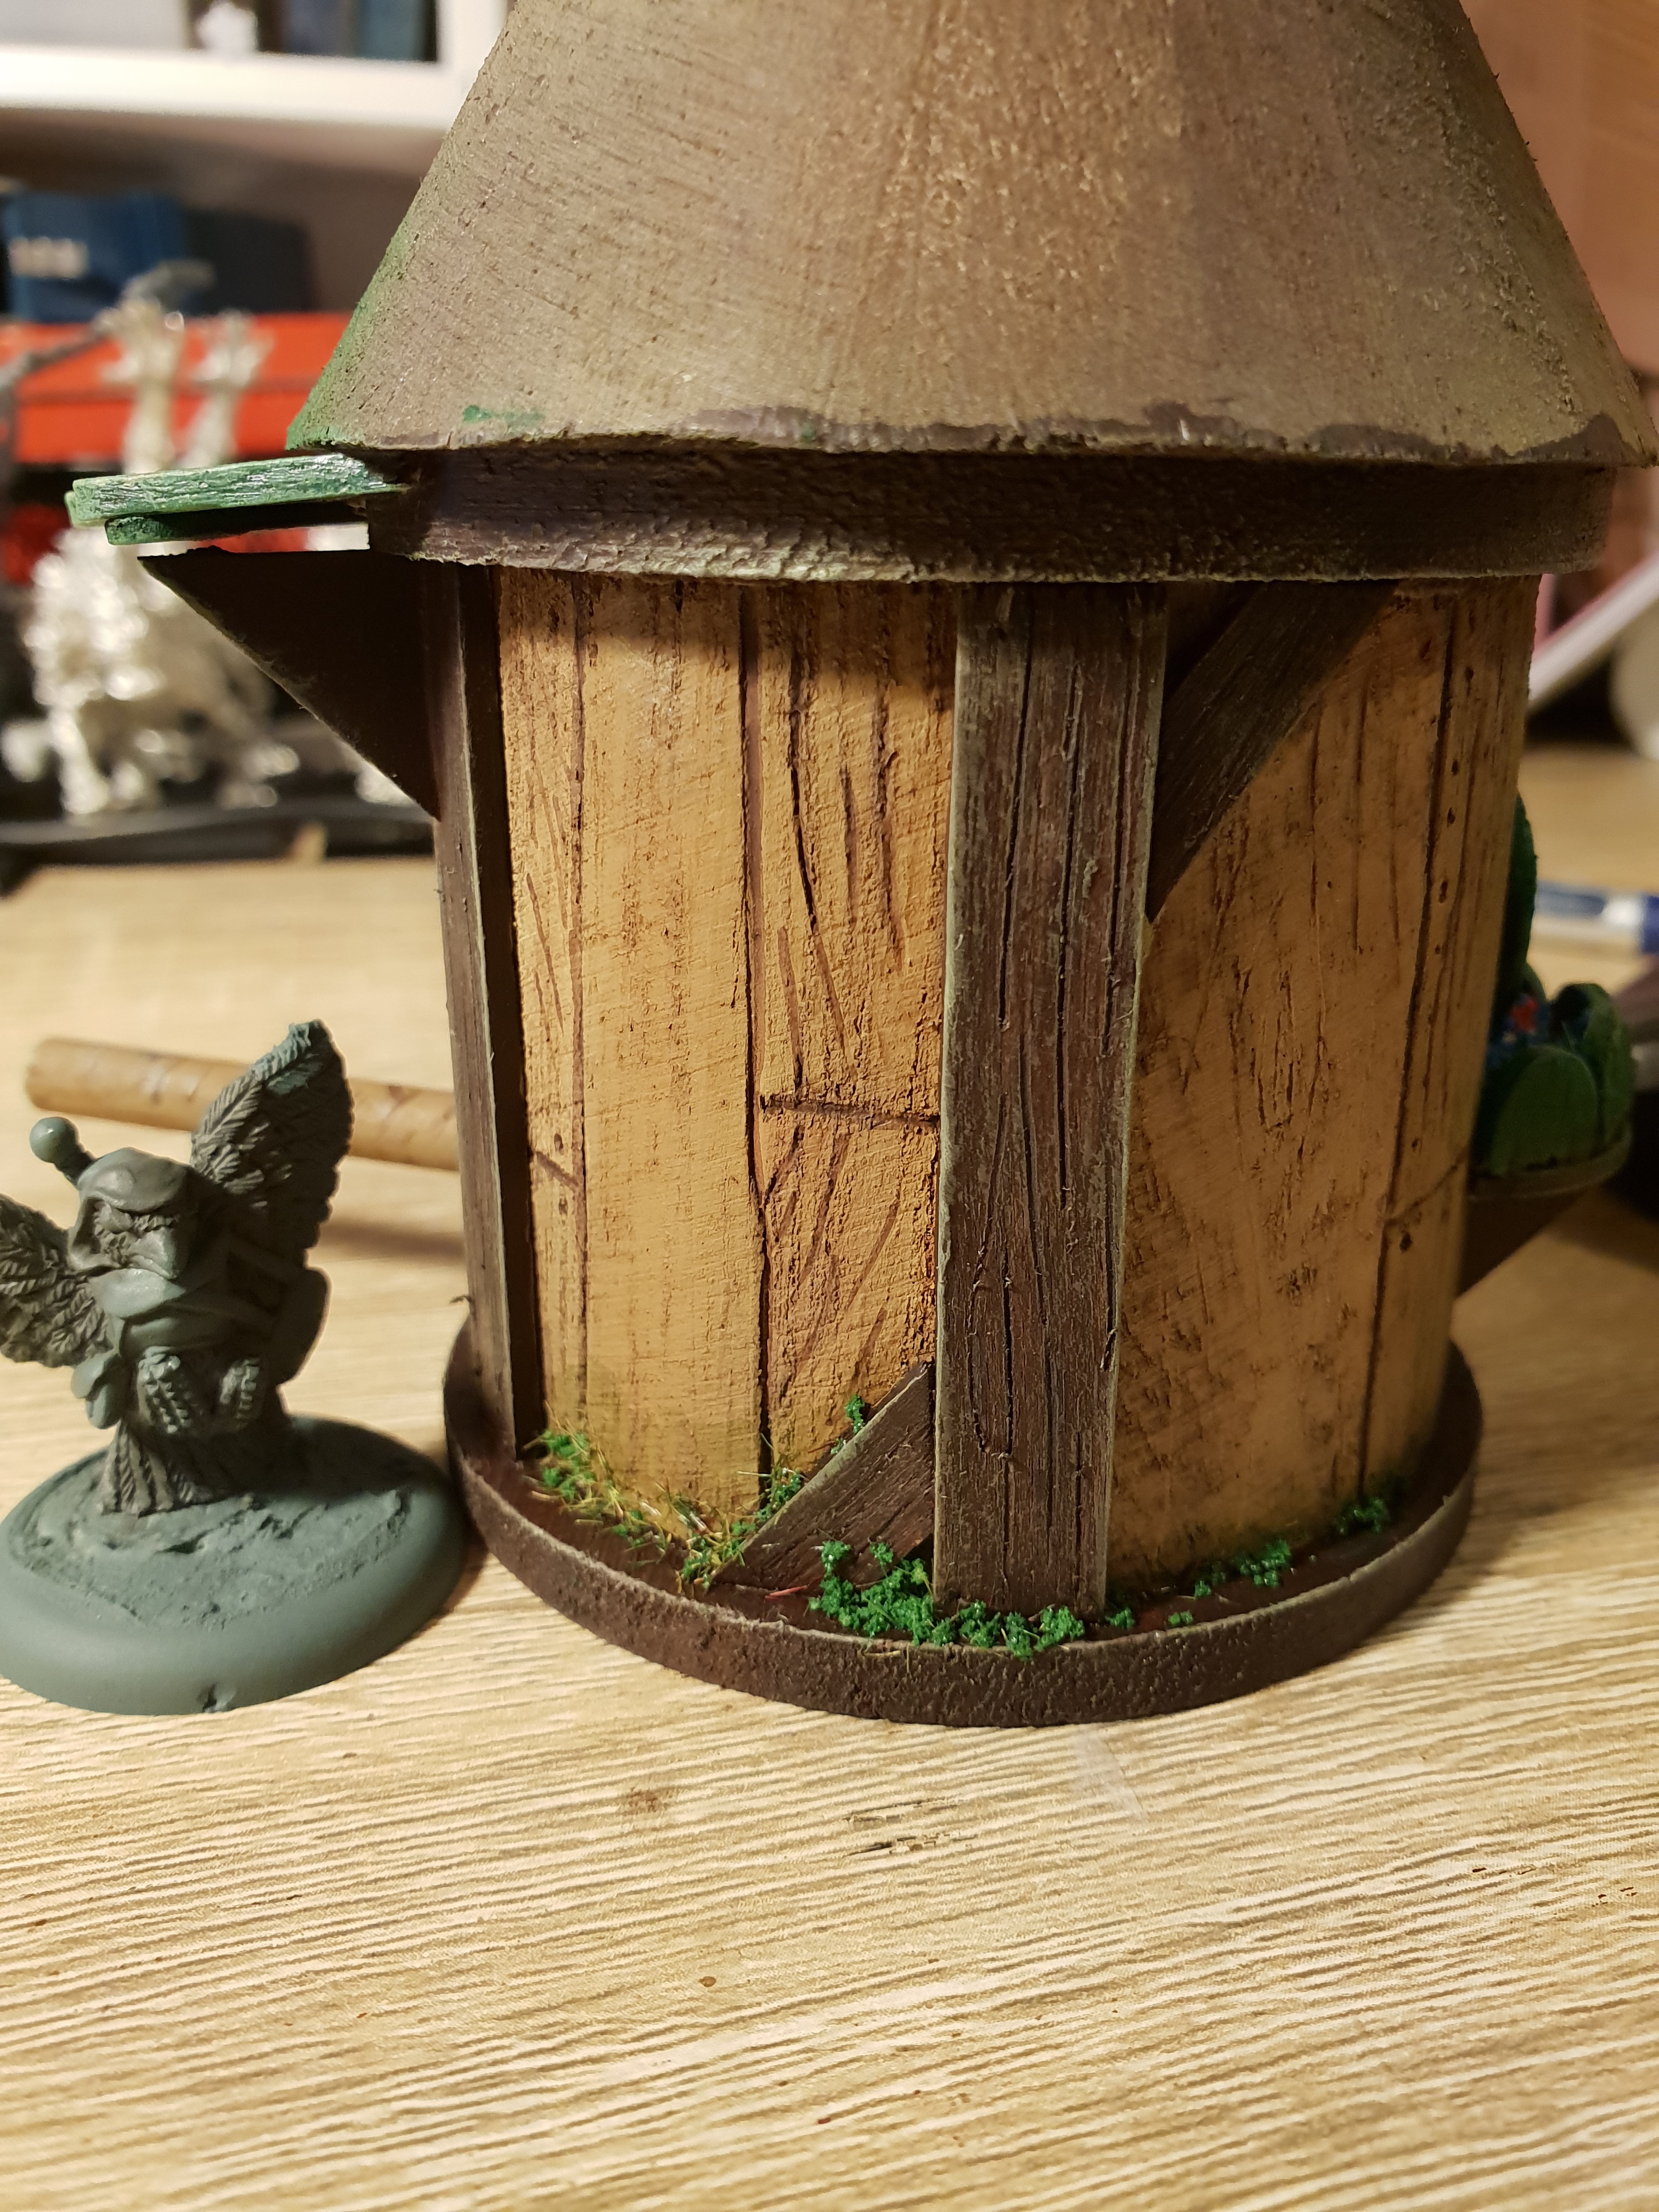
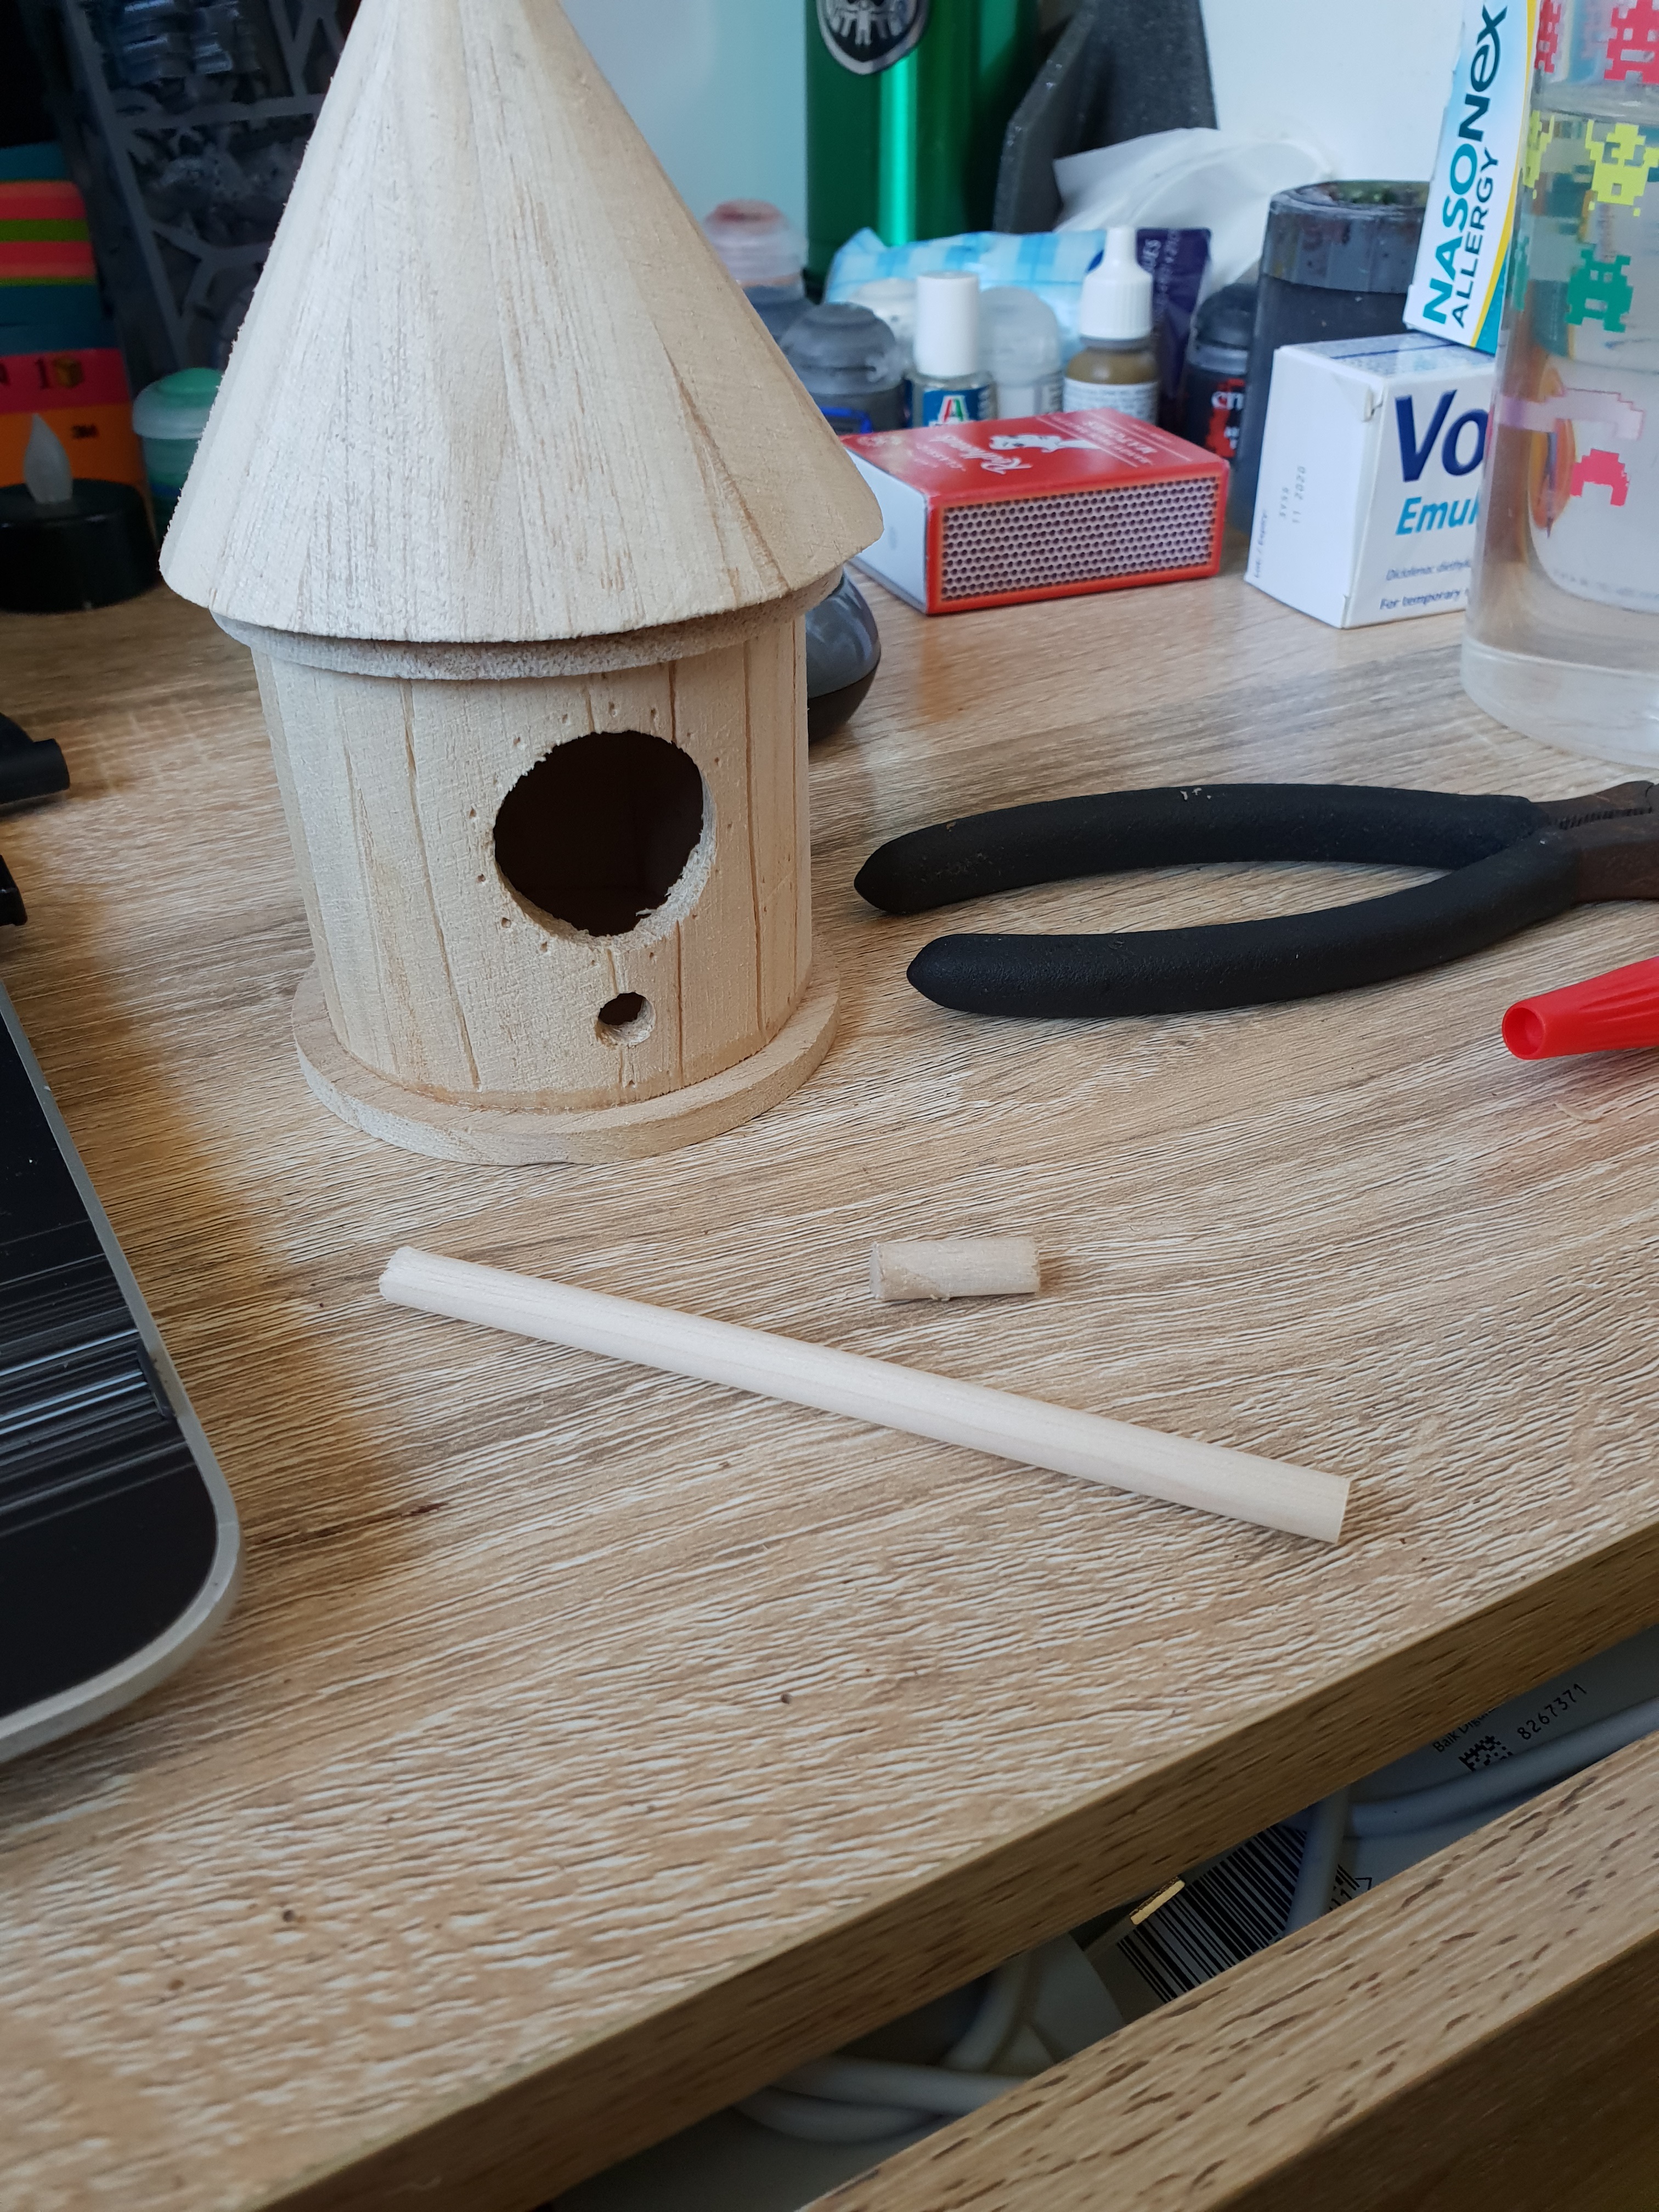
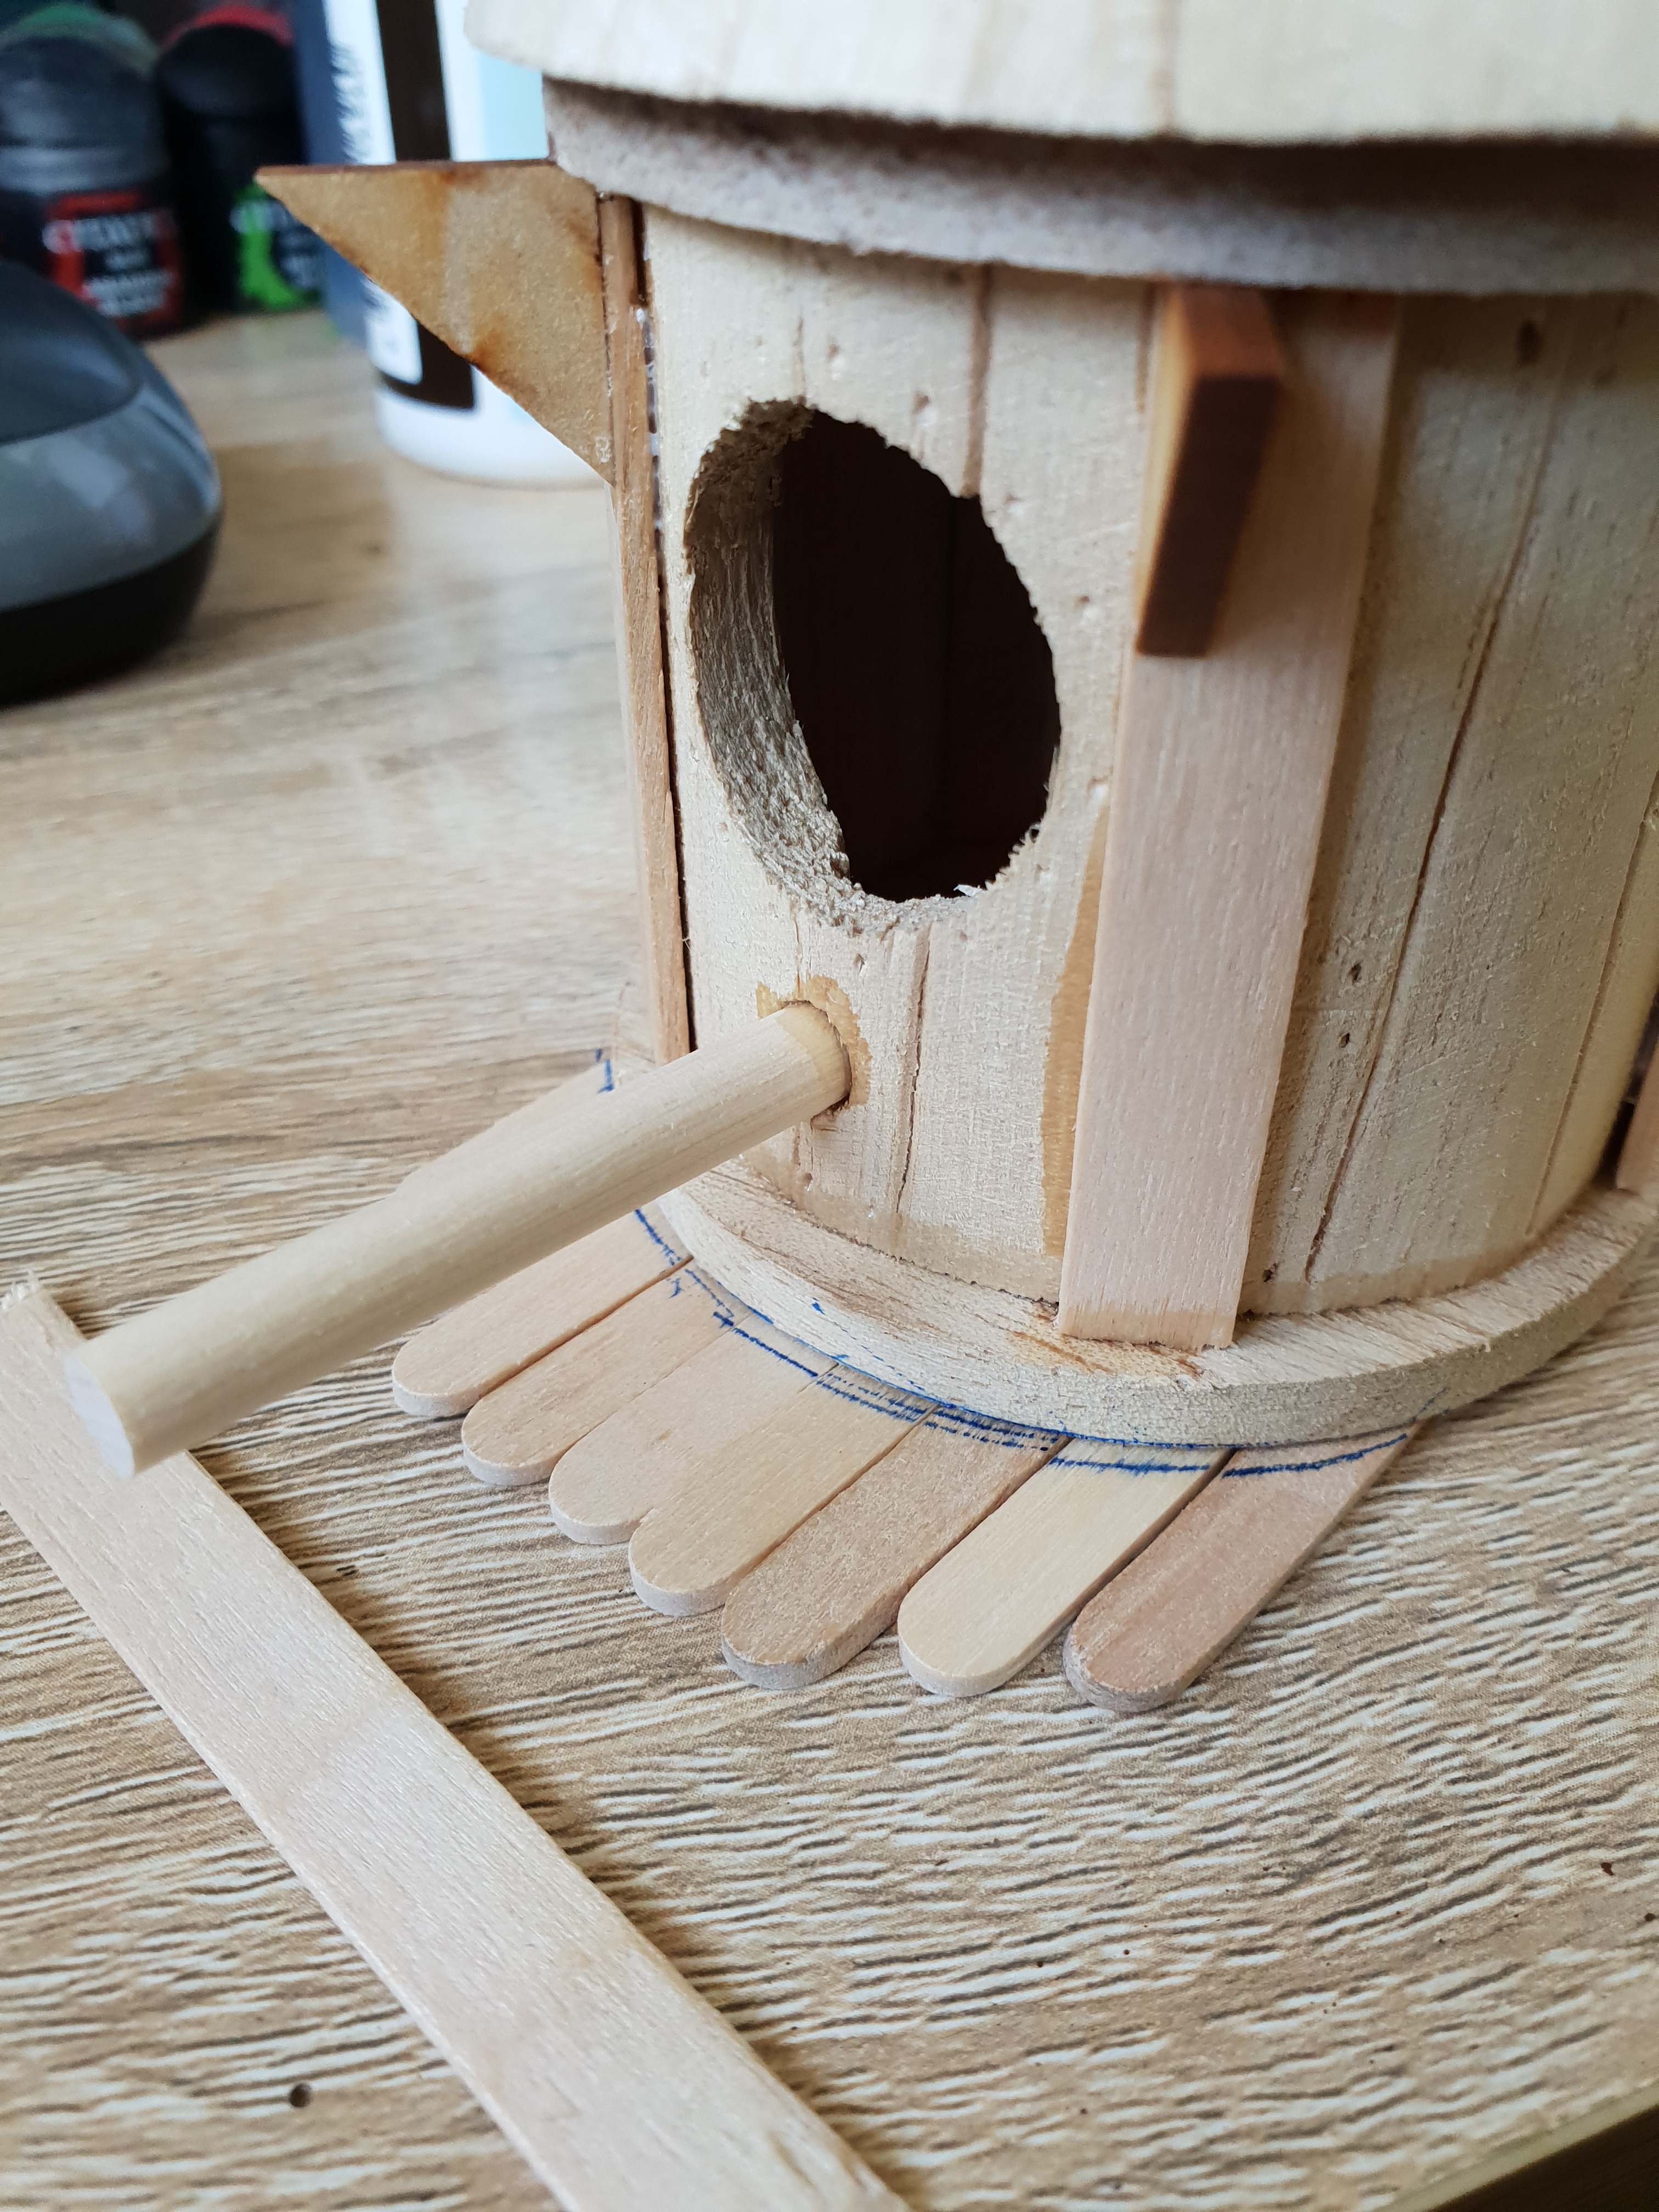
A room with a view: 3
Time to add detail to the birdhouse.
-First I replaced the perch with one big enough for some of the larger birds to use (or a couple of Sparrows to have a cuppa and a chat)
-Then I cut some pop sticks to size and added uprights and corner braces to the walls like on Tudor houses.
-Next I laid out a platform of mini sticks for a sculpted awning. I traced the shape of the hut onto them for a better fit, cut them to size and glued them onto a support beam before adding them to the house too.
-Next I cut a balsa disc to the curve of the wall, same as the previous method. Then I added some little walls to it using off cuts from pop sticks. It will be a flower filled window box in the end.
And that’s about it.
My minis have finally arrived too so I’m mixing my time between terrain and painting.
Cheers, T.


![StarCraft Tabletop Miniatures Game Pre-Orders Live Now [Updated]](https://images.beastsofwar.com/2026/03/starcraft-tmg-news-cover-600-338.jpg)


