


75th Anniversary of the Battle of Monte Cassino and Northern Italy (Gaming The Battles)


Recommendations: 781
About the Project
BEST READ IN REVERSE ORDER! The project charts and recreates the battles of Monte Cassino, fought between January 1944 to May 1944, and the onward Allied push through Northern Italy.
Related Game: Flames of War: The World War II Miniatures Game
Related Company: Battlefront Miniatures
Related Genre: Historical
This Project is Active
Gaming the Assault on the Senger Line (Part 3)
Turn 6 (Allies):
My son continued his advance across the open ground between the trees and the road. The engineers were able to remove the minefield that was discovered between the barbed wire toward the top of the map. The single remaining tank of Tank Platoon 1 tried to smoke the panther turret but failed to hit, meaning that the turret would have a free line of fire on its next turn. Tank Platoon 2 rolled up toward the PaK40 and laid down a withering hail of MG fire but failed to cause enough hits to pin the unit. The infantry platoons also moved up to support the tanks.
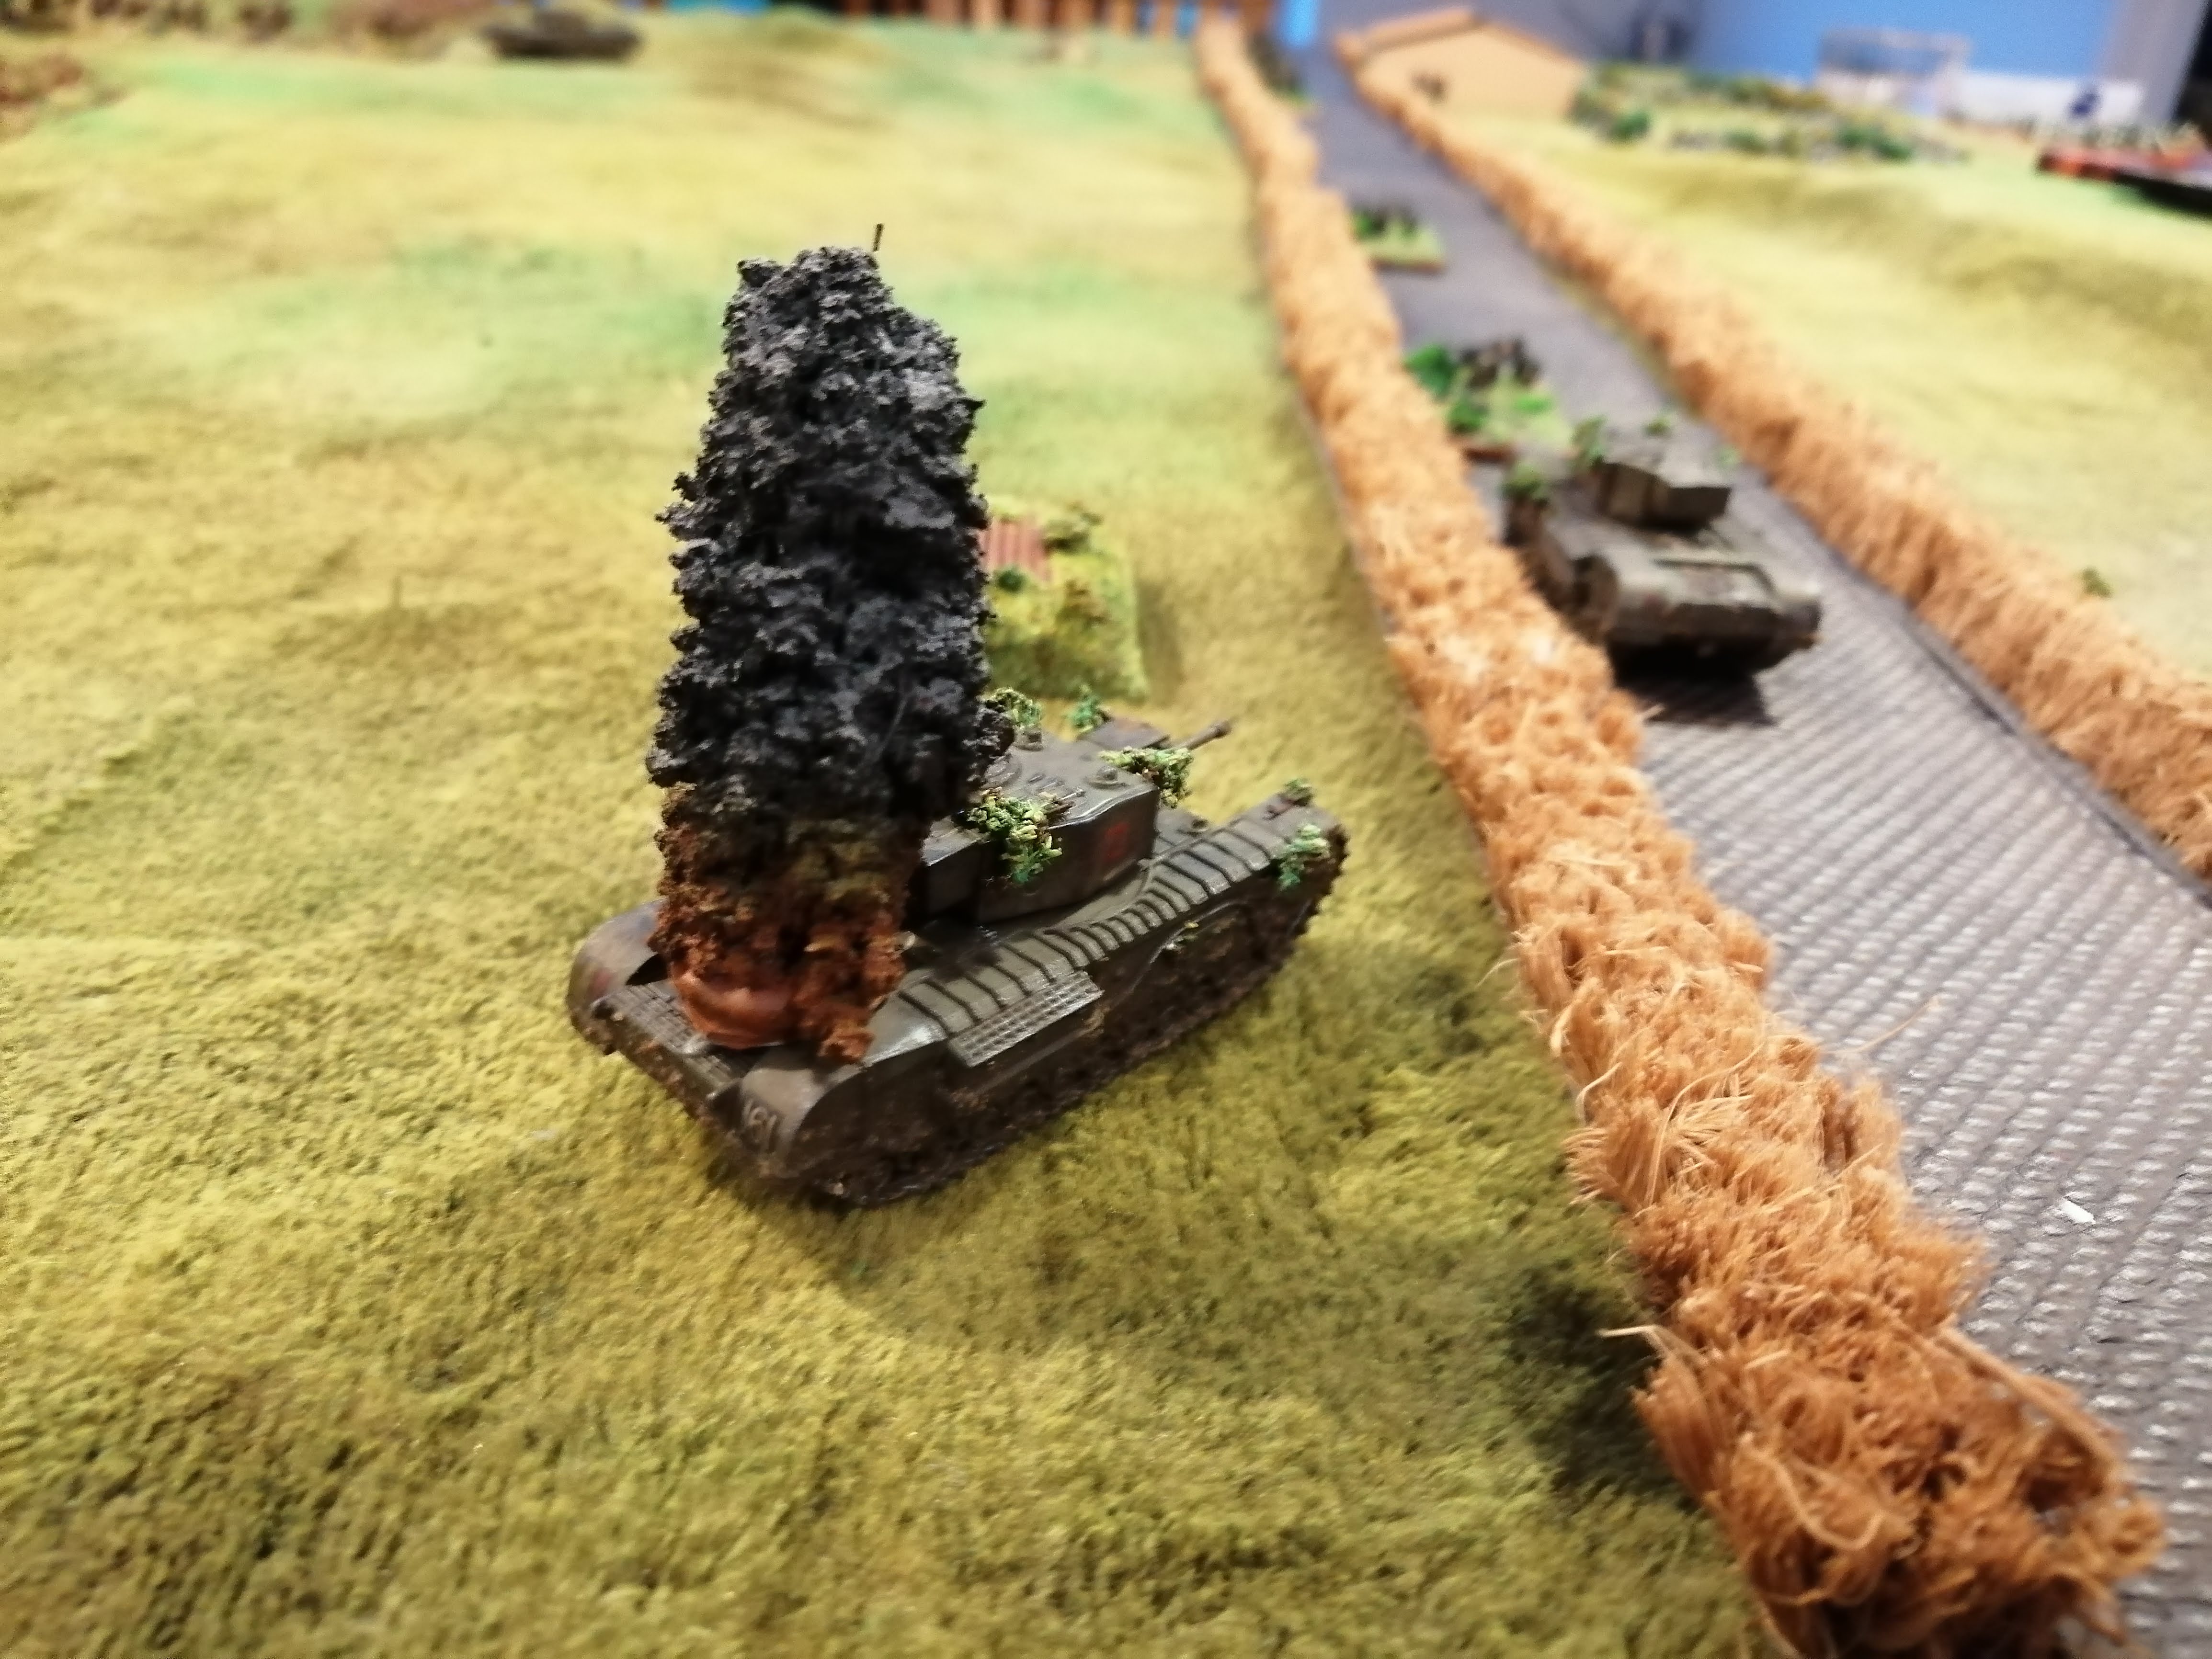
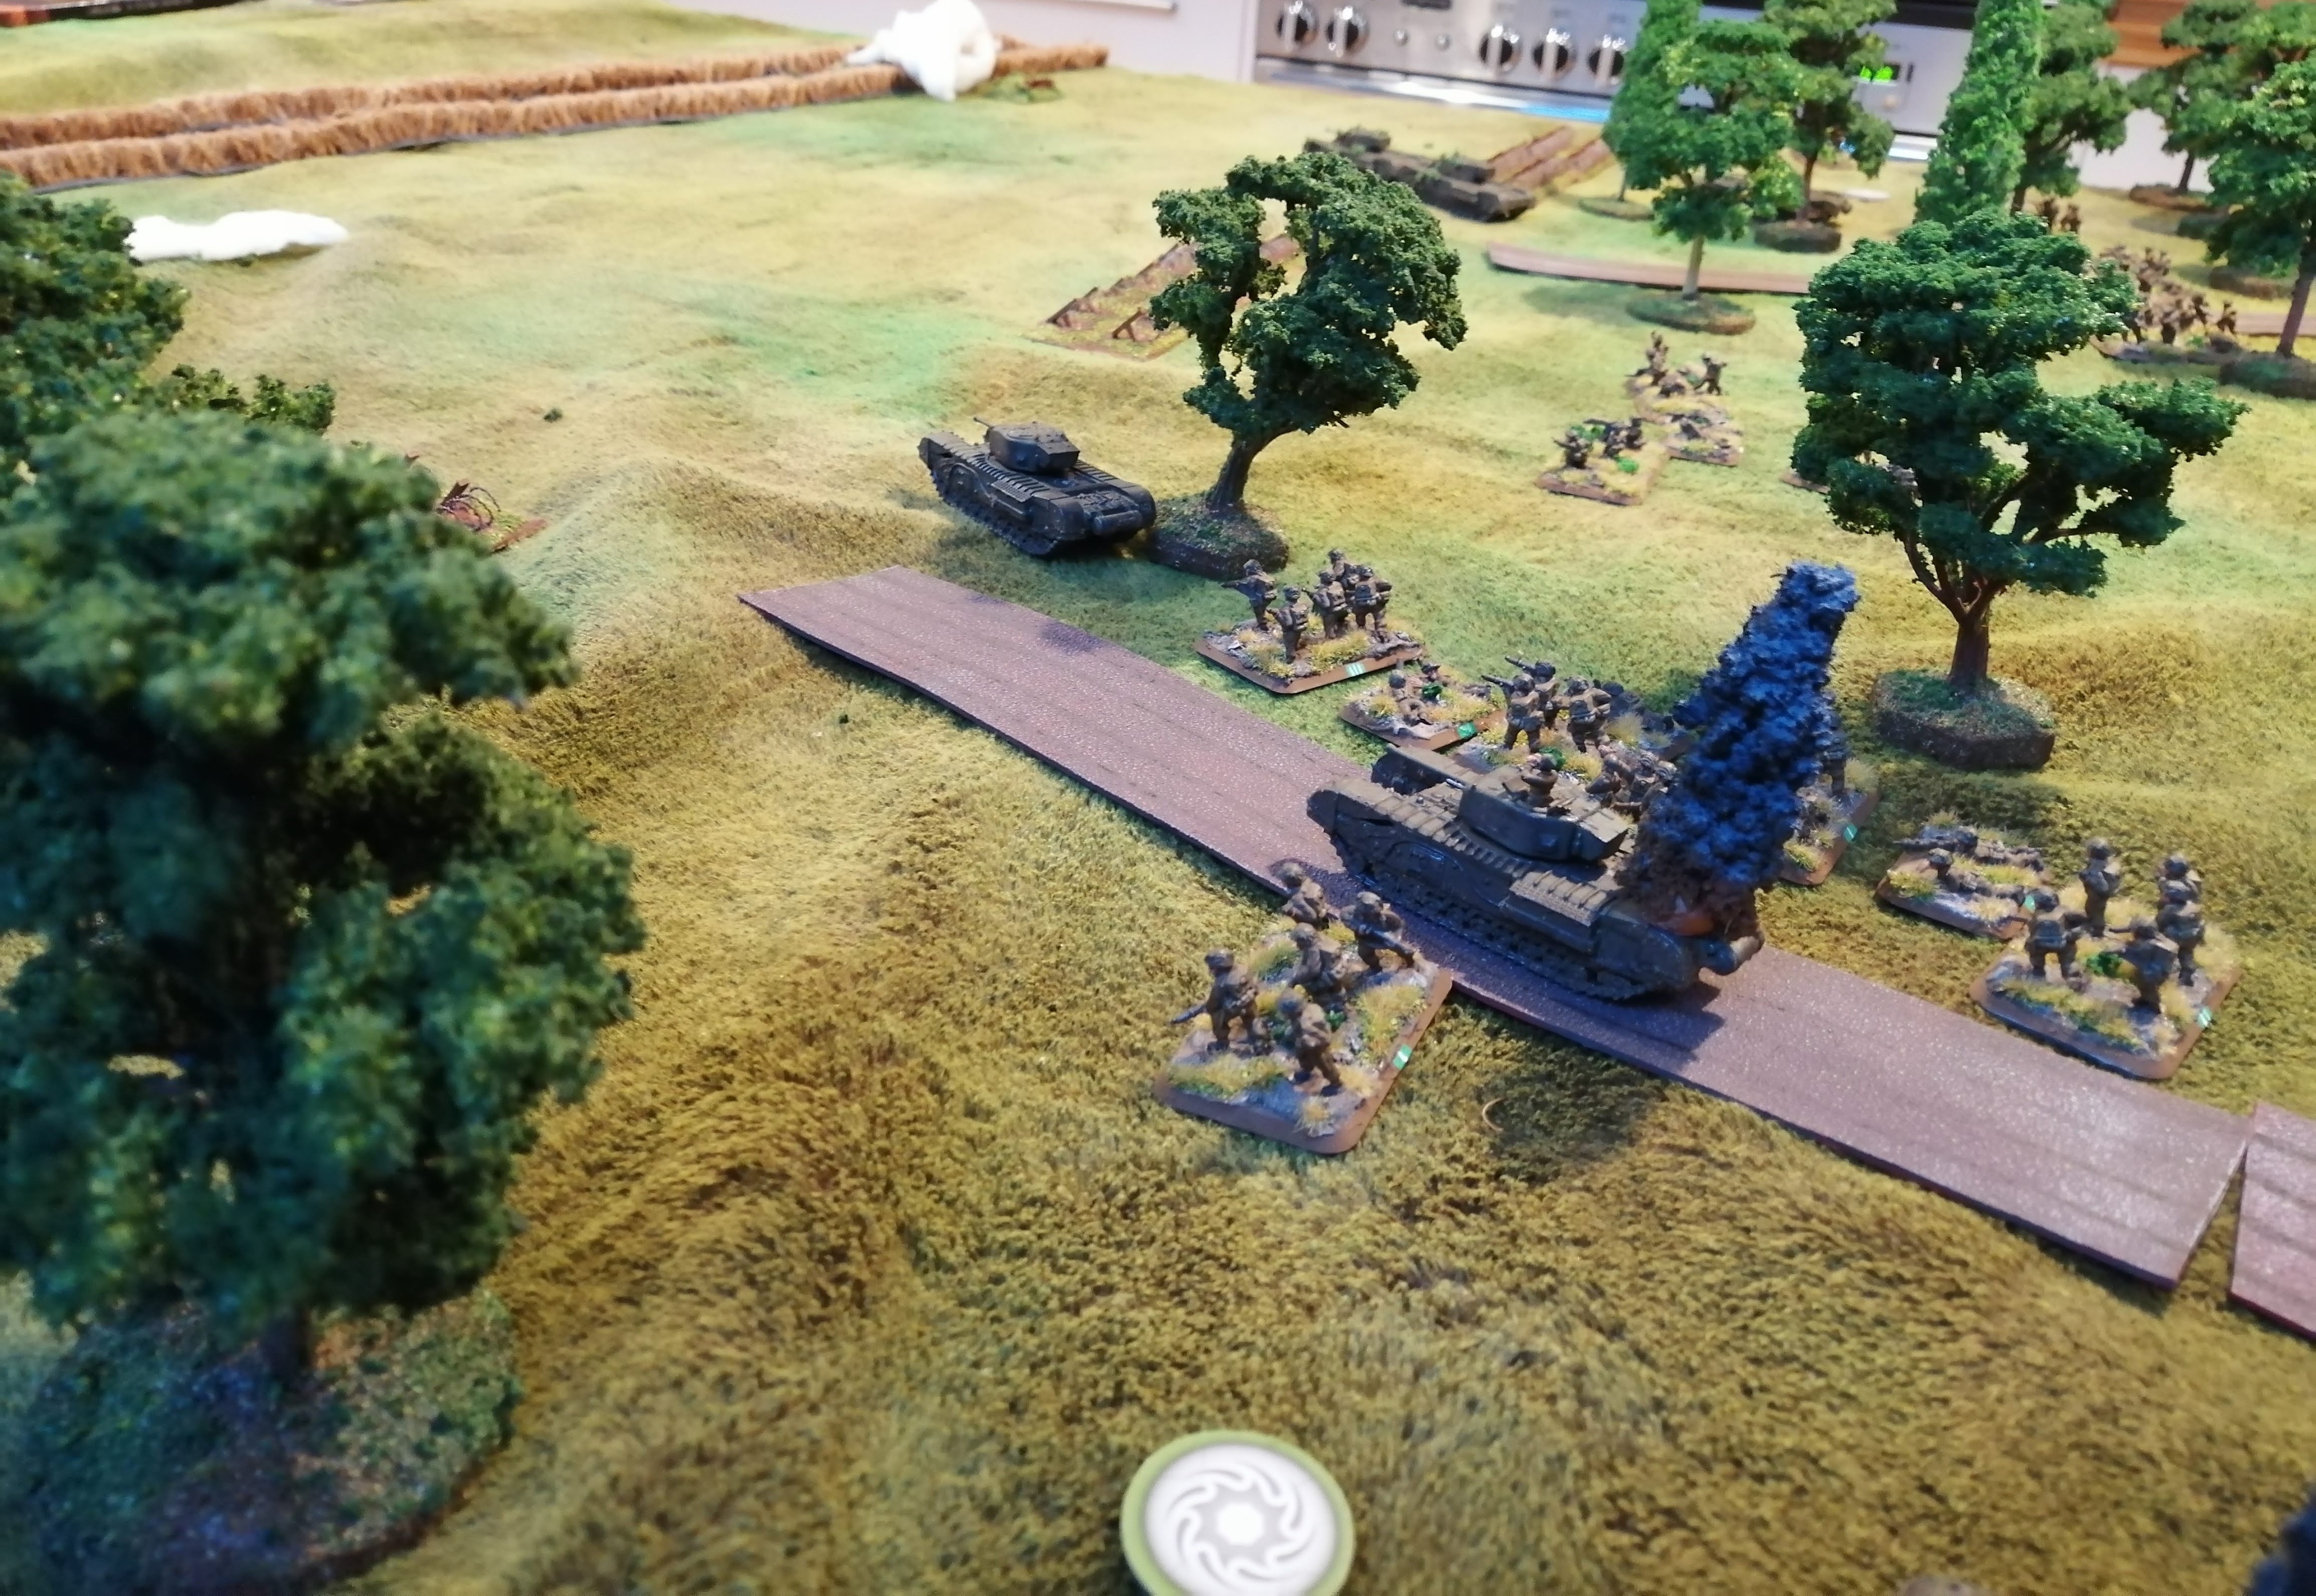
My son then decided to launch a tank assault against the PaK 40. As the Churchills rolled forward, the gun team were able to destroy one of the tanks however they weren’t quick enough to destroy more and the lead Churchill smashed through the hedgerow of the road and destroyed the PaK 40. This now placed one of the Churchills on the road and facing down toward the MG teams and the farm house.
Turn 6 (German):
It was this turn that the Panther tank decided to put in an appearance – much to my son’s dismay (I’d told him all about how good the Panther is!). Deployment was randomly rolled for and the Panther rolled on close to the two remaining tanks of Tank Platoon 2 (marked as PT on the map).
The MG Nest was able to gun down a team from Orange Platoon otherwise the German shooting was woeful. Shots flew wide of their mark and the Allies made excellent use of the terrain to make their saves. Even the Panther Turret failed to hit the Churchill advancing toward it! My son was delighted.
 End of turn 6
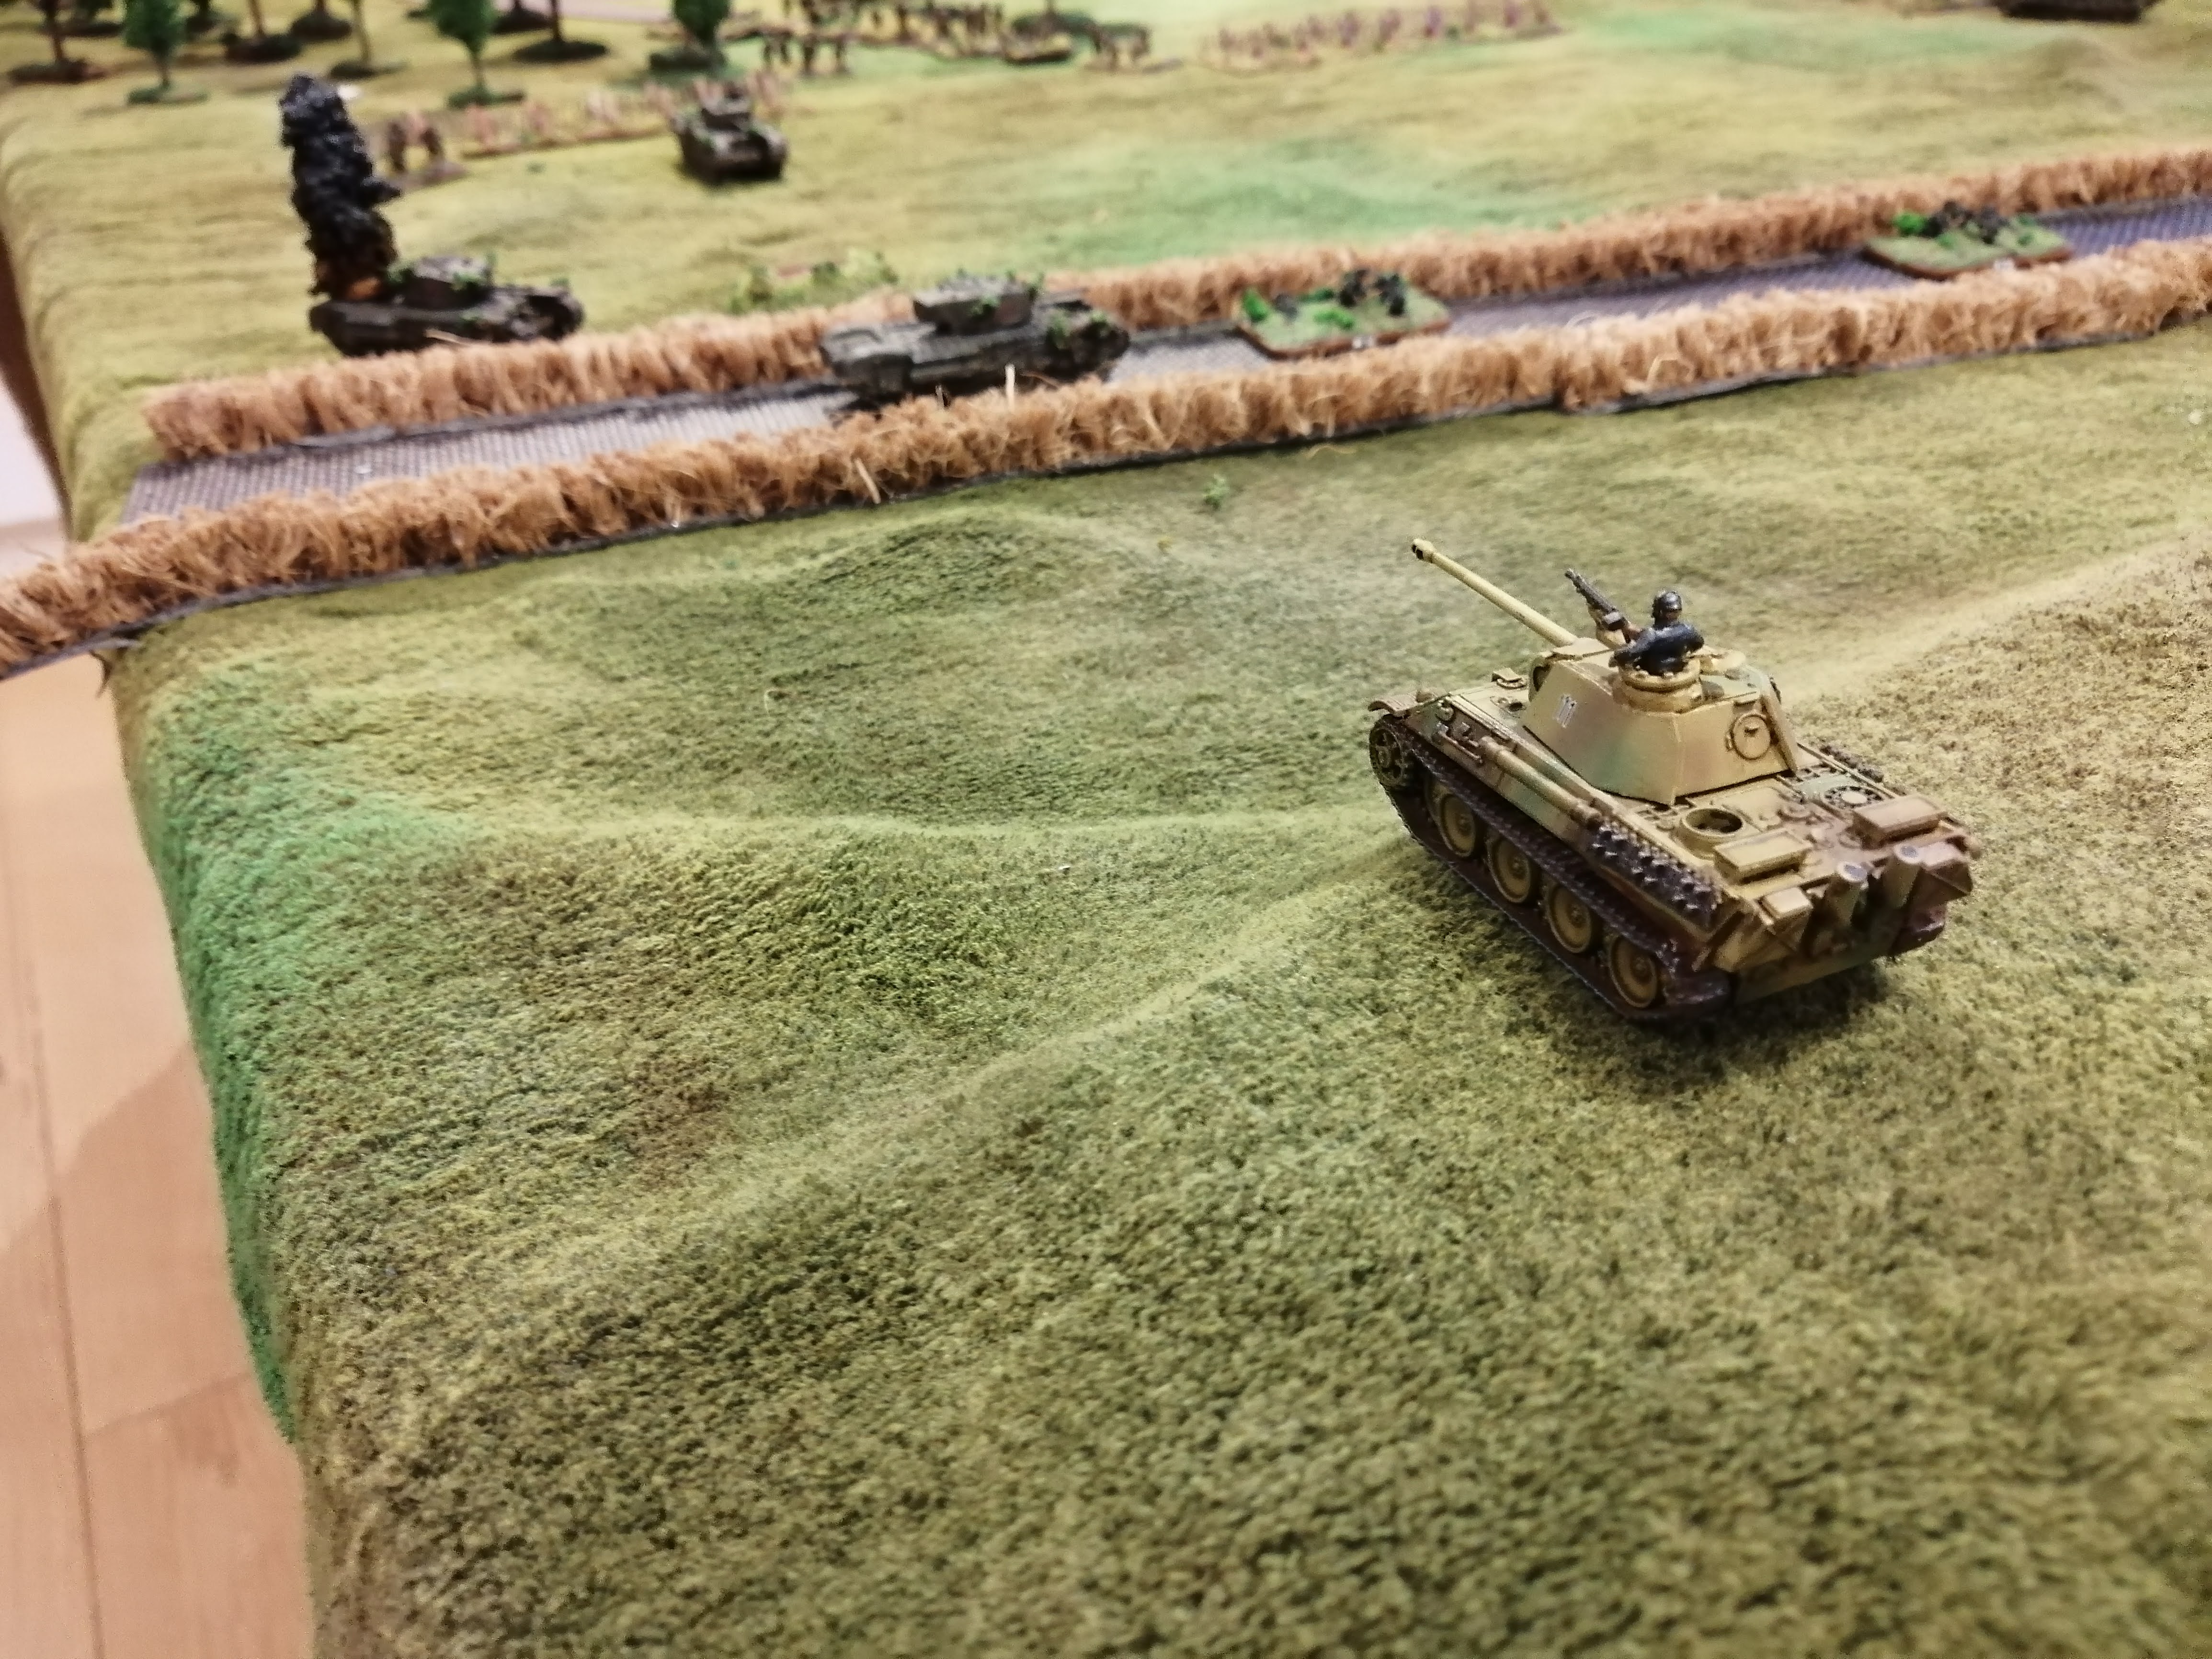 The Panther comes out to play
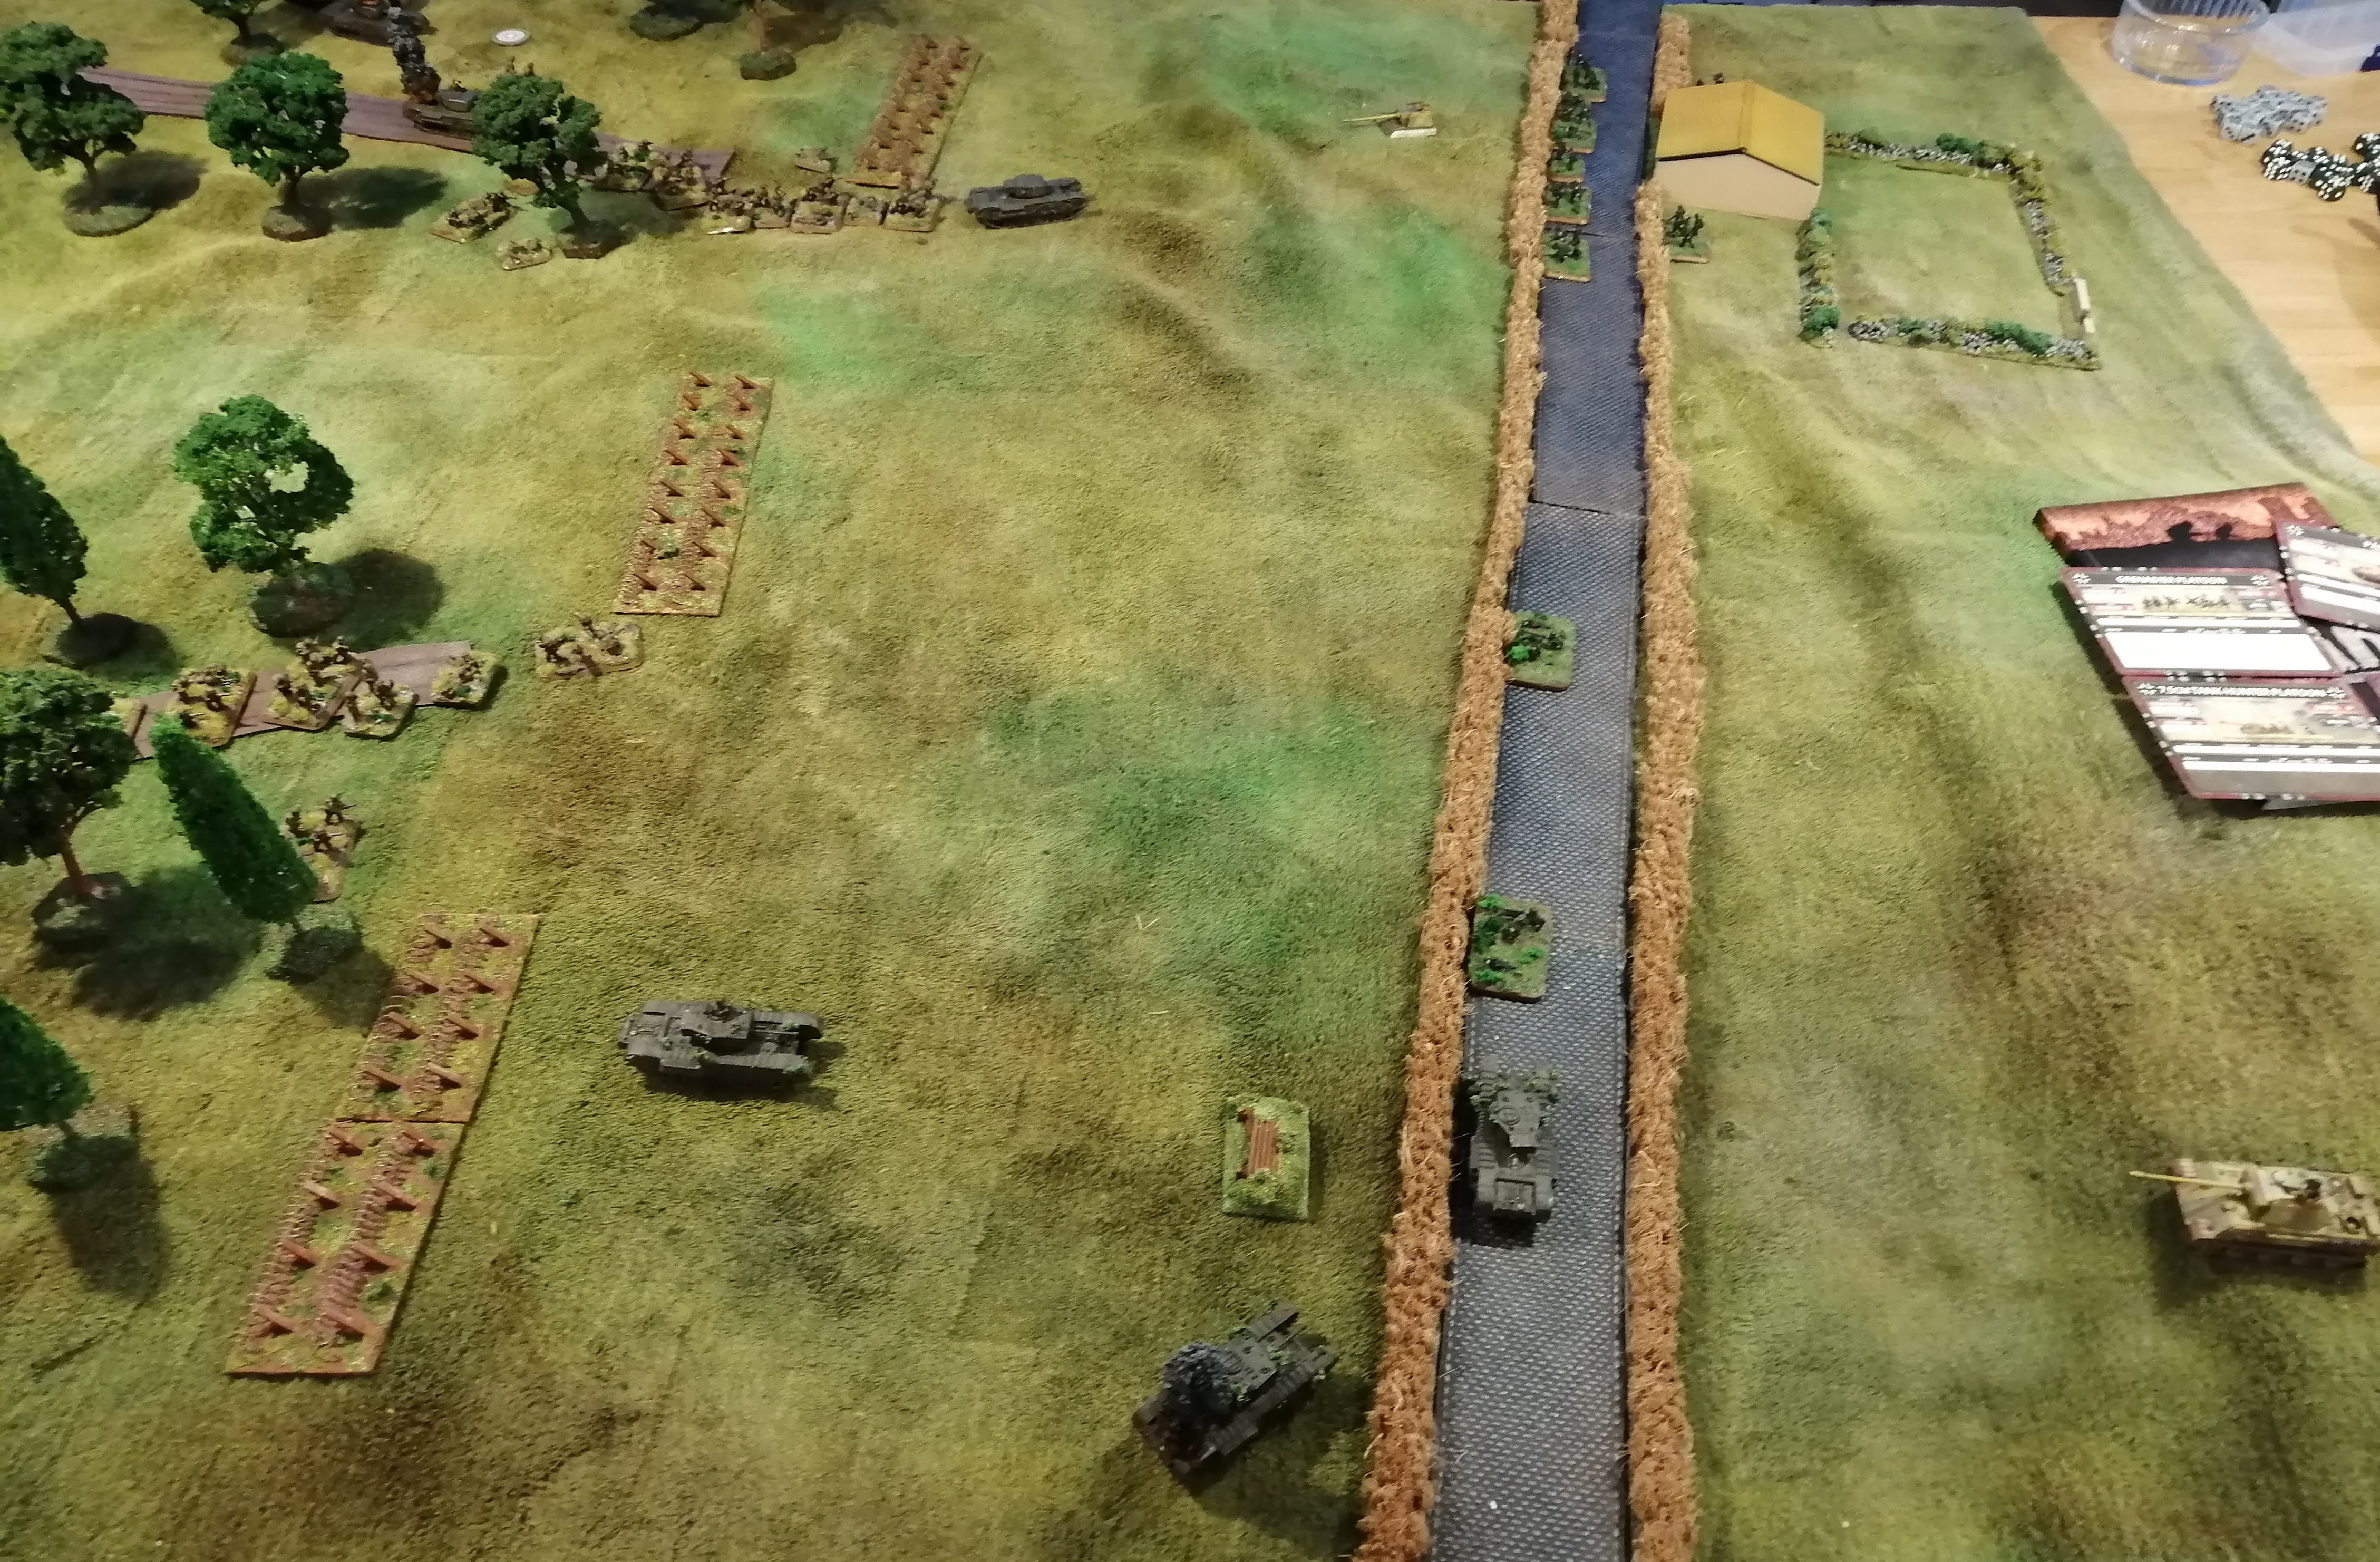

Turn 7 (Allies):
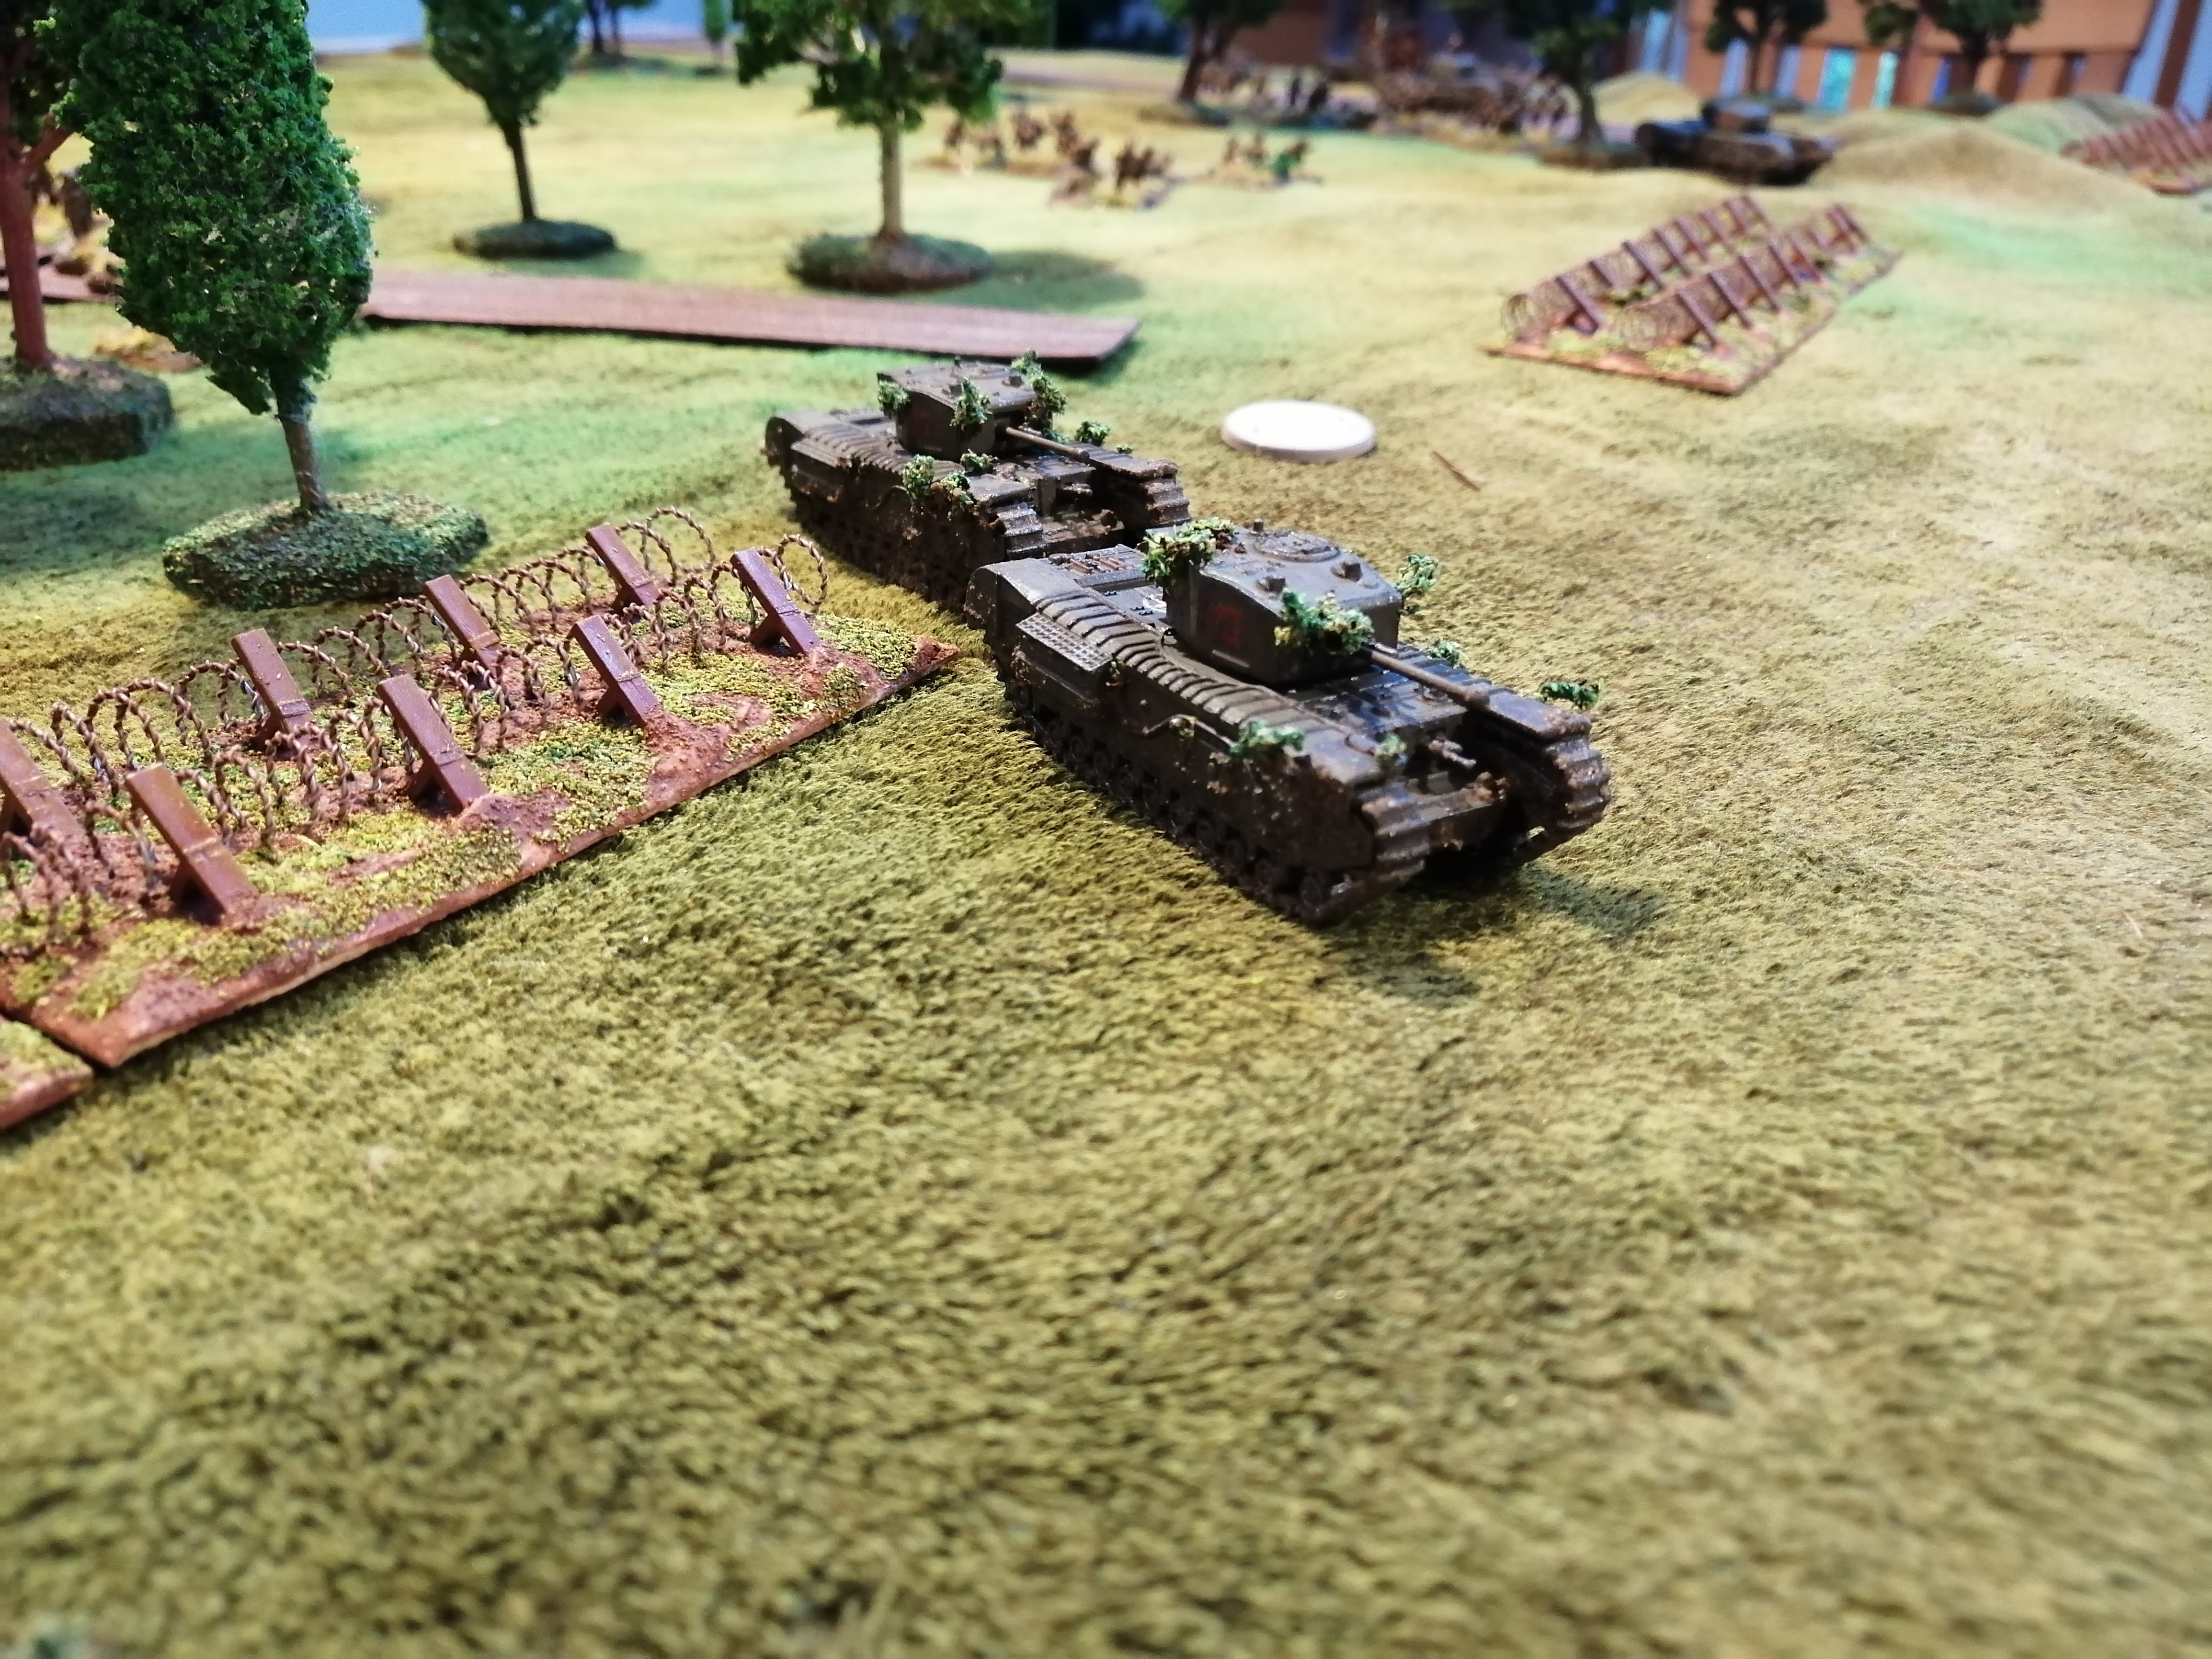
My son continued to push forward and advanced one of his Churchill tanks of Platoon 2 up to flank the Panther. The other tank from Platoon 2 moved up to the hedgerow to get some cover. Both the tanks fired at the Panther but only managed to bail the Panther rather than destroy it.
Toward the farm house, the infantry of green platoon continued to move up while the Churchill placed some smoke onto the Panther Turret. This also provided some additional cover for the infantry as the Germans defending the farm house had their line of sight blocked.
Turn 7 (German):
My son was not happy when the Panther crew passed the remount check and got their tank operational. They wasted no time at all putting a shell through one of the Churchills, leaving just one operational tank in Platoon 2.
The MG nest and MG teams put down a hail of fire on the Engineer platoon and Orange platoon. Both platoons hit the deck, getting pinned and lose a team each.
The turret is not able to shoot due to the smoke and loses another turn.
 End of turn 7
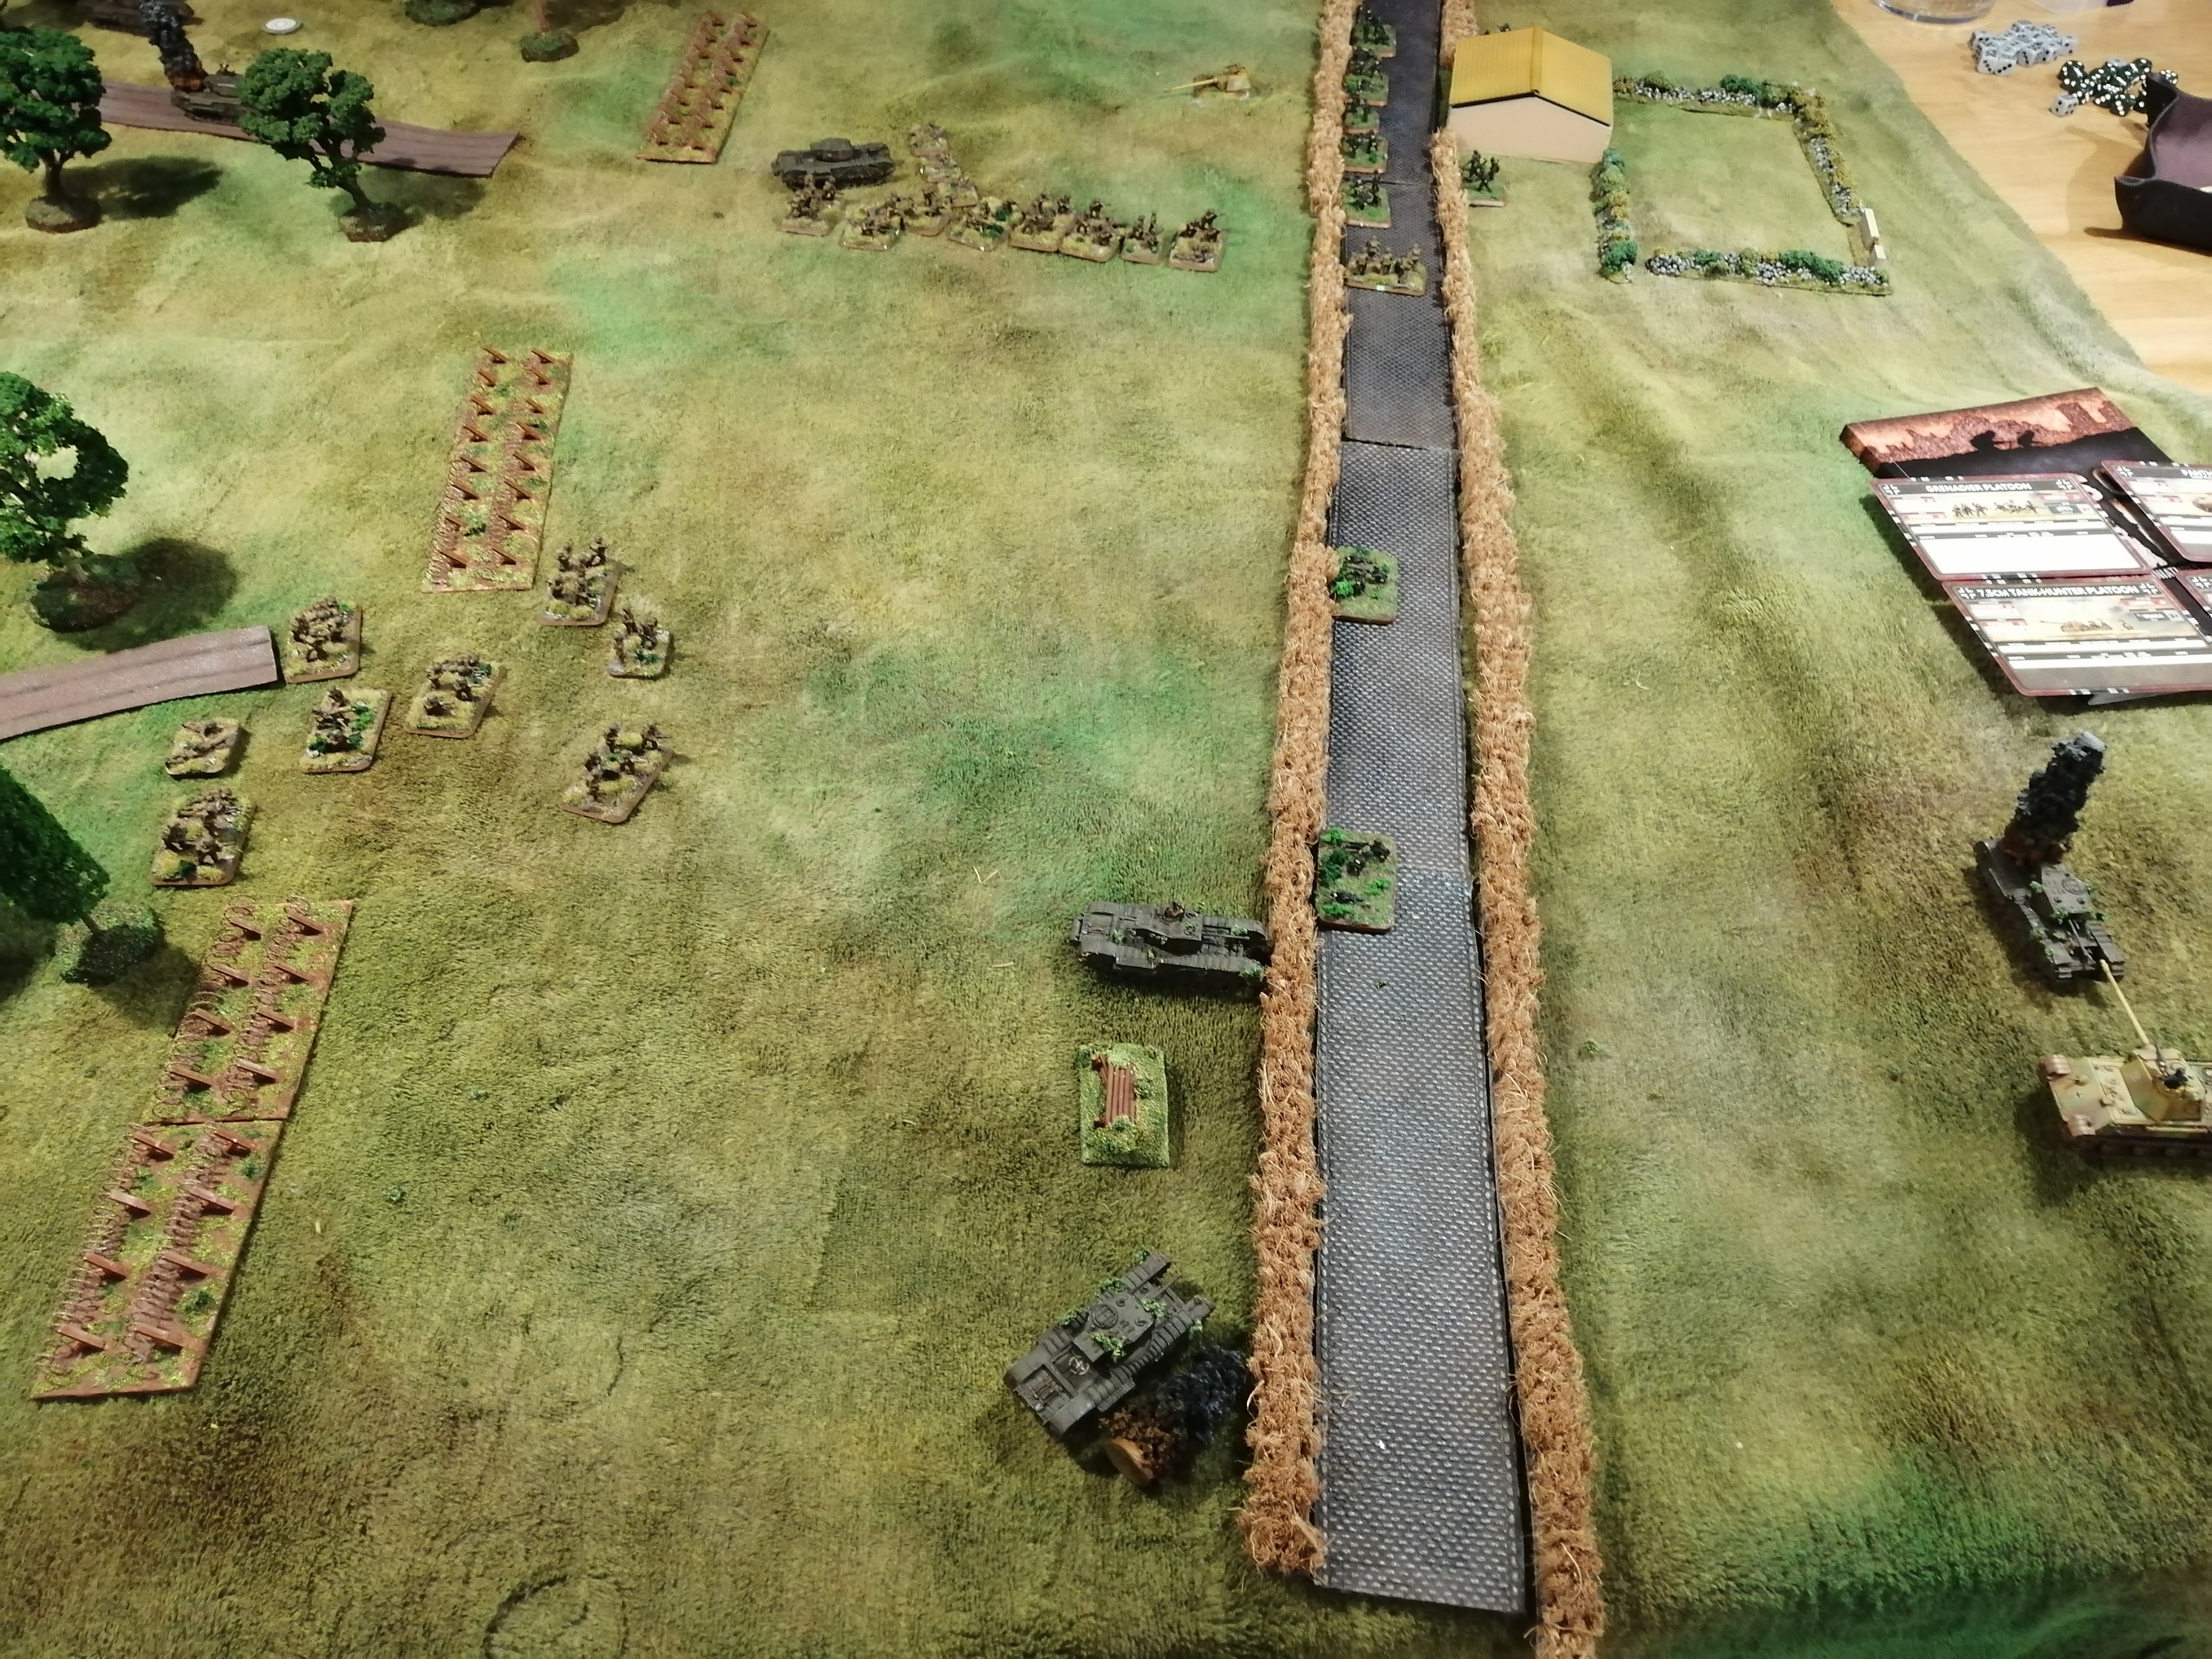
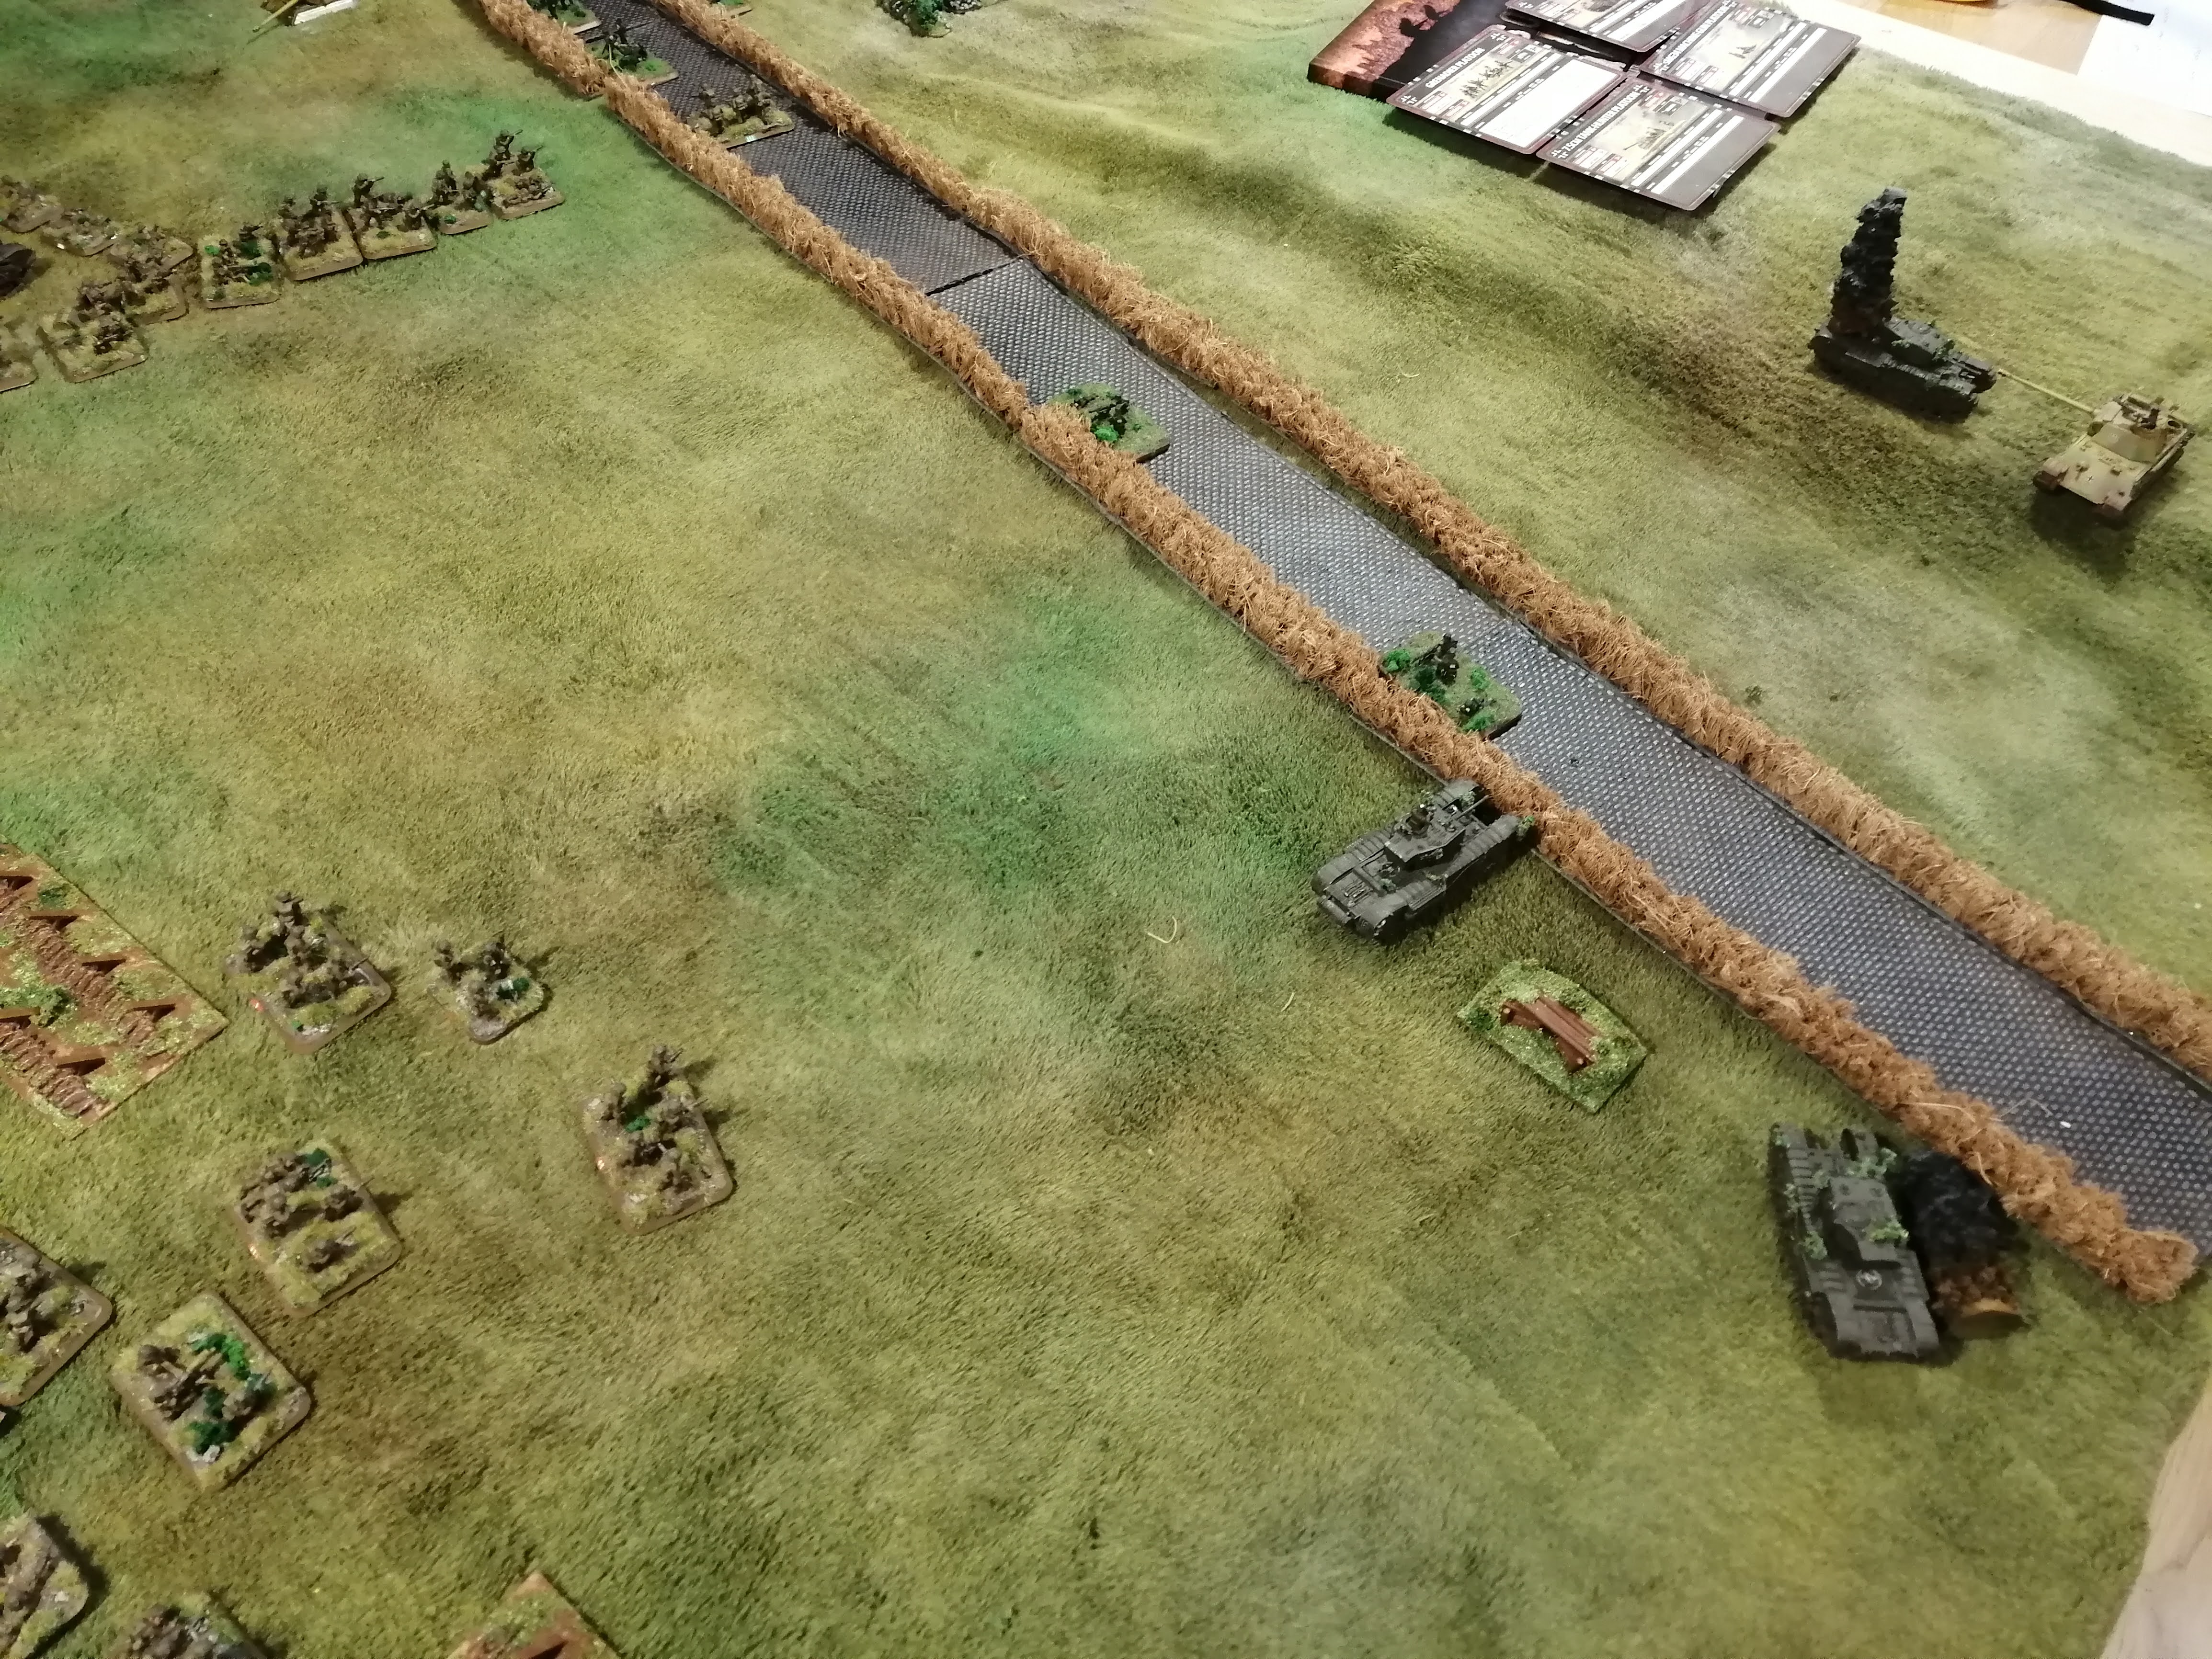
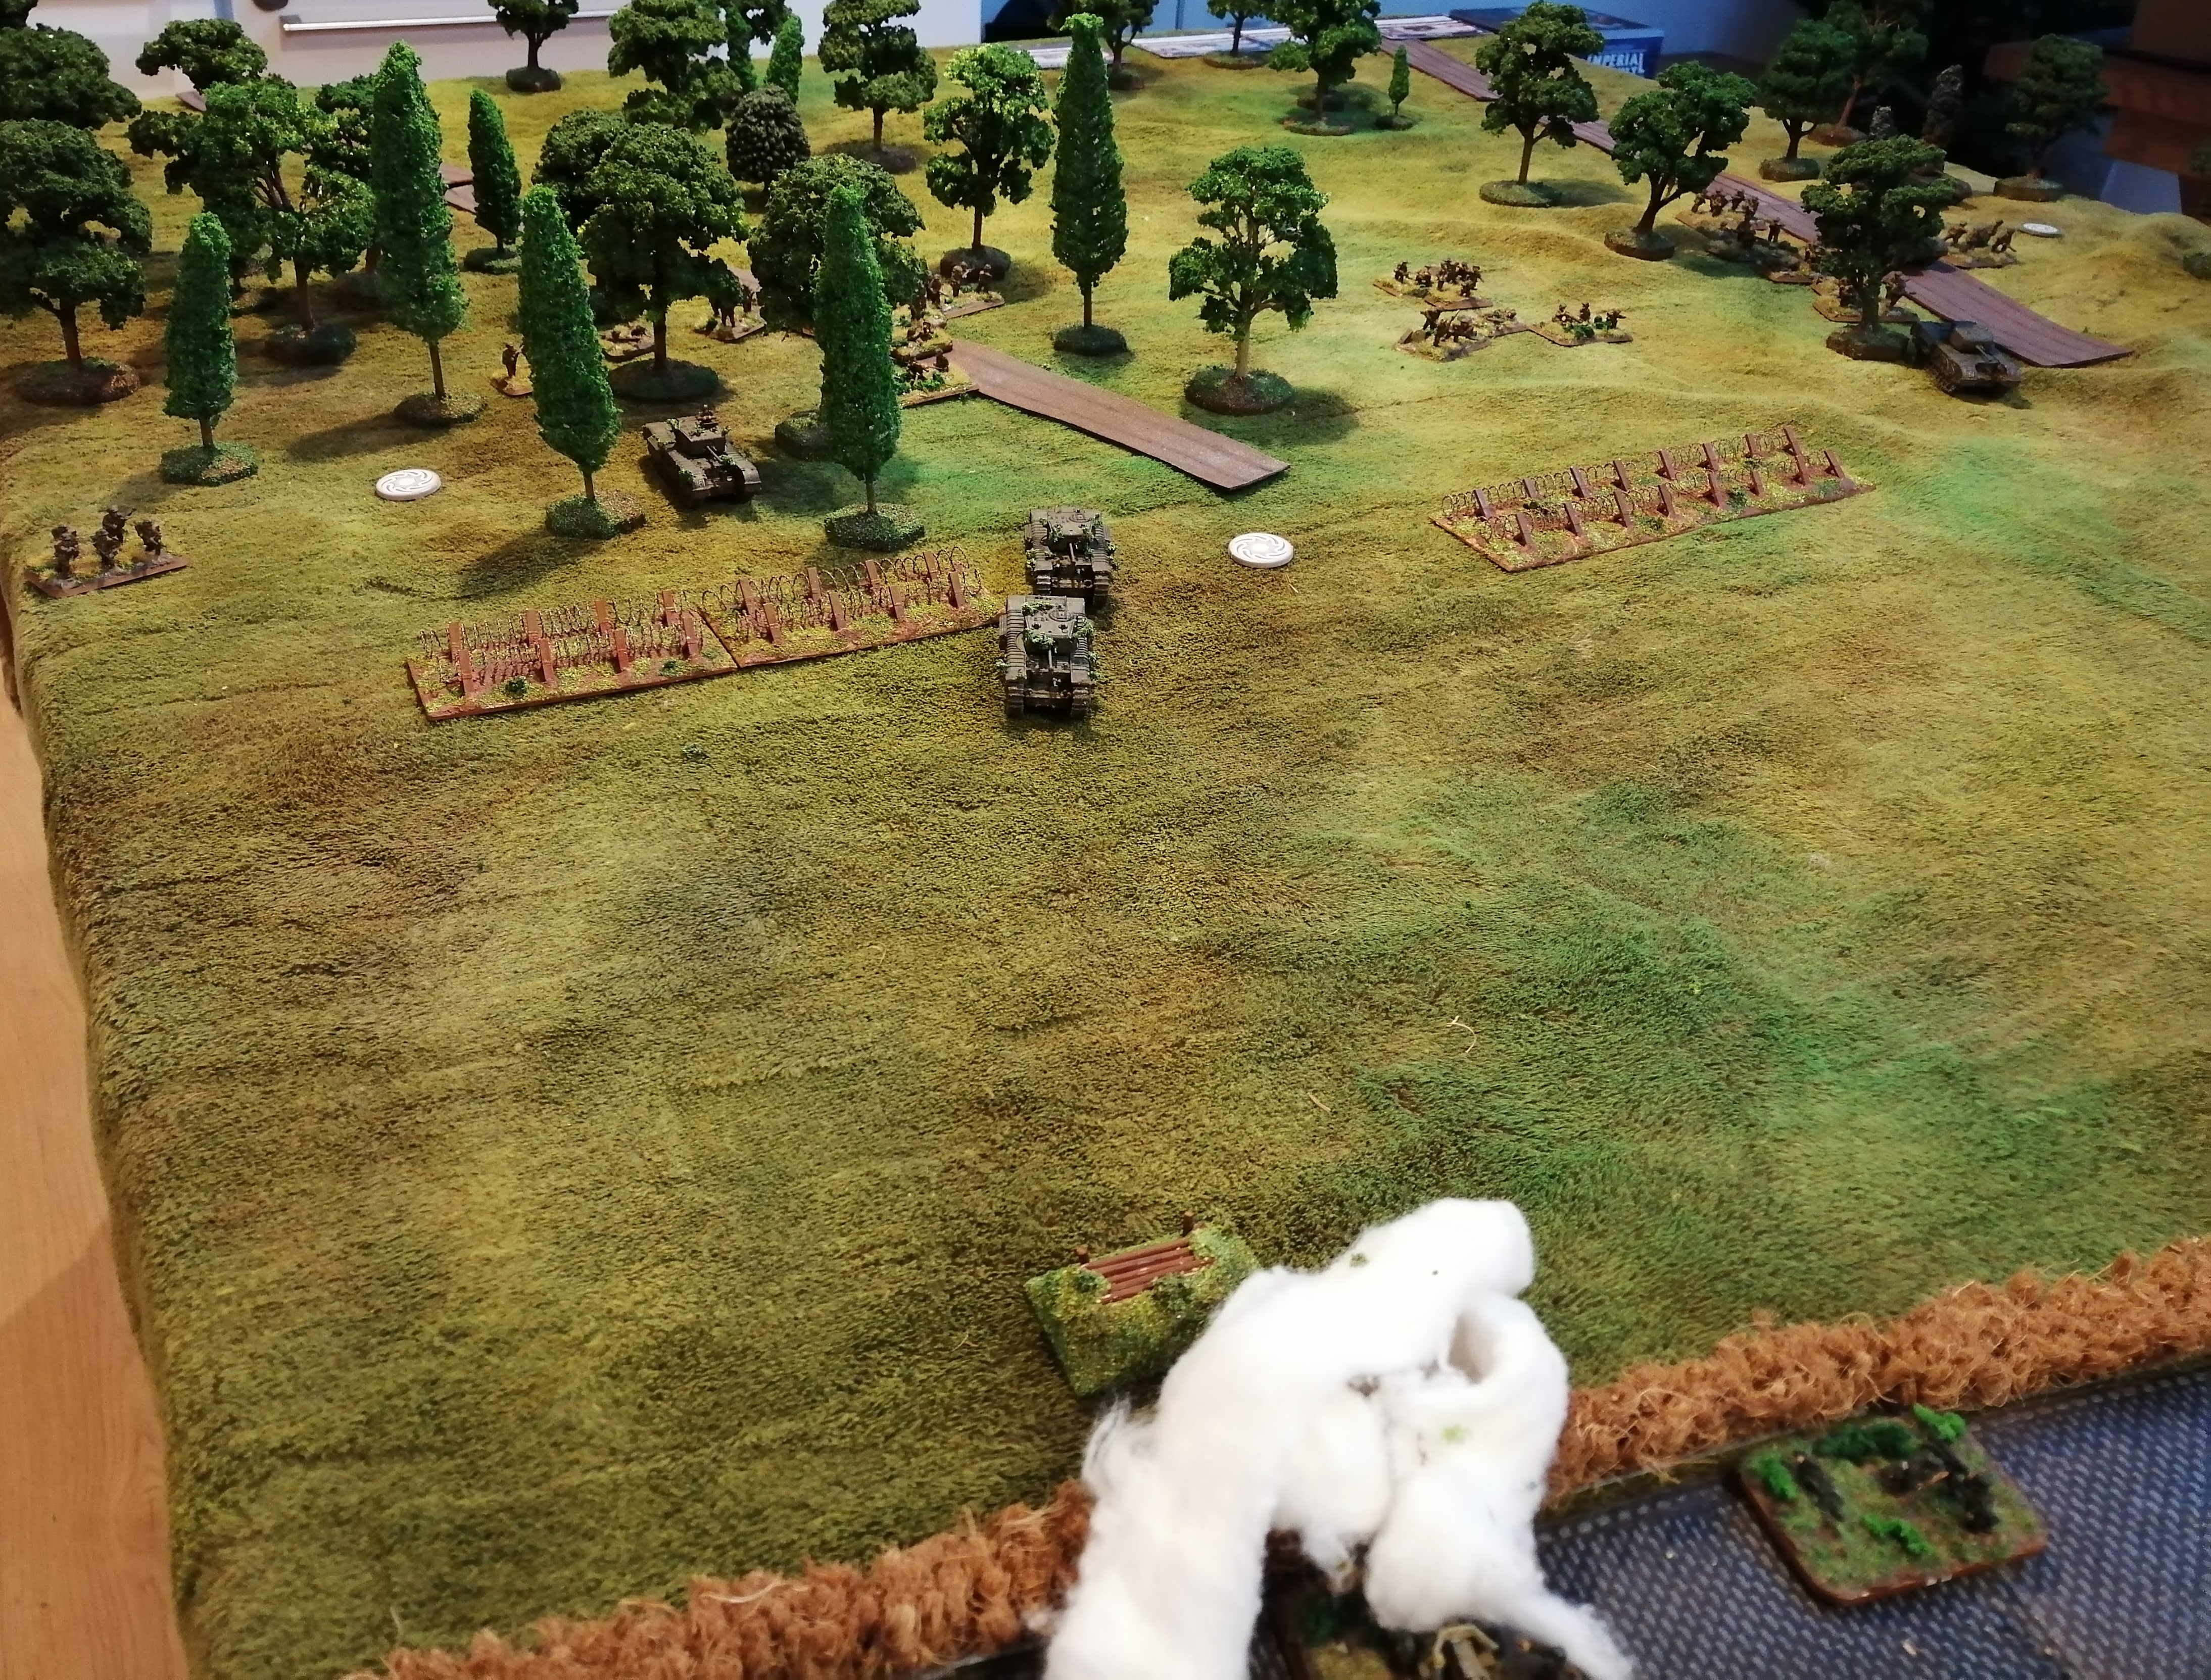
Turn 8 (Allies):
Orange Platoon remains pinned, keeping their heads down in front of the MGs. This put a dent in my son’s plans on this flank and he started to get a little down at this point.
Green platoon was able to fire the PIAT at the turret and bails it out. Some of Green platoon also advance, with one team able to scramble over the hedge on the road. Otherwise there was a lot of missing, including from the Churchill facing off against the Panther.
Turn 8 (German):
The crew in the turret decide to keep their heads down and don’t remount but without any smoke on this side of the board, the German infantry in the farmhouse are able to pin Green platoon with their shooting.
On the other flank, Orange platoon loses another team from the relentless MG fire and the Engineers get pinned again. We’re also treated to the Panther firing and missing with the first shot and having the second bounced by the thick Churchill armour. Given the fire power of both tanks on this side of the board, it’s a poor display of gunnery!
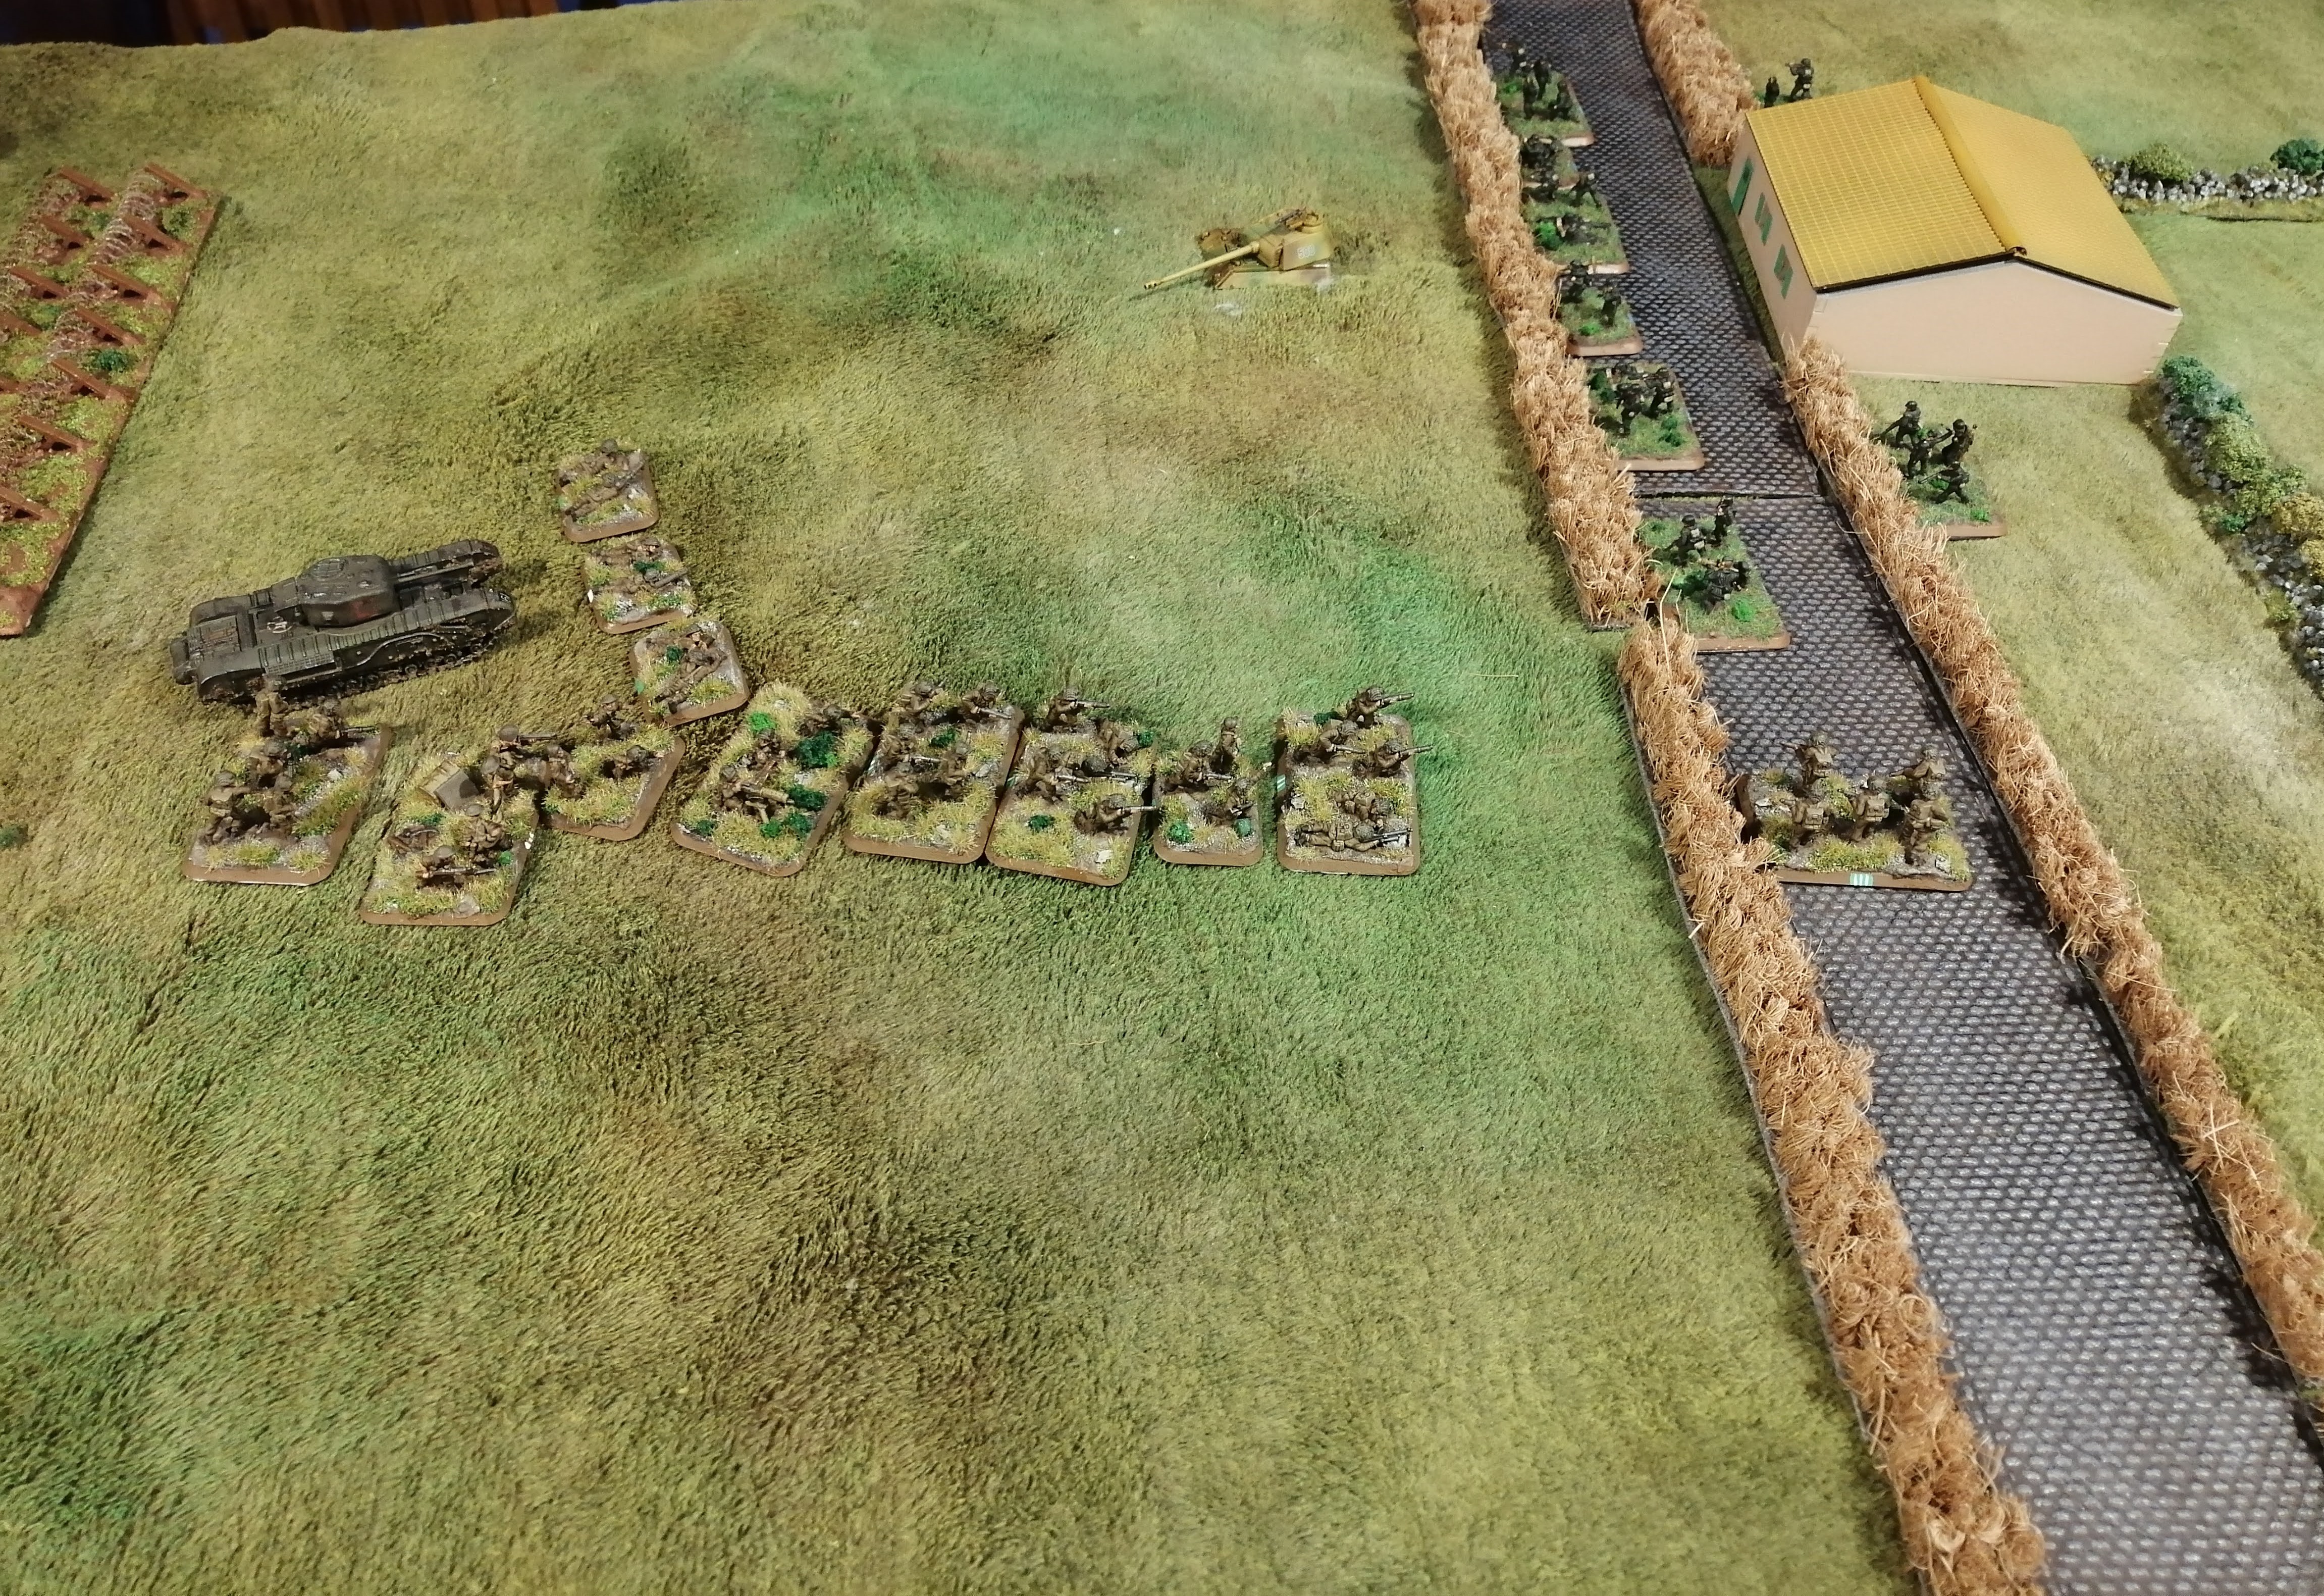
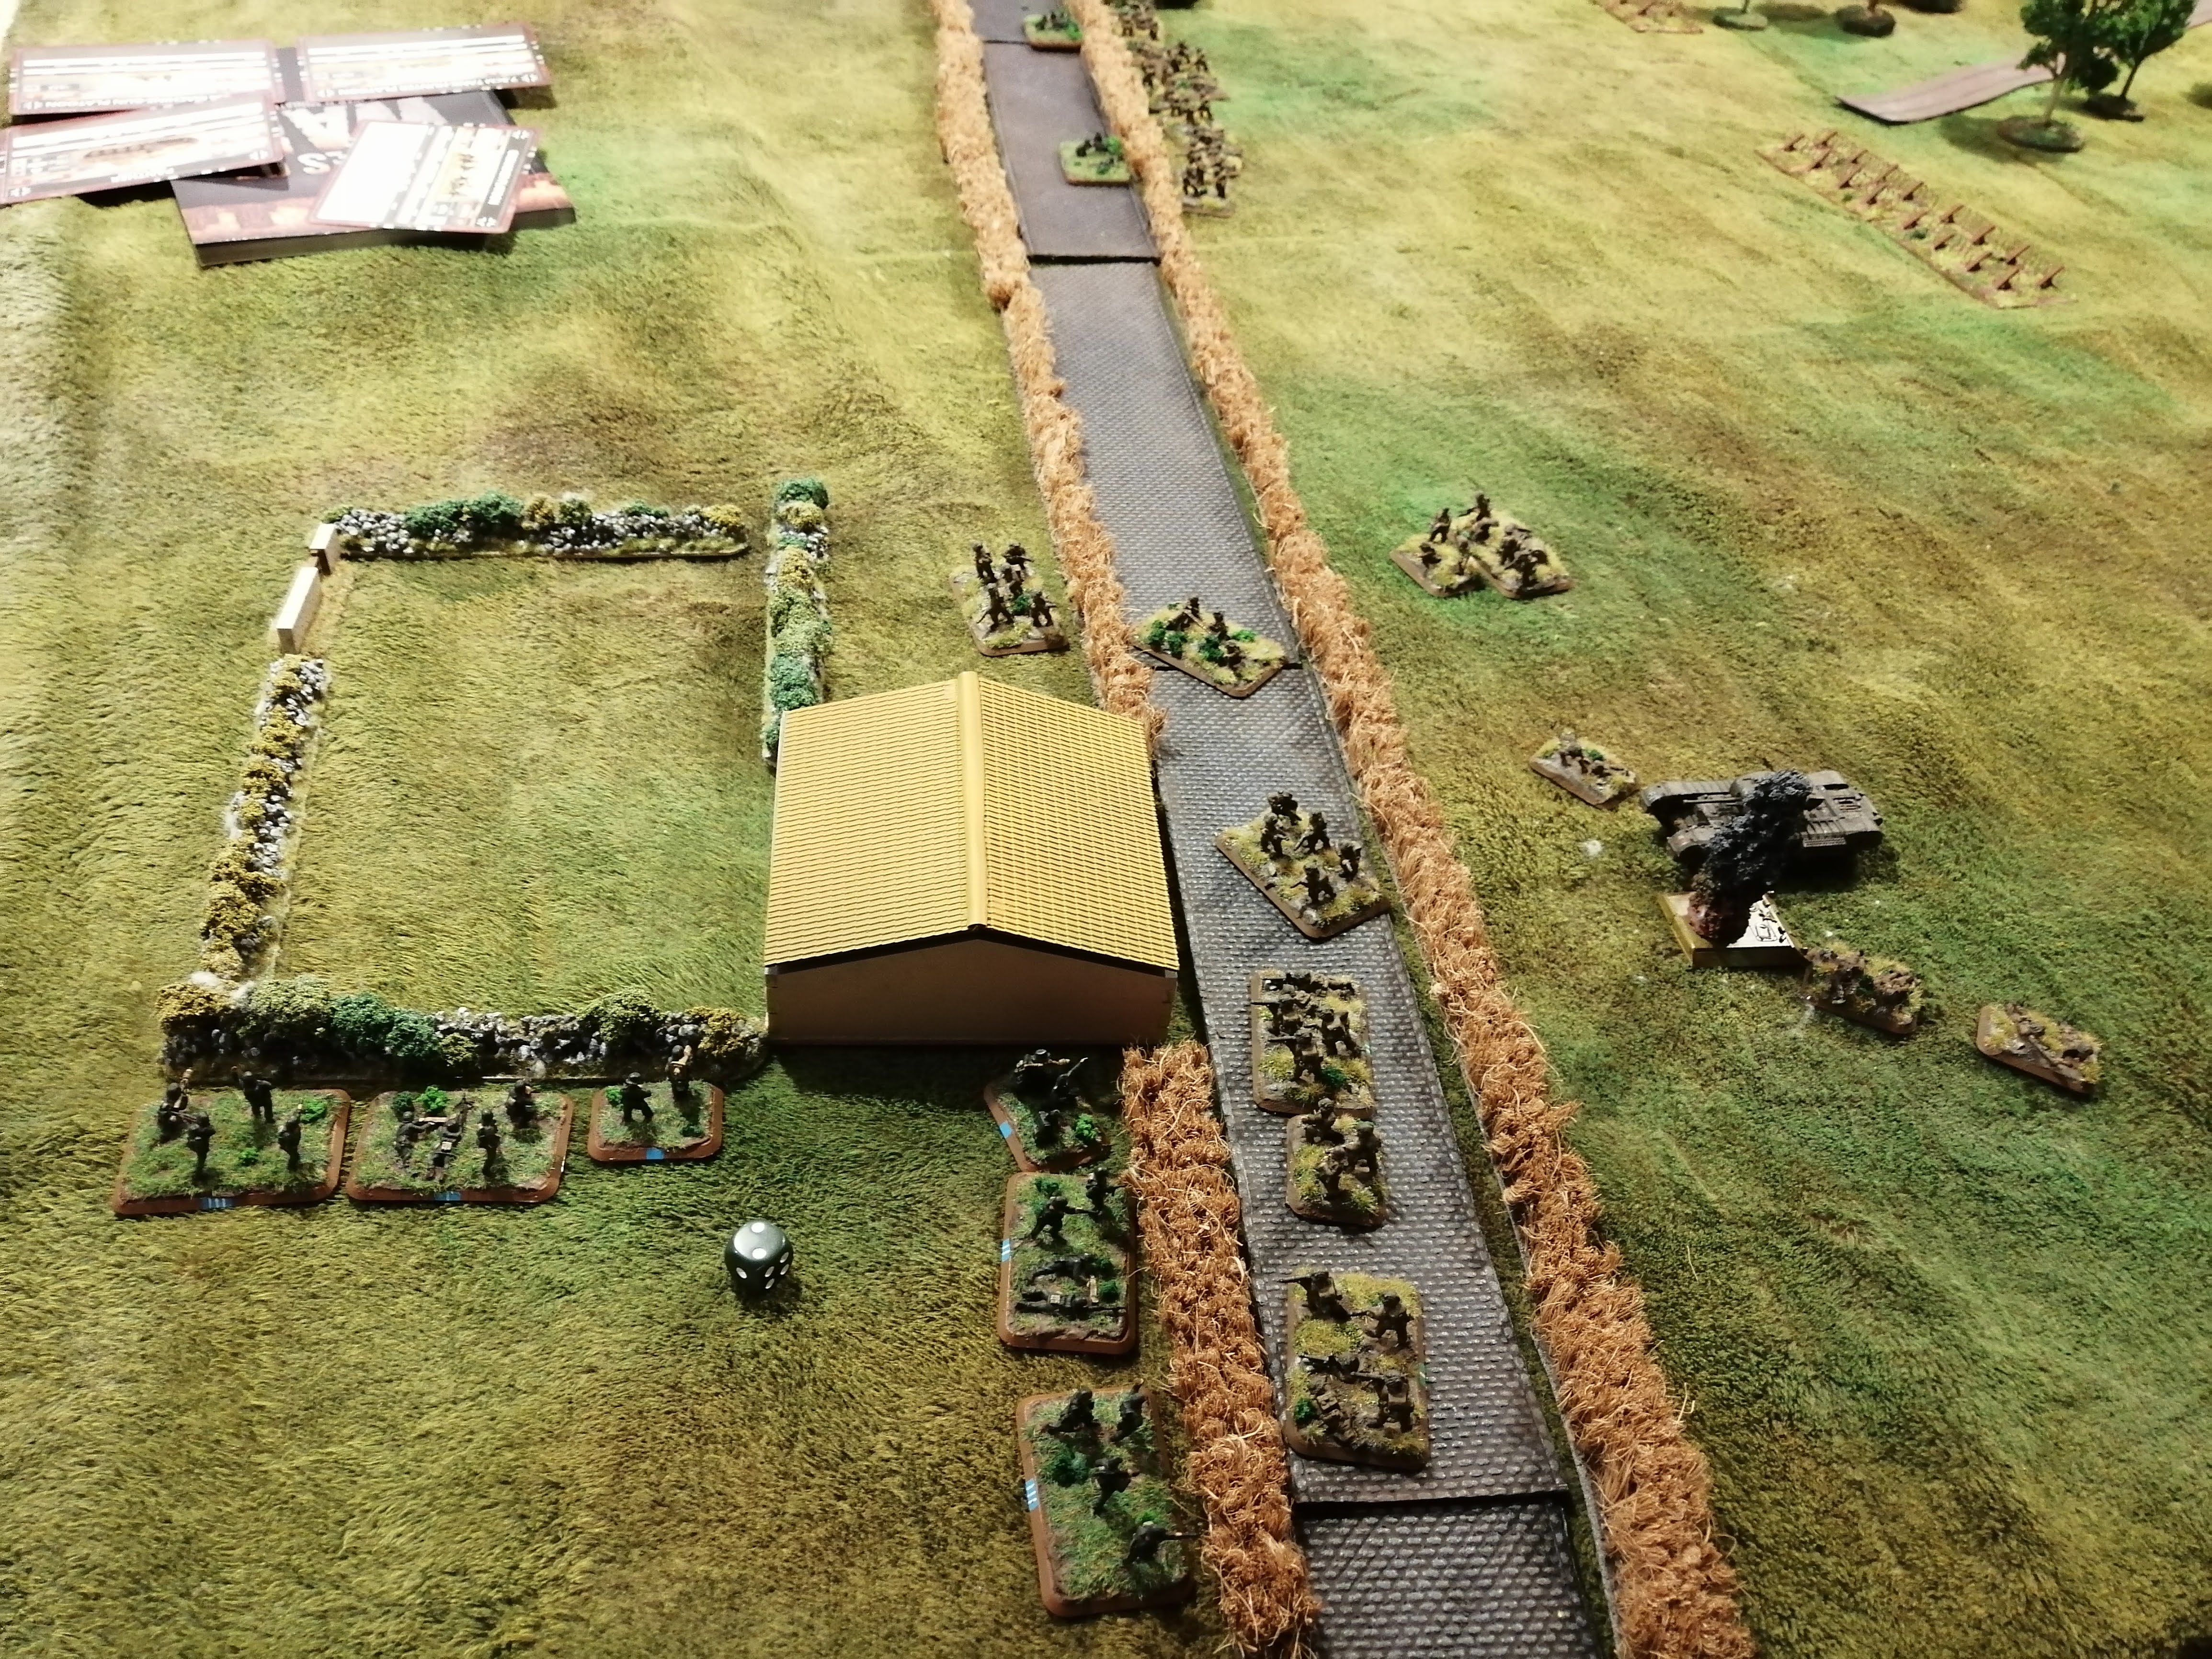
Turn 9 (Allied):
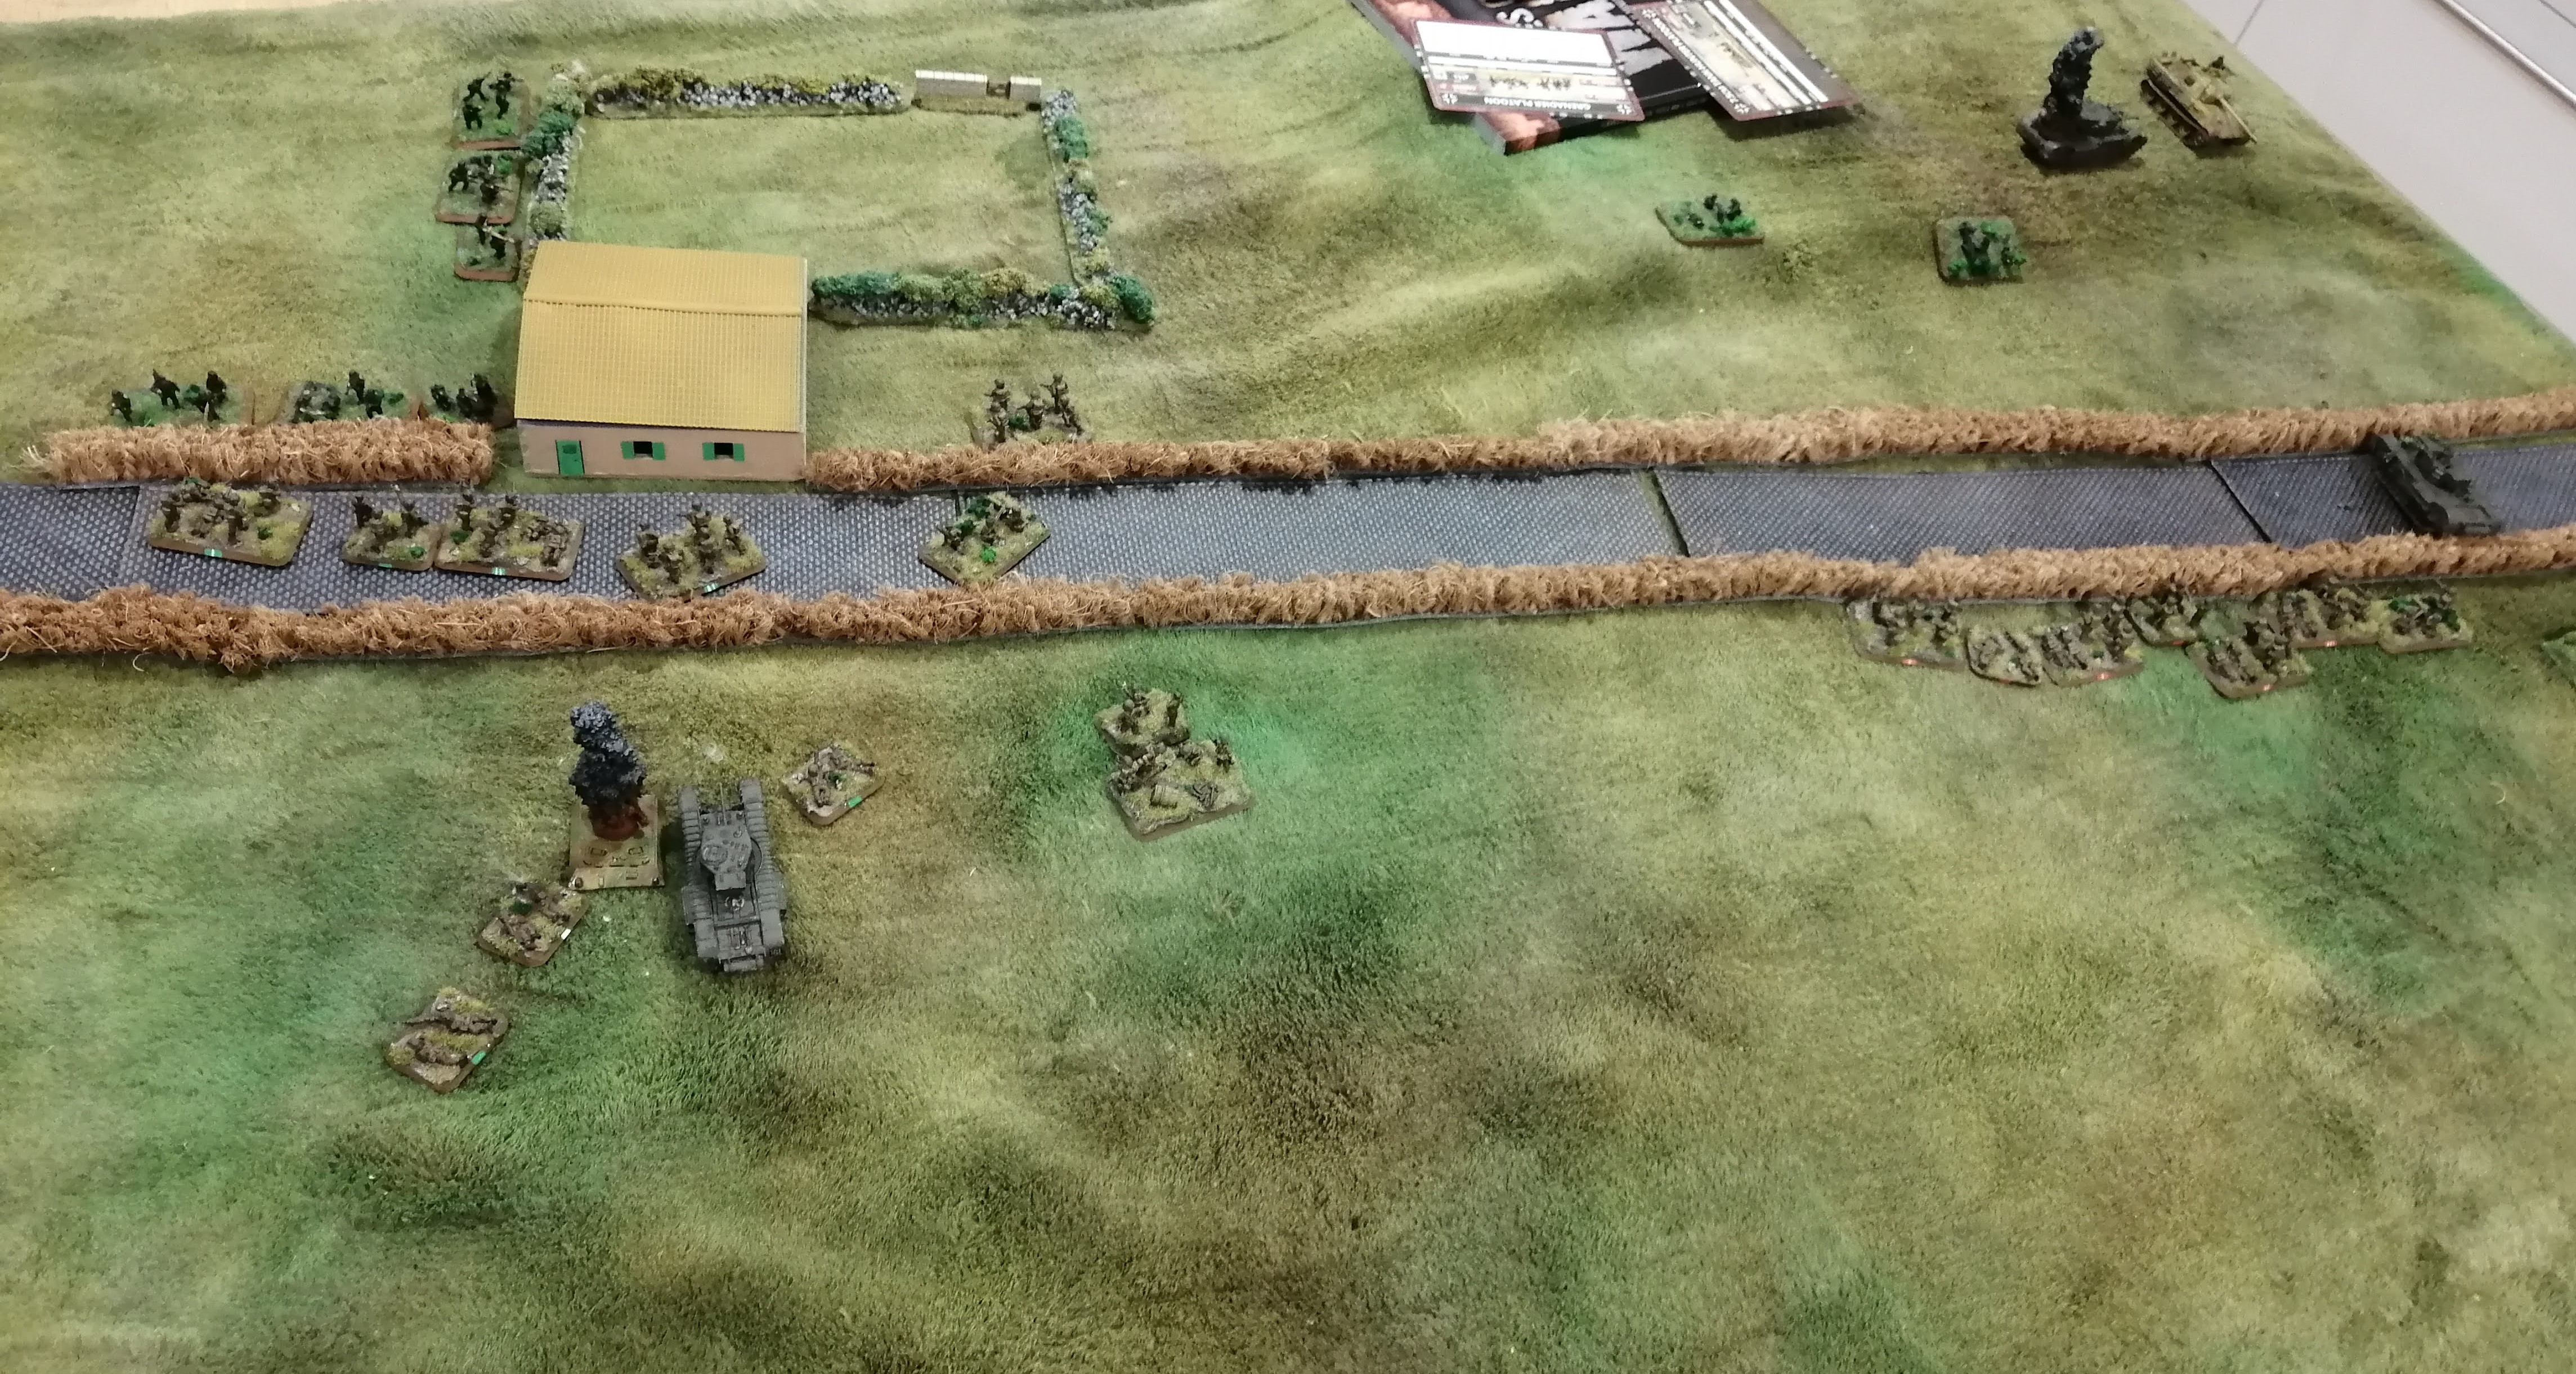
The Canadians of Green platoon waste no time in unpinning and advance again on the Germans defending the farm house. The PIAT again hits the turret bailing it for a second time which results in the crew surrendering and removing the turret from the game. Orange platoon and the engineers rally and in an advance that must have earnt many a medal for bravery, got up to the hedge row where the German MG teams were firing from.
The Churchill again failed to damage the Panther but this turn was all about the infantry.
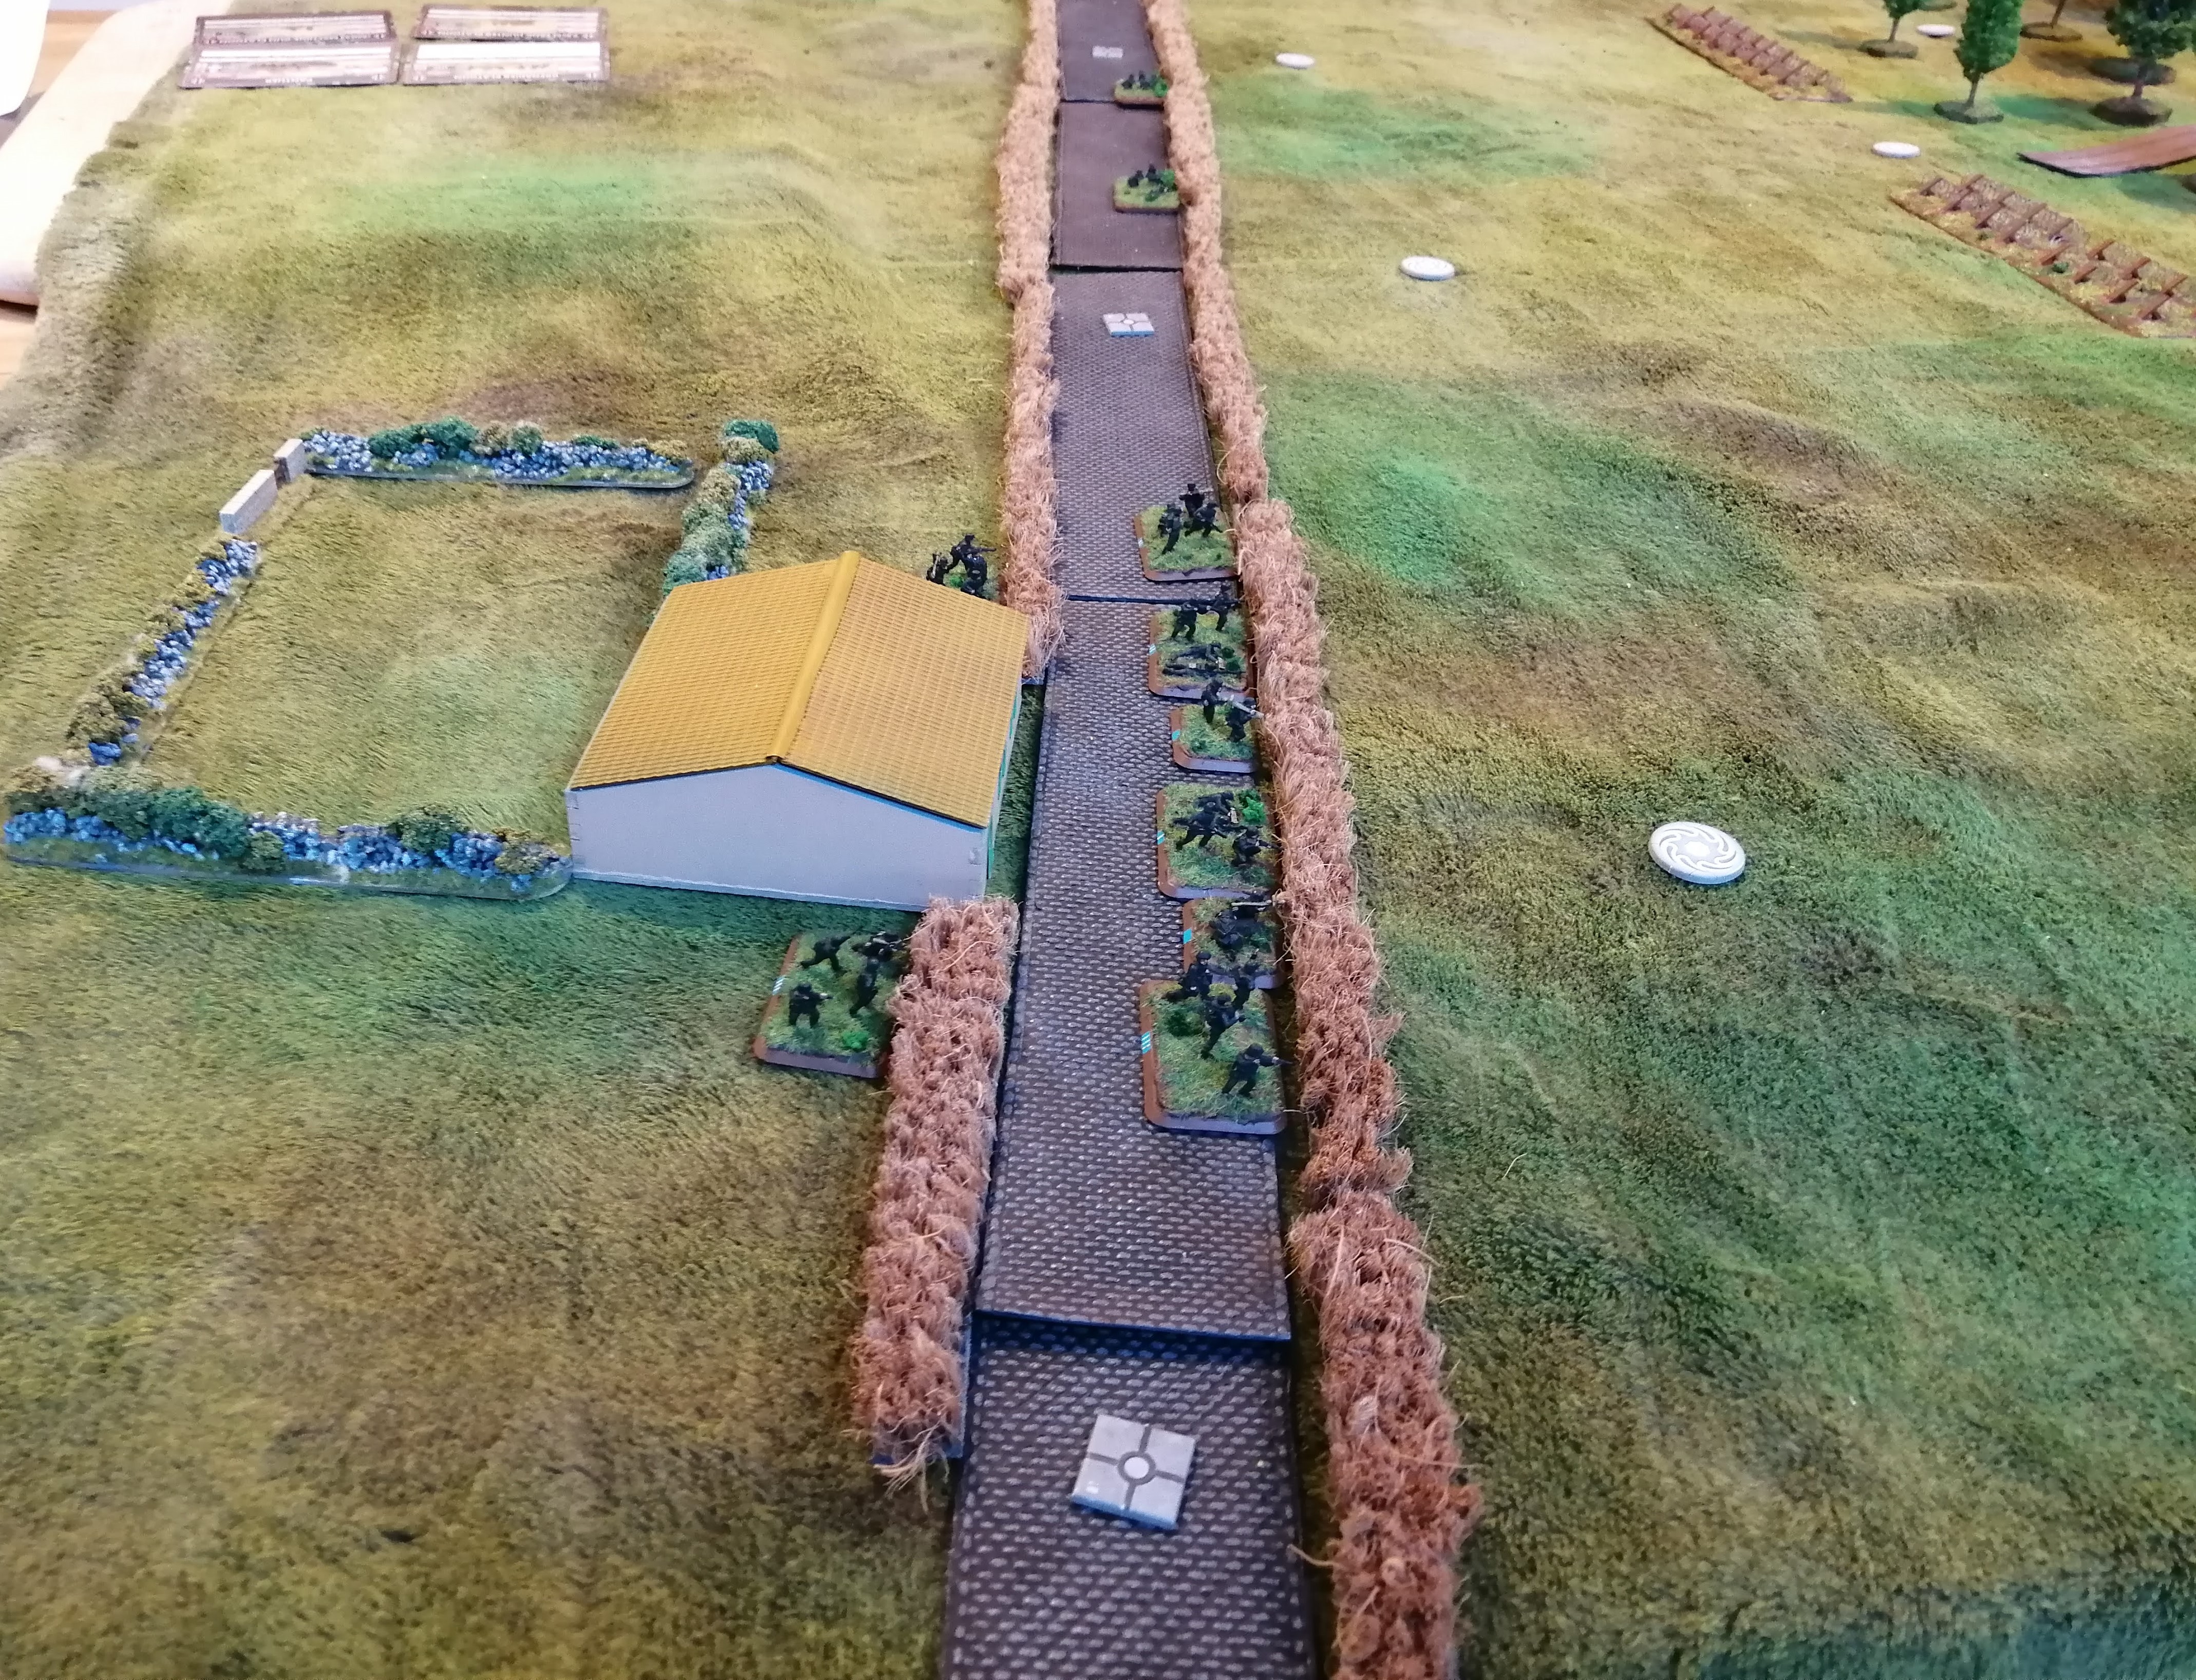
Green platoon, supported by the one remaining Churchill of Tank Platoon 1, launched an assault on the German Infantry defending the farmhouse. The assault was helped significantly by the machine gun fire from the Churchill and the MG team accompanying Green platoon who managed to pin the defenders in place before the assault hit home. The Canadian’s poured over the hedge and quickly dispatched two of the defending teams. Surprised, the Germans weren’t able to counter attack and fell back from the road and farm house, leaving the Canadians to consolidate.
Along the road, Orange Platoon launched an assault against the MG teams. Brave stuff but somehow, my son managed to actually pull this off and while he didn’t destroy the MG teams, he was able to push them back off of the road and take their position.
Turn 9 (German):
We went straight to shooting and again, the Panther failed to damage the Churchill. This was a little silly and unrealistic but we’ll put it down to the swirling dust and smoke that was the case during the actual battle.
At that, with the Canadians holding the road and the German Infantry falling back, we decided that the Allies had achieved their objective and declared an Allied victory.
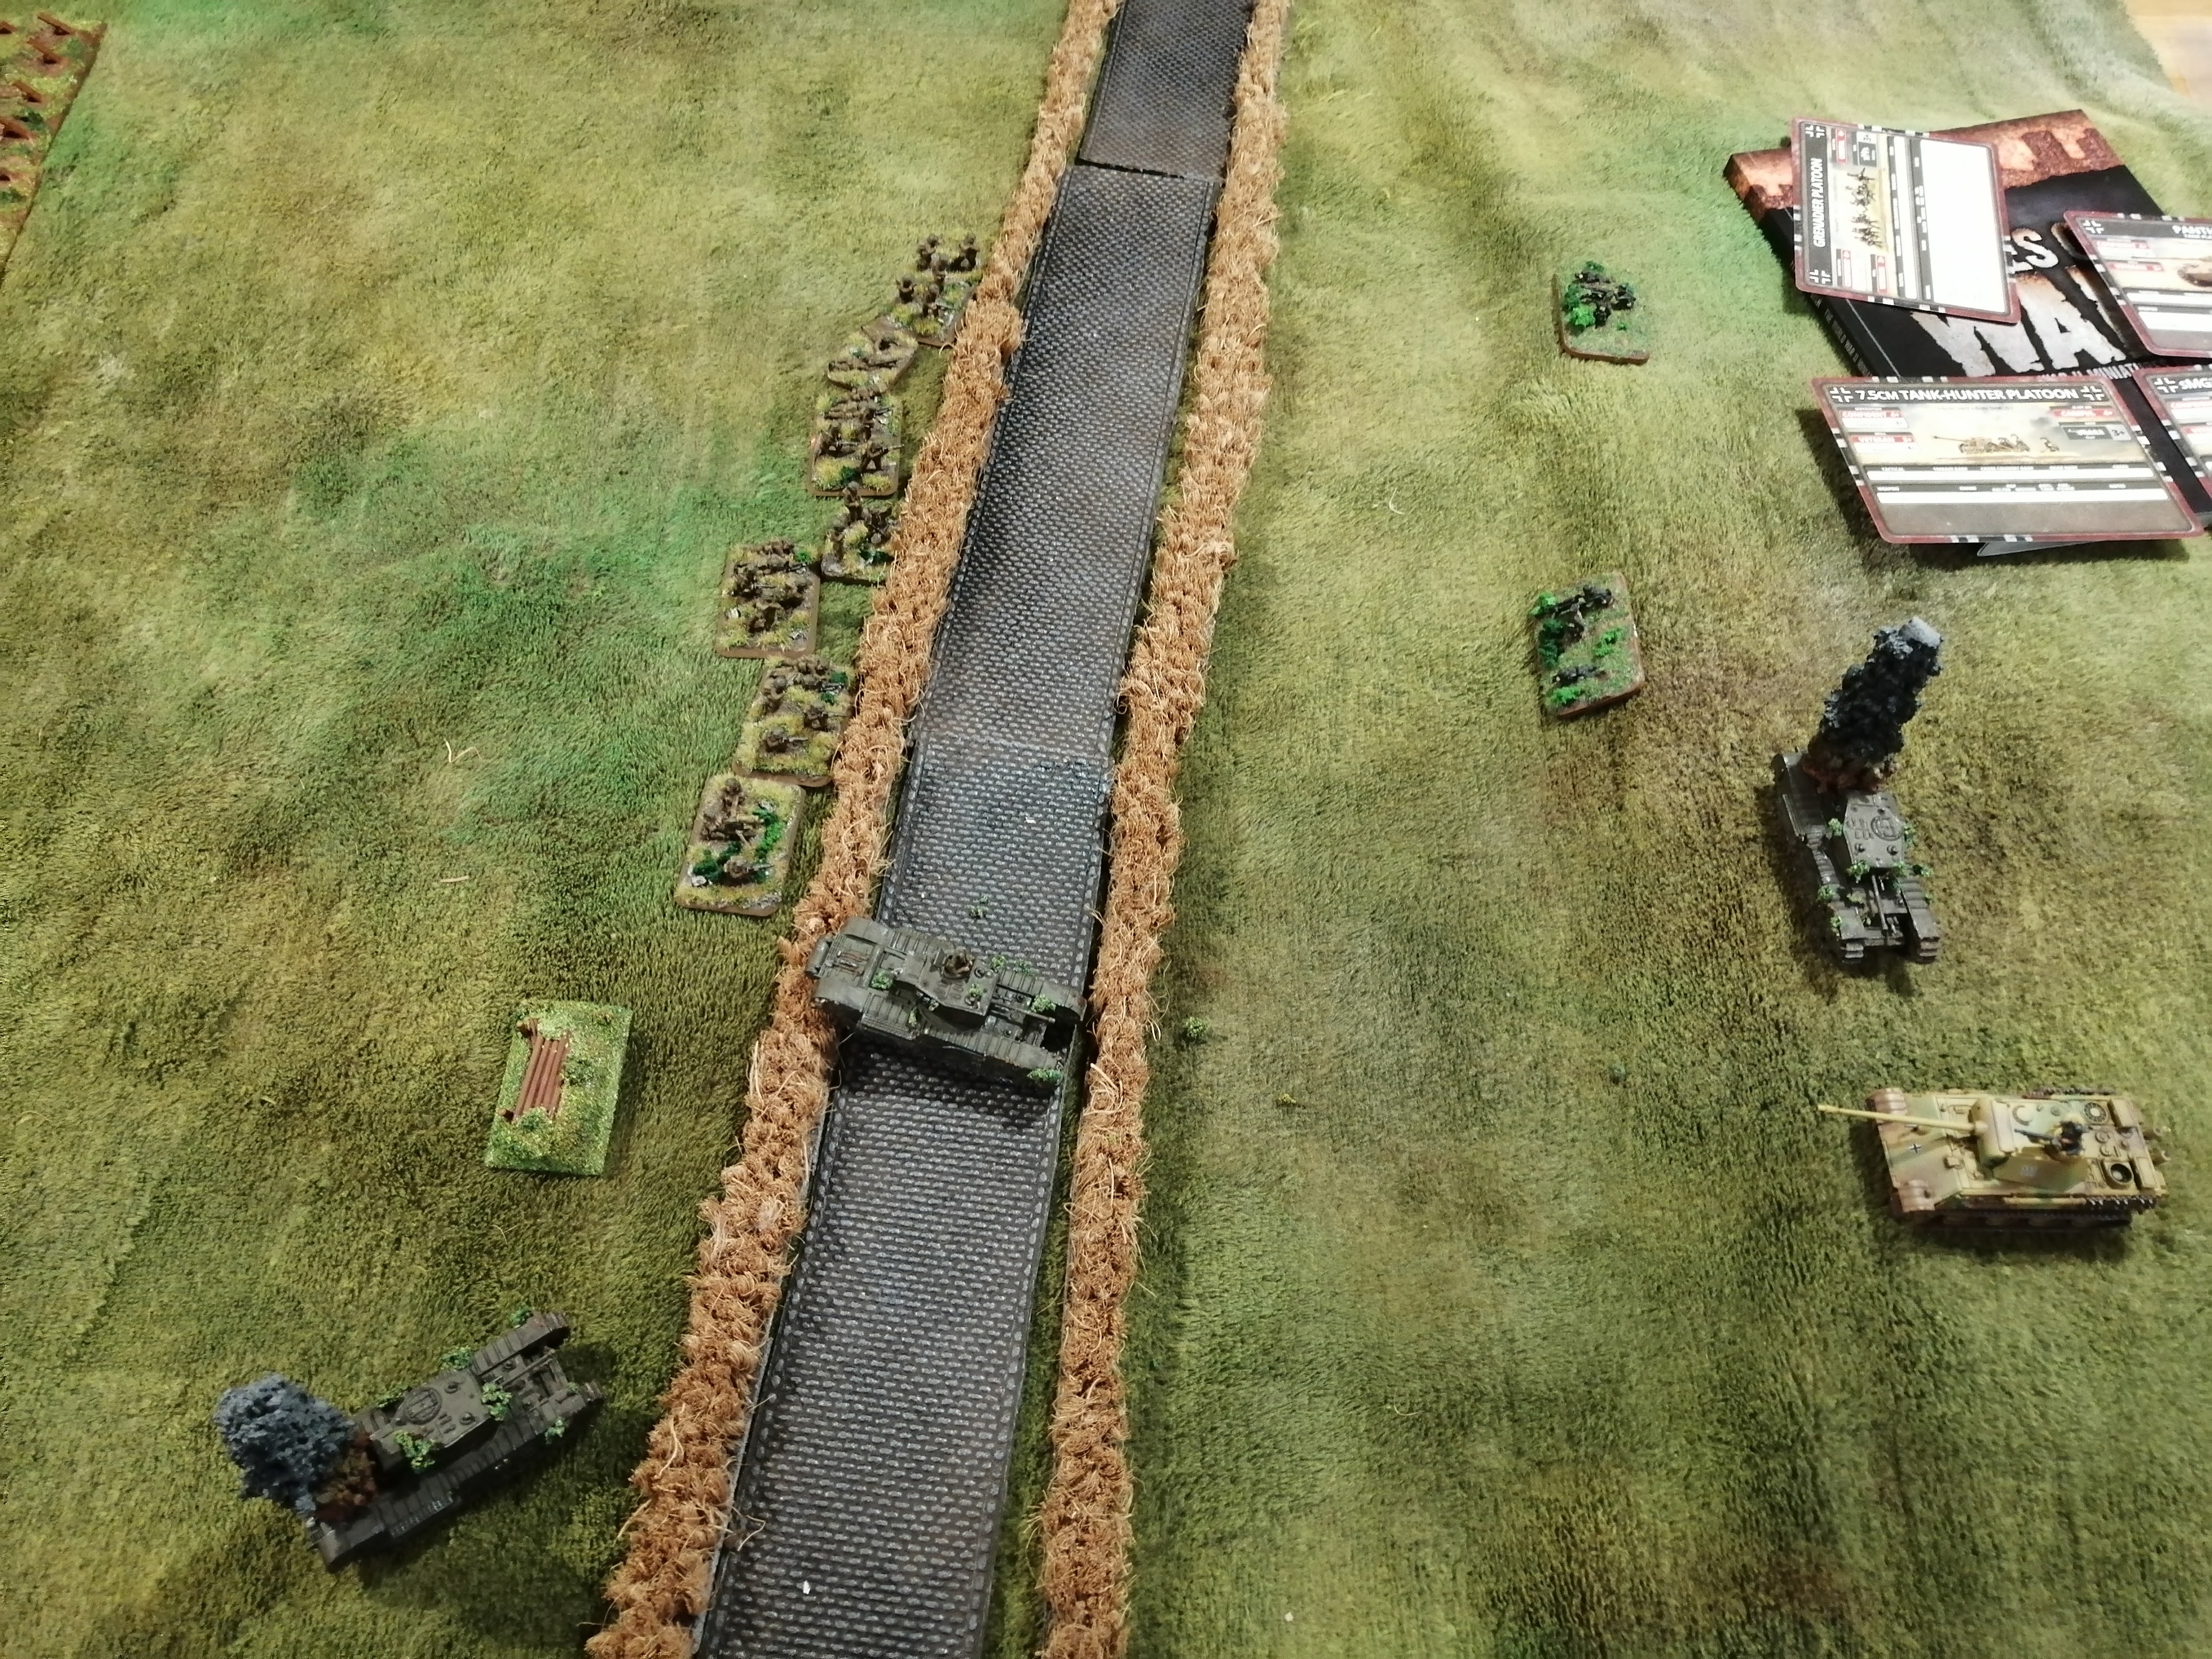
So an Allied victory, as was the case in the original battle. The Defenders retreating back to their next defensive line – the more formidable Gothic line.
My son really enjoyed it in the end and had a roller coaster ride through the battle. He wants to do it again sometime.
Overall the battle played out reasonably well. If it were to be played again, I might have given the defenders some mortar fire of their own. I would also have placed the terrain differently, with the PaK40 looking straight down at least one of the tracks – this would be more realistic and give the attacker something more to thing about.
Gaming the Assault on the Senger Line (Part 2)
Turn 3 (Allies):
My son was able to unpin both of his Infantry platoons and continued their advance up the tracks alongside their supporting tank platoons. He marched the Engineer platoon straight up the middle. Both tank platoons hose the sniper closest to them with machine gun fire resulting in the death of one sniper and the other being pinned. Just to really hammer home the point, my son then decided to assault the pinned sniper with the tanks. The sniper didn’t last long.
Turn 3 (German):
With no Allied units either in range (of any revealed units) or line of sight, there was no action. The Germans sit tight and wait the assault.
 End of Turn 3 Status
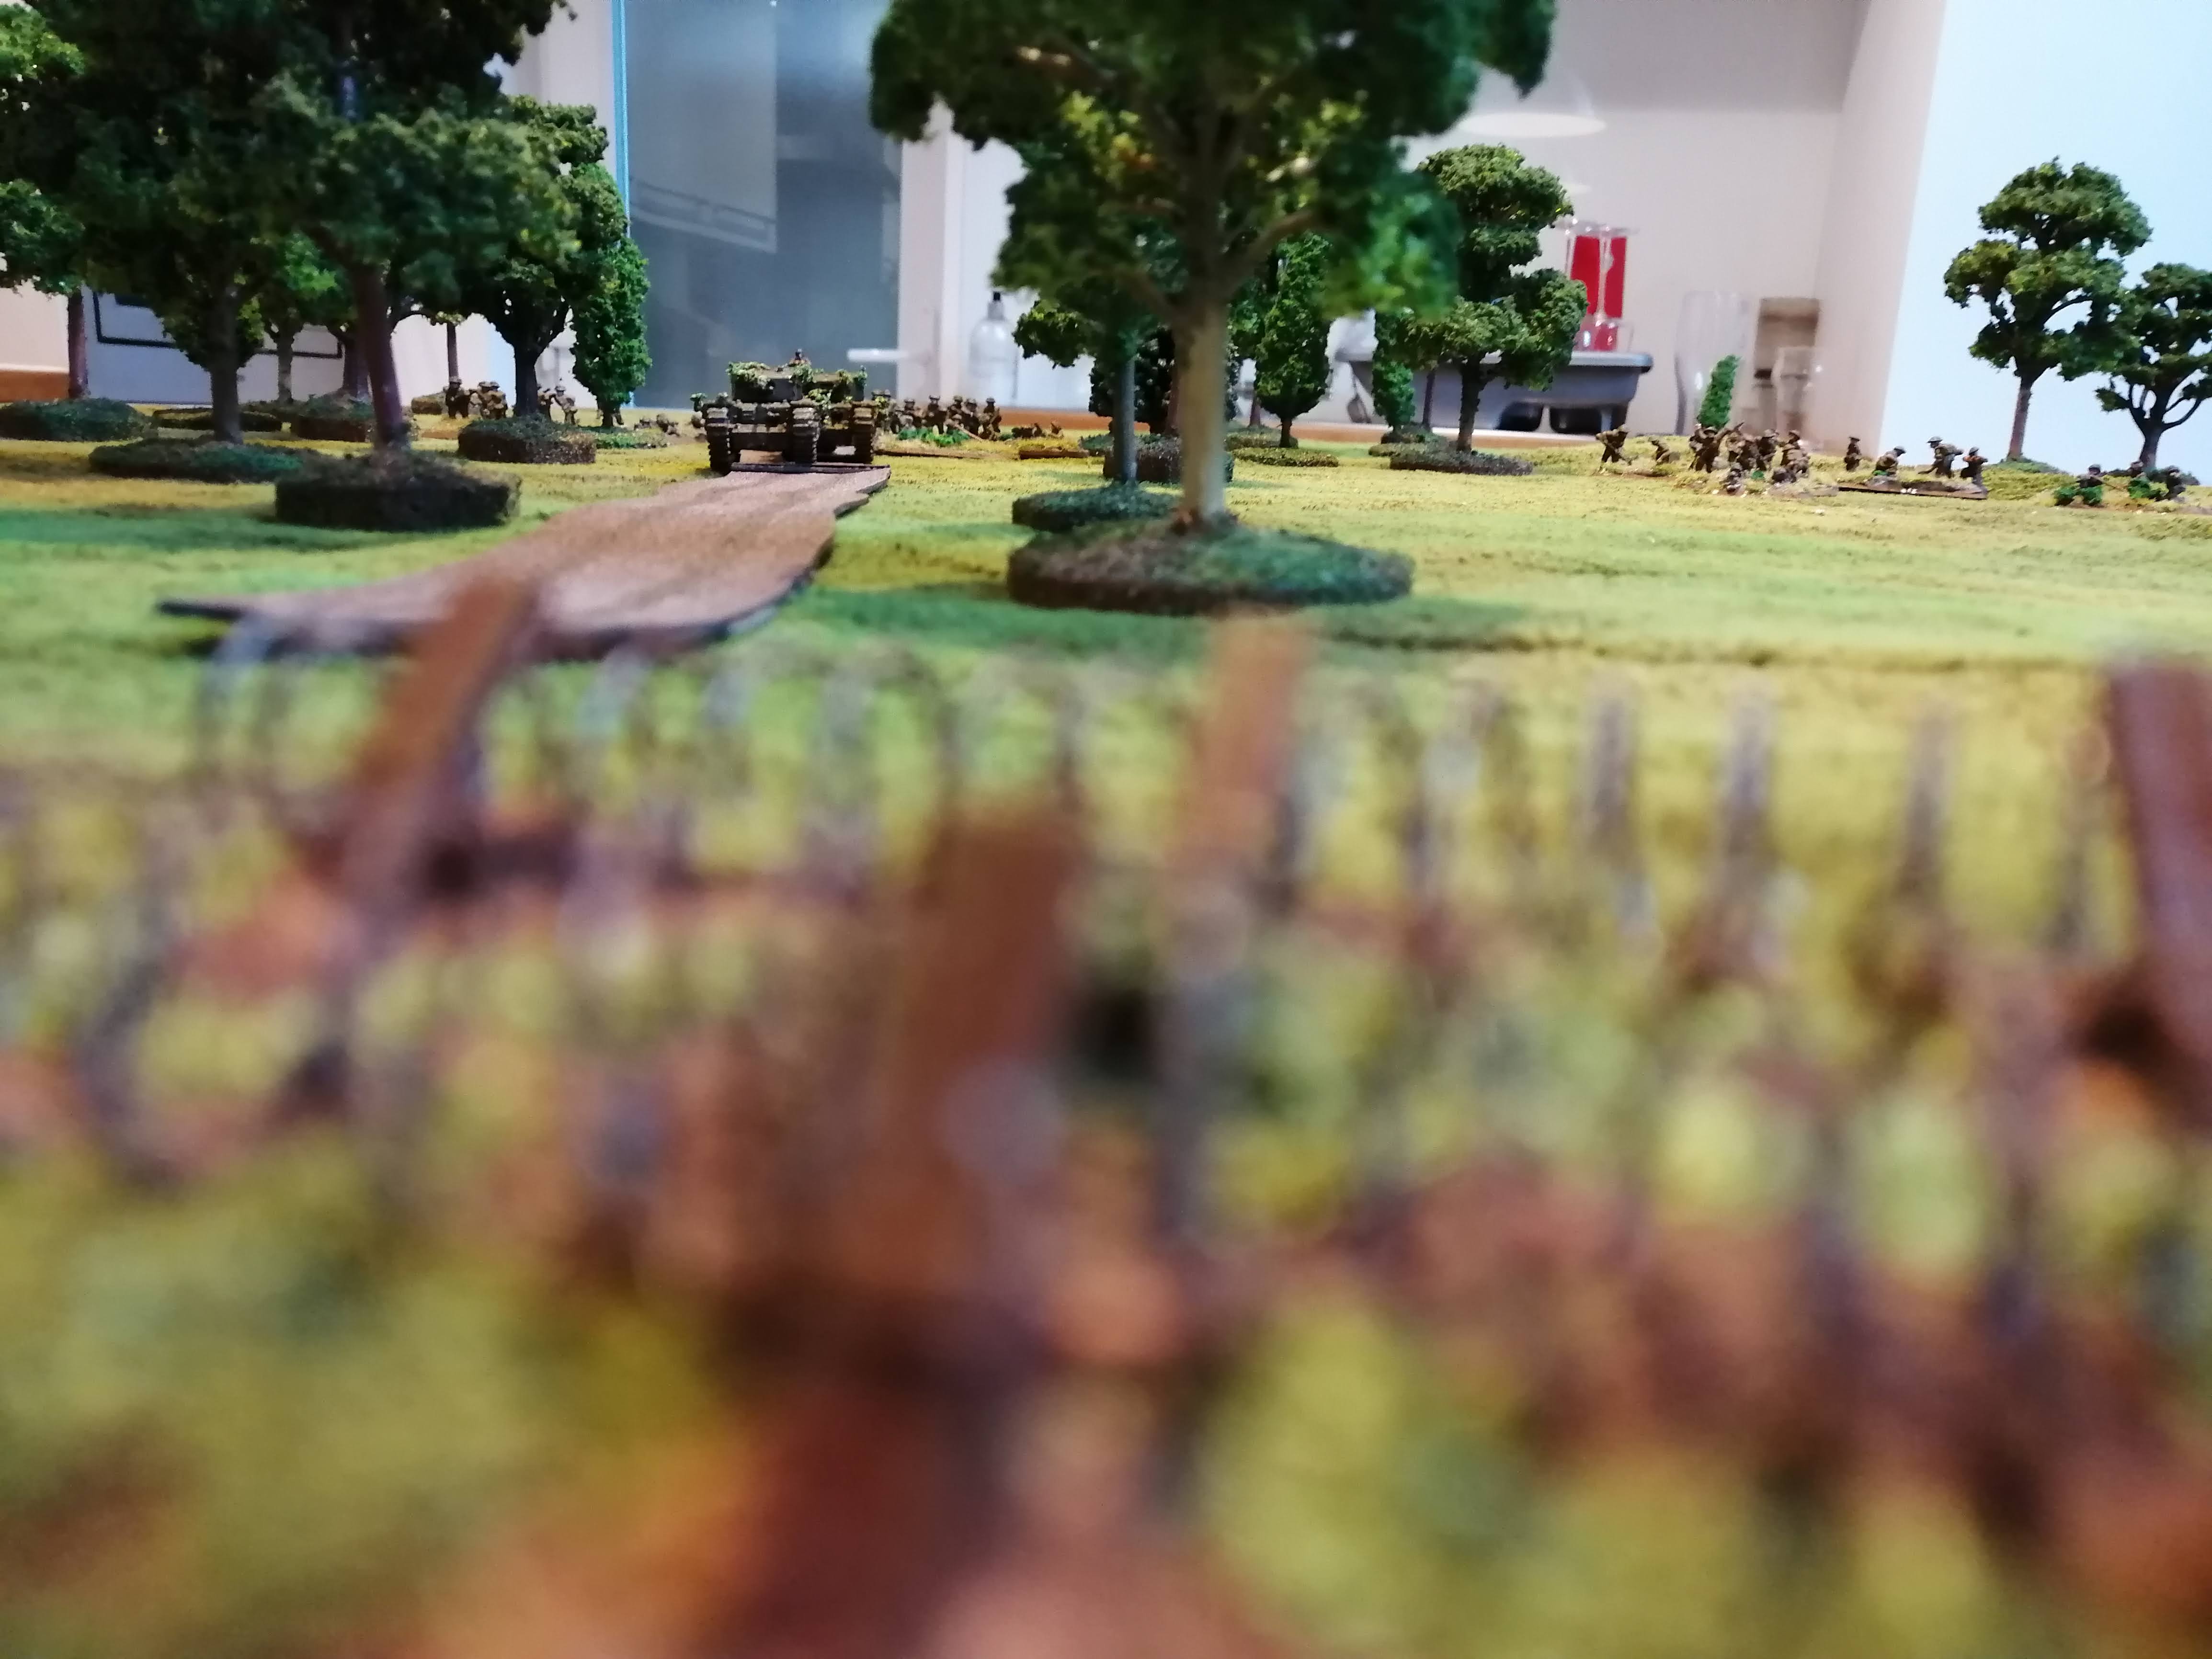 The Churchill's of the North Irish Horse advance on the barbed wire
Turn 4 (Allied):
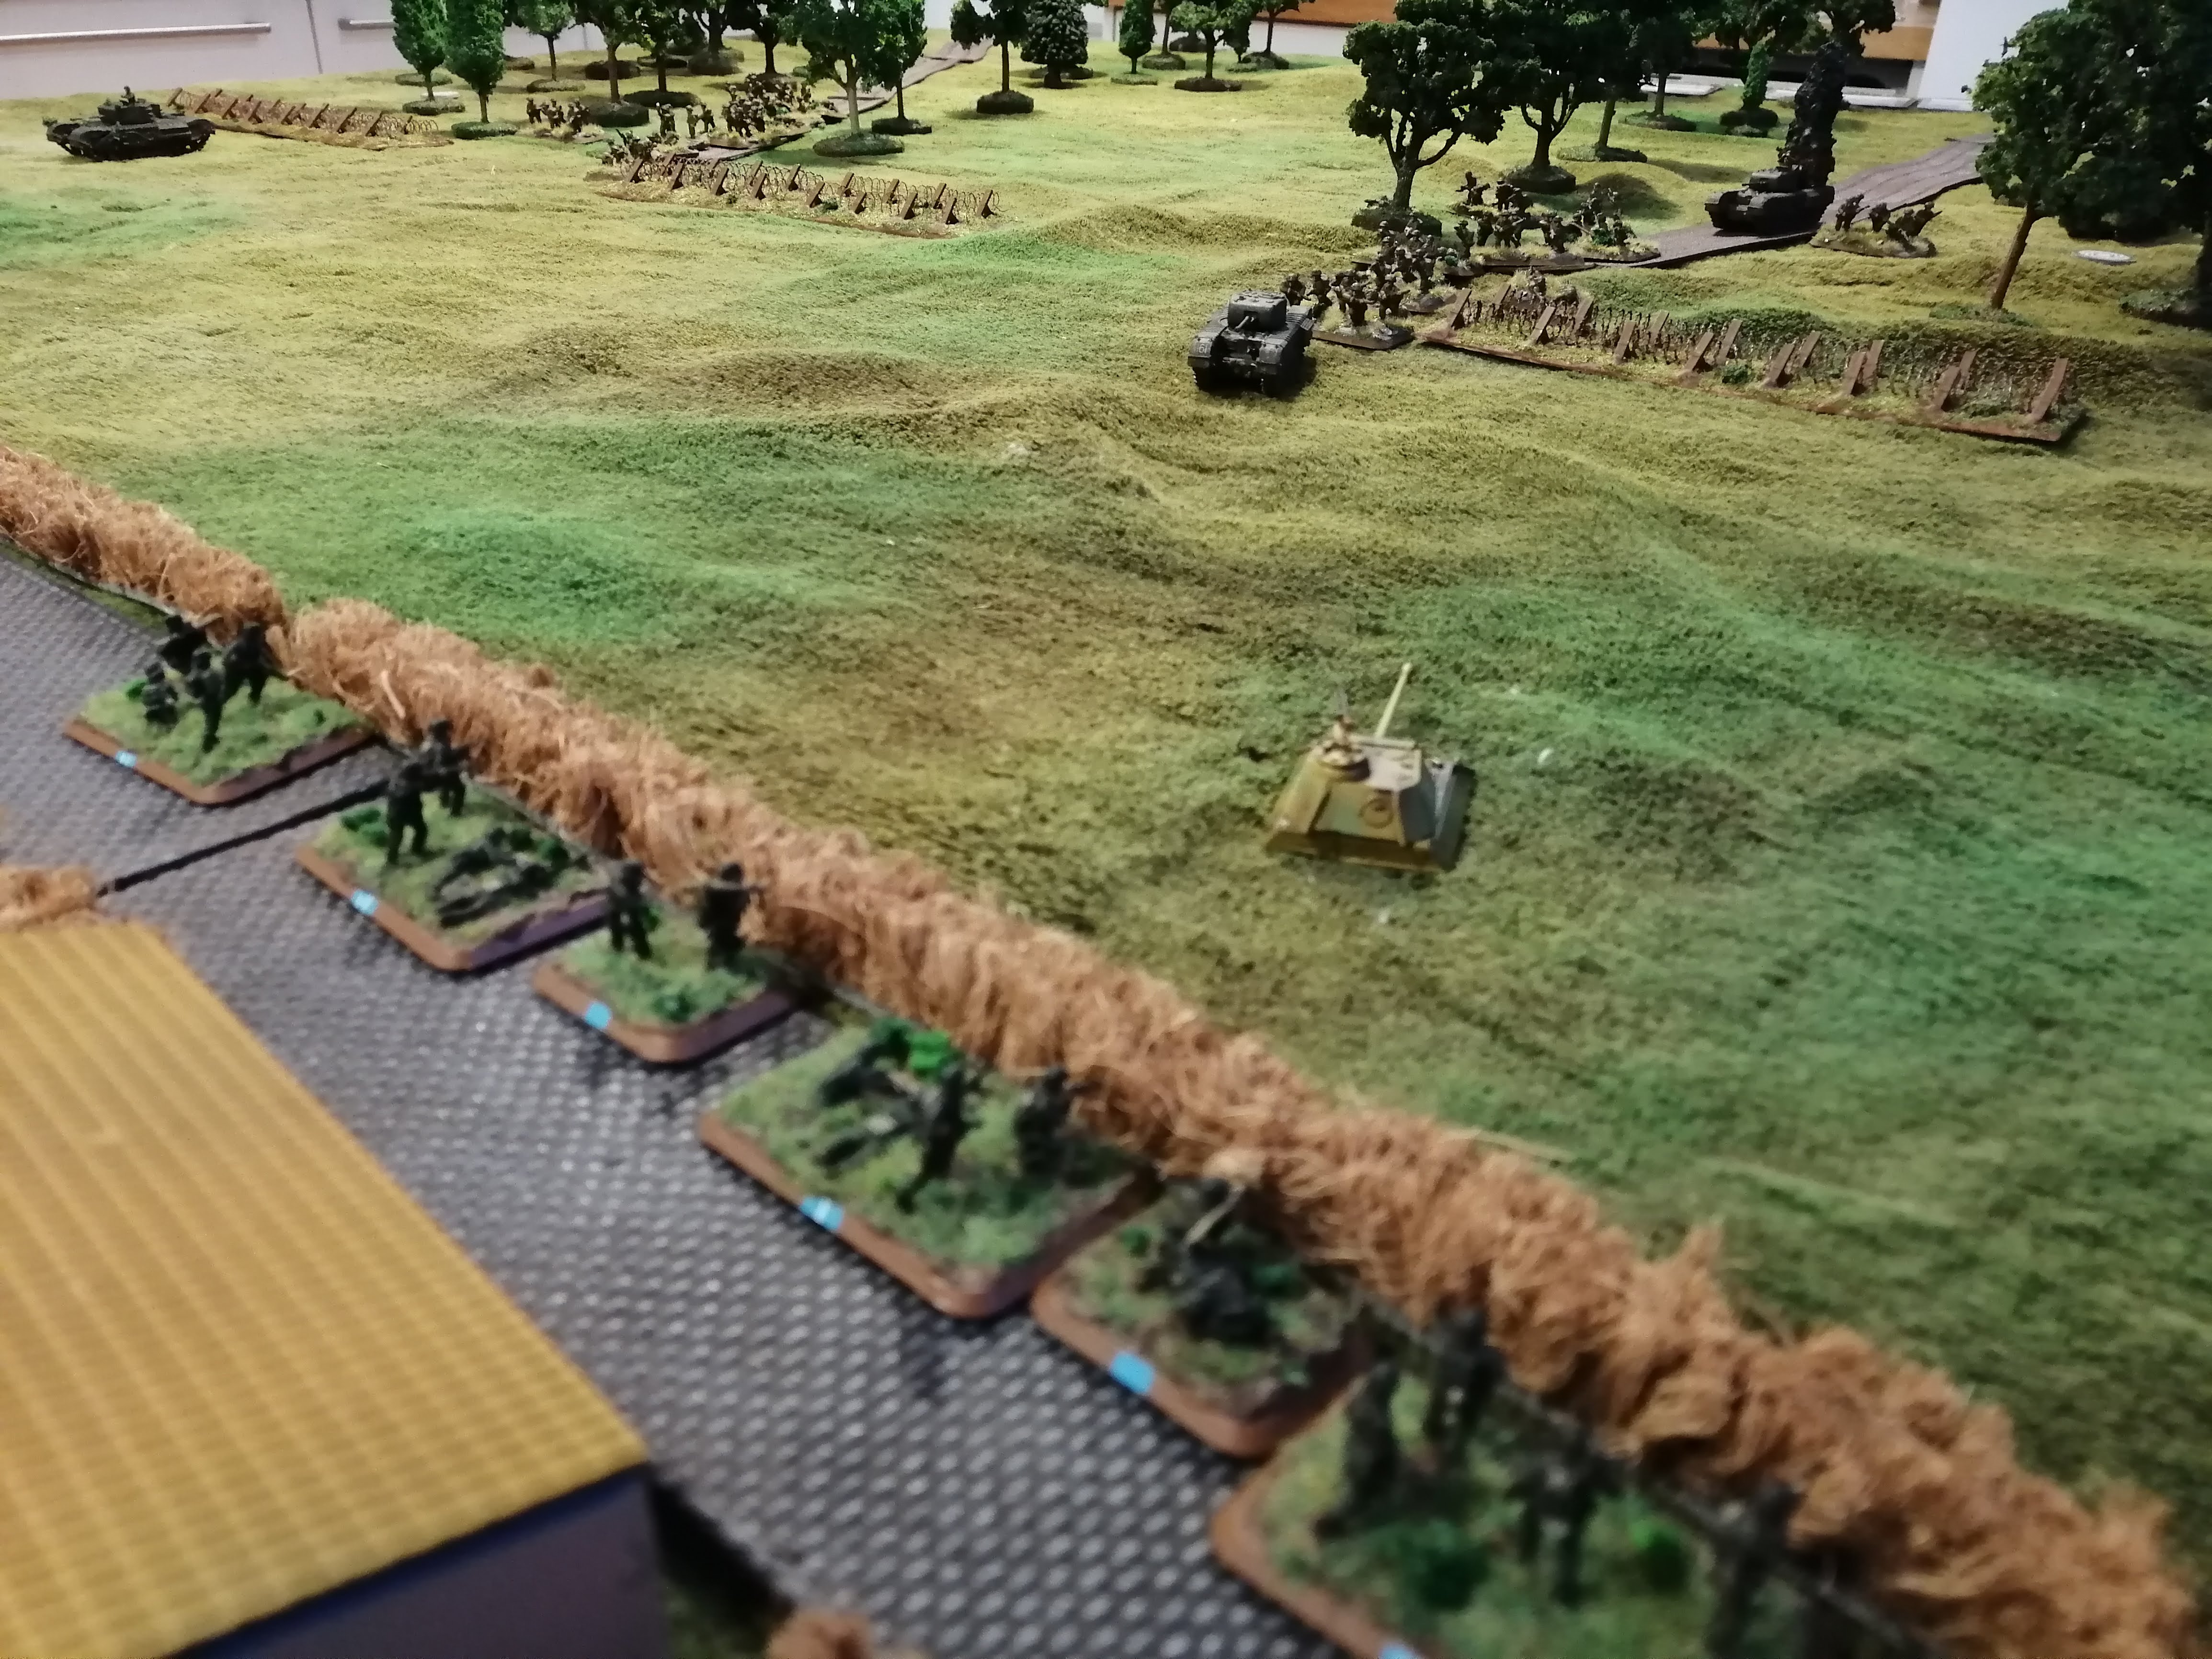
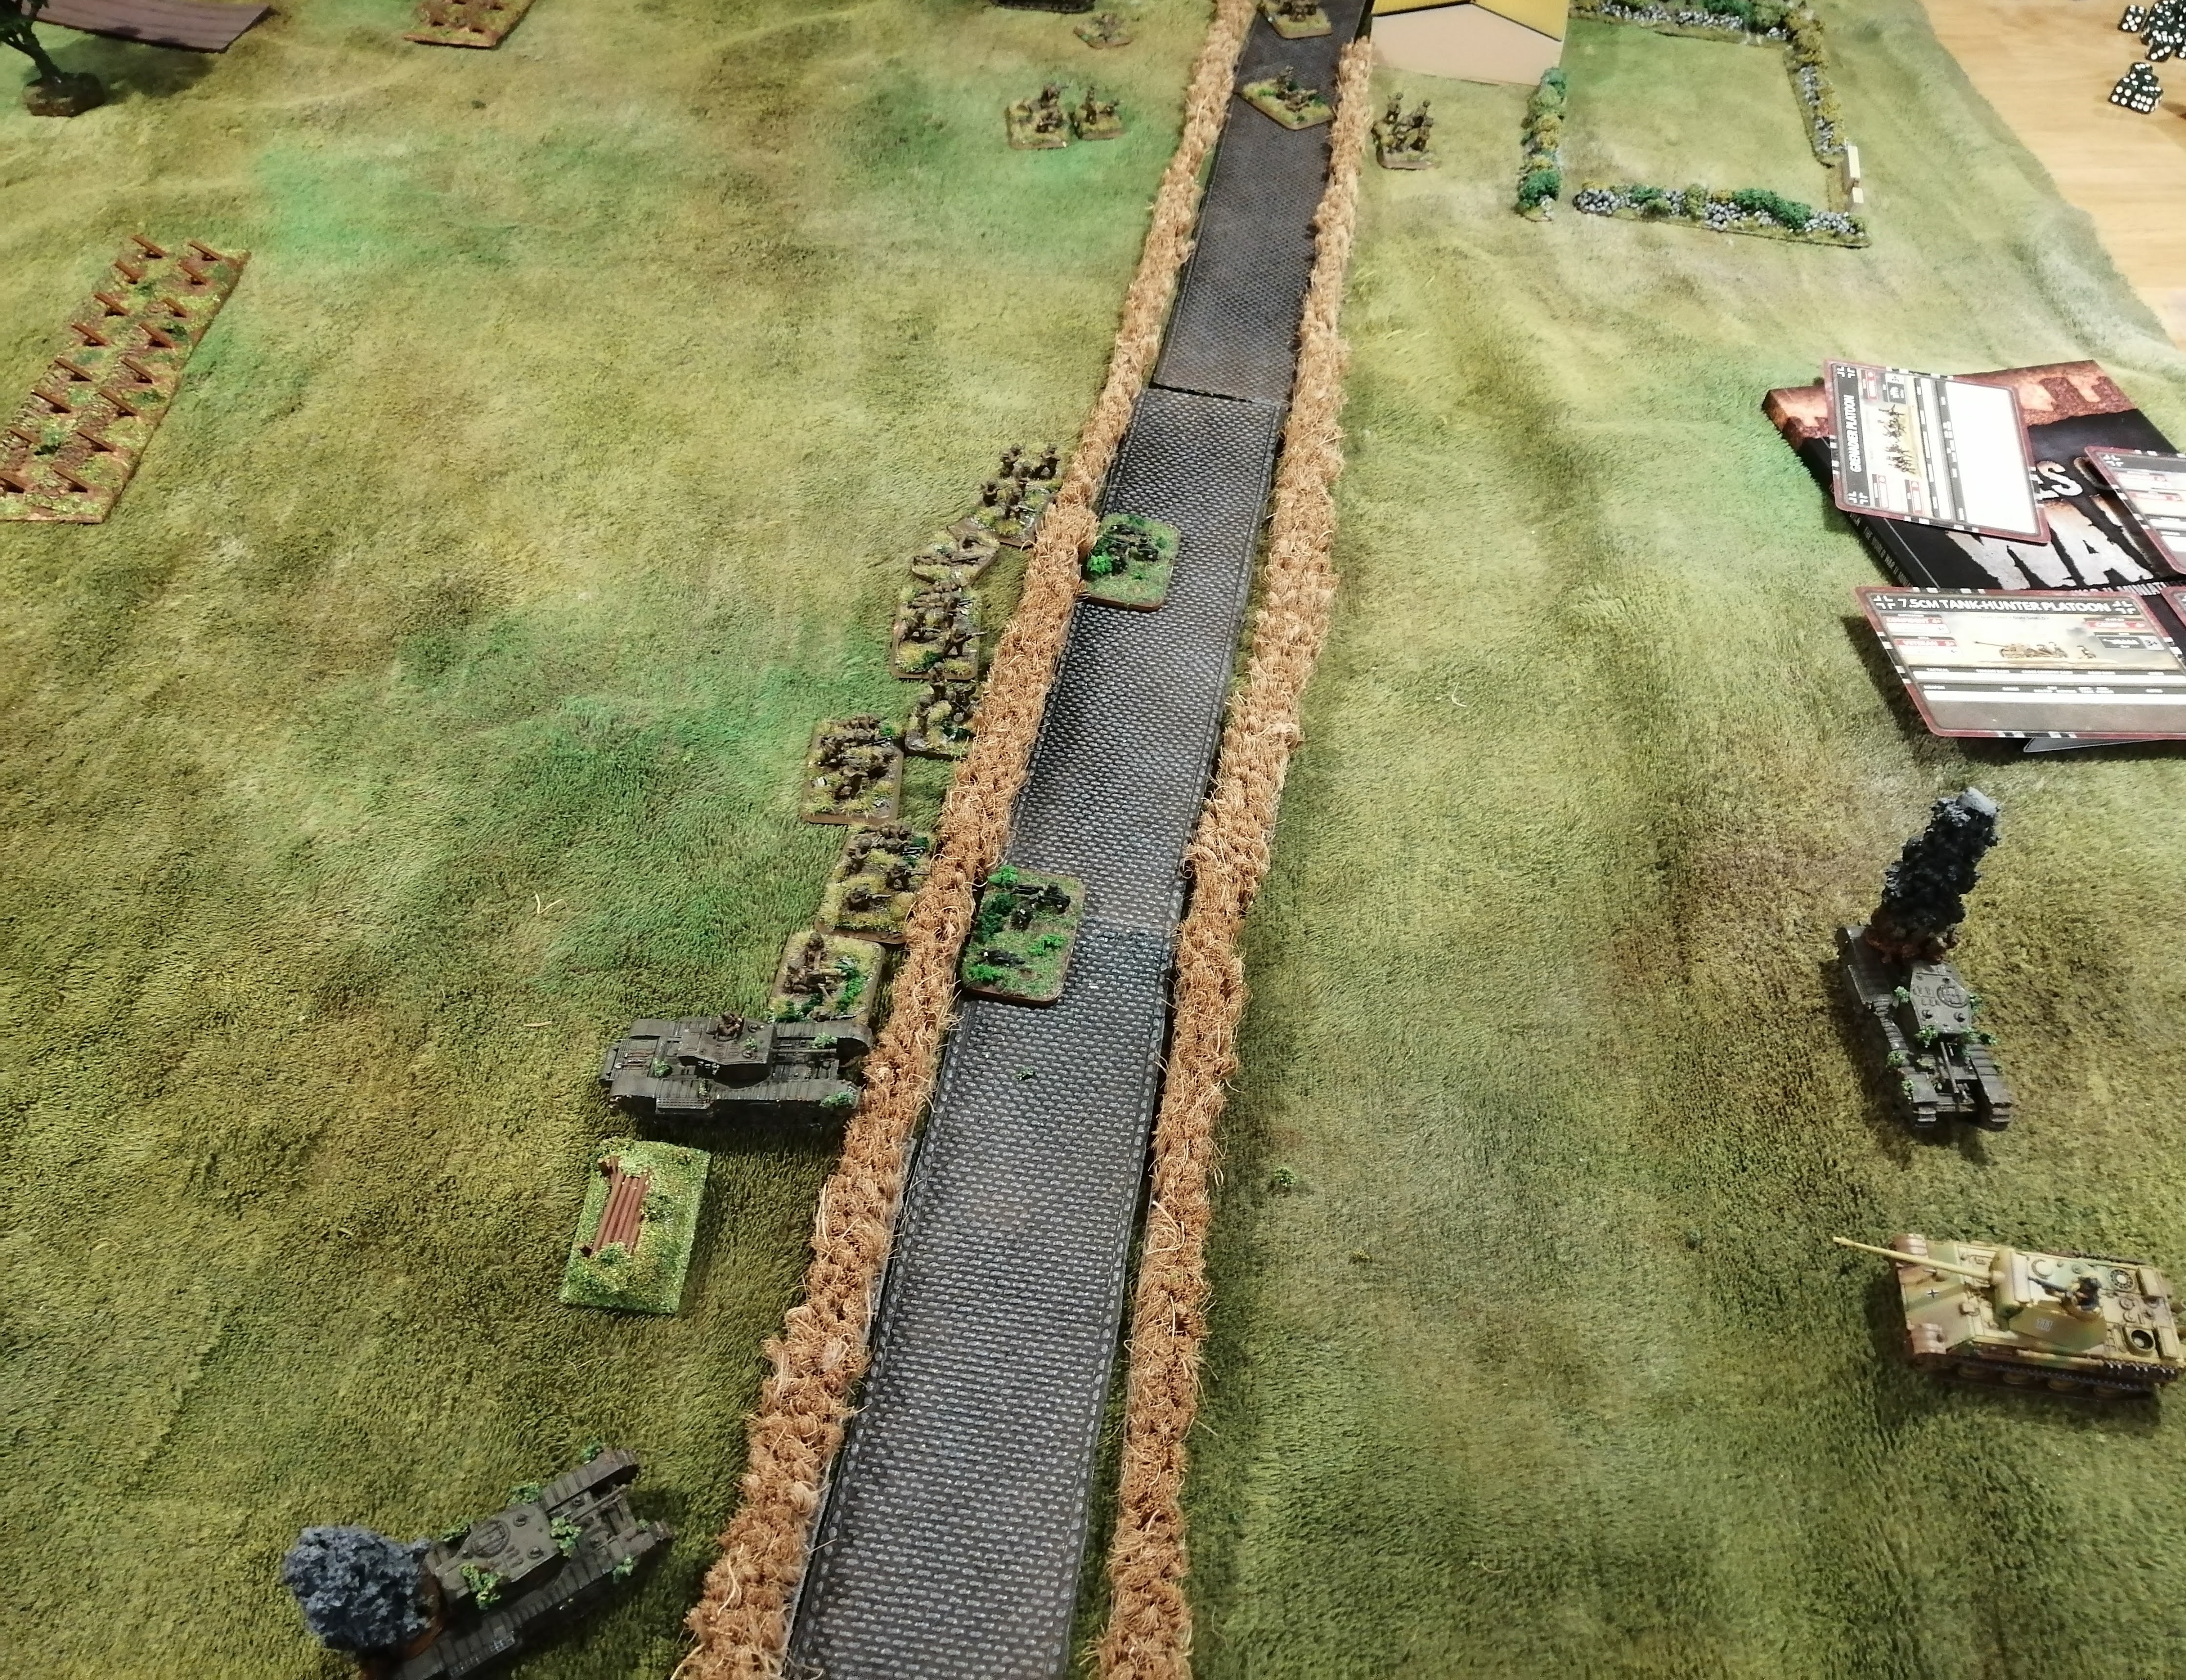
My son continued his two prong advance and was able to close his tank platoon up to another undiscovered counter. Being brave, he drove a tank over it to find out what it was. It turned out to be a mine and the tank failed its armour check, the mine penetrated the armour and was destroyed. My son wasn’t happy about this but I did point out that a number of tanks were destroyed by mines in the actual battle, so this was at least historically accurate. He did not make the same mistake with the other tank platoon and gave the counter a wide berth.
The advance also took the tanks into line of sight of the counters that could be the MG nest and Panther turret, so these were placed on the board (marked as N and P respectively on the map).
During the shooting round, my son decided to use one of his two off board mortar strikes, calling in the strike against the infantry dug in around the farm house. This caused no damage but did pin the unit in place. The lead tank fired on one of the MG Nests and my son’s particularly lucky dice rolling came into play (he is very lucky!) and he destroyed a nest.
Turn 4 (German):
The Panther Turret destroyed the second tank from Tank Platoon 1 with a clear shot down the track as the tank advanced up the track.
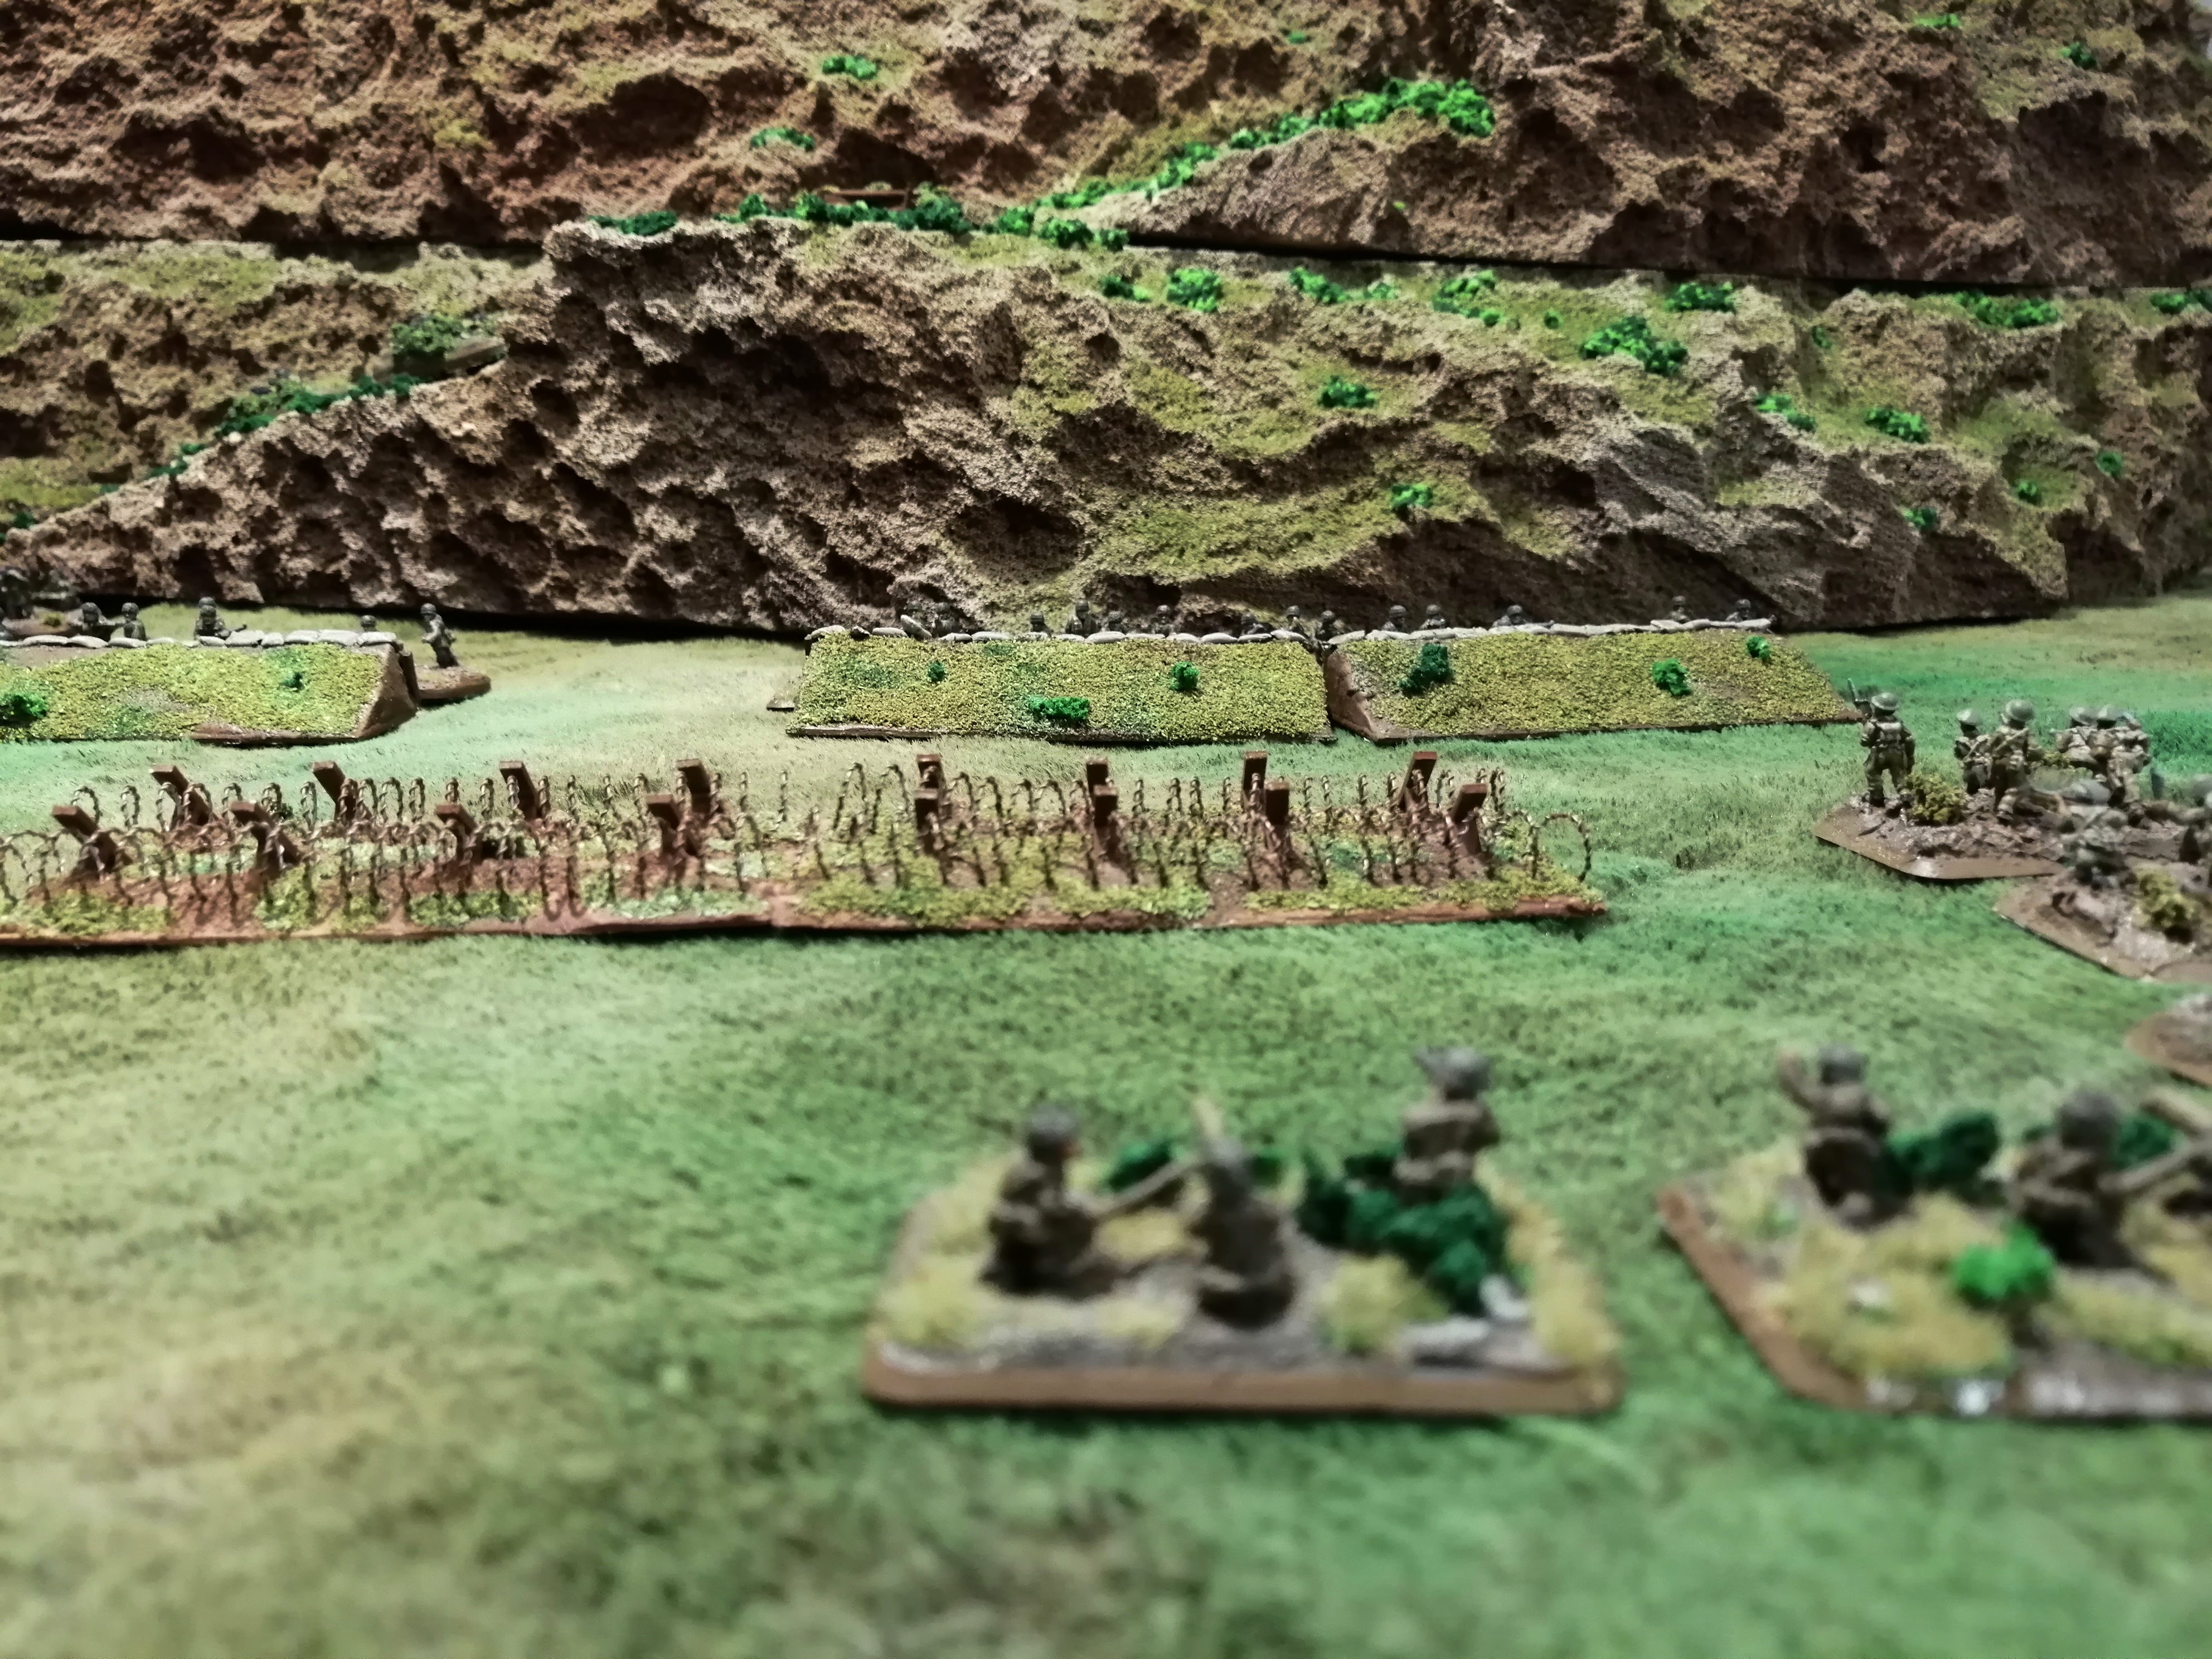
 The revealed MG Nests and Panther Turret
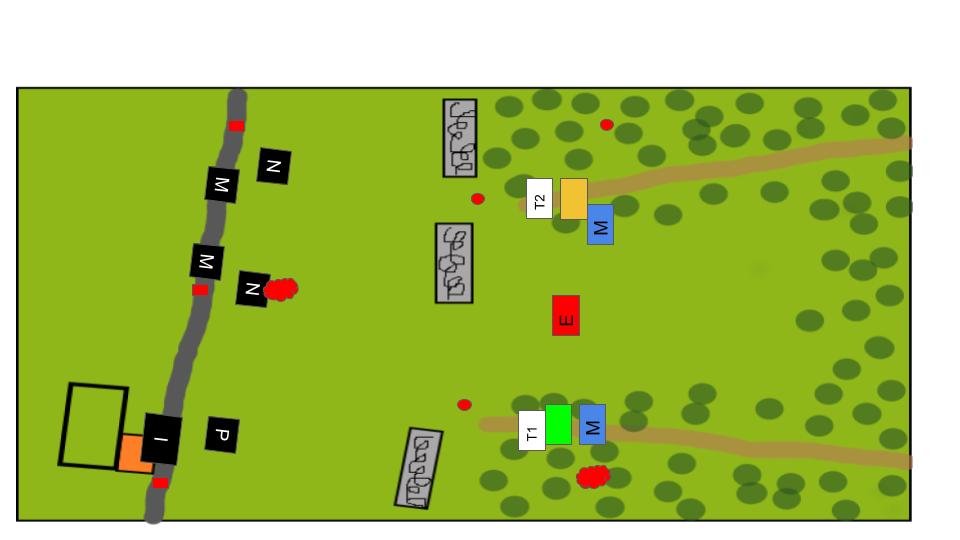 End of Turn 4
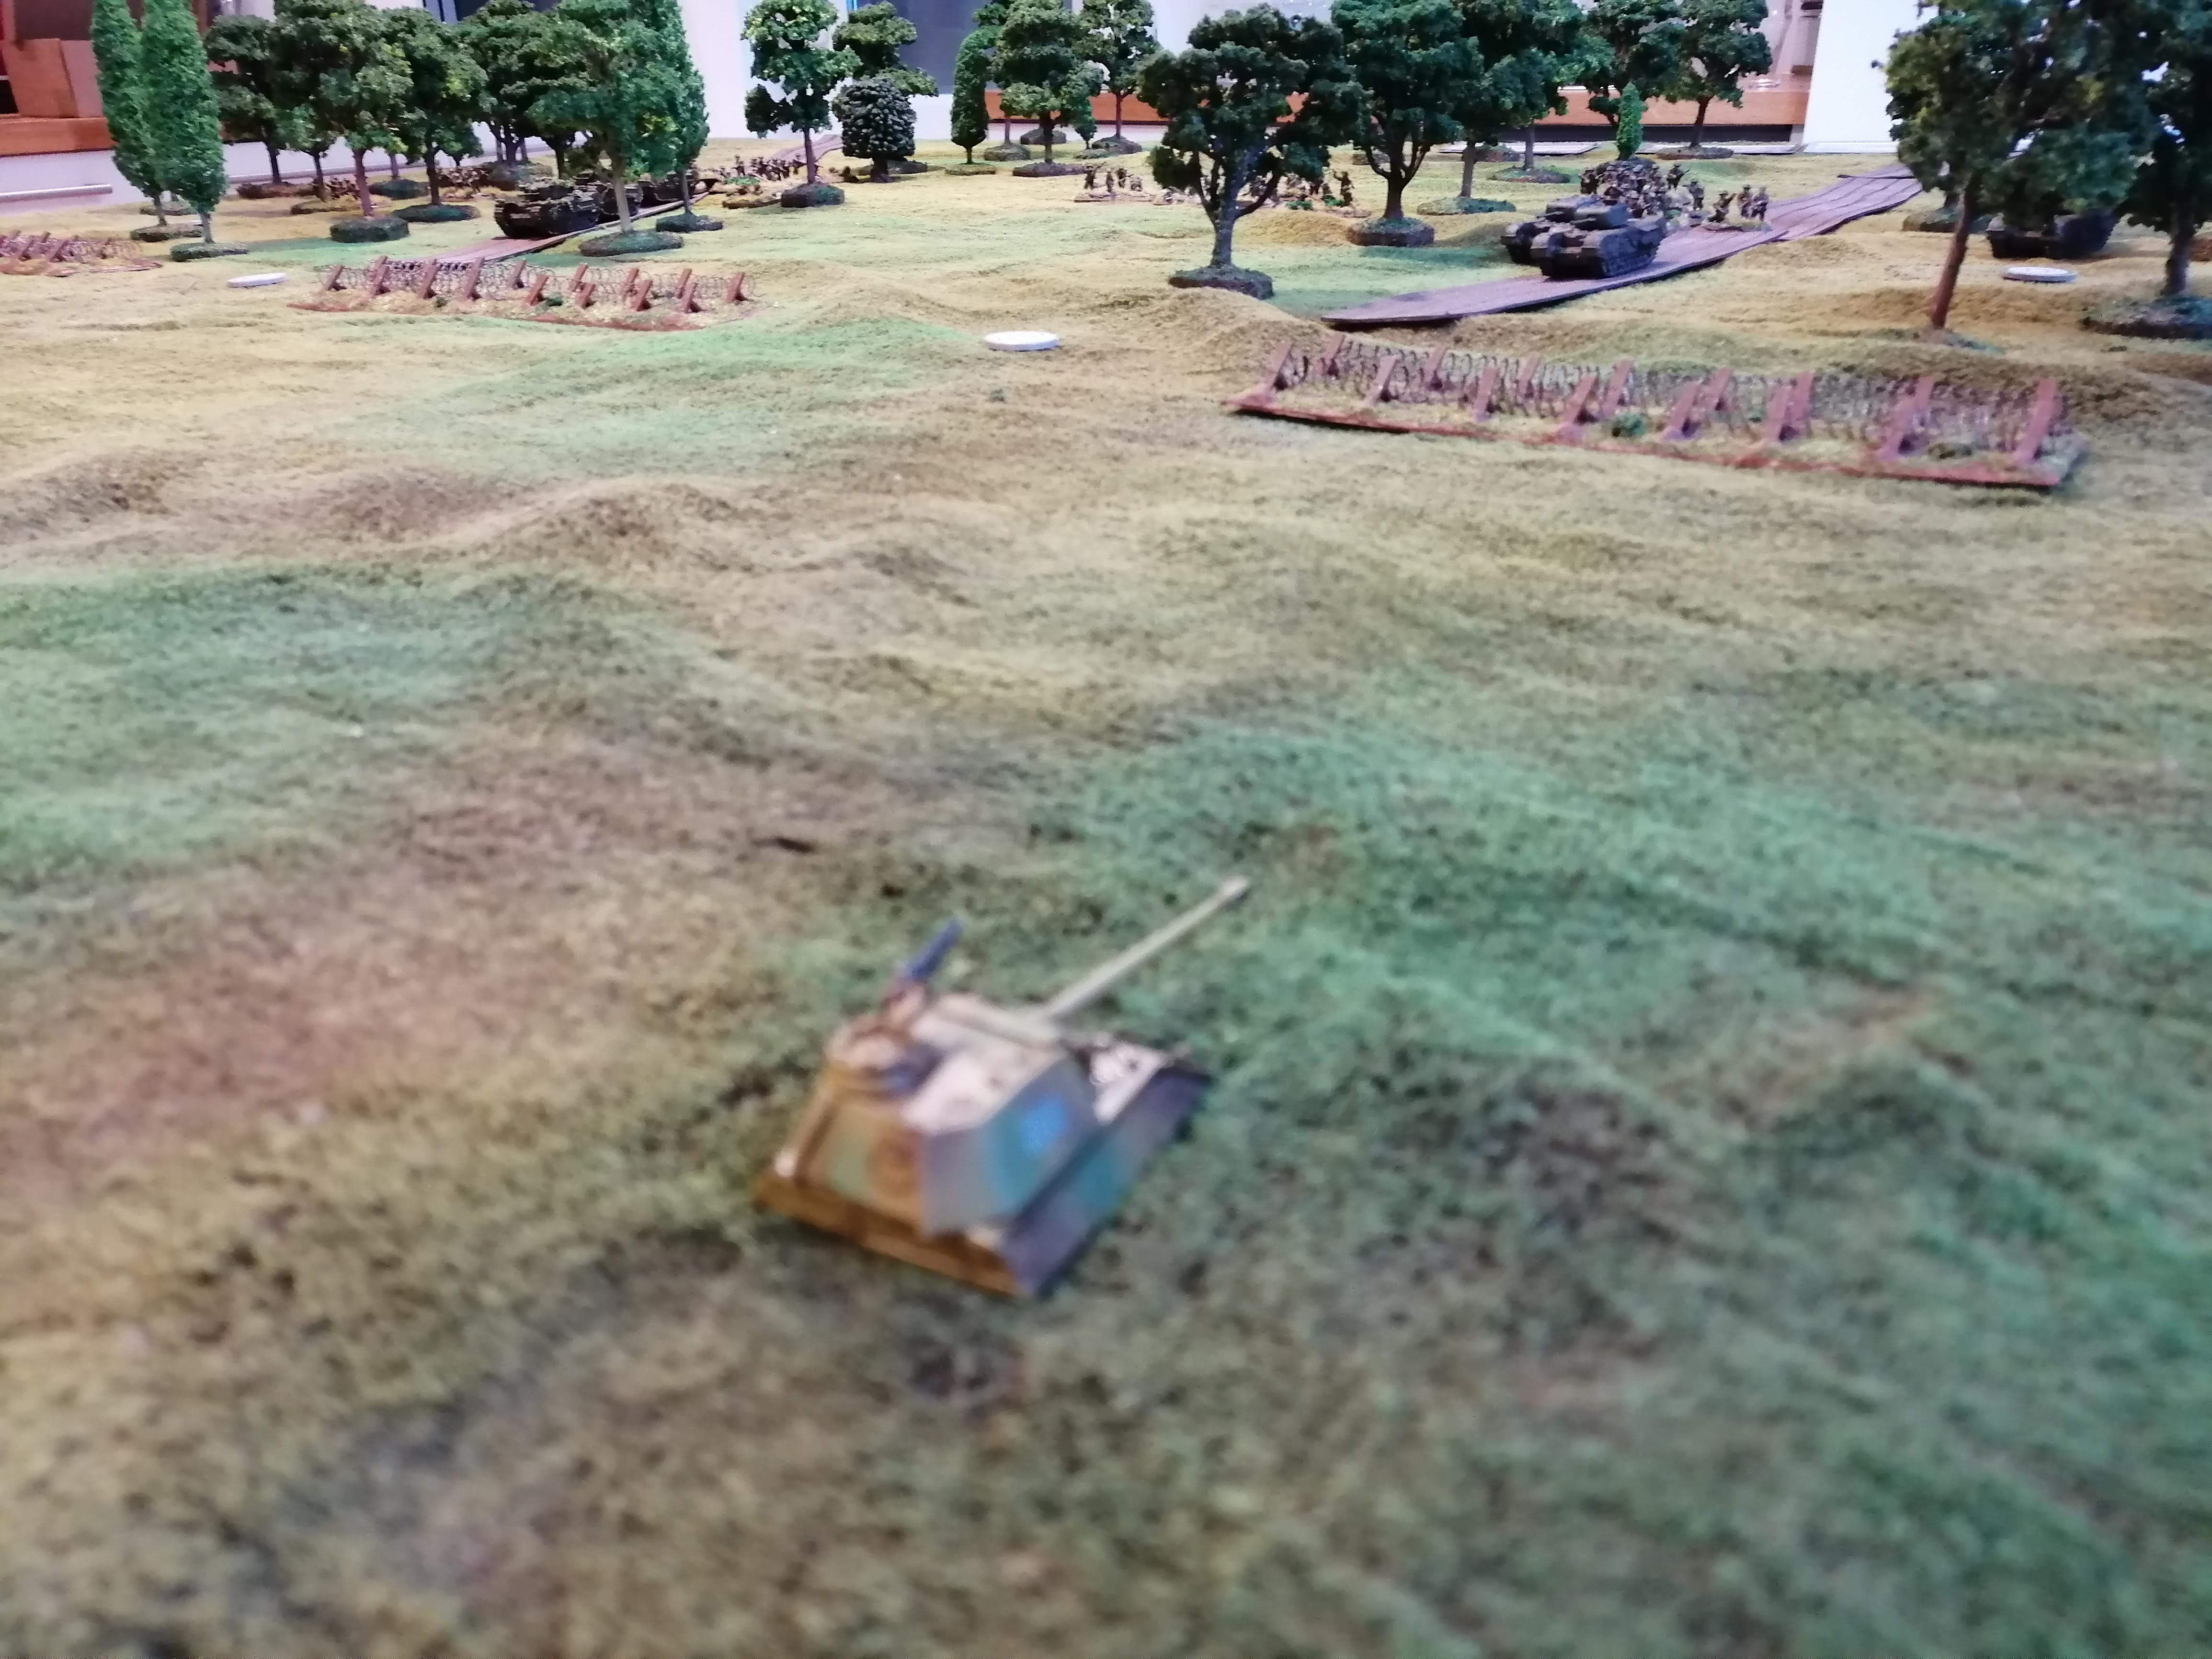 The Panther Turret swings into action against the advancing tanks of 1 Squadron
Turn 5 (Allied):
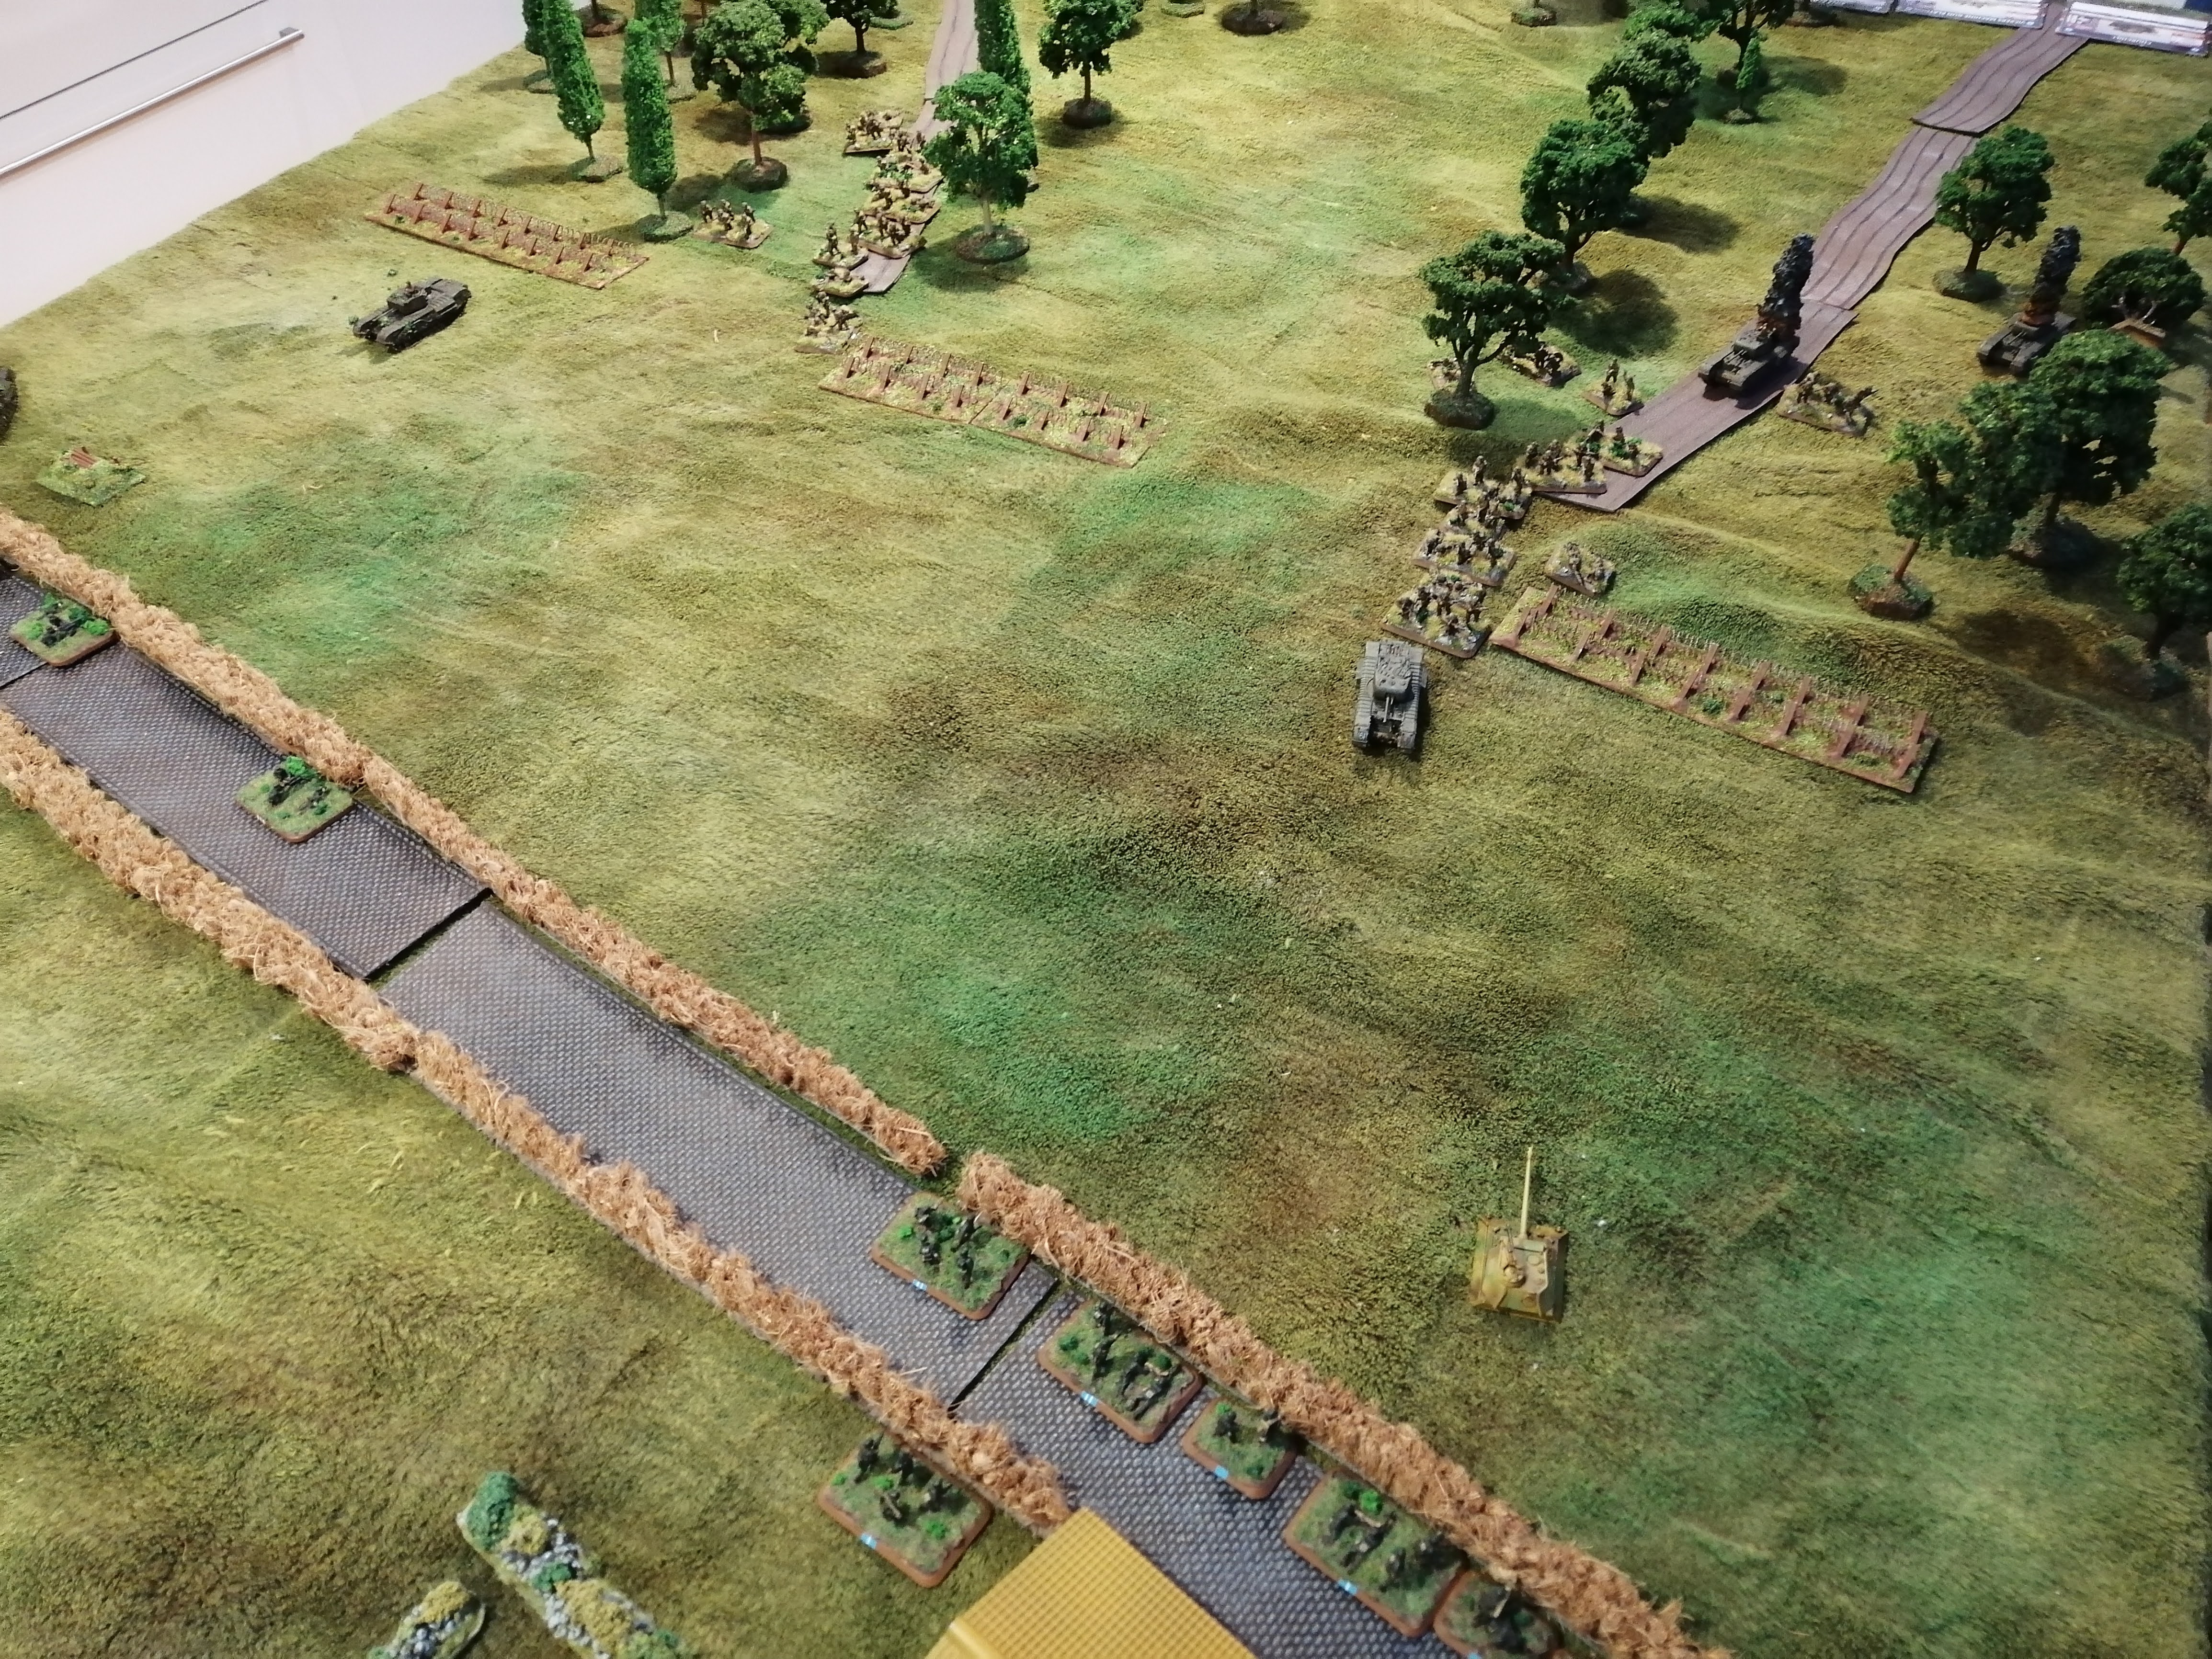
My son continued pushing forward and his tanks advanced out of the tree line to begin crossing the gap toward the road. This revealed the PaK40 that was stationed at the far end of the road from the house.
My son decided to use his smoke this round to cover his advance. Tank Platoon 2 direct fired its smoke on the PaK 40 and he called in the second of his mortar strikes to lay a smoke barrage in front of the panther turret and dug in infantry.
Turn 5 (German):
The German units couldn’t see a lot due to some well placed smoke but the MG nest was able to gun down one of the teams in the Engineer platoon. Otherwise, any other German unit that could shoot missed. I guess there was a lot of smoke and dust across the battlefield confusing the defenders!
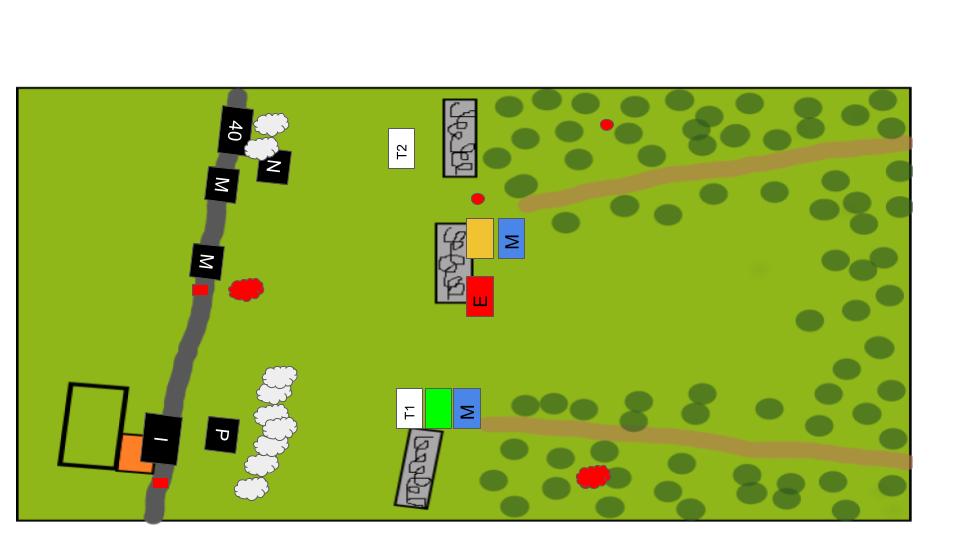 End of Turn 5
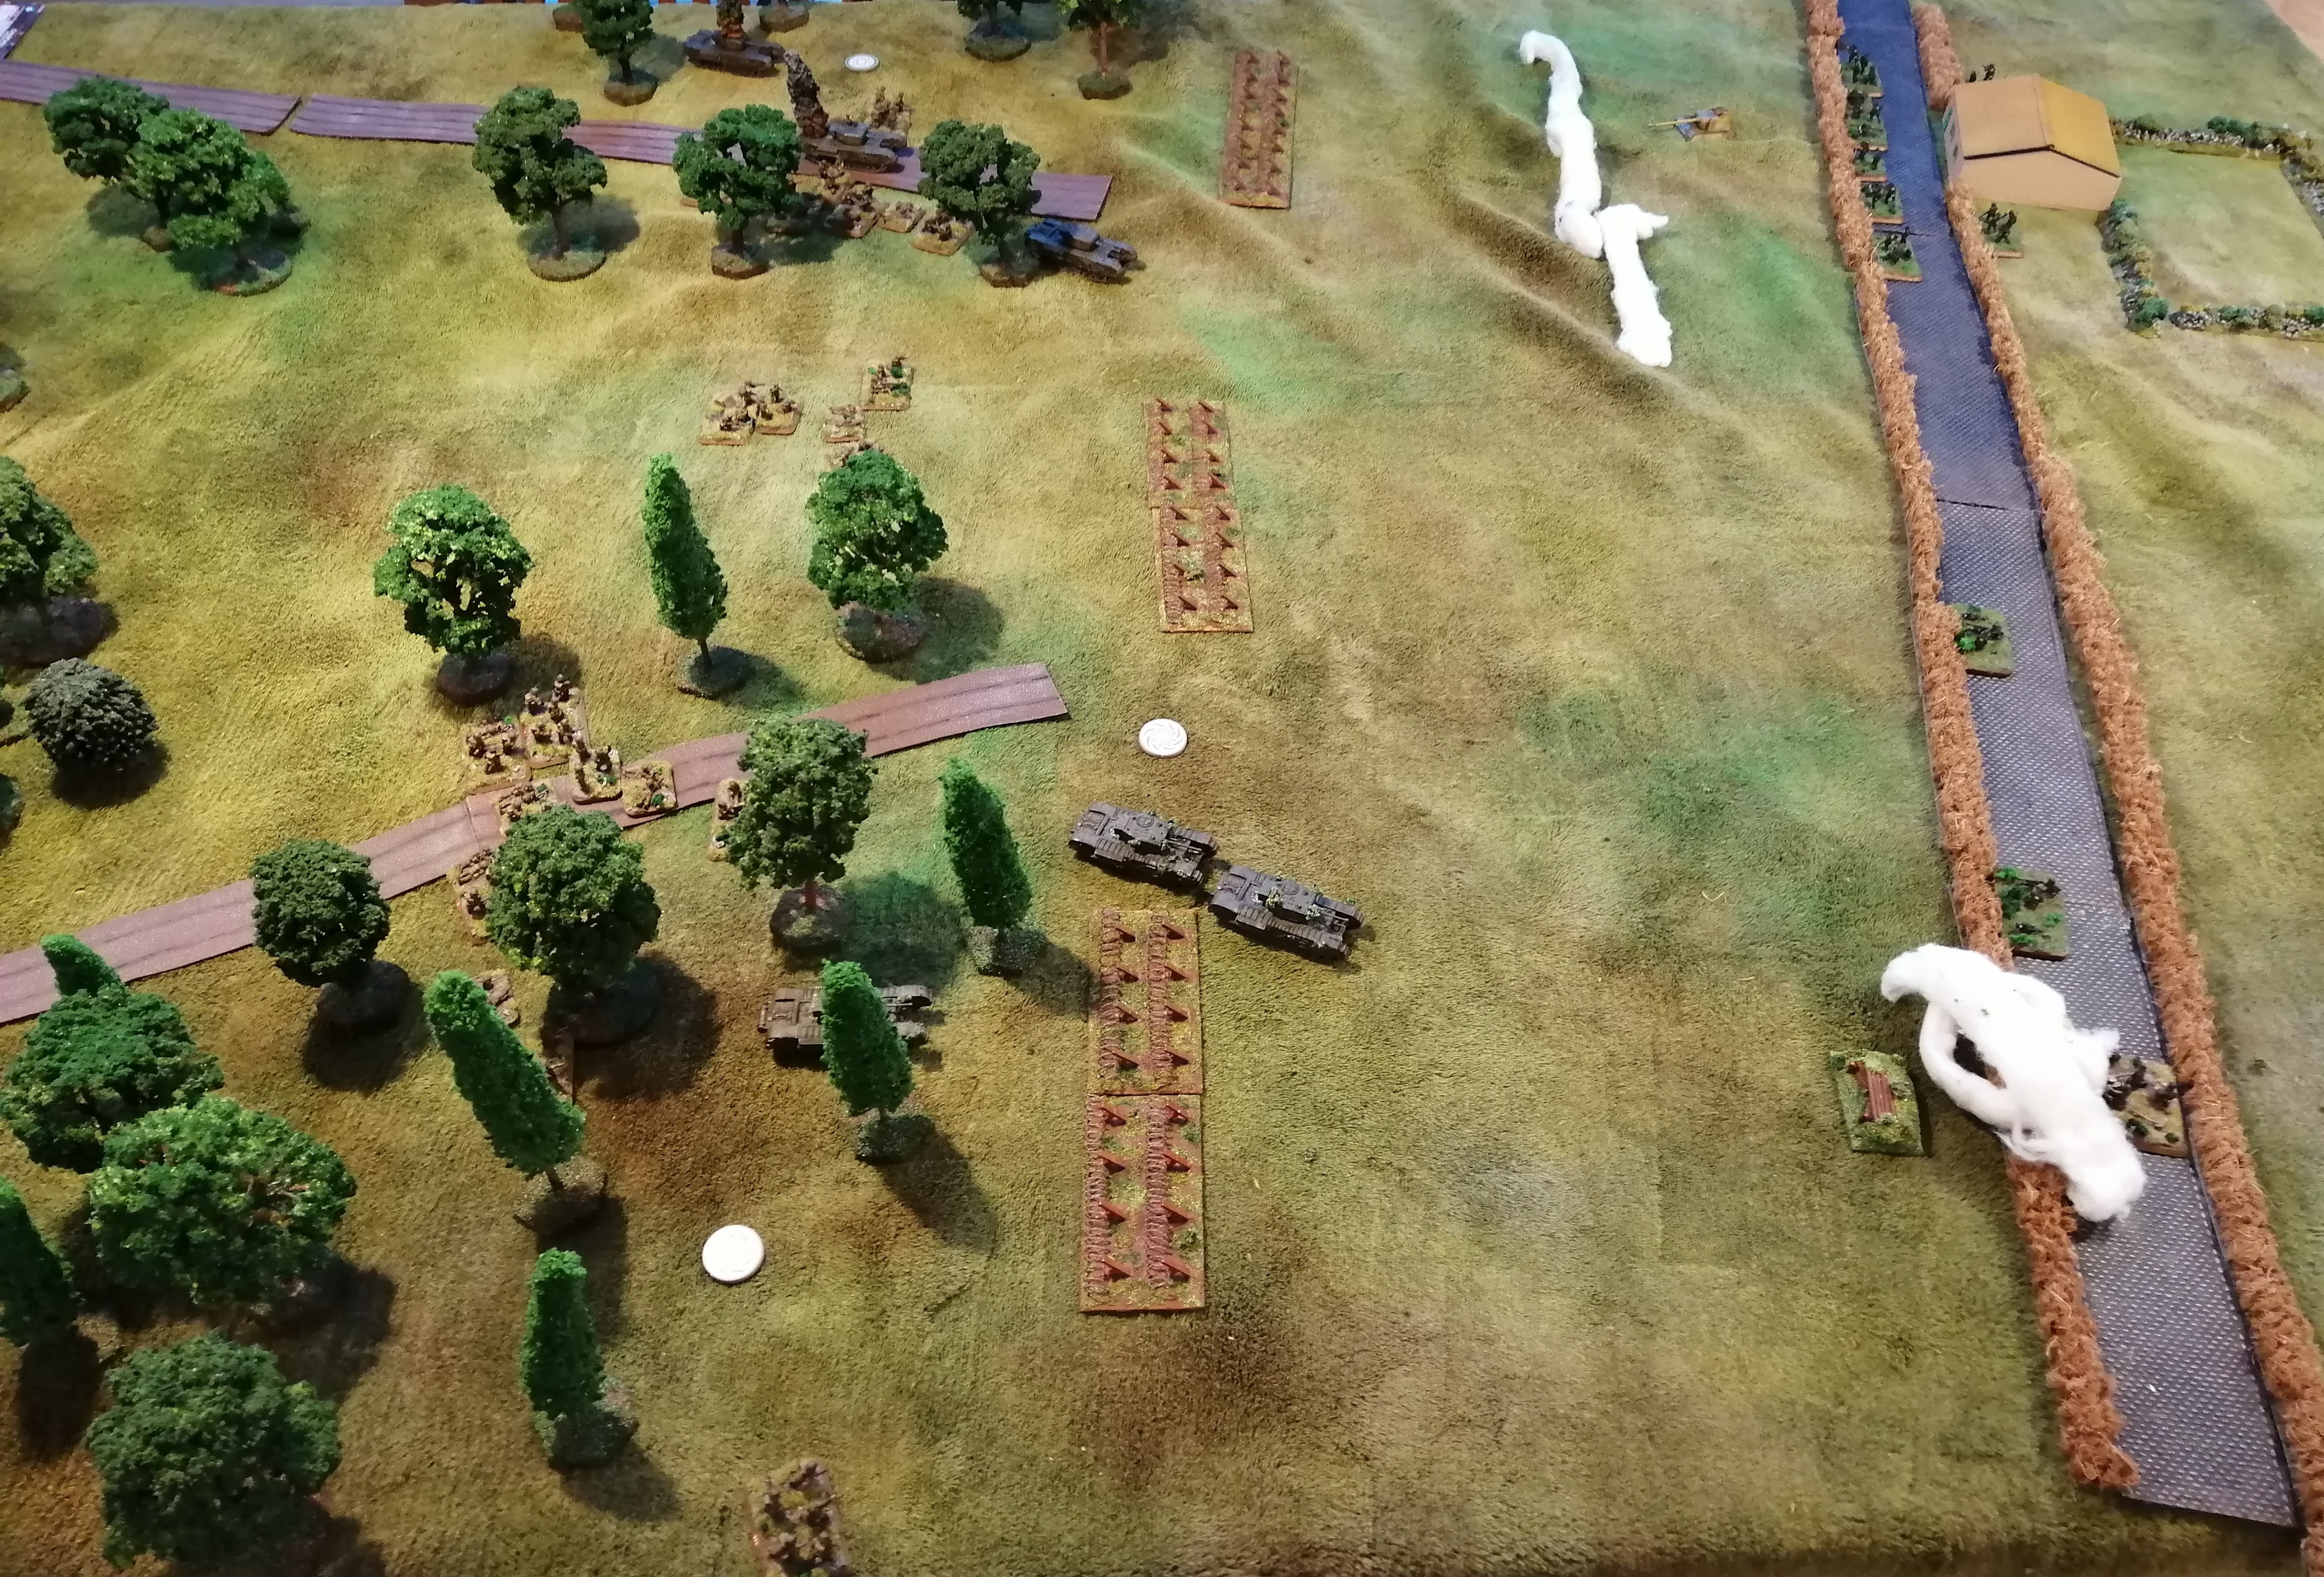
Gaming the Assault on the Senger Line
In the last post, I covered the history of the battle. Since then, time has evaporated and it took longer than planned to actually play out the battle, and then even longer to actually write it up. But here is my battle report.
Playing out the battle.
My 10 year old son wanted to get involved in this battle. While we’ve played various types of games together before, he’s never played a WW2 tabletop game and particularly not one that’s trying to recreate some historical activity. So this scenario had to be representative of the historical action while also being engaging enough for a 10 year old.
To start, let’s look at the order of battle for each side. For the Allies, we have:
Canadian Seaforths:
2 Infantry Platoons (Orange and Green) comprised of:
1 HQ team
6 MG/Rifle teams
1 2” mortar team
1 PIAT team
1 Platoon of Engineers comprised of:
1 HQ team
3 Rifle Engineer teams
1 PIAT team
1 HMG Platoon of 2 teams (1 team attached to each Infantry Platoon)
North Irish Horse
2 Tank Squadrons (Platoons 1 and 2) comprised of:
3 Churchill mk IV tanks armed with the 6pdr gun (I believe both the 6pdr and 75mm variants were at the battle however the 75mm was not widespread within Italy at this time)
In addition to the above, the Allies can call in 2 barrages from an off table 3” Mortar team. Barrages can be either smoke or standard mortar rounds.
For the defending Germans, we have:
1 Infantry Platoon comprised of:
1 HQ SMG team with Panzerfaust
6 Rifle/MG teams
2 Panzerschreck teams
1 HMG Platoon of 2 teams
1 HMG nest
1 Panther Turret bunker
2 Snipers
1 Panther tank
1 PaK 40 Anti Tank gun
In addition to the above, there are 3 minefields and 3 8” strips of barbed wire.
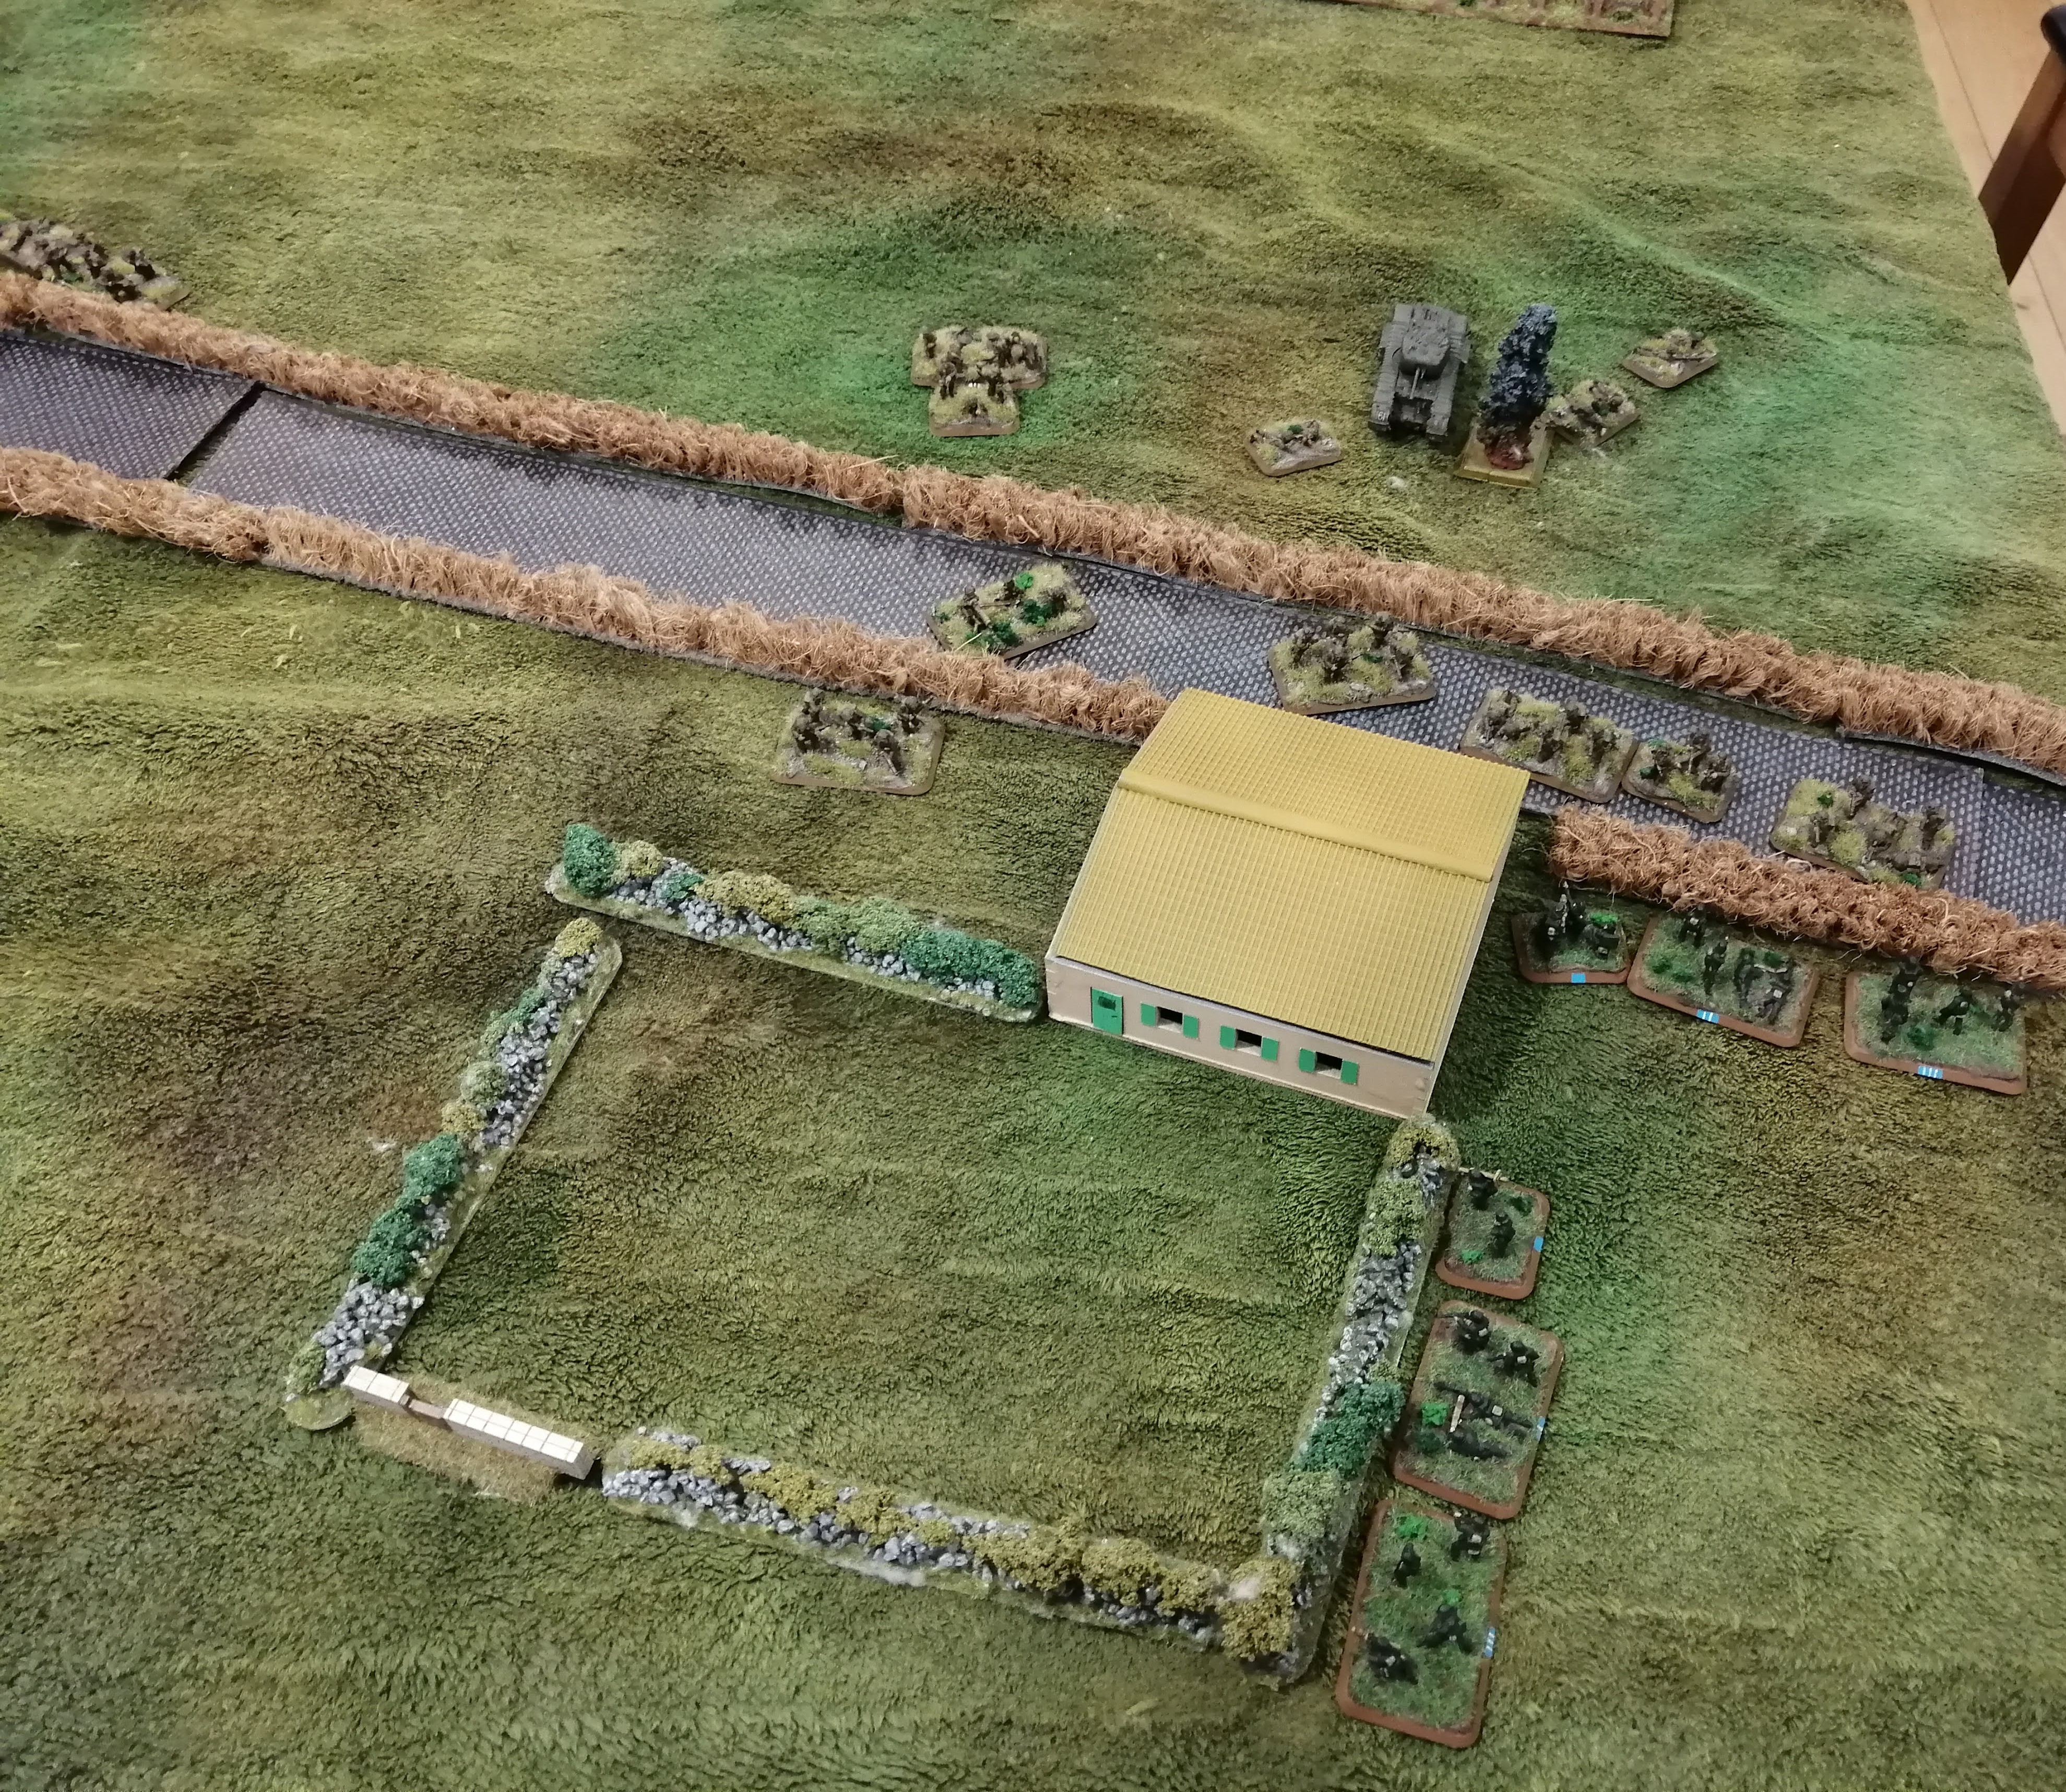
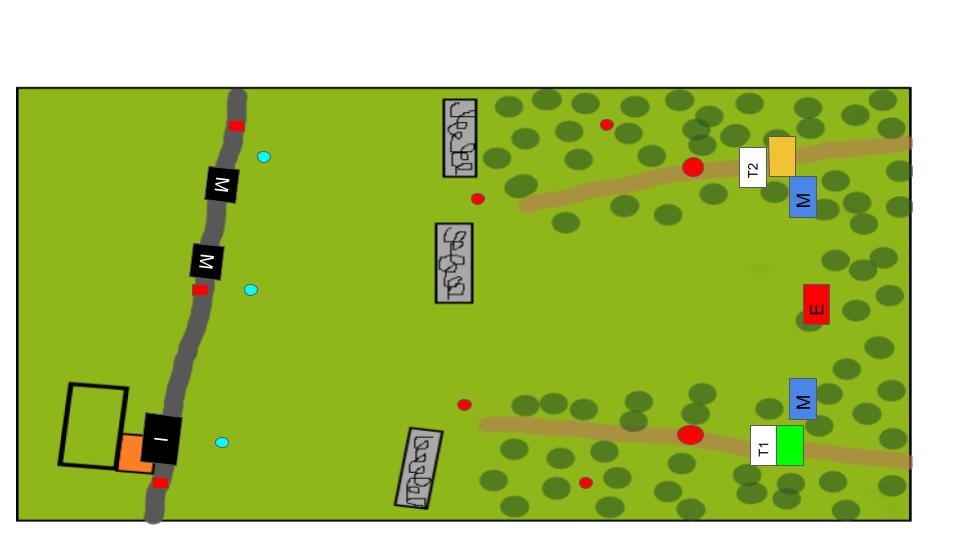
At the start of the game, only the German Infantry will be deployed in and around the farmhouse and the HMG teams will be deployed along the road.
The Panther tank arrives on a random round and will arrive from a random point along the rear table edge.
Everything else is assigned a ‘token’ that is randomly placed to keep my son guessing as to what he is facing.
Within the trees, and representing the German delaying tactics, there are 6 tokens of which,
3 are minefields
2 are snipers
1 is blank
I will look at the tokens when an Allied unit moves within 8” and if it is a sniper, will be able to fire in the next German phase. If a minefield, this will not be exposed until the Allies move within 2”.
Between the trees and the road are three tokens that represent where the bunkers could be but with no prior intelligence, the Allies won’t know what they are until they draw line of sight.
1 token is the Panther turret
1 token is the HMG Nest
1 token is blank
Finally, along the road there are two tokens that represent two possible locations for the PaK 40 anti tank gun. Again, these will only be exposed when line of sight can be drawn to them.
Victory Conditions:
The Allies will win if they can get to the road and hold the farm house. The defending Germans win if they stop the Allies doing this. There’s no time limit in achieving this.
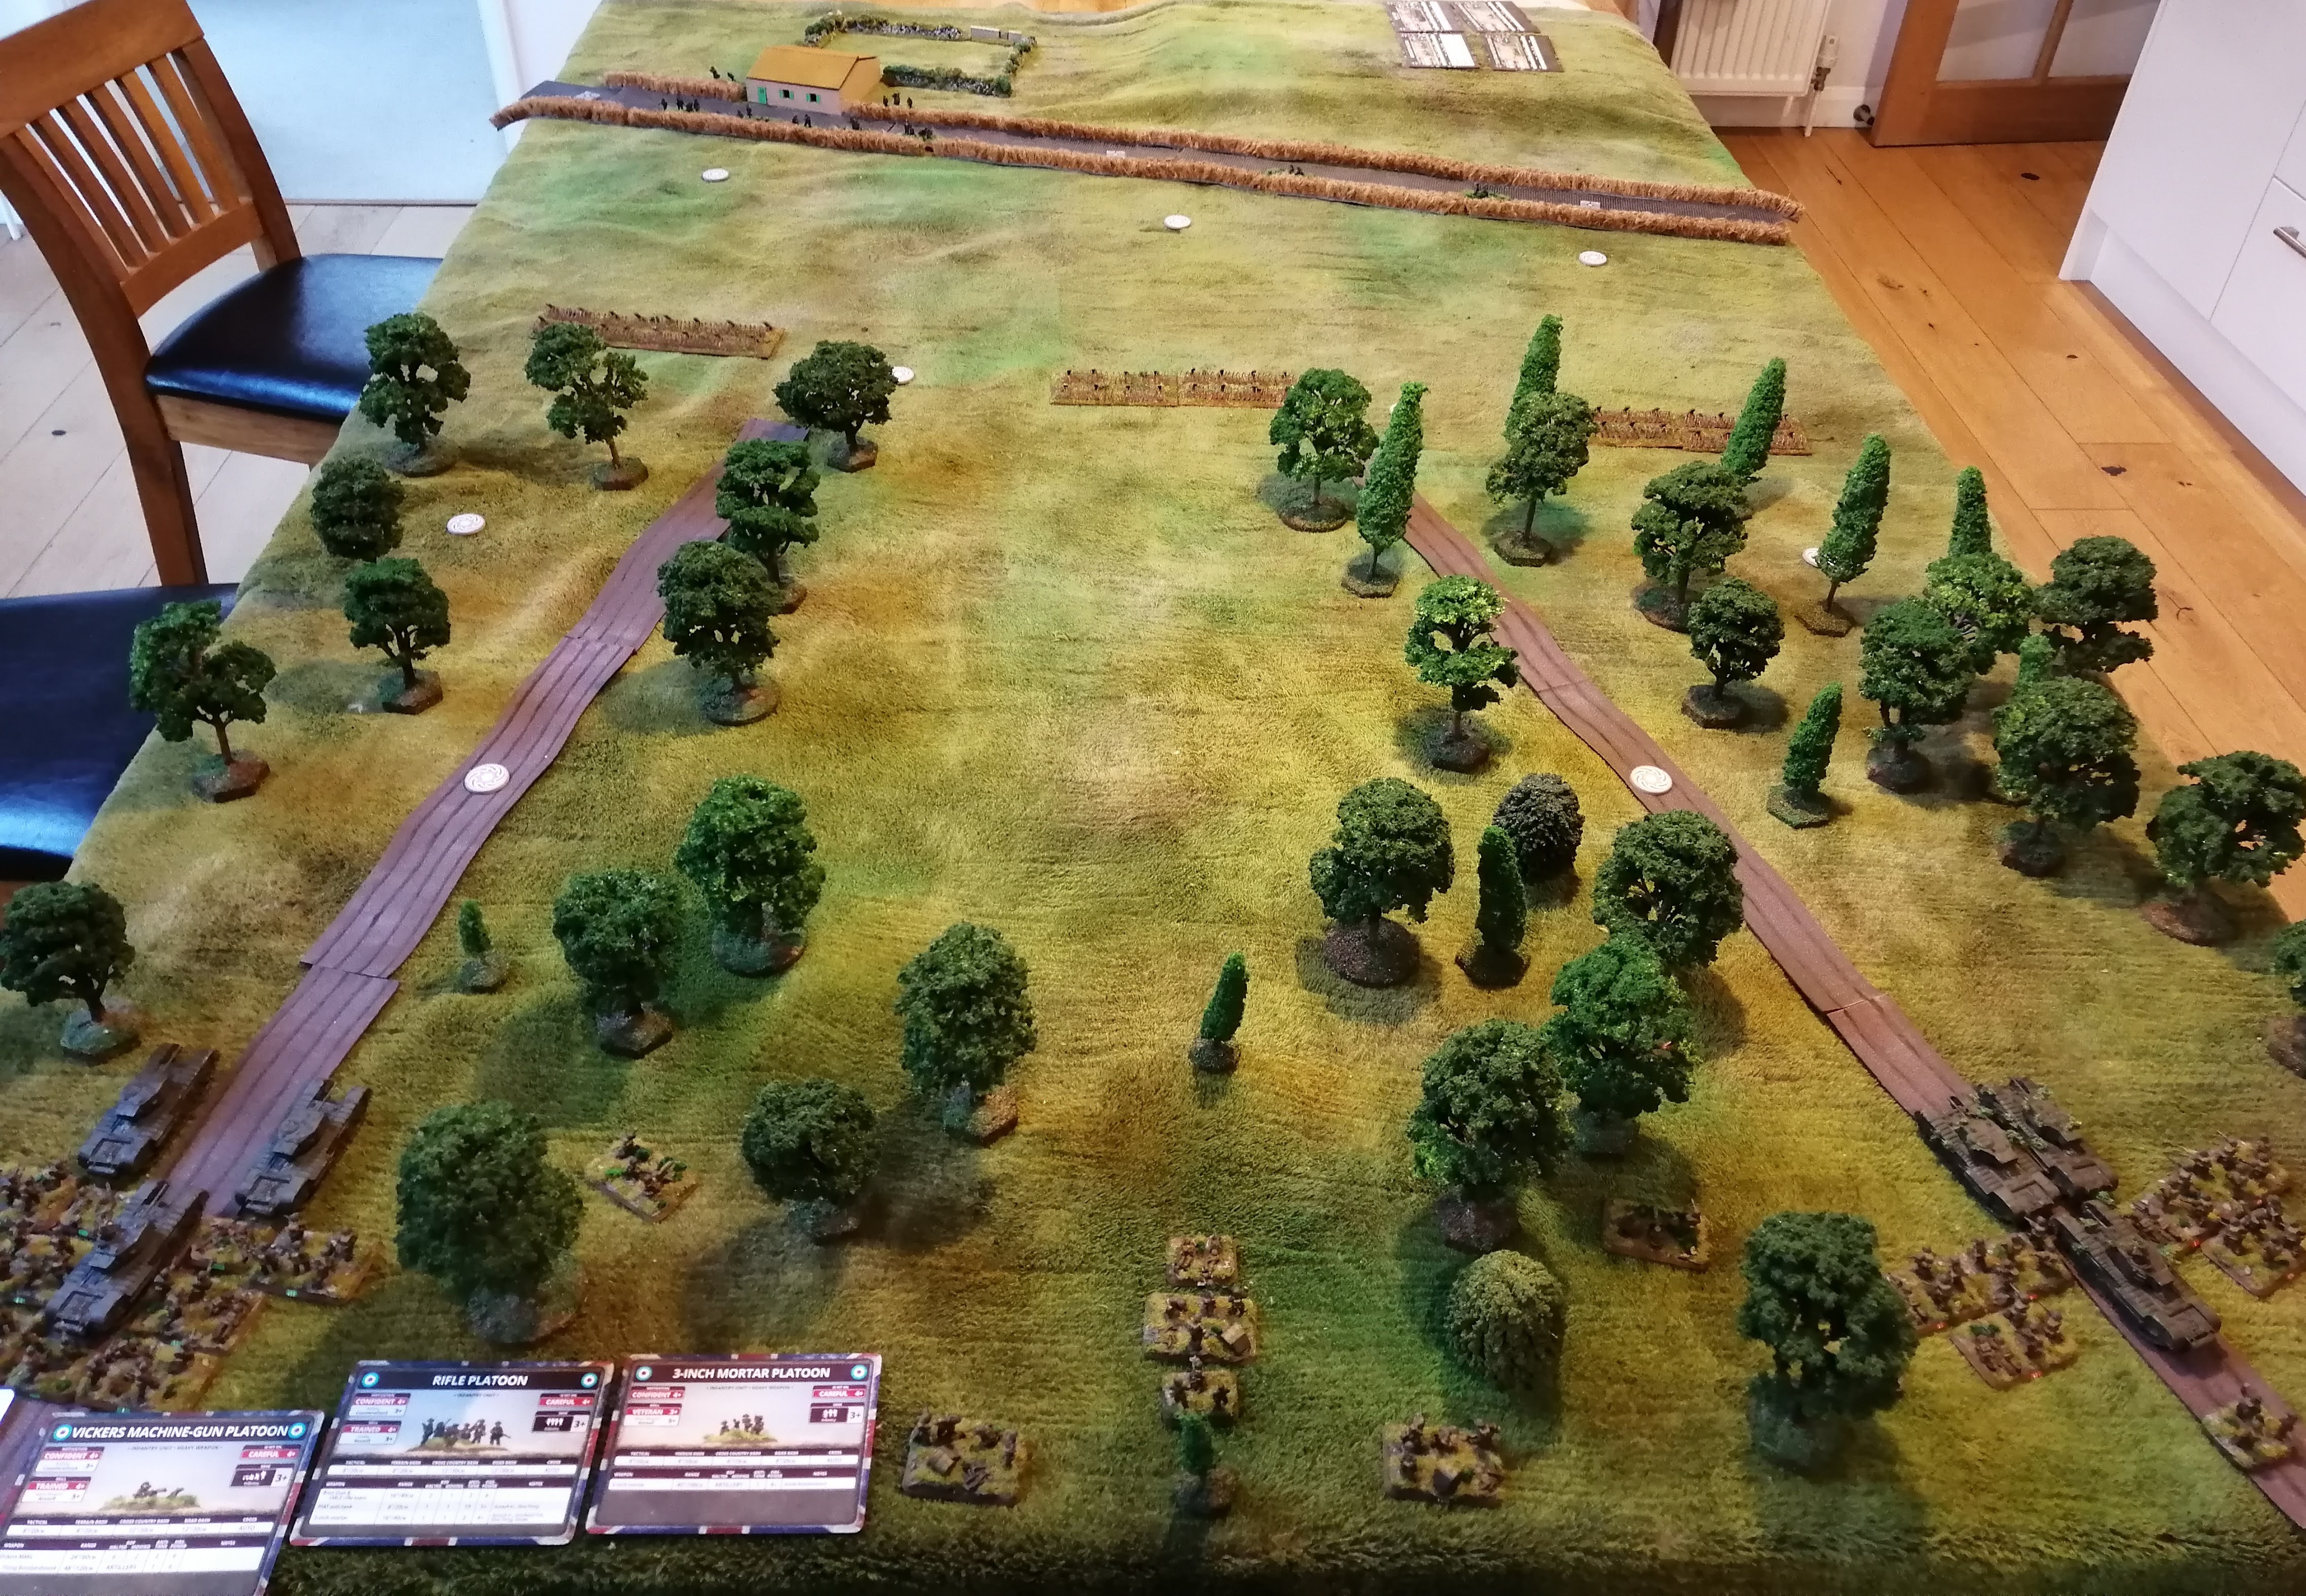
Deployment:
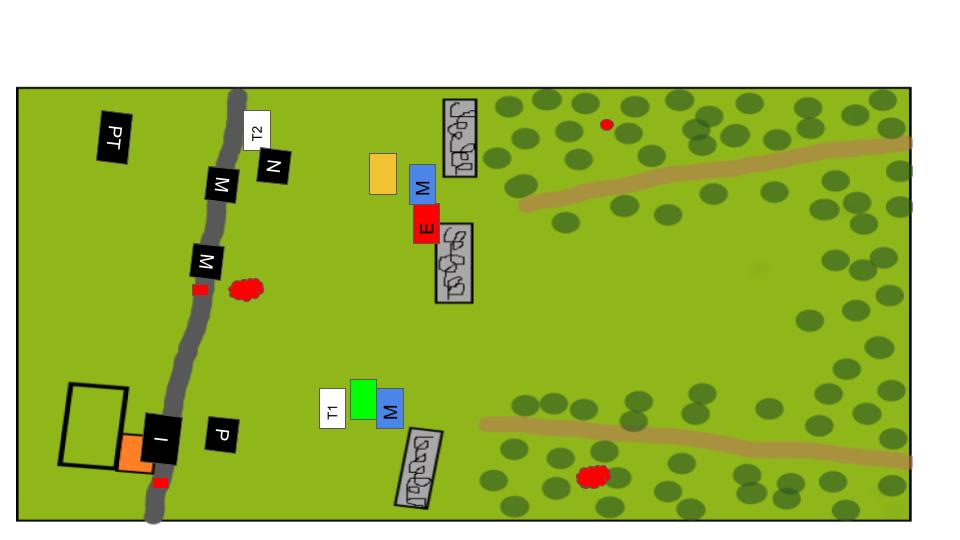
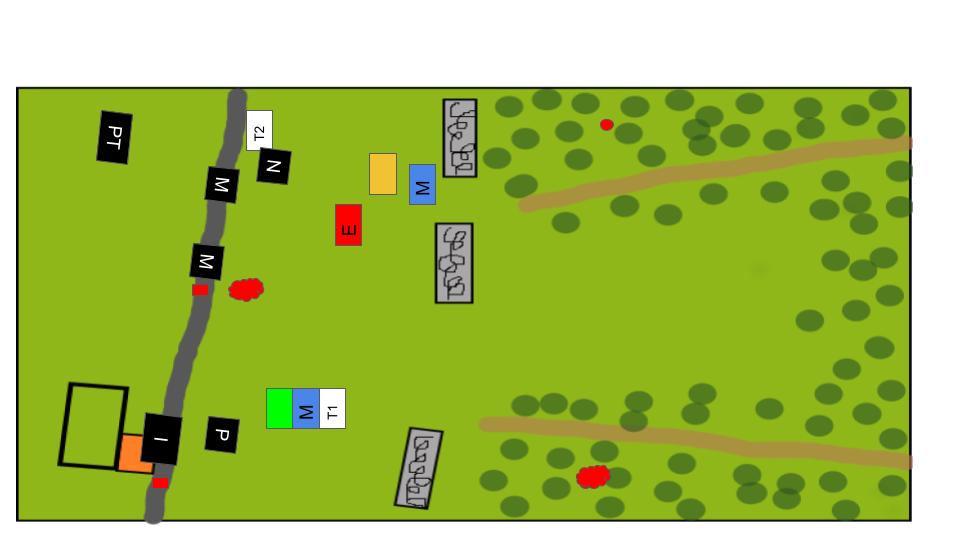
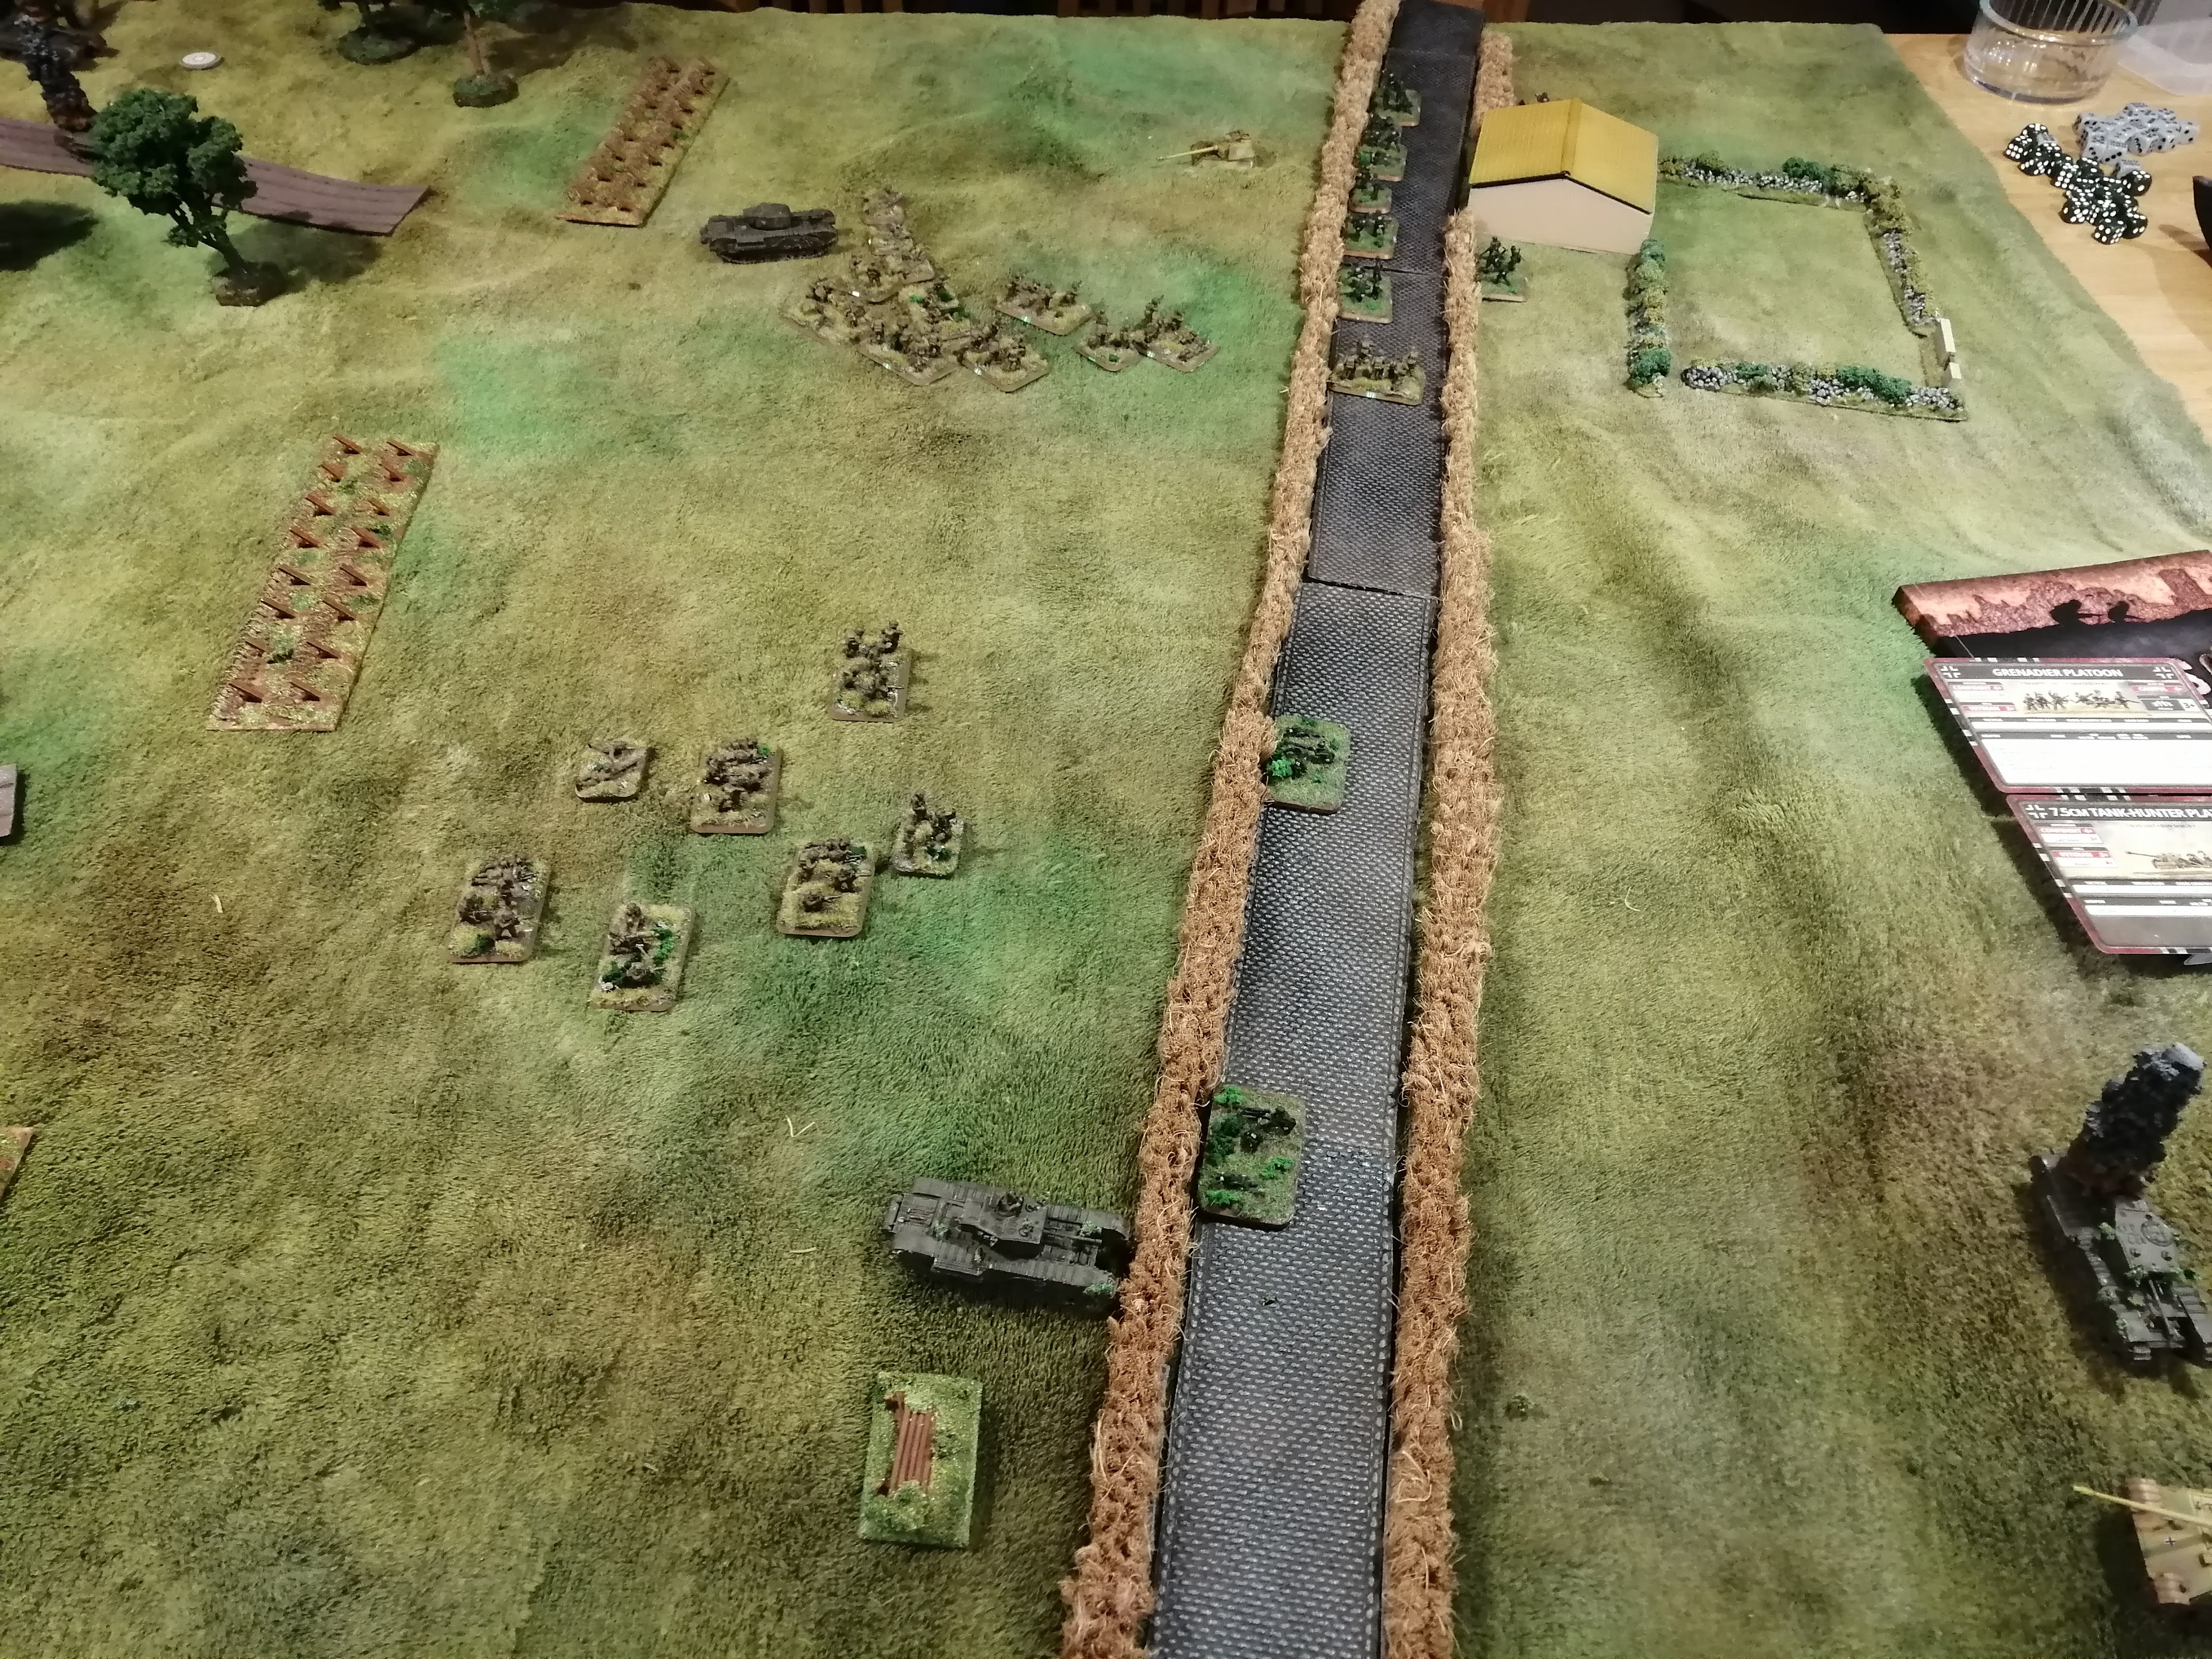
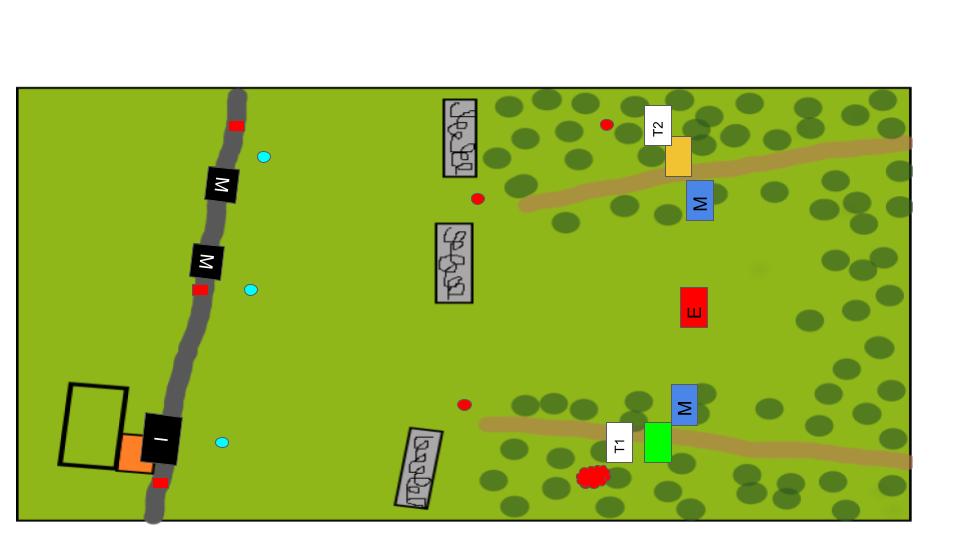
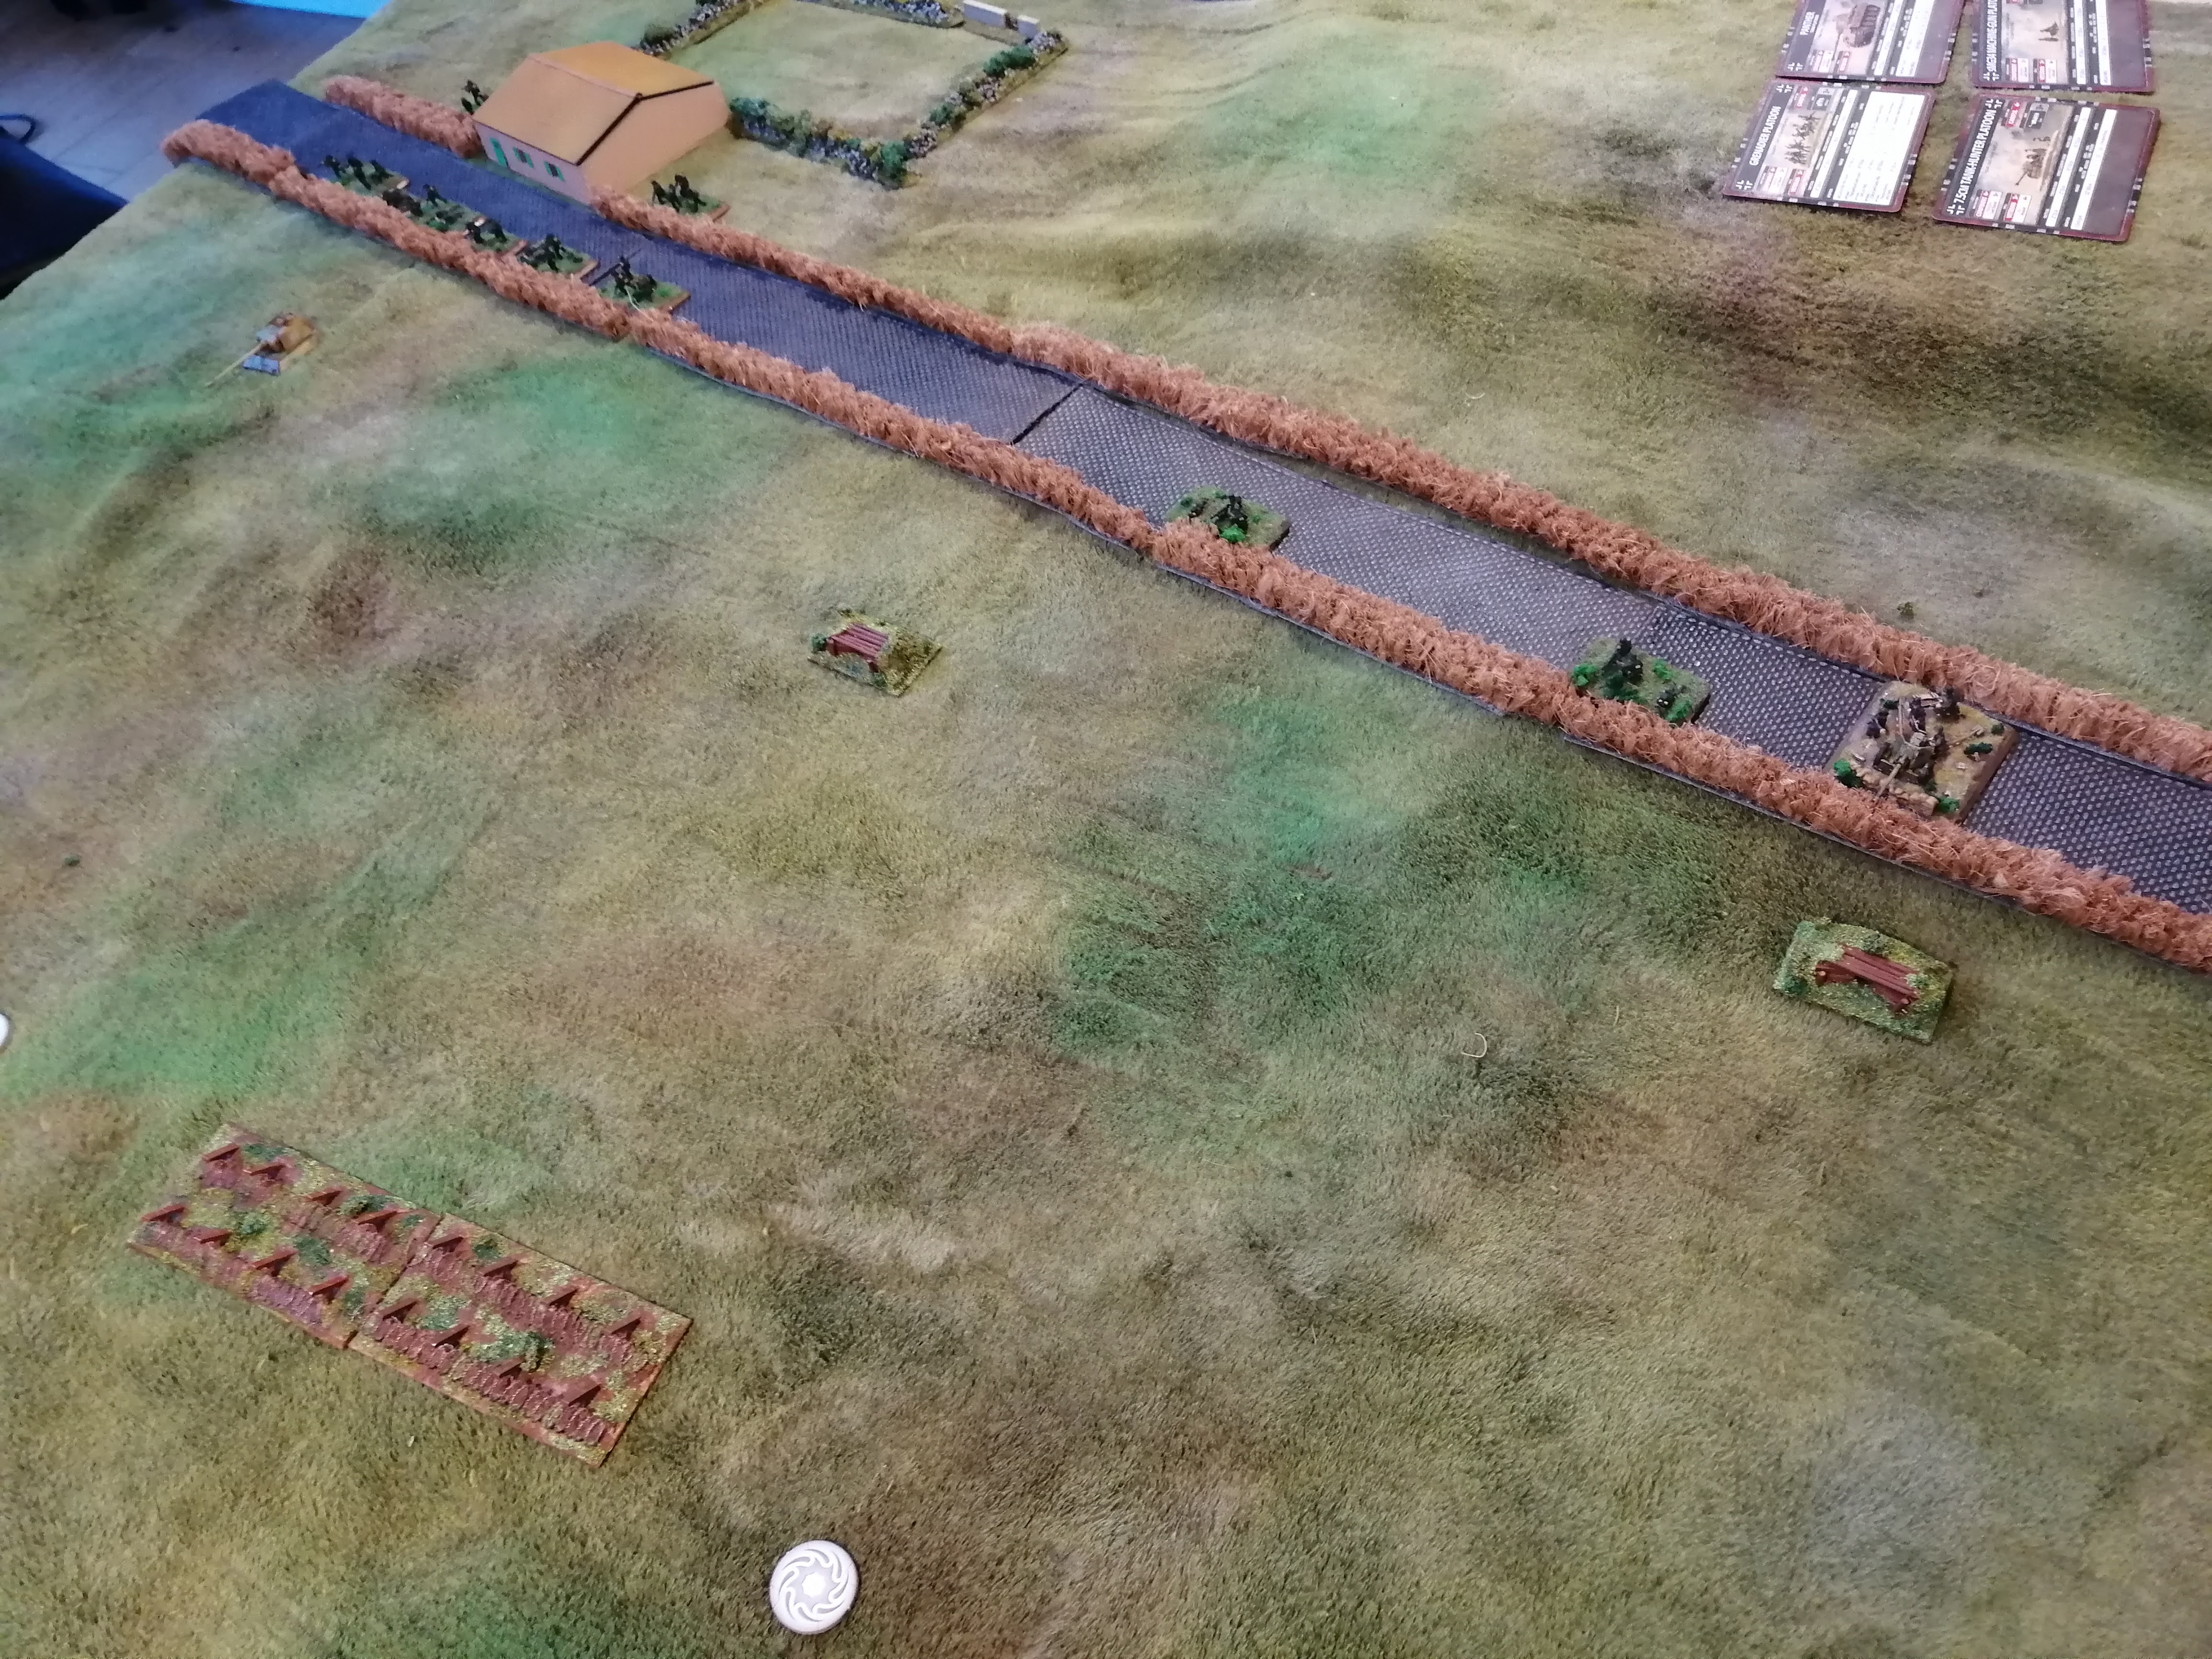
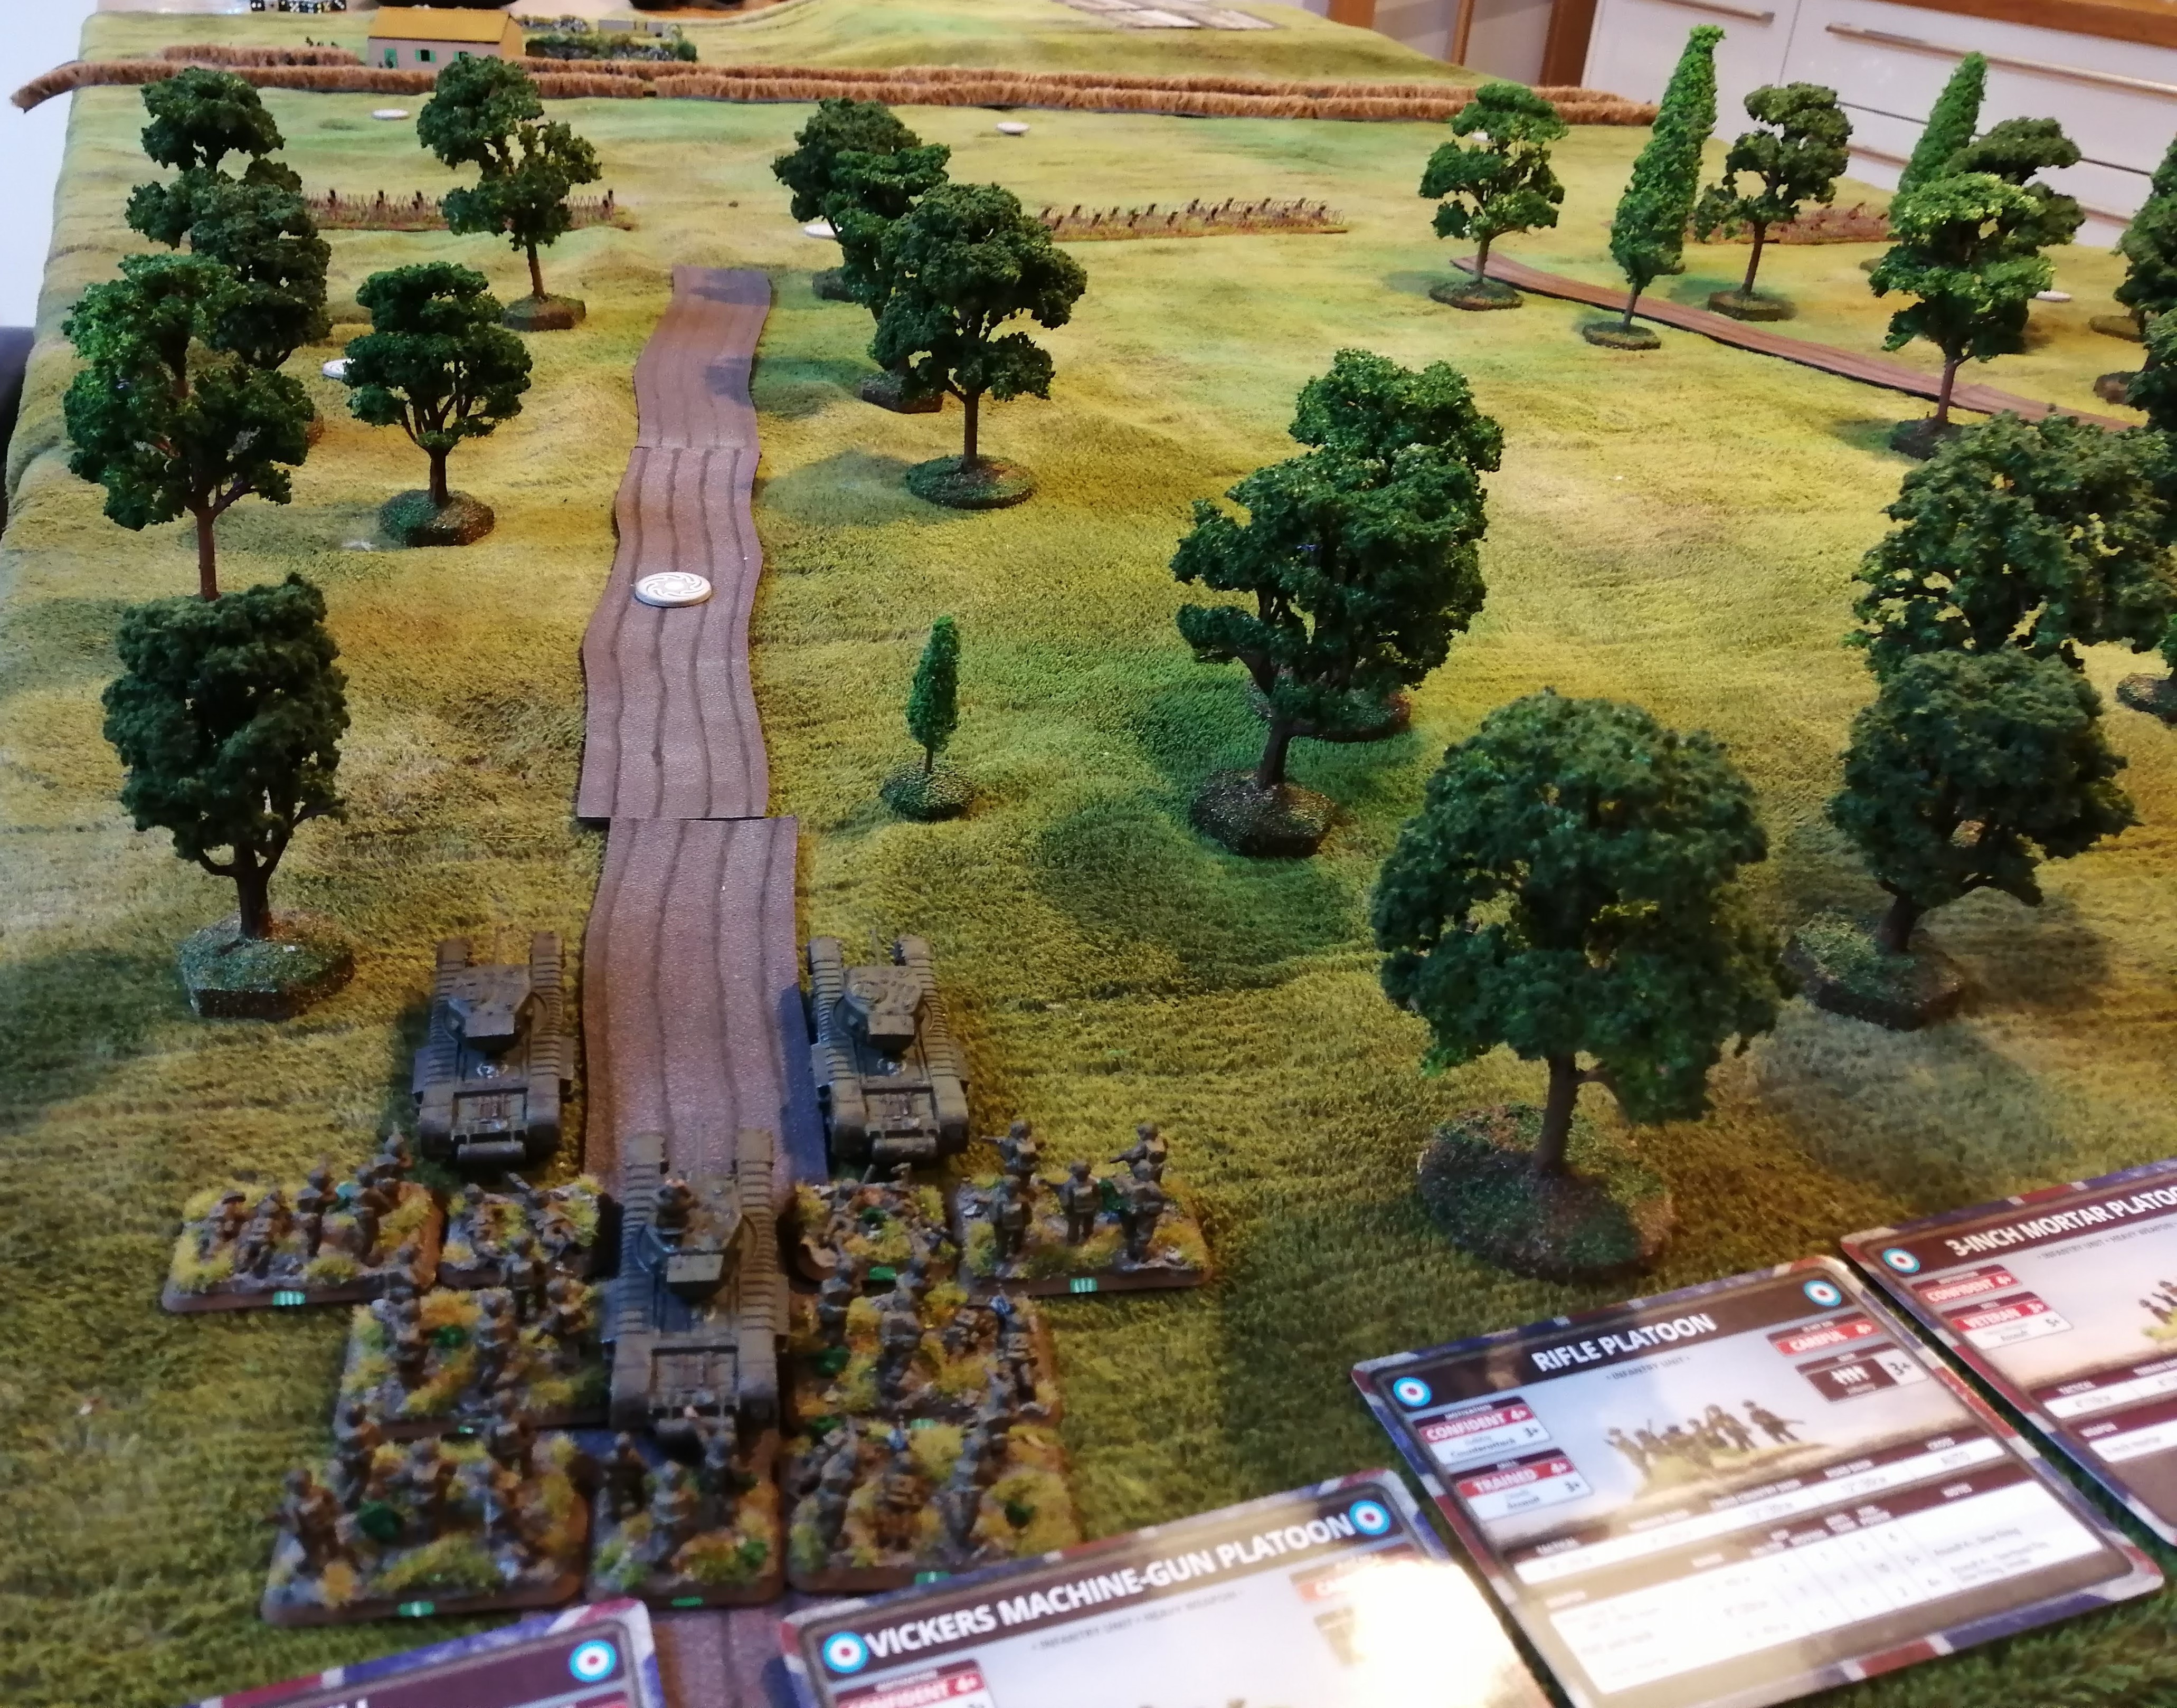
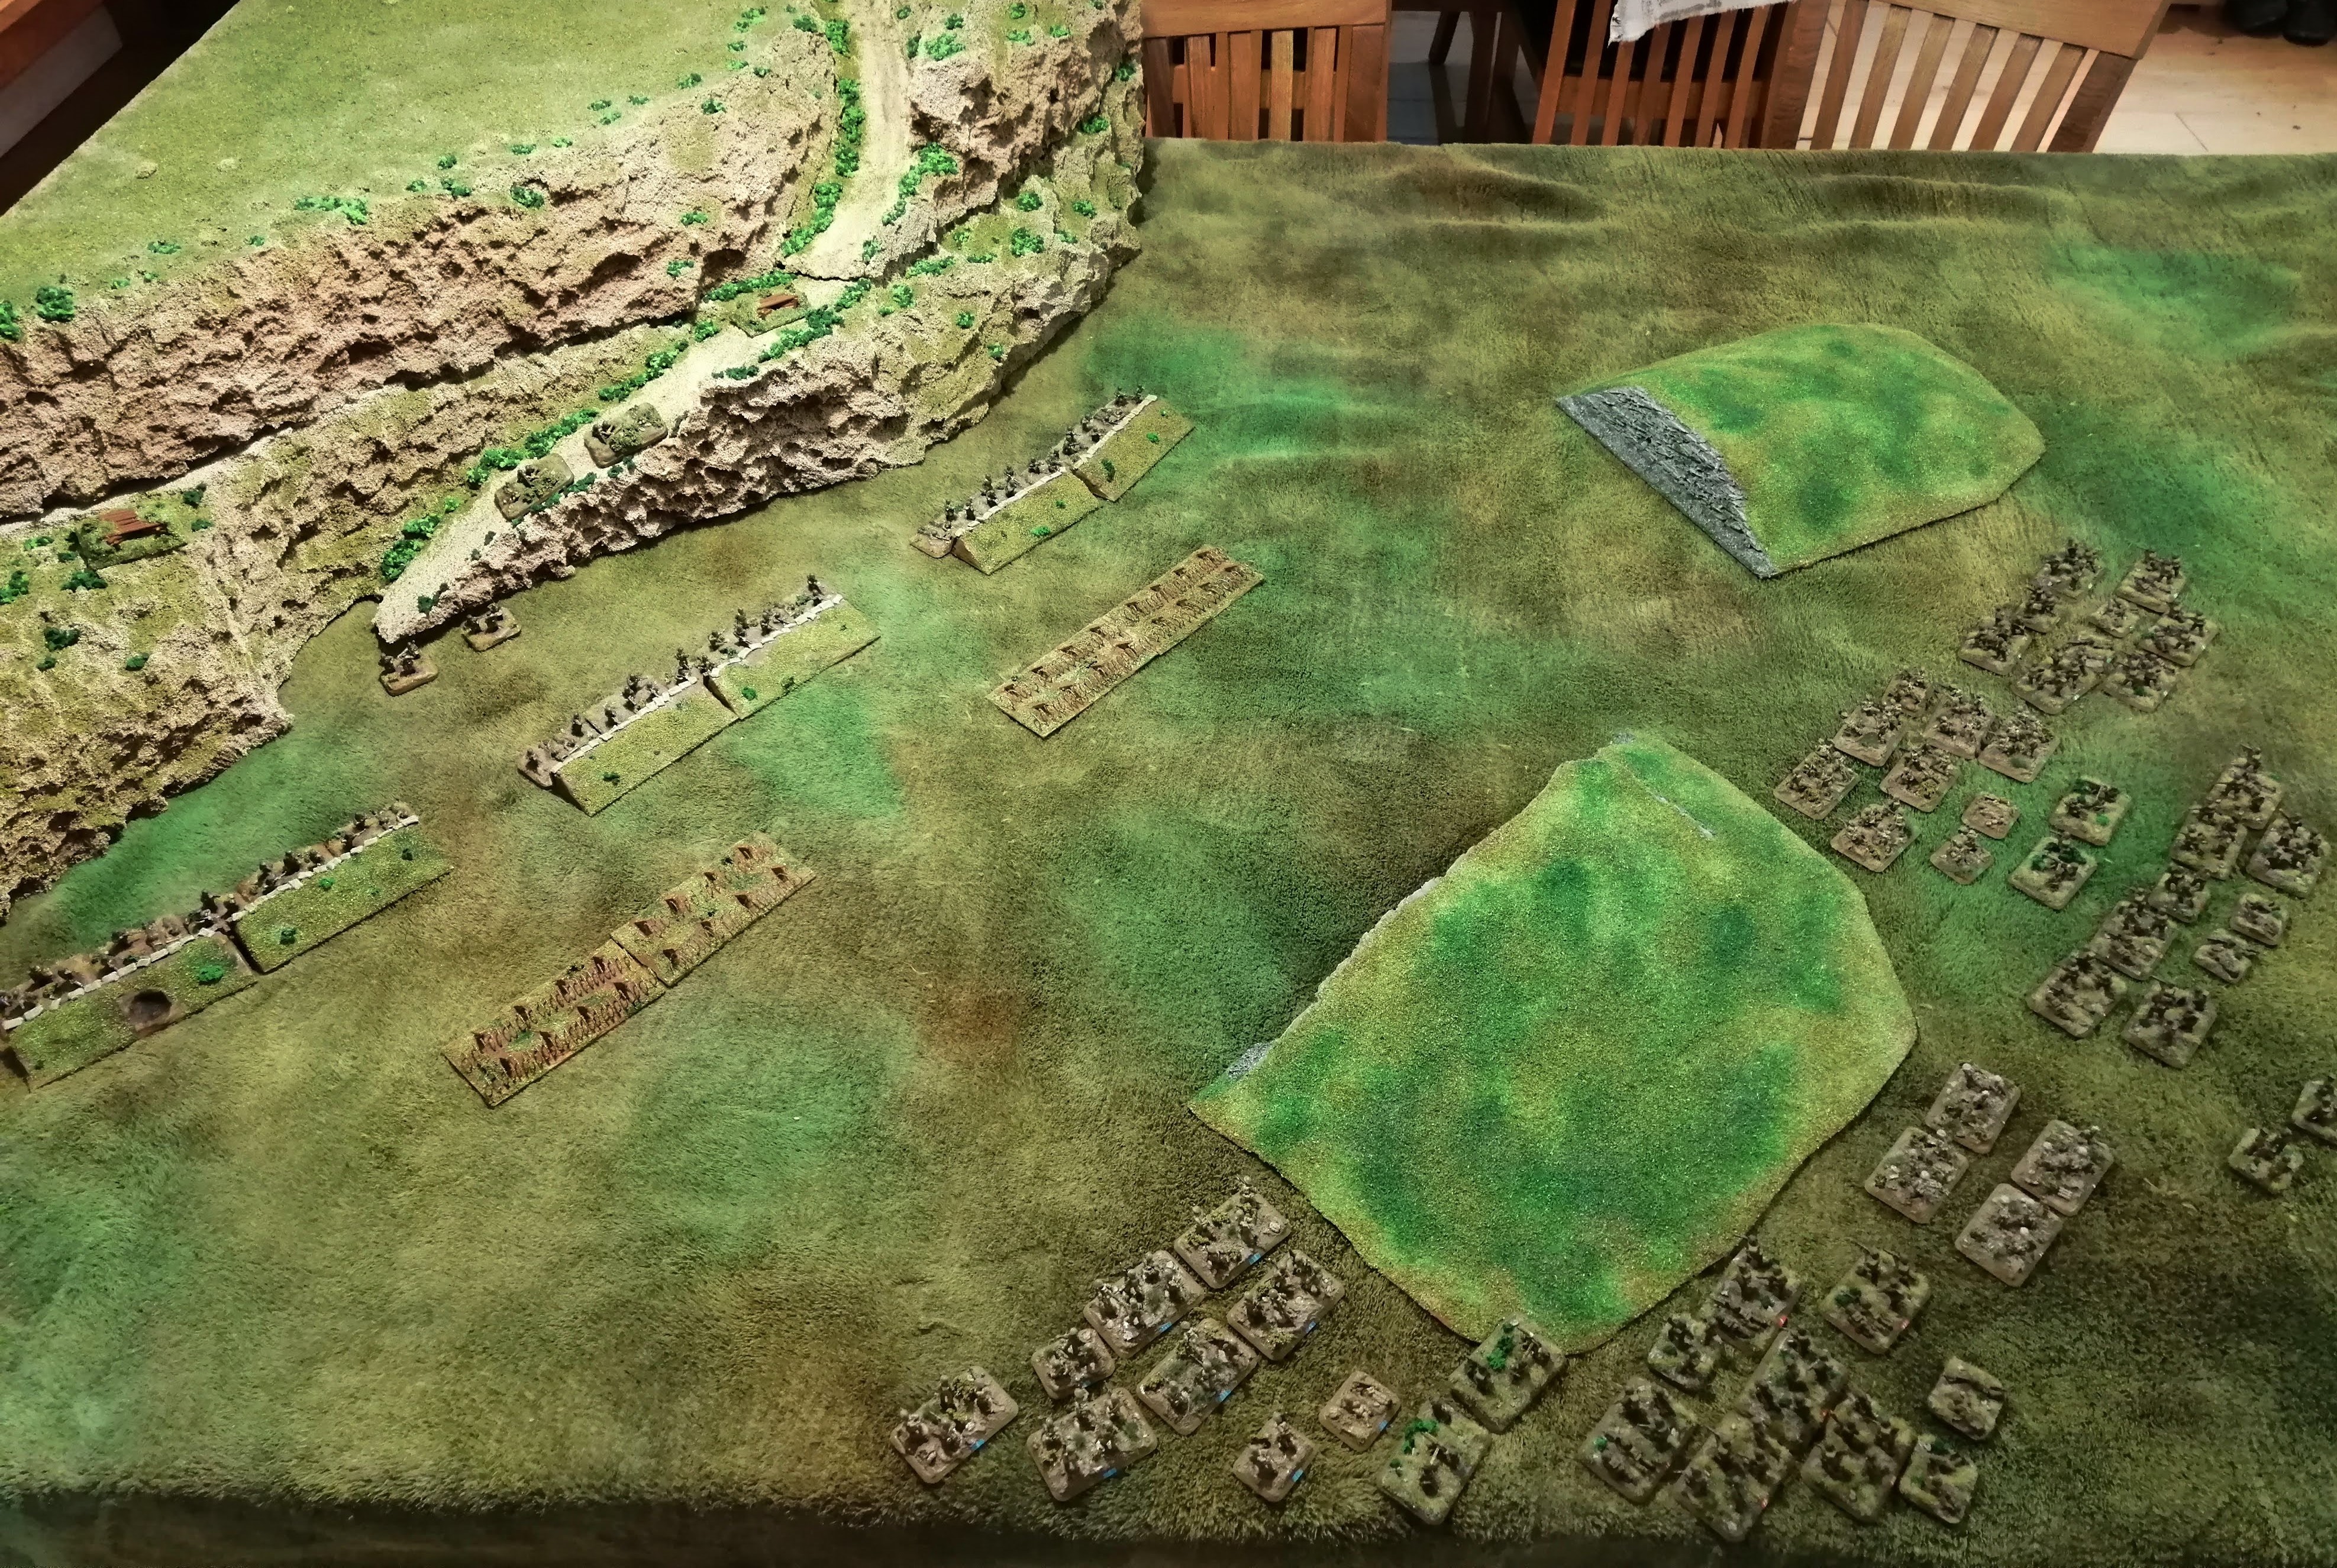
My son split his forces along the two woodland tracks with 1 Infantry platoon and 1 tank squadron on each side. He deployed the engineering platoon in the middle.
The below tactical map shows the deployment. For reference, the key to the colours are
Allied:
Green infantry platoon on the allied left along with T1 (Tank Platoon 1)
Orange infantry platoon on the allied right along with T2 (Tank Platoon 2)
E represents the Engineers and M the MG teams
The Germans are depicted in black with I being the Infantry and M being the MG teams.
The Orange block on the bottom left where the Infantry is deployed is the farmhouse with a walled garden at the back.
 Initial deployment, from the perspective of the Allies
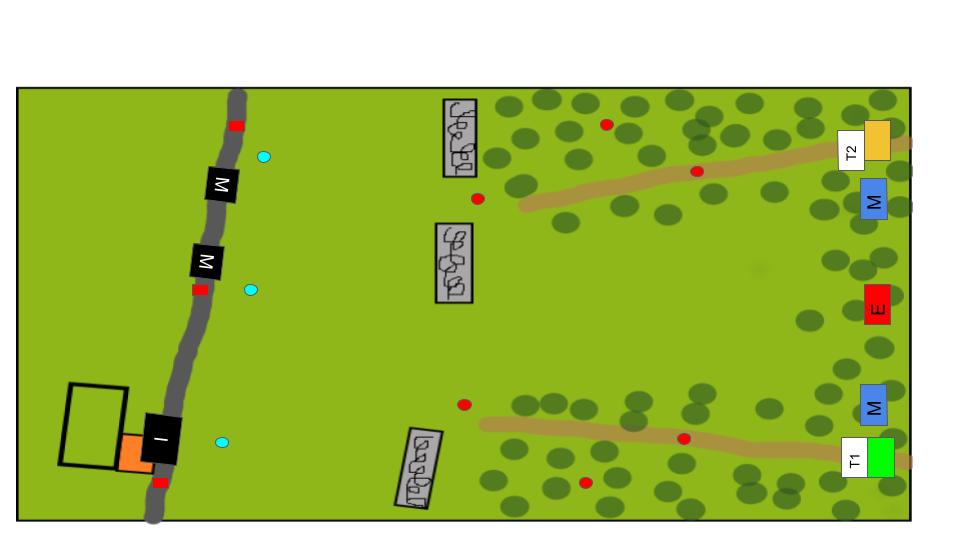 The Tactical Map
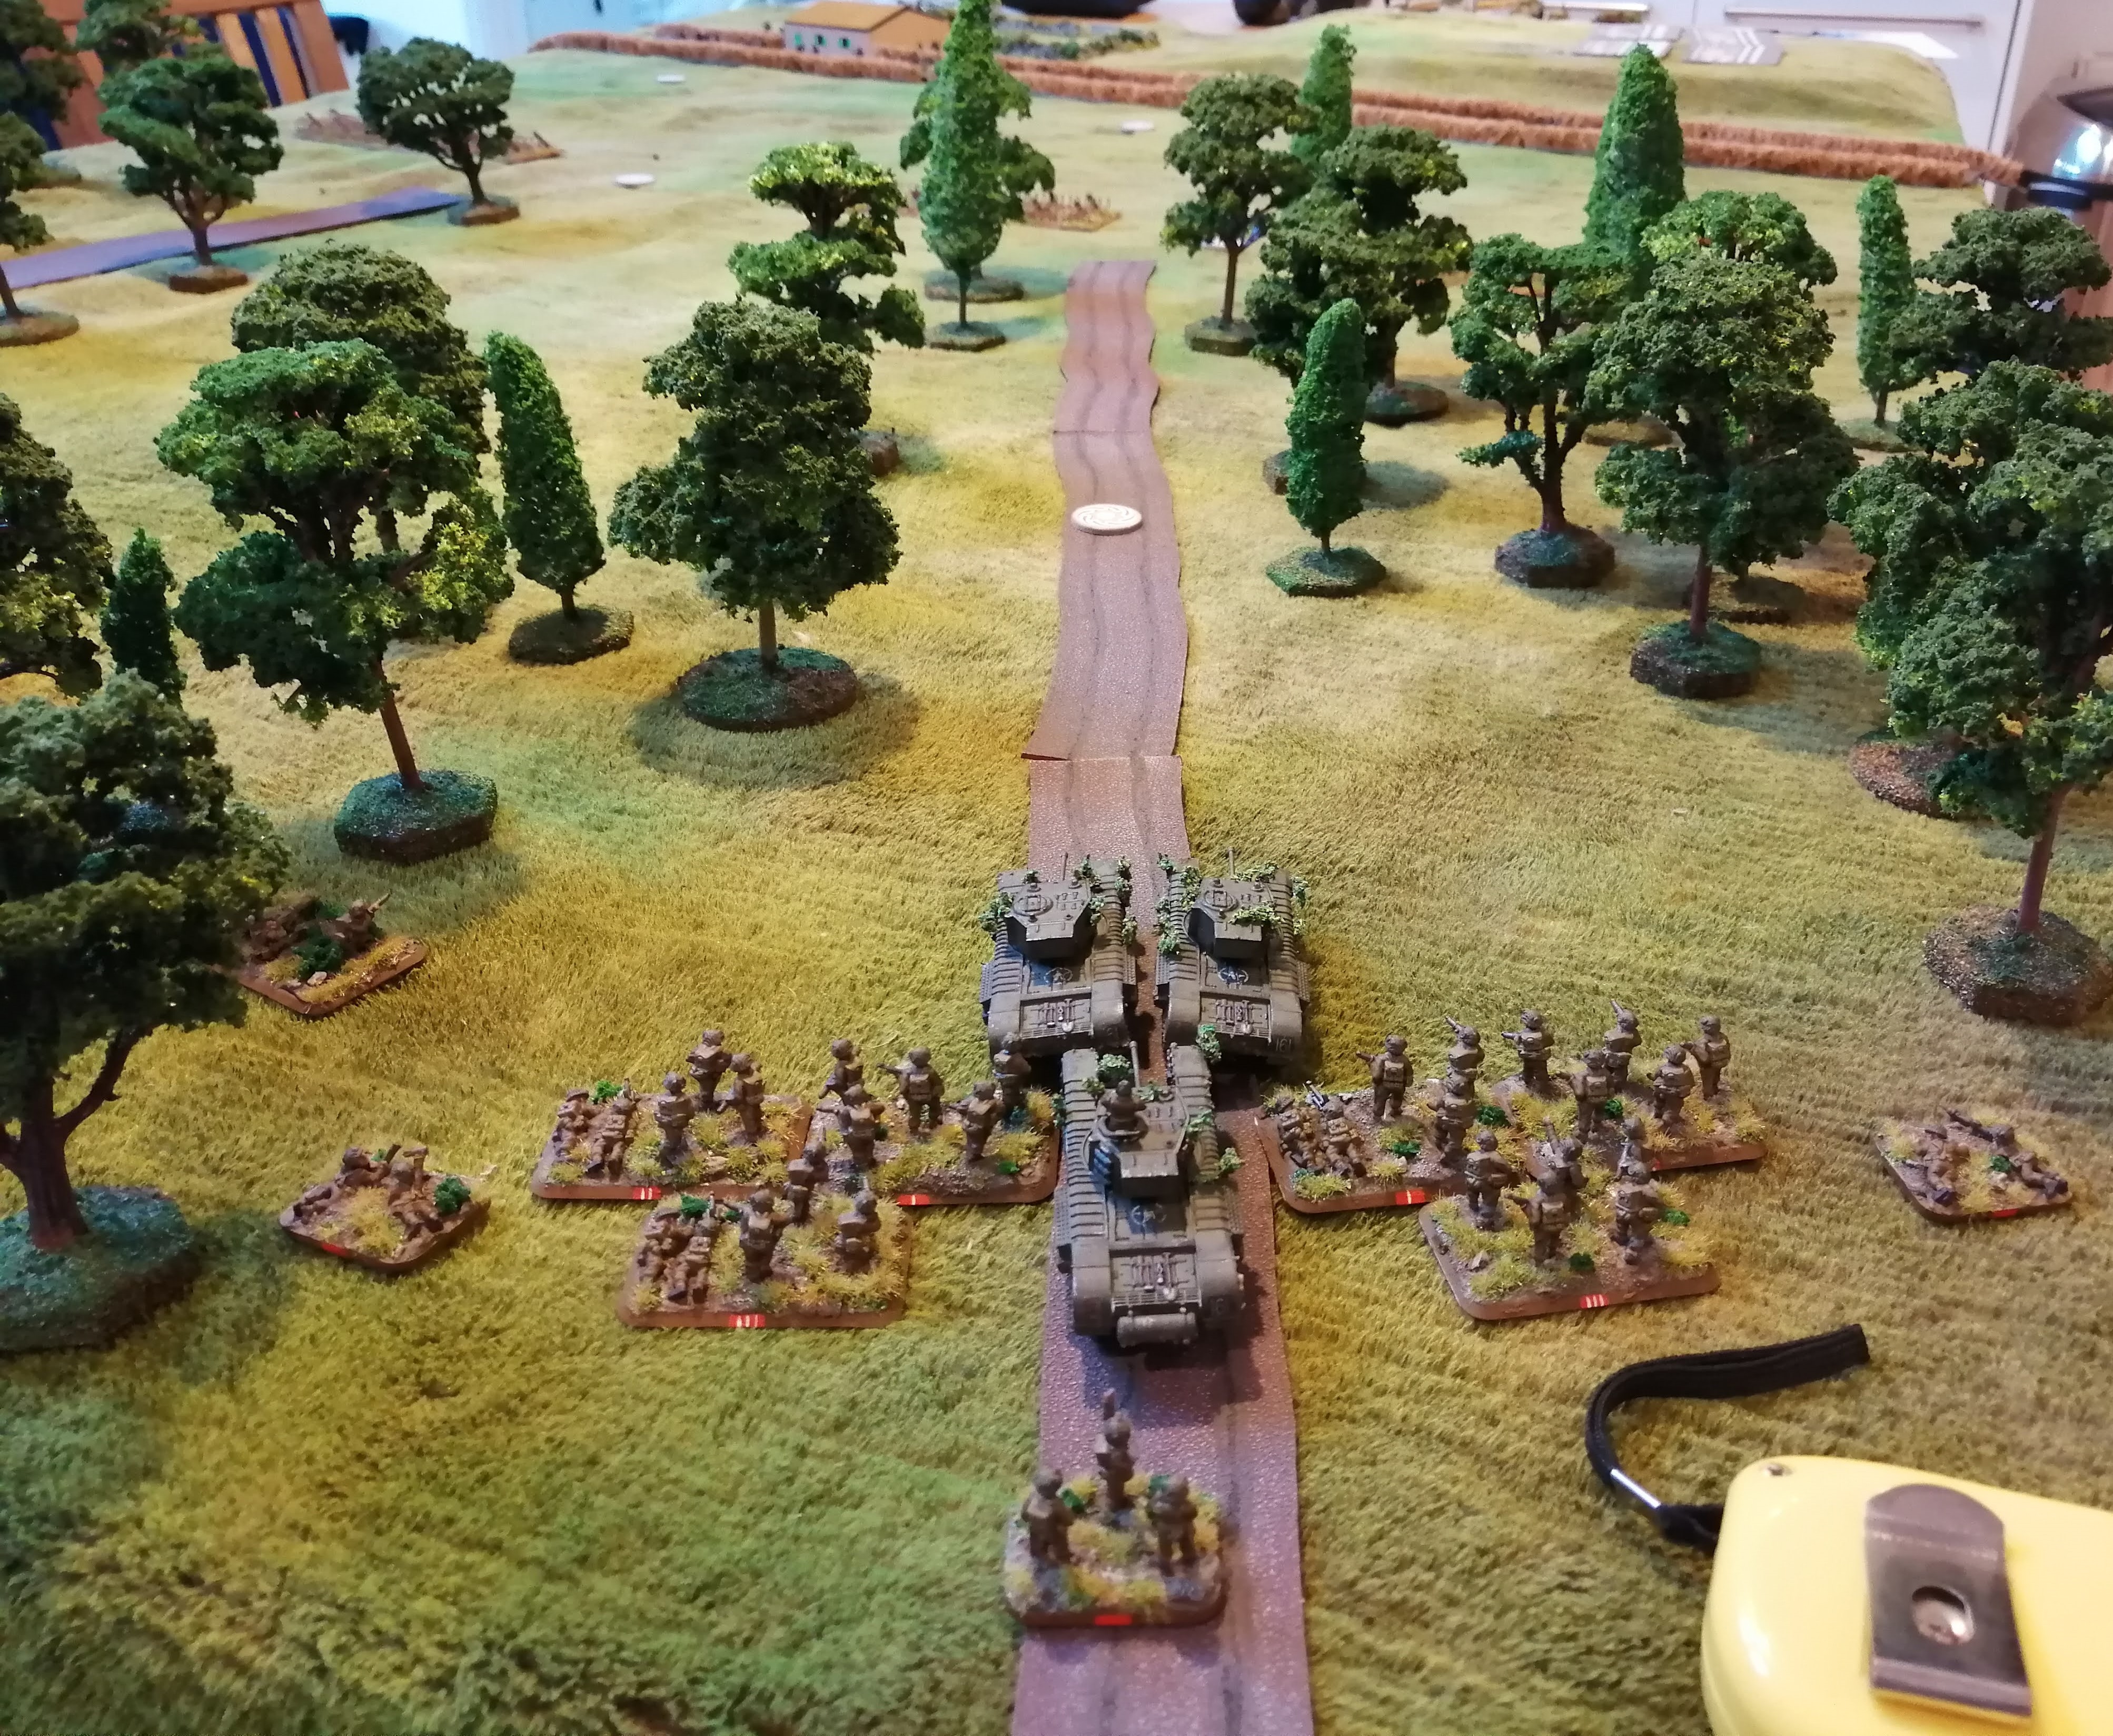

We’ll start the battle at turn 2. I deliberately set things up to allow my son to advance his troops in turn 1 without having to worry about having to shoot at, or receive fire from, the defenders. This way he can get used to the movement part of the game but suffice to say that turn 1 was just the allies advancing.
Turn 2 (Allies):
The Allies use their first turn to advance up both tracks with the engineer platoon advancing straight up the middle of the table through the trees. The advances along both tracks bring the allies to within 8” of the first tokens deployed on the tracks. Both tokens turn out to be the snipers so these are deployed. The allies cannot fire on the snipers this turn as neither sniper has fired yet. No other German units are visible or in range so this concluded the Allied turn.
Turn 2 (German):
With nothing to move, the Germans went straight to shooting. The sniper closest to the Allied Green platoon was able to kill one stand and pin the platoon. The other sniper just pinned Orange platoon.
 End of Turn 2
The Assault on the Senger Line
This project isn’t dead, it’s just been on a covid hiatus! Although by the time I play out all of the battles, it could well be the 80th anniversary!
Time to play out a new battle in the Allied assault on Monte Cassino and the Adolf Hitler line.
In the last two battles, we fought out the 1st Canadian Armoured Brigade’s crossing of the Garigliano river to allow the push into the Liri Valley and then, a few kilometres to the East, the Polish II Corps final assault on the monastery atop Monte Cassino. With Monte Cassino captured, the German defenders began falling back northwards up the Liri Valley toward their prepared defences on the Senger Line (renamed from the Hitler line at Hitler’s demand to avoid embarrassment and propaganda if the line fell). To cover the retreat, defensive positions had been prepared along the valley.
From the 18th May 1944 onwards, with a bridgehead established across the Garigliano and Rapido rivers, the British 8th Army began moving troops and tanks across the rivers to begin pushing North. On British 8th Army’s West flank, the US 5th Army were making progress, albeit slowly, up the coast with the aim of relieving the parts of the 5th Army that had landed at Anzio in late January, but had been encircled and contained in their beach head since.
Allied intelligence had identified a German defensive line arranged along a road connecting Aquino and Pontecorvo some 6KM North West of the town of Cassino and protecting Route 6 which led North, up the Liri Valley, to Rome. The Allies were desperate to secure Route 6 to ensure that their advance could proceed, so this defensive line needed to be broken. The assault on this position was assigned to 1st Canadian Infantry Division supported by the North Irish Horse tank regiment and the 51st Royal Tank Regiment. I bought the following to get a better understanding of the battle:
 From the Naval and Military Press
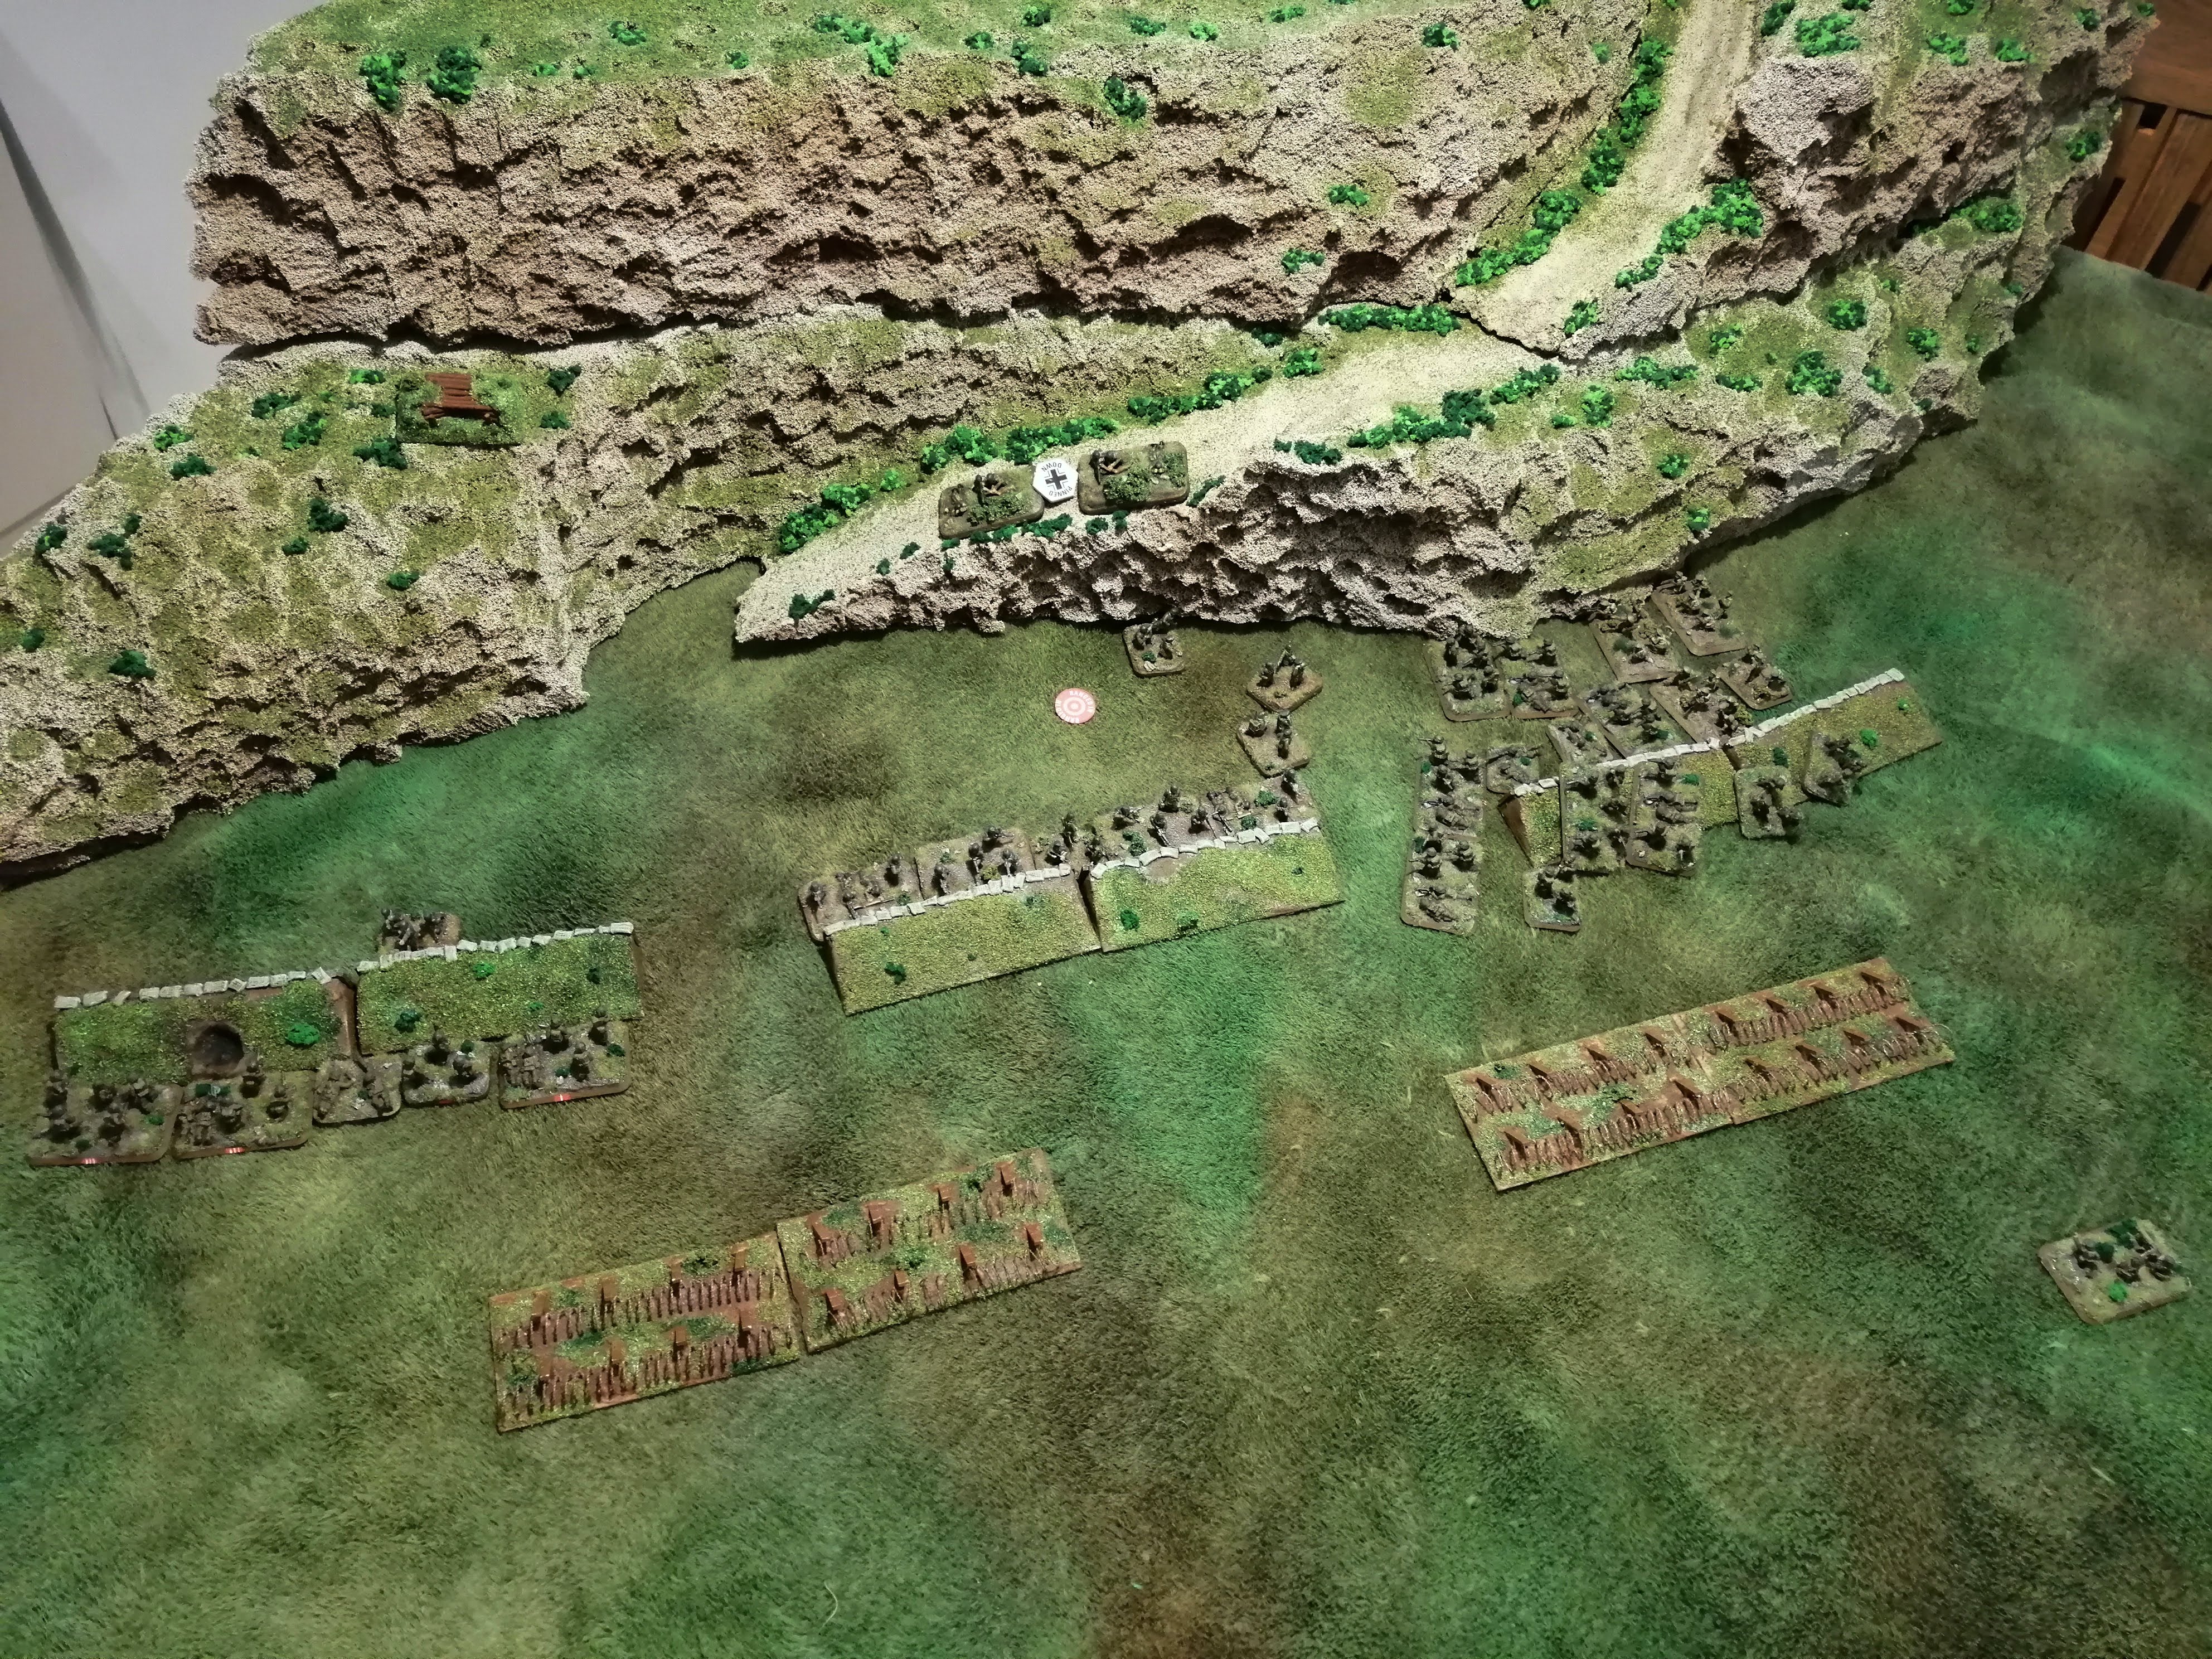
The map below shows the defensive line (in red) with the 1st Canadian Infantry approach, to the East of the now captured town of Cassino. The Orange arrow shows the Polish II Corps assault with elements of British Infantry looping around Cassino to the West after the bridgehead was established and then meeting up with the Polish atop Monte Cassino. However, as the Candian’s advanced, they were well aware that the mountain to the North of Cassino, Monte Cairo, had yet to be taken, giving the German artillery spotters the ability to see the Allied advance. This required Allied movements to take place at night but also created a potential problem for the assault itself.
 An actual military map of the attack
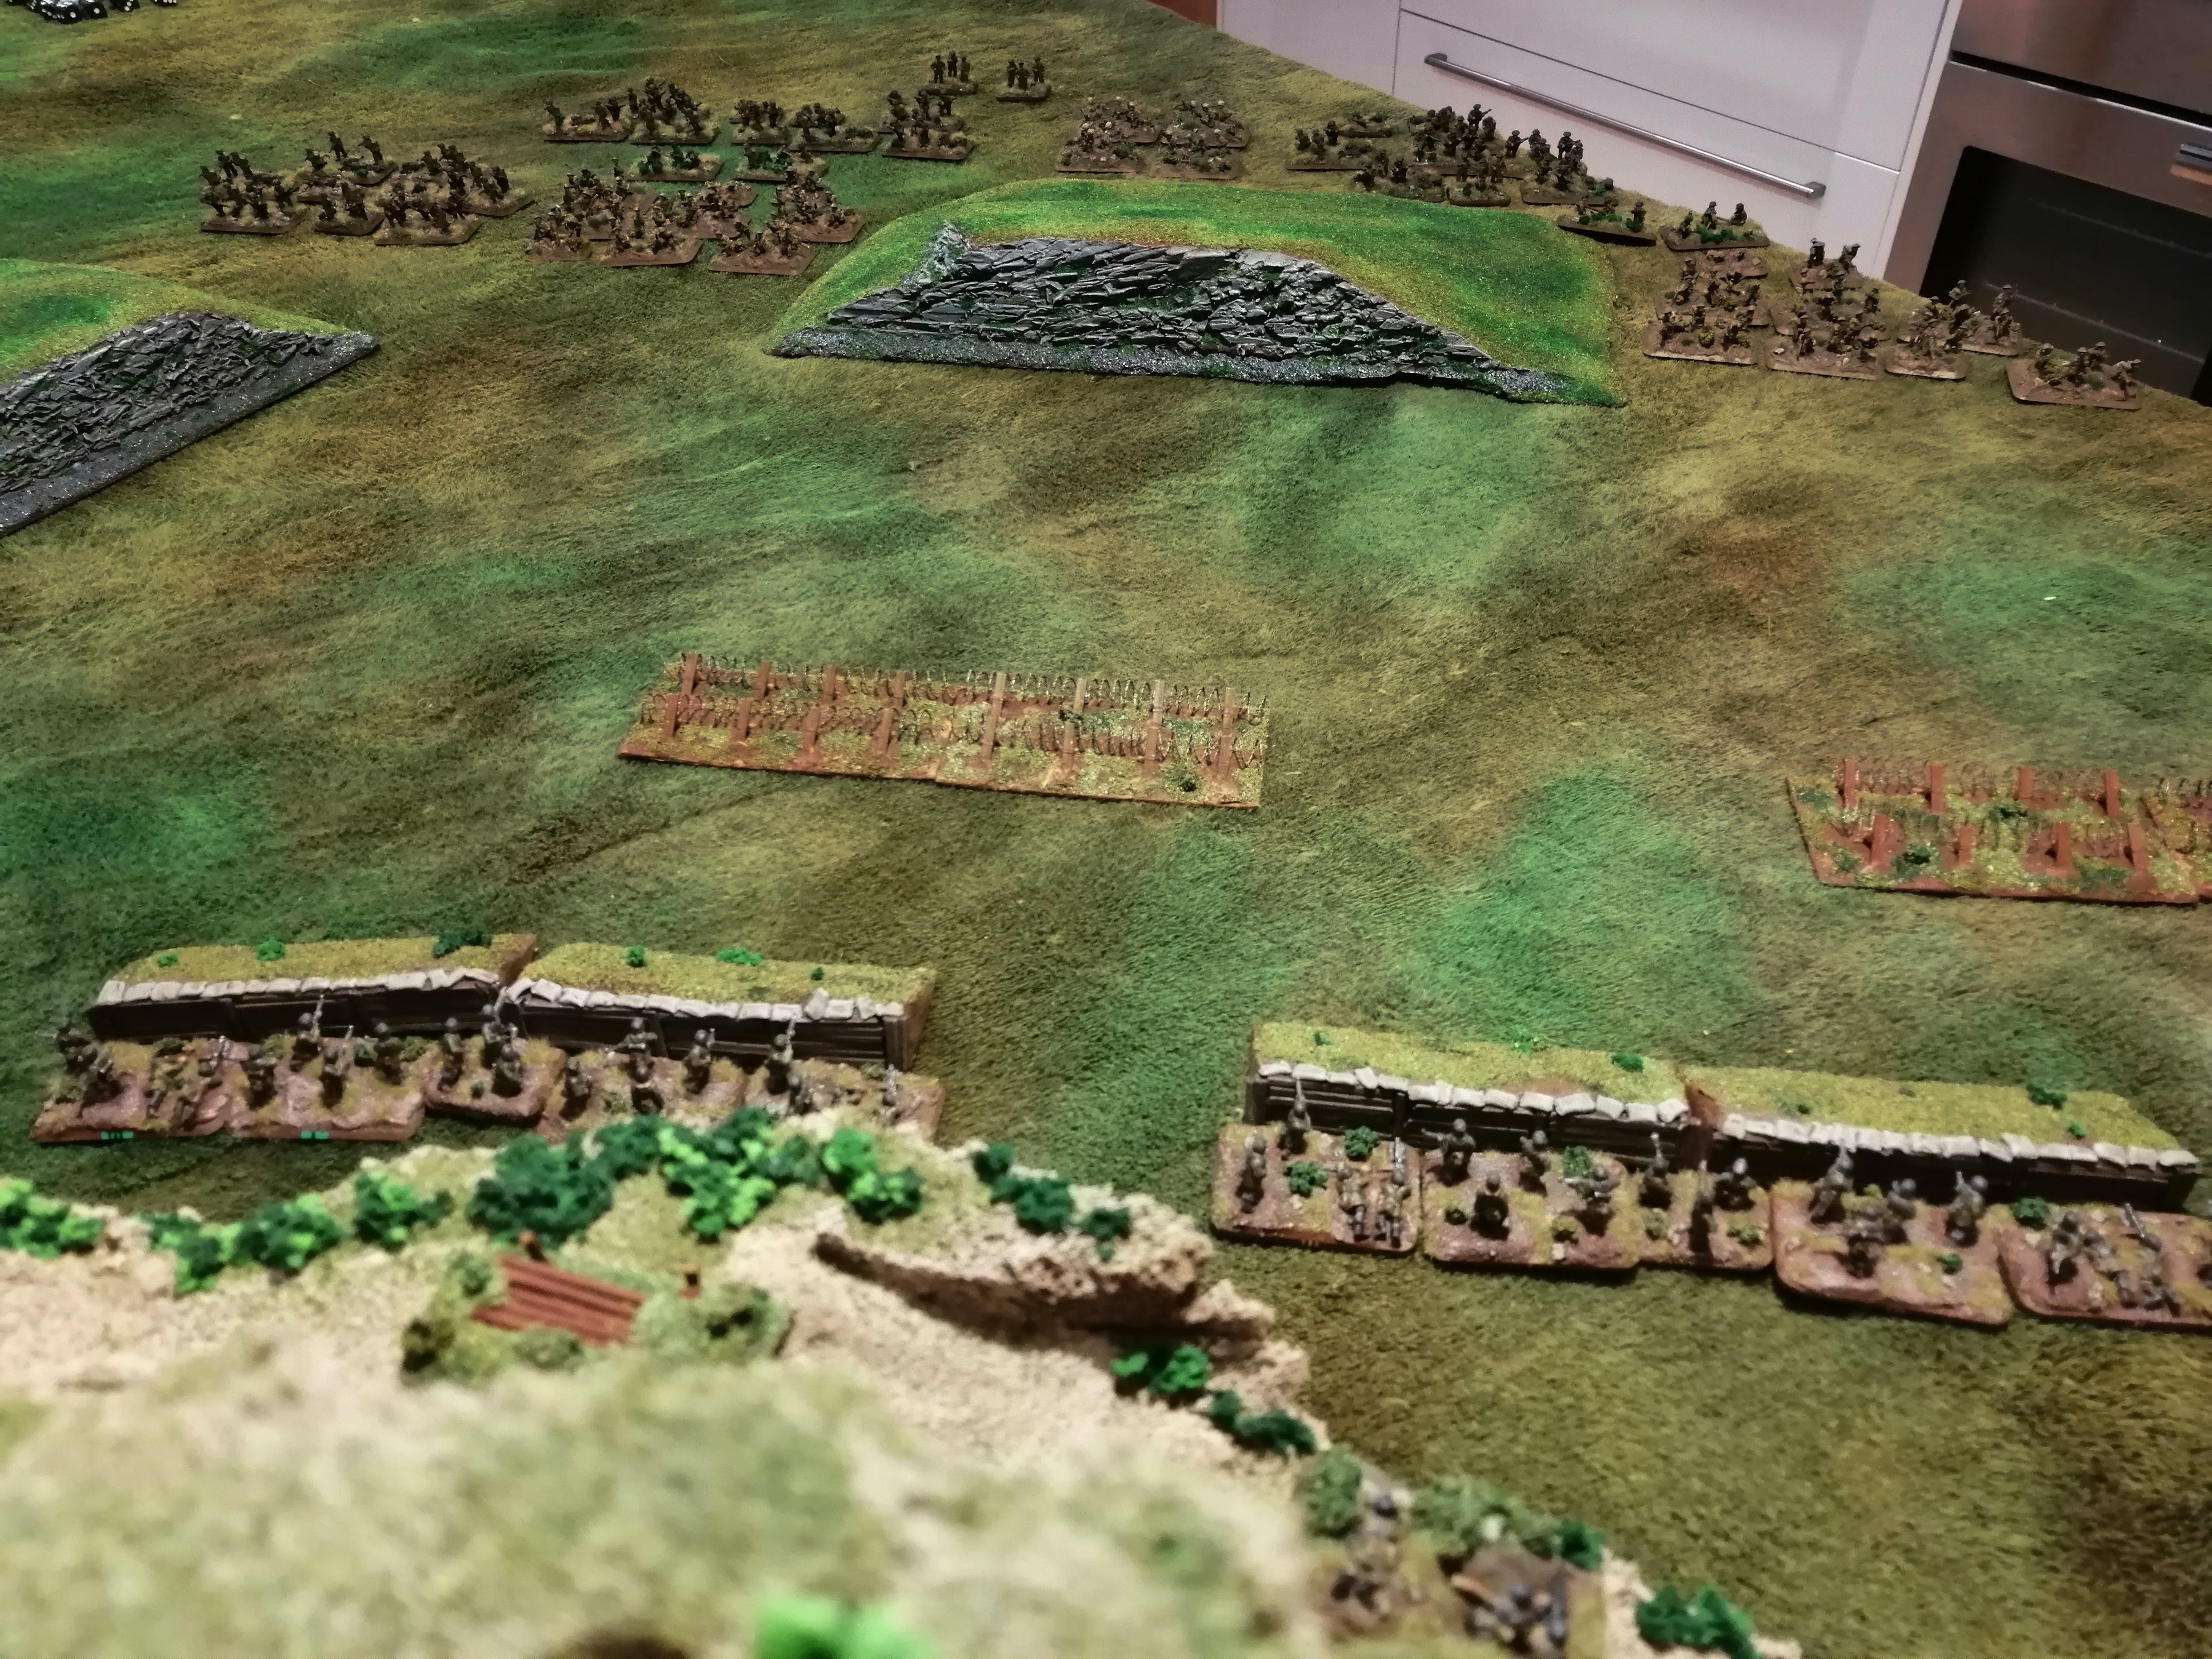
The assault was due to start on 0600 on 23rd May. The North Irish Horse (NIH) linked up with the 1st Canadian infantry during the night of 22nd/23rd and the attack was launched on time. The assault took place across a 3000 yard front with 2nd Brigade NIH on the right and 3rd Brigade with 51st Royal Tank Regiment on the left. Accompanying the tanks were two brigades of Canadian Infantry.
The assault was launched after a 600 gun artillery barrage. While this helped keep the defenders head’s down, it signalled the direction of the assault and allowed counter artillery fire to land behind the allied barrage into the advancing infantry, inflicting heavy casualties and slowing the advance.
The defensive line was well prepared. The area leading up to the Aquino/Pontecorvo road was heavily wooded although single track paths had been cut through the trees. These were heavily mined and at least two Churchill tanks were lost to these. A number of MG nests and other strong points were placed into the woods as well as snipers, some of which had strapped themselves into the trees. This, along with visibility limited to just 10 yards at times due to the dust, took a heavy toll on the assaulting troops. By 0730, the allied advance had covered just 500 yards.
Enemy tanks were also in the area. A number of these were engaged by the Canadians and the NIH and two Panzer IVs and a Panther were reported knocked out. This is the first recorded kill of a Panther on the Western front.
By 0800, the assault had reached the edge of the tree line and Allied advance were faced with a 400 yard gap to the Aquino-Pontecorvo road over open terrain. B Squadron of the NIH advanced on the objective but were fired upon by a number of anti tank guns and a panther turret emplacement, which accounted for the loss of 5 further tanks. Once again, the smoke and dust rapidly reduced visibility and helped play some part in allowing B squadron to reach the objective. They quickly linked up with a platoon from the Canadian Seaforths who were taking heavy fire from a farm house some 200 yards beyond the road. B squadron was able to engage, and destroy, the defenders and secure the initial objective.
By 1200, German tanks moved forward to try to plug the defensive gaps and, with continued anti tank fire, the NIH repositioned and attacked again. Good intelligence and aerial photography allowed a composite force made up of B and C squadron to avoid a prepared tank killing ground but they were hit first by artillery fire and then by anti tank rounds and lost a number of tanks. They were forced to fall back.
As the afternoon wore on, the Canadian Infantry, supported consistently by the NIH continued to overrun the defensive positions and by 1600, the German defenders began to retreat. By the end of the day, 1st Canadian Division had suffered around 1000 casualties and the NIH horse had lost 25 tanks and lost 34 men. These were heavy losses but it allowed the Allied advance to continue and exposed route 6.
Following the battle, the Canadian Infantry requested that the NIH dead be buried at the head of the cemetery to recognise the bravery and persistence that the NIH had fought with. Furthermore, both the NIH and the 51st RTR were given the honour of wearing the Maple Leaf in recognition of the service that they had given.
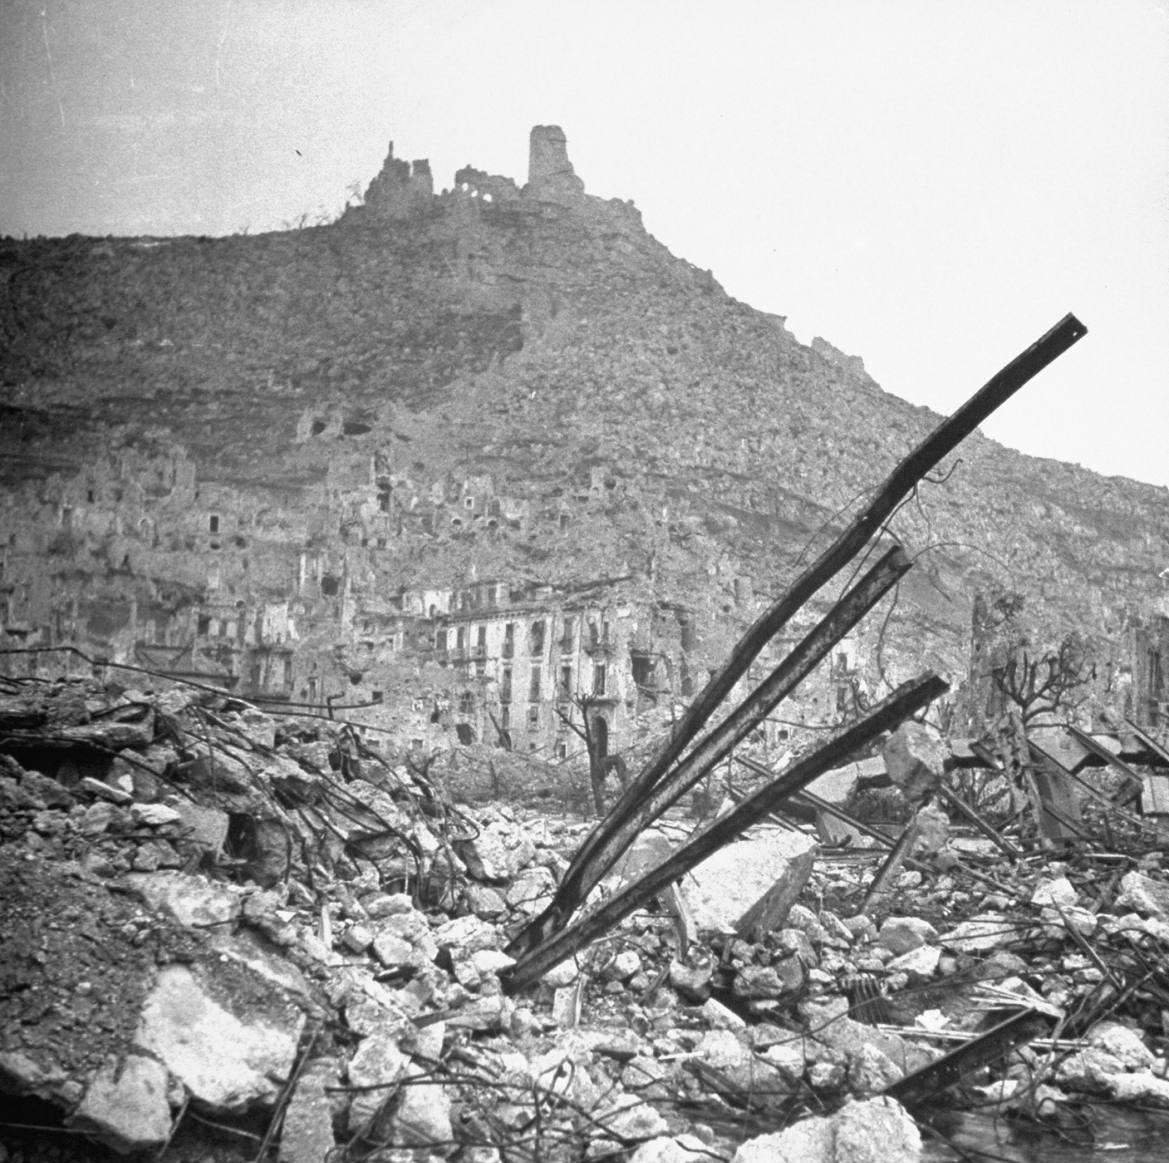
 Aquino Cathedral, not part of the battle but a lovely picture
The 4th and Final Assault on Monte Cassino (Turns 3 to 5)
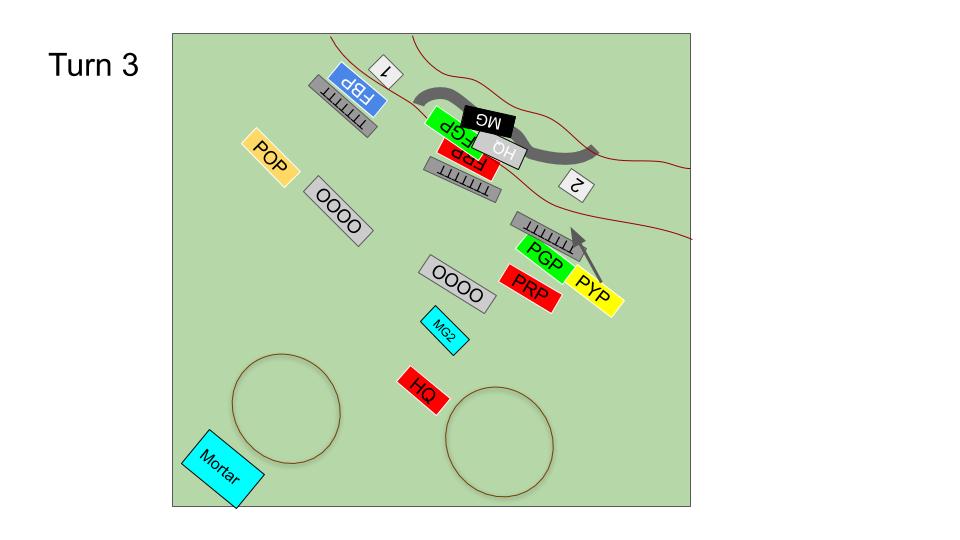
Turn 3 Polish:
Once again, the Polish desire to take the fight to the Germans sees all the platoons unpin and advance. Polish Green Platoon and Polish Yellow Platoon are able to advance within charge range of the Fallschirmjager.
The Polish shooting this turn is ineffective but the mortar platoon does manage to land a couple of shells near the Fallschirmjager Red and Green Platoons which pins them into place – potentially crucial for the upcoming assault!
Polish Green Platoon is first to attempt to push the Fallschirmjager from their trenches. Unfortunately for the Polish, the defensive fire is swift and accurate, landing five hits and killing three teams. That’s enough to stop the Polish and pin them in place.
Polish Yellow Platoon however successfully avoids the incoming fire and is able to scramble into the trenches, killing a Fallschirmjager team in the process. Clearly caught off guard, Fallschirmjager Green Platoon fail to counter attack and fall back.
Turn 3 German:
Red Platoon is unable to unpin from the mortar fire while Green Platoon falls back to the Fallschirmjager HQ.
On the German right flank, Blue Platoon and the MG nest is able to lay down a lot of fire power onto Polish Orange Platoon, who lose three teams and get pinned whilst the other MG Nest sprays Polish Red Platoon and kills a further two teams.


Turn 4 Polish:
Orange platoon is able to unpin and move up to assault range of Fallschirmjager Blue Platoon. Green platoon also jumps into the trenches with Yellow Platoon and prepares for another assault, this time on the central trench. Fallschirmjager Green Platoon, now in the open take fire and lose another team. The PIAT carried by Polish Green Platoon takes a hopeful shot at the MG nest on the hill and by some miracle, takes it out!
Green platoon assault Red Platoon in the central trench but again take a lot of fire as they launch their assault, losing another 3 teams and getting pinned. Meanwhile, on the Polish left, Orange Platoon lose a single team assaulting into Fallschirmjager Blue Platoon, killing the remaining teams of the platoon and taking the trench. The Polish now hold both of the two flank trenches. Can they push home this advantage?
Turn 4 German:
What’s left of Fallschirmjager Green platoon moves toward the trench now occupied by Polish Orange Platoon and sets up a counter attack while the Fallschirmjager HQ unit moves toward the German left flank to try to retake the occupied trench there. Desperate stuff from the defenders!
The German shooting manages to remove a few teams from the Polish platoons including one of the MG teams but is otherwise ineffective and doesn’t pin the Polish down.
Fallschirmjager Green Platoon launches their assault on Orange Platoon. The defensive fire is able to kill one team from Green Platoon leaving just the platoon HQ. The HQ jumps into the trenches and, whilst they fail to cause any damage, the Polish fallback, giving up their hard earned trench.
The company HQ assaults Polish Green platoon and gets into hand to hand combat, killing Green Platoon’s HQ and removing the rest of the platoon.
Turn 5 Polish:
Last turn and the Polish must push forward to secure victory. They manage to pass morale checks where required and get firing. The Mortar team removes another of Fallschirmjager Red Platoon’s teams and pins them in place. Orange Platoon fail to hit as do all the other platoons who are desperately firing upon the Fallschirmjager Company HQ.
Orange platoon assaults the command team of Green platoon and despite losing two more teams as they charge in, kill the last remaining team from Green Platoon and retake the trench.
Polish Yellow and Red Platoons attempt to assault the Fallschirmjager Company command but the defensive fire on both attempts is too much as Yellow loses 2 teams and is pinned in place while Red loses 3 teams and gets pinned. The assaults fail.
Turn 5 German:
With victory almost assured, the Fallschirmjager just have to hold on to the end of the turn. Red platoon passes it’s morale check and with the MG platoon, there is no need to take a Company check. During the shooting phase, Polish Red Platoon loses another couple of teams while Yellow Platoon is reduced to just two operational teams.
And with that, night falls and the Fallschirmjager begin to withdraw having successfully held off the Polish in their final assault. Although both sides took heavy casualties.
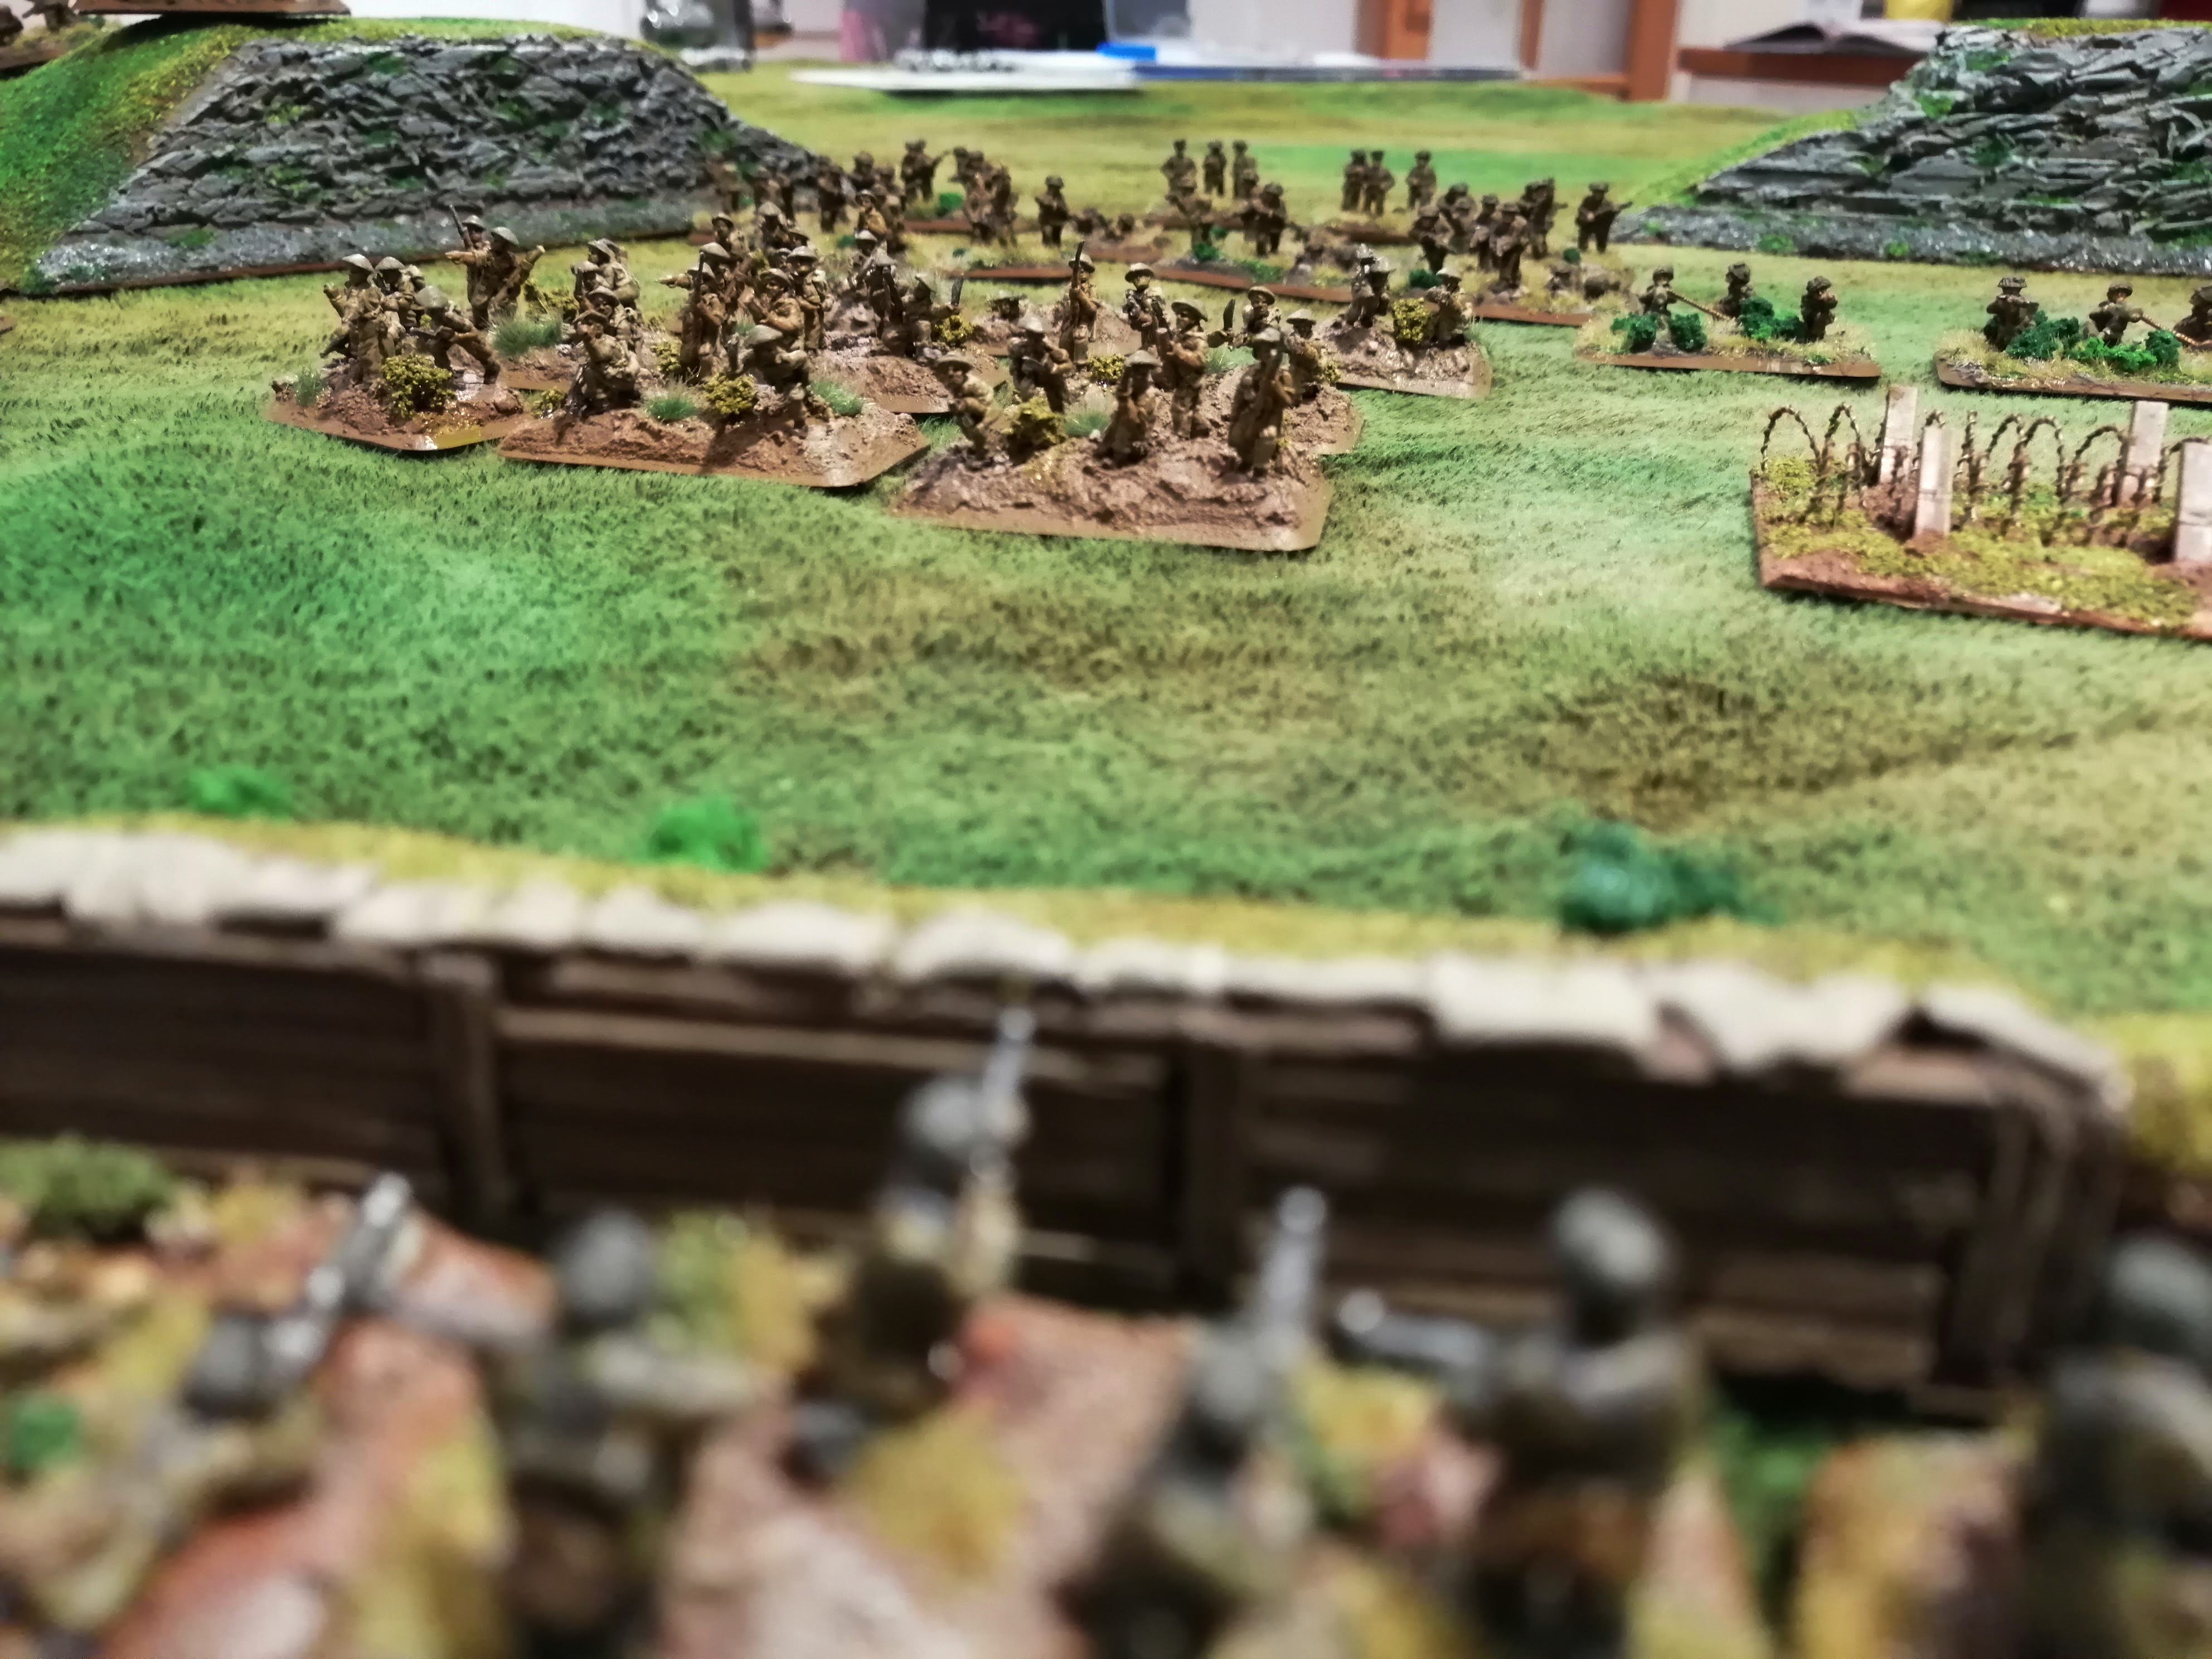
 The Fallschirmjager Company Command lead the charge into the Polish
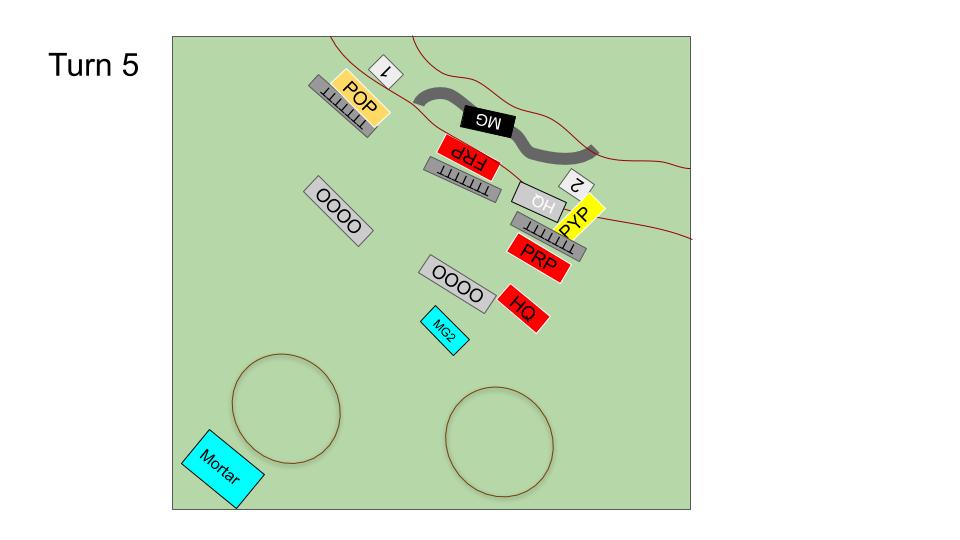
Wrap Up:
This was a fairly quick but brutal game. The number of assaults and counter assaults mirrored the actual battle and the defenders were able to last the 5 rounds to gain victory. Had they needed to hold on for another round, it could very well have been a different story.
The Fallschirmjager finally withdrew during the night of 17th May and whilst the Polish did finally take Monte Casino, it was a somewhat pyrrhic victory given the huge losses that they took in doing so. Meanwhile, in the valley below, the battle was still raging as the Allies gradually pushed north toward the Hitler Line.
The 4th and Final Assault on Monte Cassino (Turn 1 and 2)
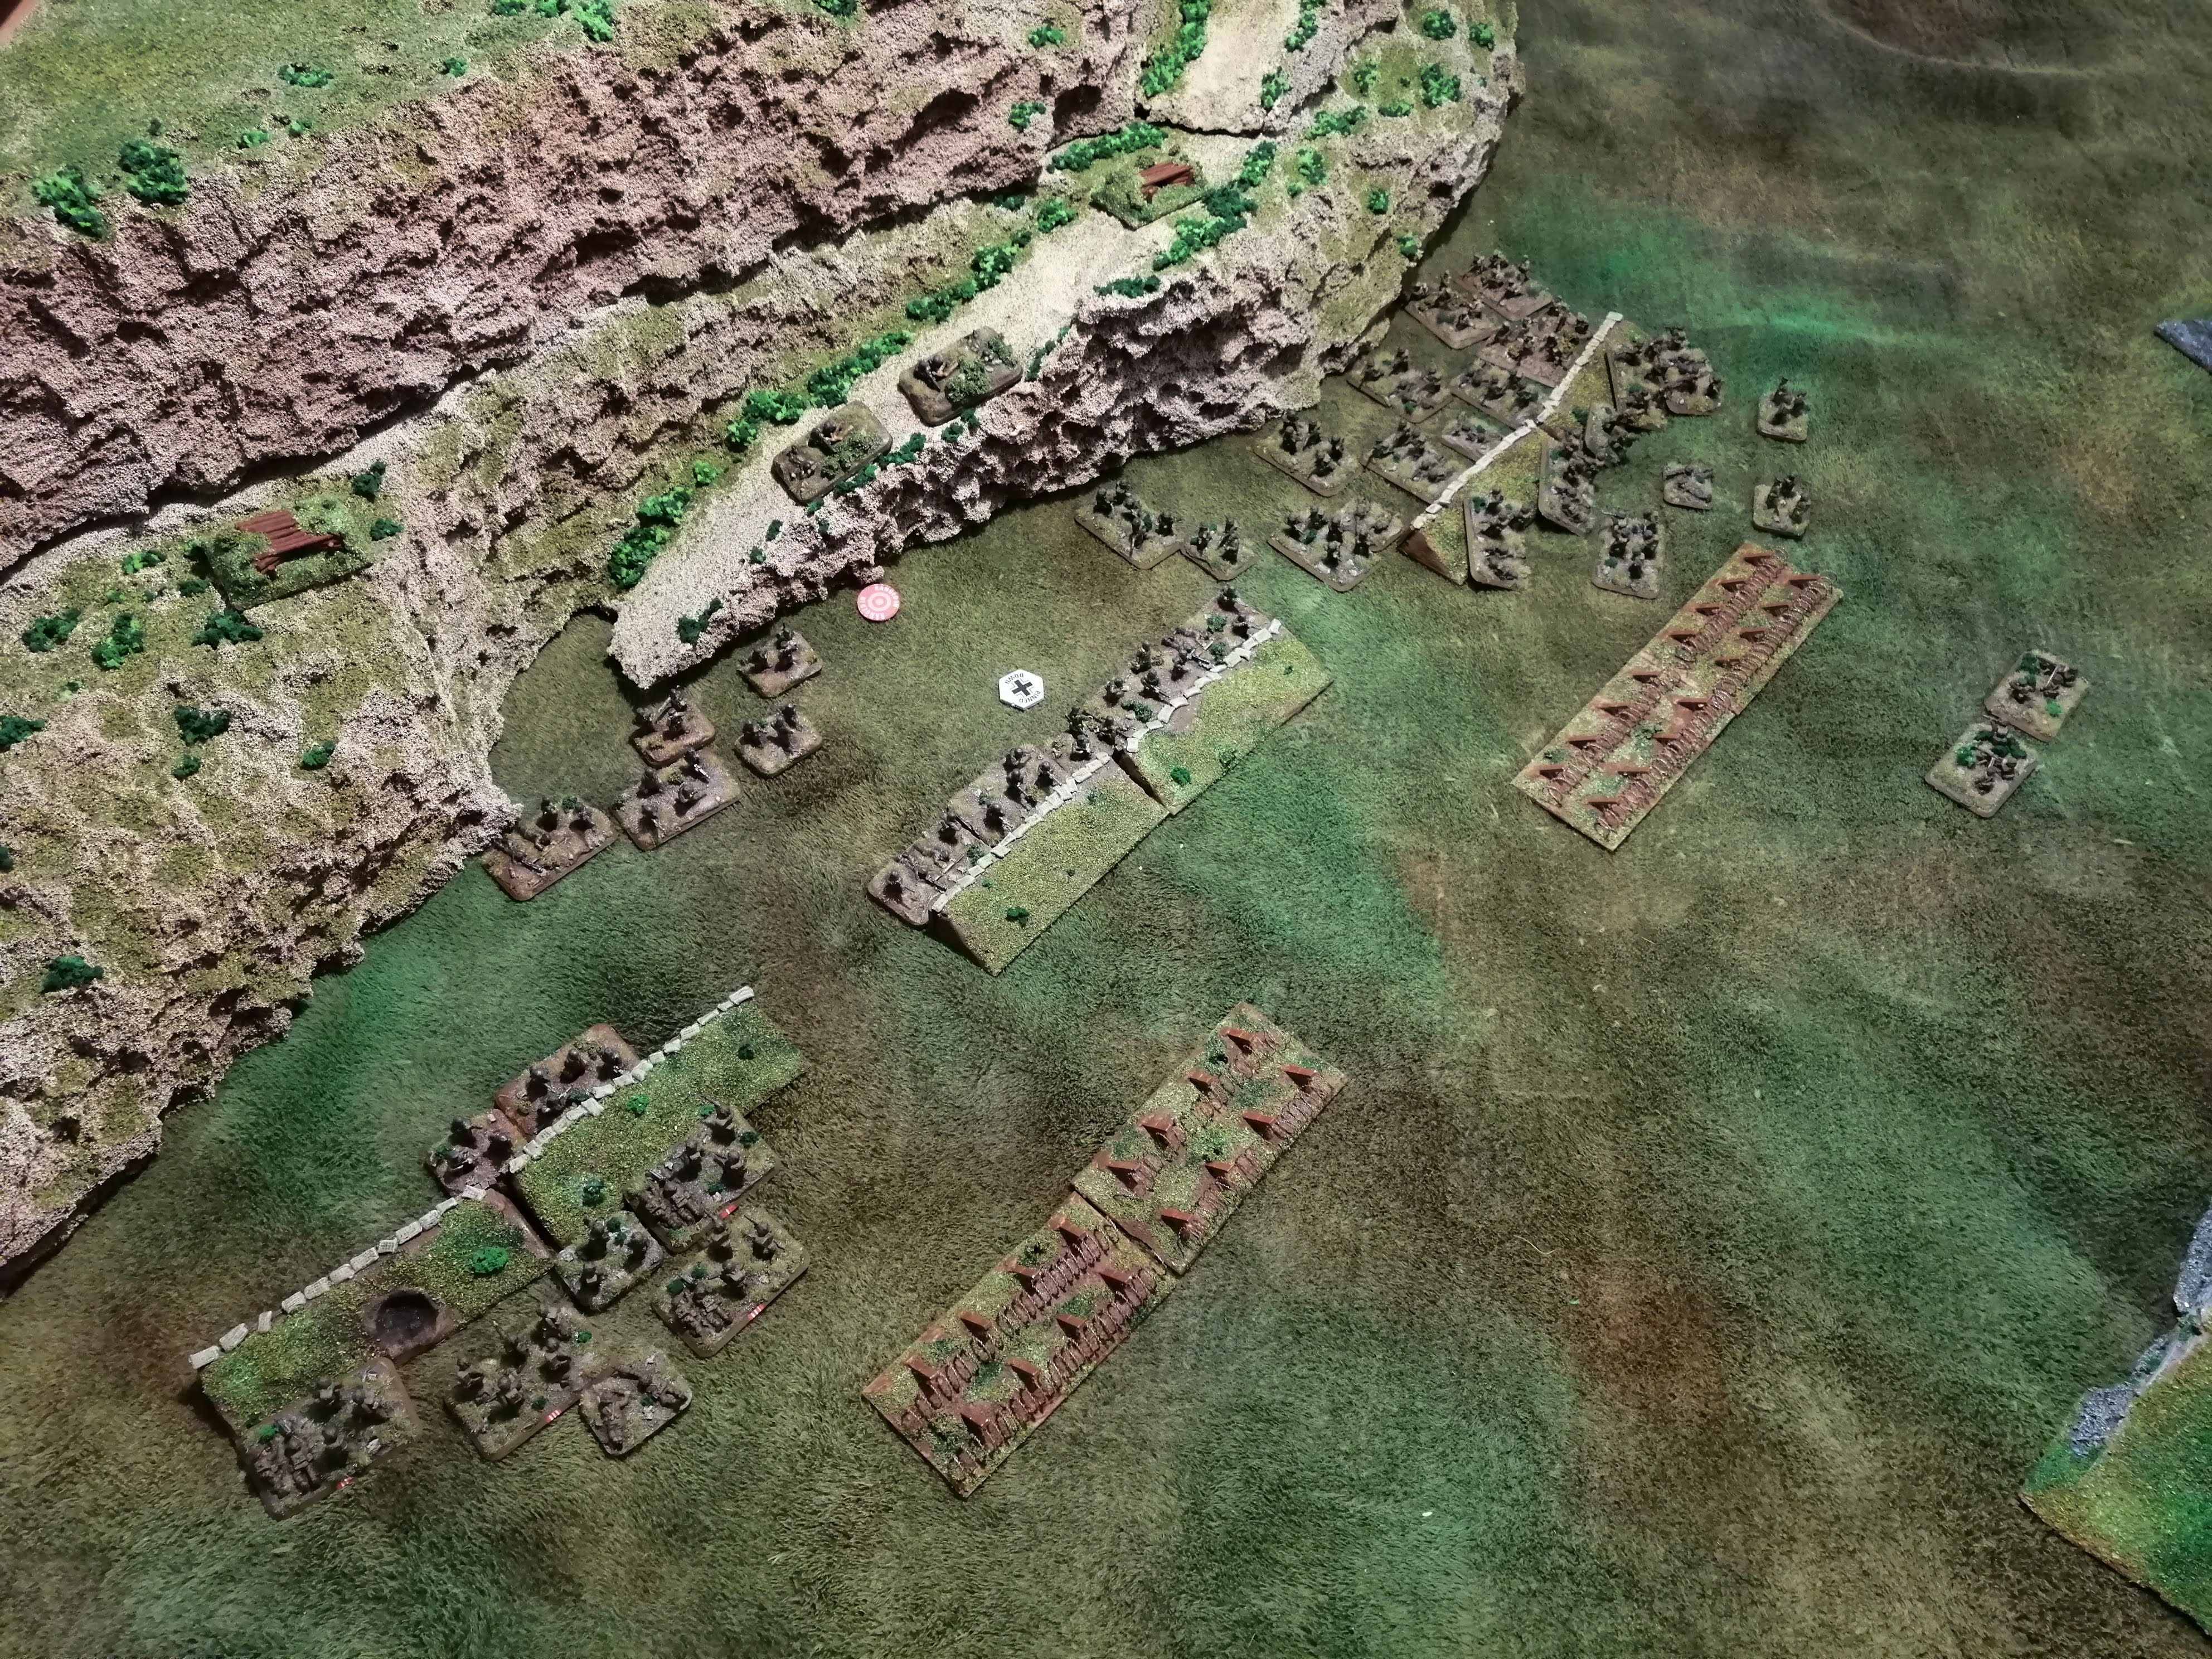
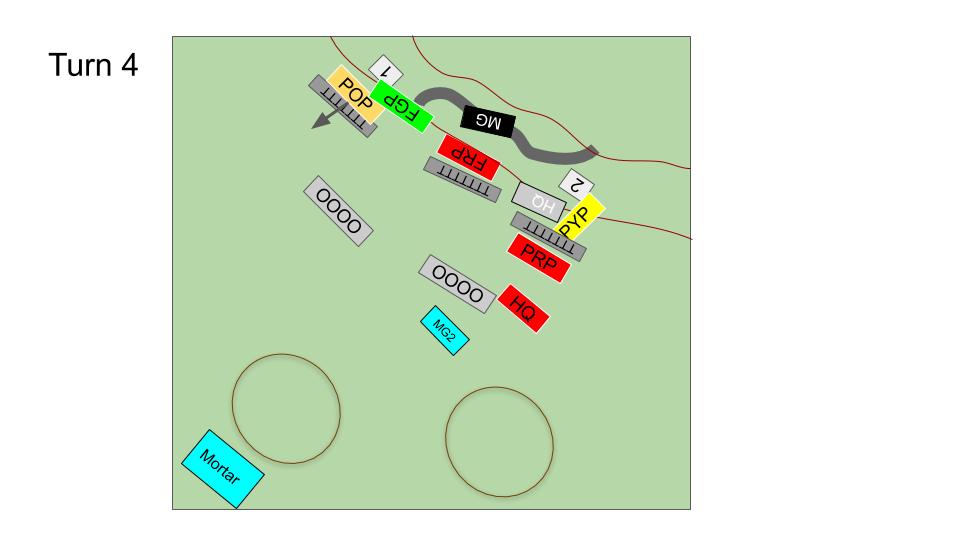
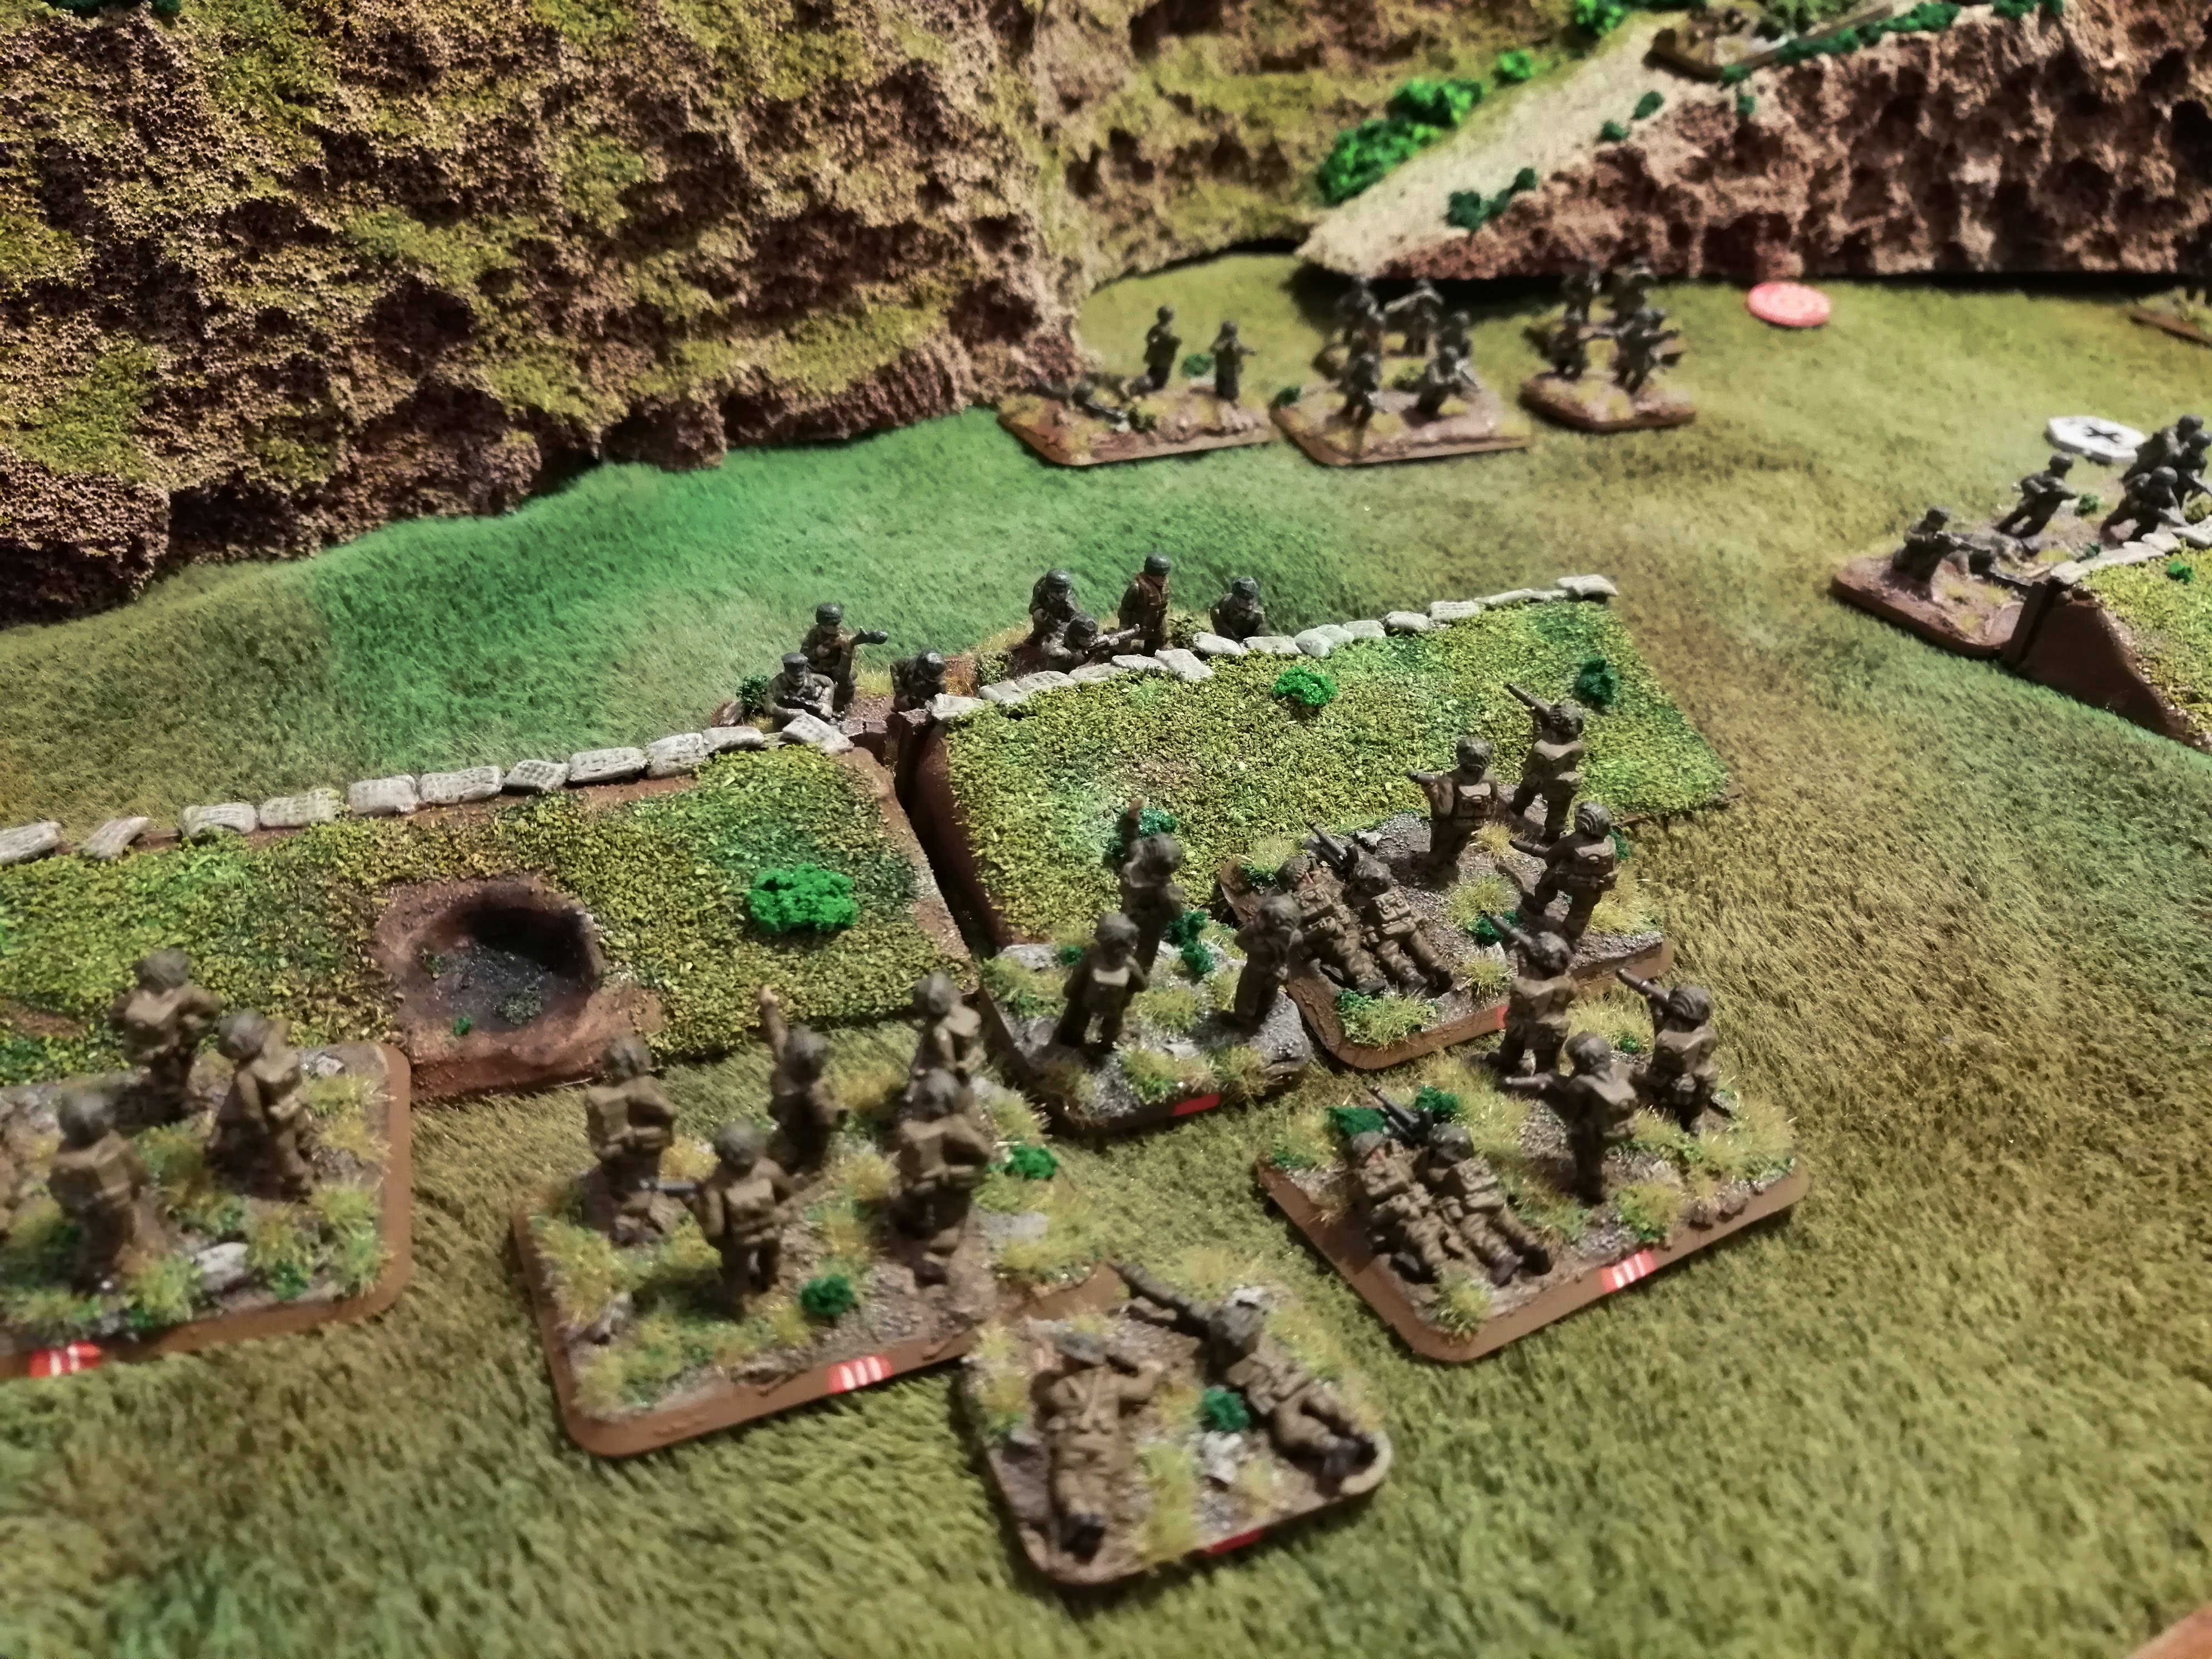
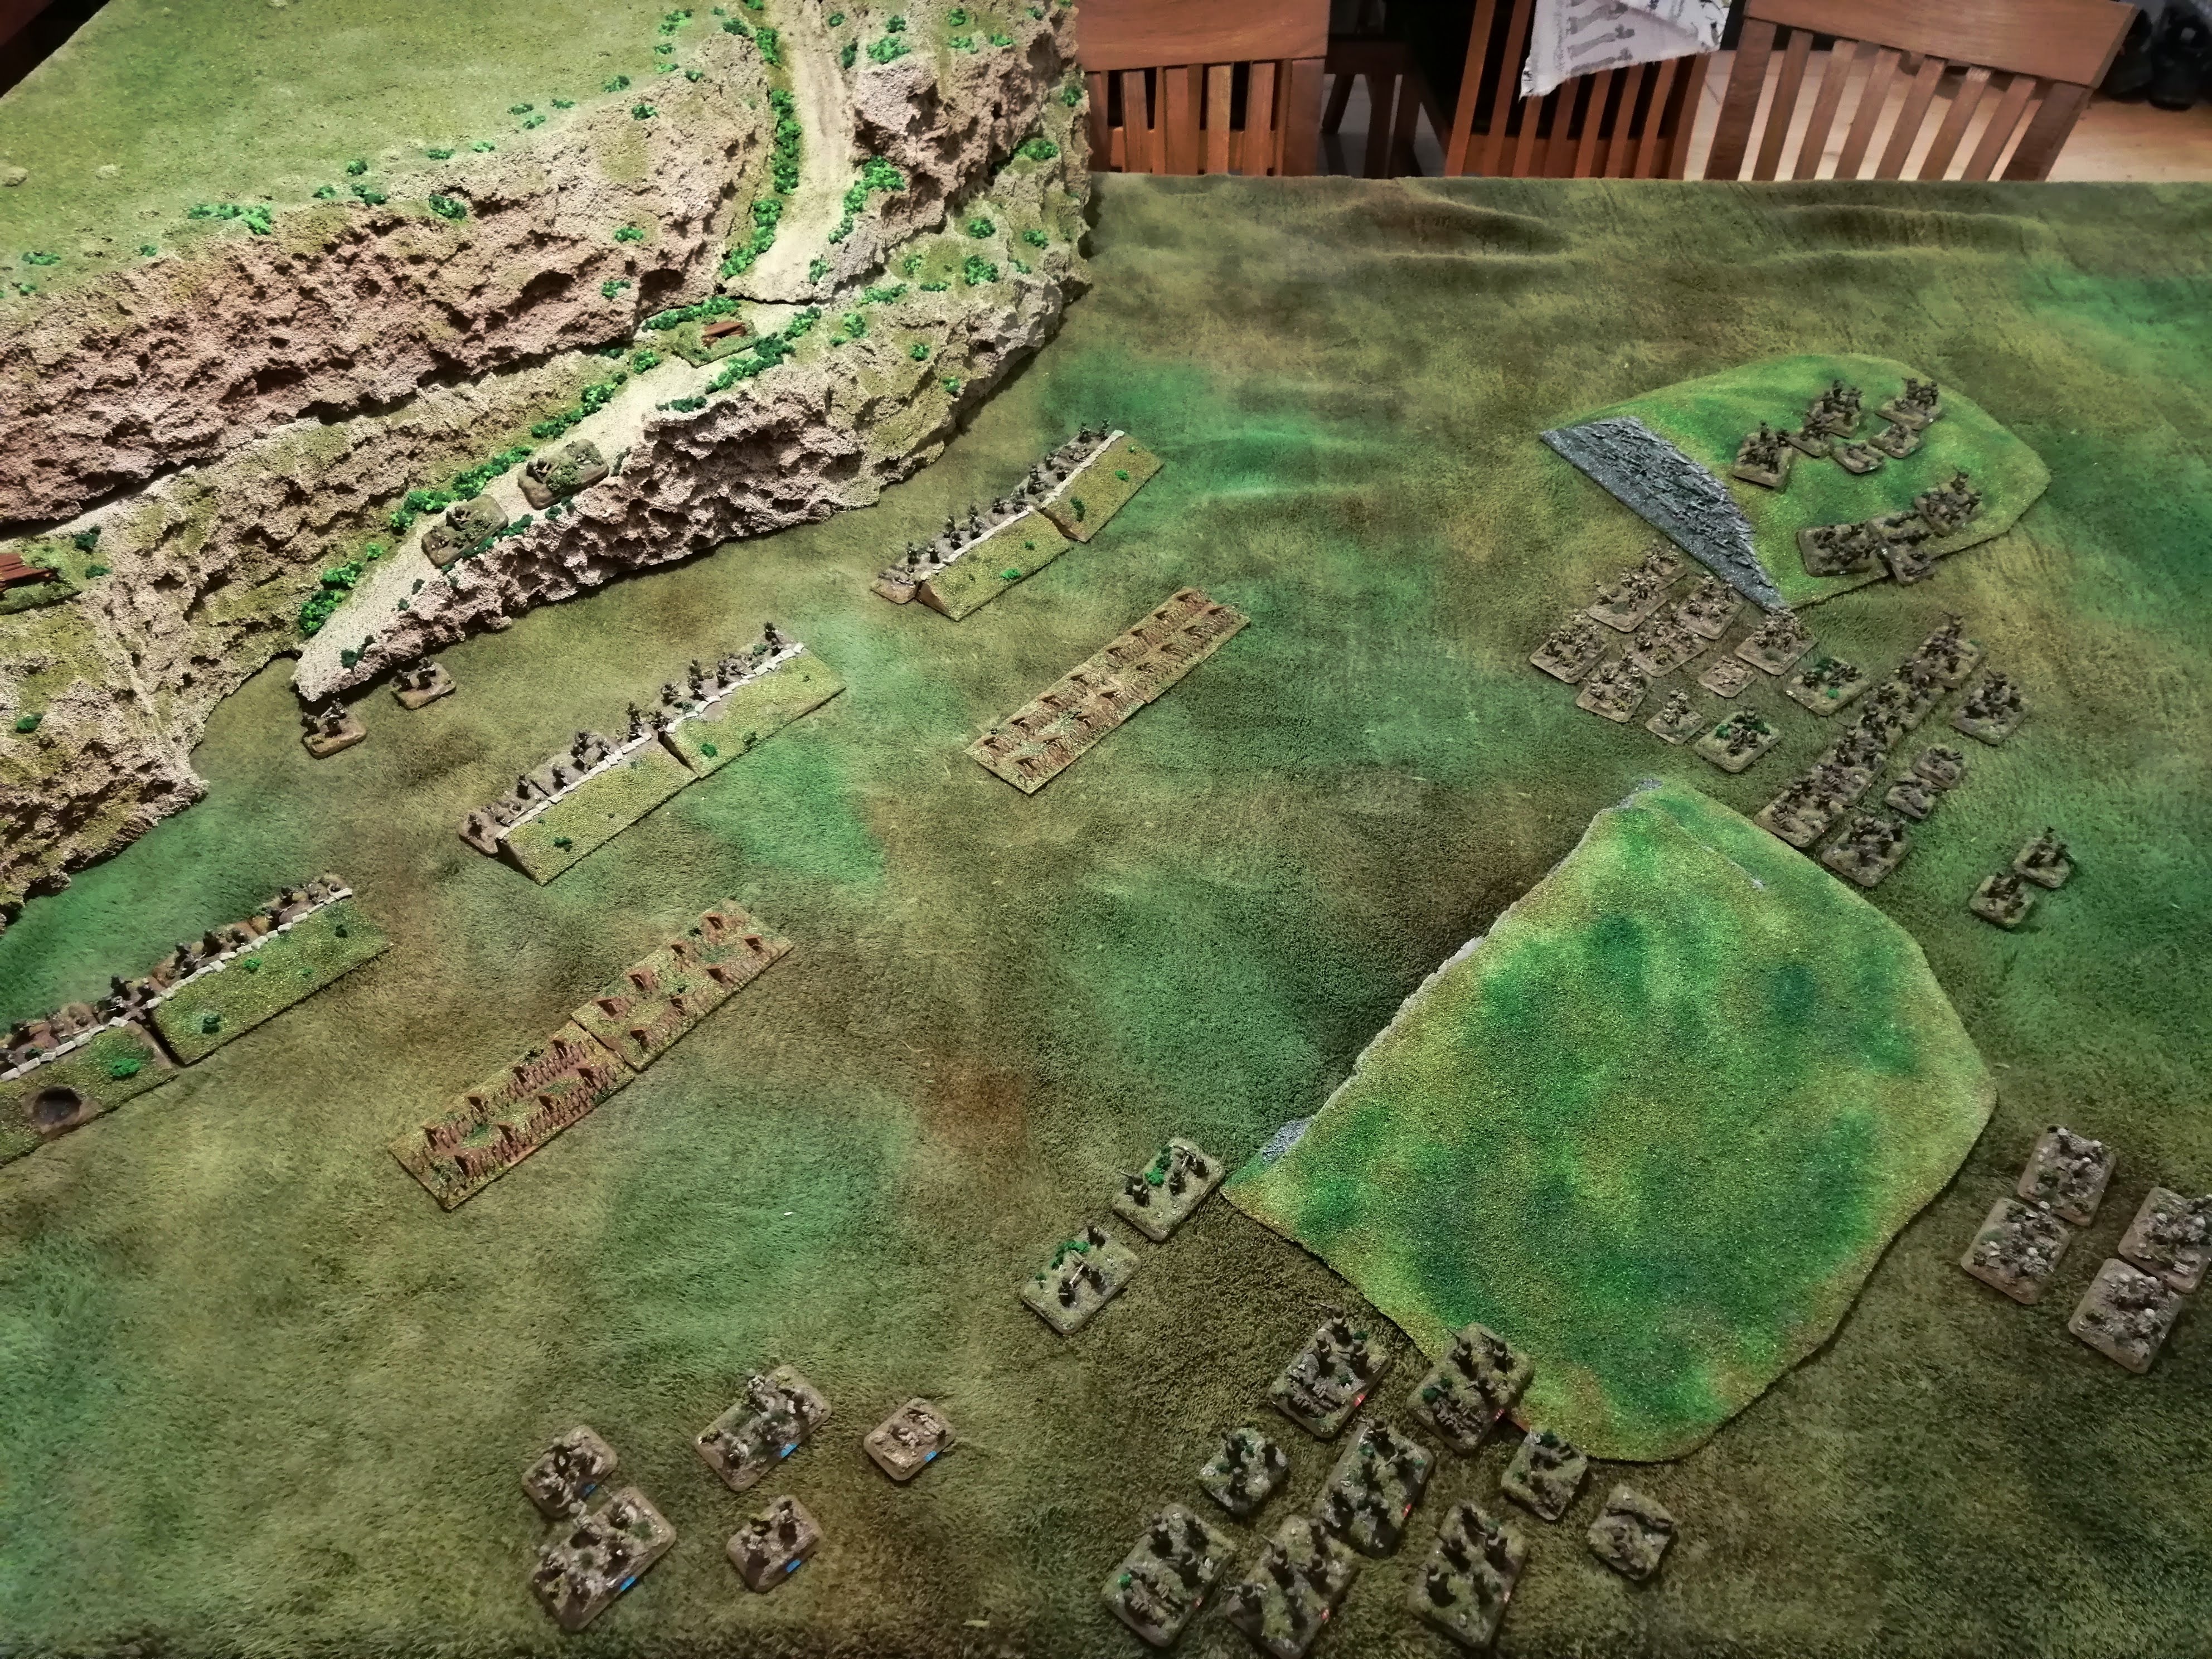
Before I start, I’ll include the tactical maps again. For reference, PBP = Polish Blue Platoon, PRP = Polish Red Platoon etc. FGP = Fallschirmjager Green Platoon.
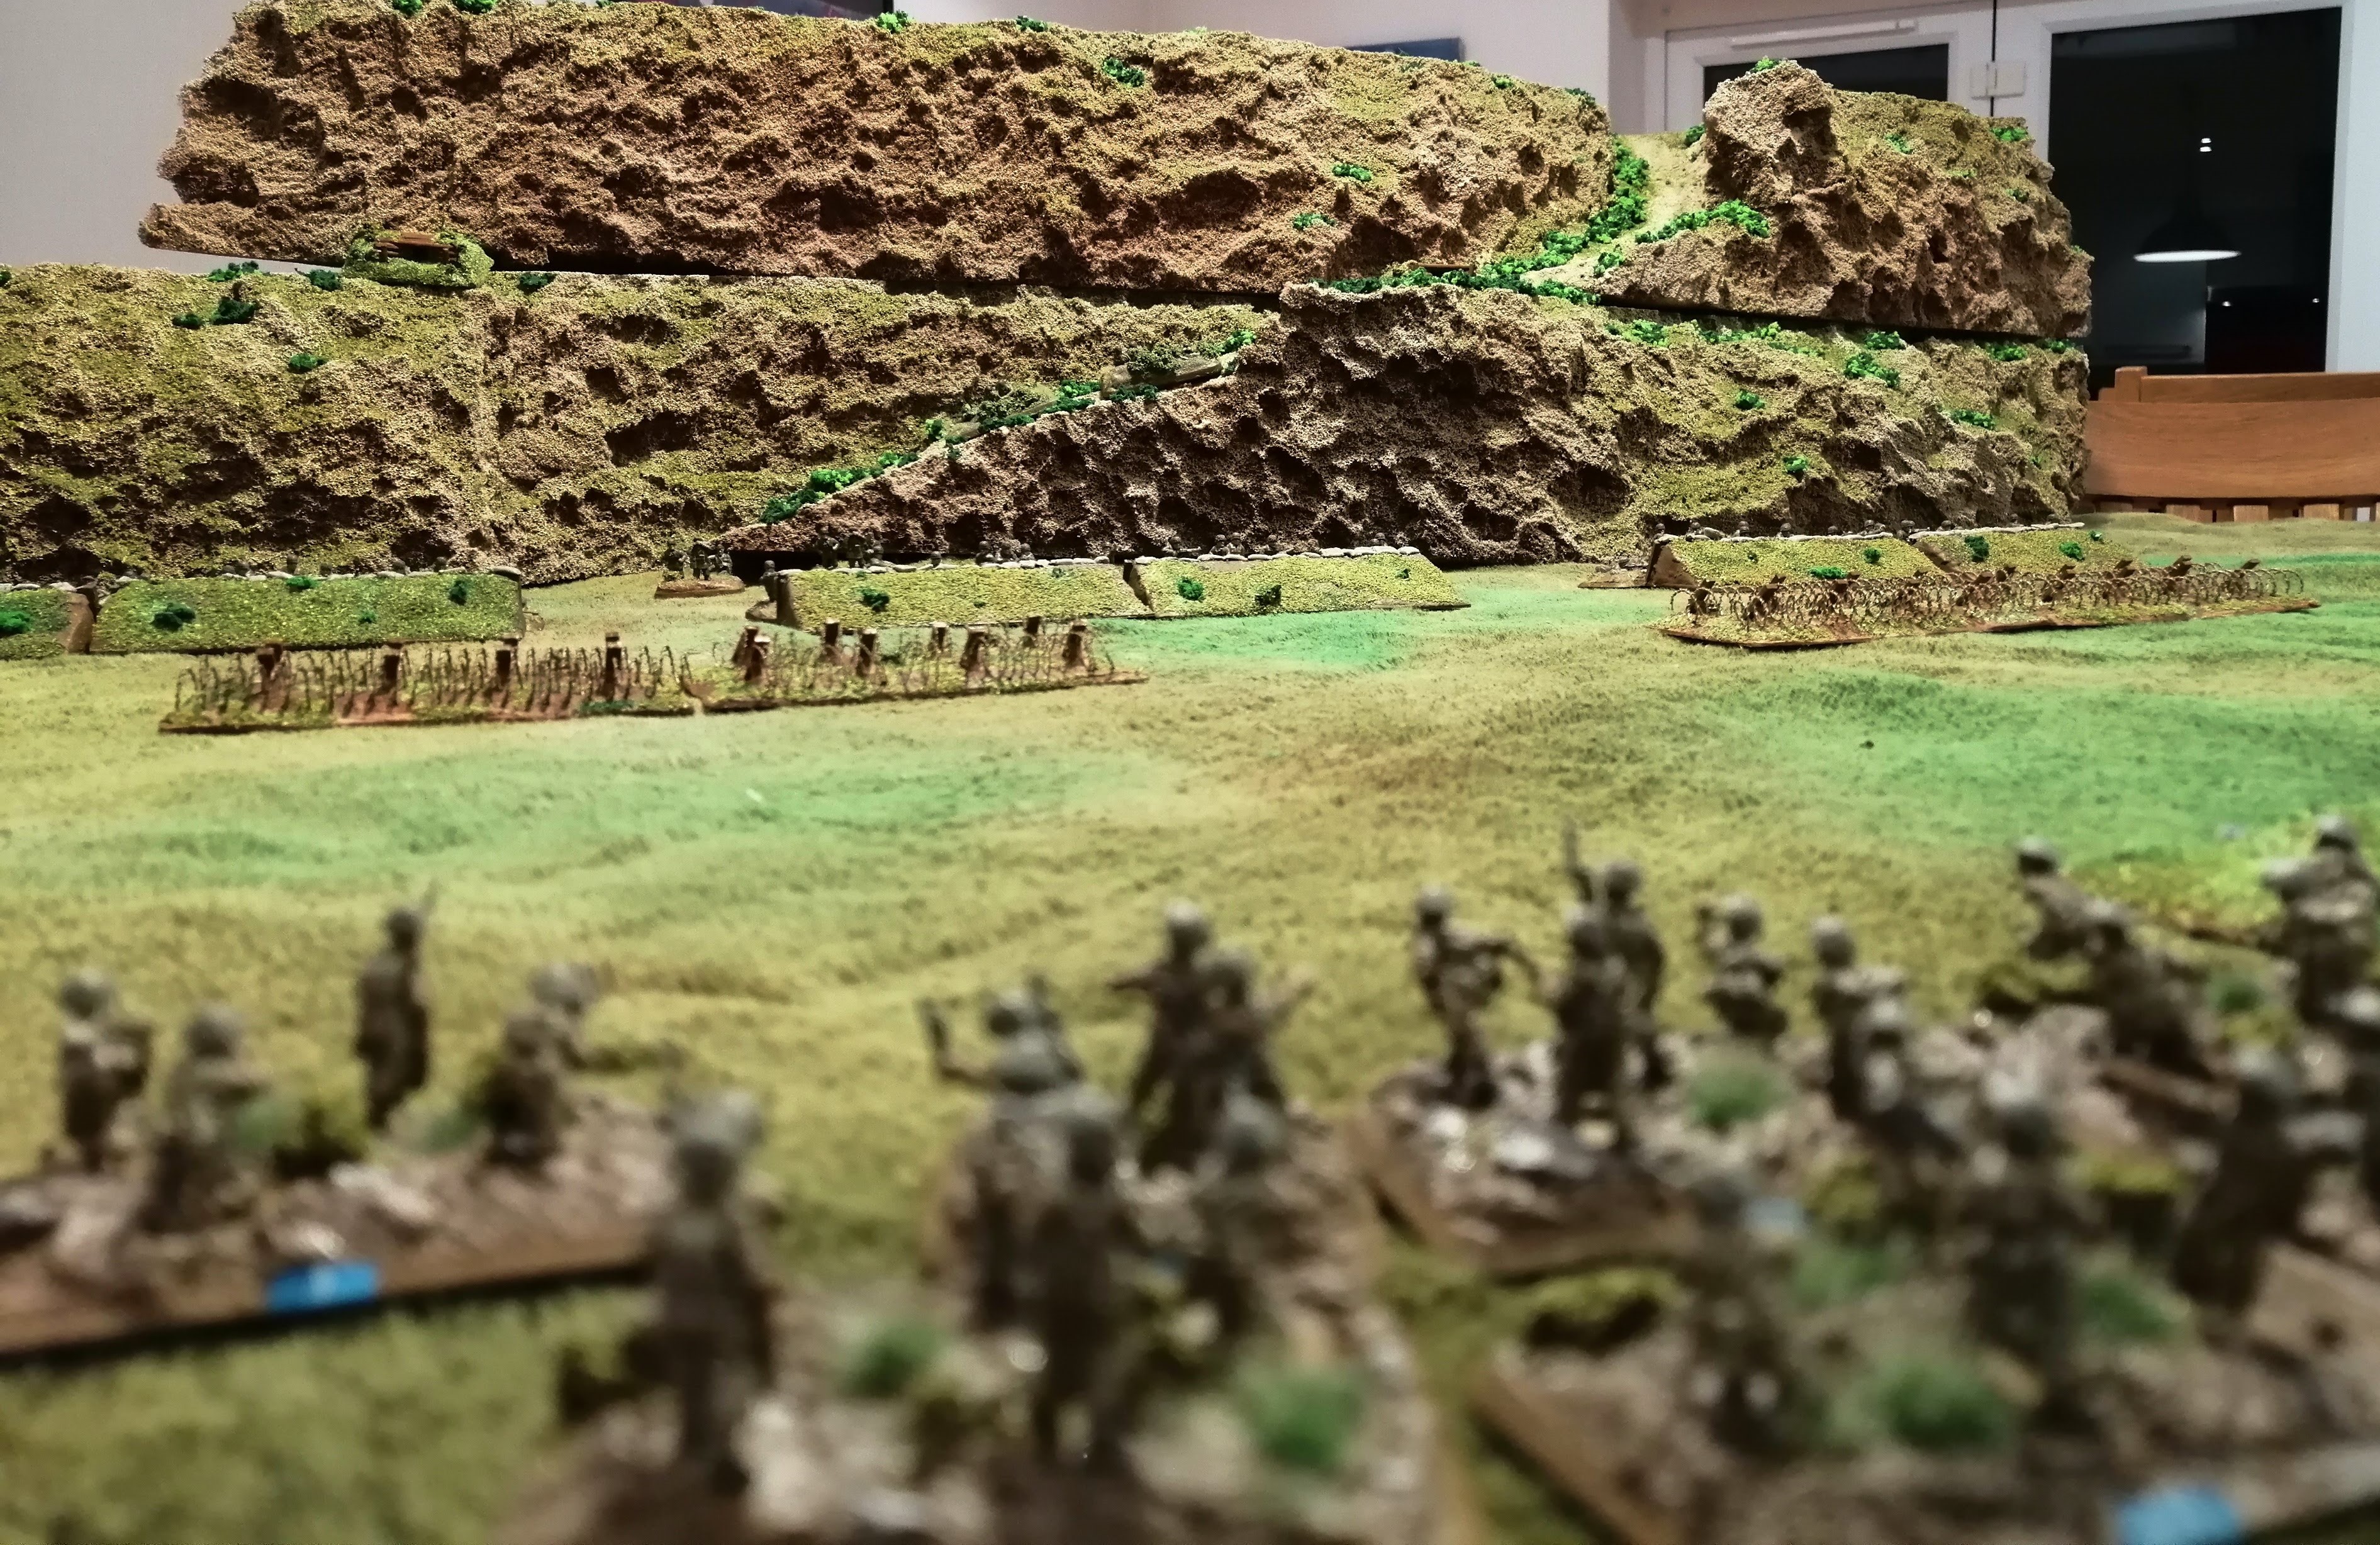 The view of the defensive position as the Polish begin their advance
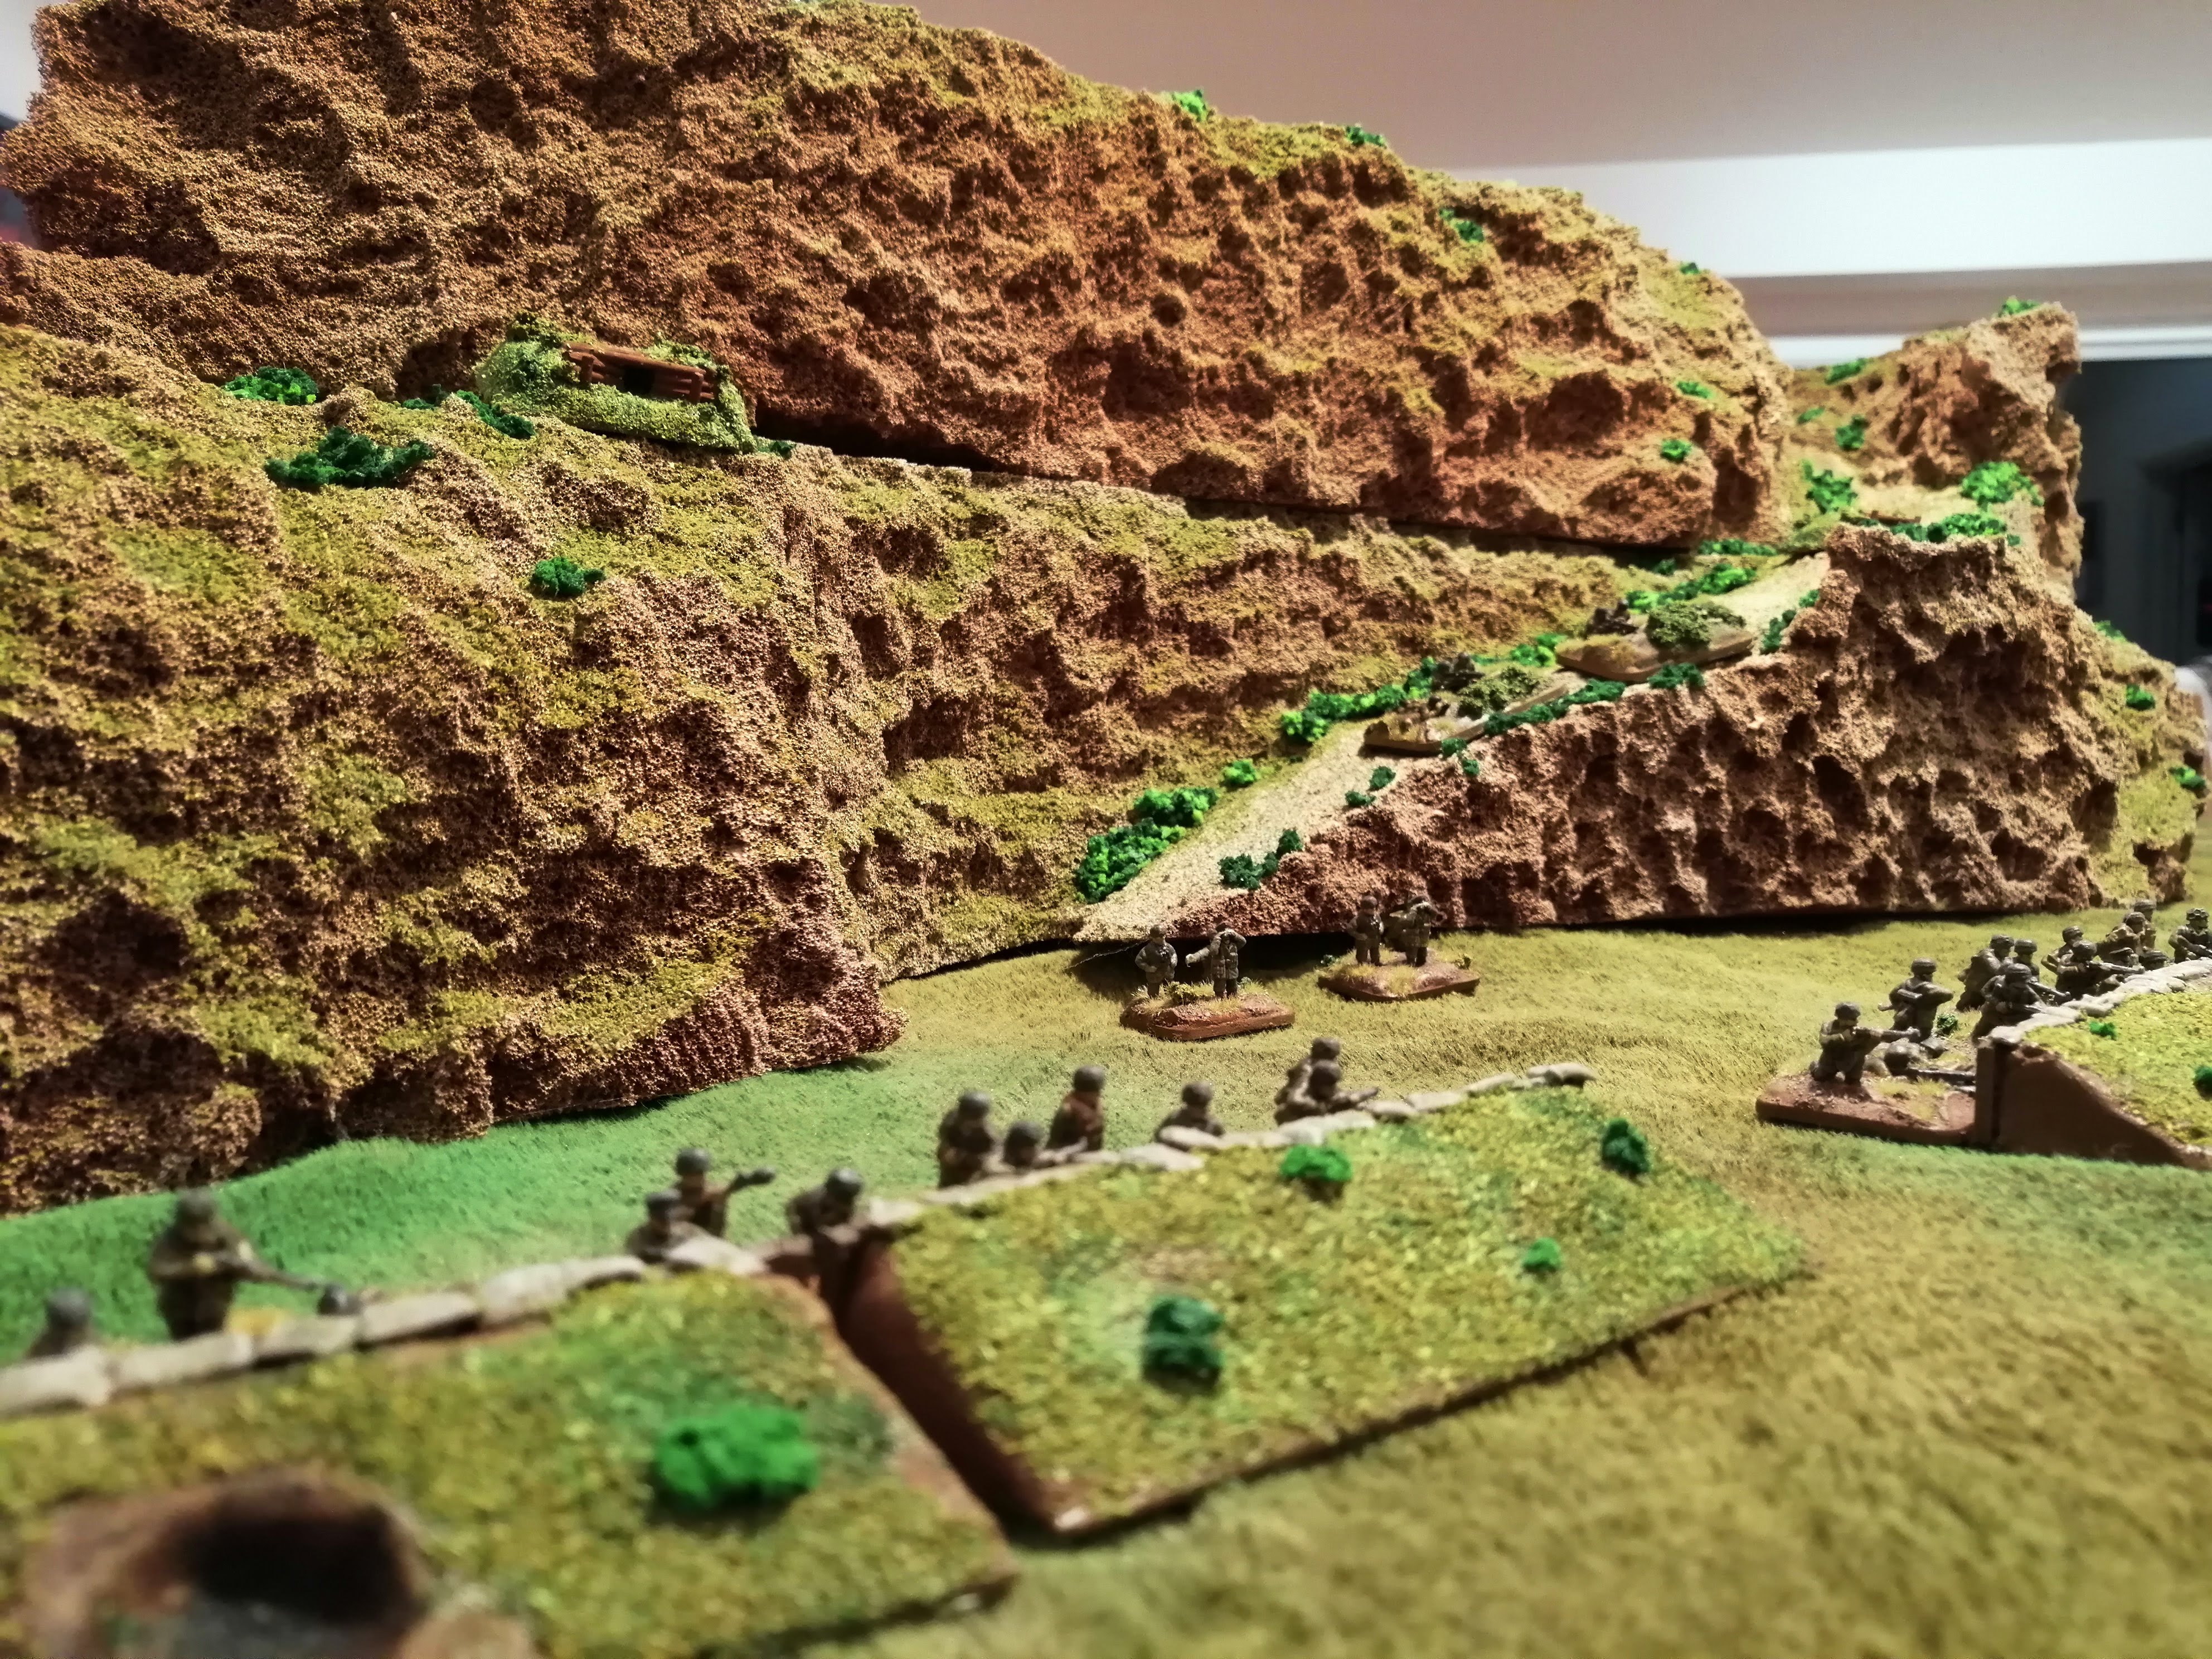 Some of the Fallschirmjager's defensive positions. Note the MG nest looming over the battlefield on the hill
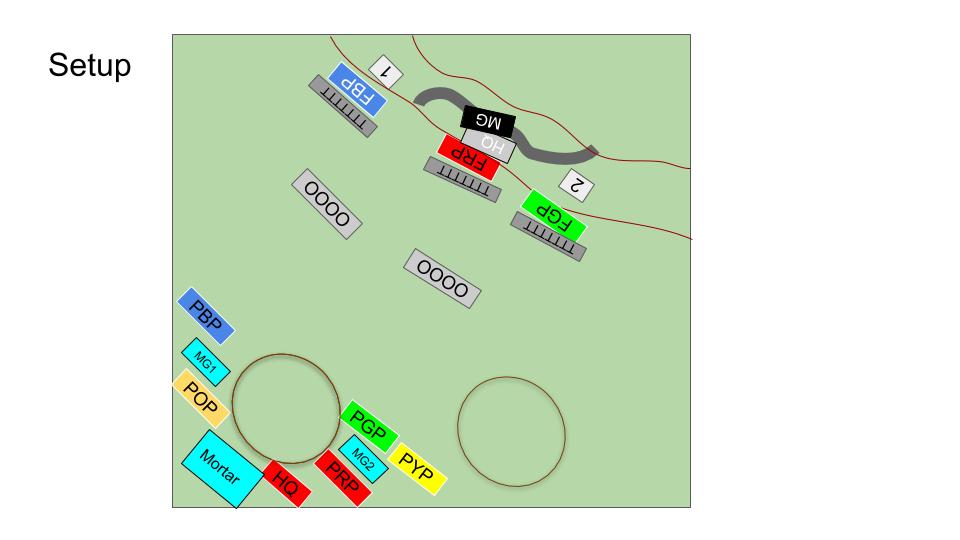

Turn 1 Polish:
The only way the Polish can win this is to get forward and do it quickly. They can only move at tactical speed due to the special rules around the terrain however every unit barring the mortar platoon moves as far forward as they can toward the German lines. The tactic is to attempt a two prong attack and try to overload the two end trenches.
After moving, the Polish try some hopeful shooting at the well dug in Fallschirmjager. It’s largely pointless as any hits that are on target just bounce off the rocks and trench line. However, just when the shooting seems to have drawn a blank, Polish Blue Platoon manages to land a punch and destroys one squad from the Fallschirmjager Blue Platoon. First blood to the Poles!
Turn 1 German:
The Fallschirmjager aren’t going to move but they are going to lay down a lot of fire, which is exactly what they do. Polish Blue Platoon on the Polish left flank takes a lot of incoming fire and loses 4 squads and finds itself pinned down. Meanwhile, Polish Green Platoon also takes hits, getting pinned and losing 1 squad. A fair amount of damage handed out in turn 1.

Turn 2 Polish:
All the pinned units are able to unpin and the entire company advances again. MG1 is able to use its full rate of fire this turn and does so to good effect, killing another squad from Fallschirmjager Blue Platoon and pinning them into position. Polish Blue Platoon also adds their fire and kills another squad from their opposing Blue Platoon.
Polish Yellow Platoon is also able to pick off a squad from F.Green Platoon whilst the remaining shooting from the other Polish rifle platoons and mortar team manage to pin the remaining Fallschirmjager in place. Compared to the previous assaults on this table, the Polish numbers are already causing problems for the defenders.
Turn 2 German:
Blue and Red platoon are able to unpin but Green remains with their heads down, seriously impacting their rate of fire.
Polish Blue Platoon takes some serious incoming fire this turn from the German trenches and is wiped out to a man. The Fallschirmjager heavy MG teams turn their fire on their Polish counterparts and Polish MG1 is destroyed. The Polish left flank is suddenly just the Orange Platoon, still with some distance to cover to reach the German trenches.
The Polish on the right flank fare better and Fallschirmjager Green Platoon is only able to remove 1 squad from Polish Green Platoon. The rest of the Polish right flank survive unscathed.
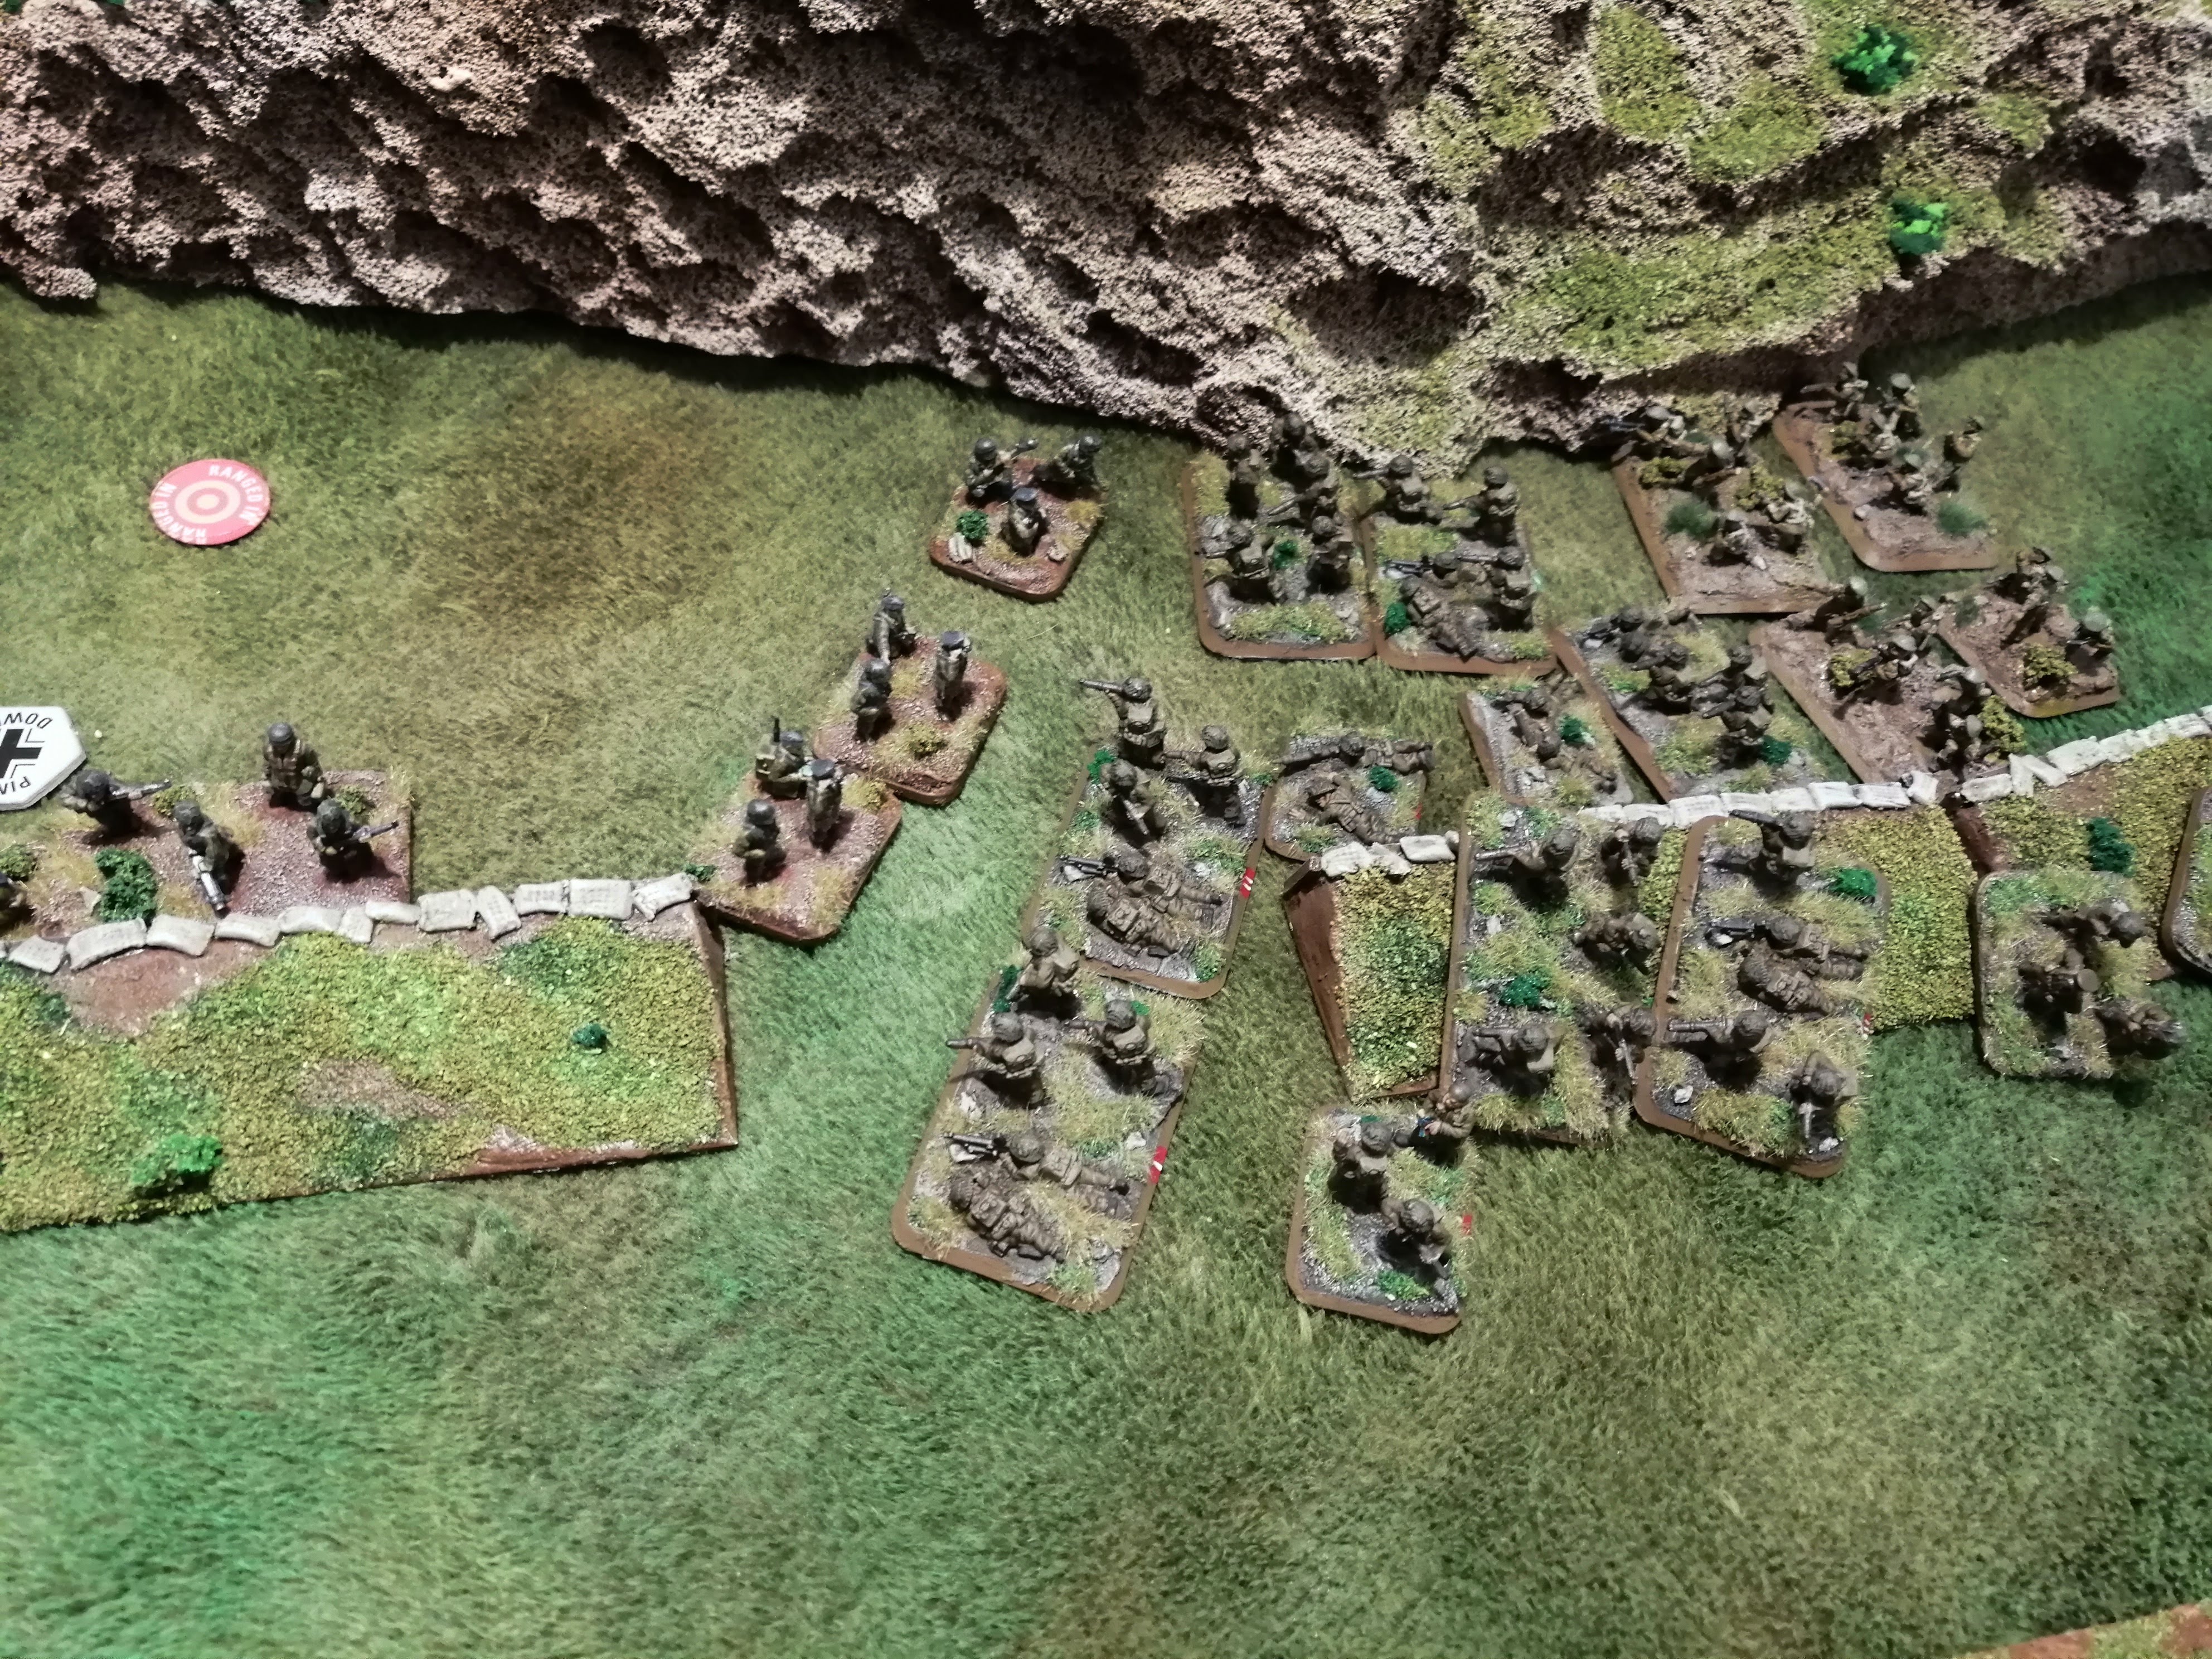
 Tactical Map at the end of Turn 2
The 4th and Final Assault on Monte Cassino
This is actually the 76th Anniversary of the fall of Monte Cassino. I had hoped to run this project keeping pace with the time line of 75 years ago, but real life happened. So, one year later than planned, I’ve finally gotten around to it.
In the previous battle, I looked at the 1st Canadian Armoured Brigade as they successfully crossed the Garigliano river to the West of the town of Cassino to support the infantry that made the crossing during the night. Getting armour onto the Northern side of the river had not been achieved in the previous attempts and despite fierce resistance, the British XIII Corps were able to inch their way up the Liri valley and began to threaten to surround Monte Cassino and cut off the defenders line of retreat.
On the XIII Corp’s left flank, the US fifth army were also making progress up the West coast of Italy. Most notably, the North African troops in the French Expeditionary Corps had progressed quickly through the Aurunci mountains and were able to begin fanning out. On 12th May, the FEC were able to begin to start putting pressure on the German defenders in the Liri valley. This caused the German line to begin to get squeezed between the FEC on the West and the British XIII Corps to the South.
Above the town of Cassino, the Polish II Corps had been tasked with taking the monastery. They followed the same route that the three previous and unsuccessful attempts had taken and once again met the defending Fallschirmjager. The fighting was brutal and bloody as the Poles fought to take Point 593, a key defensive position along Snakeshead Pass. Several times they succeeded in pushing the Fallschirmjager from their defensive positions, only for the Fallschirmjager to counter attack and regain what they had lost. After three days of fighting, the Poles pulled back slightly to recover before trying again. They had lost nearly 3800 men in the three days of fighting.
As the fighting atop Monte Cassino subsided on the 15th May, in the valley, 78th Infantry Division of the XIII Corps was pushed forward from reserve and began to advance around the back of Cassino, threatening to surround the town itself. The rest of XIII Corps were slowly progressing up the Liri valley.
On the 17th May, the Polish II Corps launched their final assault. Once again they threw themselves at the defending Fallschirmjager. As night fell, with the threat of being surrounded now almost a certainty, the Fallschirmjager were ordered to withdraw and fall back to new defensive positions on the Hitler Line. In the early hours of 18th May, British troops from 78th Division met up with the Polish II Corps on the far side of Monte Cassino. As the sun rose, Polish troops covered the last few metres to the monastery to find around 30 Fallschirmjager who were too wounded to move. They duly raised the Polish flag above Monte Cassino and finally completed the task the Allies started some four months before.
In this battle, I will look at the final few hours as the Polish assault the defending Fallschirmjager. This battlefield has been used before, but here’s the layout, with the Polish deploying at the lower right corner needing to push to the top left and take the top of the hill.
The forces are as follows
Fallschirmjager:
HQ of 2 stands armed with SMGs
3 Fallschirmjager platoons of 6 stands plus a Cmd stand
2 MG stands
2 MG Nests up in the hill overlooking the board
All of the Fallschirmjager are in trenches and therefore dug in and concealed. There are two barbed wire obstacles deployed in front of the trenches.
Polish II Corps:
HQ of 2 stands
5 Platoons of Cmd Sqd, 6 Rifle/MG squads, 2″ Mortar squad and PIAT Squad
2 Platoons of 2 MG teams
Mortar Platoon of 4 teams
Game Rules:
– The Poles are rated Fearless for this encounter. They have been waiting to be allowed a chance to show their spirit and extract revenge for the loss of their homeland on the Germans and this is their first chance
– Due to the poor terrain and the fact that it is exposed to enemy fire, no team can move at the double
Victory Conditions:
The Fallschirmjager are hopelessly outnumbered but have been ordered to withdraw. They must hold the line until the end of the 5th turn. If the Polish have reached the path at the base of the hill on or before the 5th turn, the Poles win.
Operation Diadem (Battle 1 - Turns 7 and 8)
Turn 7 Allies:
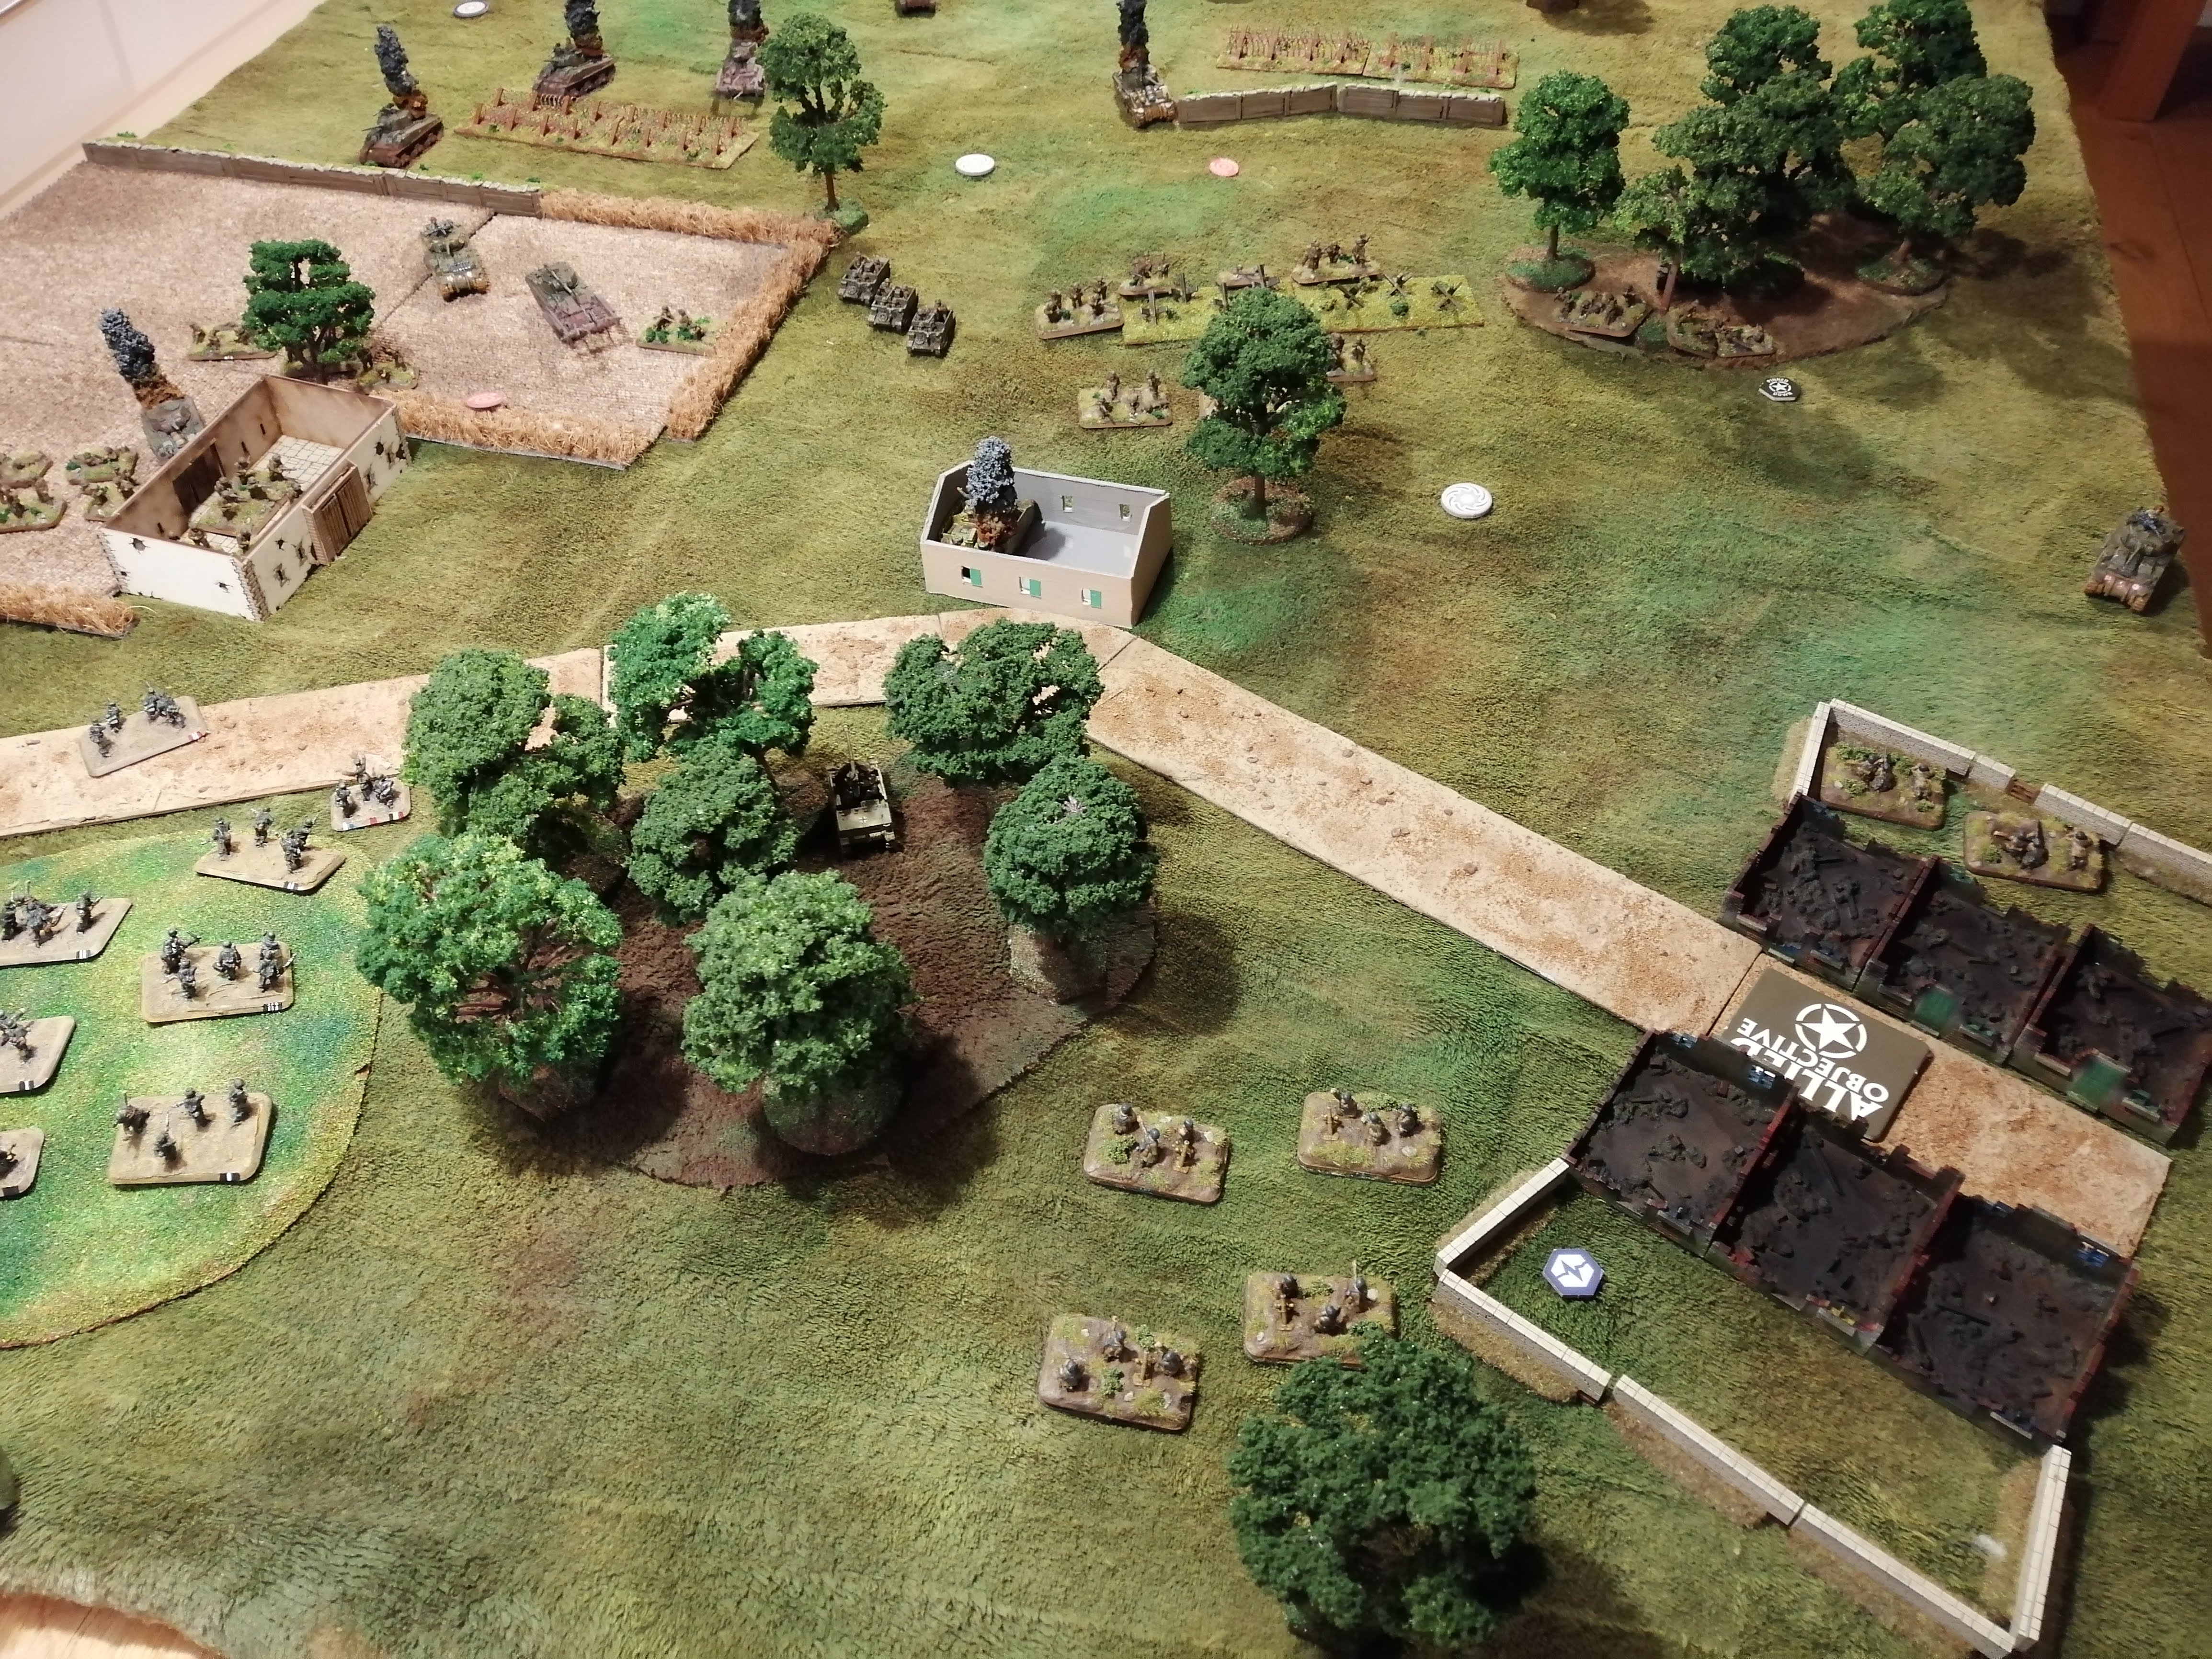
Green Platoon unpin however Red don’t and remain stuck on the edge of the tree line. Orange Platoon advance into the barn and the Engineer’s move up behind the barn in support.
The Sherman Crabs advance across the field with the MG team and the Universal Carriers move up the centre. Green Platoon advances toward the ruined farm house.
Tank Platoon 3 look to move out of the trees and the command tank manges to advance up the side however the second tank gets bogged down, unable to move.
The Universal Carriers open up with their .50 Cal guns and this proves too much for the paper thin armour of the Marder, with the shells ripping through and hitting the ammunition. Orange Platoon is able to remove the last teams from Grenadier 1, destroying the platoon.
At the end of the Allied penultimate turn, reaching the objective is looking increasingly challenging and unlikely.
Turn 7 German:
The last deployment is revealed and this is the final STuG hiding in the ruined buildings next to the objective. This is going to make the Allied victory condition even harder to obtain, with both the MG team and a STuG holding the position.
The newly discovered STuG fires upon the Command Tank from Tank Platoon 3 but fails to score a hit – we can only assume that the Sherman was going to fast up the flank for the STuG crew to get a good shot at!
The Mortar team fires on Green Platoon again but fails to cause any hits at all. The same for the MG teams who are not able to score hits against Red Platoon.
Grenadier 2 remain in position but out of range of the Engineers and Orange Platoon this turn.
 State of play at the end of Turn 7 from the German perspective
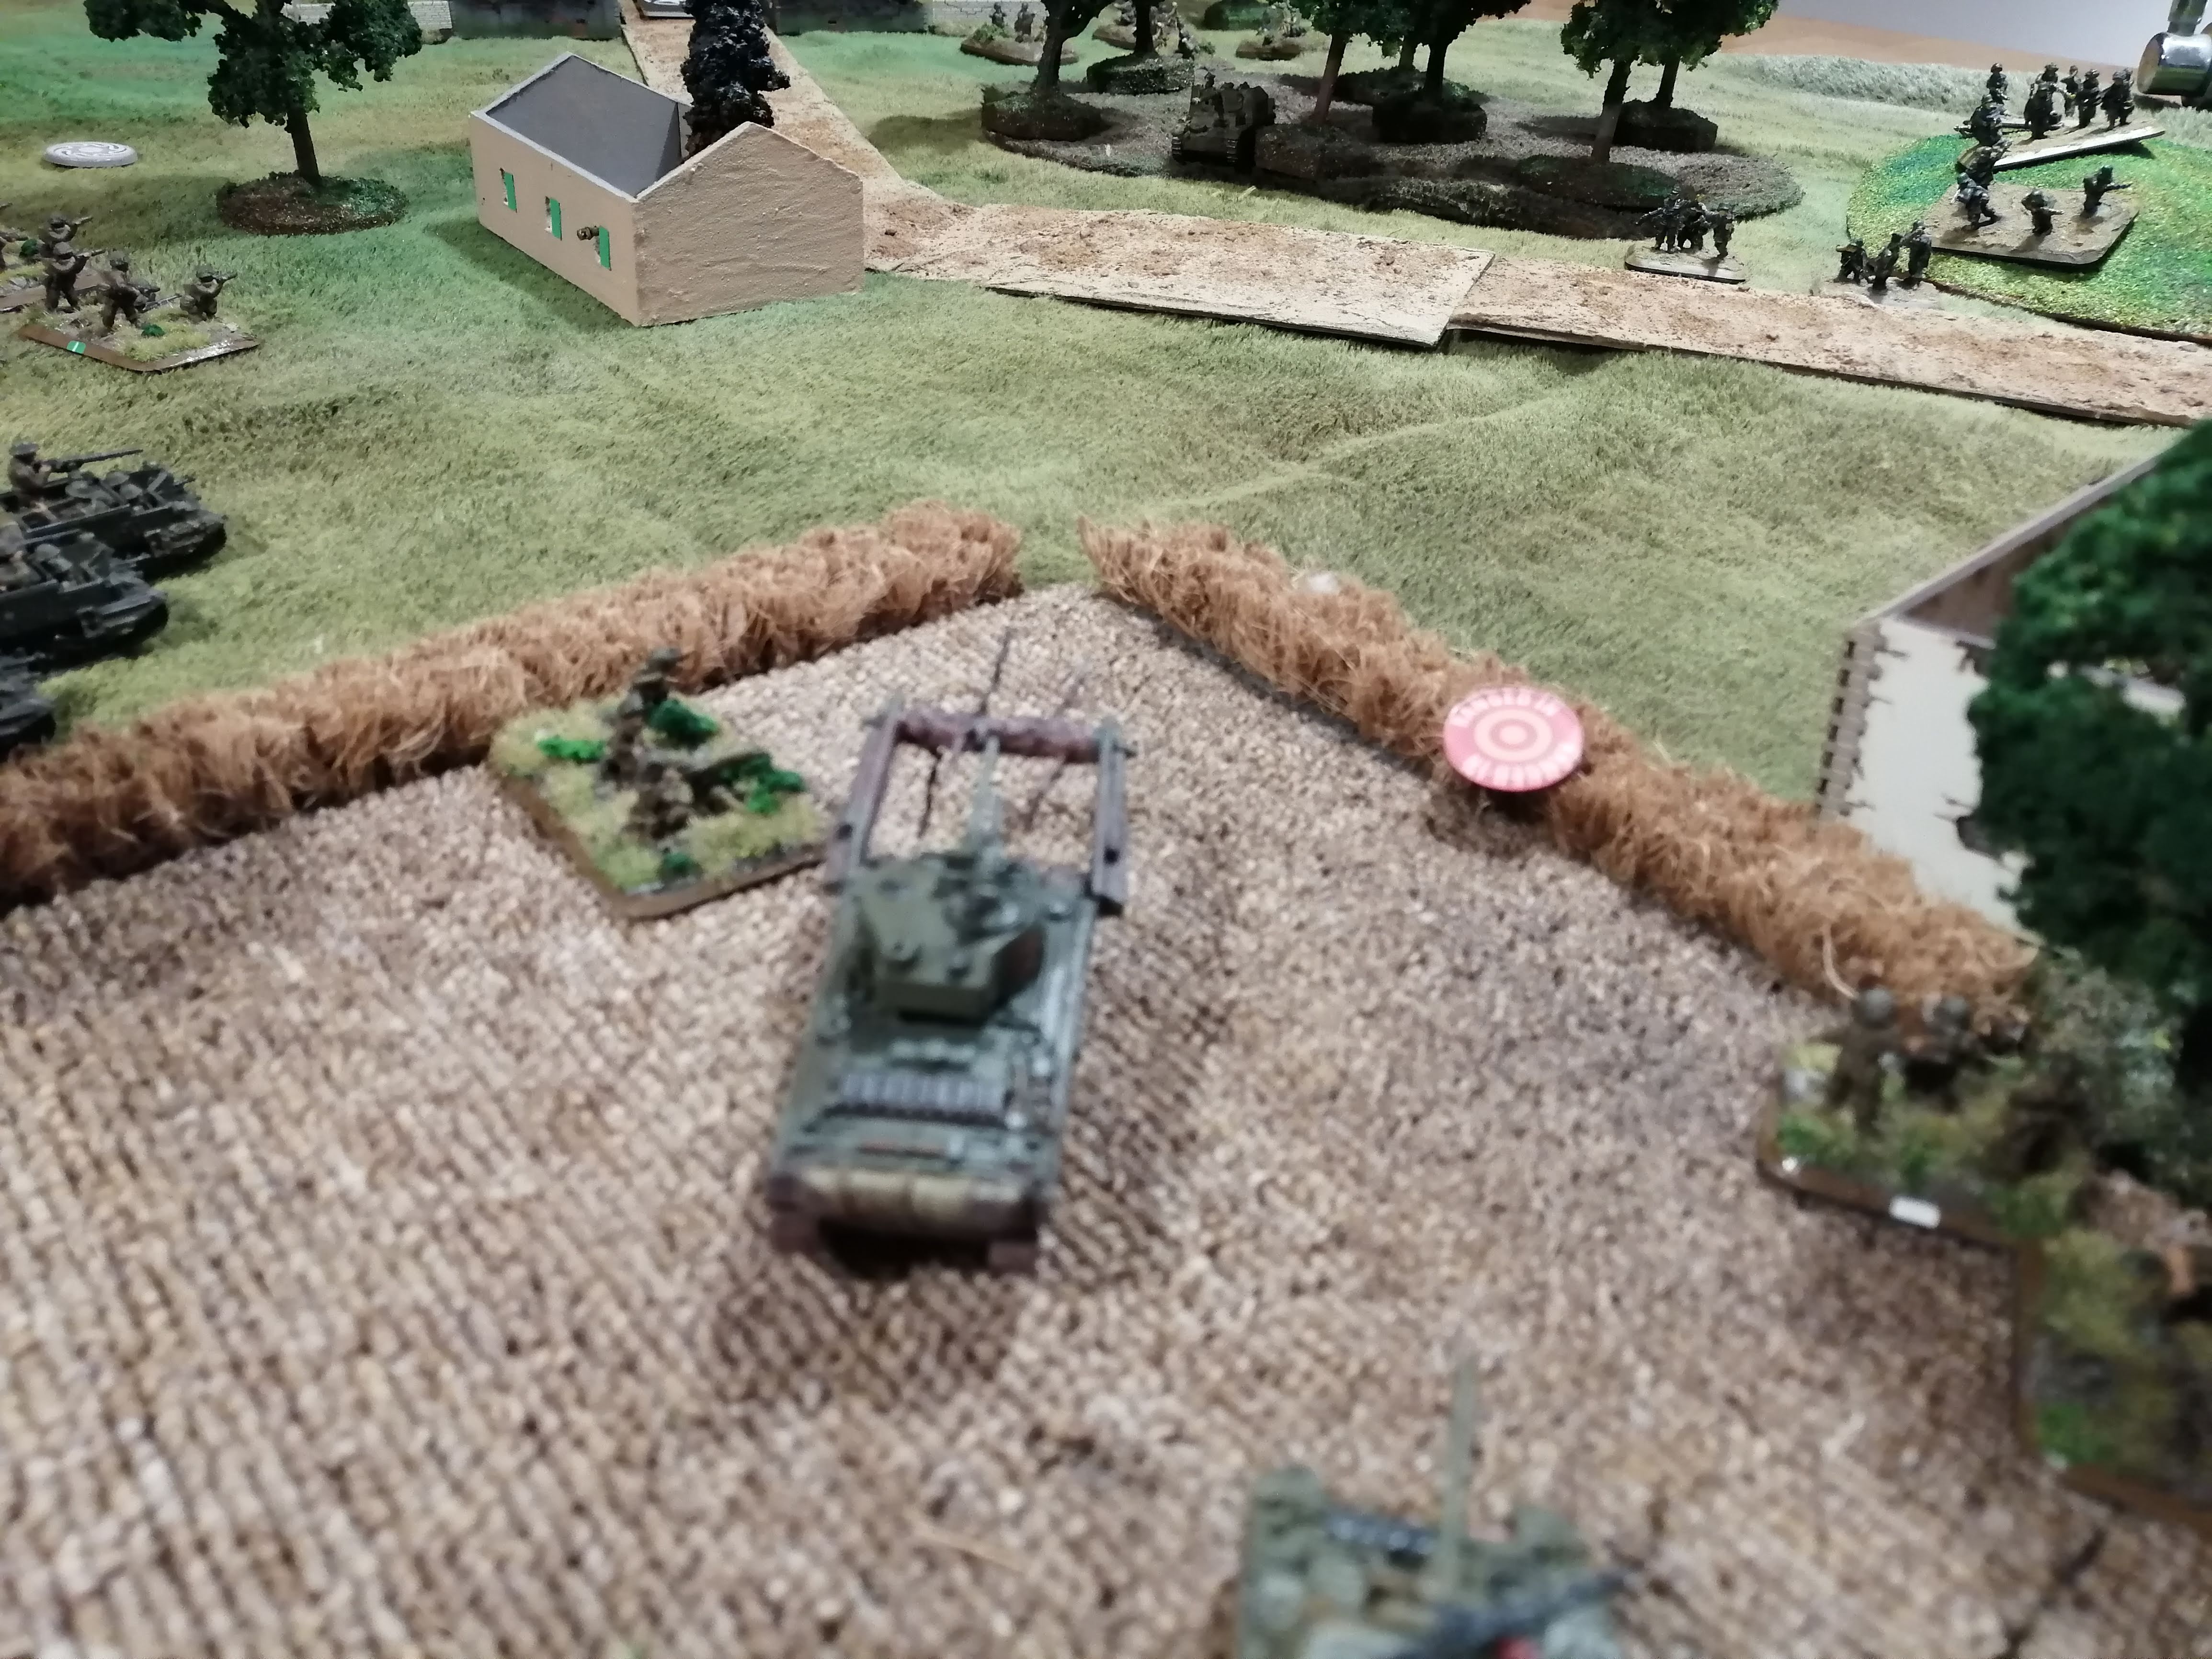 A Sherman Crab attempts to cross the hedgerow - no easy feat given the massive mine clearing equipment attached to the front
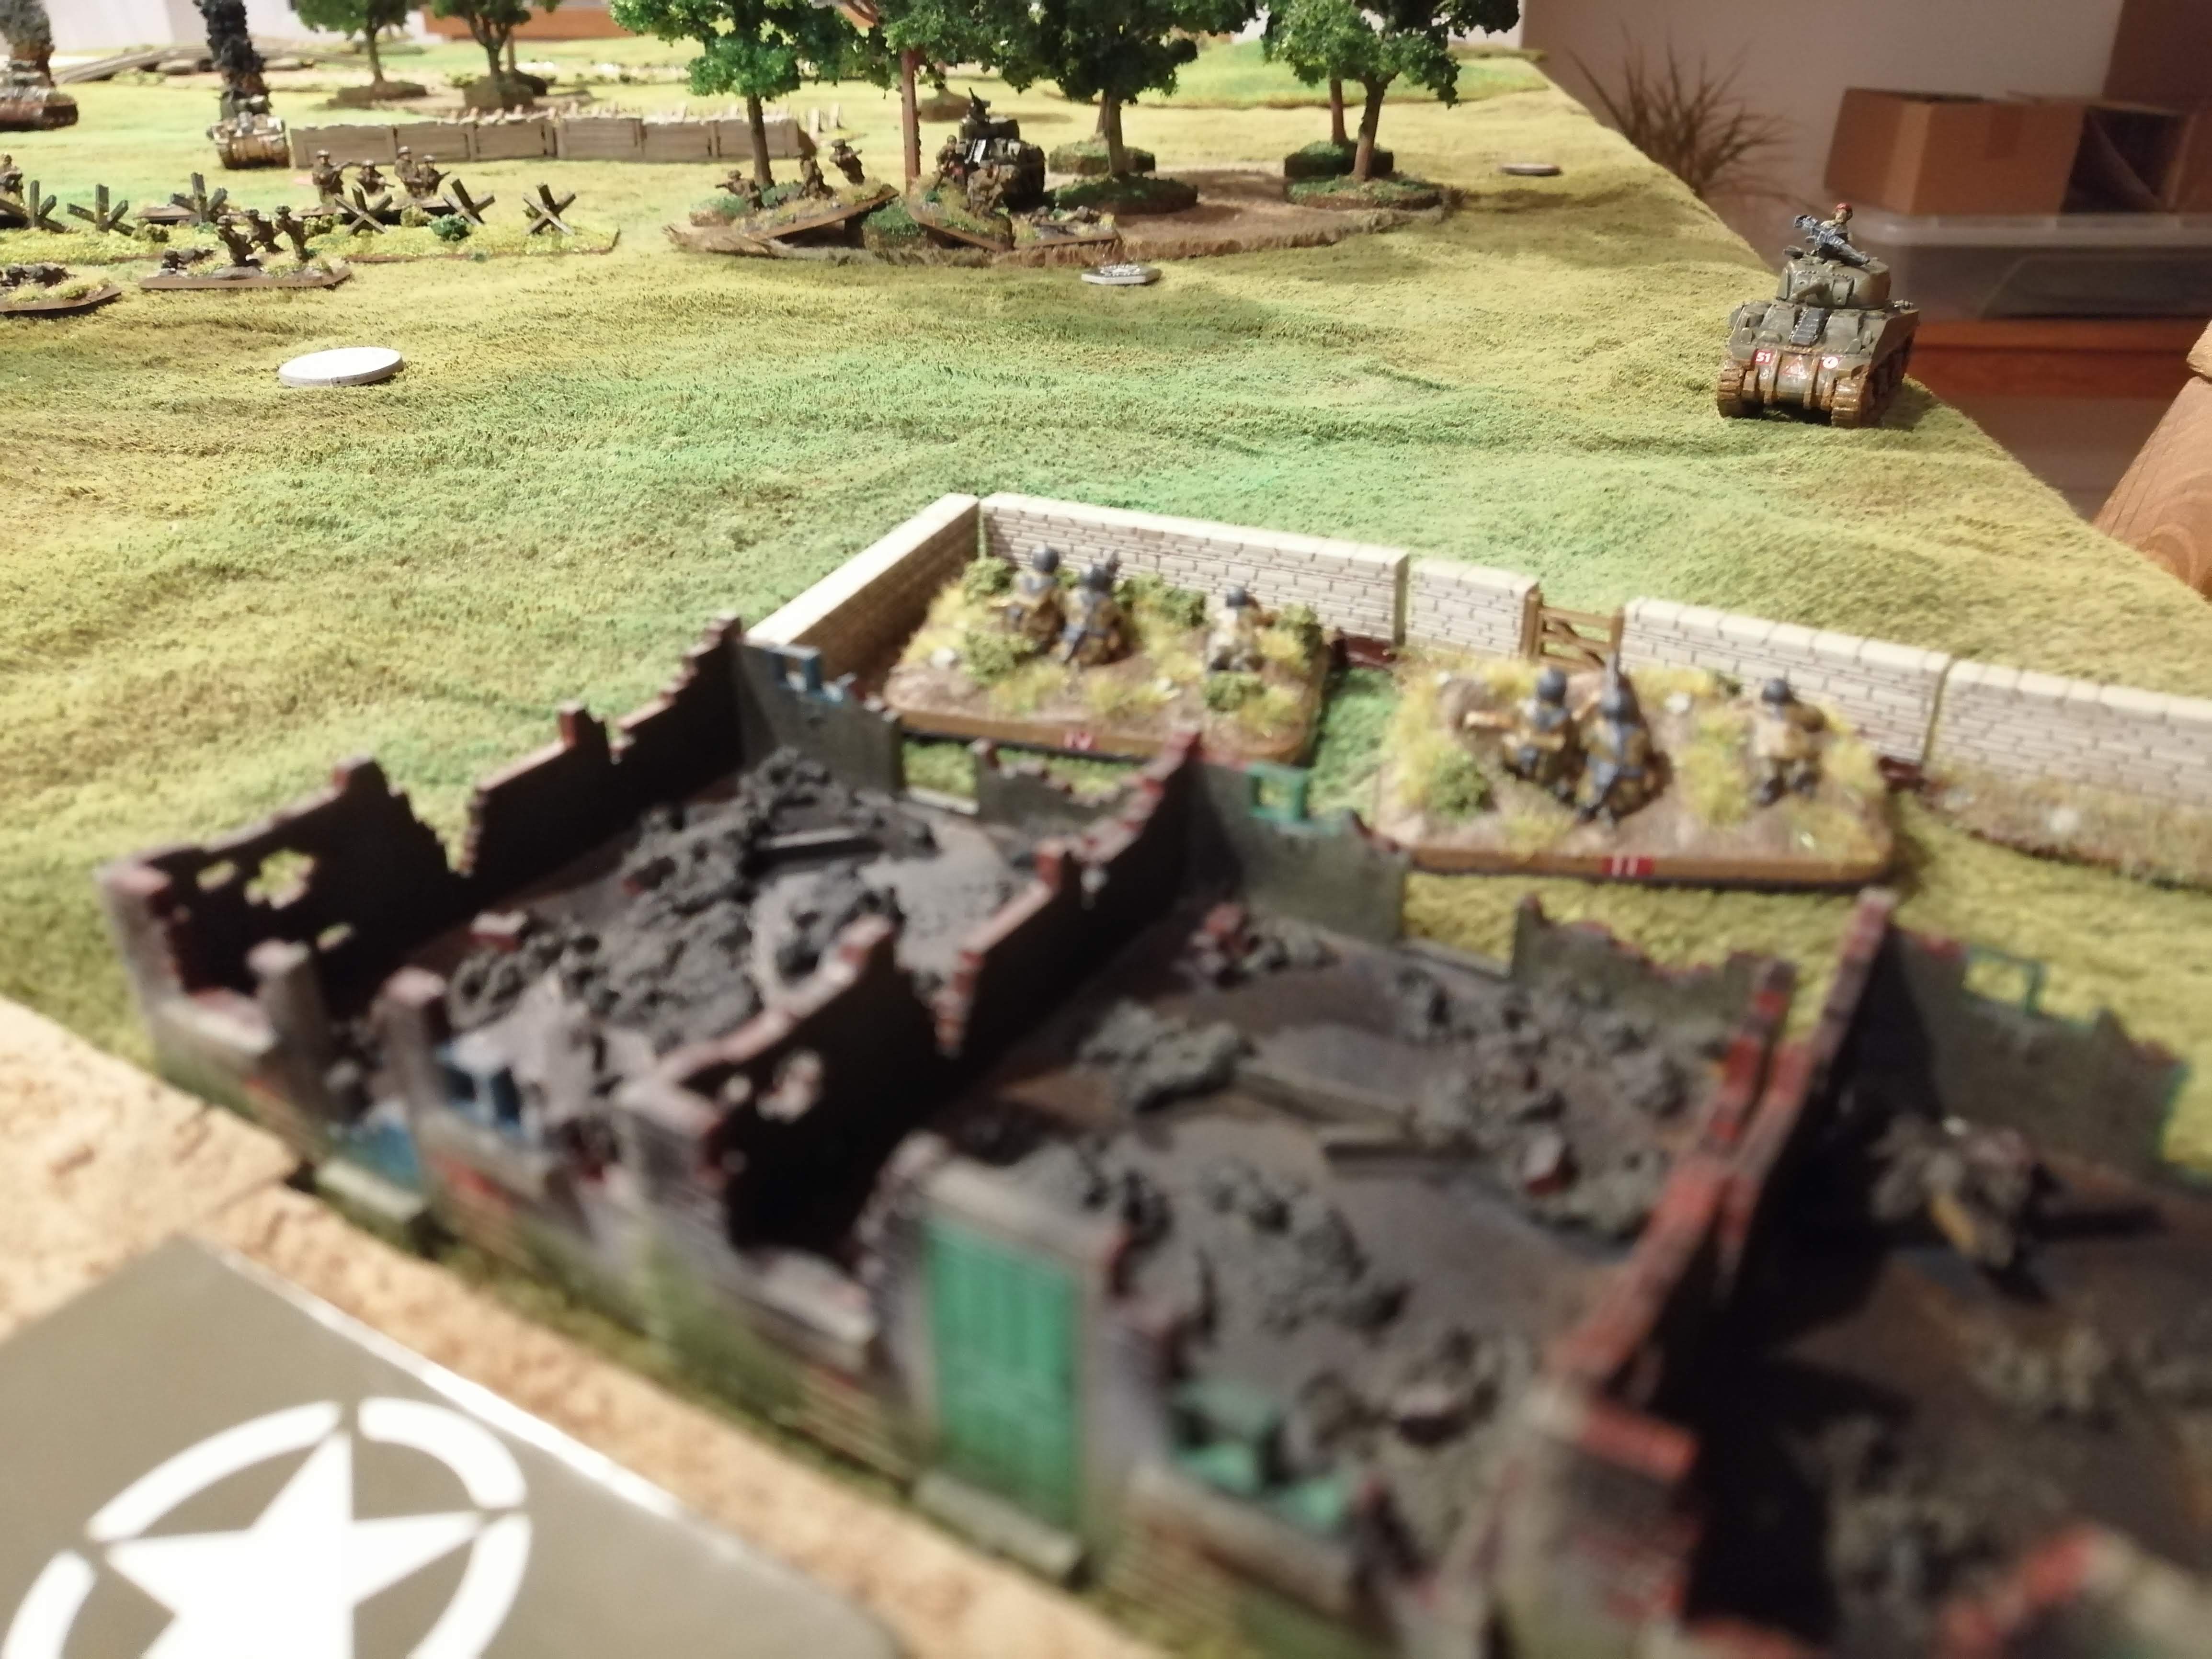 A couple of German MG teams lay down some fire on Red Platoon in the trees while the Sherman advances on their position
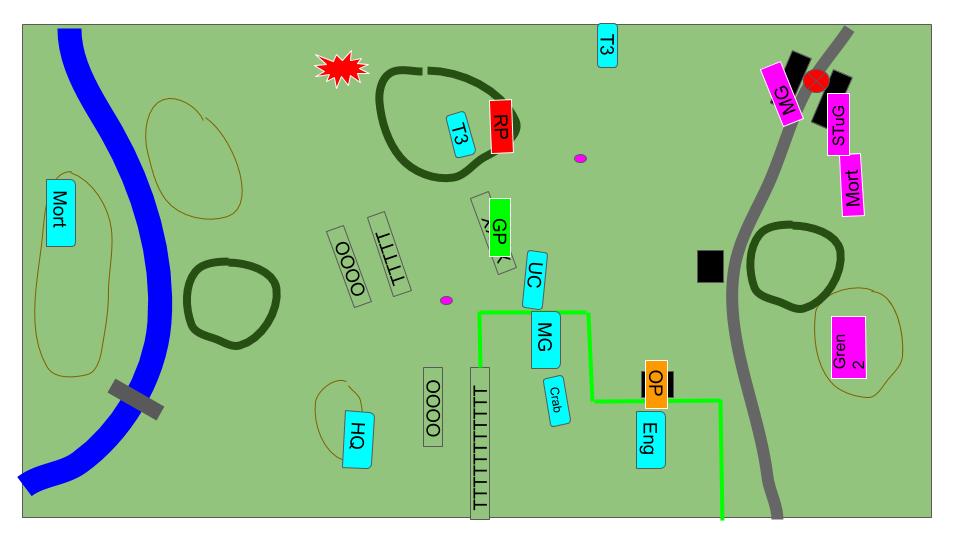


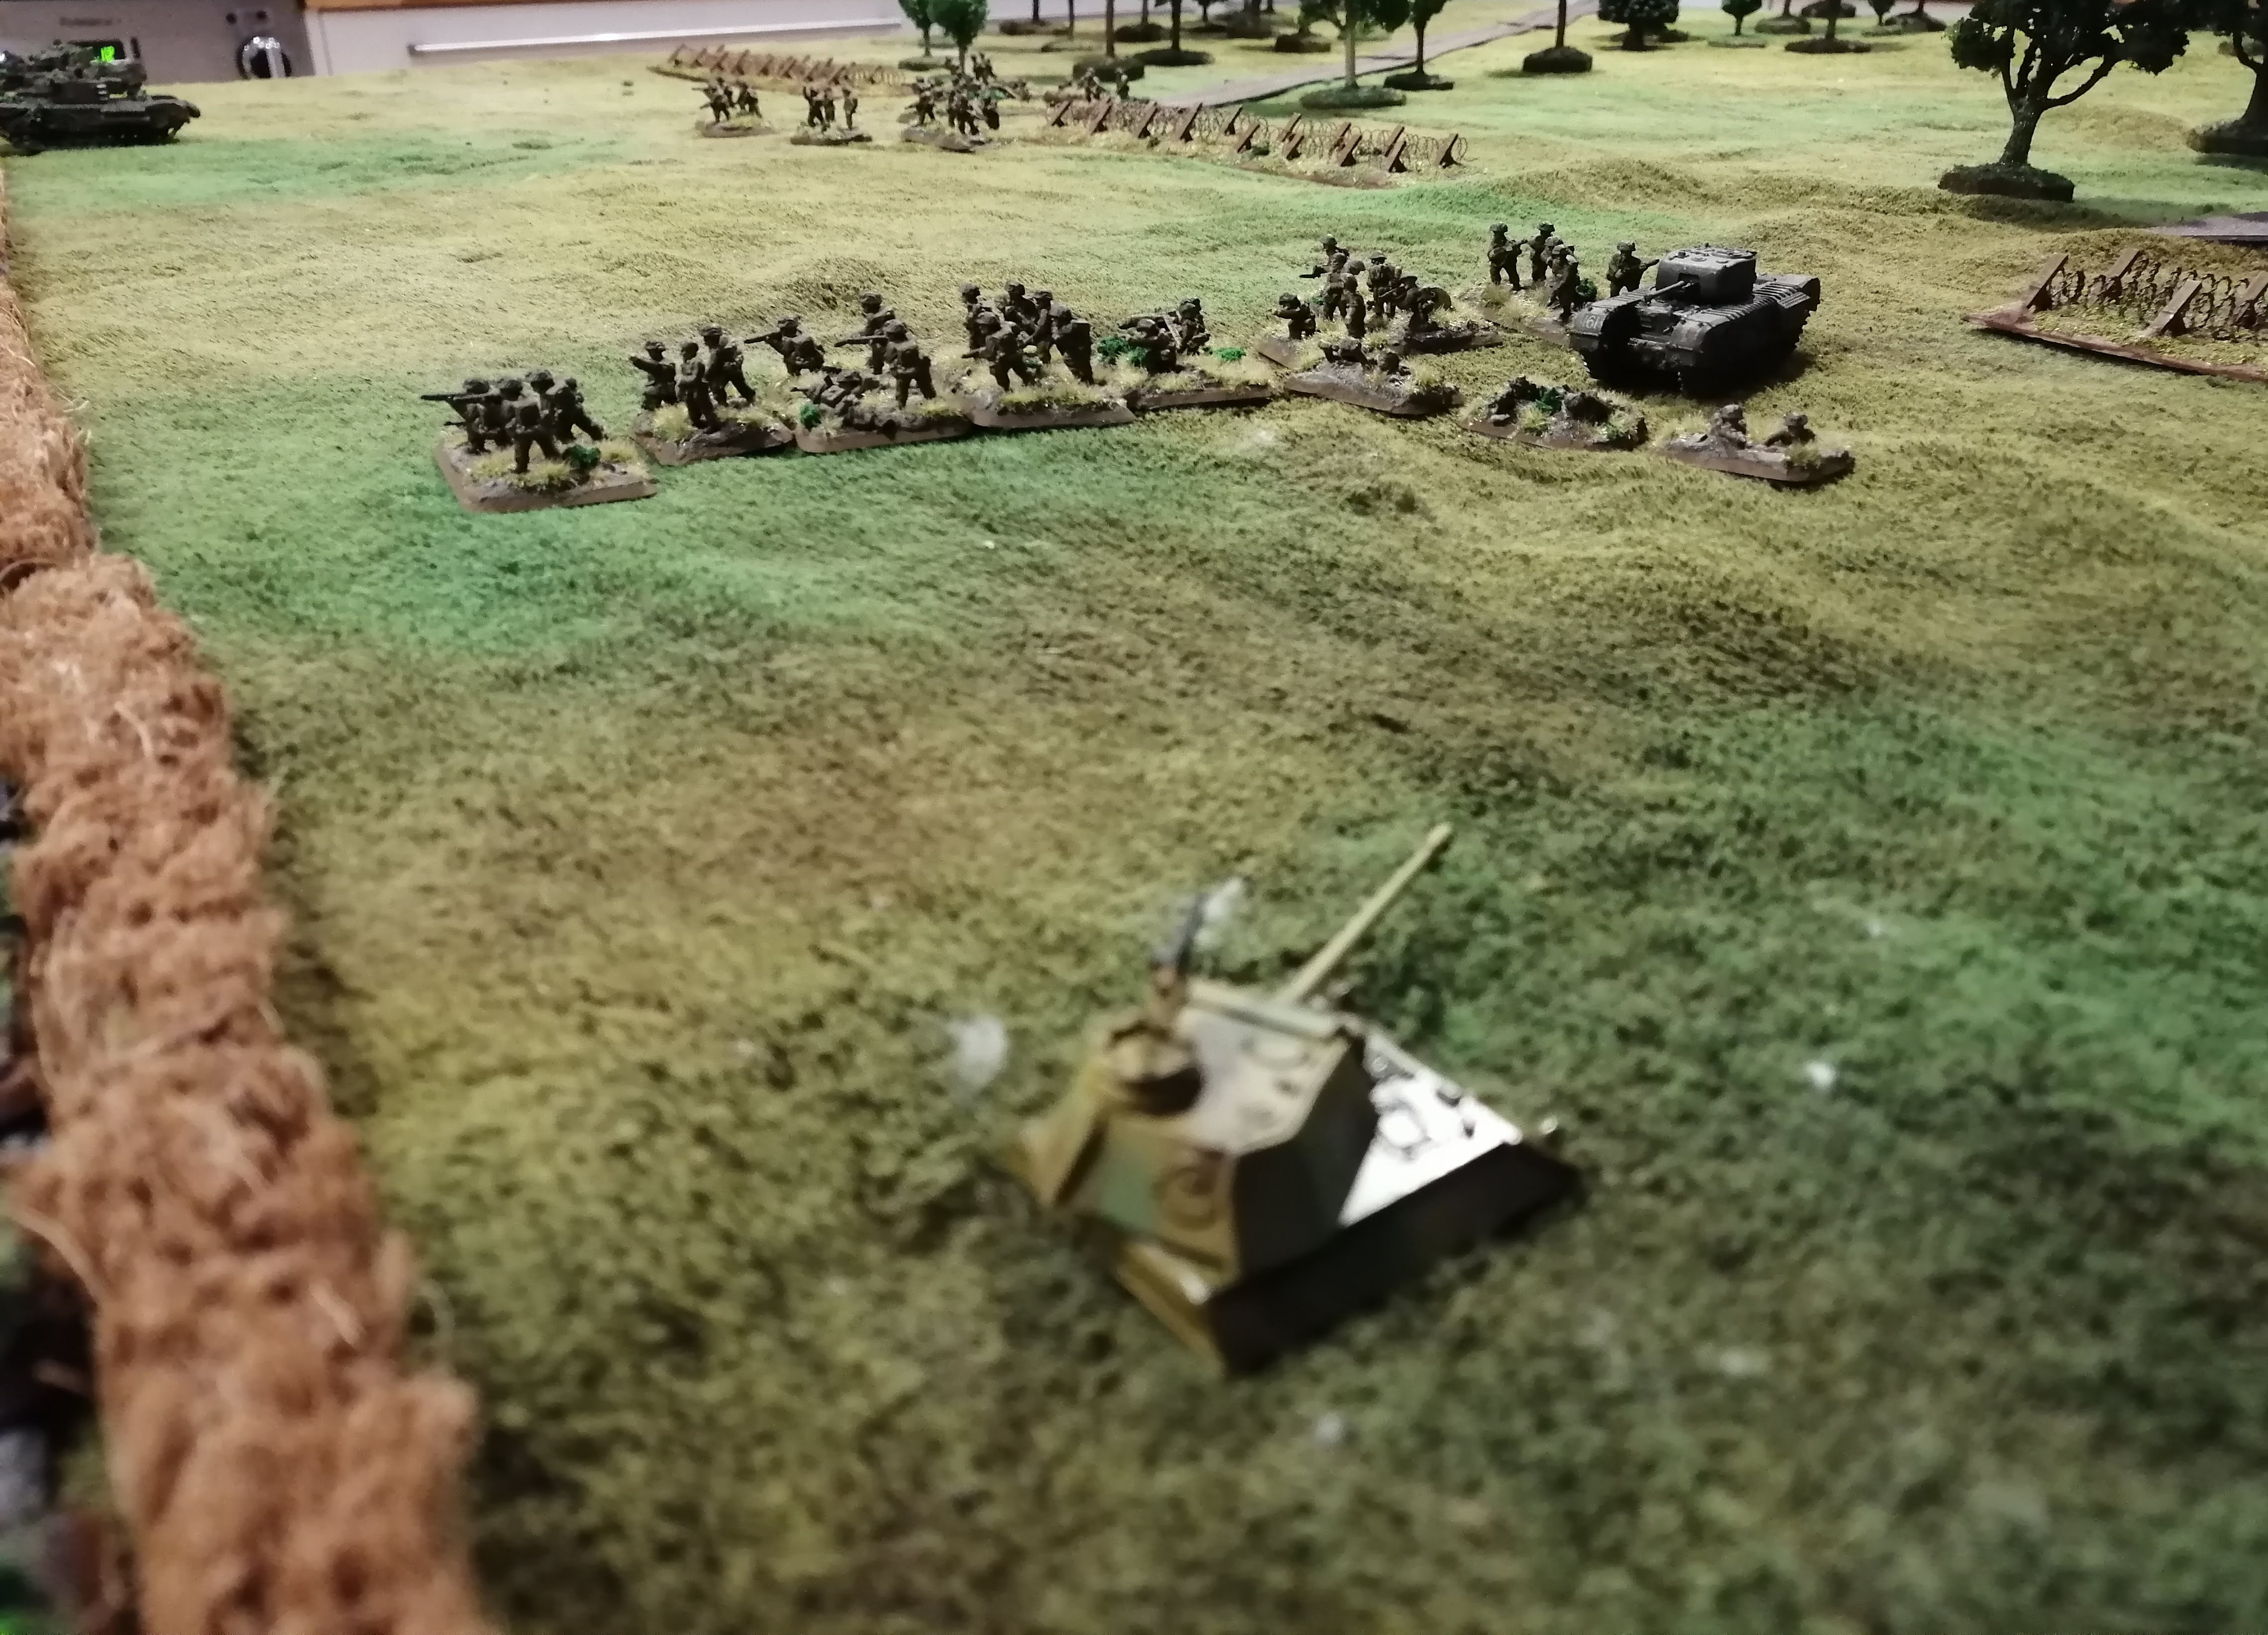
Turn 8 Allies:
Red Platoon once again fail to unpin and remain stuck in the trees. As this is the last turn, the Allies could really have done with this infantry platoon supporting the tanks as they advance on the objective!
The bogged down tank of Tank Platoon 3 fails to get going and remains stuck in the trees, it can however lend some supporting fire to its platoon command tank that advances right up to the MG teams in the ruined buildings.
The Sherman Crab platoon crosses the hedge and moves up to the farm house as do the Universal carriers and Green Platoon. The Engineers and the MG team take up positions behind the hedge.
Despite moving, the Sherman Crabs are able to draw a line to the STuG in the ruined building and hit! Given the range, the fact that the Shermans moved and the concealed nature of the target, this was one hell of a shot. The lucky shot penetrates and destroys the STuG, leaving just the MG team defending the objective. The rest of the Allied shooting is not as good with everything missing, including the command tank’s shots against the MG teams.
With nothing left to lose, the command tank from Tank Platoon 3 launches an assault against the MG Teams, crashing through the garden wall that they are hiding behind. The initial assault kills one of the MG teams and the other counter attacks hitting but failing to cause any damage against the tank. The tank attacks again and is able to destroy the last MG Team. The command tank is able to make a consolidation move and, passing its bogging check to cross into the ruined building, rolls up to the objective. The Germans don’t have any defenders within 4” and this final ditch tank charge, is enough to secure the objective and the victory for the Allies!
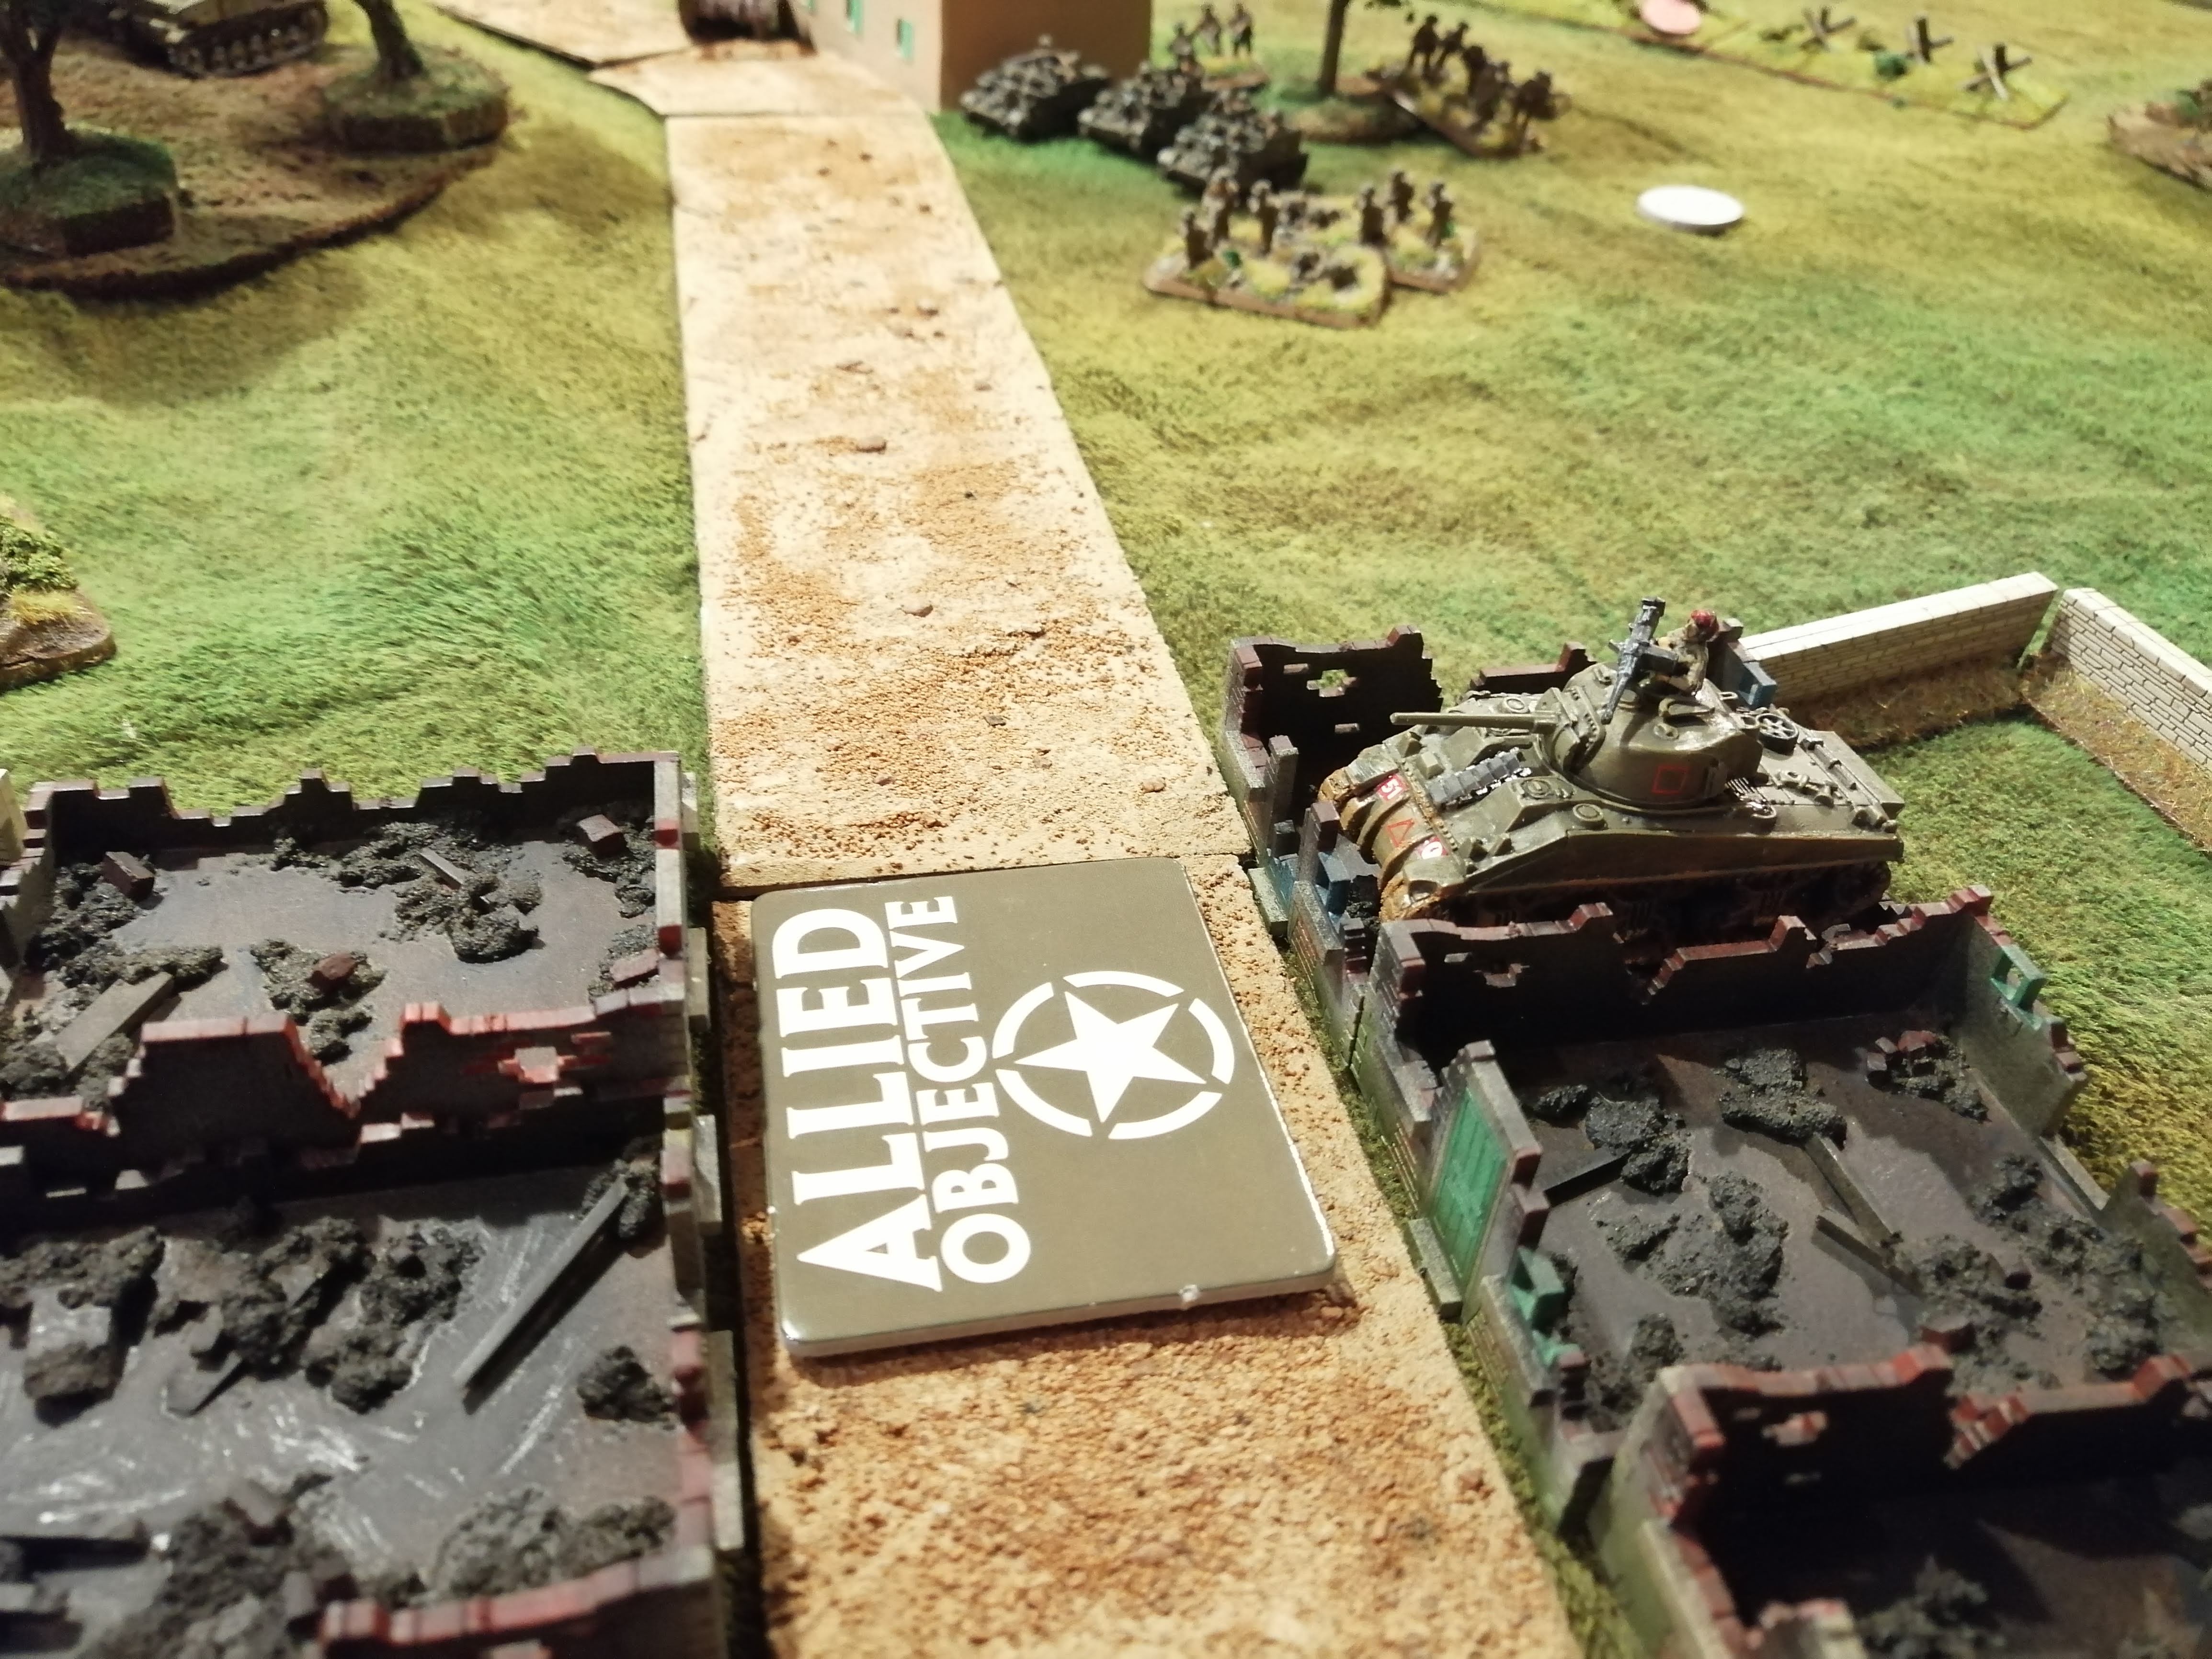 The loan Sherman captures the objective to win the game
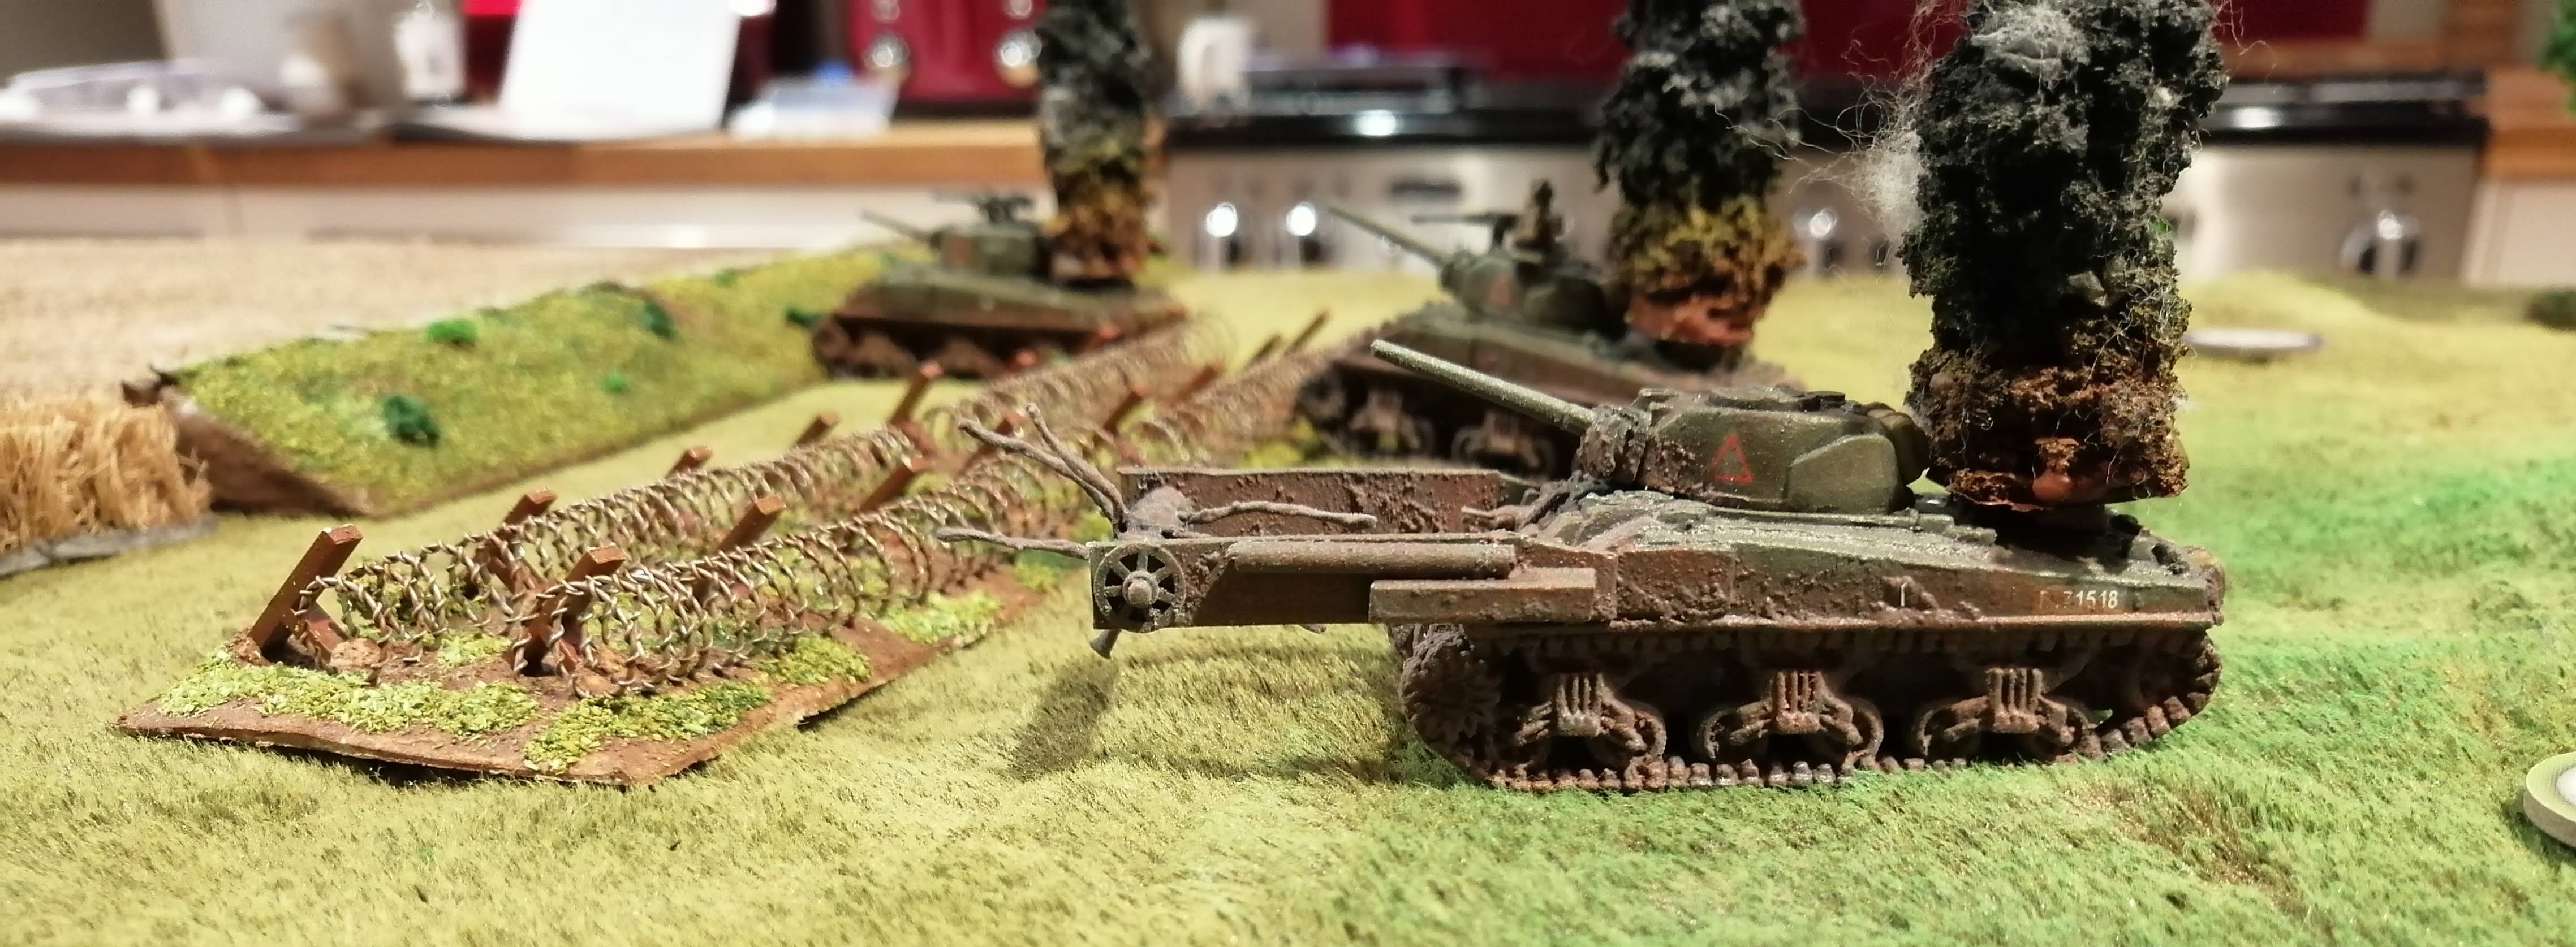 The 1st Canadian Armoured Brigade lost a number of tanks during the assault
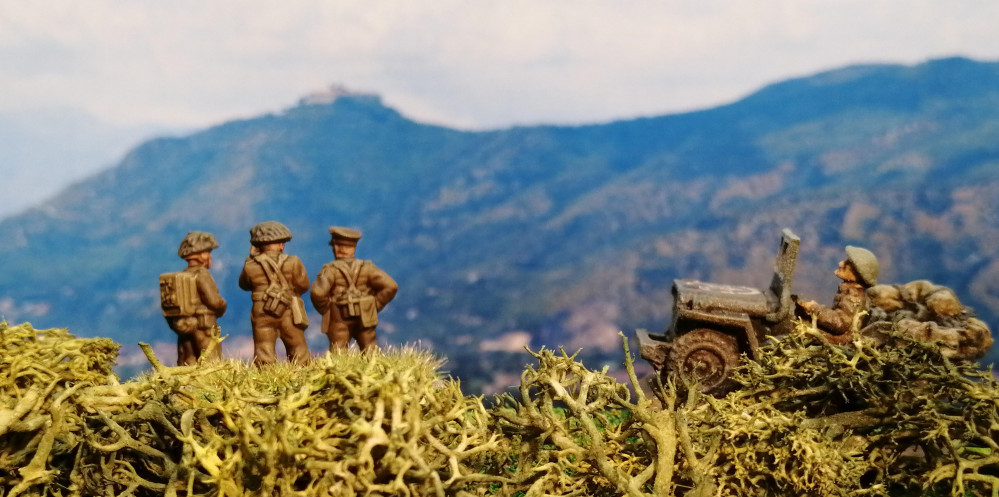
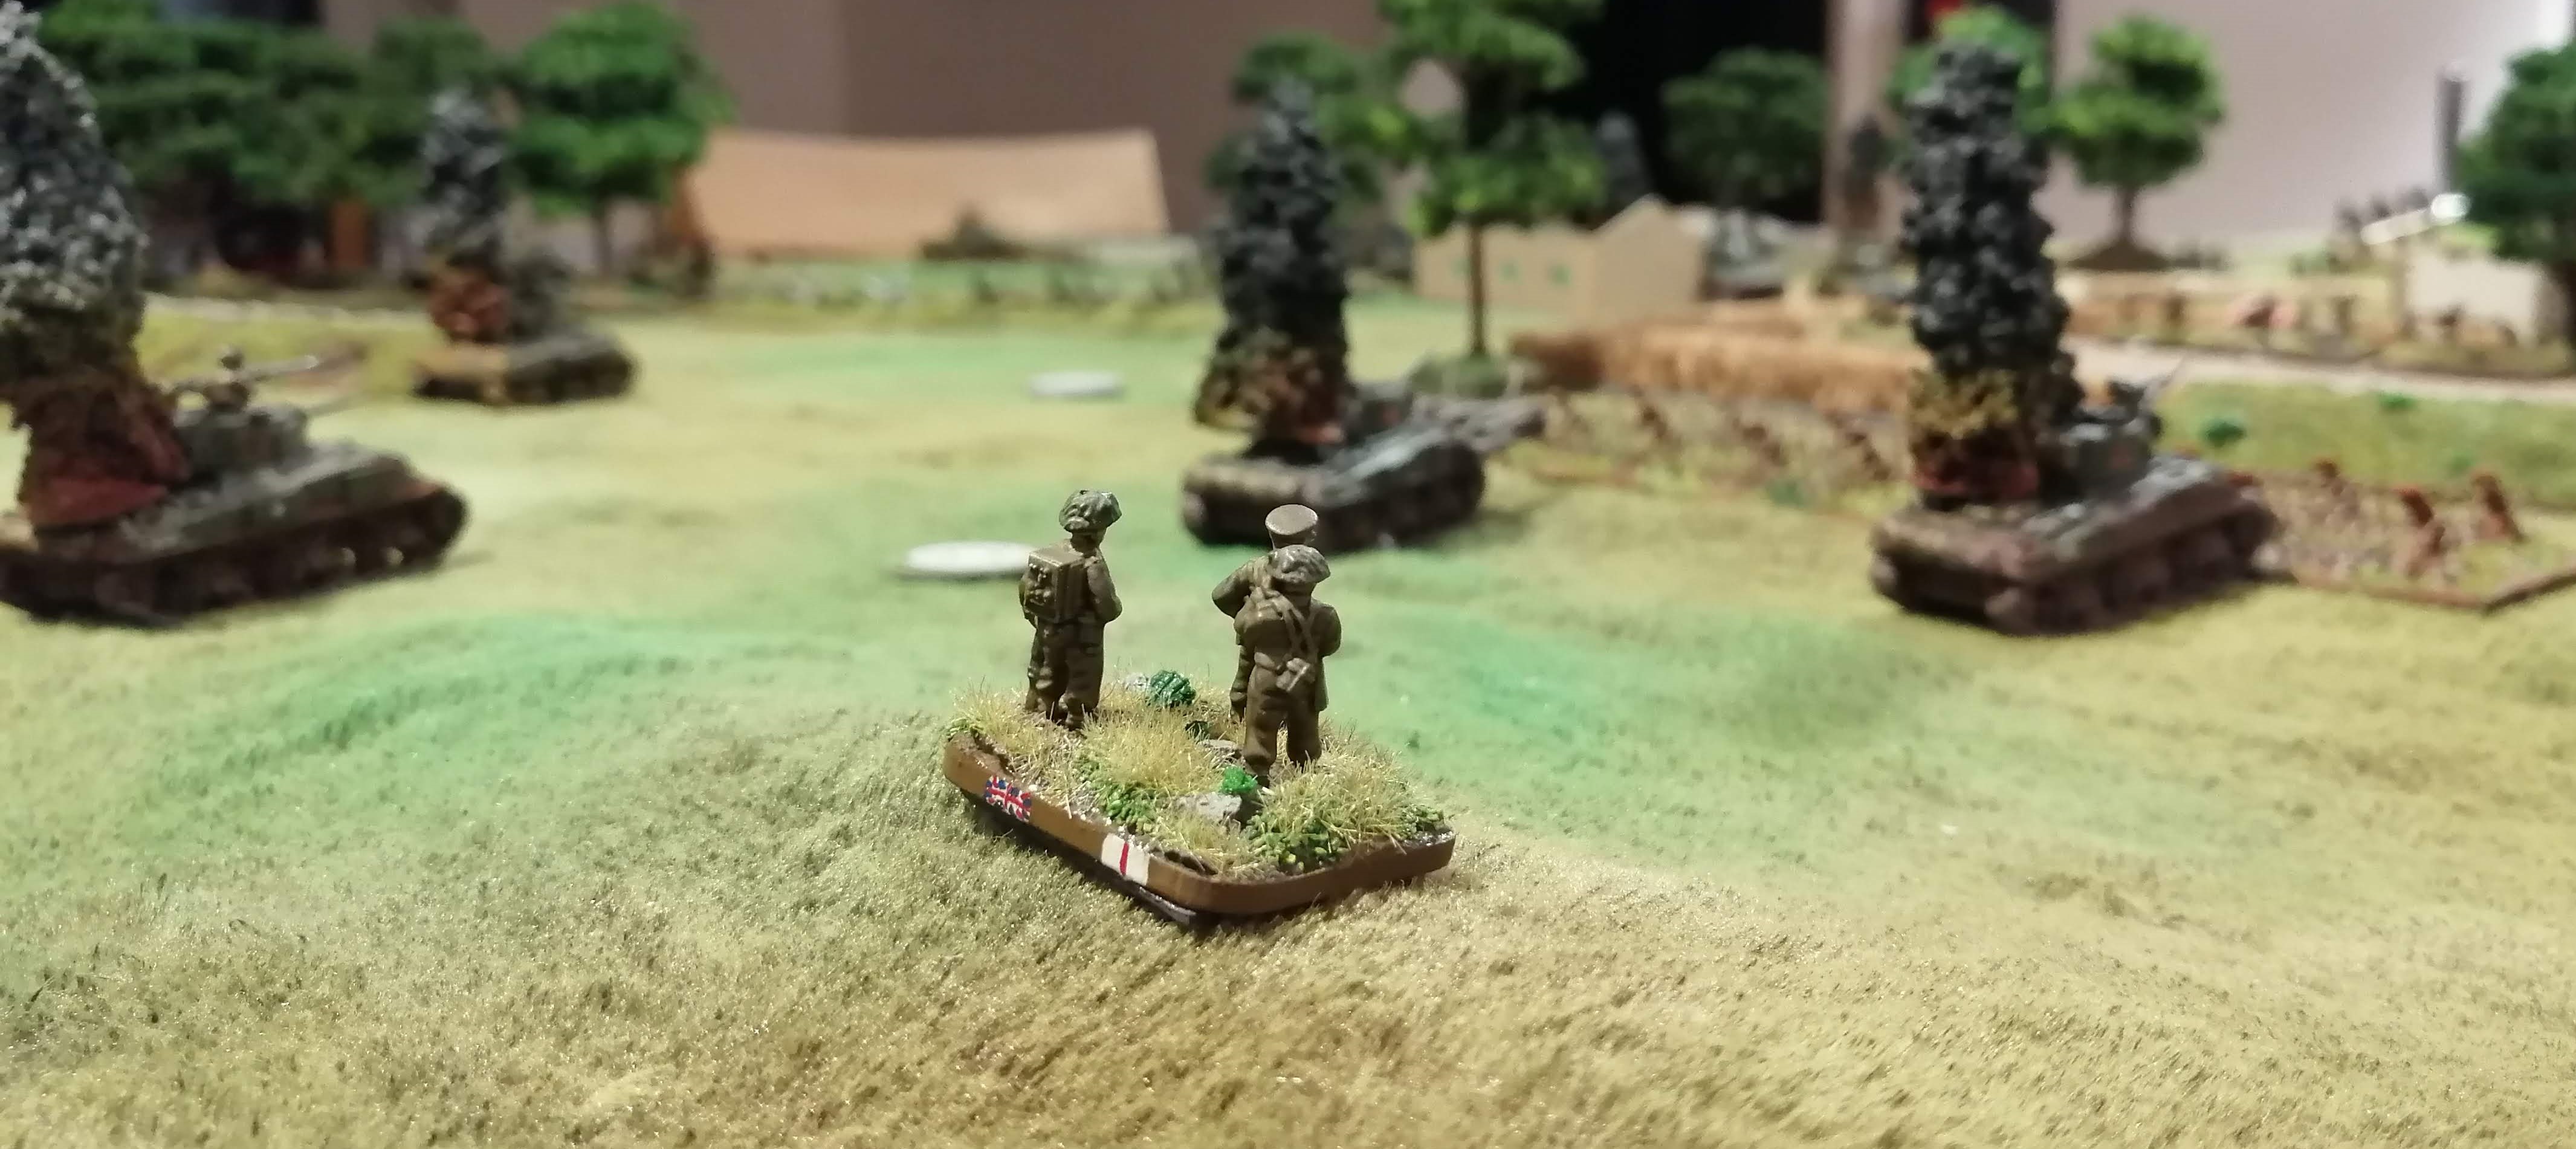 The Allied HQ survey the battlefield
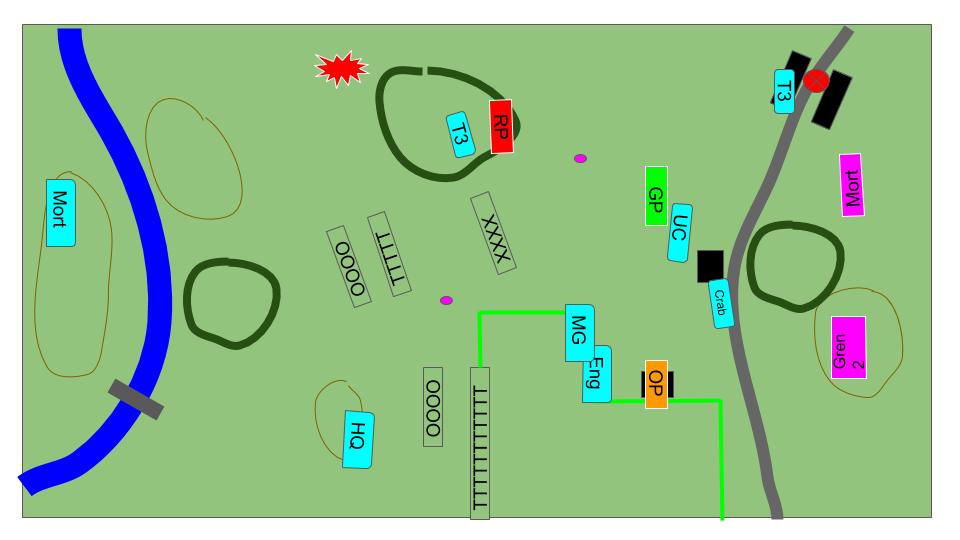

Wrap Up:
This was another tight game, coming down to the last dice roll to see whether the Allies could take the objective. It was bloody as well, with the Allies taking heavy losses as they moved up from the river banks – exactly as it was like in the actual battle. Once again the deployment markers and being randomly allocated made for an interesting game, with the Allied player not able to plan a route forward without knowing what lay in store.


