


![Alternative Trench Crusade Miniatures? Trench Missionaries Review | Wargames Atlantic [7 Days Early Access]](https://images.beastsofwar.com/2026/03/unboxing-wargames-atlantic-trench-missionaries-coverimage-225-127.jpg)


Motorised Painting Handle


Recommendations: 347
About the Project
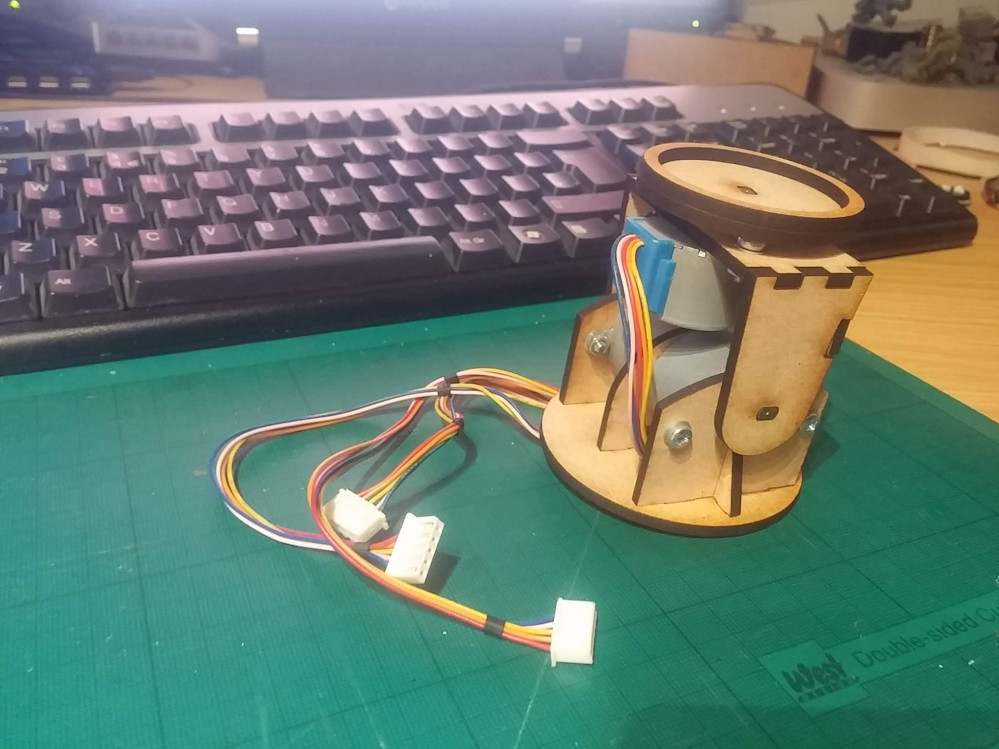
Ok, maybe it's not cool to admit it, but I'm the kind of soft sap who cries at DIY SOS - seeing people's lives changed beyond measure by the goodwill of a community of skilled people is incredible. So when I read Ryan's post about accessibility (https://www.beastsofwar.com/featured/roll-for-insight-wargaming-accessibility/) in the hobby, I figured "here's something I can get involved with". I was particularly inspired by the big button game controllers, and recall how one of the things John kept "banging on" about in his recent review of a painting handle is how comfort - in either hand - is important. Which got me thinking about people who maybe couldn't hold their miniatures comfortably, but still needed to be able to hold, position and rotate them for painting. Luckily, motors and electronics and making circuit boards is "my thing". So I set about making a motorised painting handle. Hopefully someone might find it useful. I plan to post the schematics, code, laser-cutting files and everything else needed should anyone else wish to make one too....
Related Genre: Game Aid
This Project is Completed
Arduino code for motorised painting handle
Grab yourself an Arduino, plug in the usb port and upload this code to it.
You’ll have your own motorised painting handle up and running in no time!


In danger of scope creep
I’m still not sure about this. I quite like it. But I’m not sure it’s entirely necessary. In which case, I’m not entirely convinced it needs to stay. But, it is pretty cool!
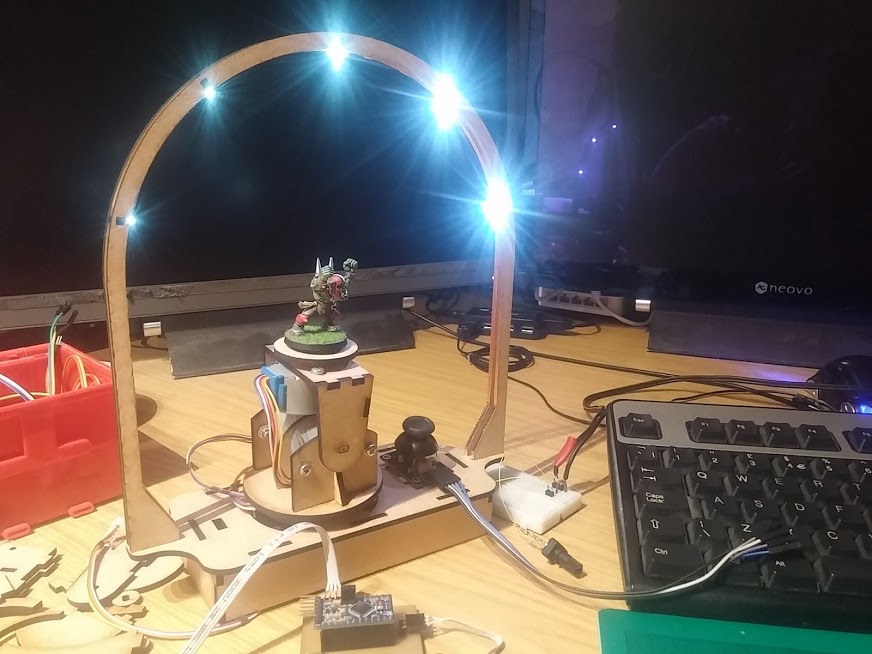
An archway of LEDs helps reduce (note, not necessarily completely eliminate, but does reduce) shadows across the miniature.
There are two ways to further reduce shadows: increase the quantity/intensity of the LEDs (which could then become an issue if they shine directly at your face while painting) or to reduce the size of the “arch” to put the LEDs closer to the miniature.
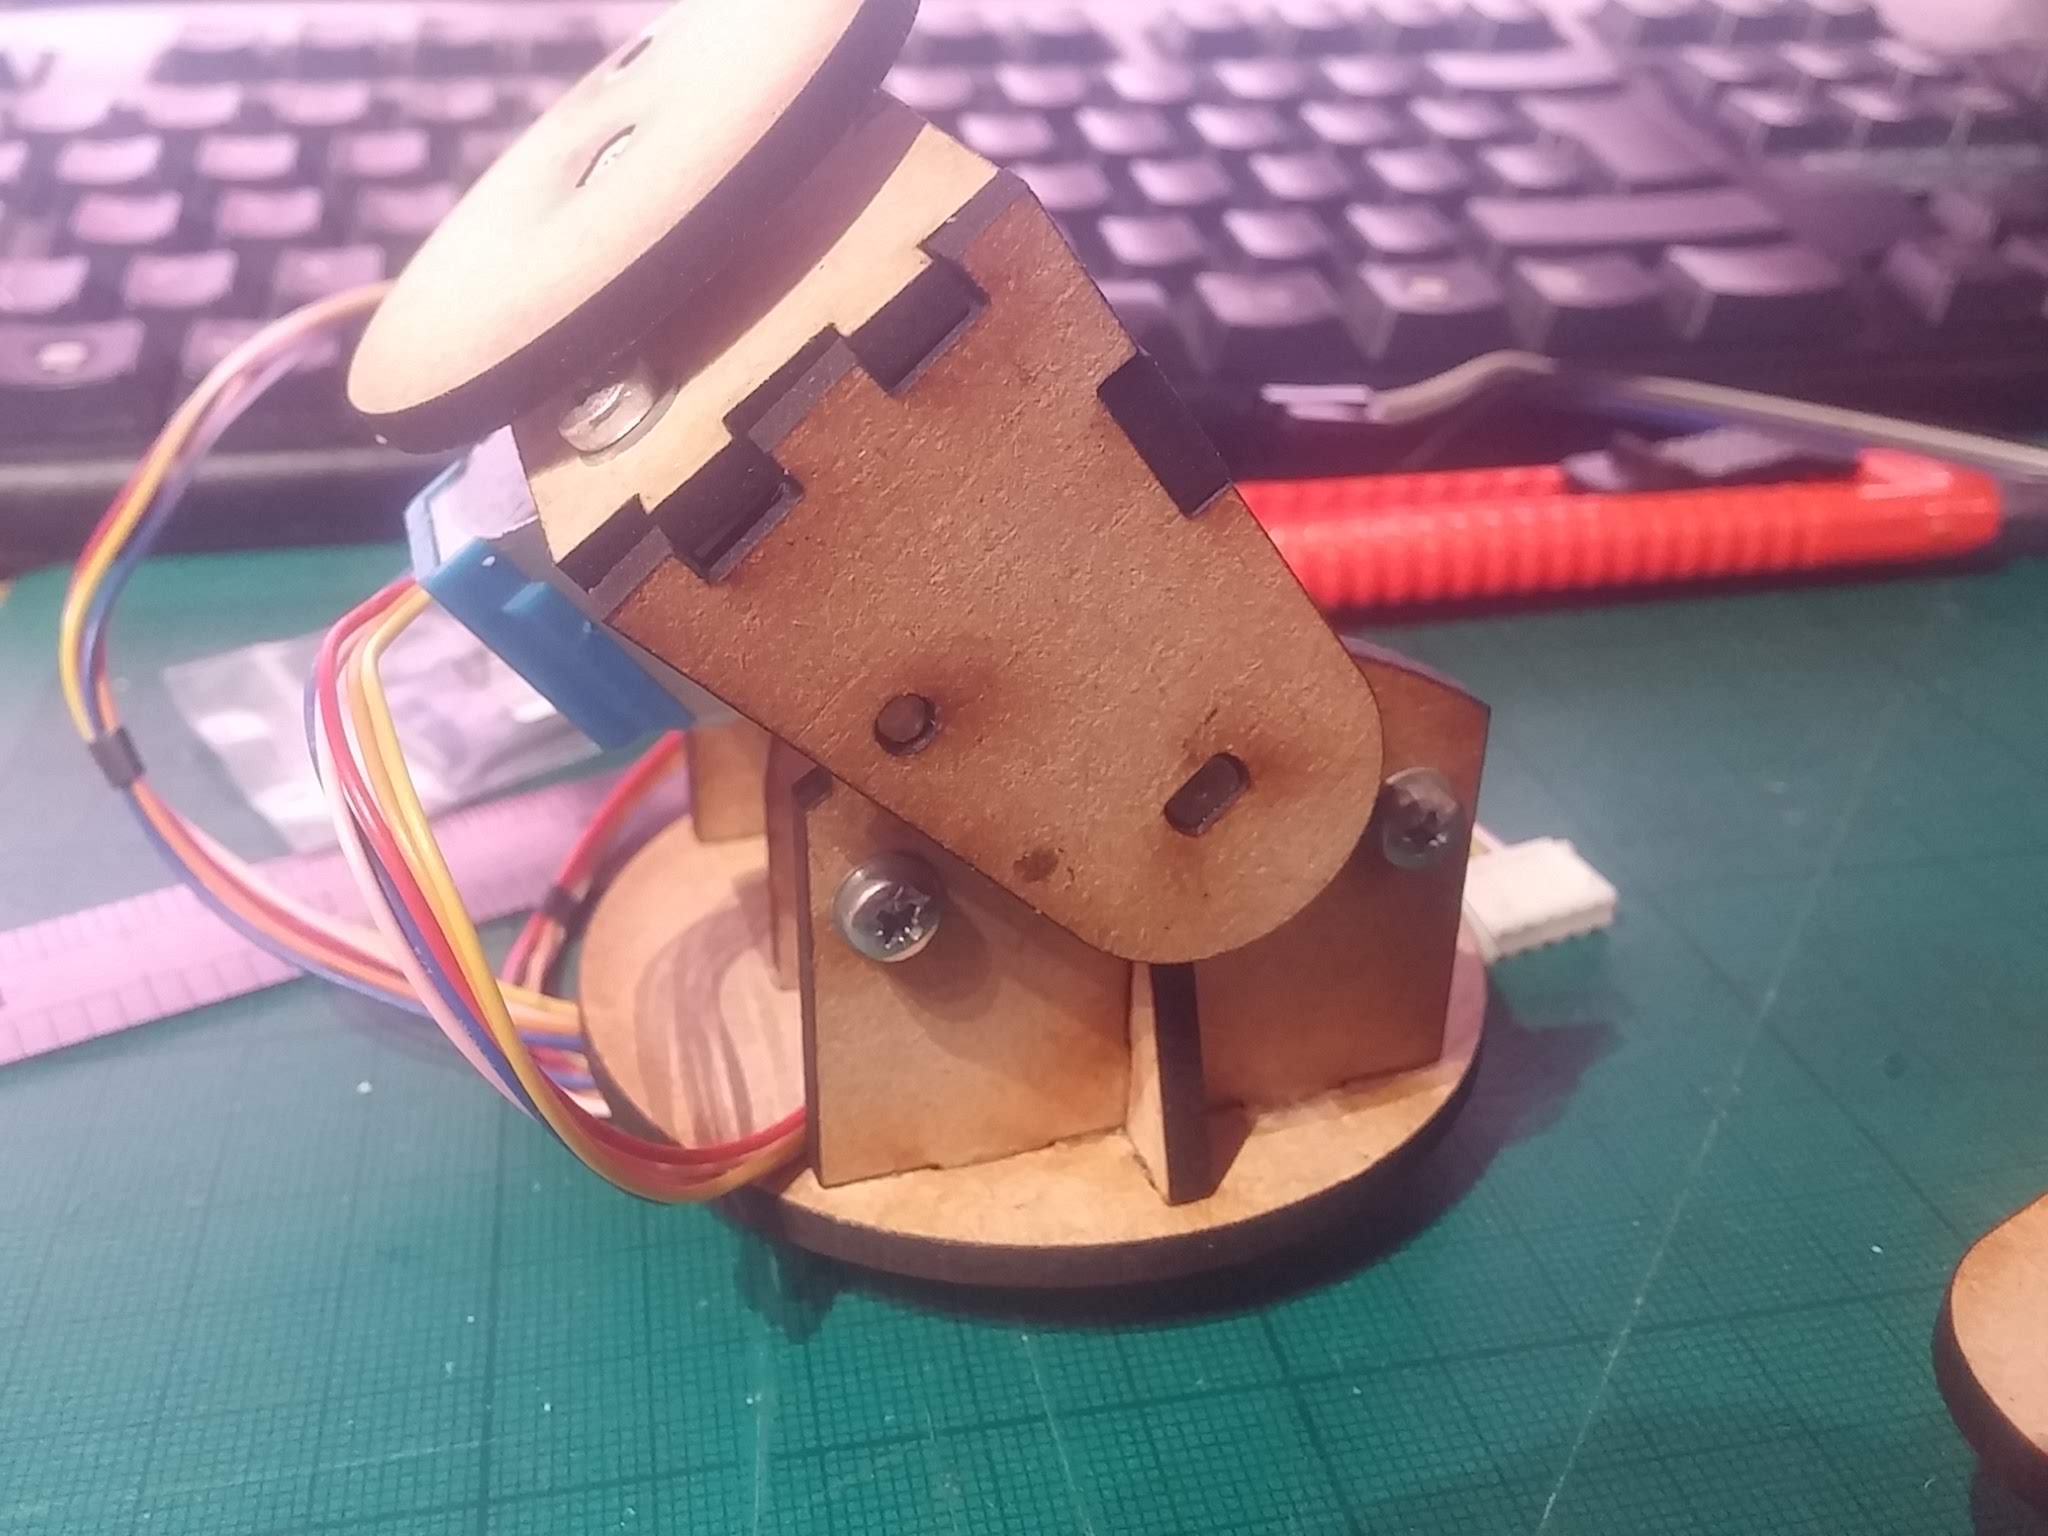
So far we’ve got three-degrees-of-freedom (I think). There are two motors in the horizontal direction, but one of them is connected to an upright which tilts backwards and forwards (so isn’t necessarily fixed in the horizontal plane).
I might keep the third axis (though it works perfectly well with just two) I’m just not sure about the LED ring. Comments….?
Nearly the weekend.....
So, if I get a few hours in the workshop this weekend, I think it’s time to take a proper look at this. First up, it’s got to have that third motor/axis; I thought that maybe two might be sufficient, but I reckon that having an overall “master” rotation is going to be important.
That means I’ll have maxed out all the i/o lines on my microcontroller. Yet I wanted to add even more stuff.
Now, sure, I could add in shift registers and clever trickery like that, to free up some i/o pins on the Arduino, but in all honesty, this project has already taken up more time that I expected it to – and adding in extra complexity like shift registers is just going to chew into the few hours I’ve got available to work on this.
One thing I do think it needs, are sensors to give it a “home” position (from which we can move to any angle/rotation). Since we’re using stepper motors (yes, we… you are building along, aren’t you?) it means that each individual axis can be positioned, accurate to about 1mm (excluding “slop” or “backlash” in the motor gears) by simply counting the steps;
If 4,000 steps are one complete revolution, and we know that the motors will be moving from the same starting position each time, then, in theory, it should be possible to record the position of each motor as it moves – and enable the user to create a number of pre-defined positions to move to.
 adding smartphone/device support should be relatively easy...?
Now having a list of pre-defined positions and being able to select/enter a name for more (as they are saved to memory) means requiring some kind of screen and a user interface (UI). That’s going to take up more i/o pins, not fewer!
So I figured that we could ditch the joystick and use a smartphone/device for both controlling the motors and as a user interface for the creating/saving settings. That means I can talk to the motors using the (currently unused) serial pins, and connect my “home position” sensors where the joystick used to be.
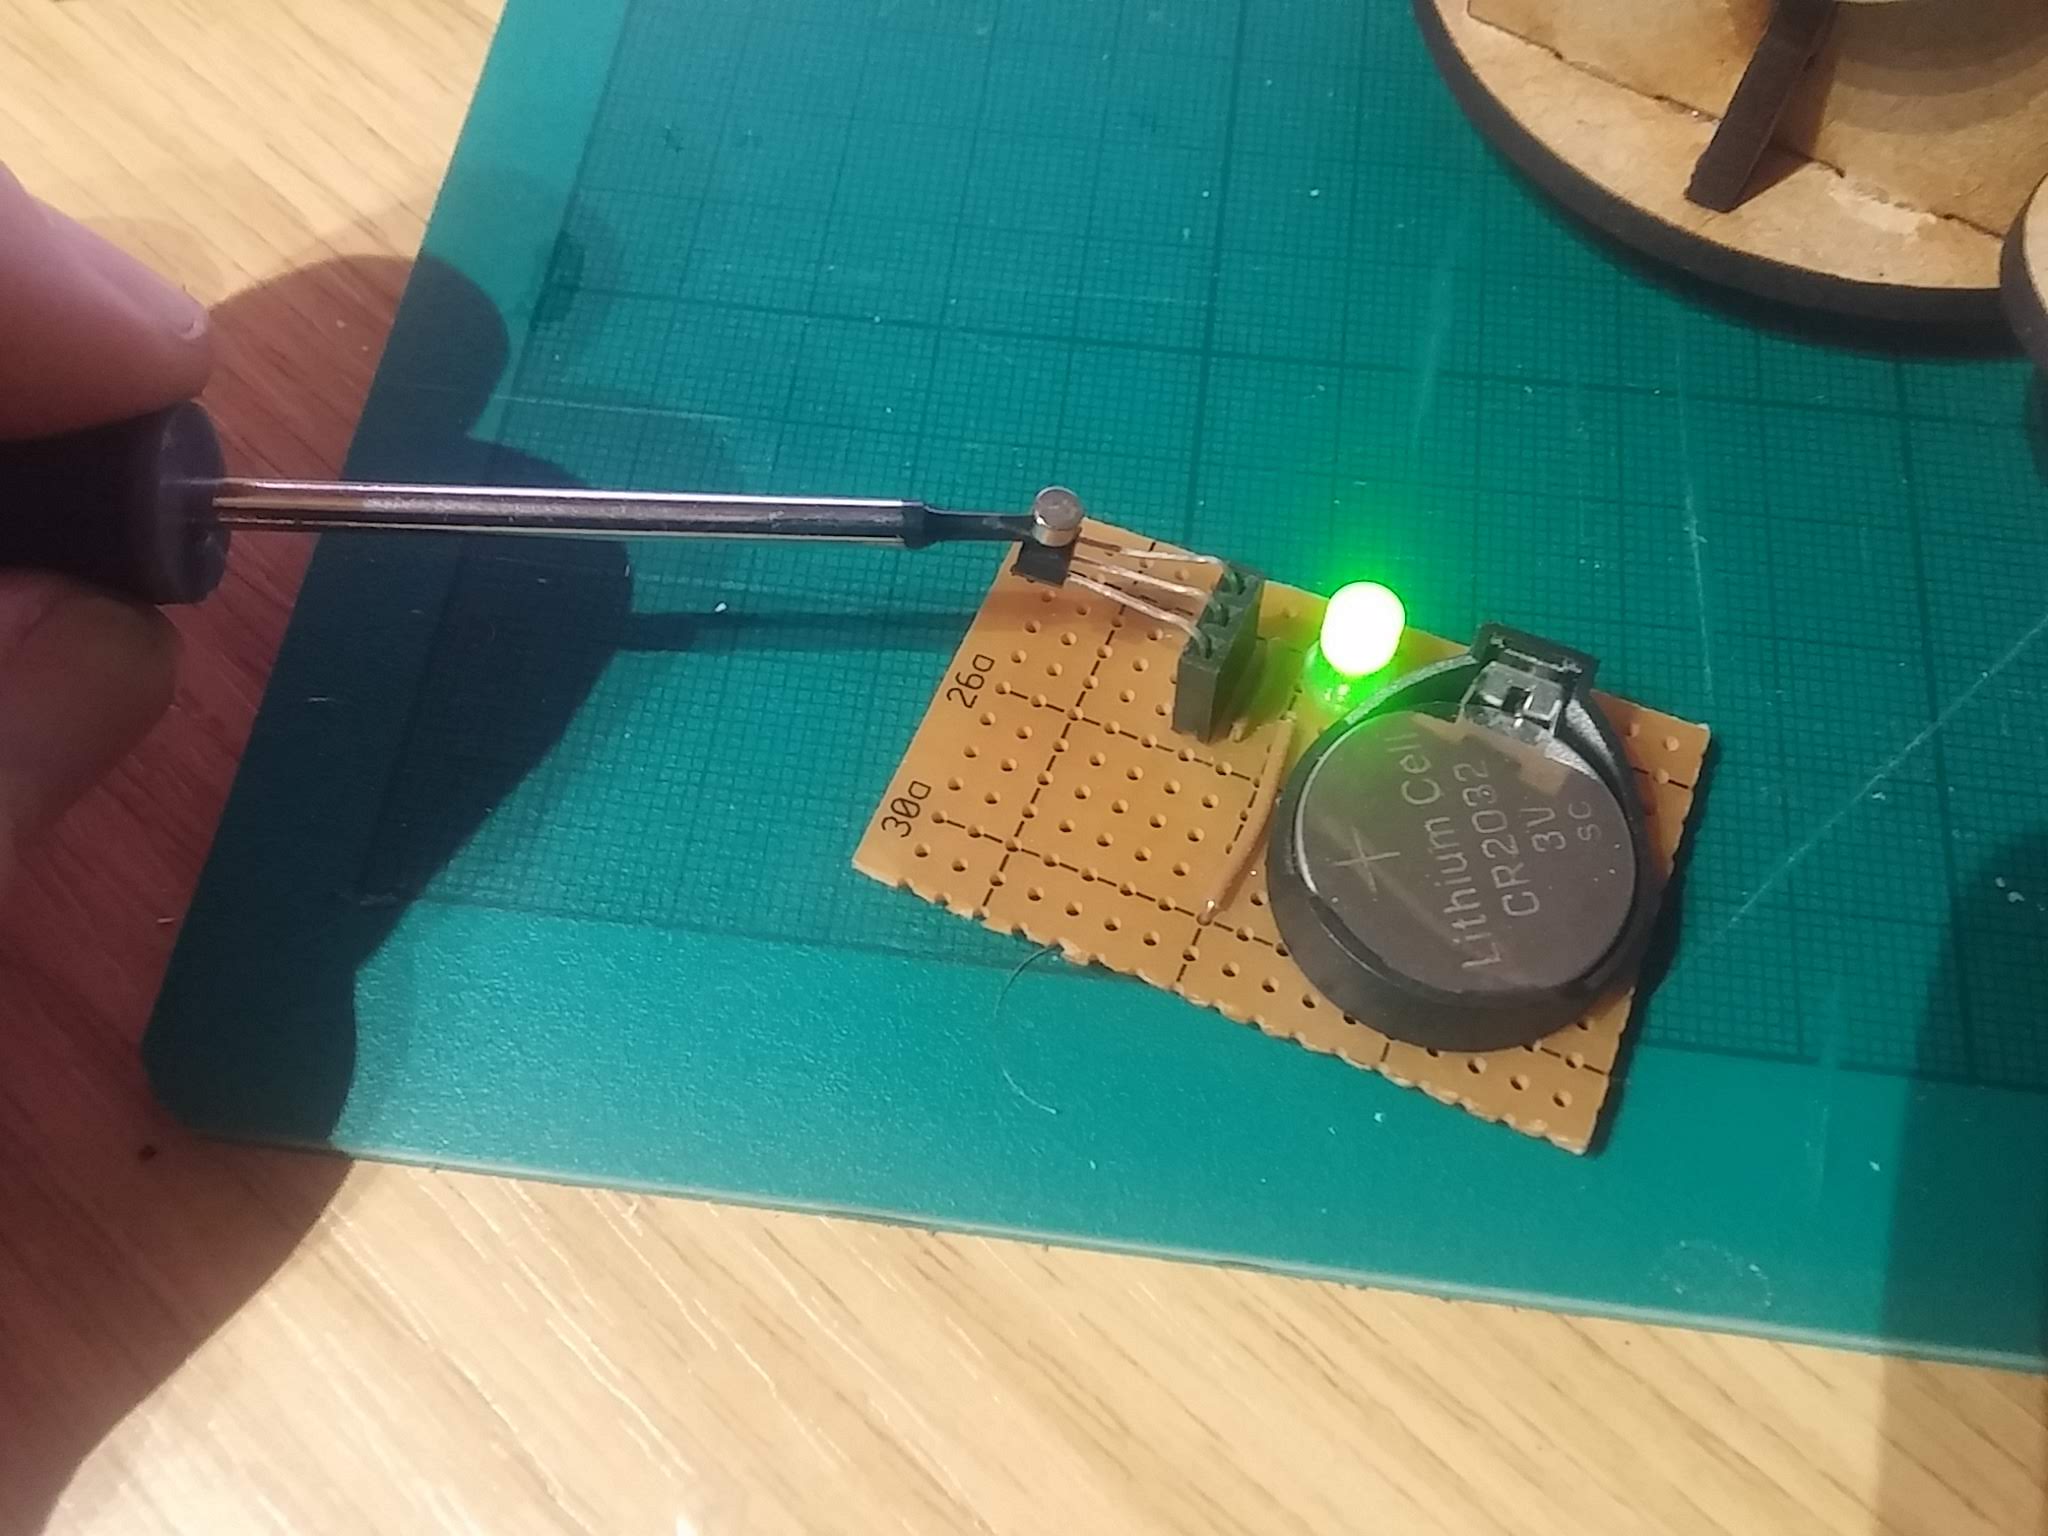 Hall sensors are great for detecting movement
I’ve already used hall effect sensors quite a lot in my interactive playing surface. They’re brilliant little sensors – physically small and can detect the presence of a magnet when placed nearby (the photo above shows how we can use the hall sensor to make an LED light up when a magnet is placed in close proximity).
I thought that we could use hall sensors and magnets affixed to the frame of the painting handle to send the microcontroller a message once a specific position has been reached.
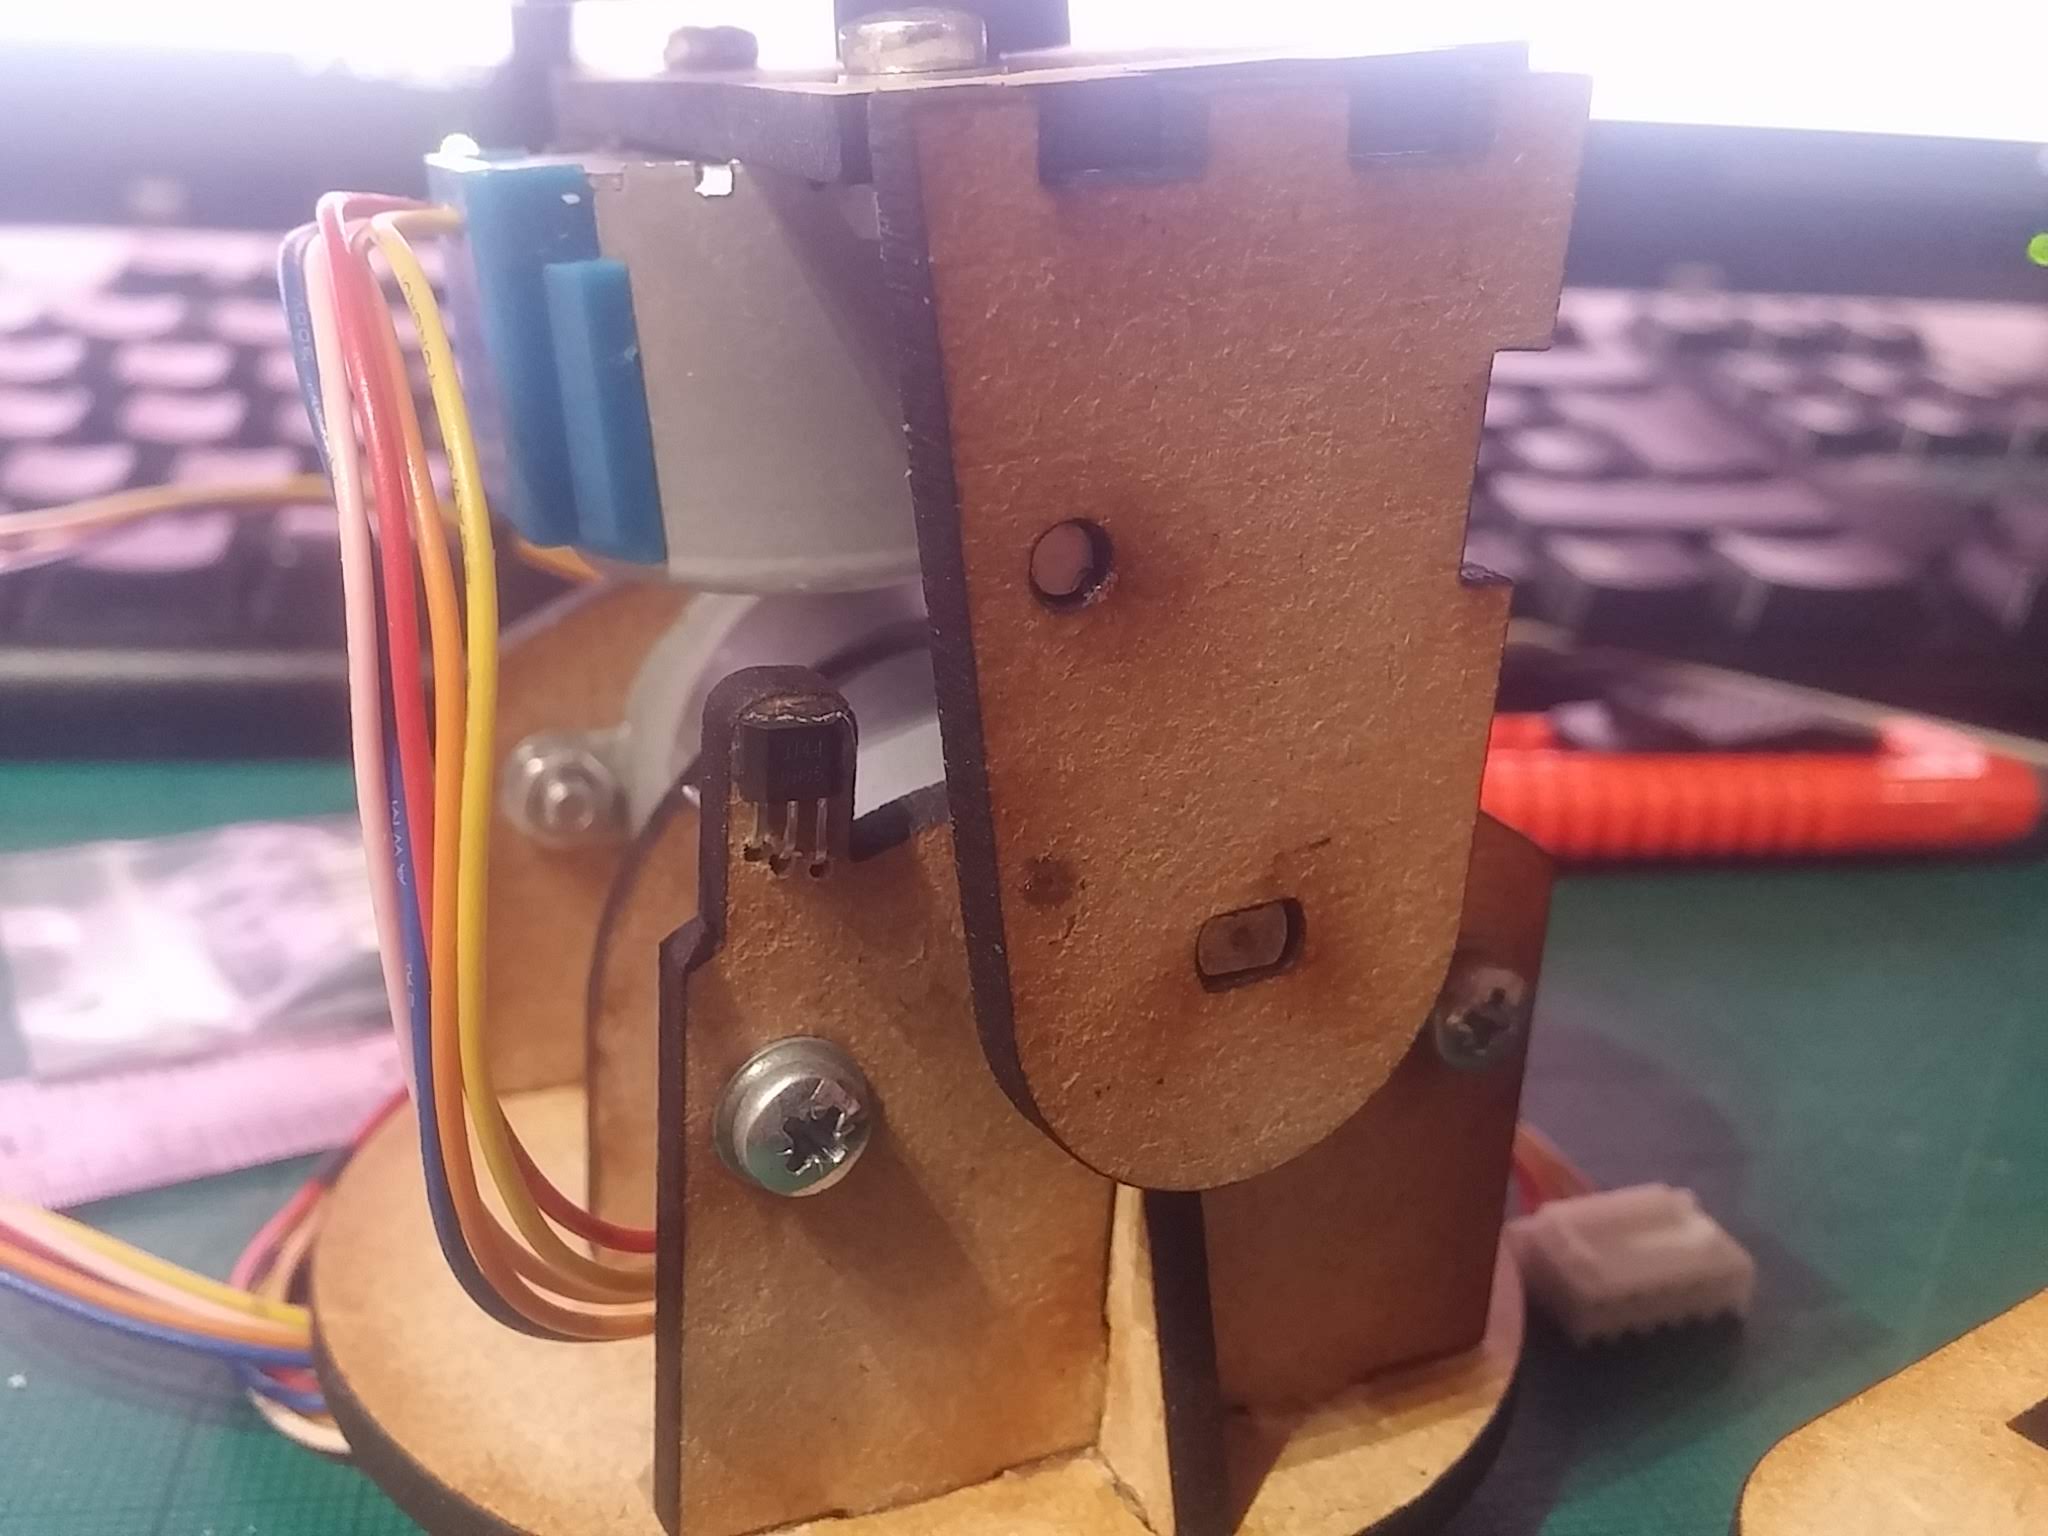 Hall sensors on the vertical axis
The hall sensor on the vertical part of the frame is triggered when the magnet embedded inside the moving section passes over it. When this happens, we know that the vertical piece is at its furthest extent.
 Can't see the hall sensor? Nope, but it can sense the magnet immediately over it.
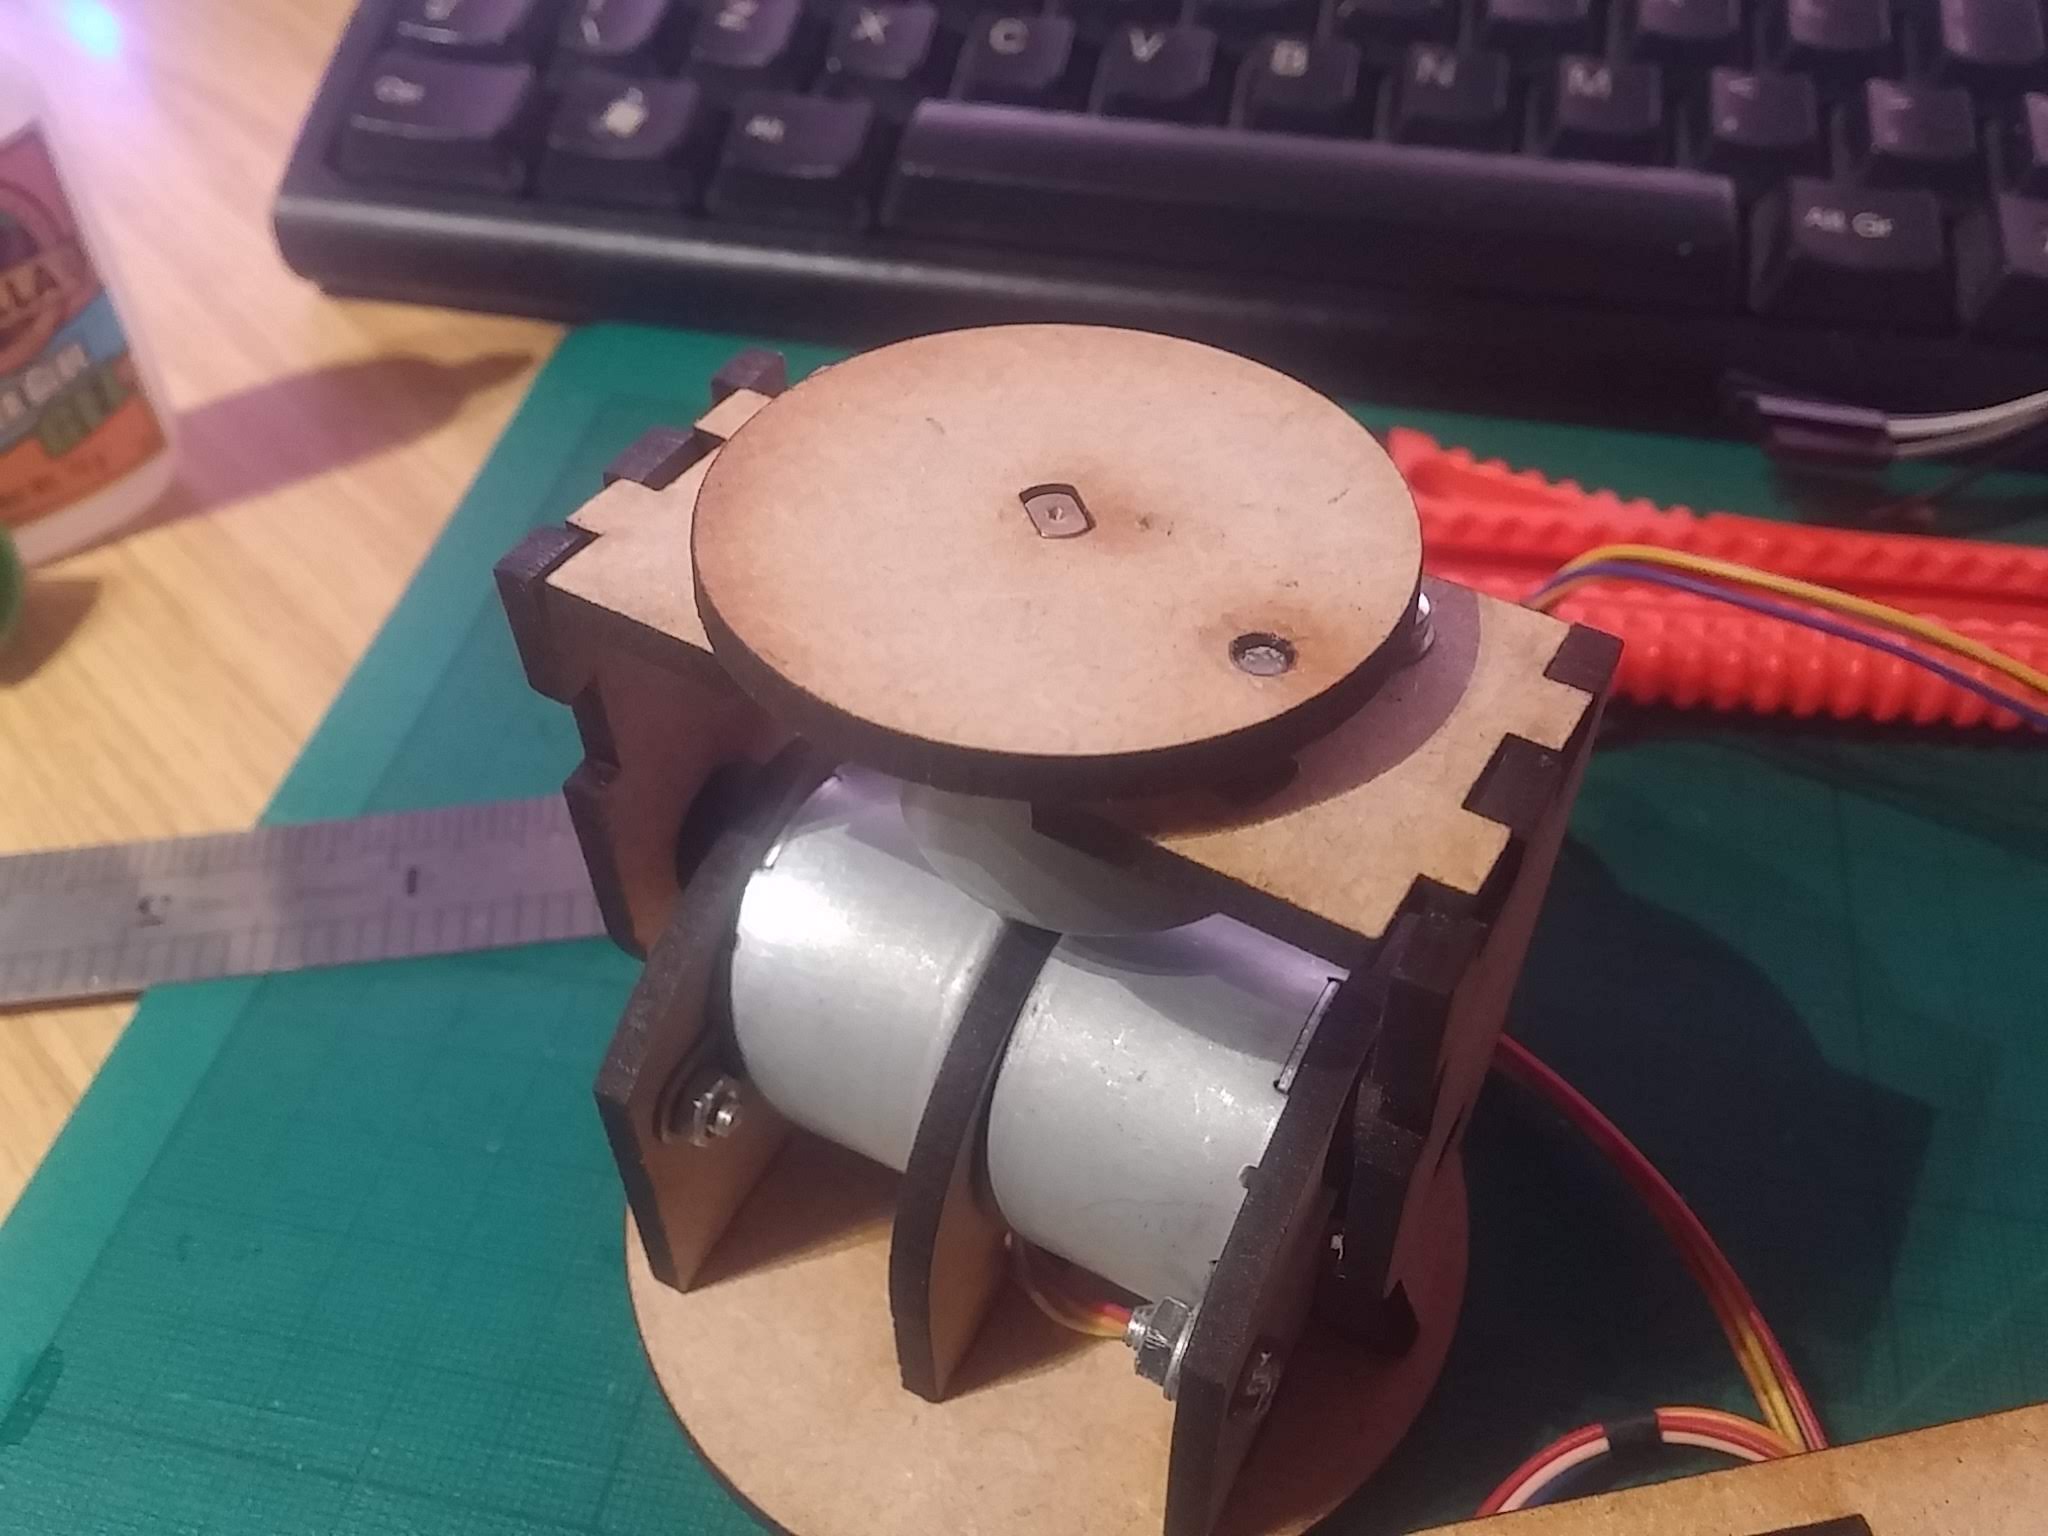 You can just make out the hall sensor underneath the 3mm magnet embedded in the rotating top.
The same applies on the rotating “tabletop” that the miniature stands on – the magnet sits on the rotating part, meaning that we don’t have to worry about wires getting tangled or wrapped around the axle, no matter how many times the top spins around.
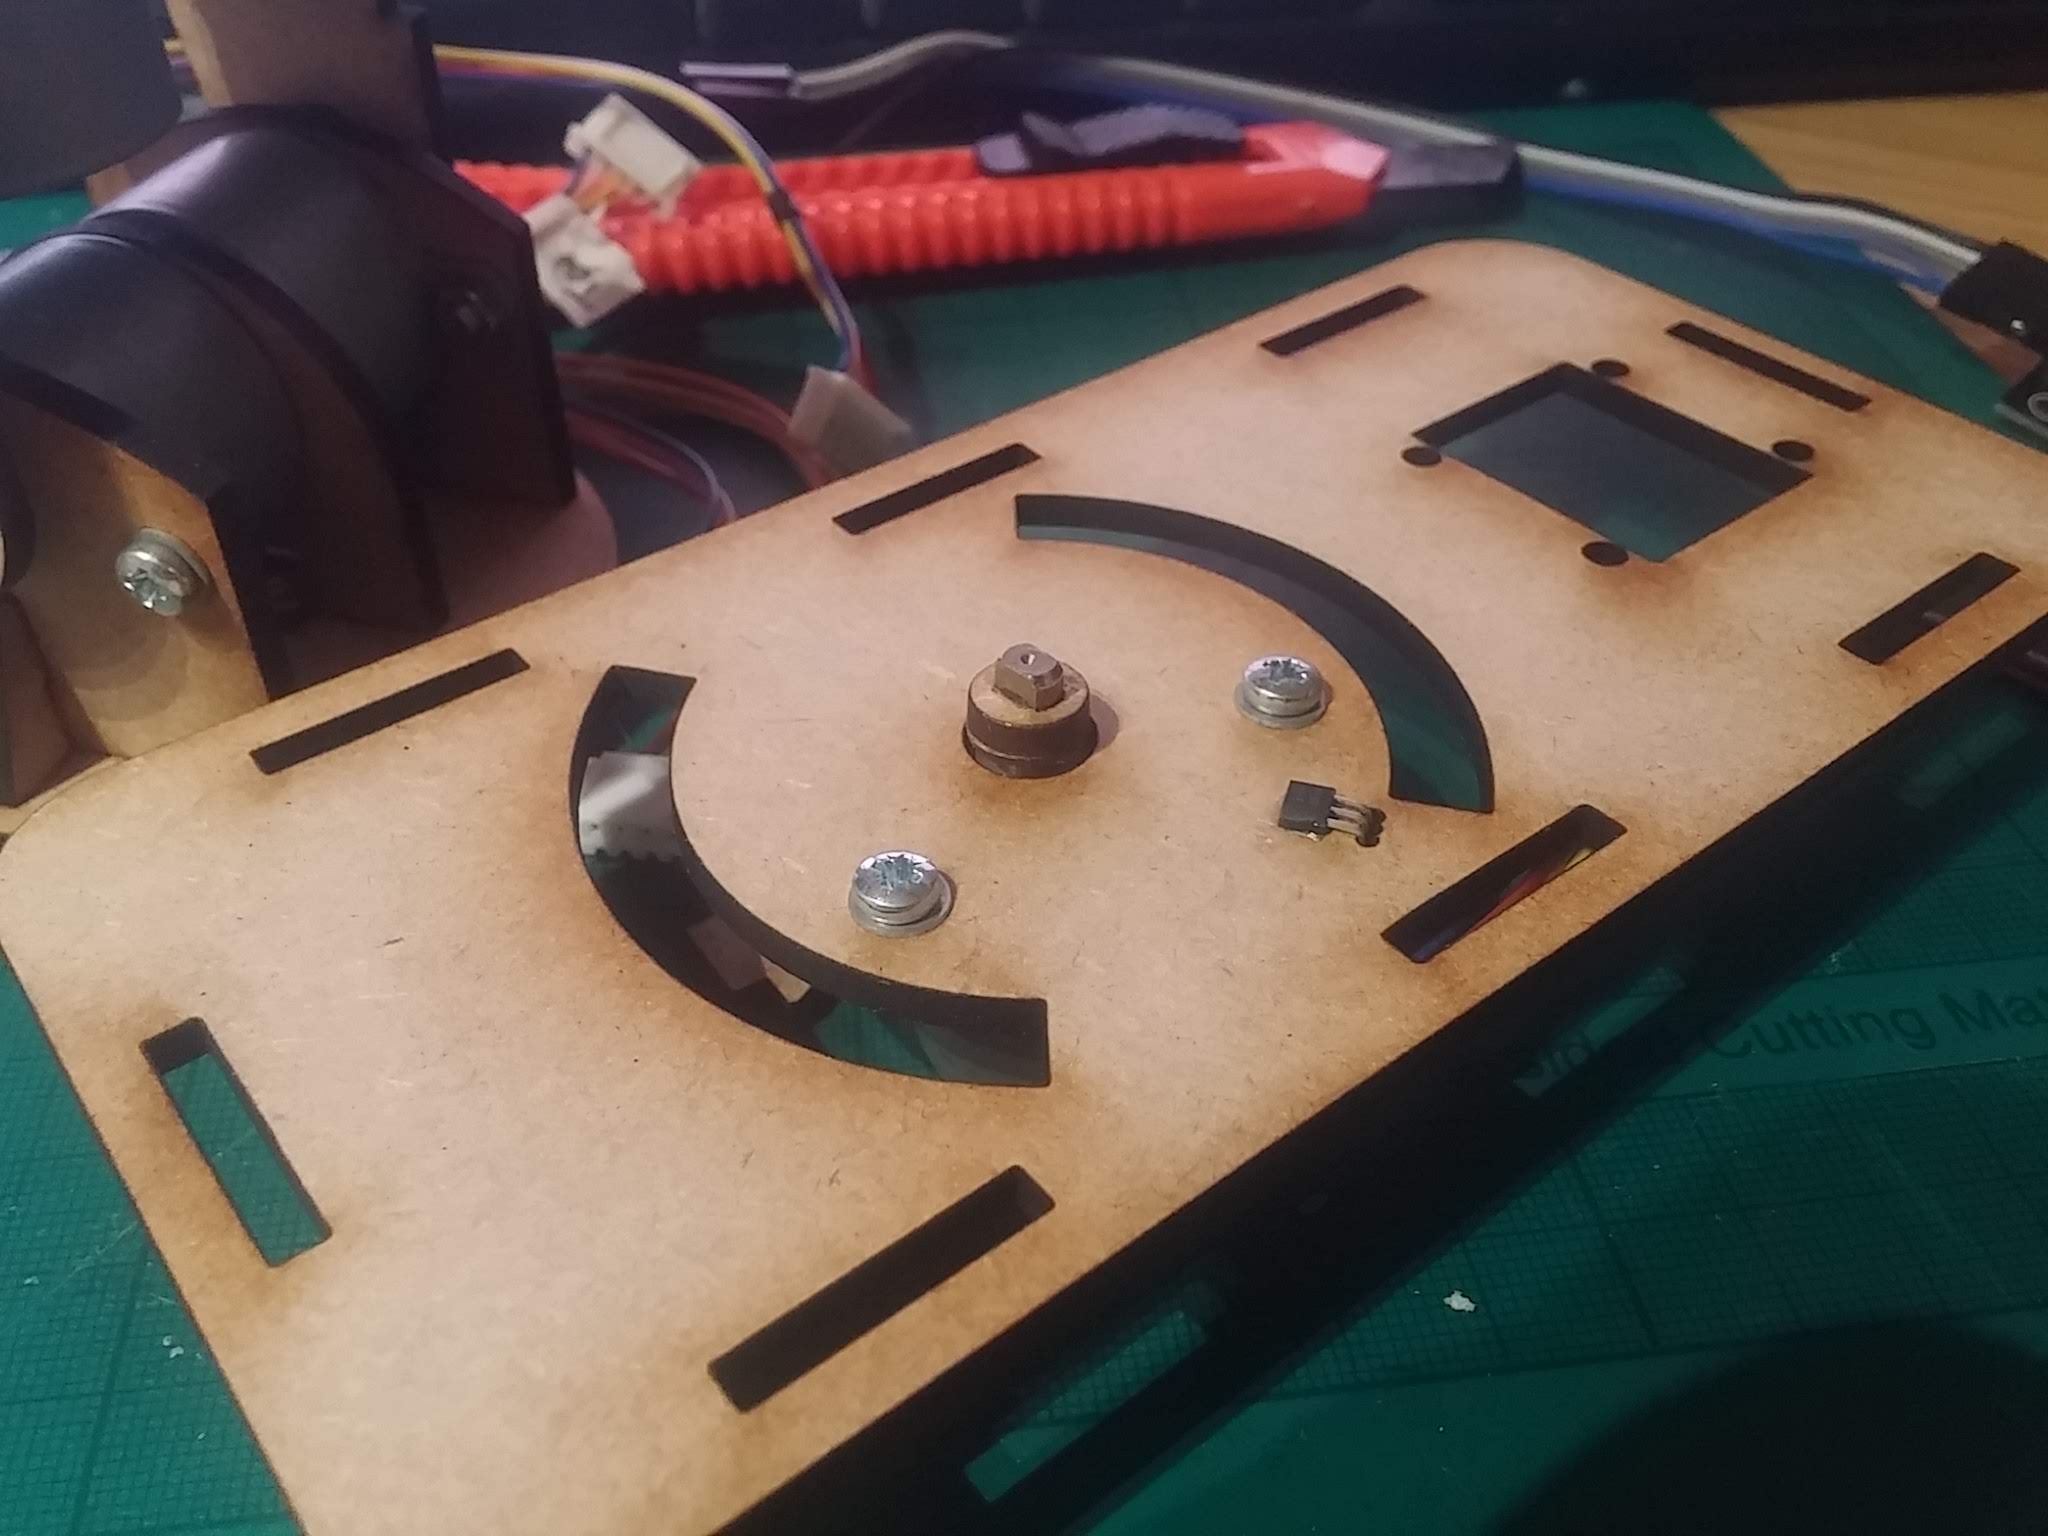
The same principle can be applied to the base – although the movement of the entire structure is restricted to just 90 degrees on the base, we can use a hall sensor in the bottom and a magnet embedded into the rotating part, to work out just where in 3D space the thing actually sits!
One week later....
It’s been over a week since the last update on this project – mainly because of real life and work commitments getting in the way, but also, partly, because I’ve been waiting for an order from China to be delivered, filled full of lovely electronics goodies.
In this parcel was a bluetooth controller, allowing me to send serial data commands to the device wirelessly. This is going to be really important. We’ll see why in a minute….
Before we can do anything clever with our bluetooth module (like hooking it up to a smartphone/tablet app) we needed to make the motorised painting handle a little more intelligent than it was.
Namely, the device didn’t know where it was in real-world space; it knew if you moved the joystick to activate some motors, but it had no concept of what those motors were driving, or why, why where the “arms” on the painting handle where at any one time.
This needs to change – because one of the things we wanted to add to our “smart, motorised painting handle” was the ability to move to pre-defined positions – which means the device needs to know where it is, before it can move to a given position.
So I changed the firmware inside the microcontroller to do two things when it very first “boots up”. The first is to move the motors until the hall sensors (that we added at the last post) trigger – once a sensor triggers, that motor stops moving. When all three motors stop moving, the device is in it’s “start position”.
The next step is to then move from the “start” position to the “home” position – i.e. from a known starting point to a desired position (in this case, straight up, with the top rotating plate facing forwards).
The video should demonstrate this in action – on reset, the device moves the motors until it sees the sensors being activated (note that some motors stop moving while others continue – this is normal). Only once all motors have come to rest does the device move to the desired position.
So far, so good.
With this in mind, it’s time to break out one of those new bluetooth modules and try controlling the painting handle from a phone…..
Pretty well done?
After adding “homing sensors” to the motorised painting handle and hacking some simple code together in Abode Animate (formerly Flash) our motorised painting handle finally comes to completion.
(yes, Unity would also be a fair cross-platform choice, but the final .apk files it creates are about twice the size of Flash-based apps)
At first I did a quick prototype in Unity3D complete with a fancy 3D model of the device, and some clever swipe/twist/rotate gestures to control it. But looking back at the original brief – to make painting more accessible to people with problems with their fine motor skills – I quickly realised that this wasn’t really appropriate.
So the interface is deliberately simple.
It has big, chunky buttons that you can prod with a stubby finger; when you press down, the motor(s) start to turn, when you lift off, they stop.
When the painting handle is in a position you’re happy with, and might want to return to again in the future, you can save the motor settings to the “bank” of slots. This gives you one-touch access to multiple pre-set, and entirely user-customisable positions – helping the user to quickly and easily get their model into position, ready for painting.
Another project ticked off.
Well, at least, complete. Well, fully working.
The last stage will be to re-create the device in acrylic (mdf is great for prototyping but just doesn’t quite have the same visual impact as laser-cut plastic), tidy up the firmware and post all the files online for you to make your own!
Controller app
Let’s take a quick look at the controller app for our motorised painting handle…

This is the main (and, let’s be honest, only) screen in the controller app. It shows a representation of the motorised painting handle, with a couple of big, easily accessible buttons to control the motors.
Press any of the large round buttons to make the device start to move. Release the button and it stops. It really is as easy as that!
Though, of course, no app would be complete without some utterly baffling settings to mess things up with….
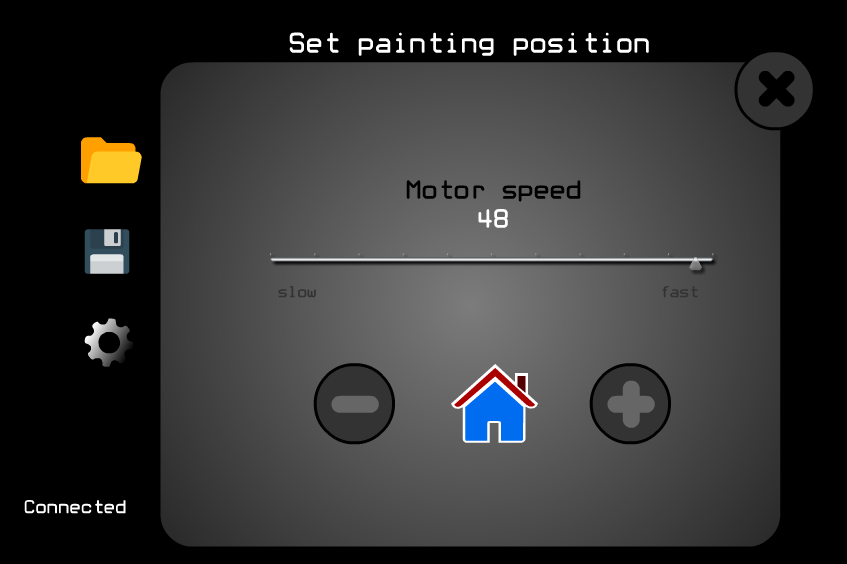
The most important setting is the motor speed.
Given the diminutive side of the device, it’s very easy to “overshoot” your target position if you’re not totally paying attention. So you can speed up and slow down all of the motors at the same time with a single slider bar.
I found that a speed of between 20-30 gives a nice responsive action – not so fast that you end up going back-a-bit-forward-a-bit, damn, too much, back-a-bit, sod it, forward-a-bit, that’ll have to do but also not so slow that your brew goes cold while you’re waiting for it to get into position.
There’s also a home button. I know, right?
This allows you to set your “favourite” starting position. When the device boots up, all of the motors rotate to their furthest extent – but this isn’t necessarily a particularly great starting position, so when you’ve got the handle in a position you’re happy with, hitting this button makes it remember to start at this point when it first wakes up.
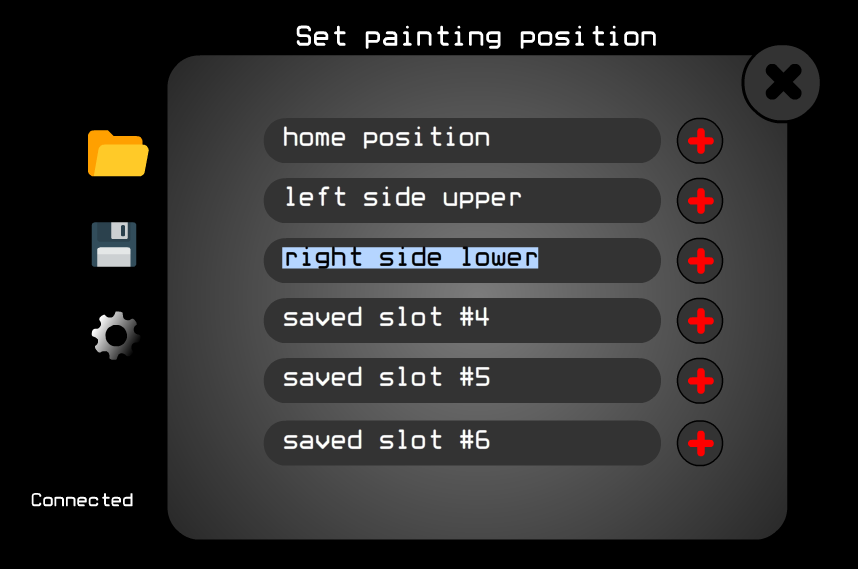
At any time, when you’ve got your miniature positioned into just the perfect spot for reaching into one of those tricky, hard-to-reach places, you can save the motor settings to memory.
Hit the “save” icon (on the main screen) and it brings up a pop-up window. Simply type in a meaningful name and hit the red “plus” button.
In future you can set it back to this position with just one-click….
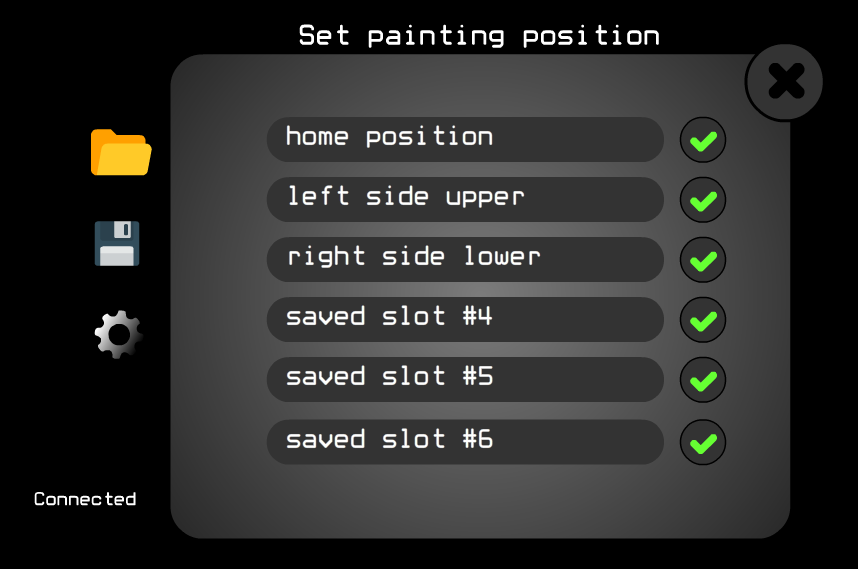
Hit the “open file” icon on the main screen and another pop-up appears, similar to the save screen.
Instead of saving motor positions to memory, here we’re recalling them. Just click the tick button alongside the previously save position and bzzzt, bzzzt, click! Hey presto – you’re back where you left off…..

![StarCraft Tabletop Miniatures Game Pre-Orders Live Now [Updated]](https://images.beastsofwar.com/2026/03/starcraft-tmg-news-cover-600-338.jpg)


![Mounted US Cavalry On Kickstarter For Dead Man’s Hand! [Updated]](https://images.beastsofwar.com/2026/03/us-cavalry-main-600-338.jpg)


![Play WW2 Commando Operations With Butcher & Bolt [Updated]](https://images.beastsofwar.com/2026/03/relaunch-600-338.jpg)


