


![Alternative Trench Crusade Miniatures? Trench Missionaries Review | Wargames Atlantic [7 Days Early Access]](https://images.beastsofwar.com/2026/03/unboxing-wargames-atlantic-trench-missionaries-coverimage-225-127.jpg)


Spring Clean Challenge: Developing WWII infantry for 3D printing


Recommendations: 45
About the Project
After joining a forum conversation about the shortage of 3D printable WWII miniatures, I decided to have a go at creating my own.
Related Game: Flames of War: The World War II Miniatures Game
Related Genre: Historical
This Project is Active
The long way around
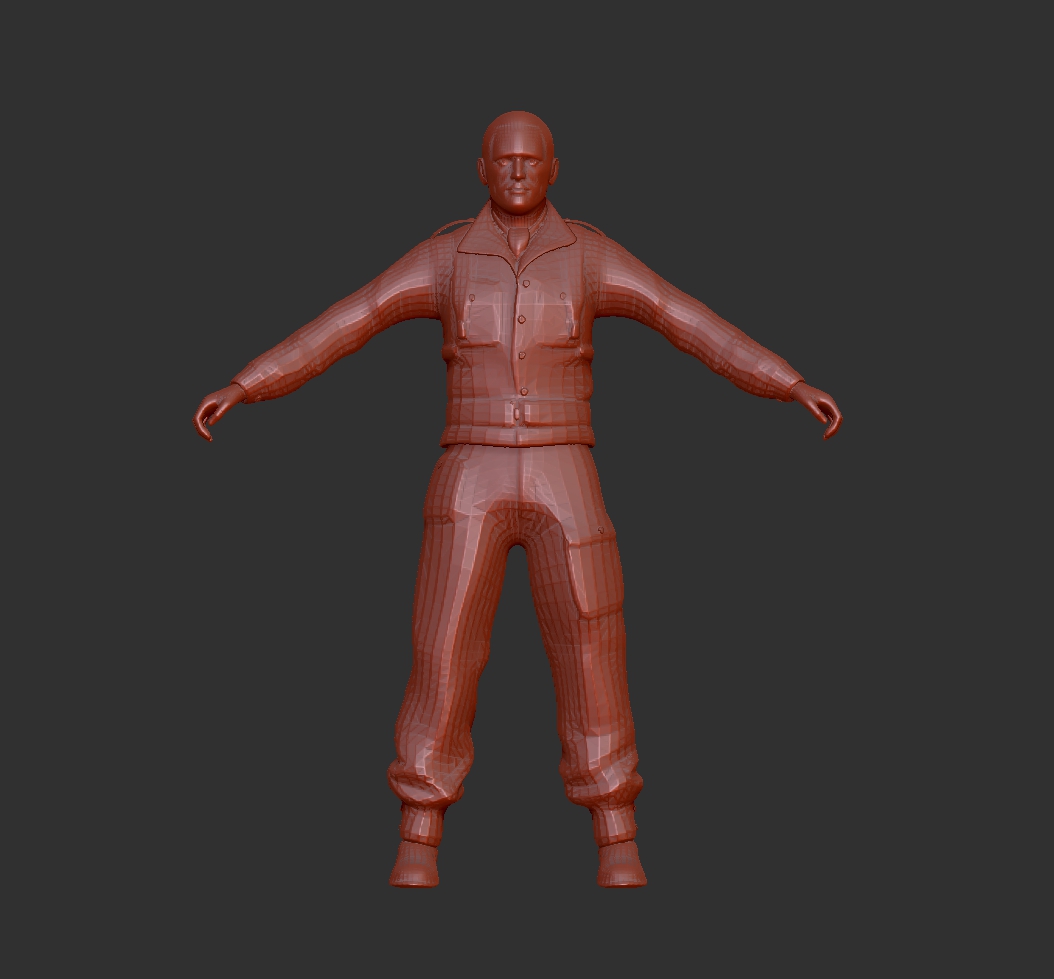
Going back to the figure in it’s original form, I took a look at the poly frame. As you can see in the image below the figure is made up of polygons of varying shapes and sizes.
This is not optimal for Zbrush modelling as the model behaves as though some areas are in higher definition than others.
There are several ways to even out the mesh and increase its density, improving the resolution of the model. The trick is retaining the detail while carrying out these operations. The simplest option was to subdivide the mesh, increasing the total number of polys. After a single subdivision the mesh looked like this:
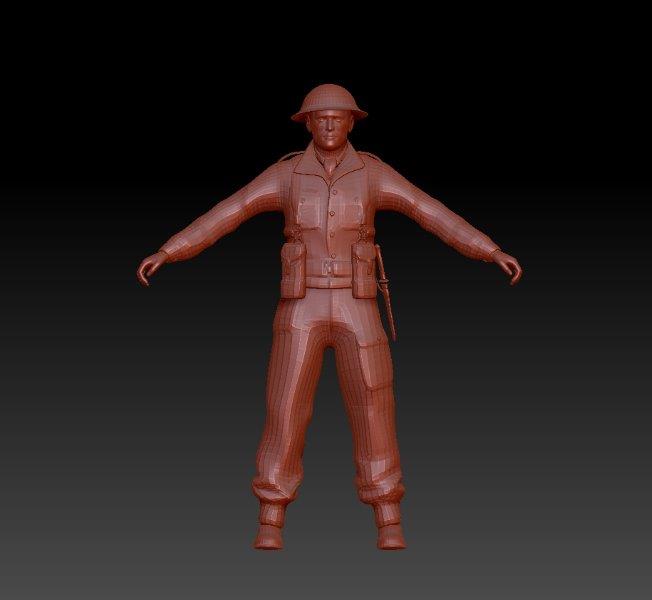
As you can see the model is far less blocky but the details have begun to soften. Areas like the straps of the webbing, as well as buttons and buckles have begun to disappear.
At this point I am aware that on a 6mm model these details are hardly likely to be an issue. However things like this annoy me and I know with a little work I can achieve a better result. I’m enjoying working with this model and will probably continue to work with it beyond this project so I want to get the best out of it.
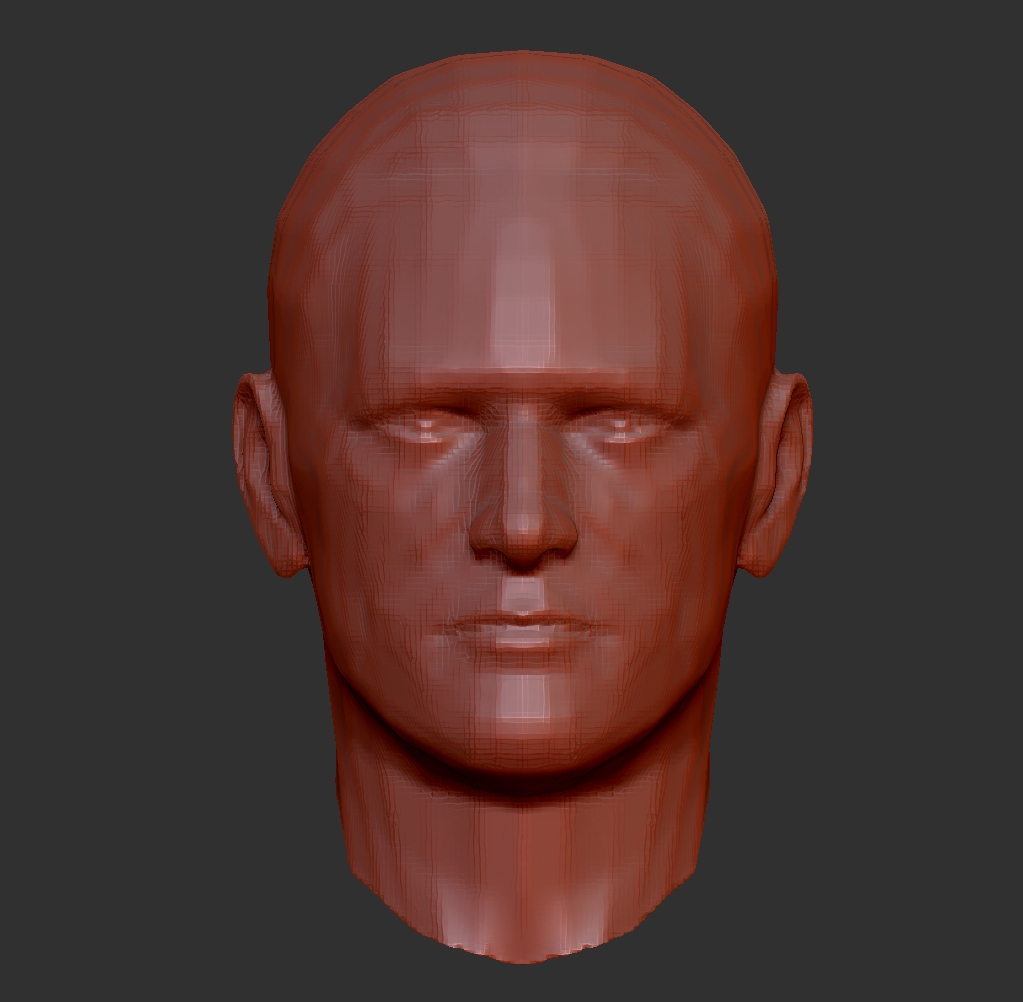
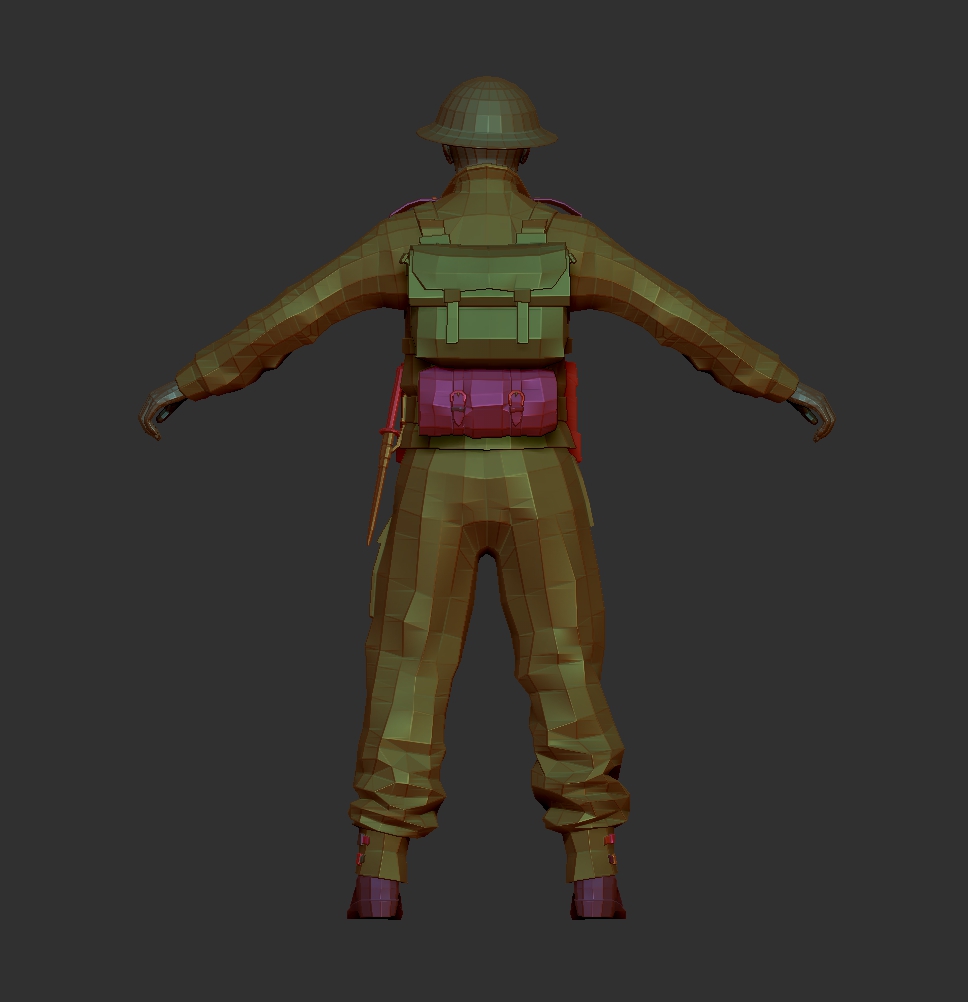
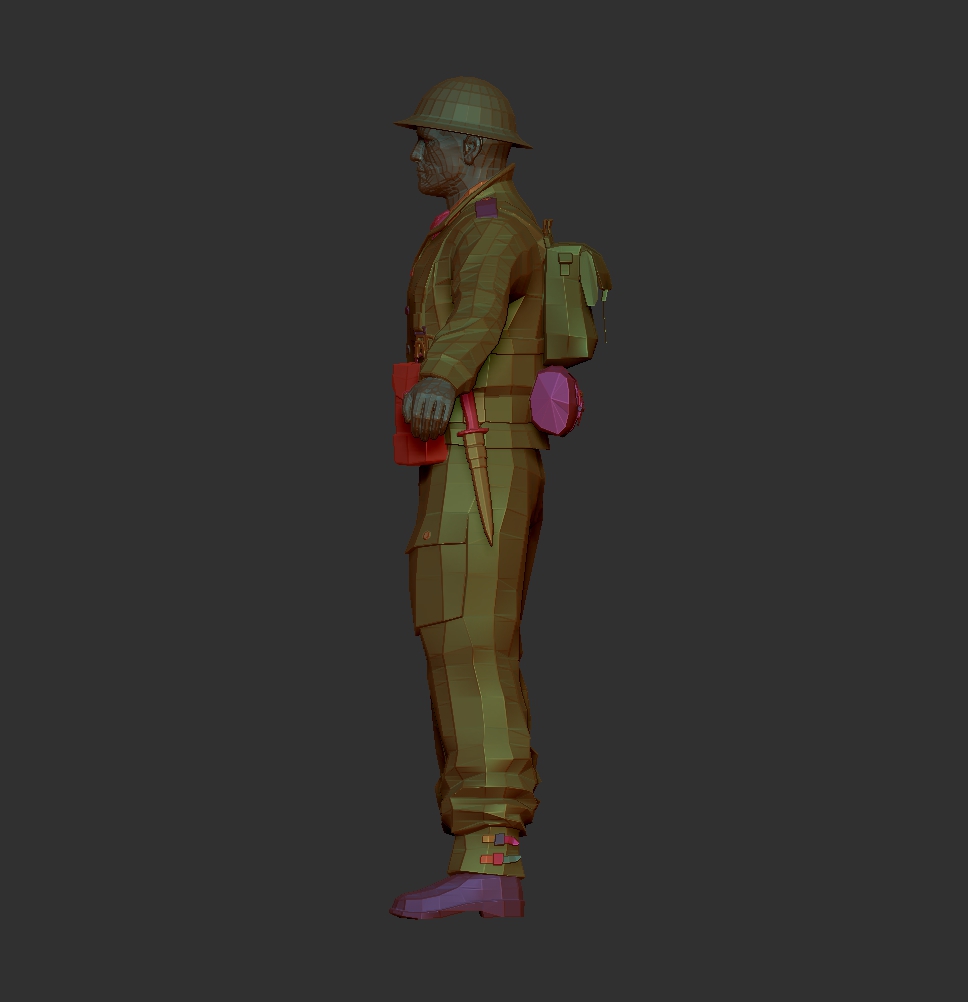
Opting to take the long way round I began separating the model into sections using the polygroups described earlier. By treating each element of the model individually I would be able to retain their form and even enhance some details, before bringing all the parts back together.
After a few hours work I was much happier with the new model. Below is a comparison of the face which has much greater definition than my first attempt.

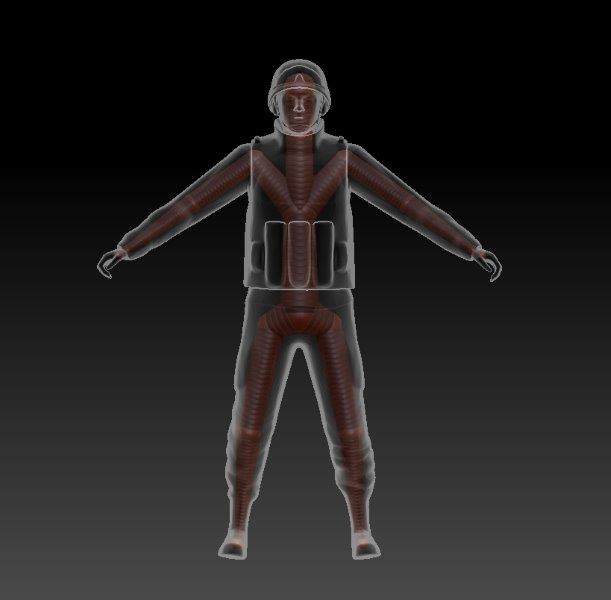
MKII Rig
With my master model downloaded it was time for another lesson in rigging. I watched the tutorials again as I wasn’t quite sure how I’d gotten it to work the first time and knew I hadn’t followed each of the steps correctly.
I also wanted to create a neater and more anatomically correct rig. The tutorials elude to the need for an economy of design when building a rig/skeleton. Too few components and the mesh would stretch and distort around the internal framework. Too many and it would become infinitely pliable, bending all over the place and loosing any sense of anatomy.
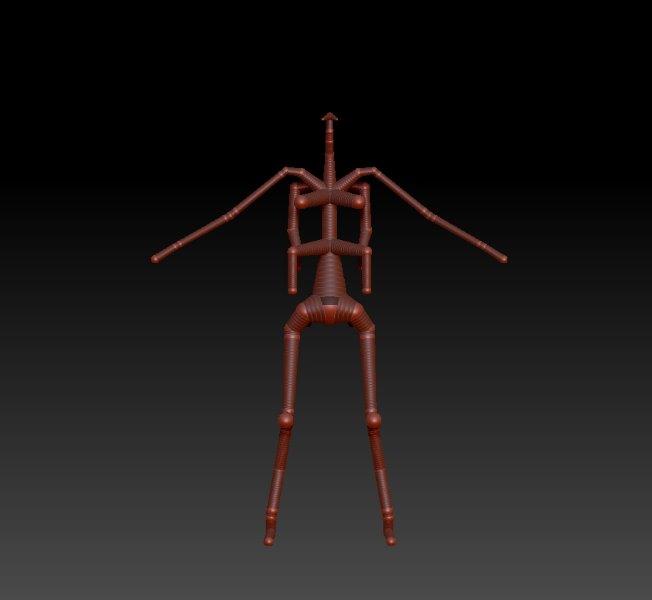
The above image shows the new rig without the soldier mesh. The various protrusions around the spine are intended to ensure that the torso retains its volume as the model bends. I’ve put structure into the pack and webbing in an attempt to retain their form and position during posing.
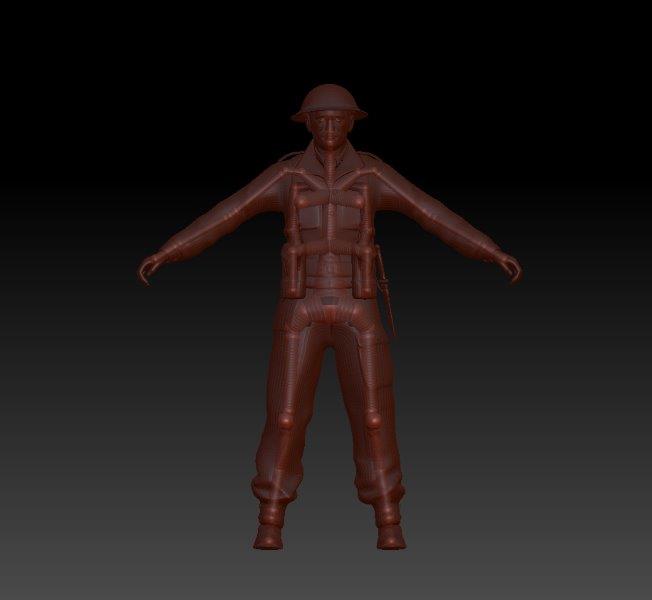
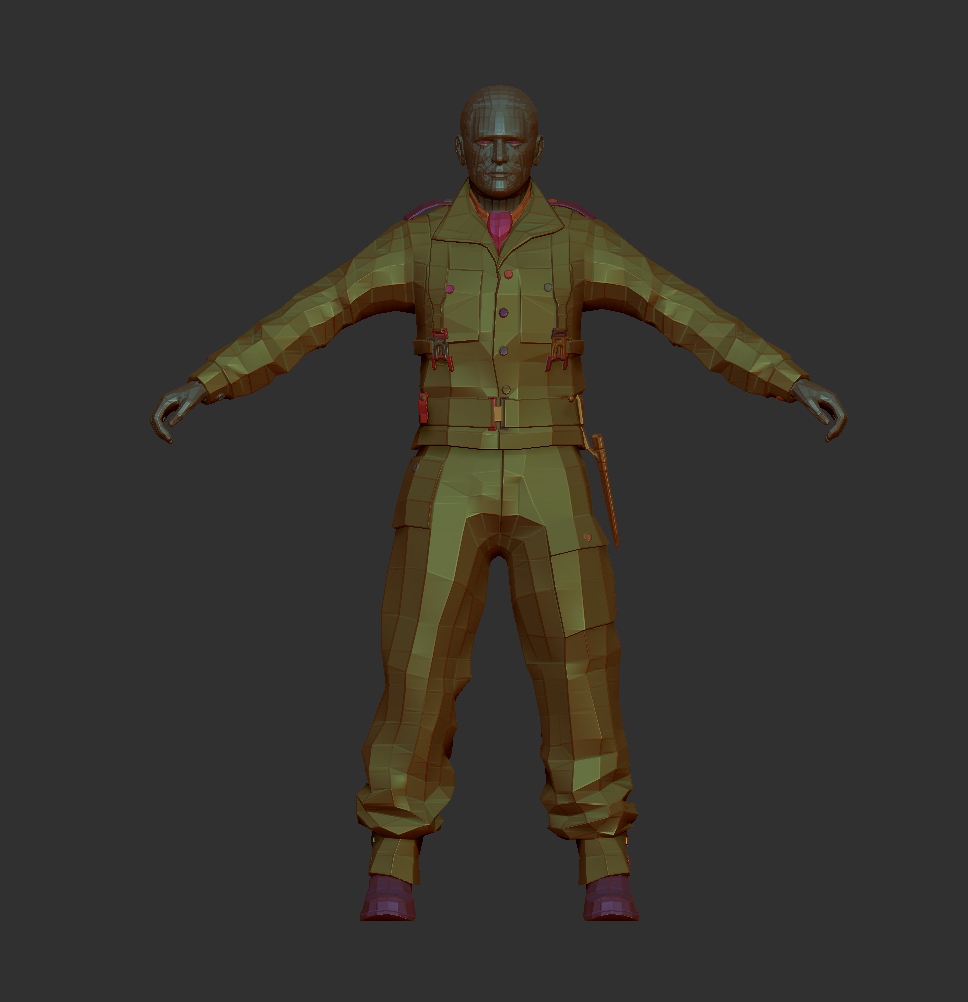
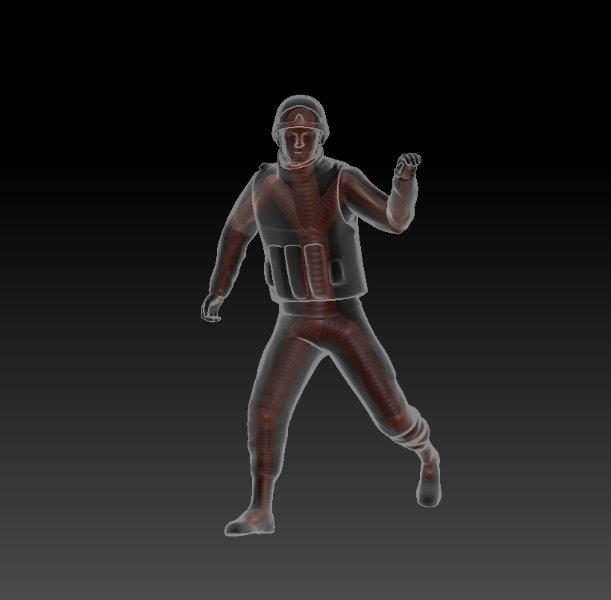
After reposing the arms, tilting the head and improving the stance of the legs I ended up with this;
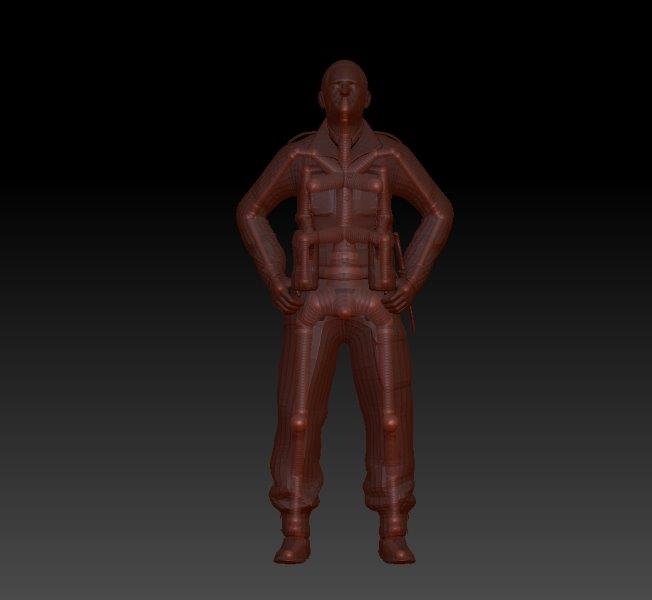
I found it beneficial to remove the helmet and reposition it manually after posing the figure, in order to retain its correct form.
I’m a little disappointed by the softening of the soldier’s form when I transfer the pose to the skin of the model. I suspect this is due to the topology of the mesh which was likely built for 3D graphics, rather than 3D printing . I think I need to do some work to the mesh prior to transferring it to my rig so I’m going back a step to revaluate.
Polygroups
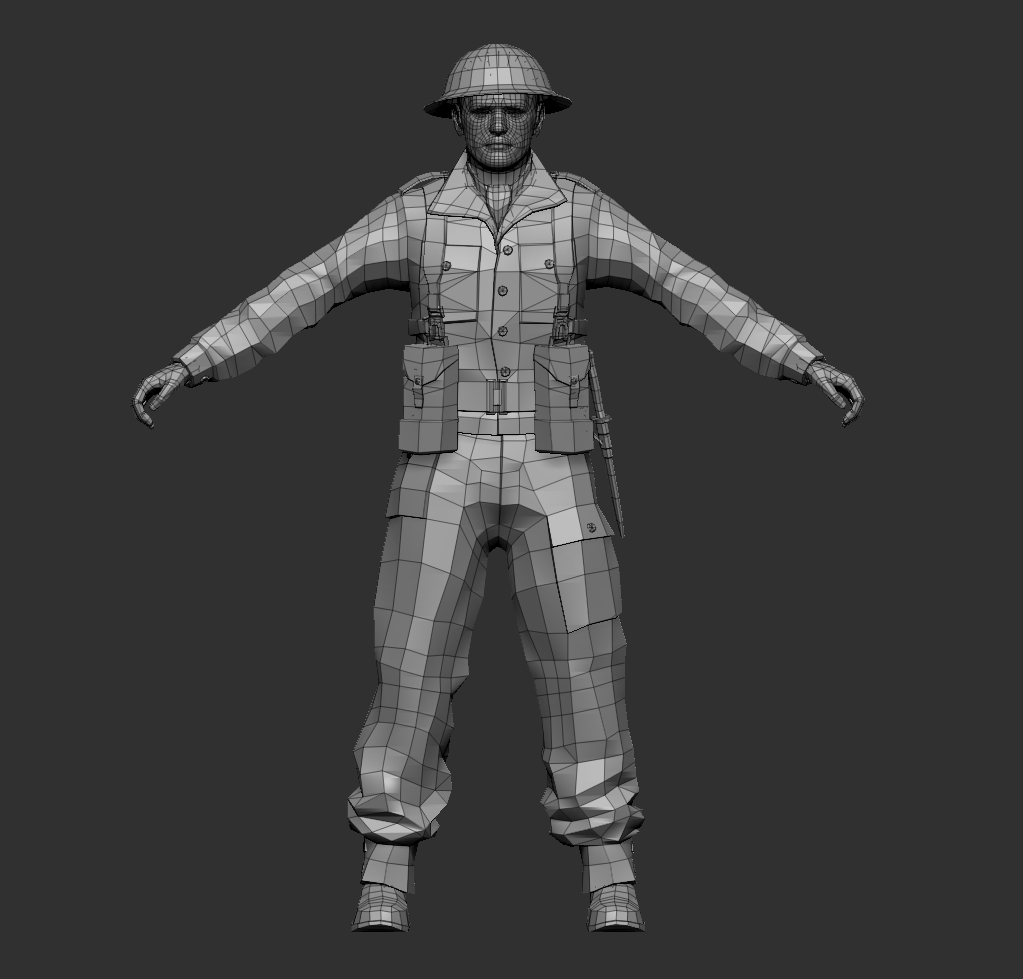
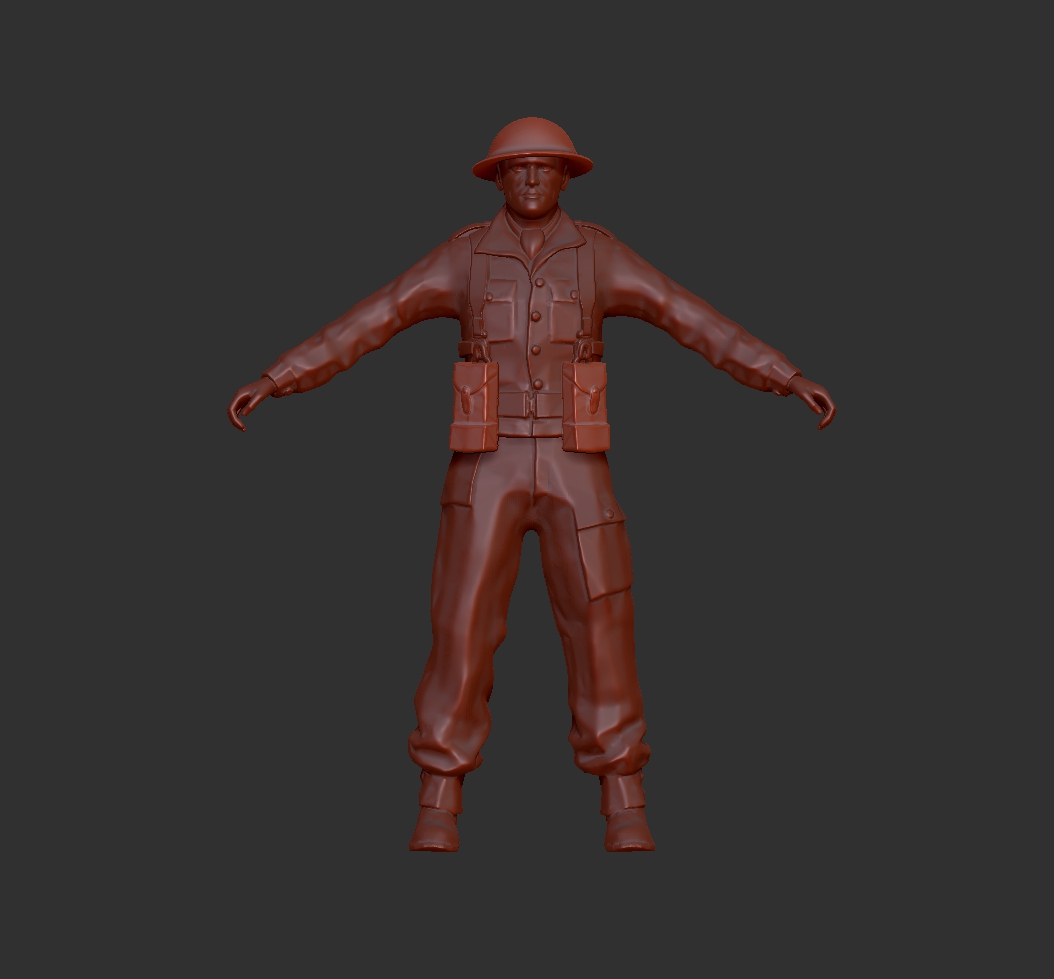
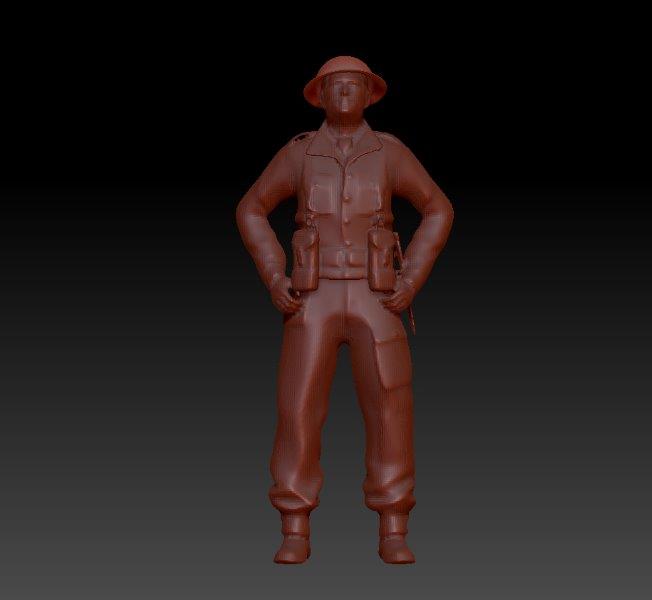
Feeling confident that this process would work I decided to download the British Infantryman. For less than the price of a pint in your local London boozer I picked up this plucky chap.
Something I hadn’t thought to check on the previous model was whether it was made up of separate Polygroups. Switching the view mode on the new model I was happy to discover that it was divided into many different areas of topology. This is delineated by the different colours in this set of images.
Polygroups are, as one might expect, groups of polygons set to a common purpose. This essentially divides a model into sections that can be easily isolated. This is particularly useful for me here as I am able to remove entire parts of the model such as the helmet and pack, giving me more options not only in how the figure looks but in how I work with it.

First Steps
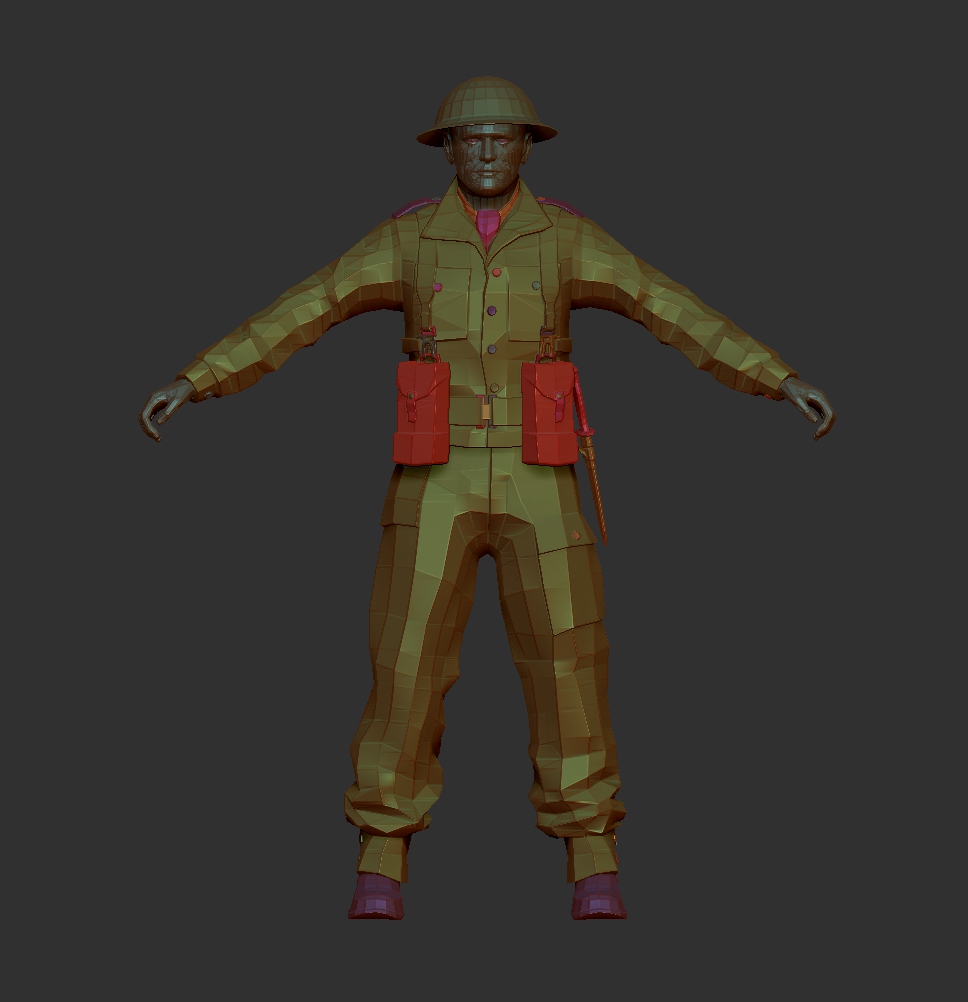
Once subdivided I made some changes to the figure’s pose by masking off sections of the body and moving them around. This is a very crude way of manipulating the figure and results in some messy areas of topology, particularly when making extreme adjustments. I had managed to pose the figure but I knew I could do better.
I had heard of the process of ‘rigging’ digital models to give them an internal skeleton. This would allow for more fluid movement and once achieved, would make for much easier manipulation of the figure poses. The free soldier I had downloaded came complete with an internal skeleton but it wasn’t something that could be used in Zbrush. I suspect it was designed for a program such as Maya but as I didn’t know (or have), that software, I would need to find an alternative solution. My next stop was YouTube to find some tutorials on Rigging in Zbrush.
After half hour of playing around while watching an excellent tutorial, I had made a basic rig.
More surprisingly, it actually seemed to work!
Testing the Water
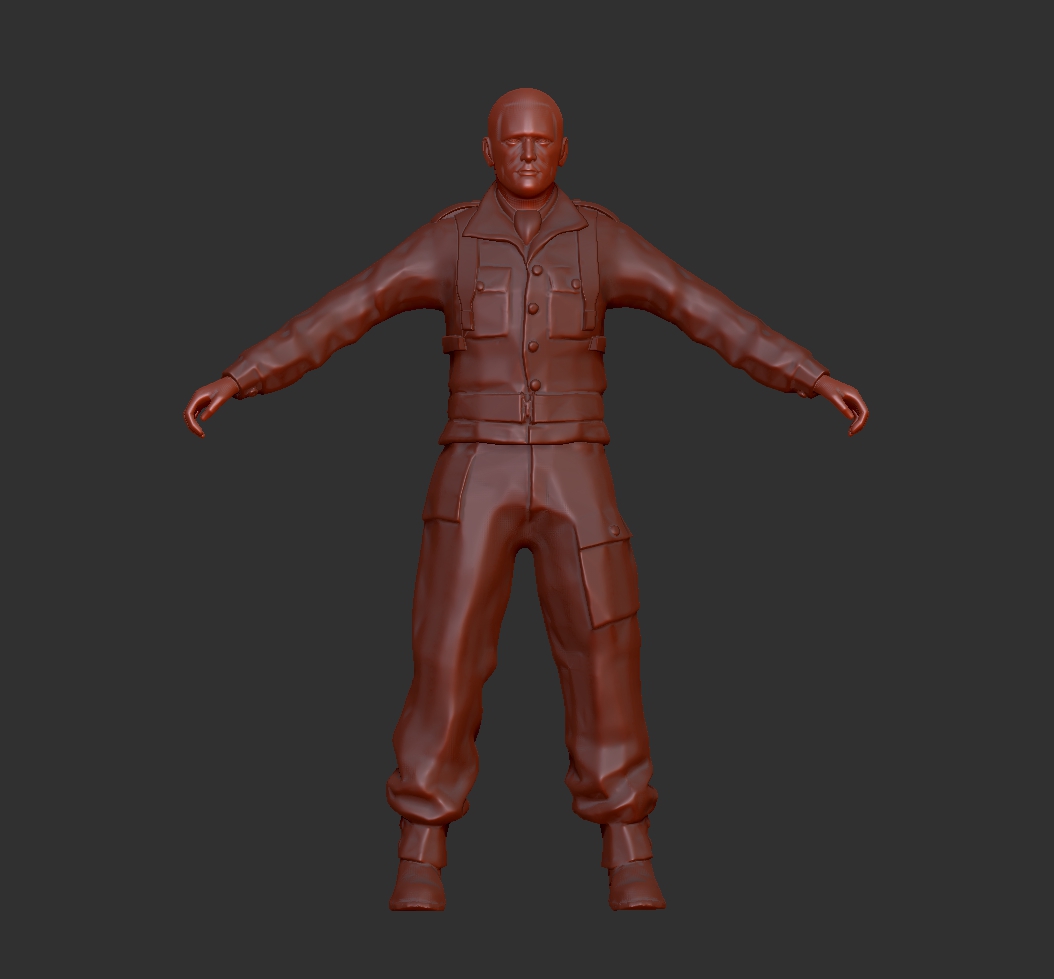
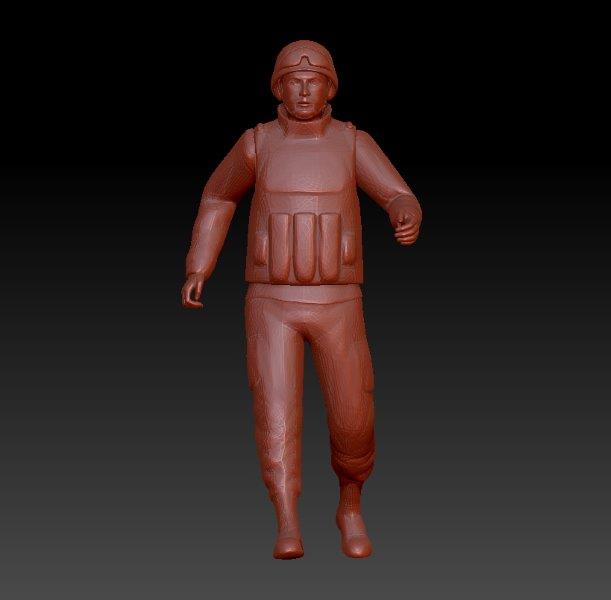
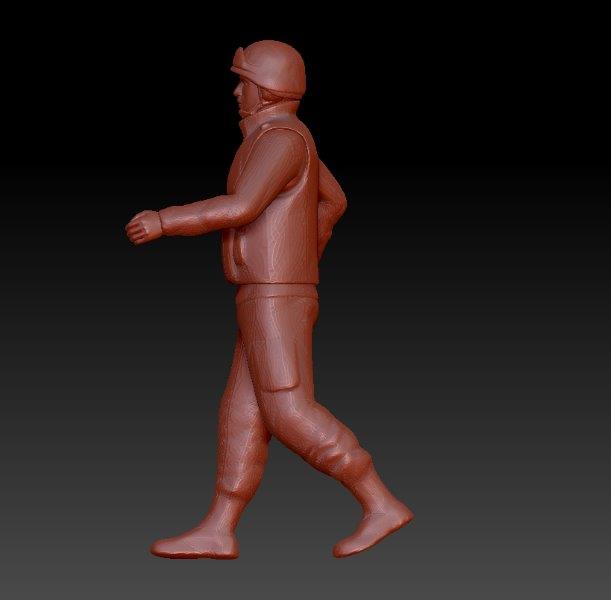
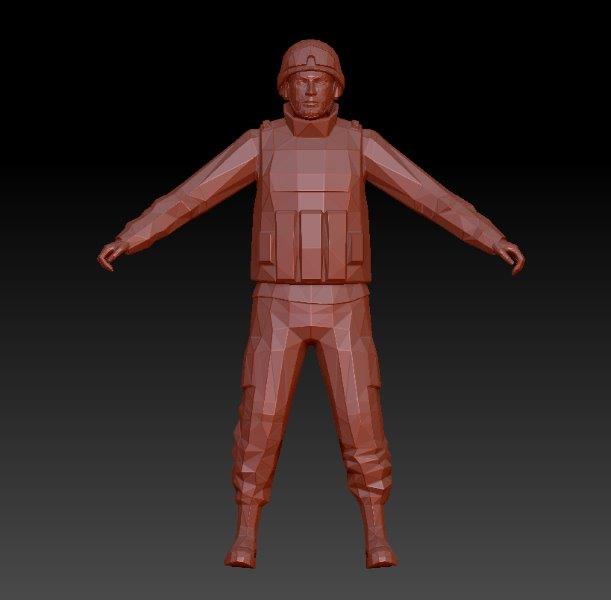
As I wasn’t really sure if my plan to purchase a digital model and repose it would work, I thought it wise to test the water with a free download first. Fortunately a comparable model, a modern Russian Soldier, was available for free from the same designer.
Here is the free soldier after I downloaded and opened him in Zbrush (the program I will primarily be using). With a low polygon count he looks quite blocky but this could be improved by simply subdividing the geometry to give it more polys.
Concept
The thread that inspired this project was about Warrens St Nazaire game, as discussed on the weekender. The brief was to find a range of 3D printable miniatures to represent the British and German forces who took part in the conflict. While I am completely open to the idea that an alternative solution will be found, the parameters of this project have given me an opportunity to progress my digital learning, very much the focus of this year for me. In many ways this is about the journey, rather than the end destination.
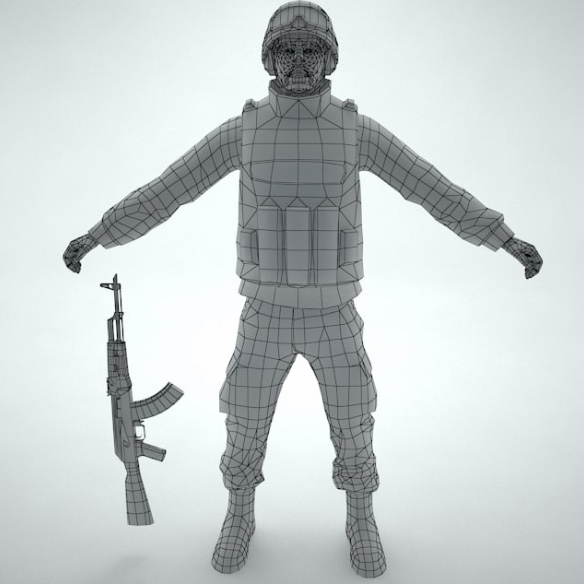
After a brief internet search I found these 3D renders on Turbosquid.
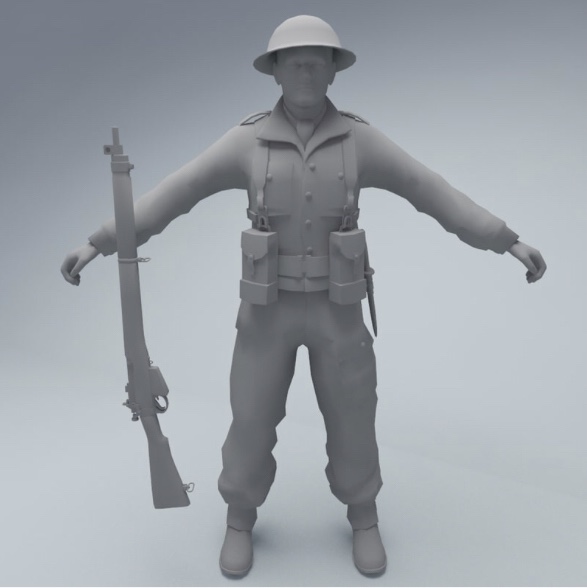

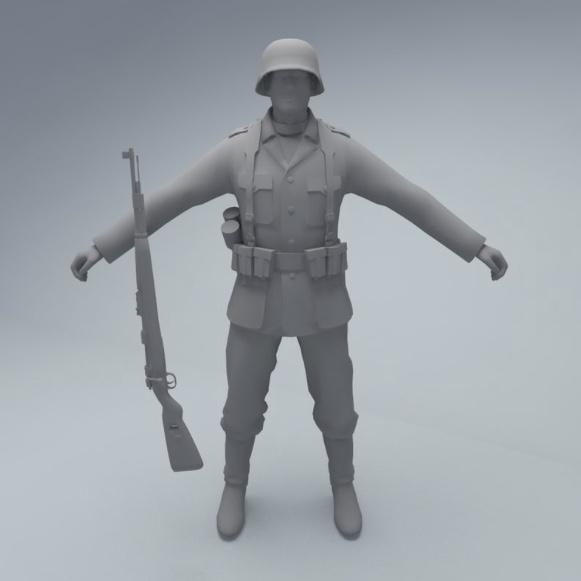

They are fairly basic by today’s miniature standards but at $6 I would say they’re decent sculpts for the money. At time of writing the aim is to produce these figures in 6mm so nice simple shapes with low profile detail seems ideal.
They also come with separate rifles or SMG’s which will be handy for posing. The soldiers can also be purchased with ‘rigs’ for $10 (more on rigs later).

![StarCraft Tabletop Miniatures Game Pre-Orders Live Now [Updated]](https://images.beastsofwar.com/2026/03/starcraft-tmg-news-cover-600-338.jpg)


![Mounted US Cavalry On Kickstarter For Dead Man’s Hand! [Updated]](https://images.beastsofwar.com/2026/03/us-cavalry-main-600-338.jpg)


![Play WW2 Commando Operations With Butcher & Bolt [Updated]](https://images.beastsofwar.com/2026/03/relaunch-600-338.jpg)


