


![10mm Medieval Miniatures! Azincourt English Army Review | Wargames Atlantic [7 Days Early Access]](https://images.beastsofwar.com/2026/03/unboxing-wargames-atlantic-azincourt-english-army-coverimage-225-127.jpg)


Building a pub interior by Jo from Oathsworn


Recommendations: 513
About the Project
Hi, I'm Jo from Oathsworn and I'm having a go at building a playable pub interior for a Burrows & Badgers scenario
Related Game: Burrows & Badgers
Related Company: Oathsworn Miniatures
Related Genre: Fantasy
This Project is Active
Part 5
The next job was to make the bar area which is L-shaped and must be accessible to all minis in the game, so a 50mm base must fit easily around it. I grabbed a few minis of various sizes and played about with foam until I felt that there was a variety of heights suitable for the different minis (you don’t want to stop the Shrew-zerker from getting his pint coz he can’t reach the counter…it won’t end well!).

I glued the various piles of foam together.

To hide the obvious layers of foam I needed some side pieces, so I placed the piles together onto some 3mm foam, drew around them and cut them out.
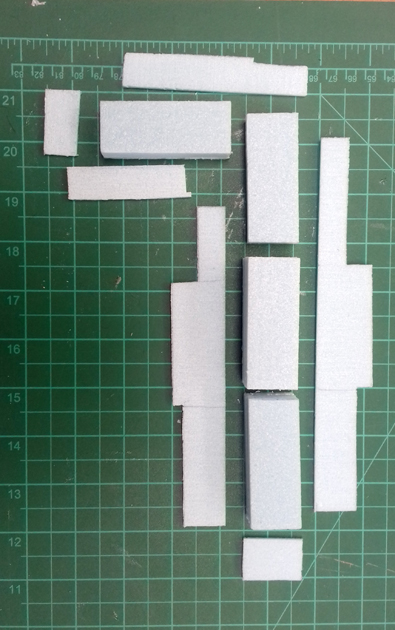
I then glued the piles together and stuck the sides on holding them in place with a few pins. They were then left to dry overnight.

Using my bic pen I then added some wood-grain details all over the bar.

I then stuck the bar in position with PVA glue and weighed it down (with actual weights this time) overnight while it dried.

Part 4
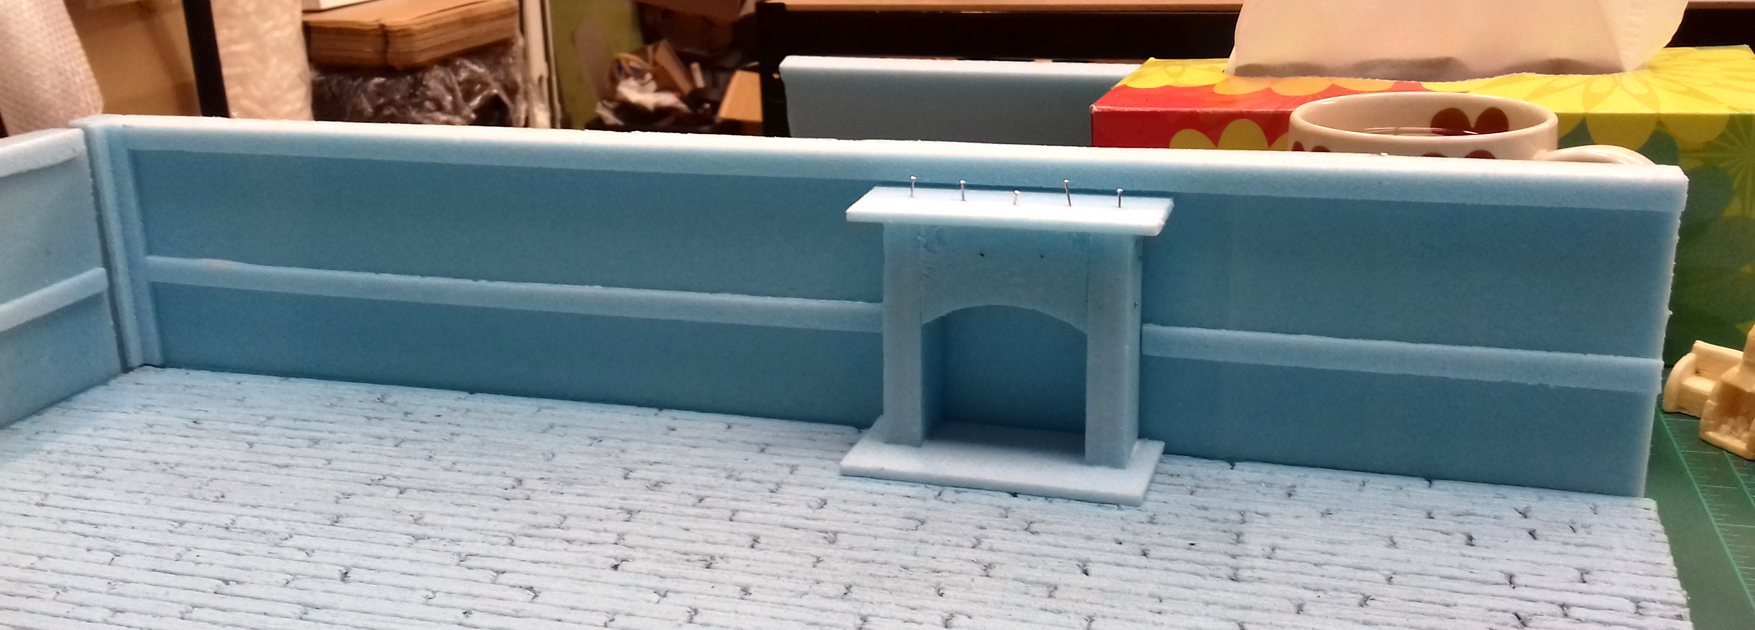
Continuing with the second wall…I cut some shorter beams and glued them in position.

I then had a final check before sticking the walls onto the floor. Yep, that’ll do.
Because I’d drawn a line where the floor butts up against the wall it was easy to see where I needed to spread the PVA glue to stick them both together.

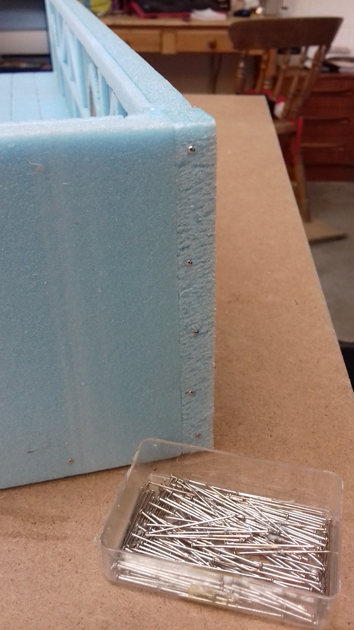
I then held the glued sections together with dressmaking pins (the pins do leave marks when you pull them out so if you want a smooth unmarked finish it’s probably best to use masking tape instead but as these are on the back which won’t be seen and will just be painted black, the pins are fine to use). It was then left to dry overnight.
Part 3
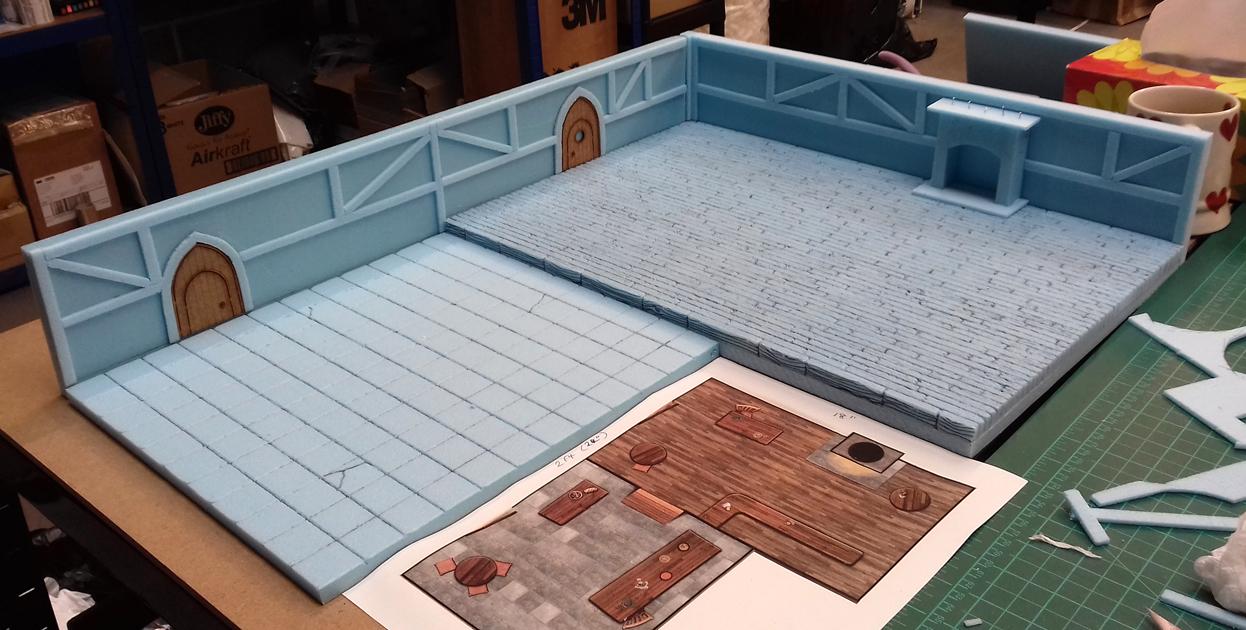
The walls were next on my to-do list, I measured the sides and cut the foam to match. I’d been working on the assumption that the foam was 24” long but it’s actually measured in mm, it’s 600mm long which is slightly shorter than what I needed…so I had to glue on an extra little piece to make it long enough. I then marked with my pen where the floor level meets the wall and where I wanted the doors to go.
Sarissa make a pack of doors in various sizes for Burrows & Badgers which are great for this kind of project so I chose two of the larger doors (which also have a smaller door inset in them for the smaller animals). I glued these in place and then cut a load of lengths from 3mm foam about ¼” wide to use for the door-frames & beams. I played around with these and placed them in different positions to see where I thought they’d look best.
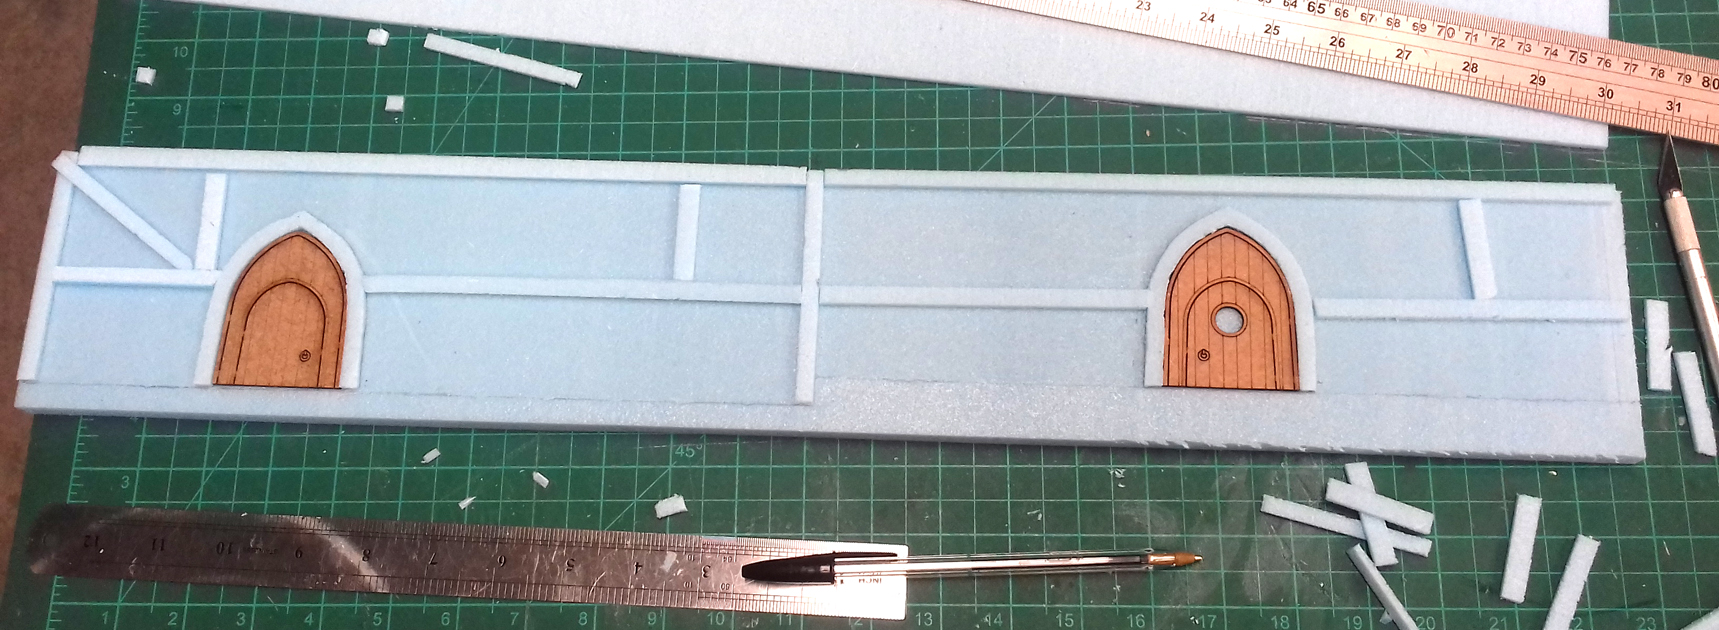
I then glued them in place and left them to dry…first wall done.
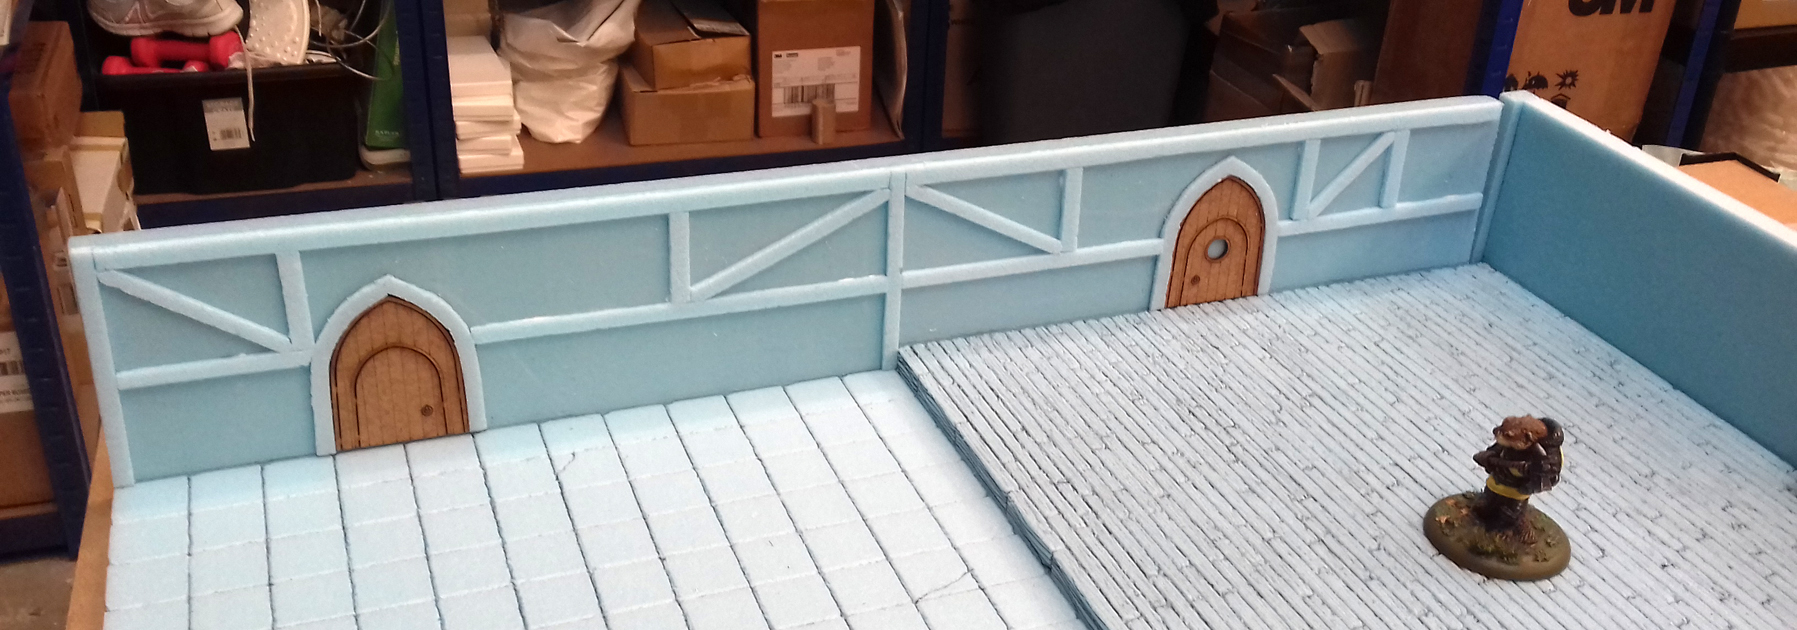
The second wall has a fireplace against it, so before I could attach the beams etc I needed to make a fireplace and mark its position so I’d then know where the beams could go. I used a mixture of the 10mm & 3mm foam and glued them all together to make a fireplace.
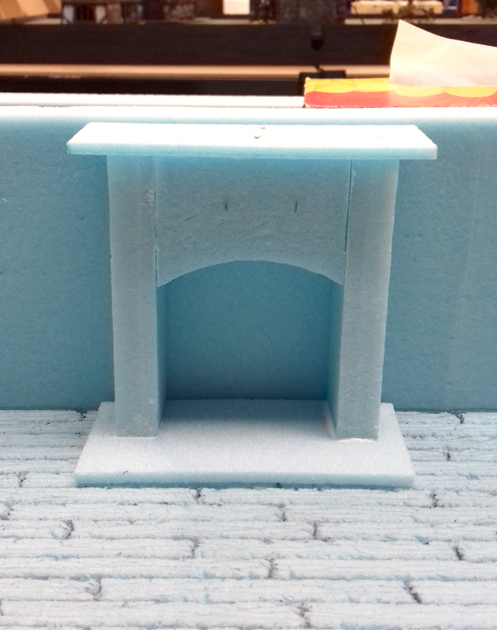
I placed the fireplace in position and lightly marked where it would be so I knew where the beams could go.

I then realised that the fireplace was too tall if it was going to match the beams going horizontally from the first wall. So I had to chop it a bit and glue & pin it back together. I then glued the long beams in place.
Part 2
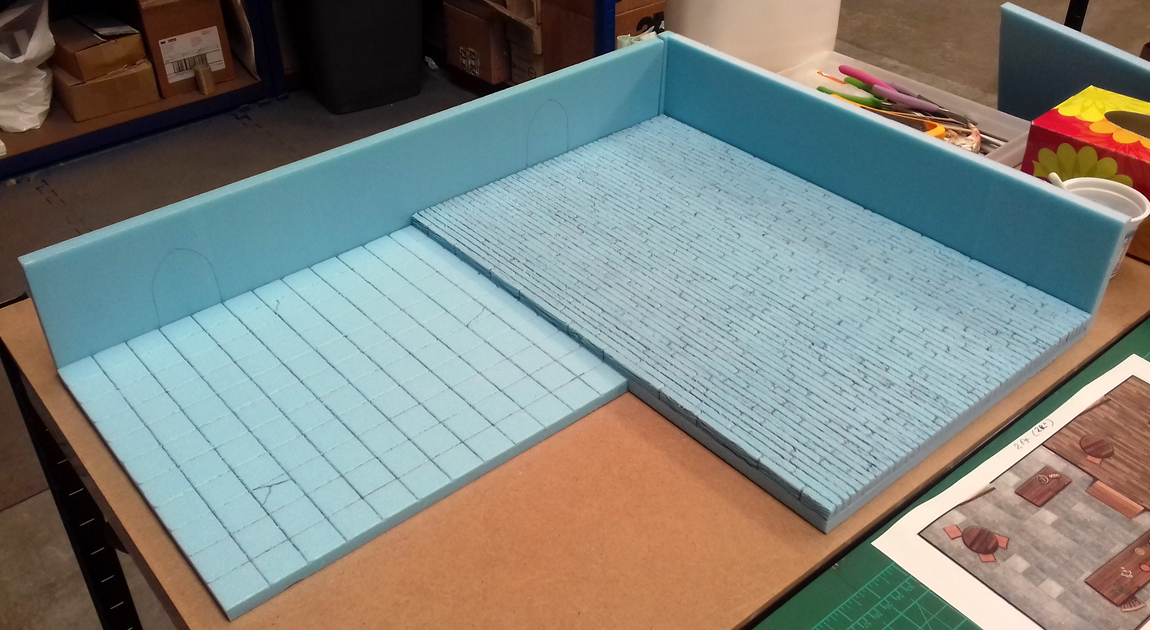
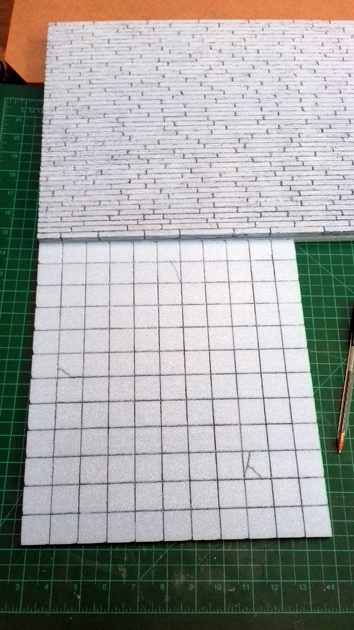
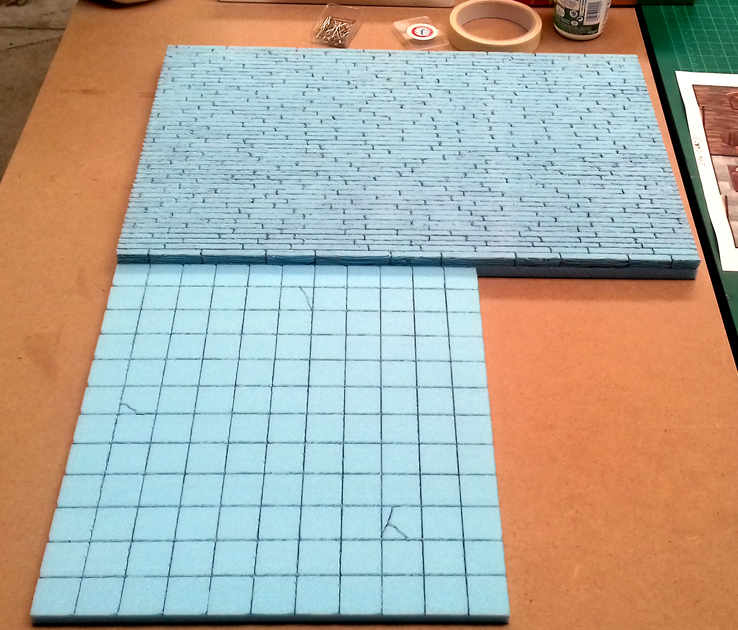
Next came the stone tiled section for the lower floor area. This was much quicker to do, so again with my pen & ruler I drew lines from left to right 1” apart.
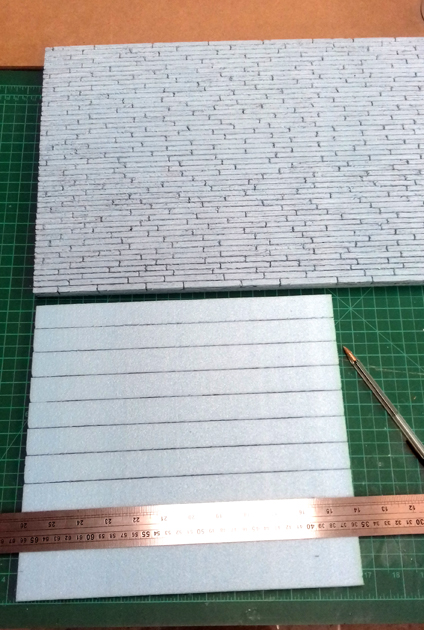
Then I rotated the foam and drew lines 1” apart again to form the squares. I then drew some cracks on a few of the tiles to add a bit of interest.
I then covered the bottom layer of the floorboard section with PVA glue and placed the detailed wooden floor on top.
To ensure the glue had a good solid bond I placed a couple of weights on top of the glued pieces (boxes of grip-seal bags in this case) and left it to dry overnight.

Next I glued the tiled section onto the side of the wooden floor and held it together with a couple of strips of masking tape underneath (which was a bit fiddly). This was when I realised it would have been better to have cut it all from one piece of foam and just add an extra section for the wooden floor. Oh well, live ‘n’ learn.
Part 1
Michael’s been busy writing a supplement for Burrows & Badgers, and it contains a scenario for a bar-room brawl. He handed me a picture of what he’d envisioned for the scene and asked if I fancied building a bar-room for us to play-test the scenario on… and I relish any excuse to dig out the blue foam, so challenge accepted!

The playing space is based on the ‘Brock’s Rest Tavern’ building that Sarissa make for Burrows & Badgers. My challenge was to make a larger version of the inside of the pub so that there’s room to play the scenario. Basically, it’s an L-shaped room (aprox. 24” x 18”) split into two sections, a lower stone floor and a slightly raised wooden floor. So the first job was to cut the floor sections – Hindsight’s a wonderful thing, and if I was to make this again I’d cut the whole bottom layer from one piece, but I cut them separately and later on glued them together (so it’s all good!). The lower floor is 11” x 12” and the upper level is 18” x 12” which I cut two of in order to raise the level (I used 10mm blue foam).

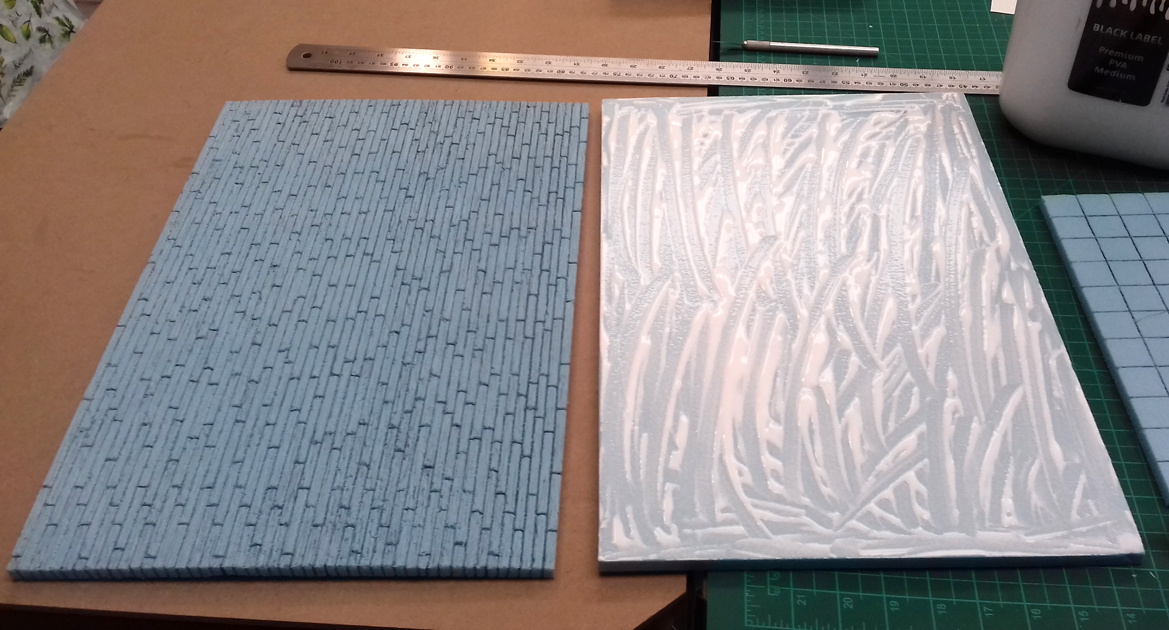
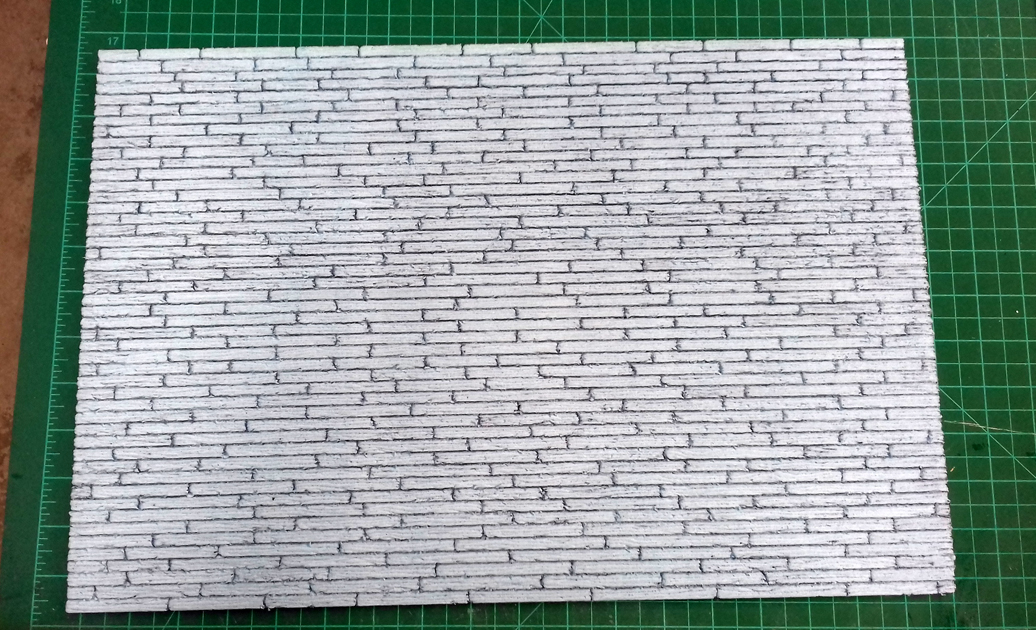
The next job was to detail the wooden floor, so with my trusty bic pen and a ruler I drew lines ¼” apart along the length of one piece of the upper floor and then marked them into planks.
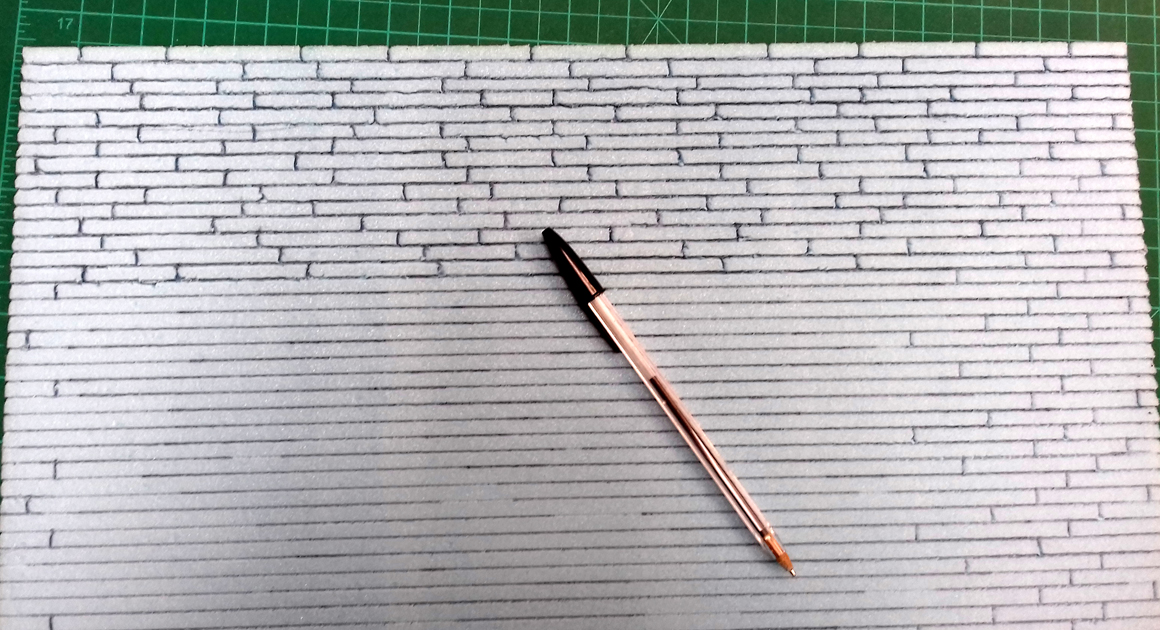
I then drew some wood-grain details on the planks which will hopefully show up when I paint/dry-brush it later.

![StarCraft Tabletop Miniatures Game Pre-Orders Live Now [Updated]](https://images.beastsofwar.com/2026/03/starcraft-tmg-news-cover-600-338.jpg)


![Mounted US Cavalry On Kickstarter For Dead Man’s Hand! [Updated]](https://images.beastsofwar.com/2026/03/us-cavalry-main-600-338.jpg)


![Play WW2 Commando Operations With Butcher & Bolt [Updated]](https://images.beastsofwar.com/2026/03/relaunch-600-338.jpg)


