


![NO Weekender Or Cult Of Games XLBS This Weekend [Updated]](https://images.beastsofwar.com/2026/03/No_Weekender_and_XLBS_this_Weekend-225-127.jpg)


Wolf’s Flames of war late war V4 update


Recommendations: 1107
About the Project
First crack at a OTT project ^-^ In v3 I had 800 points of the big 4(German,US, British and soviets) for late war . With the newish V4 book I decided to upgrade my forces! So here are my project to update it to a full 100 points in Version 4 of our beloved rules. it is quite a big jump point wise as 100 points is the equivalent of 1500 points in V3 and earlier if I am correct.
Related Game: Flames of War: The World War II Miniatures Game
Related Genre: Historical
Related Contest: Spring Clean Hobby Challenge (Old)
This Project is Active
So... what happened in a month?
Hello Boys, Girls, Aliens, and all the rest that don’t fit in the 3 previous categories.
So I pushed this project in spring cleaning mode, good. What did happen in a month? Admitedly I did put the Team yankee in priorities, but I could not not do a thing so yeah, started to put together some tanks (well 9 of them)
The honor comes to the Americans and the Germans to open this spring cleaning.
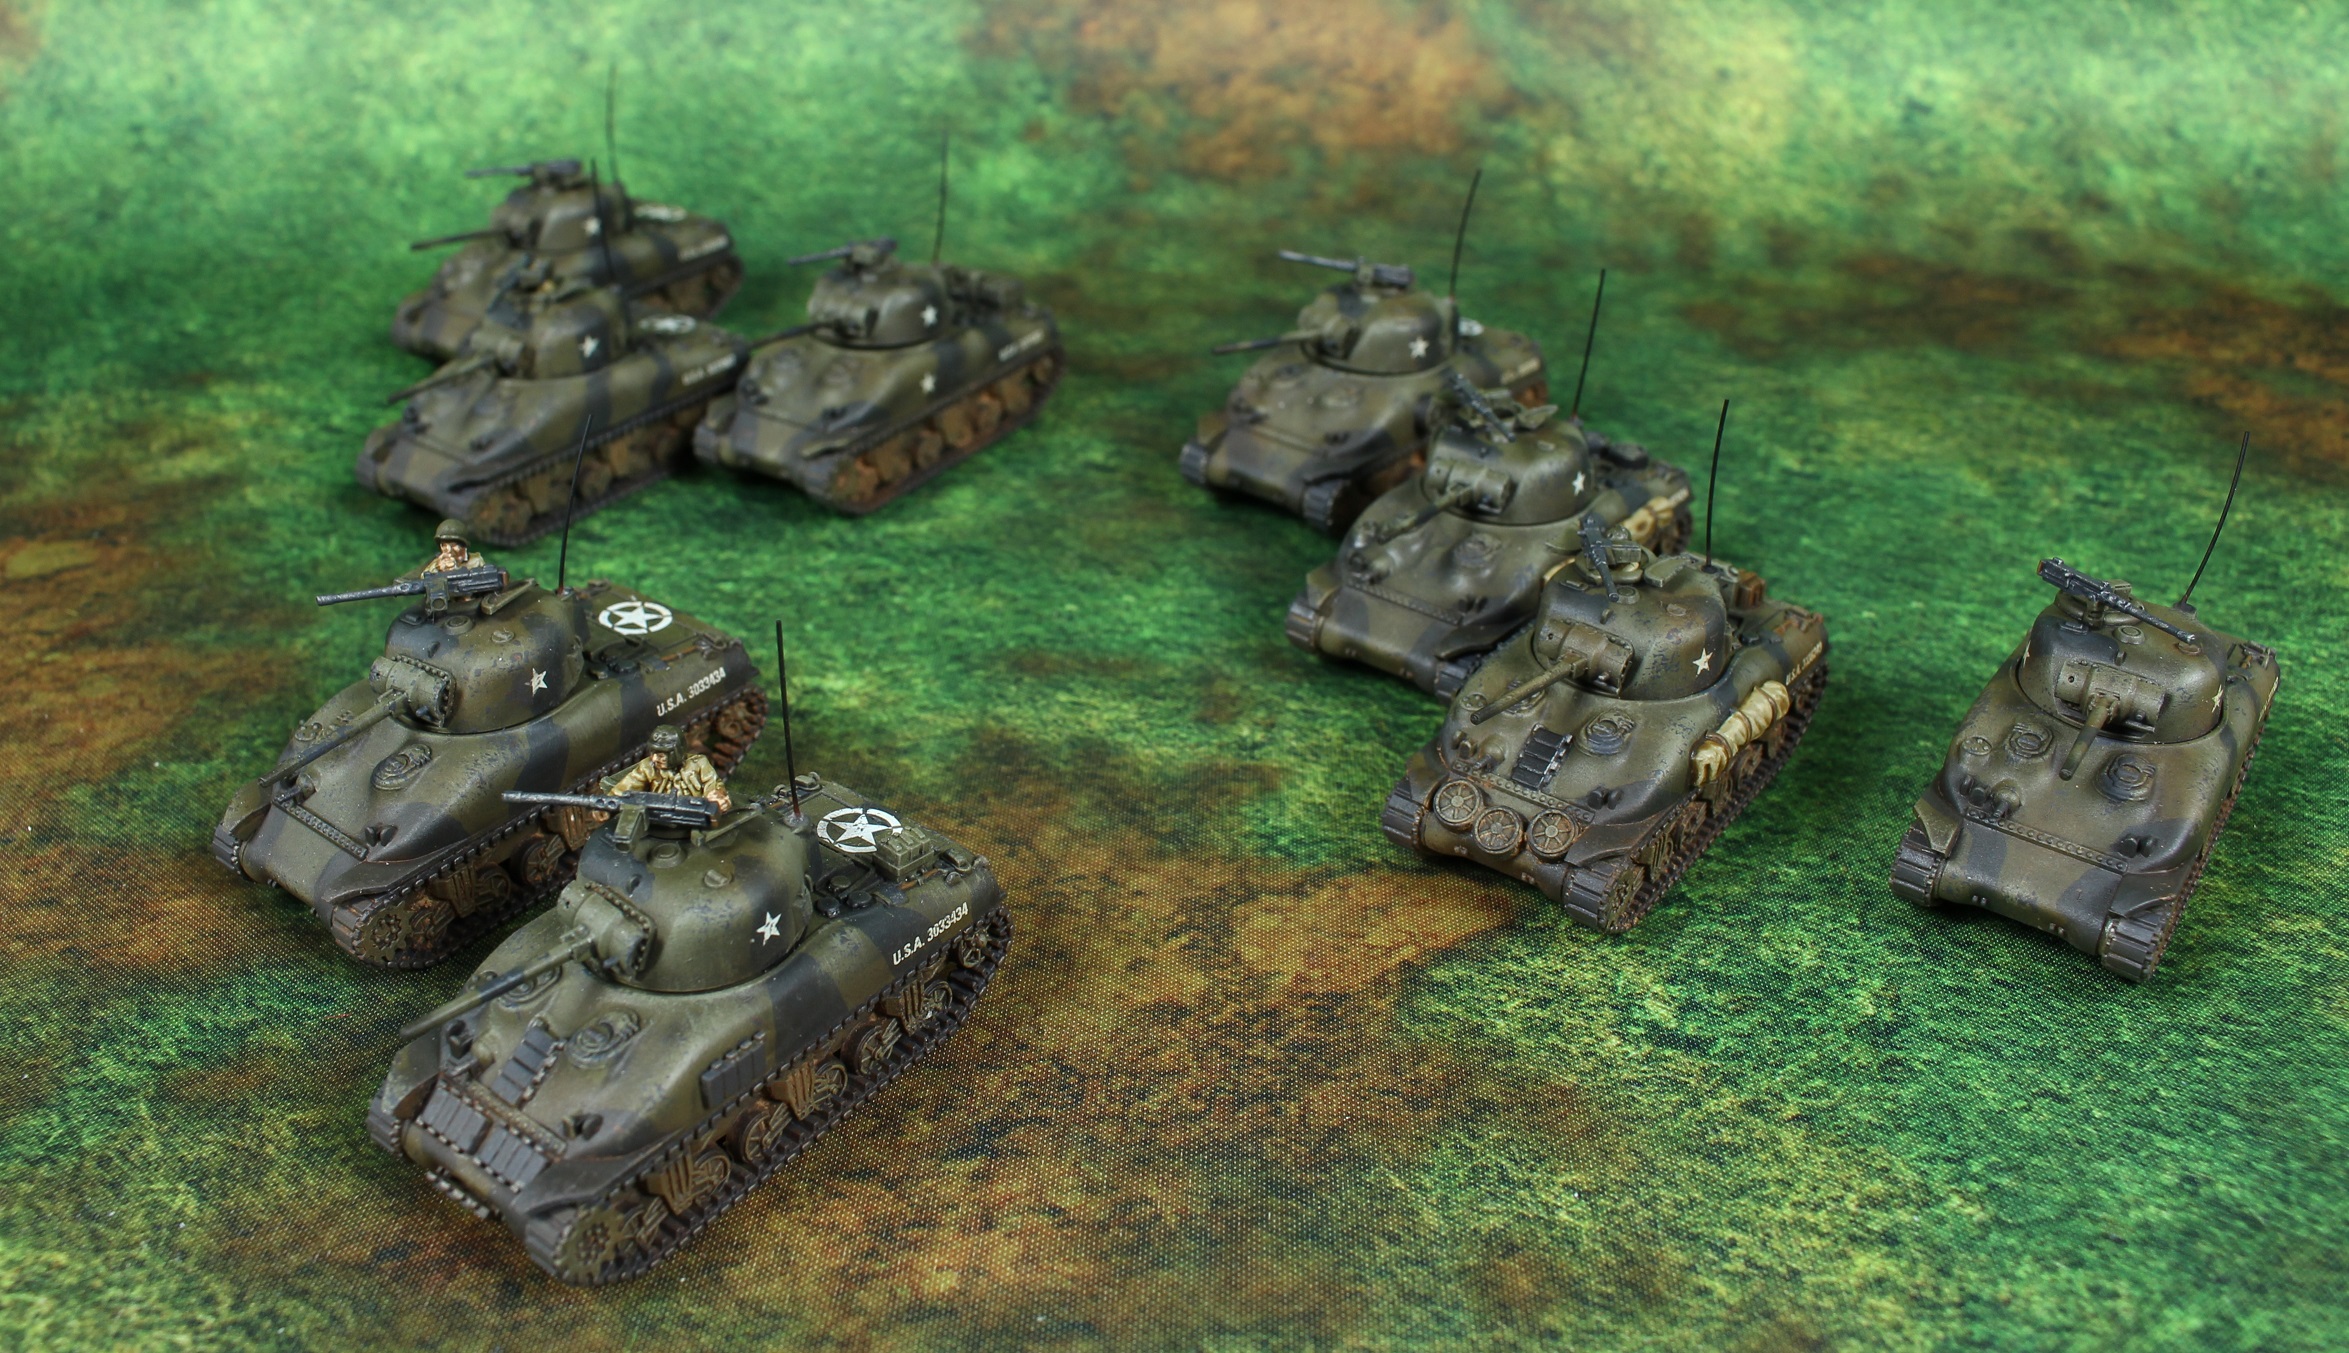
With the 4 Shermans I had still in stock from the previous army, bringing the first company to its completeness and leaving the second company with 2 tanks missing (damn that itches on my OCD)
The germans meanwhile are having updates with 2 Panzershreck Teams (one from the open Fire box and one from the old metal box of SS PanzerGrenadier Kompanie, which will go very will with my SS PanzerGrenadier Kompanie that I have already painted) and also you can see 2 PAK Crews (also from the Open Fire Box)
Proof in the picture 🙂 The shermans are not far off being done. maybe next week
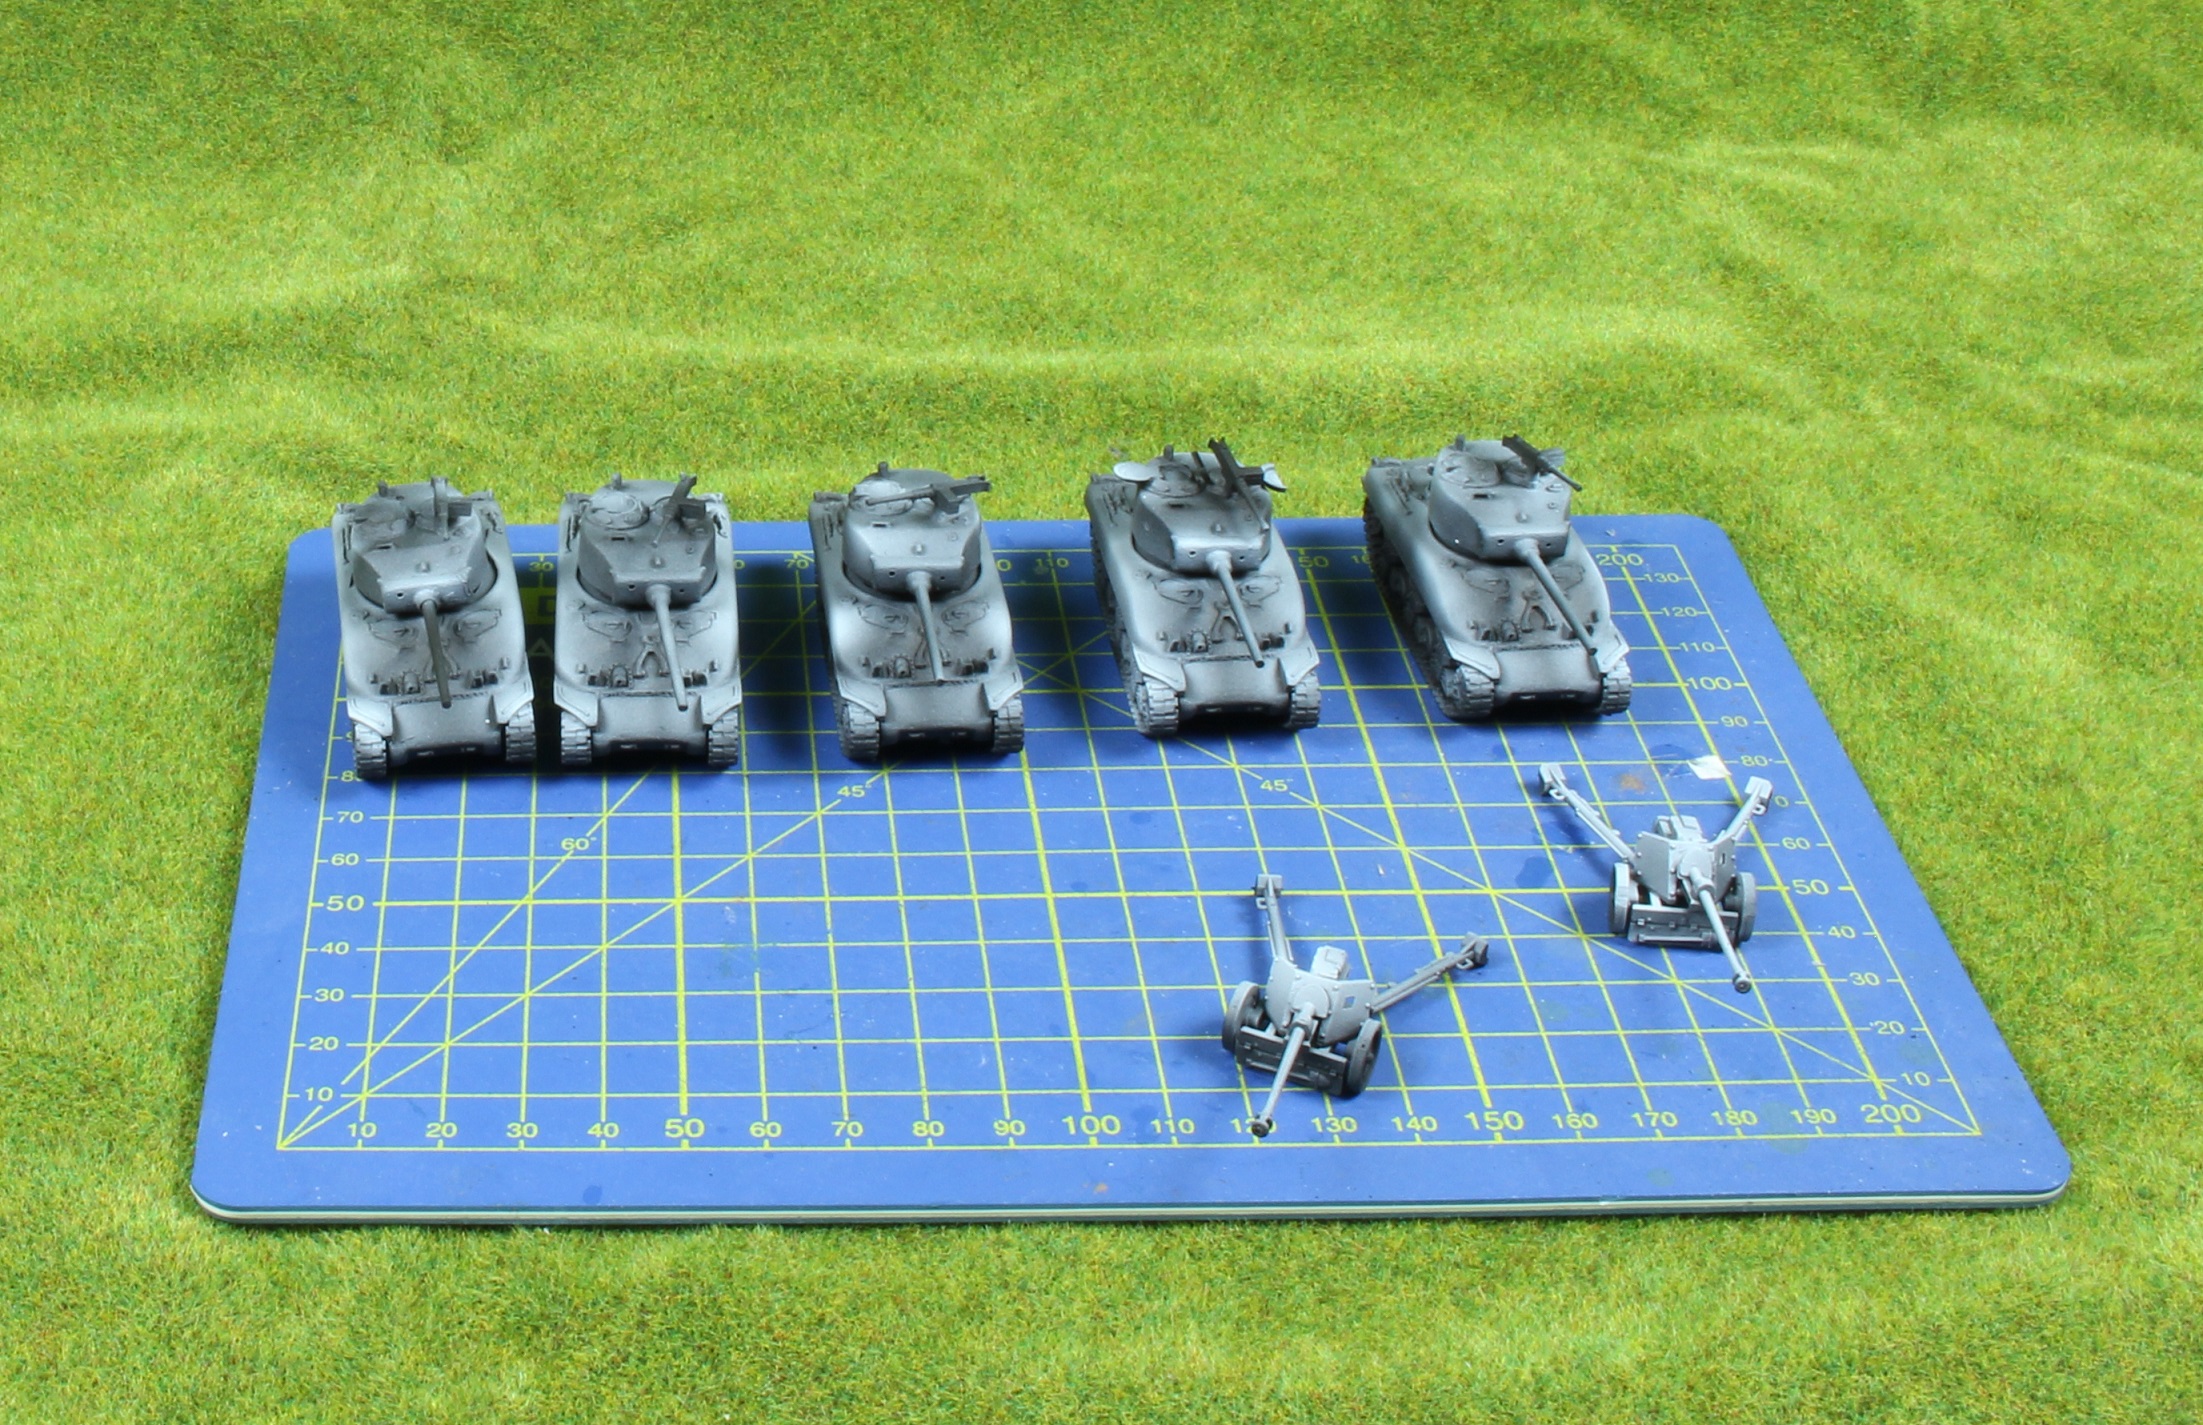
But as I was so advanced on the rest… I felt the urge to also put together the 5 Shermans 76s, so that will make a nice option for my First sherman Company 🙂
and the 2 paks for the germans, here comes the proof.
Spring Cleaning project update
Hello chaps and chapette!
SO I turned this project into spring cleaning… ok fine. First thing first.
SCOPE!
British, US, Germans and Soviets will get their share of the cake.
Brits

I shall start a second squadron, this time cromwells, really looking forward to it.
And I got a lone Spitfire that have been in my stock since it went out a few salutes ago… on and the first box of comets! So 15 tanks all together and one plane.
Germans and US
So the Germans will be the most modest. with 2 PAK 40 and two panzer Shrek teams (so I can try the solo scenarios from Battlefront)
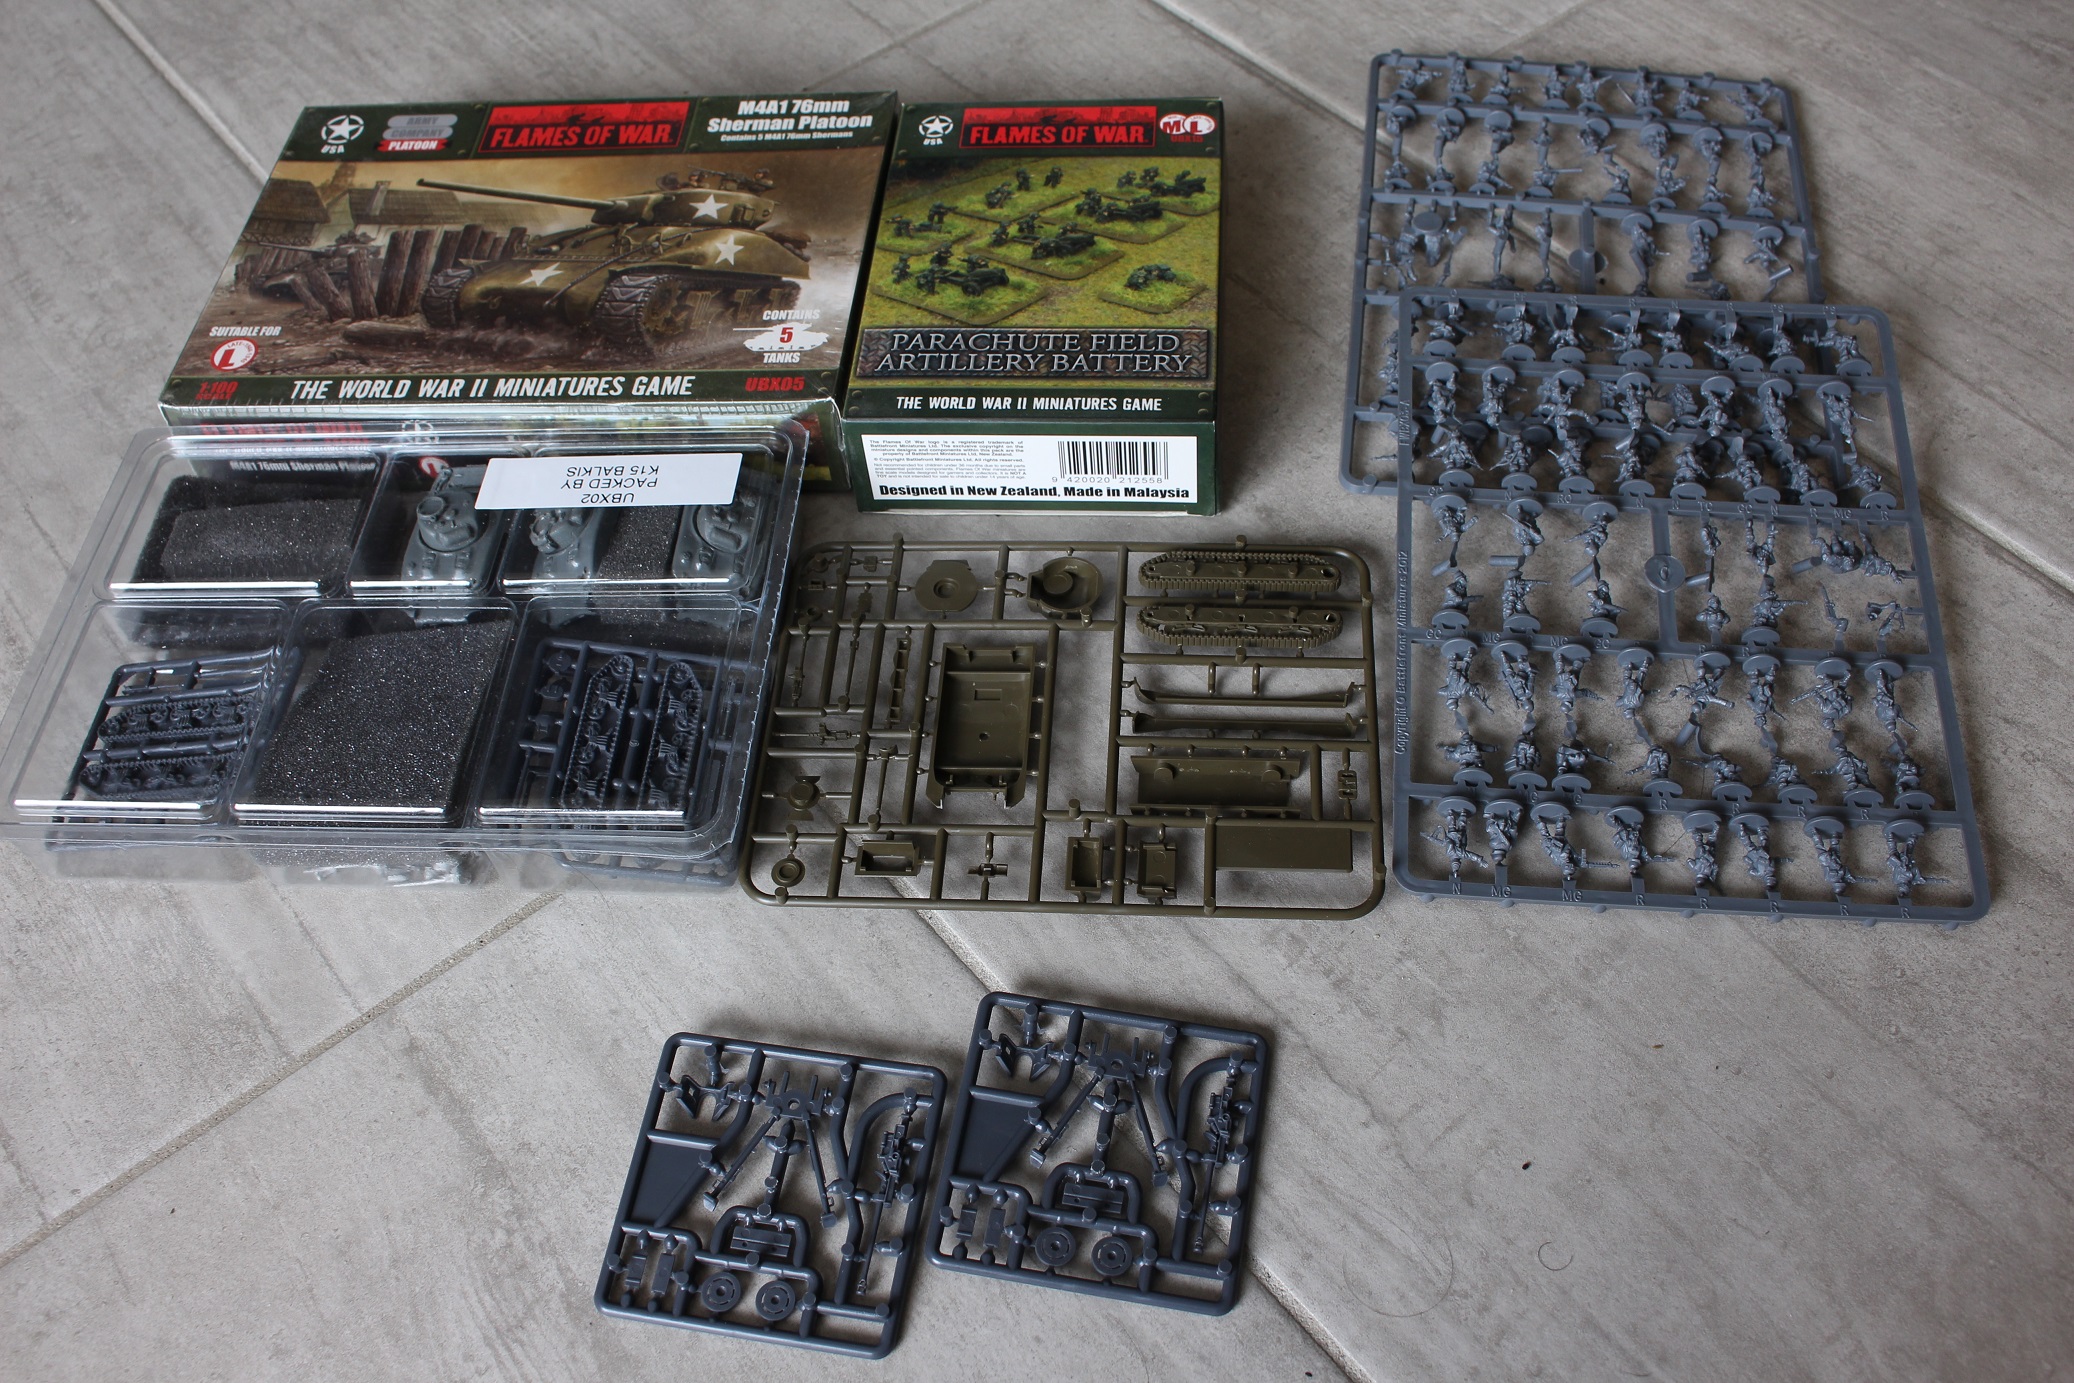
For the US. Finishing 3 Resine and plastic shermans, and one plastic sherman.
Also, a plastic paratrooper platoon (same reason as the PanzerShrek), and a battery of Paratroopers 105. Just because I own a box 😀

For the russians, 30 tank turrents. including 28 34/85 turrets
Sadly… I got an email on Friday saying “no decals for you now” so… yeah that will make them happen later.
A tally of:
- 24 tanks
- 30 Tank turrets
- 6 Artillery bases
- 11 infantry bases
- 1 airplane 🙂
Sometimes I hate myself when I see that 😛
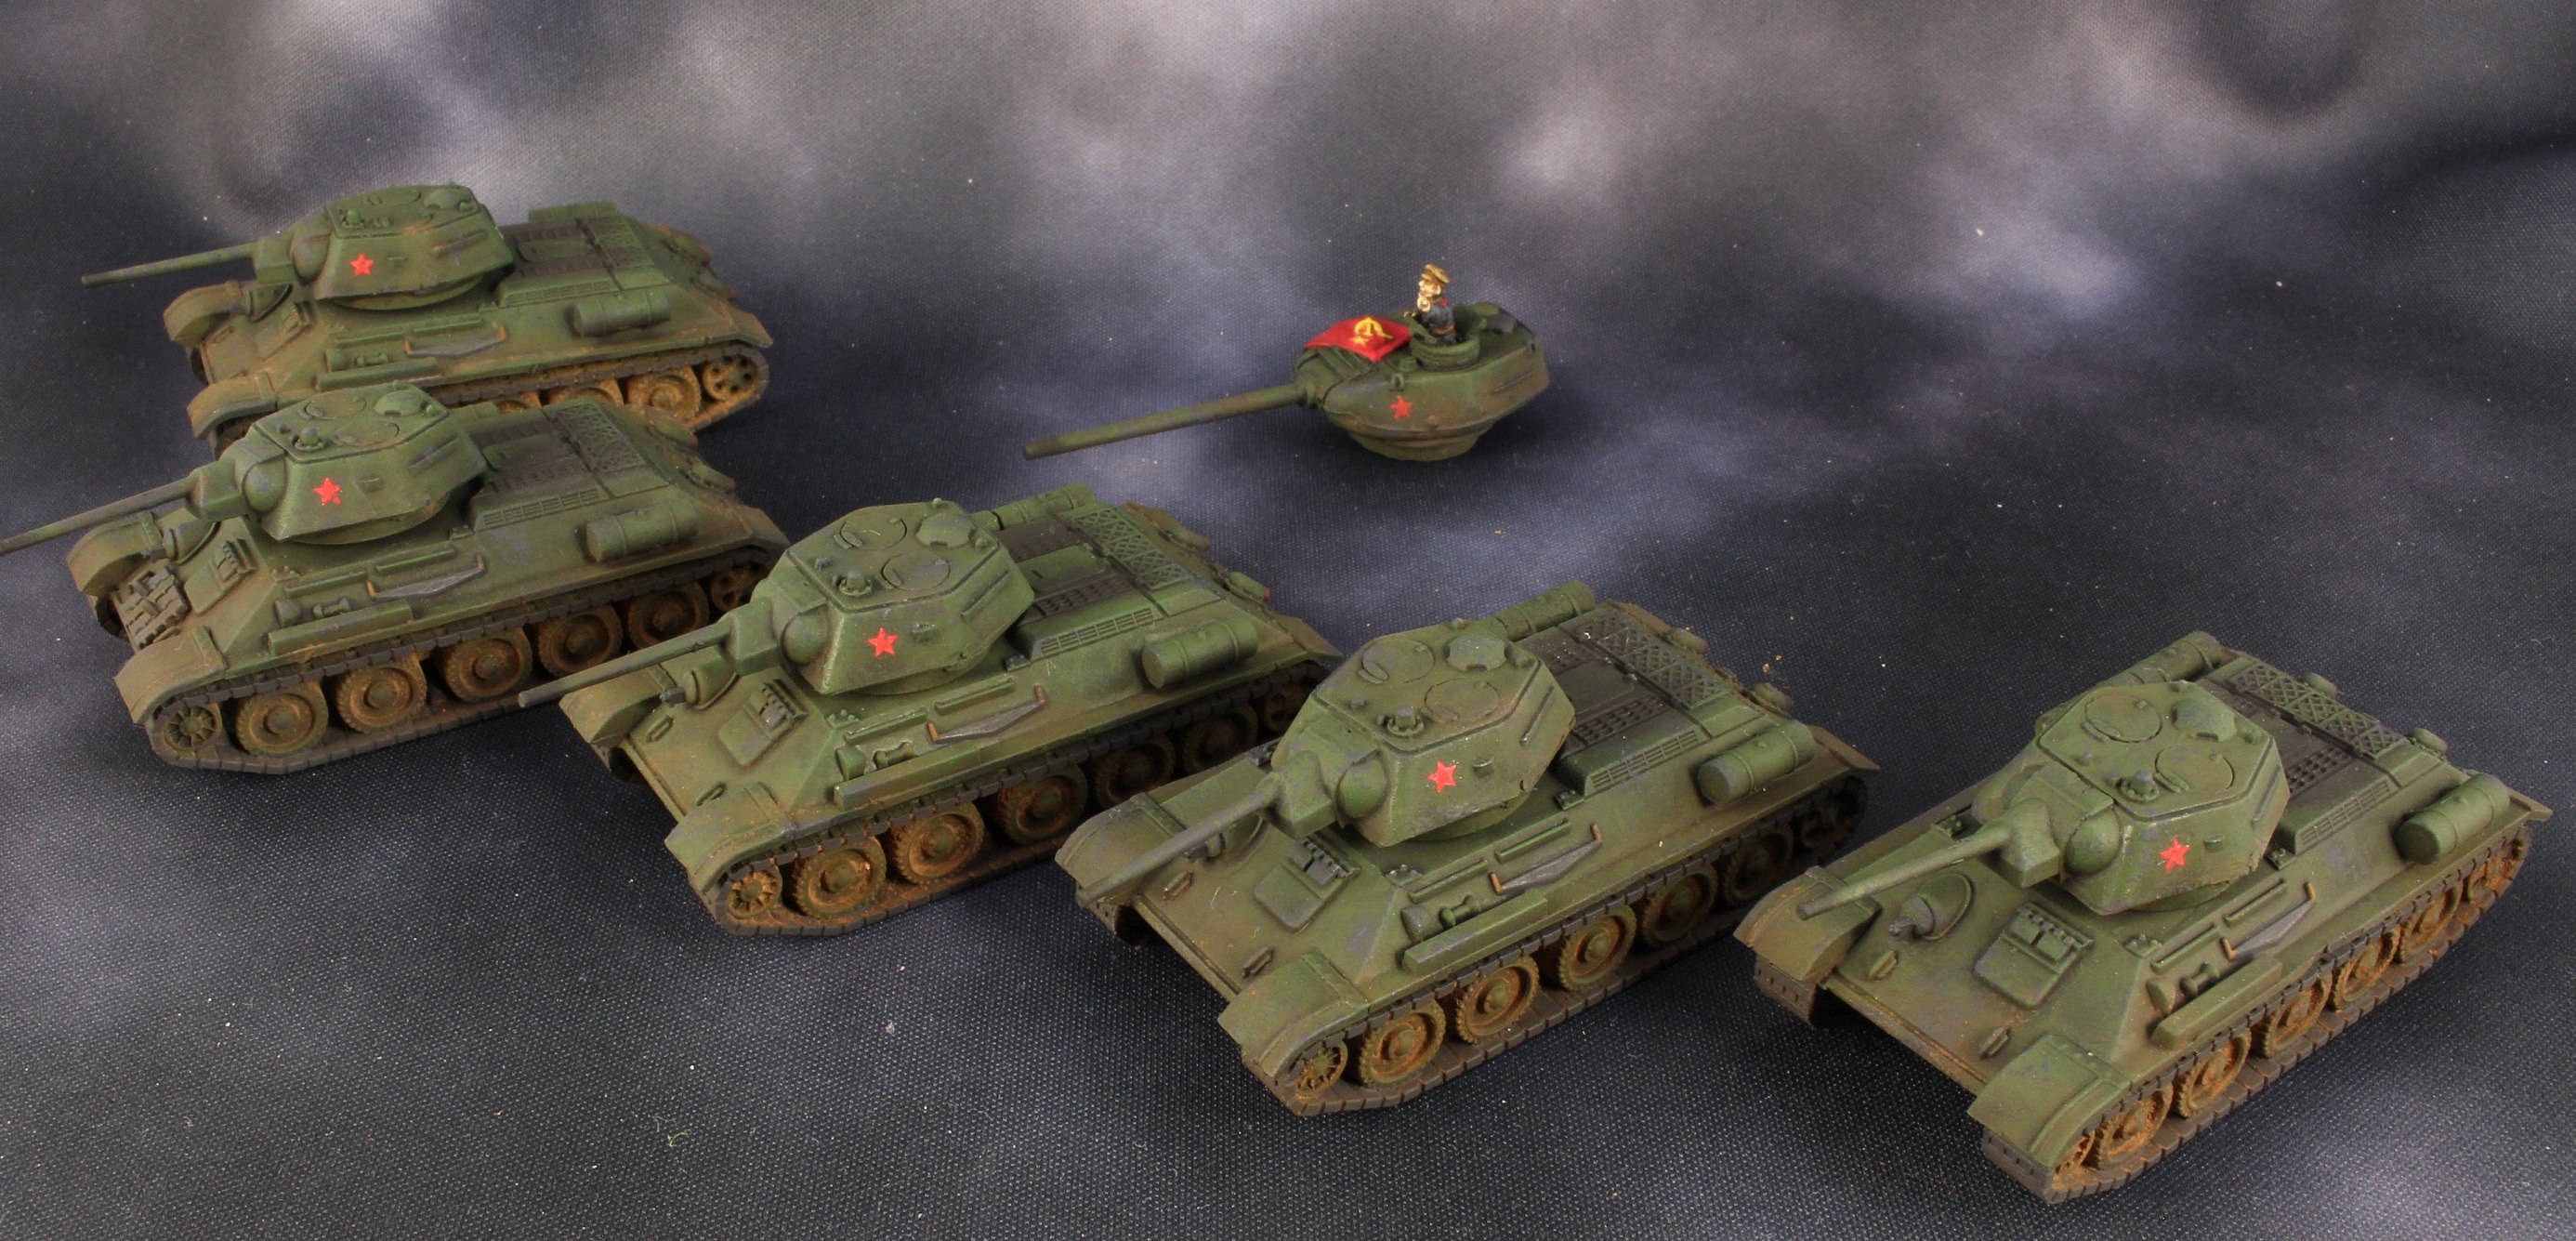
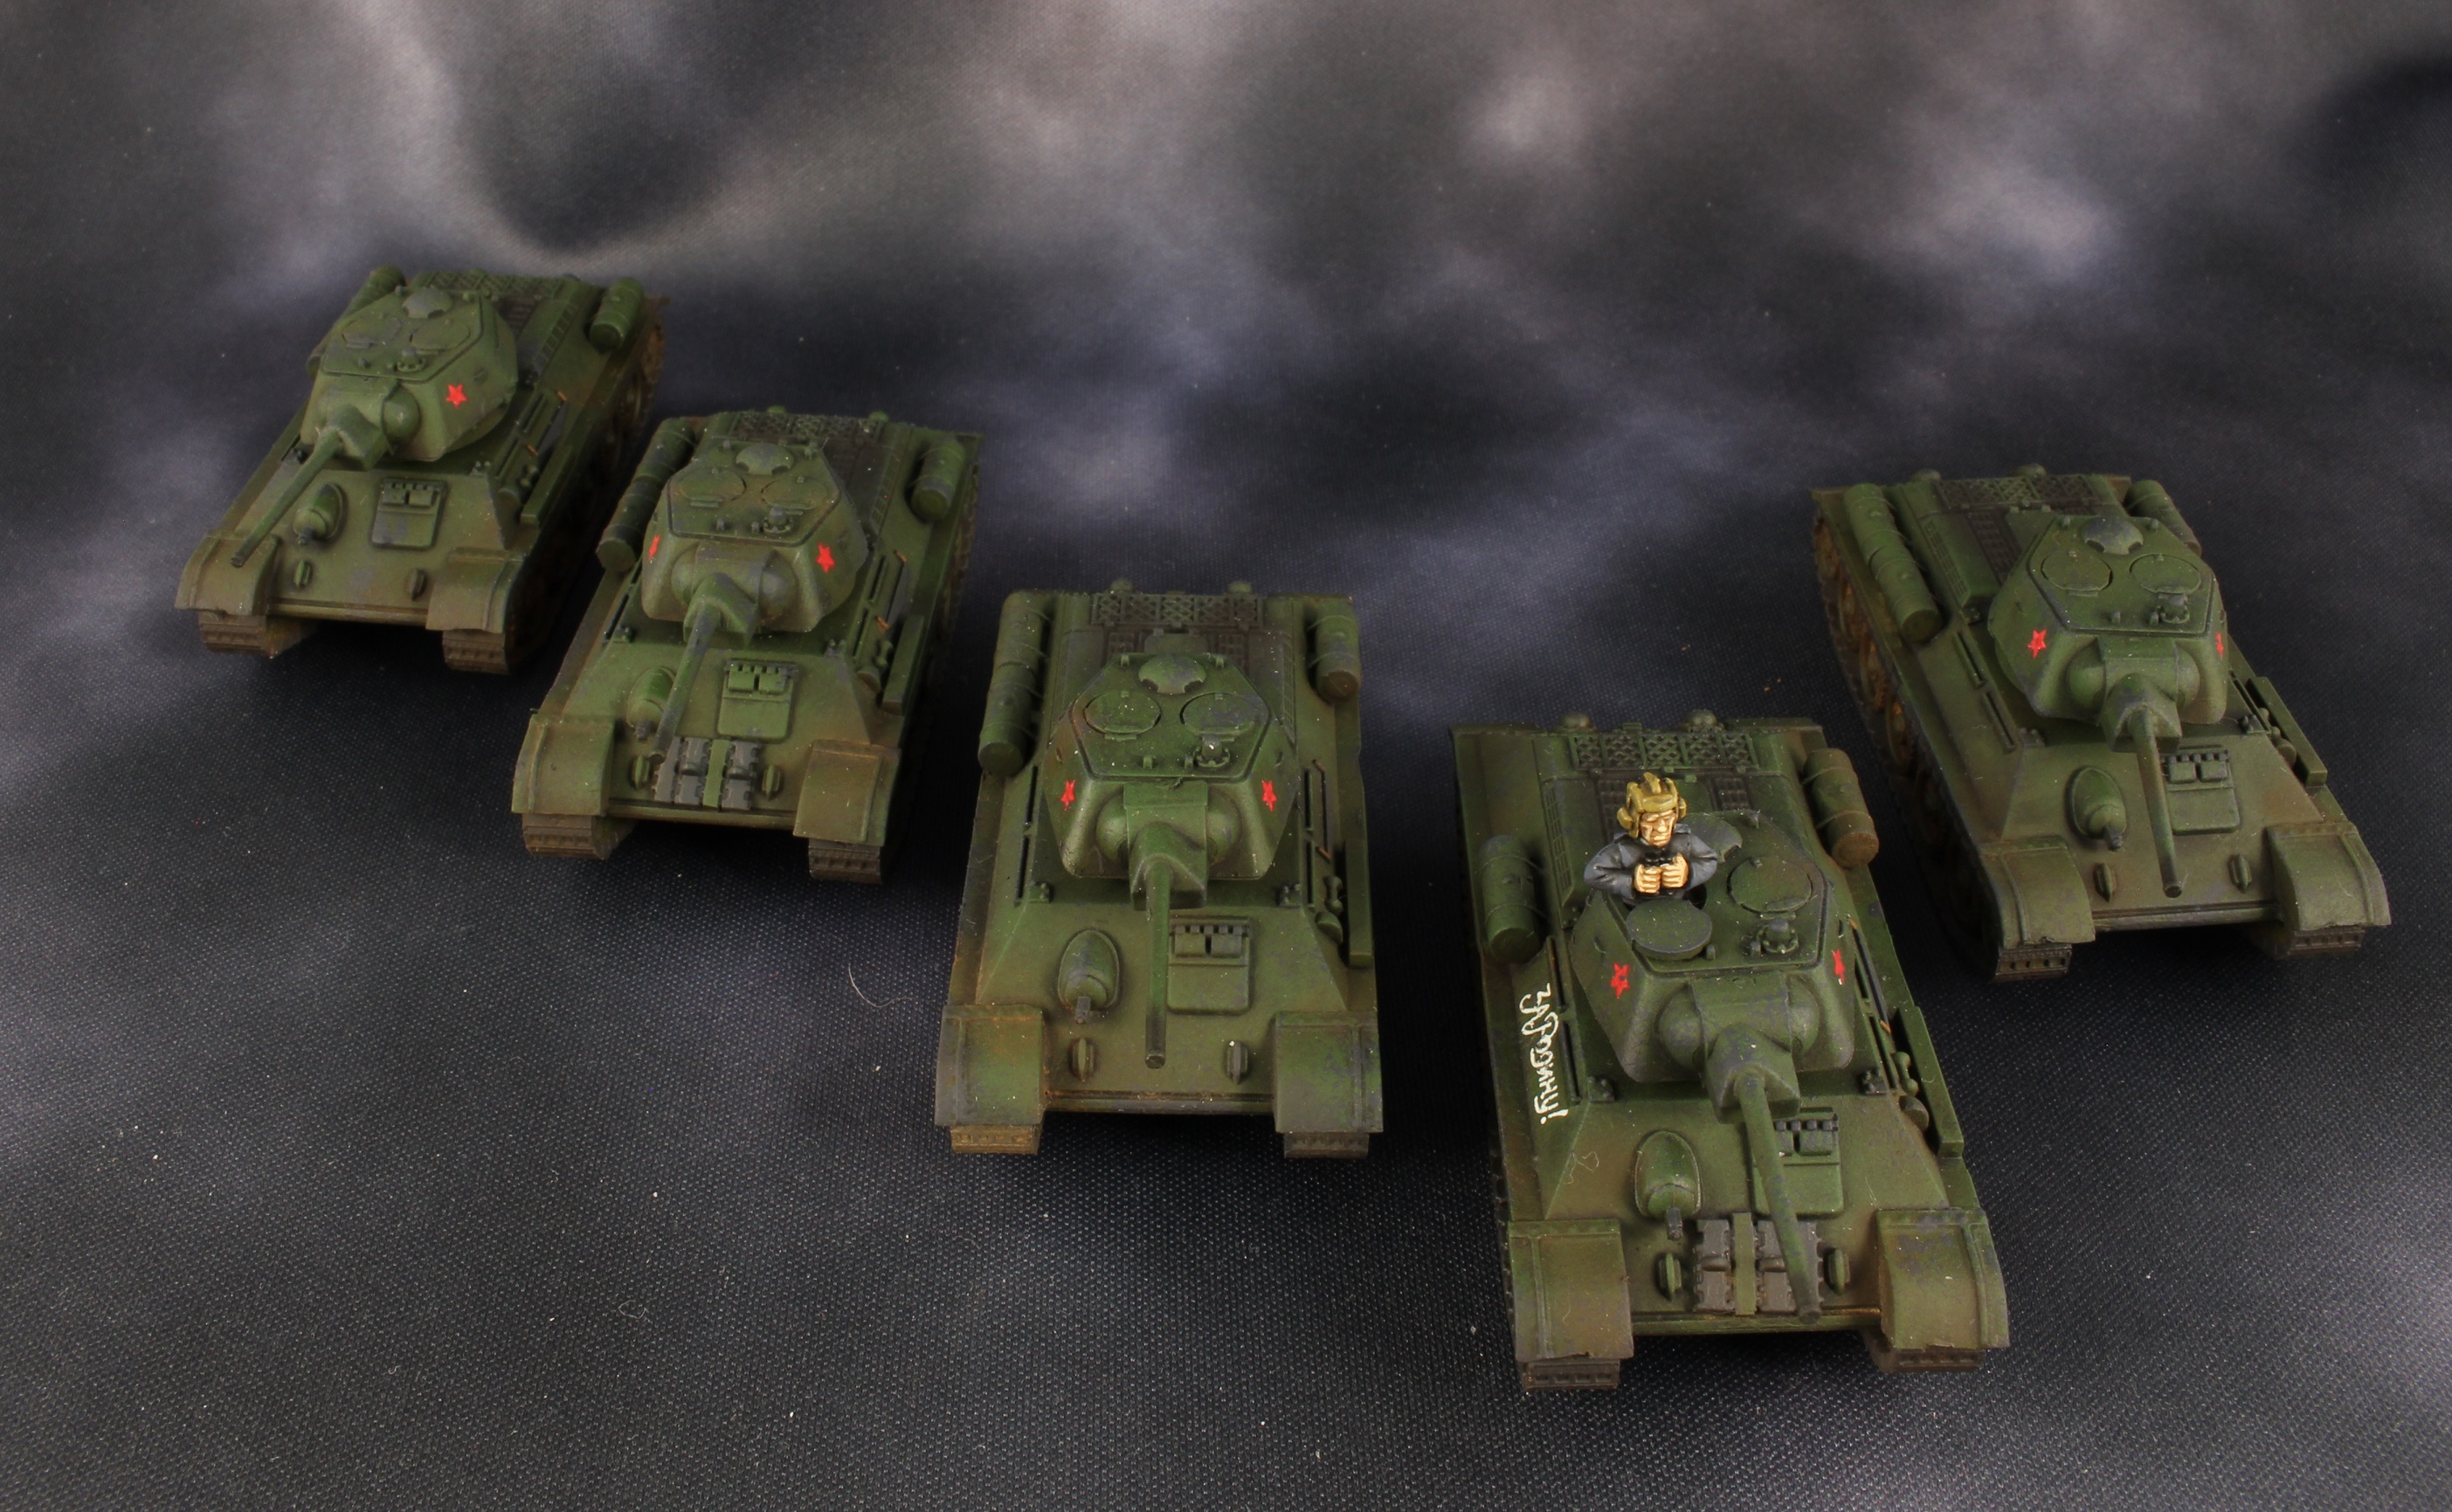
Soviet T 34 Battalion ready for war
Priviet!
So I show them in details, now here is the bulk.
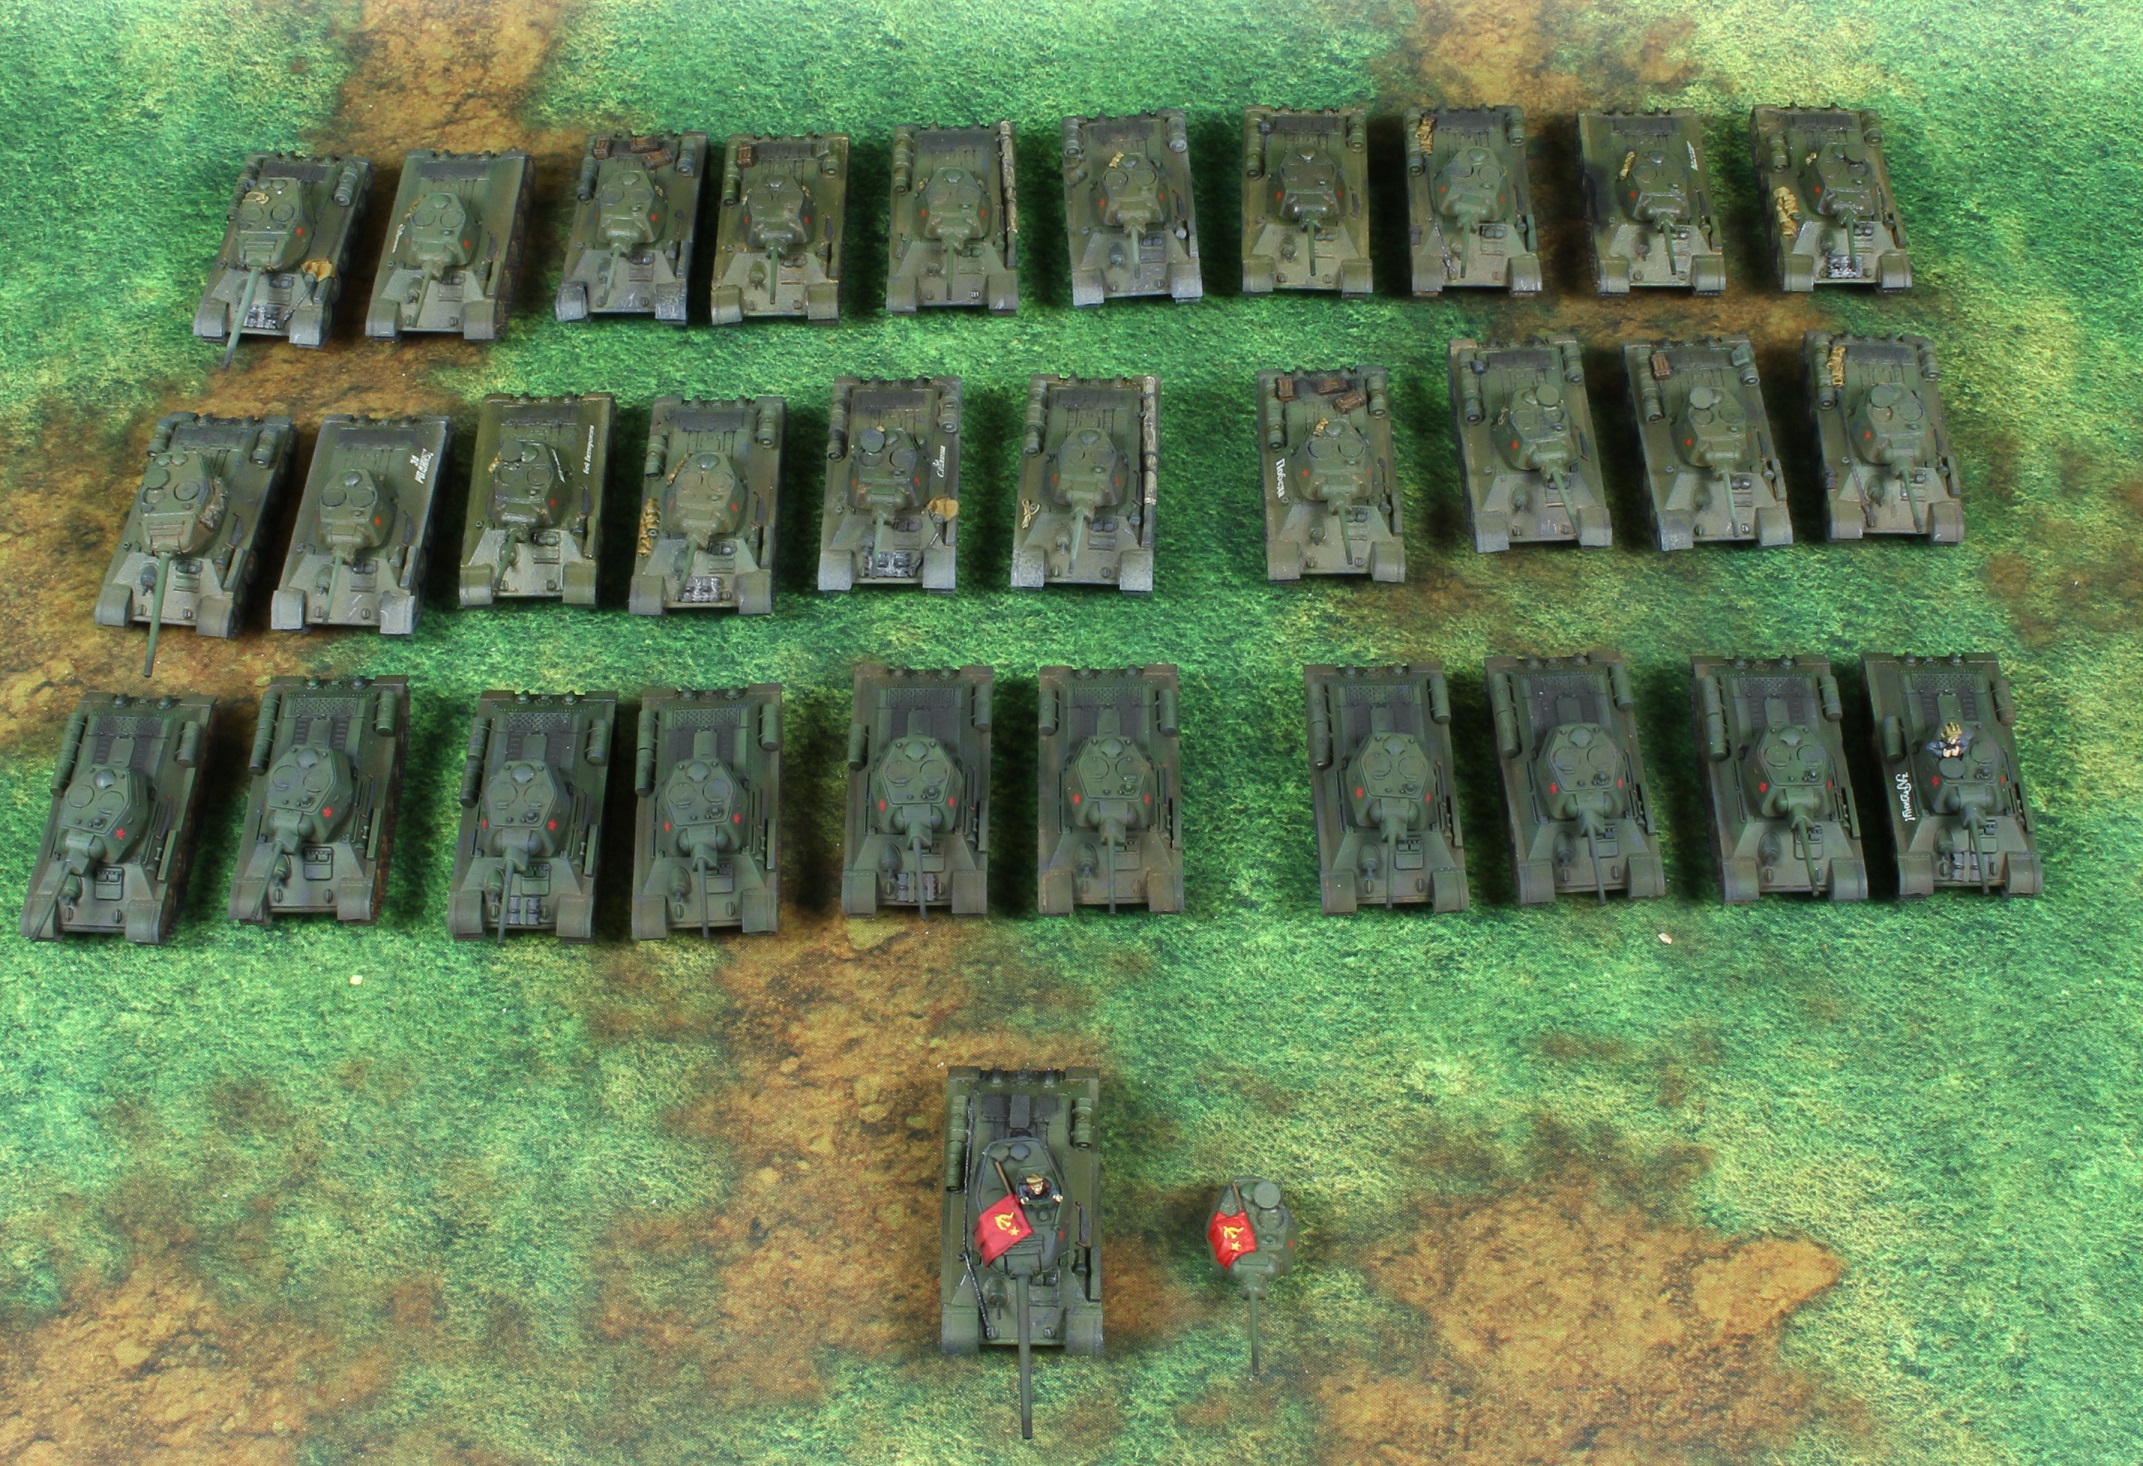
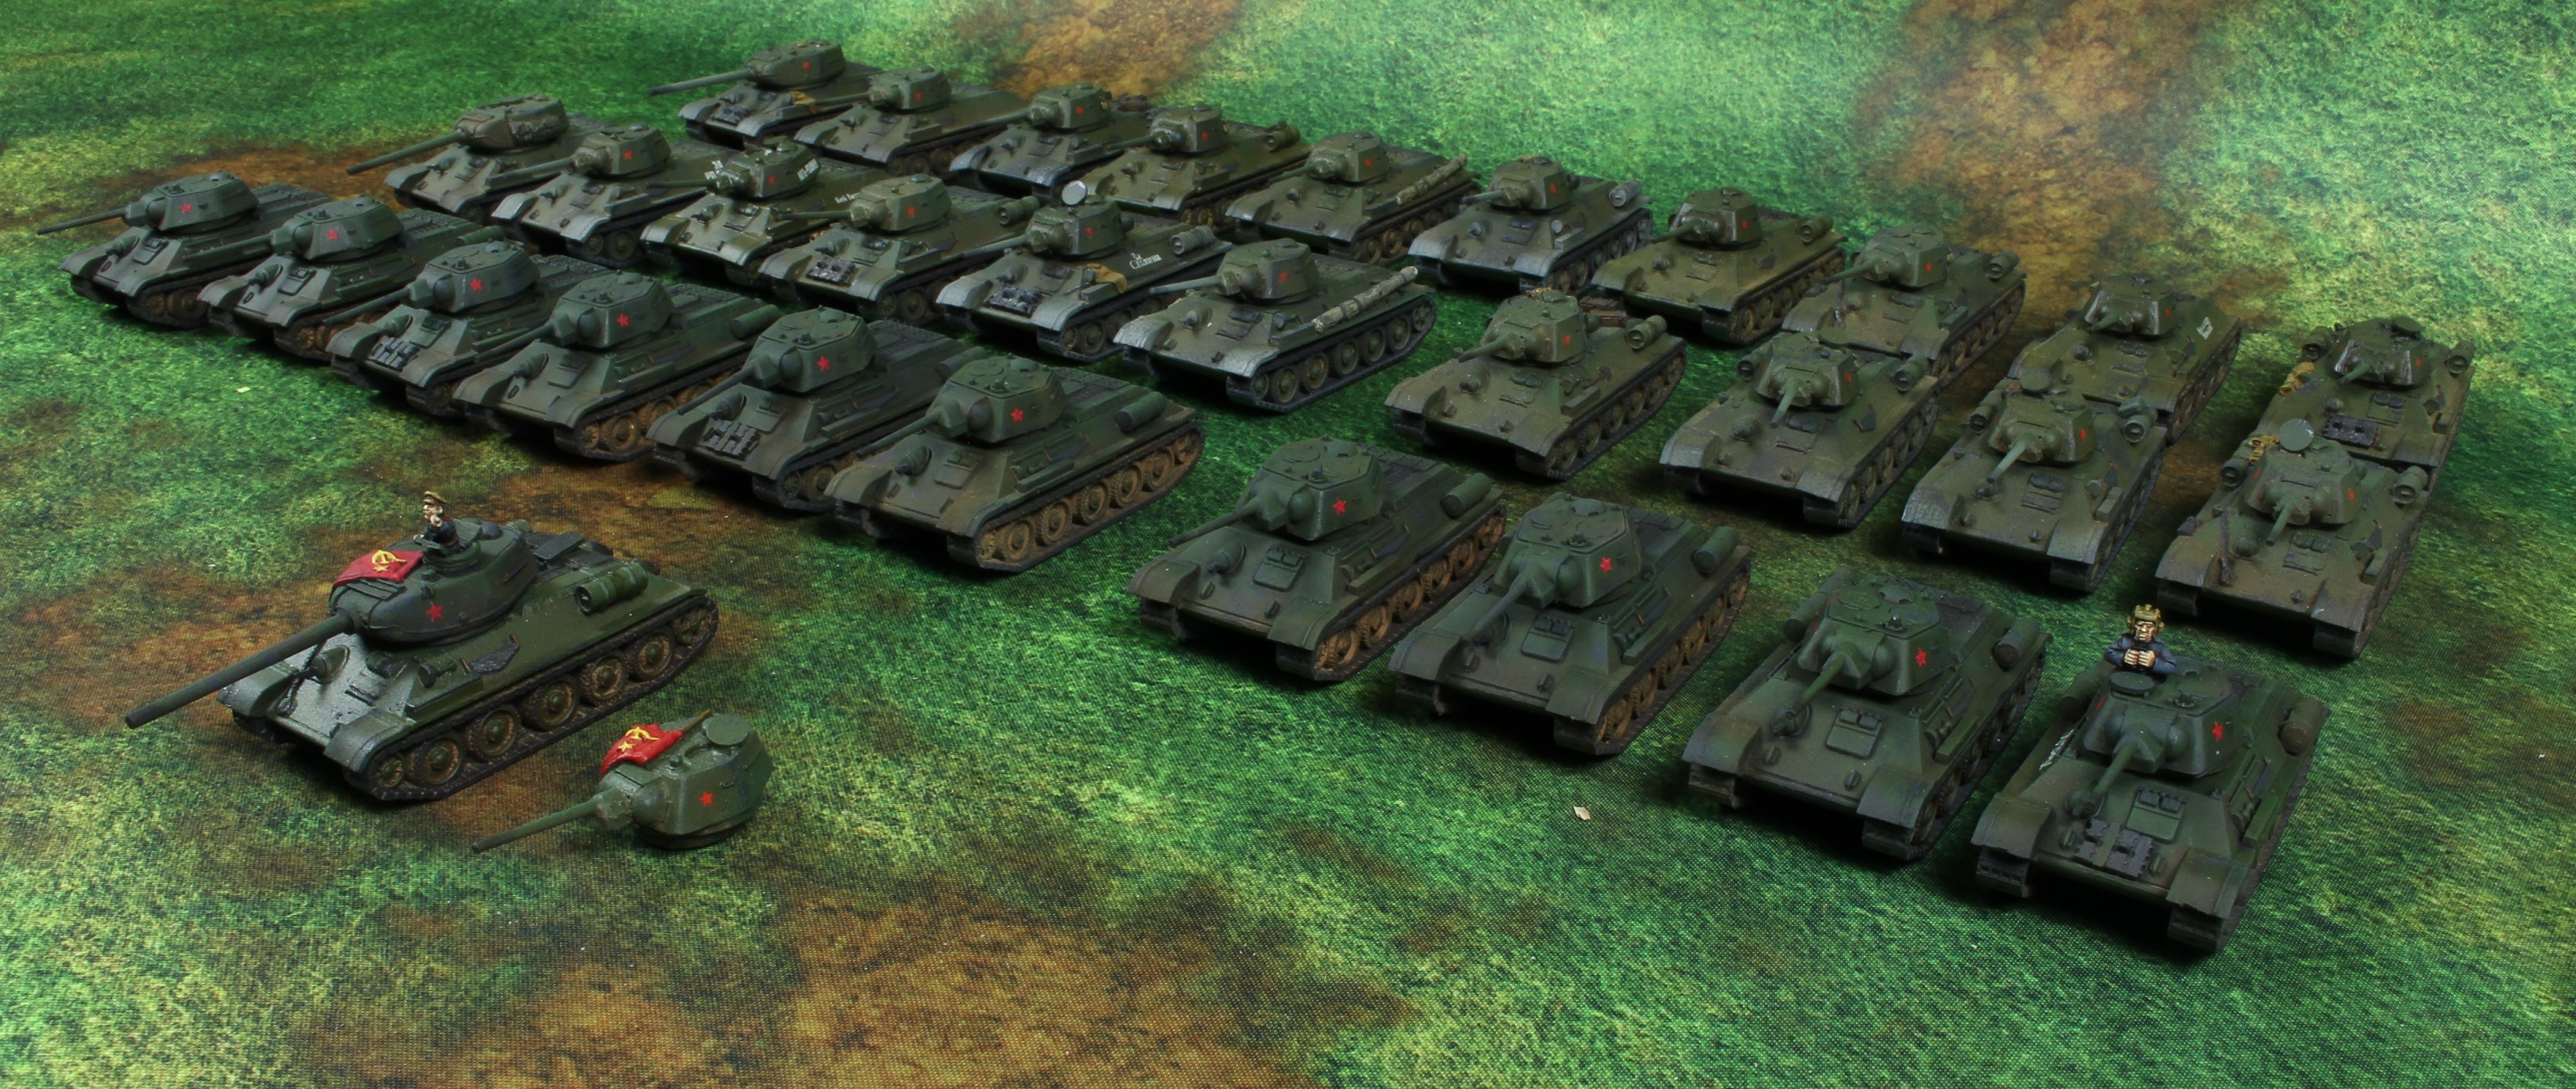
And as soon as I layed them down my mind went “I need a tank commander for the 2 other companies…” and popped 2 tank commanders off the sprew, then popped a third one so I can add a Battallion commander on the T34 – 76 turret too 😉
So that’s for what comes next for the russians. Will have to run down the inventory for the real spring cleanup challenge part. It will be Flames of war Late War only, not mid (the 2 desert armies that I have…) or Early war. Just Late, as I always am 😛
Damn my previous entry had to be split in two!
Well for some reason the previous entry couldn’t hold all the tutorial. so I shall continue in this one. Sorry about the inconvenience.
Next grab another dry brush brush and Vallejo Luftwaffe Green 823. And do an over all drybrush, go easier than the previous one this time. at this point you’ll see the overall tank really pop to life. or at least for me.

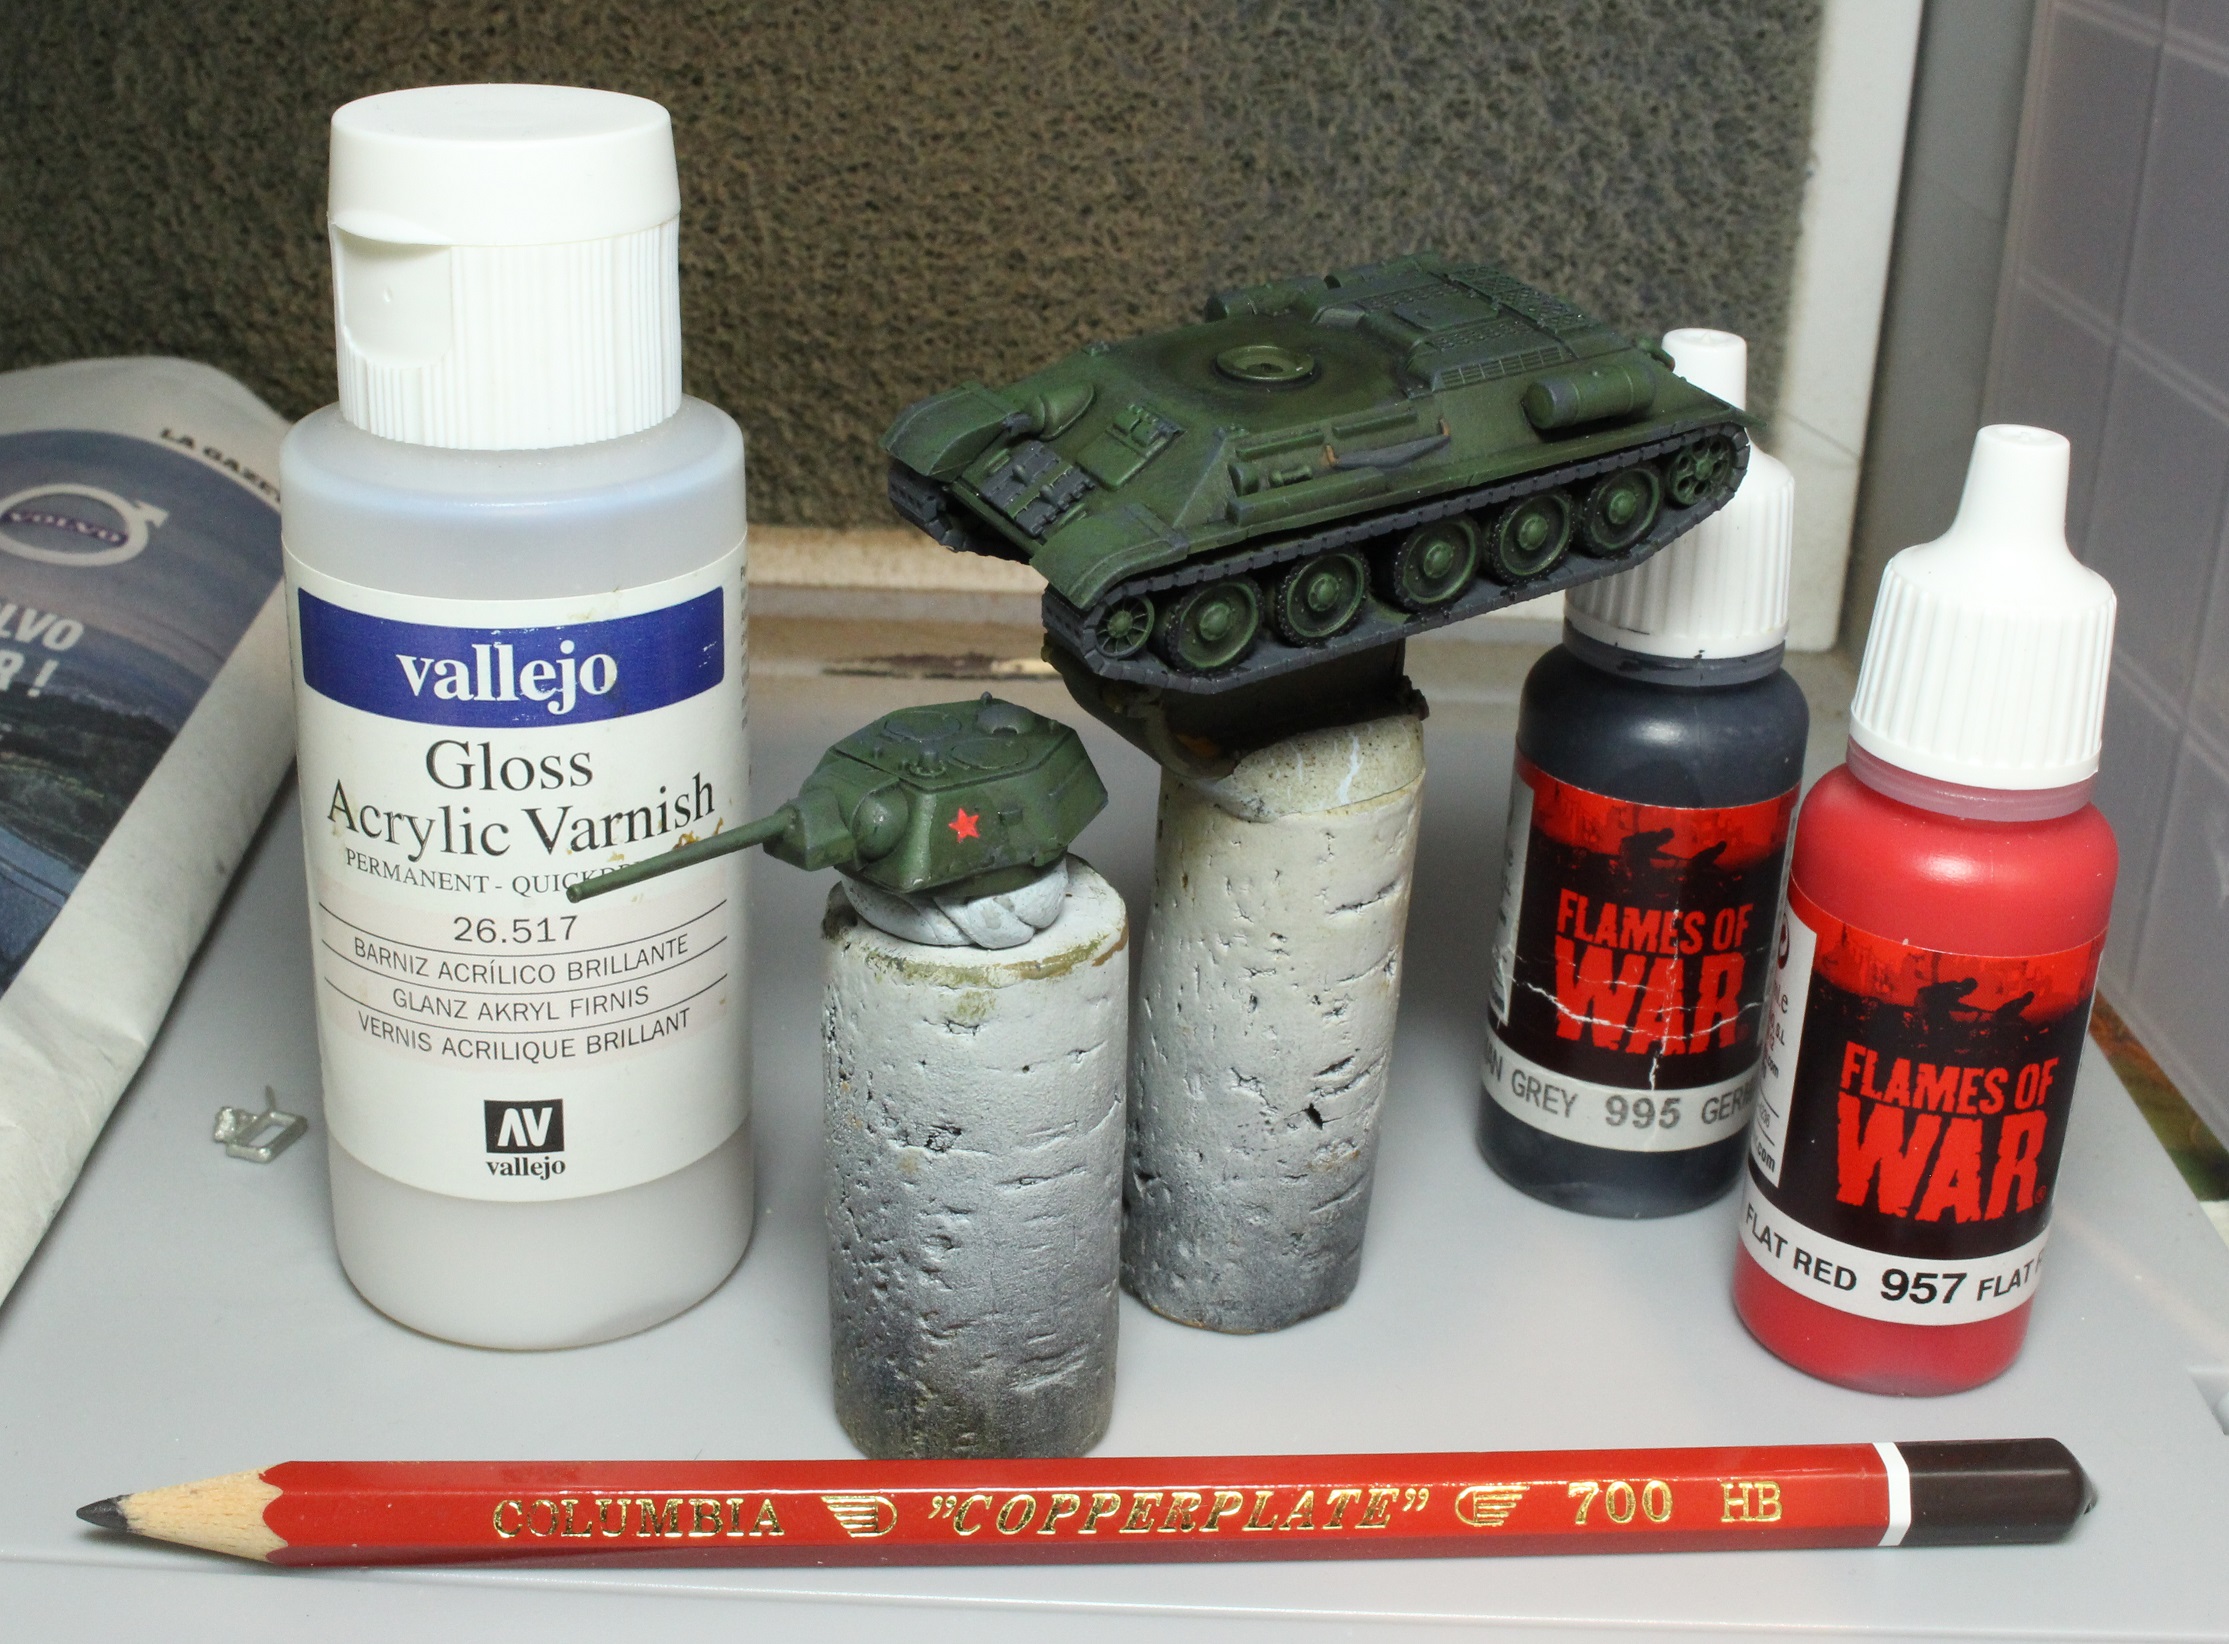
Next, Vallejo German Grey 995 on the tracks, maching gun, the huge saw and other metalic tools if you do have any.
Also wood time, hit it with Vallejo Chocolate brown 872.
Then highlight it with Vallejo Flat Earth 983 (sorry no picture of that small step)

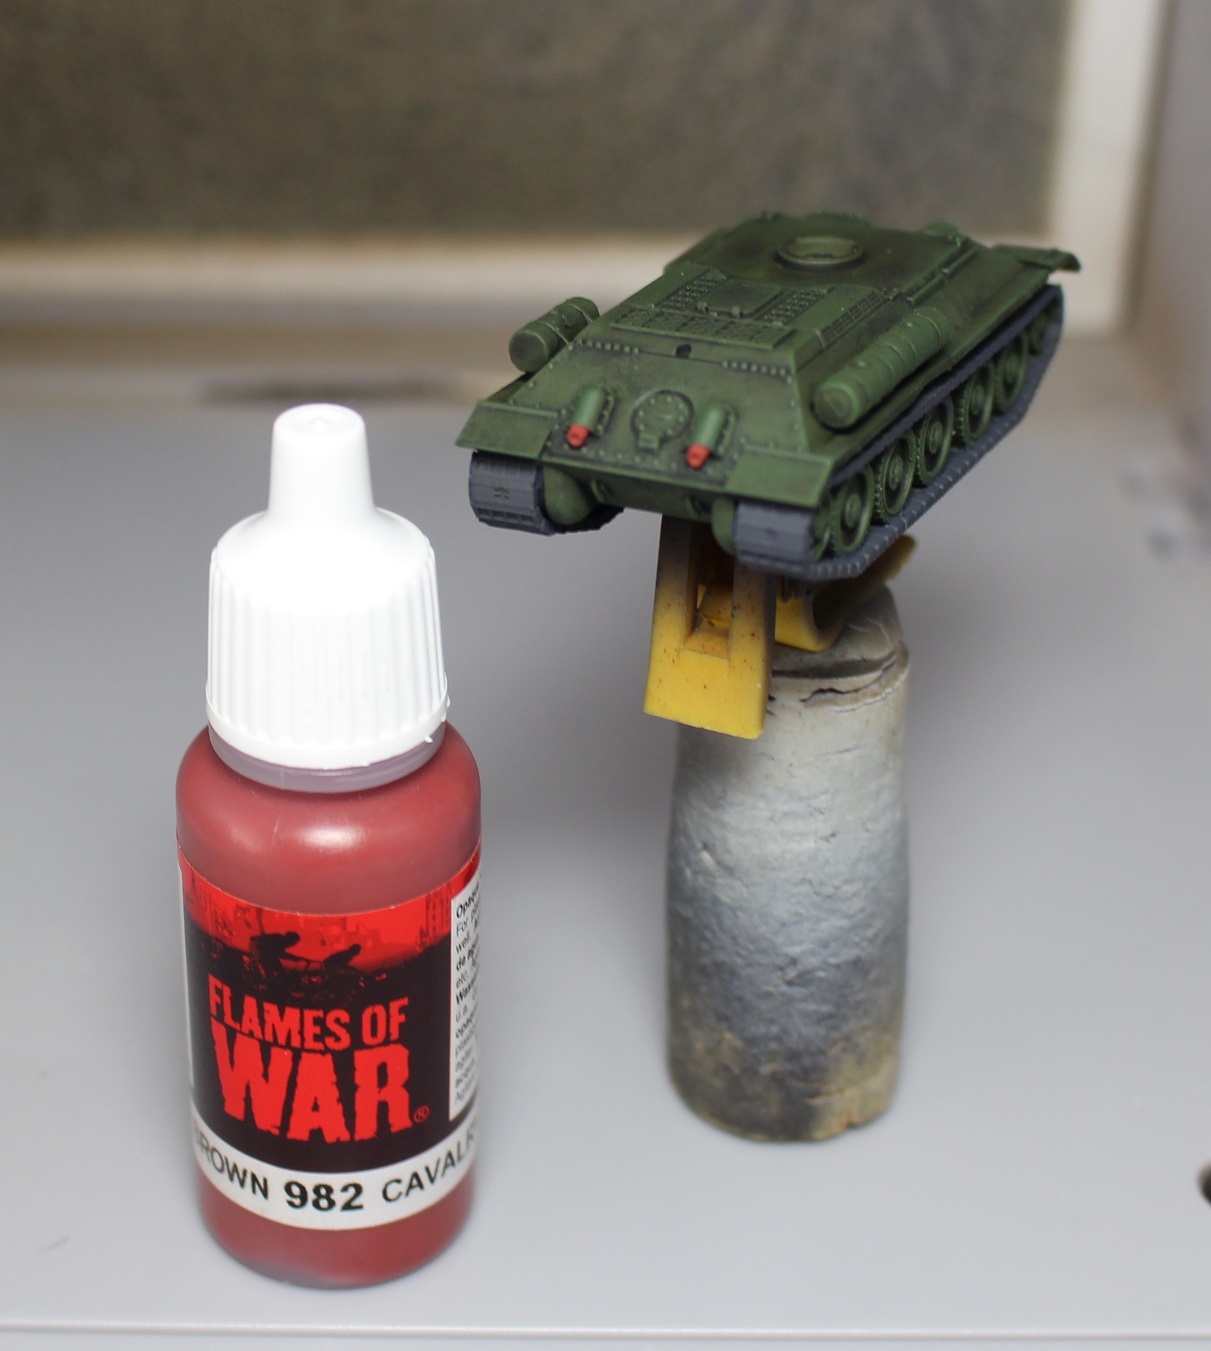
A quick Vallejo Cavalery brown 982 on the exhaust pipes, I know it looks quite harsh but don’t worry the spunging and the pigmens will tone it down and it’ll look ok.
Next! step that takes time as you do have to wait for varnish, decals and paint to dry.
Apply Vallejo Gloss varnish where the decals will go. Let it dry long enough, longer is better than not enough.
Apply the decals, use the microscale micro sol(red bottle) on it and wait that it dies, repeat the operation a few times (3-4-5 times depending of the surface). then once you gave it plenty of time to dry. gloss varnish over your decal.
In this case my russian star was white… the rest of the battallion got red star and I wanted red stars. so I took my Vallejo Flat Red 957 and painted over the decals.
Once that is dry, Vallejo German Grey 995 a small bit of sponge. and sponge all over the tank, don’t go too crazy, remove the excess on a tissue and then on your hand then take your time (yes I know it’s tempting to go fast but risks are that you’ll bugger off all your hard work).
Once that is dry, grab an HB pencil and go over the metal bits to give it some definition. do on the tank itself to represent recent scratches, or give deepness to the marks left by the sponge.
once that is done. you grab 2 dry brush brushes, a small one from GW to apply Mig Europe Dust pigment and an old brush small brush that you don’t care for anymore to do the gun and exhaust with MIG Black smoke pigment.
Once this is done, airbrush. Ammo Matt Lucky Varnish (or Ultra Matt lucky Varnish) 1 bar of pressure and spray it, I tend to do the first approche fairly far away from the model to avoid blowing everything away. then once it gets wet go closer. I also always tend to do two coats of varnish with the airbrush to avoid overdoing it and ruining all the previous work.
Sorry no picture of that.
There done!
So… After talking on the Discord server I was told “yeah sure you can upgrade your Project to a Spring cleaning challenge one” and I still got gear for FOW… so even though I finished those 40 odd tanks that I started at the end of last October, I will carry on and kill some of my pile of shame.
Scope to be defined in the next post! With a picture of the whole Russian army of course 😉
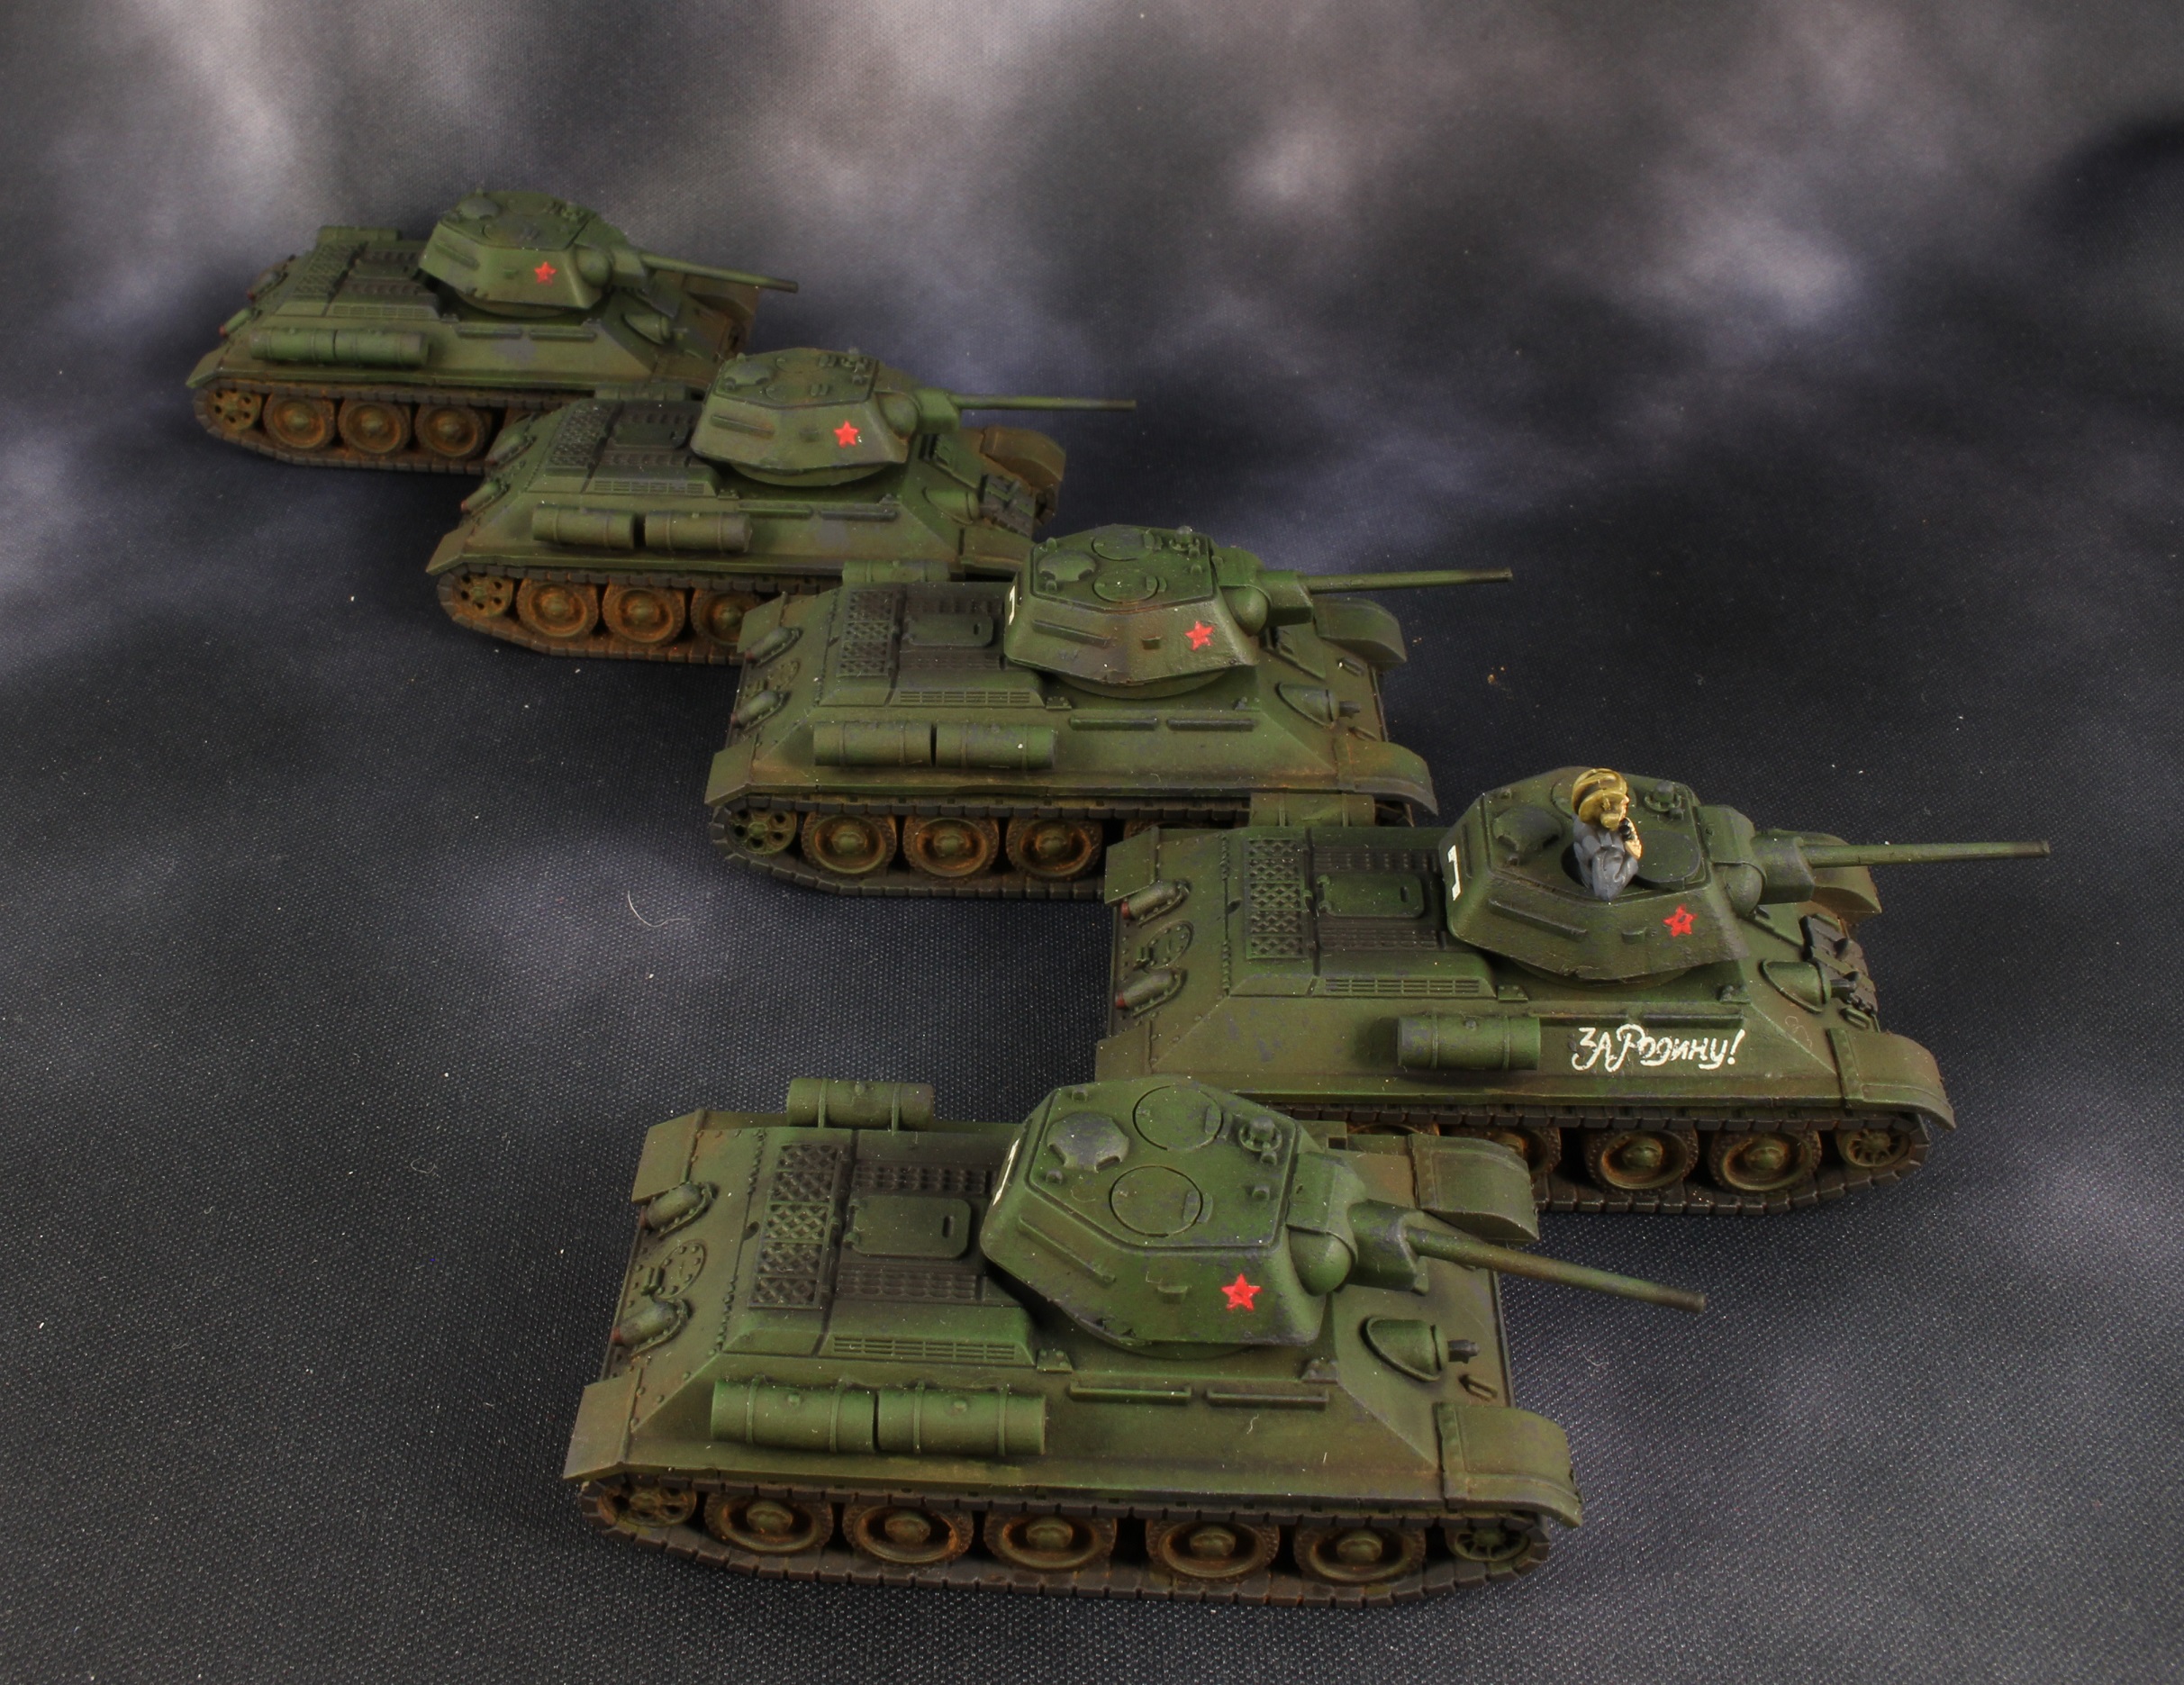
At Least, At Last, or is it?
Ladies! Gentleman! Everyone in between the former two and the ones that are not in between.
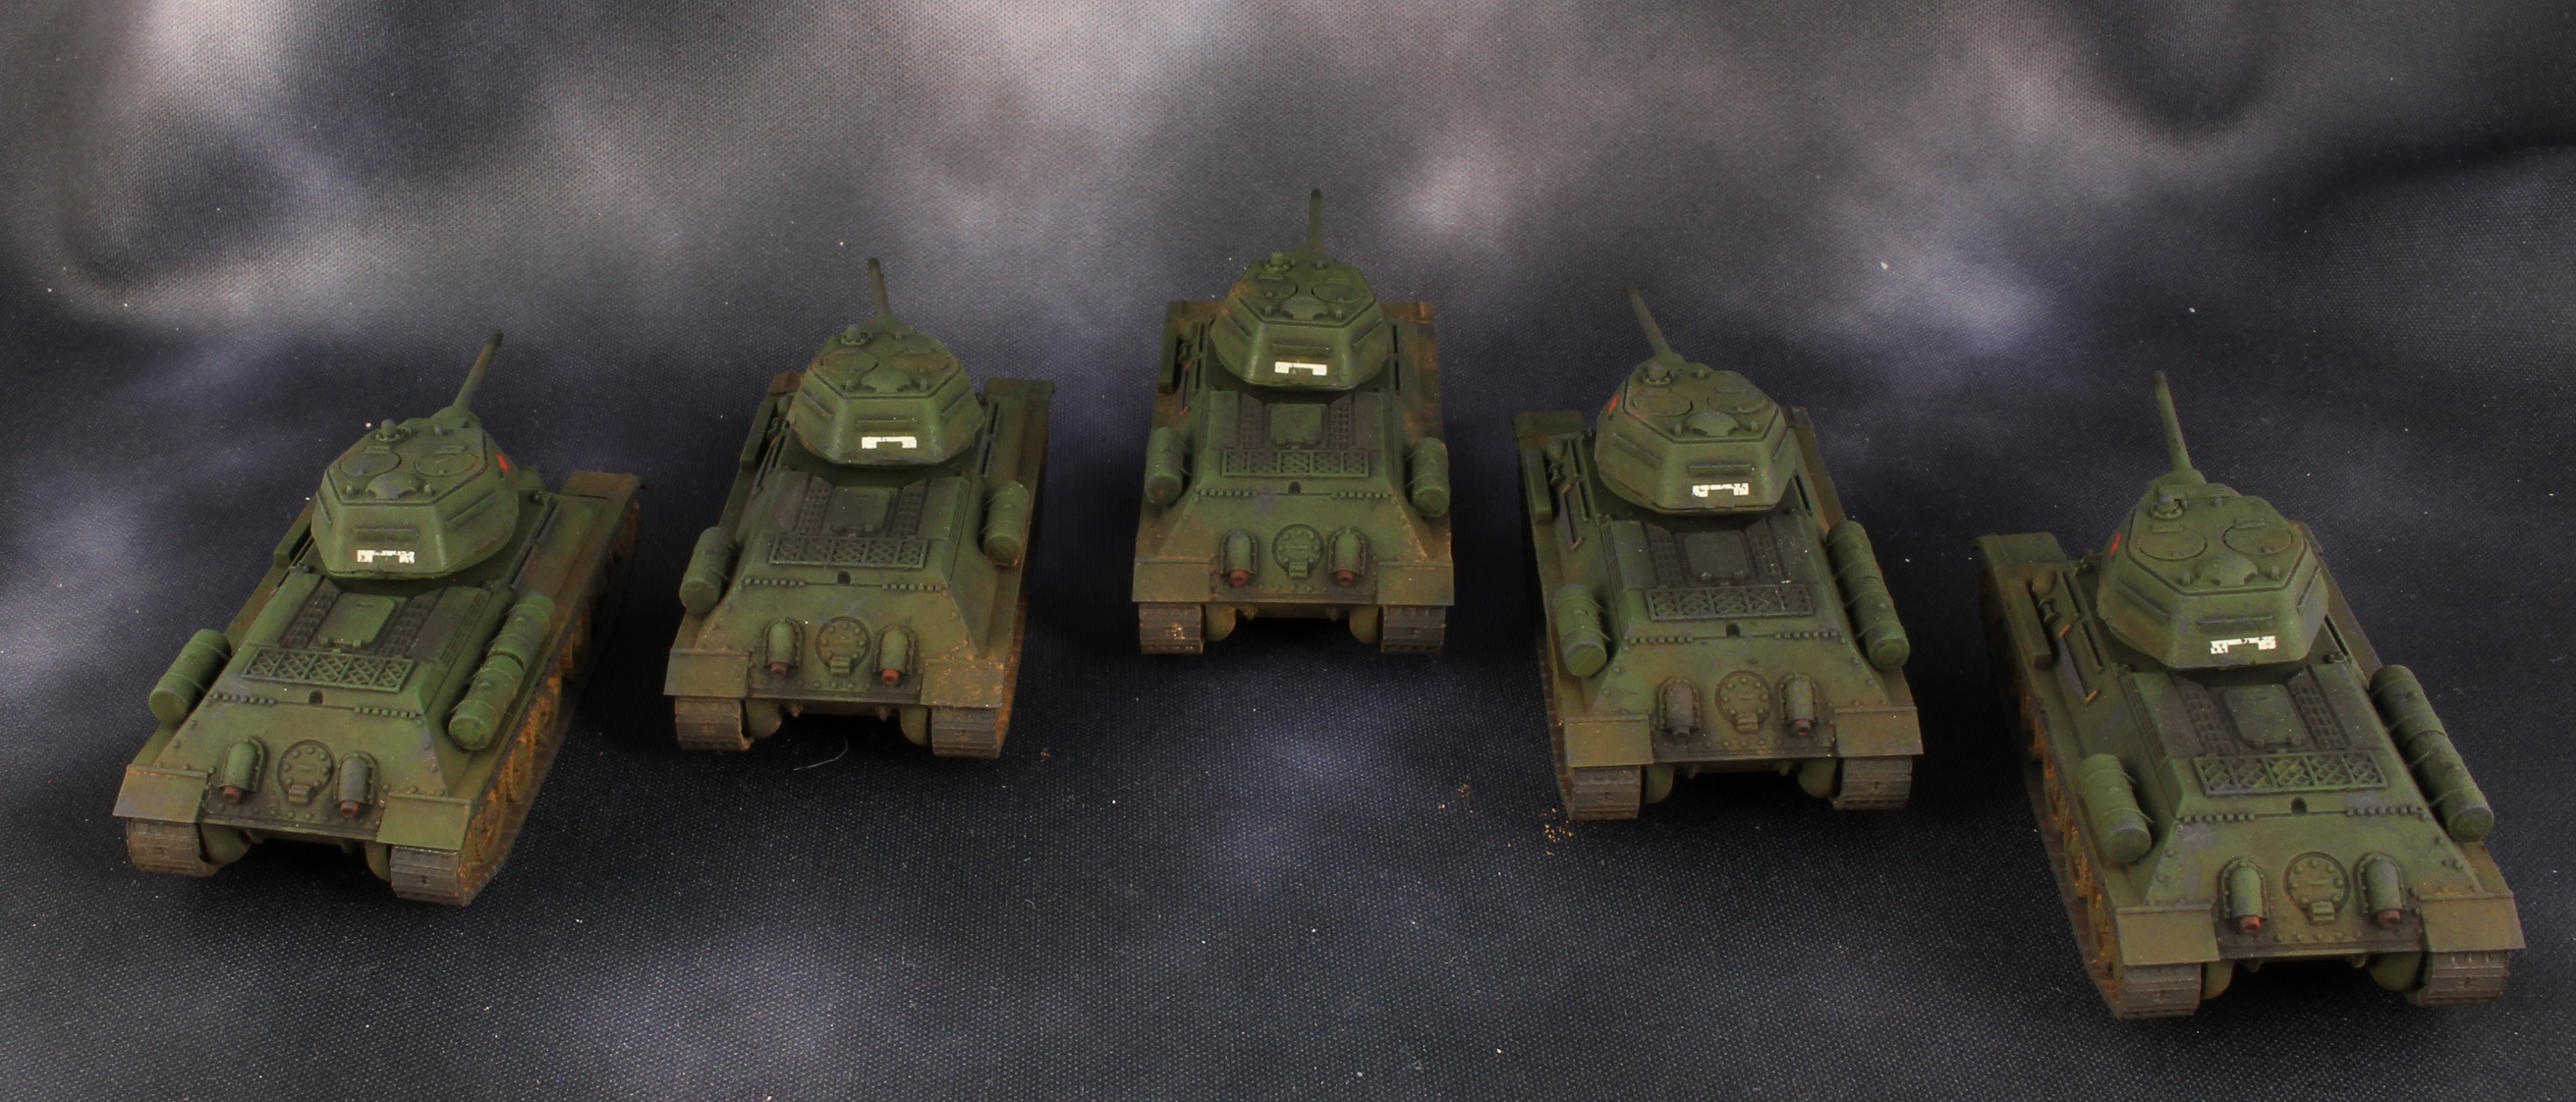
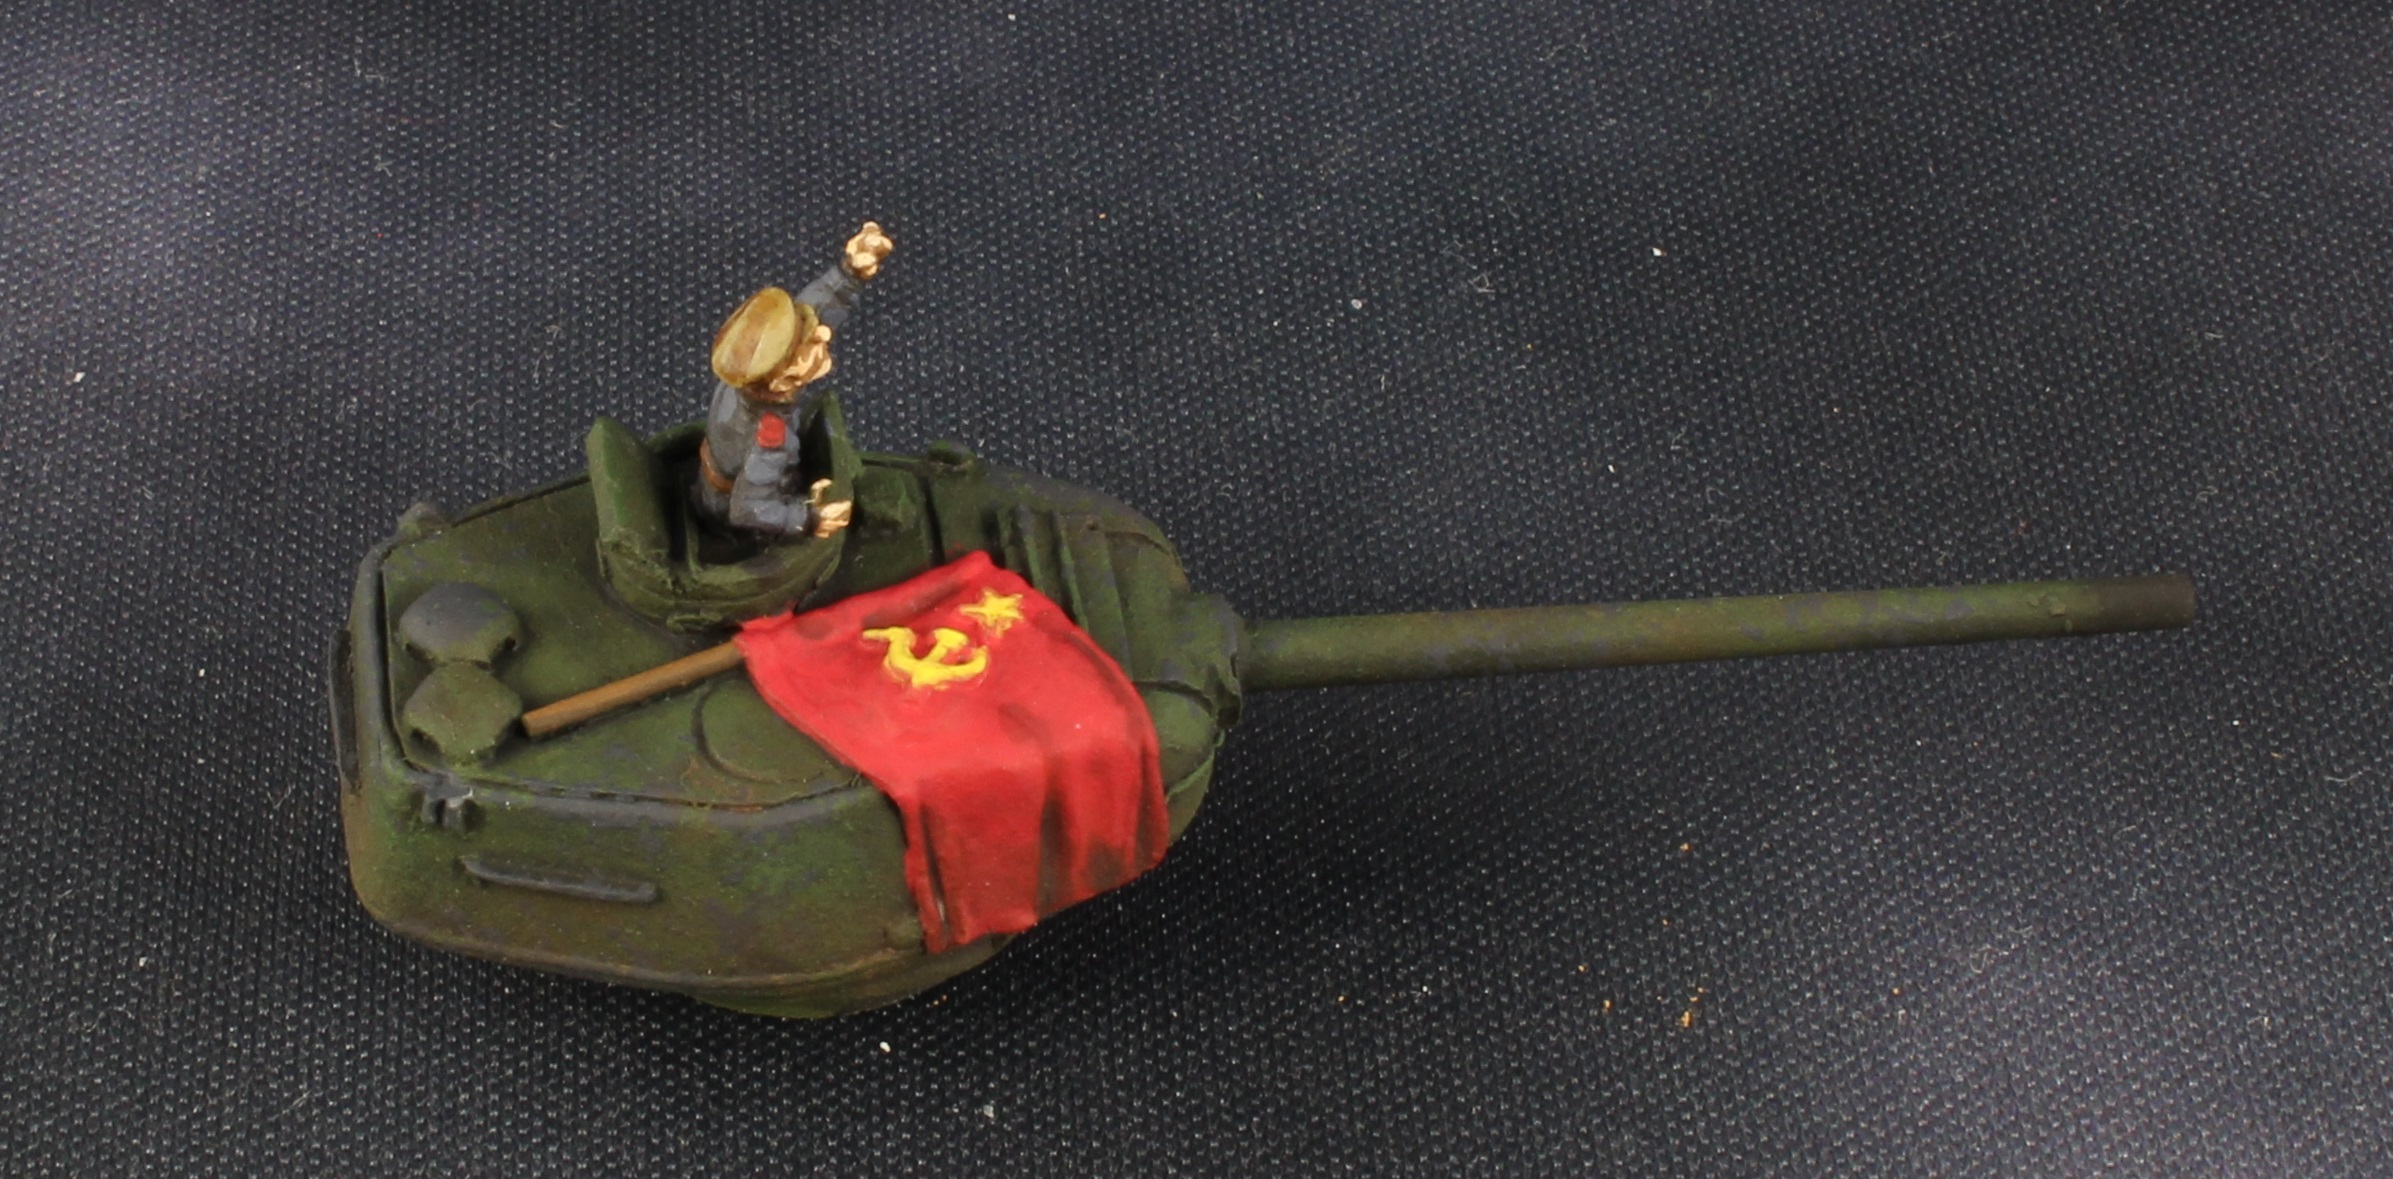
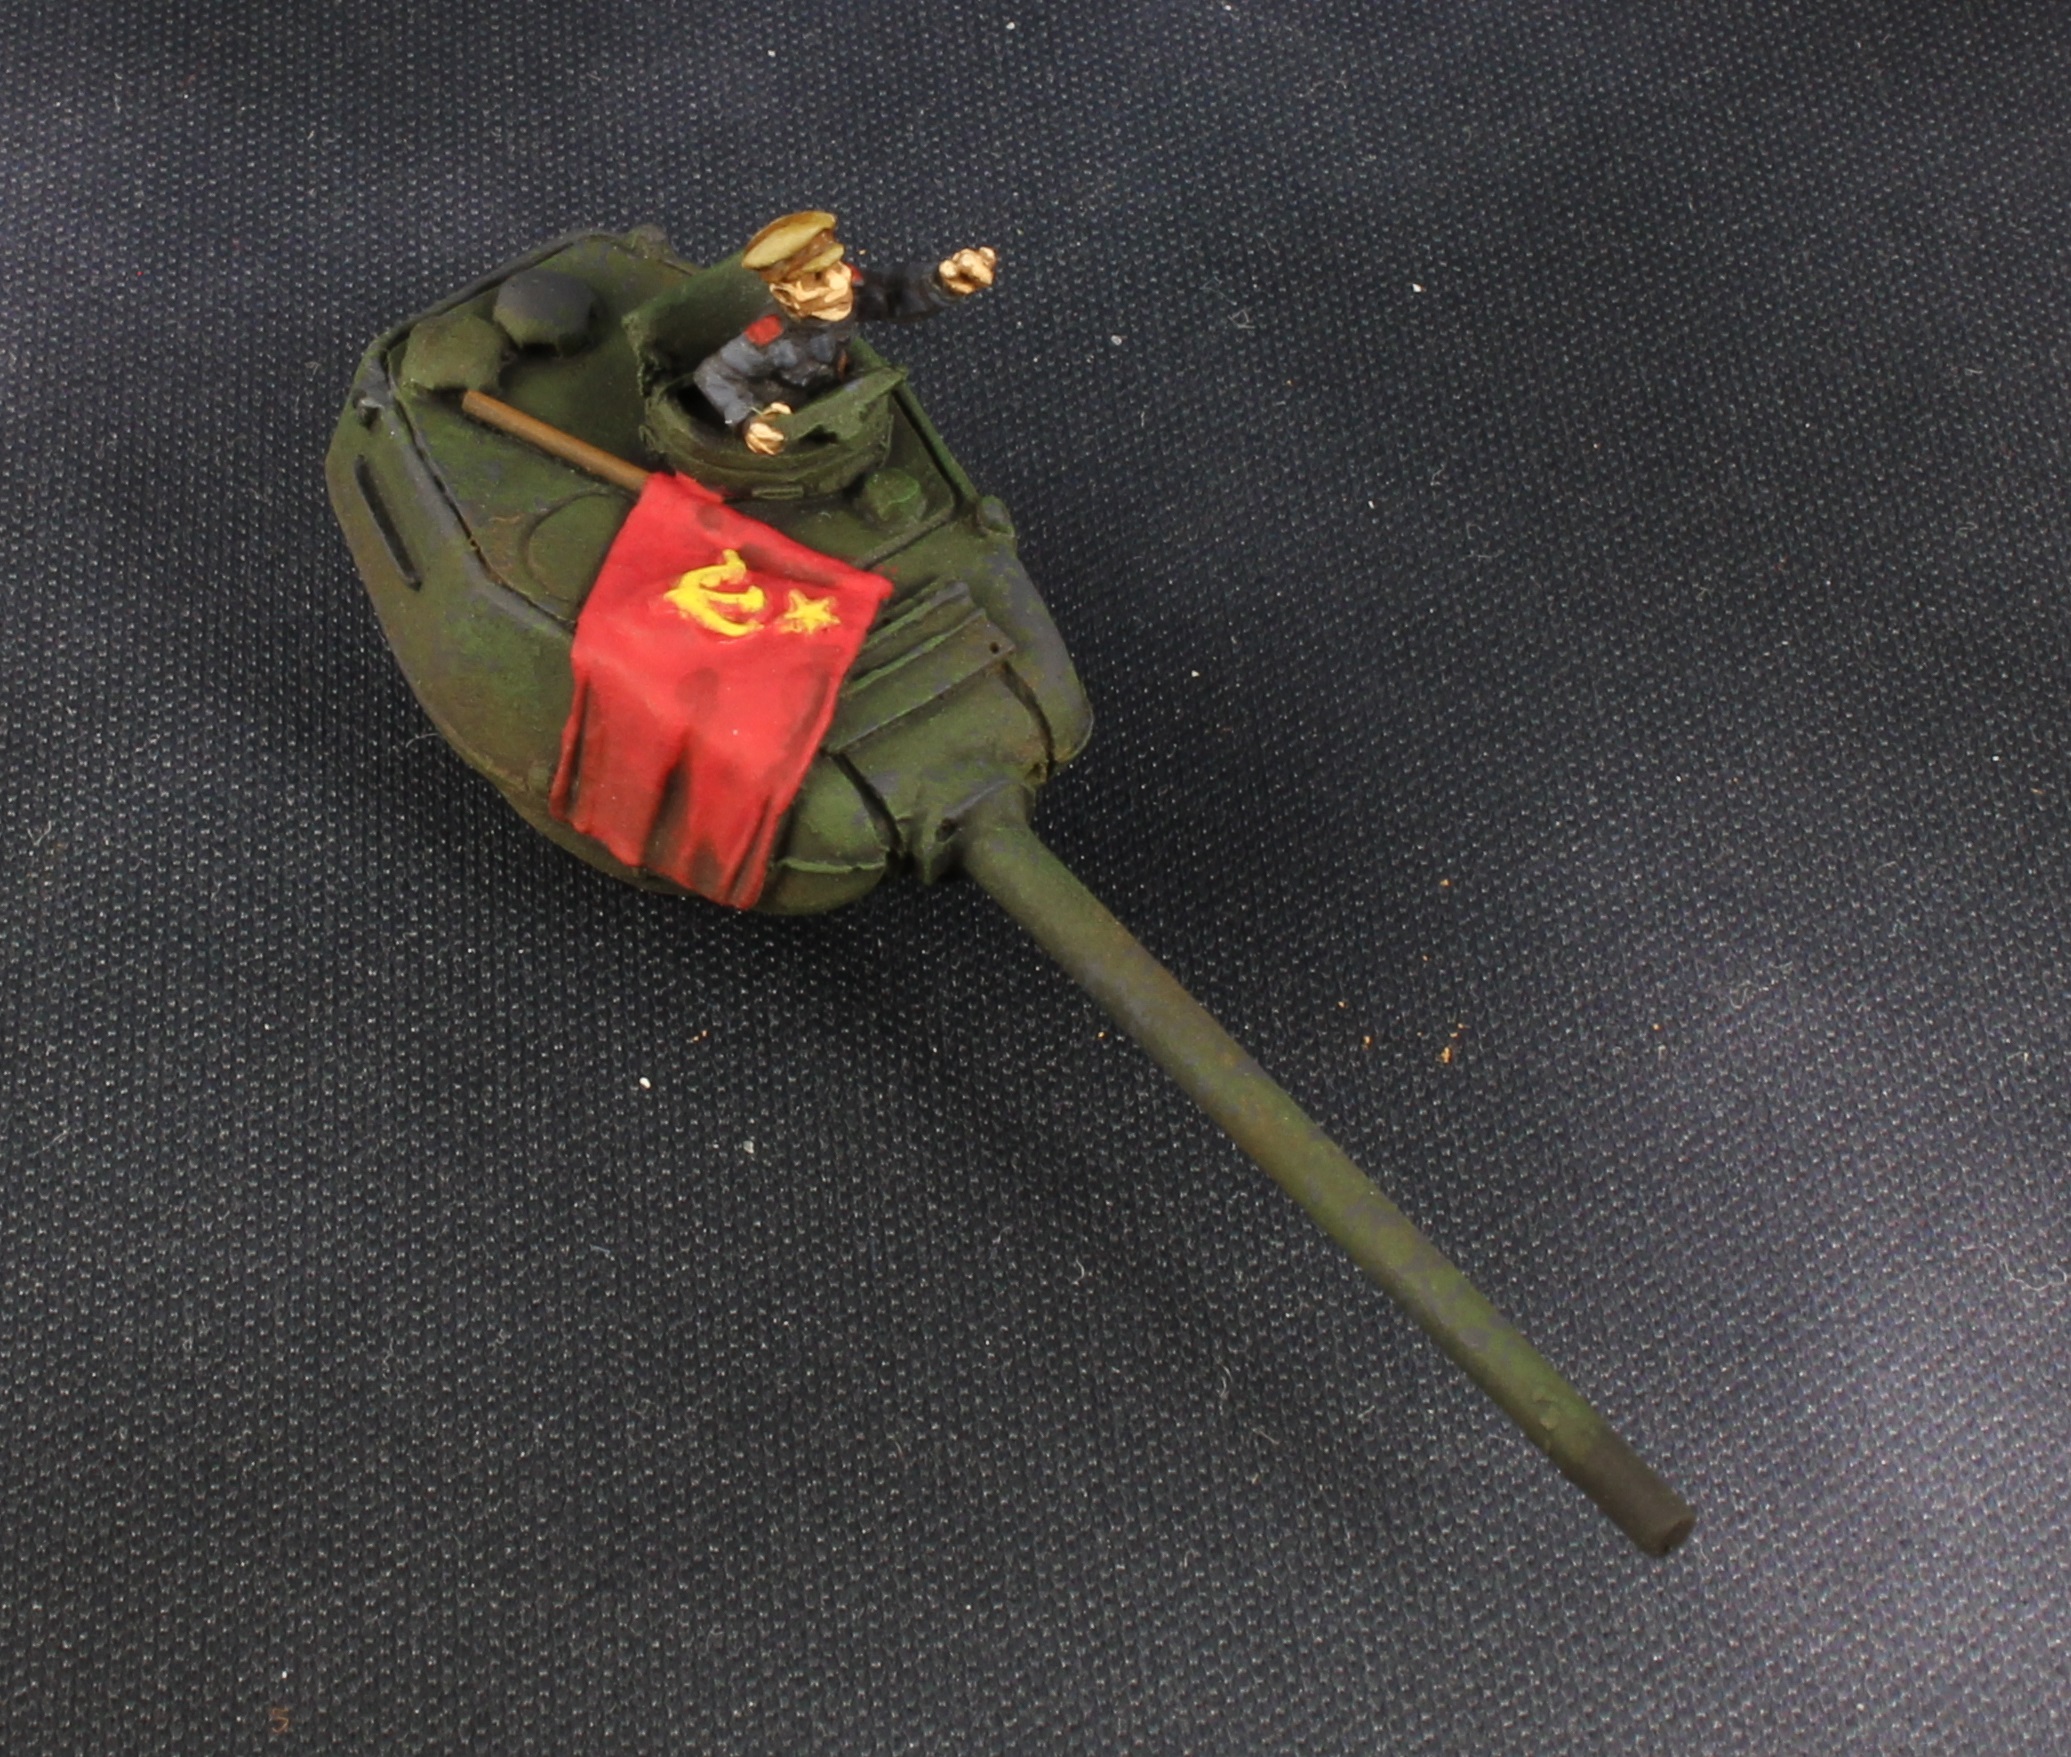
I present to you, the other half of the russian T34 Company. And the upgrade for the Battallion Commander Turret a nifty 85 mm gun and a turret equipped with a cupolla (oh my, that’s russian luxury for you right there). We even got a Lloyd shot.
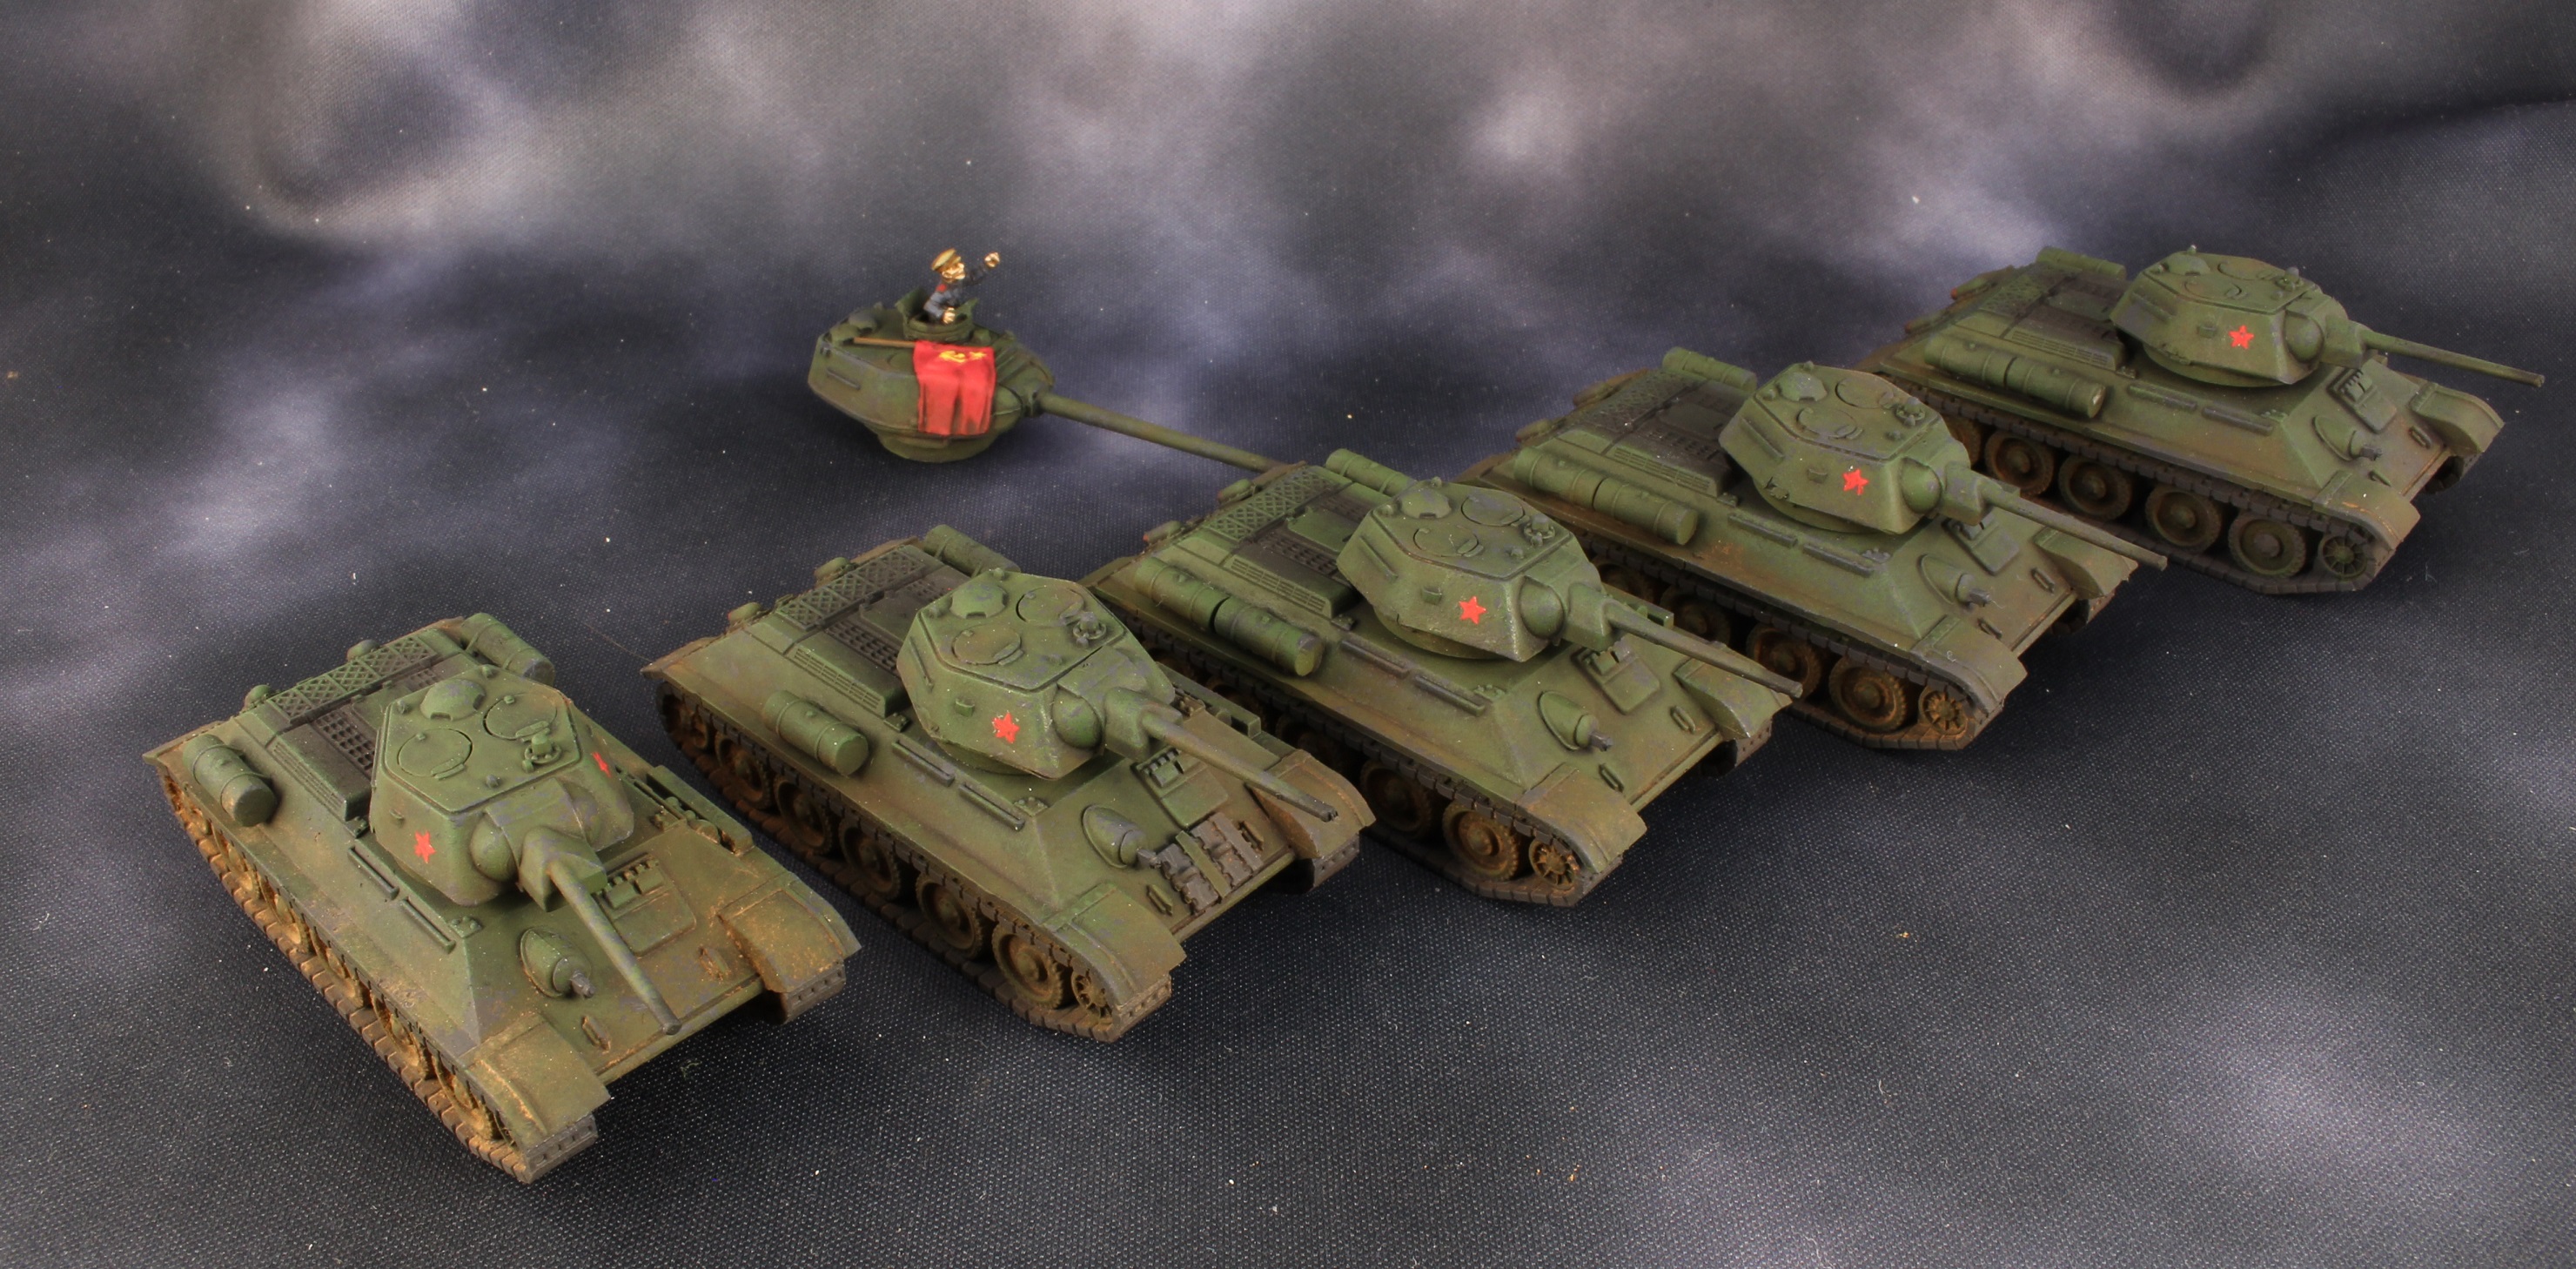
I was quite happy with the commander turret, therefor I could not resist to do a close up.
The commander was done as in t he previous post. the cap though was done in the following sequences as it’s closer to a uniform clothes. Some can tell me it’s the bloody same… well I wanted to have fun.
Vallejo Khaki Grey 880 as a base
GW Seraphim Sepia wash
Vallejo Khaki Grey 880 as a base on the raises surfaces and leave the dark bits dark.
Mix of 75 % to 25 % of Vallejo Khaki Grey 880/ Vallejo Stone Grey 884 just on the edges to make it pop some.
I was tempted to end here…. but I can’t. Here is a full step by step tutorial on how those tiny tanks were produced. Just if anyone there was wondering or wanted inspiration, also I could bloody remember it for the next time…. what you meant…..?
I’m very sorry if this tutorial will be very verbous but I wanted to try it out and see the feedbacks.
So first GW Chaos Black Rattle can undercoat, turrets removed from the hulls ,I tend to do it in 3 to 4 passes (2 on the top, two on the bottom) and go around the model doing short sprays.
Once this done put the turrets back on the hulls and do a zenith spray with a GW Chorax White Rattle can. no need to go crazy on it.
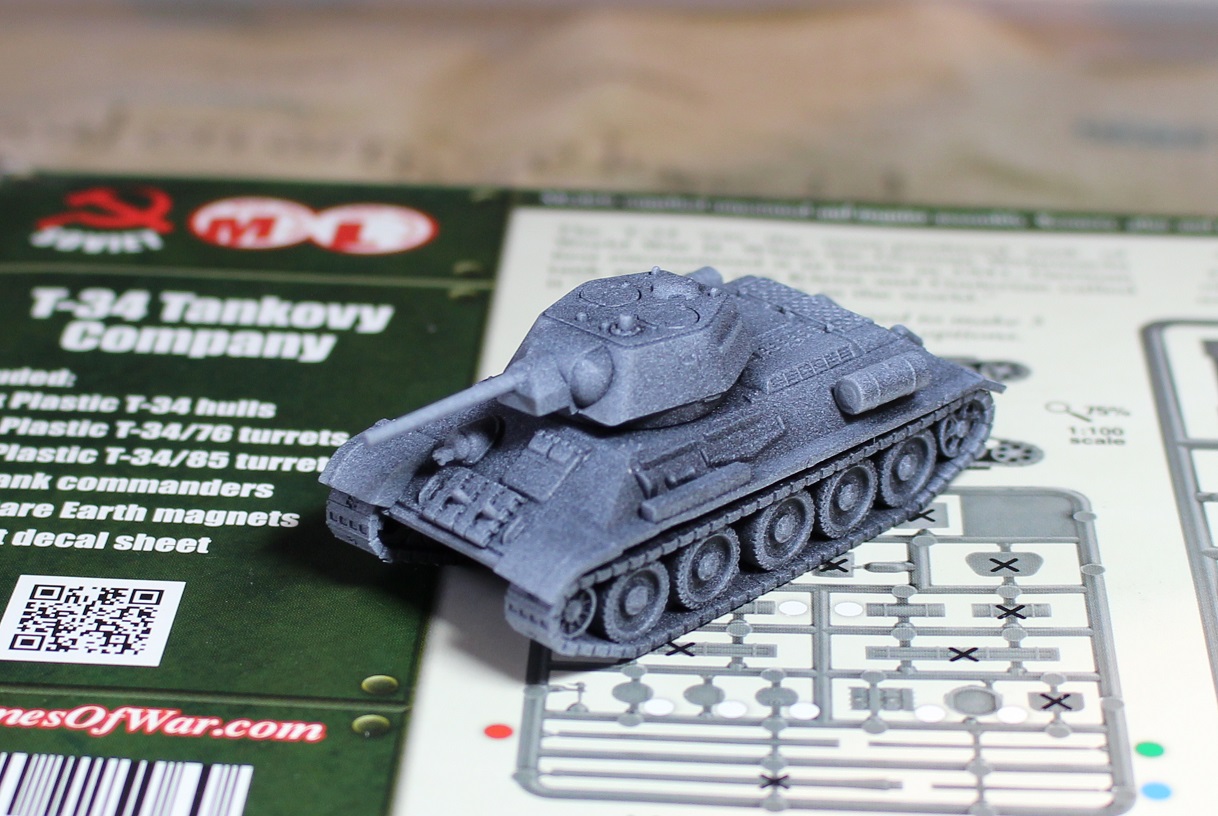
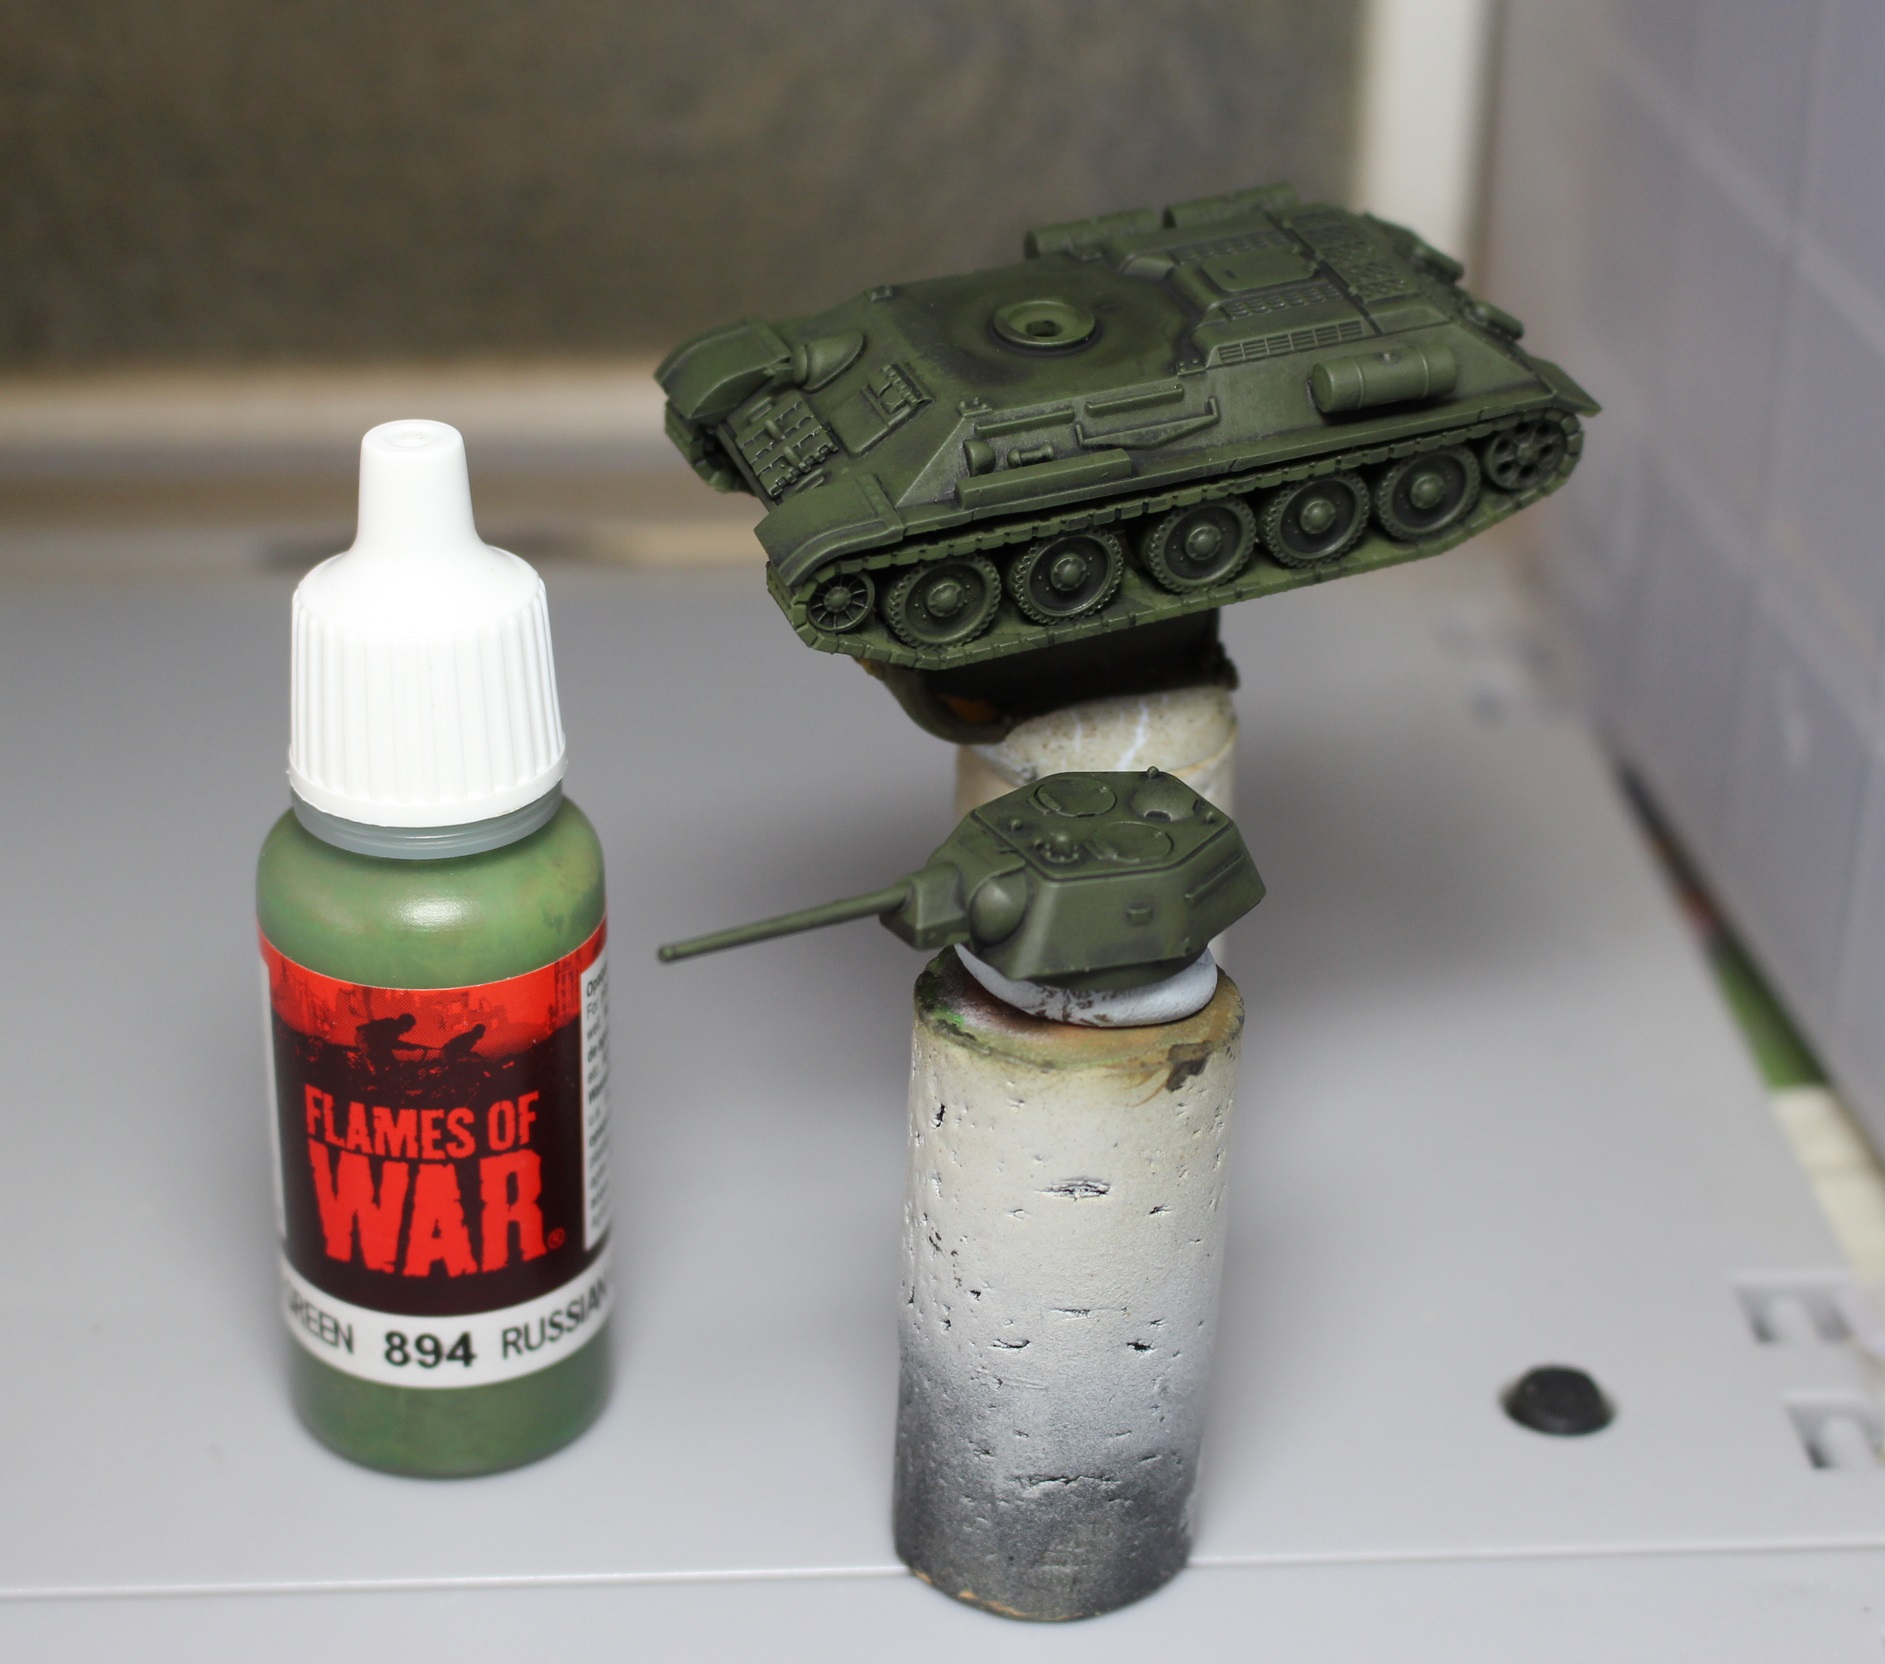
Then we go back inside. Remove the turrets from the hull, Grab your thrusty airbrush the Vallejo Russian Green 894, Vallejo Airbrush flow improver, Vallejo Airbrush Thinner.
I find, for me that with this airbrush the following mix tends to go on as a base.
twice more thinner than paint and then about 1 drop of flow improver per two drops of paint
Exemple : Paint 20 drops, thinner 40 drops, flow improver 10 drops.
2 Bar of pressure
If you don’t have an airbrush you can go with a rattle can. the onces from The plastic Soldiers company are quite good. I prefer those over the army painter which gave me a fair bit of headache going from being so thing it hides details to giving me a sandy texture (and of all of it was on droopfleet commander minis…)

Once that is done, have a break with the complicated stuff. Grab your jar of GW Nuln oil. and hit all the tank with it. try to avoid pooling on flat surface but really that’s it.
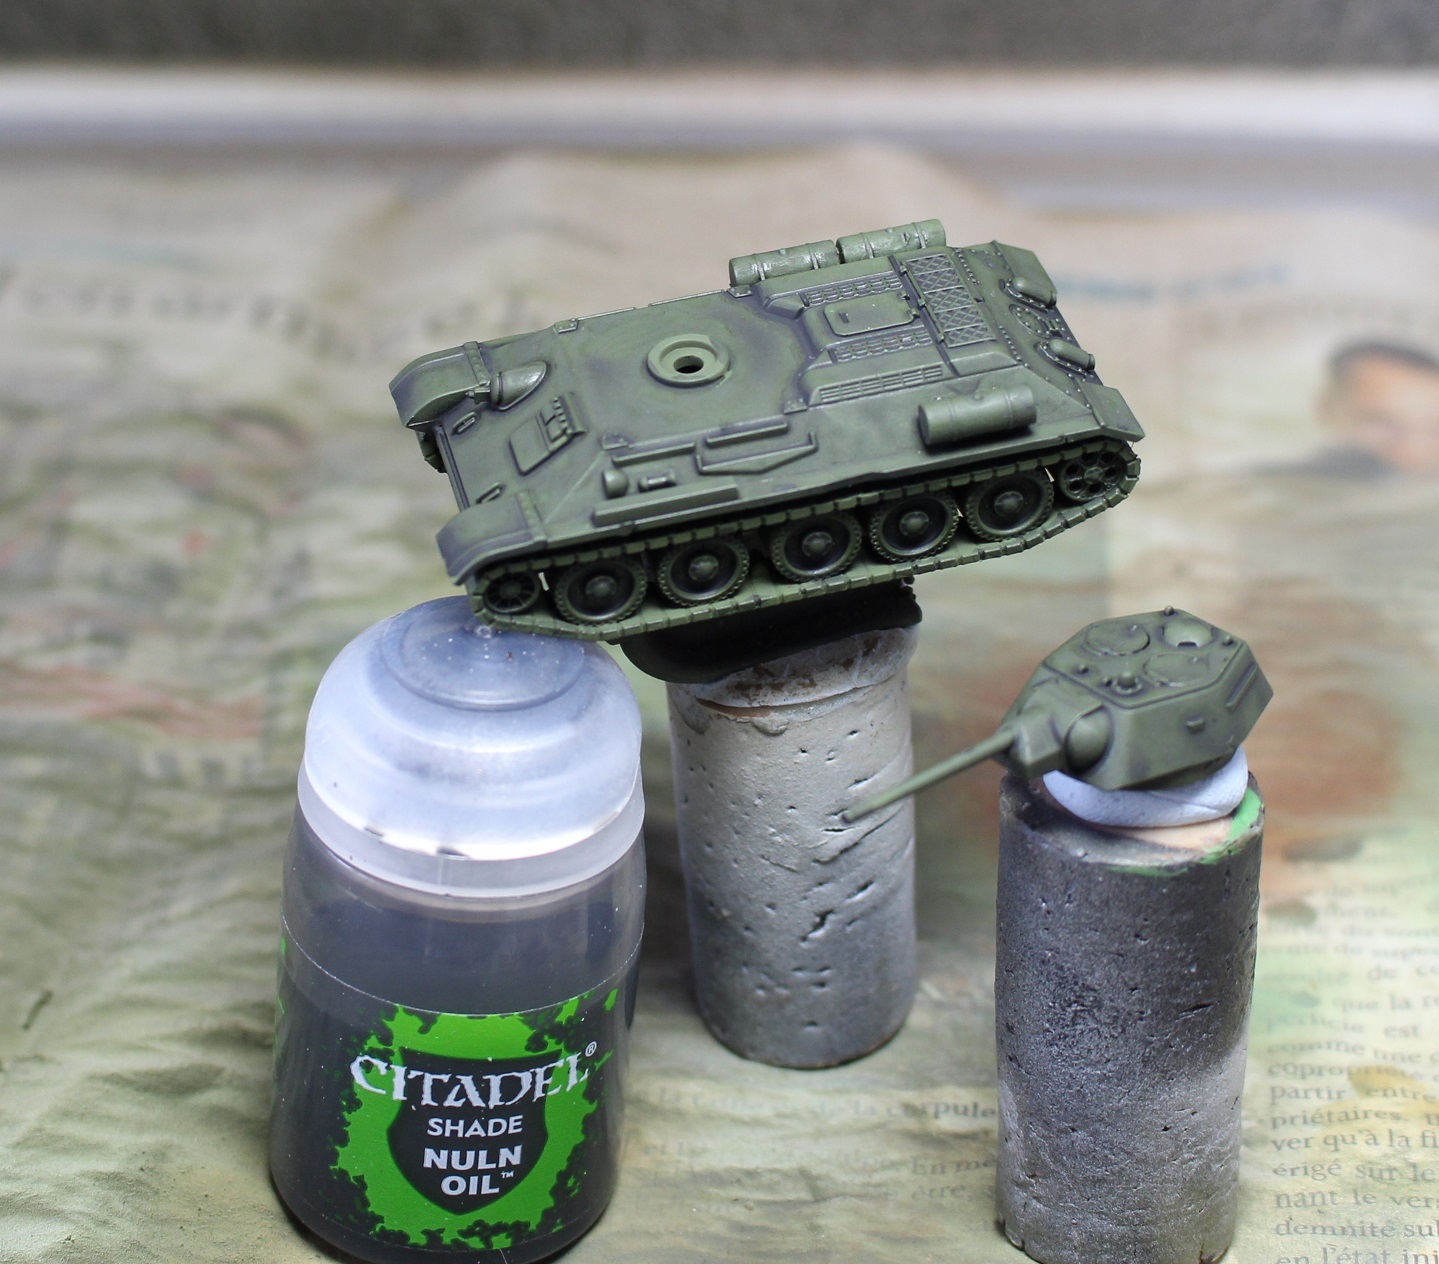
Once the wash it real dry (give it a night or at least a few hours) grab that Vallejo Russian Green 894 that was trying to run away, your favorit nicely sized dry brush brush and do an overall drybrush. When I say nicely sized it’s not too small 😉
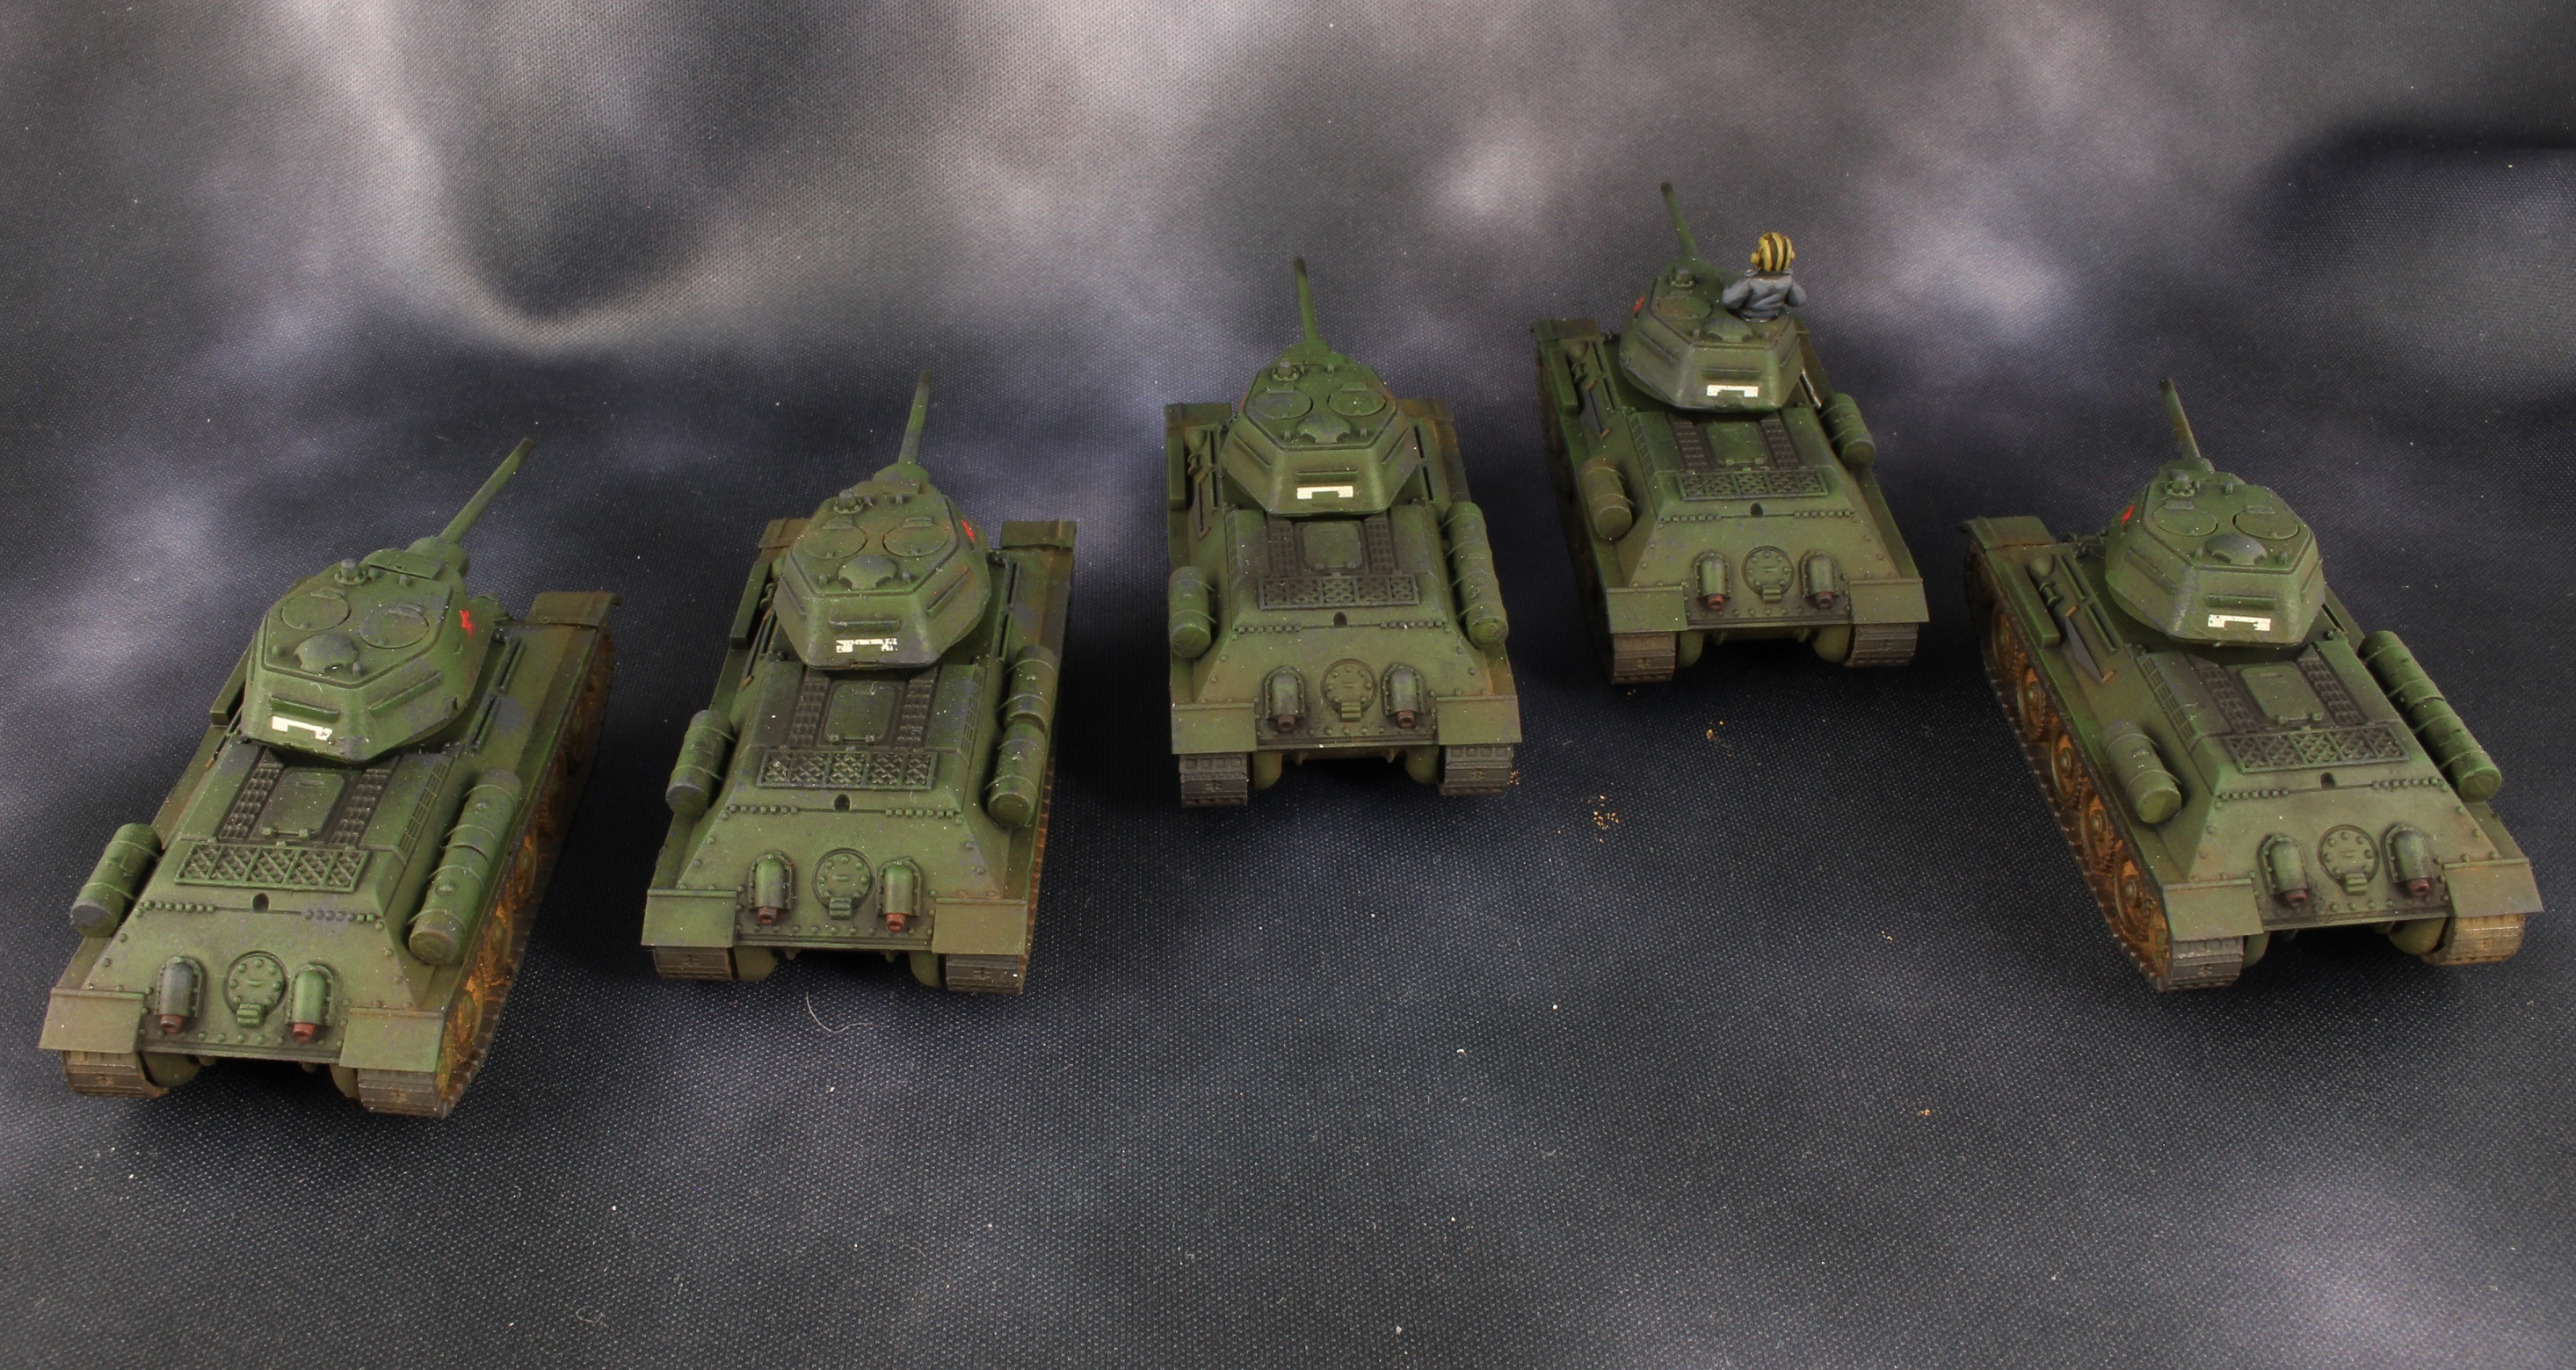
Reinforcements are in!
Priviet Komrad!
God that is easy to say hello to anyone ain’t it?
Alright, well the first half of the last company for the Soviet Tank Battallion (31 tanks oh yeah) is finished! Sorry it took longer than I wanted but I kinda forgot to paint the company commander, and I didn’t want to take a snapshot with the unit half done 😛
The tank commander is fairly straight forward to paint:
Vallejo Luftwaffe Blue 816 for his overall
GW Chaos Black for the binocular
Vallejo Khaki Grey 880 for the tanker cap
Then GW Nuln oil wash on the painted parts
once that is done
Vallejo Beige Brown 875 for the skin
Then highlight the skin with Vallejo Flat Flesh 955
Then put a dab of pure white in your Vallejo Flat Flesh and do the last highlights on the skin.
Once that is done:
Vallejo Luftwaffe Blue 816 highlight on his overall
And for the tank cap, do a mix of 50/50 of Vallejo Khaki Grey 880 and Stone Grey 884 and touch up the details (saving that for after the skin also allows you to do touch ups if you messed up badly with the skin)
Then your proud Soviet tank commander is done 🙂
Of course the post wouldn’t be complete with the pictures
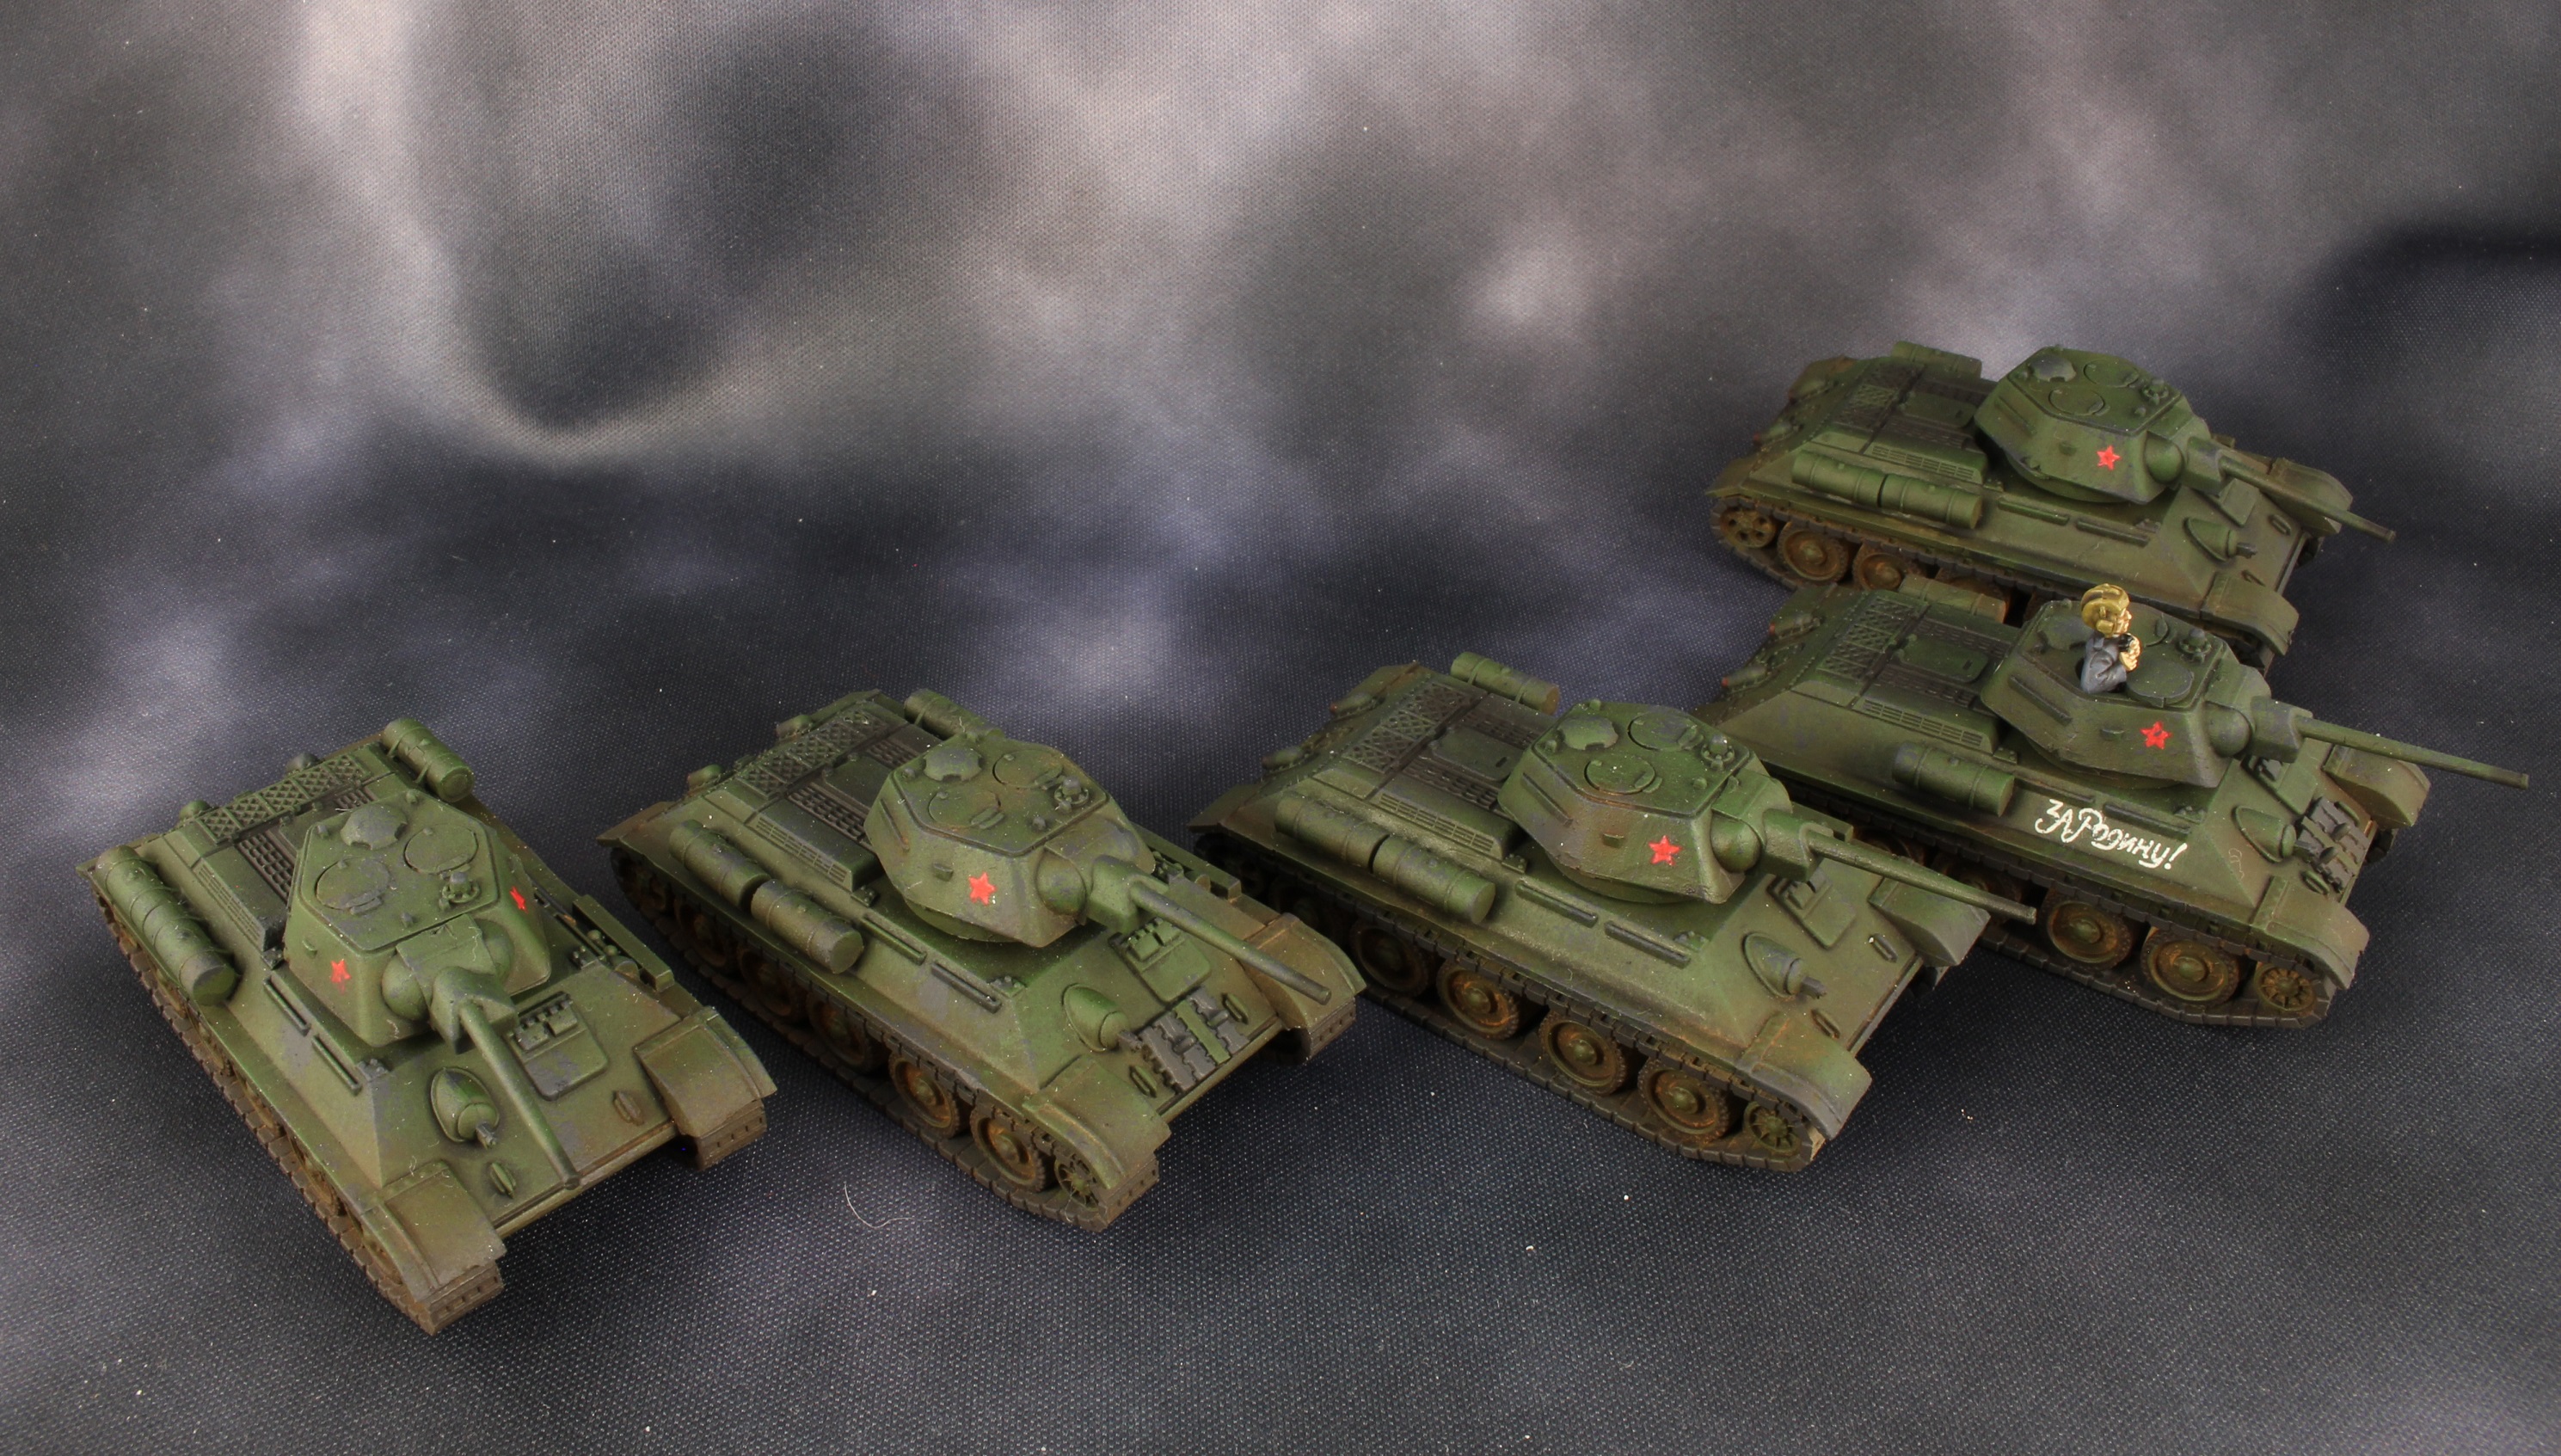
And also a @Lloyd shot 😛 also to show the marking at the end of the turret to differentiate this company from the others 🙂 and the lovely work on the exhaust
Quick update from Russia
Hello Fellows Confimenters,
Still working from home here, but I did work on my project some. Or well, quite happy with the amount of work if I am being entirely honnest.
The second half of the T34 Company was airbrushed today. Vallejo Russian Green 894. The first Half of the company got up to the point of getting its decals applied today. I will do another Gloss varnish layer on top of the decals tomorrow morning. The it will get the spunging, HB pencil for metal marking. Pigments, Matt Varnish. DONE!
So within luck I shall be done with the Russian part of the project by this time next week. And I just remembered that I need one more T34/85 turret! DOH! Oh well no biggie.
Of course here are the pictures

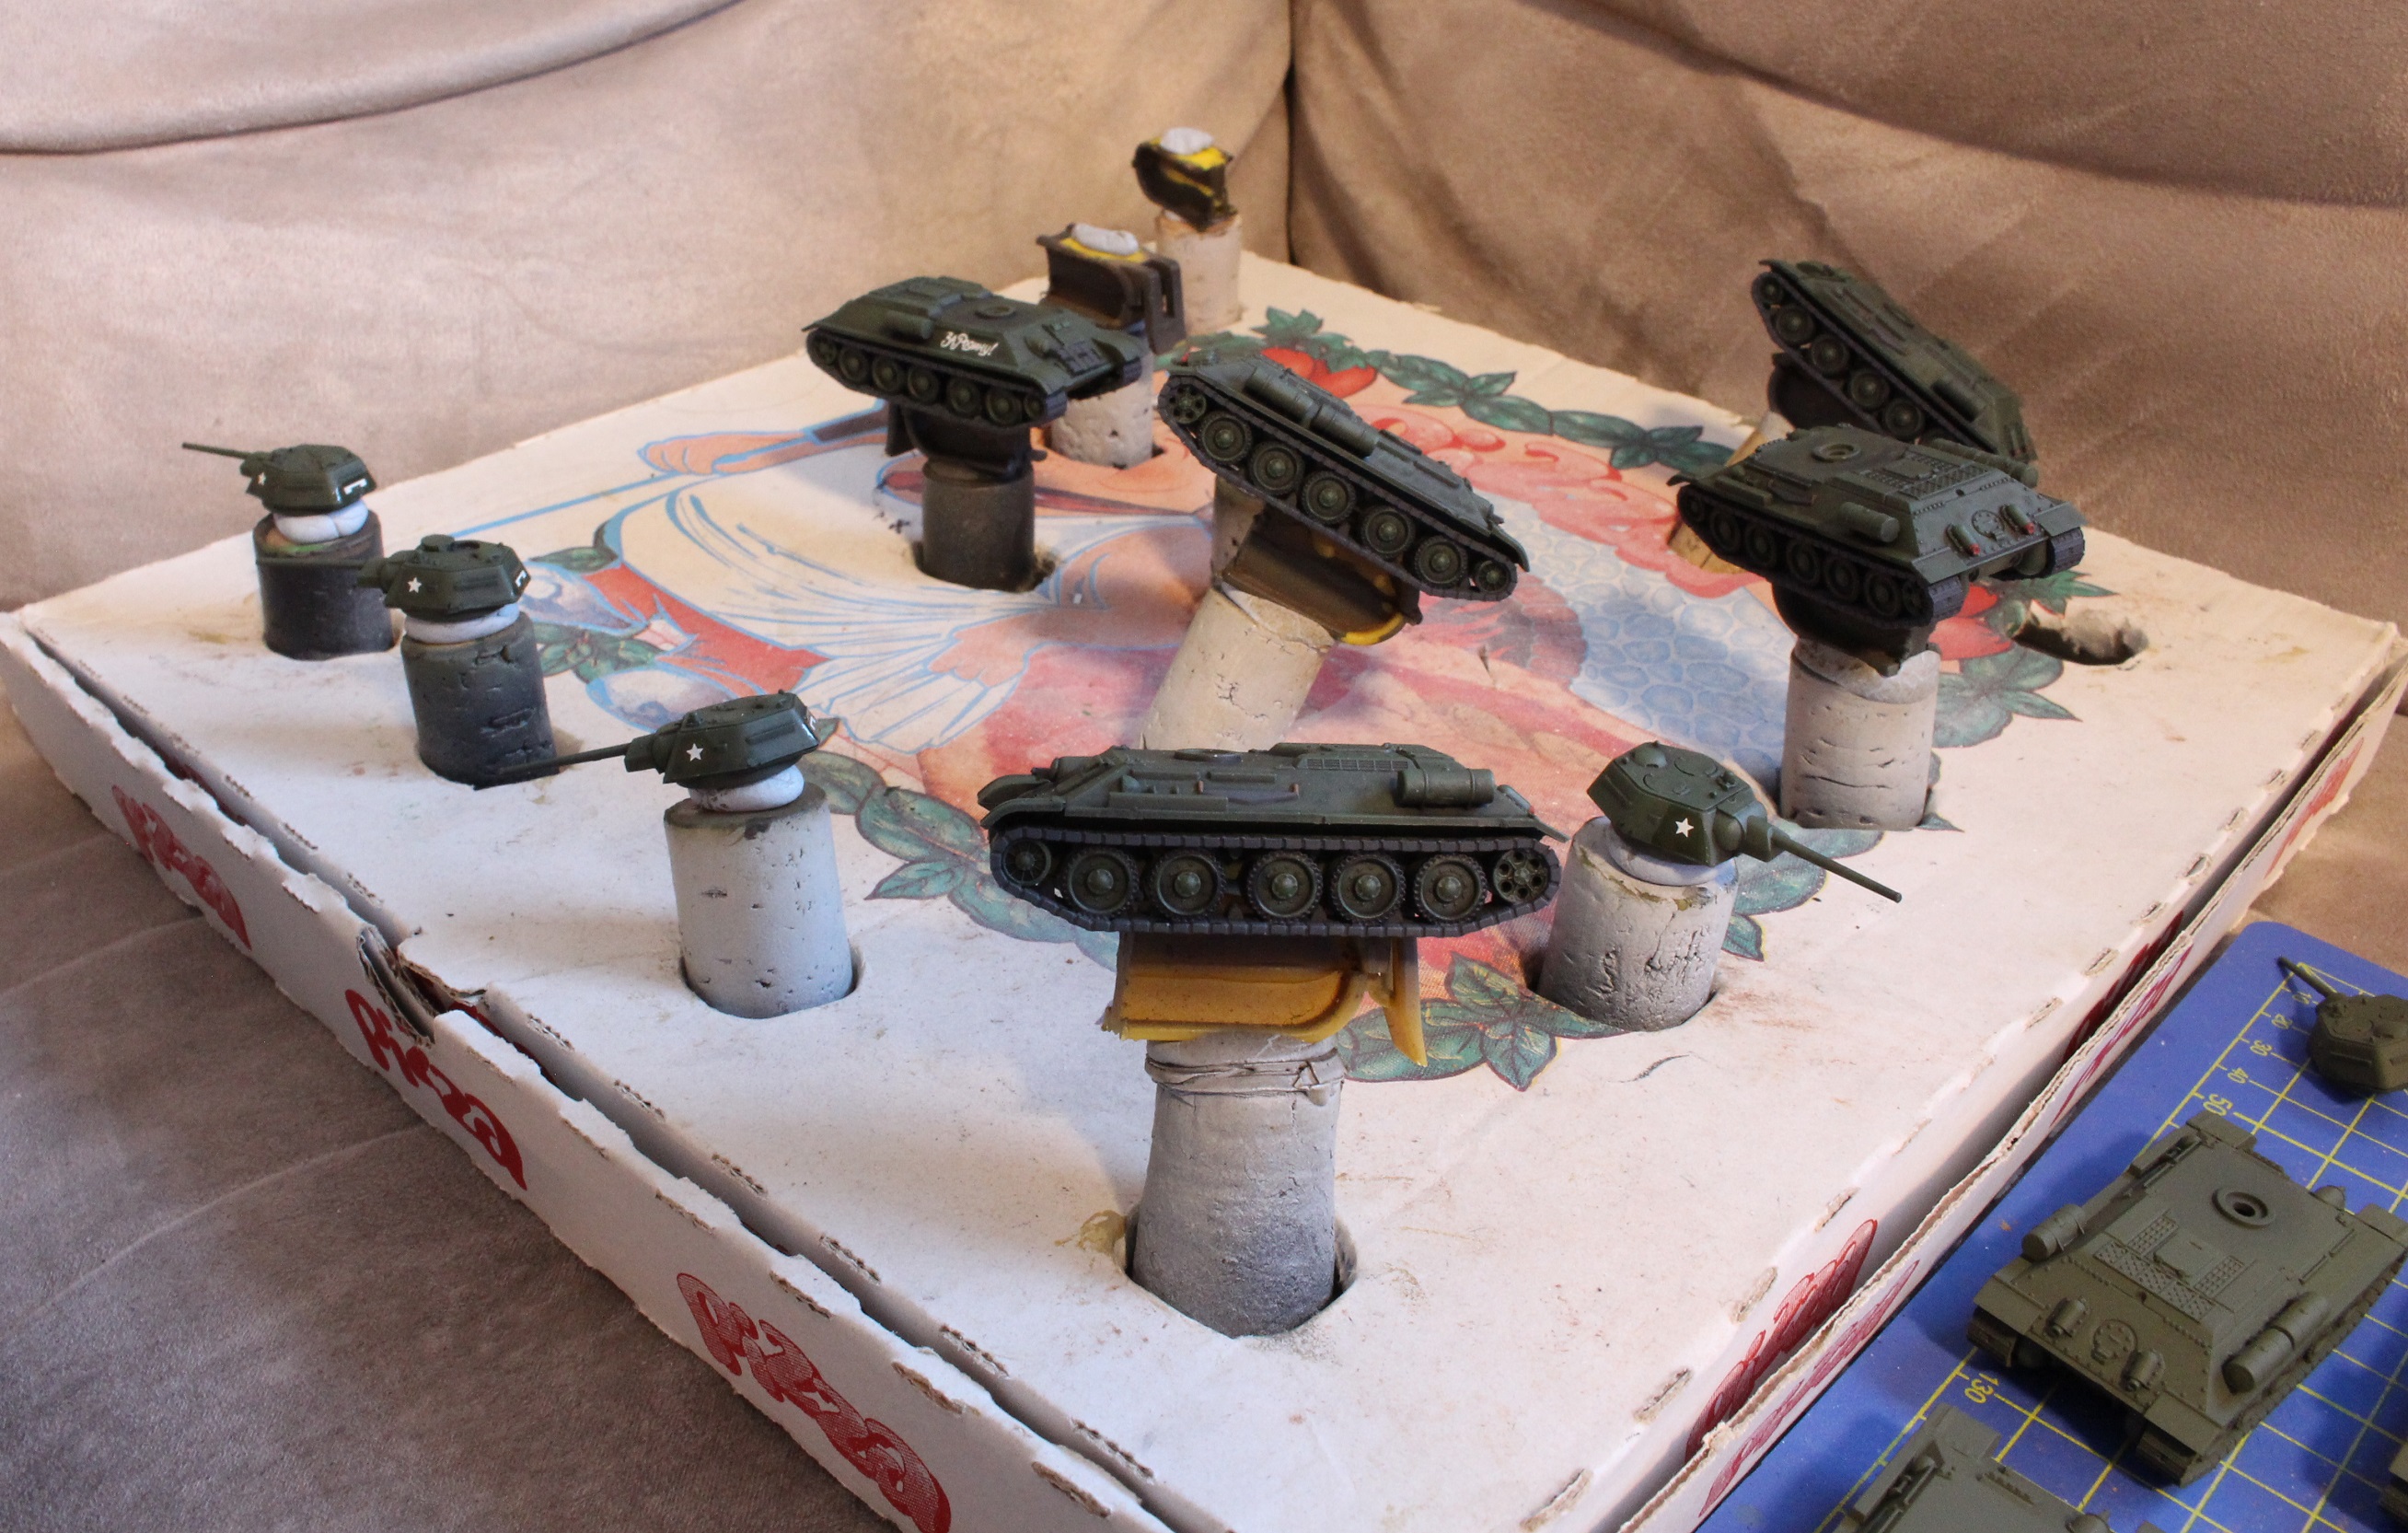
The yanks are done and the Kosaks are comin
Hello Vault Stayers (as your government probably instructed you),
I have been quiet on this project for a bit too long. But! It’s because I didn’t want to trade productive hobby time against some picture taking, resize, typing my BS (sorry it’s just a regular size, not an XL one). And yes I was obsessed to get stuff done and finished and ready. So I told myself I will power through and do one big update. So here it is.
The American army is done!
First… the 9 last tanks that you didn’t see.
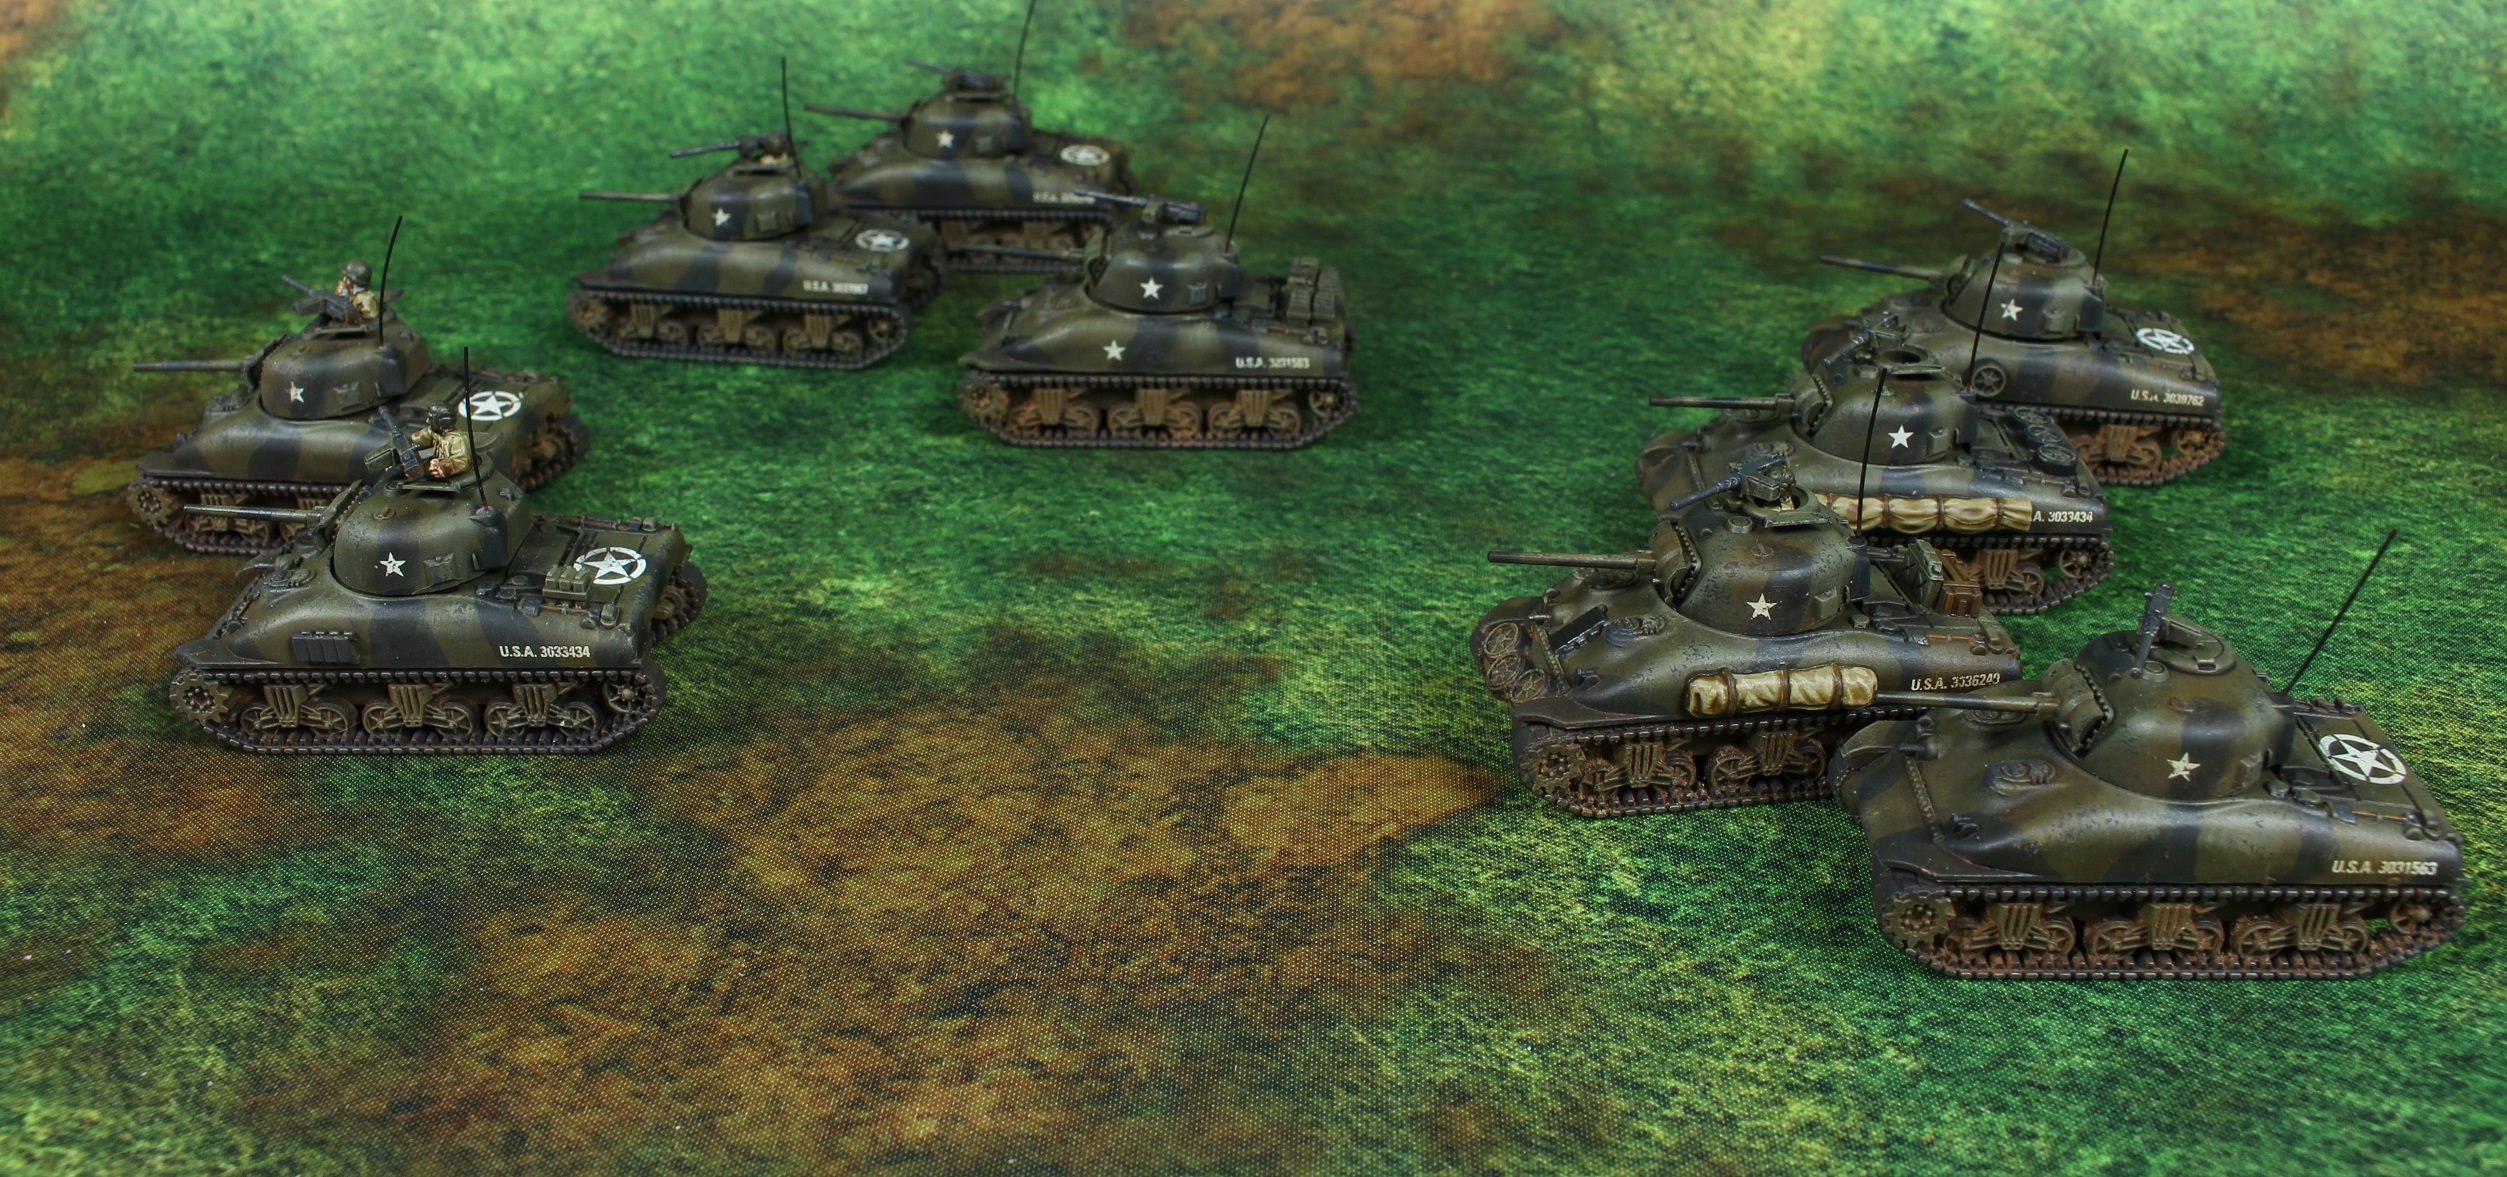
And of course the pictures of the whole army cause you know… that’s what we all want to see.

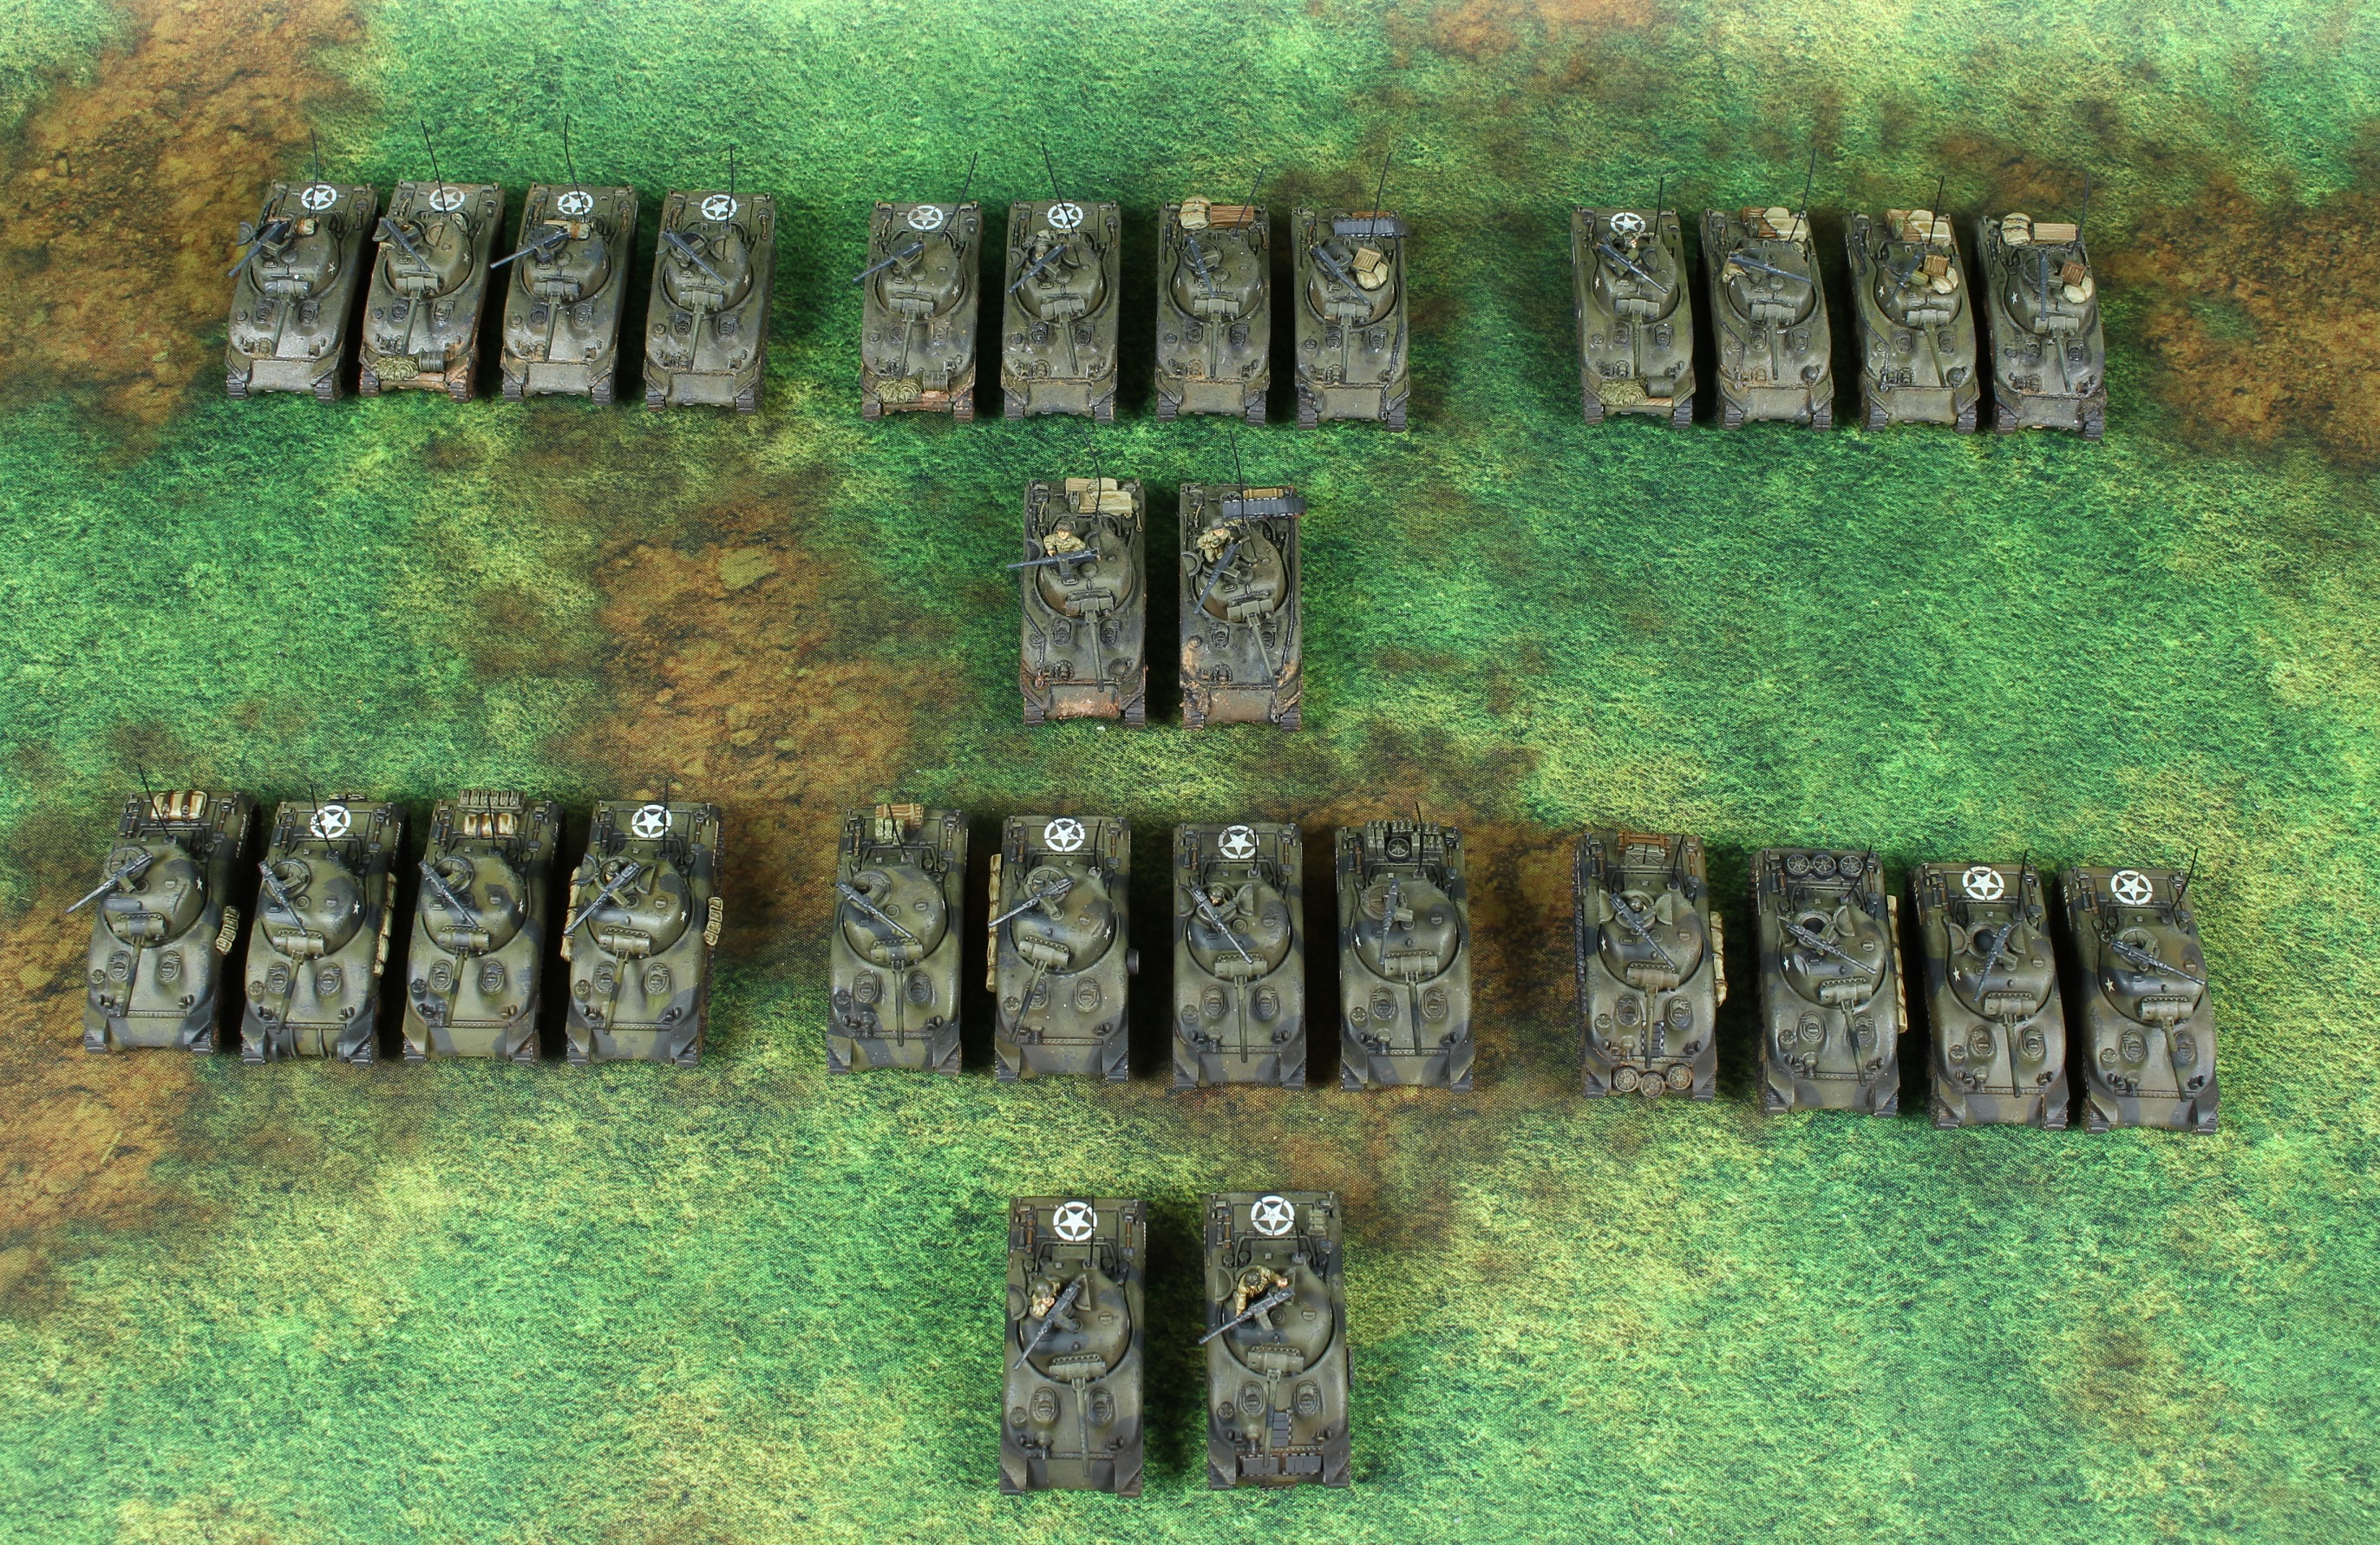
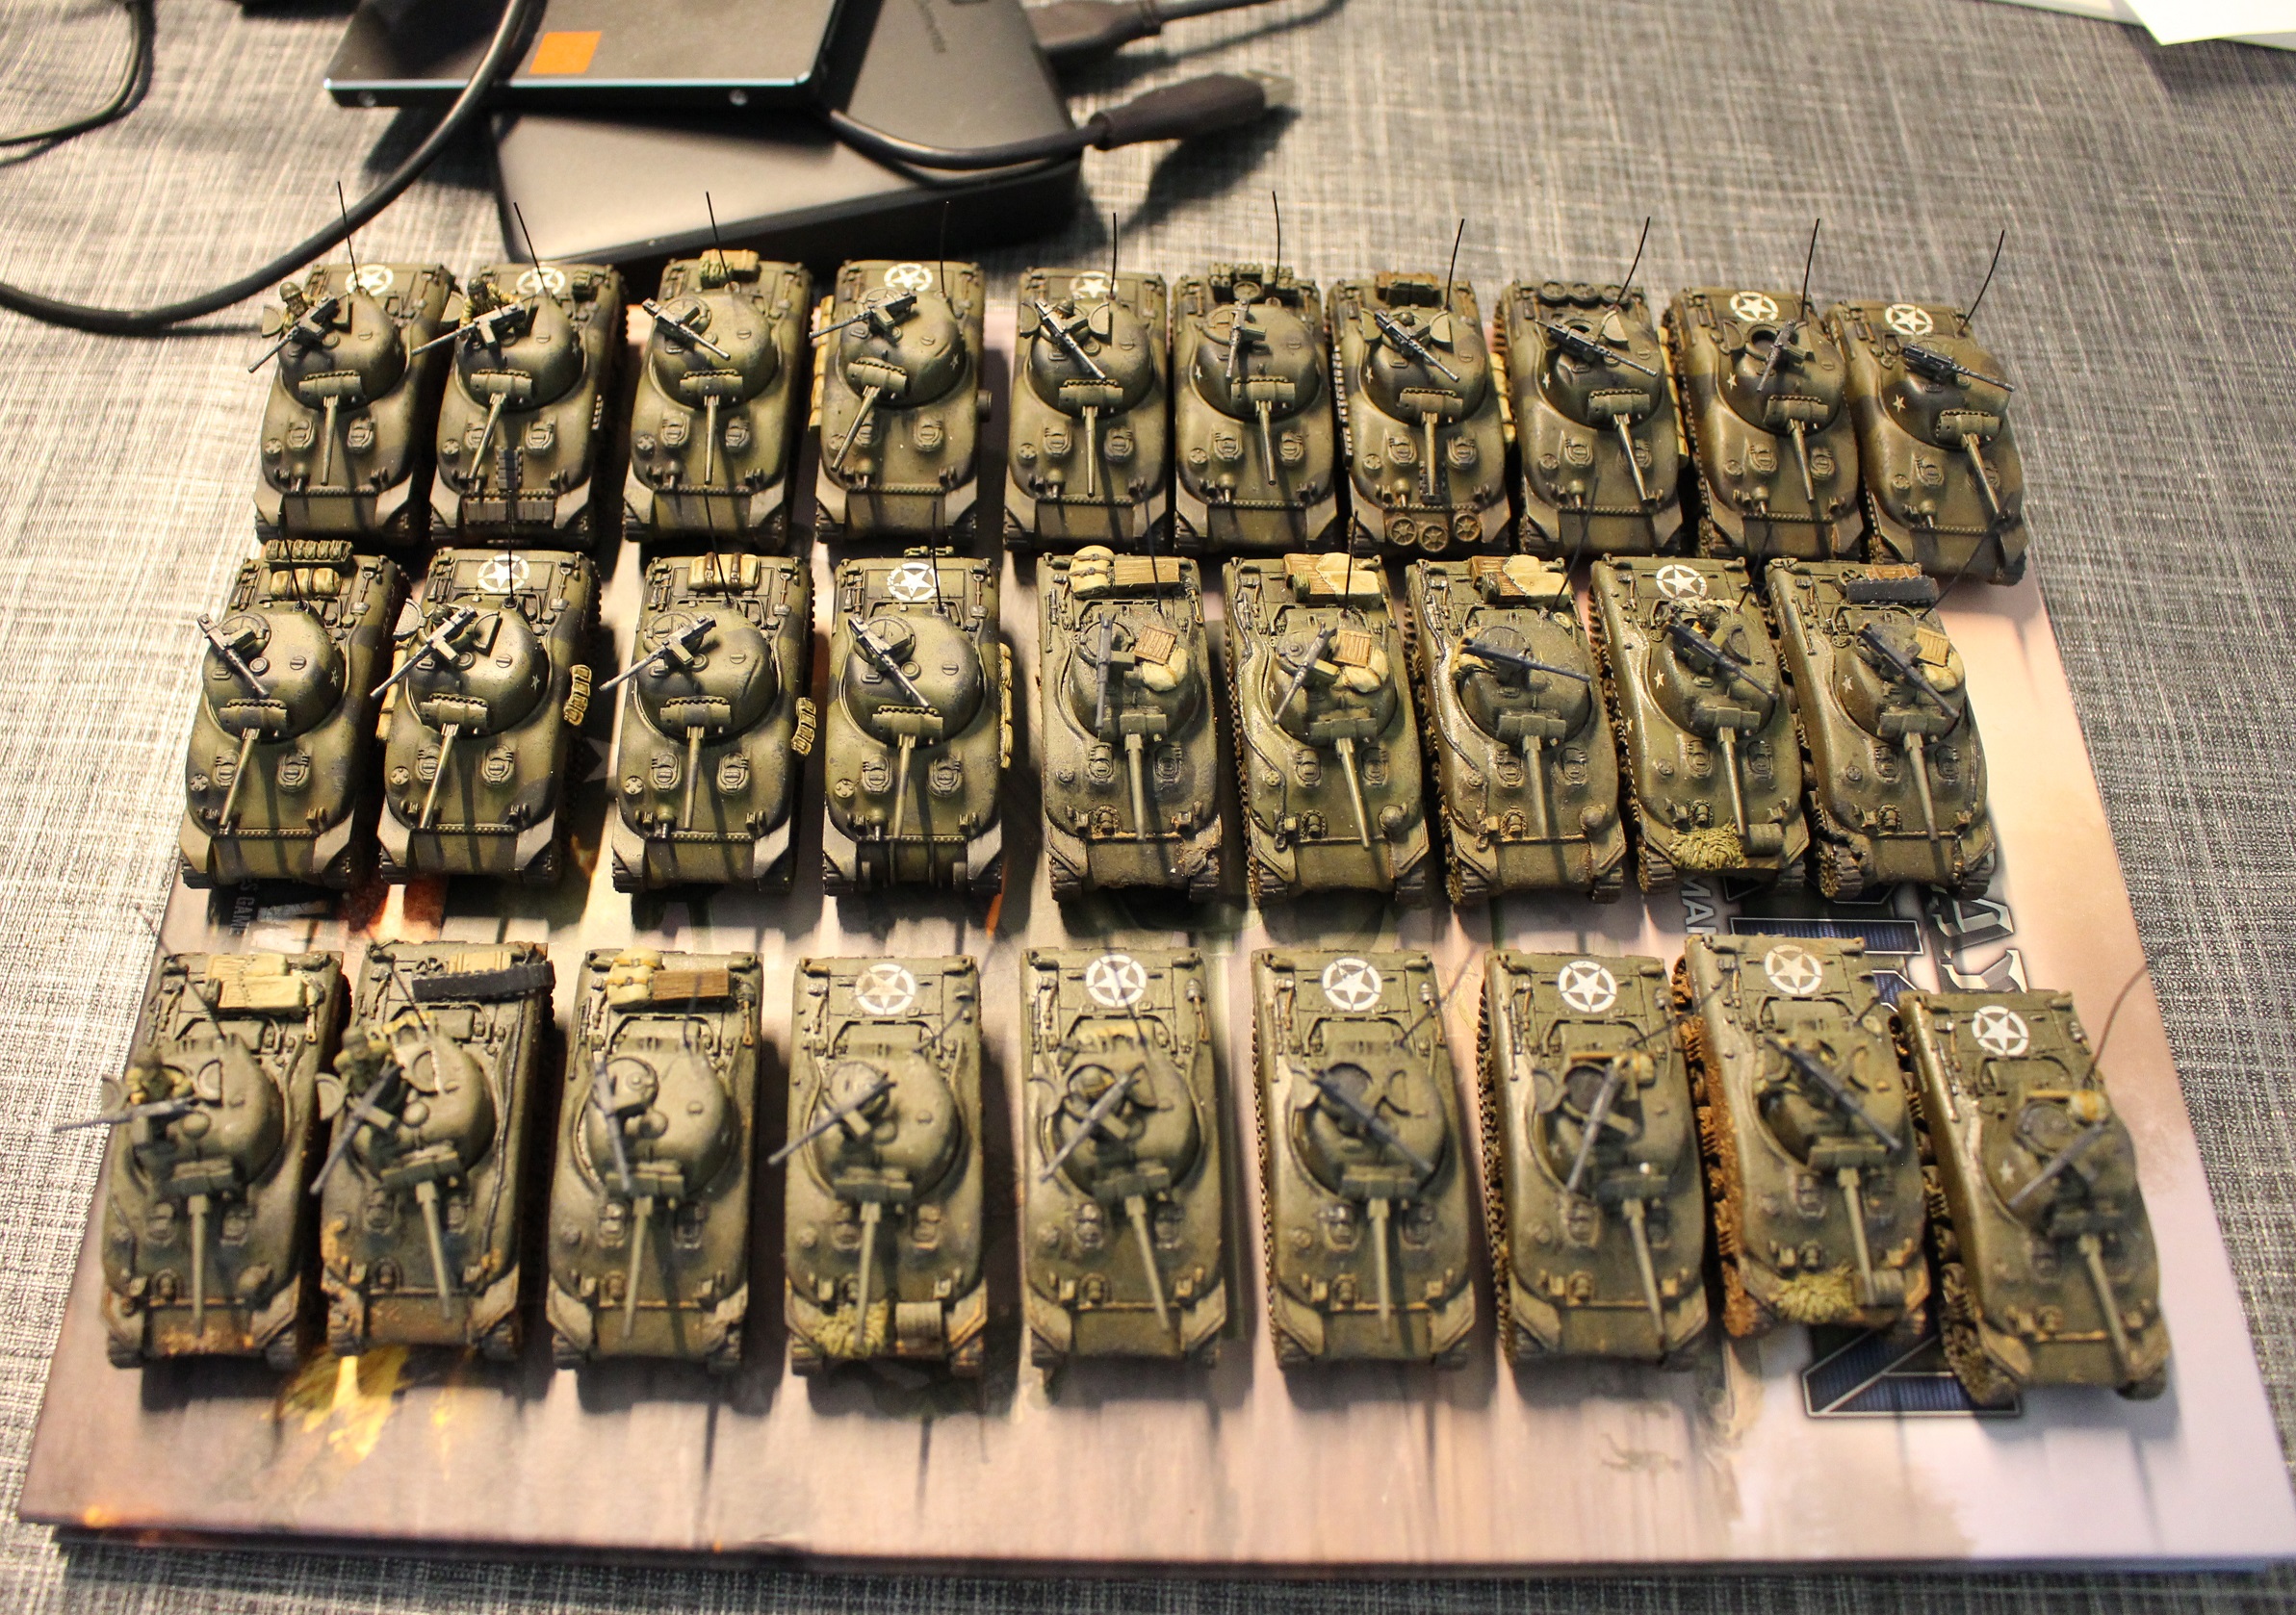
And then I packed them away…. and thought they looked cool too all huddled together. Here you are
And here are those pesky Russians, I must say I did work on them while finishing the yanks as I didn’t want to have a kind of down time.
This morning I finished to put together the turrets and also airbrushed the first wave of 5 T34. the plan being to do this army in 2 waves. Of course here are the pictures
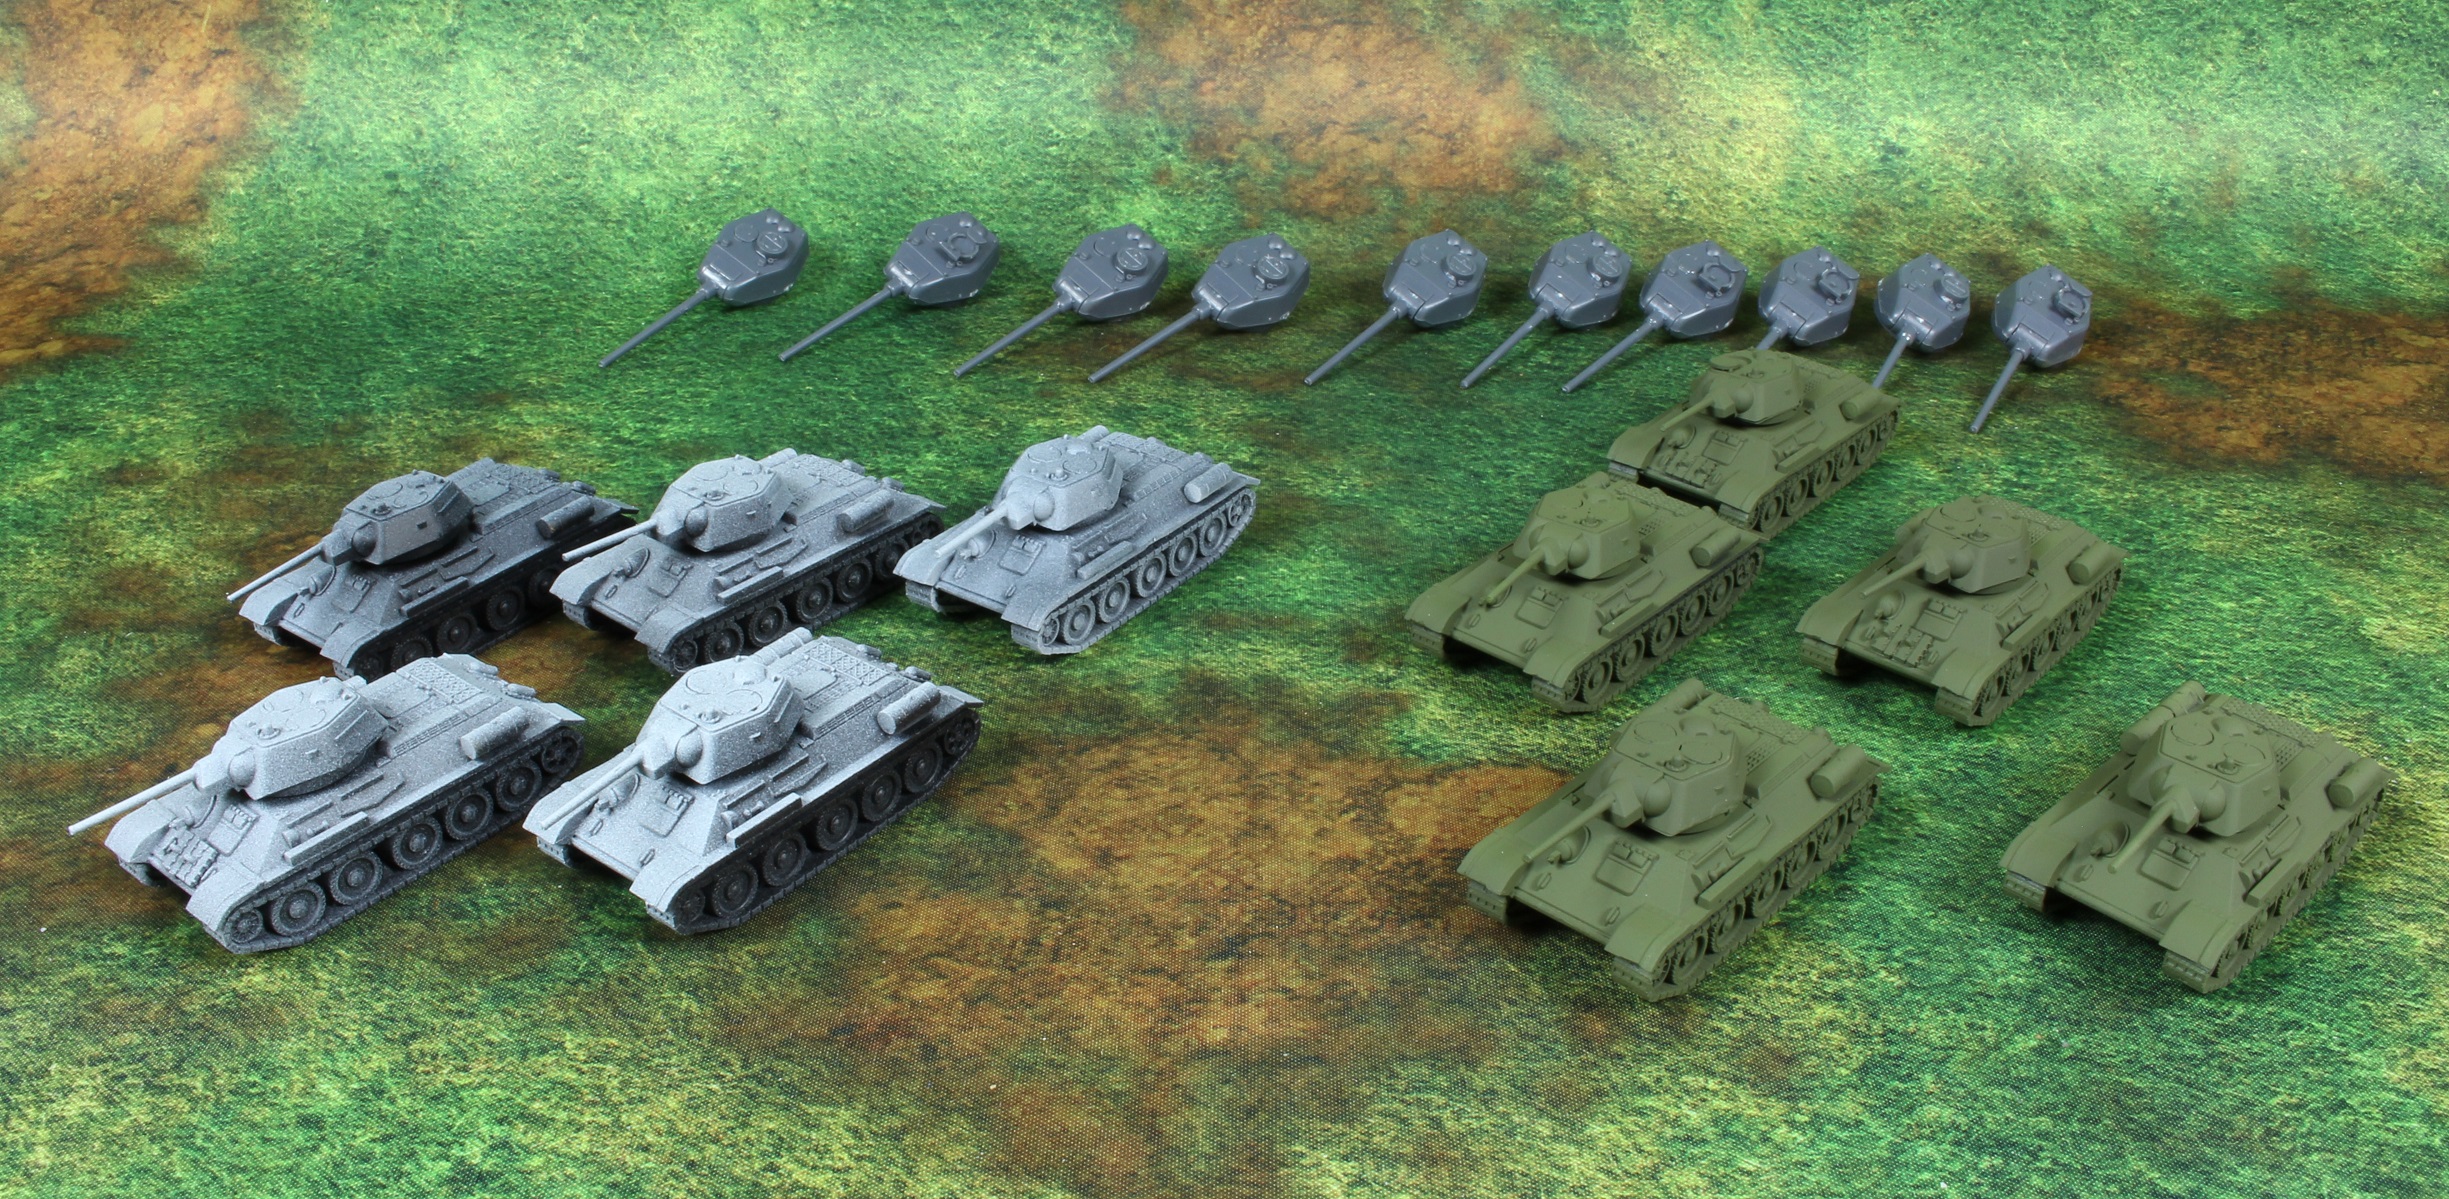
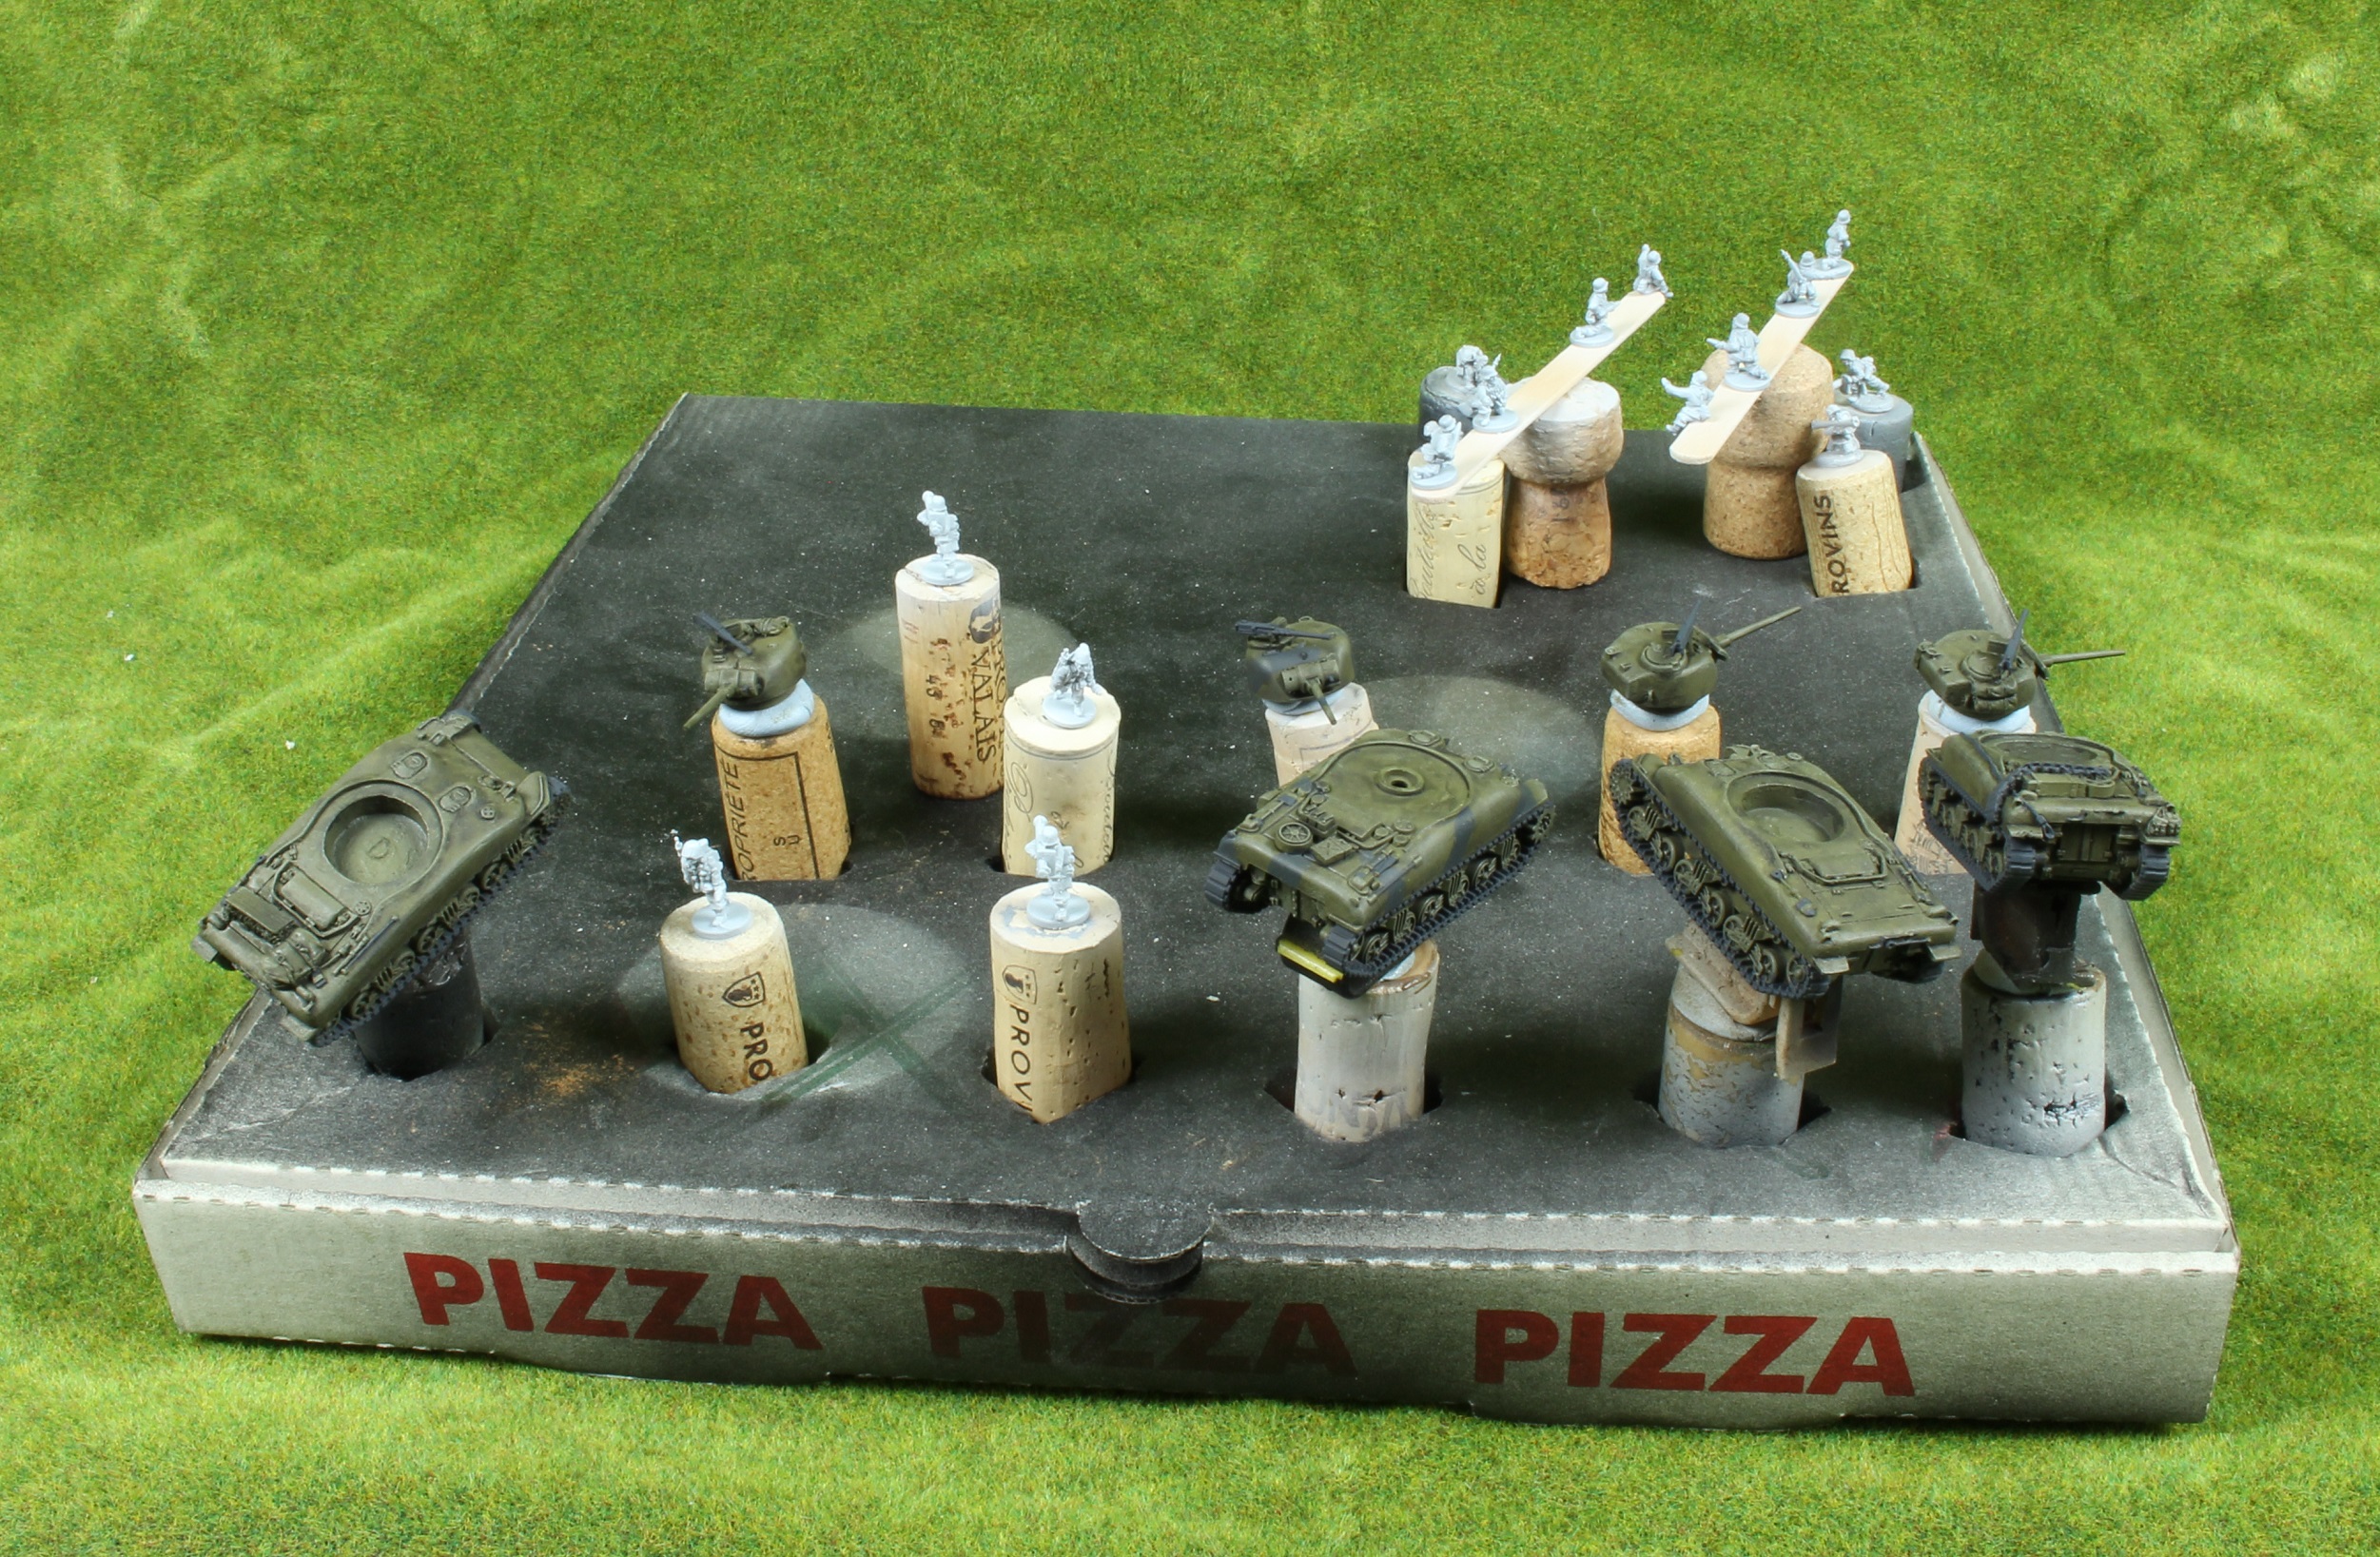
Oh and I said on Discord that I was going to cork them… so here is the proof!


