

![10mm Medieval Miniatures! Azincourt English Army Review | Wargames Atlantic [7 Days Early Access]](https://images.beastsofwar.com/2026/03/unboxing-wargames-atlantic-azincourt-english-army-coverimage-225-127.jpg)


The Founding


Recommendations: 125
About the Project
Hello all. So i've been into 40k for the better part of 20 years, collecting armies, painting and playing, but I have never created my own Chapter of space marines. It's not been something i have been too bothered with, but it has been something that has slowly grown in the back of my mind that it might be quite fun to do! designing my own colour scheme, chapter lore, history ect and converting that to the tabletop. With the introduction of all the new lore that has come with 8th Edition i think this would be a great time to start! So here is the start of my journey. Any comments, questions or advance are always welcome!
Related Game: Warhammer 40,000
Related Company: Games Workshop
Related Genre: Science Fiction
This Project is Active
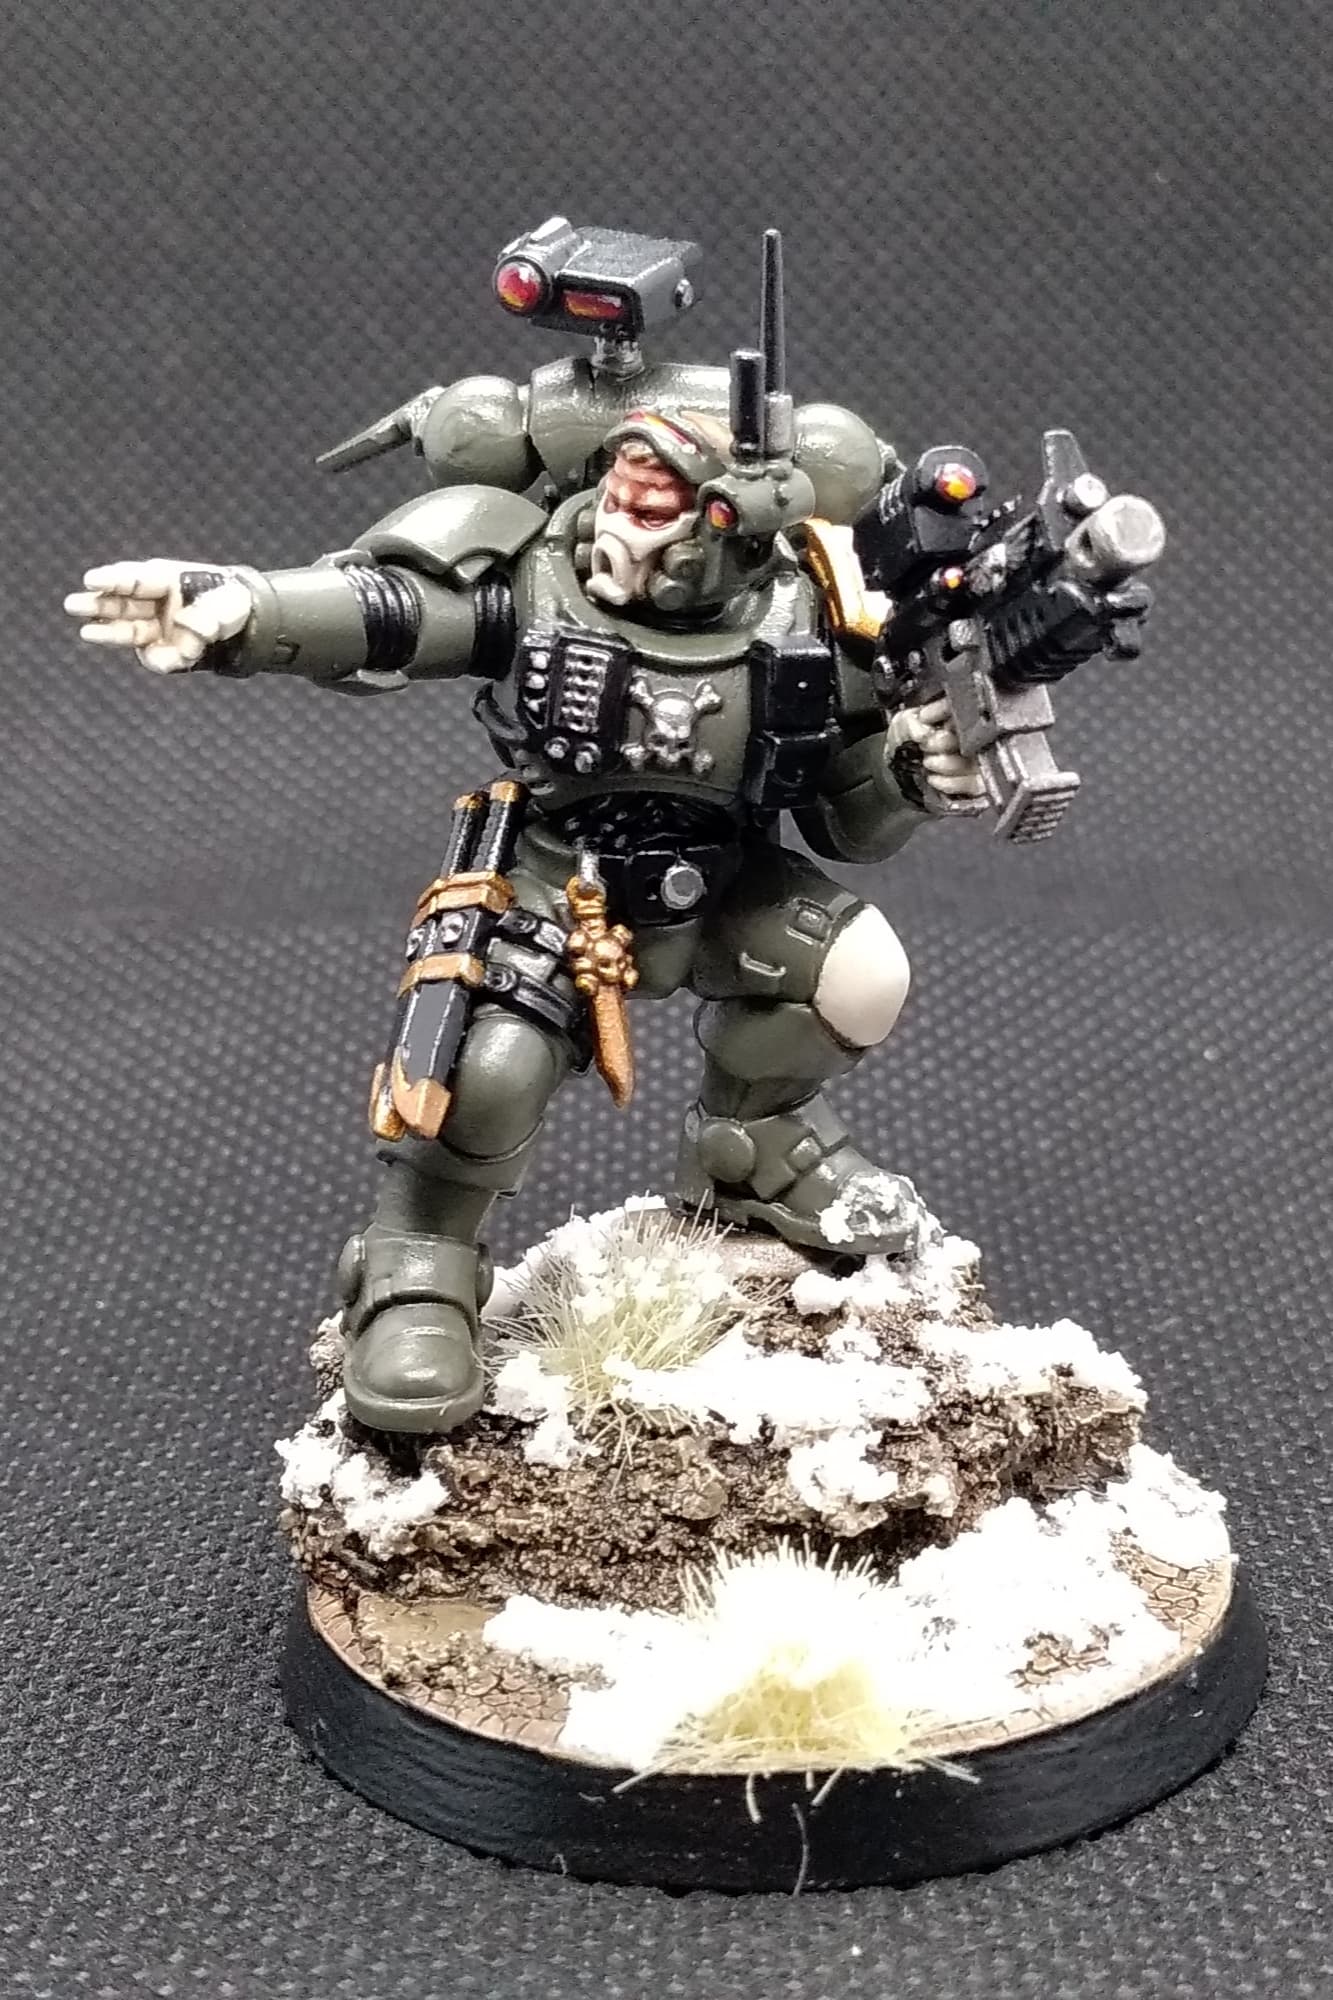
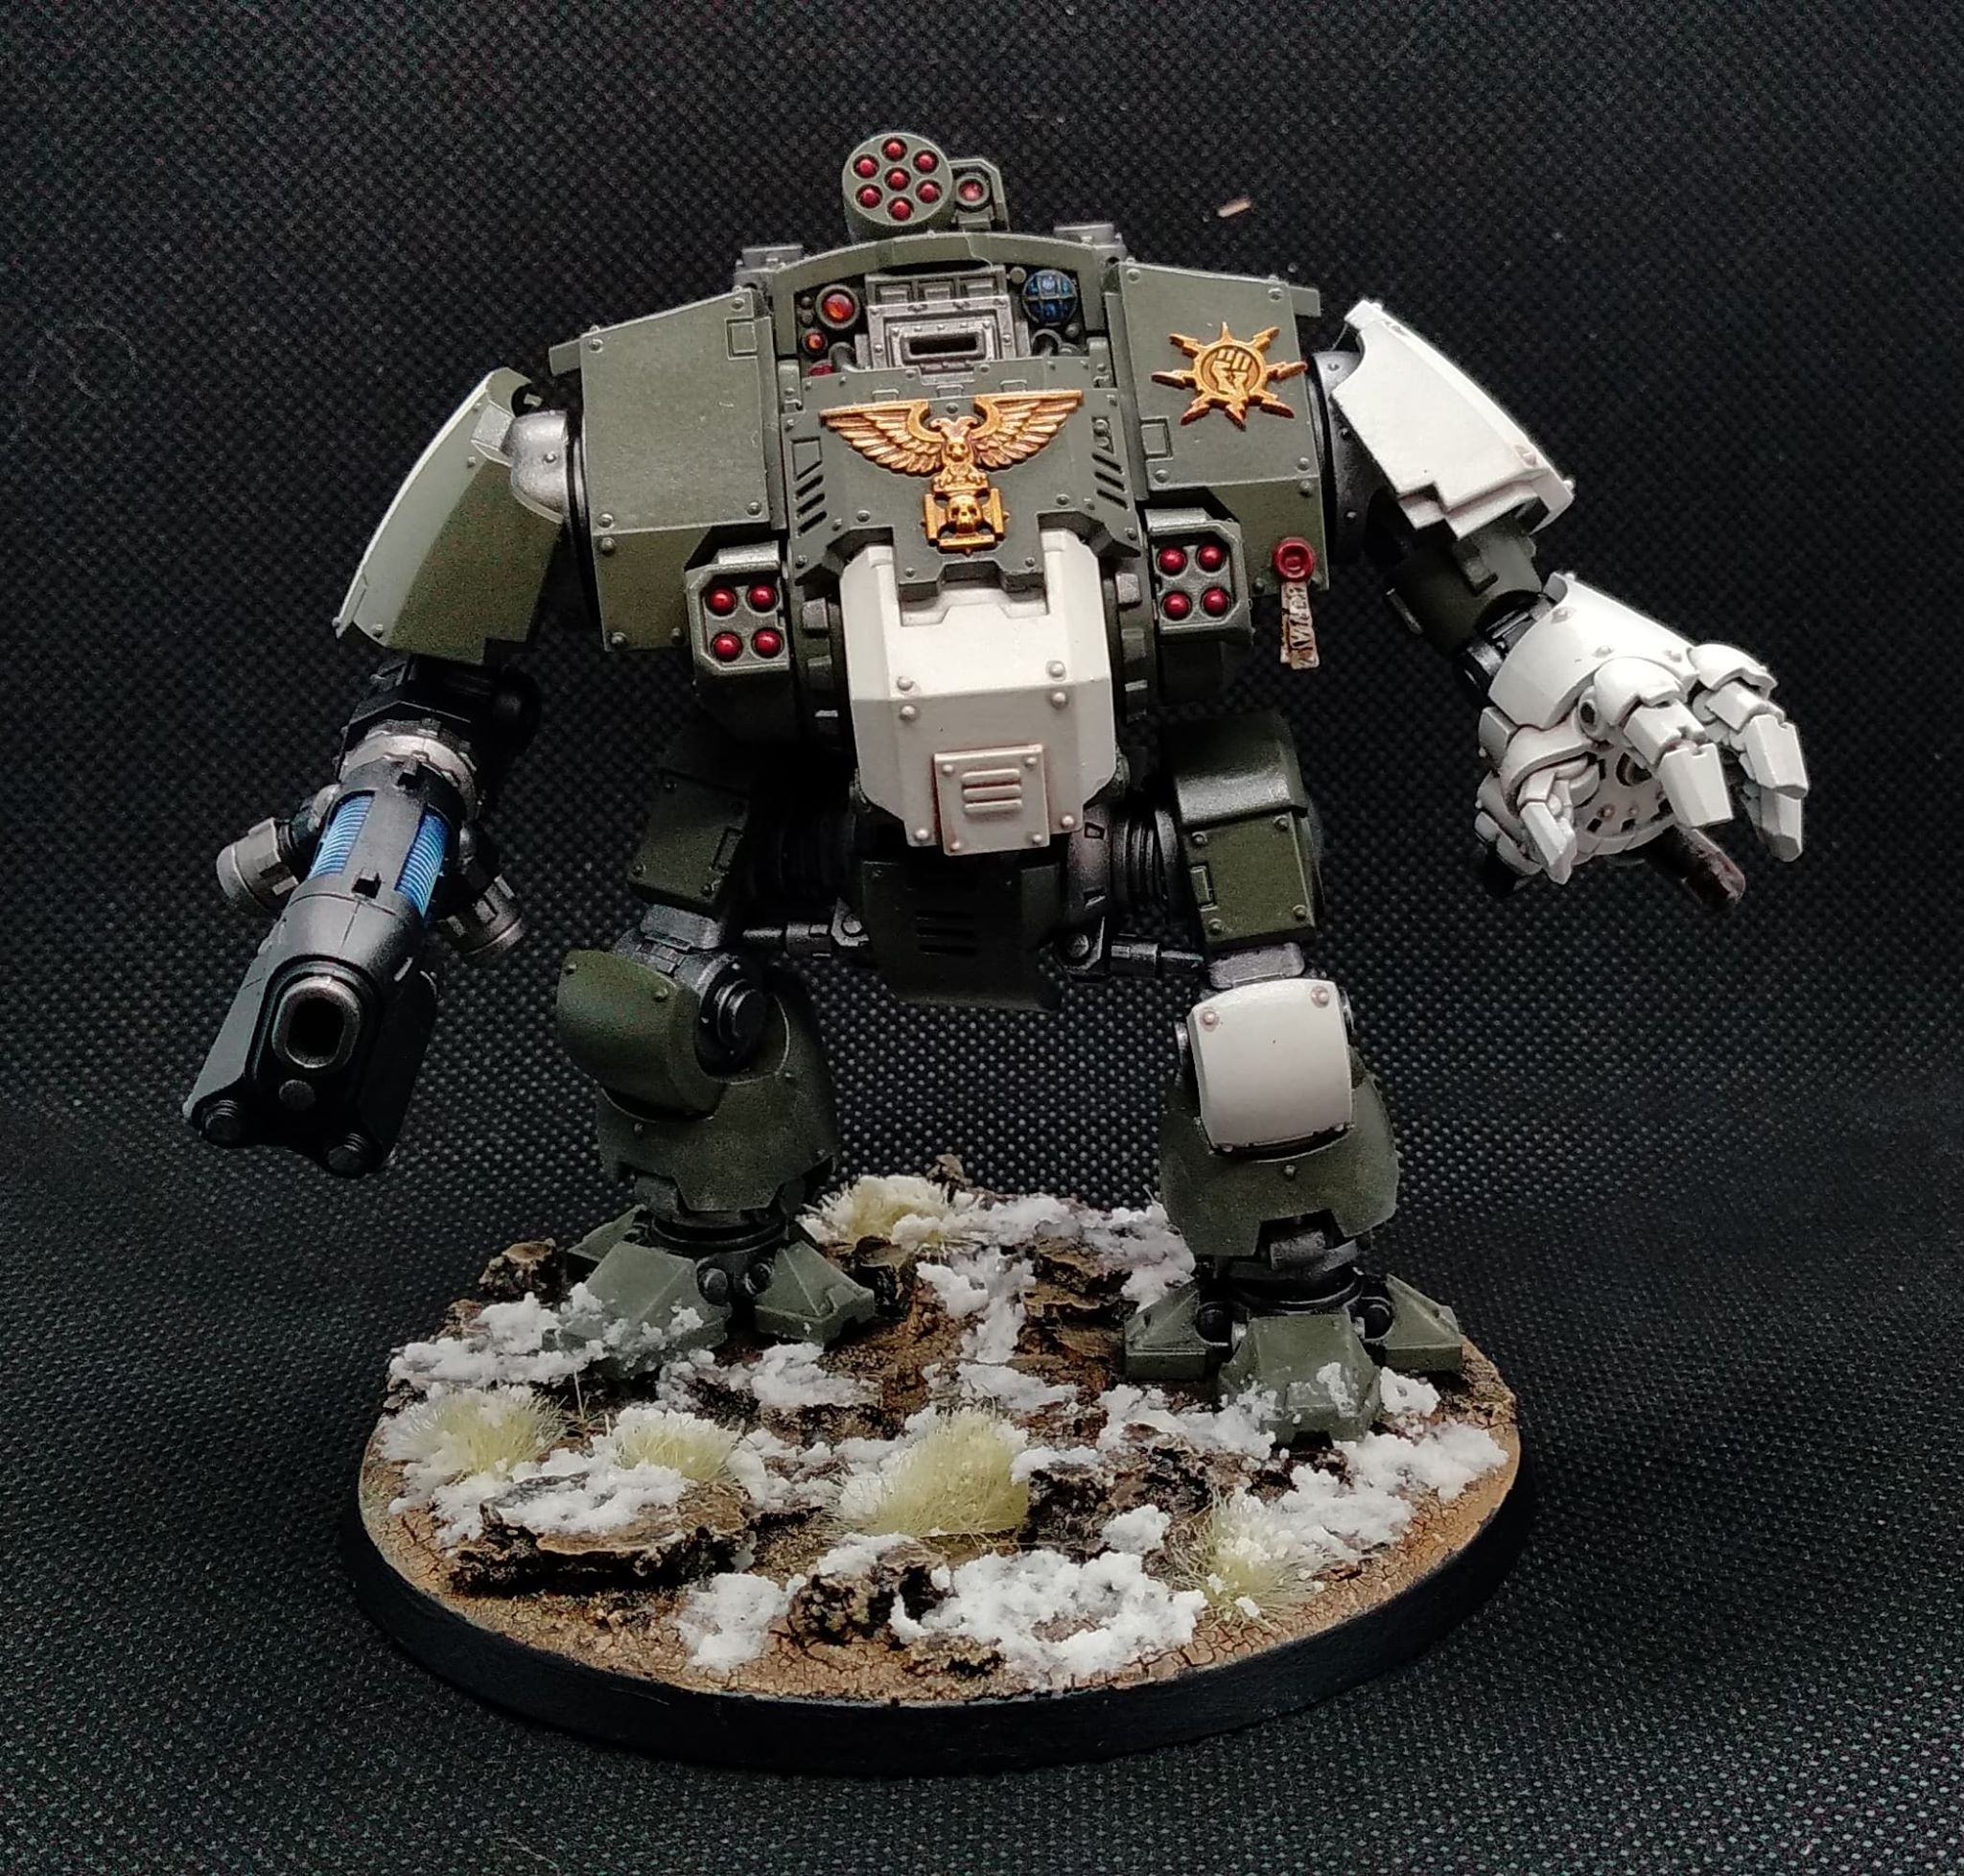
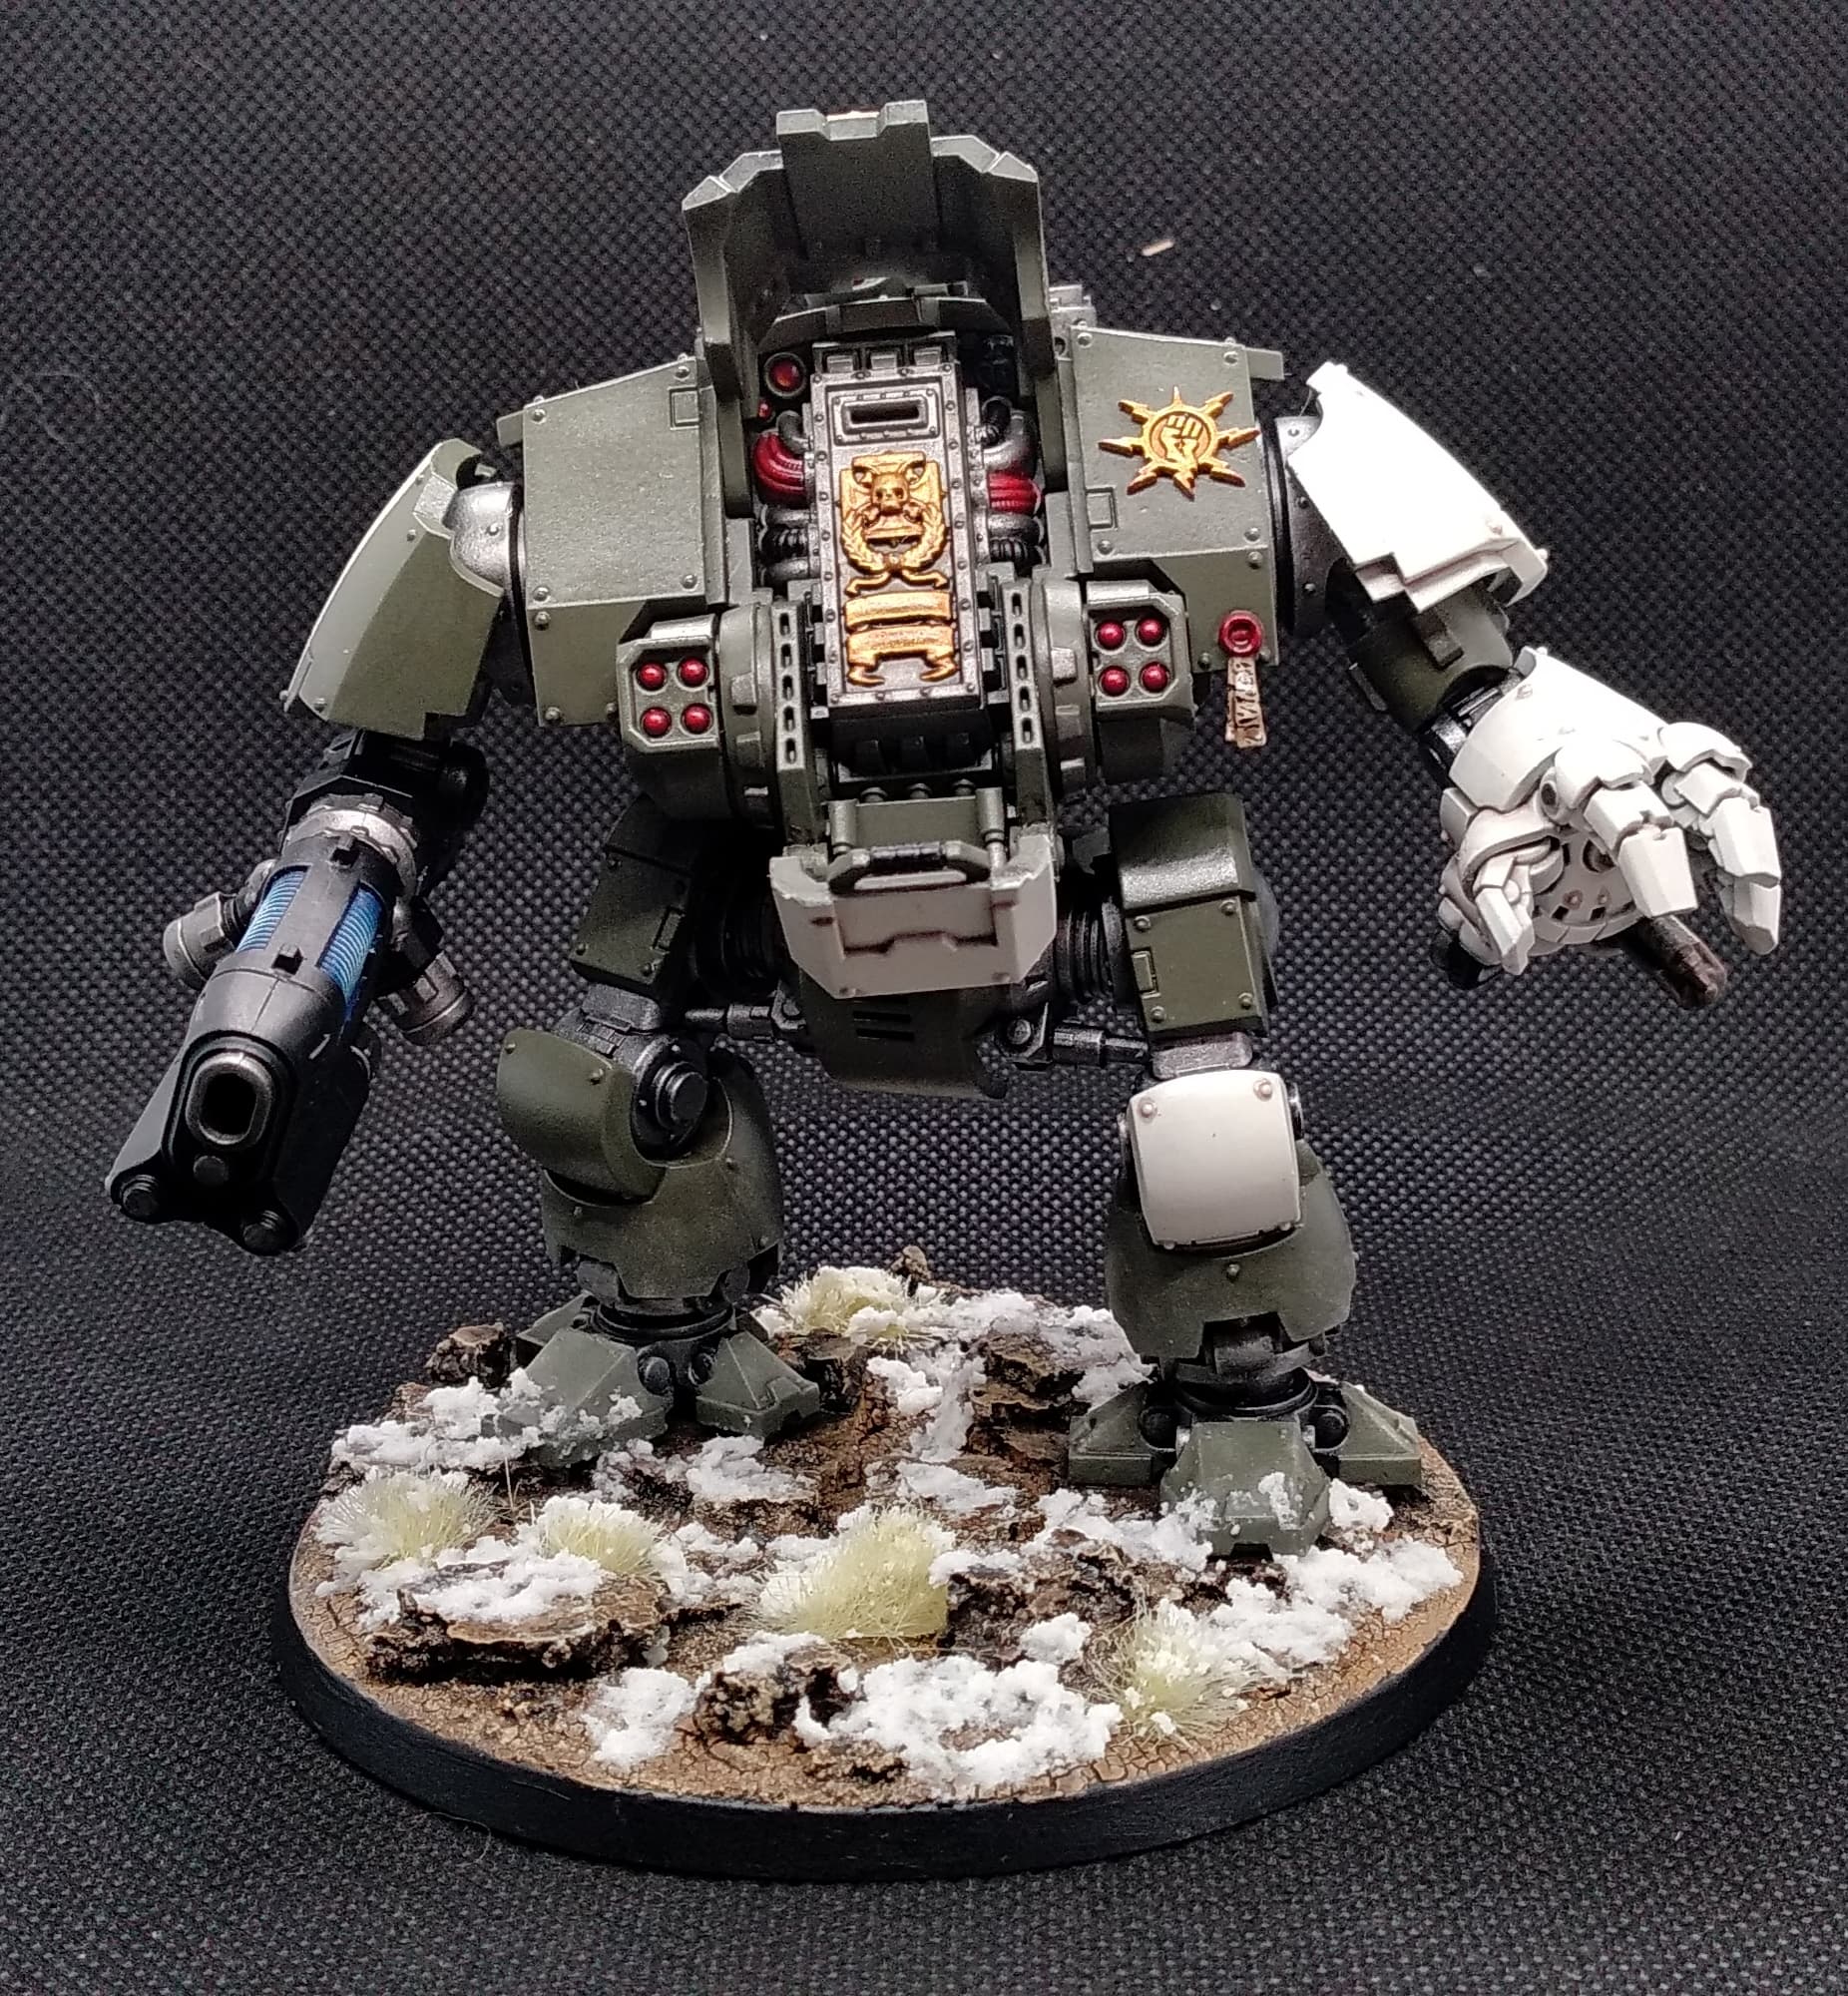
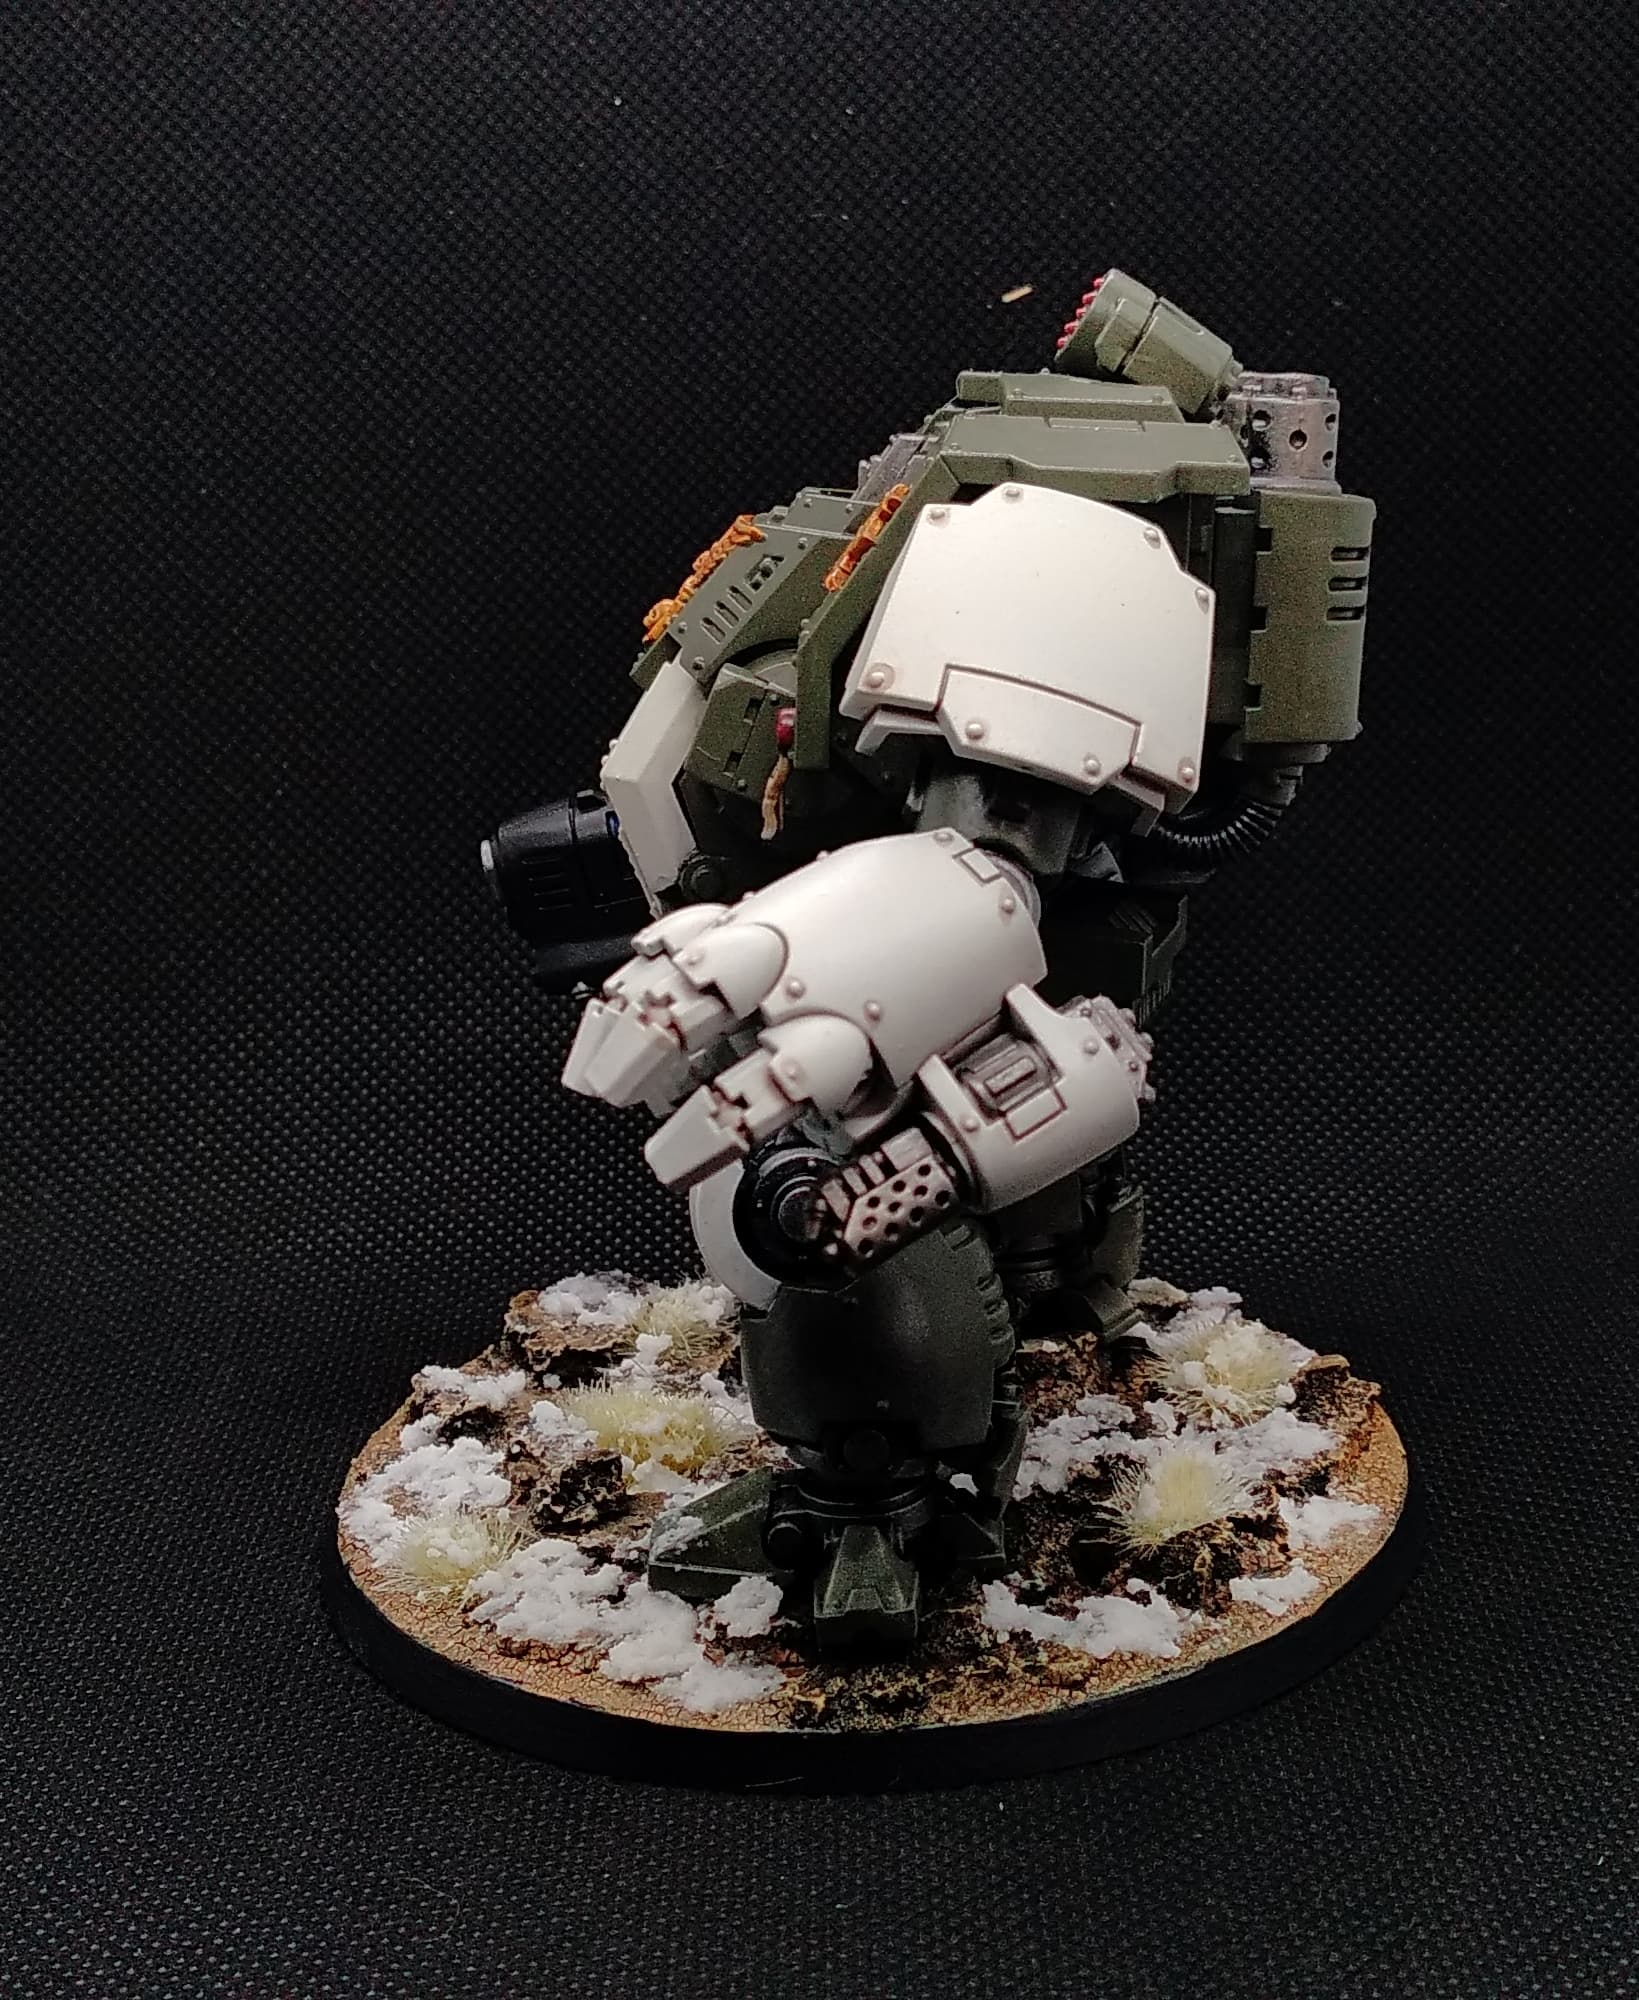
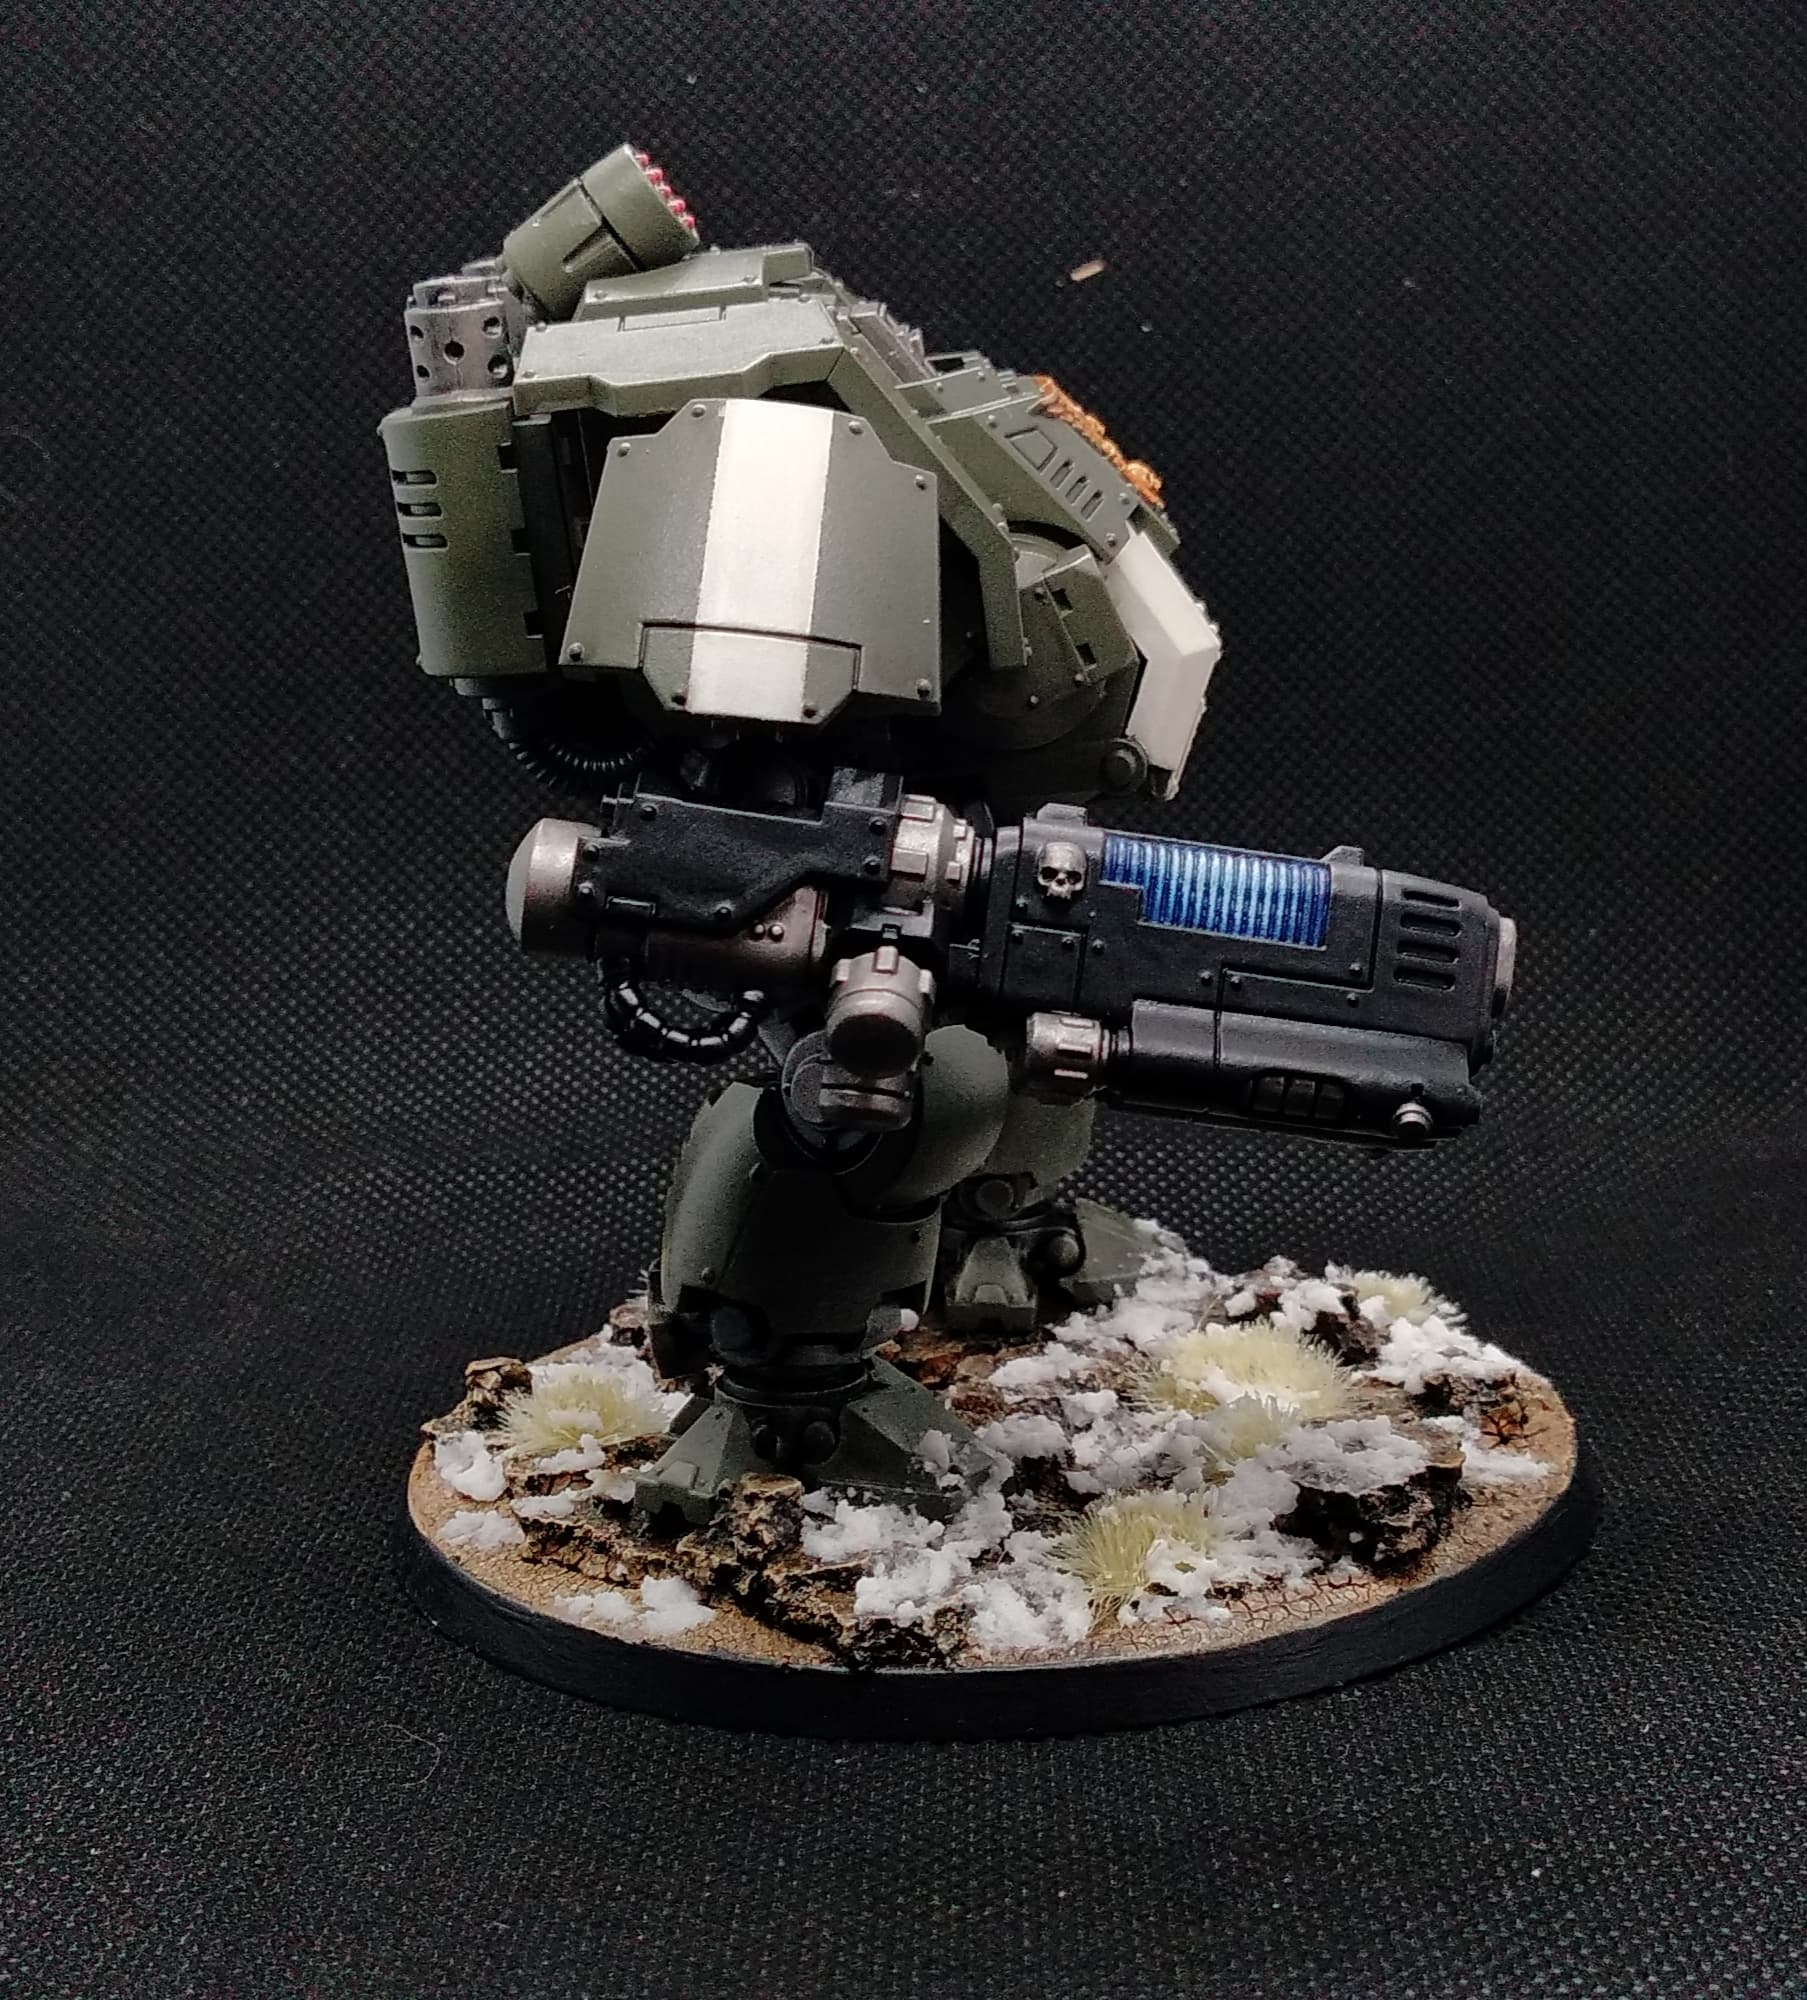
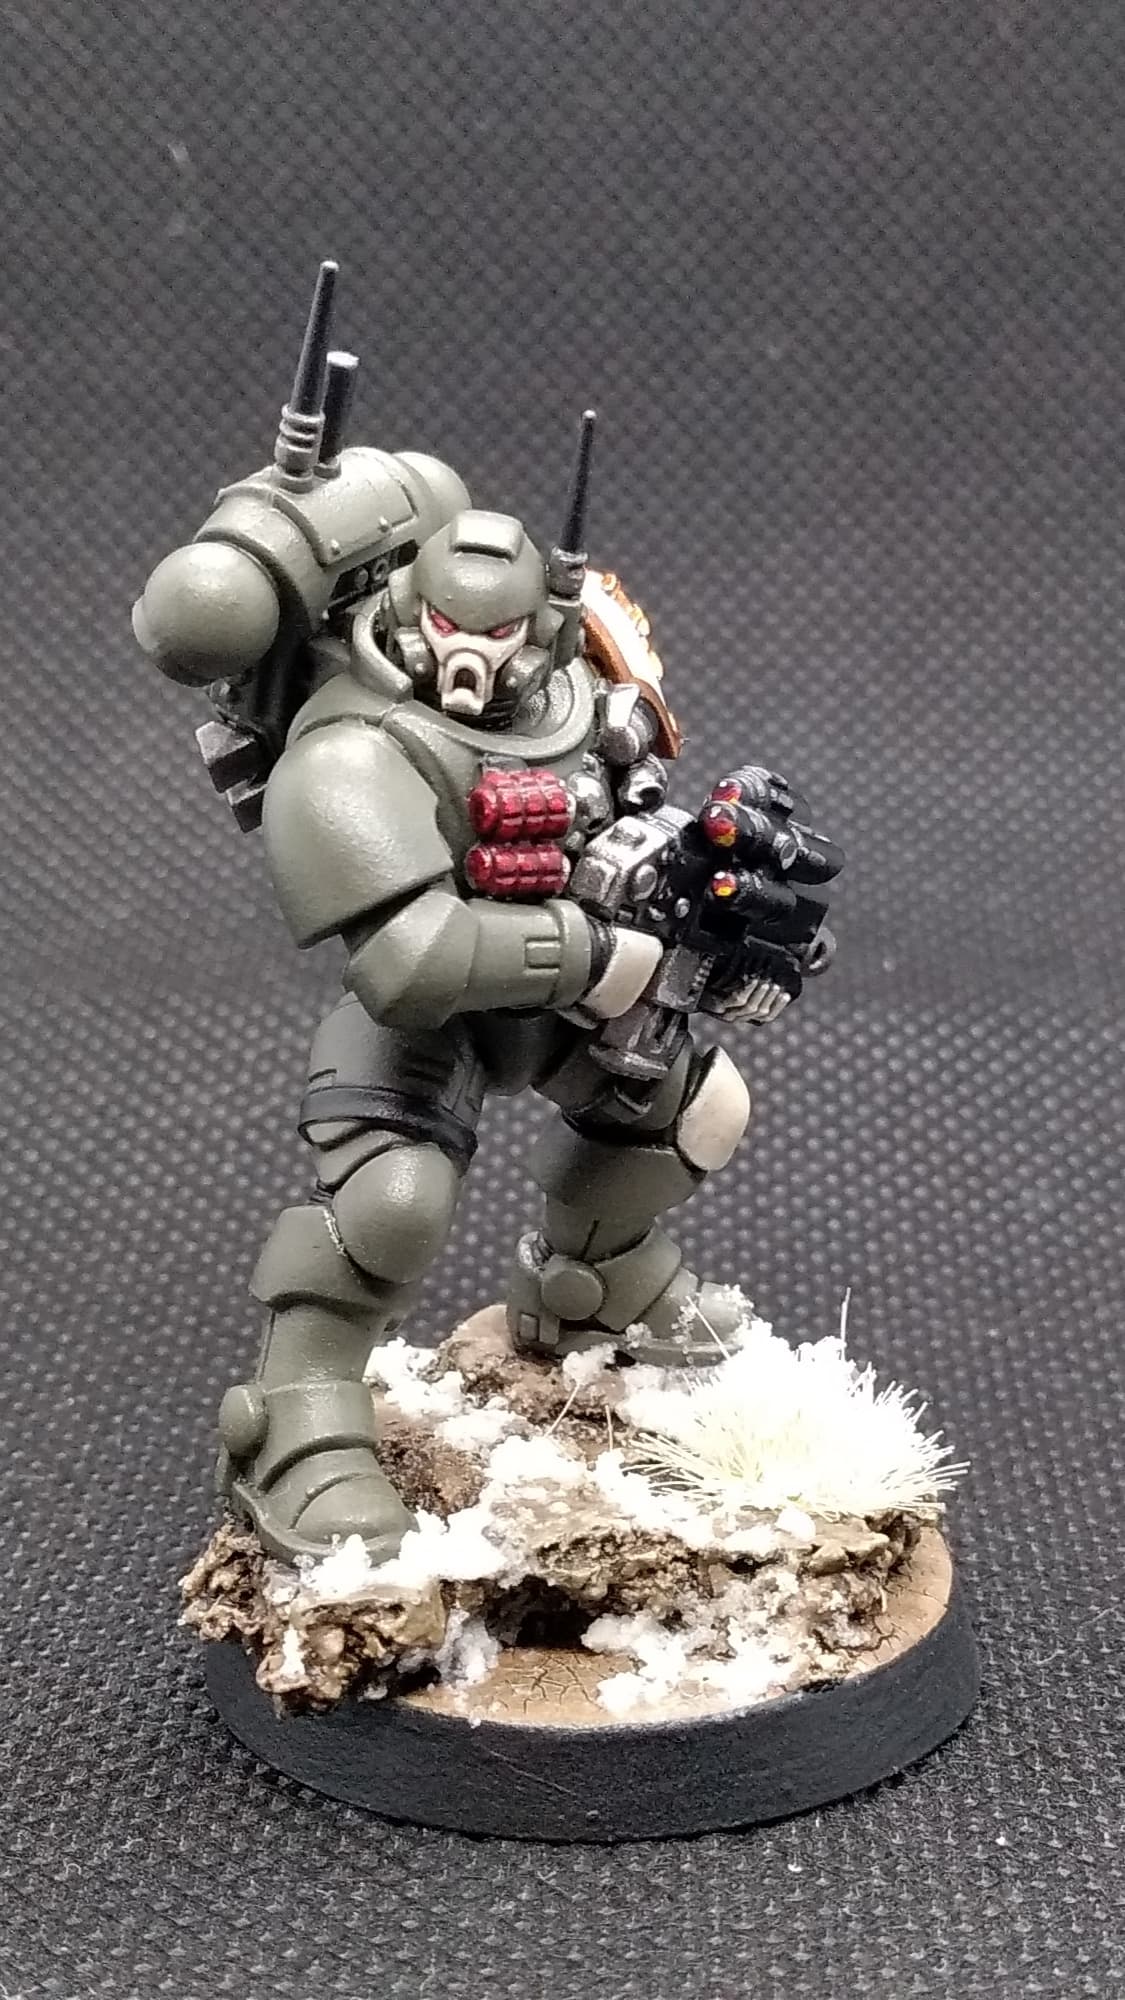
1 chunky lad and a pointy boi
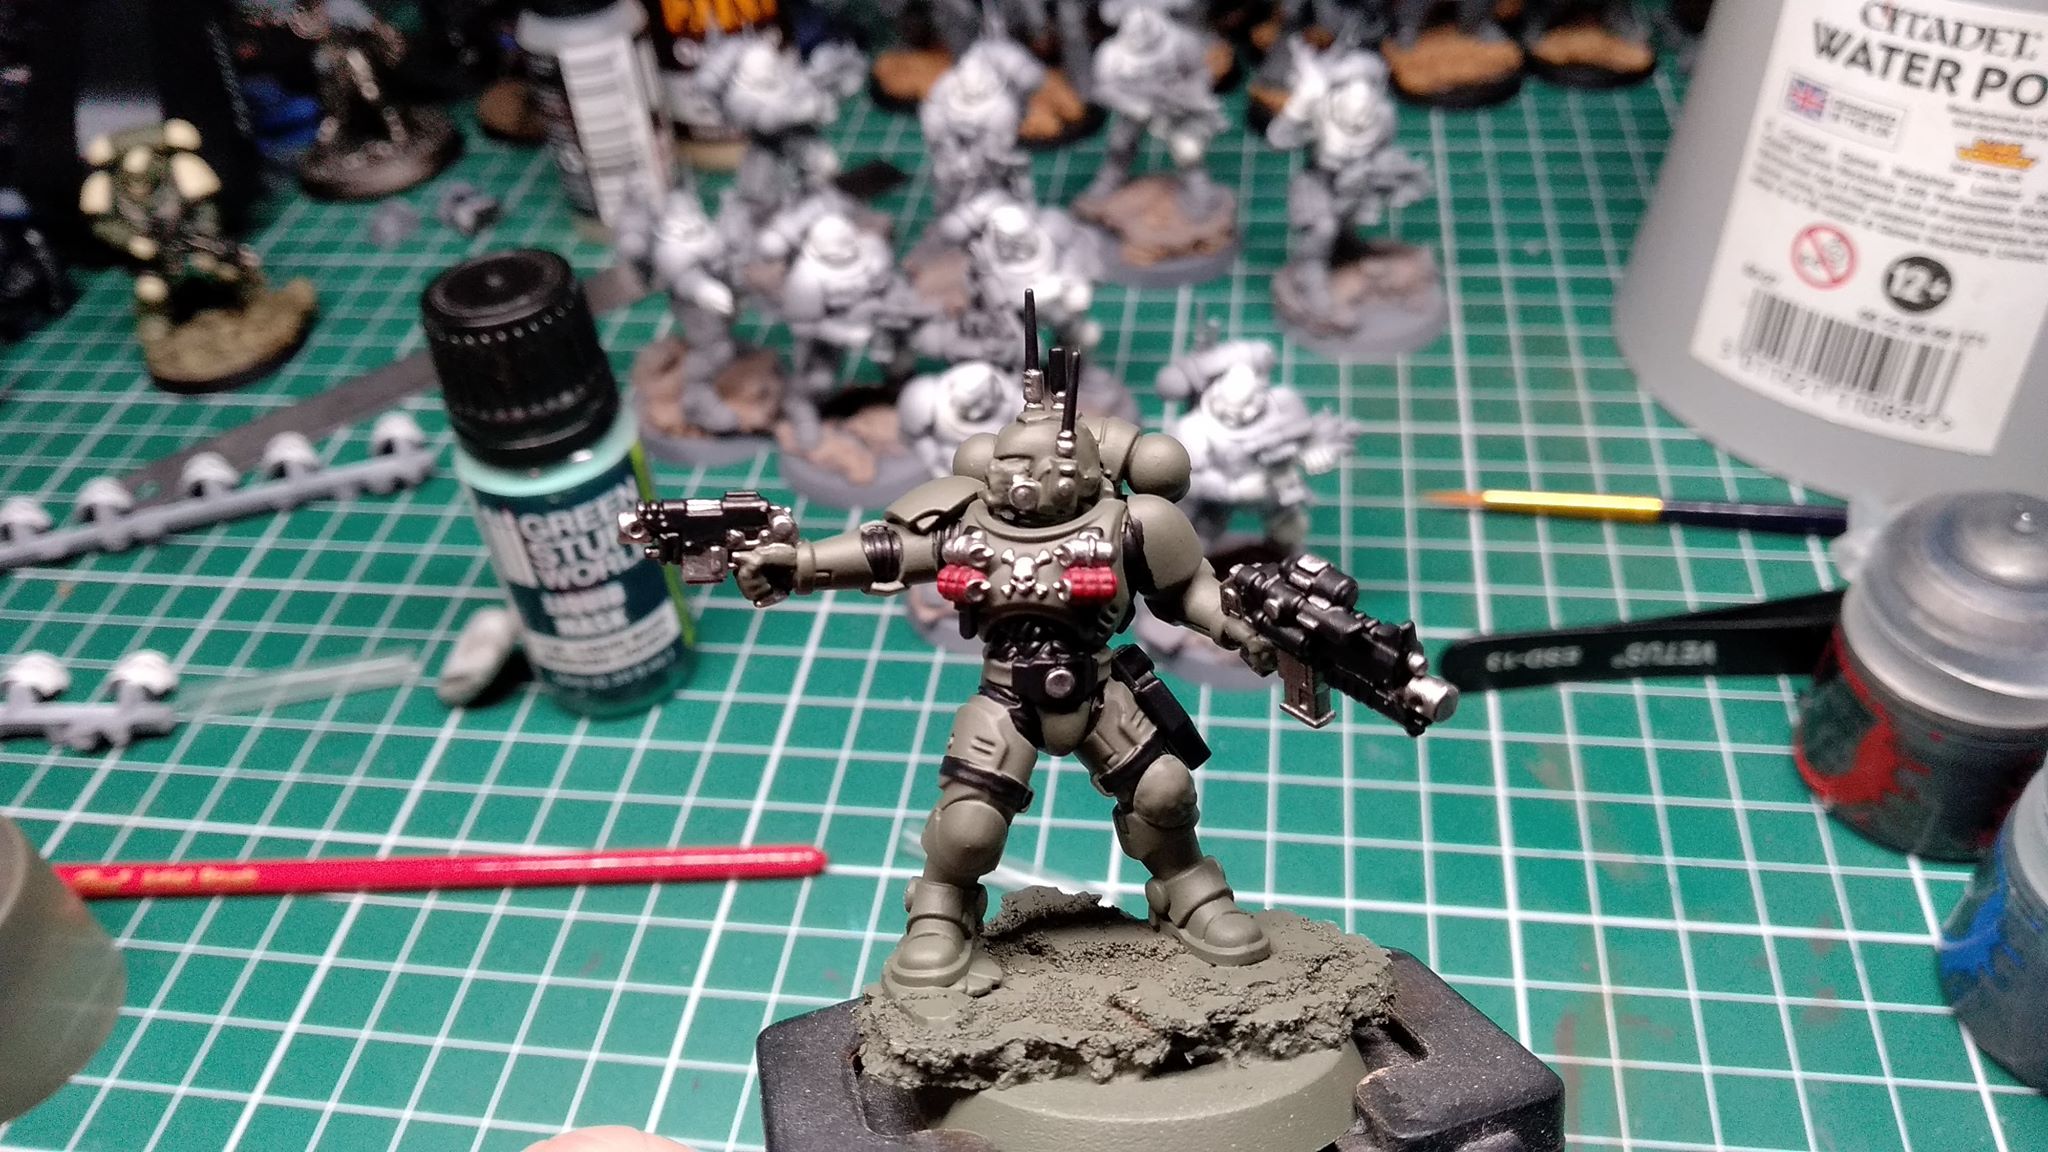
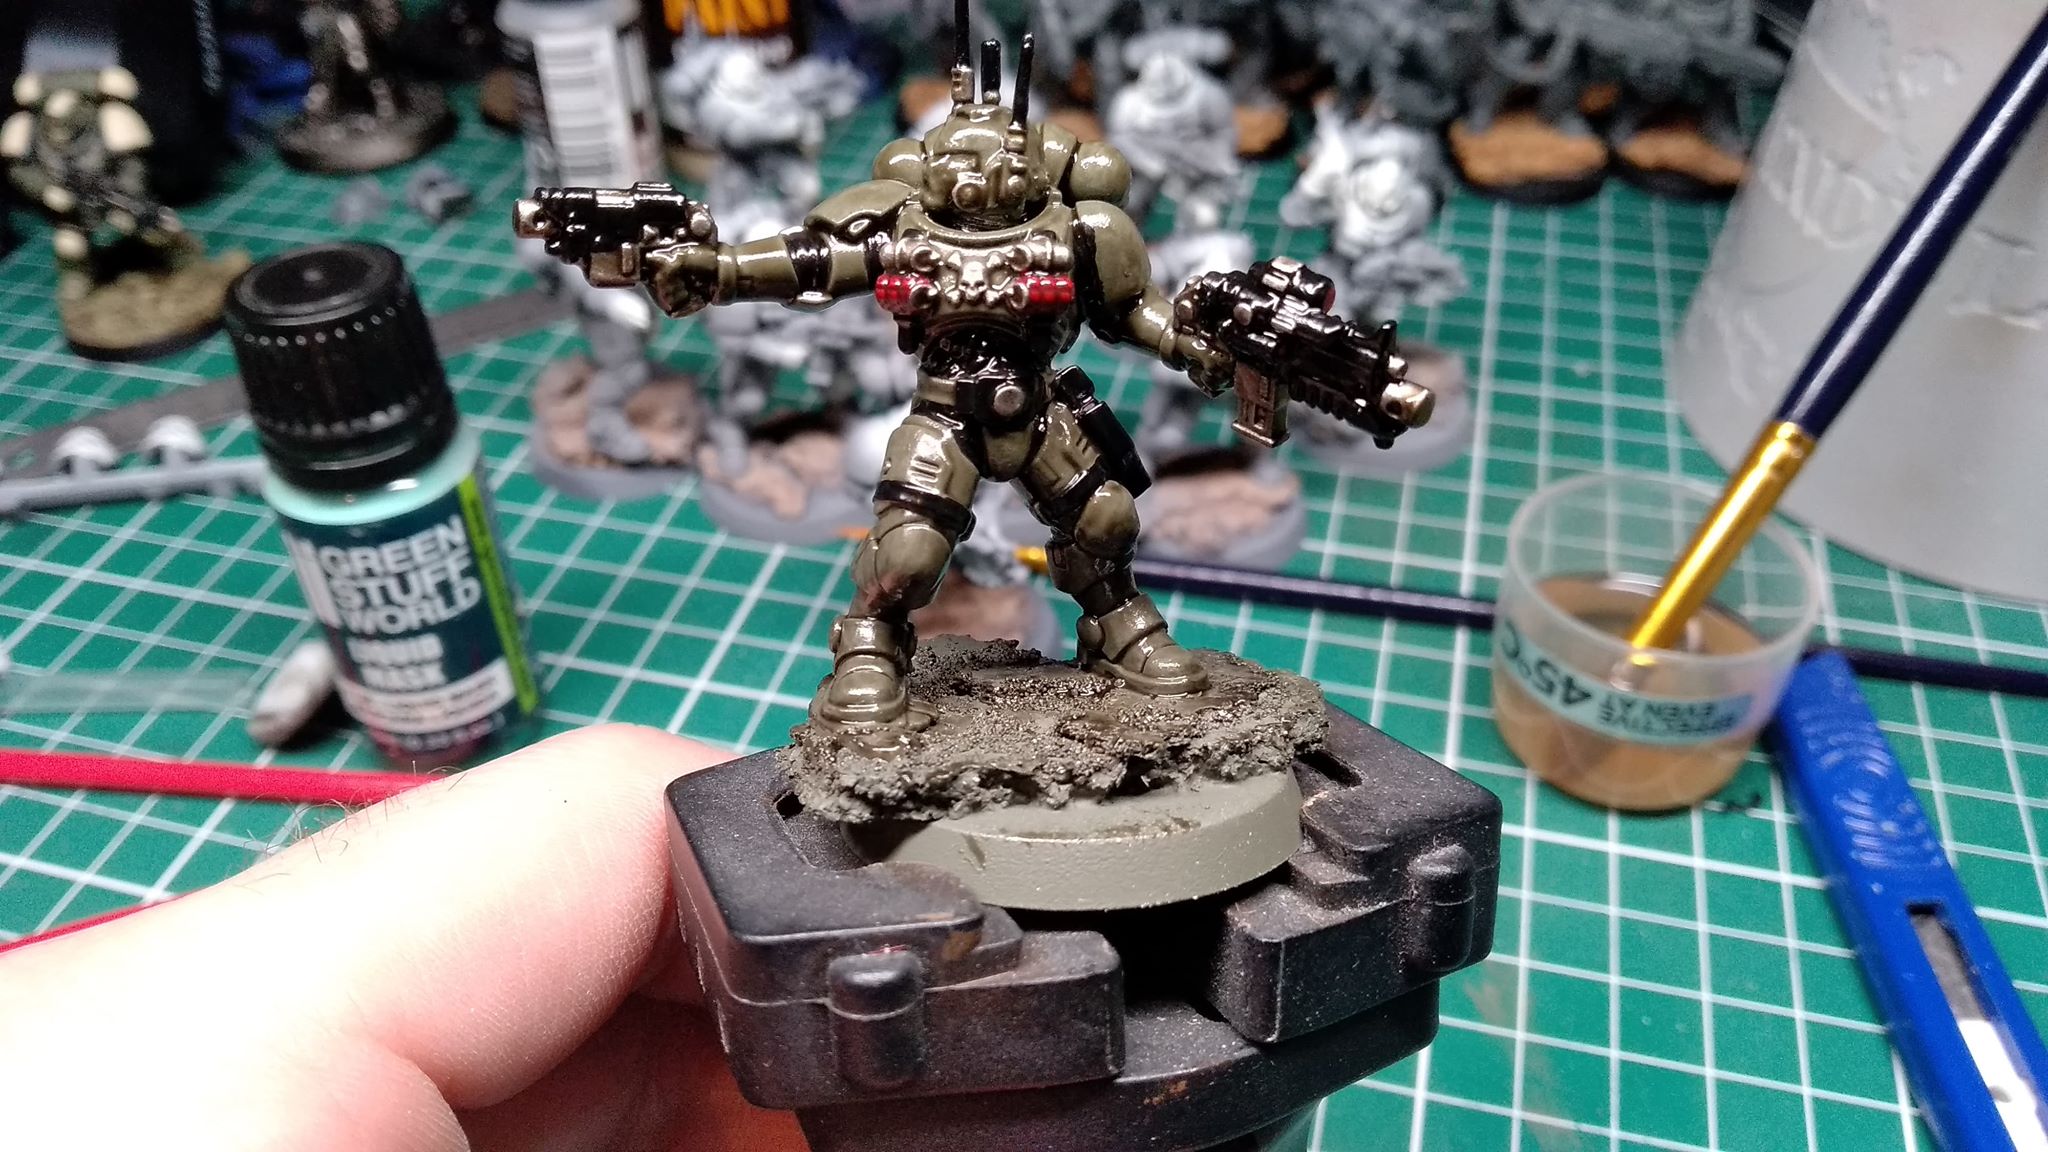
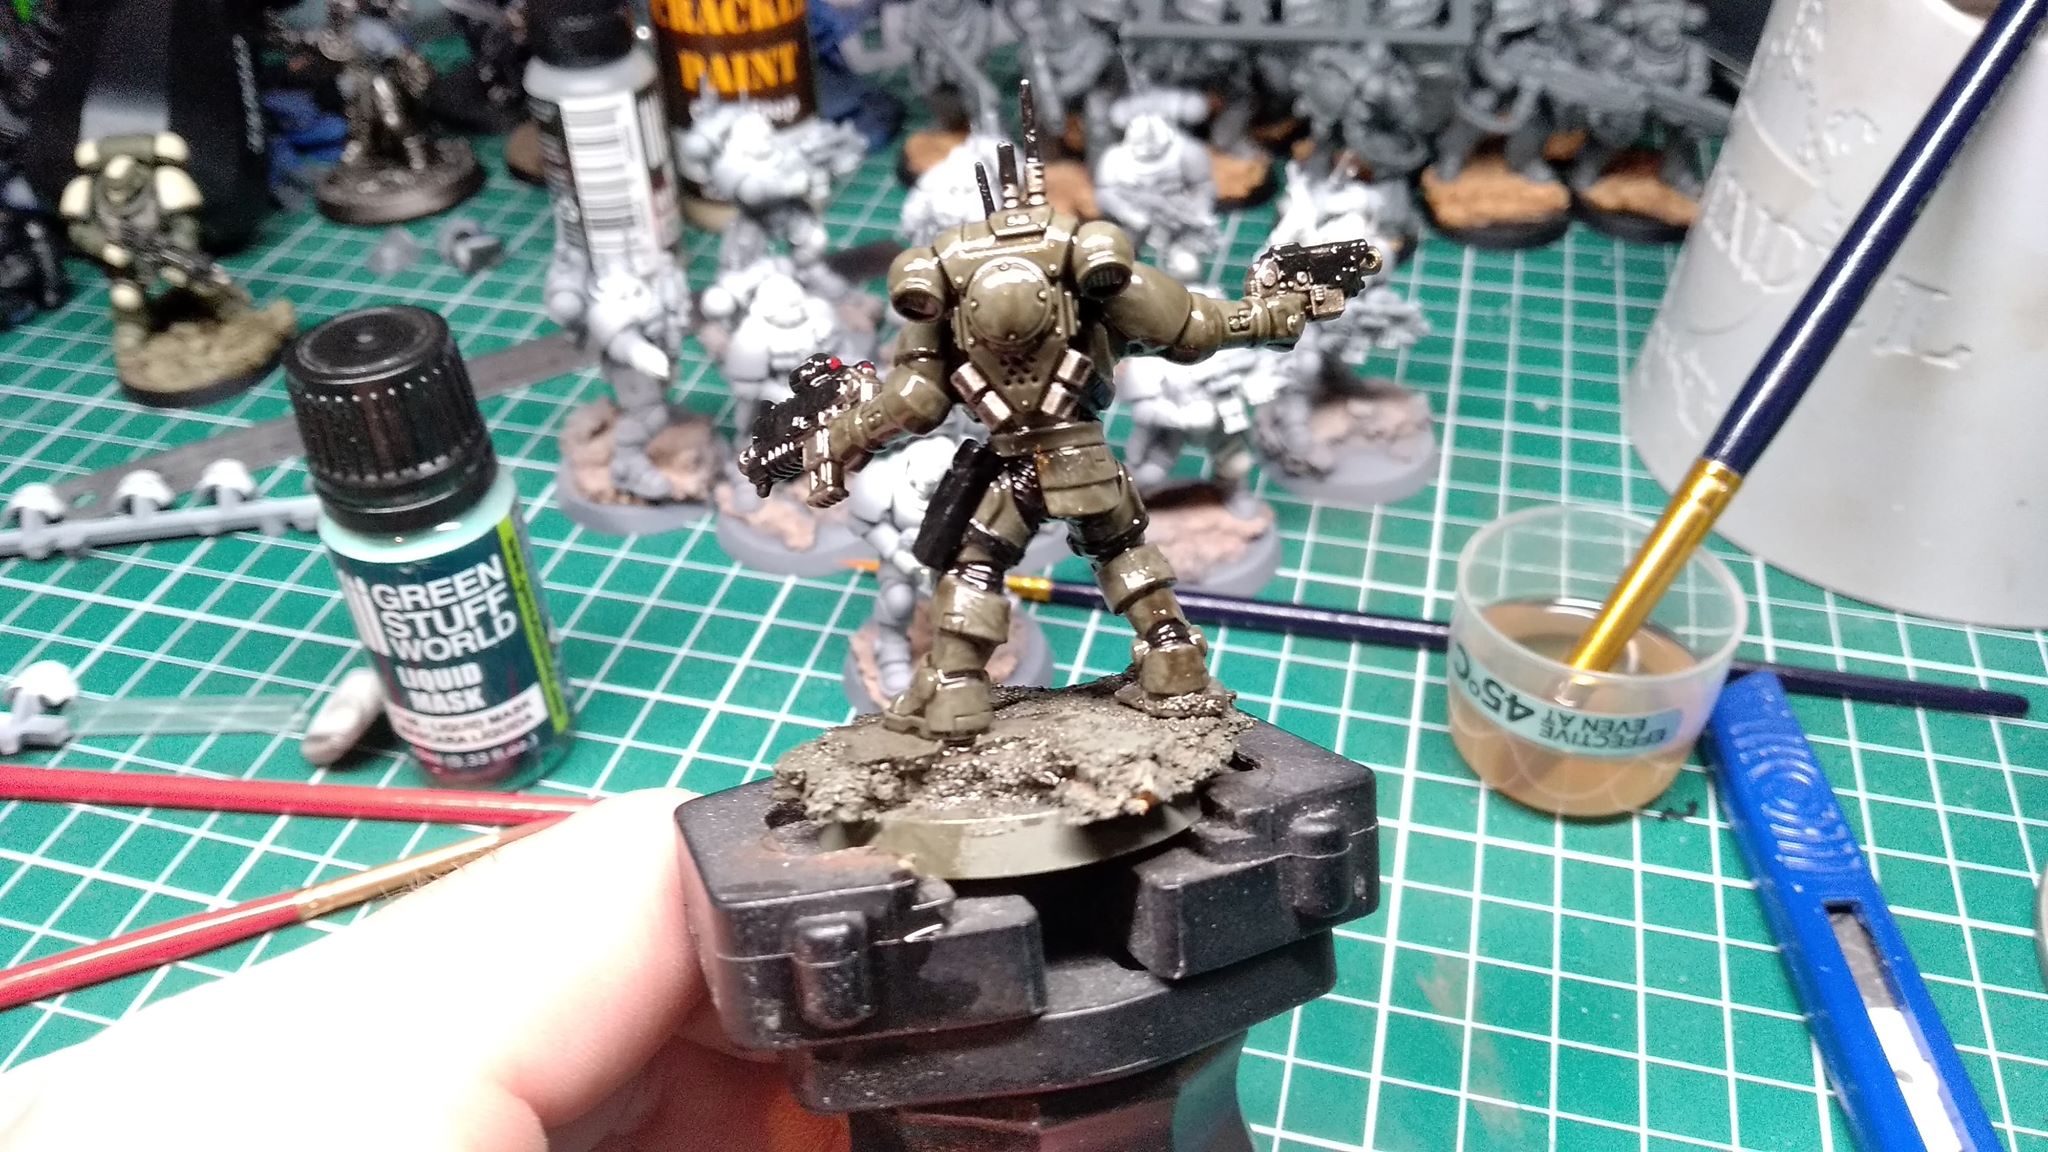
just a little progress report. i’ve finally painted my redemptor dreadnought after having it since release day, it’s been built but not painted all this time. Also i have built and painted the lieutenant from the start collect box, i really didn’t like the arm he came with with the combat knife so i had to get that swapped out for something better, luckily i have spares from of the other primaris kits i’ve built and opted for so finger pointing action. I’ve also added a few extra little antennas just to make him stand out a little and i gave him a different head as the one that came with him looks hilarious if you look at the officially painted one from GW, it has a little face on the forehead, once’s you’ve seen it you can’t unsee it.
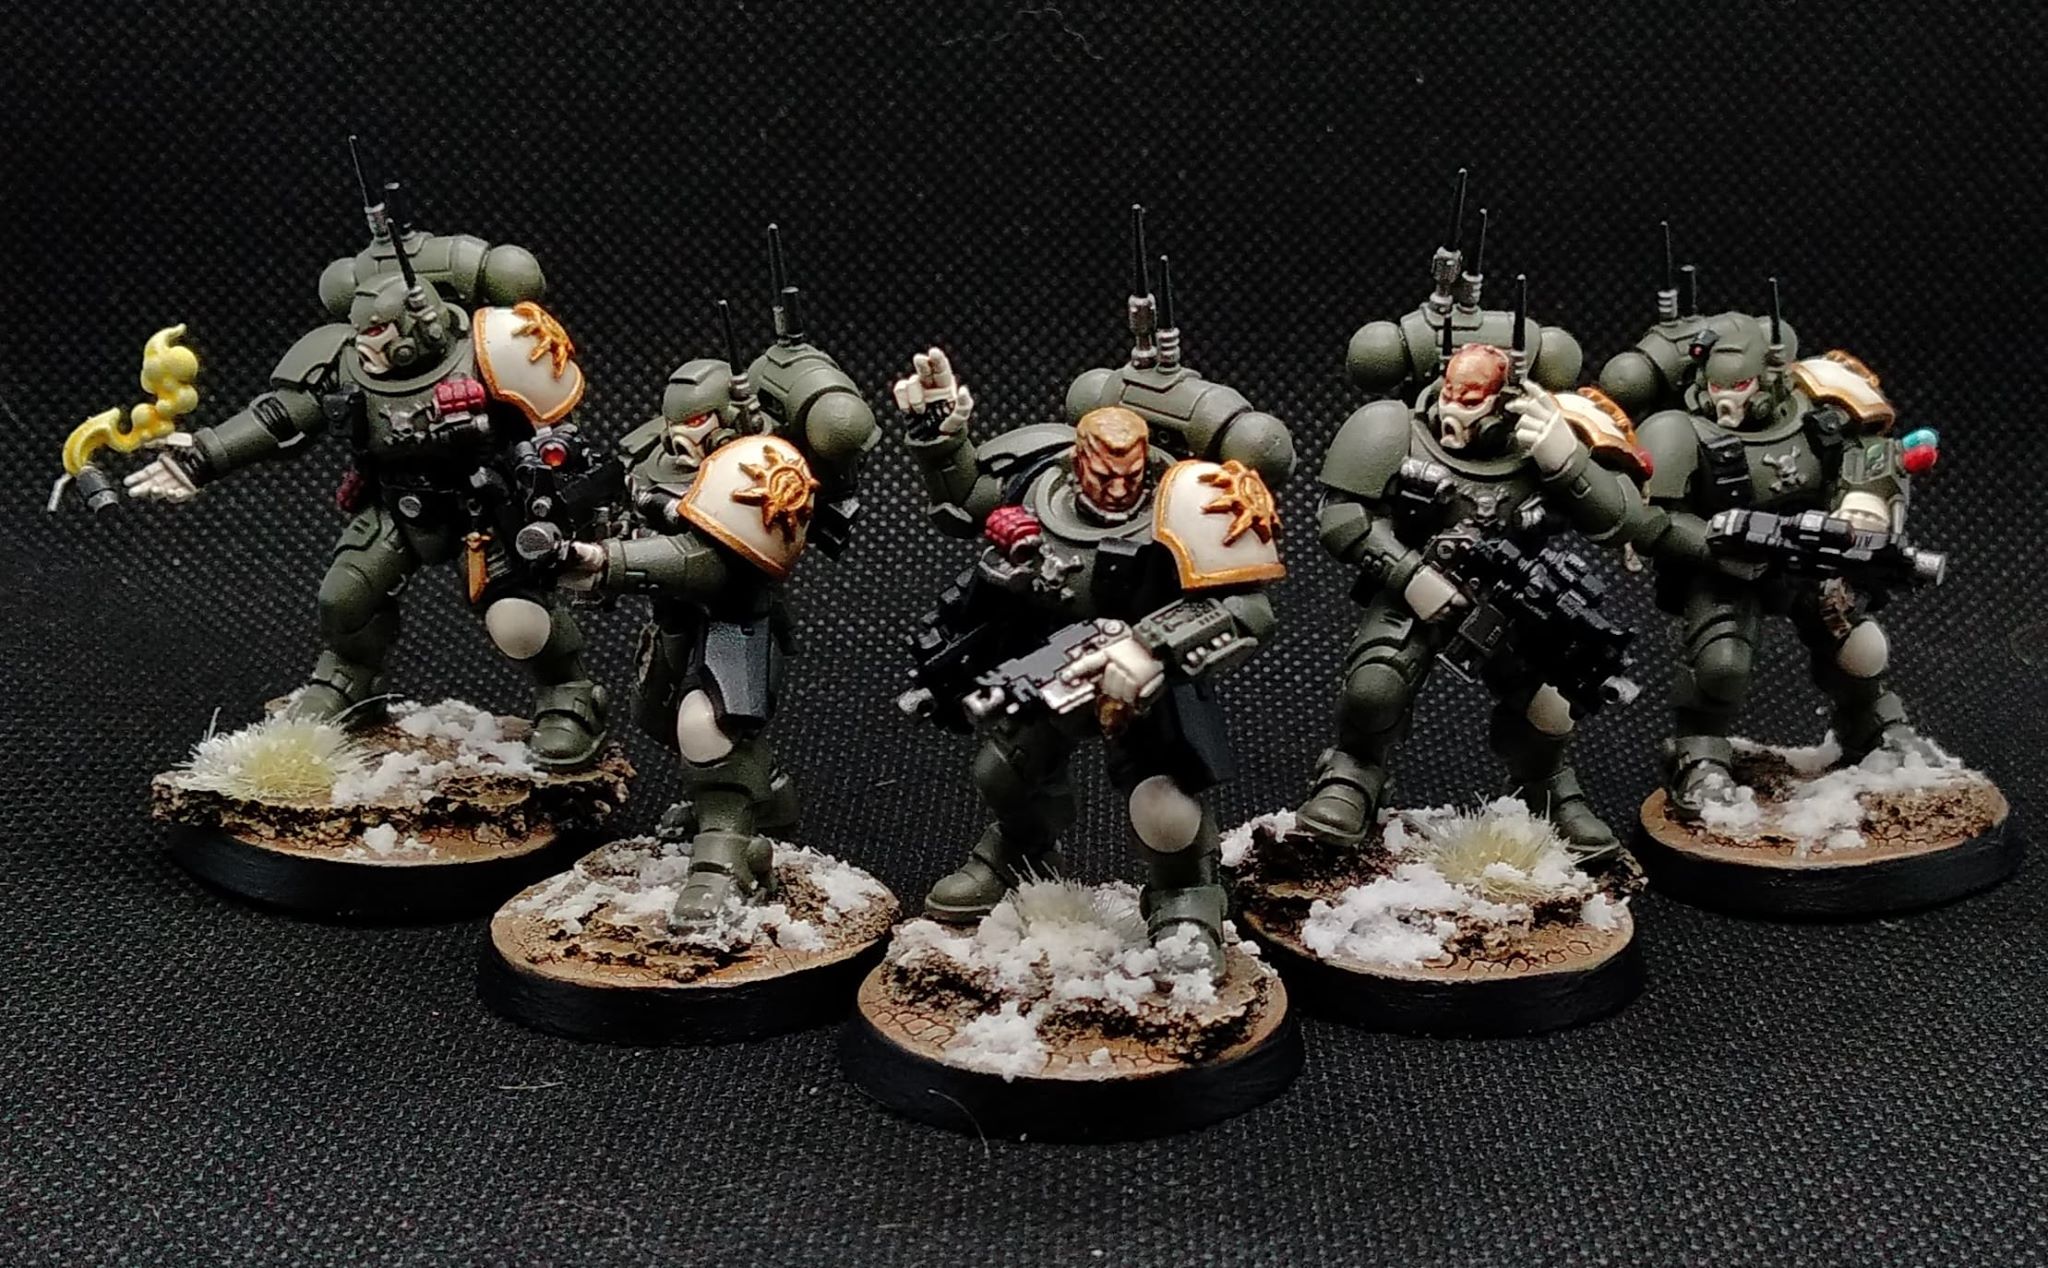
Sneaky Lads
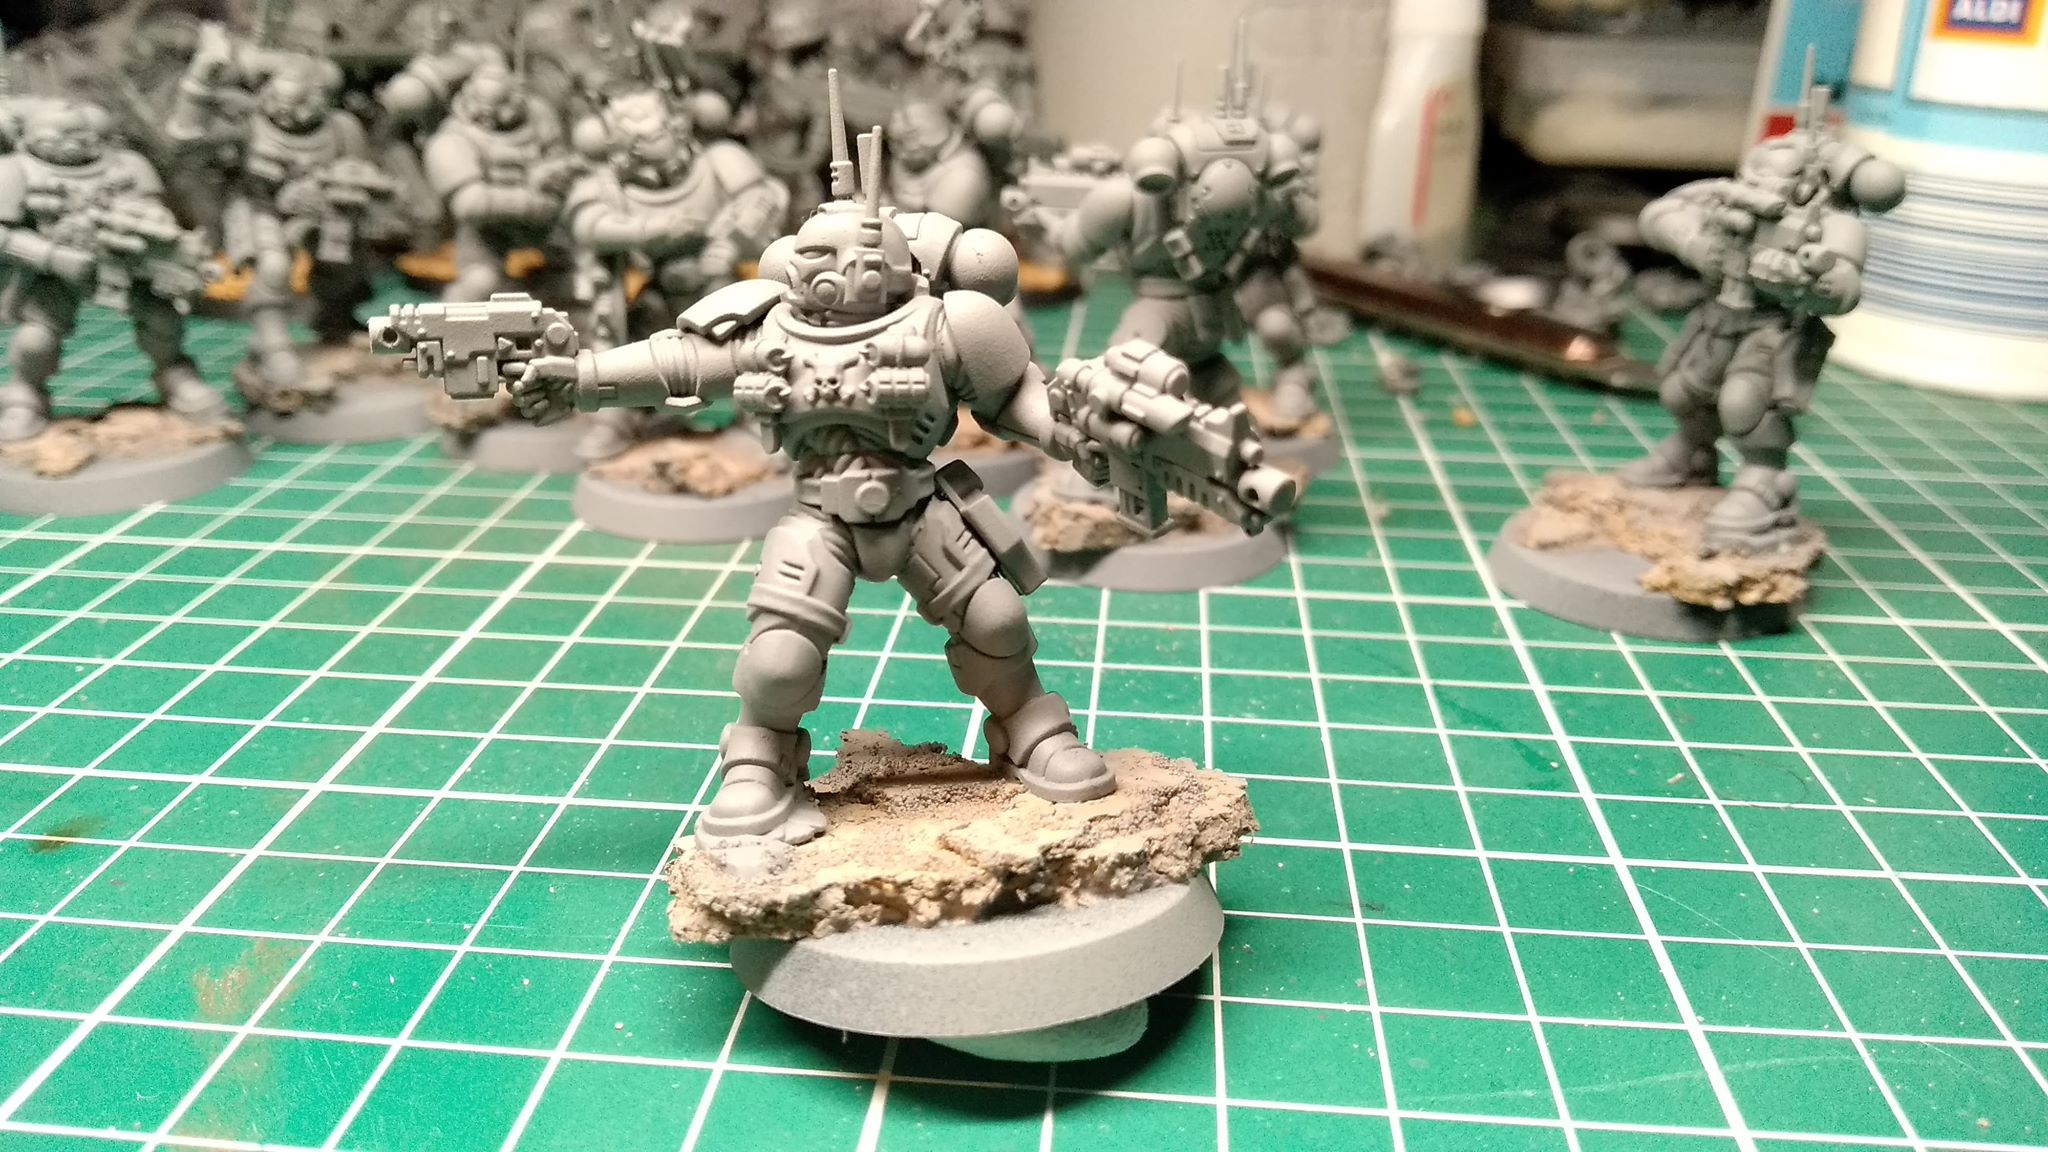
just a quick little post. so i’ve decided that i a, going to build and paint my squads in size’s no more than 5, i think this way it will help with any hobby burn out. building 5 and painting them before doing any more will help it feel like things are getting completed instead of having a big pile of grey guys staring at me and looking like it will take an age to finish.
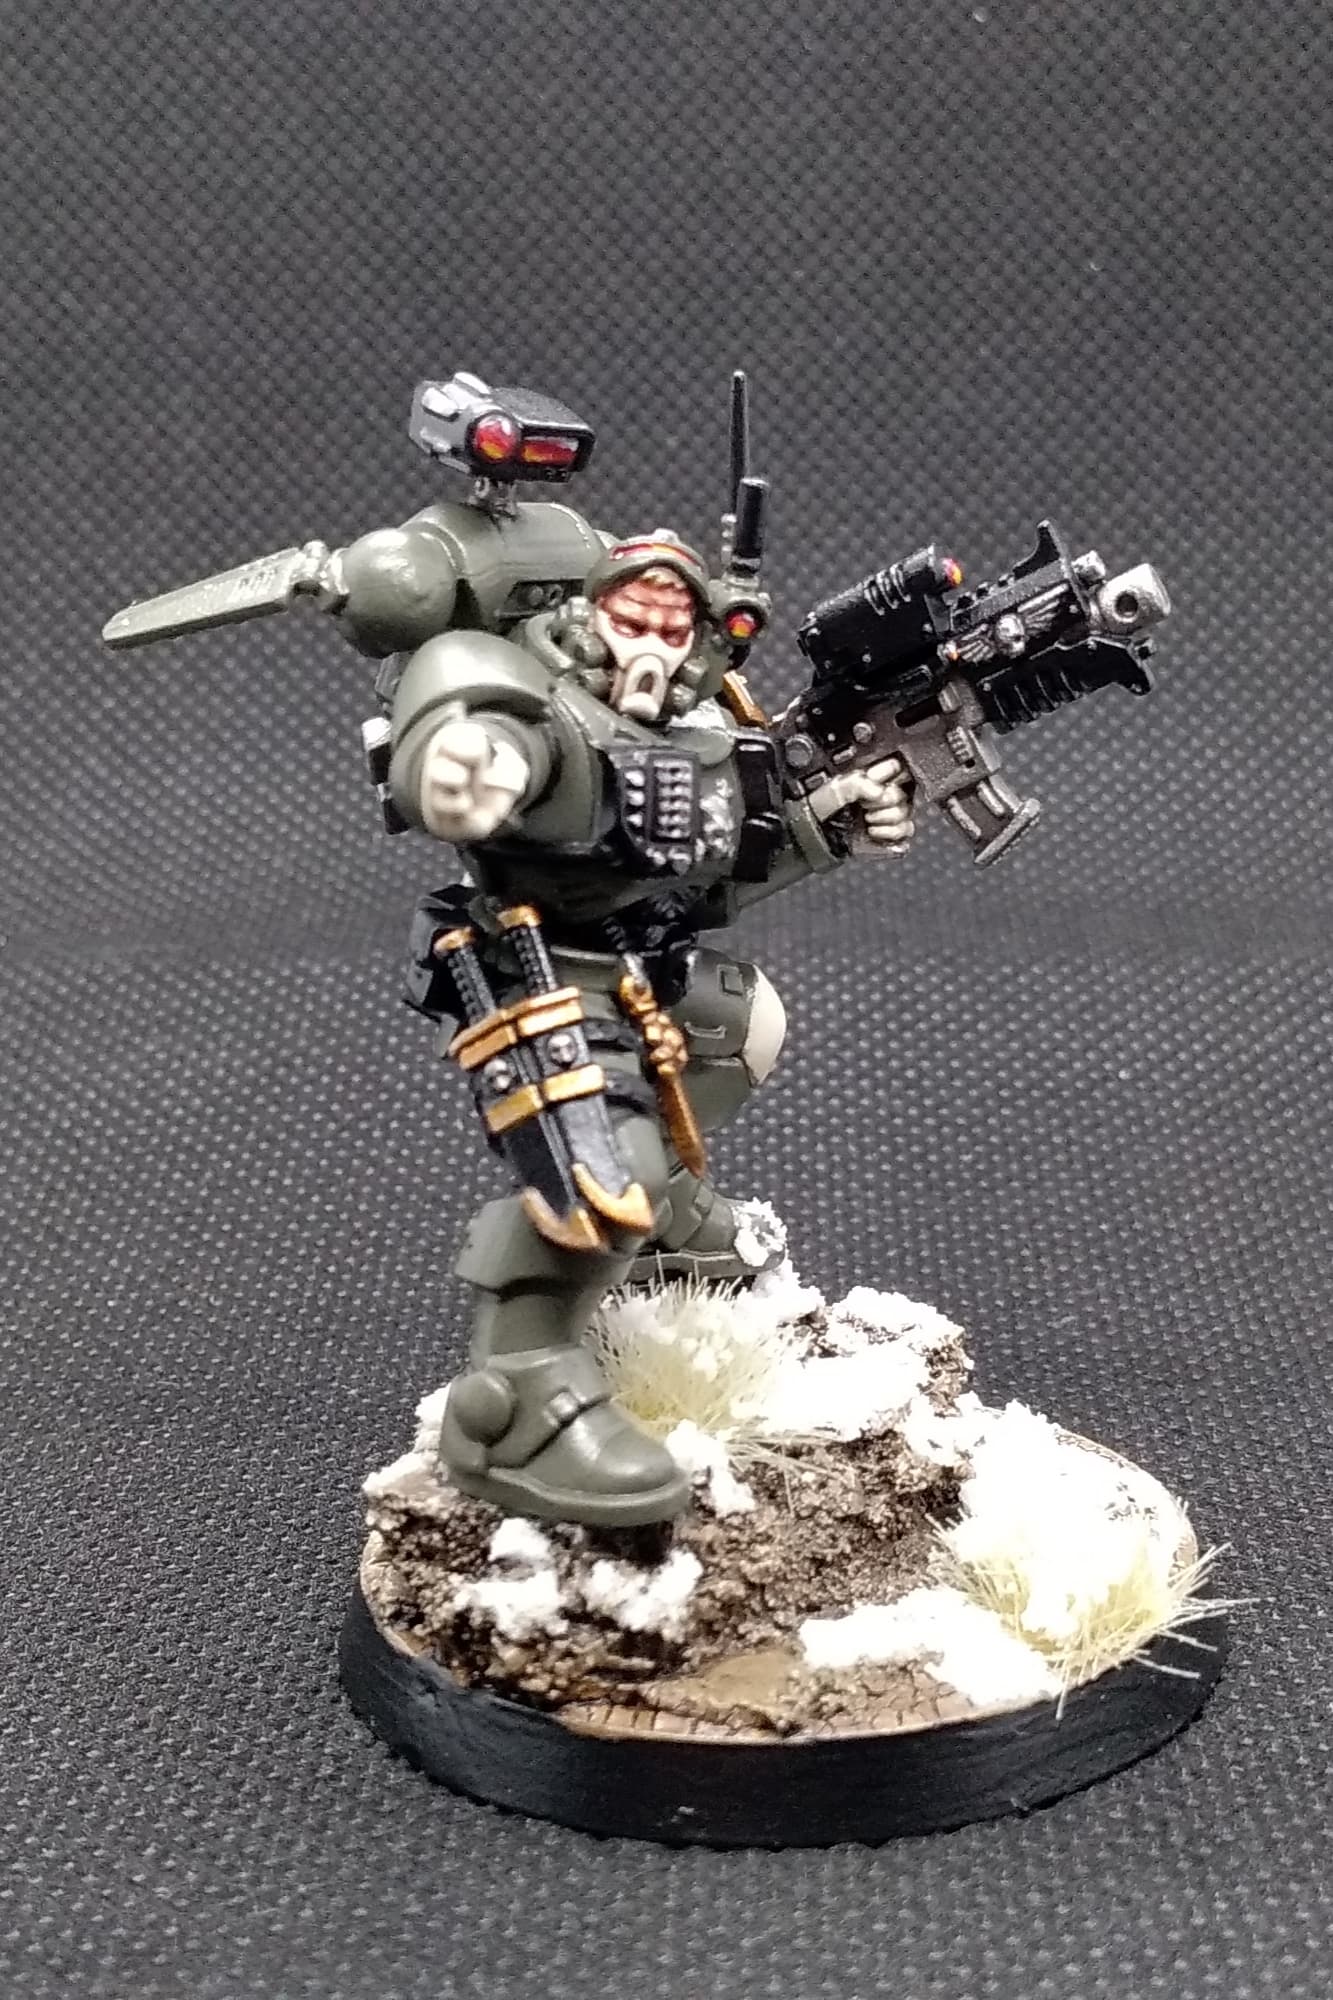
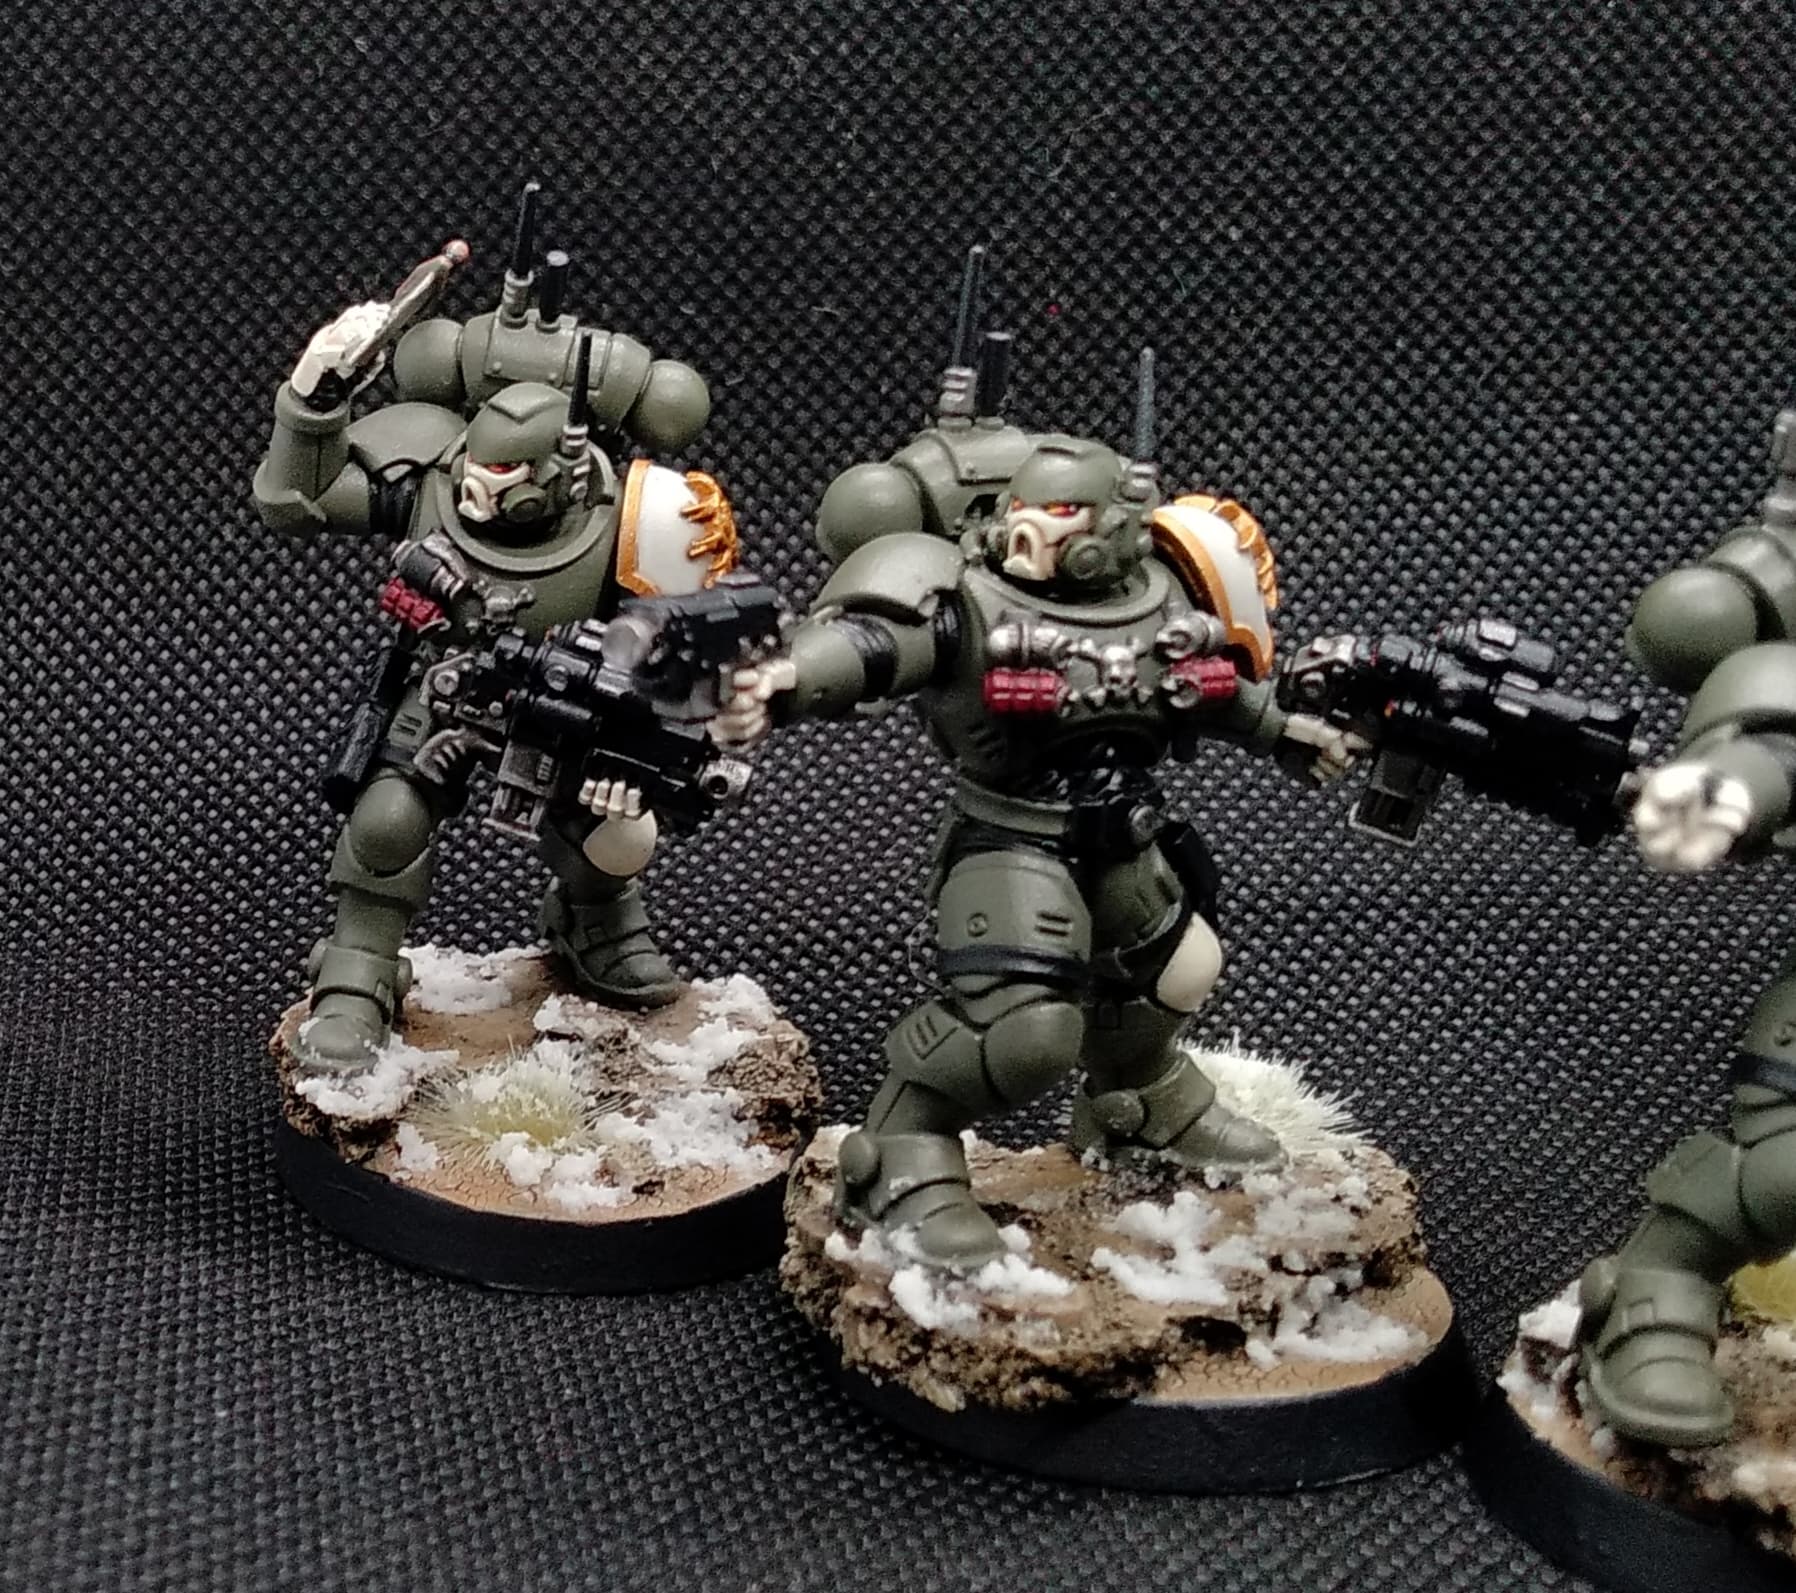
So i have build and painted 5 more infiltrators, this time these are the mono pose guys from the start collecting box, i was a little concerned with not having certain parts of the model separate to paint and glue on separately but my fears were for nothing as it all went to plan. i’m pleased with how these guys came out and they fit seamlessly with the others i have already painted.
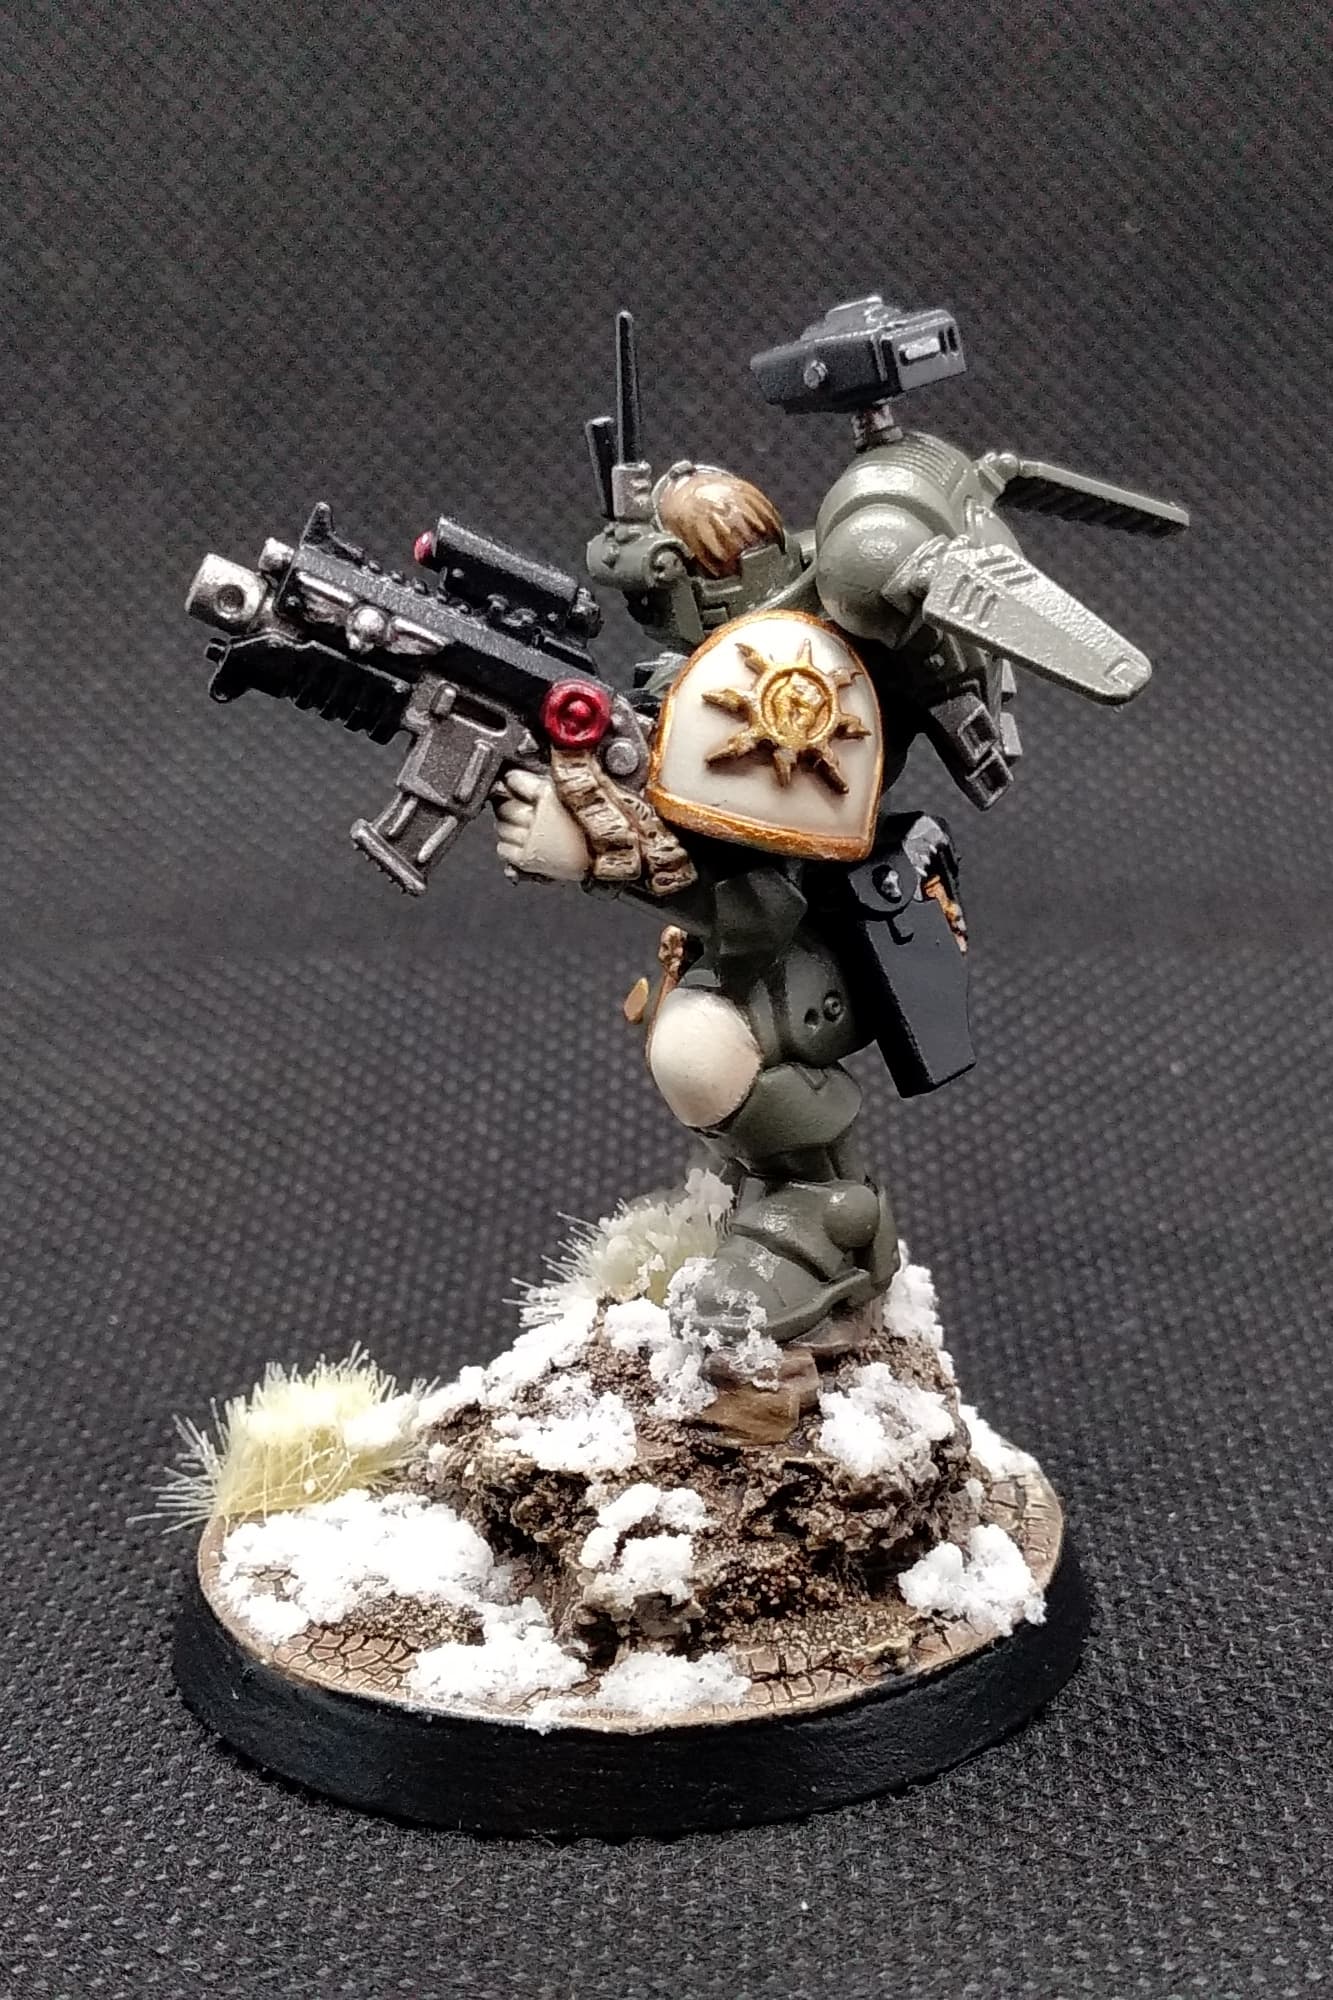
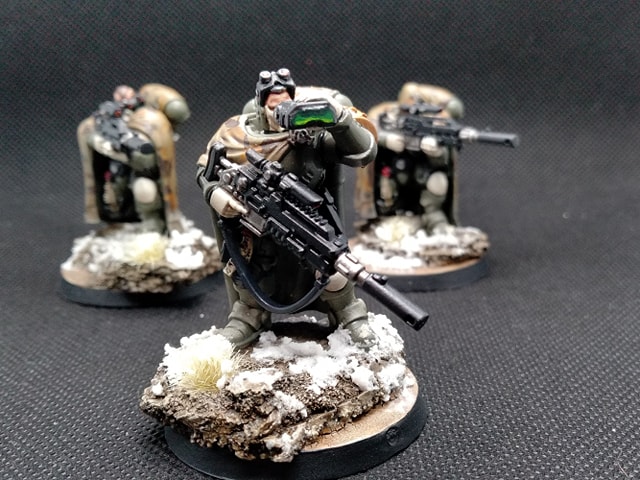
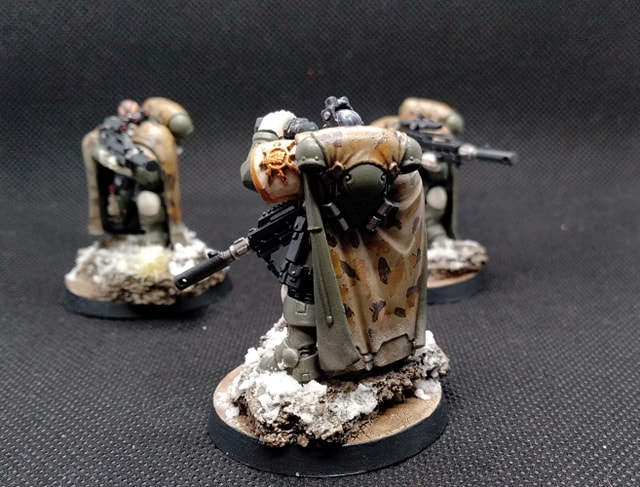
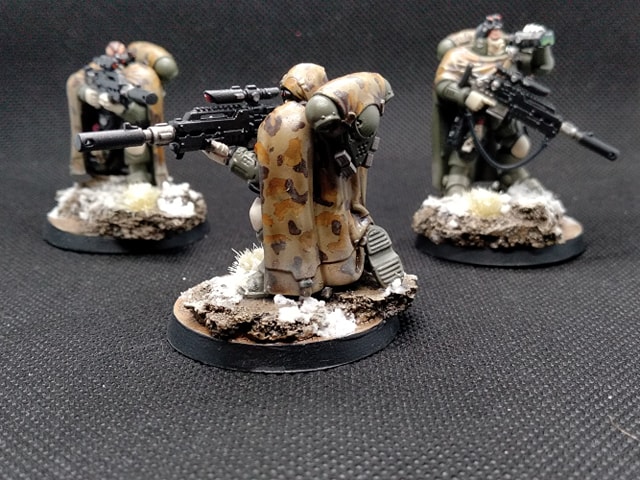
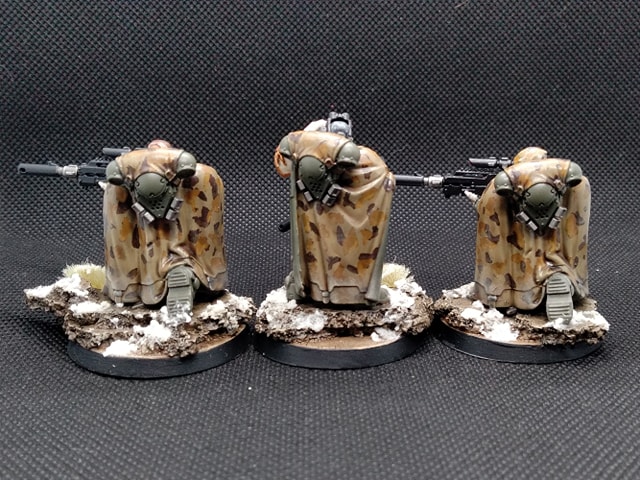
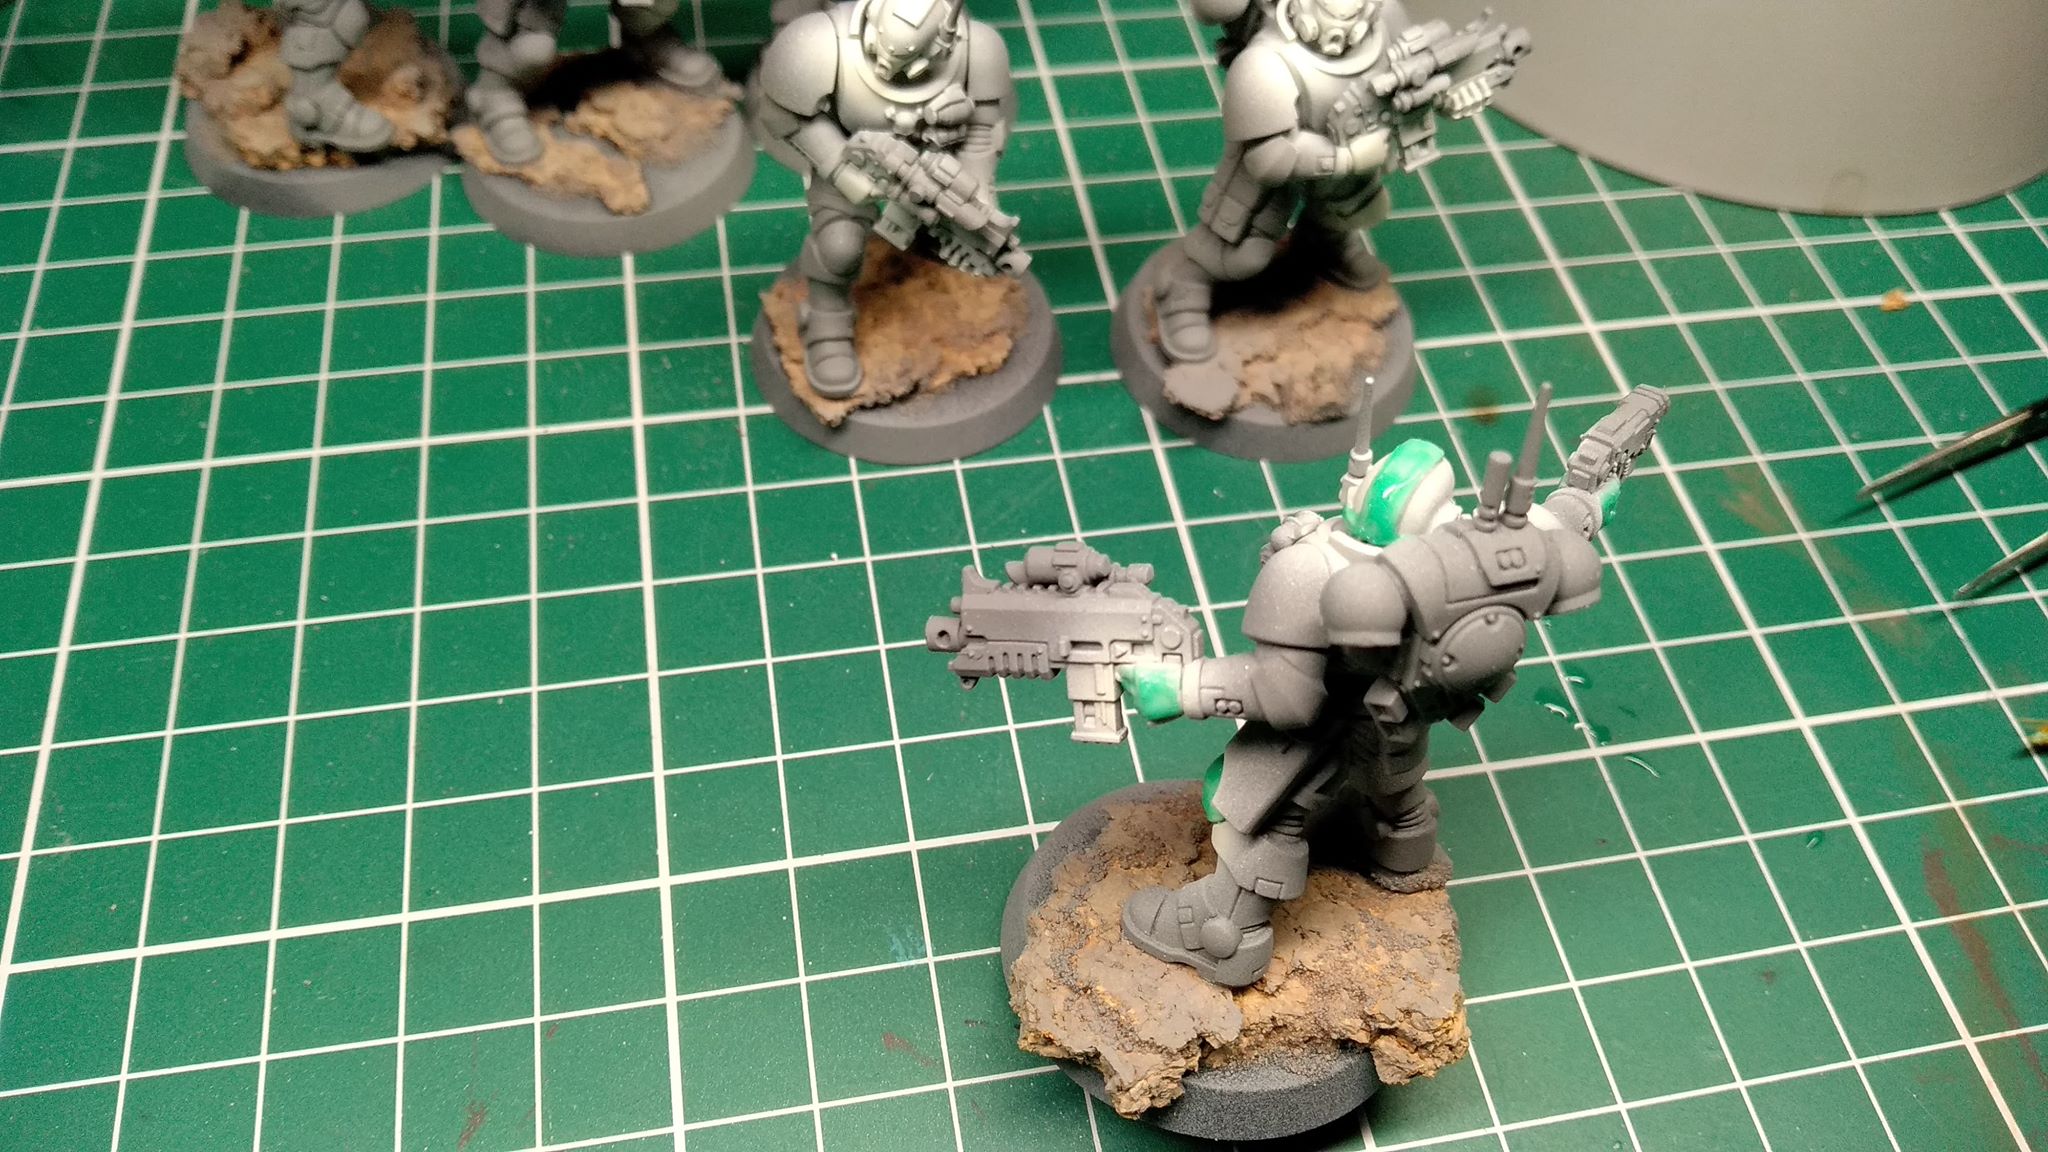
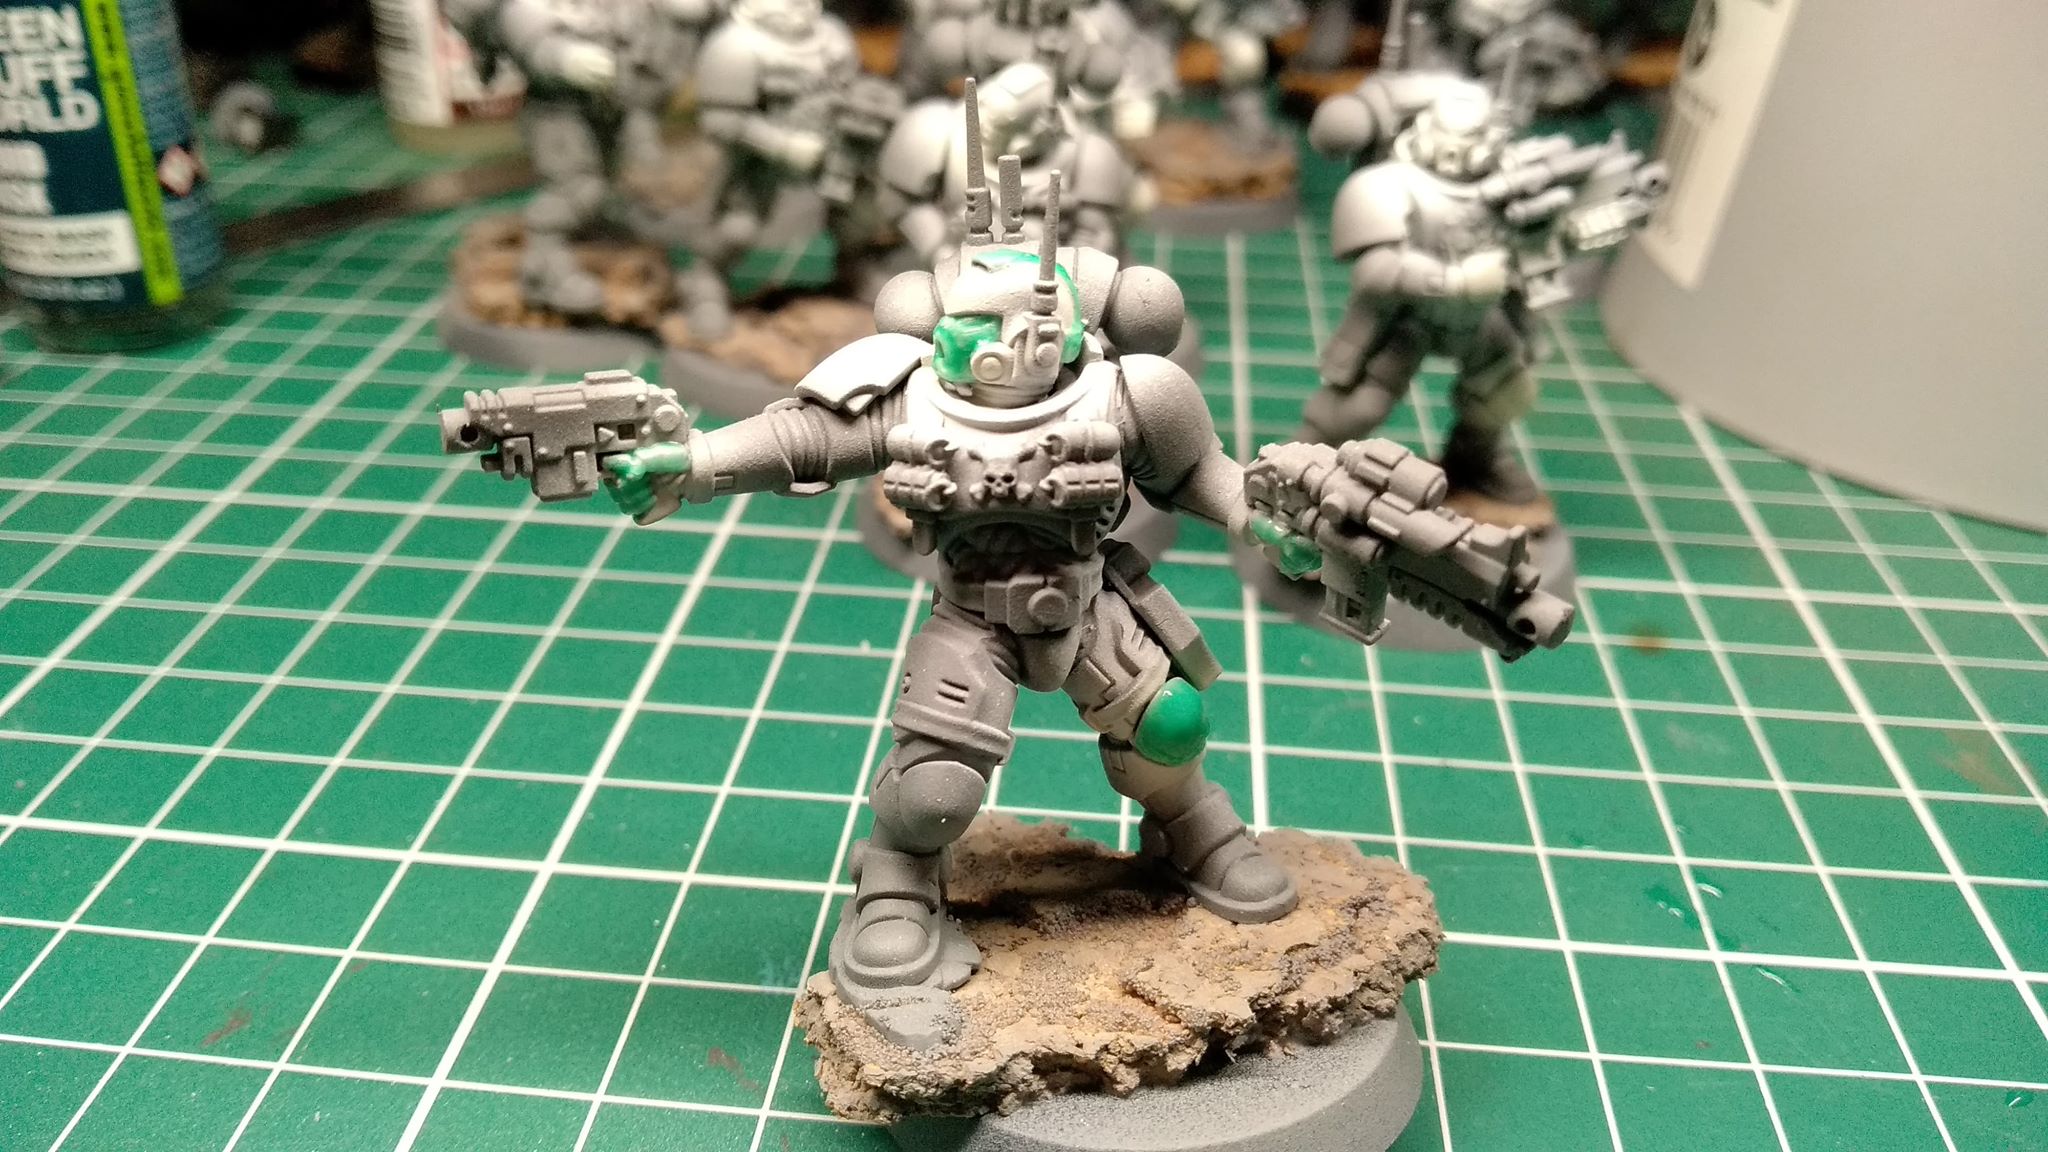
walk softly and carry a big gun
So here i have built and painted the primaris eliminators from the vanguard start collecting. I love these models, there’s something about the Vanguard marines that really attracts me to them.
I tried using and airbrush and liquid mask for the camo on their camo cloaks, one of them i forgot to do so i had to do him by hand. turns out i could have just done them all by hand as you can;t see any difference. Oh well, now i know. The end result is okay, i’m happy enough with how the camo came out but i feel it could be better, but like i said i’m happy enough with it for now.
But overall i’m very pleased with how these guys turned out.


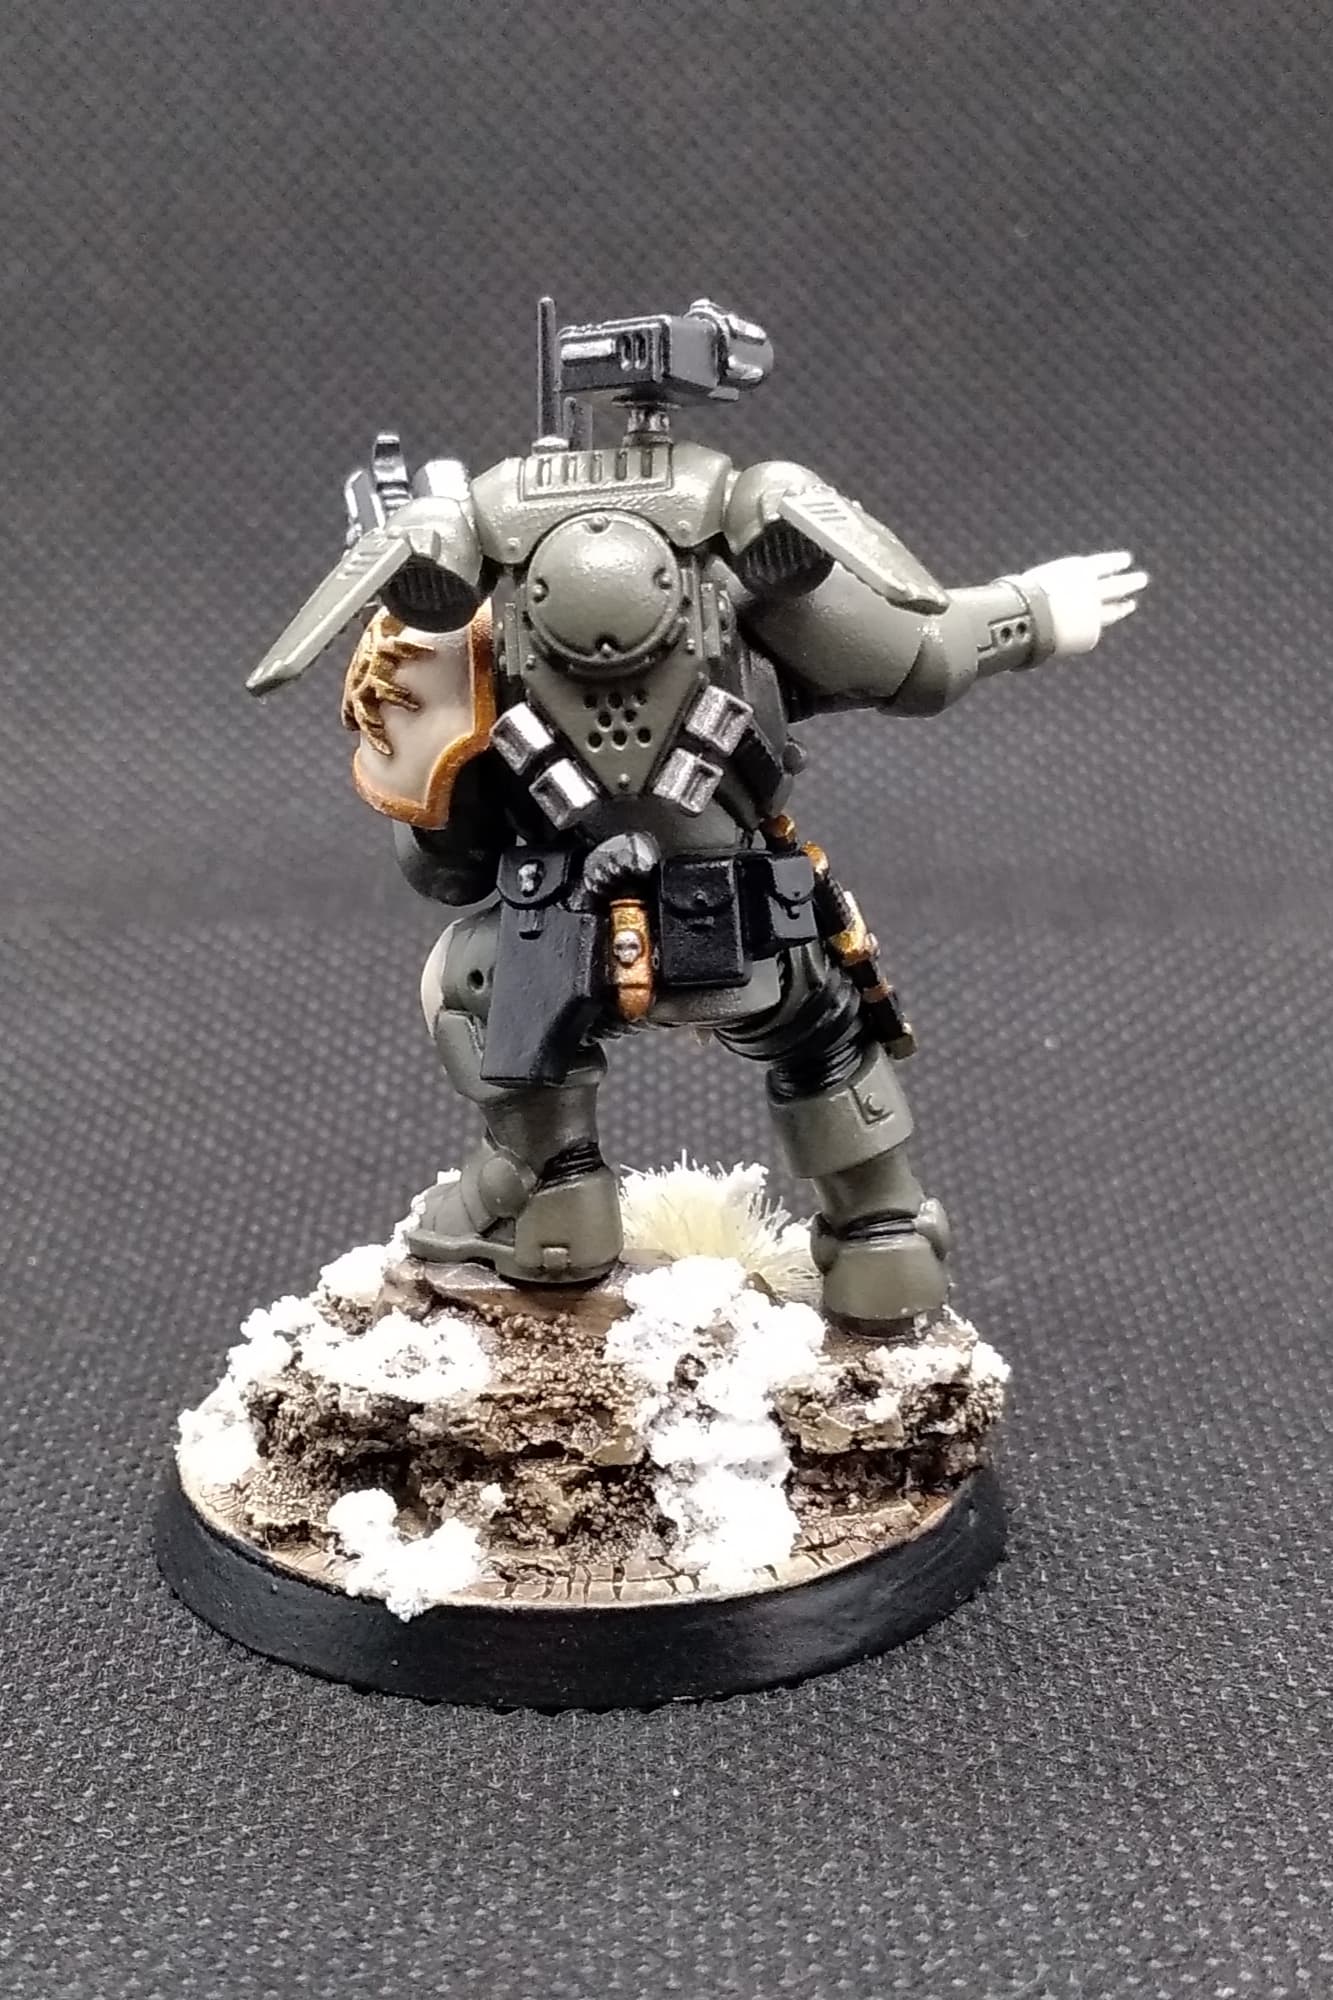
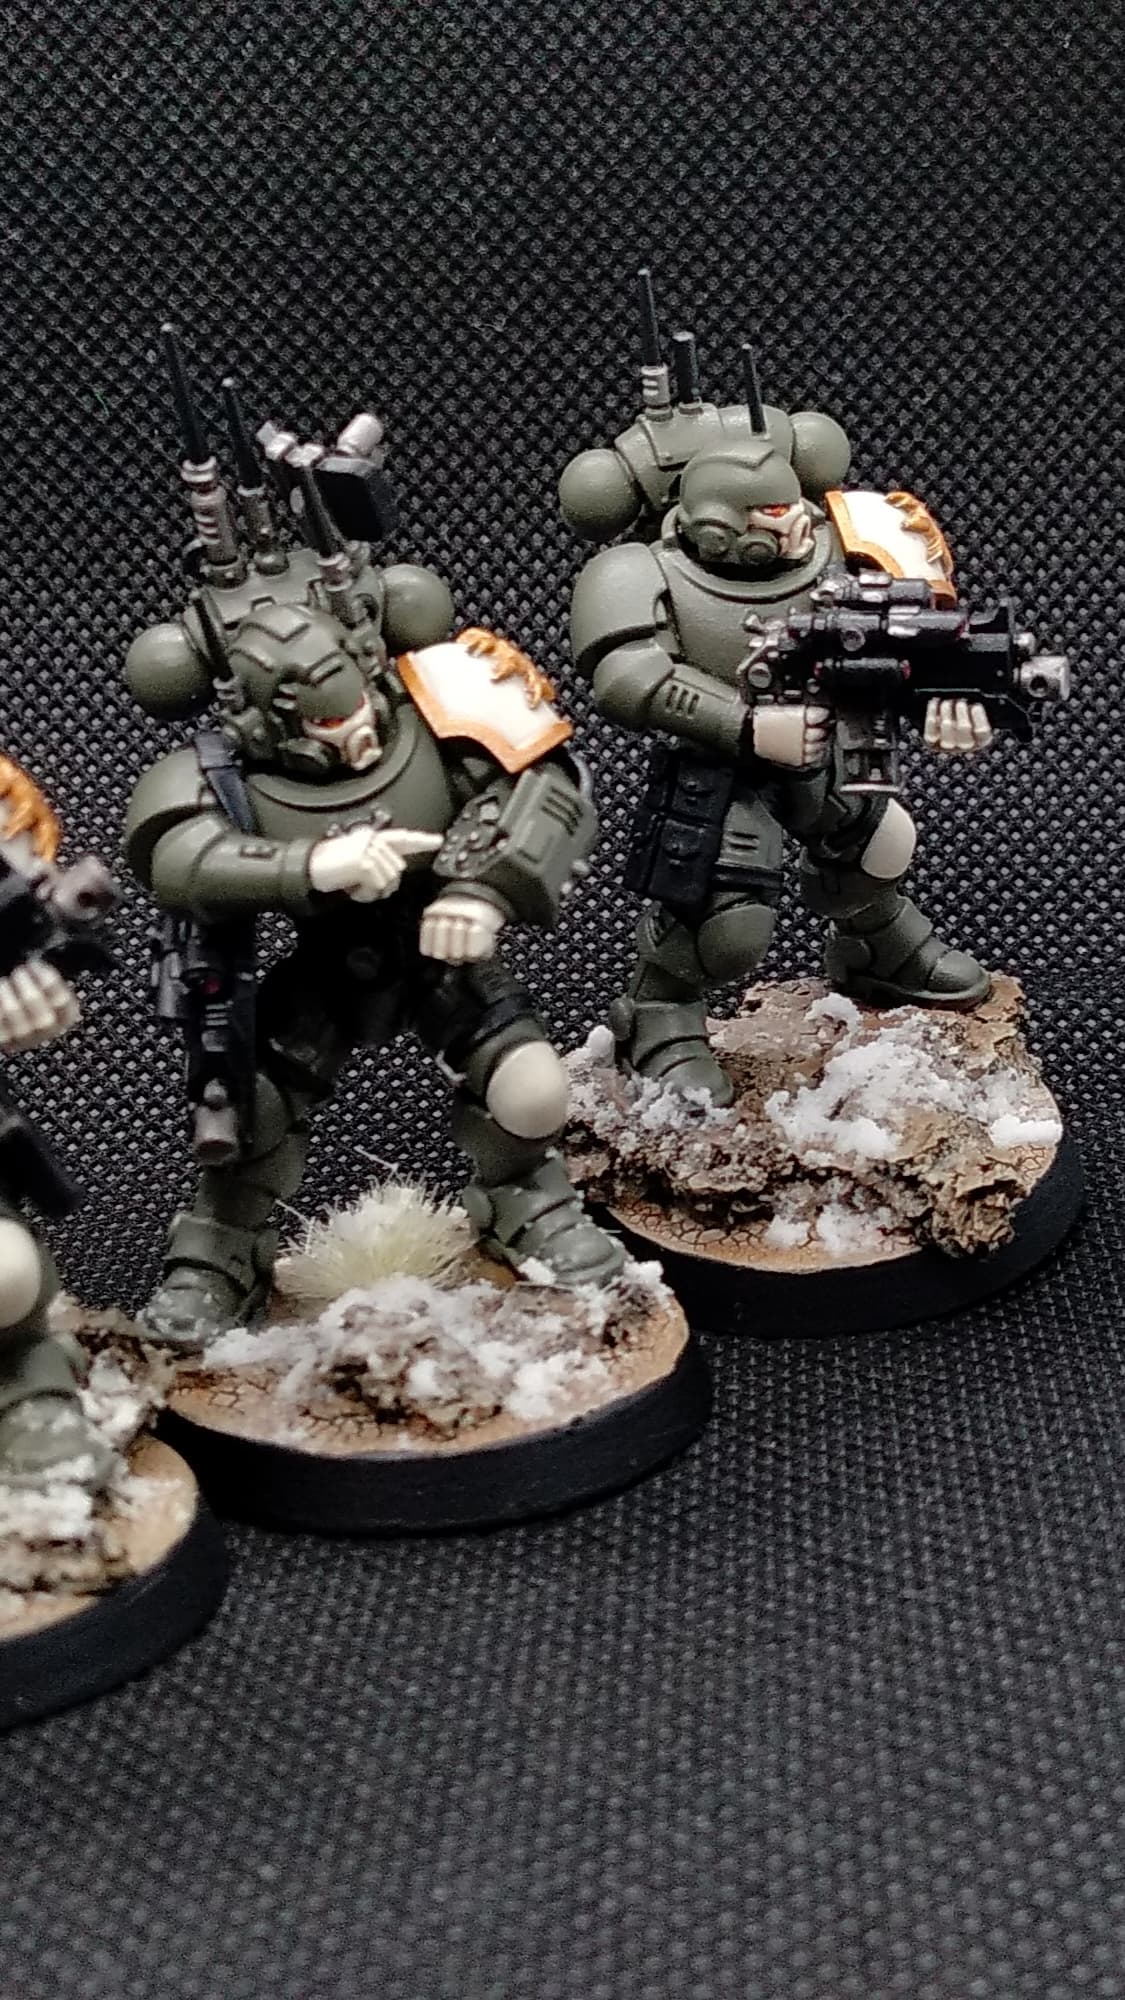
About time
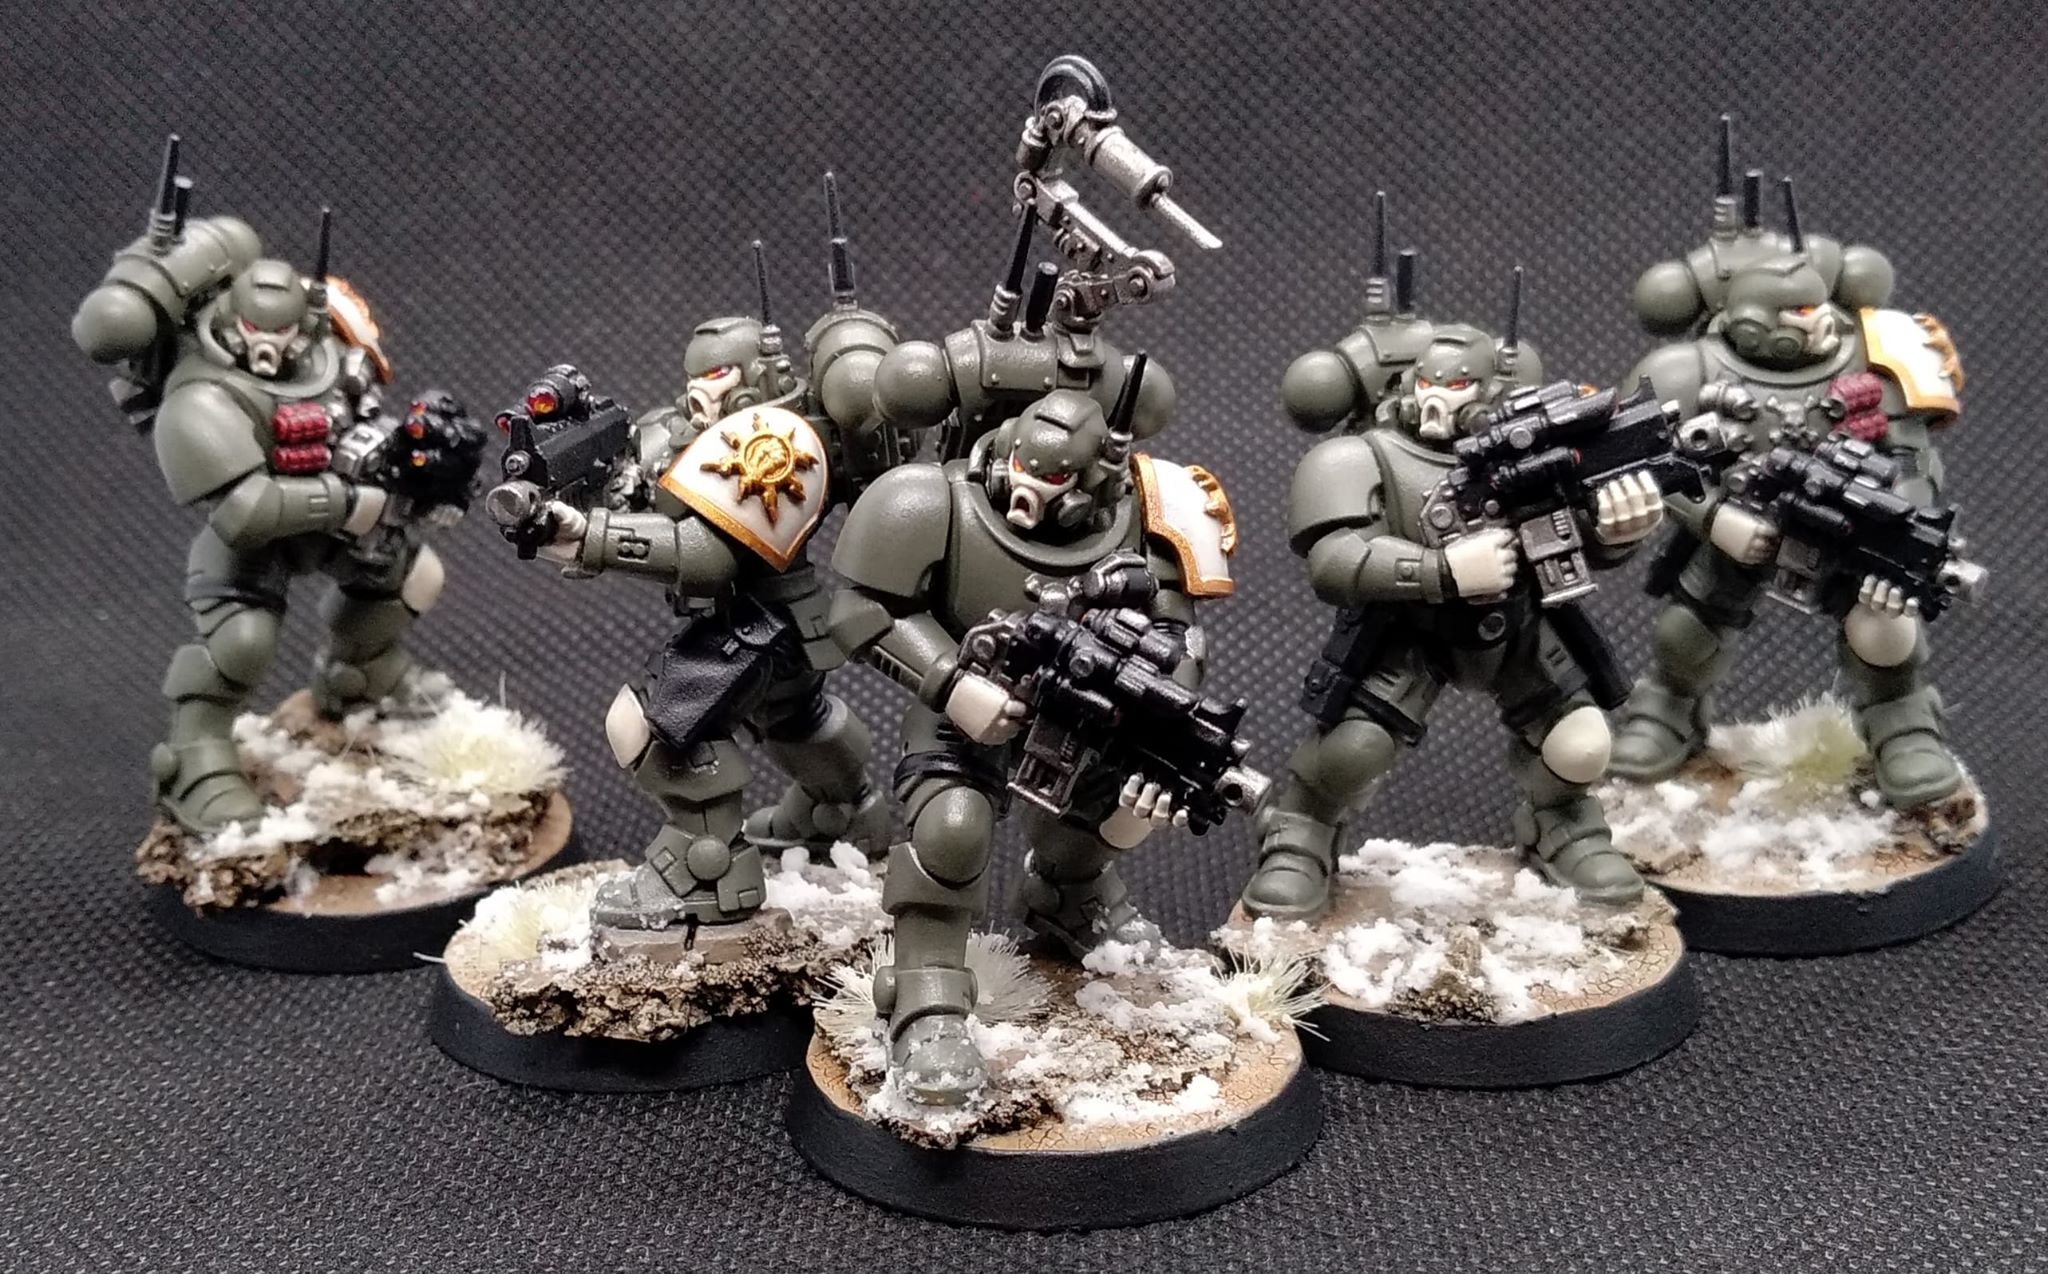
So i finally finished the entire first unit. it took me a little longer than i was expecting, but you can’t sit and paint everyday, life finds a way of ruining that. But they’re done now.
I’ve Kept everything pretty simple, mostly base colours, with the odd highlight on things such as lenses. Could i paint them to a better standard, yes, but would i ever complete an army of them, no. But for the amount of actual work put into them they look really good.
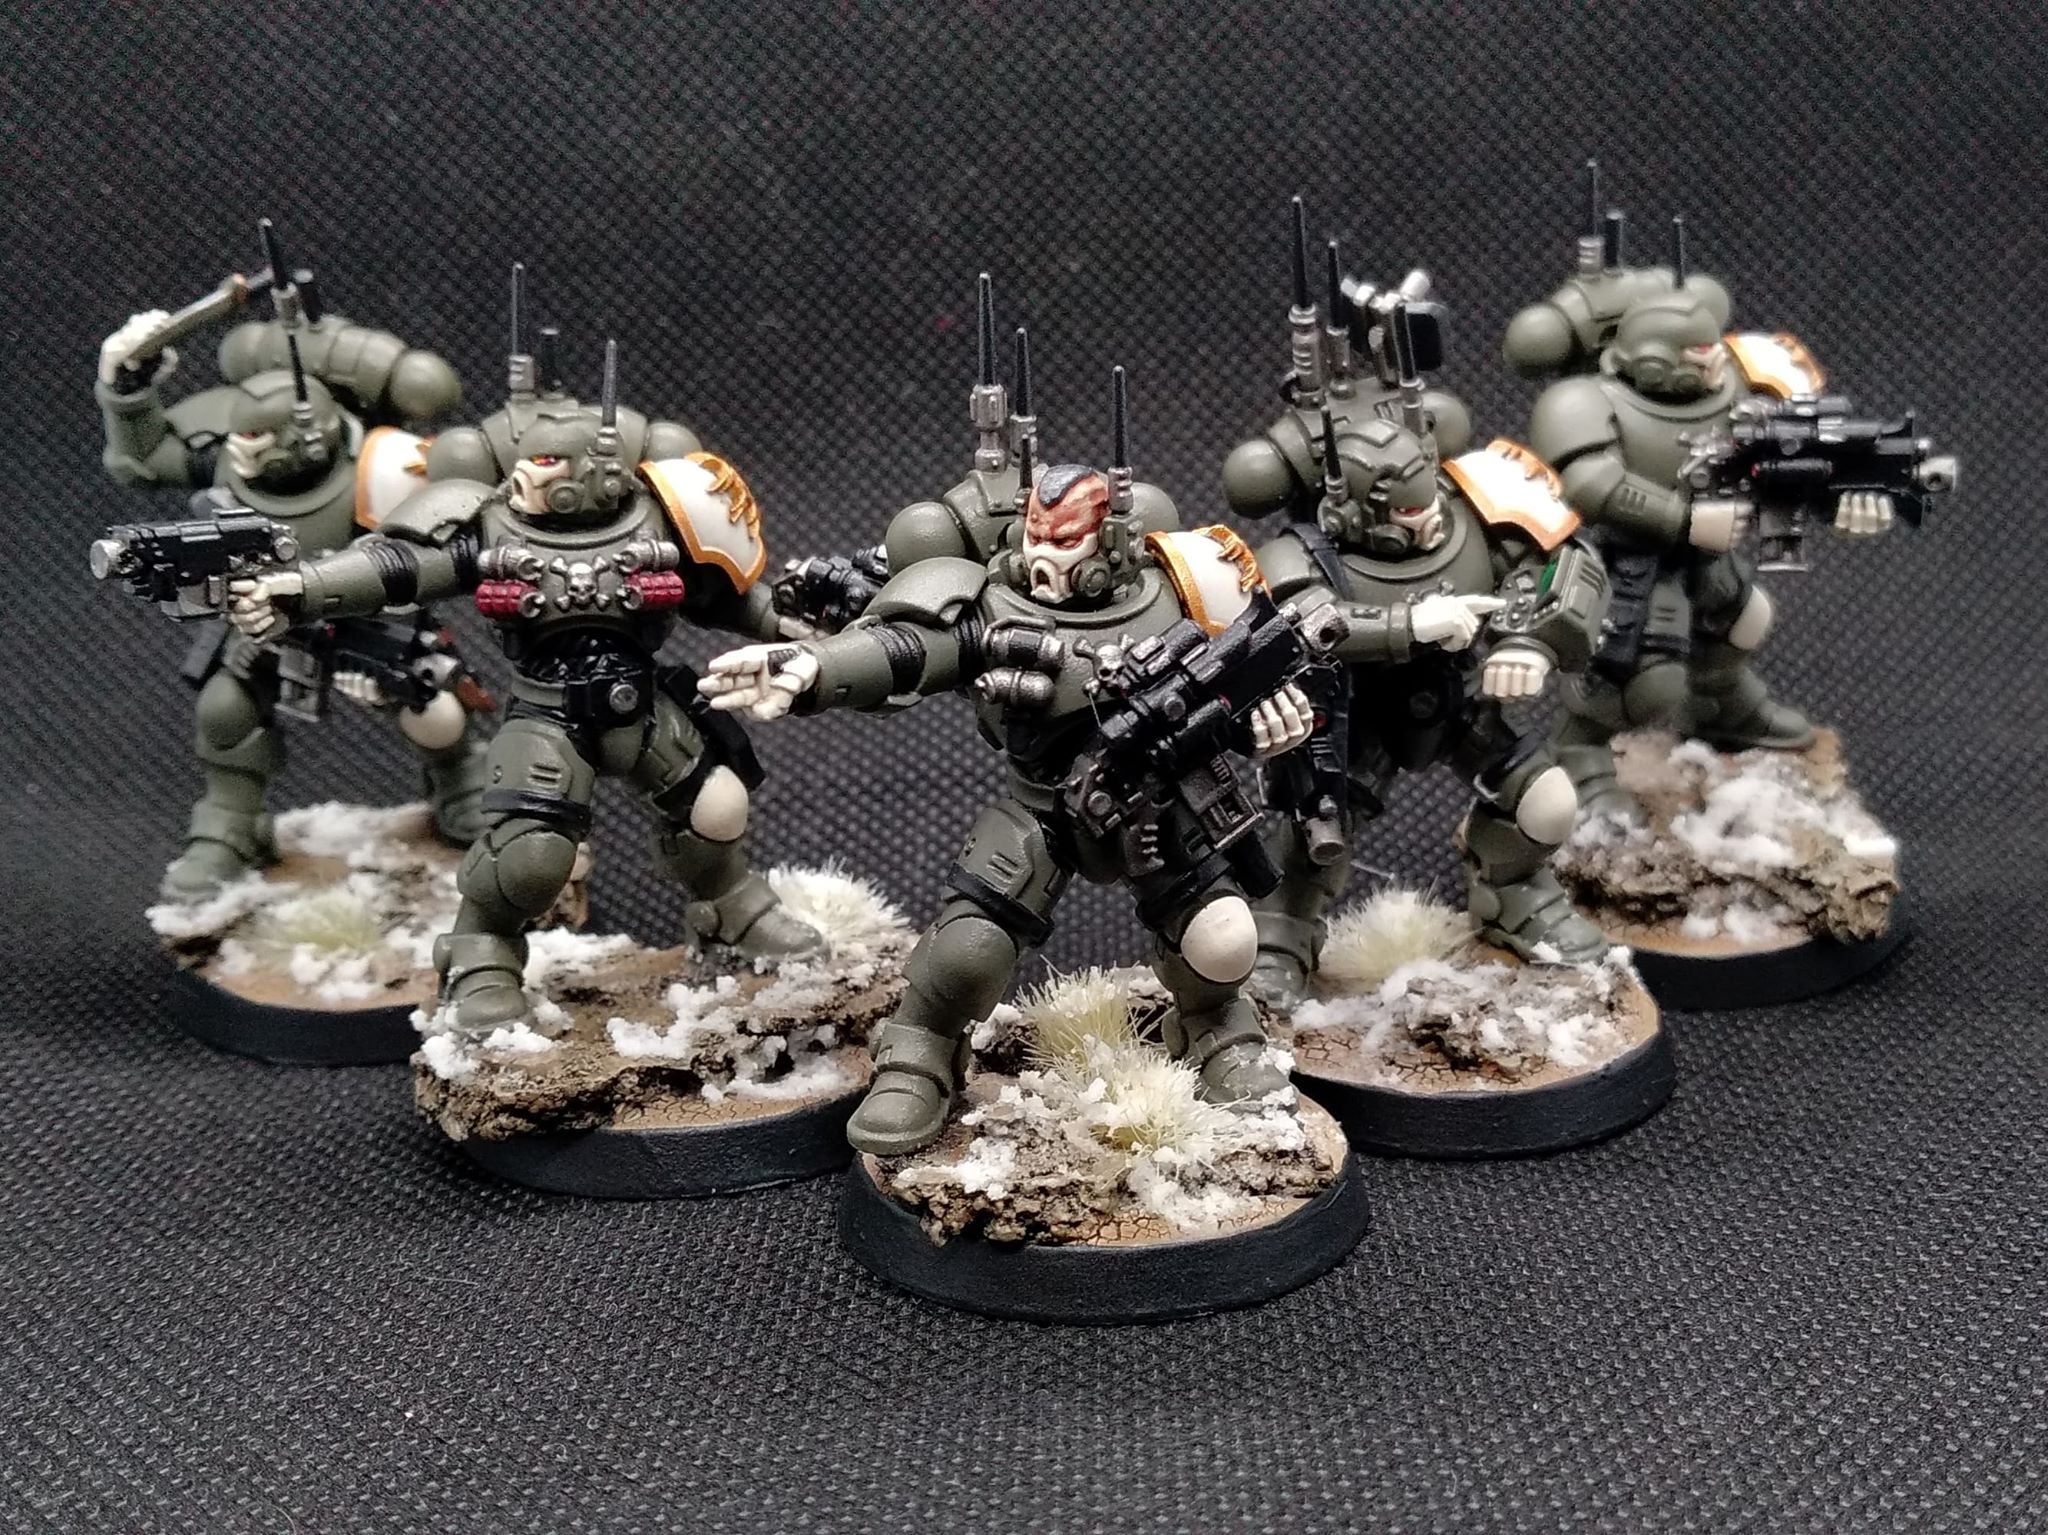


Now, onto the next unit.
Lessons Learnt
So after my first failure i had to have a little think, and here is what I have come up with.

So here is a quick step by step guide.
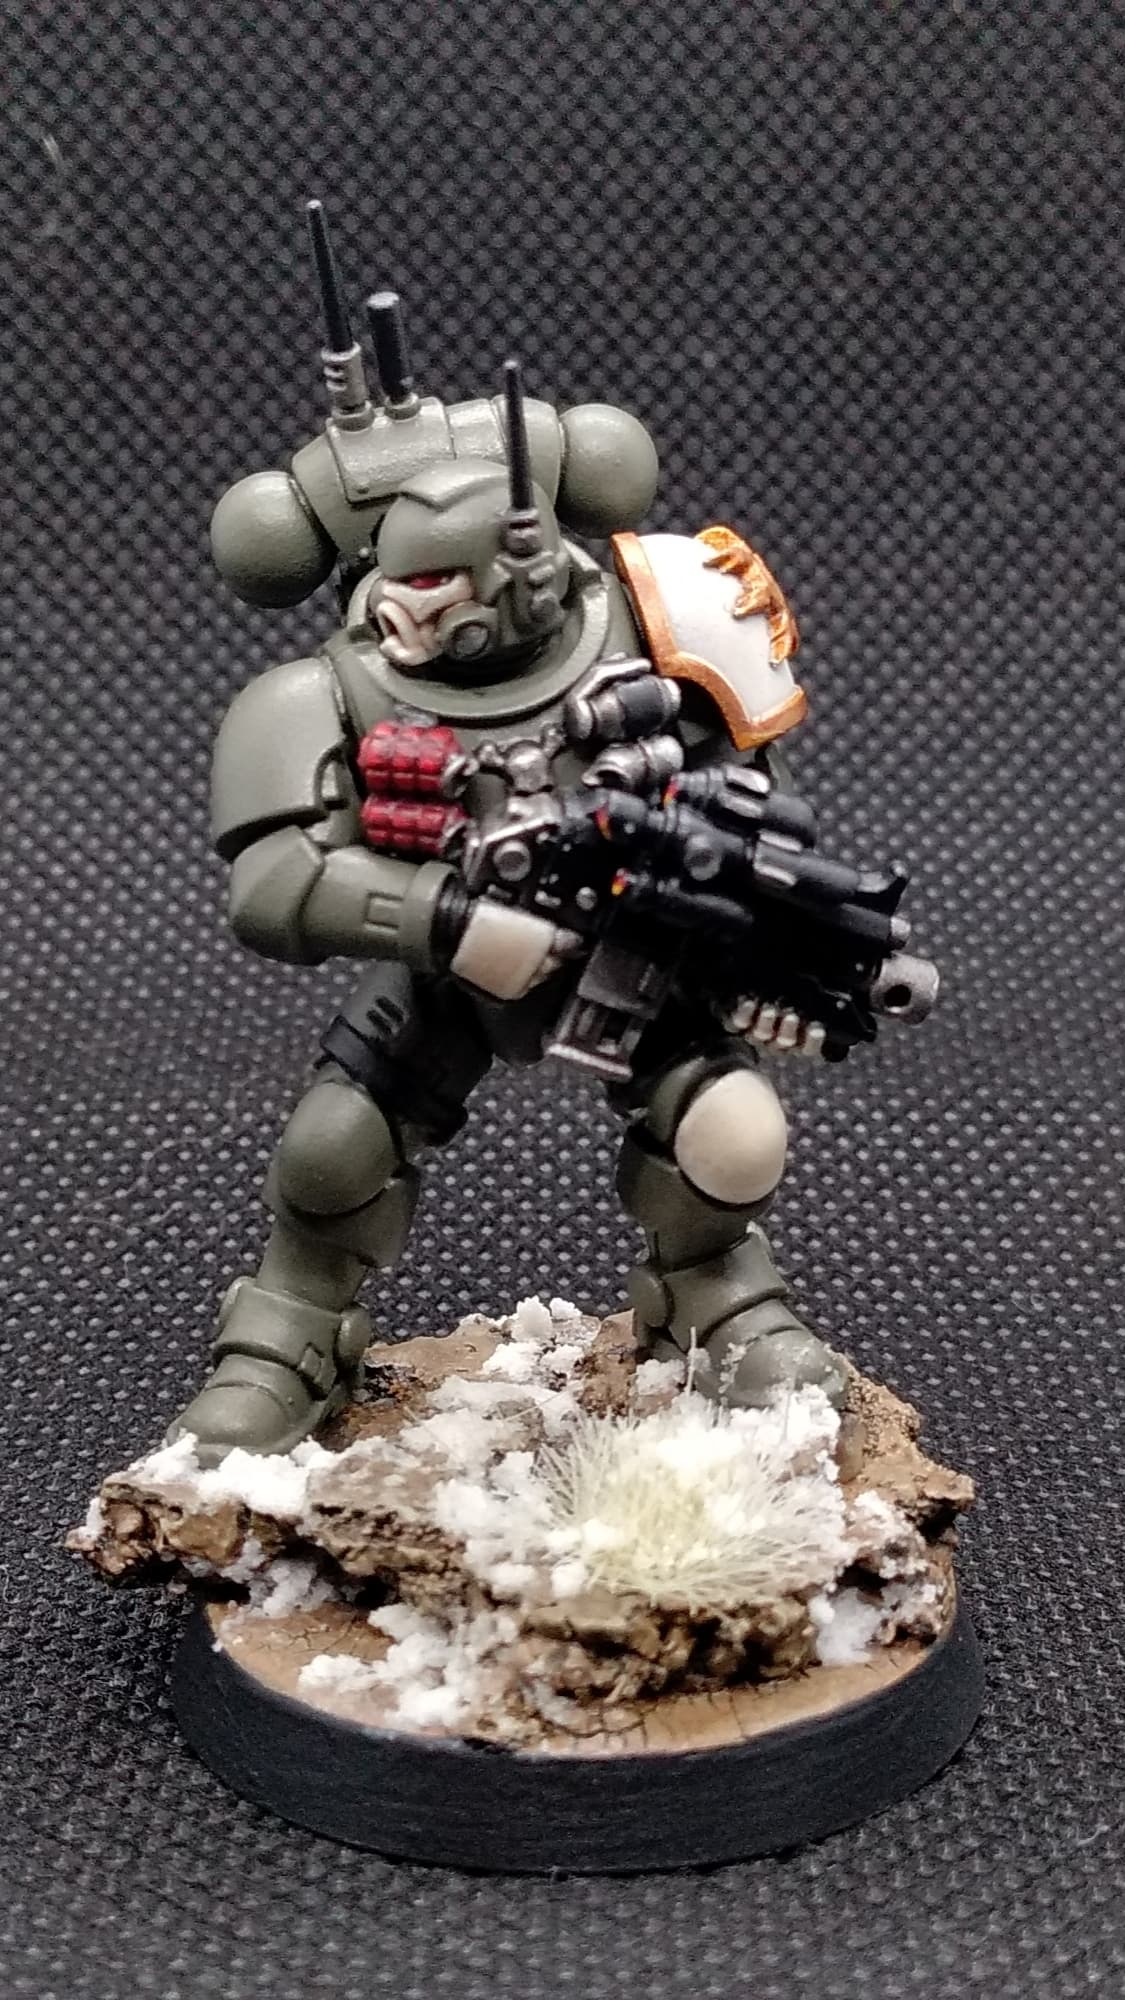
1- Prime Grey. This is just to make the next step easier
2- Airbrush army painter brainmatter beige. the grey primer was so that the beige will stick to the model. I’ve applied this without much worry about where it’s going as i’m going to mask off what i want to stay beige.
3-Greenstuff worlds liquid mask. I applied this very carefully using a cheap fine detail brush to just he area’s i wanted to keep beige.
4- Colour spray. Here i used The Plastic soldier companies German uniform fieldgrey once the liquid mask had dried.
5- Remove masking.
6- Tidy up mask. This could be where you have accidentally masked the armour you wanted in the green, Vallejo 70.830 german fieldgrey is an exact match for the spray.
7- Armour wash. here i washed the green armour with a thinned down nuln oil using lahmian medium. using the medium helps the was flow more evenly and not pool when it dries. But it’s been thinned down quite a lot so that it doesn’t darken down the model too much.
8- Block painting. Now i just paint all the basic block colours in, flat black for the armour joints, straps, pouches, gun casing and antenna’s.
Leadbelcher for various parts of the gun, scopes, antenna’s, backpacks, some grenades.
Khorne red for the the other grenades, eye lenses and scopes sights.
9- nuln oil wash applied all of the block colours applied above.
10- highlights. Red grenades were highlighted with evil sunz scarlet.
lens effects were created using Khorne red, evil sunz scarlet fire dragon bright, flash gitz yellow and white.
Silver was highlighted with stormhost silver.
11- washing the beige. so with the beige i made a wash mix of 2 parts agrax and 3 parts lahmian medium, so it’s not too strong and just enough to add a little shade to the recesses.
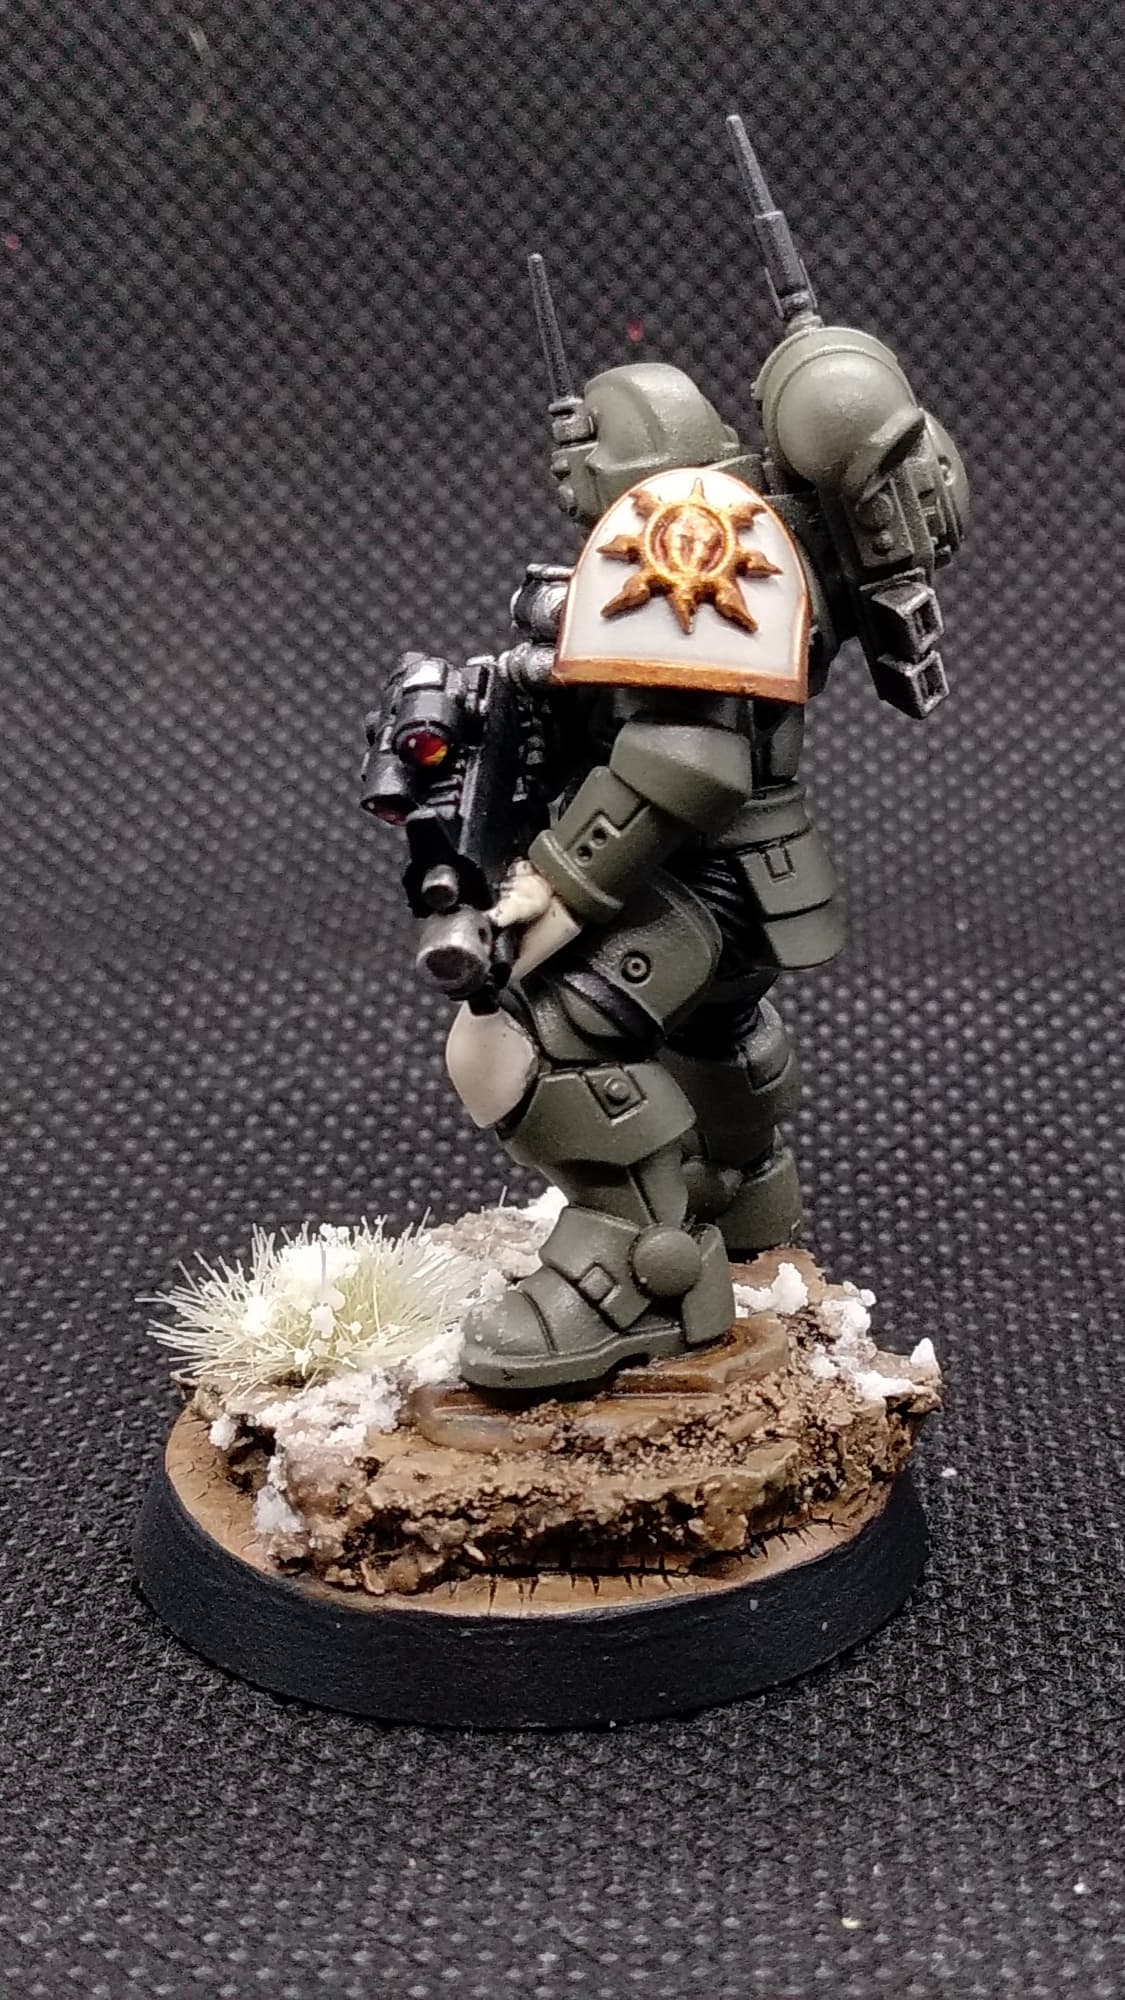
12- shoulder pad trim and symbol. base with retributor gold, wash with reikland fleshshade and little highlight of retributor gold again and then a tiny bit of silver followed by a slight wash of agrax earthshade.
13- Base. The base was painted with a base colour Rhinox hide and i then applied greenstuff worlds crackle paint, once that’s dried i then layered it with XV-88, then zandri dust, followed by a dry brush of ushabti bone. Then give it a wash of agrax followed by another drybrush of ushabti bone. then slap on a tuft of static grass and some citadel texture paint valhallan blizzard, paint eh rim black and then you’re just left with one step.
14- Matt varnish and you’re done.
First the failure
So i wanted to try and match my original test model by getting the block colours done and using army painter quickshade dip, but that wasn’t to be. everything came out too blotchy and uneven as you’ll see below. i tried using a liquid mask to make sure that the dip didn’t interfere with the off whites but it made too much of a mess to make it workable. so before i even used an anti-shine matt varnish it got stripped. So on to the next idea.
I’ll use some of the step by step photo’s i took for this to show how i am doing my next variant.
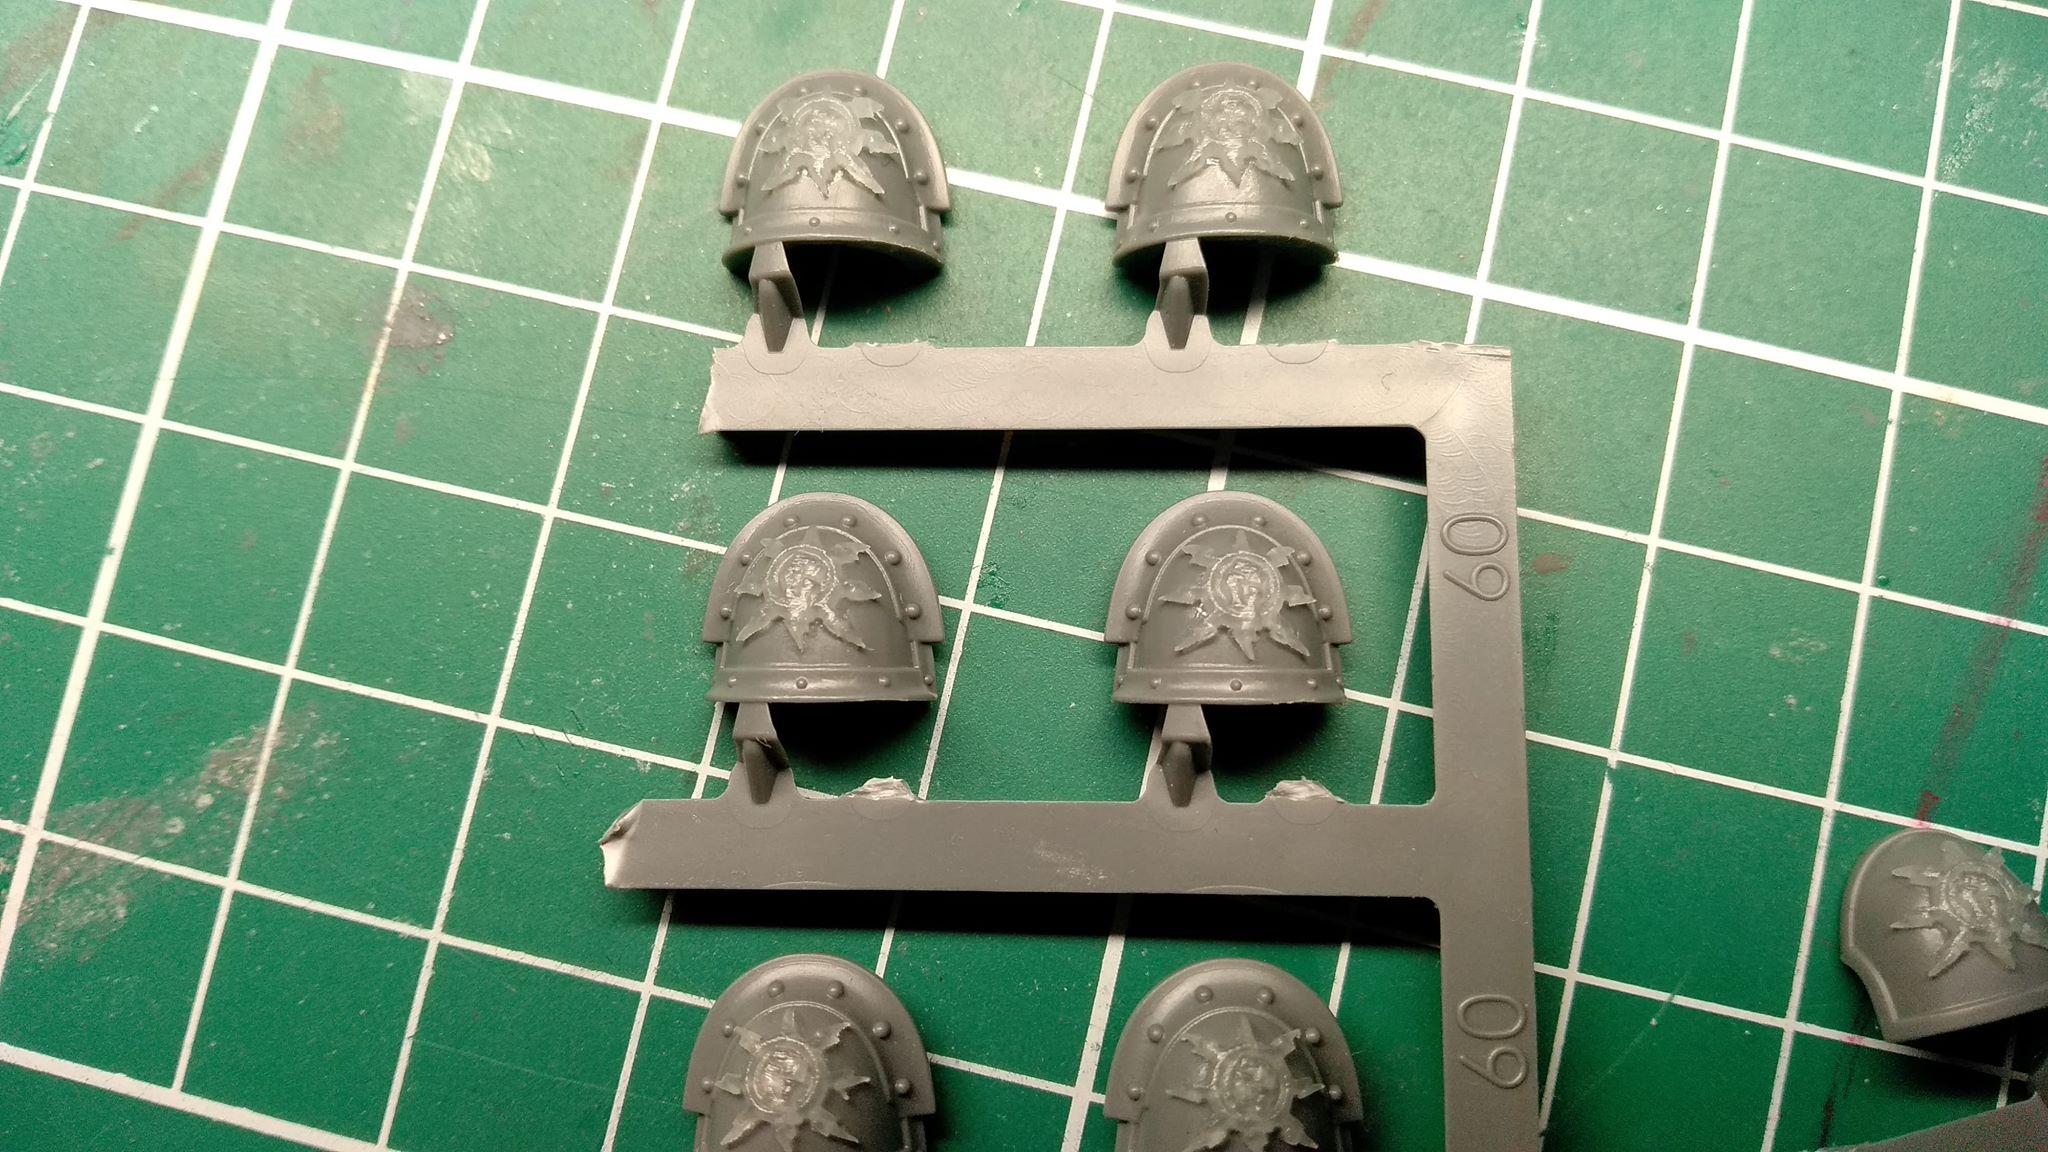
Shoulder pads
should pad chapter symbols arrived from pop goes the monkey. they look good so far but until there is any paint on then they are really hard to see.

Reinforcements Inbound
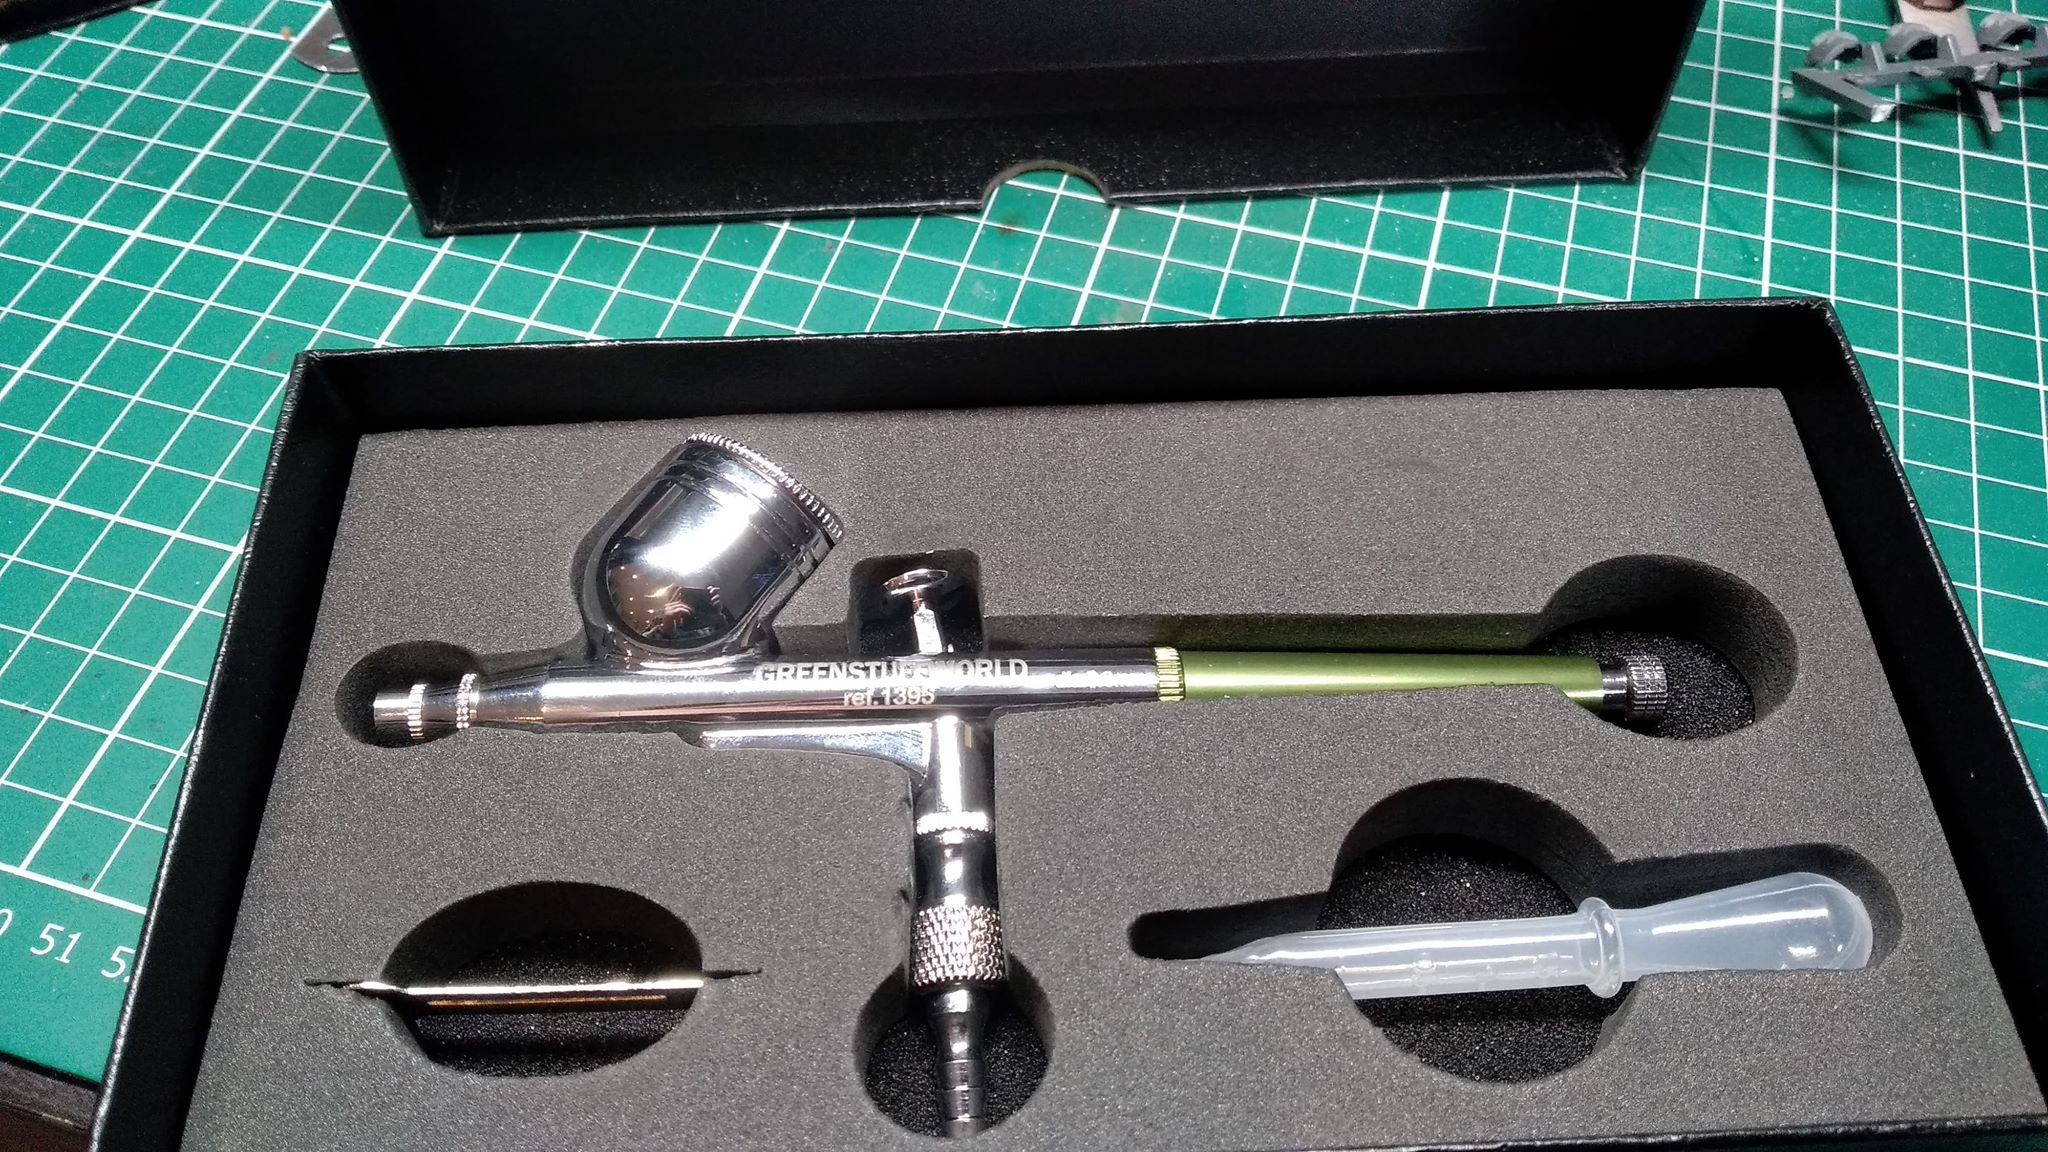
Firstly my new airbrush world has just arrived so this means i can finally make a start on painting! very excited indeed!
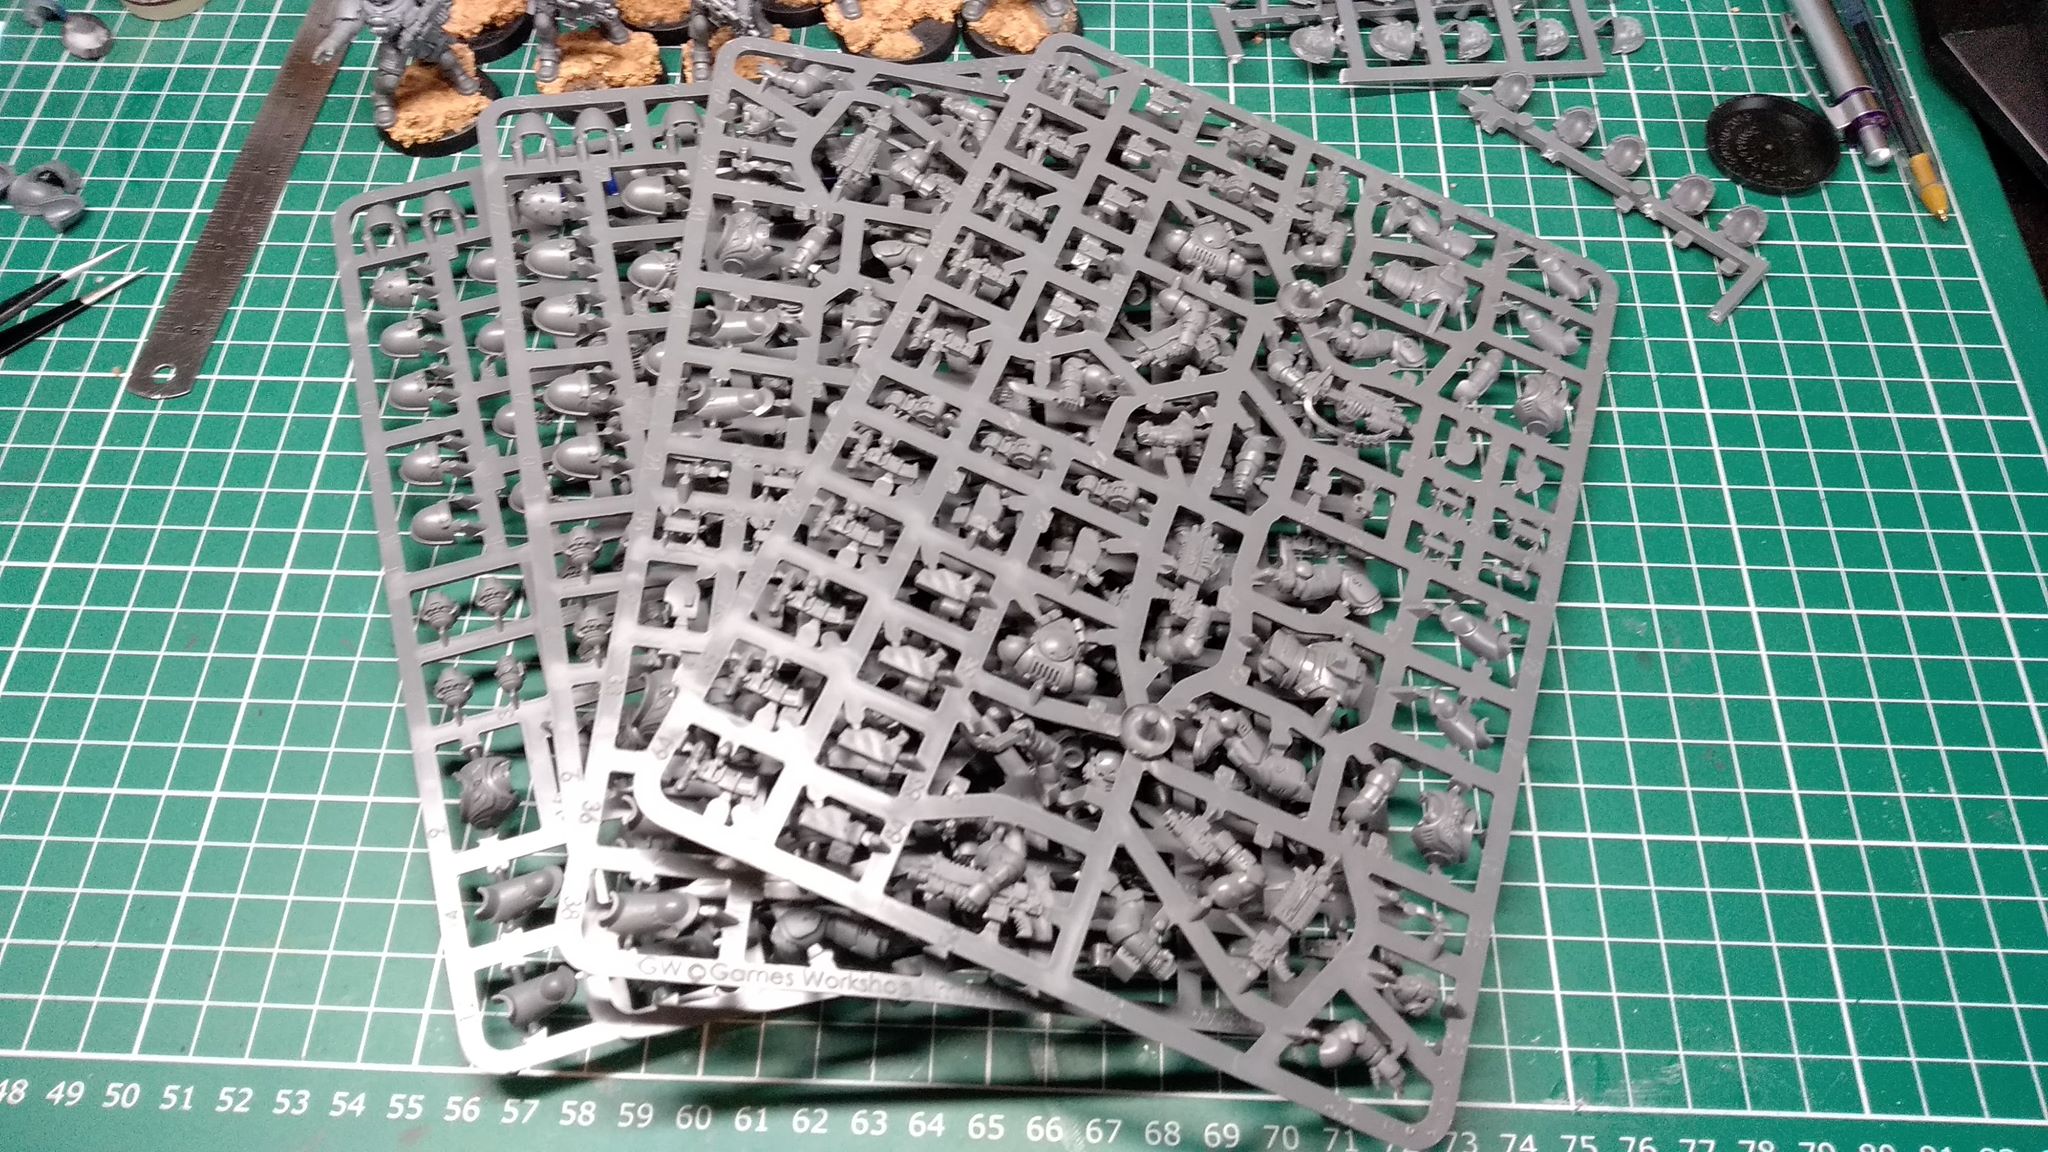
So reinforcements! I managed to pick up 10 unbuilt Intercessor on Ebay for £18, but they will have to wait, i am waiting on some parts to arrive to make these guys look different but cool. I don’t want to spoil the surprise (i hope it works as good as it did on a test mini i have done)
I also decided to buy the start collecting Vanguard box from the OnTableTop store. I’ve been eyeing it up for a while. it’s exactly what i need. I have been wanting another unit of infiltrators and a unit of those eliminators for a while but it works out a hell of a lot cheaper to buy the start collect set than to buy them separate, plus you get some extra models, so it was a no brainier really. The only element of that box set i’m not 100% sold on are the Suppressors. it’s the lack of an actual jet pack that i don’t like, they look a bit stupid, so i might have to have a look around the internet for something more fitting.


![Play WW2 Commando Operations With Butcher & Bolt [Updated]](https://images.beastsofwar.com/2026/03/relaunch-600-338.jpg)


