


![NO Weekender Or Cult Of Games XLBS This Weekend [Updated]](https://images.beastsofwar.com/2026/03/No_Weekender_and_XLBS_this_Weekend-225-127.jpg)


Spring Cleaning Miniature Gardening


Recommendations: 323
About the Project
I love making and using terrain that is themed to my armies. Some time ago, okay years ago, I collected the pieces to make forest sections for my Undead terrain collection though they would work for a number of tables. Then other things became priorities and the project was set aside. Spring Cleaning Challenge you say? Now I have to finish them! Okay, that went quickly so I'm expanding this to all kinds of terrain with trees and foliage. Got lots of flowers to use.
Related Genre: Fantasy
Related Contest: Spring Clean Hobby Challenge (Old)
This Project is Completed
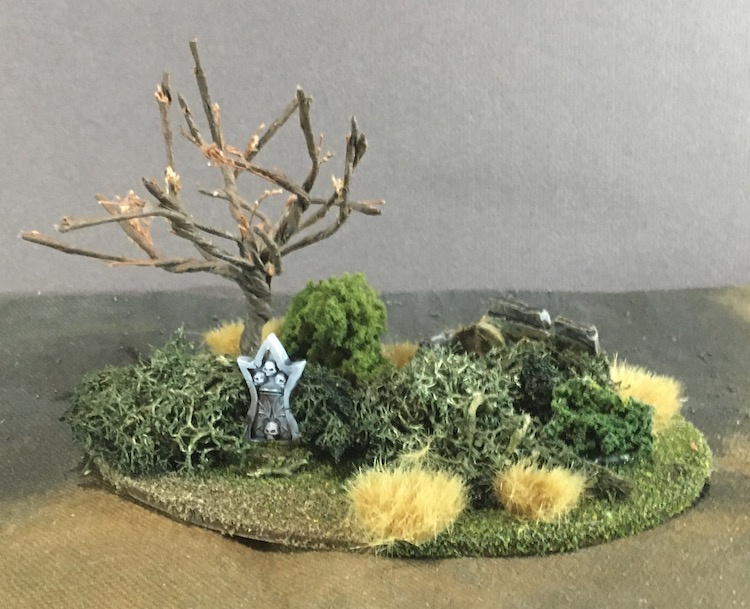
The parts
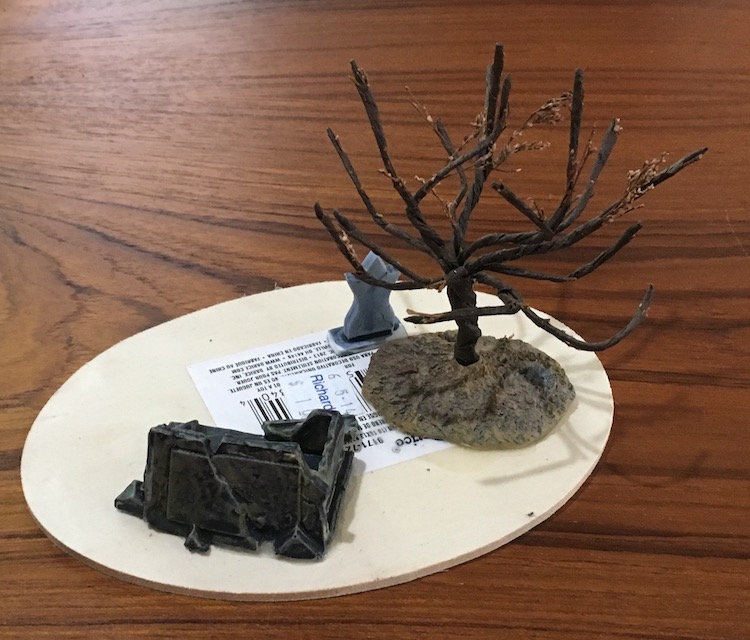
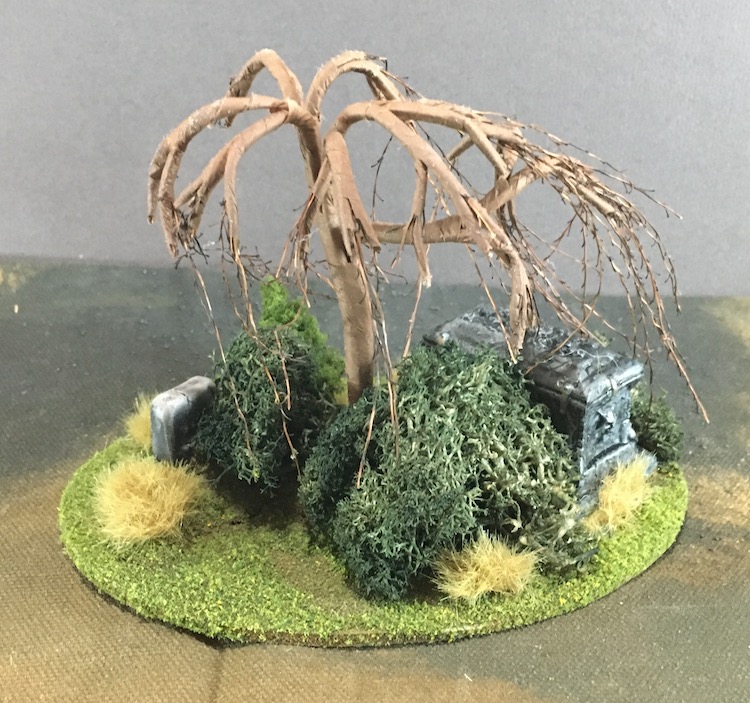
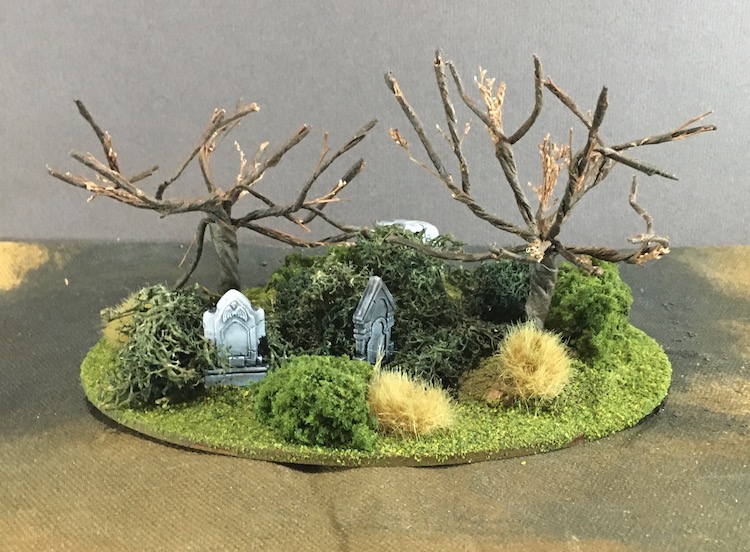
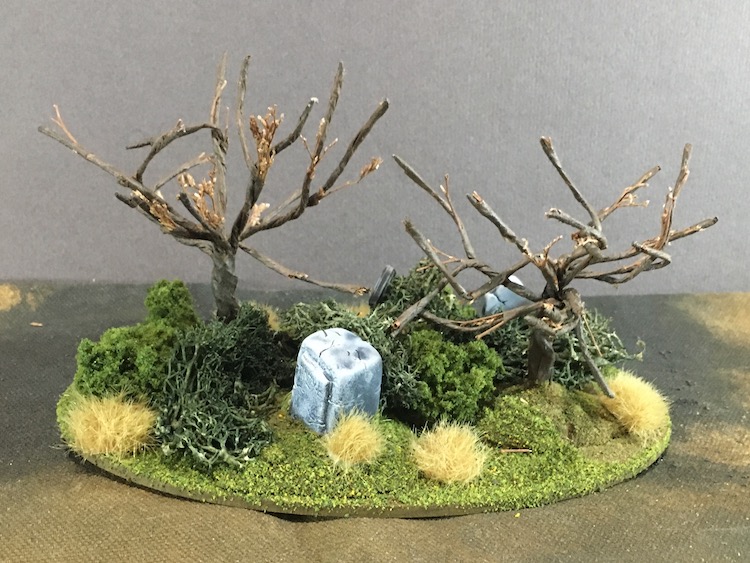
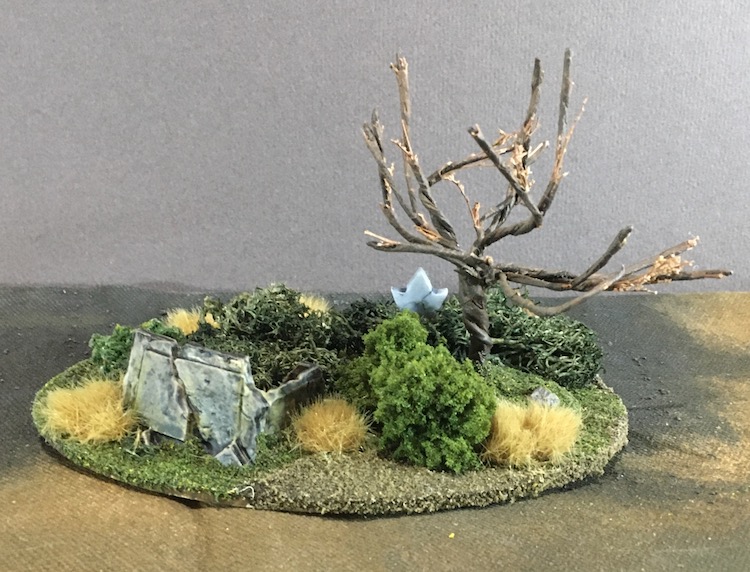
When my local craft store went out of business a few years ago, I picked up a bunch of the holiday trees they had on mark down as well as stacks of wooden circles and ovals that are always useful. I’d had them about a year when inspiration struck that they would look right at home in a cemetery. I have quite the collection of tiny grave stones and even more had showed up with one of the Bones Kickstart rewards sets. I pulled out ones that looked good with the trees, picked out bases, and that’s where it all stopped.
Fast forward a few years, California is on lock down, the OTT Spring Cleaning Challenge comes up and here is where it all starts up again.
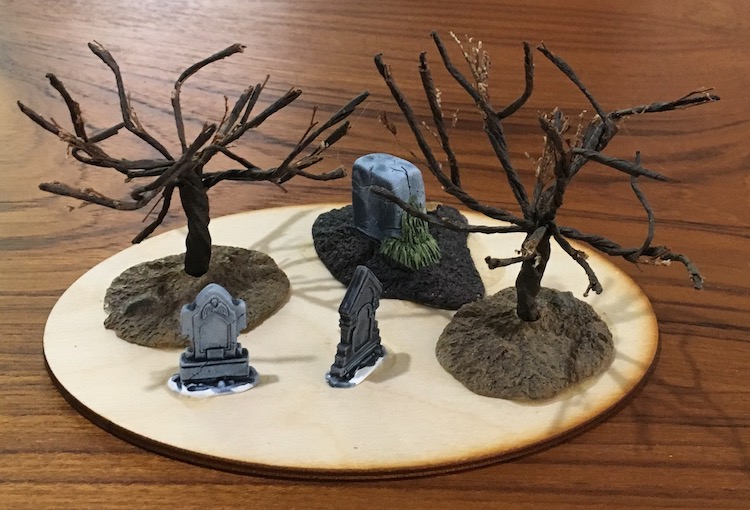
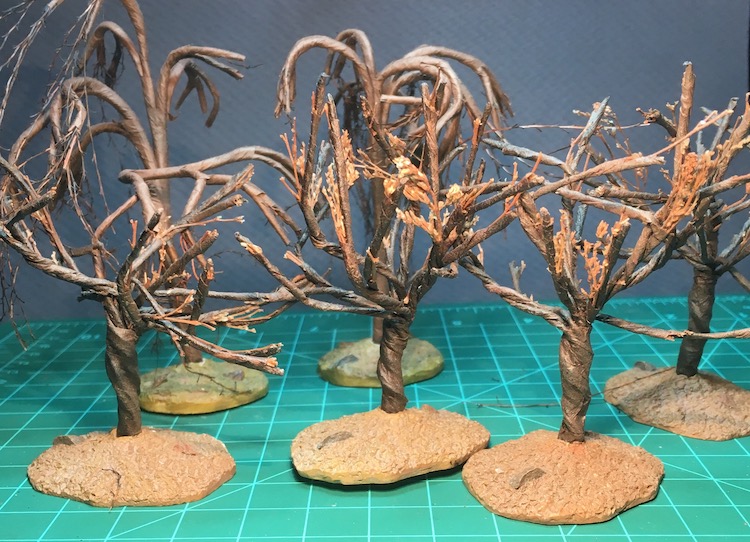 Here are the trees awaiting a graveyard.
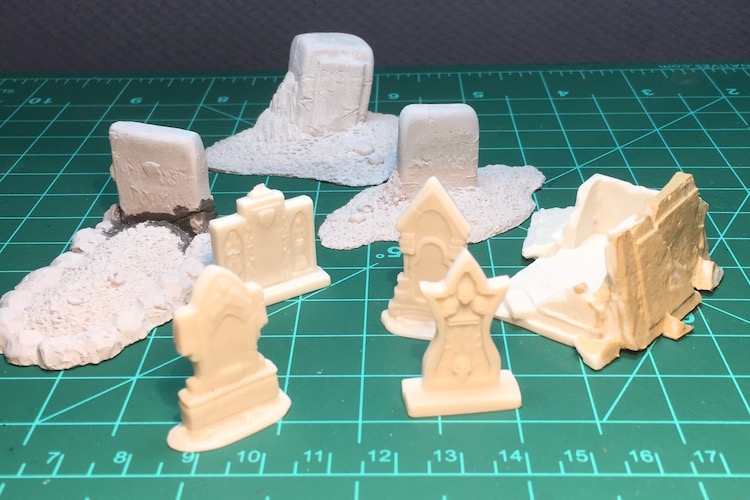 While these headstones are looking forward to making friends with them.
Assembling the parts
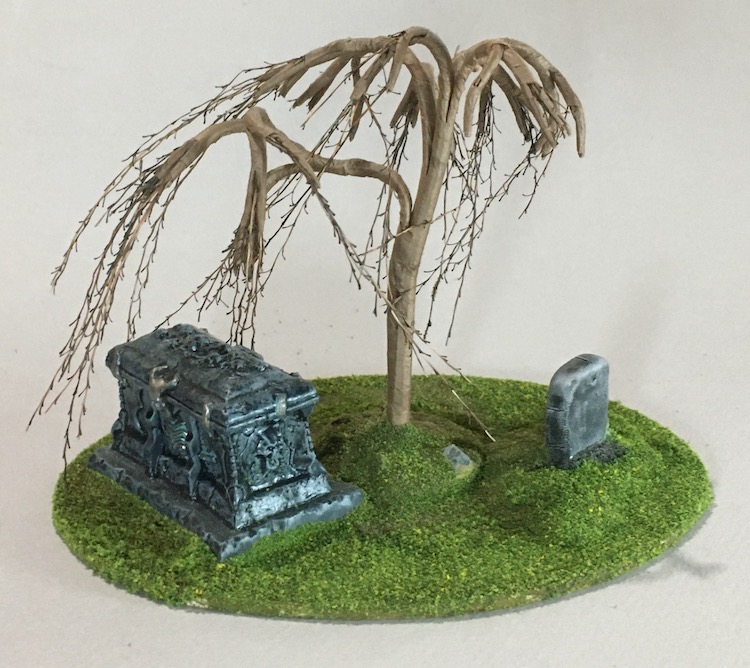
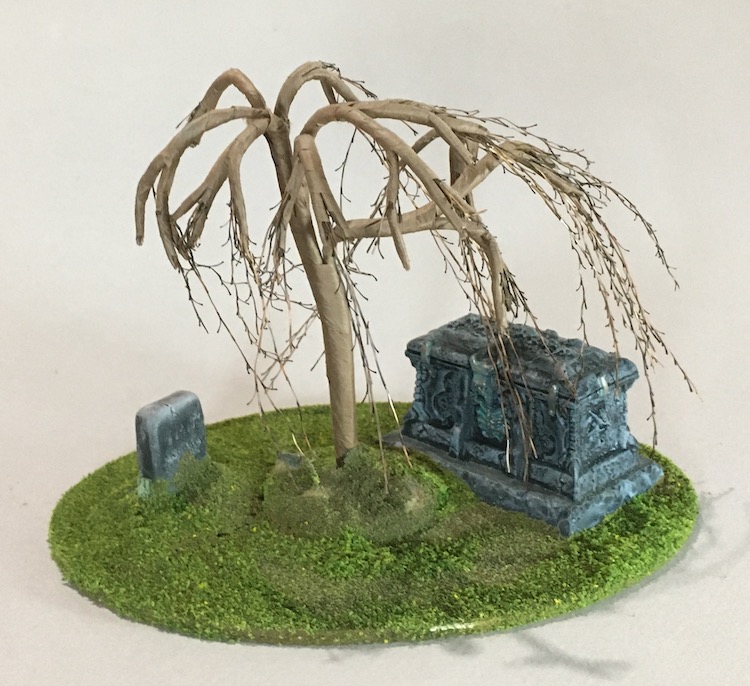
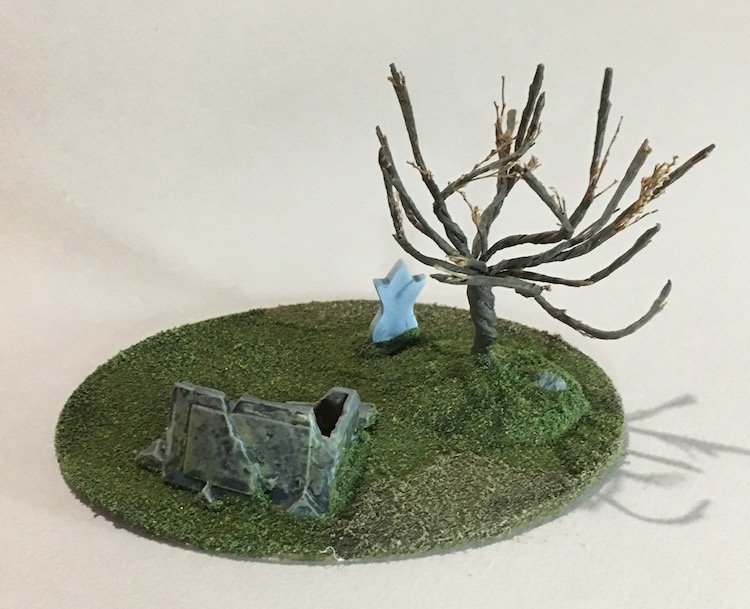
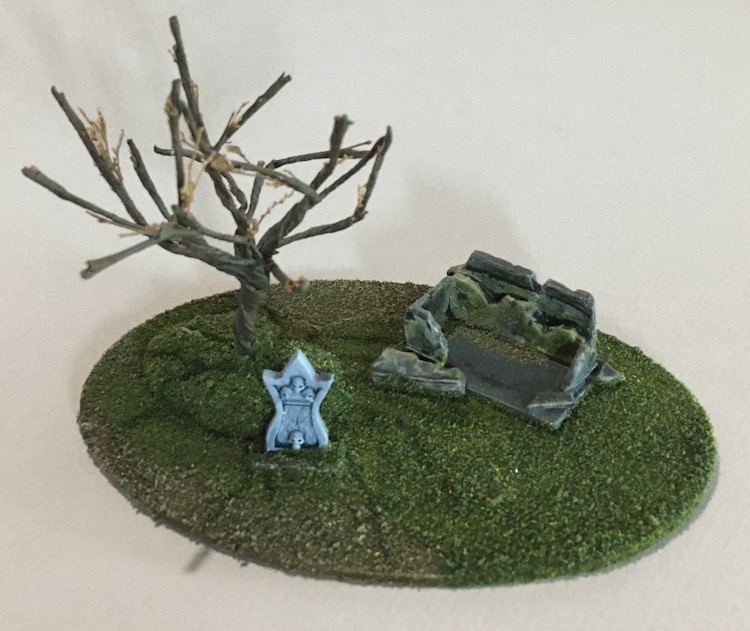
These things came together quickly after I painted up the headstones and they are already looking pretty good. I finished all four stands and thought,” That was easy. Why didn’t I get more trees?” Of course now comes the basing and flocking followed by undergrowth and overgrowth but they are glued together finally!
Flocking Applied
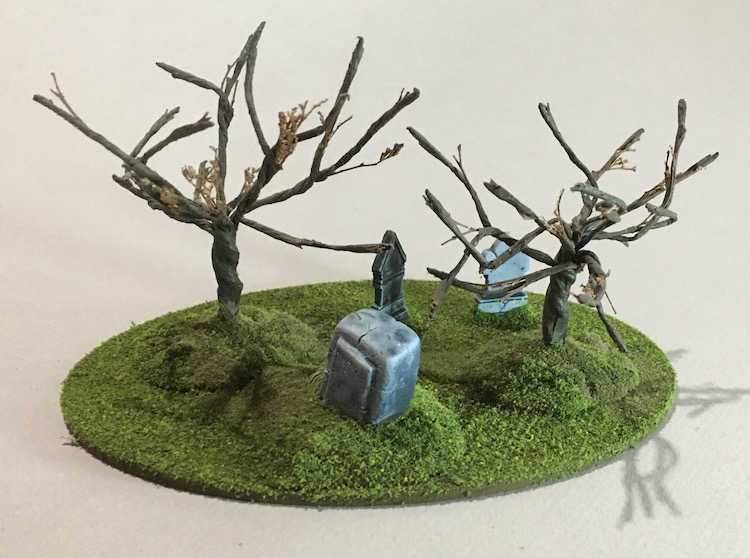
Using two different mixes of flock, one browns one greens, I flocked up the bases of my trees. I noticed a couple of the labels are barely visible through the paint and flock so will make sure they’re removed next time. Ah next time, that moment in the future when I will get things 100% correct. Too bad it’s in the future and all I have to work with is “this time”. They’re actually not that visible and as I plan to add more plants they should disappear by the end. Yes, I am going to add more plant life to the bases as I want these to look more like difficult terrain and less like a well manicured park.
 Not happy with how the light grey background bleached some of the color out.
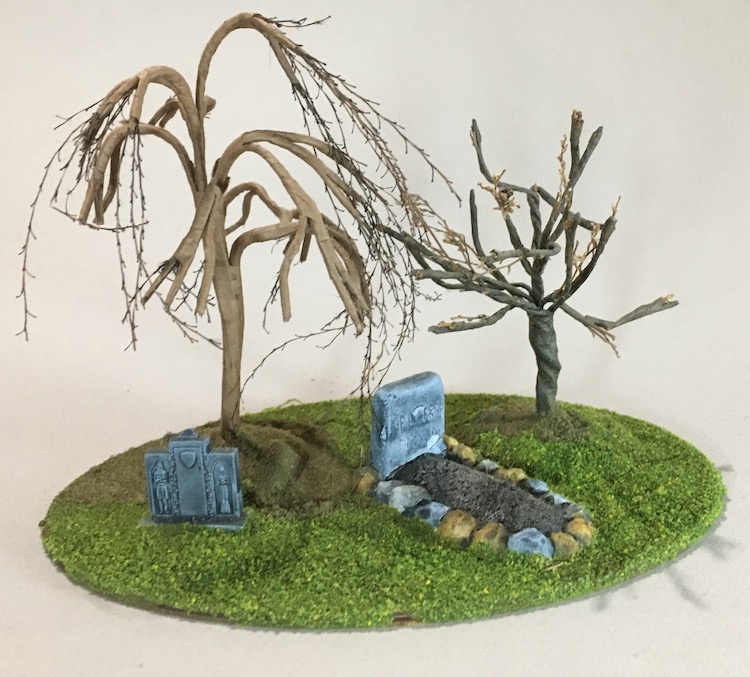
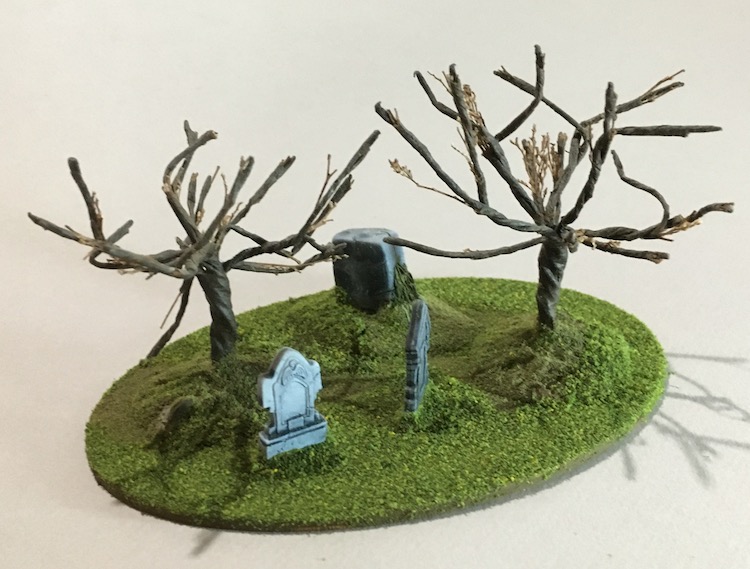
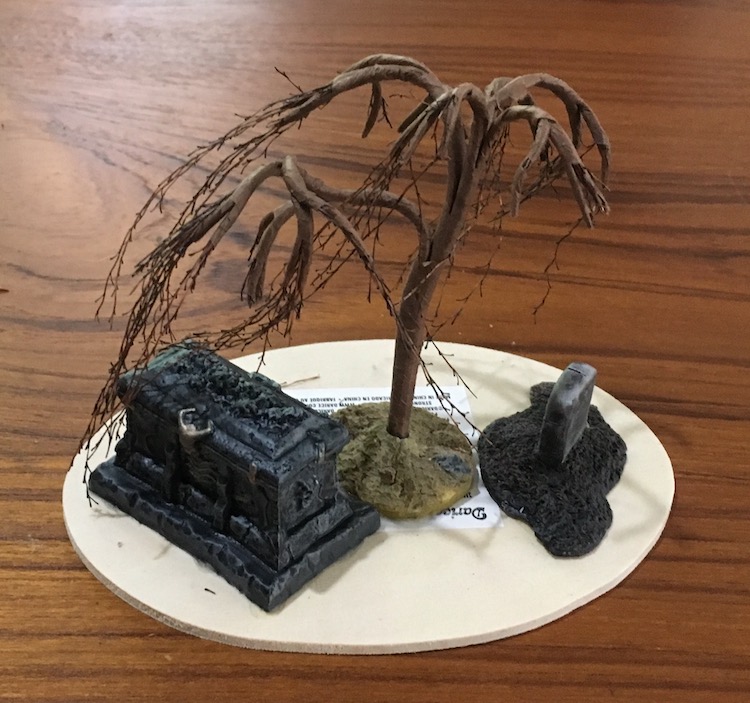
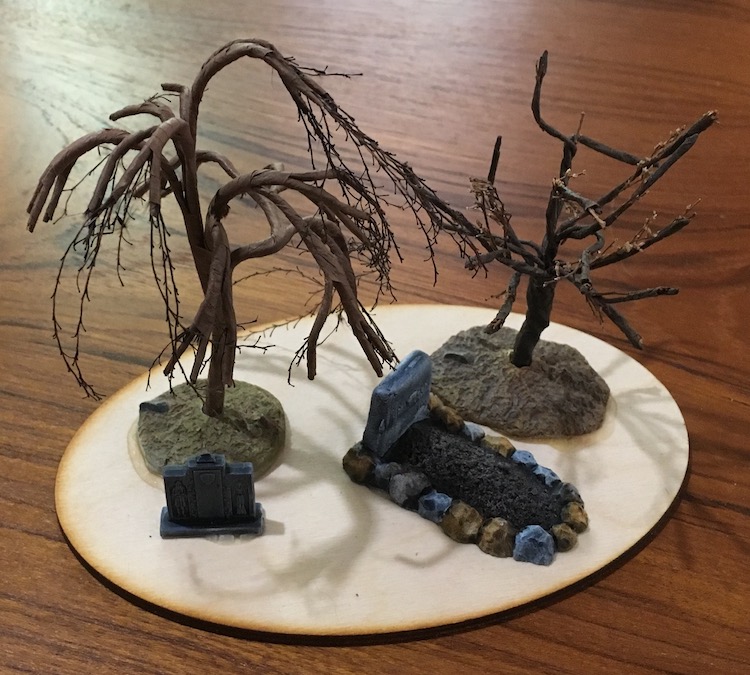
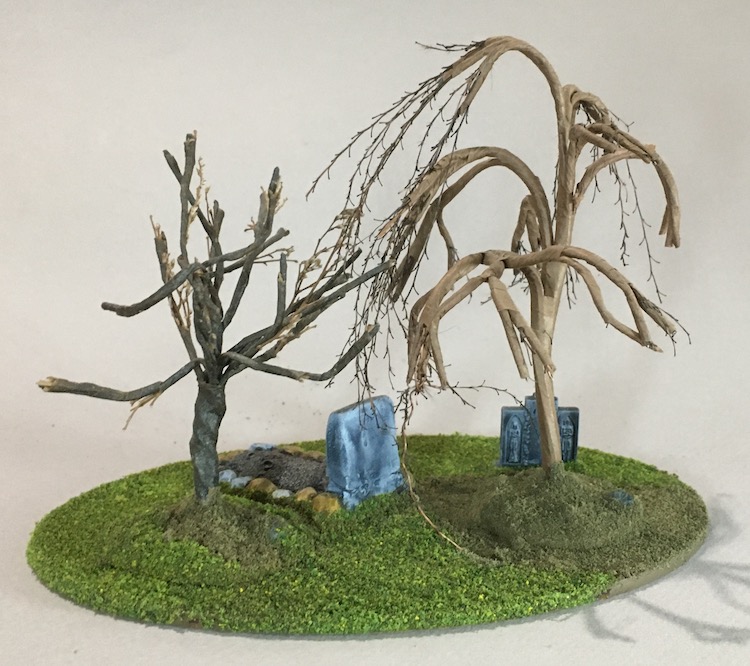
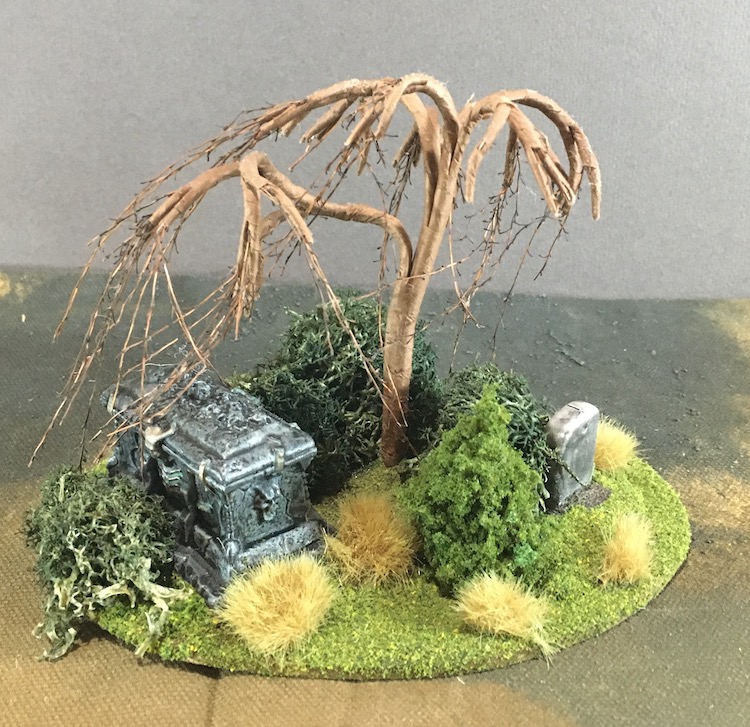
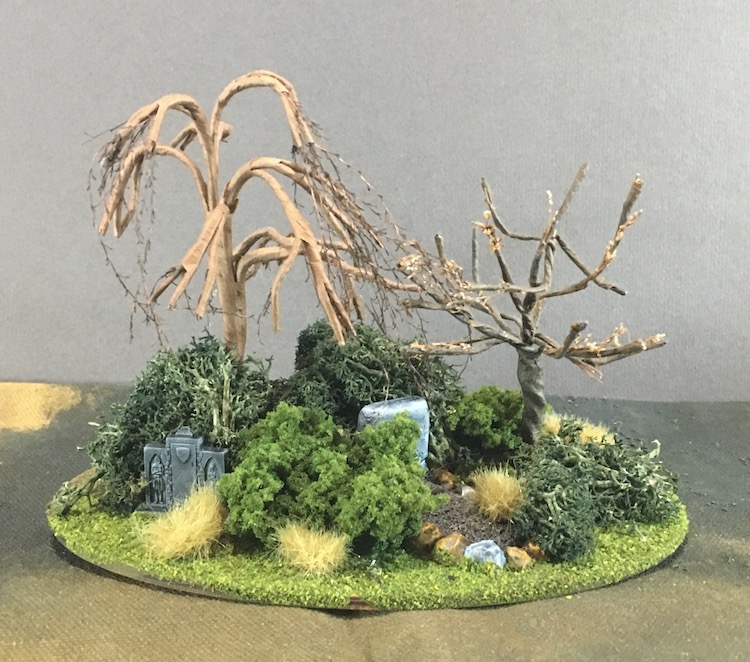
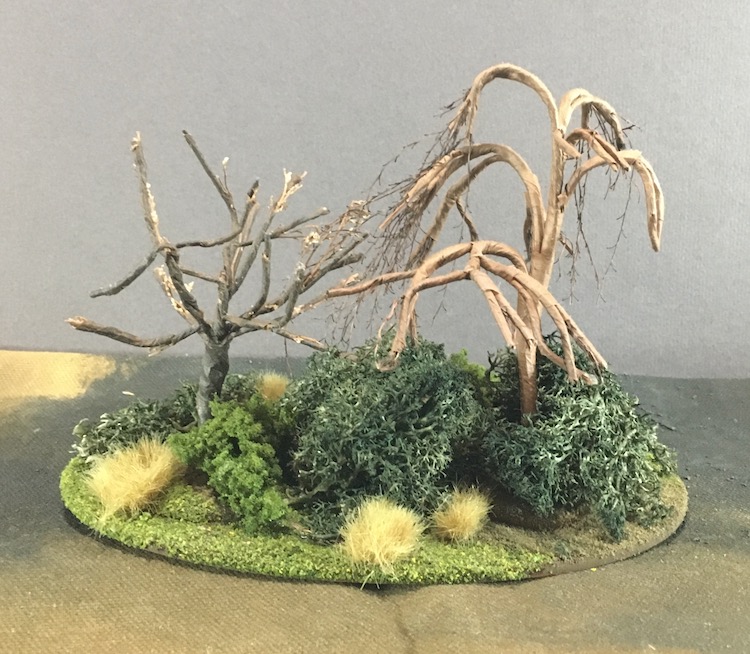
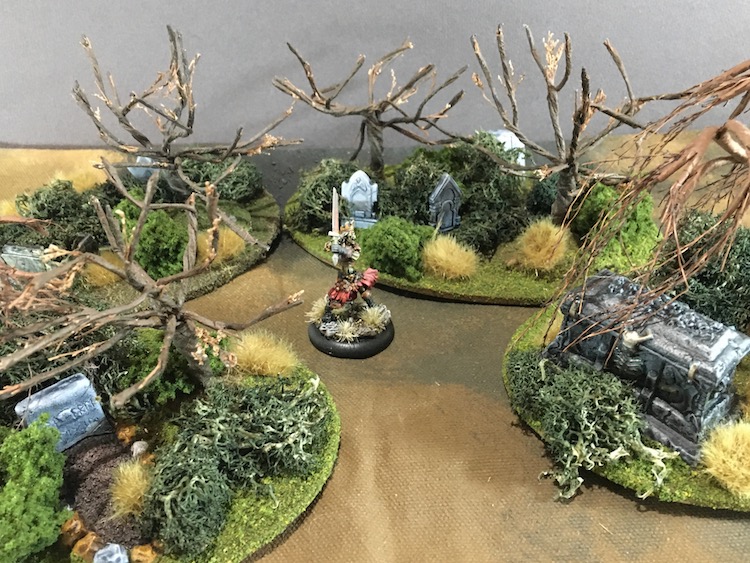
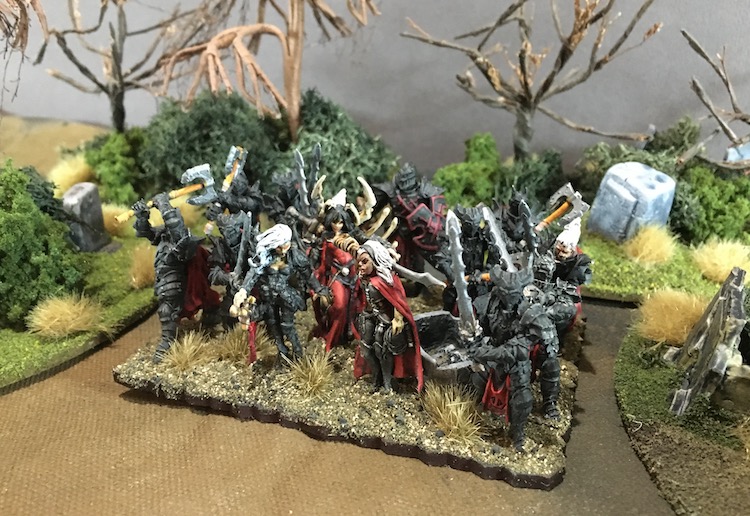
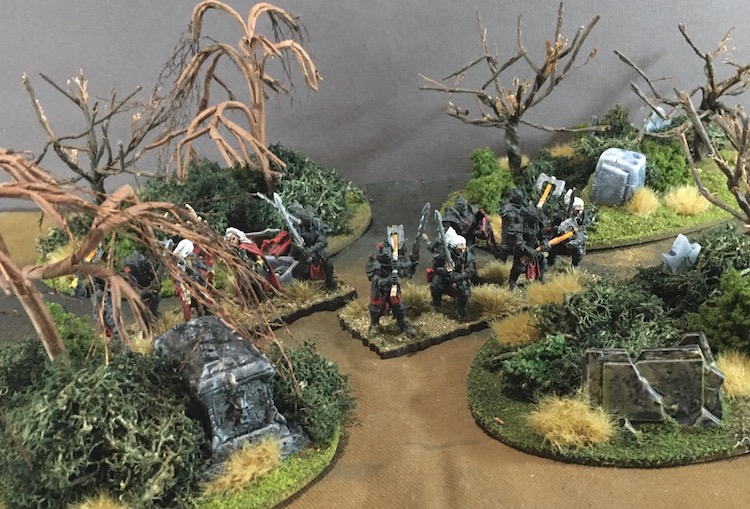
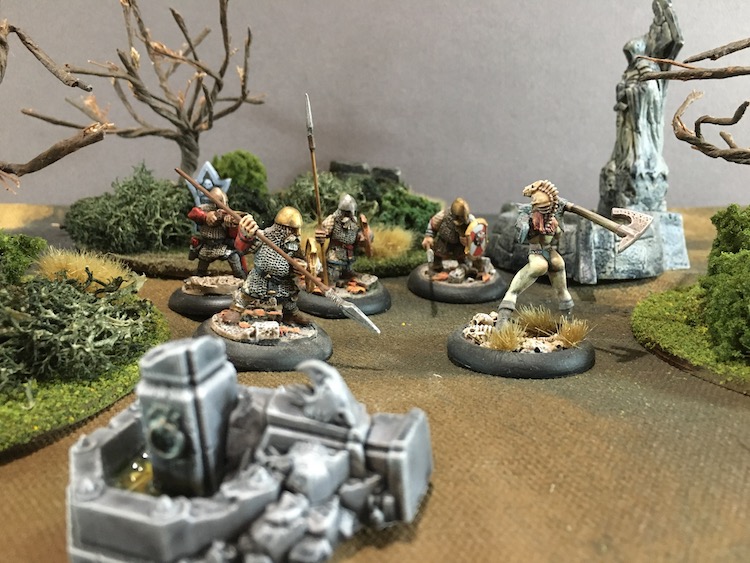
Overgrown Graveyard Finished
I have now finished landscaping the graveyard. I think they look suitably overgrown and a little mysterious. I also think they will look great with a wrought iron fence around them. I used fantasy minis in the pictures but can see these pieces used in more than a few genre’ games. As a bonus, when I was looking for my collection of terrain materials I thought It might be in a medium sized cardboard box in the closet. While trying to ascertain how best to remove said box from the almost Tetris level of closet organization When I noticed it was sitting on a much larger, transparent plastic bin full of all my Woodland Scenics bags! It is almost like Christmas except now I have to figure out how to get an even bigger box out of there.
Expanding my Horizons
While digging through my closets and garage I came upon even more terrain materials. Not only did I find the box of Woodland Scenics materials I knew I had misplaced, then I found a box of trees I didn’t know I had, finally I found a bag of trees I have no memory of acquiring. I then realized I had a number of projects that had waiting for this very discovery. Seems like I am about to start landscaping in miniature as I have parts for Samurai forests, groves from alien worlds, and a great deal of Urban Landscaping for Wolsung. So I changed the Spring Cleaning Blog to reflect that.
Welcome to my Miniature Gardening Spring Clean Project Blog.
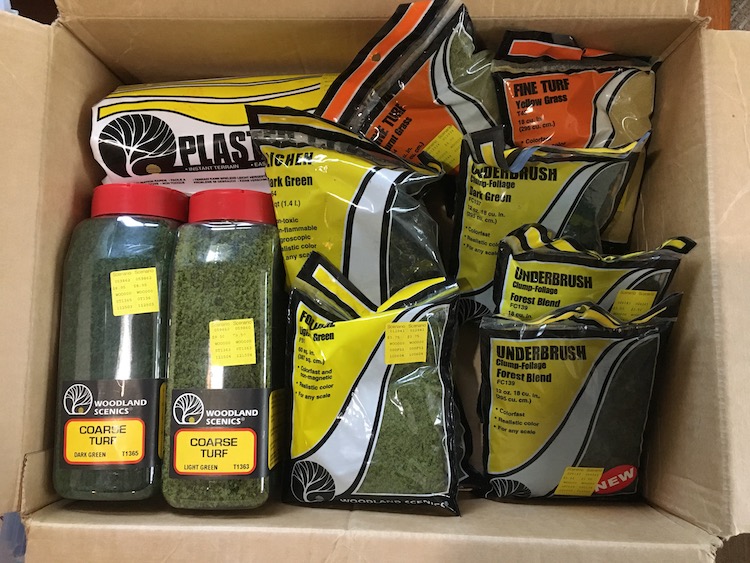 Not all the Woodland Scenics product I have but a big chunk that, until recently, had gone missing.
 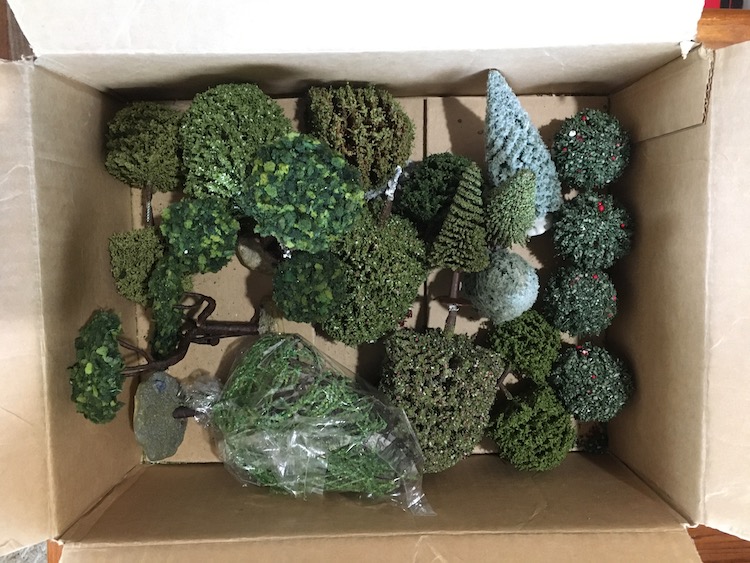 Hmmm, these look familiar but not sure where I got them.
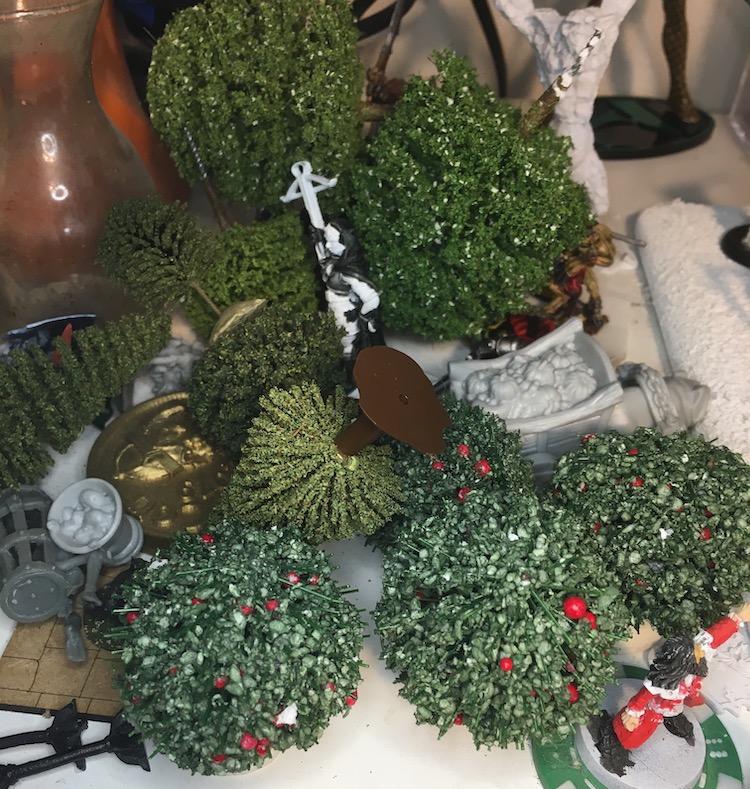 Even more similar trees but these I neither remember getting nor putting away.
Urban Gardening
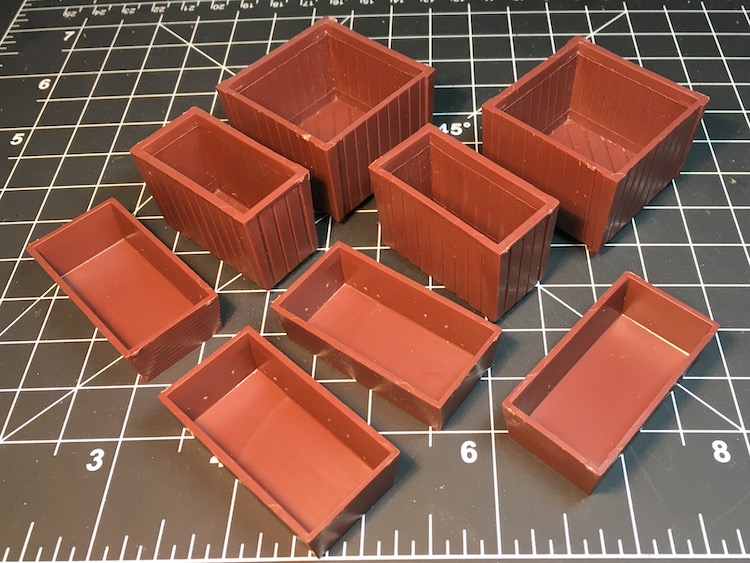
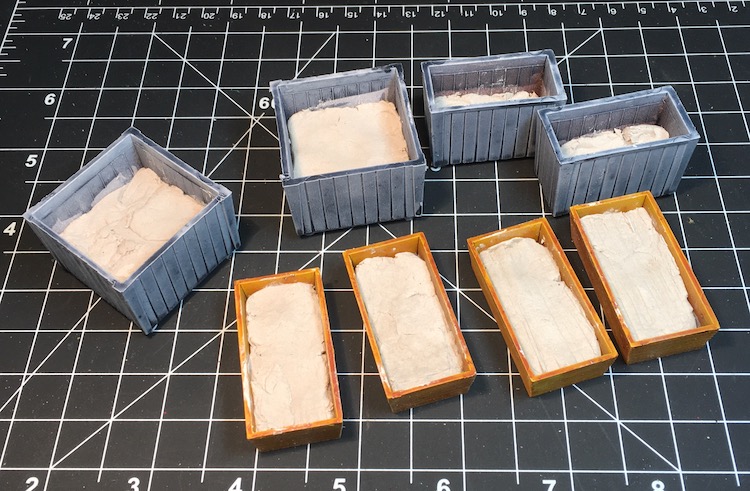
So not only have I discovered I own a fair collection of flocks and foliage but I have a good selection of flowers as well. Time to get planting. I have some crates I found recently that I think will make wonderful planters for my Wolsung neighborhood. I’ve gotten them to the painted stage and now they just need sealant before I go on as I hate rubbing off the paint I’ve already applied. The tall ones will look good with tall ornamental plants whereas the four short ones will be my first roof garden of flowers and vegetables. Well, I hope they will be as I am improvising much this as I go.
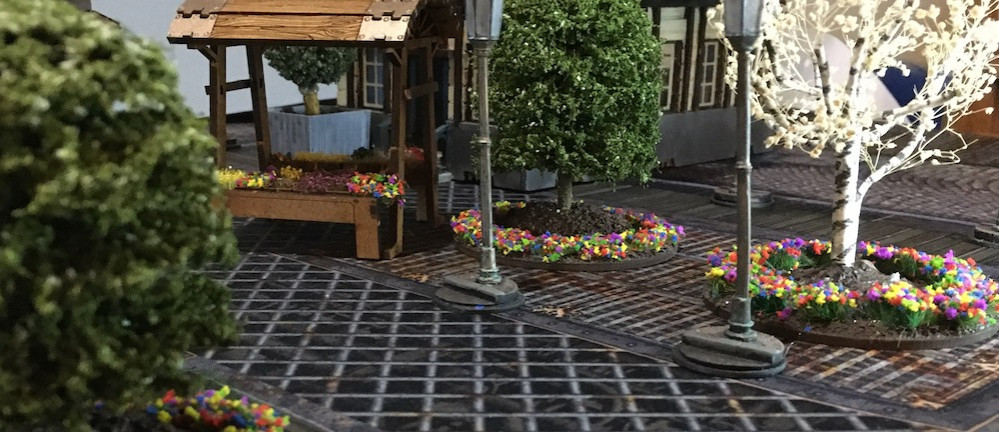
In addition, I have a number of wooden discs and ovals that will make nice planted beds, maybe a tree surrounded by flowers. That way I place them on the sidewalks as planted cutouts or in the middle of traffic circles. Once the Terrain Crate2 delivers some wrought iron benches I will have a small park area.
 Wish I knew where they're from so I could get more of them.
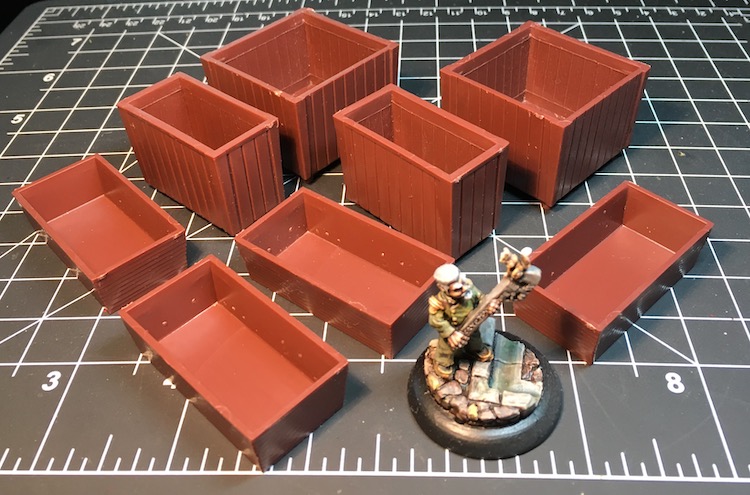 A steampunk dwarf next to them for scale... dwarf scale that is.
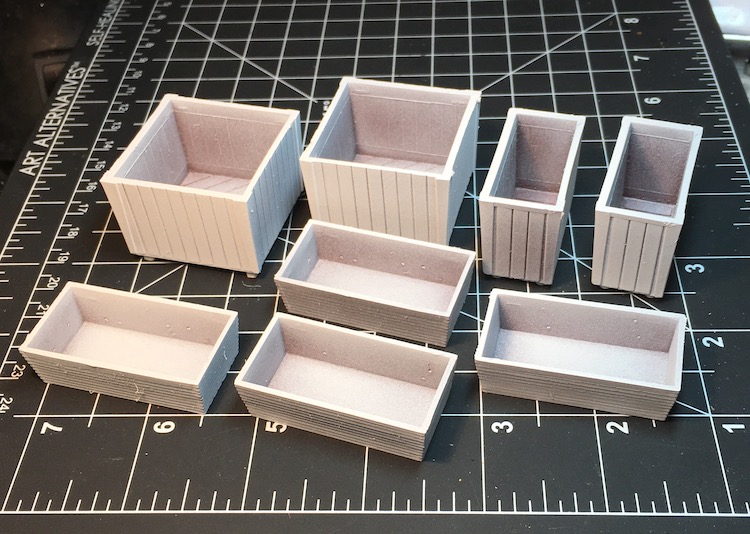
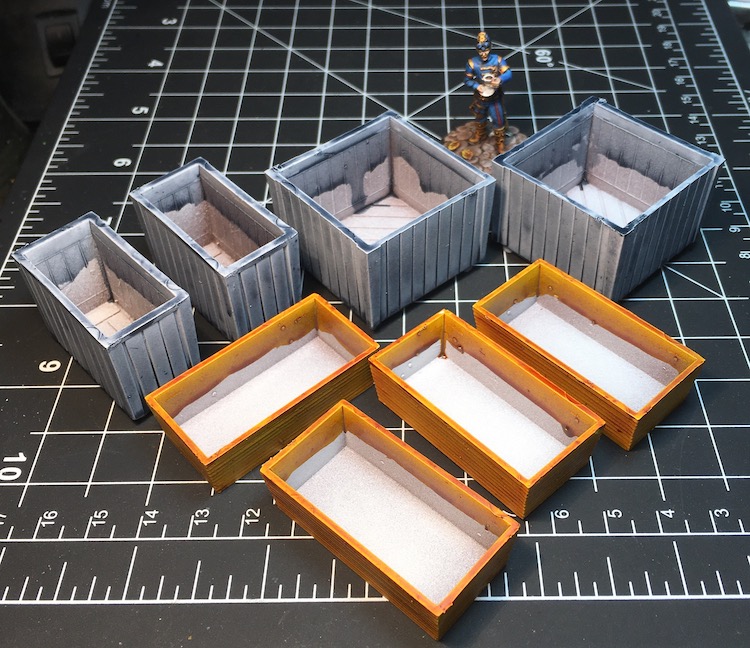 Alven Yard keeping an eye on things
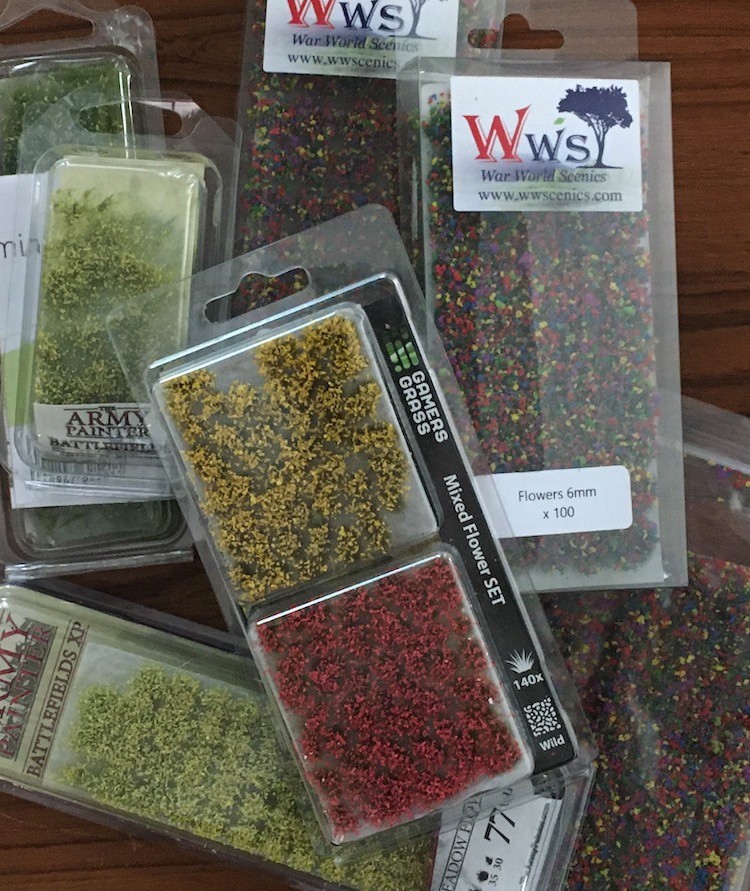 So many I'm going to turn one of my Market Stalls into a florist. No, really, I am.
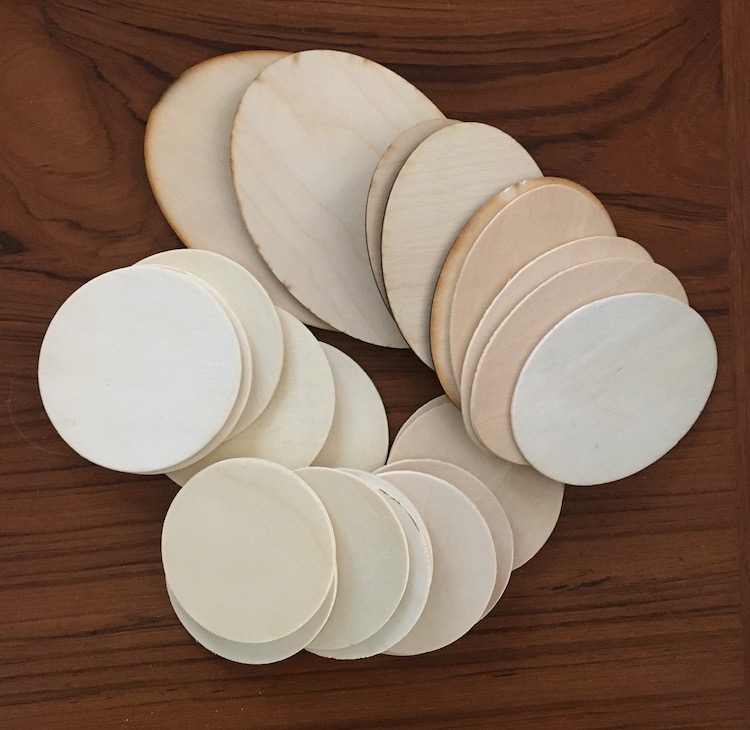 These will work well for trees and topiary.
Things are Proceeding Nicely
So my planters were sealed and I began filling them with Das Pronto air hardening clay, both to represent soil and give weight to the pieces. Asit is air hardening a I will have to build up the deeper ones in layers.
I created a flower stall for my market place from one of my Micro Arts Market pieces. Next is a baker’s stall and a produce stand. I think the Wolsung Gardener looks quite at home among the flowers and look forward to getting his gardens started.
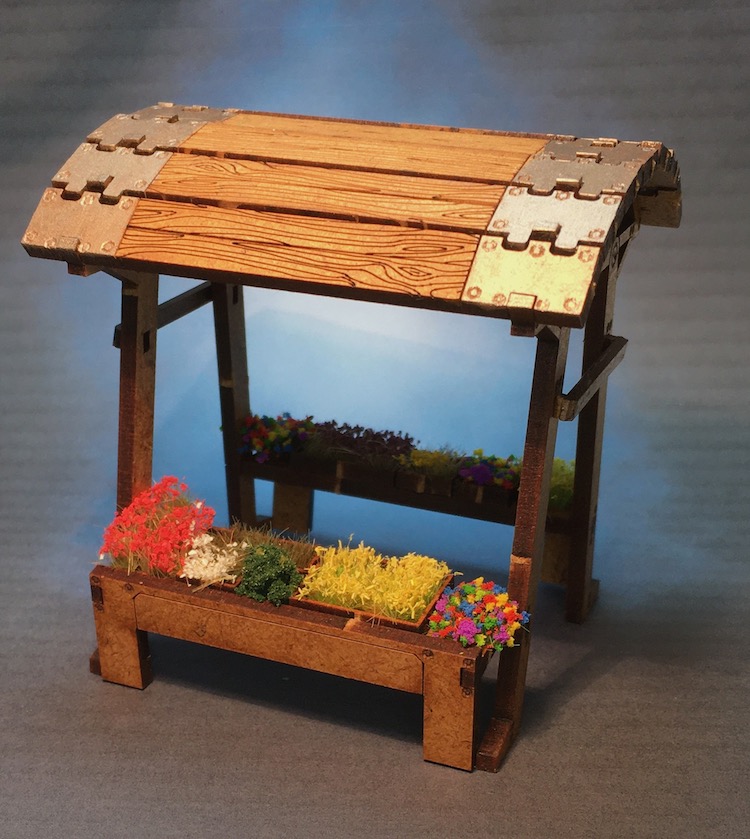 Serves no game purpose but looks so nice.
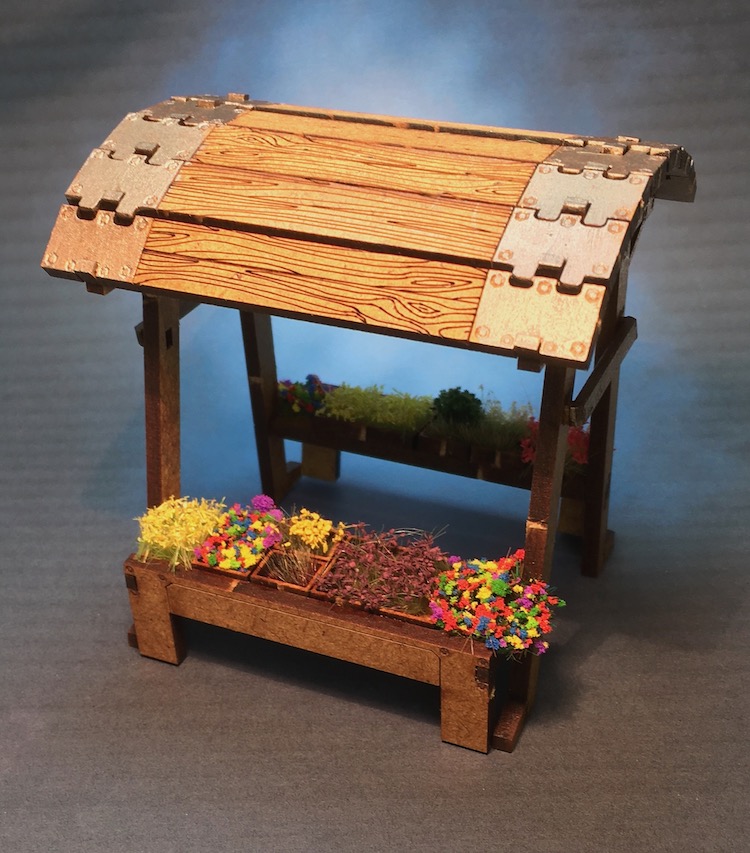 Must be my childhood spent with model train layouts showing through.
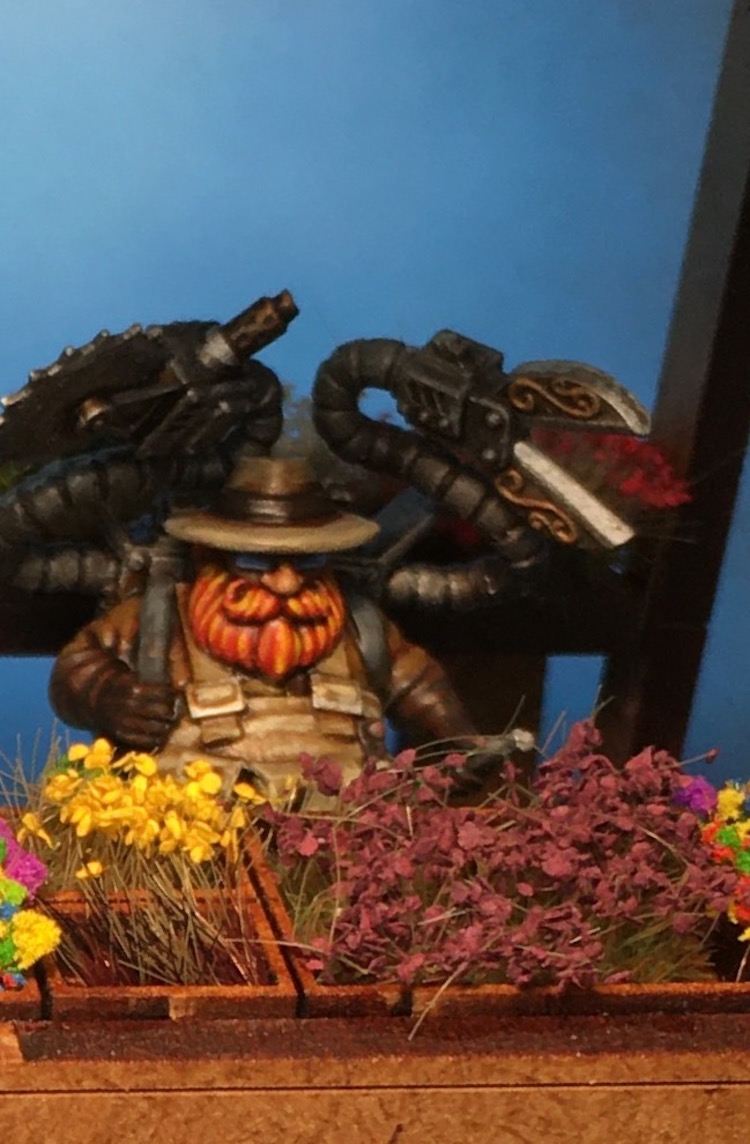 Need a bouquet for Mothers Day?
First Stages of Urban Gardening Complete
I finished off all my little planters. The small ones with flowers were the easiest as all I did was flock them and glue in the flowers. The tall ones with evergreens were just as easy and will look great separating the outdoor seating of my cafe from the plaza.
The tomato plants were a little more work but relatively simple. I glued three toothpick halves into each container and painted them green. When they dried I glued on Woodland Scenics Clump Foliage pieces. Unable to go to either the Craft or Model Railroad stores right now I went “Shopping in My Closets” as a friend of mine says and found my bag of various colors of Fimo and Sculpy polymer clays. I made a bunch of red spheres about the right size and once they had baked (do this for 2/3rds of recommended time as they are so tiny they will burn) I glued them onto the plants. Now Nona Scylla can always have fresh tomatoes.
The ornamental trees, which could flank a doorway nicely, were also a bit of work as what I had were really bushes and I wanted them to look more like well manicured ornamental trees. So I glued half a toothpick in each planter as a pin and then found some aluminium cylinders in my bits box that were just the right height to glue onto those. After they dried I raided my canvas painting supplies for my Fiber Paste by Golden to create the texture of bark. This stuff is an acrylic modeling paste, clear paint, with a fine texture mixed in. Great for building up texture on a canvas (think Van Gogh) or the surface of a model building or tree trunks. Then everything was painted, surface was flocked, and the bushes were glued into the trunks. I’m rather pleased with how these came out and am going to have to make more like them. As for now, time for more trees and planted areas.
 So easy to make and they add so much color. I need more of these.
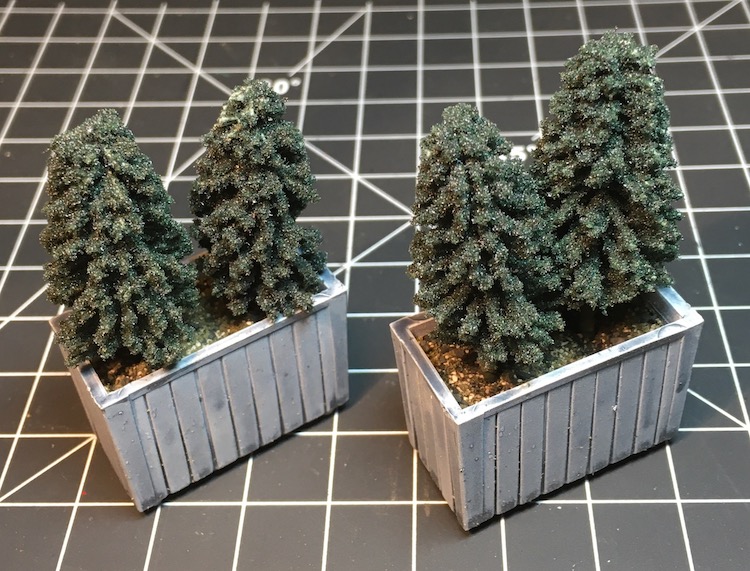 These will work nicely with my outdoor seating.
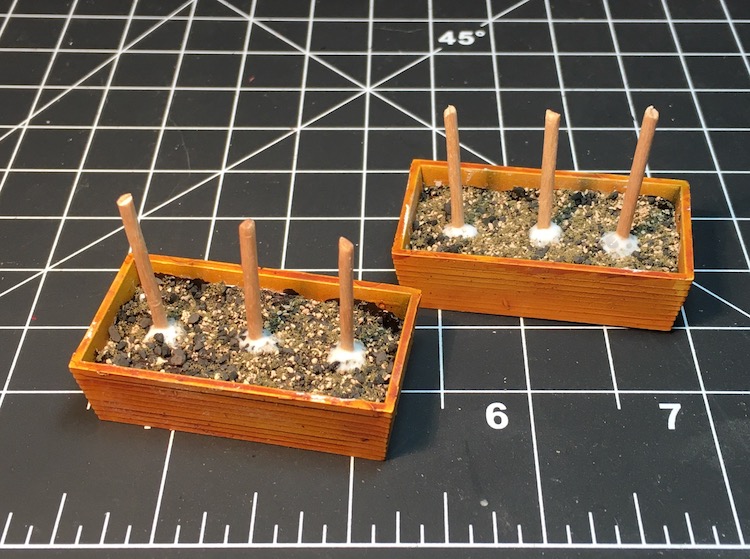 Toothpicks glued into the clay then painted green.
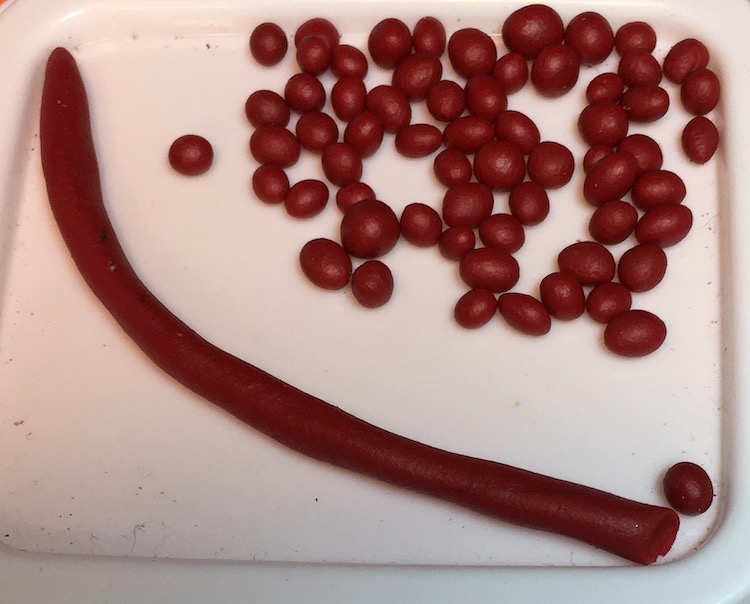 I ended up making enough to use in a Market Stall as well as in other colors.
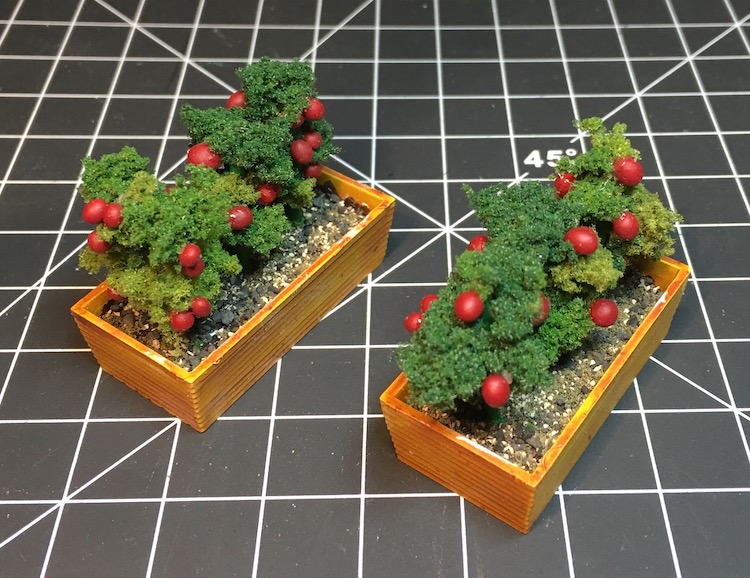 I think they really came out well.
 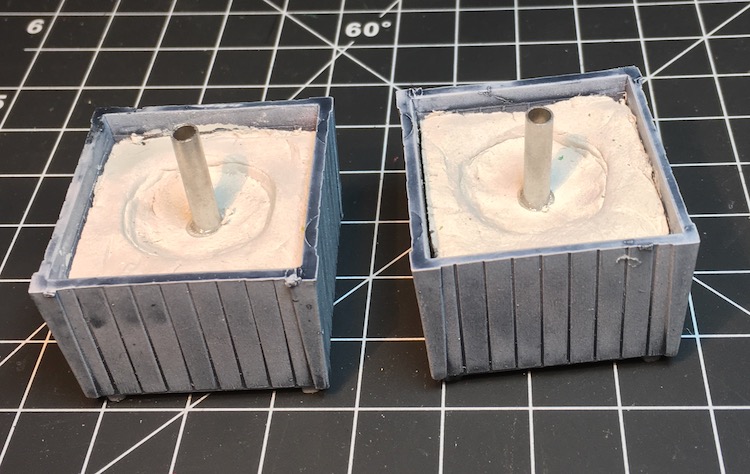 Toothpicks glued into the clay then aluminium cylinders from my scrap box are glued over them.
 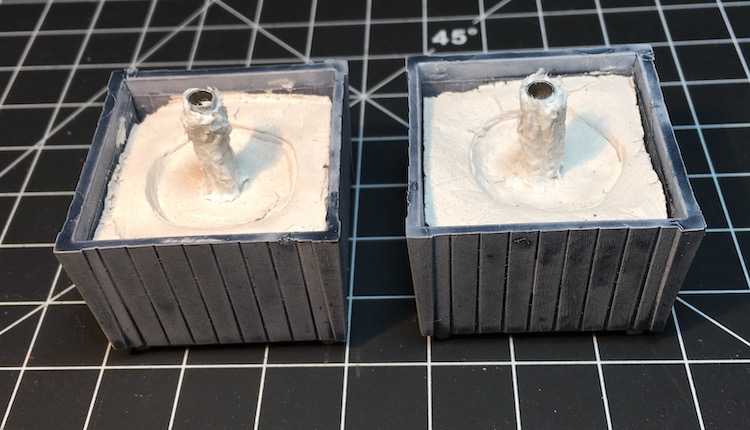 Fiber Paste, by Golden, is used to texture the trunks.
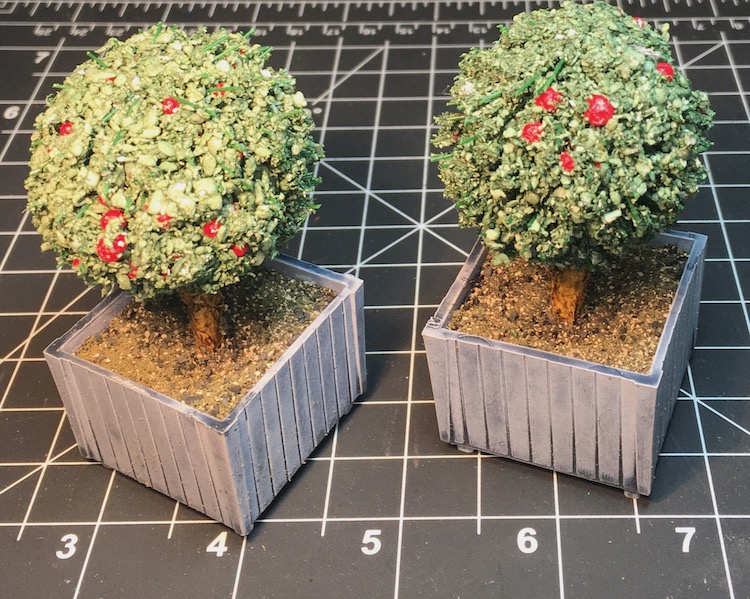 The ornamental trees are finished and ready for the table.
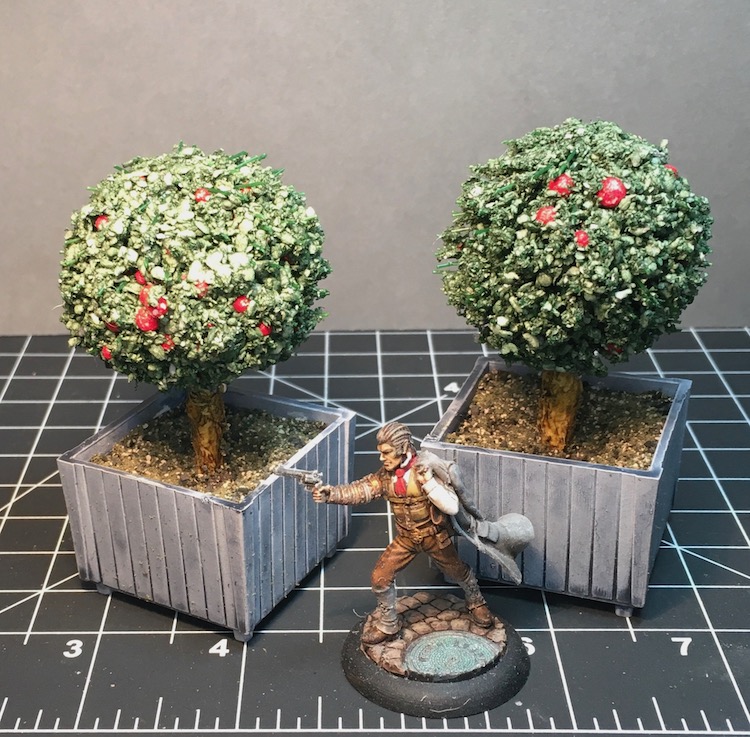 A figure for scale...
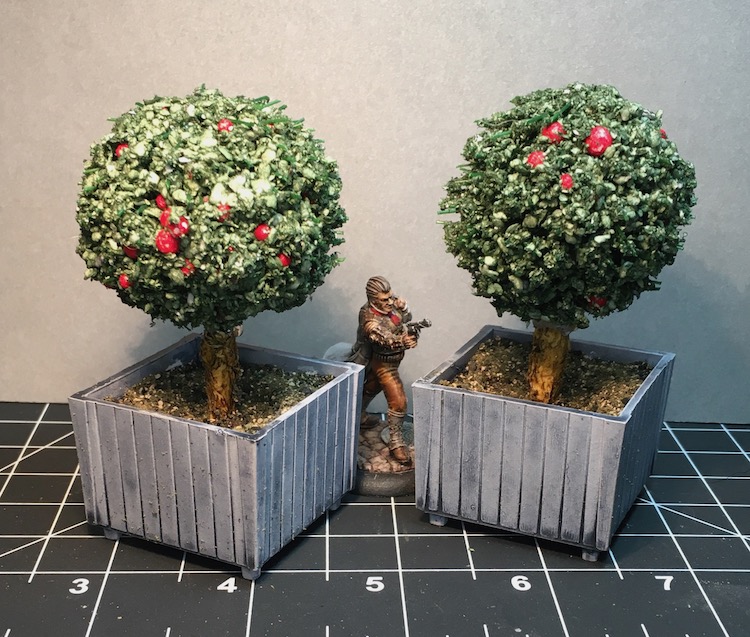 ... as well as an example of great cover.


