


OBS basics and video creation


Recommendations: 569
About the Project
With me now having a little bit of experience with OBS (Open Broadcaster Software - Free and open source software for video recording and live streaming.) I thought I'd share some real basic things. This will be a WIP all the way. Feel free to add anything you know. OBS is not to be confused with "Streamlabs OBS" which is a fork of OBS and works a bit different.
Related Genre: General
This Project is Active
Turning cameras and a clean workspace
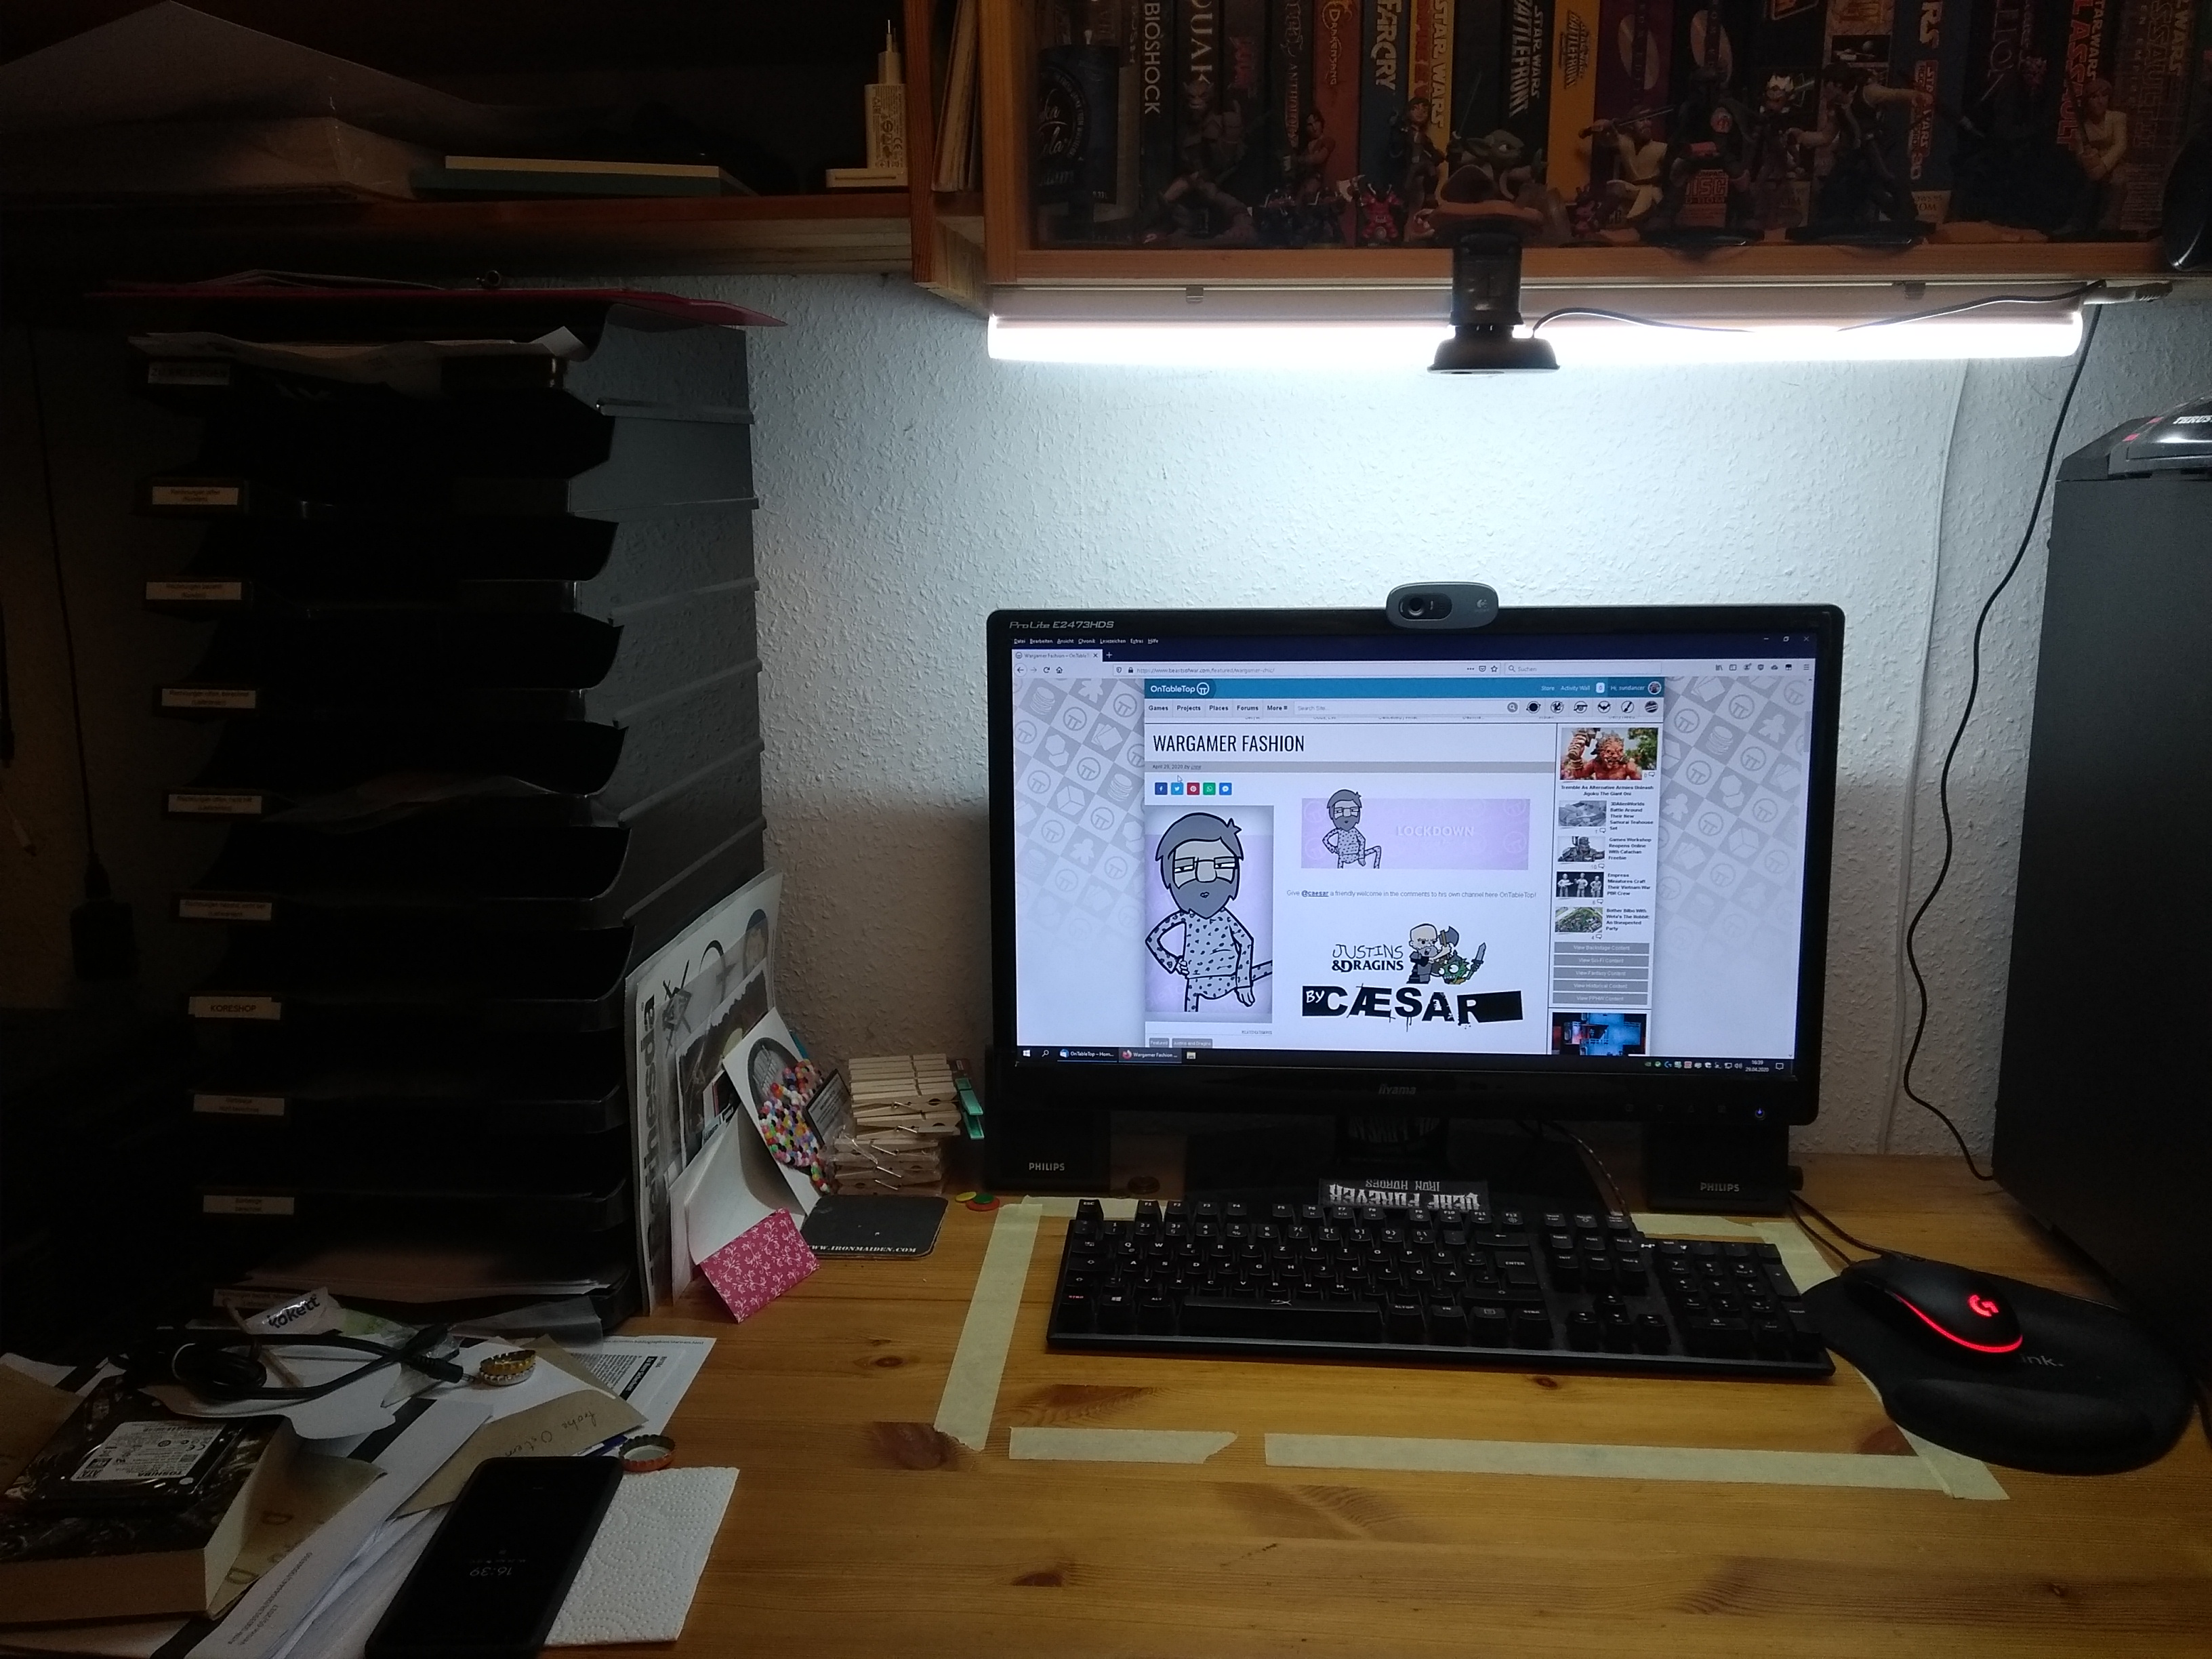
So because I was always unhappy with my workspace I did some cleaning up.
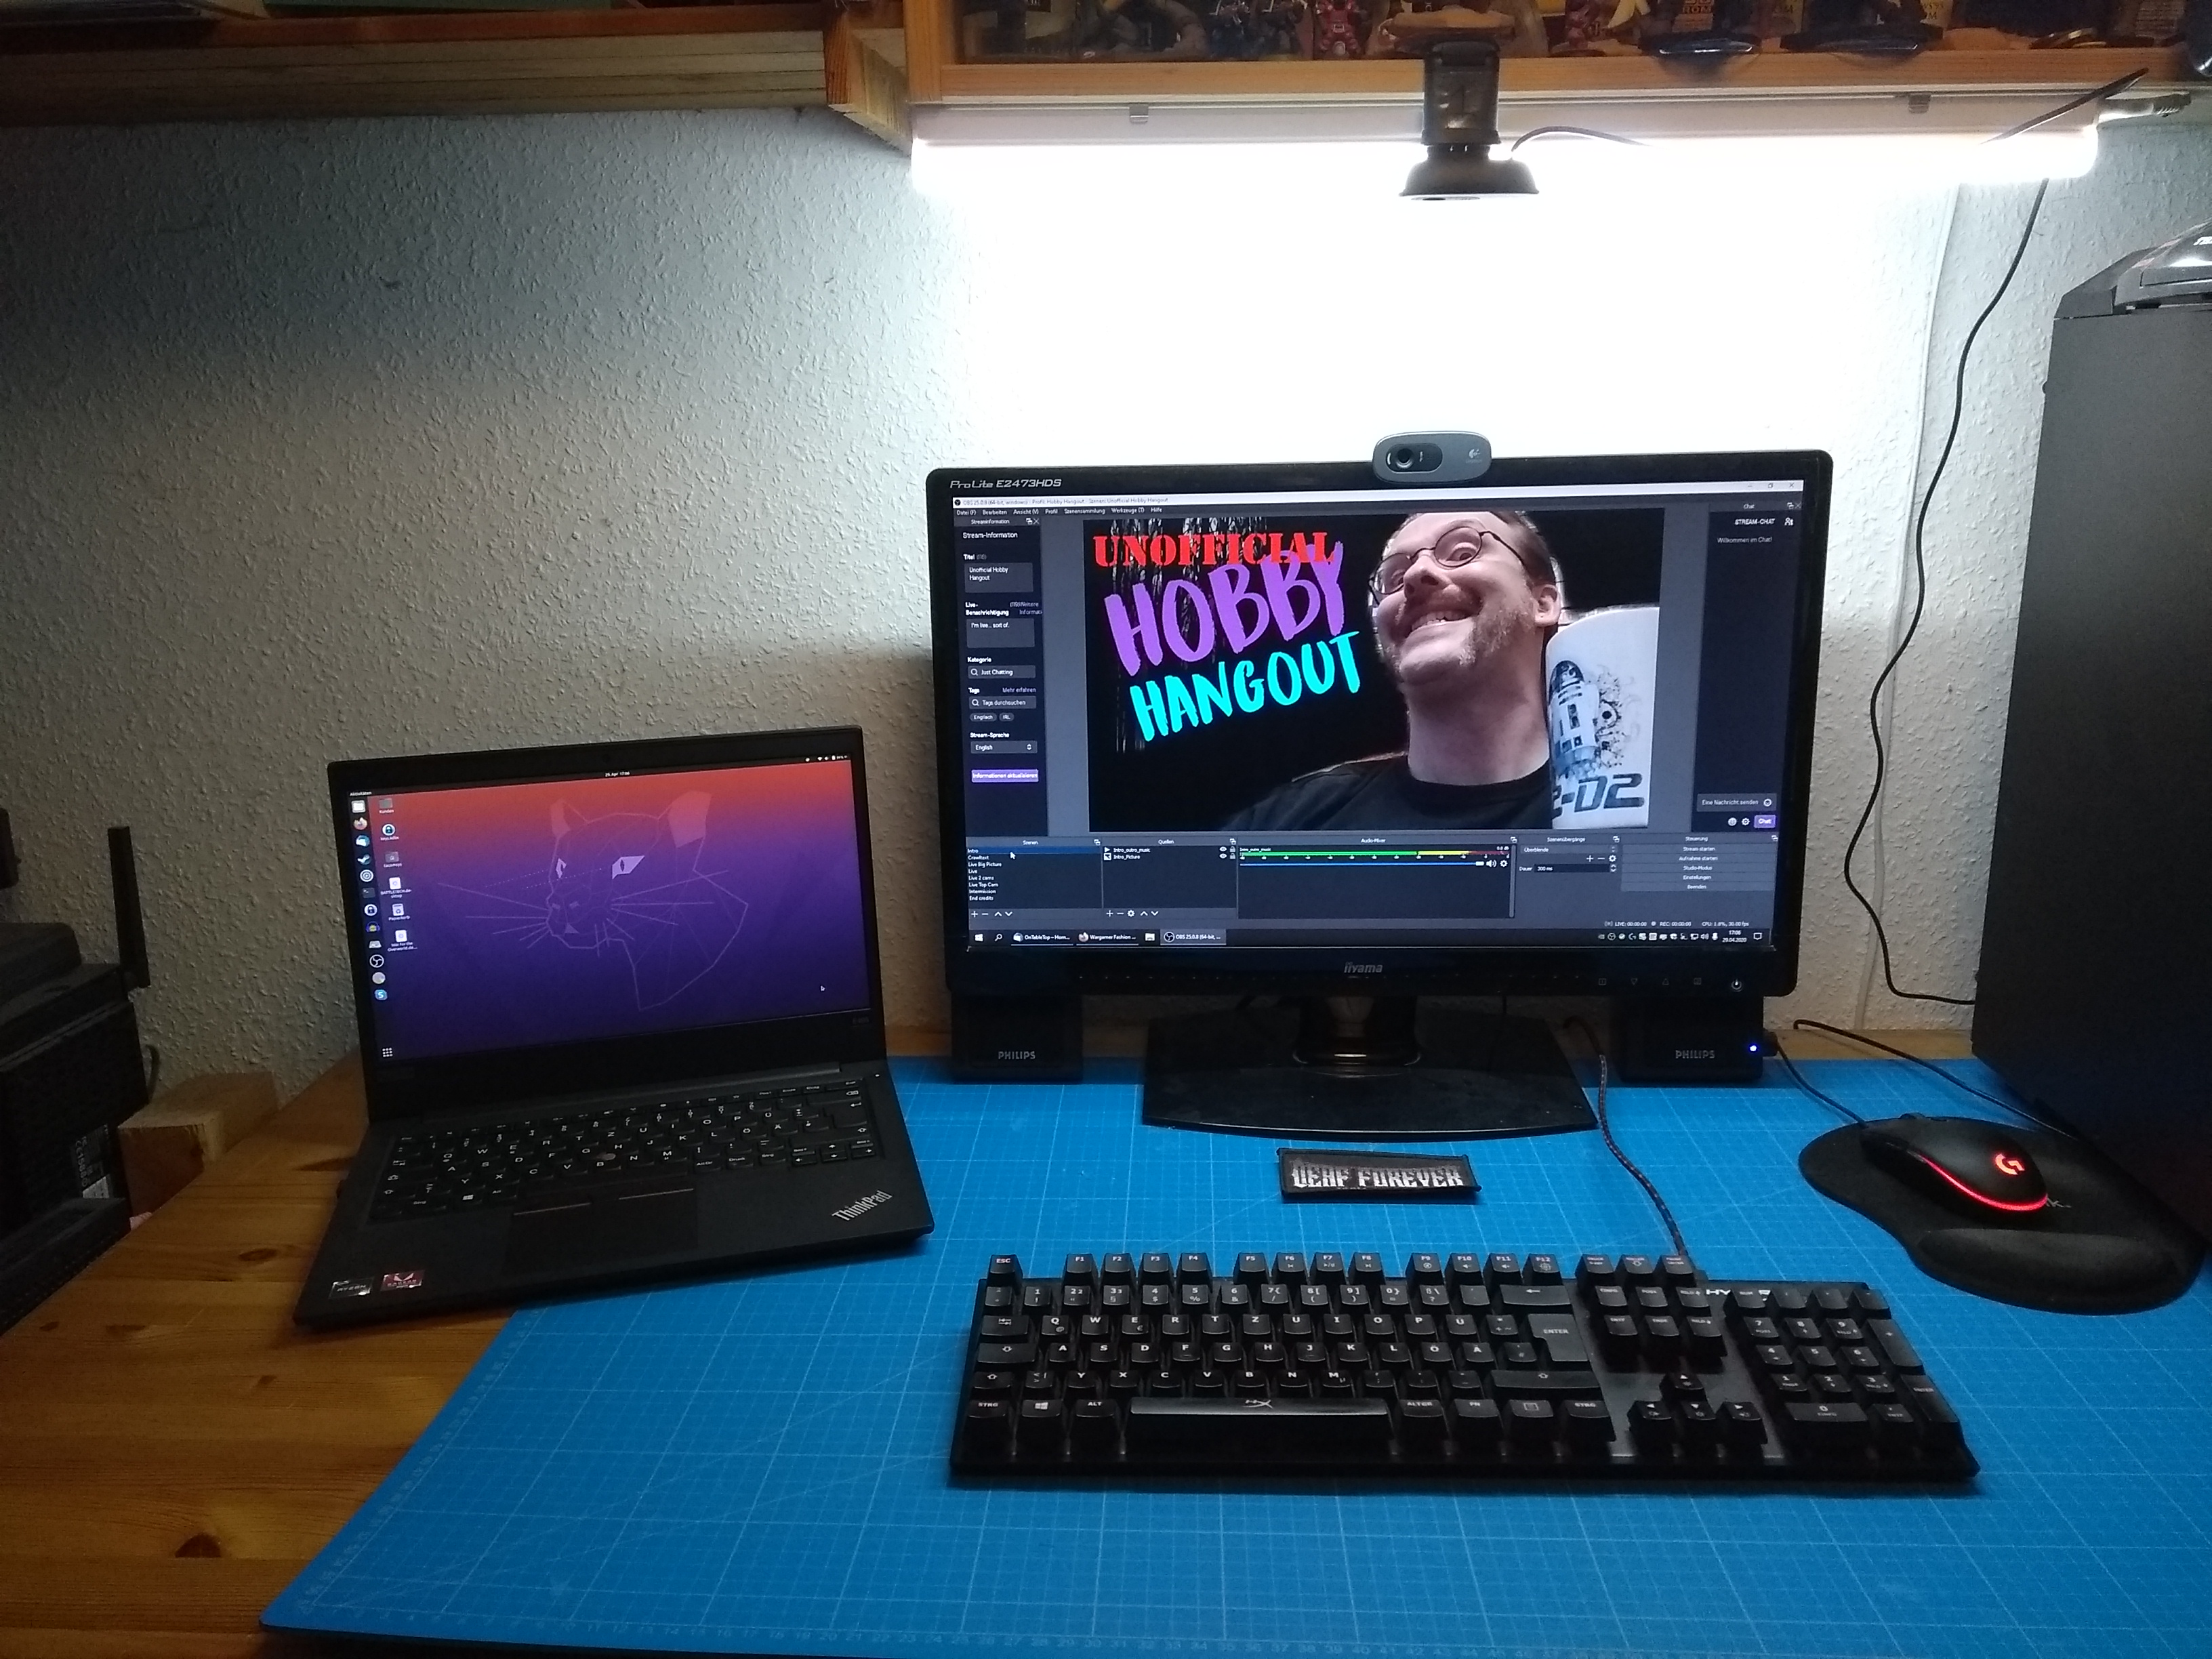
And now I have a lot of space. But one other thing that bugged me: the top cam is the wrong side around and shows everything upside down. Remounting the cam is a PITA and so I looked… and found an option within OBS it self!
Just right click on the cam source, select “Transform” and then “Flip horizontally” and again “Flip vertically”. Tada a view from the top like I look at the things! HUZZA!

More traps
If you, for what ever reason, change the port you’ve plugged your microphone or camera in: OBS will see that as a different source. So double check your source.
Traps when setting up multiple cams
So when you feel the need to use two cameras you’ll run into some trouble. If you use two of the same USB cameras they will show up with the same name in the “add sources” dialog. So when adding the first camera and you use “Create New” give it a talking name. Like “facecam”, “deskcam” or “overhead” to later know which one it is.

After that choose one of your two cameras and wait for the preview window to see if you’ve chosen the correct cam. If not, change to the other, if yes hit OK and add the second camera. Done.
But there is a catch. If you have used any of the cameras in another scene you can’t add it as additional camera. Because OBS is already grabbing that video feed. So really pay attention when naming the cameras. If you want to be 100% sure put labels on the cameras so you know the physical camera labelled “Joe” is “Joe” in OBS.
Transition and multiple scenes
So having a static stream is nice and all but can get boring after a while. So you set up different scenes. That is the box in the lower left corner. HOLD YOUR HORSES!
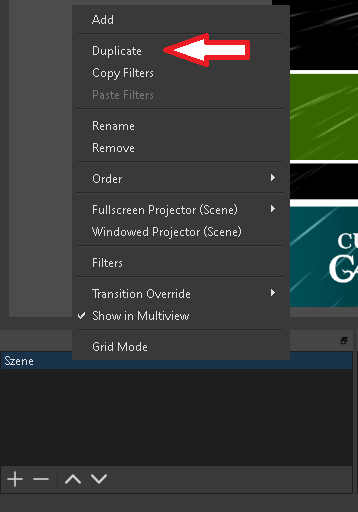
Before you hit that + and try to recreate the scene you already have with maybe a second camera or cameras having switched angeles I want to save you a buttload of work. Right click on you existing scene and click “duplicate”. Now you have an exact copy of your previous scene and can modify that. How is that for convenience?
After you’ve set up a second scene you may want to hit the “Studio Mode” button on the far right.
Now we have the upcoming scene on the left and the current streaming/recording on the right. If youclick “transition” in the middle OBS will transition to the next scene you have highlighted. So let’s say you’ve got scene a, b and c set up and a is currently live. When you select b in the lower left corner under “scenes” and hit “transition” the feed/recording will transition to b. Hit “transition” again and it will go back to a.
Try it. Experiment.
This is all from me now. I will add more when I find “important” features. Until then: happy streaming.

Basic streaming
After you’ve set up your OBS I recommend testing it with the “Start Recording” feature just to make sure audio levels are good and there is actually something to see. When you’re happy with the playback we need to get OBS and twitch to play together.
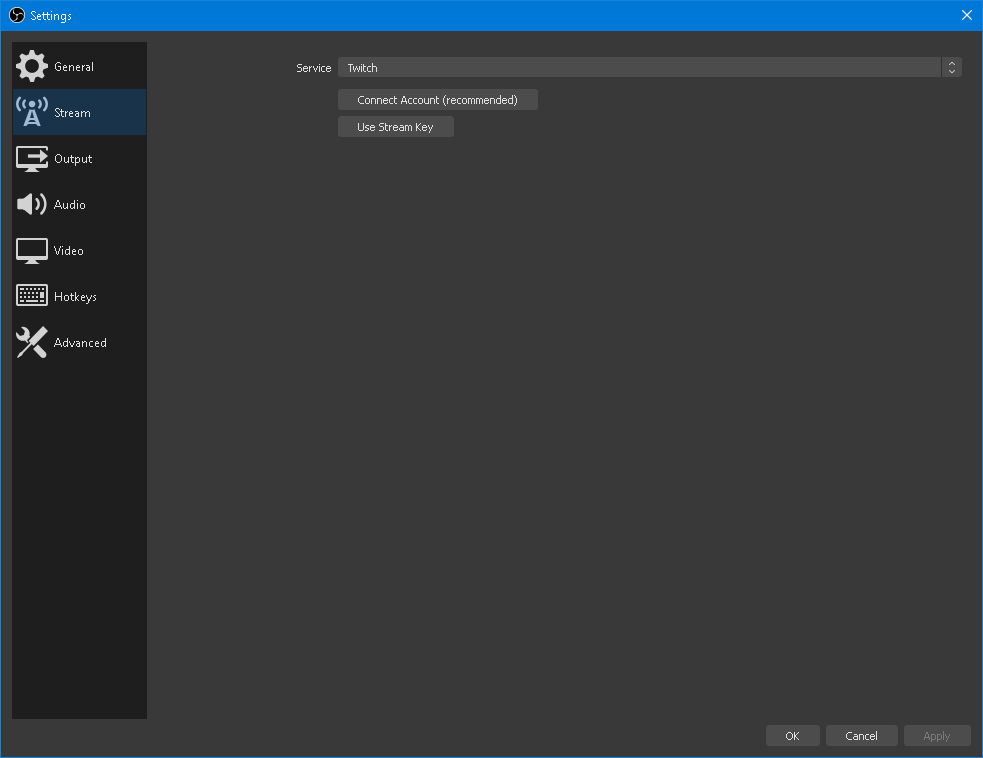
Under “File” – “Settings” – “Stream” you shoose “Twitch” as a service and hit “connect Account”. This way you’ll have a bit more control while streaming other then just using your Stream key (which you can get from your account on twitch.tv. NEVER SHOW YOUR STREAM KEY TO ANYONE! People will make use of that and you’ll end up banned from twitch. )
And that is it. You’re set up and hit “Start Streaming”. But put on some clothes first… and maybe comb your hair… and have fun!
Basic setup
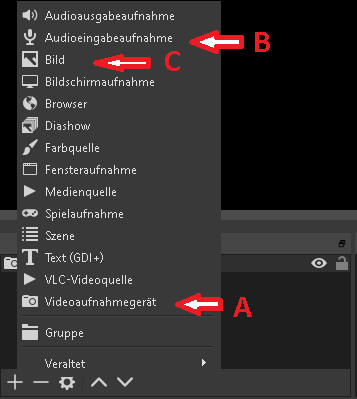
After you’ve installed and started OBS you’ll be greeted by a relatively blank screen. First thing we need to do is get some video onto the screen. Click on the plus on sources.
Here you select A) video recording with the little cam symbol.
Give you source a “speaking” name so that you’ll have an easier time finding it later.
We leave all settings “as is” to begin with and we will see how the cam will appear on the main screen. If you use an extra microphone for better audio quality also add a source using B) and add your mic.

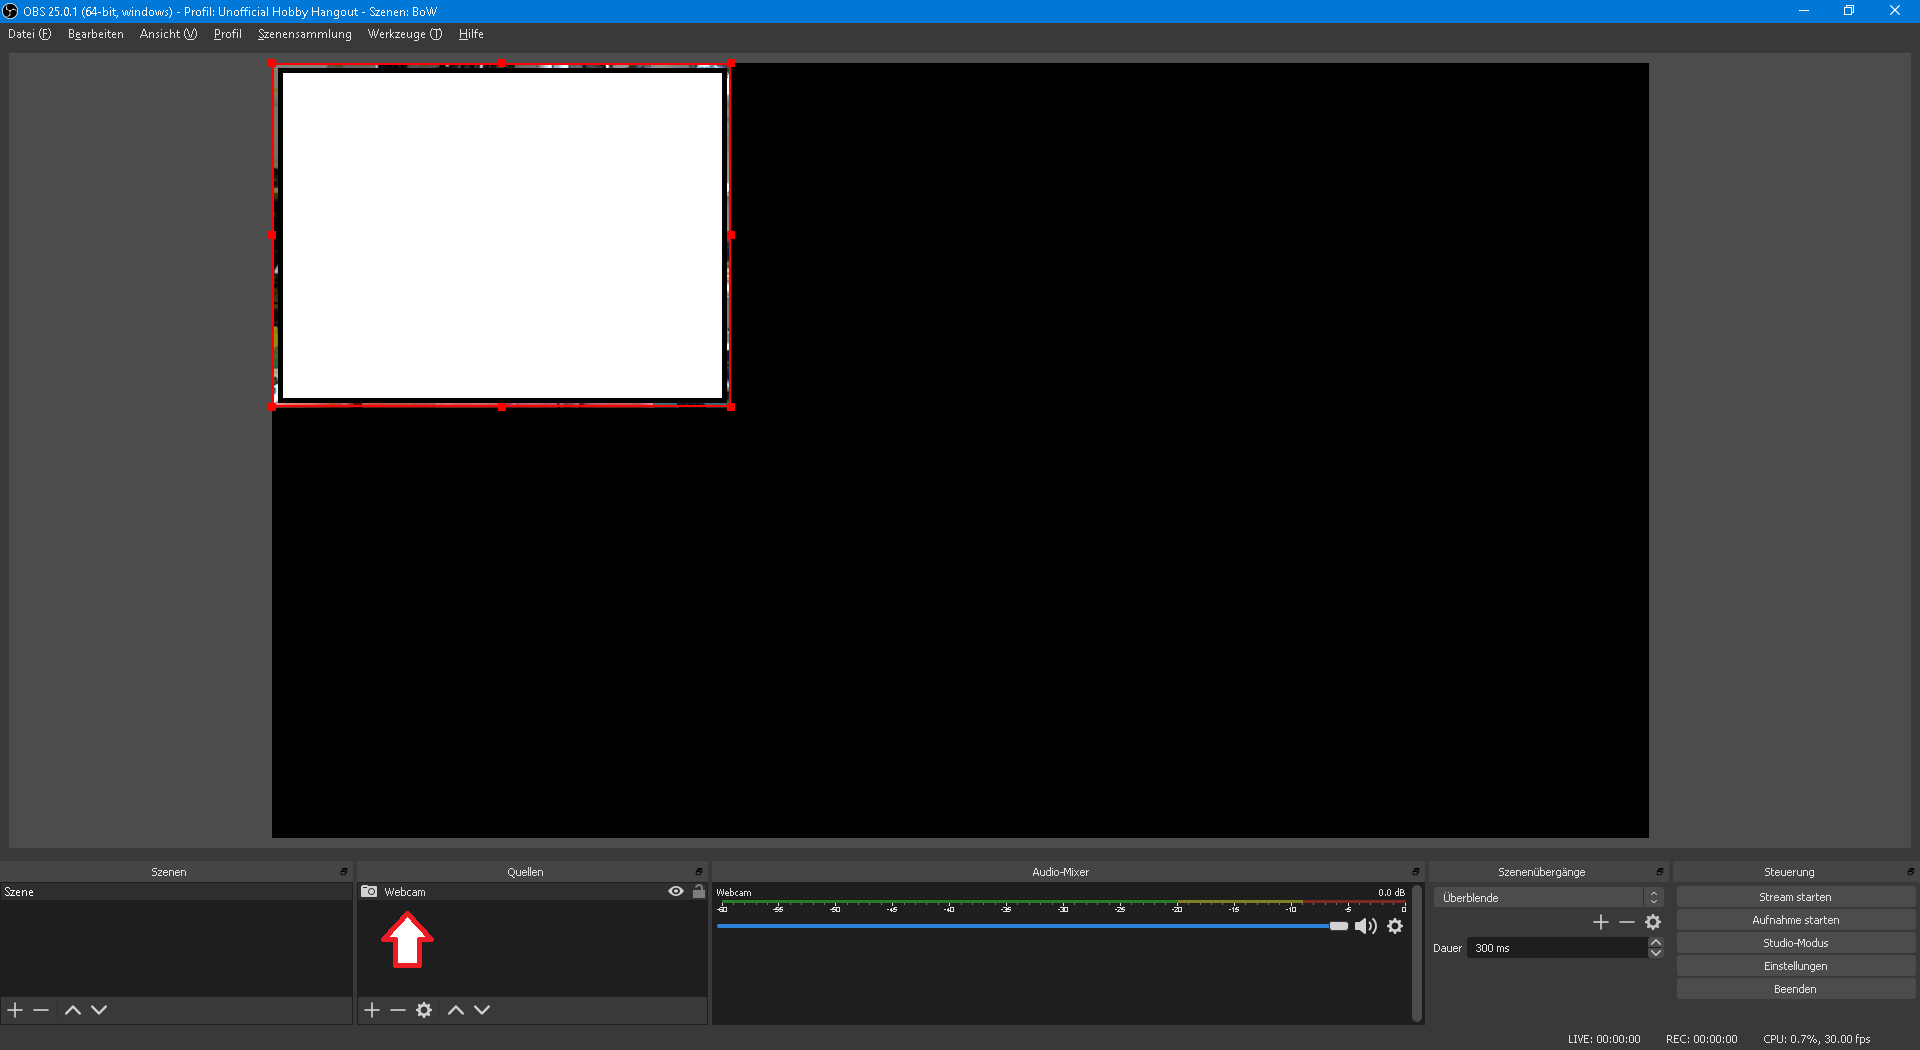
The red frame around the webcam can be picked with clicking and holding the mouse and then resized be pushing an pulling. Next you might want an overlay to make it all look shiny and cool. There are several sites out there providing free overlays. Just search them. Or snag them from some other site 😉 (No, don’t pirate, only use with permission!) If you’re handy with GIMP or photoshop you could make your own. It’s just a picture with a transparent background. So select the + on sources again and click C) for picture. The picture should be the same resolution as you’re streaming in. Default here is 1920 x 1080.
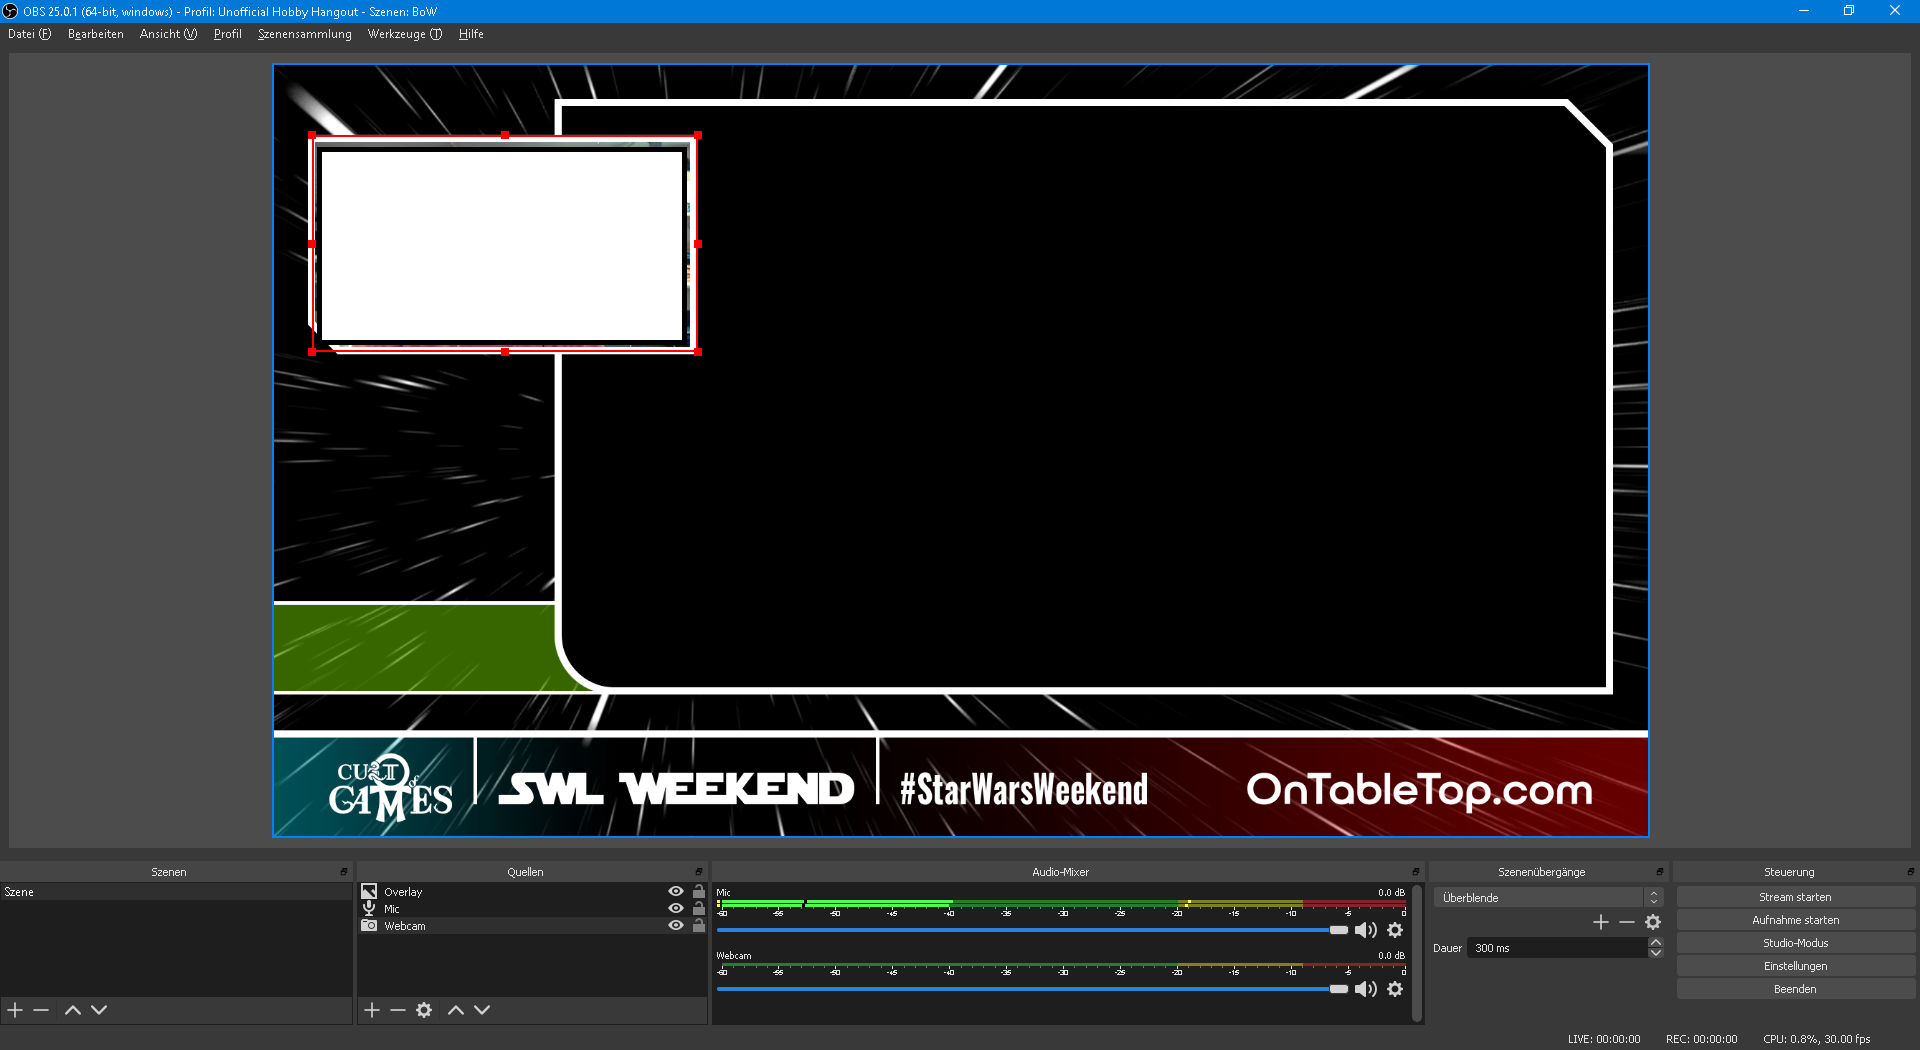
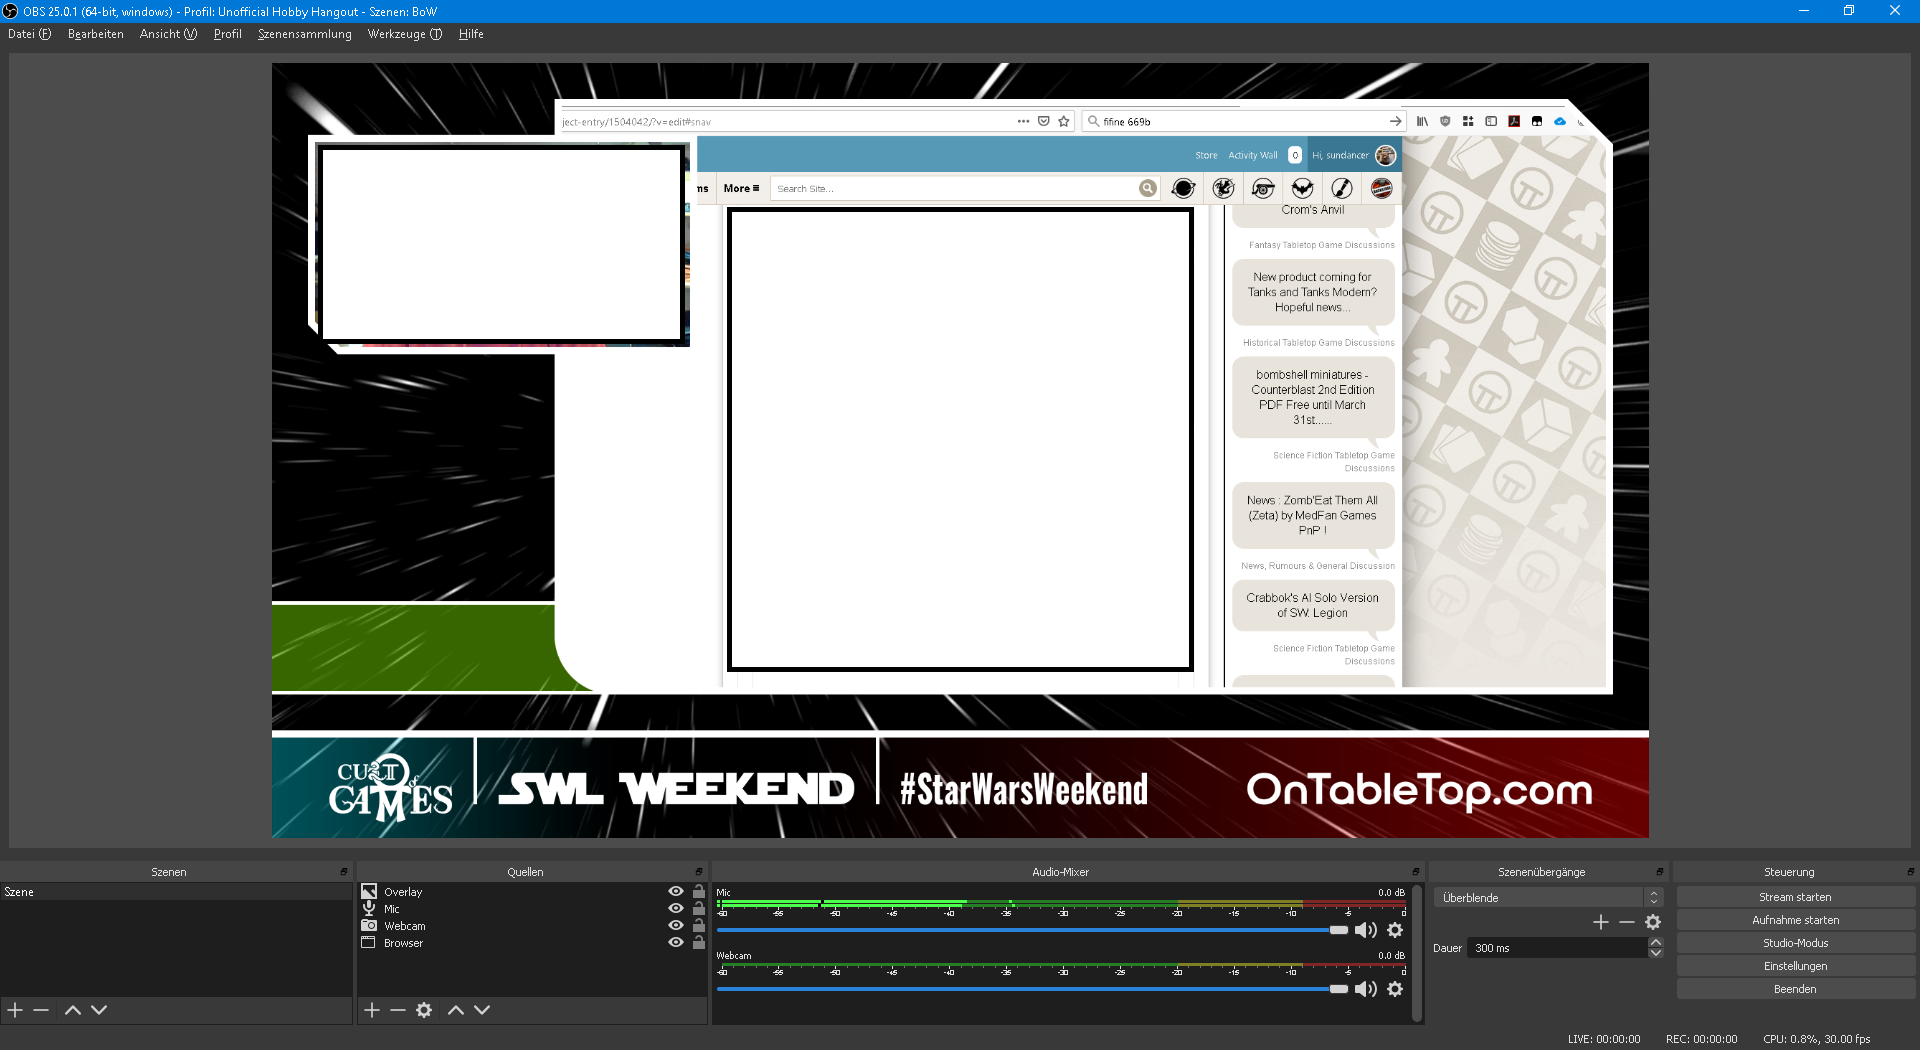
Last thing we now need is something to show. In my case the project from OTT. So open a new browser window (not a new tab because you’ll be showing the complete window! And you don’t want the world to see what sites you are browsing).
Now add a new source again but use “Window Capture” not “Browser” or you’ll use the build in browser which can lead to websites acting strange. Add your new browser window (as Window Capture, yes it’s confusing) and make sure it’s on the very bottom of the sources list.
Sources stack like layers of paper so the overlay needs to be on top of everything and everything else needs to be “sorted as needed” (see next picture)
Now you’re set up for recording. Well done! Next up: streaming.
Basic requirements
The basic requirements for streaming and/or recording video with OBS are:
- PC or laptop (PC, Mac or Linux)
- A webcam
- the OBS Software (link)
That’s it. And if you don’t want to be seen and only show web pages you could drop the webcam and just use a headset or microphone. If you want to live stream and not just record you need to setup an account with twitch.tv.
This tutorial will work along with my setup which is:
- PC with Windows 10 Pro
- Logitech C270 USB webcam
- Fifine USB mic K669B
- OBS Software (currently version 25.0.1)
- Twitch account
It is to be assumed that all hard- and software is installed and running. So let’s get preparing the first stream.


