


![1918 Spring Offensive Wargame | Full Rules Overview with John & Gerry (WW1 Tabletop Game) [7 Days Early Access]](https://images.beastsofwar.com/2026/03/unboxing-warfulcrum-games-1918-spring-offensive-review-coverimage1-225-127.jpeg)


Esoteric spring cleaning


Recommendations: 377
About the Project
This is esoteric cleaning, as won’t actually clean my closets of unpainted minis or unfinished terrain, here I will grapple with all the techniques, materials, ideas and inspirations I always wanted to use but never did. I don’t know what shape it will take in the end…
Related Genre: General
Related Contest: Spring Clean Hobby Challenge (Old)
This Project is Active
Still forward
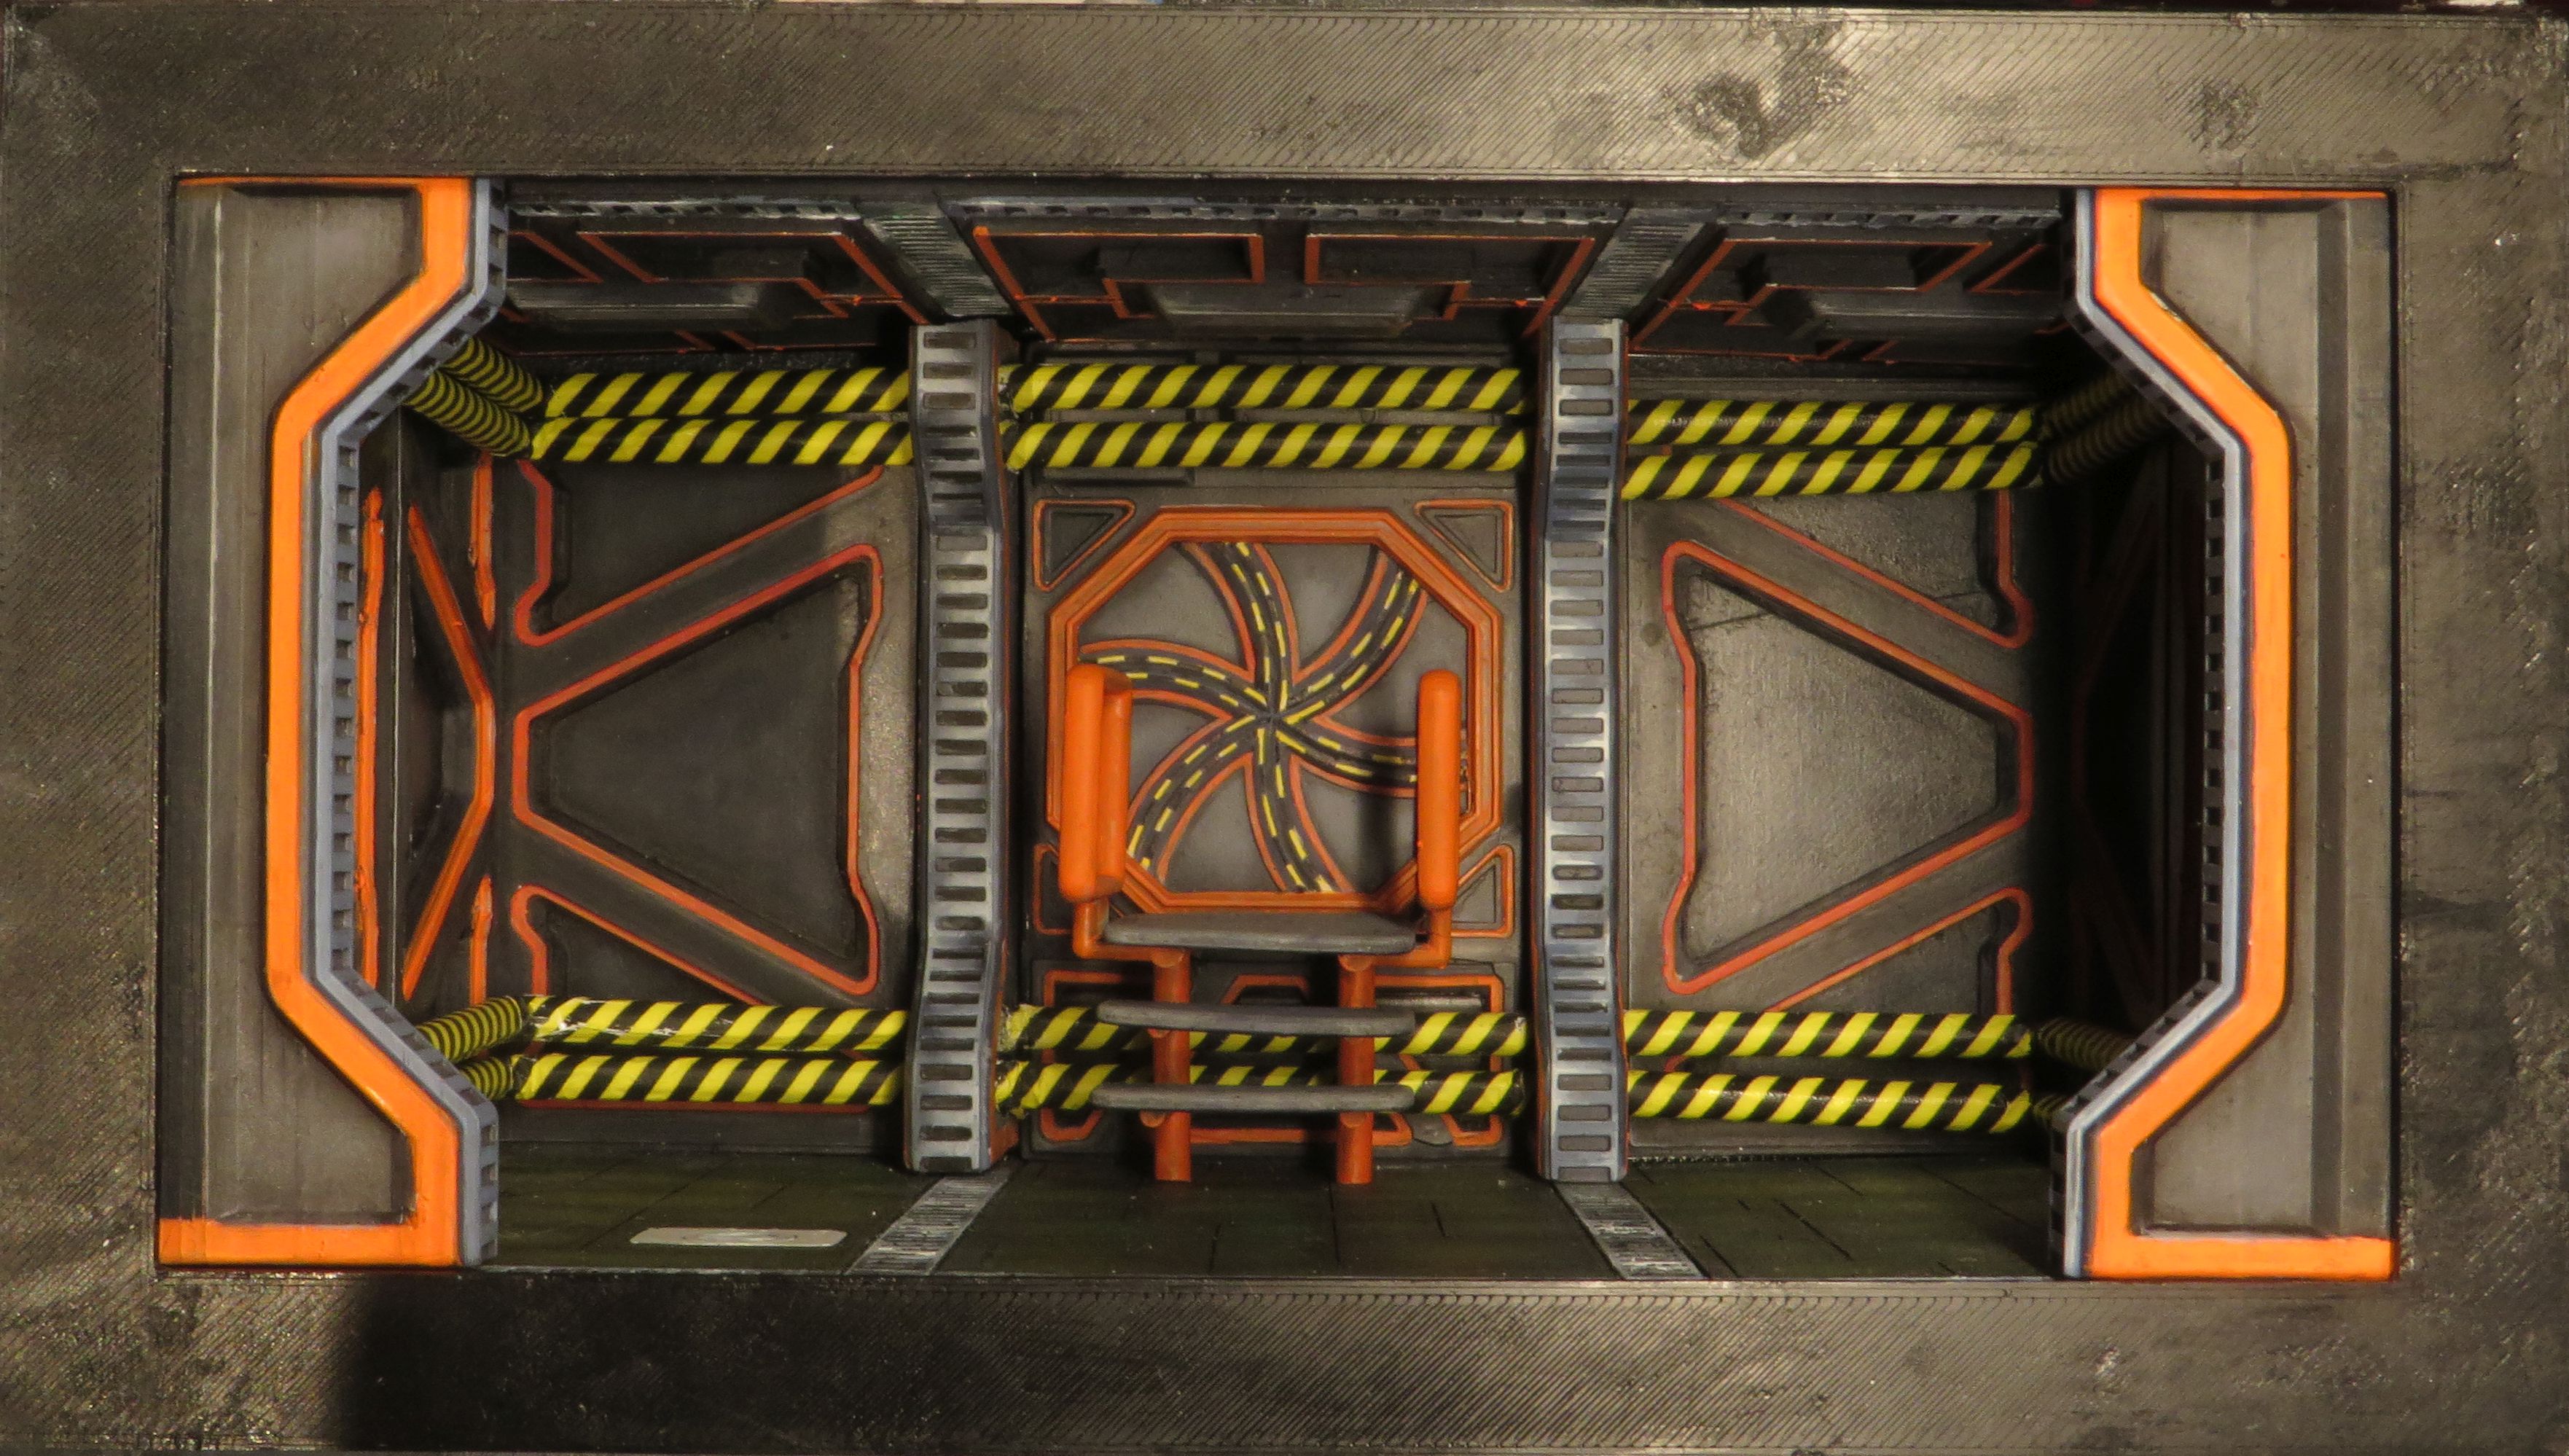
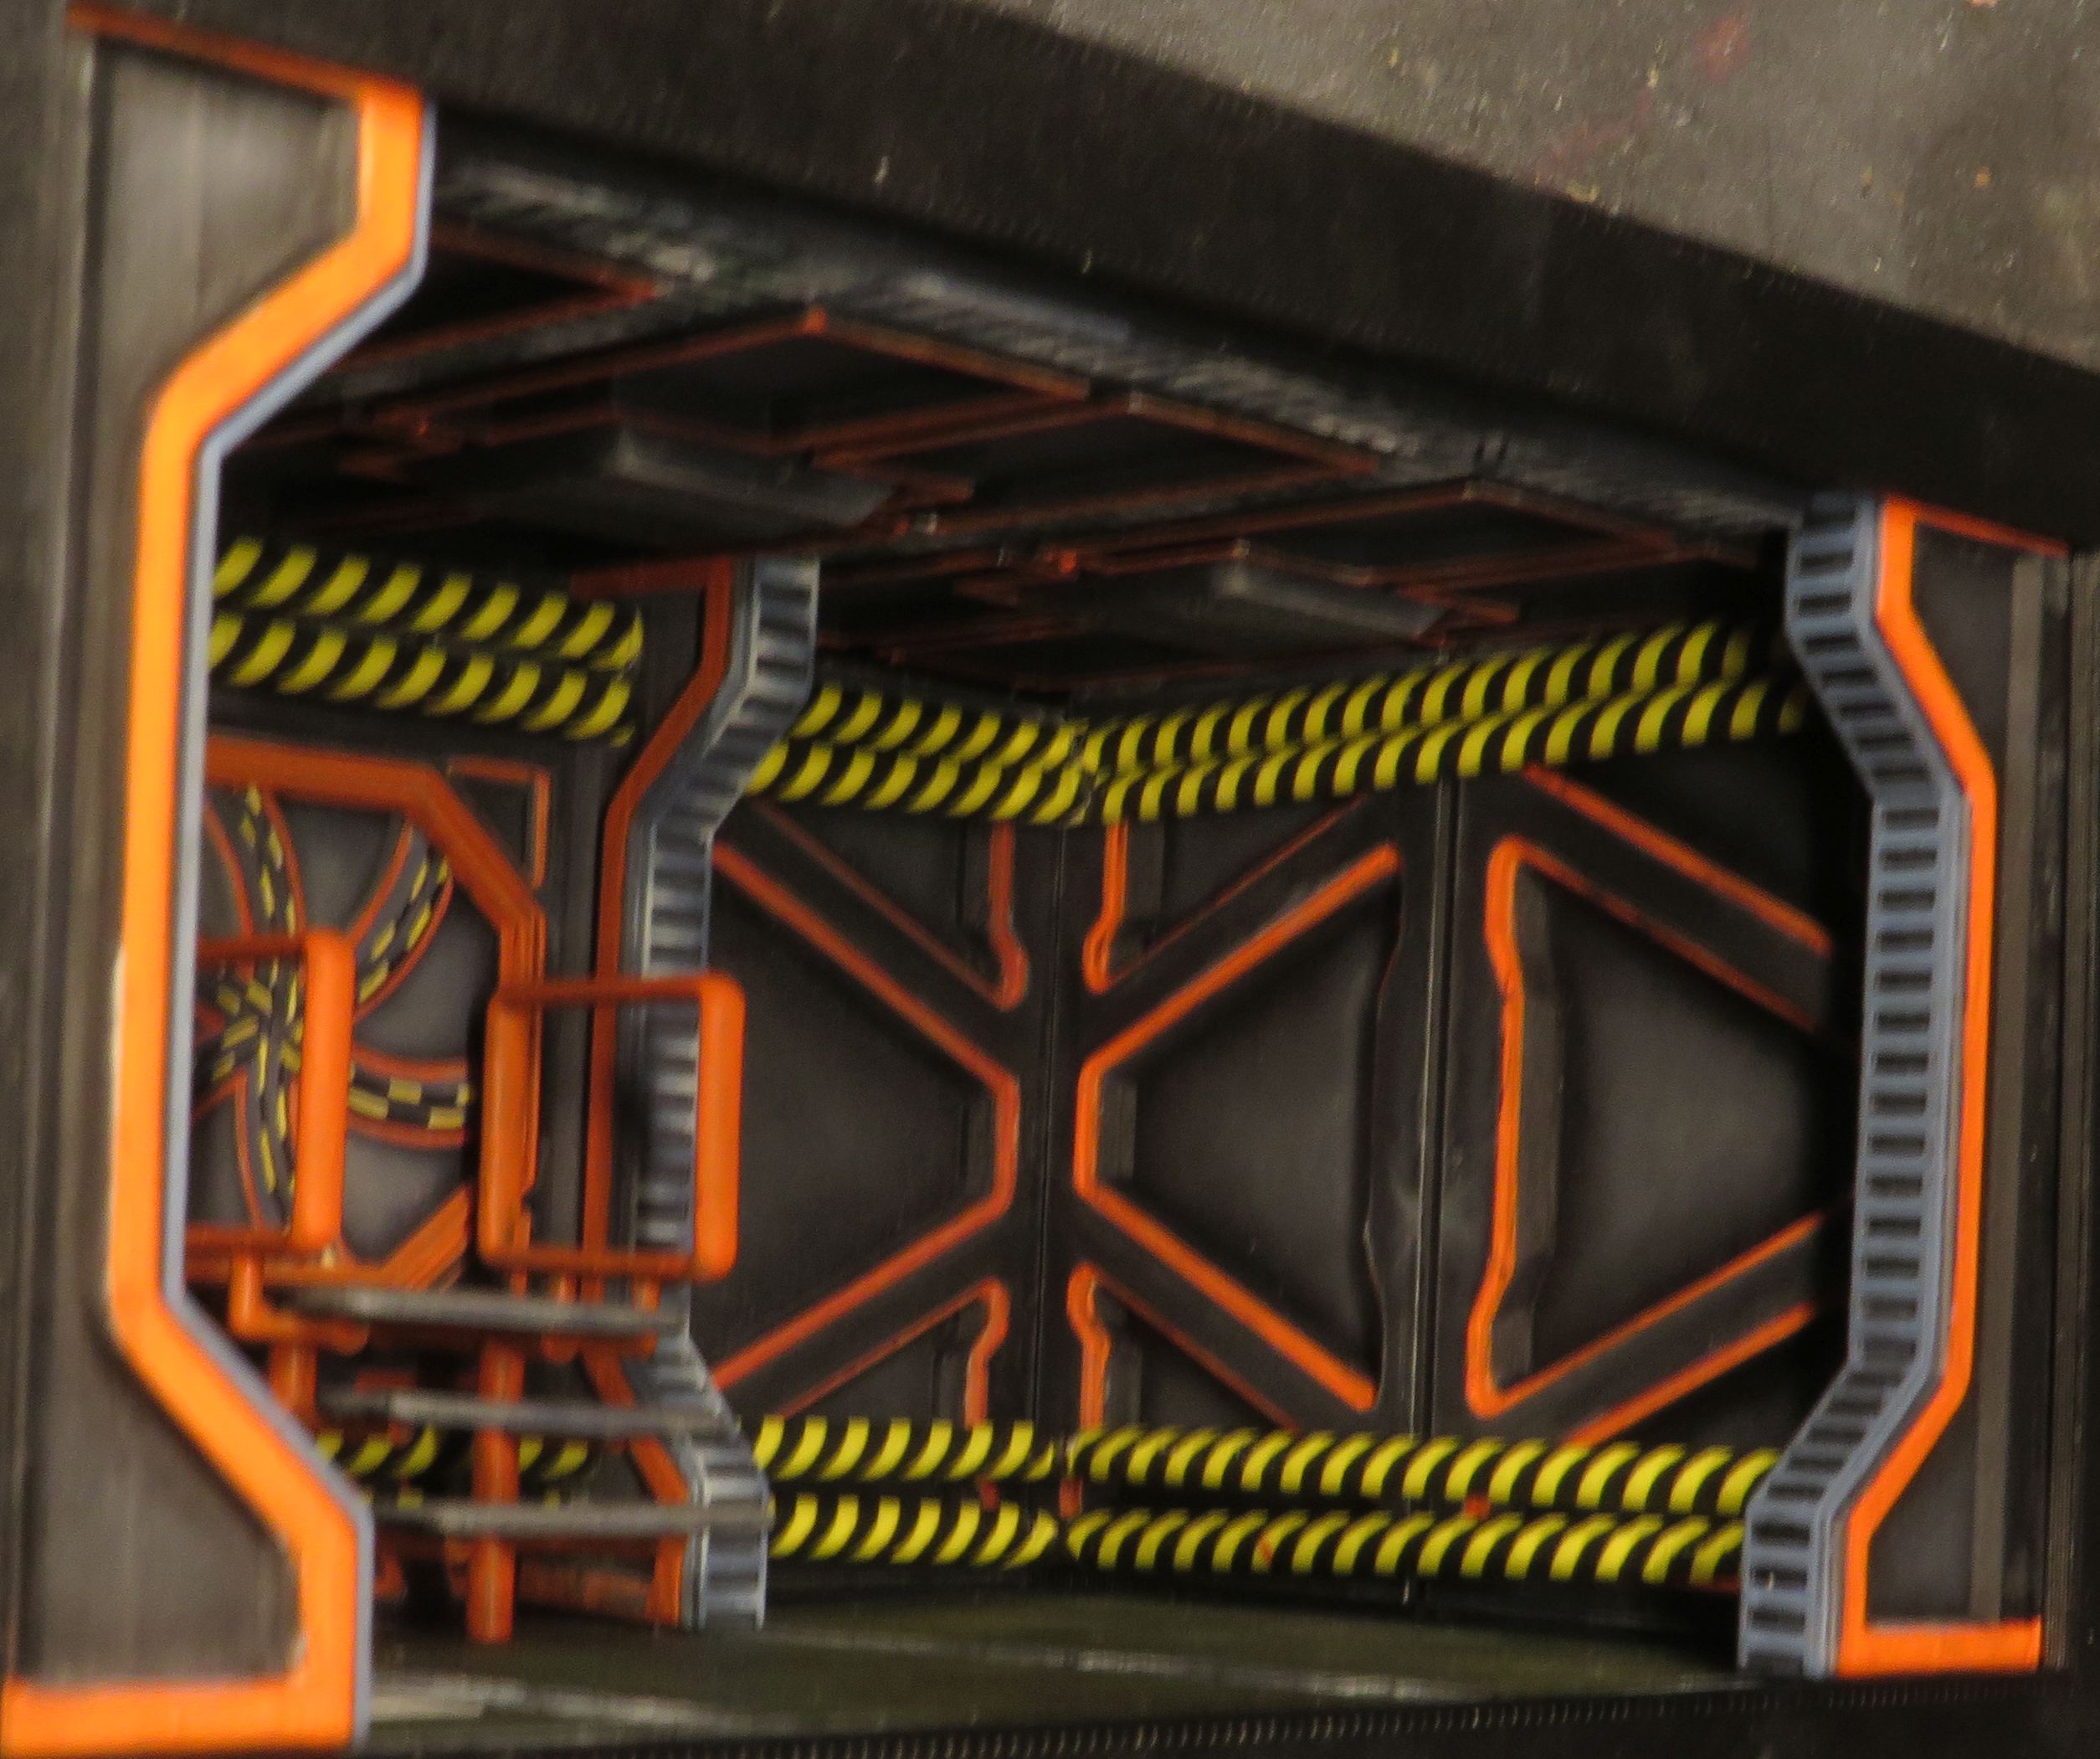
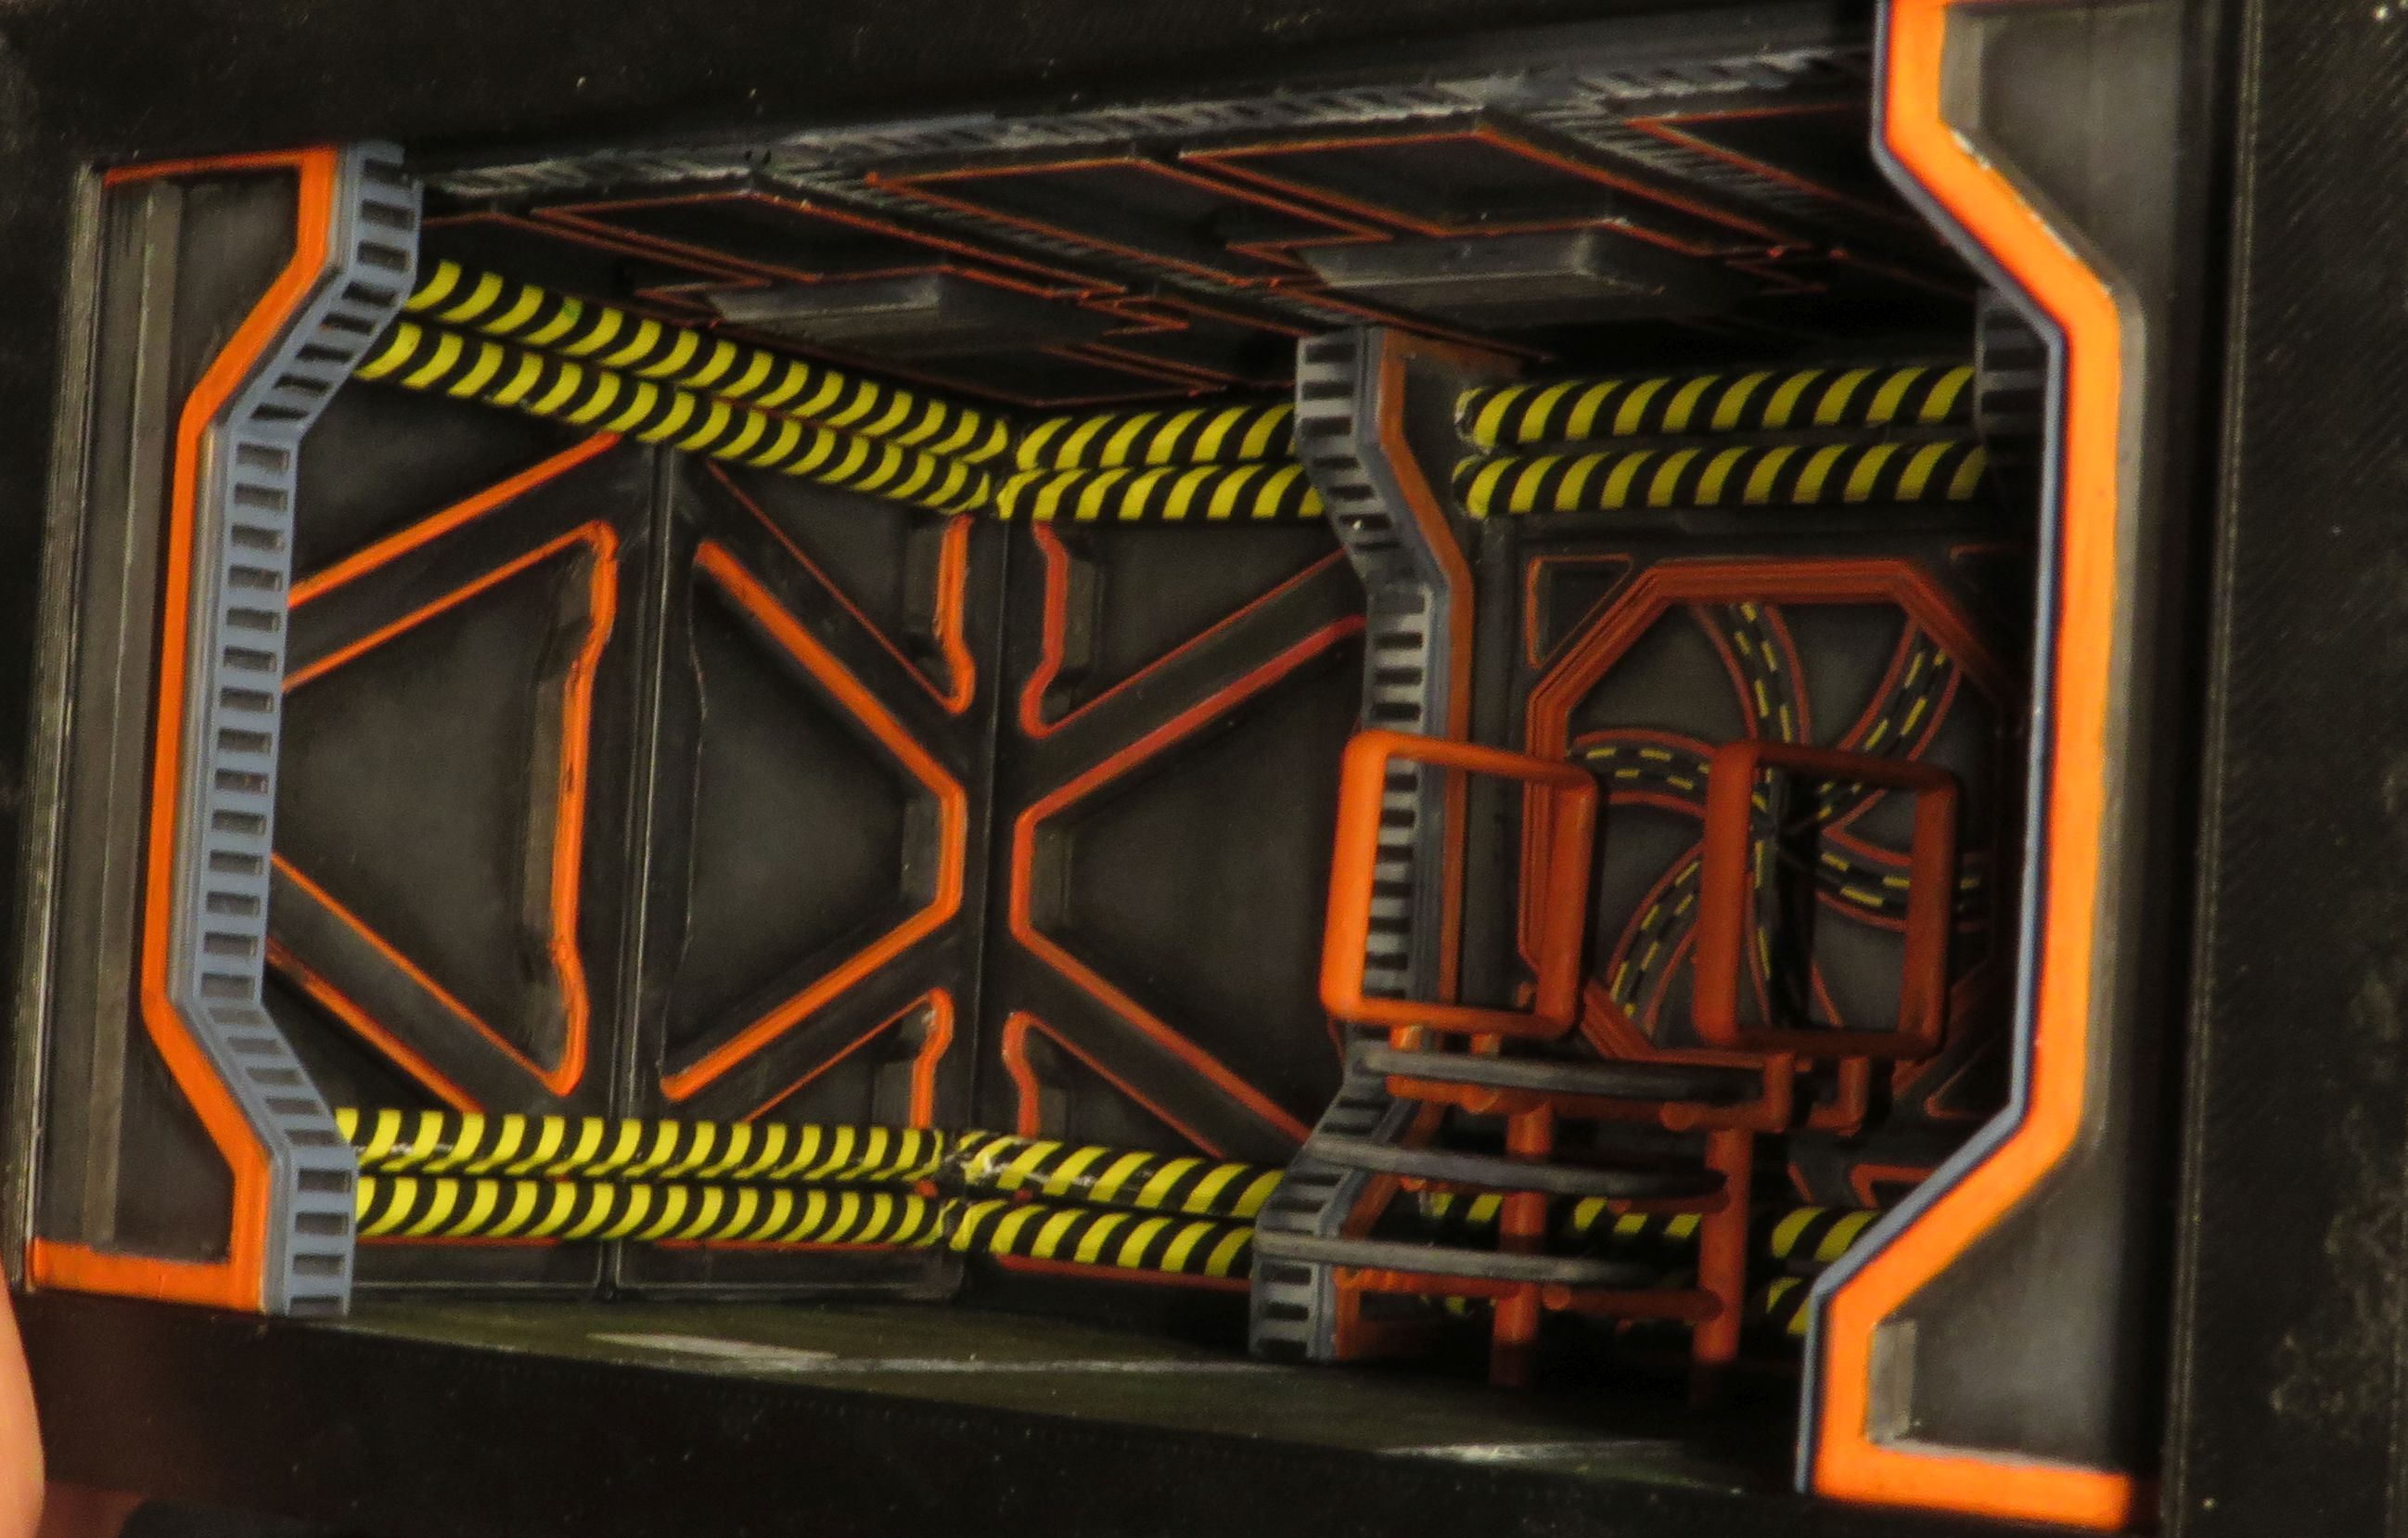
I finished the ‘spaceship cargo bay’ part of my exposition. Pictures bellow.
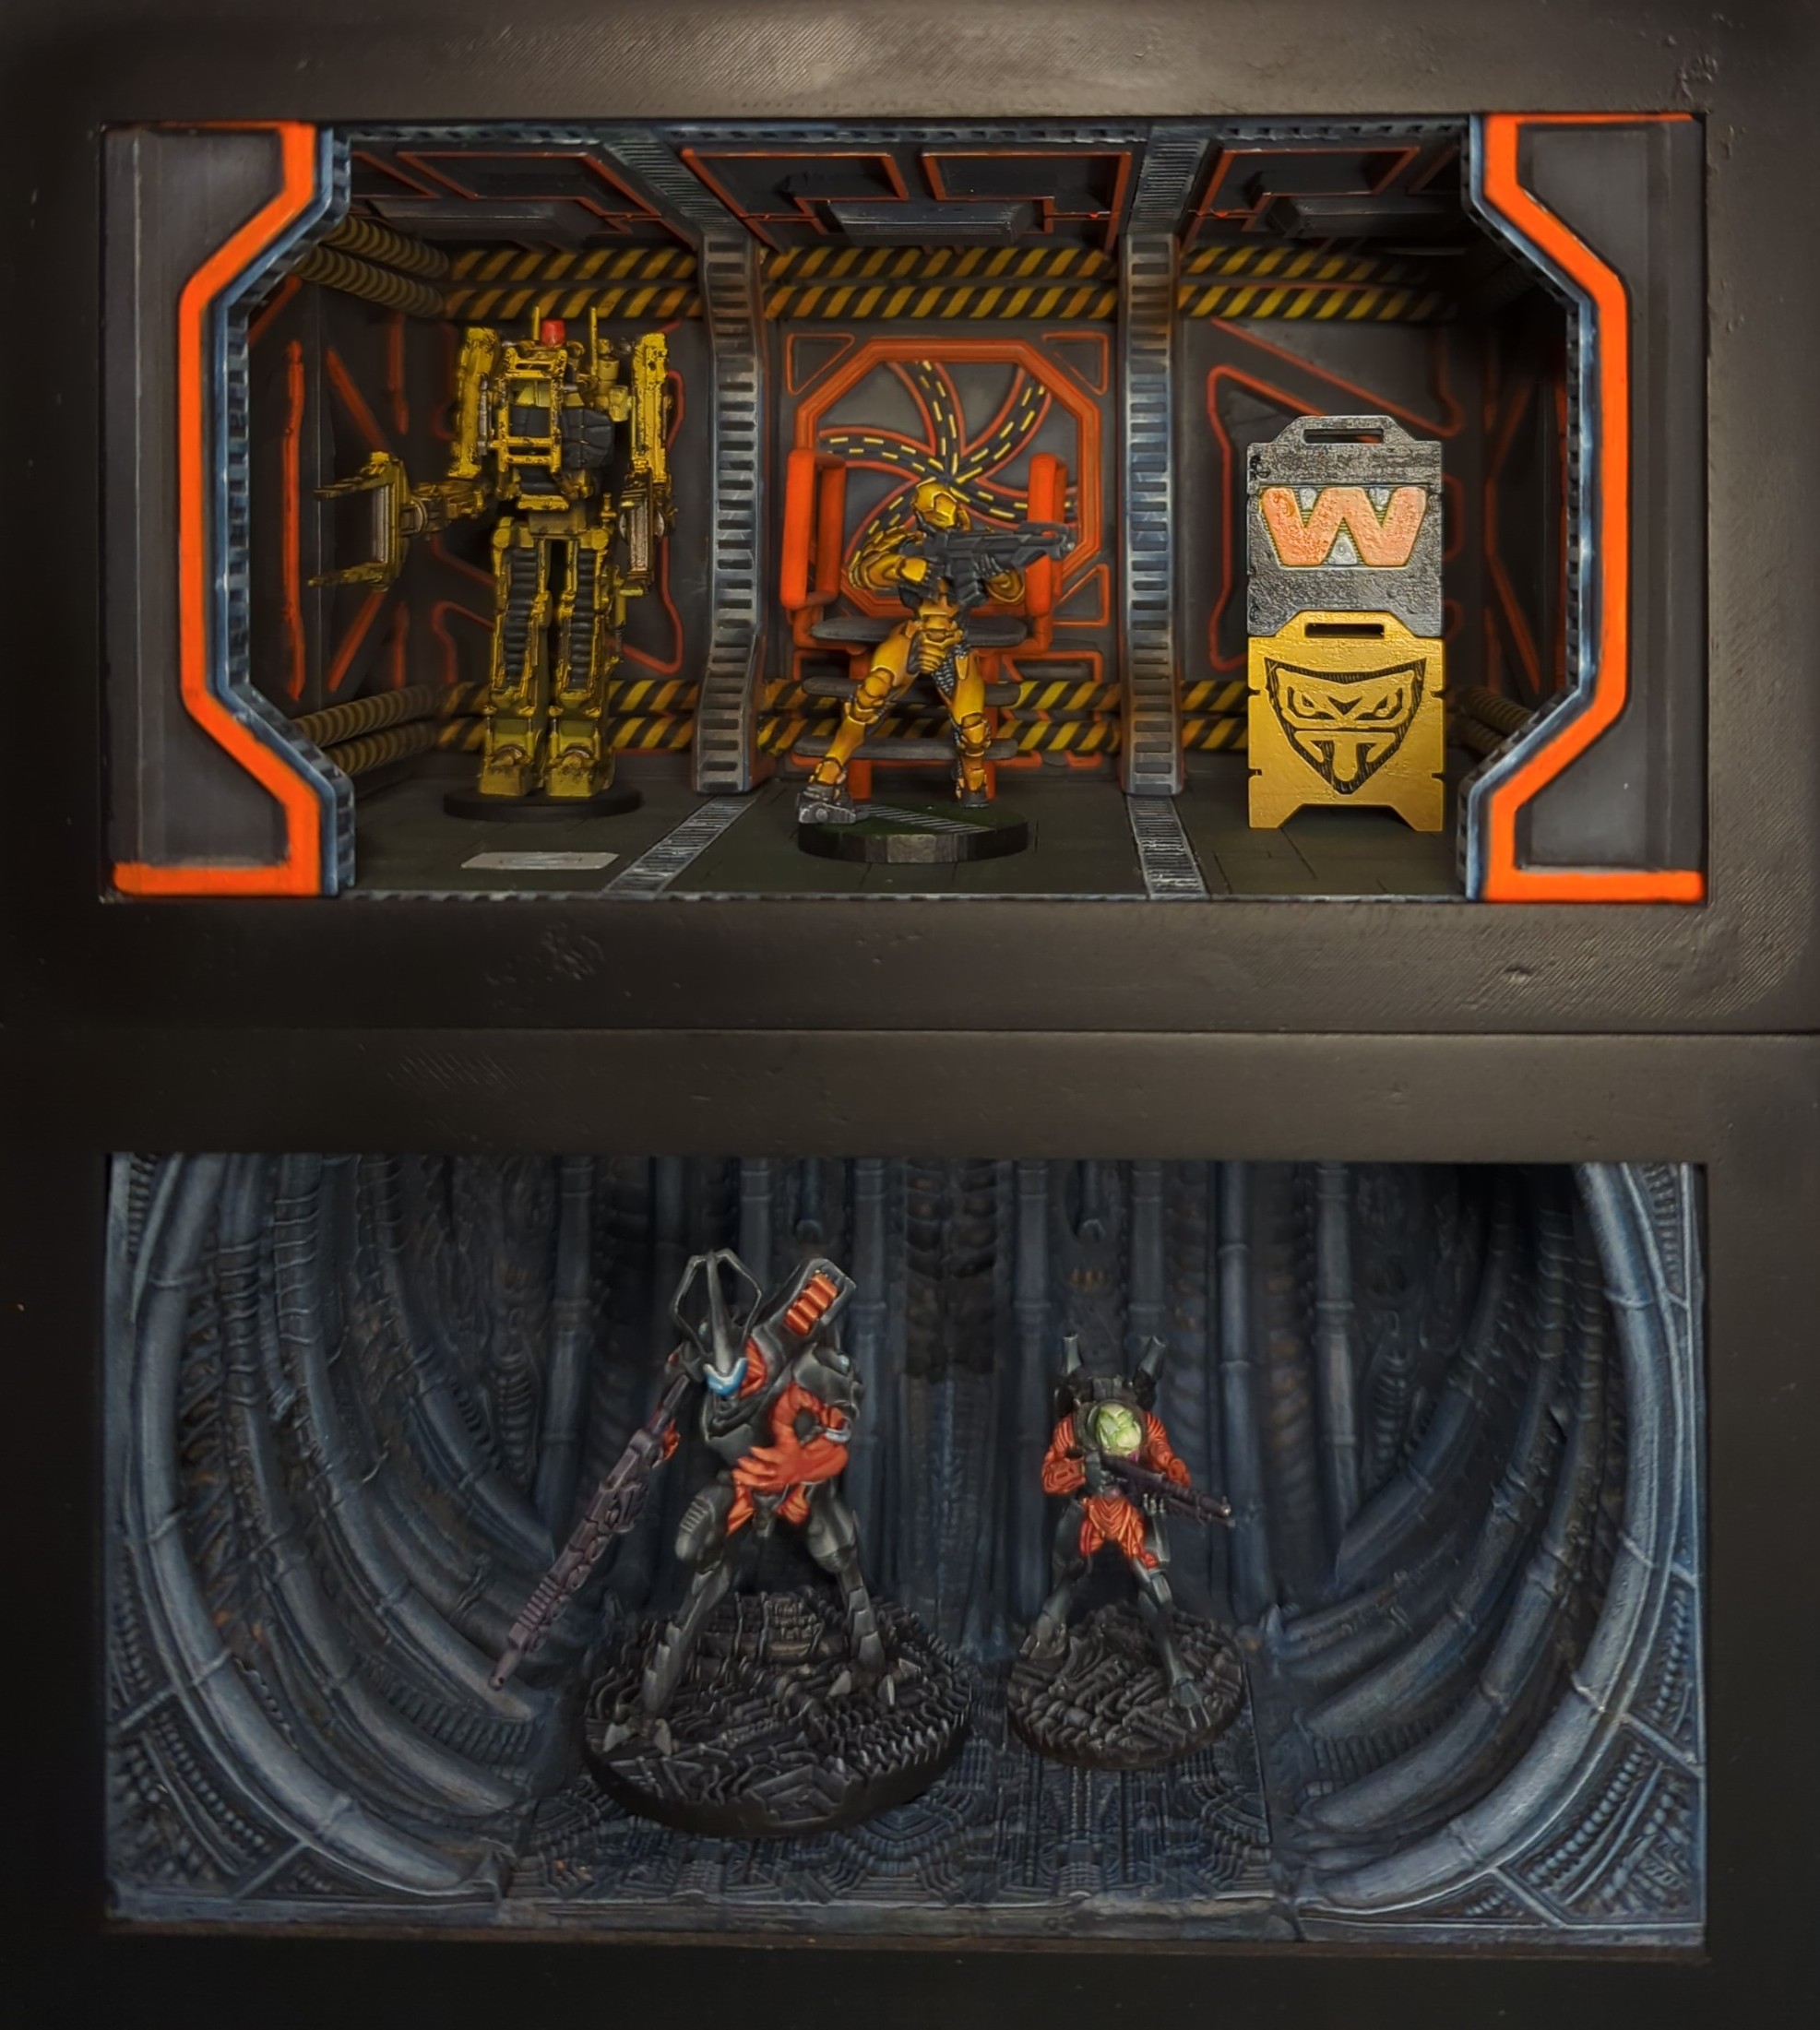
I didn’t see it live but the pictures really exaggerate imperfections of the frame, I’ll need to smooth them someday.
And this is where I stand with my full composition:
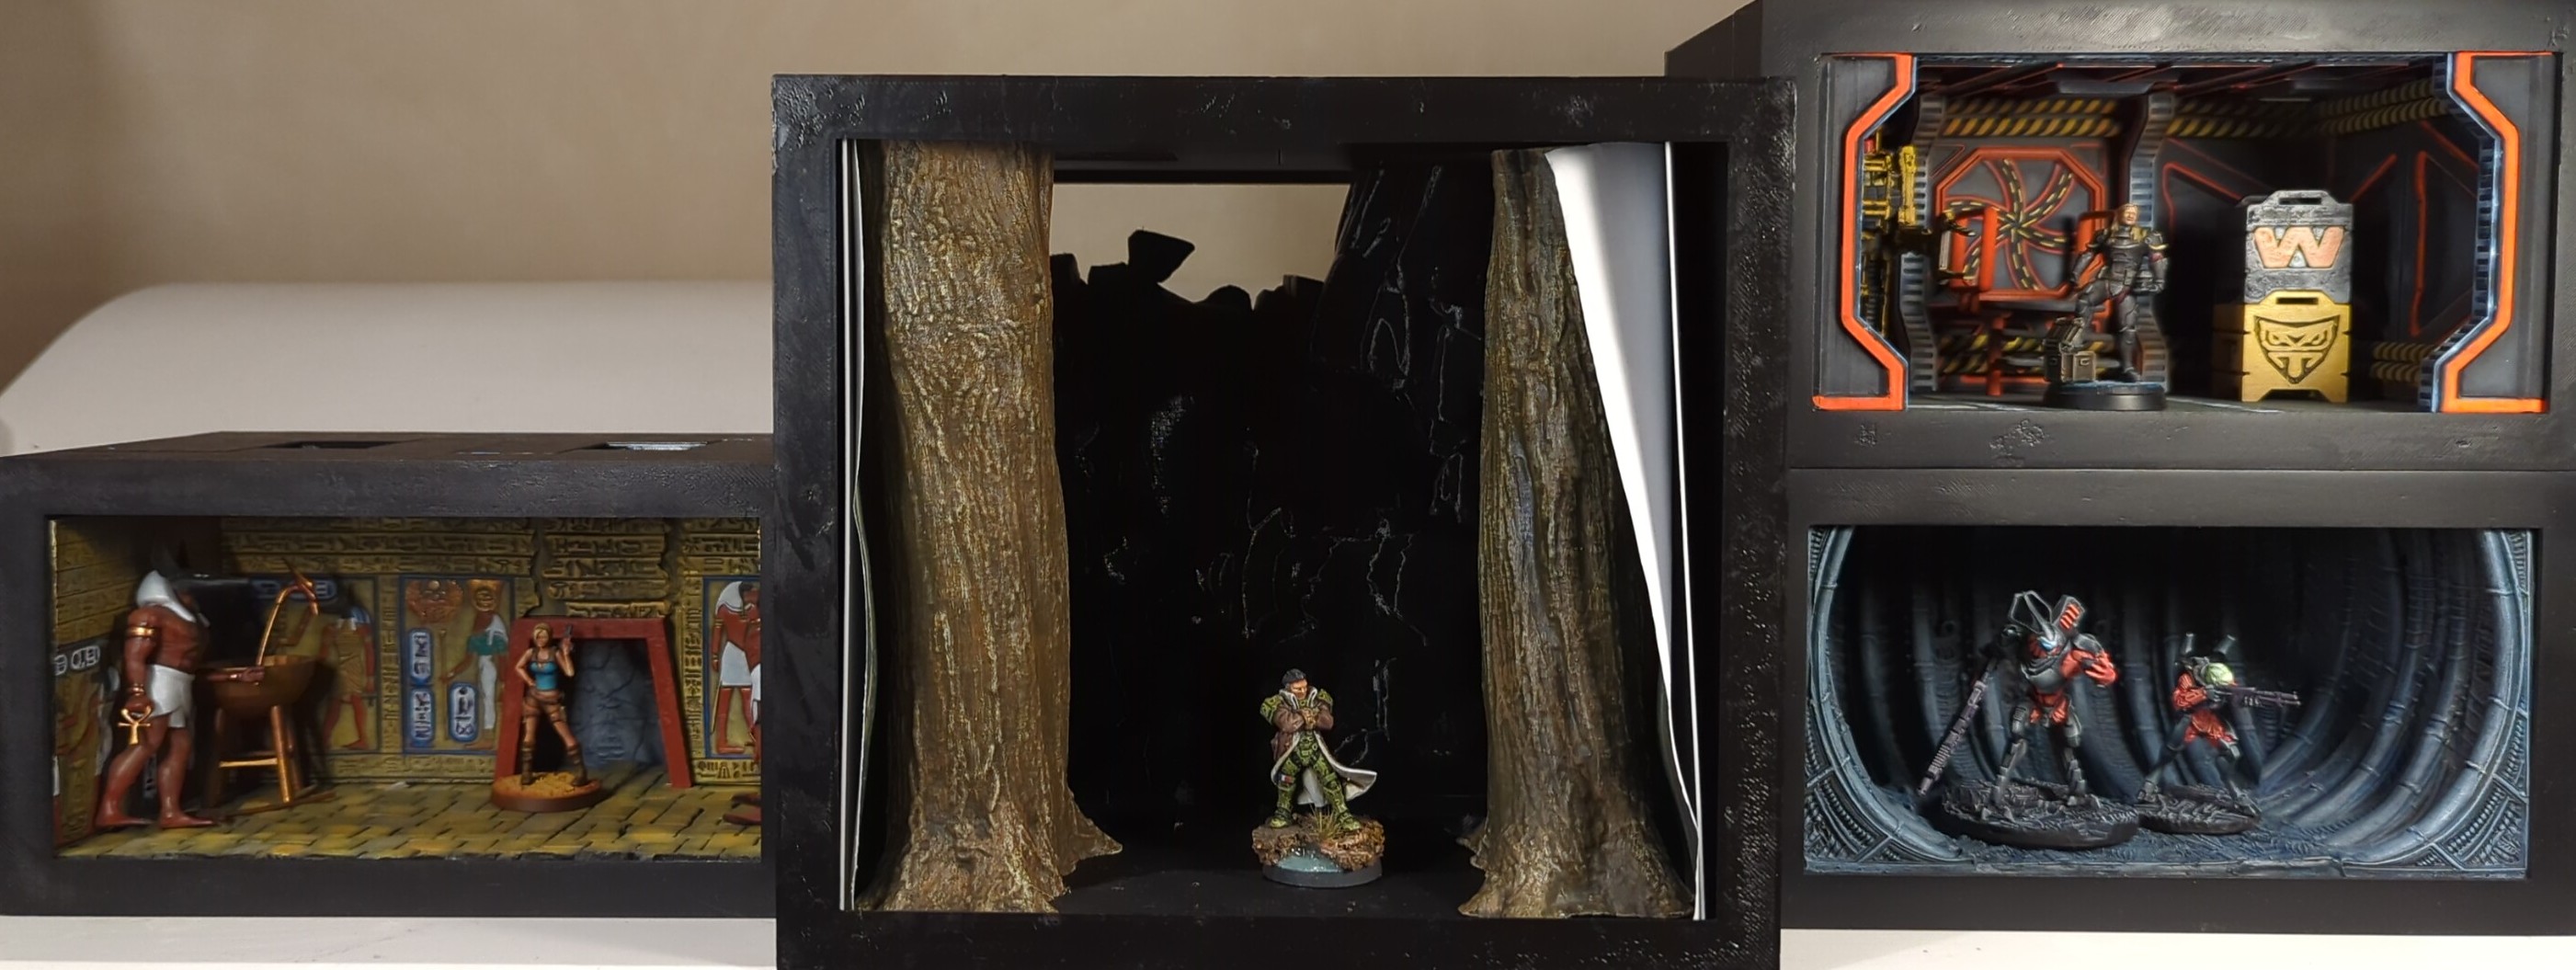
The Egyptian part still needs some touches, I need to buy some materials and this actually keeps me from finishing it. As you can see I also started the centrepiece, it is supposed to be a clearing in a dense forest/jungle with little pond and waterfall. I already have all the materials and I even started some painting. The questions remains open what theme would be the last frame in this setup… I have idea for a kind of train street inspired by famous place in Hanoi, Vietnam. The thing is that it is in portrait not landscape format.
I’m thinking maybe some outdoors scene, maybe desert or snow… or maybe the subway station as seen in original Matrix when Neo fights Smith… I’d love to hear some inspiration from you.
This project is still live, just saying…
I recently have mood to finish my opened projects, the thing is I have so many projects opened that it feels like just another day in my hobby…
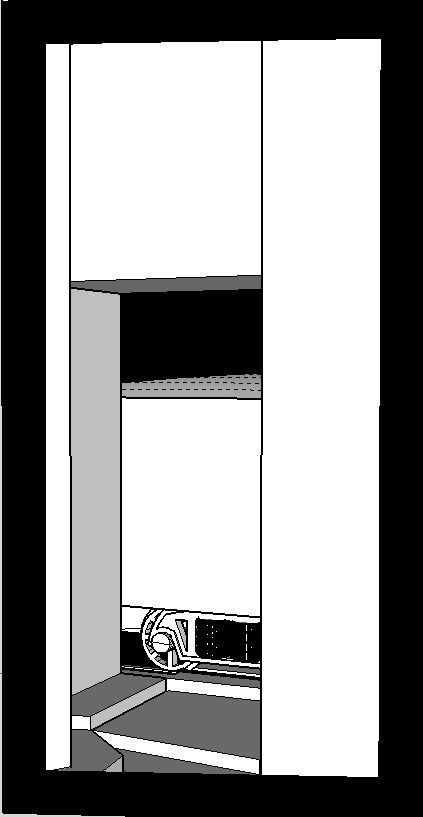
Anyway, I pushed my spaceship diorama frame thingy. All that is left to do is painting those pillars at the very front, adding some shadows and weathering on the pipes and all will be ready for final fitting into the frame.
 Oh, and it will need some matt varnish...
And bang!
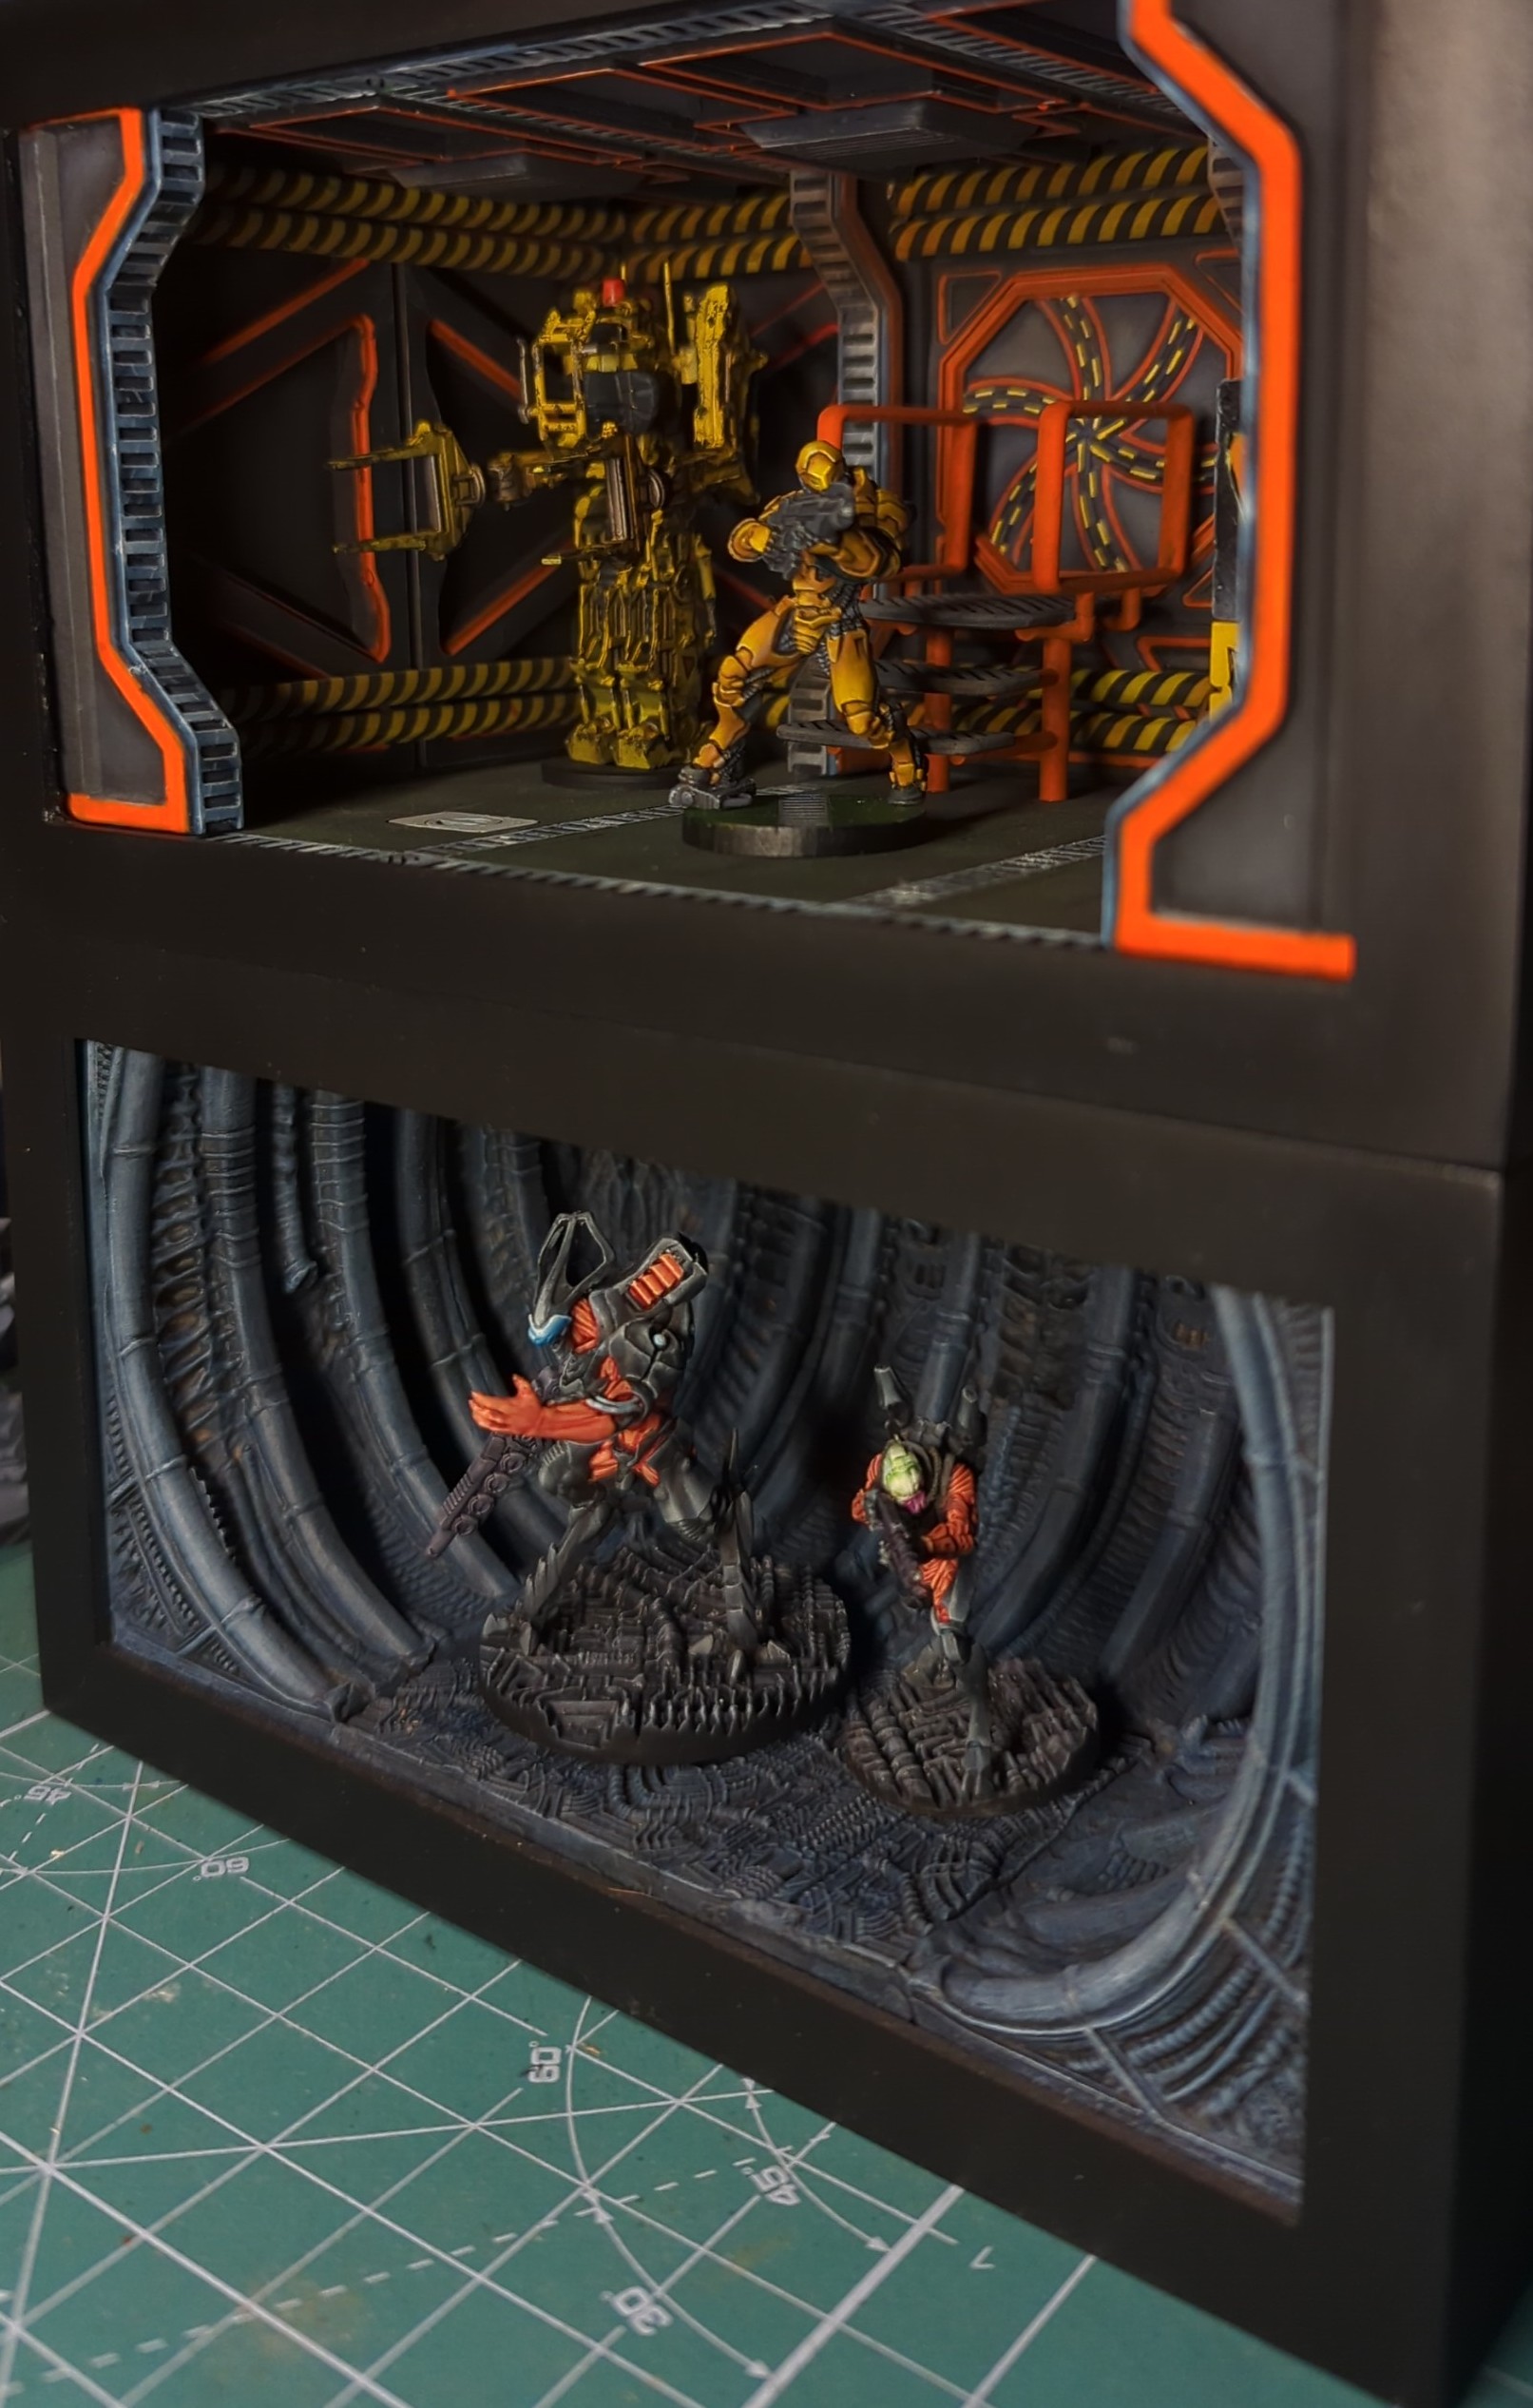
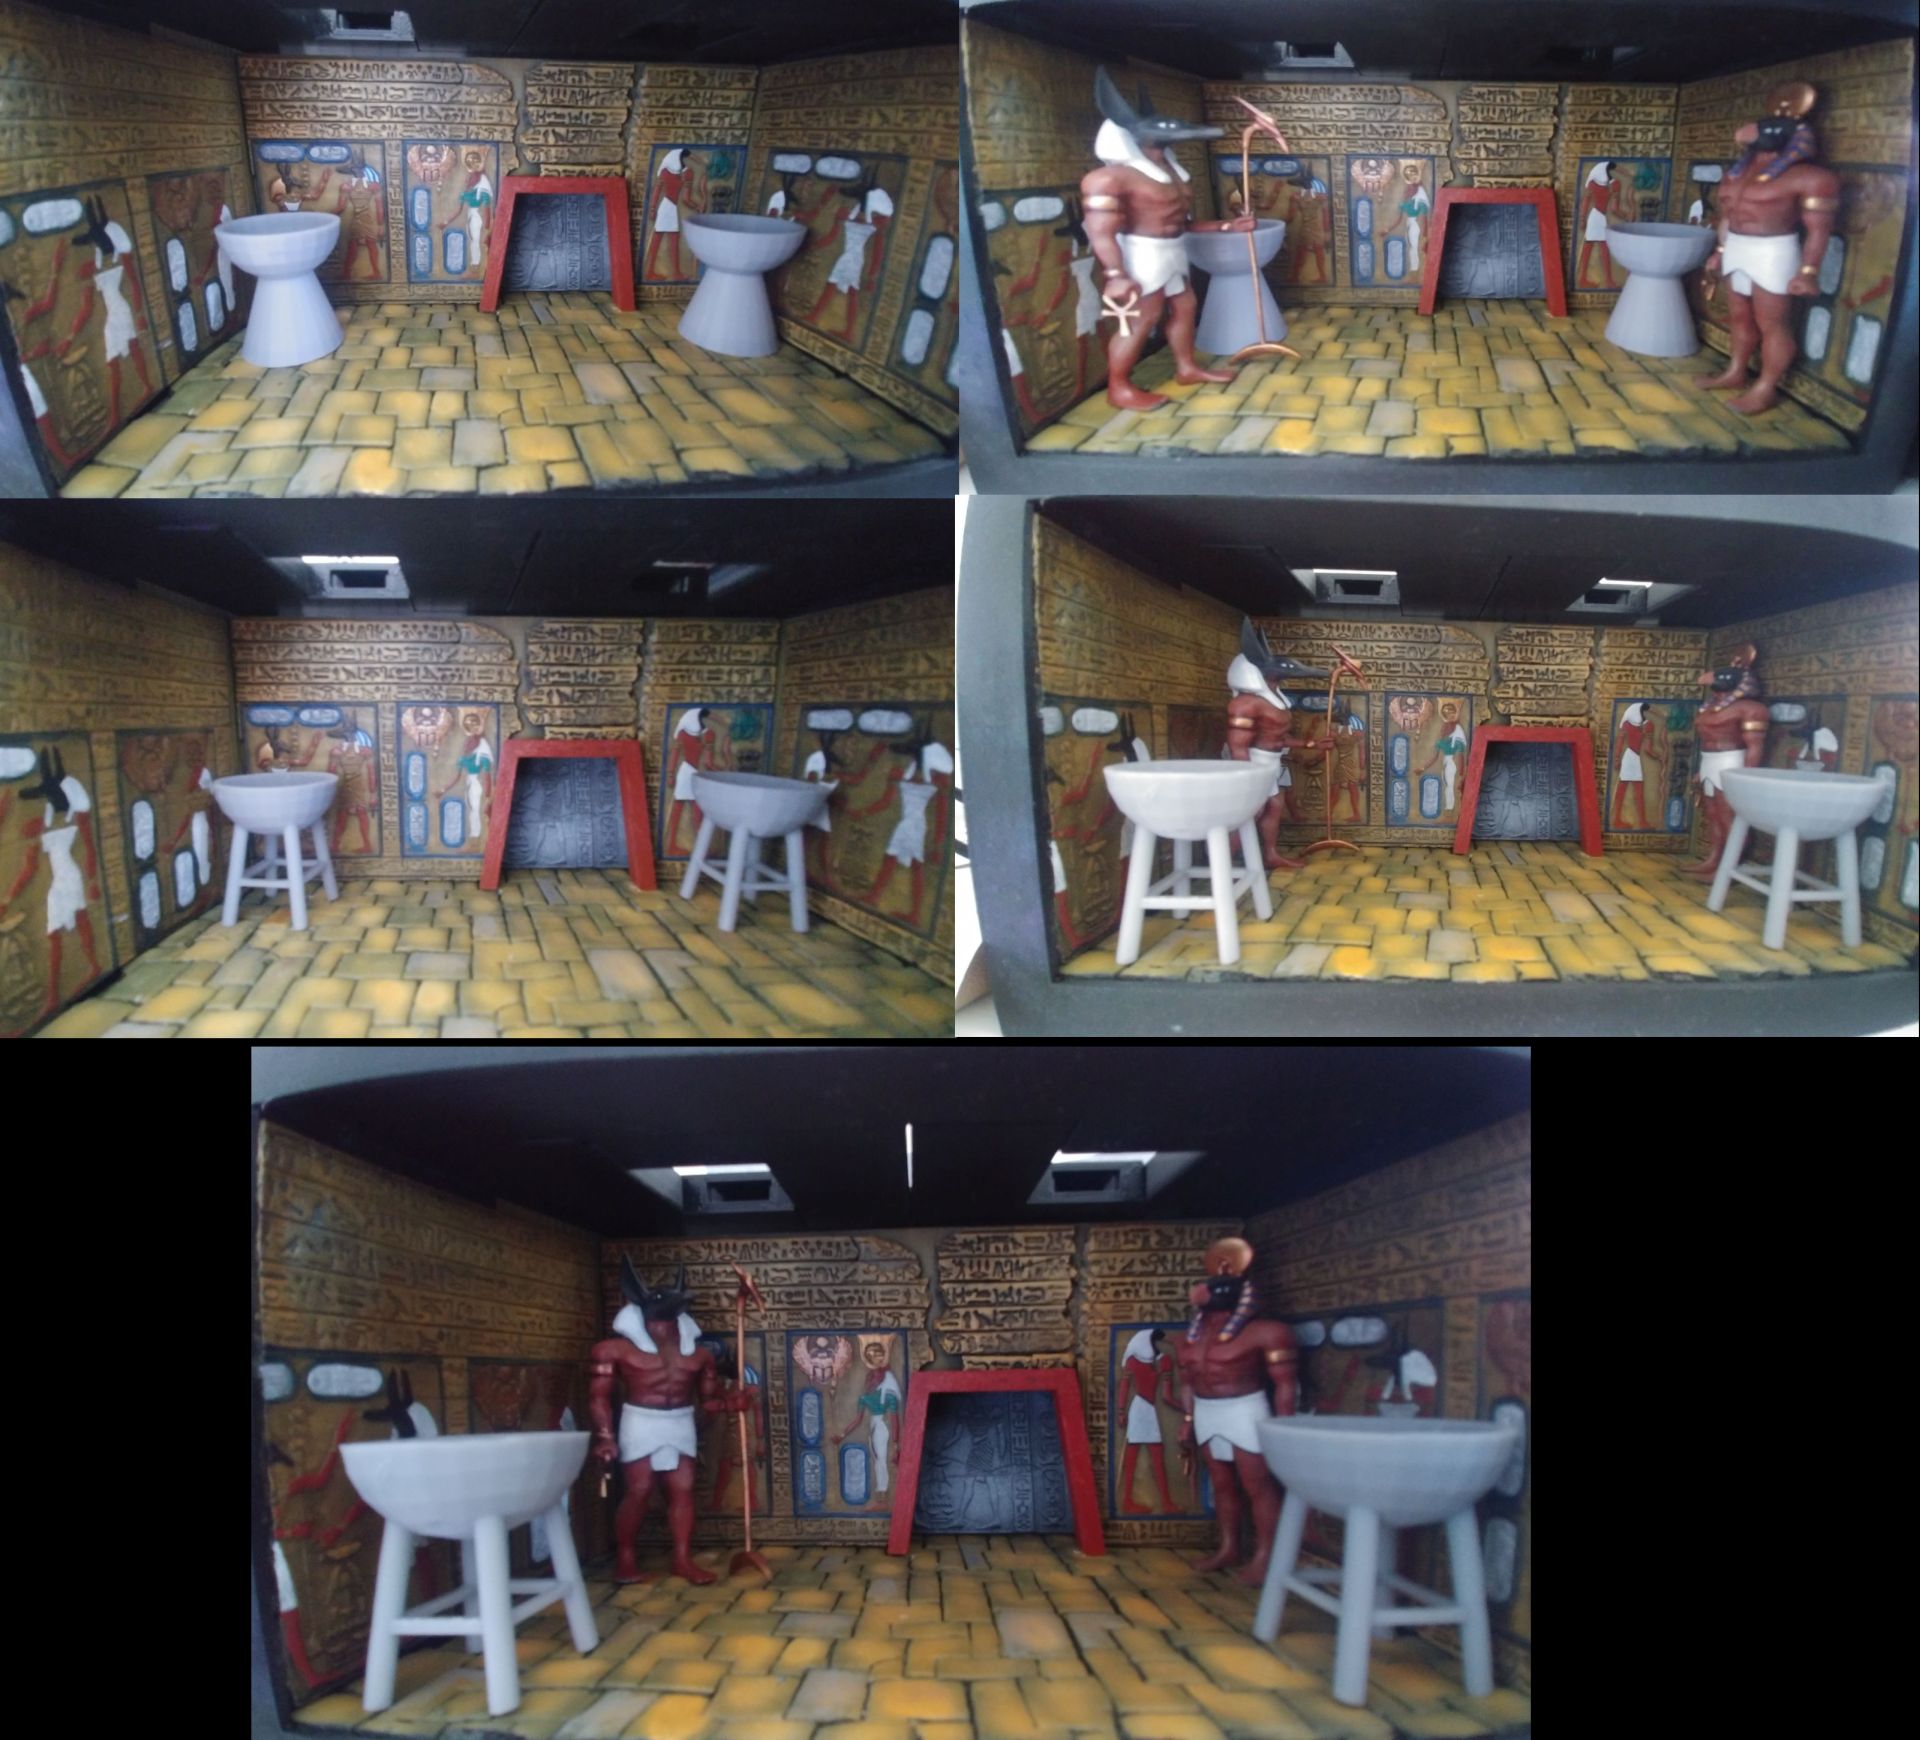
Another twist in the story. Since Spring Cleaning is all about finishing projects I decided to start new one (within scope of the original idea) and printed whole insert to yet another frame. This time Geiger’esque interior (from what I understand inspired by the Alien sanctuary as seen in Alien, the 8th Passenger of Nostromo). What is different about this one Is that I actually finished it. Bellow you’ll find a couple of WIP photos and final products.
The main challenge in this sub-project were actual STLs. They were obviously different size than my frames, but most of all, they were designed as separate pieces (straight and corner walls, floors, etc) and they don’t really fit well, there are obvious gaps and some illogical ends of patterns. I tried to remedy that as well as I could, but in some places my miliput work is clearly visible. Maybe at some point I’ll add some wires/pipes and alien eggs to hide them.
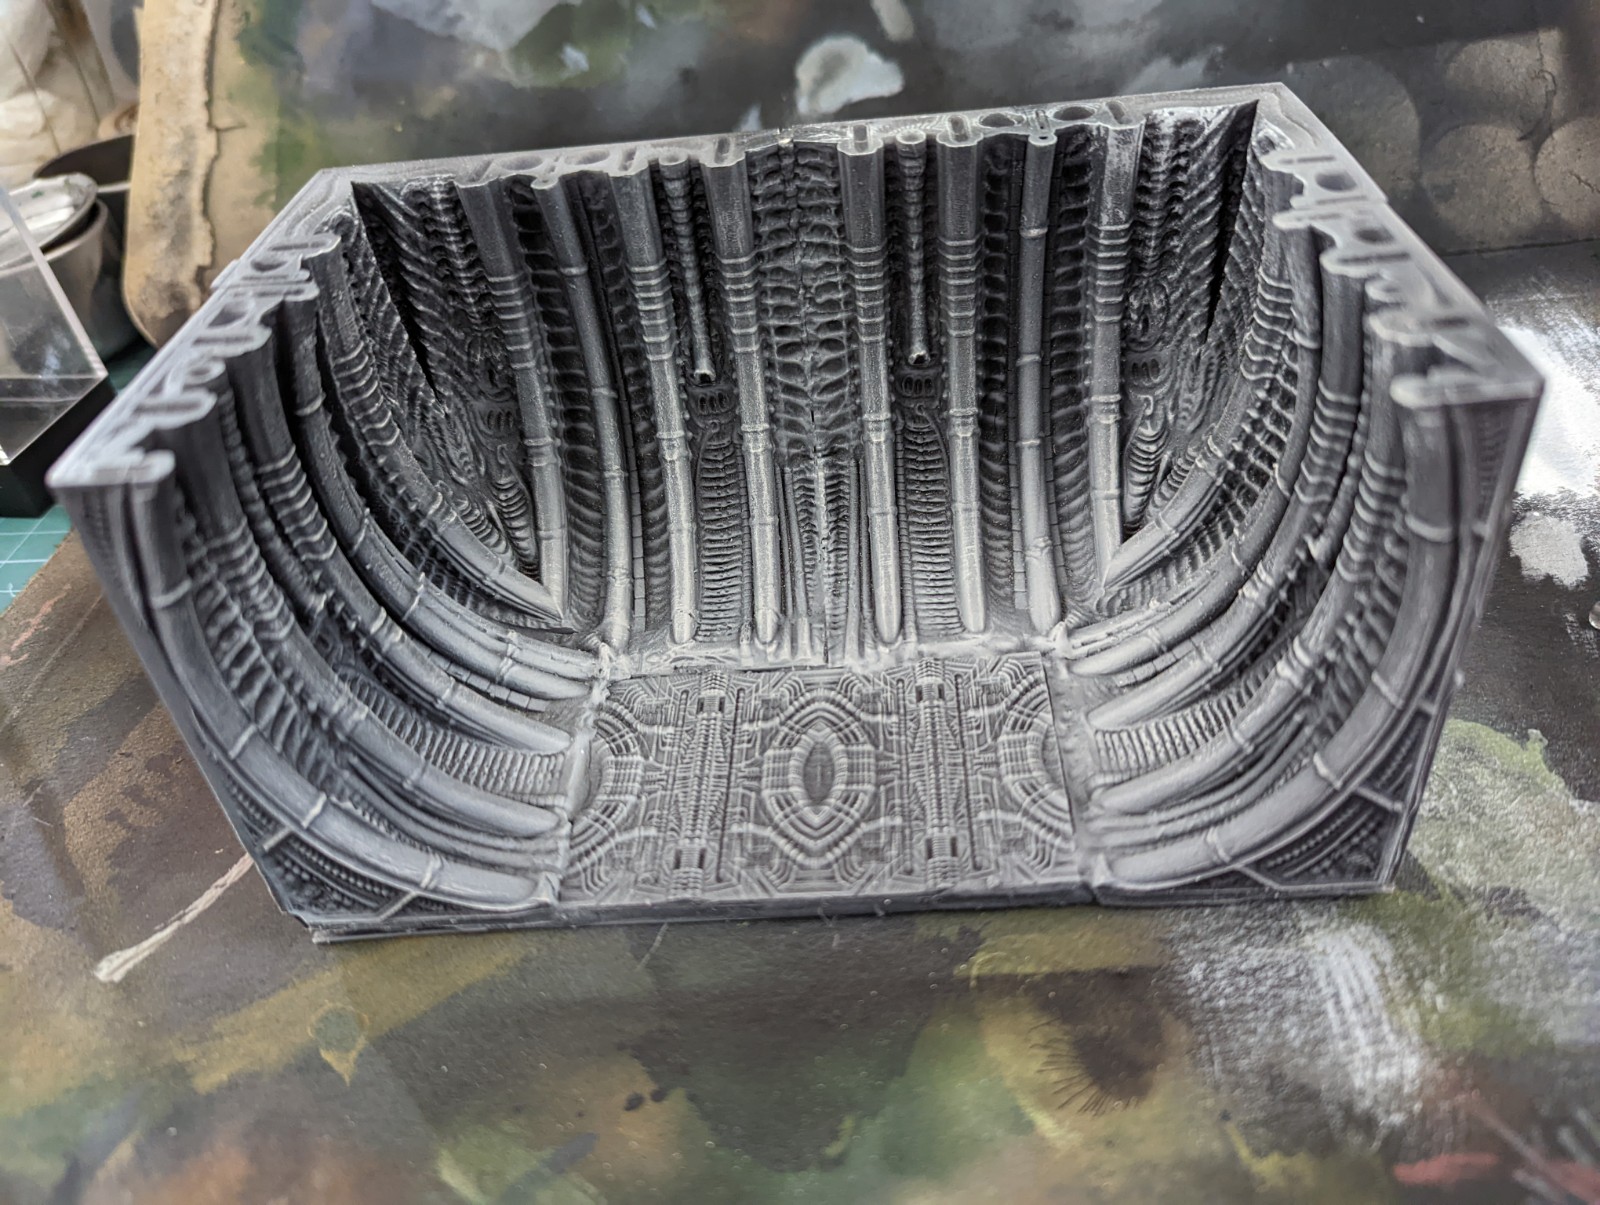 First steps: Black primer, grey ink in kind of zenithal application, white drybrush
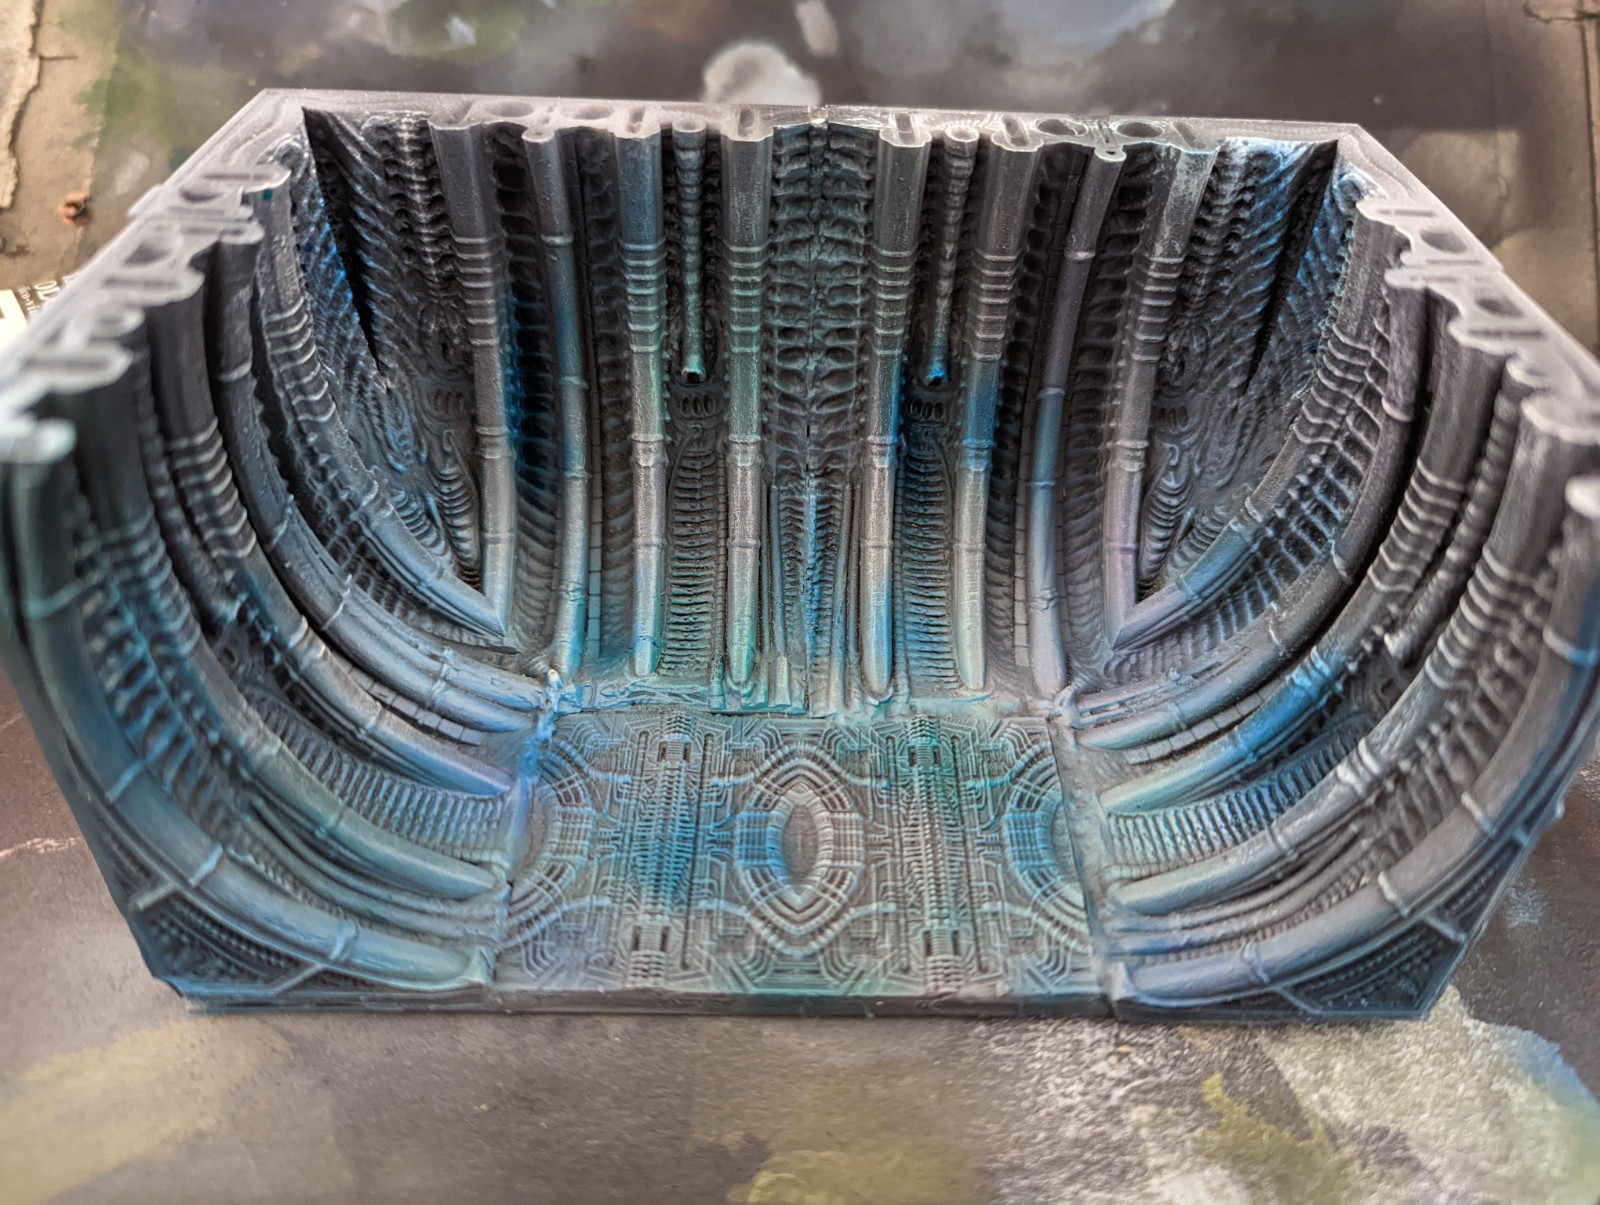 Step two: colourful spots here and there - I used some GSW intensity inks; I believe these were blue, purple and green. This is to add some faint colour to the final product
 Step three (and further): aplly wash, I went with 'chromatic black' approach - mixed dark blue and orange inks with glaze medium and water and applied several coats of it all over the model, drybrushing white a little between layers of ink.
 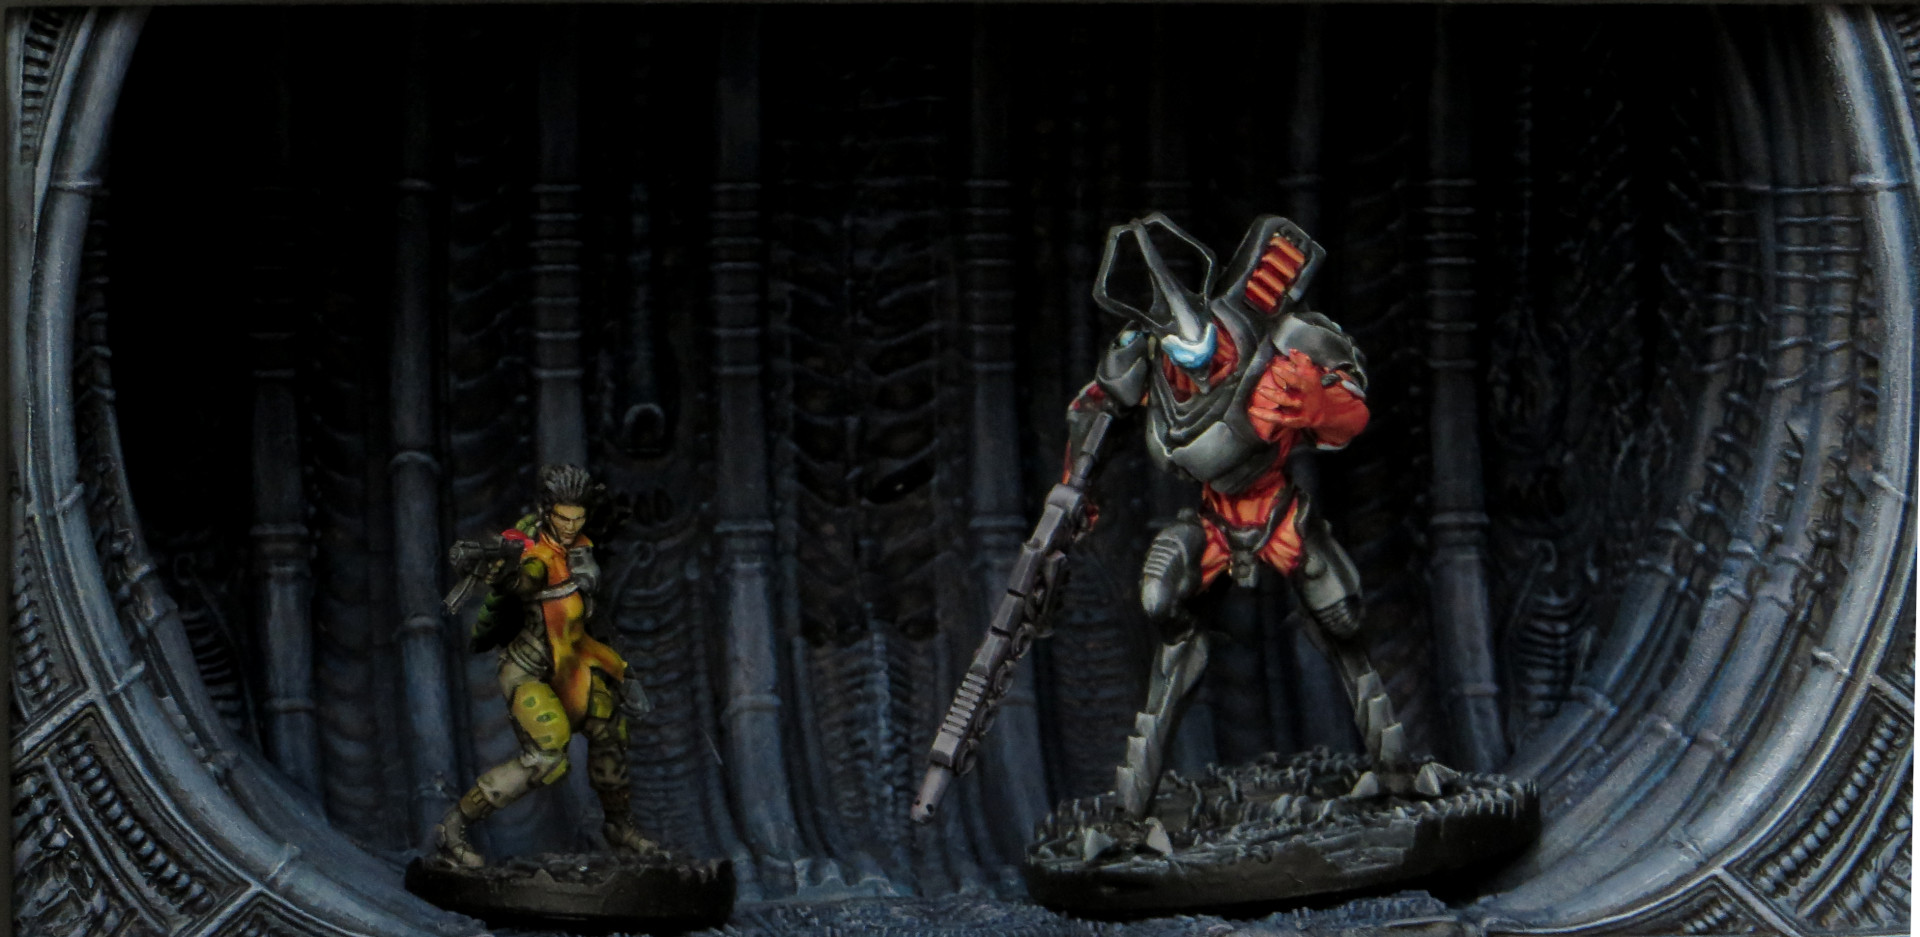 Close up
 With oldest sister, still WIP
Ha! Nobody expects… this project to resurrect!
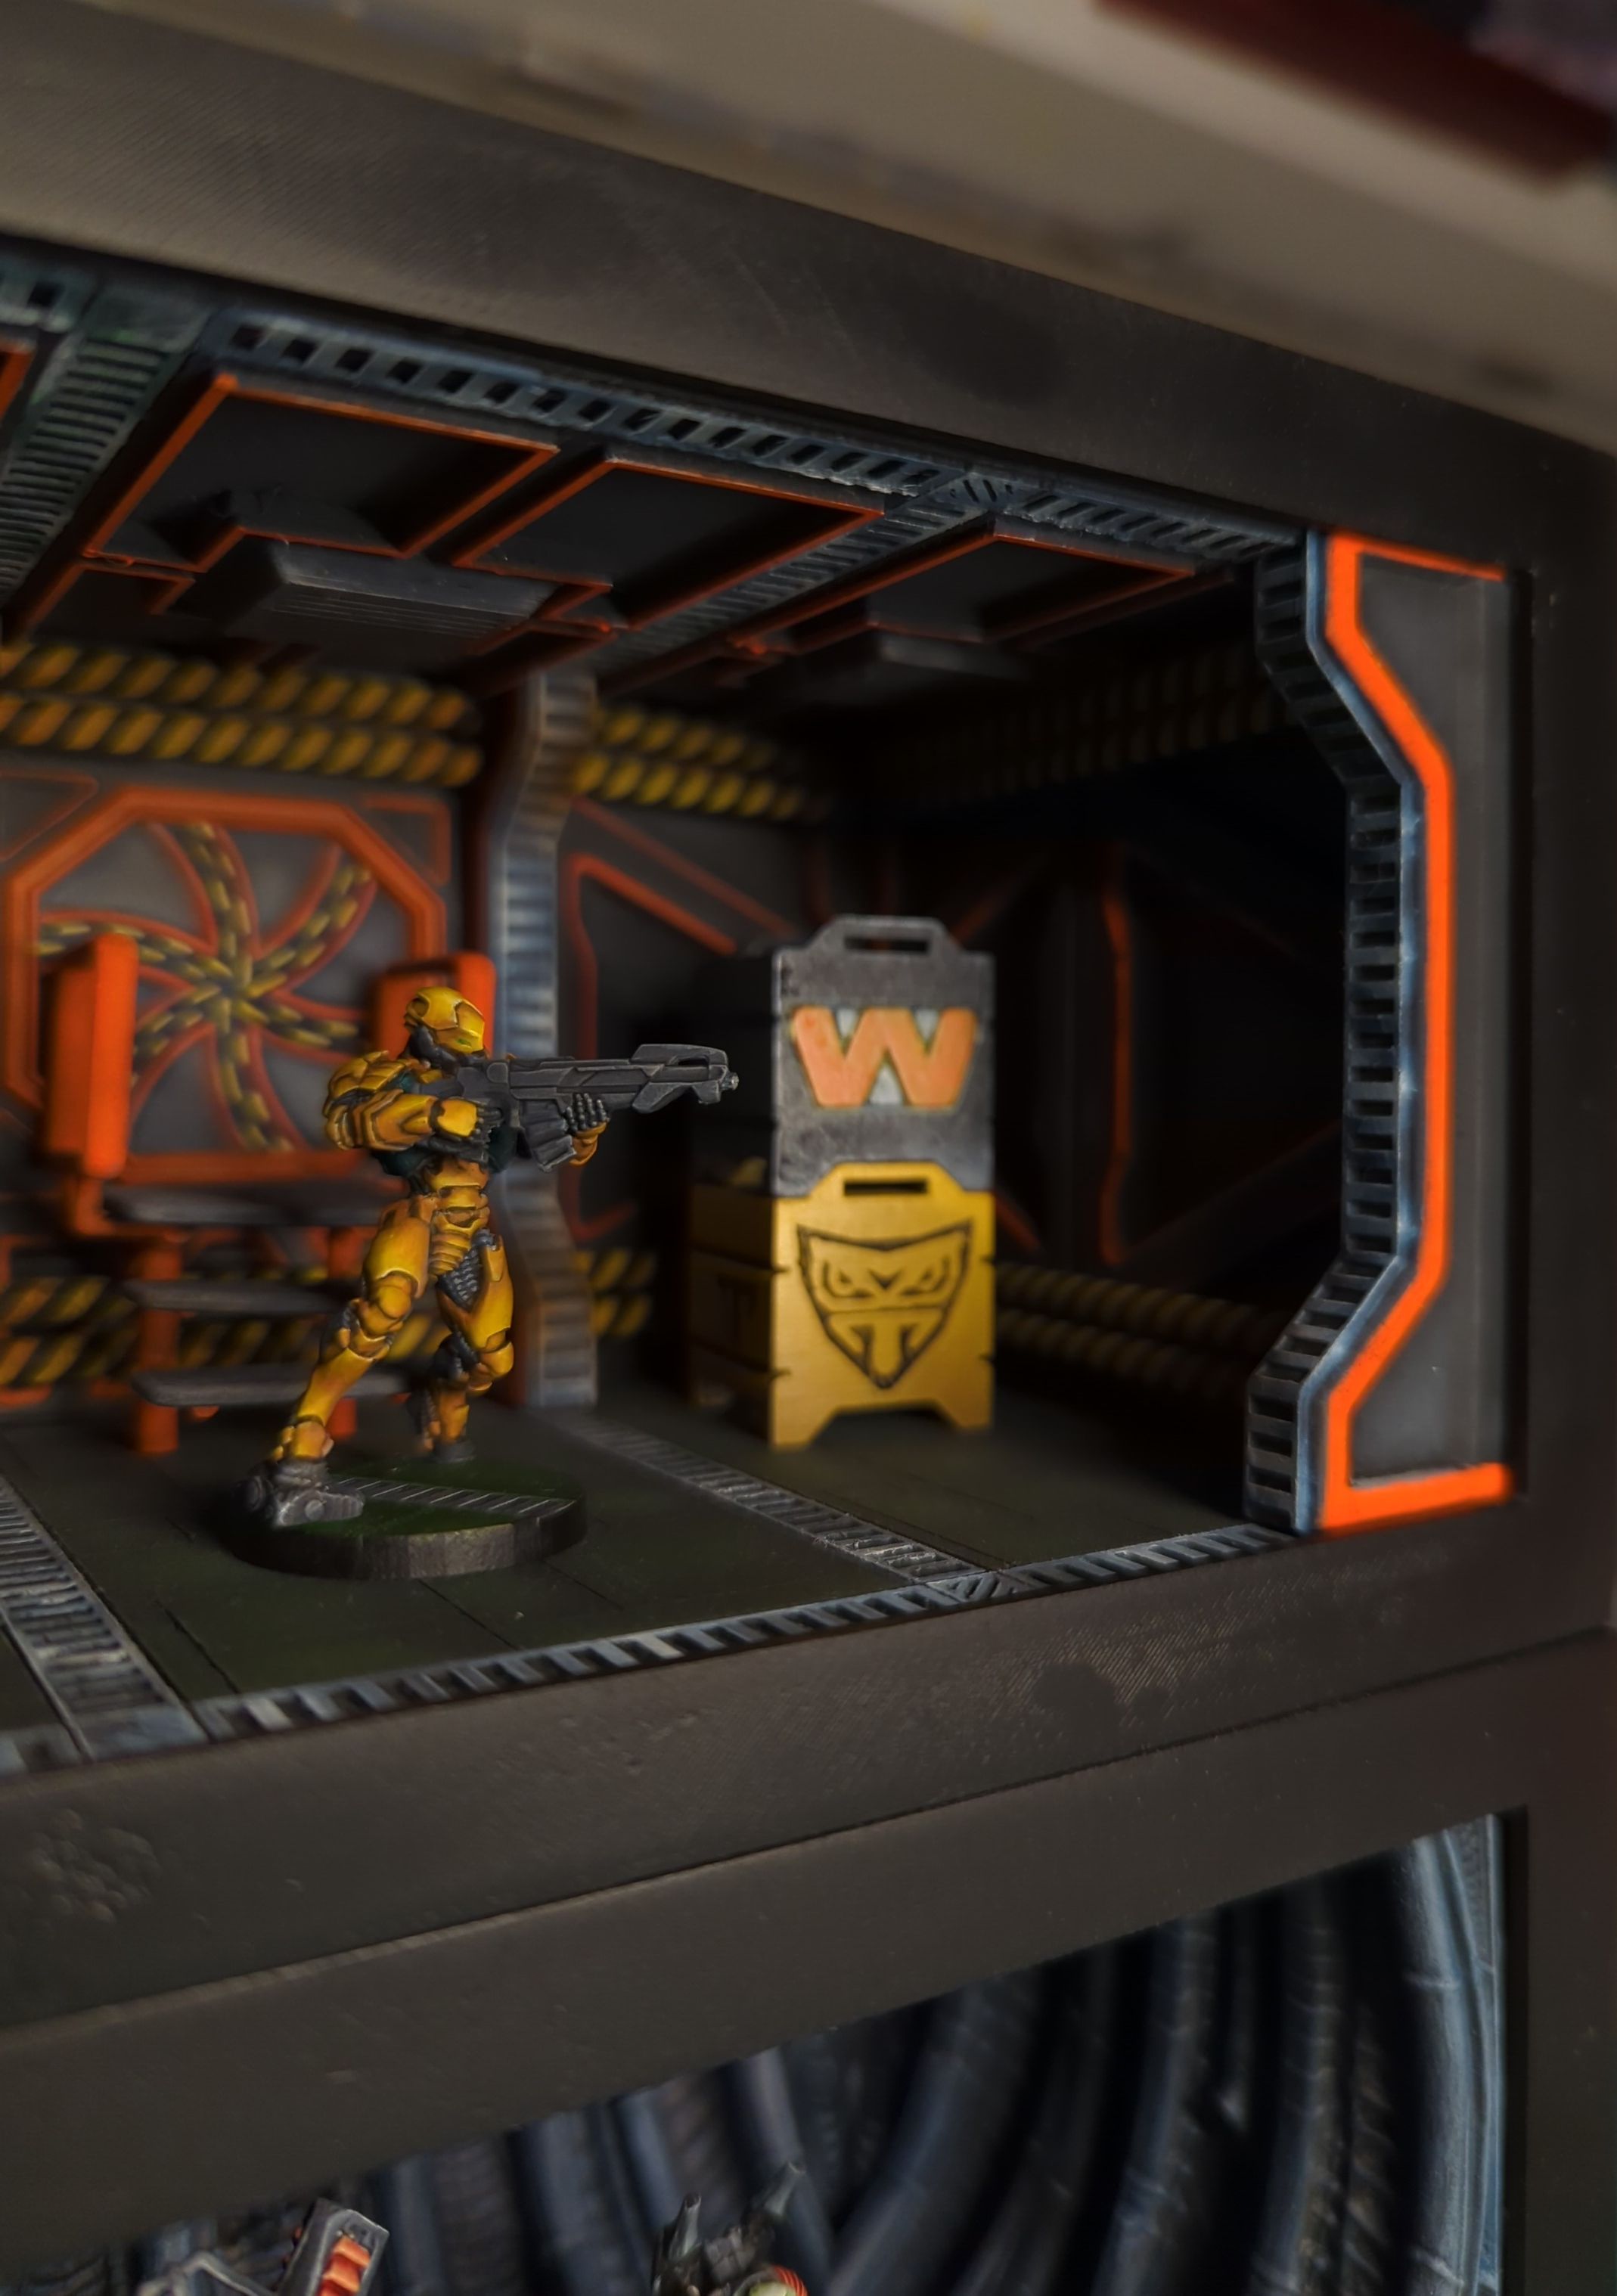
And me the least of them all. Yet here we are. I decided to continue with the diorama part of it. I designed new setting and have it completely printed and almost fully painted. I also have a sketch of the next diorama, we’ll see where it brings us/me in June.
 My new design, sf interior in colours matching my Yu Jing army for Infinity the Game
 And this is where I am with both models together
Oil 3. No more oil.
And as promised yesterday, bellow you’ll see the final photos.
In my opinion, apart from being bones and thus not having any details, he lacks some highlight, that is because I didn’t manage to mix anything like sunny skintone or ivory, the colours I usually use as final highlights.
Anyway, I really liked painting with oil paints and would recommend it to anyone, especially if you want to practice wet blending/two brush blending.
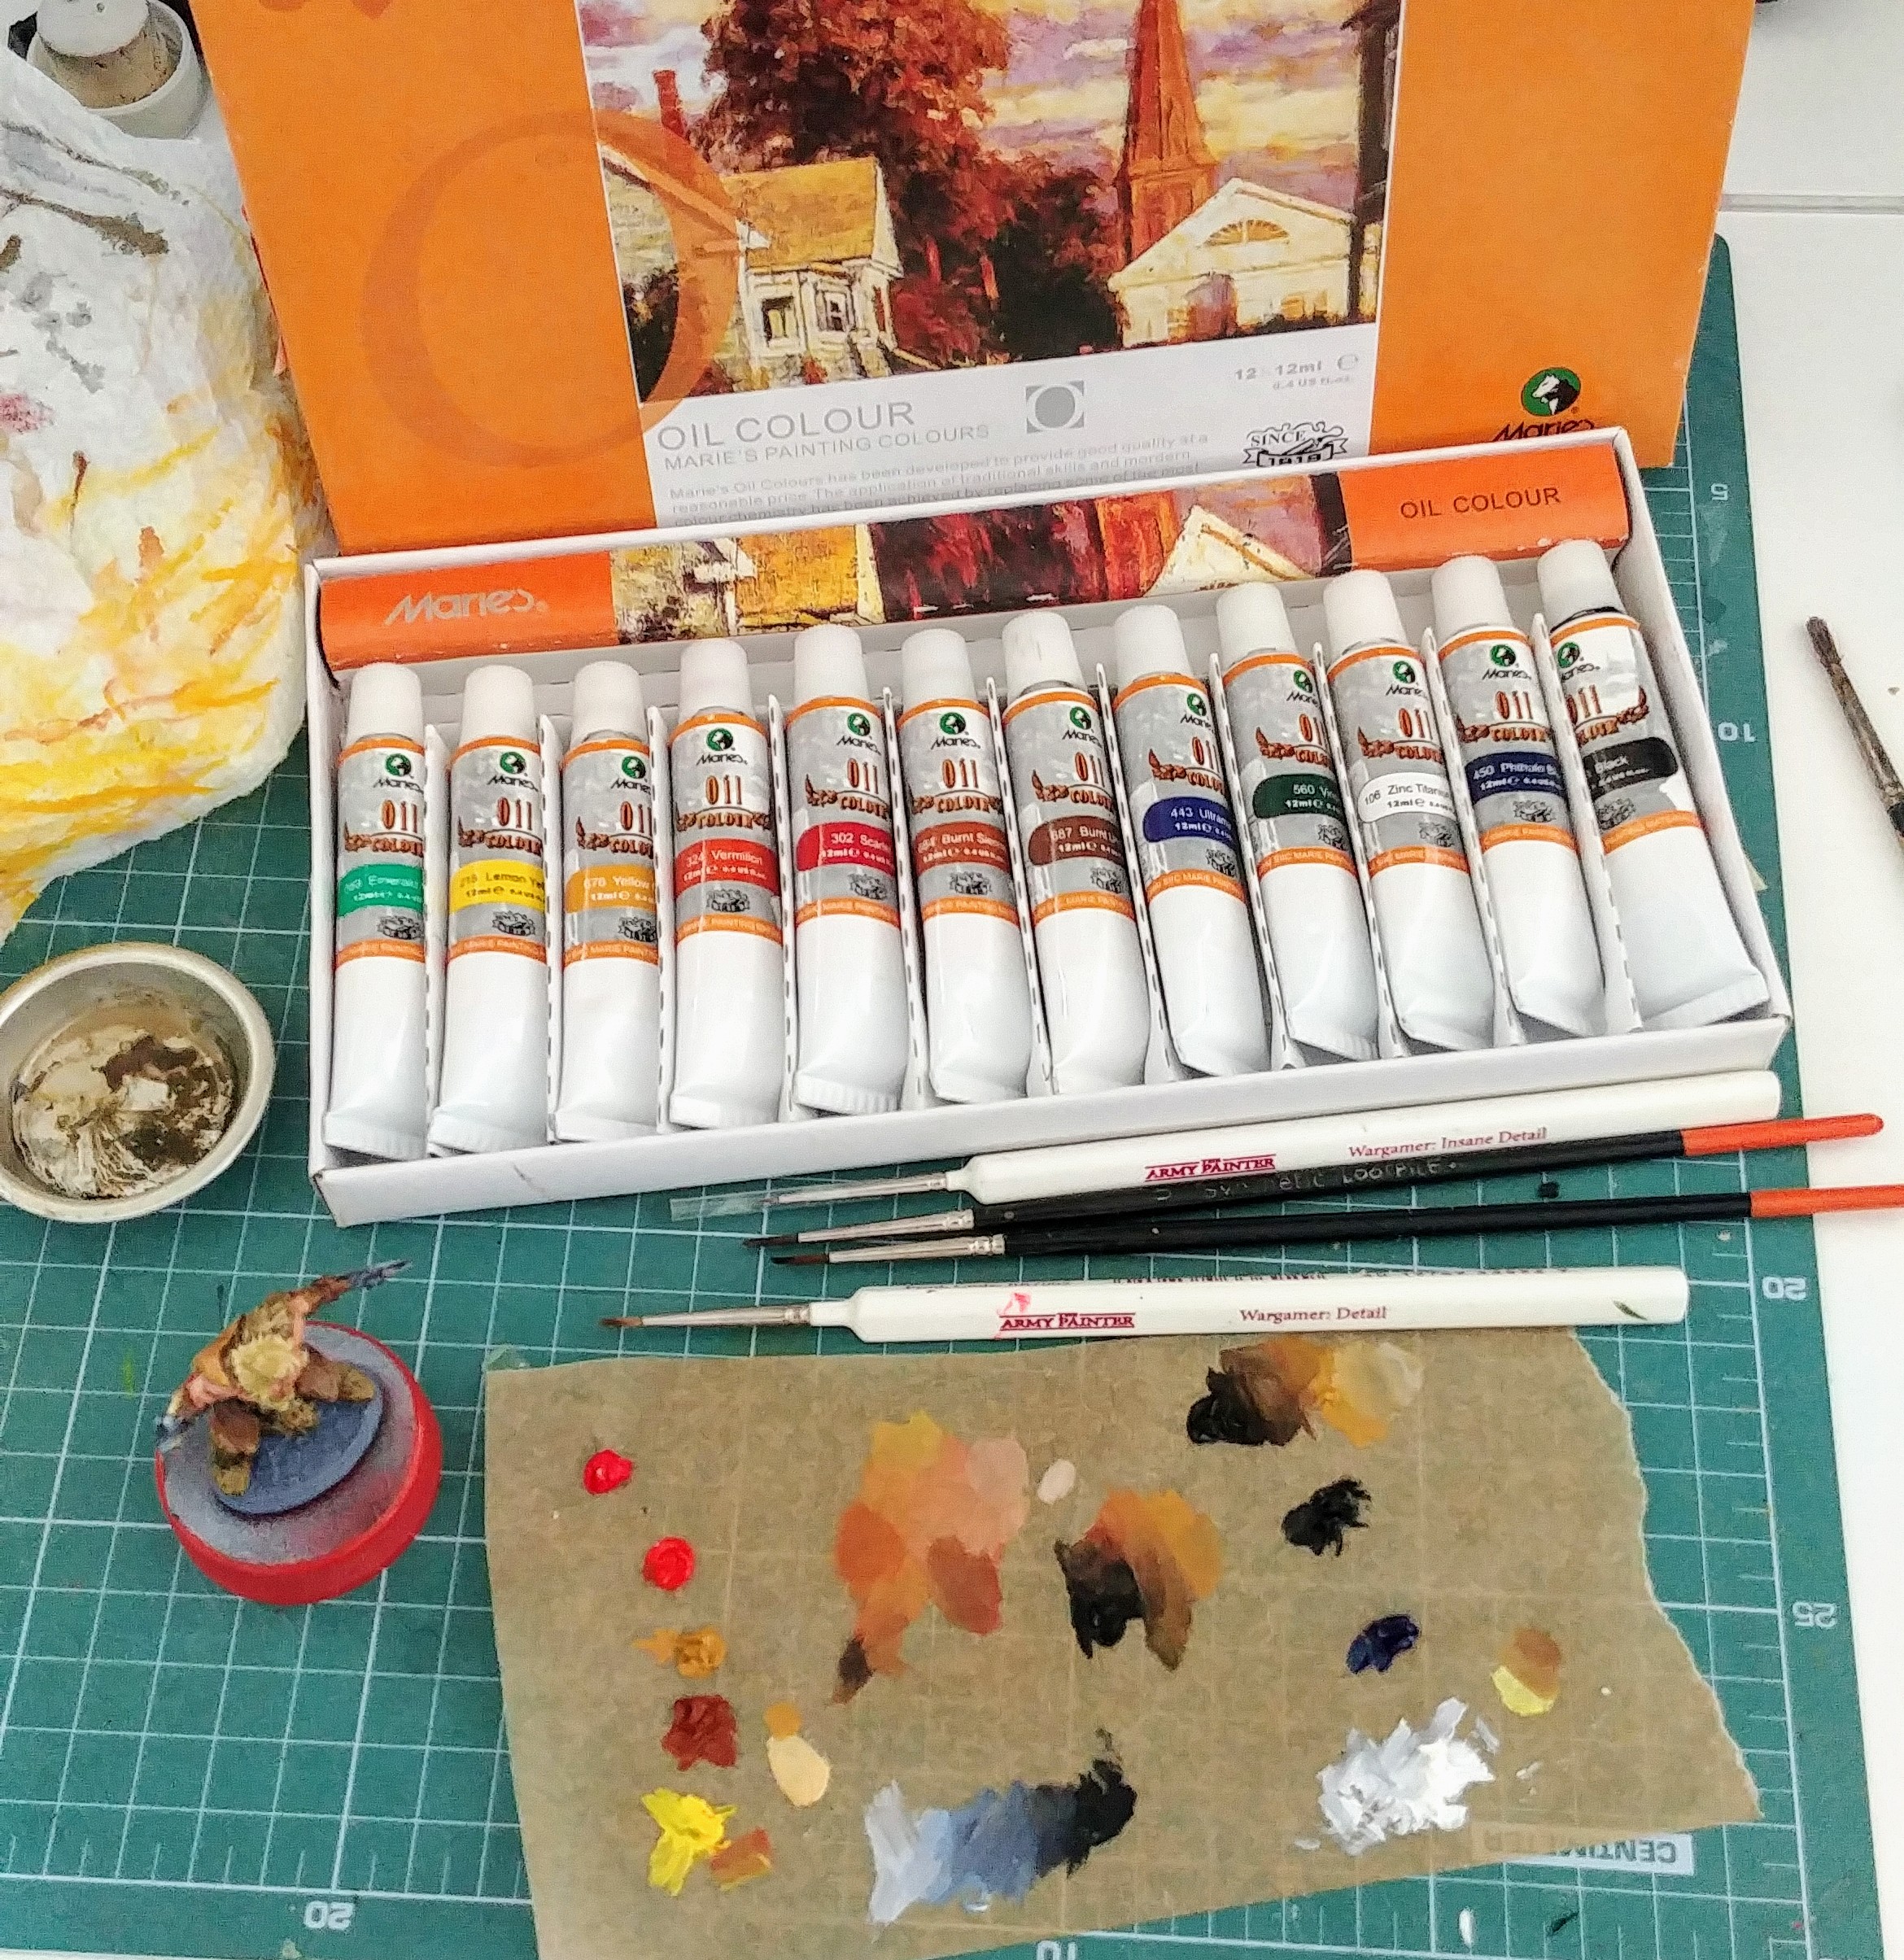
For my next oil-painting project I need to buy some stuff: drying medium, translucent medium, short bristled synthetic brush and two or three additional colours. Fun fact, I used grand total of 7 colours to paint that figure.


Oil 2. Final oil.
My oil painted barbarian is done. It took almost 3 days for the paint to dry, but I couldn’t work on him for couple more days. That changed today, and I finished him!
This is how he looked dried after previous painting session and application of fair amount of matt warnish.
Next I applied some washes (oils of course), actually working from the same palette I used painting him in the first place. Blobs of paint were quite workable with addition of a drop of white spirit even 6 days out of the tubes!
First I mixed a purple wash (heavily on the red side) for the skin part.
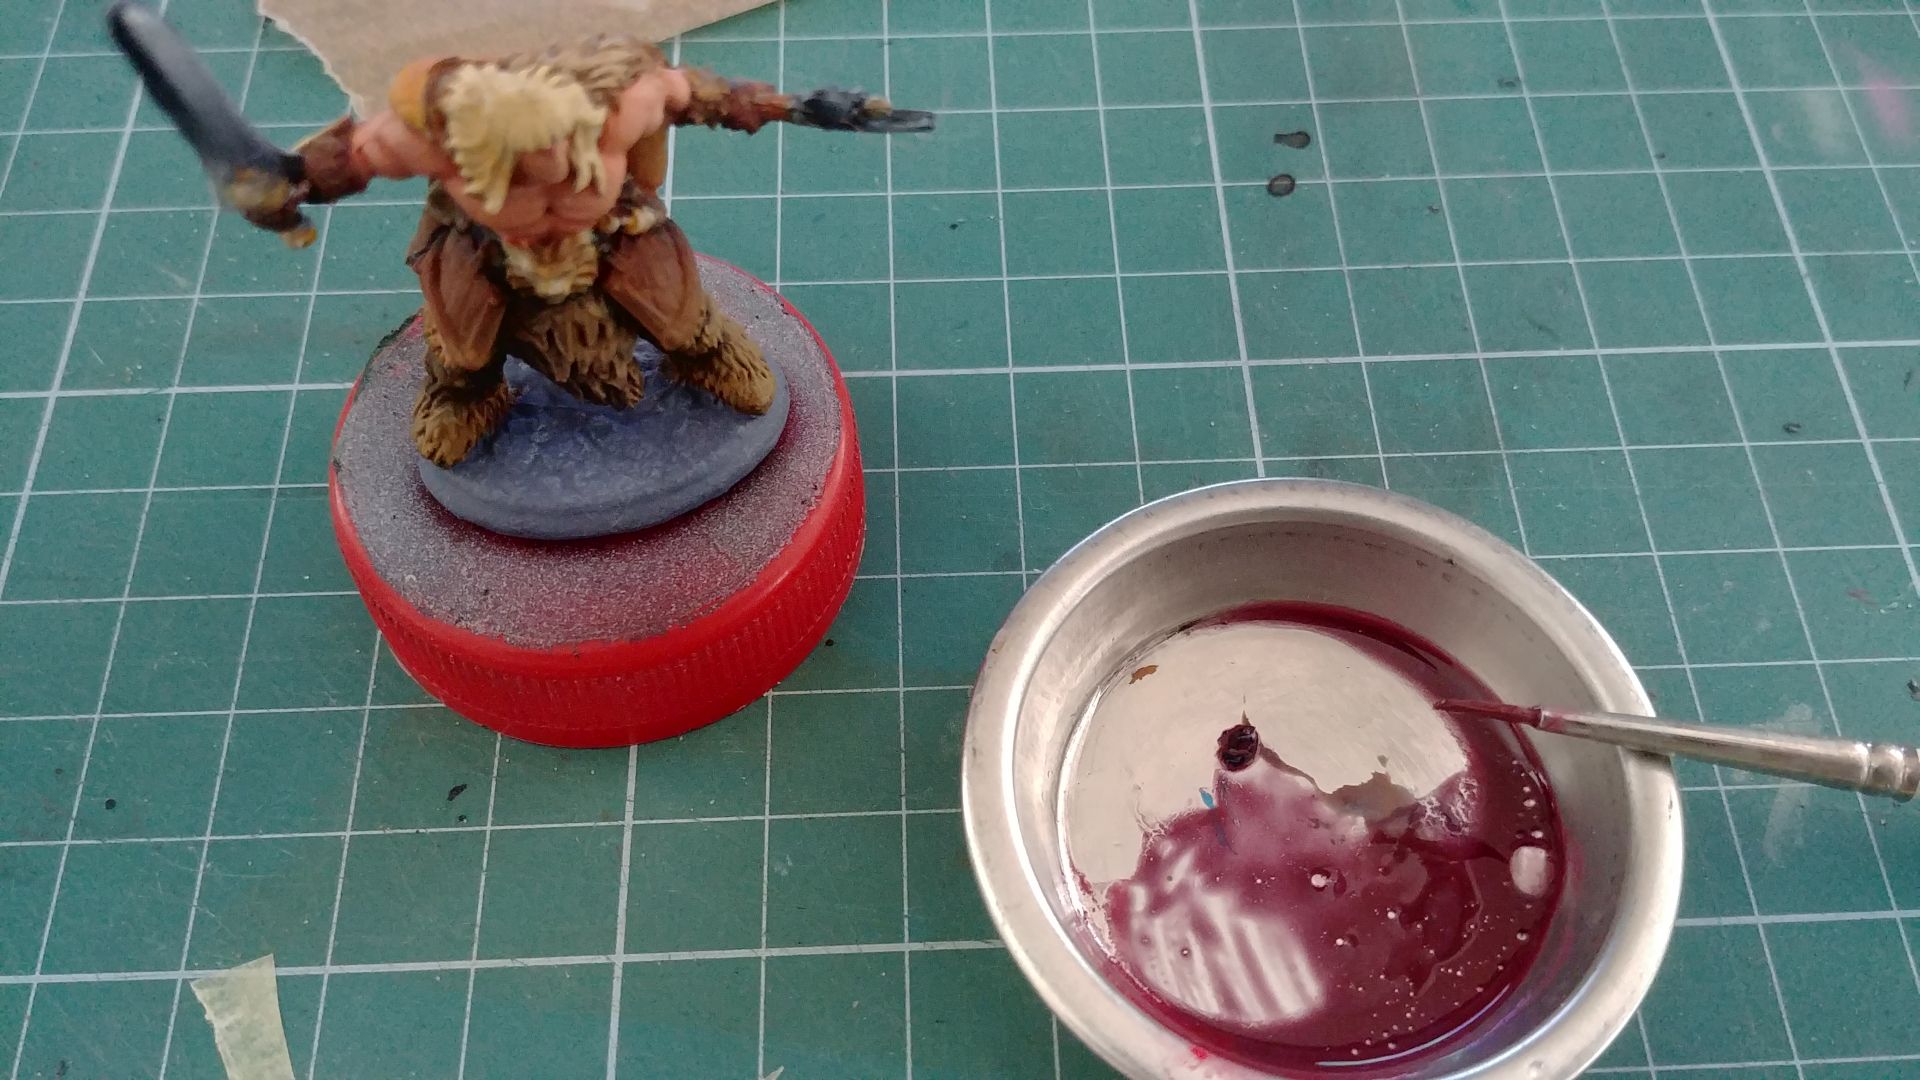
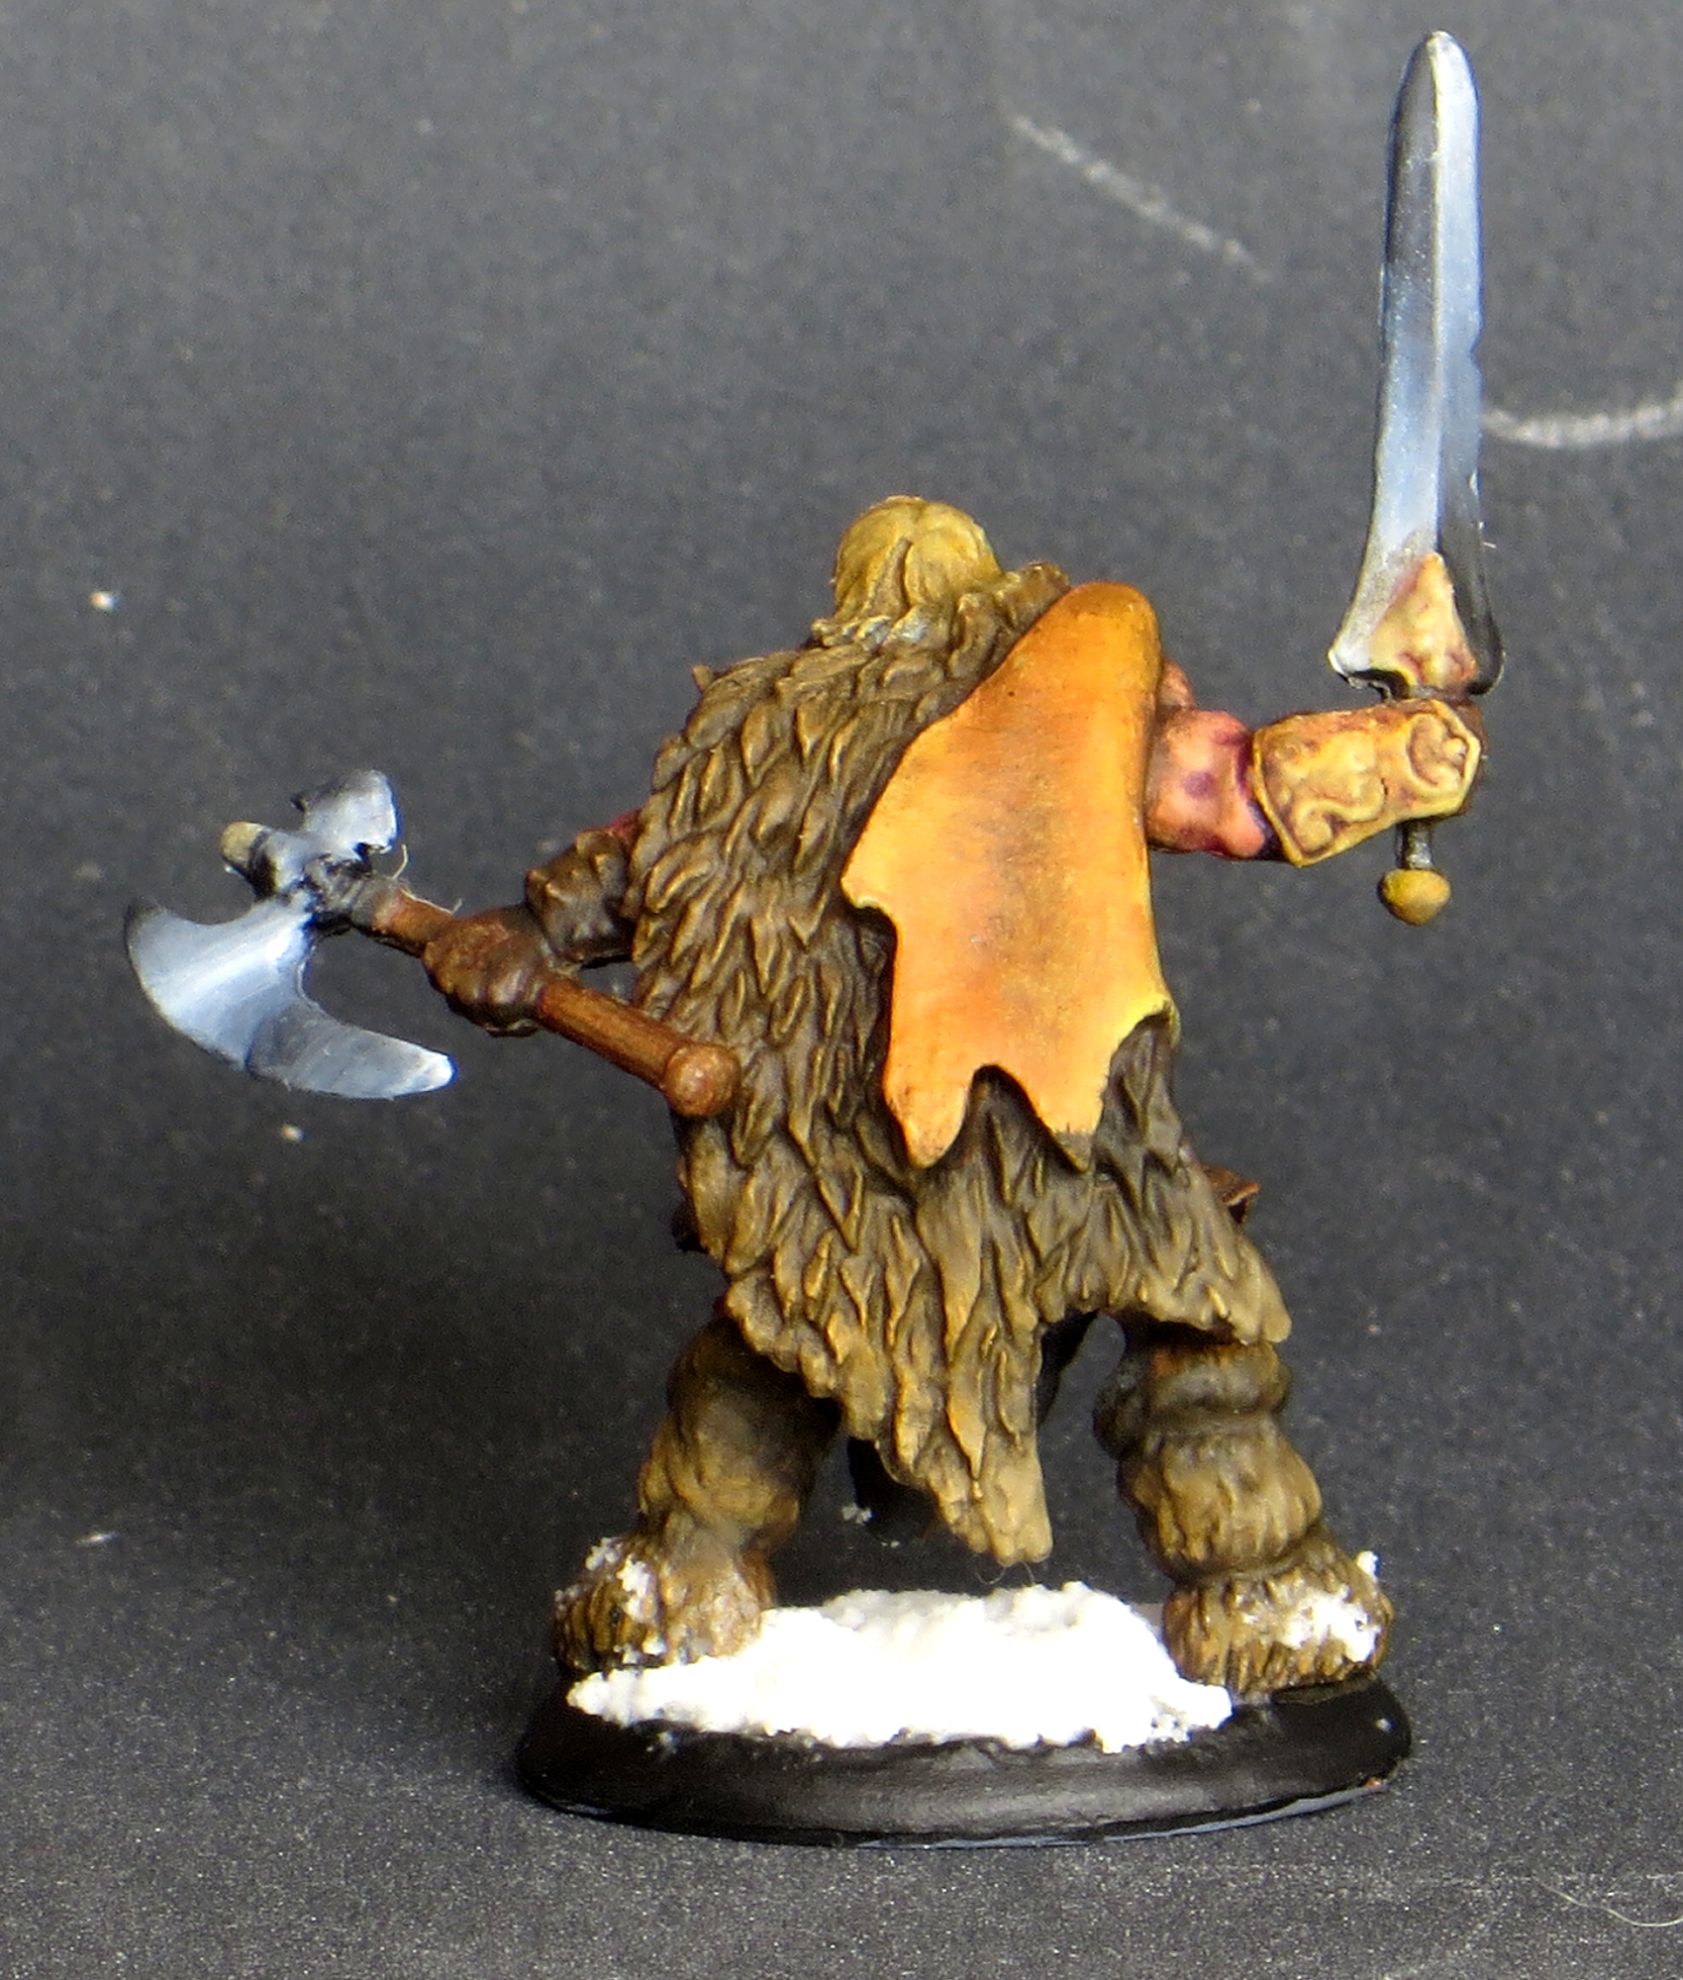
Next was a mixture of burnt sienna and umber with black (roughly 1:2:1 ratio).This was applied pretty much over all the other parts of the mini, save for weapons.
After the washed dried, I used cotton bud and my finger to wipe out the excess. After that operation I applied another layer (or couple of them) of matt varnish to lock the washes in place.
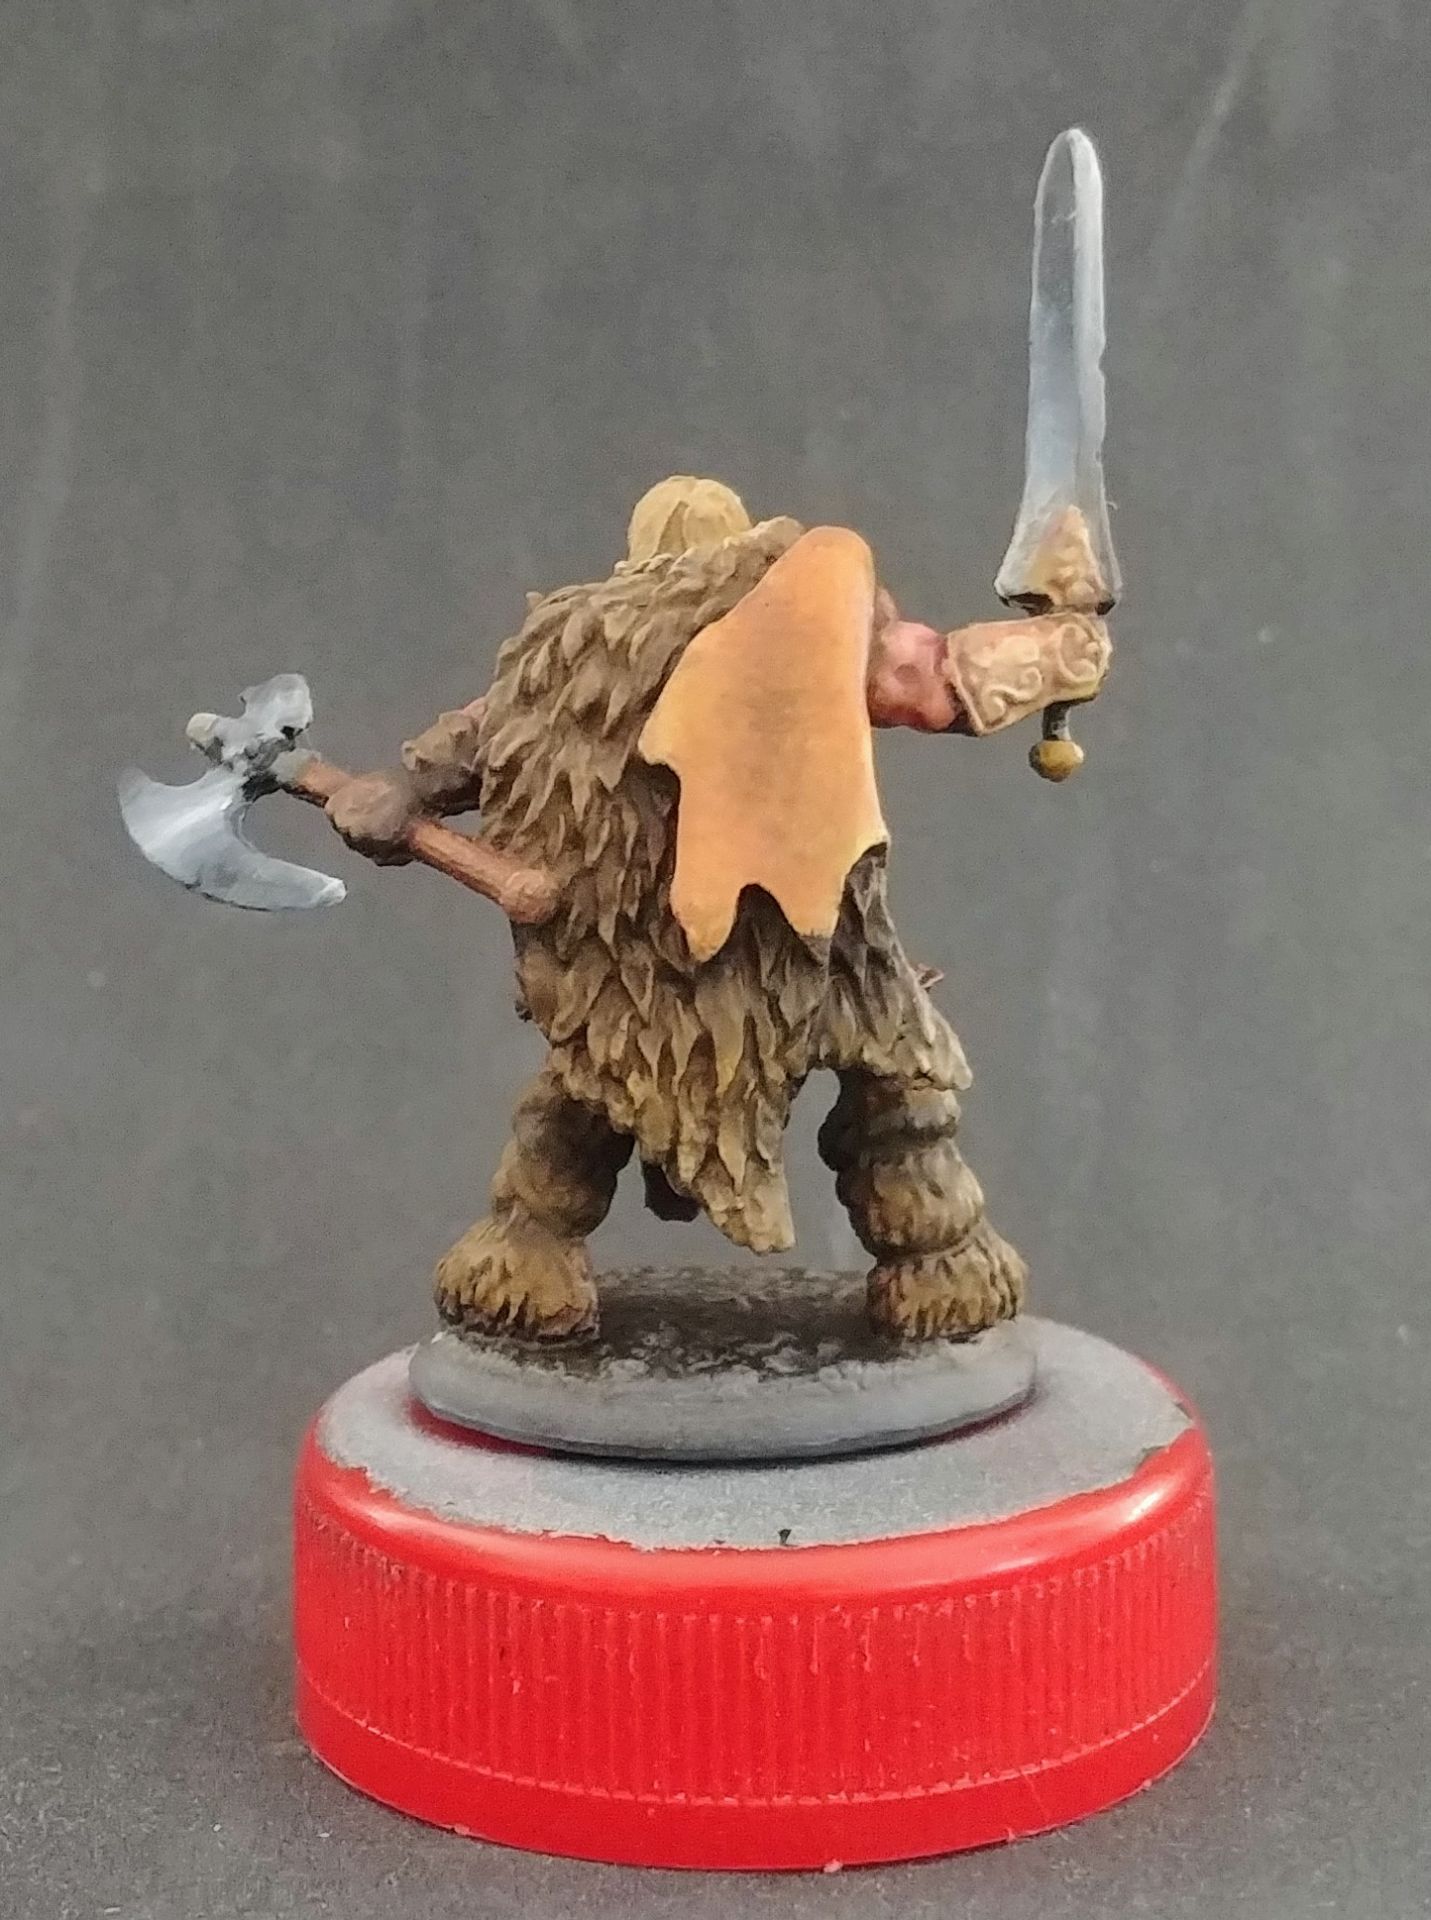
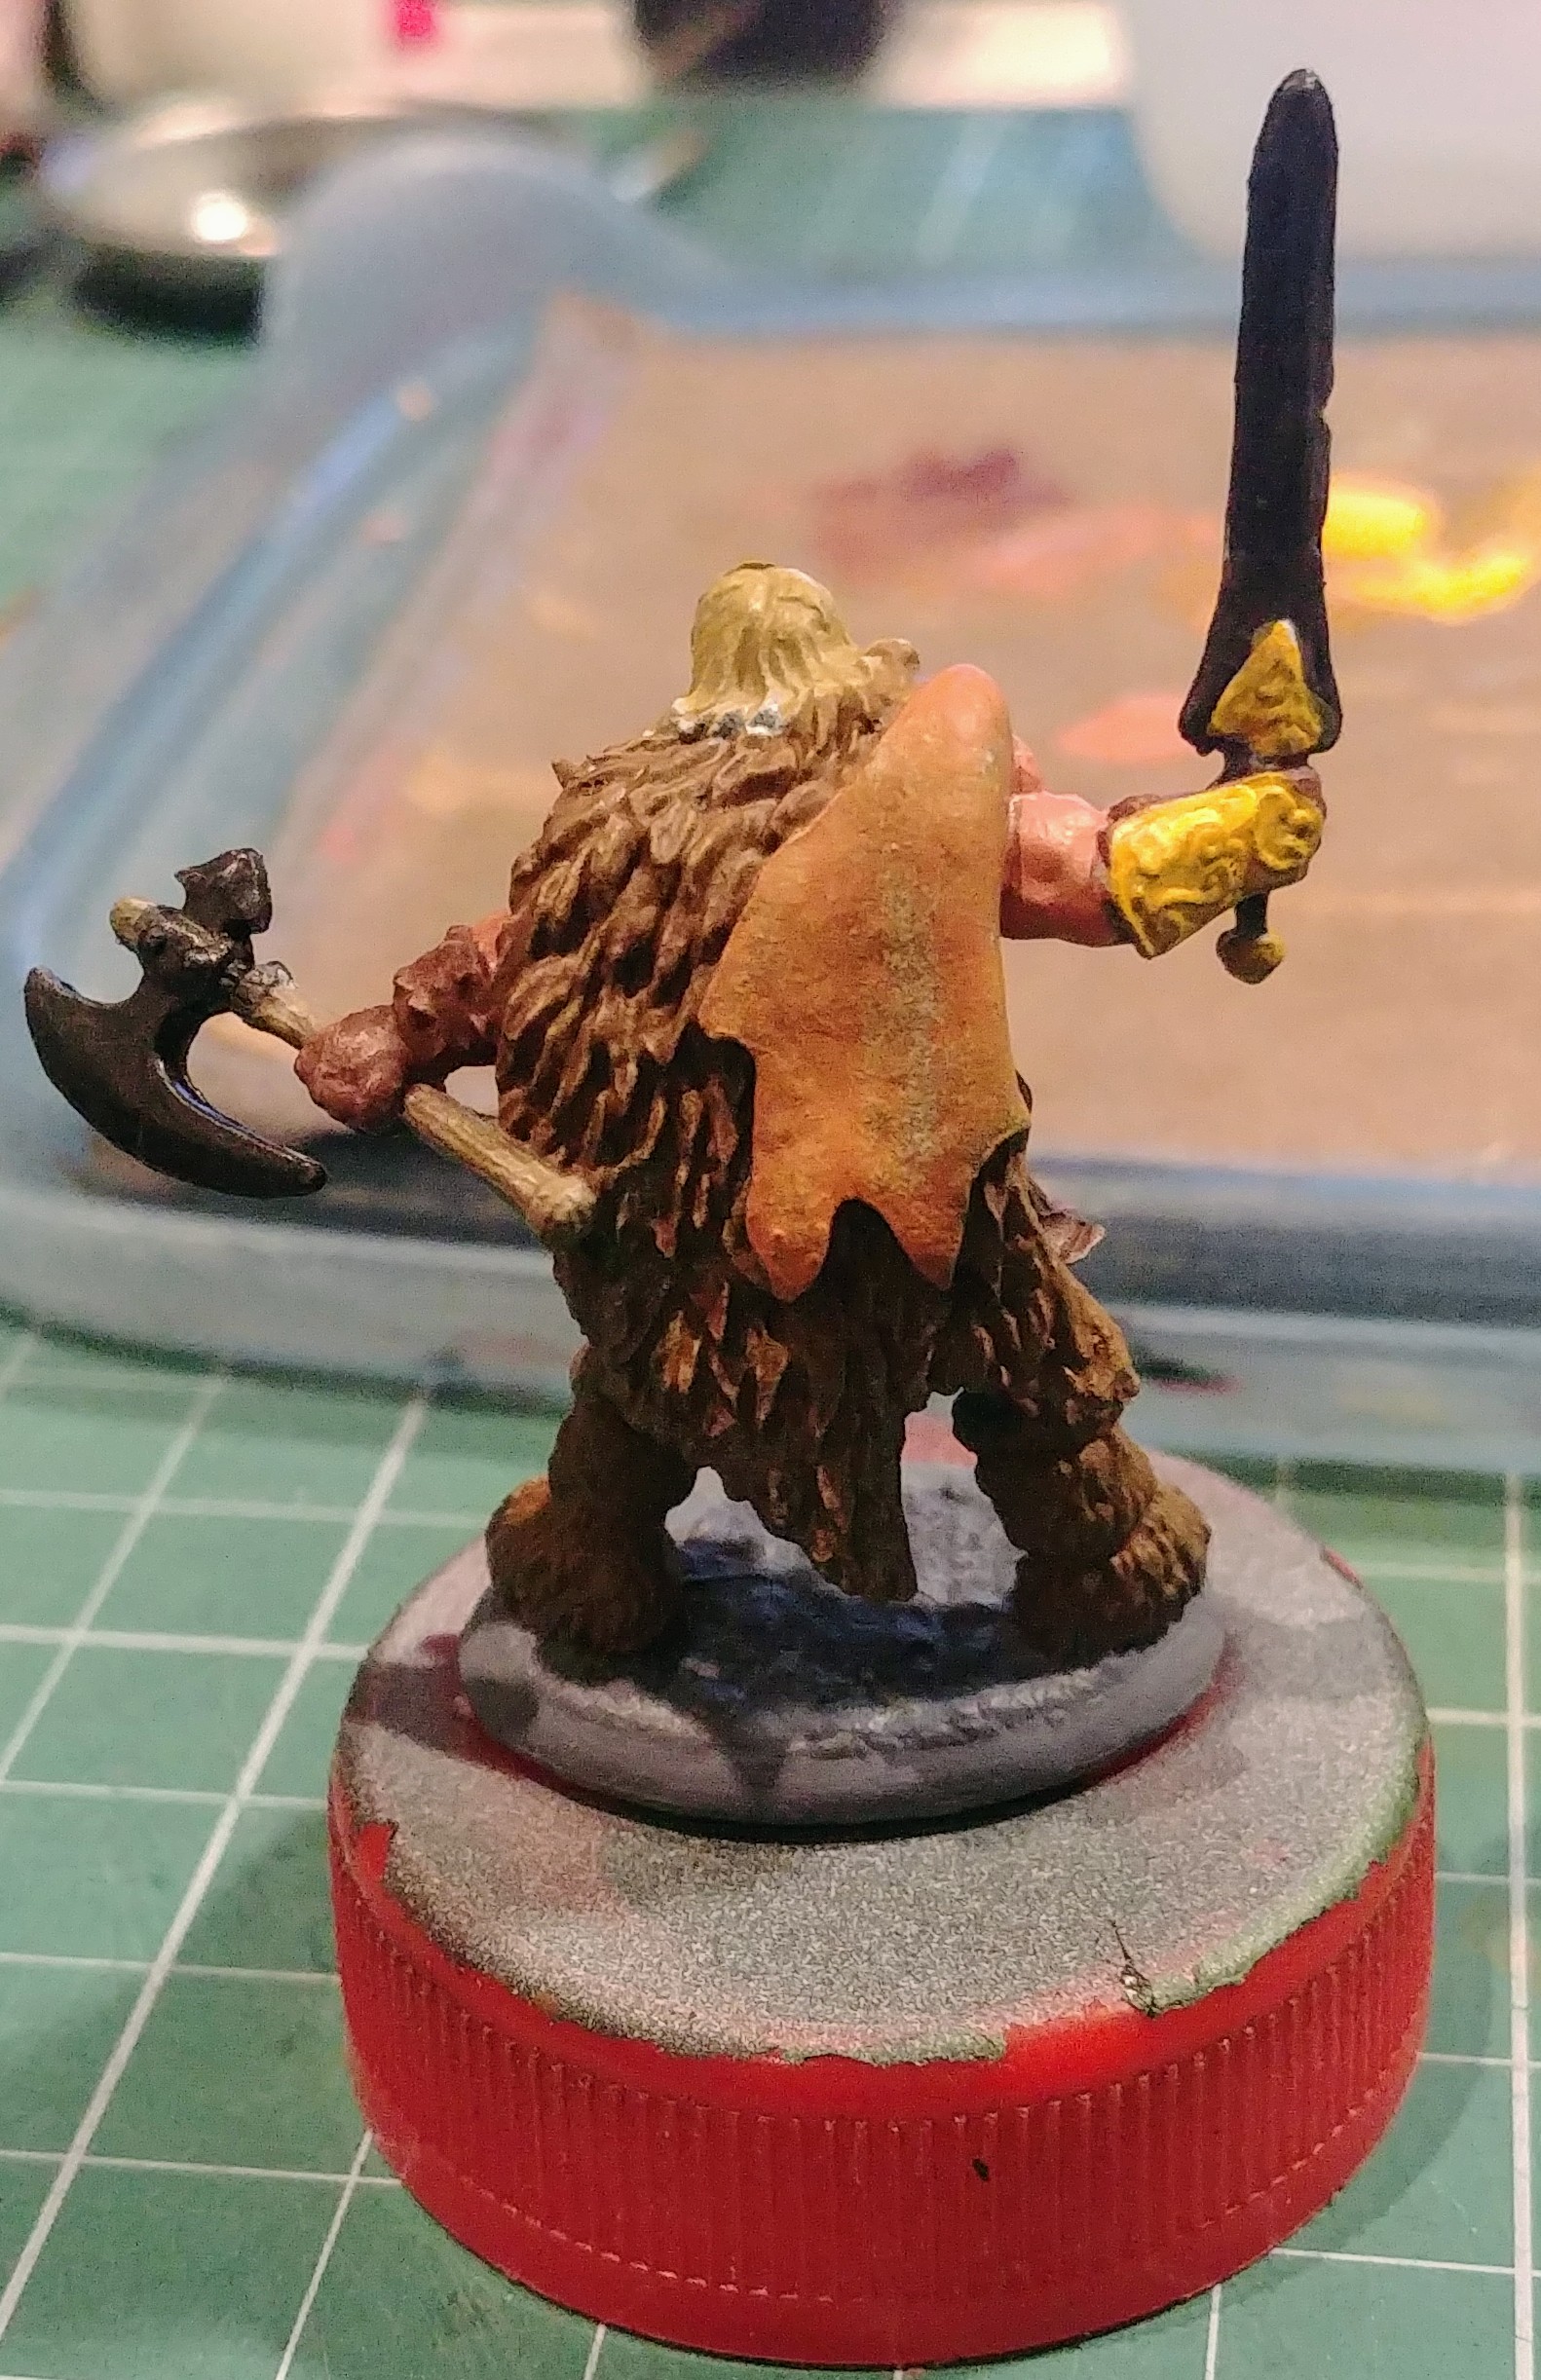
Last step was application of some highest highlights on the weapons using more transparent paints (i.e. paints mixed with white spirit). Wpplication of those white fading lines was specifically rewarding, cause all you do is make white dot in place you want highest highlight to be and then, smearing in along with a clean brush.
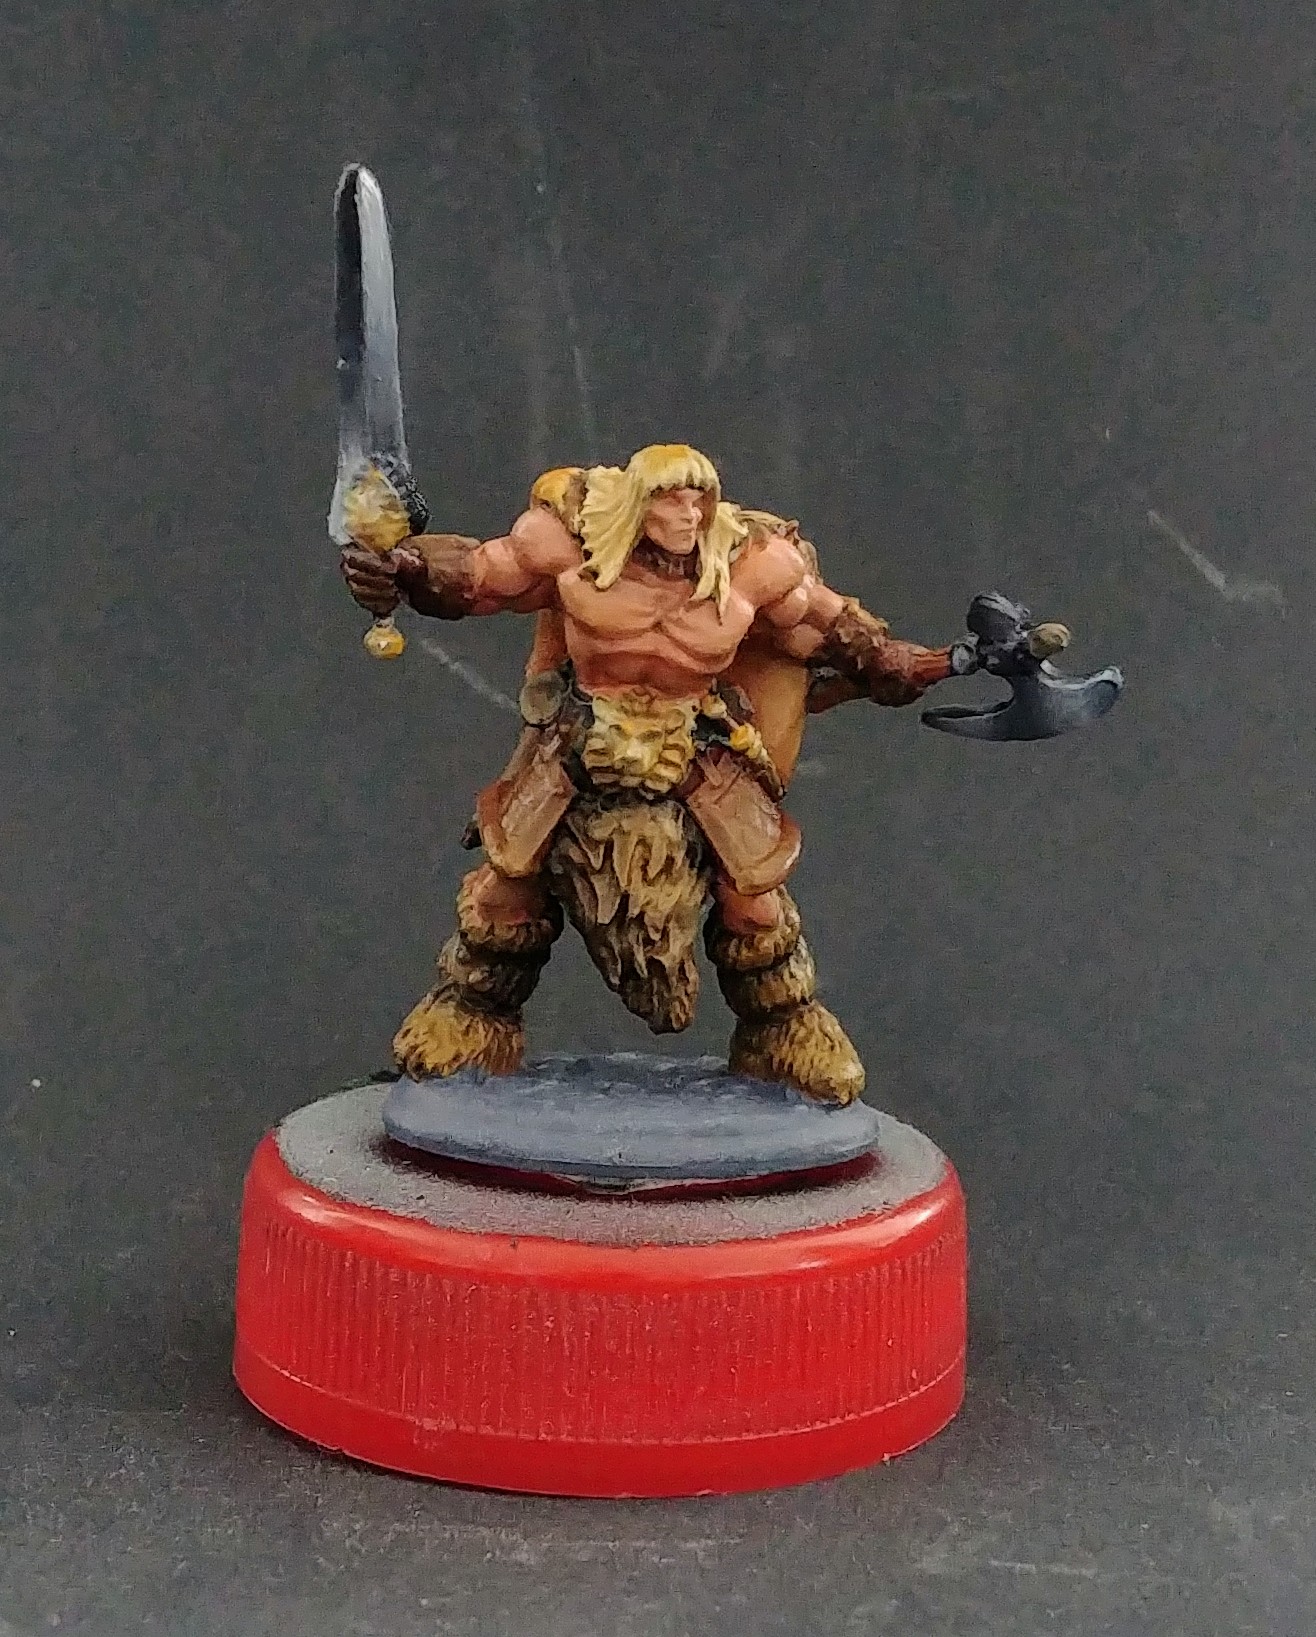
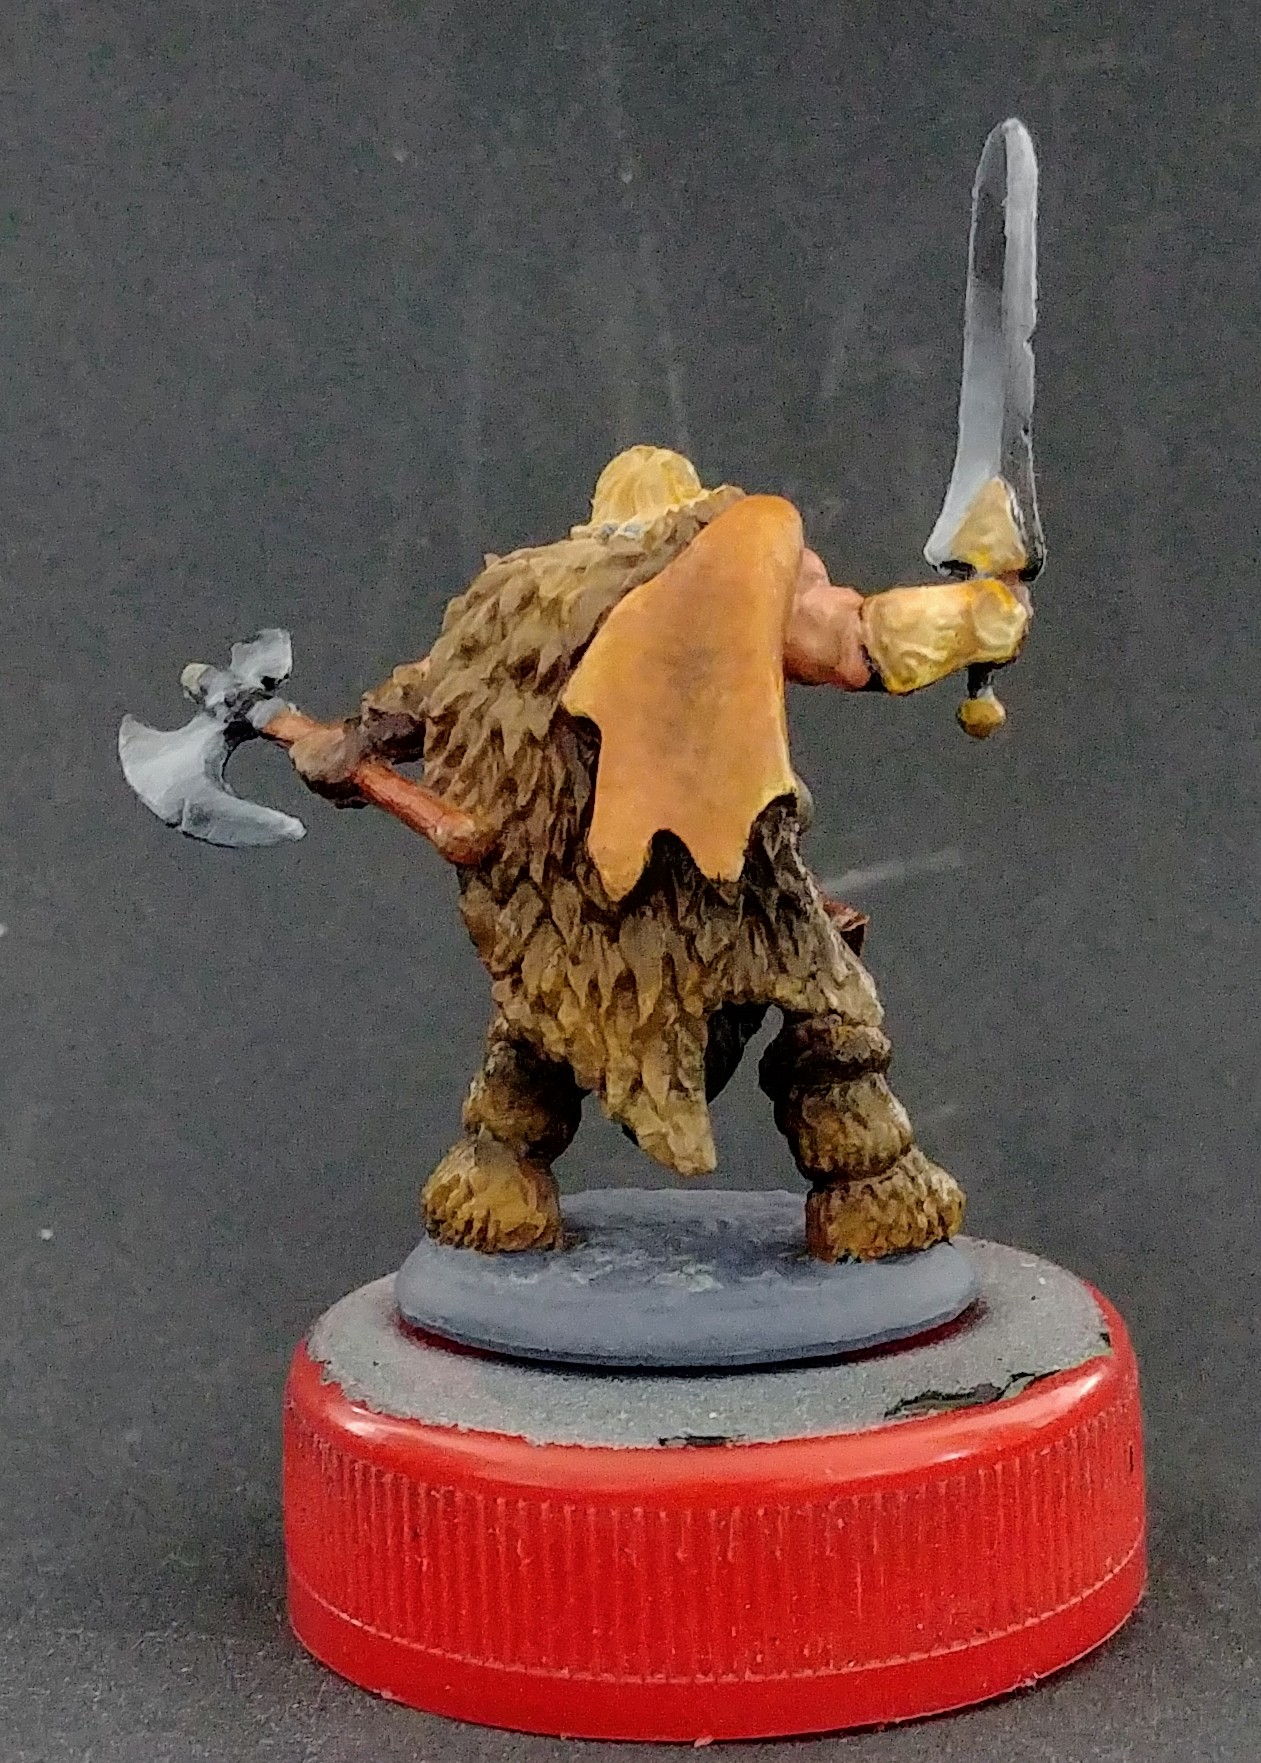
This is how he looks now.

After the warmish dries, I’ll do some rudimentary base work and post final photos tomorrow.
Oil!
I couldn’t get myself to finish the diorama yet. This whole isolation drives me nuts, I have my kids and the wife in the room I do my hobby pretty much for the whole time and only manage to squeeze some work in the late evenings.
Under the circumstances I decided to jump a bit and do next thing on my list. That happens to be oil painting. I watched some tutorials, best of them turned out to be those two:
I prepared a bit of a setup, however didn’t invest in fancy paints or fast drying medium. Instead I used a set of cheap Chinese paints I bought ages ago and used for washes (I swear I paid less than 5 EURO for them). I also own significant number of synthetic brushes, although, now I see advantage of short bristled brush.
The process of painting spans across two days, so lighting varies widely on bellow photos.
As per the first tutorial, I started with basecoat of acrylics. Just rough and ready single colour coats over zenithal primer.
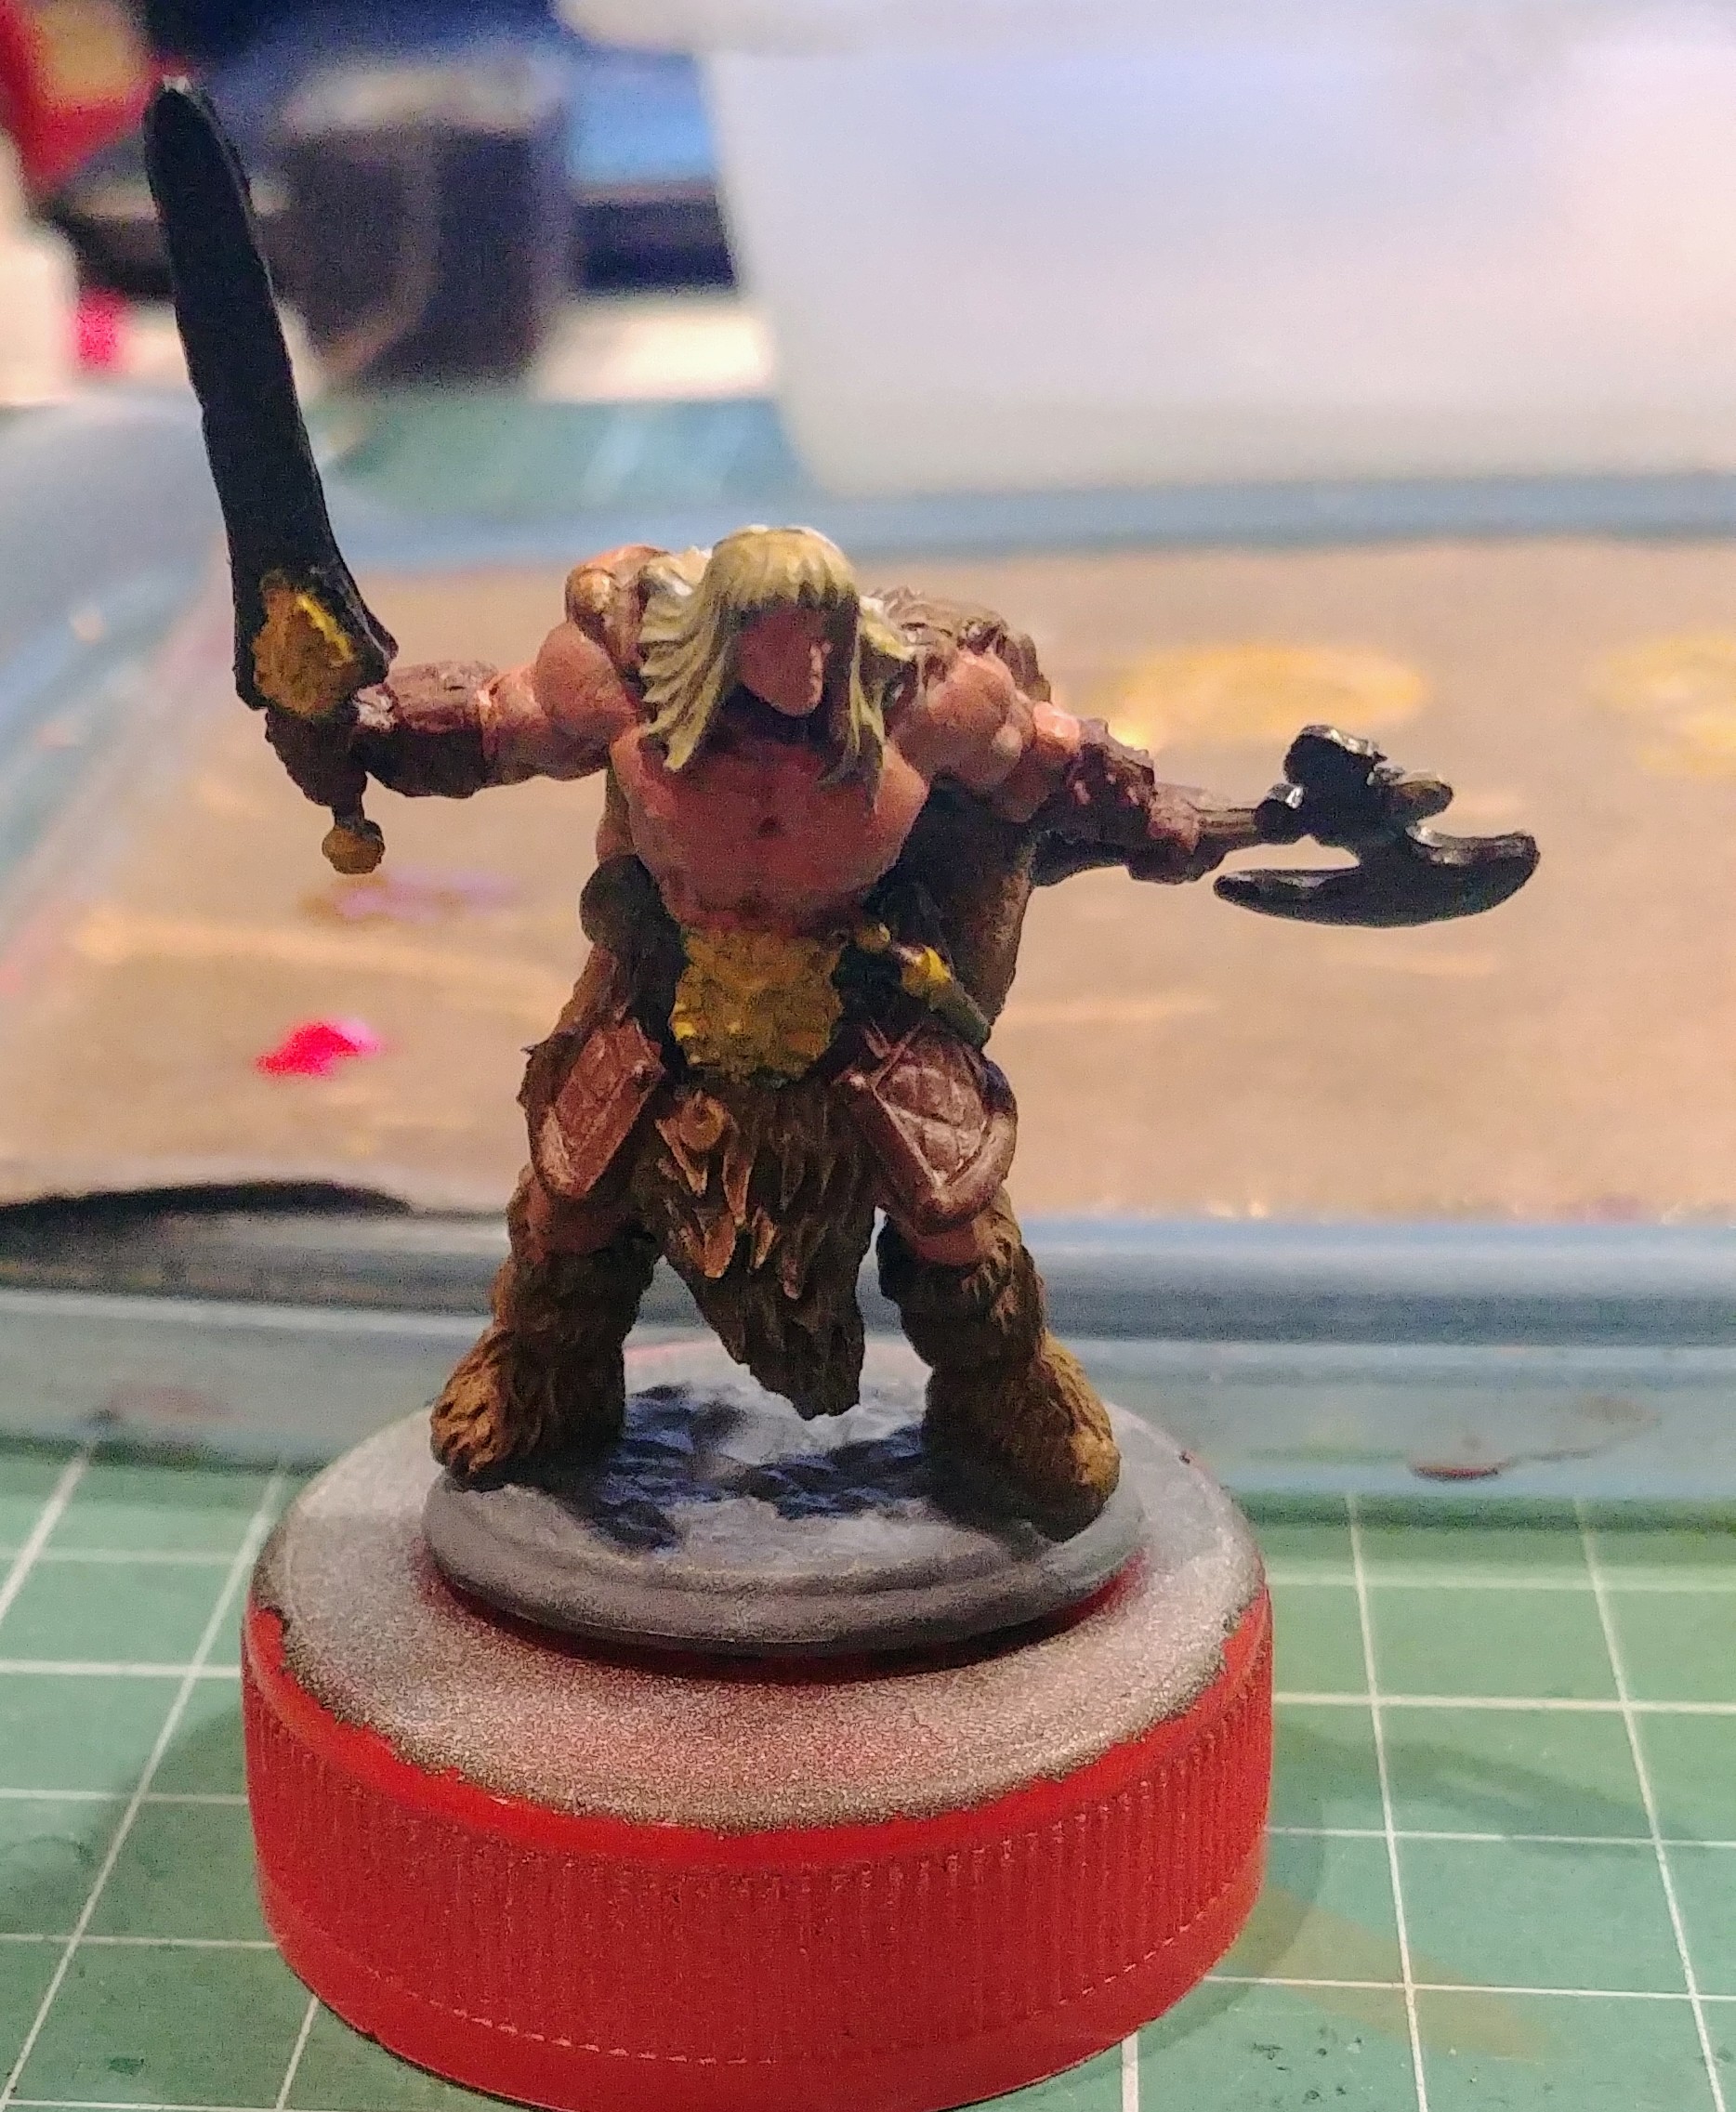
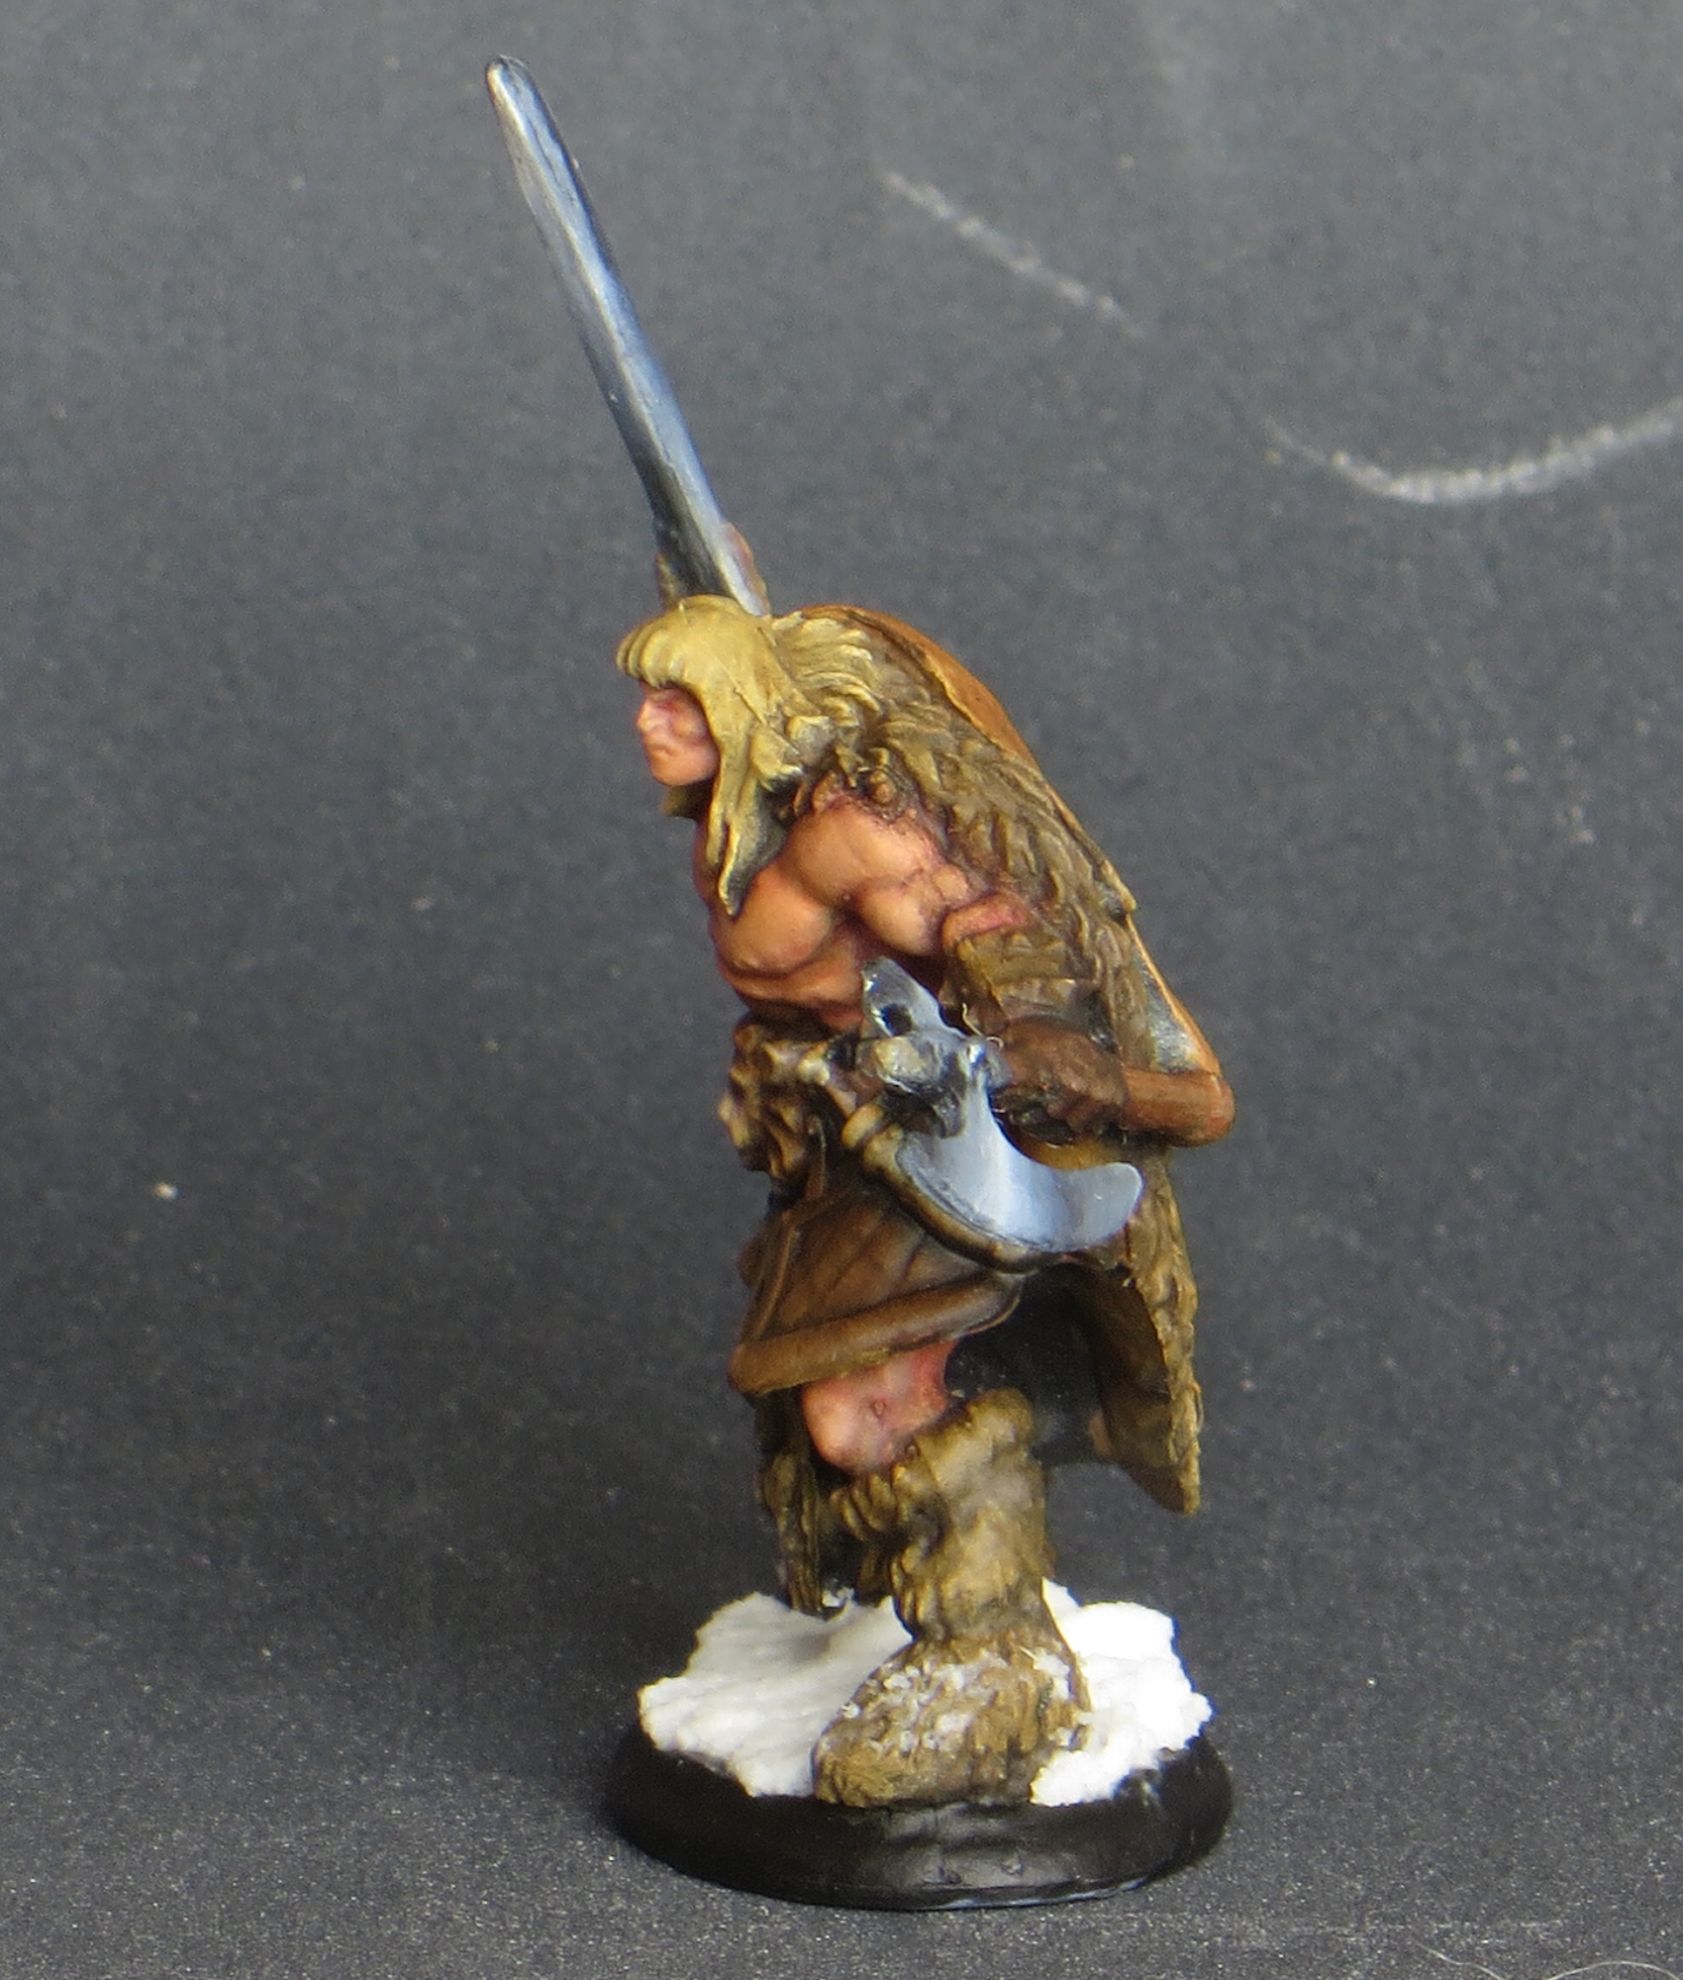
Then I applied liberal coat of matt varnish and dried the mini properly. Side note, as you can see I went for a random bones barbarian. The mini is bad, you’ll see bellow that his face is simply a blob without any details.
Then I started with the most obvious – NMM. I never understood the idea properly, but to be honest blending acrylics on such mall areas was a much bigger issue. So I started with very simple sketch of diagonal white and neighbouring blue-black… and blended them in under 4 minutes on both sides of the sword! I don’t think I’ve ever made such a clean blend in my life before! And 4 minutes is faster than airbrush if you consider changes of colour.
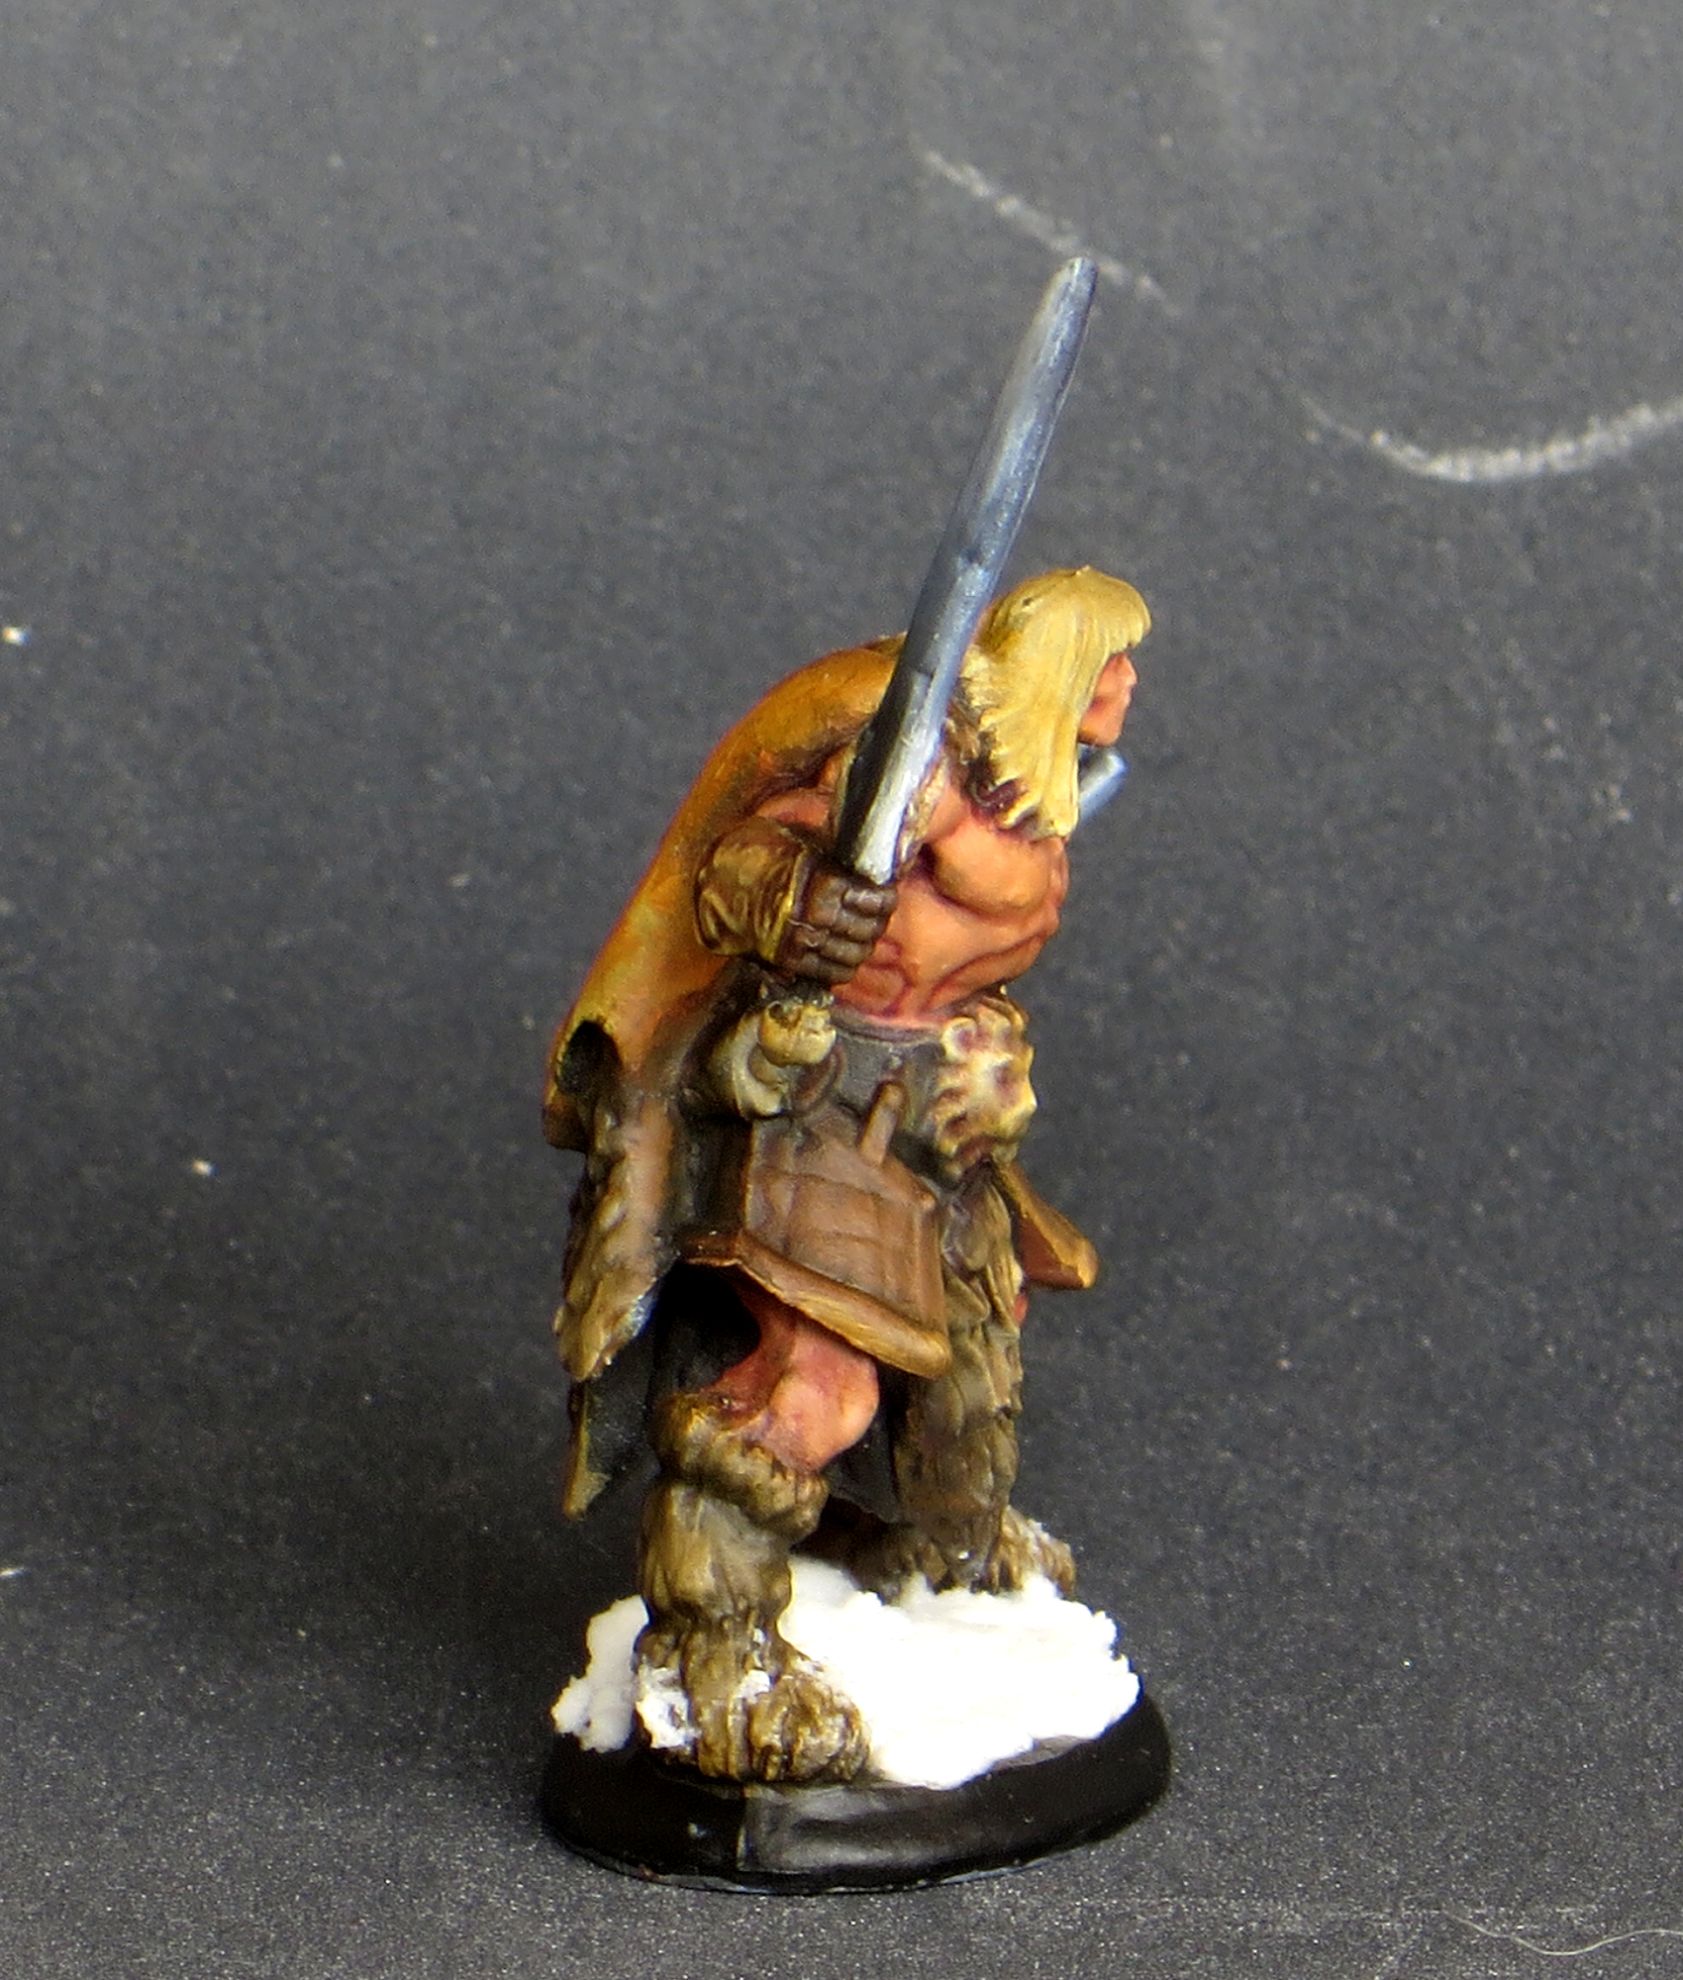
Anyway I went further and did his skin. This is where my lack of colour theory and understanding of pigments shows (together with somewhat strange choice of colours in my paints set). I can’t push contrast on the skin higher without him looking not really alive. Also, his face or lack thereof…
After problems with skin tones the rest went smoothly. This is where I’m now:


I left the mini in a display cabinet to dry properly before I varnish it and apply blacklining and some washes (oil washes of course).
I’ll report back on that if anyone’s interested.
What I learned so far:
- I love oil paints!
- There is no such thing as an error in oil painting, you can always get back and repair whatever went wrong. A clean brush with a drop of white spirit acts as an eraser!
- You really need to watch to not touch the mini, any contact with whatever before the paint is dry will destroy the paintjob – painting handle would be very useful, much more than in acrylics painting,
- I need to learn whole lot more about colours.
And there was light
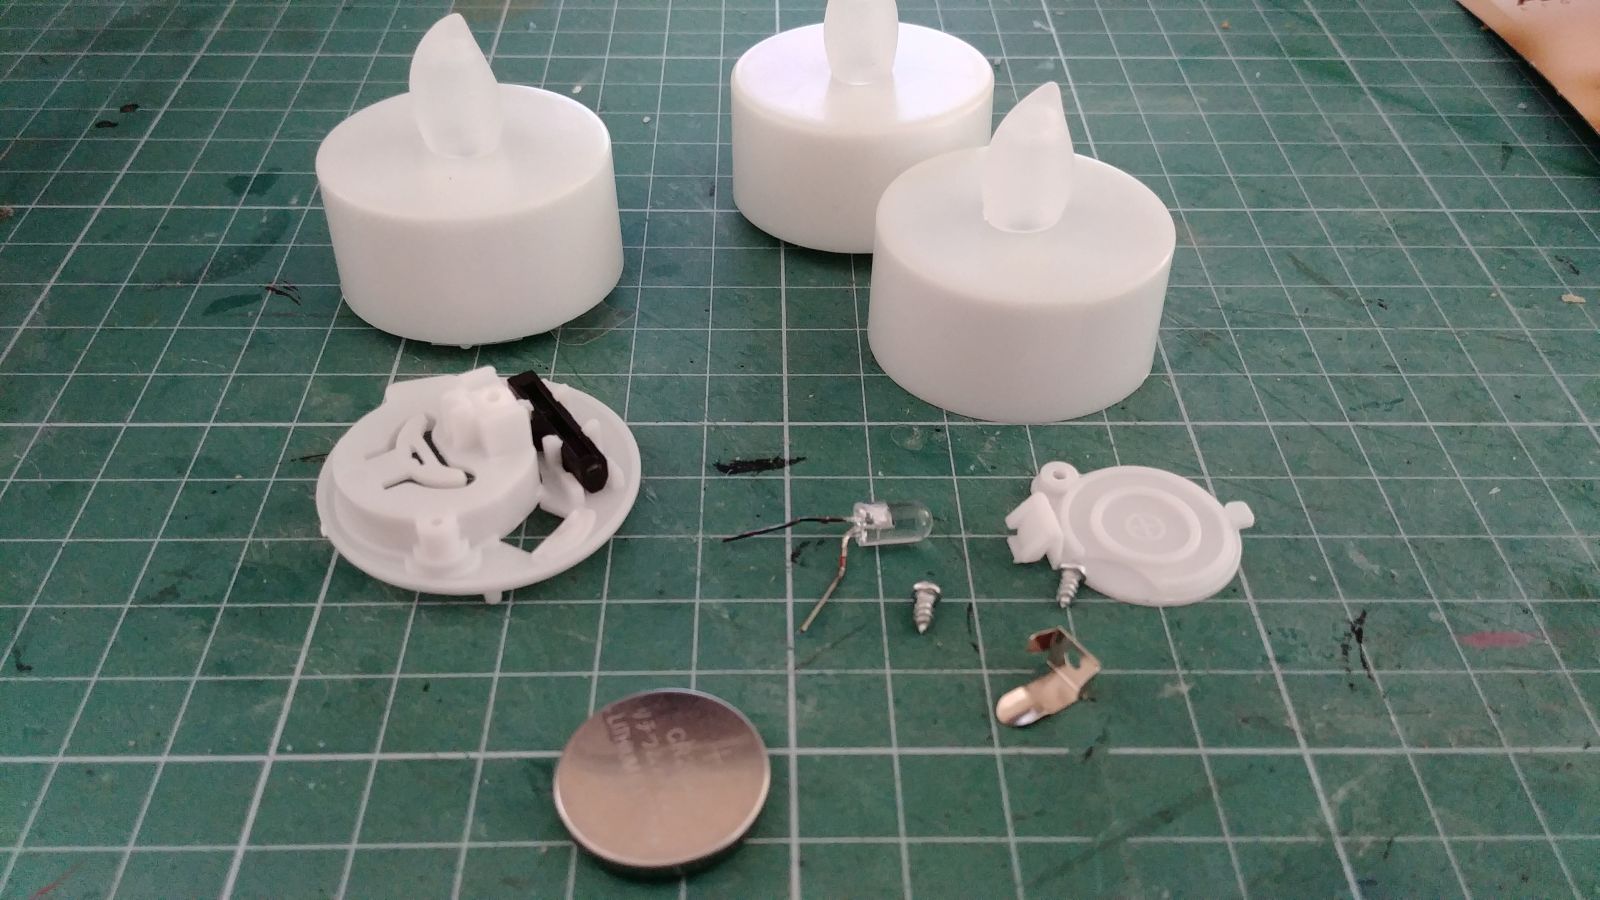
@avernos, on more than one occasion (two) suggested that this piece would benefit from lighting. I was reluctant to take this step due to lack of materials and tolls required. However, I found 3 tea lights I bought over a year ago and still not used. Of course they are useless as they are, but they made me think…
I disassembled one and found out that they are in fact quite modular, and some of their part are rather useful.
I went back to the Internet to check for inspiration on how we imagine ancients were lighting insides of their buildings and came up with this:
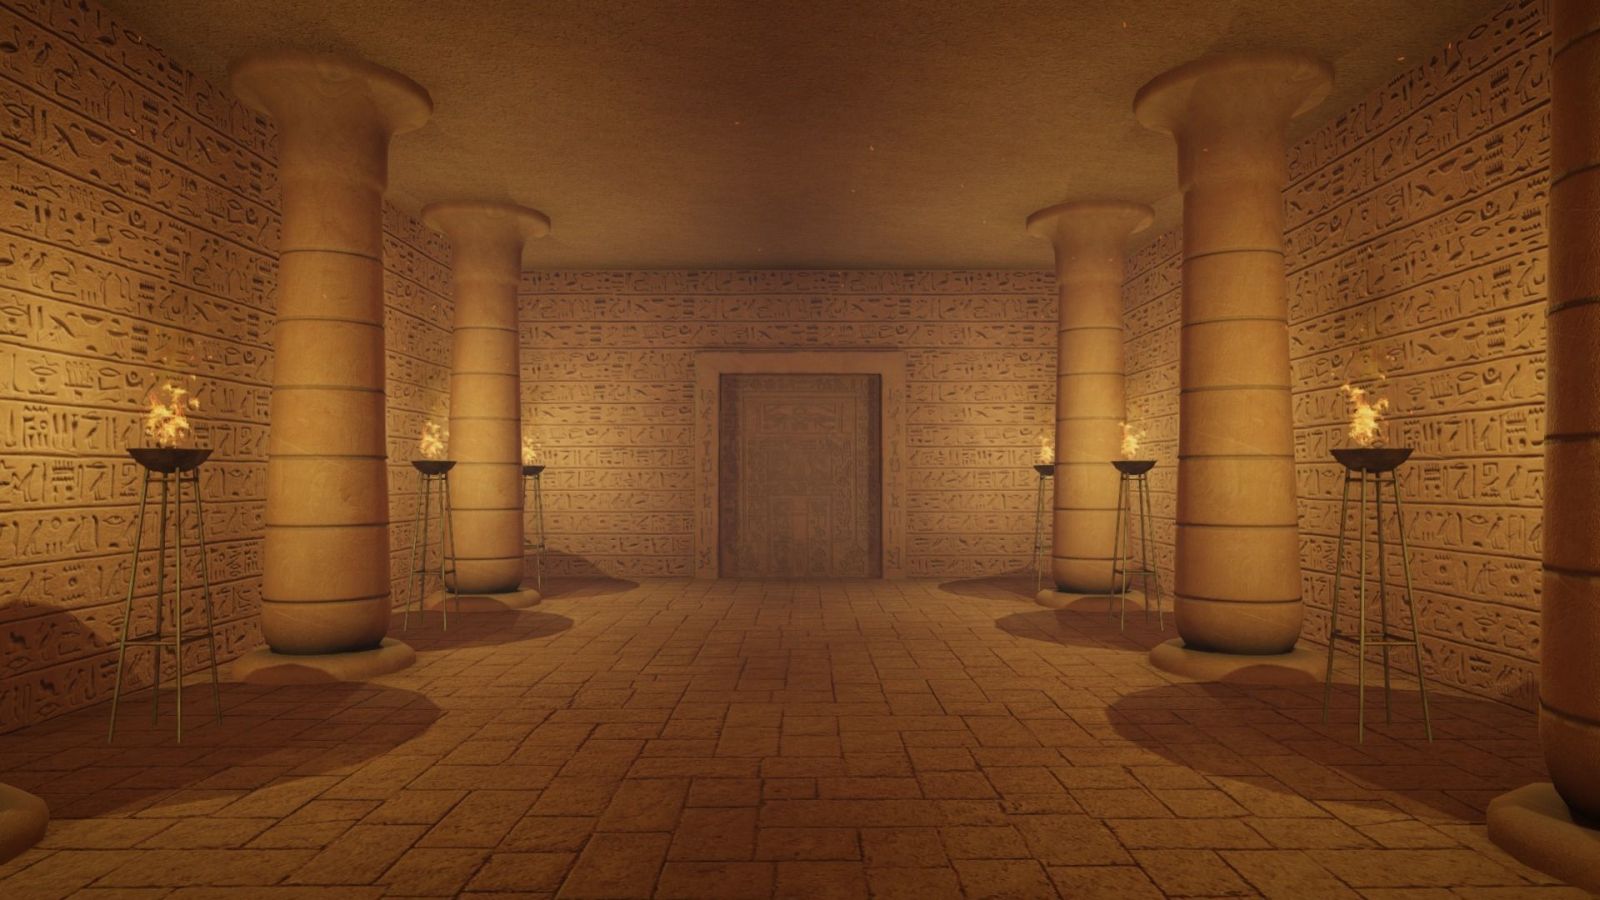
I don’t think this is particularly well grounded in historical/archaeological sources, but I liked the idea. I fired up my sketchup and designed several different shapes of ‘bowl of fire’.
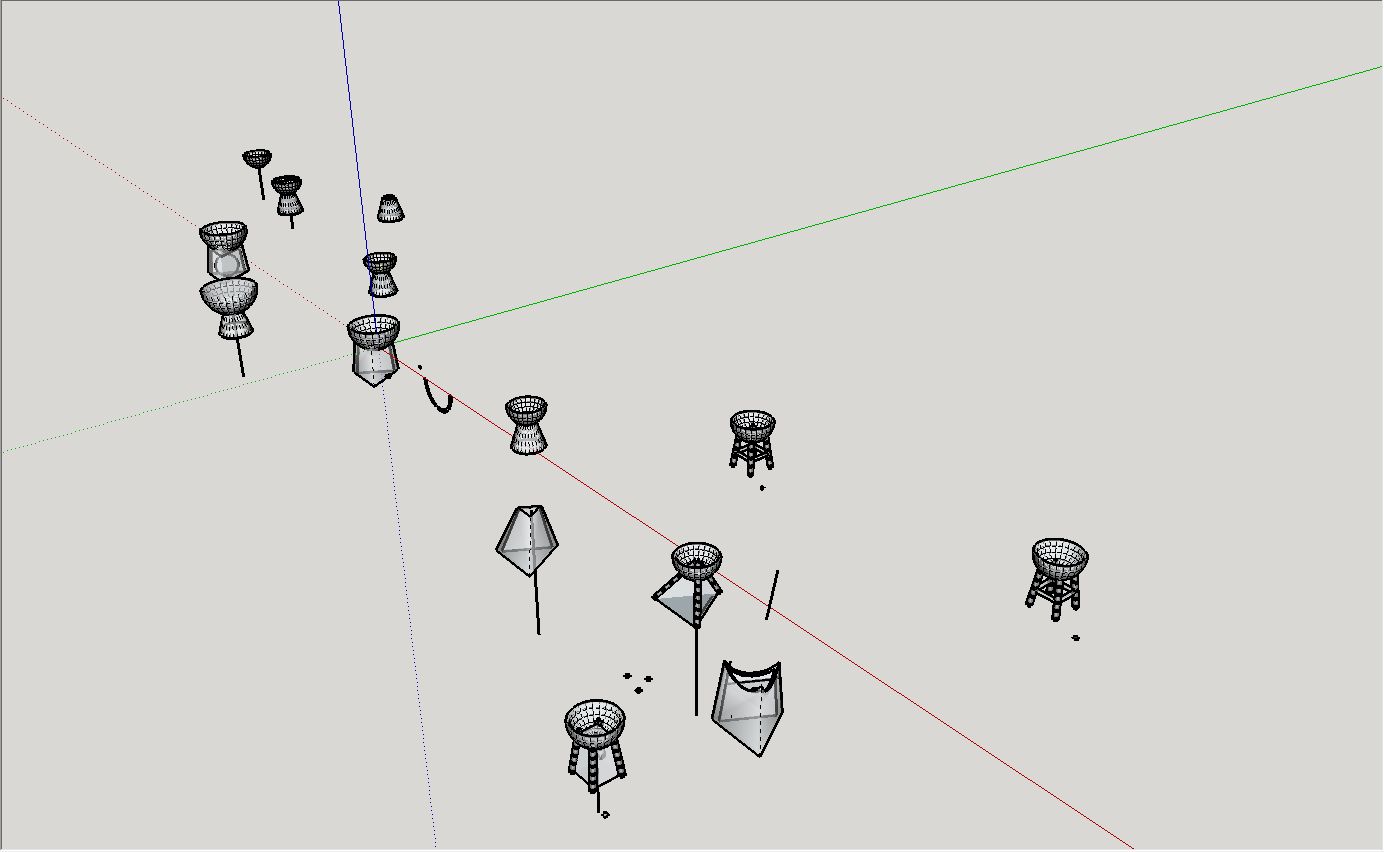
In the end I chose two designs, one with battery inside and one with wires to the battery hidden somewhere. Those are the winners in x-ray view:

I then printed three of each design (just in case, I actually plan to use two), and started tinkering with layout.
I liked last option the most. I need to decide if I want to cut those legs shorter…That would probably help with the composition, but affect proportions of those pieces in negative way. Any ideas welcome.
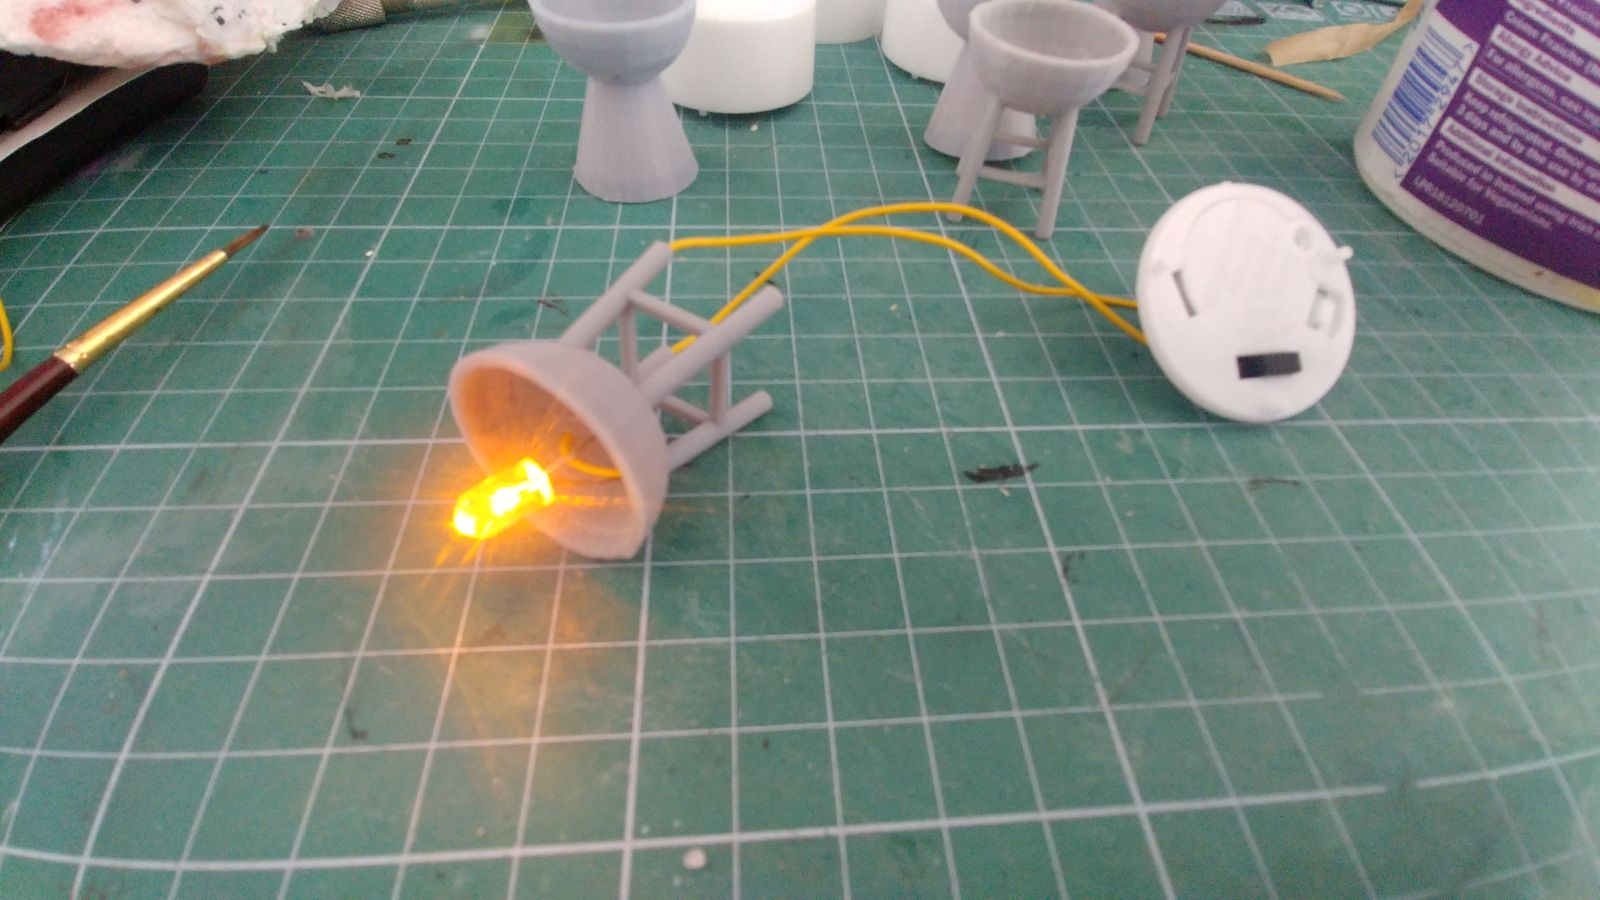
To make them shine, I used pieces of some shity wire I sometimes use on my bases and parts of actual tea lights for battery housing and convenient switch. The prototype looks like this:


![StarCraft Tabletop Miniatures Game Pre-Orders Live Now [Updated]](https://images.beastsofwar.com/2026/03/starcraft-tmg-news-cover-600-338.jpg)


