![Alternative Trench Crusade Miniatures? Trench Missionaries Review | Wargames Atlantic [7 Days Early Access]](https://images.beastsofwar.com/2026/03/unboxing-wargames-atlantic-trench-missionaries-coverimage-225-127.jpg)


![10mm Medieval Miniatures! Azincourt English Army Review | Wargames Atlantic [7 Days Early Access]](https://images.beastsofwar.com/2026/03/unboxing-wargames-atlantic-azincourt-english-army-coverimage-225-127.jpg)


Finally Finishing an Army


Recommendations: 337
About the Project
I've been part of this glorious hobby for a rather long time, and I've never really gotten an army painted...until now! I have been working on this for a while, so there is plenty of stuff already done, but there is still a lot of bare plastic on my display shelves that needs finishing! For now, it's focused on my Ultramarines, but a few other Imperium goodies may be splashed in from time to time. I'm working on getting some better pictures here and there, but I'm relying on my phone camera, so bear with me.
Related Game: Warhammer 40,000
Related Company: Games Workshop
Related Genre: Science Fiction
Related Contest: Spring Clean Hobby Challenge (Old)
This Project is Completed
Painting a Big Blue Meanie (Part 2).
Hopefully this uploads this time round, but here is the sequel to the Big Blue Meanie (still currently called Jeffrey)! Now with more blue! The painting method I use for vehicles is a little different from that of my infantry, particularly here where we have some already painted stuff that can get in the way of a drybrush.
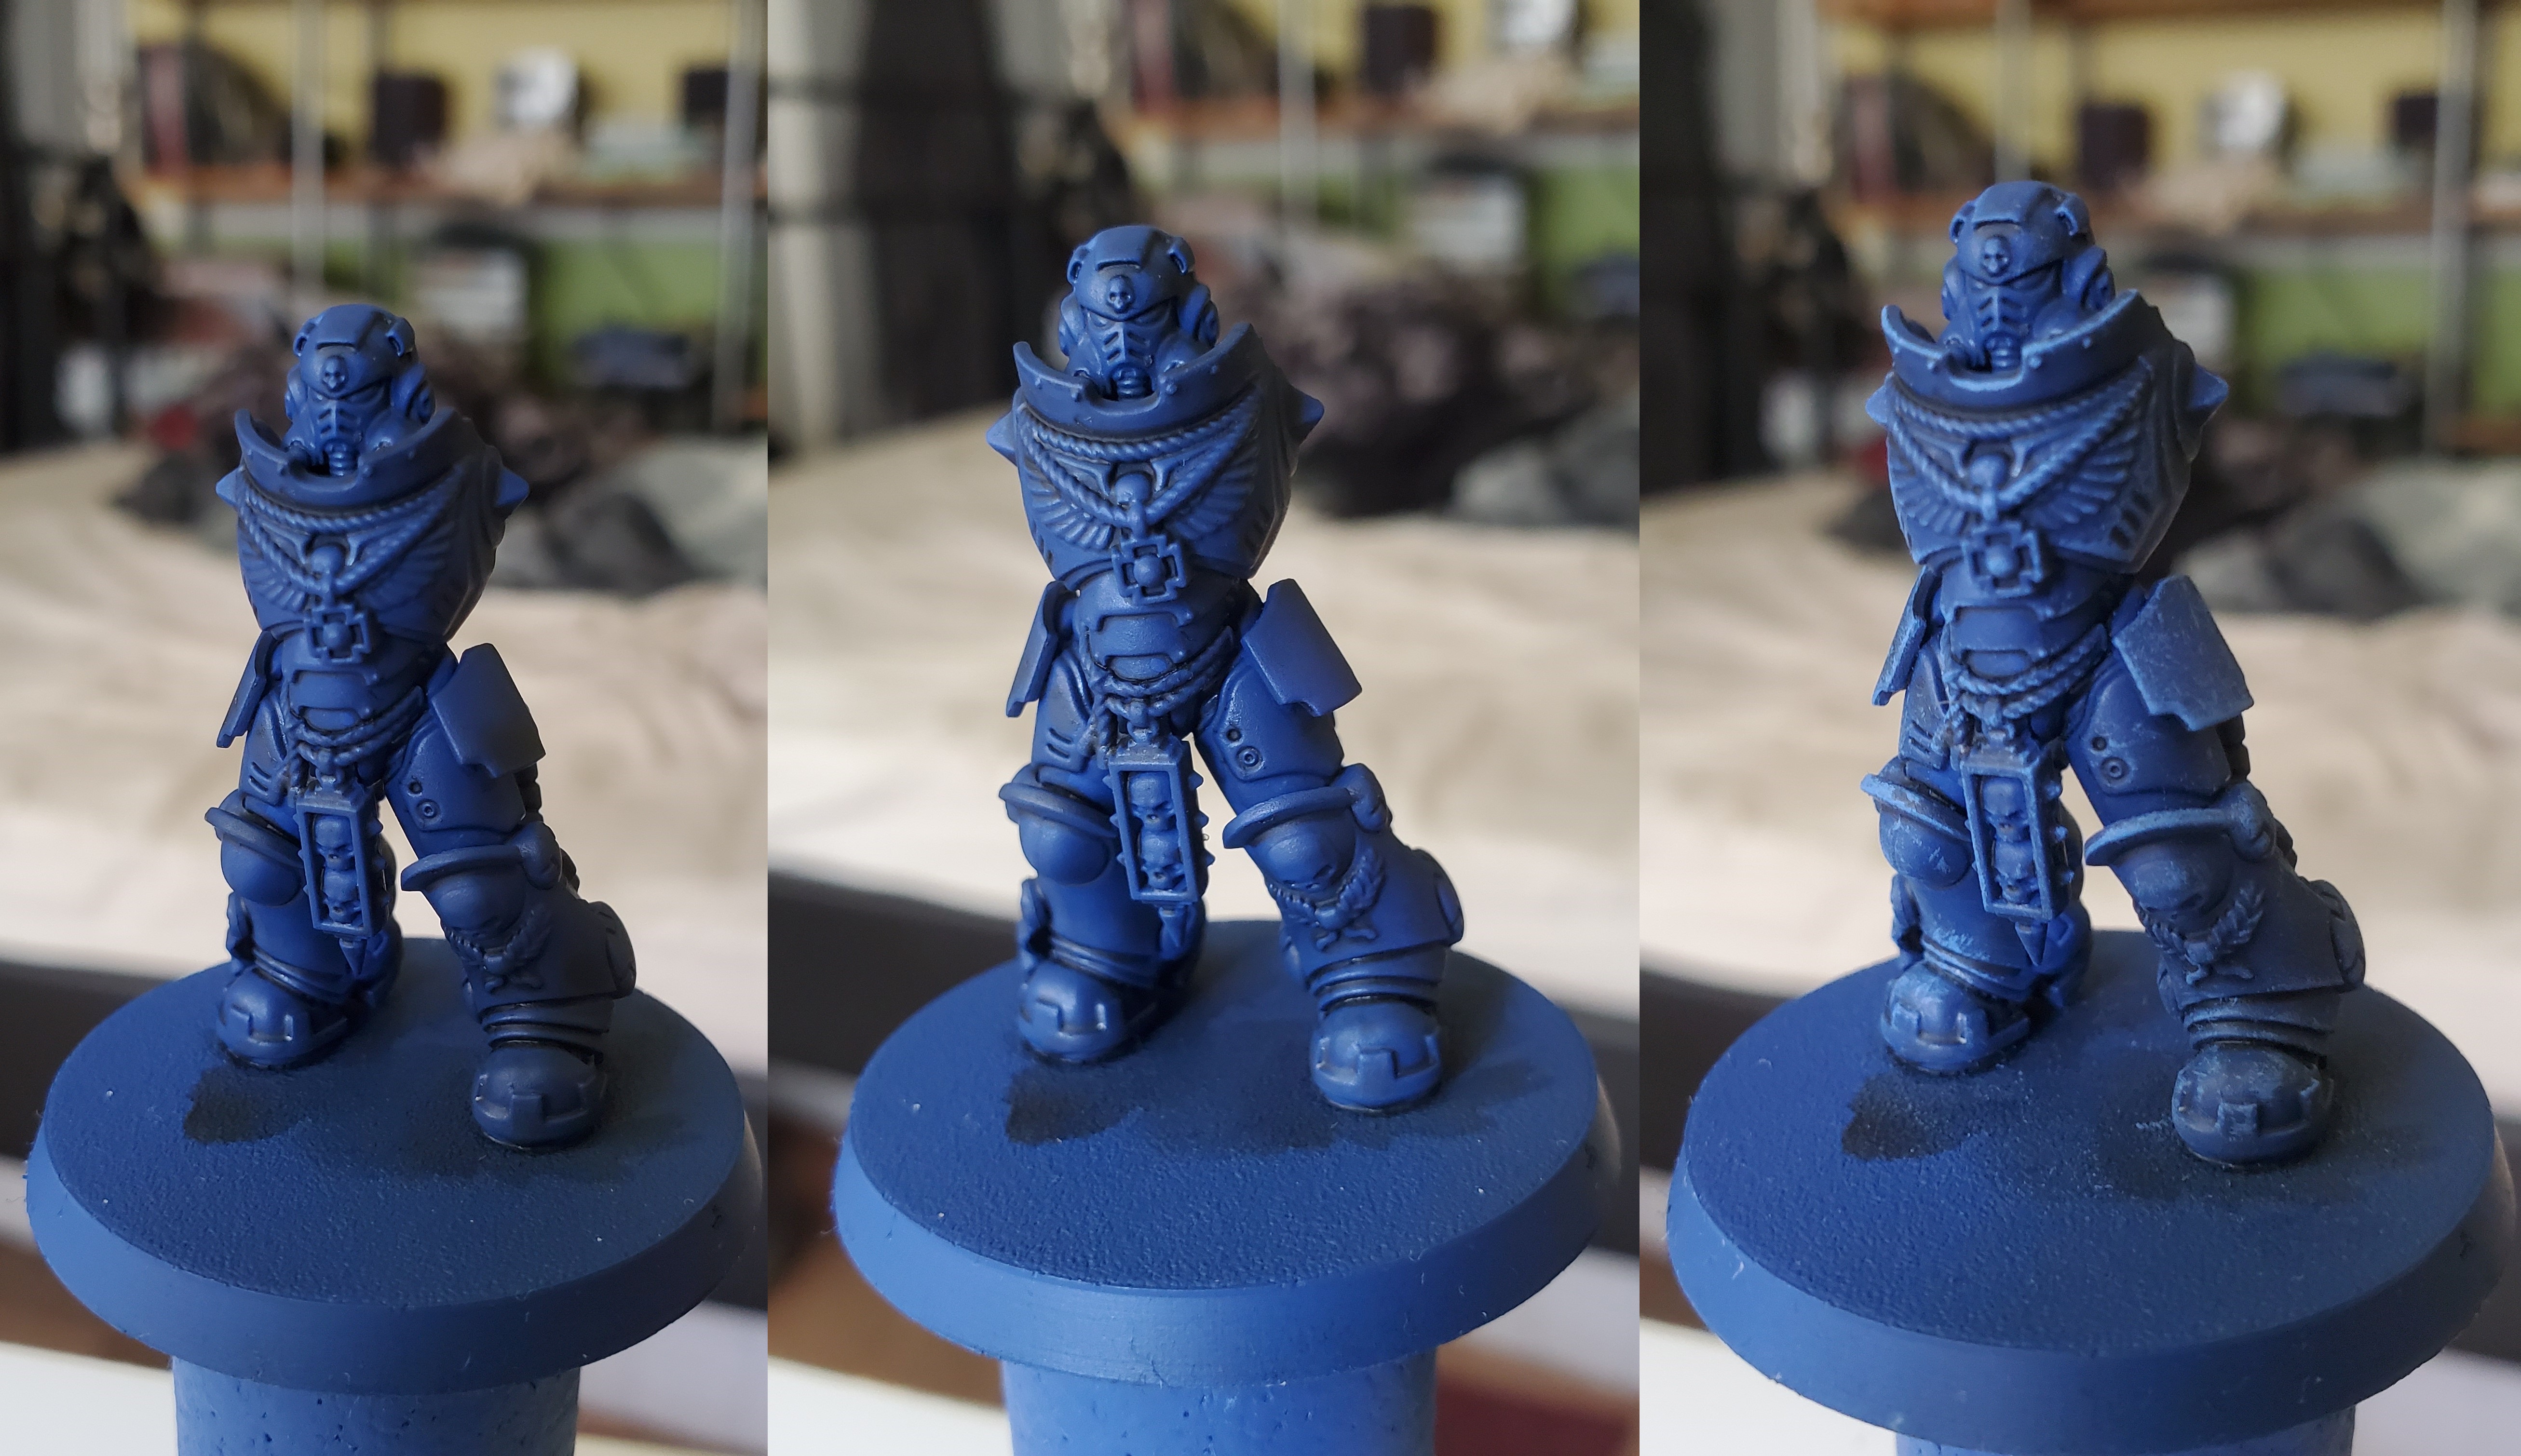
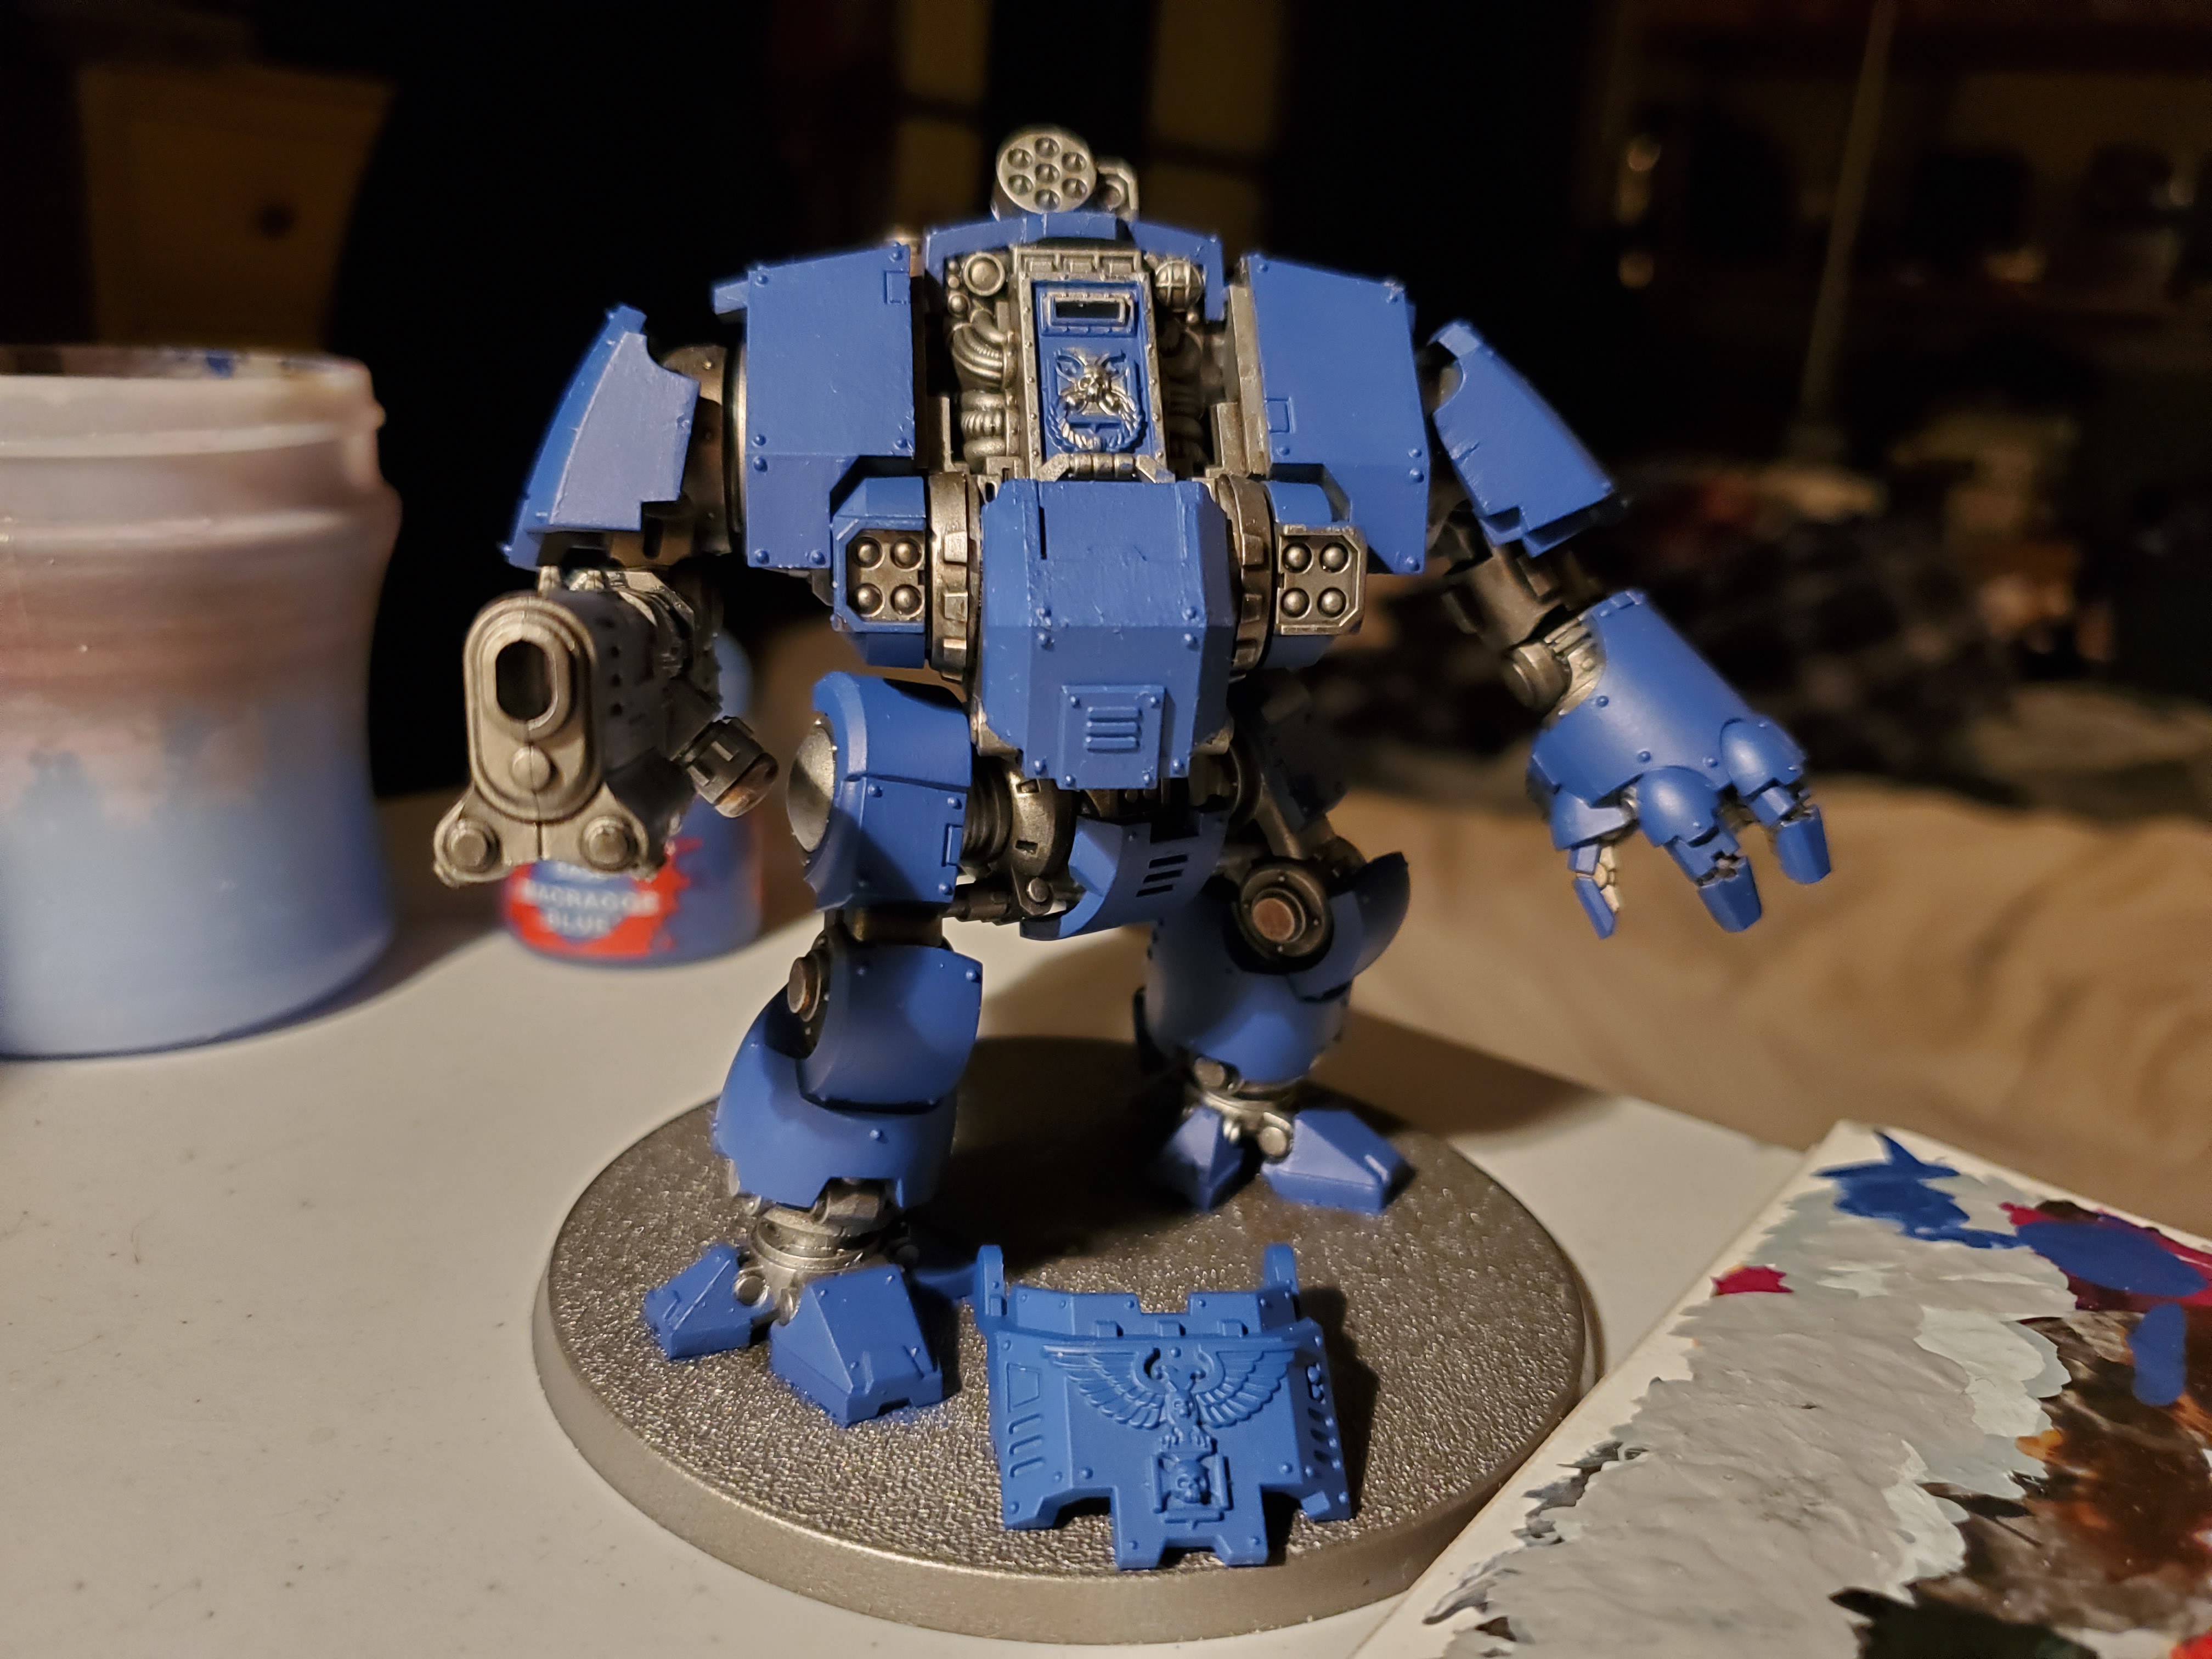 The first stage is to get the basecoat on. As a famous man once said; 'two thin coats'. A smooth, solid colour is what you want here. In a few places I put it on a bit thick, but the overall look works for me. Obviously, I used Macragge Blue here, but you can choose different colours for different chapters.
 Next a recess shade of Nuln Oil. This will take longer than an all over, but the large flat panels will pool the shade much more, so in the long run this is just a bit easier.
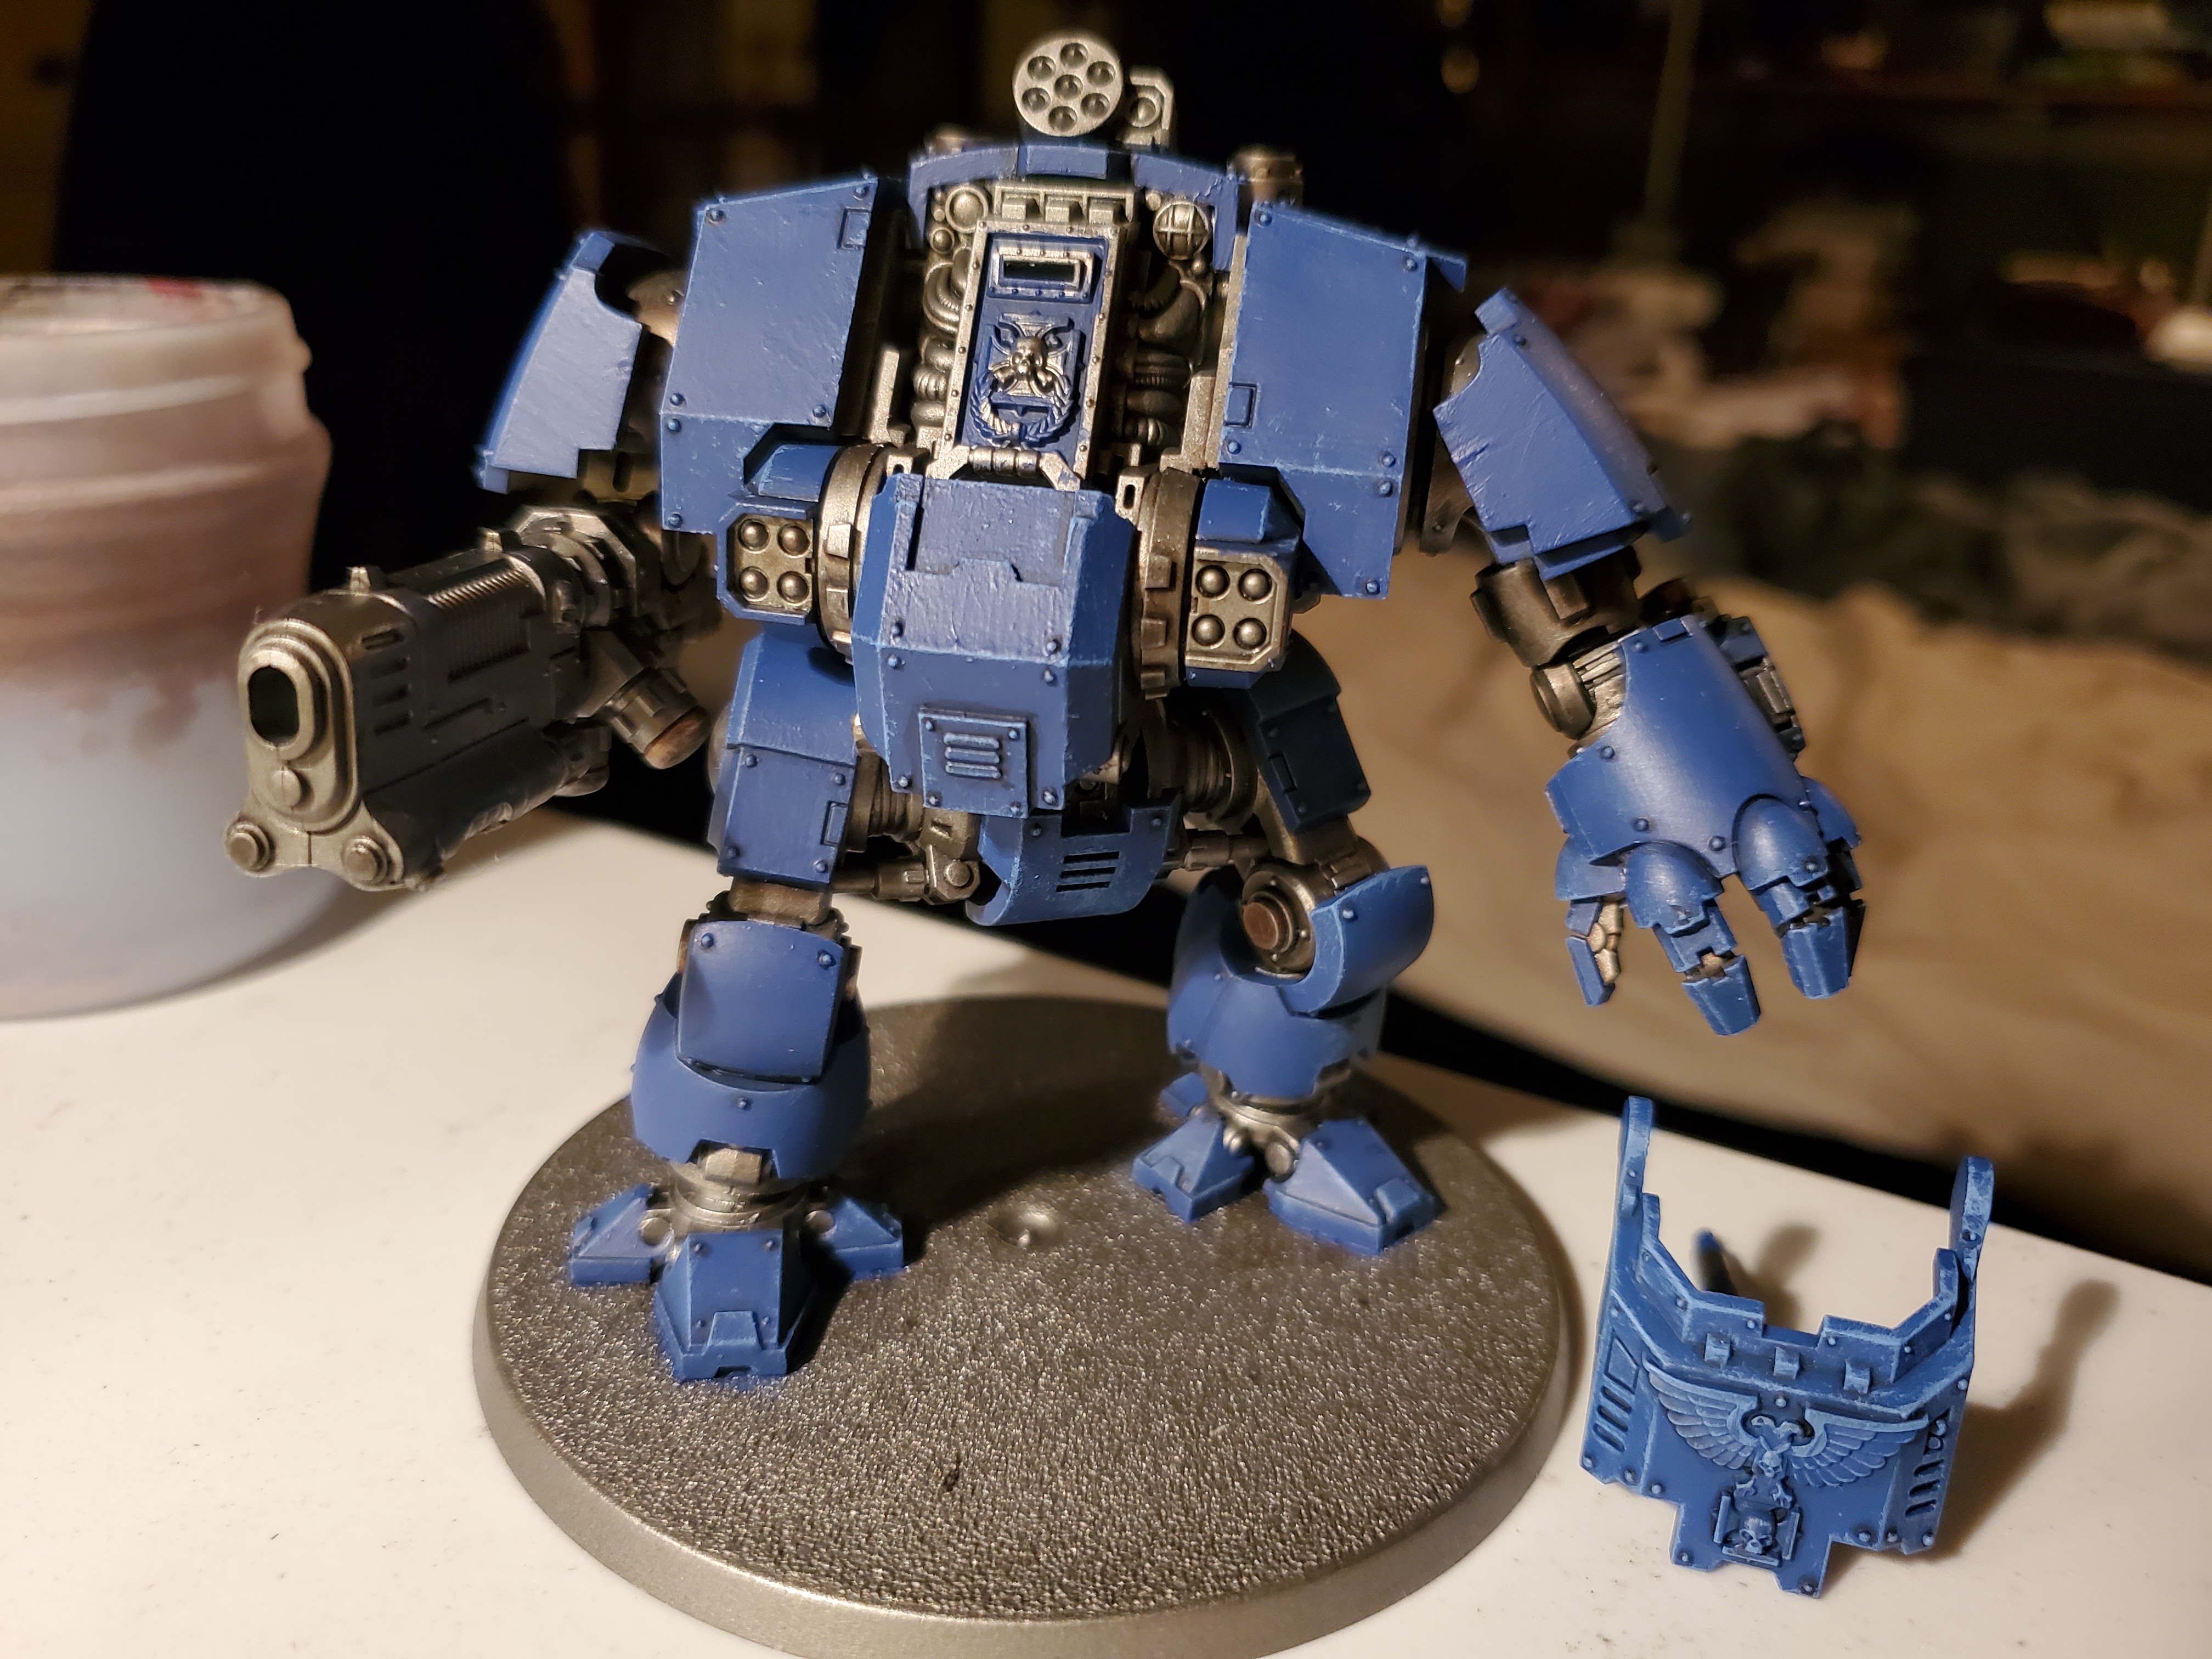 Then a final VERY careful drybrush of Calgar Blue. This really adds that edge to the model with little effort, though edge highlighting is always an option, but will take a bit more time.
And there is the blue part done! Just a few other details like gun casings and gold details left to do!
Painting a Big Blue Meanie (Part 3).
Painting black is very simple with Contrast. Duncan Rhodes’ latest video on using it was a very helpful (even if I didn’t get it 100% right first time).
 First a basecoat of Grey Seer is applied. As with all basecoats, a solid colour is important here. Two thin coats, and all that (though I may have had to do three; metals are difficult to colour over).
 Then the Contrast! As you'll notice in later pictures, I was initially a bit patchy with this coat, but that was fixed later. Contrast really is a great tool.
Painting a Big Blue Meanie (Part 4).
Plasma Coils! Always a fun task to pick what colour you want, but the Ultramarines are pretty standard, so I went with traditional blue. This did turn out a little more dull than intended, but I like to imagine this is after the weapon has just fired and is on ‘cooldown’.
 As I was applying the basecoat of Grey Seer, I also basecoated the coils, then a wash of Drakenhof Nightshade was applied all over. Just ignore the patchy paint on the gun casing.
 Next a drybrush of Ulthan Grey was added across all of the coils.
 Then another lighter drybrush of White Scar along the top edges of the coils.
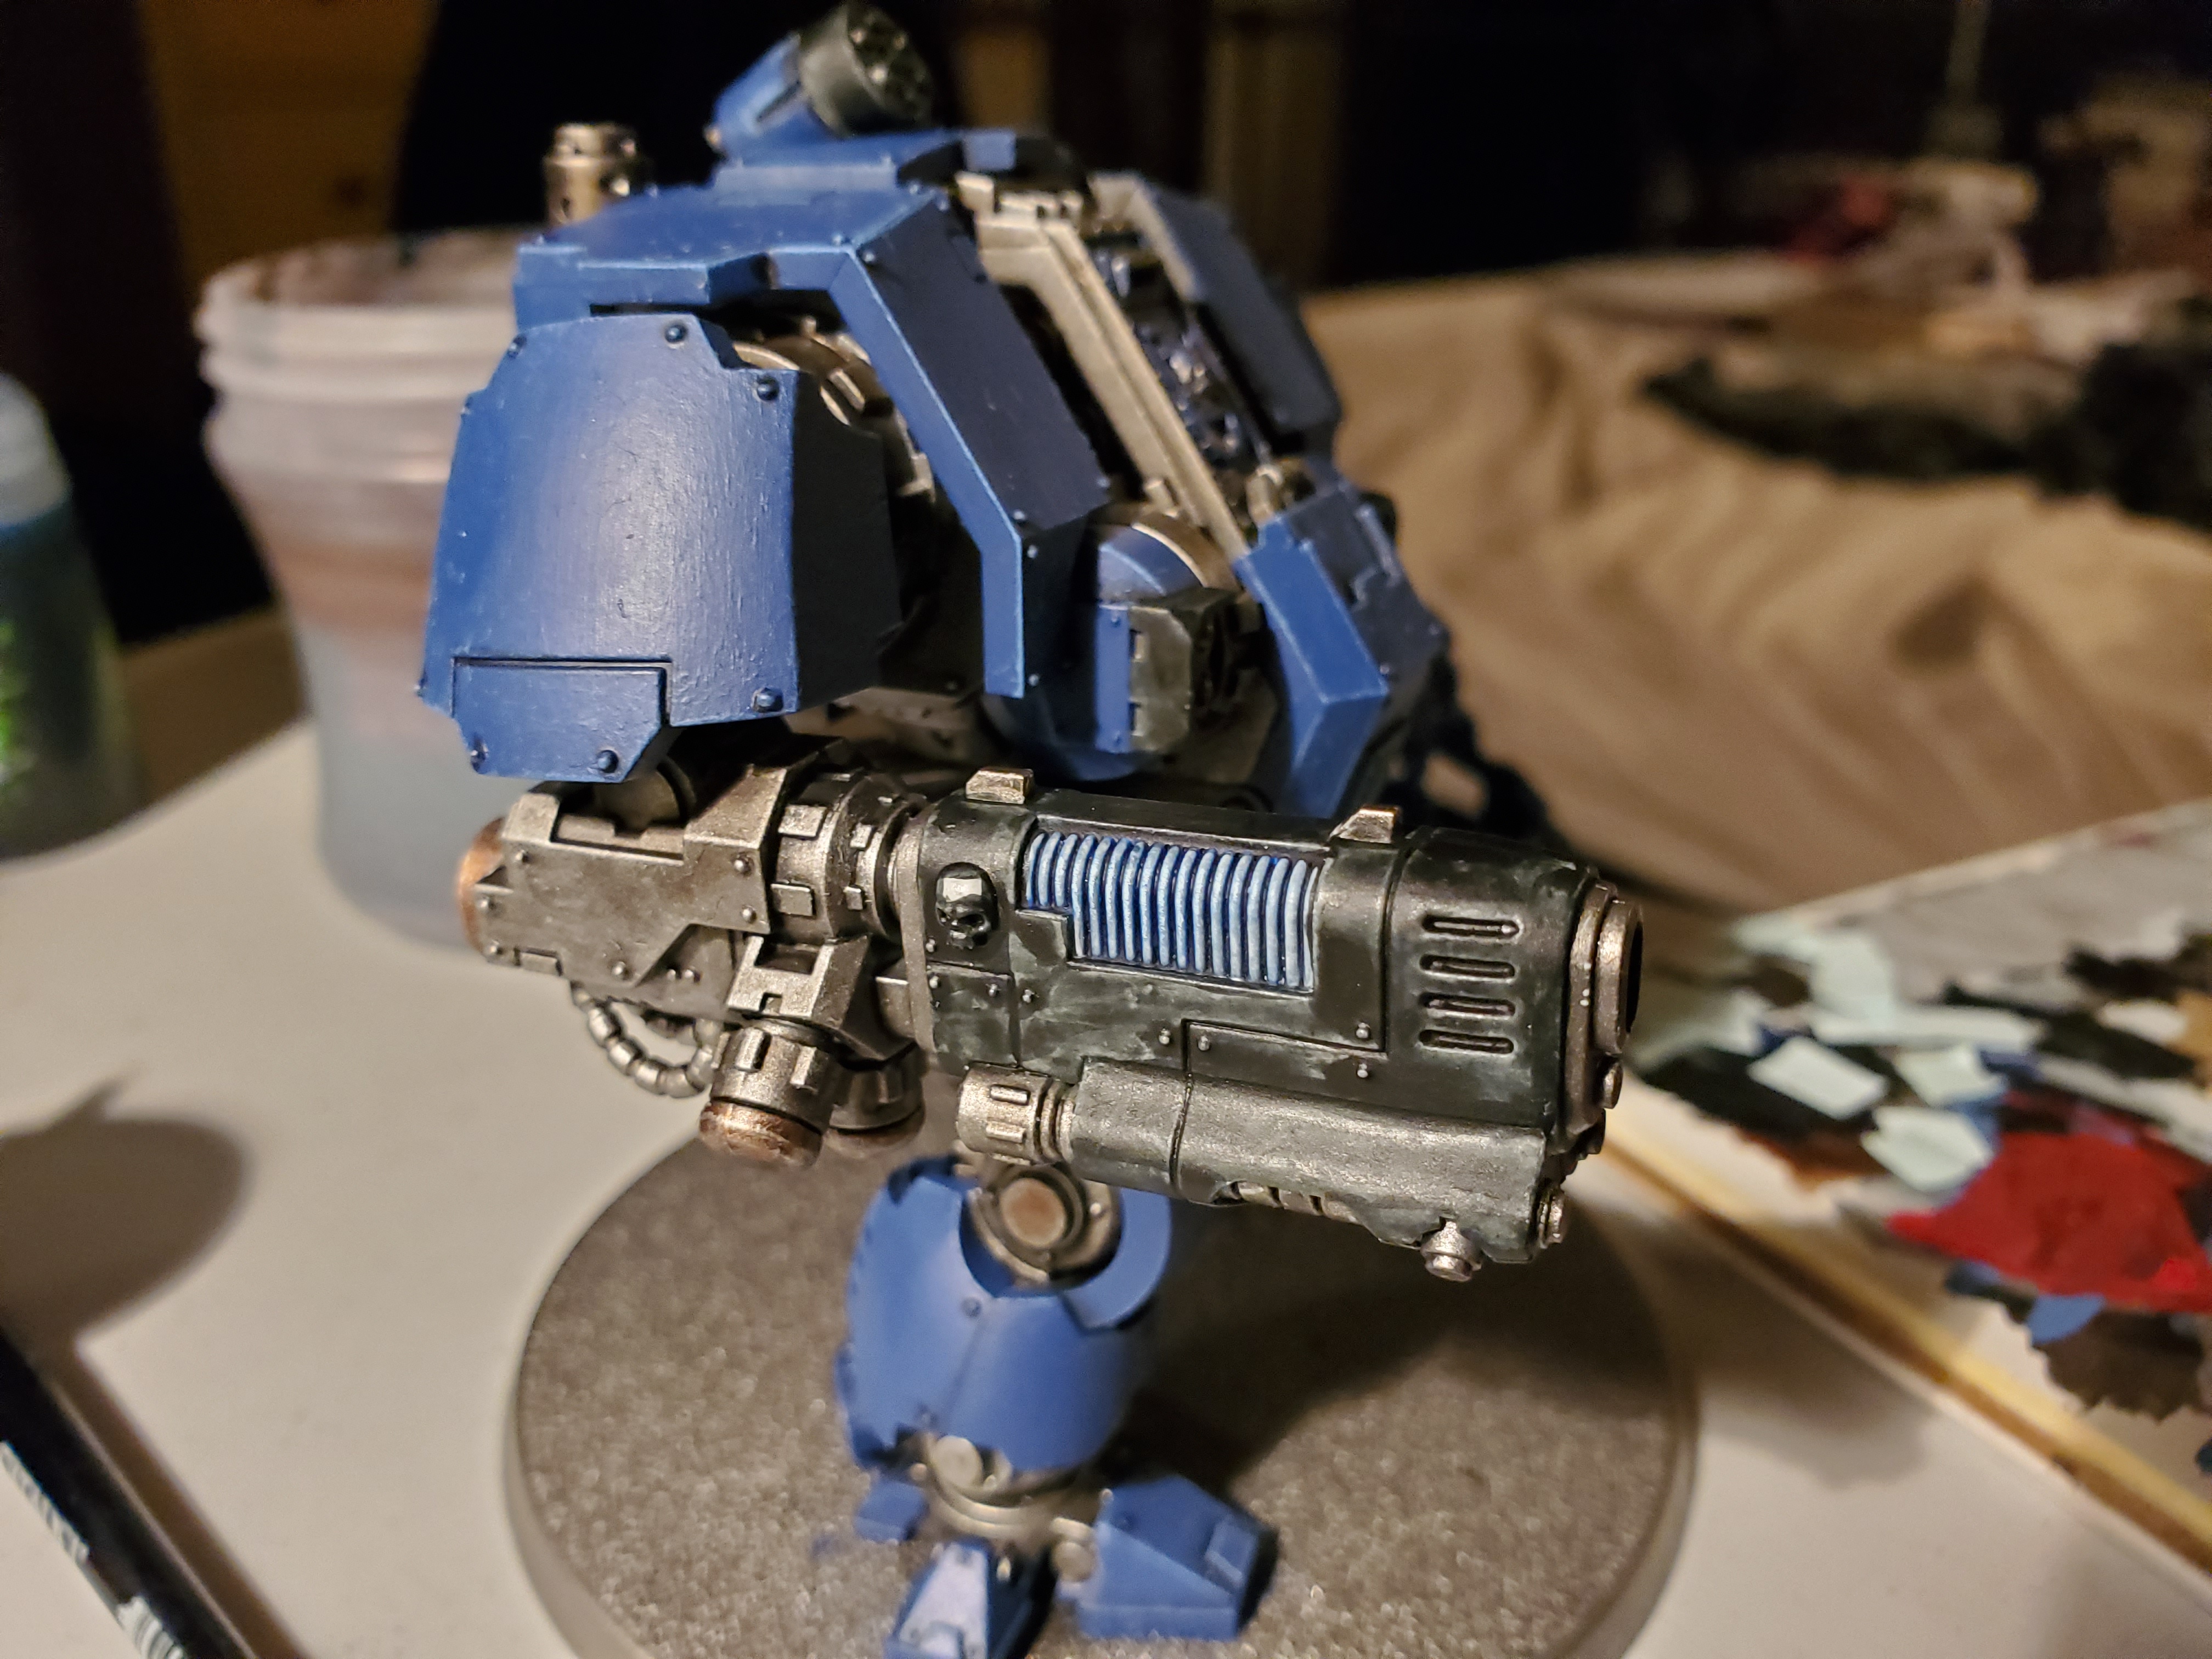 Then a glaze of Guillaman Blue across the whole thing. I think I did two coats. Then, just to add that little extra I gave the coils a coat of 'Ardcoat gloss varnish.
Painting a Big Blue Meanie (Part 5).
I thought I’d briefly go over my basing technique before showing off the finished product. I did skip a few details, but they were mostly simple base/shade/highlight stages.
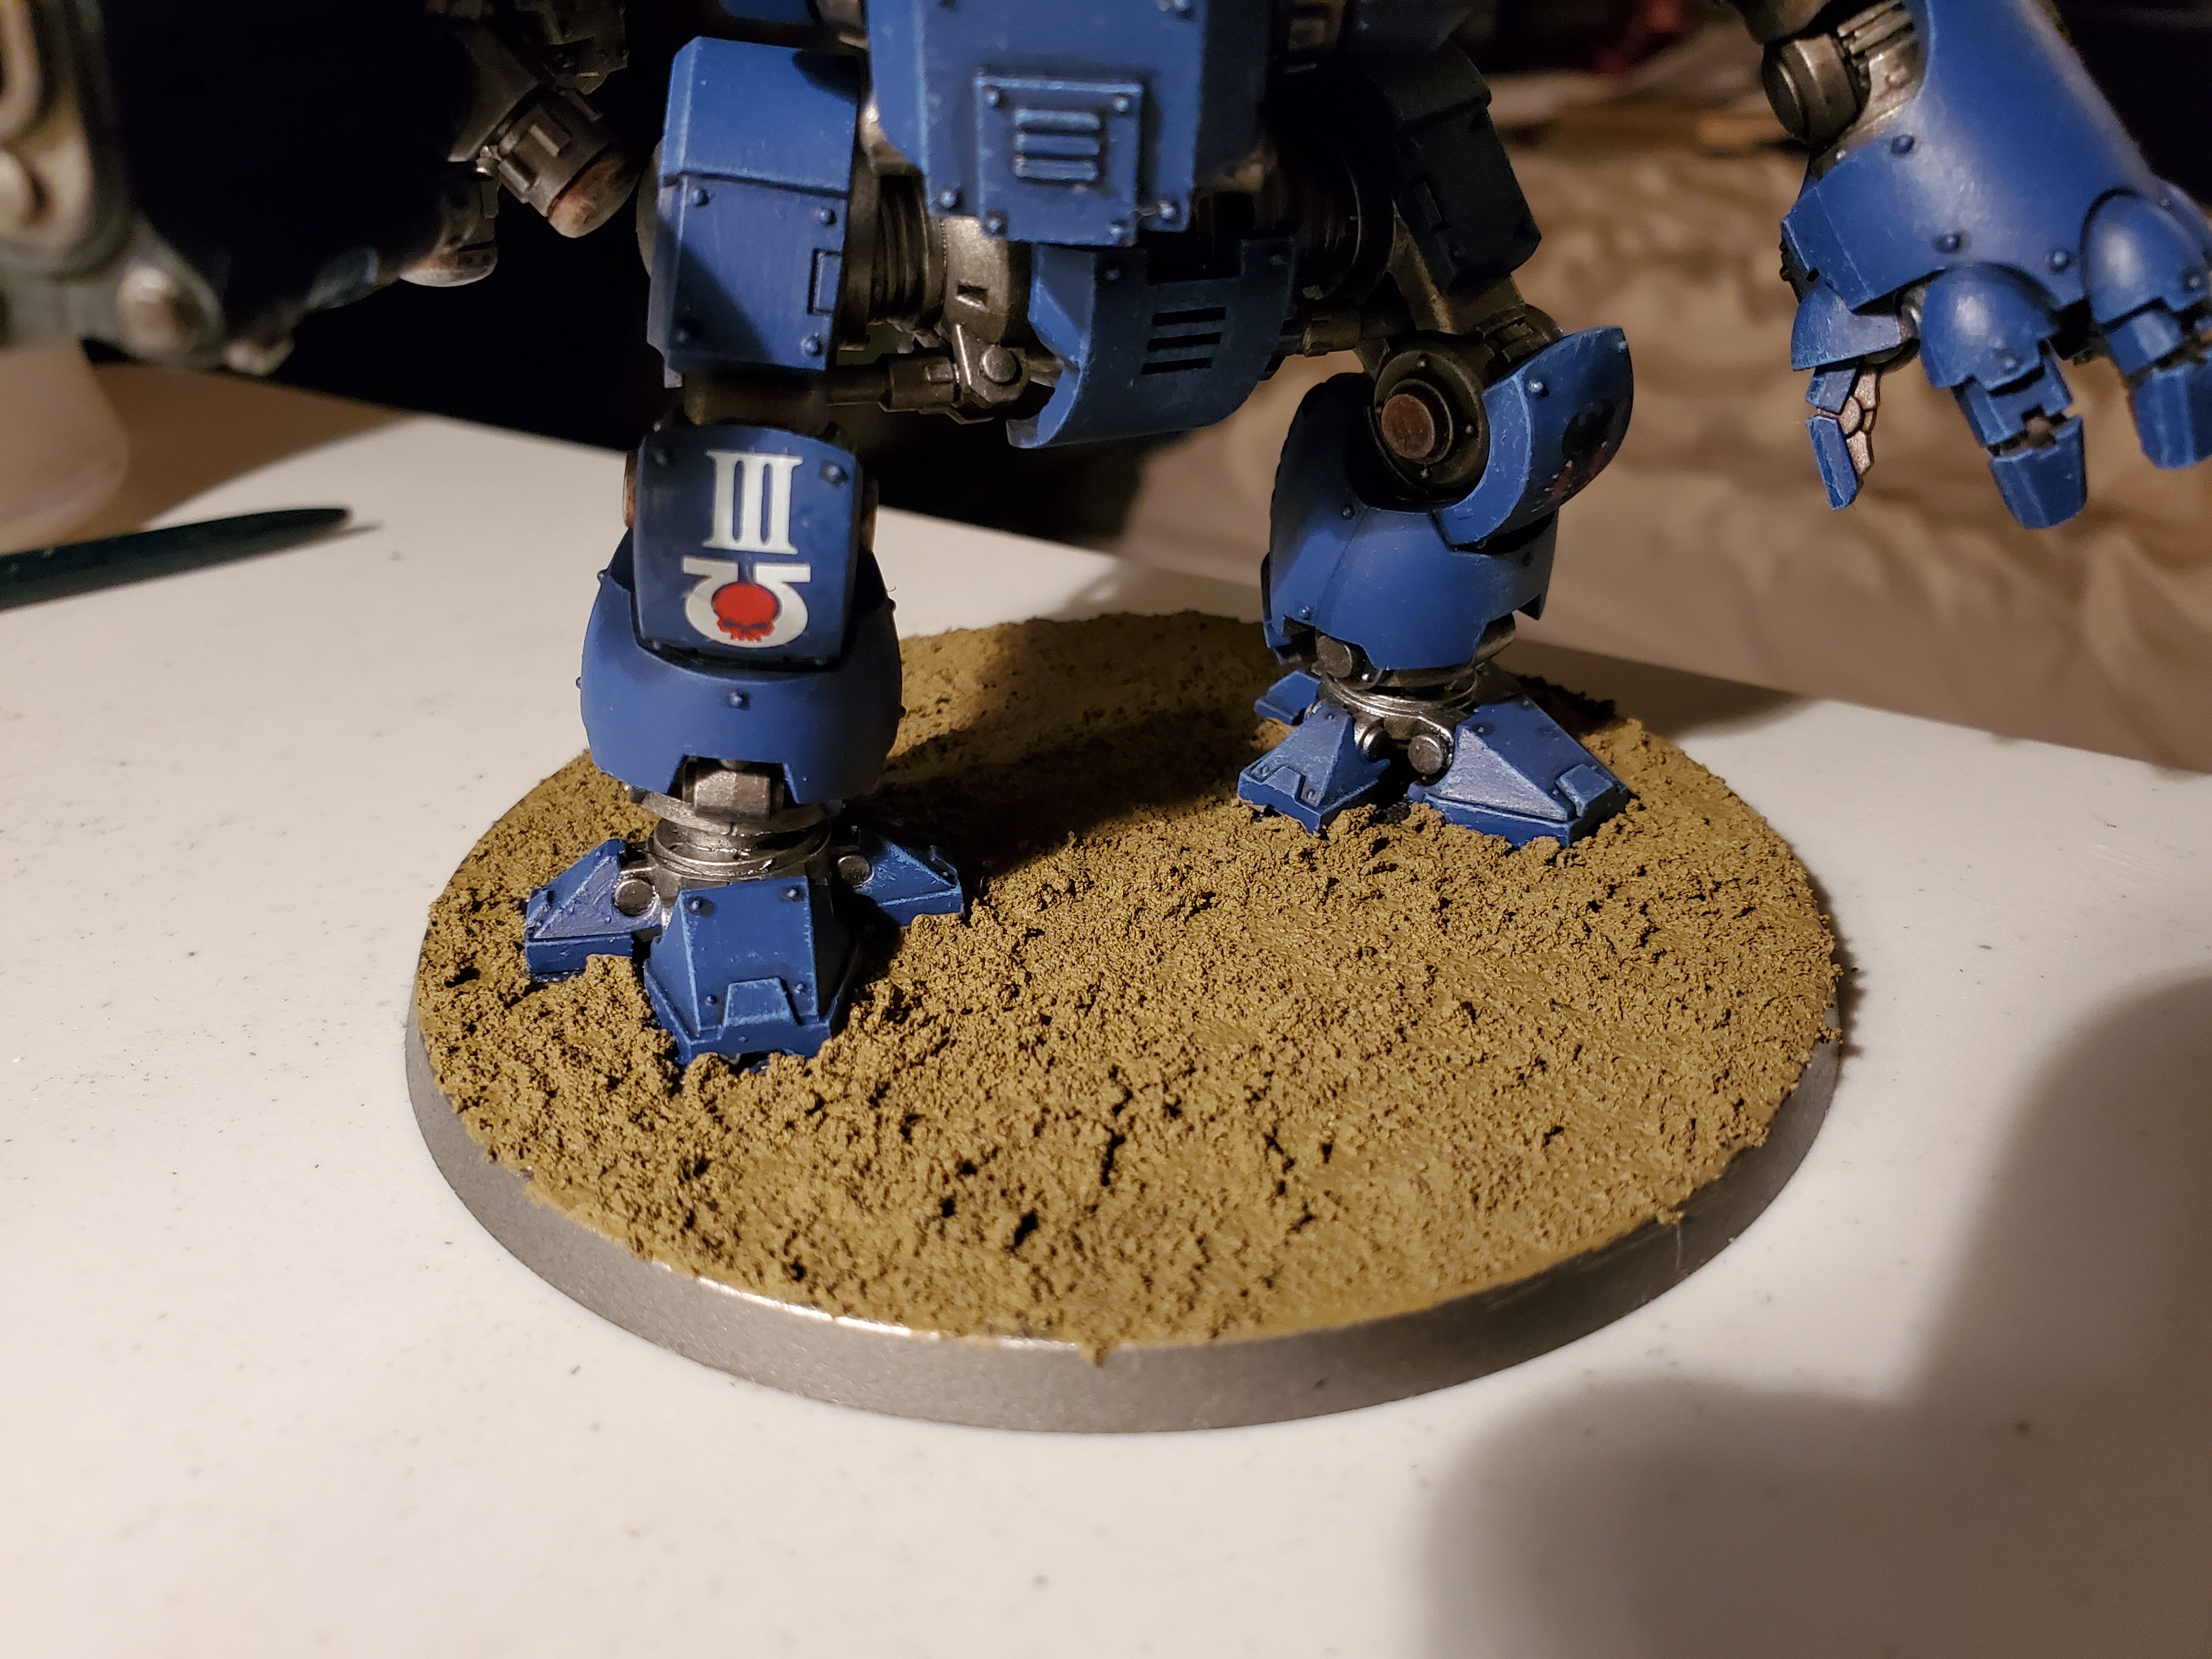 First a cover of Armageddon Dunes across the whole base (this was also the last of my Armageddon Dunes...).
 Then an all over shade of Agrax Earthshade (this is pretty much the last of my Agrax...)
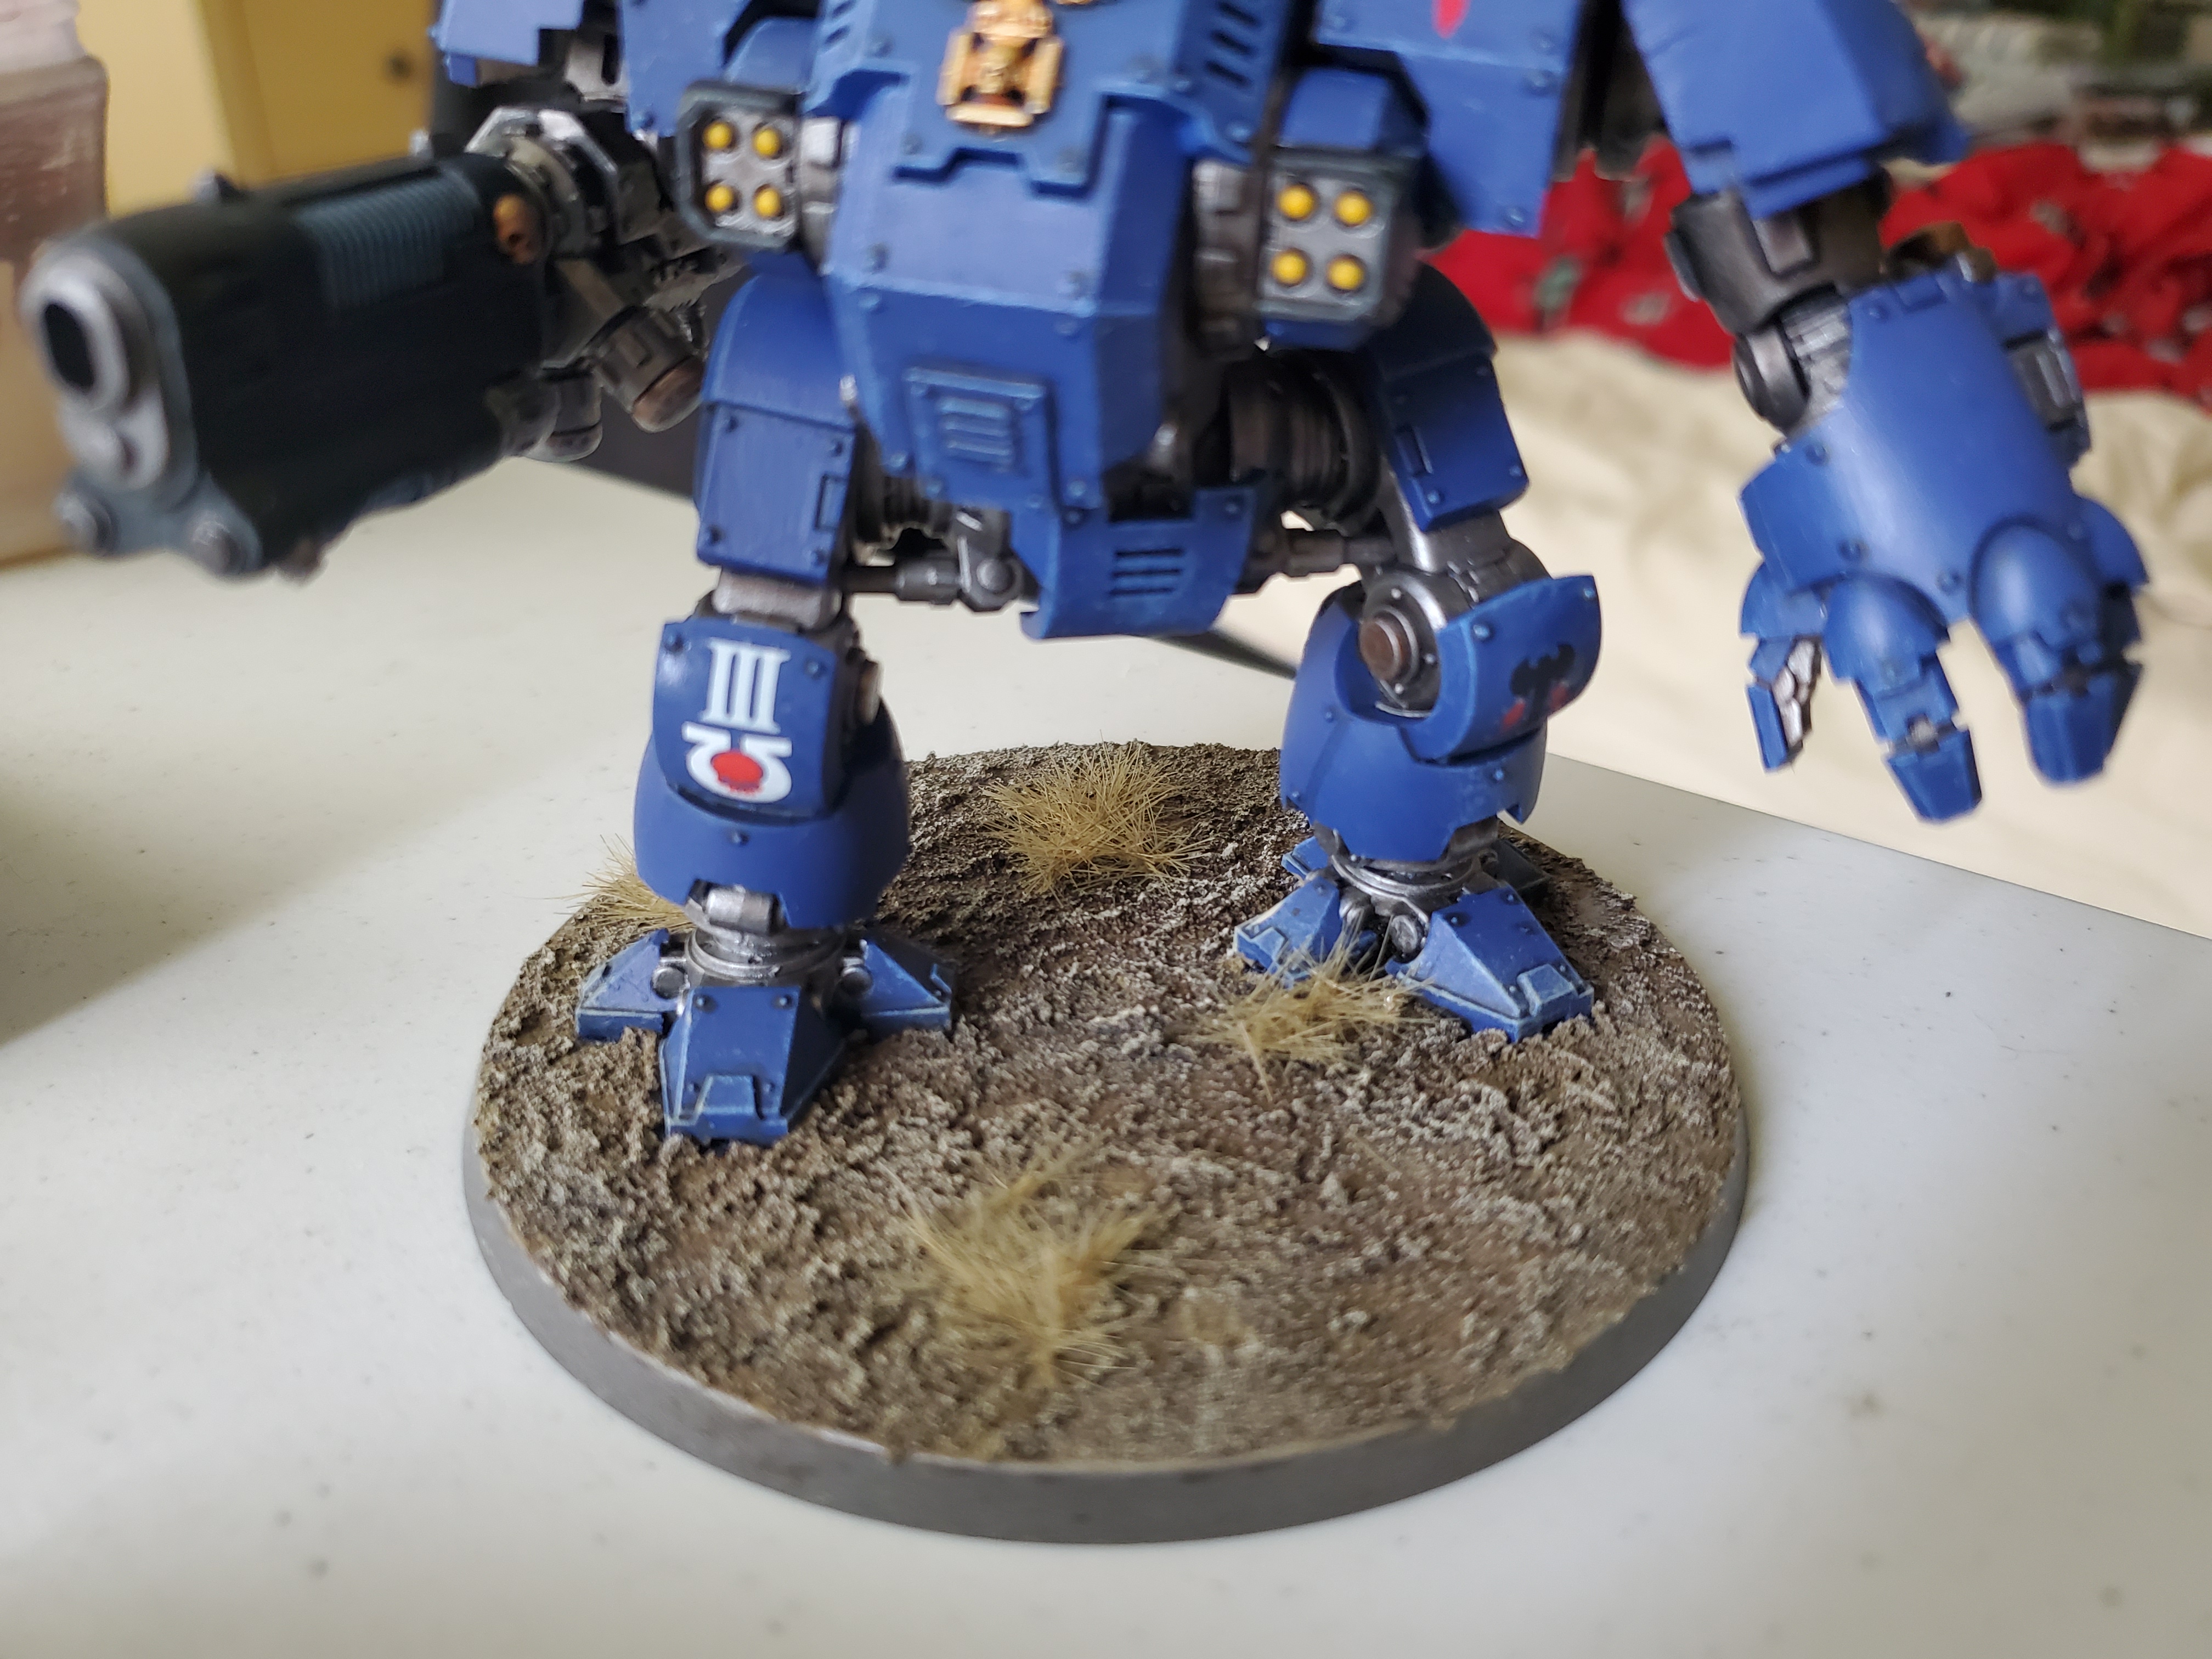 Then a drybrush of Ushabti Bone with some grass tuft added to the base.
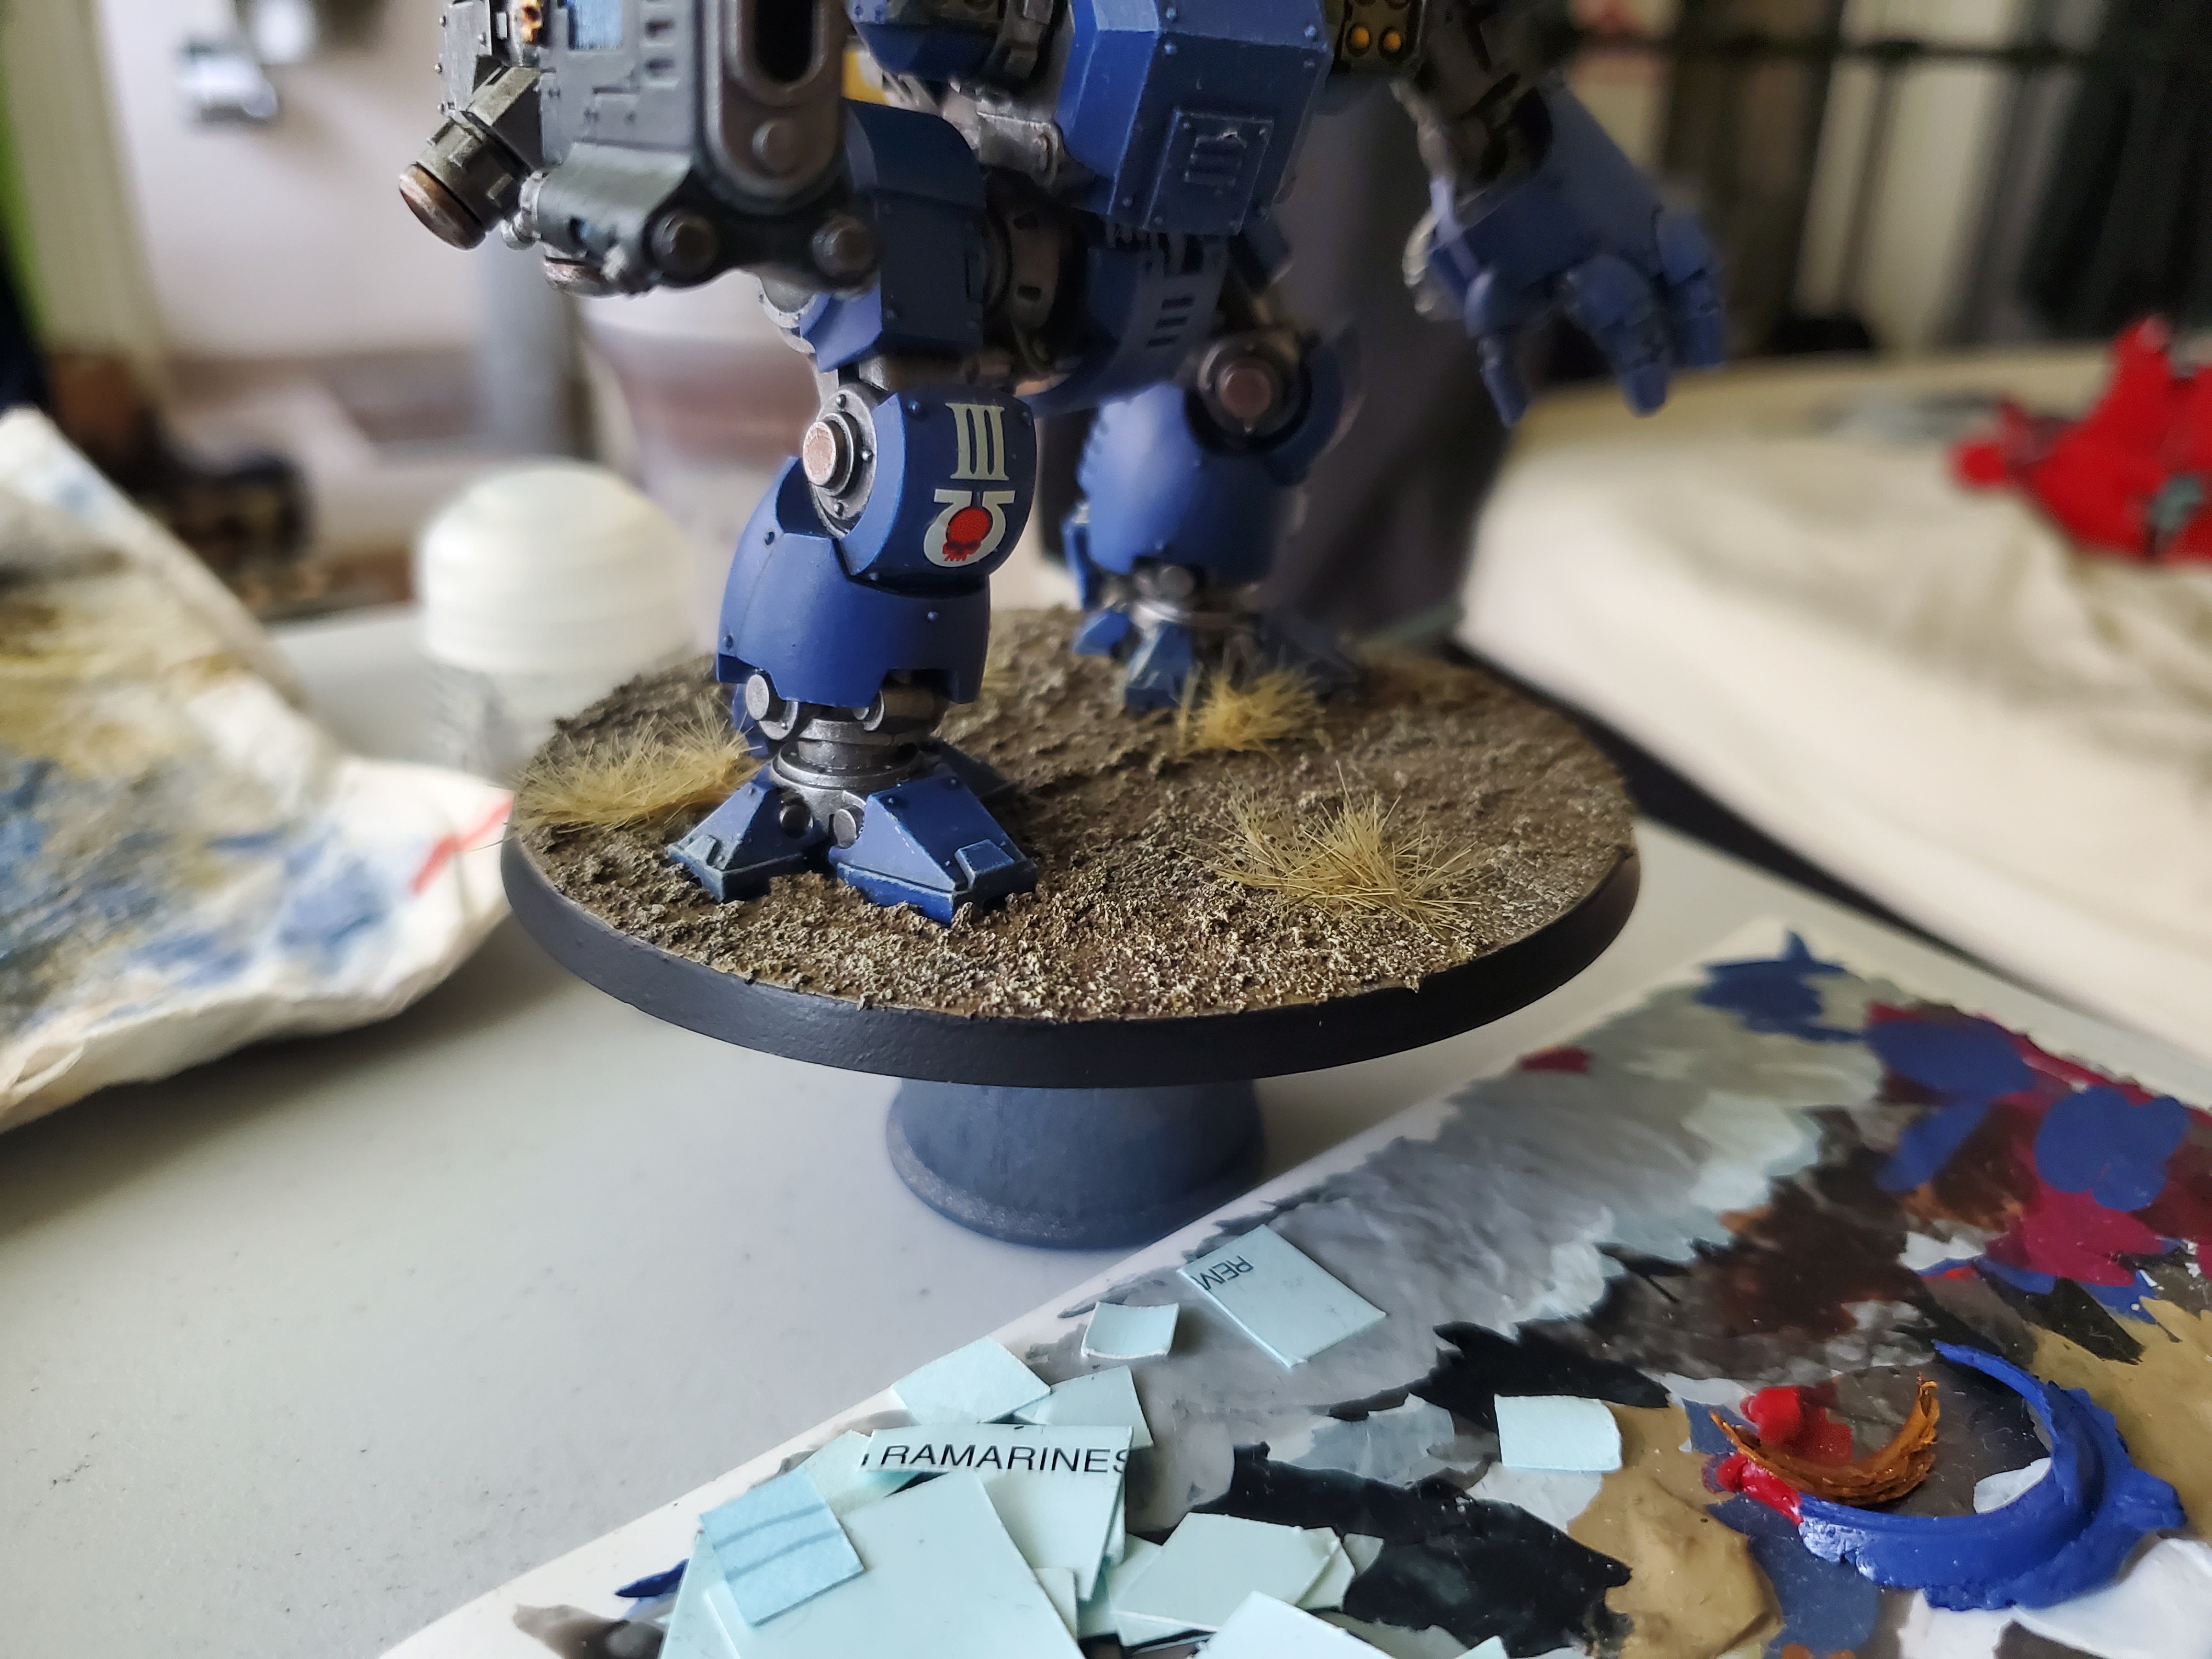 Then the edge of the base was painted in Abbadon Black (two thin coats).
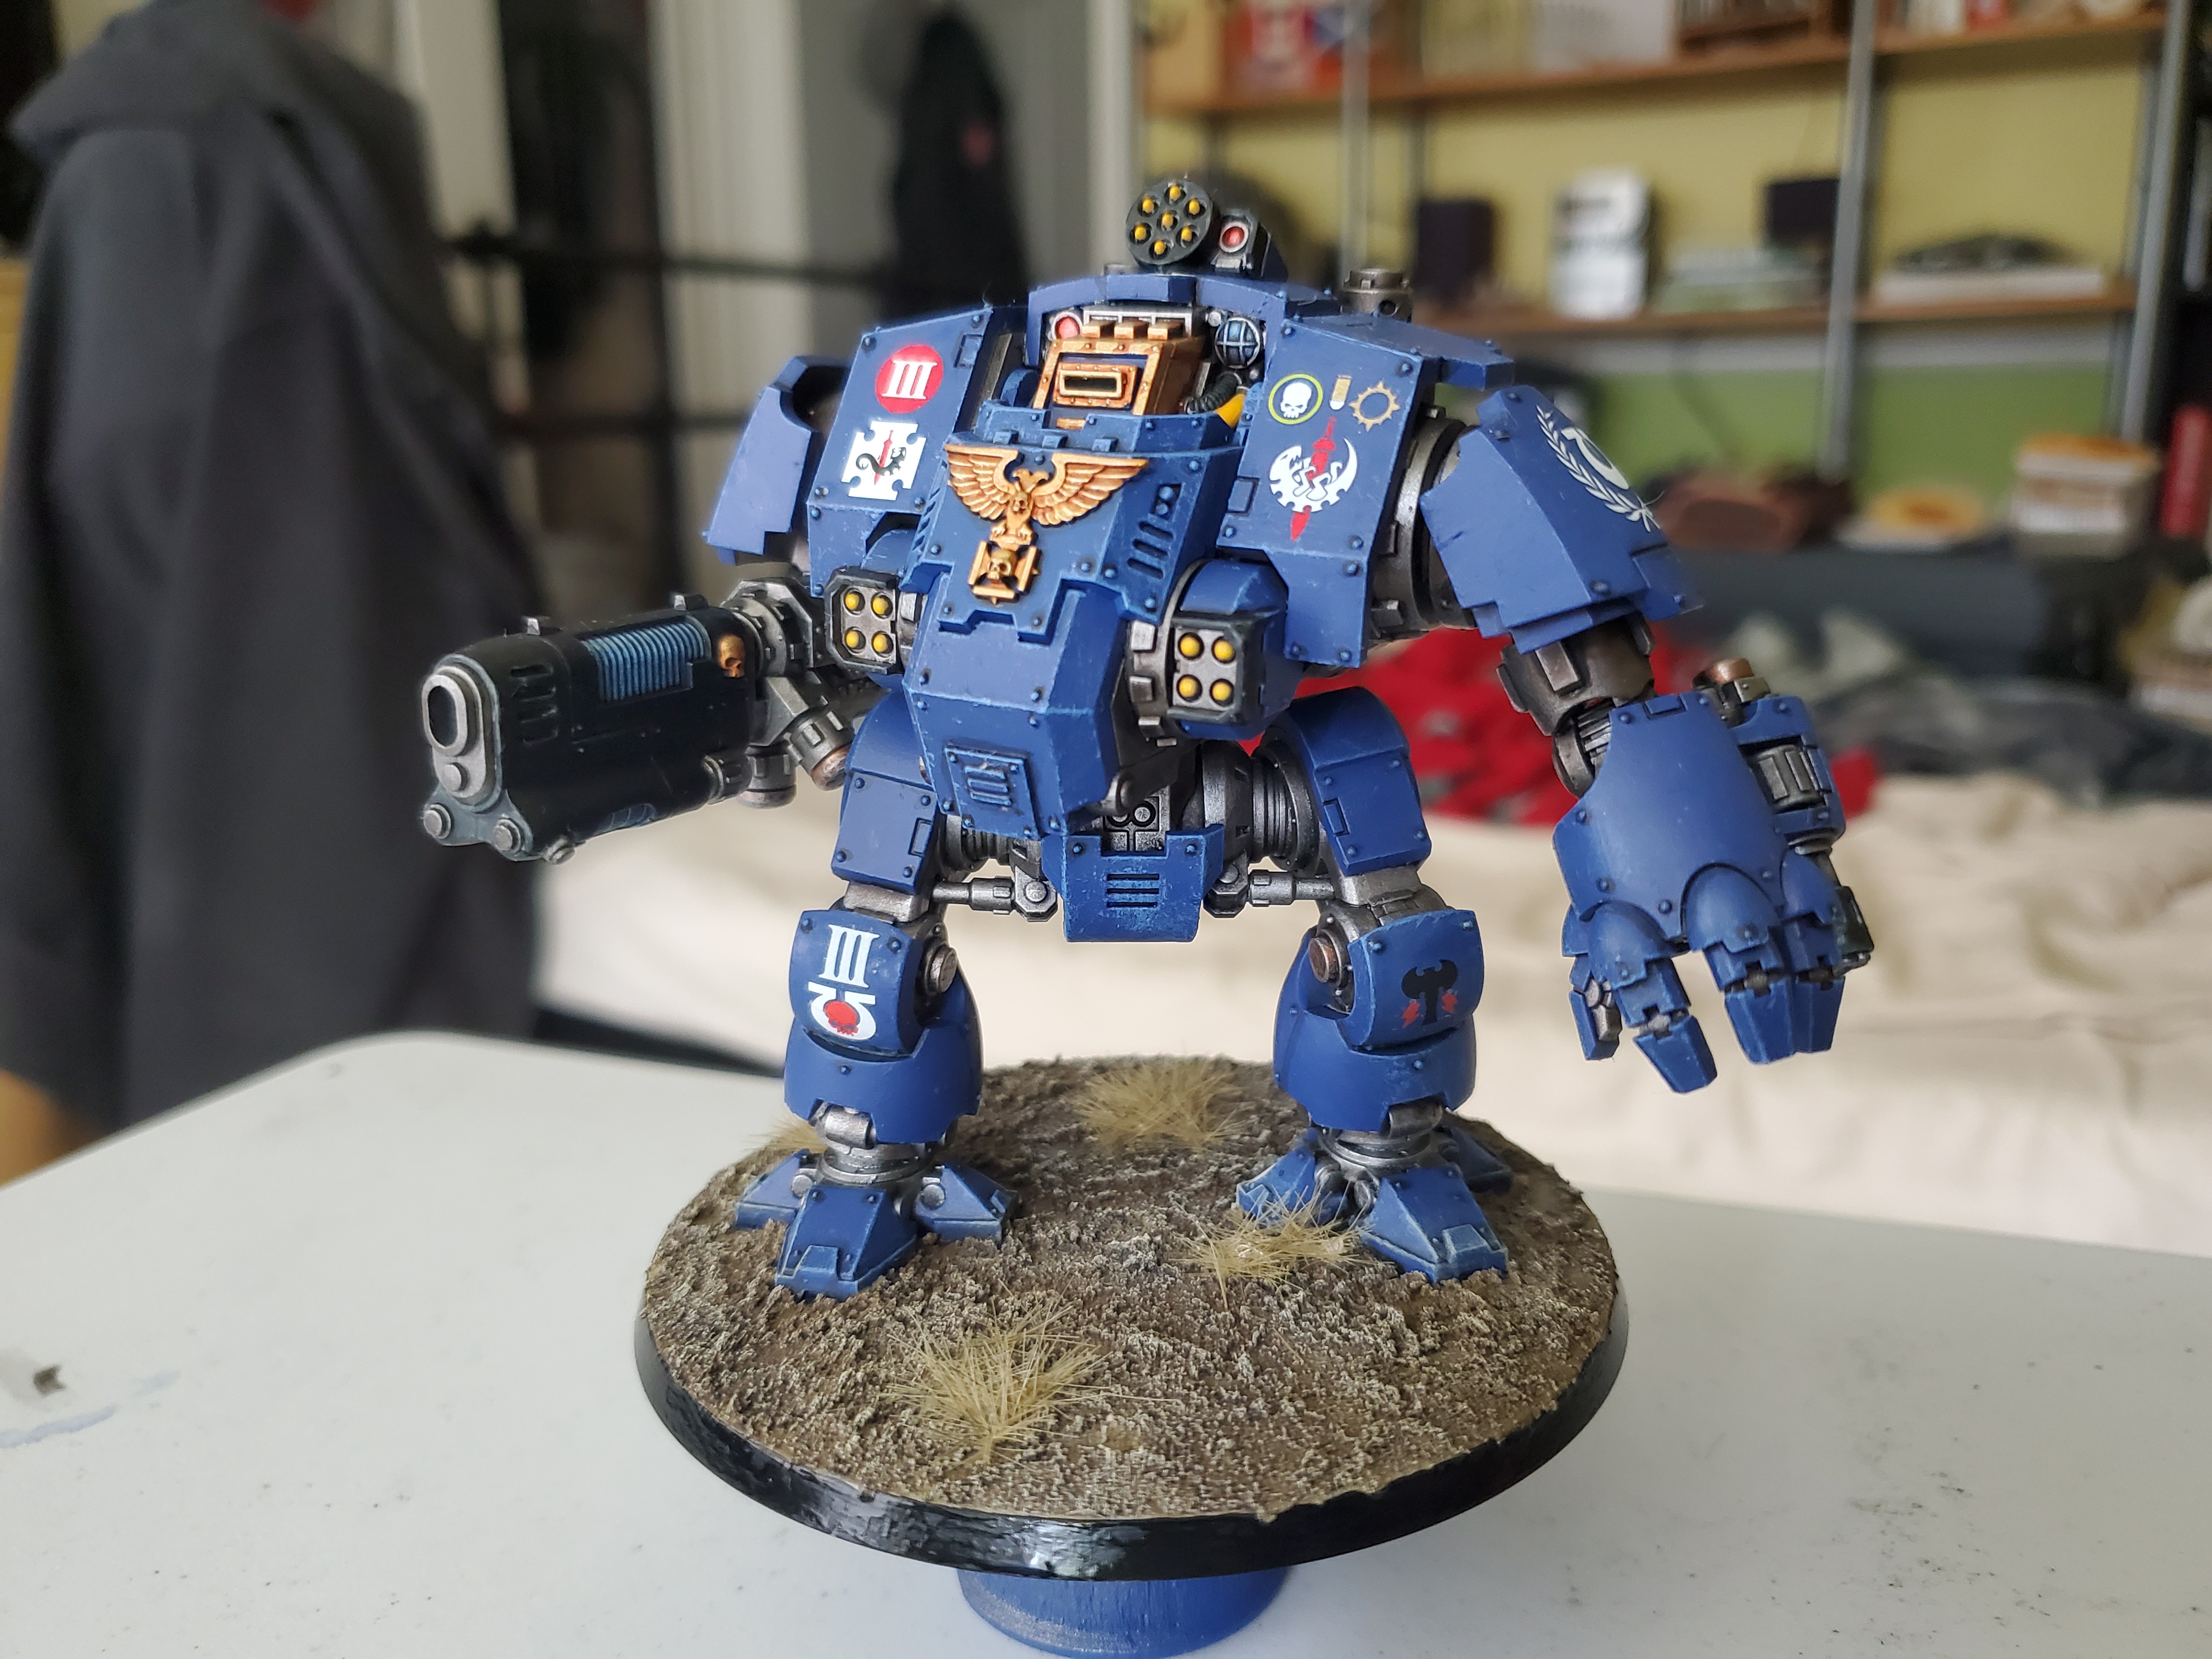 And here he is all finished! A coat of 'Ardcoat was added to the base for that last little shine.
The Great Aggressor Oddesey
This update has taken a little longer than anticipated, but my Aggressors are finally done (minus bases but more on that later). I thought I’d do a full step-by-step guide for these guys, so here we go! I started from a Macragge Blue spray undercoat and used the GW range of paints to paint these guys up.
 First the model wash shaded with an all-over coat of Nuln Oil, followed by a heavy drybrush of Macragge Blue, then finally a drybrush of Calgar blue to define the edges.
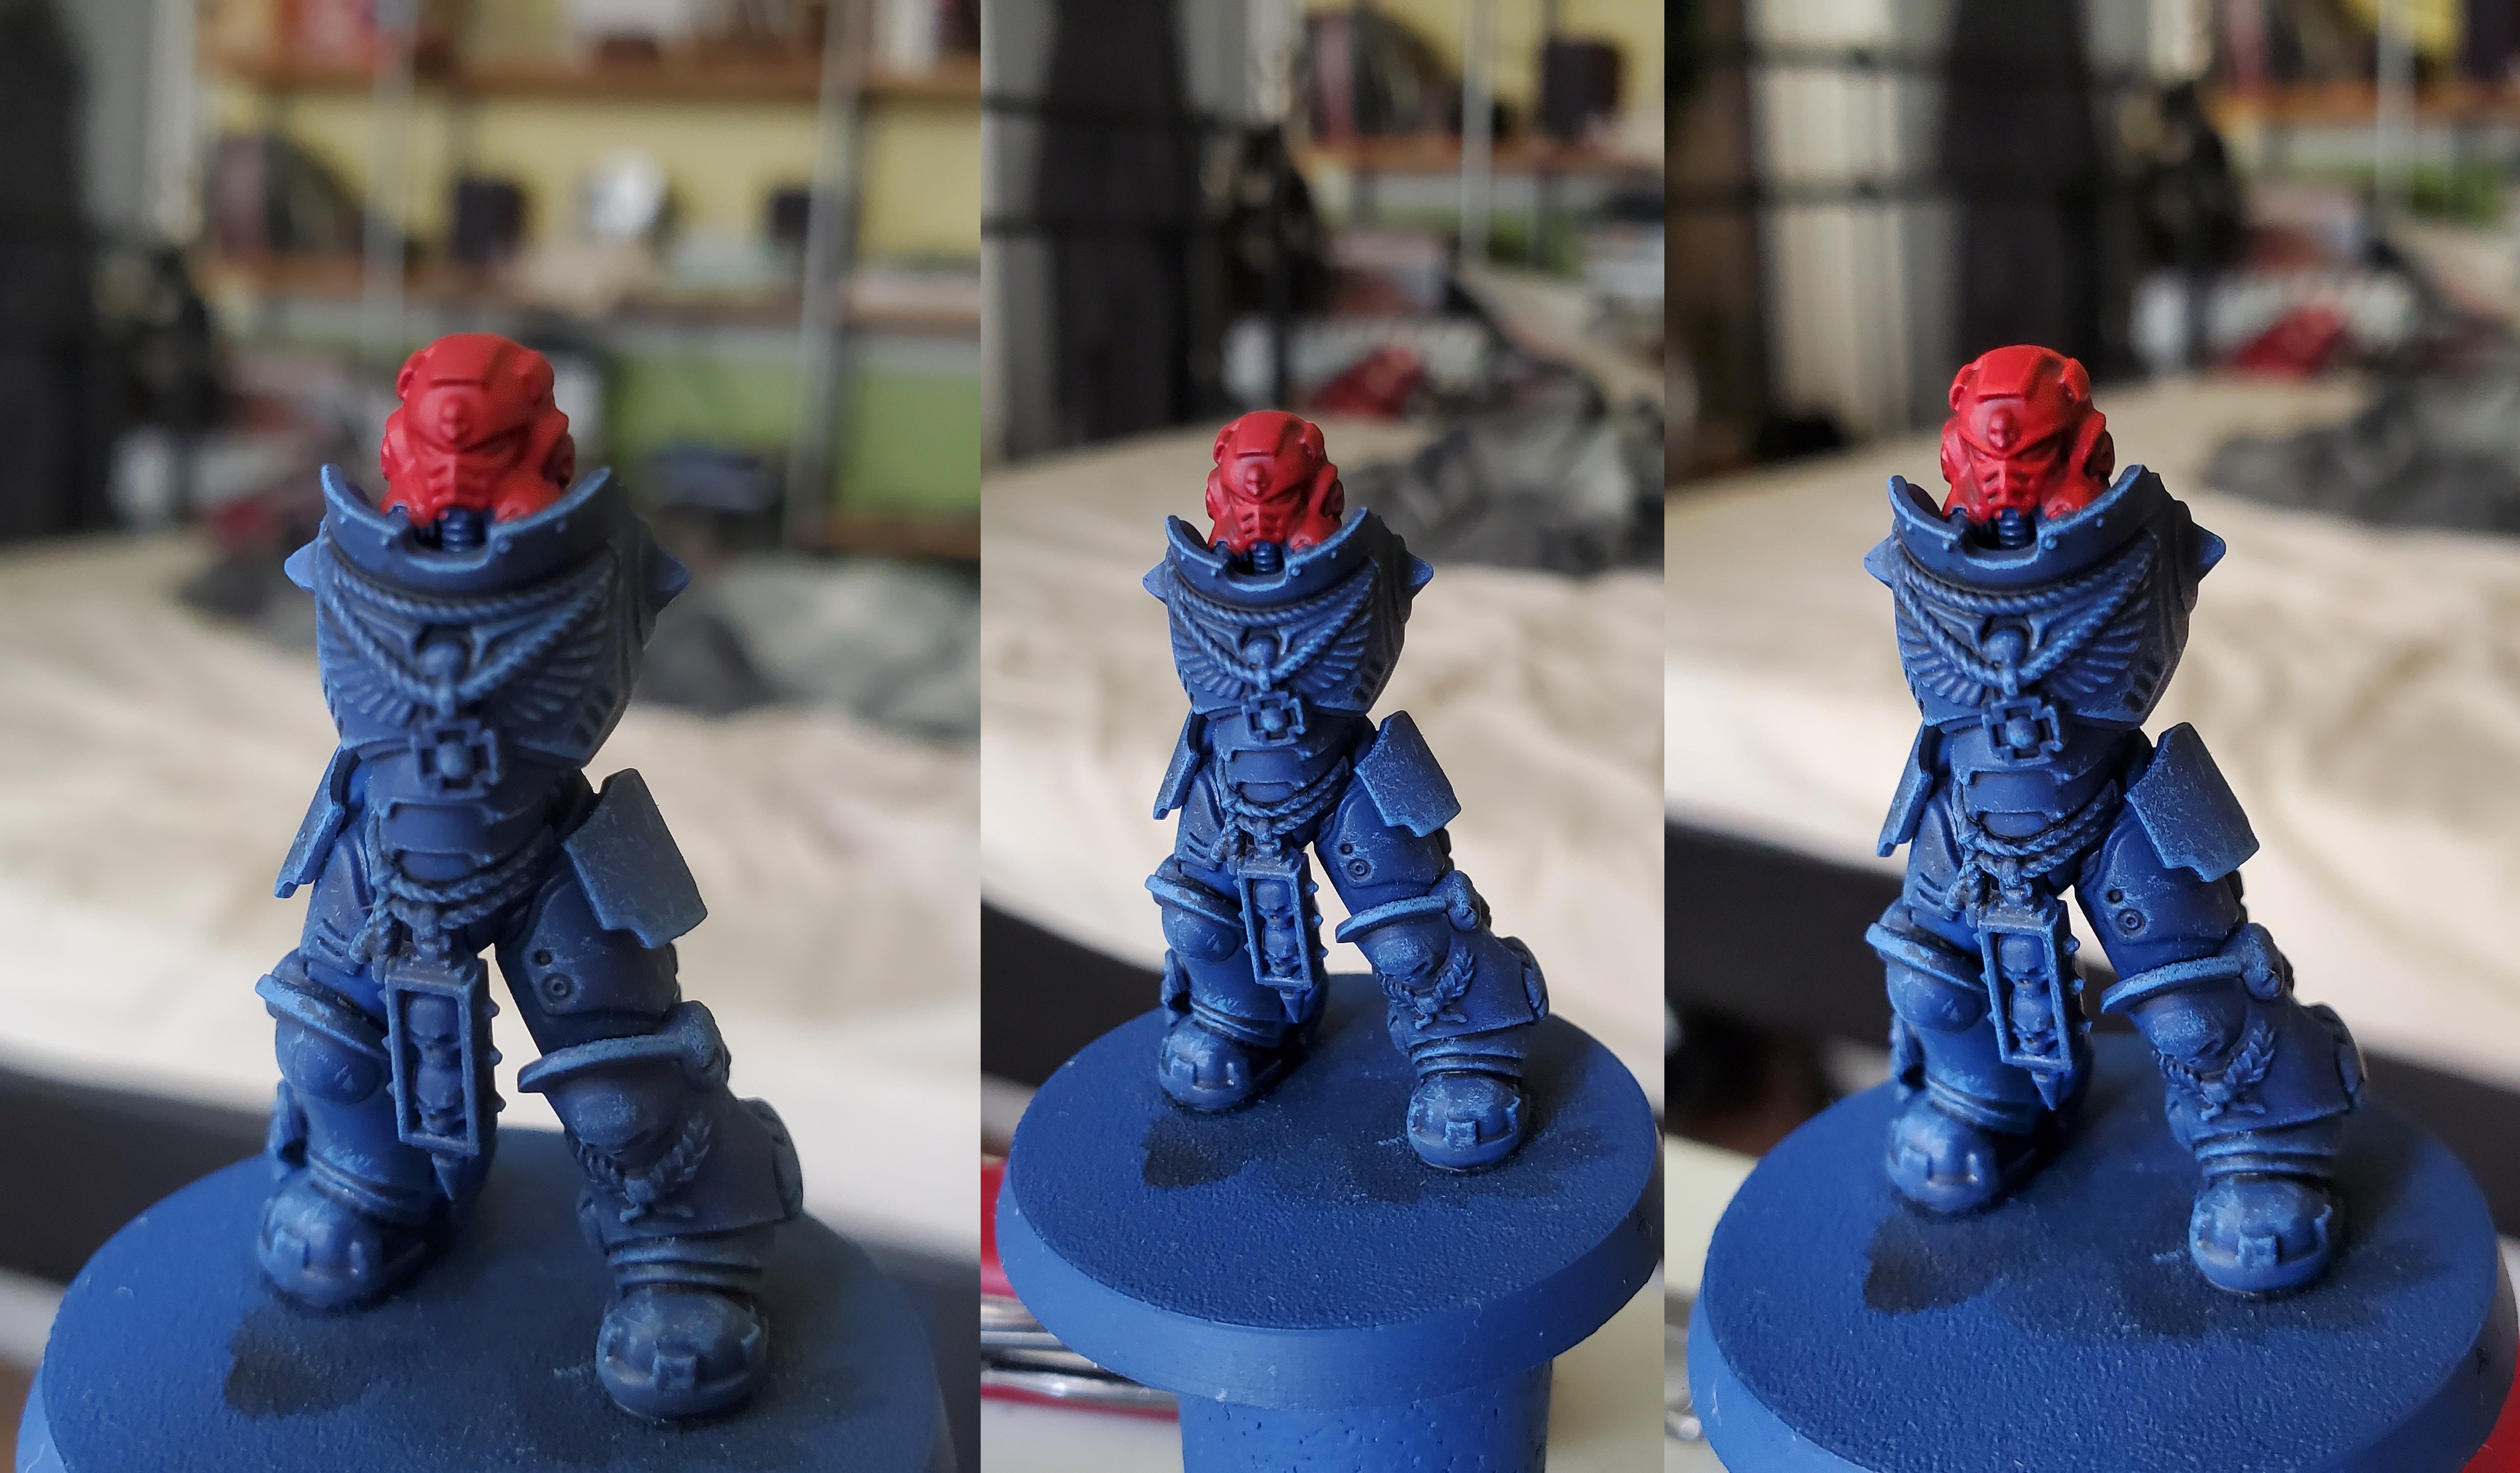 Next, the red details. These were also applied to the shoulder trims (I'm painting 3rd Coy.) and were started with a nice solid basecoat of Mephiston Red. This was followed by a recess shade of Agrax Earthshade (mainly to save paint) and then edge highlighted with Evil Sun's Scarlet.
 The black details dotted around the mini were probably the simplest to do. CONTRAST! Grey Seer base (make sure it's a good solid colour) then Black Templar Contrast over top of it. On larger, flatter surfaces it could be a bit patchy, do a second coat if this happens.
 Metal. I think we can all do this in our sleep by now, but it's the simple recipe of Leadbelcher (I believe the similar paint in the Army Painter range is Gun Metal) shaded with Nuln Oil, then drybrushed (carefully in this case) with Runefang Steel, though any bright silver would suffice.
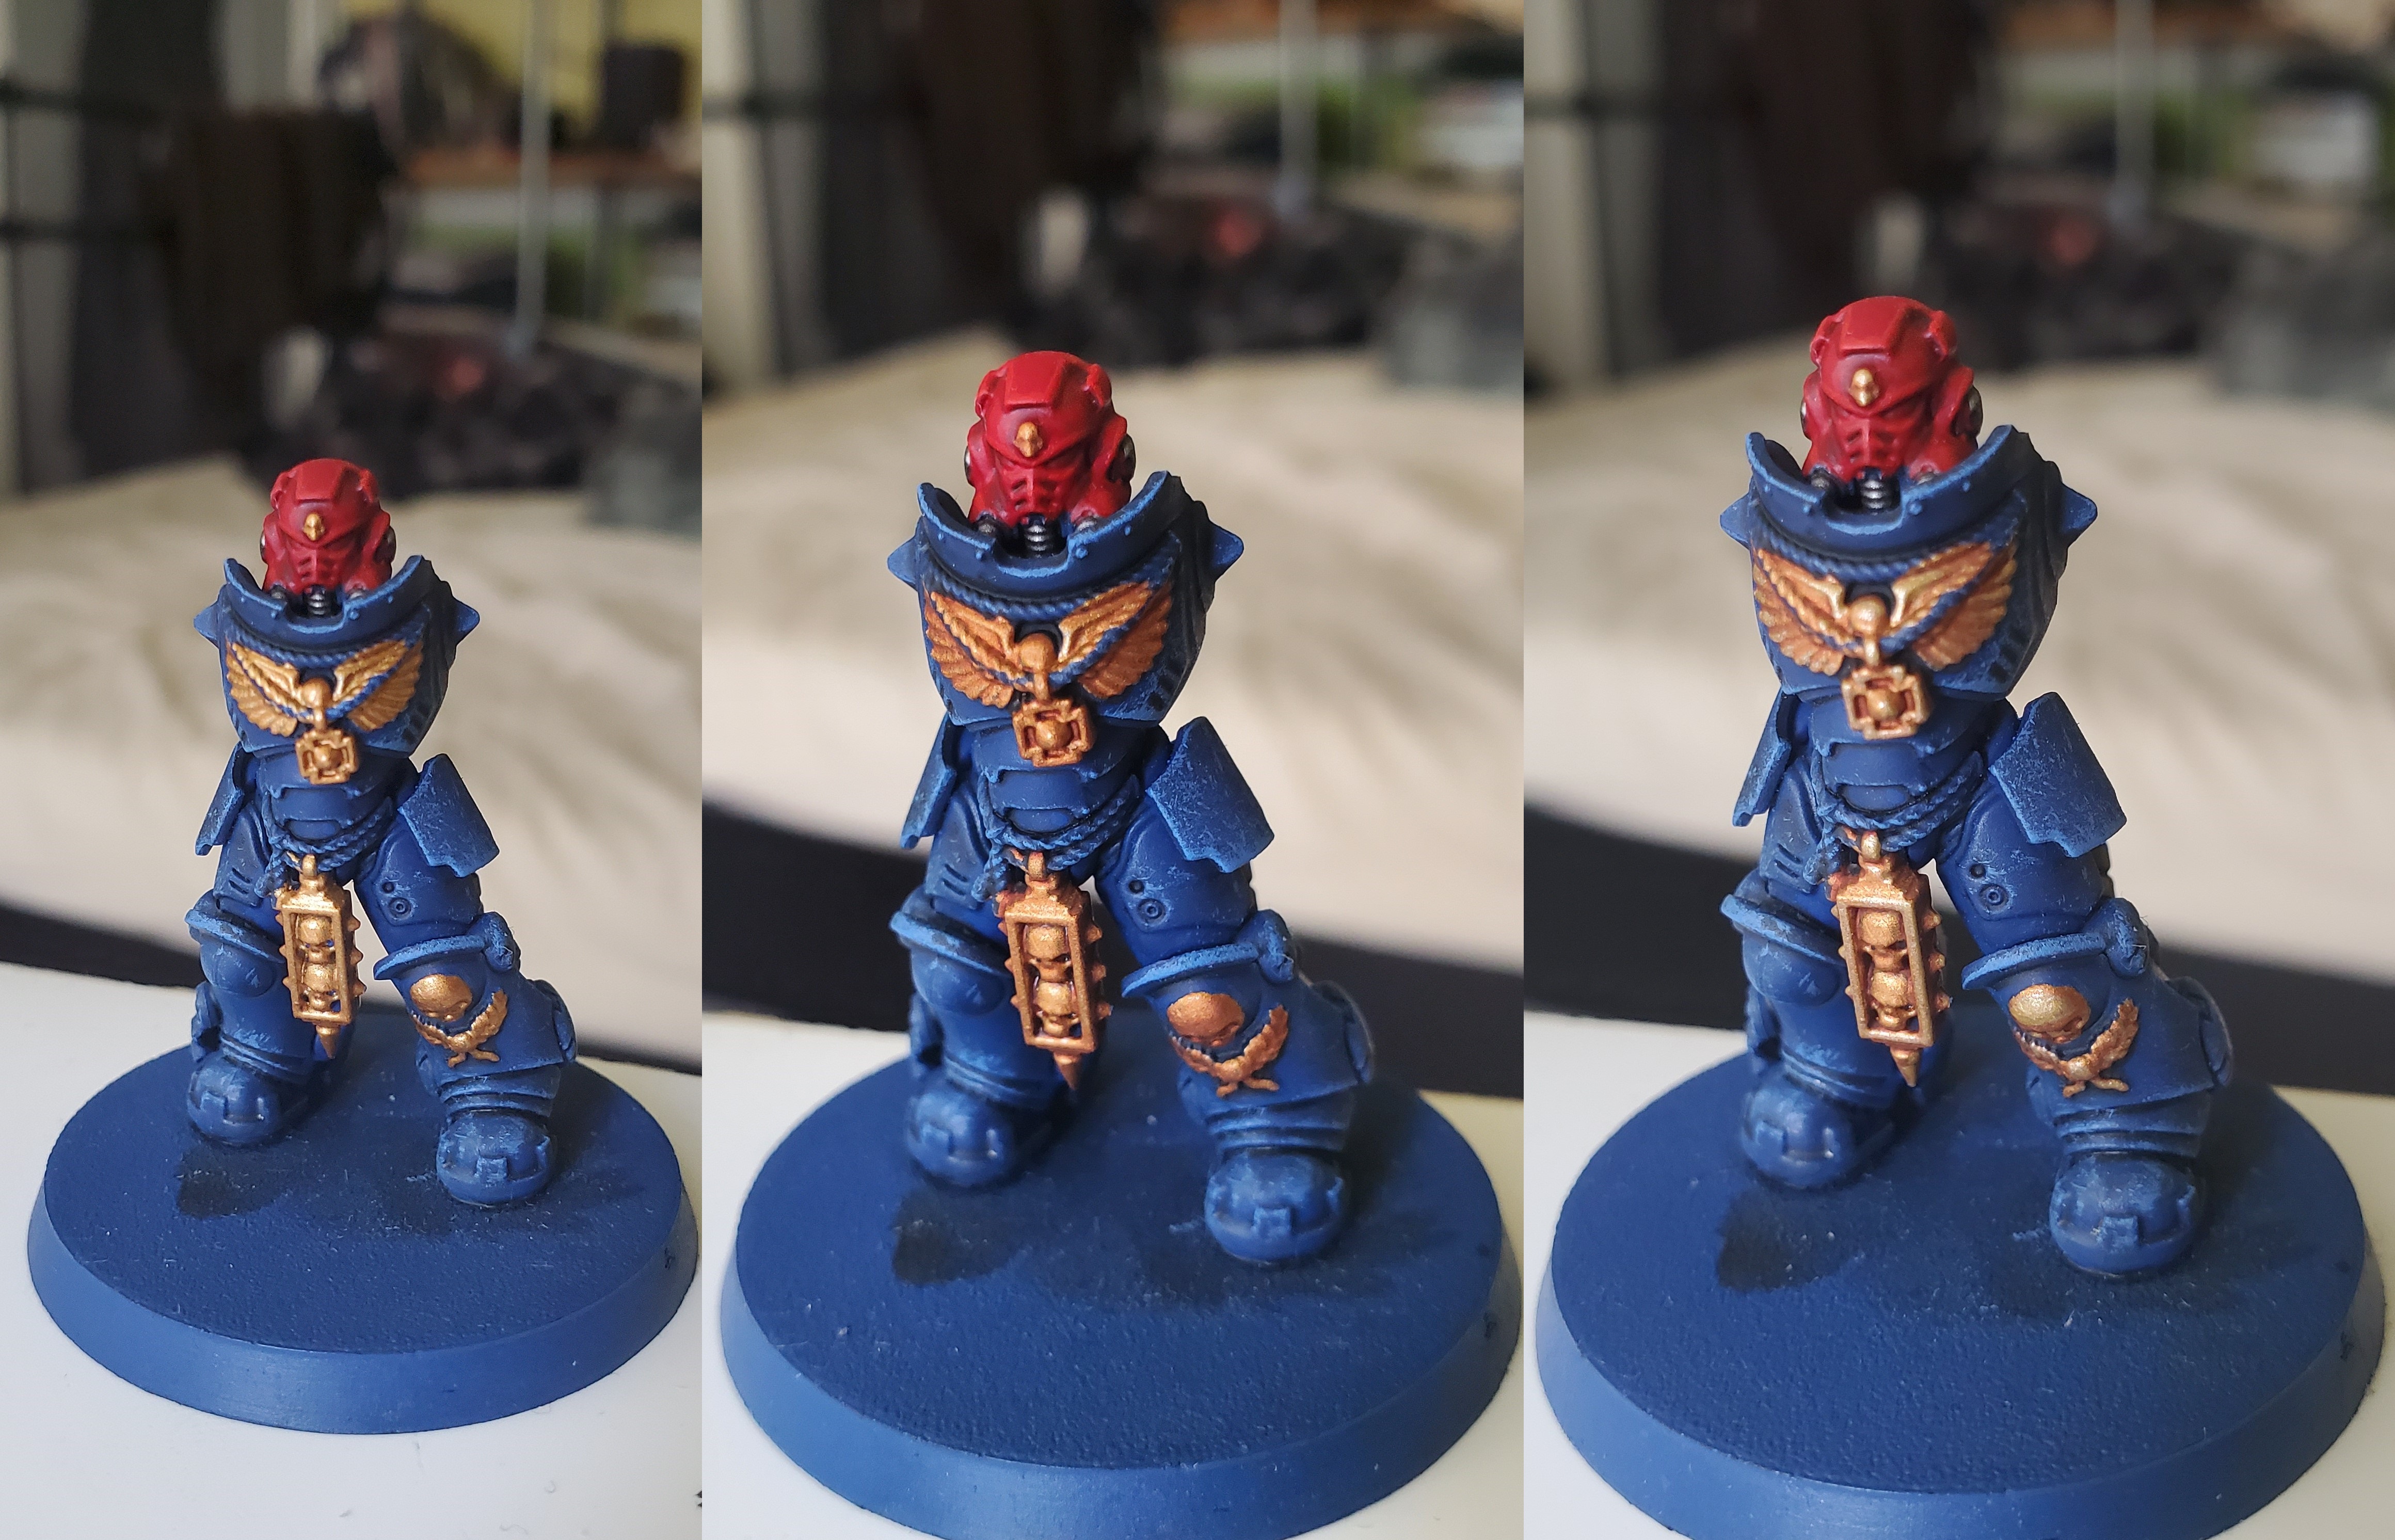 Next up are gold details. Start with a basecoat of Retributor Armour, followed by a shade of Reikland Fleshshade. Some people recommend mixing 50/50 with the glass version of the paint, but I prefer the slightly muted regular shade. After that is an edge highlight of Liberator Gold. I also have no idea how I managed to perfectly set up these images to be bigger and bigger. Magic, I guess.
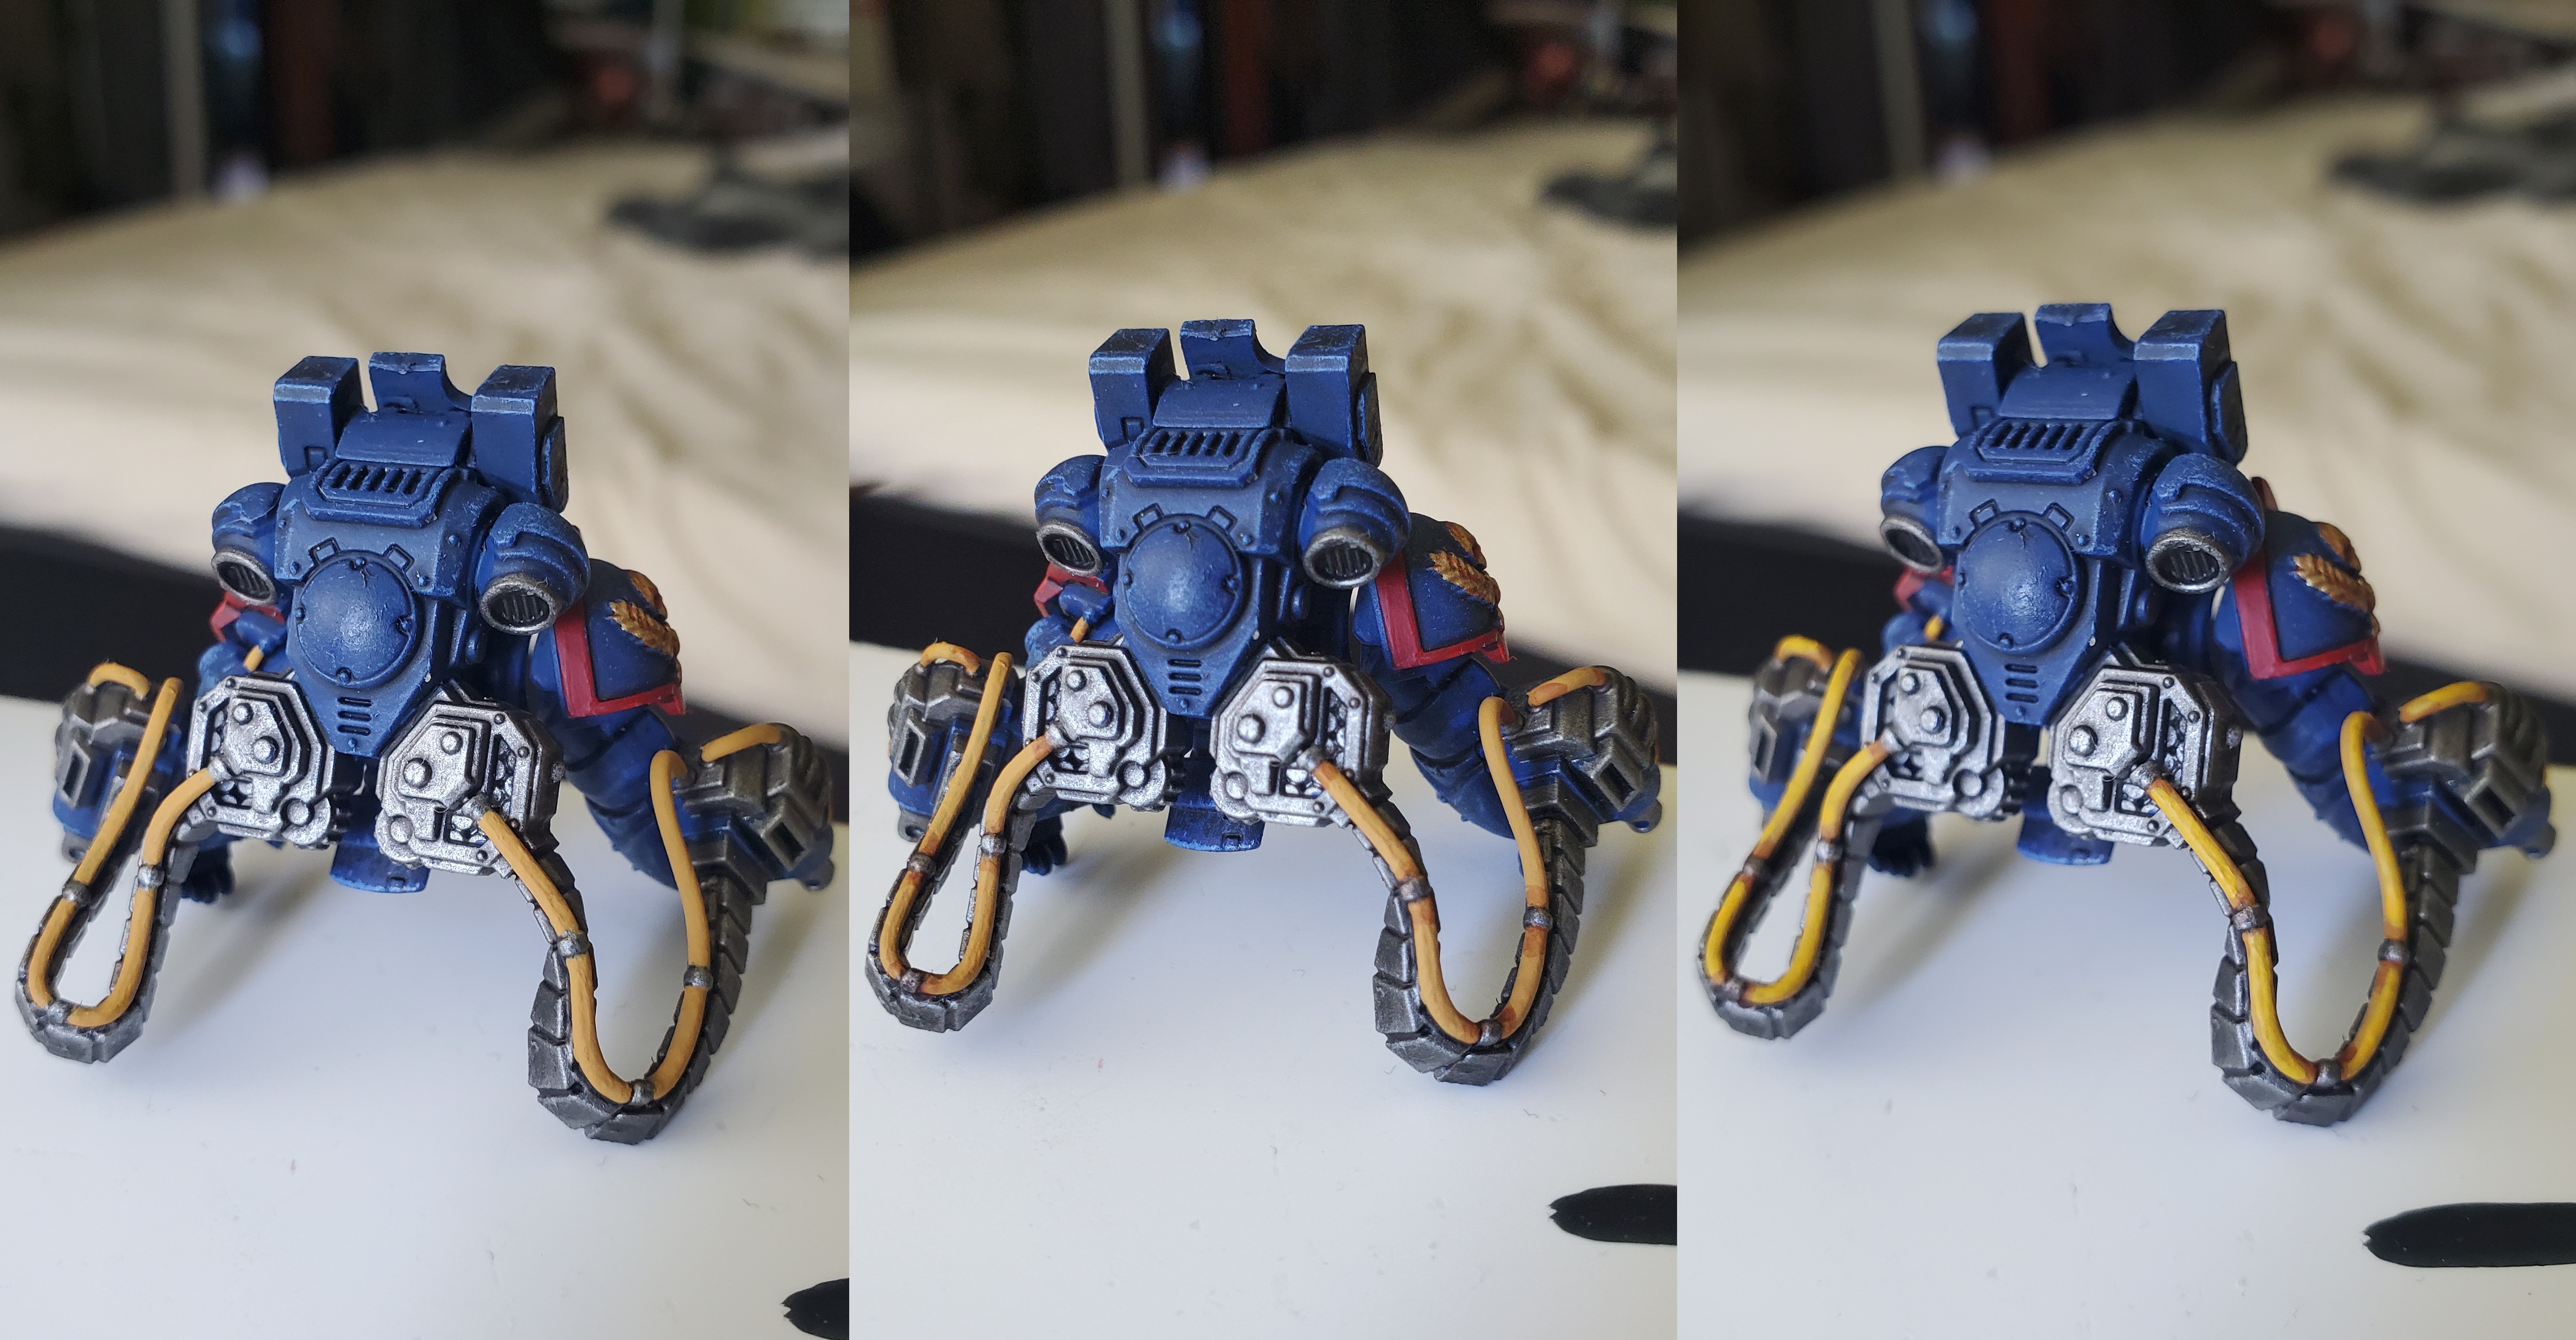 So all minis need a bit of a spot colour. It can be anything. Someting simple. Something bright. Or yellow. Yellow is a pain in the proverbials to paint, but I am rather proud of how this turned out. Basecoat is Averland Sunset. Use. Thin. Coats. This needs to be a nice solid colour without clogging details. After you have that, recess shade with Reikland Fleshshade where necessary. After that edge highlight with Yriel Yellow to really bring it out. This worked rather well for me. Also, I seem to have done the zoom thing again...
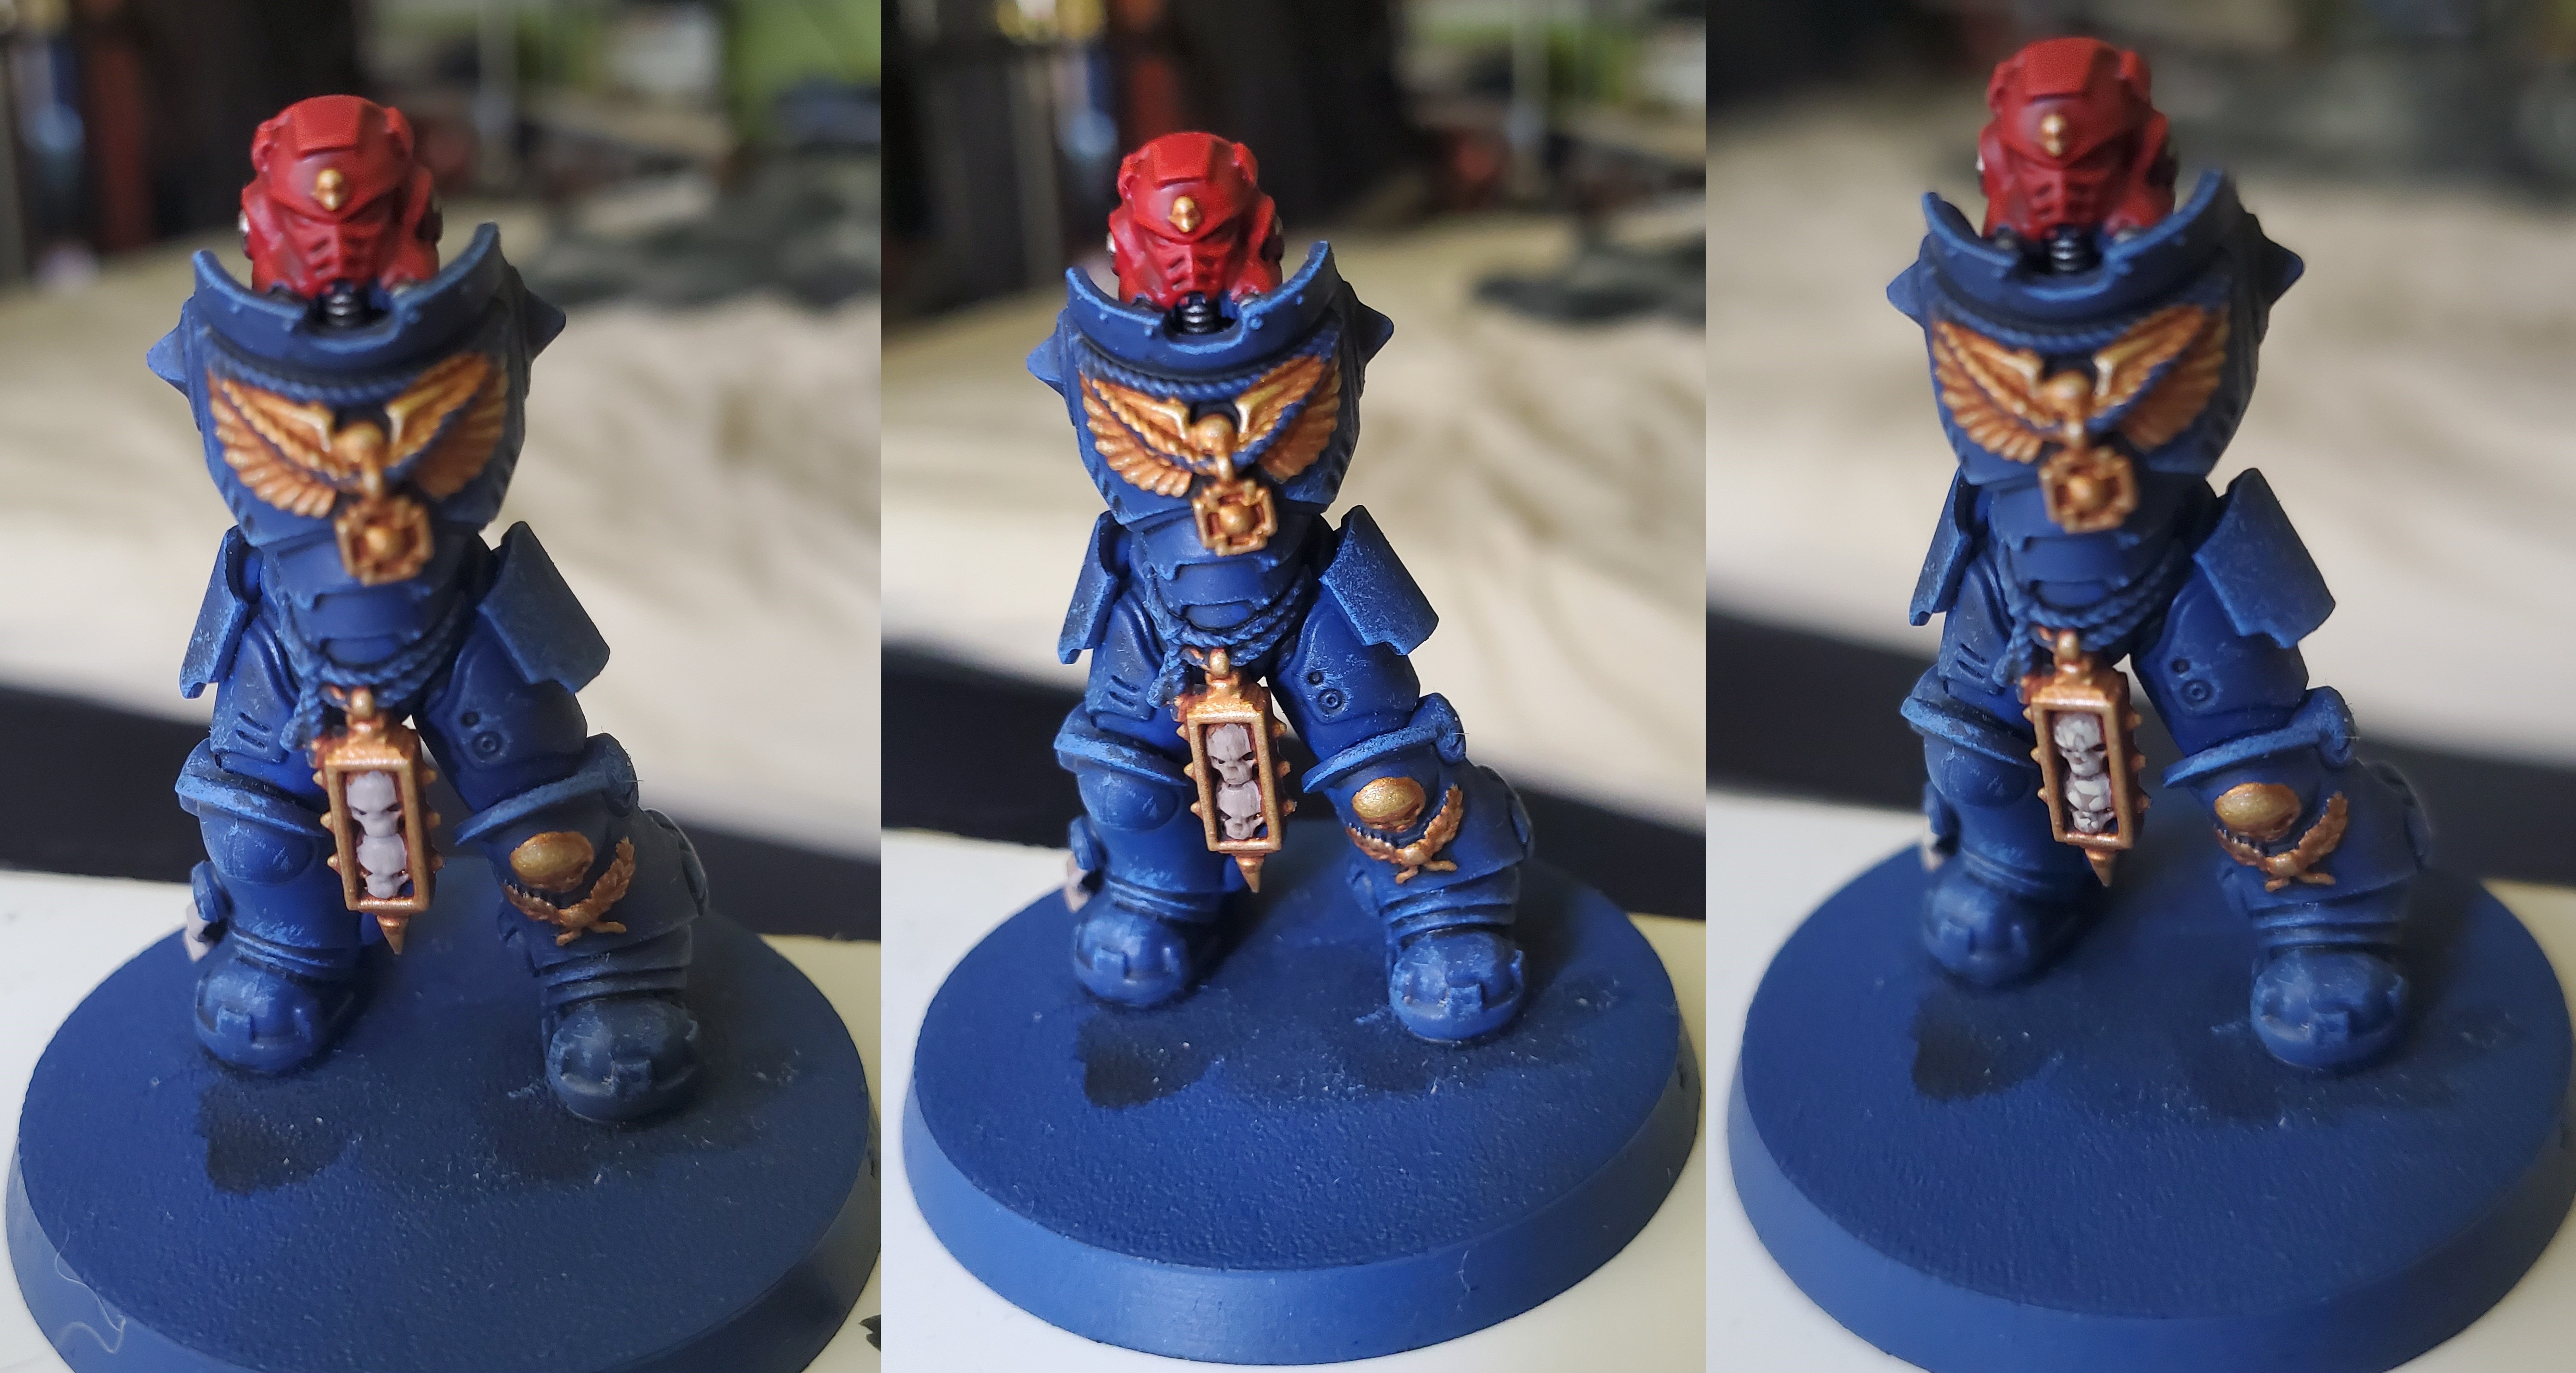 For simplicity, I used the same colours for parchment and bone on these minis, but if you have overlap of the two different things you might want to mix it up a bit (I'm just really low on Zandri Dust that I usually use for bone). Basecoat is a nice solid coat of Rakarth Flesh, shaded with Agrax Earthshade before being followed by and edge highlight of Screaming Skull.
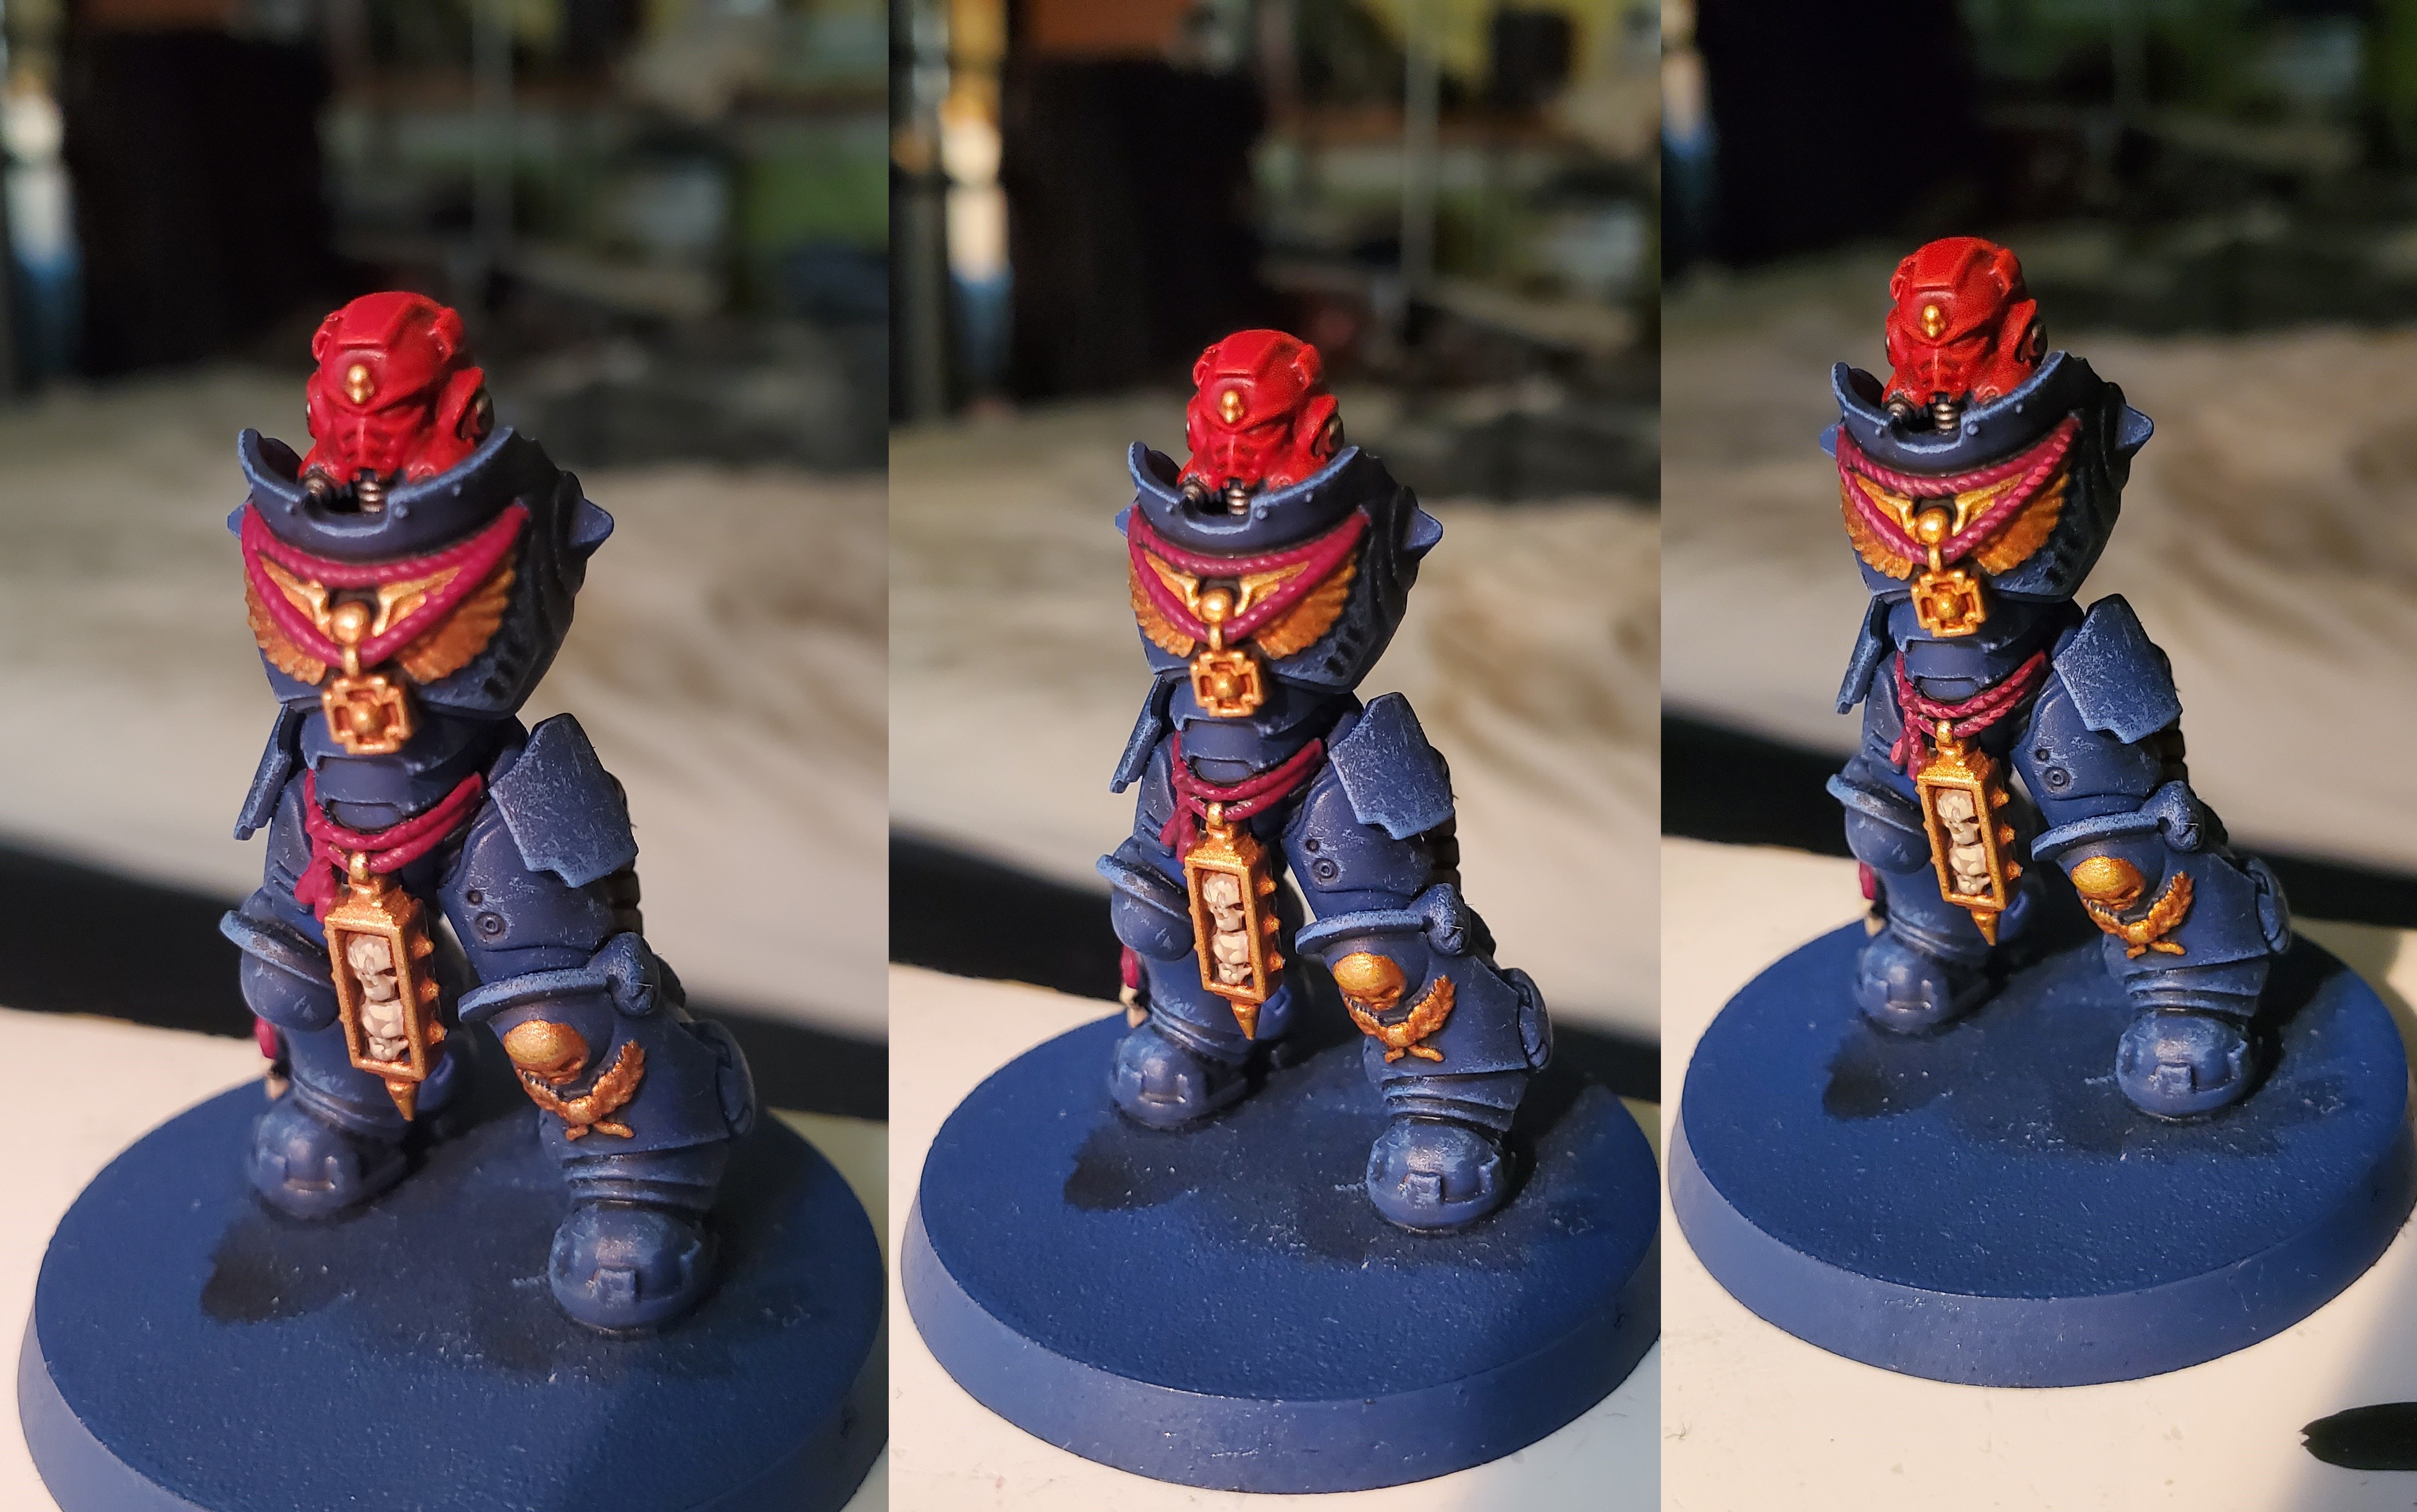 Rope details and Purity Seals were all done in a nice burgandy colour that I am rather fond of. Starting with a basecoat of Screamer Pink, the areas were then shaded with Nuln Oil and edge highlighted with Pink Horror. Simple, but really adds a bit of regal flair to the minis.
 The eyes really bring out a mini, as we all know, but can often by a pain to do. This is a trick I learned a while ago for Marine eye lenses. Simply paint a line as best you can in the eye with white, then add a glaze colour over the top of it. Add some extra coats once it's dry if you want a more vibrant colour. Here I used Waywatcher Green for my Sergeant, but the regular Marines were given a coat of Bloodletter.
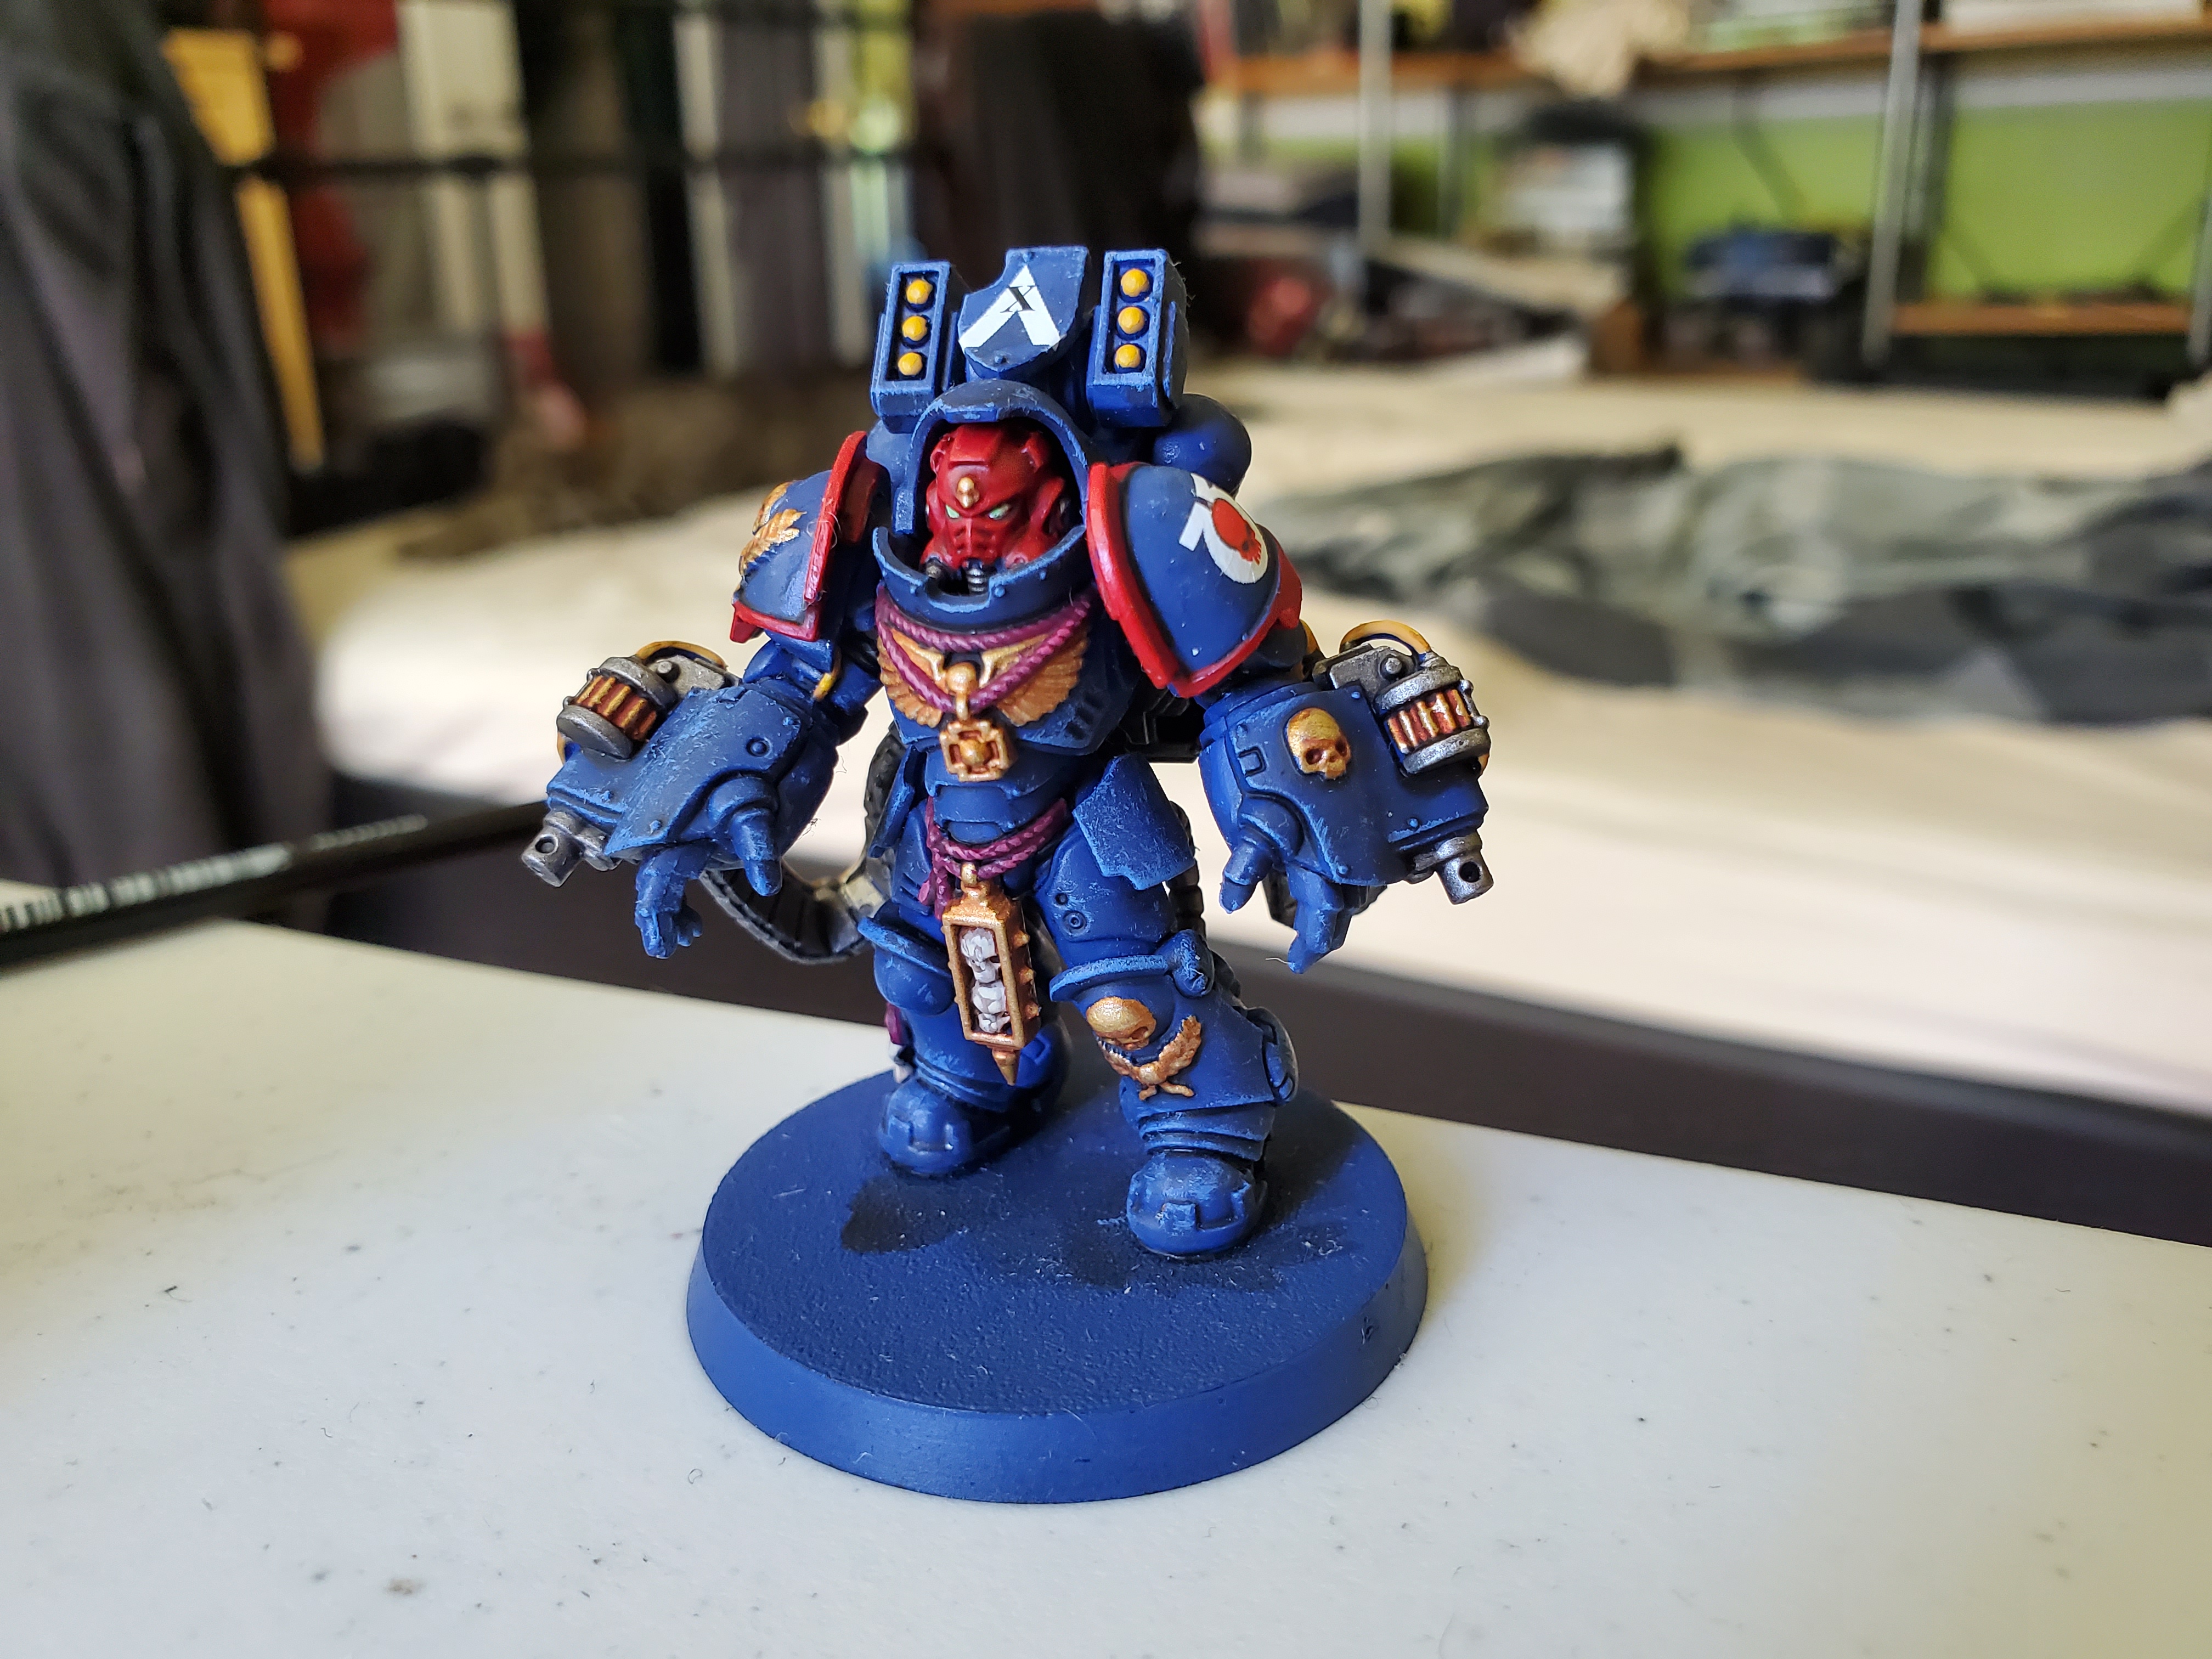 Then with the decals added (though he did get an extra one on his knee after taking this picture) he's all done!
That's all folks! (For now)
Well I finally reached beyond 1000pts. painted. A bit of a first for me, but painting blue gets a bit old after a while so I’m putting this project on hold for now. I’ll be starting up a more general project for the time being that will cover a wider range of minis. So I think I’ll change the status of this one for now.

![StarCraft Tabletop Miniatures Game Pre-Orders Live Now [Updated]](https://images.beastsofwar.com/2026/03/starcraft-tmg-news-cover-600-338.jpg)


![Mounted US Cavalry On Kickstarter For Dead Man’s Hand! [Updated]](https://images.beastsofwar.com/2026/03/us-cavalry-main-600-338.jpg)


![Play WW2 Commando Operations With Butcher & Bolt [Updated]](https://images.beastsofwar.com/2026/03/relaunch-600-338.jpg)


