

![10mm Medieval Miniatures! Azincourt English Army Review | Wargames Atlantic [7 Days Early Access]](https://images.beastsofwar.com/2026/03/unboxing-wargames-atlantic-azincourt-english-army-coverimage-225-127.jpg)


HeroQuest Lockdown Revisited


Recommendations: 340
About the Project
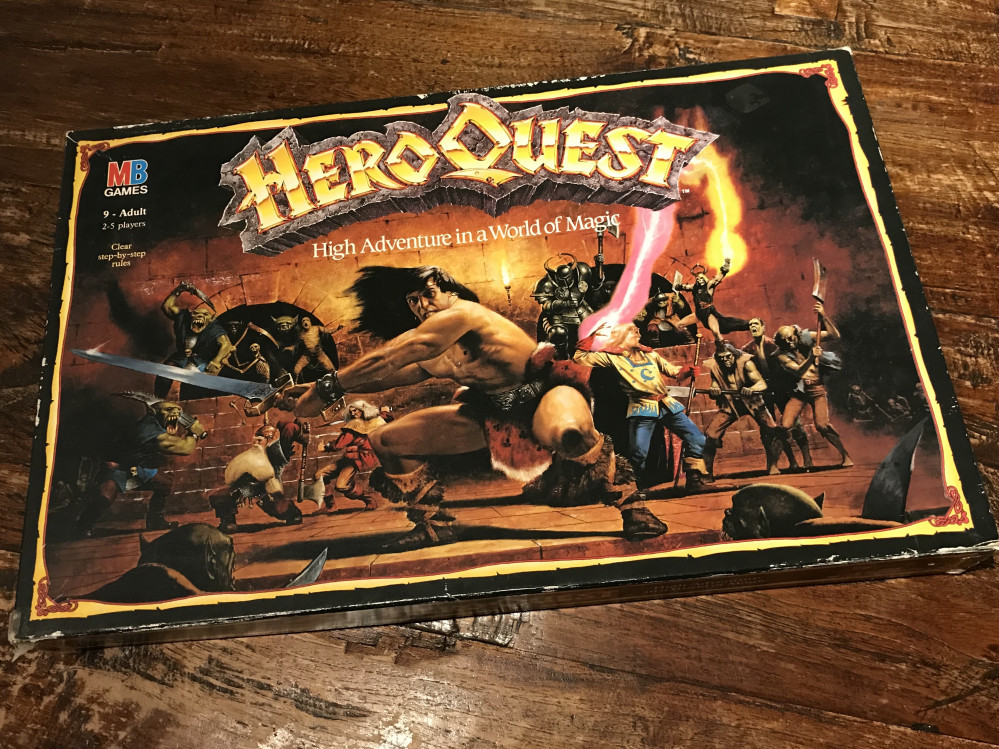
Like many gamers of my generation, HeroQuest by GW and MB games was the first miniatures game I owned. Sadly my own copy has long since been lost to time but as the nation began to move into lockdown, I bit the bullet and picked up a copy from a seller on eBay.
Related Game: HeroQuest
Related Company: Games Workshop
Related Genre: Fantasy
Related Contest: Dungeonalia 2023
This Project is Active
Revisiting an old project!
Whilst redecorating our bedroom I found my Heroquest box safely wrapped in an IKEA bag beneath my wardrobe. It had been a couple of years since it had seen the light of day and checking through the contents I was reminded that I still had a few items unfinished. With Dungeonalia dominating the OTT feed I took this as a serendipitous discovery and vowed I would finally get this project finished!
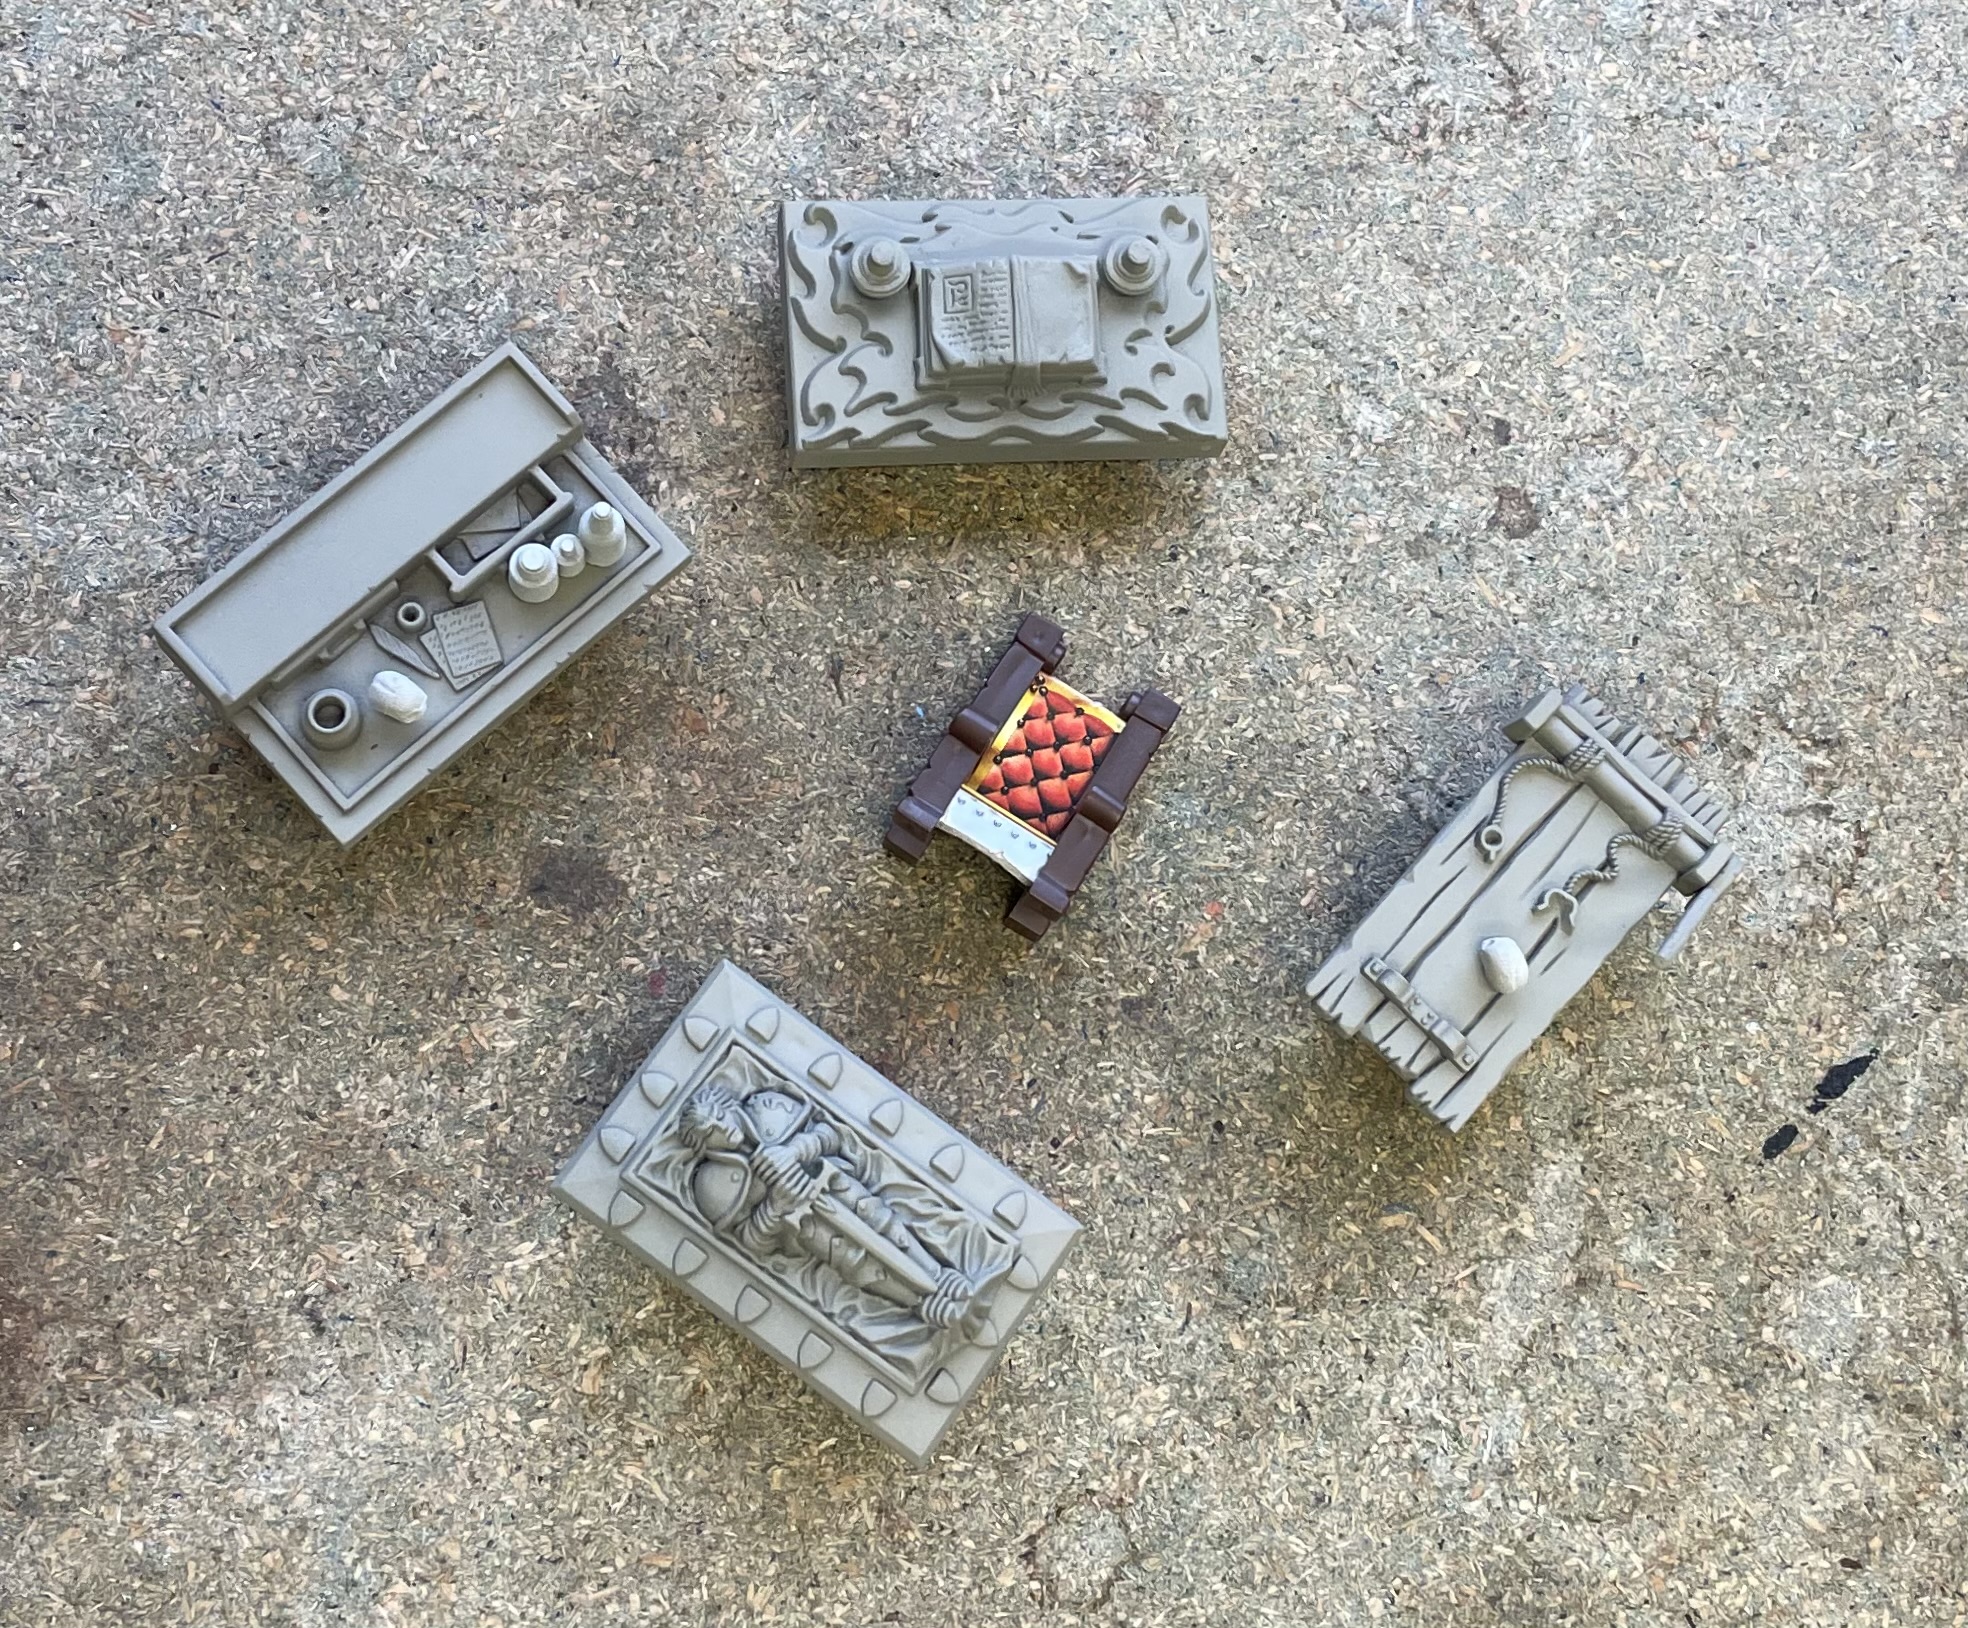
The Throne, Altar, Tomb, Rack and Alchemists Bench, were the only pieces that were left unpainted and this was largely due to them being incomplete. I had recently seen a post by Warzan linking to some really good 3D printable alternatives. However I decided I wanted to keep this set as original as I could and that I would stick with incomplete, rather than replacement parts.
Lockdown 2 - Starting the Furniture
It had been a while since we had played but during the winter lockdown Heroquest made its way back to the tabletop.
It had been my intention to address the Furniture at some point. Now seeing the panted miniatures moving around the unpainted scenery, I decided it was time to make a start.
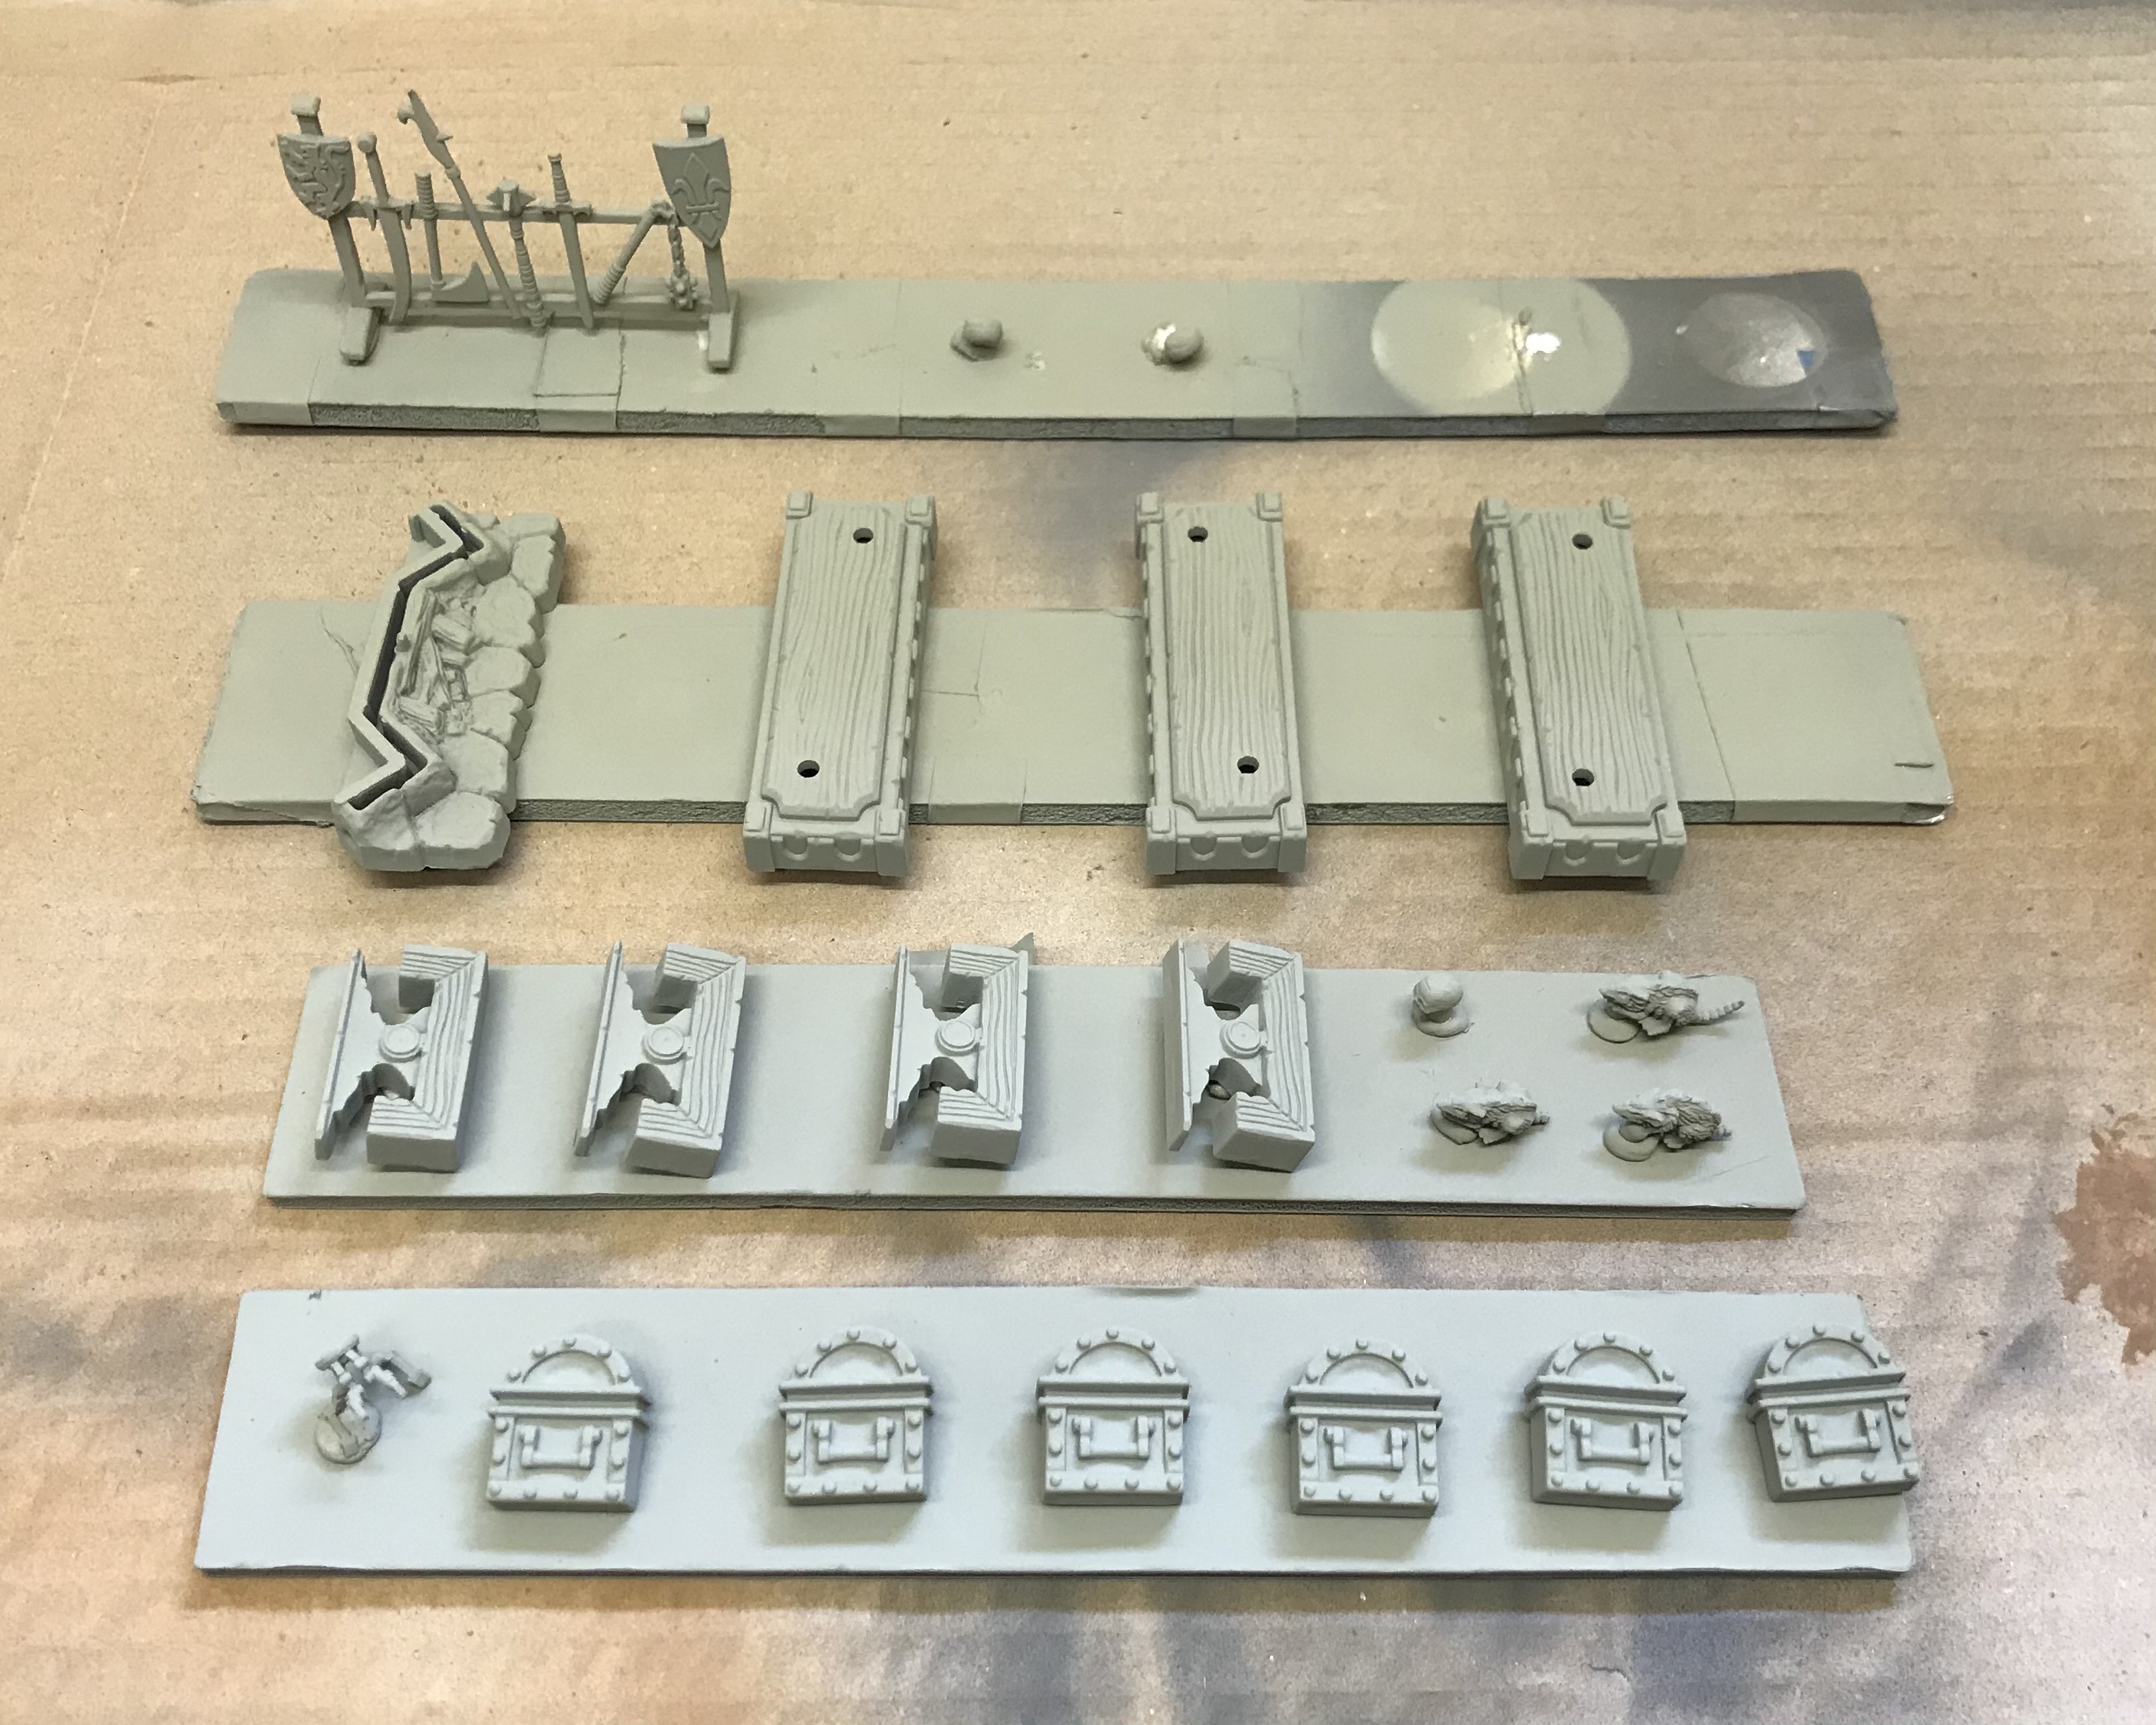
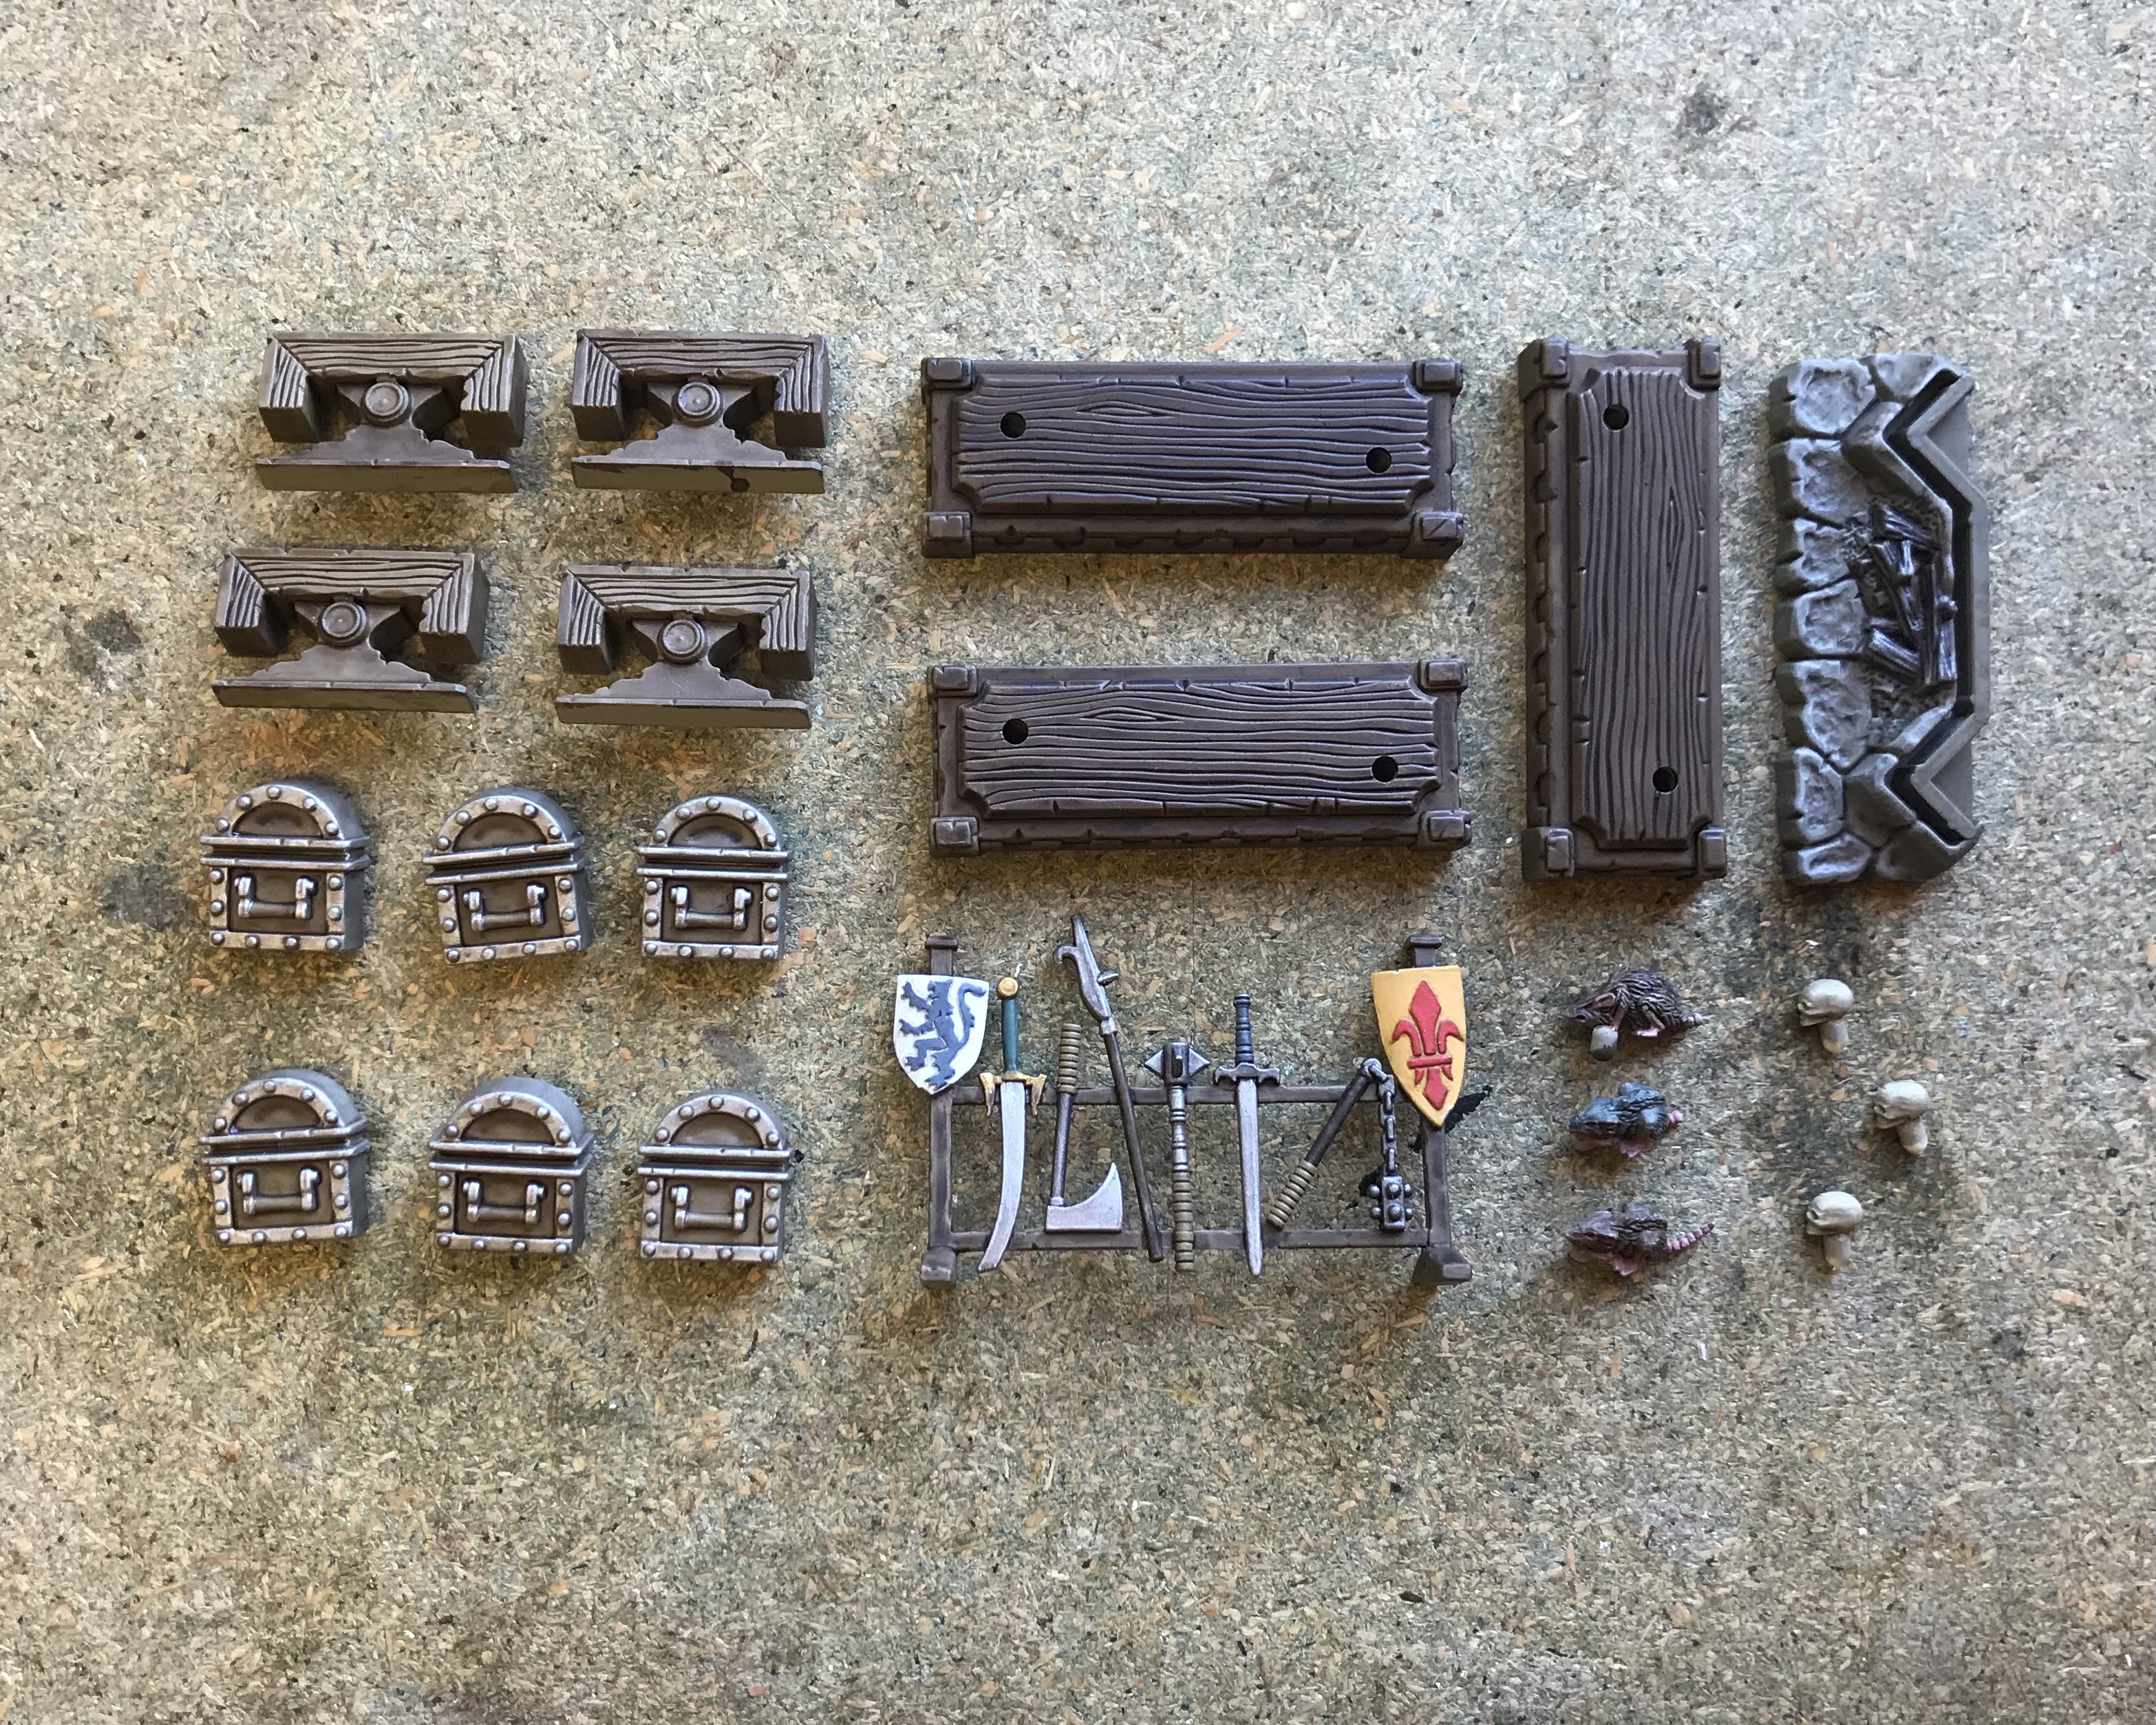
Some of the scenery elements were damaged or missing parts so I decided to tackle the u damaged ones first, in order to make headway as quickly as possible. Here we have the Wardrobe and Bookshelves, the two Tables, three Treasure Chests, Fireplace and Weapons Rack. They were primed in the same khaki primer I had used for many of the heroes and monsters.
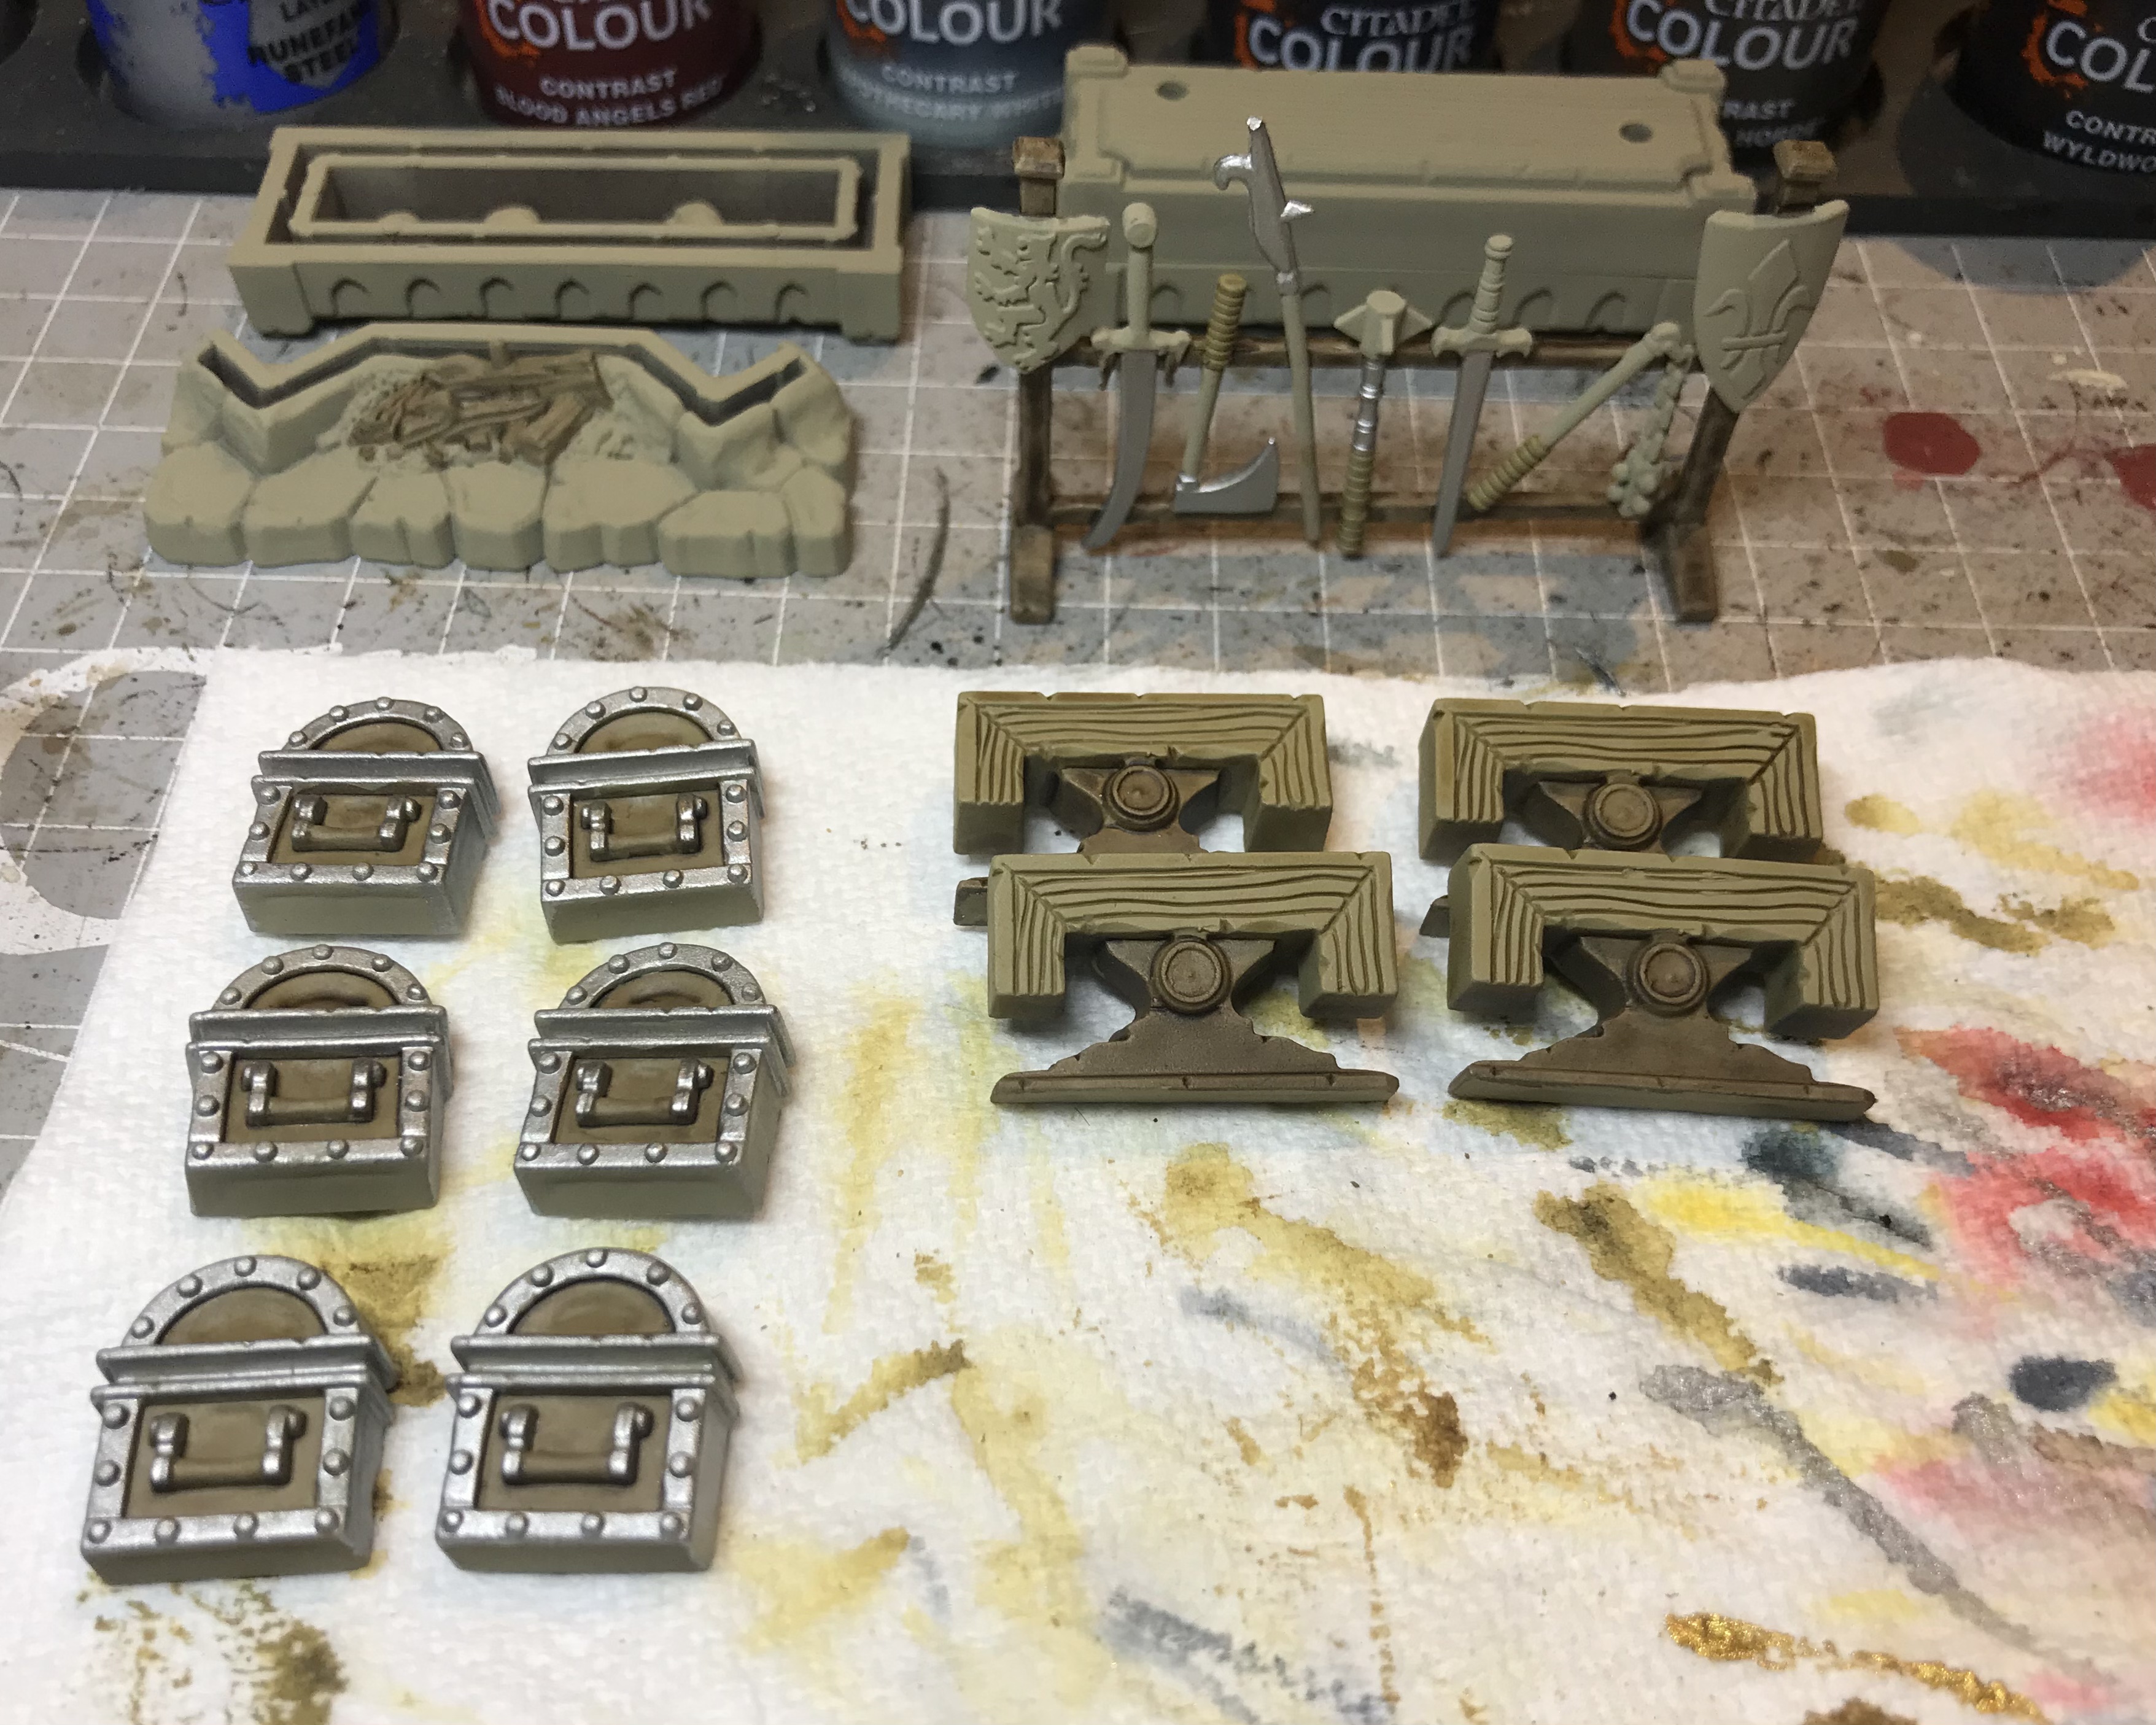
I wasn’t planning on spending much time on these pieces and jumped straight in with contrast Skeleton Hoard and Wildwood for the wooden areas. Iron breaker was used for the metals.
Skeleton hoard followed by a Screming skull dry brush was used on the skulls. The rats legs were picked out in Vallejo flesh tones before Wildwood and Black Templar Contrast were used to colour the fur. The stones of the fireplace were painted Vallejo Green Grey before being washed with Agrax and Nuln Oil. A light screaming skull dry brush brought the details back and added a dryness to the stone.
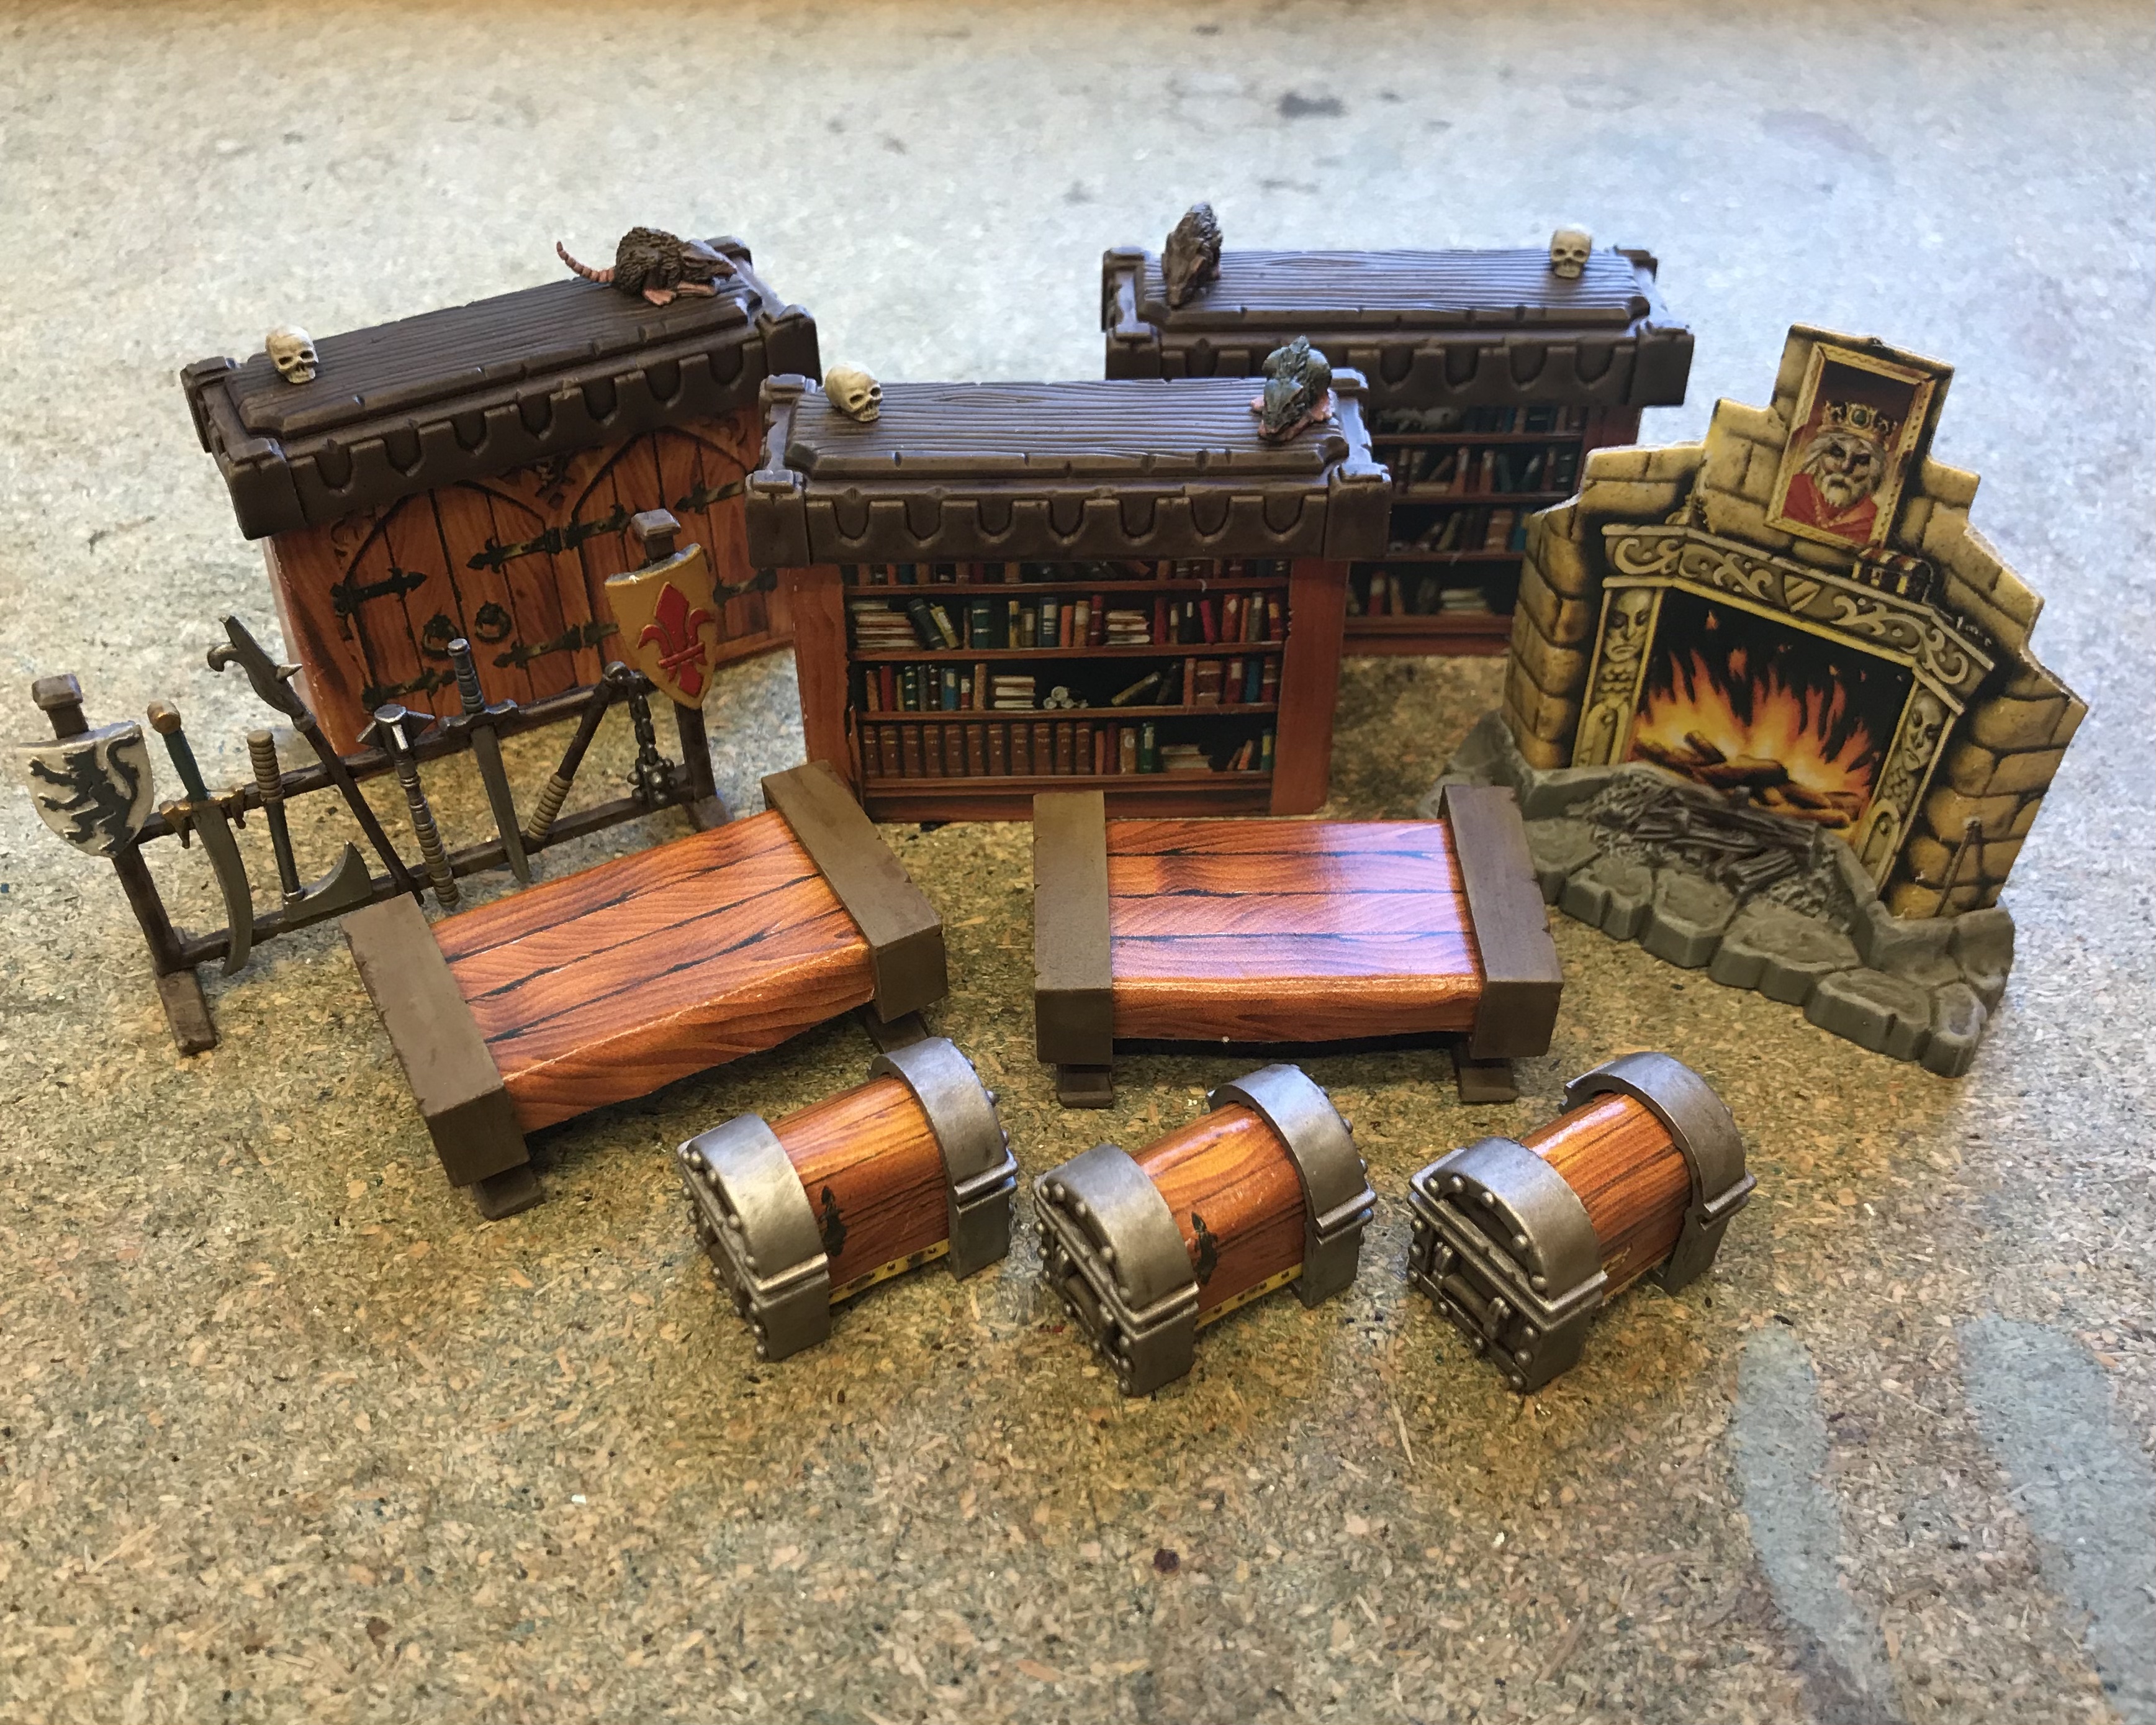
Although the paint jobs were very basic, the pieces looked so much better once the cardboard components were back in place.
The Dwarf
I always felt this guy must have been based on the White Dwarf or possibly the other way around? I’m not sure when he started appearing on the magazine. In any event he is a great little model, arguably the best model in the set.
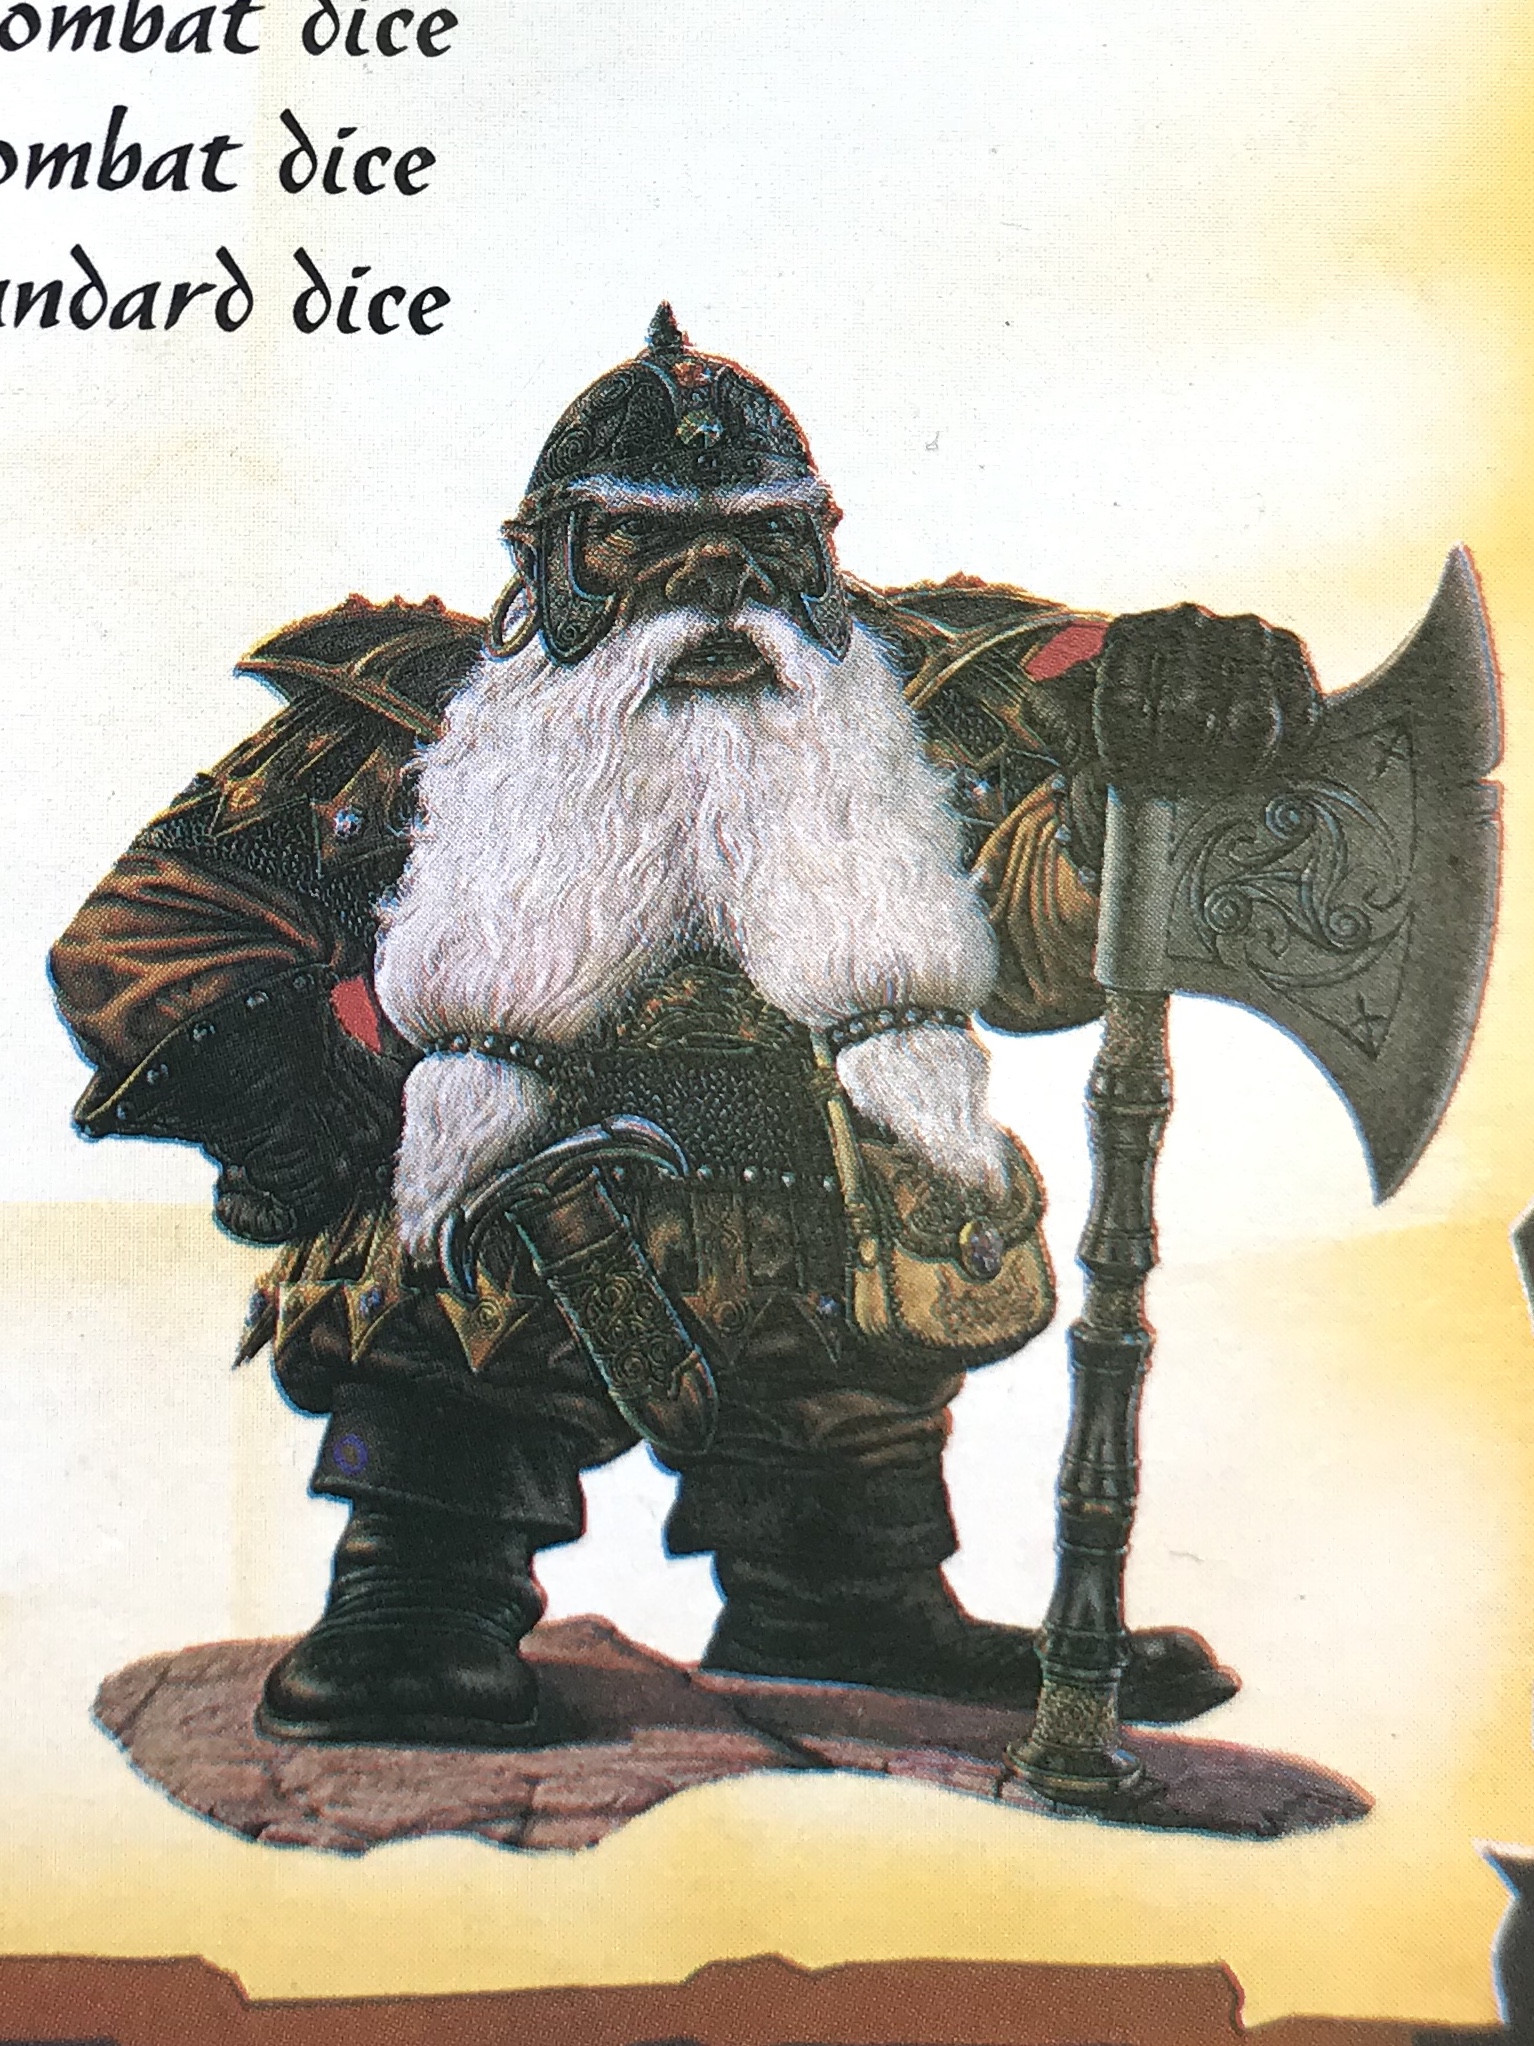 Dwarf Player Board Art
As with the other miniatures the Dwarf doesn’t have quite the level of detail depicted on the player board. I matched the colours as best I could but most of this model would be done with metallics.
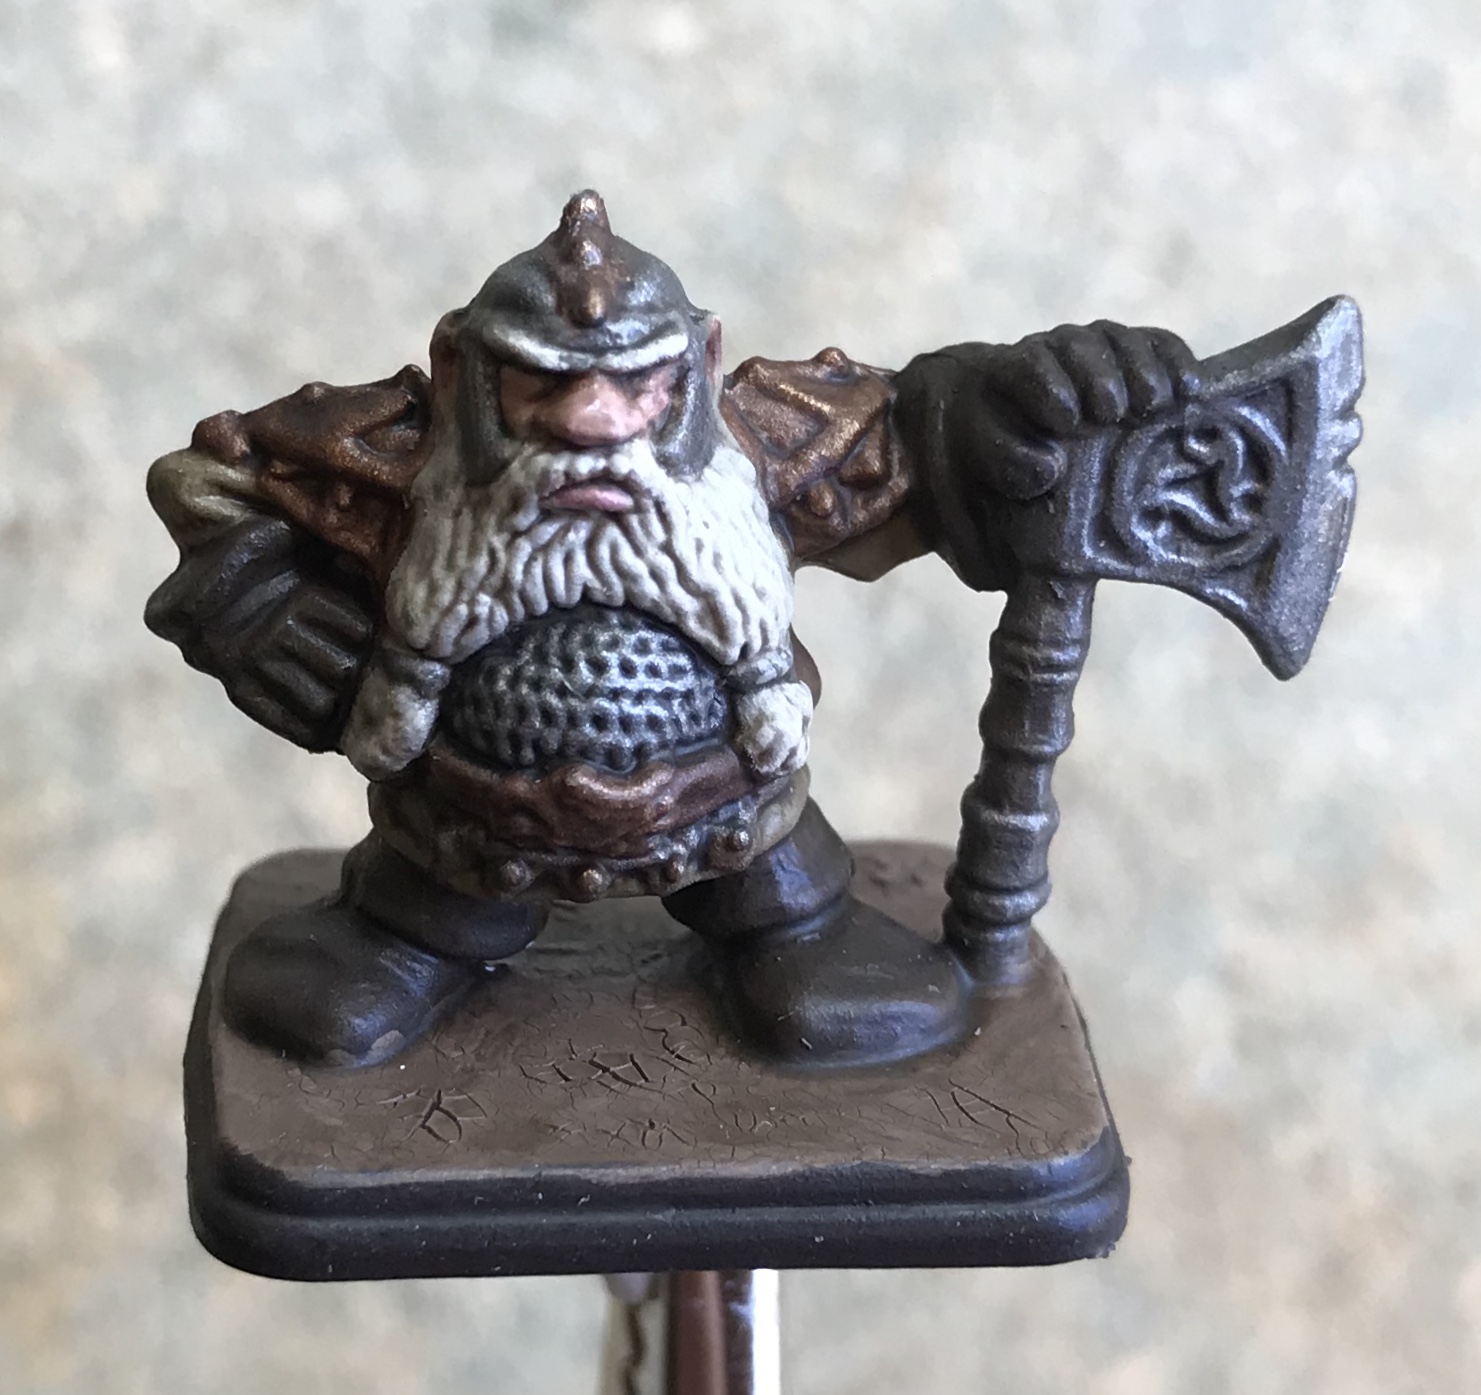 Finished Dwarf
I painted the helmet, chain mail and axe with Lead Belcher. The shoulder pads and helmet crest were done with Dwarf Bronze. All the metallics were then washed down with Nuln Oil before a dry brush of Runefang Steel was applied to the silver areas. The bronze areas had the Dwarf Bronze reapplied. The Axe then had a selective wash of Agrax Earthshade to give the impression it had been well used!
For the boots and gloves I painted Wyldwood contrast directly over the Khaki primer, while what little fabric can be seen at the elbows and hem of his jacket were Skeleton Hoard. These areas were also given a wash of Agrax Earthshade. The beard and eyebrows were painted Screaming Skull and given a thinned down wash of Agrax, then dry rushed back to Screaming Skull. I wanted a slightly ruddier complexion for the Dwarf so I used Vallejo Brown Rose flesh paint with a little Kislev flesh mixed to taste. I intentionally left his nose almost pure Brown Rose! As with the other heroes this was given a wash of Ogryn Flesh.
All the heroes were given the same Soft Tone and Matt Varnish treatment as the monsters and this certainly enhanced the shading and gave a nice, resilient finish.
With the last of the heroes done the miniatures from the set are complete. I’m taking a break to work on some other projects for a bit but I’m planning to come back to this project when I get around to printing and painting some of the missing furniture elements.
The Wizard
The Wizard has a little more variation to his colour scheme than the other heroes and required the most time to complete.
 Wizard Player Board Art
Of the four hero models, the Wizard had always been my least favourite. However once I settled down to paint him I found the miniature really grew on me, with some nice detailing and fabric work, particularly on his tunic.
I used Hoeth Blue for the trousers and collar, with Wraithbone for the rest of the tunic. A Drakenhof Nightshade wash over the trousers and a heavily thinned Skeleton Hoard over the tunic added some shading. Again I used the Blood Angels contrast on the gloves, applying it directly over the kahki. I really like the muted red this technique achieves and have used it on lots of the minis in this project. The belt and boots were painted with Vallejo Flat Brown with followed by an Agrax wash. For the hair I used Vallejo Medium Flesh Tone (Which is very yellow for a flesh tone), followed by an Agrax Wash. More of the Flesh tone was applied to the raised areas once the wash had dried. The skin was a Kislev Flesh and Vallejo Pale Flesh mix, highlighted up to Pale Flesh.
 Finished Wizard
All that was left to do was the cloak but I didn’t have a single purple paint in my collection! Not wanting to stray from the original colour scheme I mixed the Blood Angels Contrast with the Talassar Blue Contrast and applied it directly over the khaki. The result was pretty close to the board art.
The Elf
The Elf has always been my favourite of the hero models and is the hero I prefer to play. He may well have been the first miniature I ever painted as he was one of just three that I got around to painting from my original set.
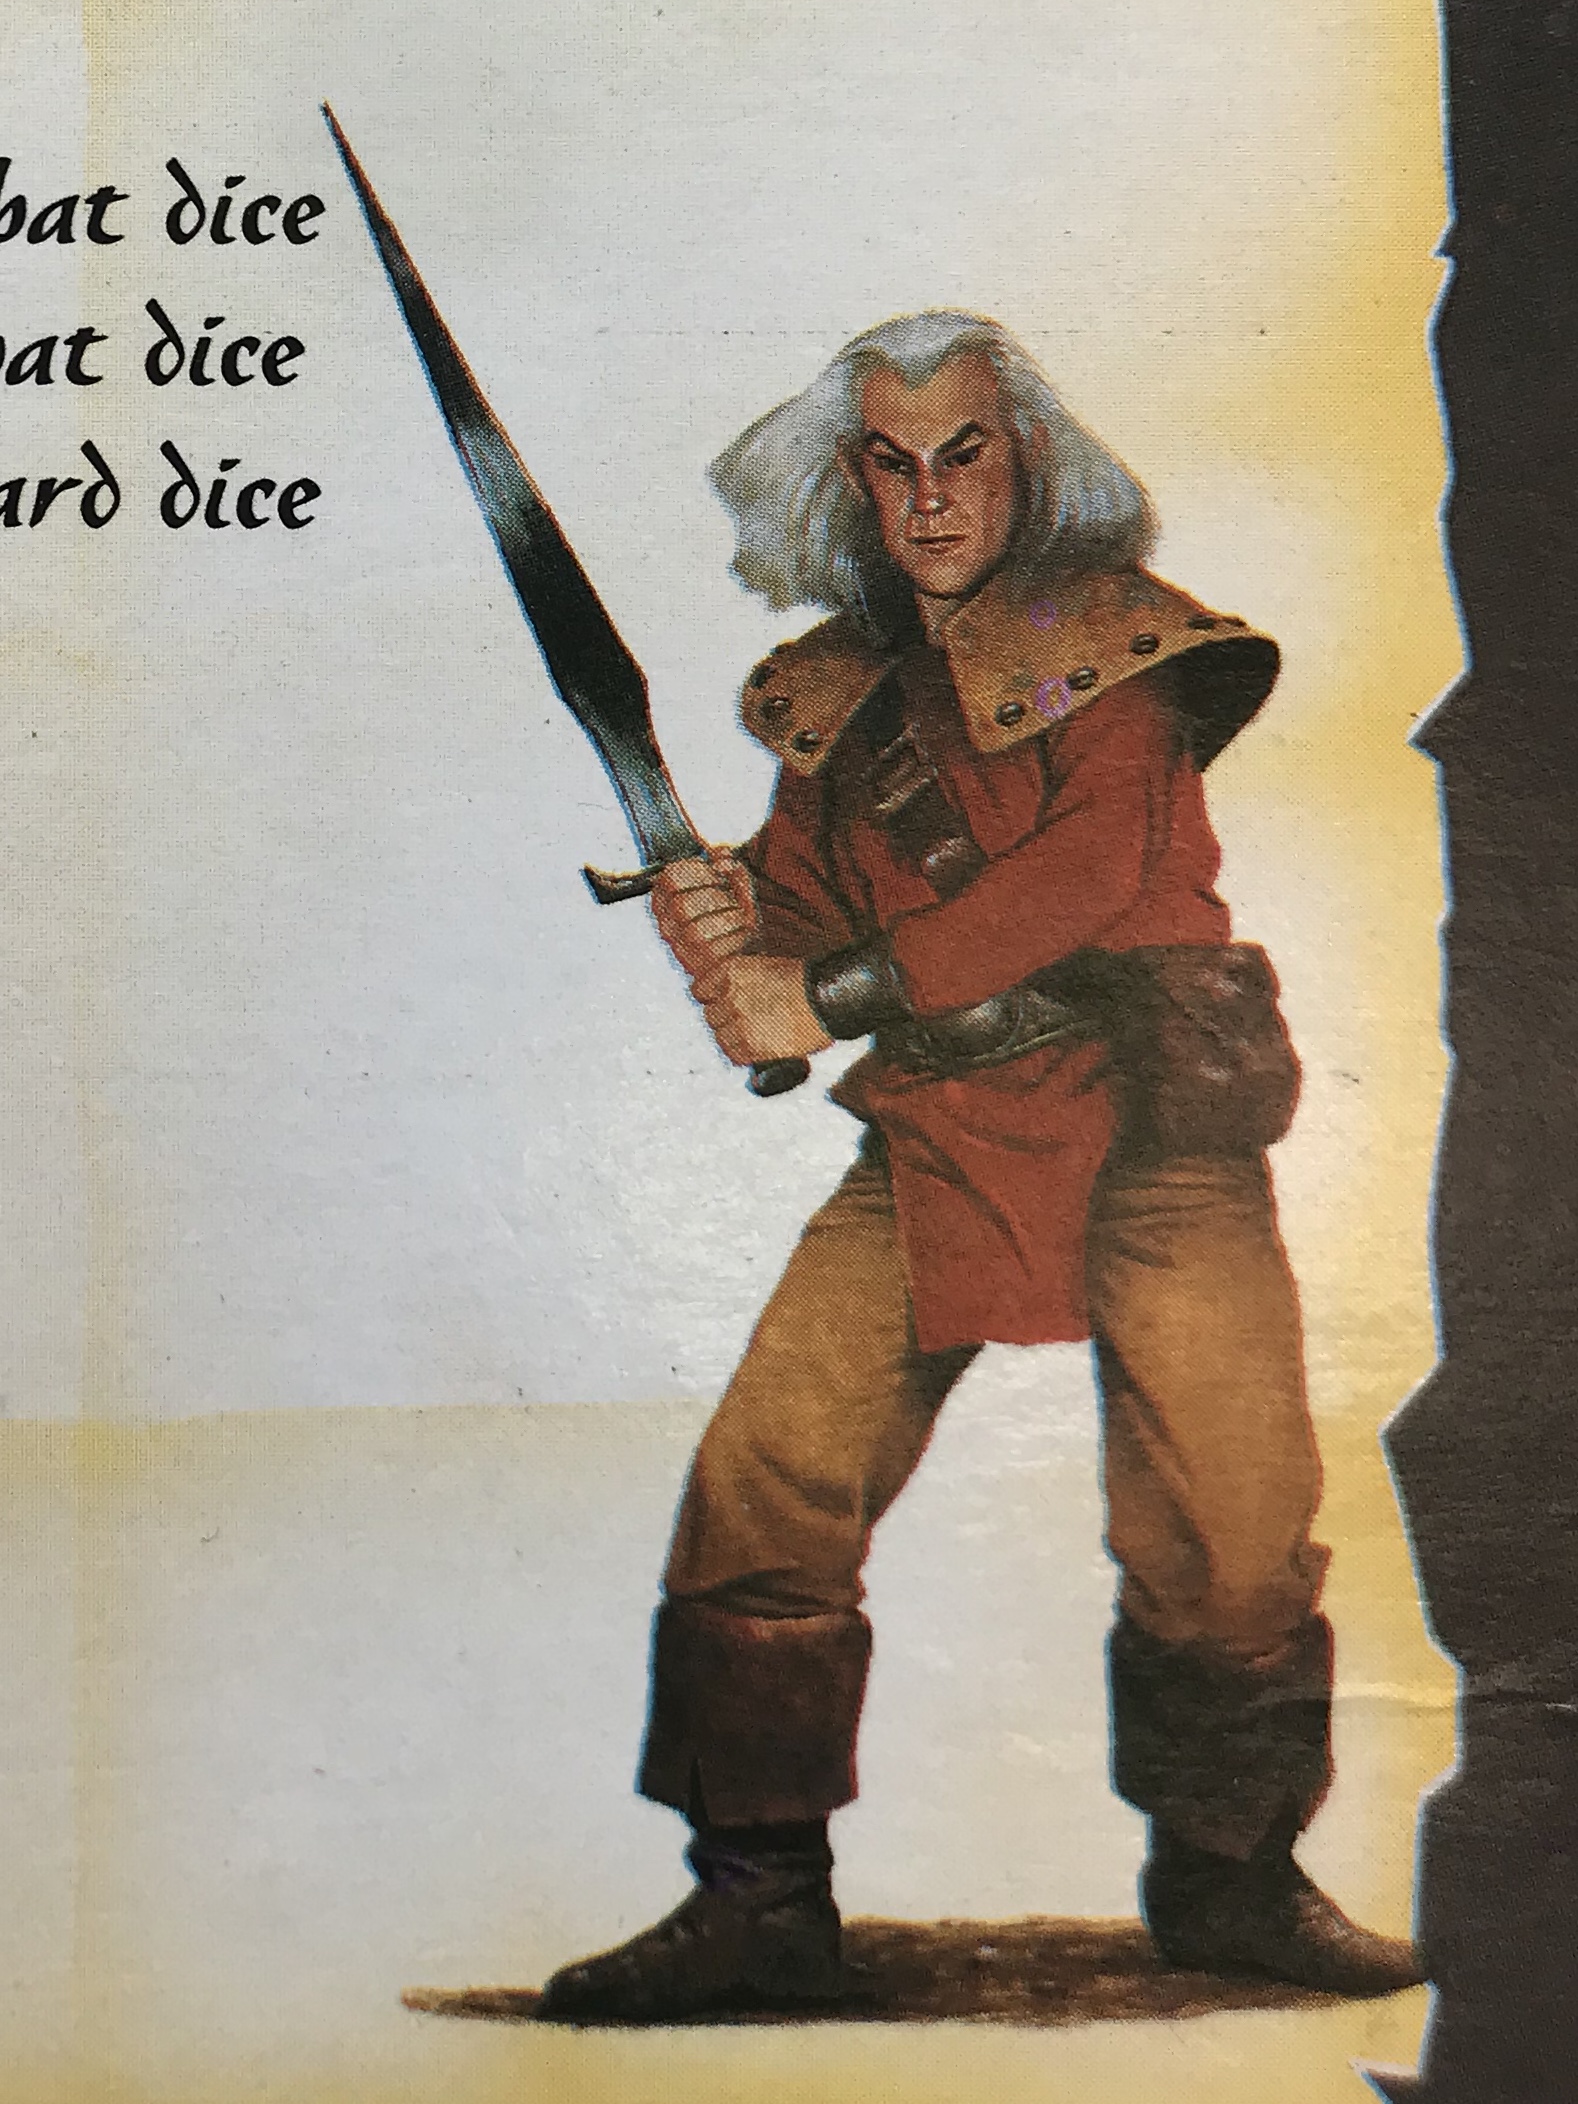 Elf Player Board Art
The Elf’s colour scheme is pretty simple and was mostly done using the contrasts paints I have been using throughout this project. Working straight over the Khaki primer I used Blood Angels Red for his jerkin and Skeleton Hoard for the trousers and lapels. The boots were painted Vallejo German Camo Medium Brown and the satchel Flat Brown before both were given a thinned down coat of Wyldwood.
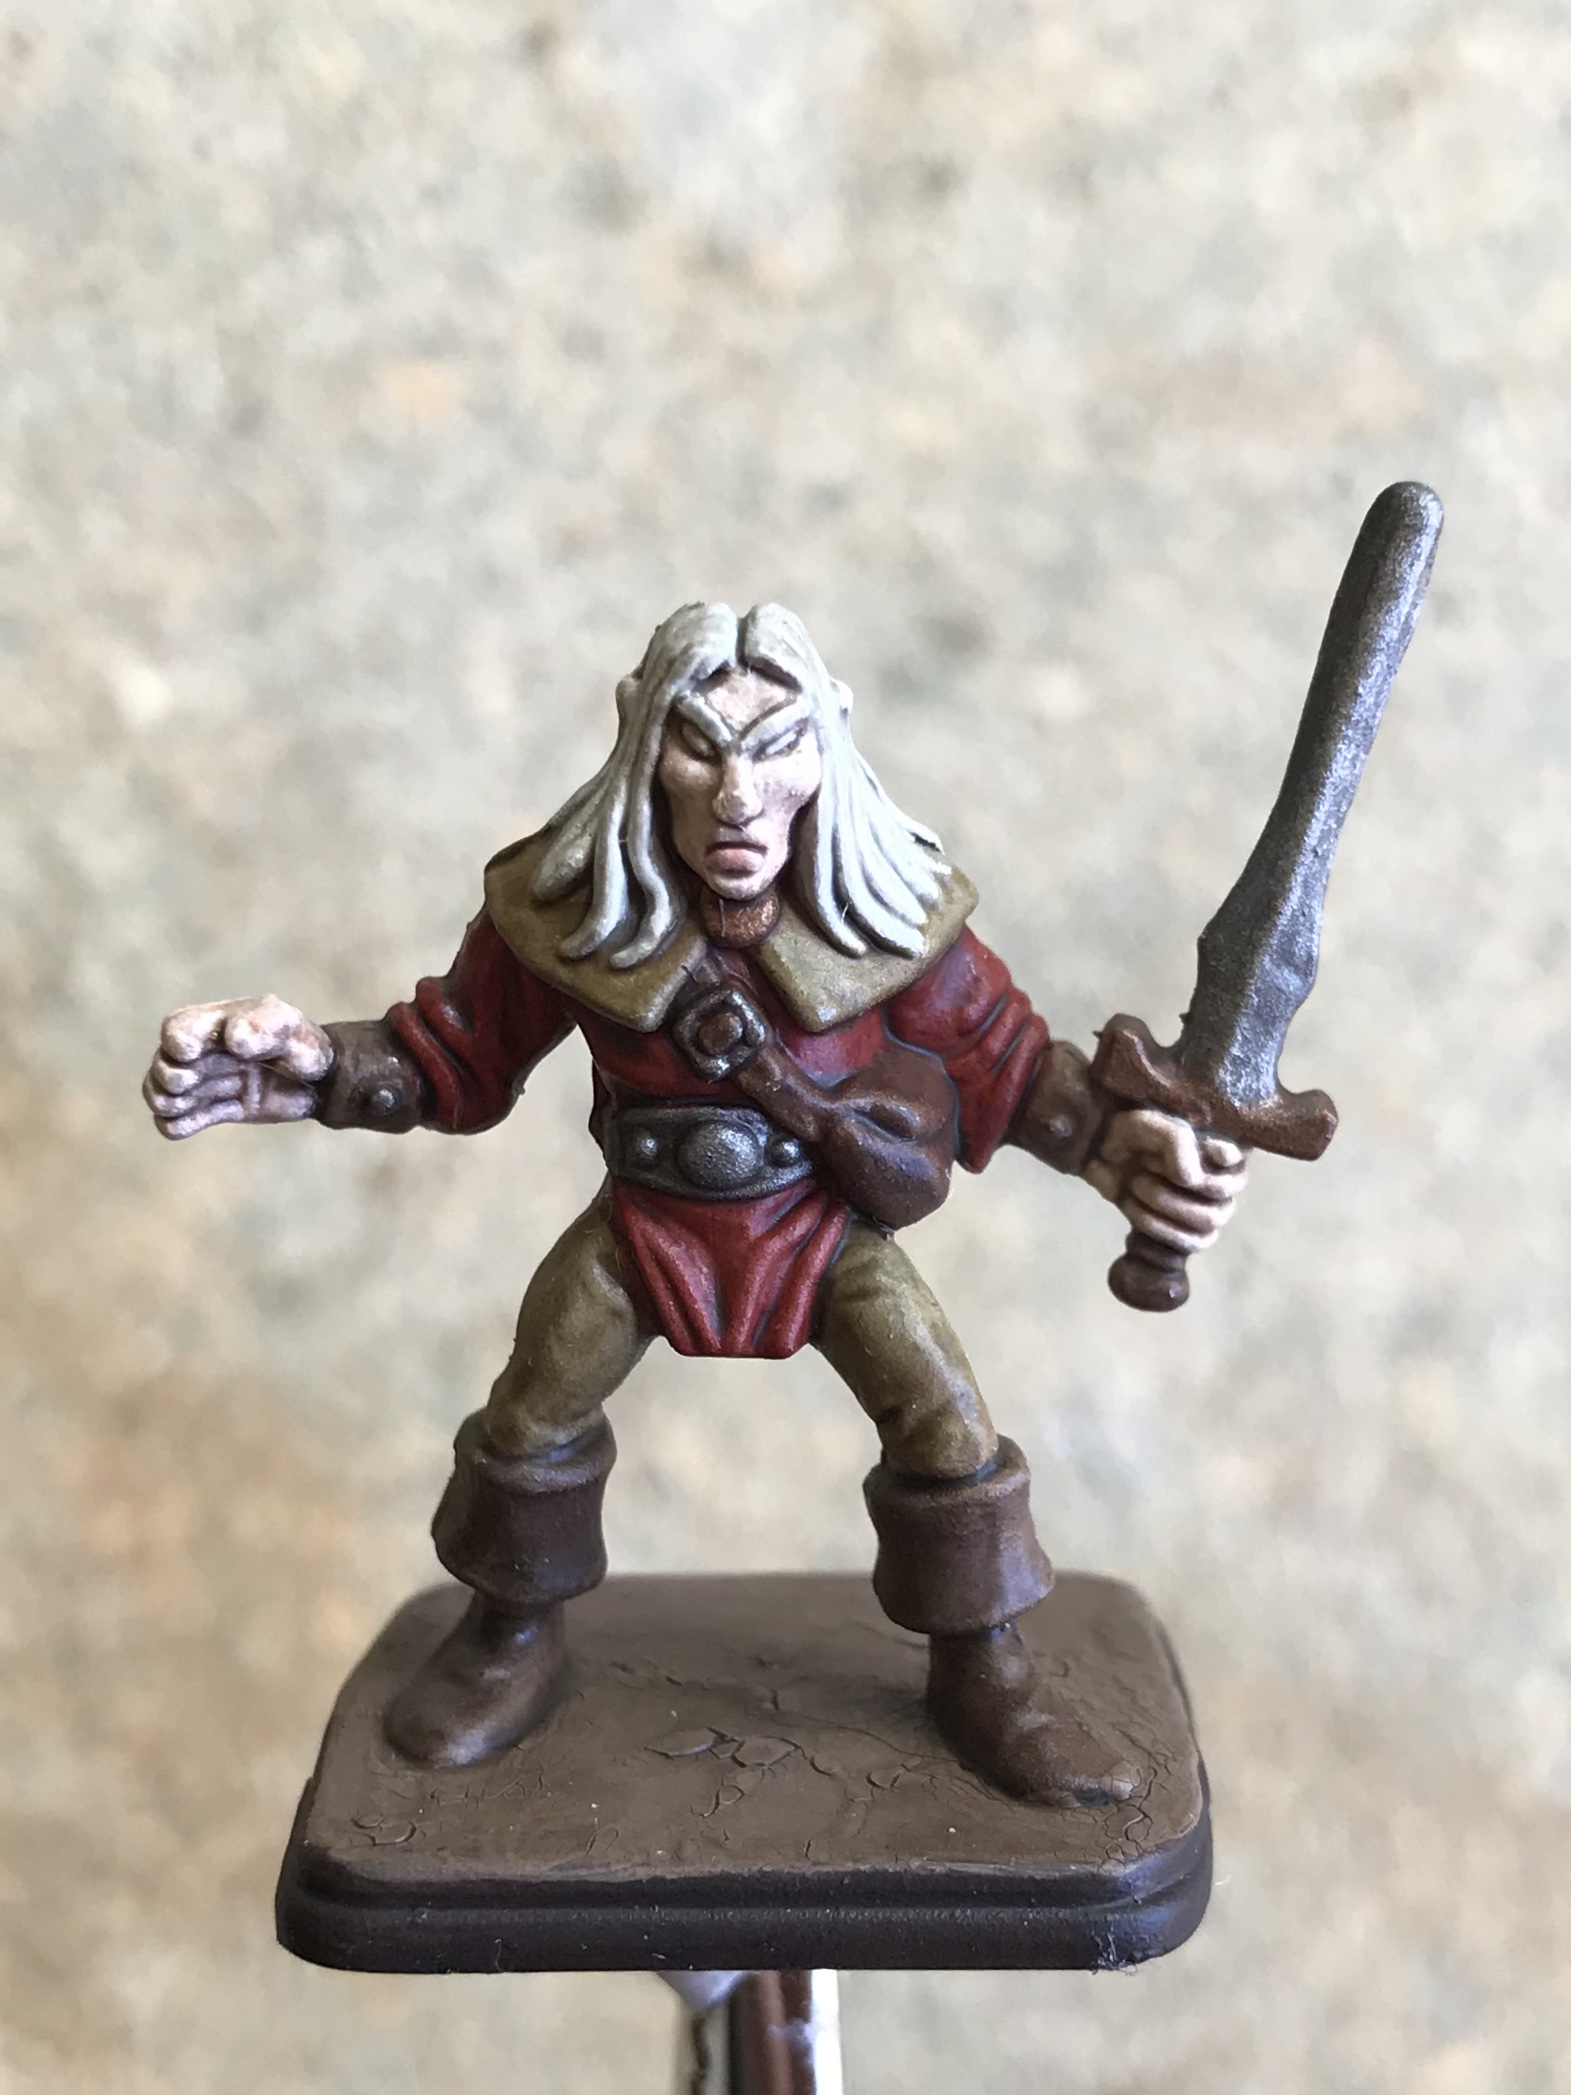 Finished Elf
The hair was simply painted skull white followed by Apothecary White. I wanted a paler skin tone for the Elf so I used a mix of the Vallejo skin tones Light Flesh and Brown Rose. It was at this point I noticed the damage to the Elf’s nose. It appears to have been squashed or ground down in some way. I will have to revisit this in the future with a file and some green stuff as an Elf with a flat nose just won’t do!
The Barbarian
It was finally time to tackle the Heroes. I chose the Barbarian to begin with, partly because he is the simplest to paint but also because he is my 6 year olds favourite character. My intention with all of the heroes was to achieve a look comparable to the player board art.
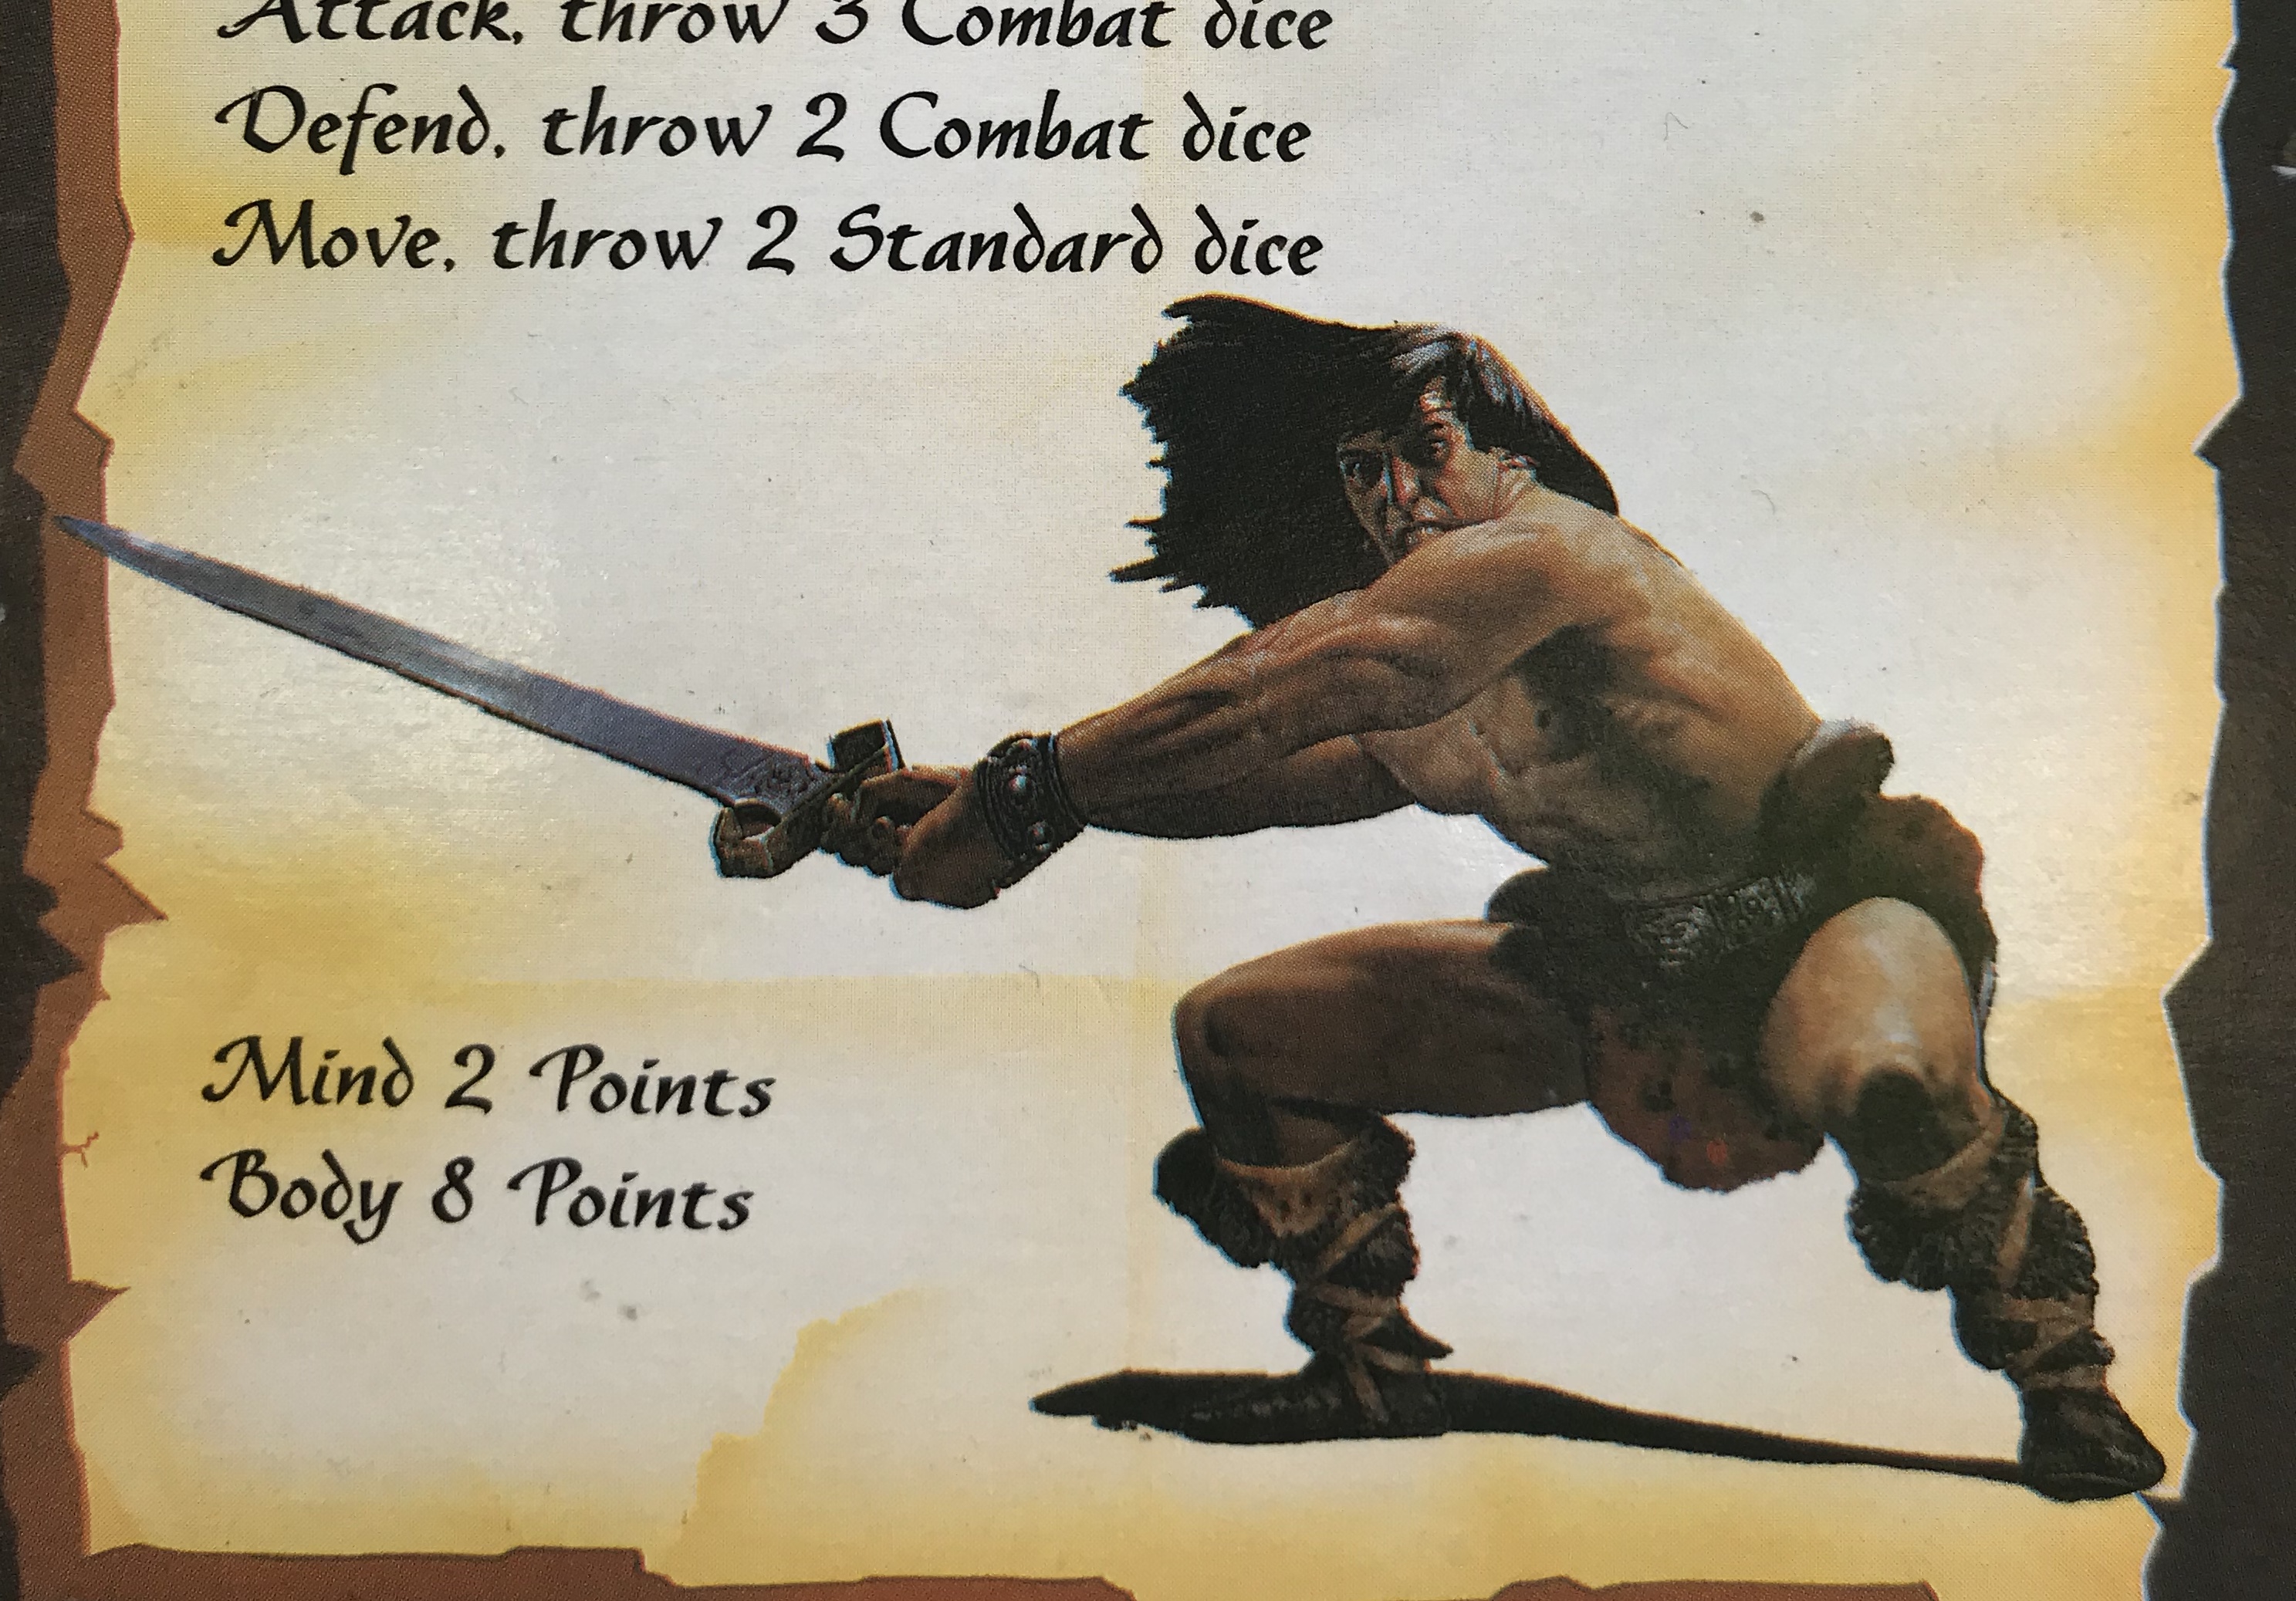 Barbarian Player Board Art
For the Barbarian’s skin I used a mix of GW Kislev Flesh and Vallejo Basic Skin Tone. This was given a wash of Ogryn Flesh before highlights were applied with another mix of the flesh colours, this time favouring the Basic Skin Tone. Pure Basic Skin Tone was used for the most raised areas, such as the nose and cheeks. I used German Camo Medium Brown from Vallejo on the hair. This was subsequently washed with several layers of null oil.
The boots and fur pants were painted Vallejo Leather Brown and washed with a thinner down mix of Wyldwood Contrast paint.
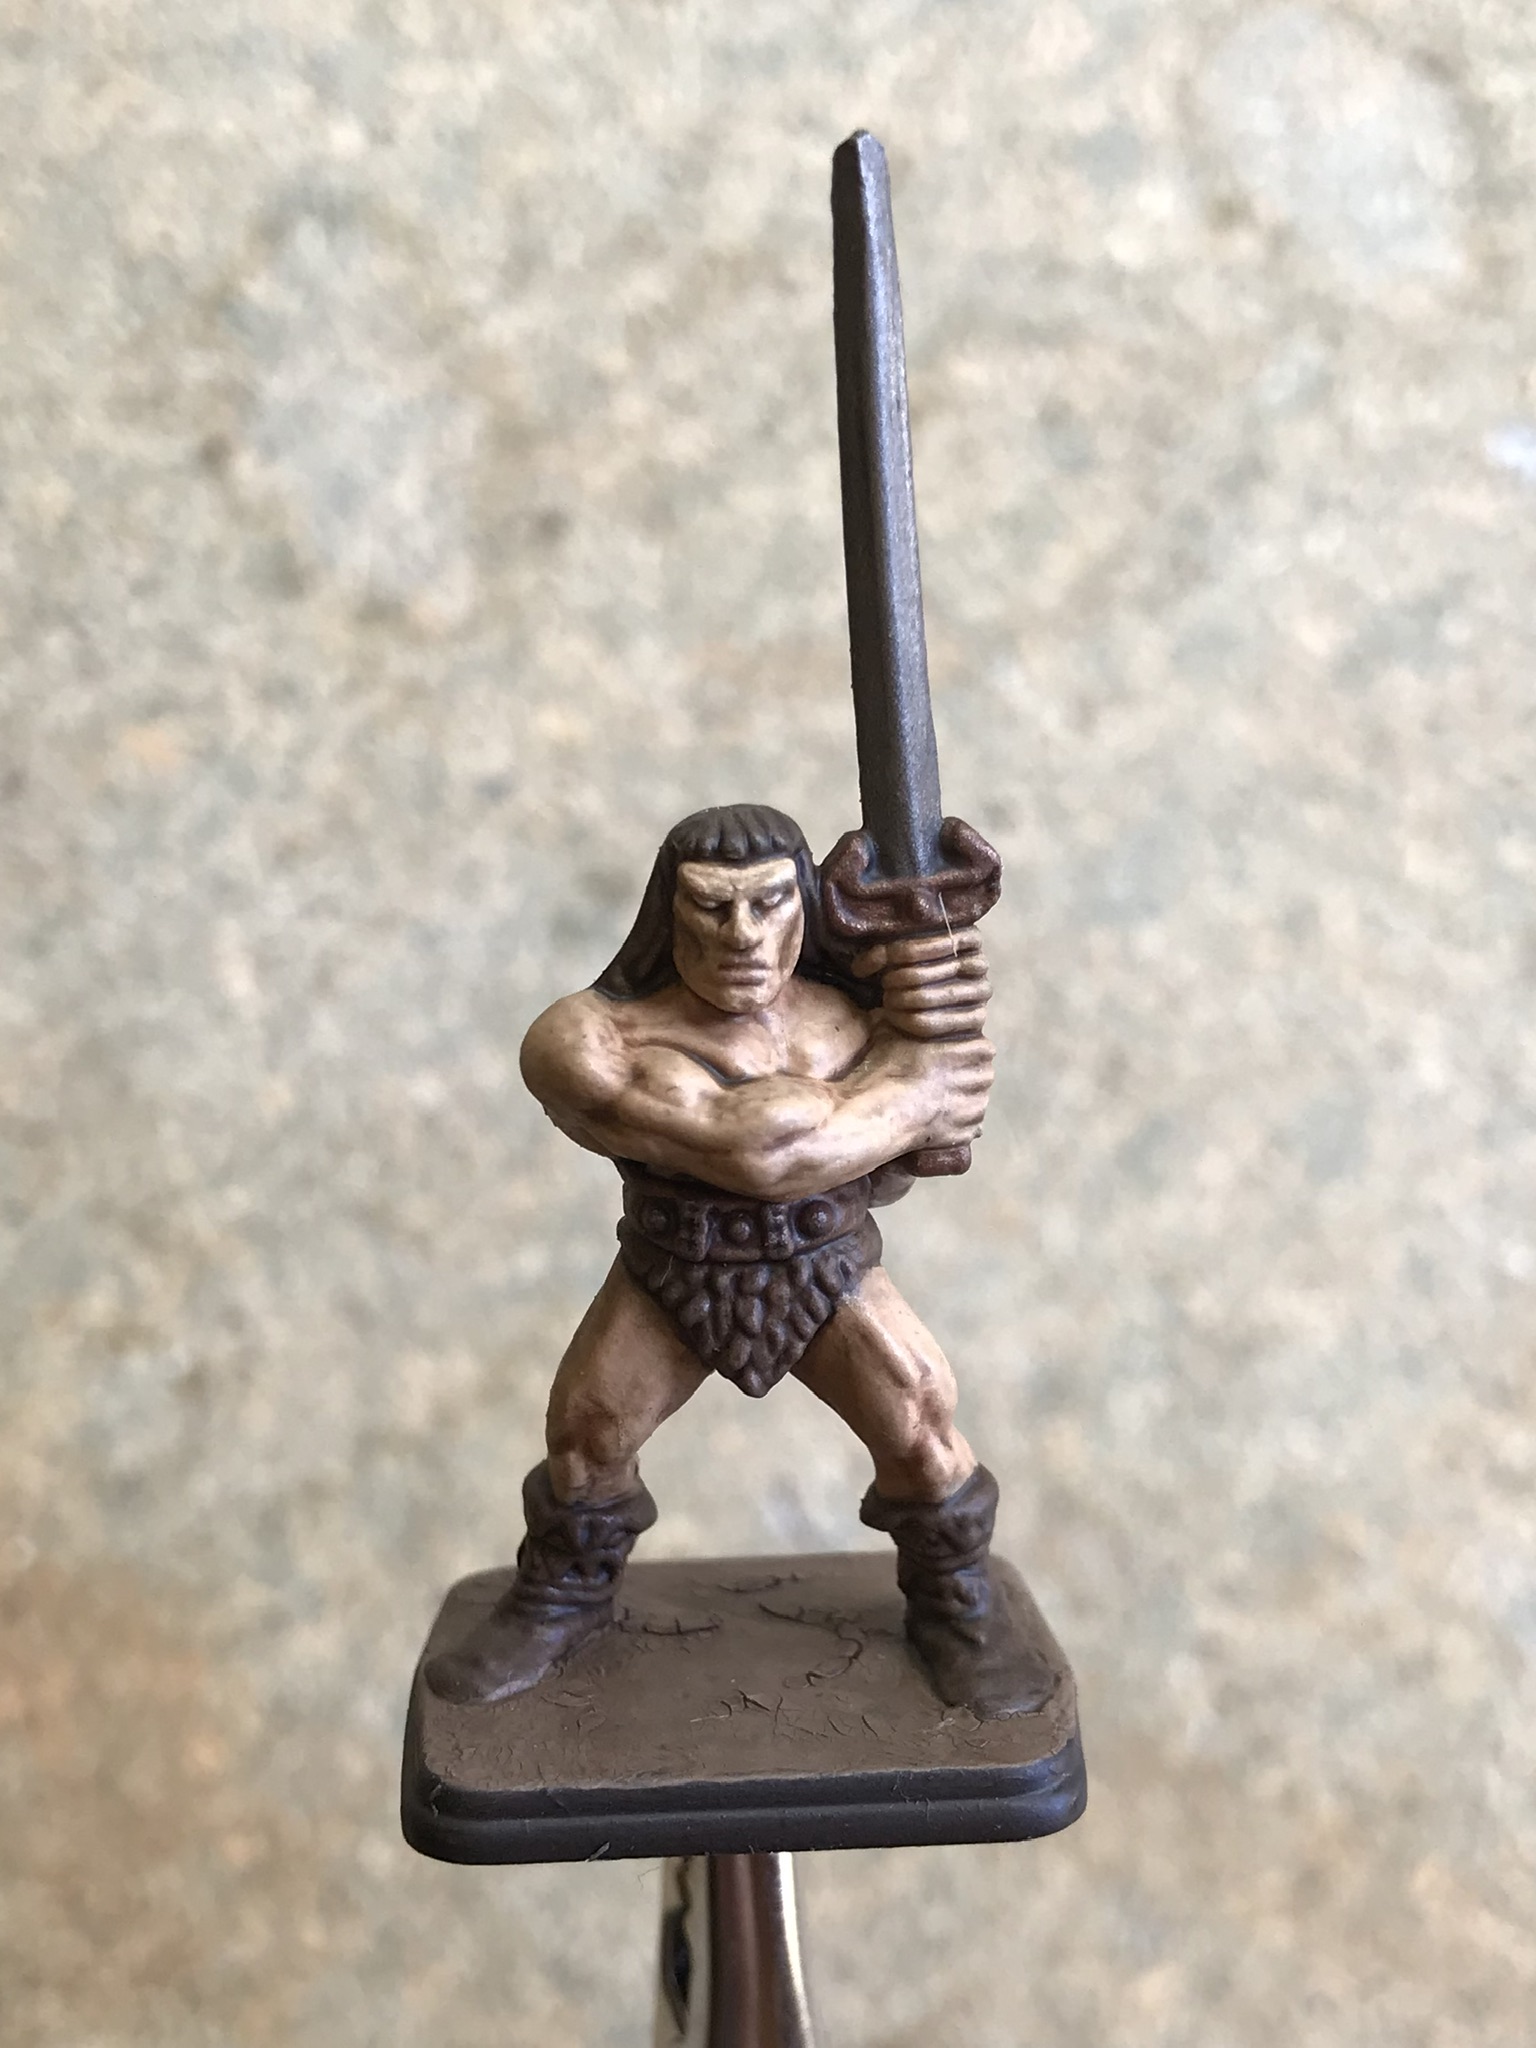 Finished Barbarian
 This picture was taken after Soft Tone and Matt Varnish and I’m slightly regretting the use of Soft Tone on the skin areas. It has left the skin looking quite grubby which is probably ok for a guy in a dungeon but not what I was aiming for!
The Chaos Sorcerer
It was almost ready to paint the heroes but before I did there was one villain left. The Chaos Sorcerer mode, aka Prince Ragnar, aka The Witch Lord is used to represent a number of different characters throughout the game and so does not have a card like the other monsters. Looking to the screen art again for inspiration we felt like this colour scheme was a good place to start.
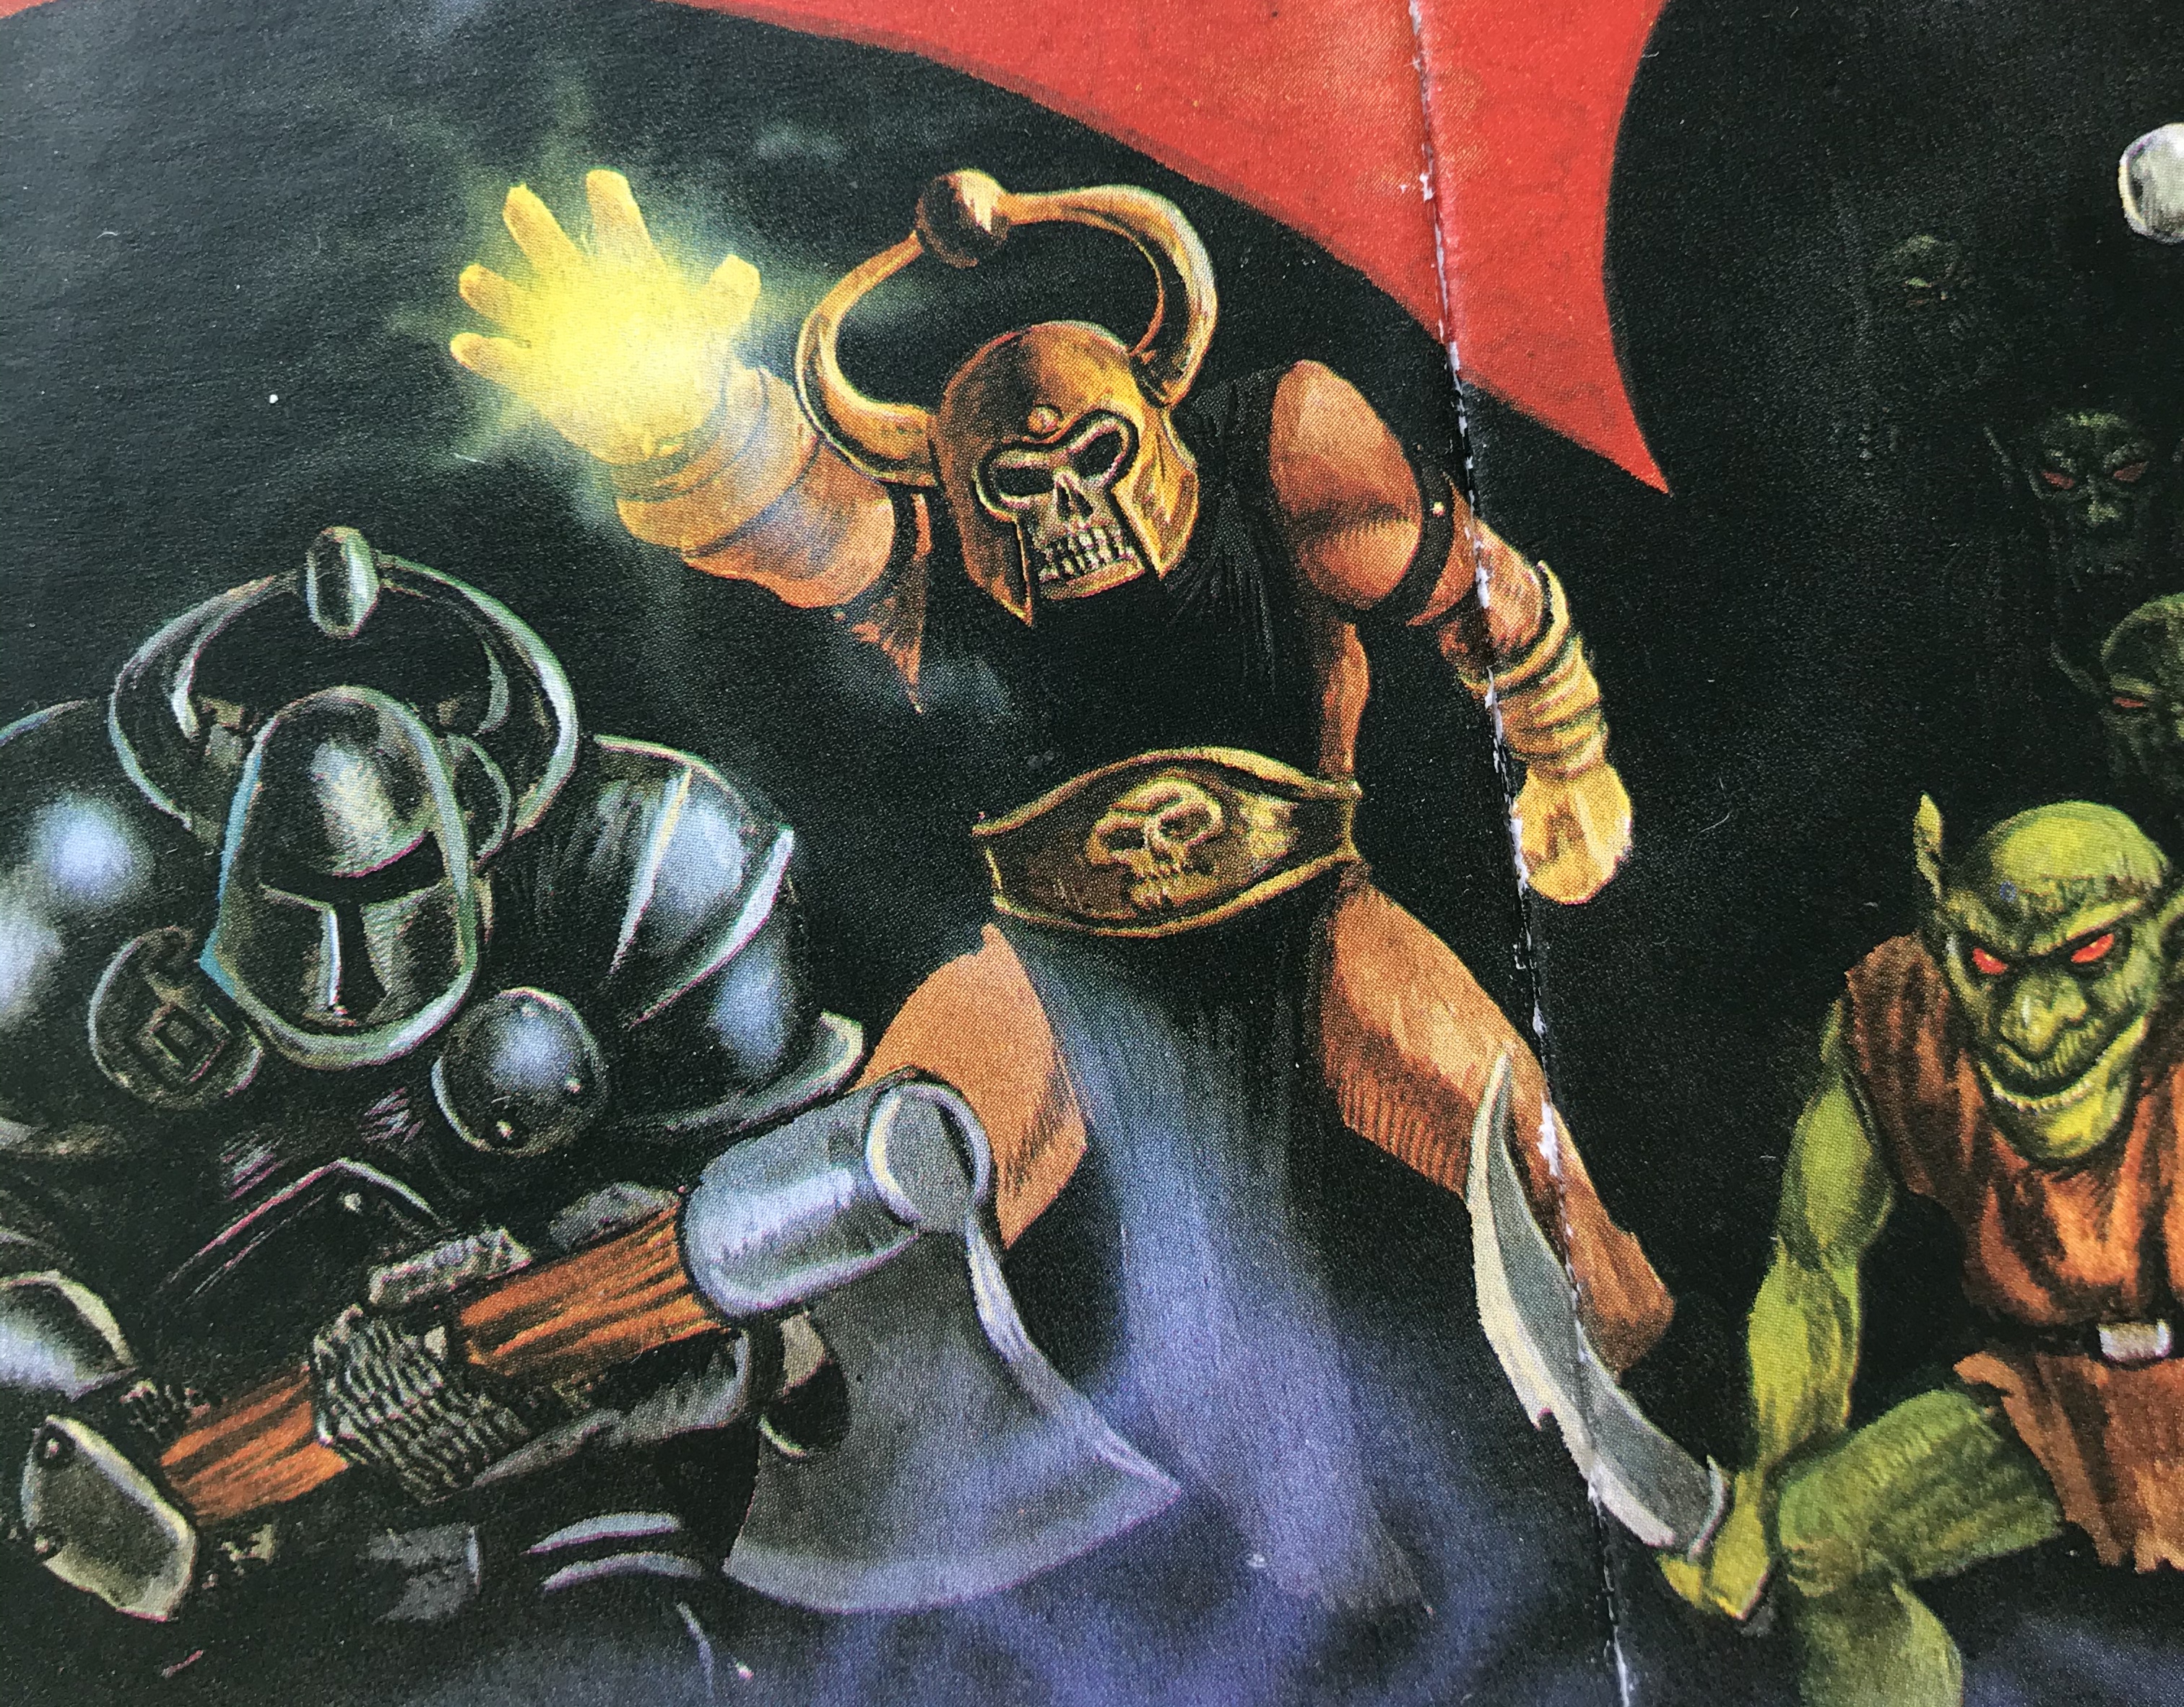
I didn’t like the idea of a muscle bound hero with a skull face so instead I decided to paint it as though it was the faceplate of his helmet. I have no idea if this was the sculptors intention but the idea of a more elaborate helmet than the Chaos Warriors serving under him seemed appropriate.
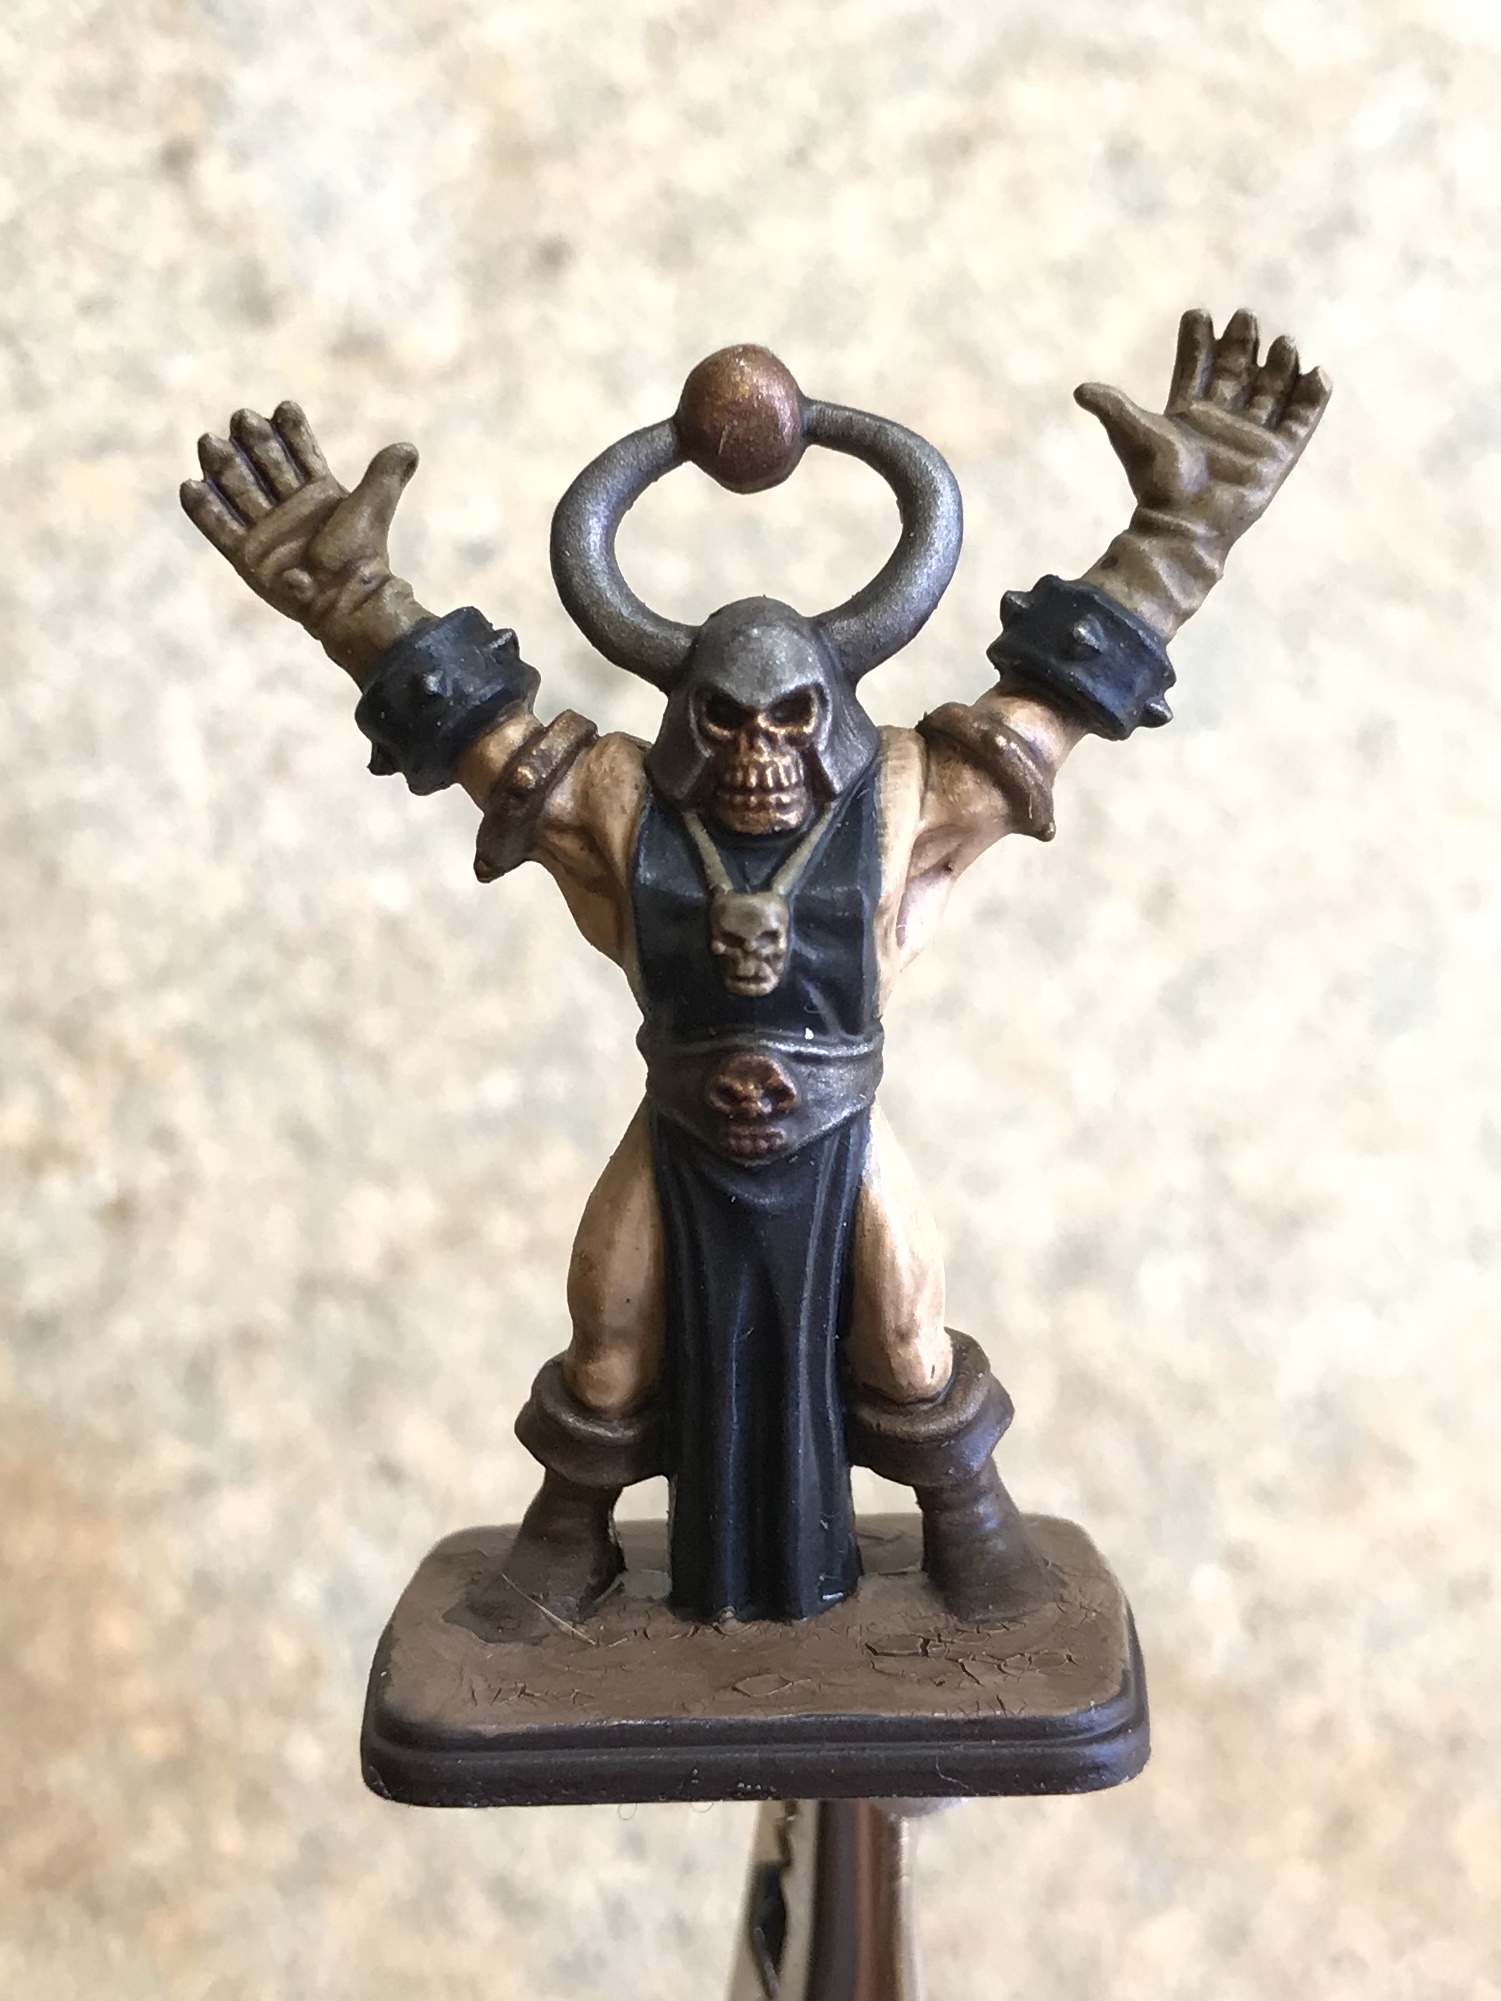 The Chaos Sorcerer
The flesh was done with Kislev Flesh, washed with Ogryn Flesh wash and highlighted with a mix of Kislev Flesh and Vallejo Light Flesh. The robes were just painted Kantor Blue and washed down with Nuln Oil.
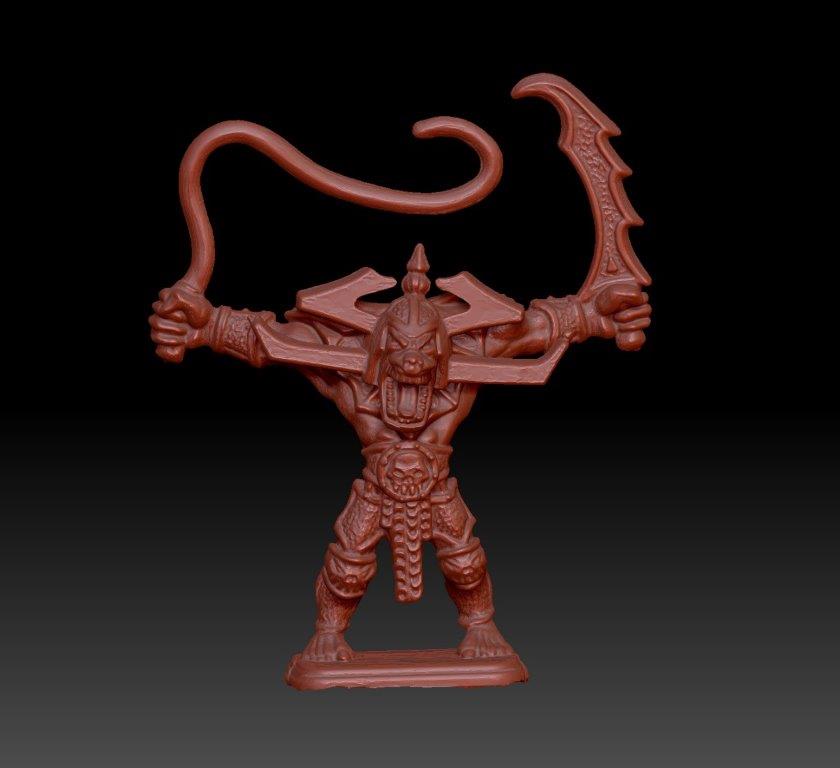
The Gargoyle
I mentioned in an earlier entry that the Gargoyle was missing his head. This did nothing to improve his looks and had to be amended before I could get to painting him.
While I had been searching for the other missing monsters I had downloaded an STL file for a complete Gargoyle. I wanted to use as much of the original set as possible so I decided I would just print the head to graft to the existing body. As a separate head file wasn’t available, I used Zbrush to make some modifications.
 The original STL in Zbrush
Once I had imported the file to Zbrush I isolated the head and deleted the body. I hadn’t previously noticed that one of the horns was missing its tip so I took the opportunity to make some adjustments. I cloned the horn on the other side and mirrored it, in order to create an authentic replacement. I then subdivided the model a couple of times to enhance the detail which would improve the sharpness of the print. I also put a hole in the back of the head which would allow me to attach it to the post on the body.
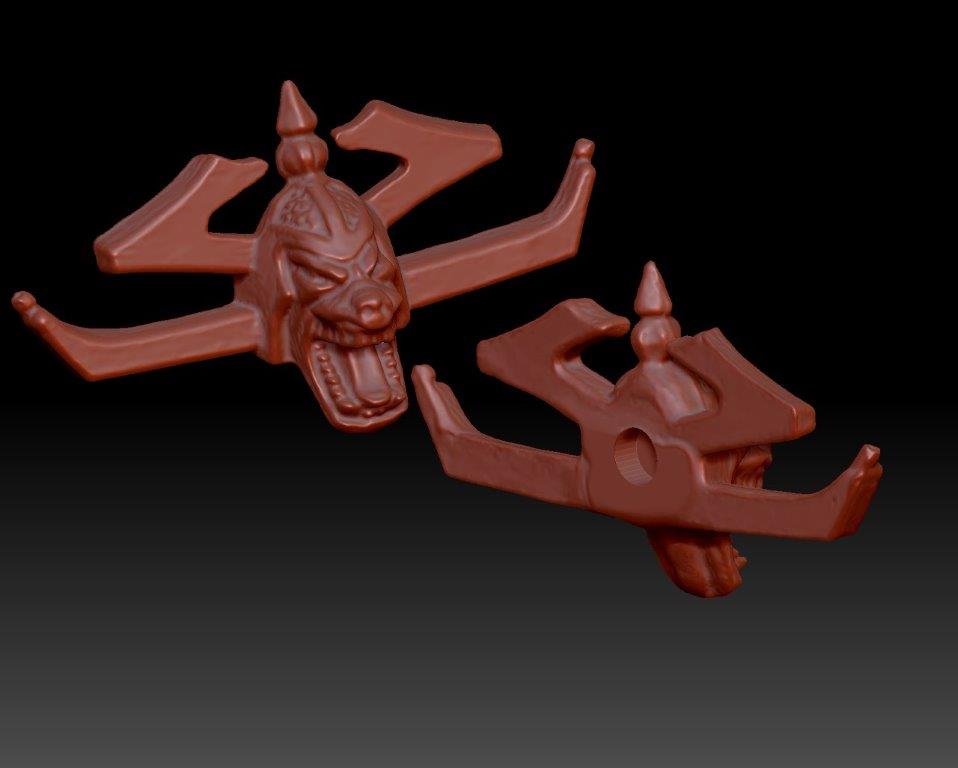 Adjusted head, ready to export and print.
 Below is a picture of the head straight off the printer. The supports were placed at the back to make for an easy clean up.
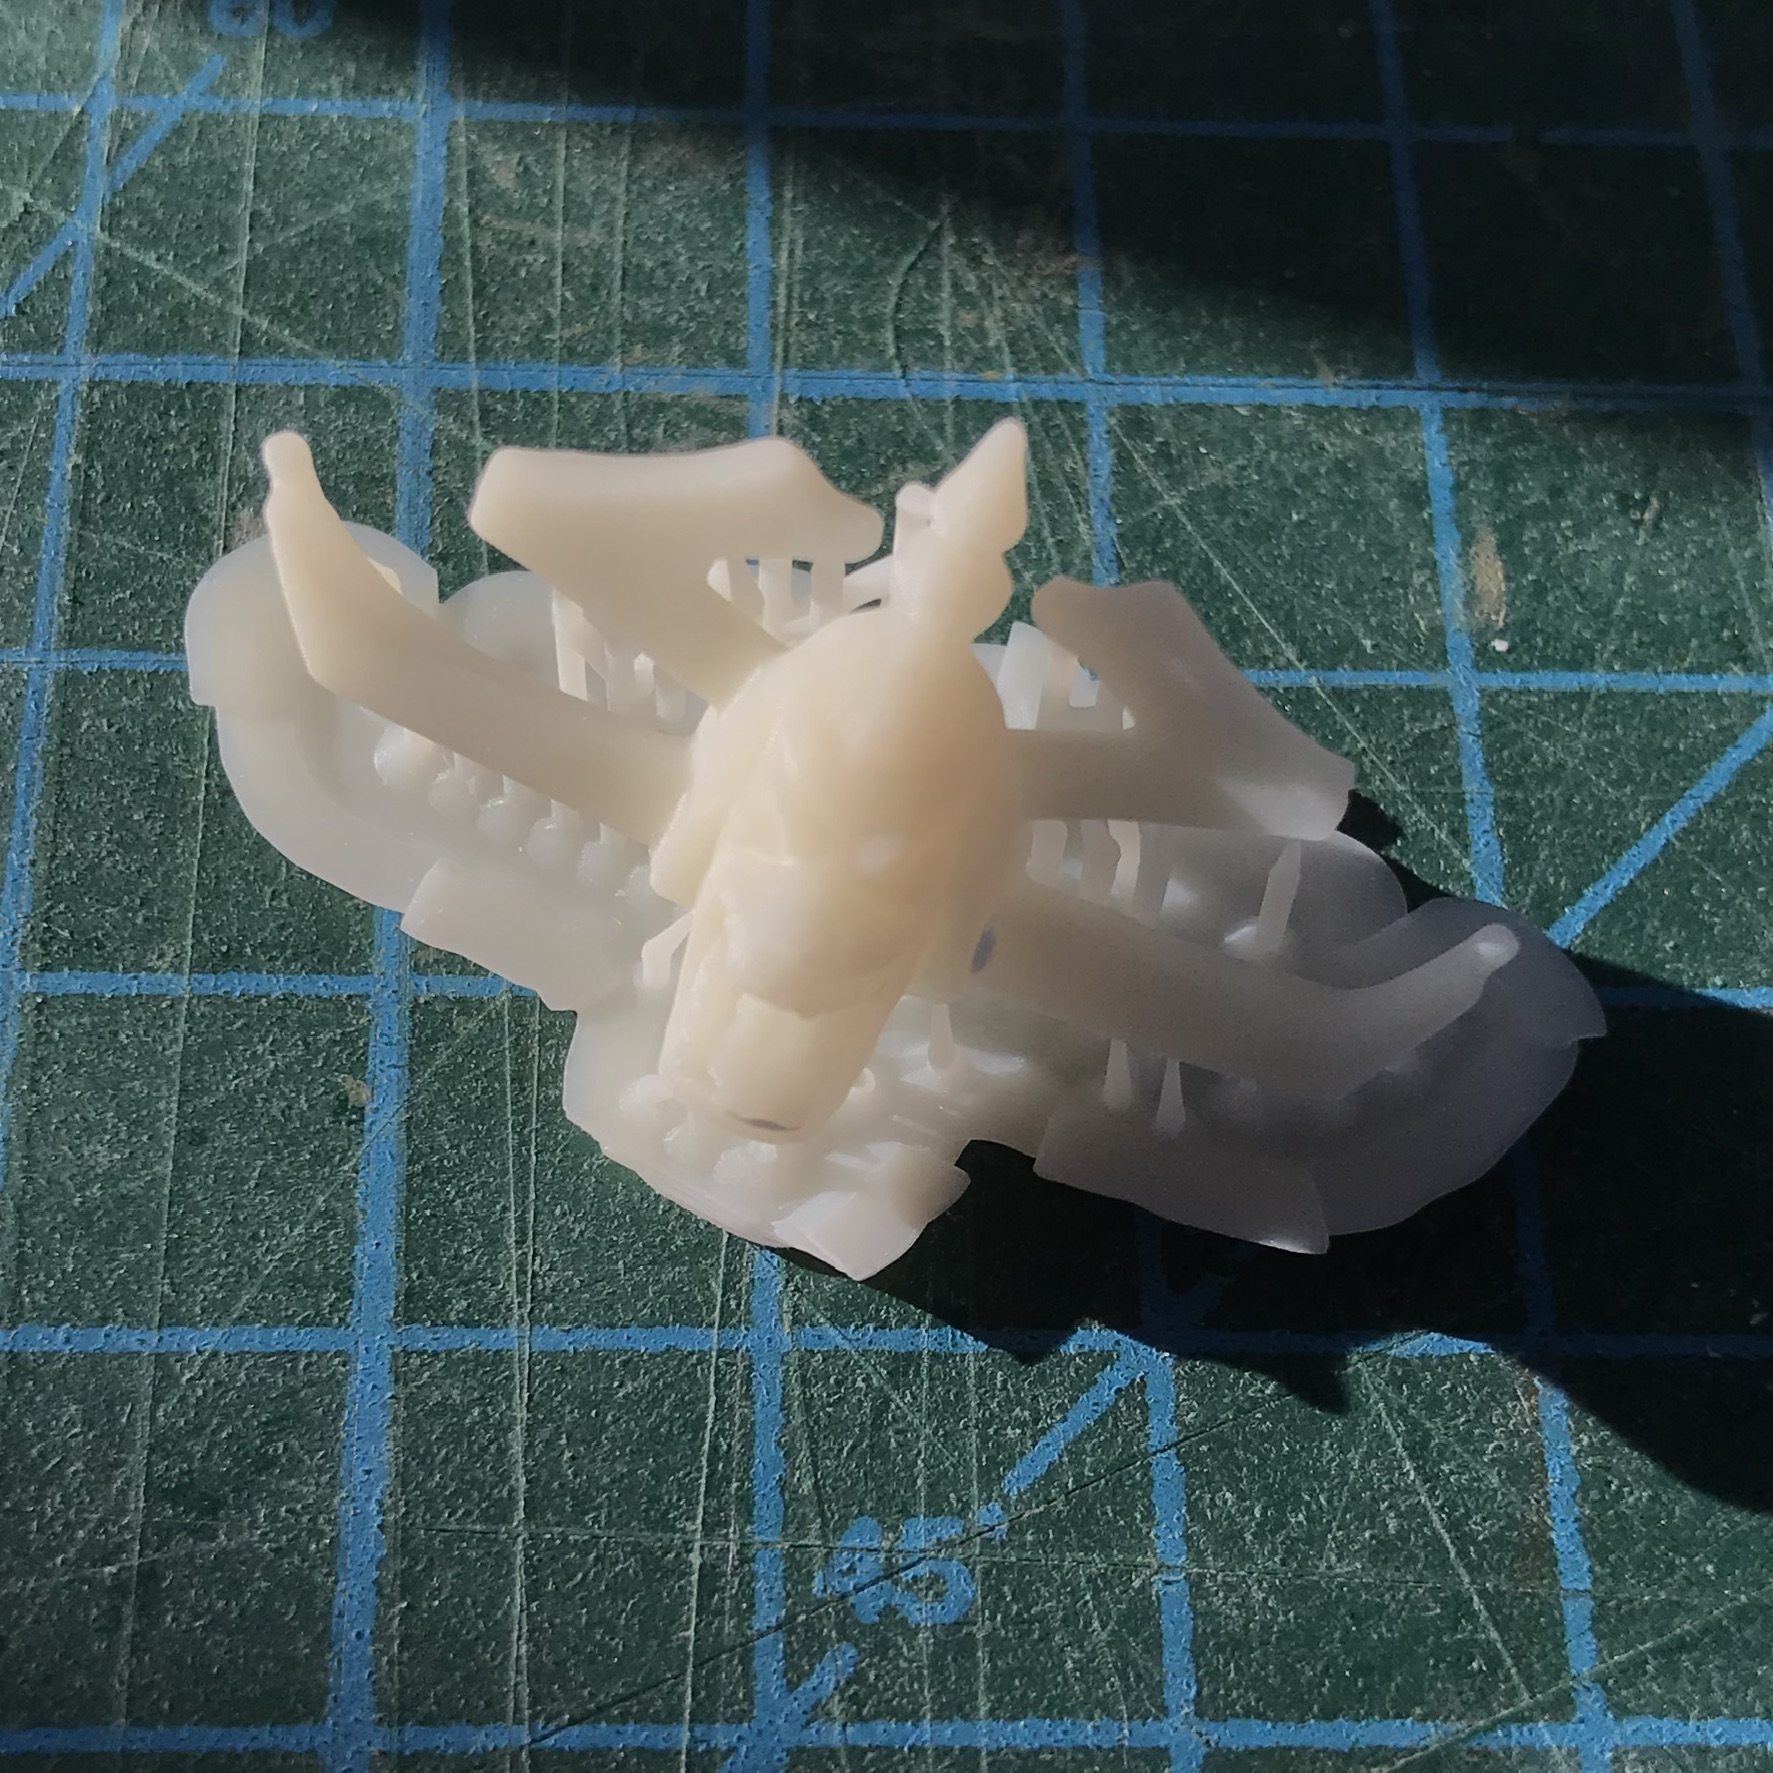 3D printed replacement head
With the head attached and the model primed he was starting to look a lot more menacing….
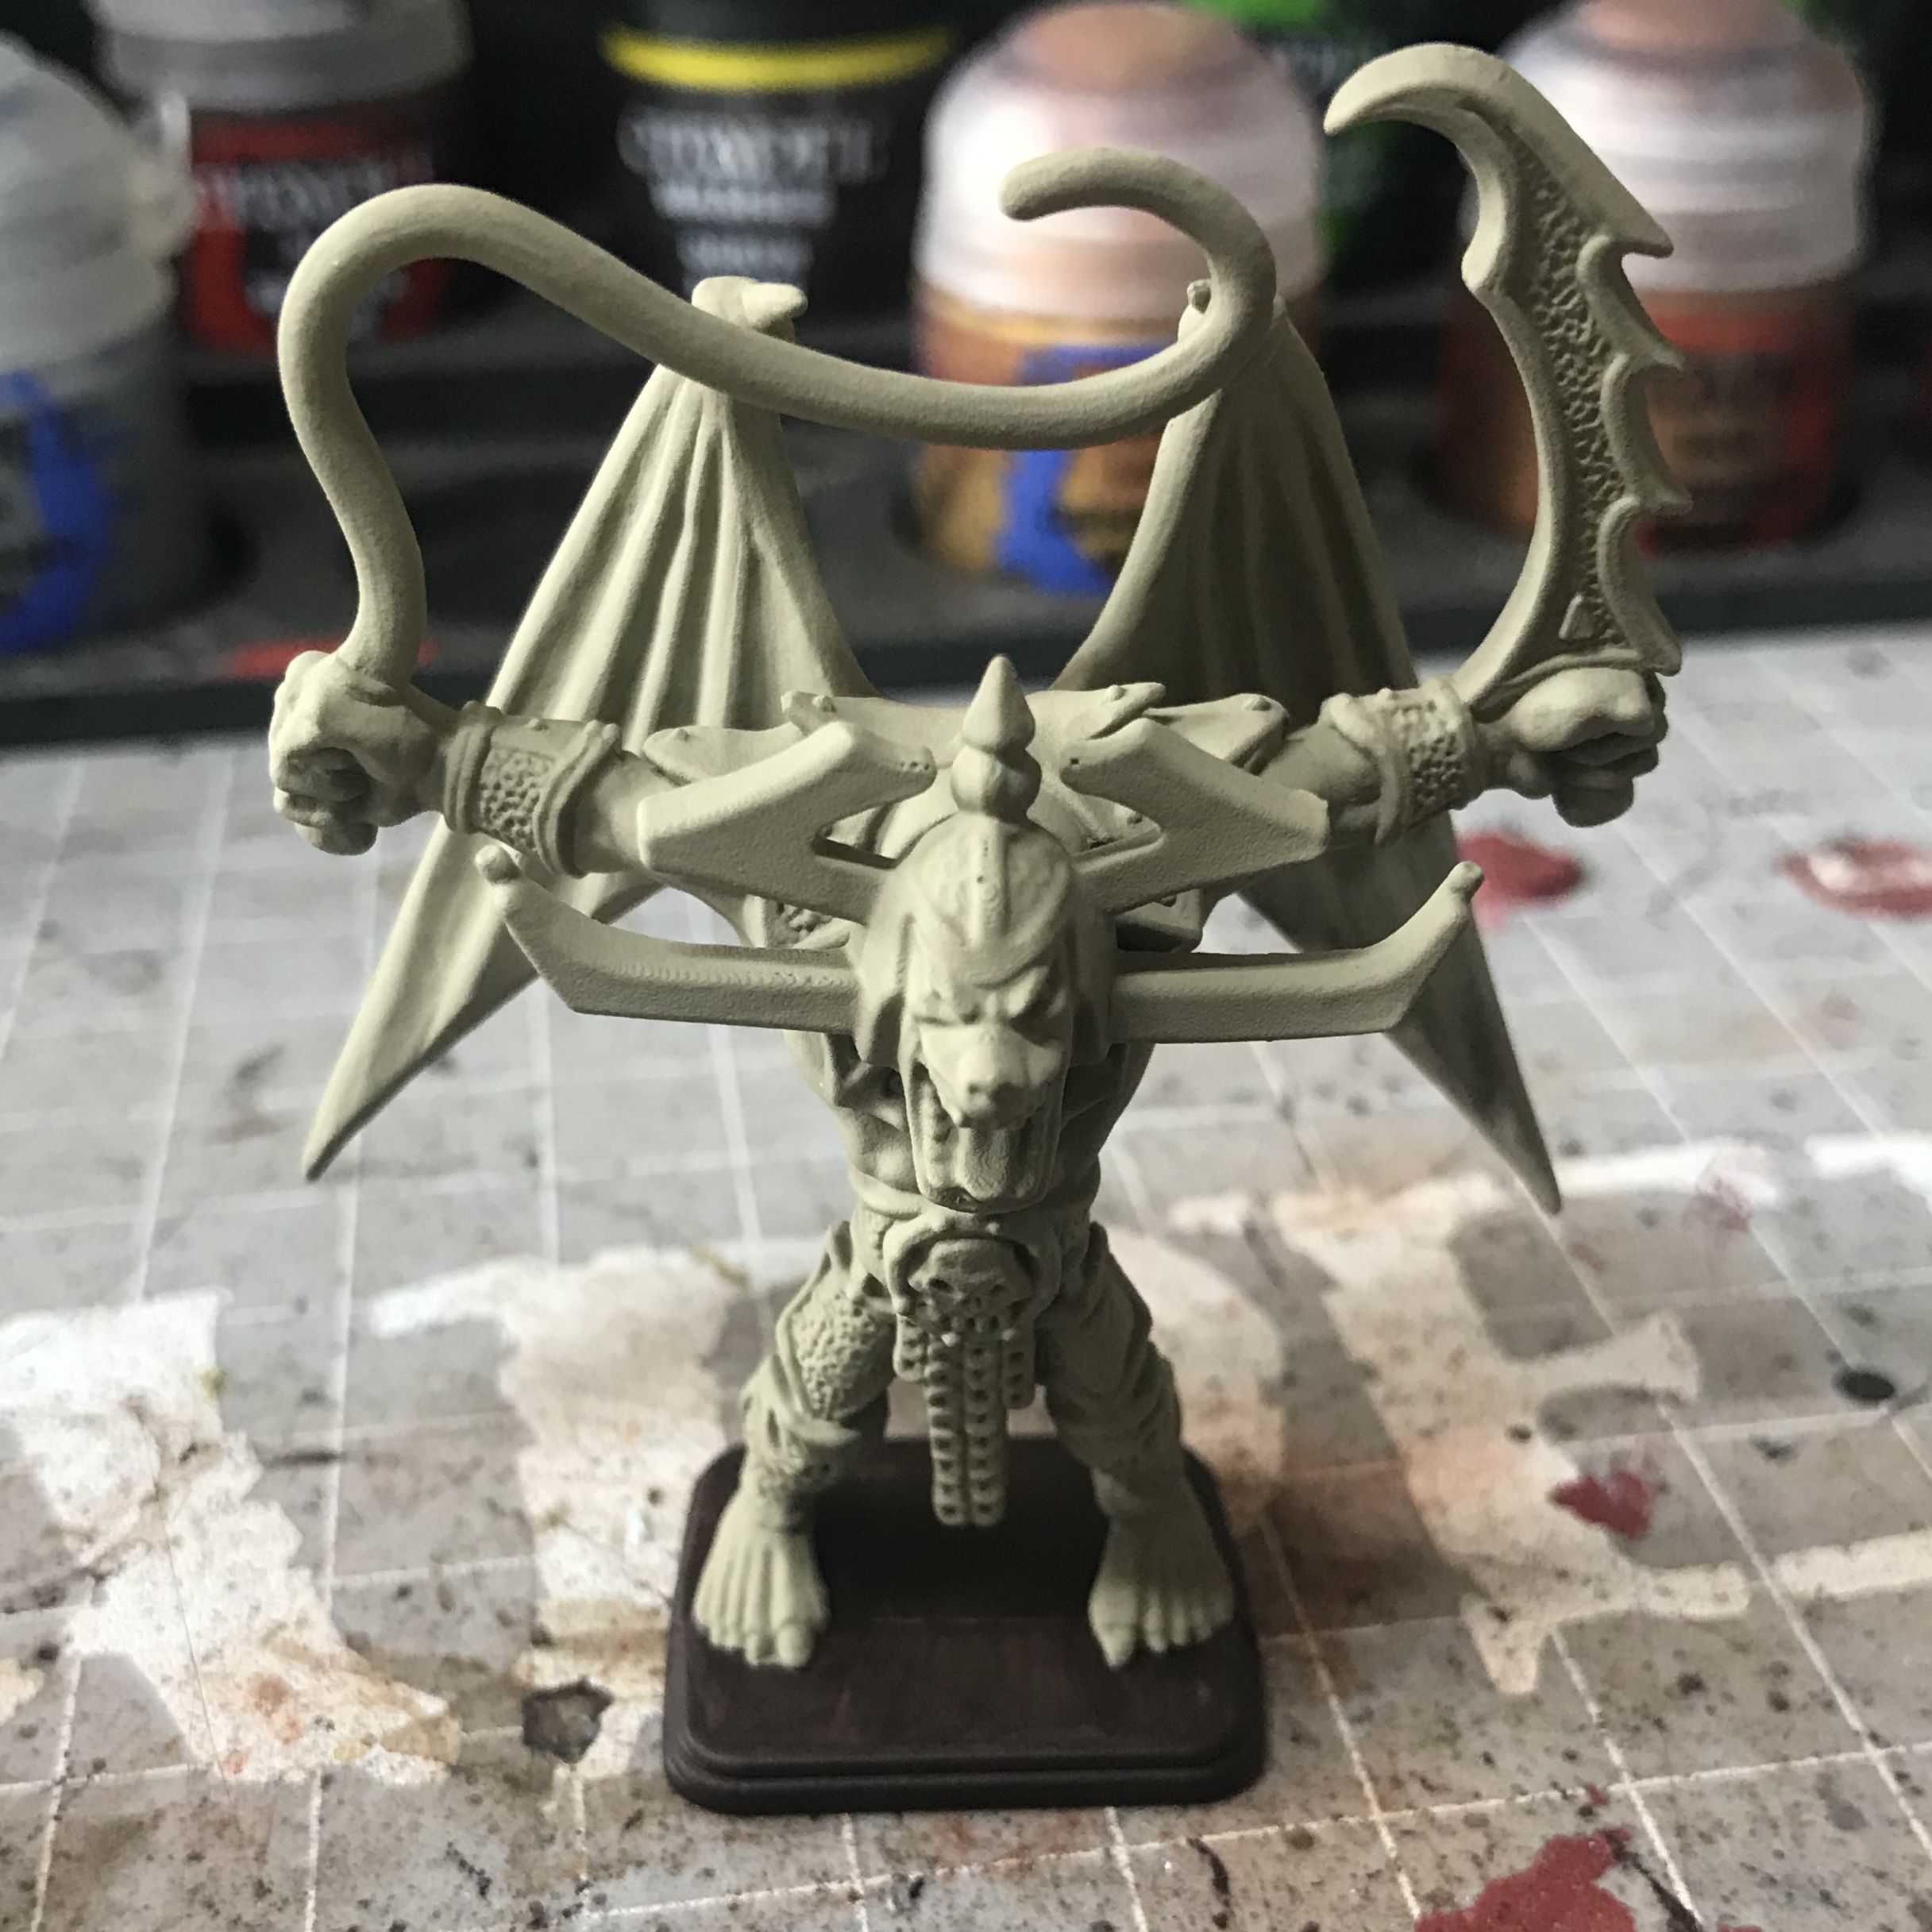 Repaired and Primed
After conferring with the boys it was decided that our Gargoyle would be painted to match the screen art, rather than the card art. This was very convenient for me as I only had to paint him to look like stone. It felt like a bit of a cop out but I consoled myself with the fact that I had just painted 29 monsters in seven days!
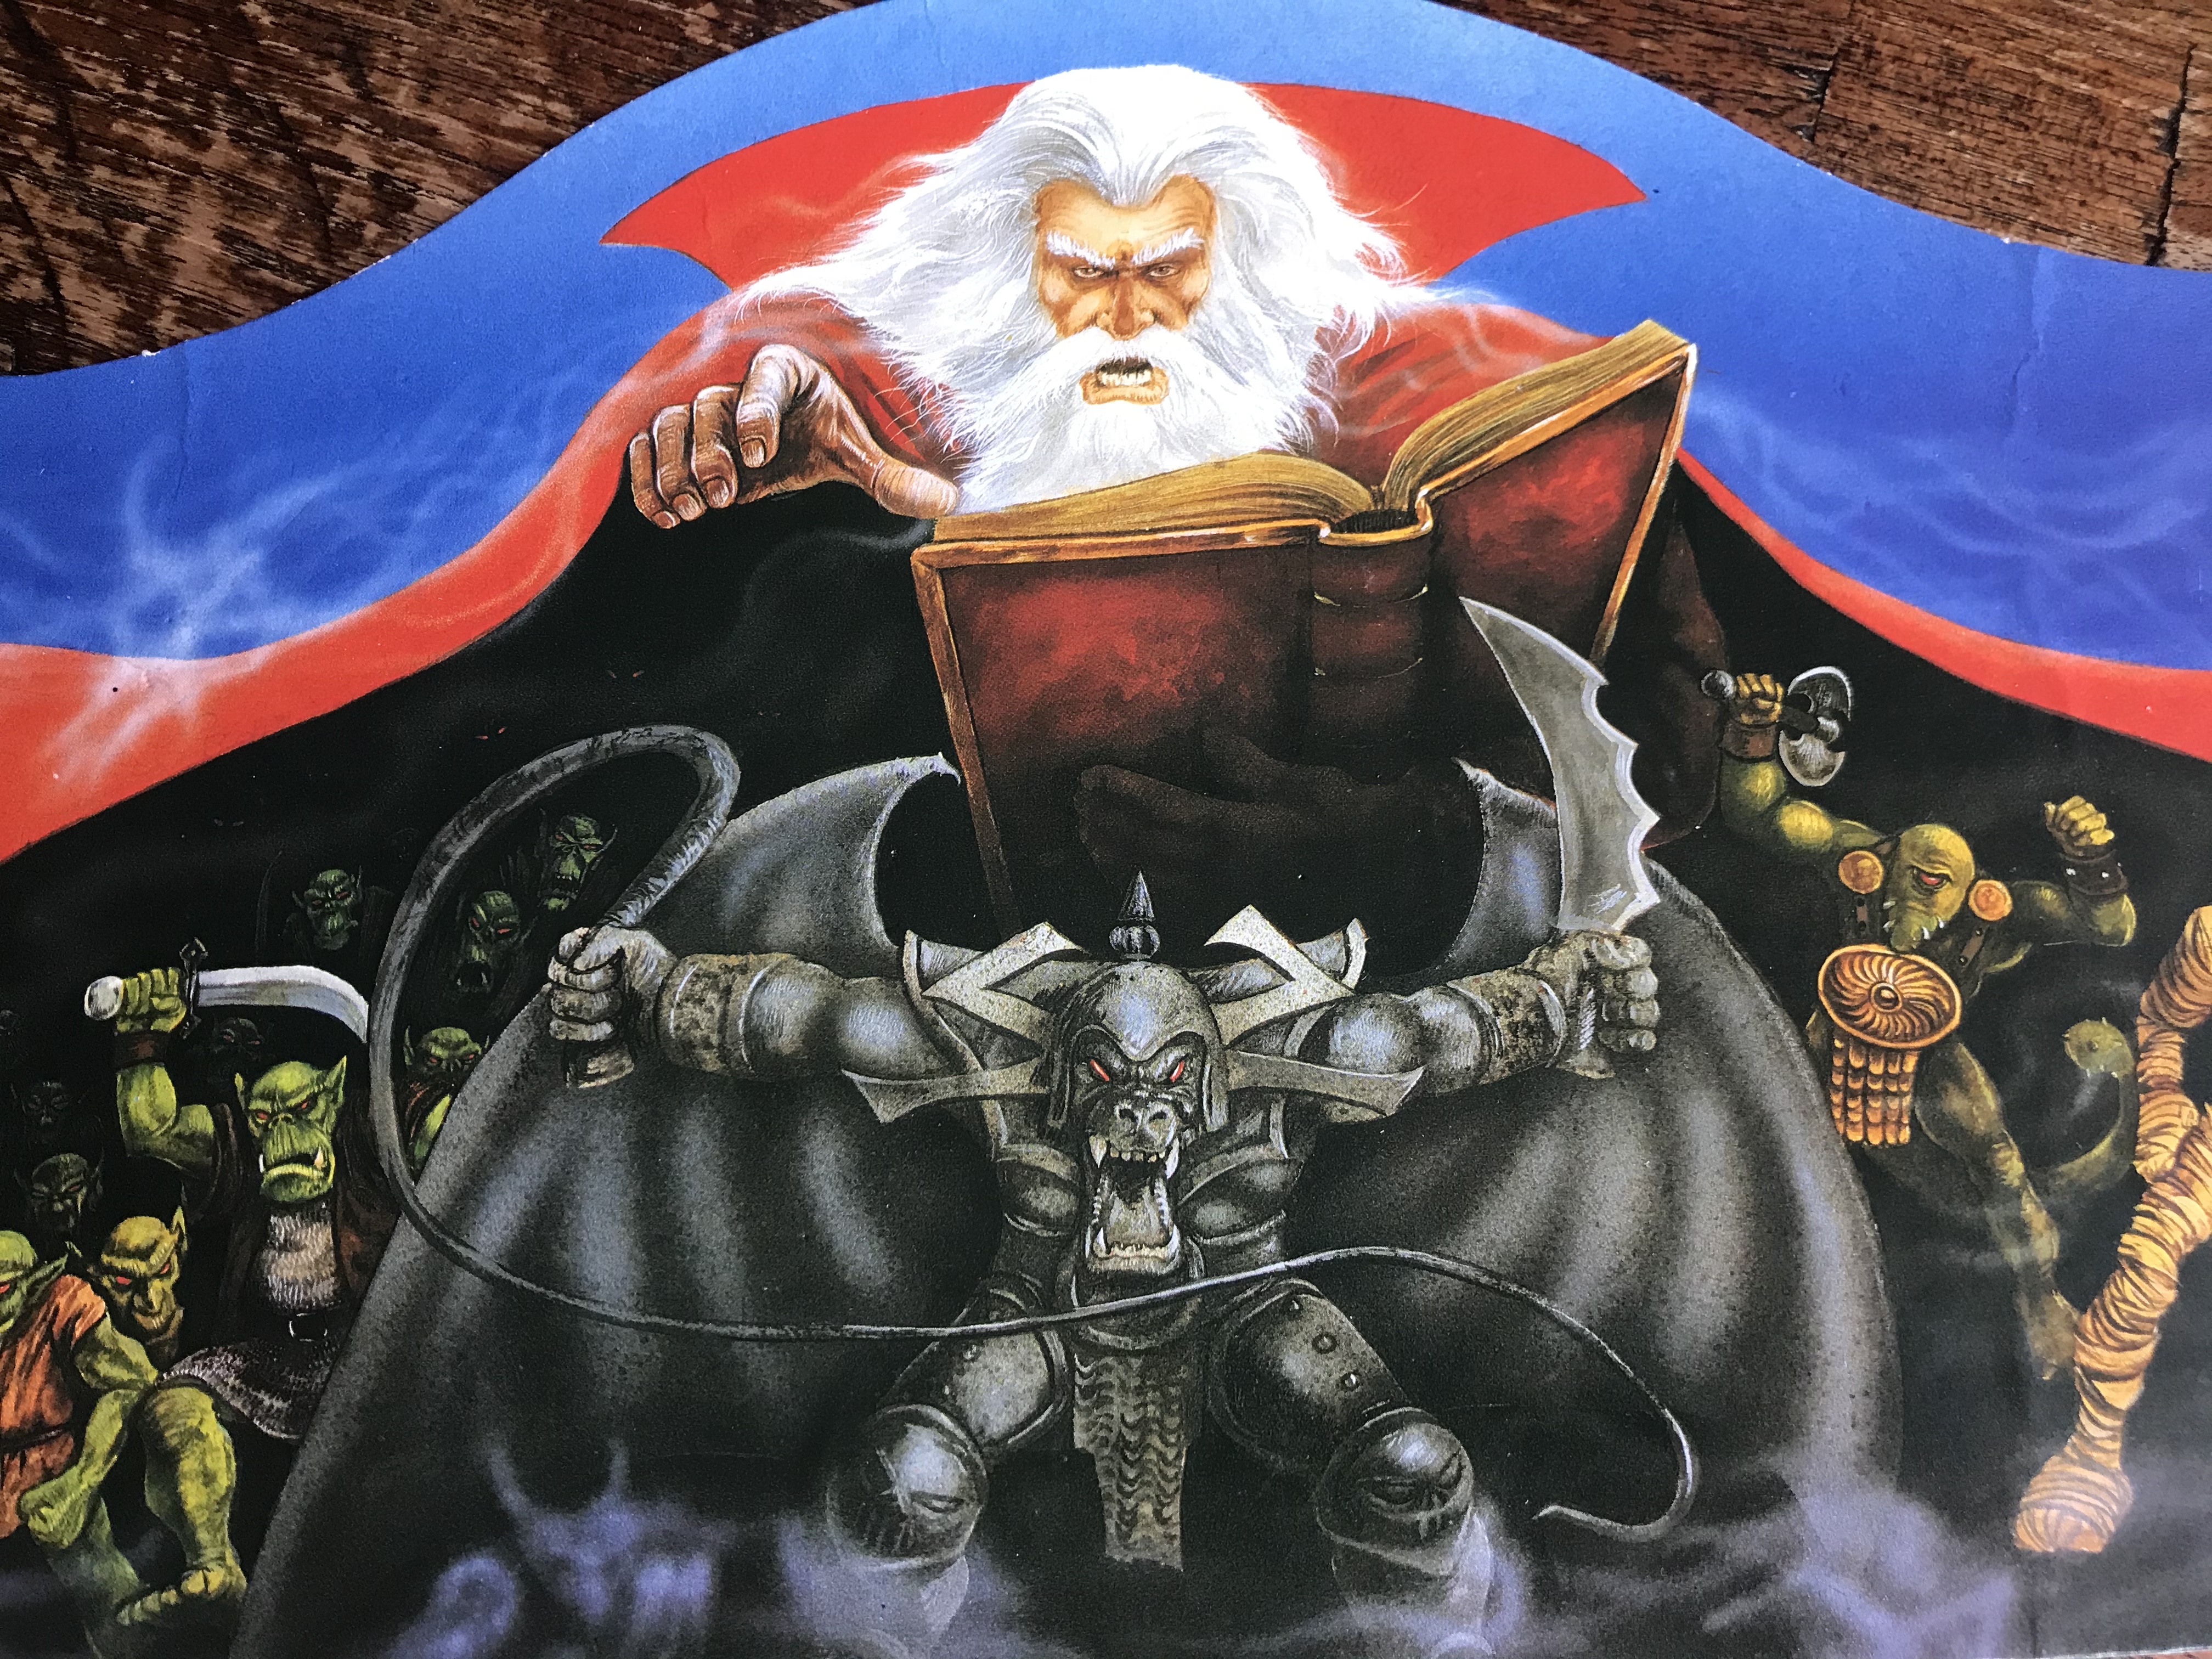 HeroQuest Screen Art
This was a very simple paint job using a base of Kings or War – Green Grey. I used an all over wash of Agrax followed by a selective wash of Nuln oil on the Wing tips and a few other places (such as the mouth and hands, to enhance the detail). Finally a dry brush of Screaming Skull finished the job. This photo was taken after Soft Tone and Matt Varnish.
 The Finished Gargoyle


![Play WW2 Commando Operations With Butcher & Bolt [Updated]](https://images.beastsofwar.com/2026/03/relaunch-600-338.jpg)


