![Alternative Trench Crusade Miniatures? Trench Missionaries Review | Wargames Atlantic [7 Days Early Access]](https://images.beastsofwar.com/2026/03/unboxing-wargames-atlantic-trench-missionaries-coverimage-225-127.jpg)


![10mm Medieval Miniatures! Azincourt English Army Review | Wargames Atlantic [7 Days Early Access]](https://images.beastsofwar.com/2026/03/unboxing-wargames-atlantic-azincourt-english-army-coverimage-225-127.jpg)


CRC’s Crazy Compendium 2; Eclectic Boogaloo


Recommendations: 687
About the Project
Welcome to the next season of the "most vaguely inconsistent extravaganza that no one really thinks about but if they did they'd be mildly misanthropic about it"! Following along from my last project, here you will find an array of things I'm working on from various games and companies. Hopefully we can manage a bit more variety than last time, but I have been slowly working through a significant backlog, so we get what we get. We think we finally got away from Spiny Norman, but we can never be too sure, so strap up and buckle in for the most ambivalent ride of someone else's life! For those who missed it, the last project can be found here: https://www.beastsofwar.com/project/1533345/
Related Genre: General
Related Contest: Spring Clean Hobby Challenge (Old)
This Project is Active
"A man who fights for coin is loyal only to his purse."
Next model I’m working on is Vargo Hoat from A Song of Ice and Fire Miniatures Game by CMON. To begin with I wasn’t really sure what I wanted to do with this mini before I realised he had quite a lovely cloak (that probably didn’t come from Essos). Vargo is one of those characters that everyone dislikes, even the fictional people within the books (I don’t think he made it into the TV series…), but he does switch sides at one point from the Lannisters to Roose Bolton and I though a turncloak with a nice cloak was too good an opportunity to pass up.
The outside of the cloak is in Lannister red, but the facings and the lining of his cloak is in the Bolton colours of a reddish pink colours. There’s not as much contrast between these colours as there would be between the red and the white of the Starks, but I like this subtle look a little more. That being said, it looks a little more interesting than everything being a dark shade of brown and/or black particularly bearing in mind that much of his armour is studded leather.
 In a move I've not really tried before, I chose a base colour and shade for the entire cloak that didn't really match the end colours. Here I used a deep purple (Xereus Purple from GW) and then shaded it with a purple shade (Druchii Violet from GW). This I used as a base for both colours as an almost pre-shade colour that is almost completely layered over, though using thinned paints.
 The pink colour on the lining was done with Screamer Pink and Pink Horror from GW using thin layers of Screamer Pink to cover all but the deepest recesses of the purple base colour before grading up to Pink Horror before picking out some edges with Cadian Fleshtone (GW).
 The red used a similar pattern of Mephiston Red to Evil Sunz Scarlet to a final highlight of Wild Rider Red (all GW) with the Wild Rider Red focusing on just the sharpest point so as to not turn the look too orange.
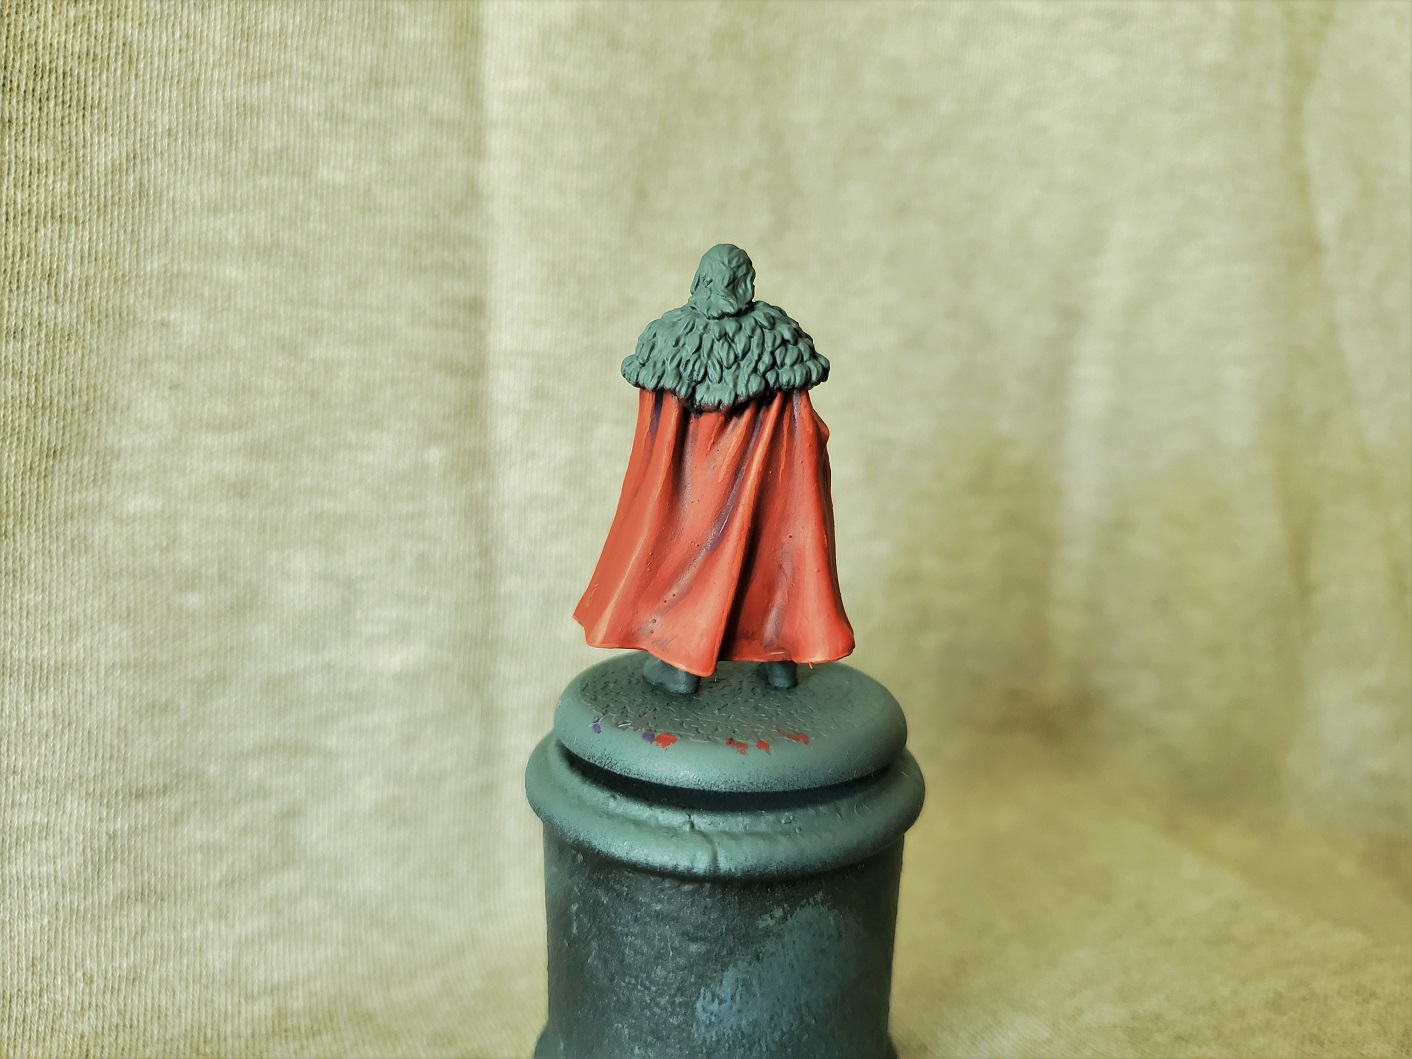 And the traditional Lloyd shot. Really pleased with how the cloak turned out. The lighting is a bit wierd on this pictures as it seems to blur out some of the deep folds, but hopefully once he's all finished up that won't be an issue in the final pictures.
The real downside with being this happy about the cloak is that I’m a bit afraid to paint anything else in case I spill onto it and ruin it… Ah well. The show goes on. Timing wise this did take a fair bit of time with all of the thin layers and such, but in total and counting drying time for the shades I got this done in about 2 hours. The longer you take here, the smoother your transitions will be, but if you do find some things looking a little stark once you’re done a nice glaze of either red or pink should sort that out nicely.
Happy hobby everyone.
*EDIT* I tweaked the brightness on the pictures a little to make the colours look a little better…they were just too bright.
From the Line to the Guns
This one is a bit of a repaint, because I just got the idea in my head to make a Napoleonic Wars Royal Artillery ‘command stand’. I’ll add more before I get them all based together, I think, but for now this chap was a quick starting point. So let’s start with how he was…
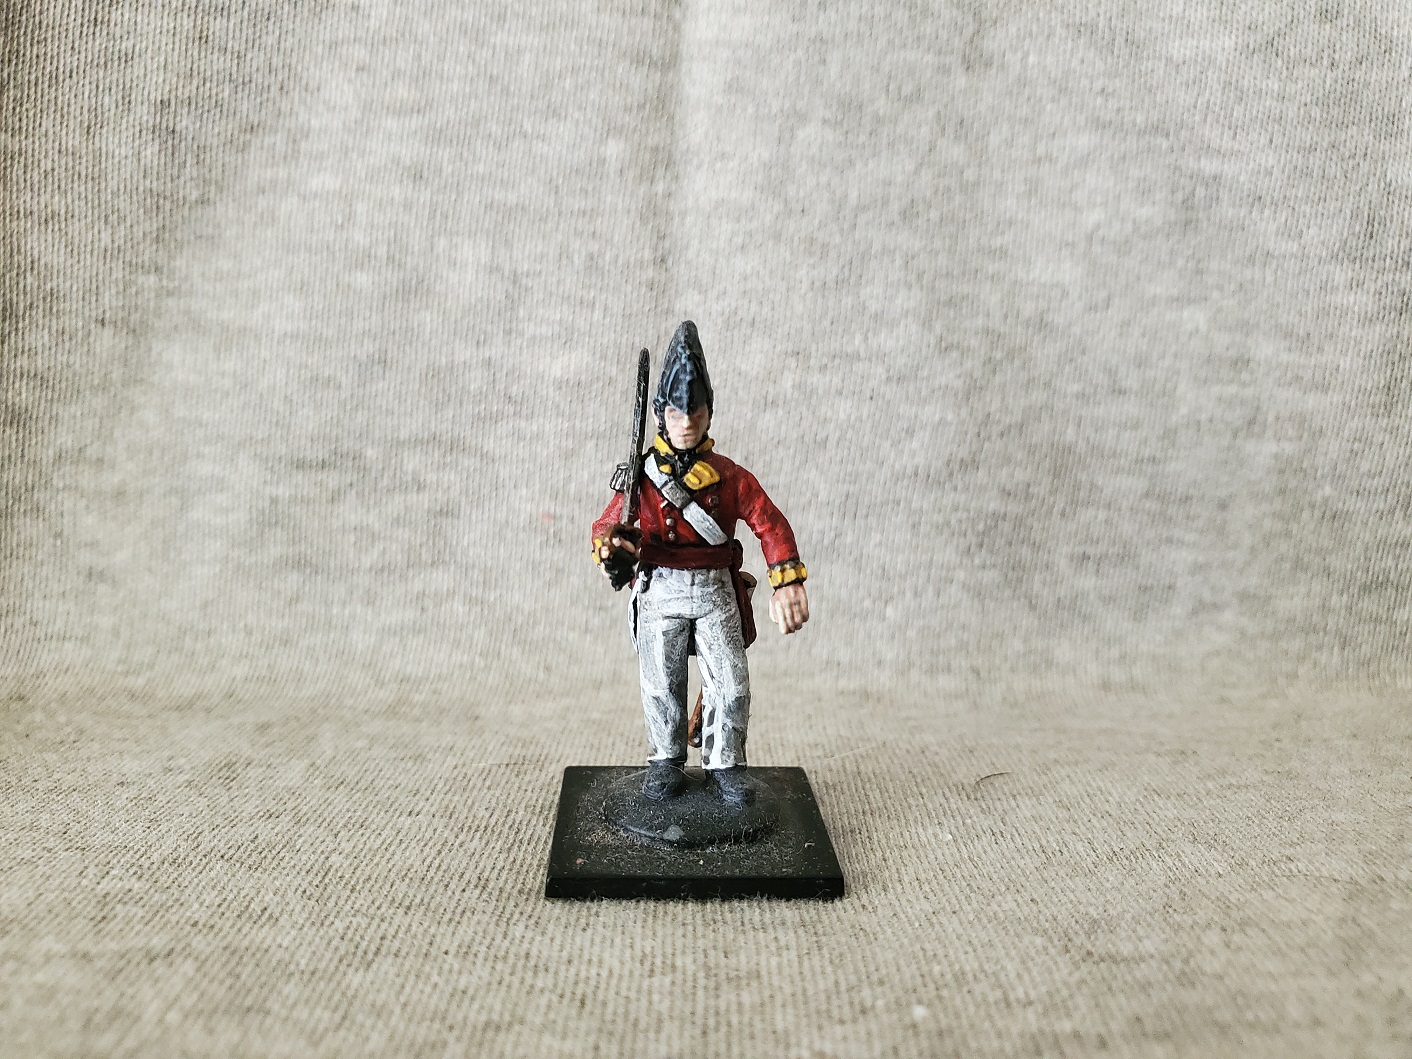 He's one of the plastic Perrys that I originally painted up as a company officer (he only has one epaulette) of the 57th Foot. I painted him several years ago now, so it's also a nice opportunity to see how much better my painting has gotten since then...I hope.
 I decided to cover over what was that as the detail was still pretty good, and dug out some reference images. I’ve gotten pretty close, I think, but there is one definite inaccuracy and one probably inaccuracy. The definite one is merely a result of using an Infantry sculpt as a ‘stand-in’ as the Royal Artillery did not have square cross-belt buckles like this chap, they had oval ones, but I wasn’t going to try and fix that on a mini of this scale. The second probable inaccuracy are the turnbacks on the jacket tails. They did switch to red (as you can see below) but most of the pictures of Napoleonic officers in the post-1812 short tail coats and I suspect that the tails on the pre-1812 jackets would have had white turnbacks. I might fix that. I probably won’t.
 You can see the red turnback on the officer here, but this is a later uniform than what I have with the longer tails. The rest of the uniform is a good marker for colours, though.
And here’s what I ended up with!
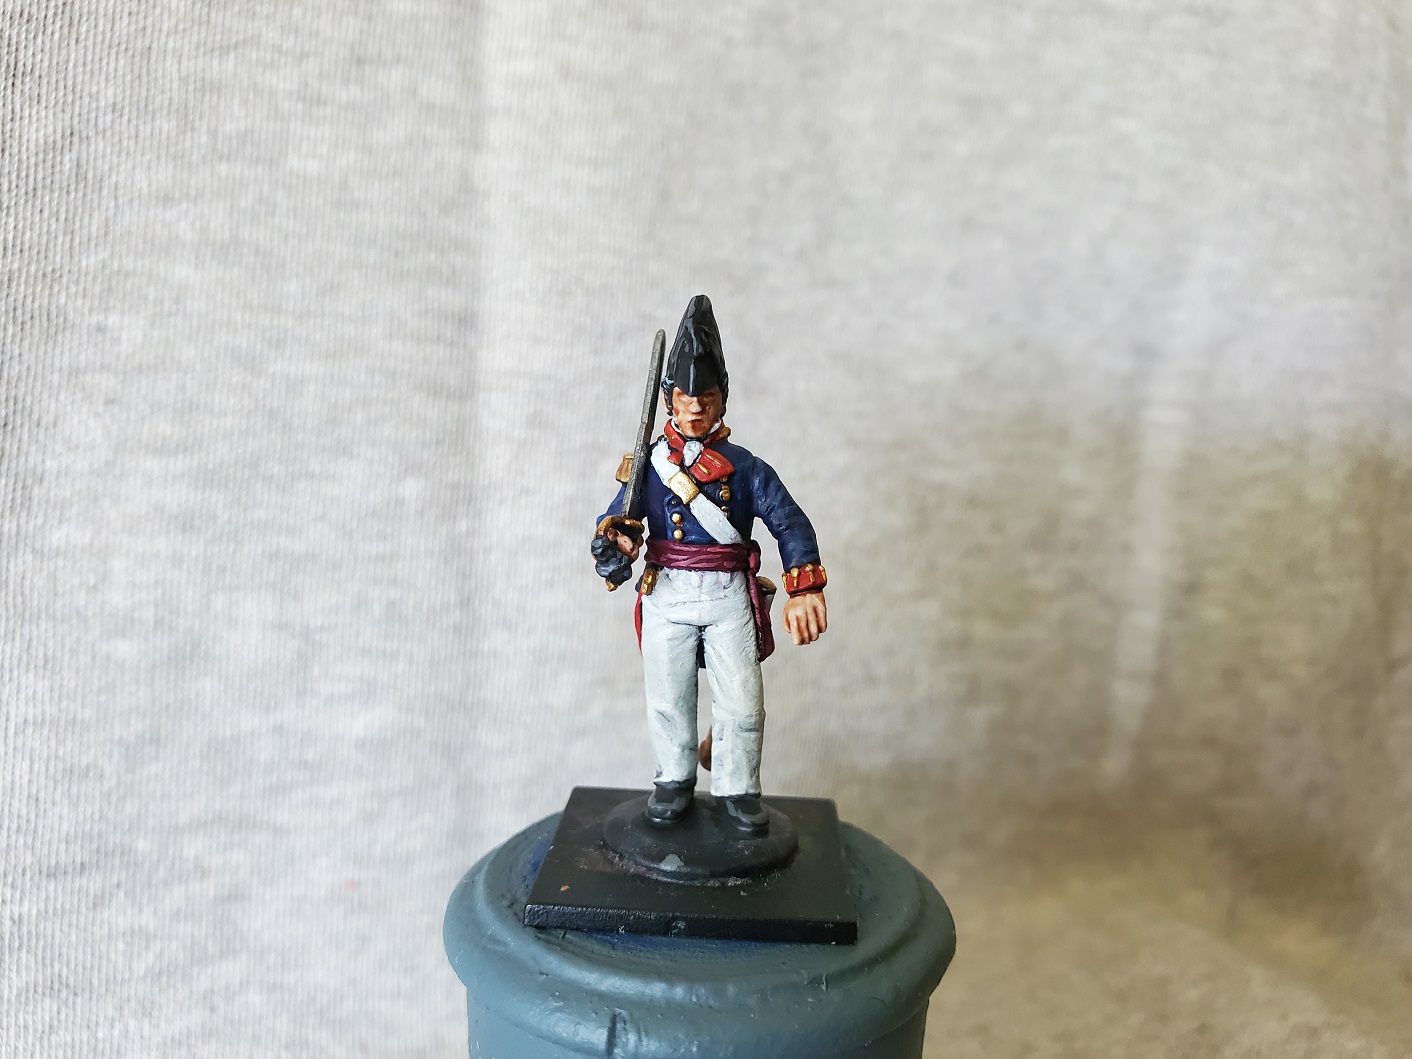 The jacket is Kantor Blue (GW) shaded with Druchii Violet (GW), then re-layed with Kantor Blue and highlighted with Alaitoc Blue (GW). As the trousers already had some shading before I simply re-layered with Ulthuan Grey (GW) before highlighting with White Scar (GW).
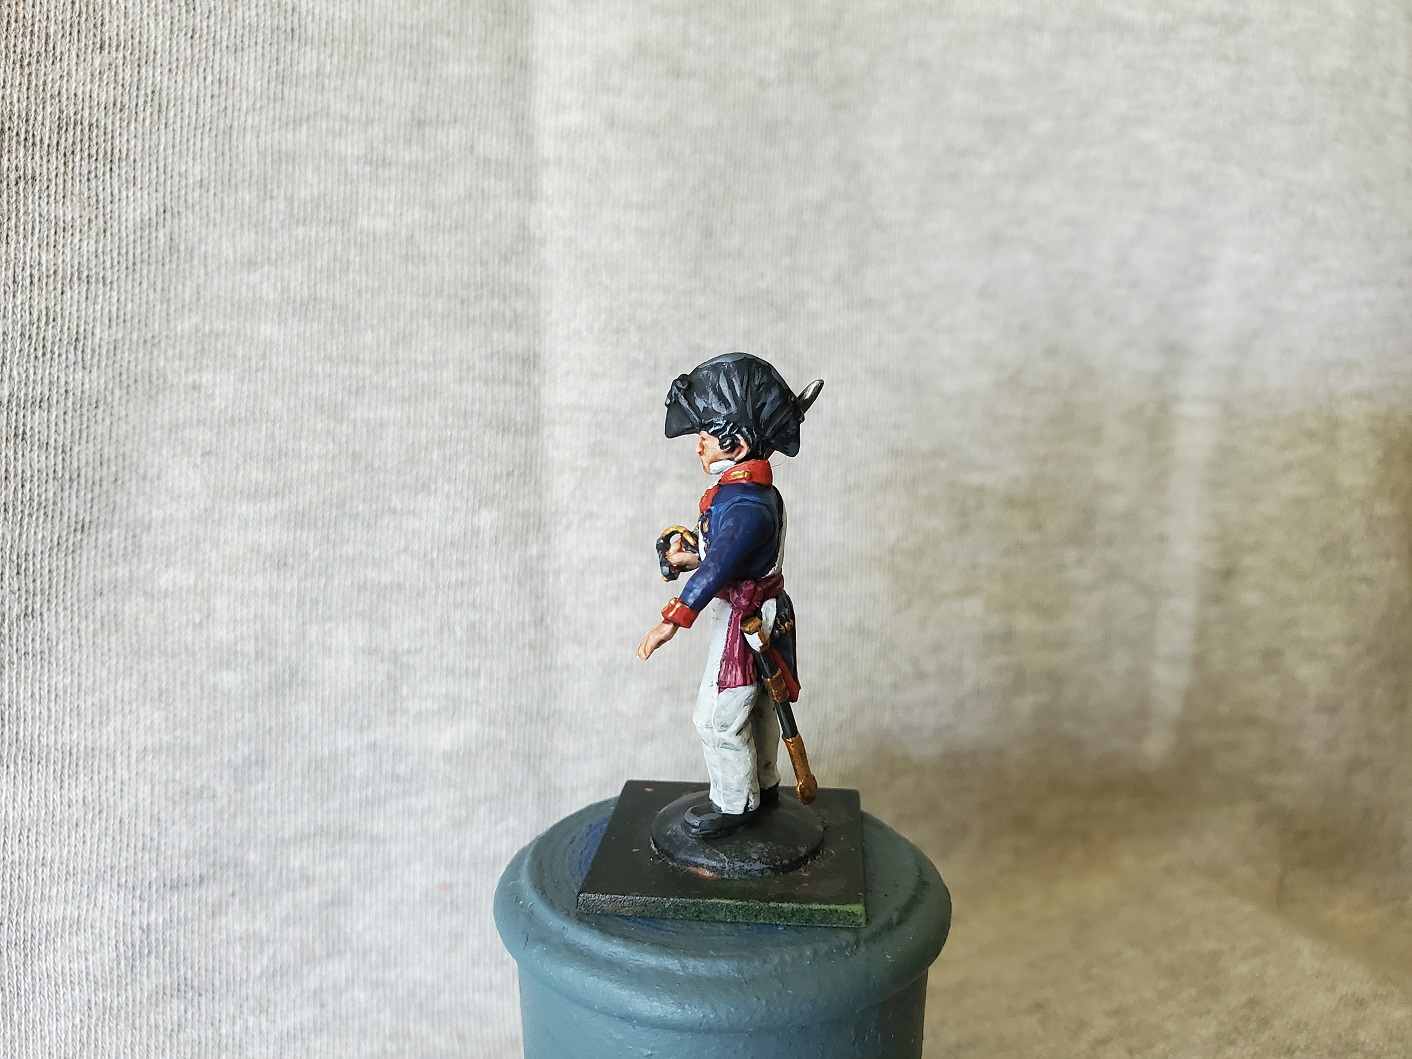 The officer's sash around his waist is painted with Screamer Pink (GW) and shaded with Carroburg Crimson (GW) before highlighting of some fo the folds with Pink Horror (GW). Sergeants and above also wear sashes like this, however they are much more red and contain a stripe of facing colour (or equivalent) down the middle of the sash. CSMs and RSMs may have worn sashes more like the officers, though that would depend on the wealth of those men, really.
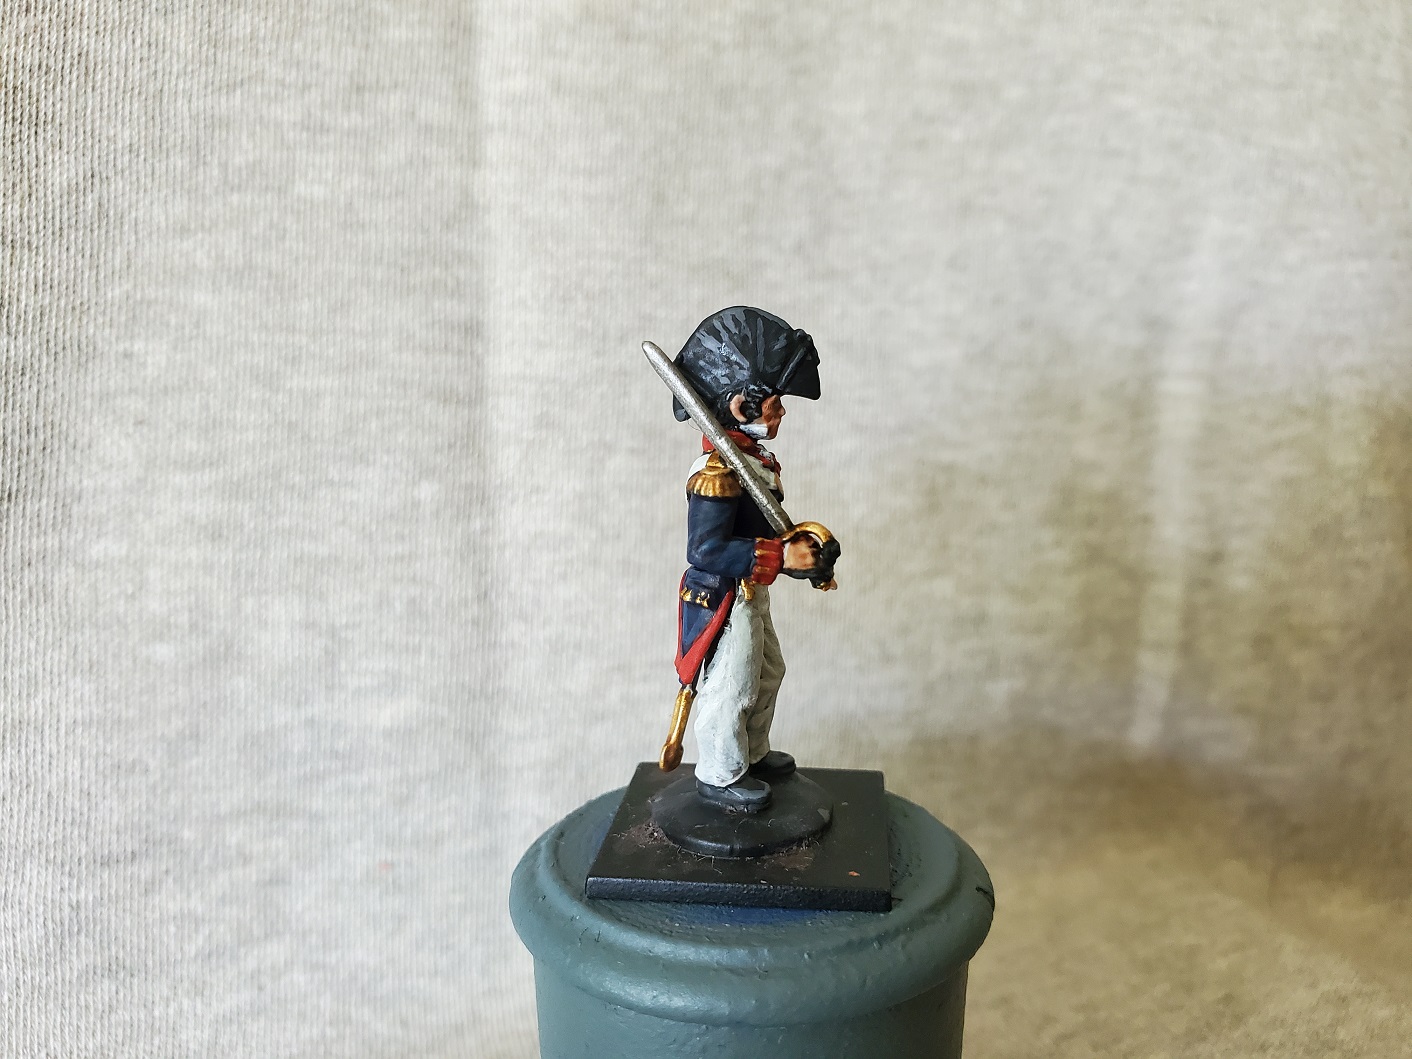 The sword knot (the black bit on the sword handle) is also a bit of an inaccuracy. Typically Officers had fancy golden knots that were more for show that purprose, but I went with a black colour here simlpy for a bit of contrast. It could either be a field replacement or simply a cheaper one for the battlefield and leave the good one at home for parades.
 And the traditional Lloyd. The red colour on the facings is just Mephiston Red (GW) highlighted with Evil Suns Scarlet (GW). In places where there were deeper recesses I rand some Carrbourg Crimson into those, but there wasn't too many in this case. I wanted to maintain a bright red to contrast the dark blue nicely.
All in all, and considering some painting breaks, this chap took me a couple of hours to get done. That is considering him being a repaint rather than a ‘ground up’ job, so there would be more time taken if I had to shade the trousers and such. I plan to combine this chap with a drummer and a mounted senior officer as a command stand at some point, but that’s a problem for later on. For now he’ll just go on the shelf of things I’ve finished…twice… I wish I could remove the Spring Clean Competition thing from my project because this hasn’t really turned out to be much about spring cleaning and more about painting what I fancy and have paints for at the time…
Anyhoo… Happy painting, folks!
In a better light.
Better…though not perfect… One day I’ll have a decent set up for mini photos…
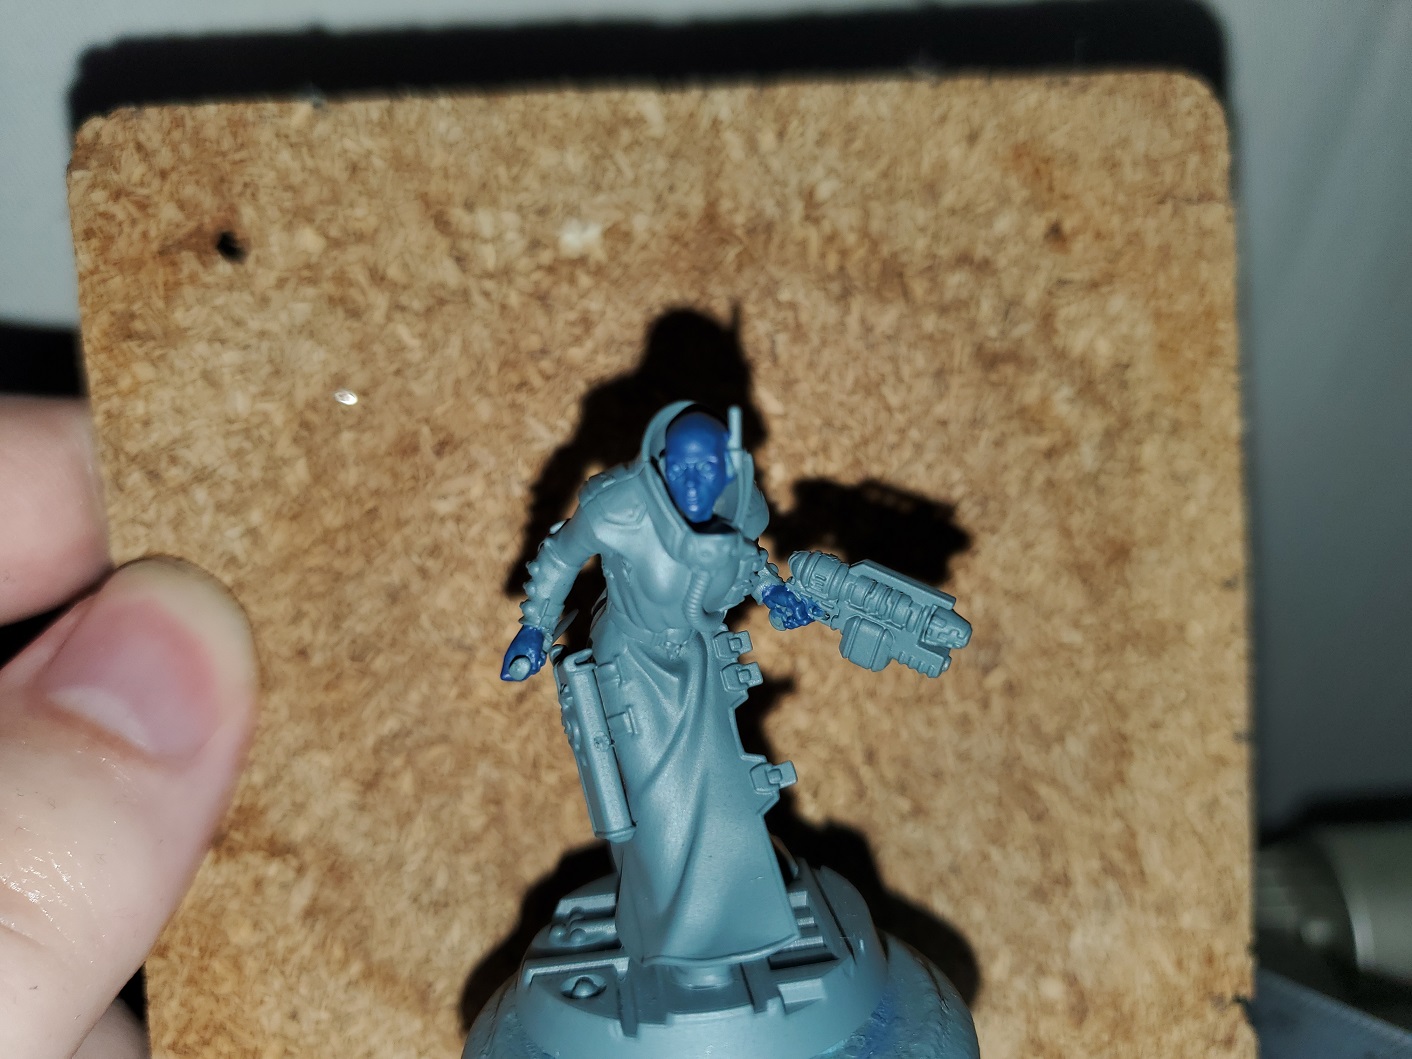
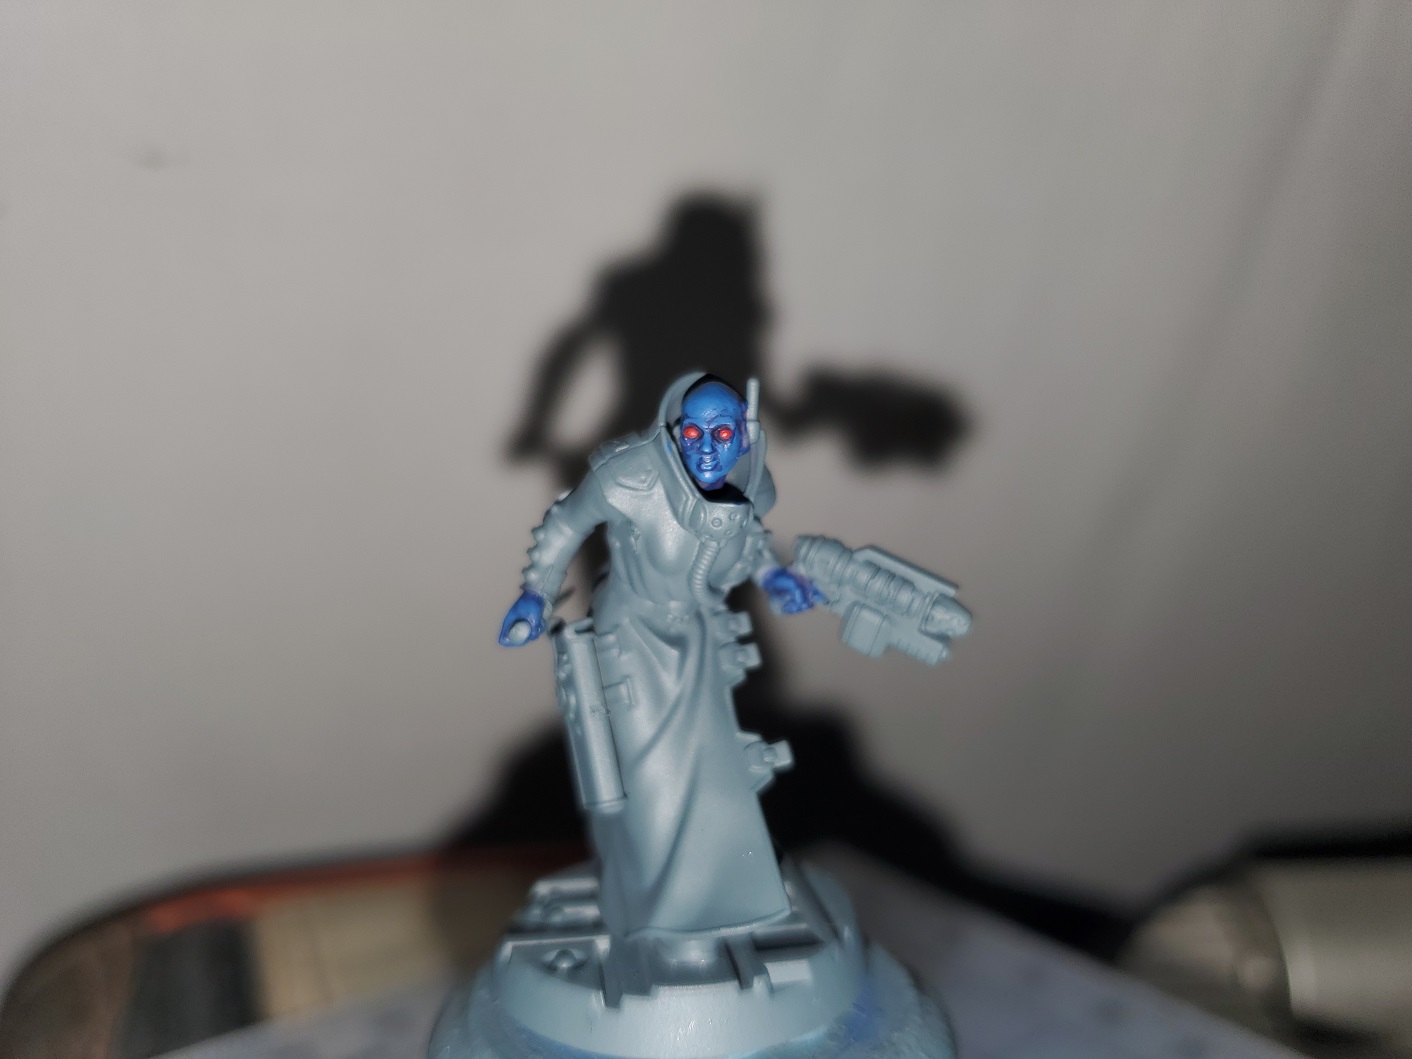
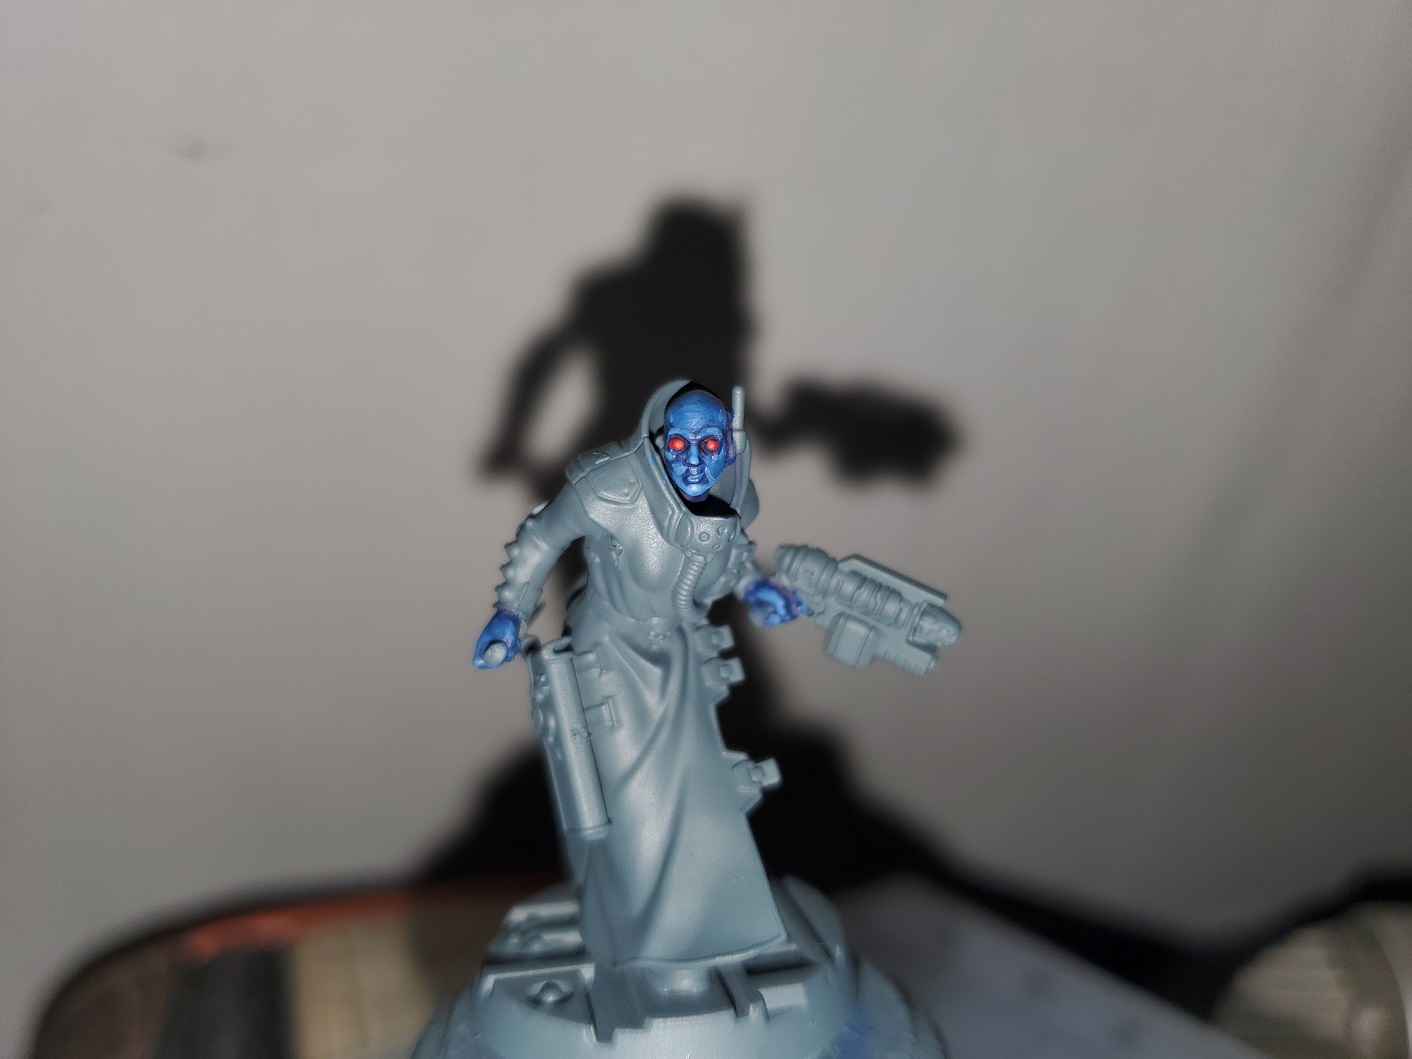
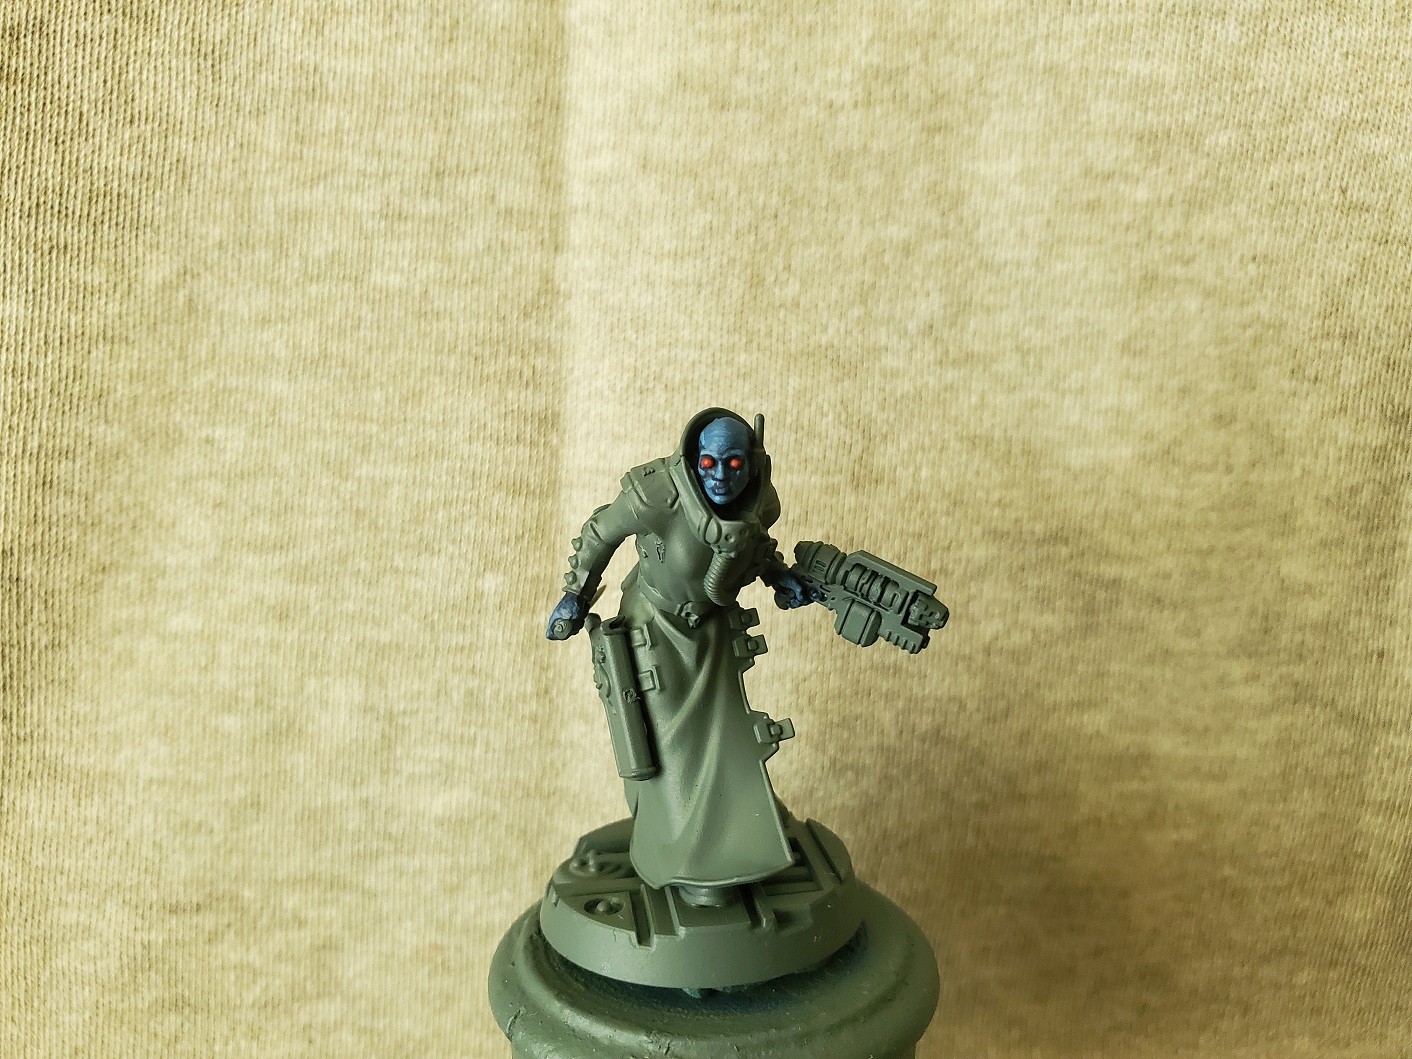 Chiss bird first this time. I guess with eyes like that I shouldn't really call her anything other than Chiss. :P
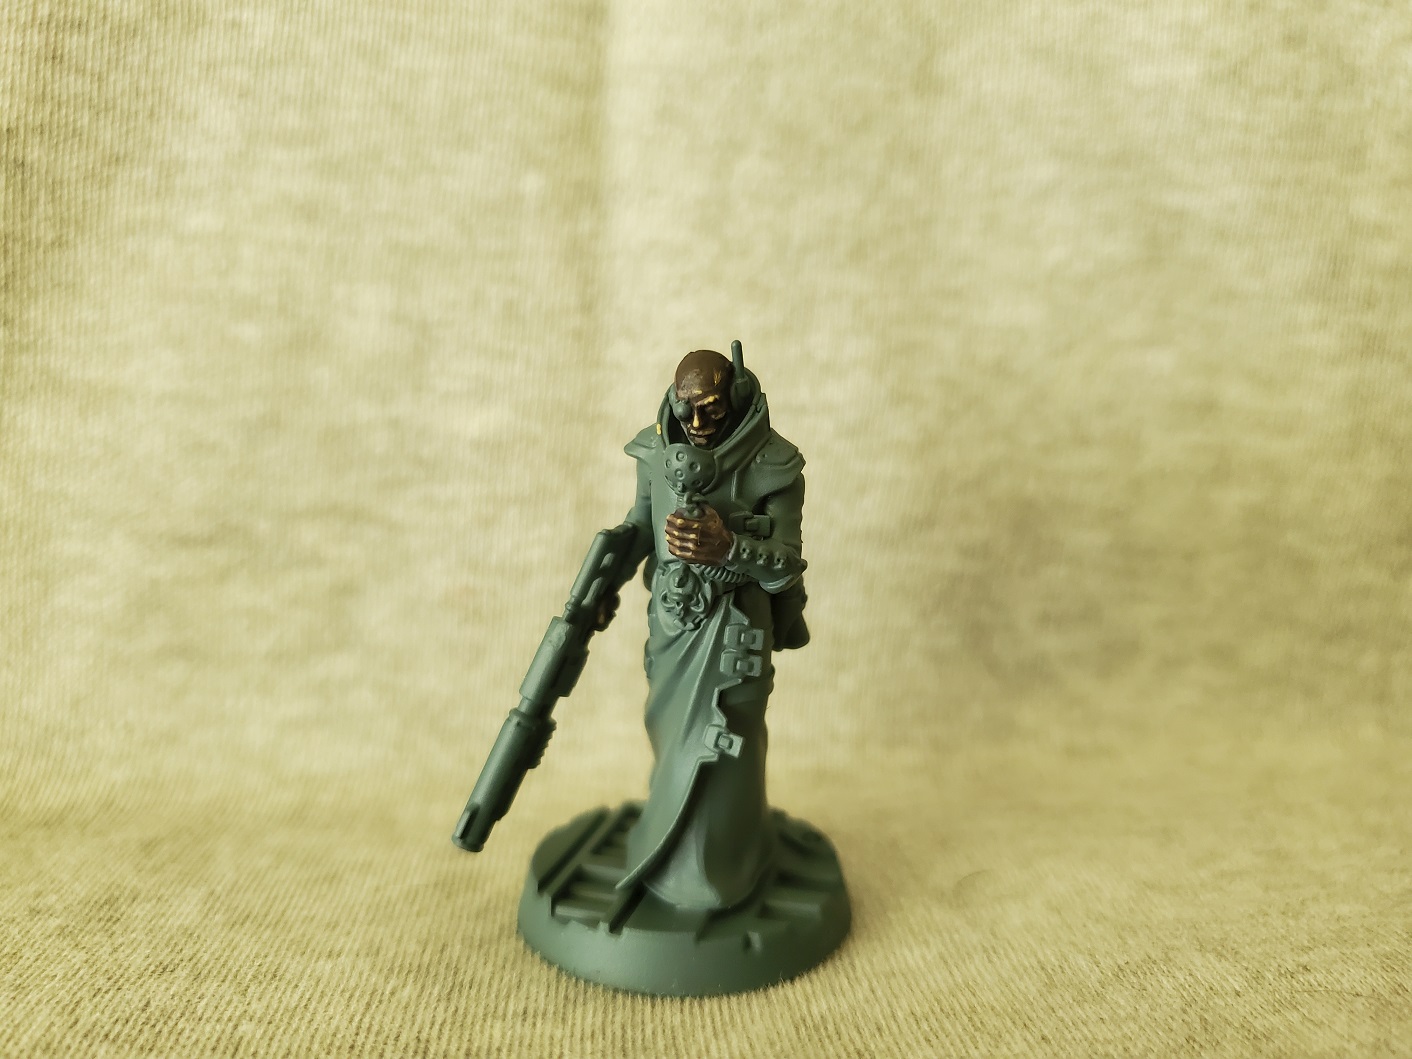 And the stern looking chap with the electro-monocle.
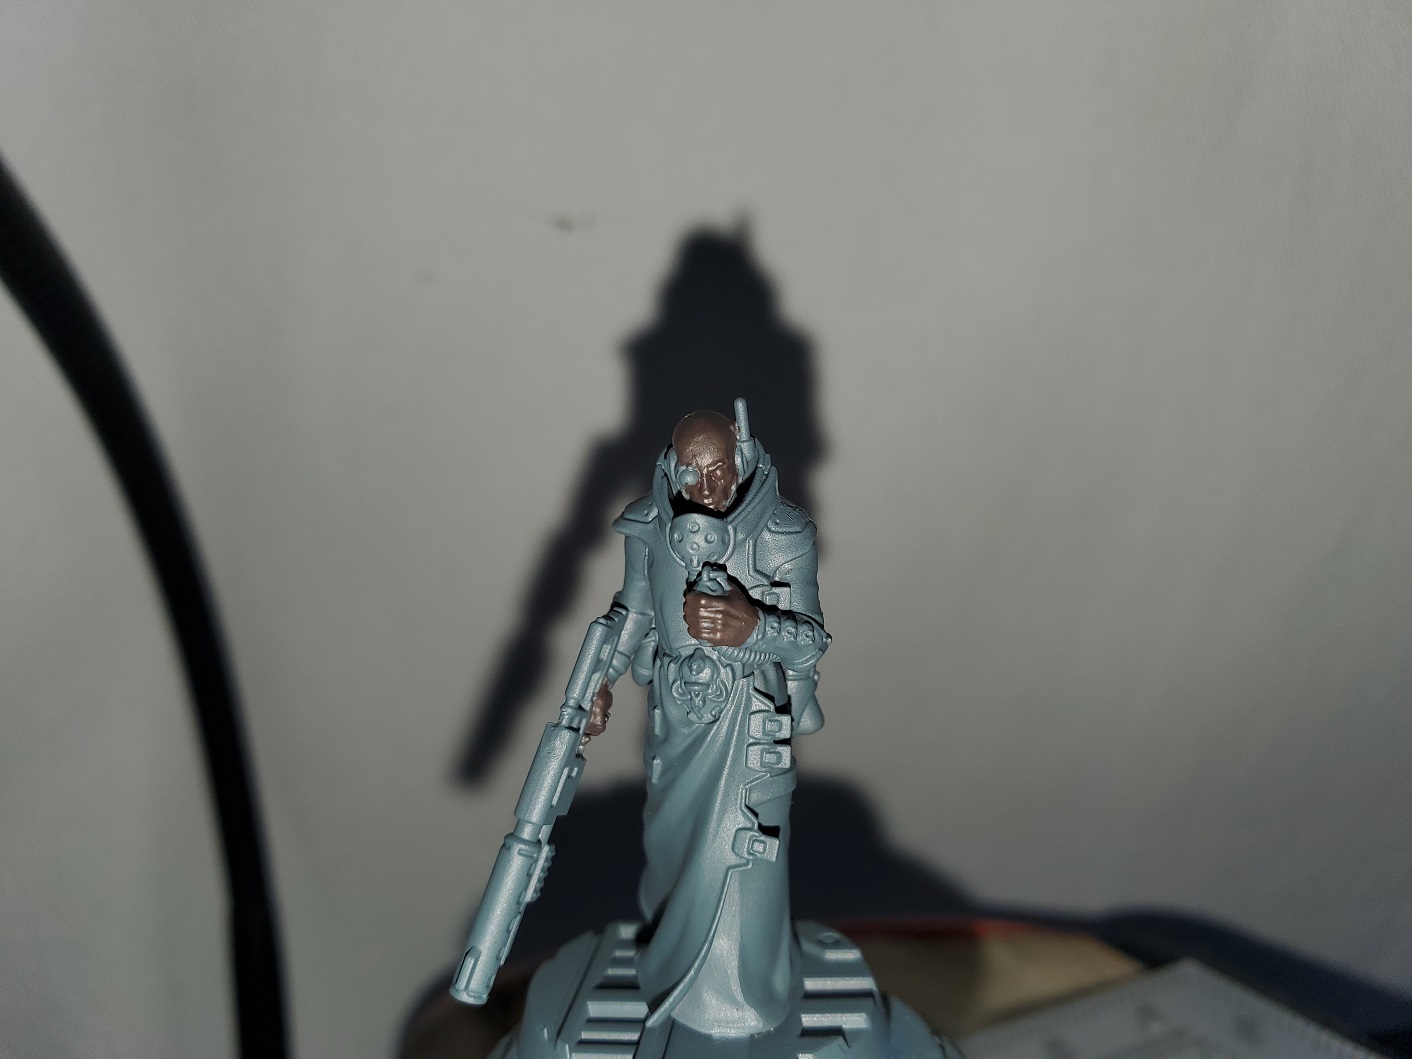
 Some experiments in skin tones.
Second time writing this, as it just completely failed to post before (I’m guessing the image gallery thing is still causing problems), but here we go again!
I’ve been wanting to do some experiments with various skin tones for several years now. Other than some Tau skin tones a LONG time ago I’ve never really branched out much from what I know and I decided I may as well learn some new recipes for more diverse tones. Still have some experiments I want to try, but I’ve got a couple of them sorted here.
First one is a borrowed recipe from Tuffyears that they used for some Zulus a few weeks ago (at least I think it was weeks…I lose track of time very easily these days…). I added a few extra steps and I may have highlighted a little high, but we’ll get to that in a bit. Second experiment is a Chiss skin tone (Grand Admiral Thrawn) partly in honour of Sundancer’s ever-lasting quest for Star Wars: Epic Legion and partly because I’ve been on a bit of a Star Wars kick myself recently. I suppose you could also use this tone for Tau as well, if you REALLY wanted to. 😛 That being said what I came up with is typically a bit darker than Tau tones are usually depicted, and possibly could do with some brighter stages for Chiss as well, or at least how Thrawn appears in Star Wars Rebels.
The minis I’ve used are Delaques from GW and Necromunda, and the lighting on the pictures is not the greatest. I was going to wait until the morning with the better light for final shots, but I’m afraid of forgetting what paints I used…because I’m an idiot… so here goes!
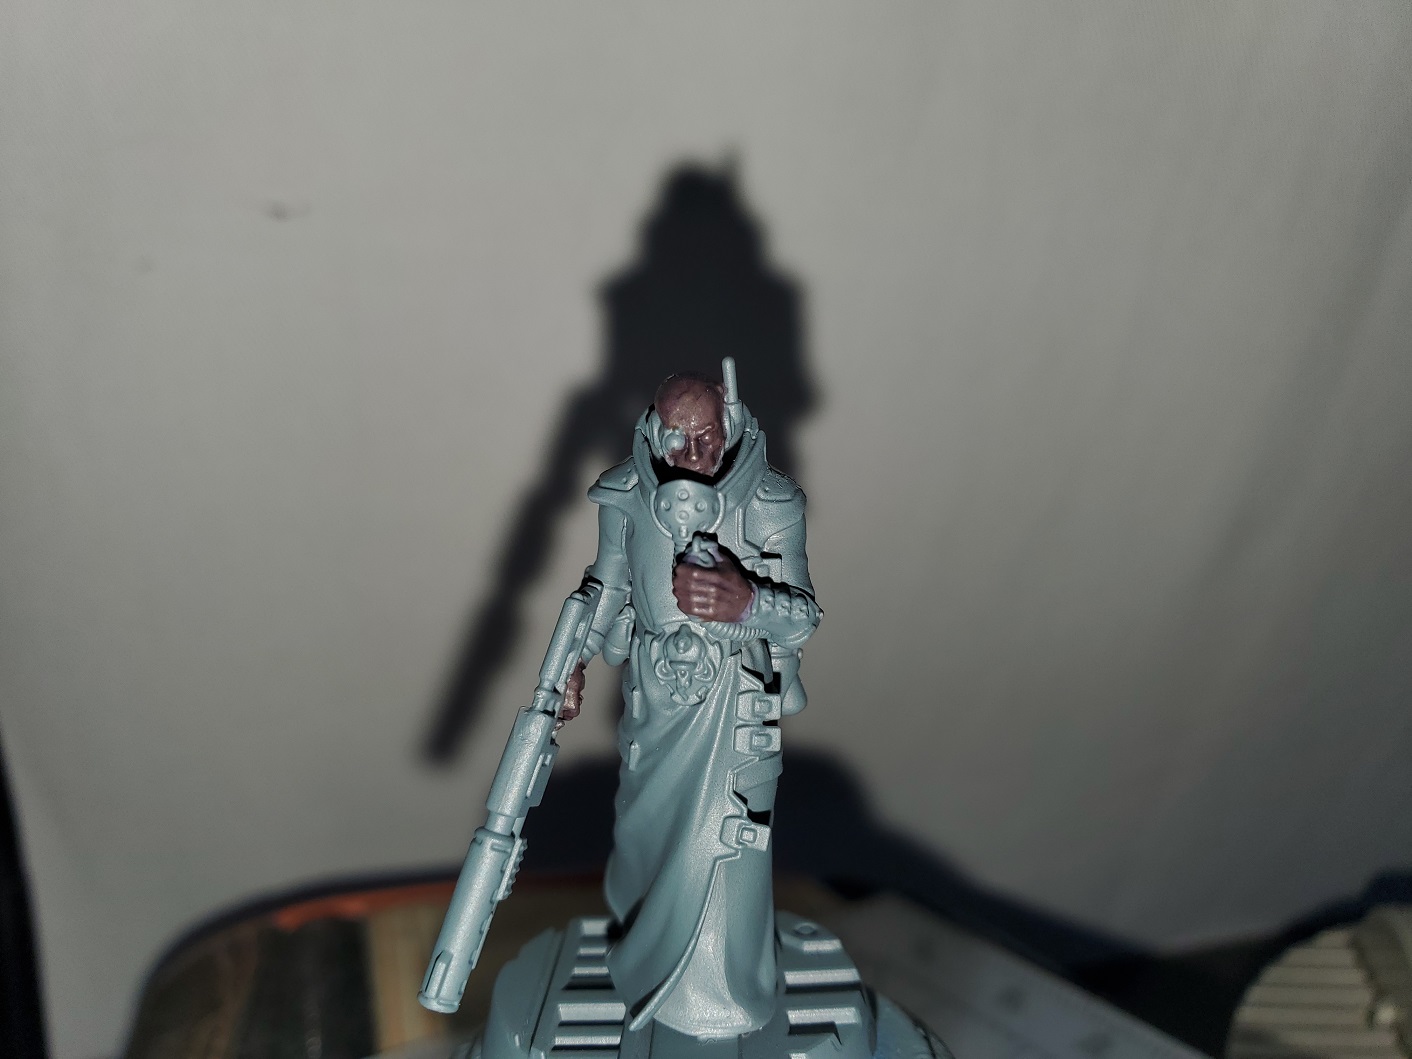
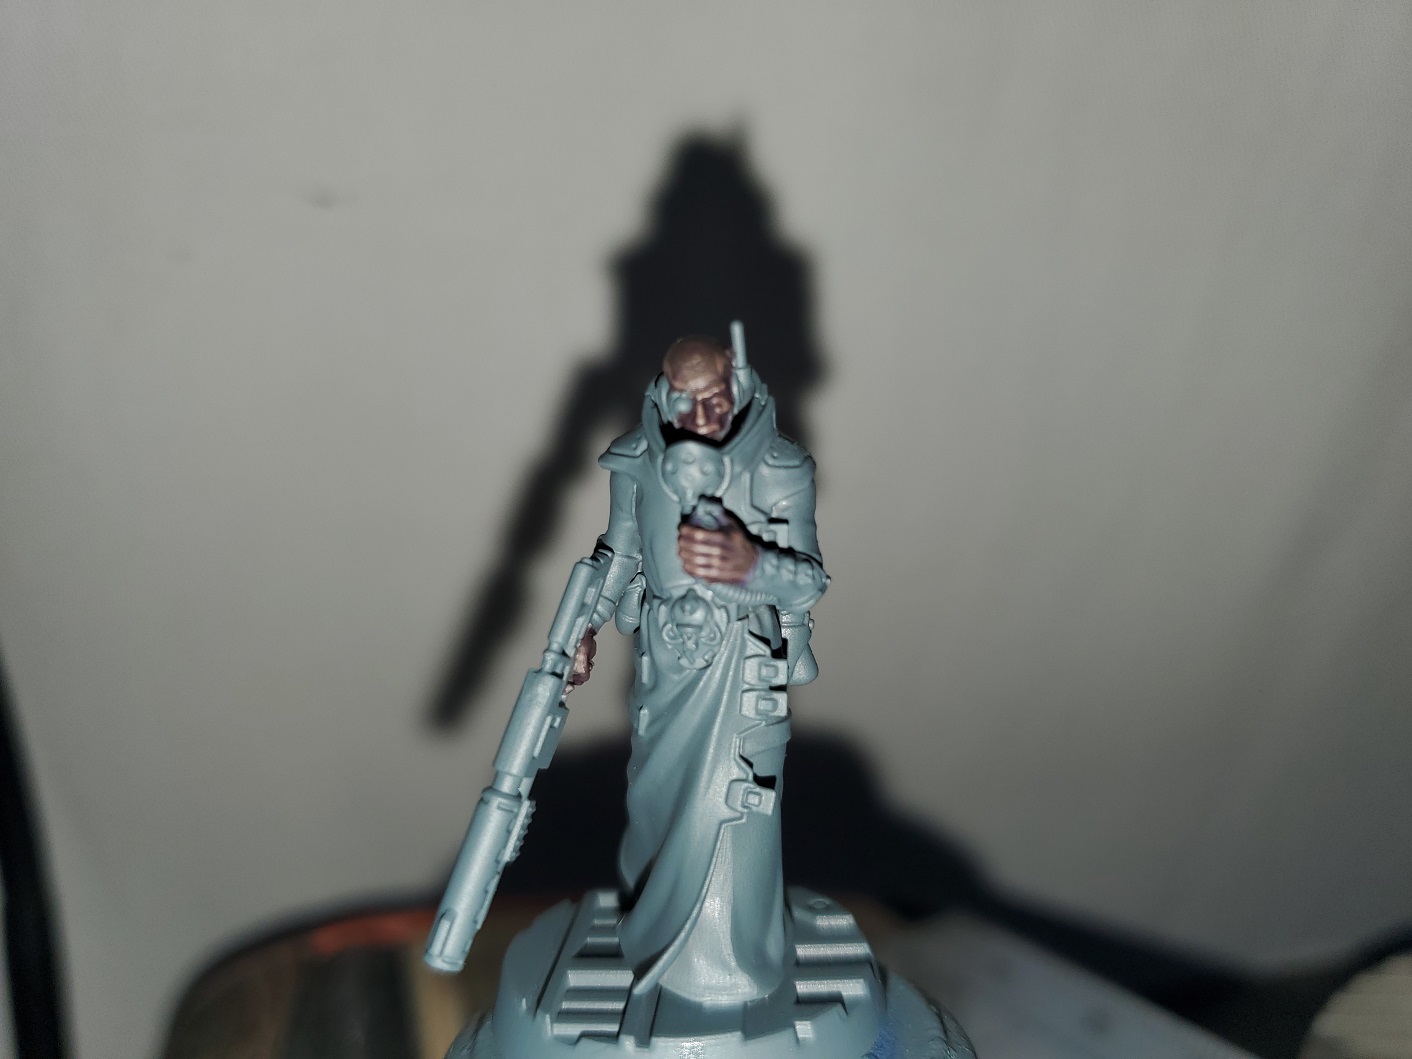
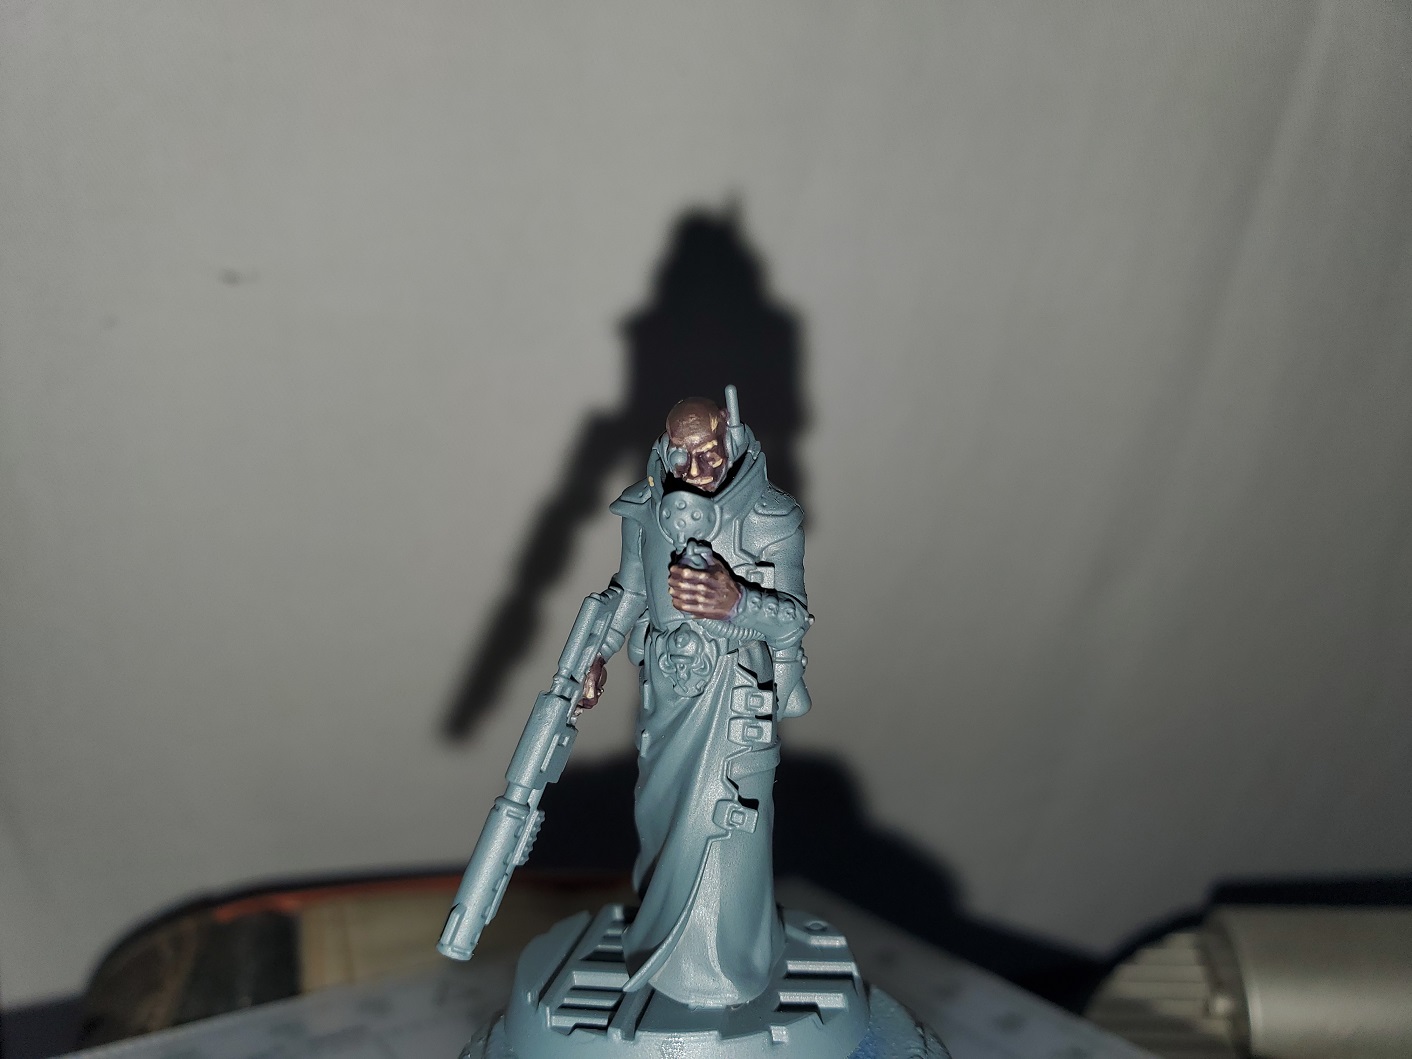
The basecoat here was Dryad Bark (GW) before being followed with an all over shade of Druchii Violet (GW). Something I did, but didn’t take a step-by-step picture for was to reapply the Dryad Bark basecoat to the top of the head and a little to the back of the hands, though this is not a necessity (definitely not if painting a mini with hair). Following on from that I applied an initial highlight of Gorthor Brown (GW) remembering to try and keep the paint a little thin and applying a few coats if needed. The main focus is on the facial structure, through the hands on these minis have quite well defined tendons as well and this chap, being bald, had a few wrinkles on the back of his head. This step was one of the longest (20-ish minutes) as the more careful you are the better the final look. The final spot highlight was done with Ungor Flesh (GW) and may have been a jump too high. For example this chaps nose looks rather bright. I’d advise replacing the Ungor Flesh with a darker tone like Cadian Flesh Tone (GW) just to keep that slight warm tone in the extremities. That being said, if you were to paint a mini with an outstretched hand the Ungor Flesh would work wonders for highlighting the palm to get that slightly brighter tone.
All in all this skin tone took me somewhere around 1 and a quarter to one and a half hours to finish, though if you cut that final highlight it will save you 10-15 minutes.

The pictures here are a little out of focus…my apologies for that…bad lighting is always a problem and I’m not a fan of the flash…
Basecoat here was Kantor Blue (GW) You could use Macragge Blue (GW) for a bright basecoat or even Stegadon Scale Green (GW) if you want a more green tint to the overall look. Over this I shaded with Druchii Violet (GW). Again, Drakenhof Nightshade (GW) is another option for a more blue look however over a basecoat as dark as Kantor Blue I tend to find it is not as visible as Druchii Violet. As I was going for a Chiss look (and the eyes on the Delaques are very buldging) I decided to go for painting the eyes. After the shade had dried I took the opportunity to paint the eyes with Mephiston Red (GW) and then layered Alaitoc Blue (GW) onto the skin. This is done to brighten the tone up so apply this more broadly, just avoid deeper recesses. I found this coloured worked well thinned more than usual and slowly built up in a few layers. This adds time to the scheme, but the final result is a little smoother. Over this I highlighted with Hoeth Blue (GW) and picked out the center of the eyes with Evil Sunz Scarlet (GW). If you wanted to push the highlights a little further, you could also add some Fenrisian Grey (GW), though I didn’t here.
This scheme took a little less time, as I didn’t have to be as careful with the Alaitoc Blue, but if you do choose to push the highlights to Fenrisian Grey it’s take about the same time as the other tone above. If you don’t go that far, this took me a little over an hour.
It both these cases, be aware that if you have larger areas of skin, or add your shade a little thicker than I did the timings could take longer due to the drying time of the shade paints. I was being fairly careful with my shades here so that cut down the drying time a bit.
Hopefully tomorrow I can add some extra pictures of the finished skin tones with better light. I might add them as a new entry or I might just add them to the end of this one, we’ll see. Happy painting!
Paint shortage is a bit of an issue...
So the plan for the next mini was something other than Bolt Action… Primed a Space Marine and everything…then realised that I actually don’t have the paint for his armour because it dried up and I had to chuck it. I was not impressed.
Anyhoo… I do want to get a playable force of Brits for Bolt Action done though at the moment painting batches is not that simple of a task what with trying to move but also not actually having a place to move to yet, so I sort of get stuck with individual minis when time allows, so here is my officer for my platoon.
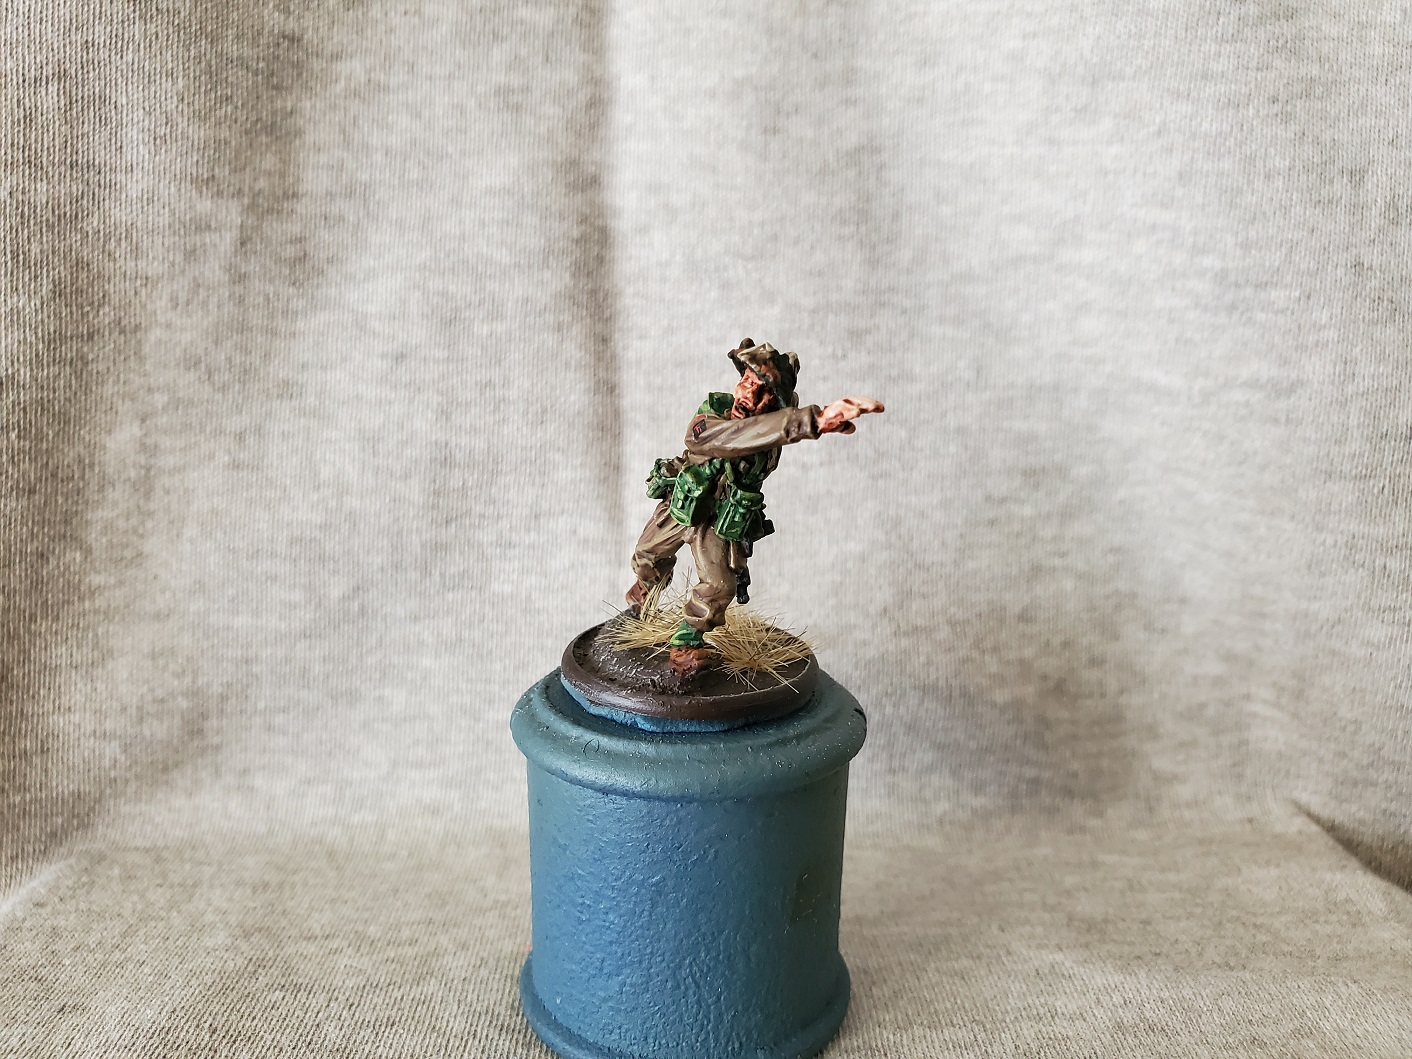 Technically he is a mini of CSM Stanley Hollis VC from Warlord Games, but I've painted him up as an officer here, though do look up CSM Hollis; he's the only VC from D-Day.
There’s a few things here that I’d like to go over in terms of accuracy, so if you’re not as into that sort of thing as I am bare with me for a bit.
First thing to discuss is the boots because I’ve made a little boo-boo with recent minis, but it’s not a big deal so I won’t go back and fix it. Long story short, the regular soldiers were issued with black boot, whereas officers had brown. Imagine Captain Mainwaring telling Sergeant Wilson he’s got the wrong coloured boots on because he’s not an officer. Now I’ve only made this mistake with some of my minis so I’m just going to say that some of the chaps in the platoon have managed to ‘acquire’ some nicer boots from somewhere and put it all down to the ‘use what you can get’ adage that so often occurs in war.
The second ‘inaccuracy’ is the fact that this chap has the full kit; pack and all. Now TYPICALLY officers were not prescribed such things in their uniform which is why many officer minis you see are not wearing packs. That being said, if only one chap isn’t wearing a pack he sort of stands out so it stands to reason that an officer who wants to last needs to blend in with his men a little bit more. In this case, I have two explainations: 1. The Sergeant has taken it upon himself to make sure this Rupert makes it home so has given him spare kit to help him blend in. 2. He’s a soldier been promoted up from the ranks and just kept his old kit because it’s cheaper than buying new.
 For anyone who has this mini and wants to more accurately depict him as Hollis, you should use the 3rd Division badges that come in the new British Infantry box from Warlord (the black and red Triforce badge).
 Another option is no badges at all to make your chaps more 'free'. The Regimental badge at the top of the sleeve was always there, but you can paint in a little curve of appropriate colour rather than use decals. Technically speaking, soldiers were supposed to not wear all their badges so as to prevent the enemy working out which divisions were where...put not everyone followed such rules.
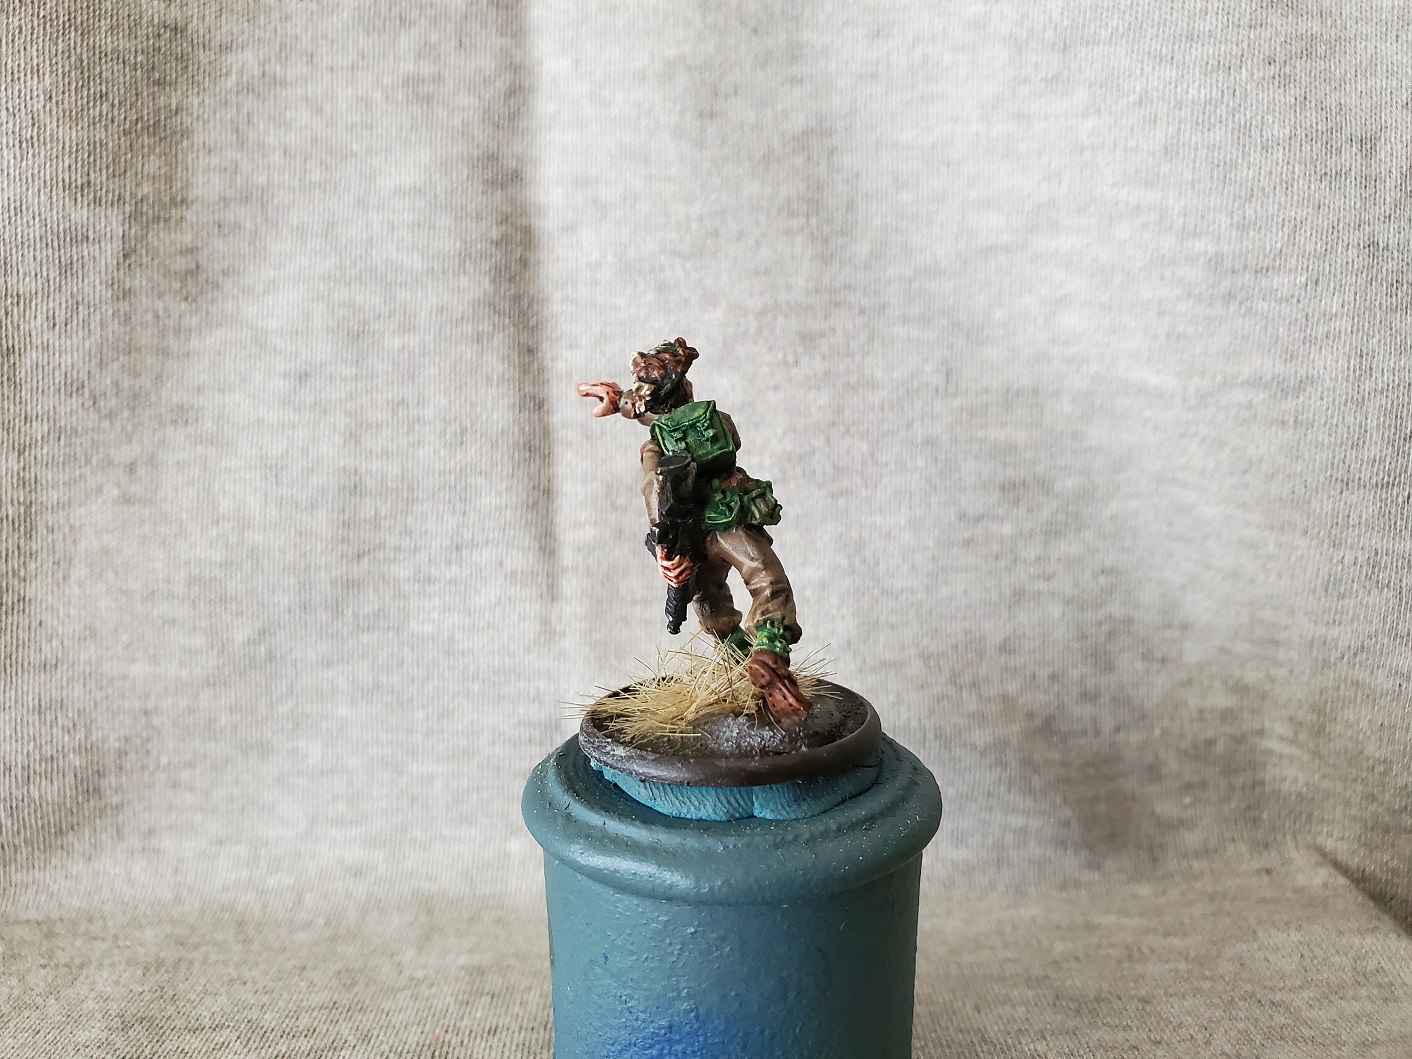 And the traditional Lloyd shot.
On the subject of Regimental badges or unit patches (the curved band above the square division badge) they can be left off easily enough as well for those who aren’t fans of decals or freehand work. If anyone decides to be a FARB (otherwise referred to as a dick) because ‘yOu DoN’T hAvE tHe RiGhT BaDgE’, then just tell them your chaps decided to go the whole hog in preventing unit information getting to the enemy. Remember, if you’re captured it’s name, rank, and number you give.
If you do want to add them, then the simple rules are red for infantry, blue for artillery, green for Rifle regiments, and (I think) yellow for armoured. I’m not sure on that last one, though…
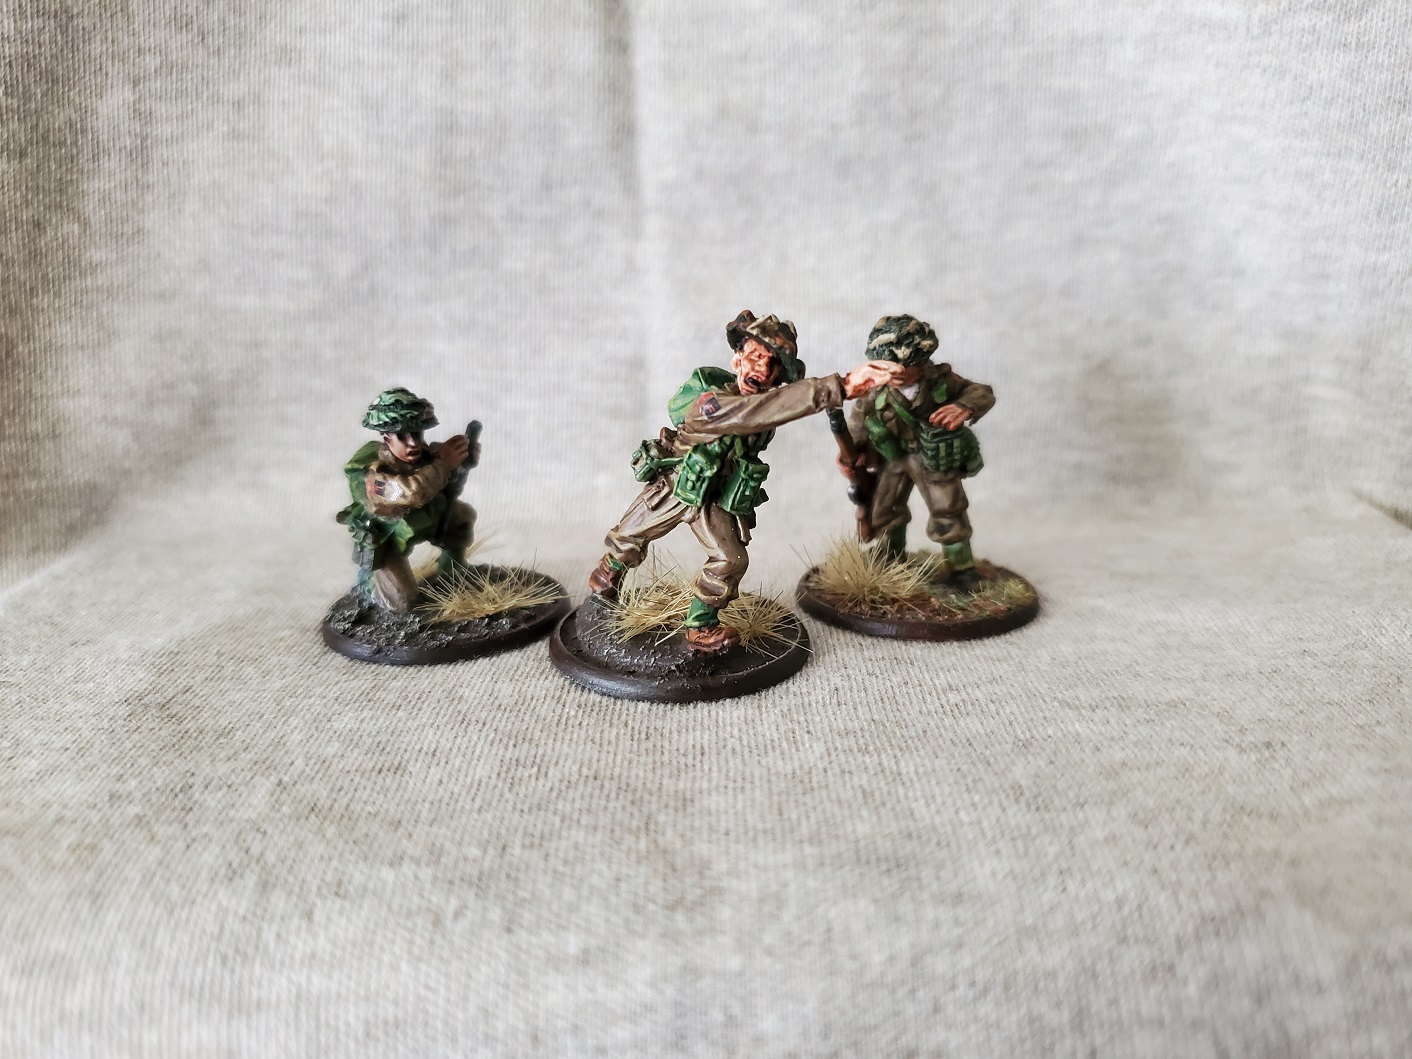 And with that my Platoon Command is all done. A Rupert and his Sergeant along with the Radioman to make sure everyone knows about their adventures together! Or more importantly to get the instructions. Radios are important things, you know.
So this one is technically cheating...
The only thing I have done in the past few days on these chaps is to re-colour the webbing using the methods below…the Tommies themselves have been painted for years… Though I would like the opportunity to remind everyone out there that using a palette really can help…I was too lazy to get mine out and I may have put on too much in places. Some of them even needed some matting down because the shade when on a bit shiny… Patience is a virtue, and I’m just not that virtuous…
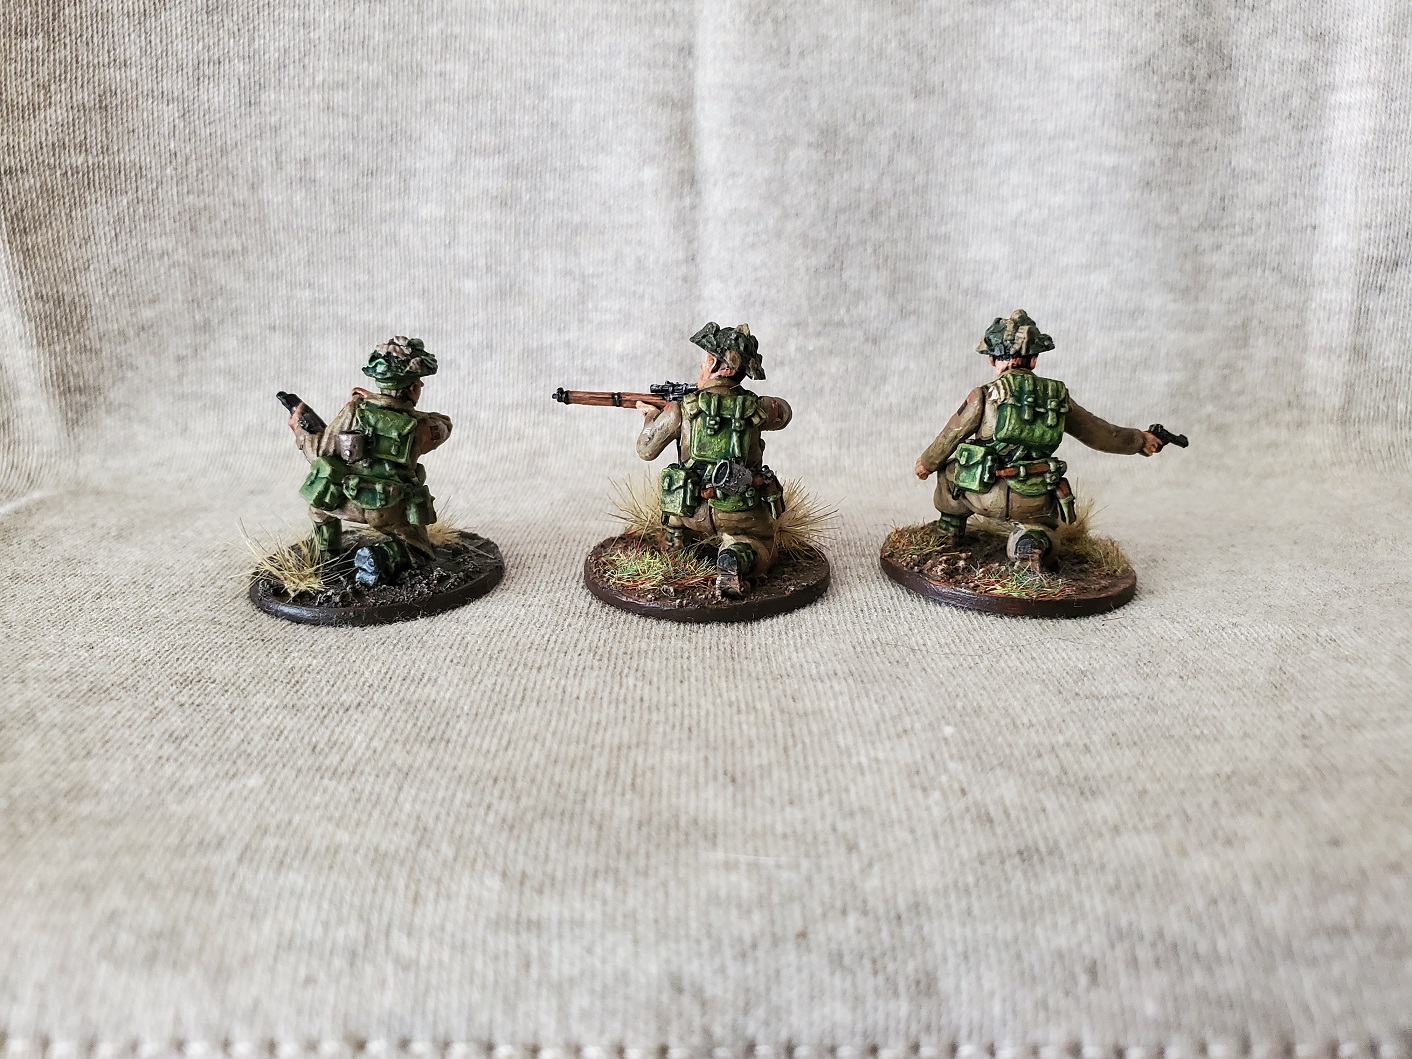
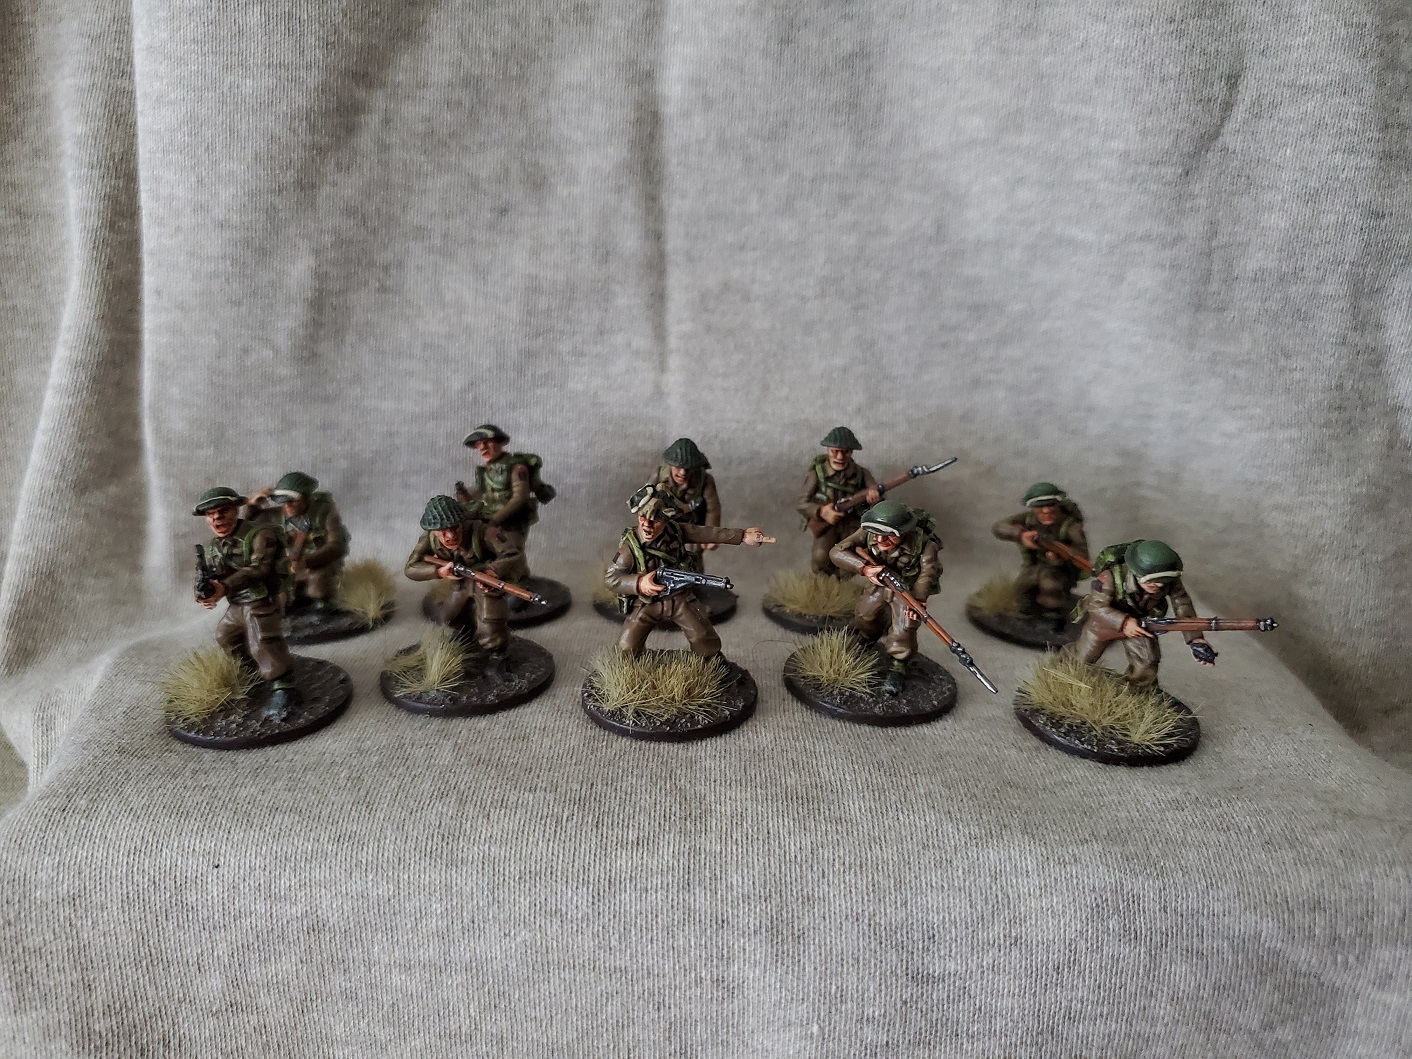 Single 10 man Infantry Section. Cpl., L/Cpl, Bren Gunner, and Loader (as shown by many extra ammo pouches...
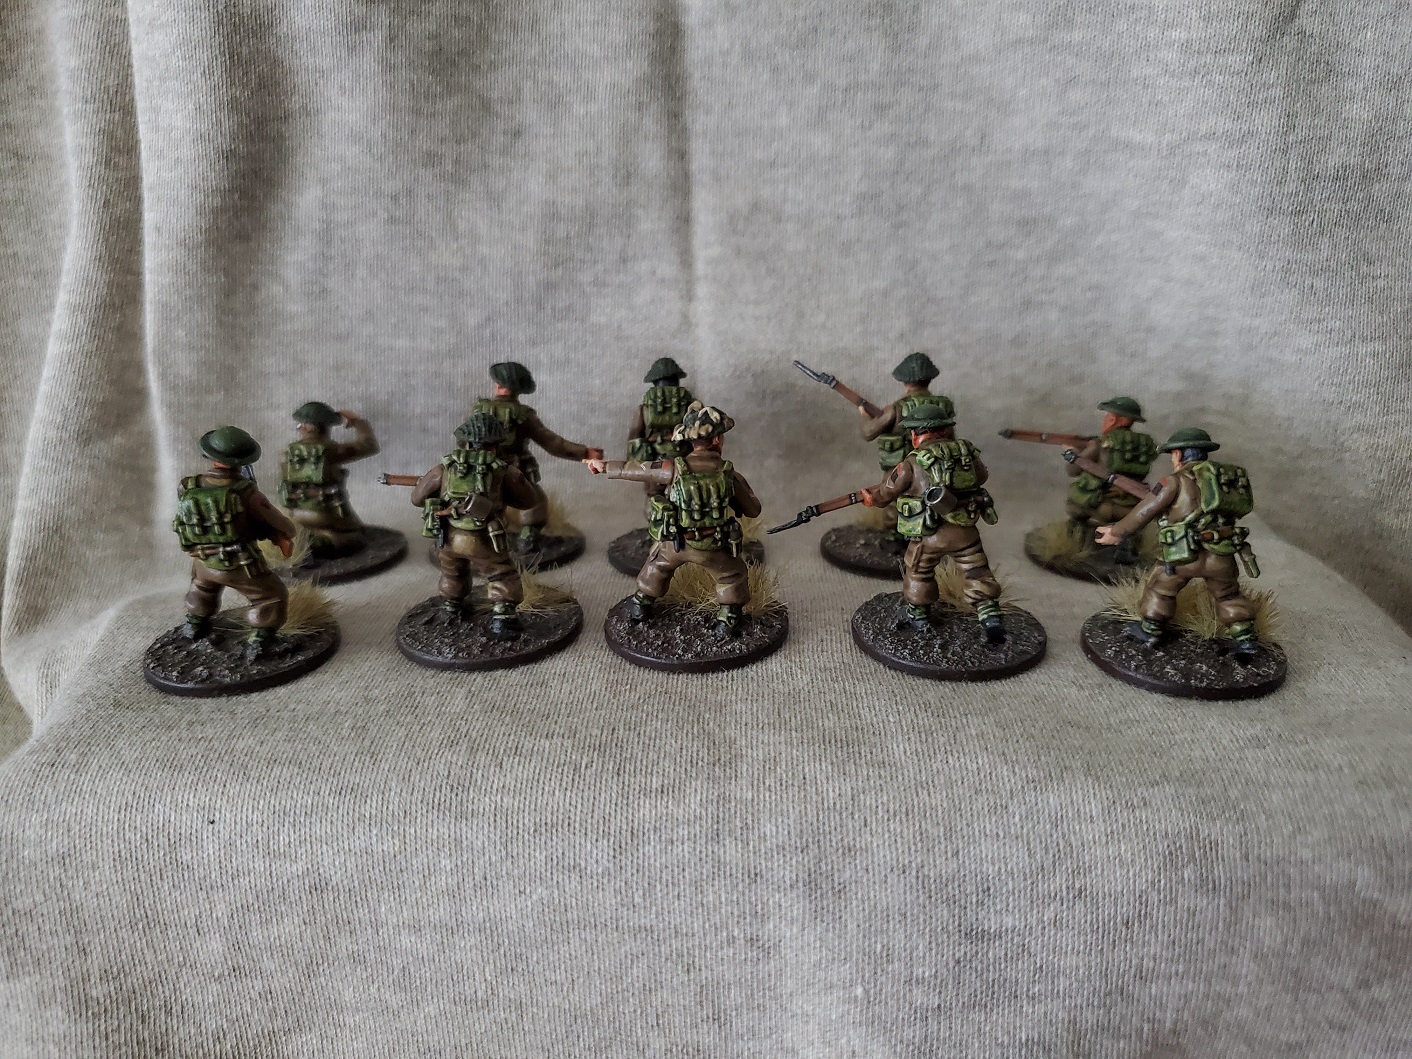 And Lloyd shots...that honestly show of more of what I actually re-coloured...
Hopefully something non-BA will be worked on next…but things are a little tricky with not really being able to keep too much stuff out while I get ready for moving…
I swear I will stop banging on about webbing at some point...but here's more!
So I did mention before that I had a bunch of beige webbing on other Tommies that needed changing, so I thought I’d go over some of my experiments to re-colour them rather than just re-paint the whole chaps. Here I’m doing it using washes from Citadel but I would think that similar paints from other companies would also work. I would advise against the Contrast paints, unless you thin them down just because of the coverage you get. As you’ll see, the ability to add a few coats to subtly change colours is really useful. And while I have used this for webbing, you can use similar ideas to shift with all sorts of colours. You want your old beige minis to have some yellow panels? You can do that with these same ideas.
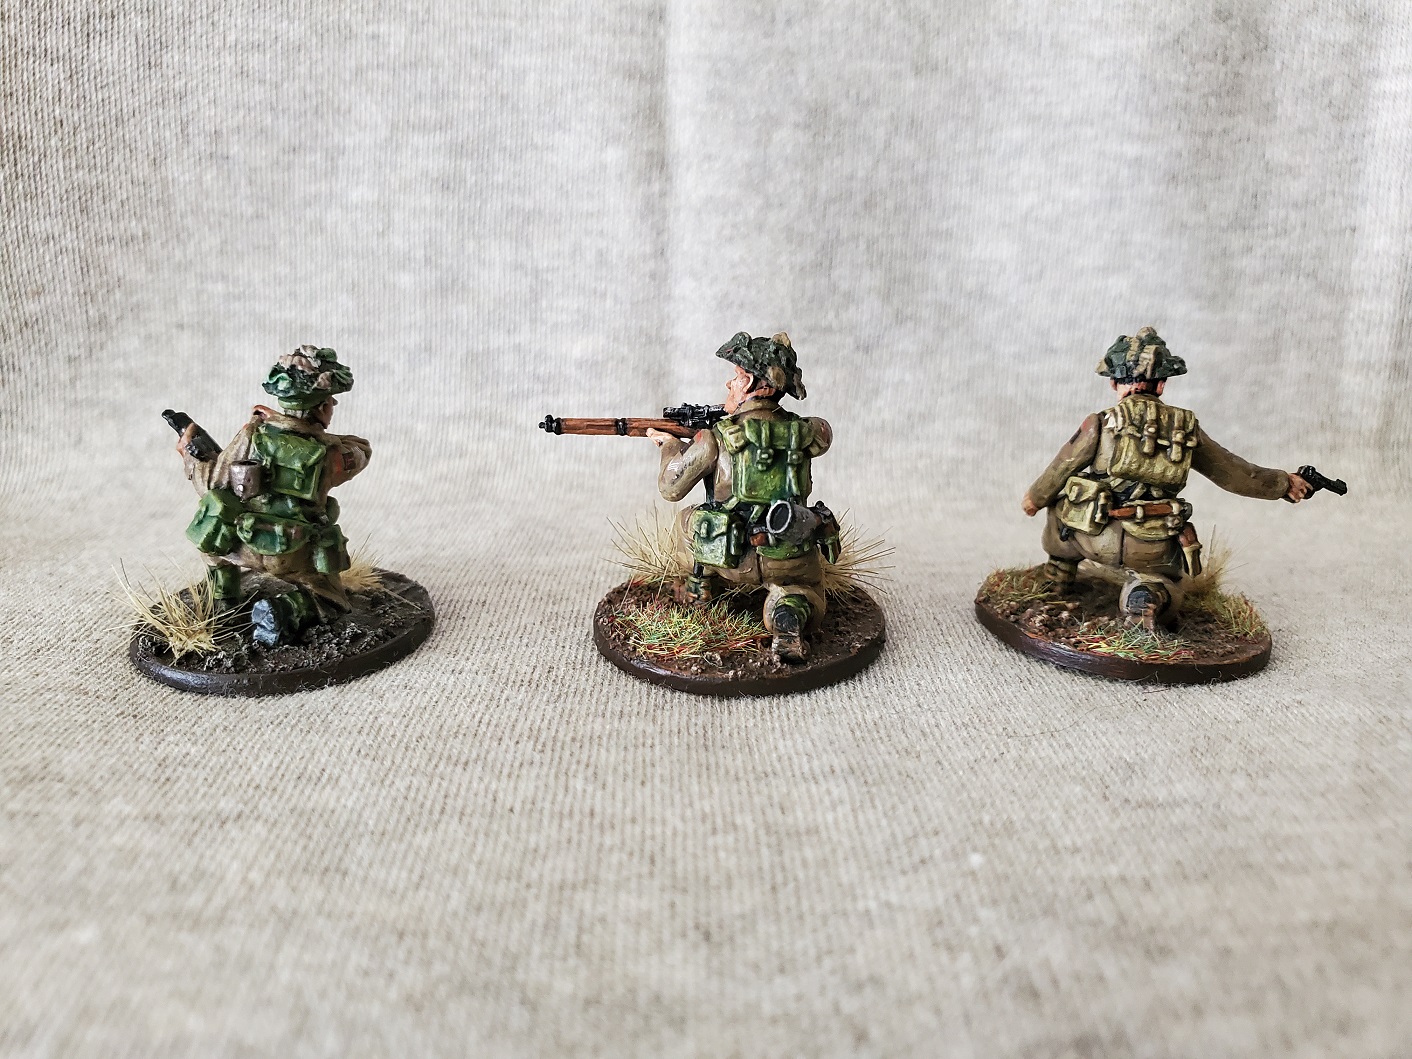
 So here's where I started. On the left is a Sergeant that I painted the webbing on recently to my 'new standard', in the middle is a Sniper that I experimented on a while back with some Athonian Camoshade, and on the right is a Spotter with the original beige colour I painted.
The first experiment I wanted to try was to try and tint the Sniper to be a bit more green, so I got some Biel-Tan Green shade that is a much more green shade rather than the brown-green colour of Athonian Camoshade. Using a shade means that the colours below will show through a bit so I can keep some highlights I did earlier. I also had to remember what I had done before with the Athonian Camoshade and discovered that I must have used two coats of the paint to reach the colour previously on the Sniper.
 Same figure on the left, Sniper with the coat of Biel-Tan Green added, and the Spotter with just the one coat of Athonian Camoshade. This is where I noticed the original colour must have been two coats.
And so the final result looks a pretty good match and was quick and easy to re-colour using only two paints. I could possibly get away with just the Biel-Tan Green, but I like the slight brown tint I get this way…
 The final product, and all Lloyd shots!
 I might put up a post related to some research for the Archer SP 17pdr that I was doing earlier…but I might not be painting my tank for a while, so I might save it for when I get ready to paint. No more webbing posts now, I promise.
The Cheshires are finally all in the same place!
So if anyone is a little confused with me saying Cheshires when I talked about Hampshires before, don’t worry about it. The Machine Gun regiment for the 50th Division were the 2nd Btln. of the Cheshire Rgt. I know probably no one is concerned with that bit of info, but still. Anyhoo…
The MMG team is all finished and ready for the fight! You’ll get to see the difference dulling down the brighter webbing had here and as I suspected it’s not quite the same as my new chap with the darker paint job, but it’s close enough. Let’s just say the Cpl. knows how to put the blanco on better, shall we?
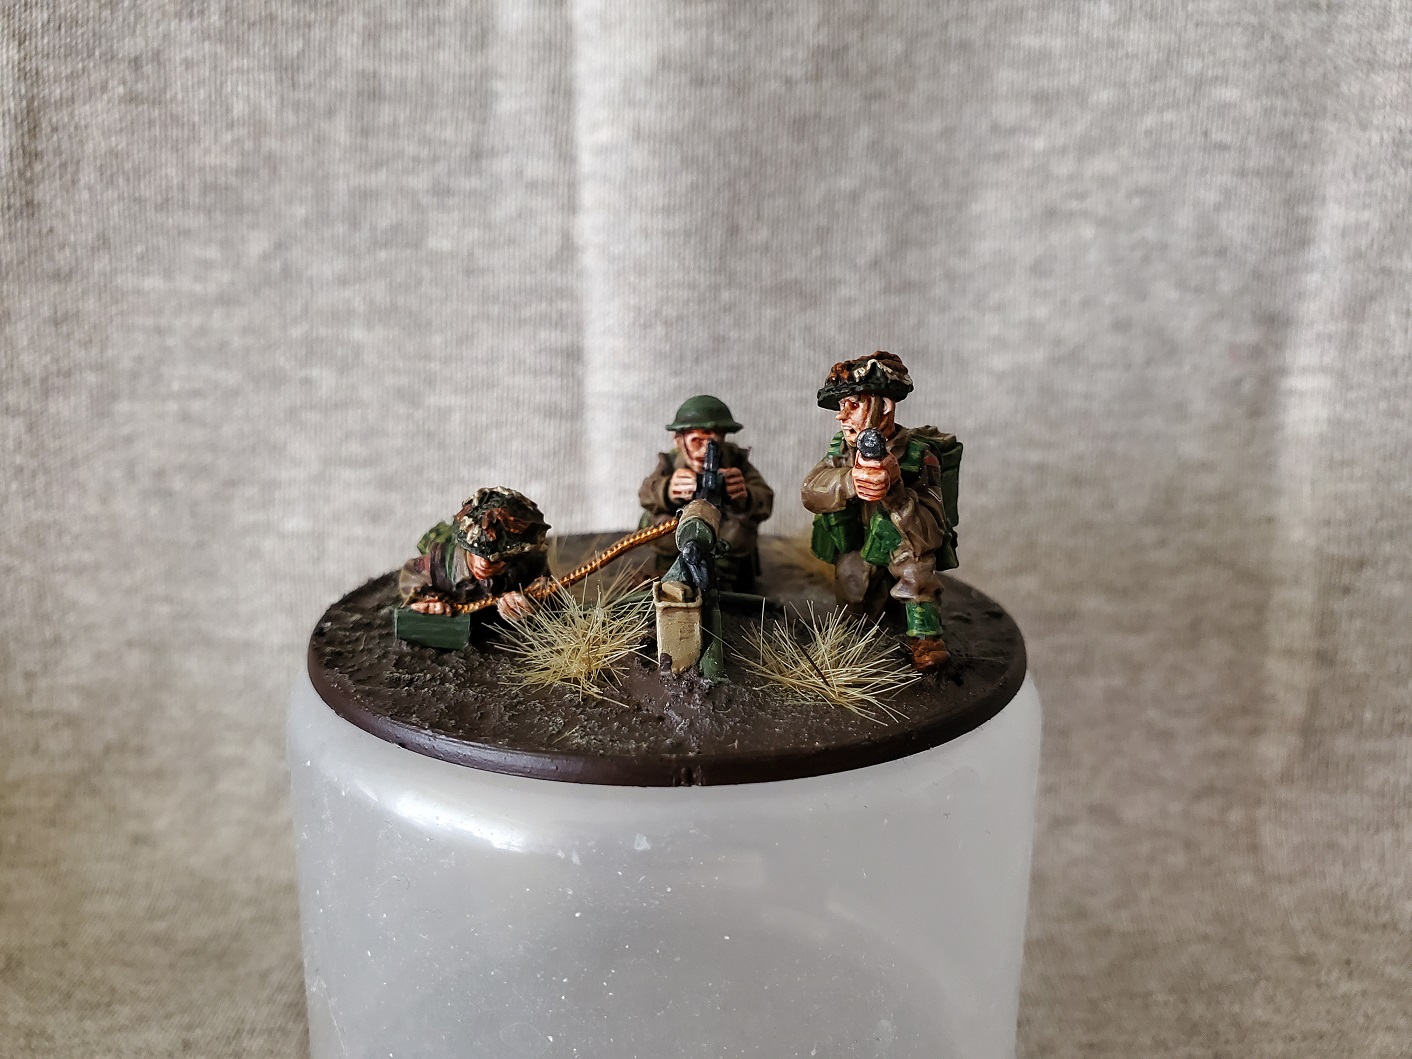 Hopefully the focus worked properly so we shouldn't have any Gerry shots of the loader and spotter...
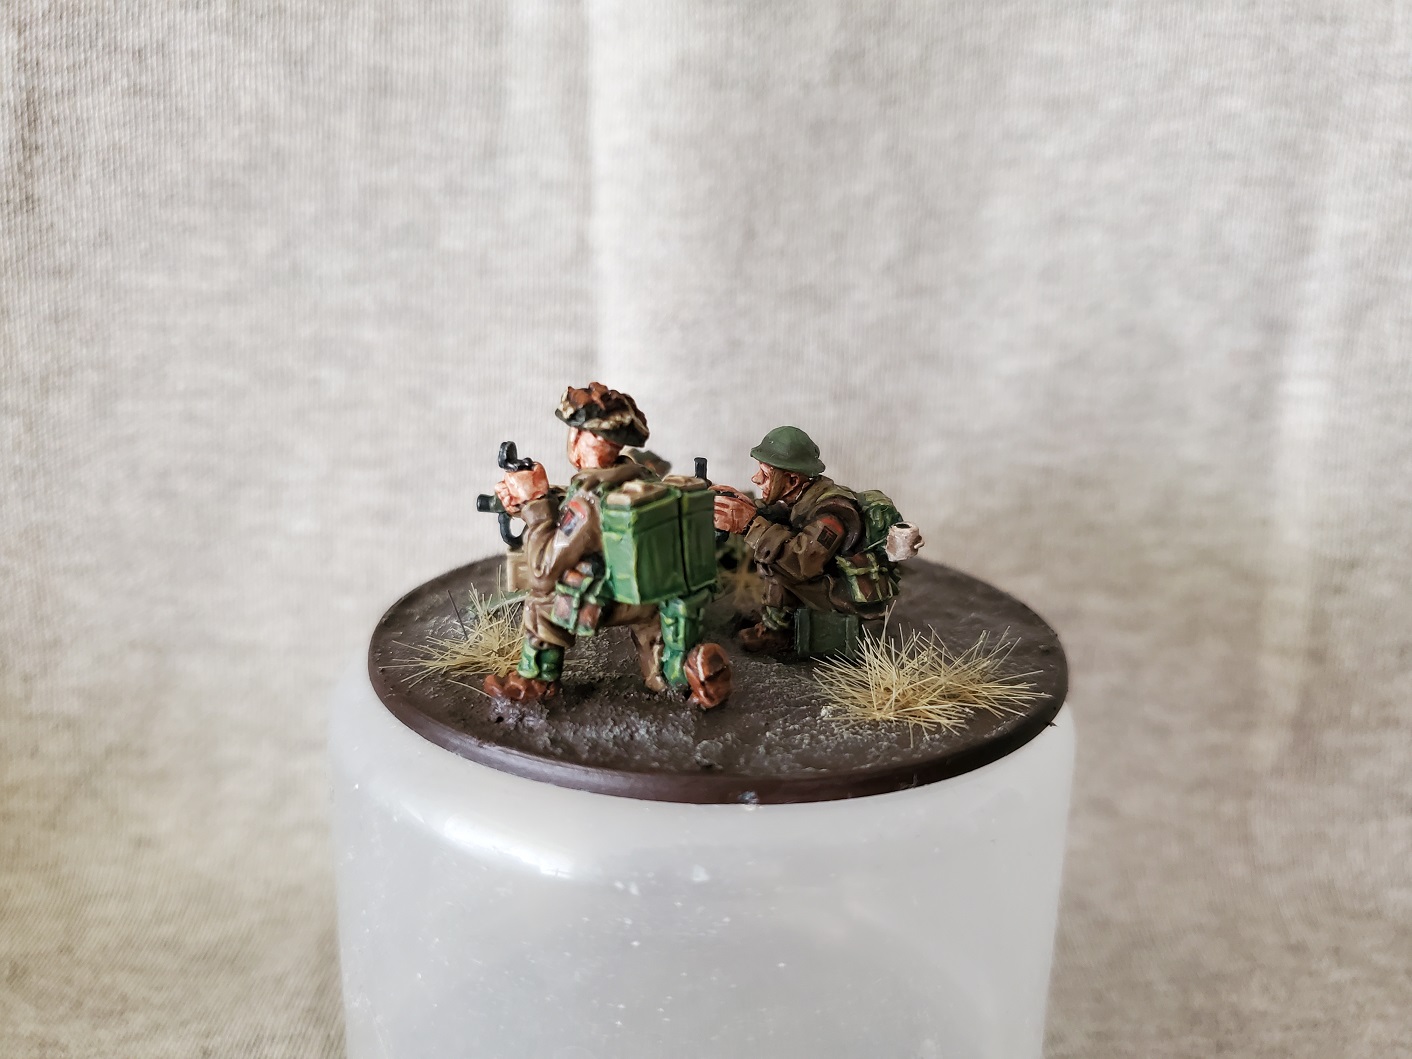 The weather is still a bit British over here at the moment, so the pics are a little dark. I love the weather when it's like home, but it does make taking pictures a little tricky...
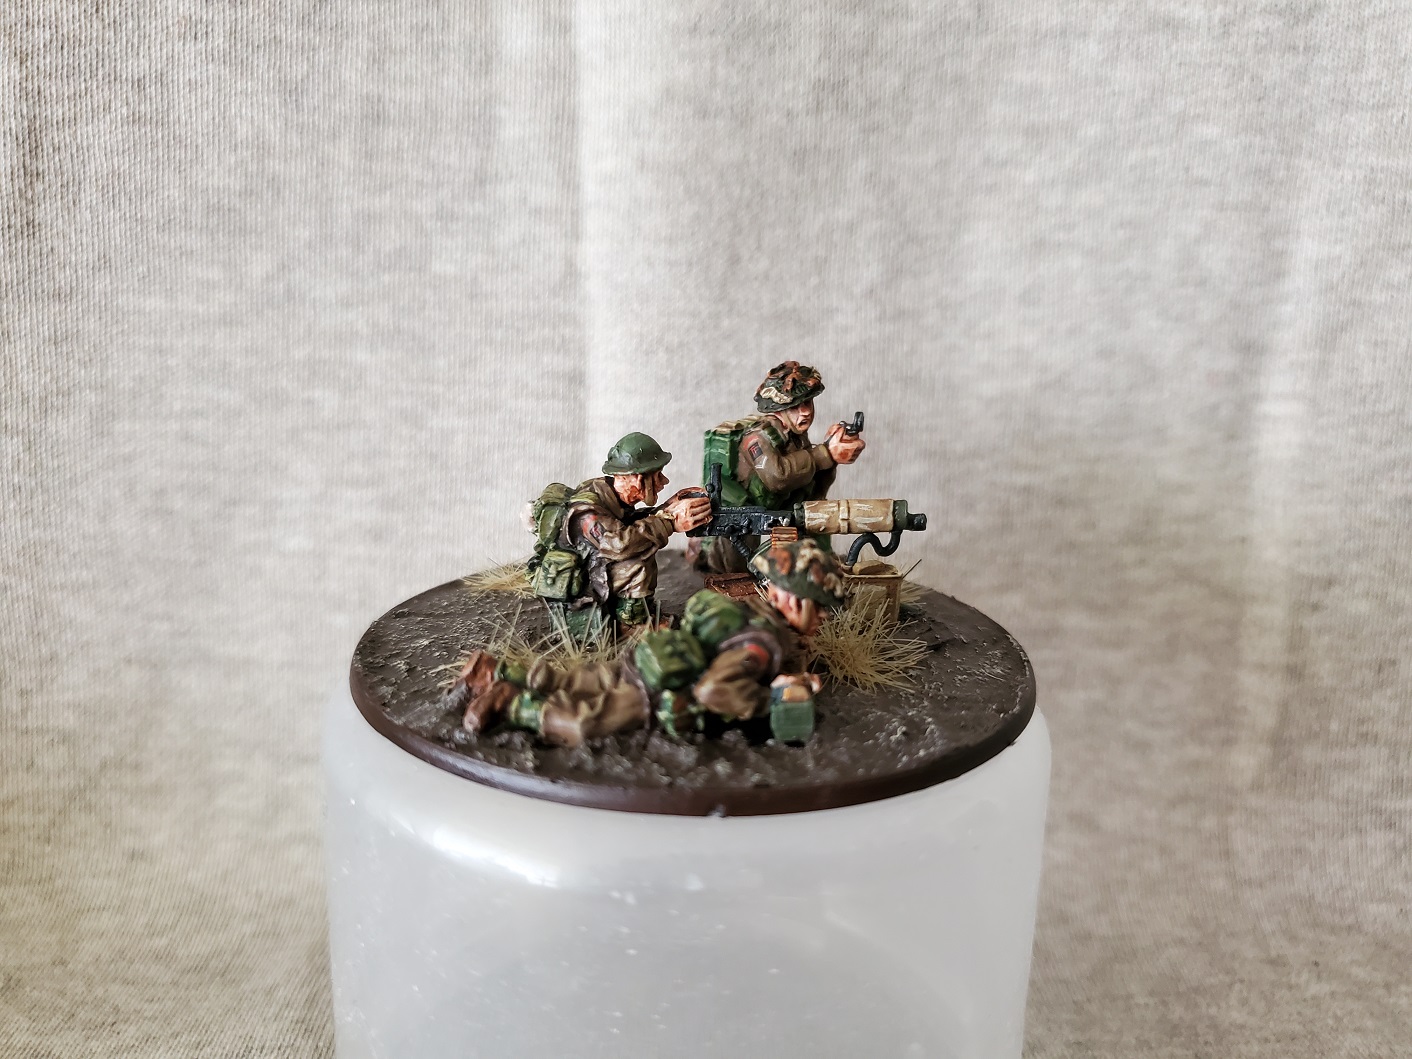 I think in future I might go back to using Athonian Camoshade for the wash over the webbing just make it a little more brown, but I'm happy with these as they are.
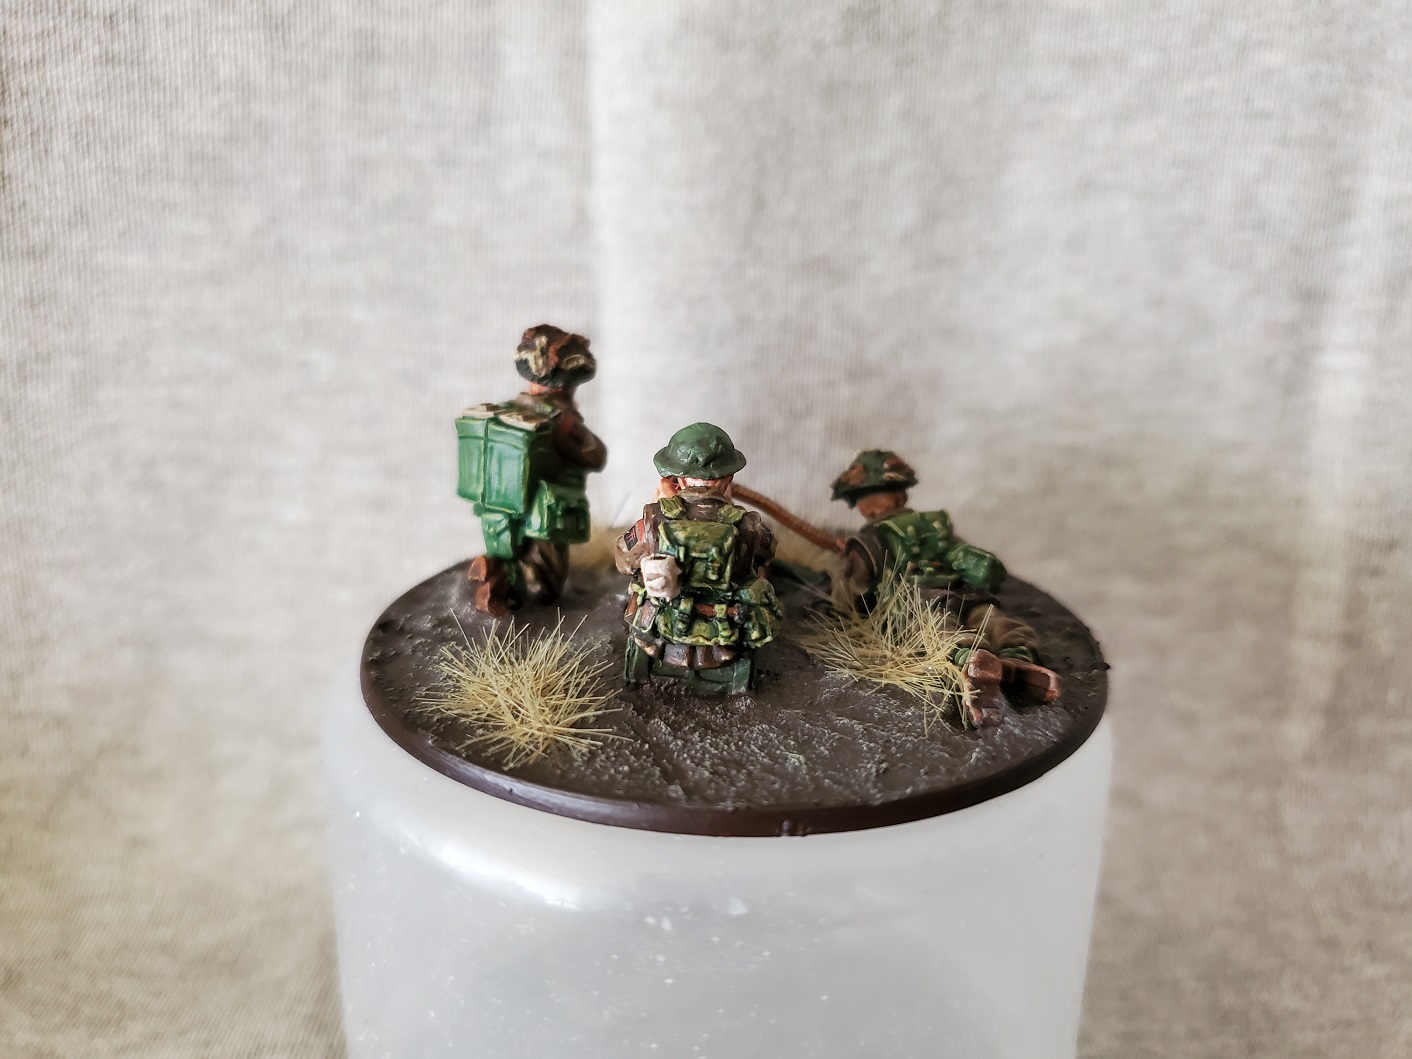 One, two, three times a Lloyd shot...
There will definitely be a Universal Carrier coming for these chaps in the future, along side some small changes to other Brits I have already painted. Maybe even the crew from my 6pdr will get repainted to match my NW Europe chaps; they need repainting anyway even if they are still going to stay with my Forgotten Army chaps… So there’s some stuff coming. Might deviate from Bolt Action for a bit, and things might slow down while I’m prepping to move in the next month or so, but things are coming.

![StarCraft Tabletop Miniatures Game Pre-Orders Live Now [Updated]](https://images.beastsofwar.com/2026/03/starcraft-tmg-news-cover-600-338.jpg)


![Mounted US Cavalry On Kickstarter For Dead Man’s Hand! [Updated]](https://images.beastsofwar.com/2026/03/us-cavalry-main-600-338.jpg)


![Play WW2 Commando Operations With Butcher & Bolt [Updated]](https://images.beastsofwar.com/2026/03/relaunch-600-338.jpg)


