


![10mm Medieval Miniatures! Azincourt English Army Review | Wargames Atlantic [7 Days Early Access]](https://images.beastsofwar.com/2026/03/unboxing-wargames-atlantic-azincourt-english-army-coverimage-225-127.jpg)


Stuff what I been painting


Recommendations: 692
About the Project
This project has no reason or purpose. It is just a collection of stuff that I've been painting. It might be linked to other projects I have running or it might not. It also exists to track my tackling of my pile of potential.
Related Genre: General
This Project is Active
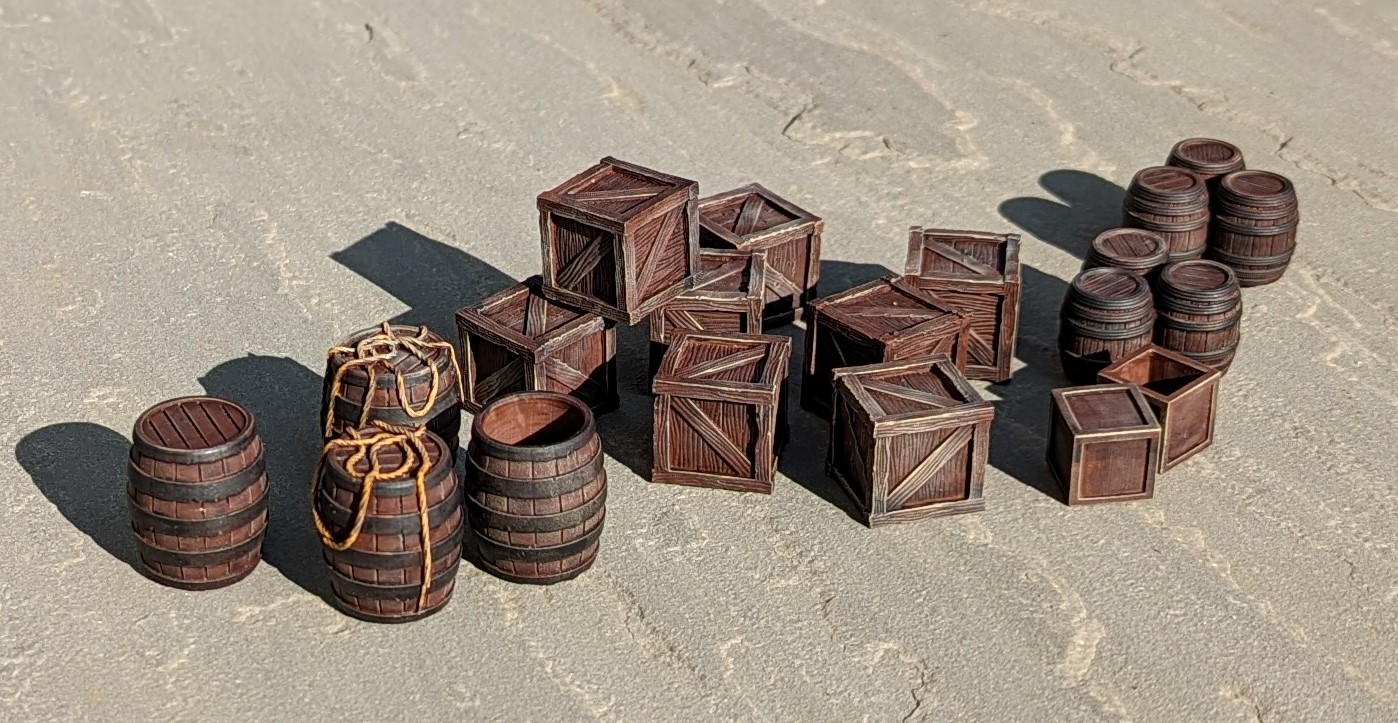
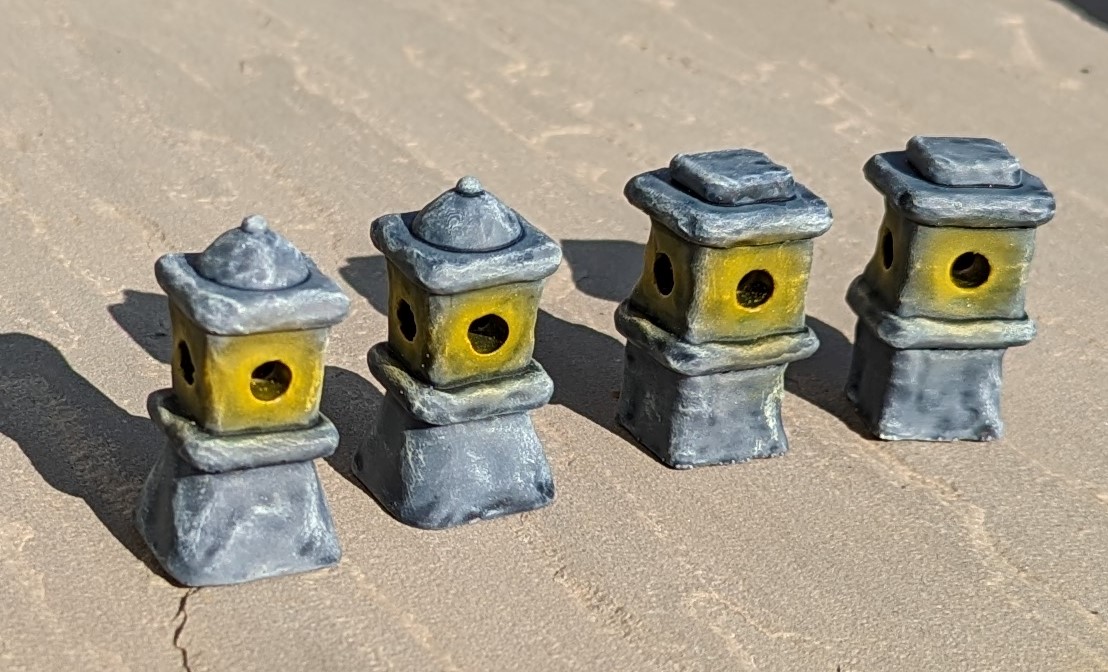
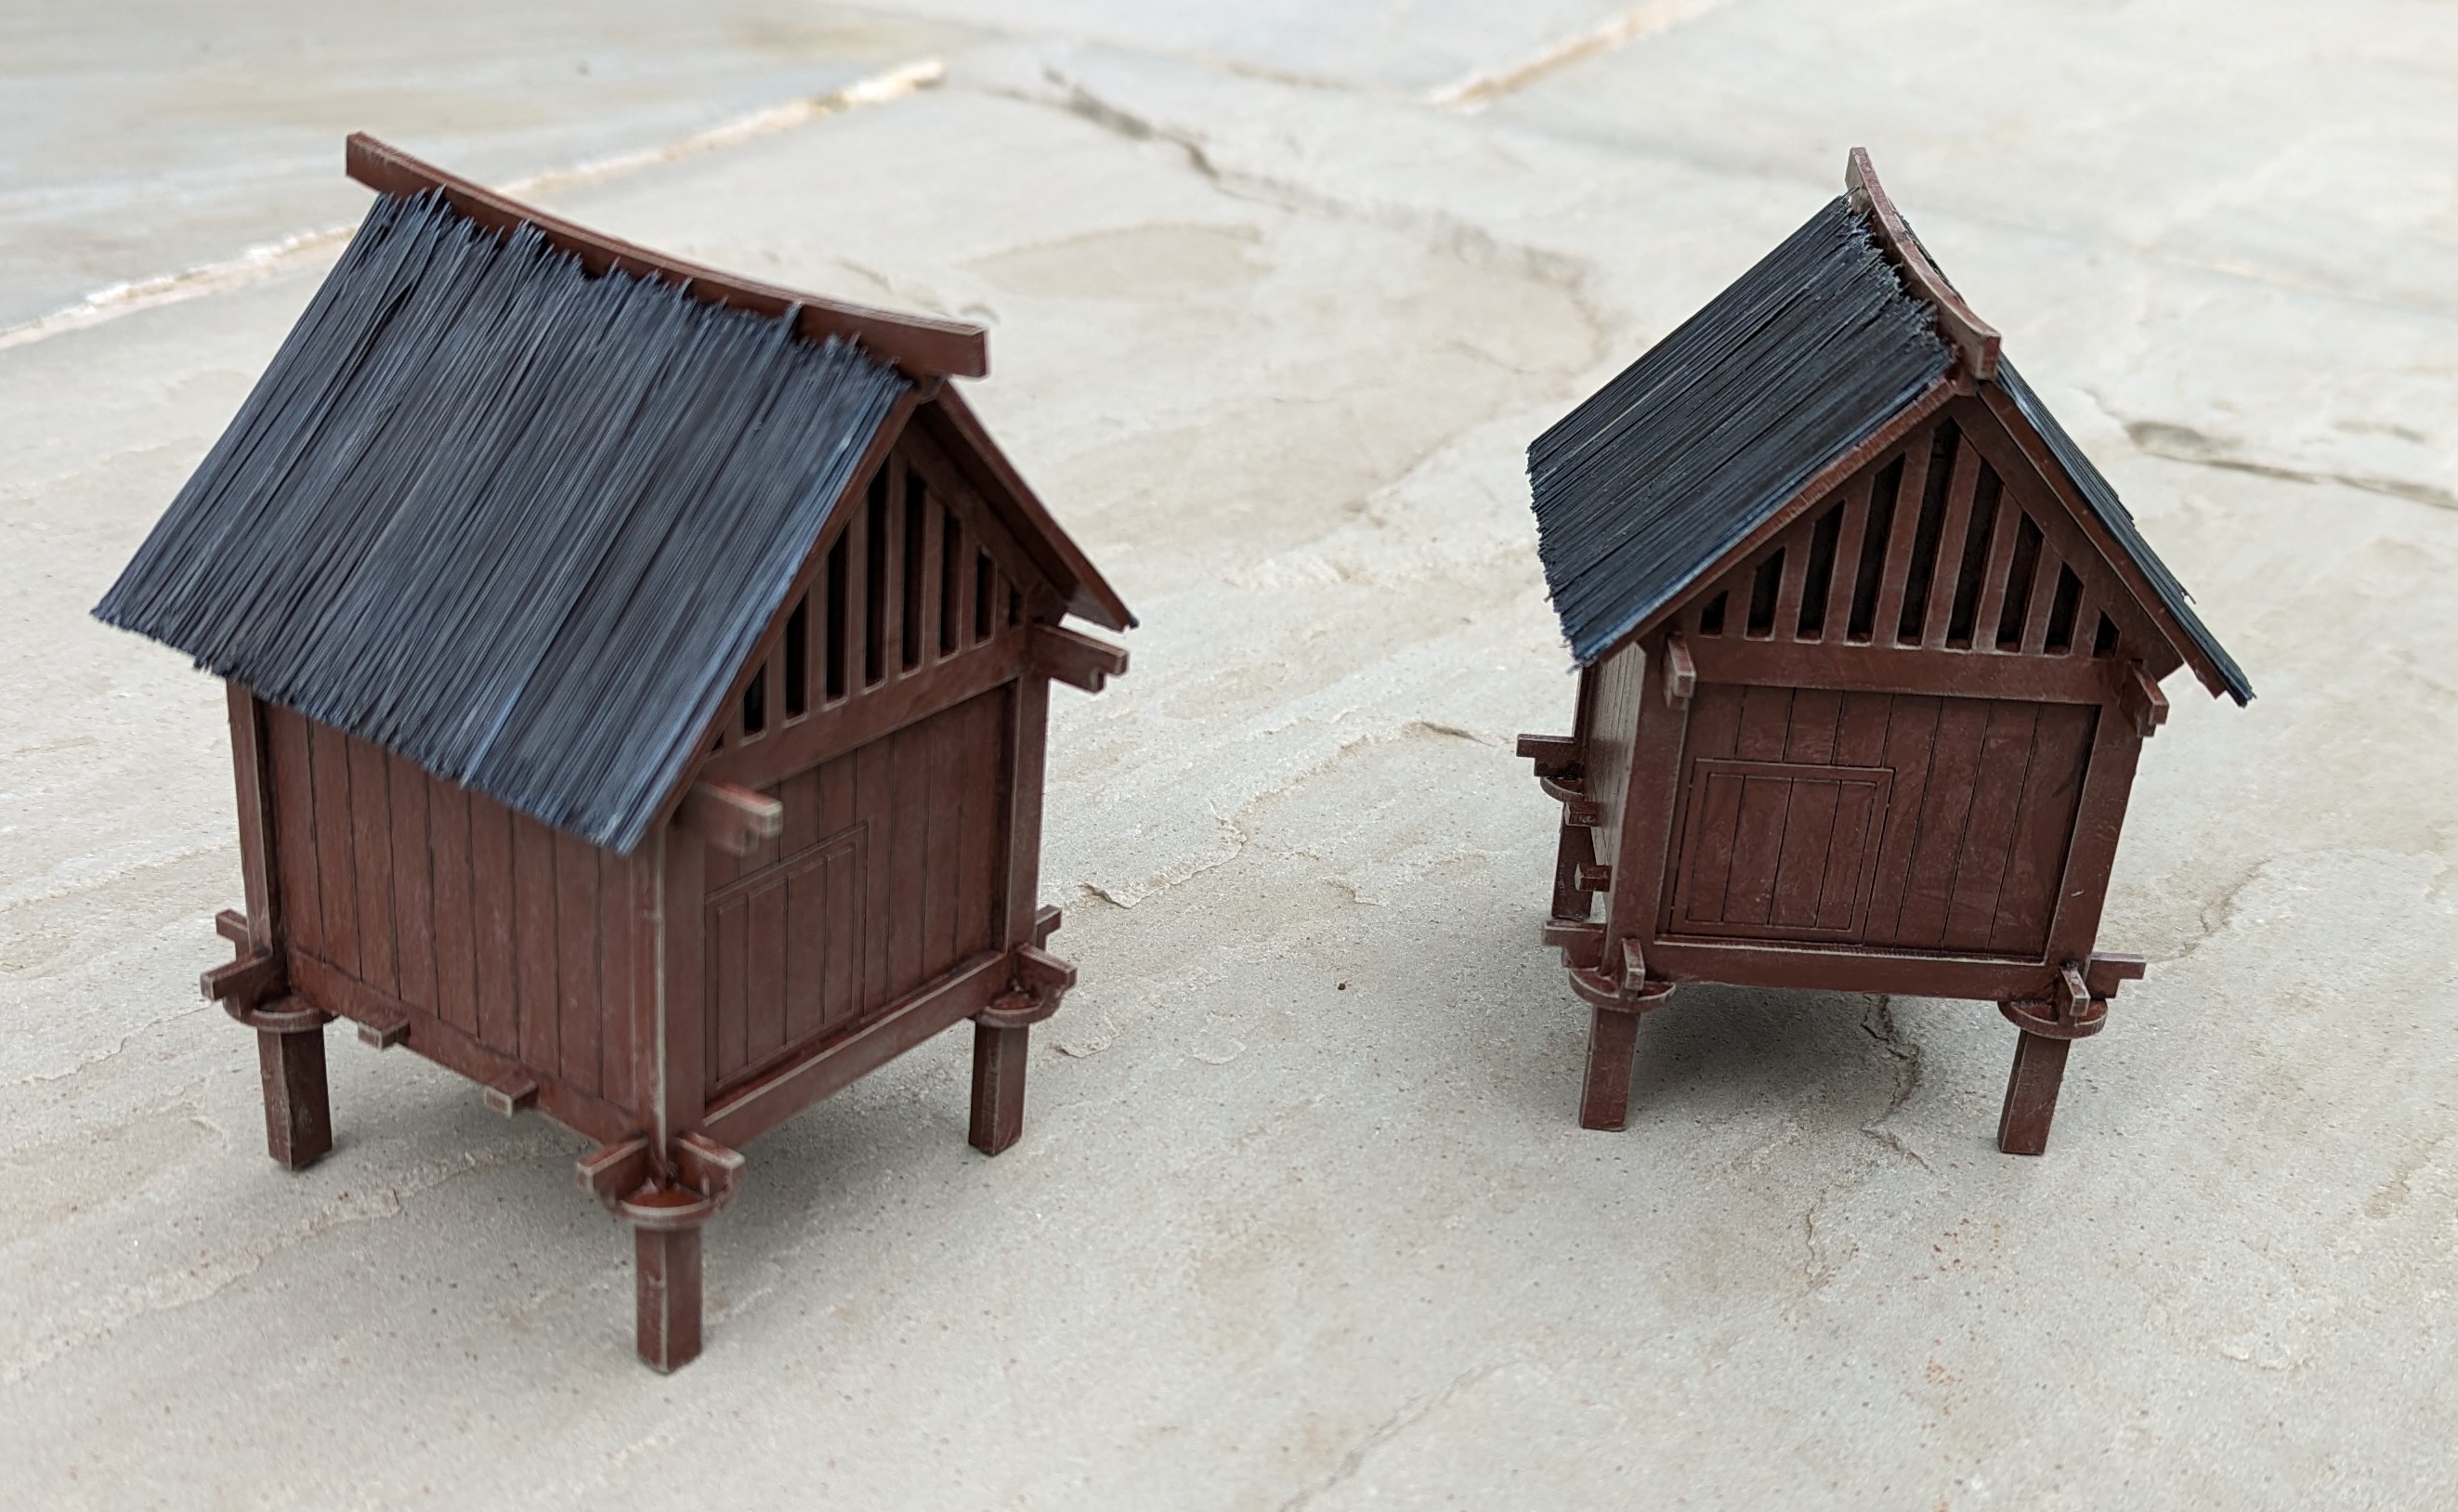
Lots of terrain
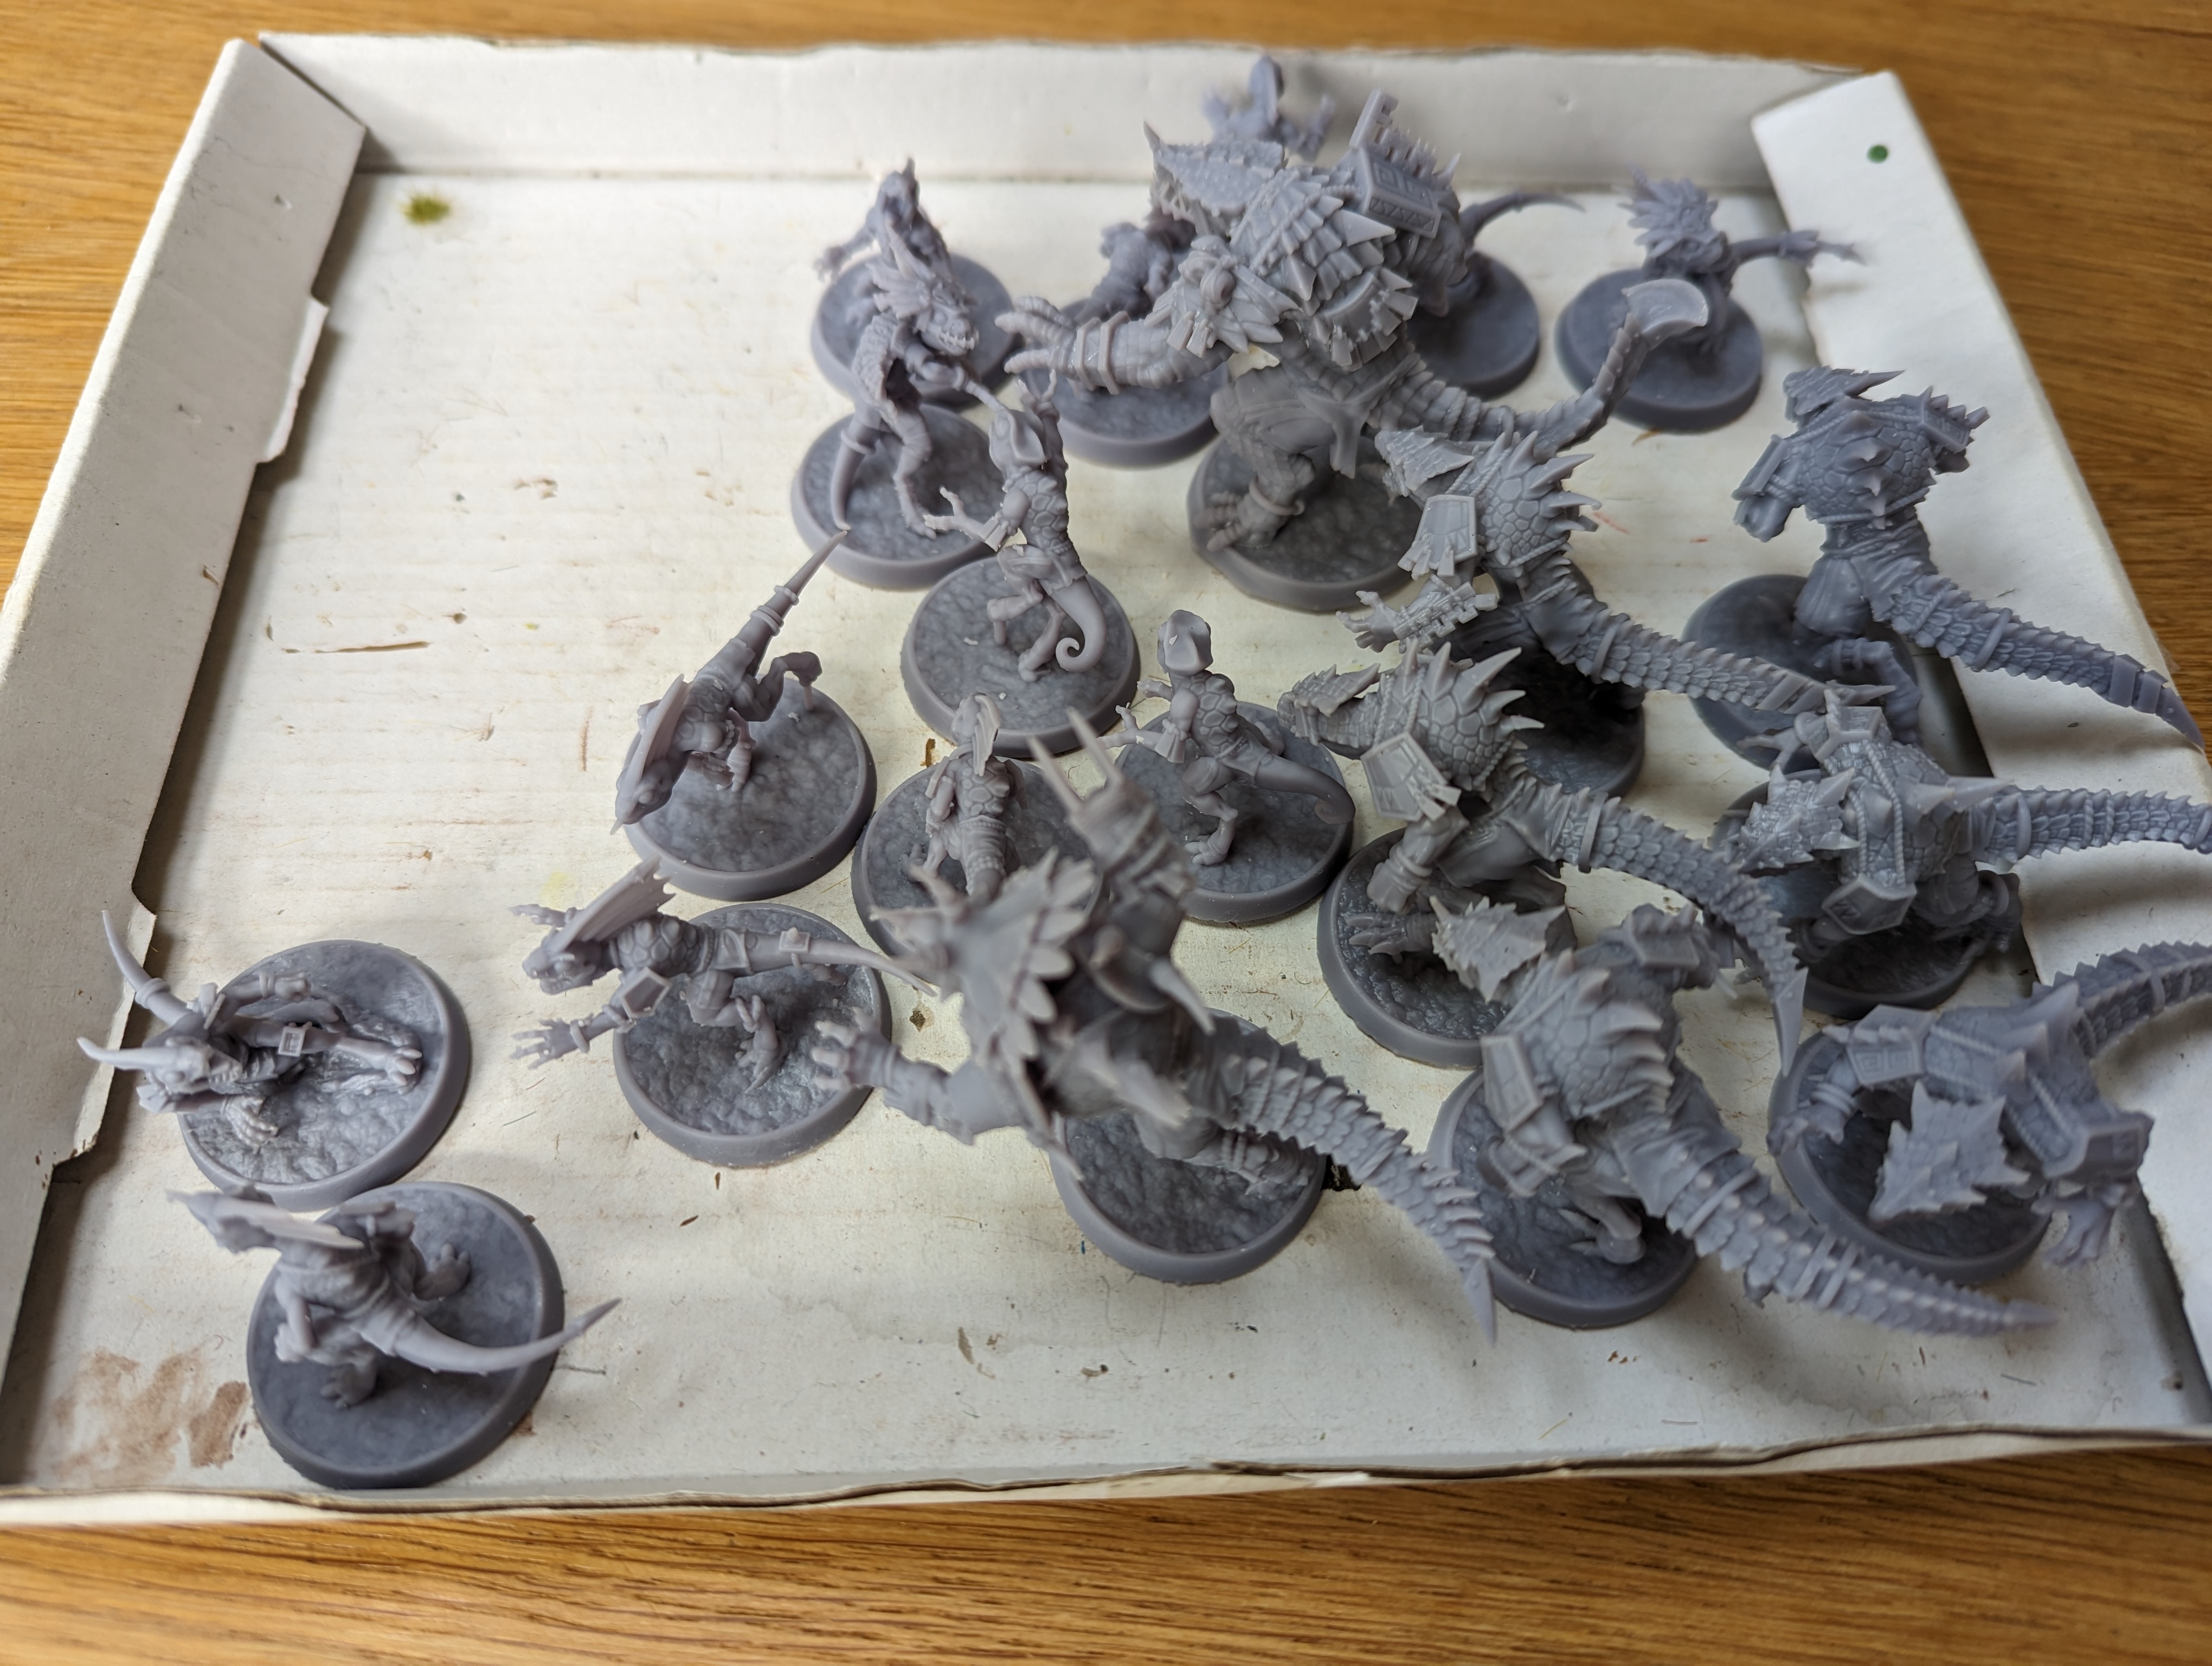
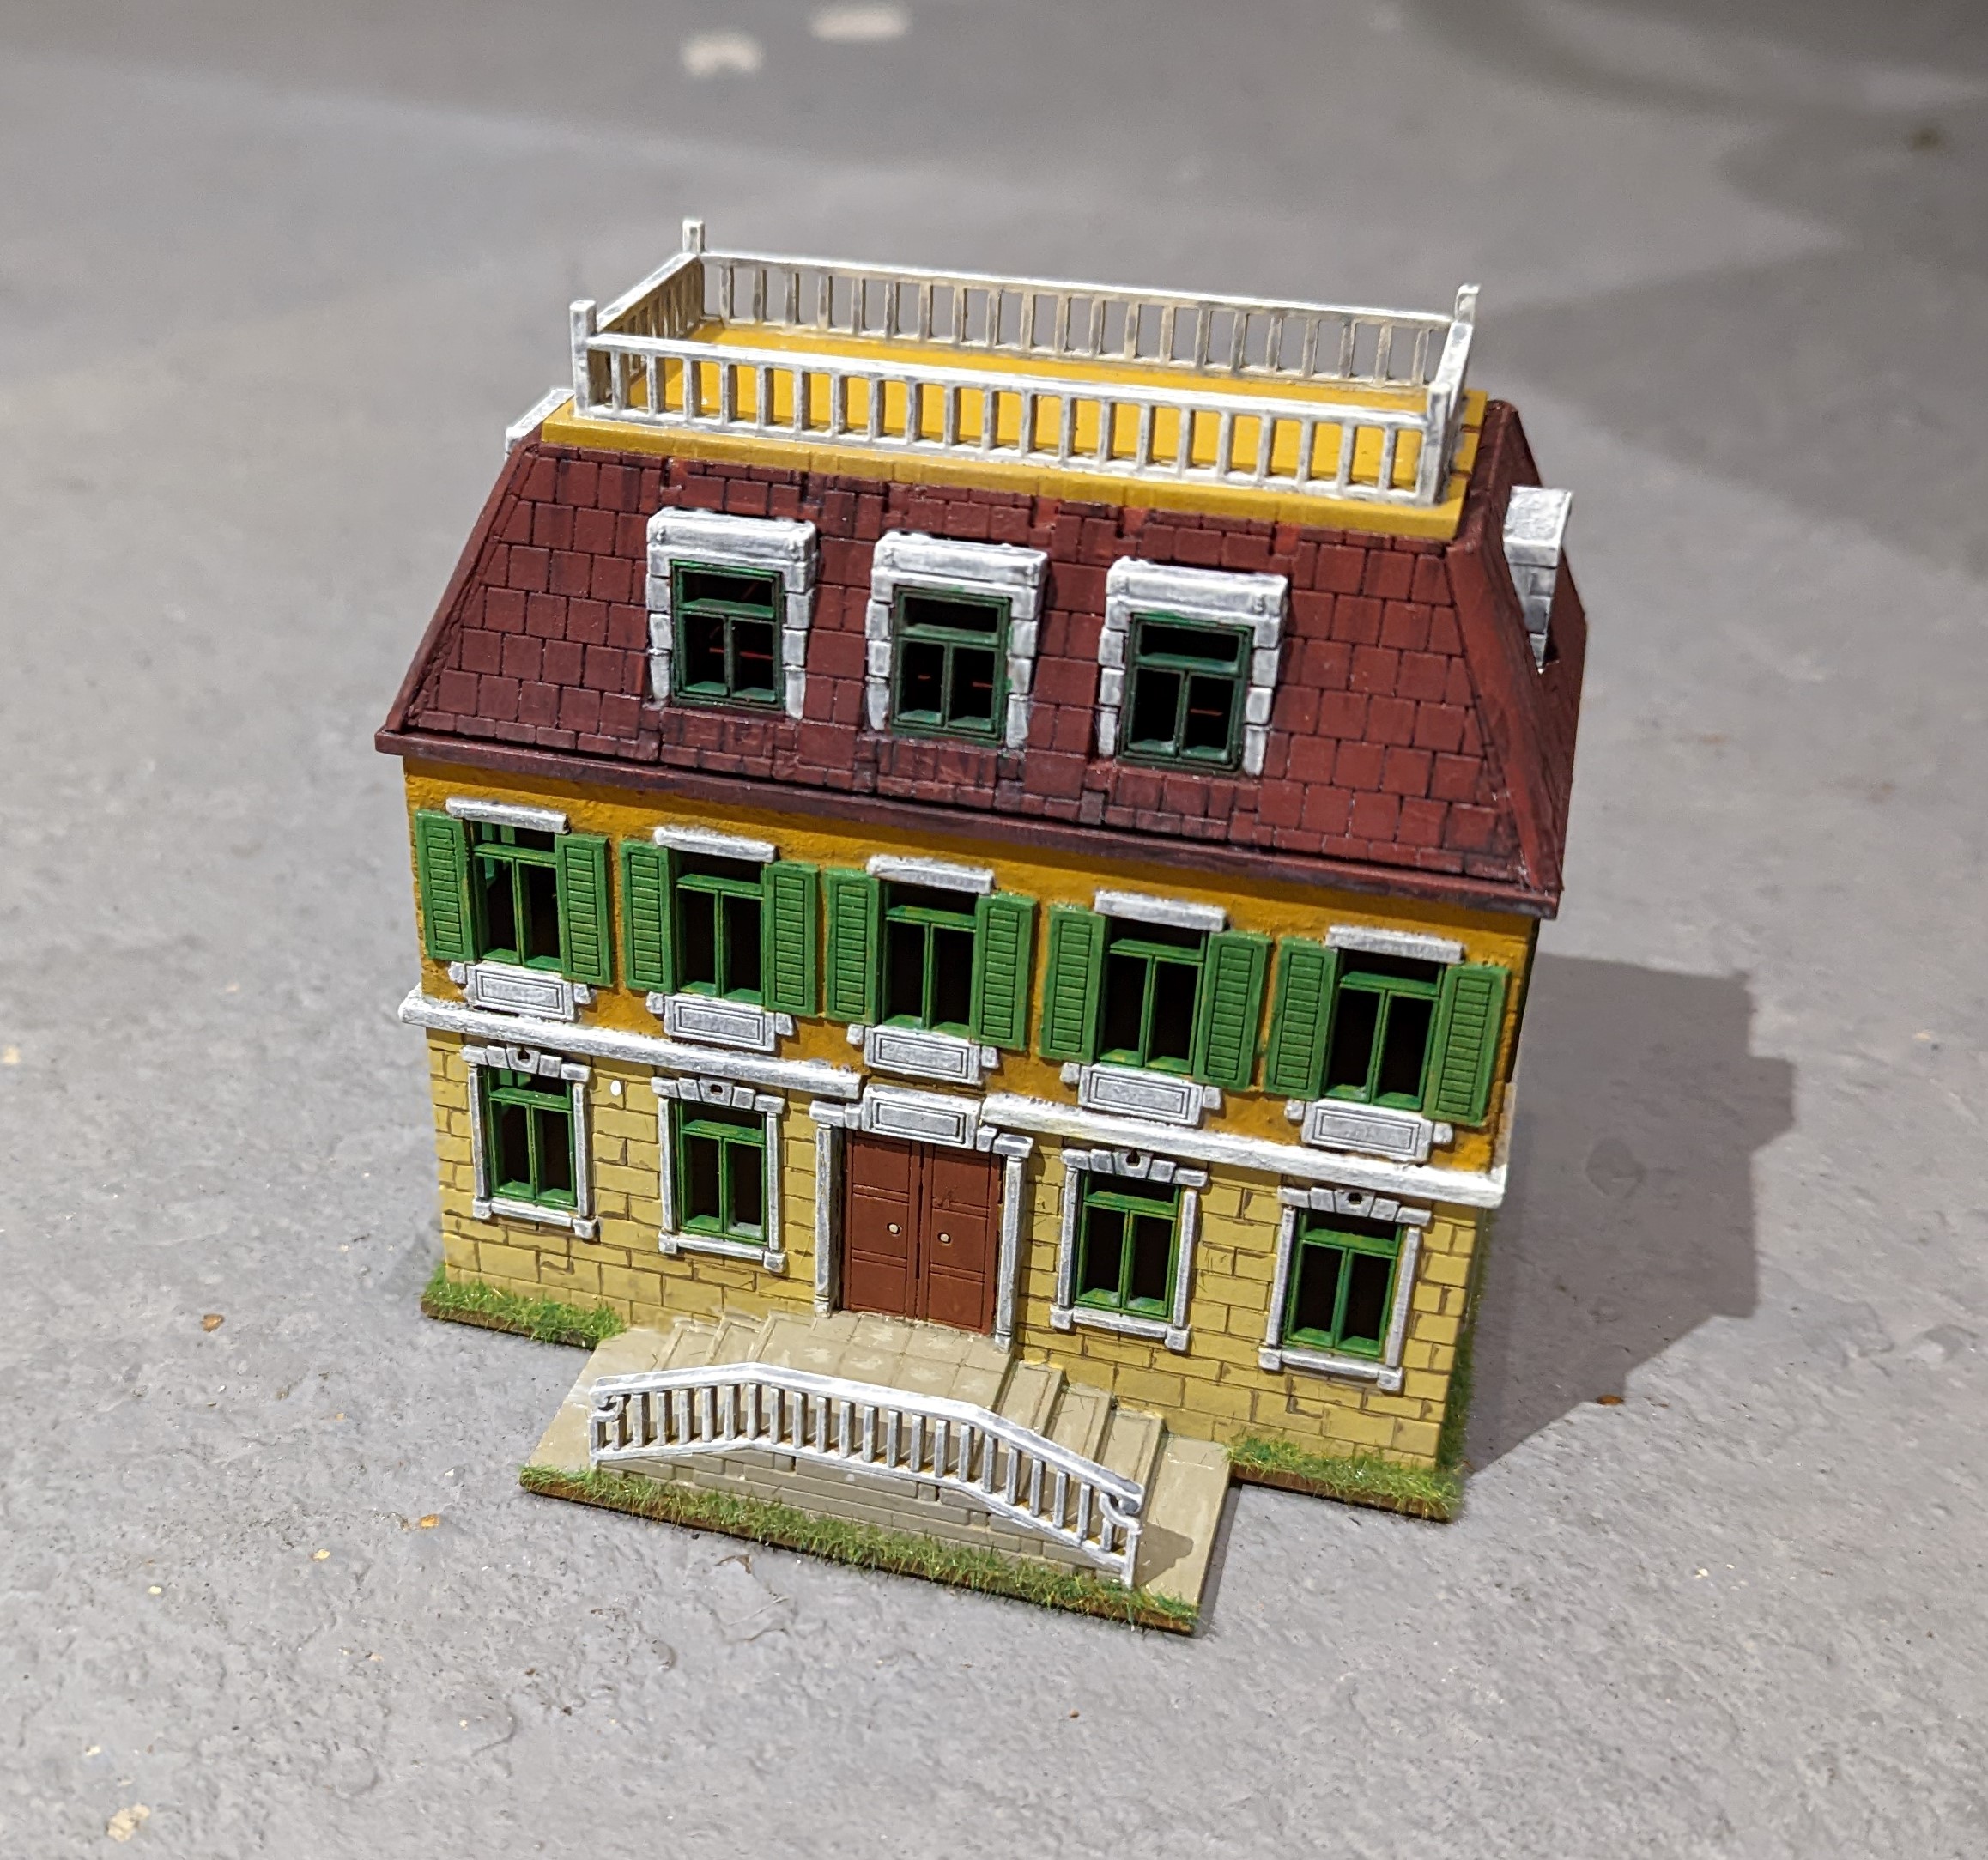
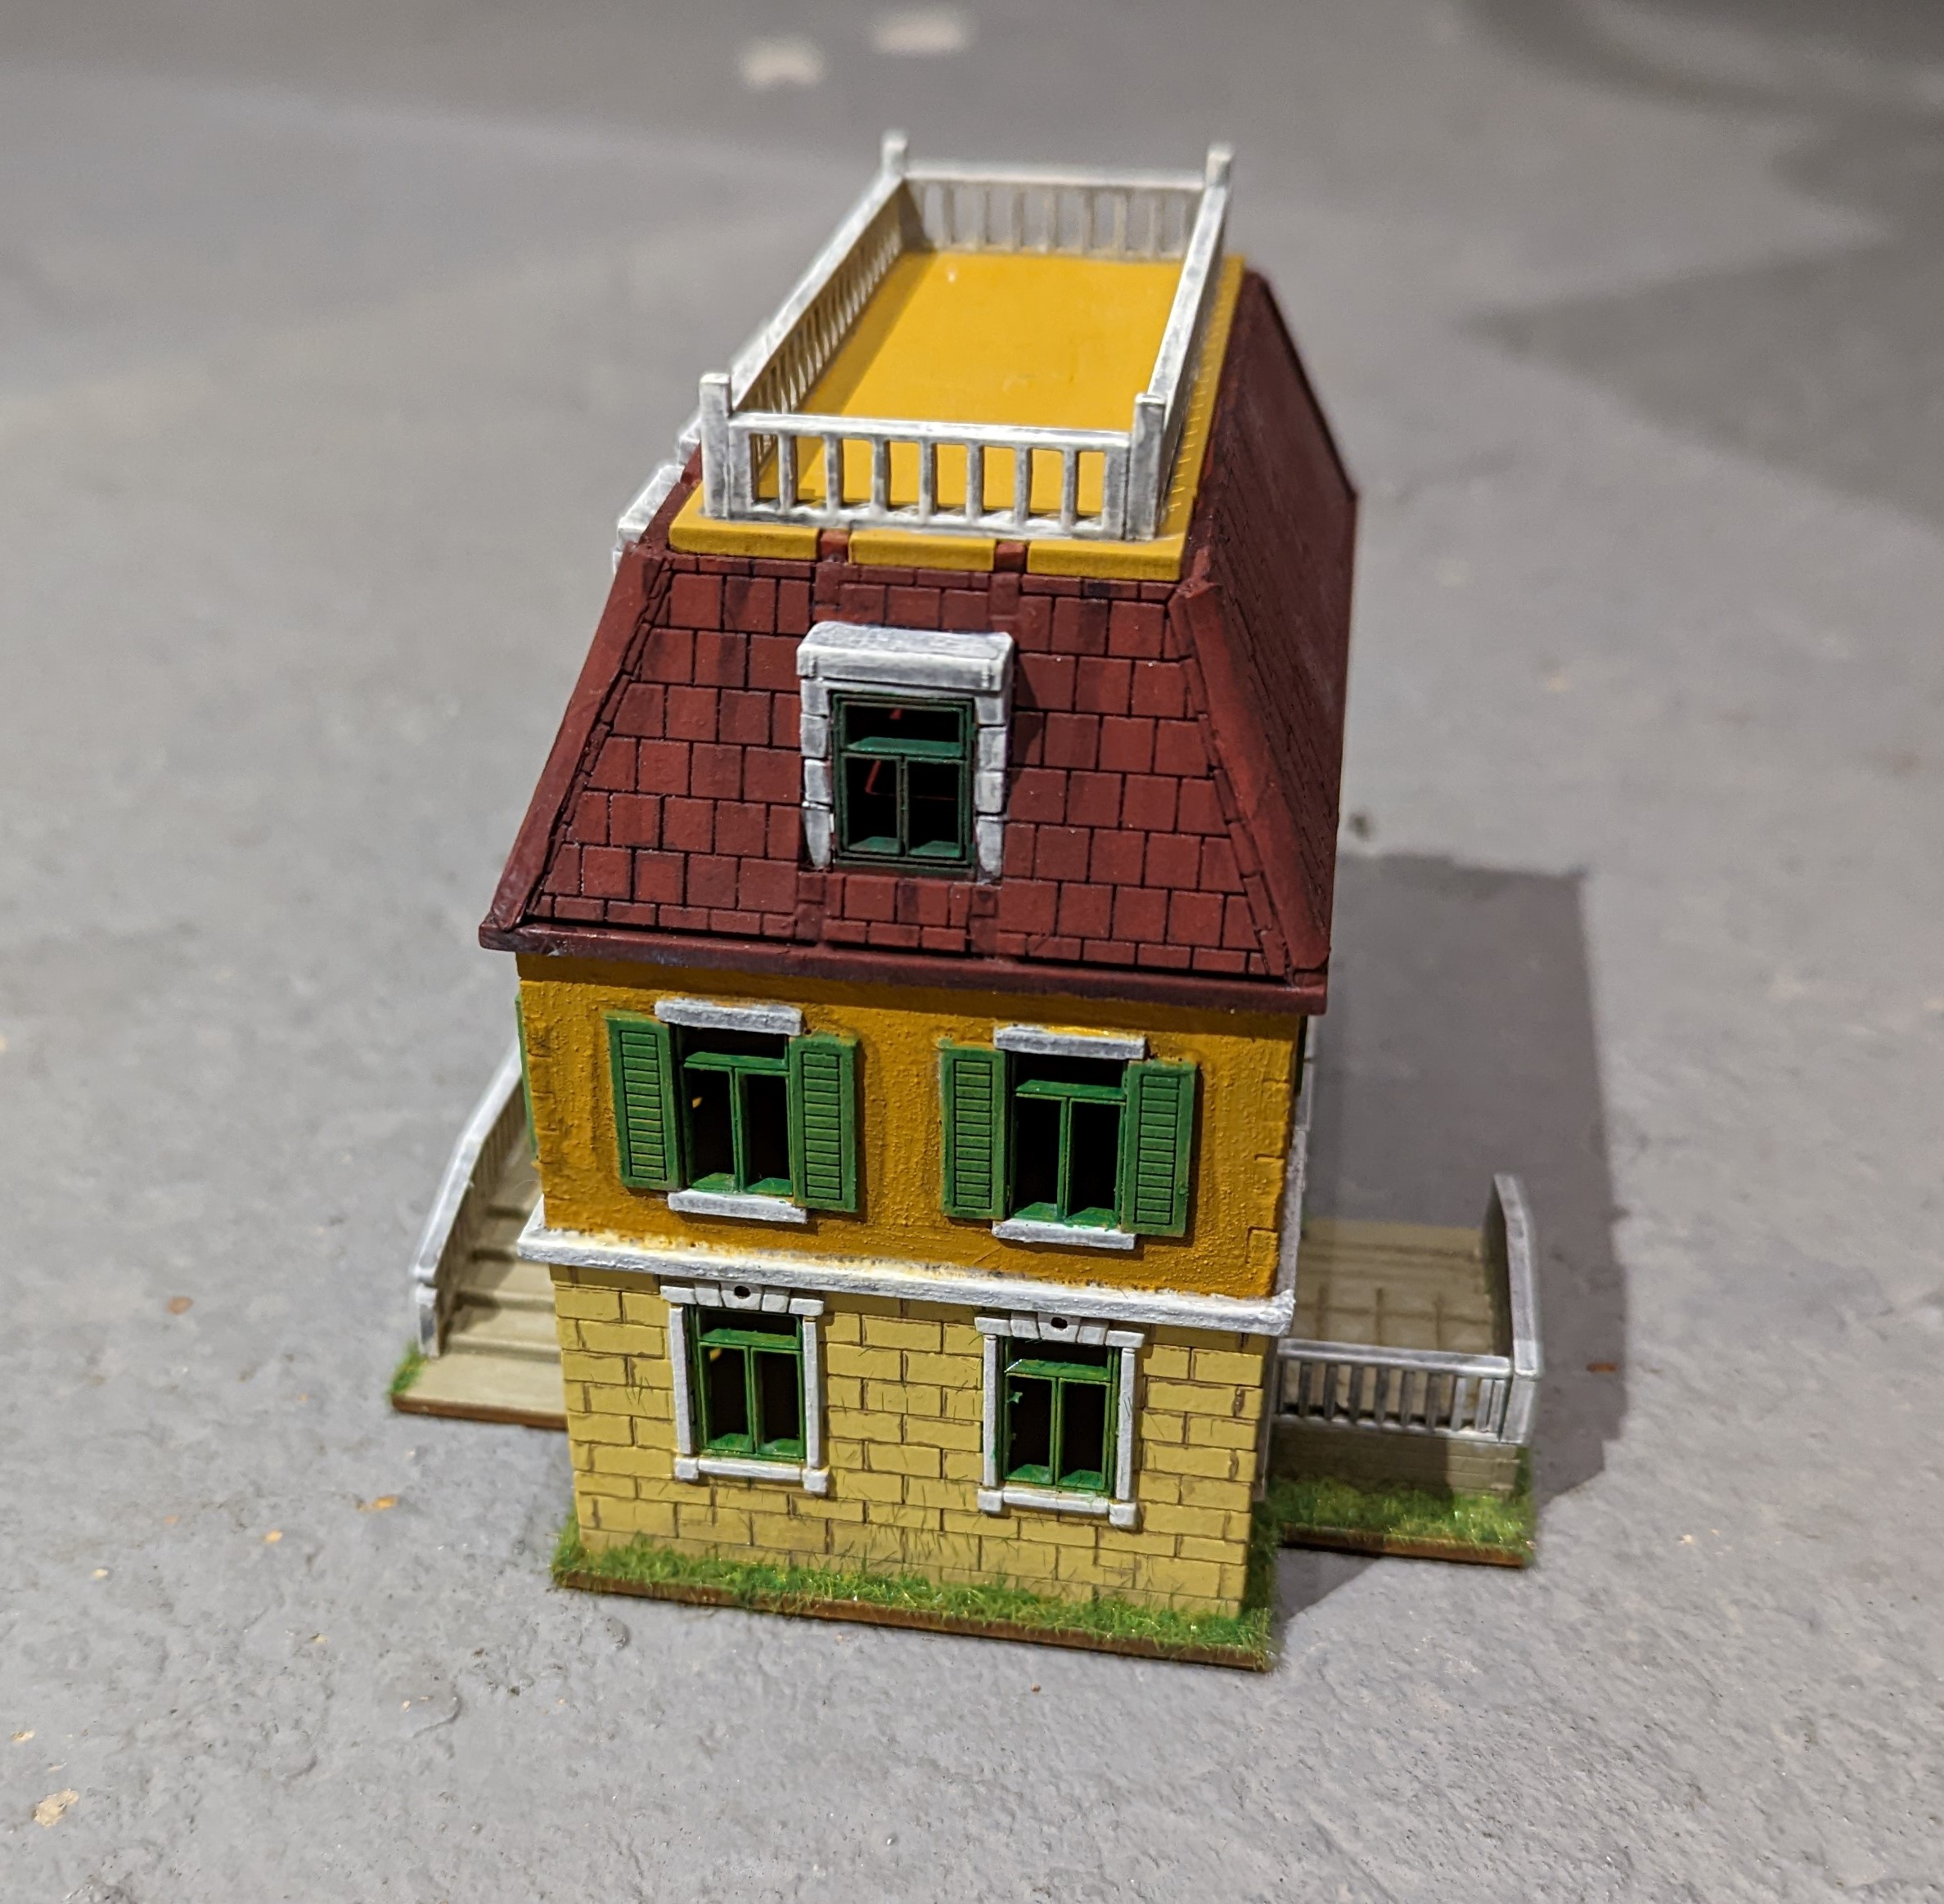
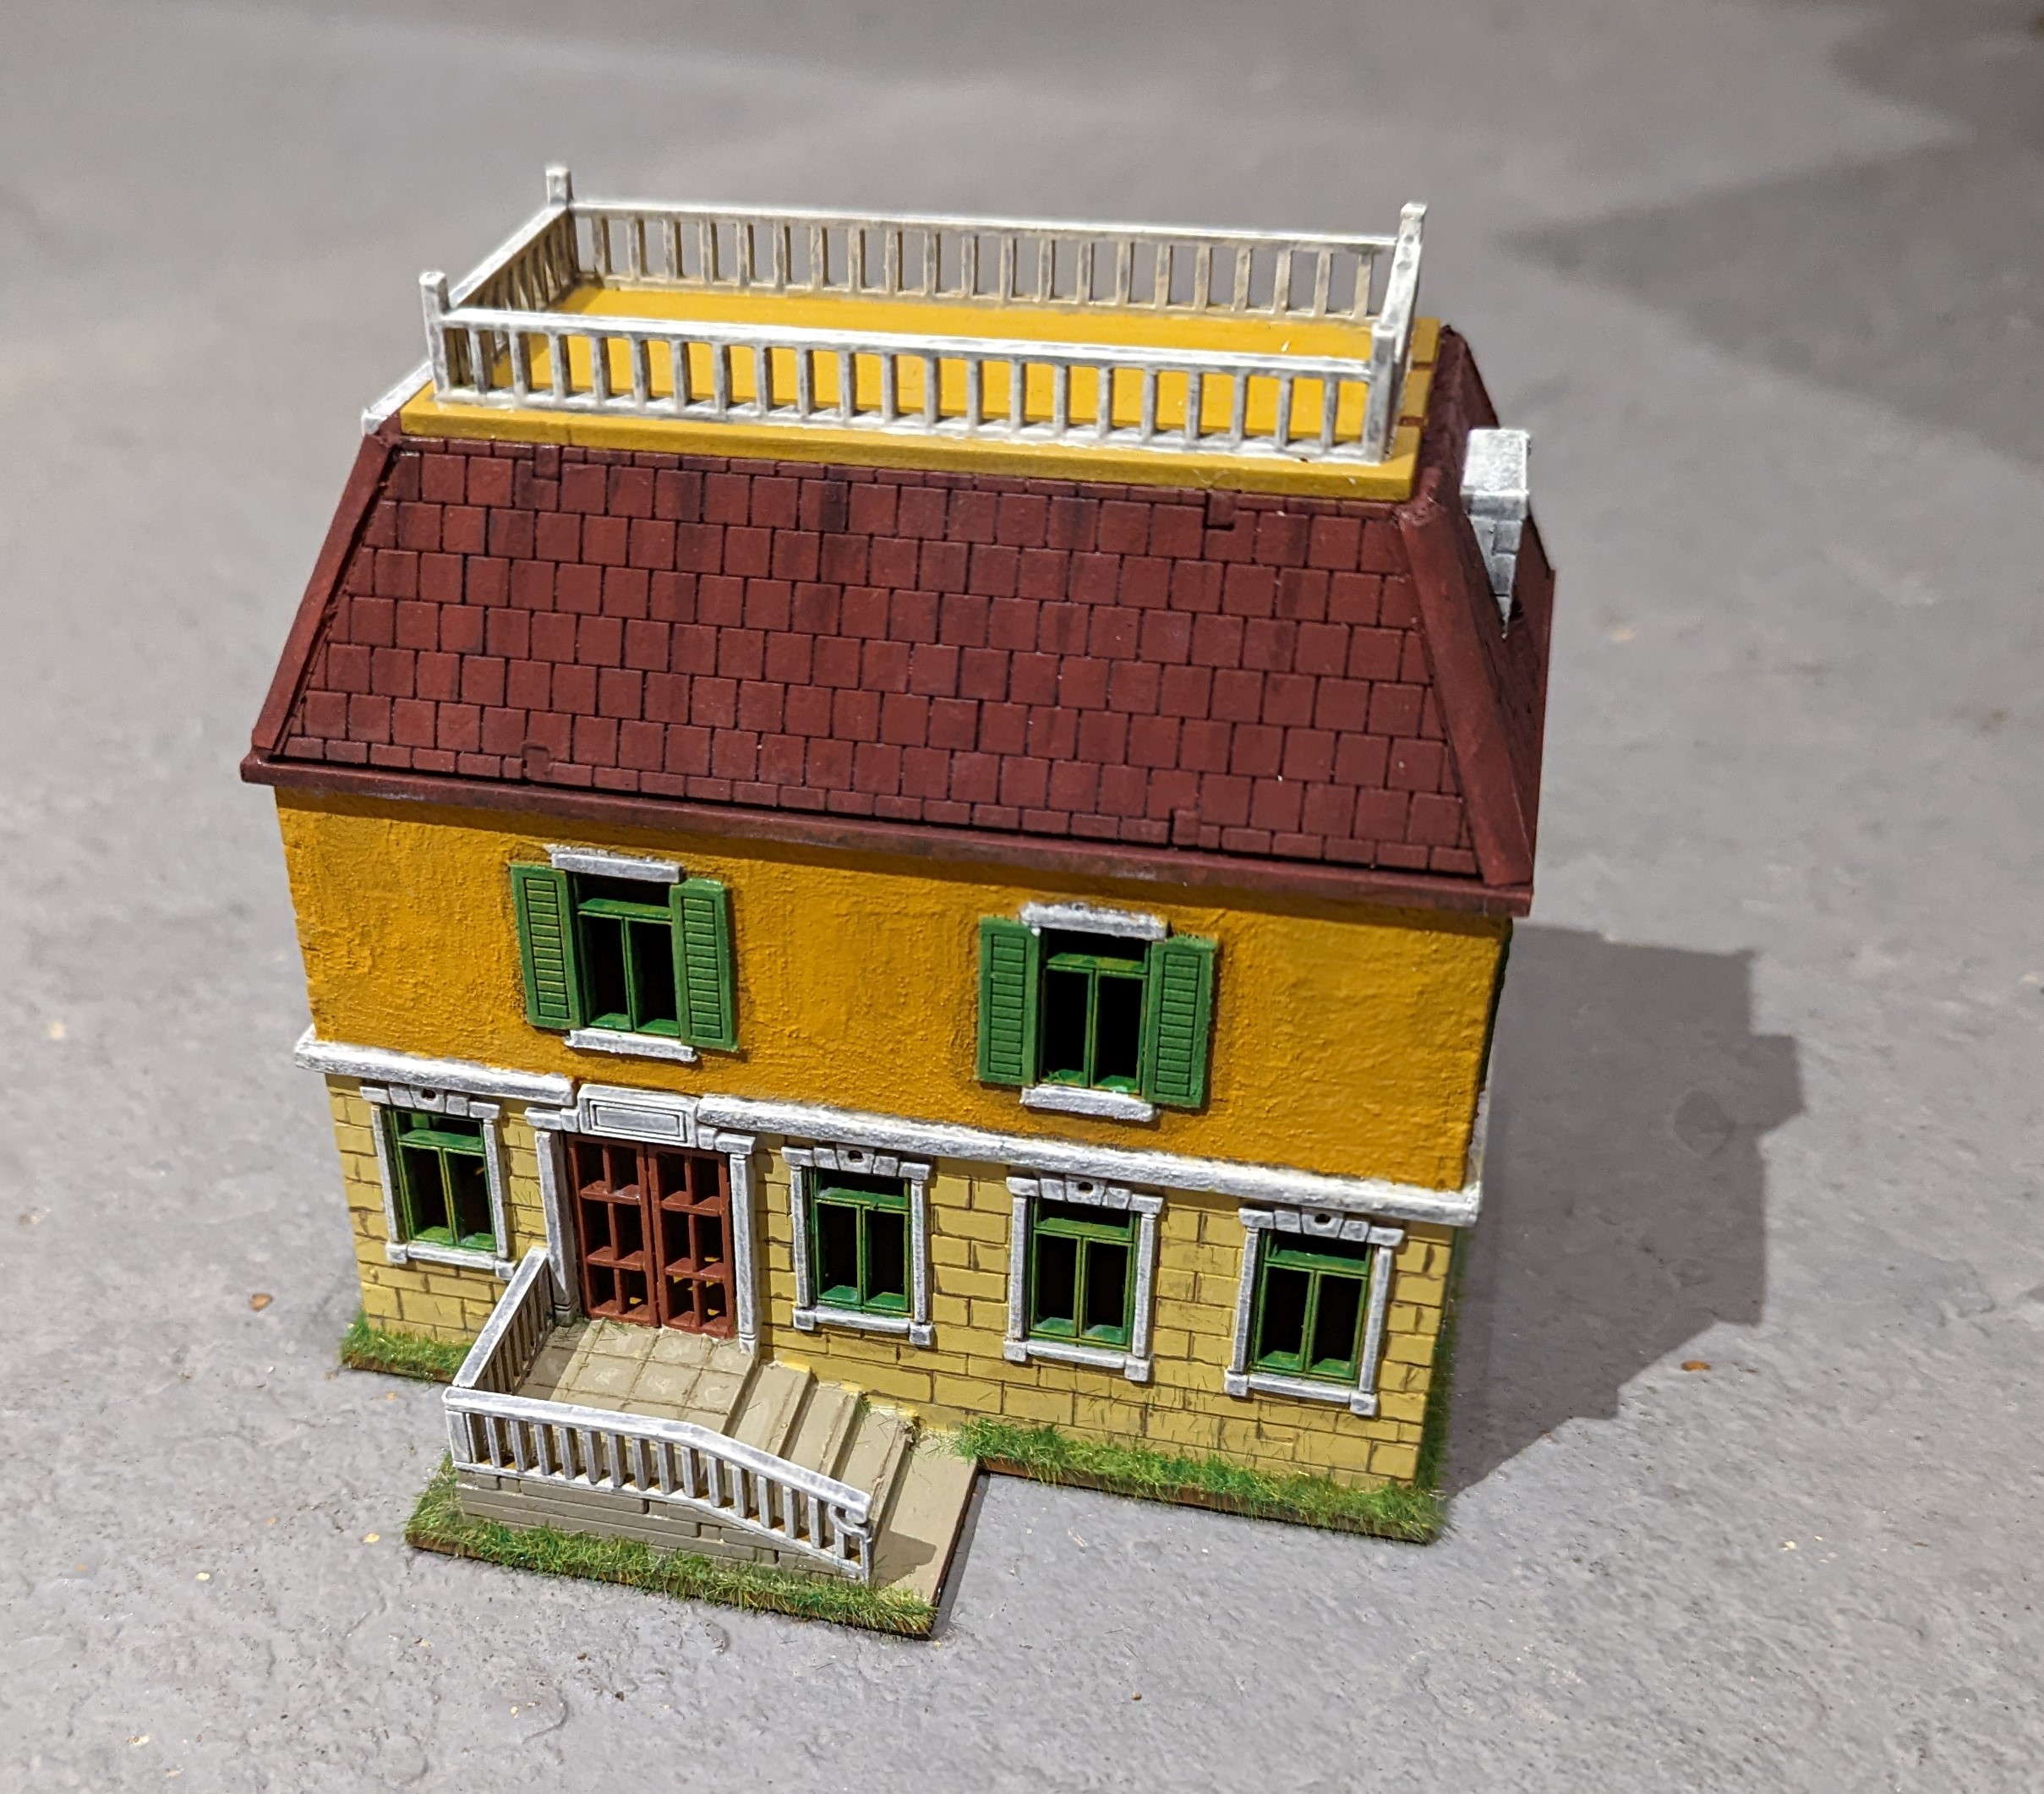
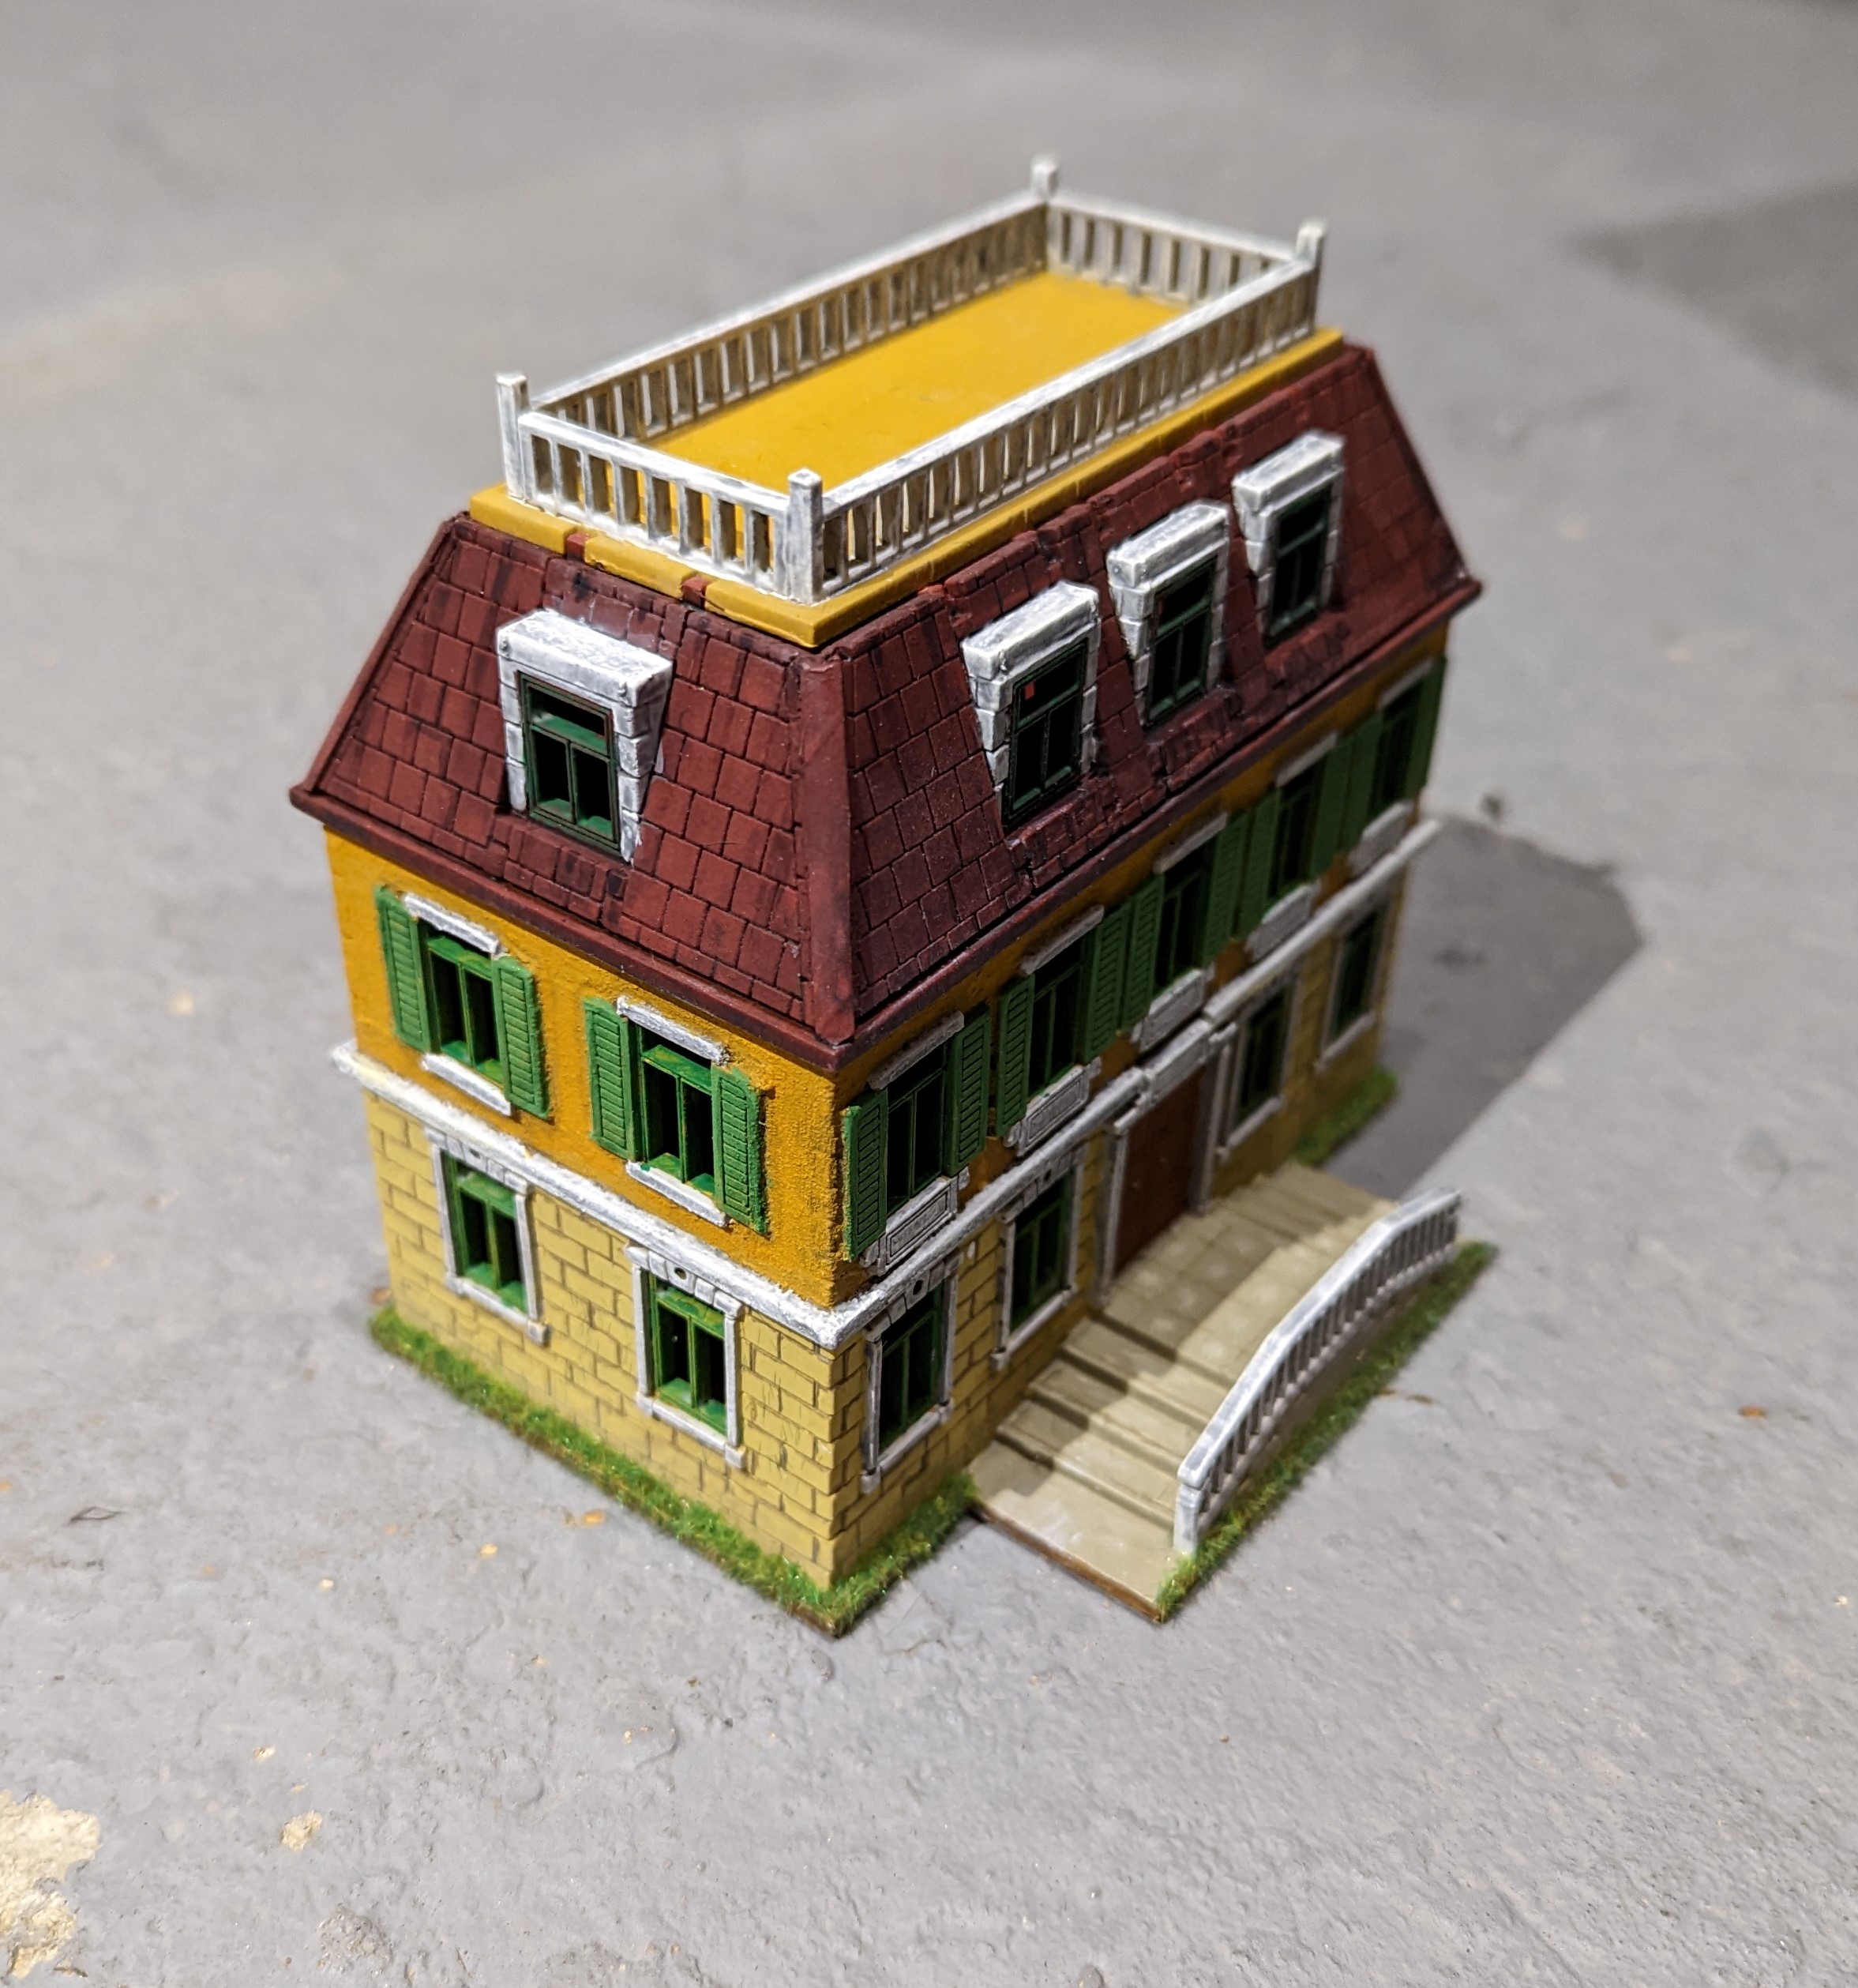
This month, I have mostly been painting terrain for Bushido.


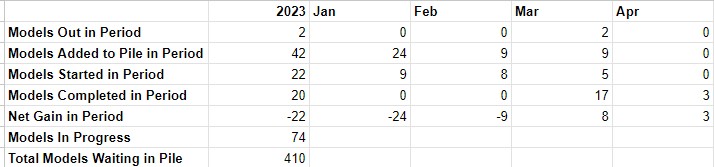
So May was quite a productive month in tackling the pile of potential, with 26 separate models completed! Down side is I also picked up some FoW models with the new Berlin book and added 27 to the pile, so that’s an increase to the pile rather than a decrease, albeit by just 1. Maybe June will bring about a decrease…..
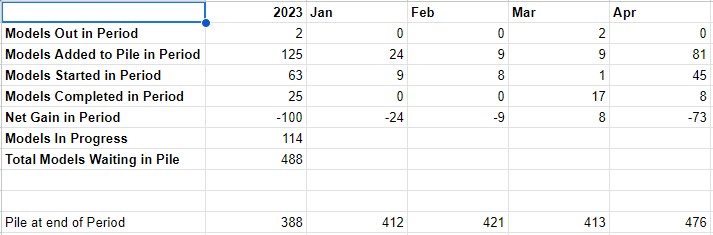
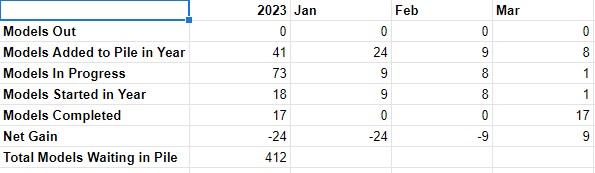
 The spreadsheet of truth. Maybe I should add some graphs and charts.....
Warpstone and Mortars
I rounded off April by finishing off some models that I’ve had on the painting table for some time for different reasons.
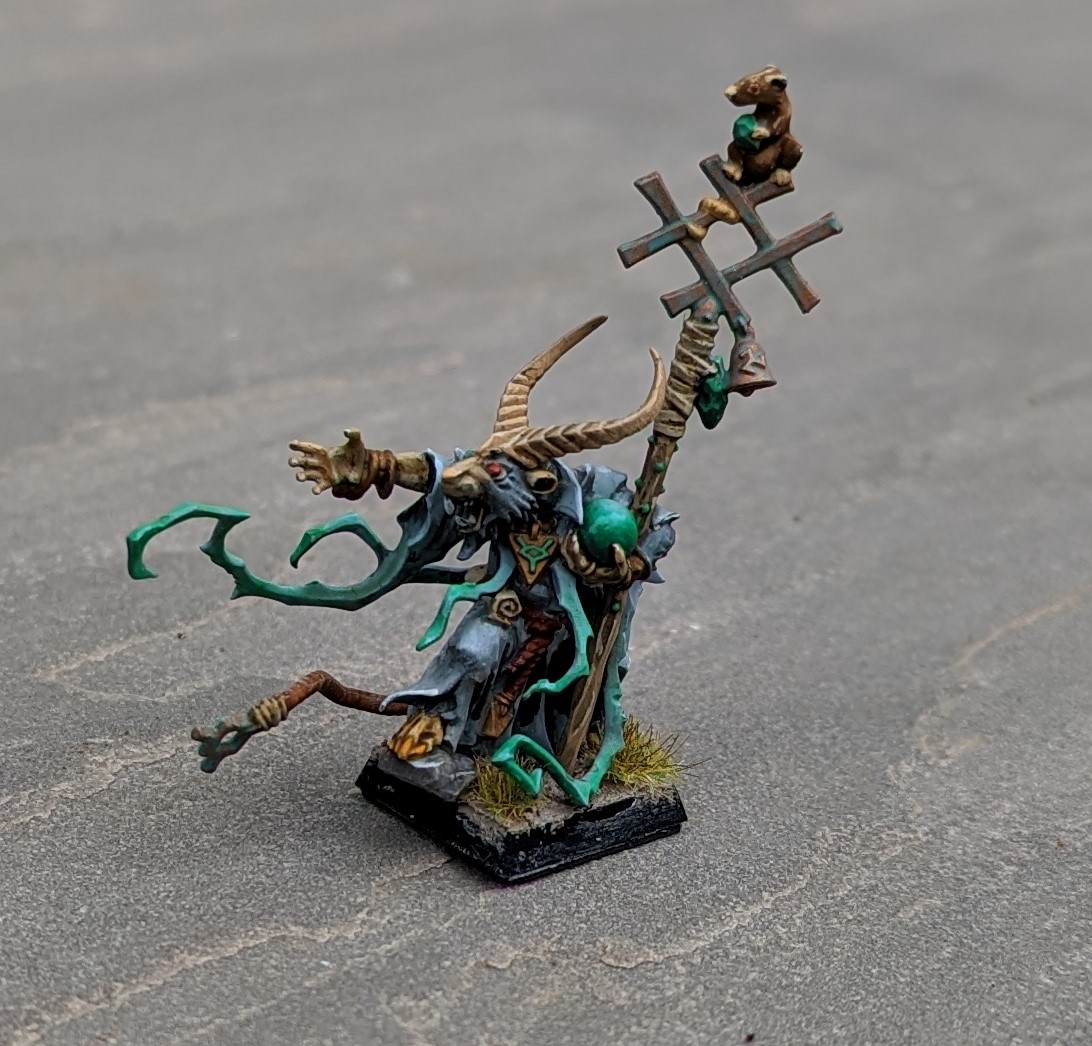
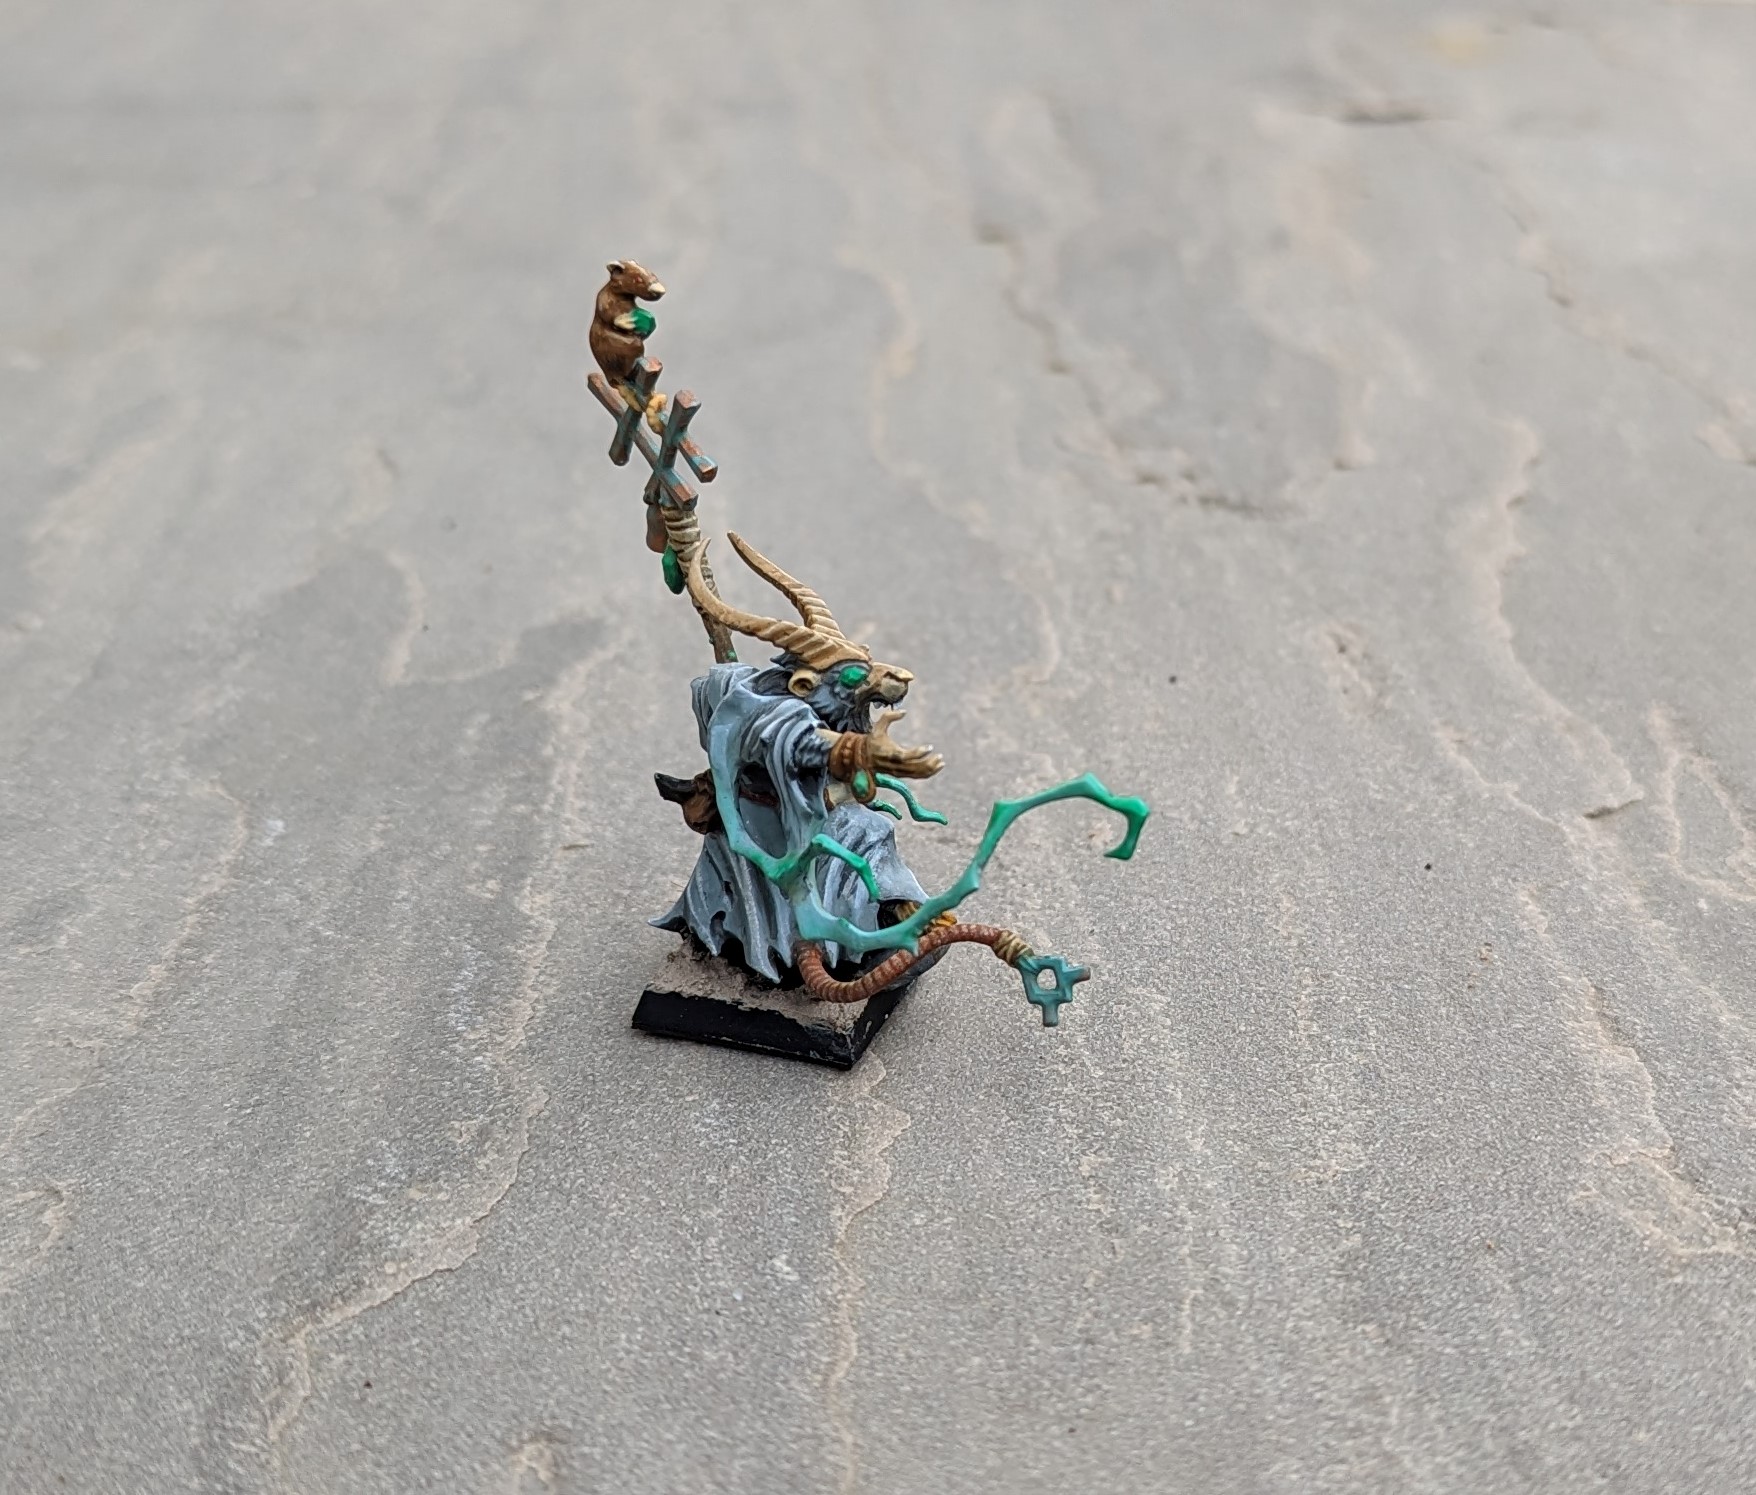
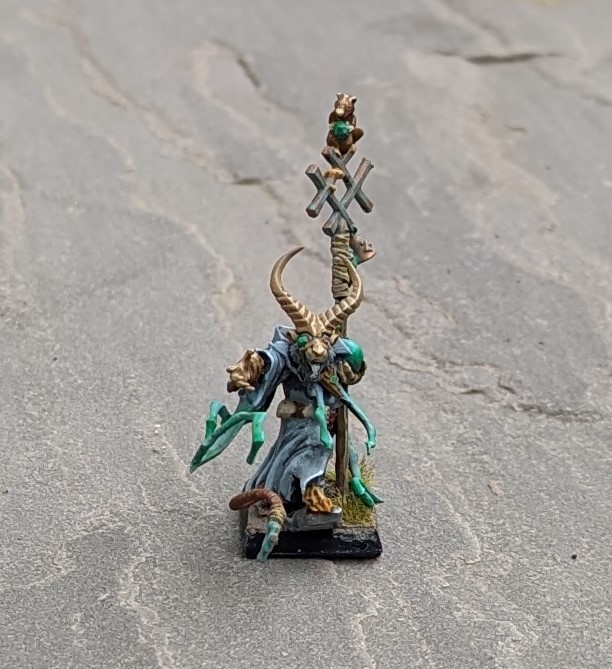
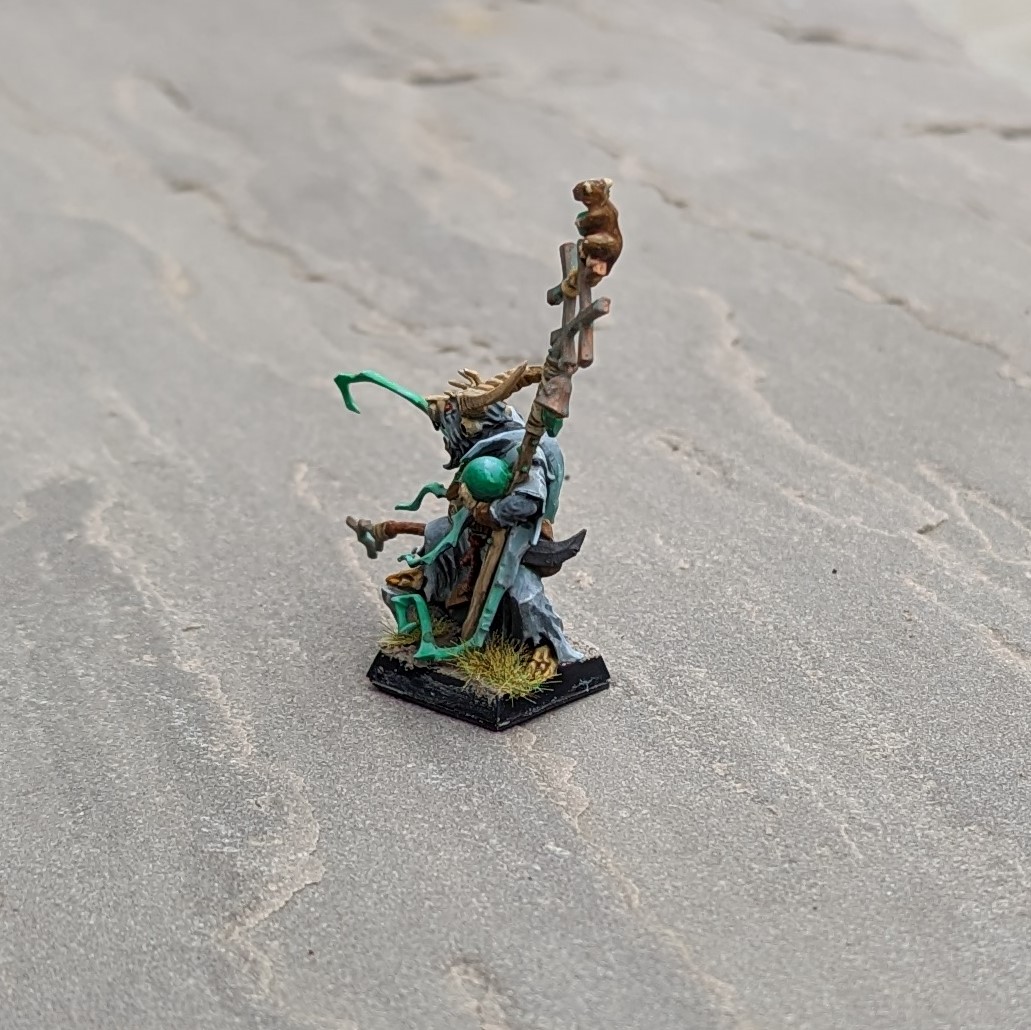
First up, we have a very old Grey Seer. I started painting this chap years ago before he got discarded and forgotten in a shoe box of other half painted figures. I fancied trying some blending from the grey into the green using glazes as part of the overall job. I think it’s turned out OK but could probably have done with some more glazes to really smooth the transition.
The base does need to be finished off by removing the excess basing material and painting the edge but otherwise all done.
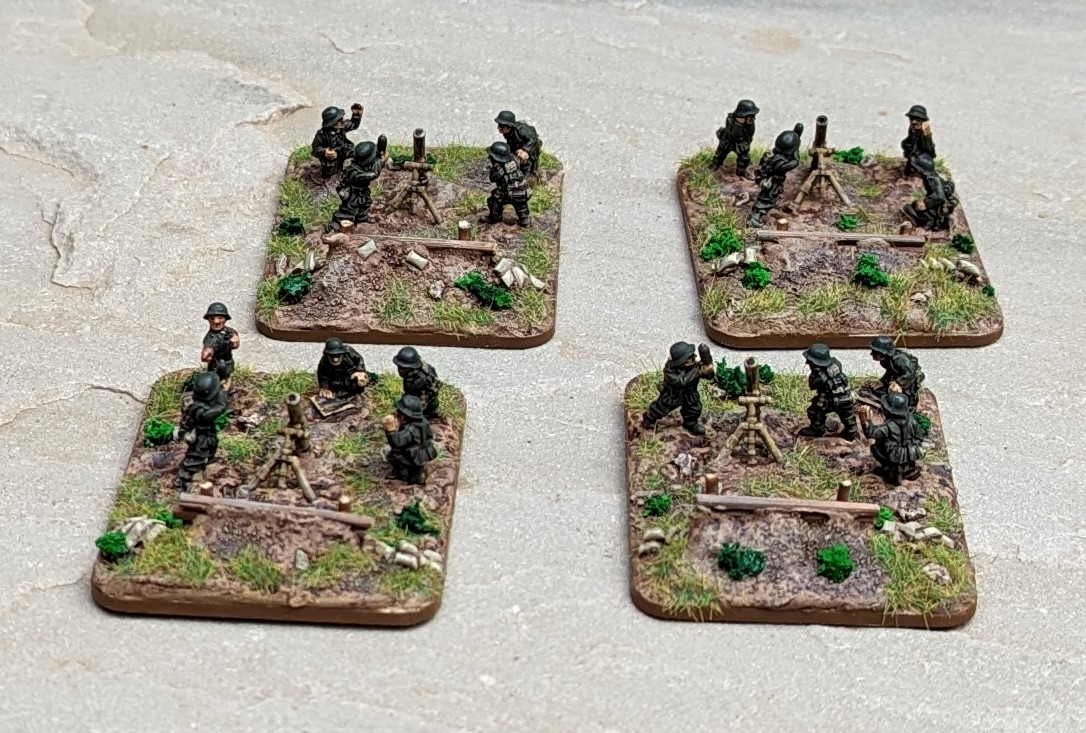
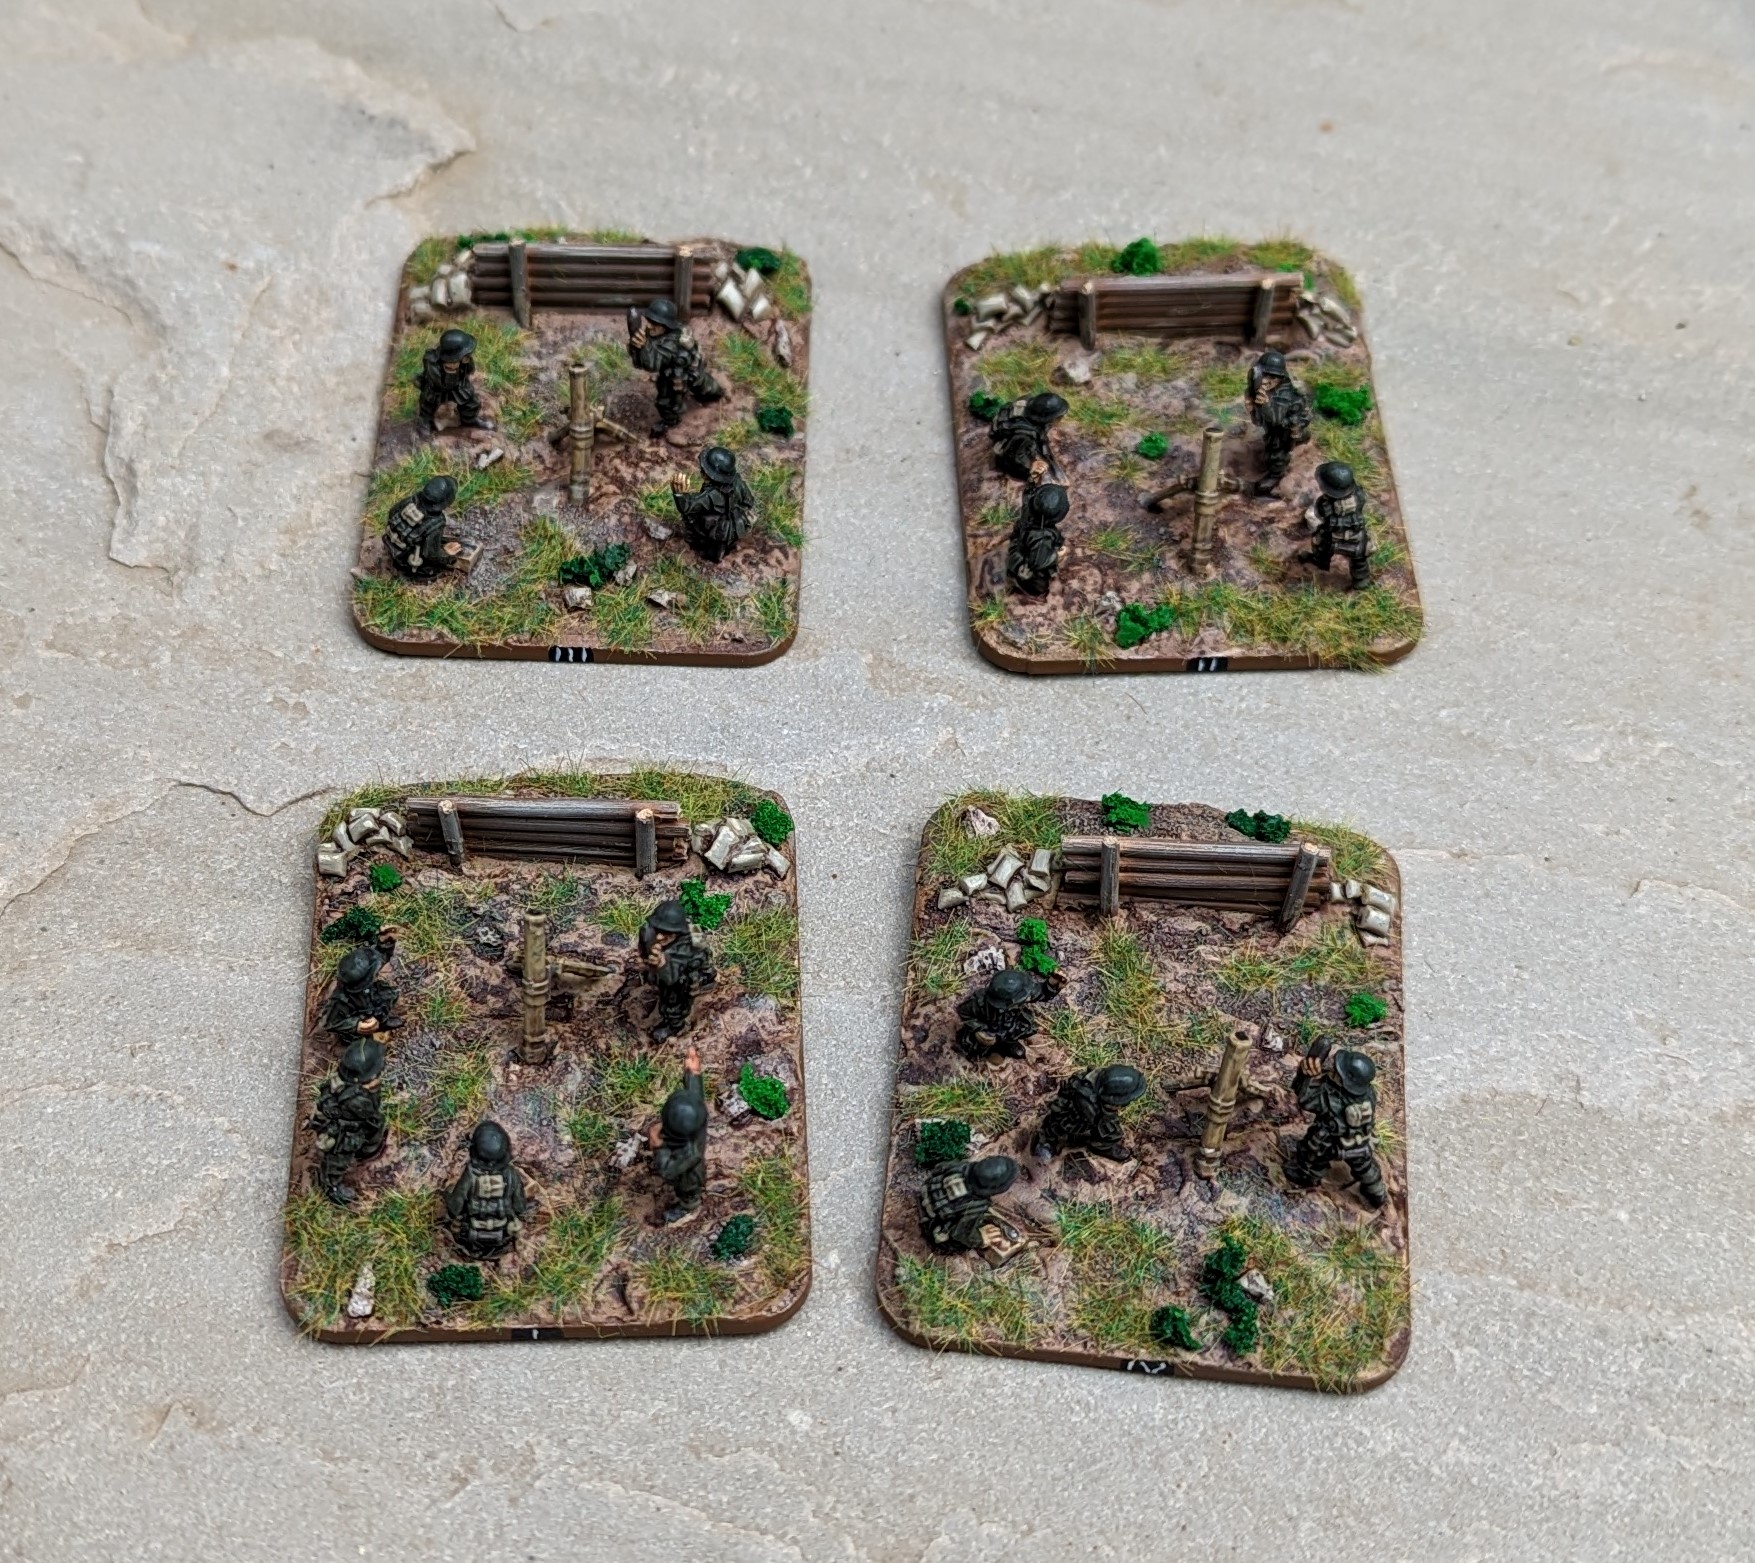
I’ve also completed four 12cm Heavy Mortar teams for my FoW German forces. These will add a little bit of punch to the support teams and, as I’ve modeled them behind earth works, I surely get permanent cover and bullet proof cover don’t I????
These have also been on the painting desk for a while. I started and got a little bored with batch painting various shades of field grey, khaki and other drab colours.
So that’s another 5 models removed from the pile of potential. However, I and my son decided to give Bushido a try and have dived in head first. I’ve started a project on it here:
https://www.beastsofwar.com/project-entry/1815678/
This has pushed the pile of potential in April completely in the wrong direction, particularly as I have 3D printed a lot of terrain for the game. Here’s the latest update but the pile has grown by a net 73 models in the month. Still, just means I will have to work harder at getting things painted – and I’ve already started a lot of the painting for the terrain with 45 models getting at least primed in April with some further along, so I hope to get the number down quickly.
Blood Bowl star players
I’ve now completed three Blood Bowl teams on this project (the Human and Ork teams from the box and a Wood Elf team). Time to add some star players to be rostered.
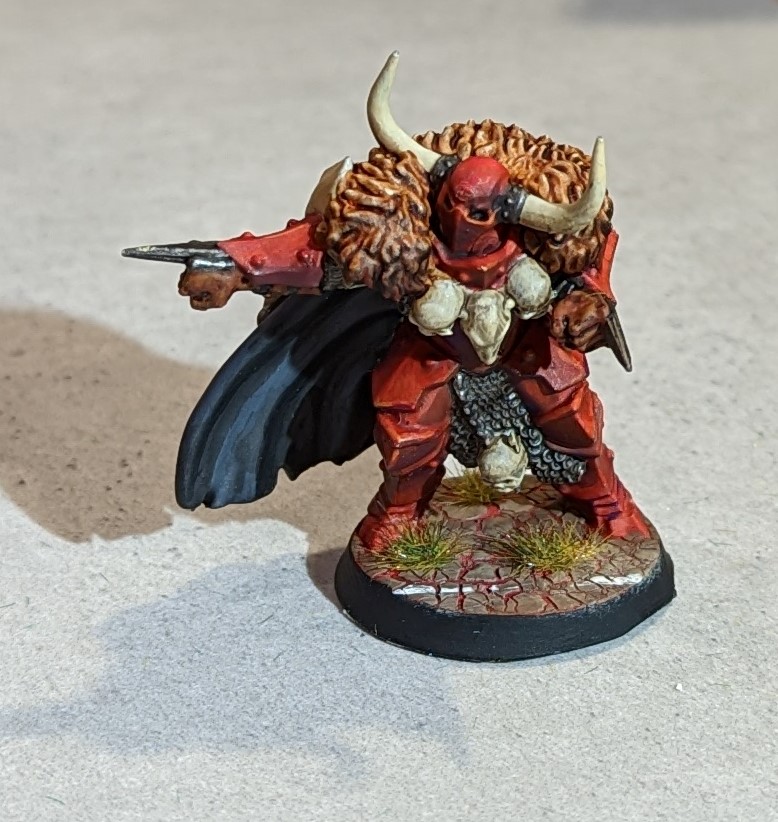
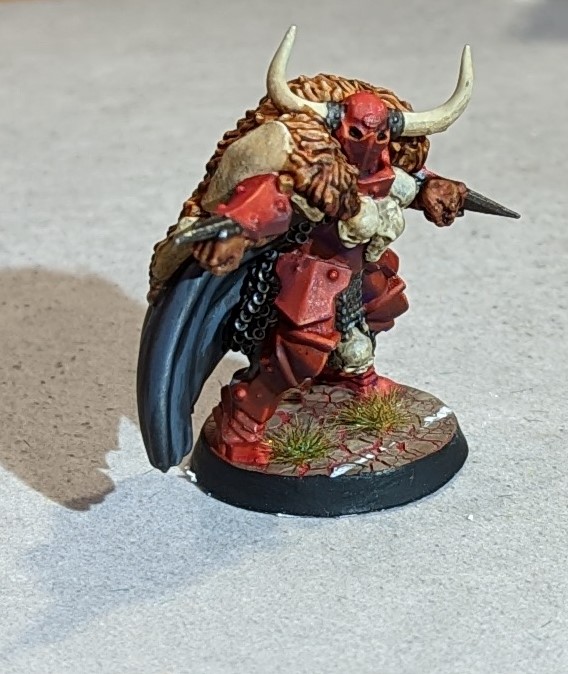
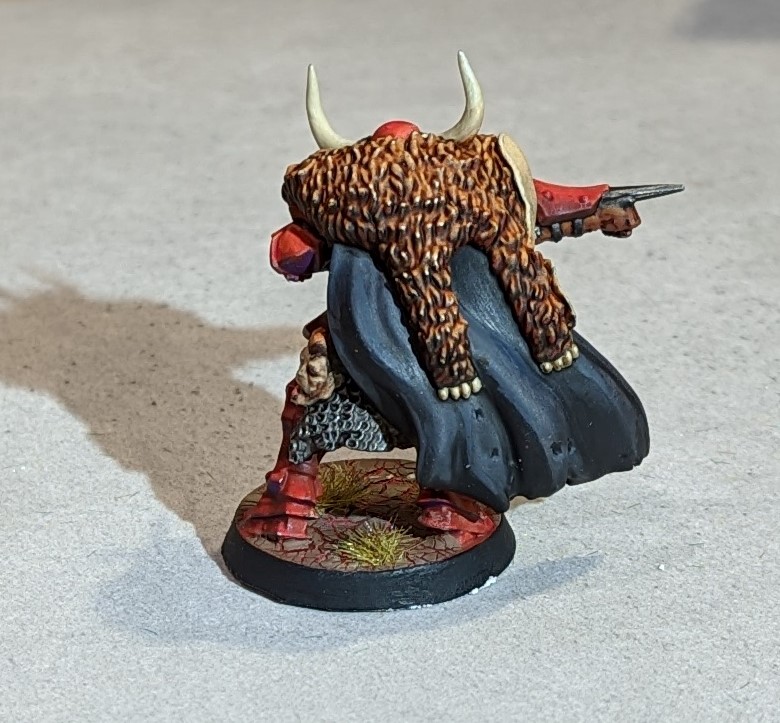
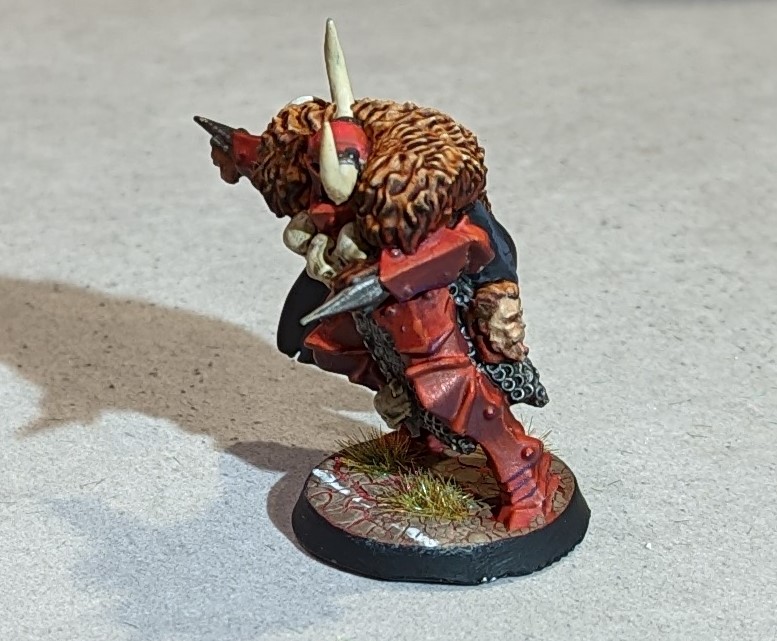
This first star player is a 3d print and I’m going to use as Lord Borak. The base idea is stolen straight from a Gerry Can, so thanks for showing how to actually use crackle paint as I had given up on my bottle!
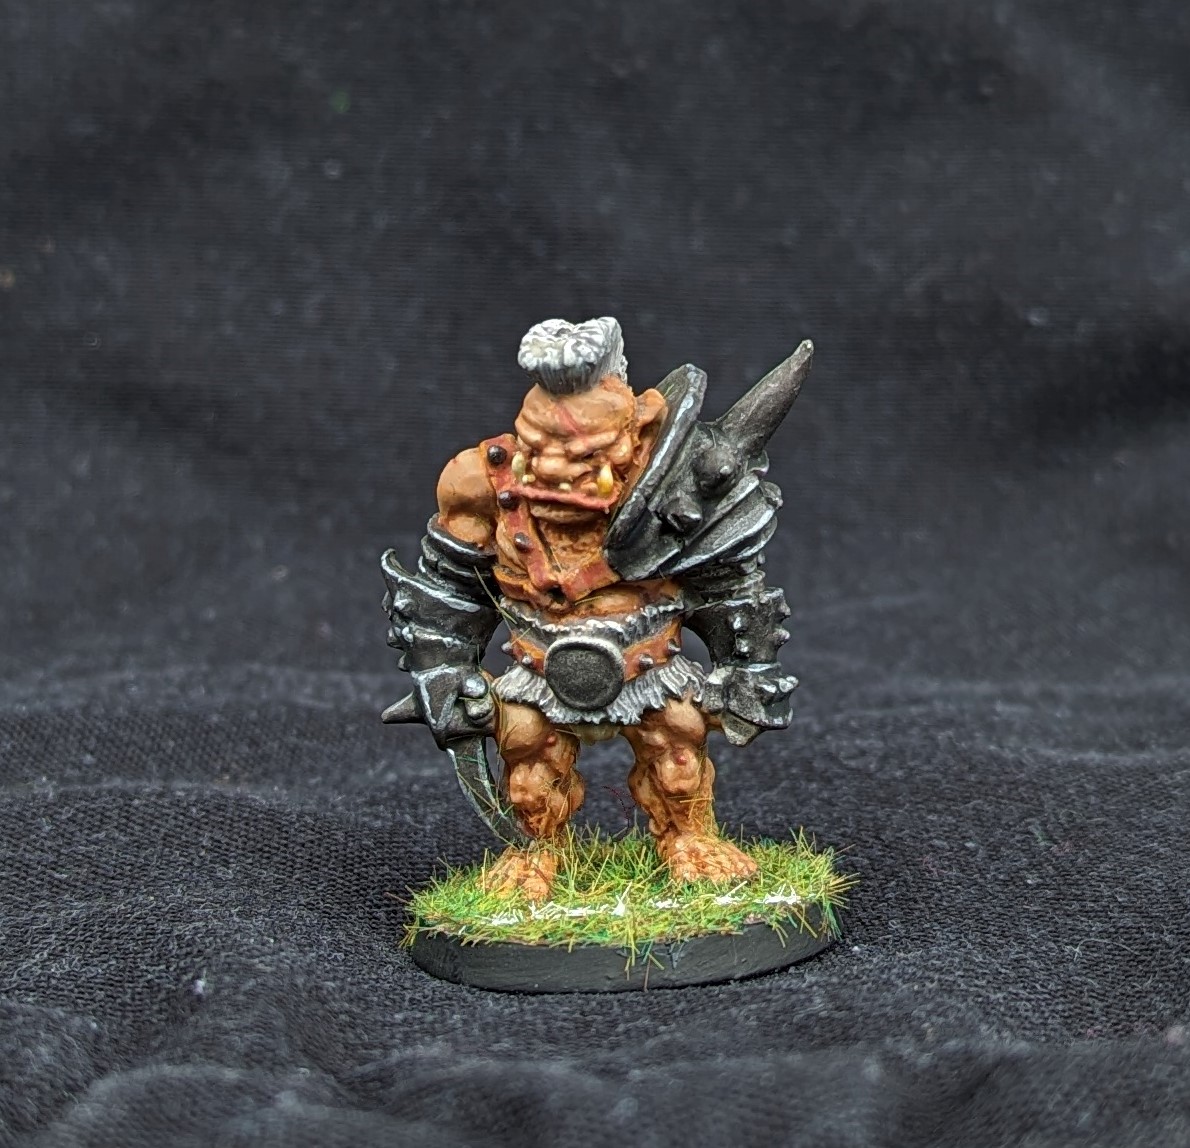
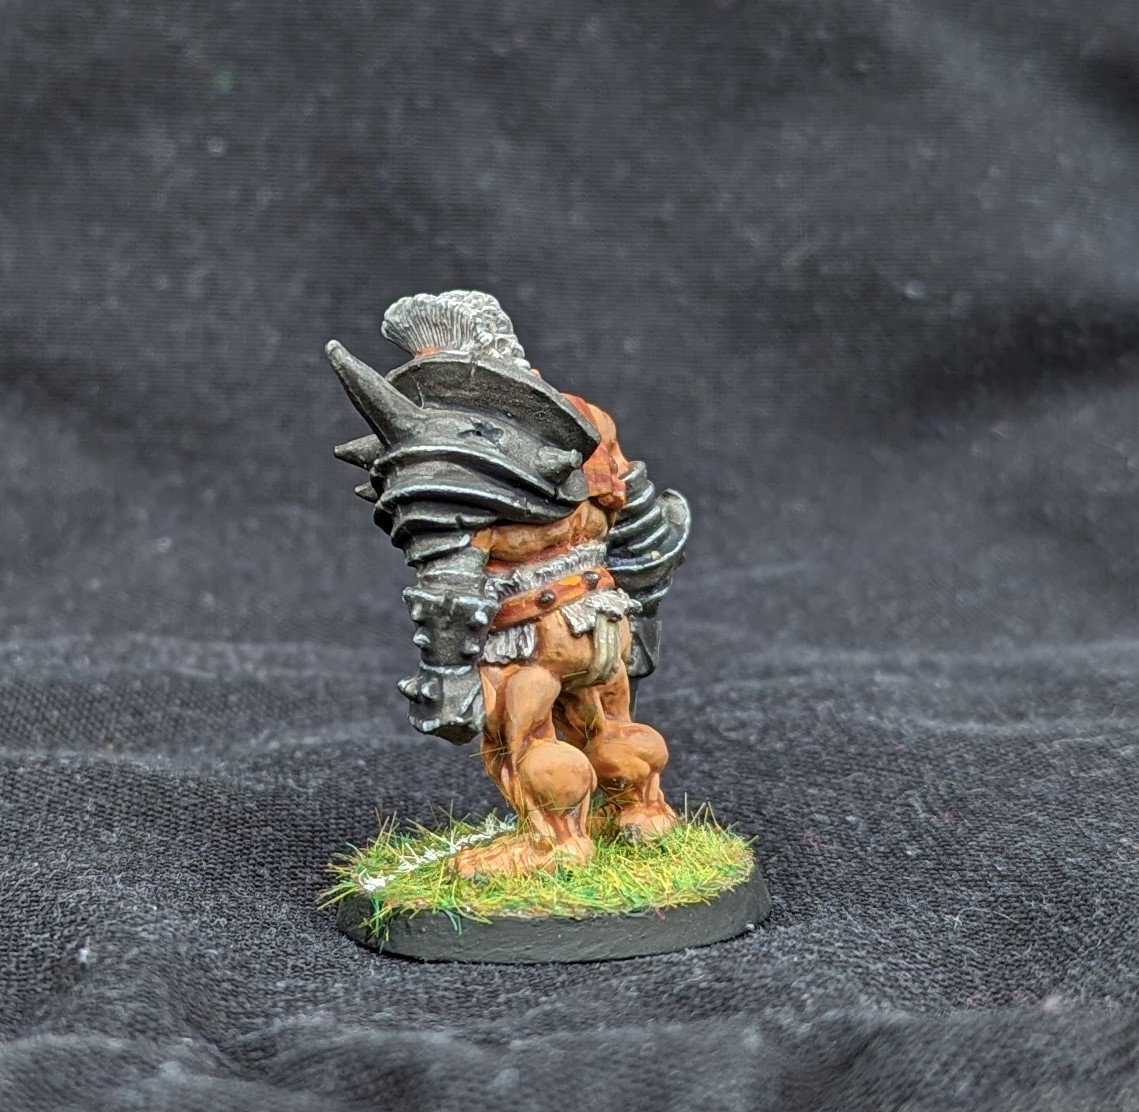
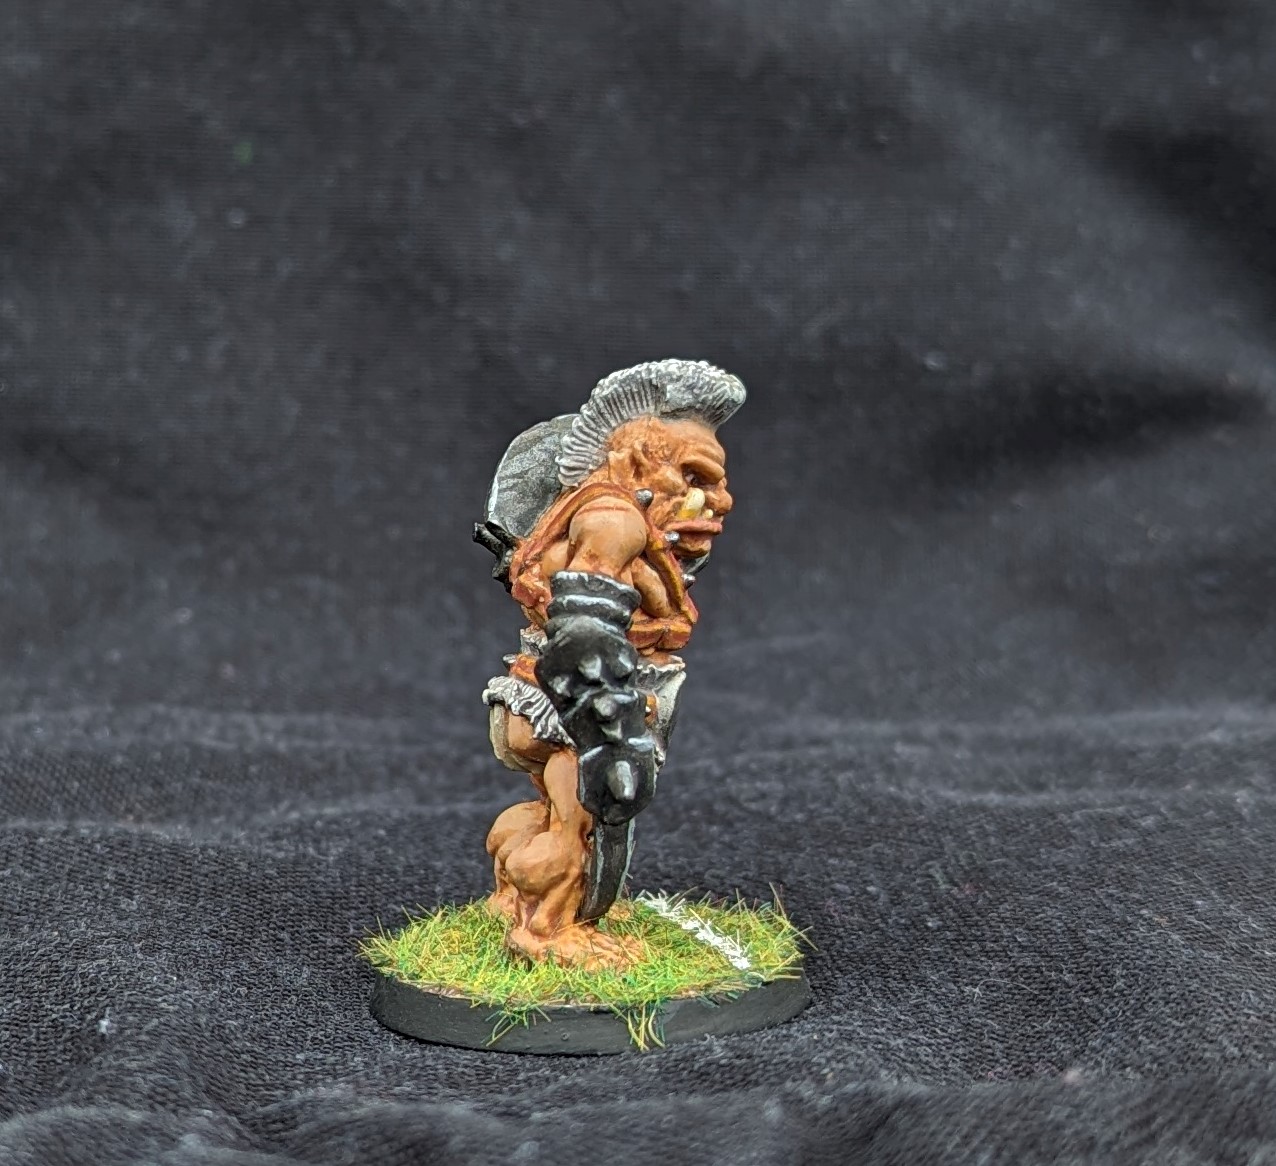
Next up we have a really old metal miniature. I can’t actually remember whether this was just a generic ogre or was the old model for Morg’n’Thorg. Either way, I will treat him as The Mighty Zug as he’s not really ogre sized when compared to the current models – scale creep for you.
Not the most dynamic of poses and I’m also not sure who goes on to a BB pitch wearing a nappy but I like the model. He also clearly never skips leg day either.
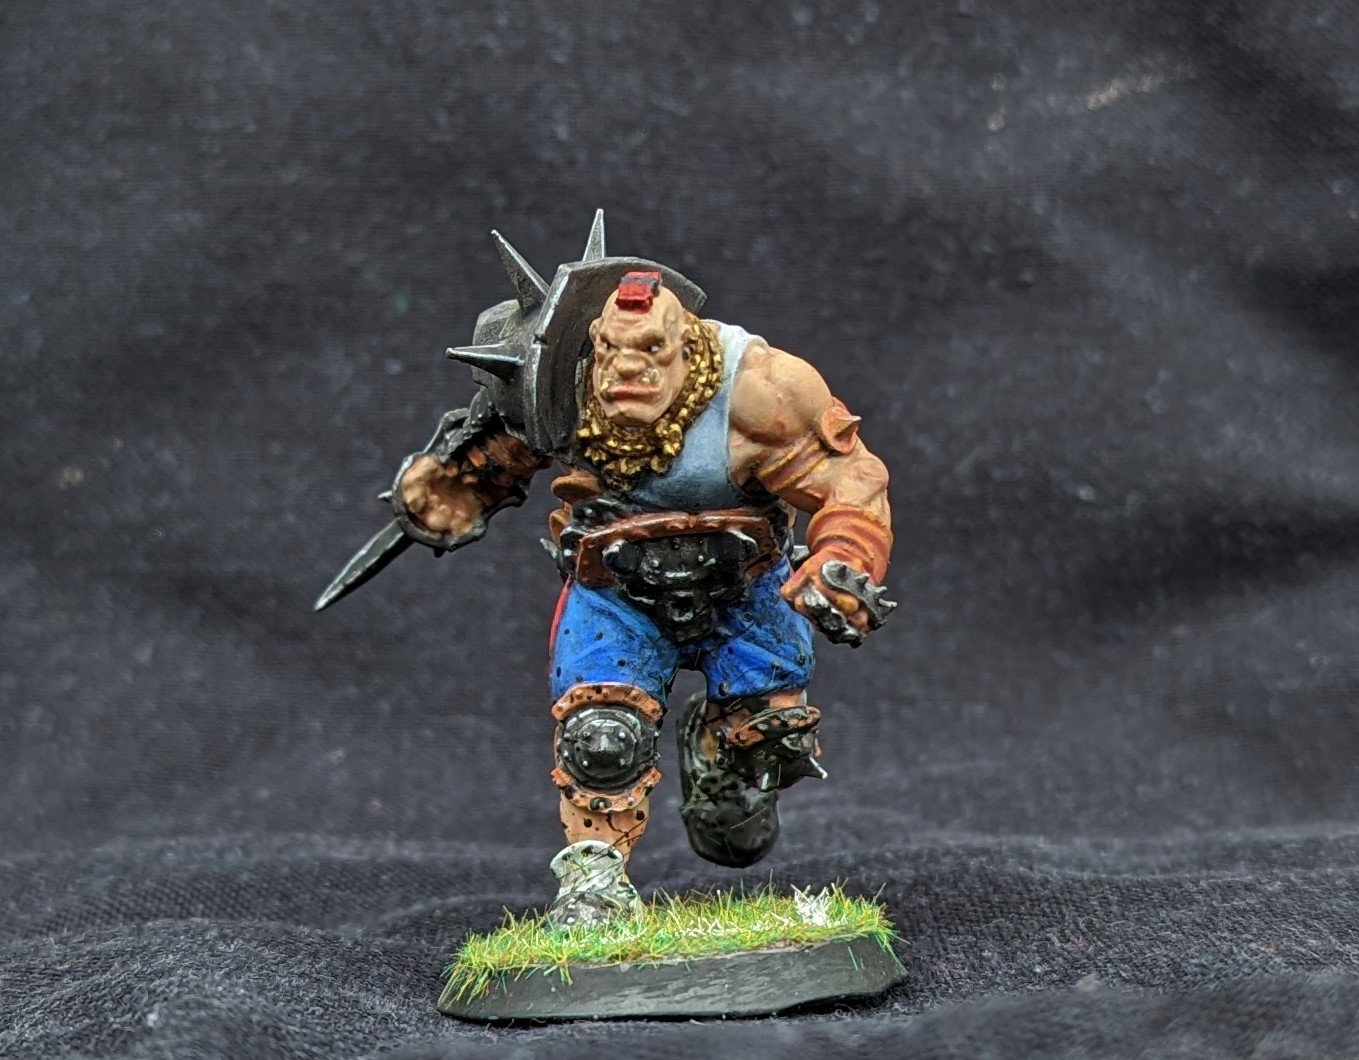
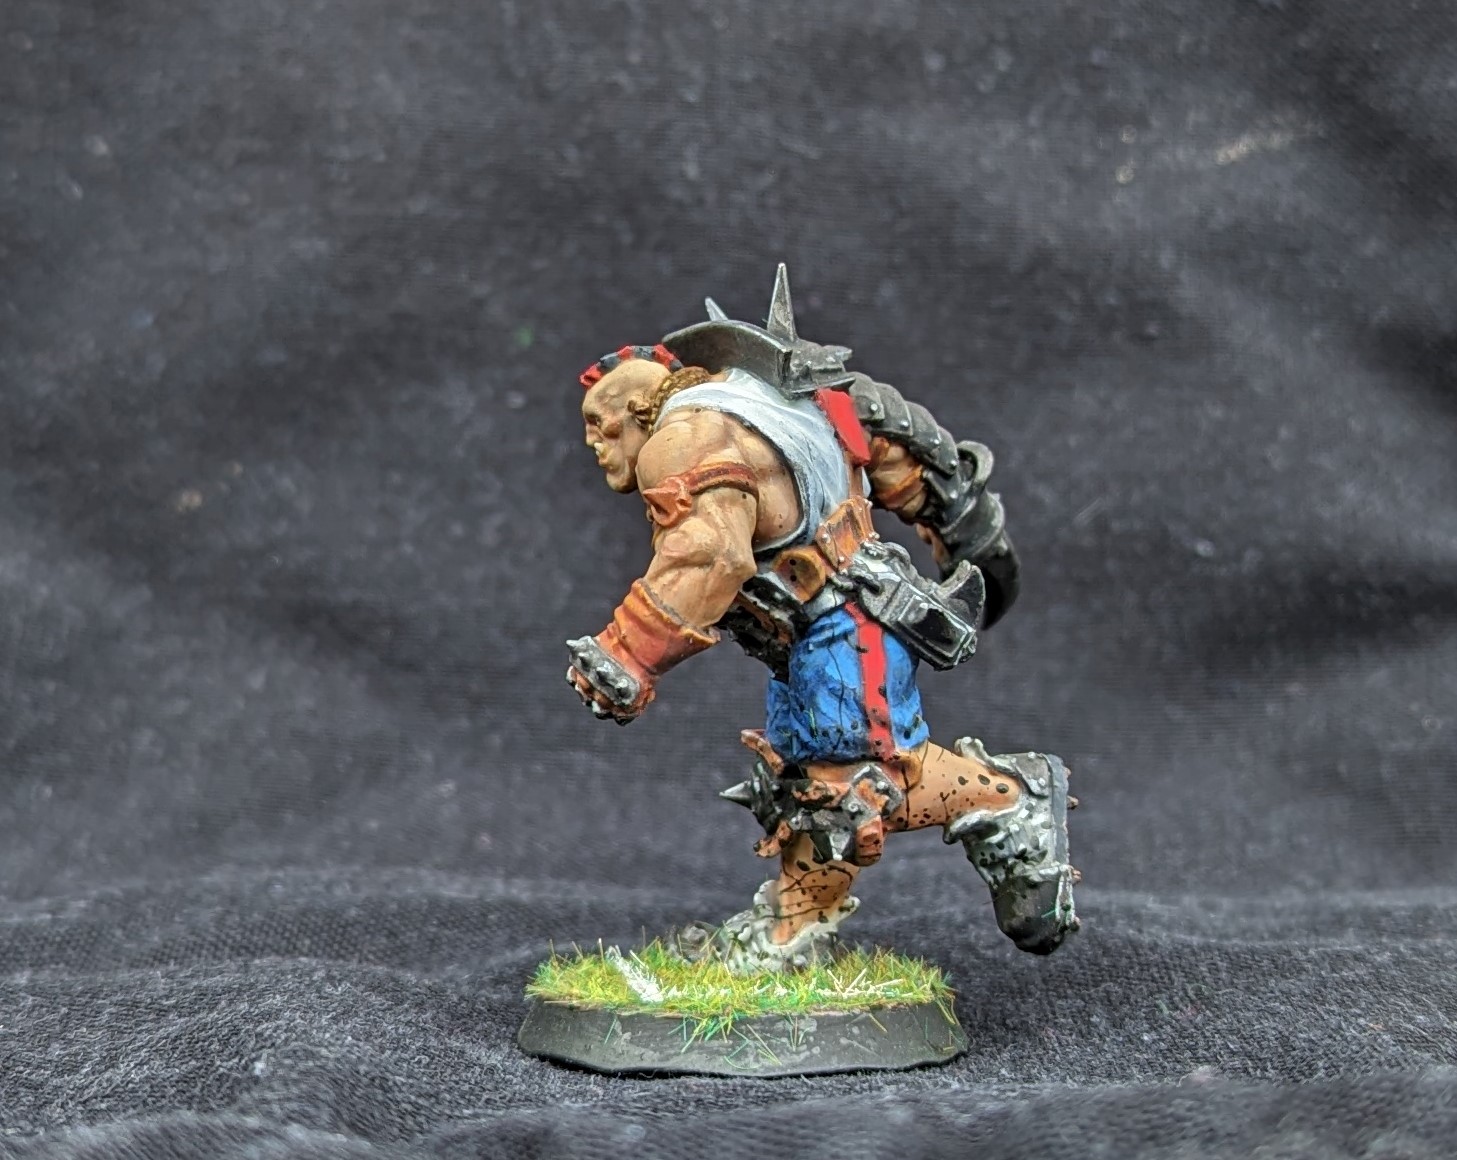
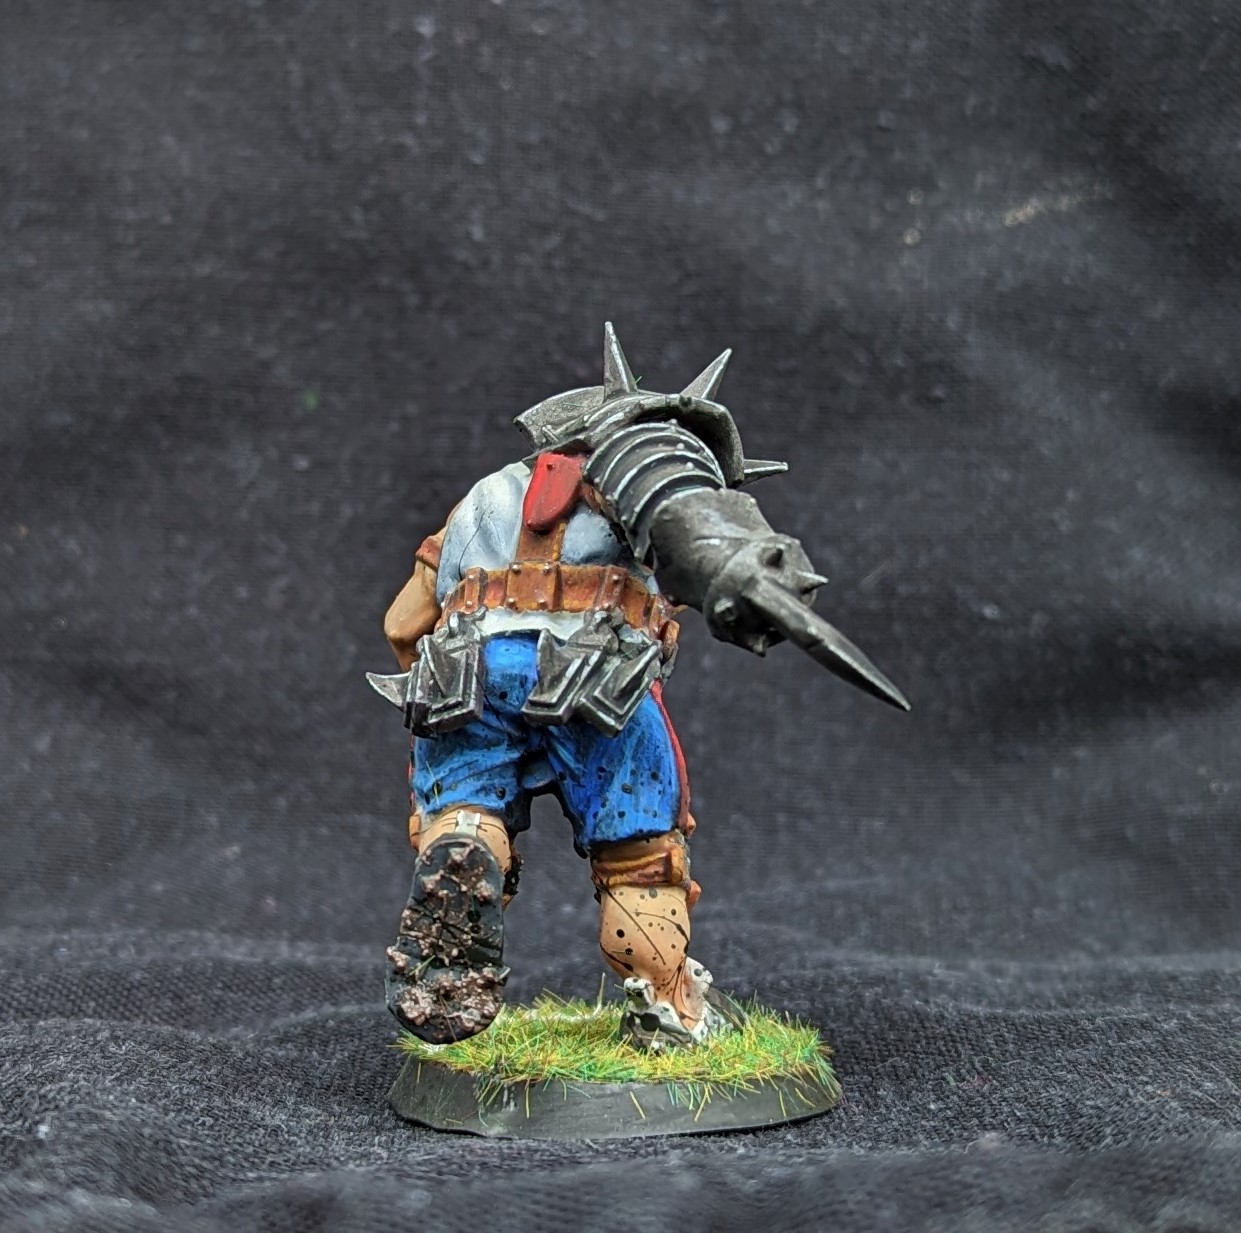
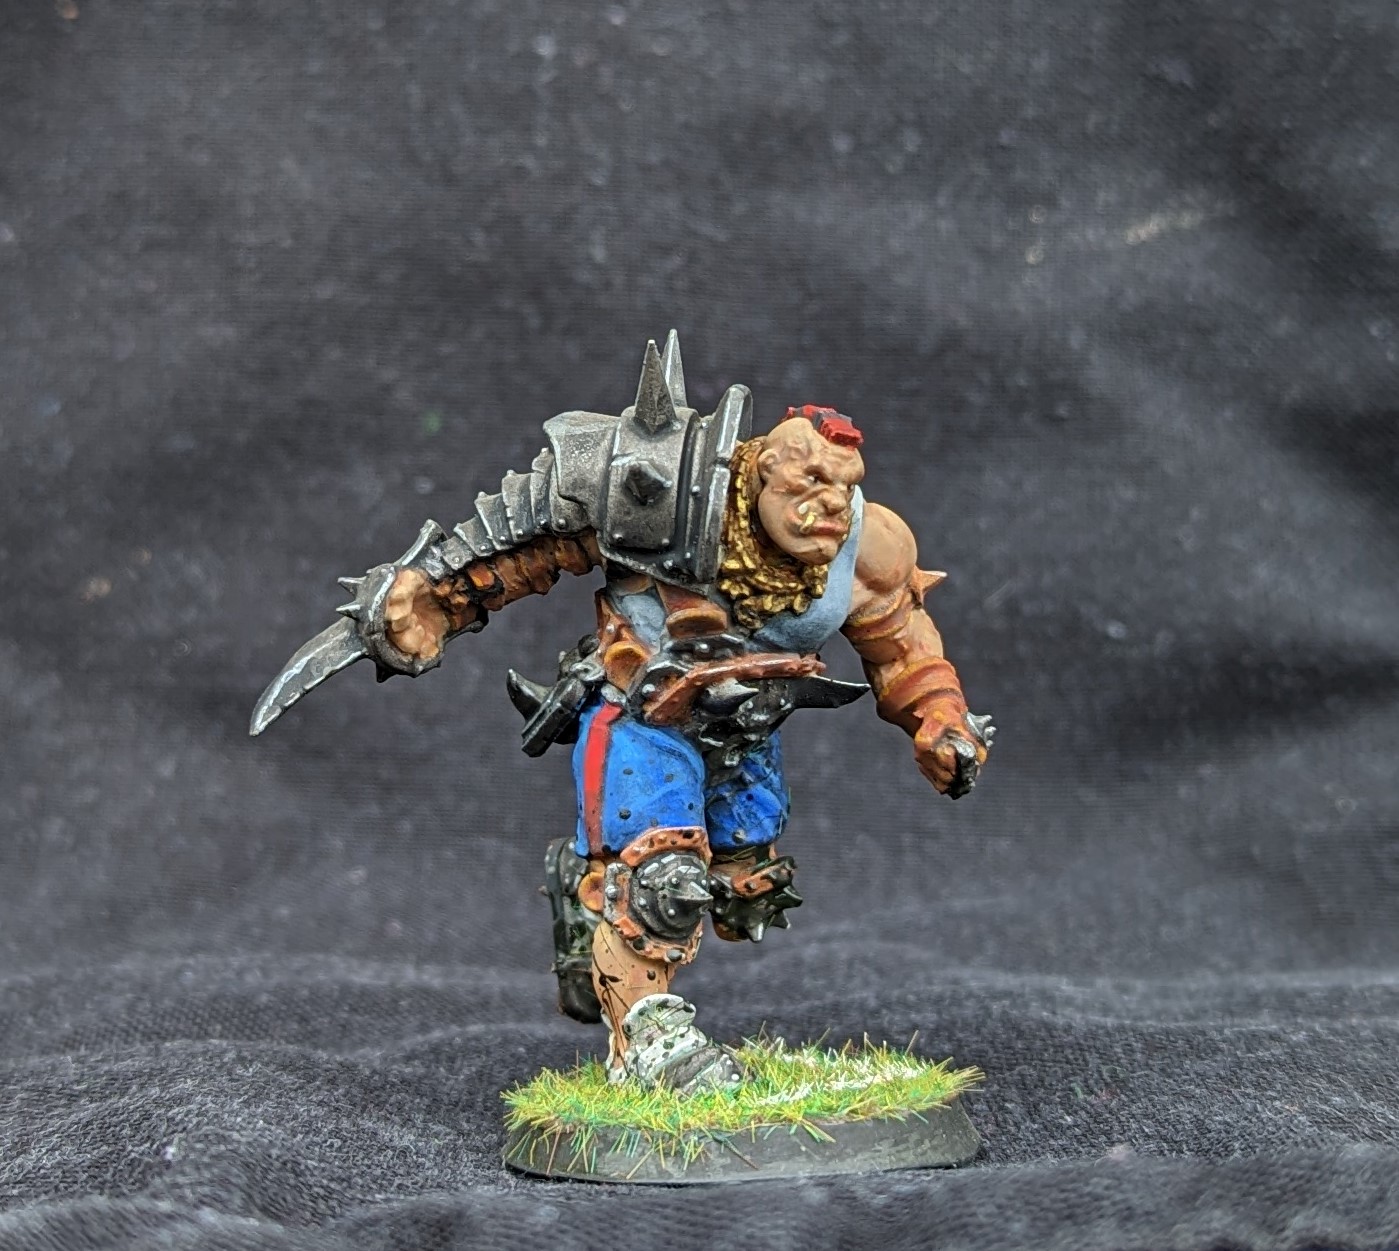
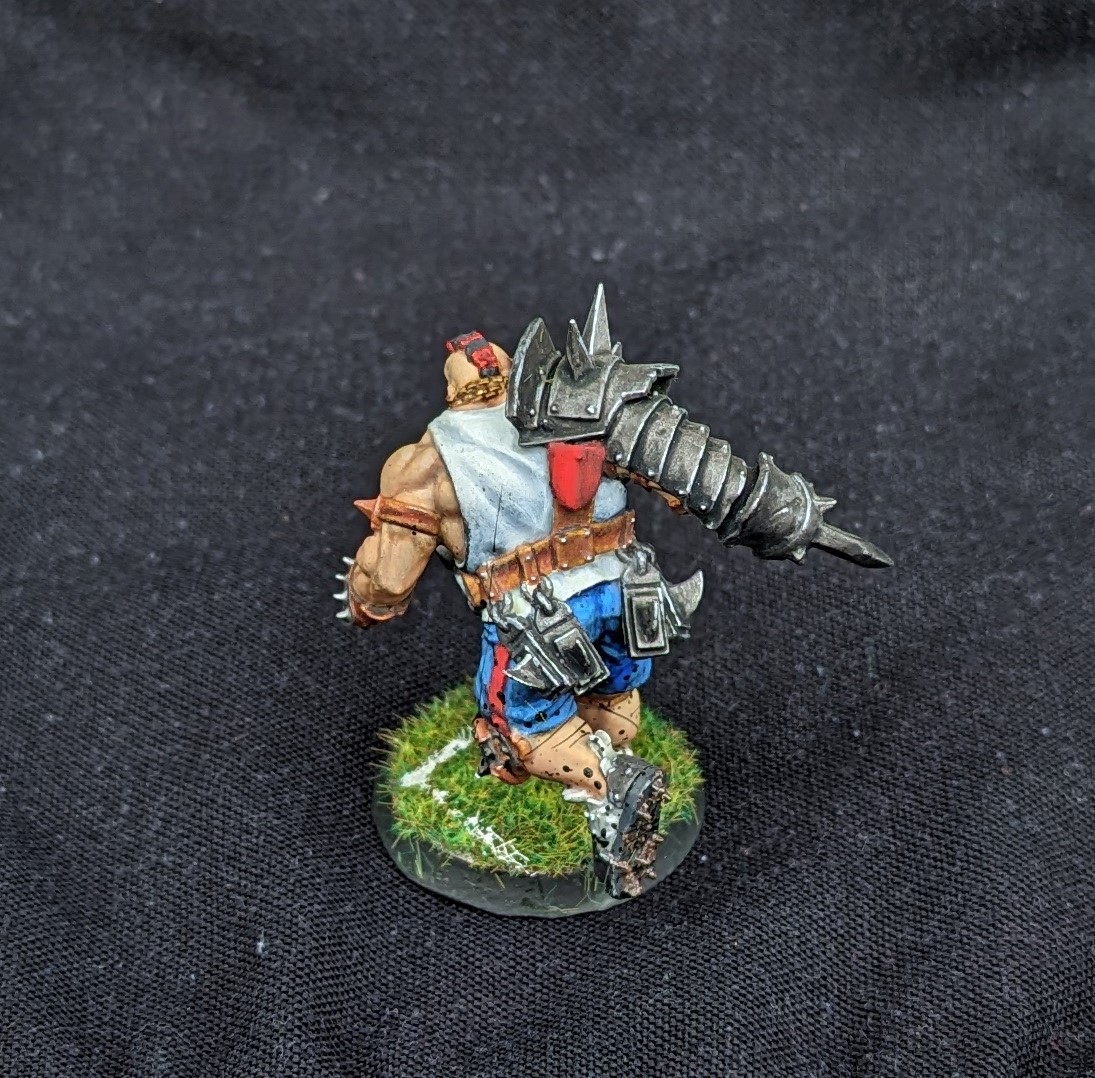
Last up we have another 3d Print which I’ve scaled up a little to look even more imposing on the pitch. This will be my new Morg’n’Thorg.
I’ve painted the white vest using oil paints. It takes a long time to dry but I’m really starting to like using the oils for blending. The rest is all acrylic.
I tried to splatter mud over his lower half using a MIG enamel. I’m not entirely convinced with the result and something I need to continue to work on. I copied an approach by Nightshift, a scale modeler on YouTube but he works at a different scale so I maybe I should have taken this into account first.
To update on the Pile Of Potential tally. One model got added to the pile in March. This was not my doing and was a present from work colleagues. They don’t know that I paint models but at a previous team event, I mentioned that I would really like to own a tank, preferably a Churchill. Such lofty goals are out of my price range. As I’m changing roles soon, I was presented with a 1:35 scale model Leopard tank, which was gratefully received and has been added to the pile.
The three star players do however reduce the total slightly.
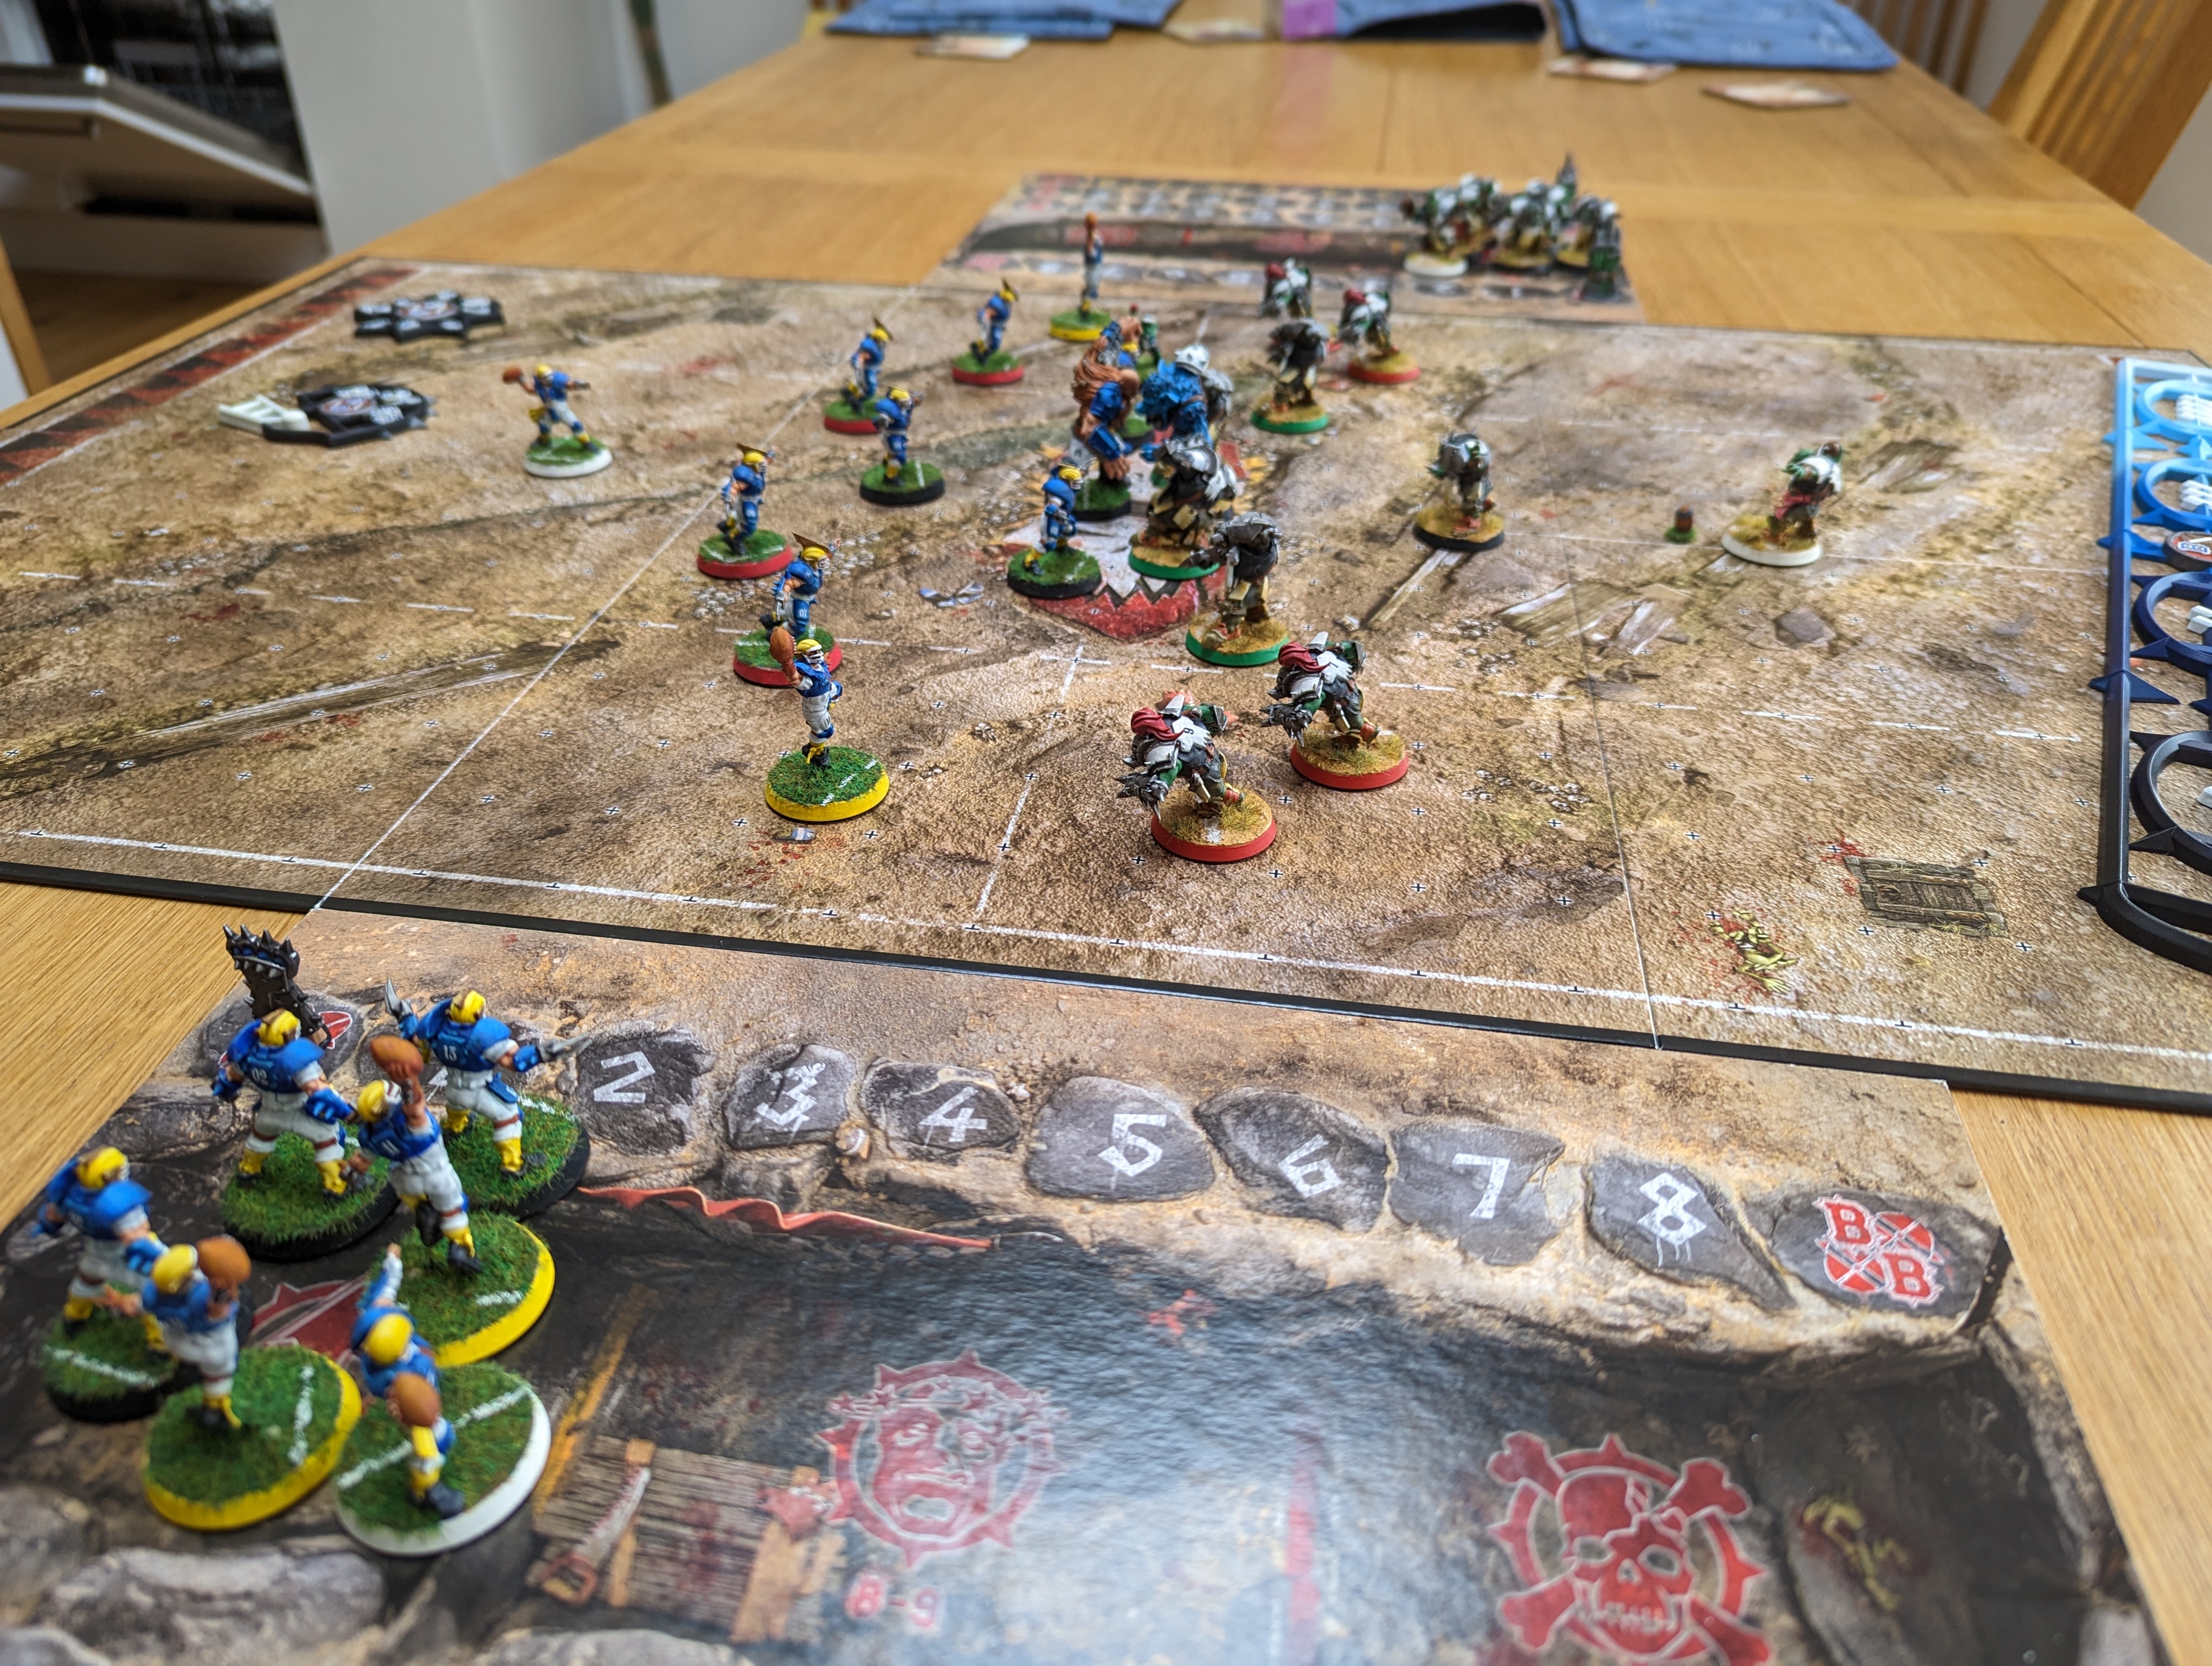
"What's that Bob, more Blood Bowl?". "It sure looks like it Jim."
I’ve always liked Blood Bowl and still have my 2nd edition boxed version hidden away somewhere. So when GW released an updated version in 2016, I got myself a copy. I had no-one to play with, but that didn’t stop me!
I painted the Orc team up some time ago along with the counters and templates. I’ve also painted a Wood Elf team (all here on this project) but the human team lay languishing in the box, just bare blue plastic. But no more, I got myself some spare minis to make a full team (because GW obviously don’t provide the full 16 players in the box) as well as a lovely ogre to add some punch.
For colour schemes, I went for a mix of my two favourite football teams, Southend United and Brighton (don’t ask). So while it’s not the most original, I like the look.
I had a real challenge with the blue. I was trying out some Scale 75 paint. It’s gel based but I found it very chalky and inconsistent in its coverage. It took several layers to get right but then looked really thick. I did consider stripping them and starting again but just didn’t have the time. These models were also the first time I tried out speed paints, in particular the white. It worked well but I’m not overly sure I’m happy with the final look. What I have learnt is I need to experiment more with both Scale 75 and Speed paints.

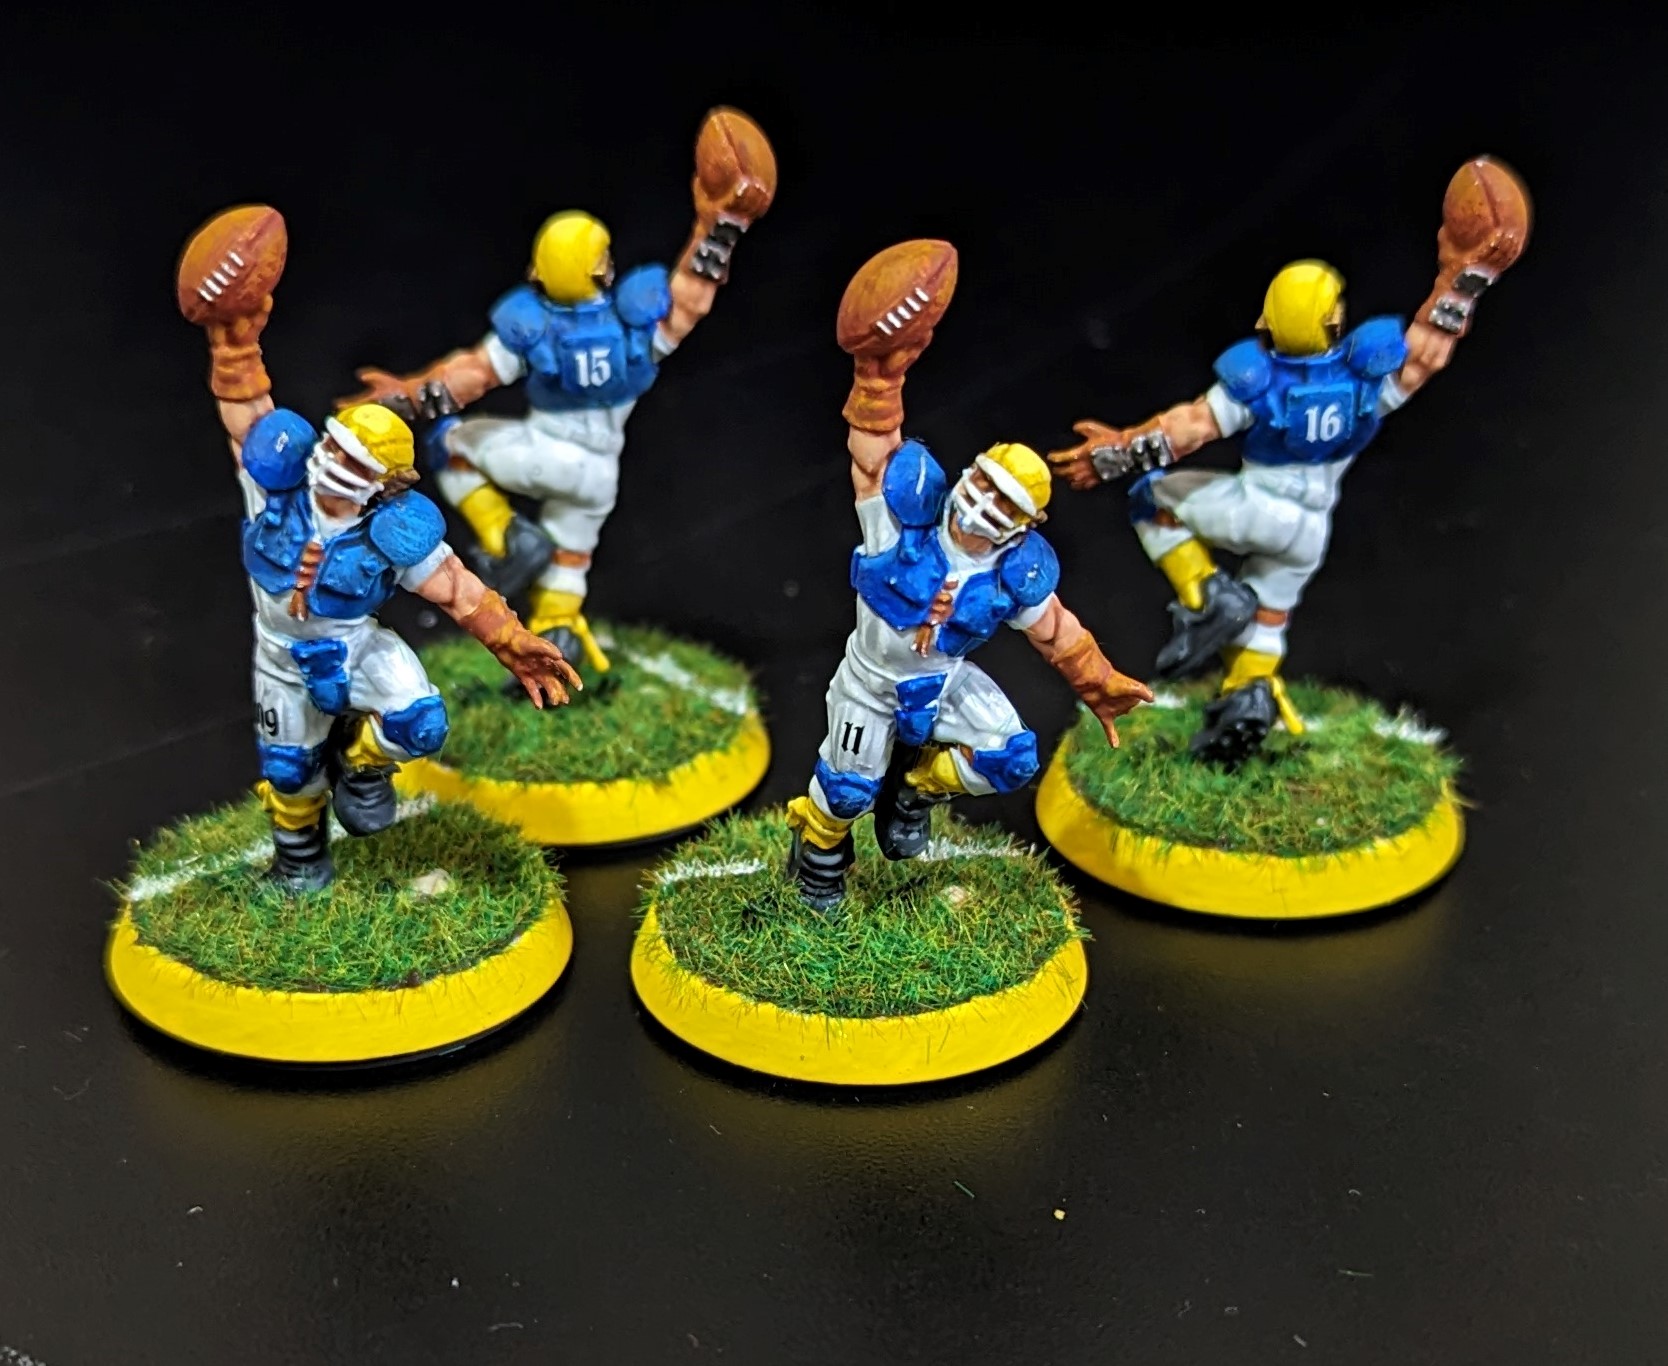

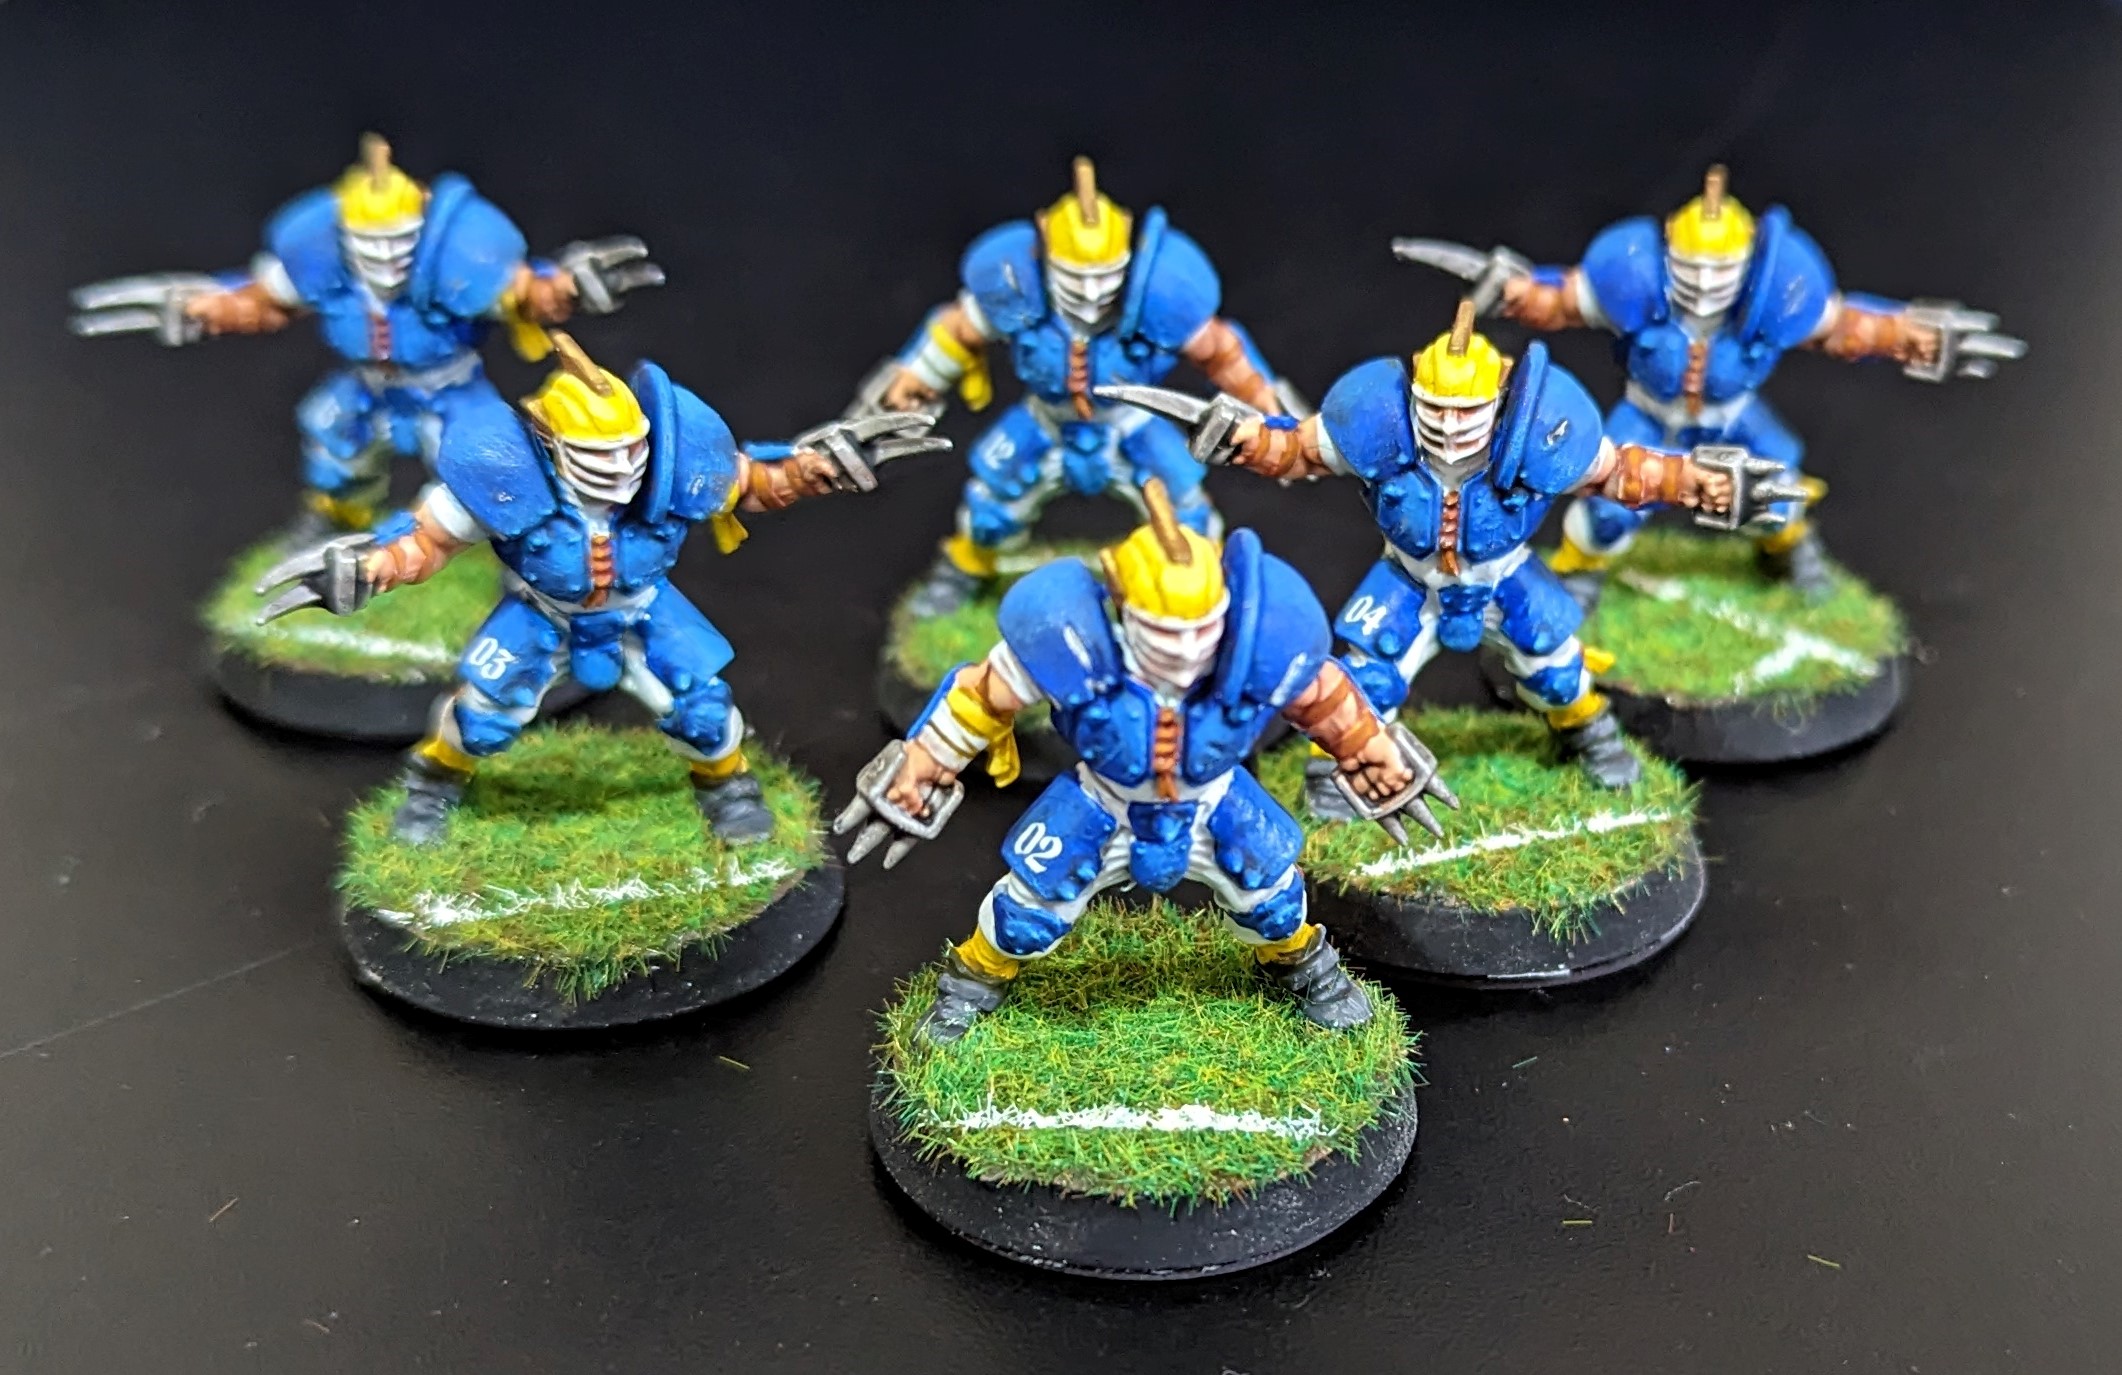

And here’s the team photo for the calendar
 Most of these are even in focus
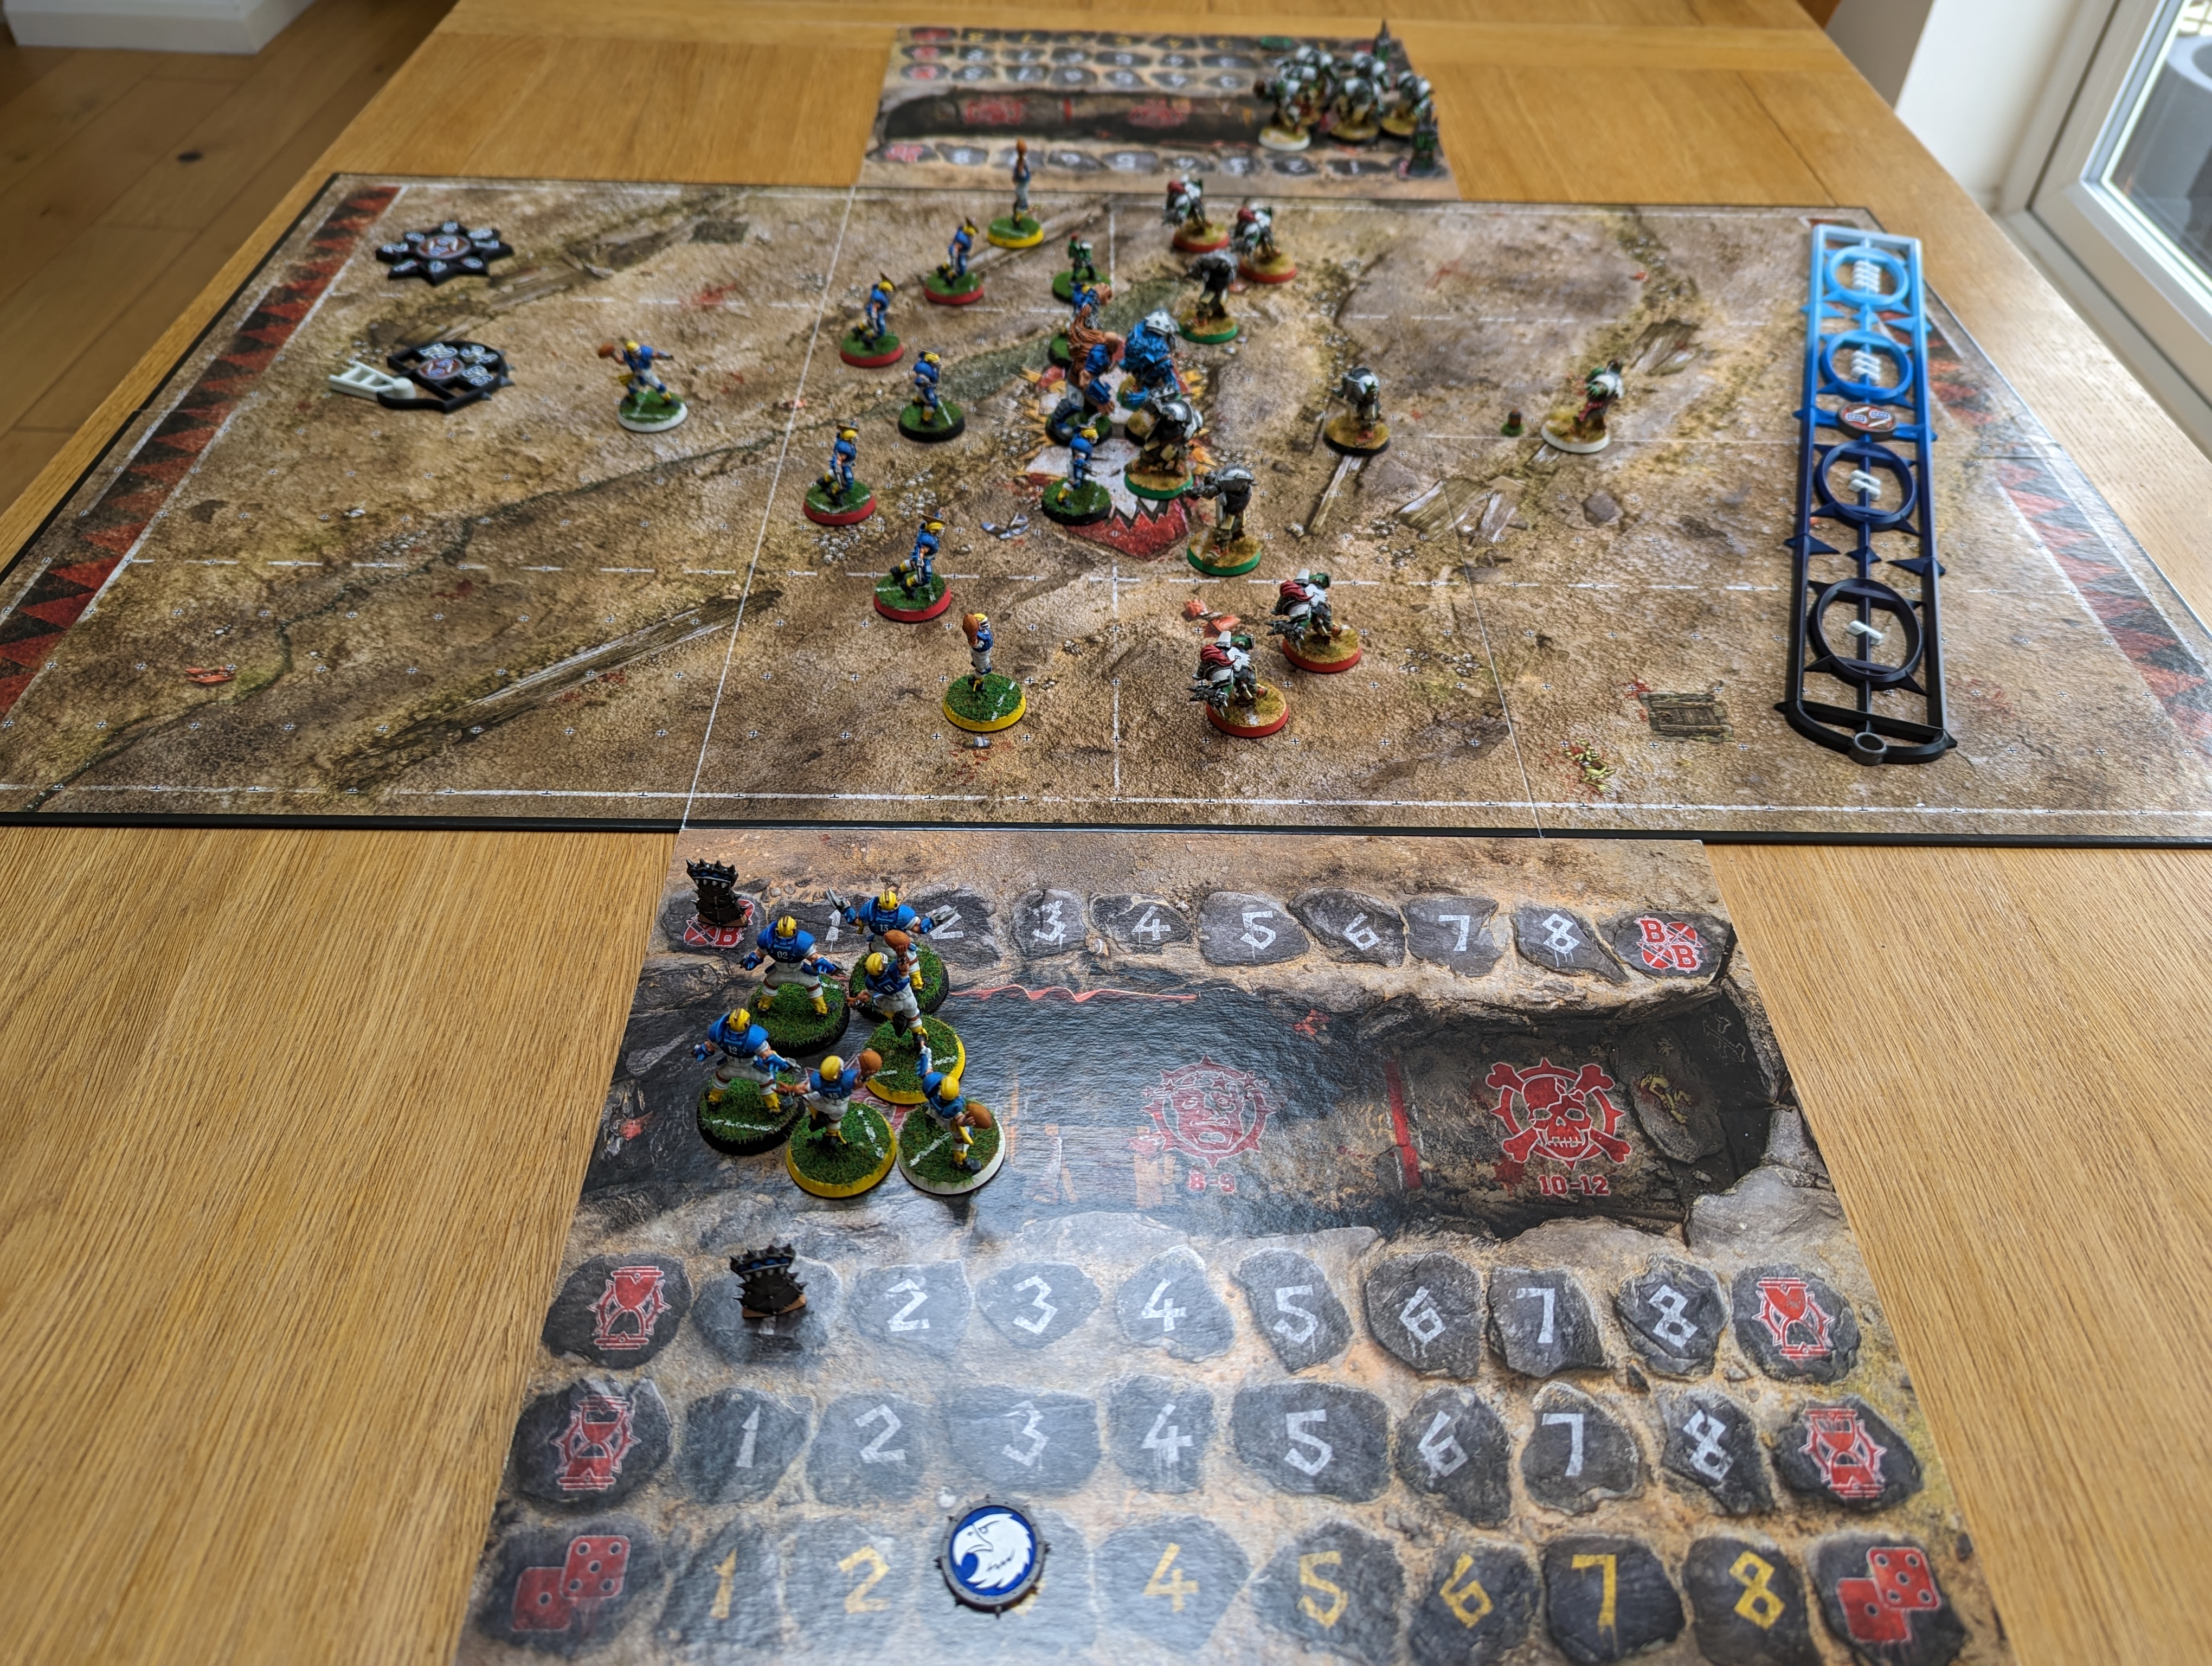
Which now means, 7 years after getting the boxed game, I’ve painted everything in it. Well done me. Here’s a recent match which the Orcs won 2-0 thanks to some violent actions from their Black Orcs that left a number of the human team needing a good chiropractor.
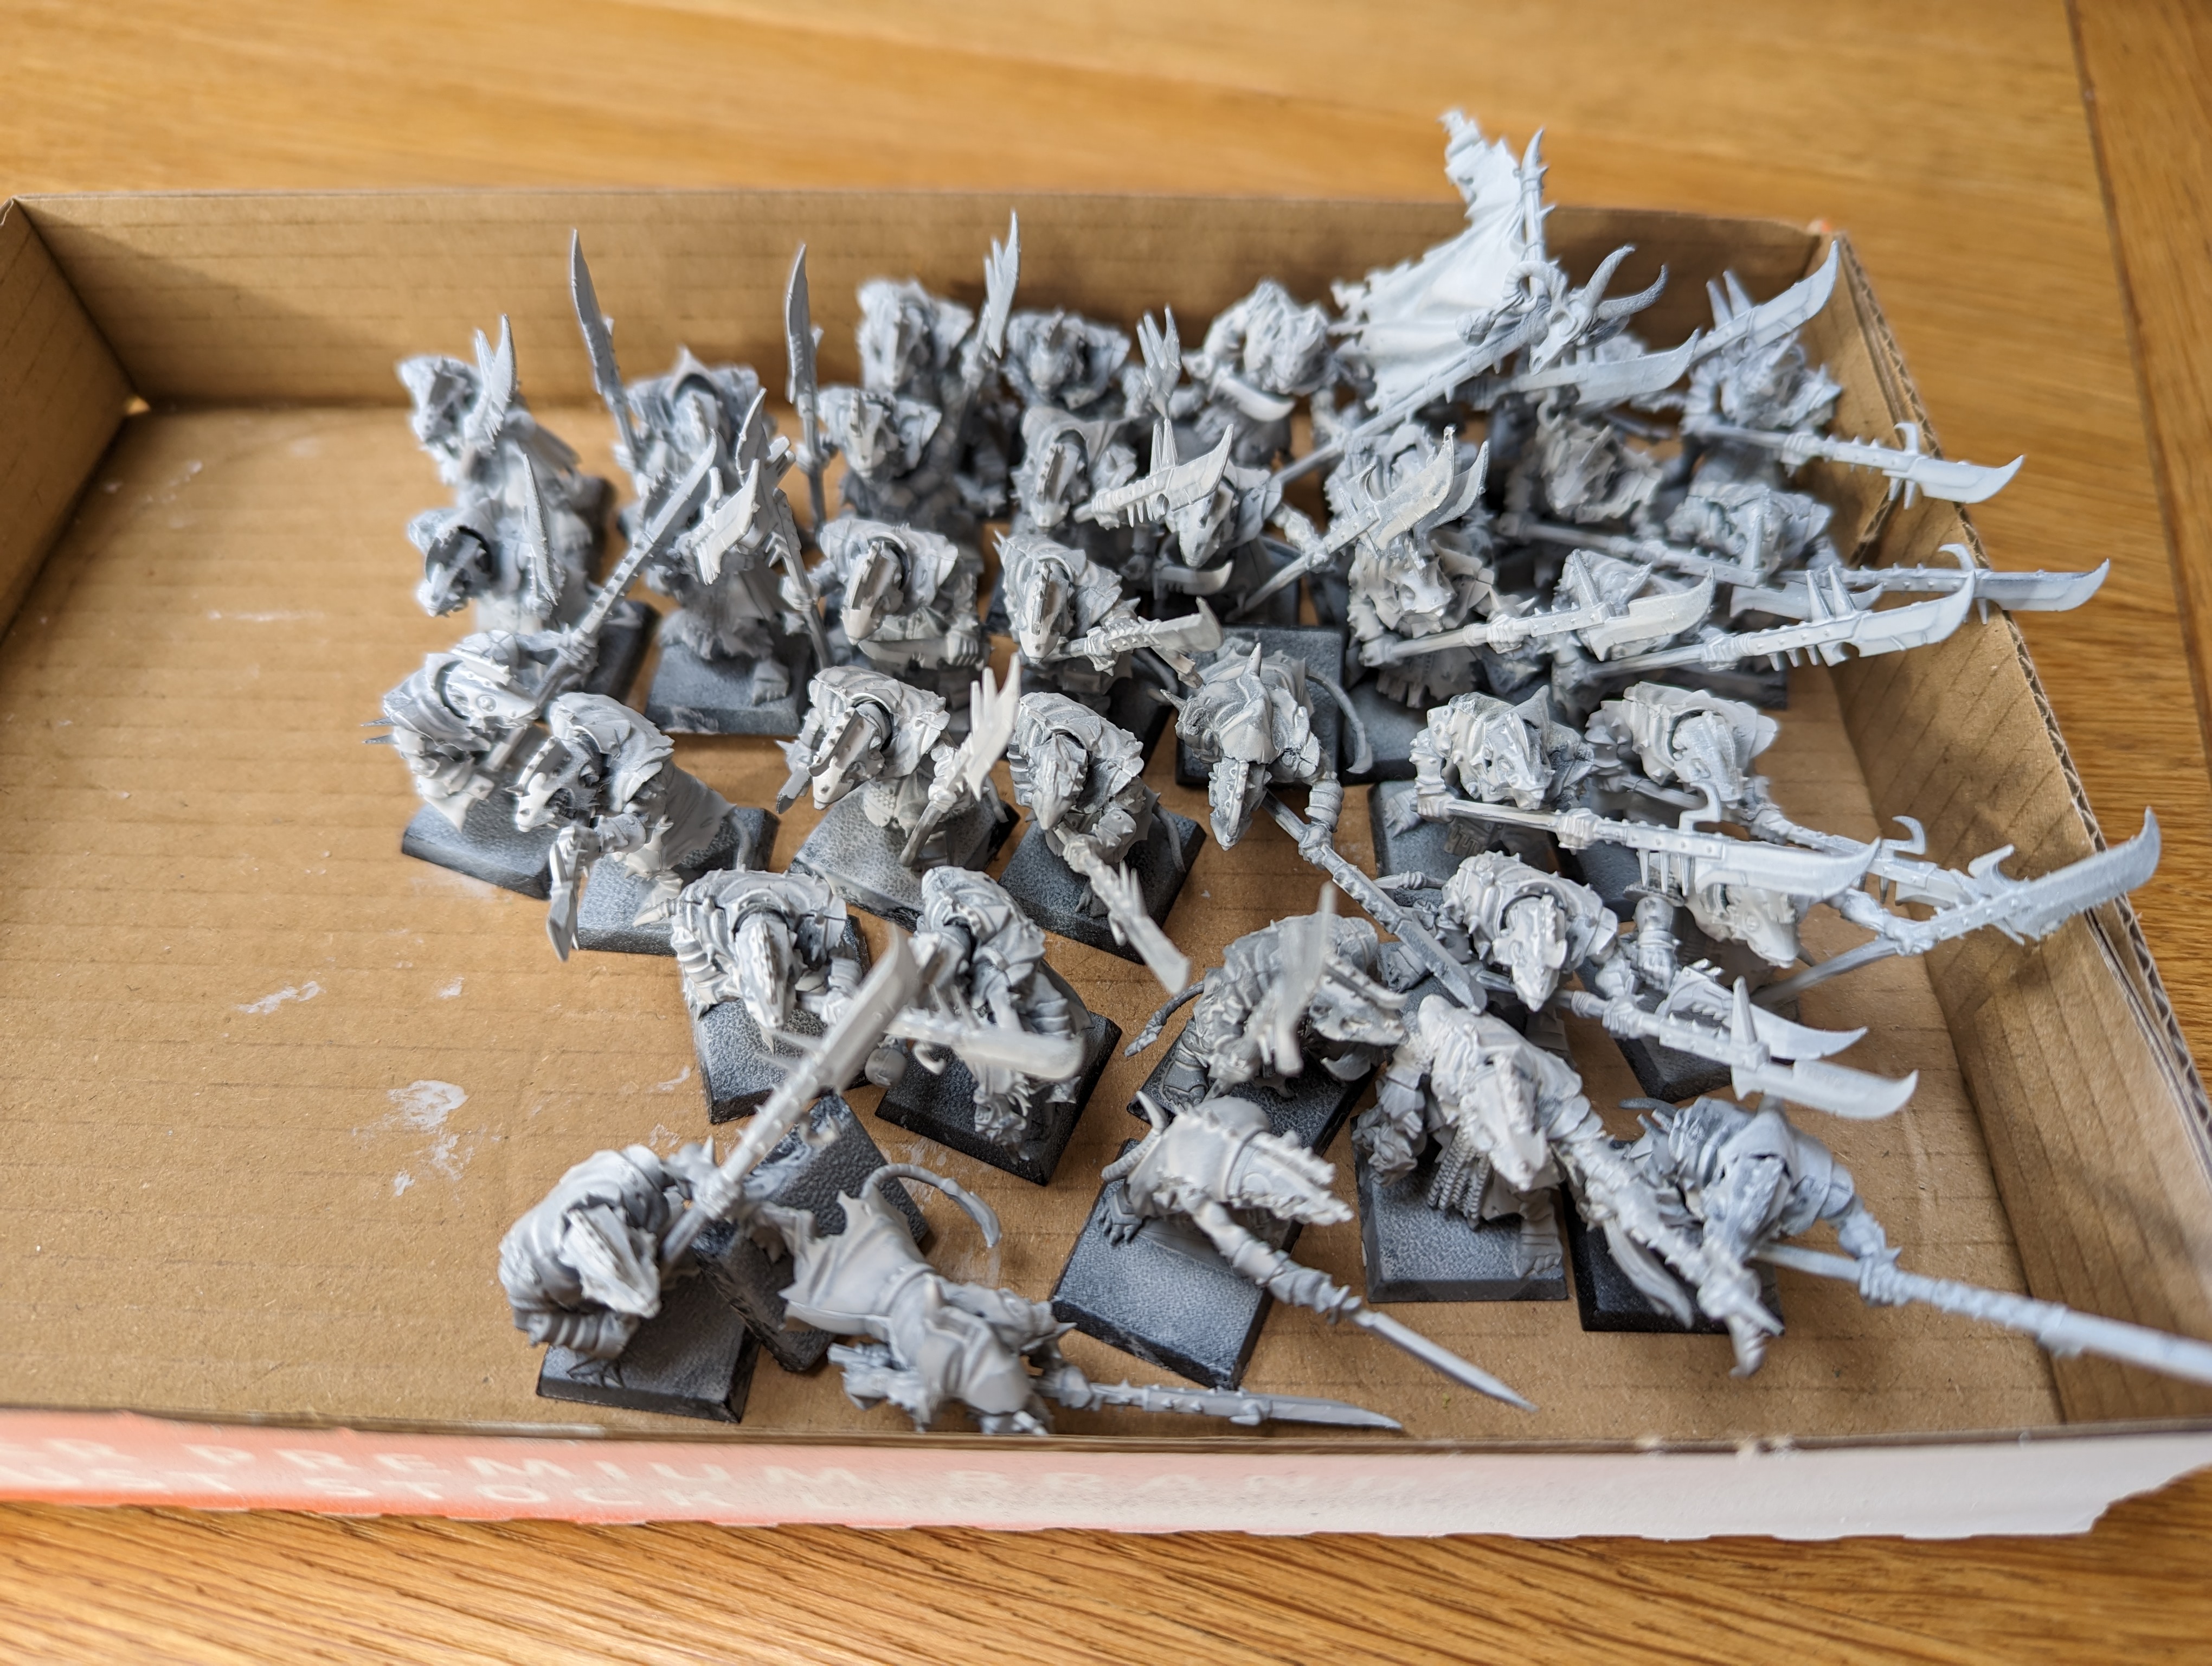
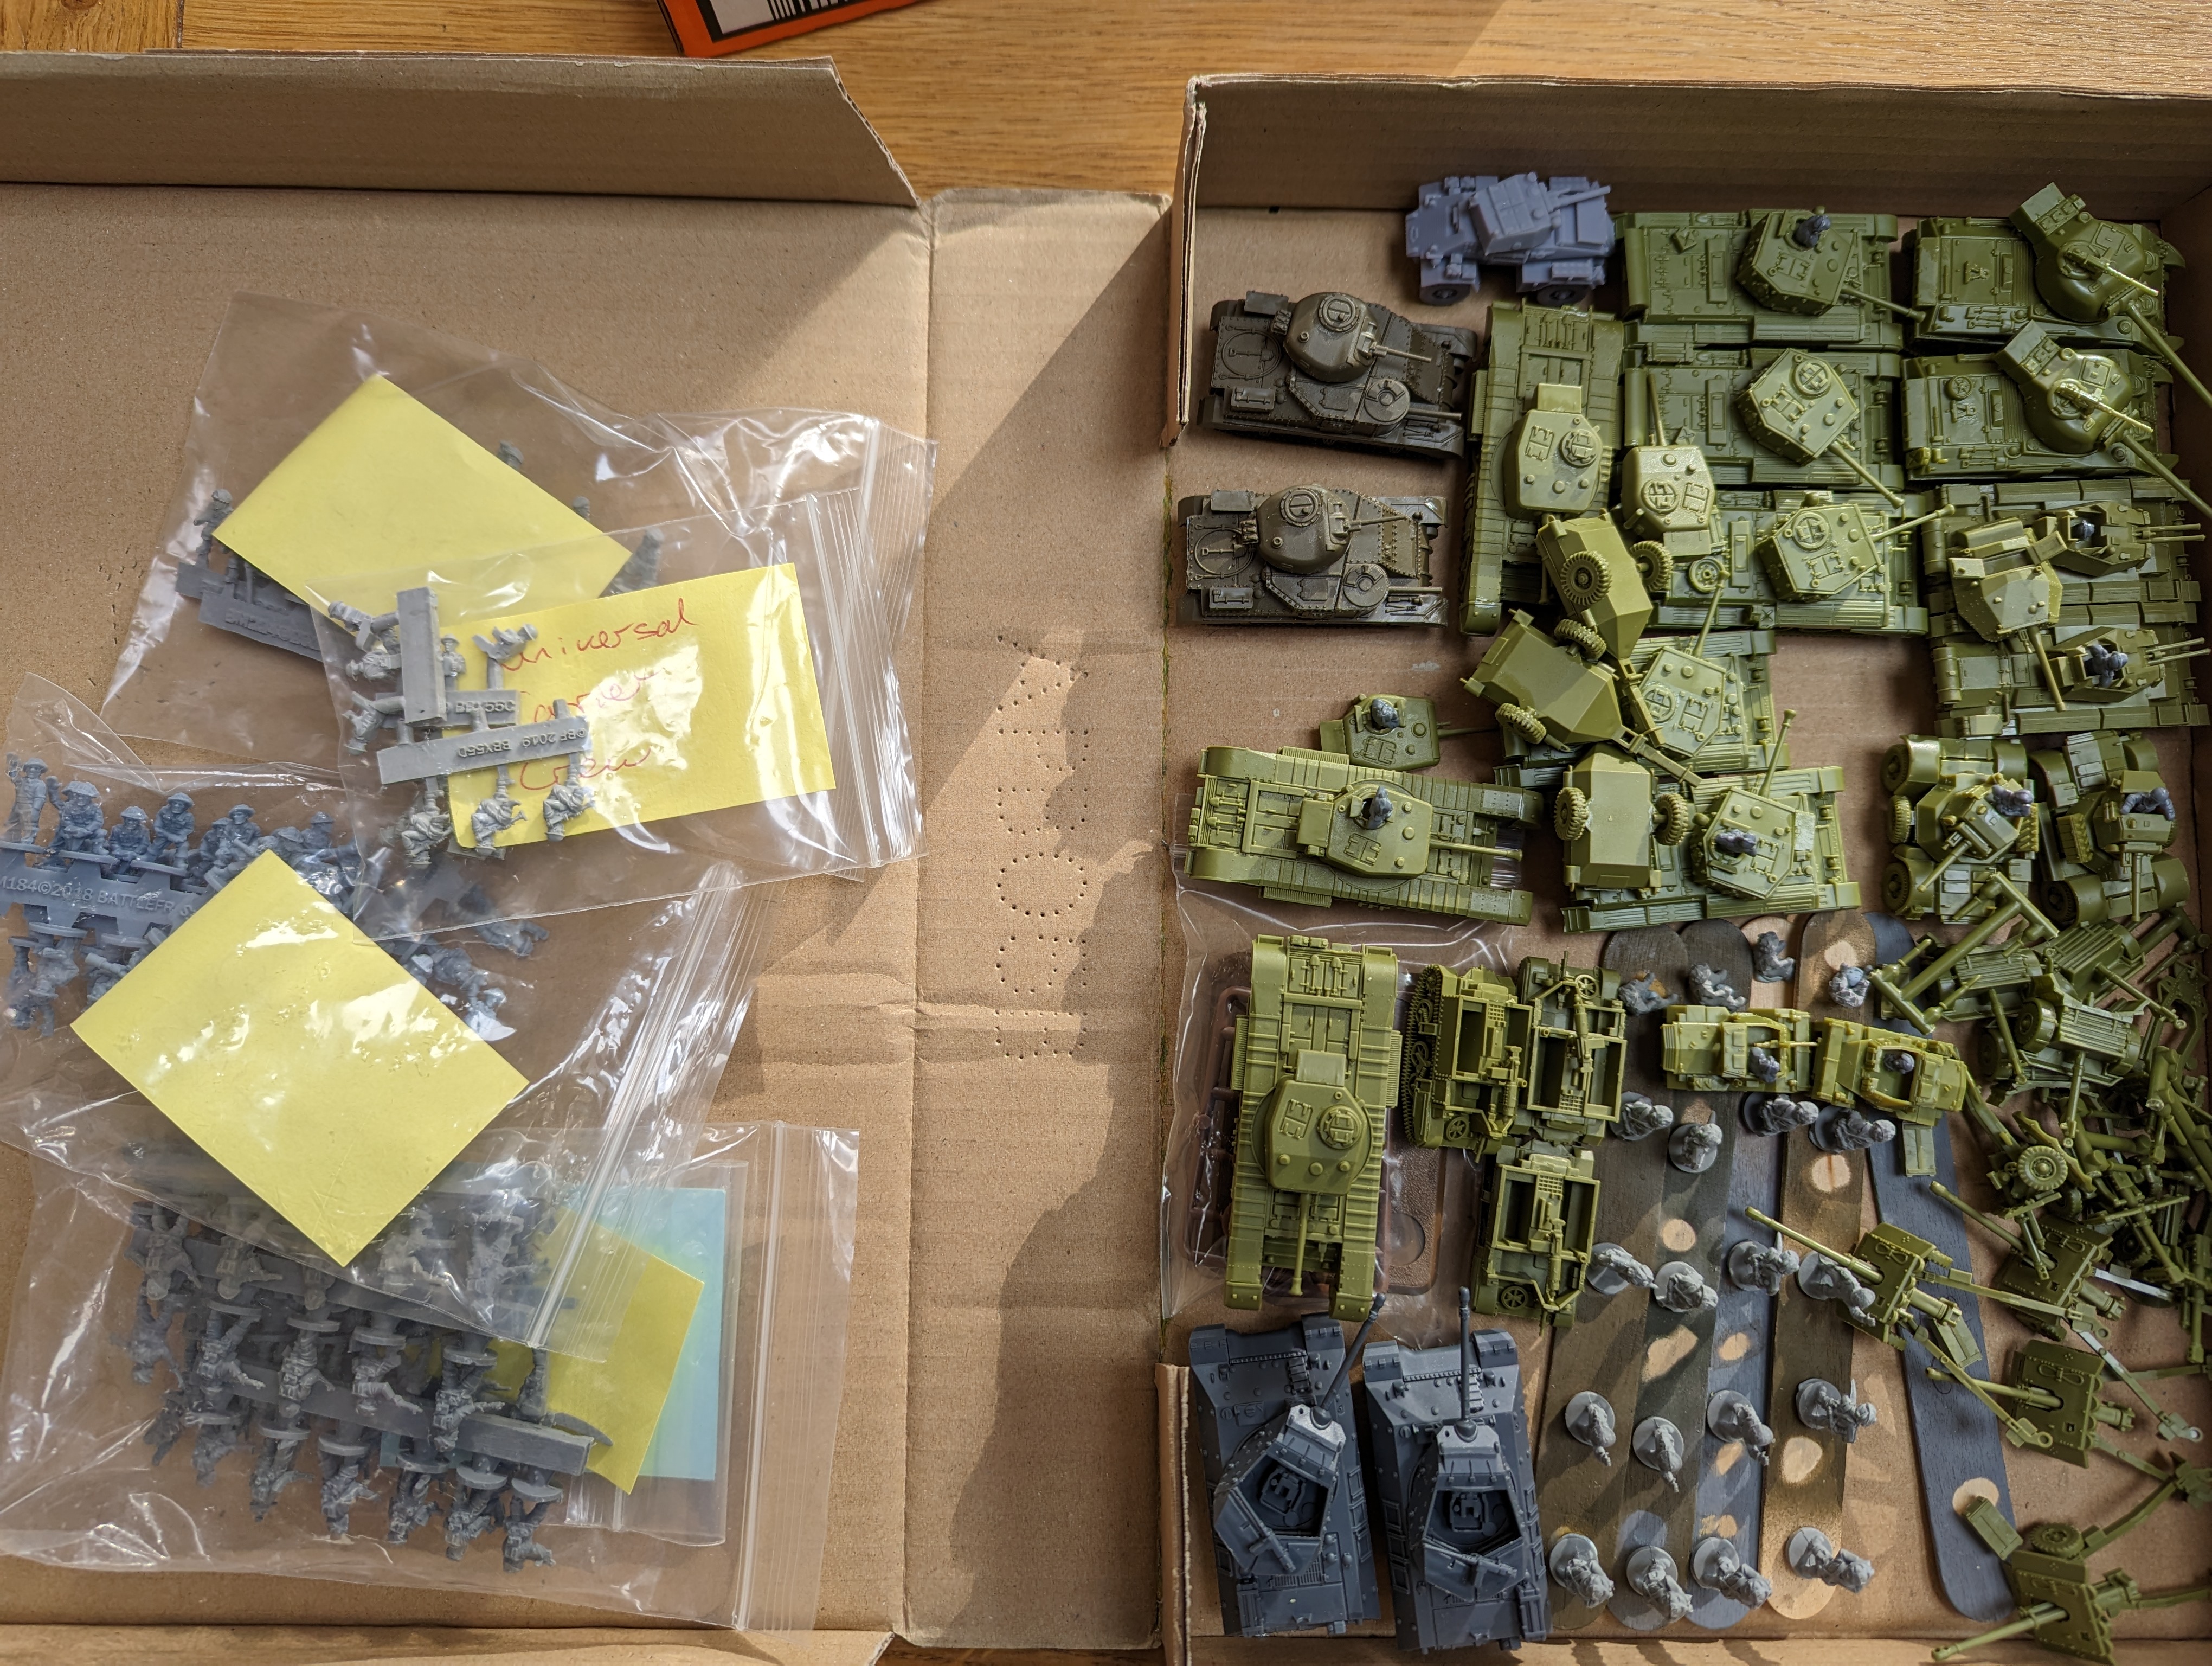
And now that I have a model tracker, I can update some of them as completed. Eagle eyed readers will spot that the total models in the pile has increased from last time. That’s because I’ve found some more stuff hidden away and I’ve yet to even open two boxes of WHFB models that I have. I also bought some more FoW stuff (German 12cm mortars and 88 Flak and 88 AT guns – I’ll be painting these shortly).
But I’m only 9 models away from breaking even on the pile for this year.
Pile Shaming Myself
I have a pile of potential that is, like my waistline, only going in one direction – expanding. Like my waistline, I would like it to go in the other direction, so I need to take action. I’ve decided to publicly shame myself on the size of my pile of potential in the hope that this will push me toward reducing it. This is also where the comparison of my pile and my waistline stops – I’m not in any way advocating body shaming here! 🙂
I don’t have a permanent painting station but rather a wheeled painting set of drawers that hides, out of sight, under the stairs. Alongside this, are some boxes that contain unpainted models that are supposed to be painted next. This is just part of the pile of shame and there is more in the garage. But here are some pictures showing what I’m talking about
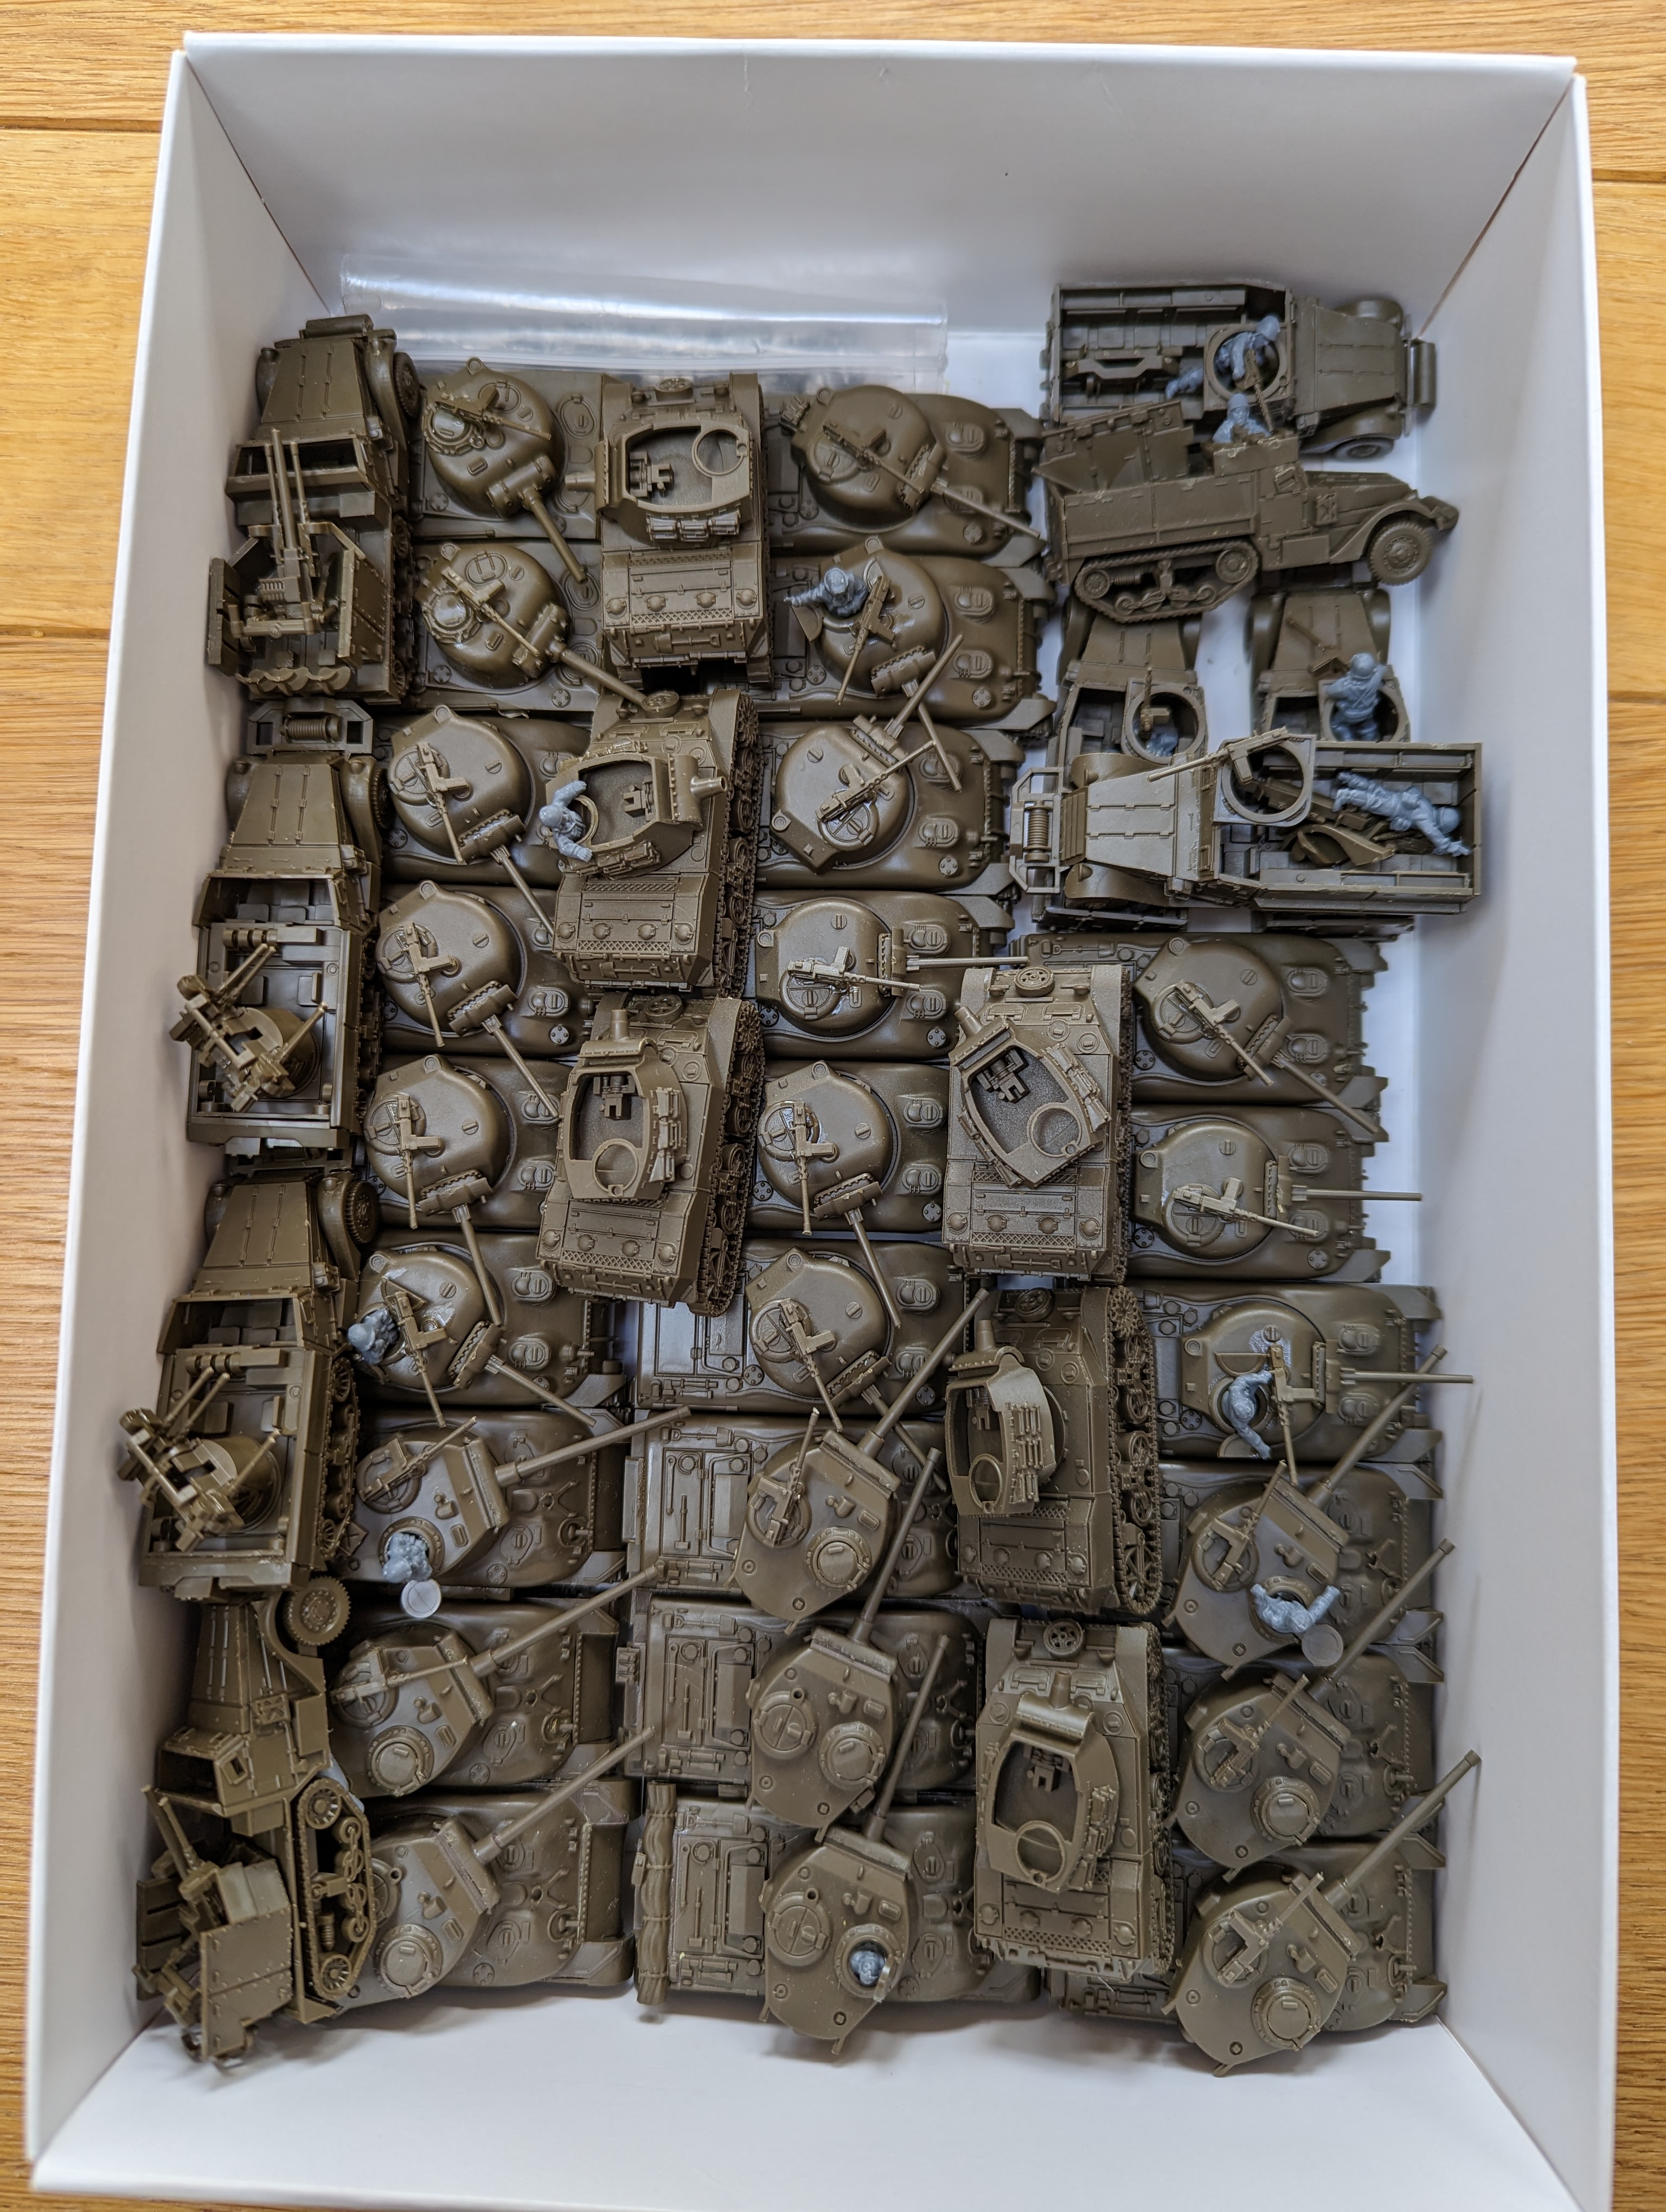
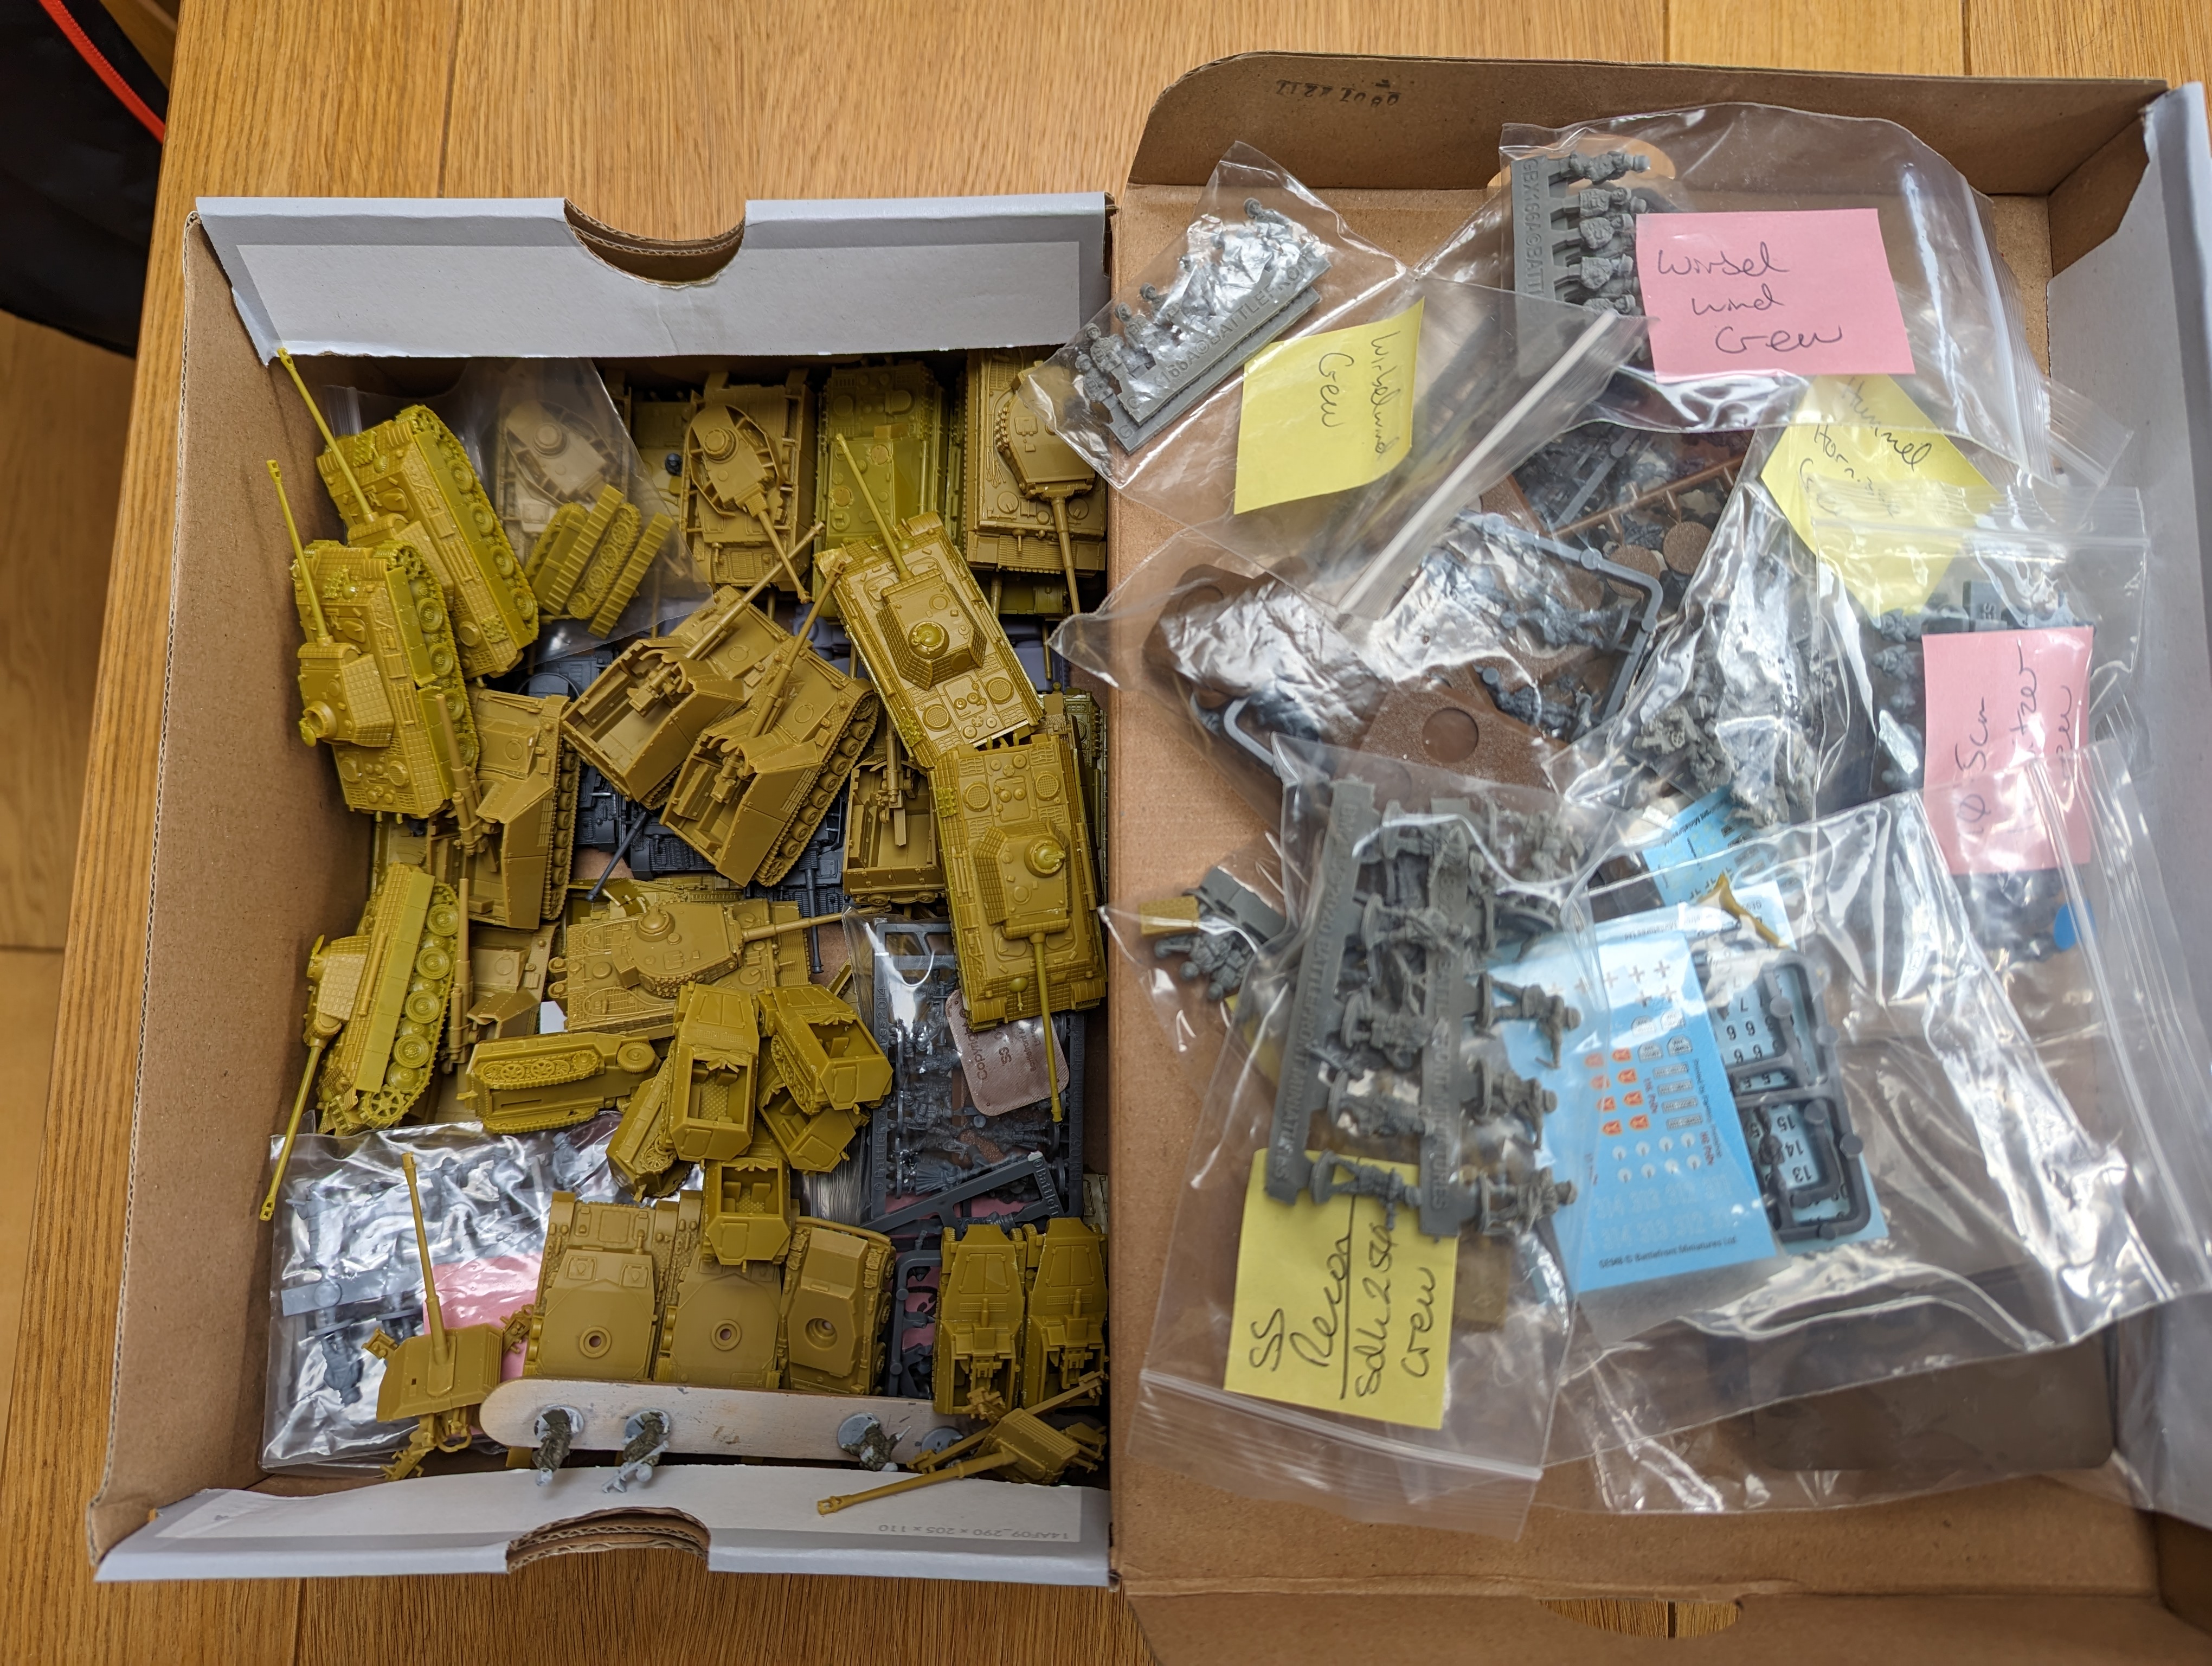
Now I expect that my pile is not as extensive as others, but it is too big for me. The obvious answer is to actually get a paint brush out and start painting but I decided to procrastinate some more and to catalogue my pile. In this way, I can track progress and see what’s outstanding and hopefully feel a bit more positive about get things completed.
To manage this, I created a spreadsheet because everyone loves a spreadsheet. In it, I have listed all of the models in the pile. By model, I have chosen to make this either an individual model (like a FoW tank) or a base (like a FoW infantry stand). This does create some disparity in the size of effort – for example, one of the entries is a High Elf riding a dragon, which counts as 1 model whereas a FoW German Infantry HQ (2 bases made up of 6 15mm men) counts as 2 models. But it’s start.
I’ve not finished cataloging all of the pile yet as it is buried away in places, this will happen over time so I expect the Pile number will grow, but I’m keen to focus on the Completed number. So, as I progress, I plan to update the spreadsheet and keep a tally of the numbers. Here is the state of play today.
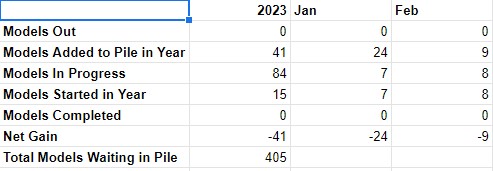
As you can see, a current pile of 405 models. Nothing completed so far in 2023. But I do have 84 models in progress. By progress, I mean undercoated as a minimum. I don’t count models that are built otherwise (as you can see from the pictures above) this number would be much higher! The negative net gain shows that I have bought more models in 2023 than I have painted, which is akin to eating lots of cake and not going on a run (to return to the waistline analogy!)
I’m also hoping to add some nice graphs to my spreadsheet because that will also help get the models painted!
Feel free to drop in here and leave pile shaming comments in this project to spur me on to get the number down!
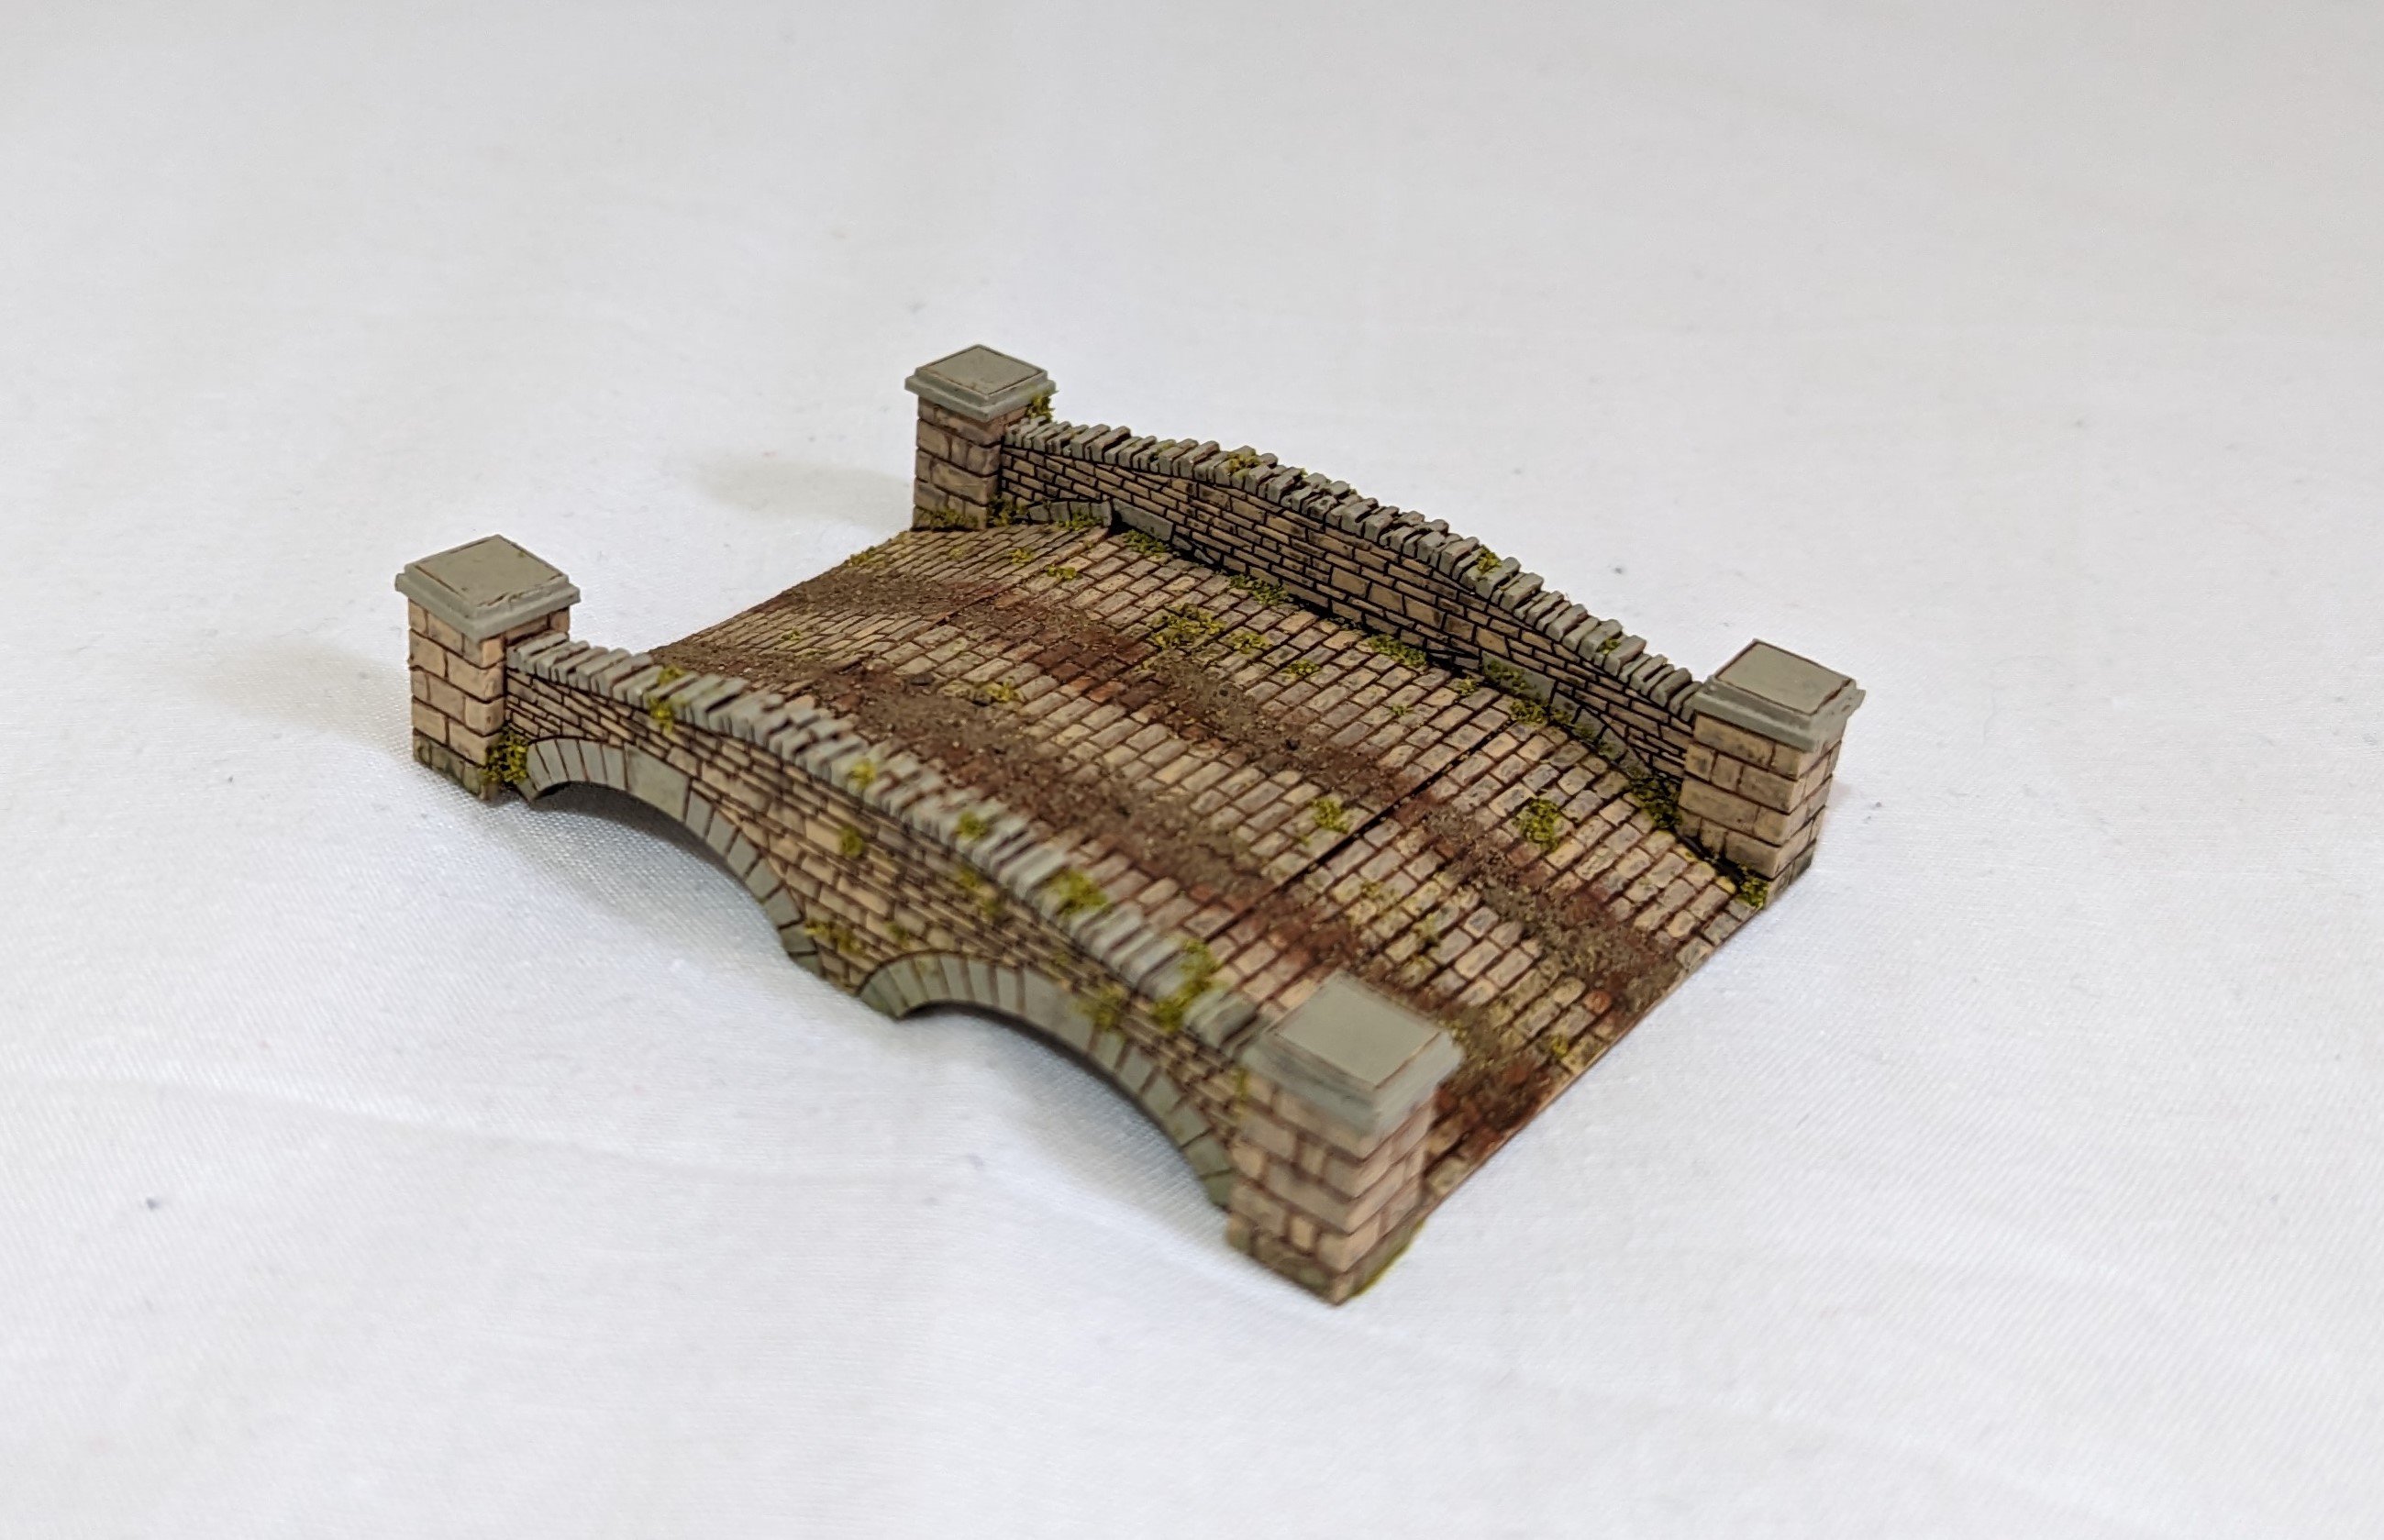
Bridges and Balls
I’ve had this mdf bridge in my terrain box for ages and thought it was time to give it some colour. Didn’t think it would take too long to paint and I could squeeze it in around work.
It’s not brilliant but looks better than an unpainted mdf bridge.


I’ve also been working on some Blood Bowl stuff and realised that I did not have any painted balls to play with. As they’re so small, this was easy to rectify!
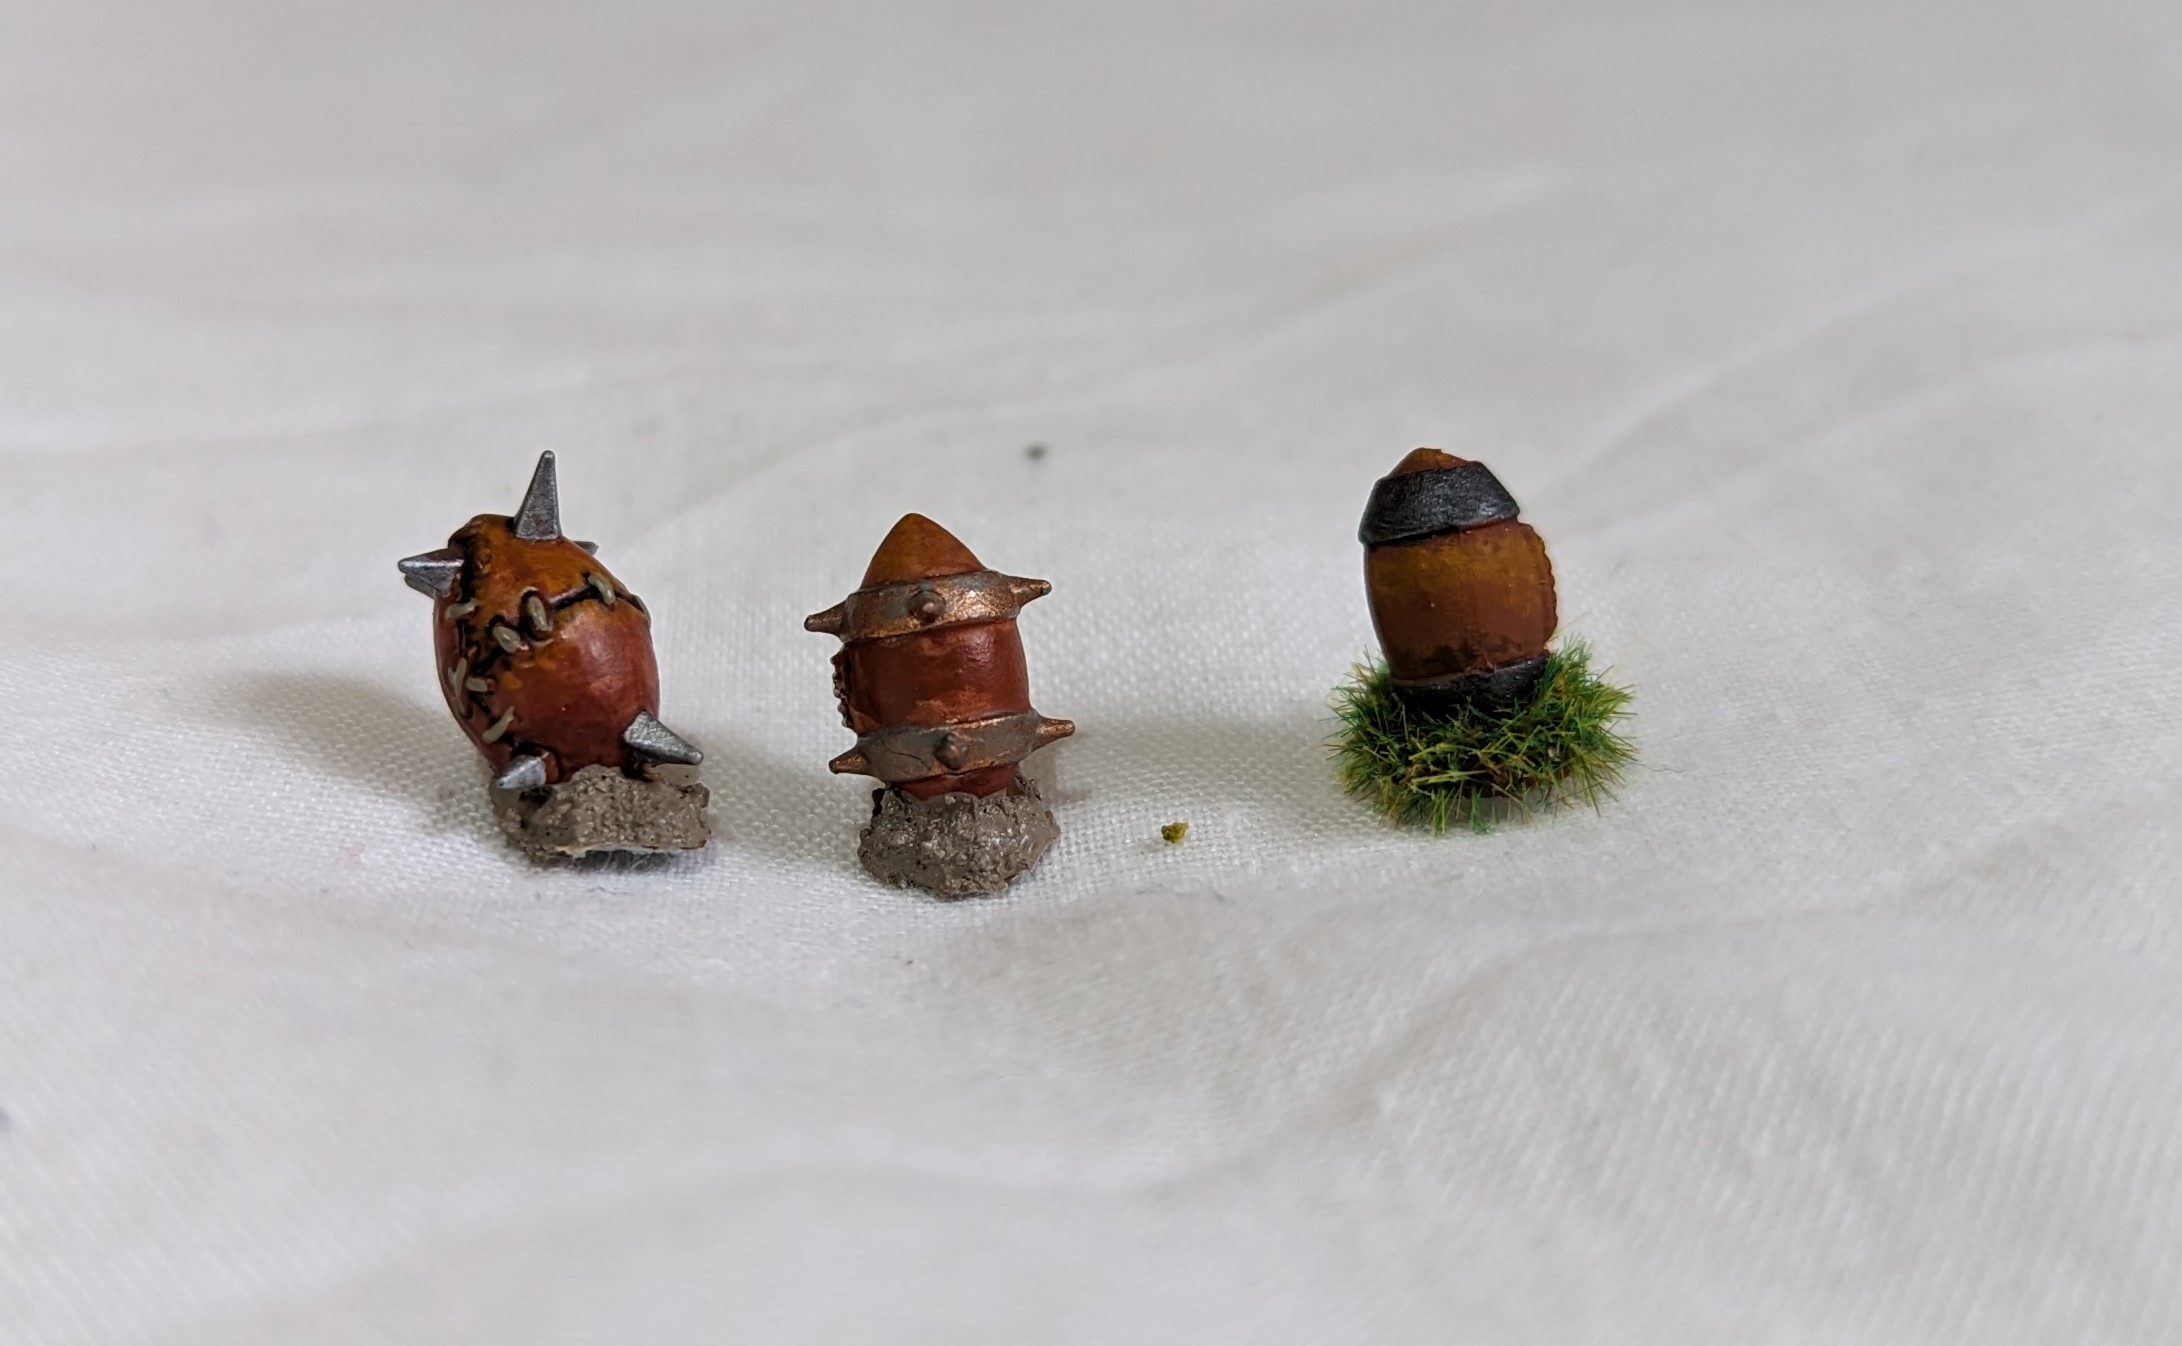

Terrain and Hans with his phallic ammunition
Painting my scenery and terrain is something that I’ve always been meaning to do. It really enhances the in game experience. So as a change of pace, I tackled a couple of terrain pieces.
First up, we have an MDF chateau. I sealed the MDF first with PVA but this was a royal pain in the arse to paint. It took multiple layers, the paint was blotchy, the paint ran and several other irritating things. The upshot is I probably didn’t seal the model well enough. So this took ages to paint to even get it vaguely close to tabletop standard. I eventually got to the point that I’d had enough and it was good enough. Not the most motivating painting experience.

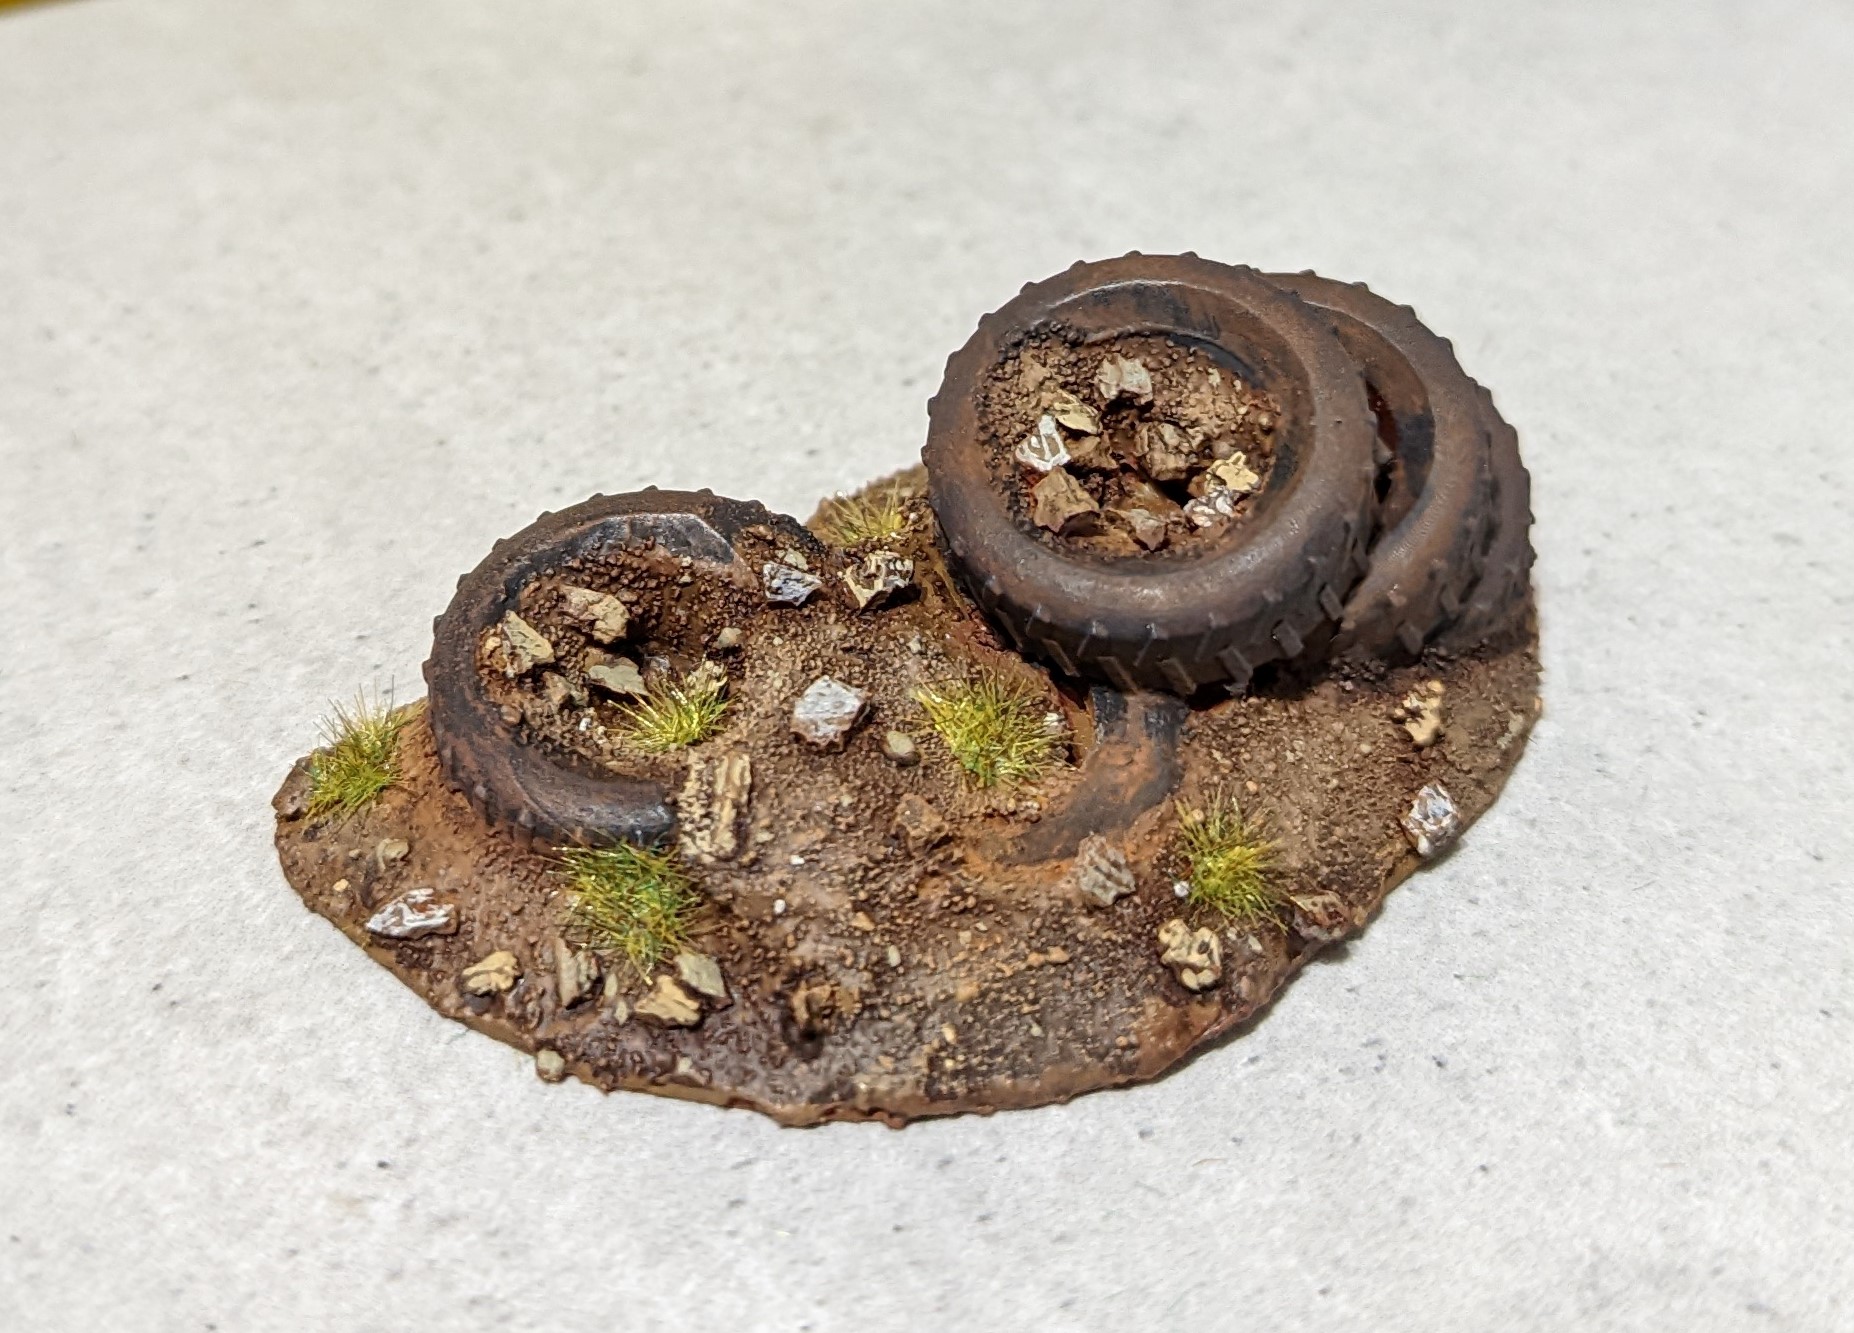
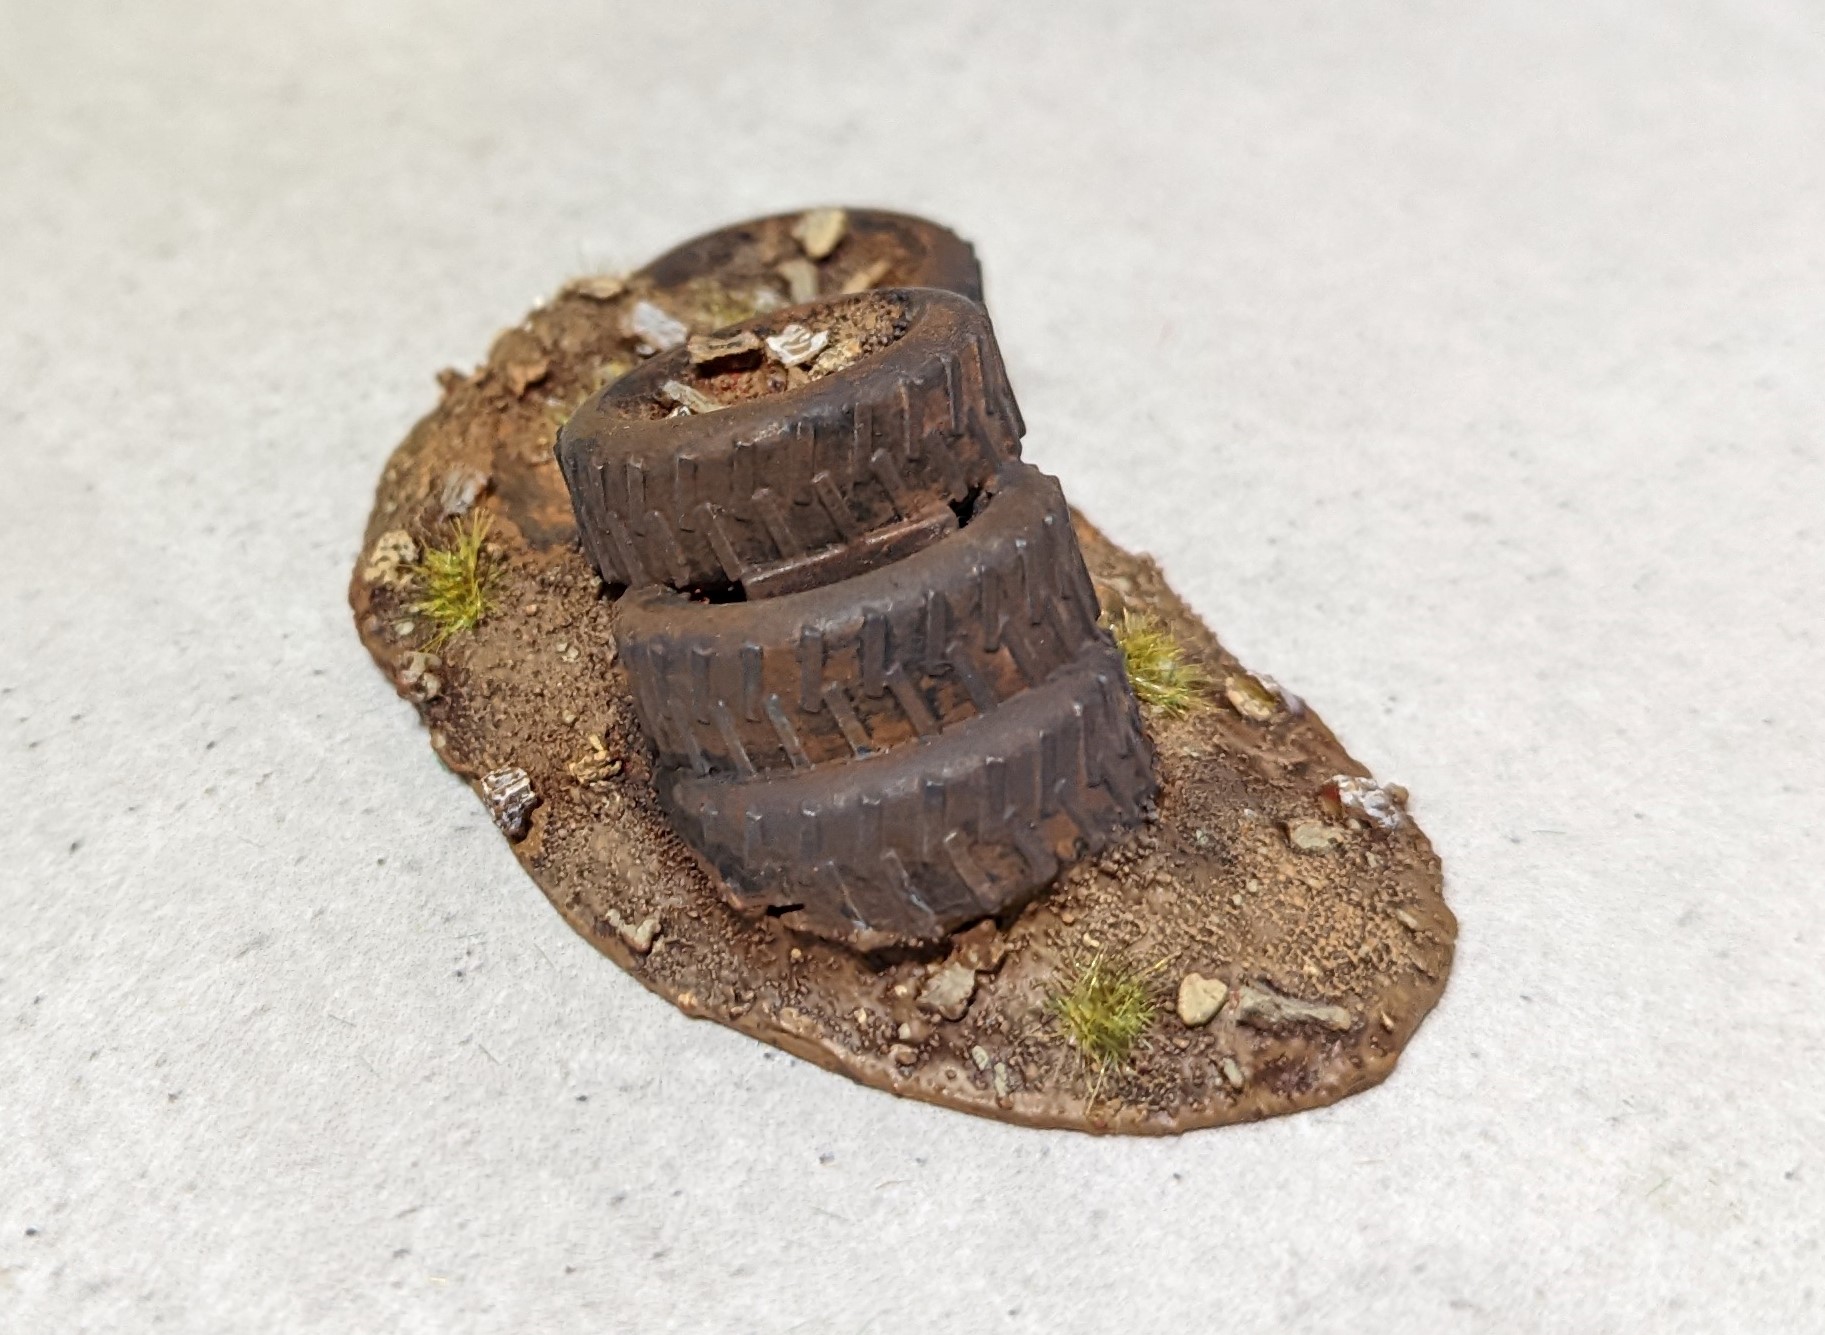
Next up, I 3d printed some tyres as a test print for some Gaslands terrain. The scale was way too big and better for 28mm so I mounted it on some plasticard, added some acrylic paste and painted away. Suffice to say, this was a lot easier to paint than the MDF chateau and cheered me up after the previous frustration. Not sure what I’m going to do with it now that I’ve finished it but I’m sure that I will figure it out.

While I was painting the PaK40 guns in my last update, I found a loader model who looks like he’s not holding regular ammunition. Not quite sure what Hans is holding to load into the gun, but the enemy are likely to get a surprise.
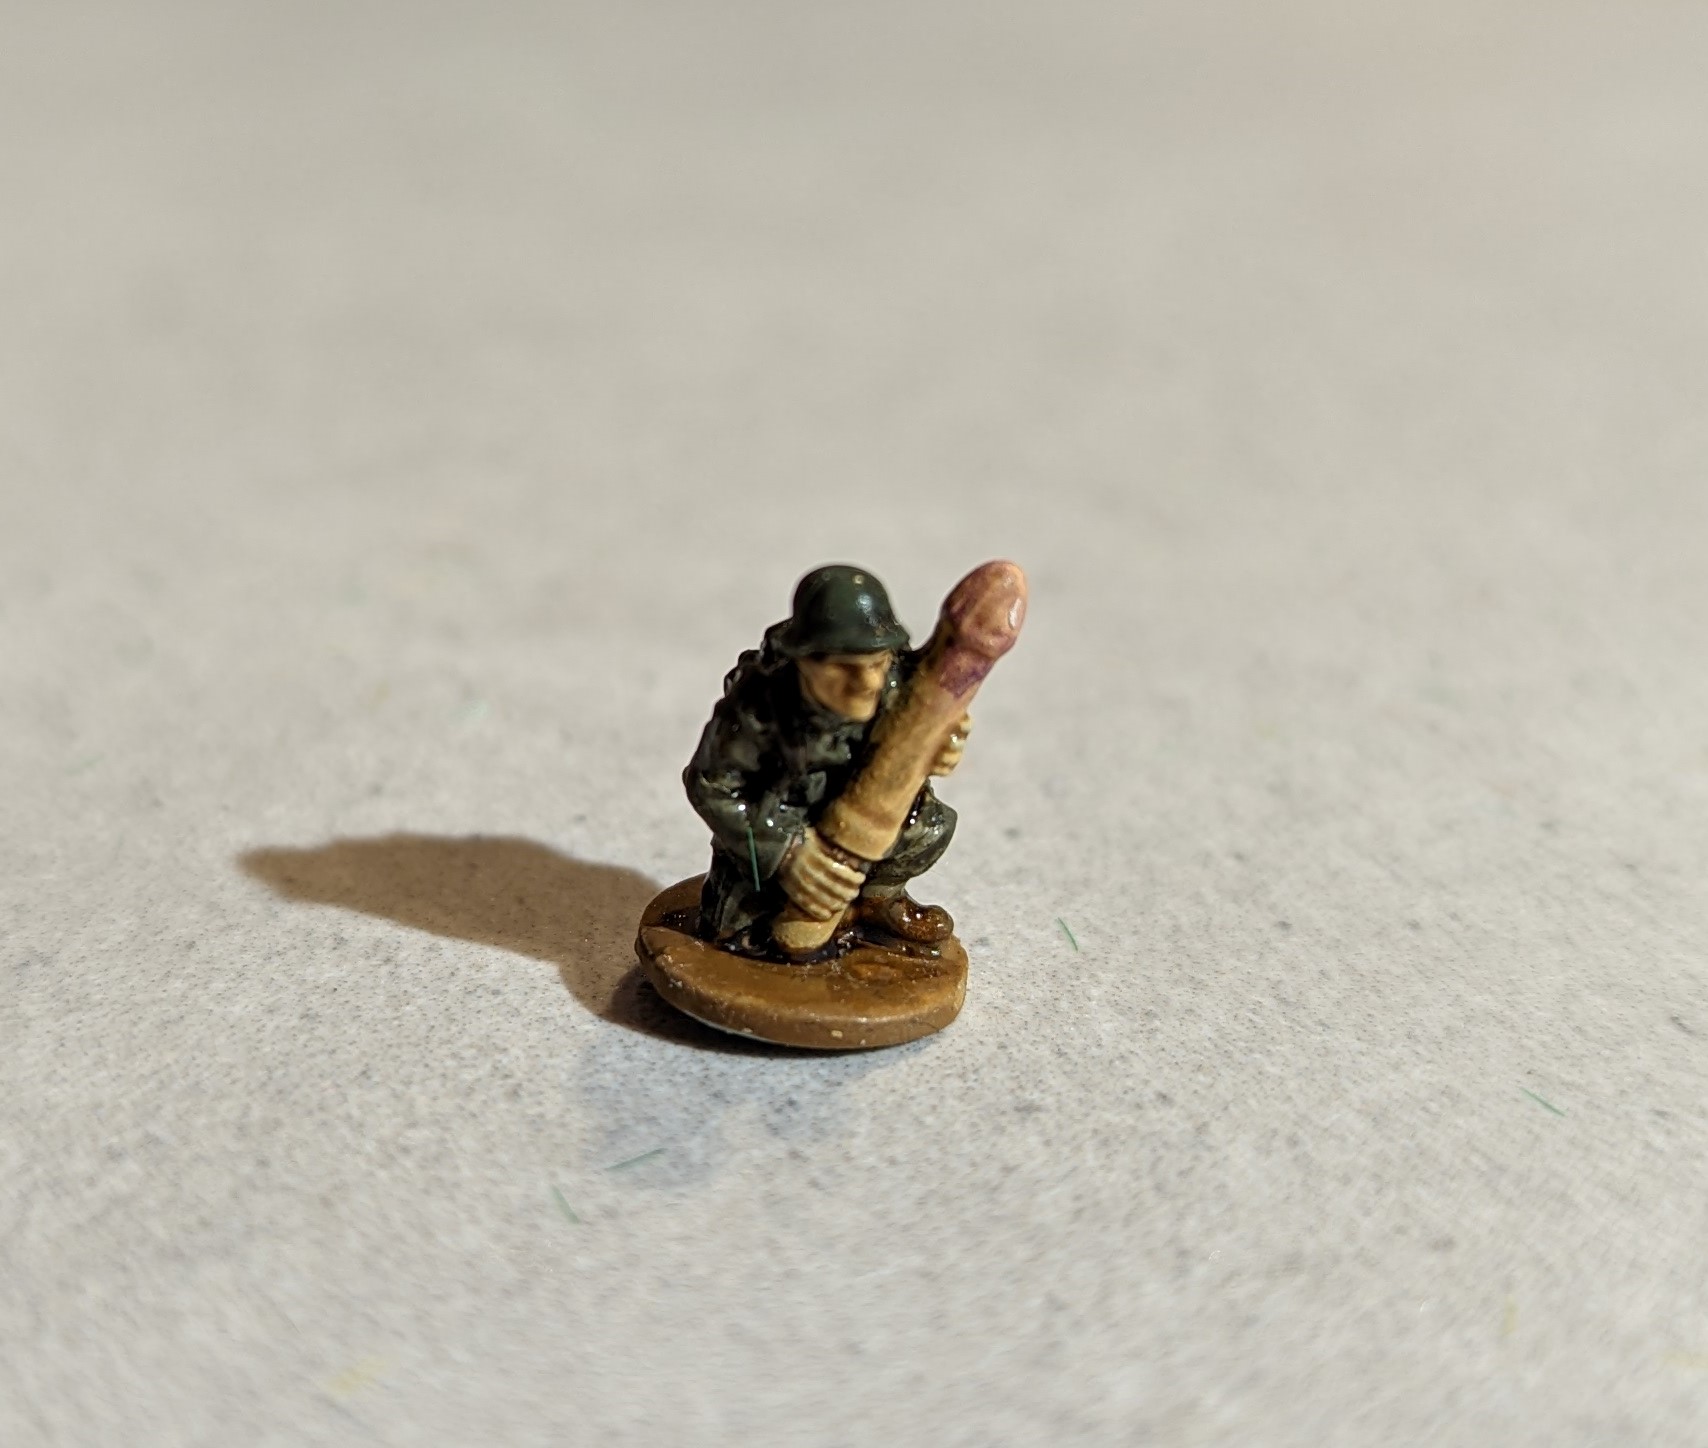 Dirty Hans
More guns
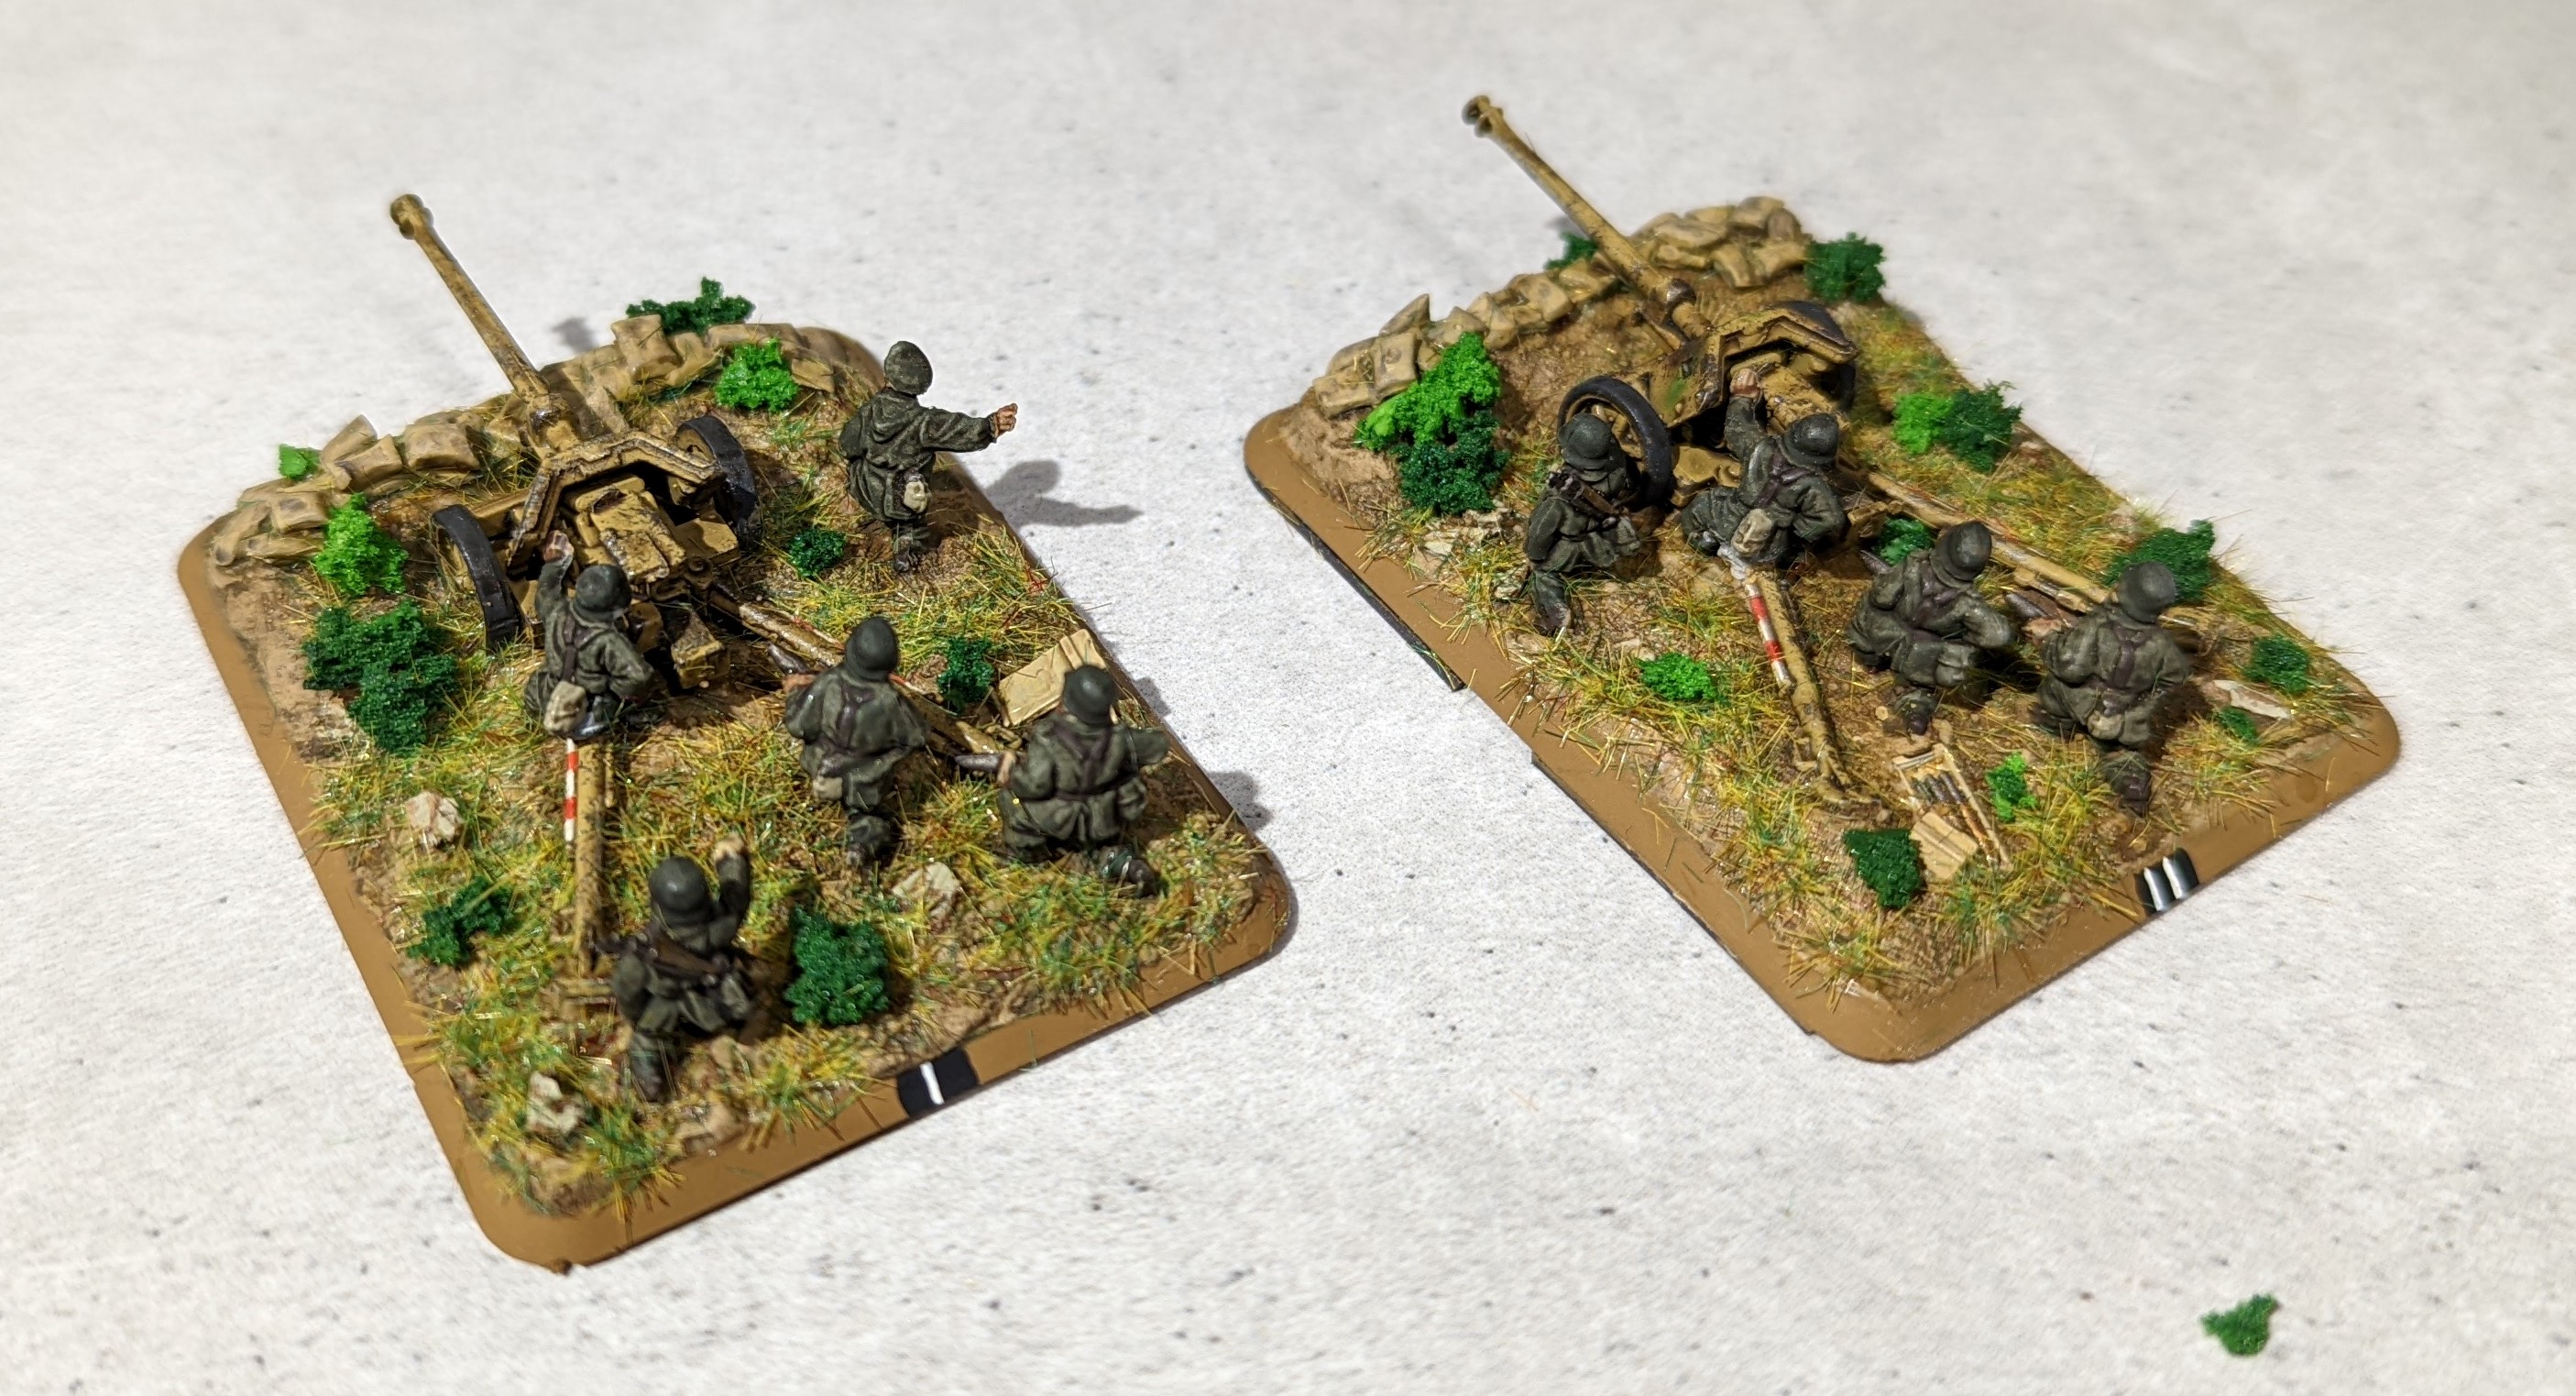
My previous entry here was the initial deployment of my US 1st Armoured Division. The arrival of these new tanks into my Italian forces set up has the defending Germans a little worried and they have called for some additional firepower. So, to plug the gap in the lines, I’ve painted up some PaK 40 Anti Tank guns. The punch on this should easily penetrate the thin armour of the M4A1 Shermans!
These two guns are the Battlefront plastic kit. Easy to put together and reasonably quick to paint. Colour scheme is a simple dunkelgelb with some brown and green airbrushed on to create a camo effect. Chipping is just applied quickly with a sponge and gunmetal. Crew are a standard German Field Grey with a wash. A quick and easy approach.
The bases are polyfila mixed with a brown paint (to avoid the issue of any chips leaving a stark white patch) over which I sprinkle some sand and small cork chips. I pile the polyfila up at the front to create a ‘dug in’ look. The sand bags are home made from greenstuff.
 Lloyd shot first for a change
 What the US 1st Armoured will see (if they get close enough)


![Mounted US Cavalry On Kickstarter For Dead Man’s Hand! [Updated]](https://images.beastsofwar.com/2026/03/us-cavalry-main-600-338.jpg)


![Play WW2 Commando Operations With Butcher & Bolt [Updated]](https://images.beastsofwar.com/2026/03/relaunch-600-338.jpg)


