


![NO Weekender Or Cult Of Games XLBS This Weekend [Updated]](https://images.beastsofwar.com/2026/03/No_Weekender_and_XLBS_this_Weekend-225-127.jpg)


Moonstone


Recommendations: 592
About the Project
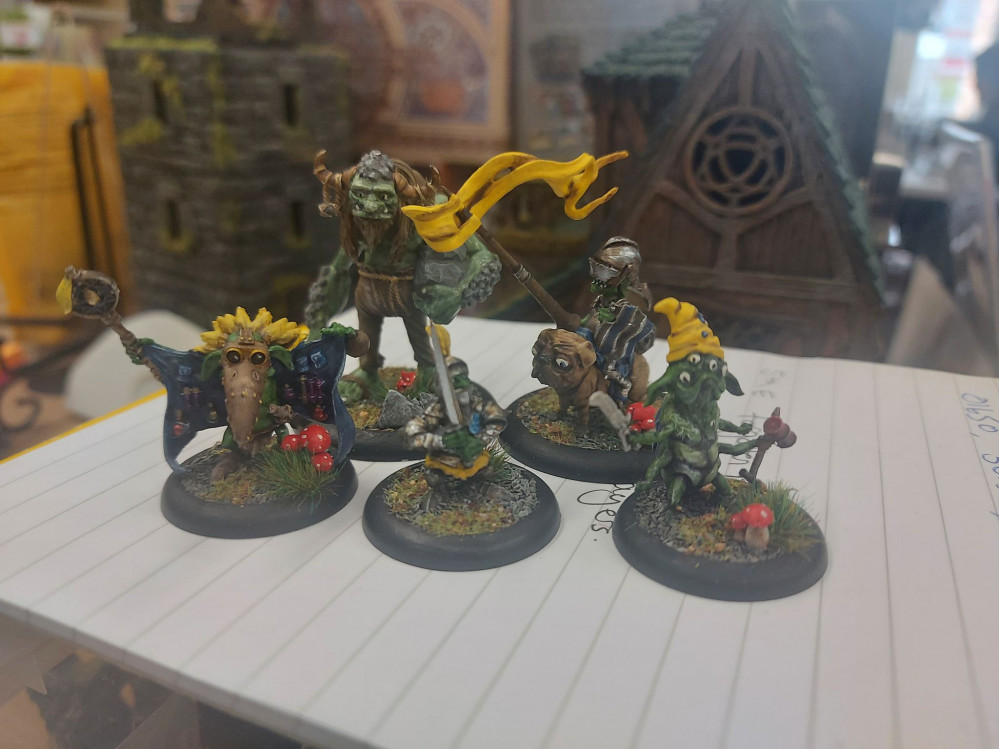
Painting my first Moonstone troupe, along with the scenery and terrain board to go with it.
Related Game: Moonstone
Related Company: Goblin King Games
Related Genre: Fantasy
This Project is Active
Finished!
 With the first of our Moonstone Monthly events happening this Saturday, I have finally finished the board! The houses are all painted ready. The trees are based. Ducks have been 3d printed for the pond. It's been a lot of fun to work on, and I think I'll do one for Kings of War next. Or maybe I'll paint a Deadzone faction. Decisions decisions. . .
 The statue
I knew I wanted a statue for the town centre. Considering the heavy Labyrinth influences within the game, and fact its from Goblin King Games, it had to be Jareth.
Here he is, 3d printed and on a plinth cut from Cork sheets, with some added flock for good measure. I think he’ll make a lovely centrepiece!

Wednesday's Work
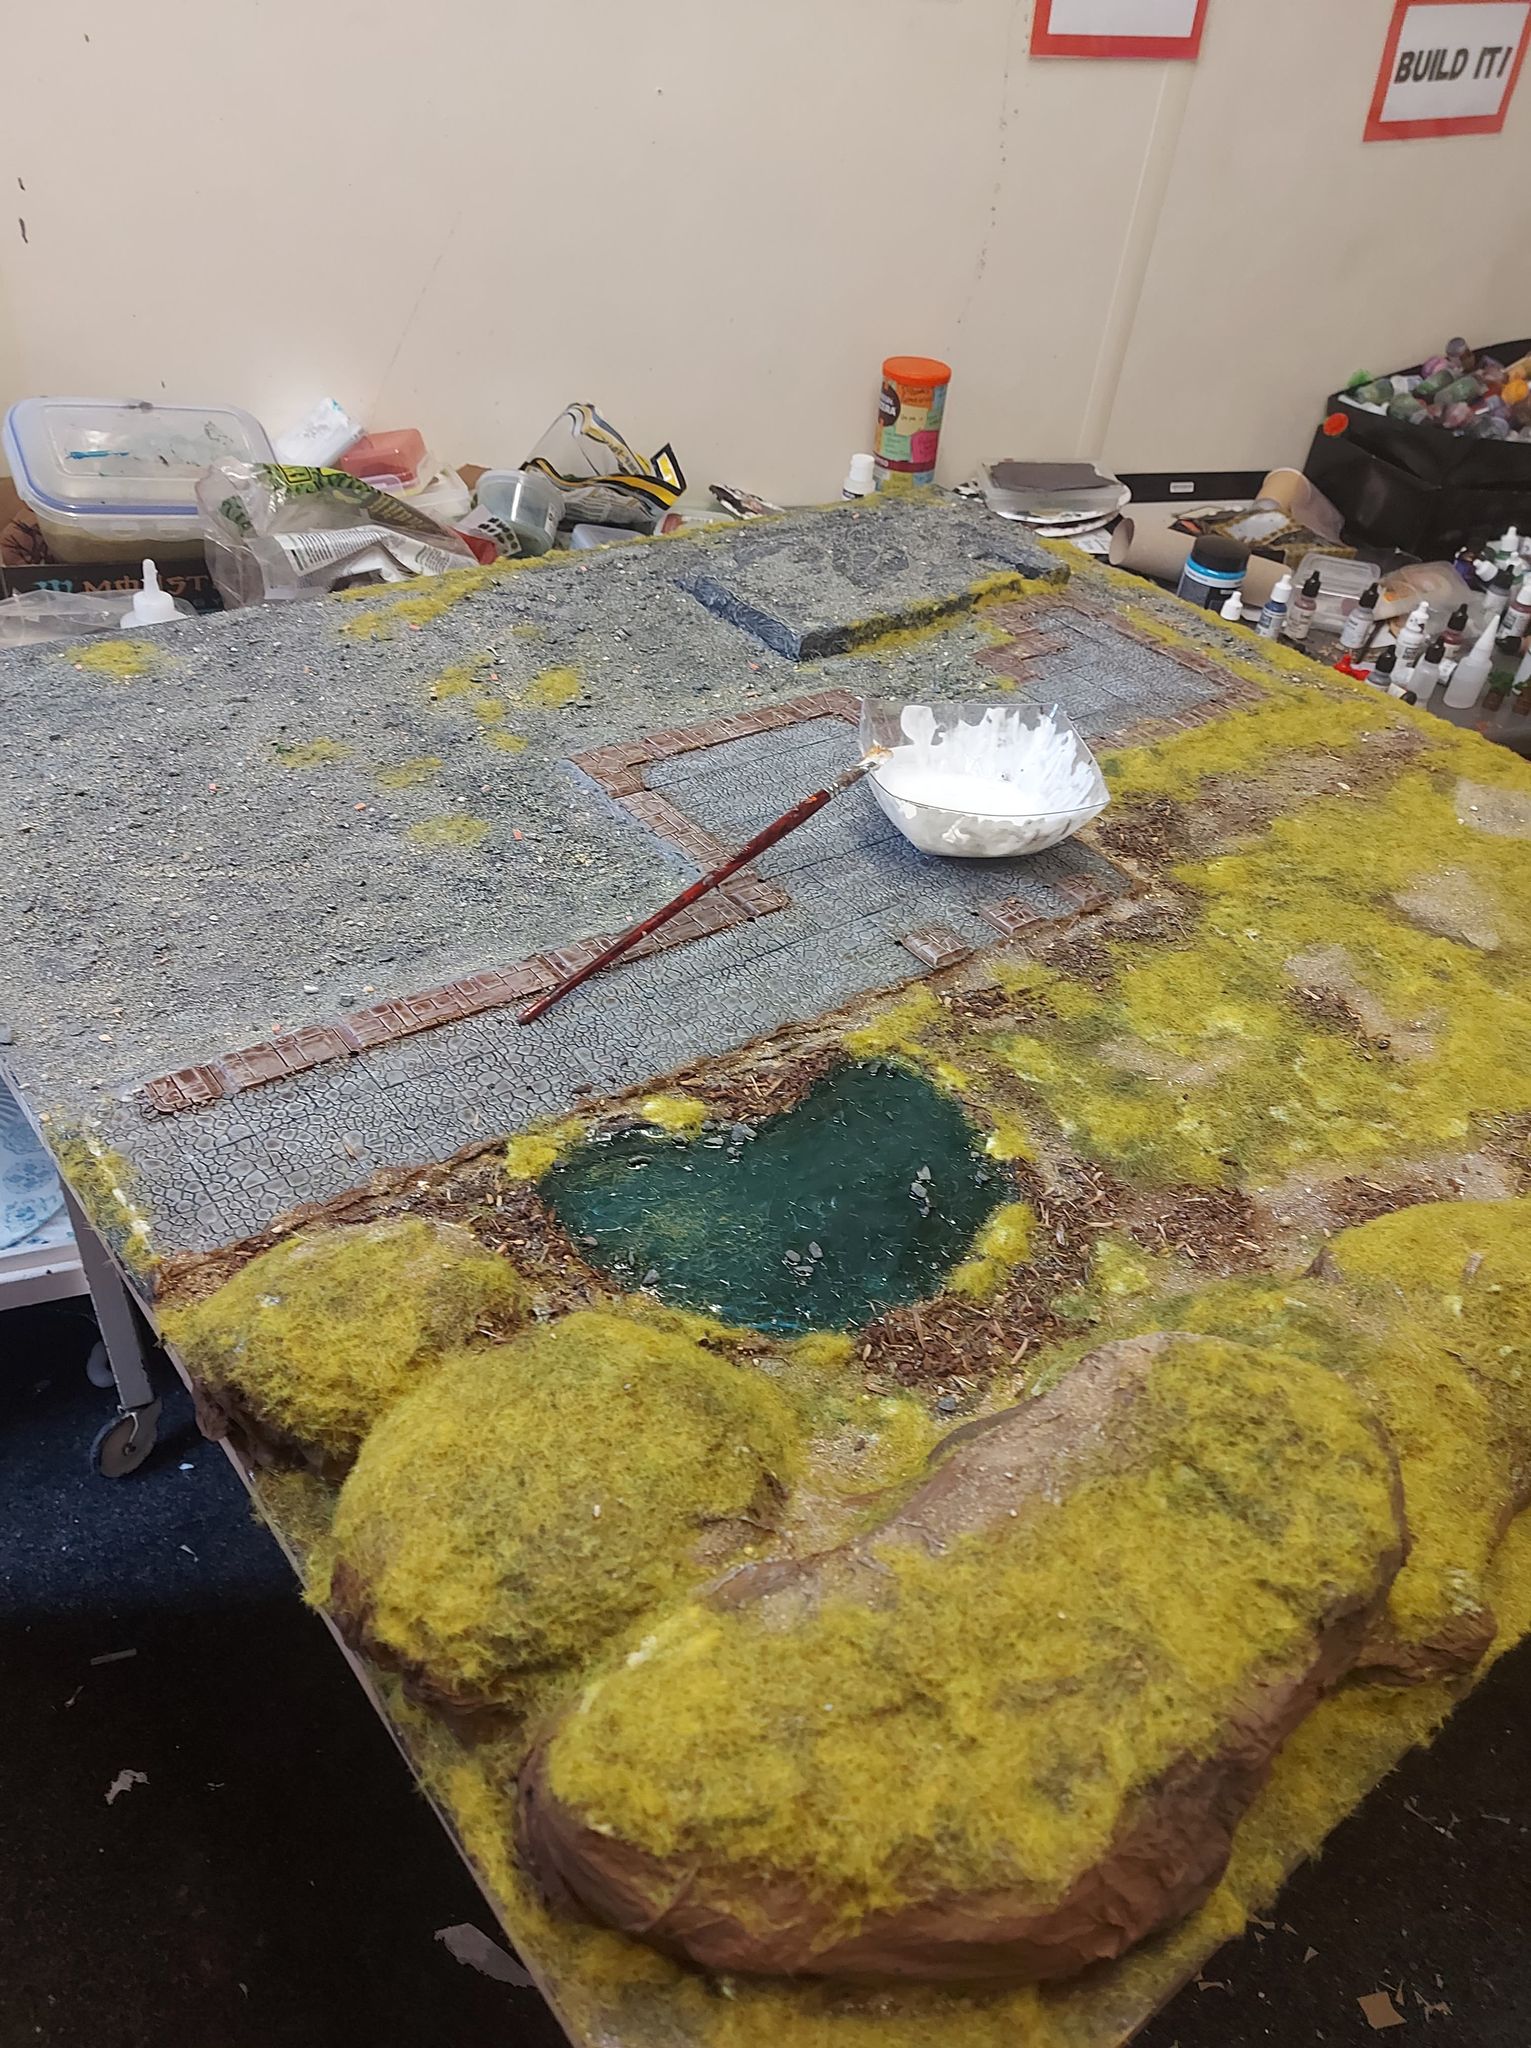
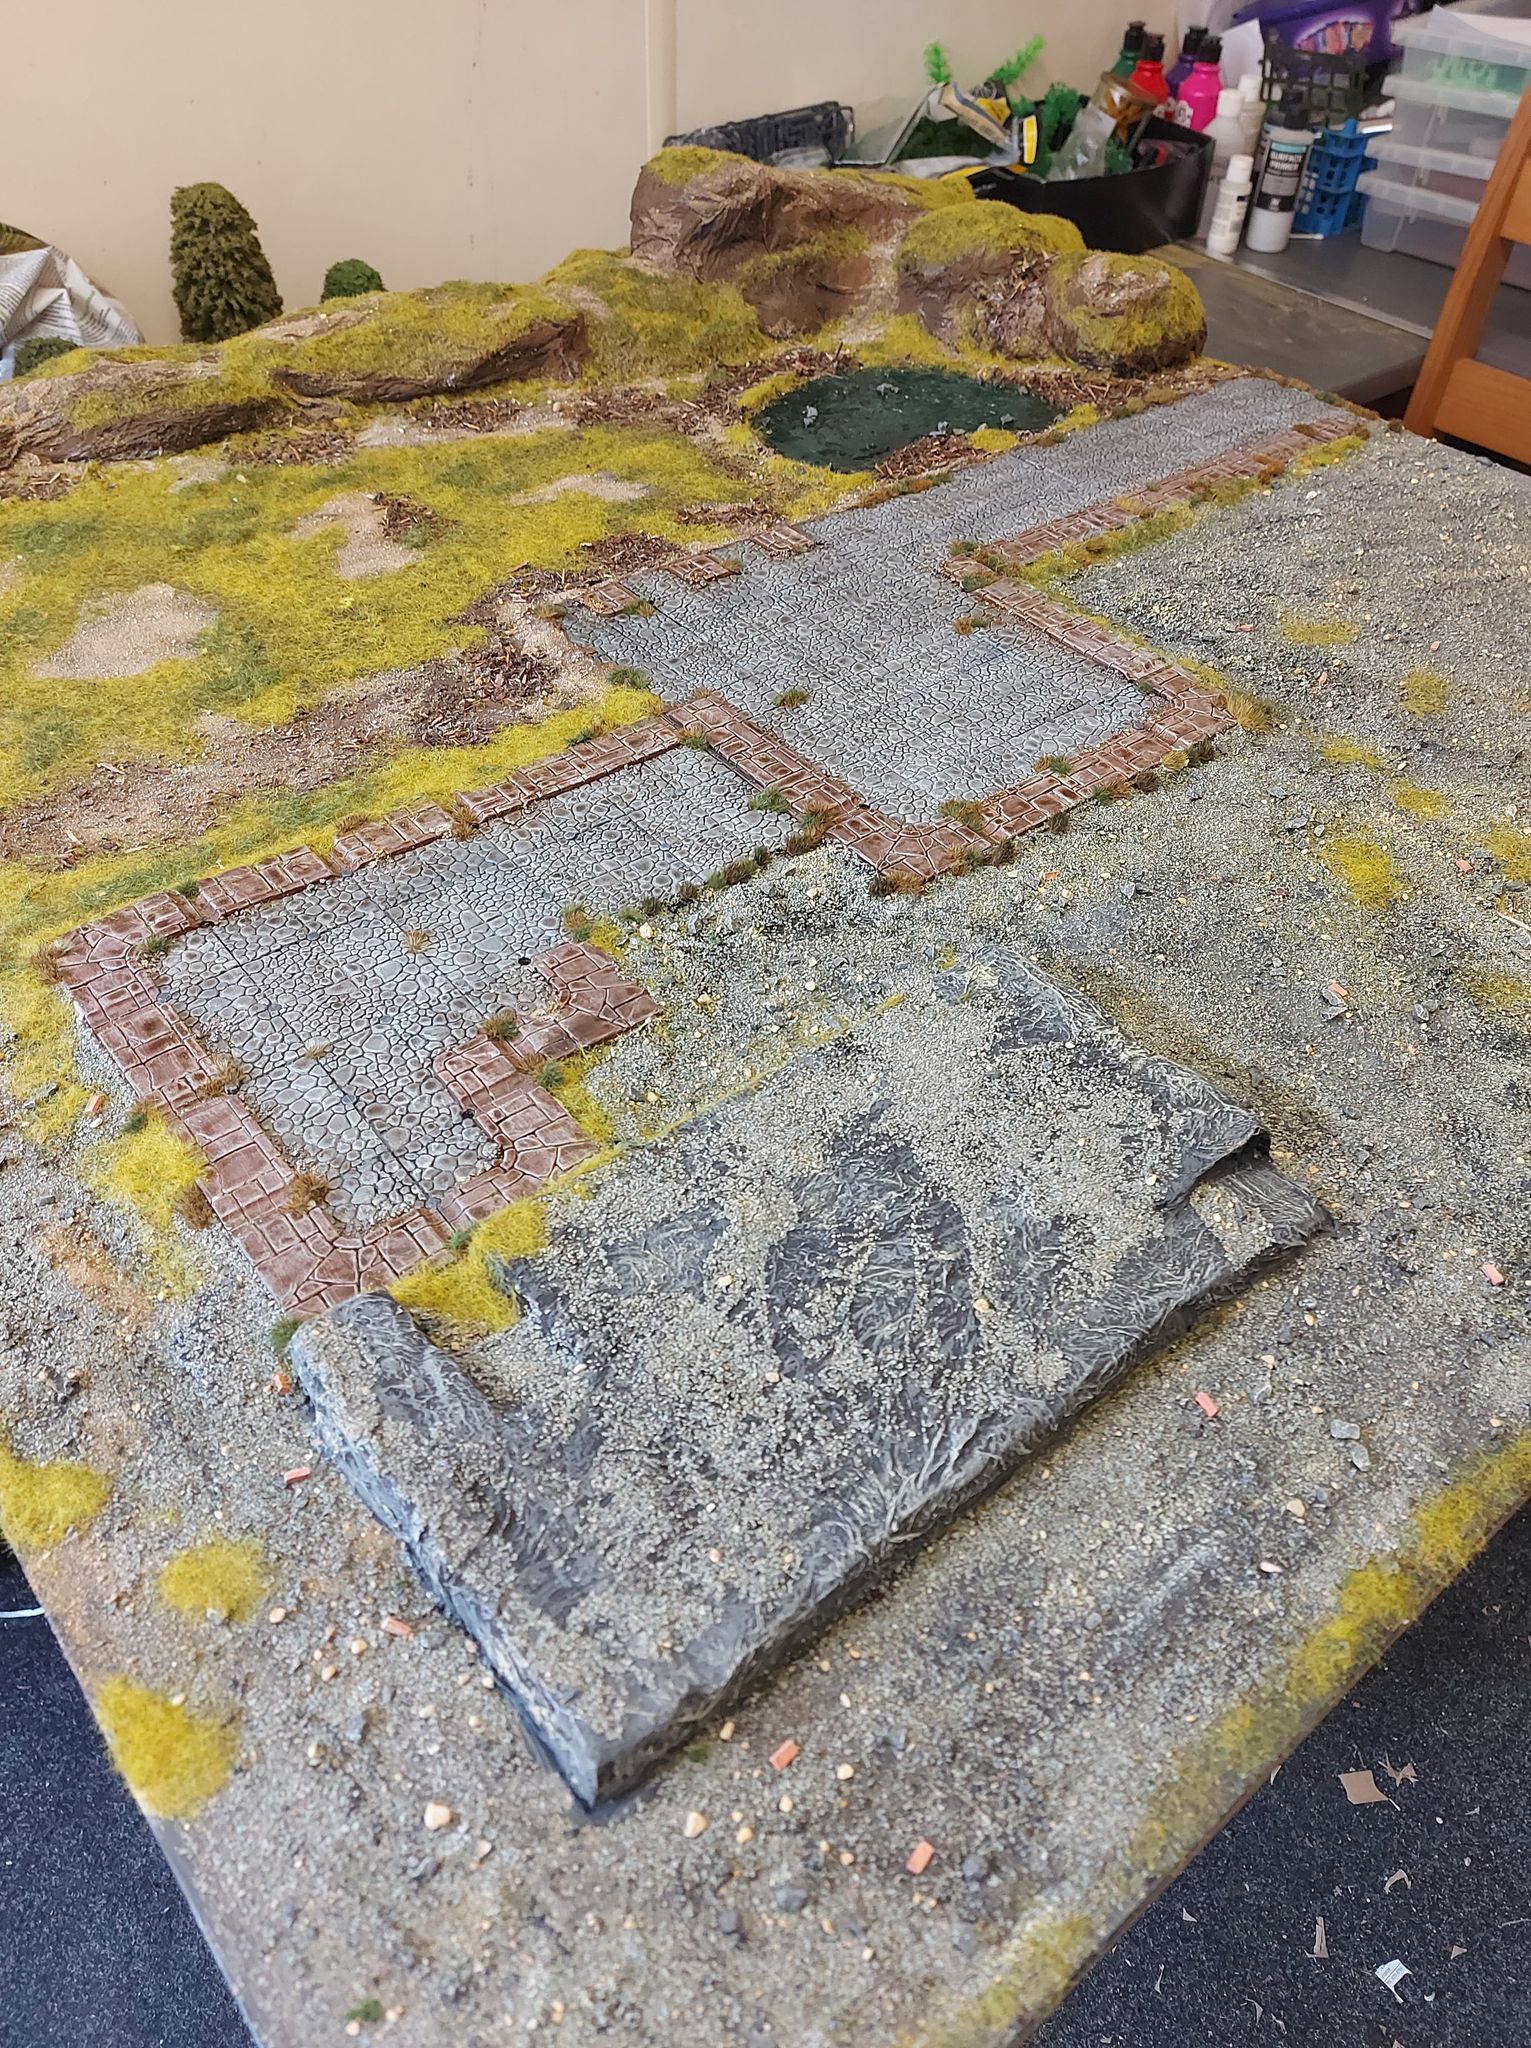 Got to do some fine detail work, now that the ground cover is all dry and done. After shaking off any loose flock, it was time to add some tufts around the paths and cobbles. Again, I used 3 different colours, to give it more texture and a more natural appearance.
 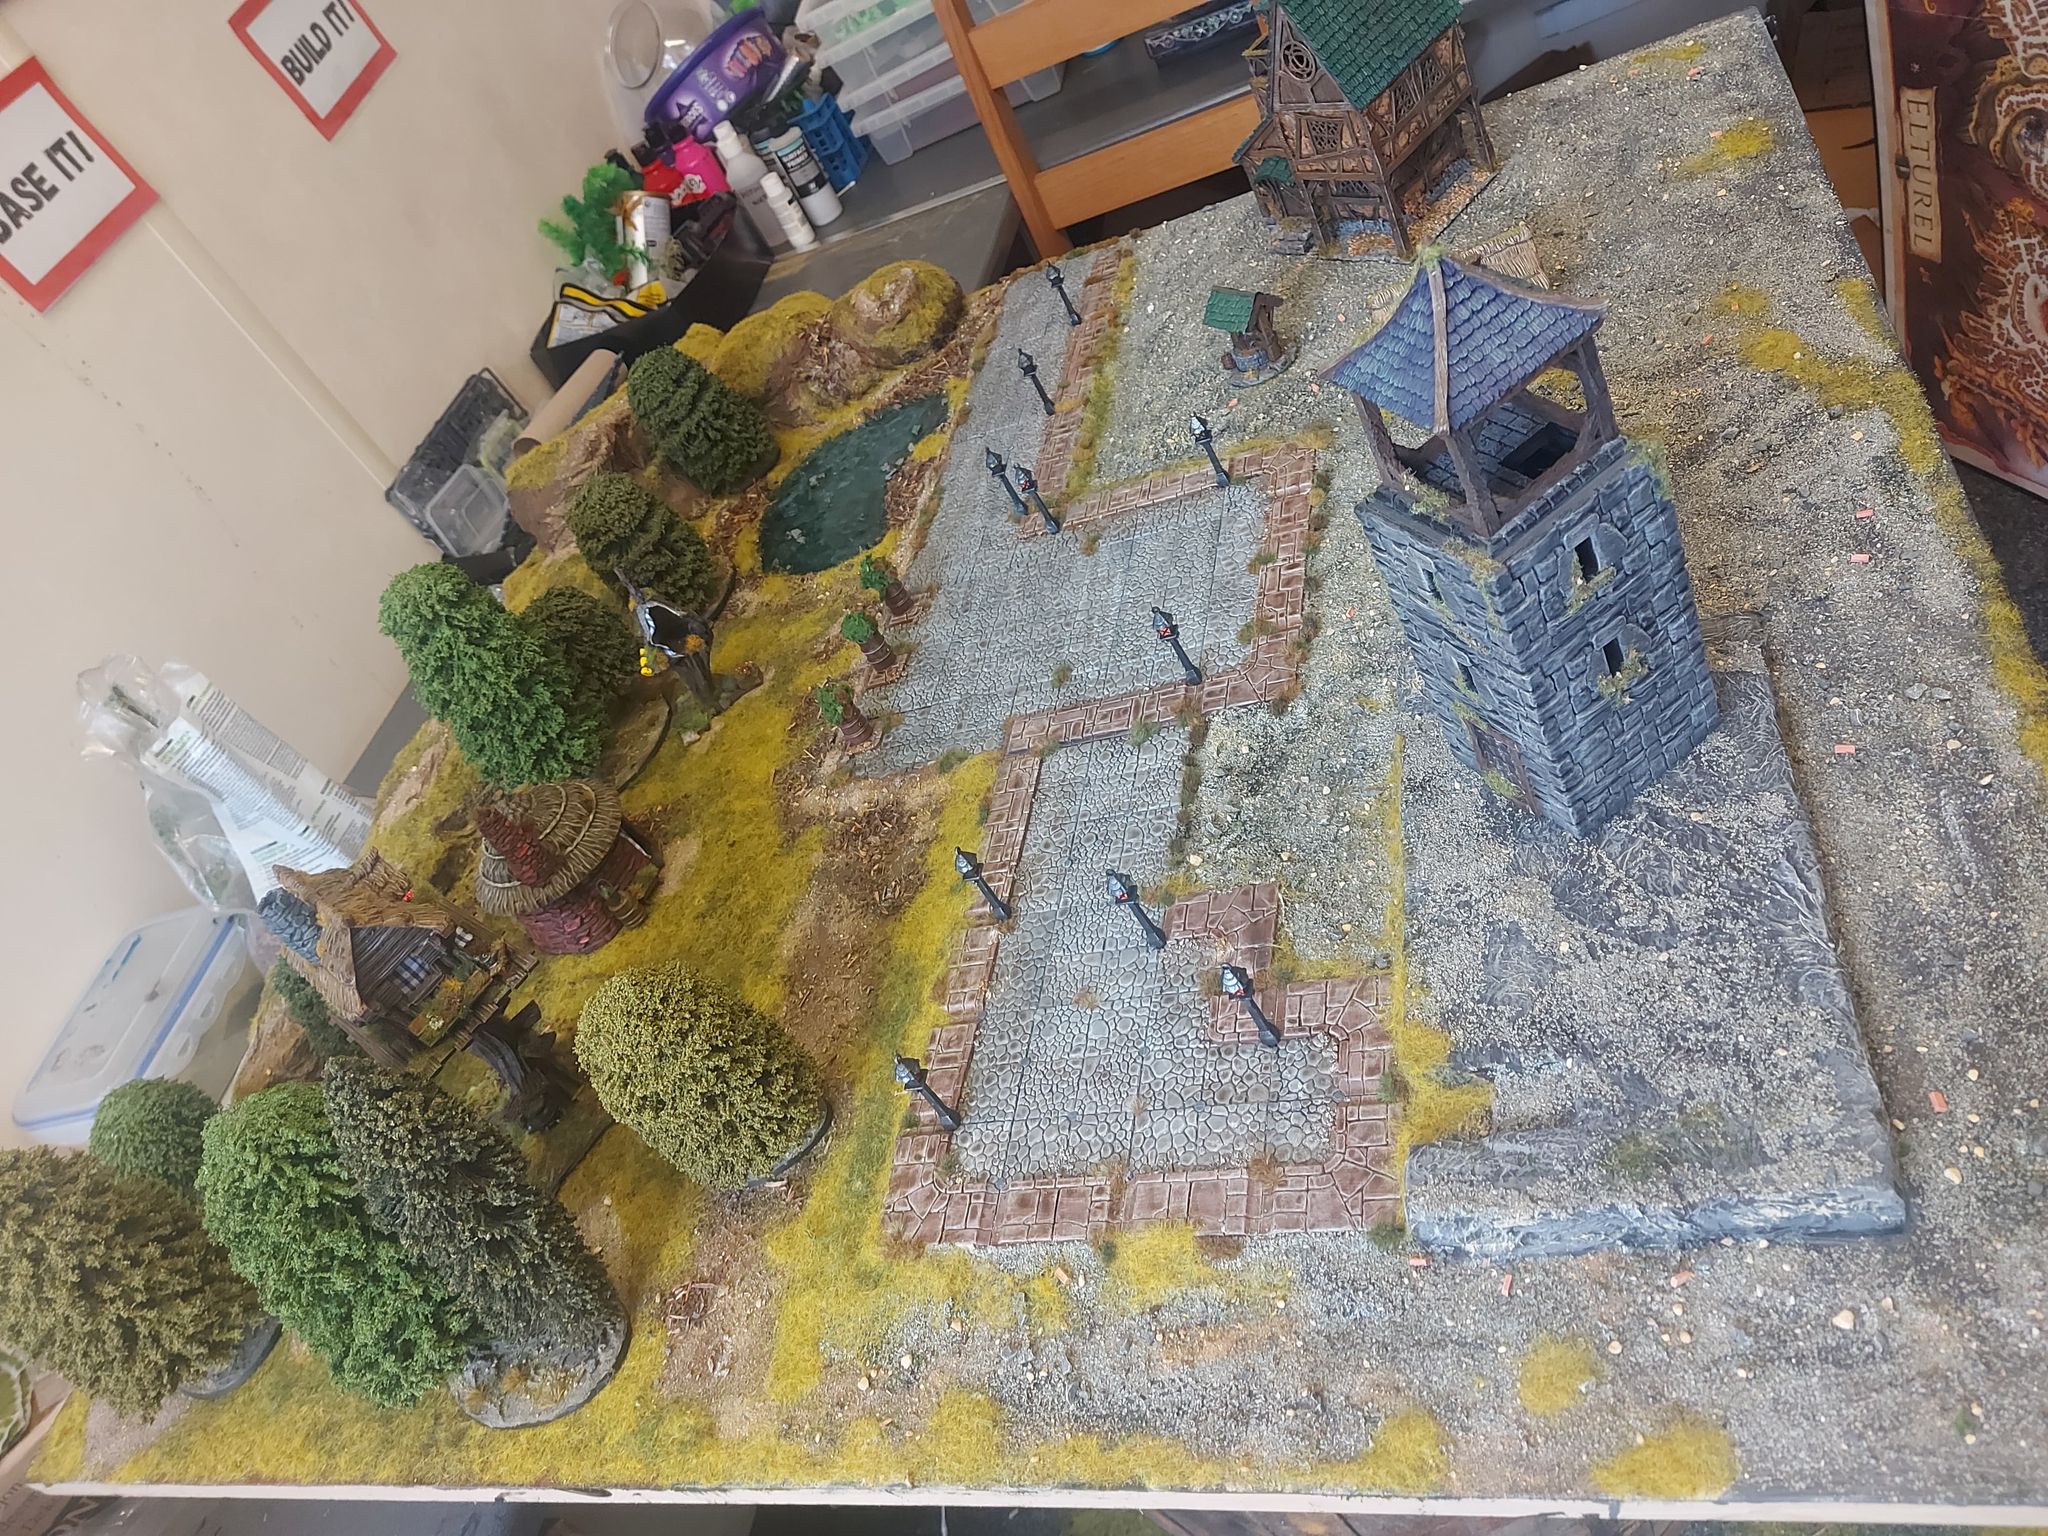 I painted up some Dungeons and Lasers lamp-posts, and they look perfect on this board. I spaced them out around the town square, and then began placing some trees and buildings, to get an idea of how it will look when set up properly. I decided I need another 2 or 3 buildings on the town side, so time to look through the Tarok STLs and find a couple I like. I'm also tempted by the windmill, but this board needs to be ready by the 24th, so I shall have to see how time goes.
 Next few steps.
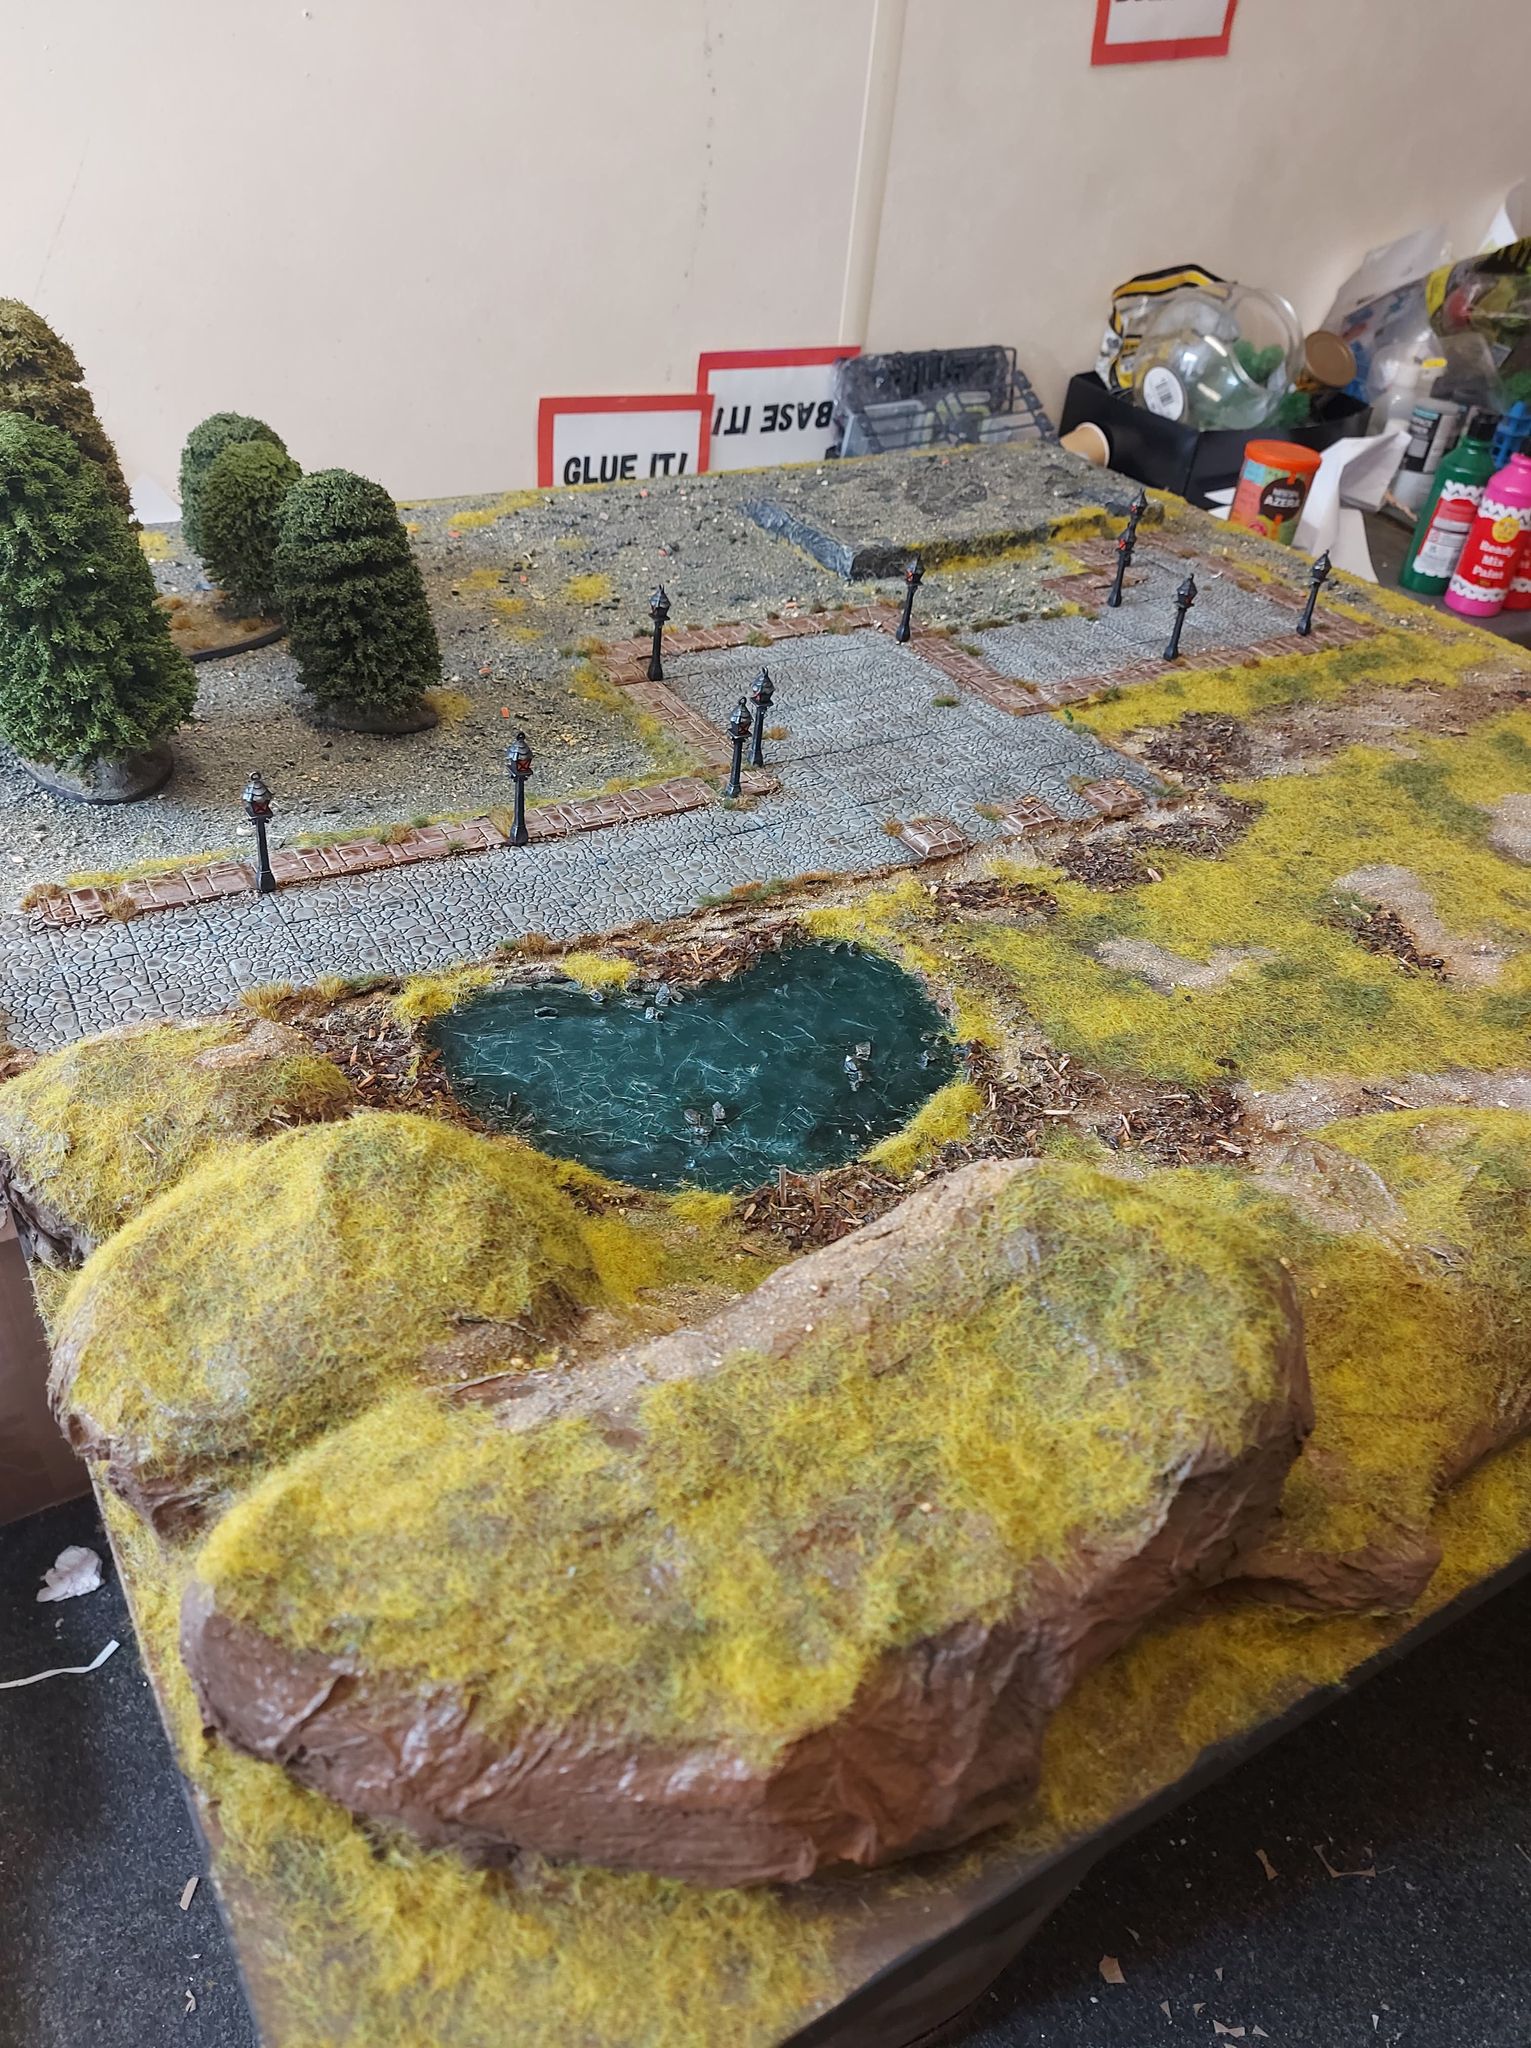
 Finally have chance to catch up with my project updates! It's been crazy busy the last few days for various reasons, and although progress has been made, I've not had chance to post it. Once all the paper mache was dry, and I'd covered the whole board with some light scatter rocks for texture, I base coated the whole thing in brown and grey. After that, I drybrushed the ground, and began with some layers of static grass/flock. I used three different colours of this, to add texture and depth.
 Thursday Progress
 Today began with cutting out a million little cardboard stones to clad the tower base with.
  Next steps were tackling the paper mache on the paper scrunches to make hills and slopes, and using a combination of earth texture and more paper mache to create smooth transitions between the street panels and the rest of the board.
 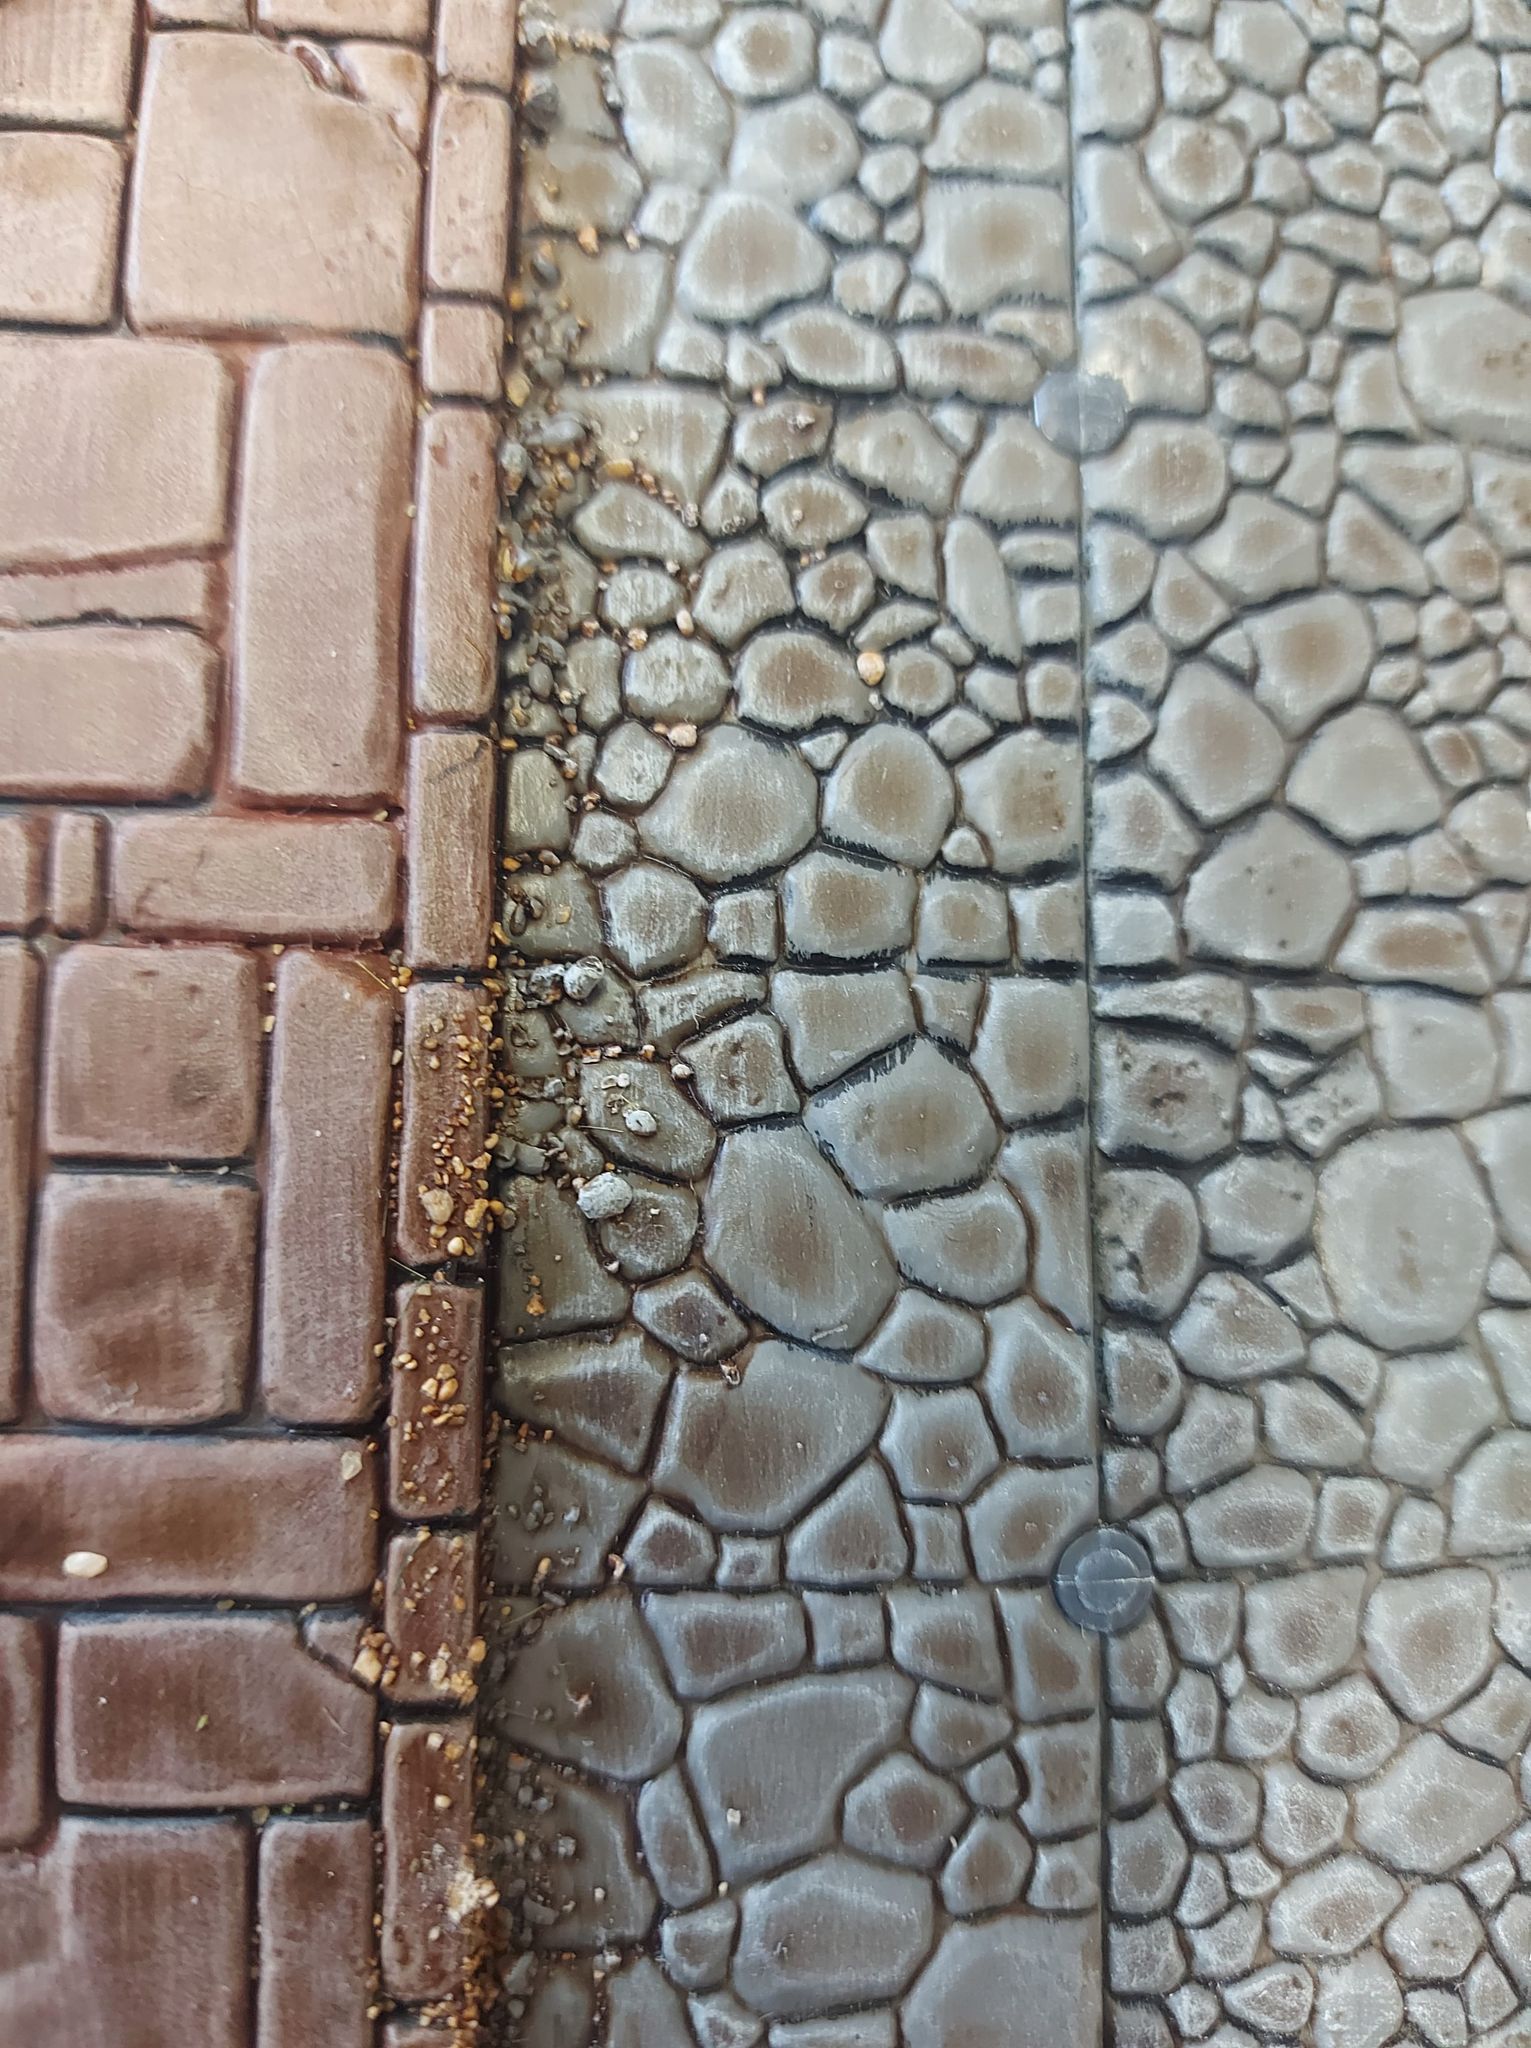 I used some small rock scatter to add some character to the streets, and make them look a little more worn.
 Thursday Progress
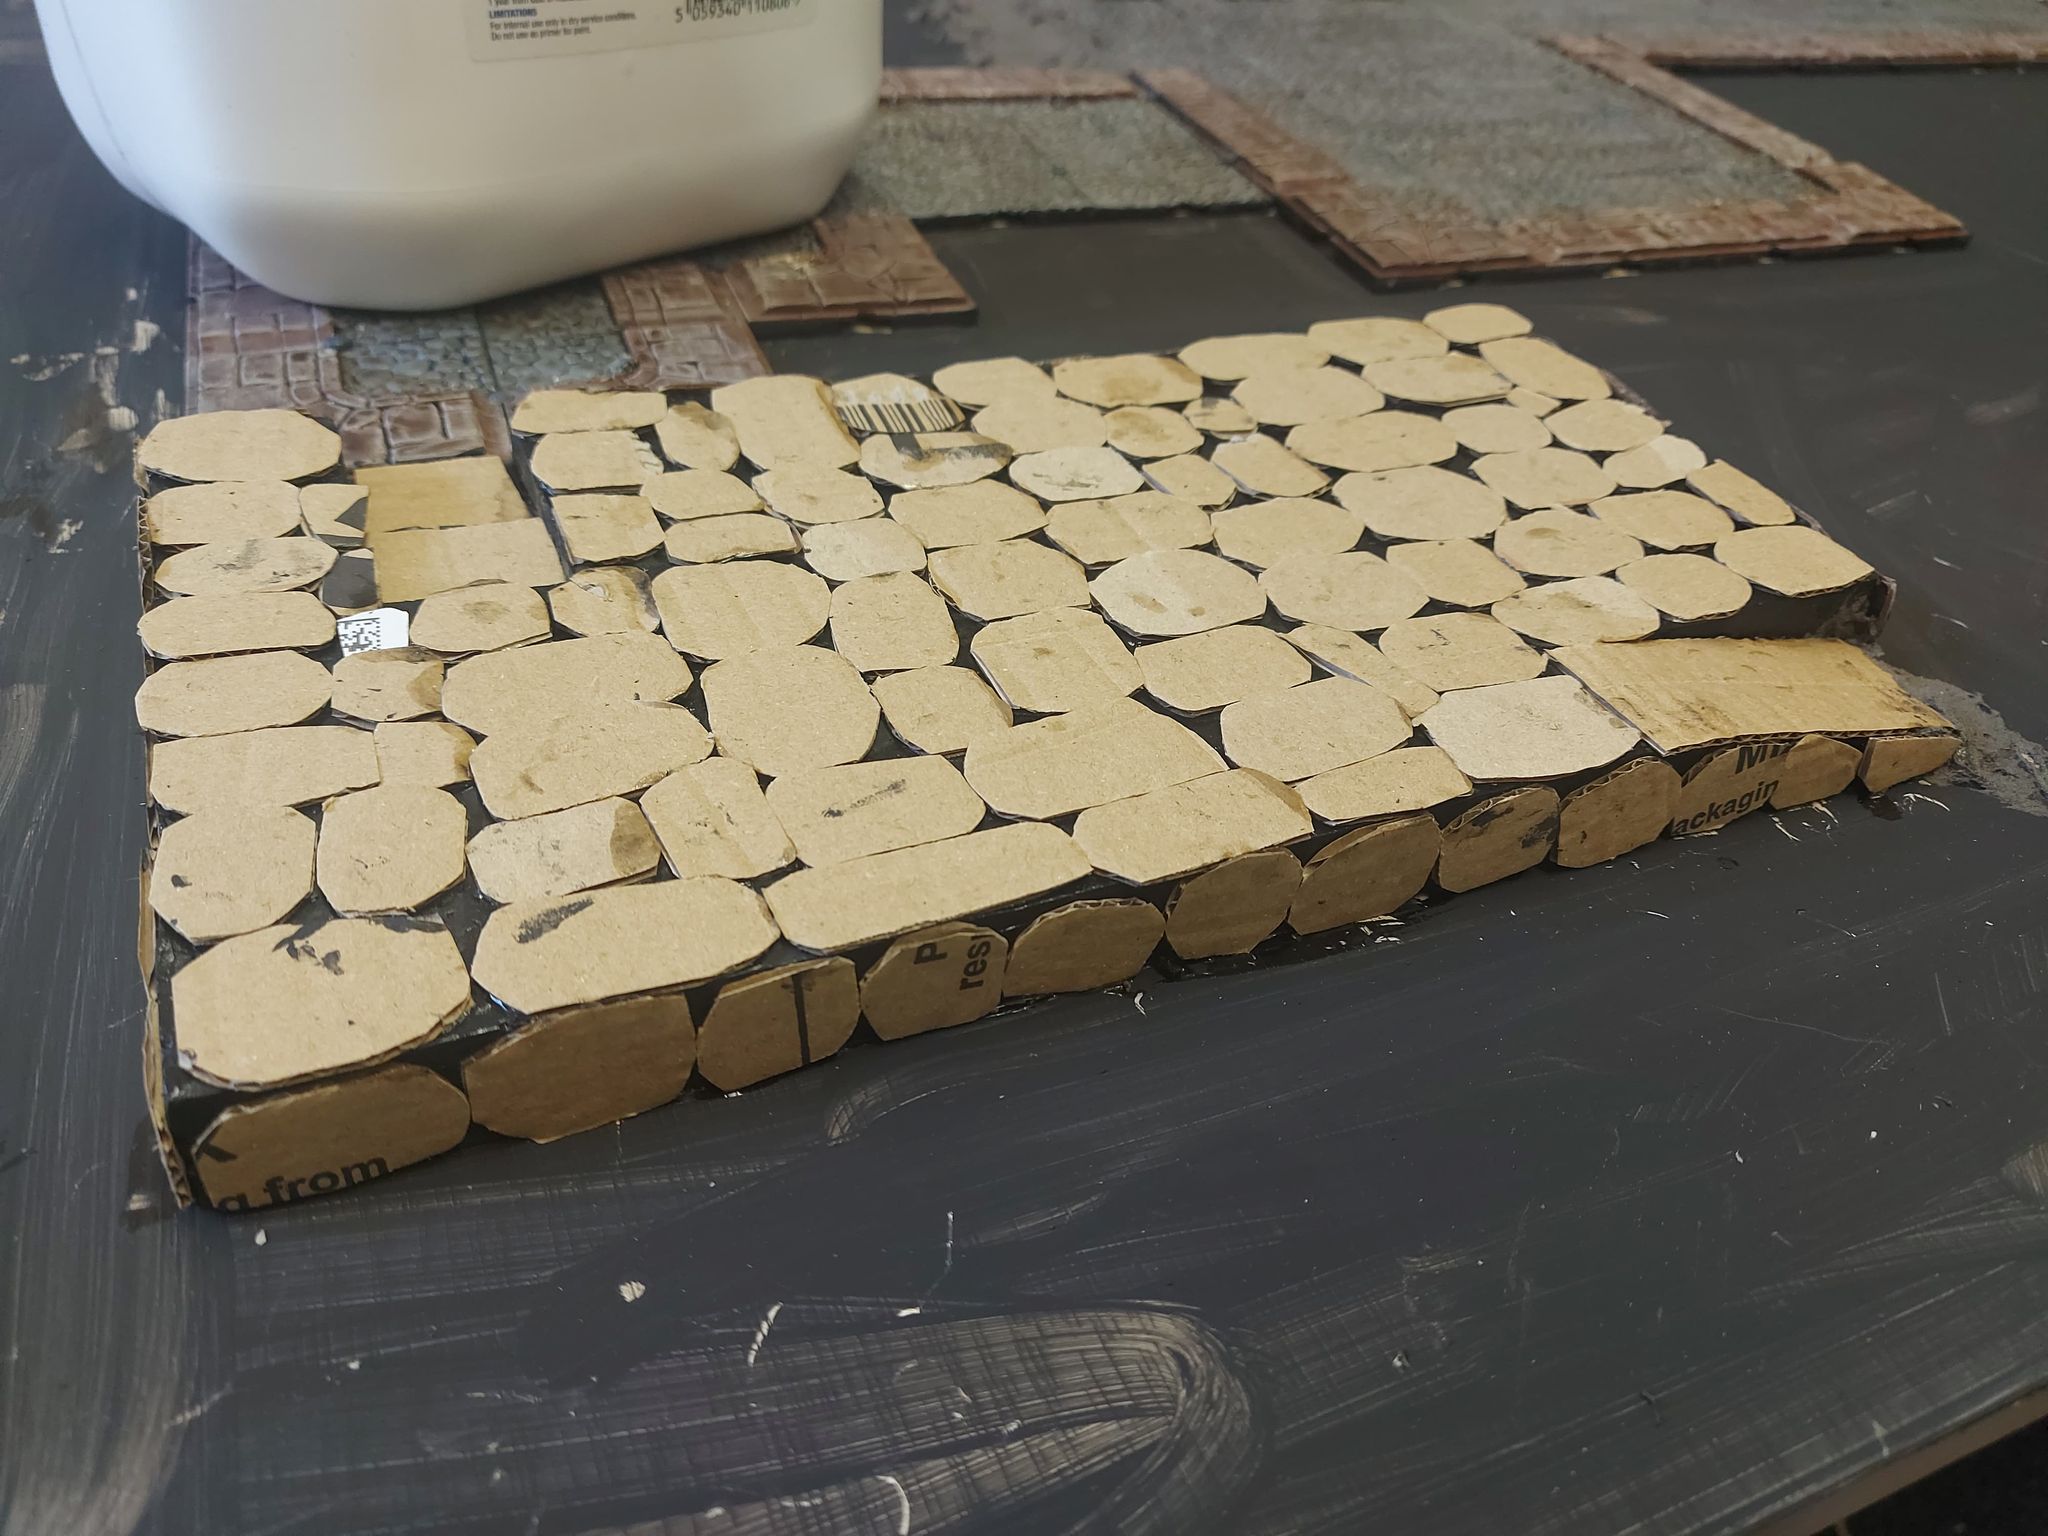 Today began with cutting out a million and five cardboard flagstones to cover the tower platform.
 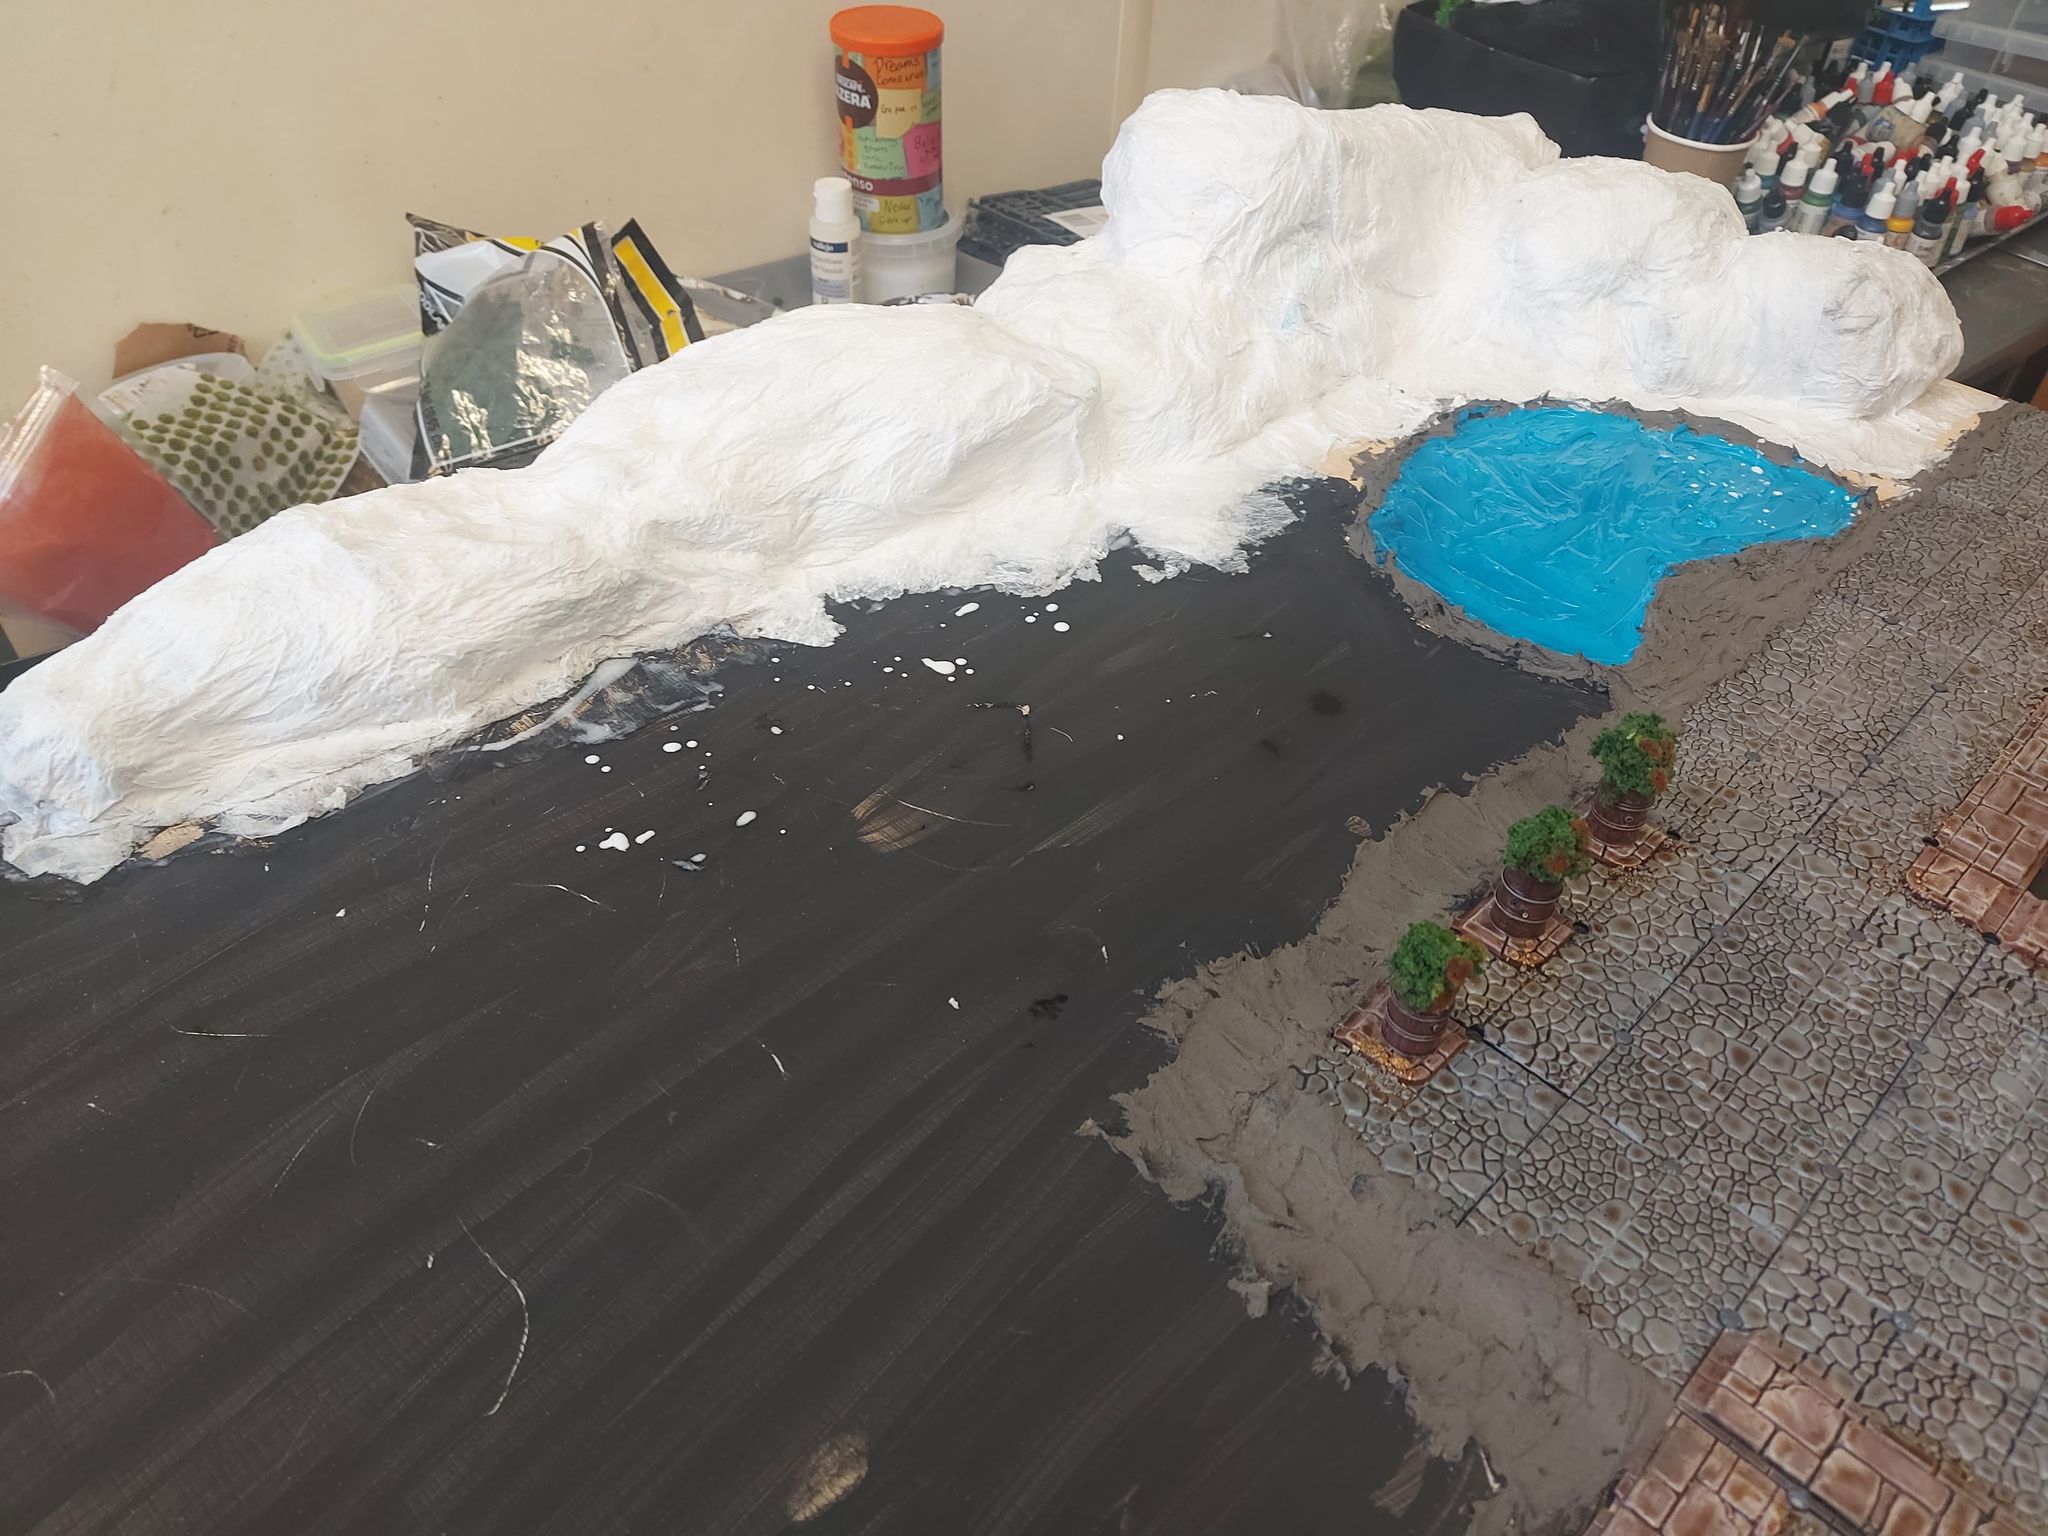 Next up was covering those paper scrunches with a lovely layer of paper mache, which was waaaay more fun than I thought it would be.
 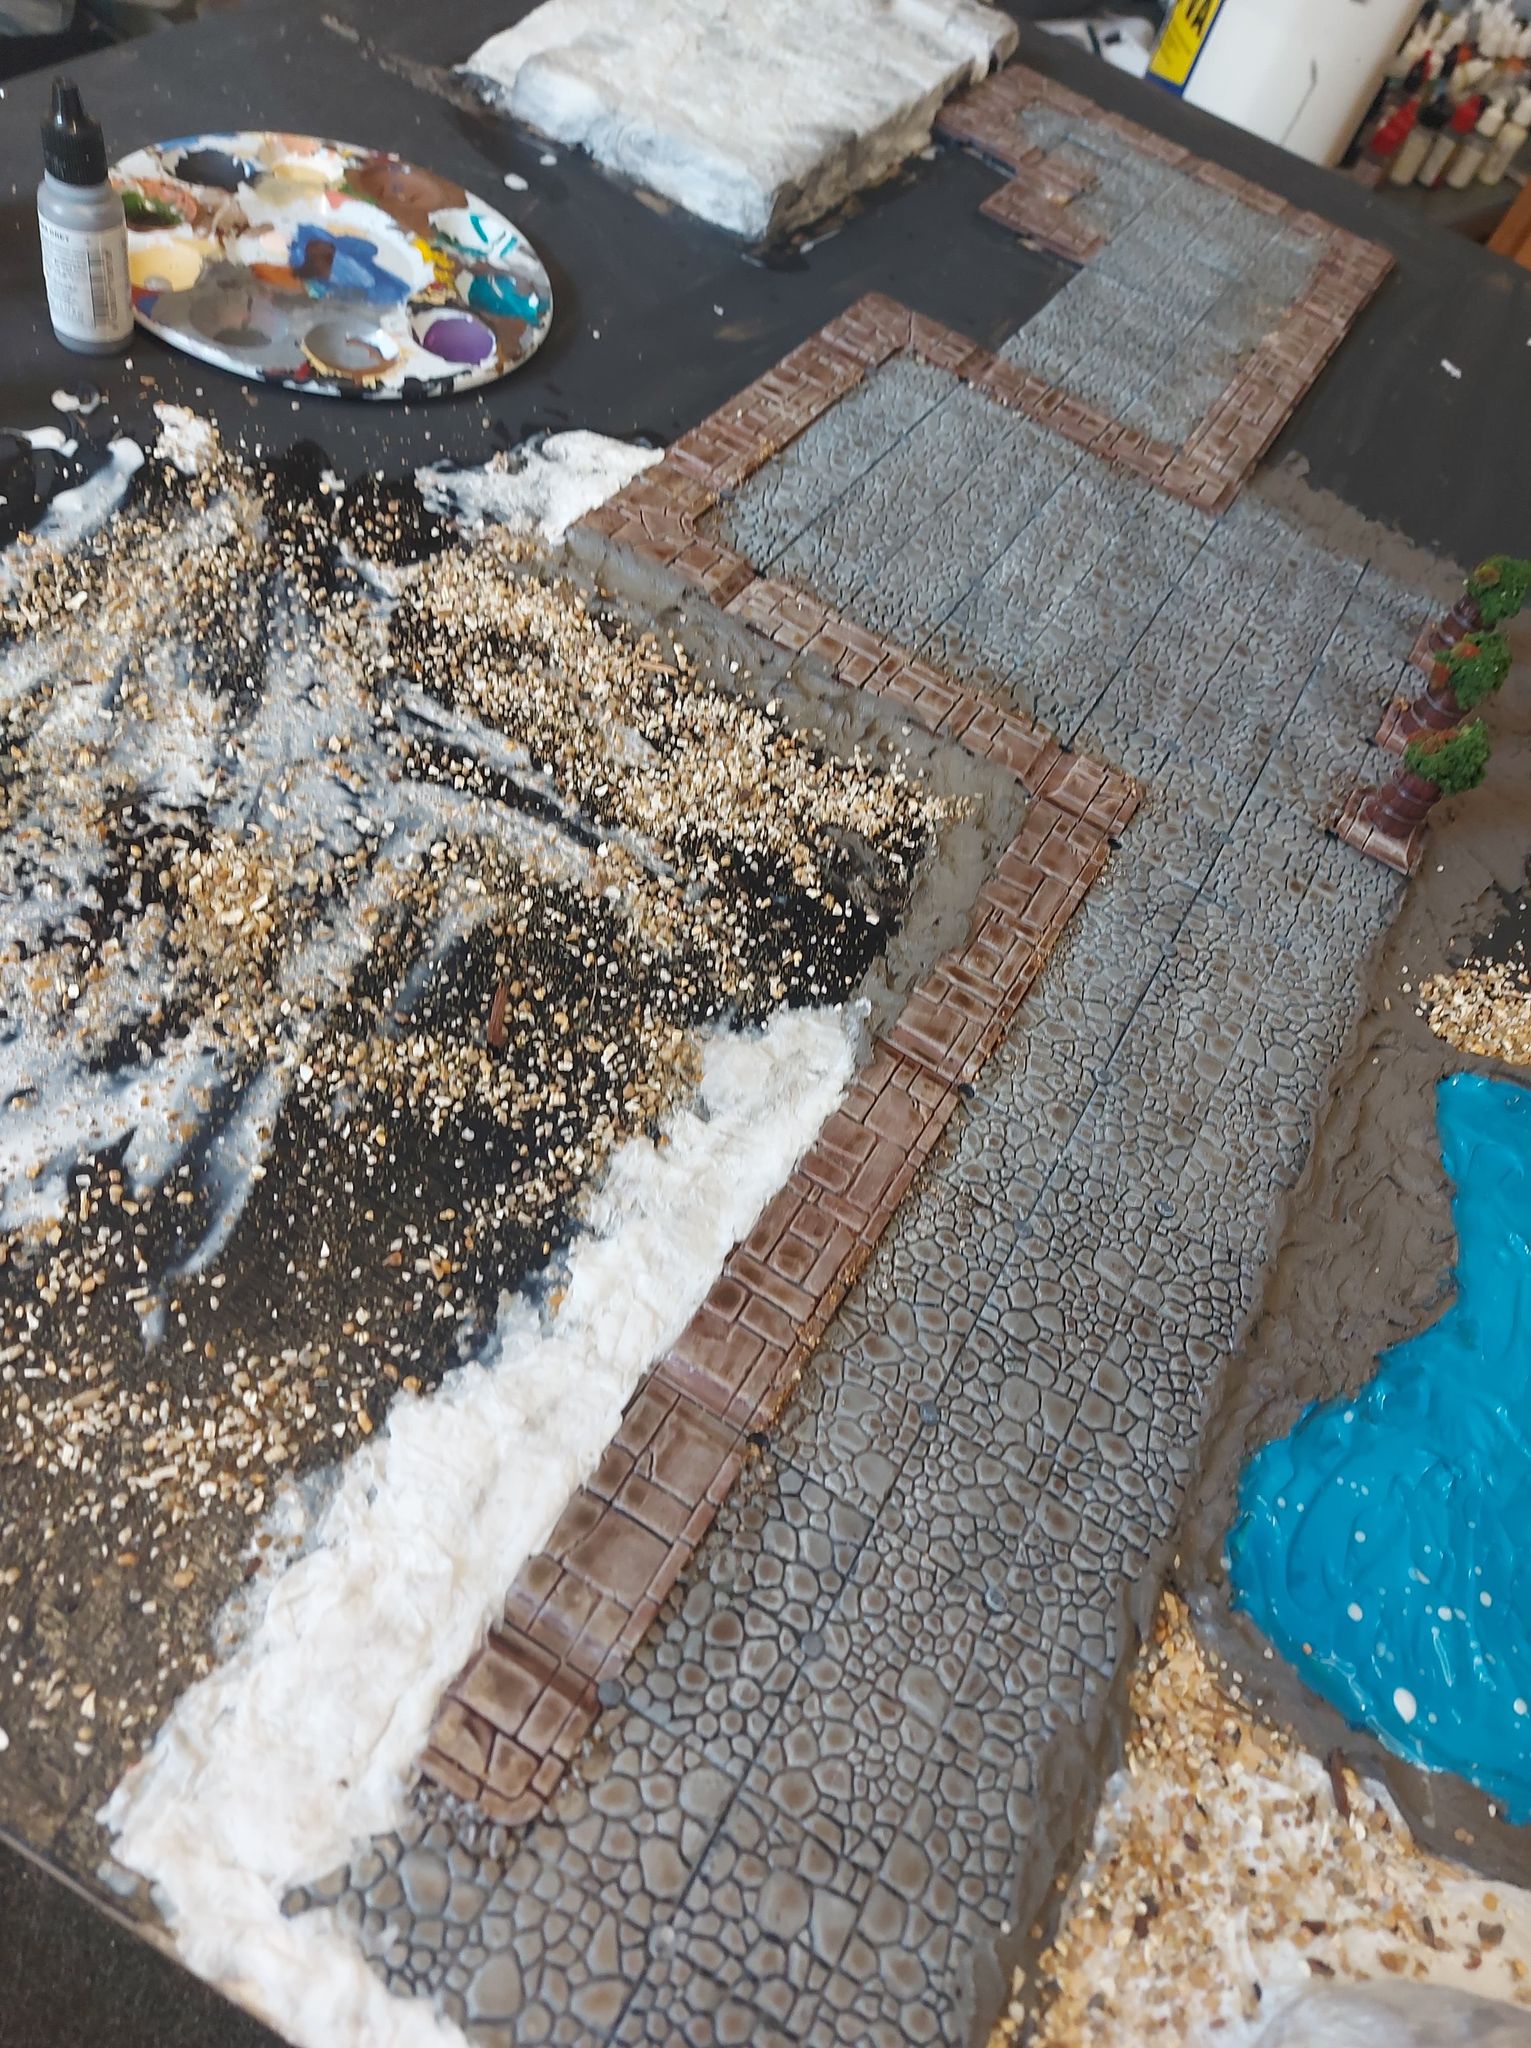 After that, I added some small scatter rocks to the board, to give it some texture ready for painting. I also used a combination of earth texture and paper mache to make smooth transitions between the street sections and the rest of the board.
 I always love my fiddly little details, so I also added some small rock scatter to the street panels, to give them a more worn look. I painted, inked, and drybrushed them to match either the street or the footpath.
 Wednesday Progress
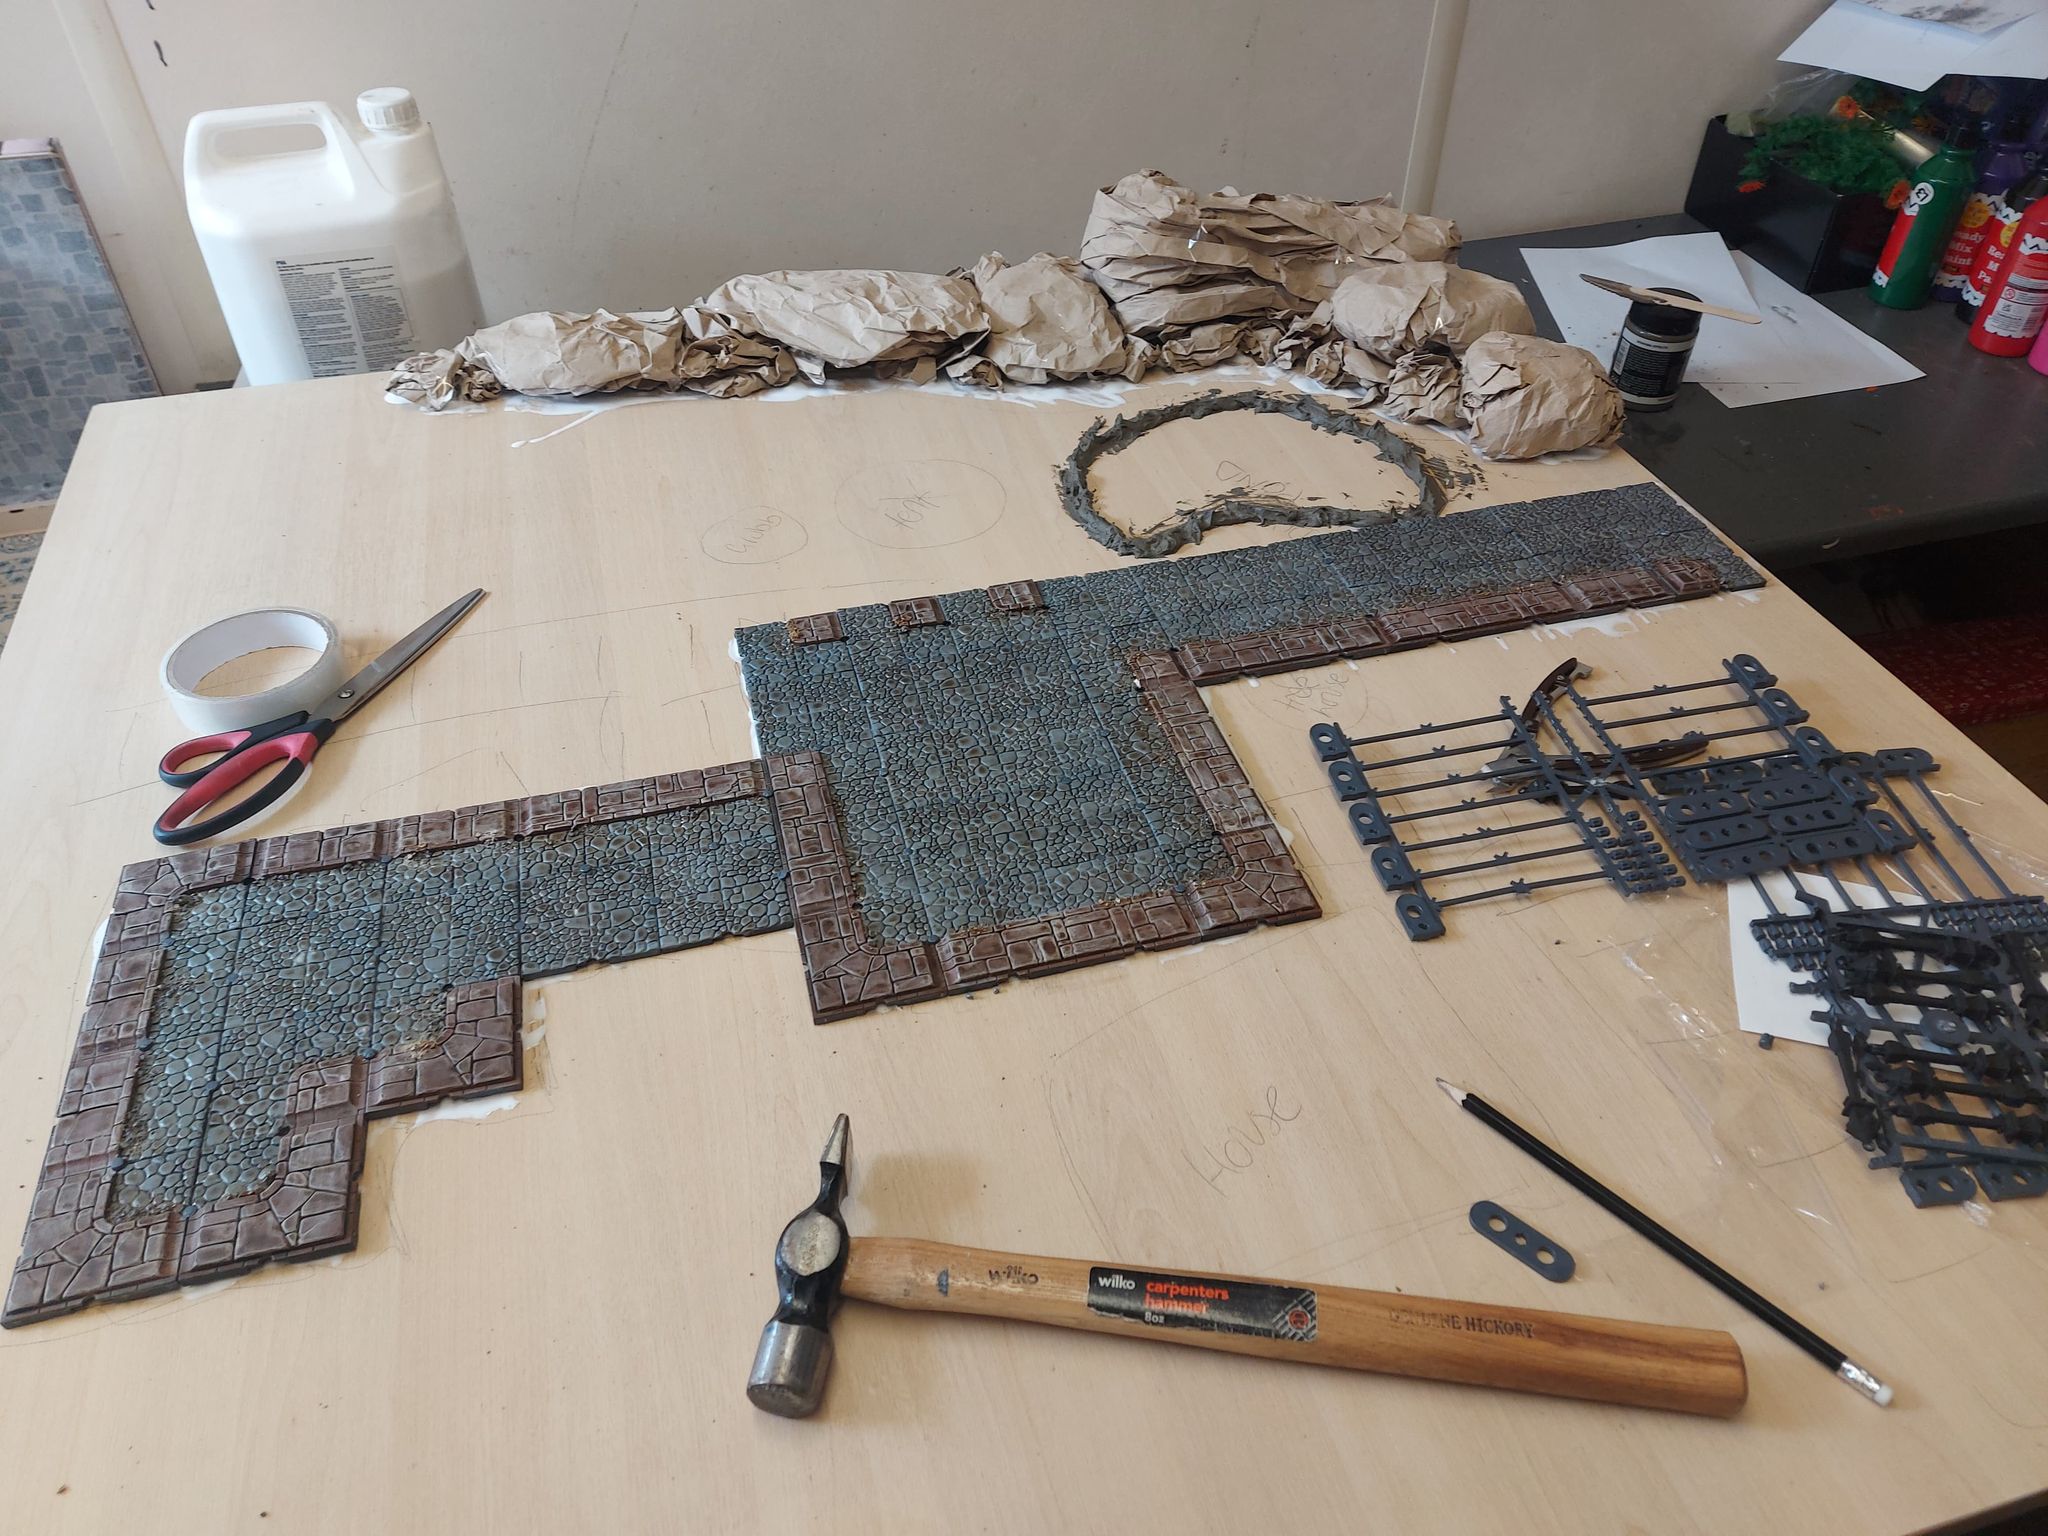 To begin today, I plotted out where I wanted the streets I'd previously painted, and got them glued down.
 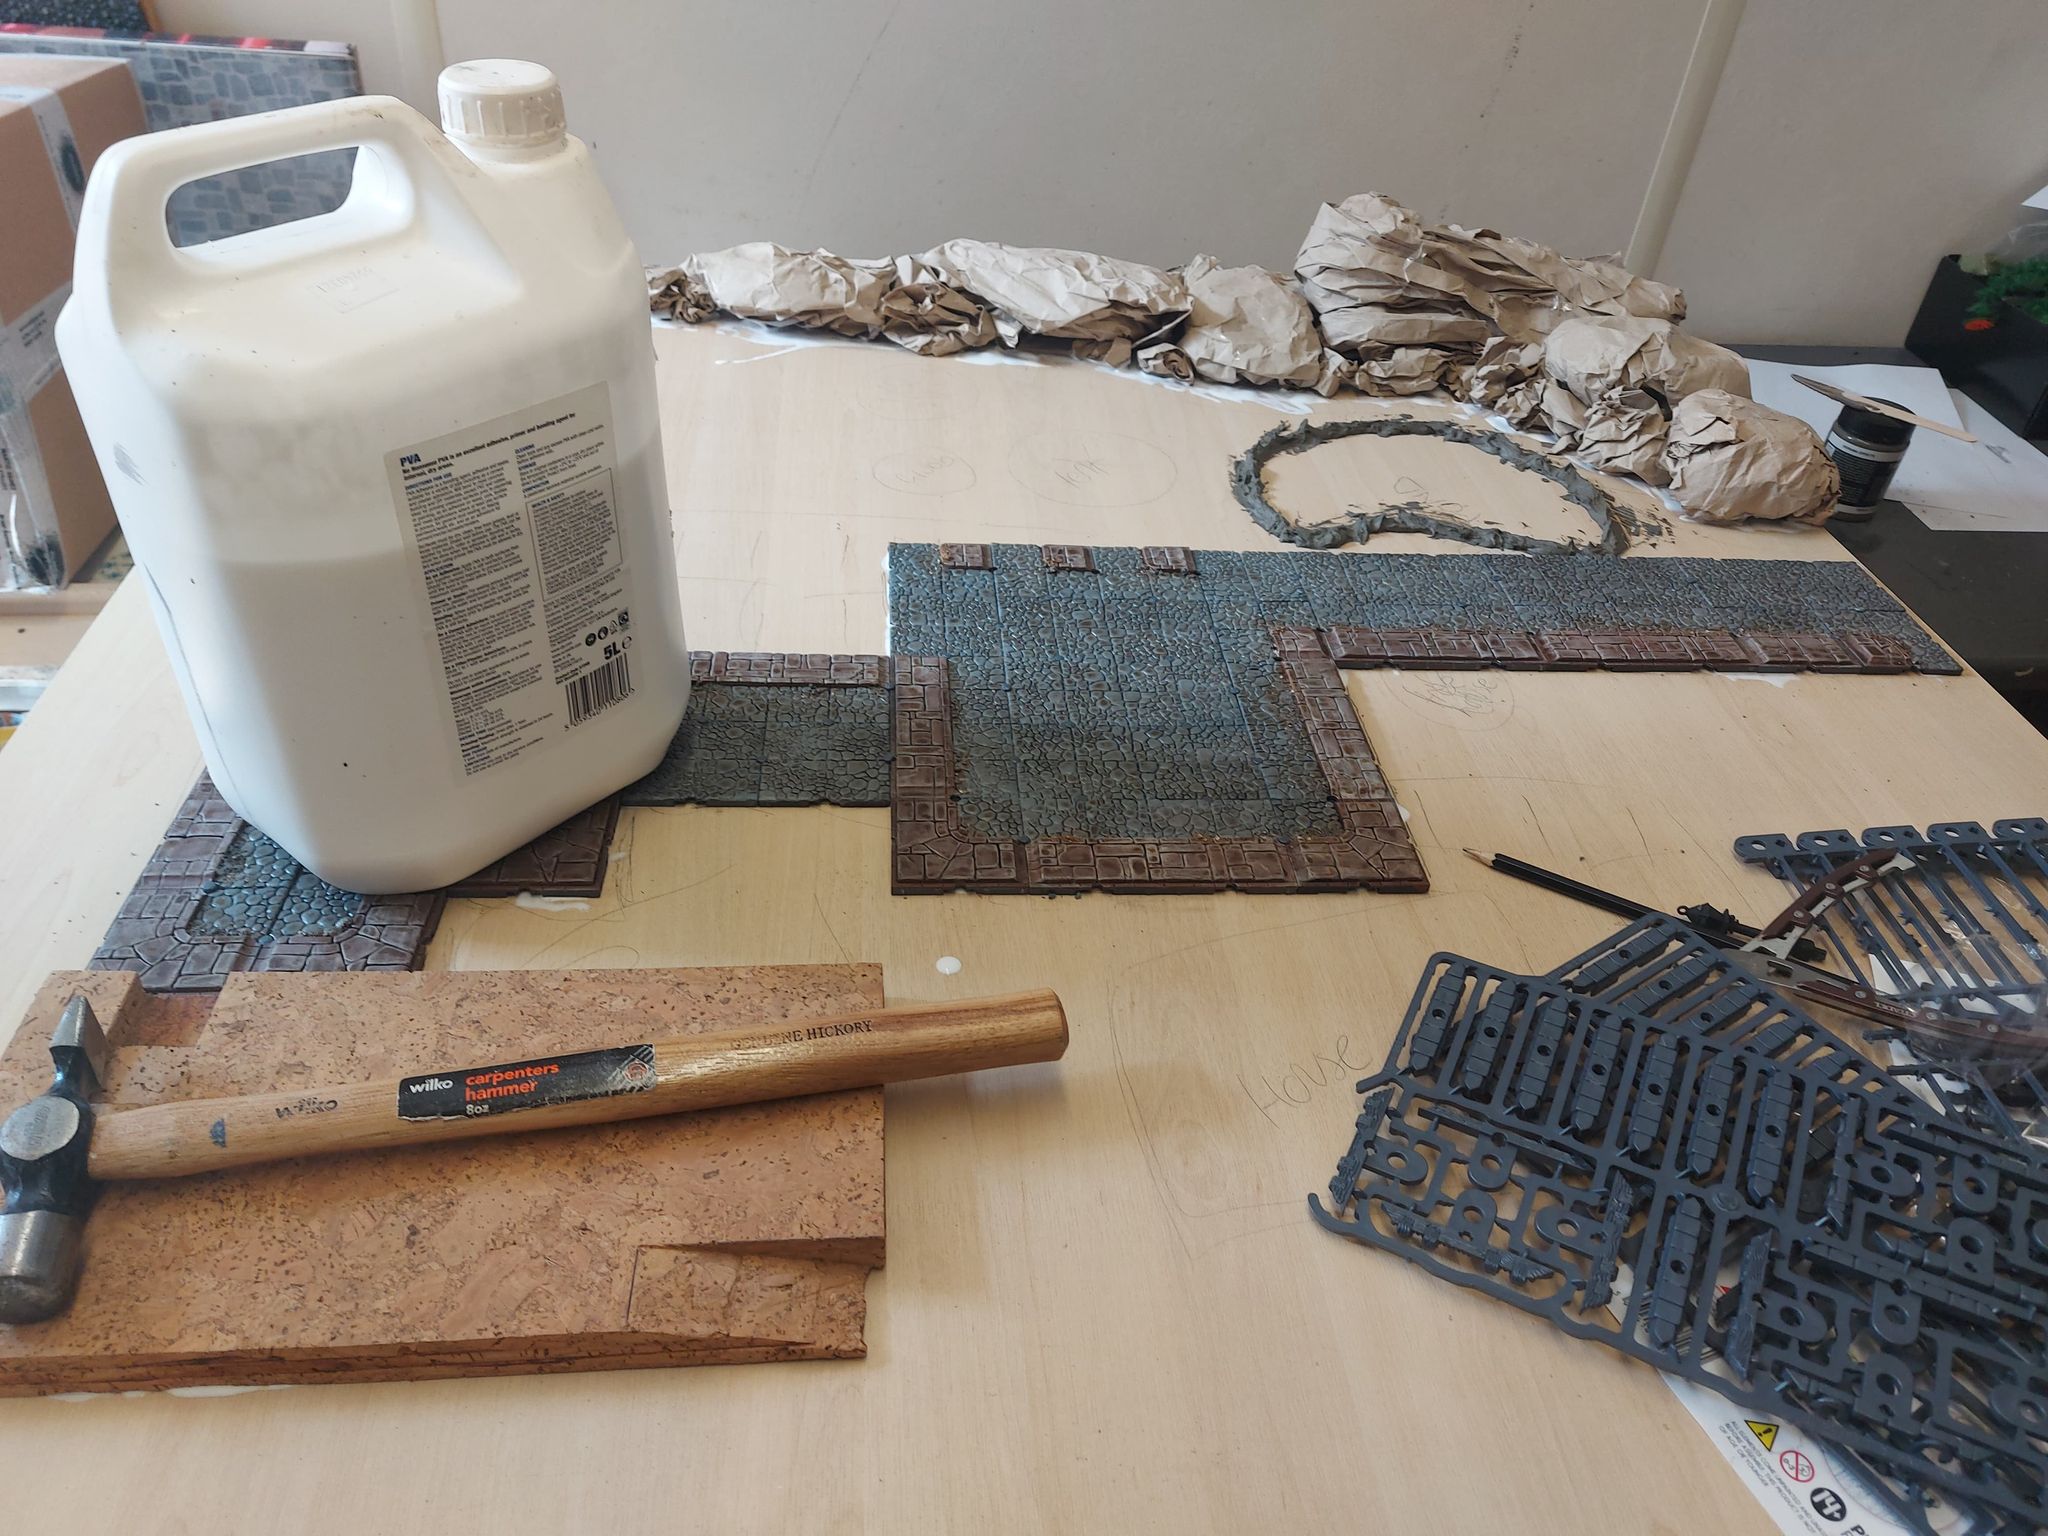 Next, was to stick down some basic scrunched paper to mark out where the hills will be, and add the boundary shape for the duck pond. I also laid a cork block, into which I'd carved steps and a slope, ready for the tower to go on.
 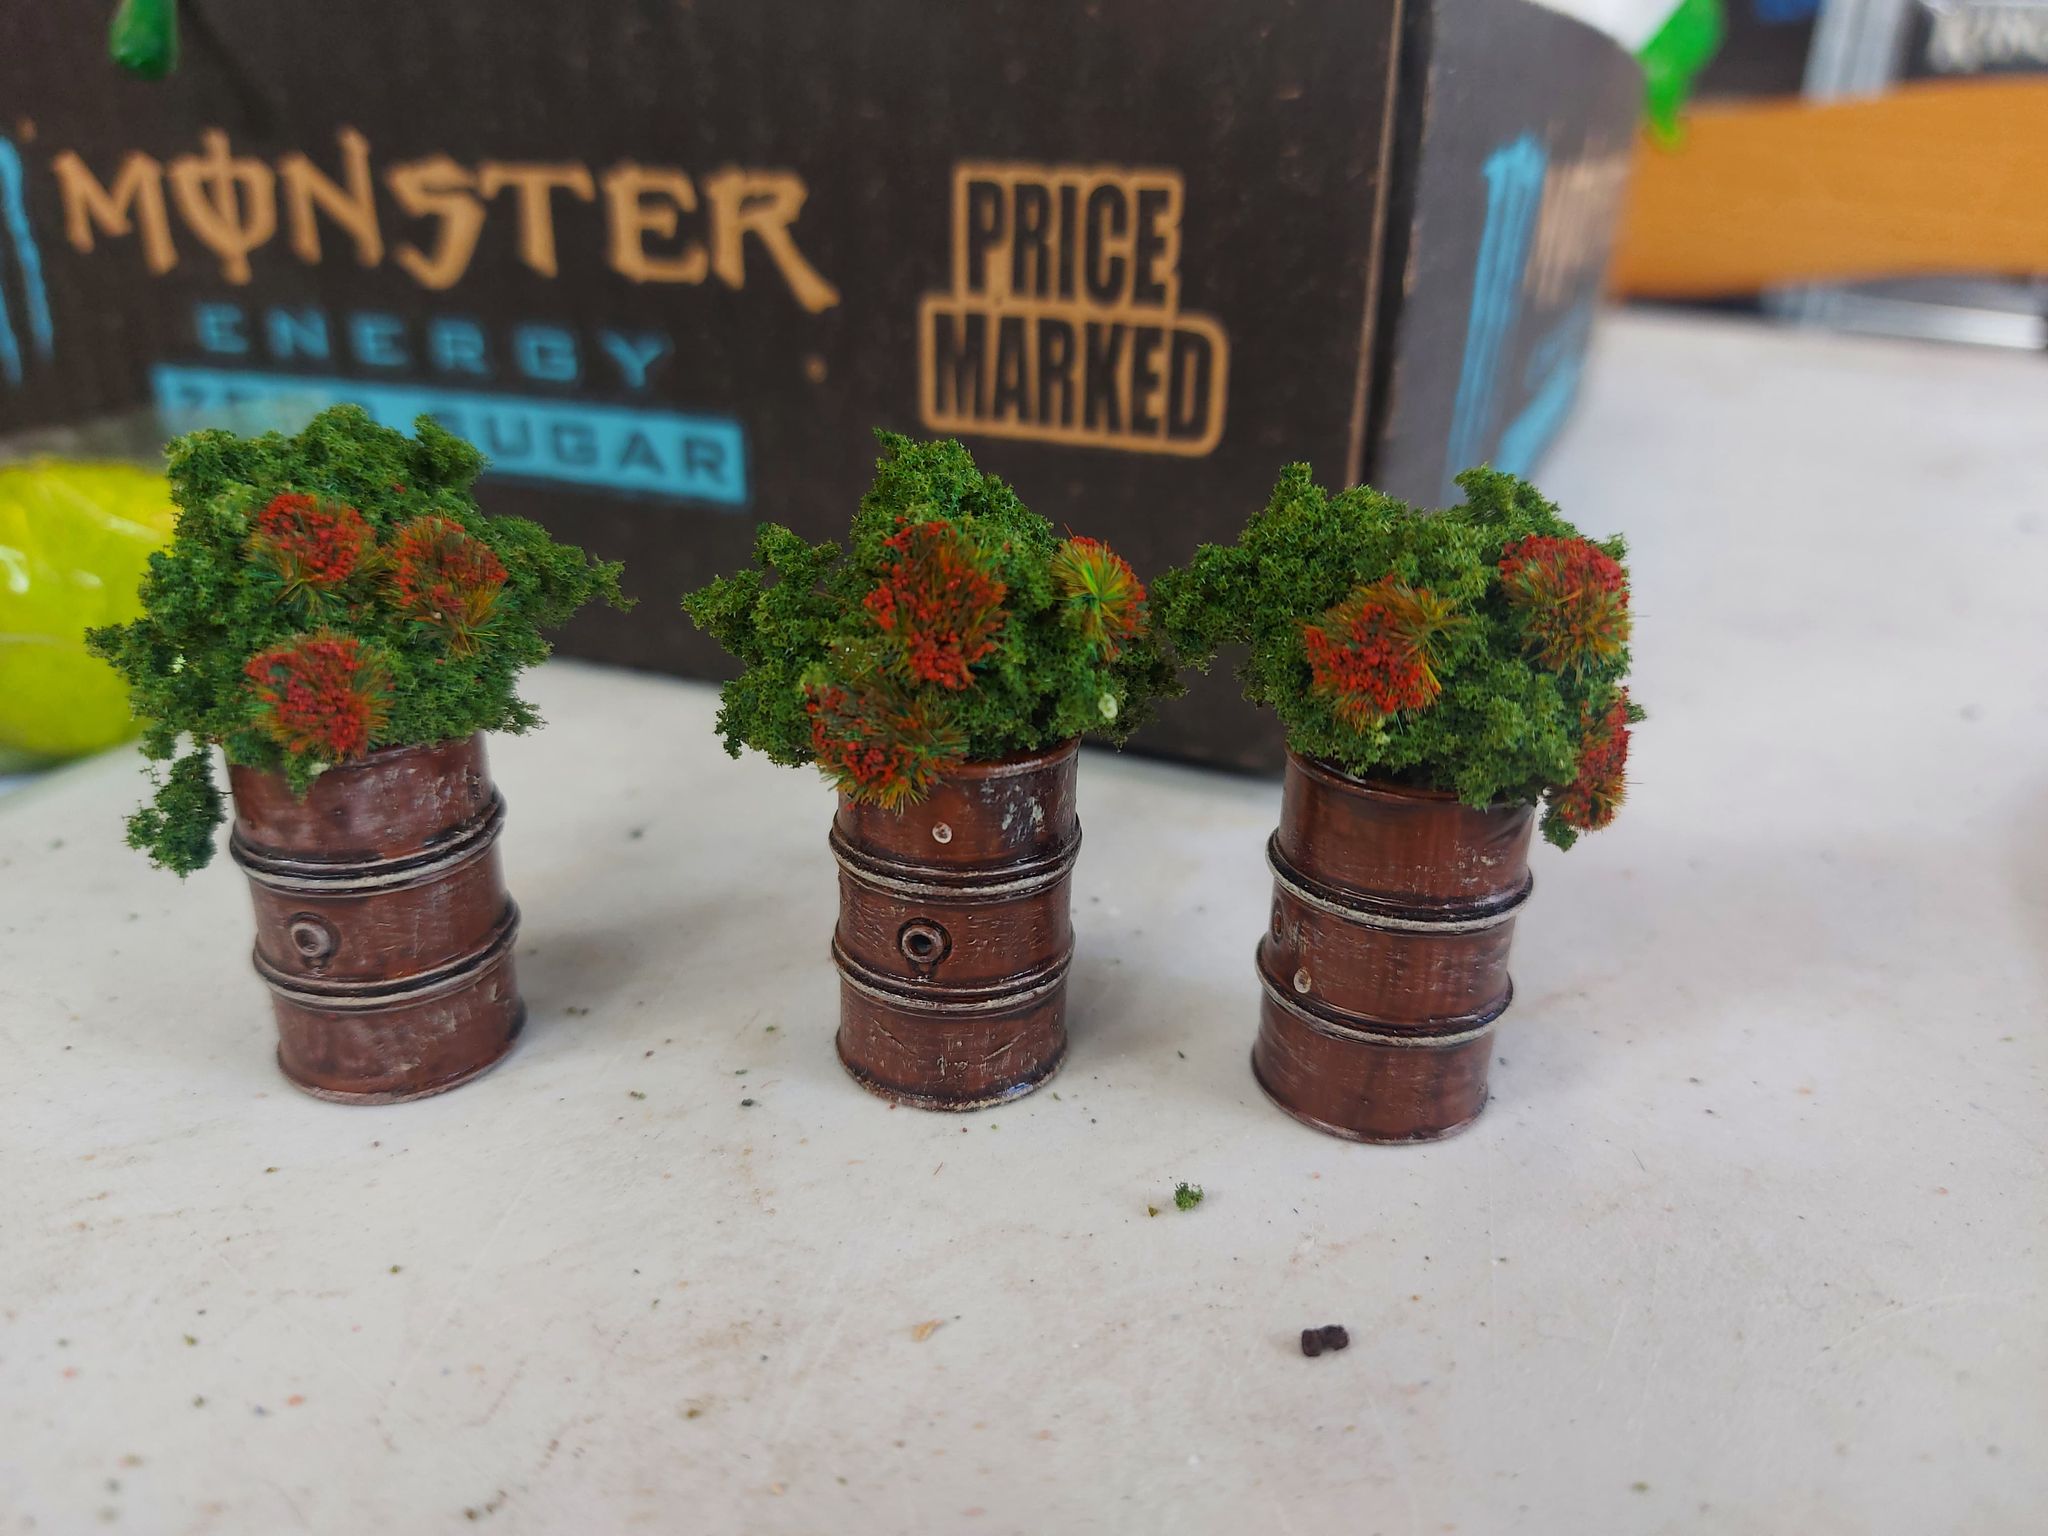 A quick re-purpose of some old GW 40k scatter terrain gave me these cute barrel planters to go in the town square.
 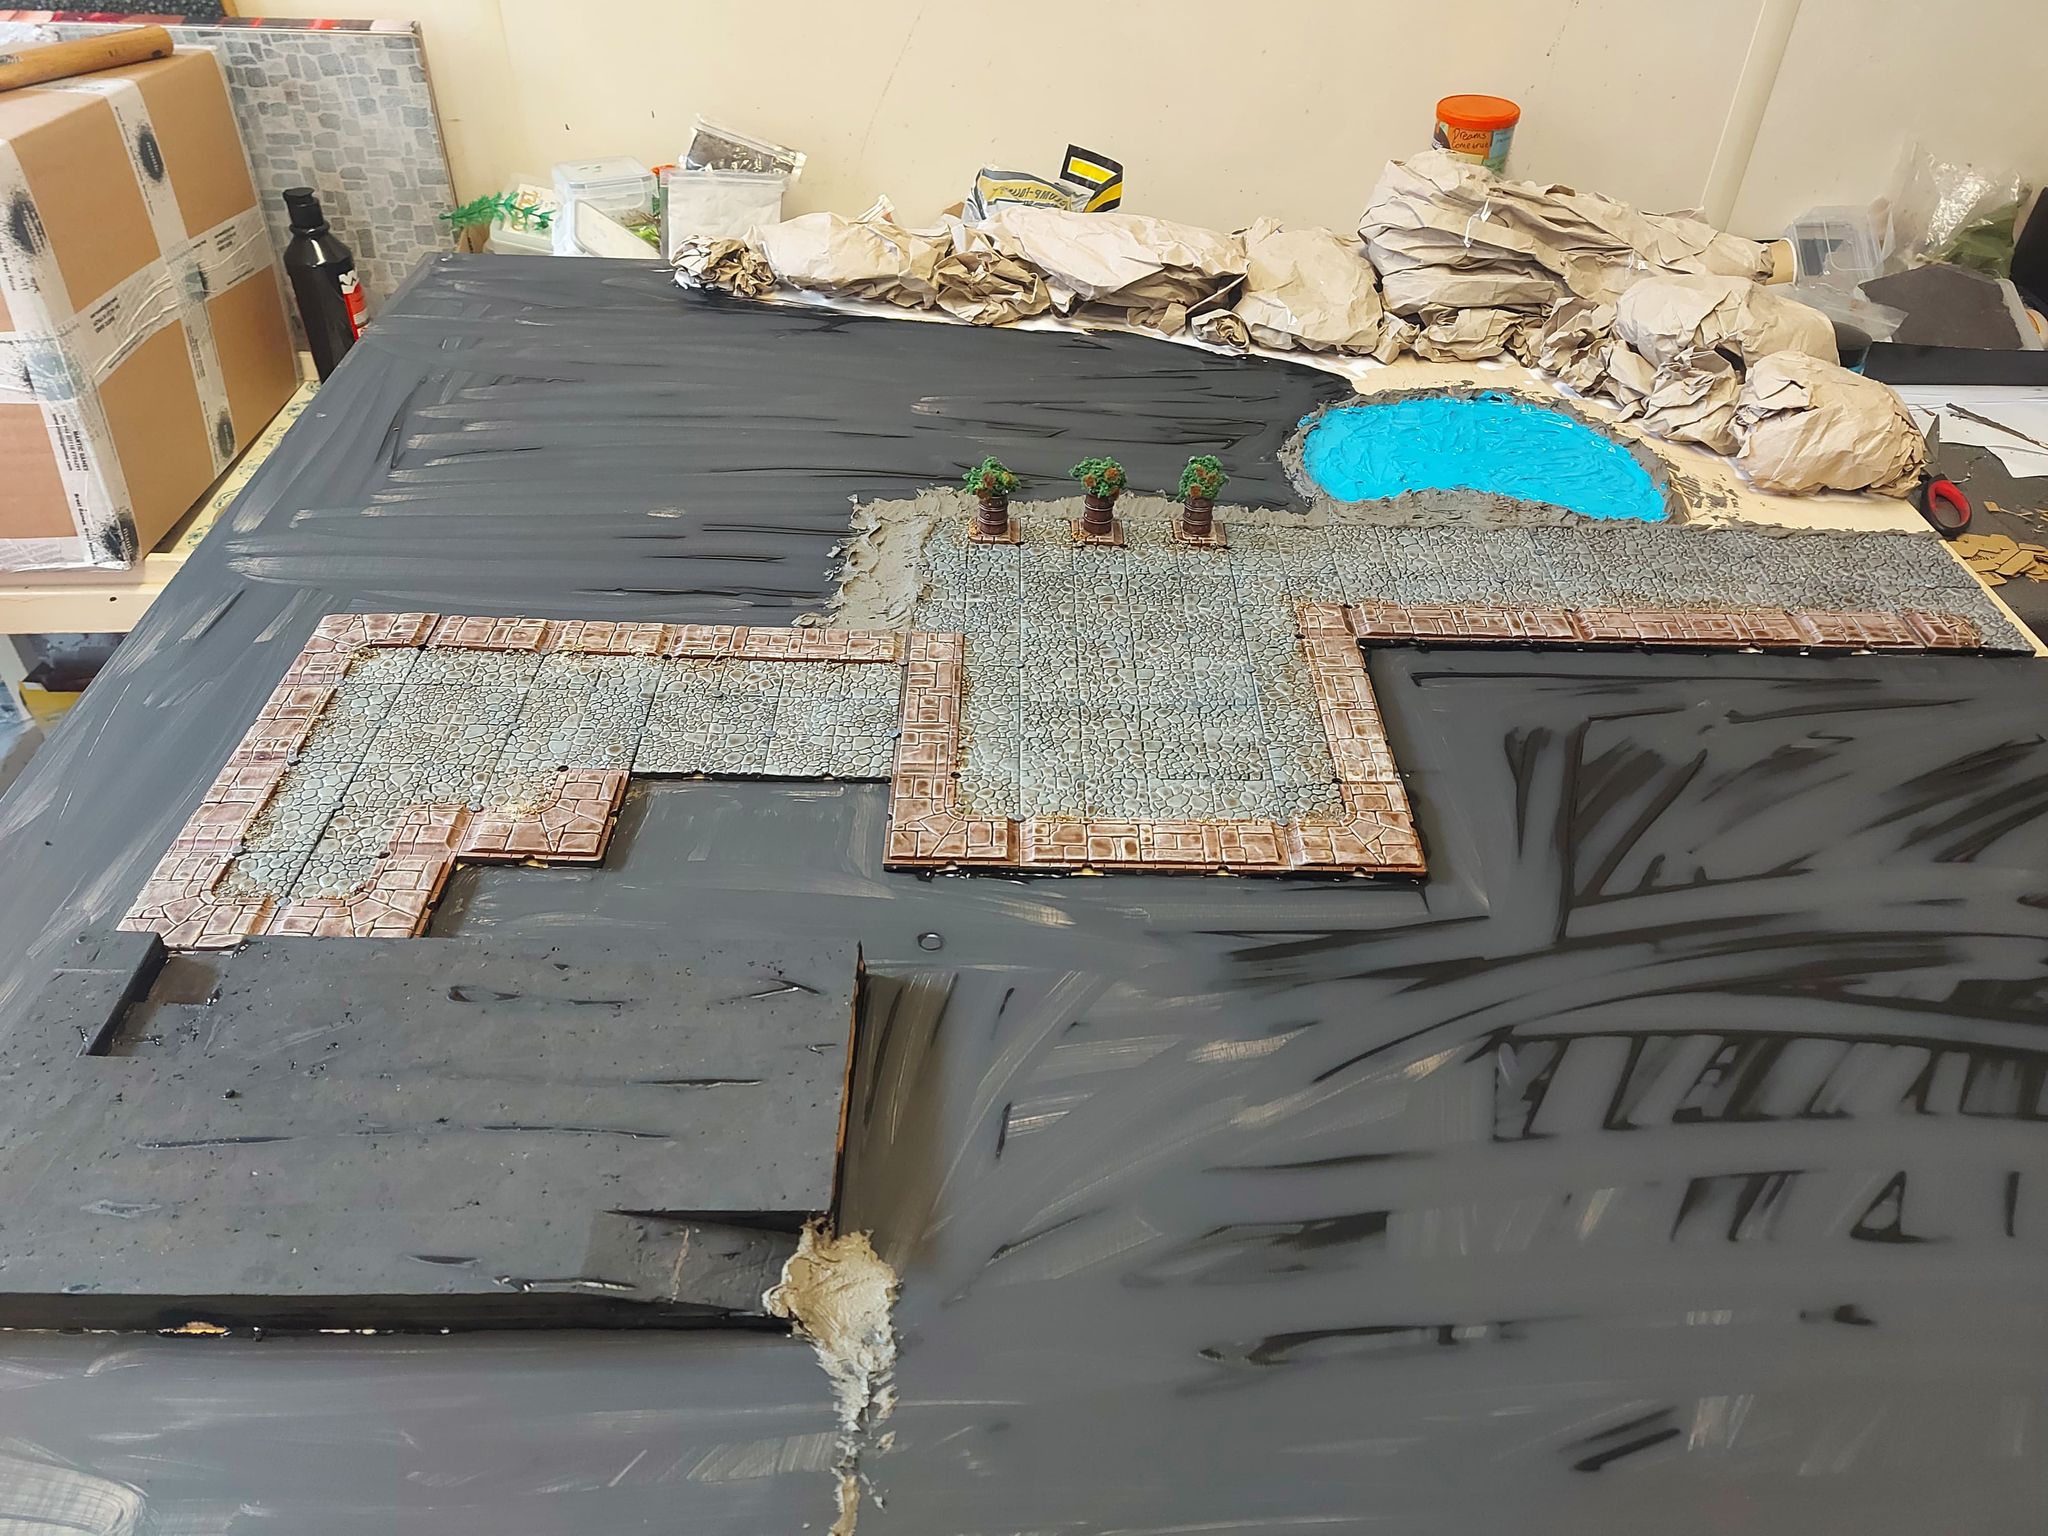 I filled in the pond with a layer of water texture, which I'll paint when dry and cover in clear water texture to give it depth, and a coat of black over everything else. That's enough for today, and it'll all be dry when I open up in the morning.
 Starting the board (finally!)
After far too long letting life and other stuff get in the way, I finally got to start work on my Moonstone board in the back room, whilst the regular Sunday group played d&d out front.
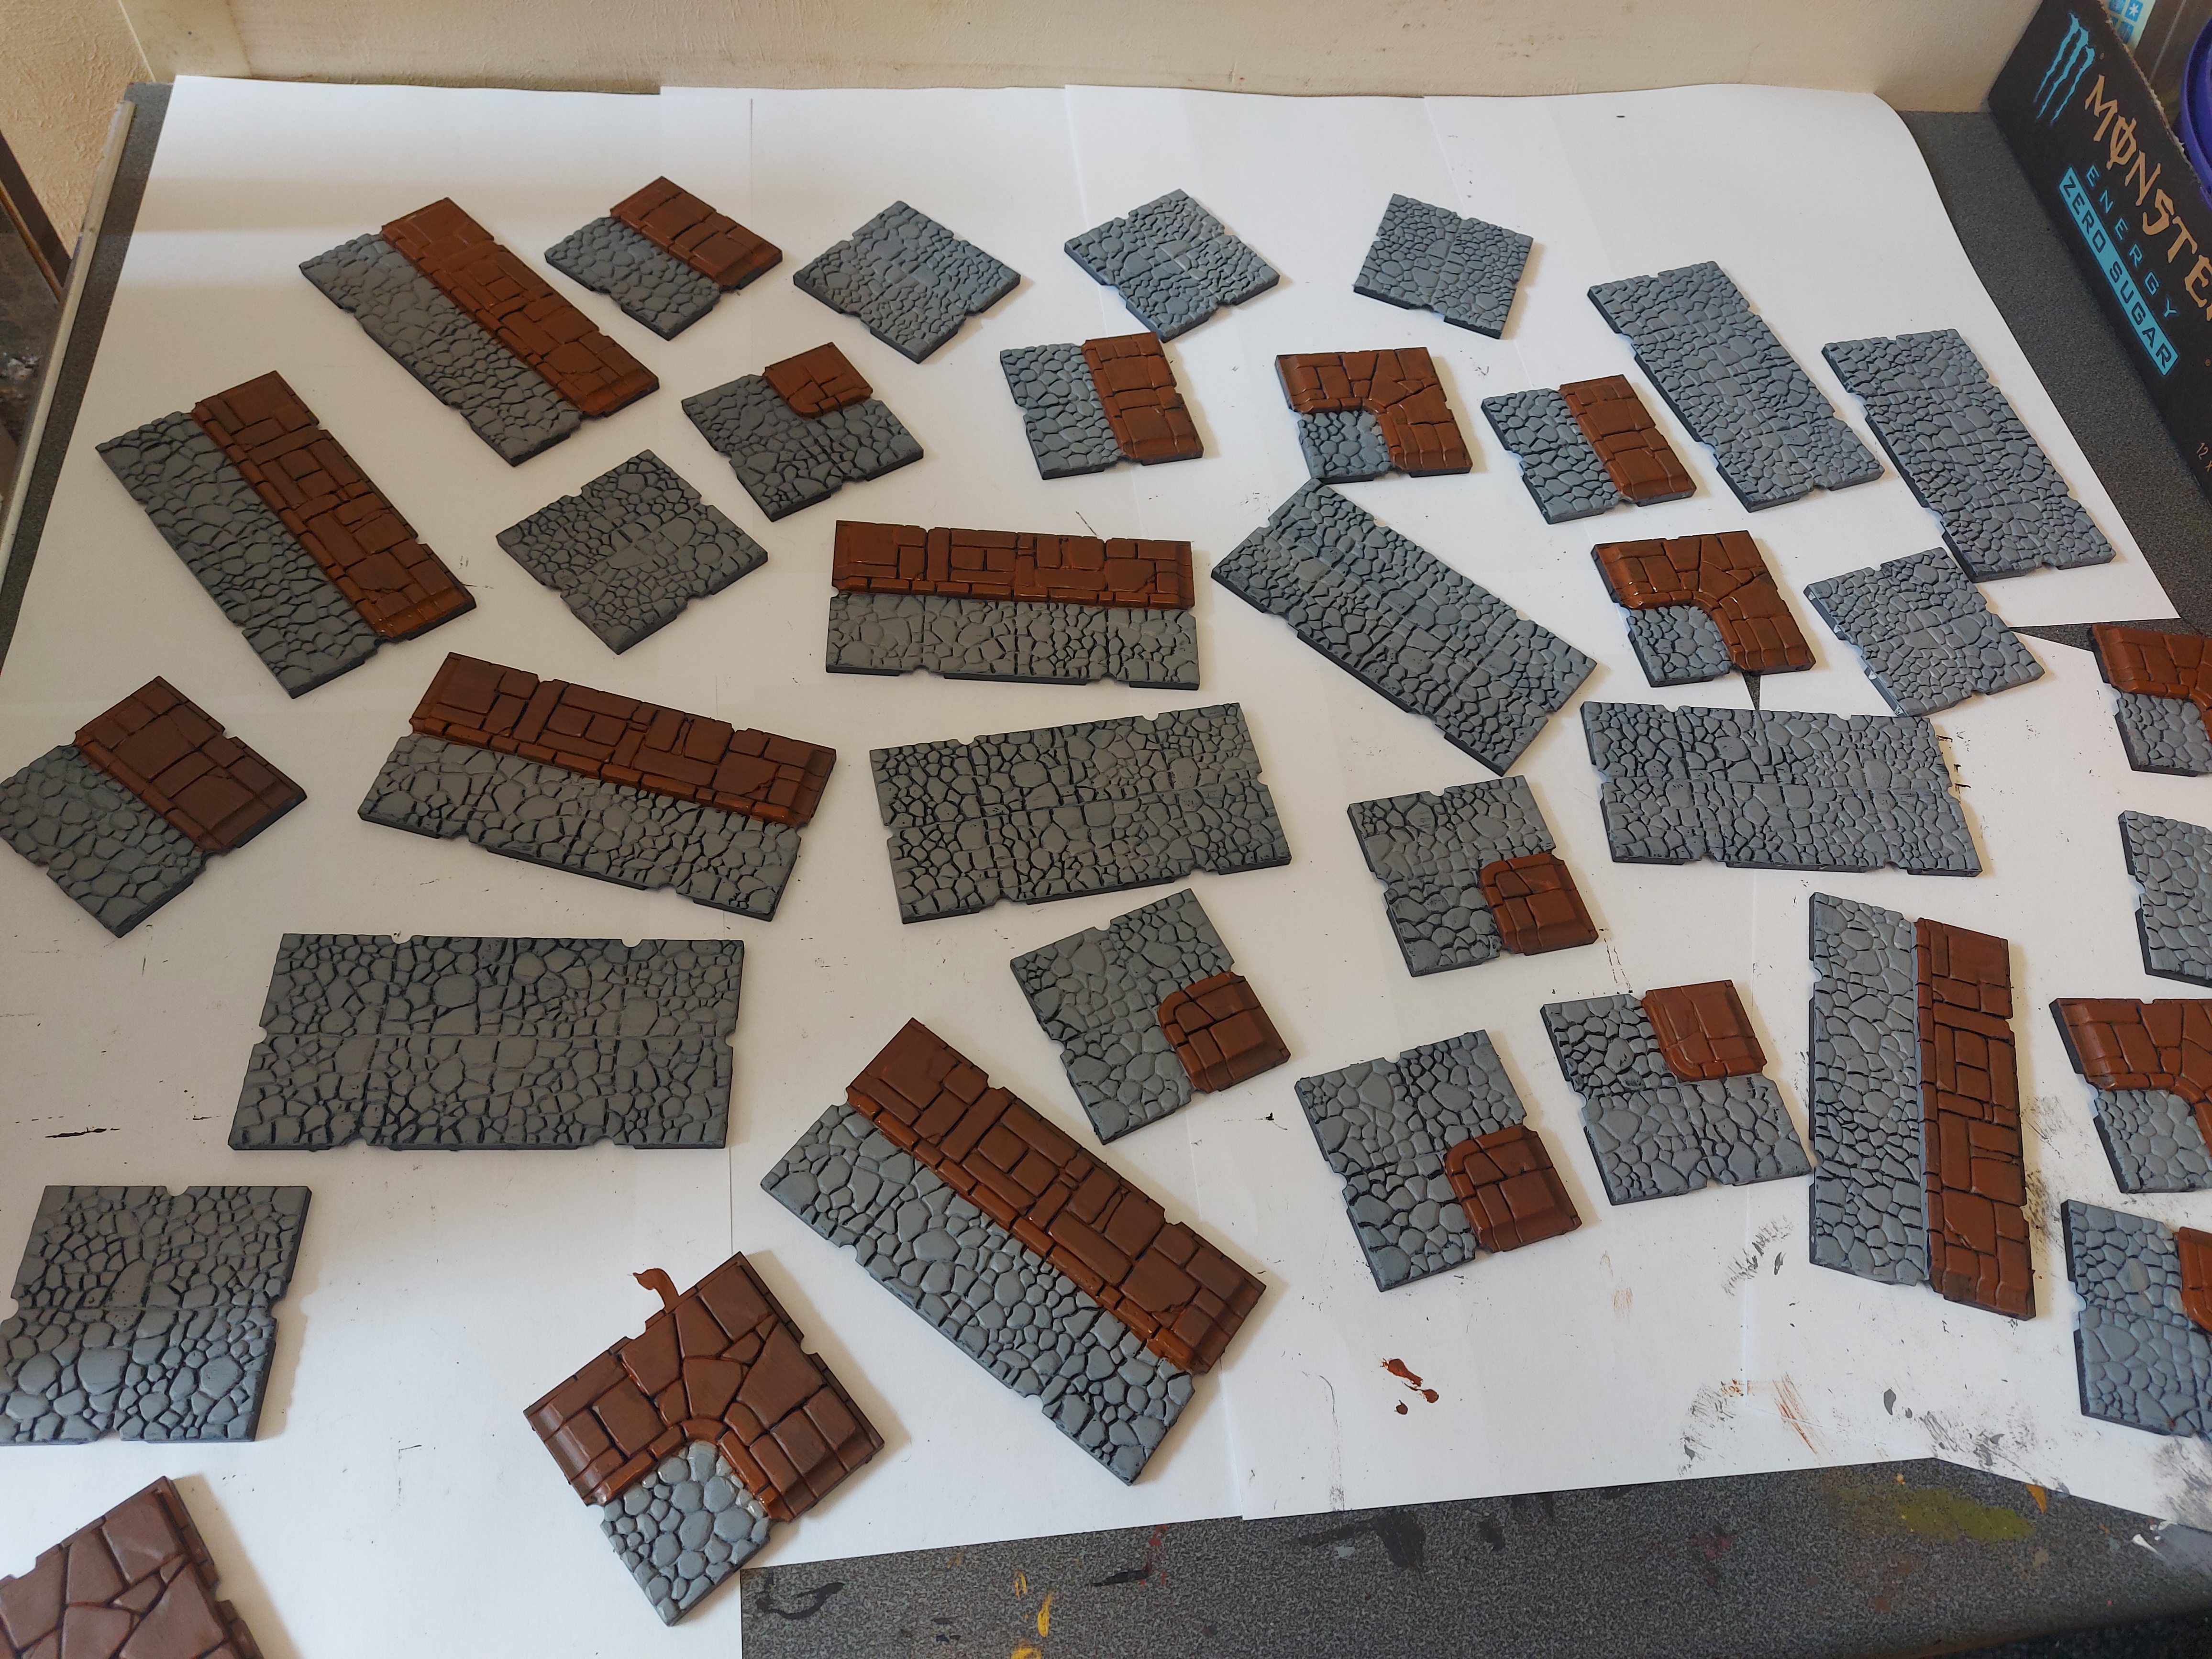
To start with, I have a city streets pack from Dungeons and Lasers which I’m going to use as the main focus of the board. The idea is to get the terrain and streets etc glued down and keep buildings, trees etc free standing and moveable.
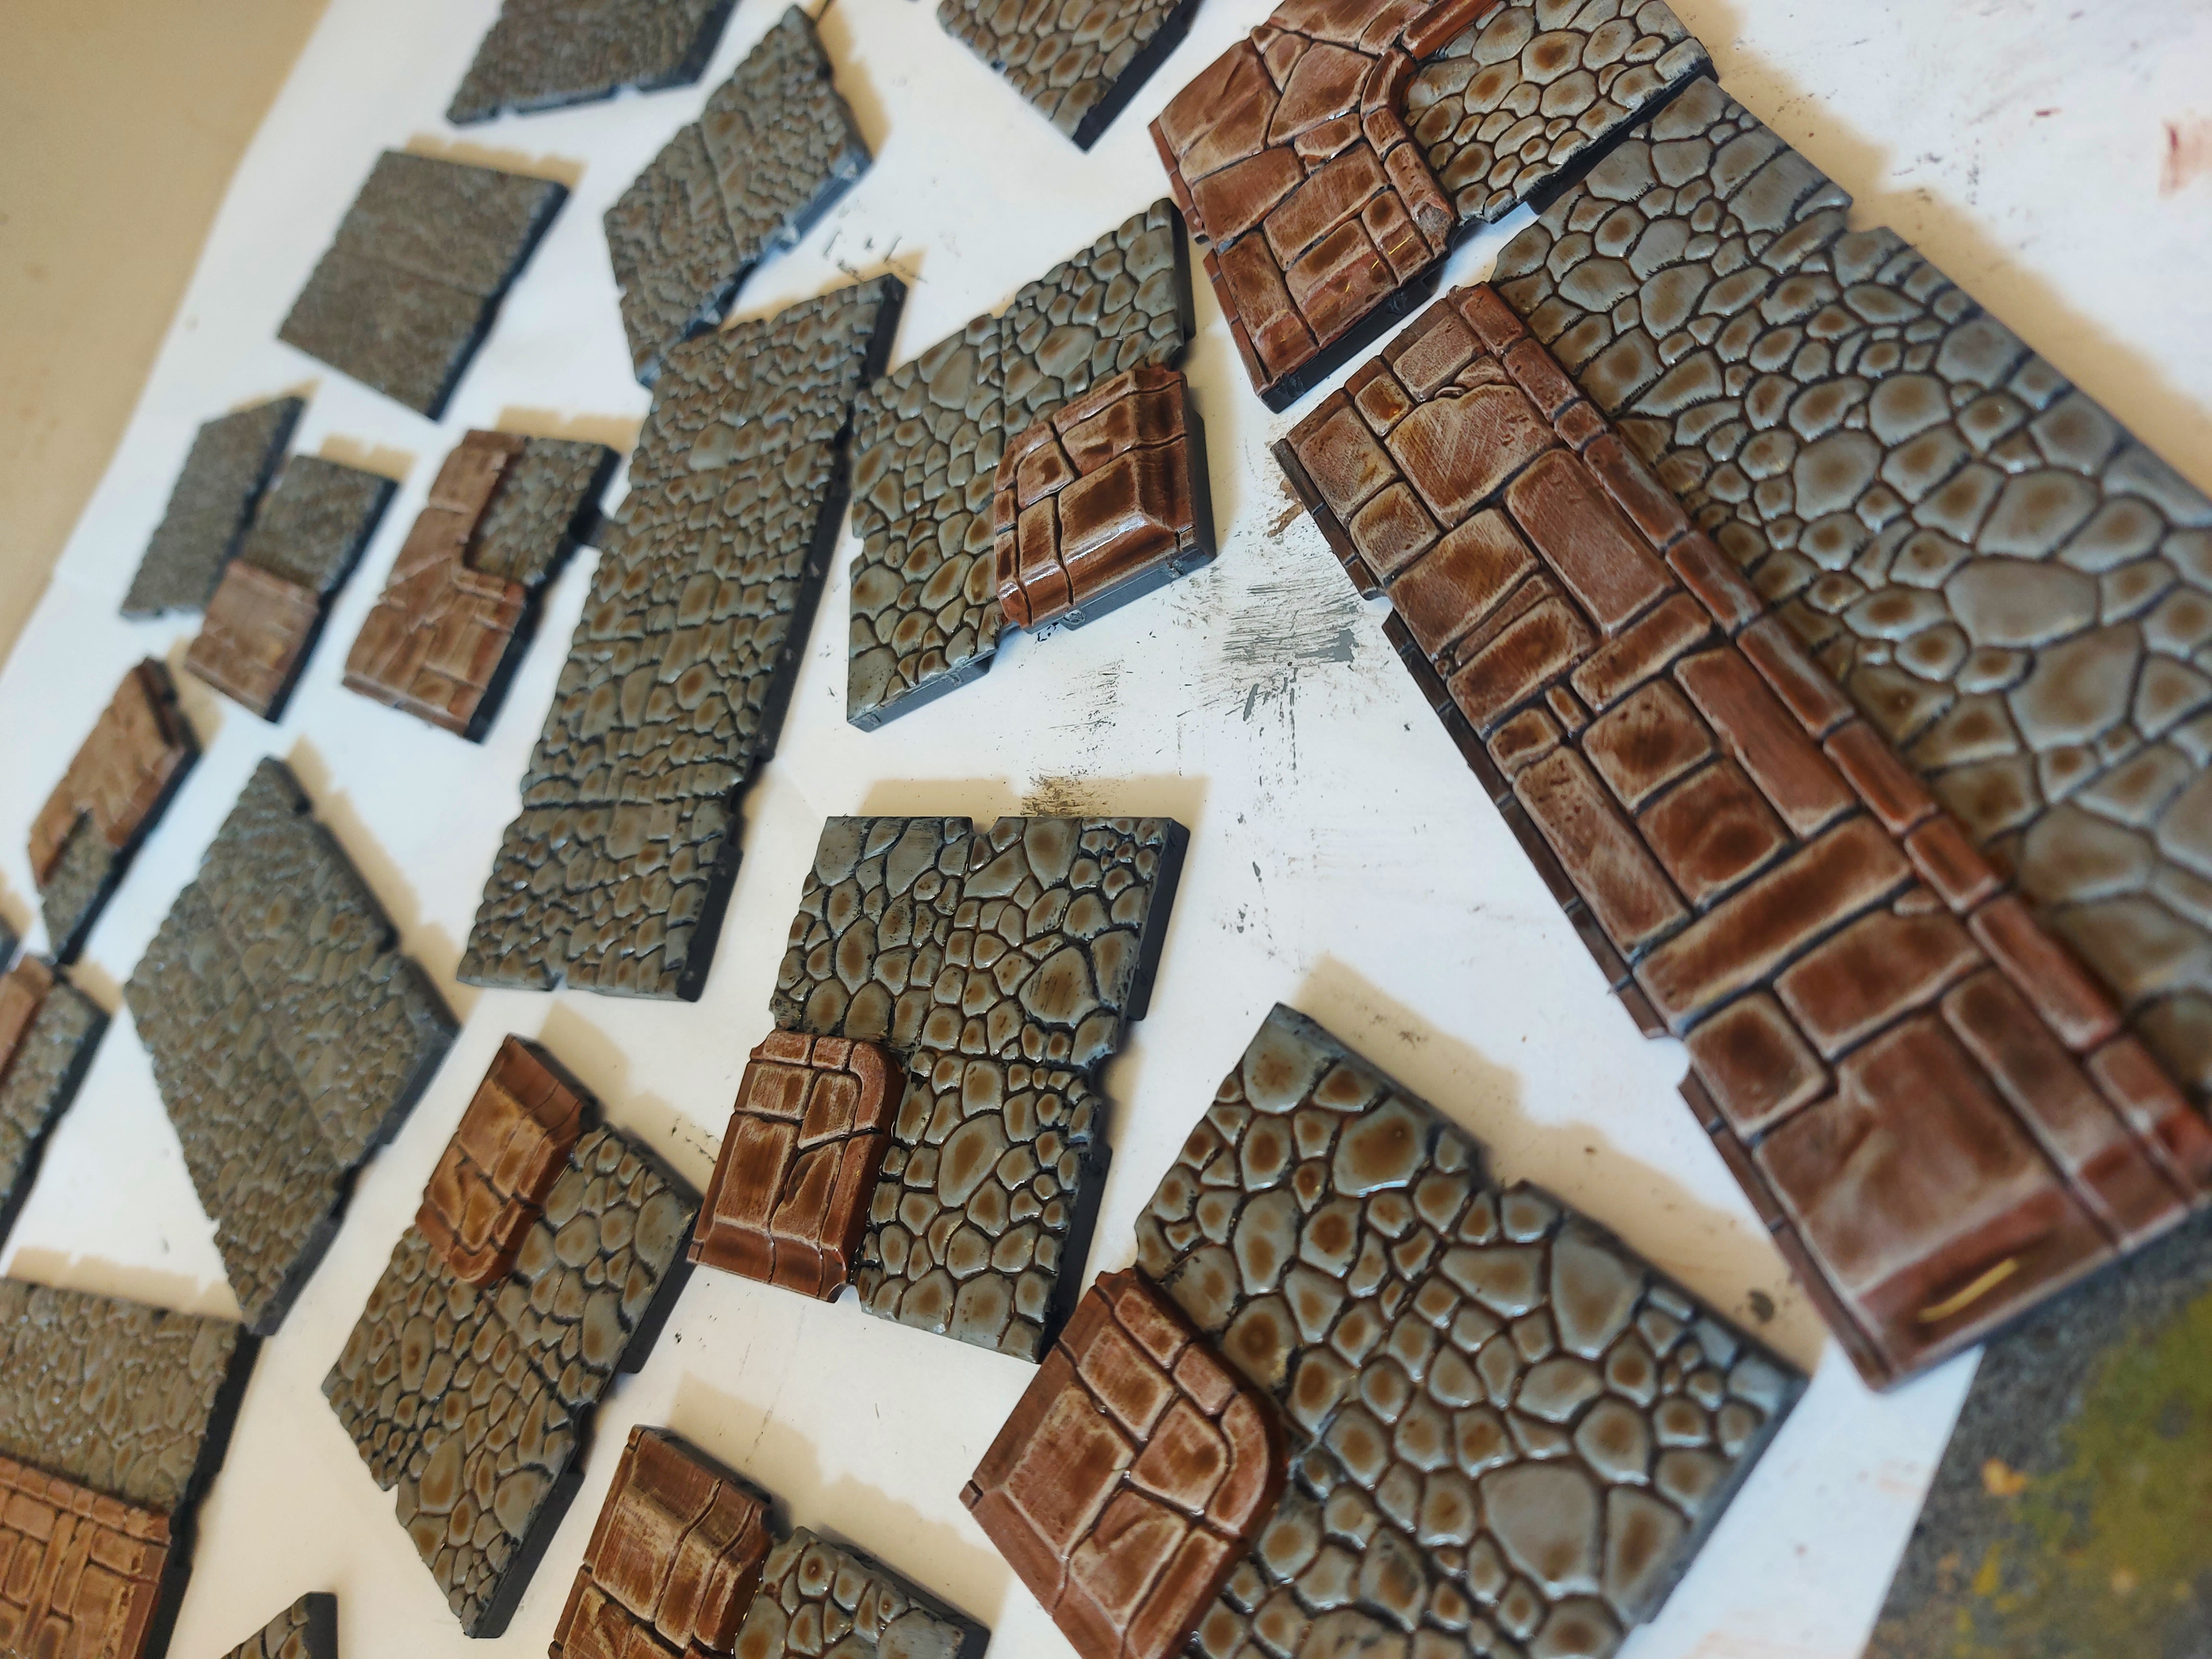
The street pieces were undercoated with black spray, and then I painted on the base coats. I used a mid grey for the cobbled roads, and a reddish brown for the footpaths. When dry, I drybrushed the paths with a bright bone colour. This was followed with a generous coating of ink wash across everything in a nice dirty brown, to unify the street and pathways a bit more. That was all I had time for today, but I’m back in the shop on Wednesday and I’ll get the next few steps complete.


