


![Alternative Trench Crusade Miniatures? Trench Missionaries Review | Wargames Atlantic [7 Days Early Access]](https://images.beastsofwar.com/2026/03/unboxing-wargames-atlantic-trench-missionaries-coverimage-225-127.jpg)


3D Wolsung Terrain (spring cleaning challenge 2023)


Recommendations: 452
About the Project
Back around 2017, after watching BOW-OTT demoing Wolsung steampunk skirmish game i was hooked. I back their first Kick starter and started playing some game with what hero and henchmen i could get on Ebay. I always love the Wolsung terrain but it was hard to find here in the US. 2017 I also got my first 3D printer and try to create some terrain to match the MDF terrain from Micro arts studio was a disaster for the start. The PLA filament i used cause a lot of issue with the 3D model i made in tinker CAD. Clogging and under extrusion made my first prints weak and unusable. My plans to make the interior of an Airship were dashed :(. Fast forward to today i have desided give this project another go and see what i can do.
Related Game: Wolsung SSG
Related Genre: Steampunk
Related Contest: Spring Clean Hobby Challenge 2023
This Project is Active
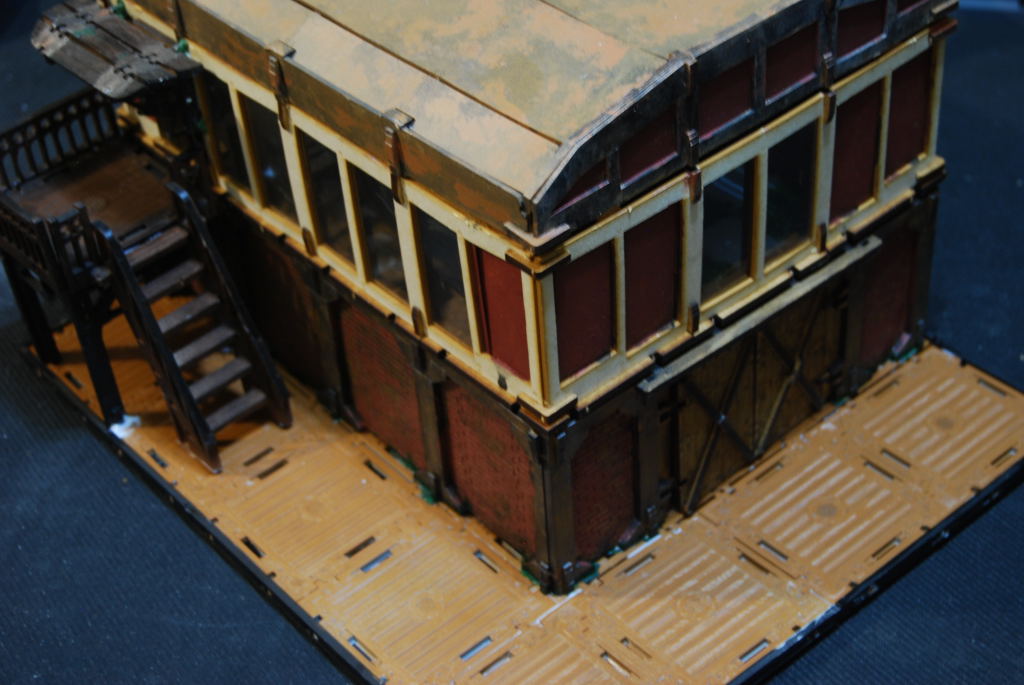
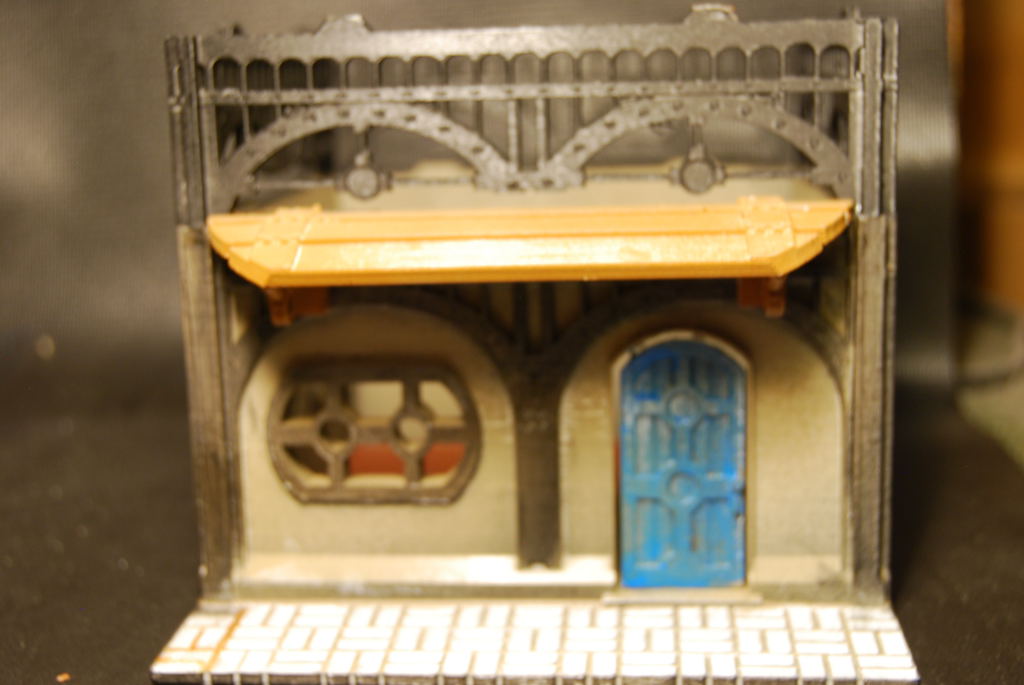
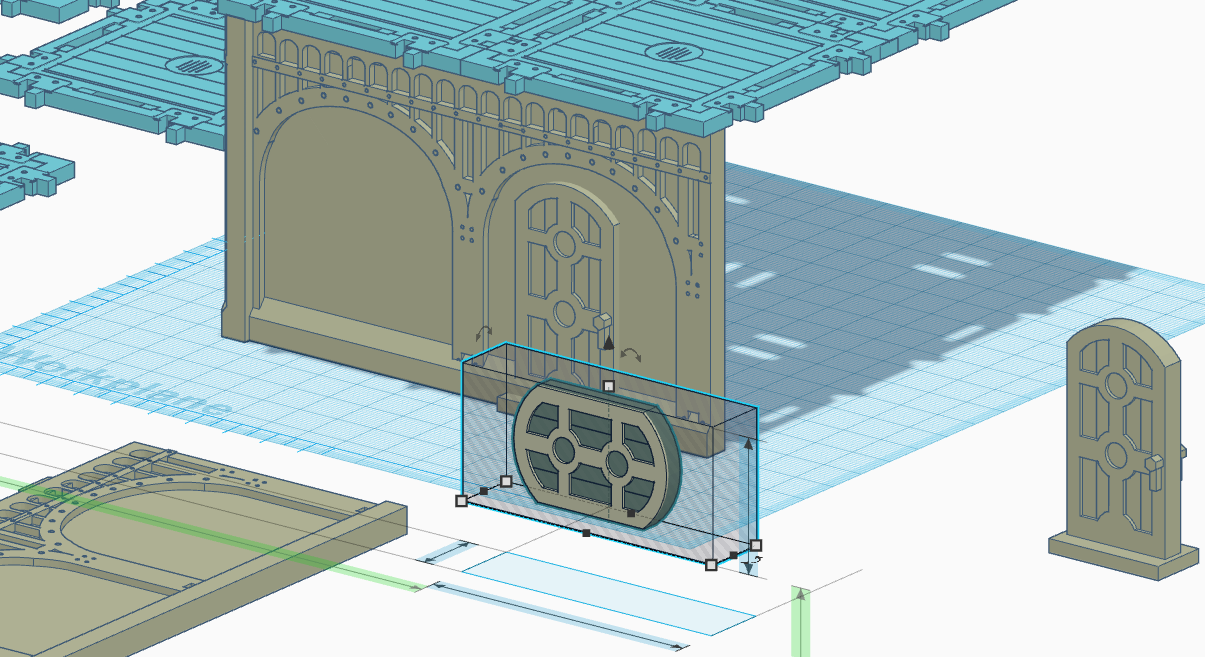
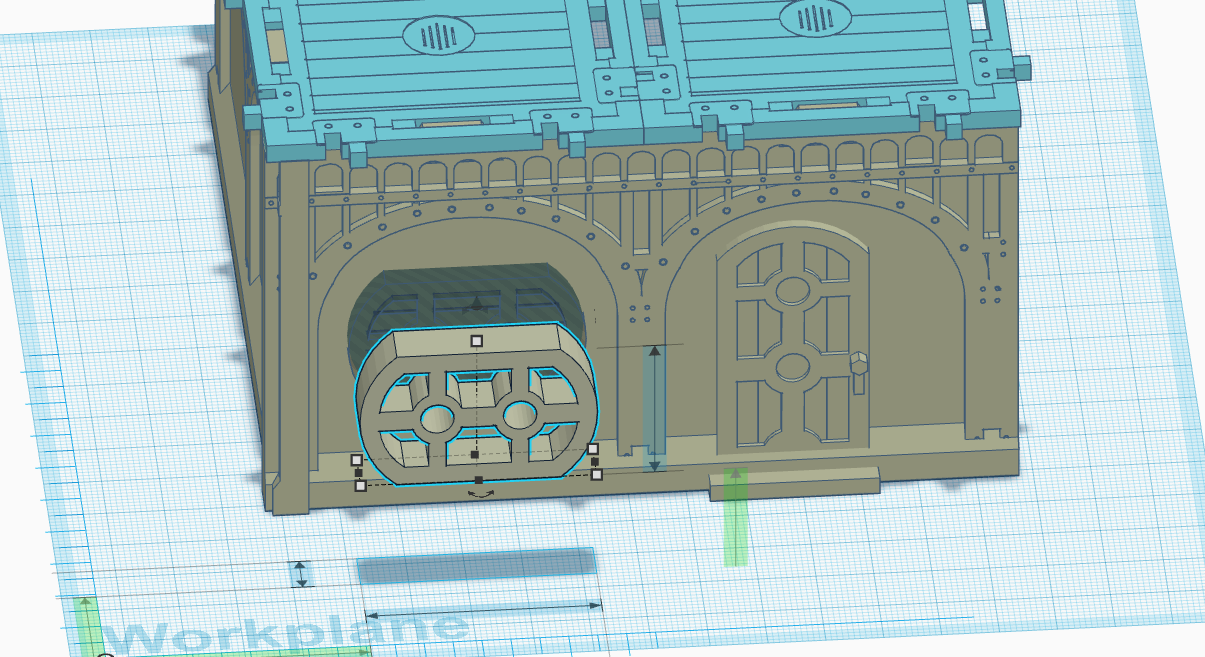
Working on a working door
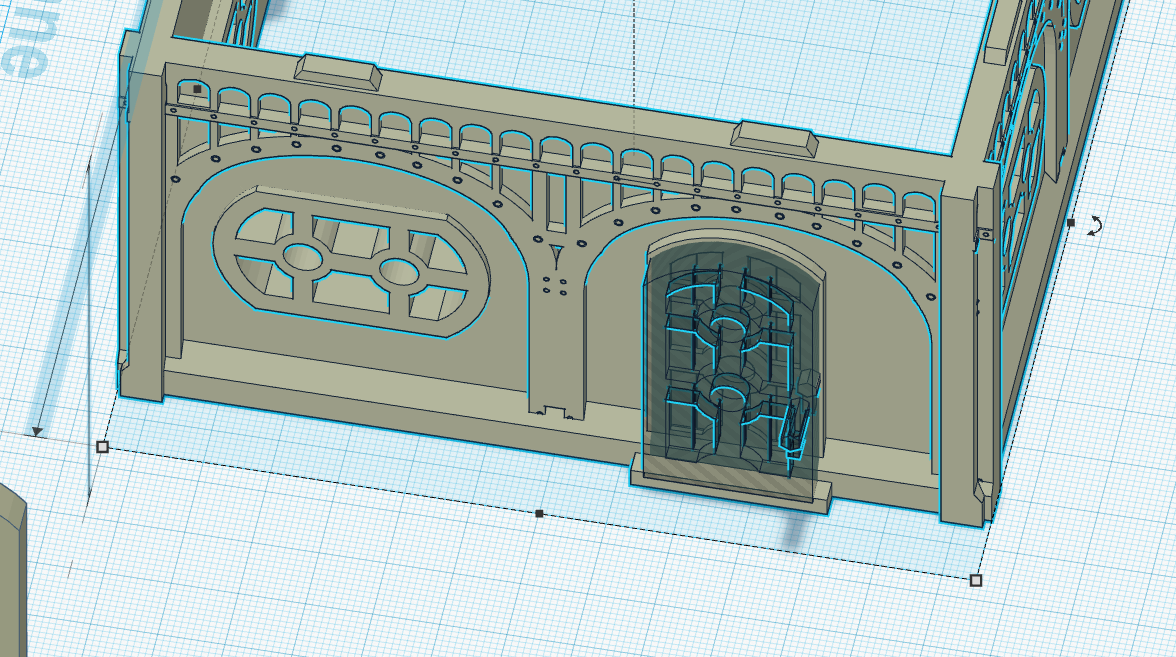
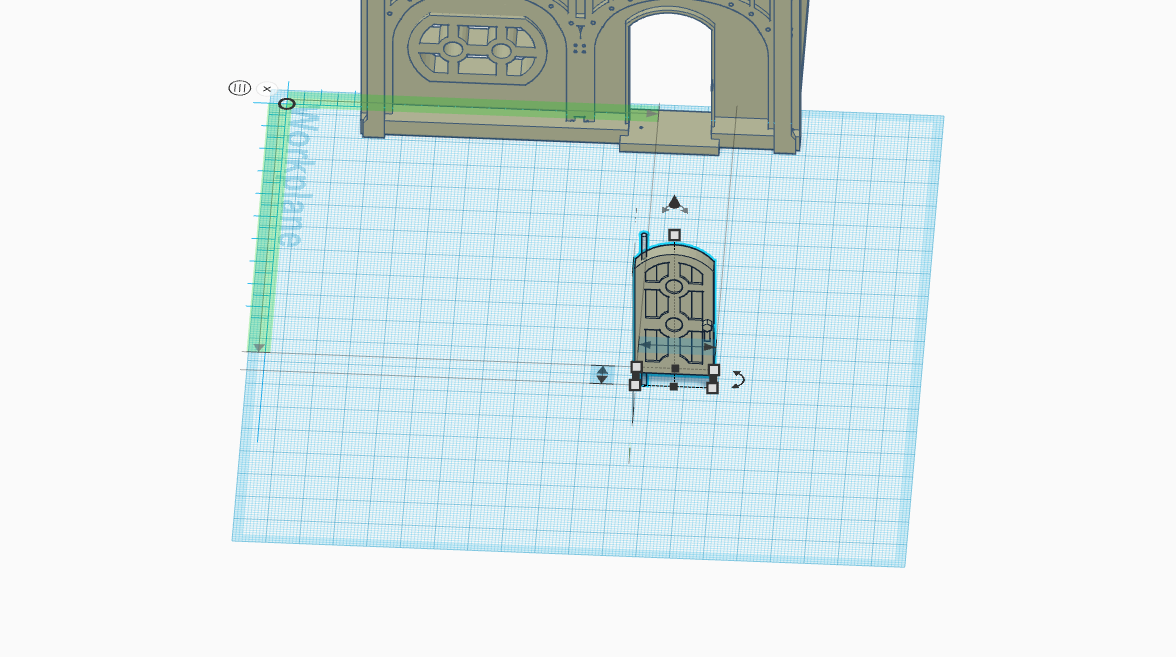
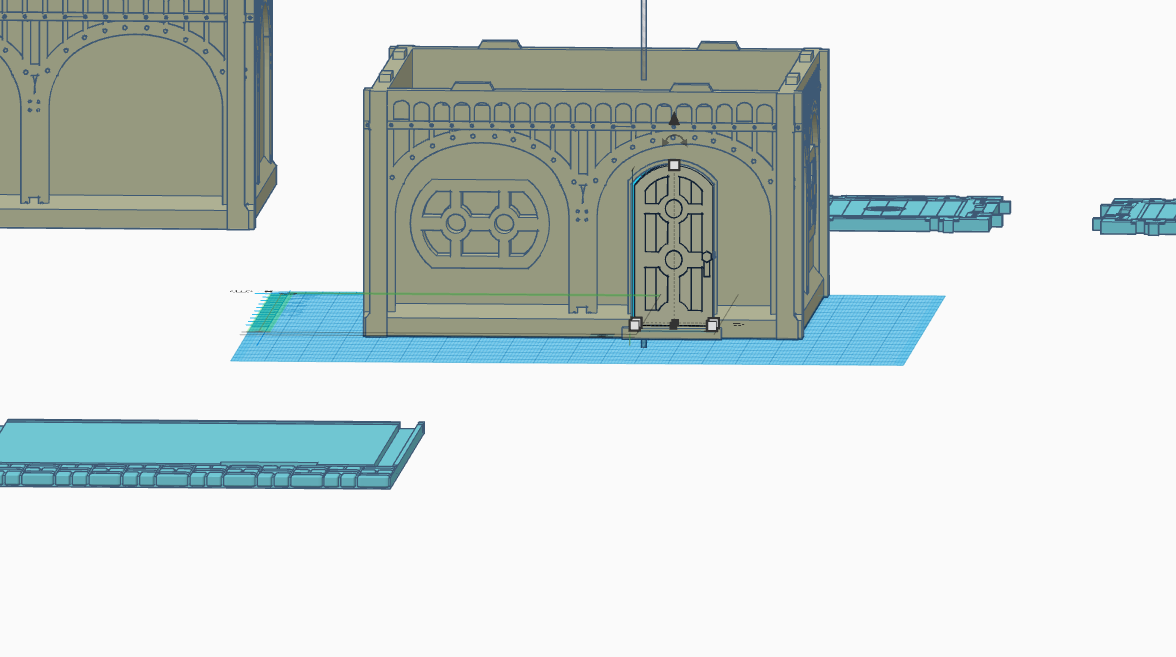
First thing you need to do is make a copy of any building you want to added a working door to. Next i remove the door by creating a negative in shape of that door (normally is a retangle in my case i use a copy of the door imported into tinker CAD. Next using the same door file i resize it to be smaller than the opening so it can open with out rubbing the walls. Finally i created negative cylinder to run a paper clip through too act as my hinge. (i try 3D print hinges but most fail over time.)
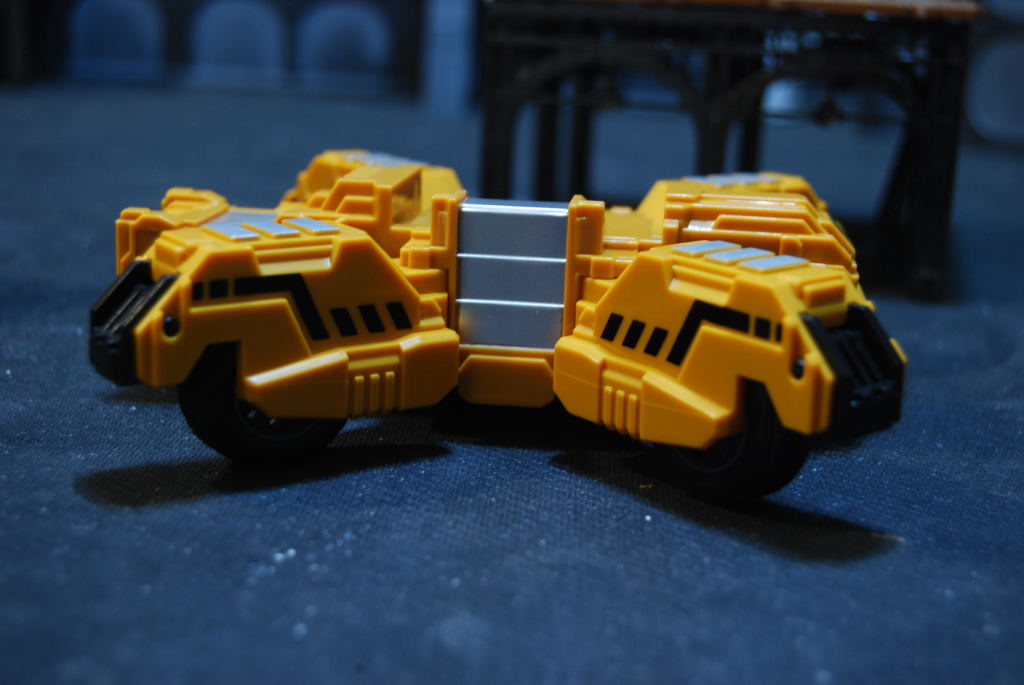
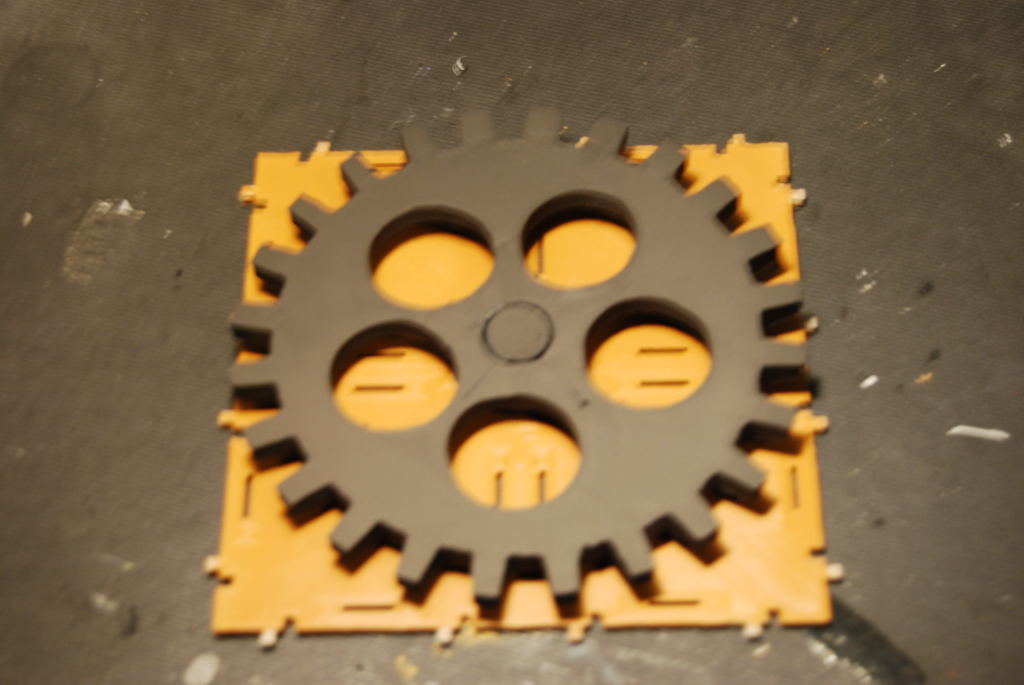
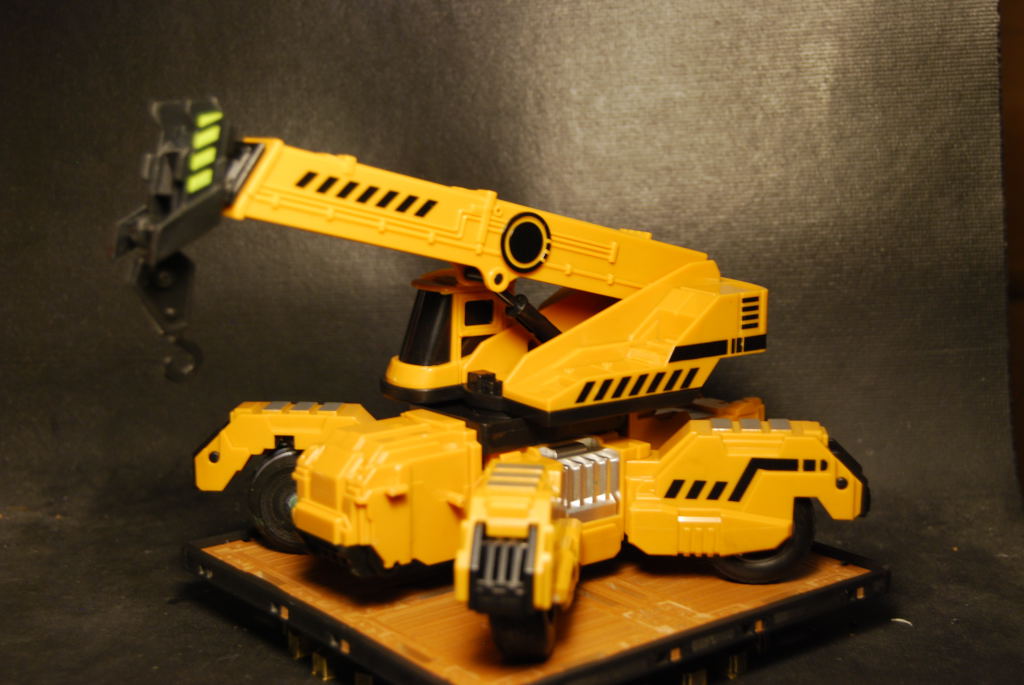
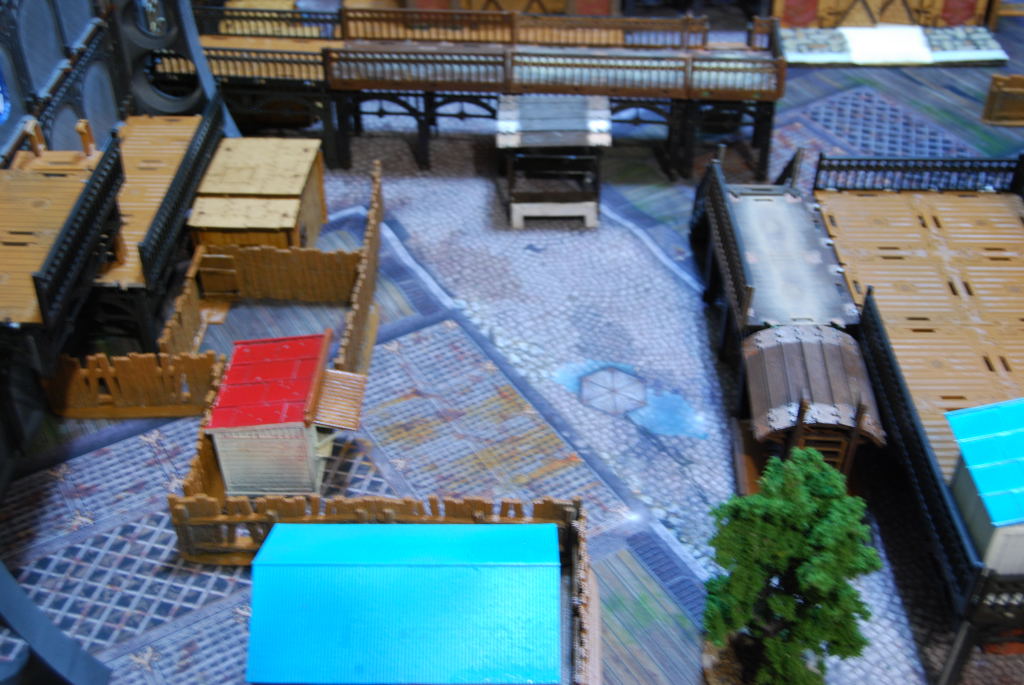
Toy crane
I found this toy crane on Ebay and wanted to use it on the tabletop. It has been setting in my bit box for more than 5 years. I started by taking it apart to see what kind of pieces i could use from it. I like the idea of adding the wheels to the the legs things so i glue them down. Ok now i need to 3D print some wheel cover to hide the hollow wheels. Then i made a base that rotate that themed for Wolsung.


Ongoing
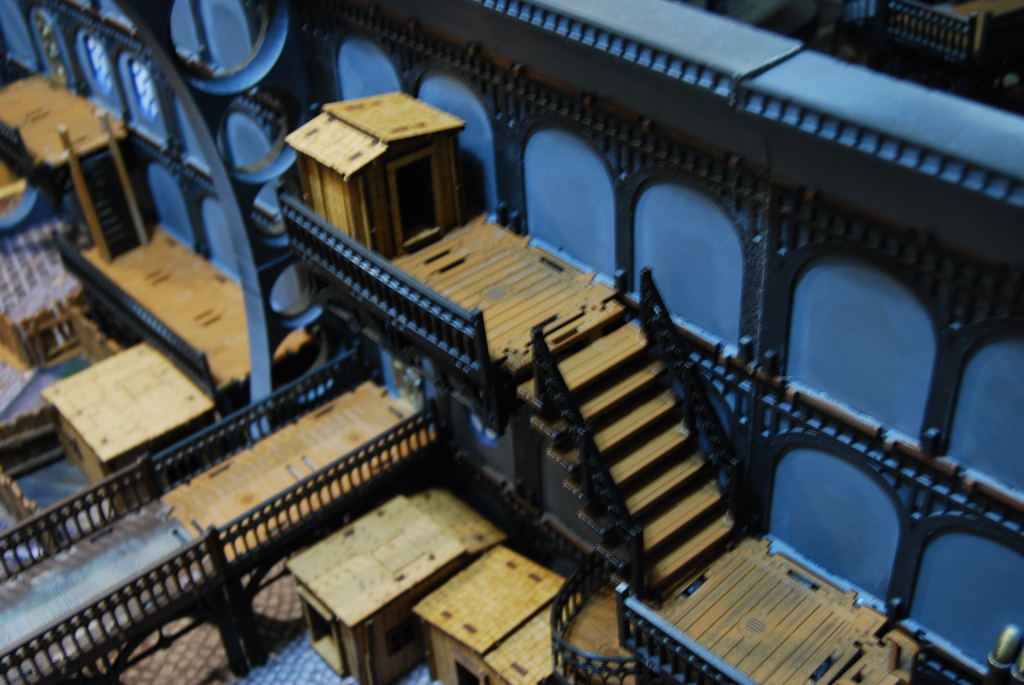
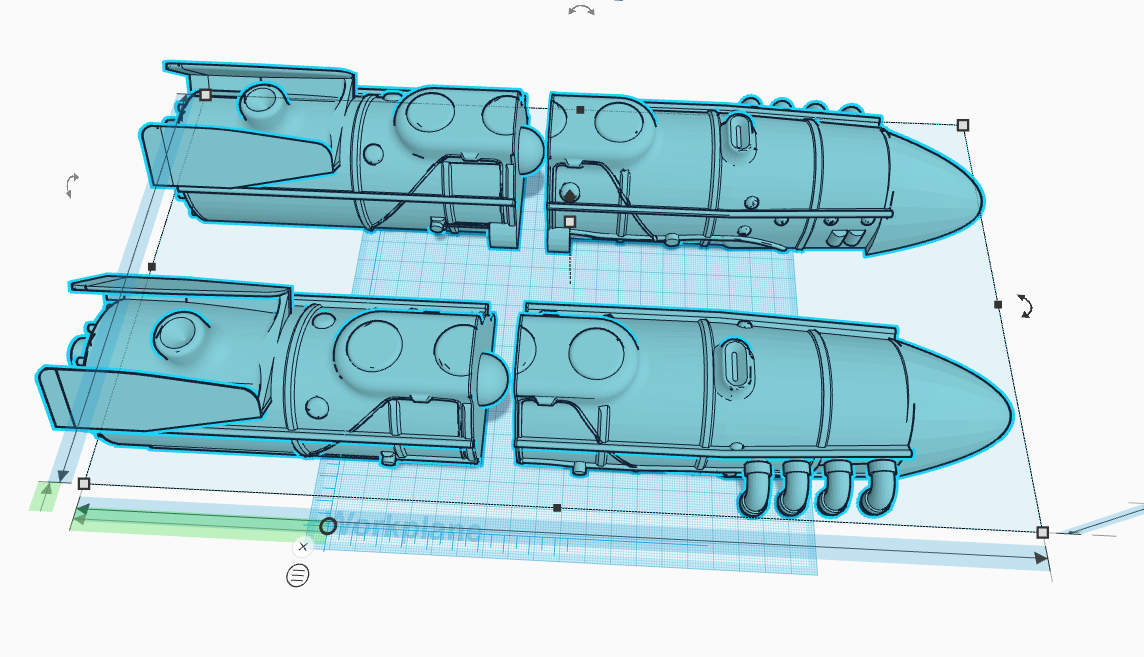 Ongoing project an engine for my airship.
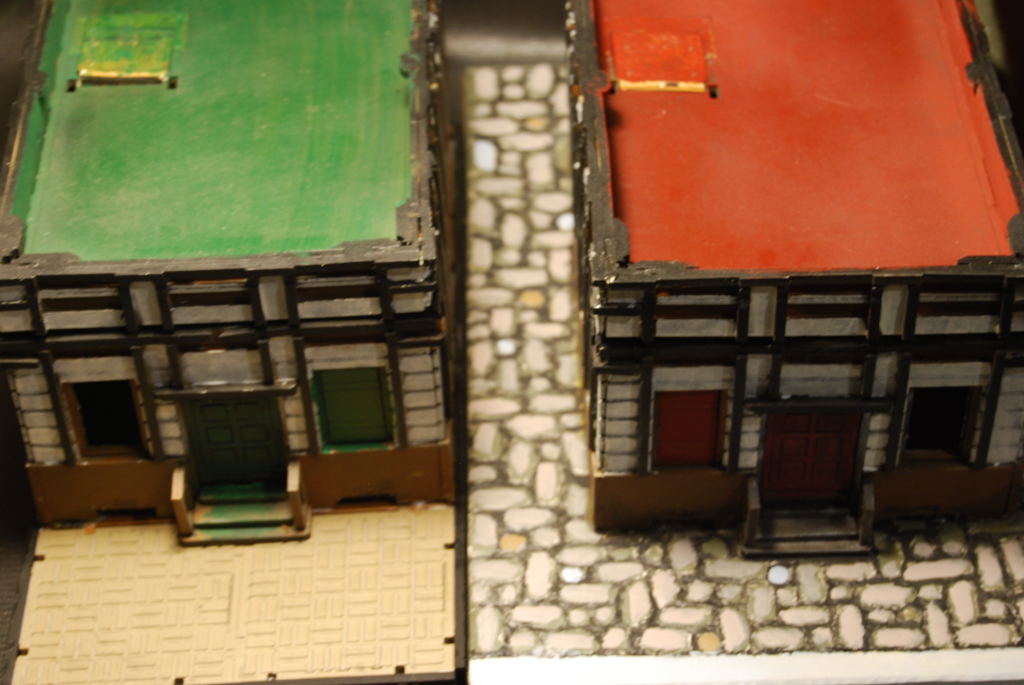
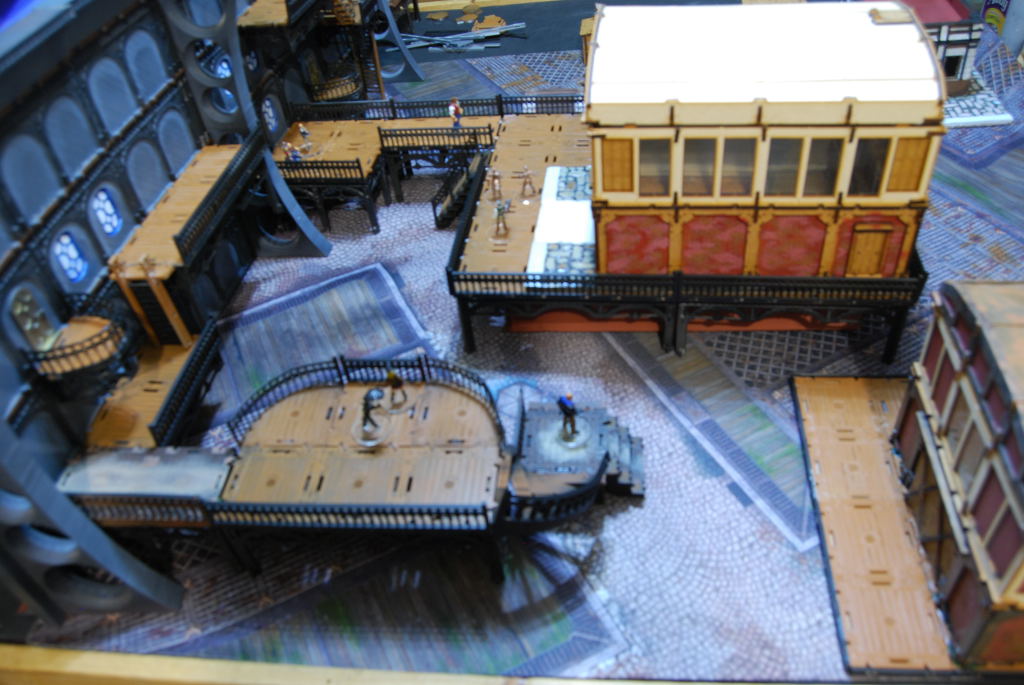
  Basing for my Wolsung terrain.
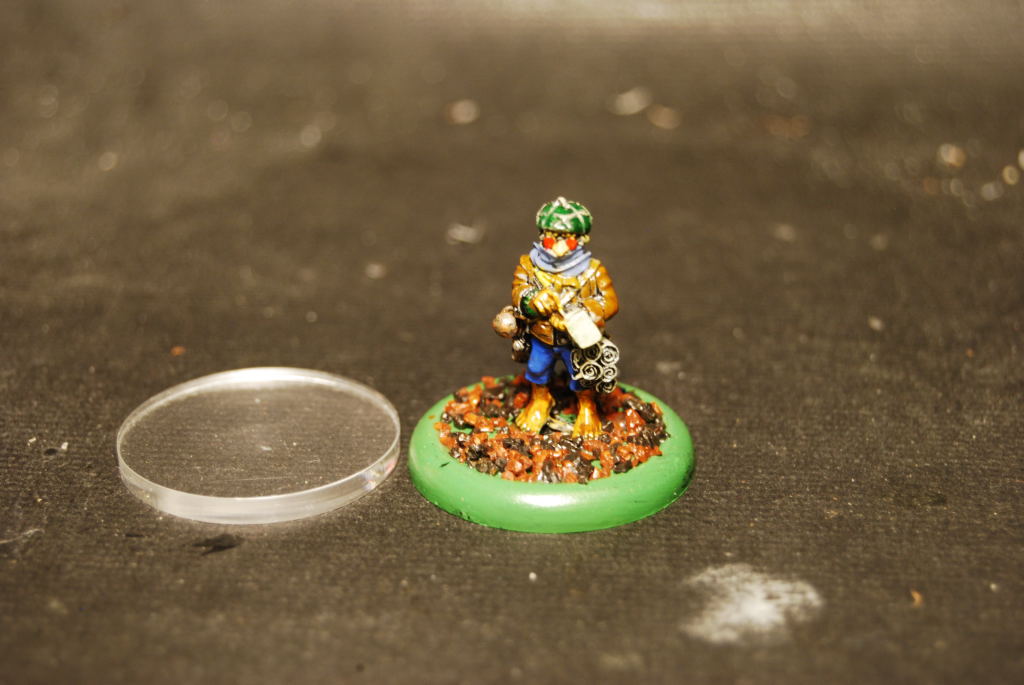 Adding clear base to my miniatures, I bought 40 (30mm base) and still need about 10 more plus some 50 mm ones
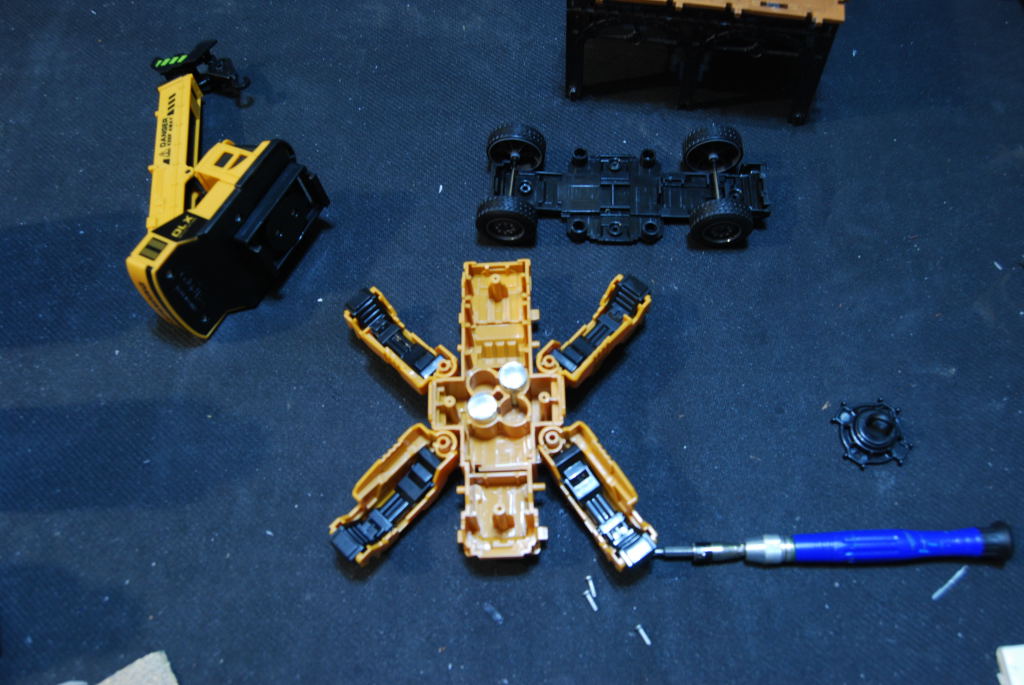 I want to make use of this toy crane.
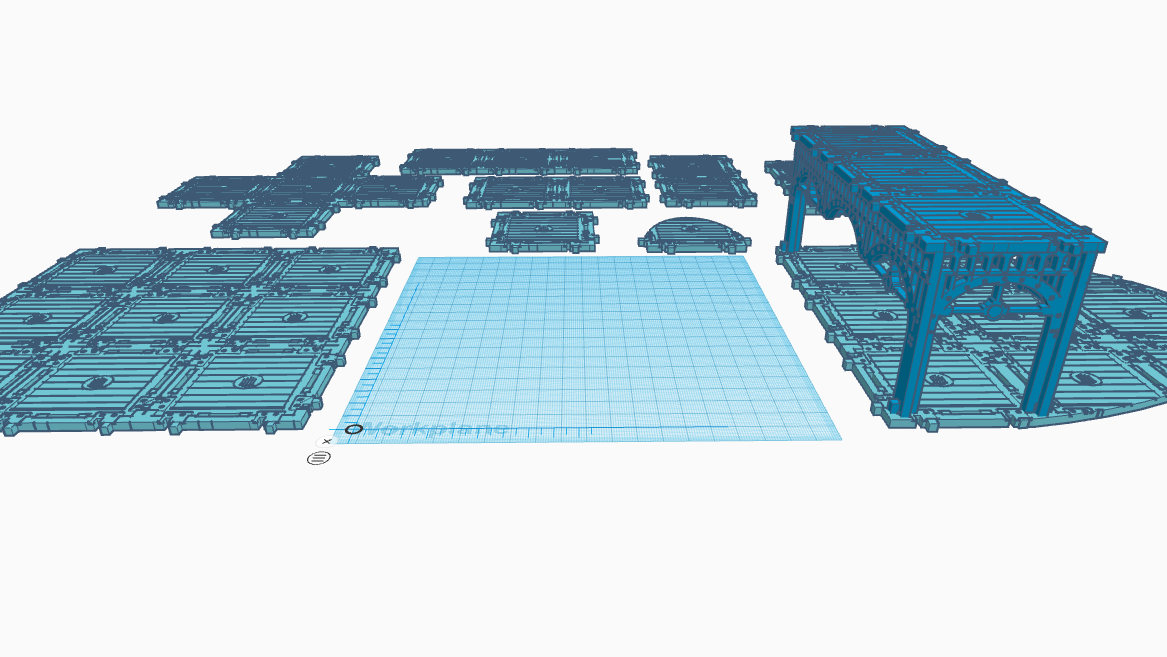 I want to make a space hulk like (2.5D dungeon crawl) version of an airship interior. Using the walkway decks as a modular floor plan. (maybe next spring clearing idea.)
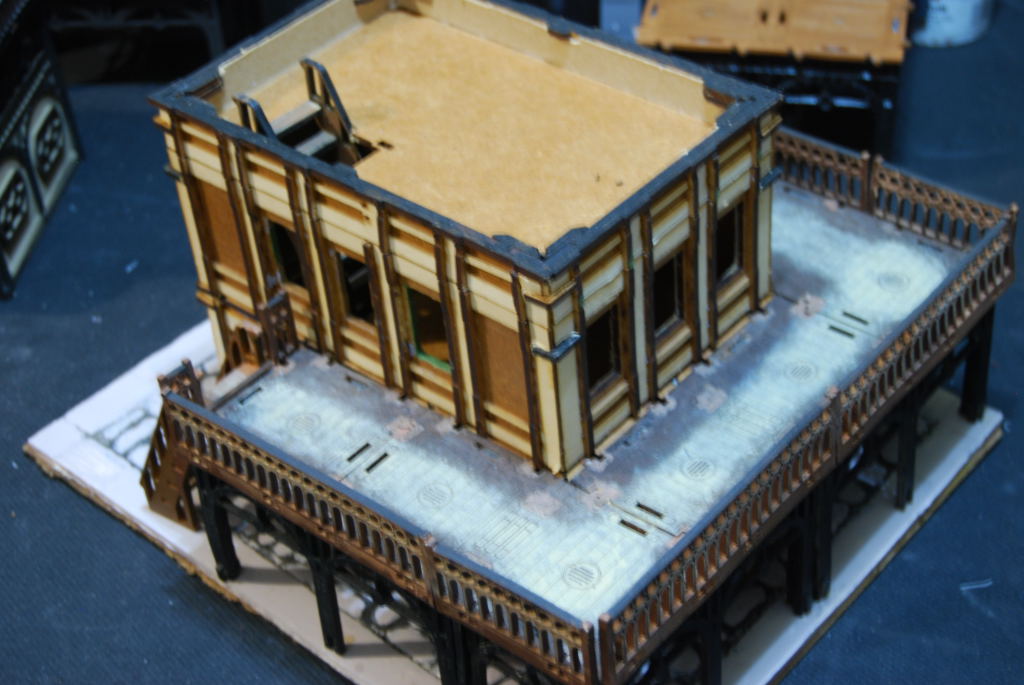
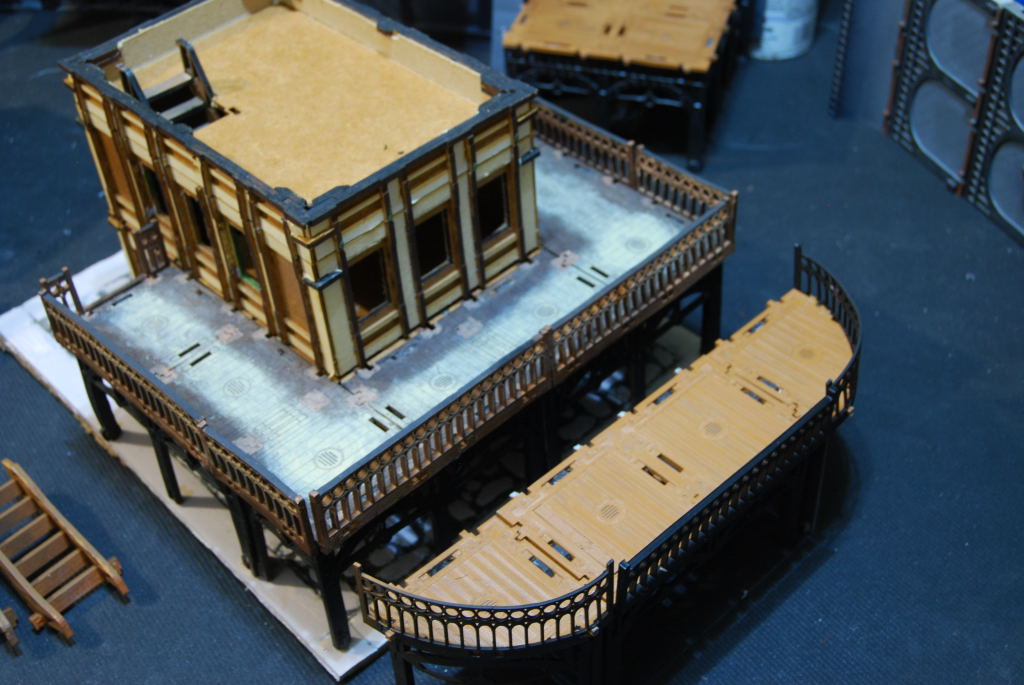
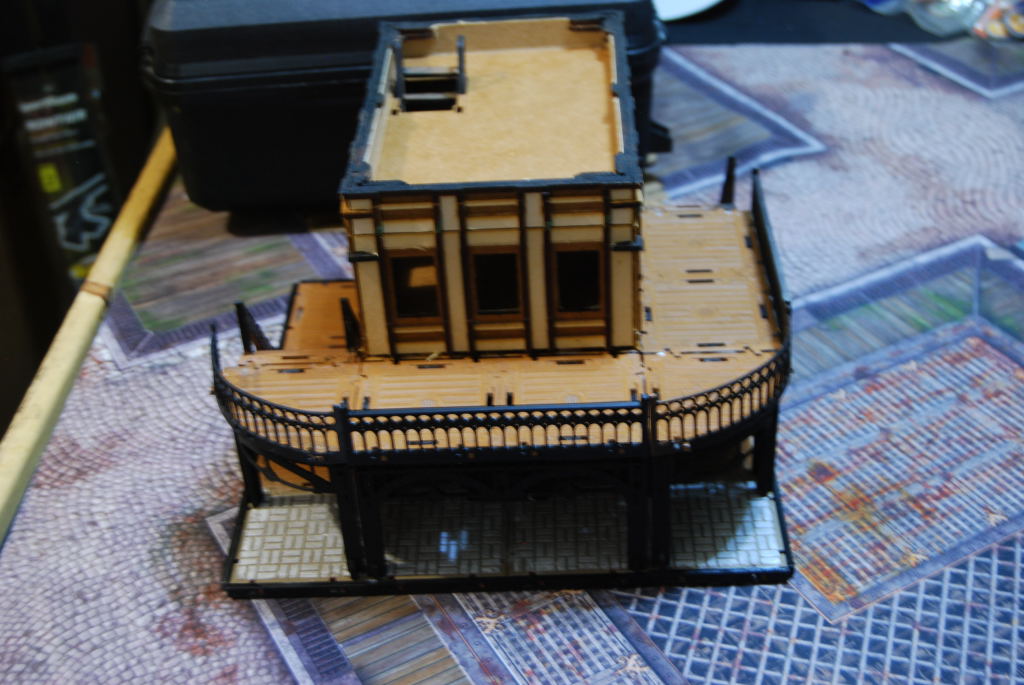
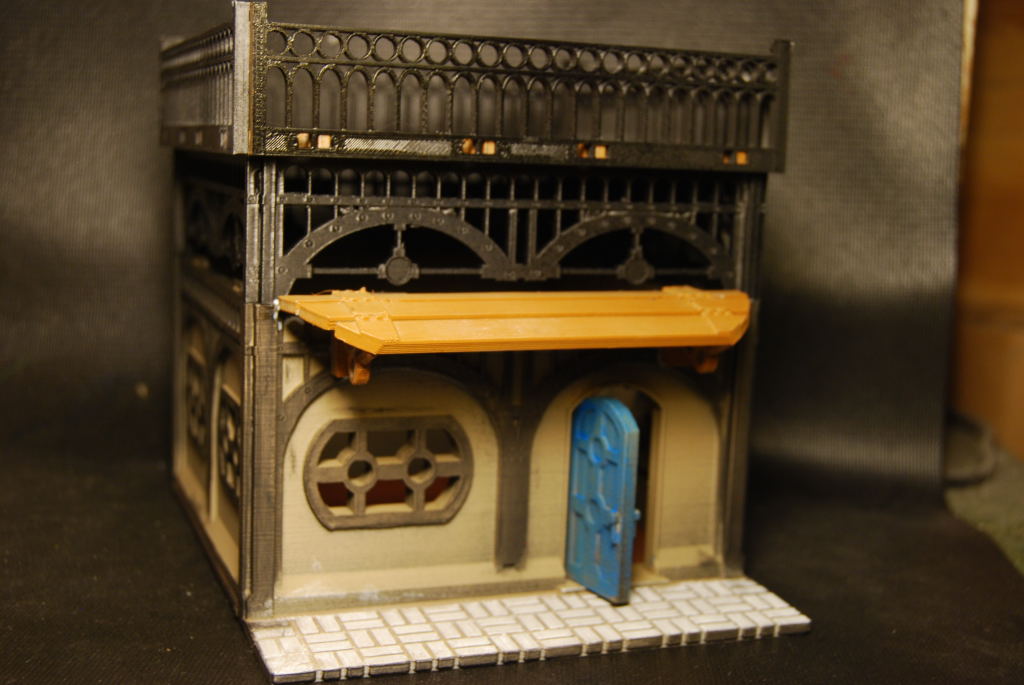
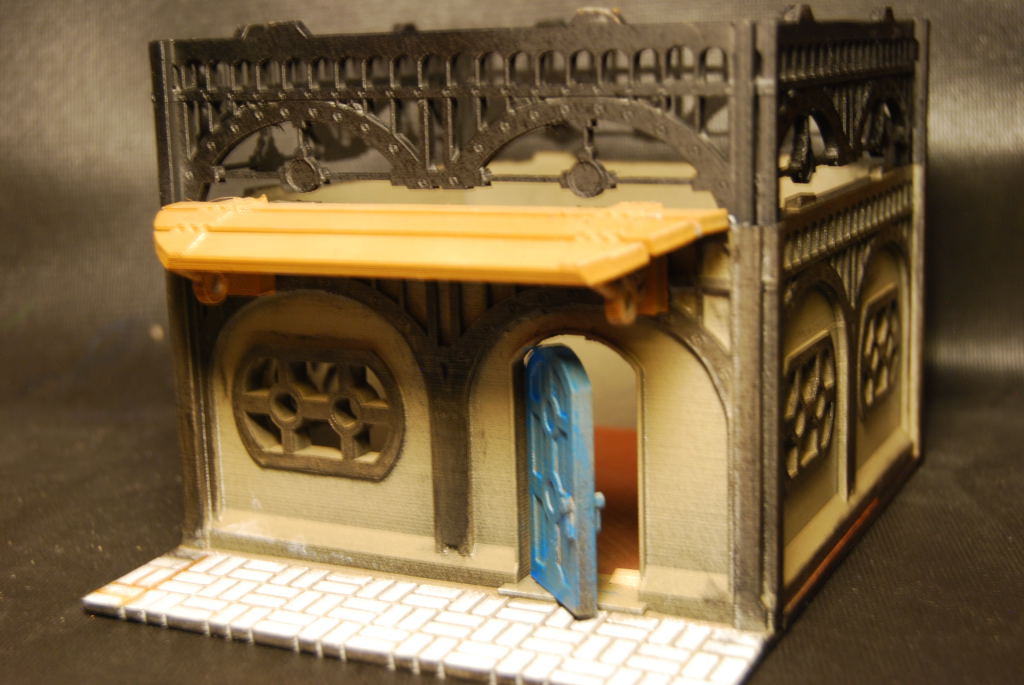
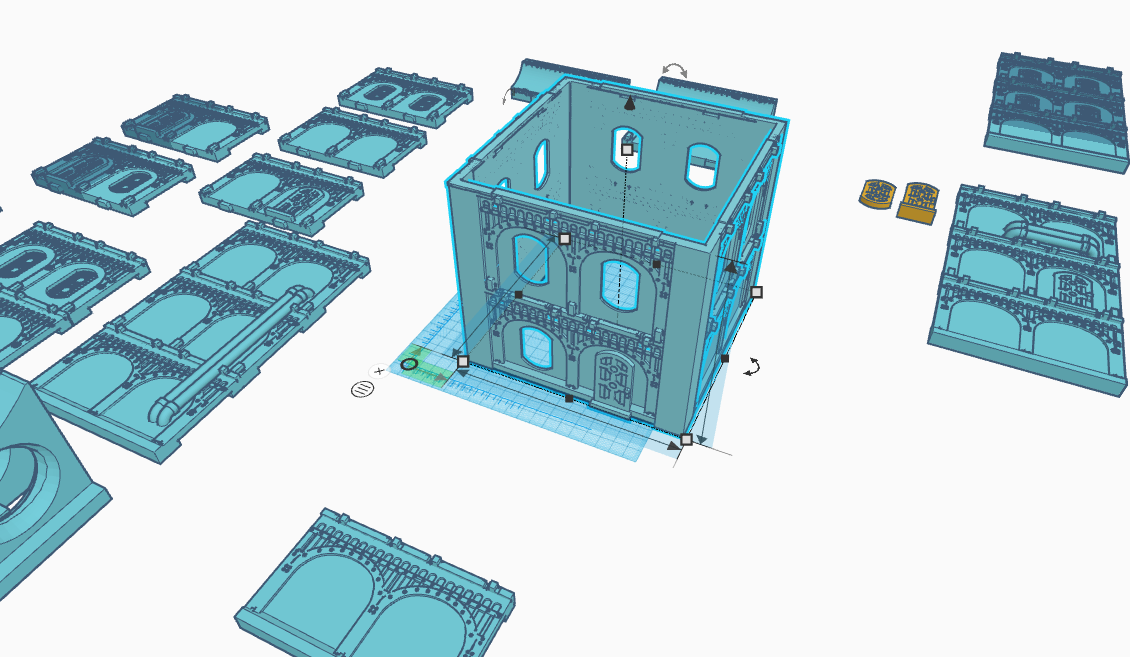 Two story test building (a 36 hour print)
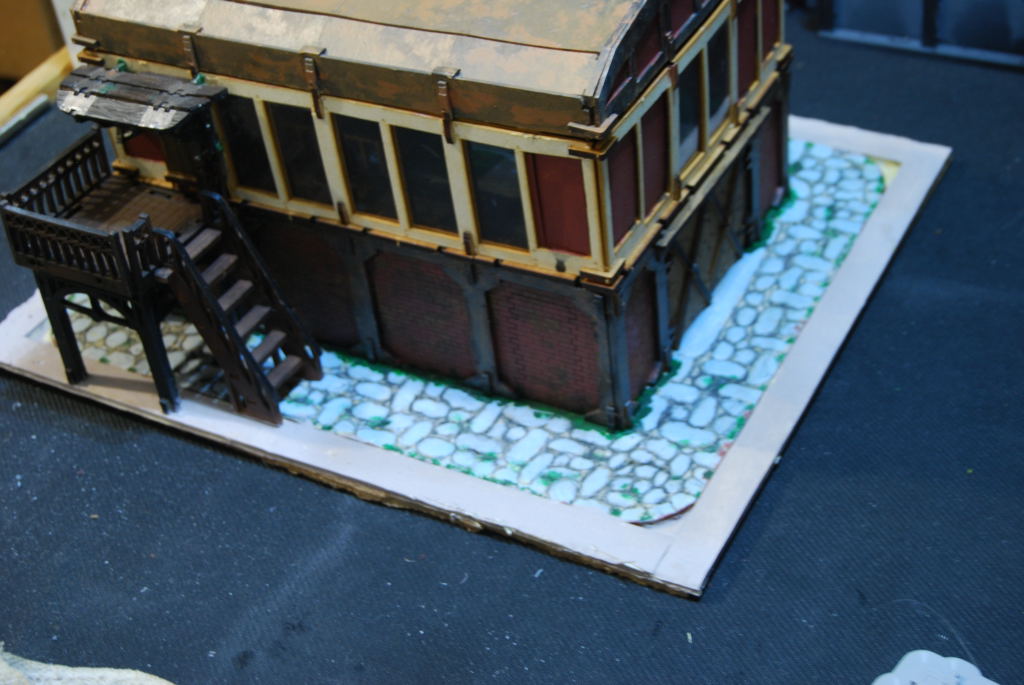
 Working door for the small shop.
 Evolution of an idea
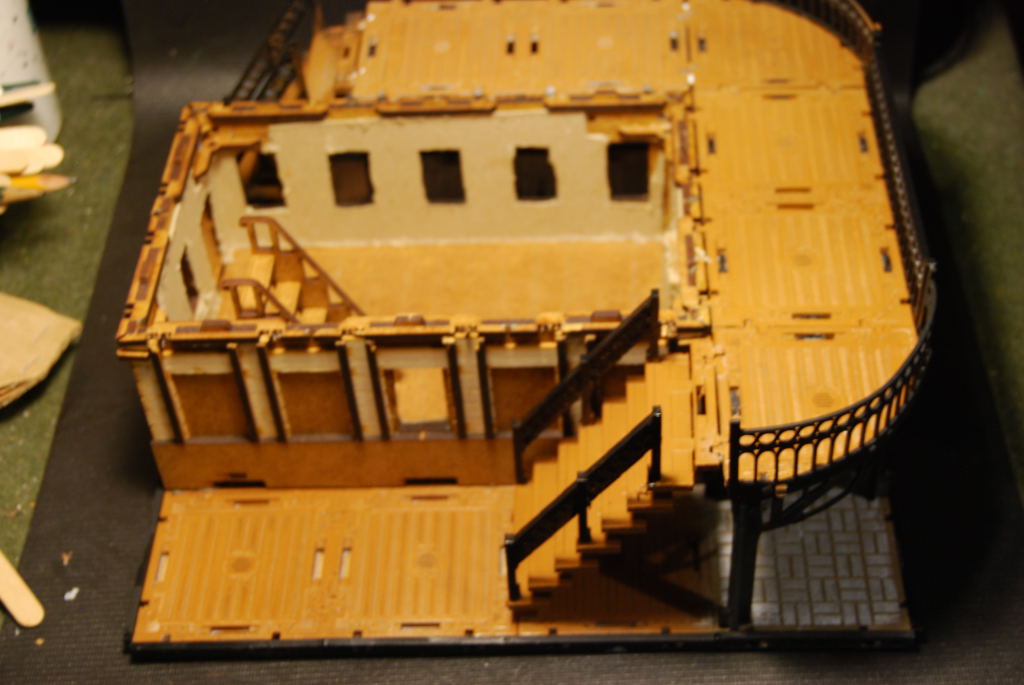
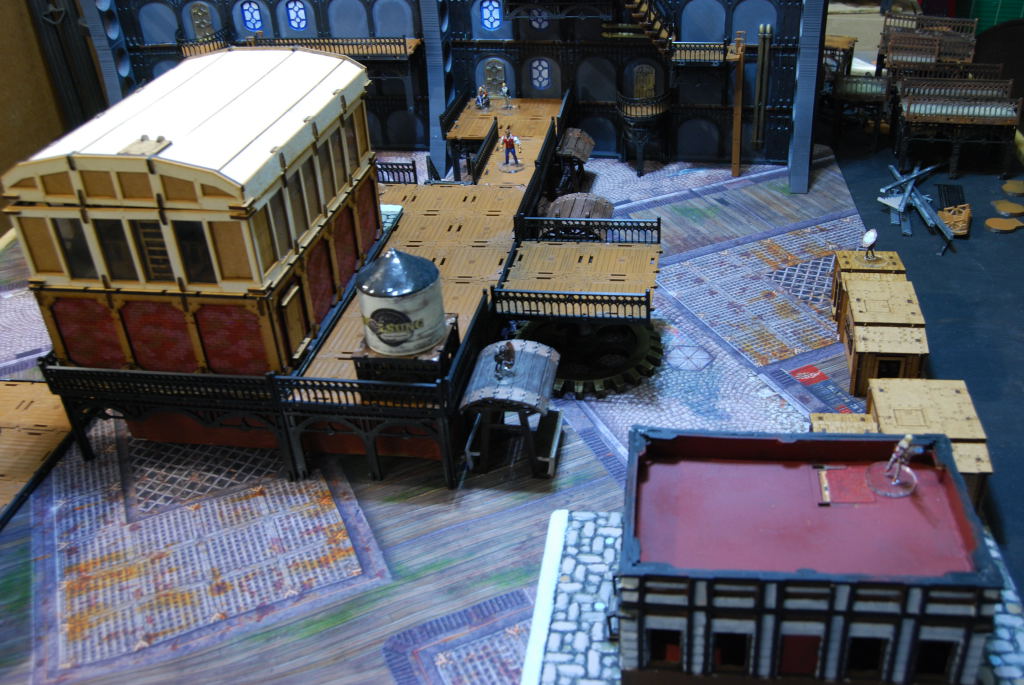
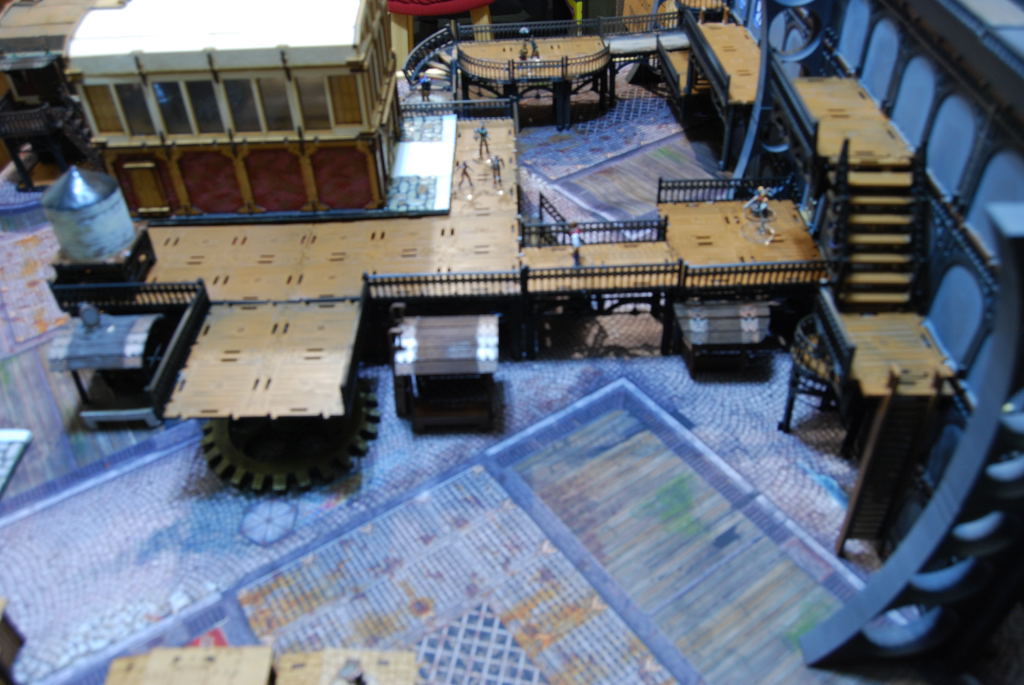
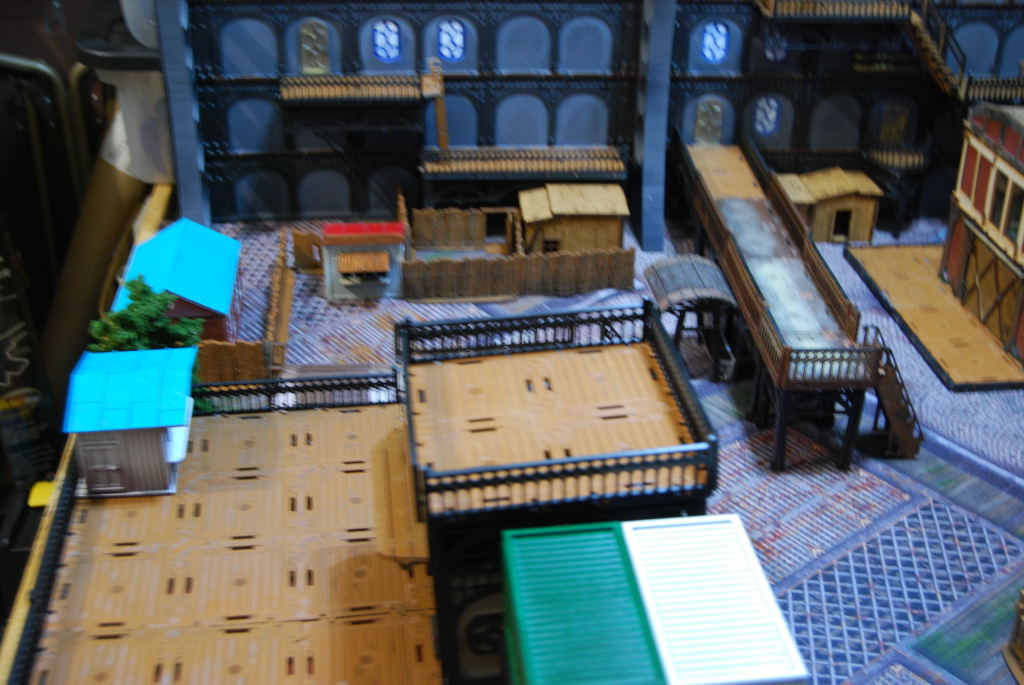
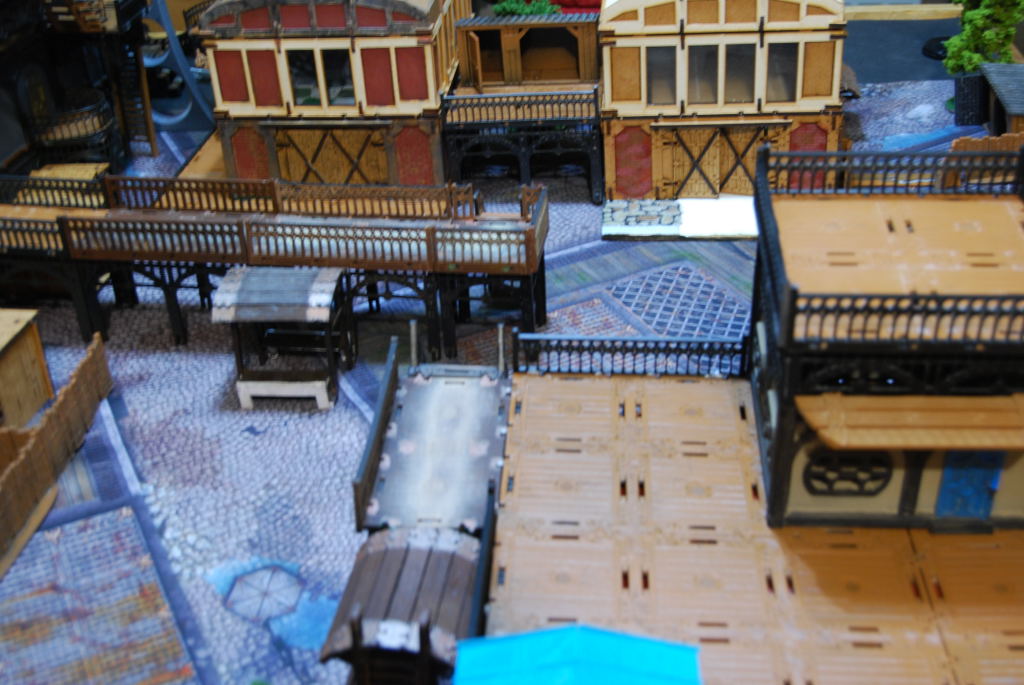
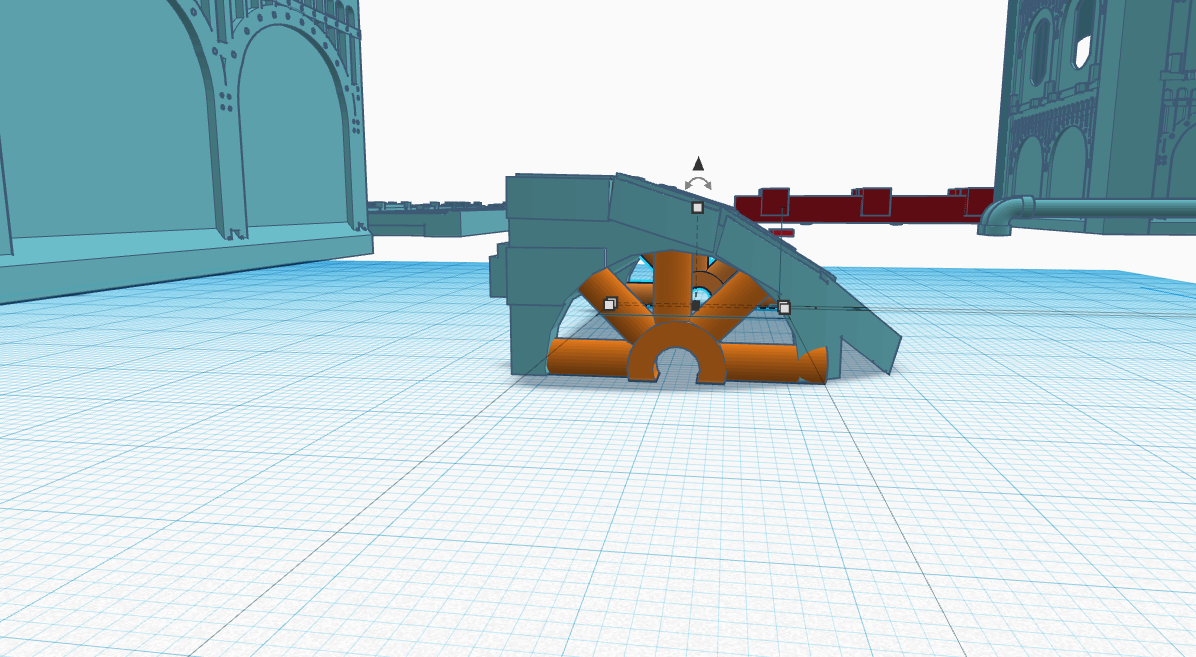
While in Tinker CAD i was playing around with an idea to incorporate the interior wall with the rest of my terrain. I started with a basic wall to add a stable foundation to build from. The idea was to create different level from which i could build upon. The next logical step was a corner. Then that evolved in adding a door and windows. Next thing i know it become a house then into a small shop.


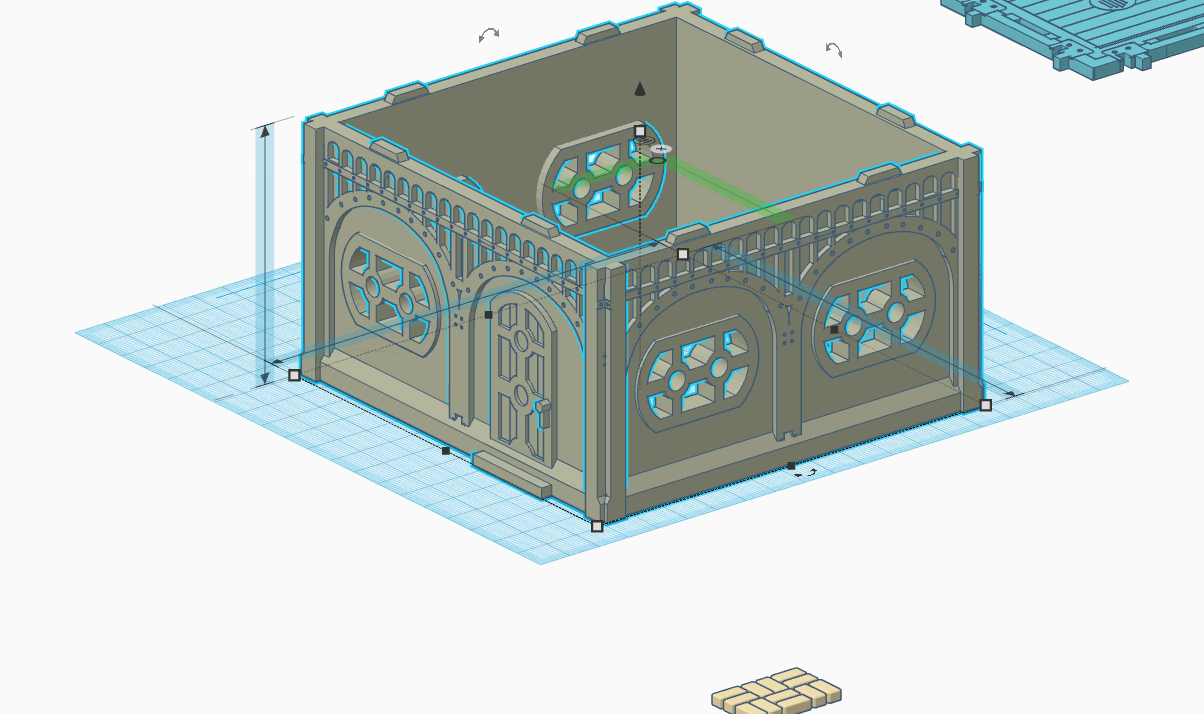
 The small house took about 20 hours to complete. There are some issue with a gap around the windows and the walls are not symmetrical. Overall decent test print:)
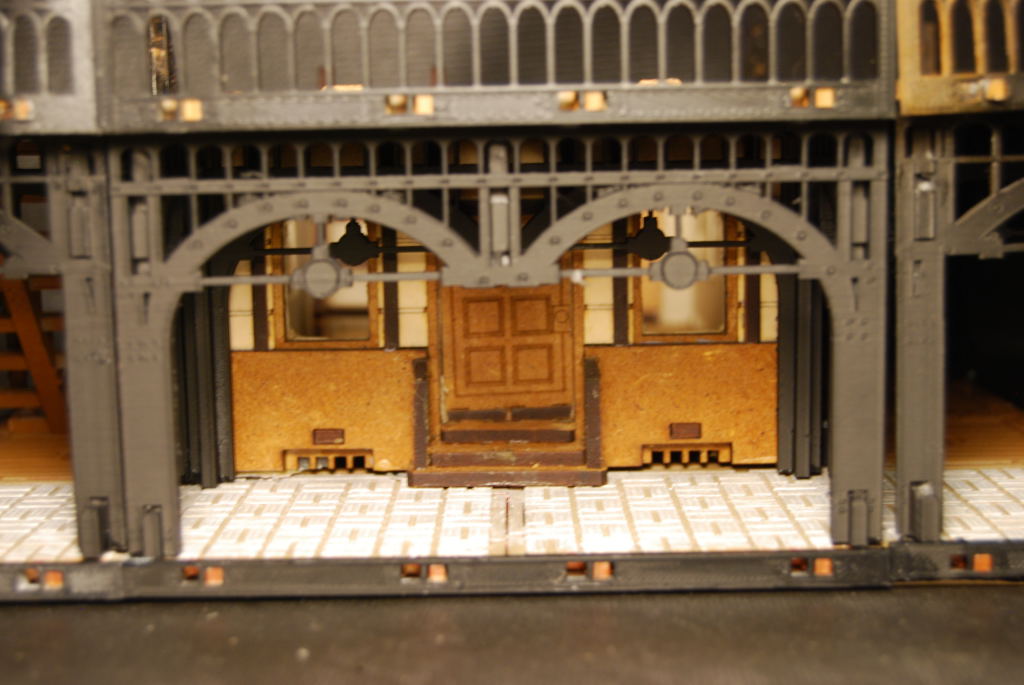
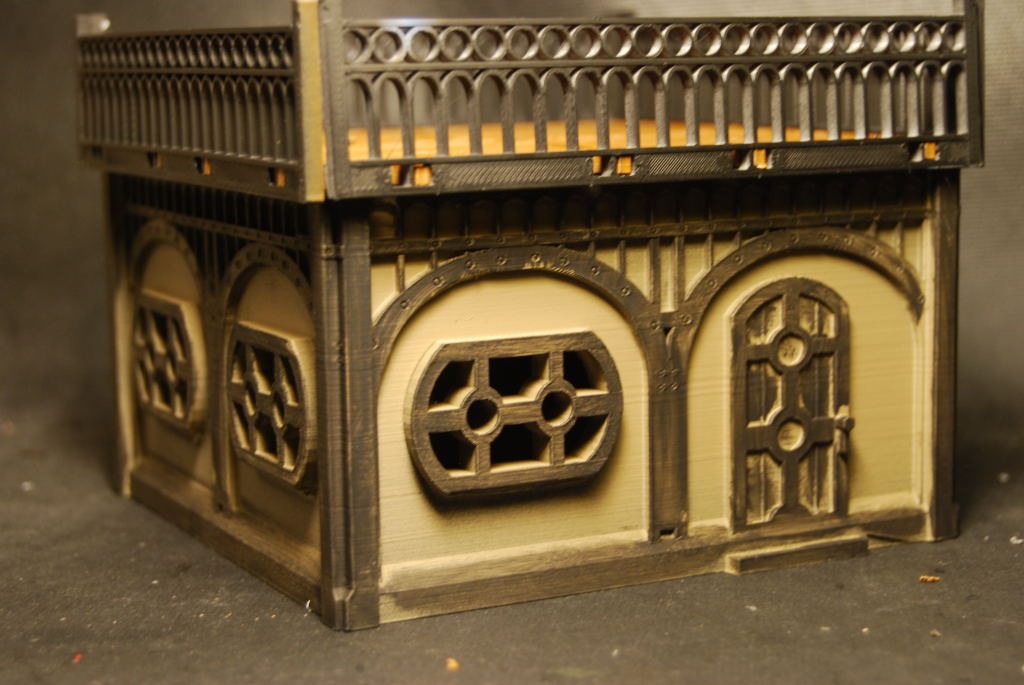
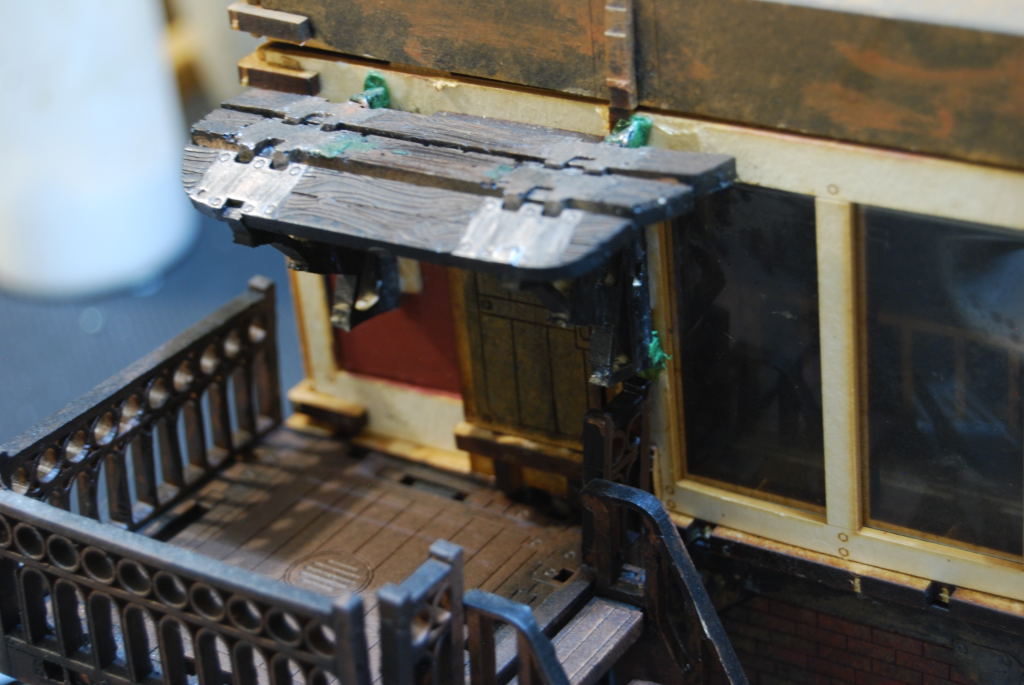
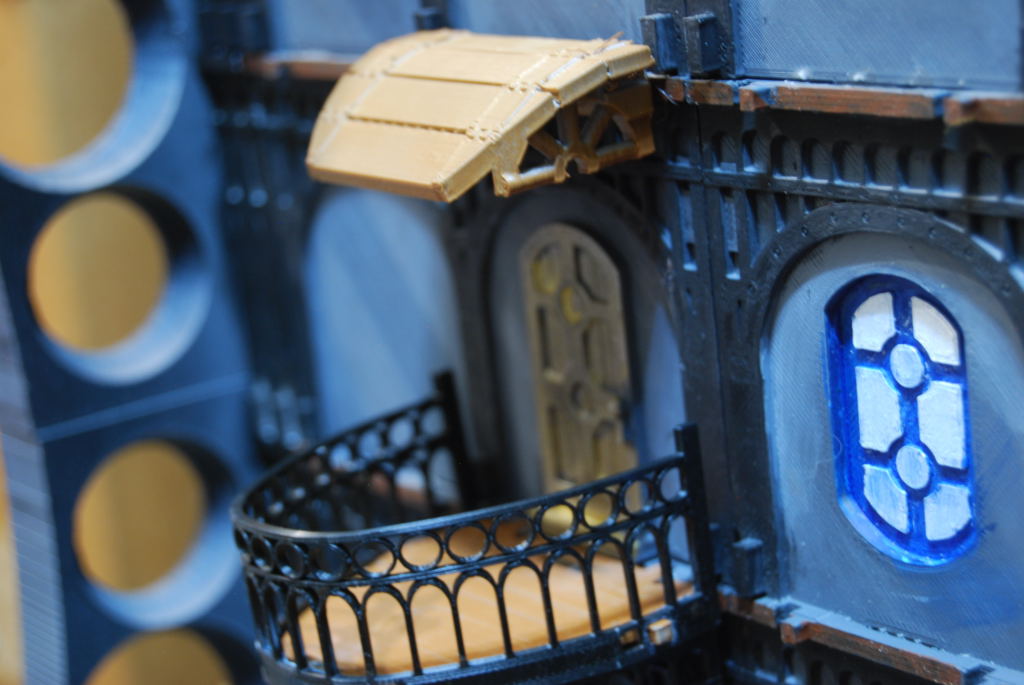
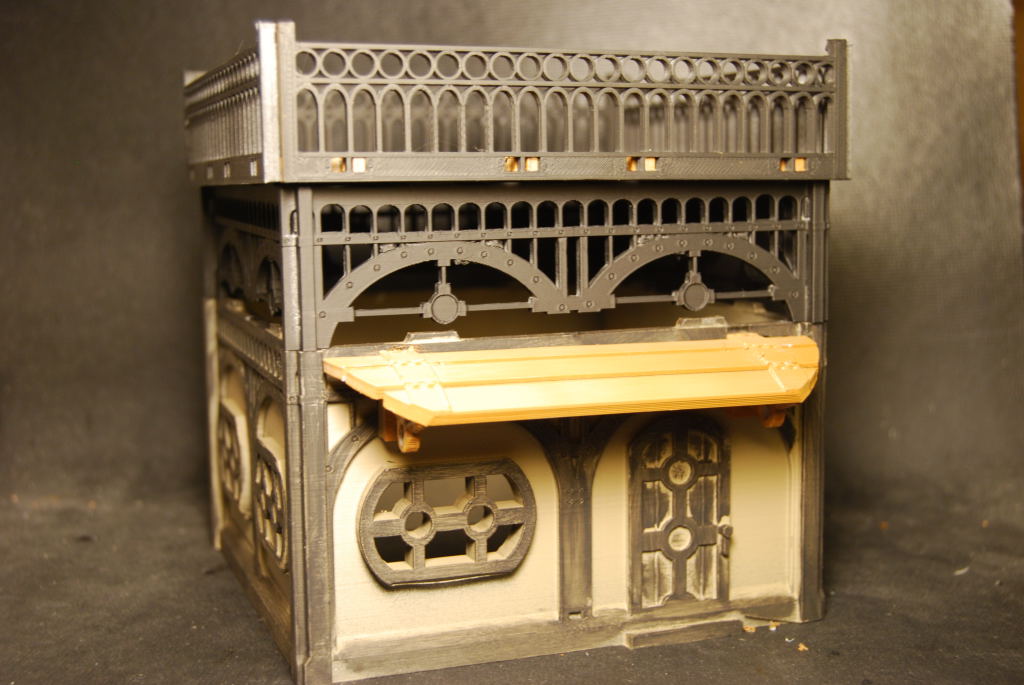 Next i added an awning and an arch. Now that cool :).
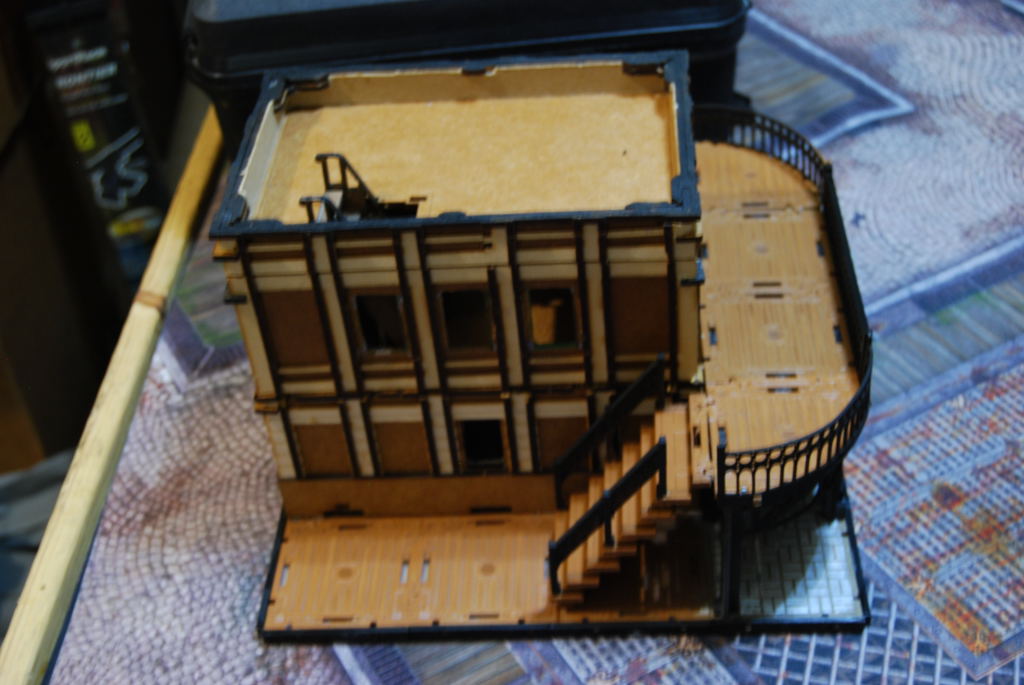
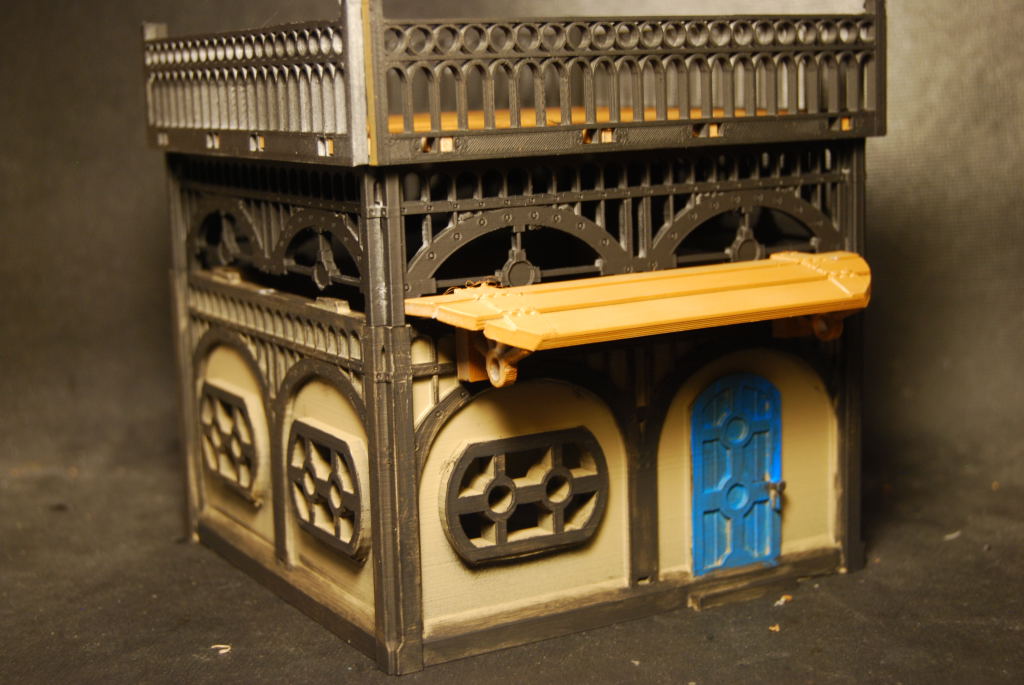 Finished painting some of the detail and she ready for the table.
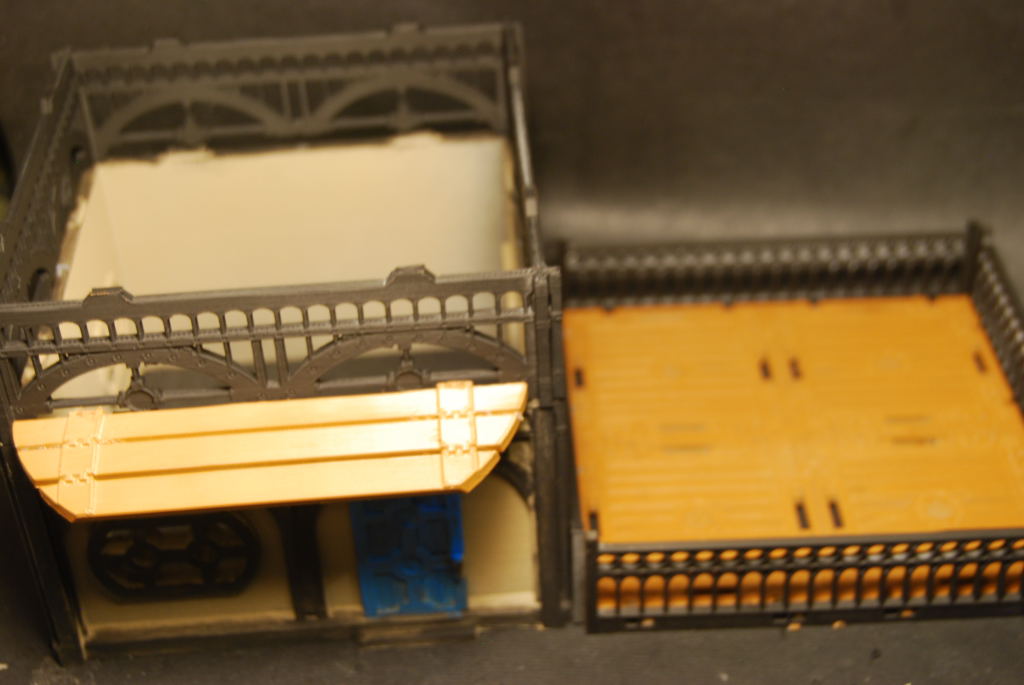 I made sure the roof was removable to allow access to the interior.
Awning
 I made this awning from one of the food stalls that Micro Arts Studio makes. I have decided to try to make one in Tinker CAD.
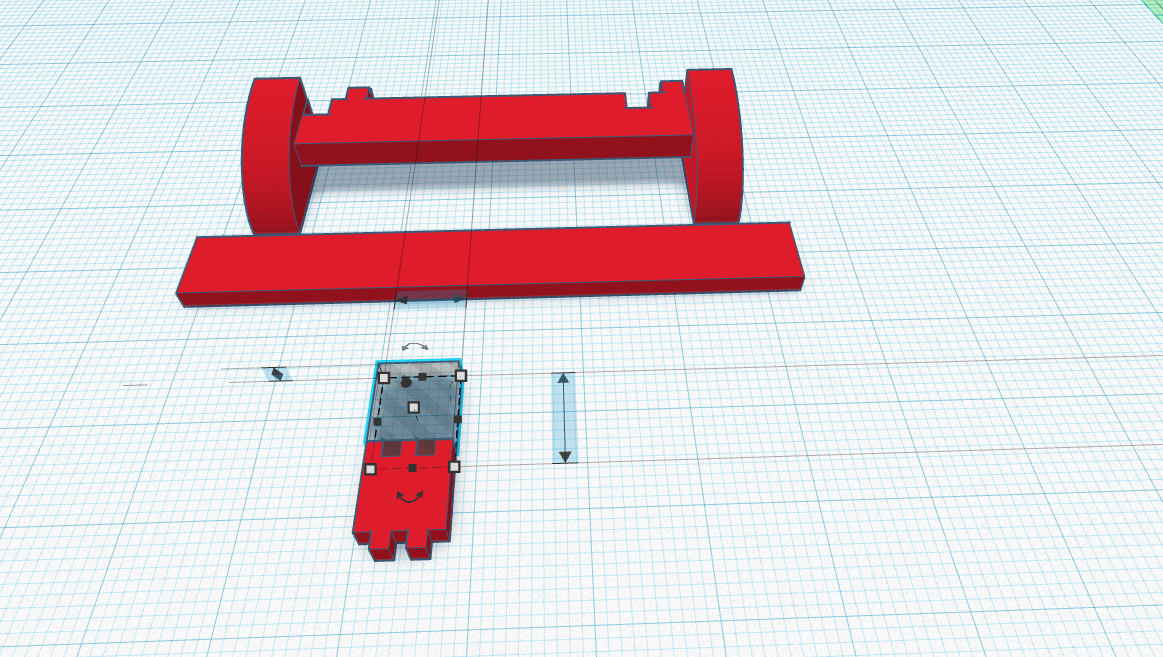
 My test print was backwards because file was rotated 90 degree to make it easier to work on. I just mirror the image and printed it again.
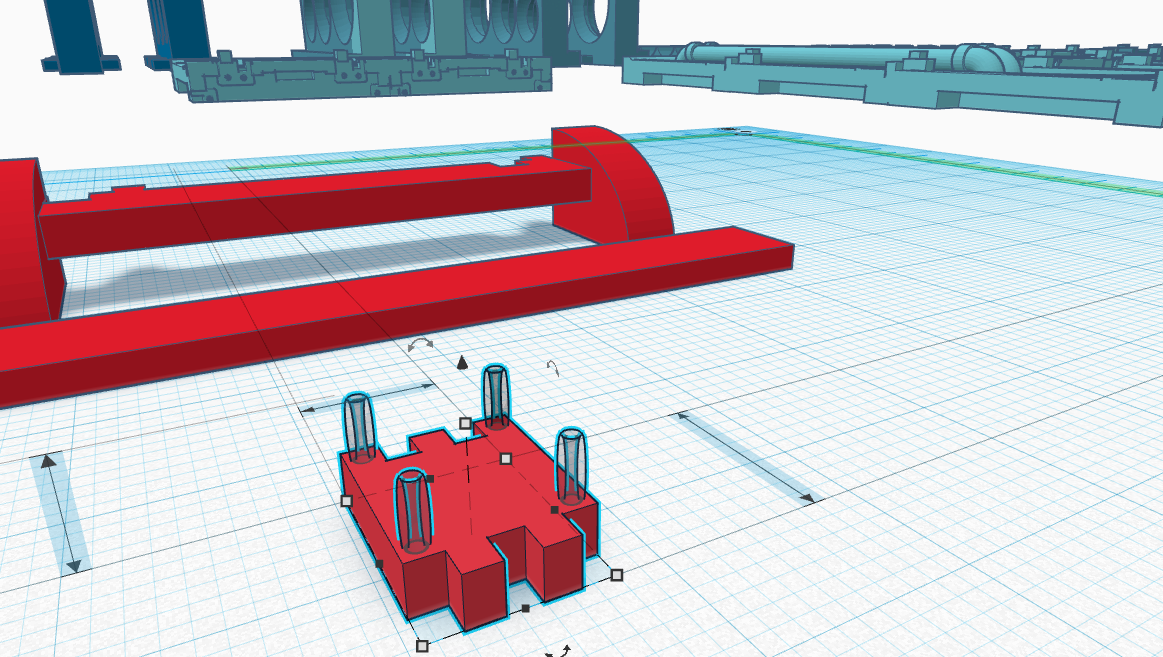
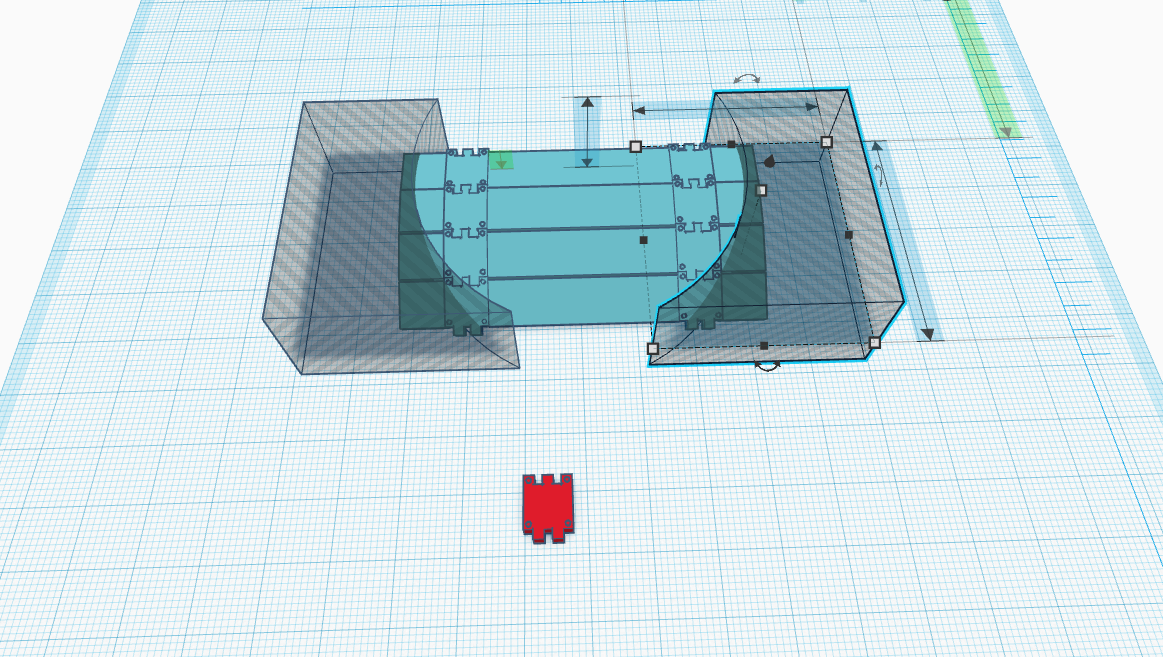
  Testing the fit before going back to Tinker CAD to added some flare.

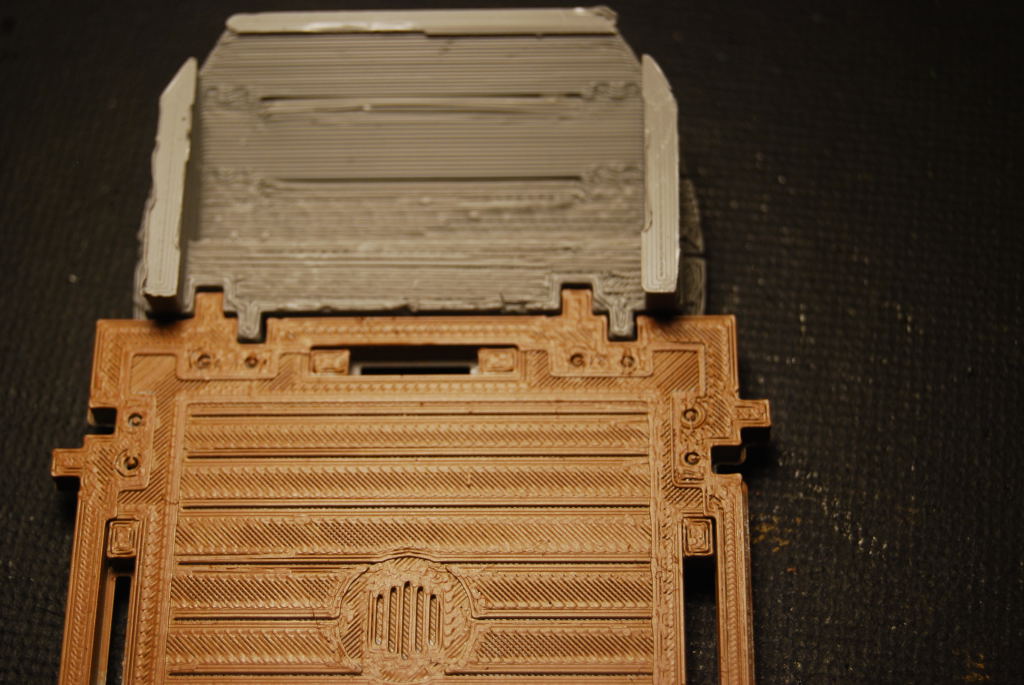
 Much Better than before.
Awning
 I made this awning from one of the stall that Micro Arts Studio makes. I have decided to try to make one in Tinker CAD.
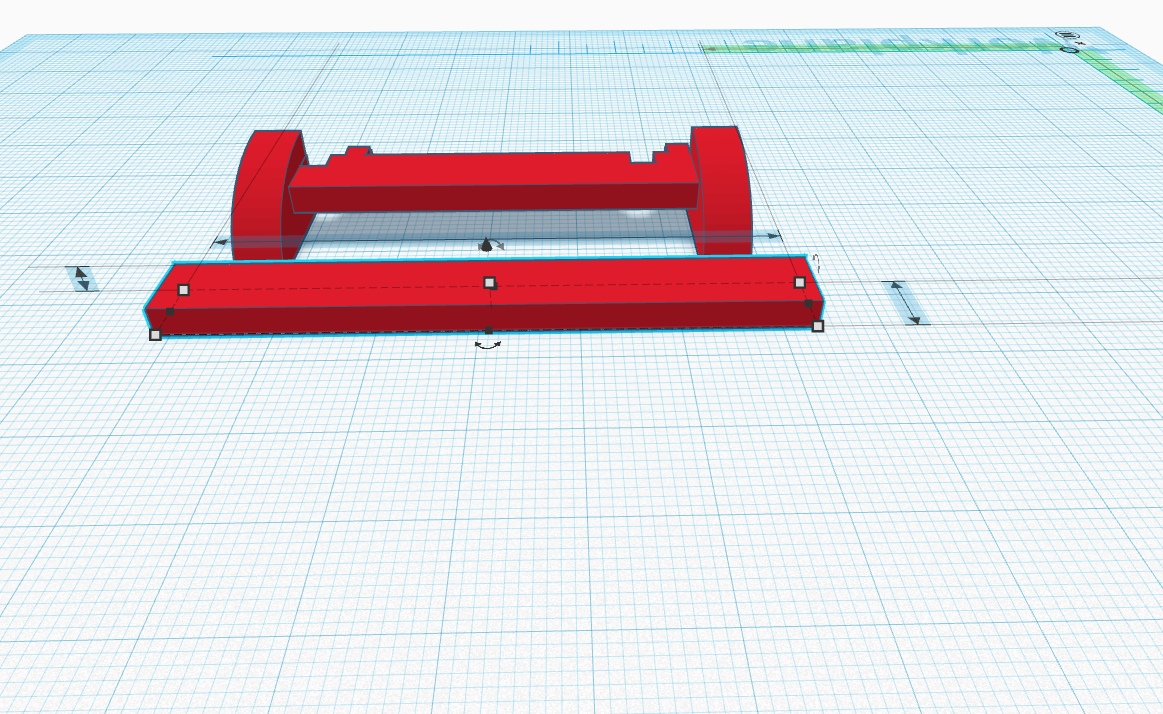


 My test print was backwards because file was rotated 90 degree to make it easier to work on. I just mirror the image and printed it again.
  Testing the fit before going back to Tinker CAD to added some flare.
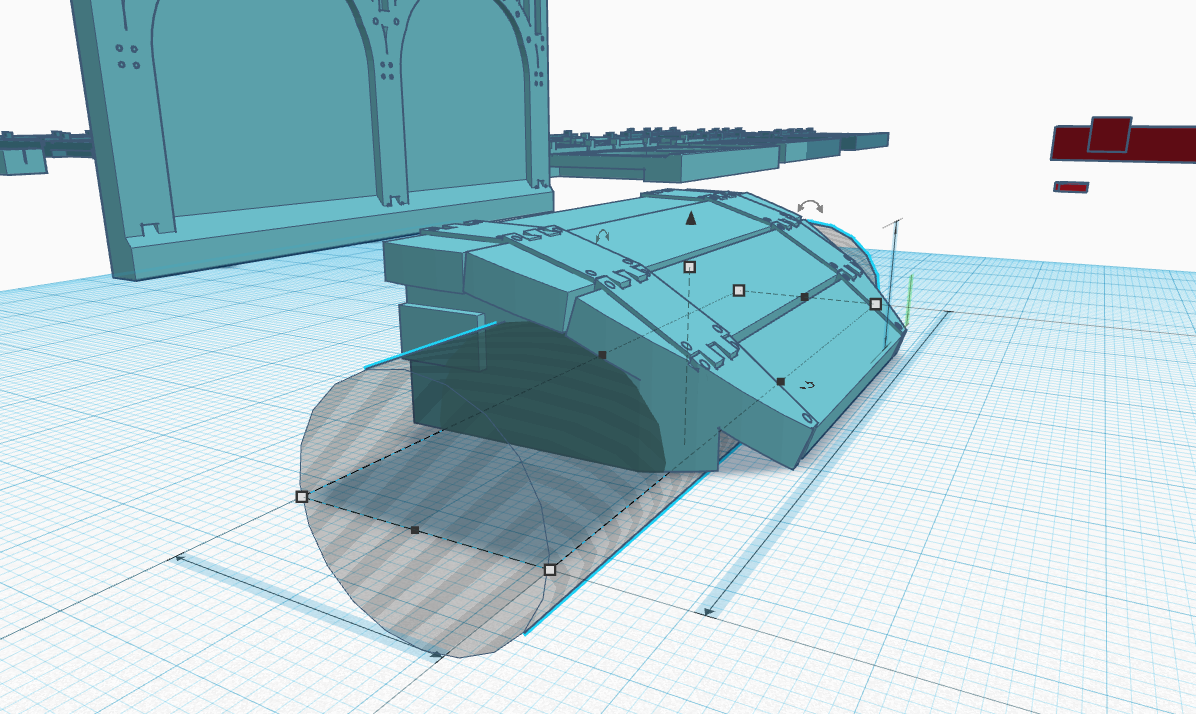
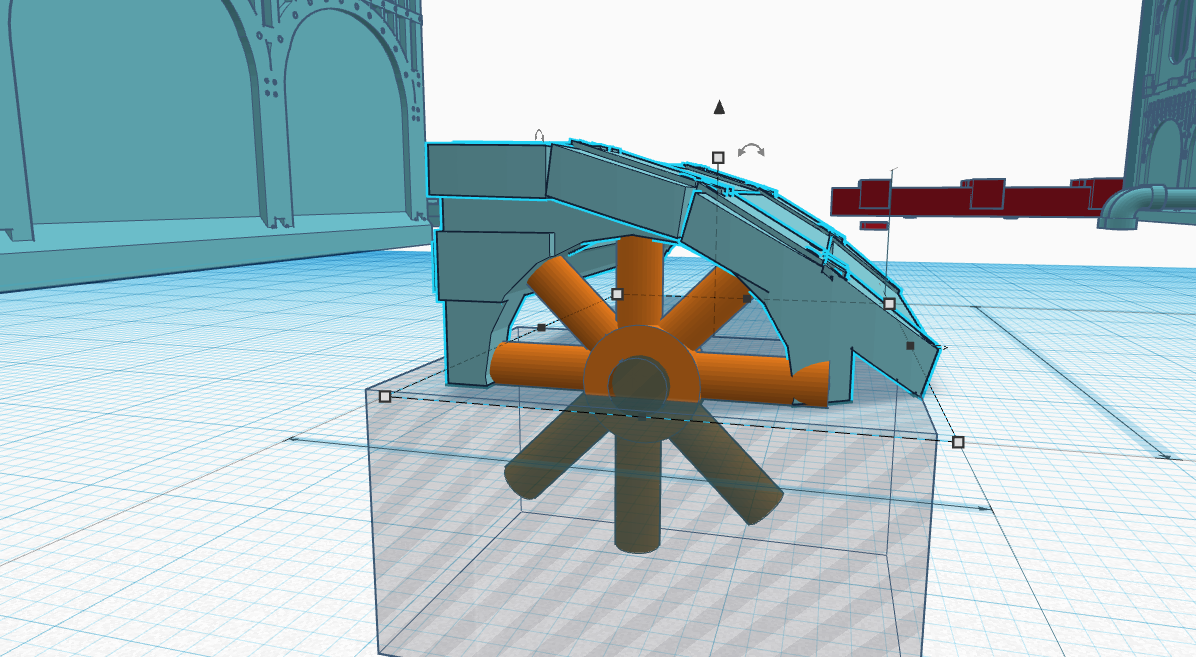

 Much Better than before.
![StarCraft Tabletop Miniatures Game Pre-Orders Live Now [Updated]](https://images.beastsofwar.com/2026/03/starcraft-tmg-news-cover-600-338.jpg)


![Mounted US Cavalry On Kickstarter For Dead Man’s Hand! [Updated]](https://images.beastsofwar.com/2026/03/us-cavalry-main-600-338.jpg)


![Play WW2 Commando Operations With Butcher & Bolt [Updated]](https://images.beastsofwar.com/2026/03/relaunch-600-338.jpg)


