

![10mm Medieval Miniatures! Azincourt English Army Review | Wargames Atlantic [7 Days Early Access]](https://images.beastsofwar.com/2026/03/unboxing-wargames-atlantic-azincourt-english-army-coverimage-225-127.jpg)


Mortal vs Marco


Recommendations: 371
About the Project
Choose your god wisely. What happens when a mere mortal has aspirations to emulate a higher power? When does a tutorial just become showing off? Does David get crushed by Goliath, or does the sling swing true once more? Choose your god wisely….
Related Game: Warhammer 40,000
Related Company: Games Workshop
Related Genre: Science Fiction
Related Contest: Spring Clean Hobby Challenge 2023
This Project is Completed
Spring is Sprung, the Grass is Riz. I Wonder Where the Birdies is.
Ah, springtime. That time of the year when winter finally feels like it’s on the way out, daffodils bloom and birds sing. Oh, and the OTT team make you feel really bad about all the projects you haven’t finished inspire you to return to old projects….ahem..
Should I! Dare I?
Well, given I have just posted a bunch of pictures I took 15 months ago, clearly I am!
Taking Stock and Making Decisions
Ok, so here I am now staring at this:

How to proceed? As I see it I have a few options:
1. Strip it (or re-prime it) and start again
2. Fix the errors and finish the model in my own way
3. Fix the errors and try to pick the Marco tutorial back up
4. Chuck it back in the box and pretend it never happened.
Realistically it’s options 2 and 3 that are on the table. Therefore, whichever I choose, I need to see if I can wind it back to a pre-error situation. Which means fixing the overspray.
Then – the next step for both options would be the same. A pinline oil wash.
So I may as well undertake those two steps while I am deciding how to proceed. Hopefully the act of getting started will grease the wheels sufficiently to get this done!
Step 10: Fix the Overspray
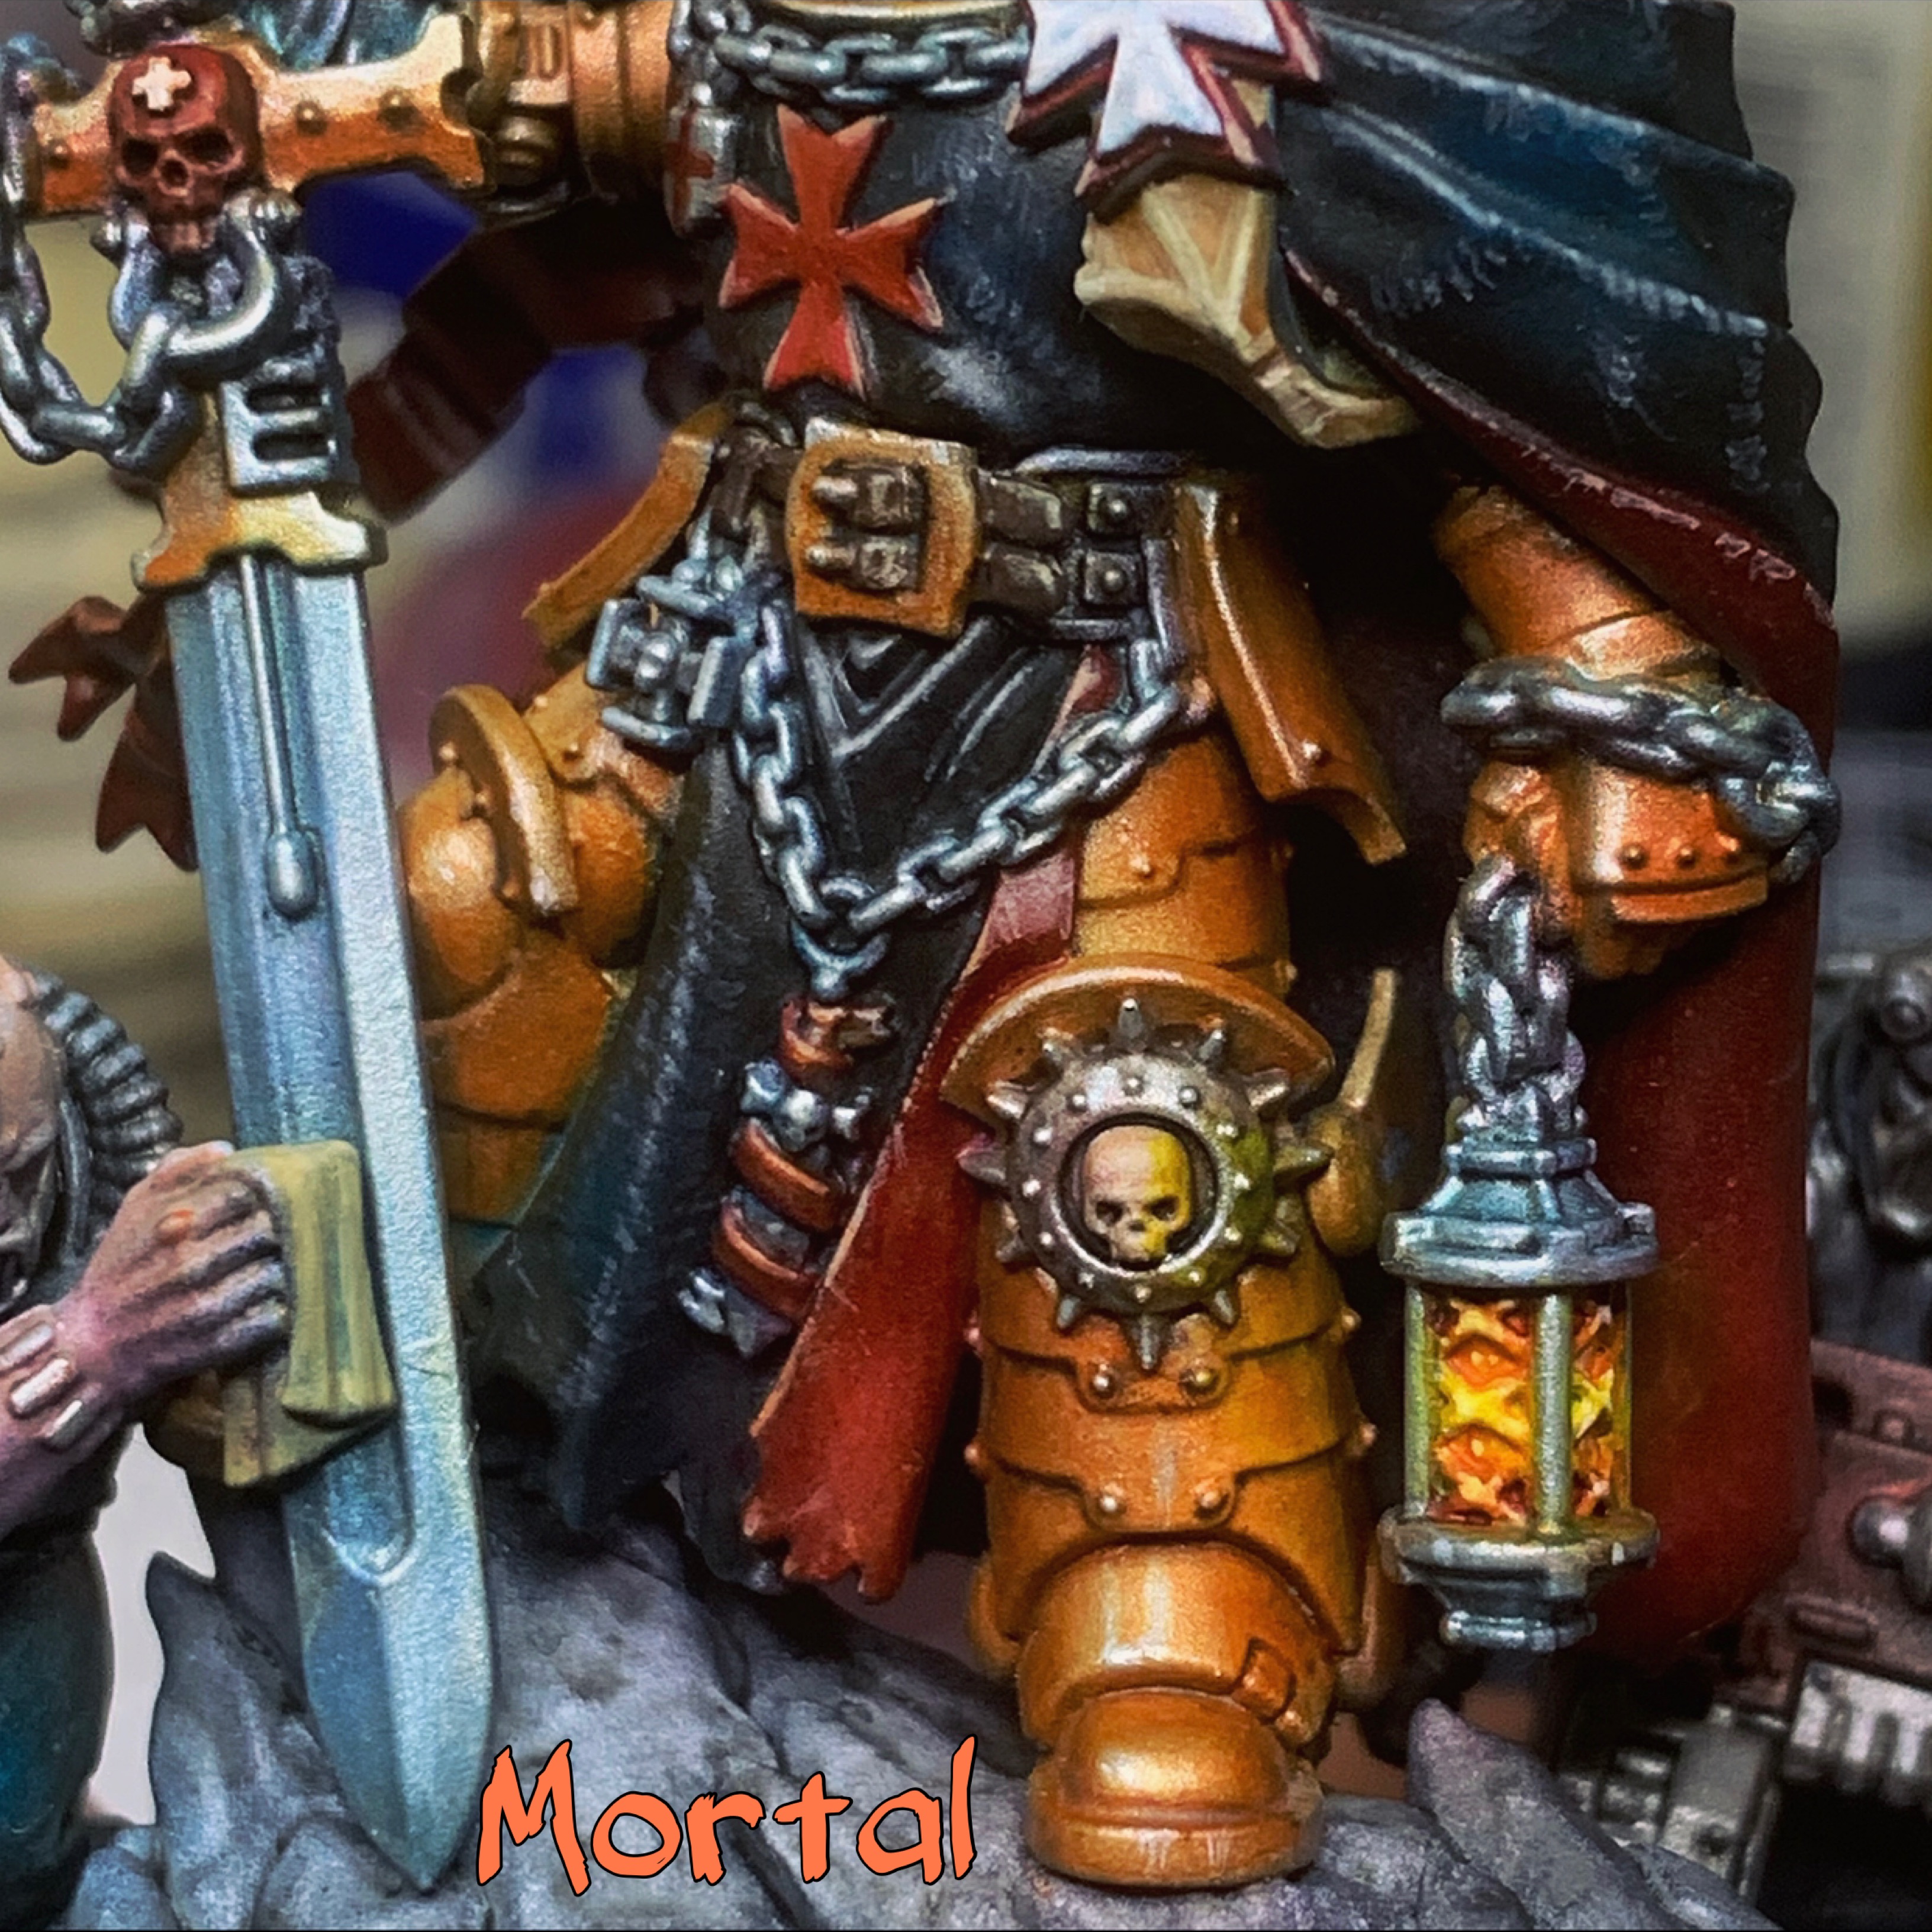
Thankfully, in my wisdom 15 months ago, I kept some of the gold mix in a dropper bottle. Even more thankfully it was still liquid! So I don’t need to re-mix the gold. It doesn’t quite match what’s on the model after its orange ink tint, but a glaze of orange contrast paint gets it close.
That’s got it a bit neater, and I am less embarrassed by the sight of it now!
Step 11: Black Oil Pinline Wash
The staple of any Marco tutorial and, for some time now, a staple of my own process. Oil (or enamel) washes.
Unfortunately for me, only a pinwash here. I would have loved a heavier oil application as that is more in my comfort zone than what is to come after this, but this I can do.
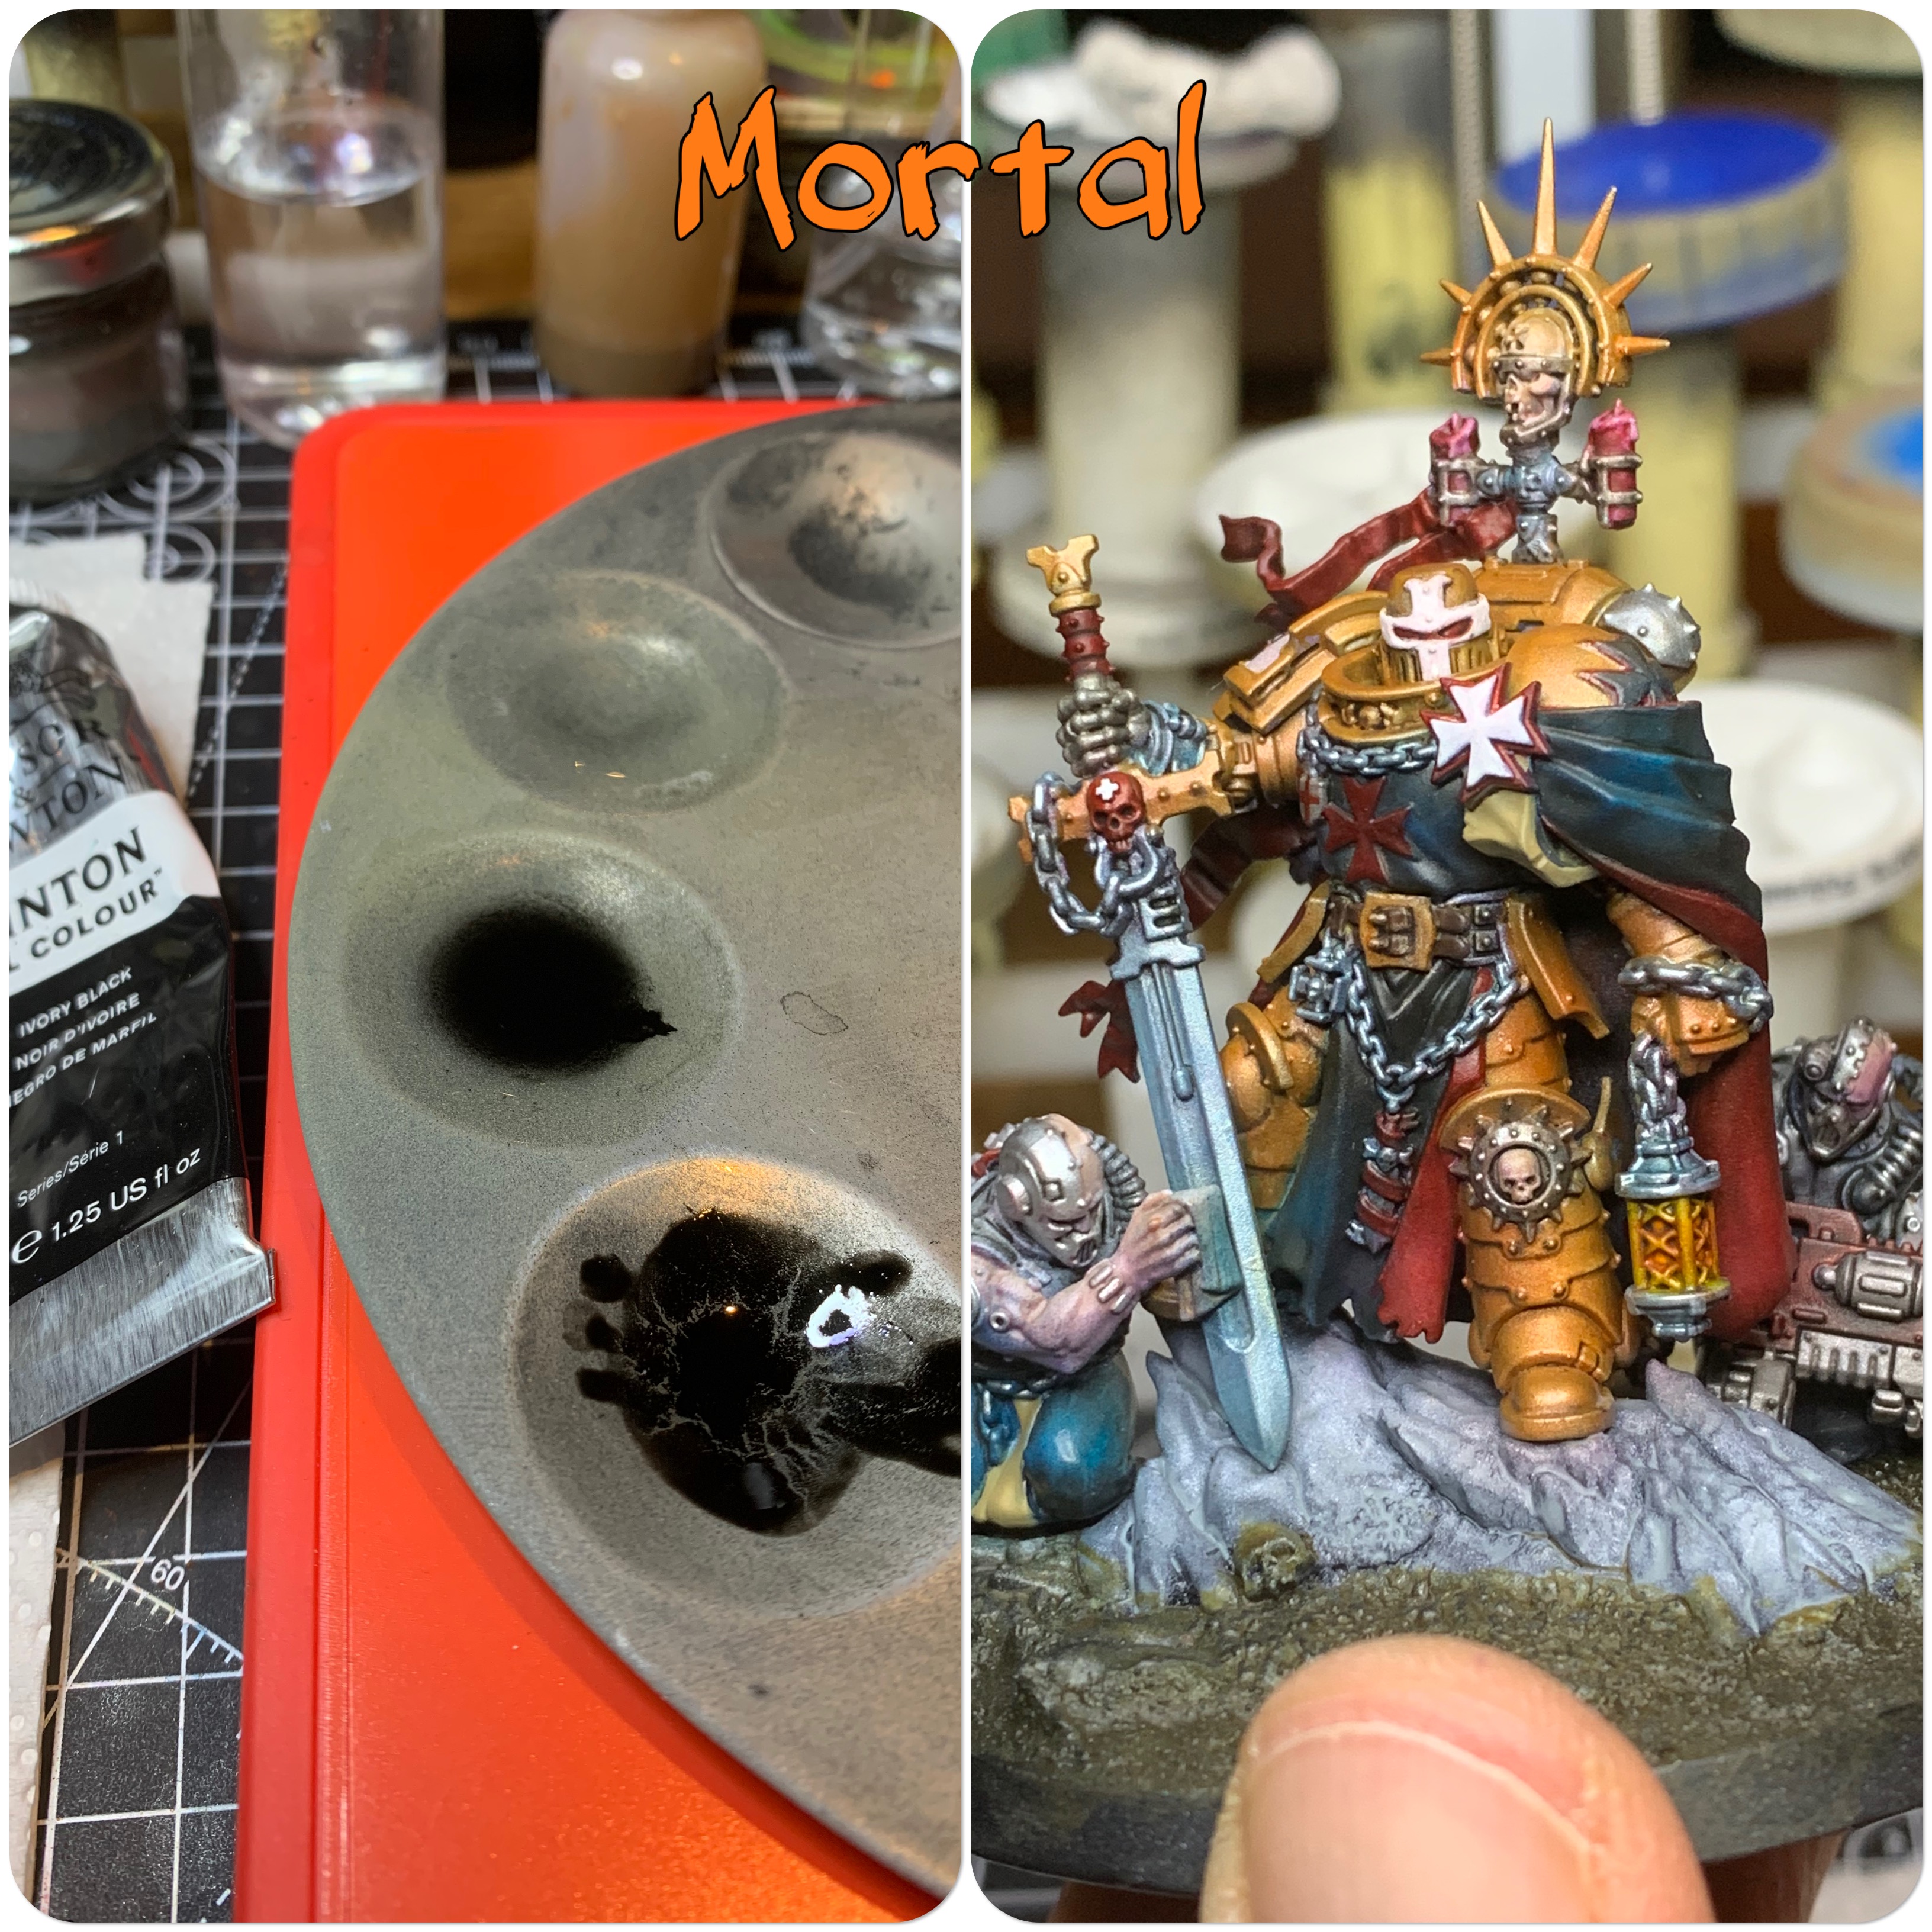
That’s got it looking a little crisper.
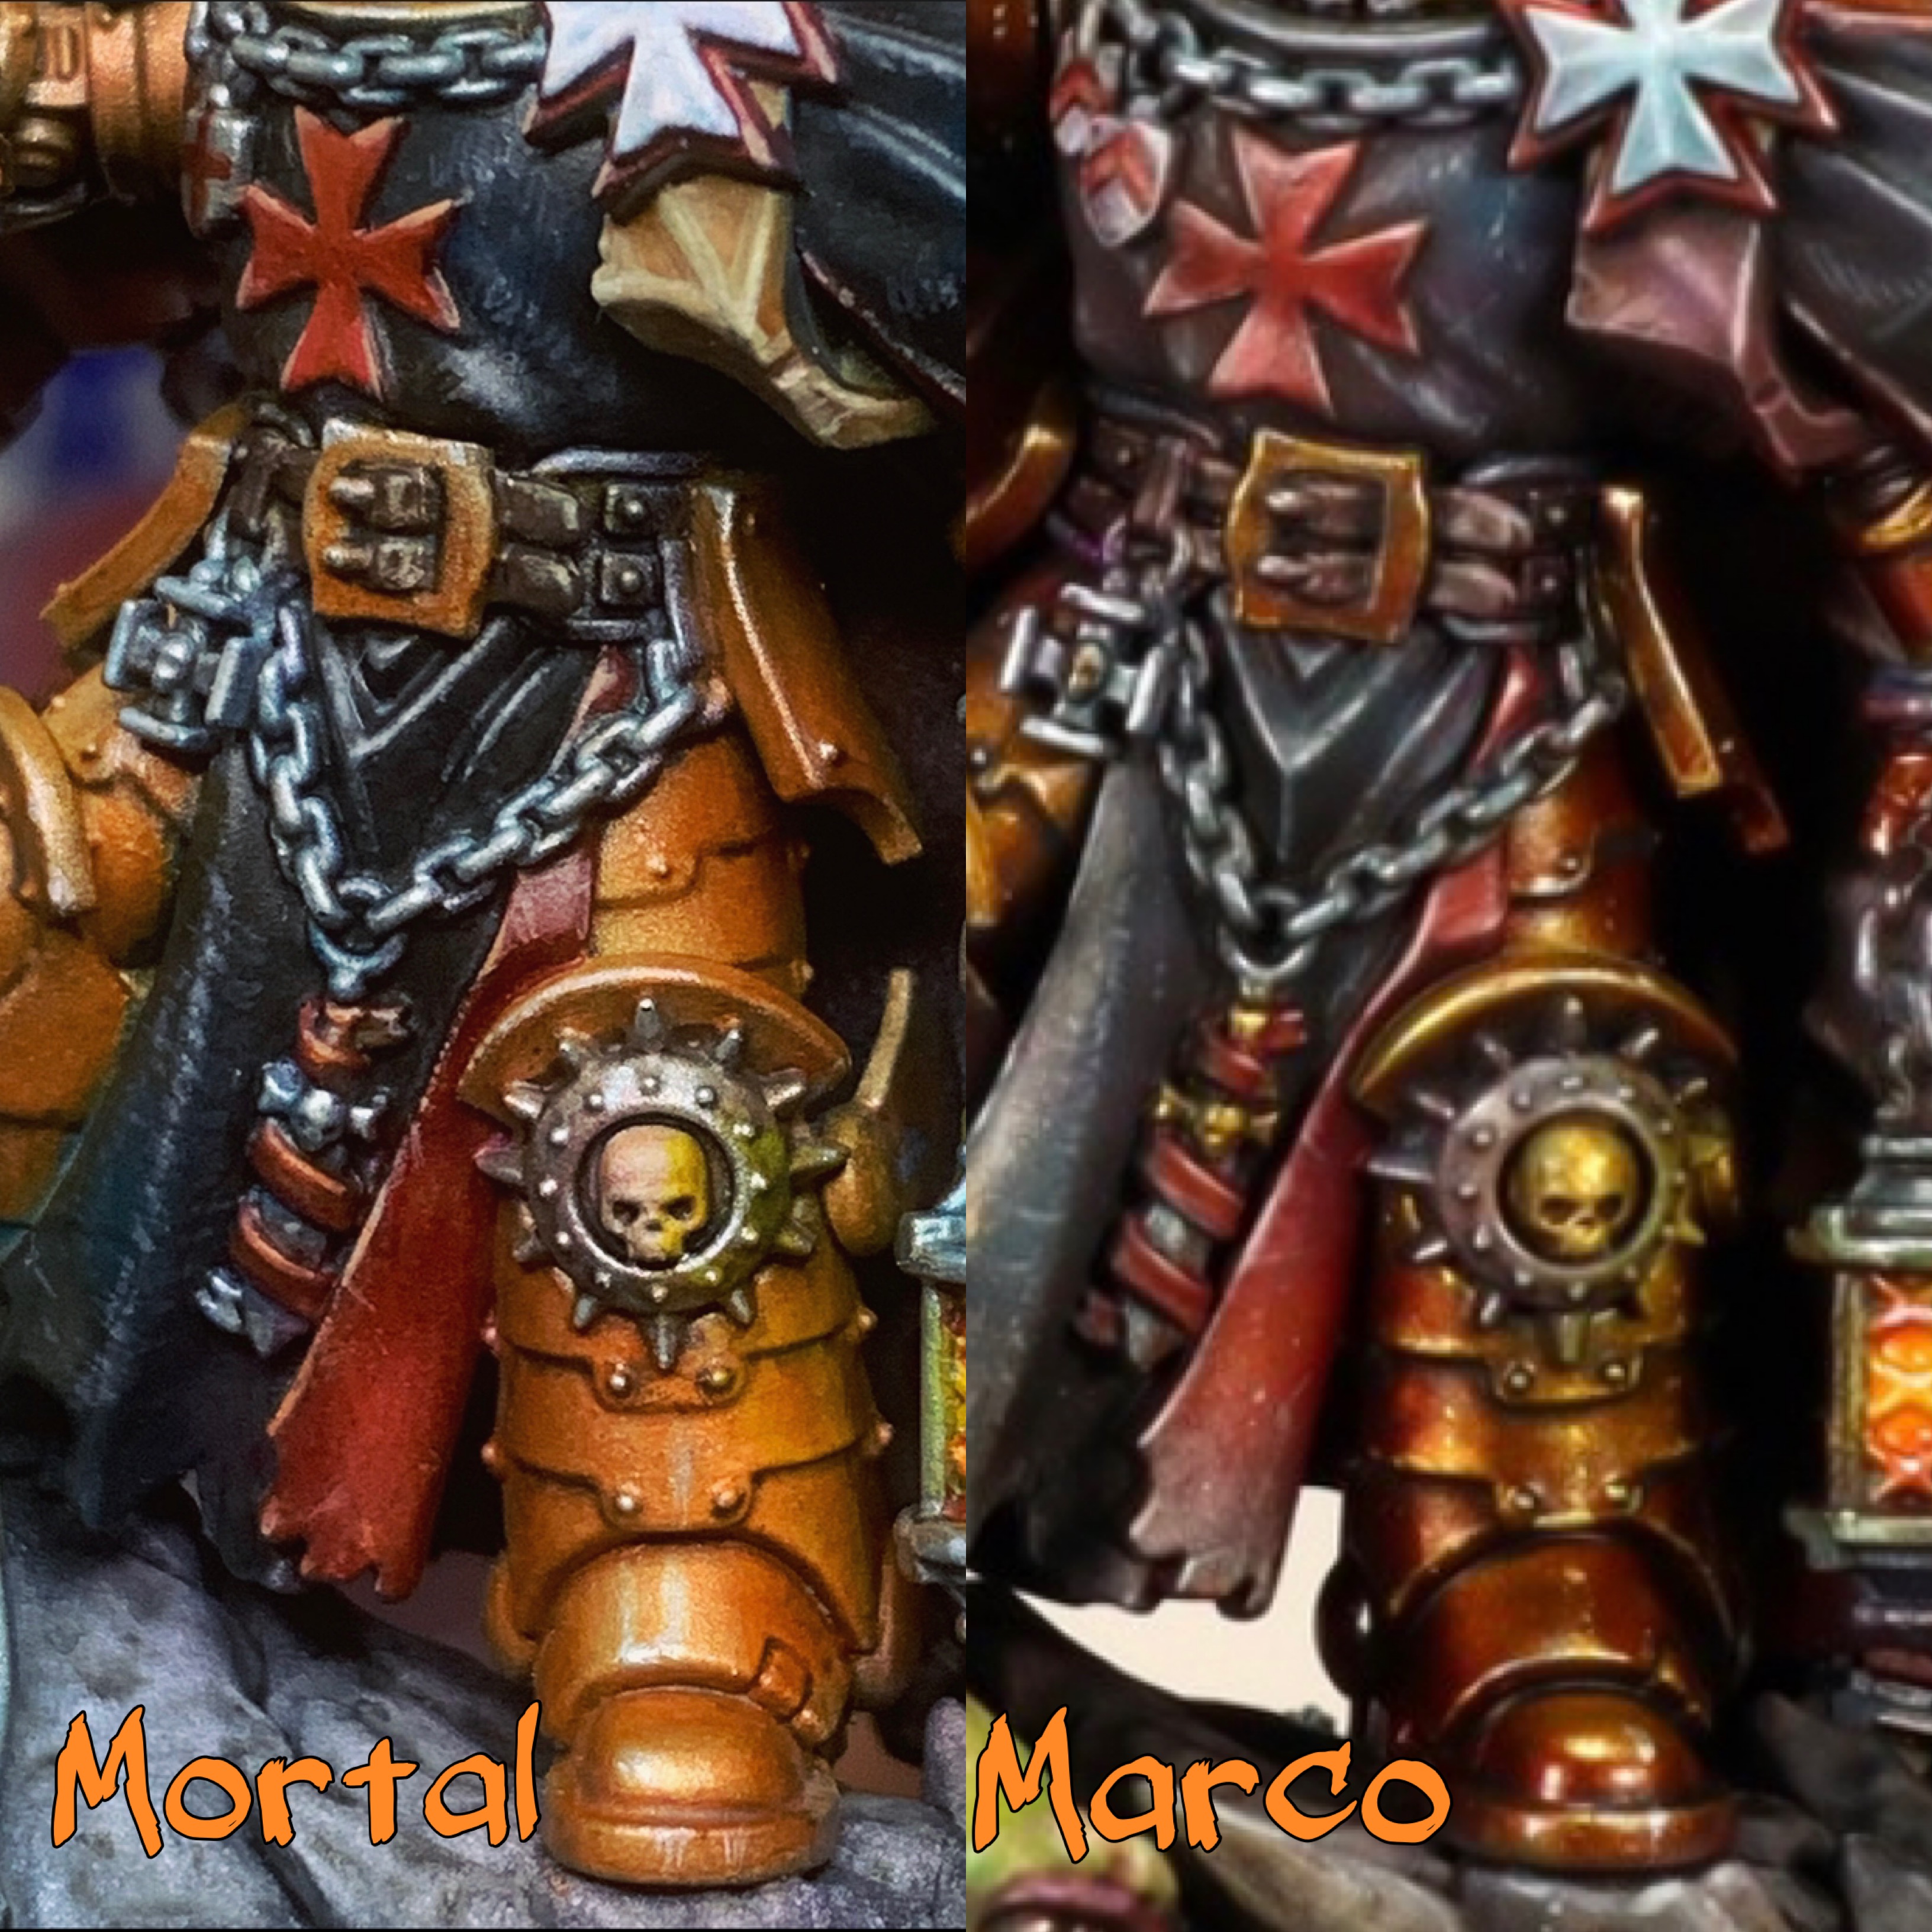
So that leaves us here. Trying to find the closest comparison from Marco’s video, and this is about as close a comparison photo as I can get. Even compensating for the high contrast he runs on his camera, his is clearly deeper, richer and more contrasty than mine.
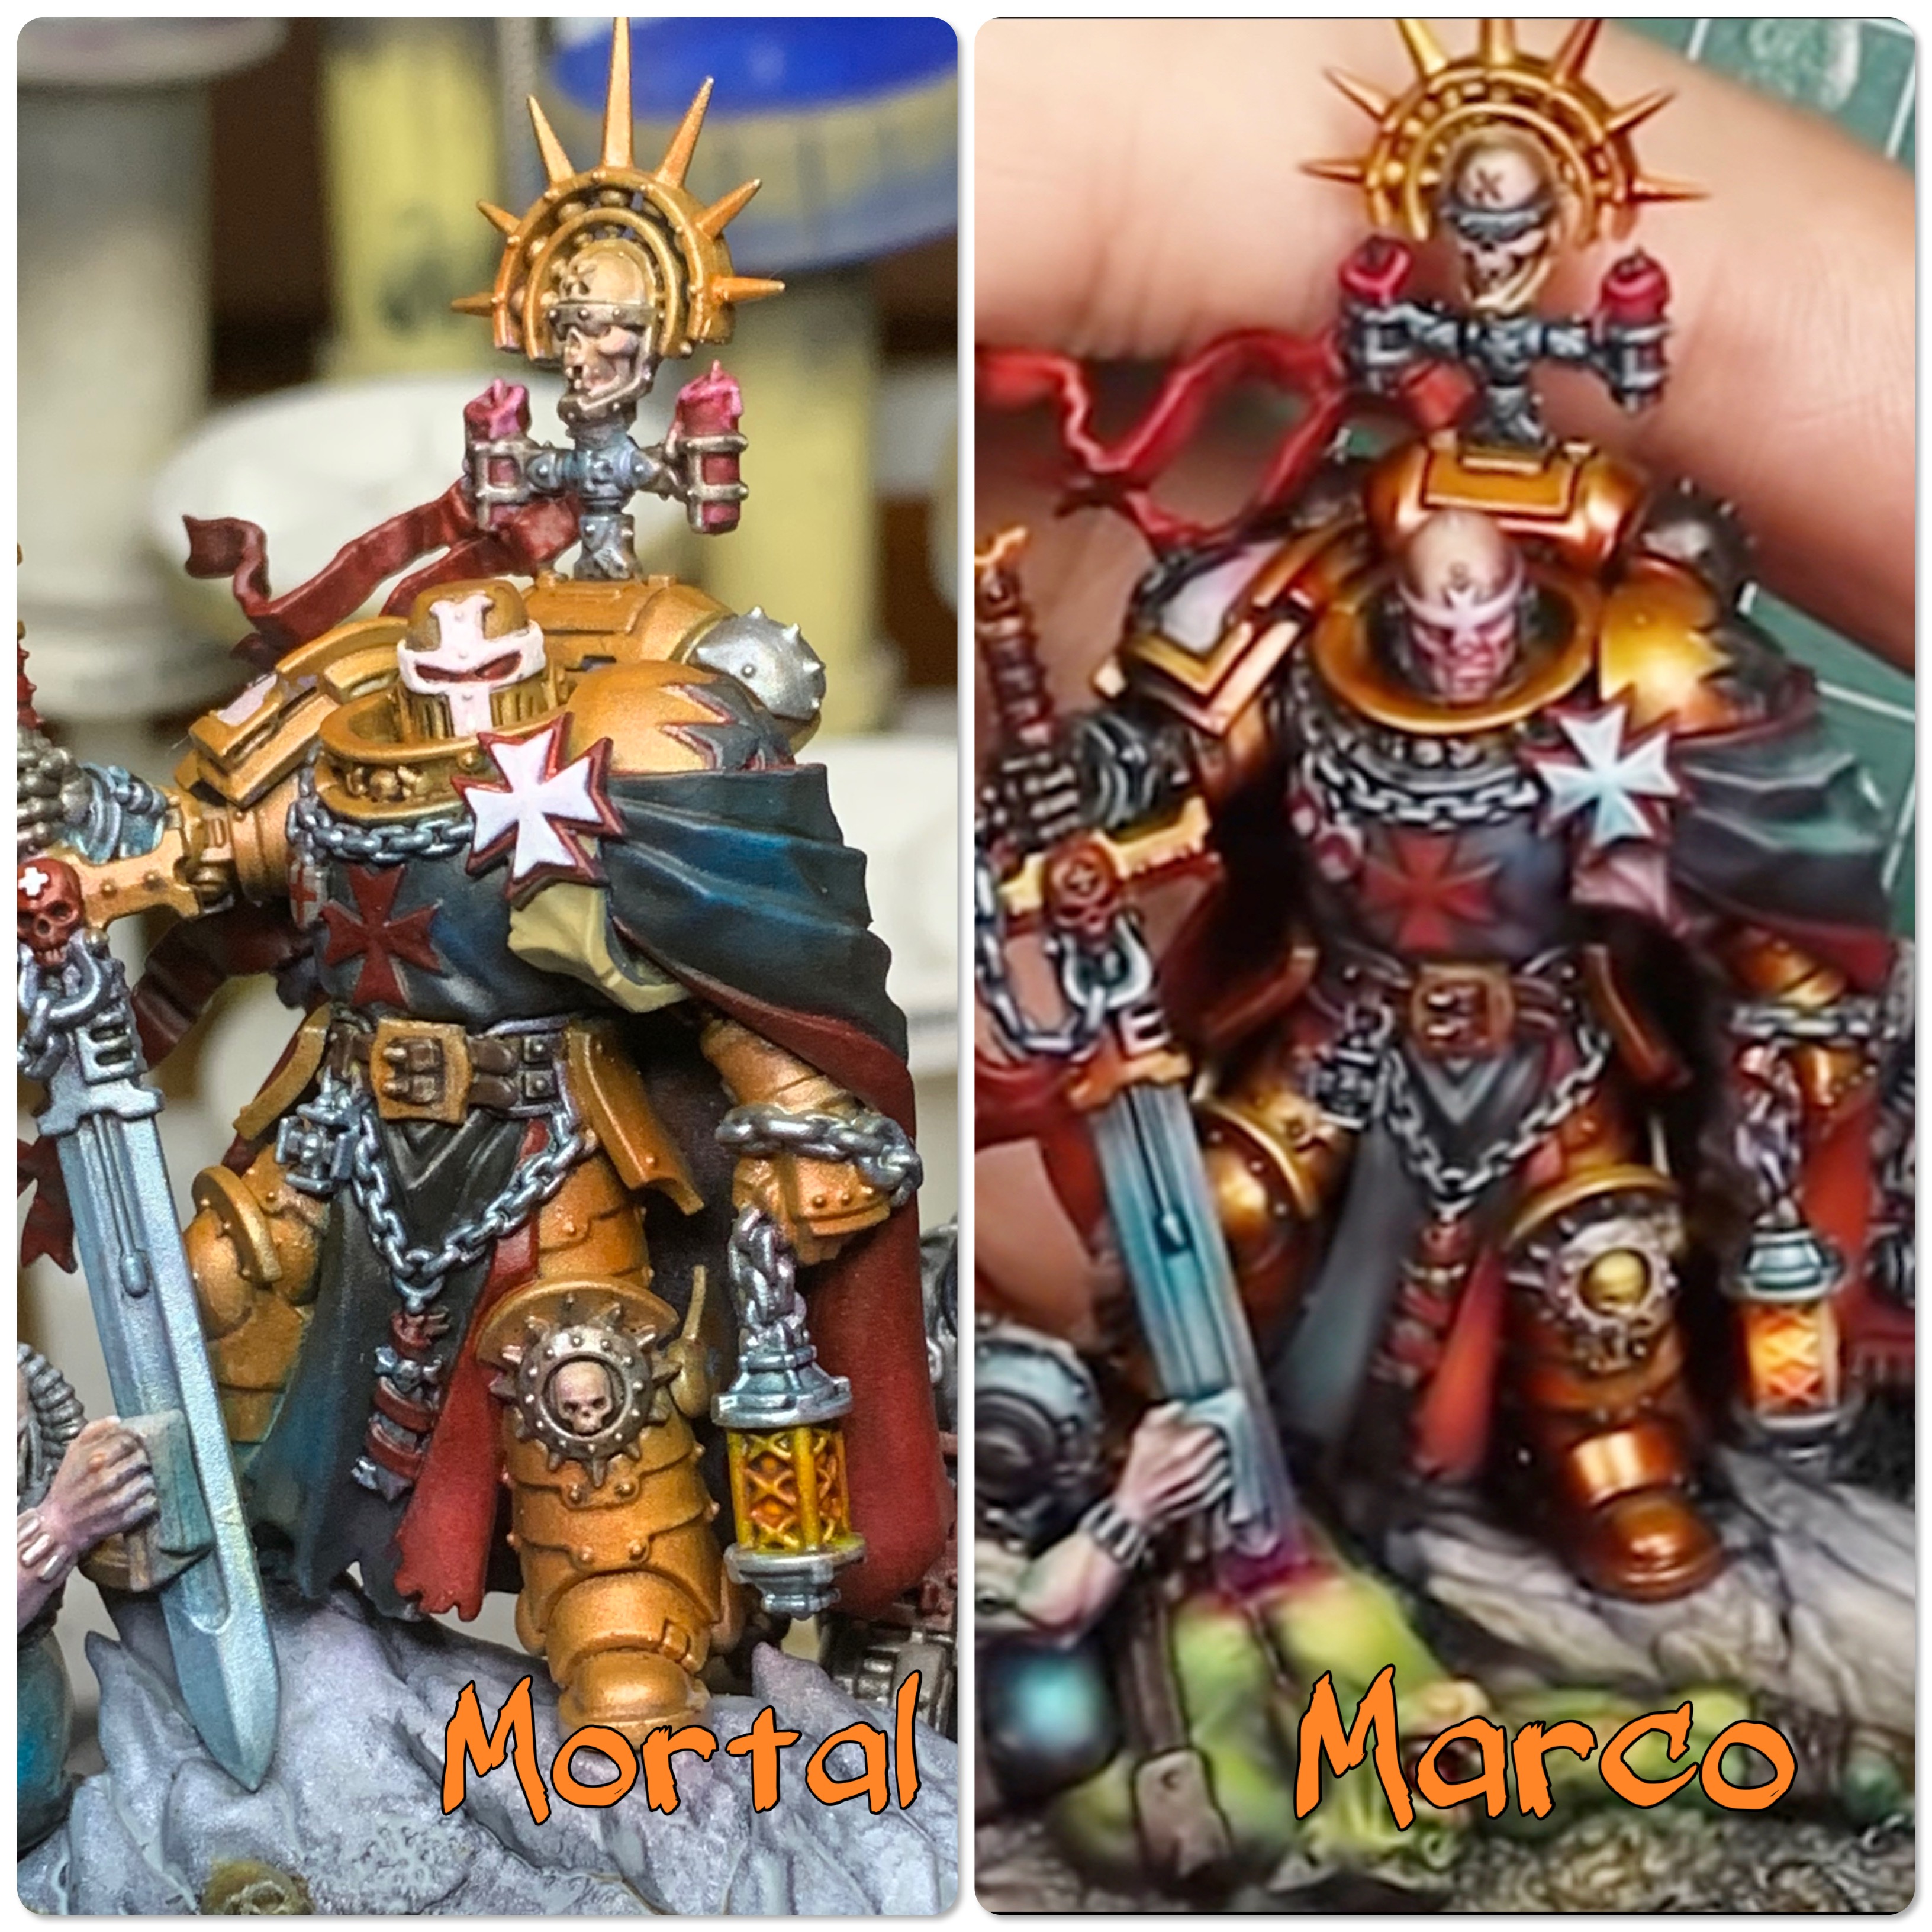
Now this brings us to a really important point about the challenge of following along with a tutorial such as this. Marco painted the model in 4 hours. This video is less than 30 mins long. Even allowing for a 2x speed up of the actual painting, there is a lot you don’t see.
”Sign up to my Patreon for every little line and brushstroke” is the sales pitch.
So it’s clear to me that I am missing steps that are creating this divergence between mine and his models.
Coupled with that, the next stages have Marco reaching for his infinite paint supply – a supply that I am less motivated to replicate:
So, it’s decision time, how to proceed?!
Buy £100 worth of heavy body acrylics and sign up for the Patreon to follow each brushstroke?
Or crack on my own way?
Cue Training Montage!
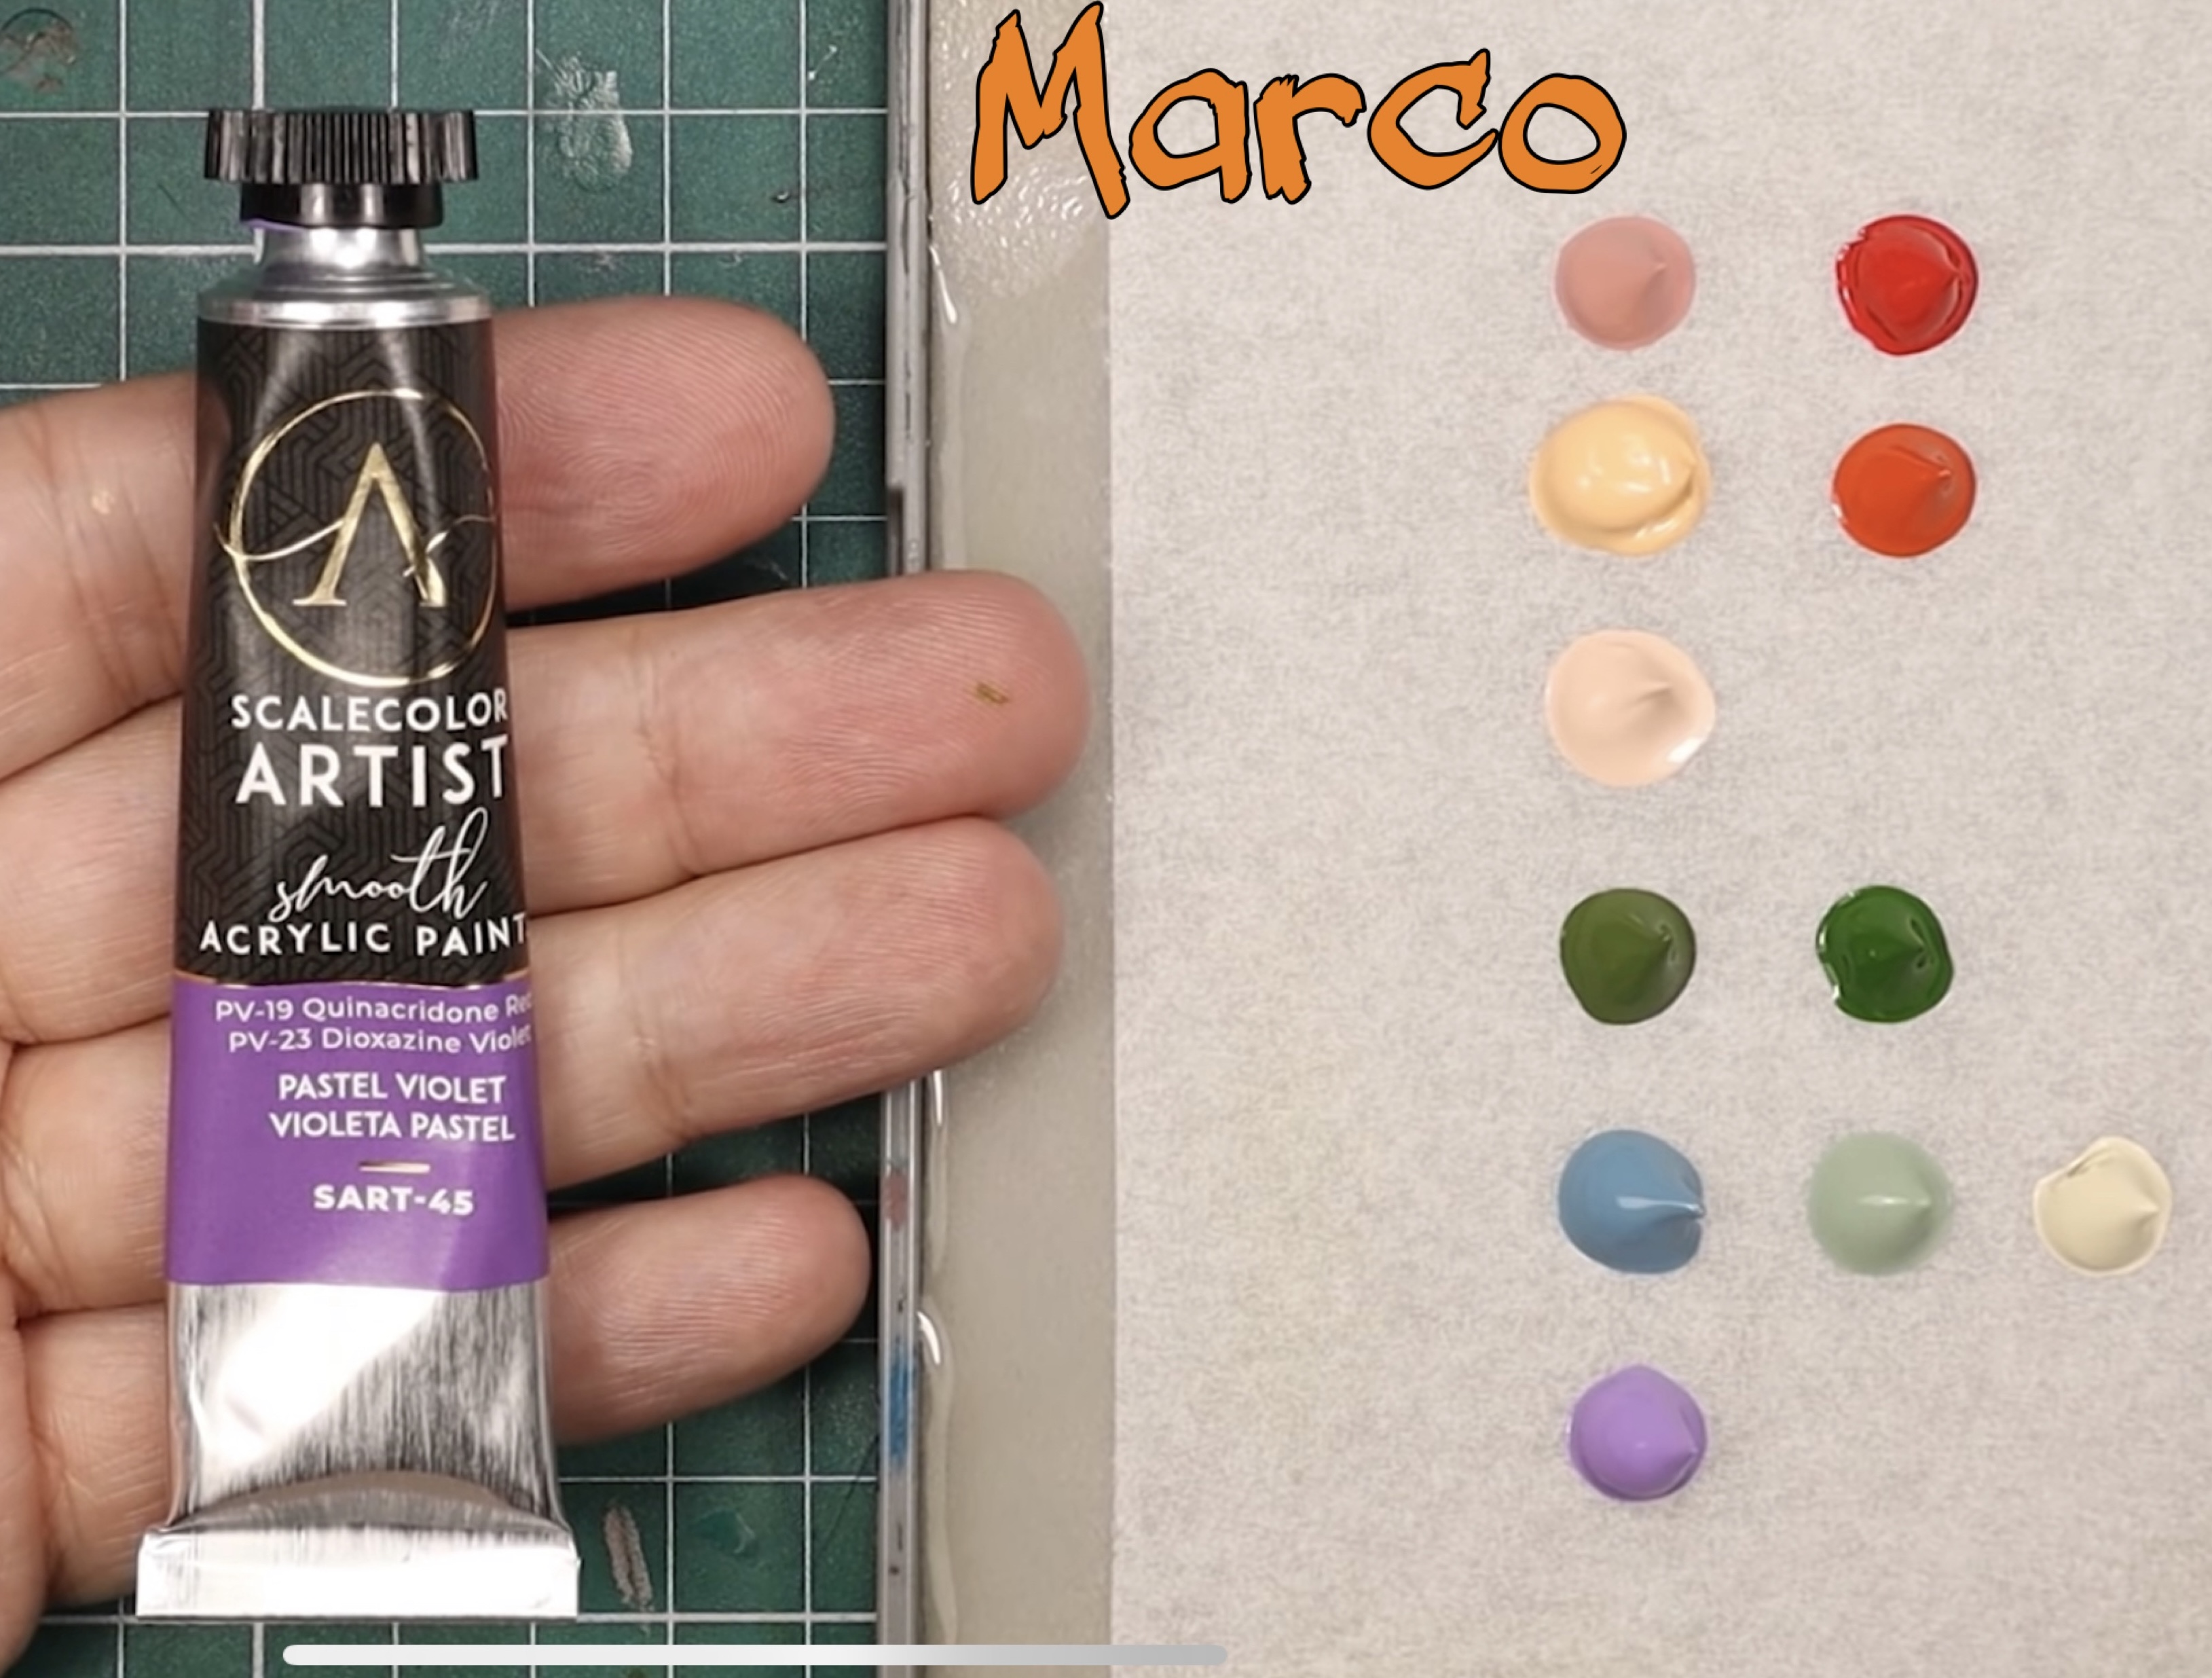
So I had a think, and it occurred to me that I’ve watched a lot of Marco videos. A lot. And to be honest, there is nothing he is doing in this video that he hasn’t shown before. Ok, so he always seems to reach for a new paint range that I don’t own, but the techniques aren’t new and I’ve tried many of them before.
So in a way he’s been preparing me for this for years. I don’t need to copy every brushstroke! I need to use what I have learned, and put it into practise.
Maybe I can’t replicate his style, or reproduce his mastery of the medium, but I can push myself to get as close as I can to the end result.
Time to double my efforts! Cue training montage!

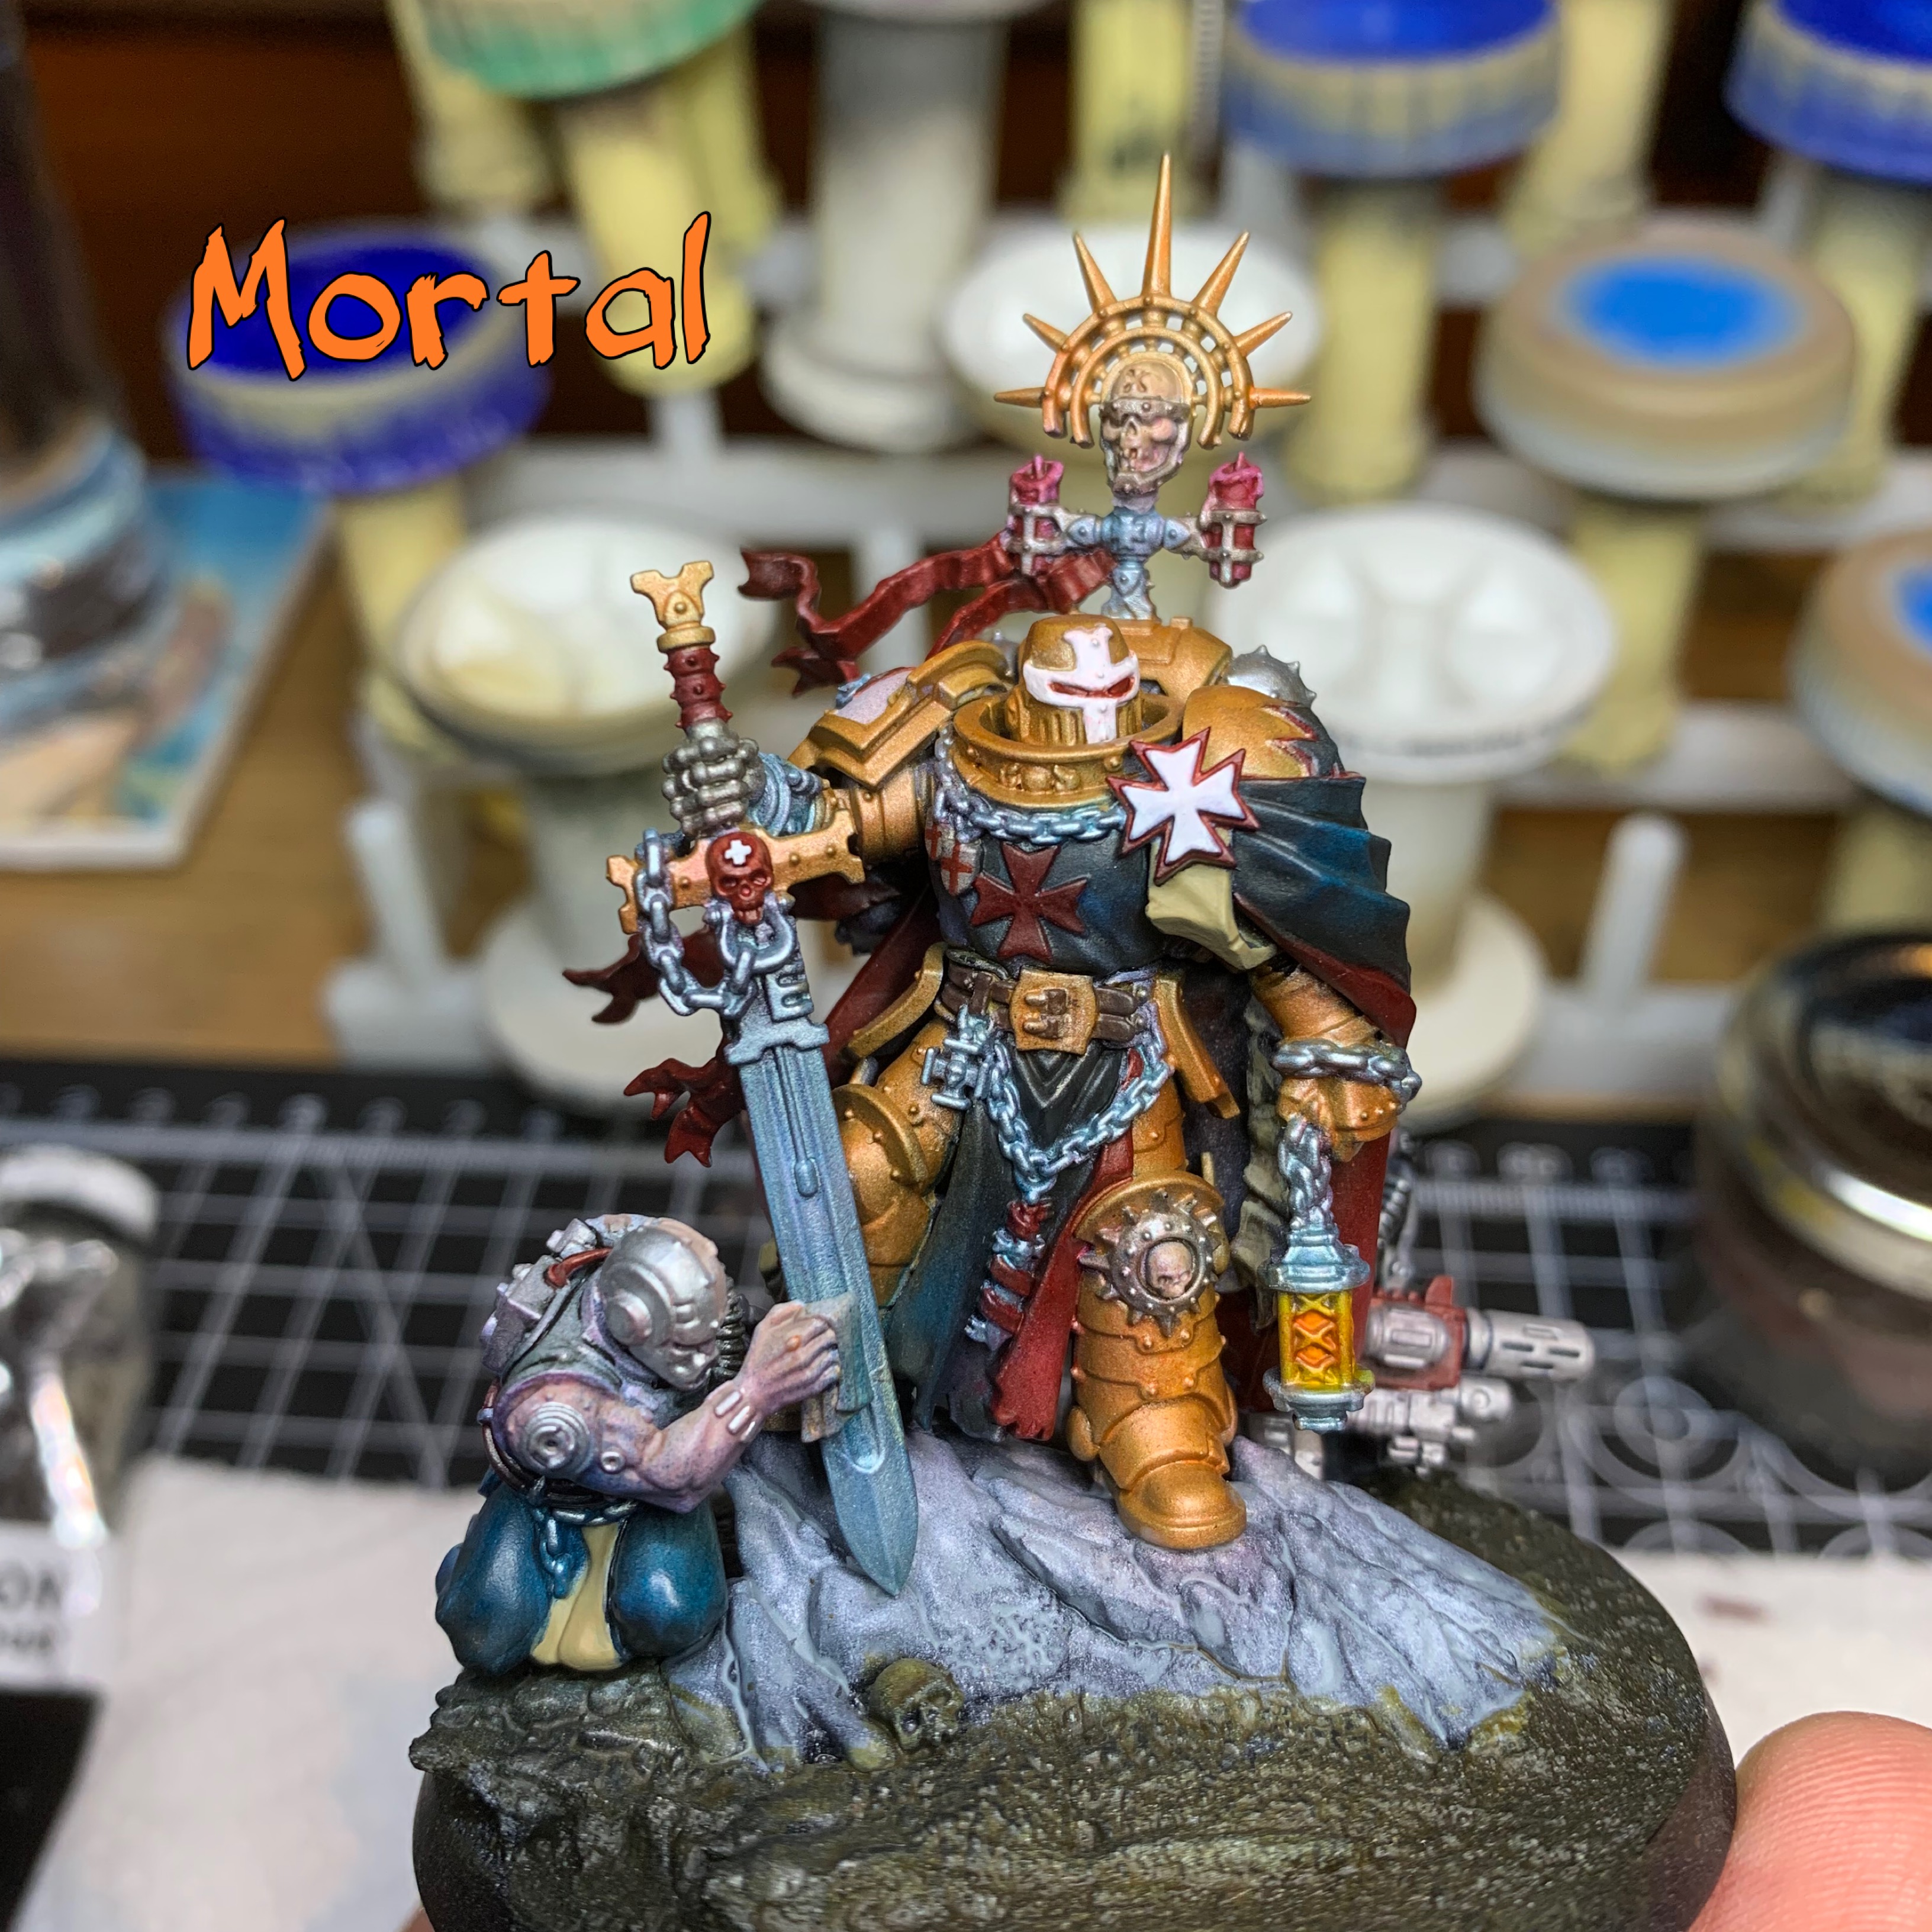
Step 12: No More Steps - Just Paint!
My only reference now is Marco’s final piece. I’m zooming in and using what I see to inform my painting, but I am now free of steps and method, I’m just painting what I see using whatever paints I have to hand, and putting my own spin on it where I feel I prefer something different (for example the colour of the ribbon thing).
I’m motivated to crack on, and it’s getting closer to the result I’m looking for!
The wider shot of where I’m at currently (anything out of this shot hasn’t had attention yet!):
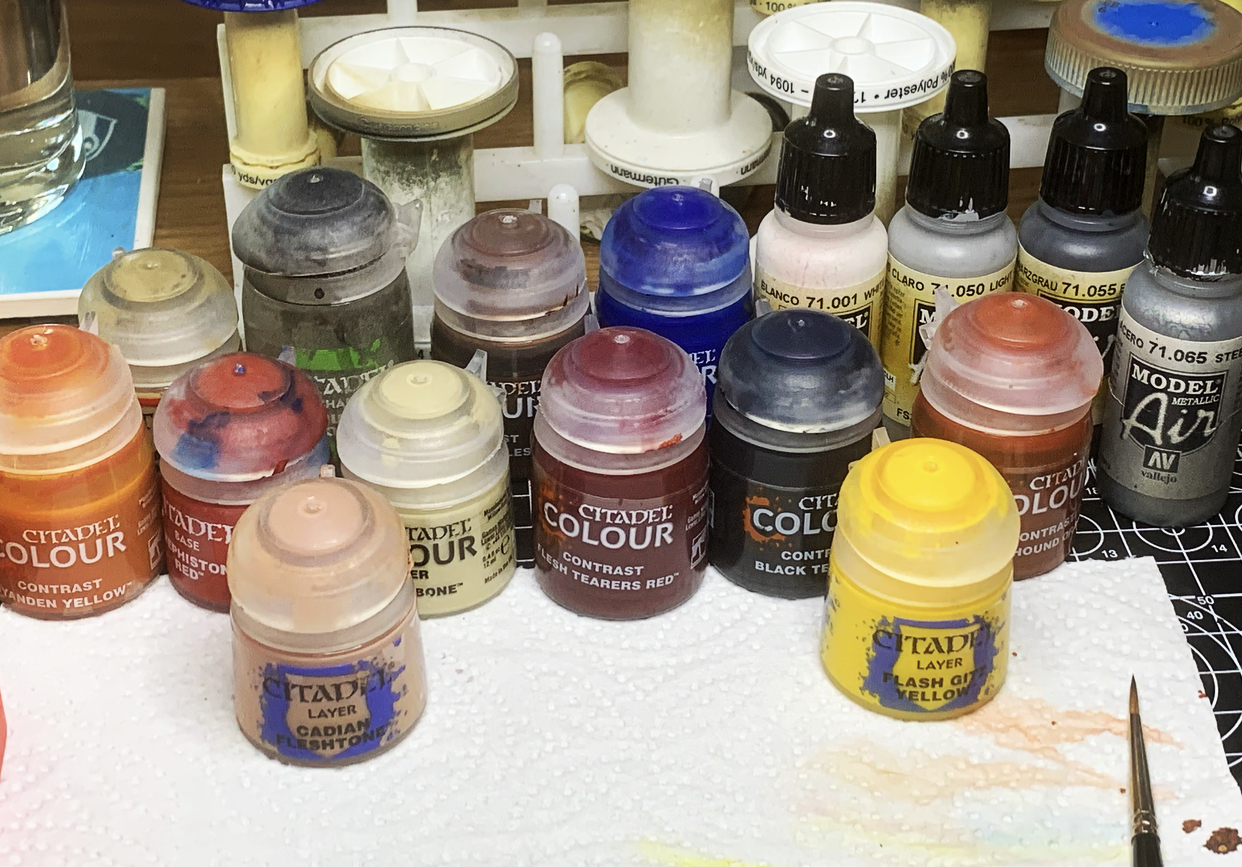
Whilst I am not following ‘steps’ now, I do want to make sure I document what paints I’ve used in these later stages whilst I still have the palette in front of me to jog the memory:
Armour: Marco’s Mix, Gryph-Hound Orange and Vallejo Steel
Black cloak detailing: Vallejo Black-Grey and Light Grey
Silver Highlights – Vallejo Steel
Red Parts: Flesh Tearers Red, Mephiston Red, Cadian Fleshtone (highlight)
Lantern Glow: Gryph-Hound Orange, Flesh Tearers Red, Flash Gita Yellow
Red Cloak – Flesh Tearers Red (glaze), Cadian Fleshtone (highlight)
Beige Ribbon: Zandri Dust, Guilliman Flesh (wash), Ushabti Bone (highlight)
All white parts and spot highlights: Vallejo White

It’s all about the Base, no Rebels
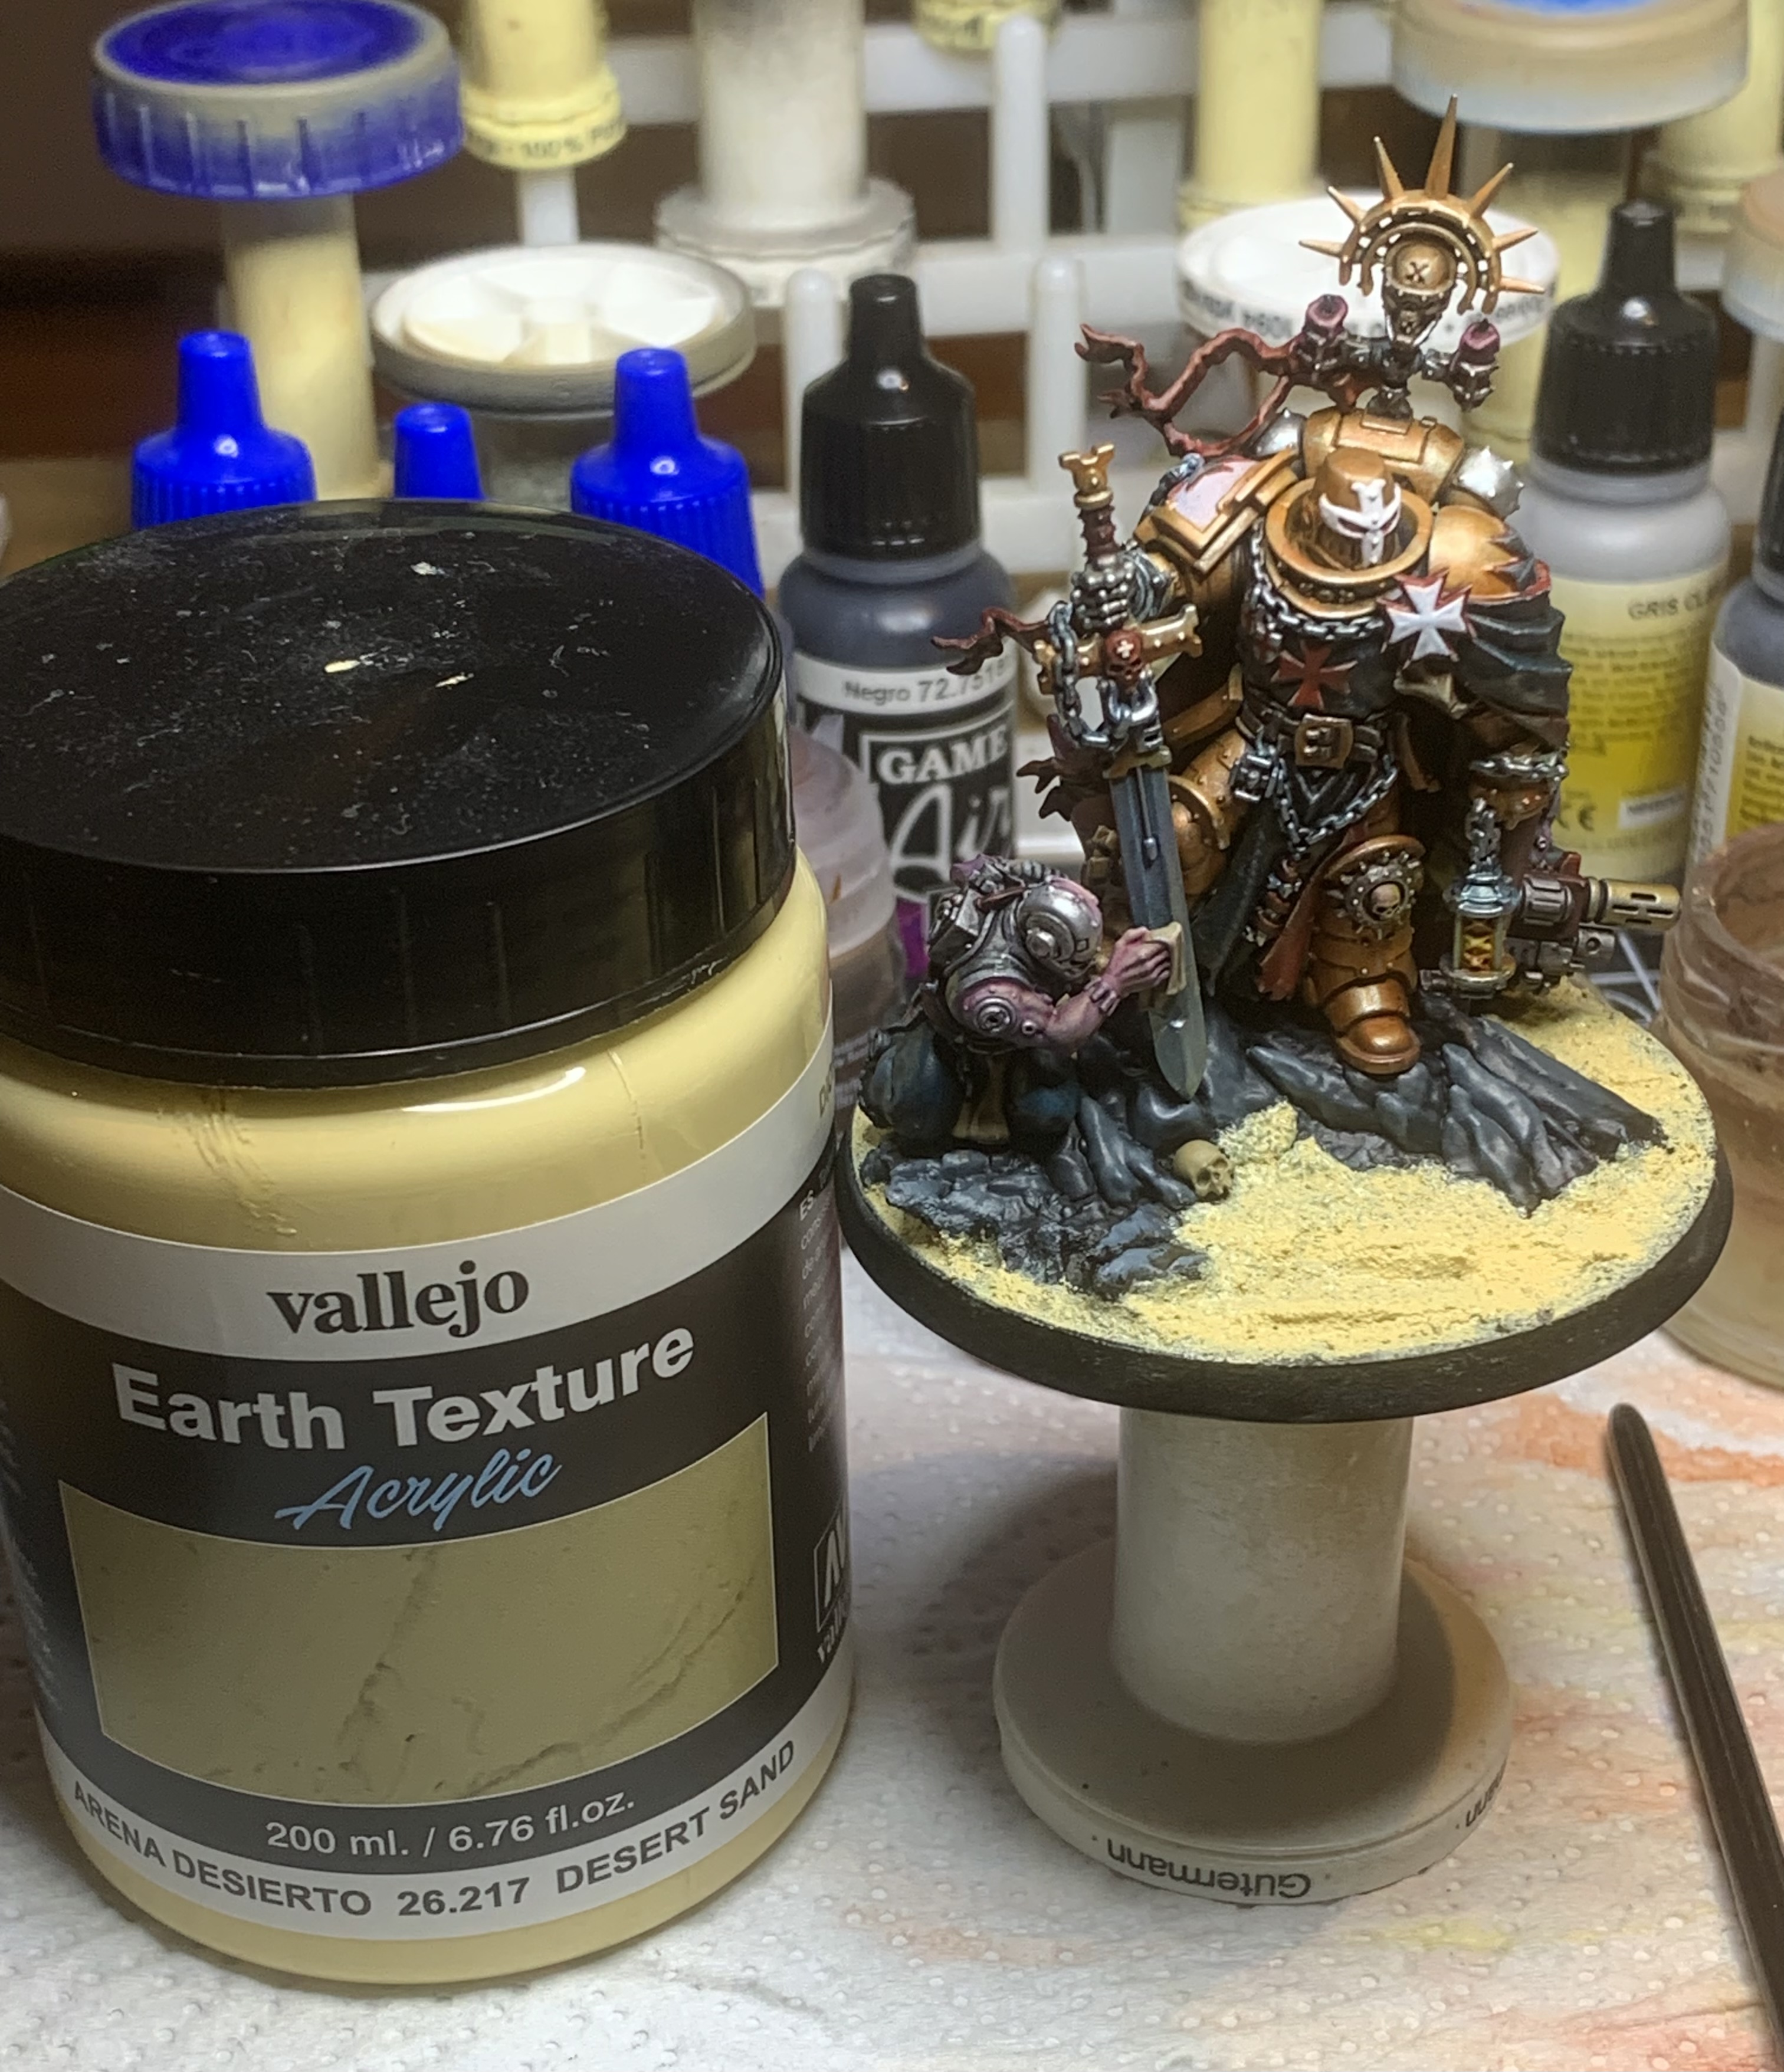
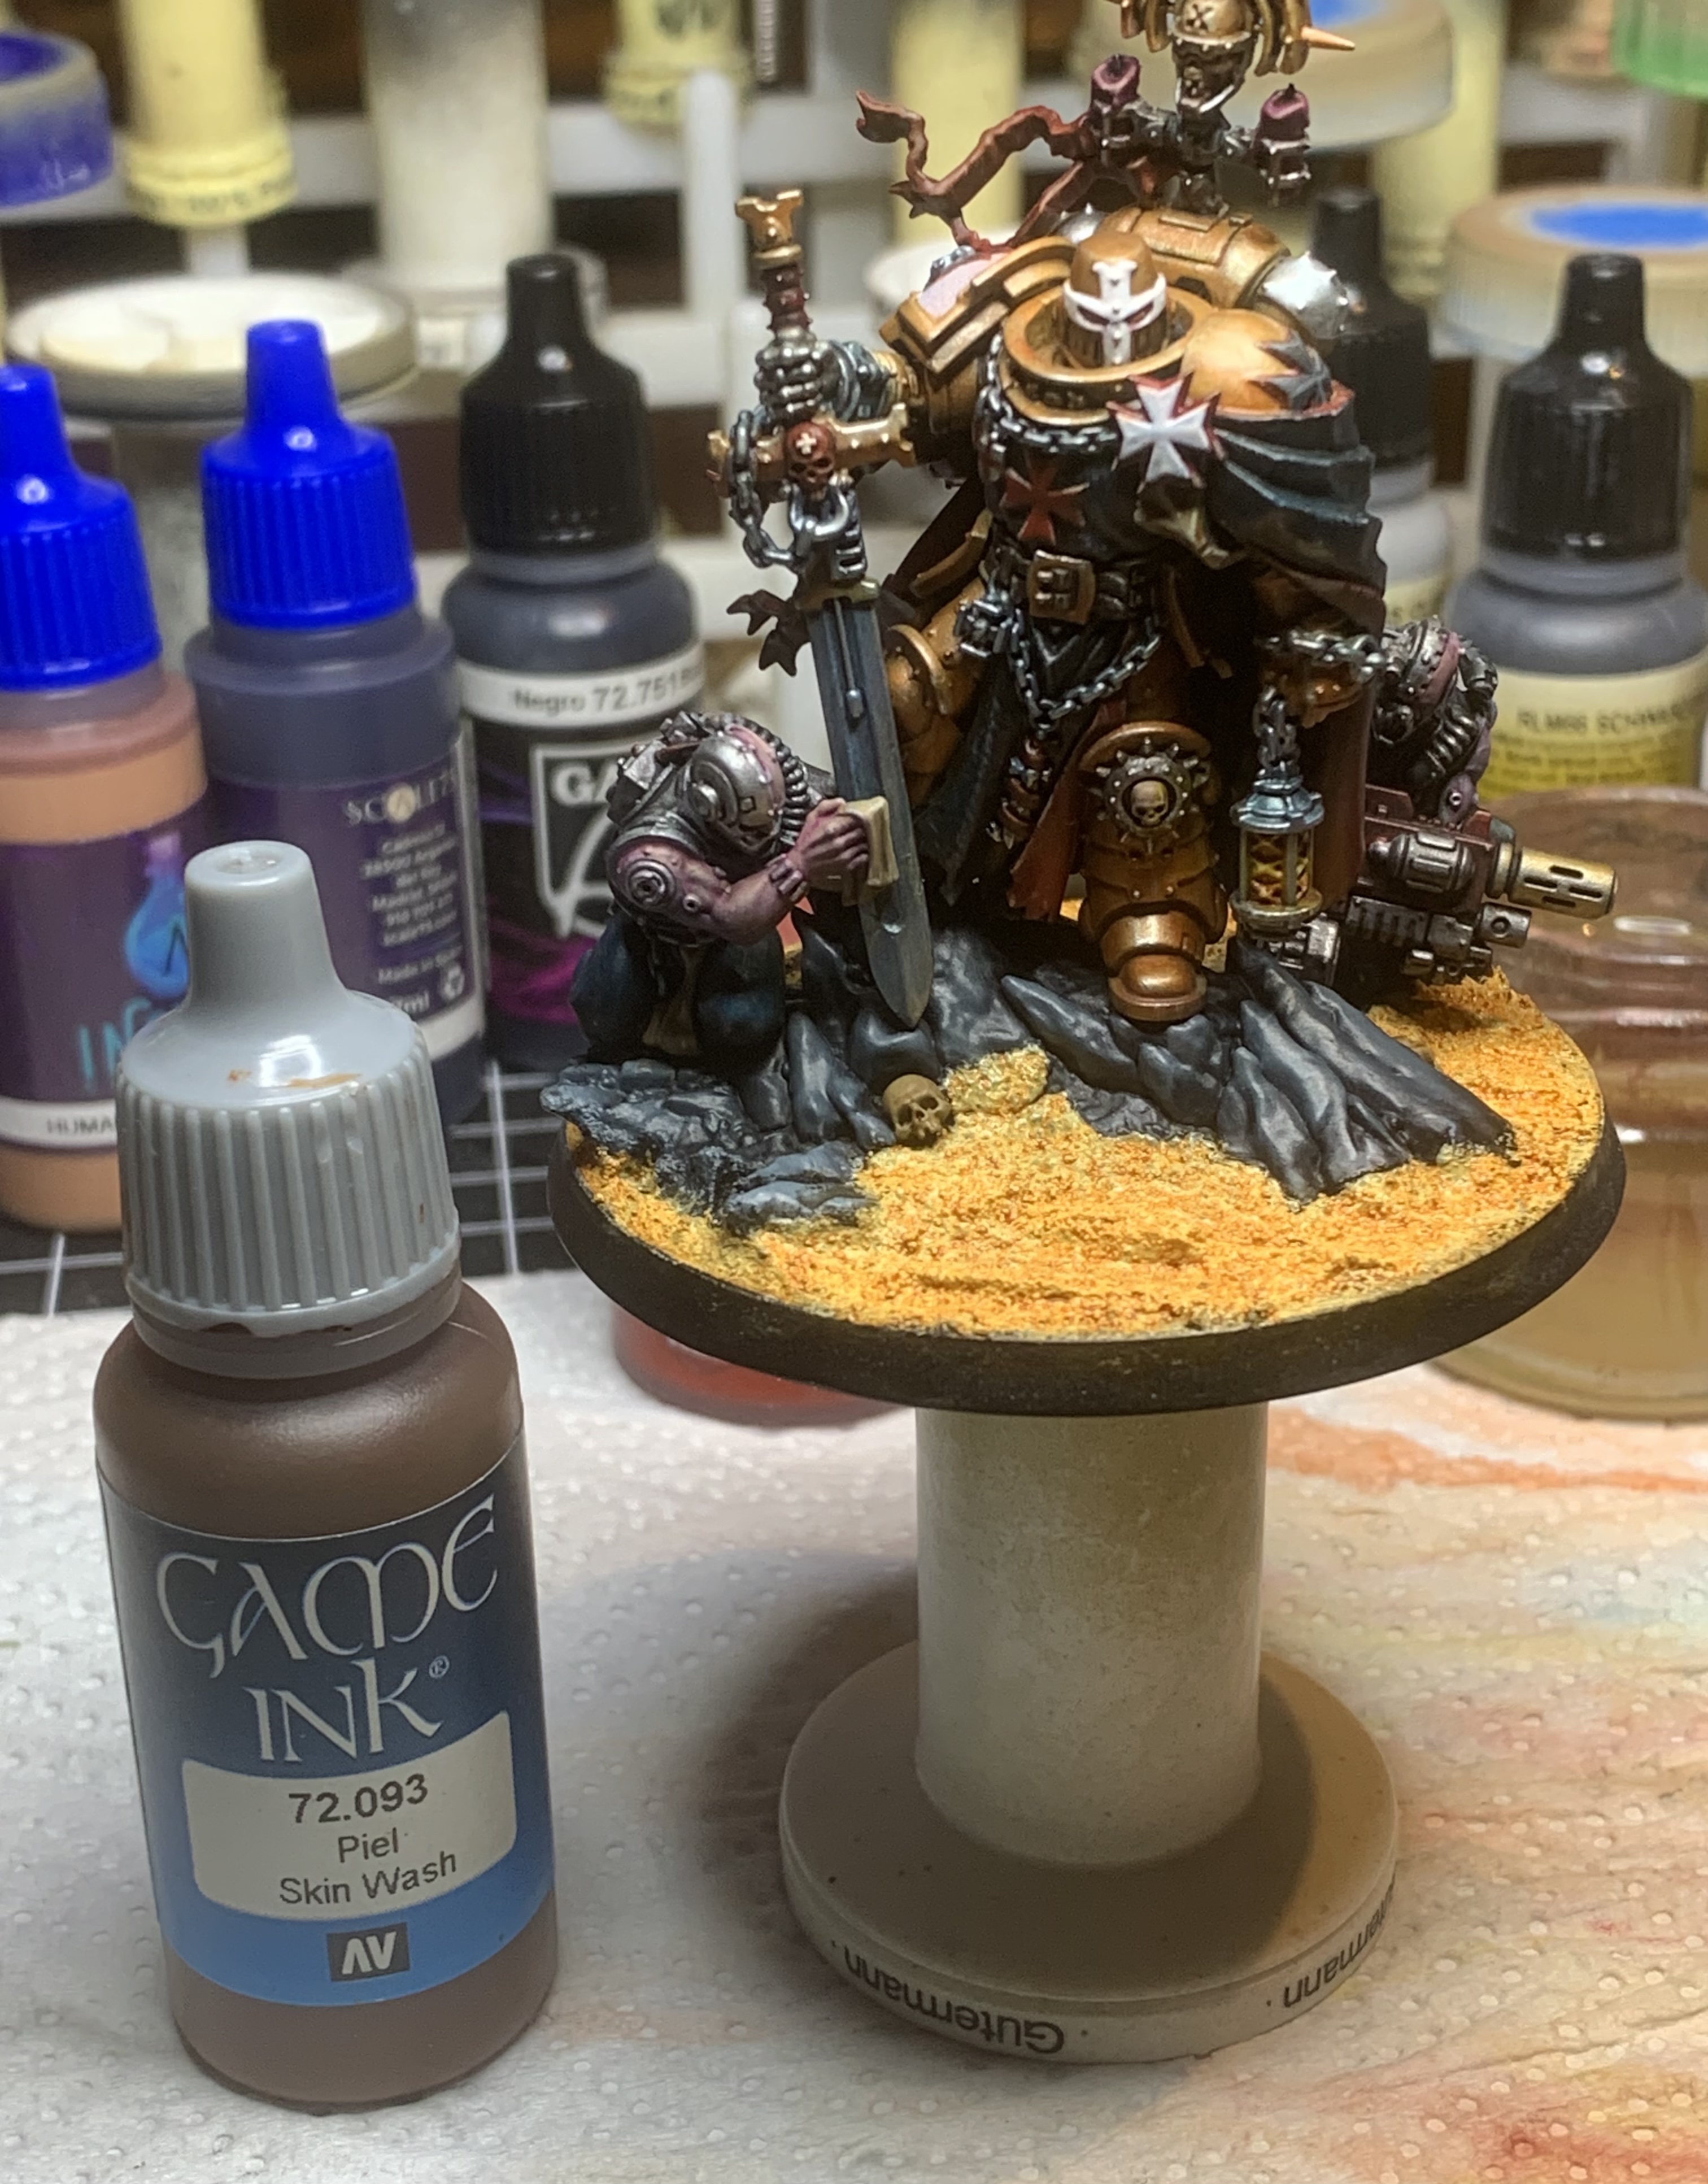
I’ve now got to the point where I’d like to see it with the base done to get the overall effect and identify any last tweaks.
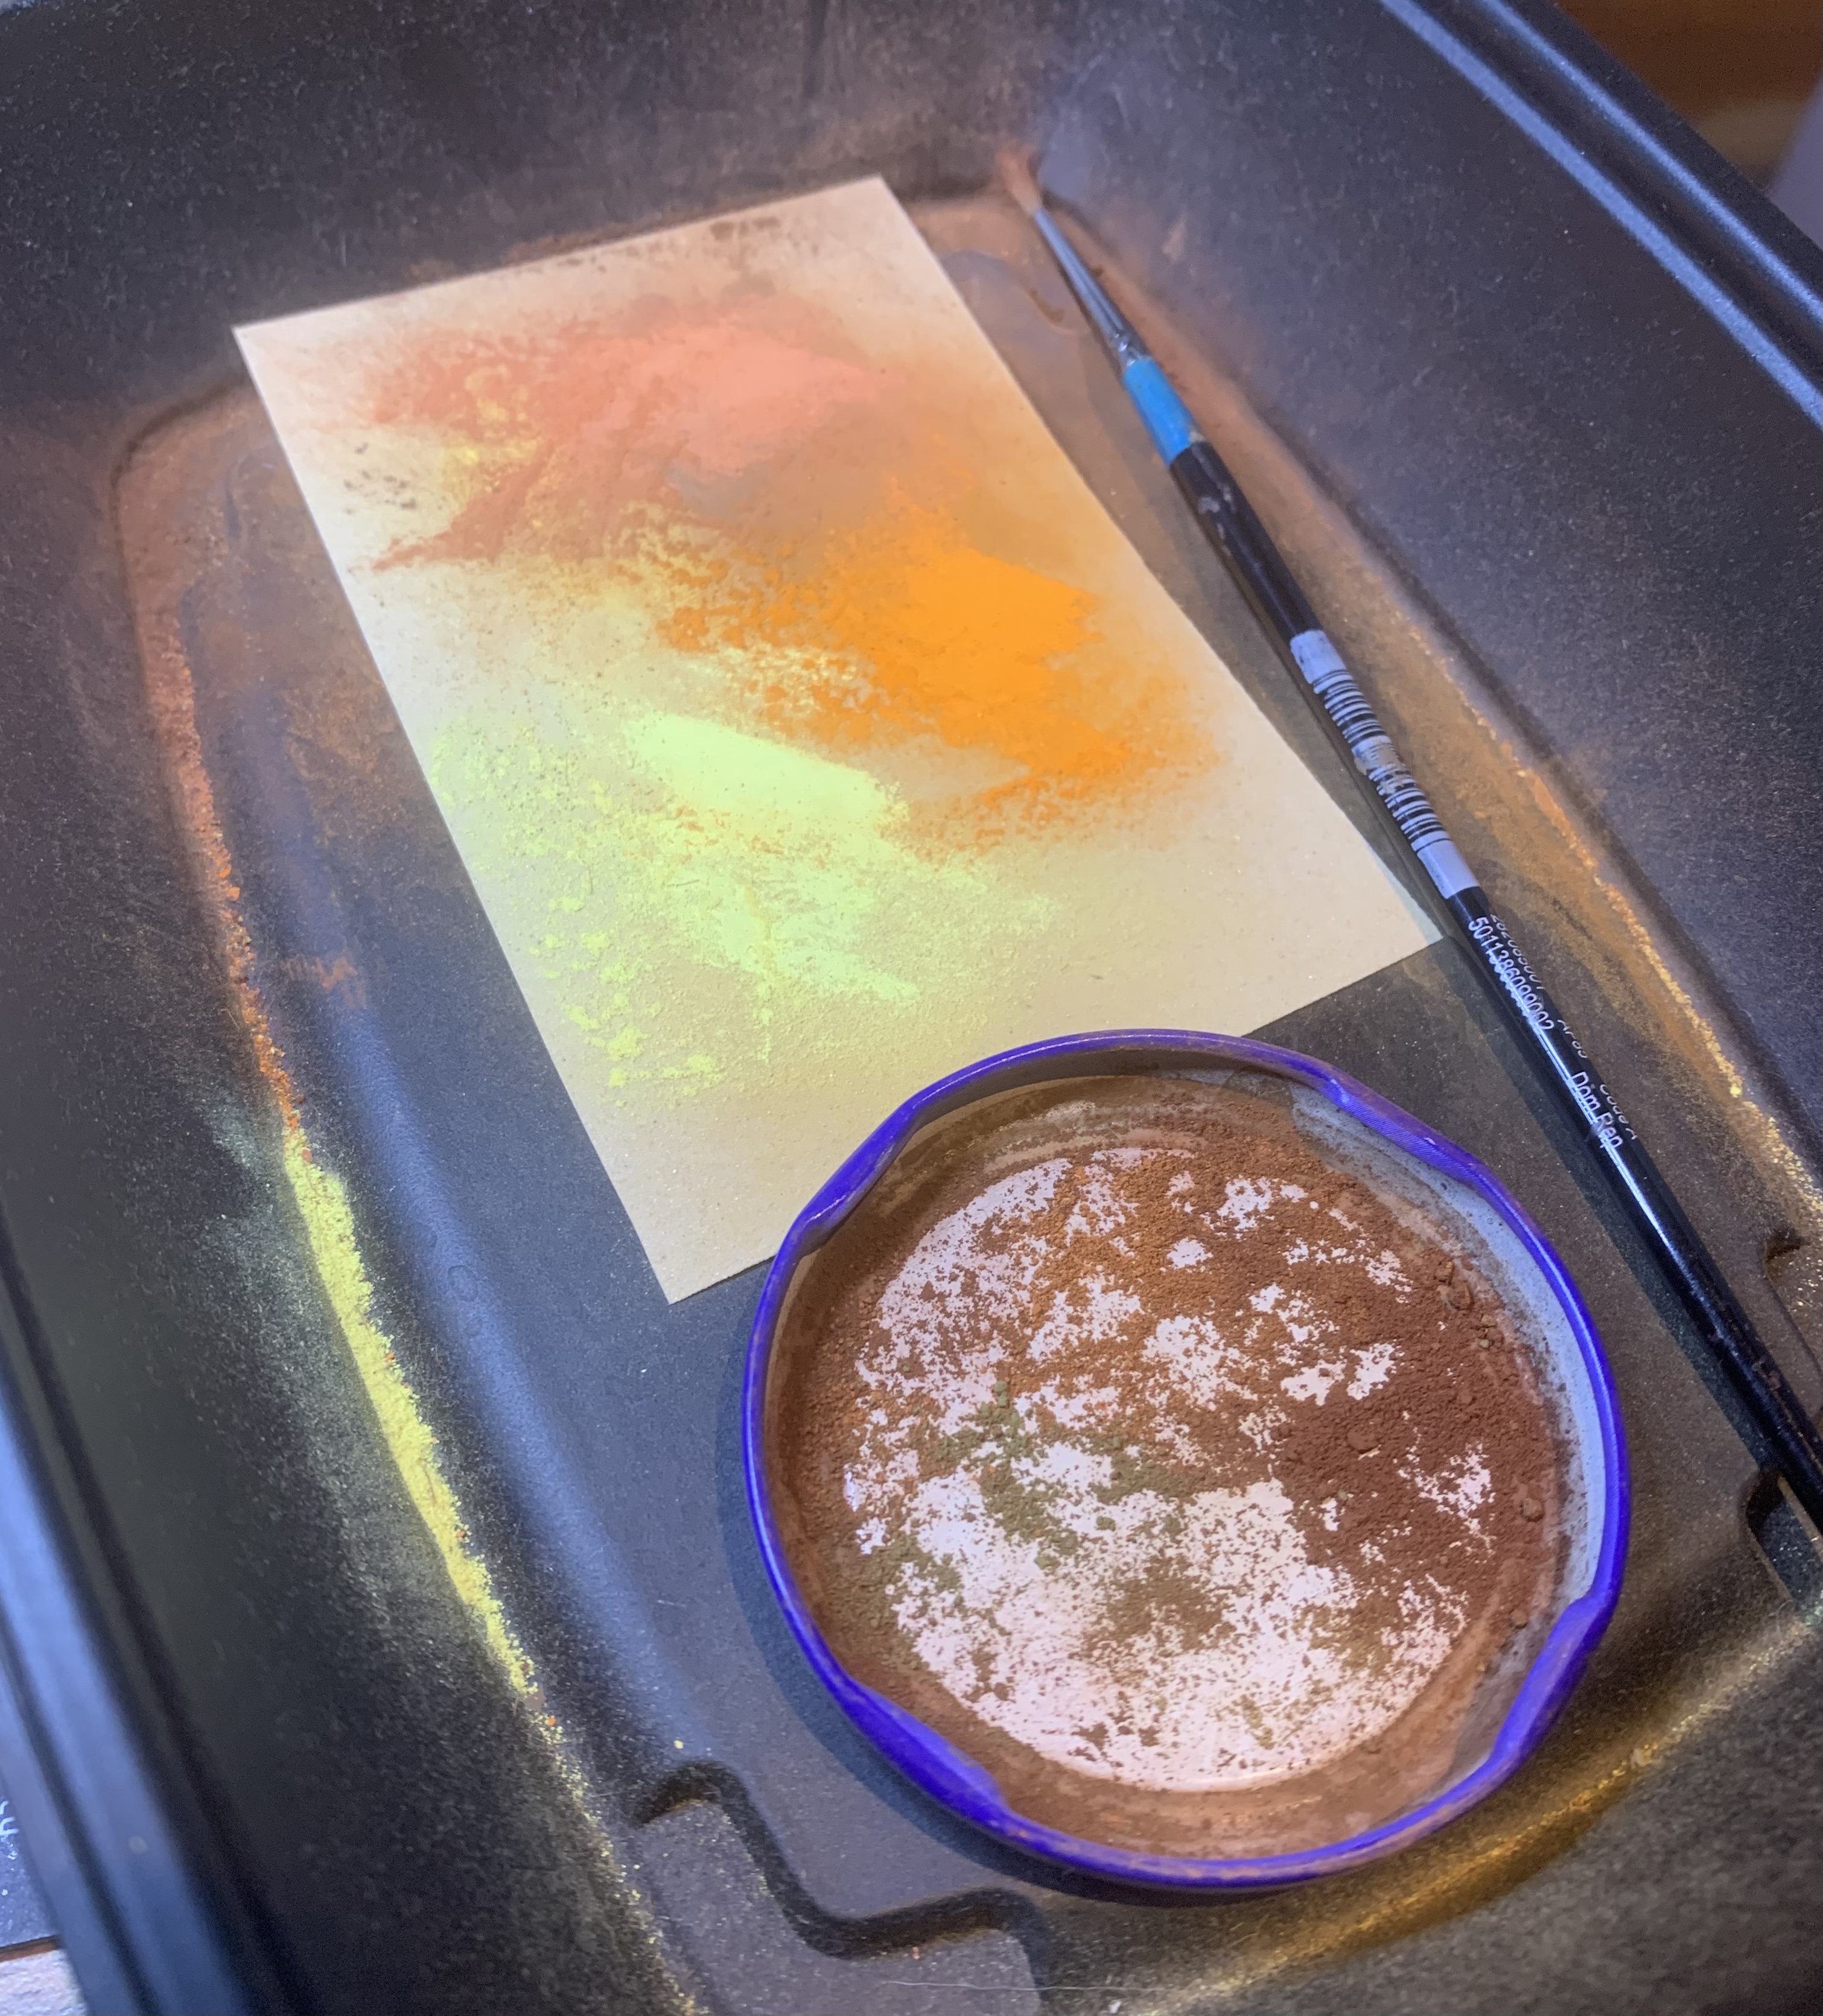
Simple process of texture paste, wash, and weathering powders (some of which are ground pastels).


![Play WW2 Commando Operations With Butcher & Bolt [Updated]](https://images.beastsofwar.com/2026/03/relaunch-600-338.jpg)


