


![1918 Spring Offensive Wargame | Full Rules Overview with John & Gerry (WW1 Tabletop Game) [7 Days Early Access]](https://images.beastsofwar.com/2026/03/unboxing-warfulcrum-games-1918-spring-offensive-review-coverimage1-225-127.jpeg)


Ballroom Blitz


Recommendations: 267
About the Project
If you saw my Moonstone project from last year, you'll know how much I love it. Although I finished my troupe, I still had models I wanted to paint. So I'm going to paint them and make a diorama, just for fun.
Related Game: Moonstone
Related Company: Goblin King Games
Related Genre: Fantasy
This Project is Active
Tiny Roast Chickens
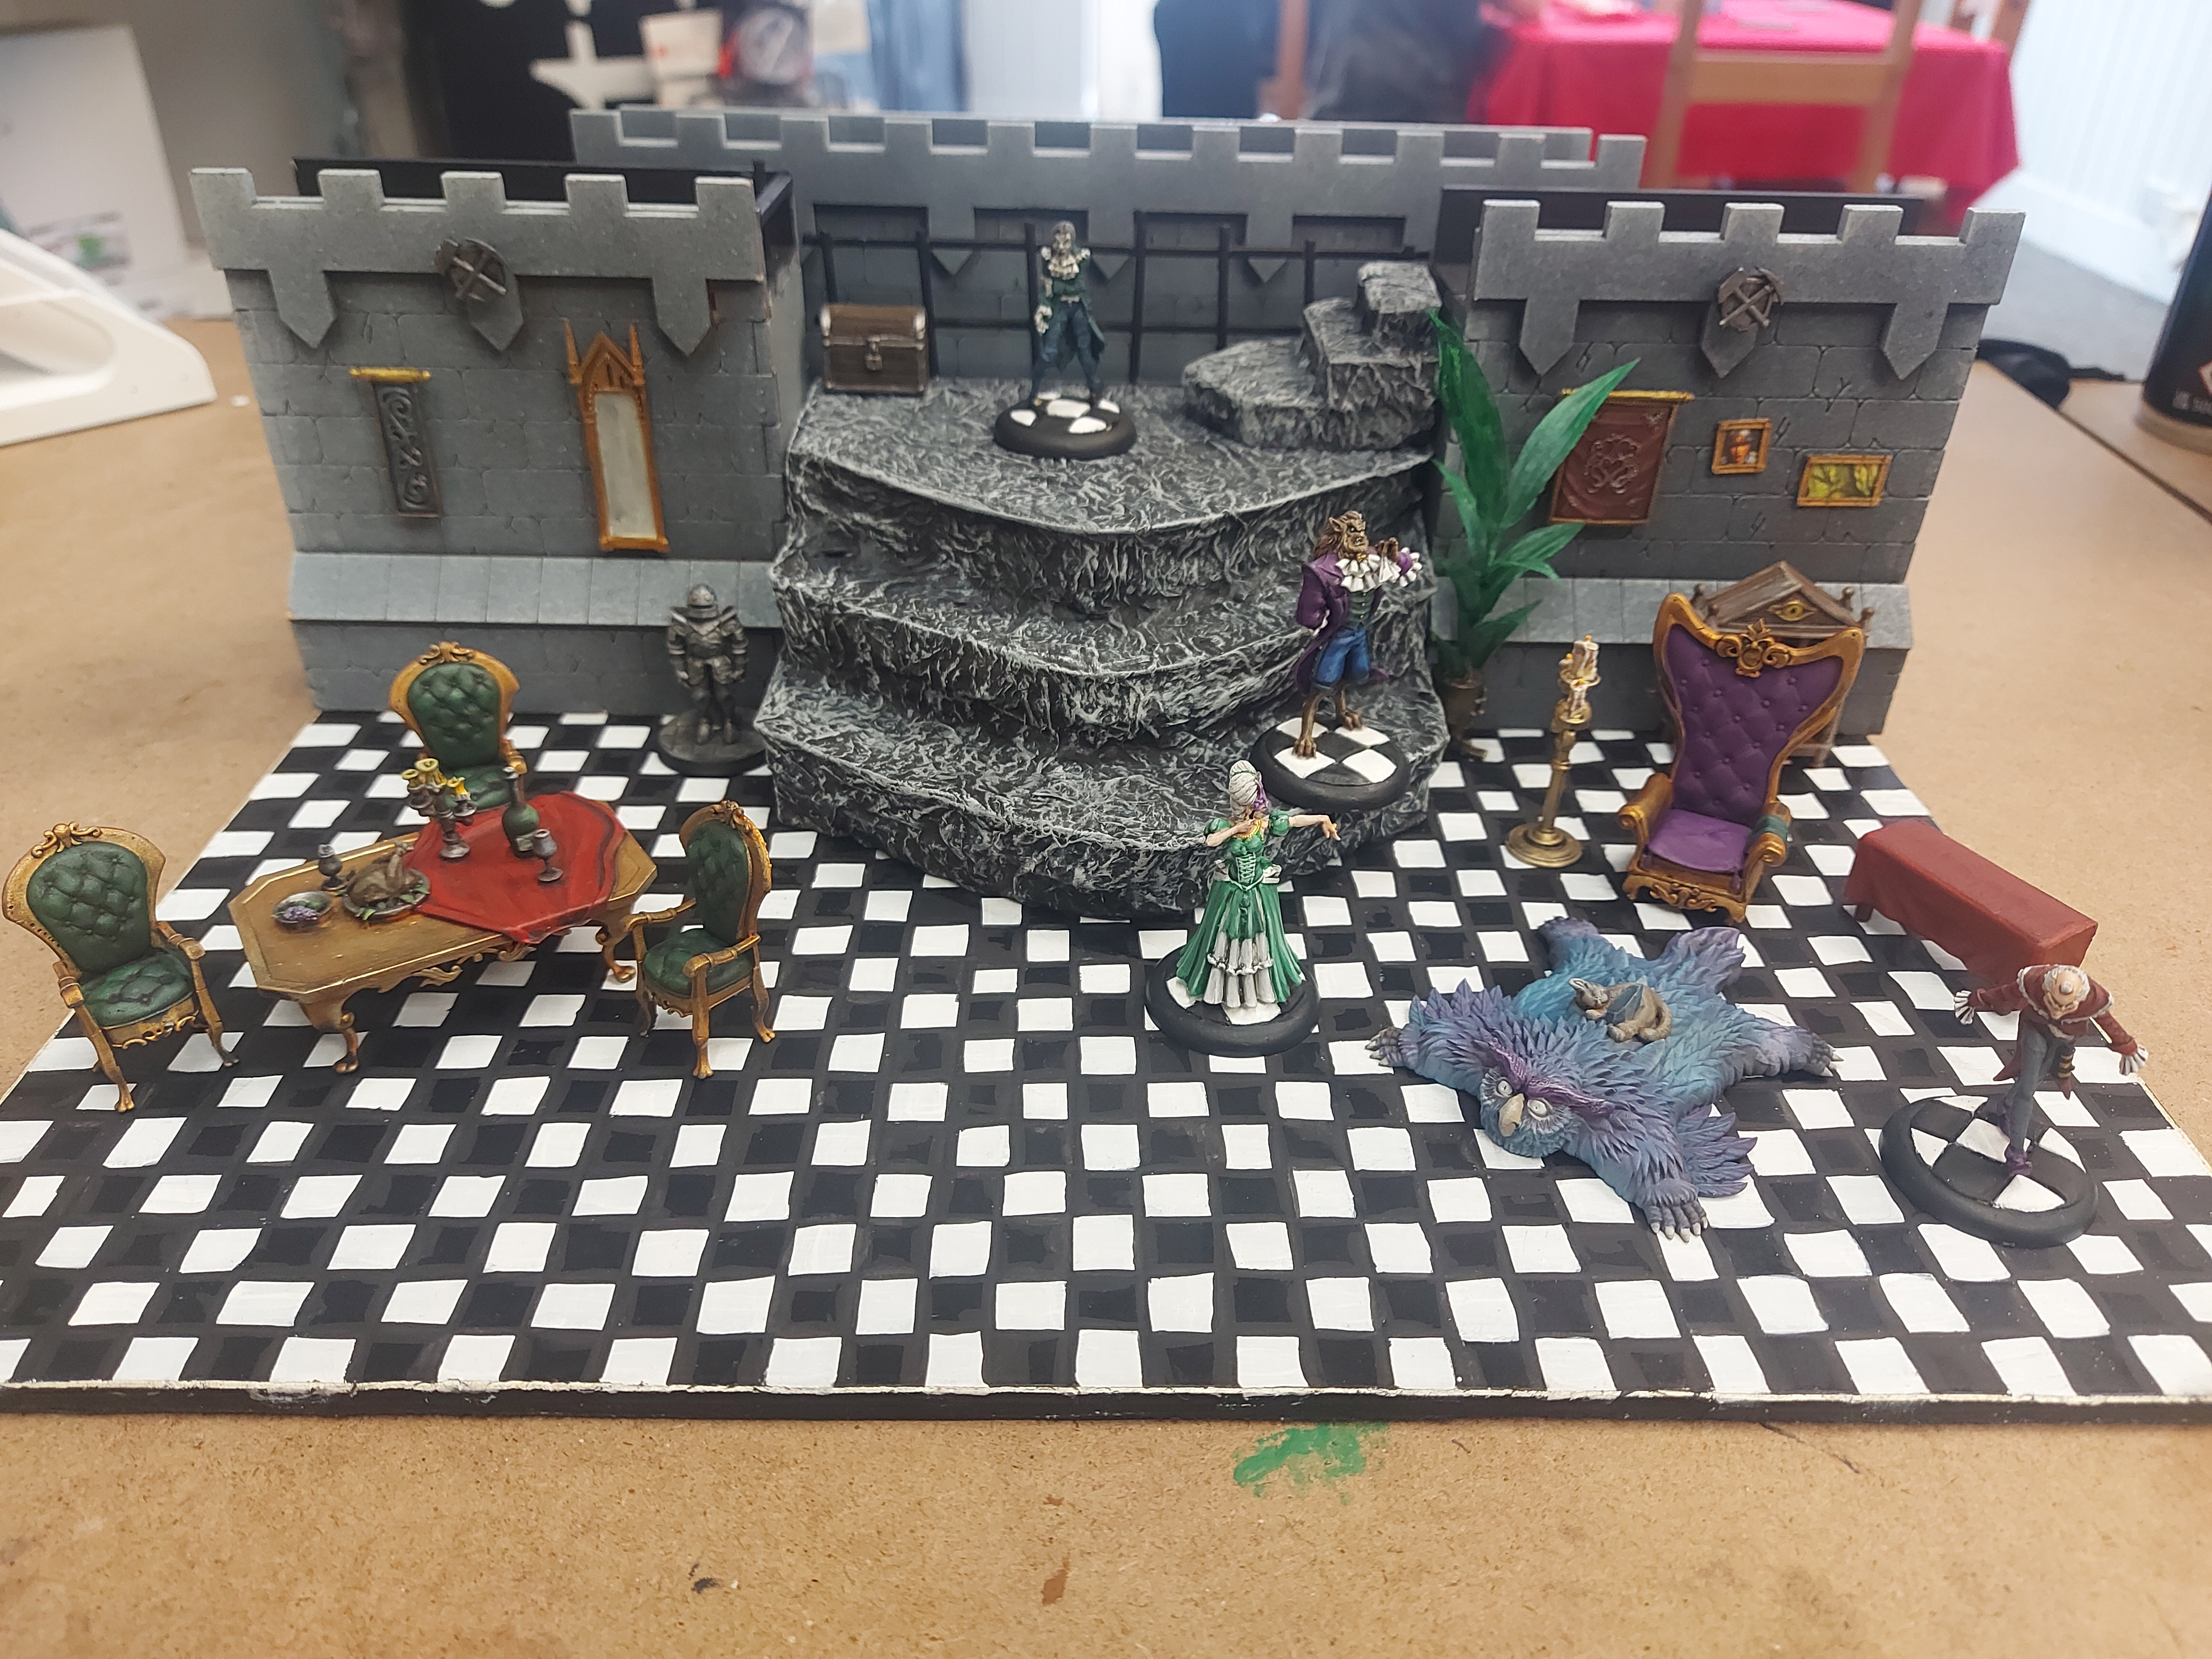
The ballroom was still looking a bit bare in places, so it was time to get the feast installed, along with a couple of other extra little details.
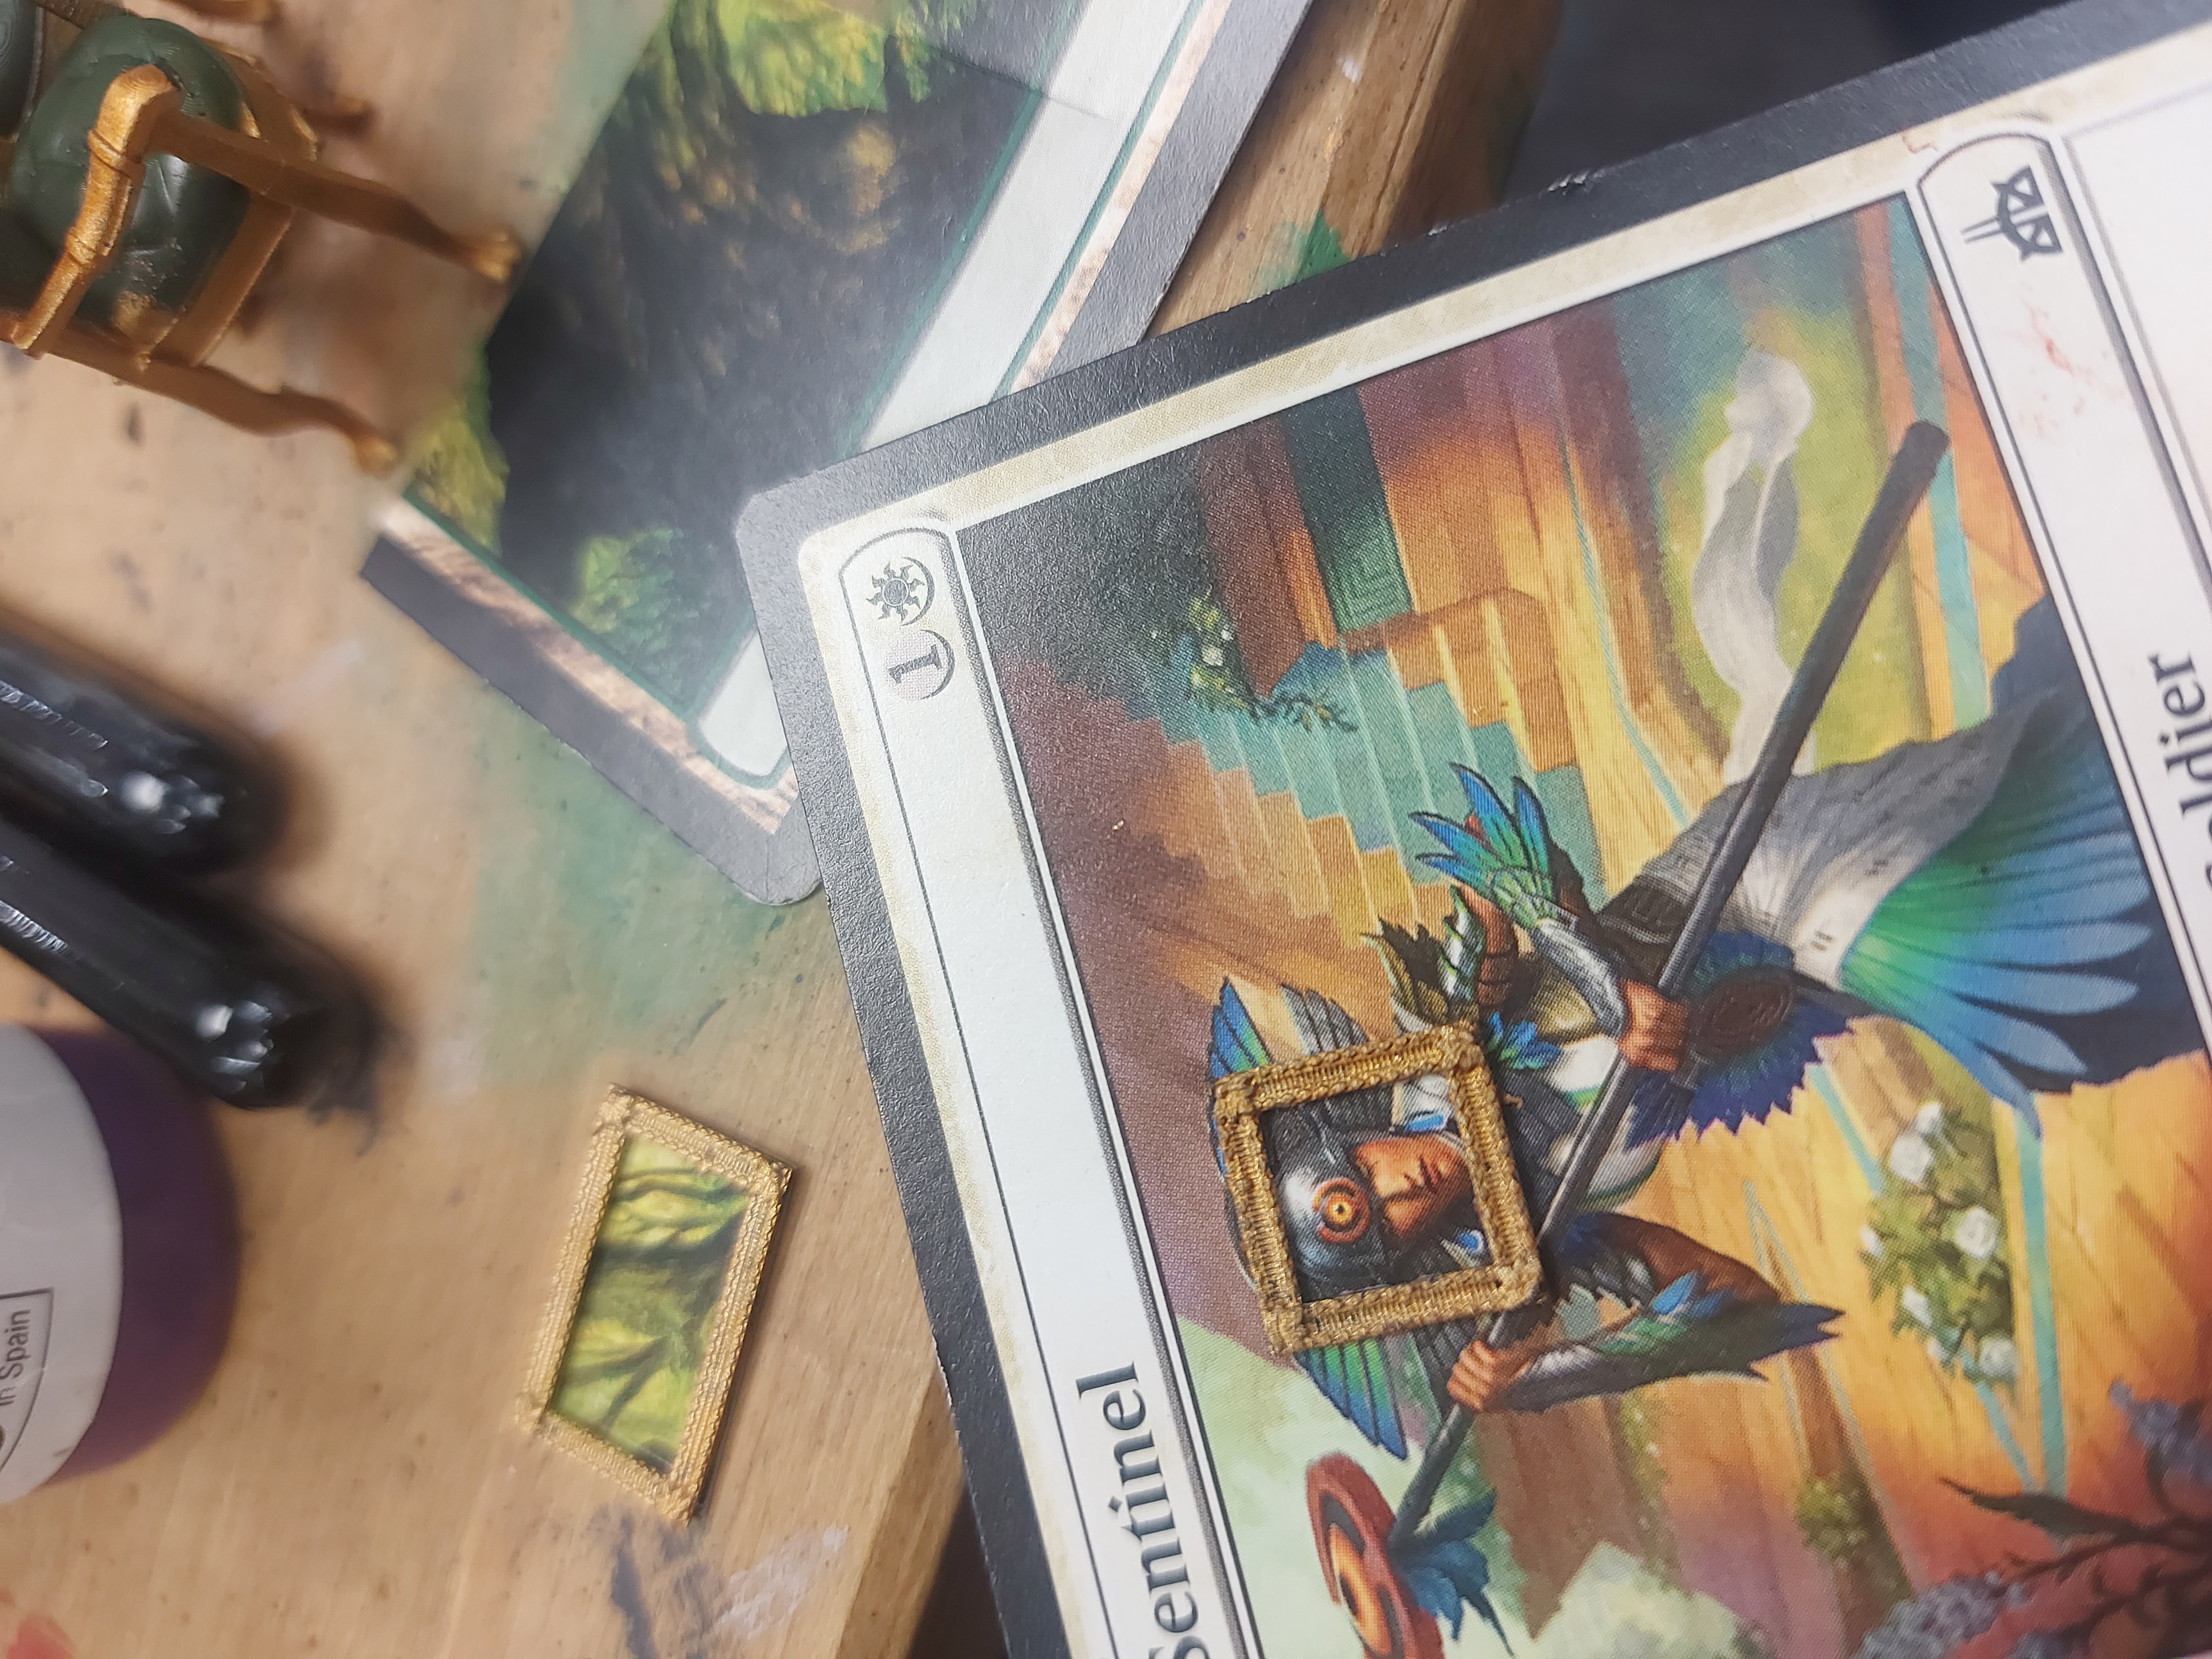
Amongst them were 2 tiny picture frames. I painted them gold and then glued them onto some old Magic cards to make paintings. Once dry, I cut them out and stuck them to the wall.
The dining table and chairs were fun to work on. I’d never painted a teeny roast chicken before. ? Again, I stuck to those rich, jewel colours to tie in with The Beasts taste in interior decor.
Tree Time
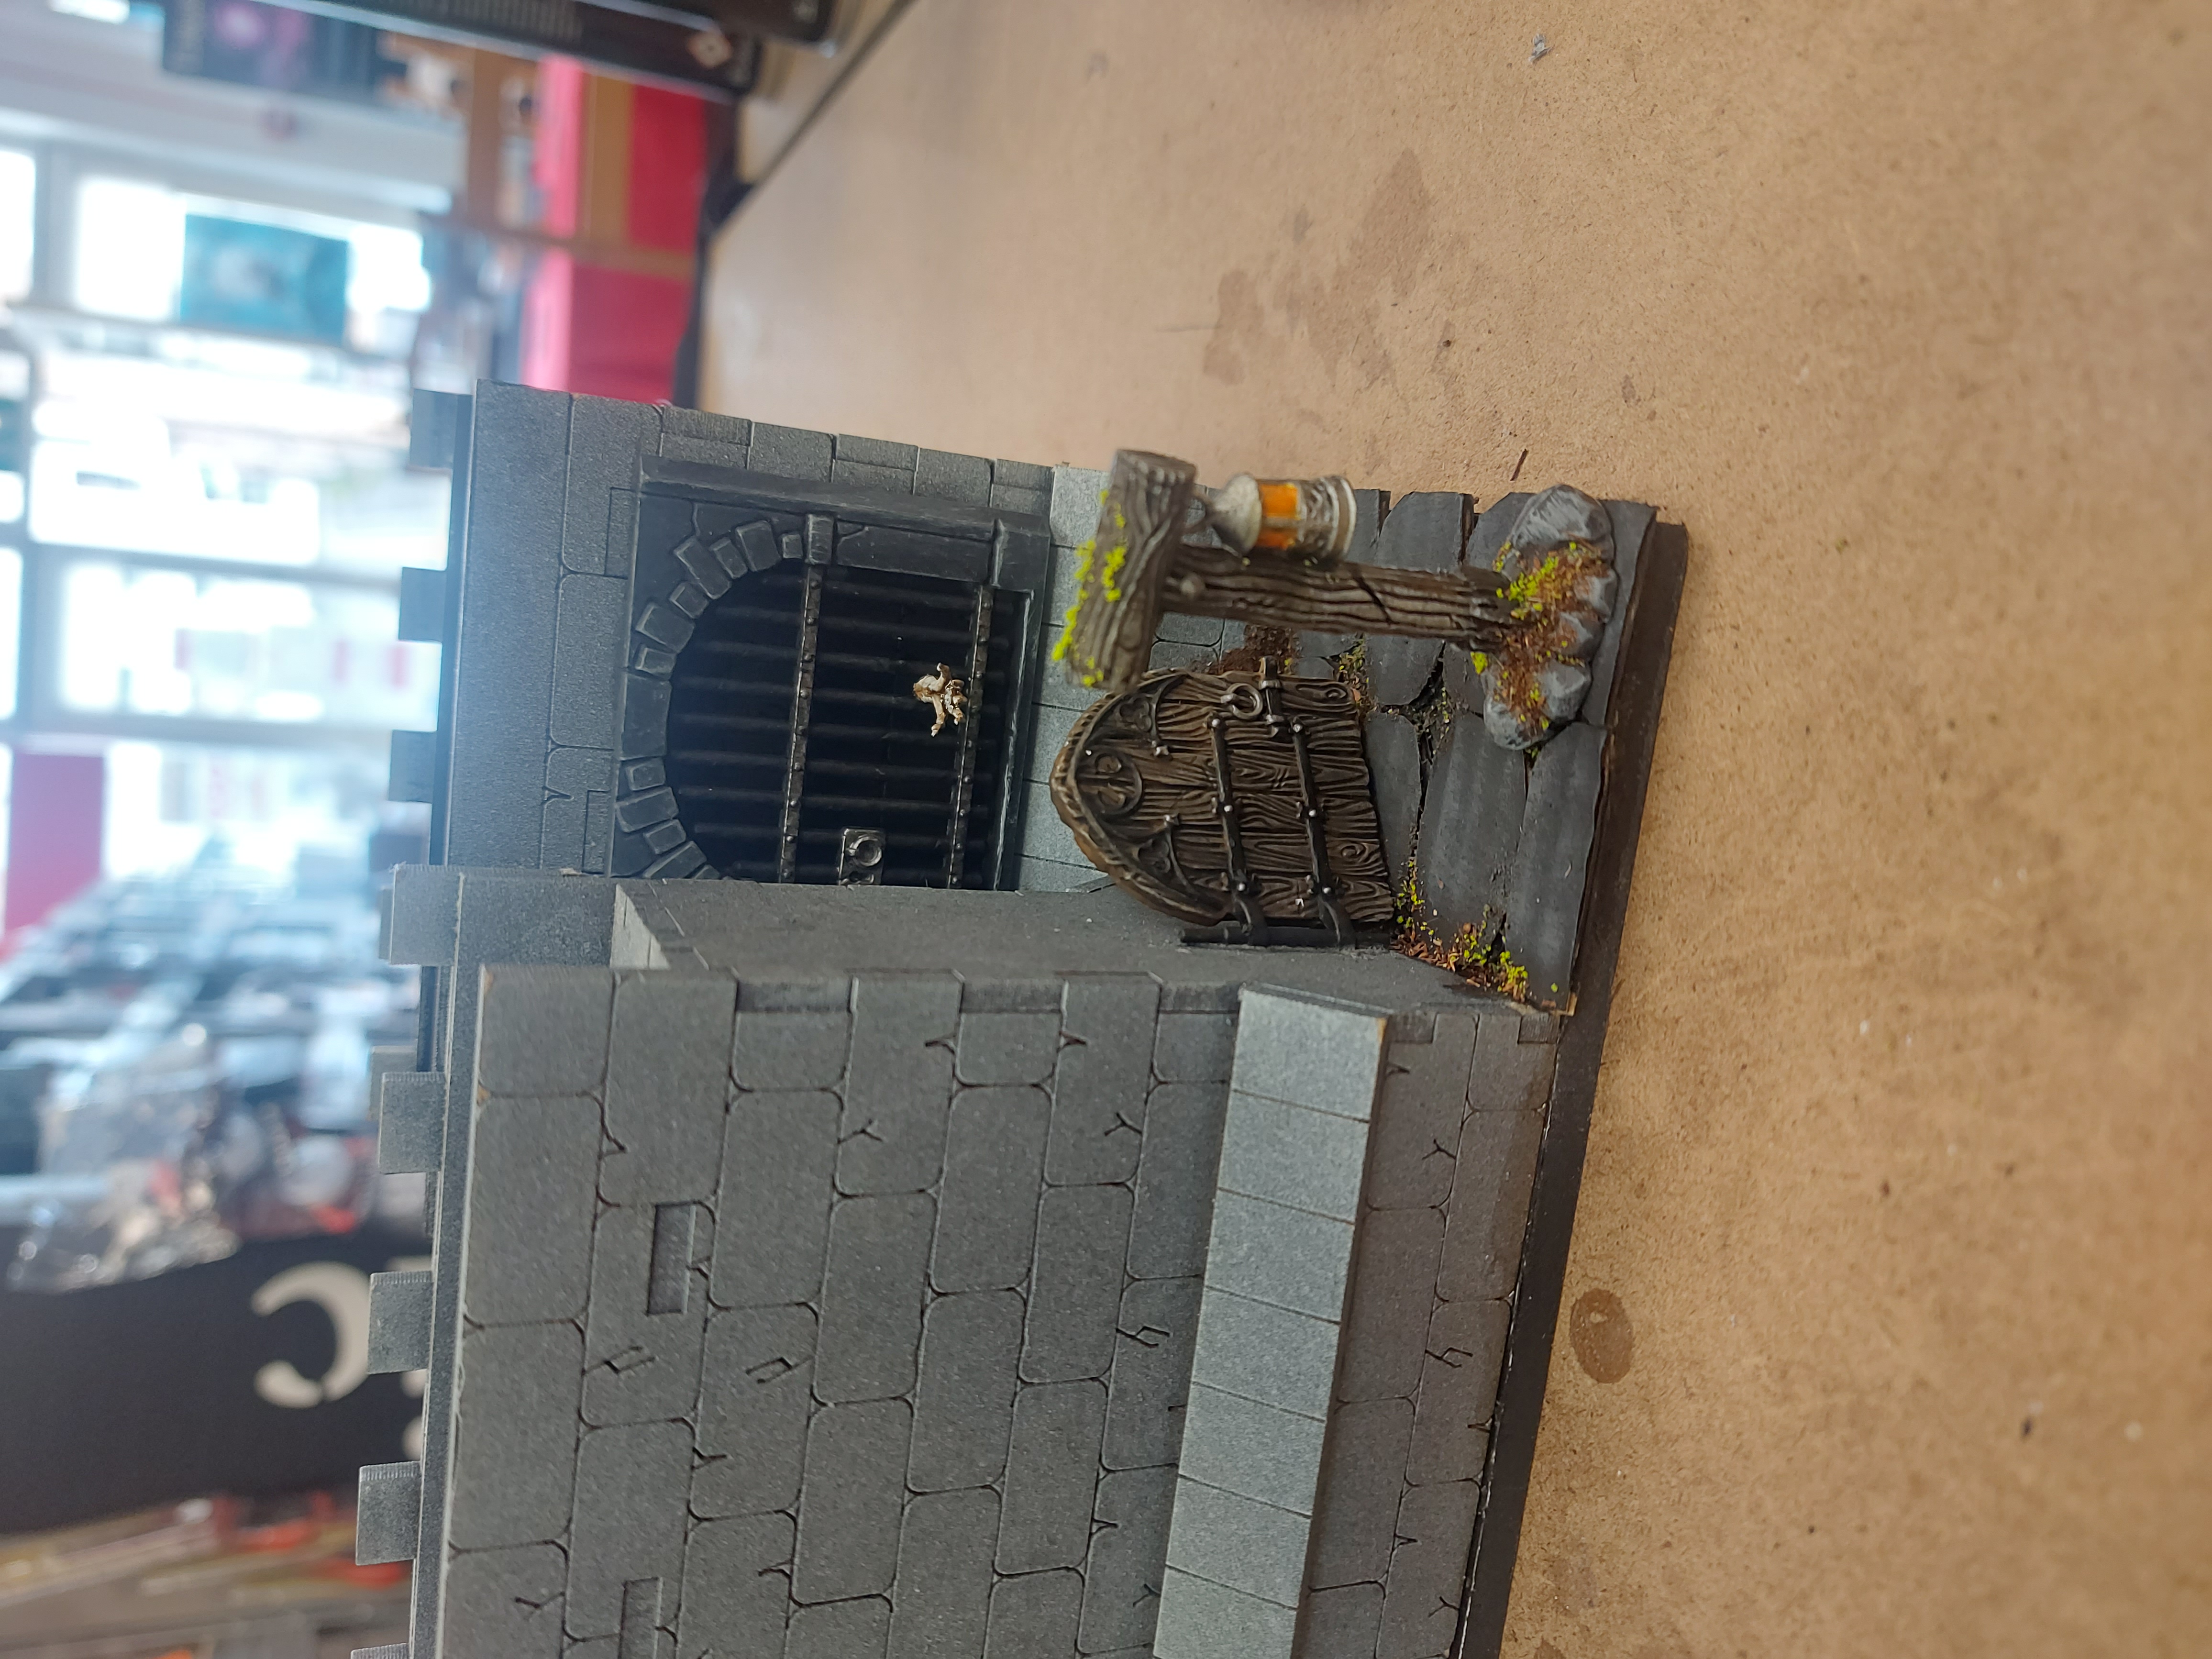
I was liking how the dungeon entrance at the rear of the castle was looking, but it still needed something more. I found a cool wooden post with a lantern, and got that painted up and glued.
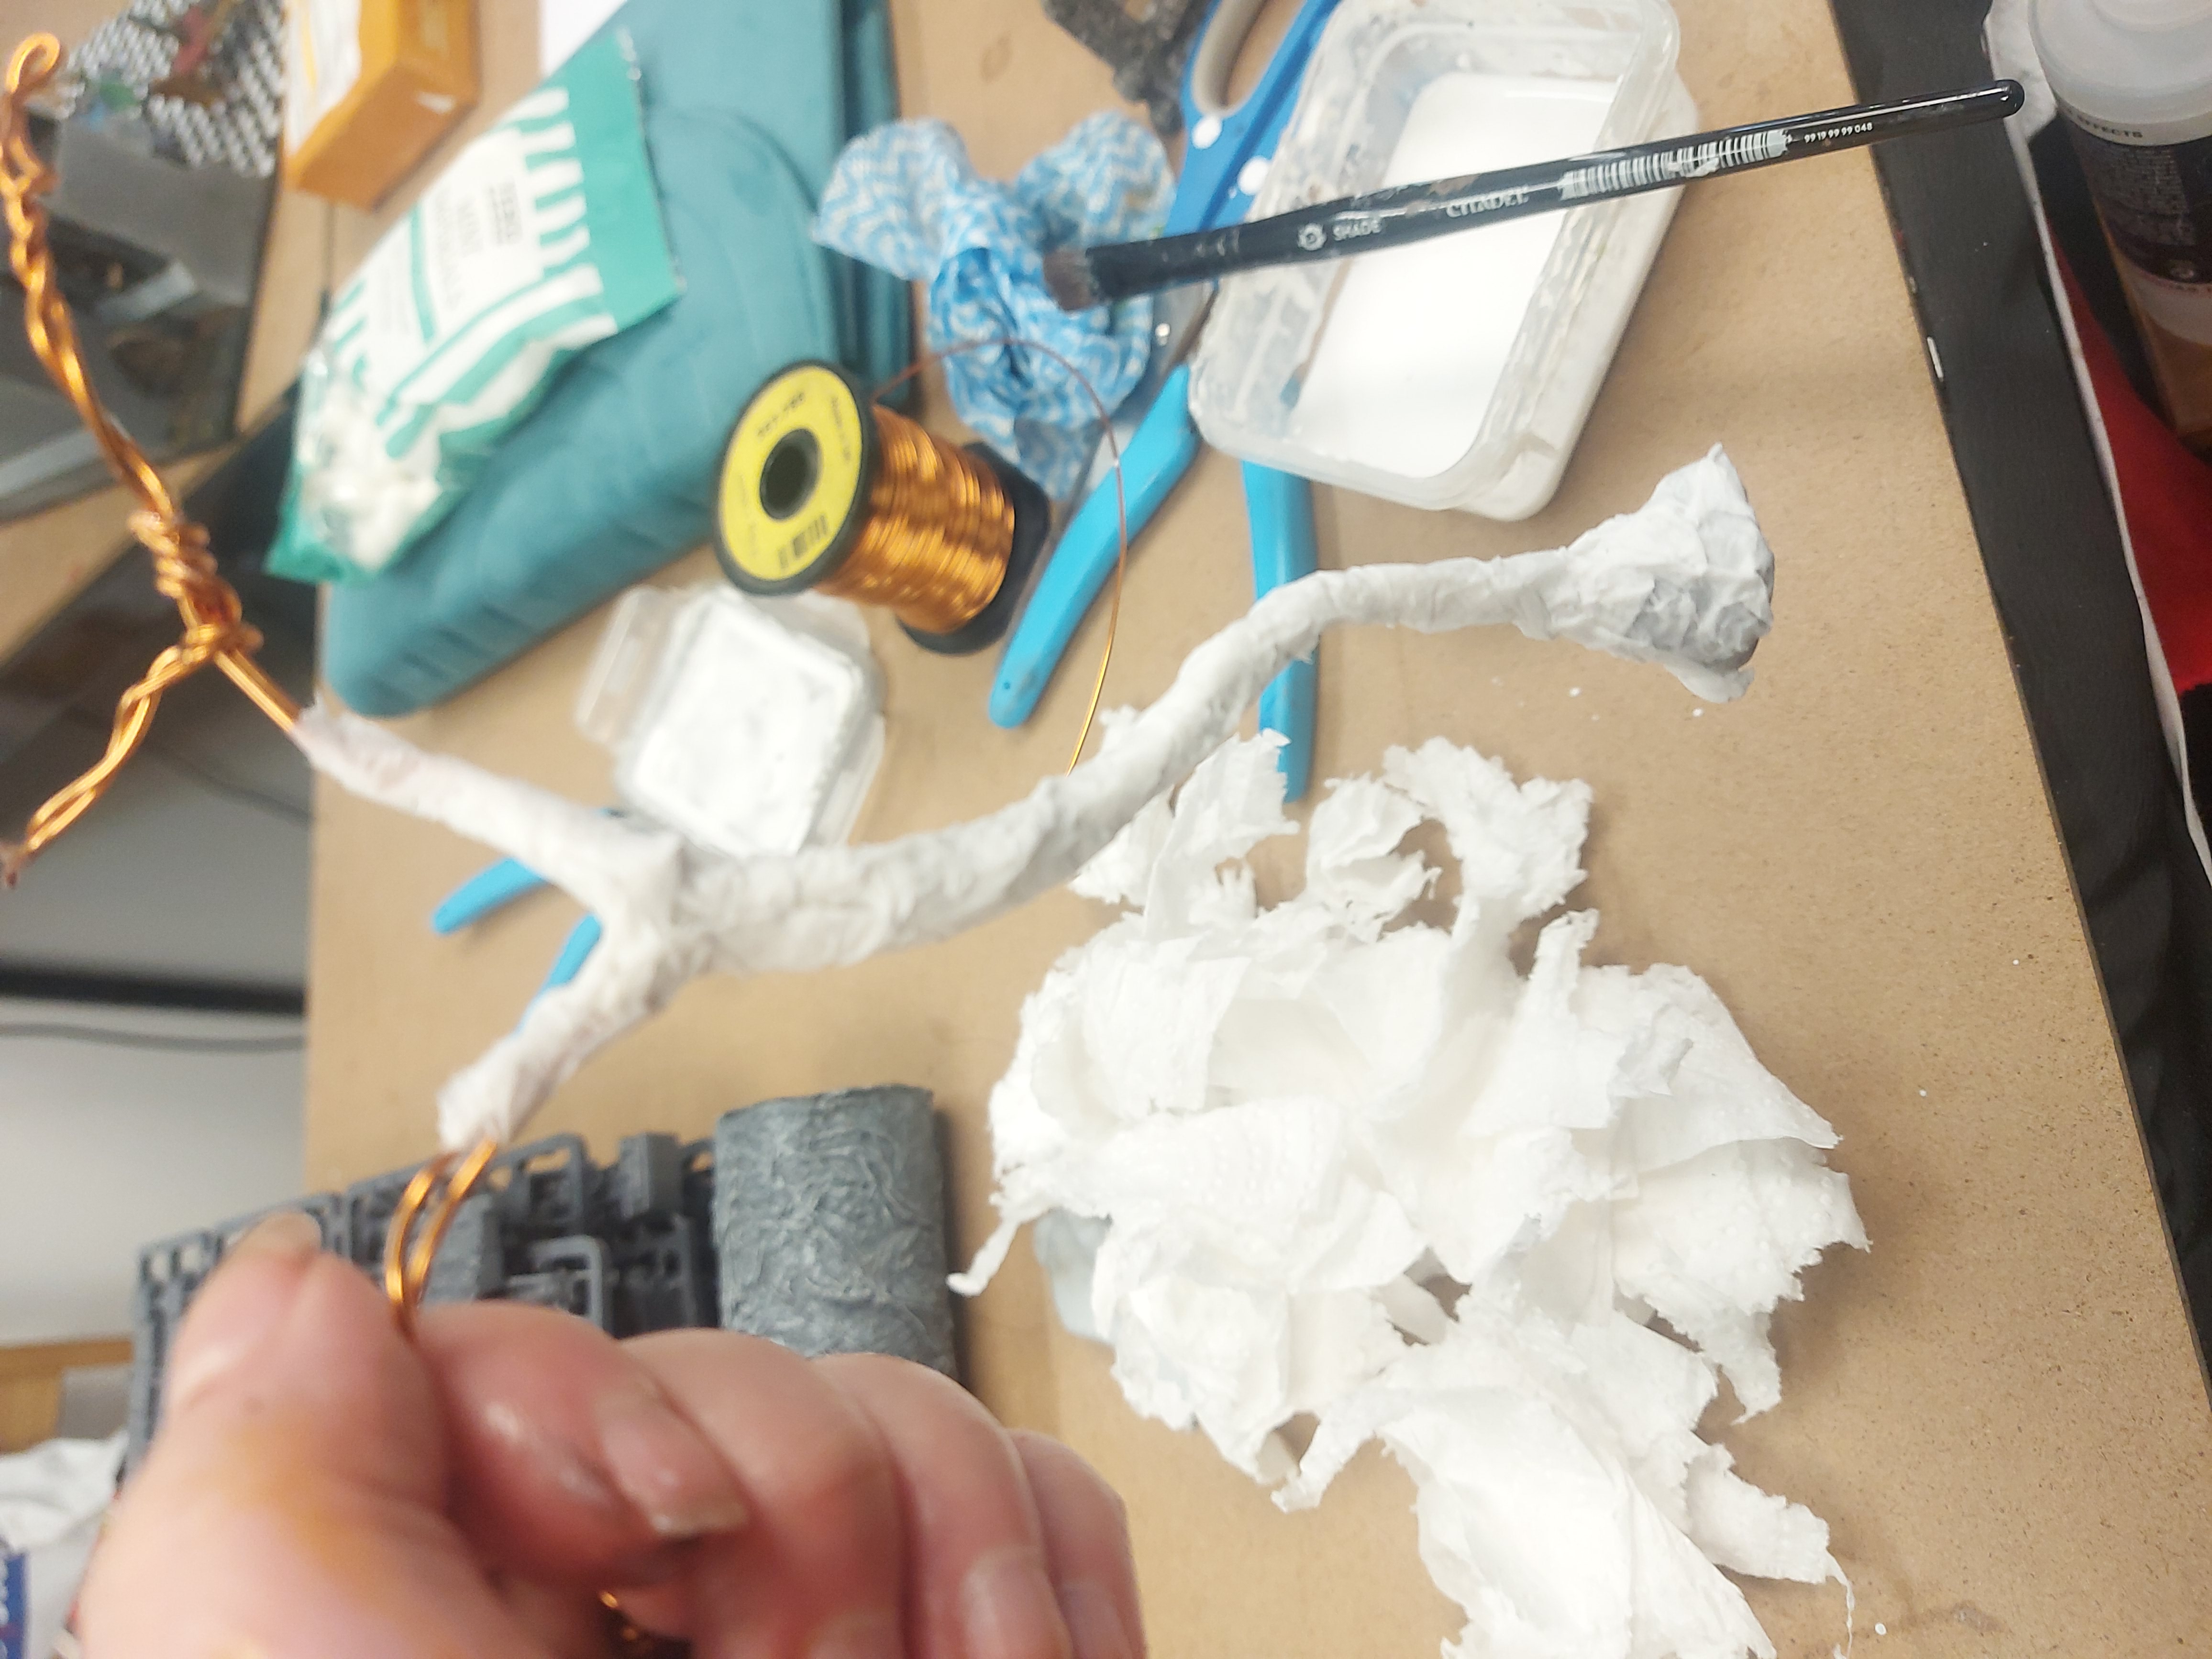
I wanted a tree, a spindly dead kind of tree, but we only had really nice pretty ones which were too big anyway, or the chunky molded ones from GW that were also way too big. I found some nice thin wire and bent in into the shape I needed. I did the same to make a couple of branches, before covering it all with a bit of tin foil and then paper mache. Once dry, it was a quick black undercoat, dark brown base layer, and 2 shades of lighter brown drybrush. I added a little mossy dirt and voila. I left it all to dry completely before adding it to the diorama.
Interior Design
Today I focused on some of the furniture pieces that Darren kindly 3d printed for me last night (I’m so spoiled).
For the long mirror, I used a layer of clear water effect over a silver white background, and mixed a little nuln oil into it while still wet to create the illusion of shadows and reflections.
It’s all coming together nicely now.
Tomorrow I’ll work on the turret, and finish off the furniture.


Back To The Ballroom
I had a dig around in the bits boxes out back and managed to find a fair few pieces that I wanted to incorporate into the ballroom.
I wanted a big potted plant too, so I used a cut-off piece from an old aquarium plant stuck in nice urn-type thing I found on a Dungeons and Lasers sprue. I glued it in and sprinkled dirt-flock on top to look like mud. I painted the leaves just so they didn’t look like plastic fish tank plants anymore.
I hung some little banners on the wall, and added a bookcase, little table, and a treasure chest.
Round the back of the castle wall, I installed a dungeon, complete with desperately reaching inhabitant.
Tomorrow, it’s time for a turret!


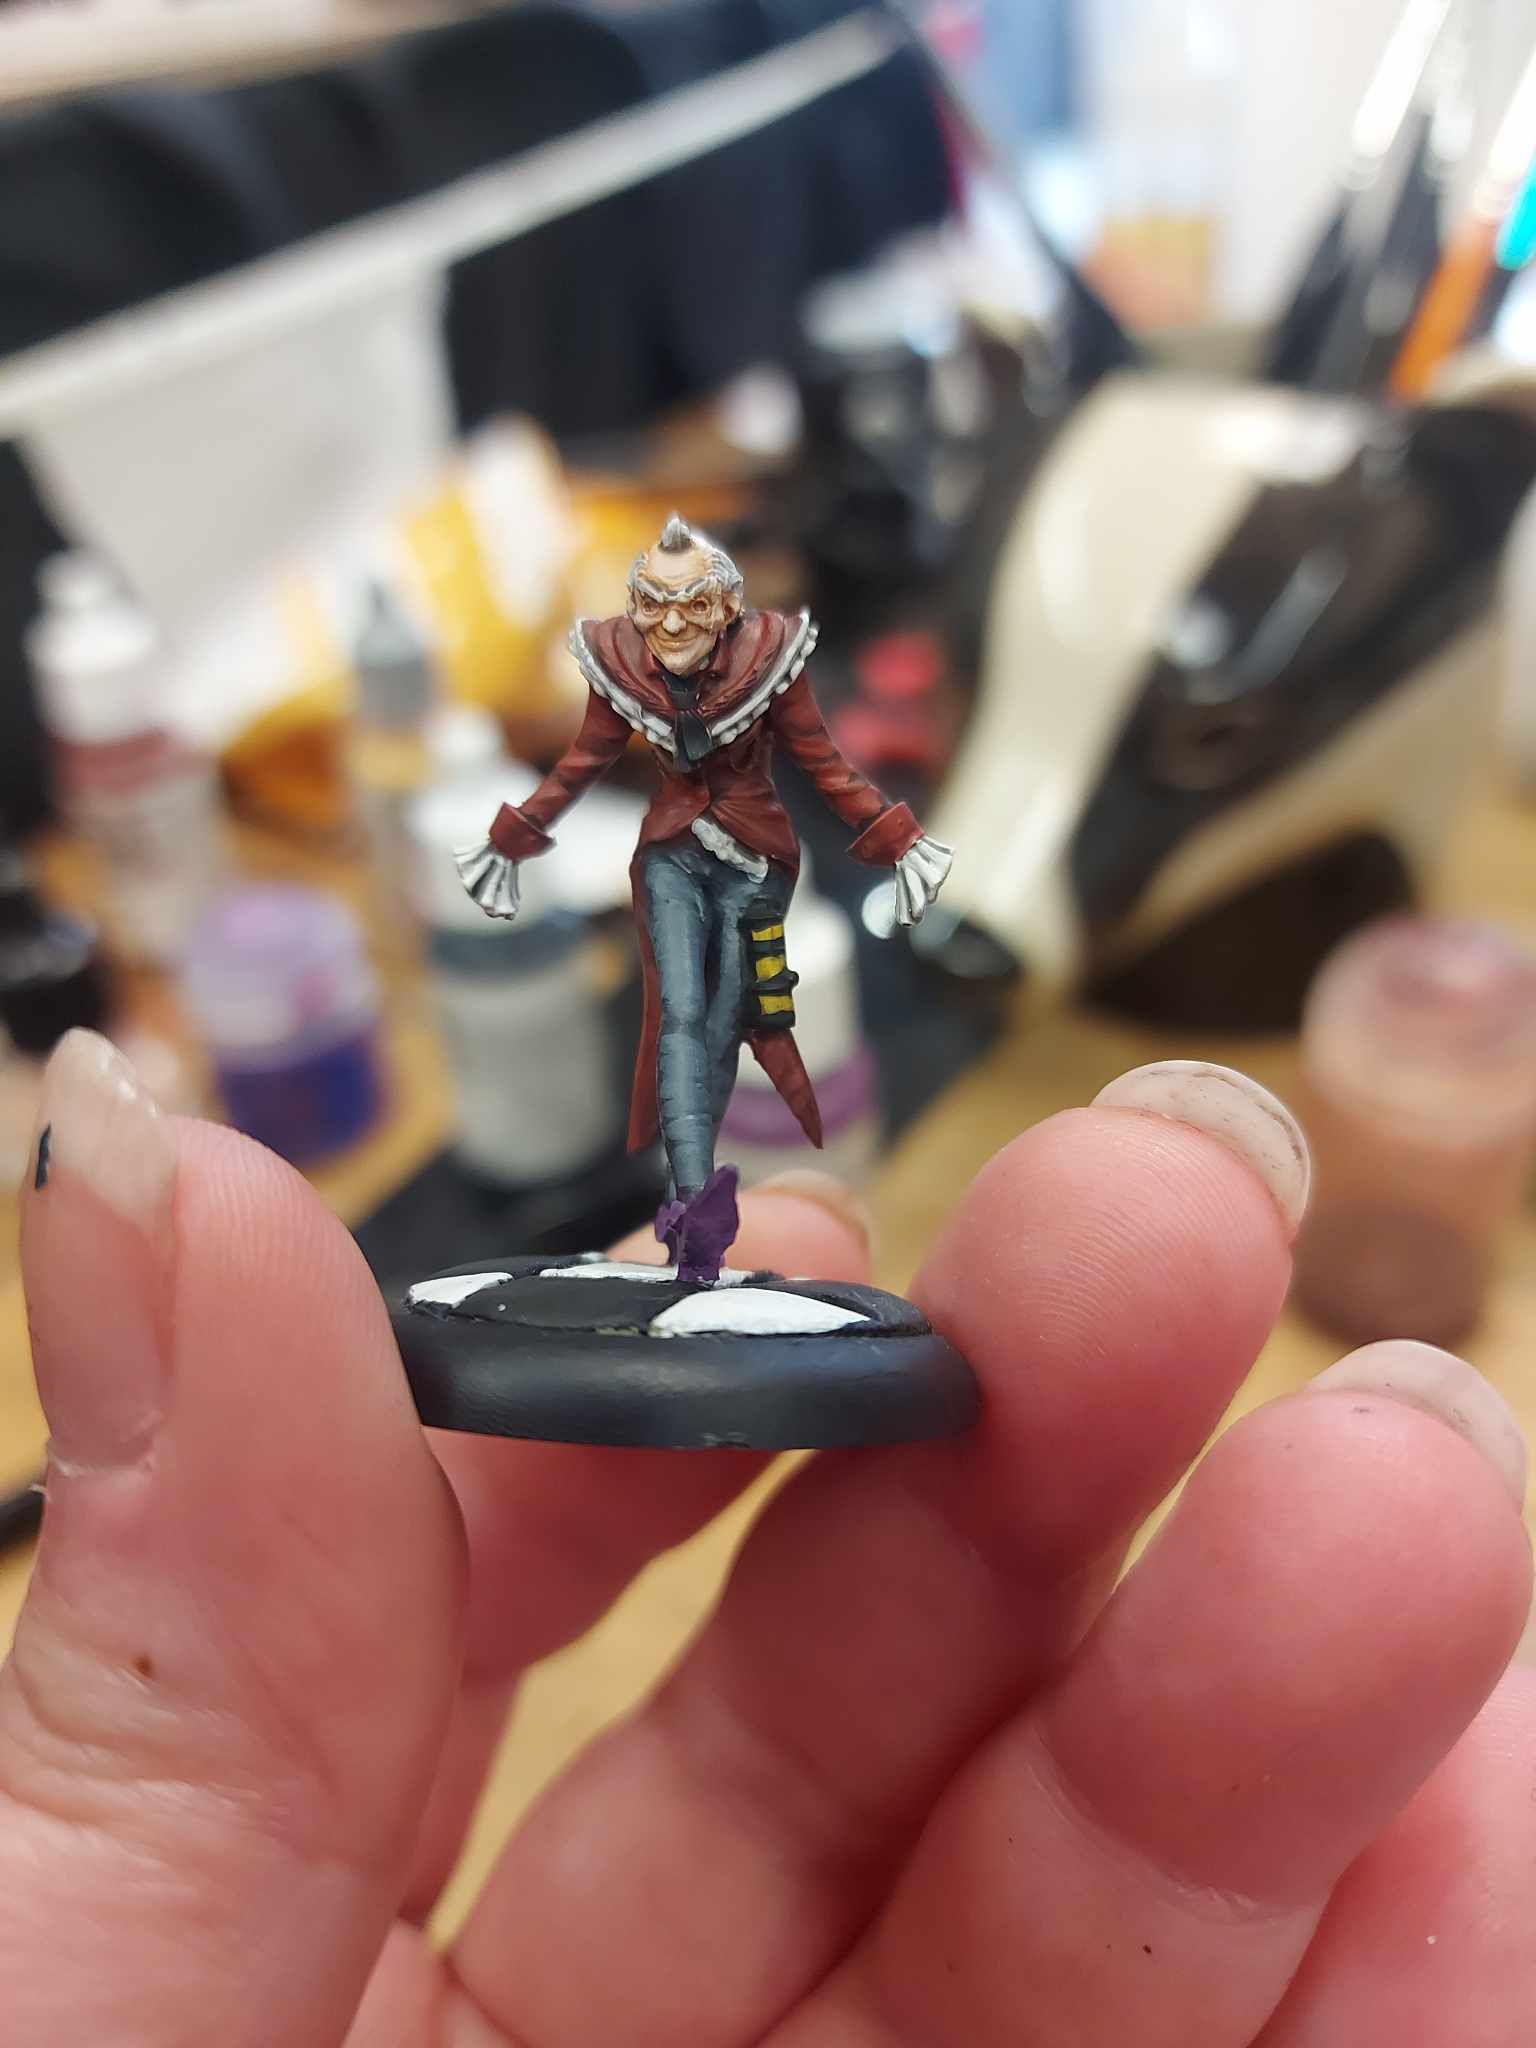
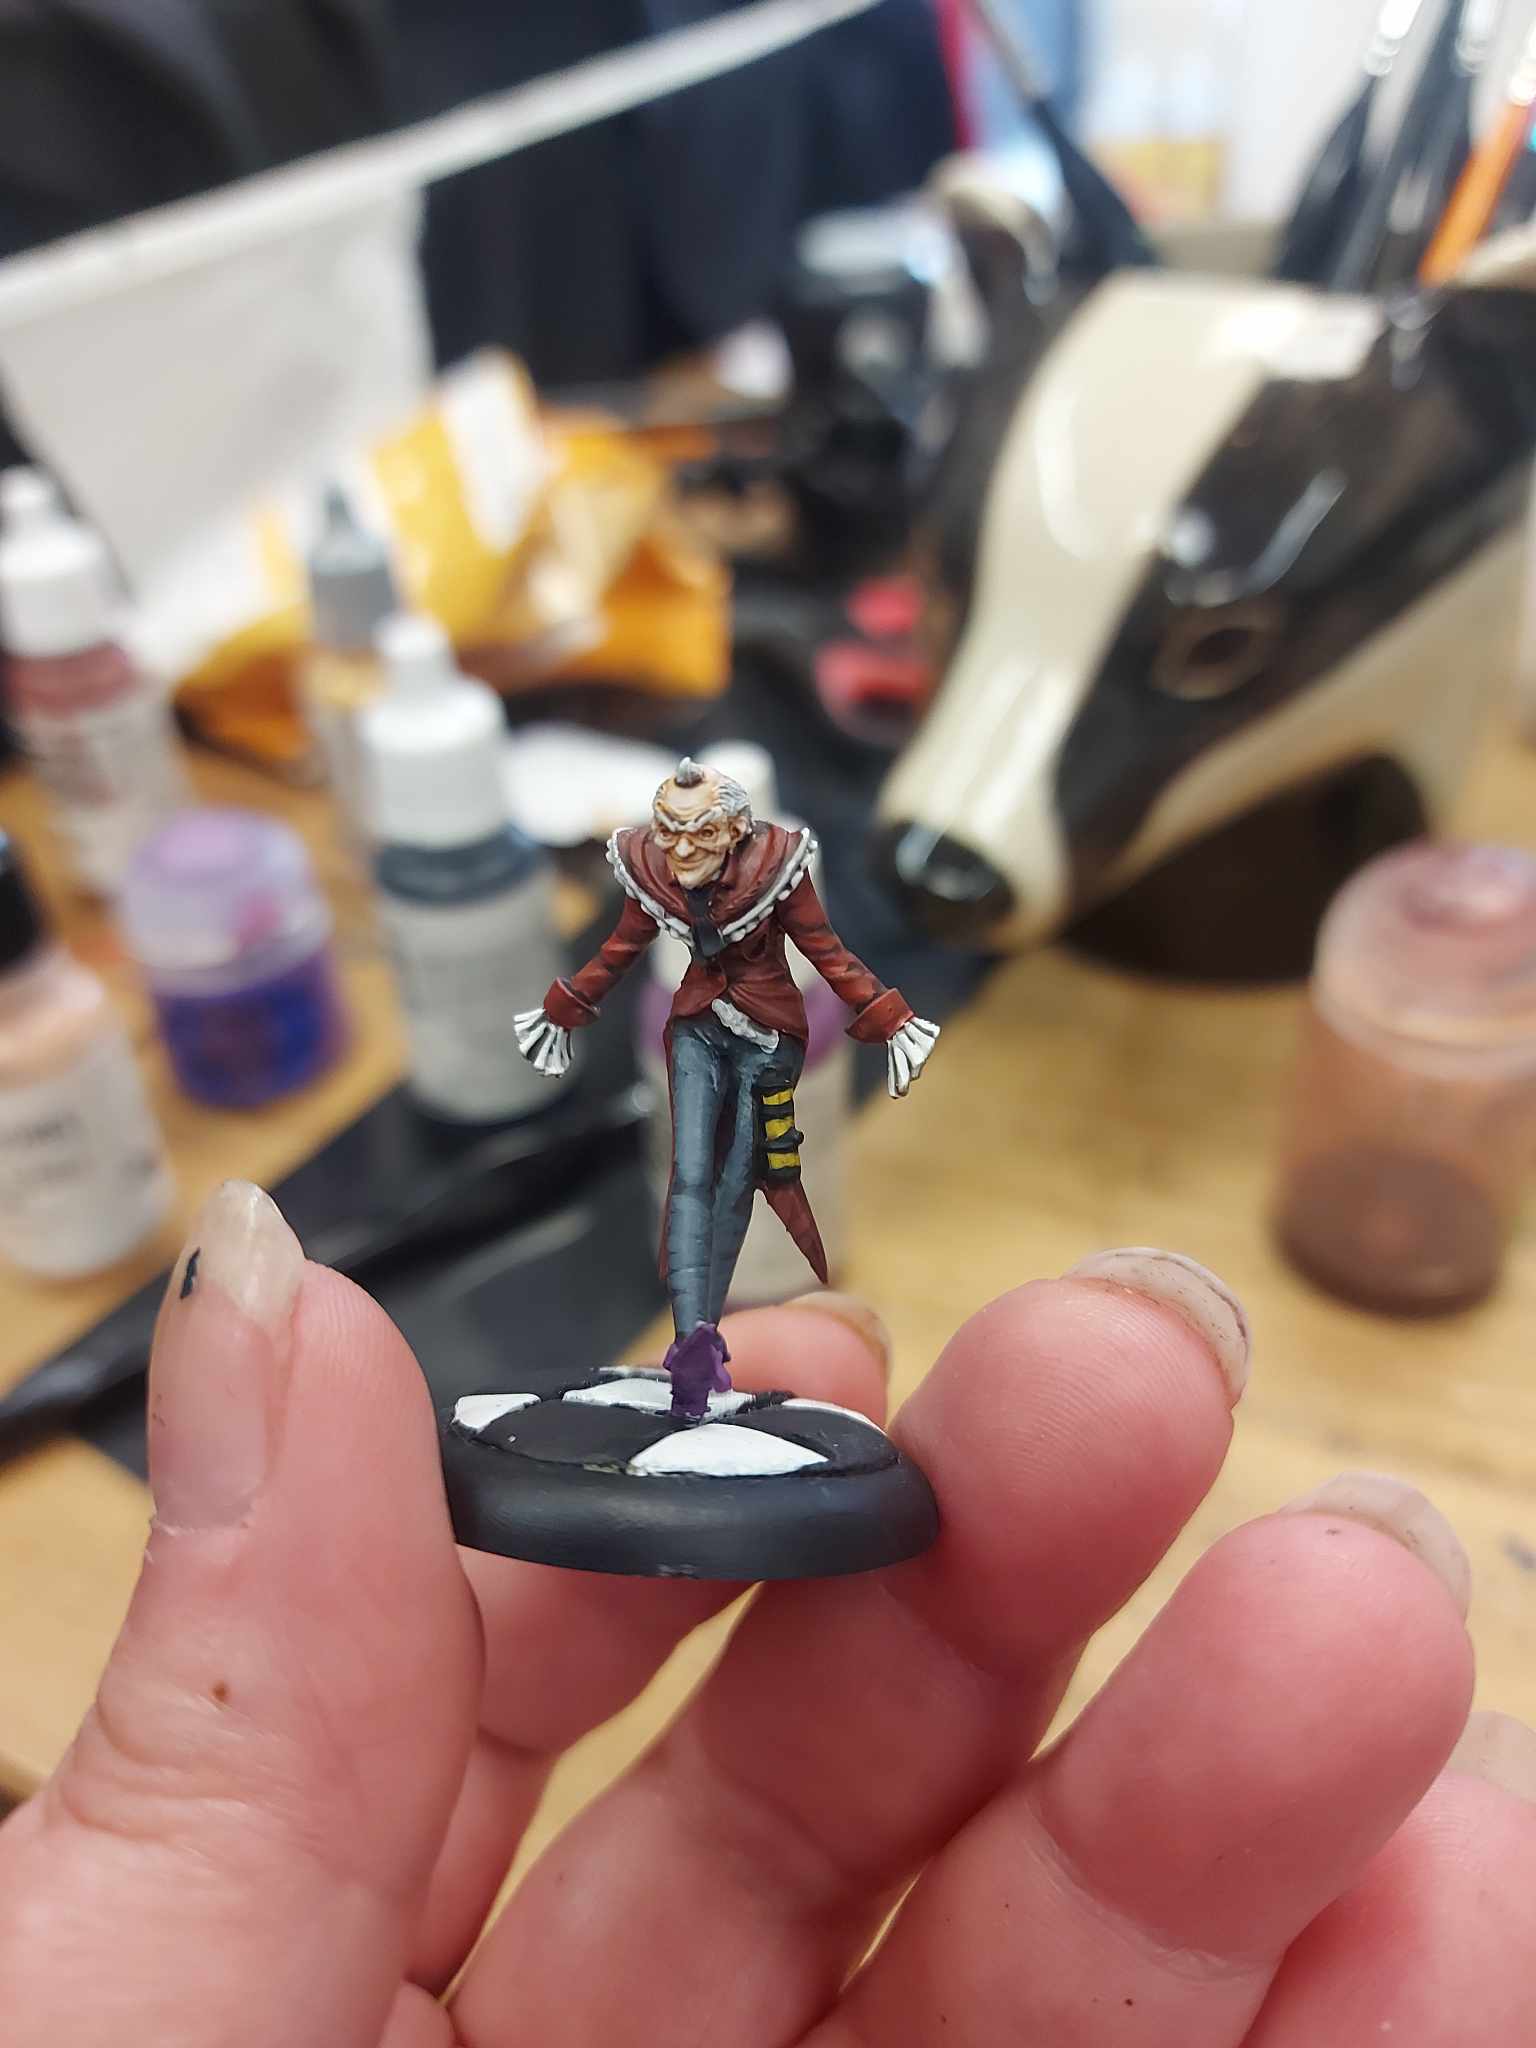
The More The Merrier!
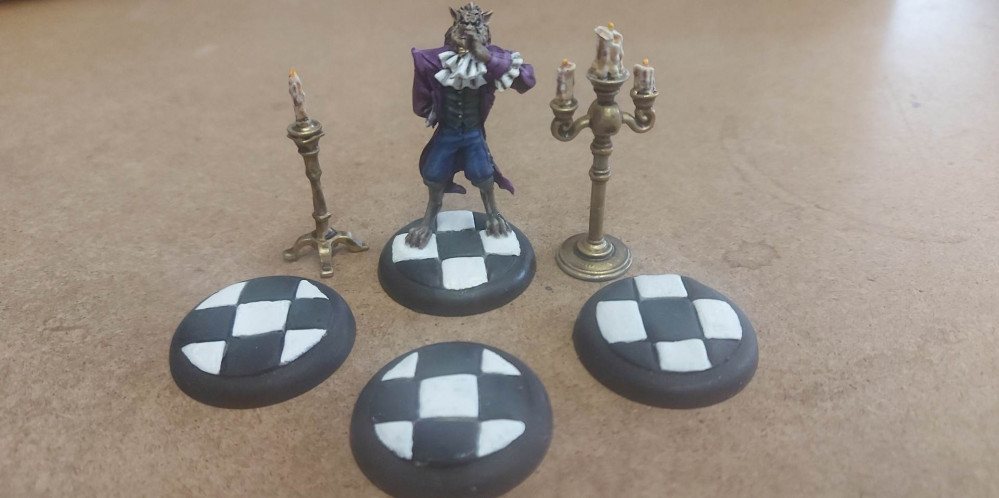
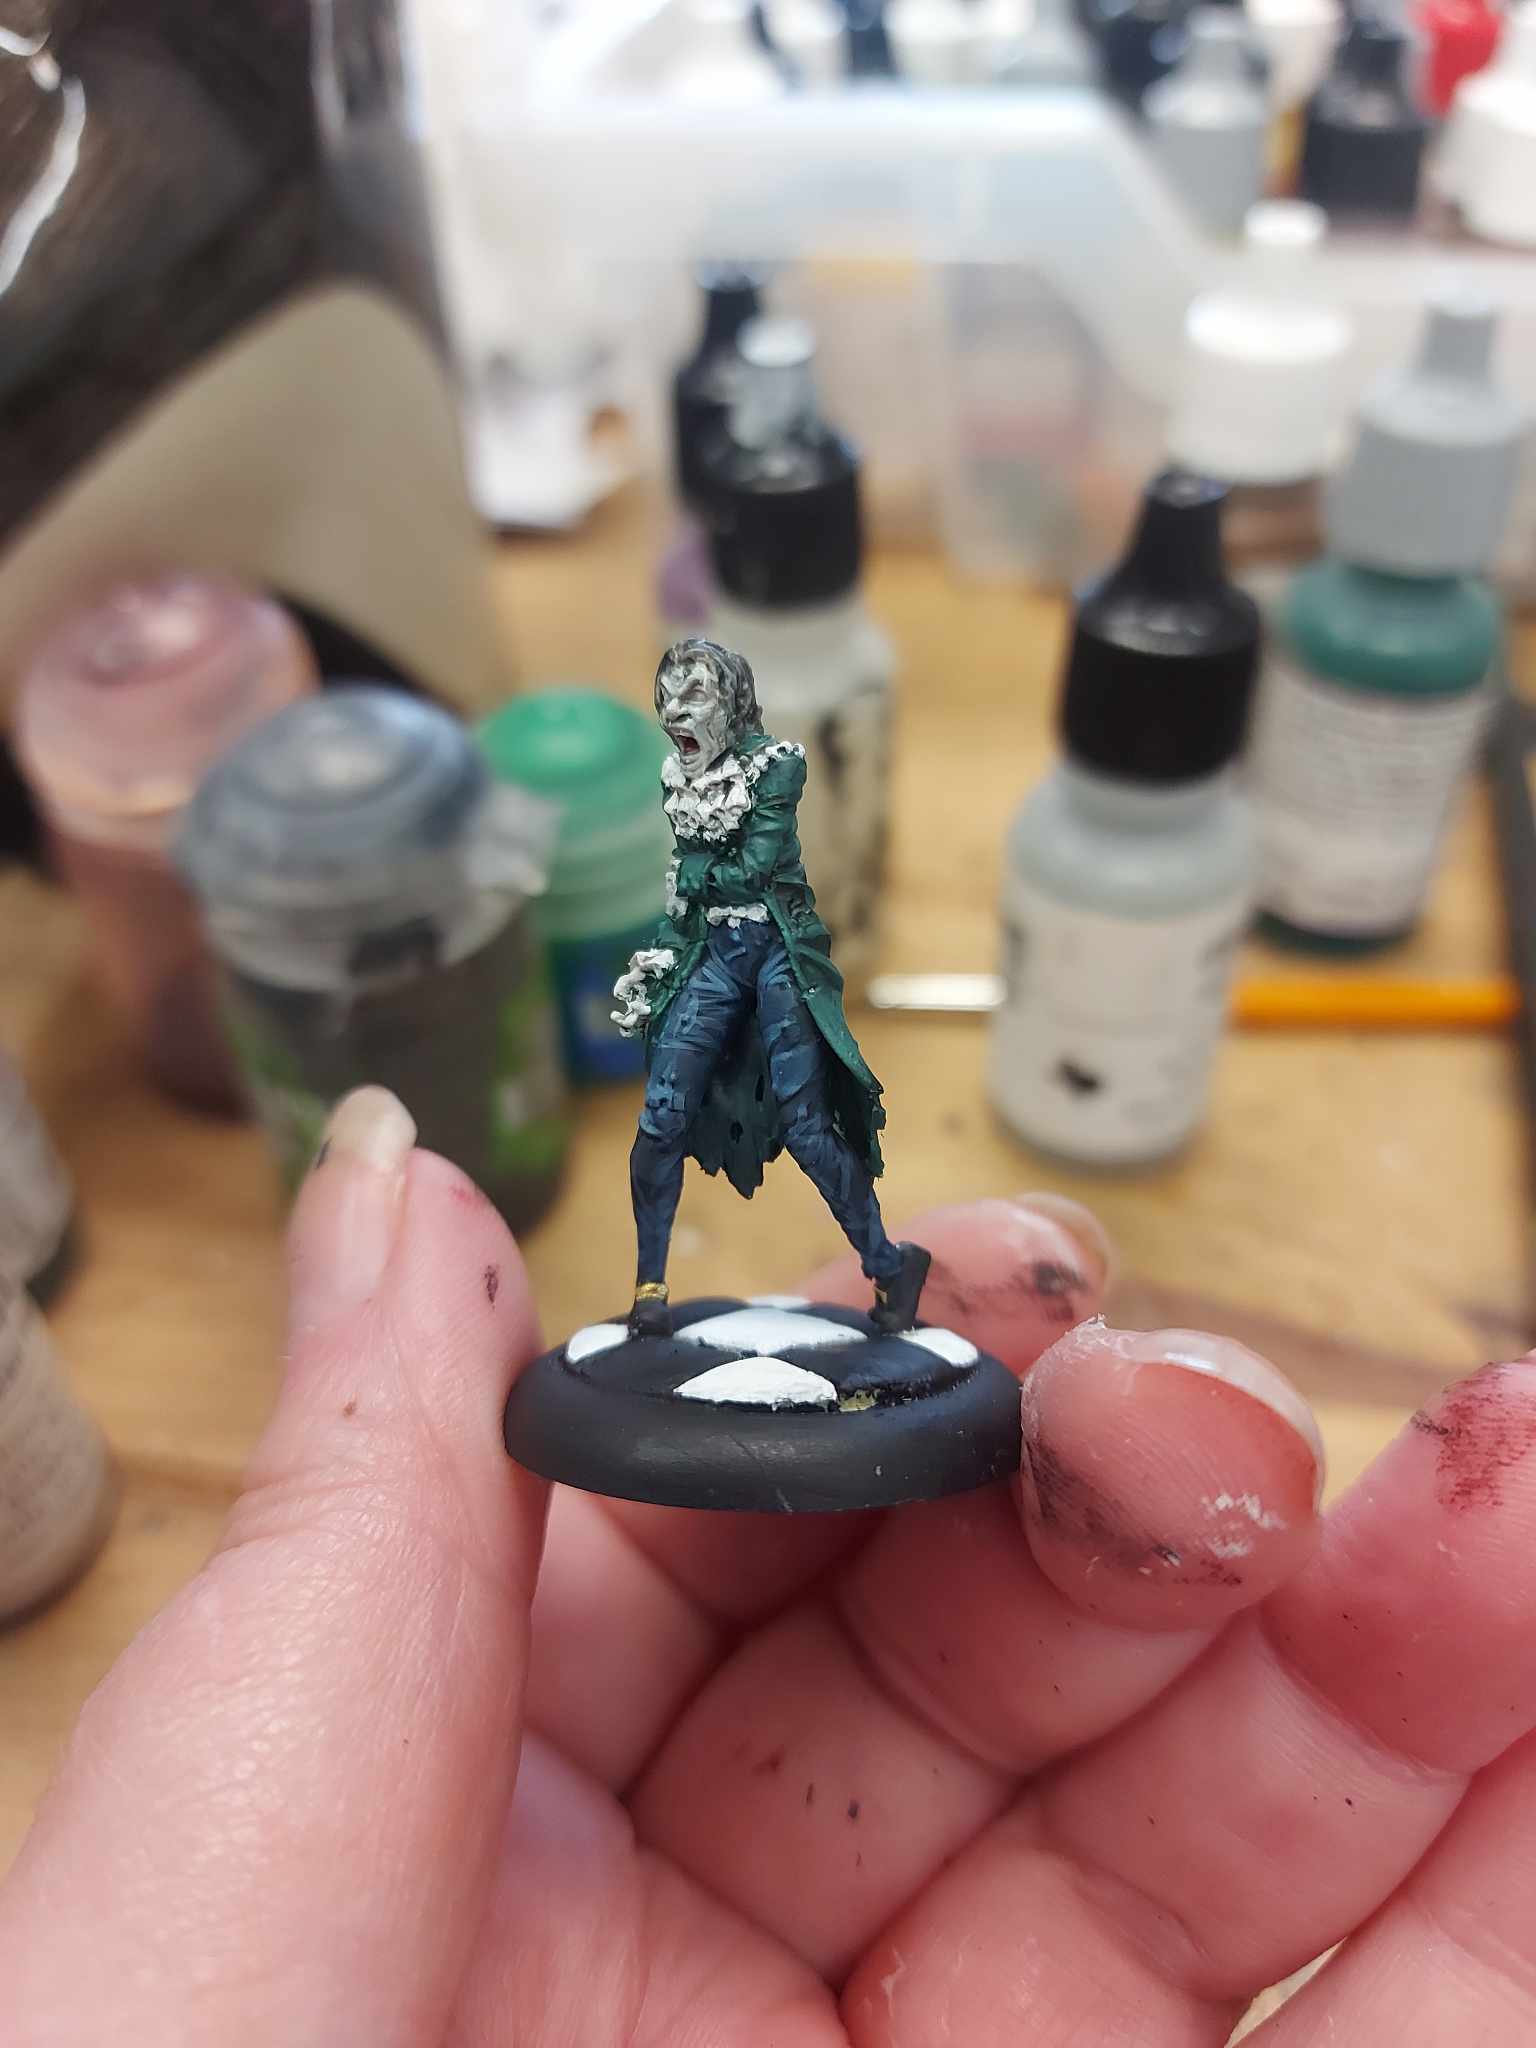
This morning, I set about getting the last two inhabitants of the ballroom painted up – The Creep and The Revenant. Another two gorgeous minis from the Moonstone range, who were lots of fun to paint. I stuck to the rich, vibrant colours I used for The Beast and The Duchess, as I want the models and furniture to really stand out against the grey tones of the backdrop.
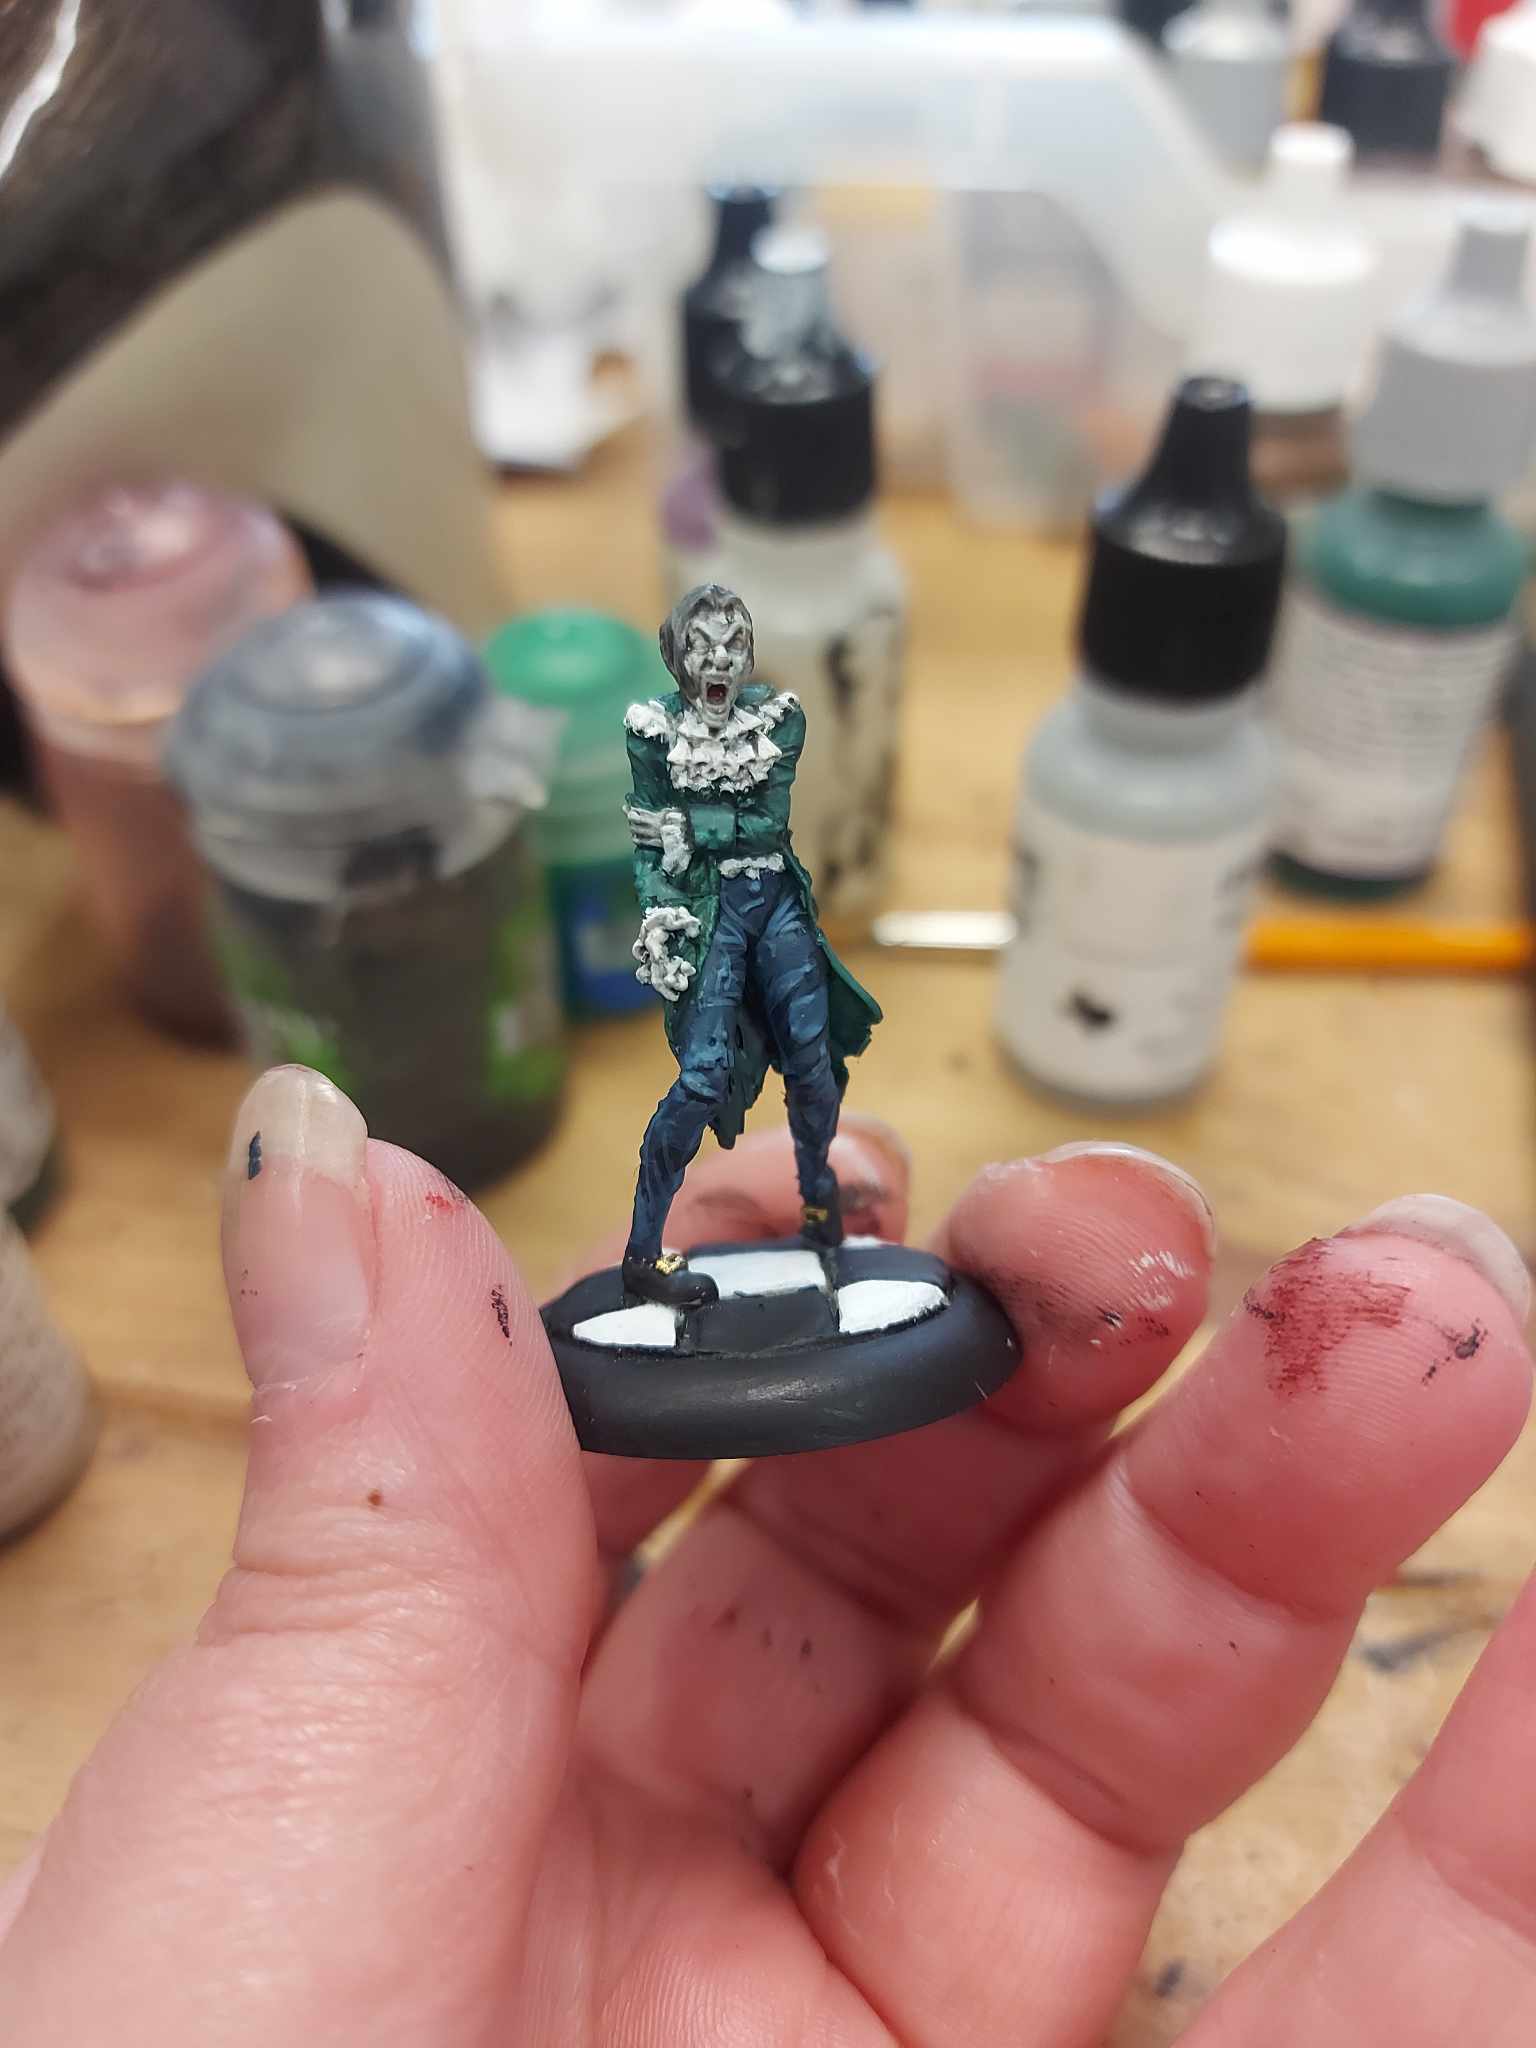
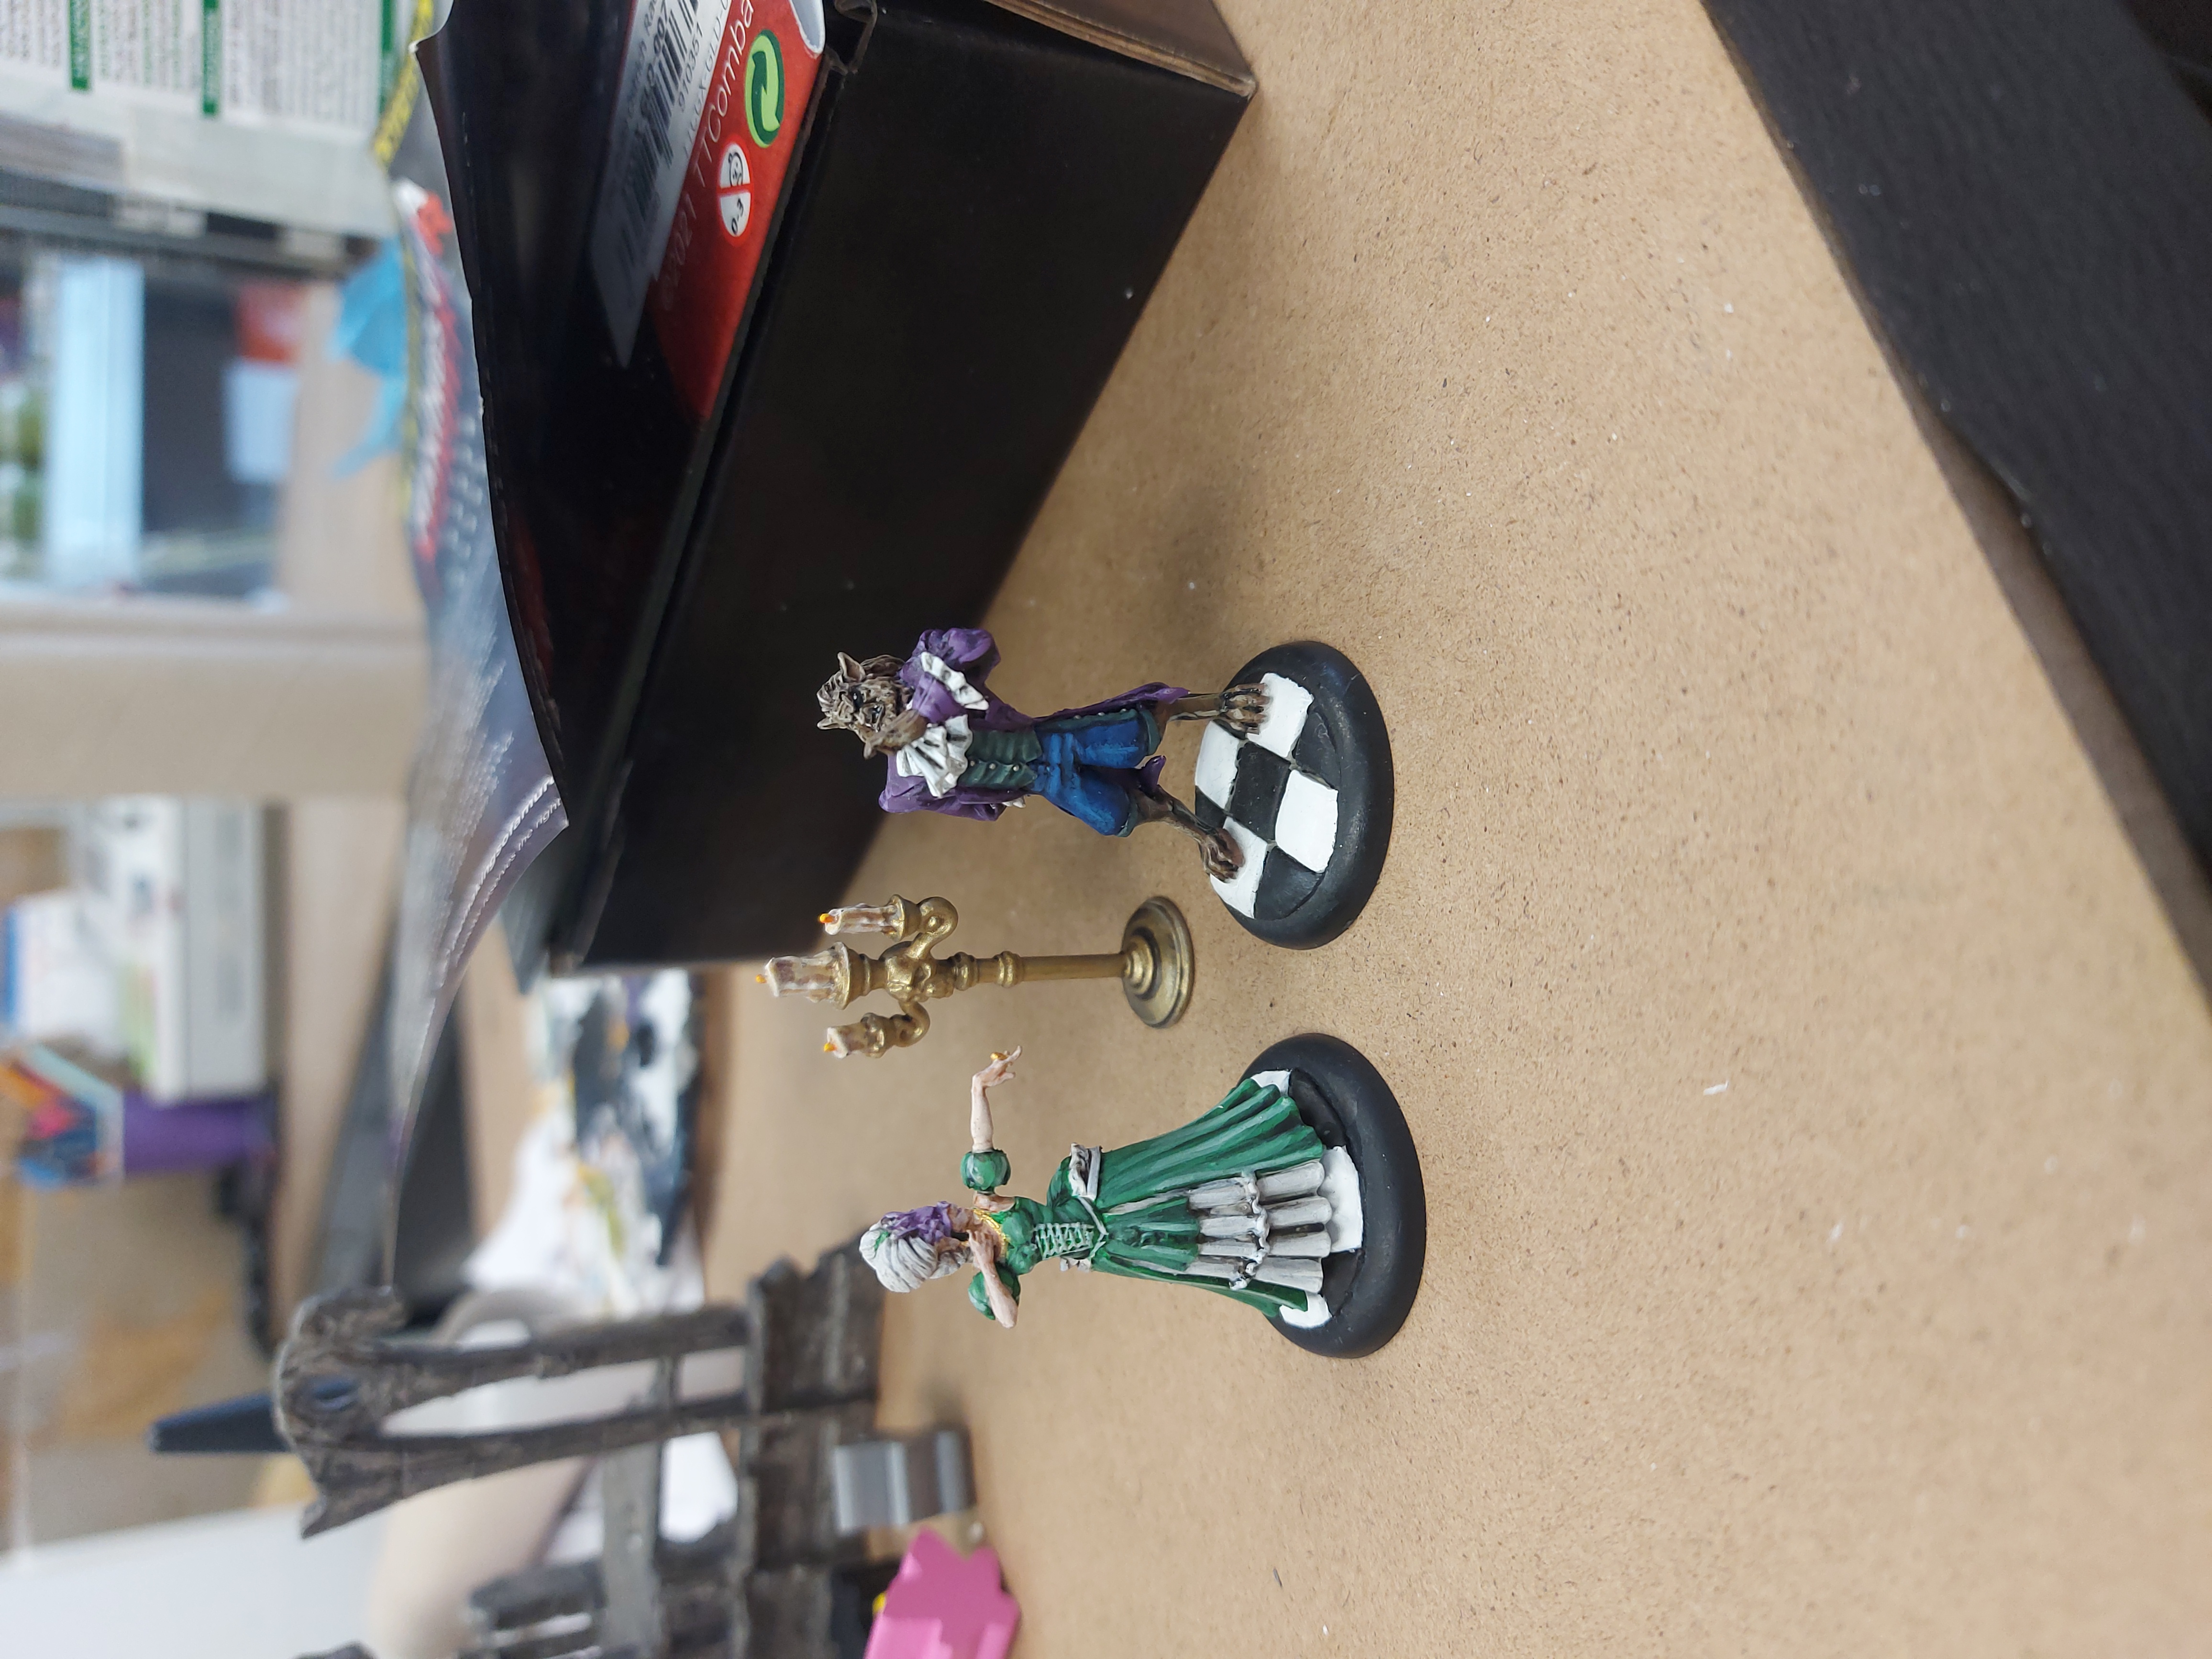
Be Our Guest!
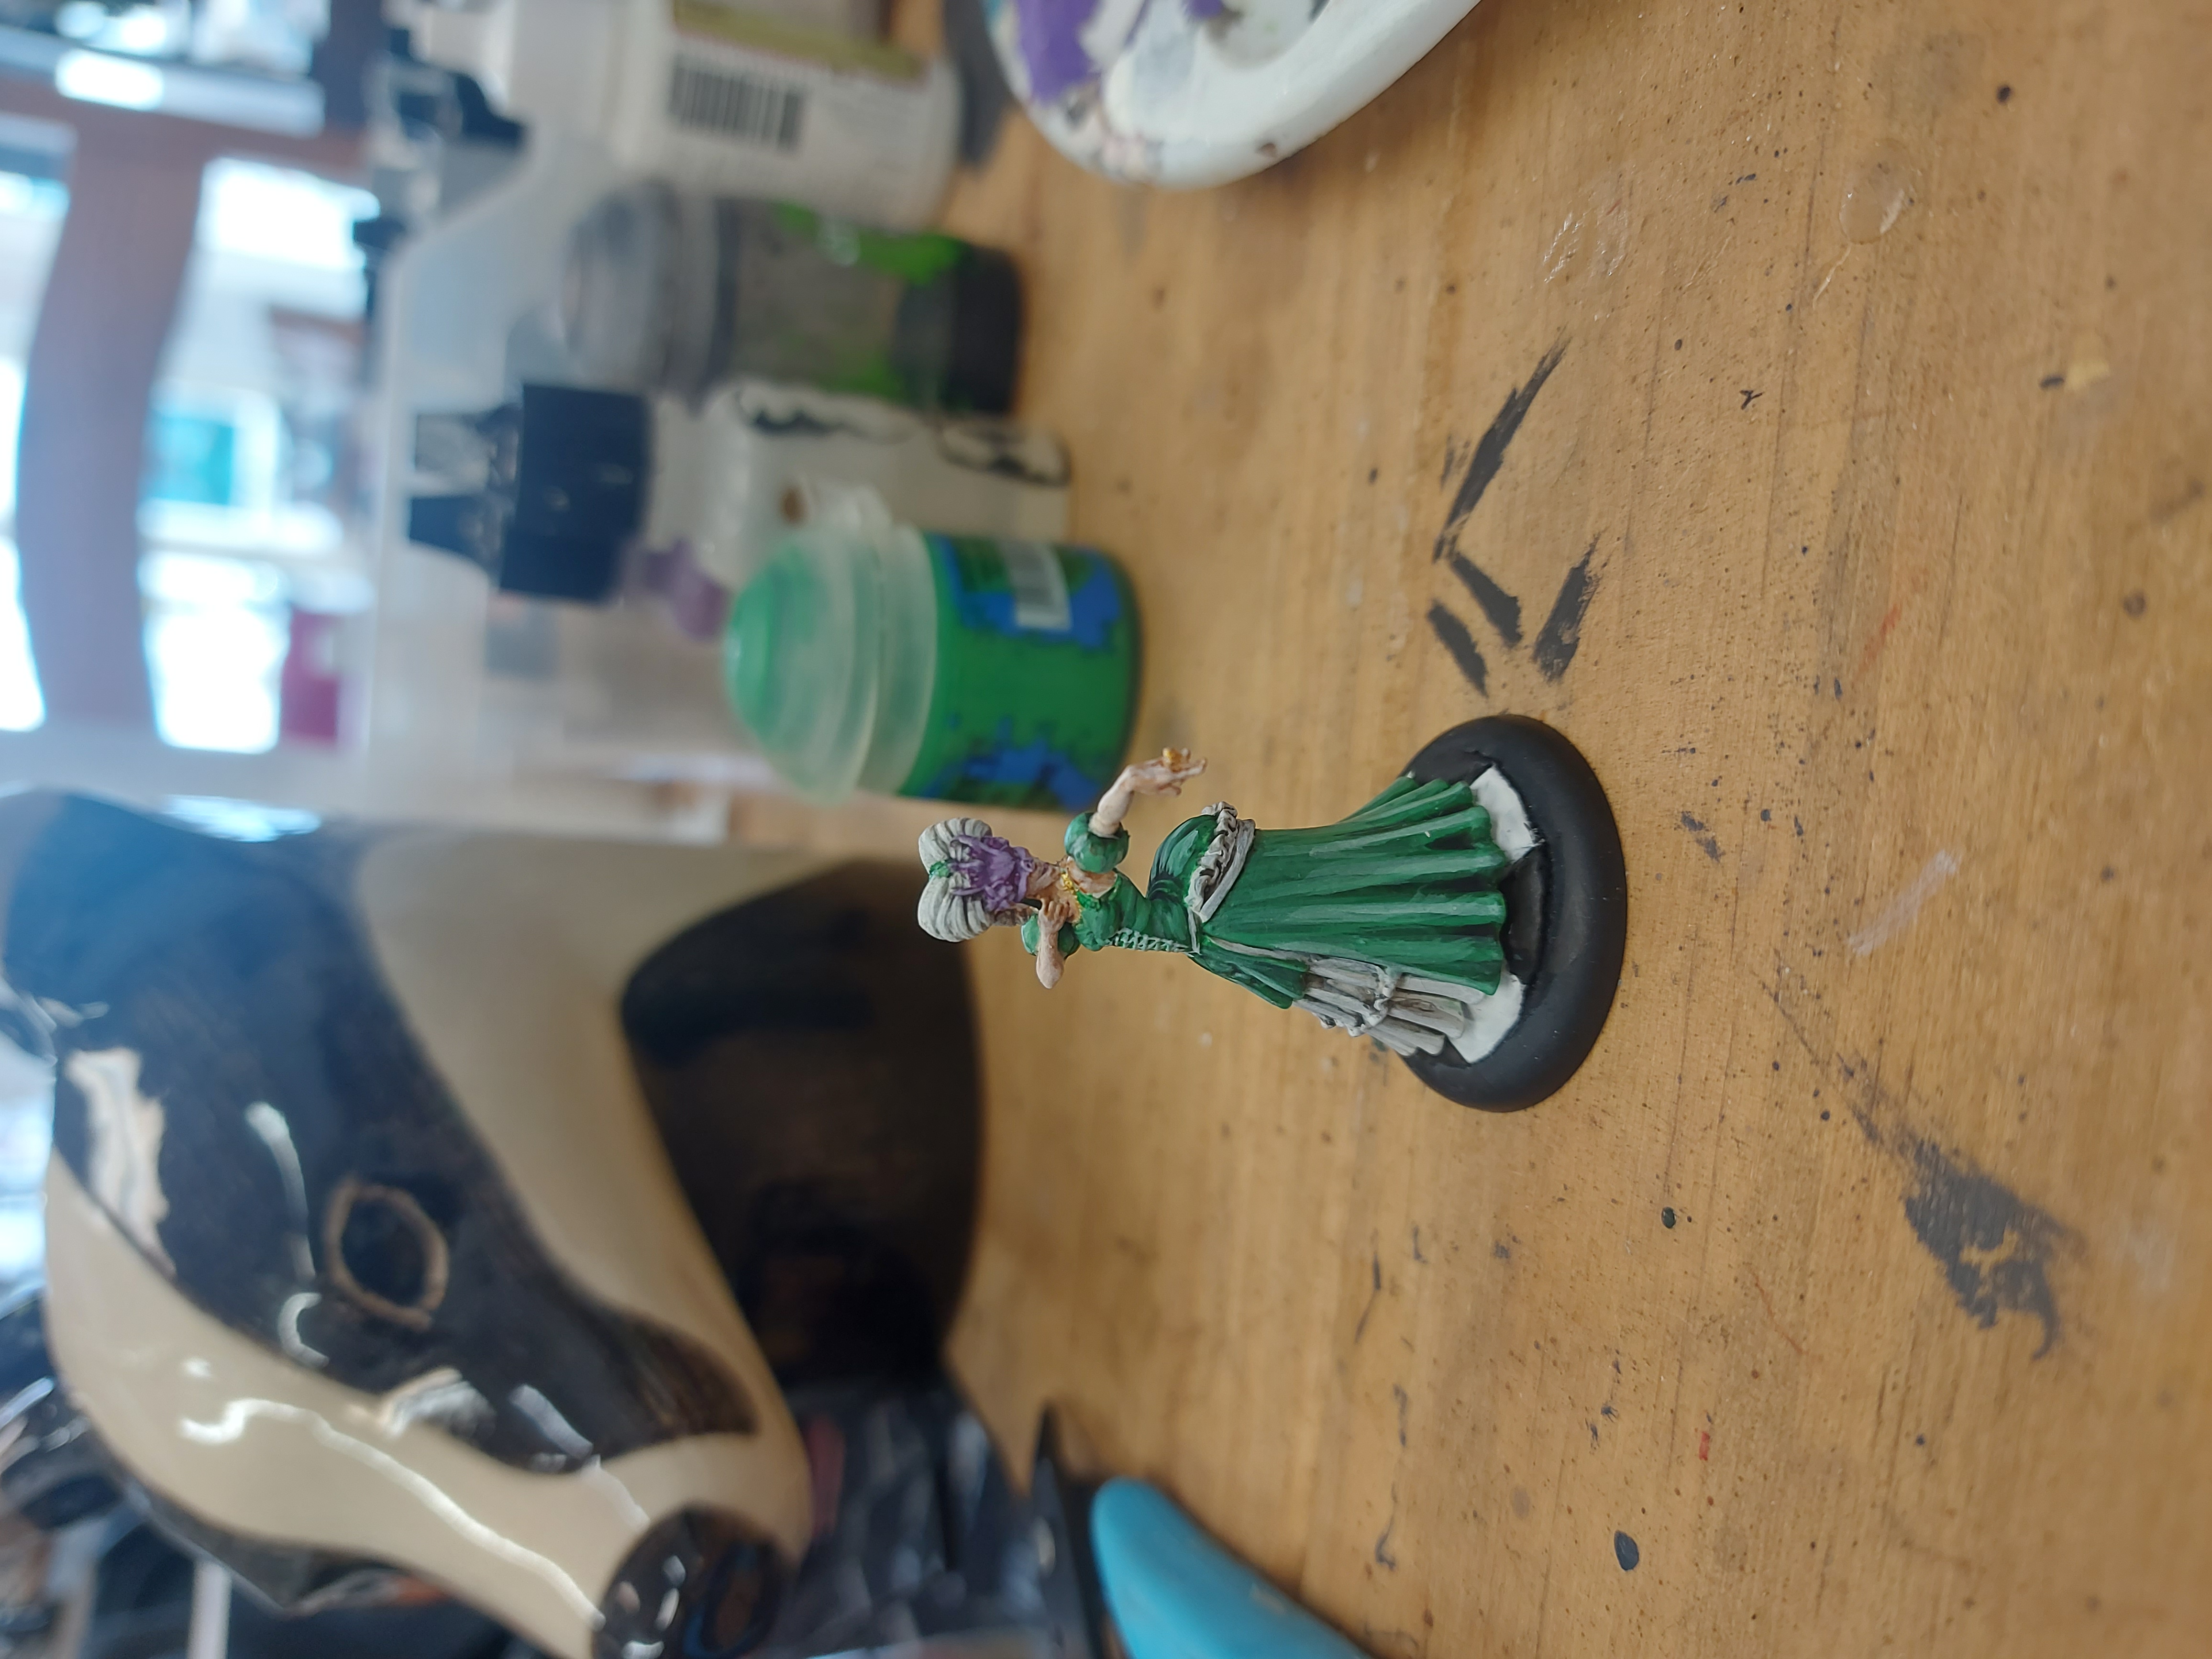
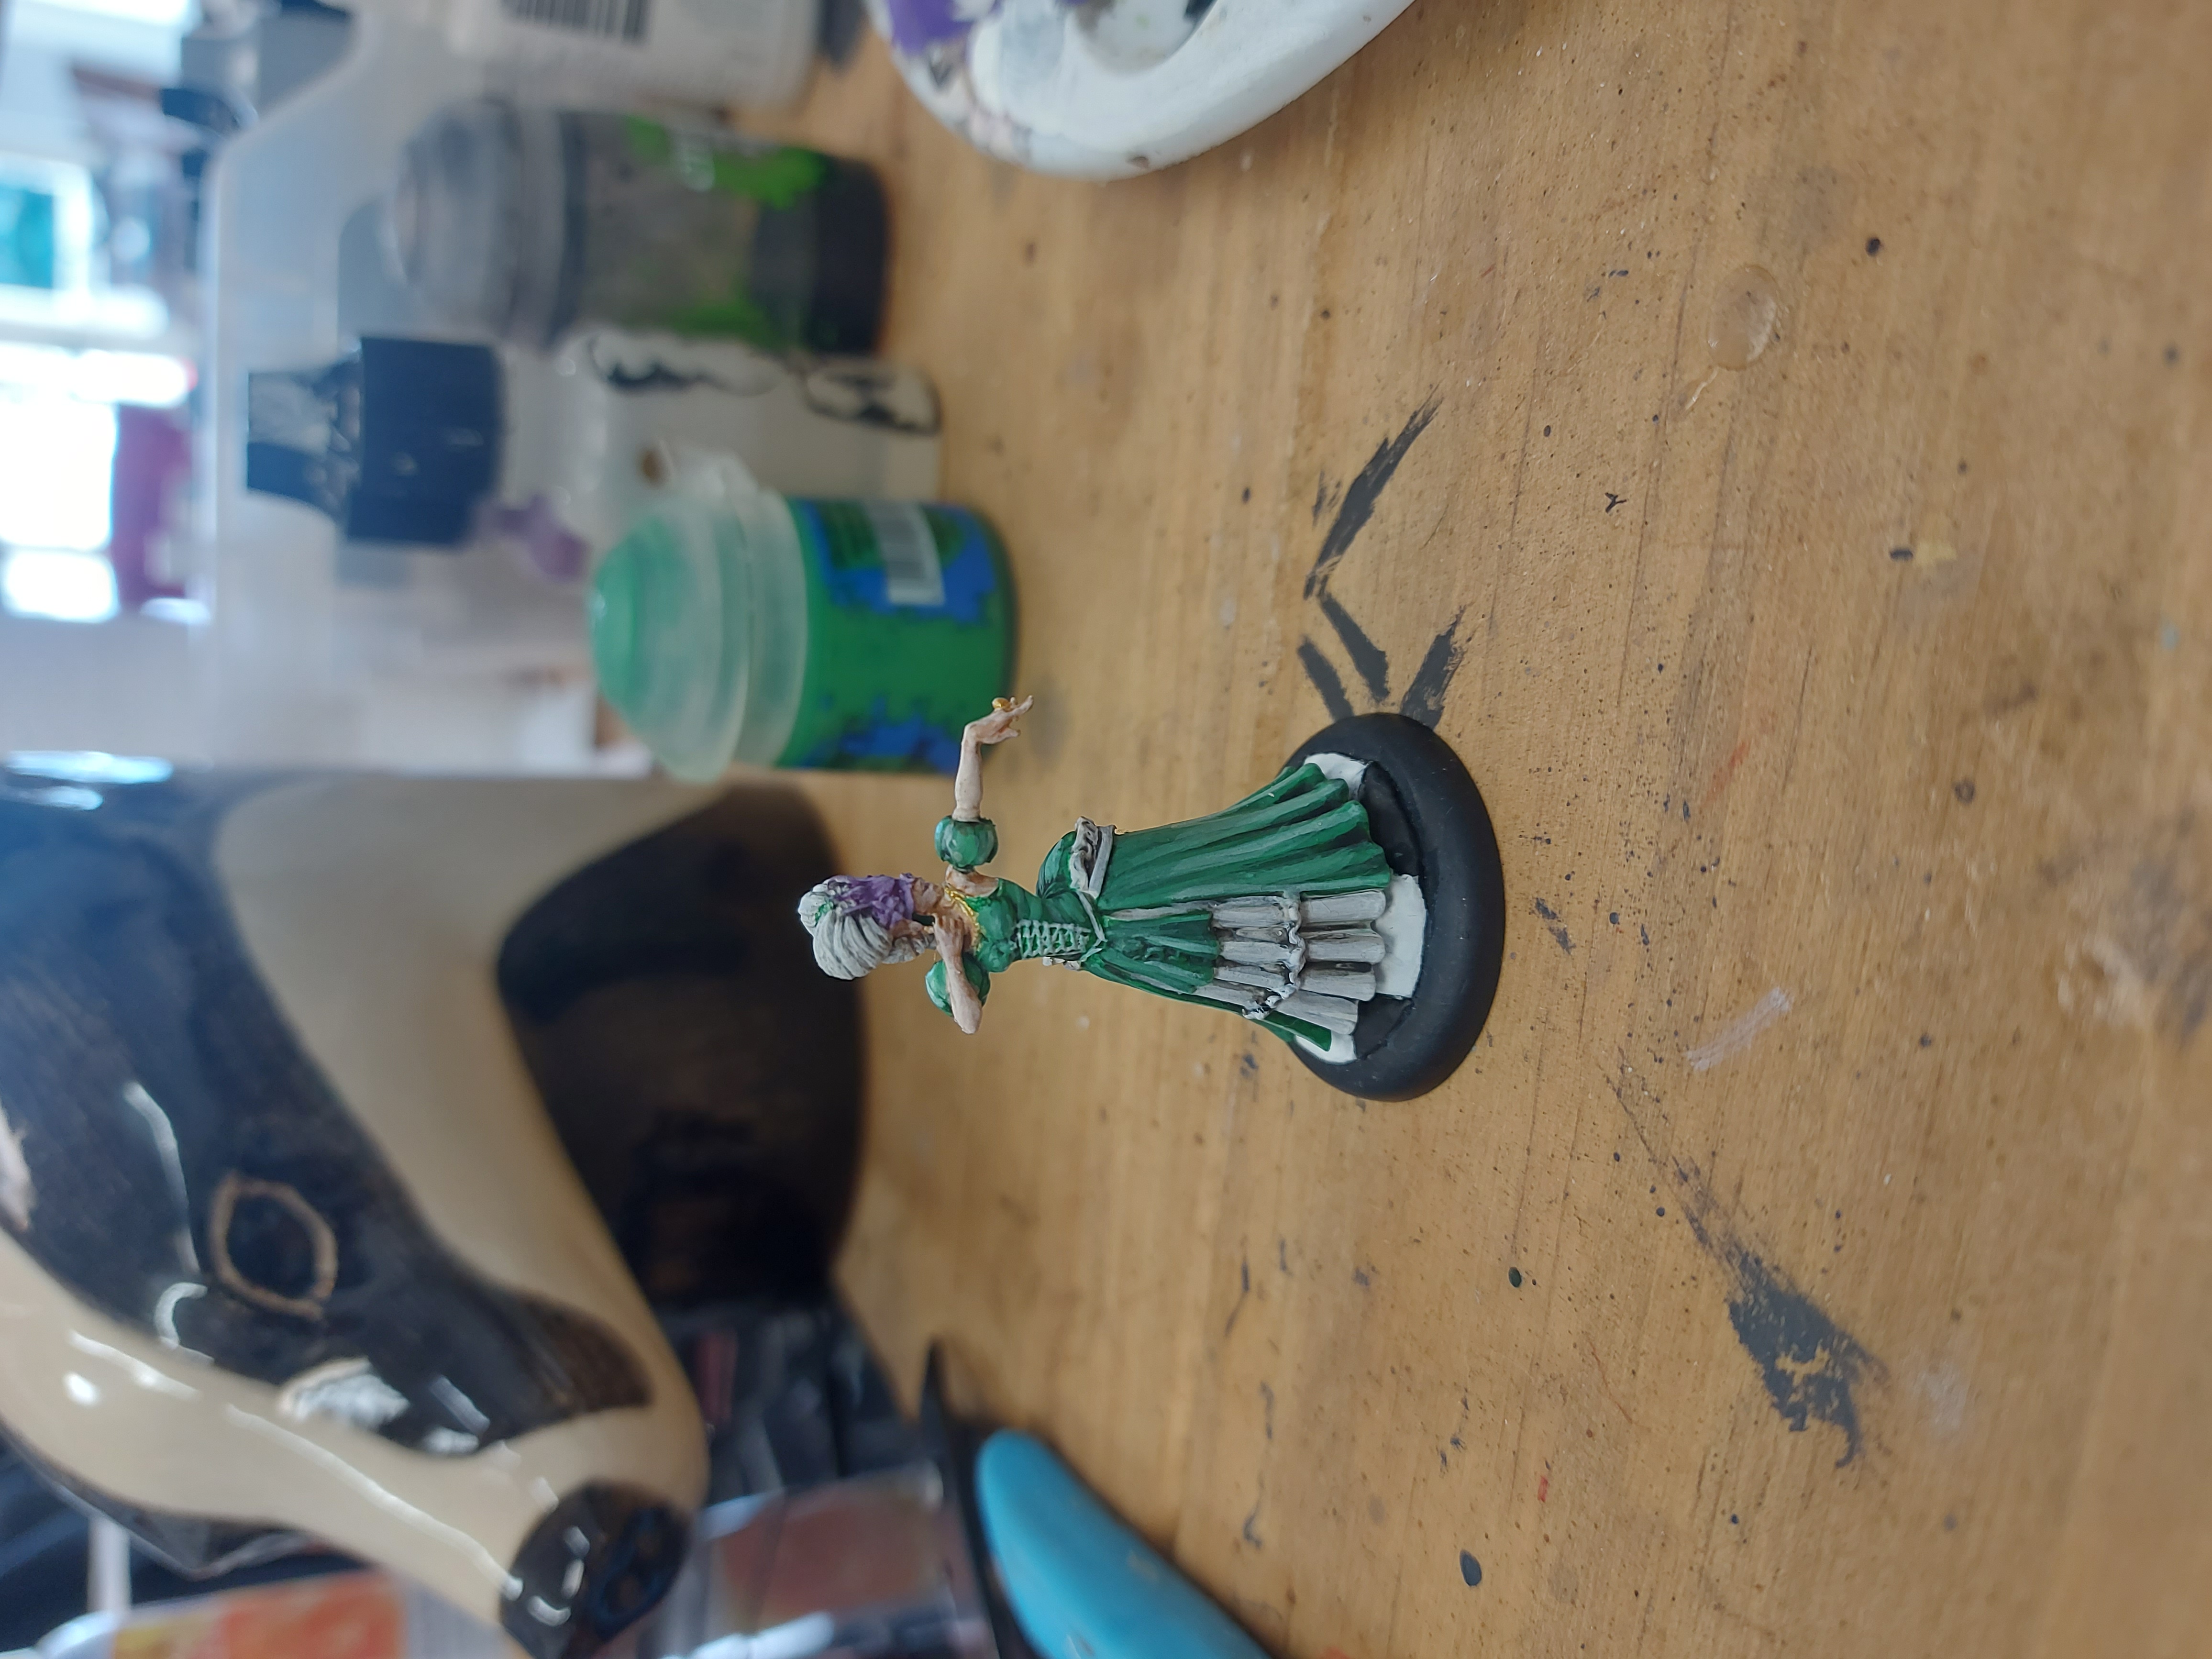
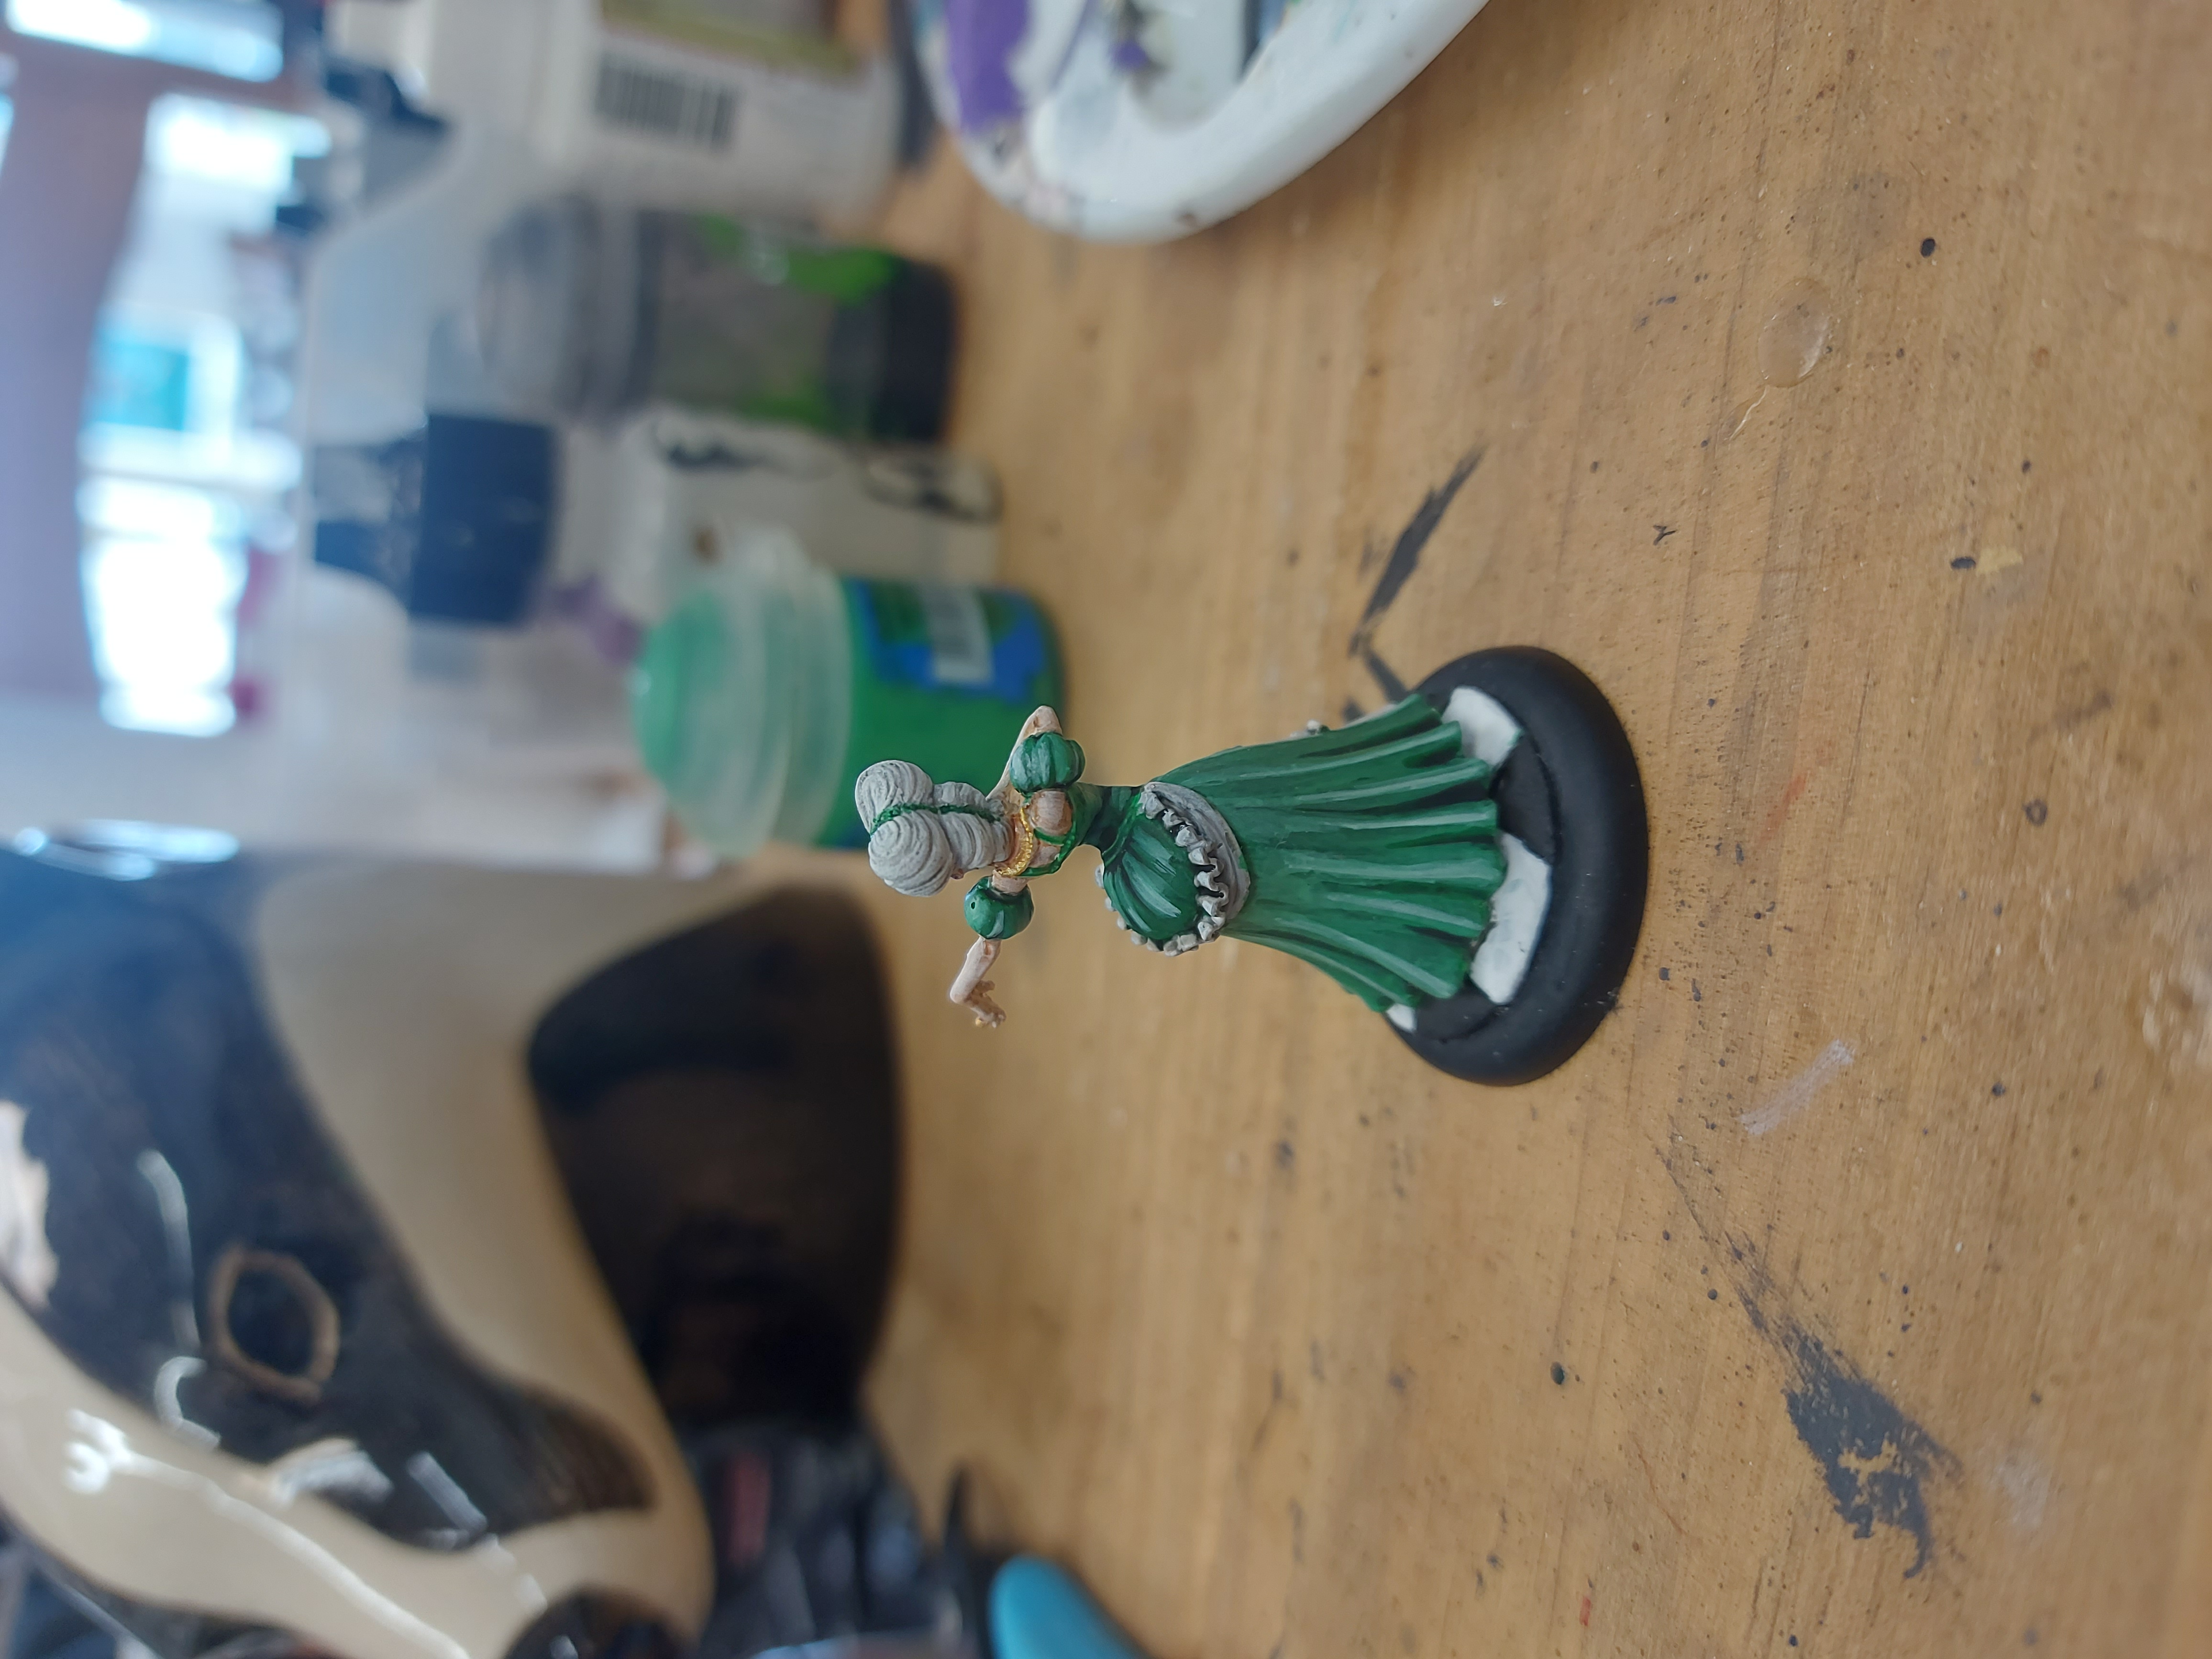
Whilst still pondering the dilemma of bricking the towers, I painted up the next model for the display.
She’s beautifully detailed as you’d expect from a Moonstone mini, was was really enjoyable to paint. I chose green for her dress as I wanted to steer clear from her looking like Belle when next to The Beast. Glad I did, because I love how the green turned out.
Stairway to Heaven and the Kitchen Roll Tunes
Remember all the plasticard side panels and front edge pieces I cut for the stairs? Yeah, I ripped them off.
I decided I wanted them to look like stone instead. I did a nice layer of paper mache to create a bit of texture on the stairs, then base coated black, followed with drybrushes in dark grey, light grey, and cream. I stuck the rear railing on and painted that black, too. And I also found a couple of cardboard tubes that I’m gonna use as turrets on each side. Just need to decide how to create the brickwork on them (very much open to any suggestions here).

Back to The Ballroom
OK, focus Bexx!
With that random interlude finished with, I turned my attentions back to the ballroom. I wanted to make some kind of ornate banister type thing to run along the back of the first little landing. I found some weird bendy plastic things and thought “they’ll do!”. And indeed they did. They cut like a dream with regular clippers, and glued in place with a couple of dabs of superglue. I trimmed the lengths to make a nice gradient with the middle being highest, sloping down to either end. I want to find something to stick on the ends to make it more ornate, but that’s a job for tomorrow, cos it’s time to close the shop and go home to eat pizza.
I left everything gluing, propped up with spray cans (which absolutely aren’t stock, promise), with the counter looking a right mess. And if Darren says anything, I’ll just tell him Gerry said it was OK 😛


![StarCraft Tabletop Miniatures Game Pre-Orders Live Now [Updated]](https://images.beastsofwar.com/2026/03/starcraft-tmg-news-cover-600-338.jpg)


![Mounted US Cavalry On Kickstarter For Dead Man’s Hand! [Updated]](https://images.beastsofwar.com/2026/03/us-cavalry-main-600-338.jpg)


