


![Alternative Trench Crusade Miniatures? Trench Missionaries Review | Wargames Atlantic [7 Days Early Access]](https://images.beastsofwar.com/2026/03/unboxing-wargames-atlantic-trench-missionaries-coverimage-225-127.jpg)


Aircraft Crash Board


Recommendations: 422
About the Project
I’m building a small gaming board featuring an aircraft crashed to jungle.
Related Genre: General
Related Contest: TerrainFest 2023
This Project is Completed
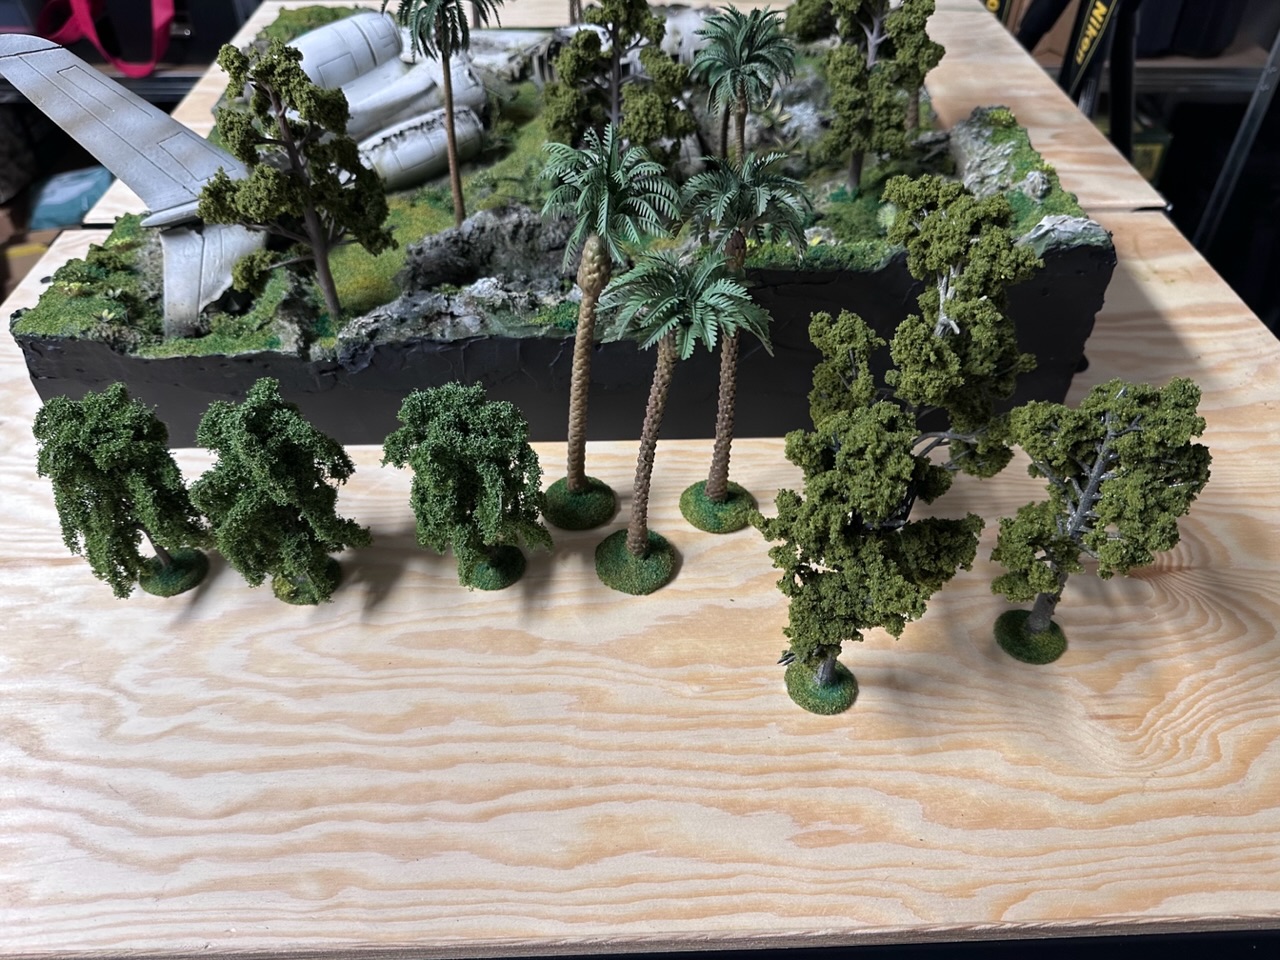
Which trees to use?
I would really appreciate the community’s opinion on which combination of trees I should use for the board. The goal is to create a feel of somewhat dense jungle, but keeping it playable.
The plan is to repurpose some of my existing trees, and I did order more palm trees.
Below are some photos I took earlier, also places some aquarium plants in situ, I do intend to use them as well.
Which ones I should use? Mix all or just one or two types? Get something else altogether?
Tree 1: palm trees. Many available and ordered more.
Tree 2: Willows. These are old 4Ground trees, no longer available. I have 3 or 4.
Tree 3: Woodland Scenics trees. I’ve plenty of armatures in different sizes and foliage couple of different green tones.
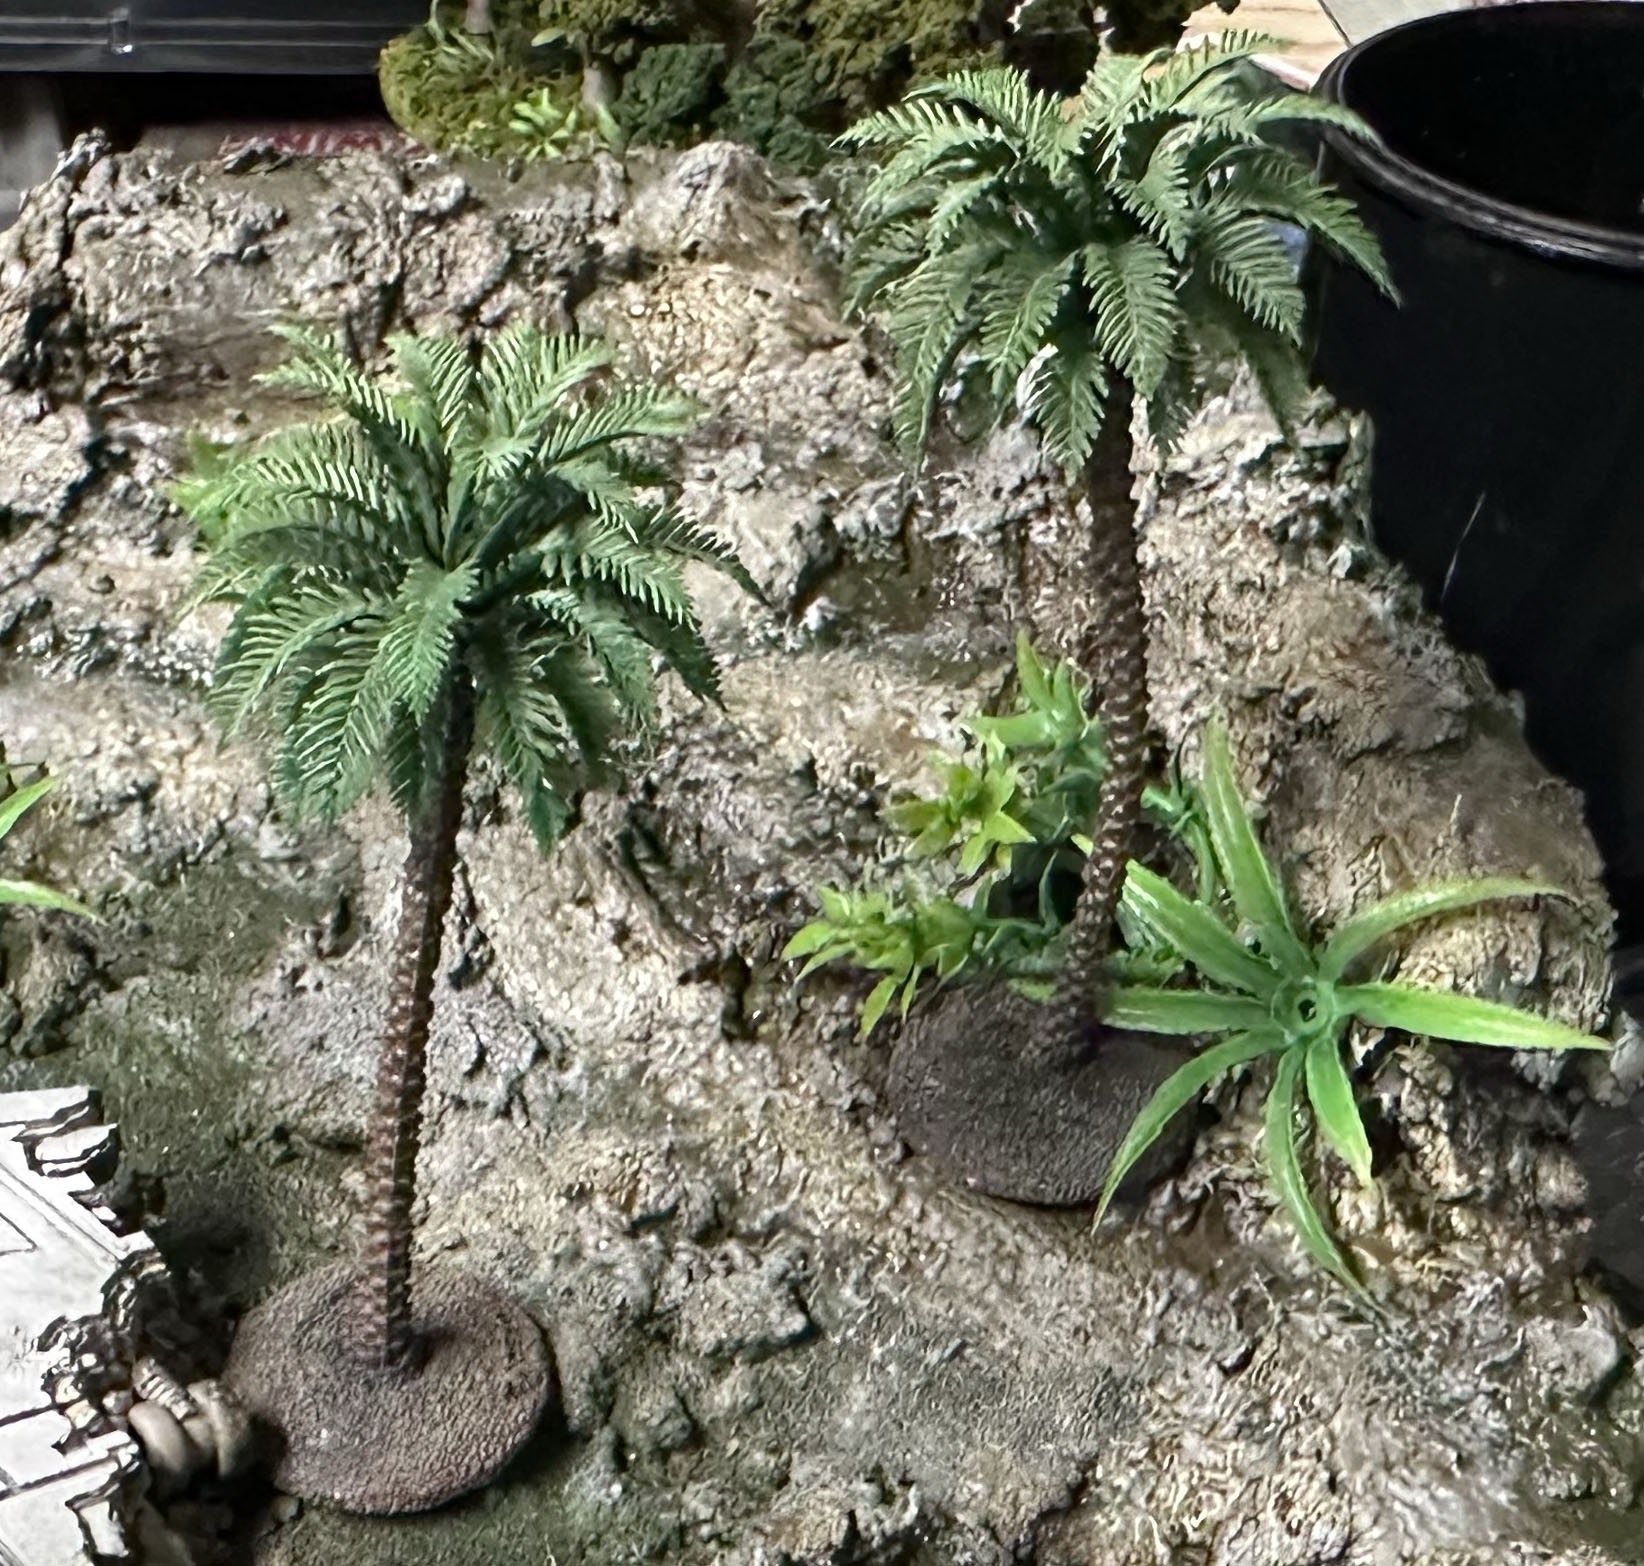 Tree 1 - Palm trees
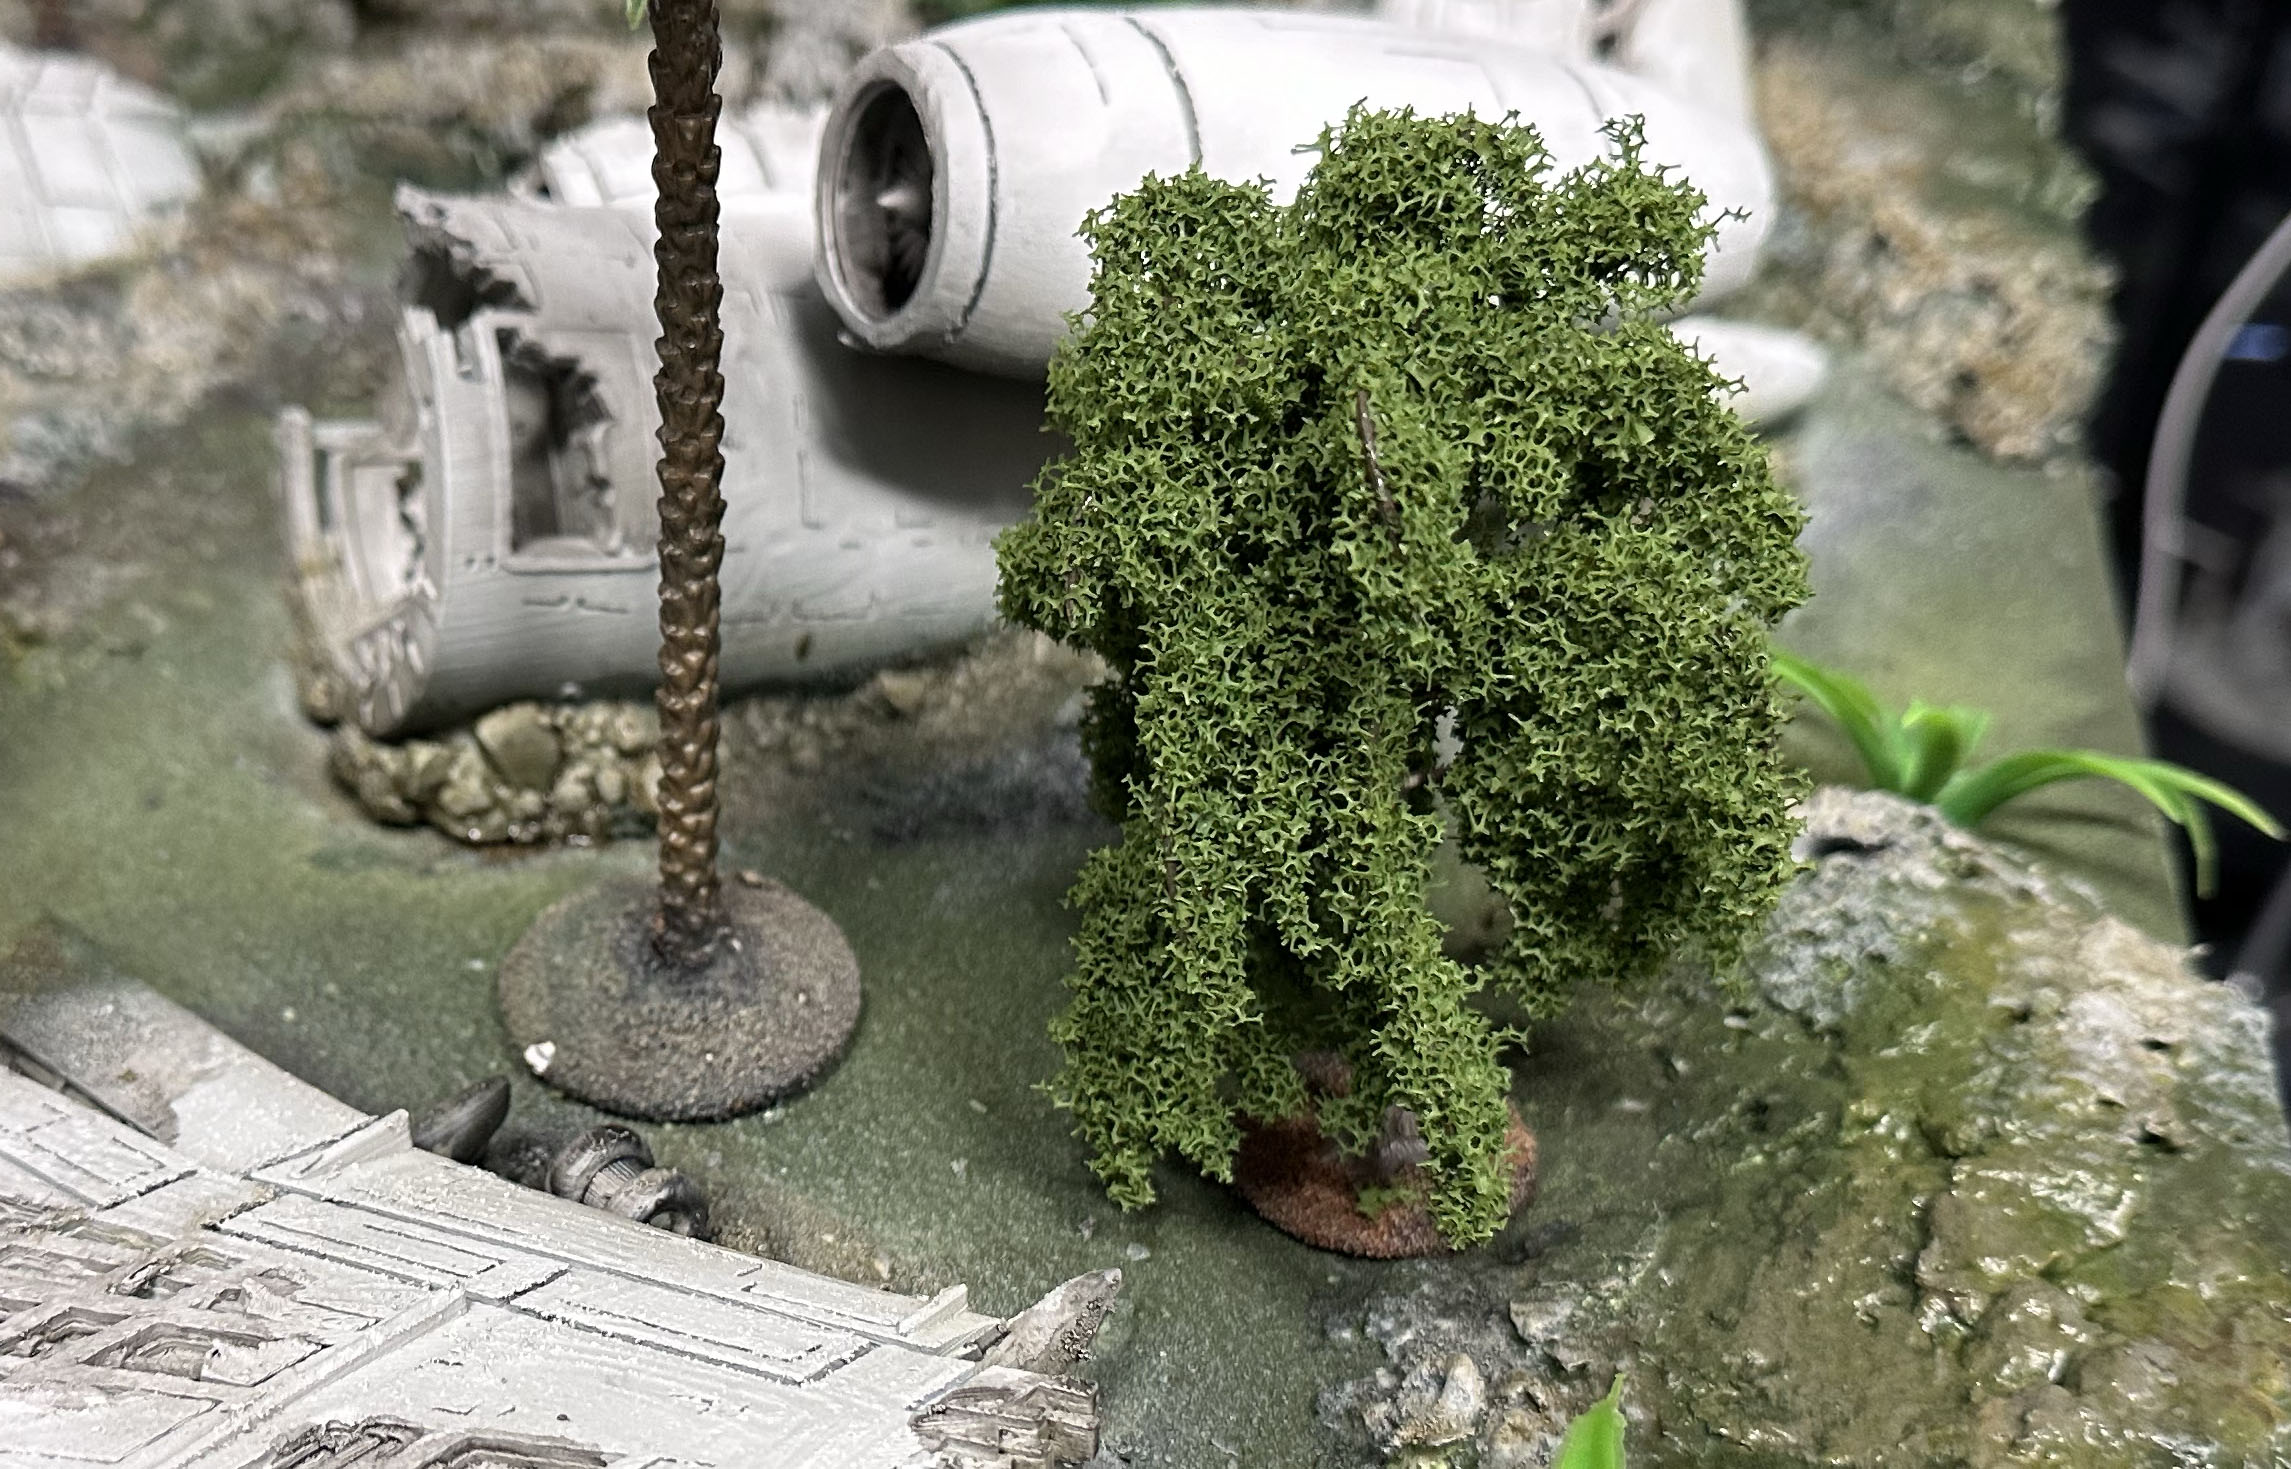 Tree 2 - Willows
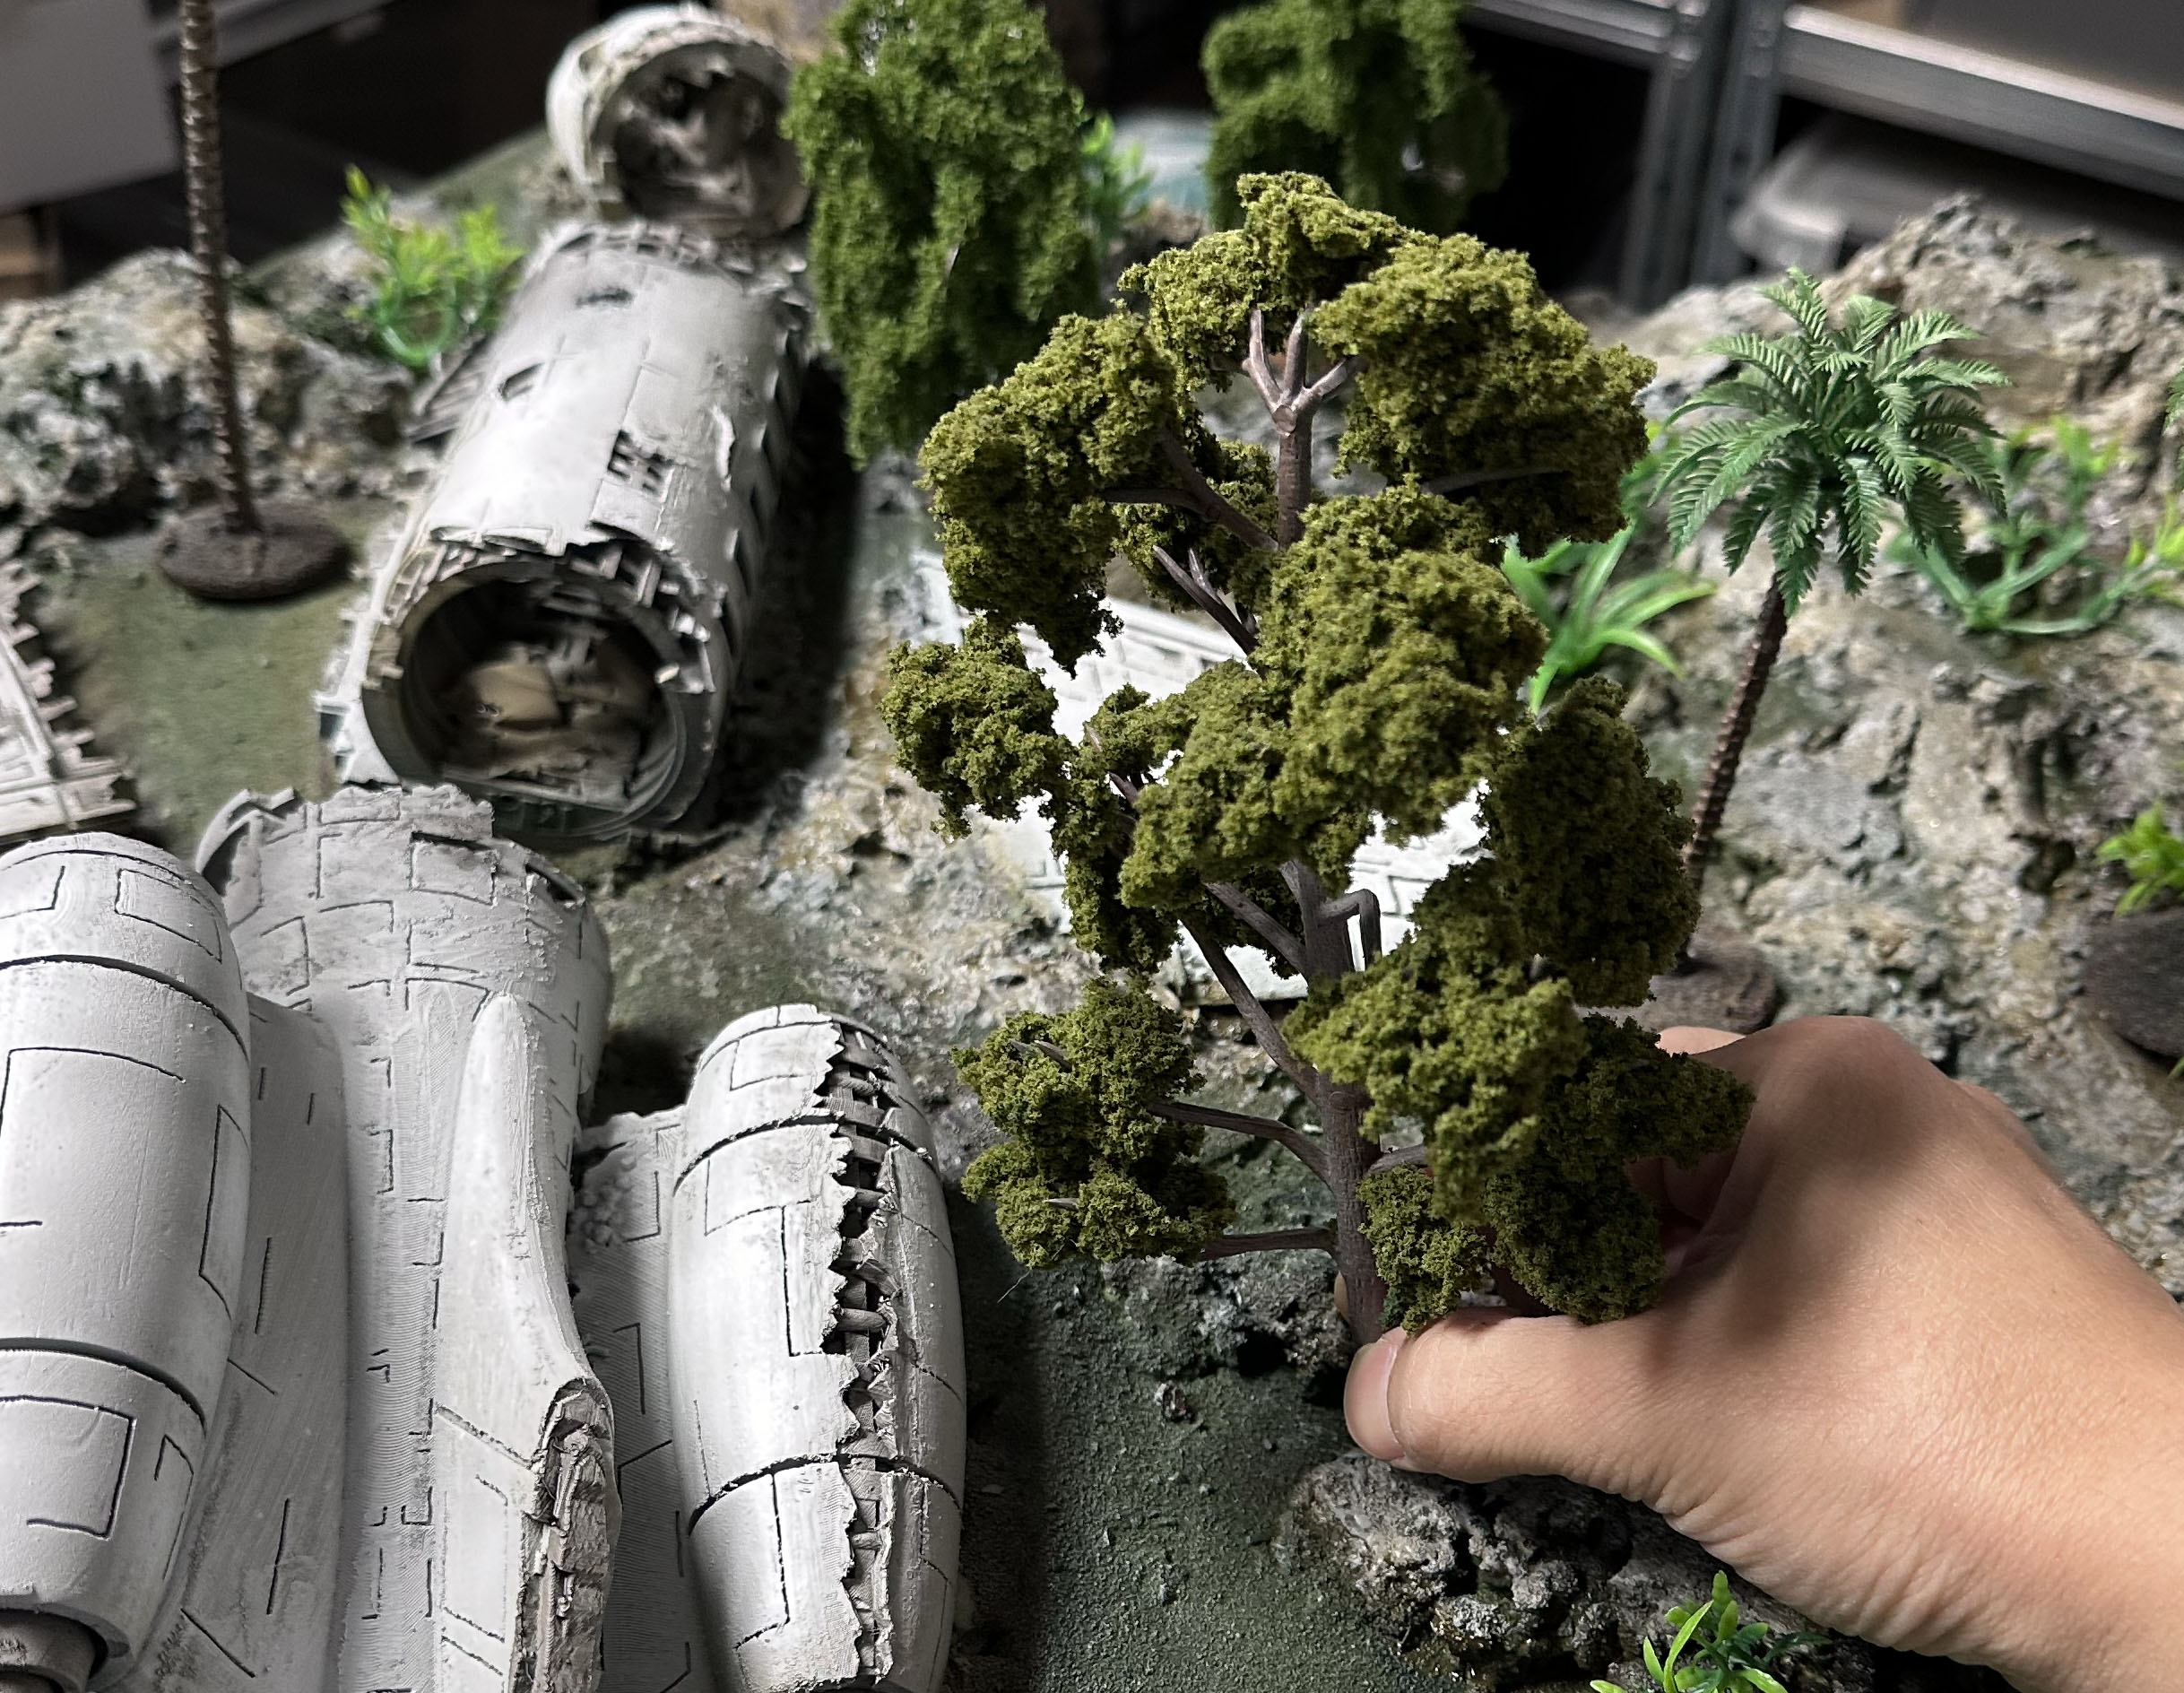 Tree 3 - Woodland scenics
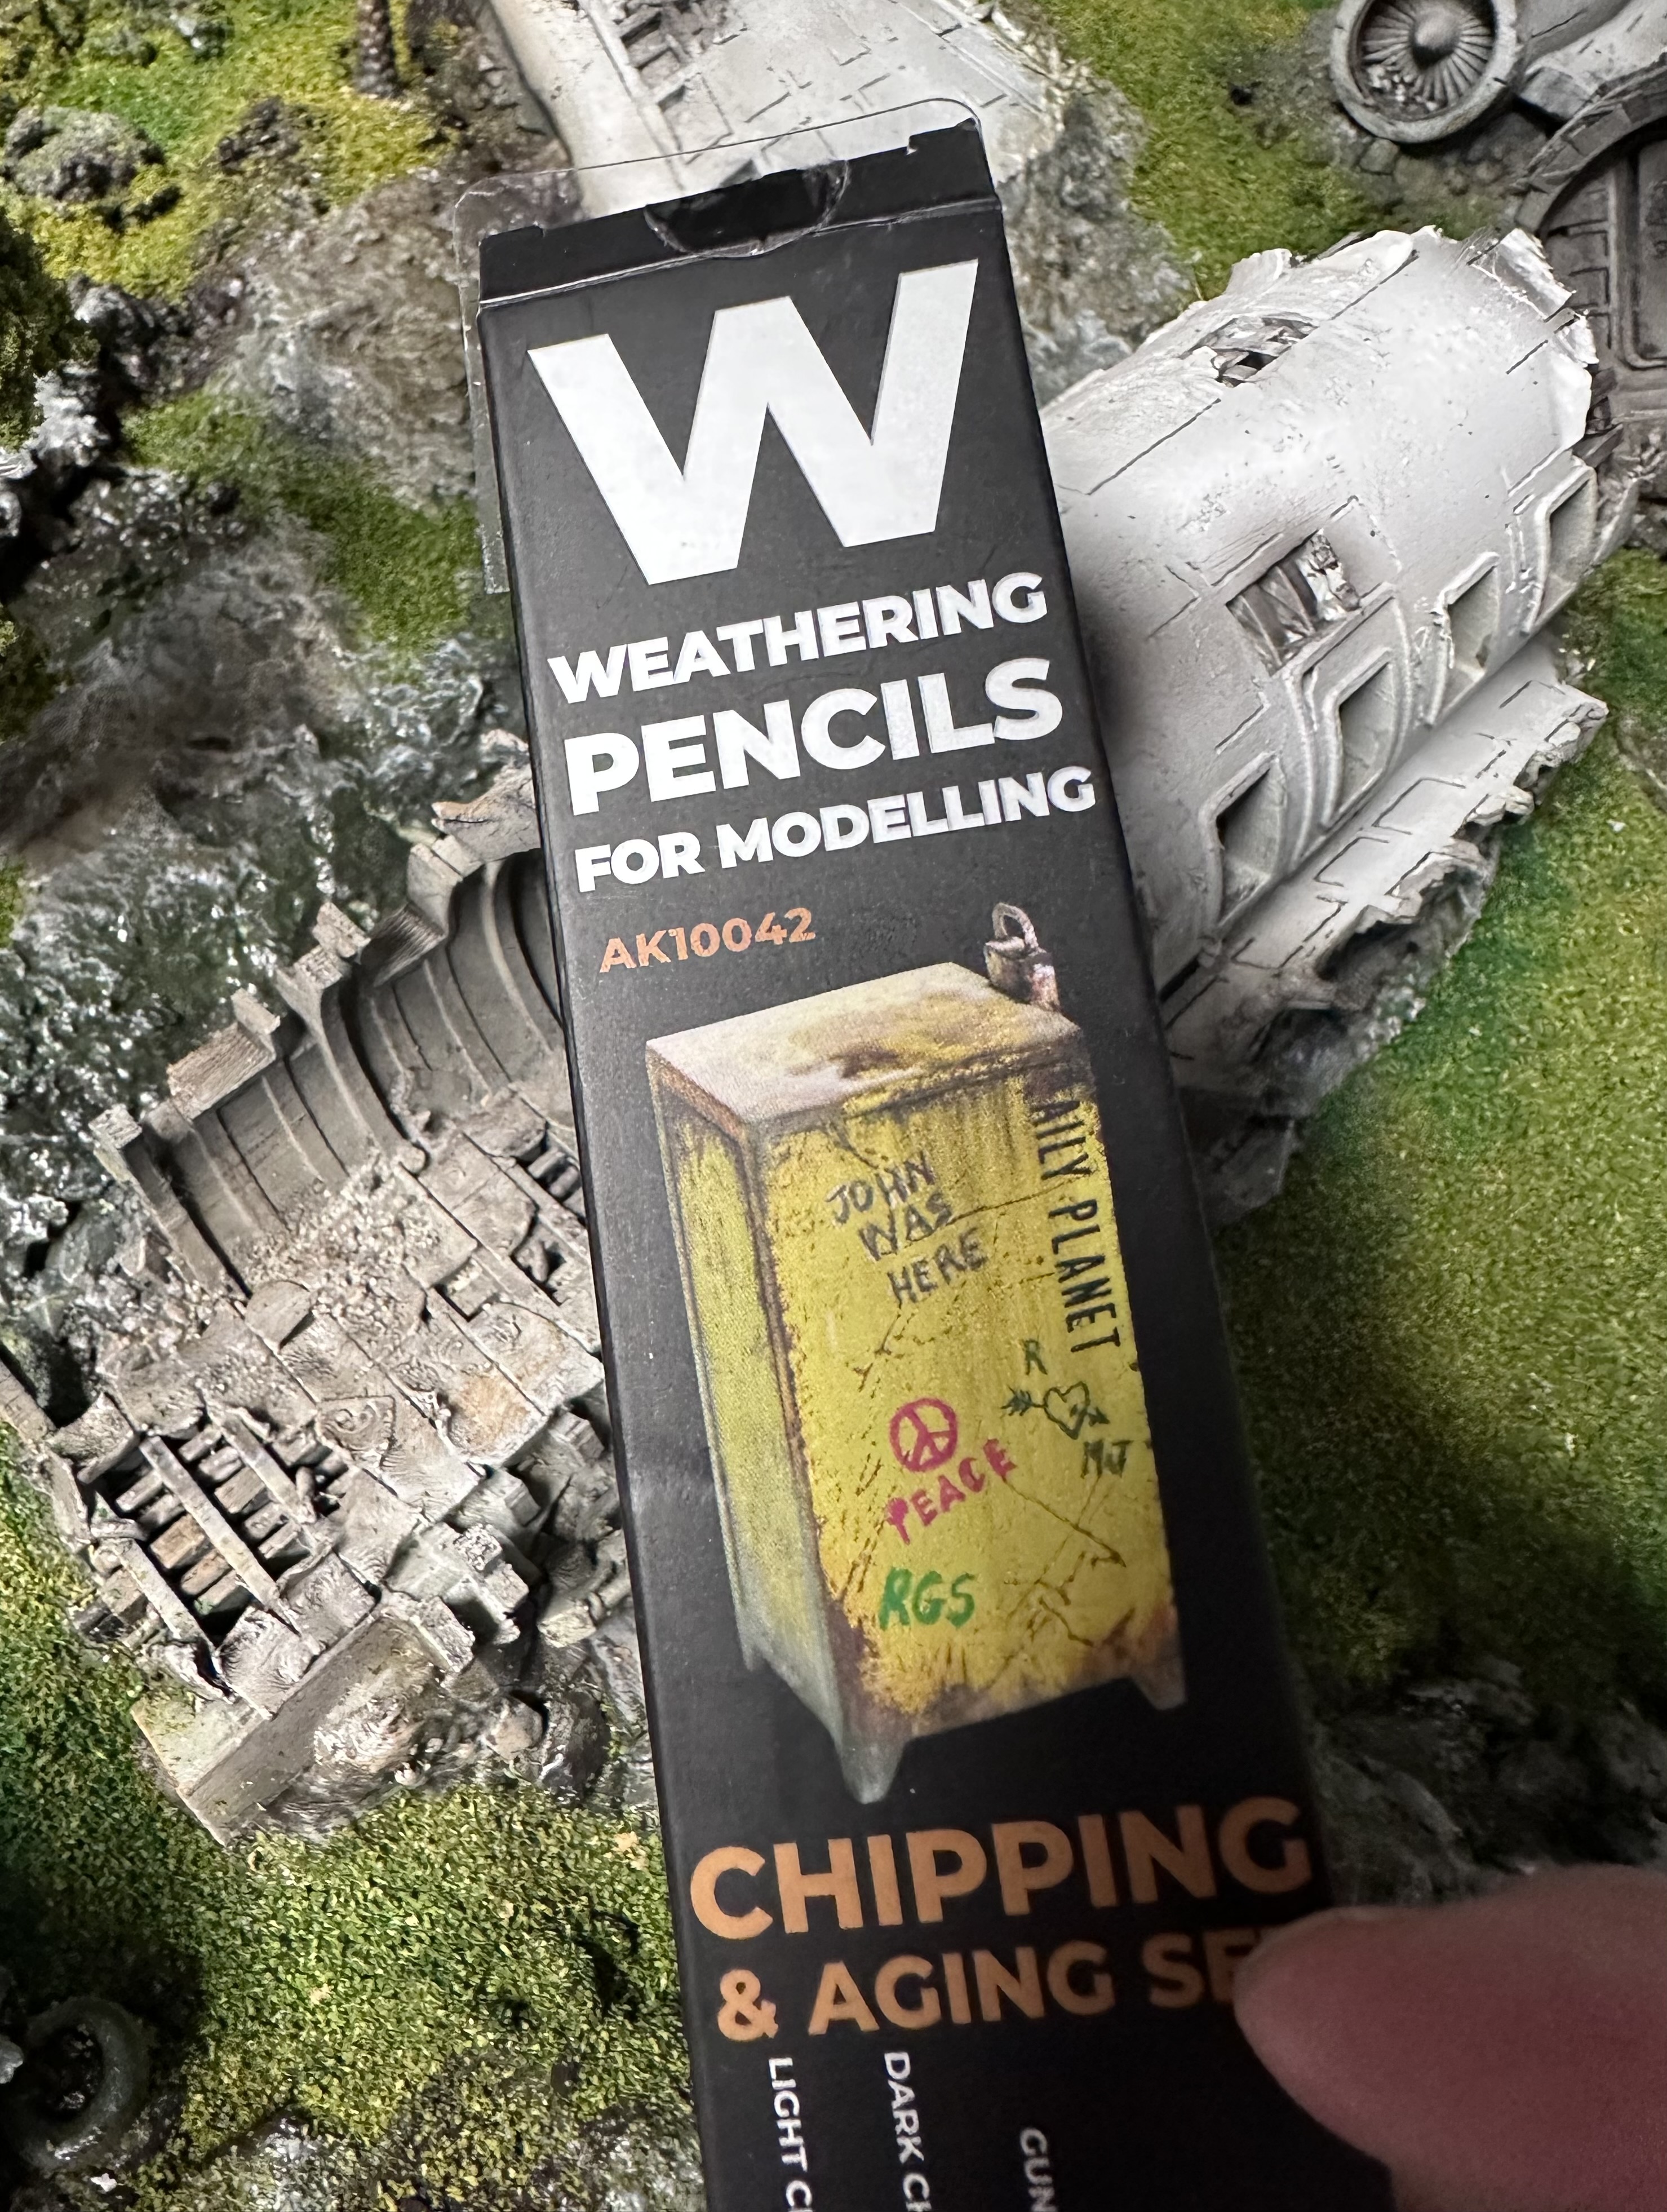


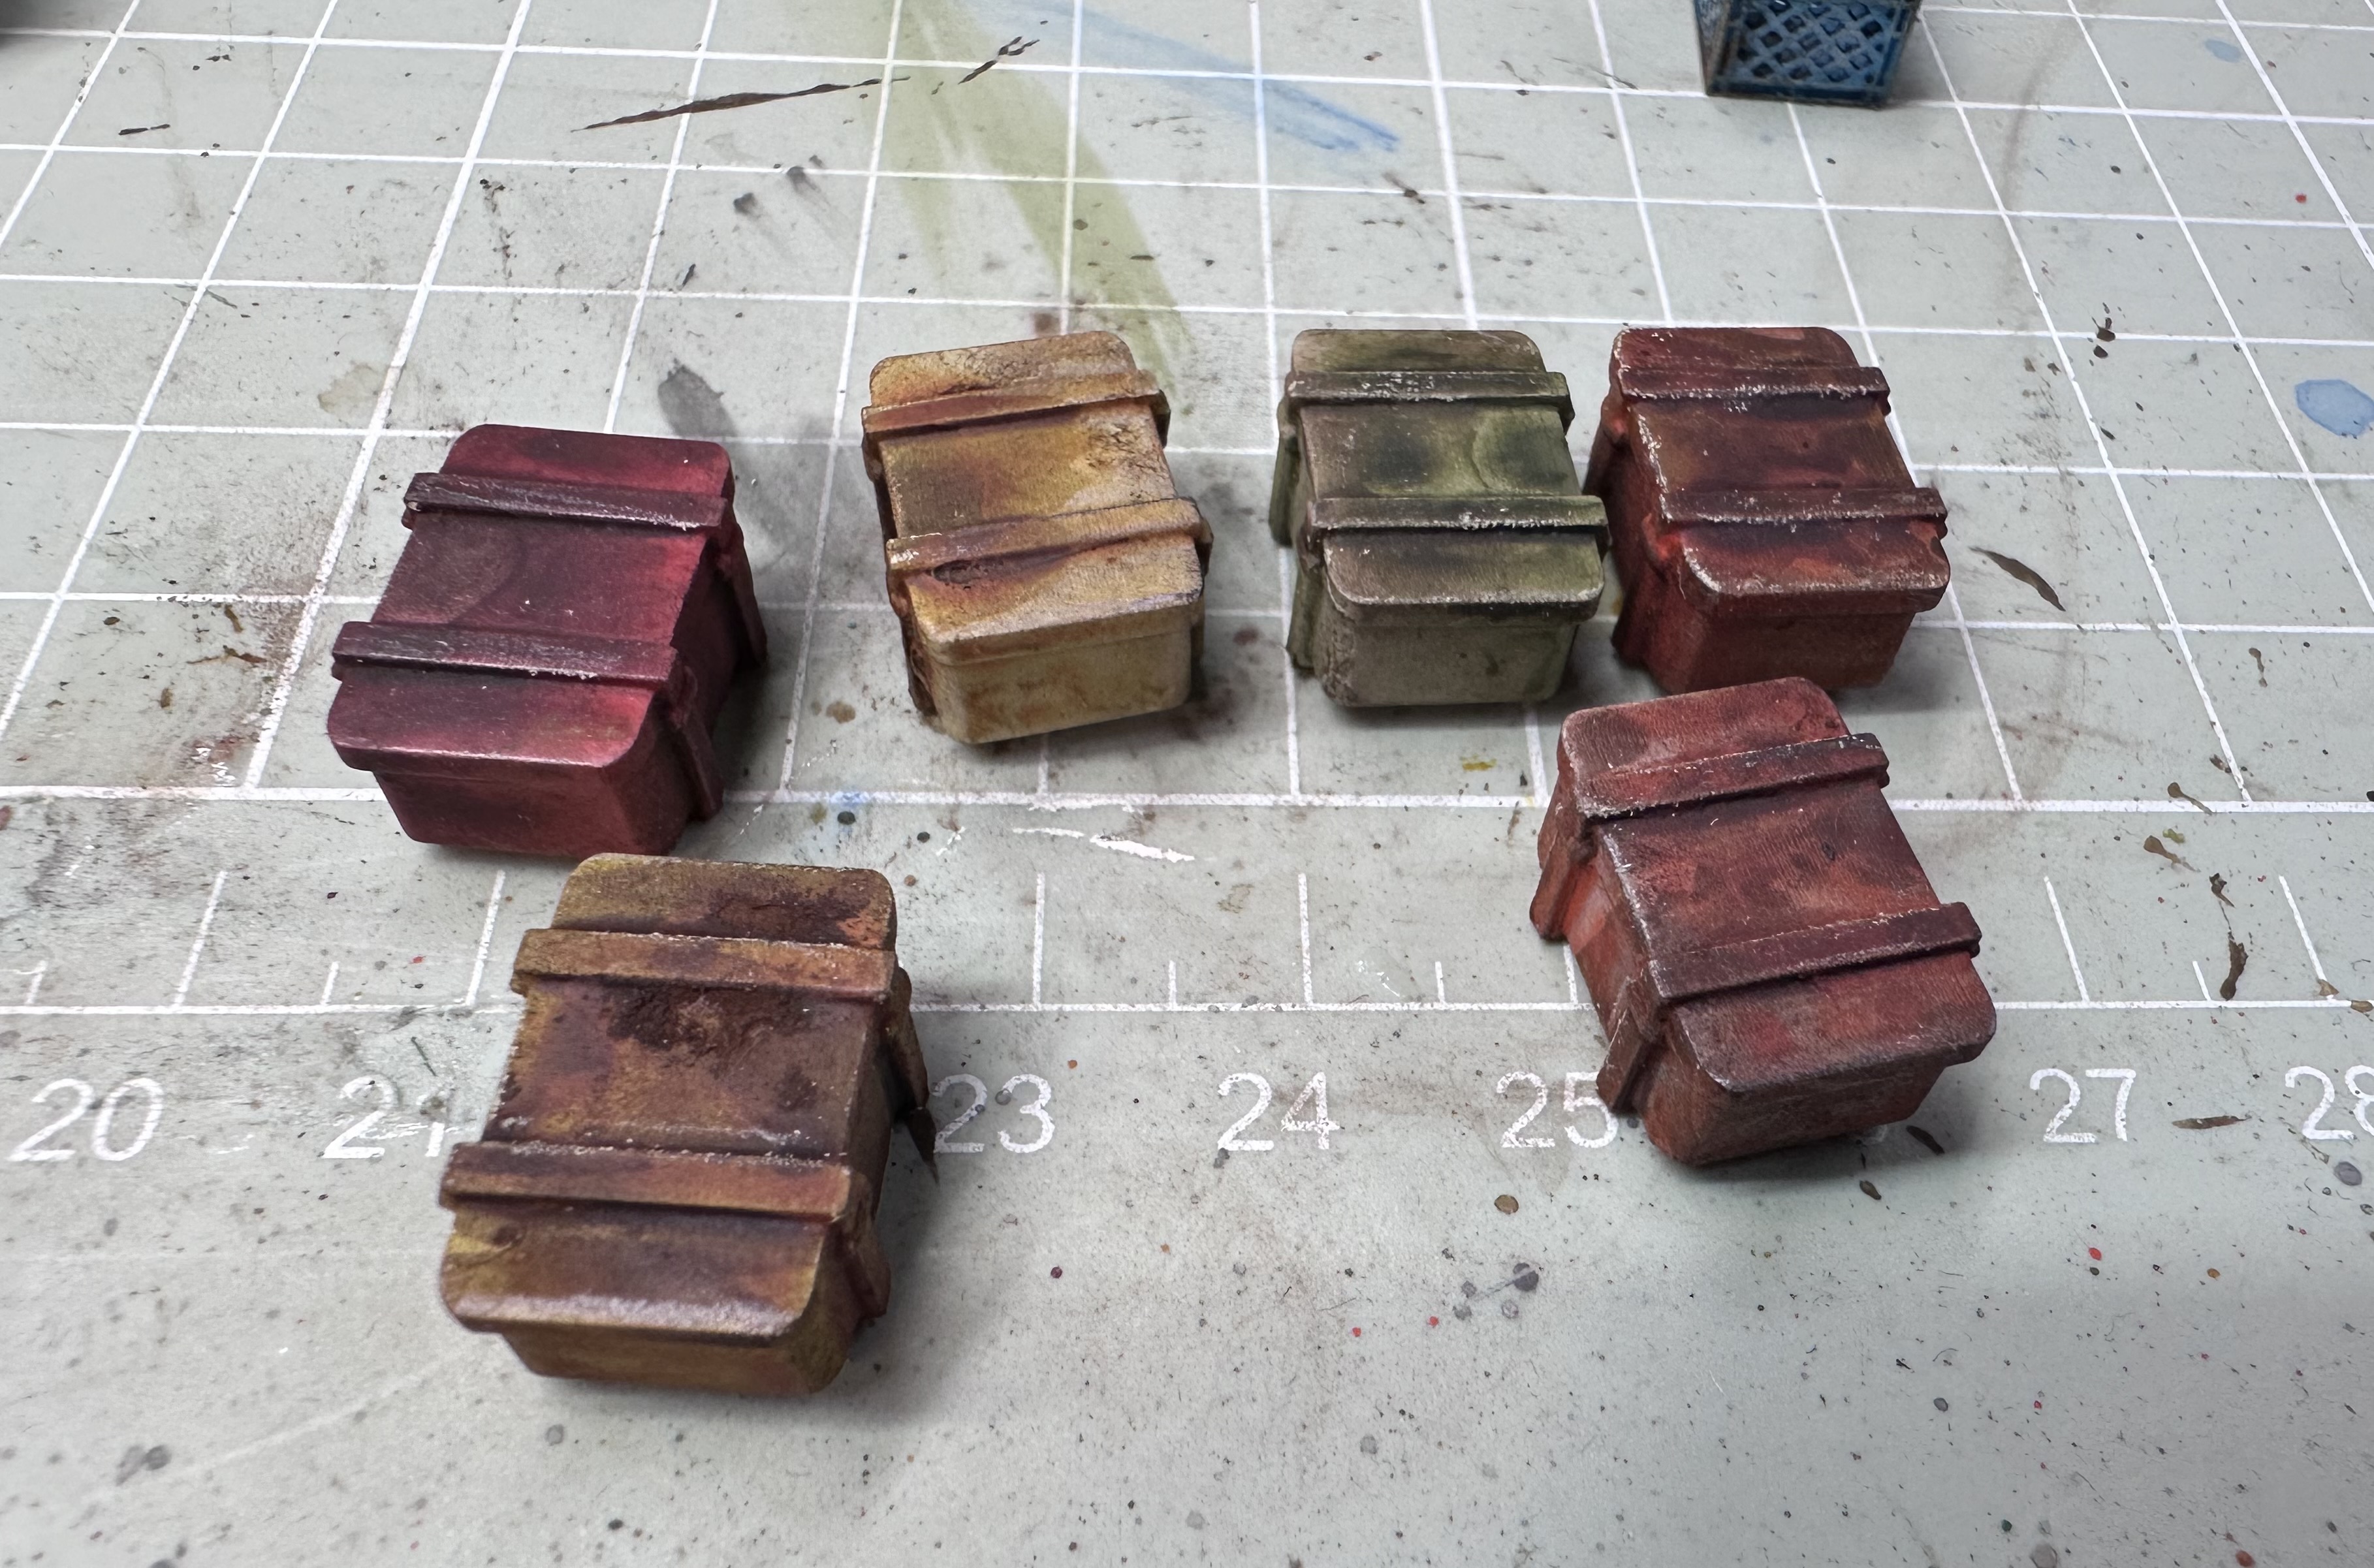
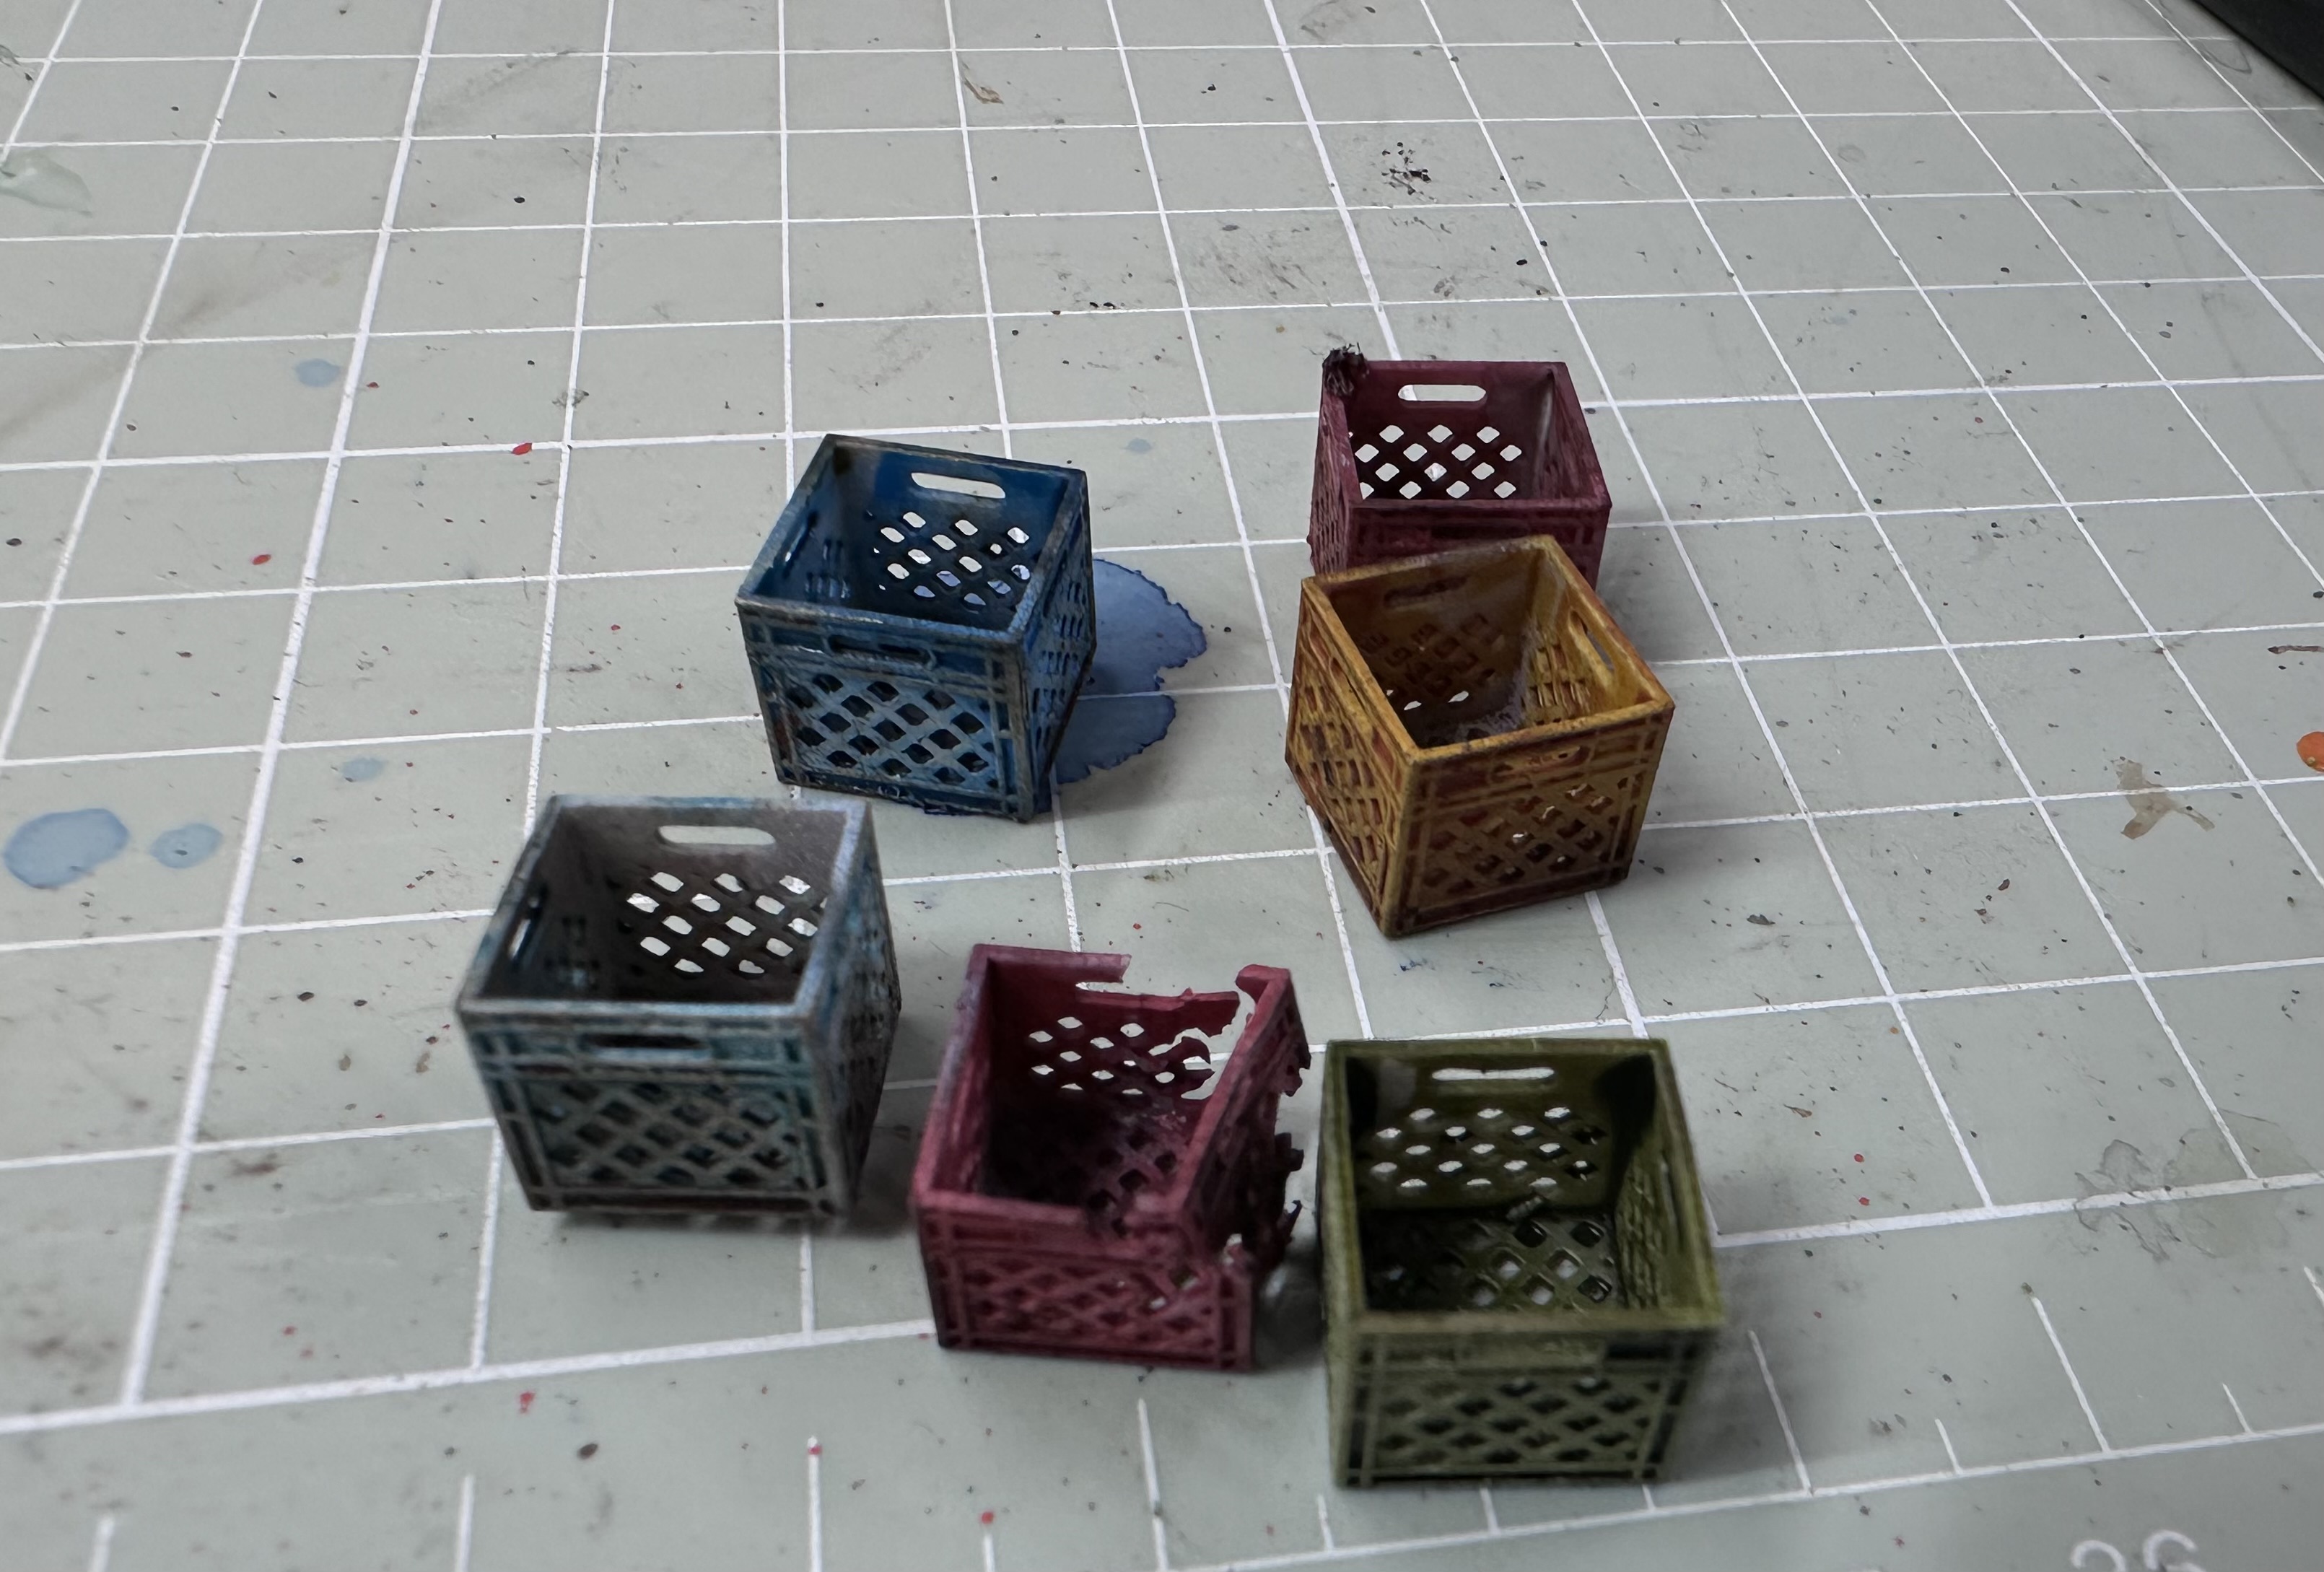
Printing some boxes and crates
@hutch shared an idea in the comments to add some incidental pieces, crates and such. I found some interesting pieces in MyMiniFactory:
https://www.myminifactory.com/object/3d-print-milk-crate-for-dioramas-214623
https://www.myminifactory.com/object/3d-print-oil-drums-and-ammo-boxes-253246
I printed bunch, because why not, can always use them in other builds or bases too. Despite small size they came out nice from the resin printer.
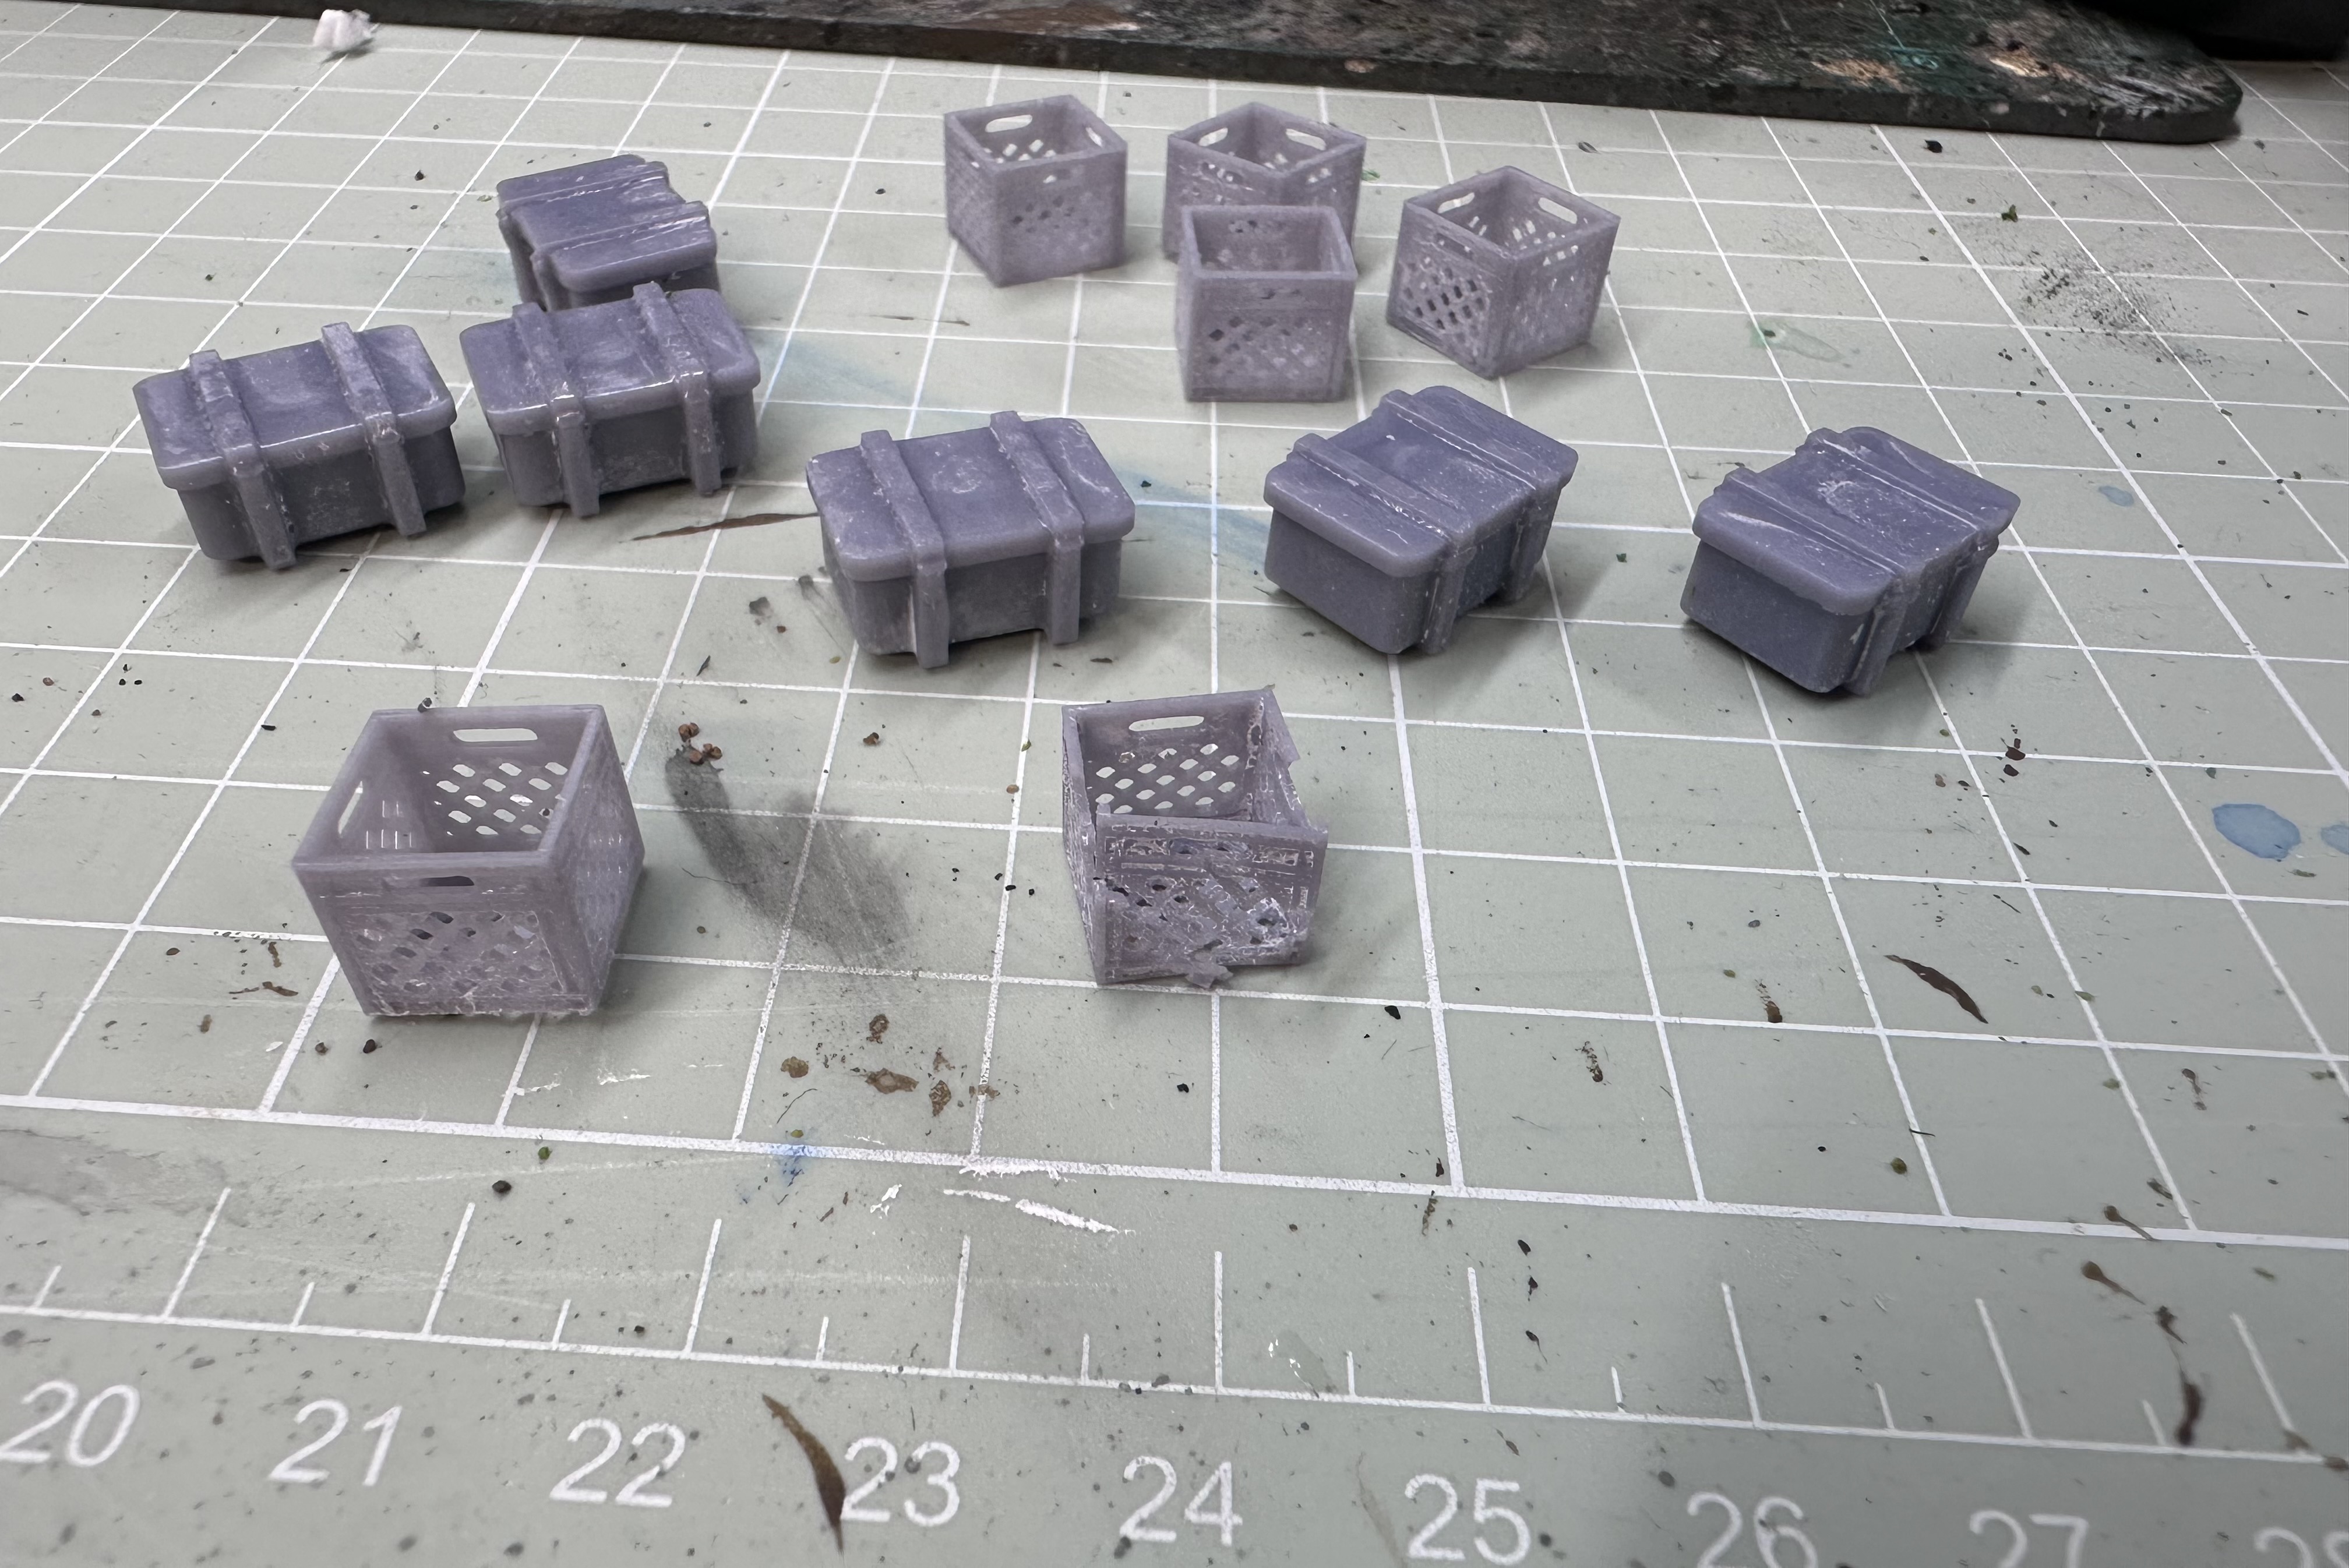 (the grid is 1cm)
Trees, plants, and a bit of clean up
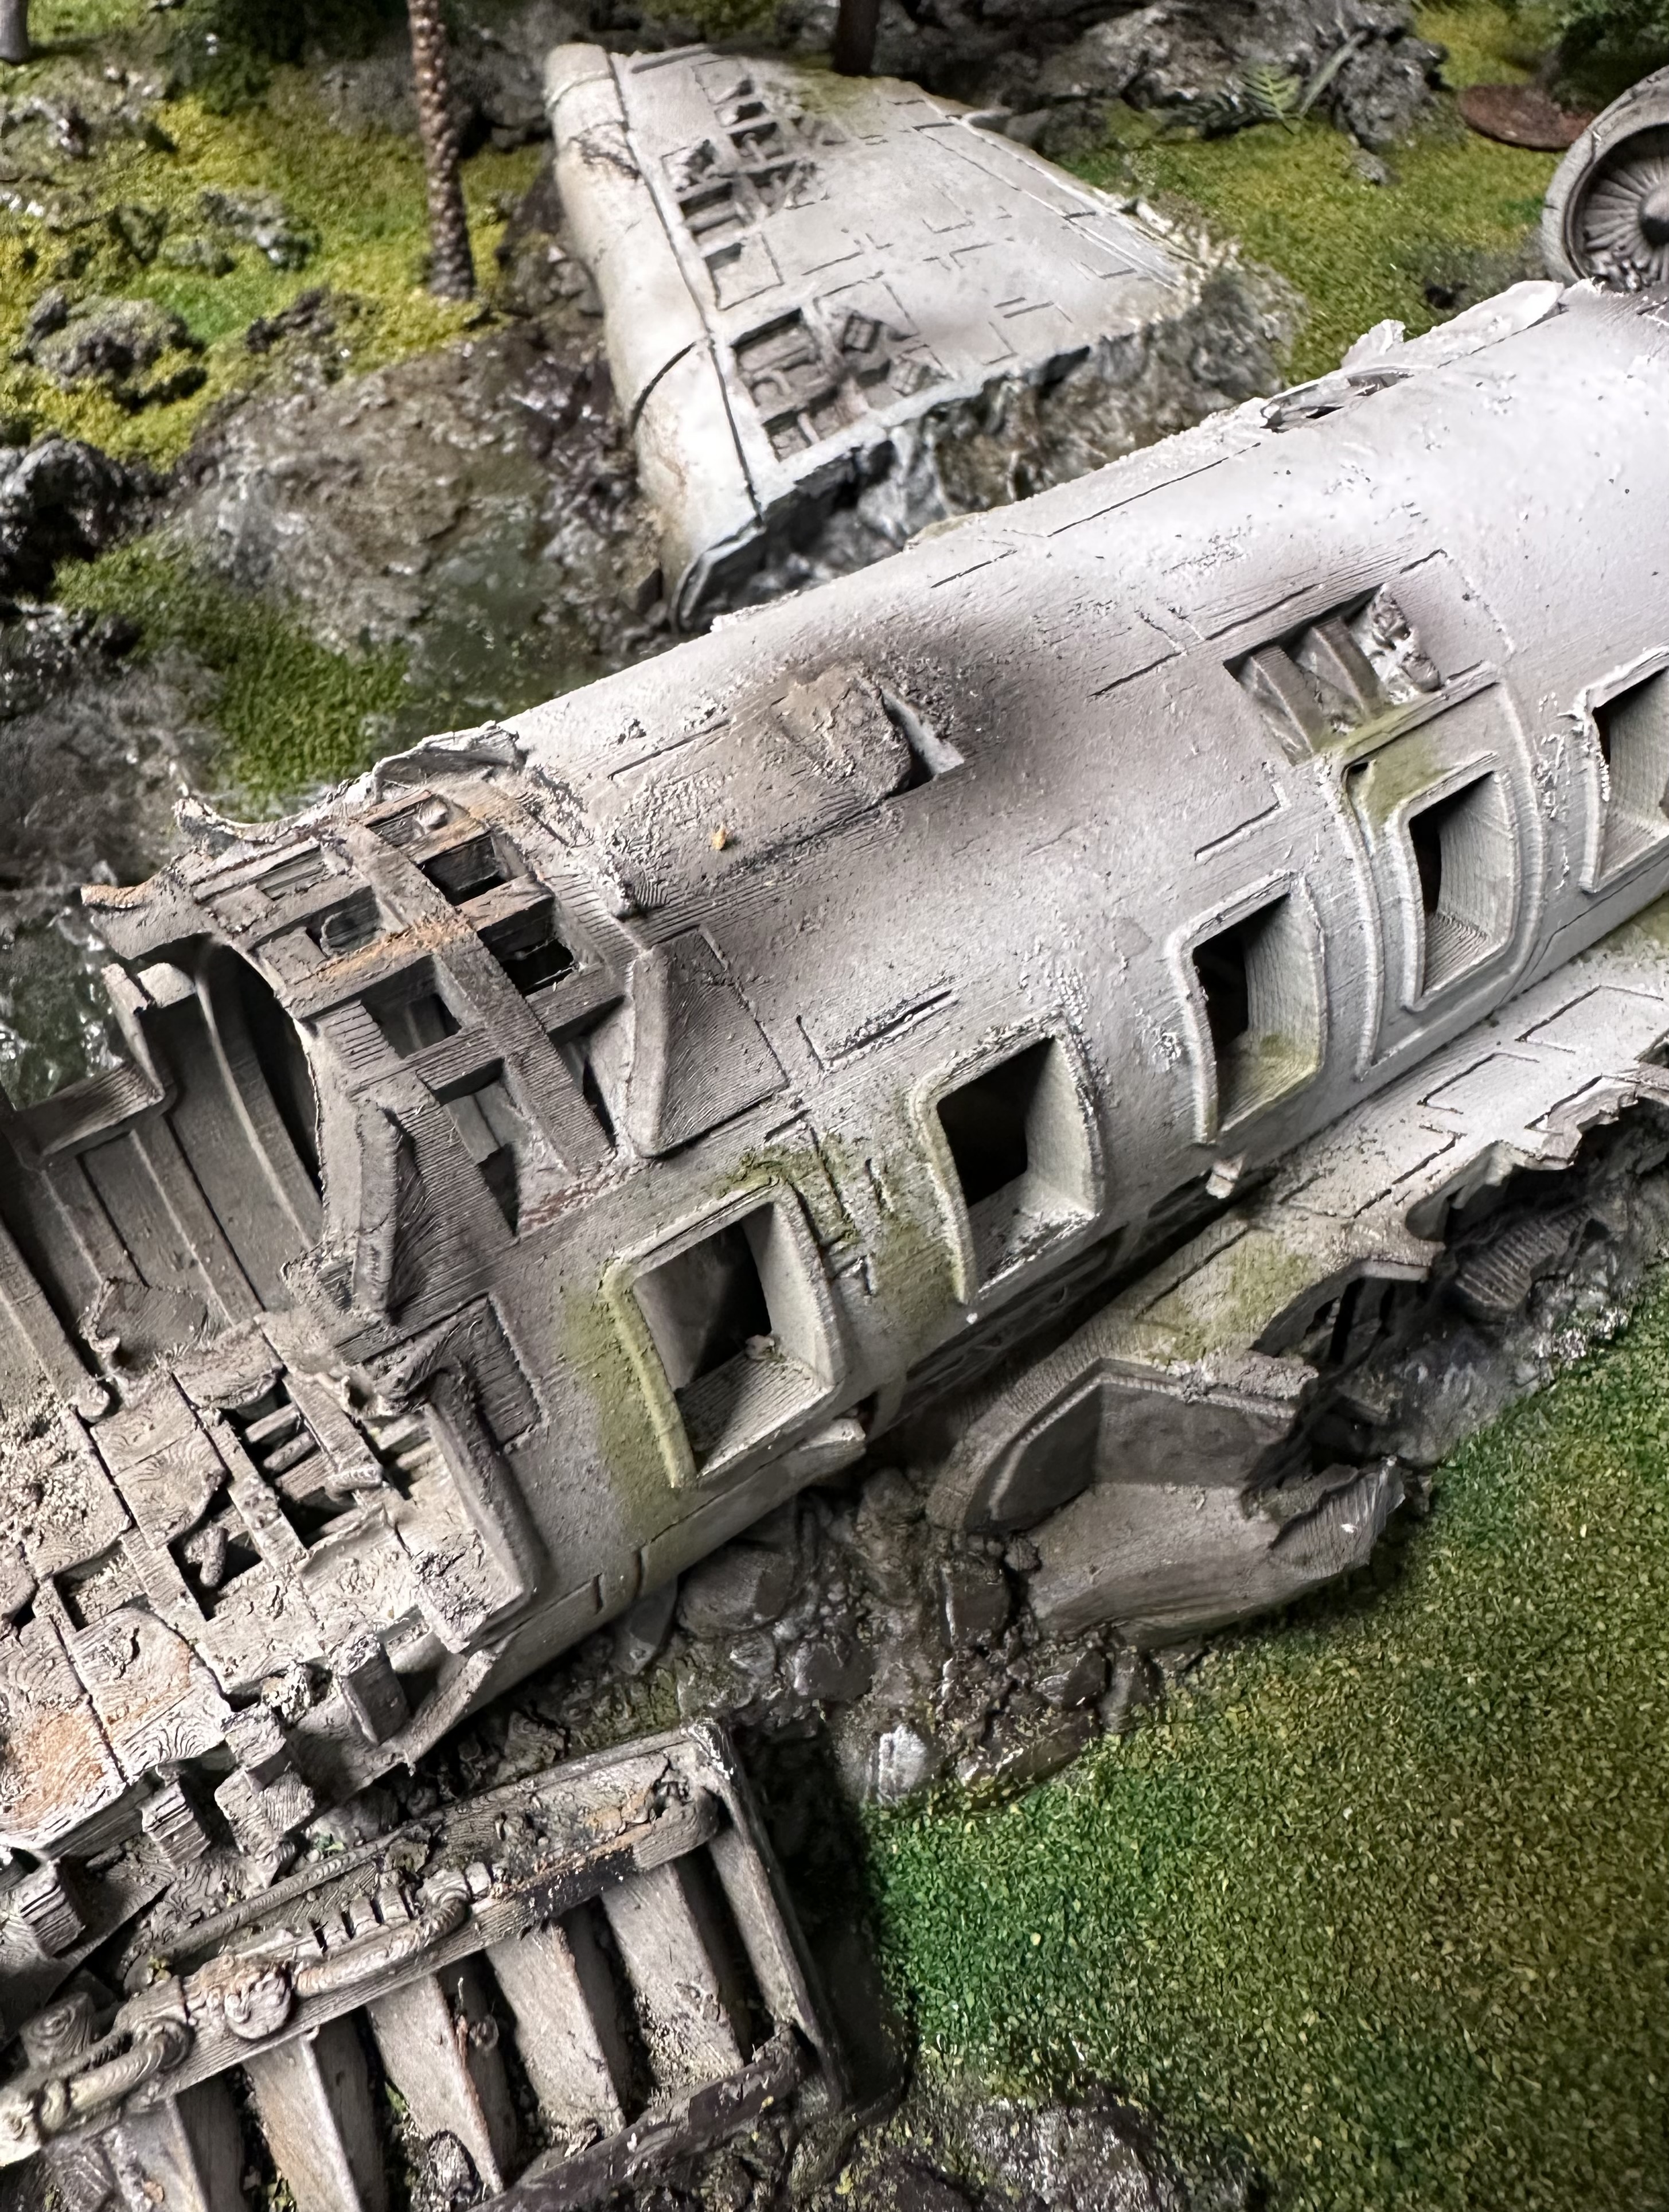
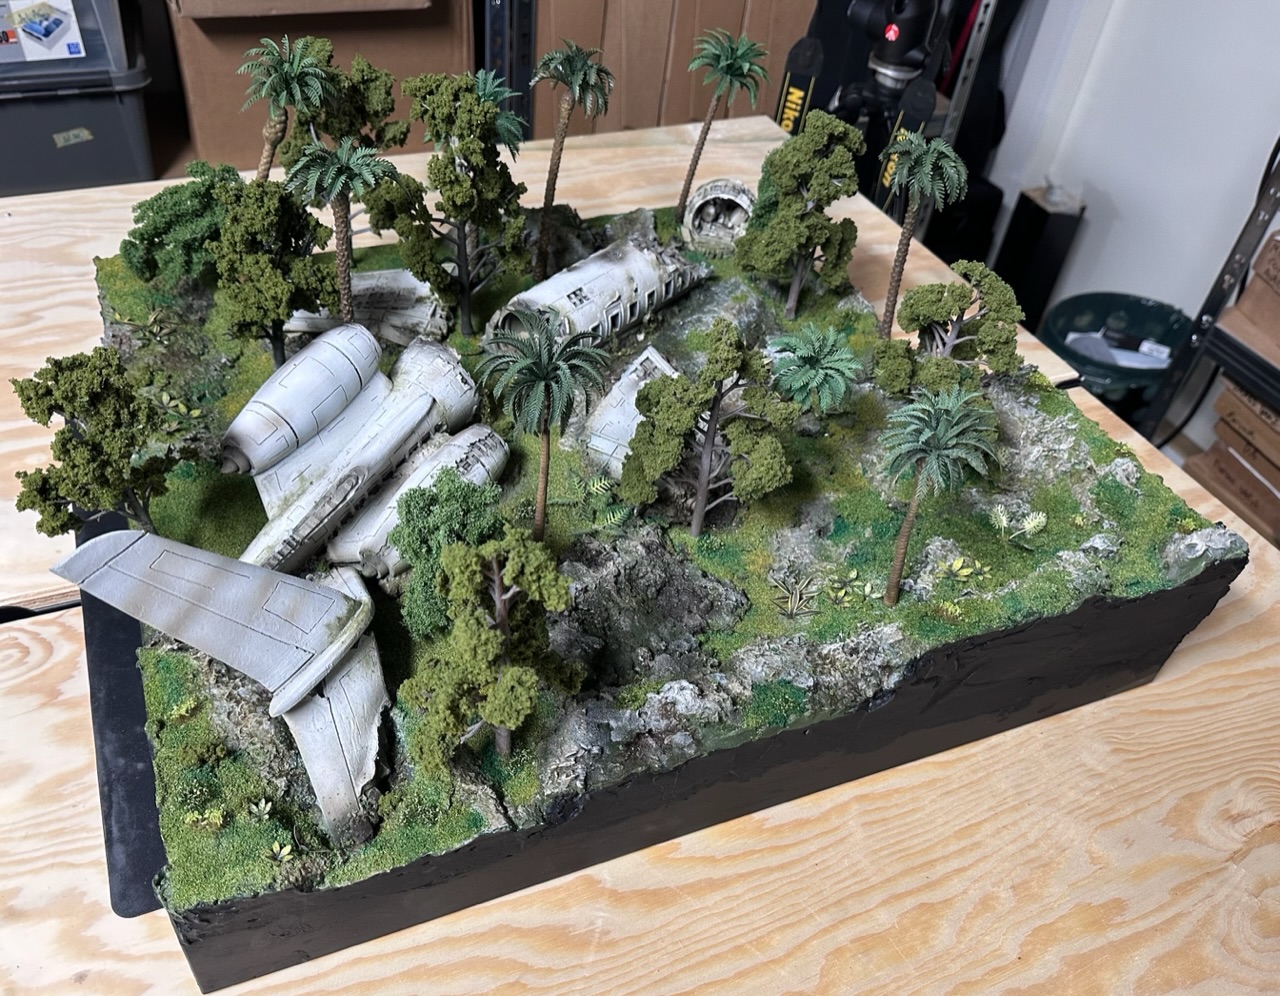
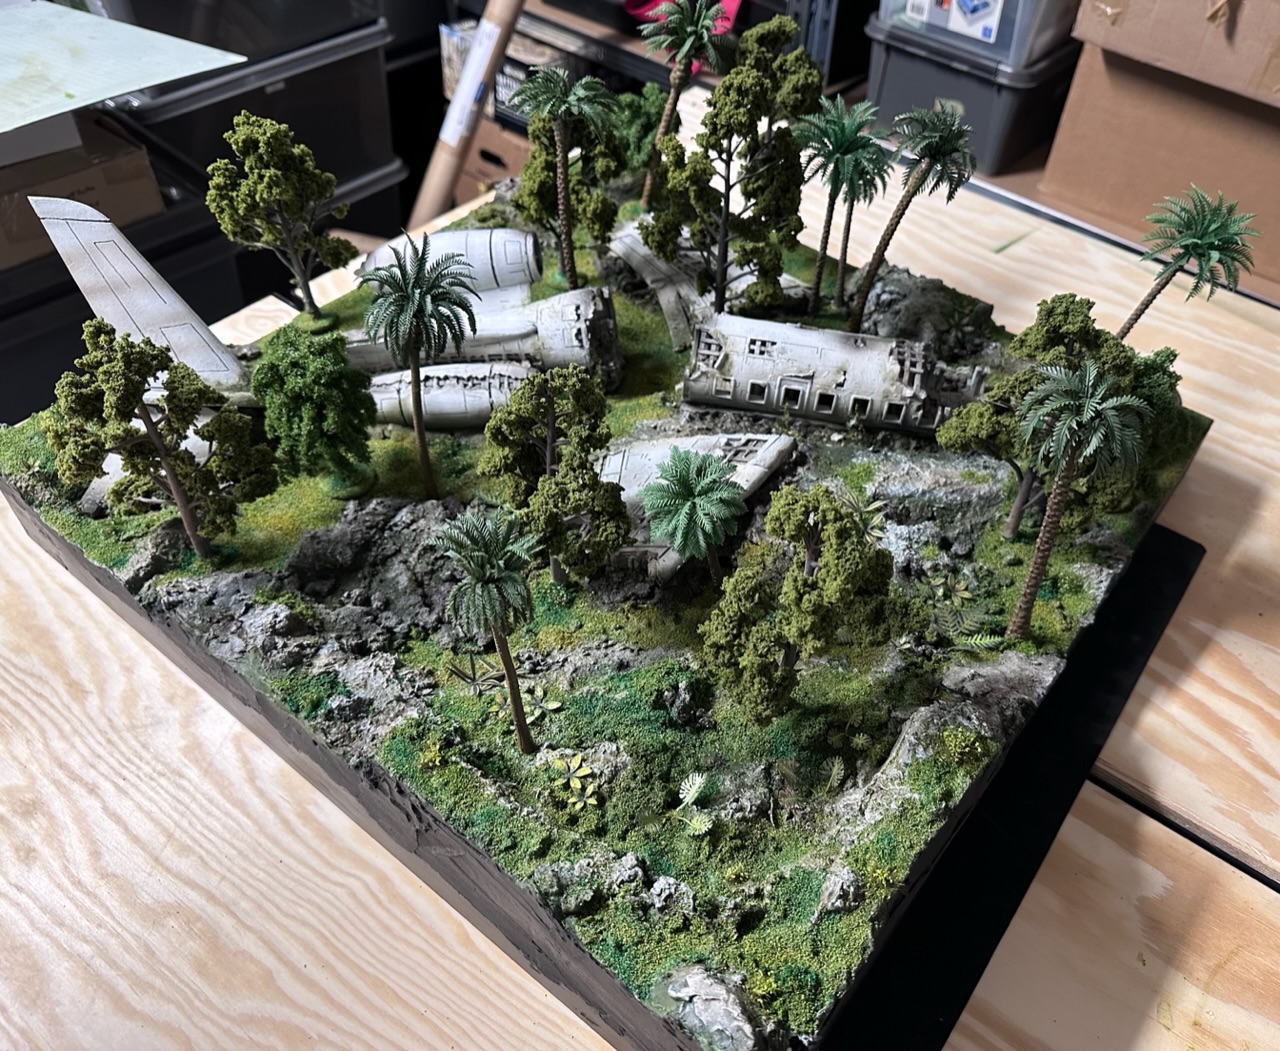
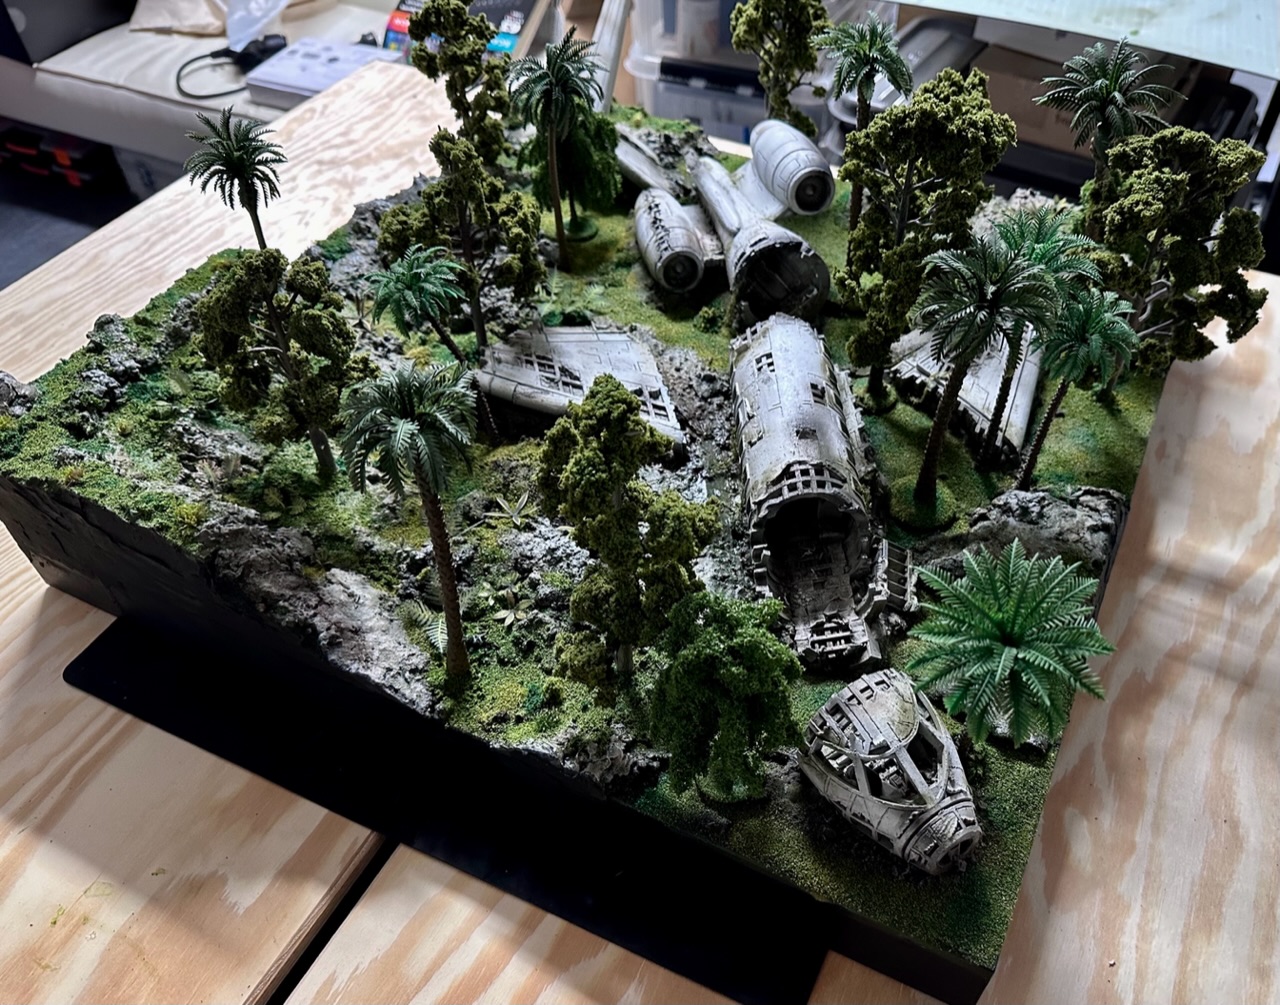
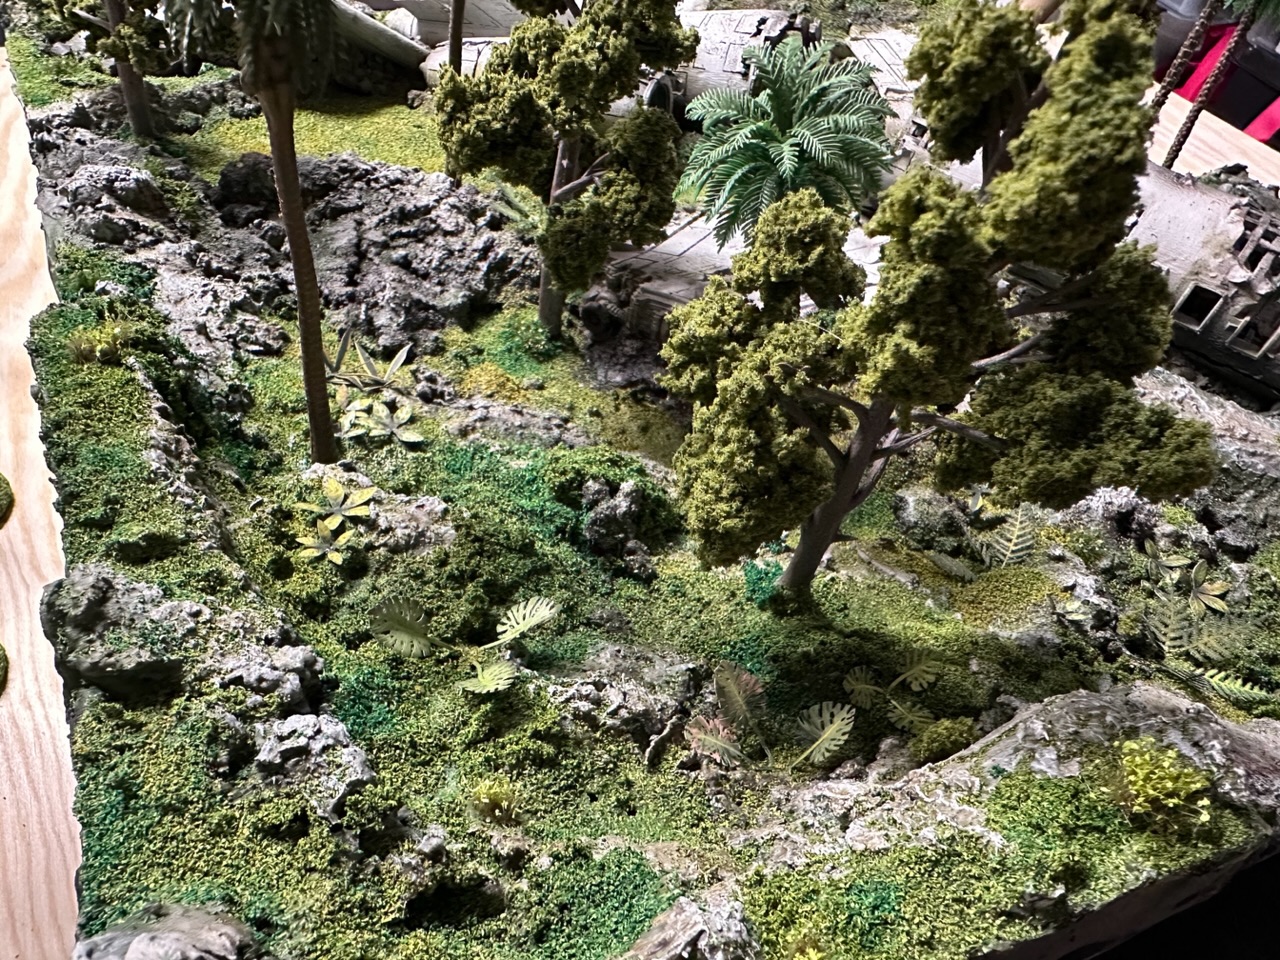
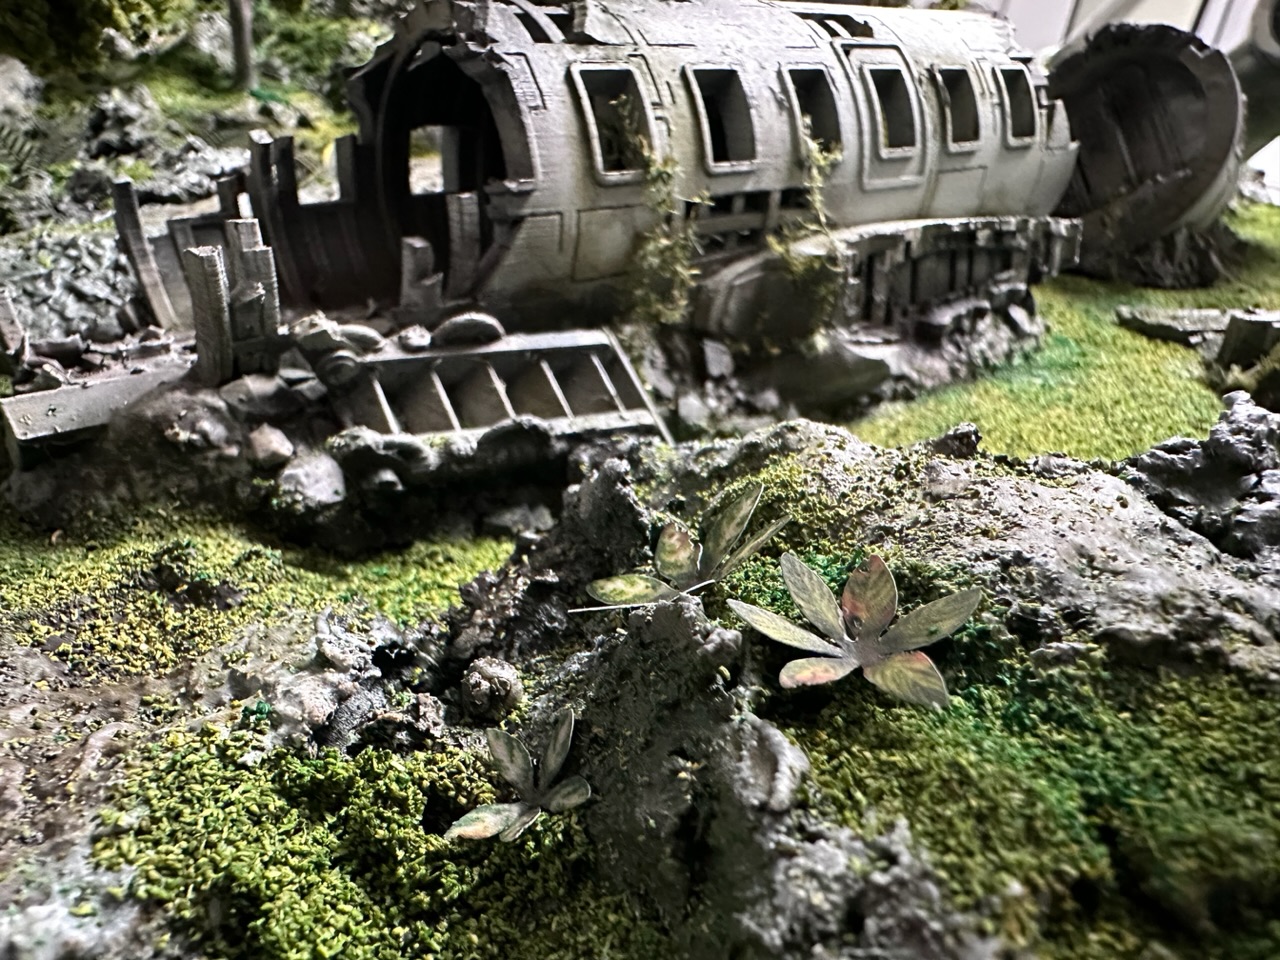
Nearing the final stages of the project!
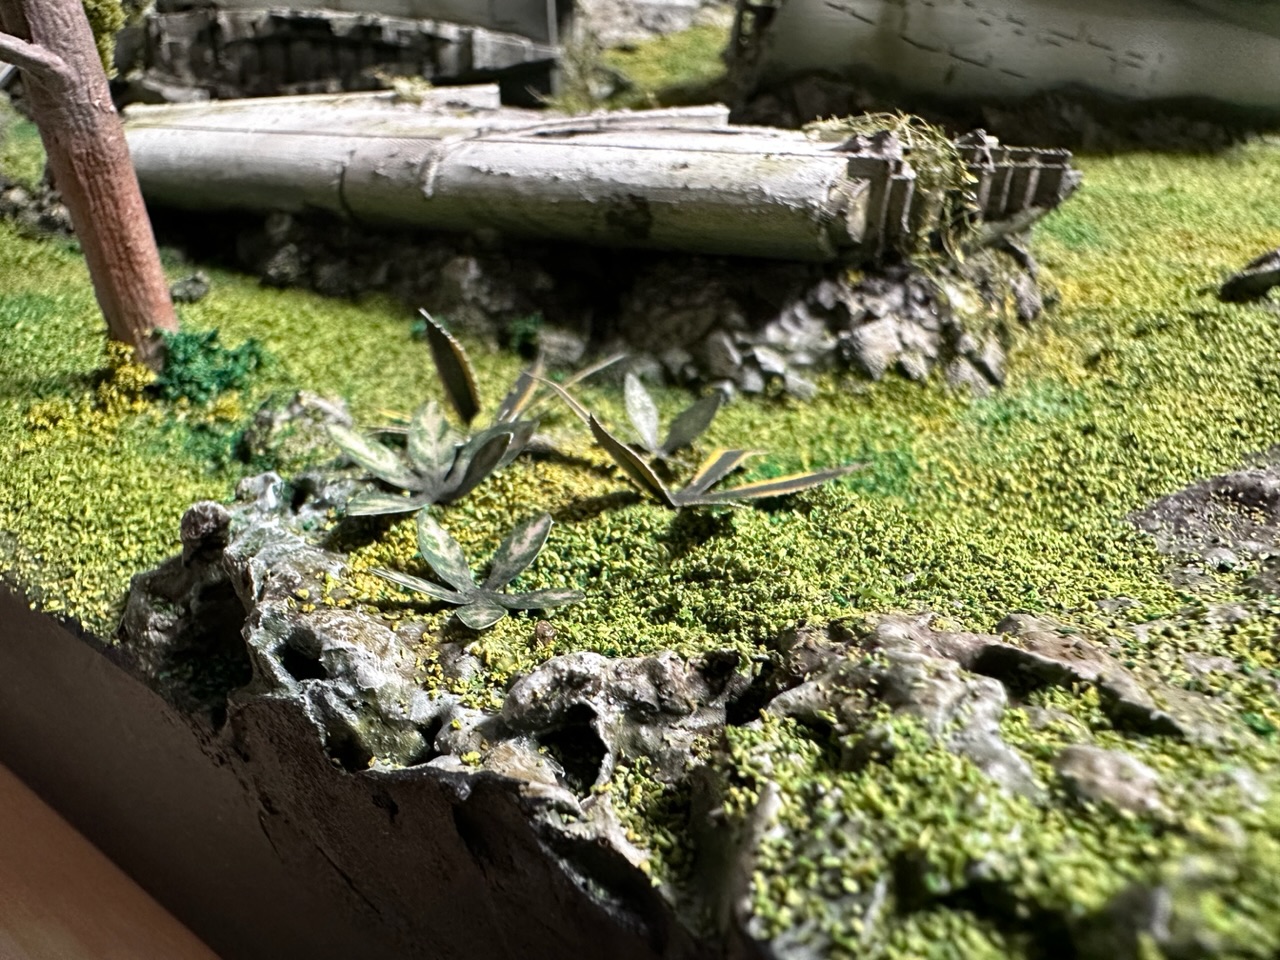
I glued in some of the trees and added jungle plants here and there. As was recommended in the comments, instead of the plastic aquarium plants I used laser cut ones from Gamers Grass. They look fantastic, especially after a matt varnish coat.
Few flat areas were left open for set on pieces and I based few loose trees to match. So there’s some modularity, the board can be made feel more dense or I can build alternate additional pieces for different games or scenarios.
As a tidy up, I sanded the outside edges flat and painted them black. Small thing but makes so much cleaner look.
There’s still one weekend of Terrain Fest left, and I plan to finalise the project with:
- few more palm trees and separately based trees
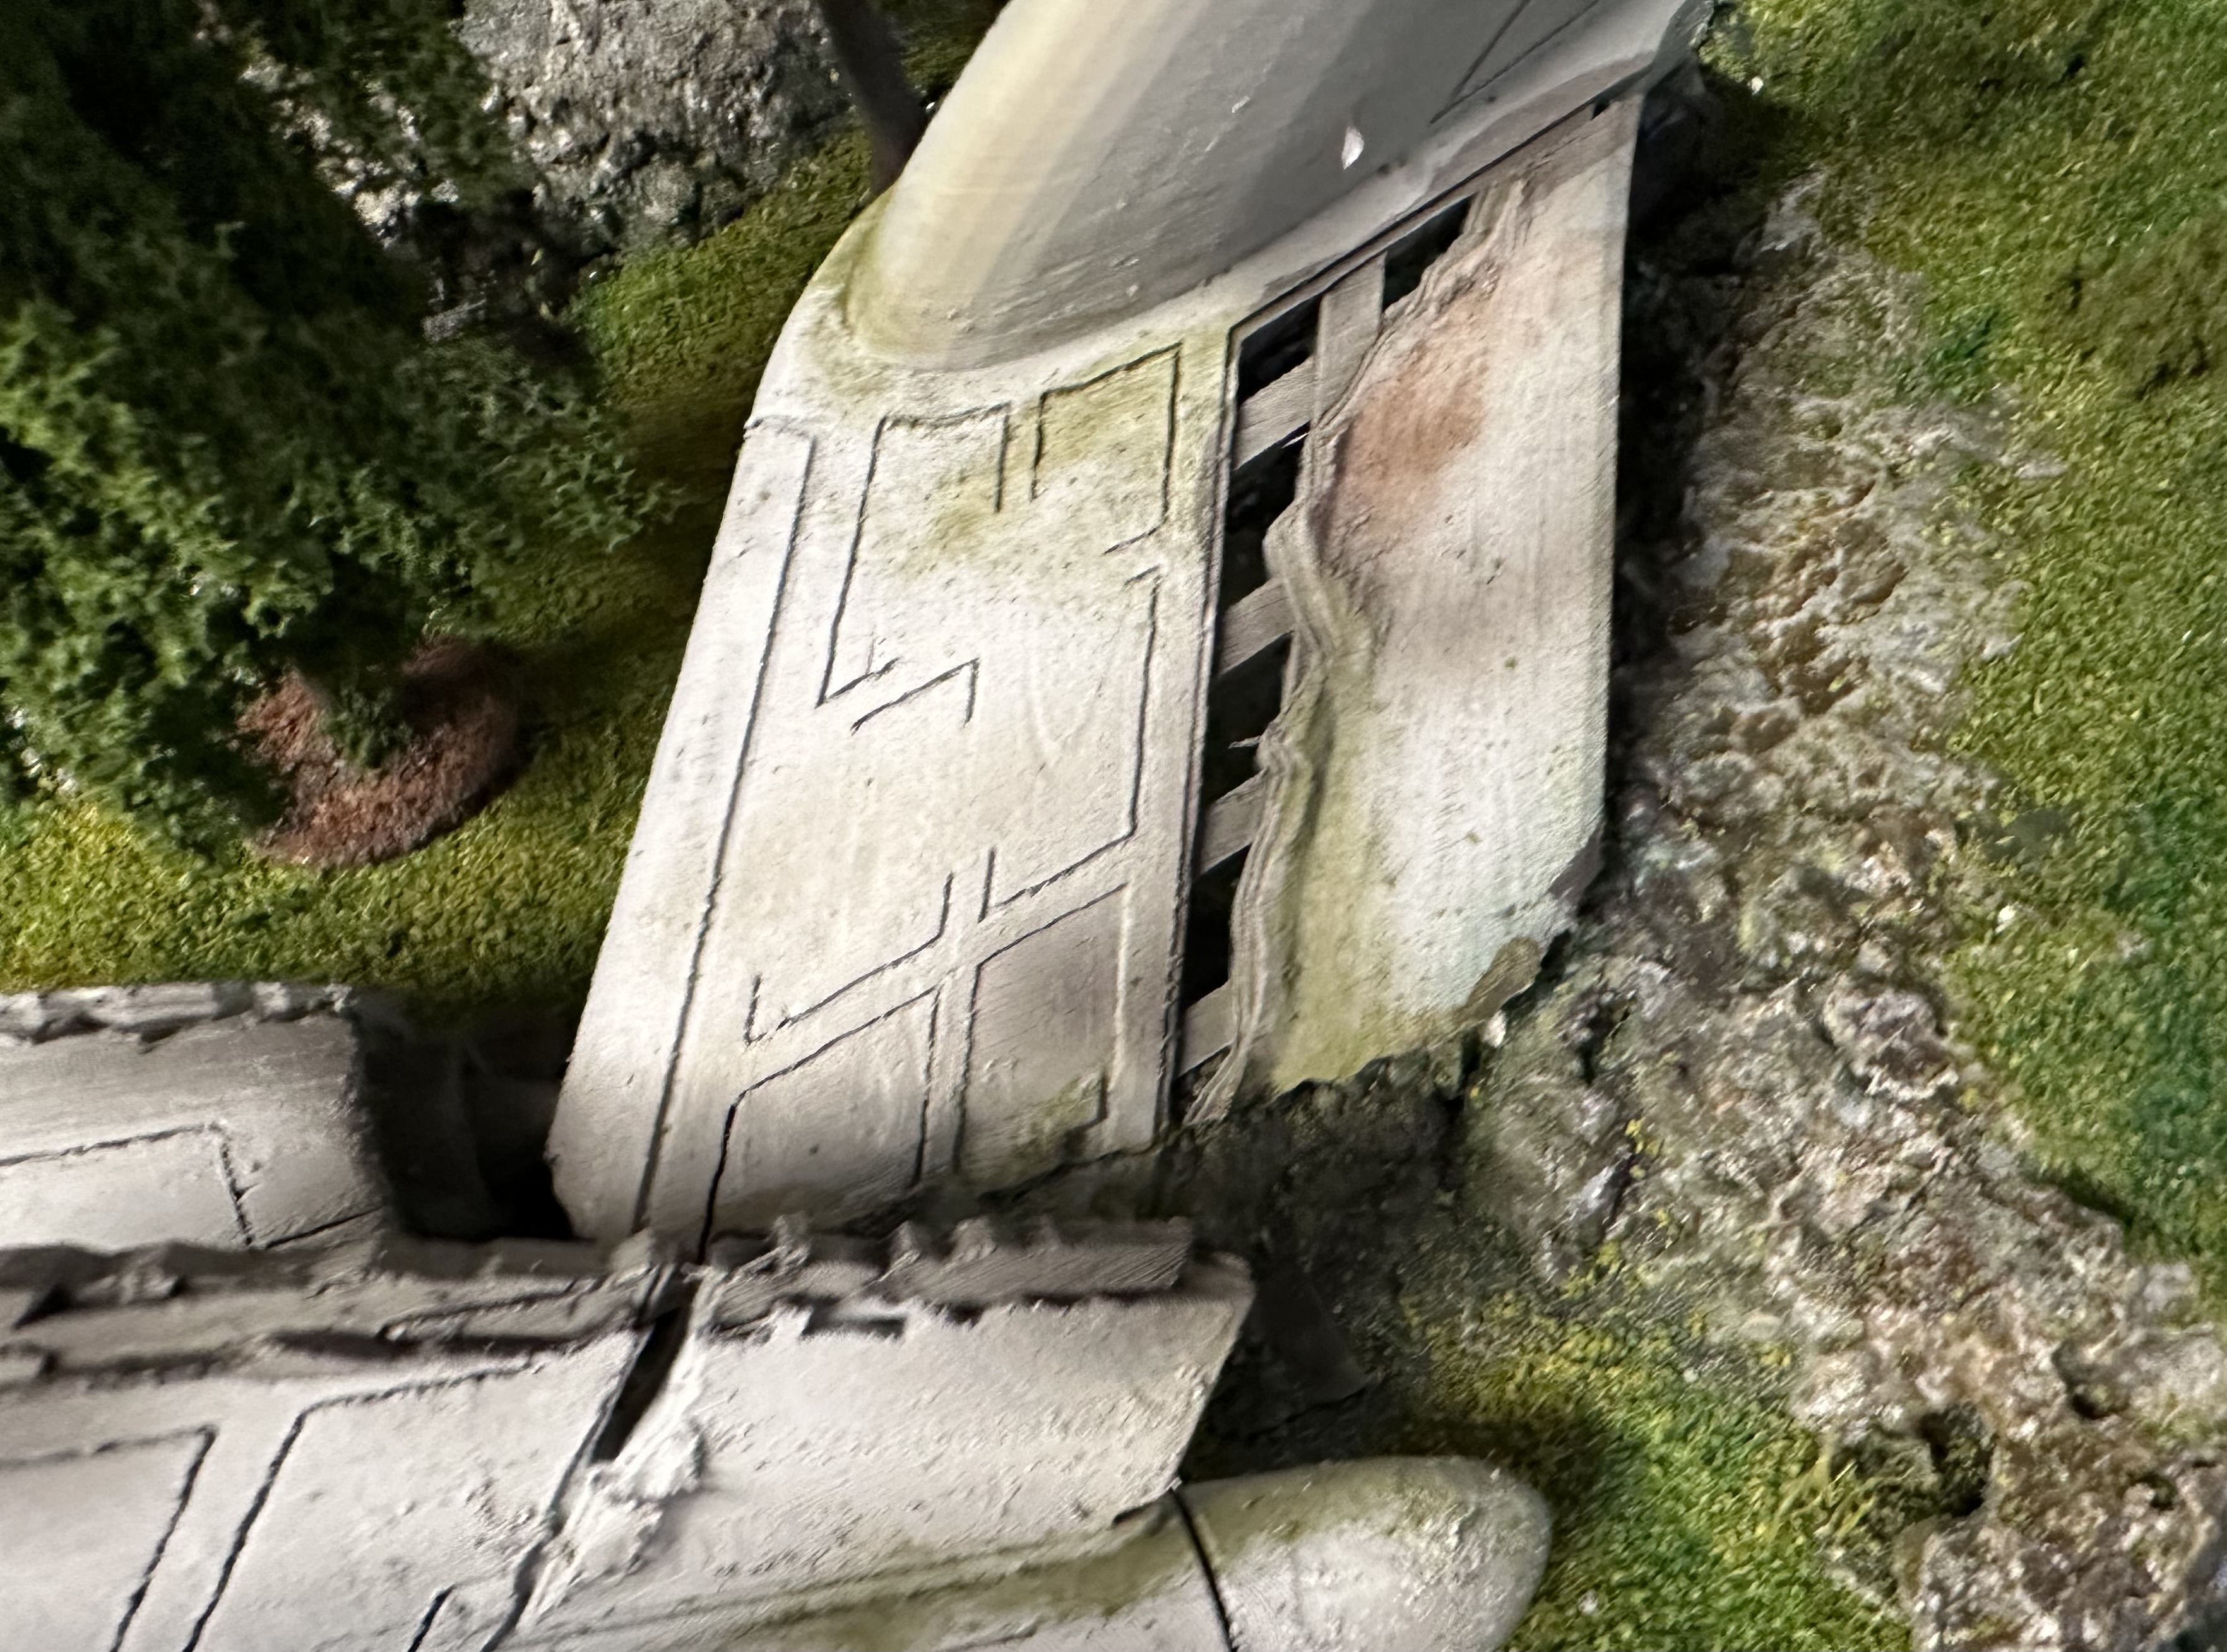
- add more moss/green and vines to the plane — I want to make it look it’s been there for a while
- final sealing and varnishing coats
- proper photos
- plan and get started on a storage box.

Making plastic palm trees look decent
I wanted to add few more palm trees to the project. Couple of glue to the board and few based as set on pieces.
Using the typical cheap plastic trees you can buy online, these are the steps I used to make them look decent.
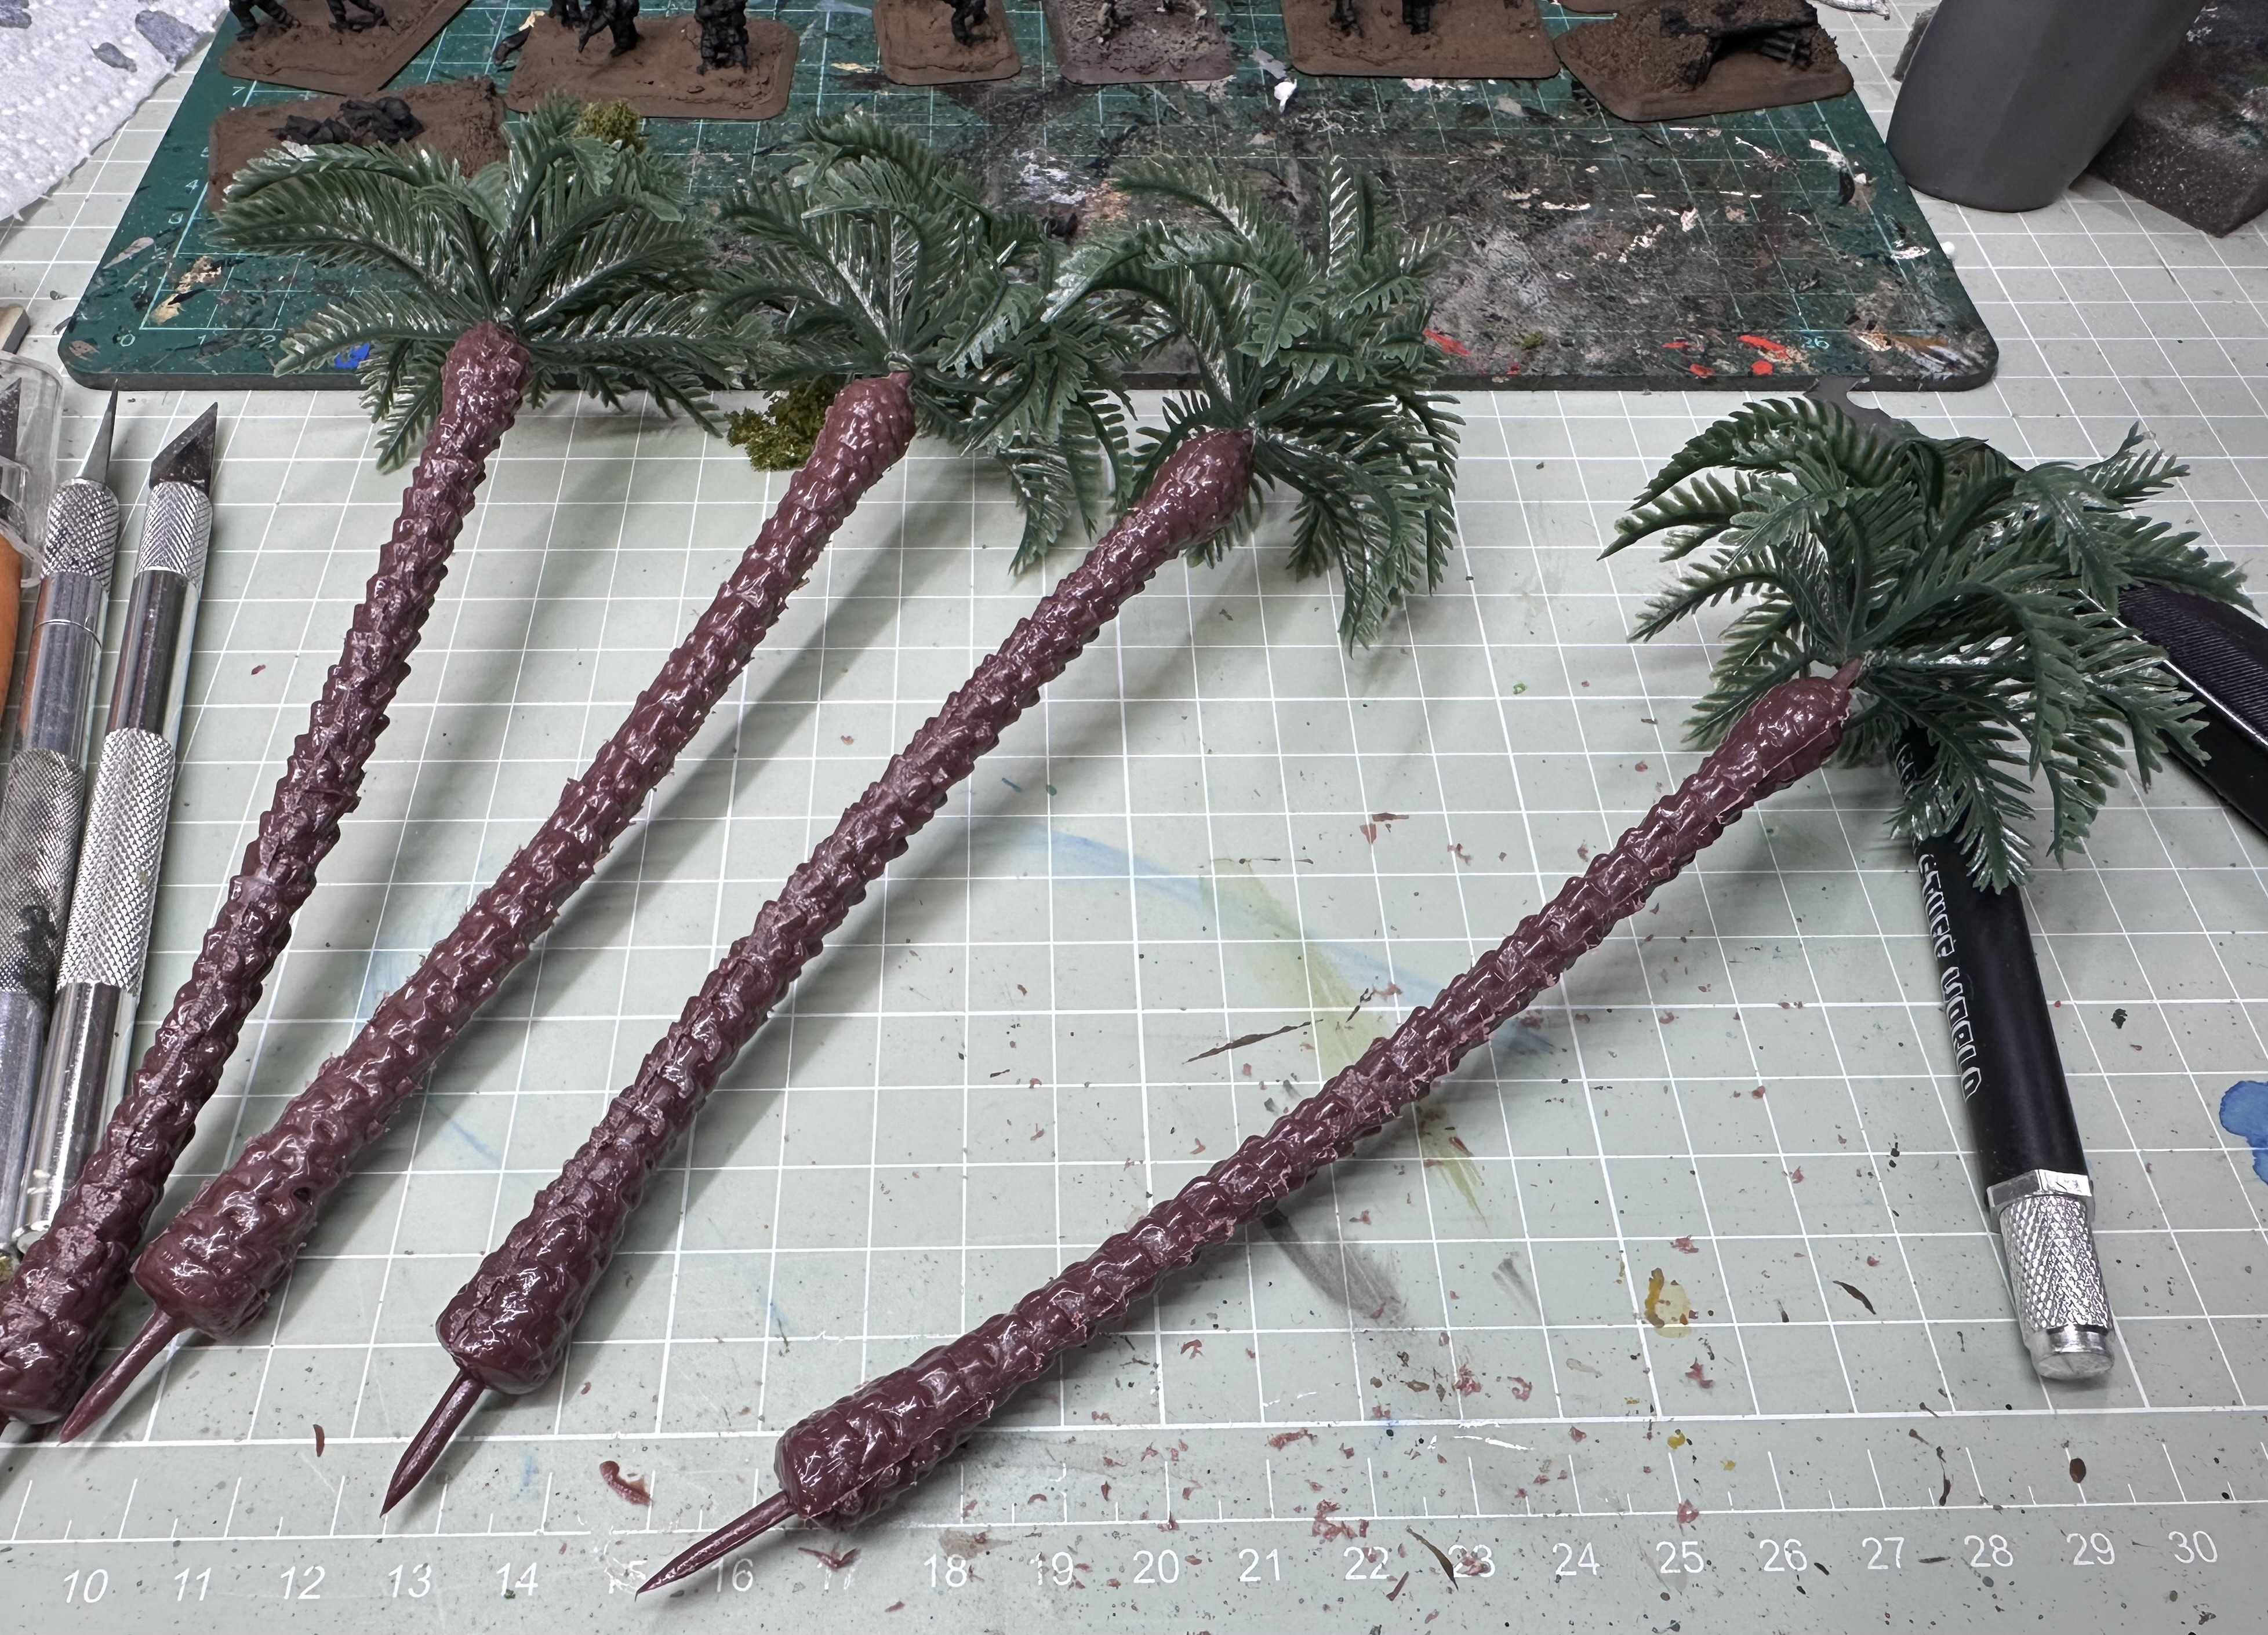 Clean up the terrible mould lines
 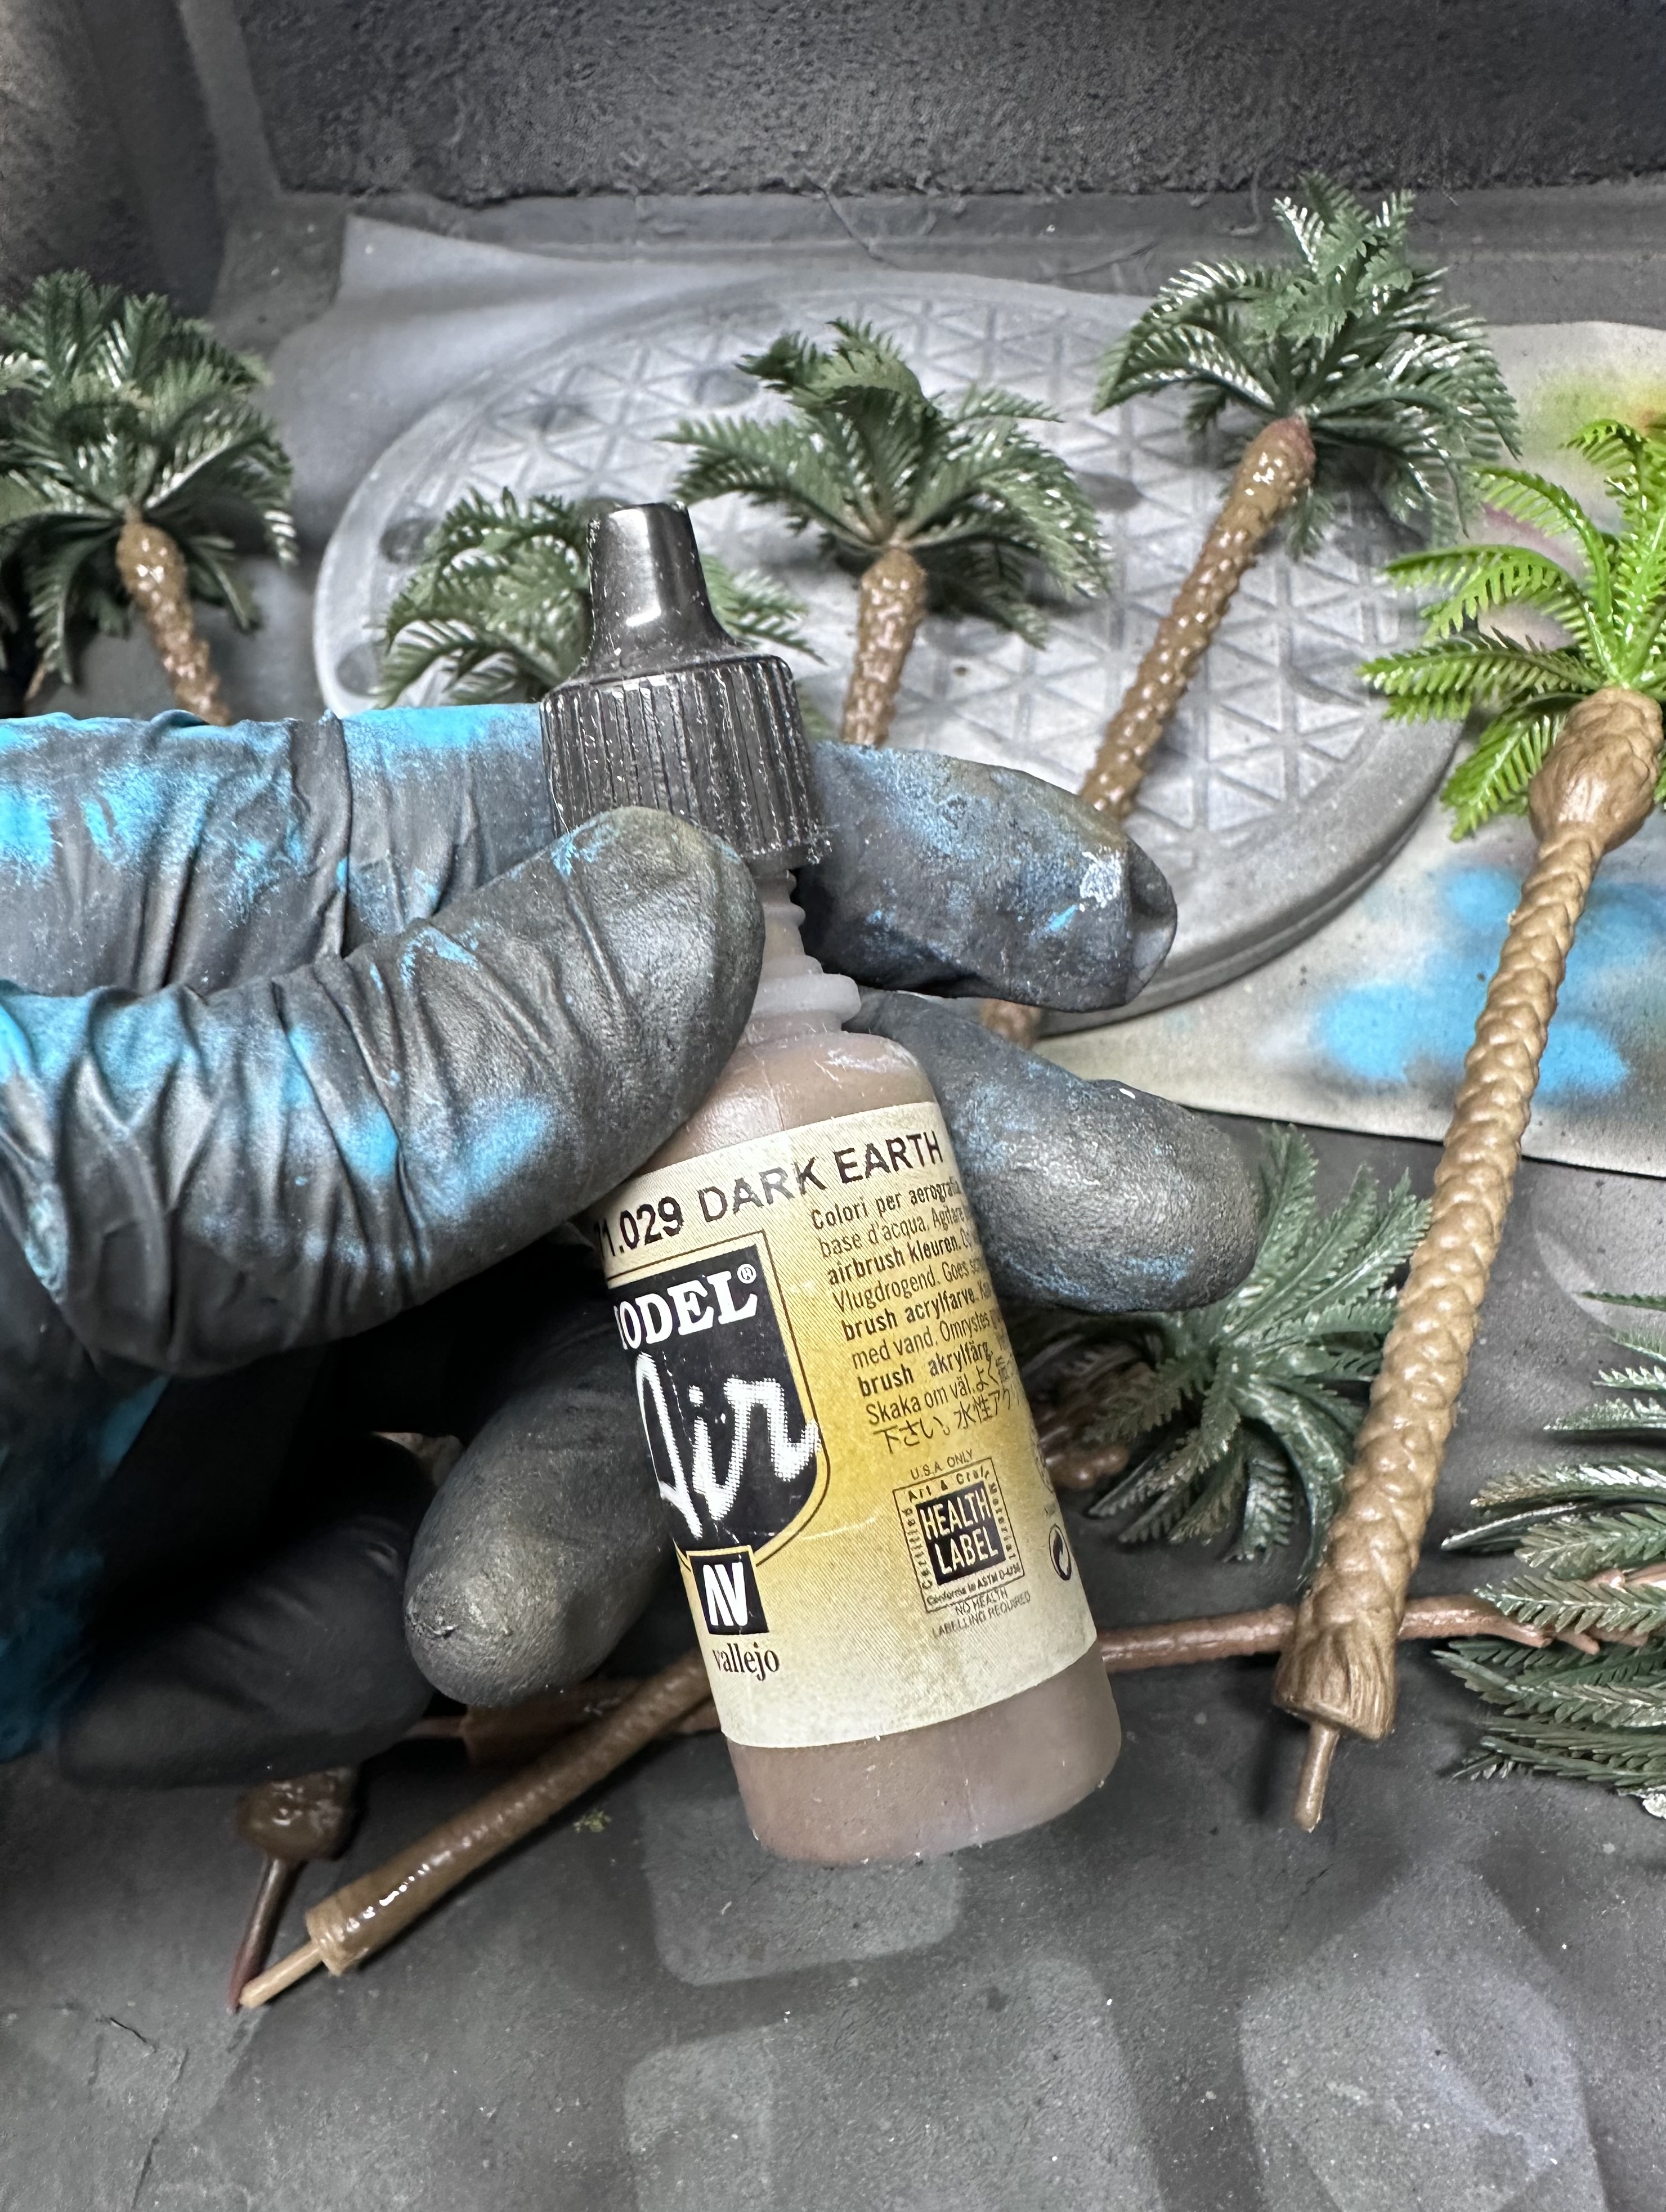 Airbrush the trunks with Vallejo Dark Earth
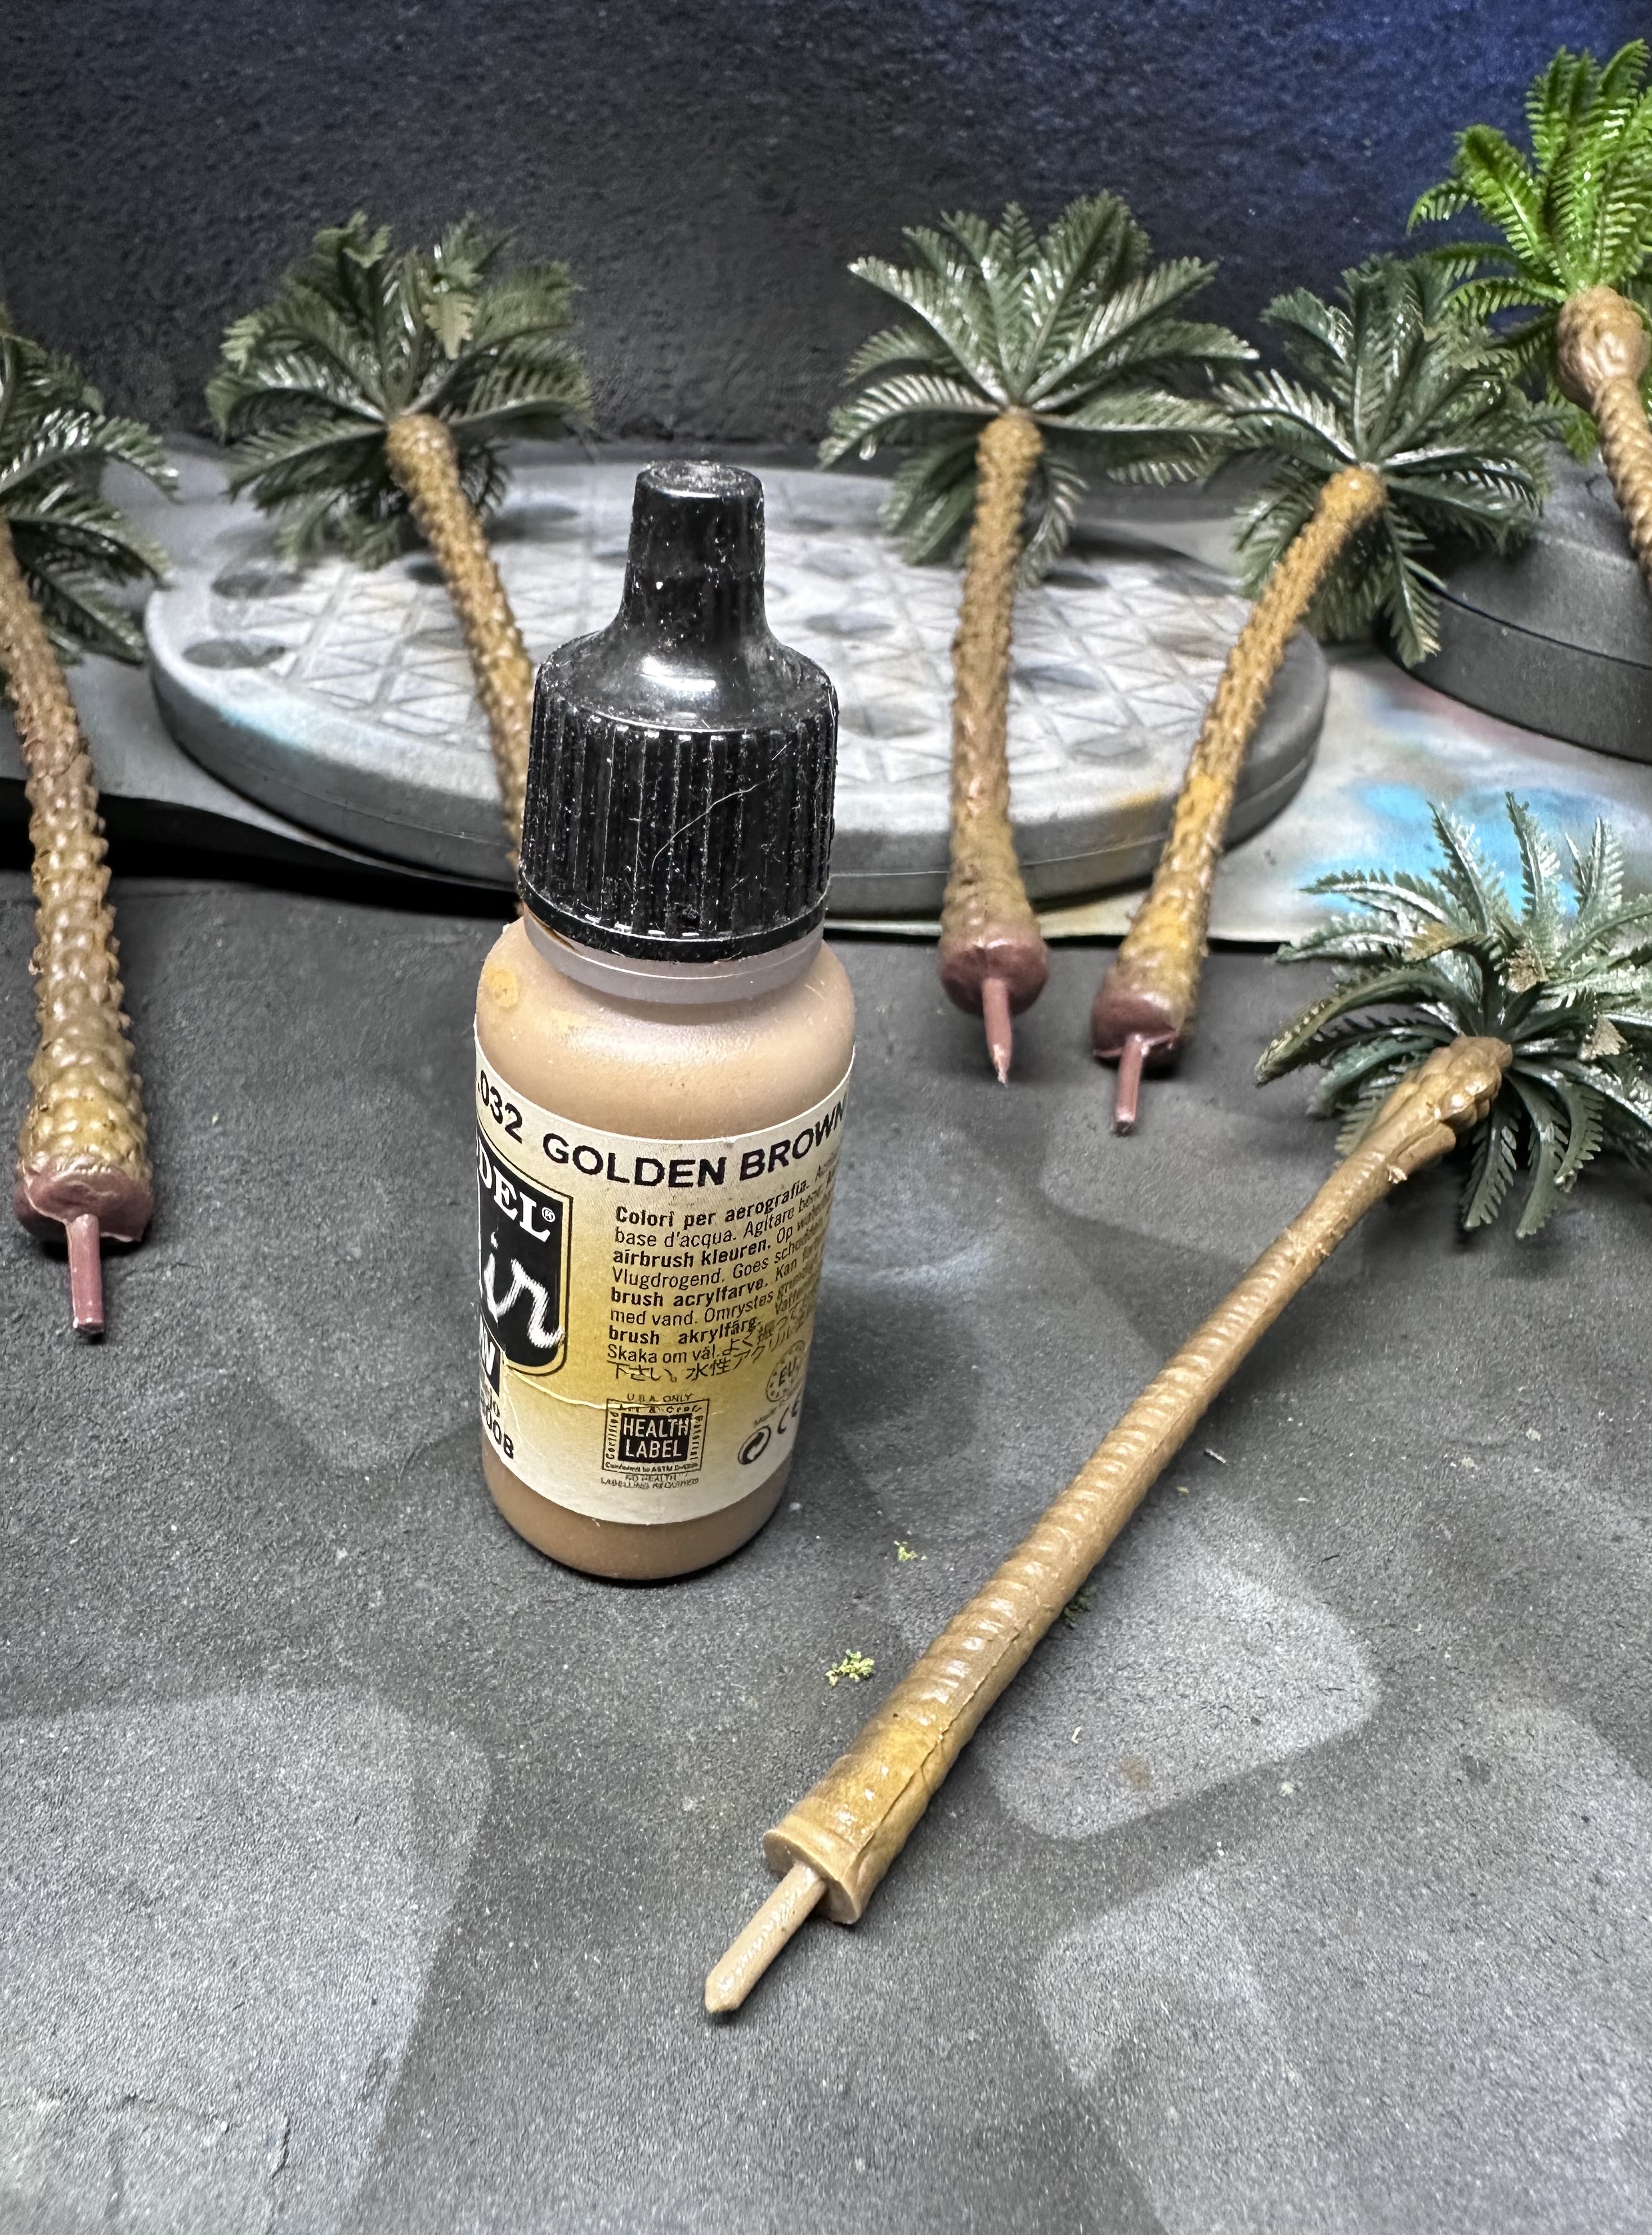 Follow with Gold Brown
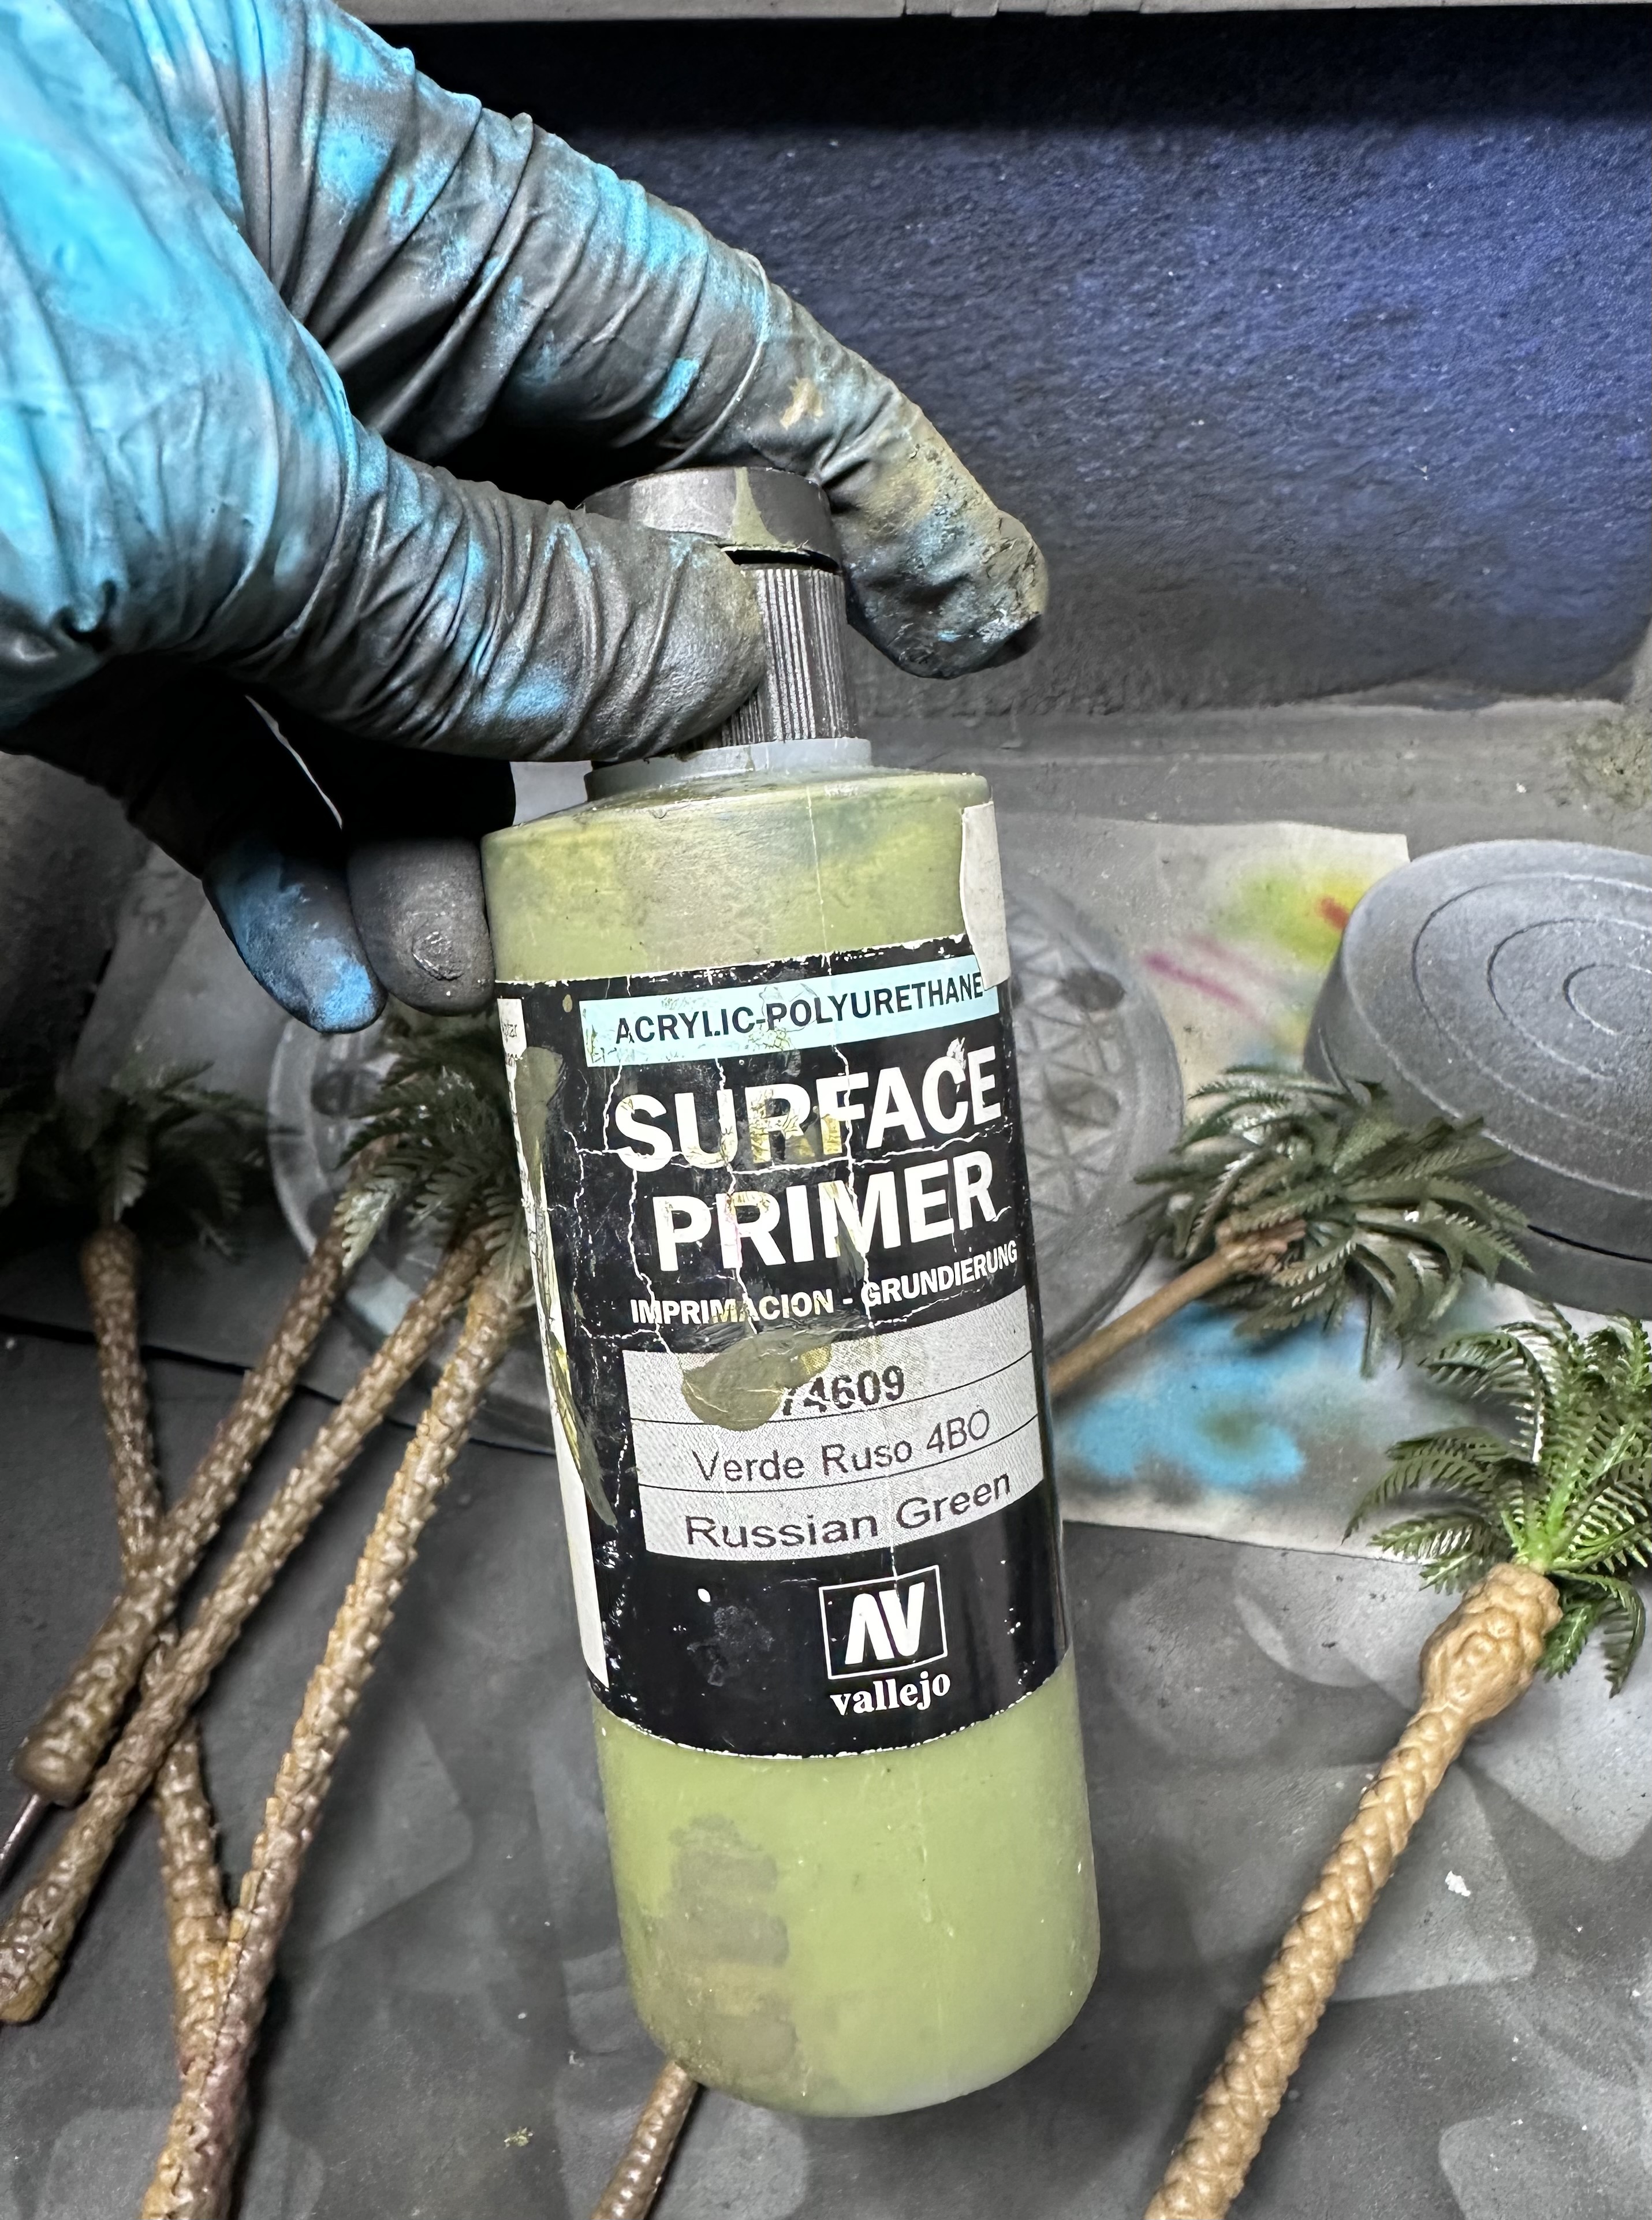 Russian Green as the darkest green for the leaves
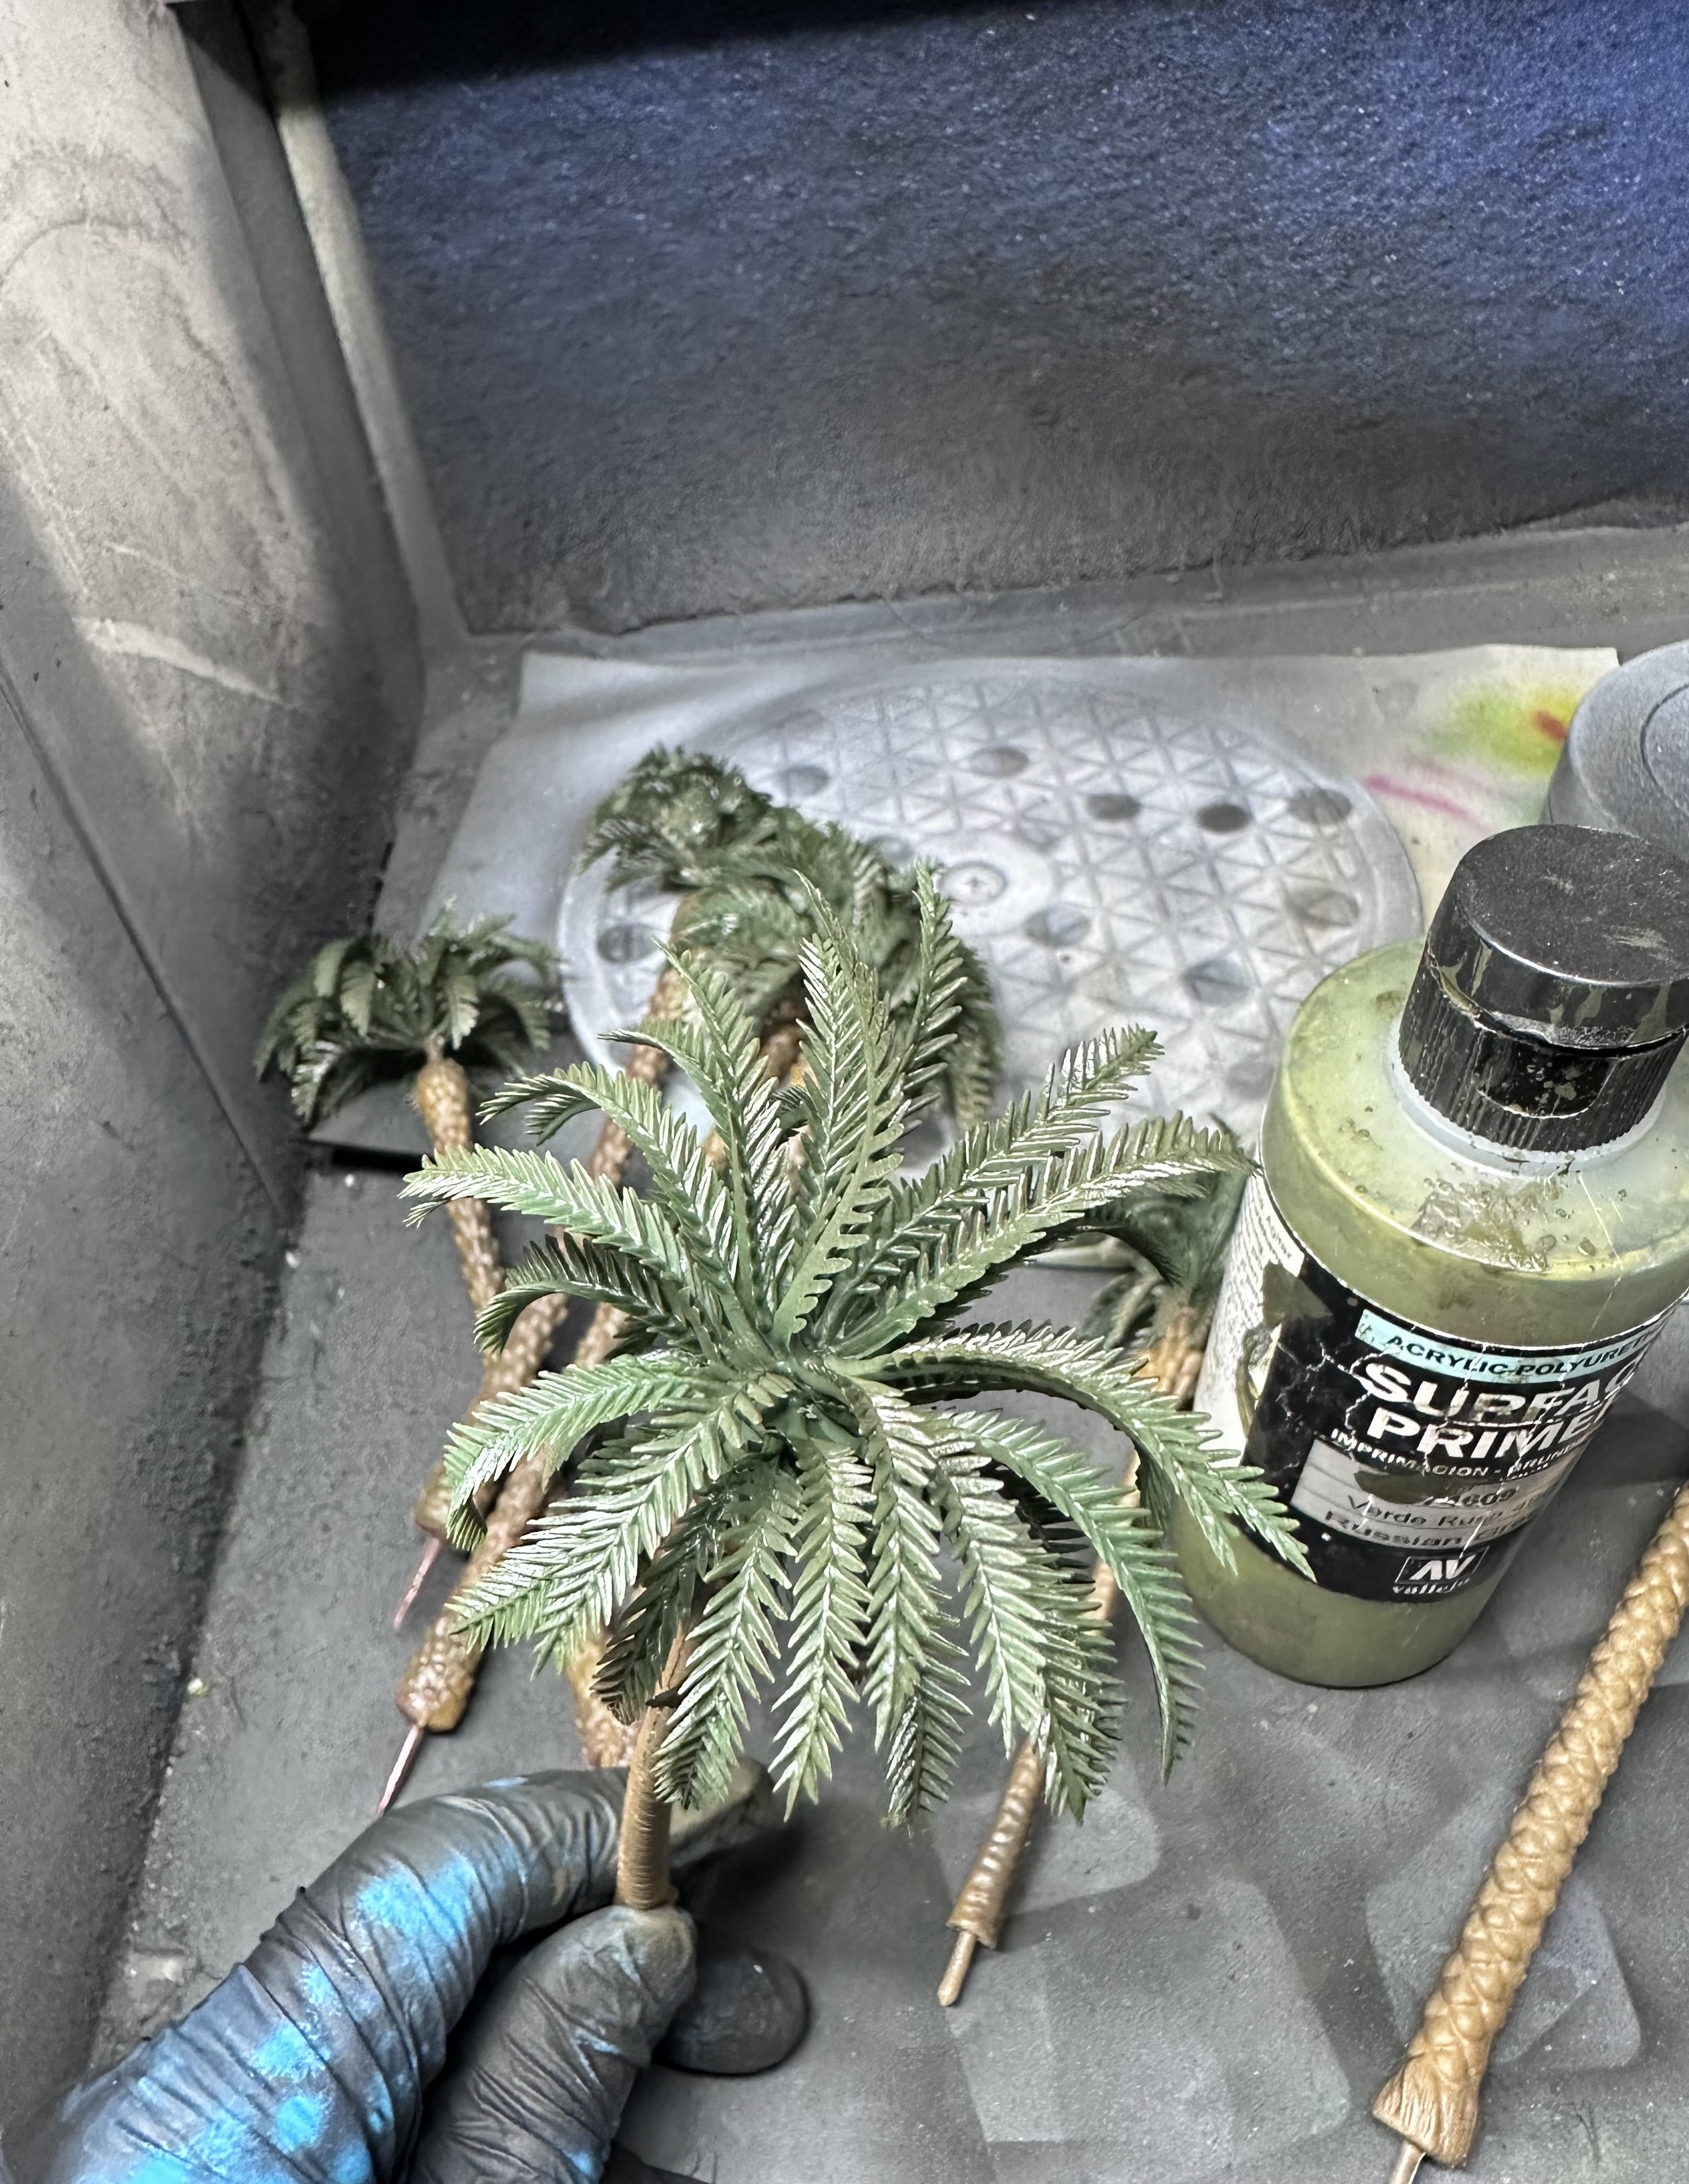
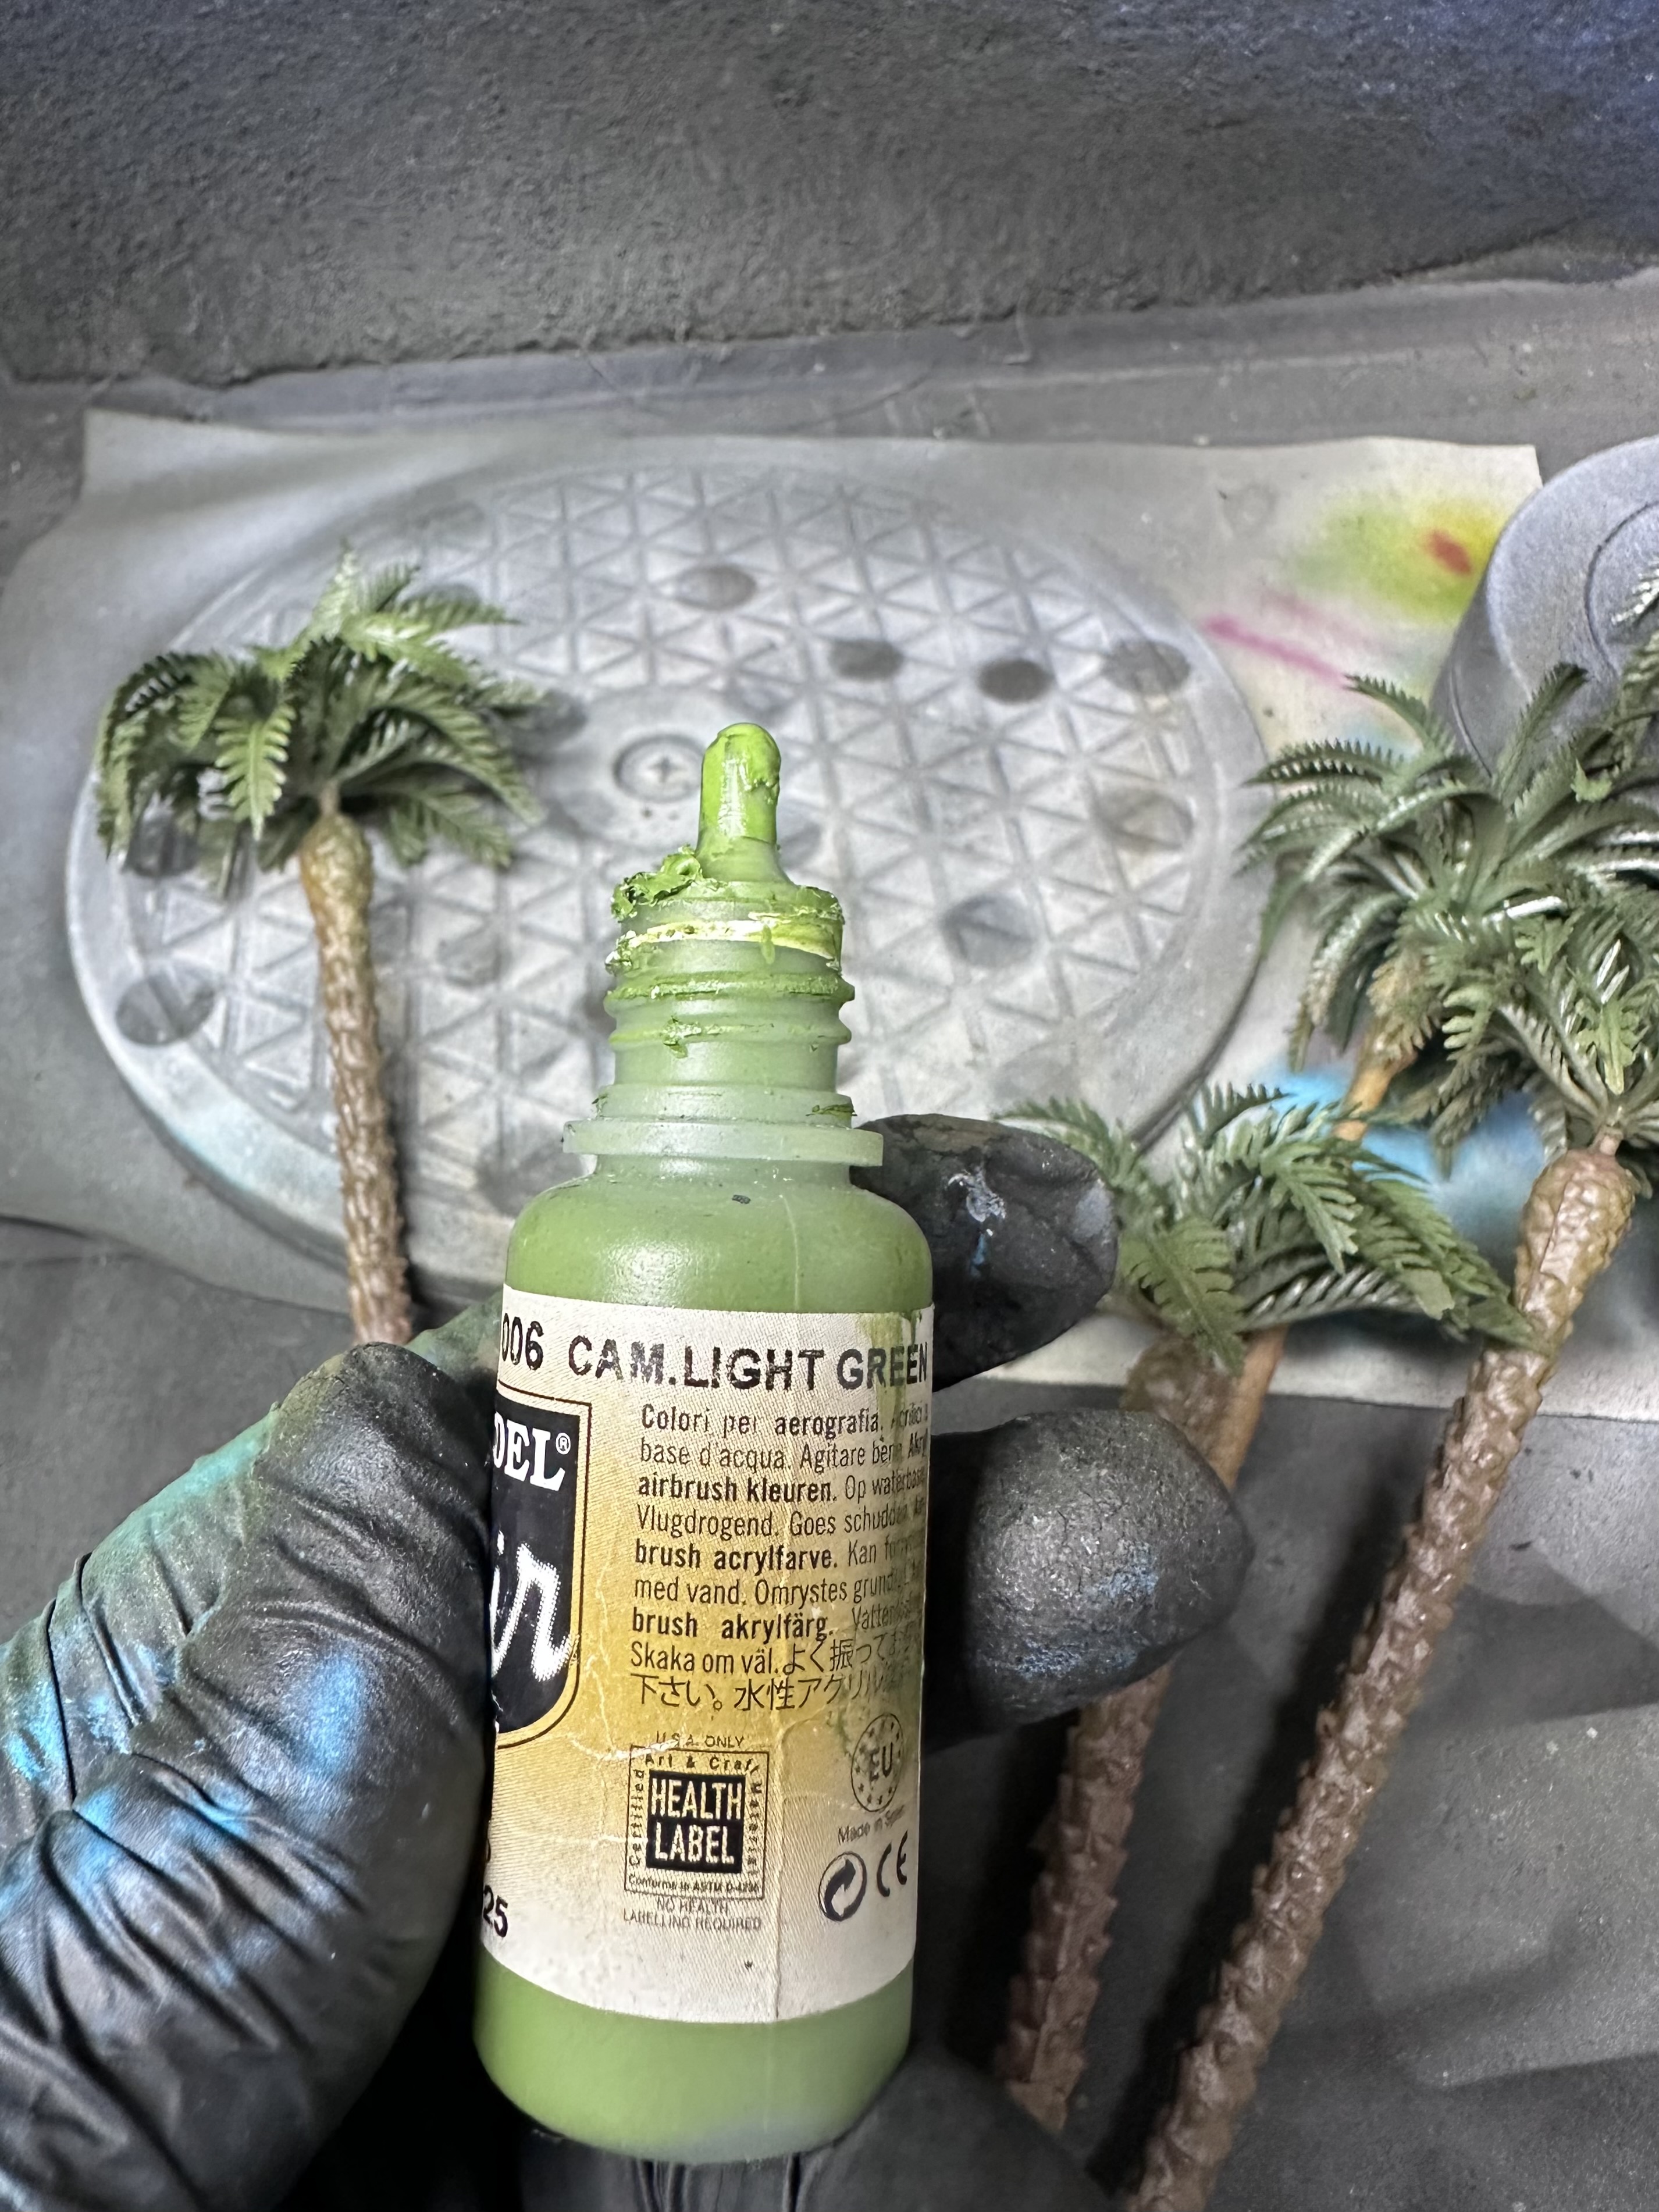 Camo Light Green for some highlighting
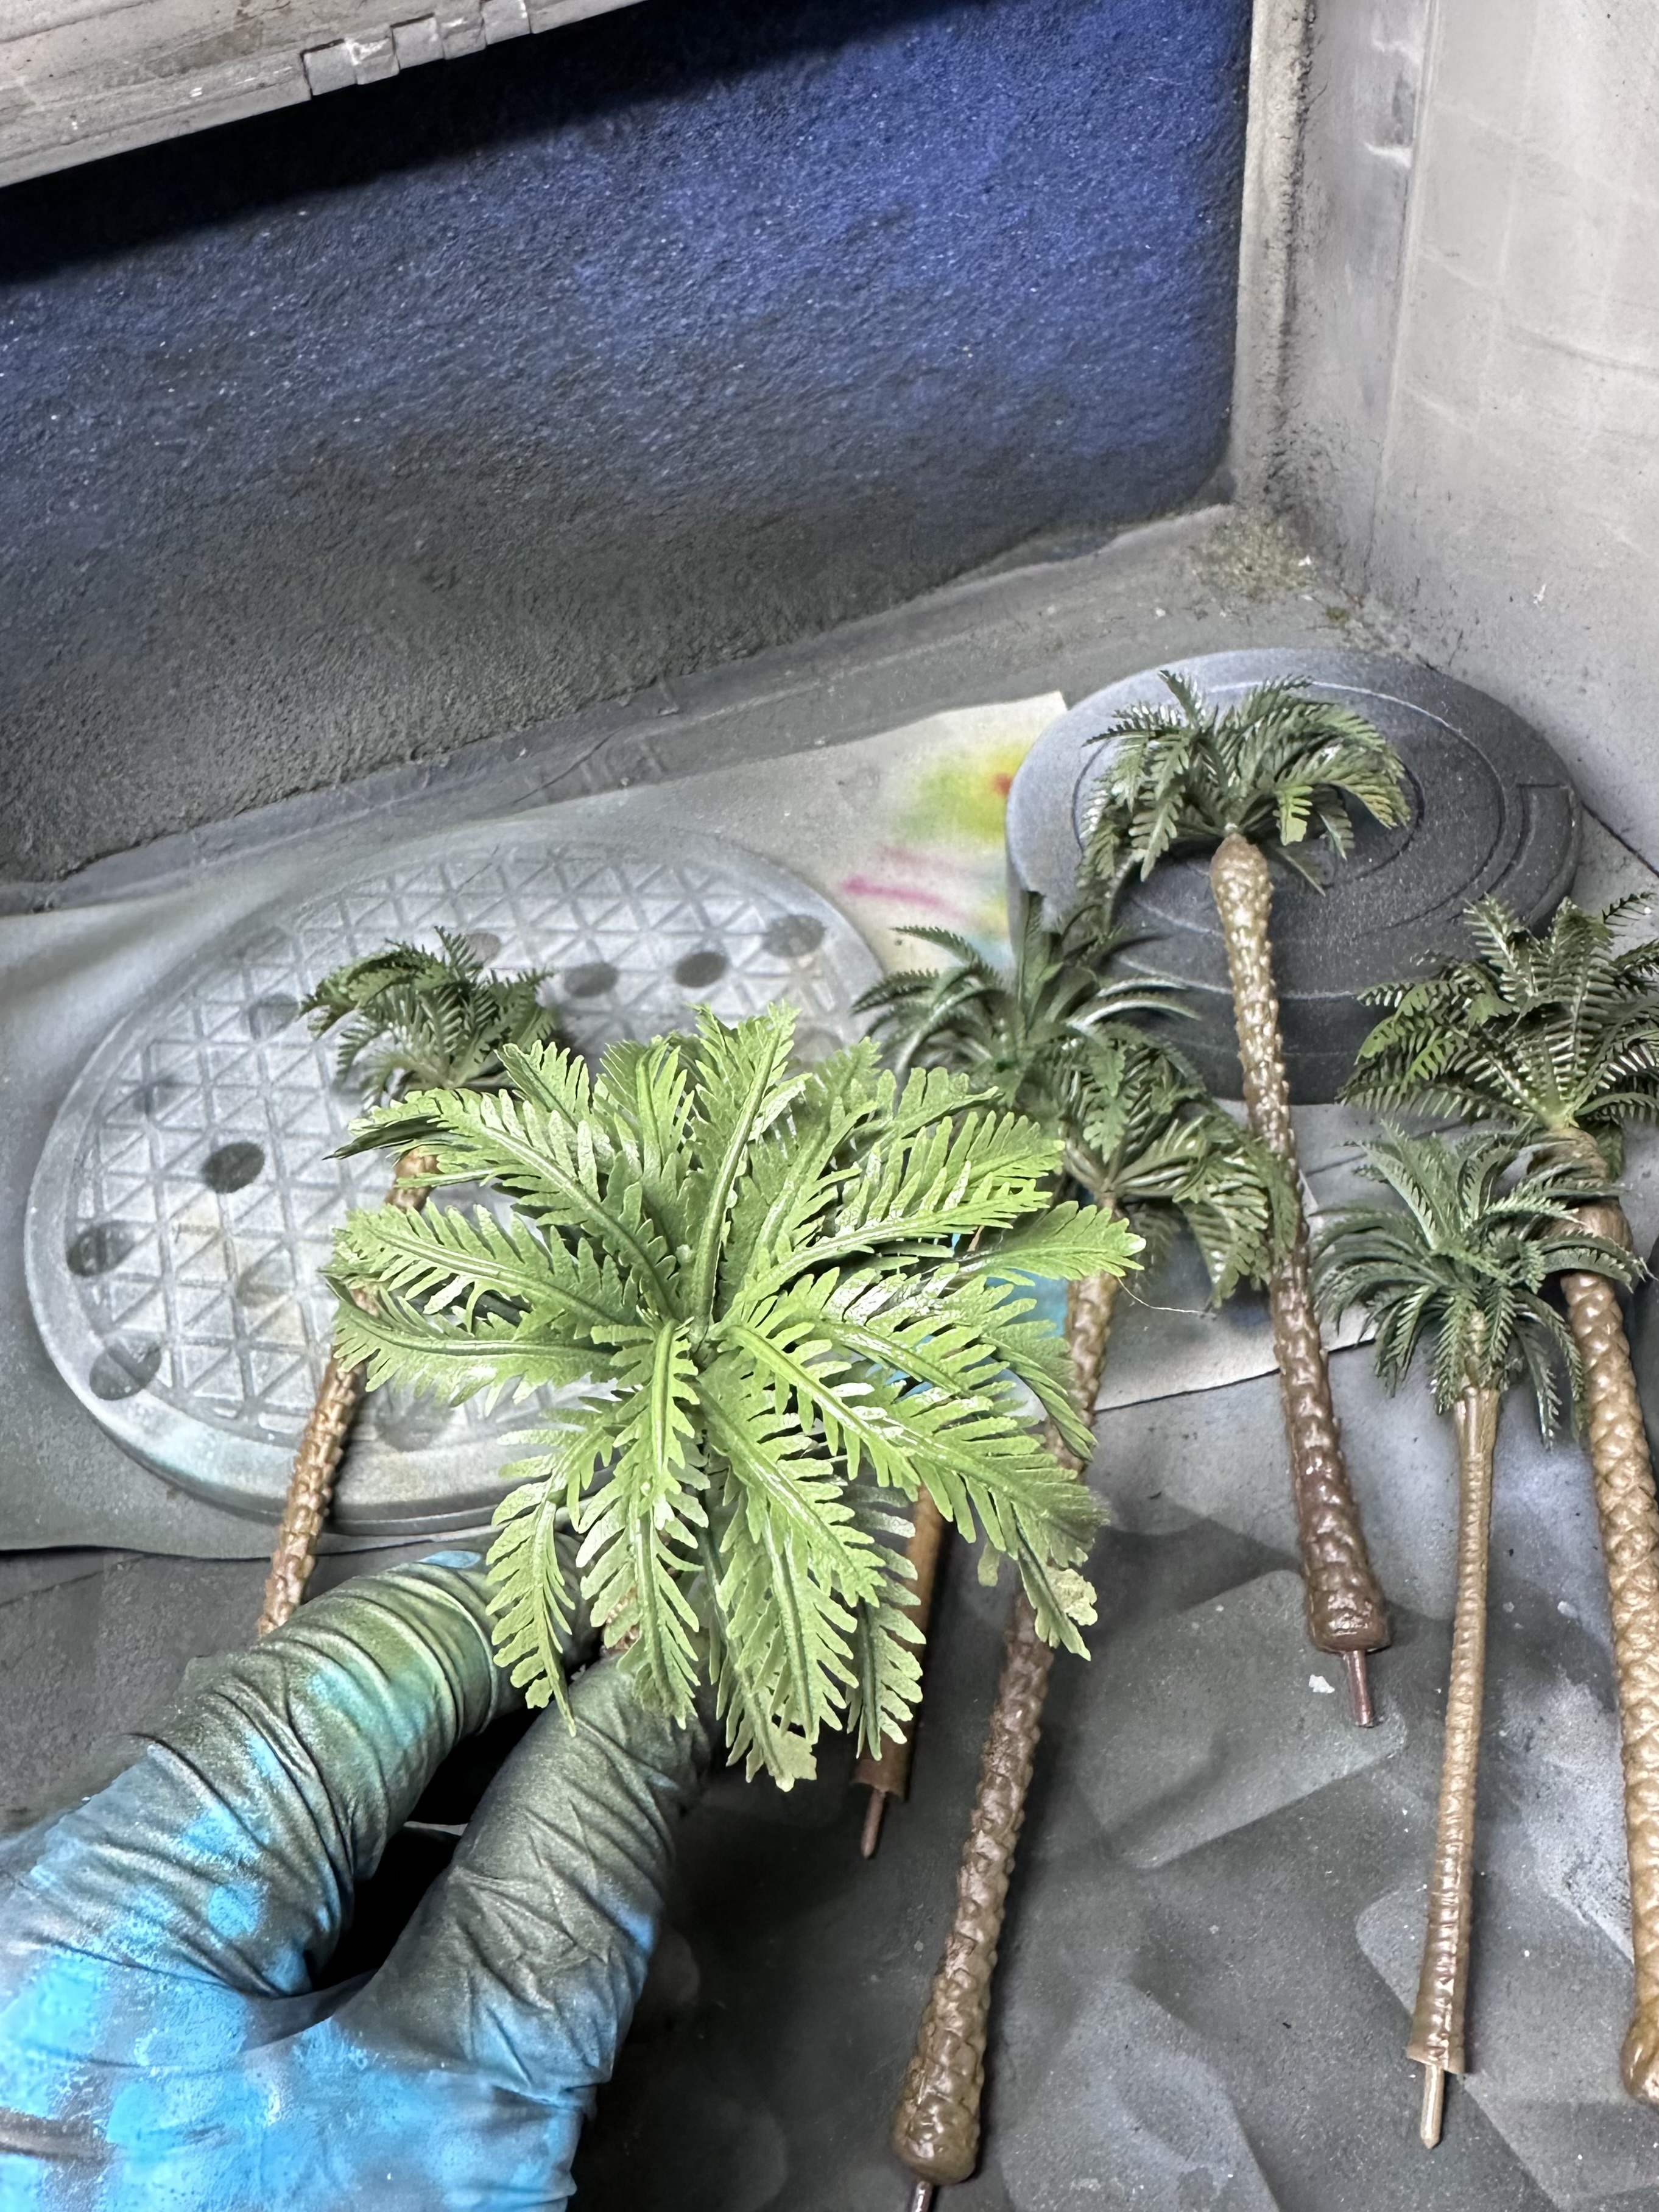 Pale Green as a final highlight. This is the end result
Weathering boxes and crates
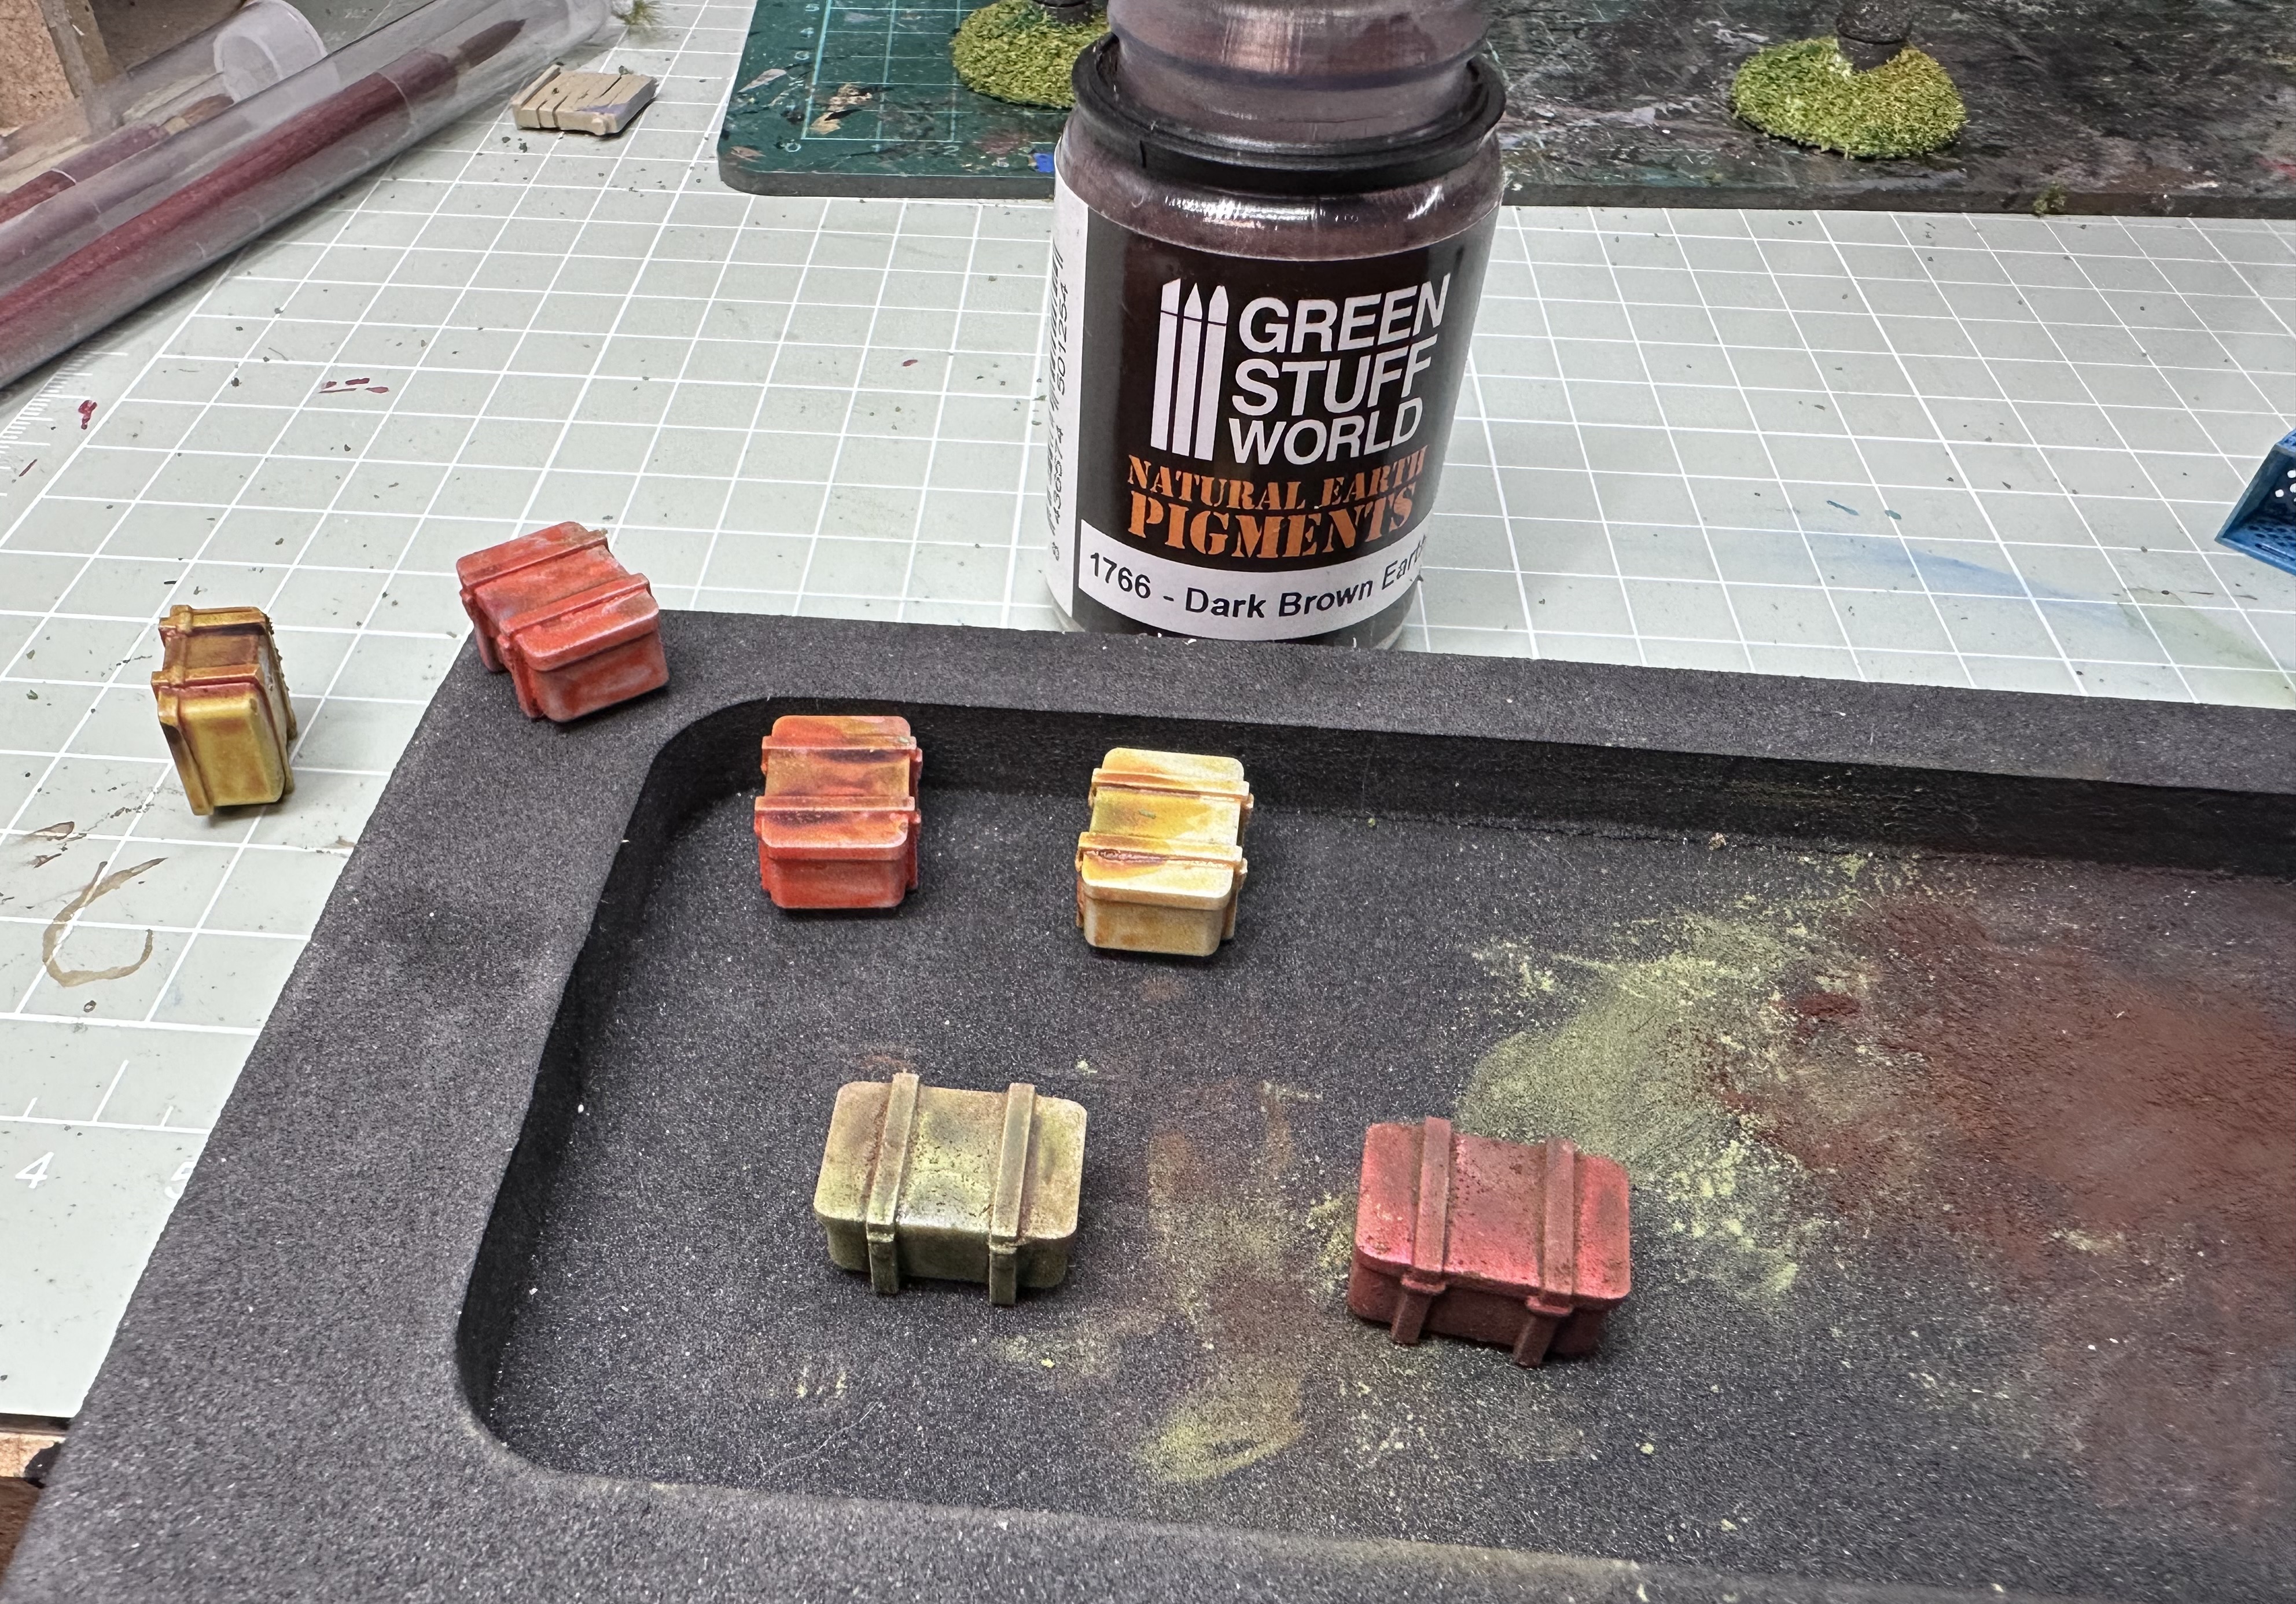
Weathering the boxes and crates.
They were first painted in quick manner with Contrast paints.
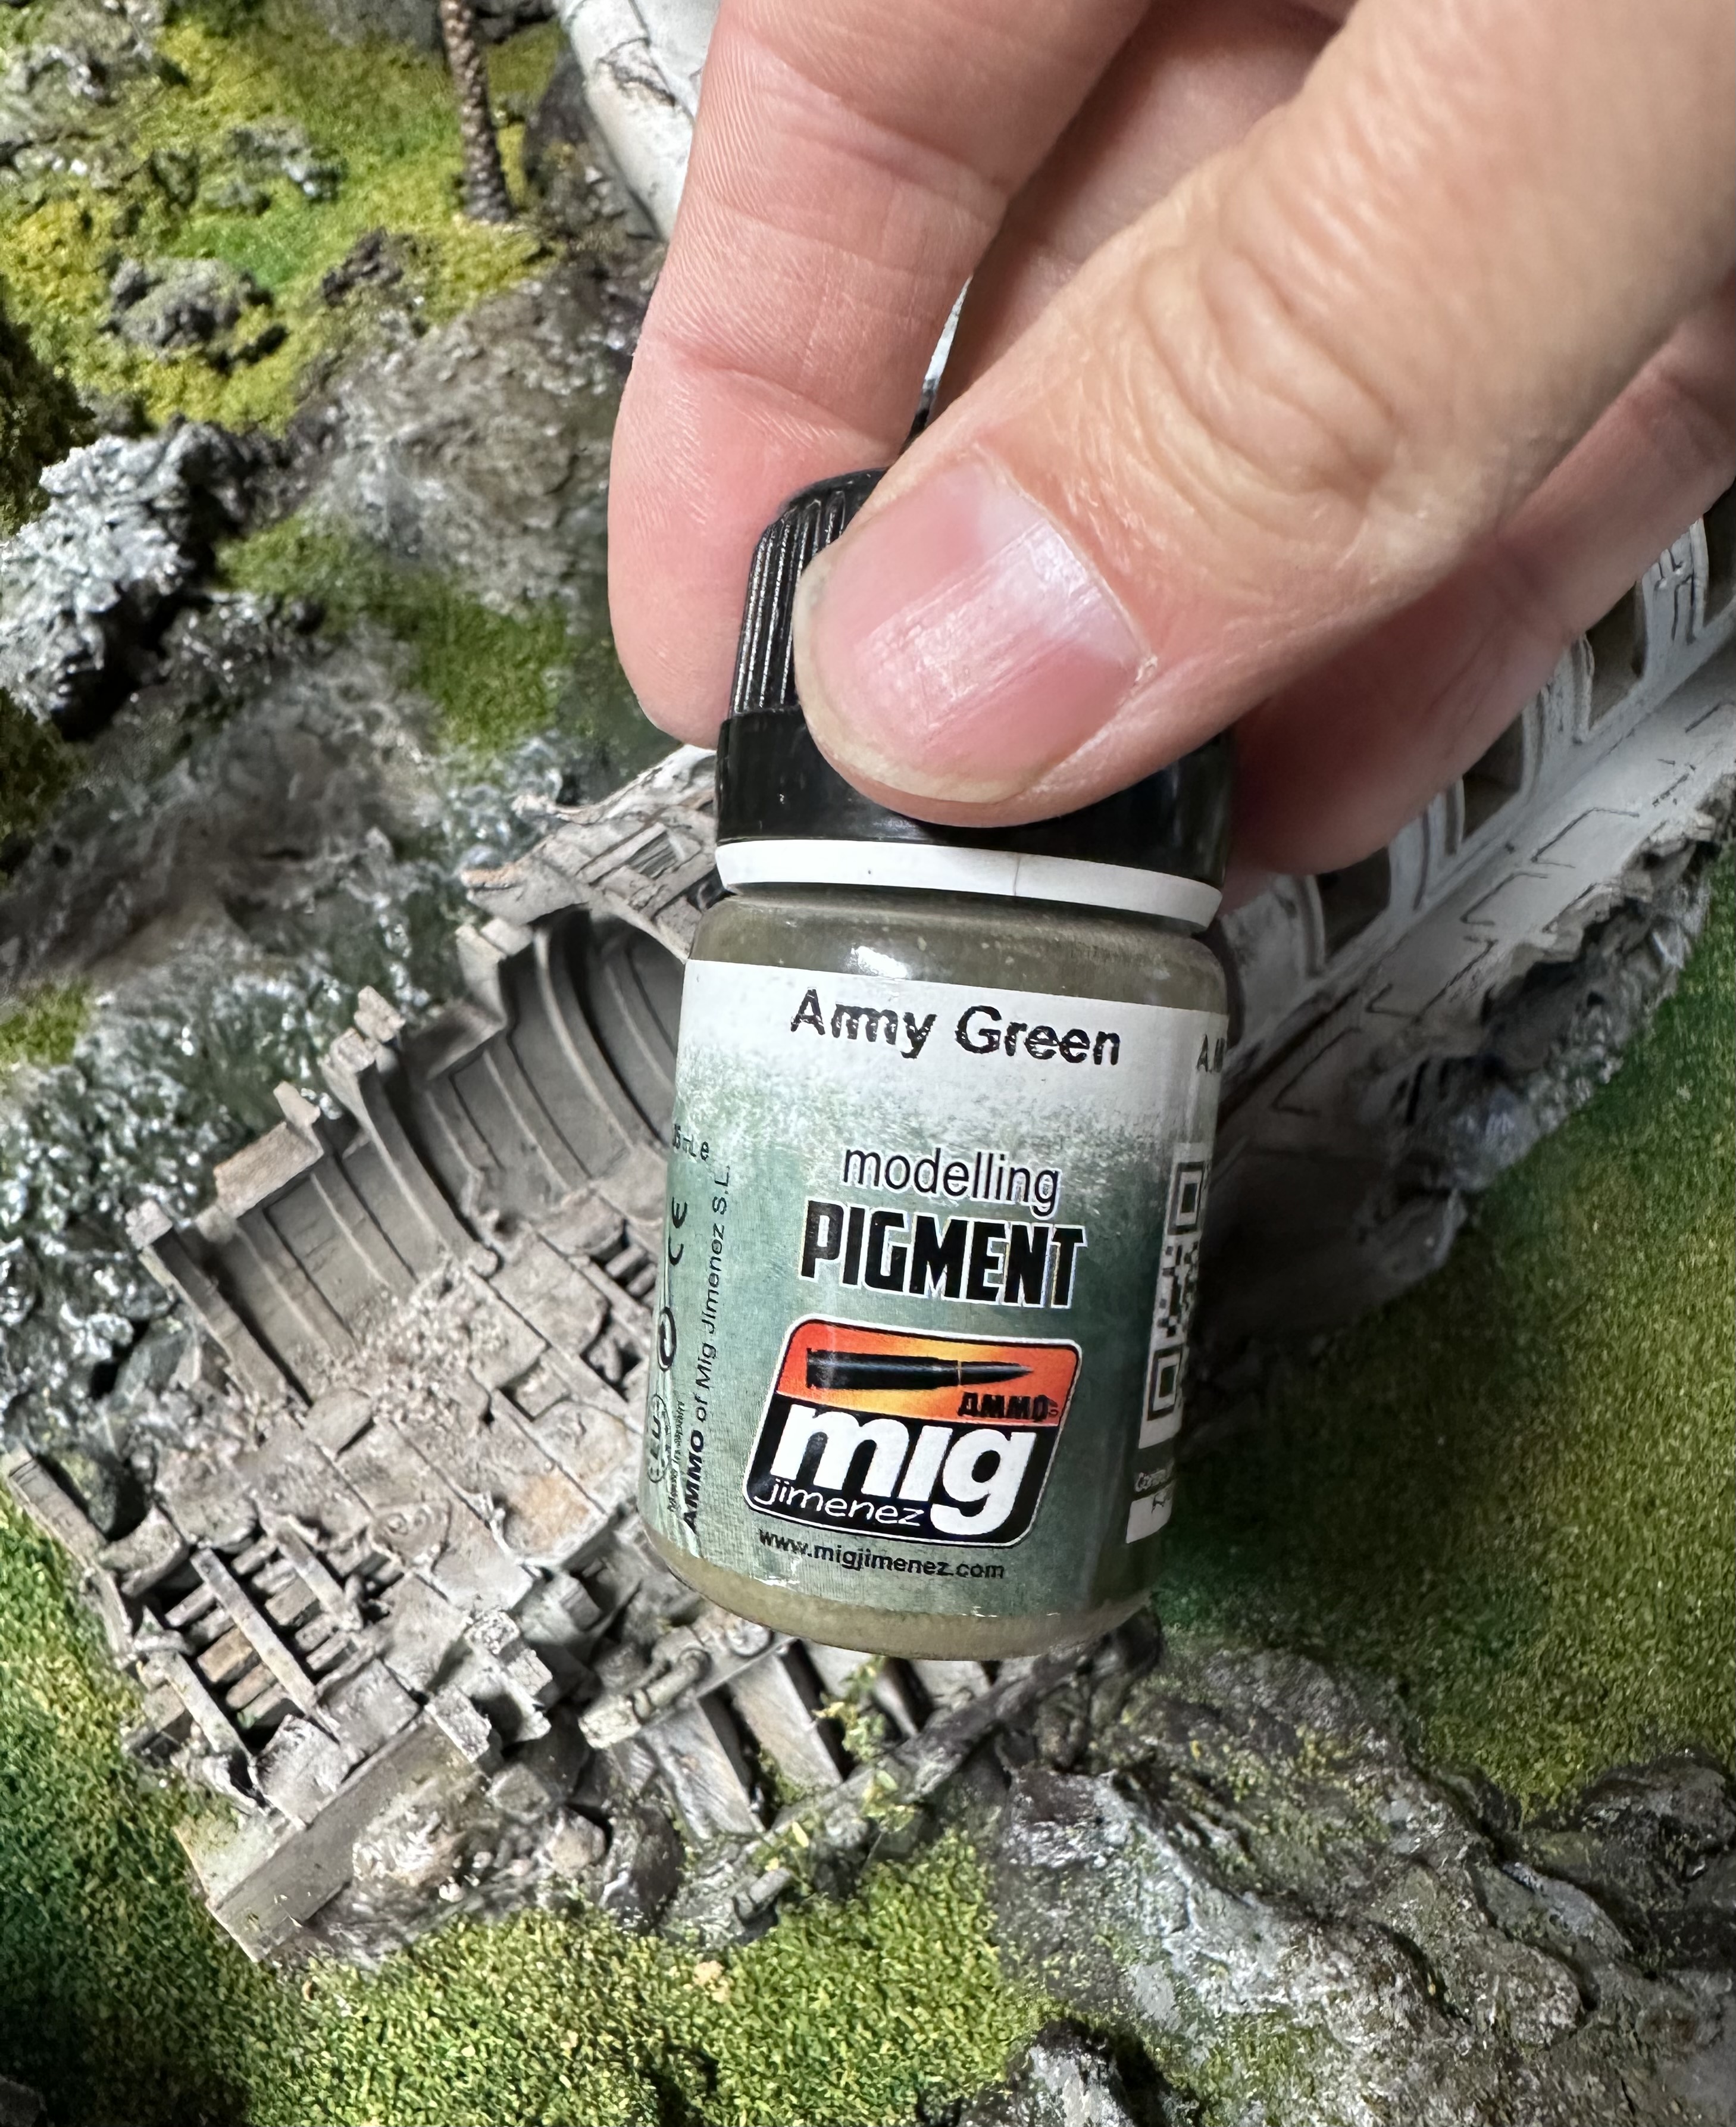
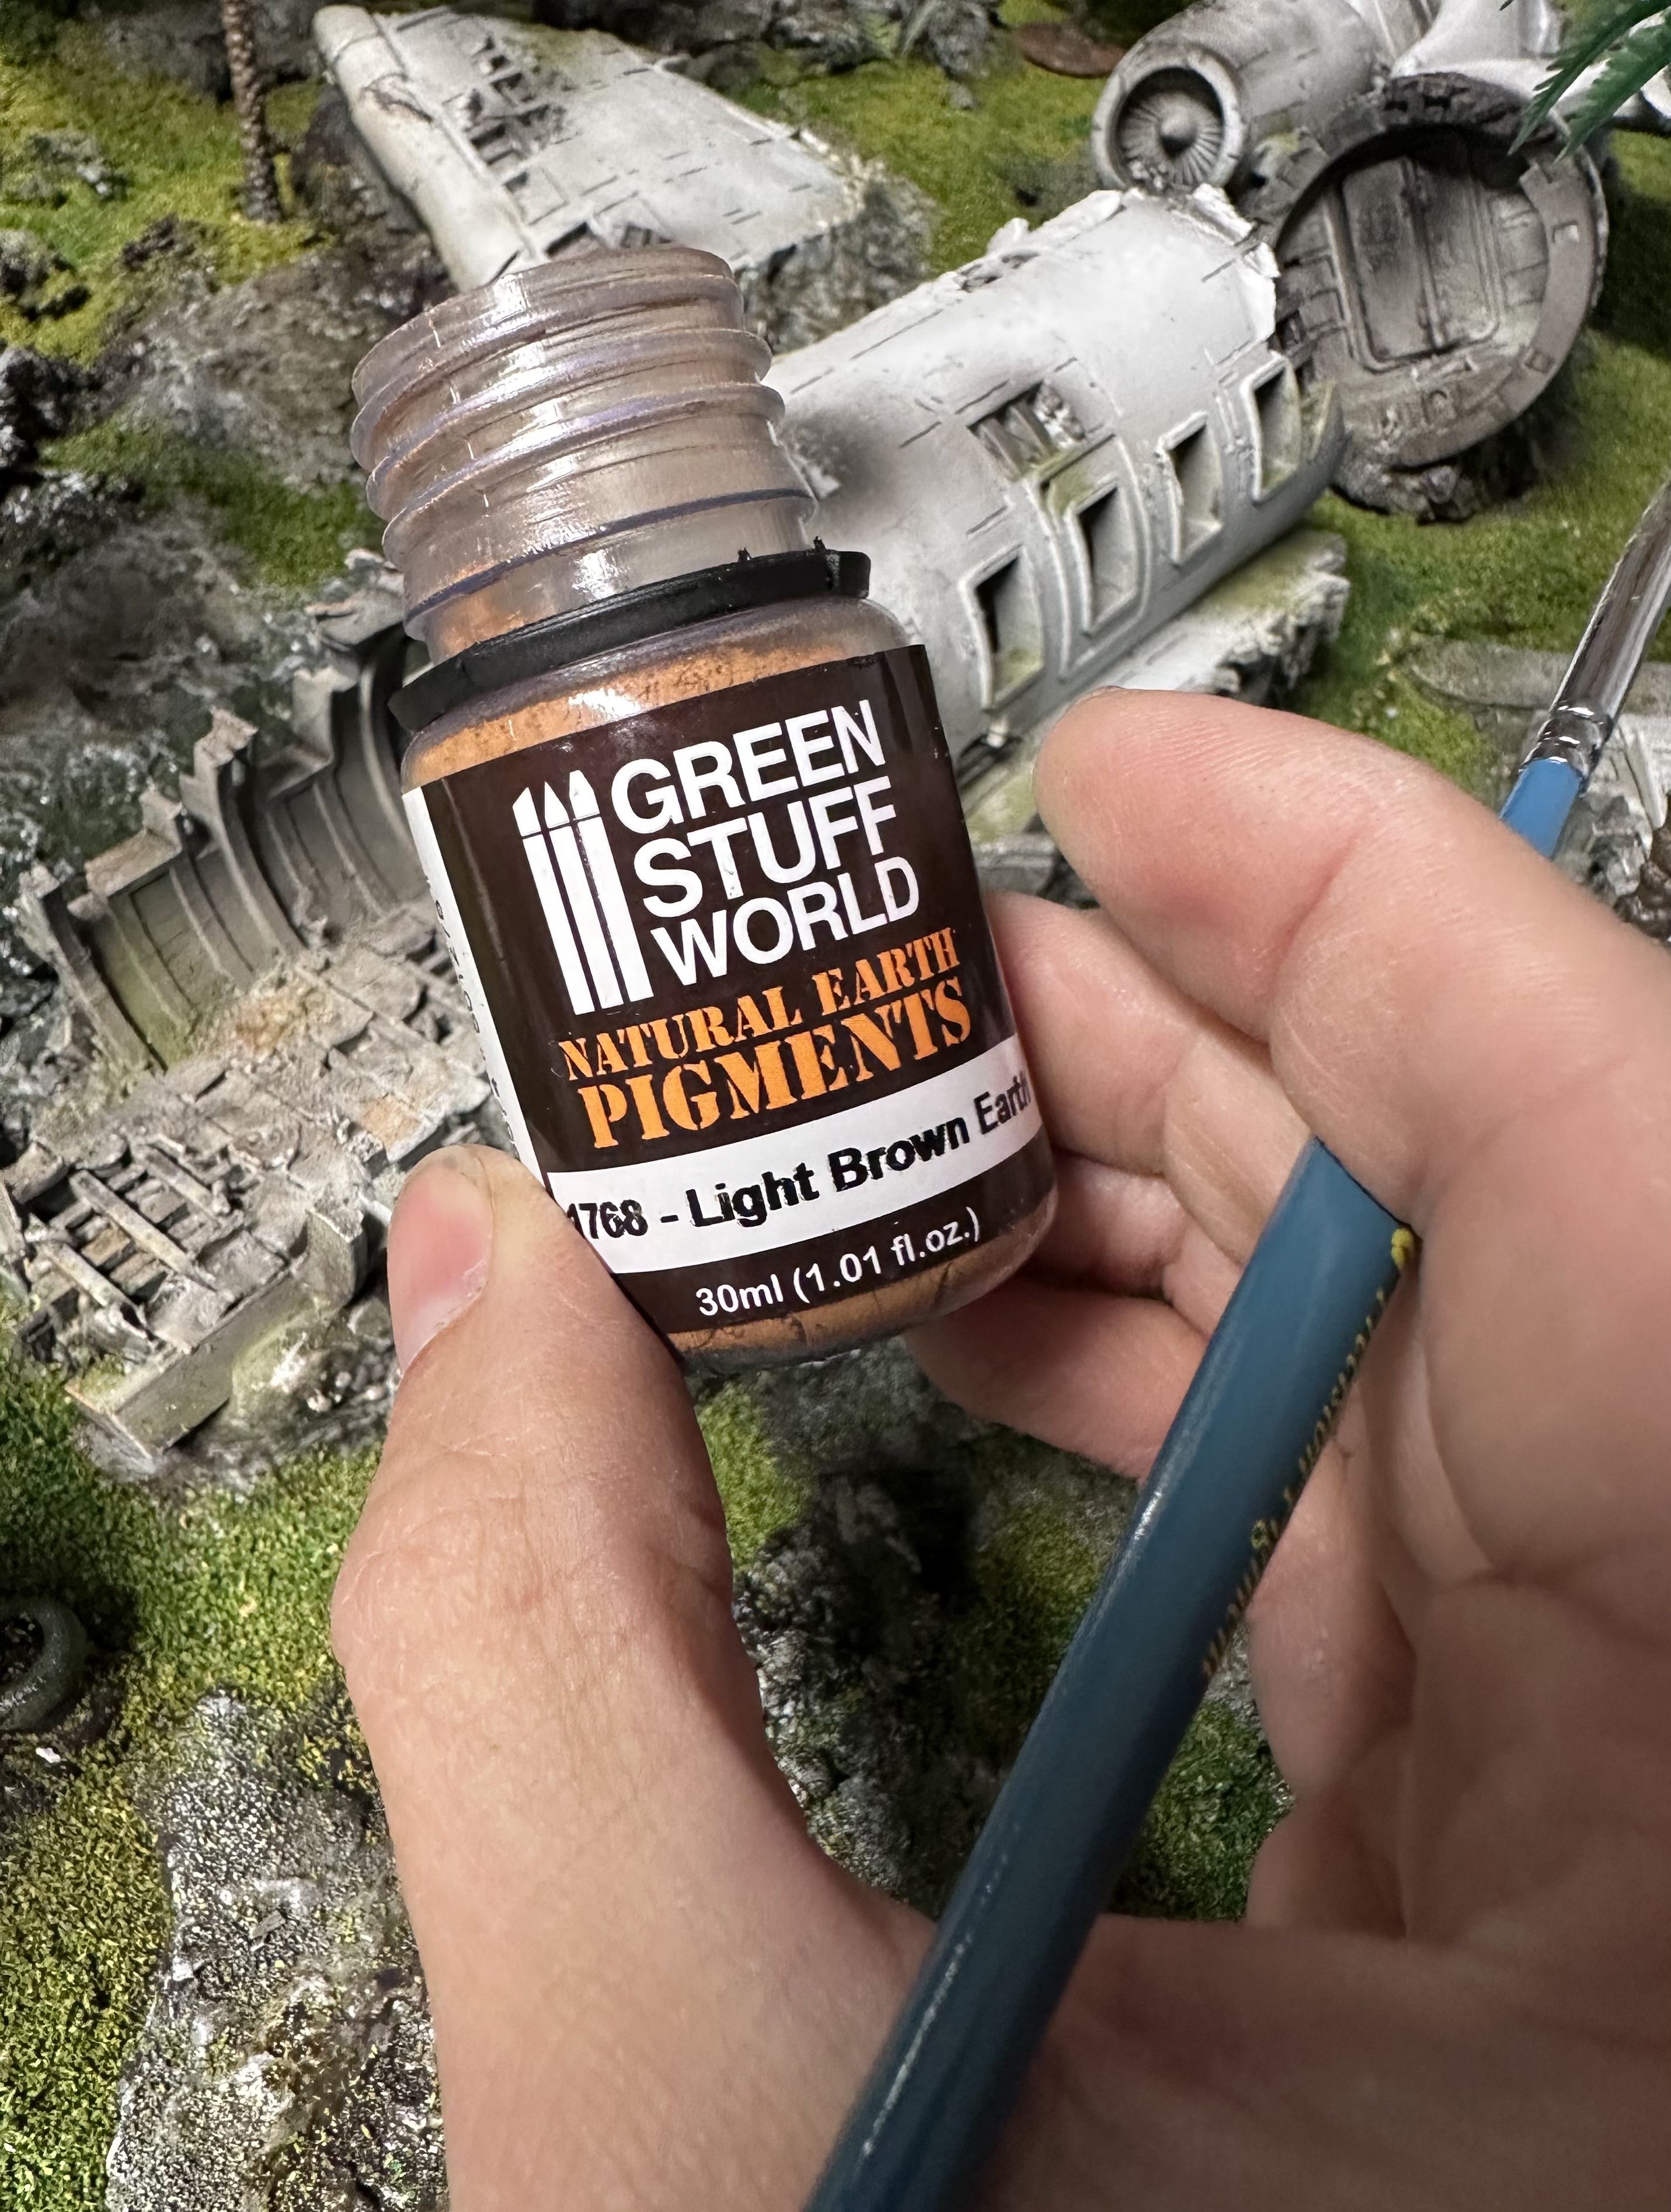
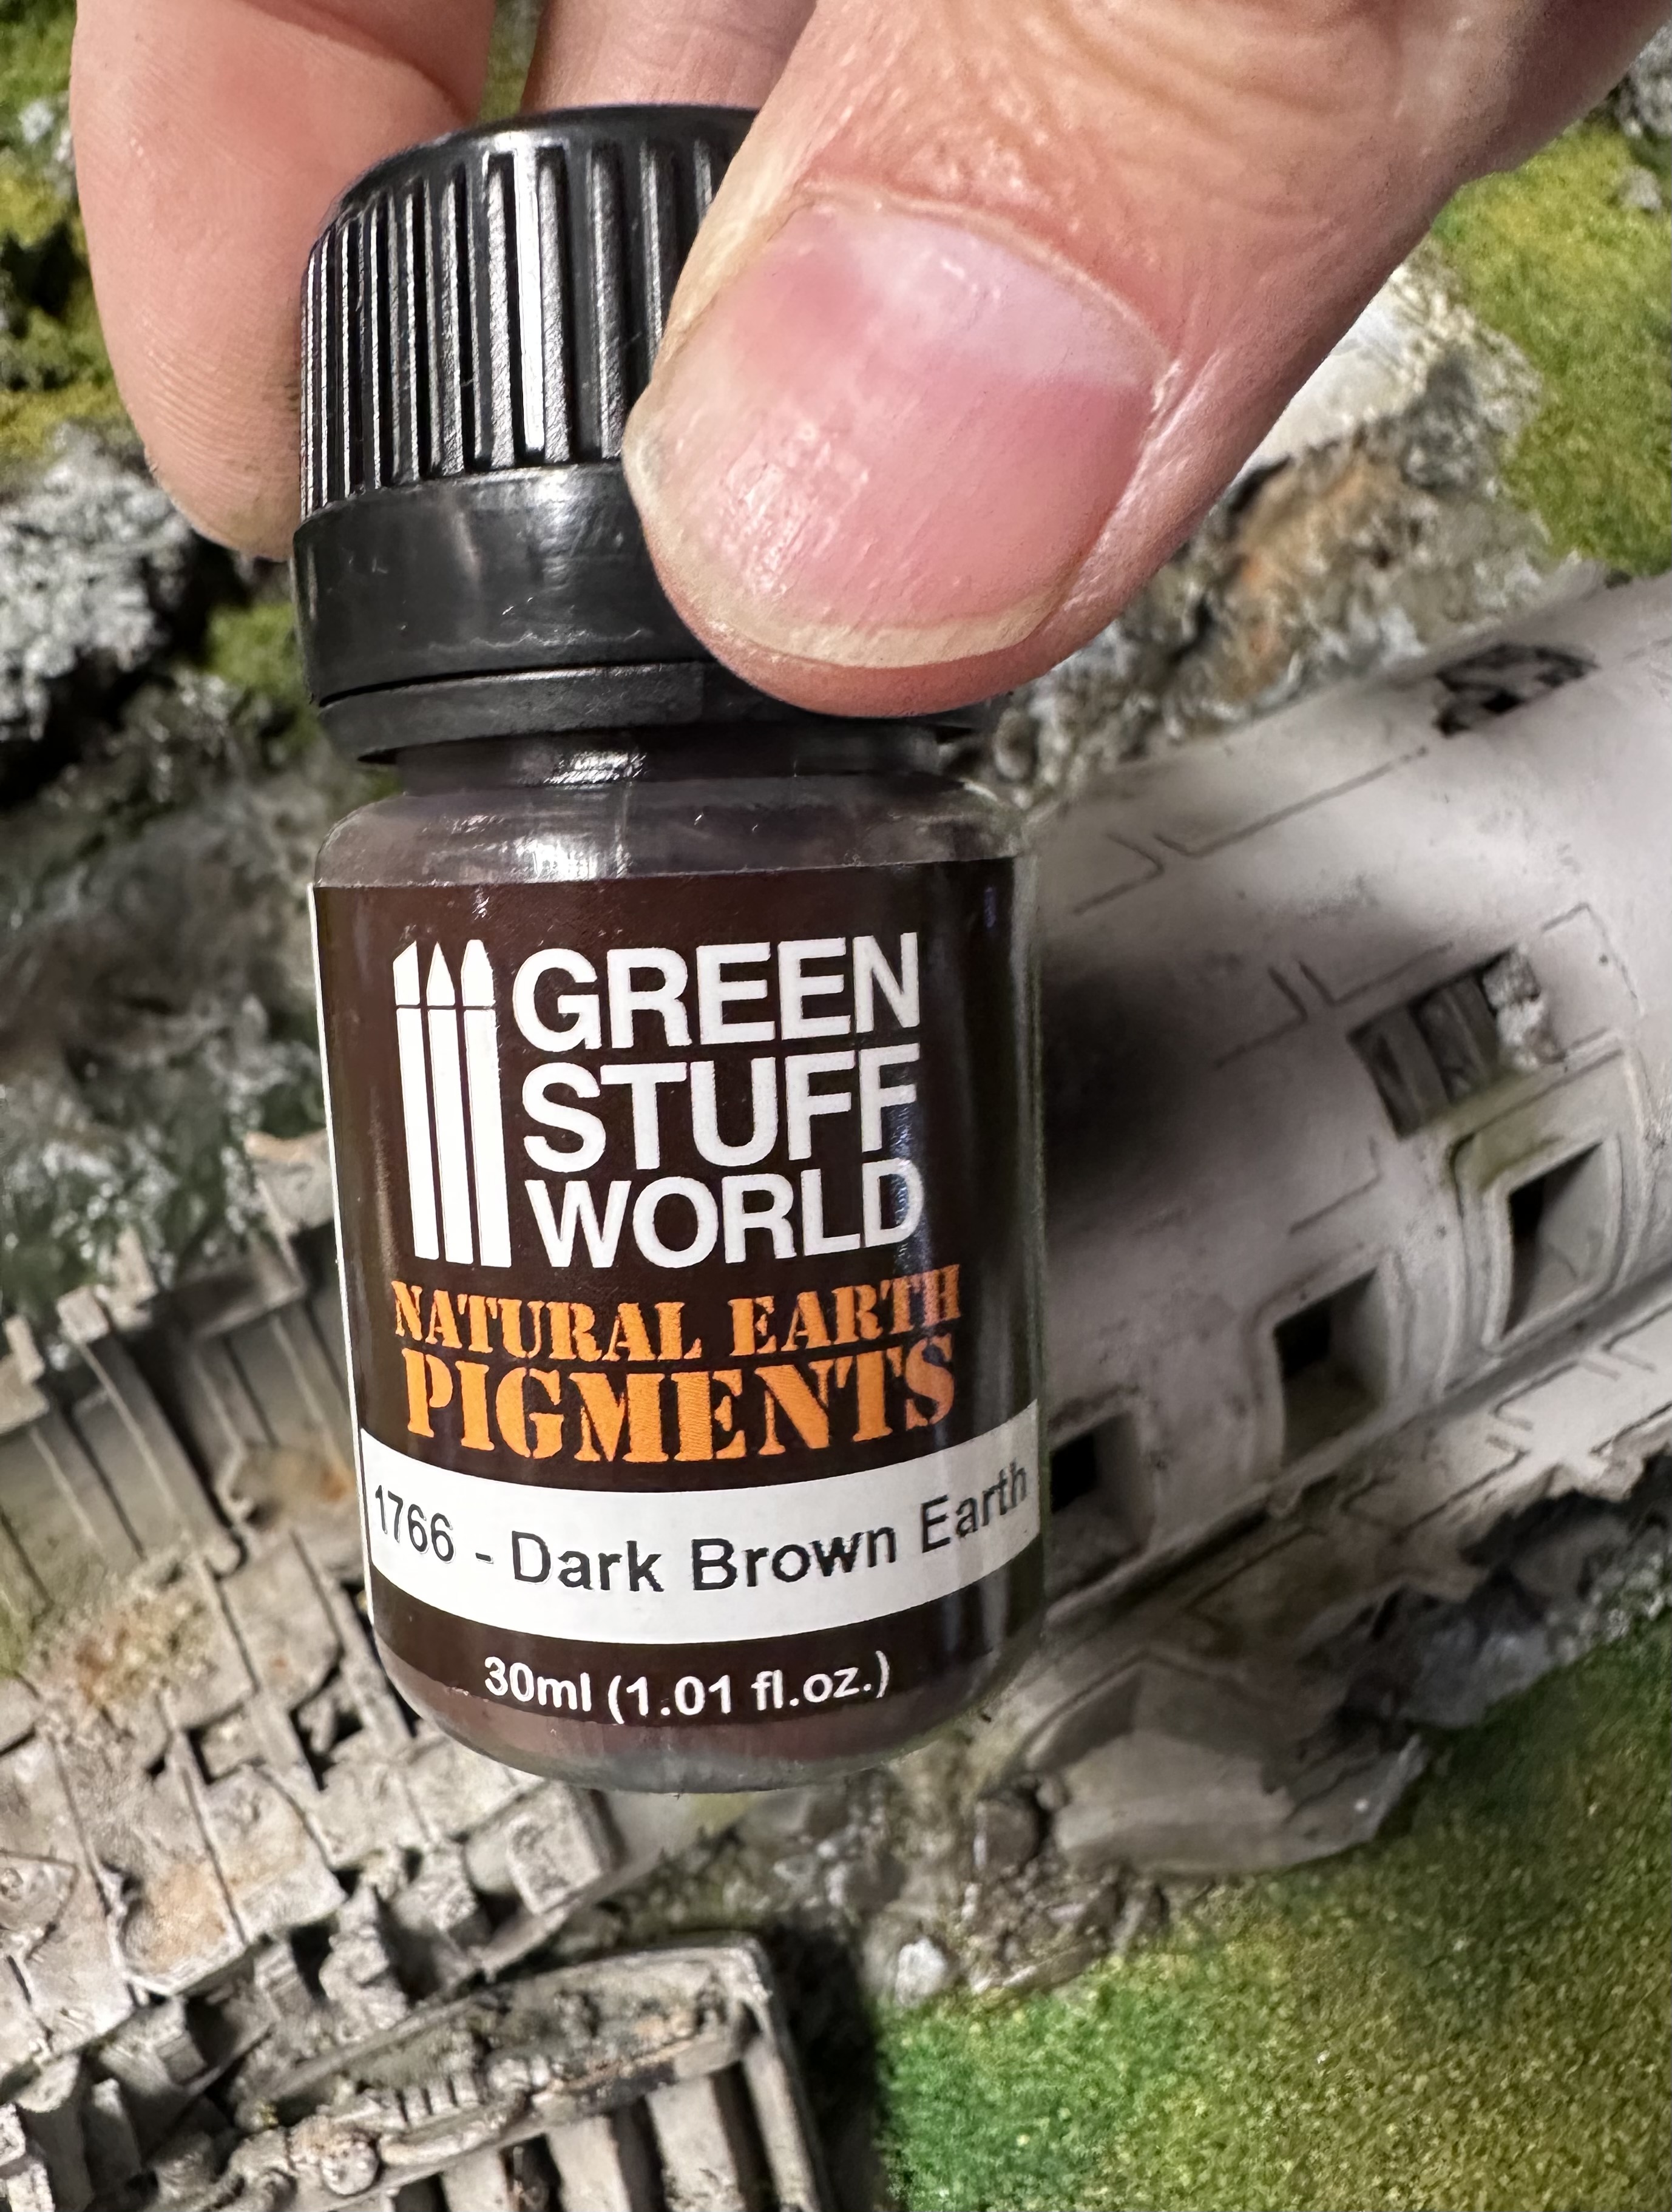
For weathering I went in heavy with a dark brown pigment powder, really rubbing it on the surfaces with a short bristled brush. I used the weathering pencils to bring out some edges.
Finally sealed them with matt varnish to lock in the pigments and get rid of the Contrast shine.
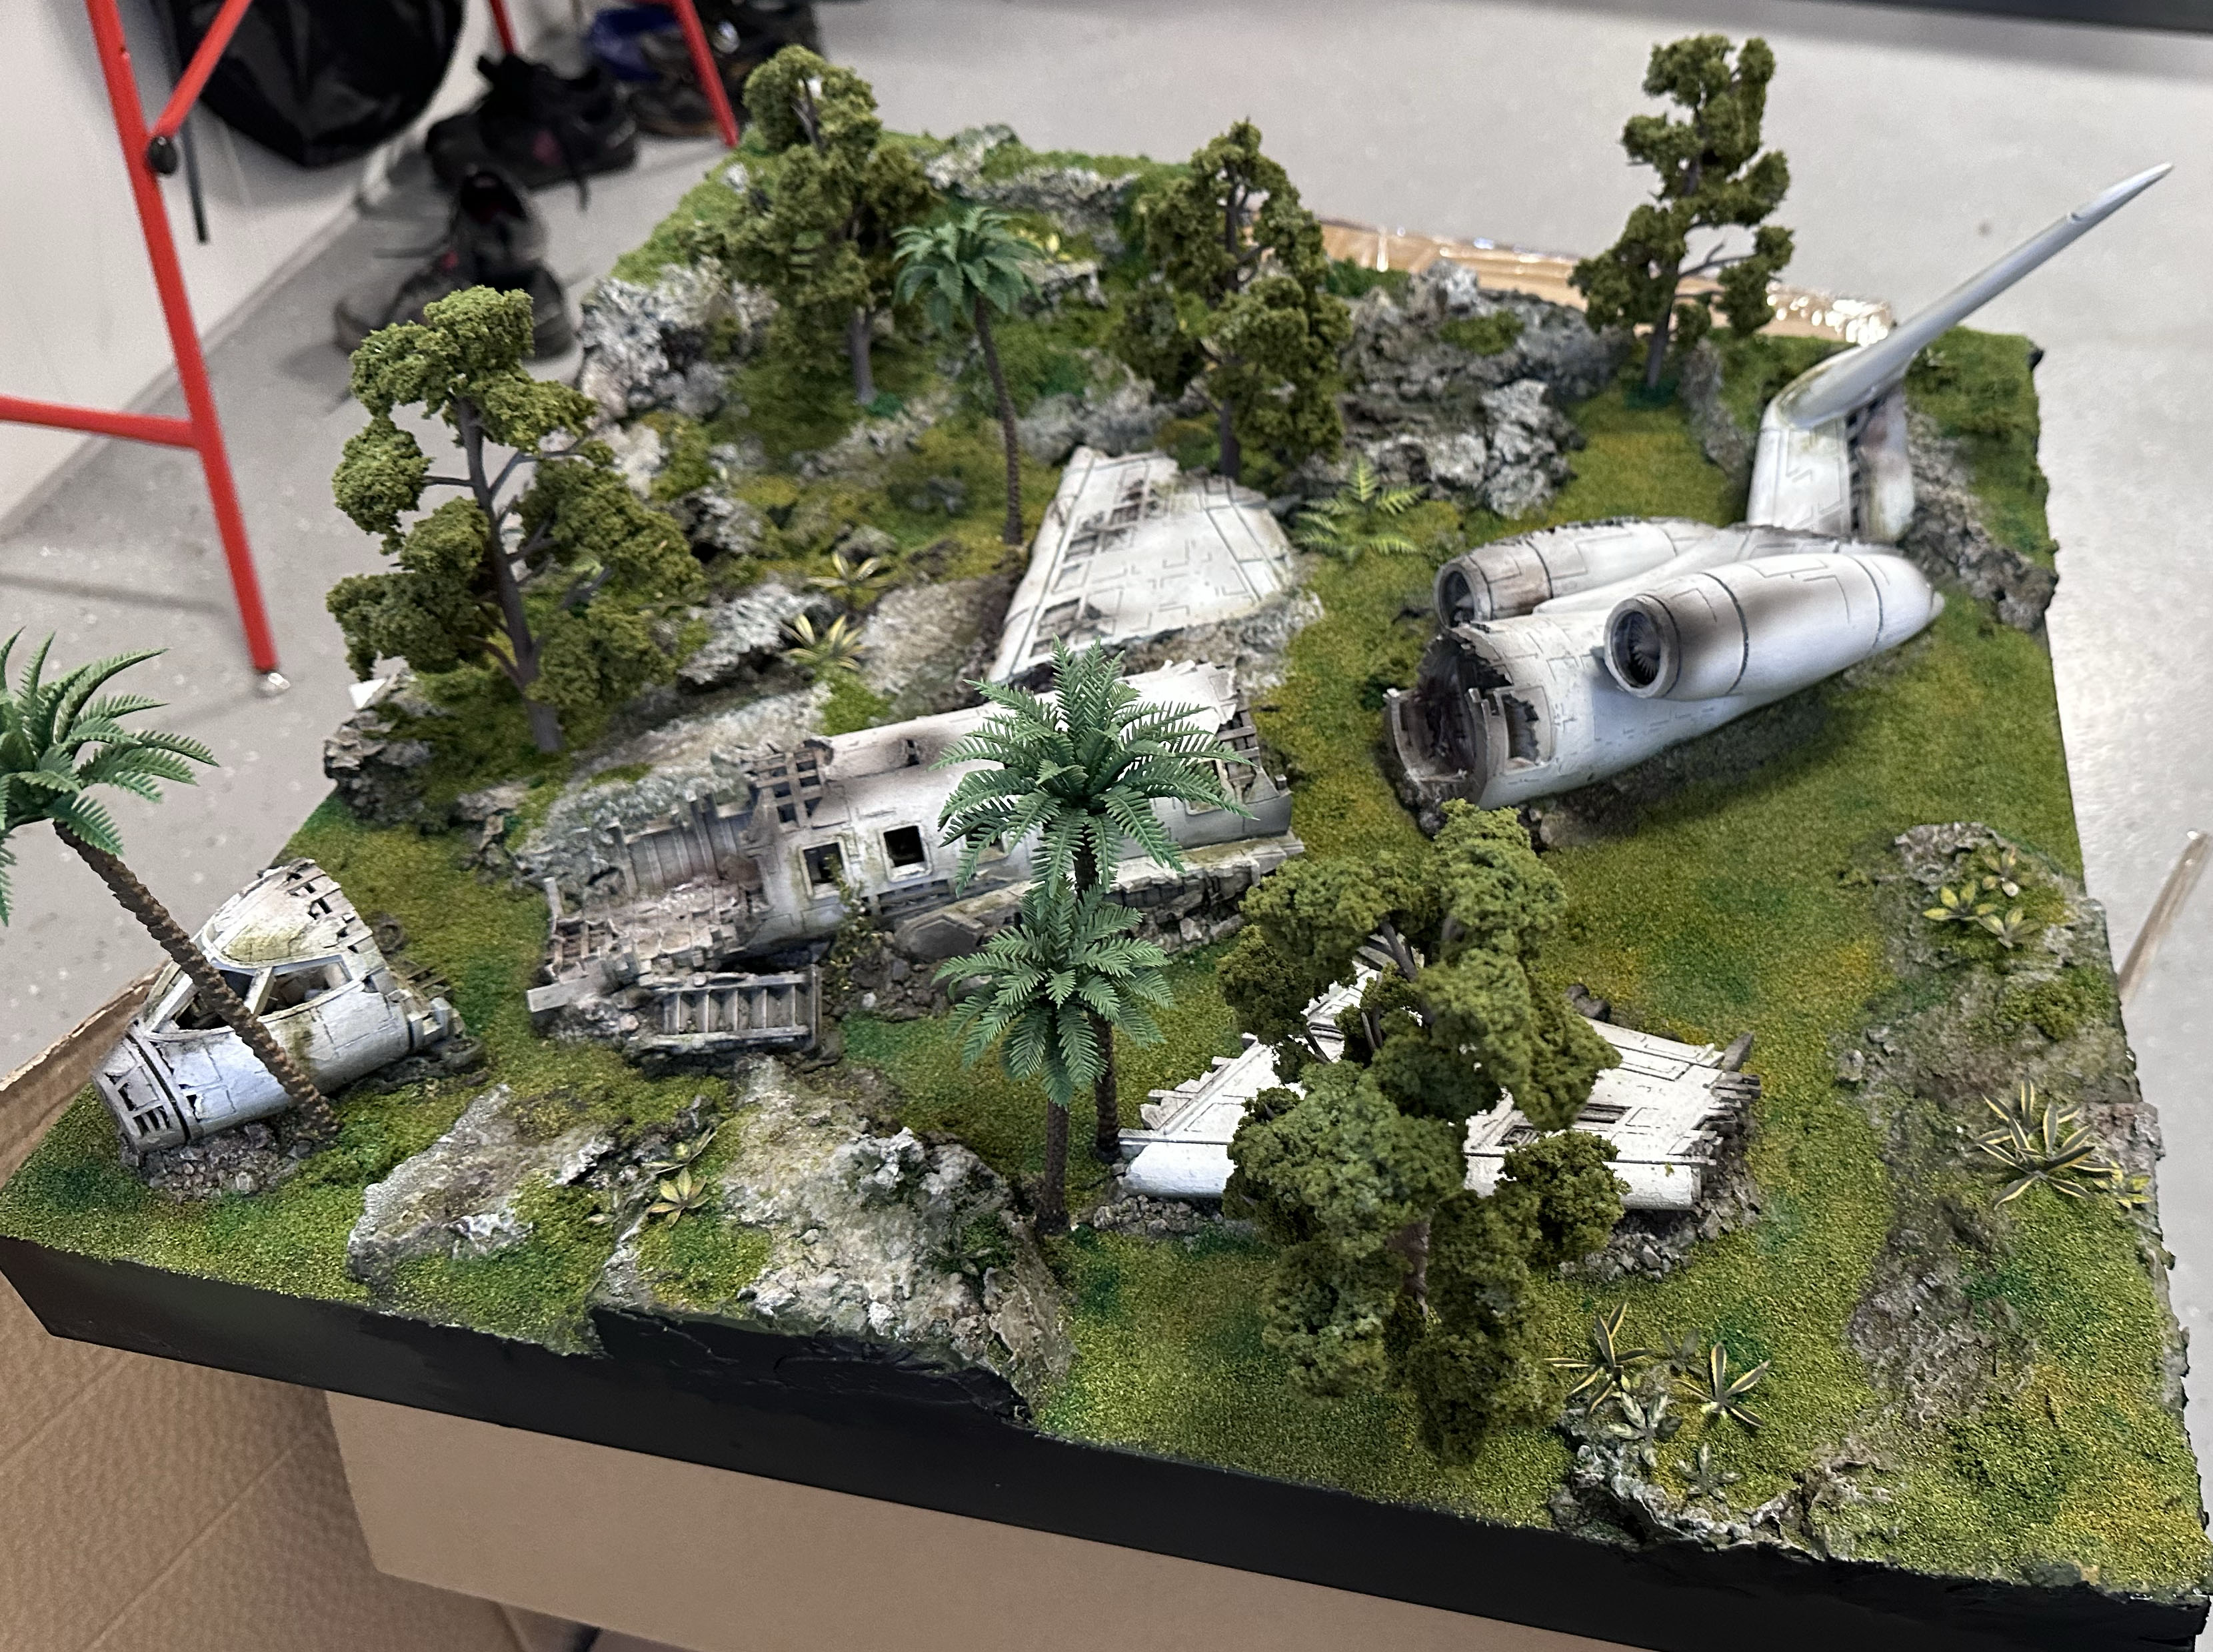
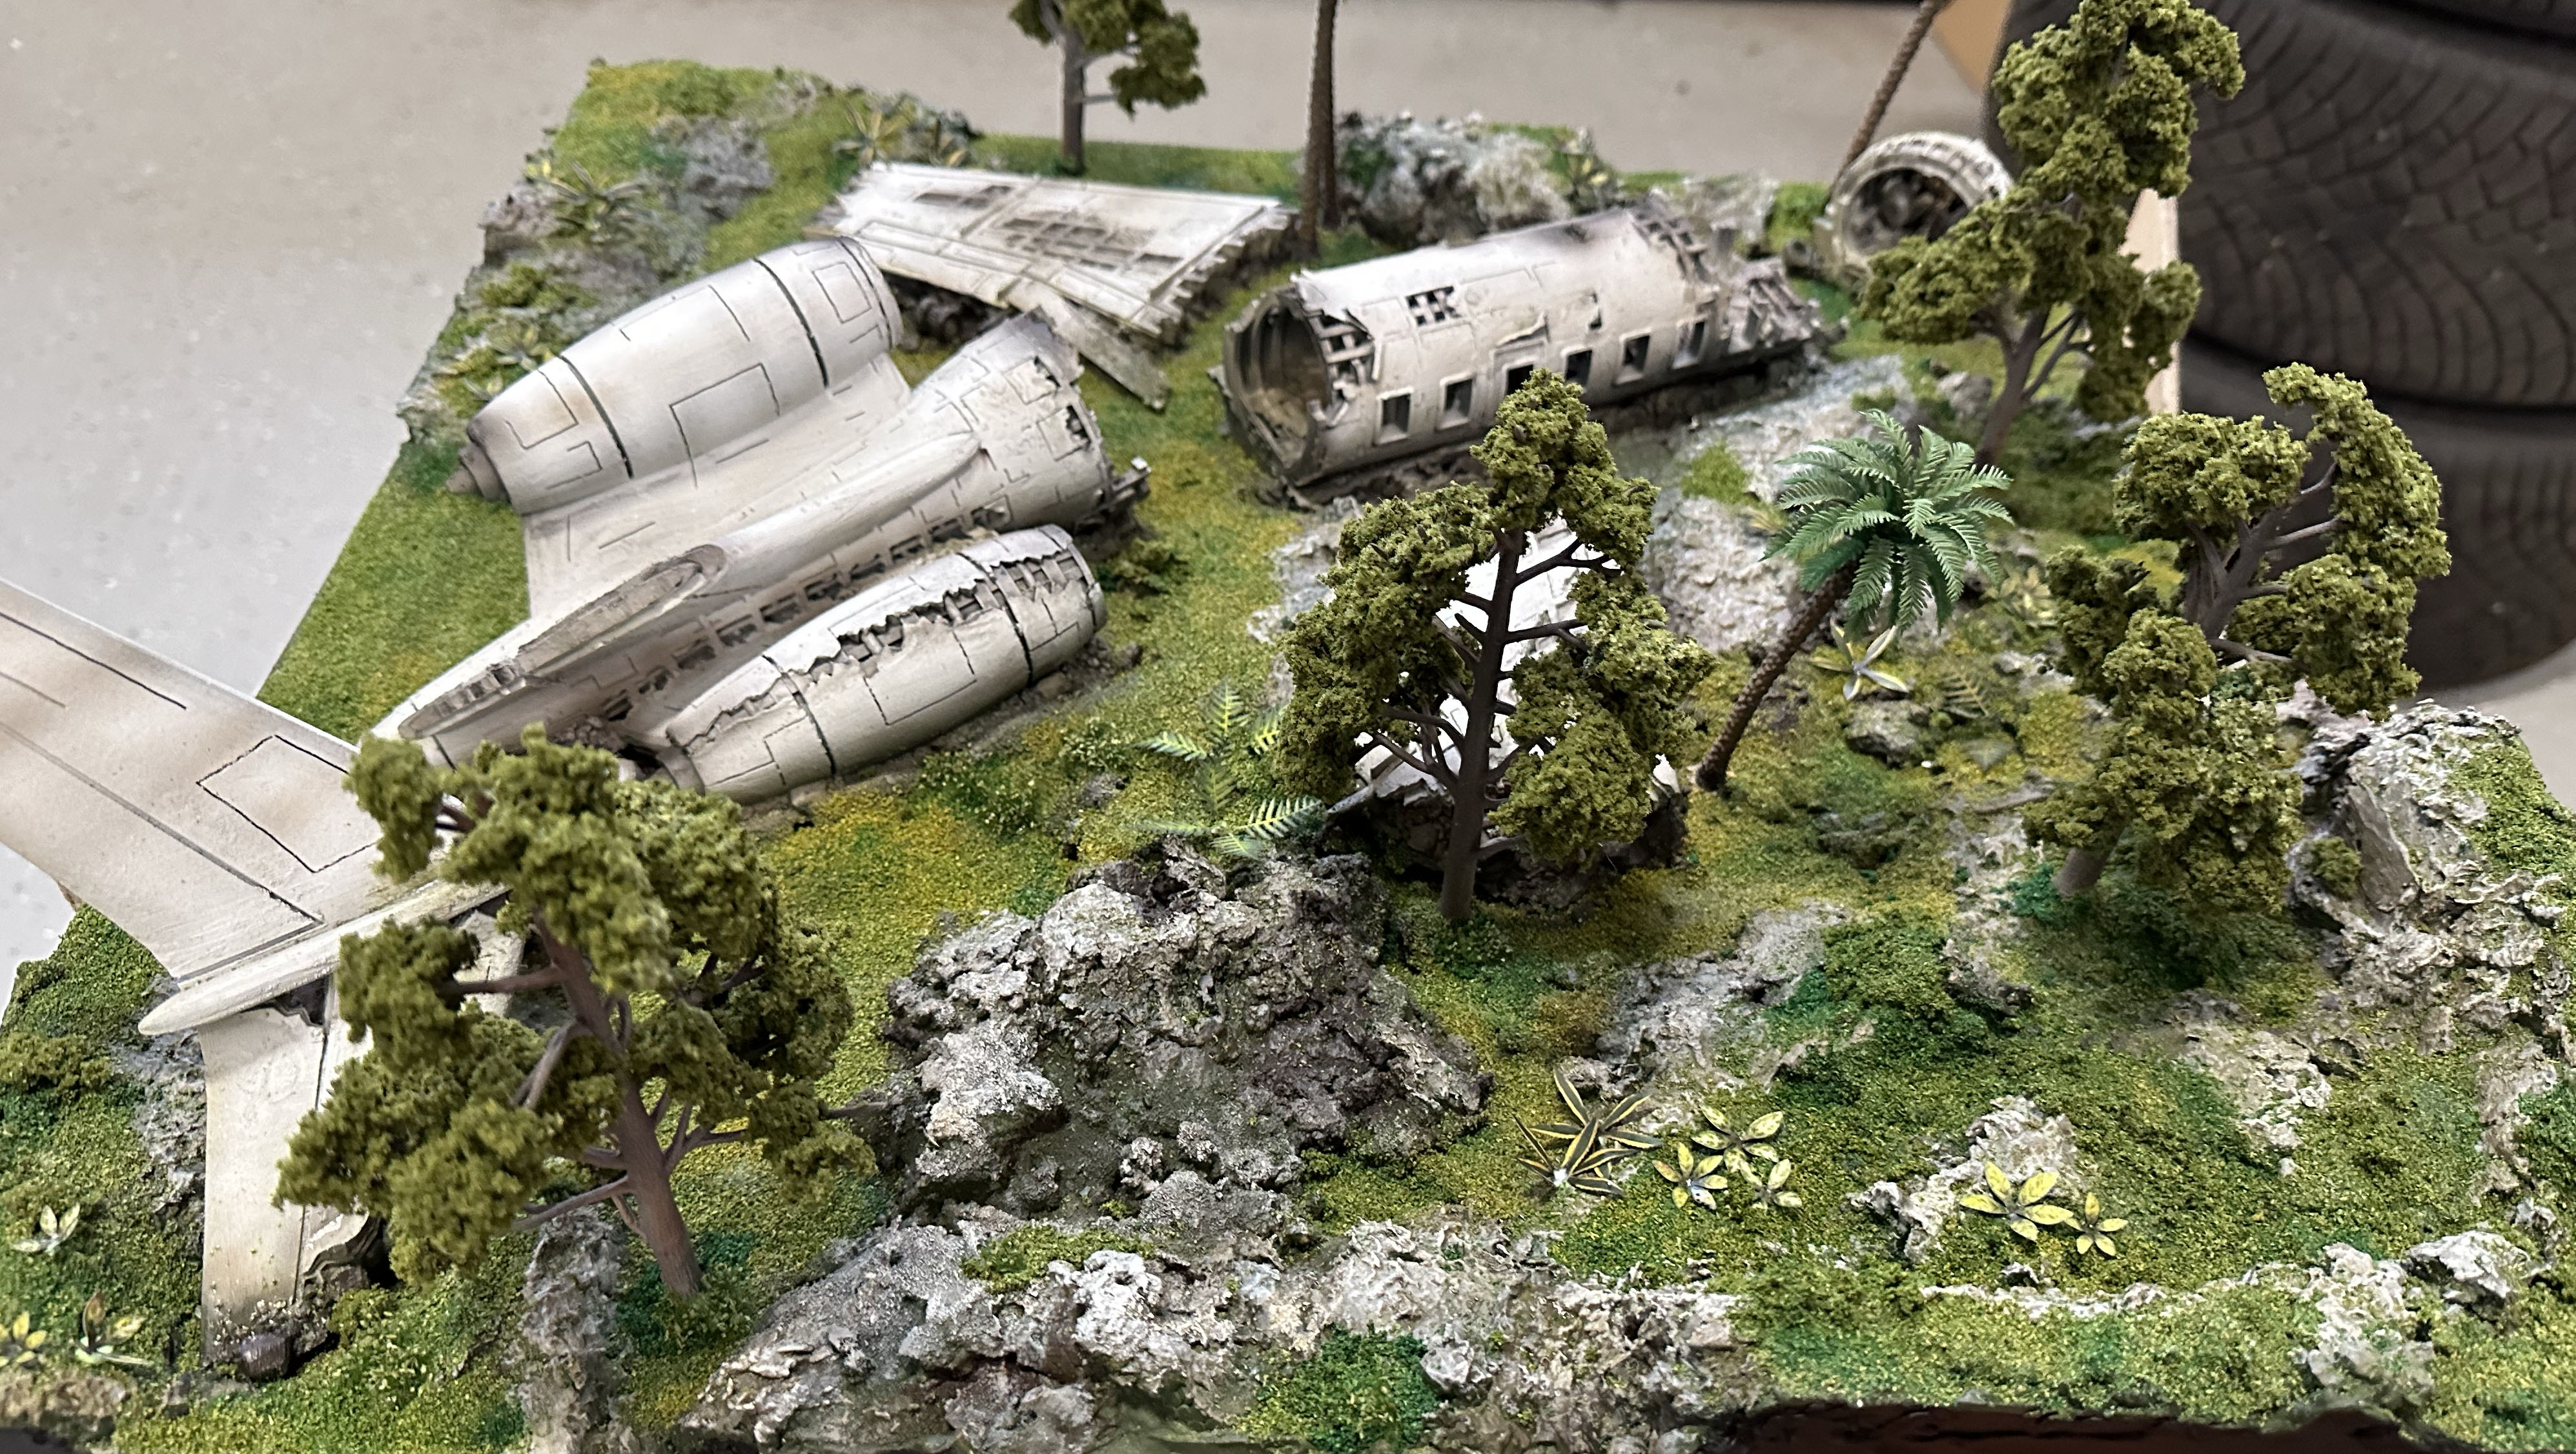
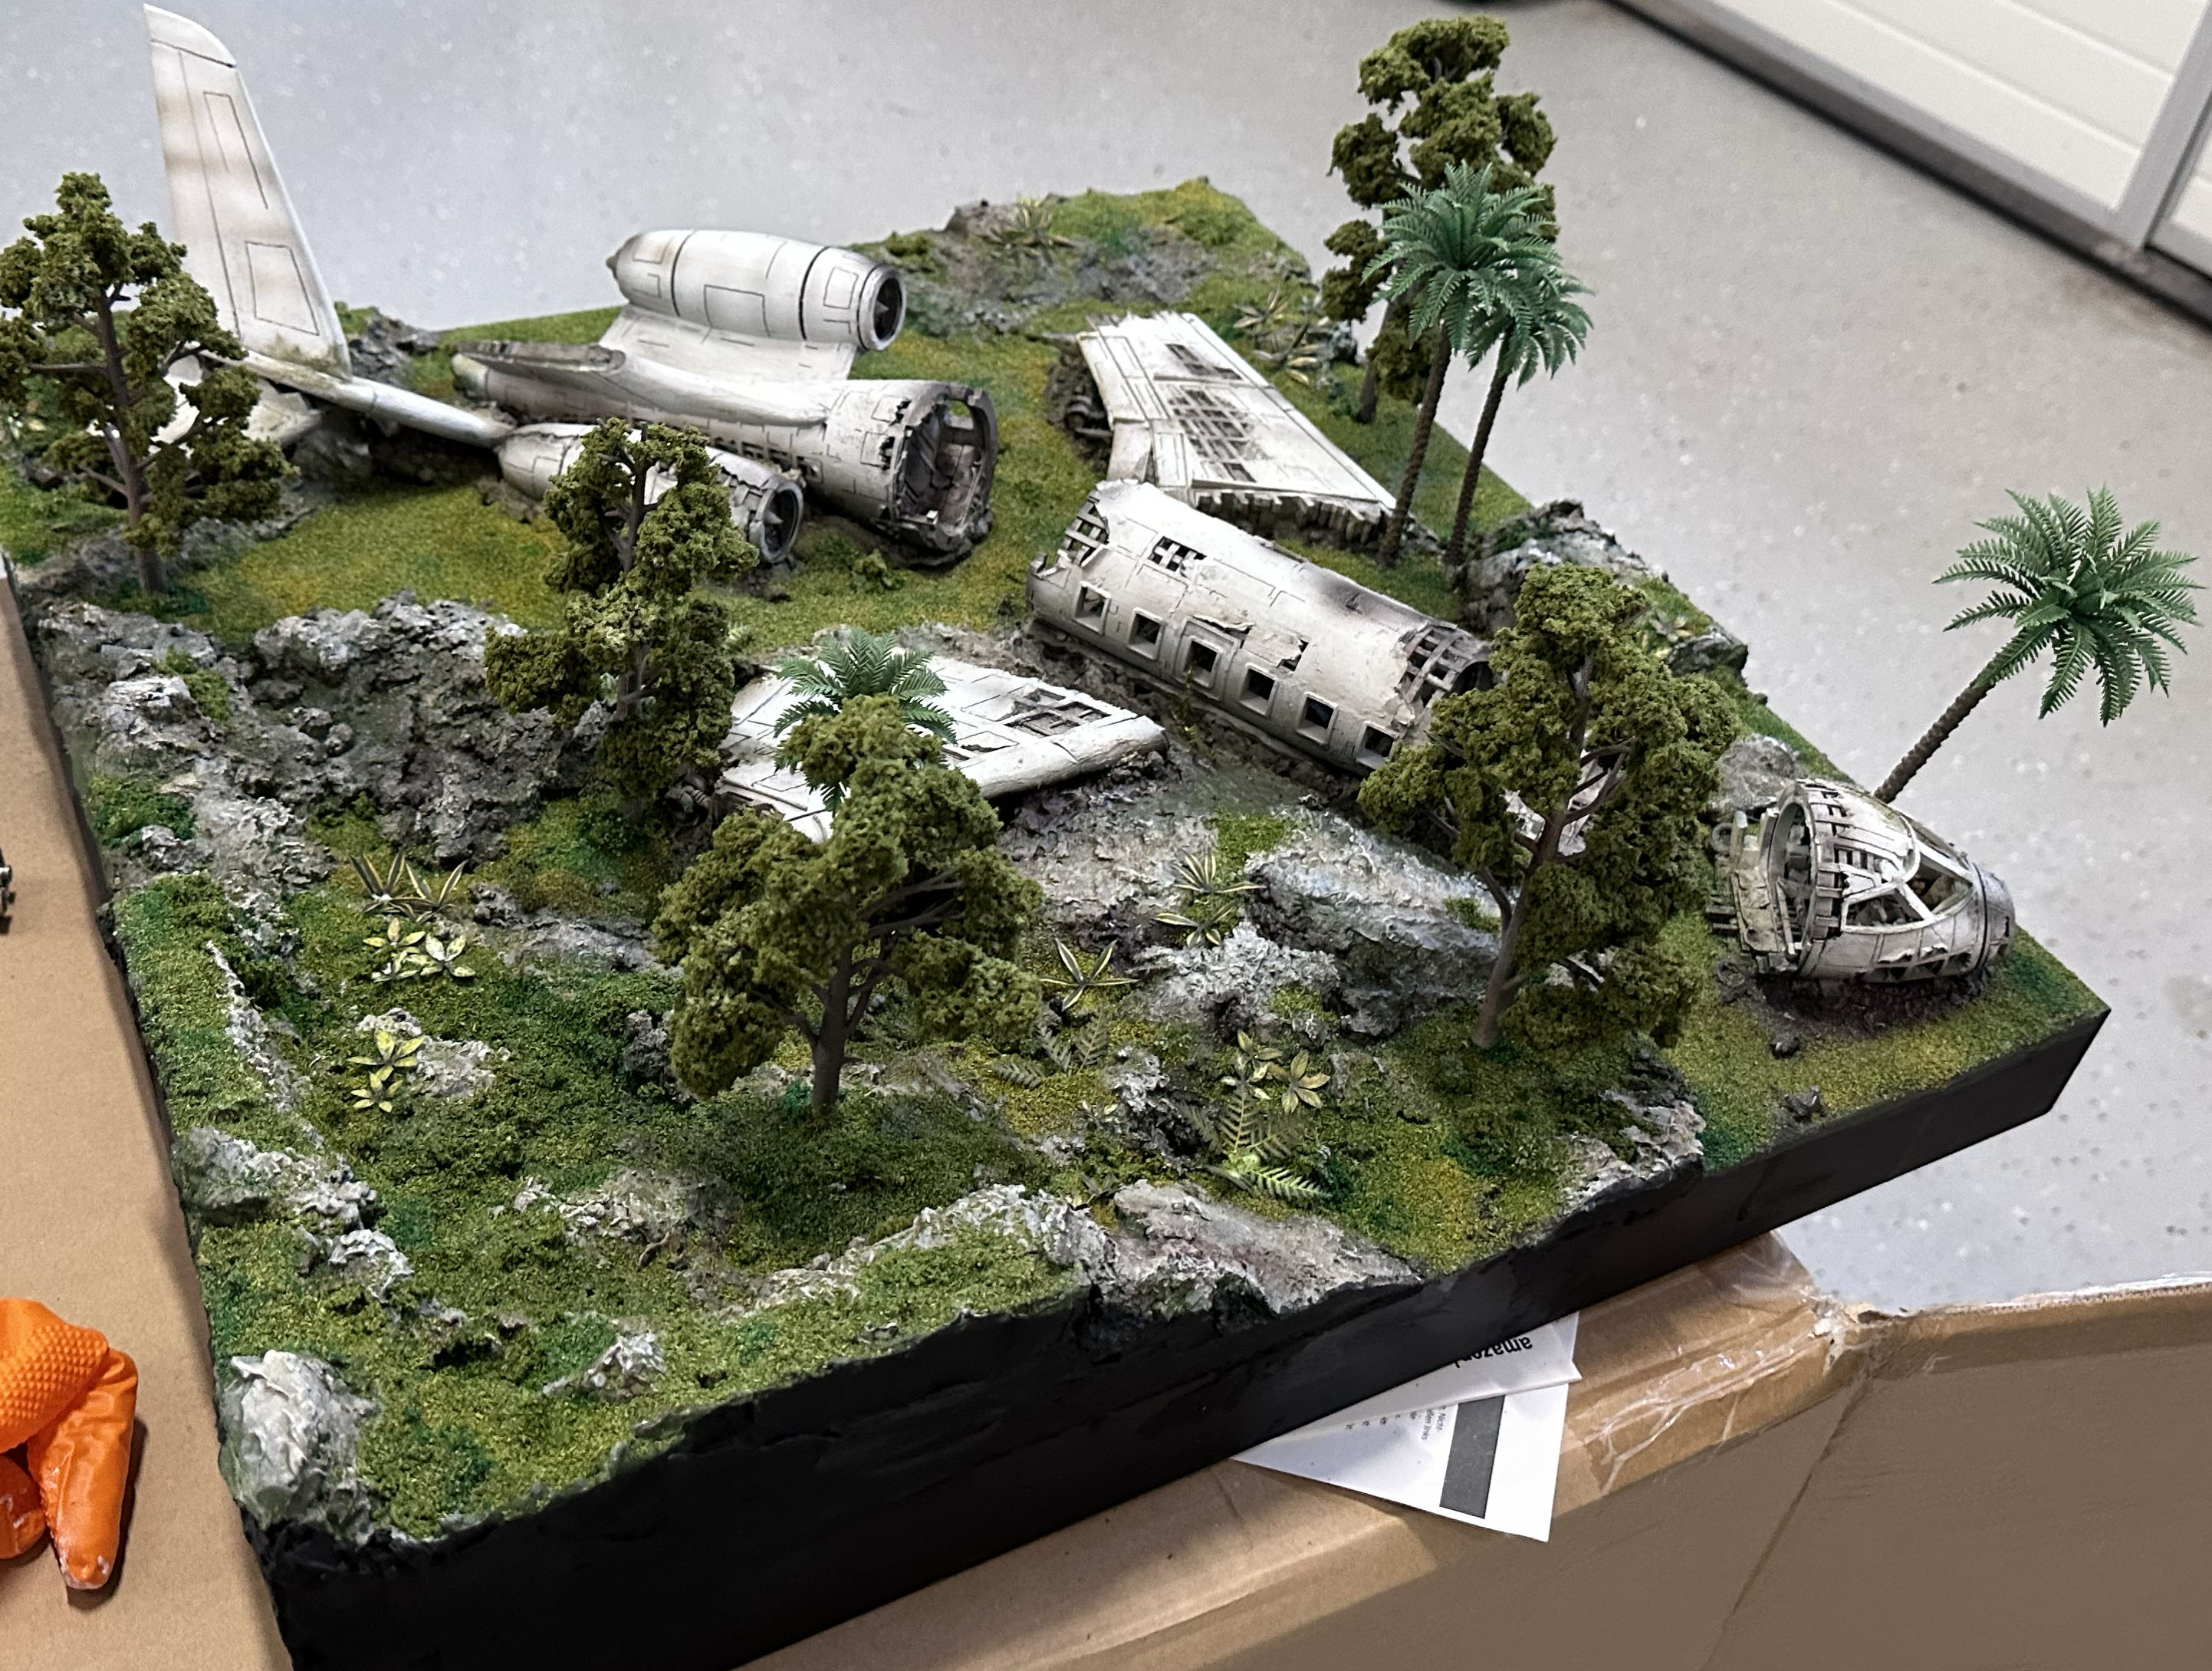
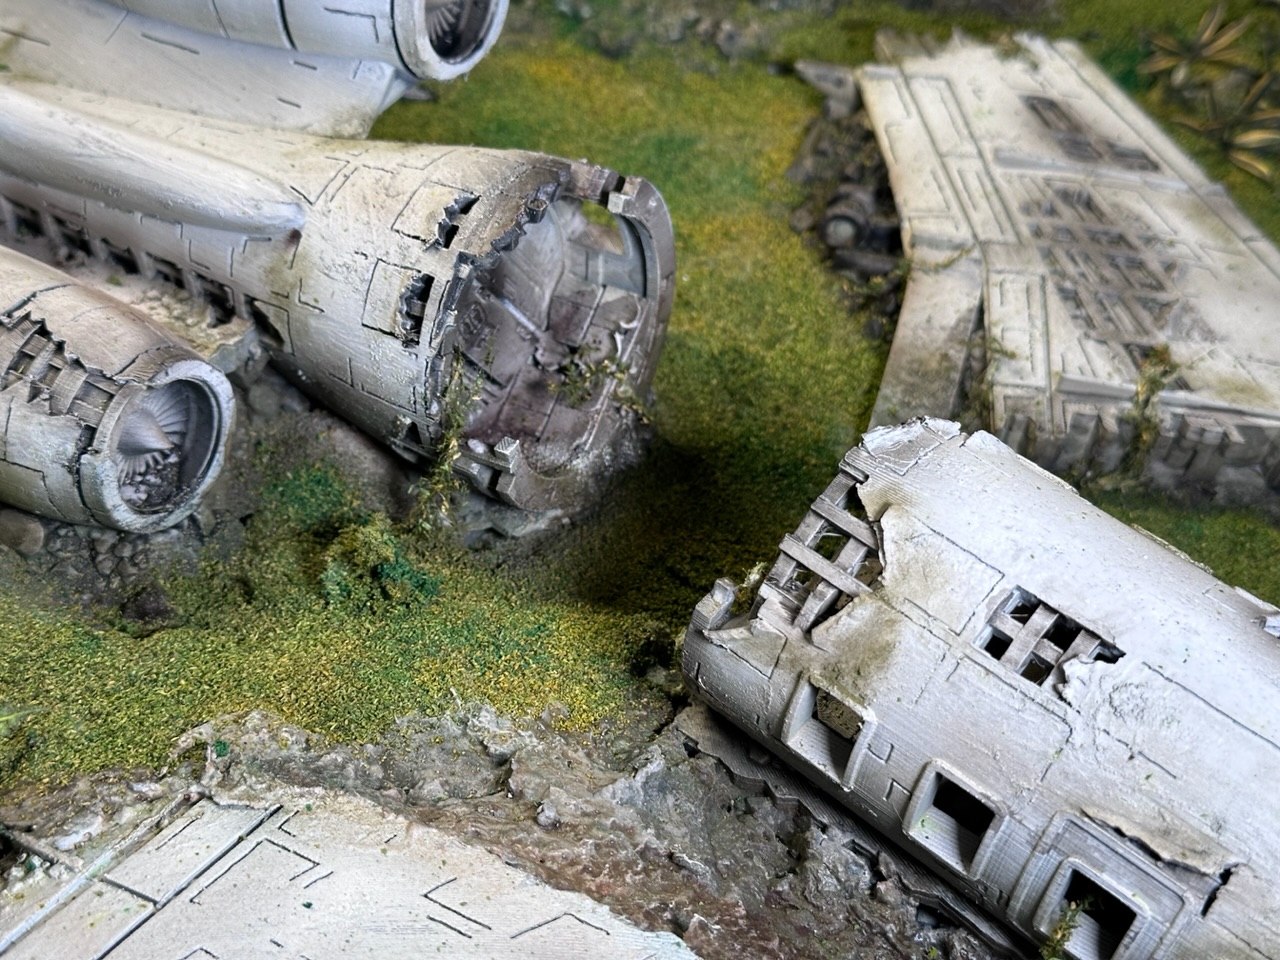
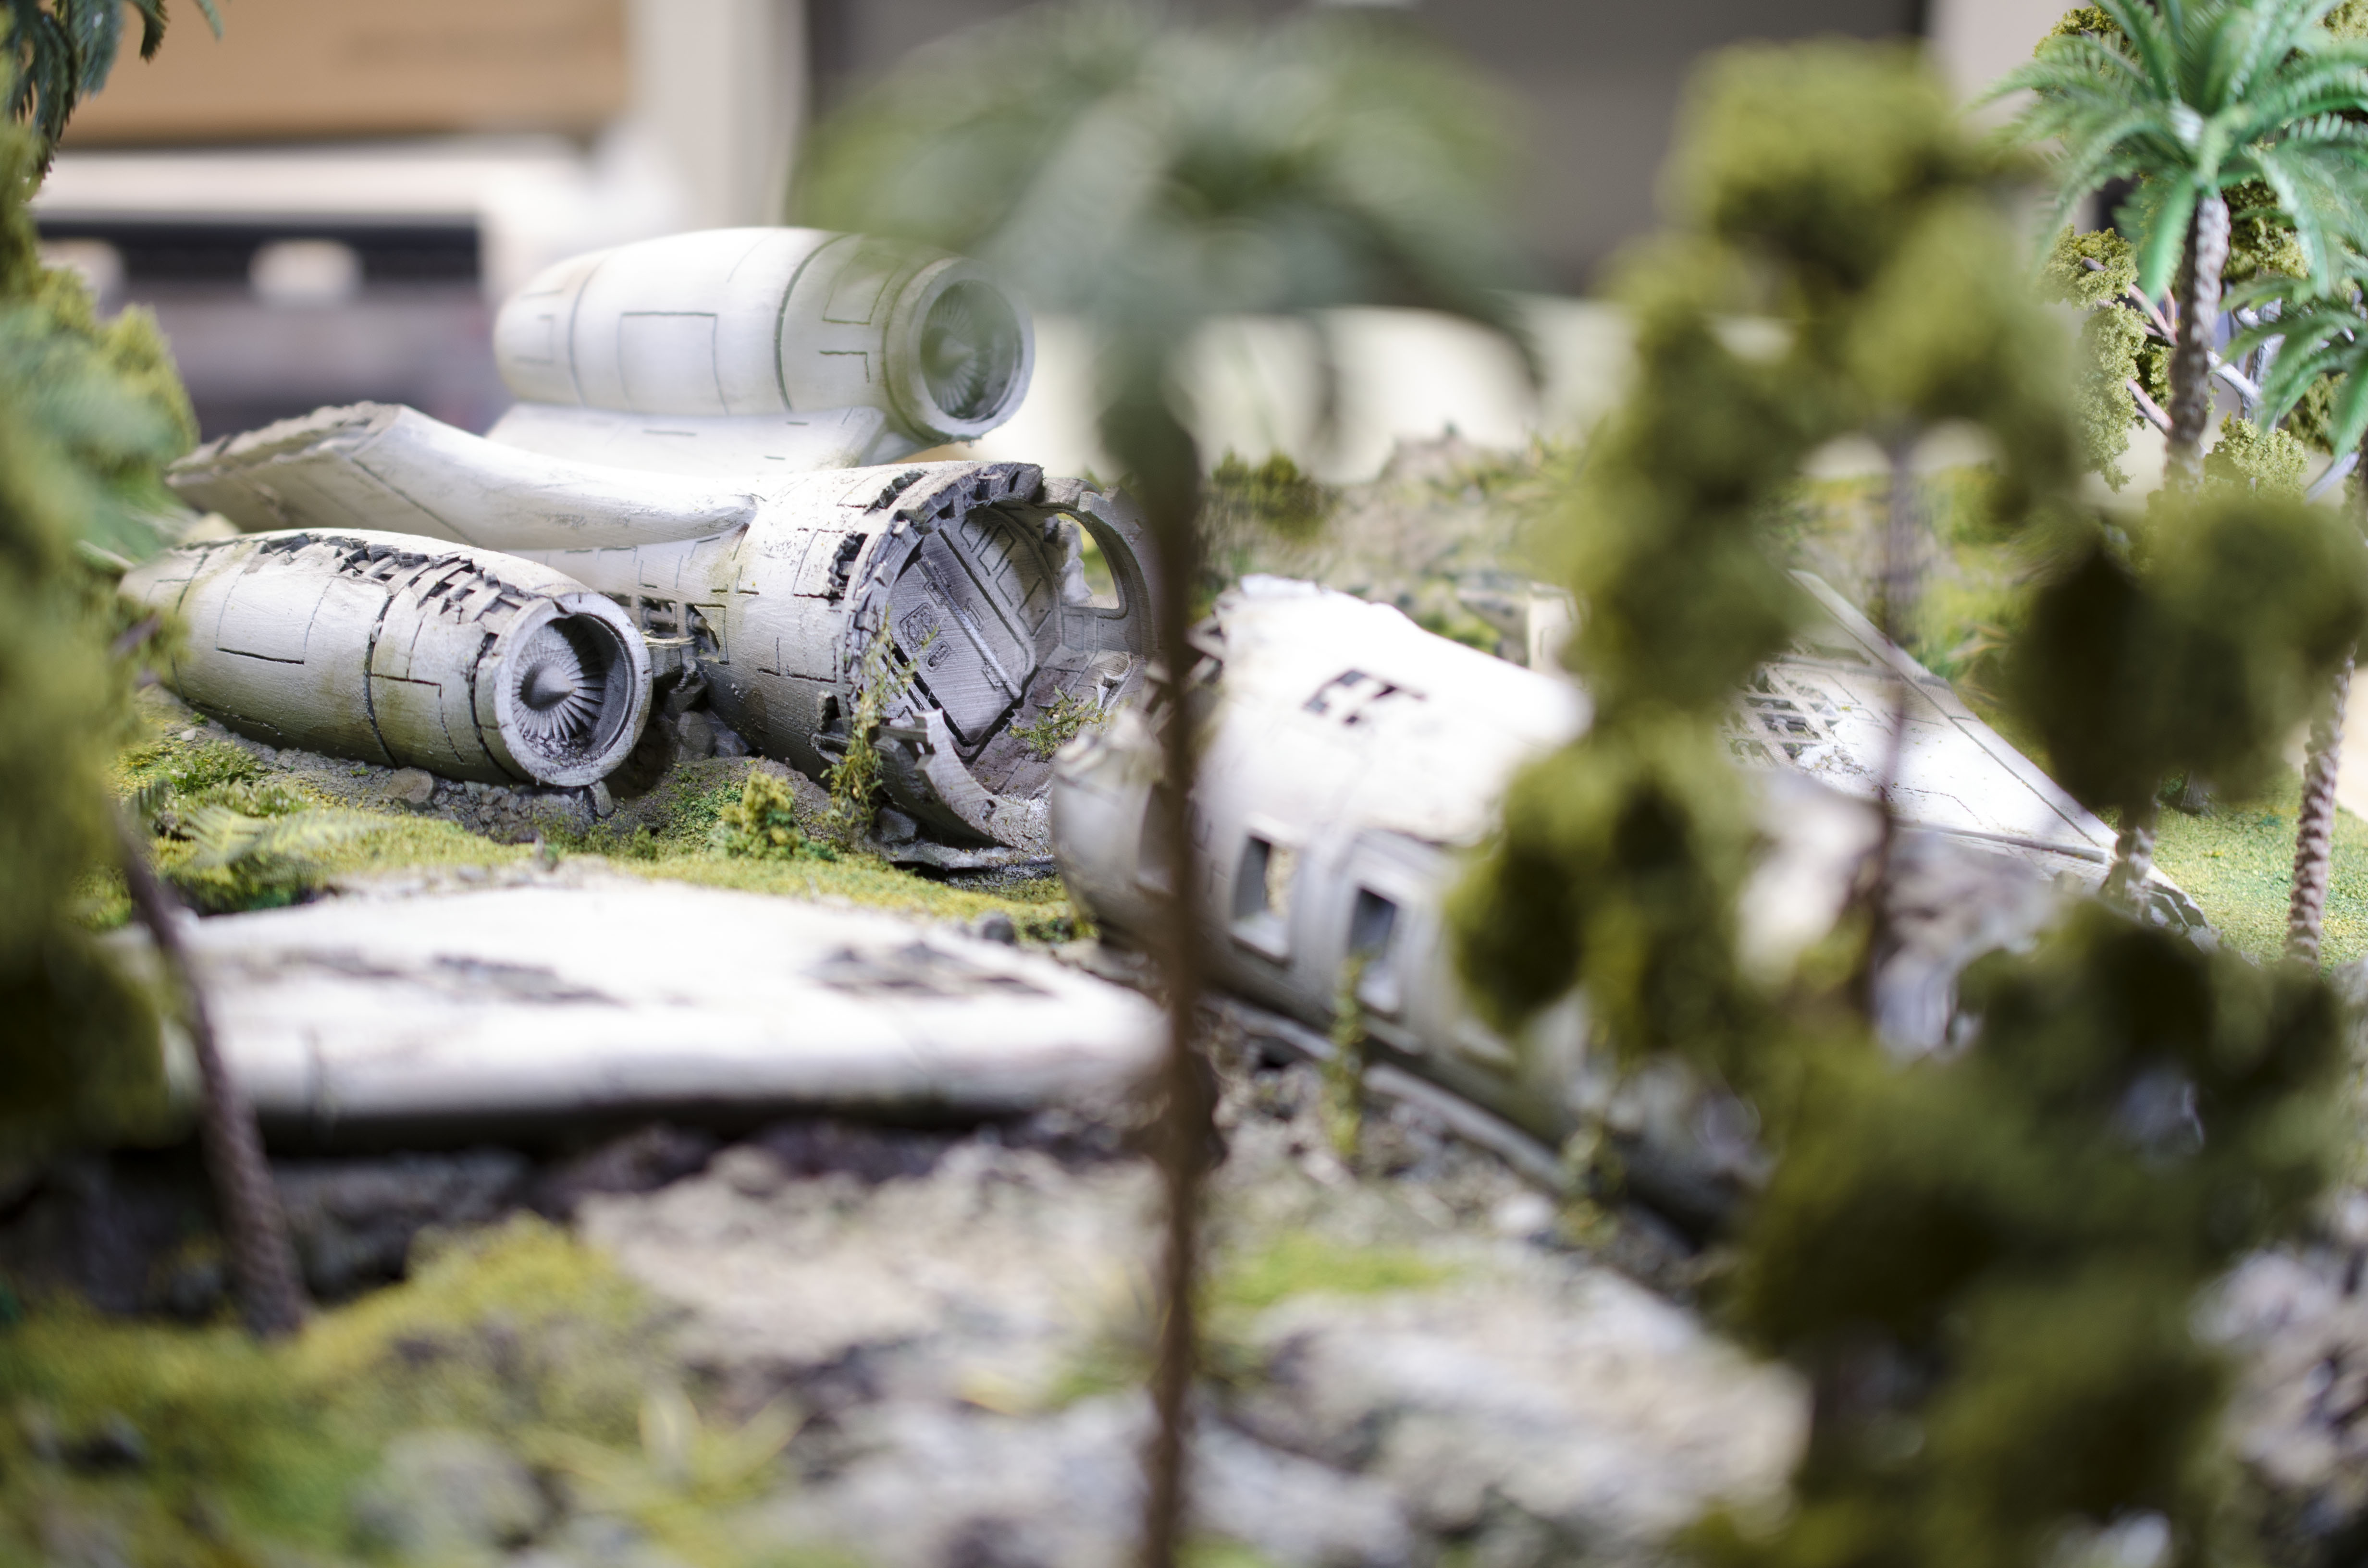
Photos of the completed board
Aaand done!
Everything sealed and varnished, a kilo of flock hoovered from my floor all the supplied packed away.
Here’s some photos.
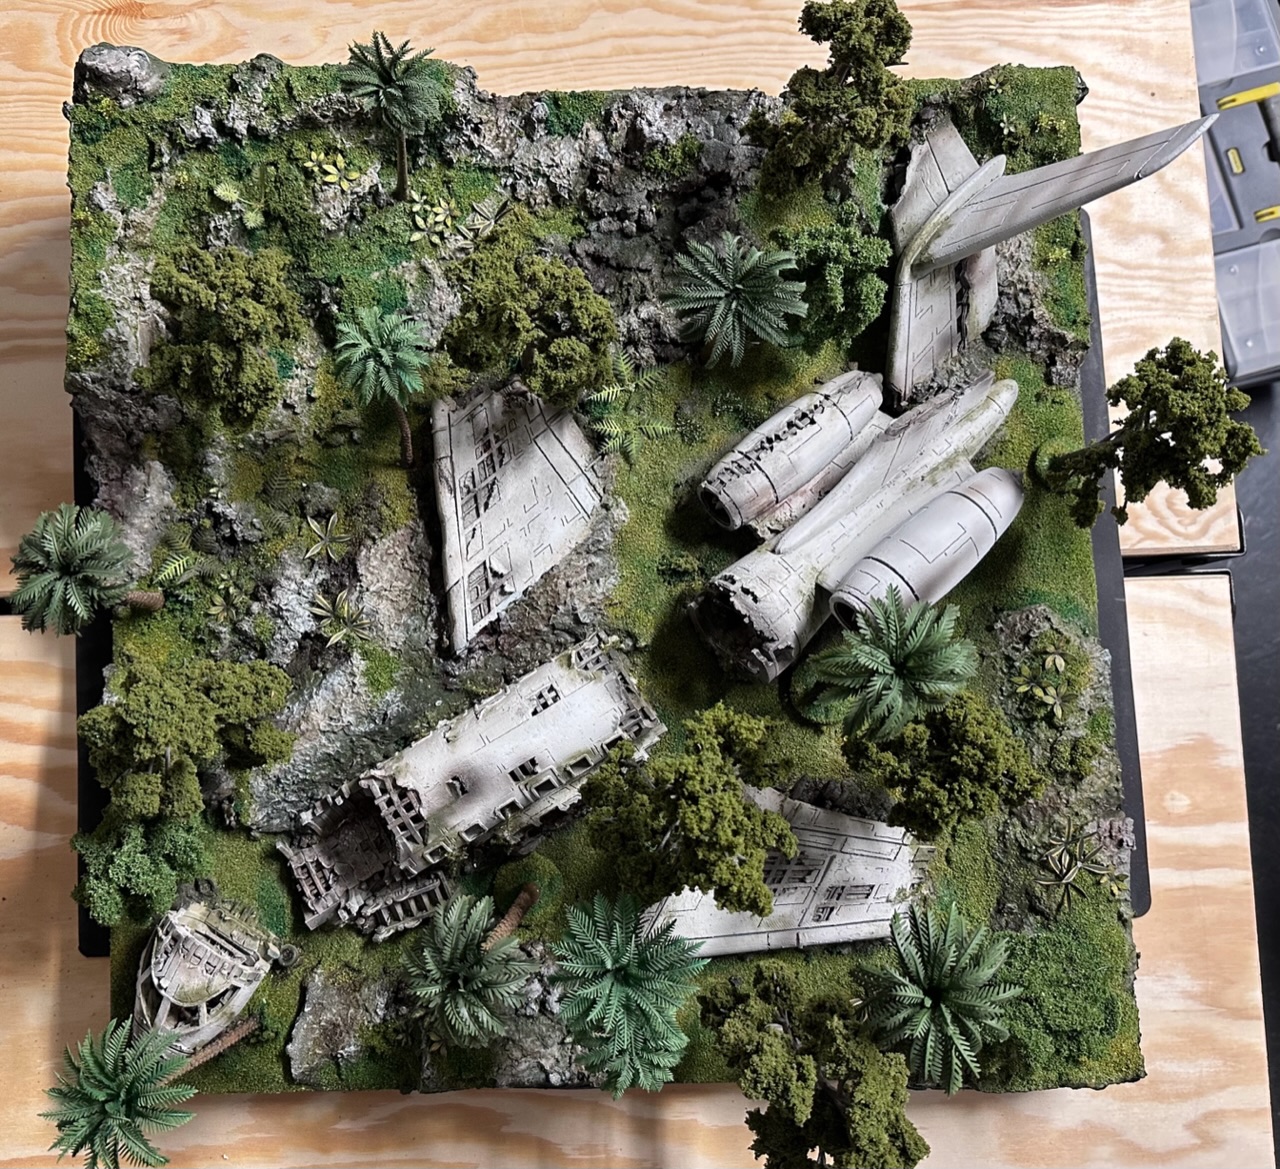
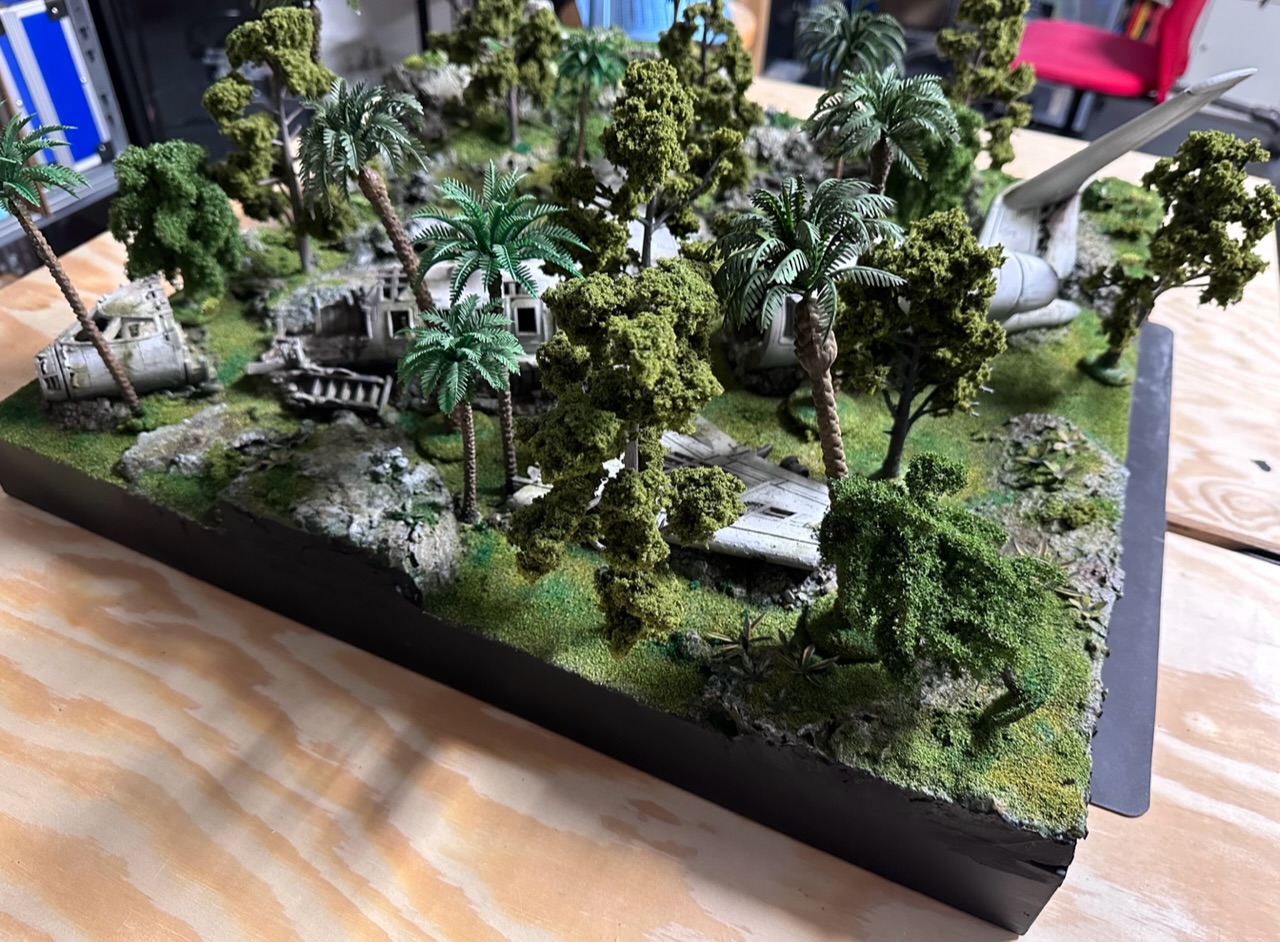
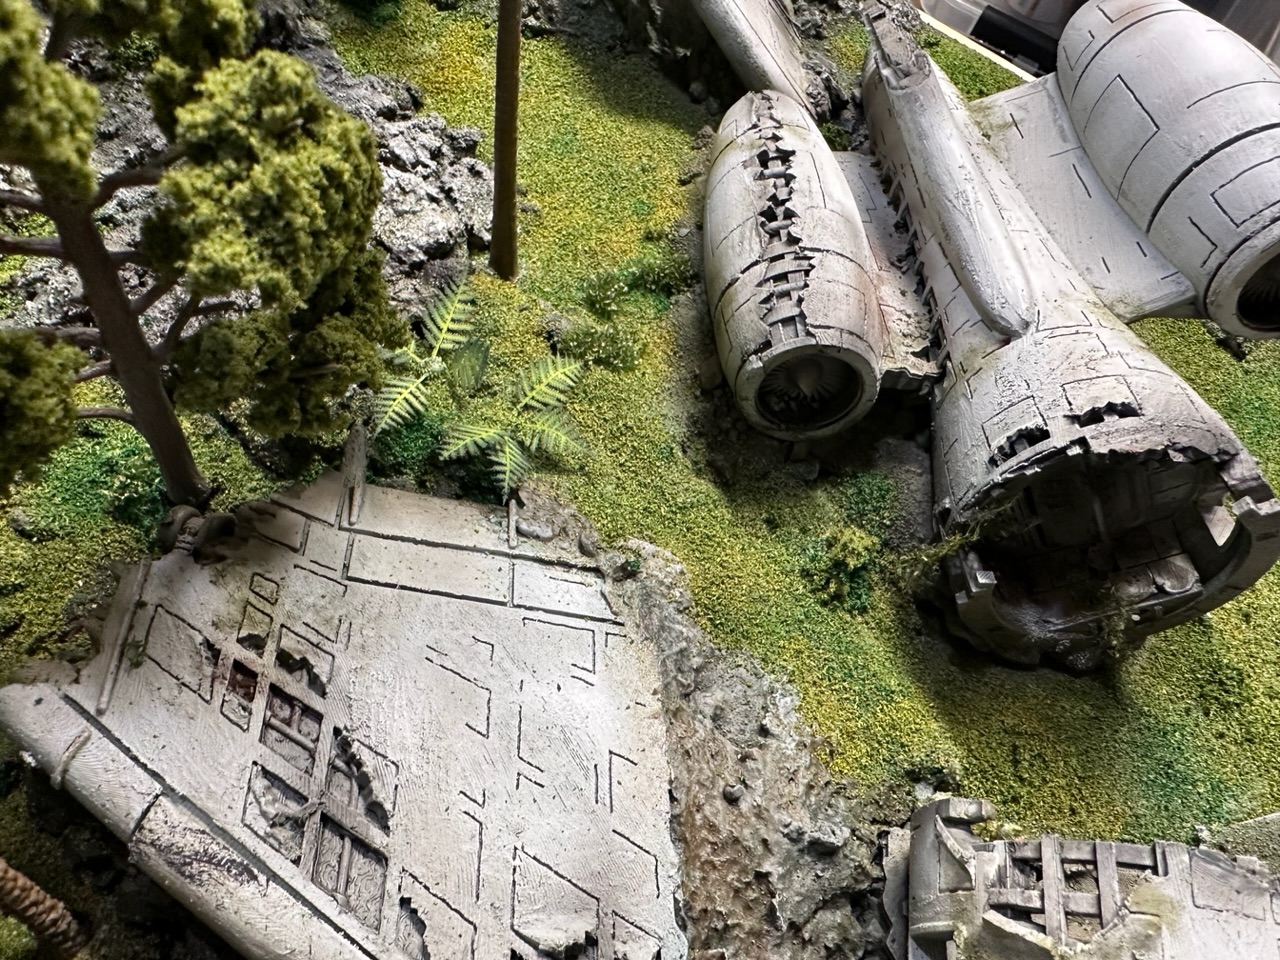
Below are the set-on trees I made
And here’s the board without the removable trees. Plenty of options to add scenario objectives or other pieces to customise the layout.
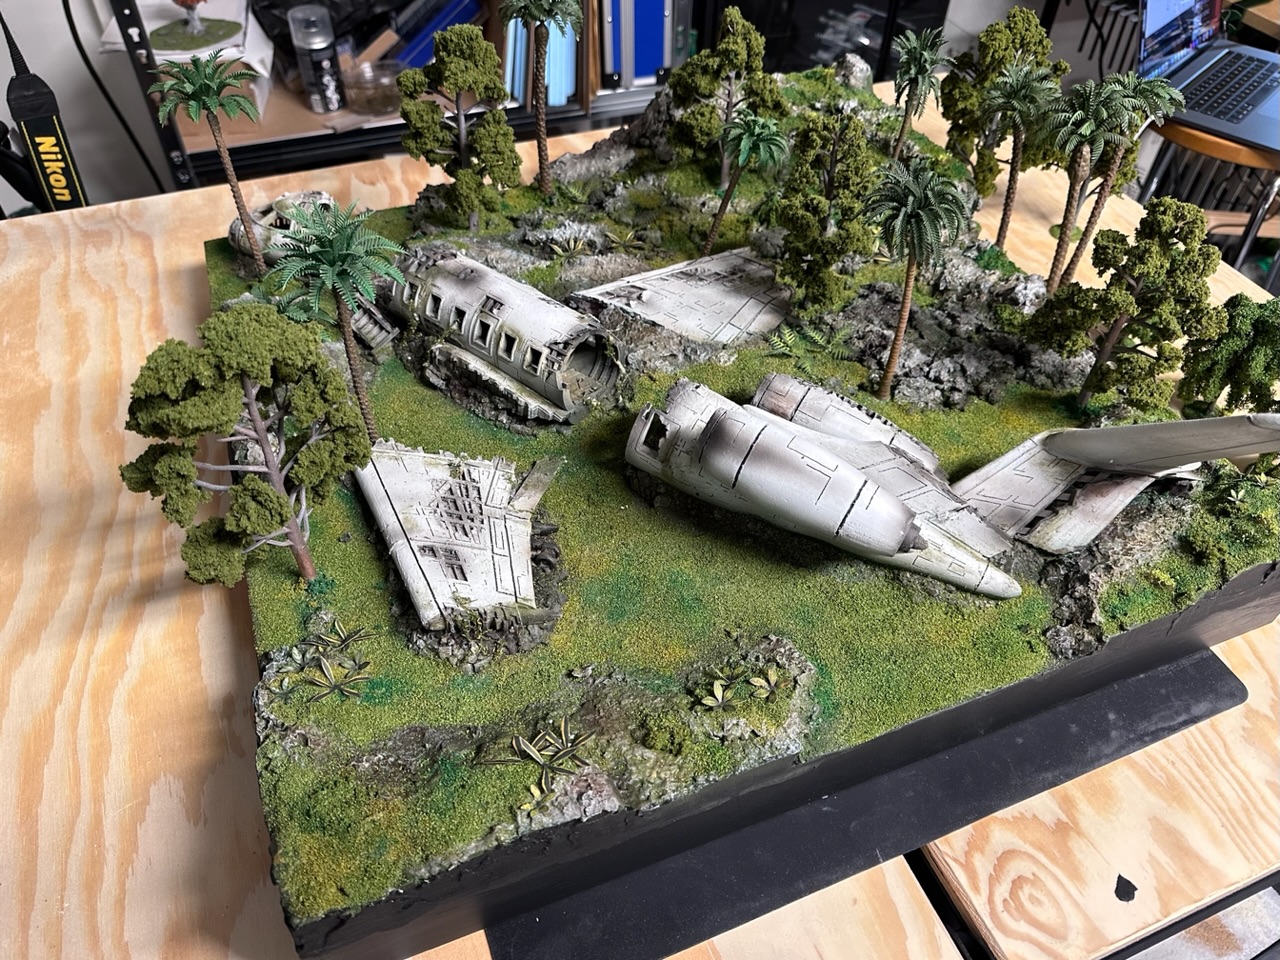
Some more photos as a gallery.


![StarCraft Tabletop Miniatures Game Pre-Orders Live Now [Updated]](https://images.beastsofwar.com/2026/03/starcraft-tmg-news-cover-600-338.jpg)


![Mounted US Cavalry On Kickstarter For Dead Man’s Hand! [Updated]](https://images.beastsofwar.com/2026/03/us-cavalry-main-600-338.jpg)


![Play WW2 Commando Operations With Butcher & Bolt [Updated]](https://images.beastsofwar.com/2026/03/relaunch-600-338.jpg)


