![Alternative Trench Crusade Miniatures? Trench Missionaries Review | Wargames Atlantic [7 Days Early Access]](https://images.beastsofwar.com/2026/03/unboxing-wargames-atlantic-trench-missionaries-coverimage-225-127.jpg)


![10mm Medieval Miniatures! Azincourt English Army Review | Wargames Atlantic [7 Days Early Access]](https://images.beastsofwar.com/2026/03/unboxing-wargames-atlantic-azincourt-english-army-coverimage-225-127.jpg)


Building the war room of my dreams


Recommendations: 297
About the Project
Got a new house and finally got some real space for my hobby. Time to build my war room. A place for tabletop hobby & games.
Related Genre: General
Related Contest: Spring Clean Hobby Challenge 2025
This Project is Active
Painting and cursing
Finally doing some actual work again.
The process :
- prepare the table with a cover
- lay scrap pieces of mdf on top
- try and lift the sliding door of the rail
- lay it flat on the table
- clean it with some kind of detergent/degreasing the local DIY store recommended
- prime it dark gray
- wait (5+ hours according to the instructions on the tin)
- mask off the edge between the blue and dark gray parts
- paint both parts
- wait for paint to dry
- try and fit the sliding door back on the rail
- repeat
Getting the doors back onto the rails again was the worst part of this entire process. There are two sets of rails. The doors on the ‘back’ rails were easy to lift off. The ones on the front … not so much. Getting them back involved a lot of cursing. It doesn’t help that the doors are as tall as the room itself and my lifting capabilities are severely underpowered.
At the time of this update I have finished priming the last door.
Fun facts:
Instead of accurately measuring the height of the blue edges I used the size of the T-square as a reference. It is about 28 cm tall on the short edge, which more or less matched the height I wanted them to be anyway.
If I had waited for the dark blue to dry before painting the center dark gray I could have avoided the unpainted stripes that delineate the borders between those sections. That would have delayed the completion of this part of the project. I think that in hindsight the end result is better. It won’t stay primer gray forever though.
Original design called for hazard stripes at the top and bottom of the panels.
At this time I’m not convinced it will look good. I had been planning to use tape to do that effect, because painting those stripes was a bit too much effort anyway.
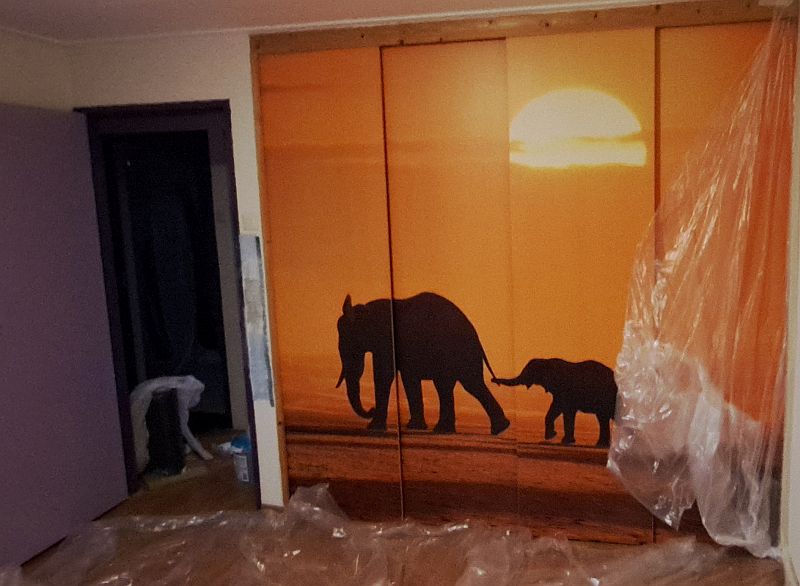 original design
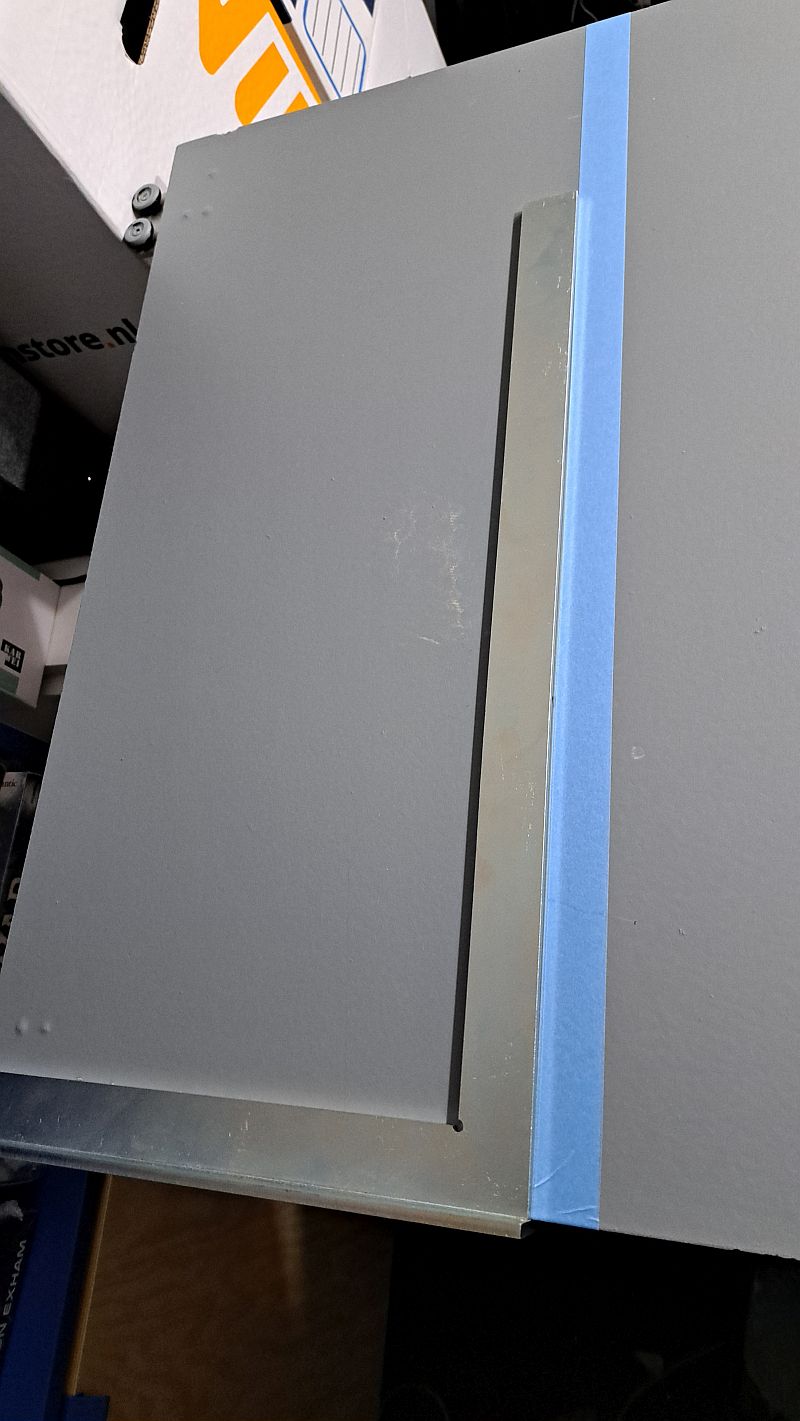 cleaned and painted with dark gray primer
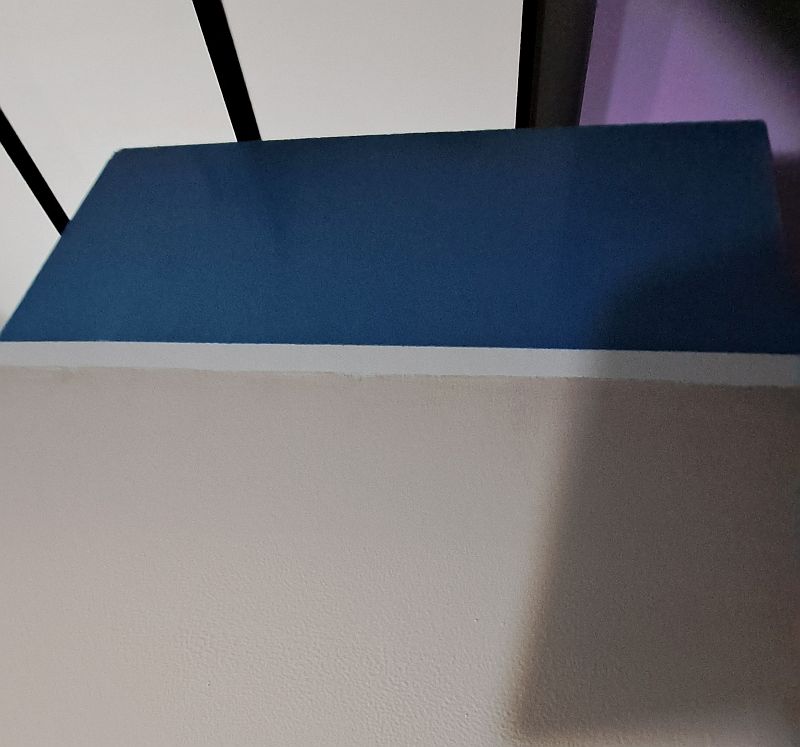 dark blue and dark gray sections painted
 painted and back in position
Of course it’s not 100% finished.
Things to do :
- paint the edges of the door panels
- prime and paint the frame
- clean up the paint on the door themselves
- detailing, which includes vinyl stickers
More planning, more delays
I *ahem* tested Gemini for the next part of my grand plan in this project.
Or rather … it tested me as like all the other LLM’s before it once again messed up the design as I was getting close to having something that looked good.
Luckily I managed to save a few images of the design.
There is only one problem left : executing it in the real world.
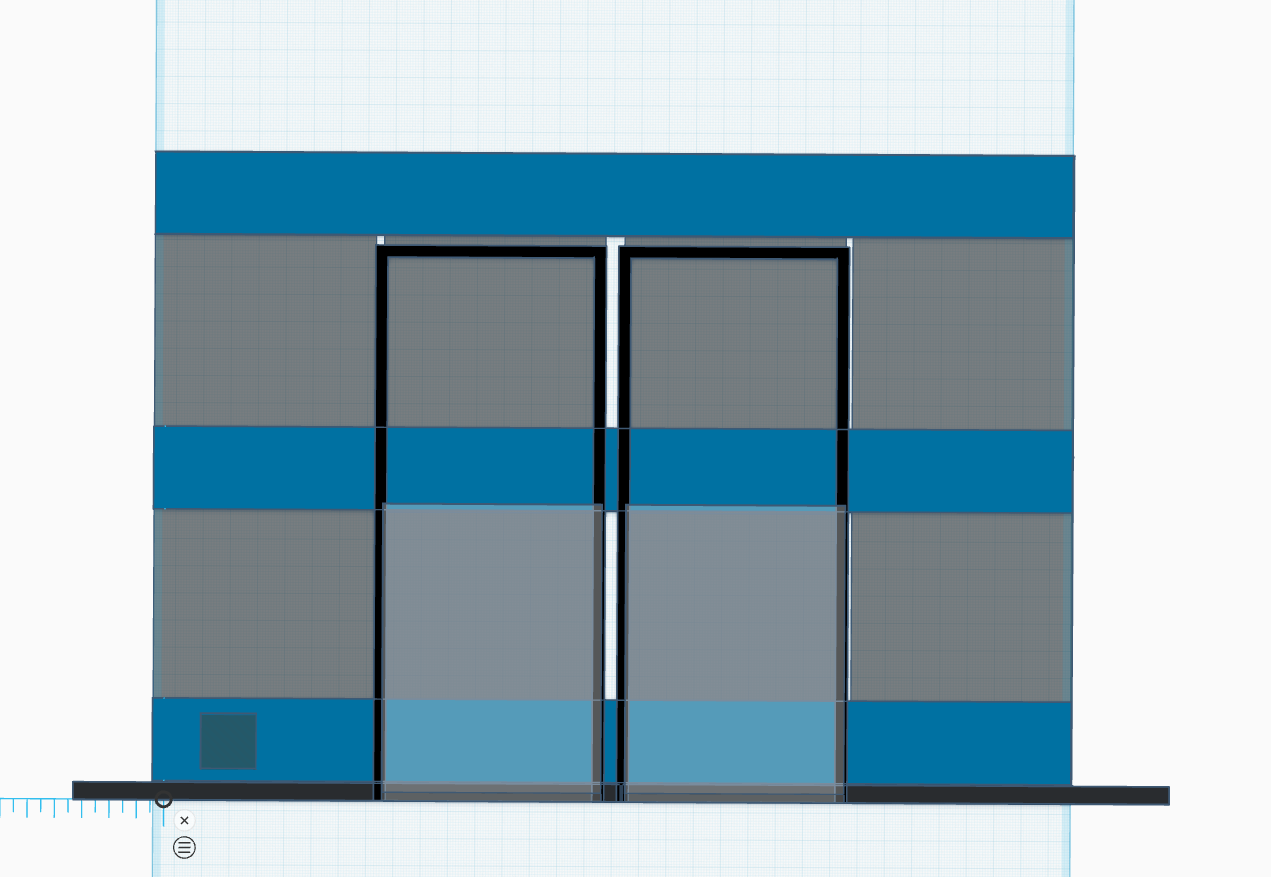 the outline of the design in tinkercad
 a plan for 'greeblies'
During the planning phase I learned two new words : ‘batten’ and ‘noggin’.
To make the concept a reality Gemini told me that I needed to add wooden planks to the wall. 5 vertical (‘batten’) and a whole heap of horizontal ones called ‘noggins’. On top of that construct we shall attempt to mount 6mm MDF plates.
As per usual I spend a lot of time correcting and fixing the mistakes the bloody thing kept making, but I think I’ve got the overall layout planned.
Because I don’t trust the measurements and calculations that Gemini gave me I won’t be ordering everything at once. The 5 vertical battens do appear to be a pretty safe bet, so that shouldn’t be much of a problem.
The horizontal noggins should be pretty safe to do as well, because I can at least rely on the width of the billy bookcases (80cm) that form part of the design.
Everything else … well let’s just say that I’d rather measure in the real world first, because while gaps between the panels are part of the design I do want them to be somewhat symmetrical.
Only one question left : can I do this ?
We will have to find out later, because I really should have finished the doors of the built-in closet first. Although this side quest did help me figure out the placement and height of the blue accents that are part of those designs as well.
 details of the construction - part 1
 details of the construction - part 2
Racking it again
While waiting for bits to arrive I’ve had another long session trying to convince these ‘AI’ things to do my bidding. This time the subject was the paint racks and I like to think that I’ve completed the planning phase for that part.
In the initial concept I was going to use the Ikea Skadis boards, but that restricted placement of the shelves a bit too much. I did keep the layouts for the 3 sizes as they did help me predict the space required.
Of course … all of this is theory. I’ve yet to buy the materials and execute the plan. And we all know what happens to plans and reality. 😉
Got some shopping to do before that can happen.
Silly interlude
Given that the profile picture is from the ‘Dr. Strangelove’ movie here is a weird factoid:
Stanley Kubrick wanted the tablecloth on the War Room table to be green, so the actors would feel like they were playing a game of poker over the world’s fate.
I can’t help but wonder if I should look into this.
It would be kind of cool, but it also will prevent me from using the table as a hobby surface without additional precautions.
Transforming built-in storage : design and plan
With Claude.AI not being good at design I asked Gemini for assistance. I won’t bore you with details, but the bloody thing f*cked up the design when I thought we had it locked in as I was asking for refinements and small changes.
Luckily the ‘almost perfect’ version of the design was available, so I simply made a screenshot and continued our conversation from there.
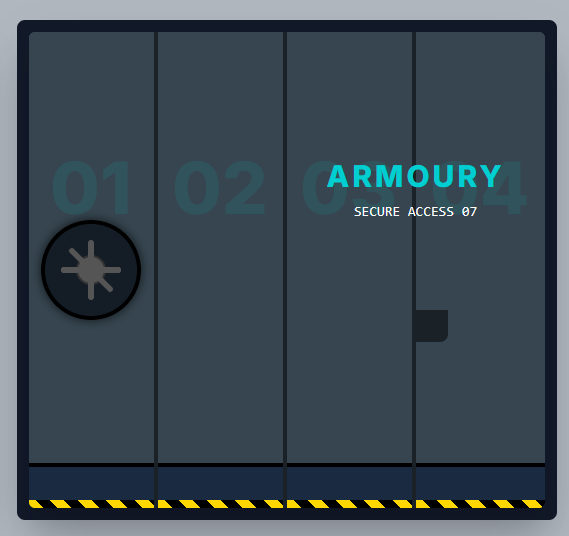 almost done
 After much cursing and a few more iterations this is now the design:
The text will be done in vinyl stickers ordered from a webshop that allows for personalized vinyl text stickers. I haven’t specified the ‘secure access 07’ text.
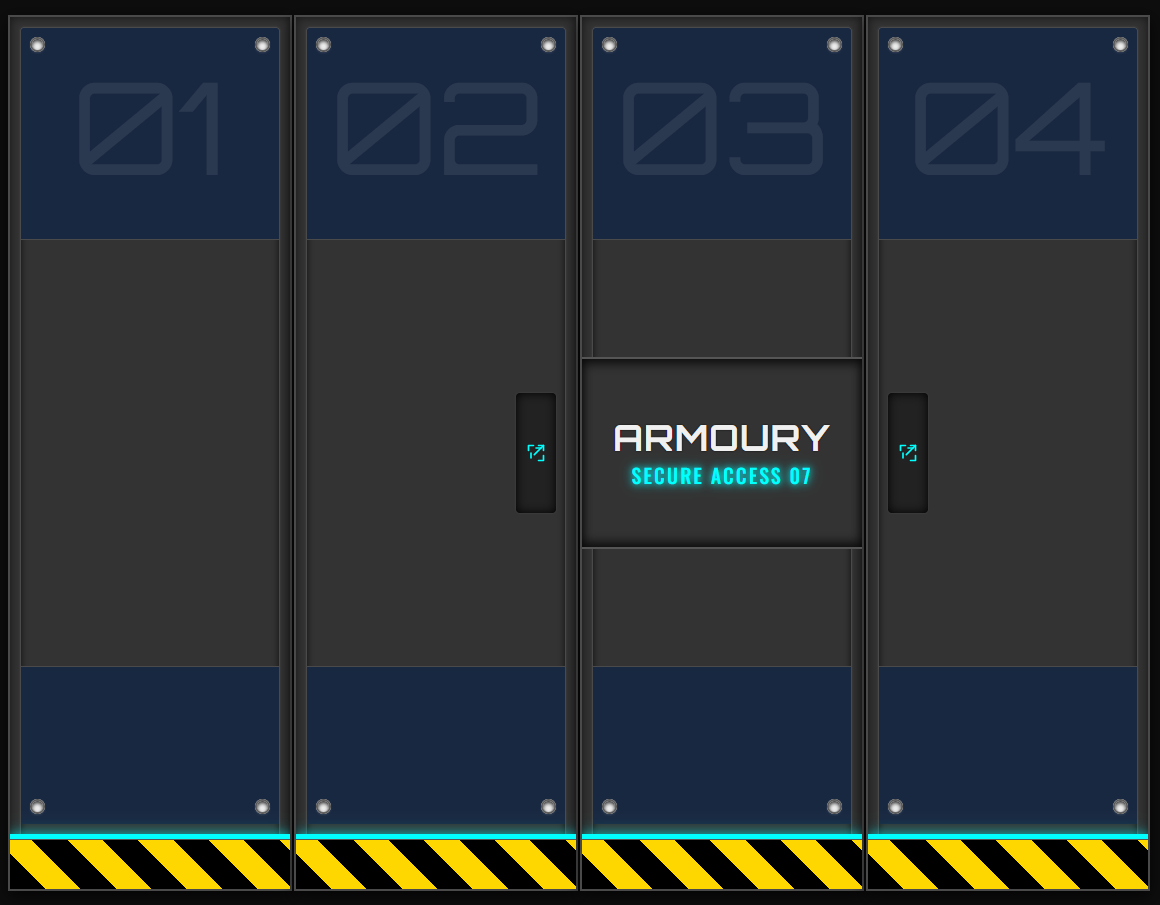 The plan before reality strikes
And of course as I was creating the entry for my project Gemini’s idiocy struck again. At least I got the image of the final design saved now.
Gemini has a nasty habit of wanting to create interactive webpages when all I really want is an image that helps me understand the design. I guess that is because this one has been taught to create webpages, so it tends to fall back (and or hallucinate) that anything you ask it to do is aimed at creating a webpage instead of simply presenting content. Claude.AI isn’t as obsessed with webpage-design, but you do have to tell it to generate HTML output whenever you want to visualise the design ideas it has suggested.
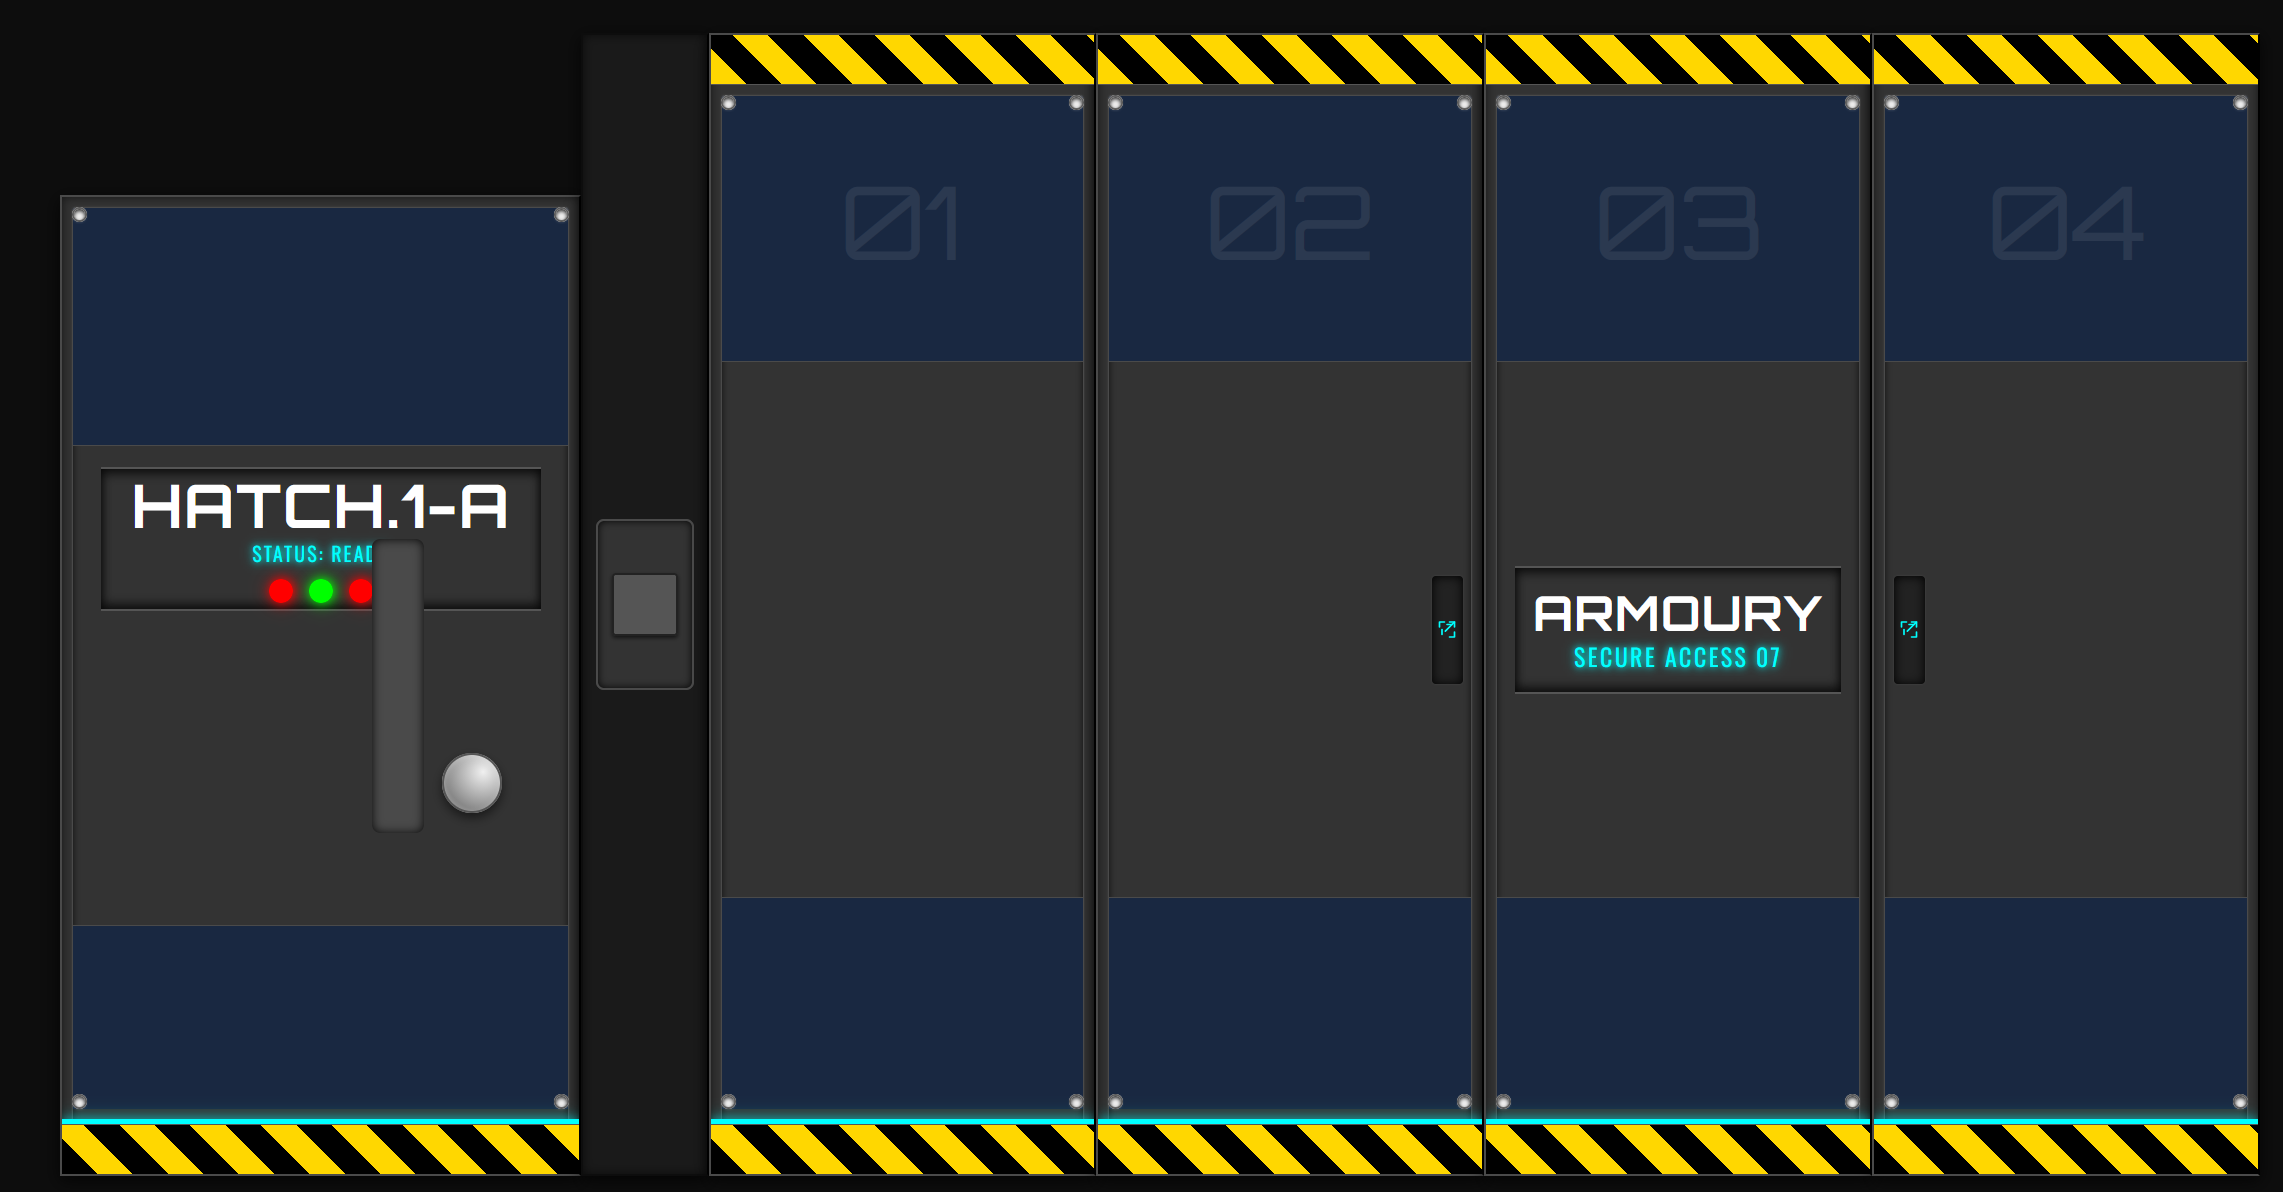 a rough sketch of the final design
While trying to get it to include the door to the room in a similar design things went of the rails again. There probably is a trick to keeping the thing on track, but that’s a future me problem.
Anyways … after a bit of cursing I managed to convince it to help me write a plan of attack as well as a shopping list. All I need to do now is wait for parts to arrive and get to work.
It would be sooo nice to have a laser cutter so I could add the little greeblies (sp?) without having to scour the web for parts that may or may not be any good.
This is always the hardest part of any project, isn’t it ?
Talking to a brick wall
Hell-o-ween has come and gone, so it’s time to go back to this project and attempt to get these ‘AI’ things to do my bidding or at least help me with inspiration and design.
I had kept the initial prompt that started my consersation with Gemini and tried it with Claude.AI For some reason that thing recommended Ikea furniture for pretty much everything, including suggesting picture shelves ‘Mosslanda’ for paint storage.
It did ask me for my priorities (gaming vs hobby) and help me go into detail on how to setup my paint station for batch painting.
The one thing Claude.AI is not good at is the creation of documents & lists during such conversations. Gemini is definitely much better at this.
And of course once again I ran into the brick wall that is the ‘message size’ and time limit. To me this suggests it is best to use this LLM for short focused conversations as hitting the brickwall that is the session limit is no fun.
If at first you don't succeed
As mentioned the infernal ‘AI’ had managed to lose the context of the entire discussion about the theming and layout of the room. I did manage to salvage the paint rack designs so not all was lost.
Now I’m back to square one in completing the layout and theming of the room.
New feature unlocked: ‘canvas’.
If you want Gemini to create documents or create ‘interactive webpages’ (= plain ol’ HTML with a bit of javascript). then you need to select the ‘canvas’ tool when initiating a conversation with the damned toaster.
So yeah … trying again and hoping to not lose the vital information for construction and shopping like I did previously.
Live and learn, eh ?
Racking it with our Robot overlords
While I have added plenty of storage options to the room I had no clue how to use the available space. Paint storage was another thing that I wanted to solve.
@gorram had posted a topic asking for ideas and examples used by other CoGs within the community, which did help a bit.
However as I made a quick inventory of the paints I had collected I realised I needed something a bit more structured.
And so I decided to ask Gemini for inspiration. As we were discussing the layout of the room the topic turned to storage solutions. Initially it suggested a couple of spice racks from that well known Scandawegian store, but when I told it how many paints I had in my inventory it had a cool suggestion for maximizing wall storage space : French Cleats.
Here is a video that shows the concept (and a lot of wood working)
A few hours later ...
This is the ‘app’ that Gemini and I created.
The Ultimate Paint Rack Designer(tm?)
I’ve designed it to have all the info on building the racks and calculating the materials required.
Note : I have not checked all the results, so things may not be correct.
It should serve as a guideline for building your own rack.
The default numbers were guessed by Gemini. For some reason it keeps defaulting to these values despite me stating it should use the actual values for these ranges.
And knowing my speed … you will probably get it finished before me 😉
There’s still a few ideas I have to discuss with the robot overlords.

![StarCraft Tabletop Miniatures Game Pre-Orders Live Now [Updated]](https://images.beastsofwar.com/2026/03/starcraft-tmg-news-cover-600-338.jpg)


![Mounted US Cavalry On Kickstarter For Dead Man’s Hand! [Updated]](https://images.beastsofwar.com/2026/03/us-cavalry-main-600-338.jpg)


![Play WW2 Commando Operations With Butcher & Bolt [Updated]](https://images.beastsofwar.com/2026/03/relaunch-600-338.jpg)


