

![Alternative Trench Crusade Miniatures? Trench Missionaries Review | Wargames Atlantic [7 Days Early Access]](https://images.beastsofwar.com/2026/03/unboxing-wargames-atlantic-trench-missionaries-coverimage-225-127.jpg)


TerrainFest 2024 with 144Artist


Recommendations: 66
About the Project
As with many of us, I have a number of projects I've started but lost track of as they are covered with the newer shiny things. It will surprise no one that some of them are Kickstart rewards. So I'm going to try and work through some of these partial terrain projects so I can store completed stuff rather than dreams and ideas.
Related Genre: General
Related Contest: TerrainFest 2024
This Project is Active
Groundworks Applied
I think the contest may have closed by now but I am going to finish the project regardless so will continue posting progress until it is complete. I mixed up my own version of Crustard. If you haven’t watched Bill Making Stuff on YouTube, I highly recommend it and not just because I got the name Crustard from him. I mix white glue with dry wall patch, acrylic medium, some fine ground charcoal, a spot of water, and a mix of craft paints to get a brown I liked.
I coated the base with this but also used it to attach the “roots” I made out of plastic fern. I am hoping this breaks up the surface a bit adding an interesting texture. I will be adding another layer once the first dries to further tack down the plastic plants.
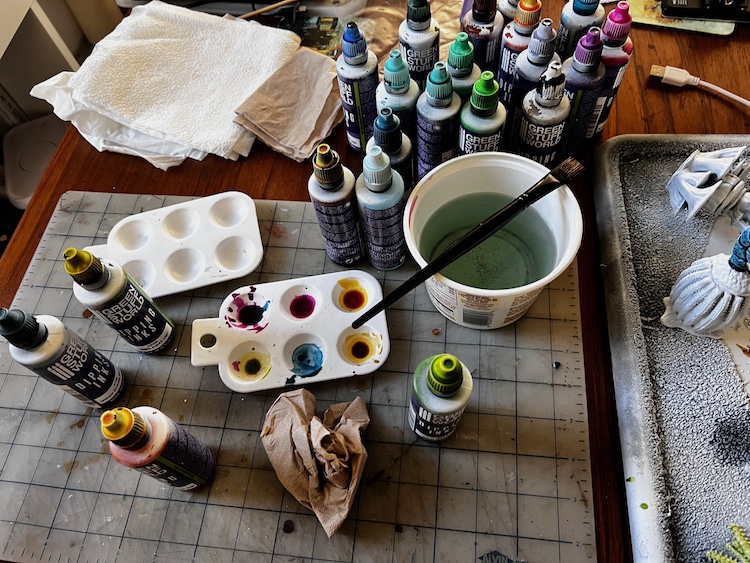
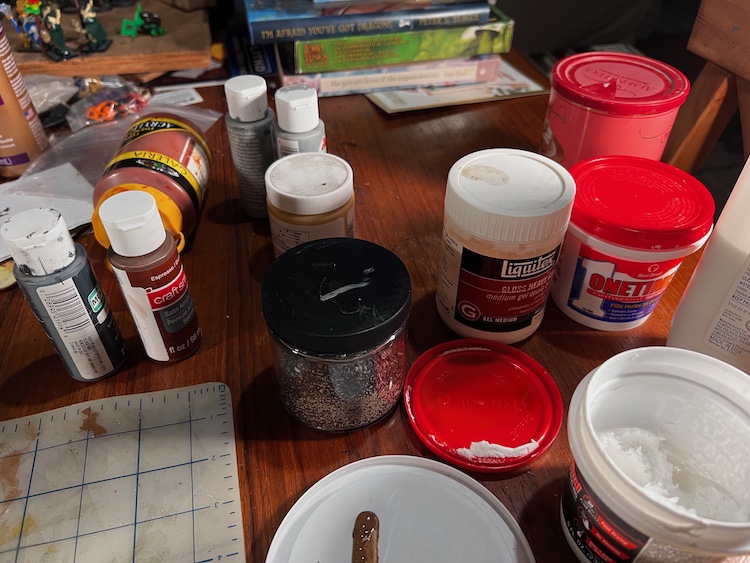 Here is the stack of ingredients I used to make my "Crustard"
 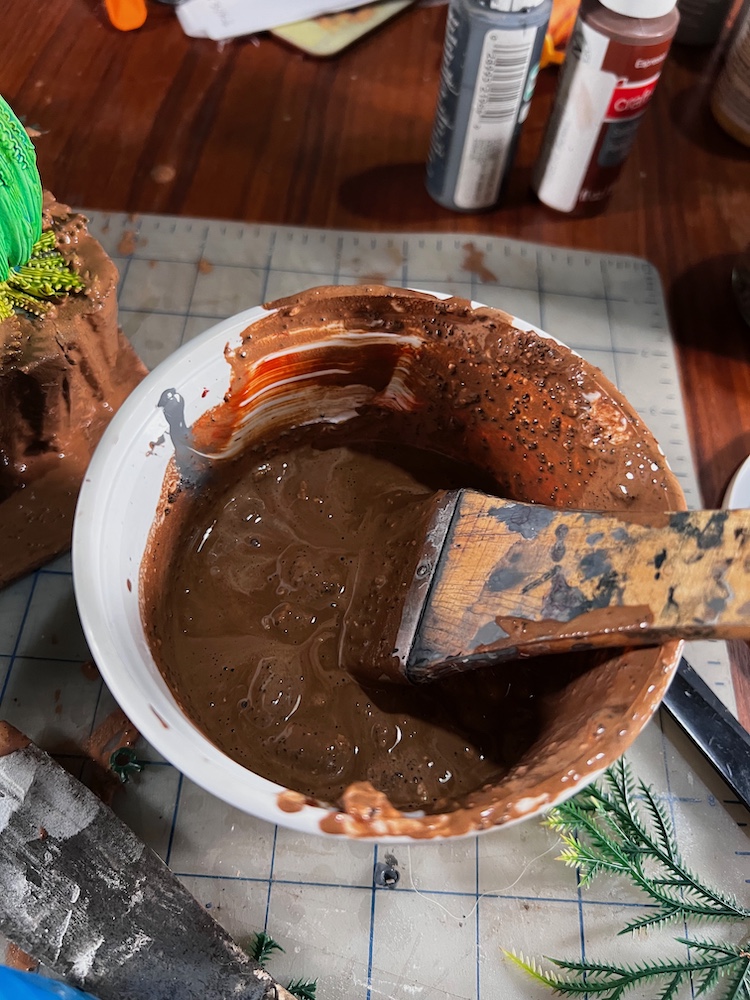 Here is the fresh batch of "Crustard". I mix it in a sealable plastic container as I will need to use it over a few days.
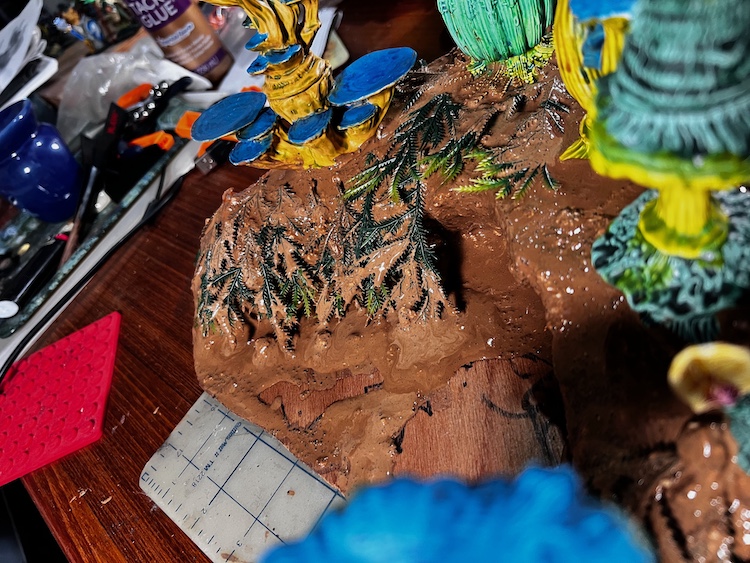 Goes on gloppy but really holds down the chopped up plastic plant I use as roots.
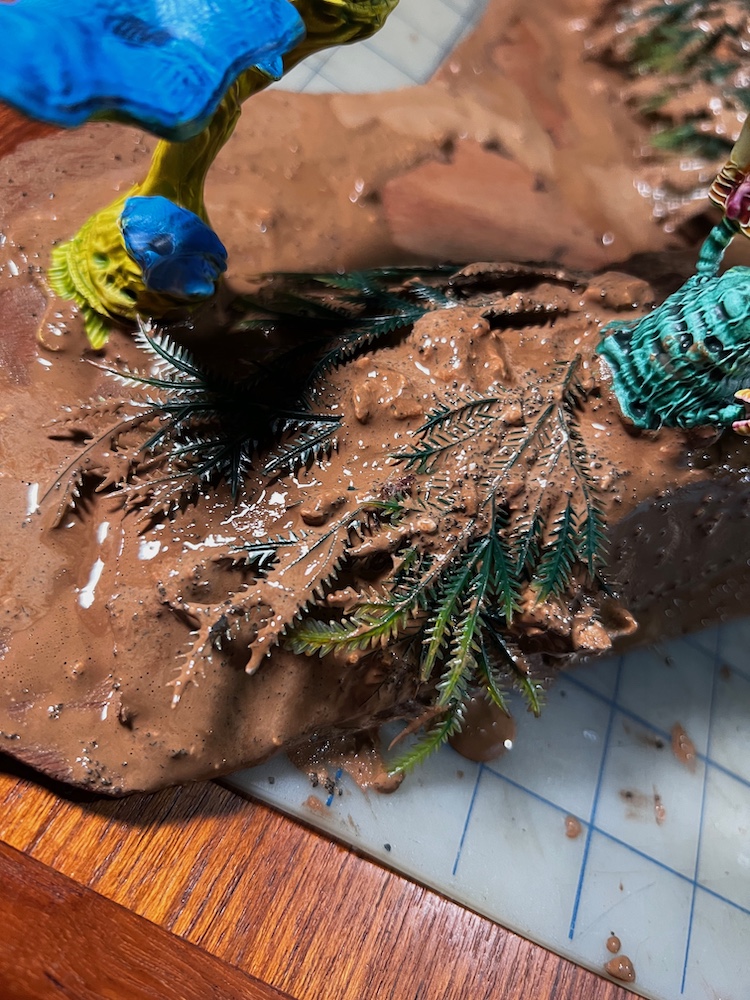 I will go over it all with some more paints when it dries.
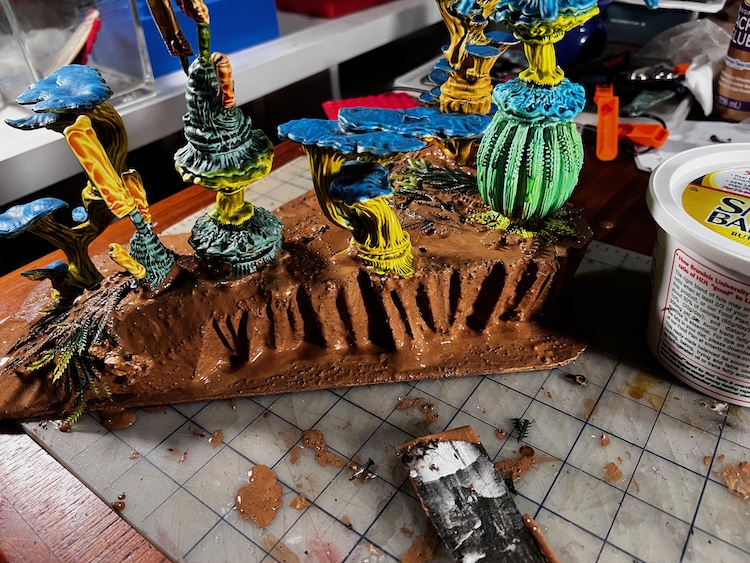 The glop also softens the edges of the foam.
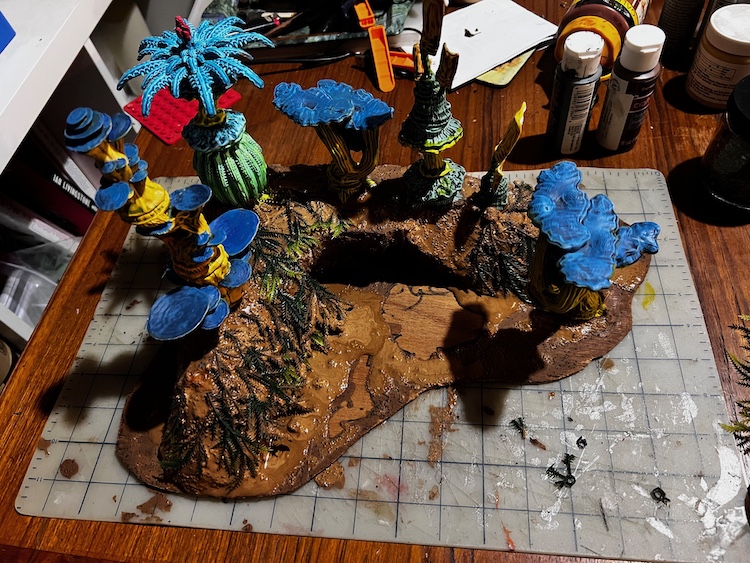 Now it all has to dry before I can add a second coat.
Finally Some Progress
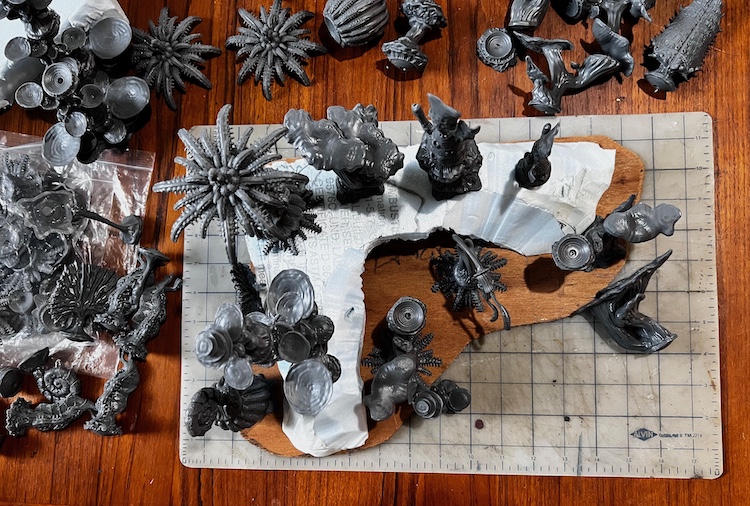
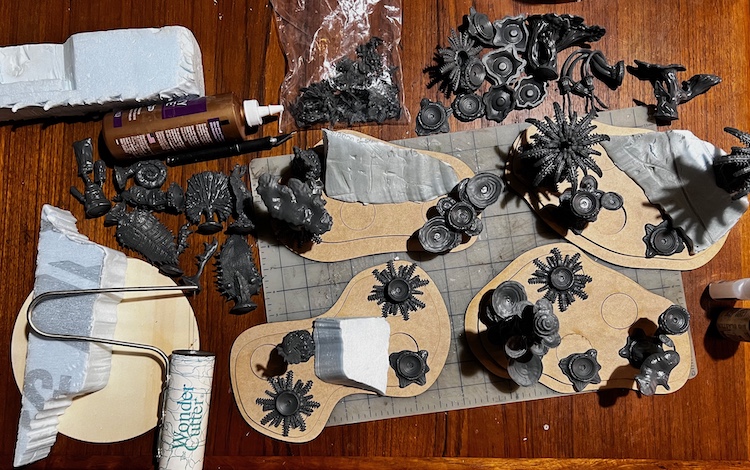
Nice to finally get back to working on my fungi forest base. I had imagined making a bunch of them but in the end I realized it was better to just focus on getting the biggest one finished. I can see getting back to these with the next Terrain Challenge but we will have to see what the new year brings for that.
I did get these pieces painted in December but then got overwhelmed by all that which happens that time of year. I’ve now glued most of the plants to the base and drawn circles where the remainder will be glued. For now, I’ve left off the ones that would make texturing and painting the base harder.
As to the Terrain Tiles I wanted to get painted, they are still waiting so won’t be appearing again in this blog.
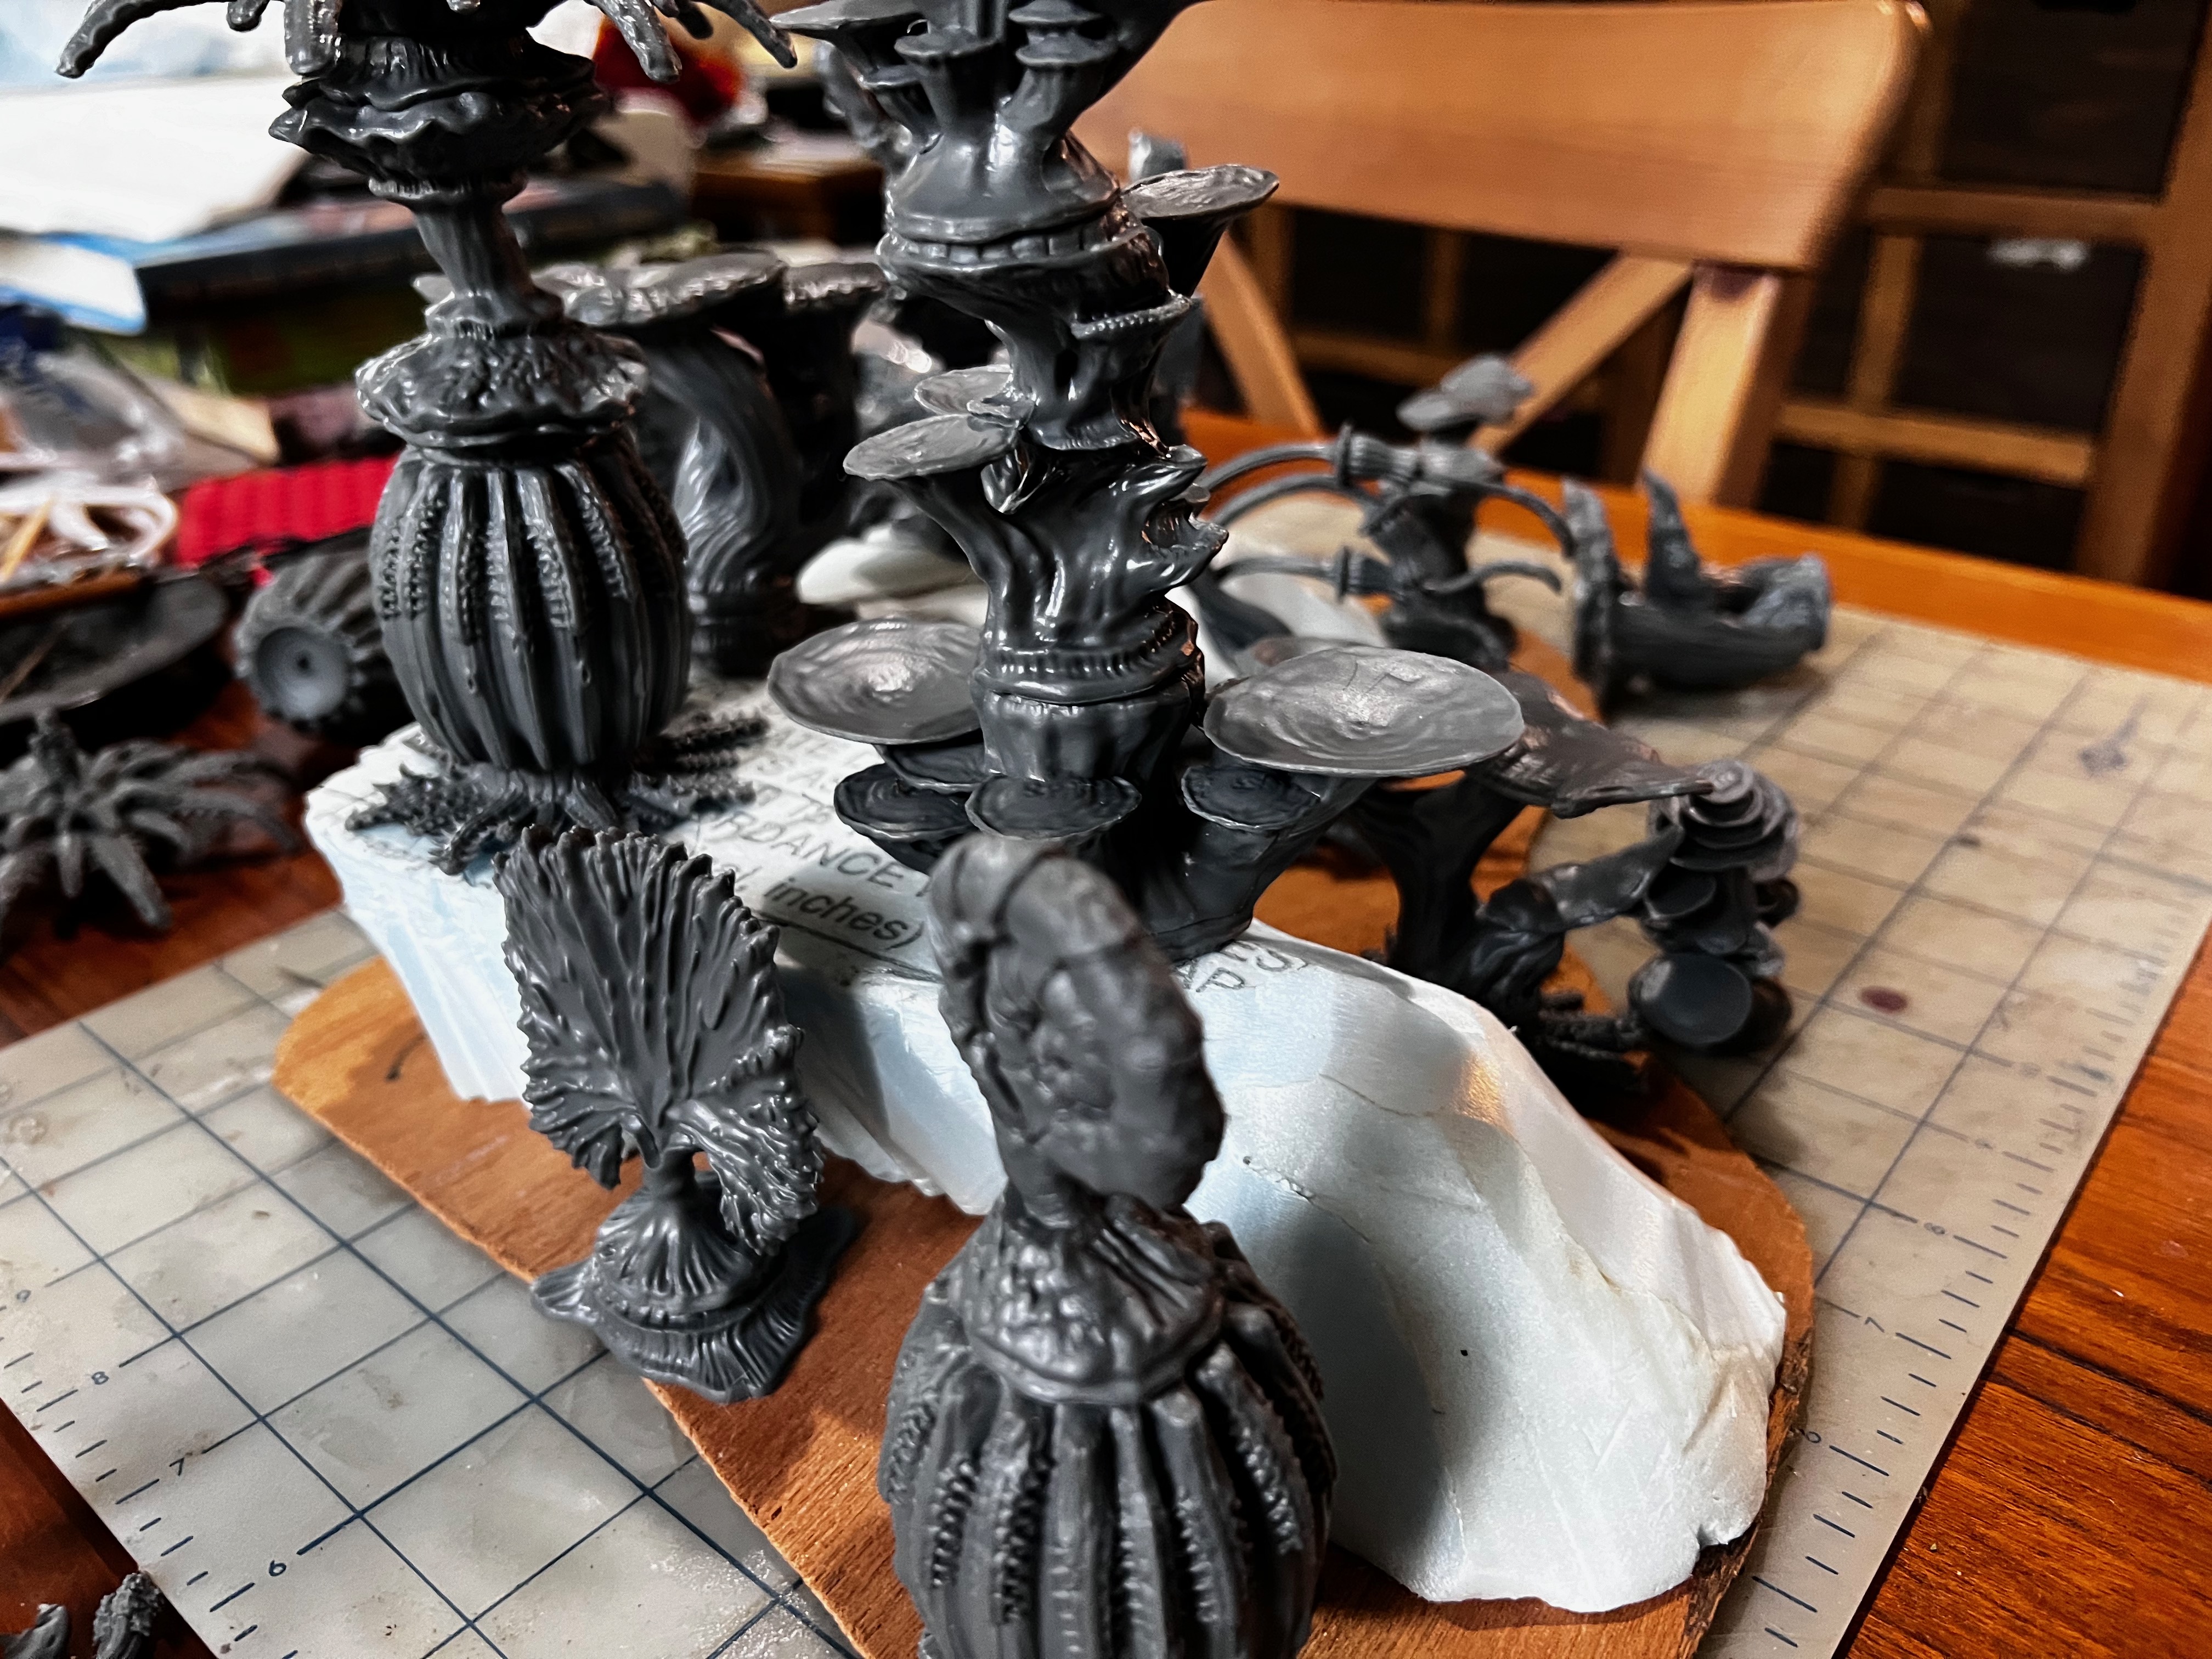
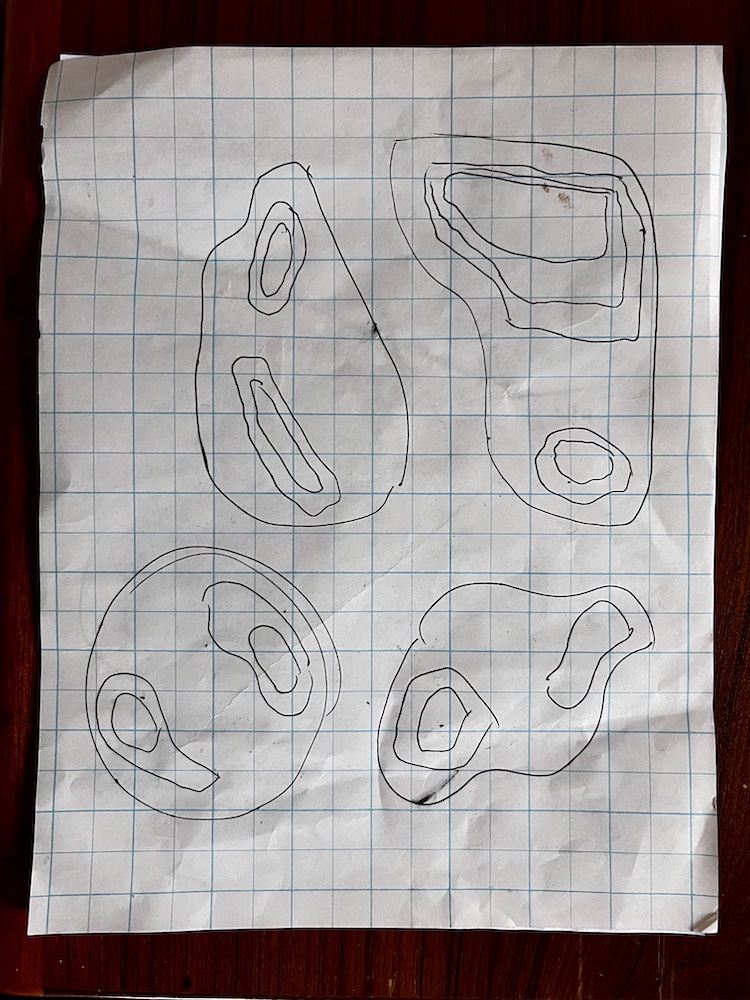
 These have been painted for some time, just patiently waiting for me to return to them.
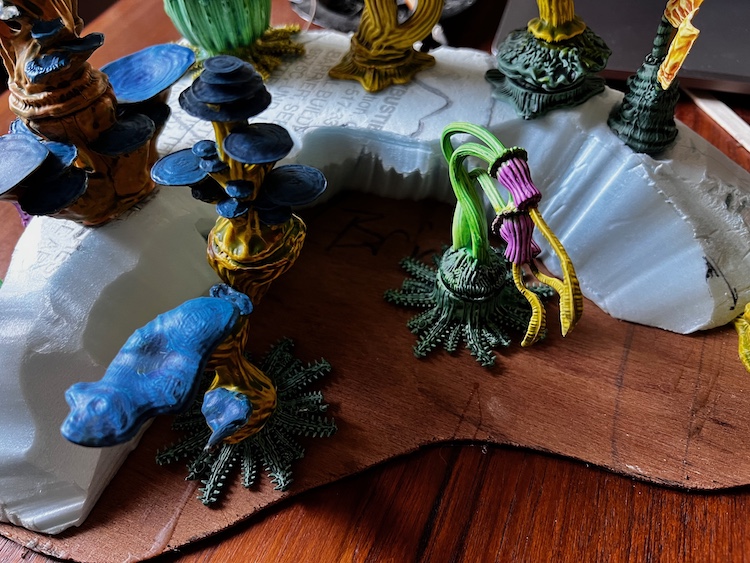 Glad I photographed my initial ideas as I had forgotten where I intended to glue everything. The two in front will wait for glue.
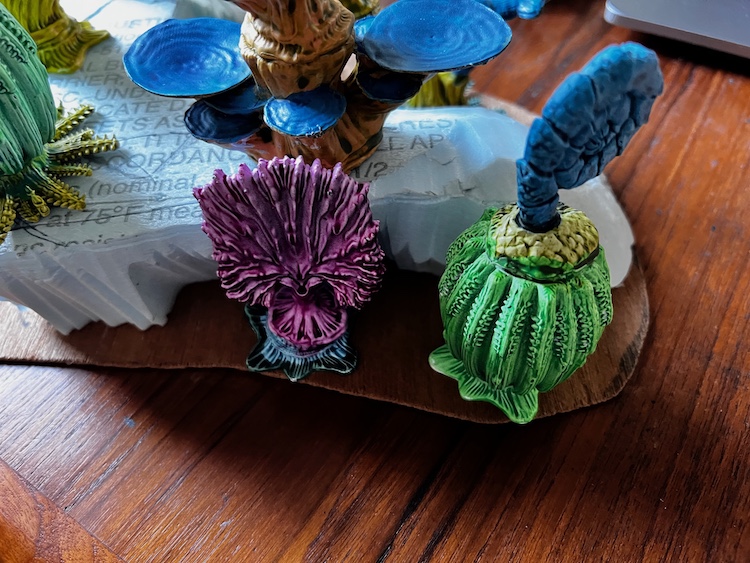 Gluing these two in place now would really mess with my ability to work on the ground behind them.
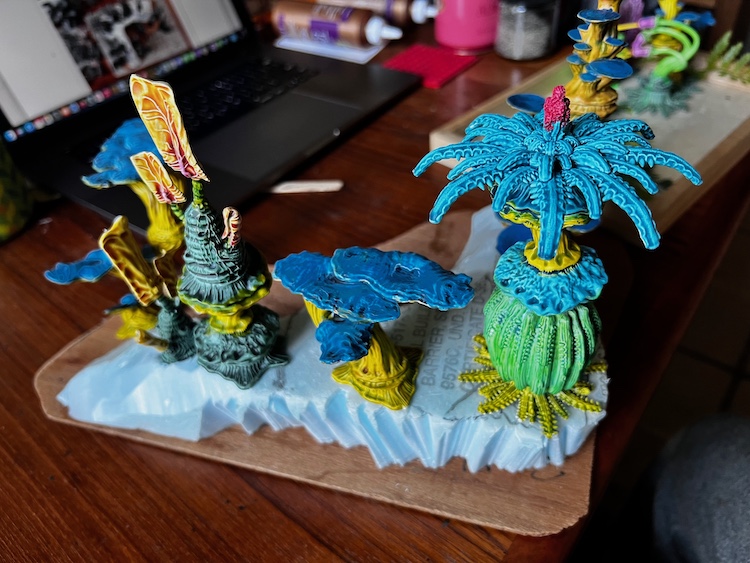 Already liking the look of this base.
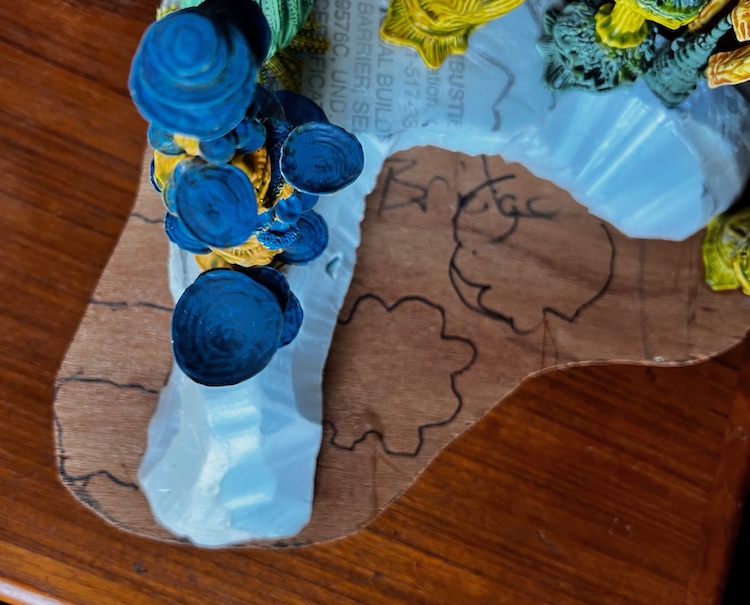 I'll avoid texturing the base within my "circles" so I can glue the tress in place after I've finished the ground work. I can blend it all at the end.
A Small Side Project
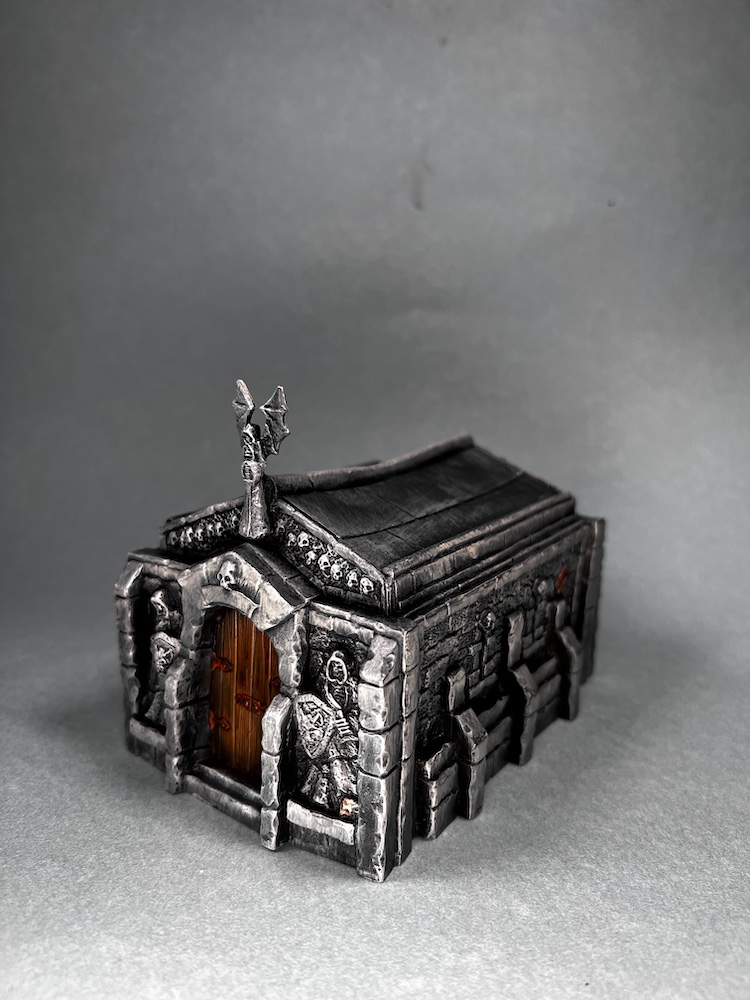
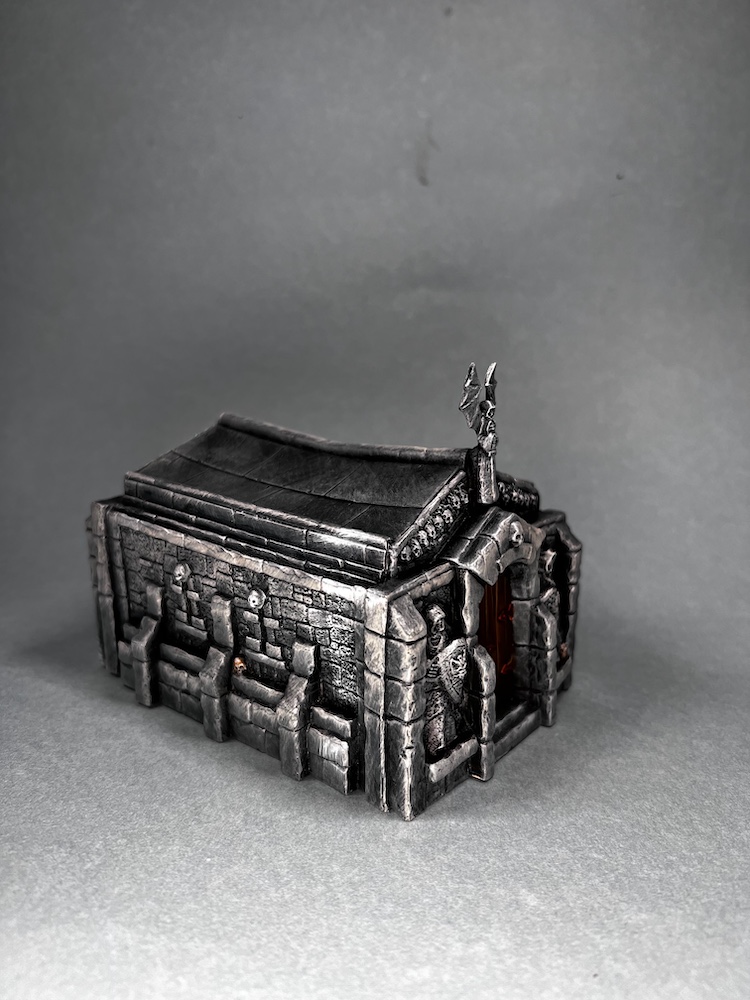
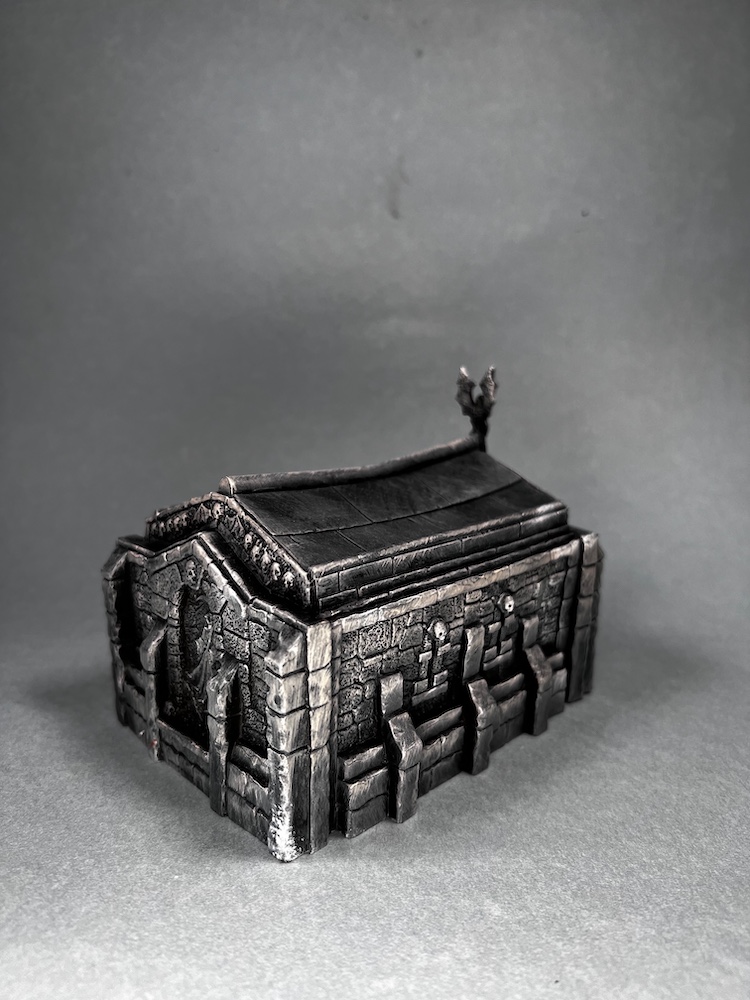
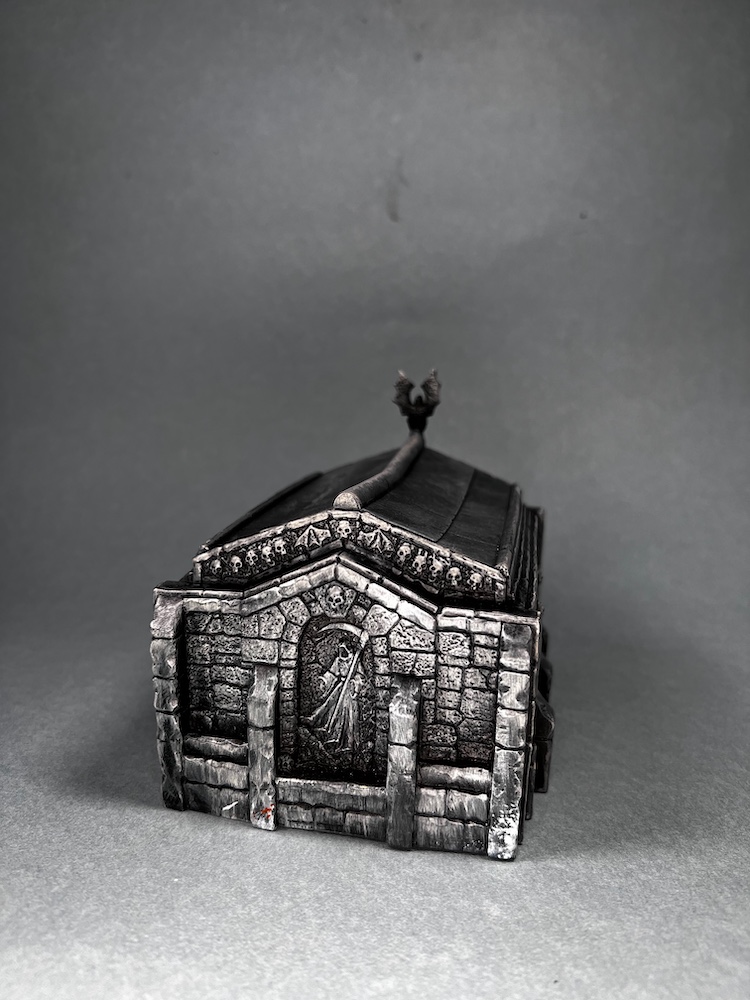
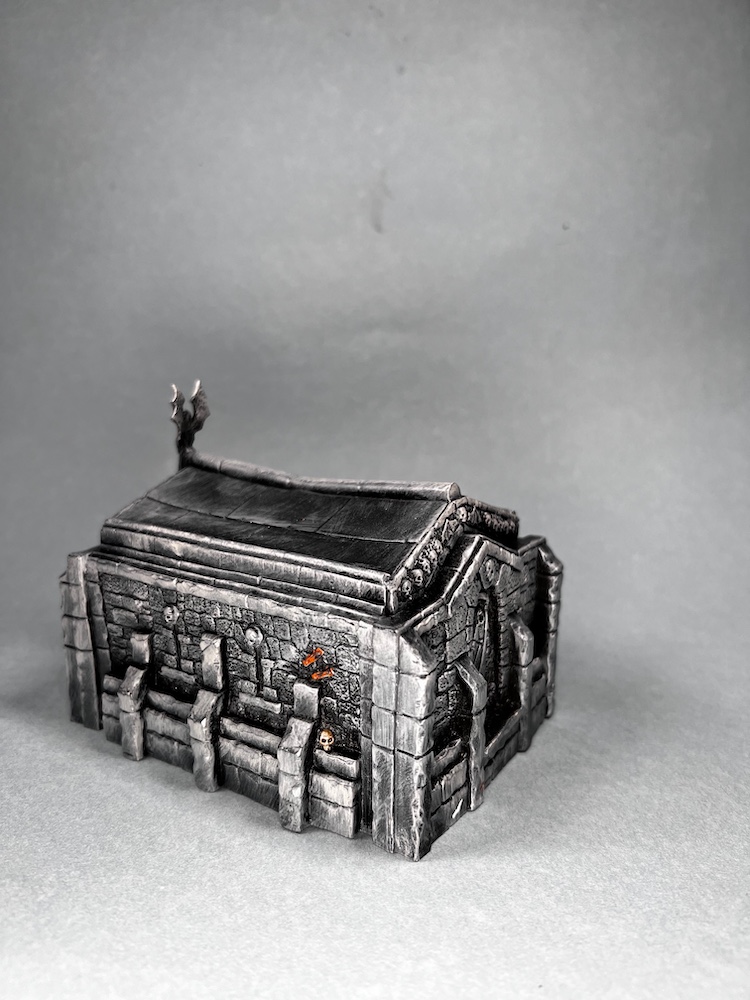
Trying to clear space in my closet and put away various kits and minis I came upon this fun little mausoleum that I believe was part of the Reaper Bones 6 campaign. Knowing it would paint quickly, that there is space in my “Necropolis” bin, and preferring to store finished terrain I decided to paint it. I went with a black primer before dry brushing the entire piece with various grays and browns. Finished it off by picking out a few details and it is ready to serve my undead army. It’s terrain so I decided to include it here.
Fungus Painting Time
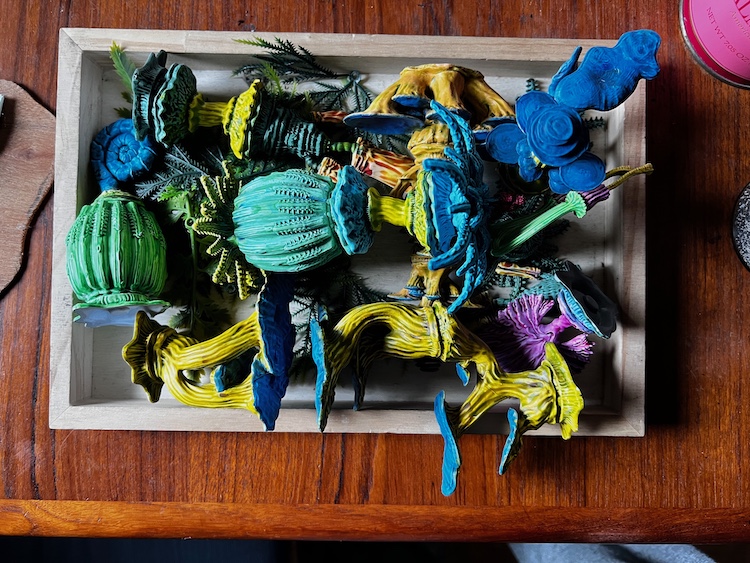
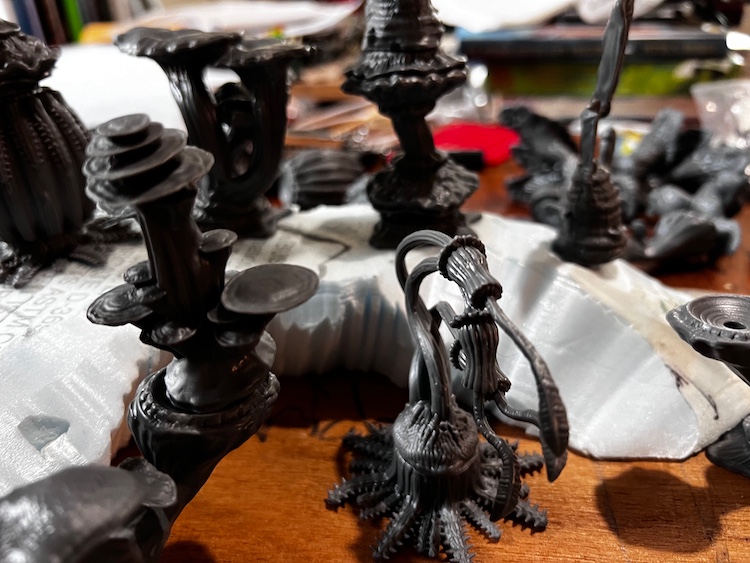
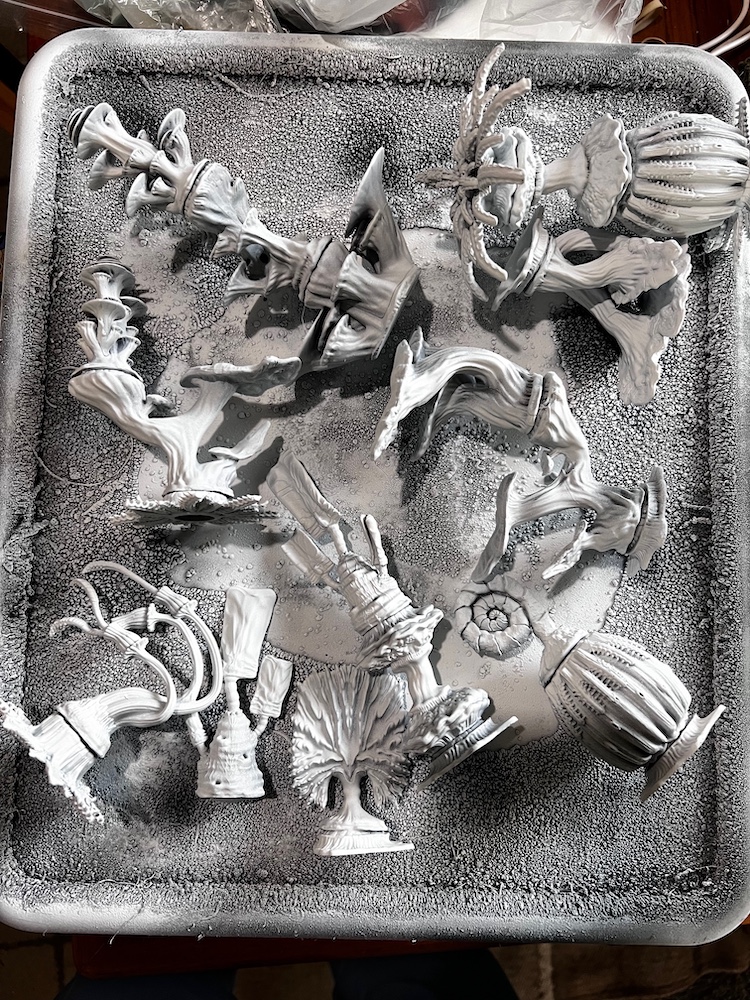
I’ve got the base built and glued together some fungus trees to adorn it. I went with a white prime this time, rather than zenithal. Even though I am using Green Stuff World Dipping Inks I decided to start with a flat white. I also washed a handful of plastic plant parts that I will be gluing down as roots and ground cover.
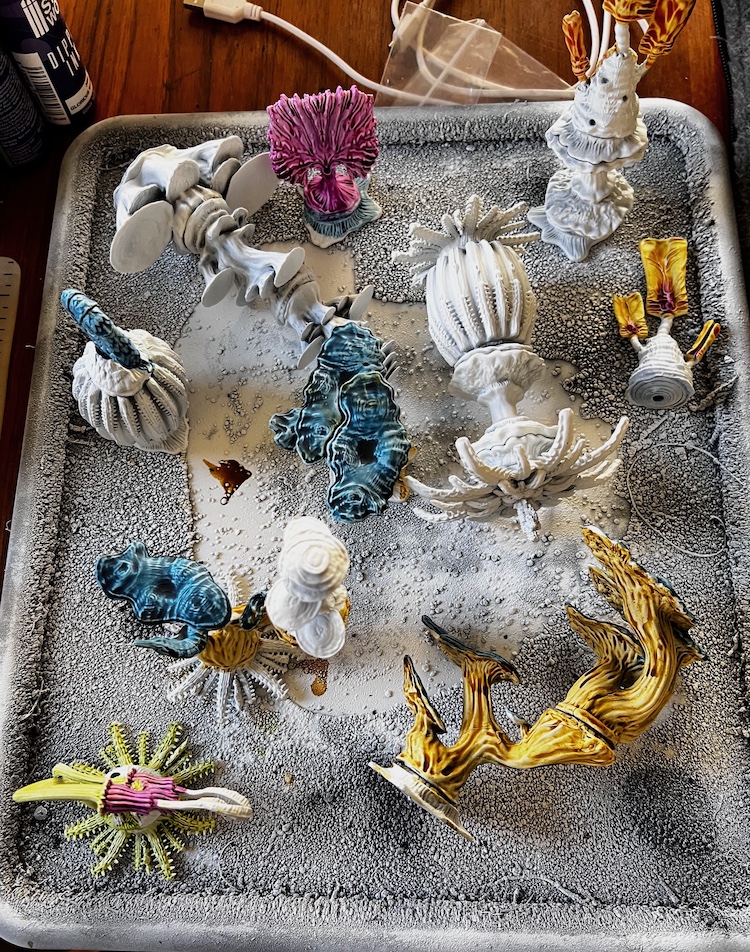 A couple of the colors are too light, not liking the pastel look.
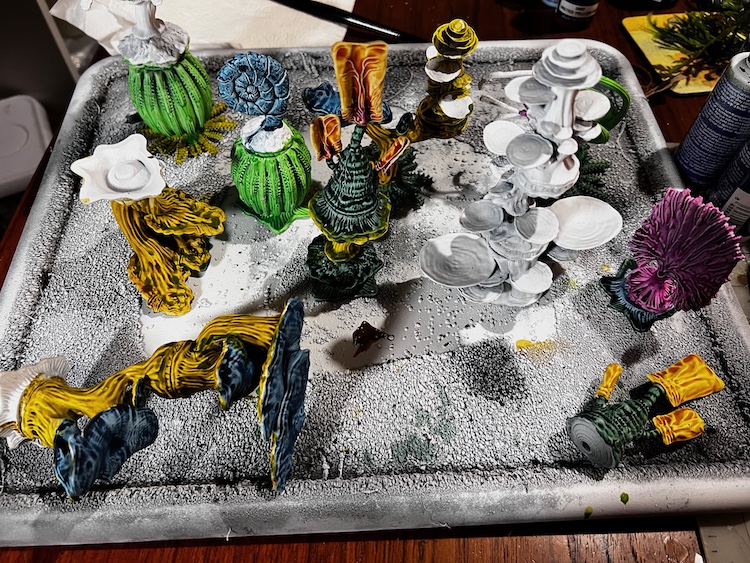 Much better with second coats of richer colors. While they don't need to match the previous set I painted, I do want them brightly colored to liven up a table.
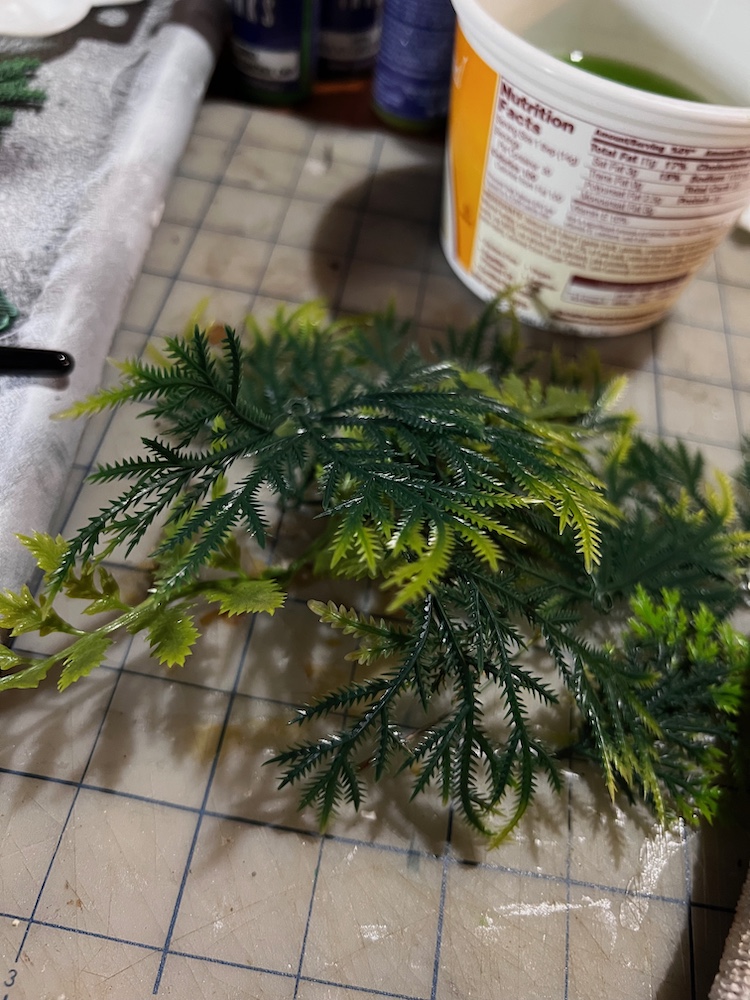 Fun shapes and textures but one has to wash them well or they don't take paint.
First Base Begun
I started putting together my biggest forest base. I had just enough power left in some batteries to use my hot wire and cut a piece of foam down to fit, raising the elevation of part of the base. I made some test assemblies and then got down to gluing trees together. Once they dried I got them primed white. Now I need to get new batteries to run my hot wire and get more foam cut. Until then I have plenty of fungal forms to paint and a base to texture.
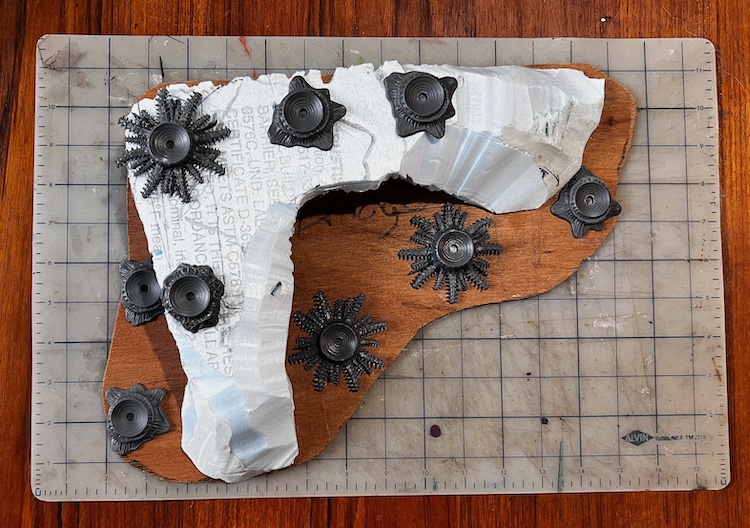
 Need batteries to go further.
Second Fungus Forest Planning
The first set of Fungus Forest I built are all pretty much flat, with little change in height. I wanted to add some more characters pieces to the collection by using bigger bases, more plants, and changes in altitude. I want to create some Impassable pieces as well as paths and hiding places. I might even get a sniper’s nest built.
 Some contour sketches to play with the idea of added height
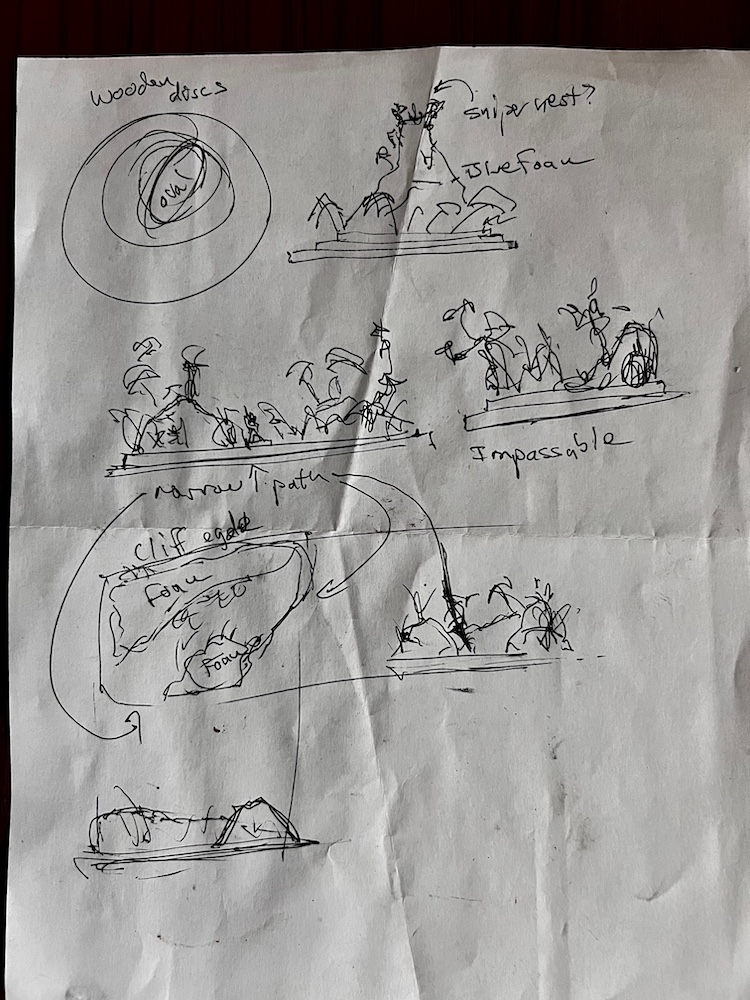 Sketches of how I might stagger the levels and create paths and cover.
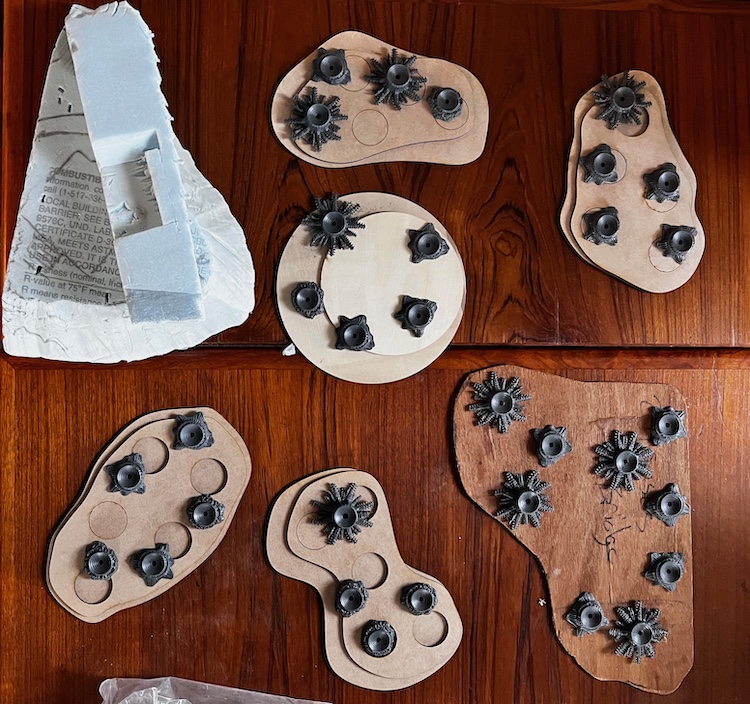 These are all the bases I own and they look like enough to cover the bases well.
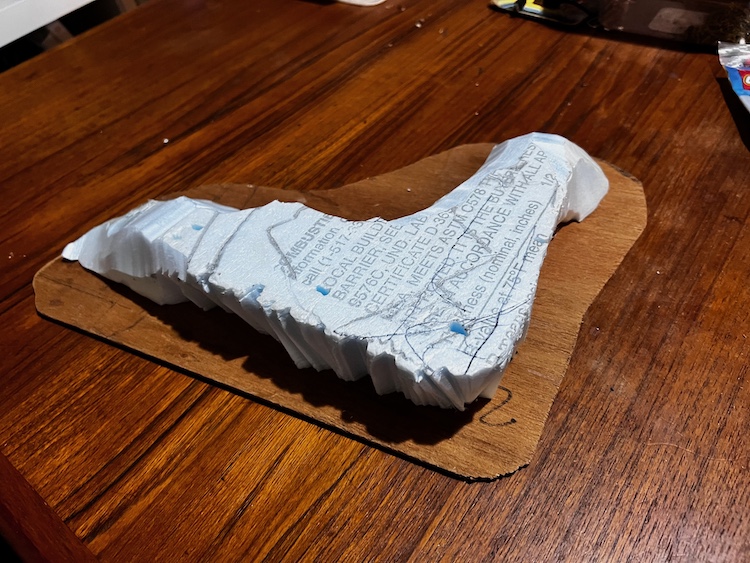 Here is the biggest base which I tried to add character to with cave like structures and a small dell.
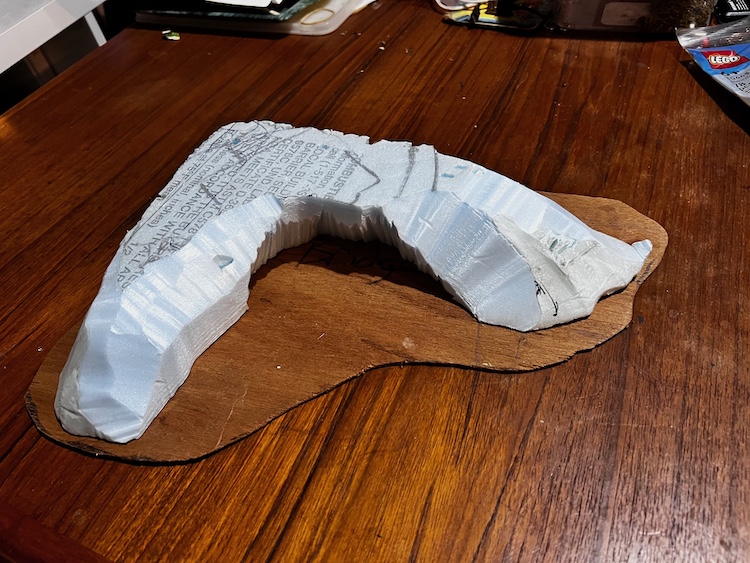 The other side of the large base.
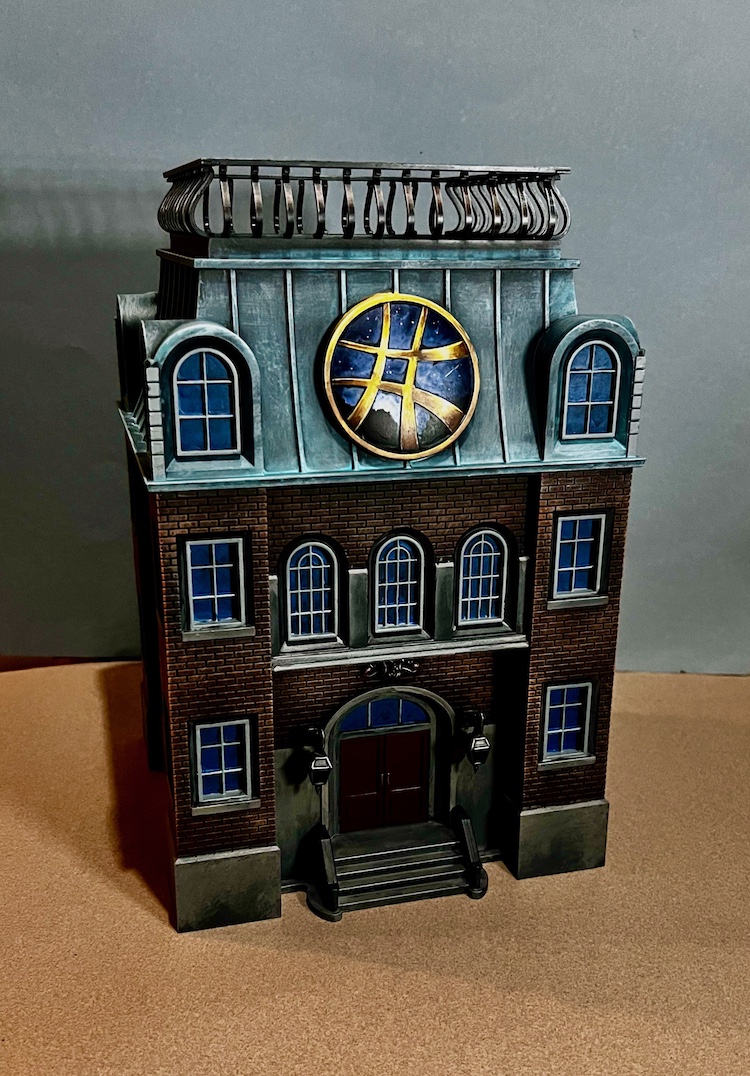
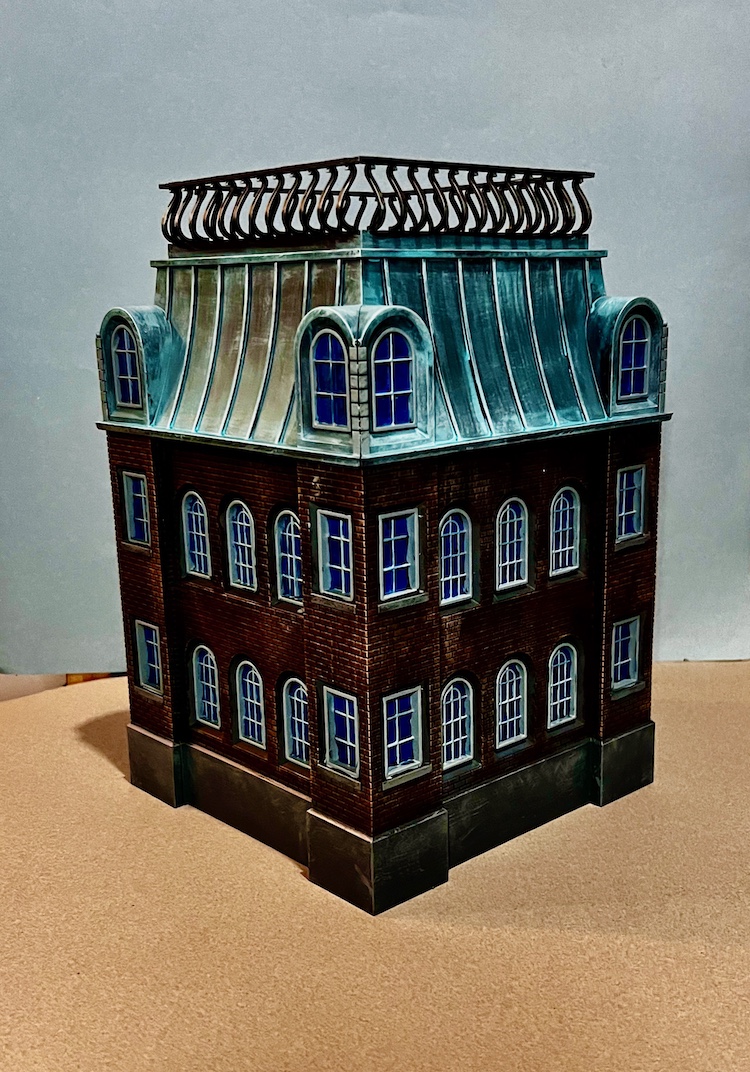
I finished AMG's Sanctum Santorum
I finished the paint job on my Sanctum Santorum. While not part of my Terrain Fest plans it is terrain, never the less, so I feel like showing it off. Coming up next; Fungus Forest Plans.
More pictures on my Marvel Crisis Protocol blog.
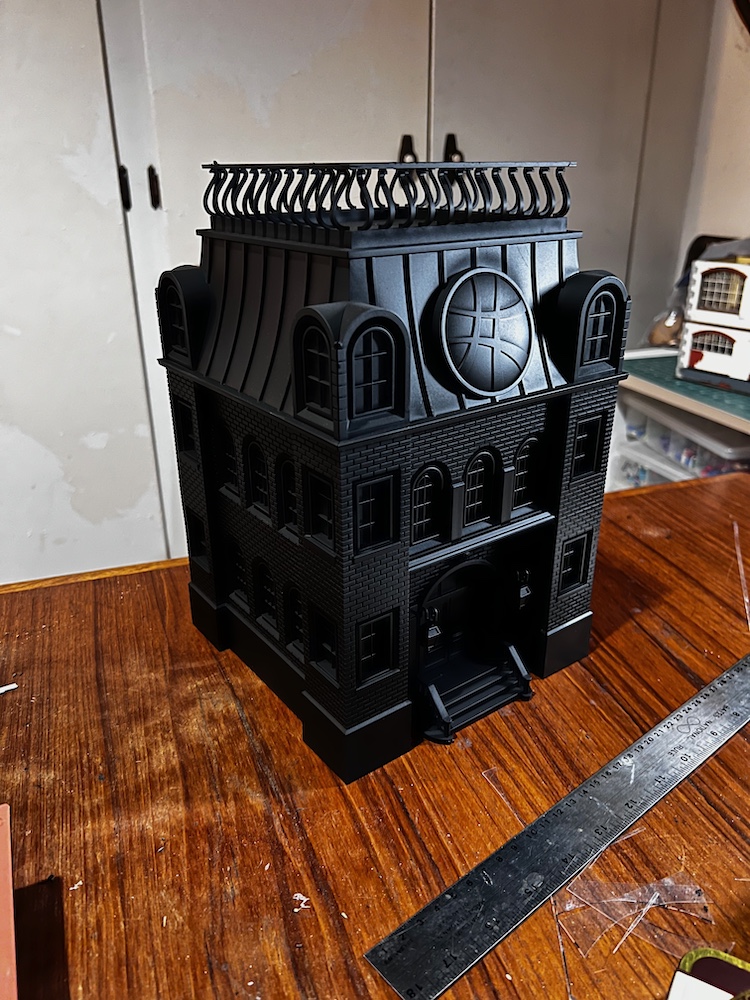
Primed Another MCP Building.
I assembled and primed the Sanctum Santorum black. I’ve been painting it as well but that process is posted in my MCP Project Blog. I will post the finished shots here as well as there. I want to keep this blog updated with all the terrain I’m working on right now.

![StarCraft Tabletop Miniatures Game Pre-Orders Live Now [Updated]](https://images.beastsofwar.com/2026/03/starcraft-tmg-news-cover-600-338.jpg)


![Mounted US Cavalry On Kickstarter For Dead Man’s Hand! [Updated]](https://images.beastsofwar.com/2026/03/us-cavalry-main-600-338.jpg)


![Play WW2 Commando Operations With Butcher & Bolt [Updated]](https://images.beastsofwar.com/2026/03/relaunch-600-338.jpg)


